HOLIDAY DONATION DRIVE - SUPPORT MSW - DO YOUR PART TO KEEP THIS GREAT FORUM GOING! (Only 44 donations so far out of 49,000 members - C'mon guys!)
×


Jeff preisler
-
Posts
92 -
Joined
-
Last visited
Content Type
Profiles
Forums
Gallery
Events
Everything posted by Jeff preisler
-
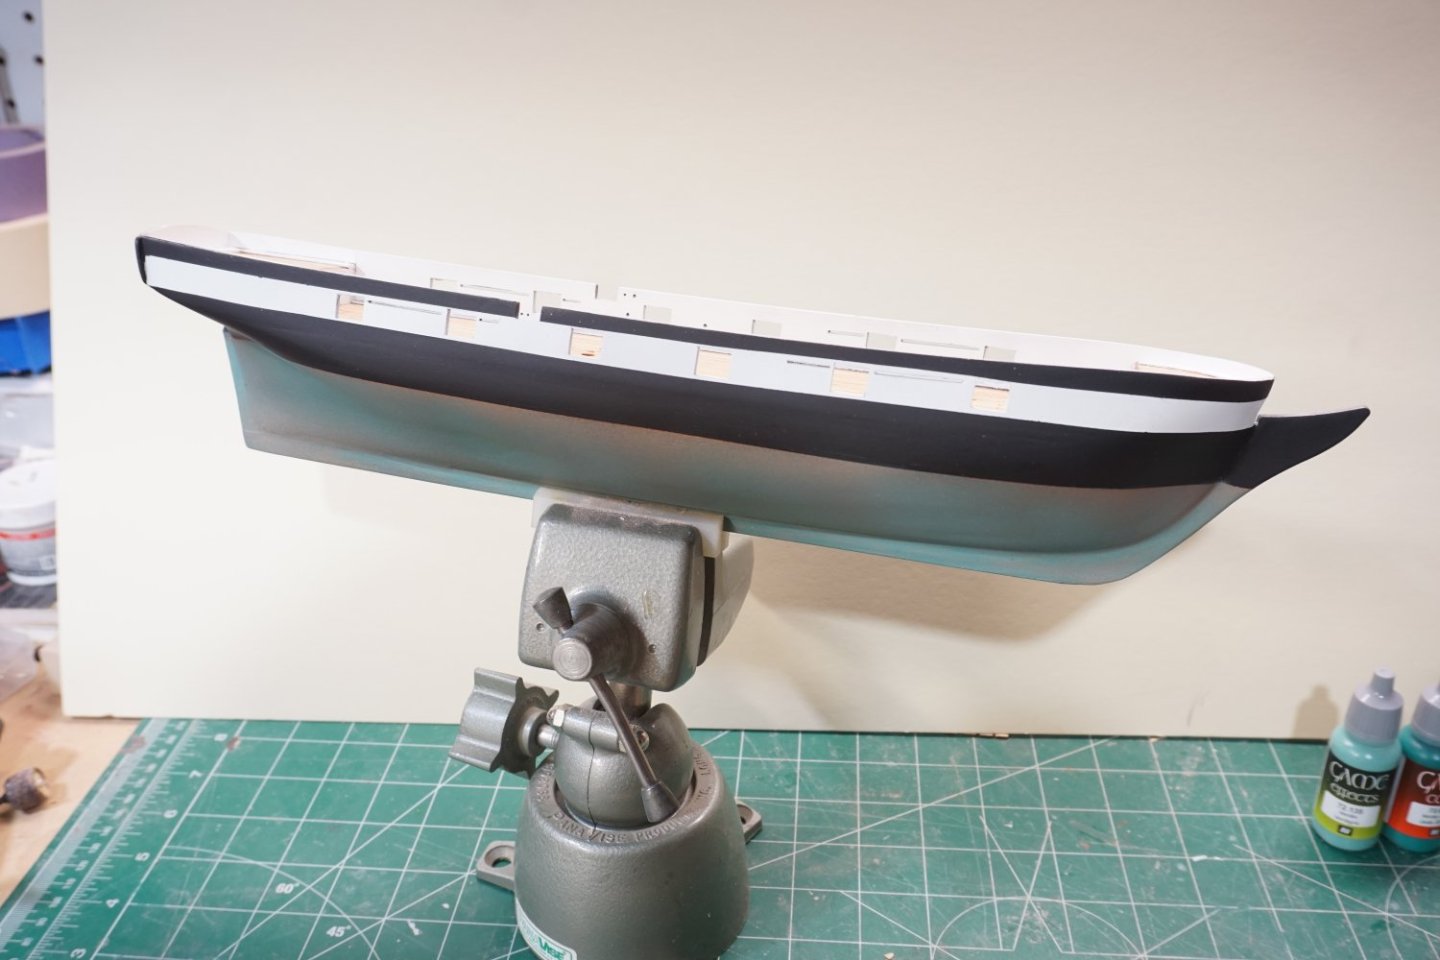
This is an experimentation for me as my 1st time trying to simulate Pantina. It's probably not over-kill in real world, but to me, it appears a bit much for the model. I'm going to try buffing this out a little and will post pictures of my results. If I still do not like, I will just re-mask and repaint.
-
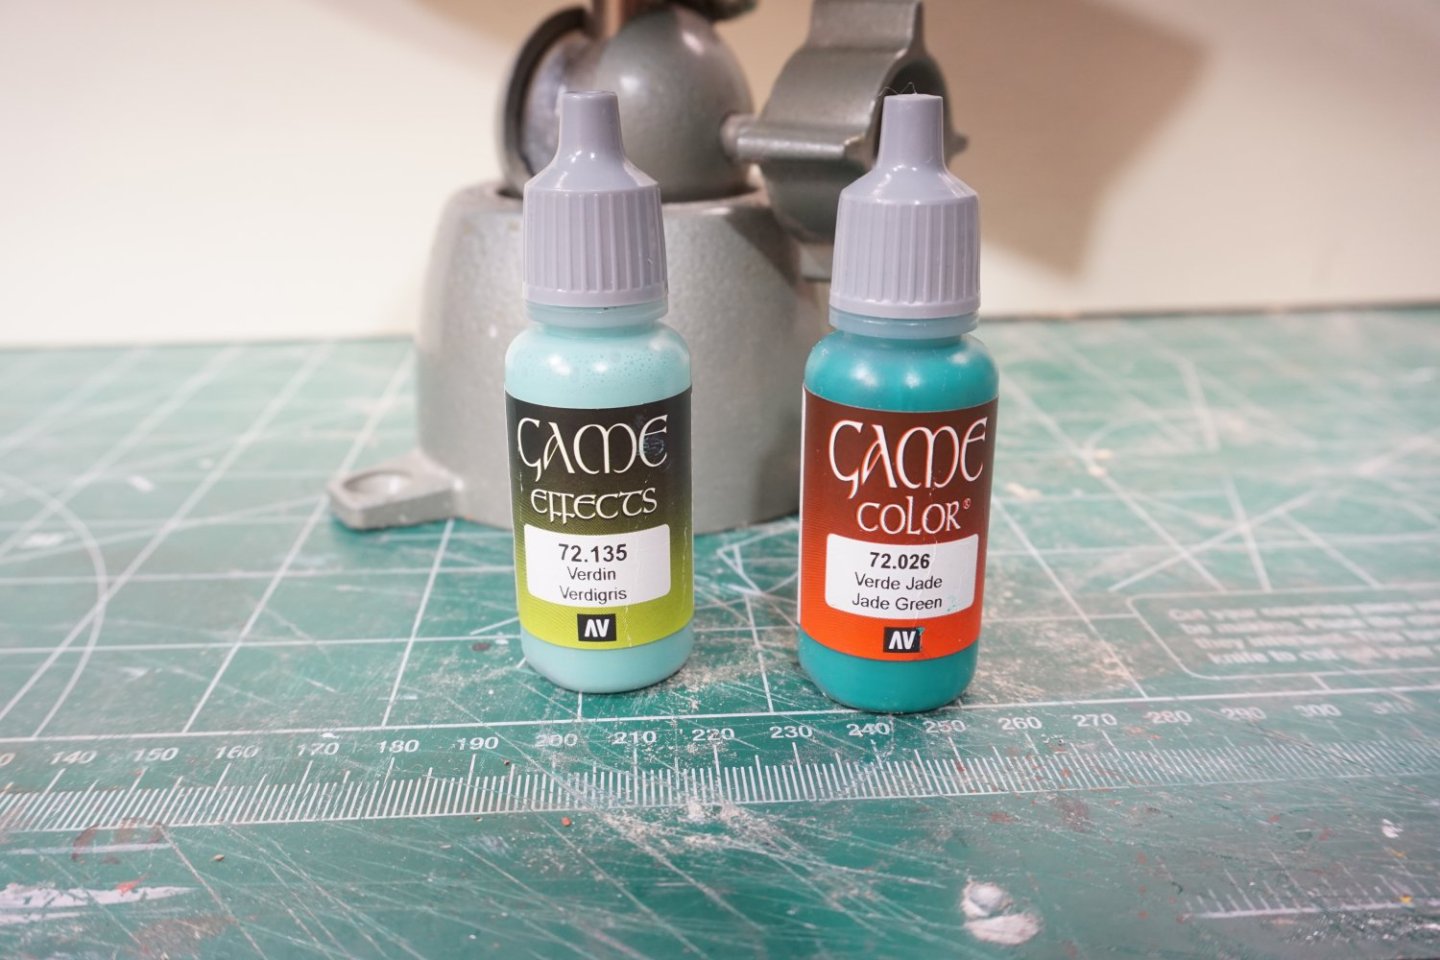
Here is what I came up with for the copper patina. I used Vallejo paint and gave it a dusting with my airbrush. Just wondering if I went to heavy on the dusting??

- 50 replies
-
- 5
-

-
- Perry
- BlueJacket Shipcrafters
- (and 1 more)
-
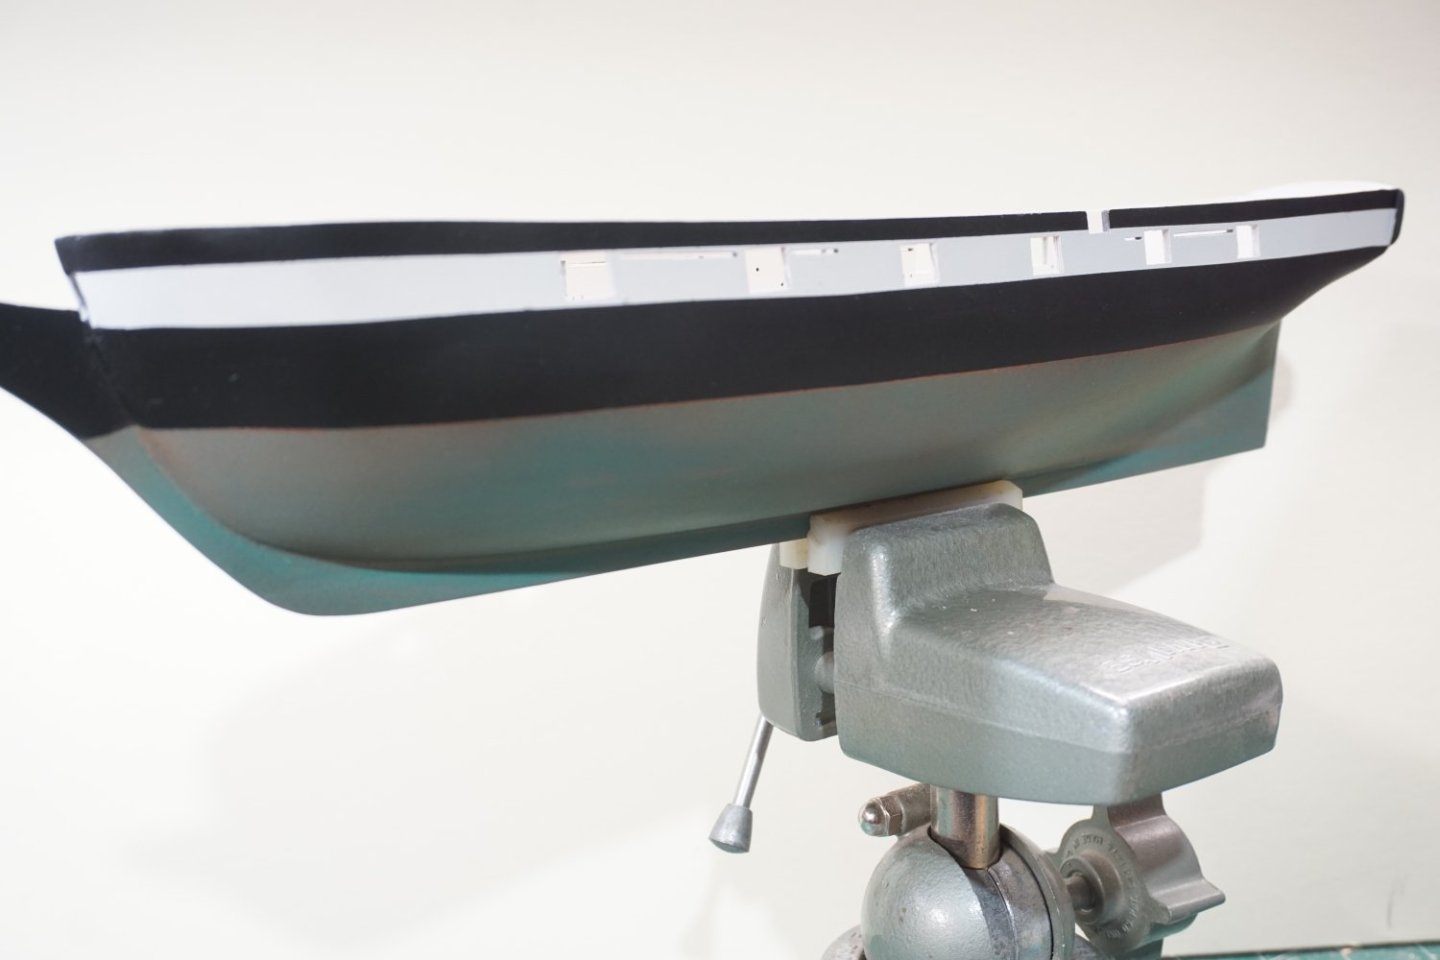
Thanks for the tip. After dusting some lighter green paint on some copper painted wood vs dry brushing, I like the airbrush dusting result the best.
- 50 replies
-
- 1
-
-
- Perry
- BlueJacket Shipcrafters
- (and 1 more)
-
Thank you, I will do that.
-
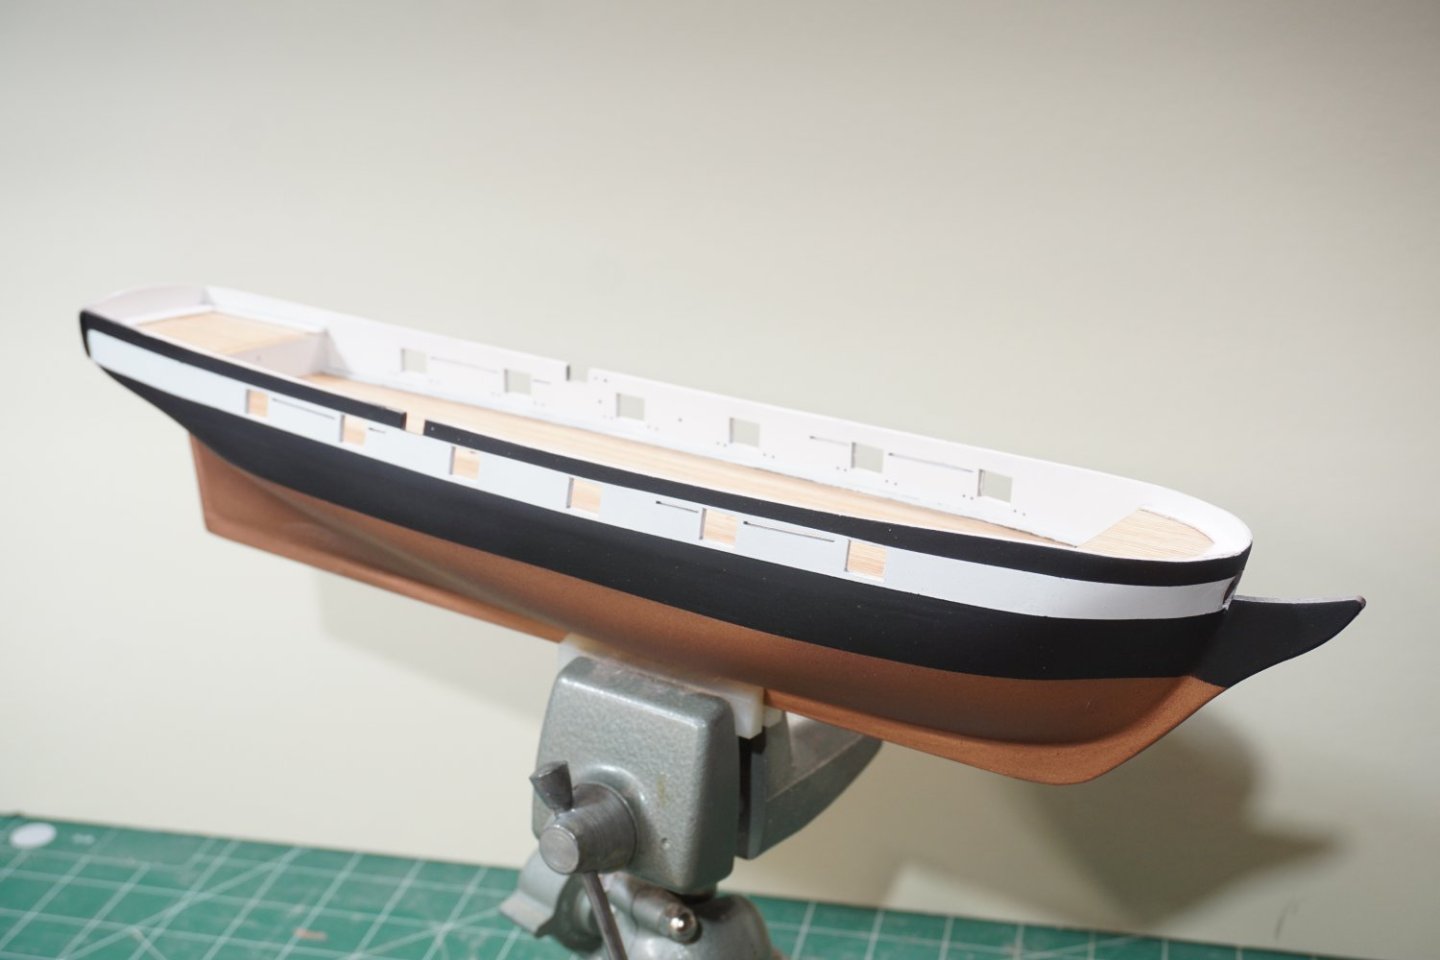
Just completed the painting of the hull, a couple of areas I will have to touch up, but overall, I'm pleased with the result. Next, I'm going to try to figure out a good way to get that greenish patina on the copper. If anyone has any ideas on how to achieve that look, I'm open to suggestions. I may try dry brushing some pastel powders on some copper painted scrap wood or using my airbrush with the correct green color which I'm still trying to figure out.
- 50 replies
-
- 9
-
-
- Perry
- BlueJacket Shipcrafters
- (and 1 more)
-
I was just reviewing one of my future projects and hadn't put it away yet, but I did think it would make an interesting back drop for a photo.🙂
- 50 replies
-
- 1
-
-
- Perry
- BlueJacket Shipcrafters
- (and 1 more)
-
Looks great Lia!! Have fun with your build!
-
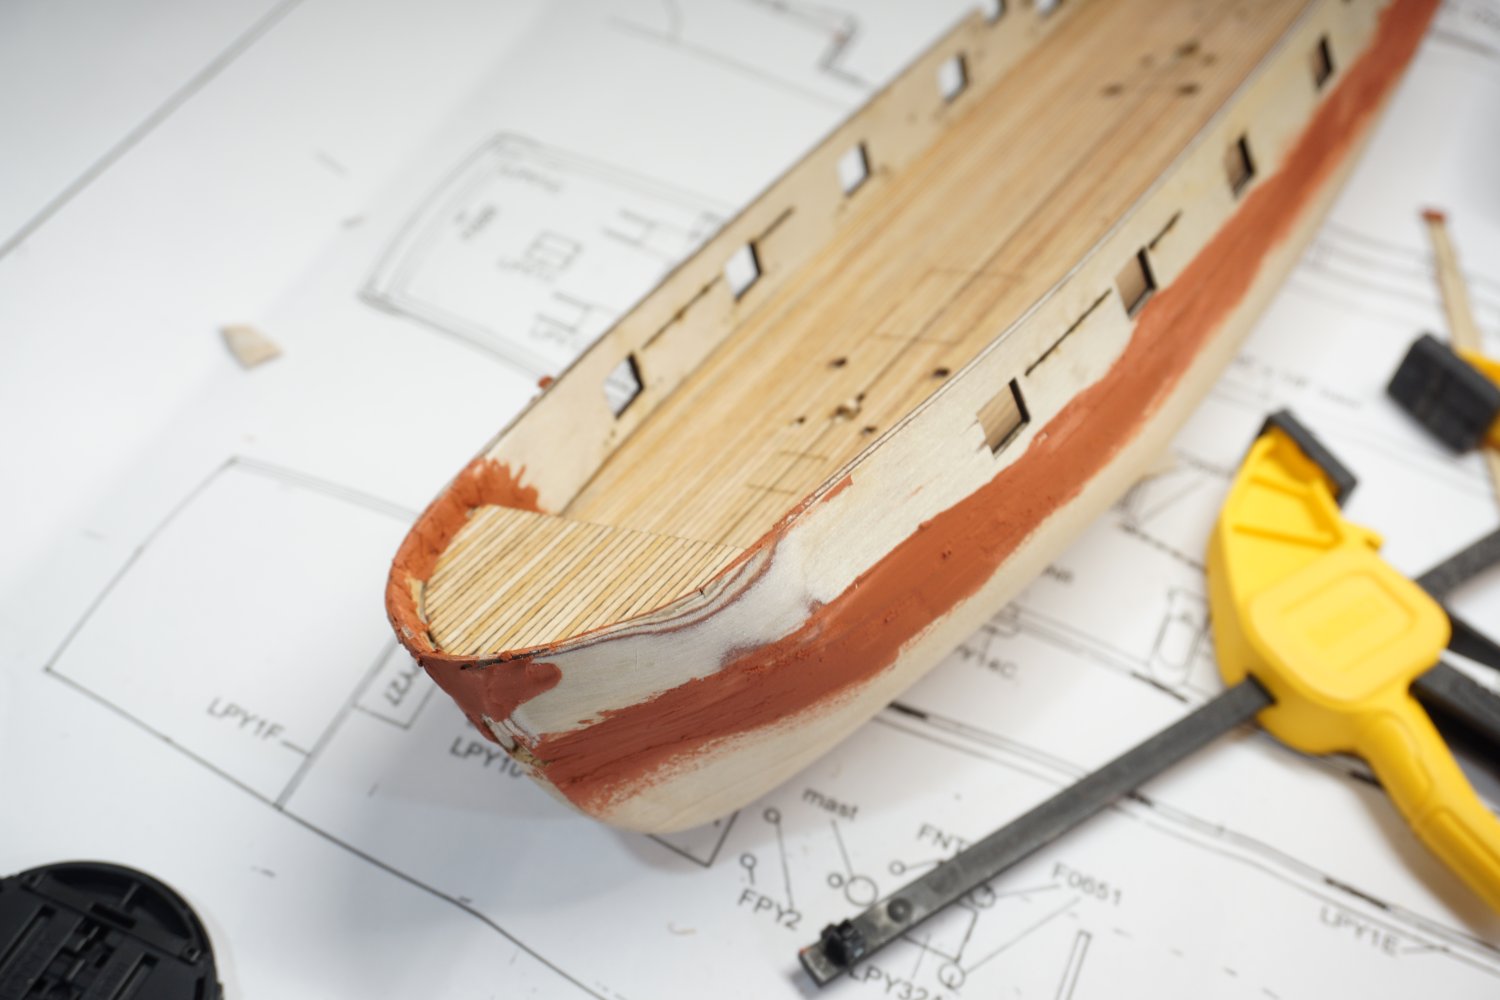
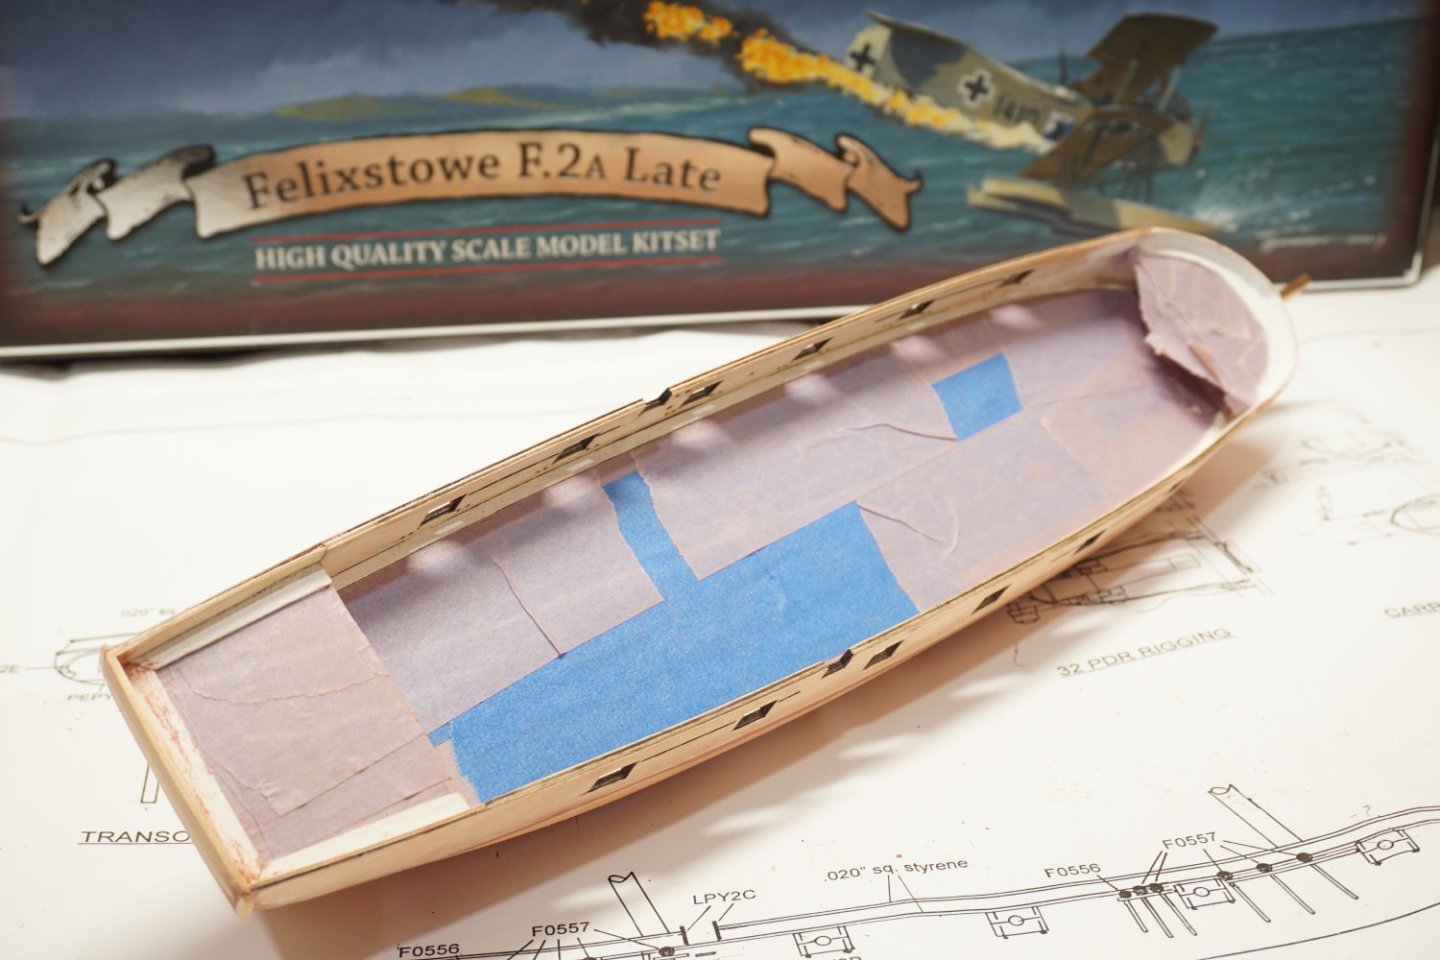
Drilled a 3/16" hole for rudder shaft, proceeded to install gammon knee, stern post and keel. I added a couple of filler pieces between gammon knee and keel plank to fill in a gap from my over-sanding. Using Bondo automotive spot putty I filled in all sanding defects, then gave a final sanding before priming. After 1st coat of primer, I used some vinyl spackling to fill in a low area on hull side and a few small scratches. After my final 3rd coat of primer and final sanding I'm ready for paint.

- 50 replies
-
- 8
-
-
- Perry
- BlueJacket Shipcrafters
- (and 1 more)
-
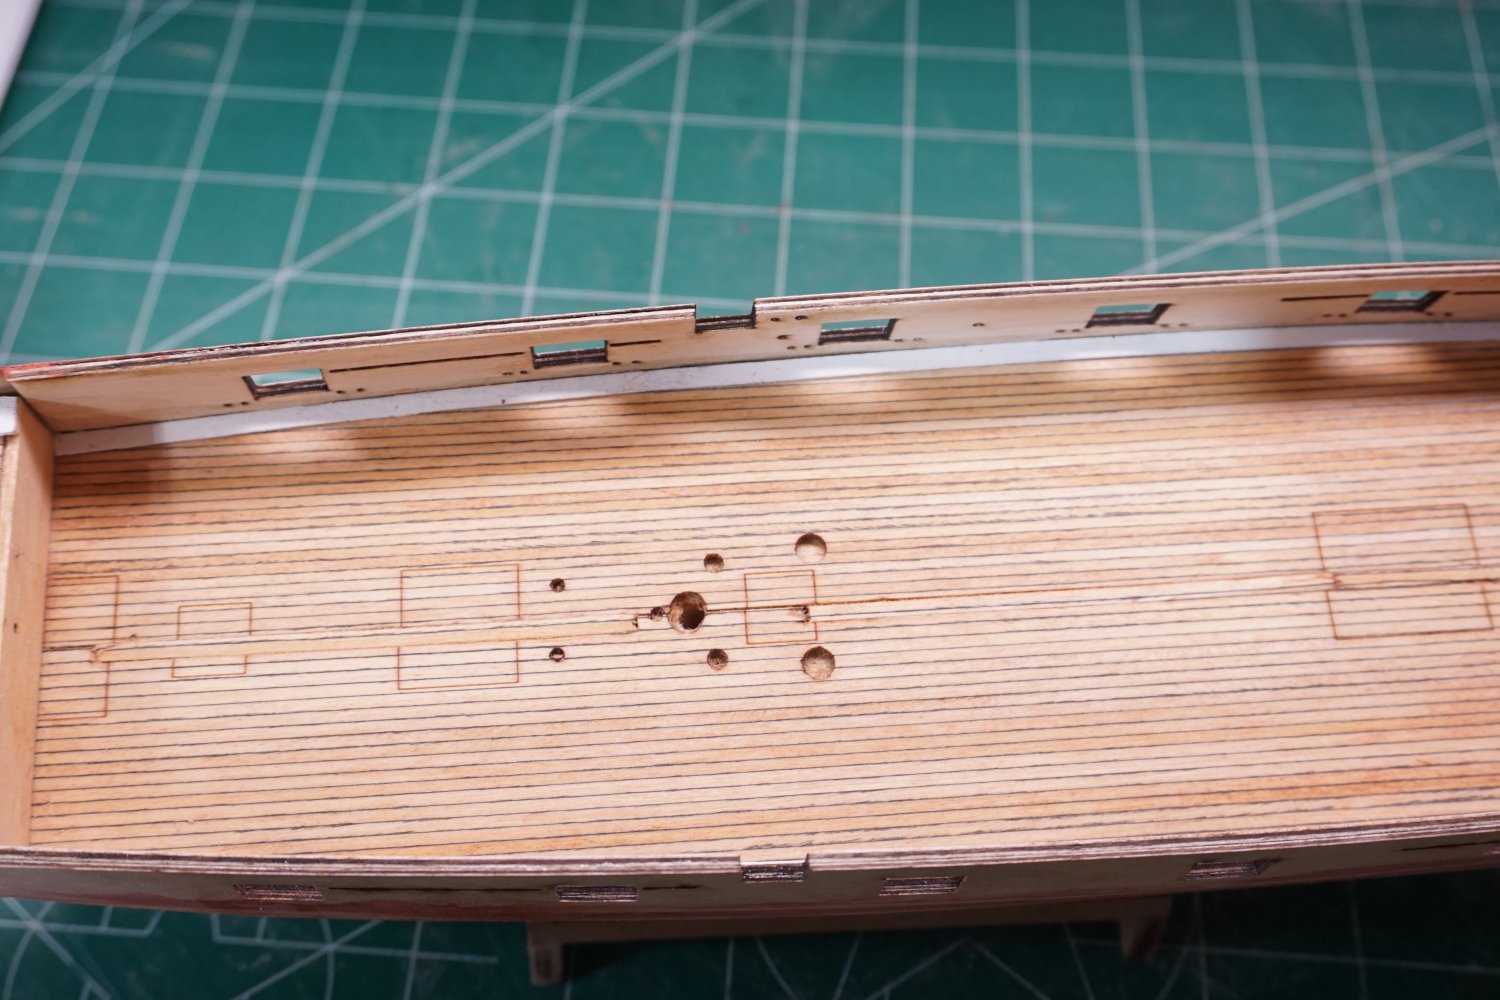
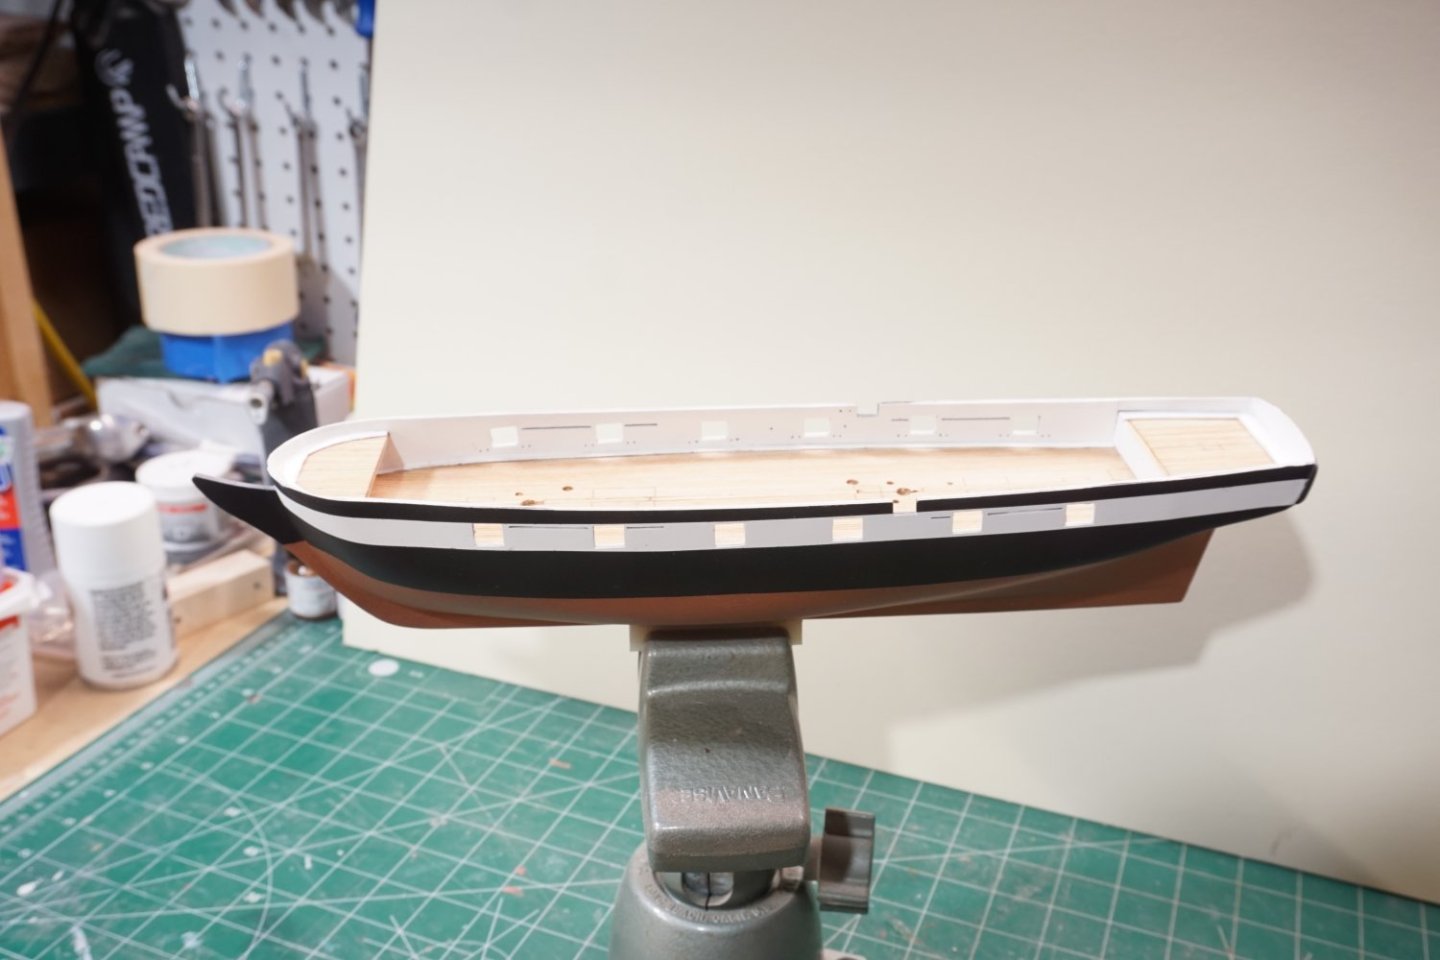
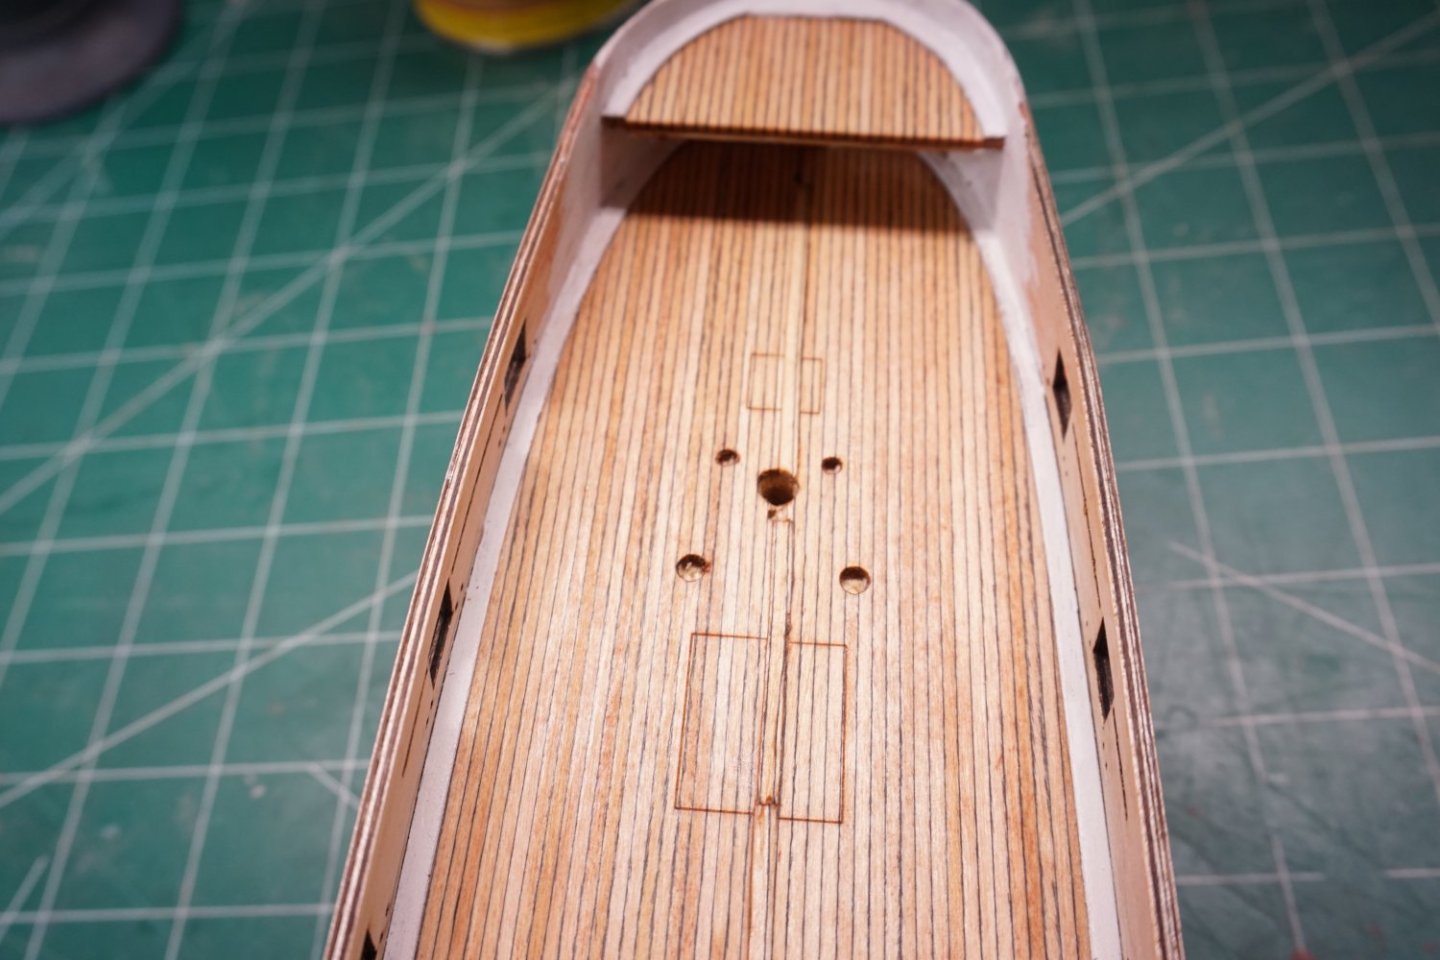
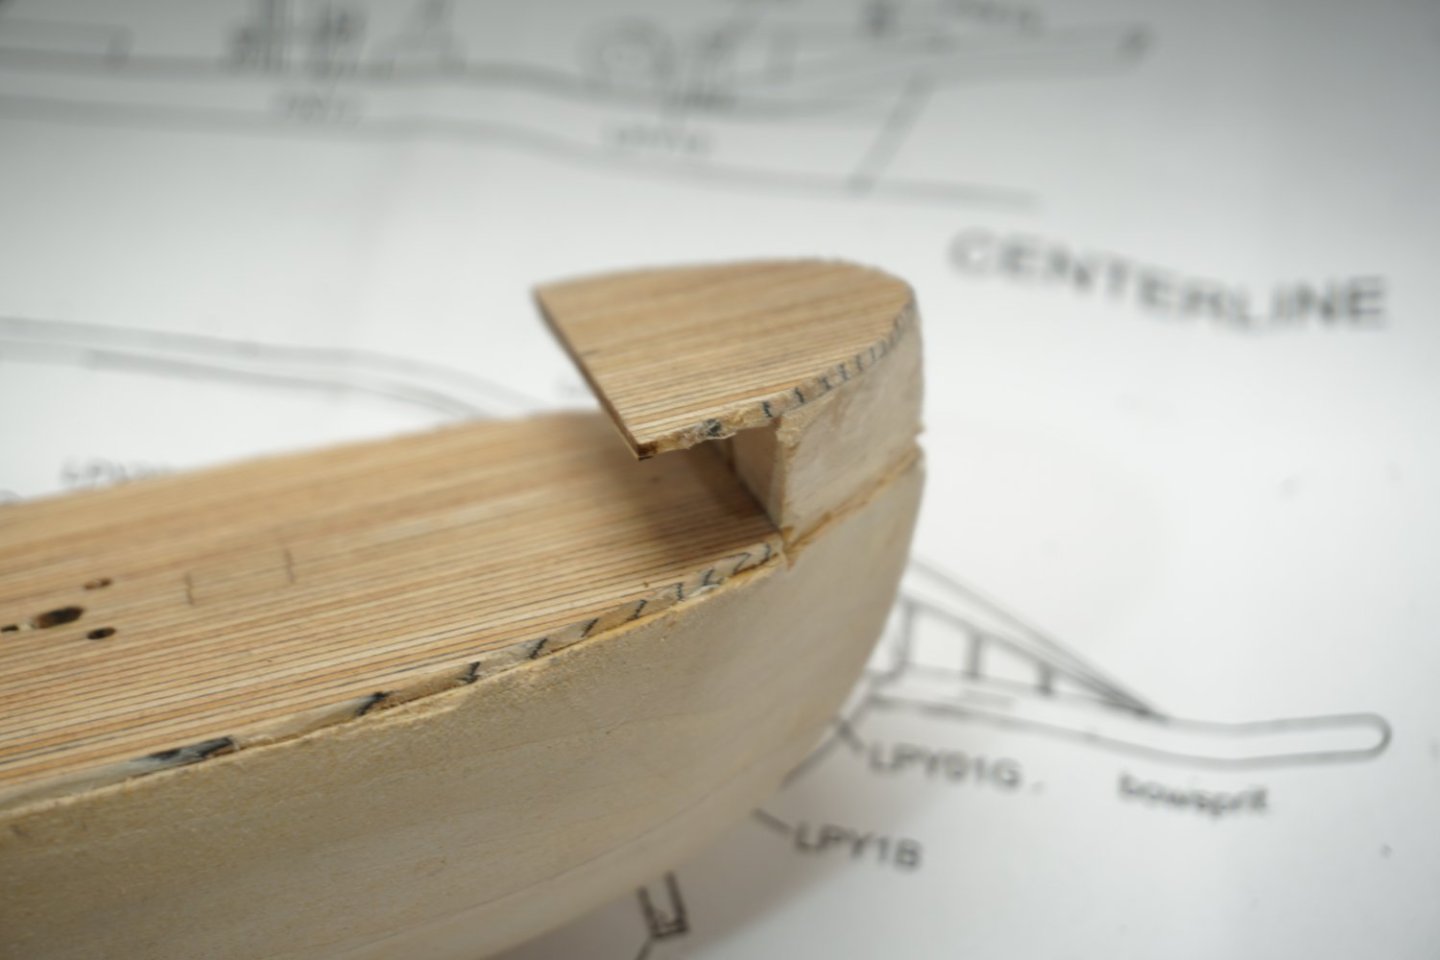
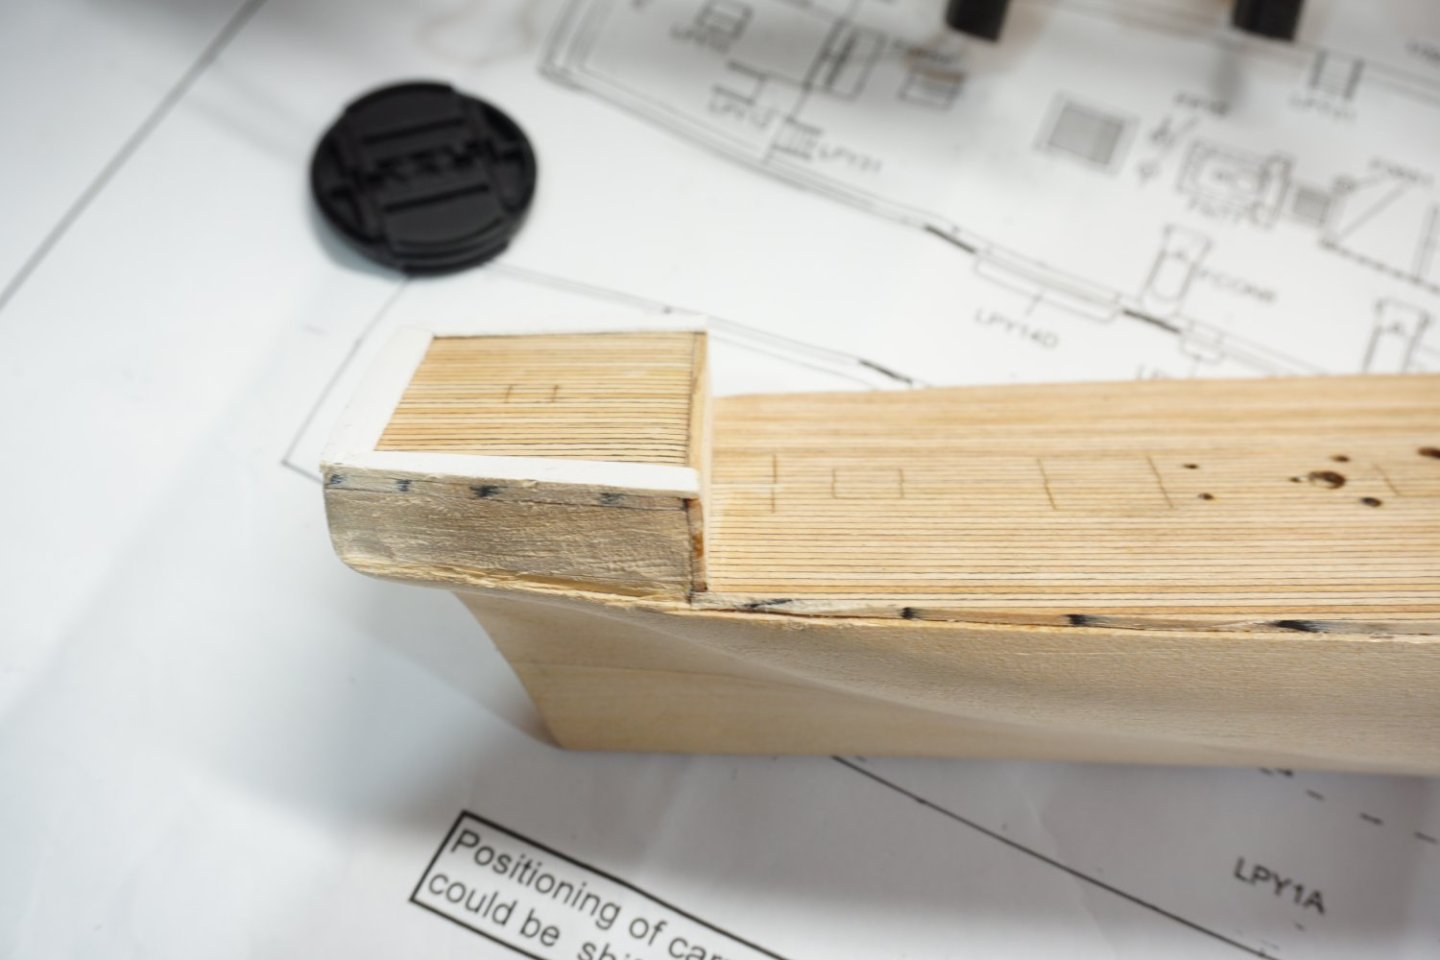
One mistake I made was when attaching deck, I wasn't careful and did not butt up the seam good as illustrated in 1st photo. I didn't like this, so I cut an 1/8" notch down the centerline then used scrap deck material and ripped a 1/8" wide strip and glued in place as shown in the photos. Most of that seam will be covered by deck furniture but you would have seen some of that seam and it would've bothered me. Live and learn.


- 50 replies
-
- 5
-
-
- Perry
- BlueJacket Shipcrafters
- (and 1 more)
-
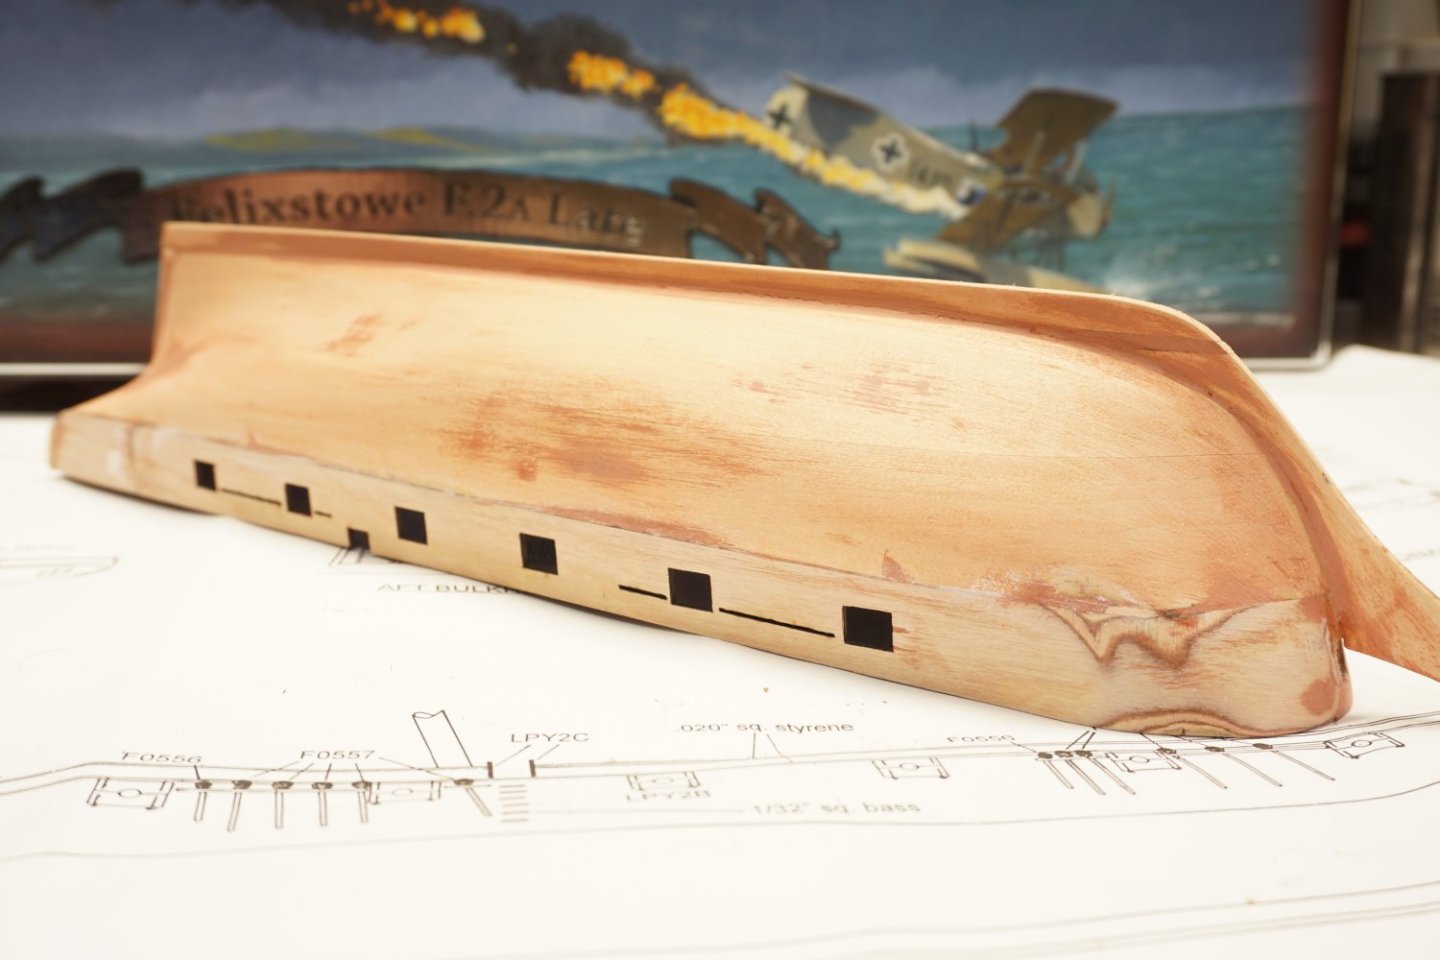
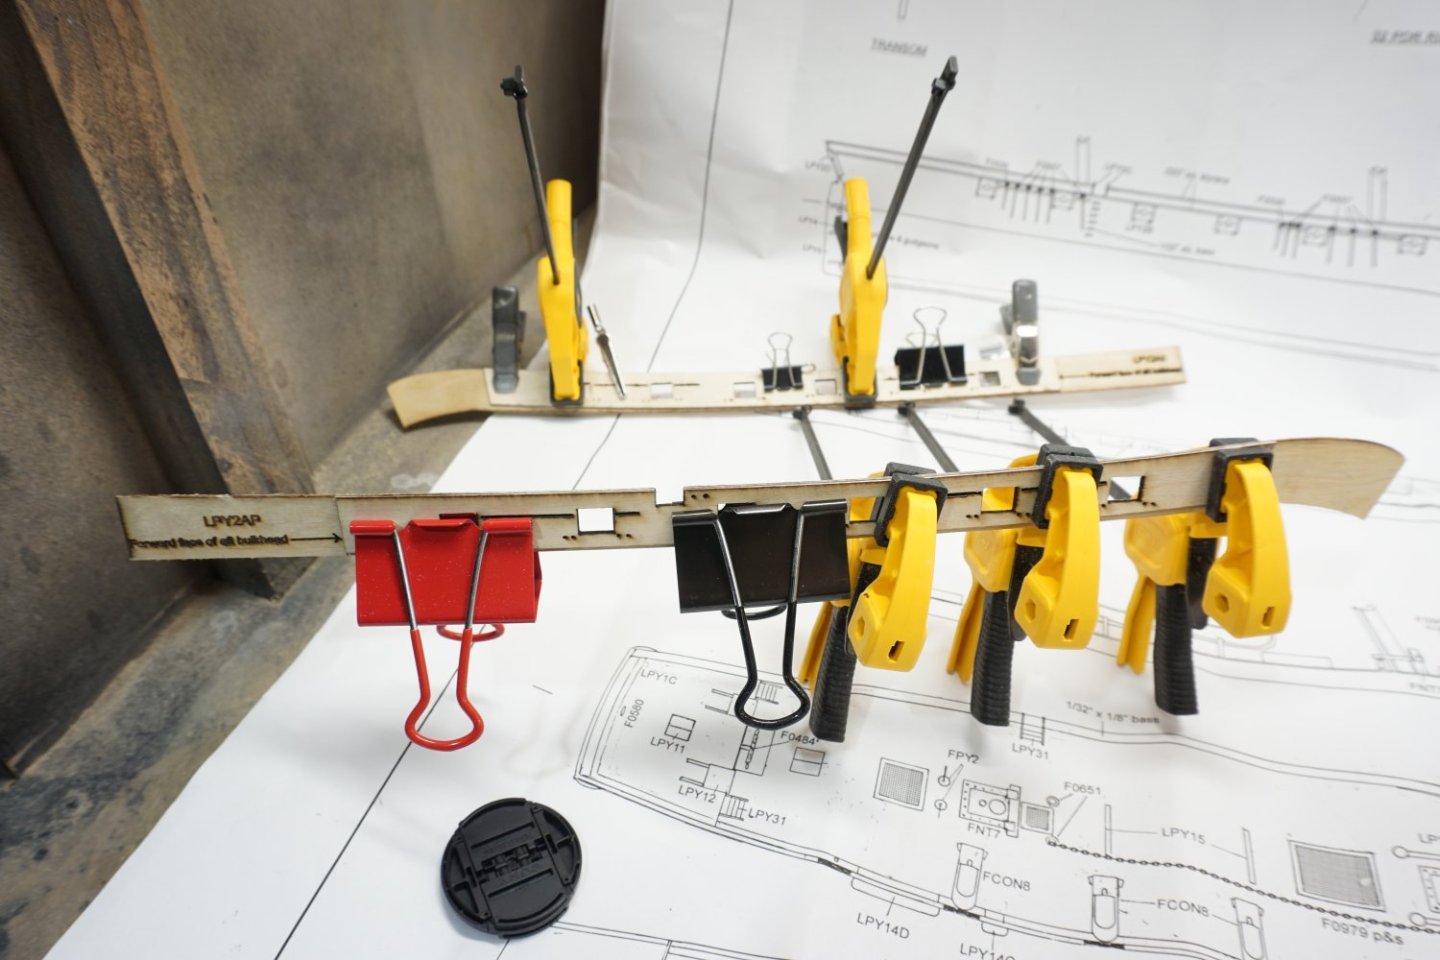
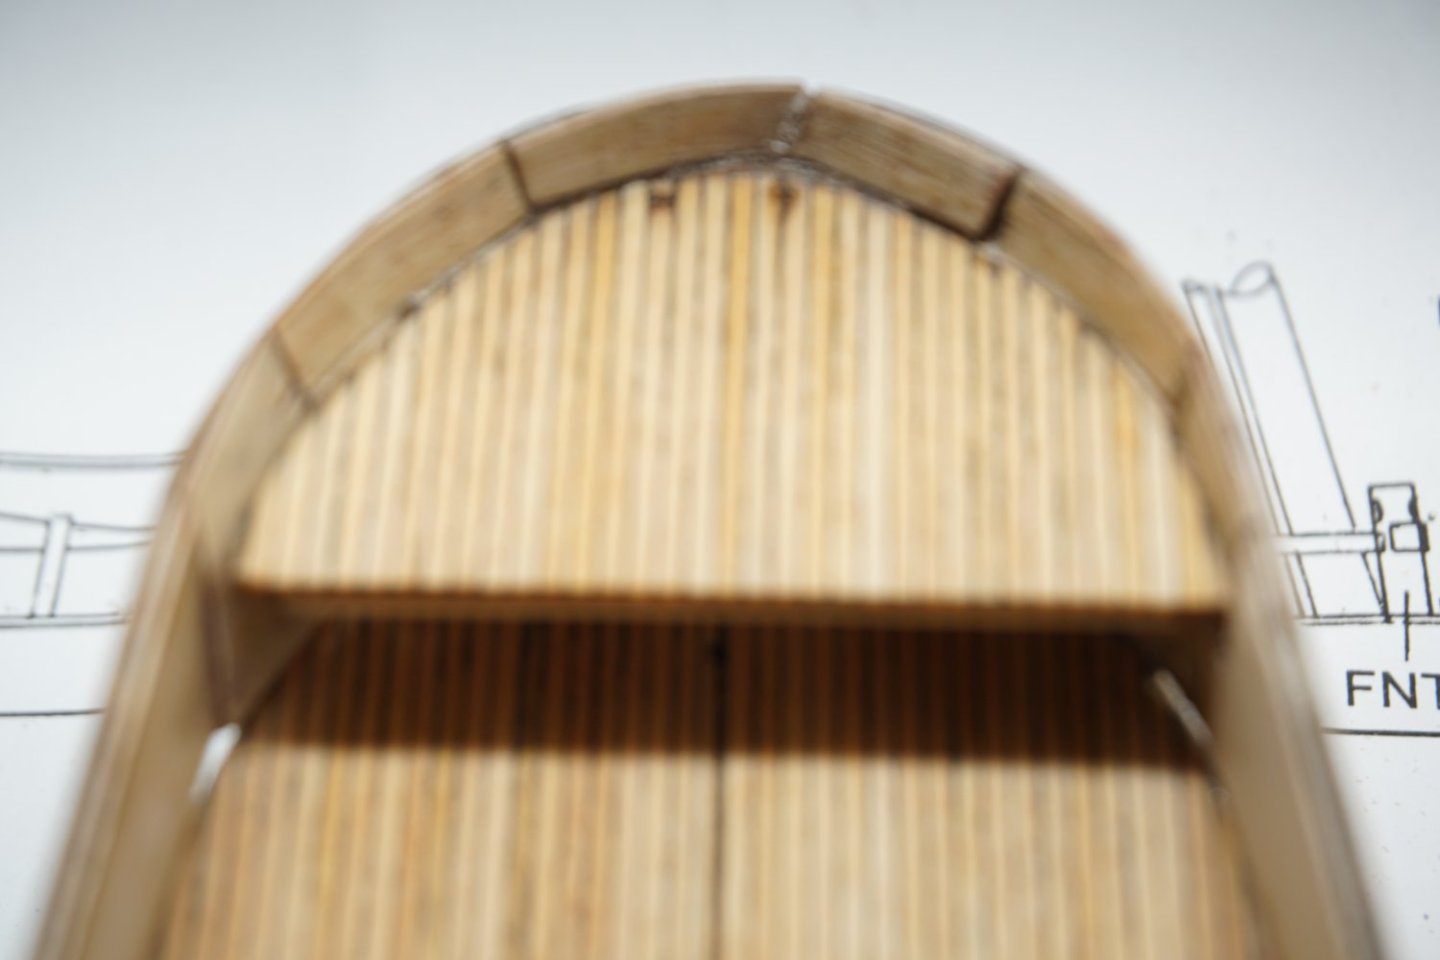
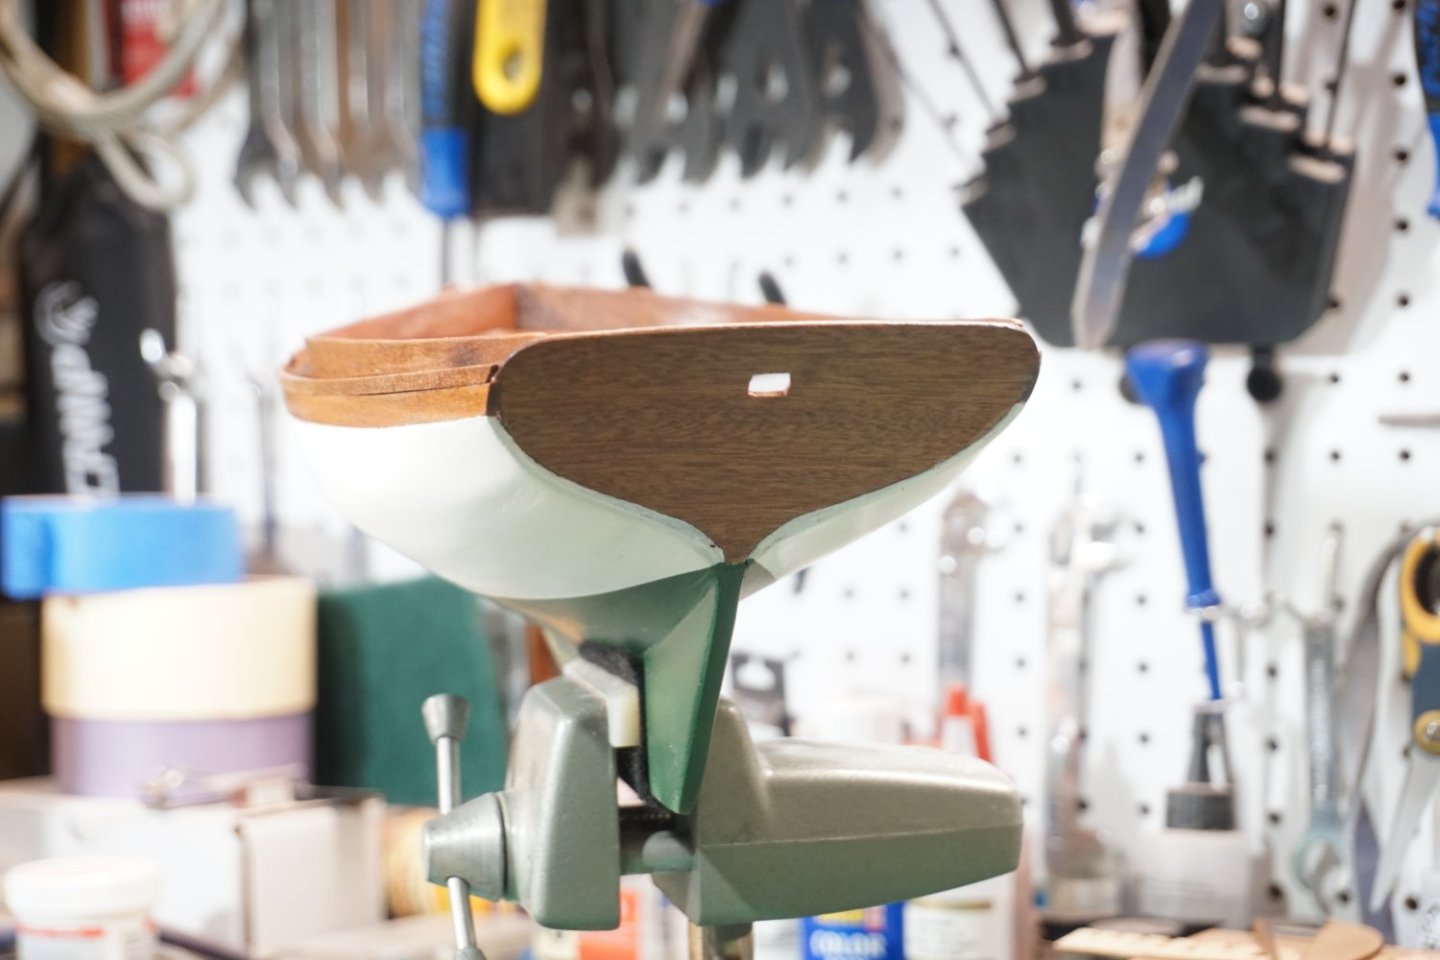
Cut the recess in hull sides at quarter deck and forecastle deck, then cut in the main deck 1/32". Next laminated the inner bulwarks to the outer bulwarks, after dry I used my heat gun to curve the bulwarks at bow. At the forecastle deck I removed to much material when sanding to shape so I used scrap wood for filler along with putty. I'm finding this hull to be a little more challenging than the other Bluejacket kits that I had built, but that is a good thing as I'm gaining experience and learning from my mistakes. The other build threads on this same kit are very helpful to me.


- 50 replies
-
- 6
-
-
- Perry
- BlueJacket Shipcrafters
- (and 1 more)
-
Excellent build thread and fine workmanship. I currently started this project myself and your build thread is a wealth of detailed information, thank you.
-
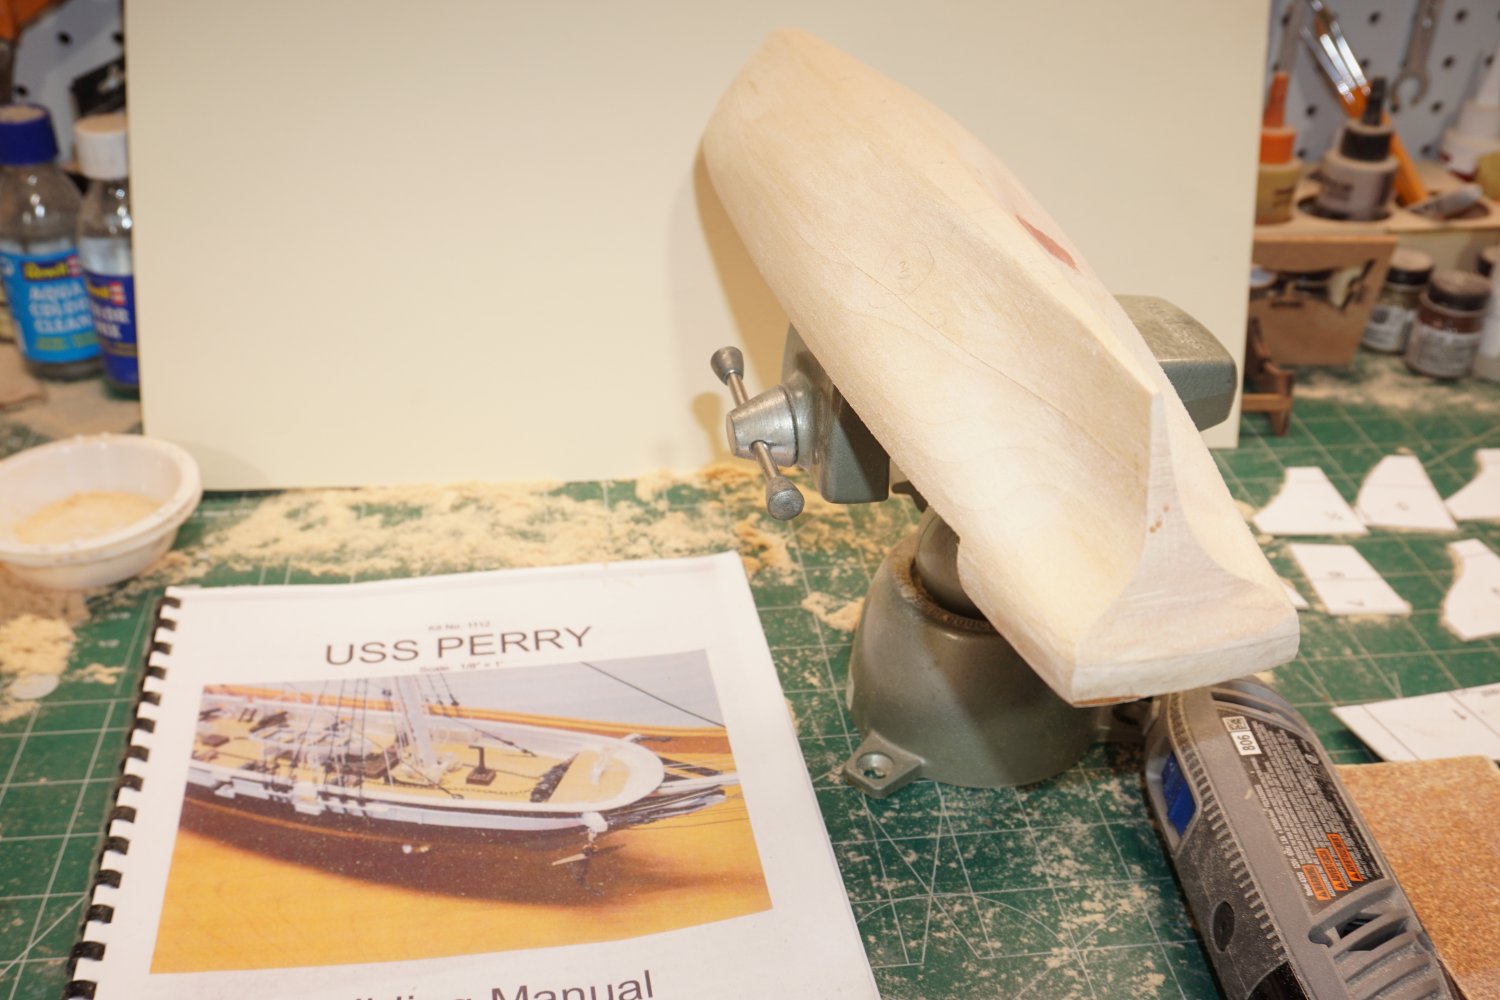
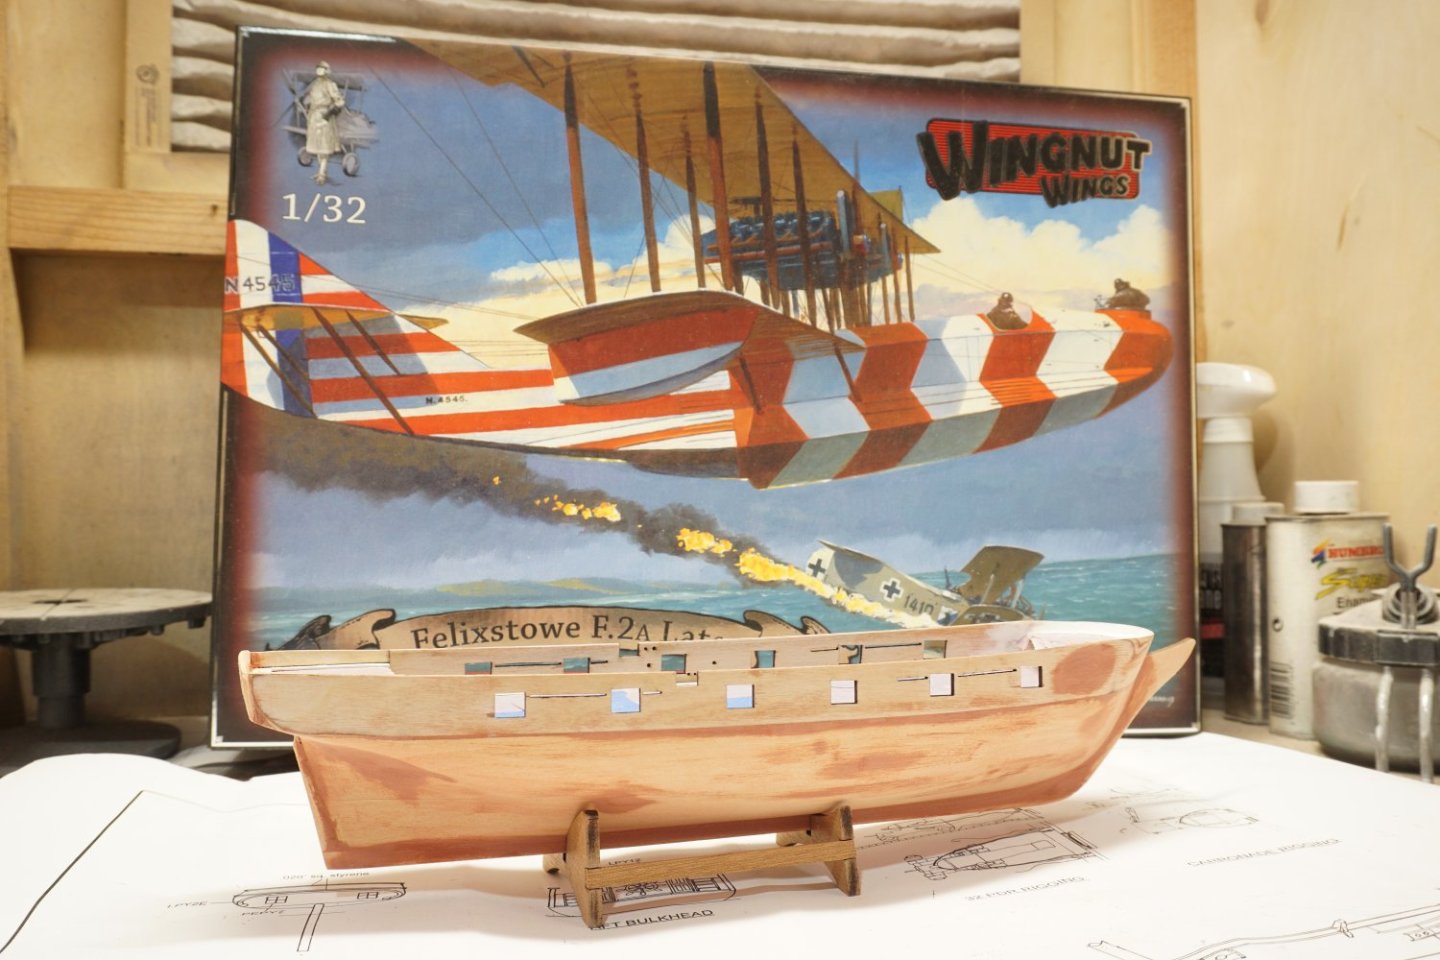
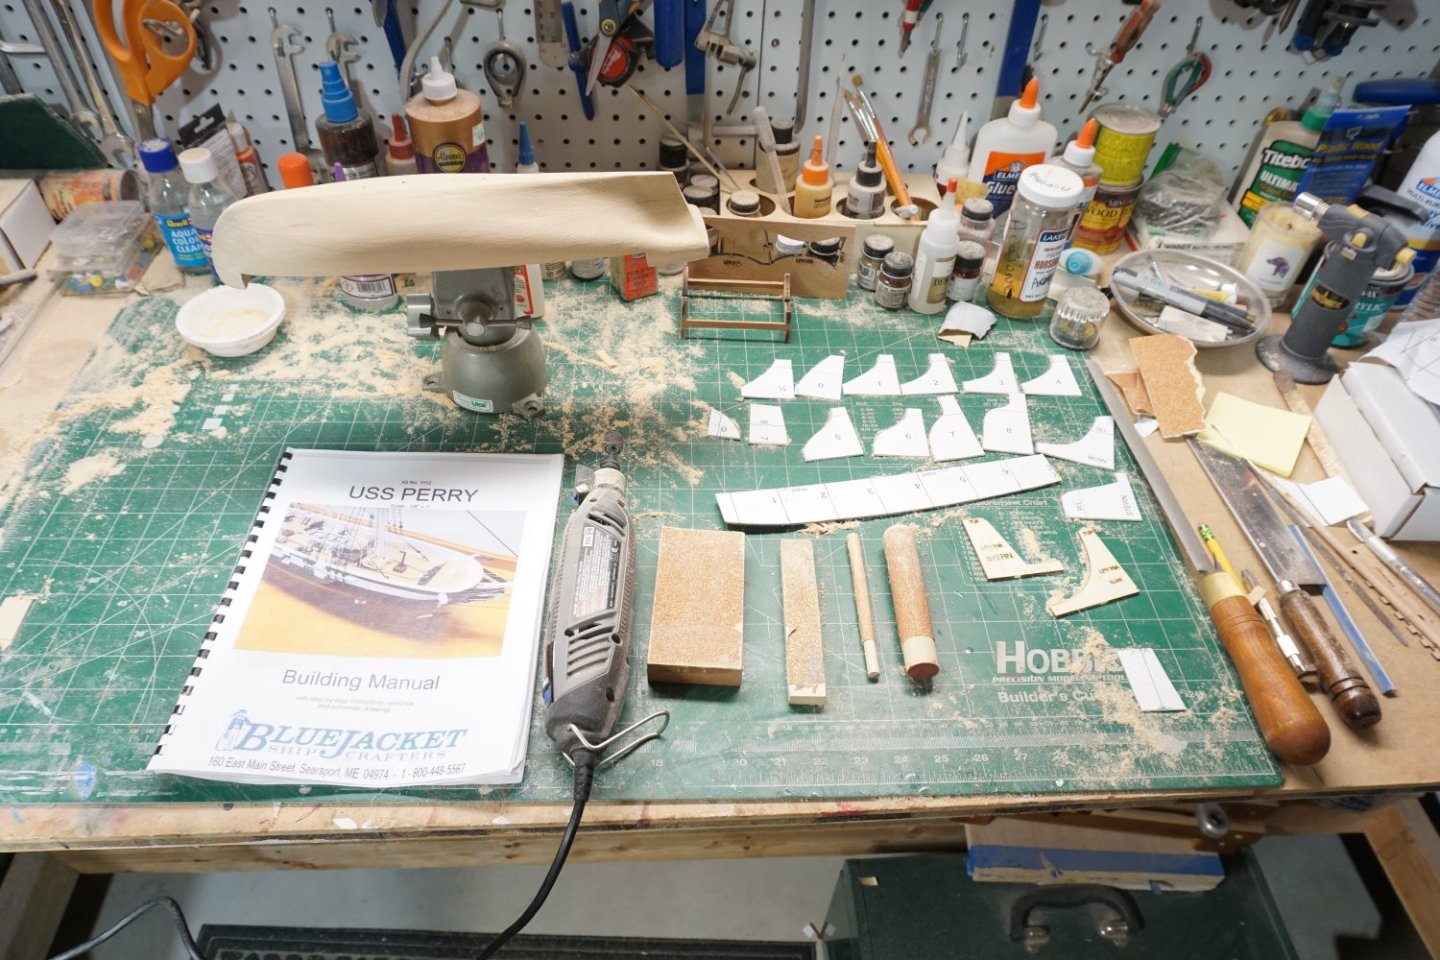
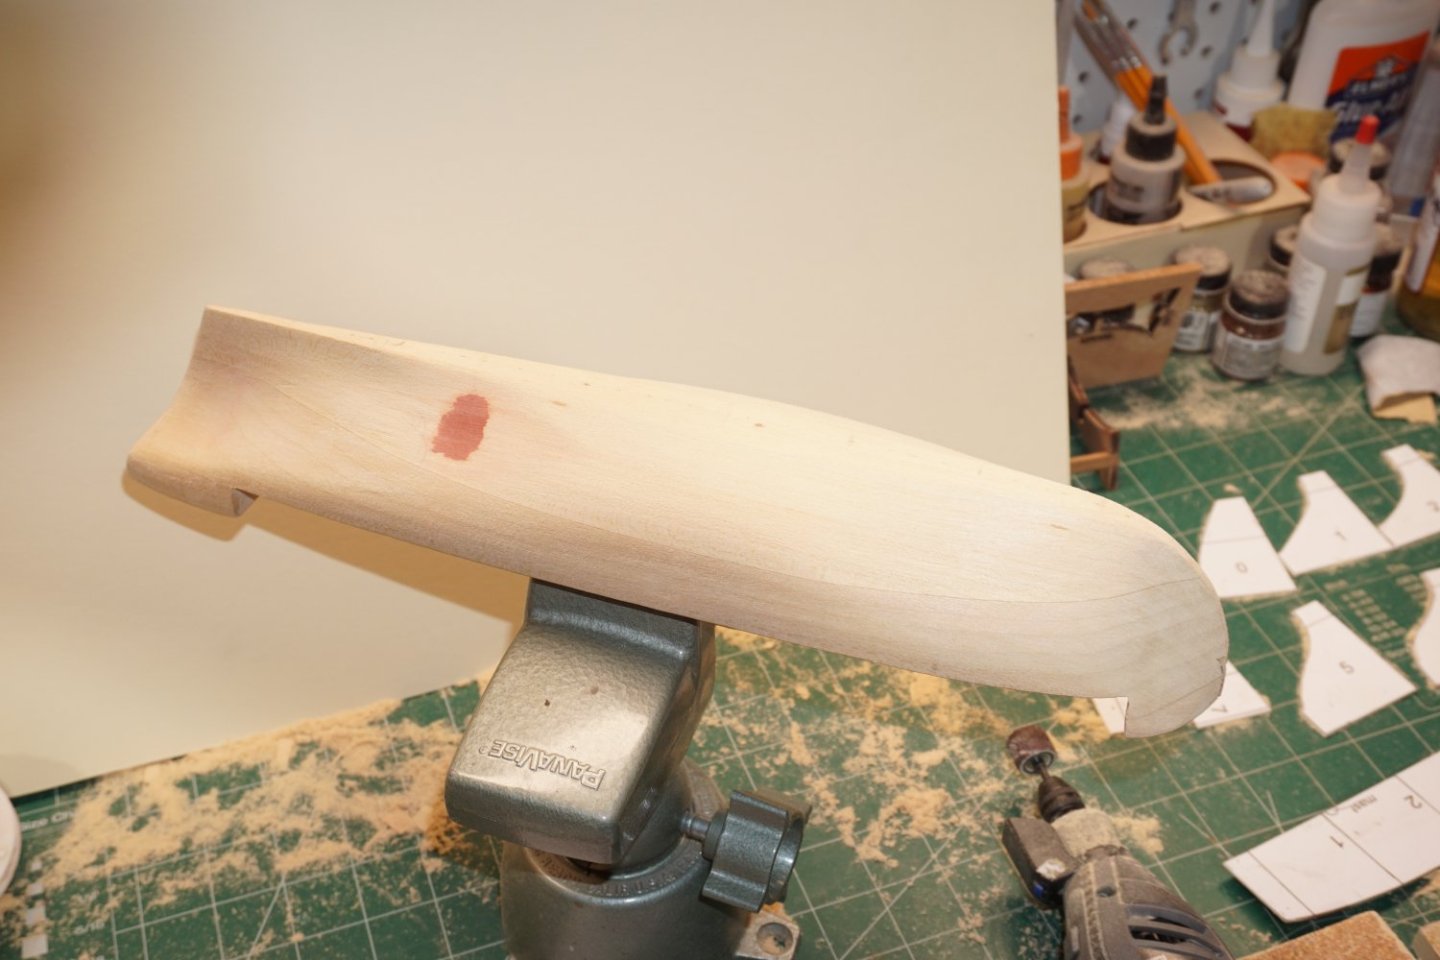
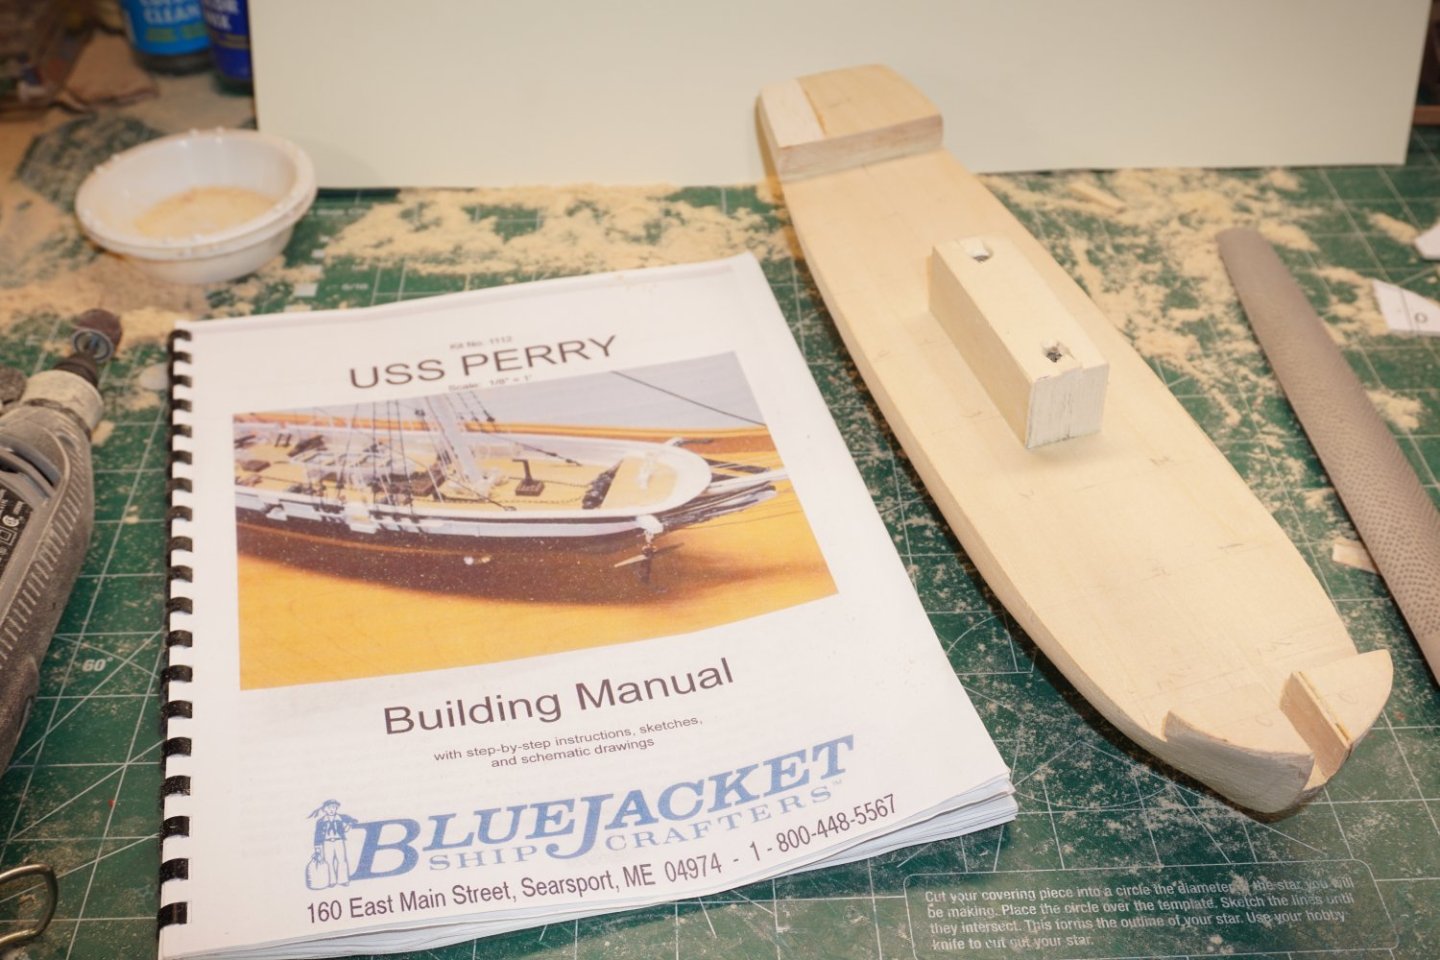
The Perry was launched in May 1843 by the Norfolk naval Yard and commissioned 13 OCT 1843, Comdr. Samuel F. Du Pont in command. I decided on this kit as I want to try an actual ship model with more complicated rigging, and I figured this will be a good one to start with as I really like the looks and history of this model. This is a solid hulled model so my 1st steps were to cut out all hull and deck templates which I laminated to card stock. I proceeded to prepare the deck surfaces with a good sanding then established the centerline. Using the deck templates as a guide, I marked the hull template locations and then traced the deck outlines out on the hull. Using my rasp, I shaped the hull to match the deck out line, then established the correct bow and stern curves with kit supplied templates. Lastly, I worked the hull to its finished shape by checking progress with hull templates. After approx. 10 hours over 3 days, and a very messy workbench I was able to get this step complete.


- 50 replies
-
- 9
-
-
- Perry
- BlueJacket Shipcrafters
- (and 1 more)
-
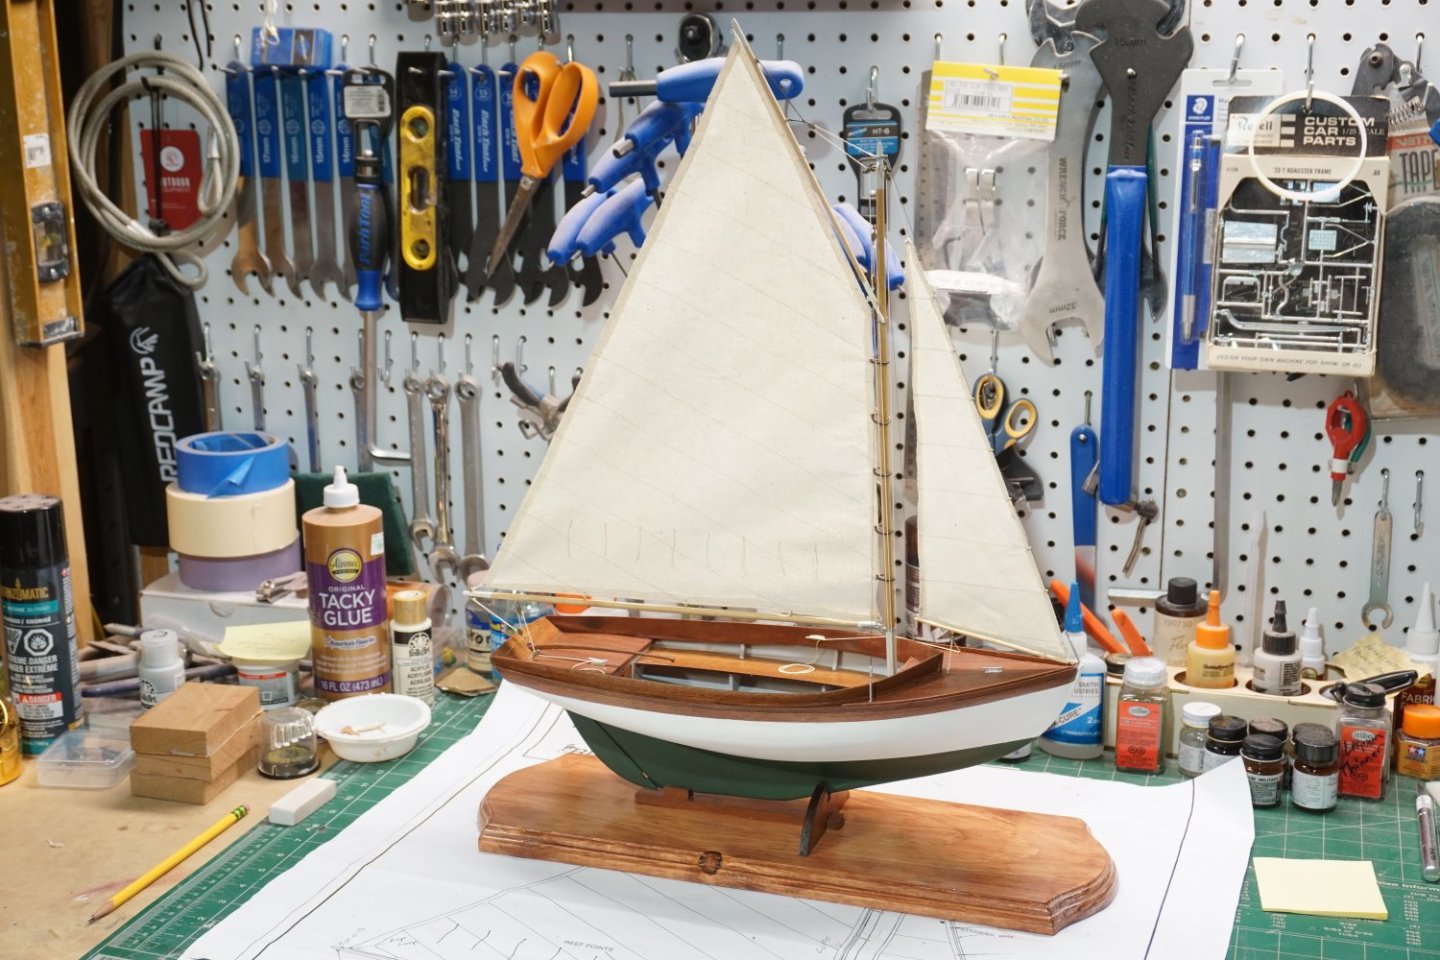
My photography knowledge is minimal, so I apologize for that; but I took some clearer photos that I thought I would add to this build thread.


- 23 replies
-
- 9
-
-
- Herreshoff 12 1/2
- BlueJacket Shipcrafters
- (and 1 more)
-
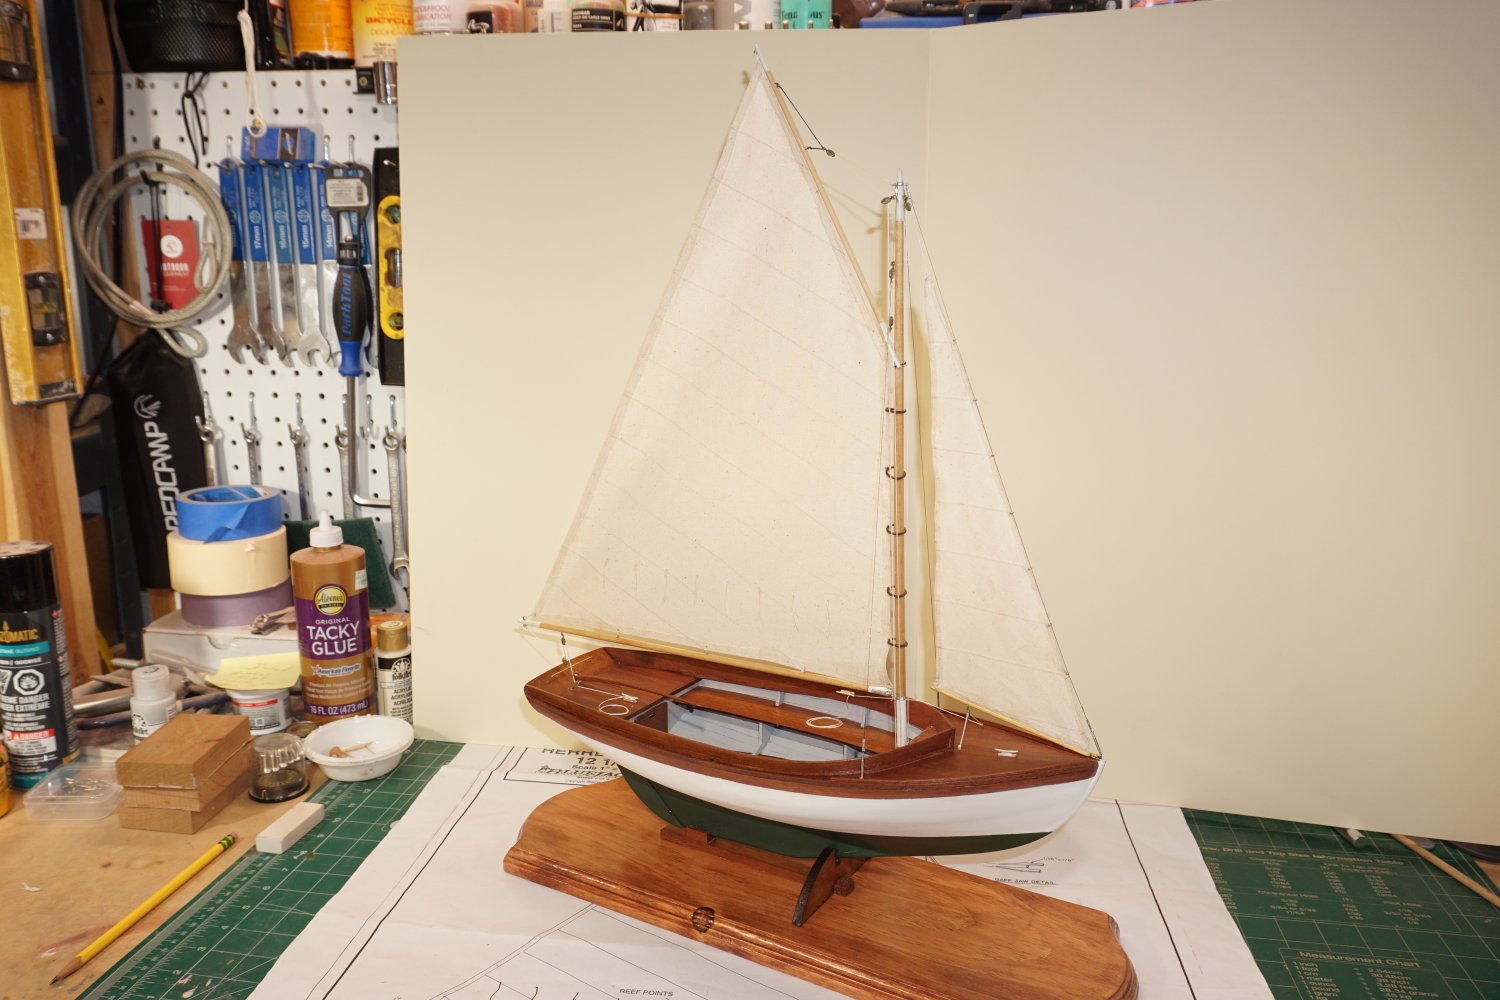
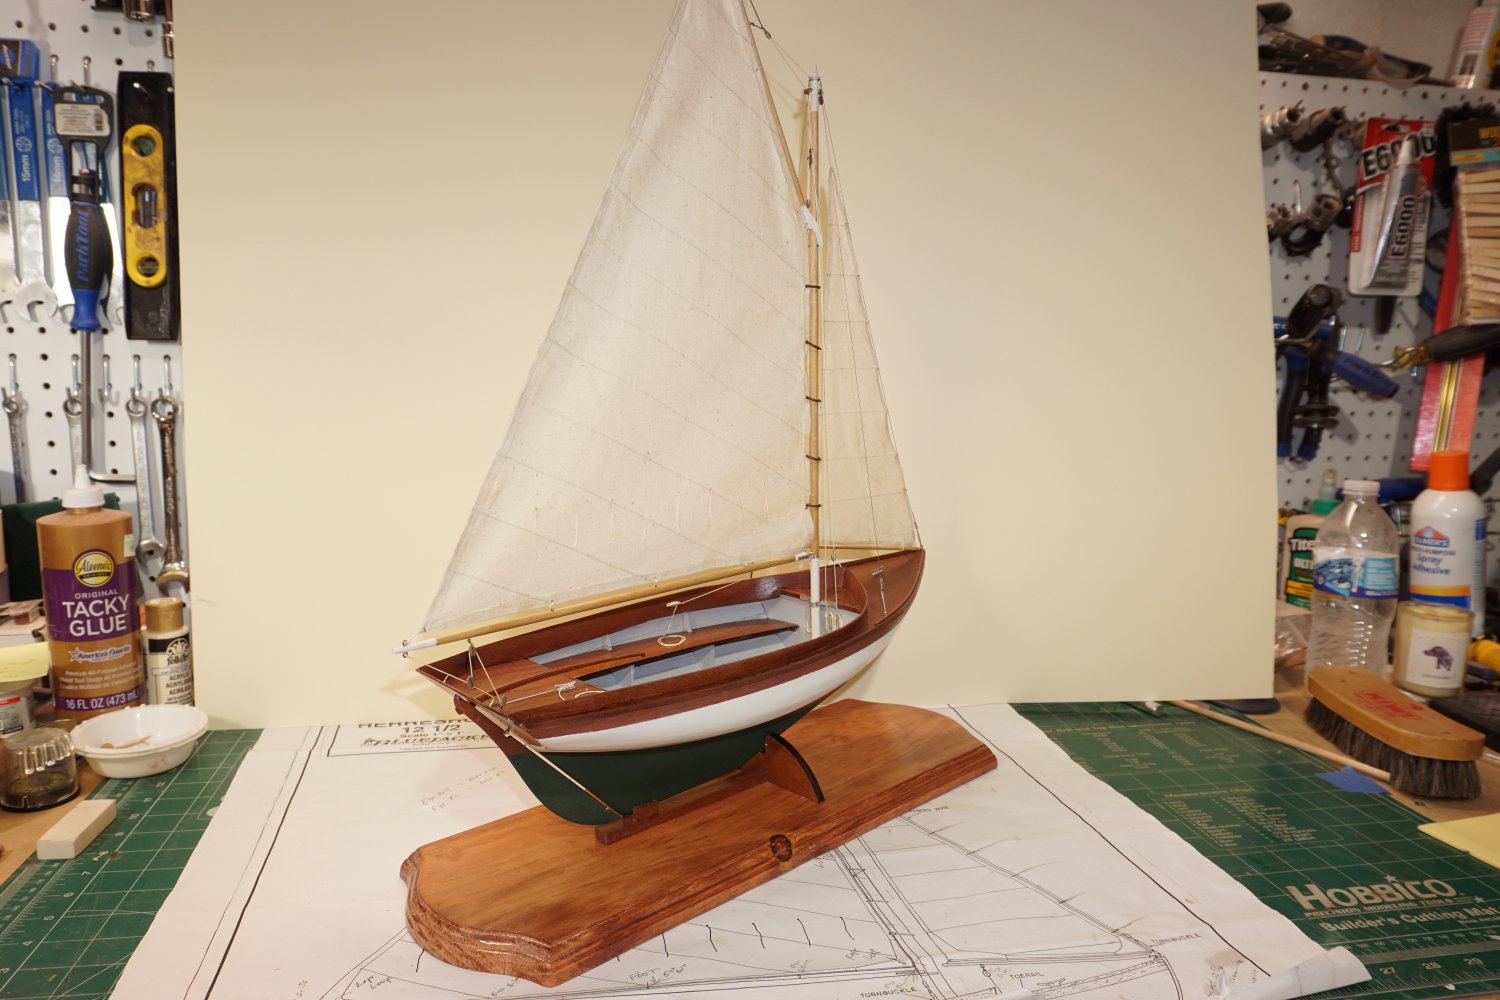
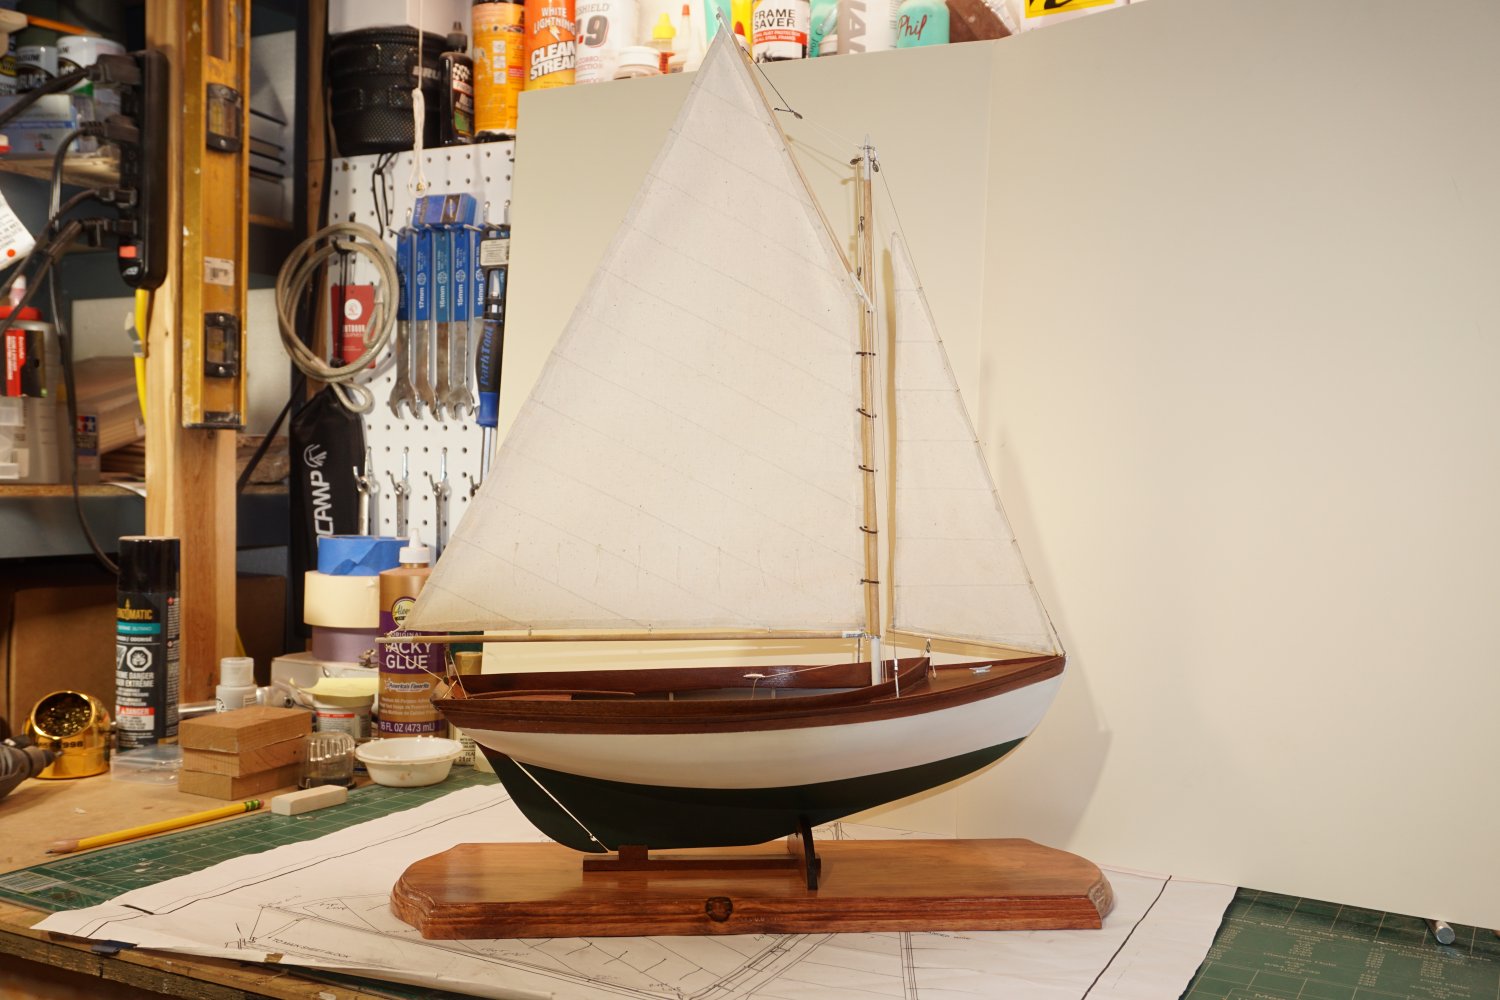
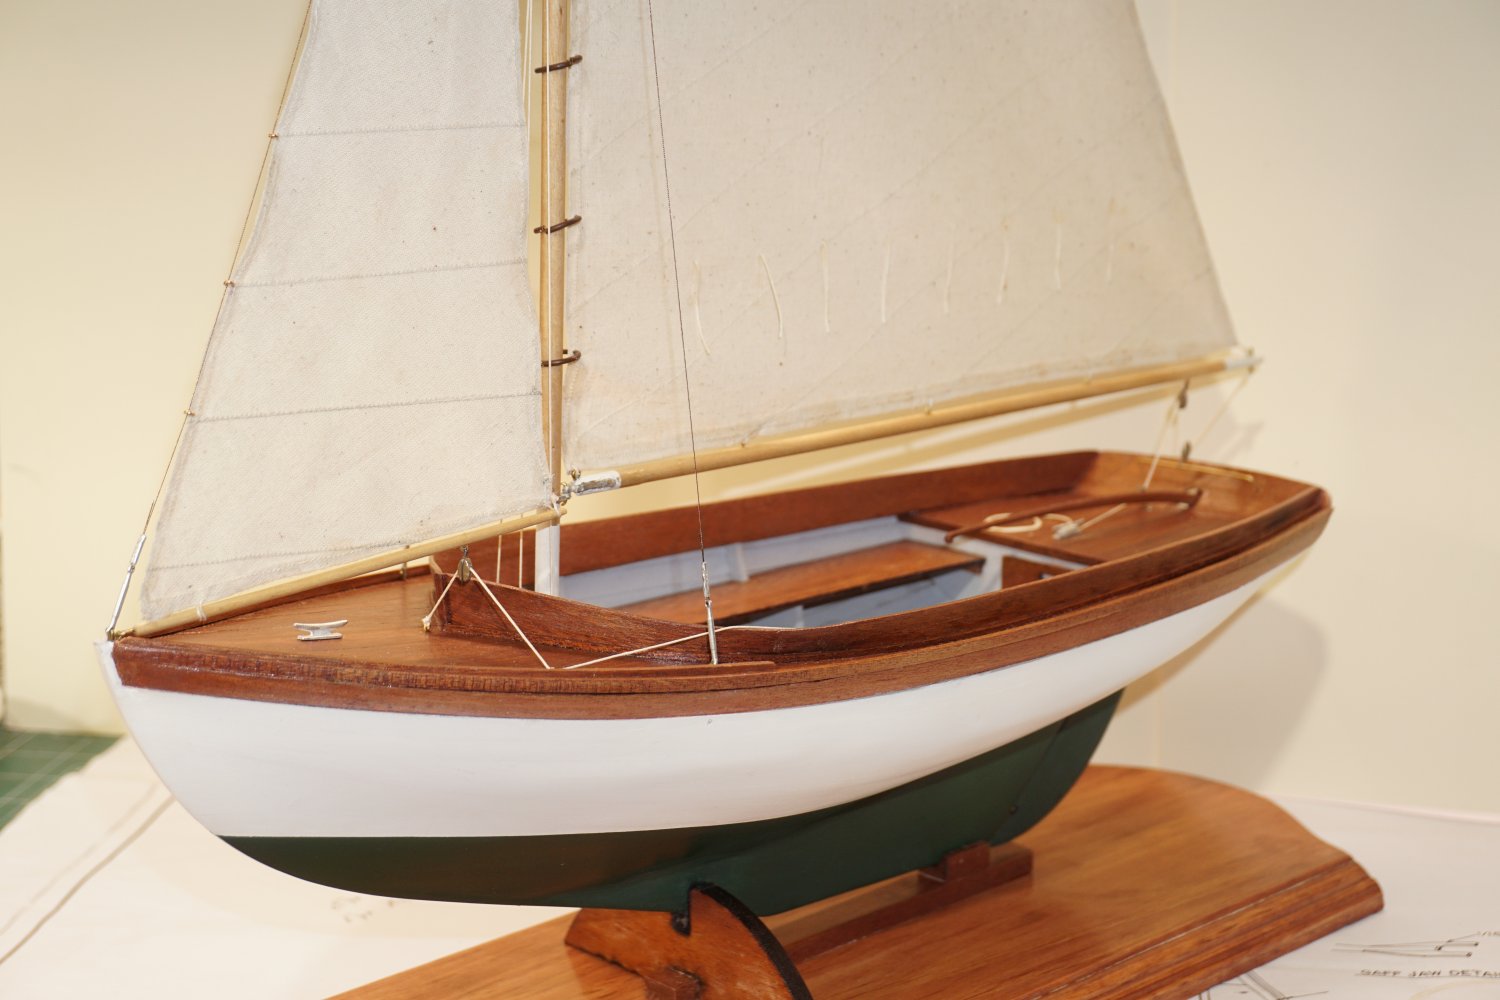
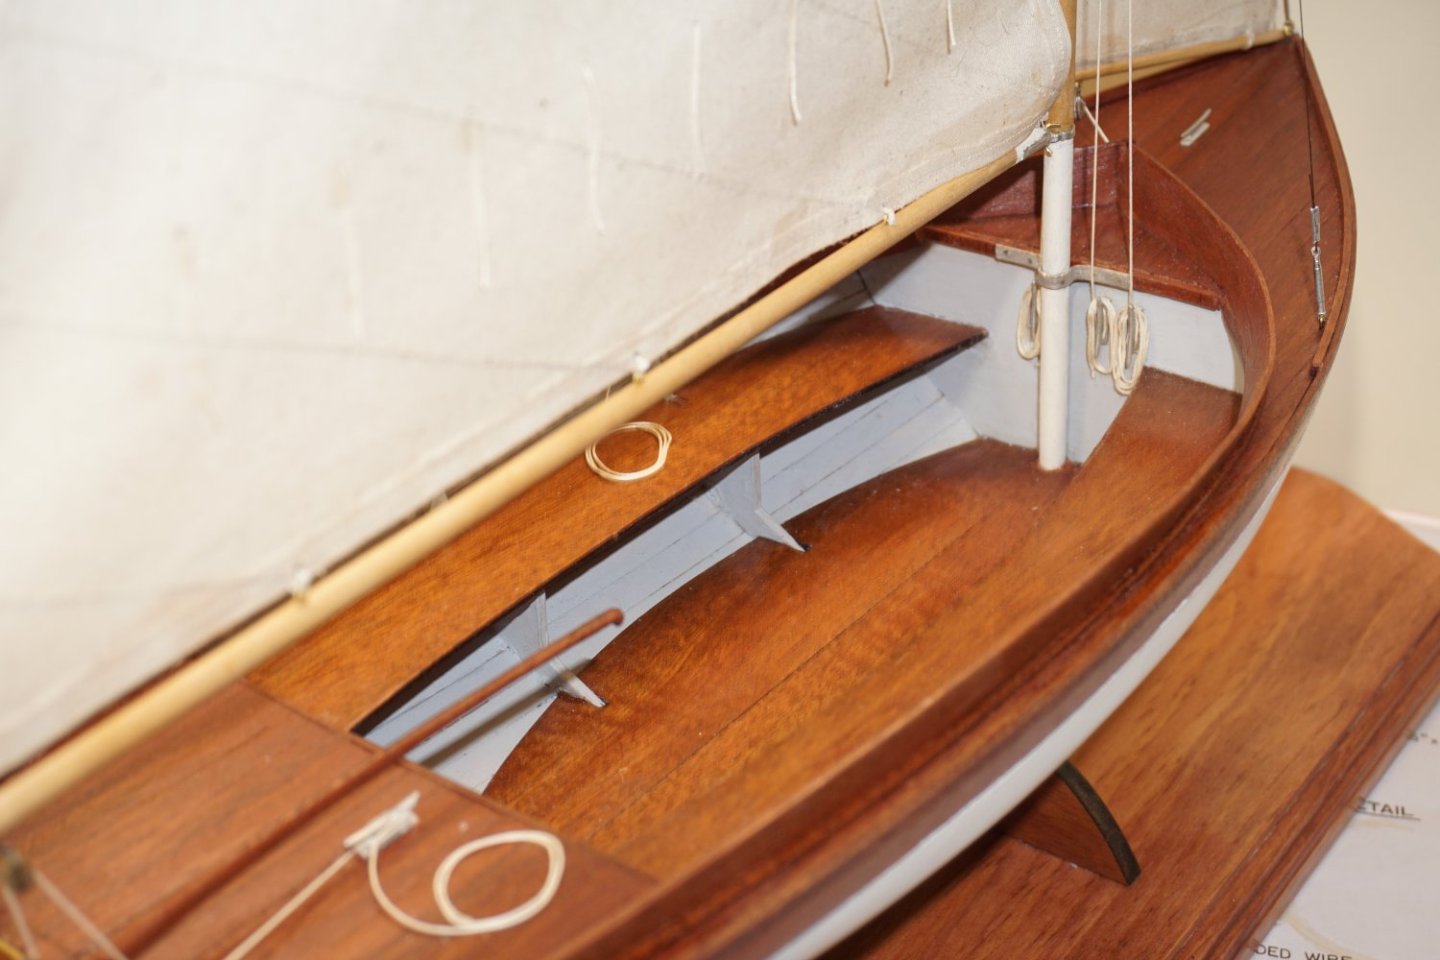
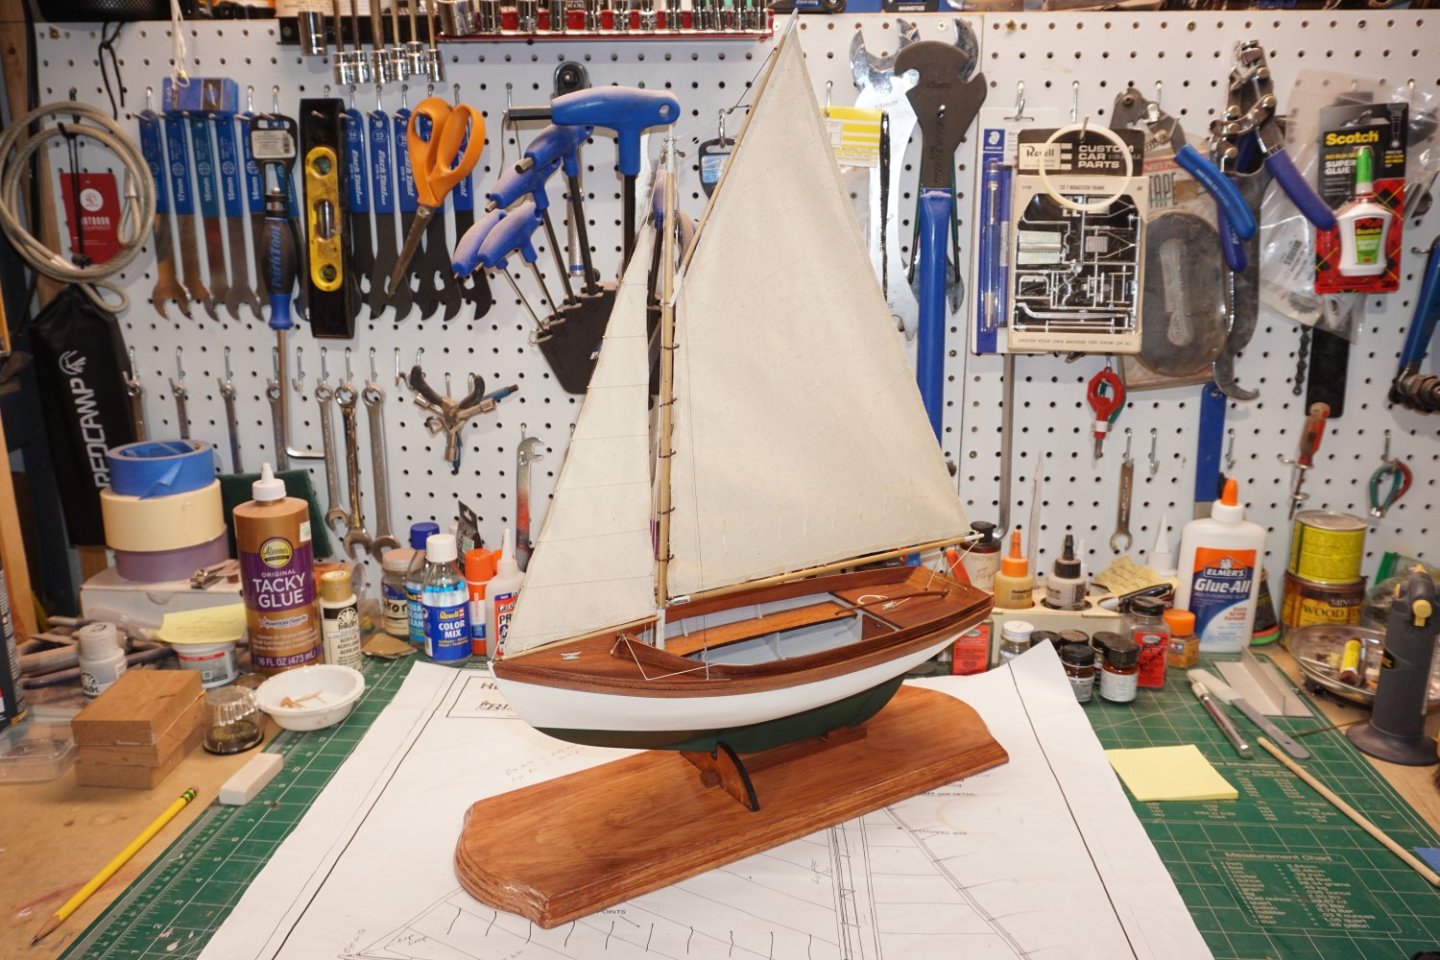
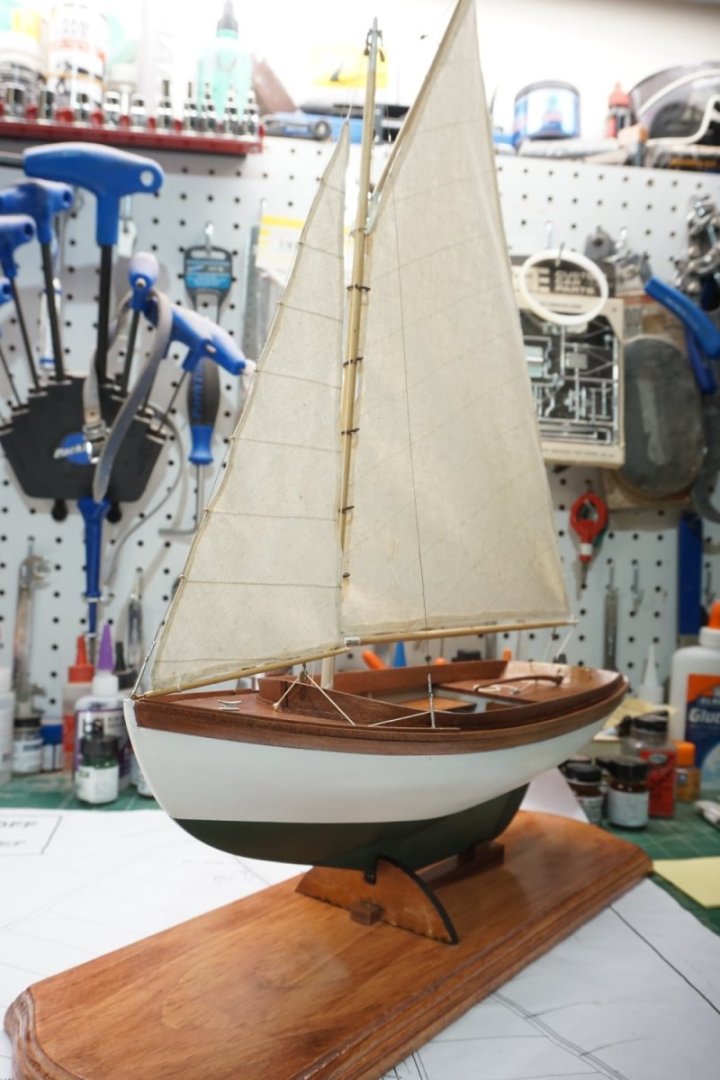
All the rigging complete, Made the rope coils per instruction manual and touched up all the areas that needed it and I'm calling this project complete. I am very happy with how this turned out, now I will just have to have the wife help me find a spot to display her.


- 23 replies
-
- 10
-
-

-
- Herreshoff 12 1/2
- BlueJacket Shipcrafters
- (and 1 more)
-
Thank you, Nic. Currently working on the rigging and it's going well thanks to all I learned from you in your rigging class. The only trouble I had, which is totally my fault, is that I broke one of the turnbuckles when I pulled it too tight, Luckly I robbed one from the Nantucket kit that I haven't built yet and made a note in that kit to replace it.
-
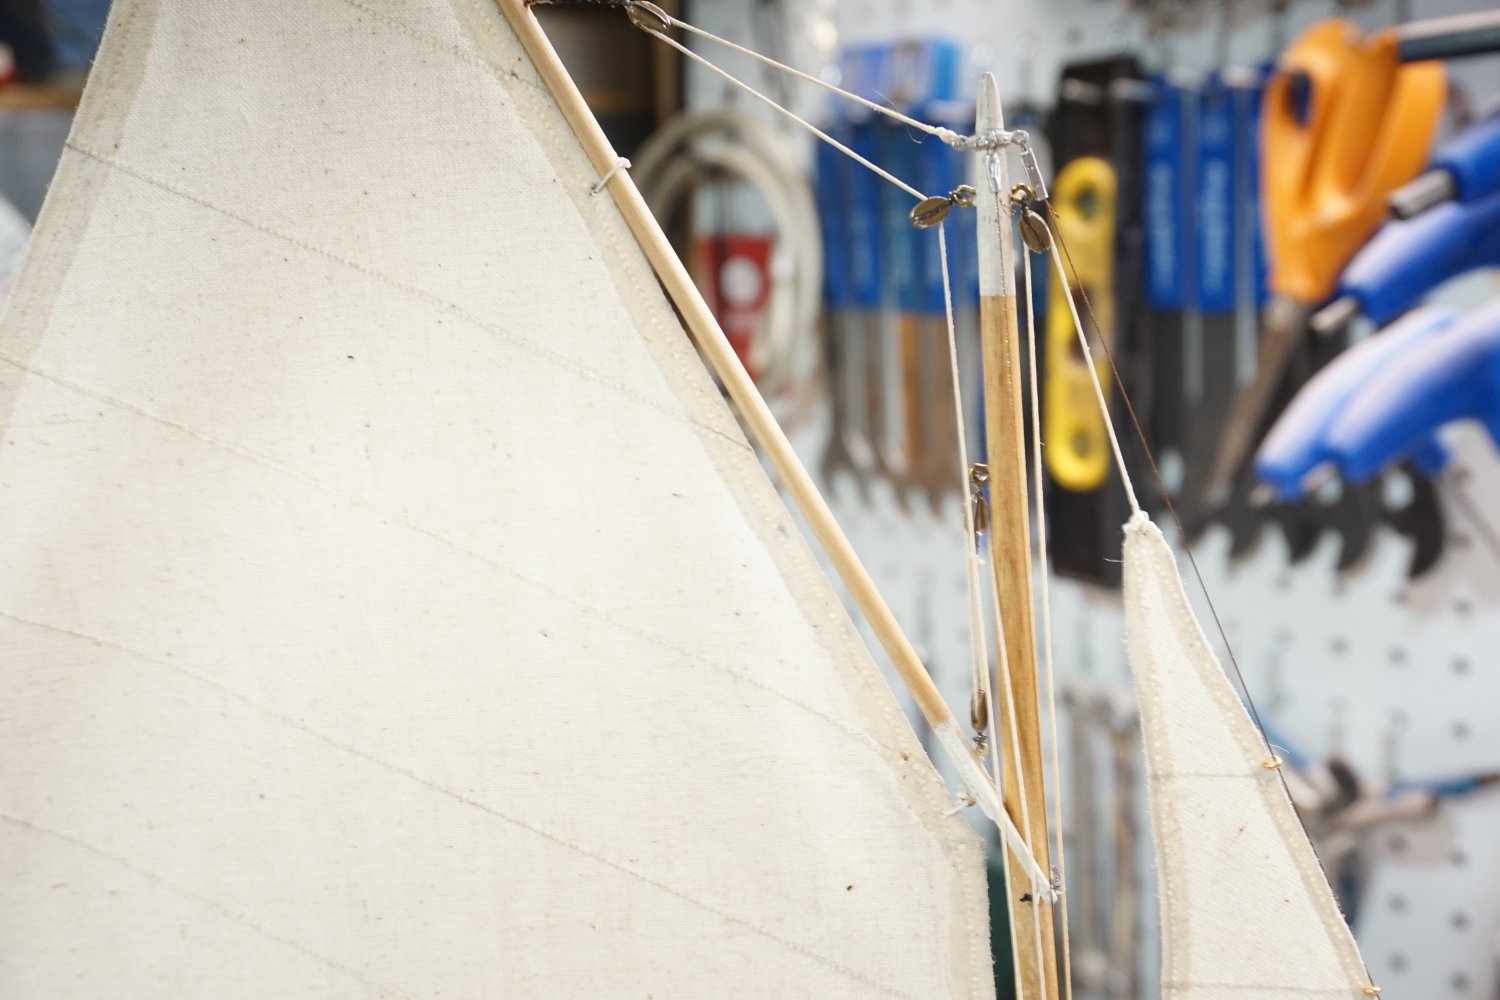
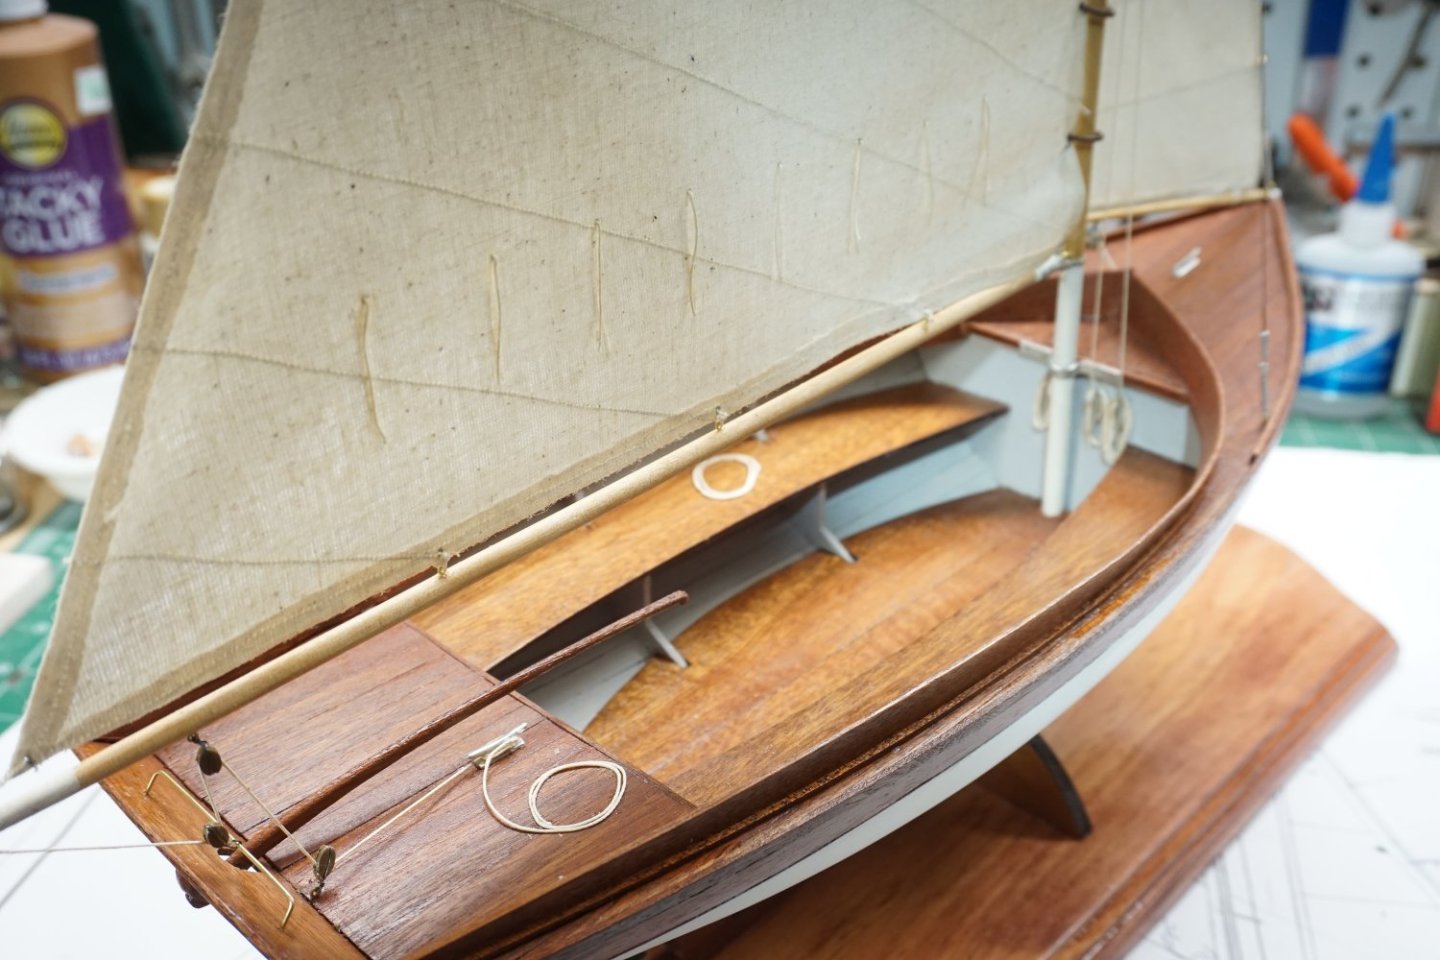
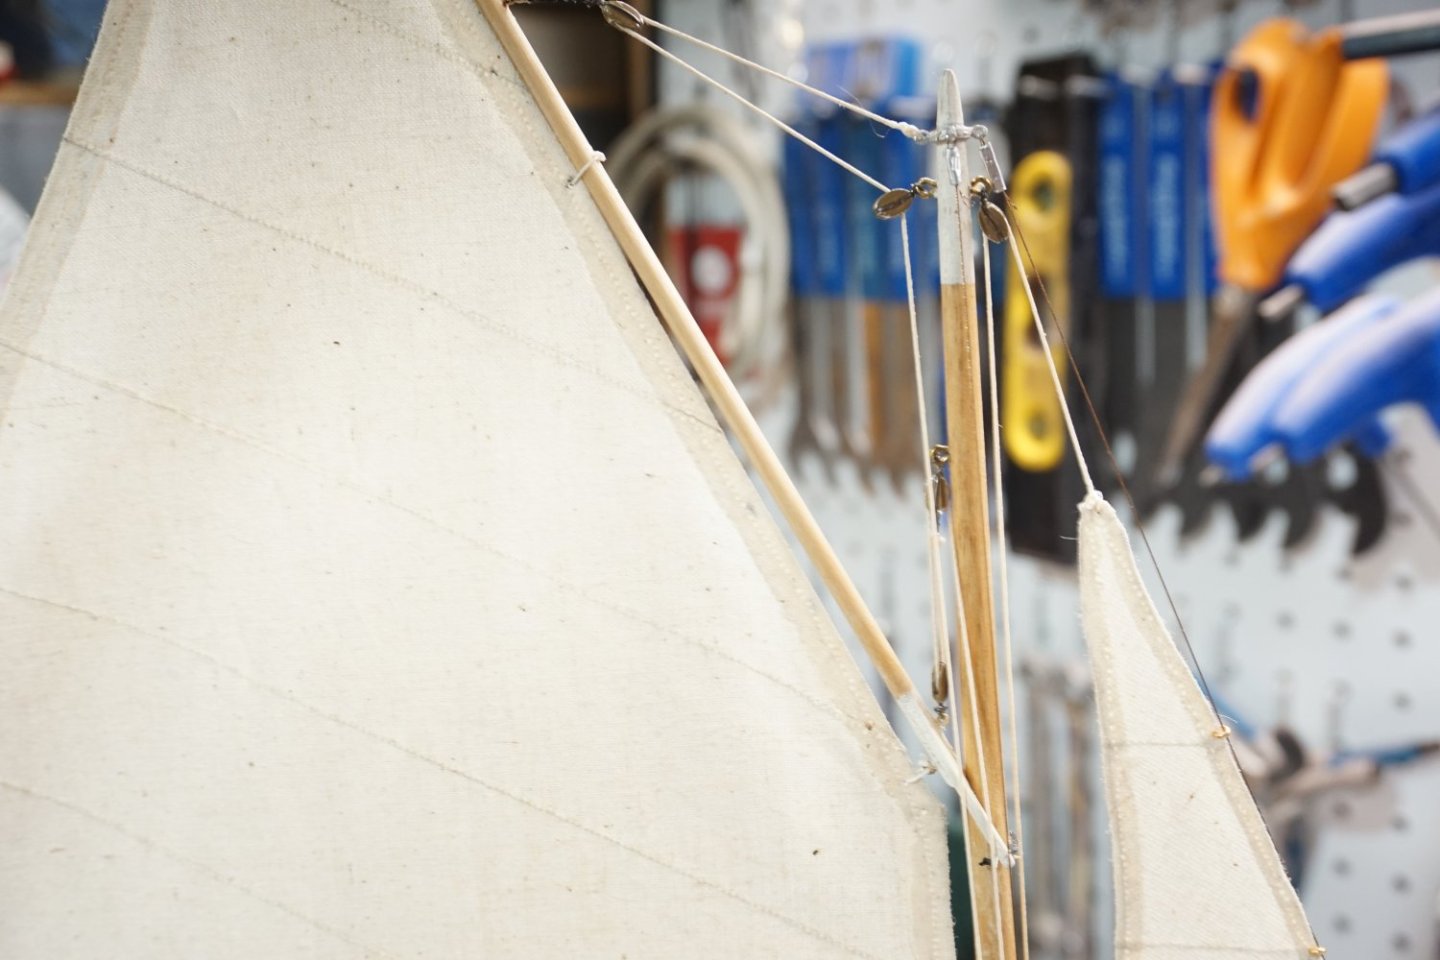
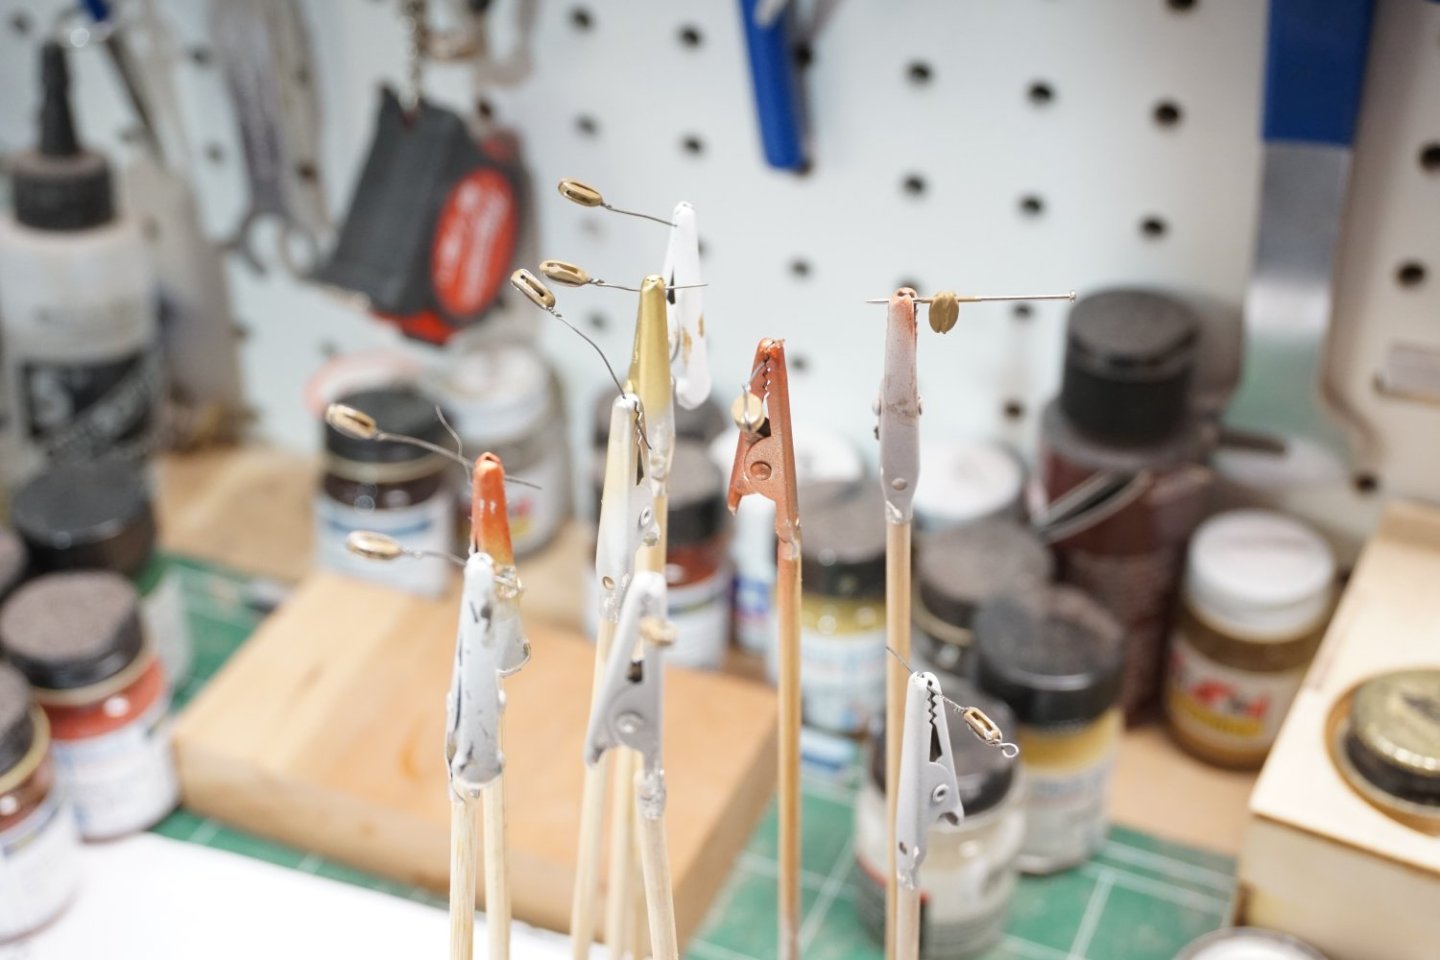
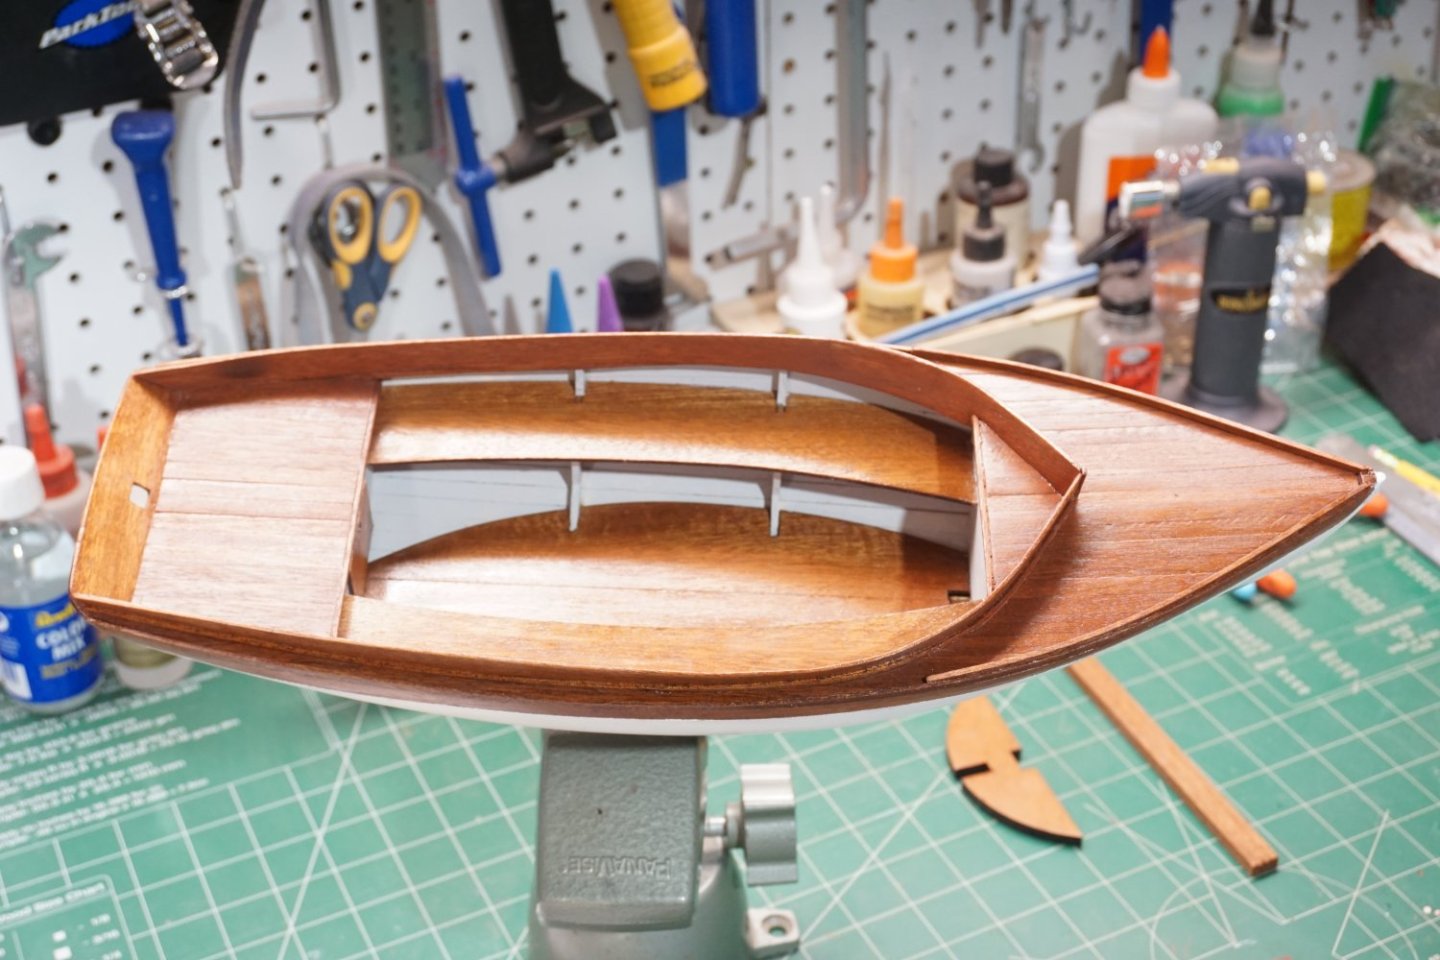
After studying the plans and re-reading the manual and looking at some finished photos of this model I marked out locations for all eye bolts and eye pins. Next, after prepping the mast, boom, gaff, and jib club with all the proper eyelets I added the 6 cleats to their proper locations and stropped all 8 blocks (one block was stropped with a becket). Prepared the traveler and was careful drilling attachment holes so I wouldn't go all the way through the transom. As far as finishing, they all were left natural, but received a coat of floquil Swedish wood oil and white paint in the proper locations. The blocks were painted with a brown enamel color. Now I'm ready for the rigging.


- 23 replies
-
- 6
-
-
- Herreshoff 12 1/2
- BlueJacket Shipcrafters
- (and 1 more)
-
Thank you, and I'm glad you like. Jeff
-
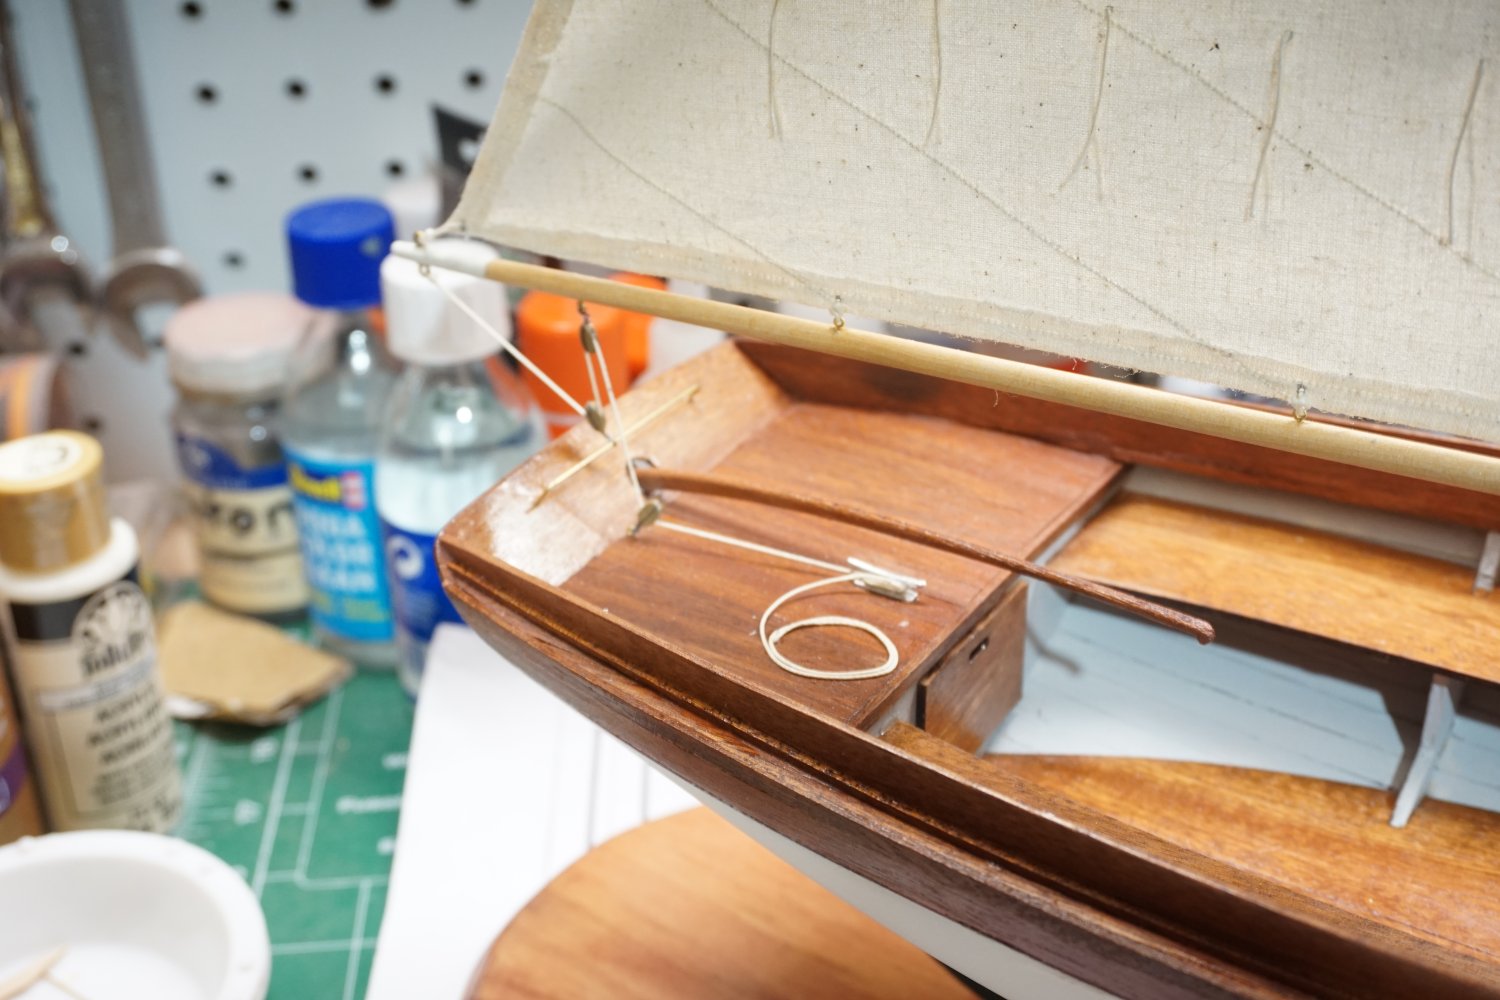
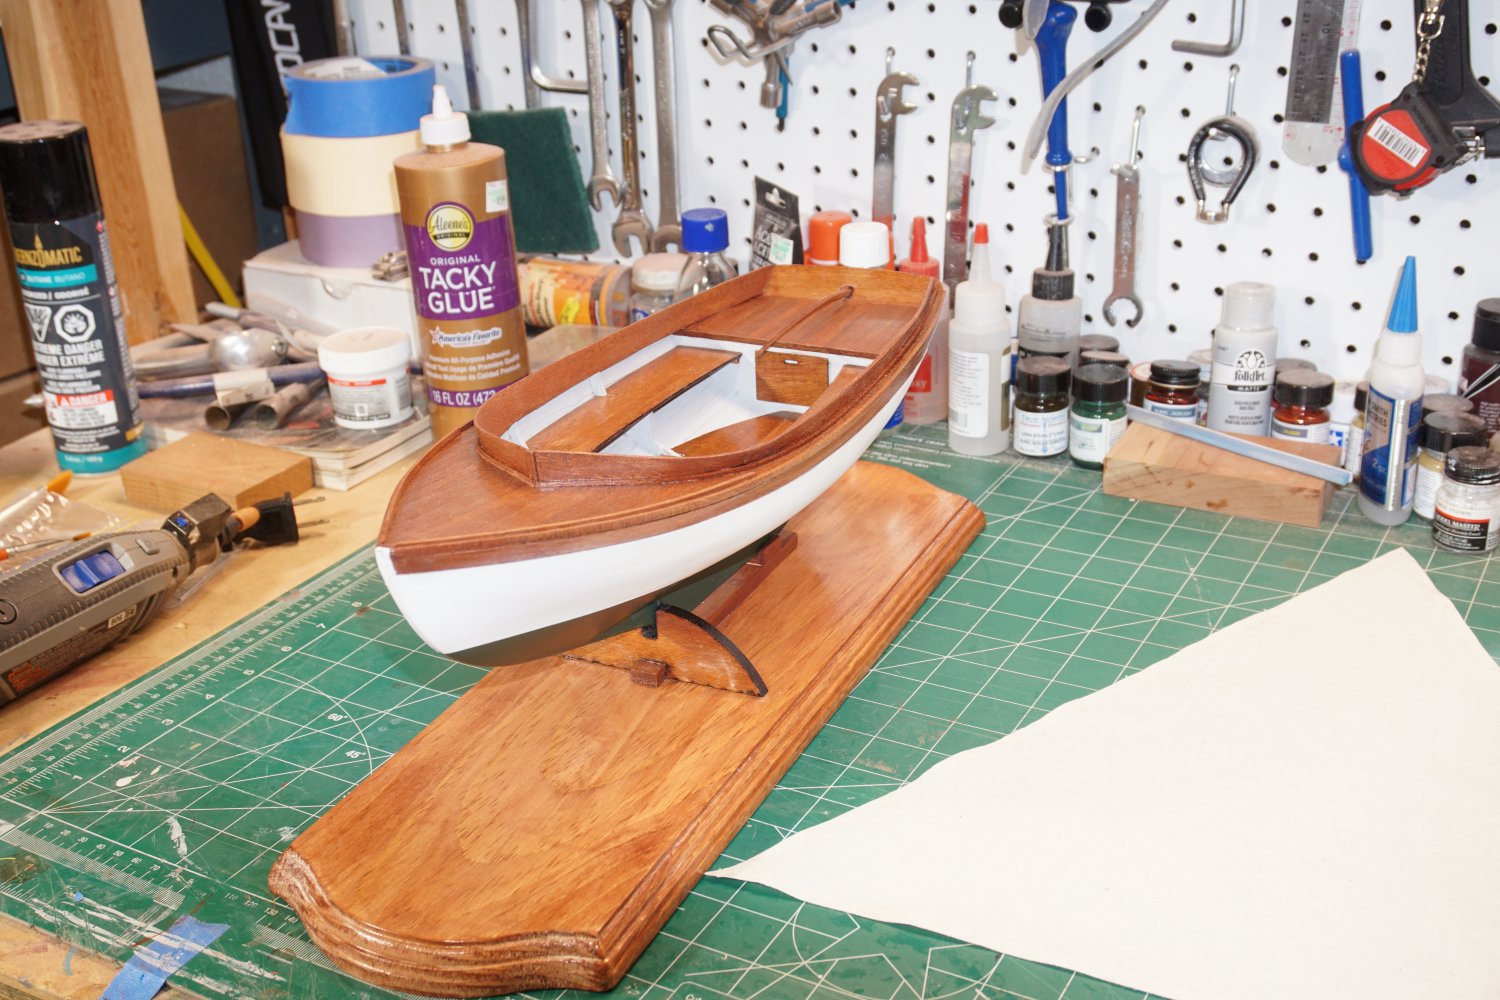
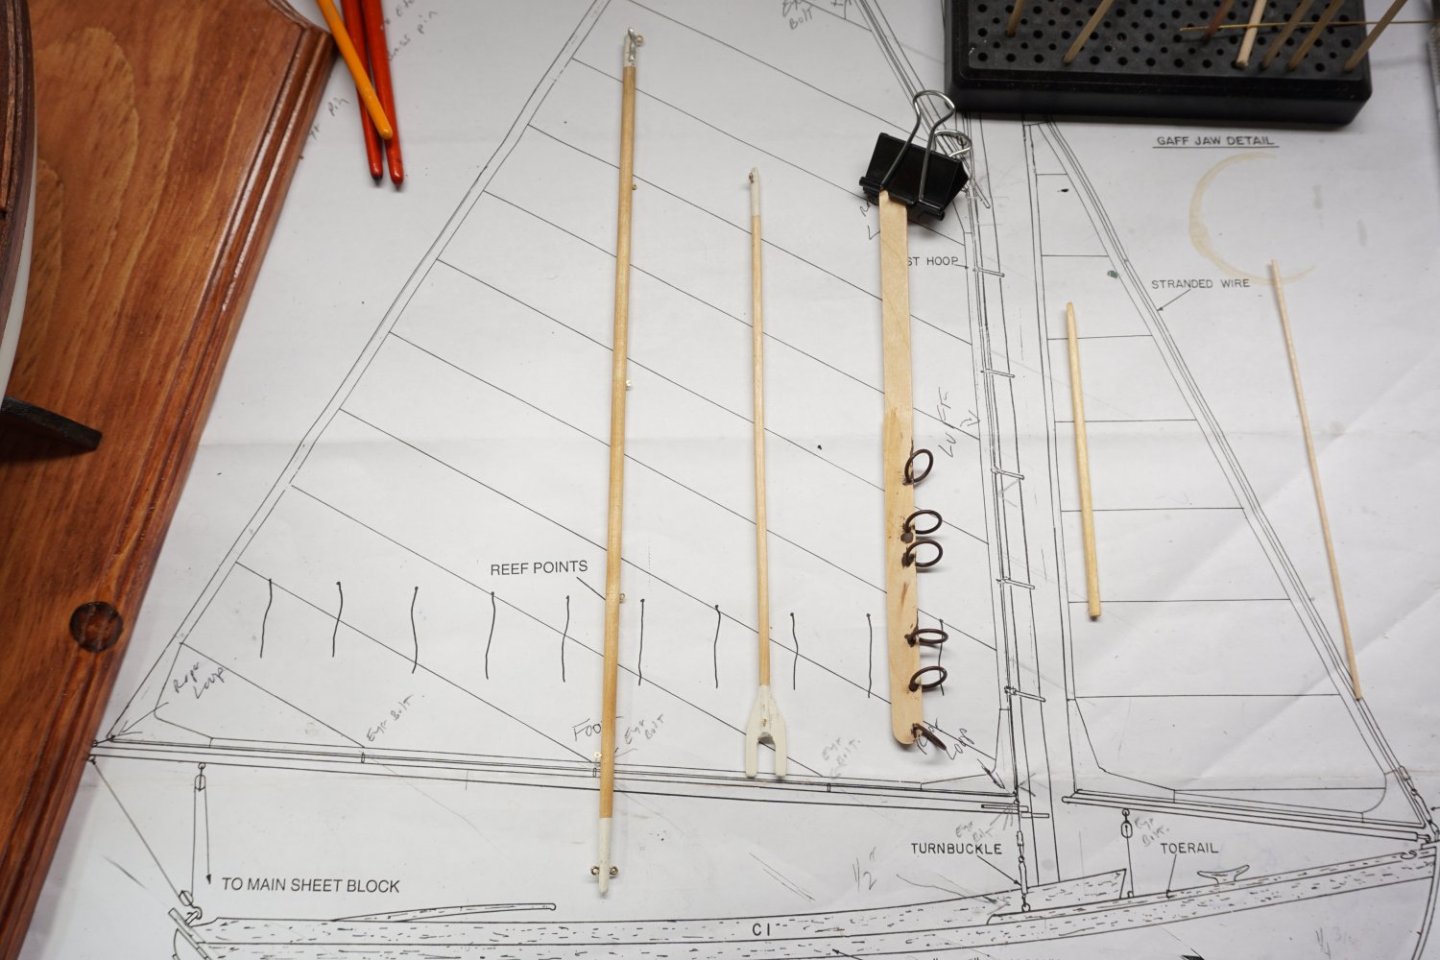
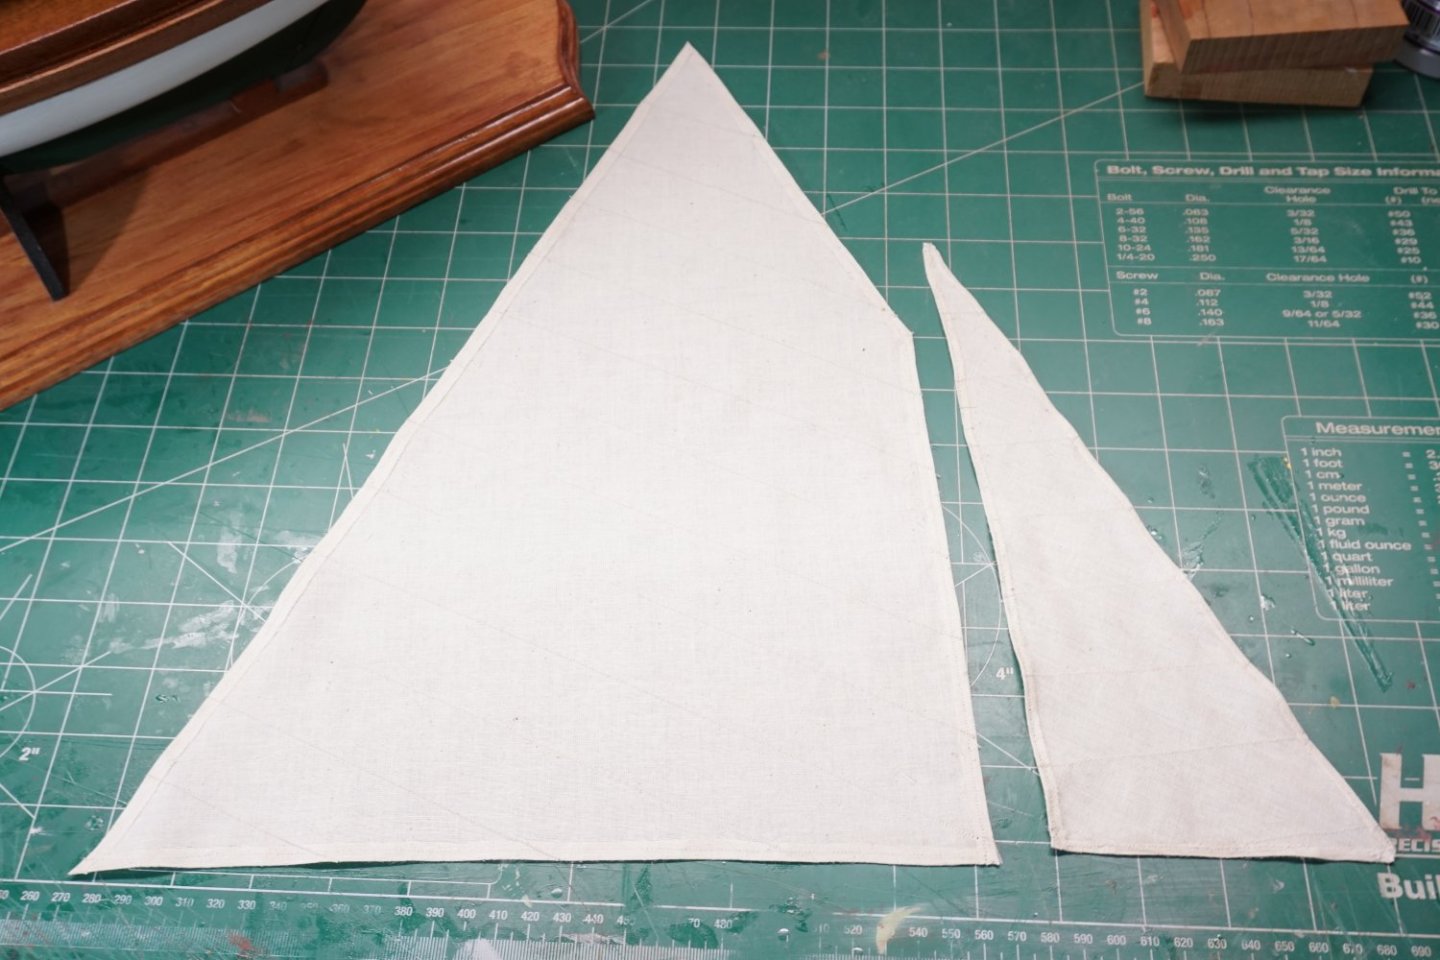
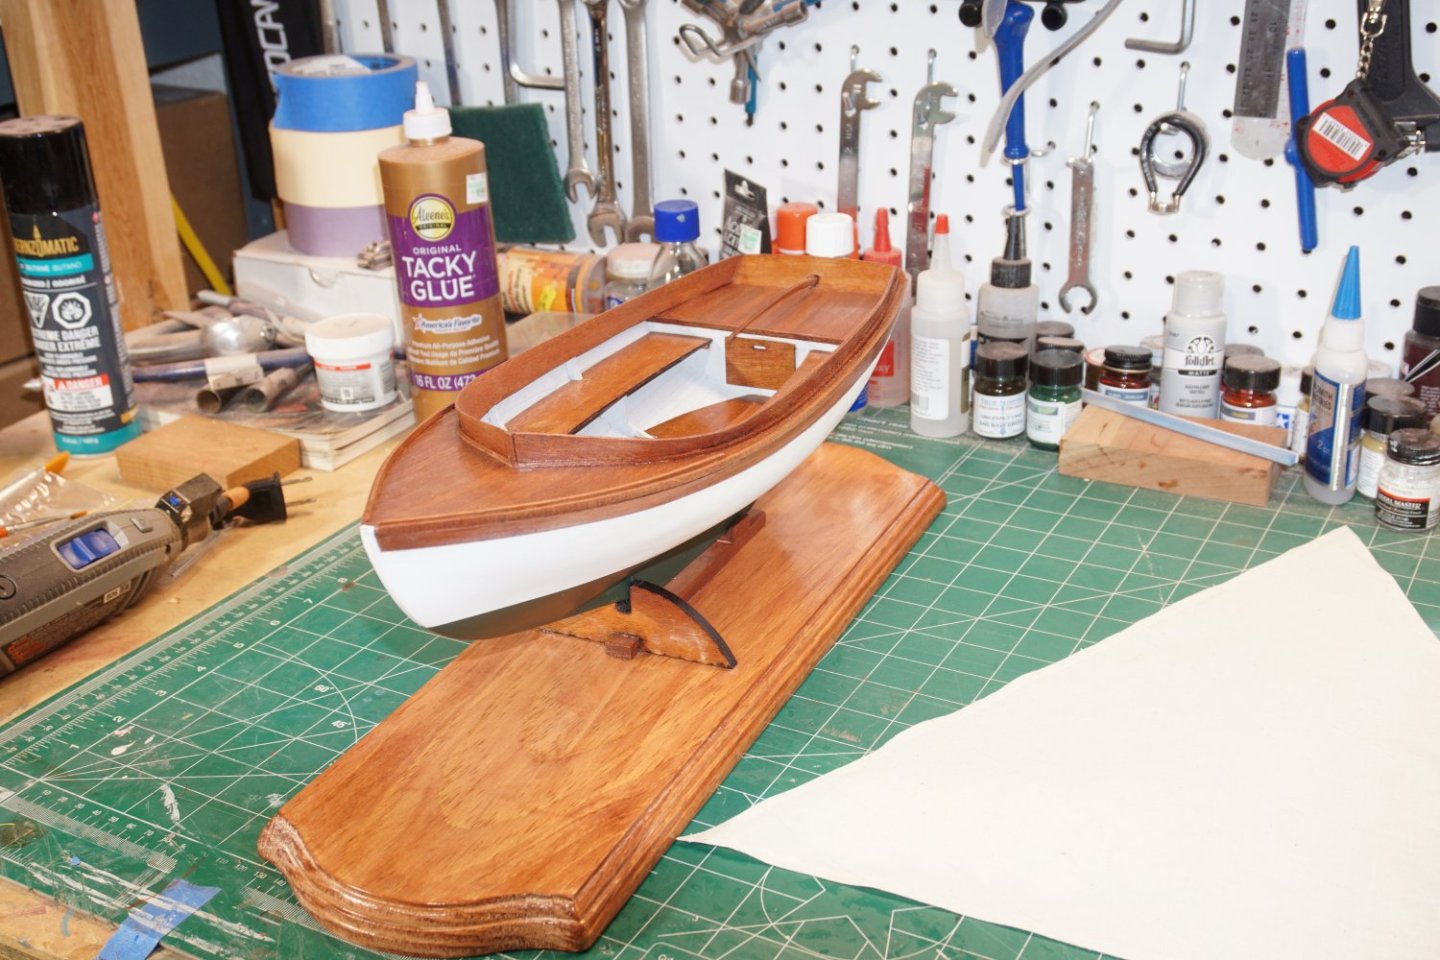
Completed the rudder assembly per kit instruction then proceeded with the permanent mounting base. I didn't really want to glue it to the base, but I wanted it to be secure. Per kit instructions, I set a vertical 1/16 brass rod vertical in the aft end of the mount and also fabricated a wood cradle out of scrap mahogany from the kit to make it steadier. On to the sails: after ironing out the wrinkles in fabric with wife's iron I cut them out and drew the panel stitching locations lightly with a pencil to use as a guide for sewing. I did add approx. additional quarter inch for the hems which I folded over and glued with Aleene's fabric glue just to hold in place for stitching. We have a Singer simple sewing machine at home (which I never used before) and educated myself watching a couple of you tube videos on how to use which was very helpful. I sewed all the hems and the panel stitching locations and to my surprise it went pretty smooth for my 1st time using a sewing machine. Next steps will be preparing the mast and boom.
- 23 replies
-
- 6
-
-
- Herreshoff 12 1/2
- BlueJacket Shipcrafters
- (and 1 more)
-
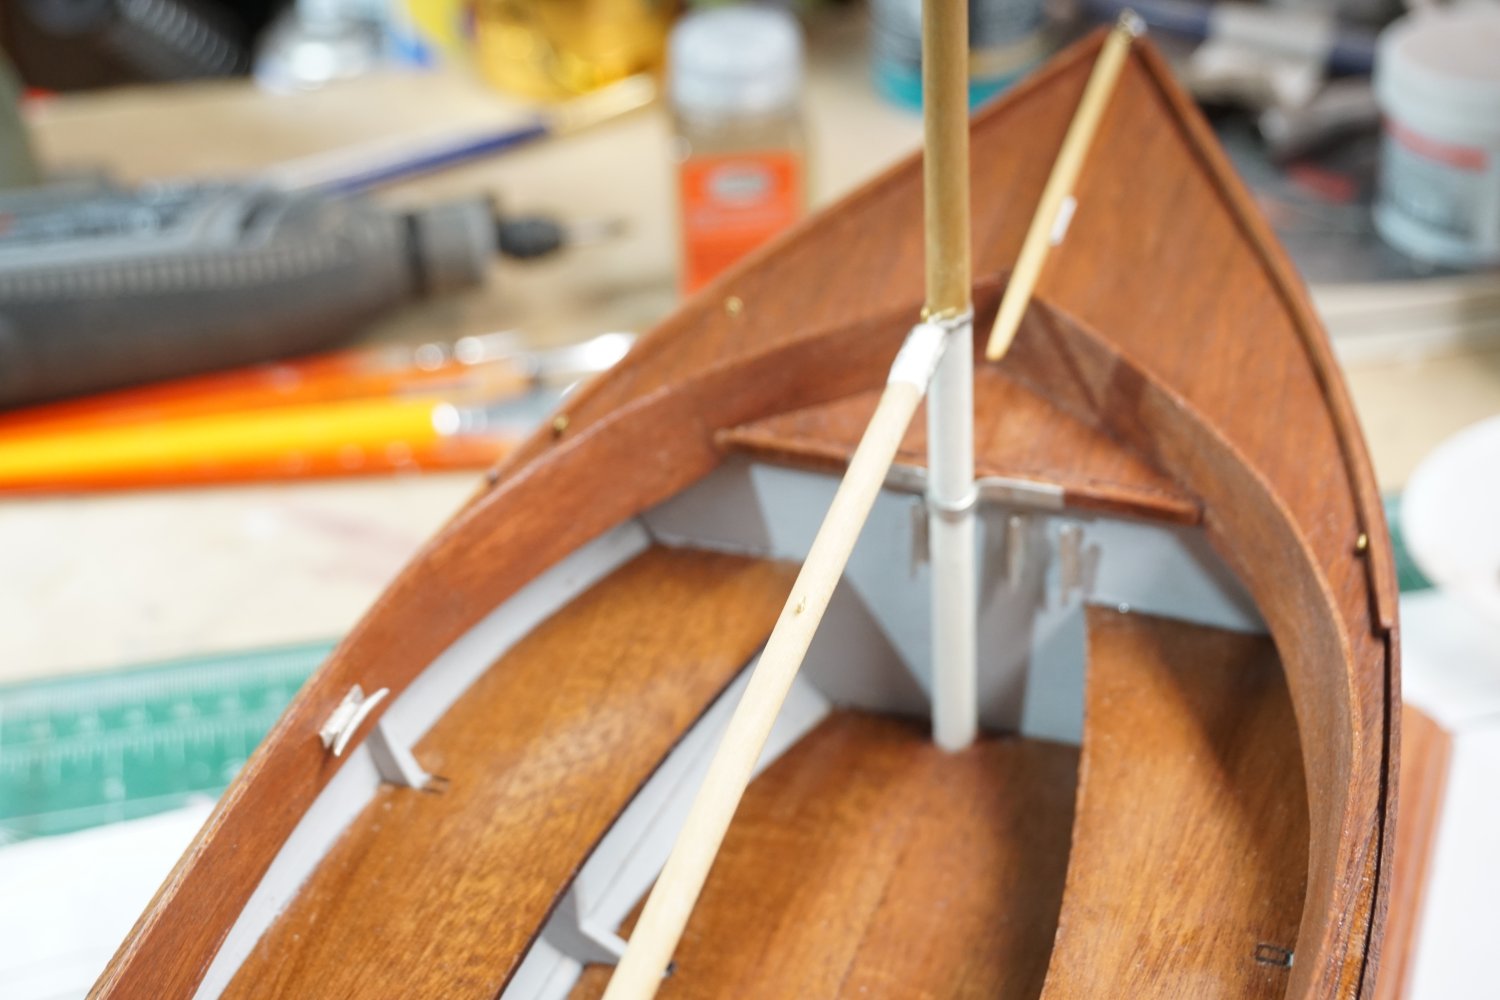
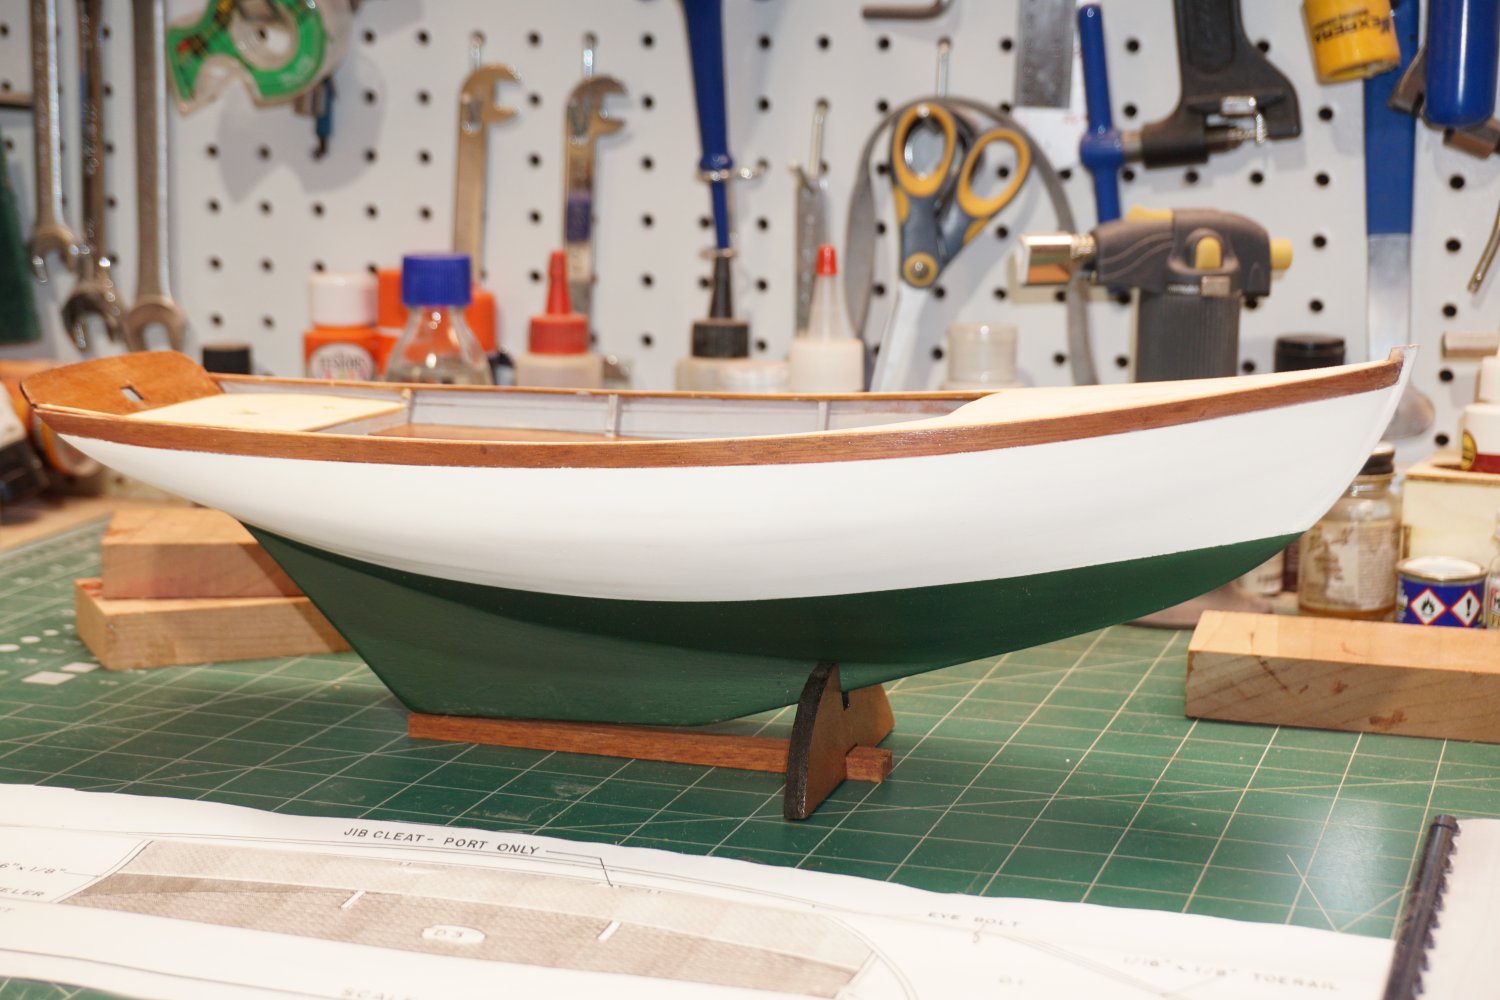
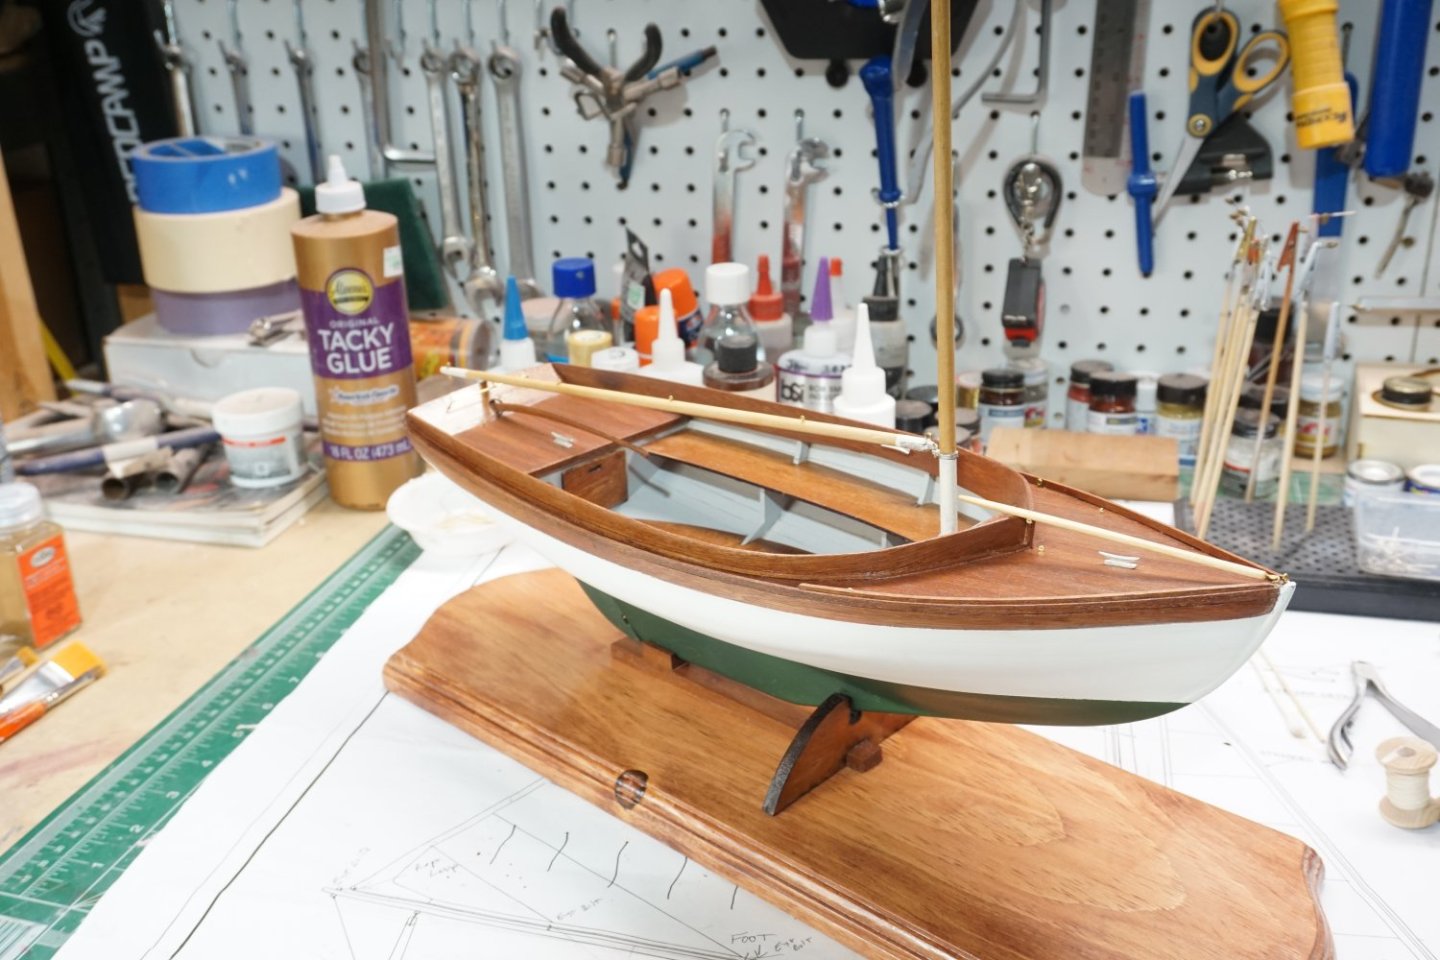
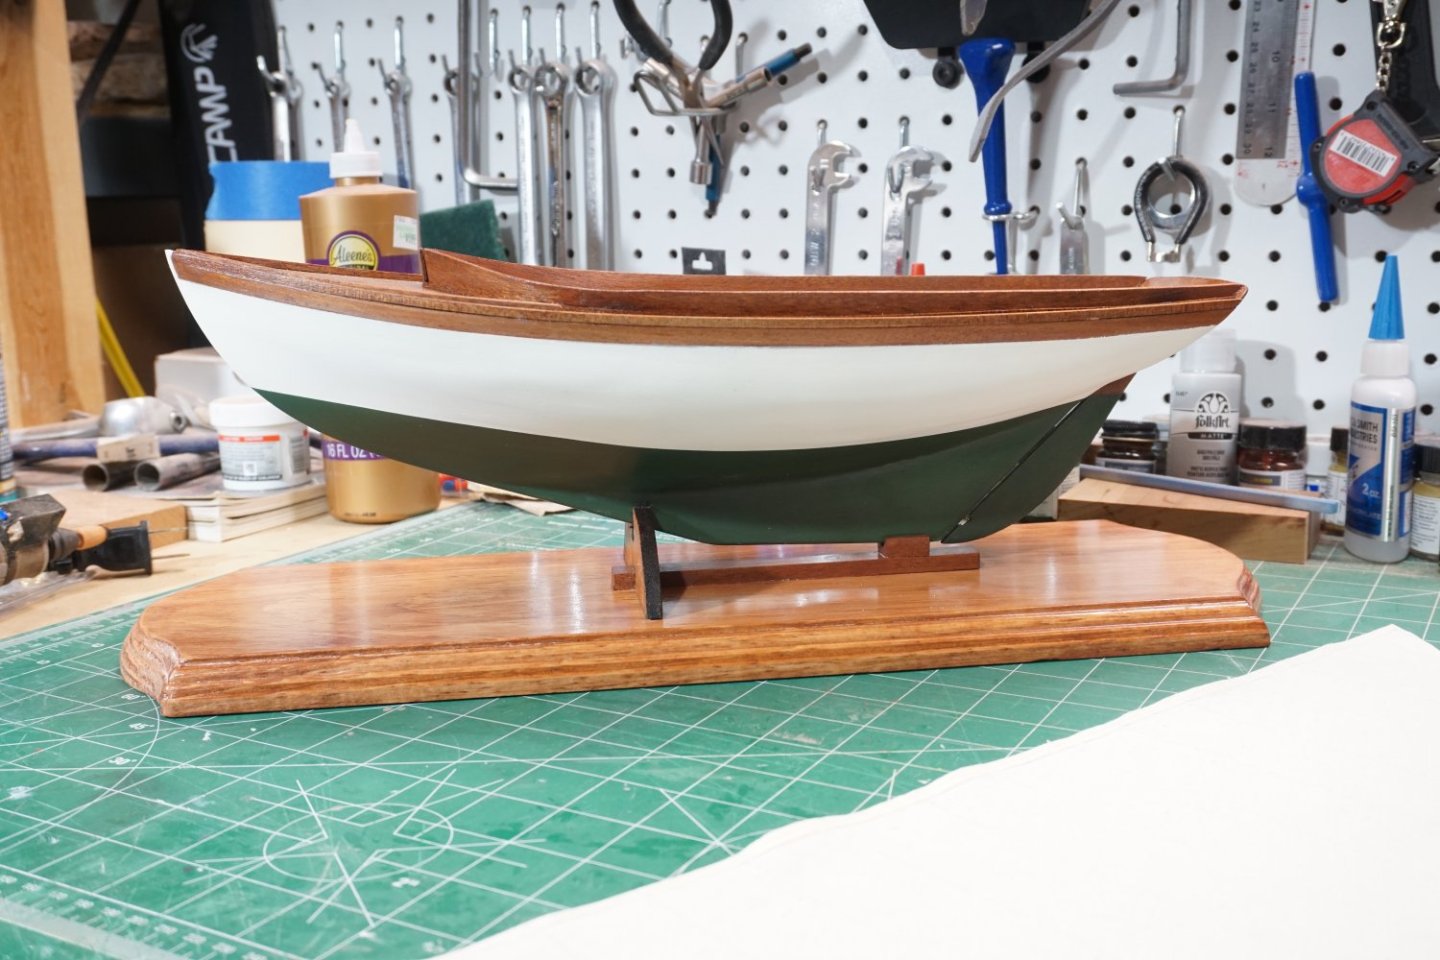
Deck planking, cockpit coaming and trim work complete. Had a little trouble when bending the cockpit coaming as it snapped when bending. Probably my impatience caused this not soaking wood long enough?? As I'm pretty new to this I still haven't figured out the best way of plank bending, any tips would be appreciated in this procedure. After gluing cockpit coaming in place, I addressed the cracks in coaming with some thinned down scrap mahogany that I laminated in place, then applied a little stainable wood filler, sanded and re-stained. After everything was sanded and dry, I finished the wood with miniwax polycrylic clear. Final touch ups with paint and now I'm on to fabricating the rudder and tiller.

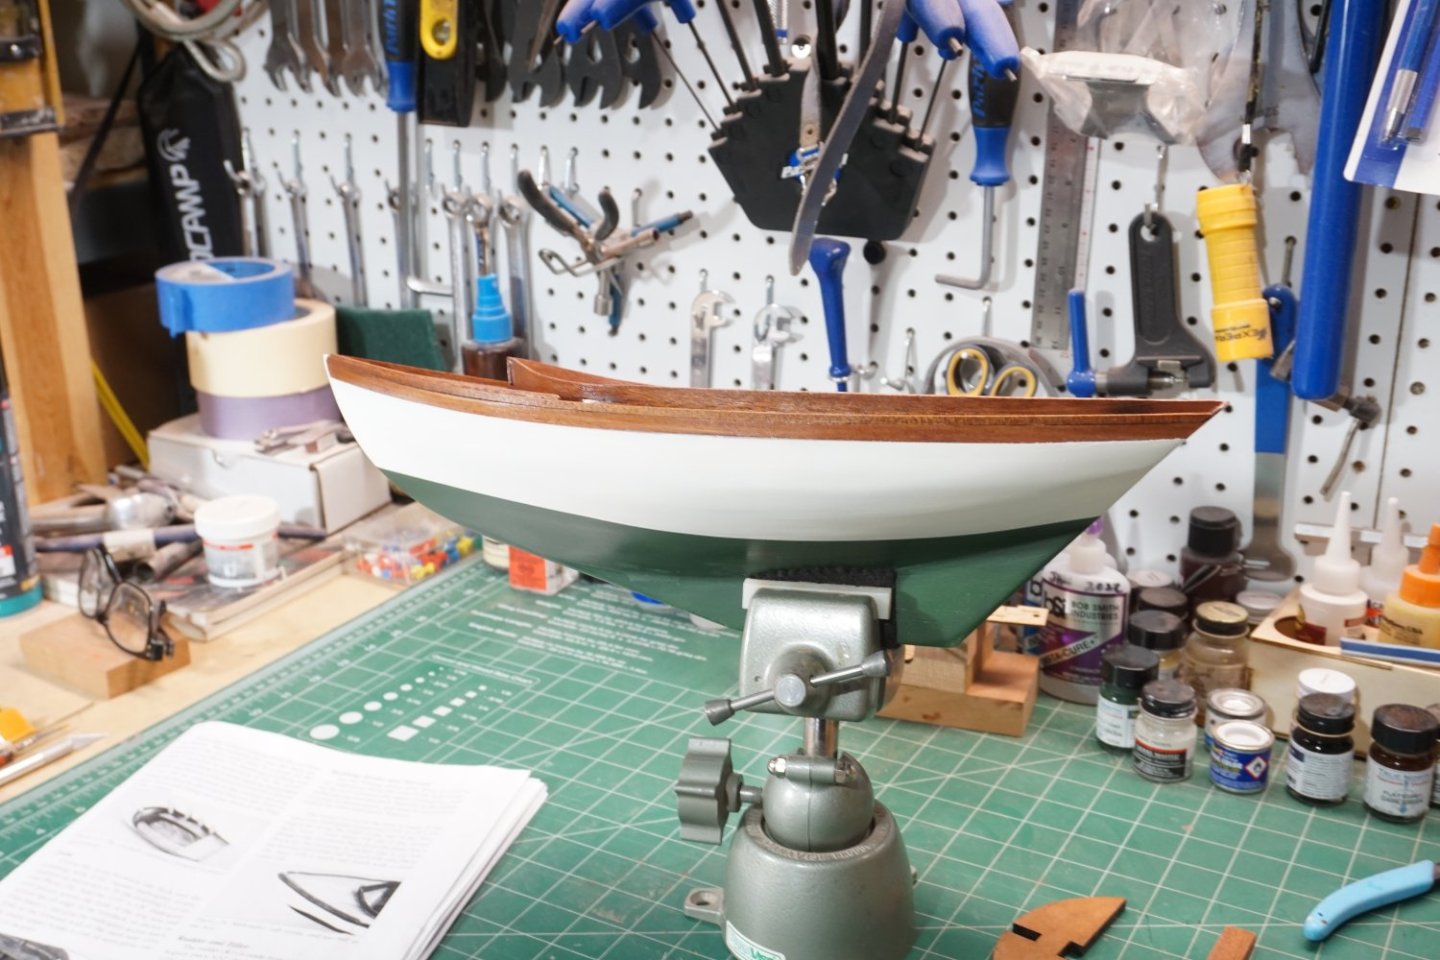
- 23 replies
-
- 6
-
-
- Herreshoff 12 1/2
- BlueJacket Shipcrafters
- (and 1 more)
-
I thinned it with True North Paints thinner approx. 3 parts paint to 1 part thinner. about the consistency of milk.
-
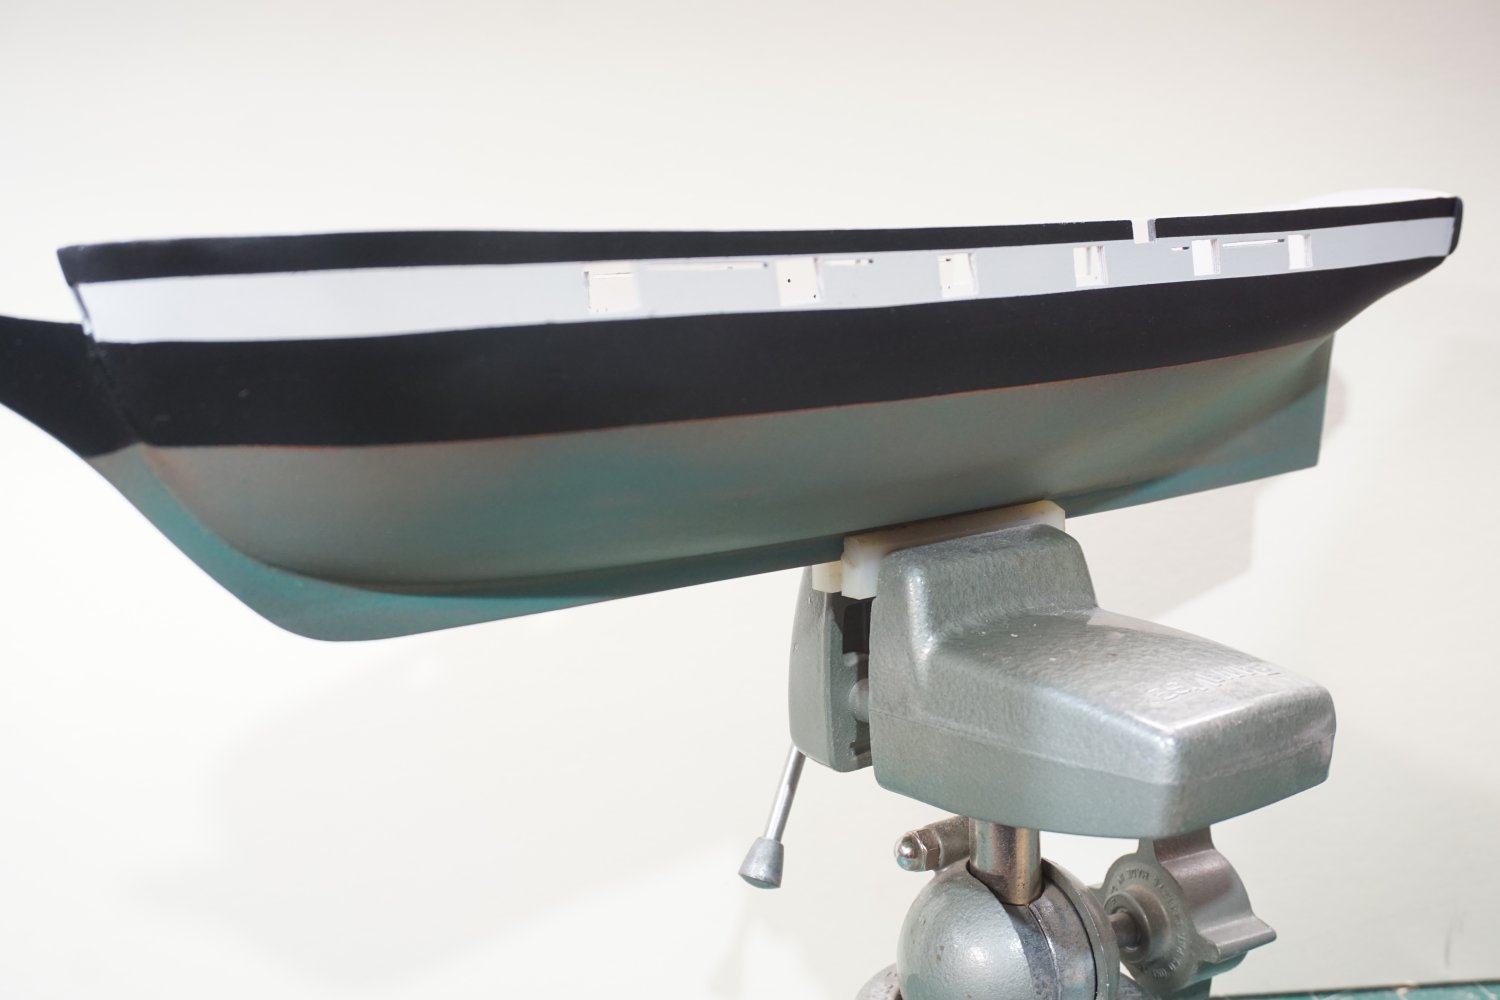
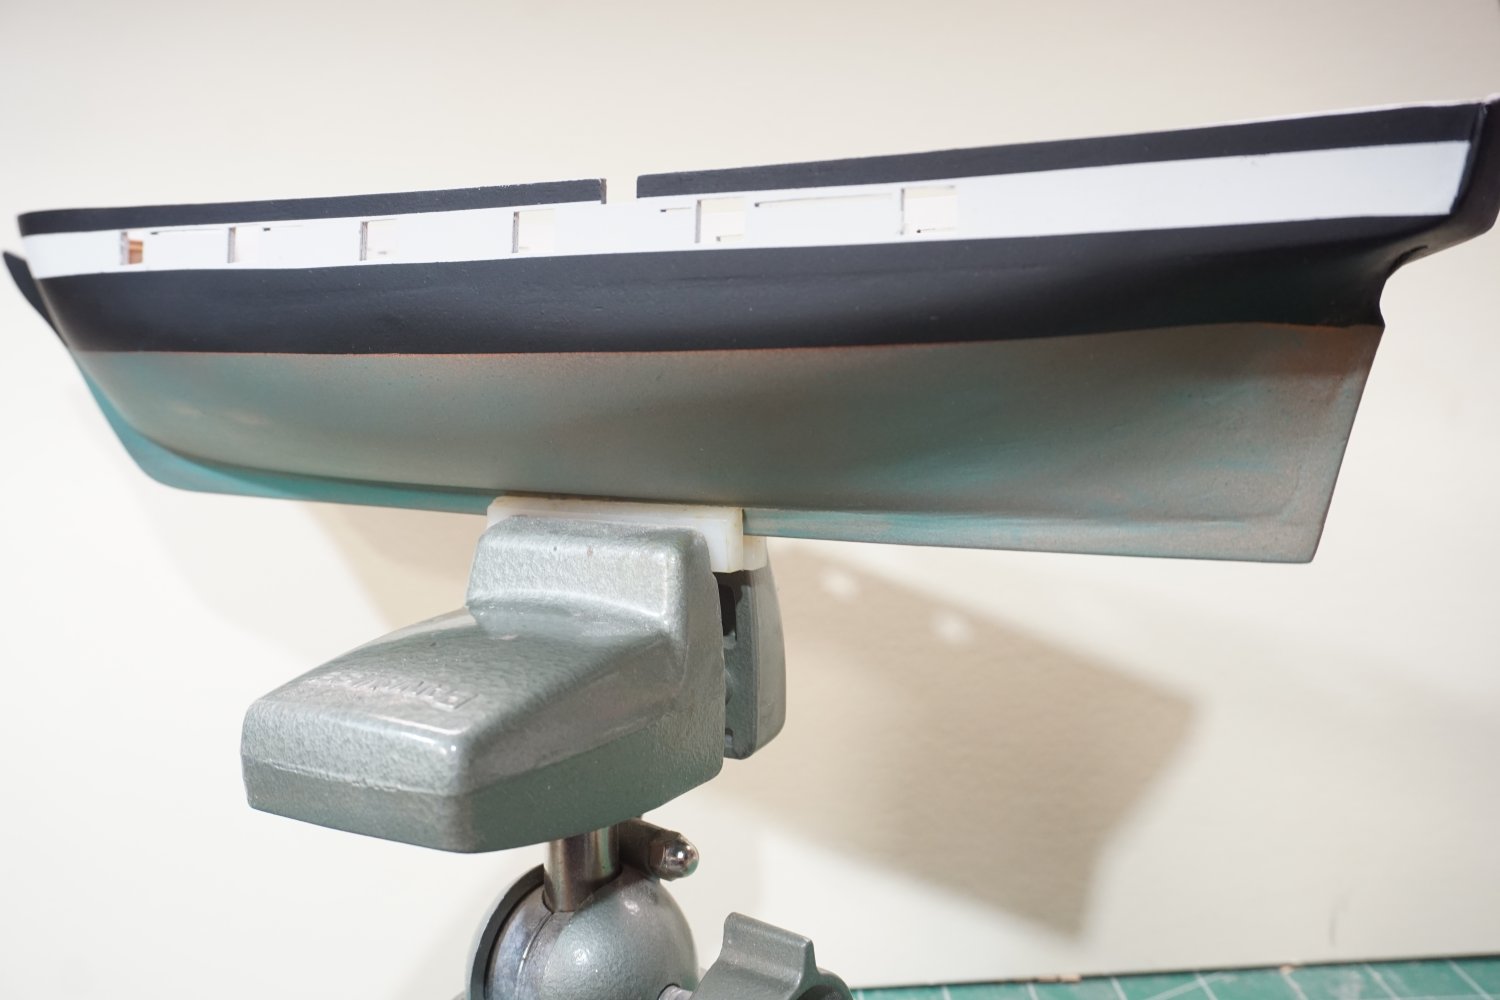
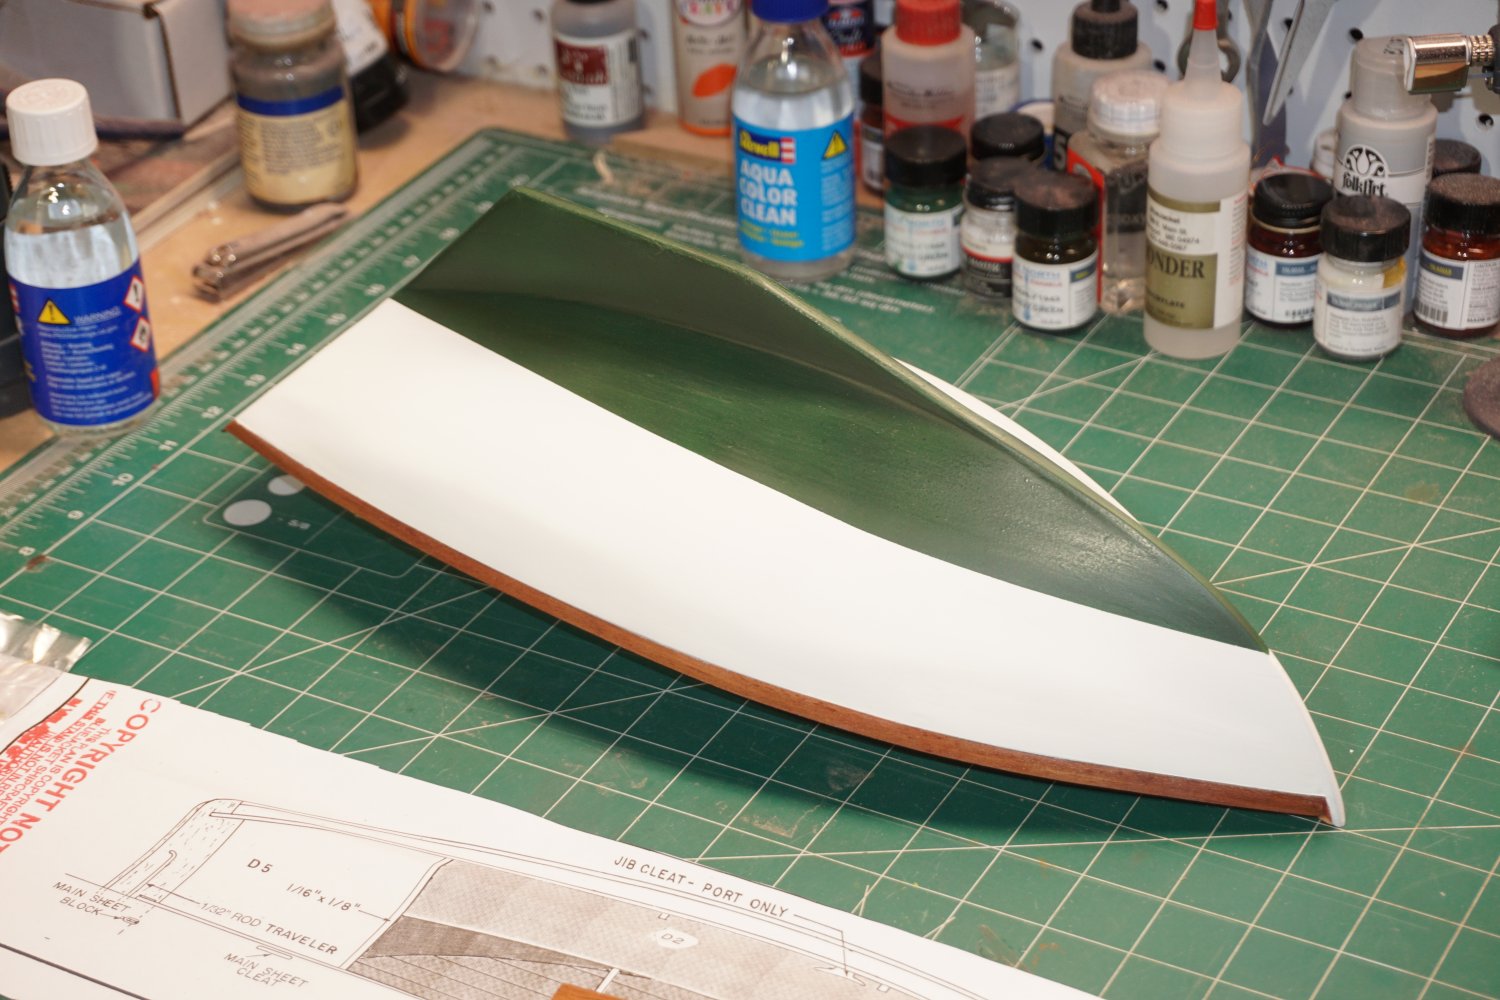
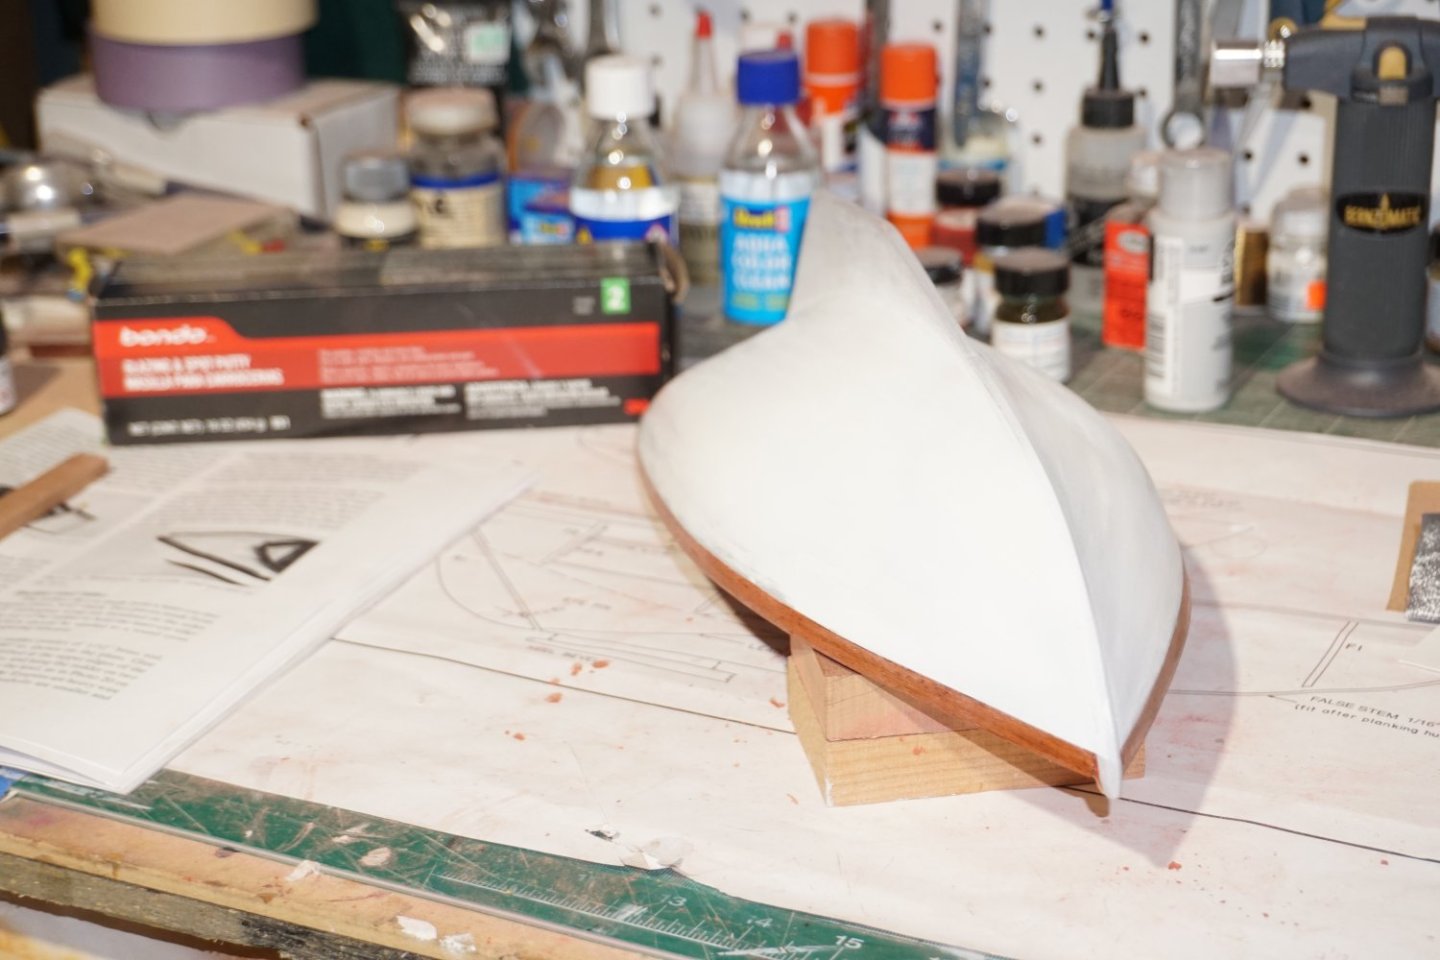
Air brushed hull flat white then masked off water line and sprayed USN early green 1943 from True north paints. There were some dust particles in the finish, but I was able to sand them out with some very fine sandpaper (1800 grit up to 12000), probably a bit of overkill but I was able to get rid of the scratches to where it looked acceptable to me.


- 23 replies
-
- 6
-
-
-
- Herreshoff 12 1/2
- BlueJacket Shipcrafters
- (and 1 more)
-
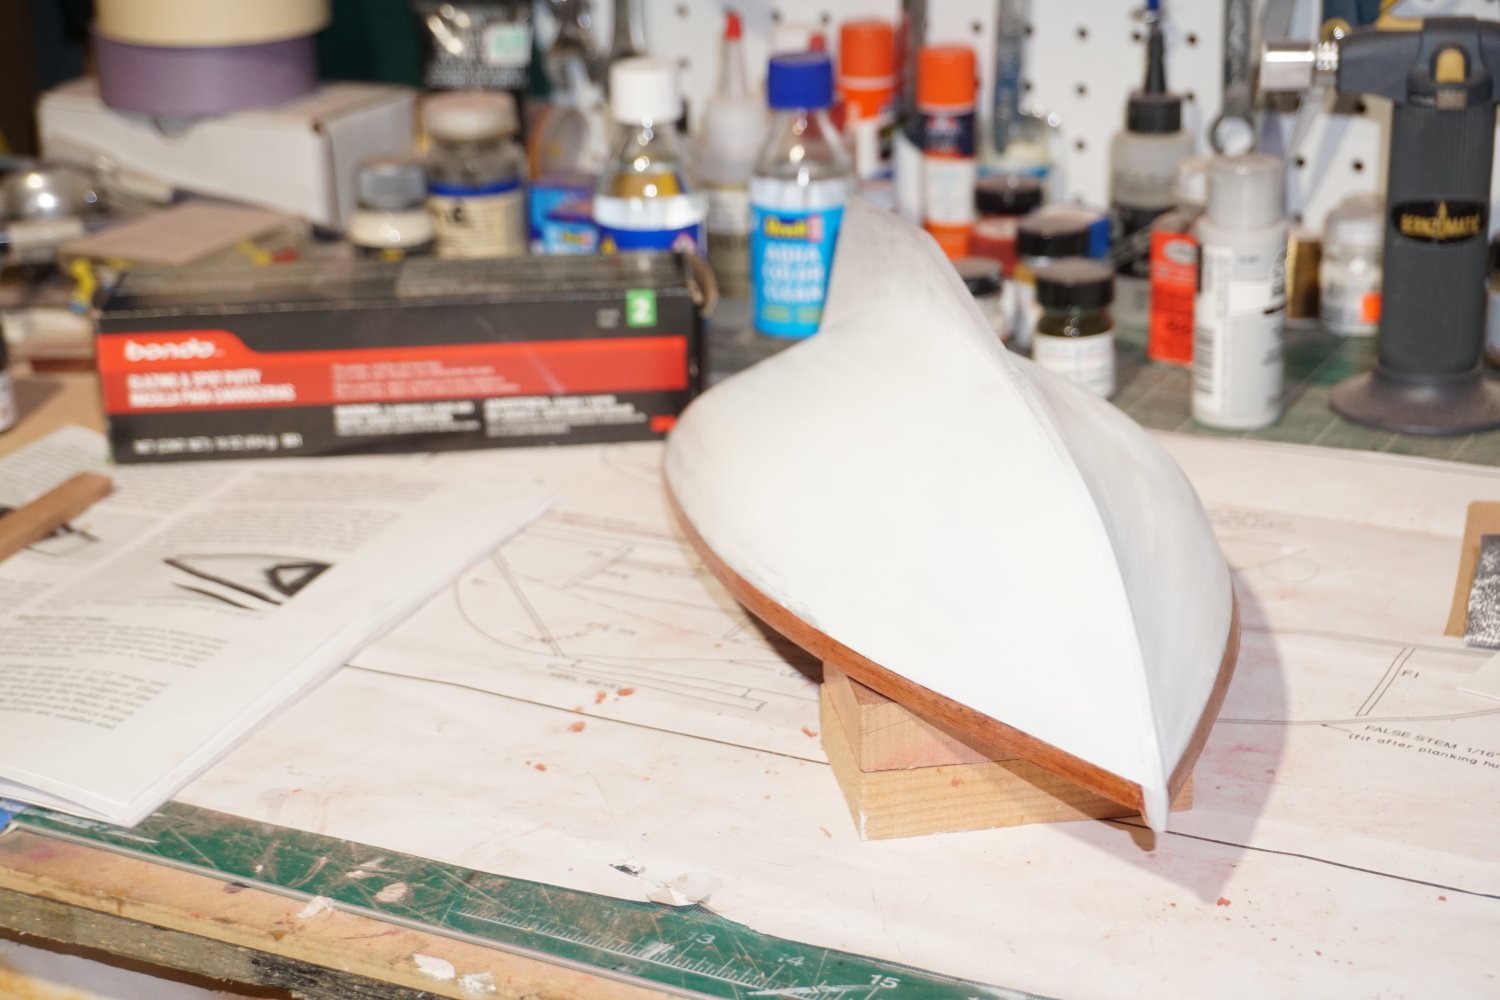
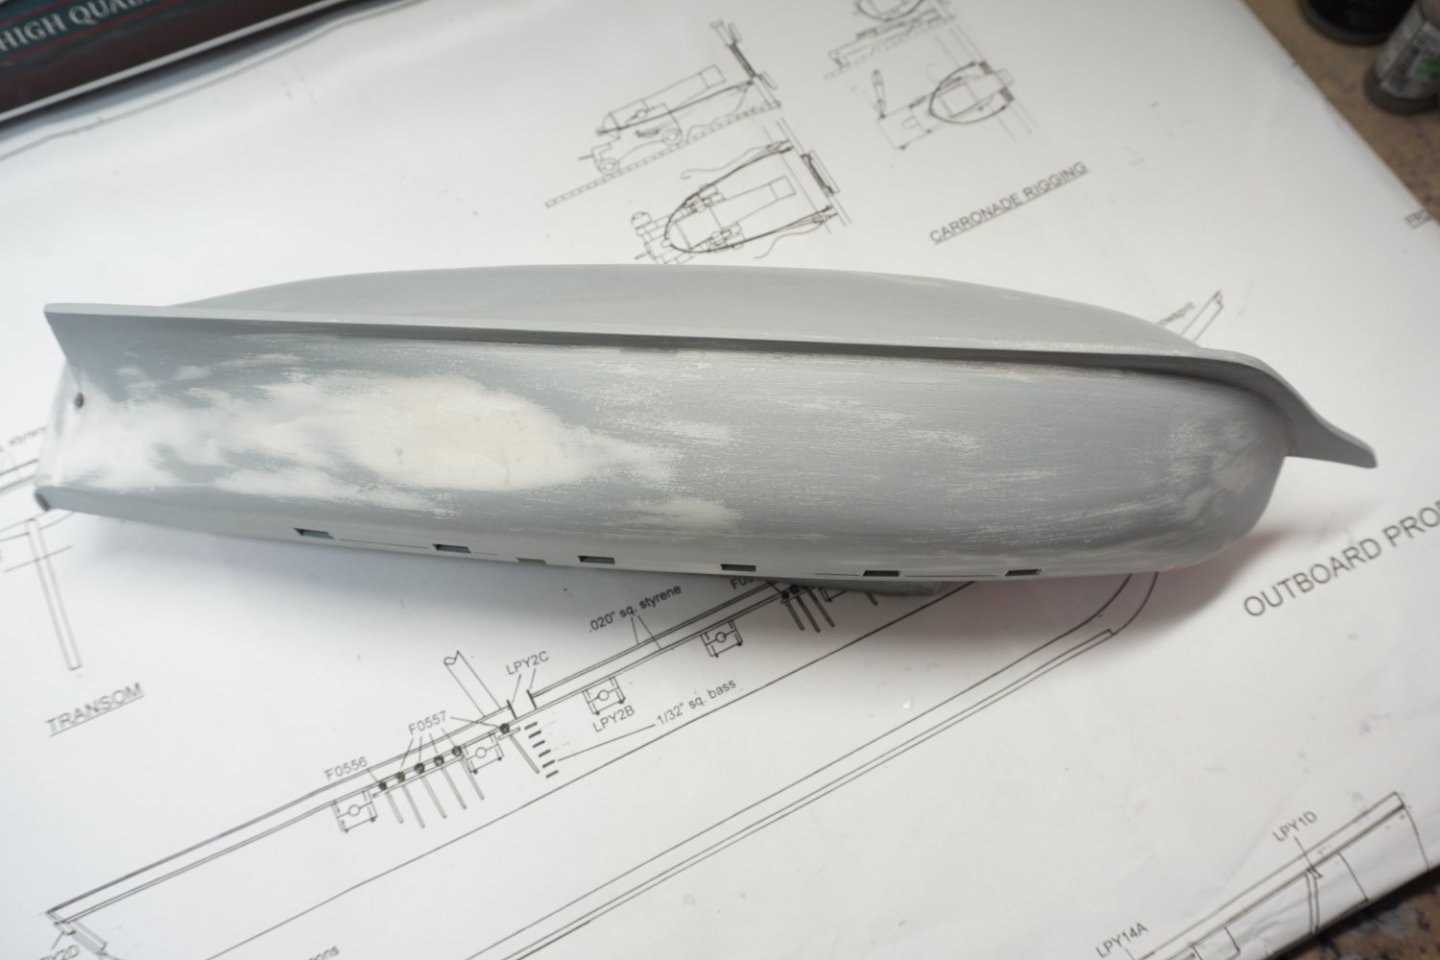
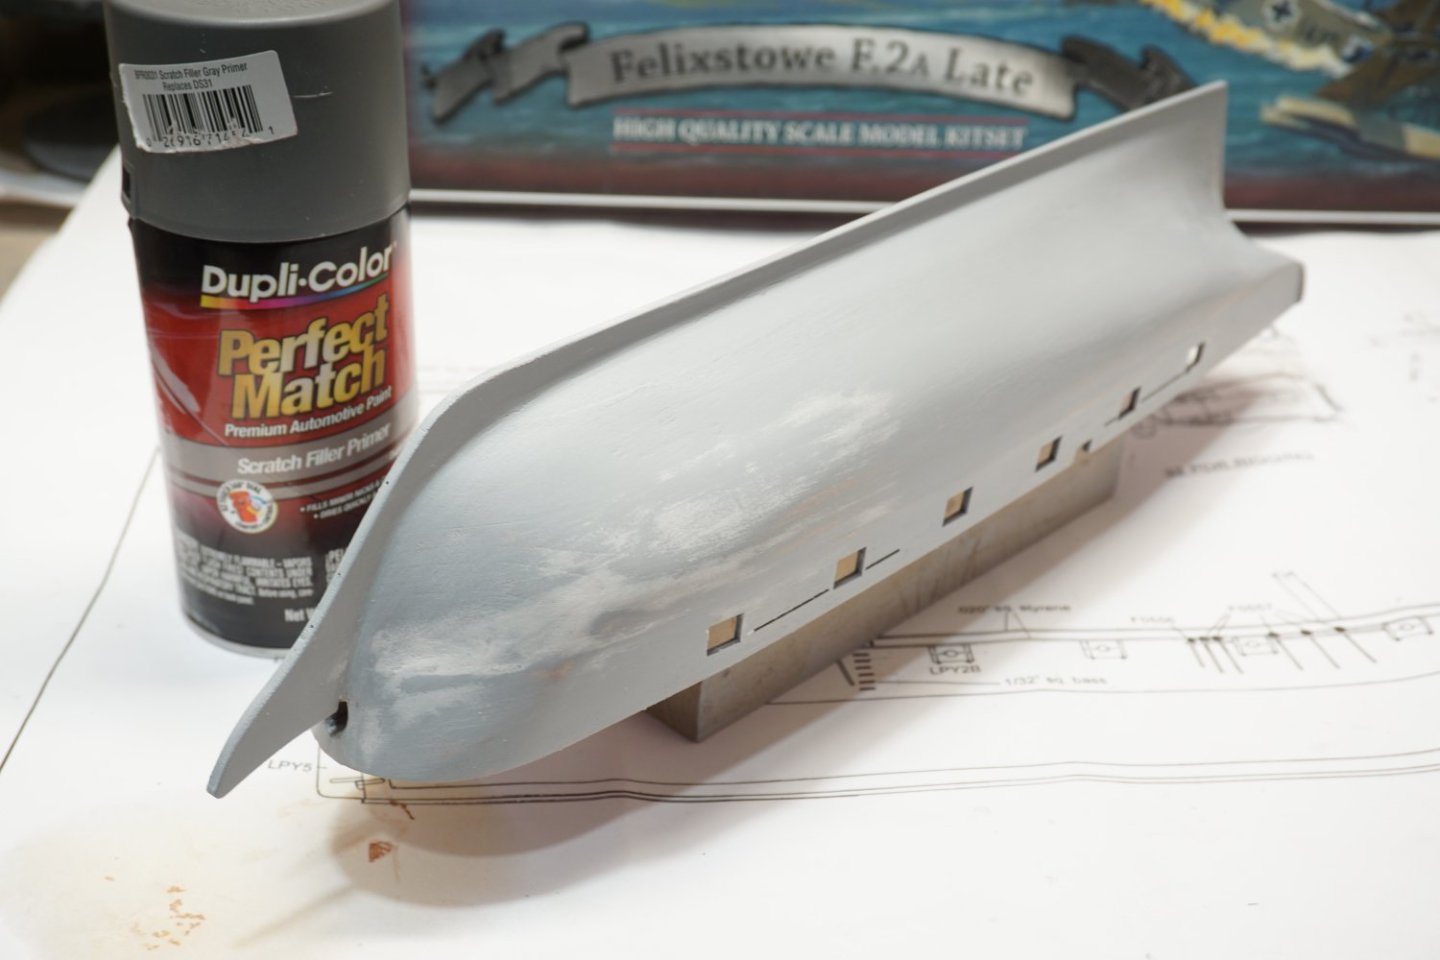
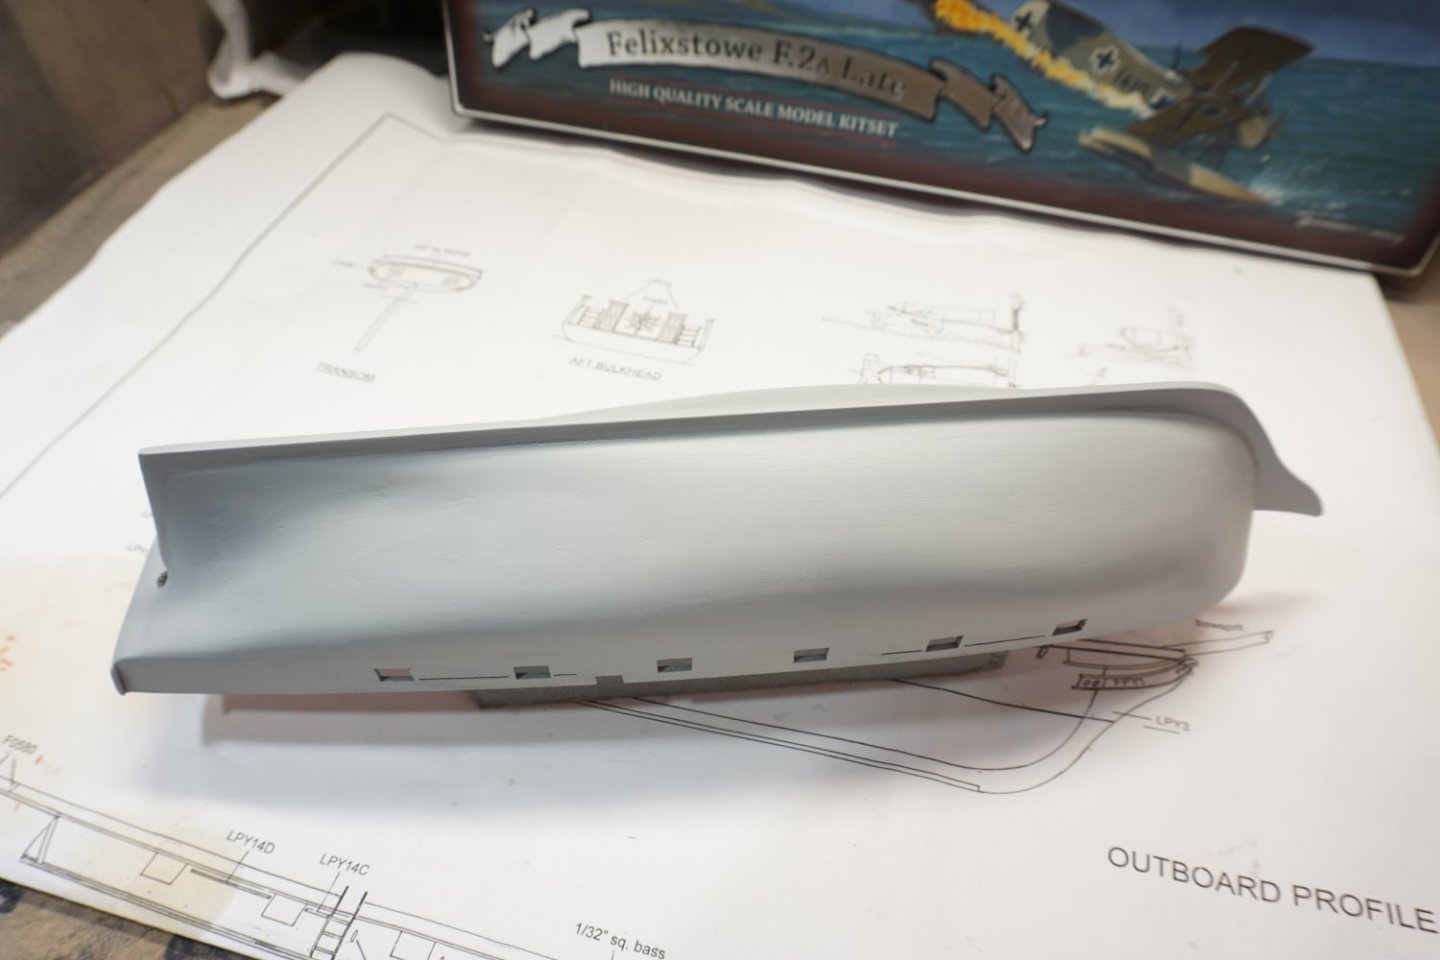
Lots of sanding, filler and primer and now it will be ready for paint. After masking off the finished mahogany I will be airbrushing with True North precision paints.
- 23 replies
-
- 4
-
-
-
- Herreshoff 12 1/2
- BlueJacket Shipcrafters
- (and 1 more)
-
Thank you. Yes, I agree with you, this boat will have paint.
-
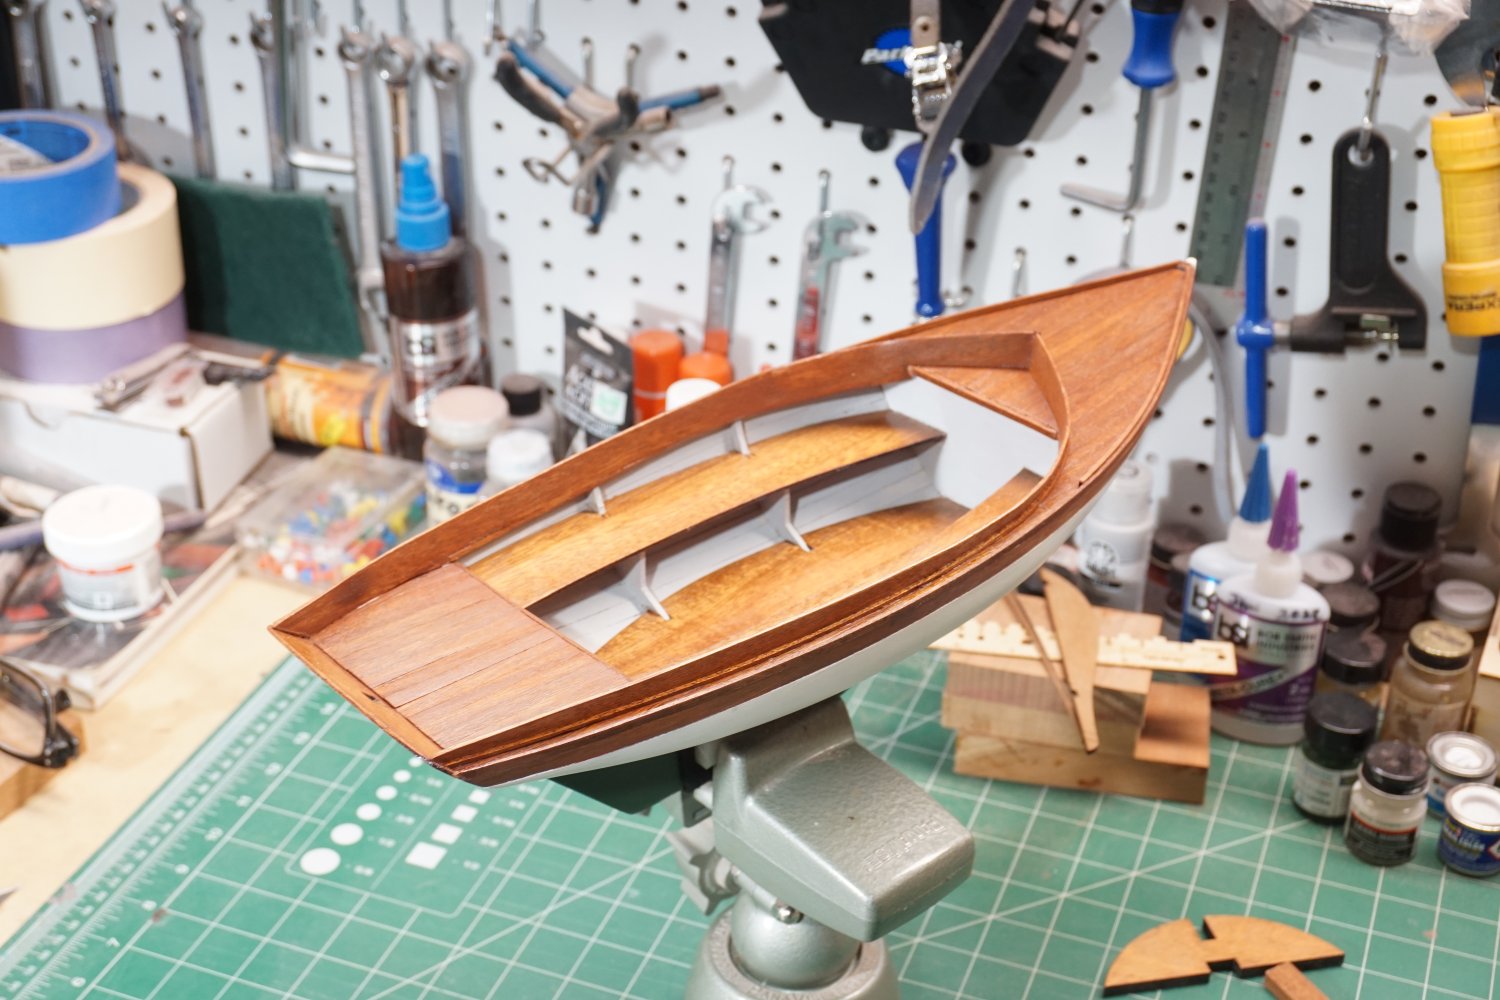
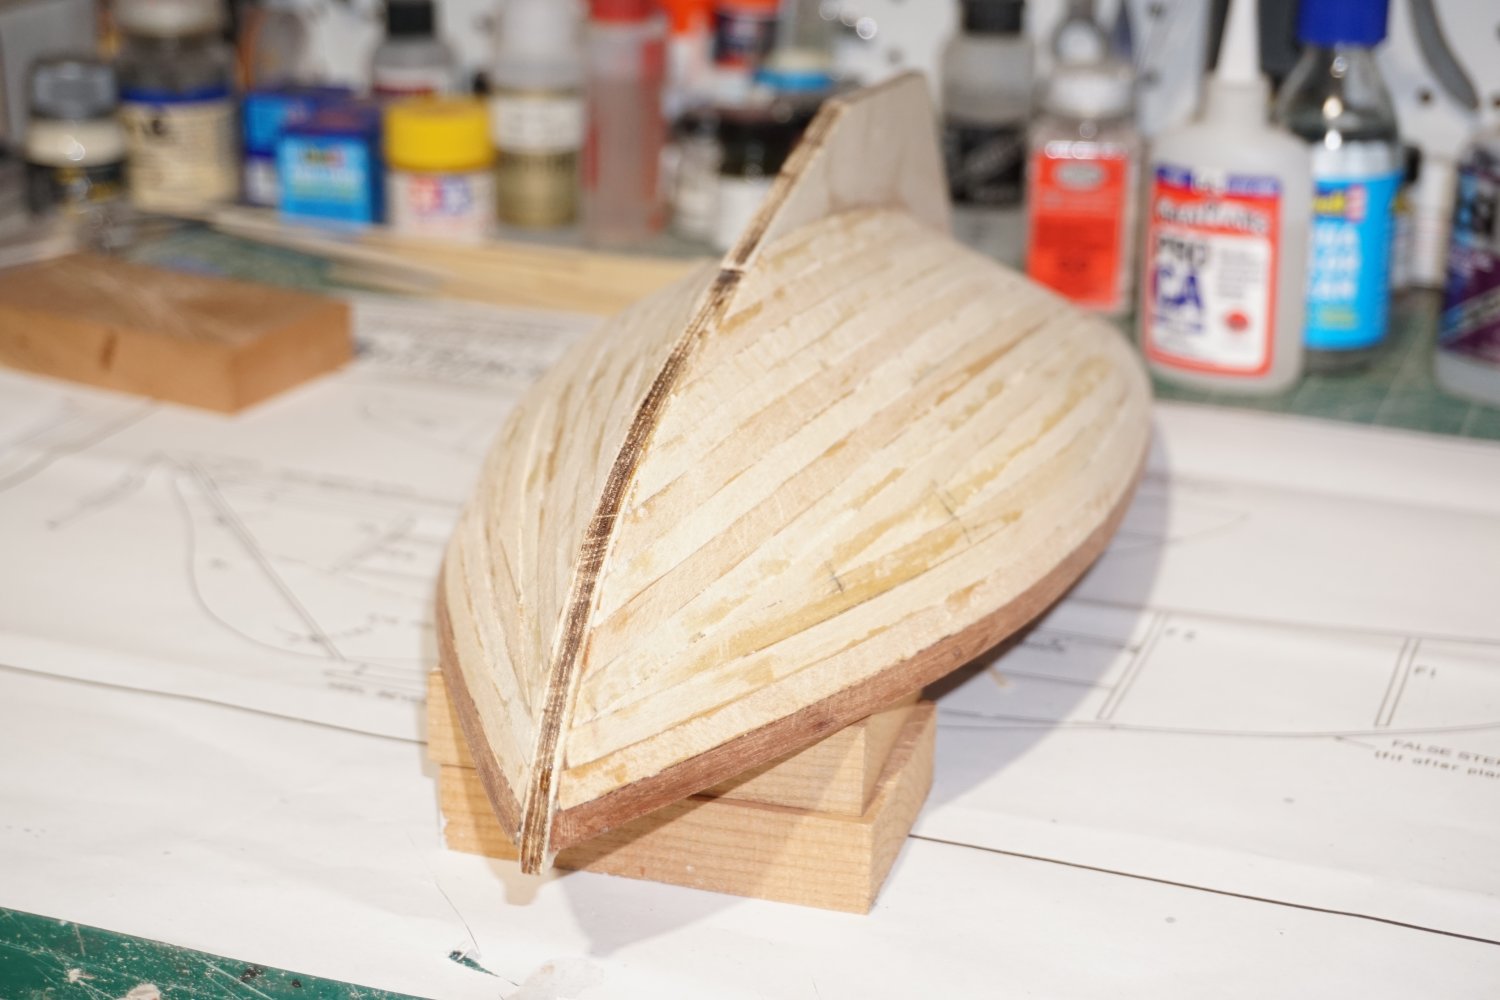
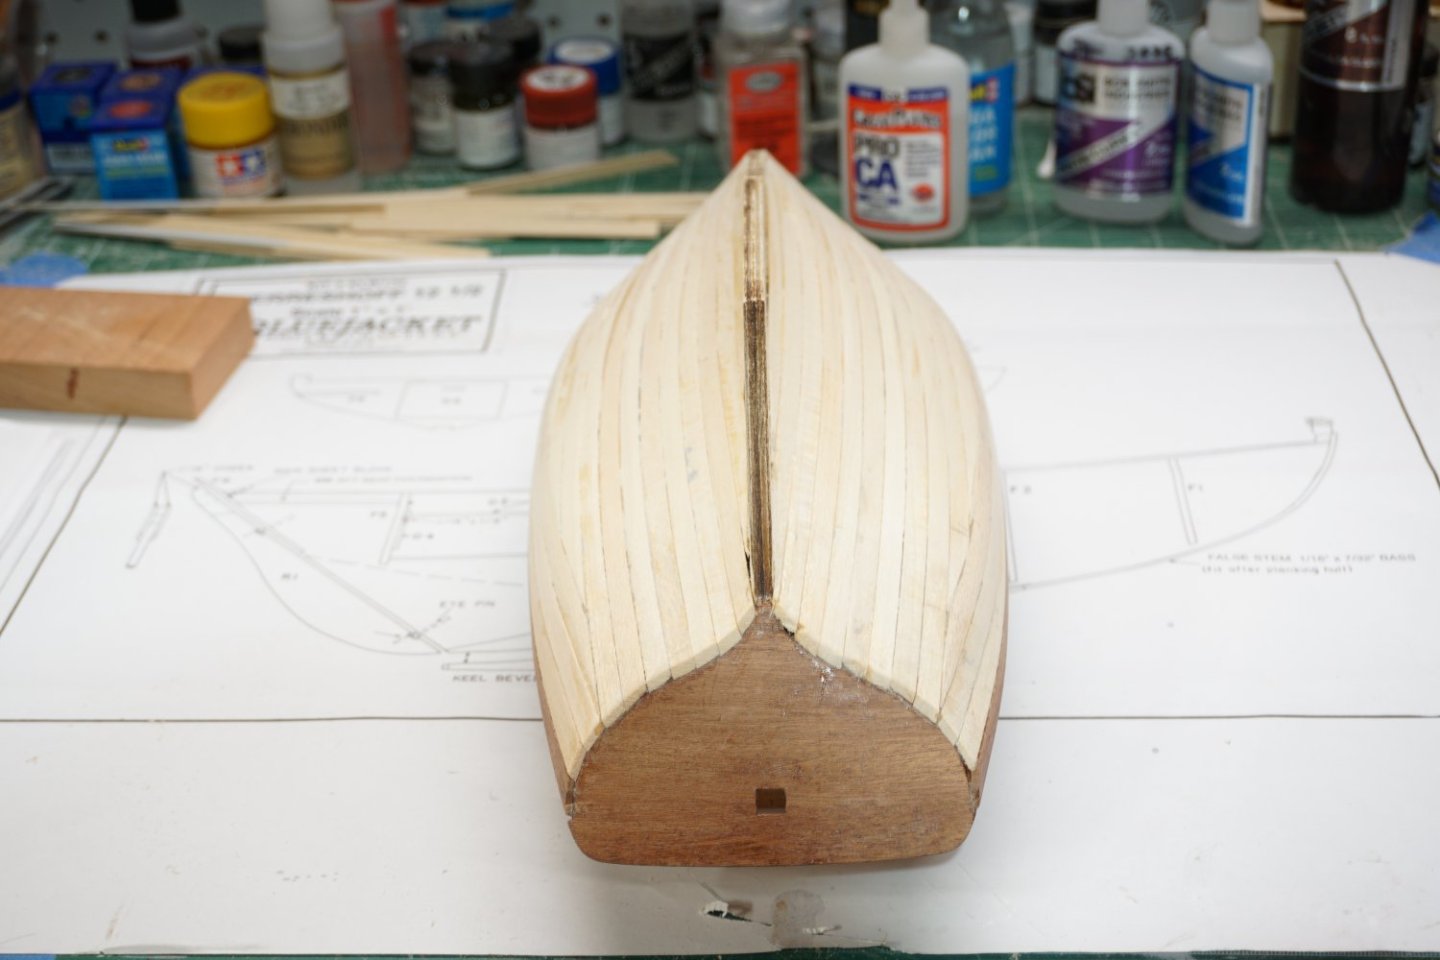
Finished the planking and I am somewhat pleased with the result considering this is my 2nd time planking a model. I little unevenness between some of the planks but with sanding and some automotive filler it should be Ok. I see some models that have beautifully finished hulls with a natural finish probably little to no filler and that is what I would like to achieve someday. I'm still learning.

- 23 replies
-
- 4
-
-
- Herreshoff 12 1/2
- BlueJacket Shipcrafters
- (and 1 more)