
closehaul
-
Posts
150 -
Joined
-
Last visited
Content Type
Profiles
Forums
Gallery
Events
Everything posted by closehaul
-
 Thank you Nic, I never knew body putty could be this effective on such a small scale. A one to one paint to thinner mix works well on them too.
 -
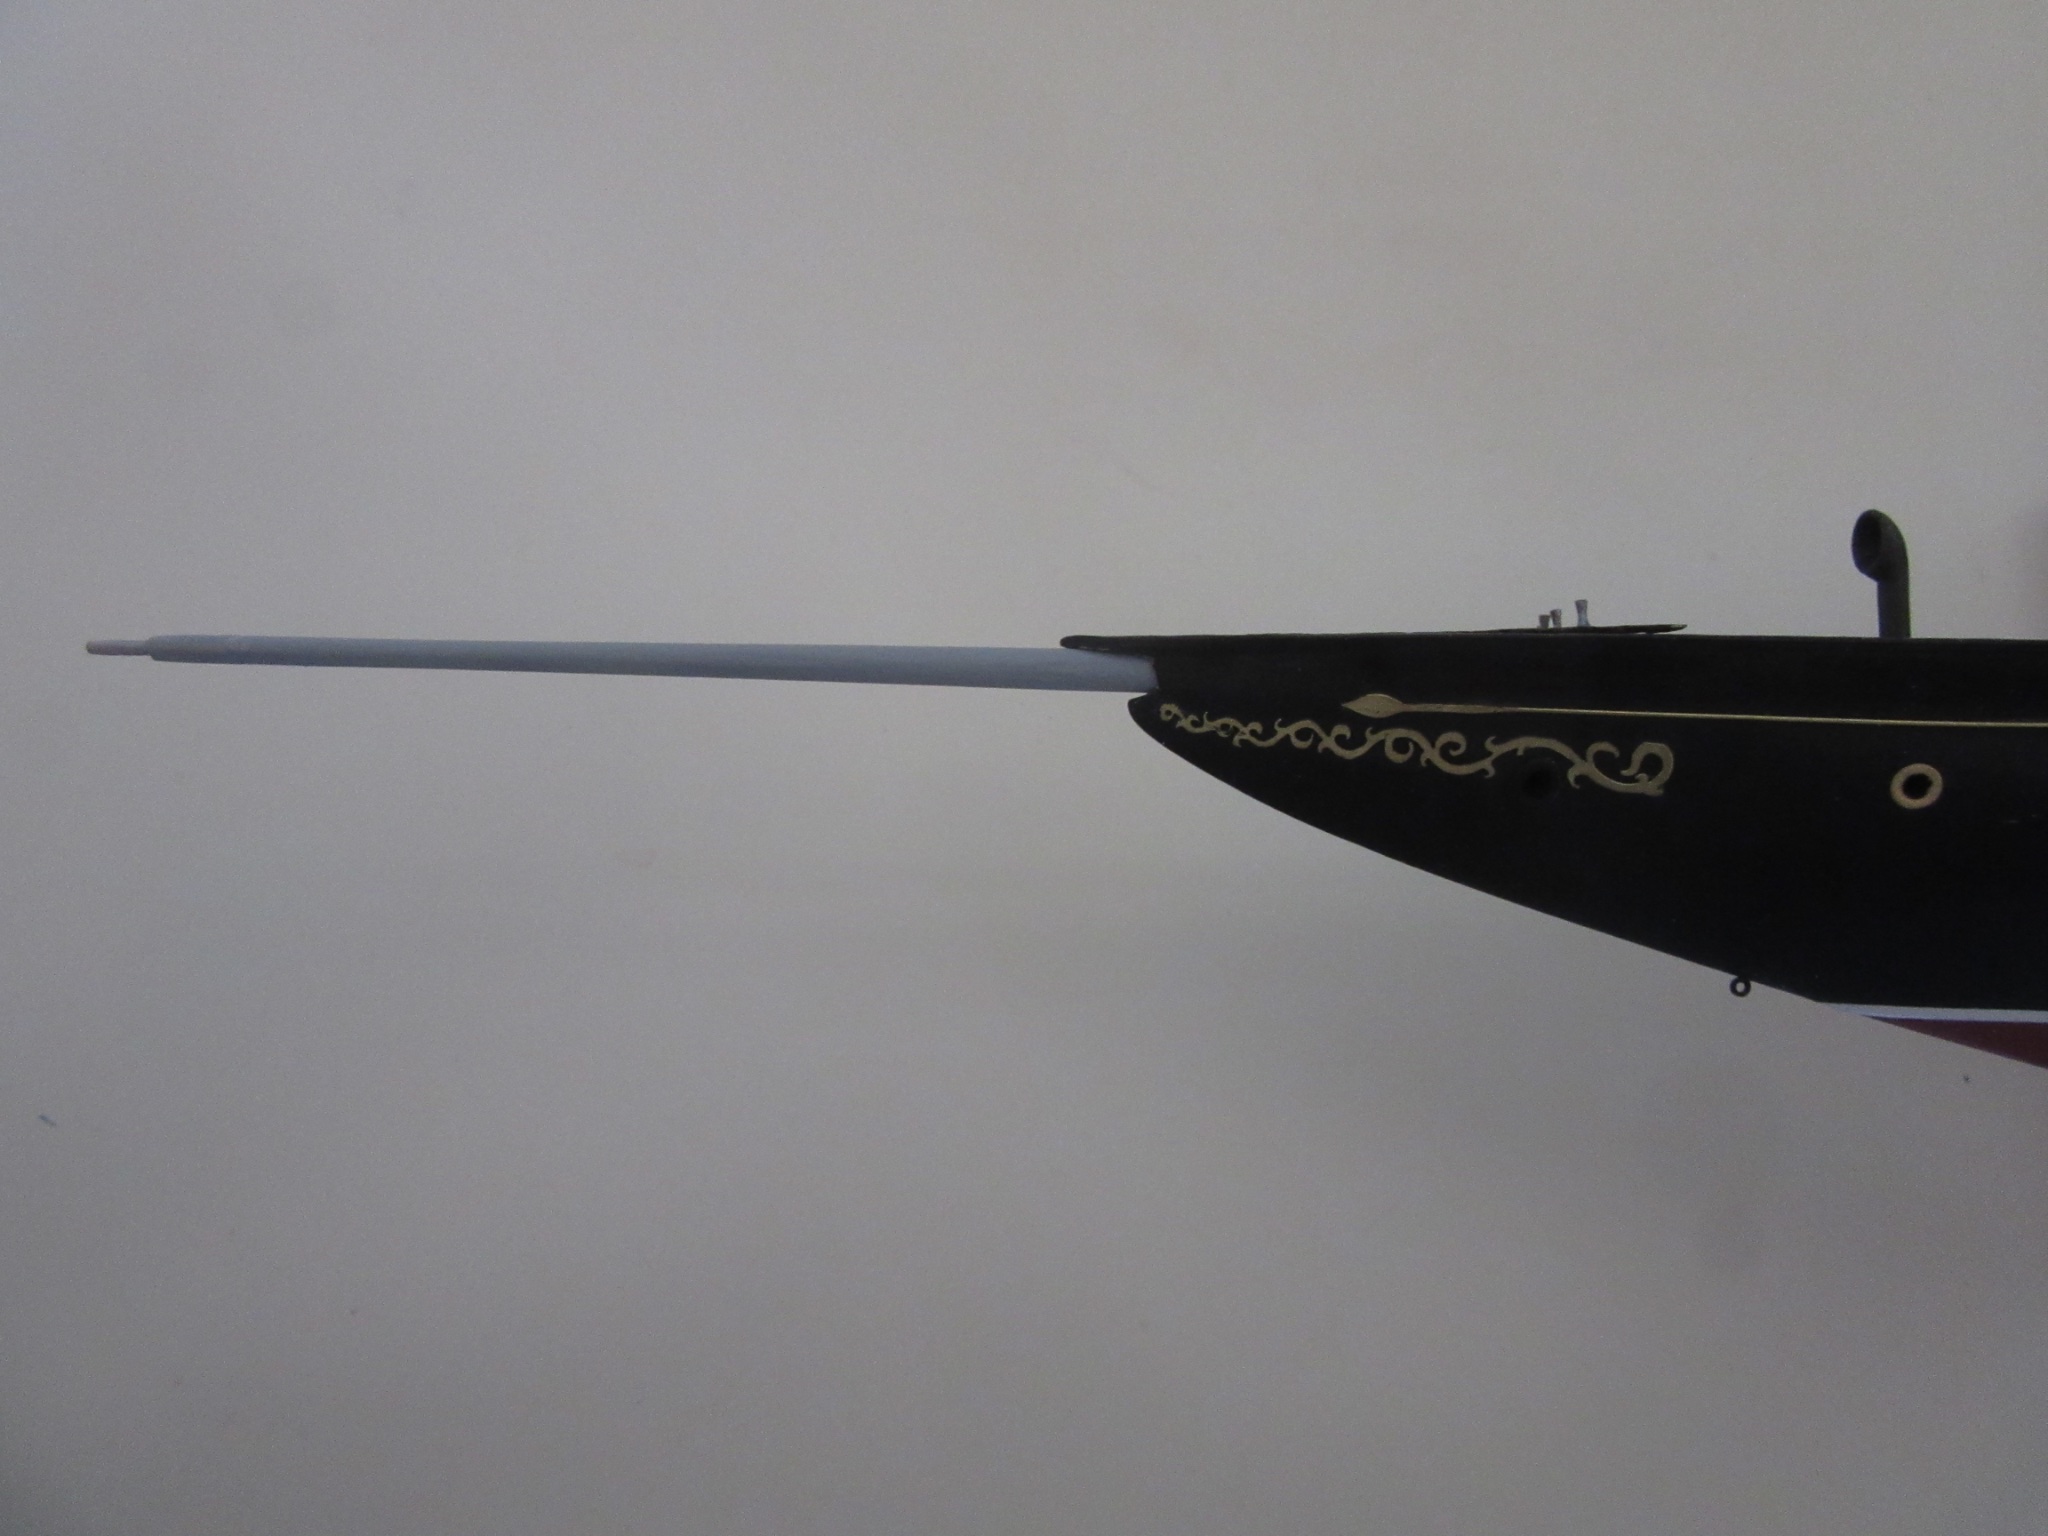
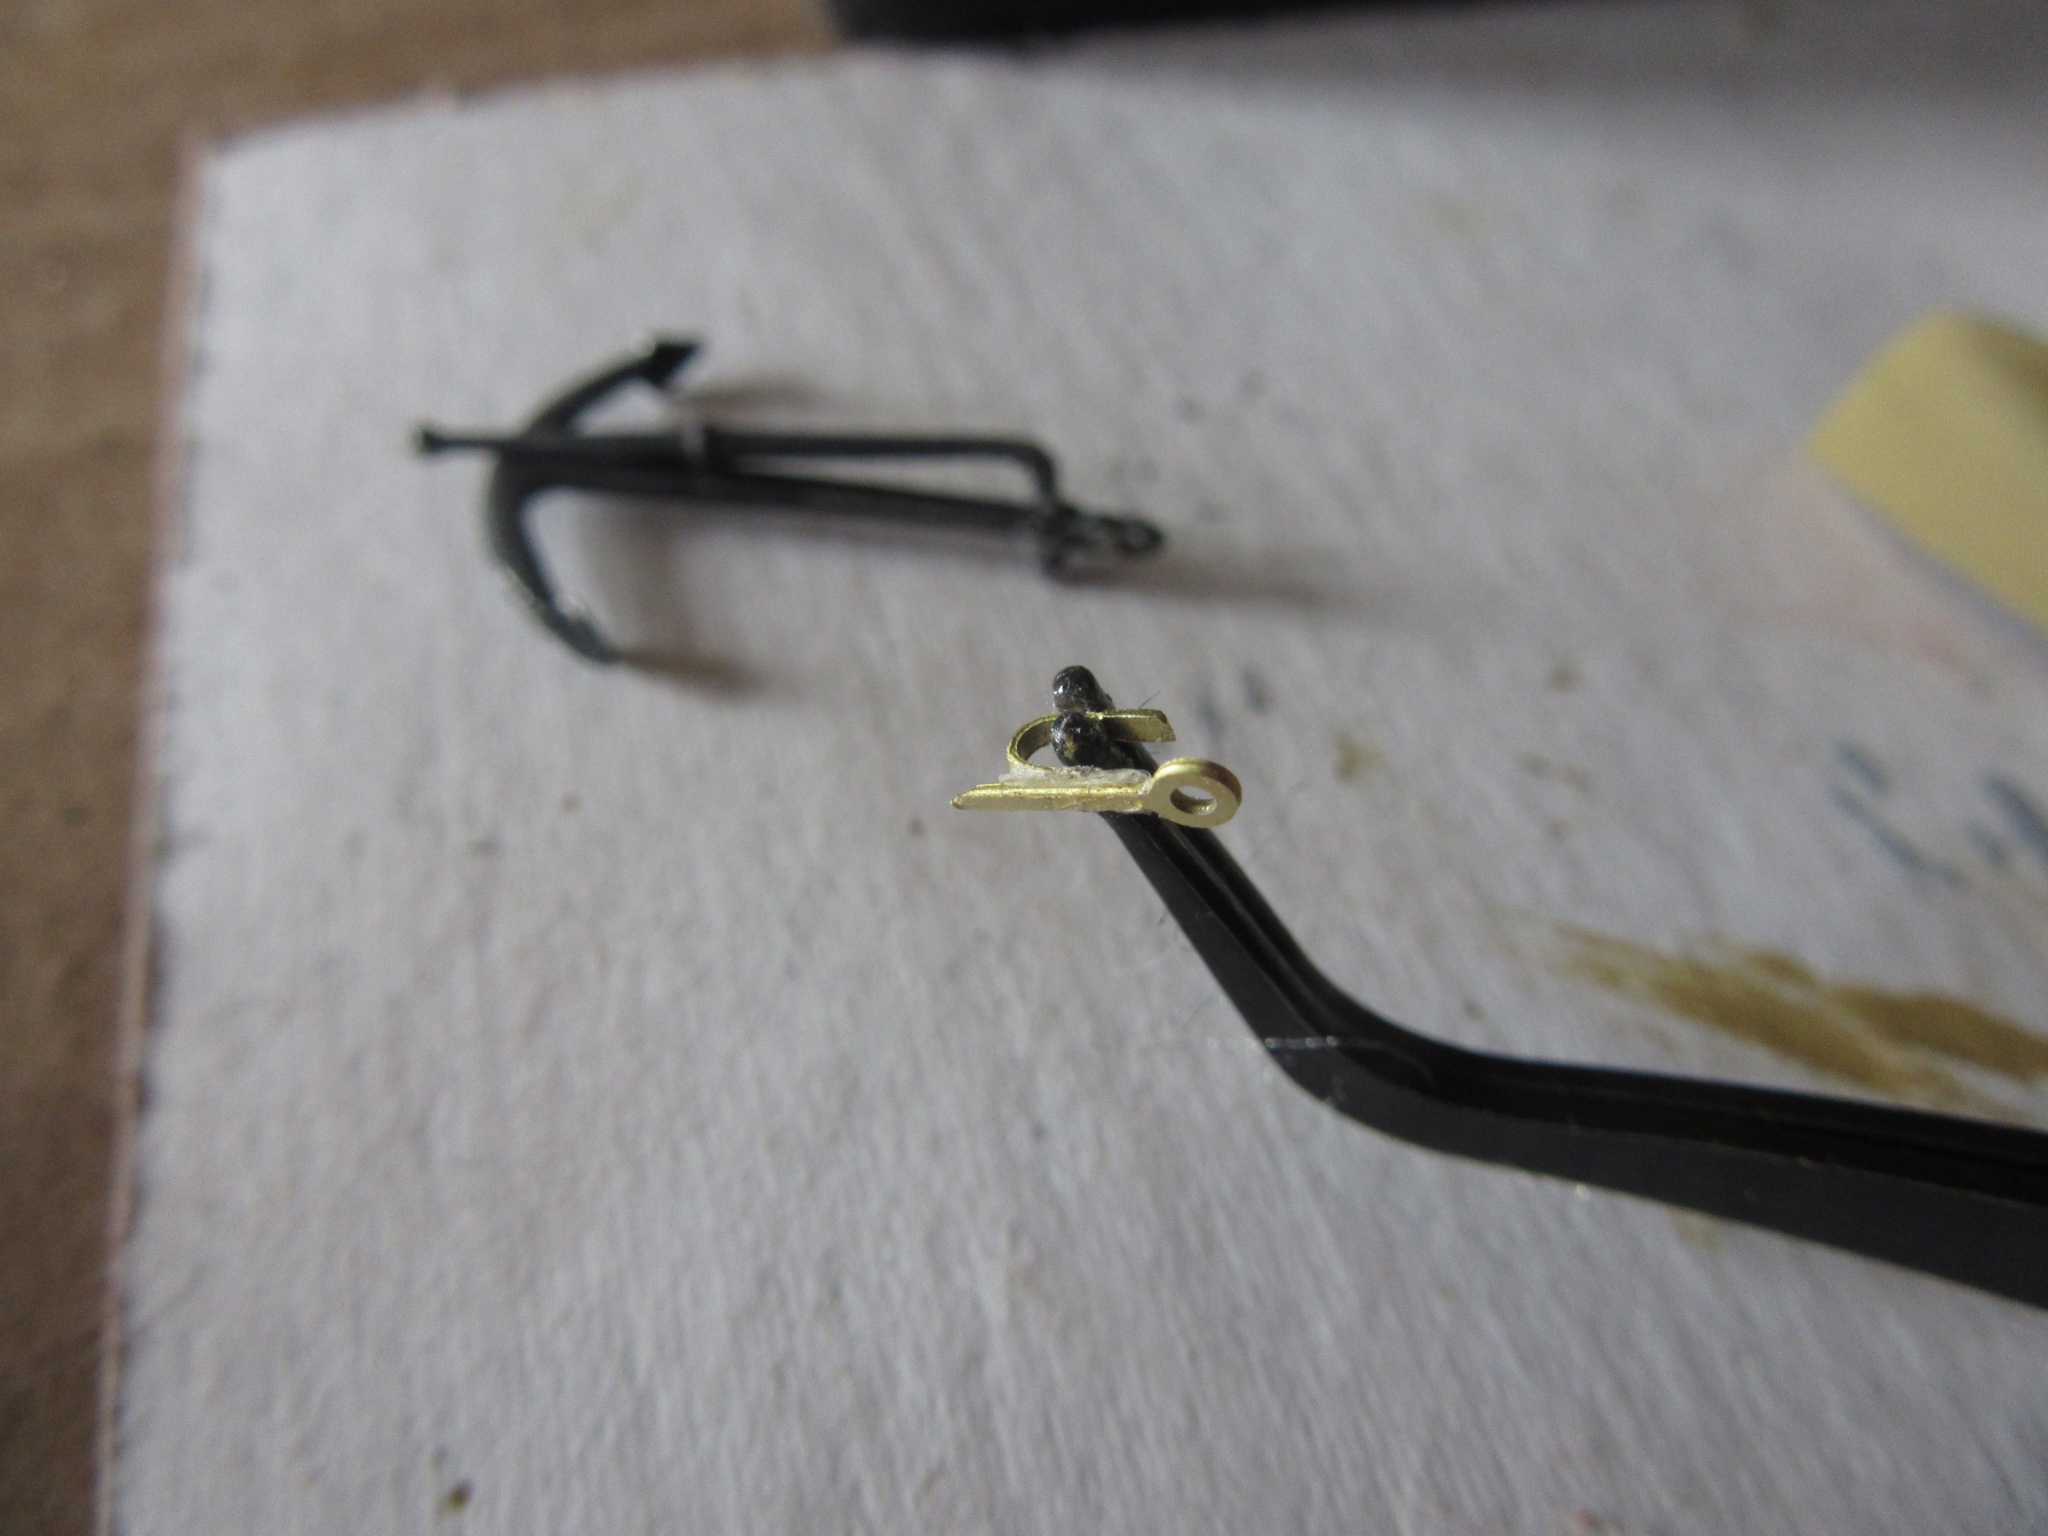
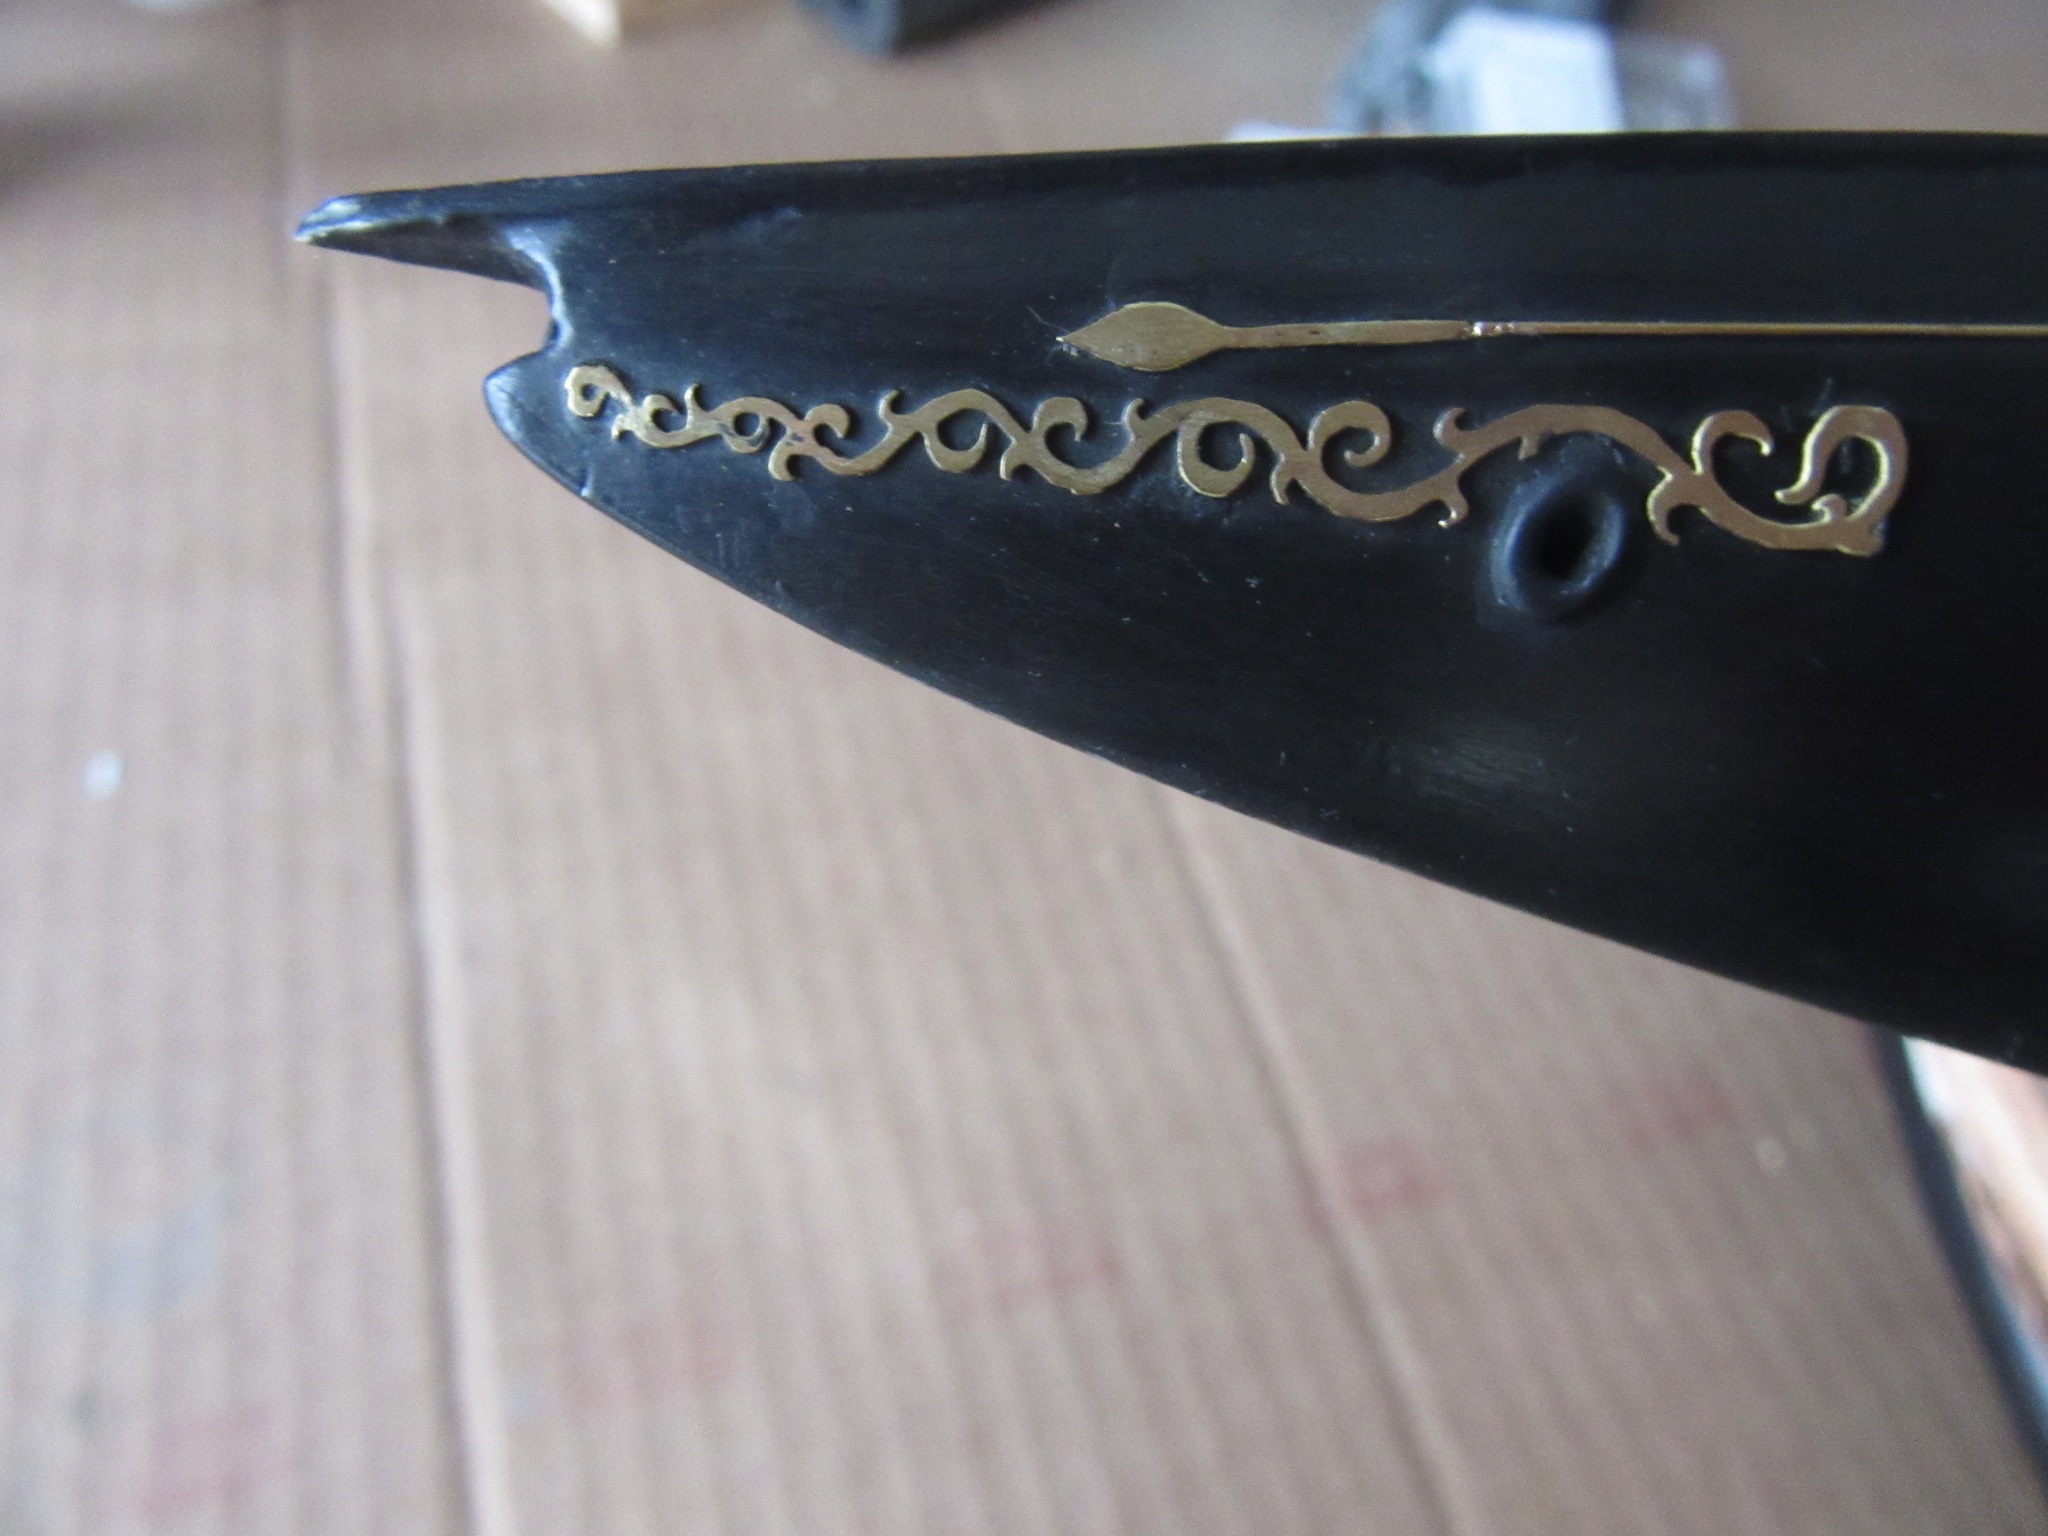
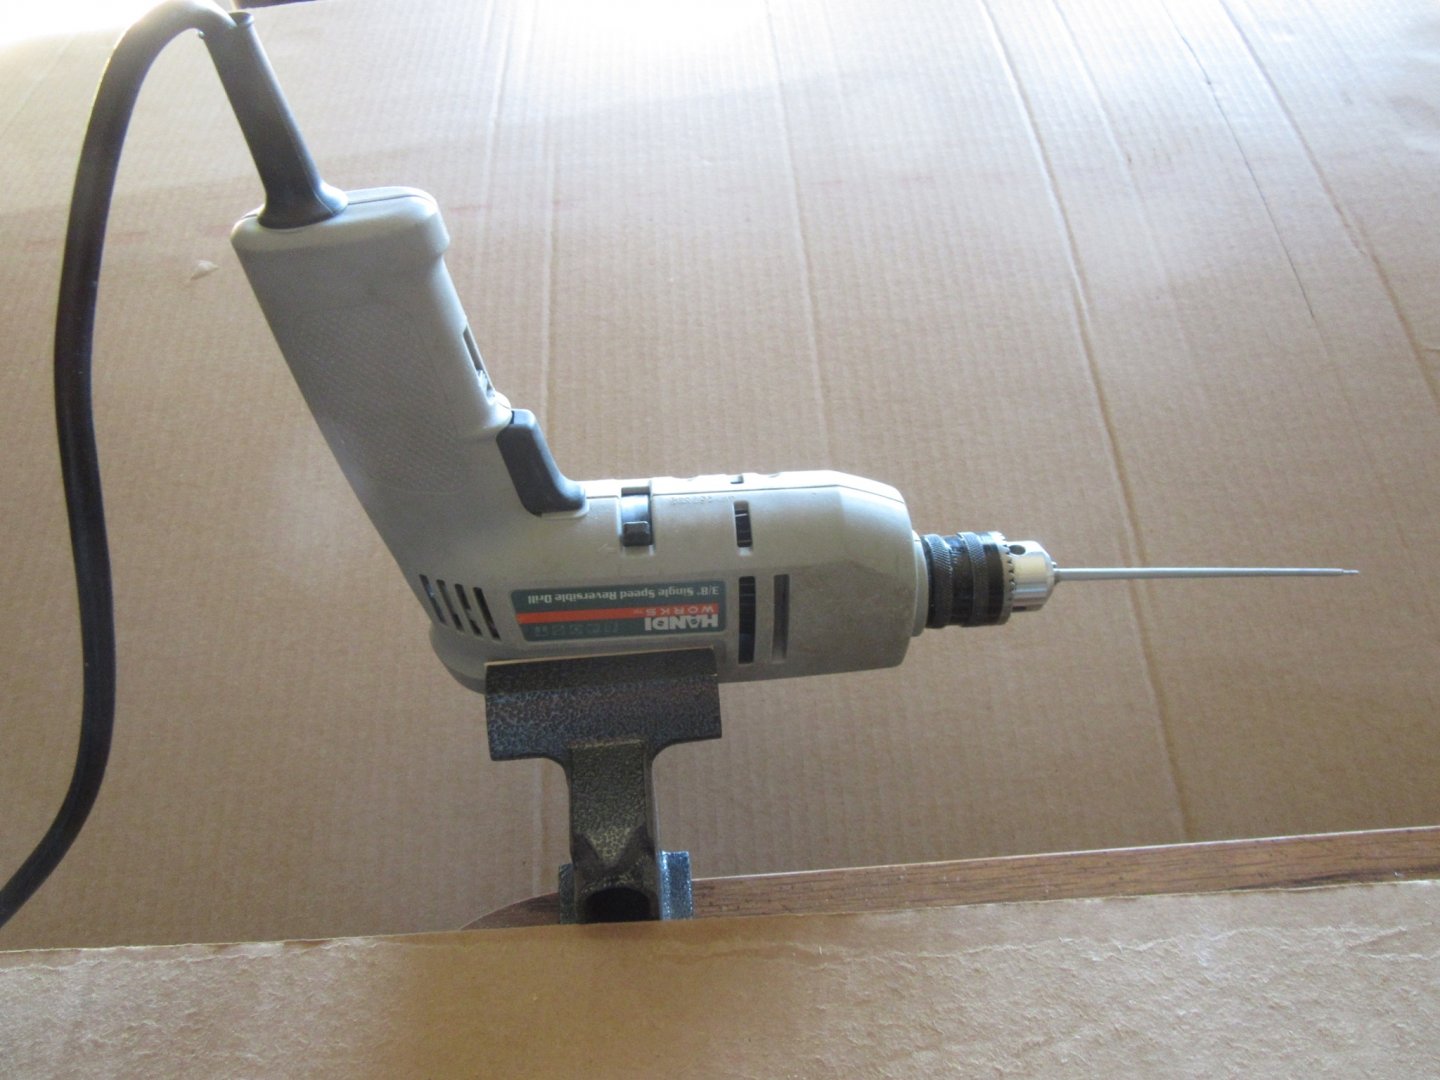
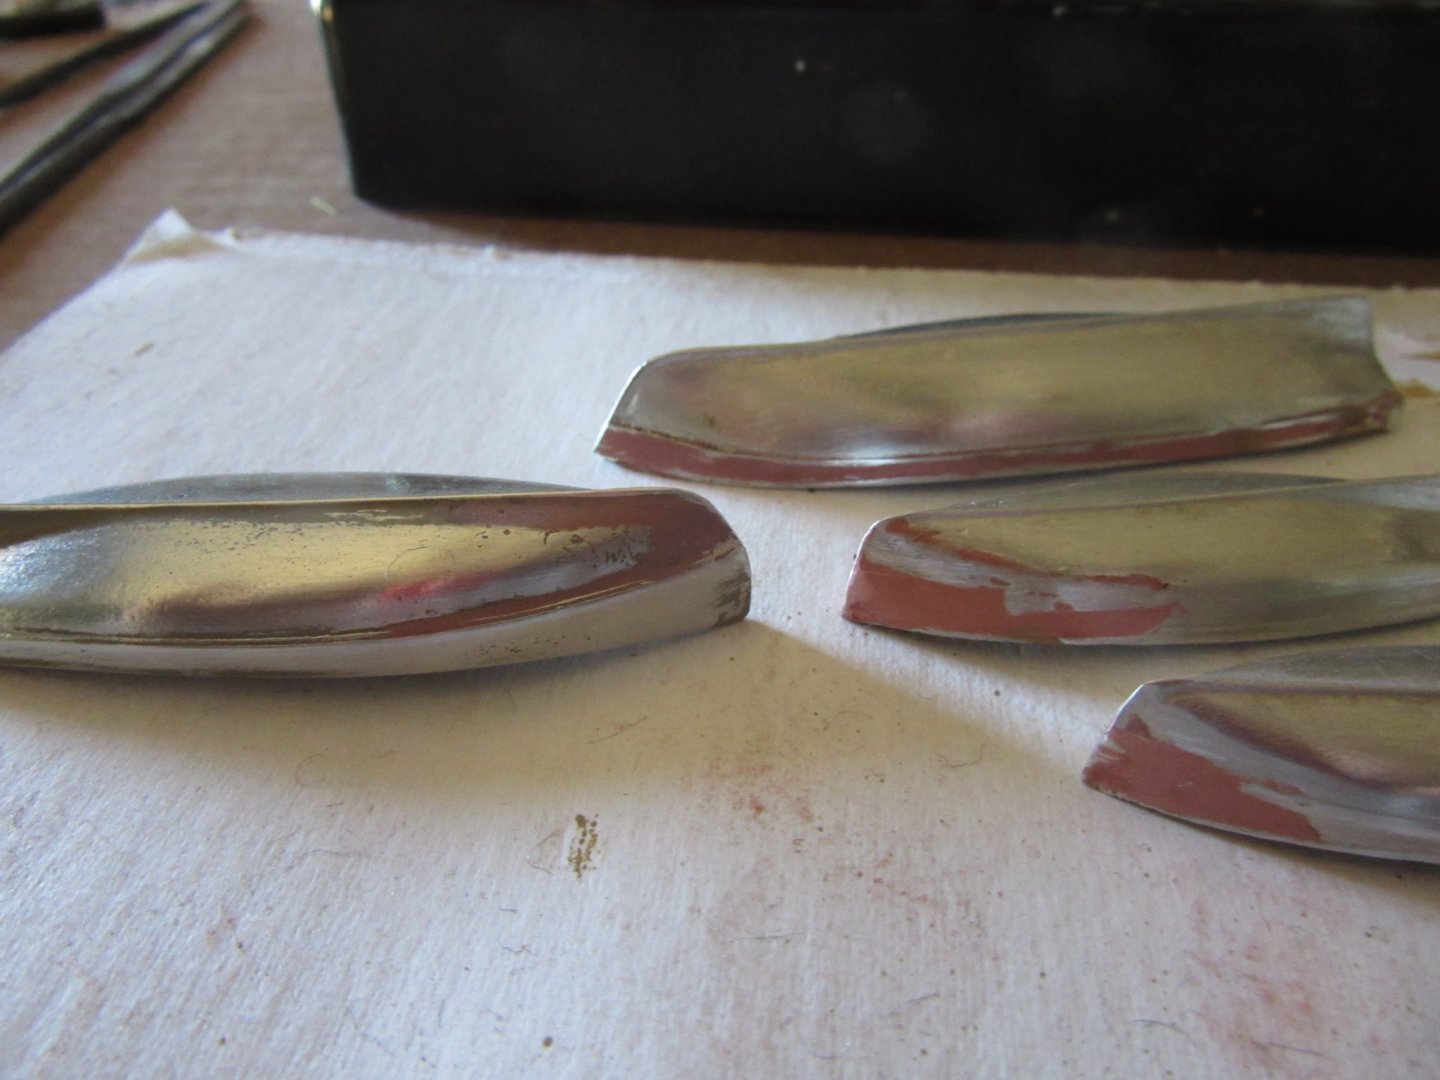
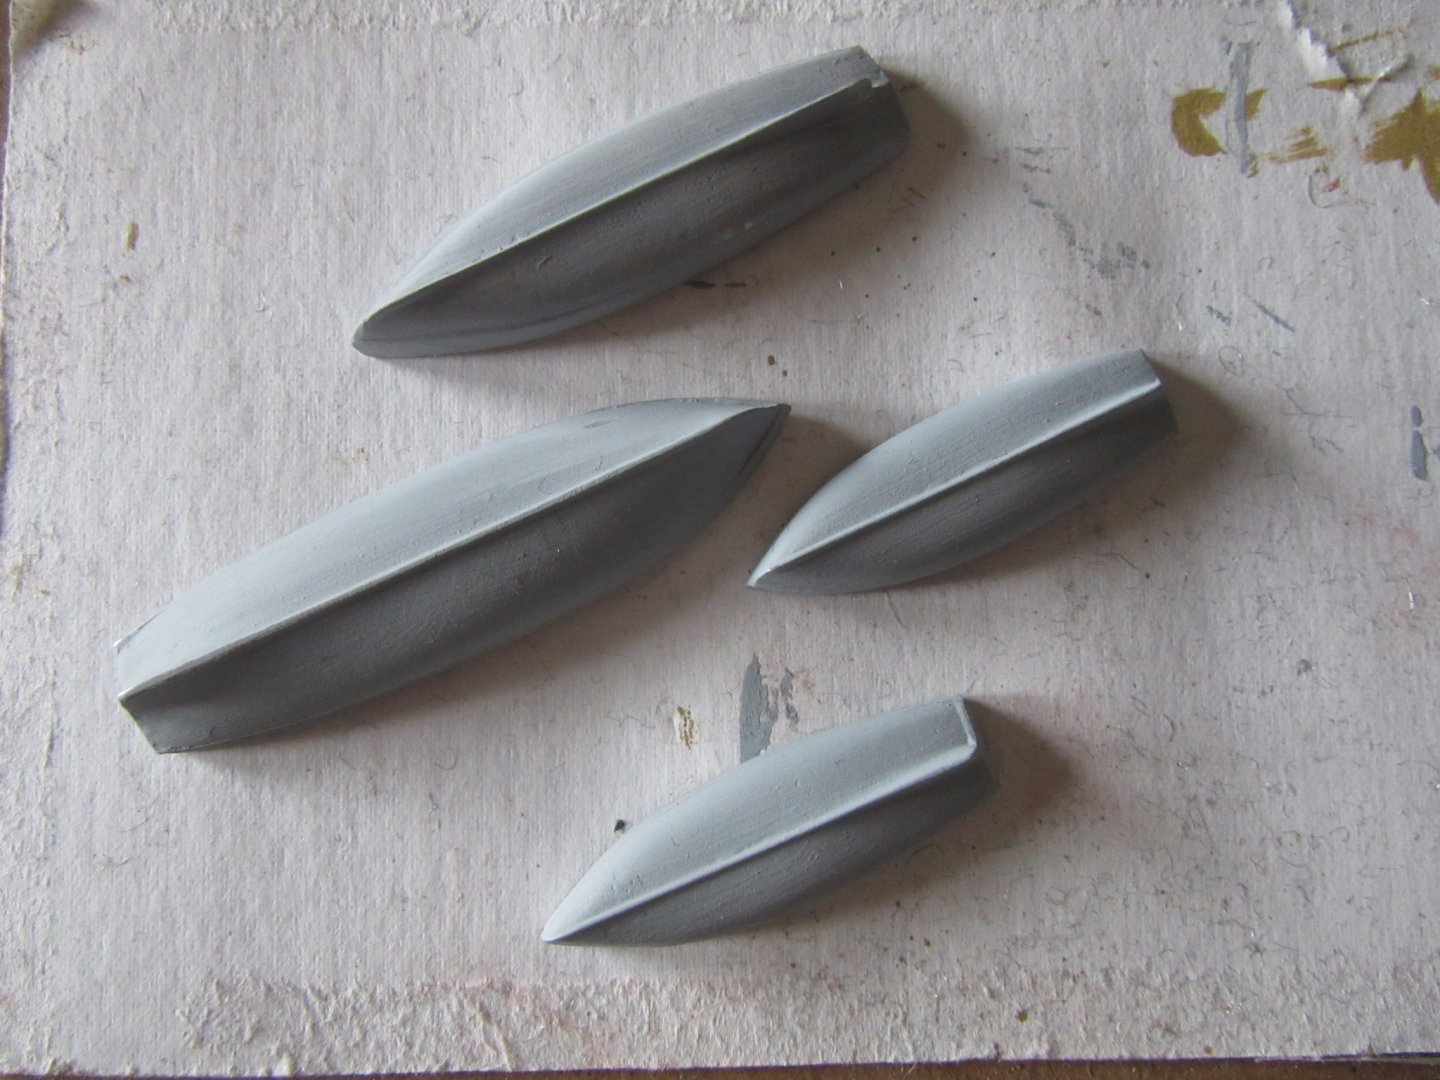
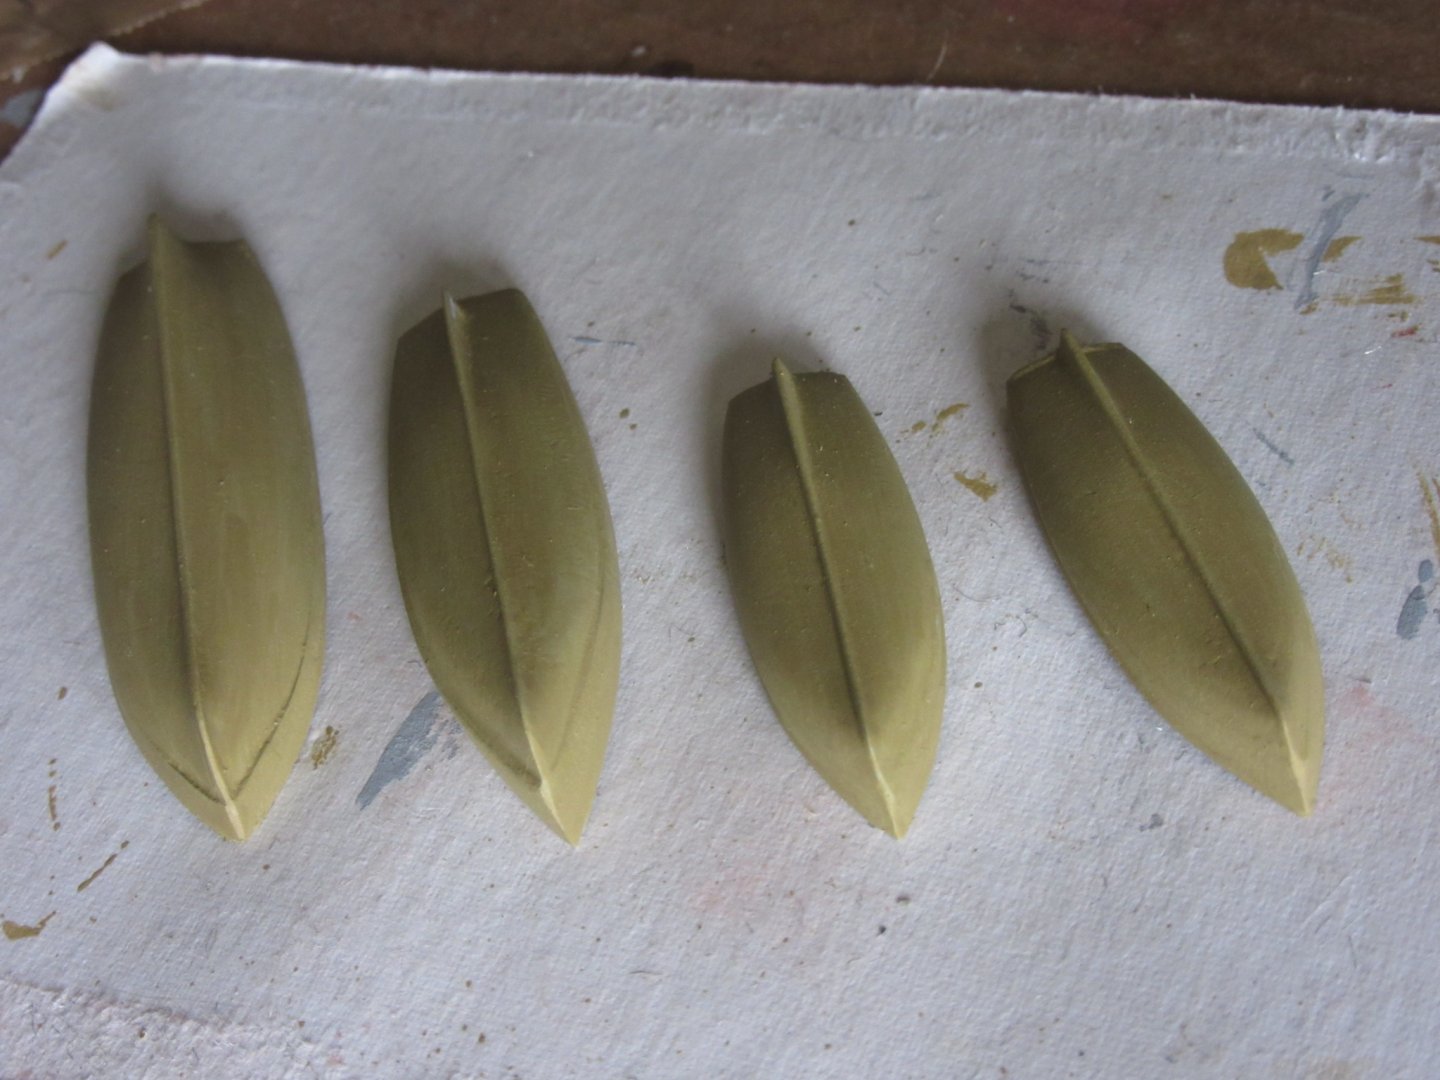
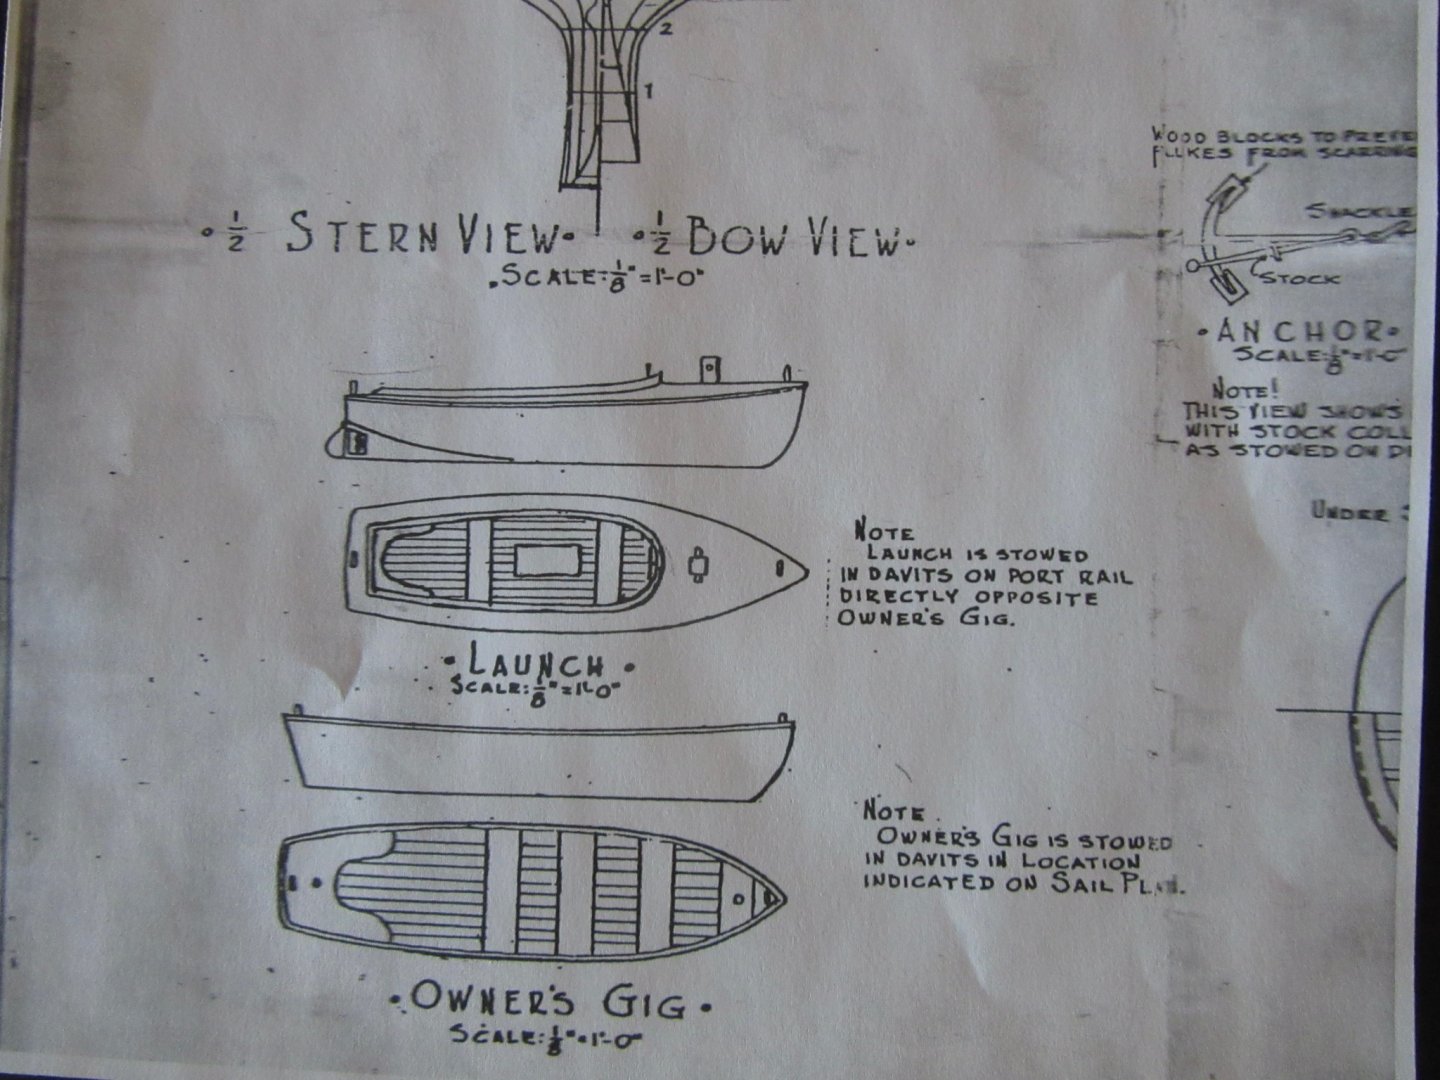
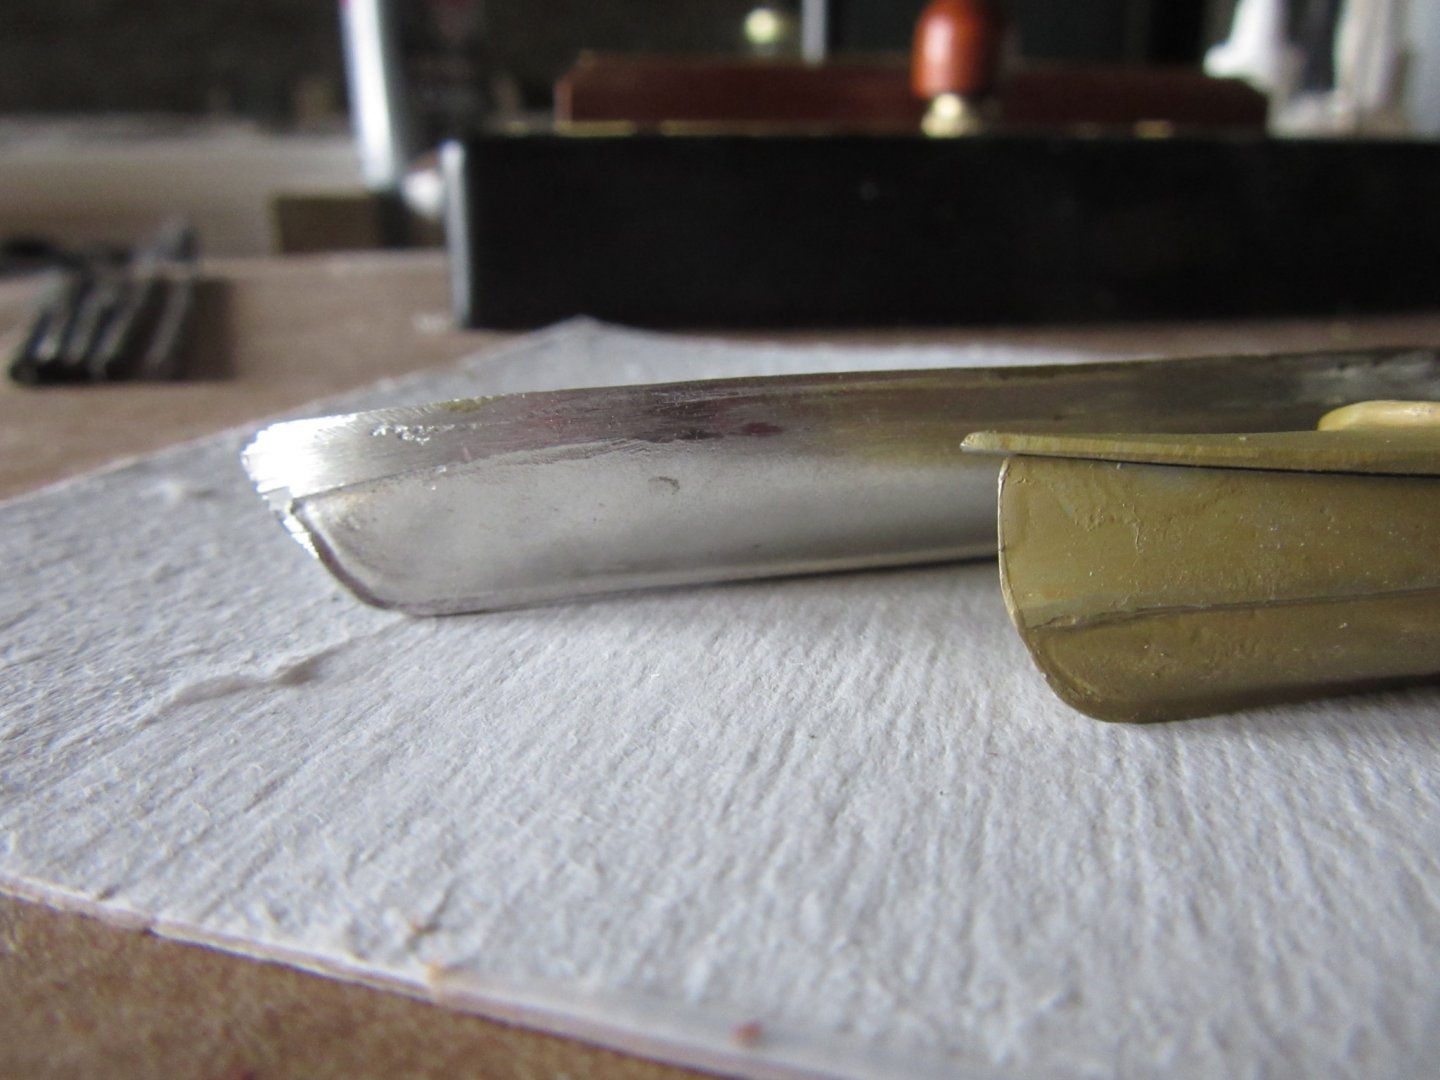
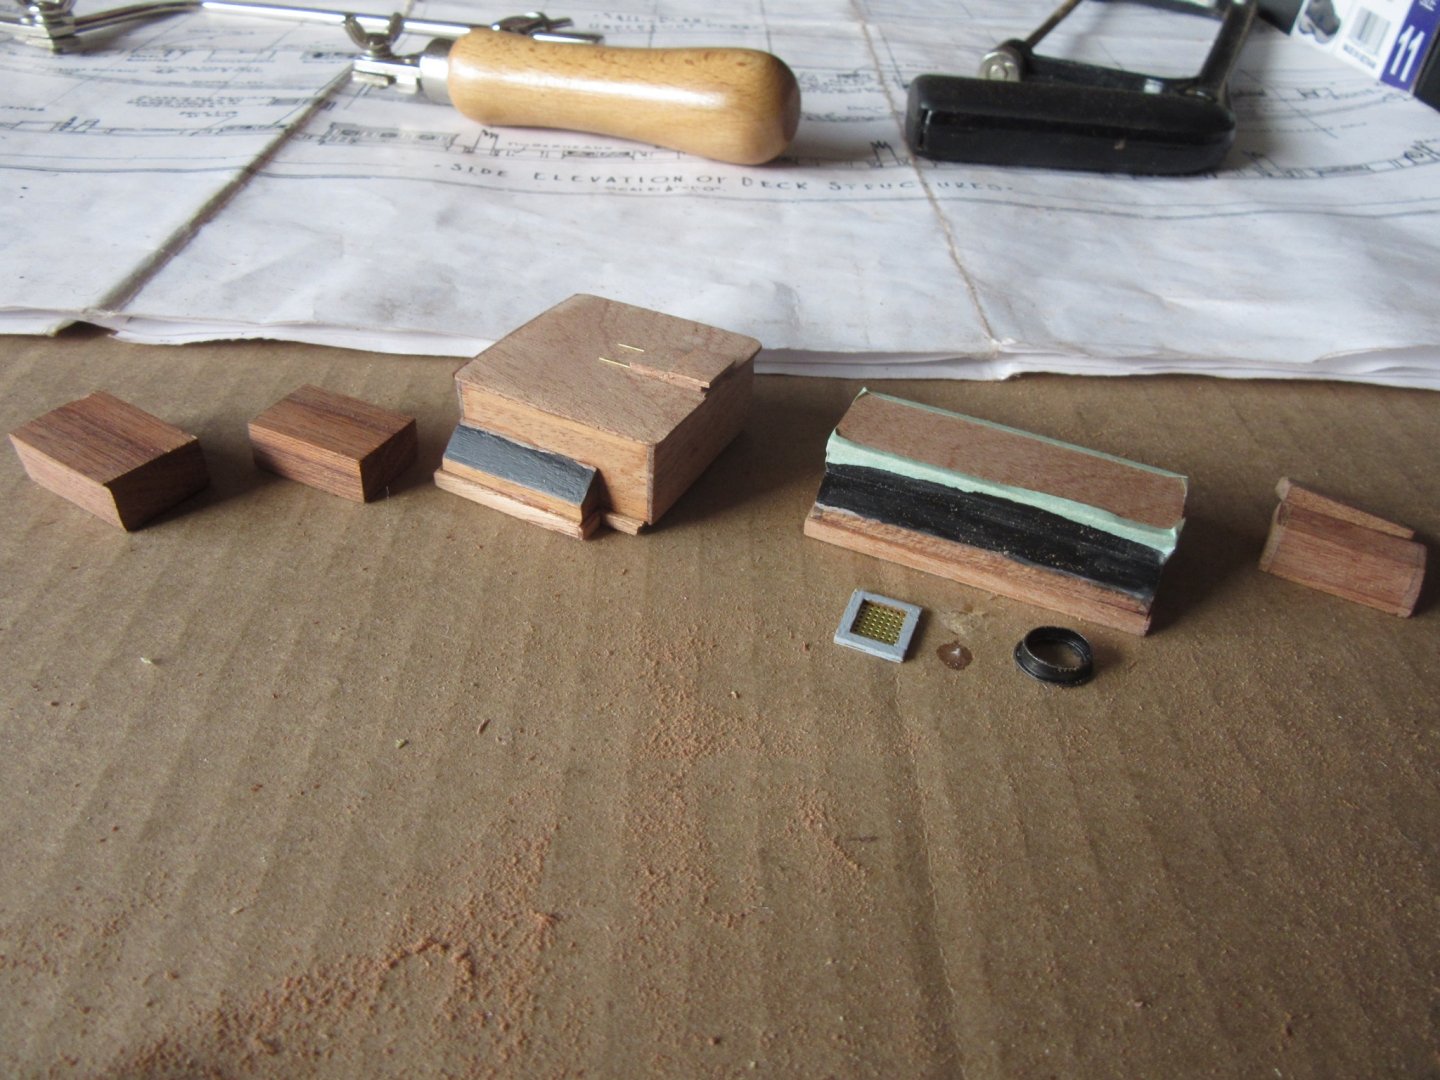
The past few days the bowsprit been tapered, primed and fitted to the stem temporarily. The masting techniques posted in the modeling section present a multitude of methods for fashioning masts, booms etc. The vise mounted drill worked out very well for tapering the bowsprit and was handed sanded with 400 grit paper for priming. One other item I noticed on the sail plan is a shackle for the anchor. After several failed attempts at it the latest one is working out so far. The ships' boat hulls are currently a work in progress with body putty applied and fine sanded with 400 grit paper then 0000 steel wool, primed and first paint coat brushed on.


-
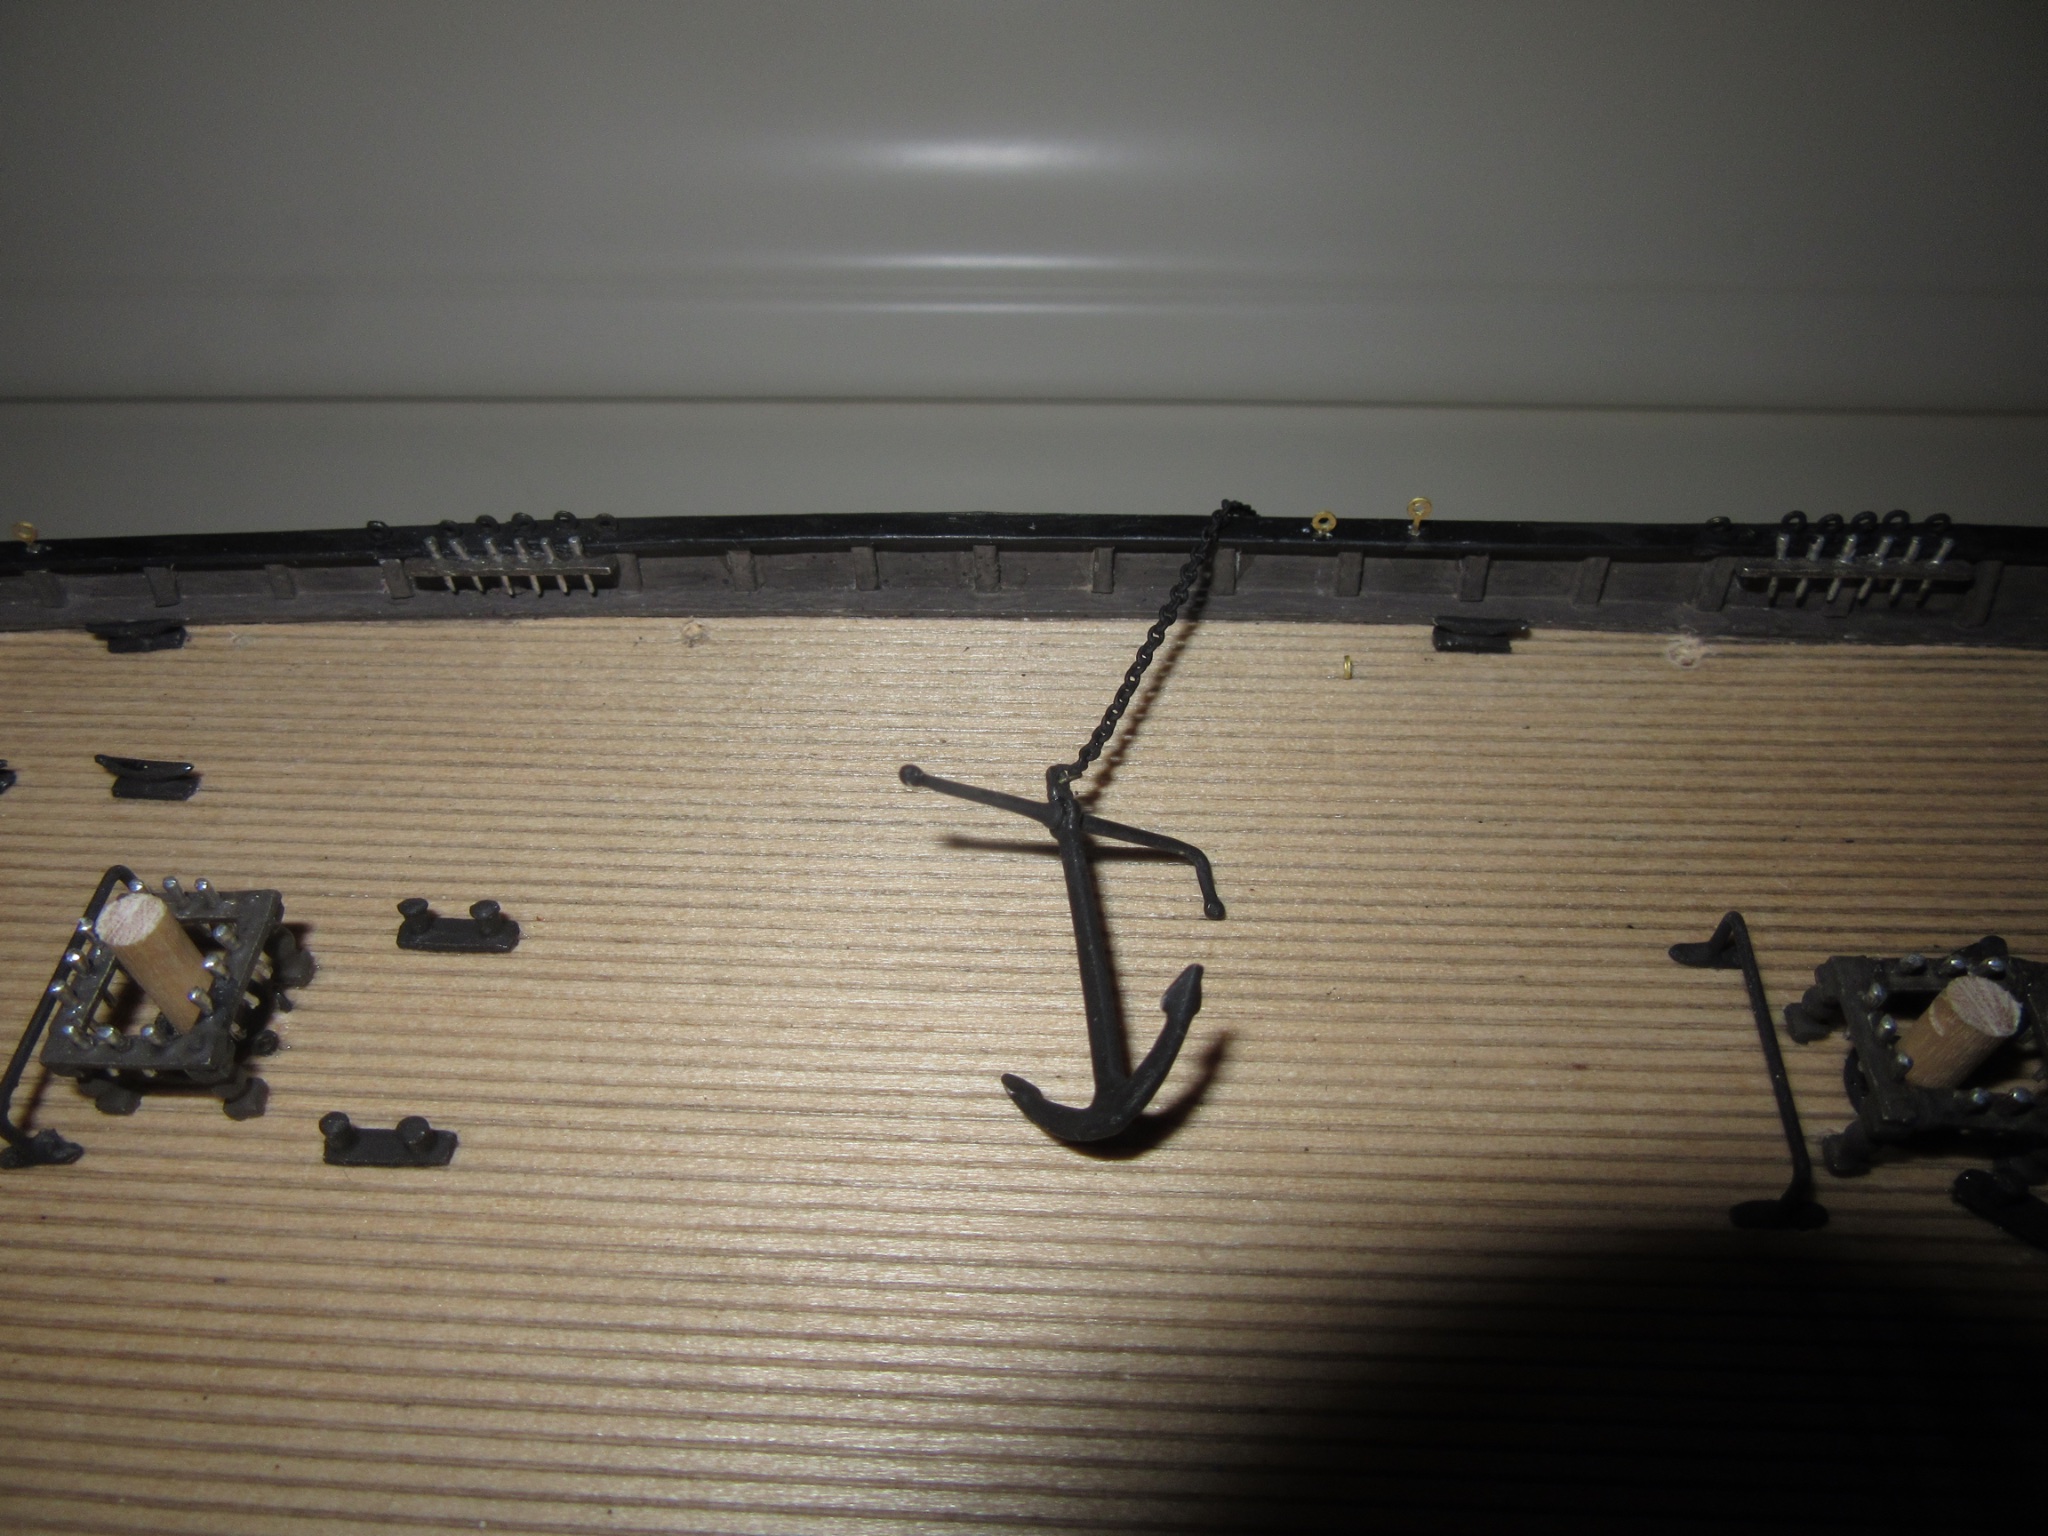
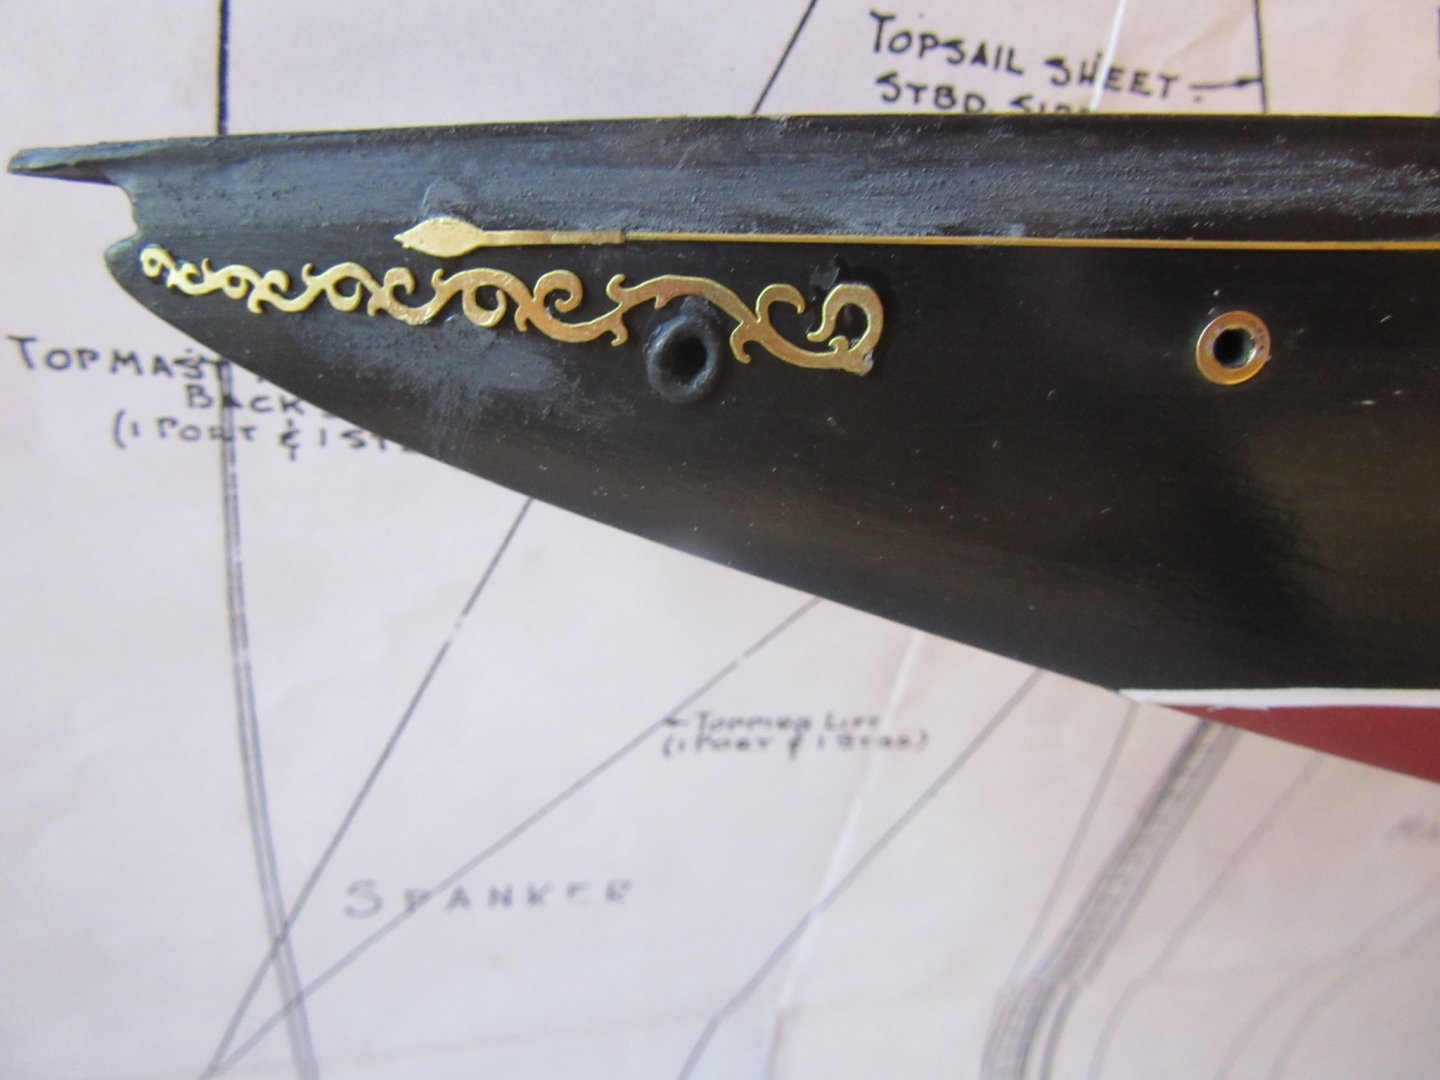
Well this is the part of the build I eat crow. A couple posts back I stated there were no mentions, depictions or photos of the anchor's crossmember. As the printer was dispensing my copy of the ship's boats details, there on the right was the anchor and crossmember with instructions to lay them both flat on the deck. My apologies to Bluejacket Shipcrafters for implying a lack of information on the sail plan of Atlantic because of my oversight.
-
Thank you gsdpic, but if it wasn't for your build log I wouldn't have caught it. By the way, I'm considering a plank and frame hull on my next build but on a lesser skill level as it would be an entry level kit to get the feel off it. Your build of America impressed me with all the lattice work of ribs, beams, planks and decking involved in its assembly. It will be a model to cherish for years to come.
-
Thank you Etubino, all my woodshop classes from high school have come in handy even on this small scale.
-
Thank you Nic. I just can't say how enjoyable it is looking at less and less parts as I complete Atlantic in the homestretch.
-
Hi schooner and thank you for your reply. I never considered using CA for the small flaws so I'll apply both where needed on all hulls. As far as the anchor, there isn't anywhere on the sail plan that shows it at all. The instruction book describes the rigging and wooden deck pads for the anchor flukes to rest on and it's davit but there is no mention, depiction, or photo of that crossmember. I'm going with your advice and laying both anchor and crossmember flat on the deck. Thank you and everyone for the wonderful support and encouragement that's been given me.
-
Another question is the disposition of the anchor on deck. I've assembled it with the crossmember in place. I noticed on gsdpic's build log of America the crossmembers are unjointed from the anchor and laying flat with it. Have I erred again? lol.

-
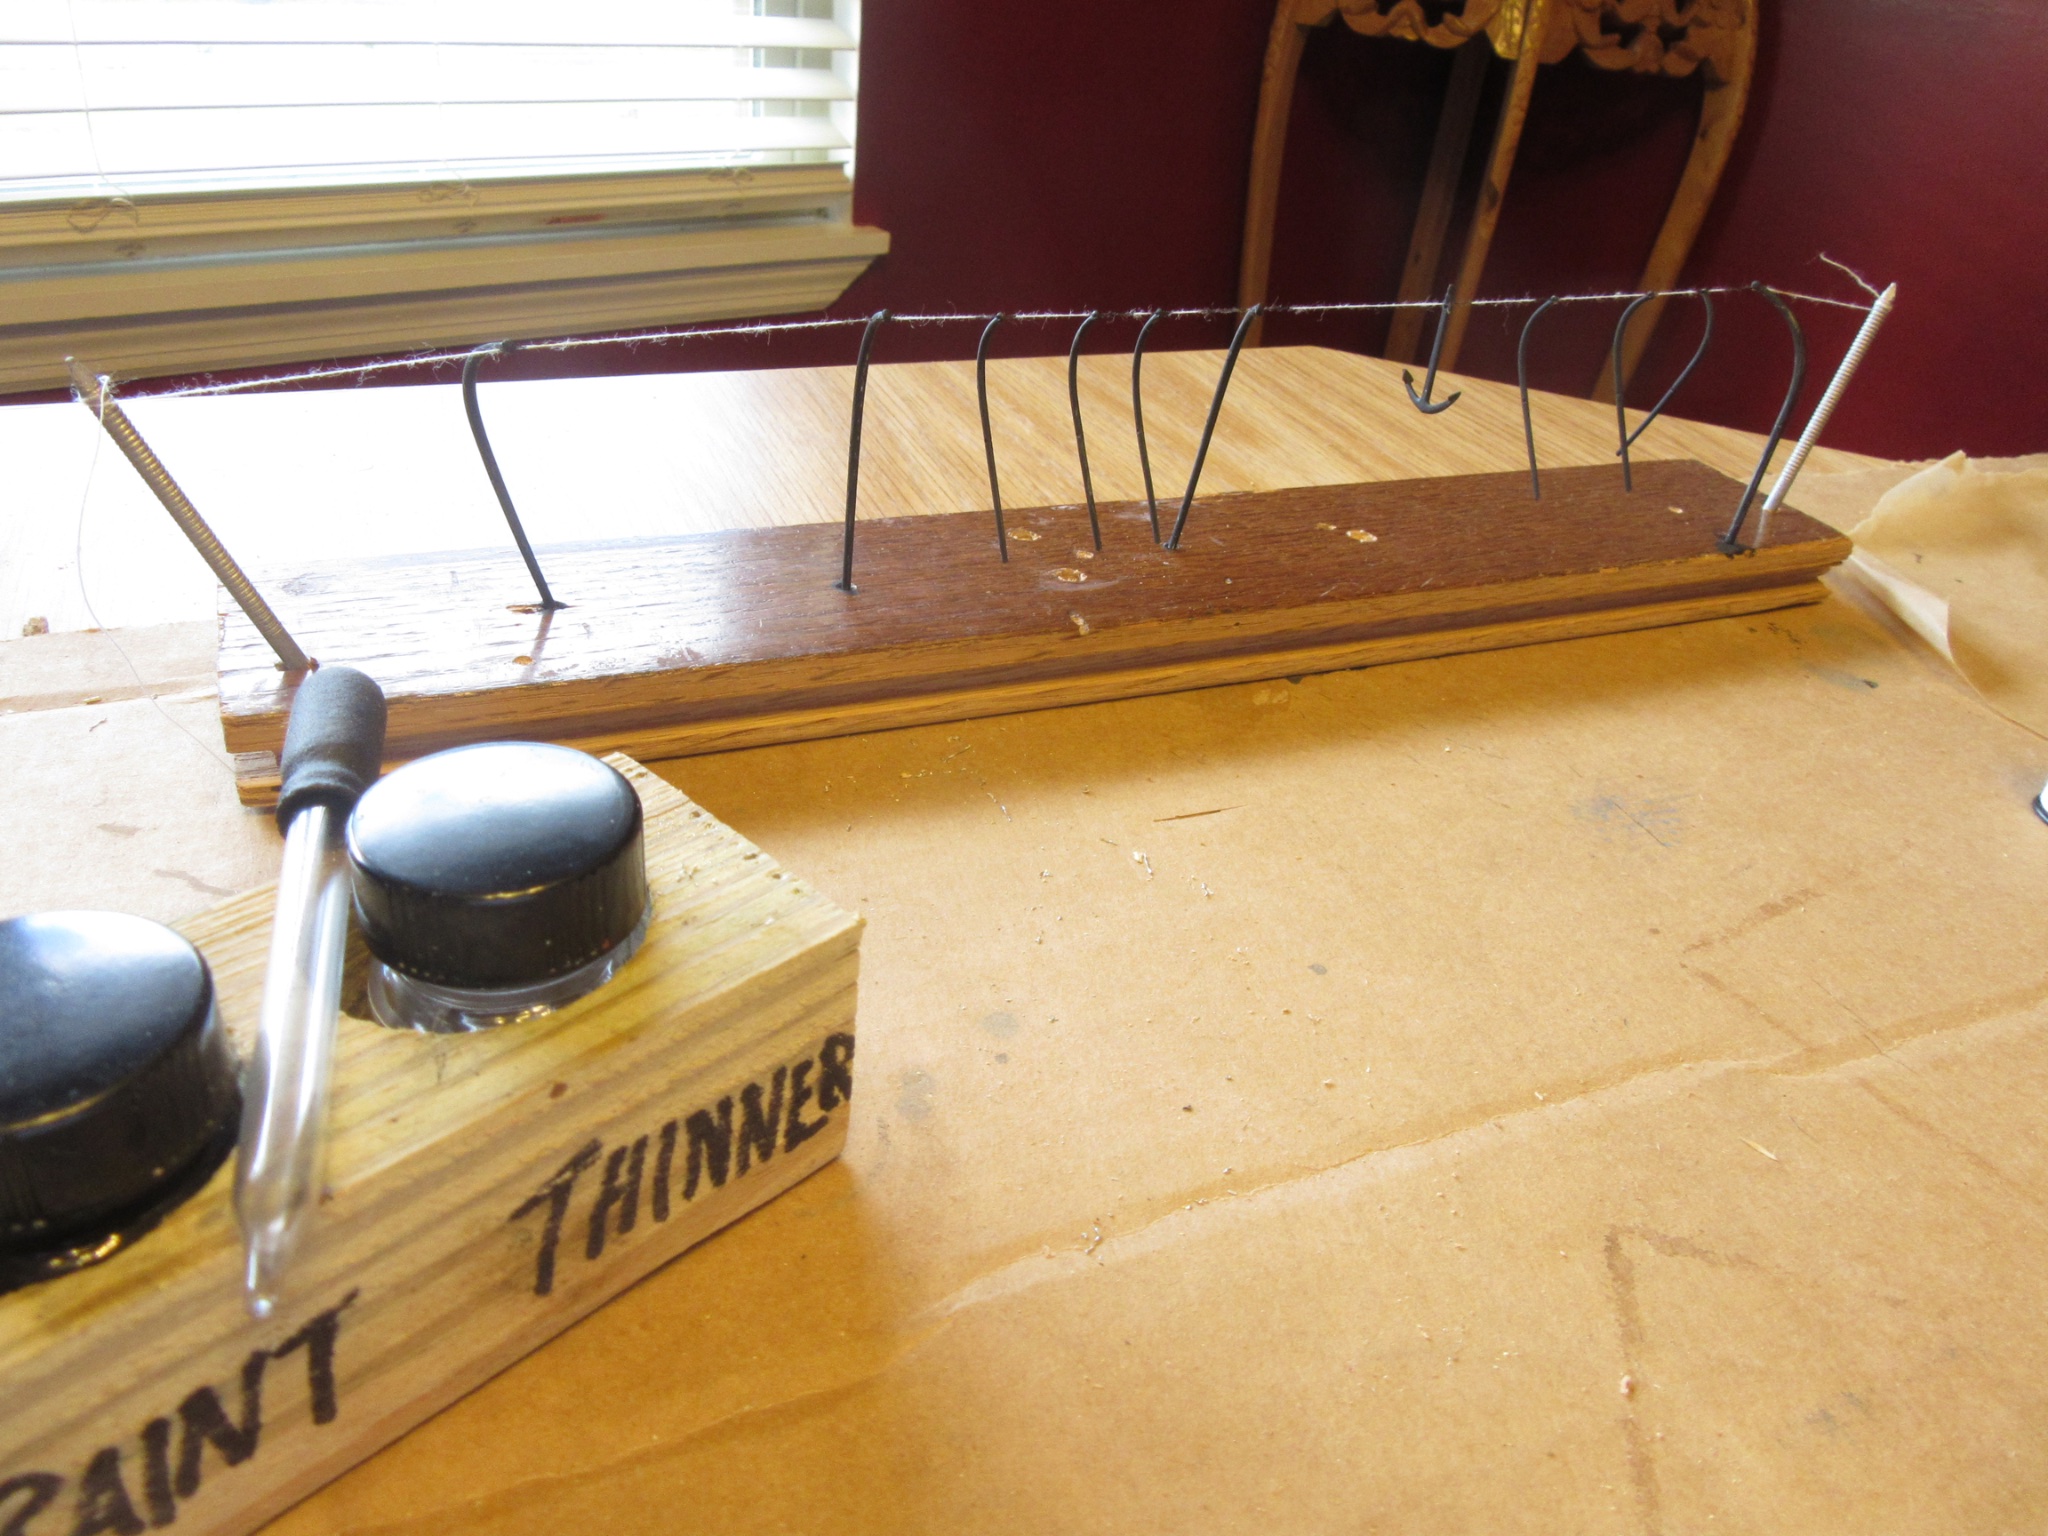
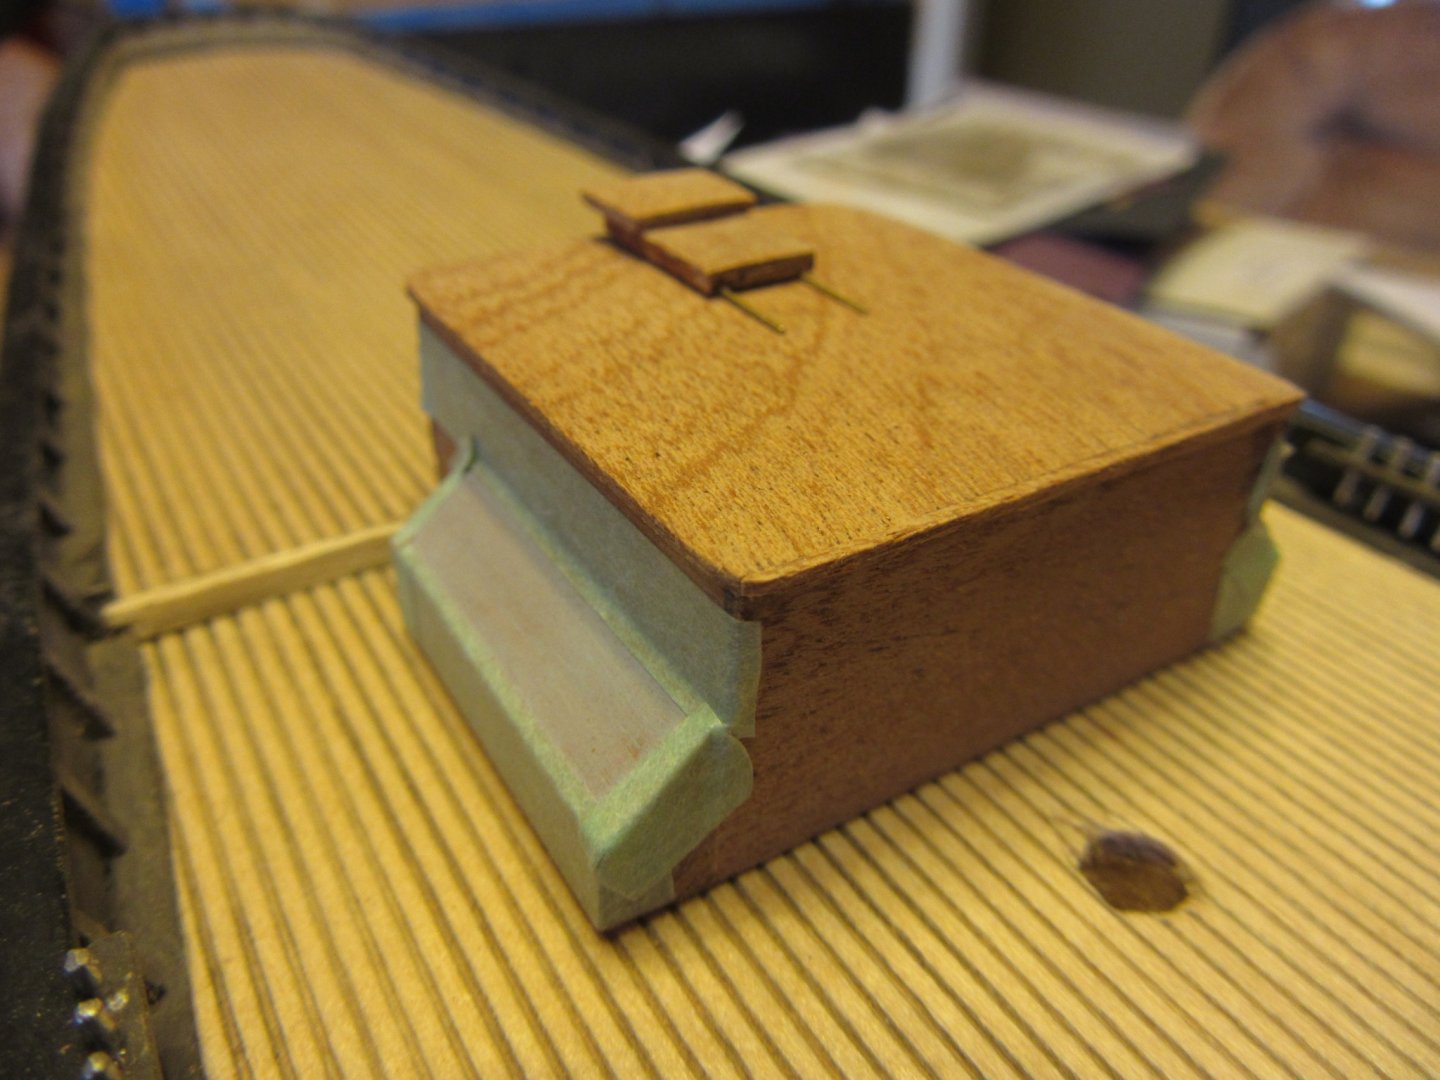
The ship's boats are the last pieces to be completed before the masting and rigging begins. I've been filing and sanding their hulls as smooth as I can but there are slight cavitations on the hull surfaces in certain areas that shows up in the paint. I'm thinking of using small amounts of body putty to remedy this. Any one think this is a good fix?
-
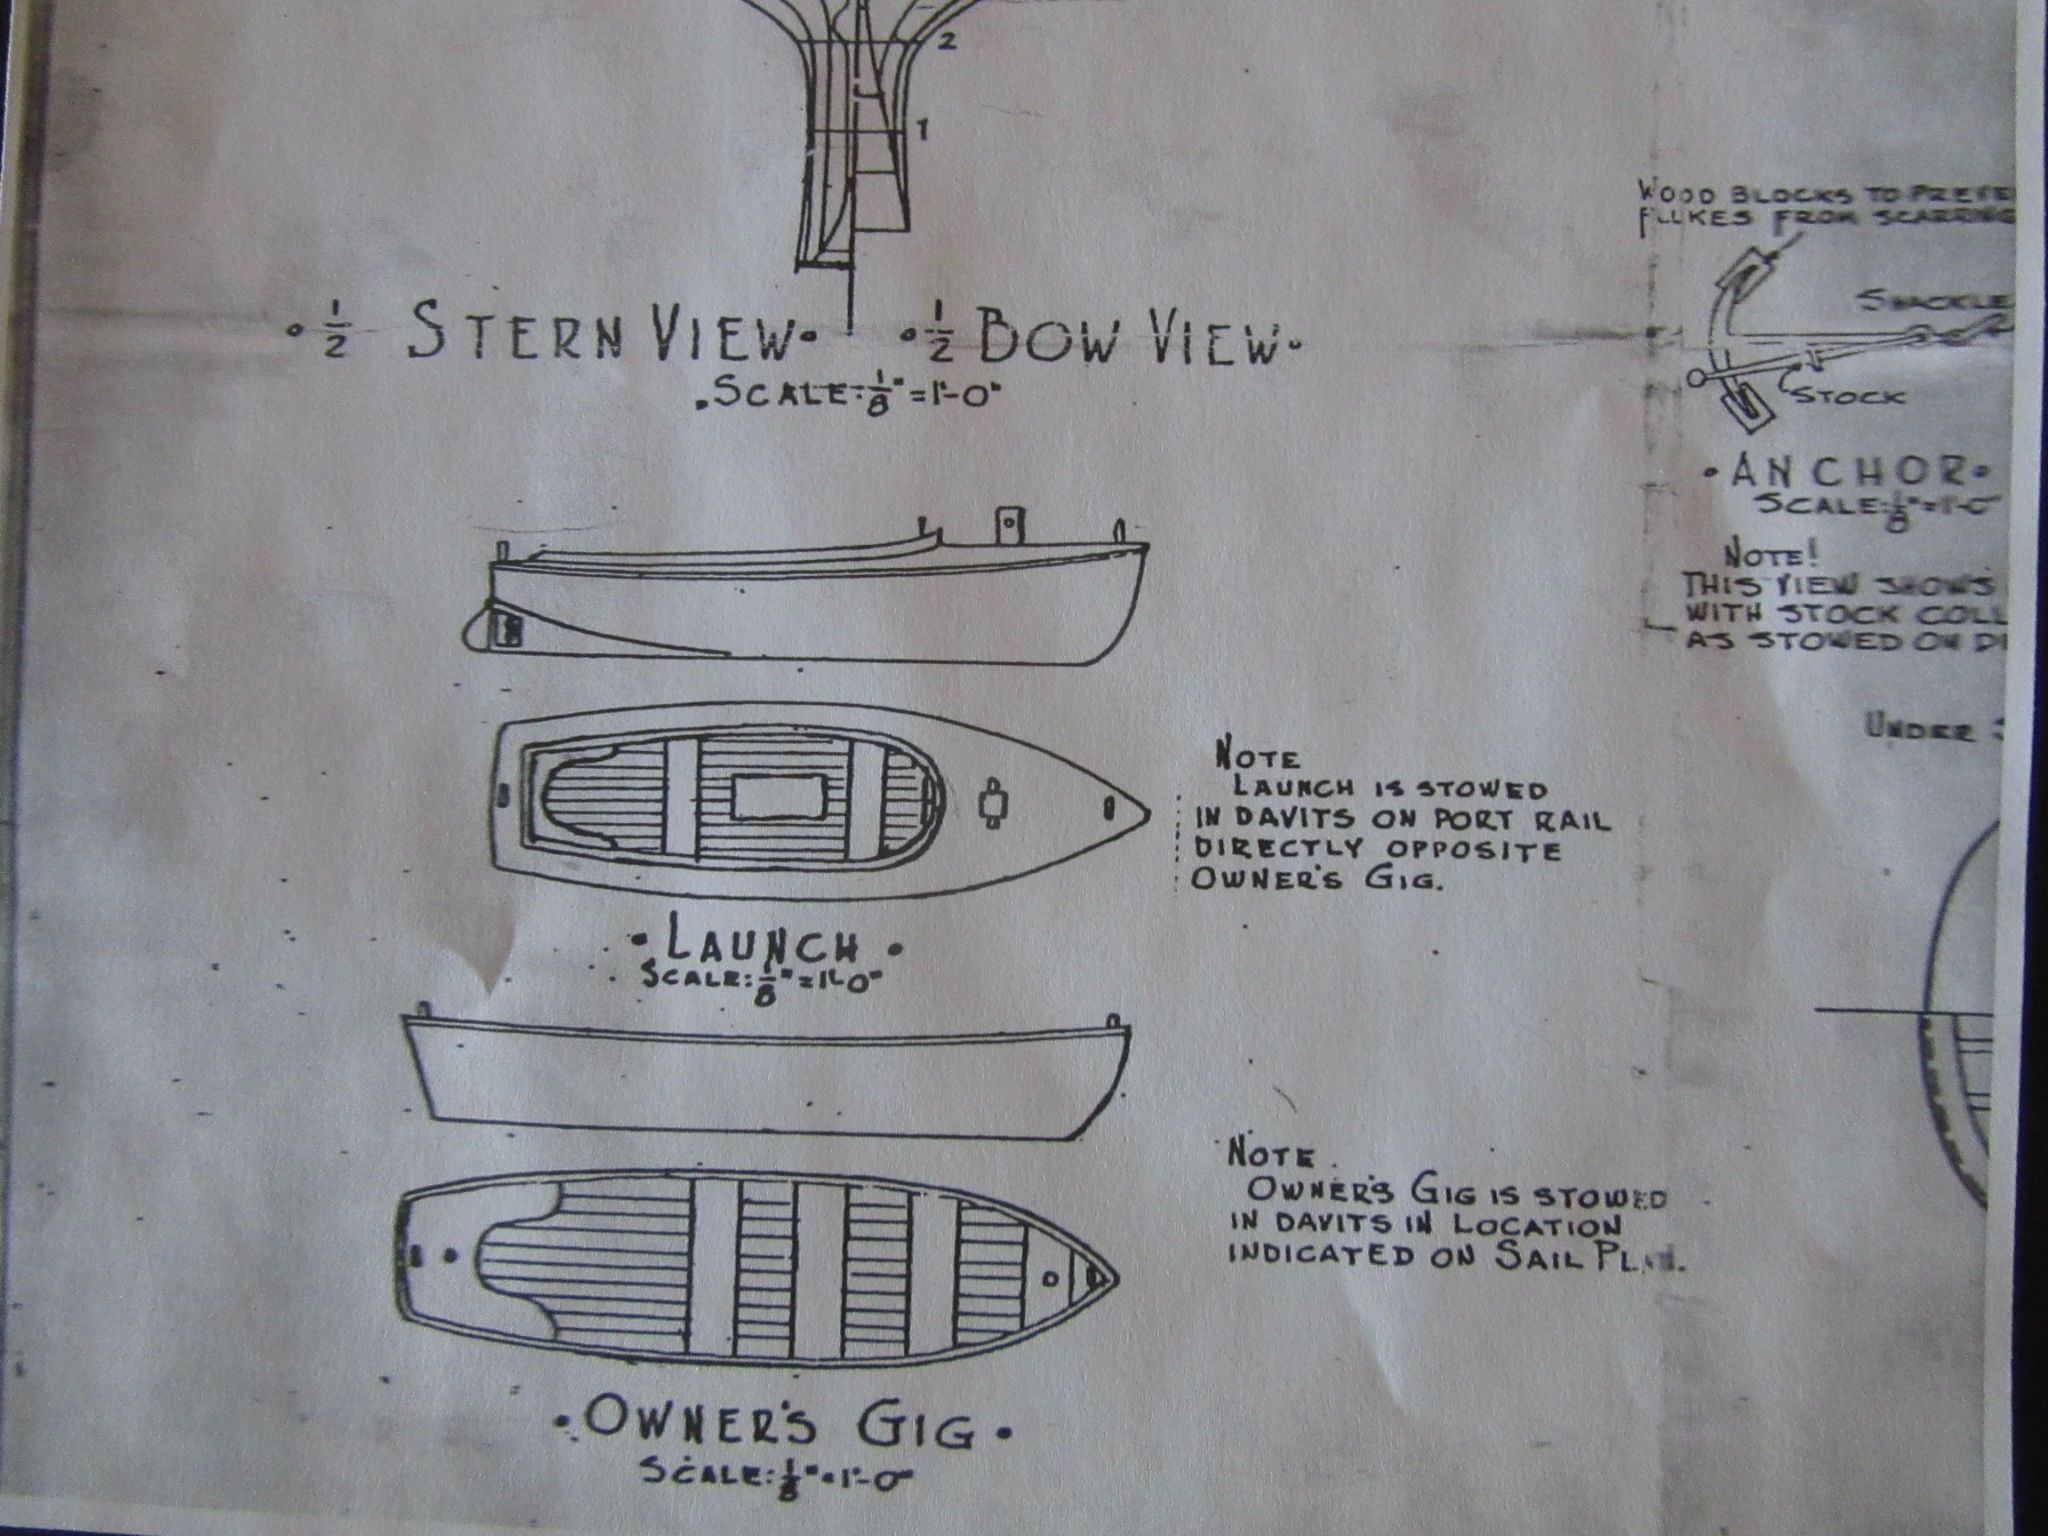
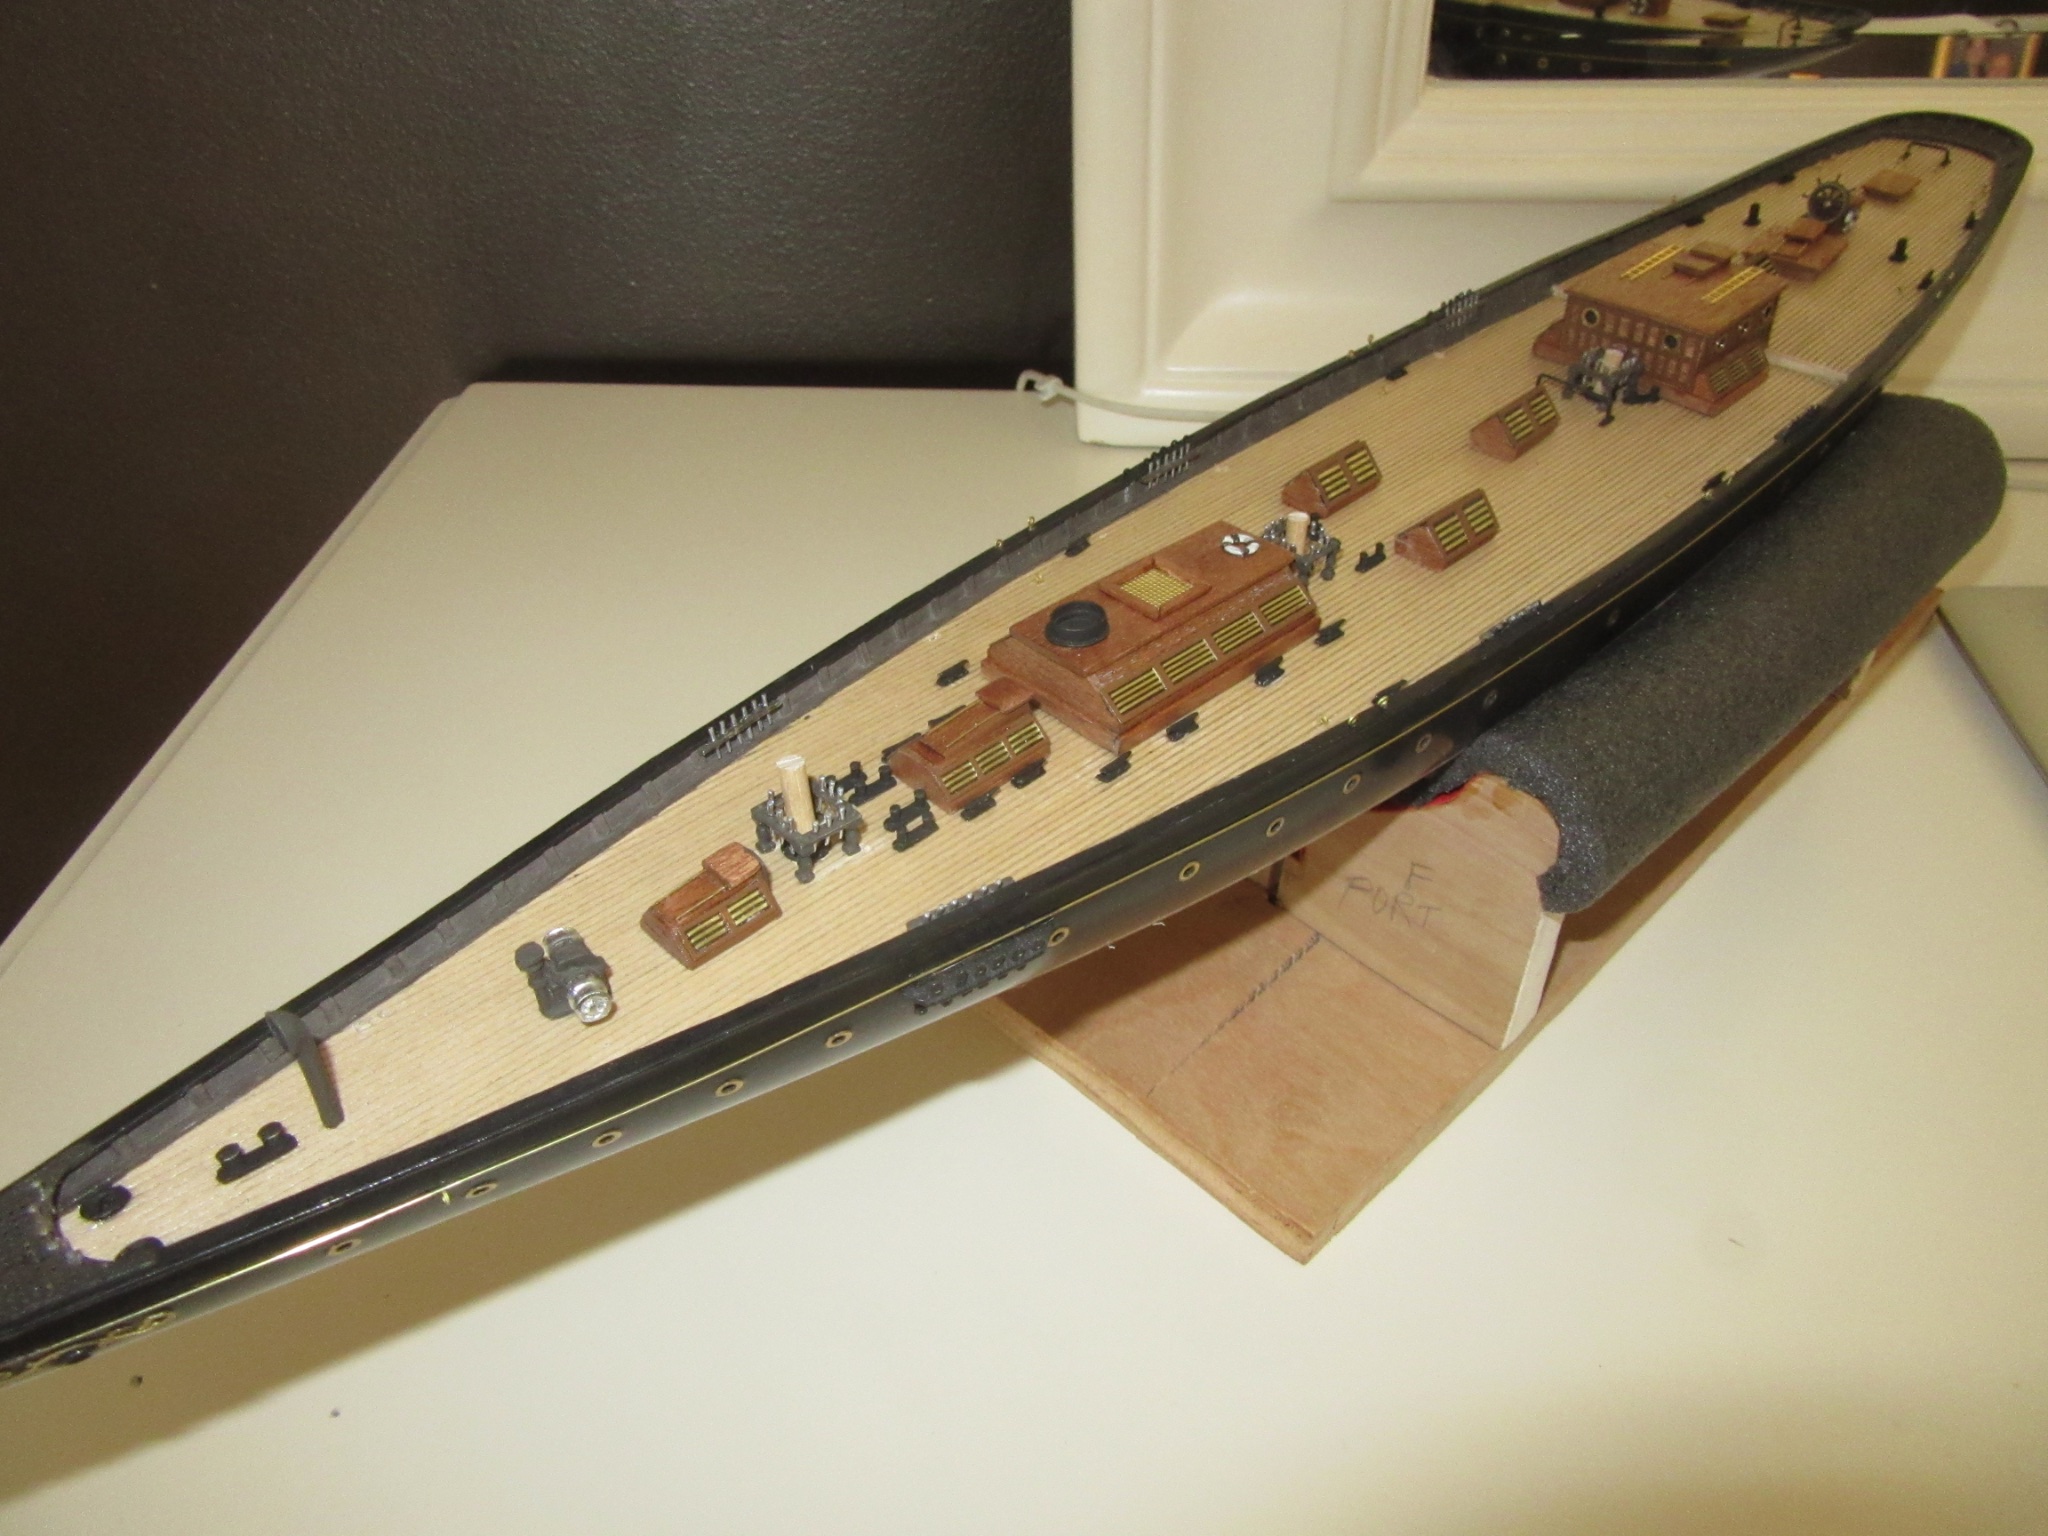
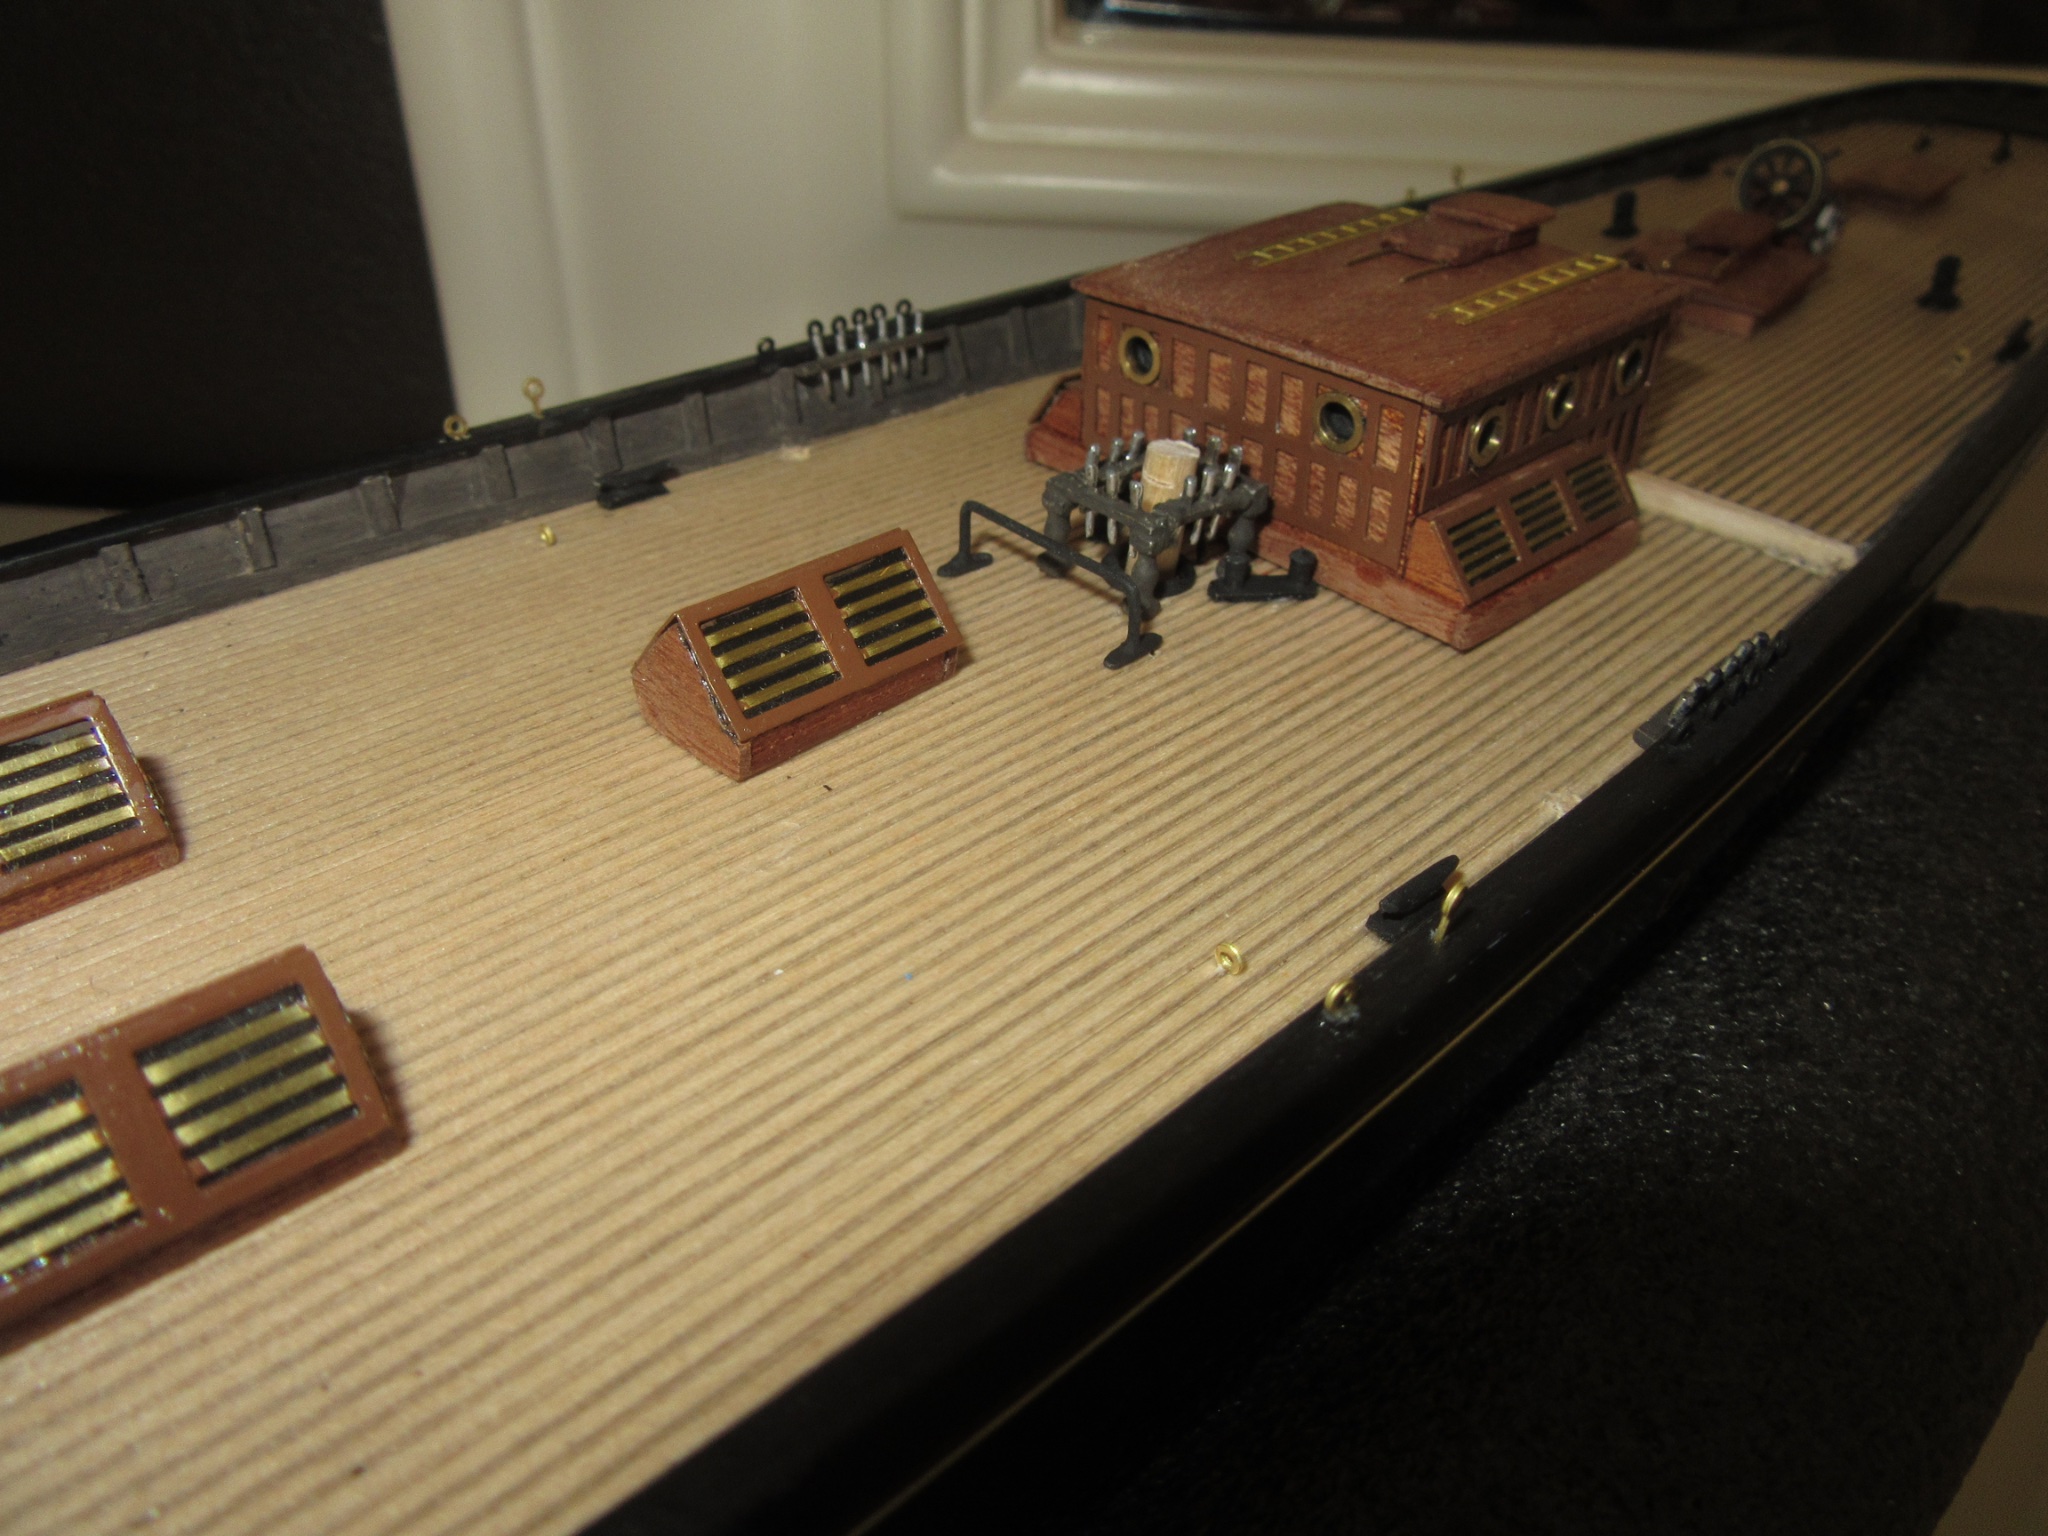
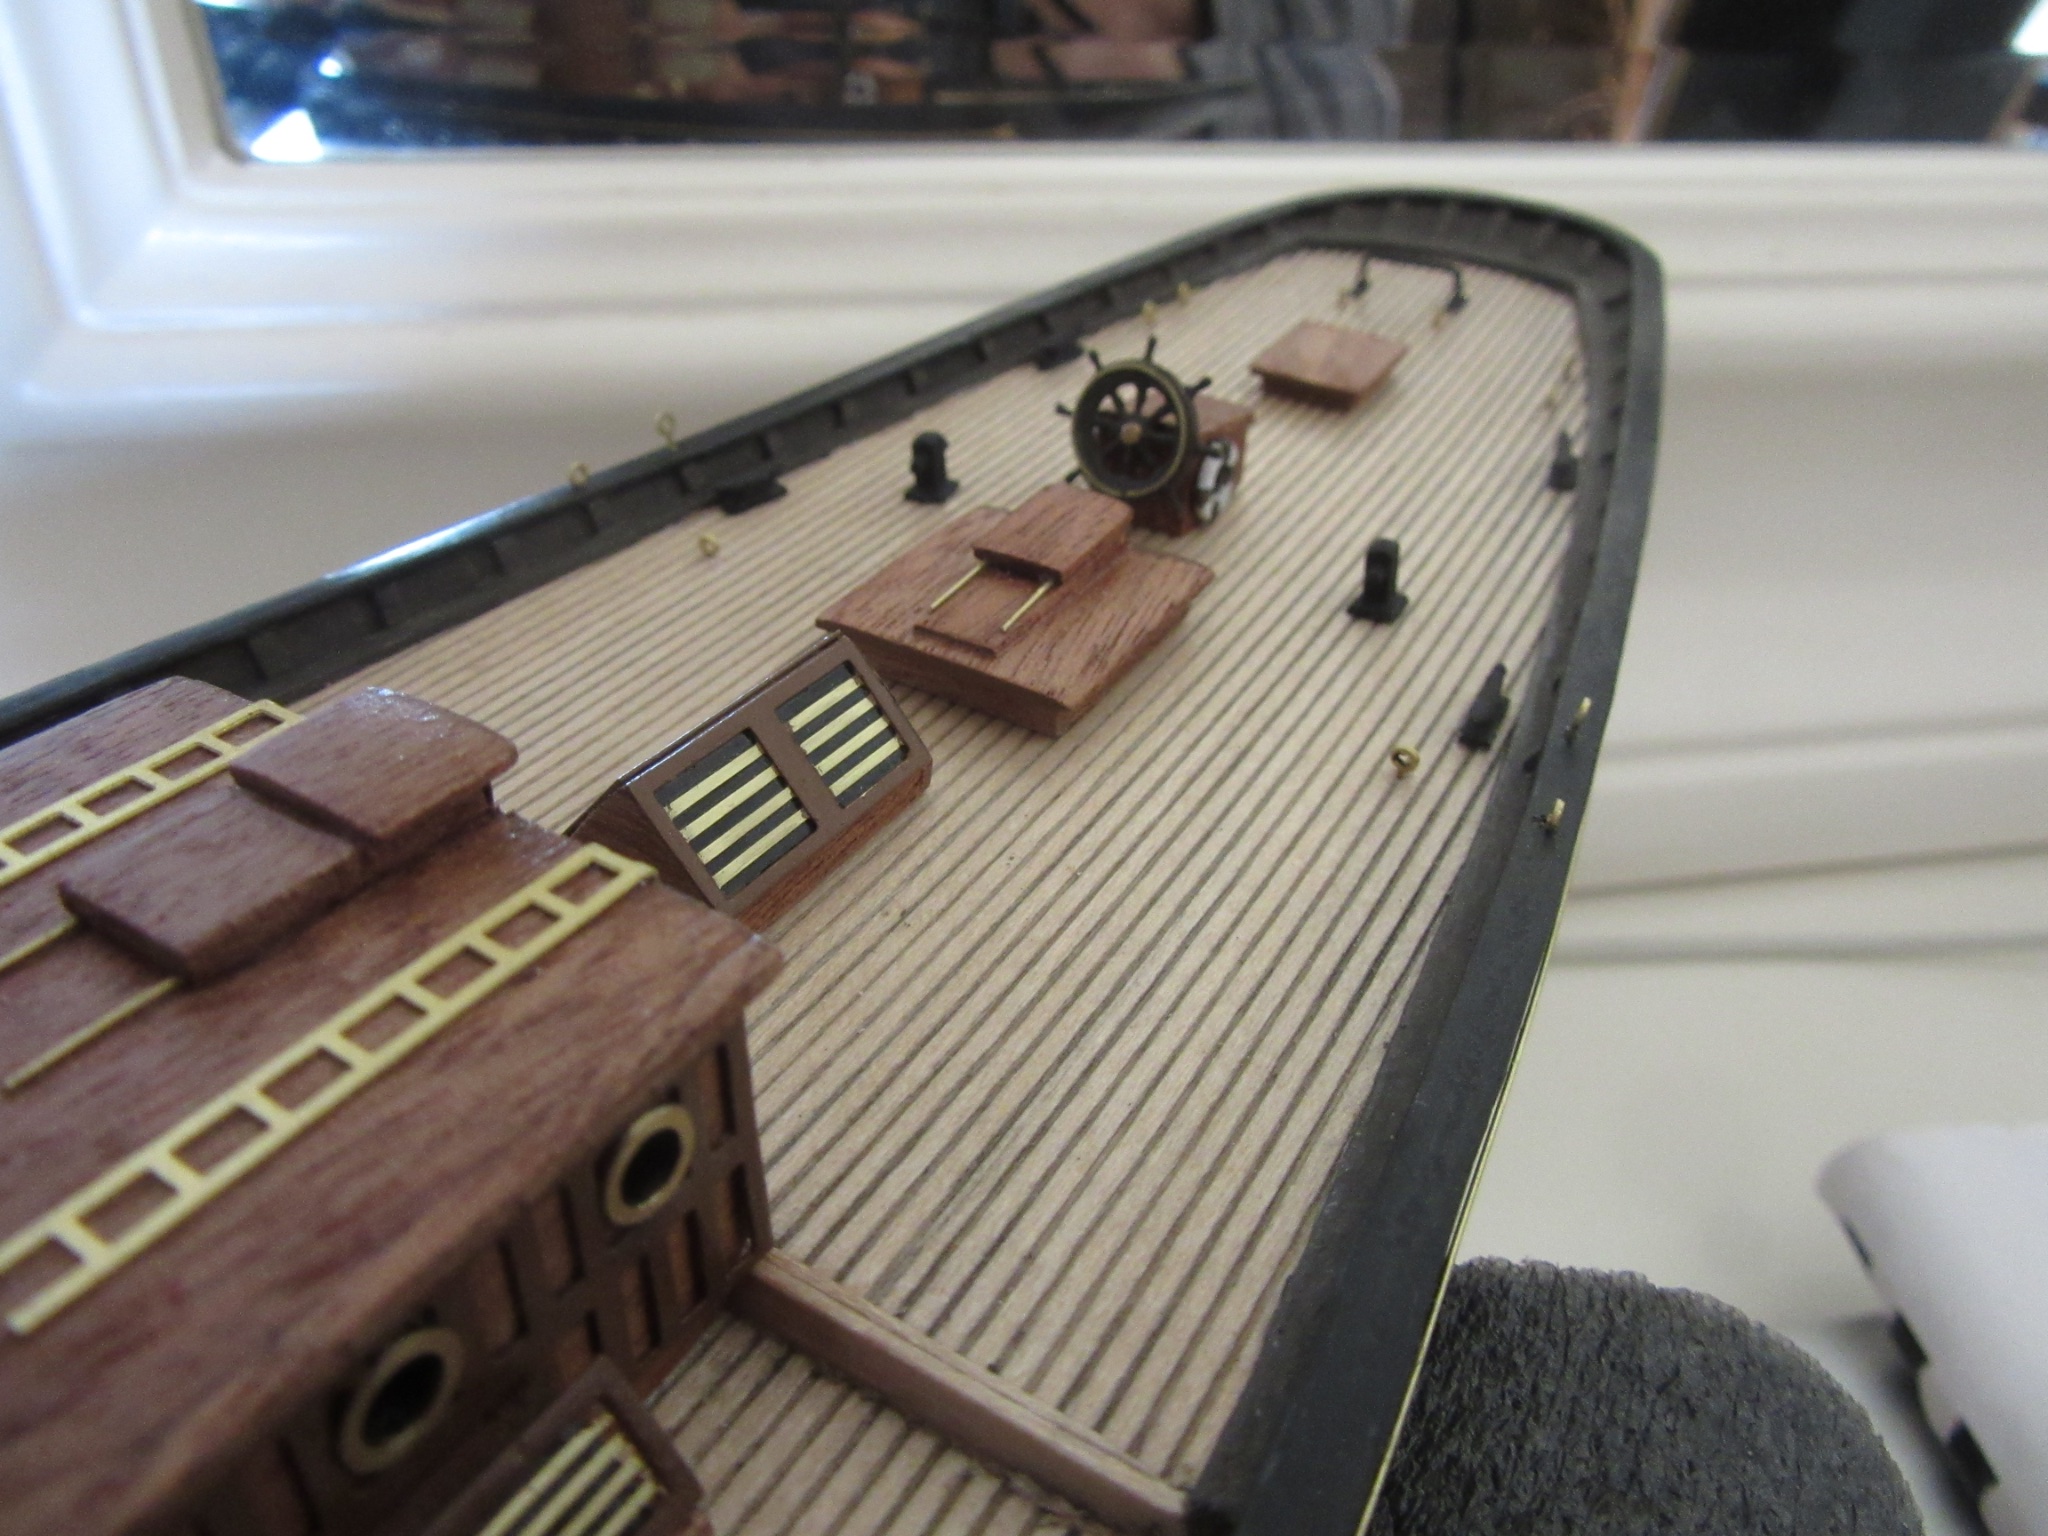
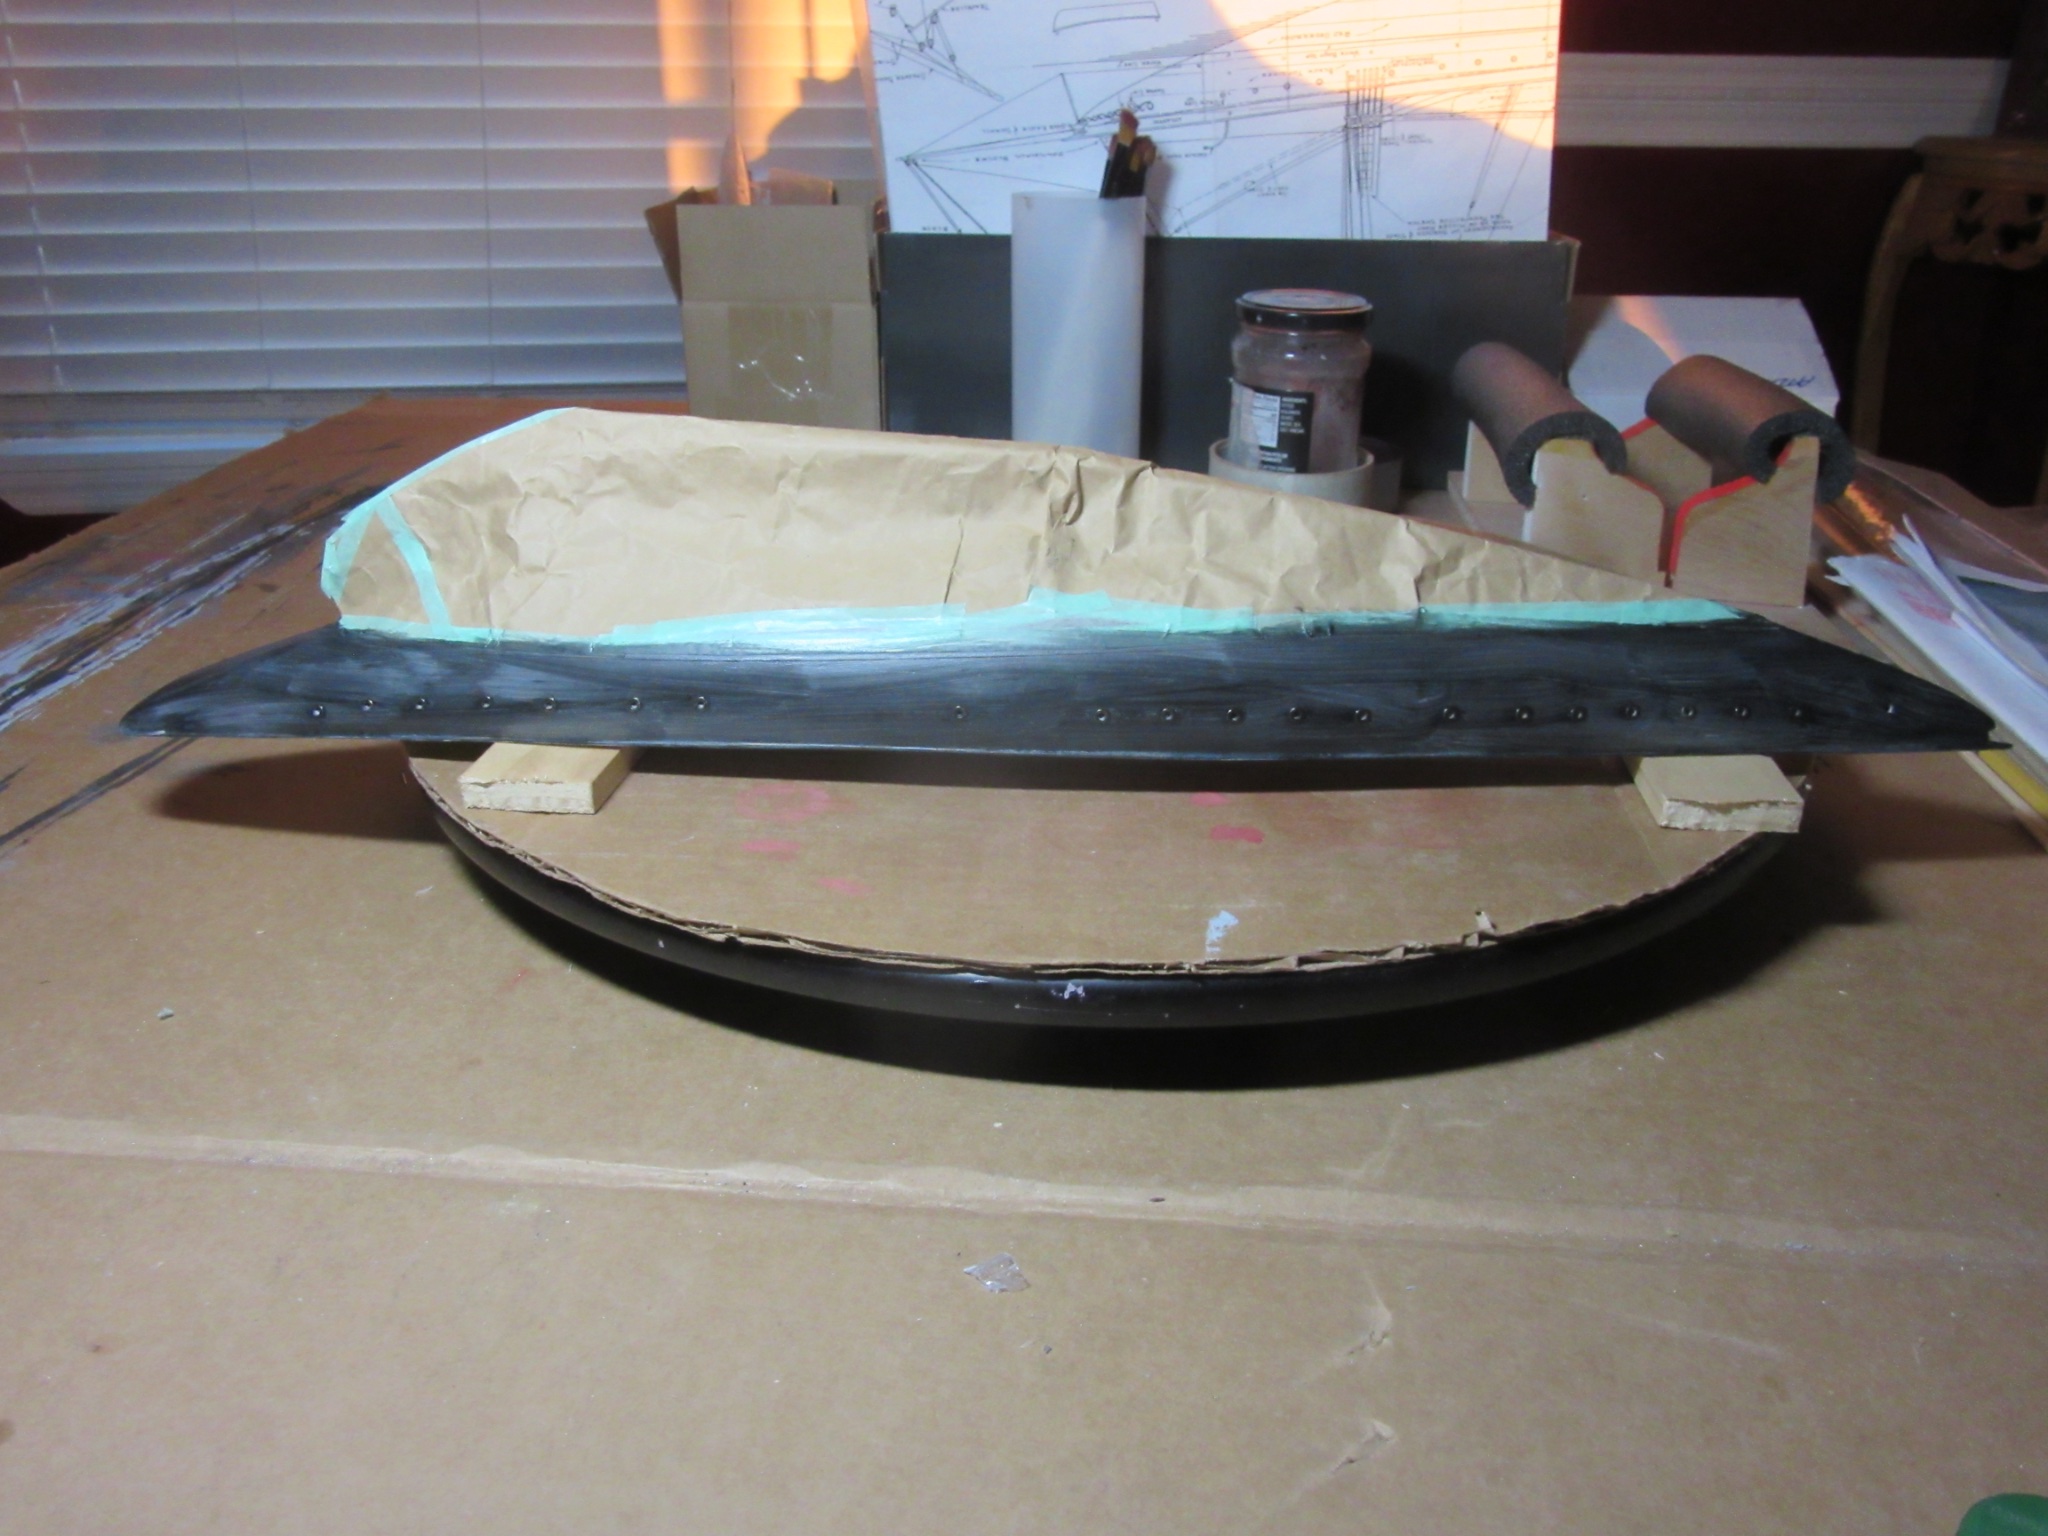
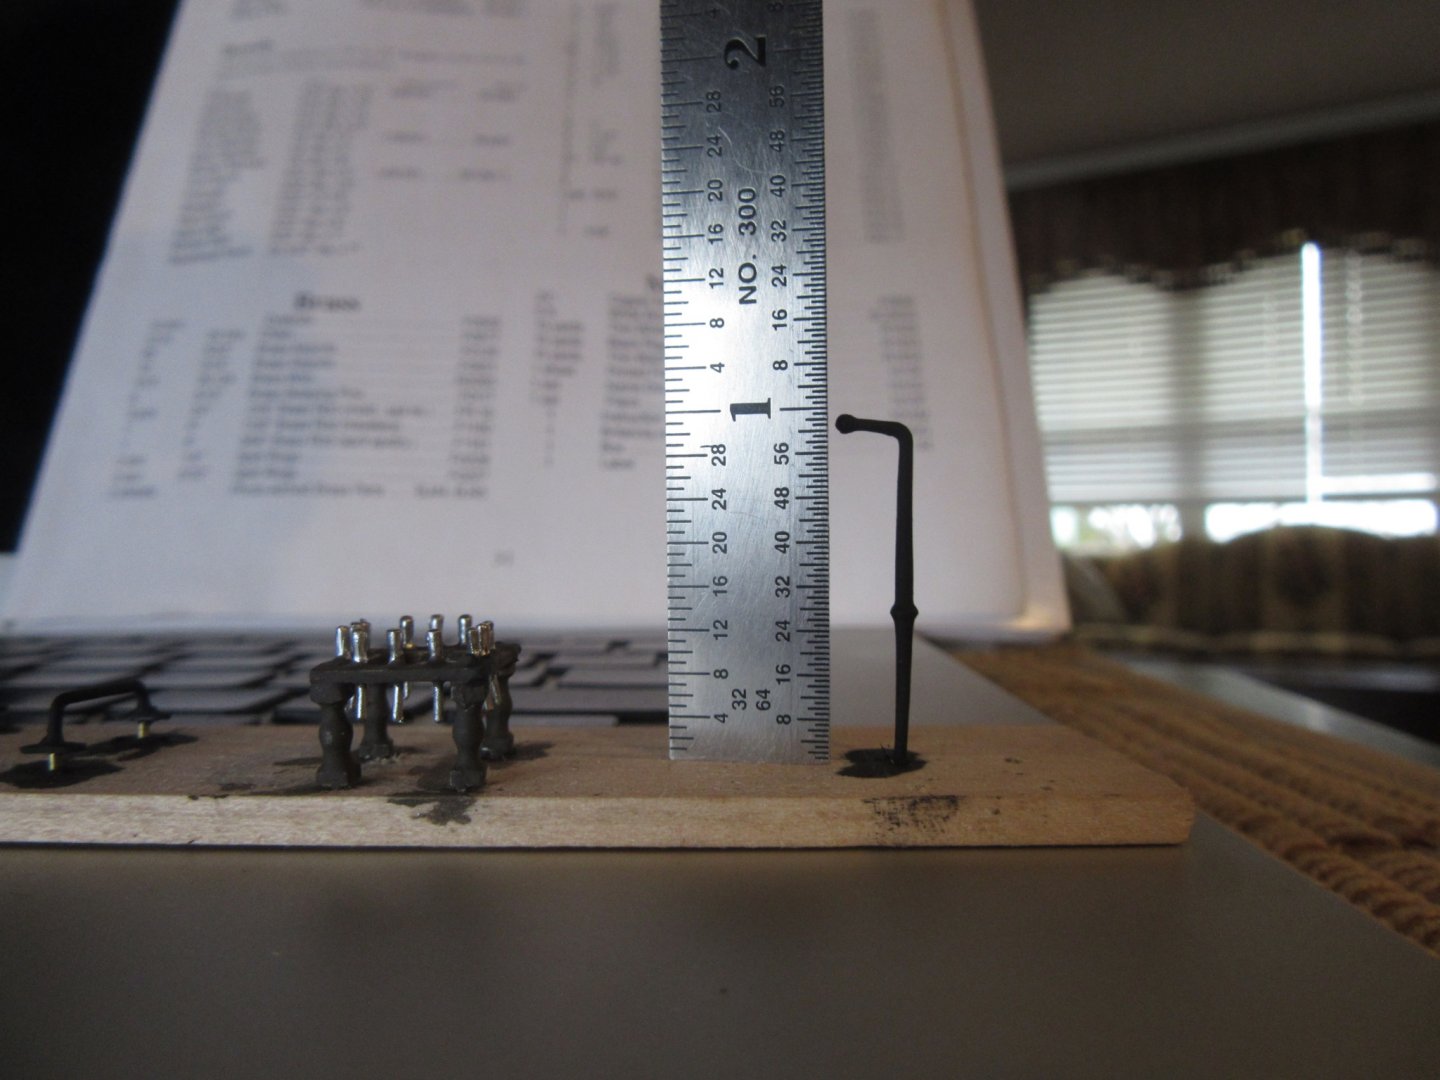
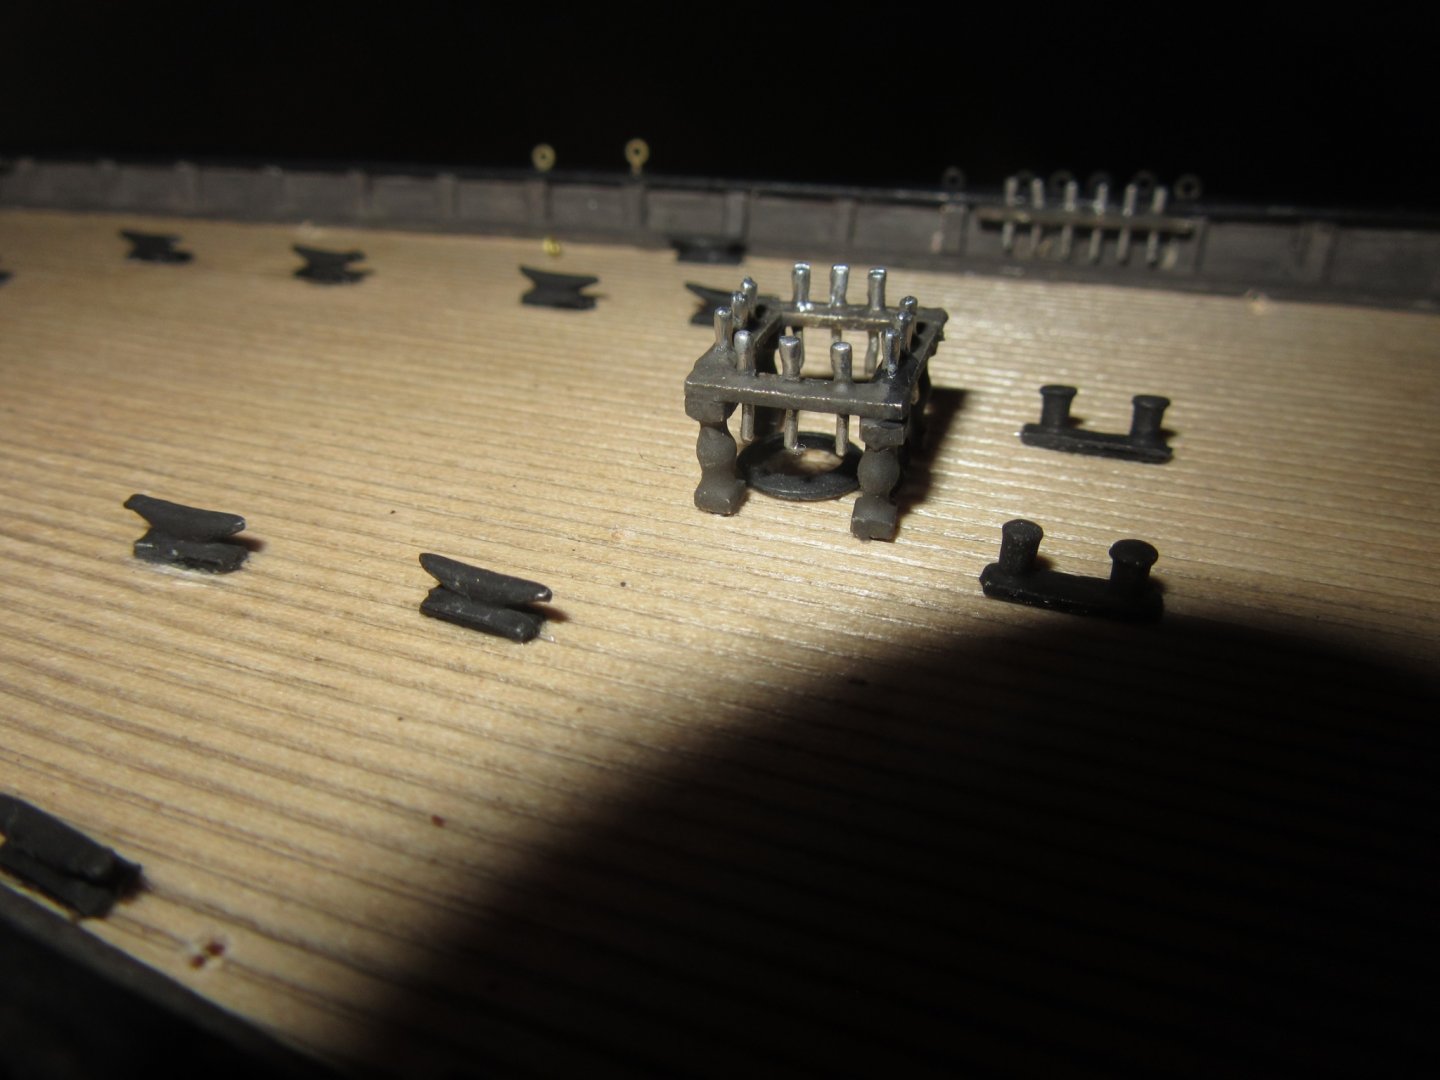
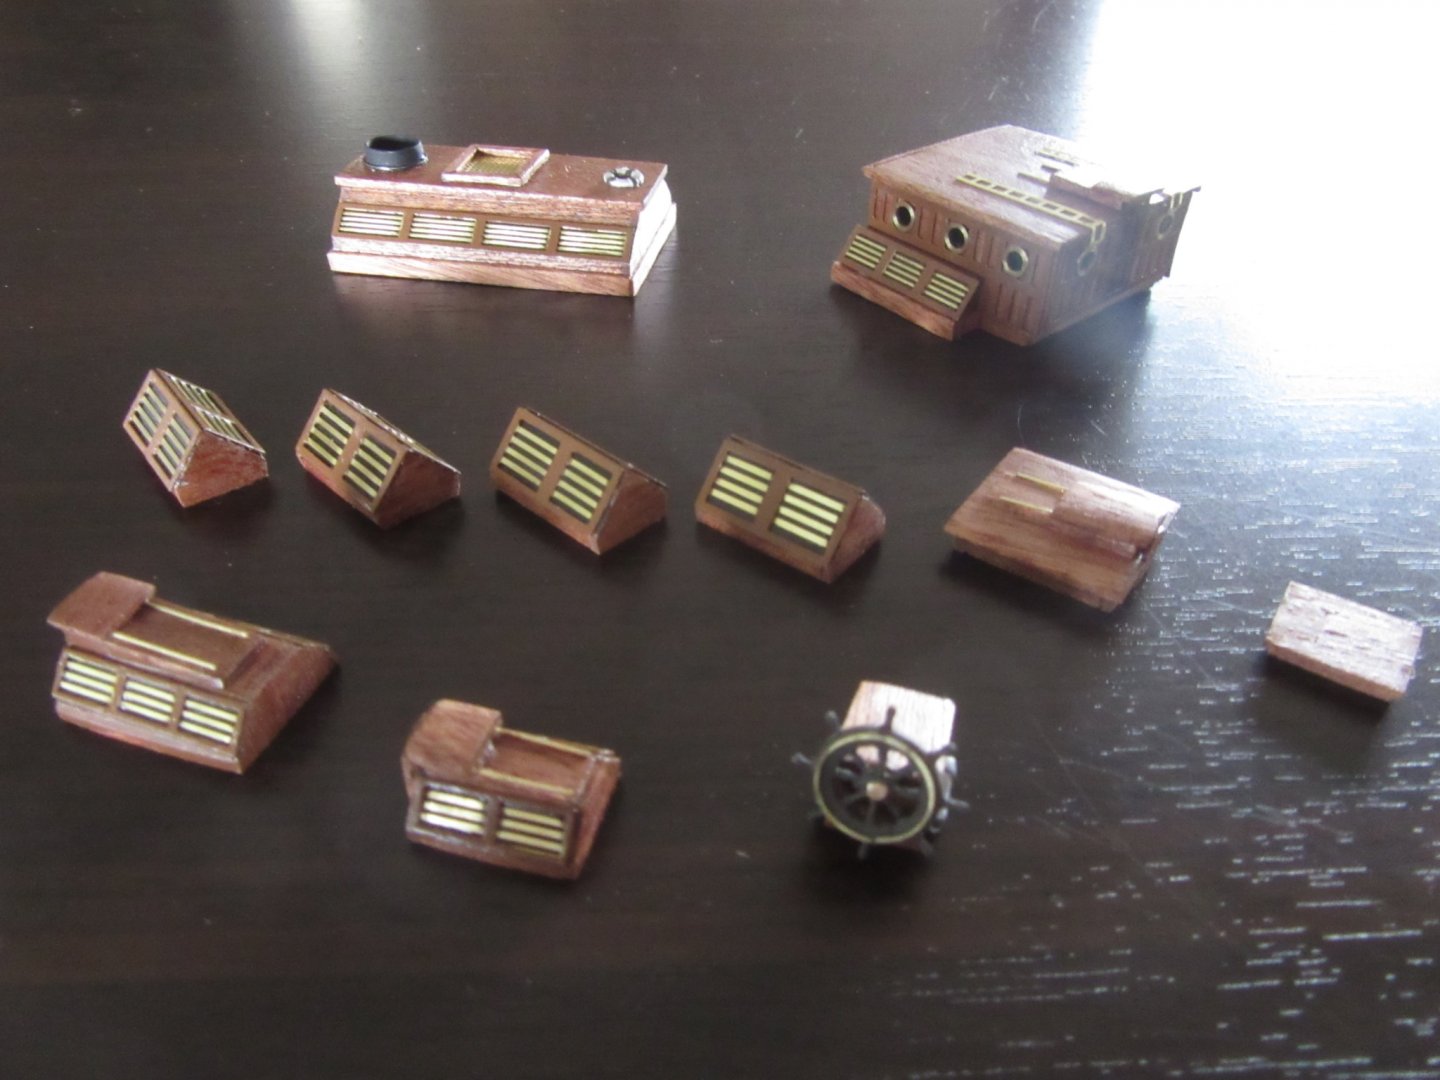
Except for the 2 optional square yards that get affixed to the foredeck area, all deck fittings, hardware and mahogany furniture have been completed and painted. The mahogany pieces, placed on deck for display, are to be set permanently further on down the build. The windlass is yet to be placed also.


-
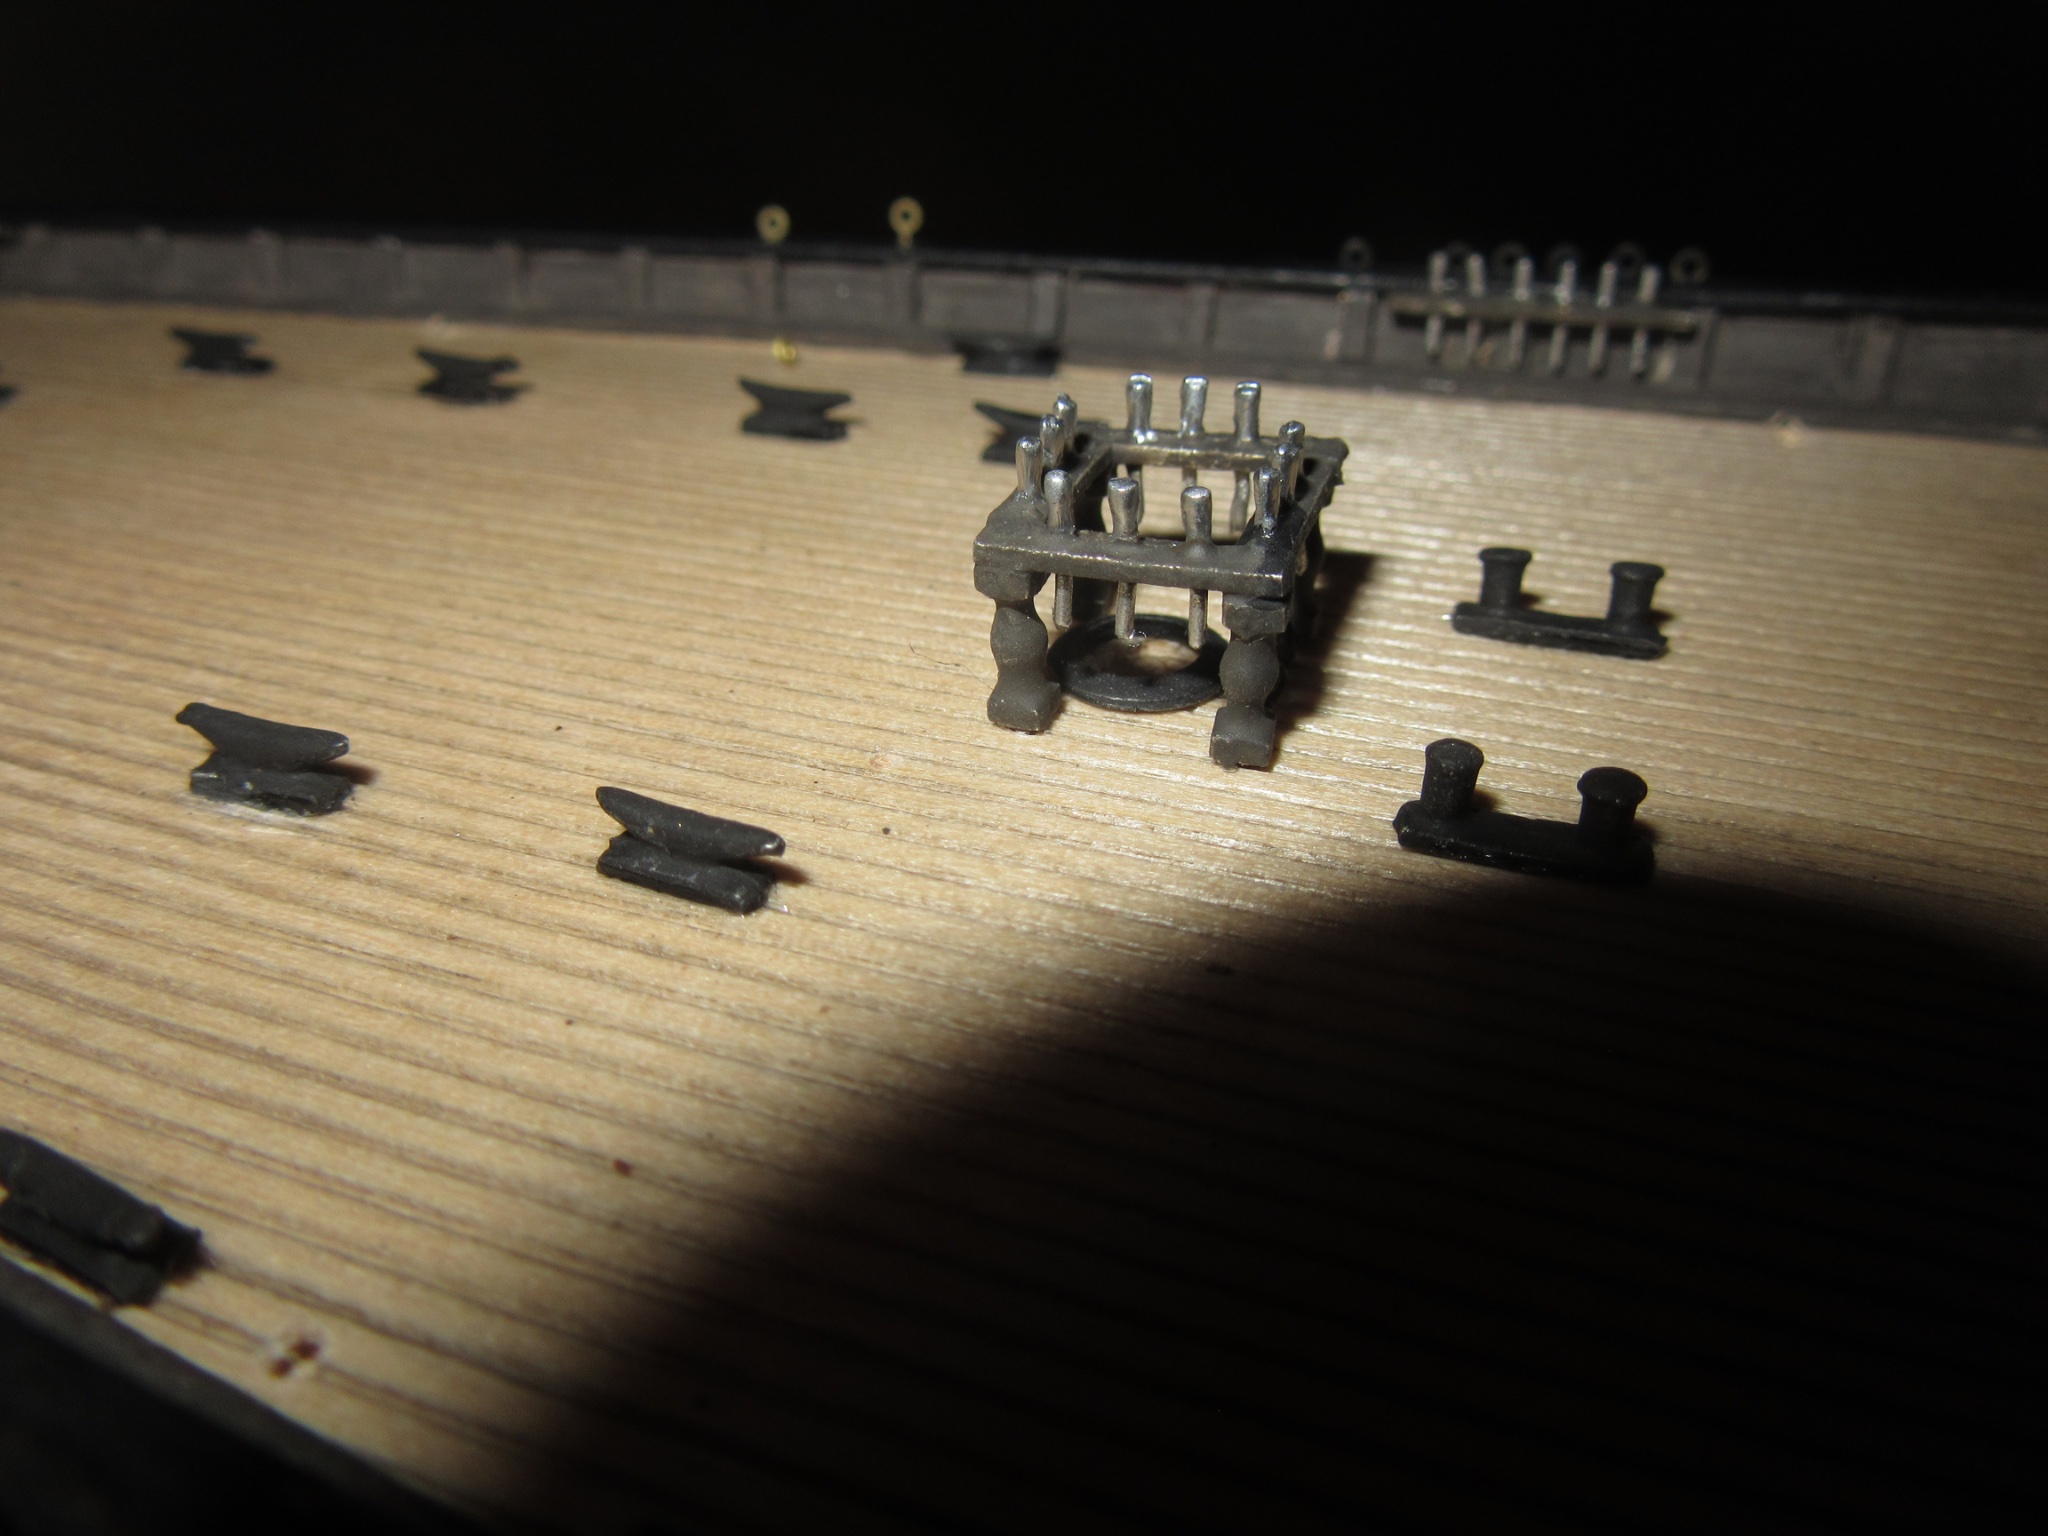
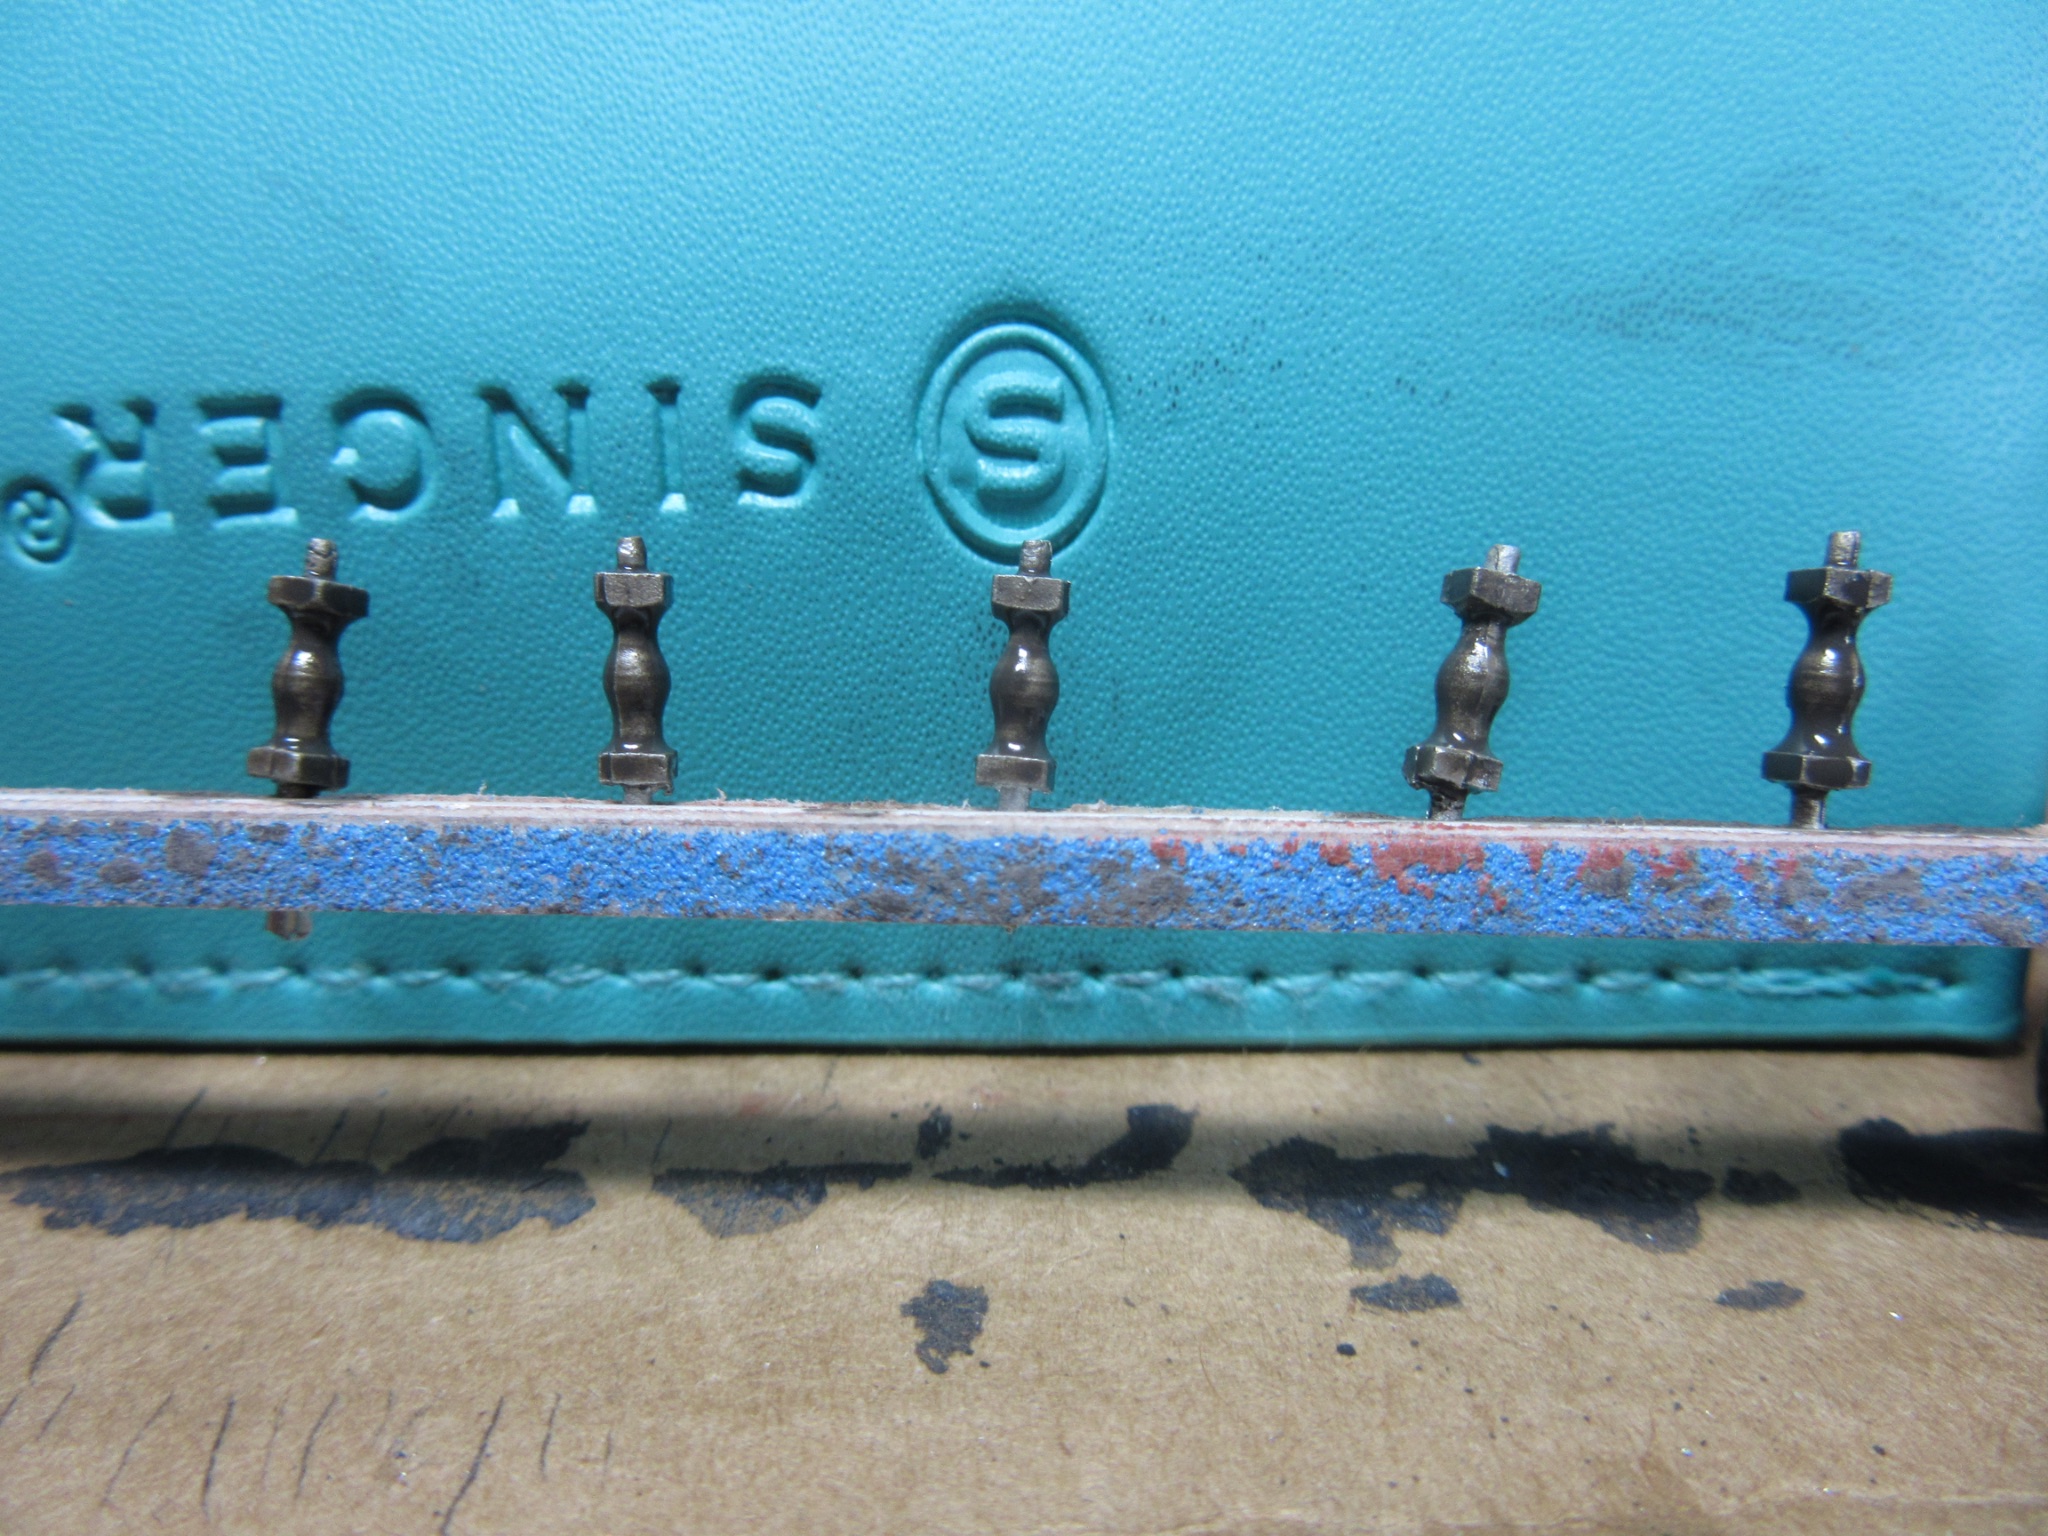
Approaching my second attempt at the fife rails, I have to comment on the quality of the Bluejacket kit britannia metal stanchions for rails. They have been so finely finished I dare not take a file to them. Following the kit instructions the pieces were brushed with thinner for cleaning then the first coat applied.

-
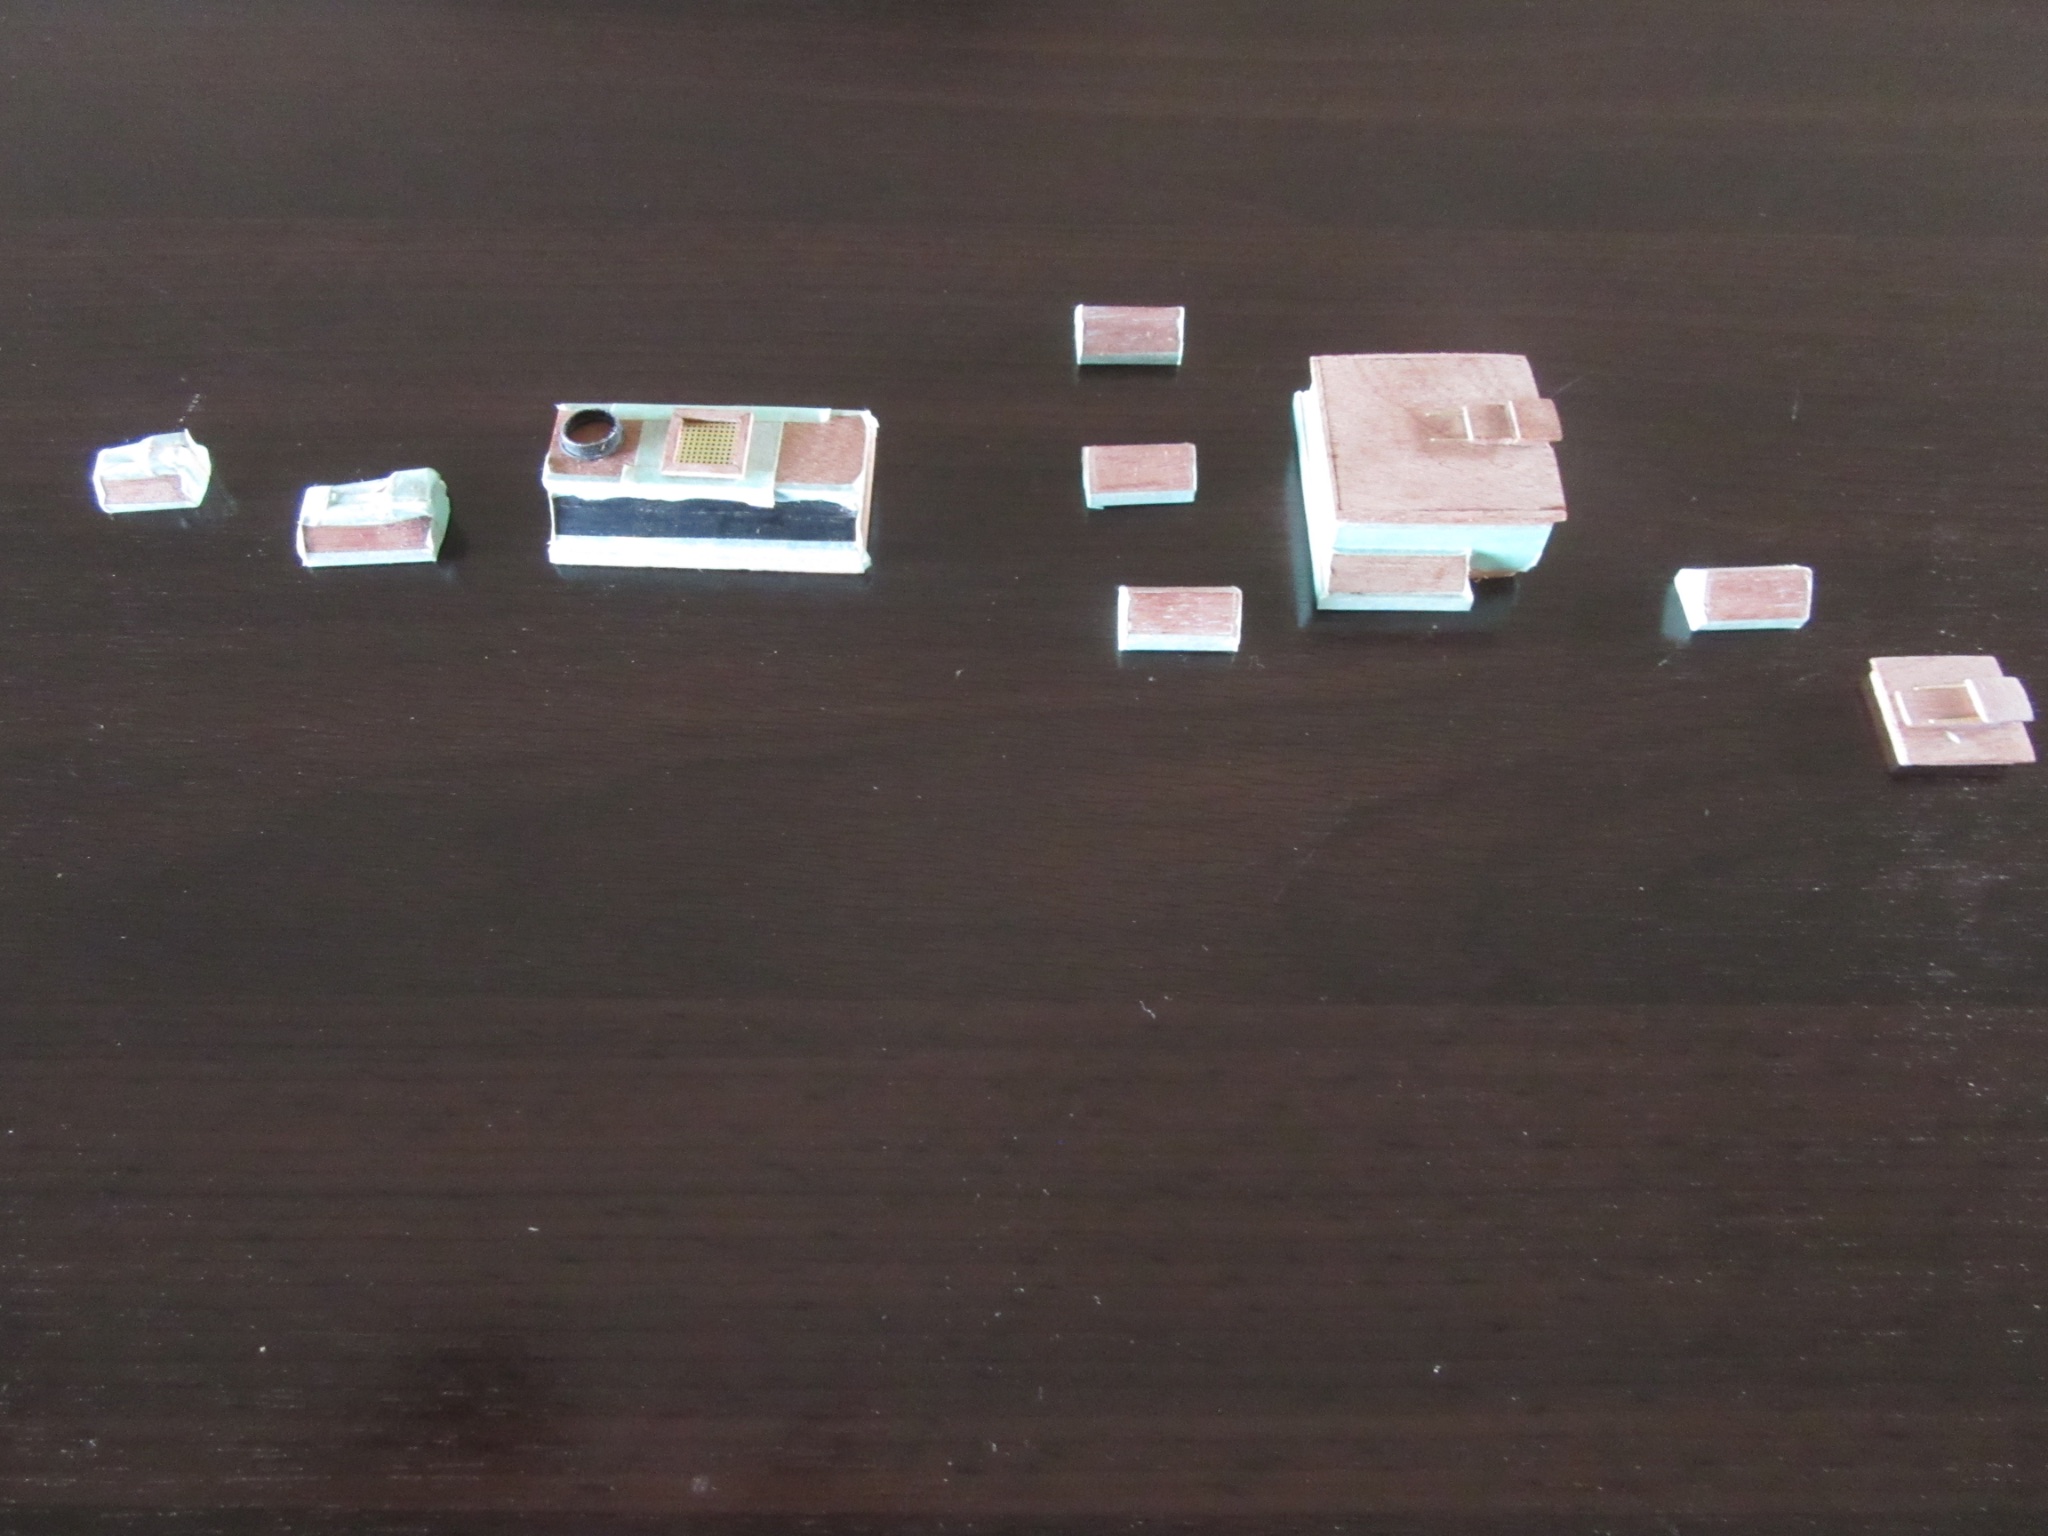
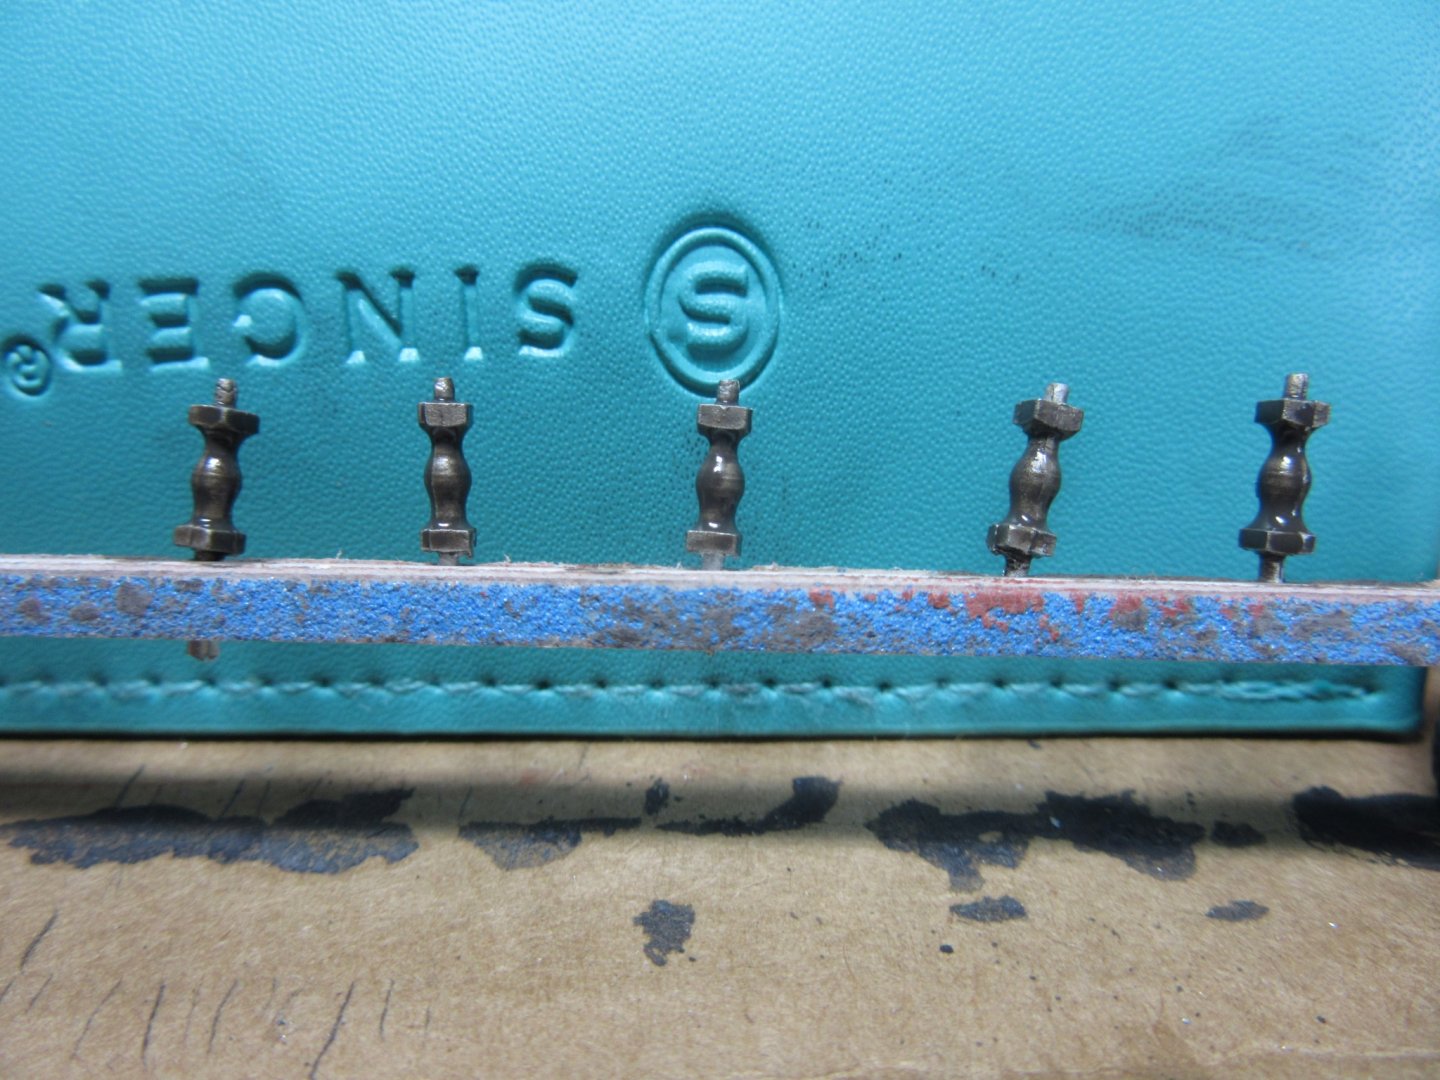
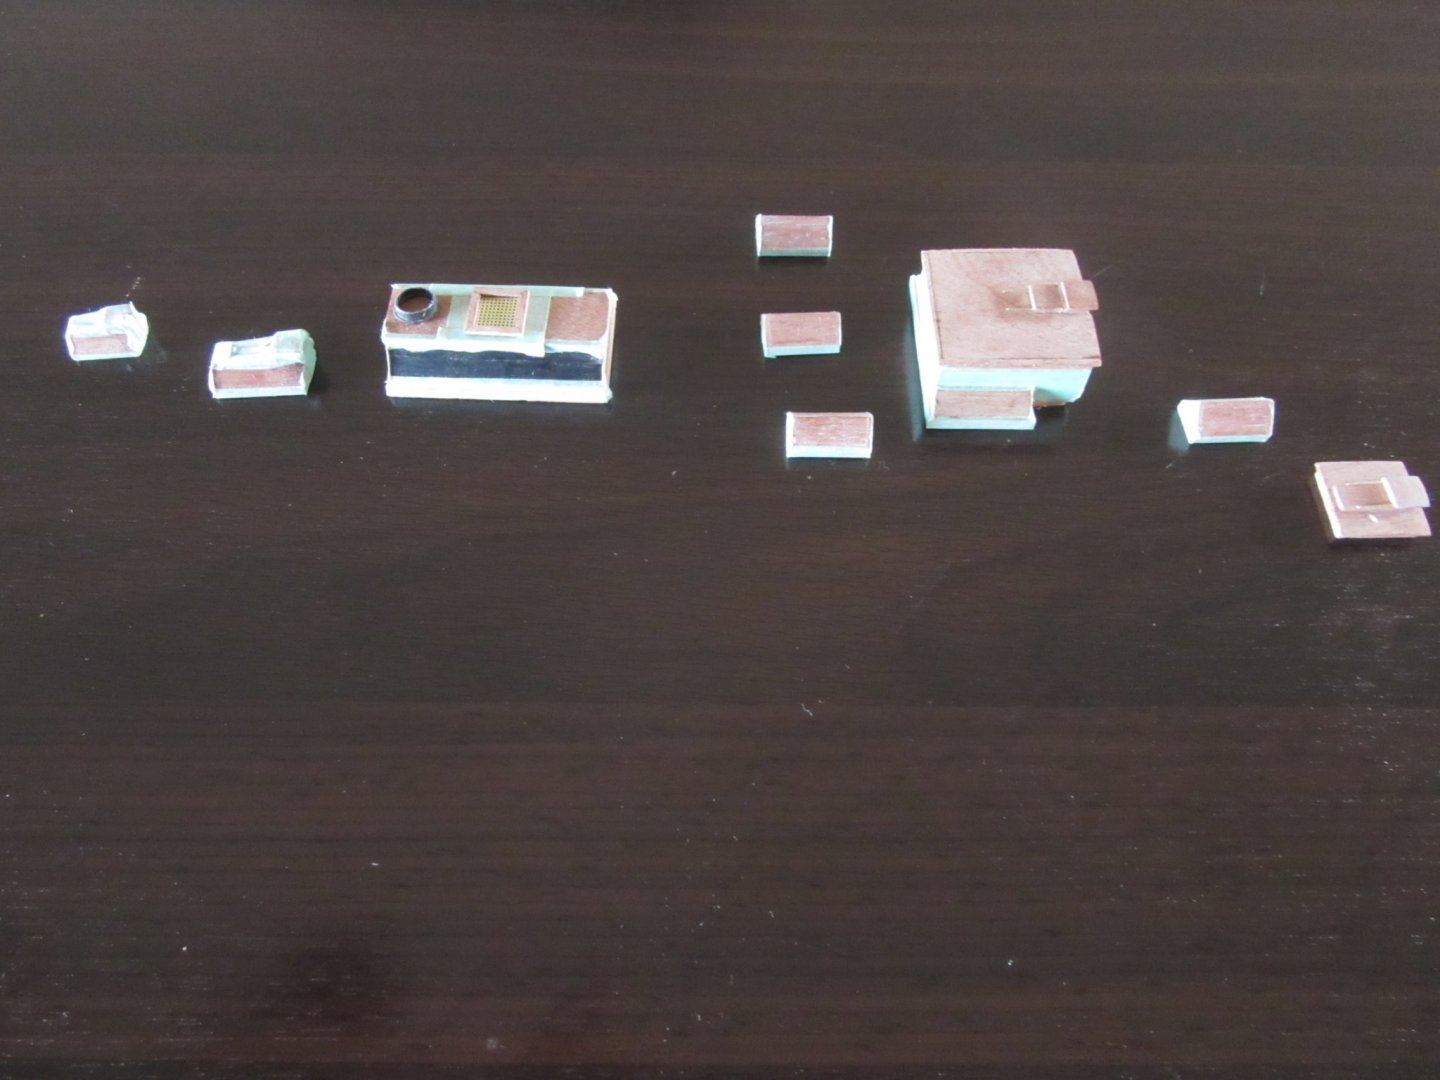
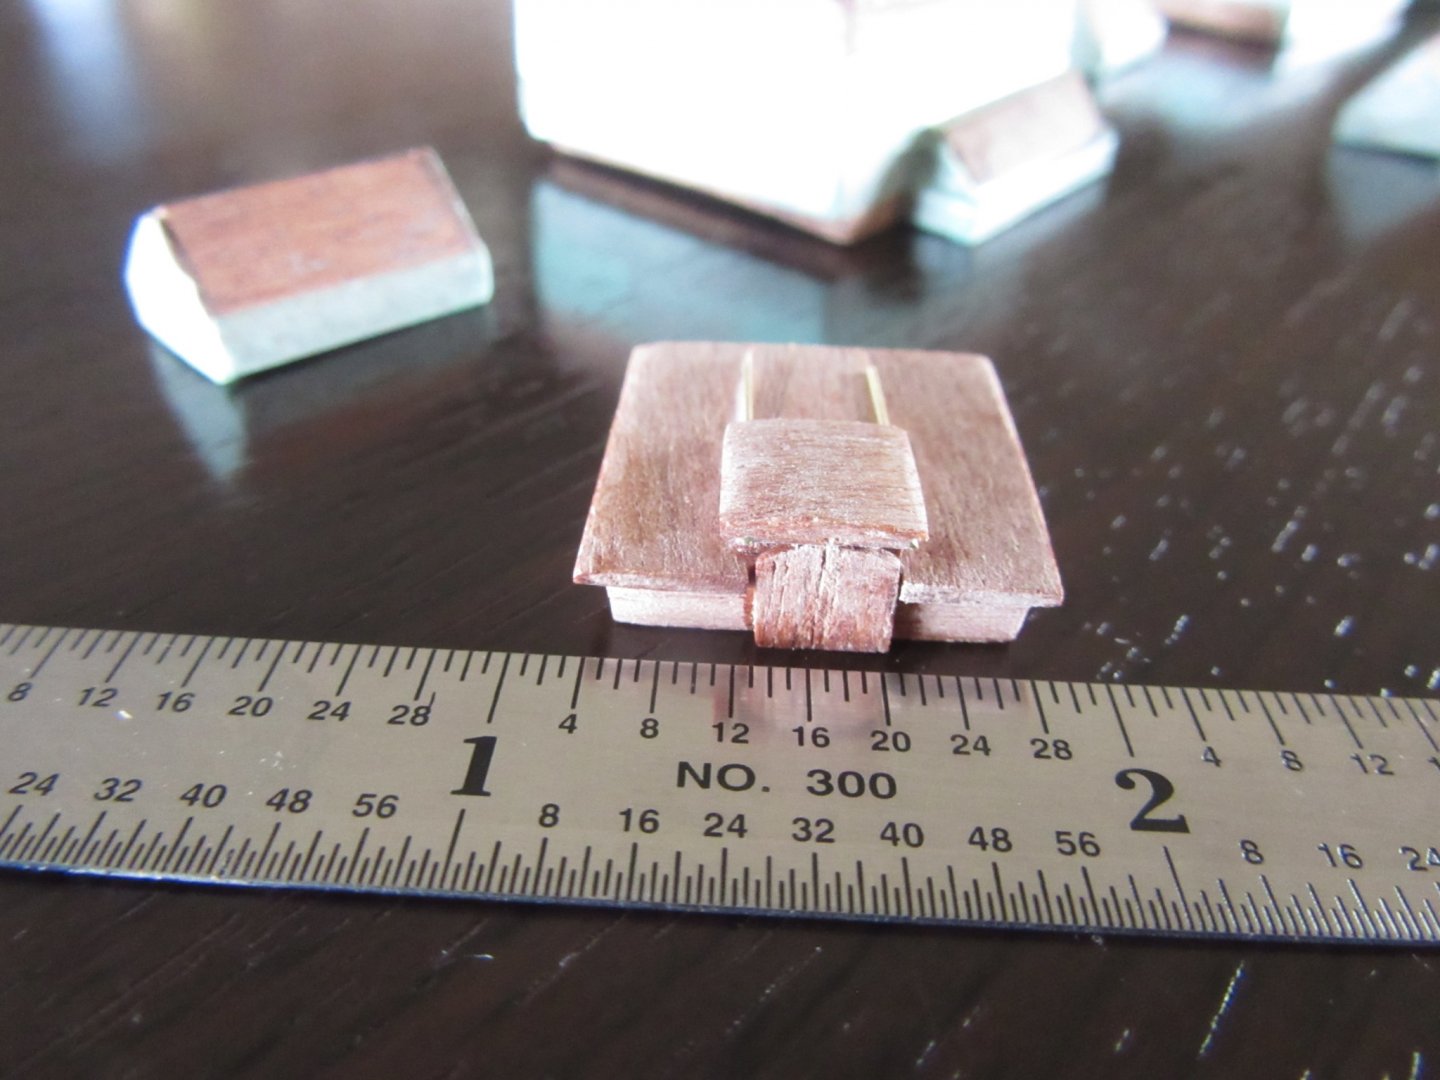
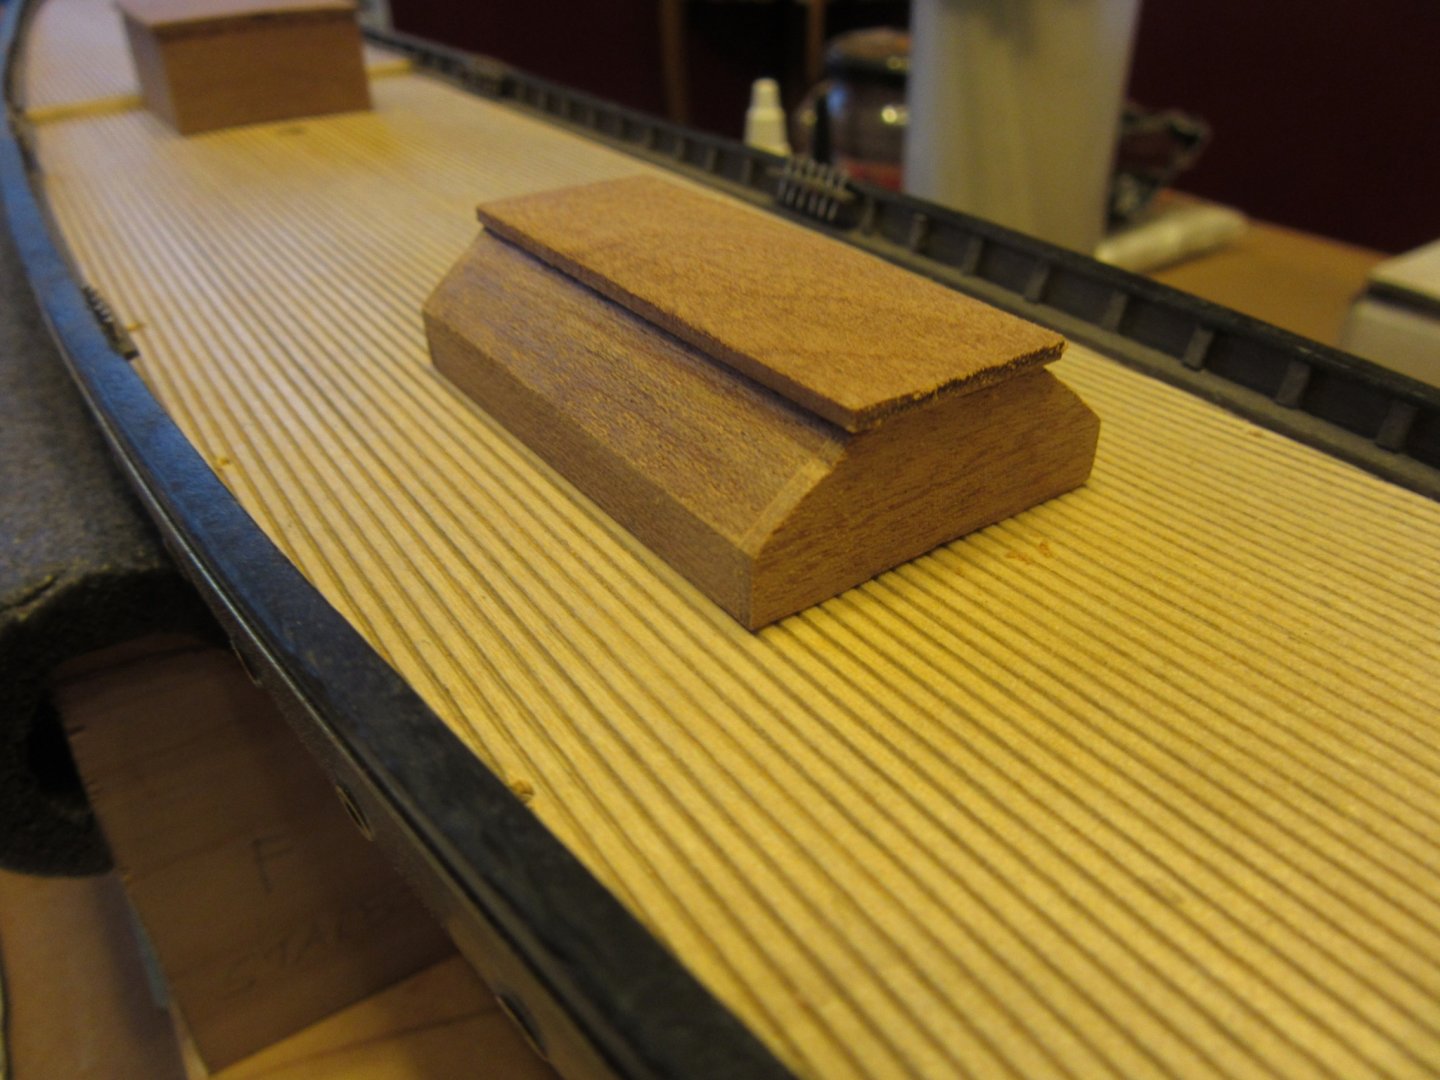
All wood deck furnishings (cabin, engine house, skylights, companionways and hatch) are completed an set aside until installation. This portion of the build has been done in advance of the deck fittings (cleats, bits, eyebolts and fife rails) while waiting for paint and metal parts. The metal parts were all accounted for with the kit but in attempting the fife rail assembly there were some failures that required parts replenishment.
-
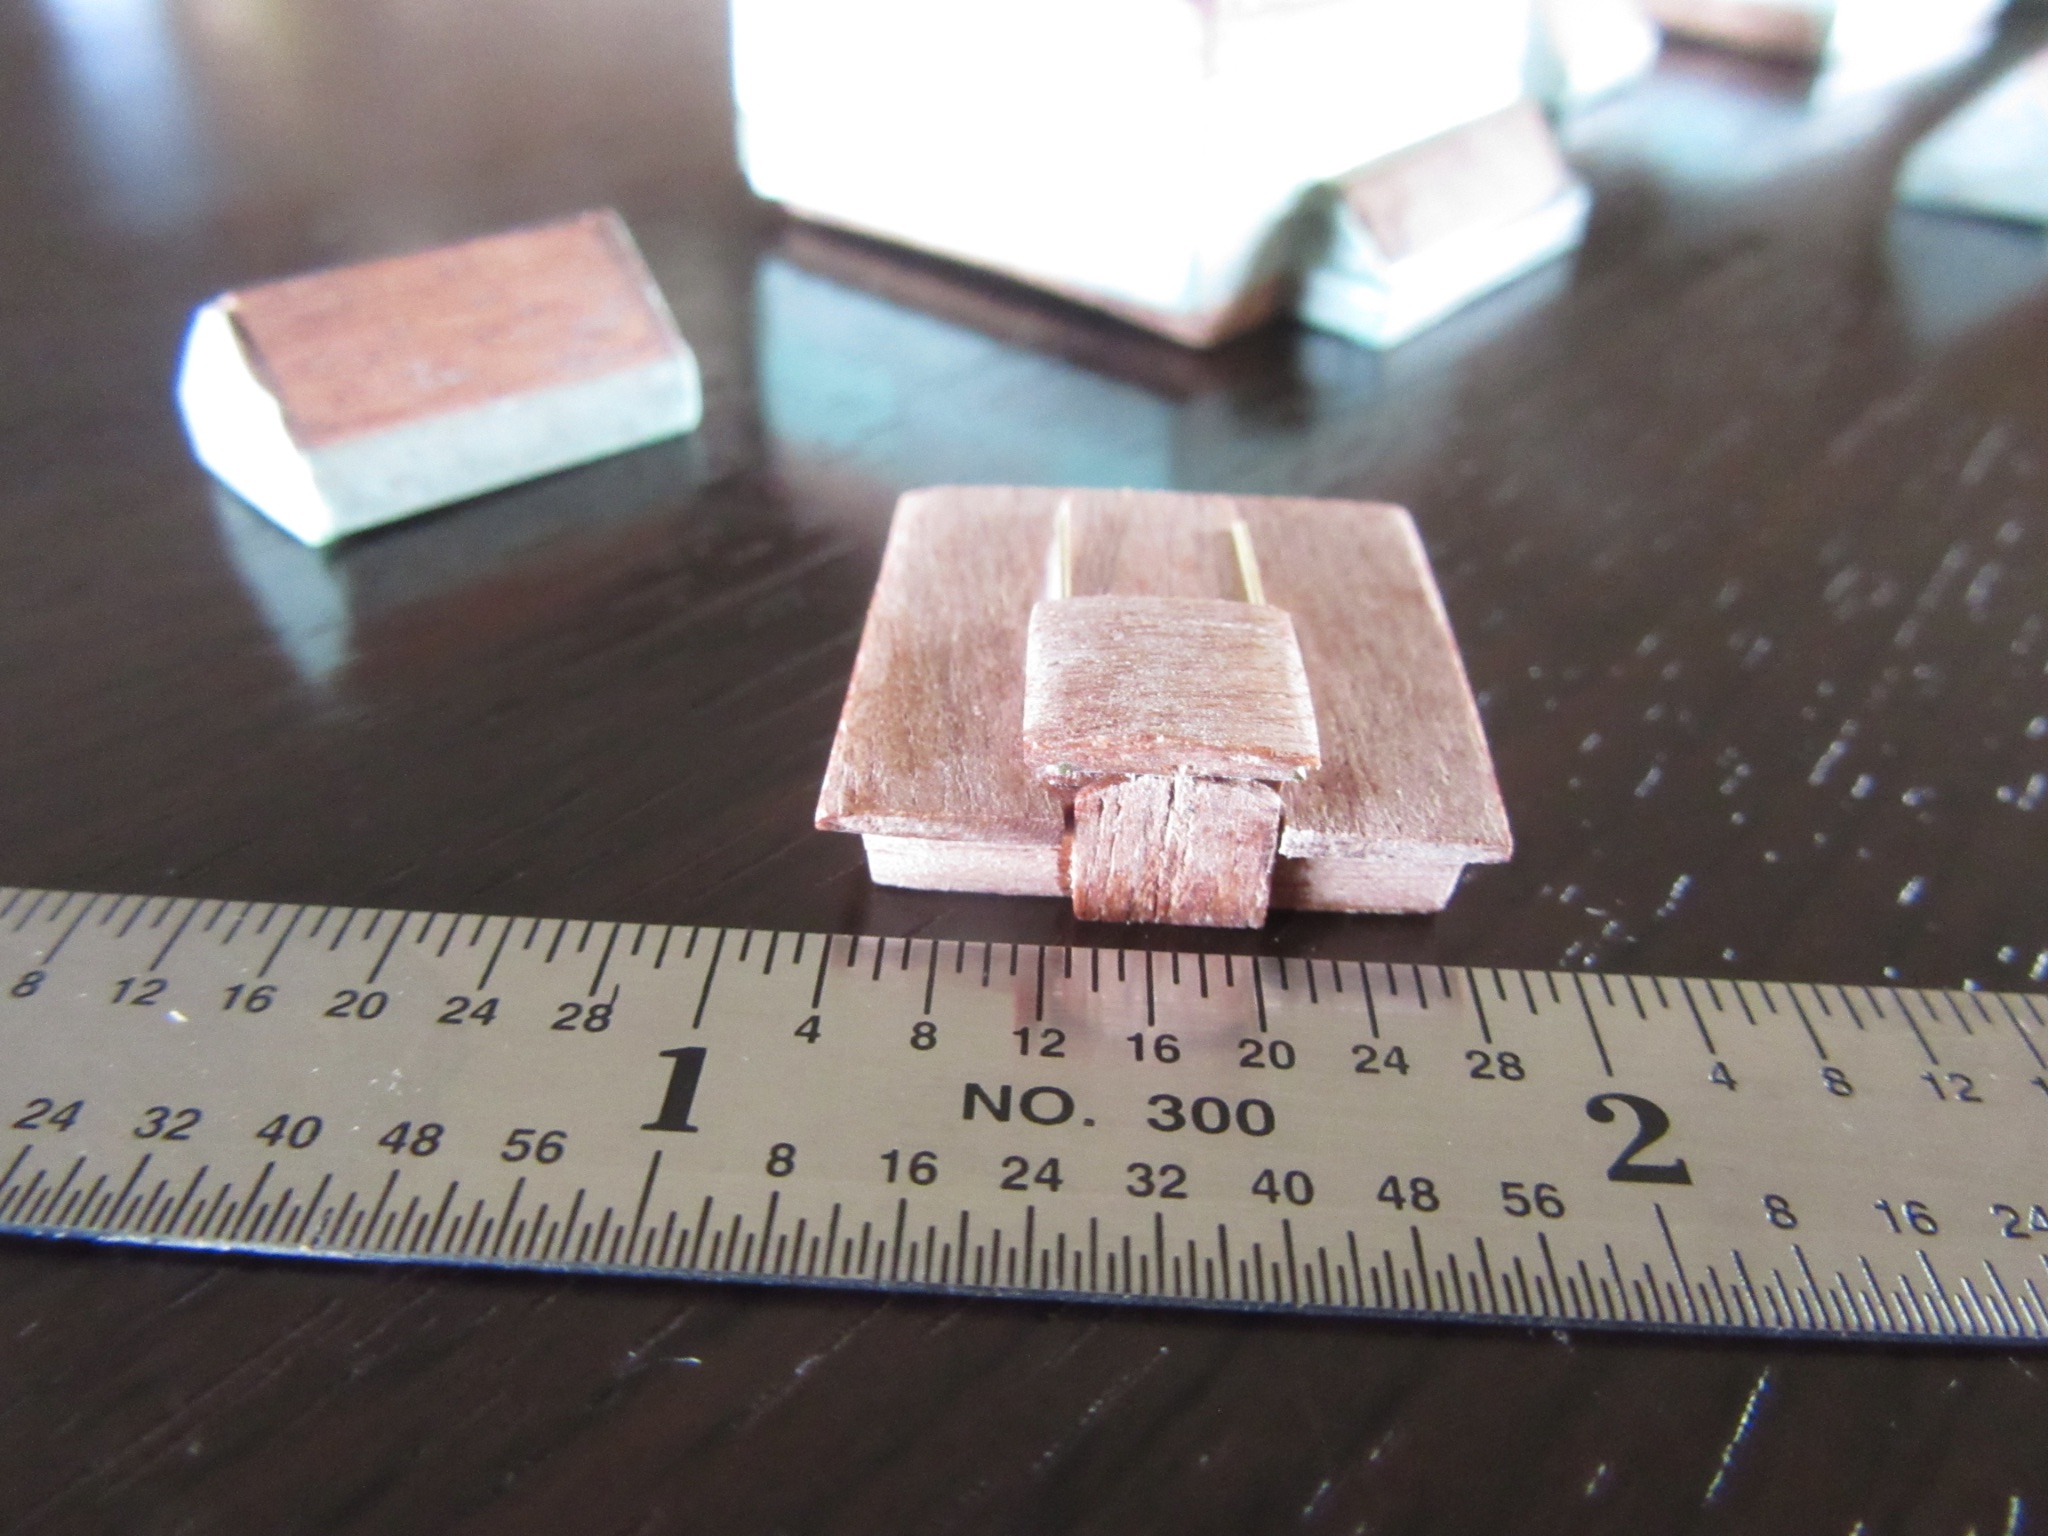
Progress has slowed over the holidays but Was able to finish the woodwork on companionways and skylights. The macro shot on the quarterdeck companionway showed me what my eyes couldn't. Steel wool should help and the clear satin finish should brighten things up.
-
Next step is cutting and sanding the deck furniture. The hull has been blown clean of the mahogany sawdust on it and temporarily set aside as work on the deck cabin, engine house, companionways and skylights starts taking shape.
-
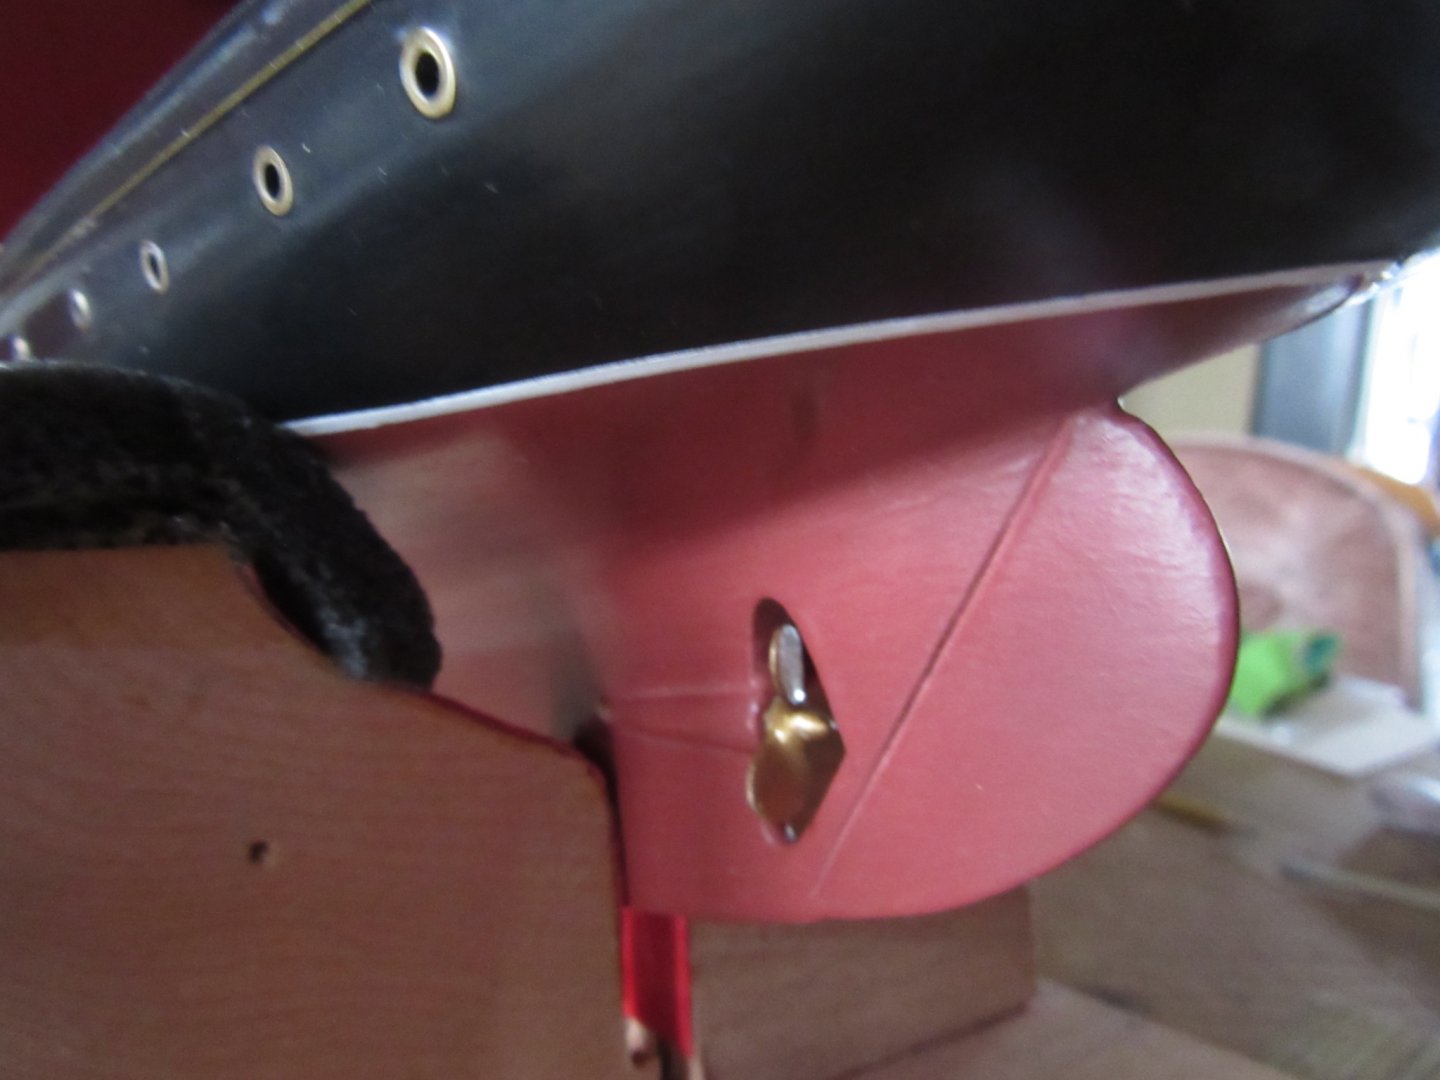
I repainted the glue damage, attached the prop and have now moved topside installing the first deck fittings (bow pins and pin rails).

-
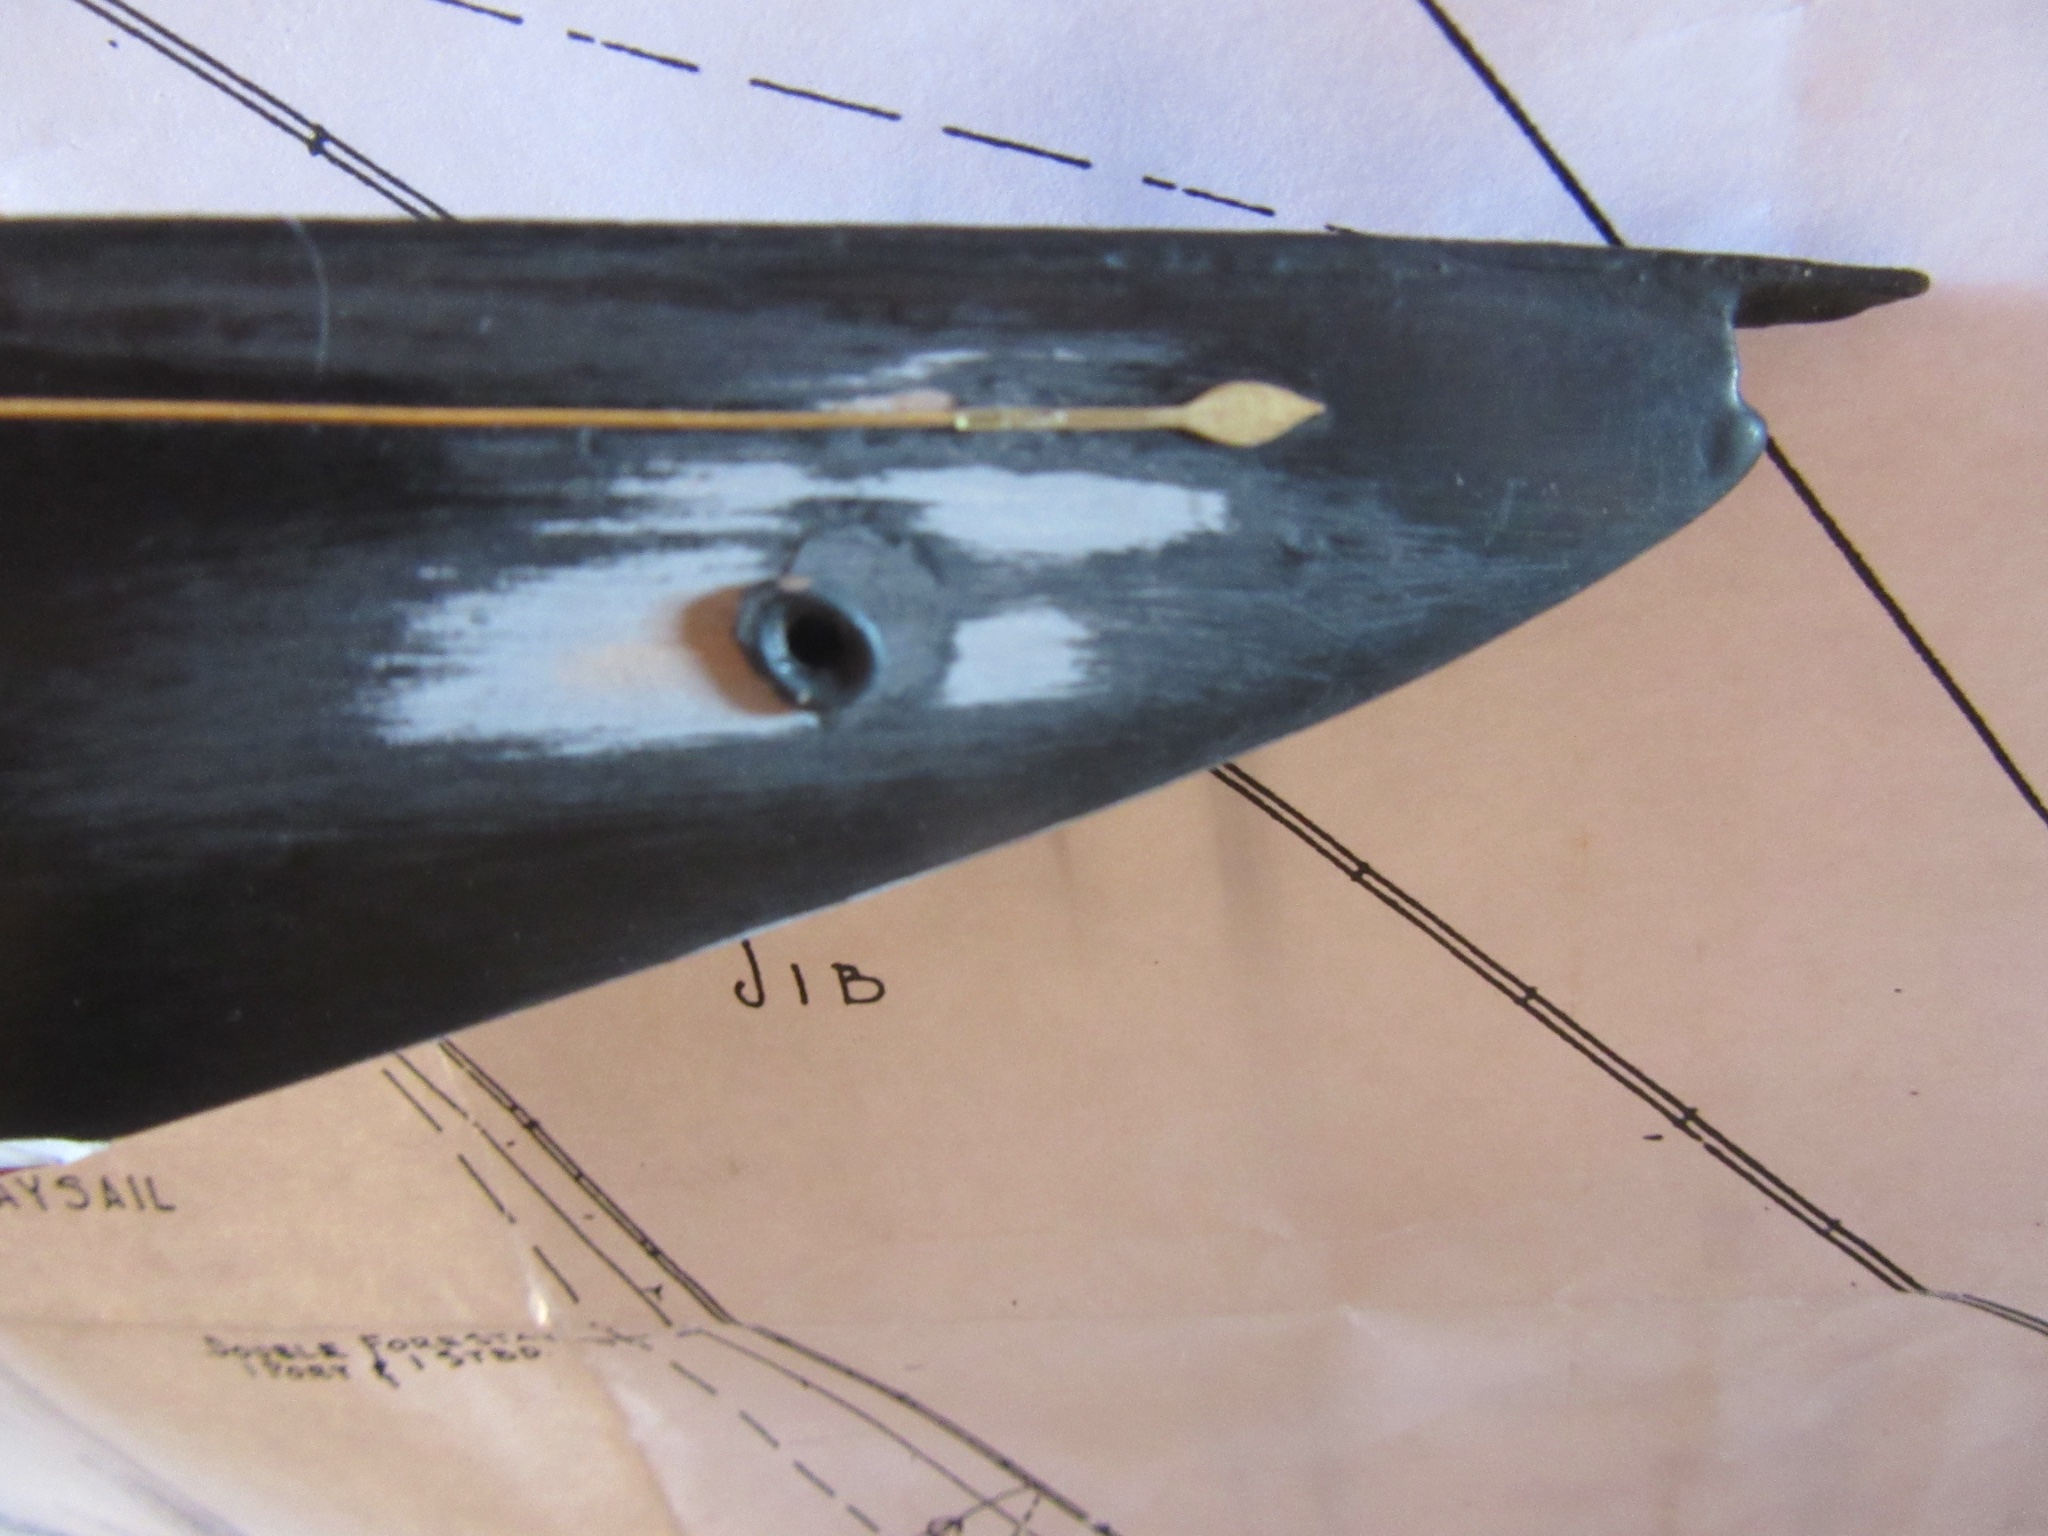
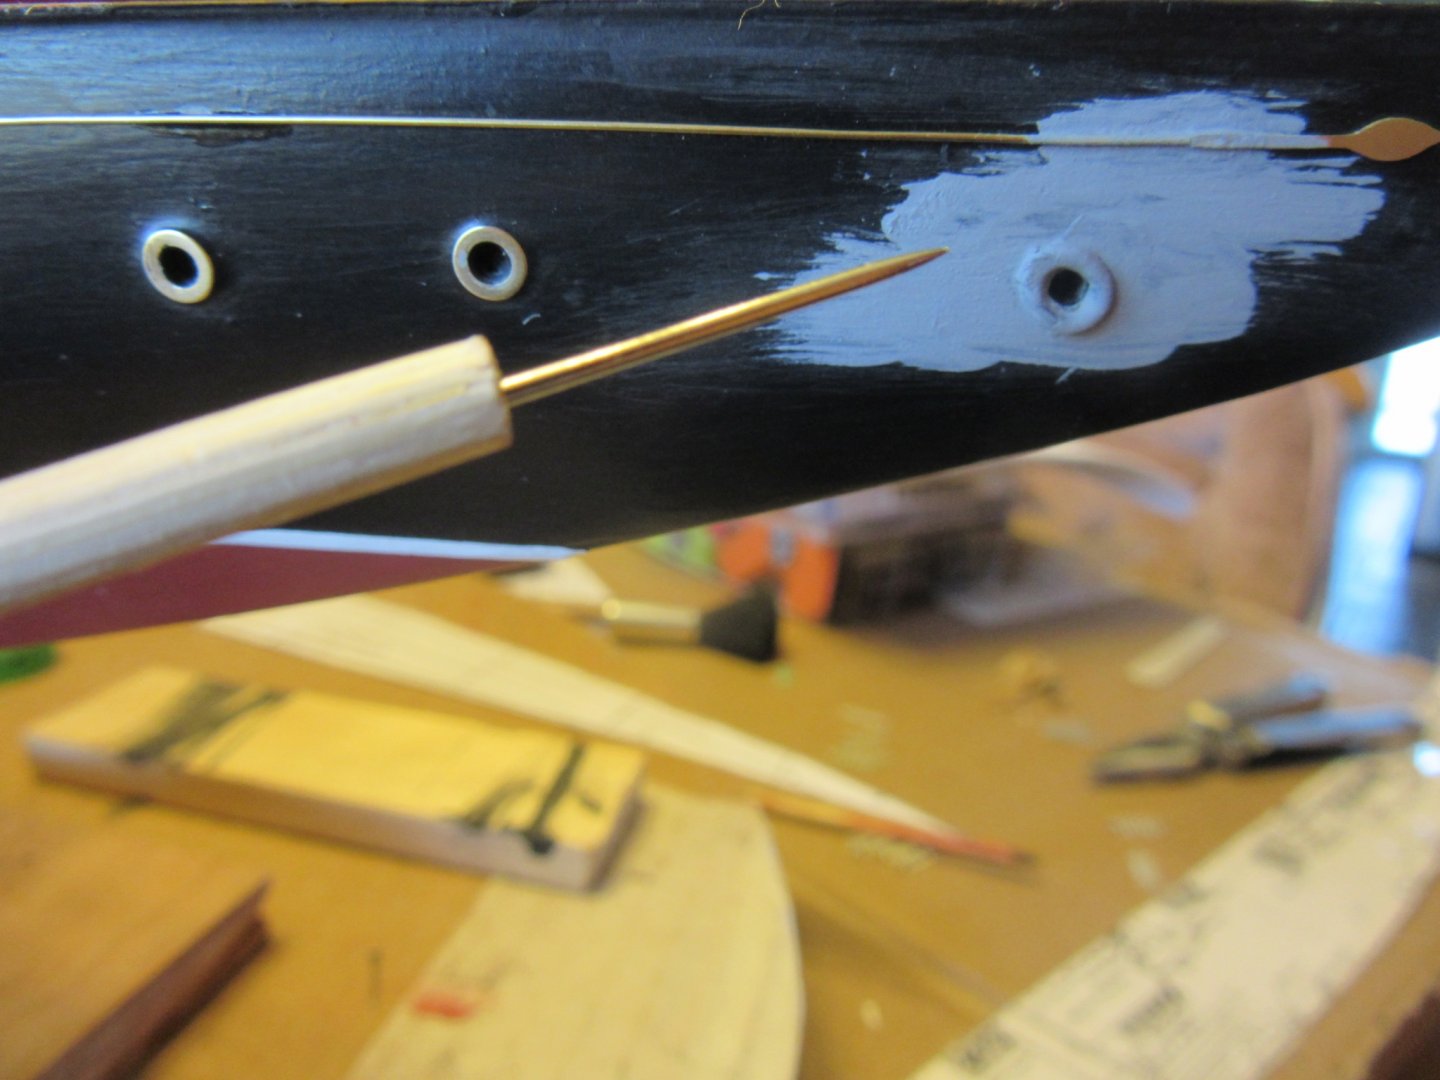
Thank you Nic for the link. Although I'm putting a small quantity of CA glue into an old contact lens case lid, I've been applying it with the end of a toothpick which I now see as the problem. I'll be rigging a needle in a small dow to use as an applicator from here on forward.
-
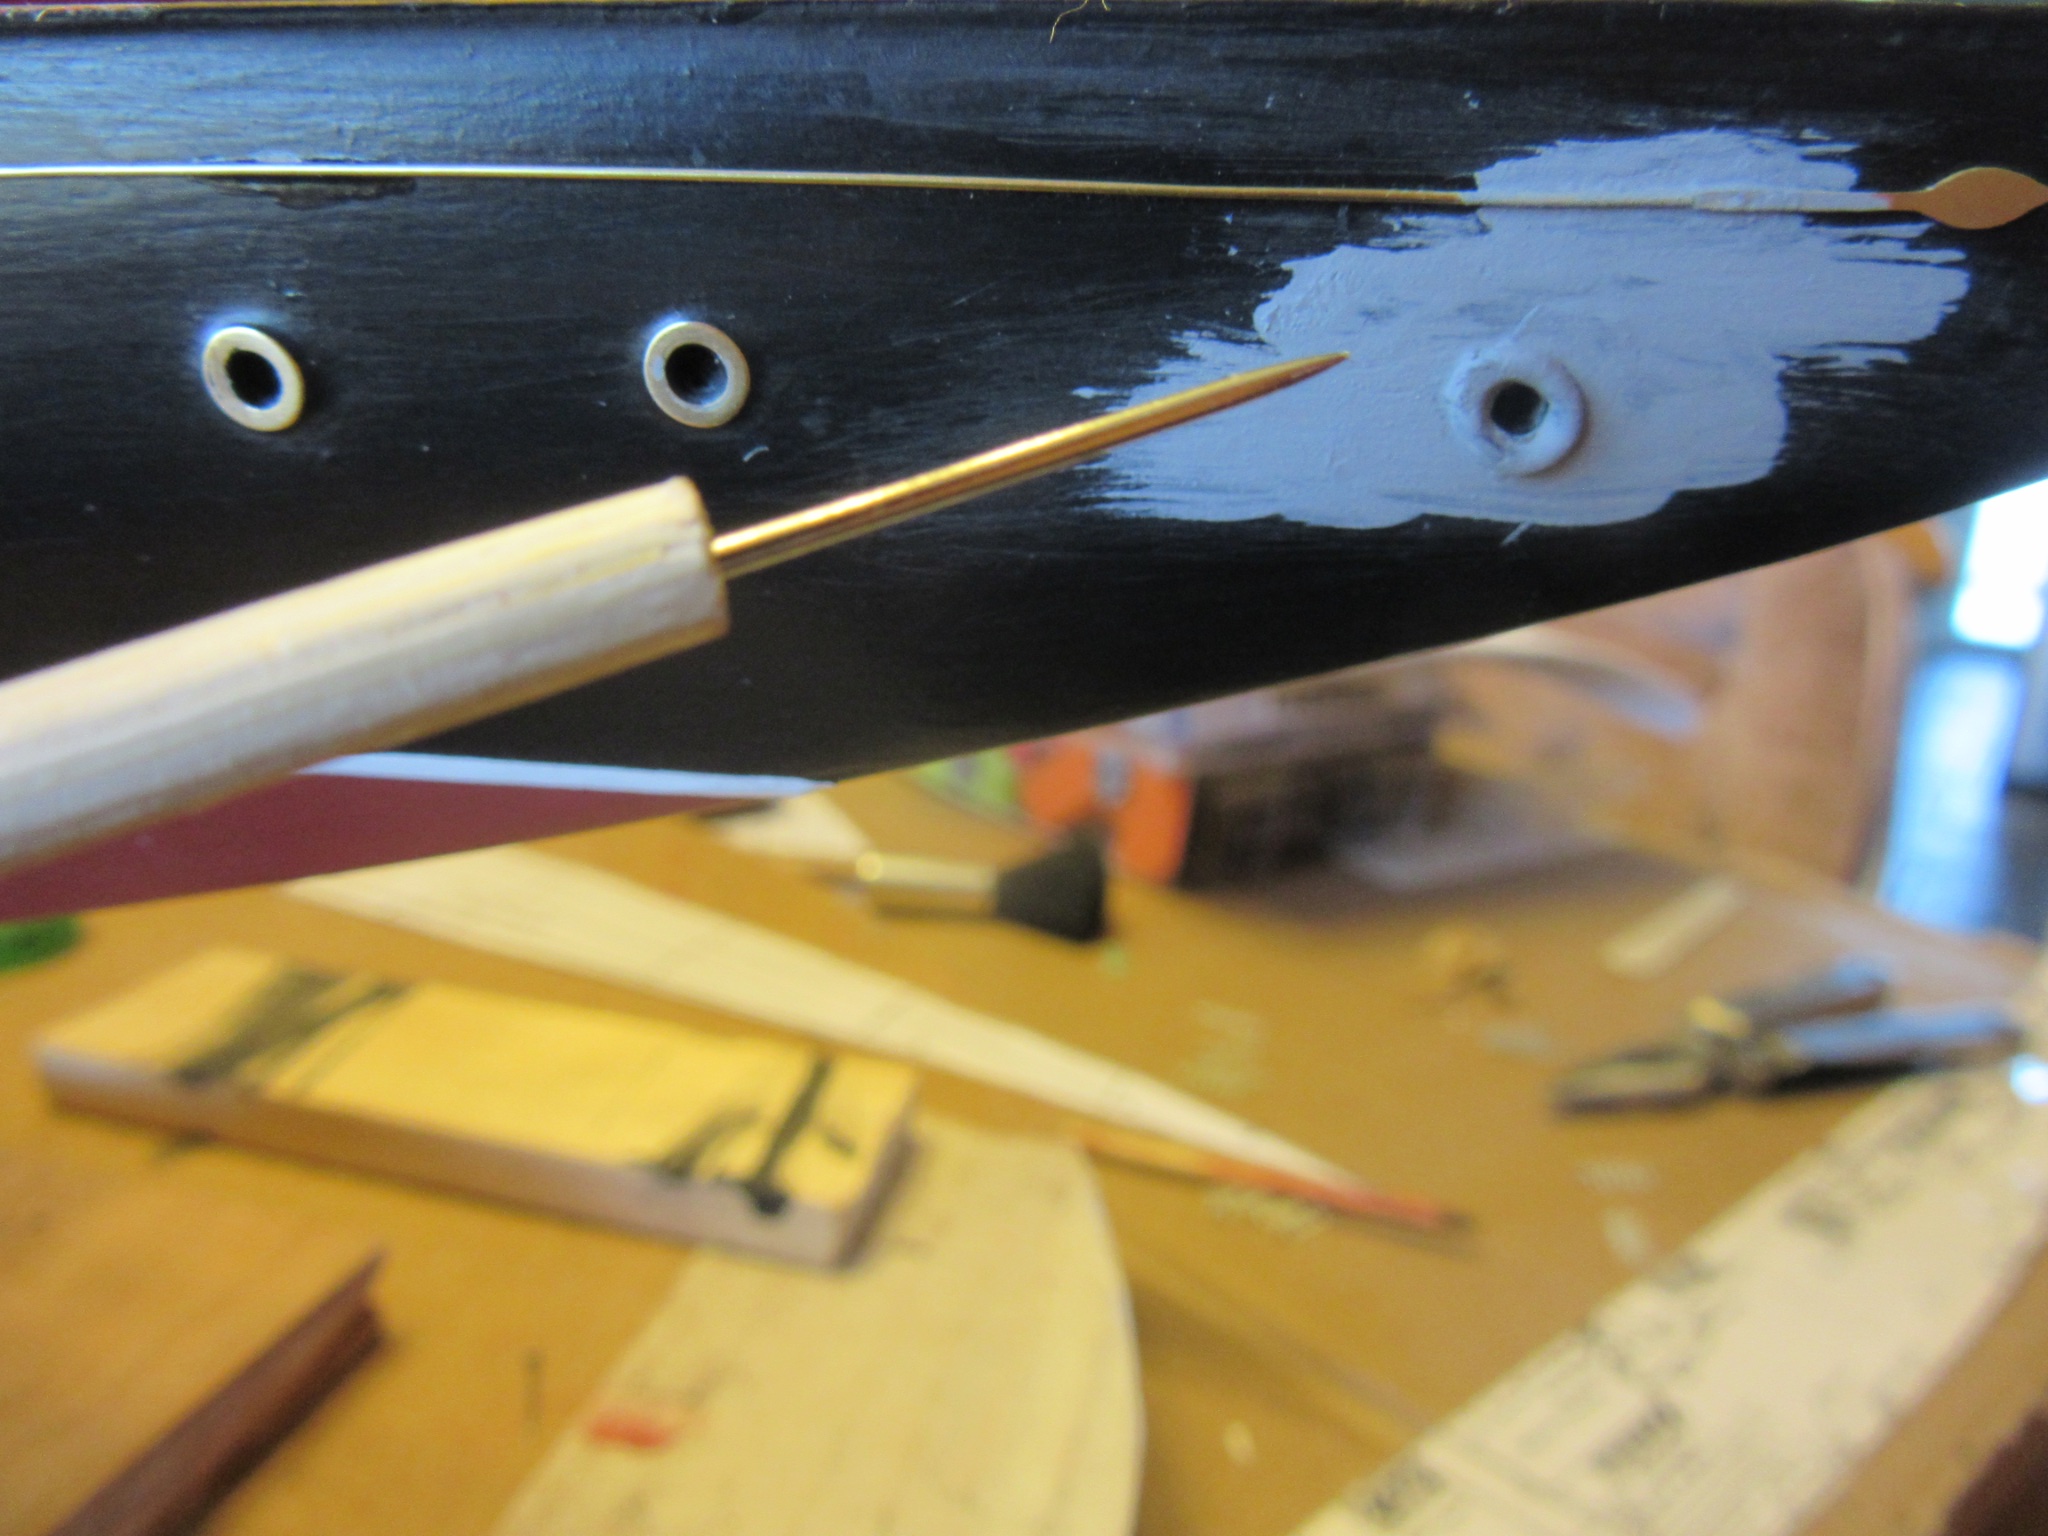
The CA glue is so unforgiving. In attempting to attach the scroll work per instructions to the bow I ended up with a chocolate mess. Repainting the entire hull is not an option having come this far. There is plenty of the flat black original paint remaining in the pot to redo the damage. As always comments and tips are welcomed.

-
Thank you Bob. The hull painting in your Pen Duick build log inspired me as to what can be achieved. In fact I picked up a set of sanding blocks used in your log that gave the smooth contours to Atlantic's hull needed for stepping up on the painting process.
-
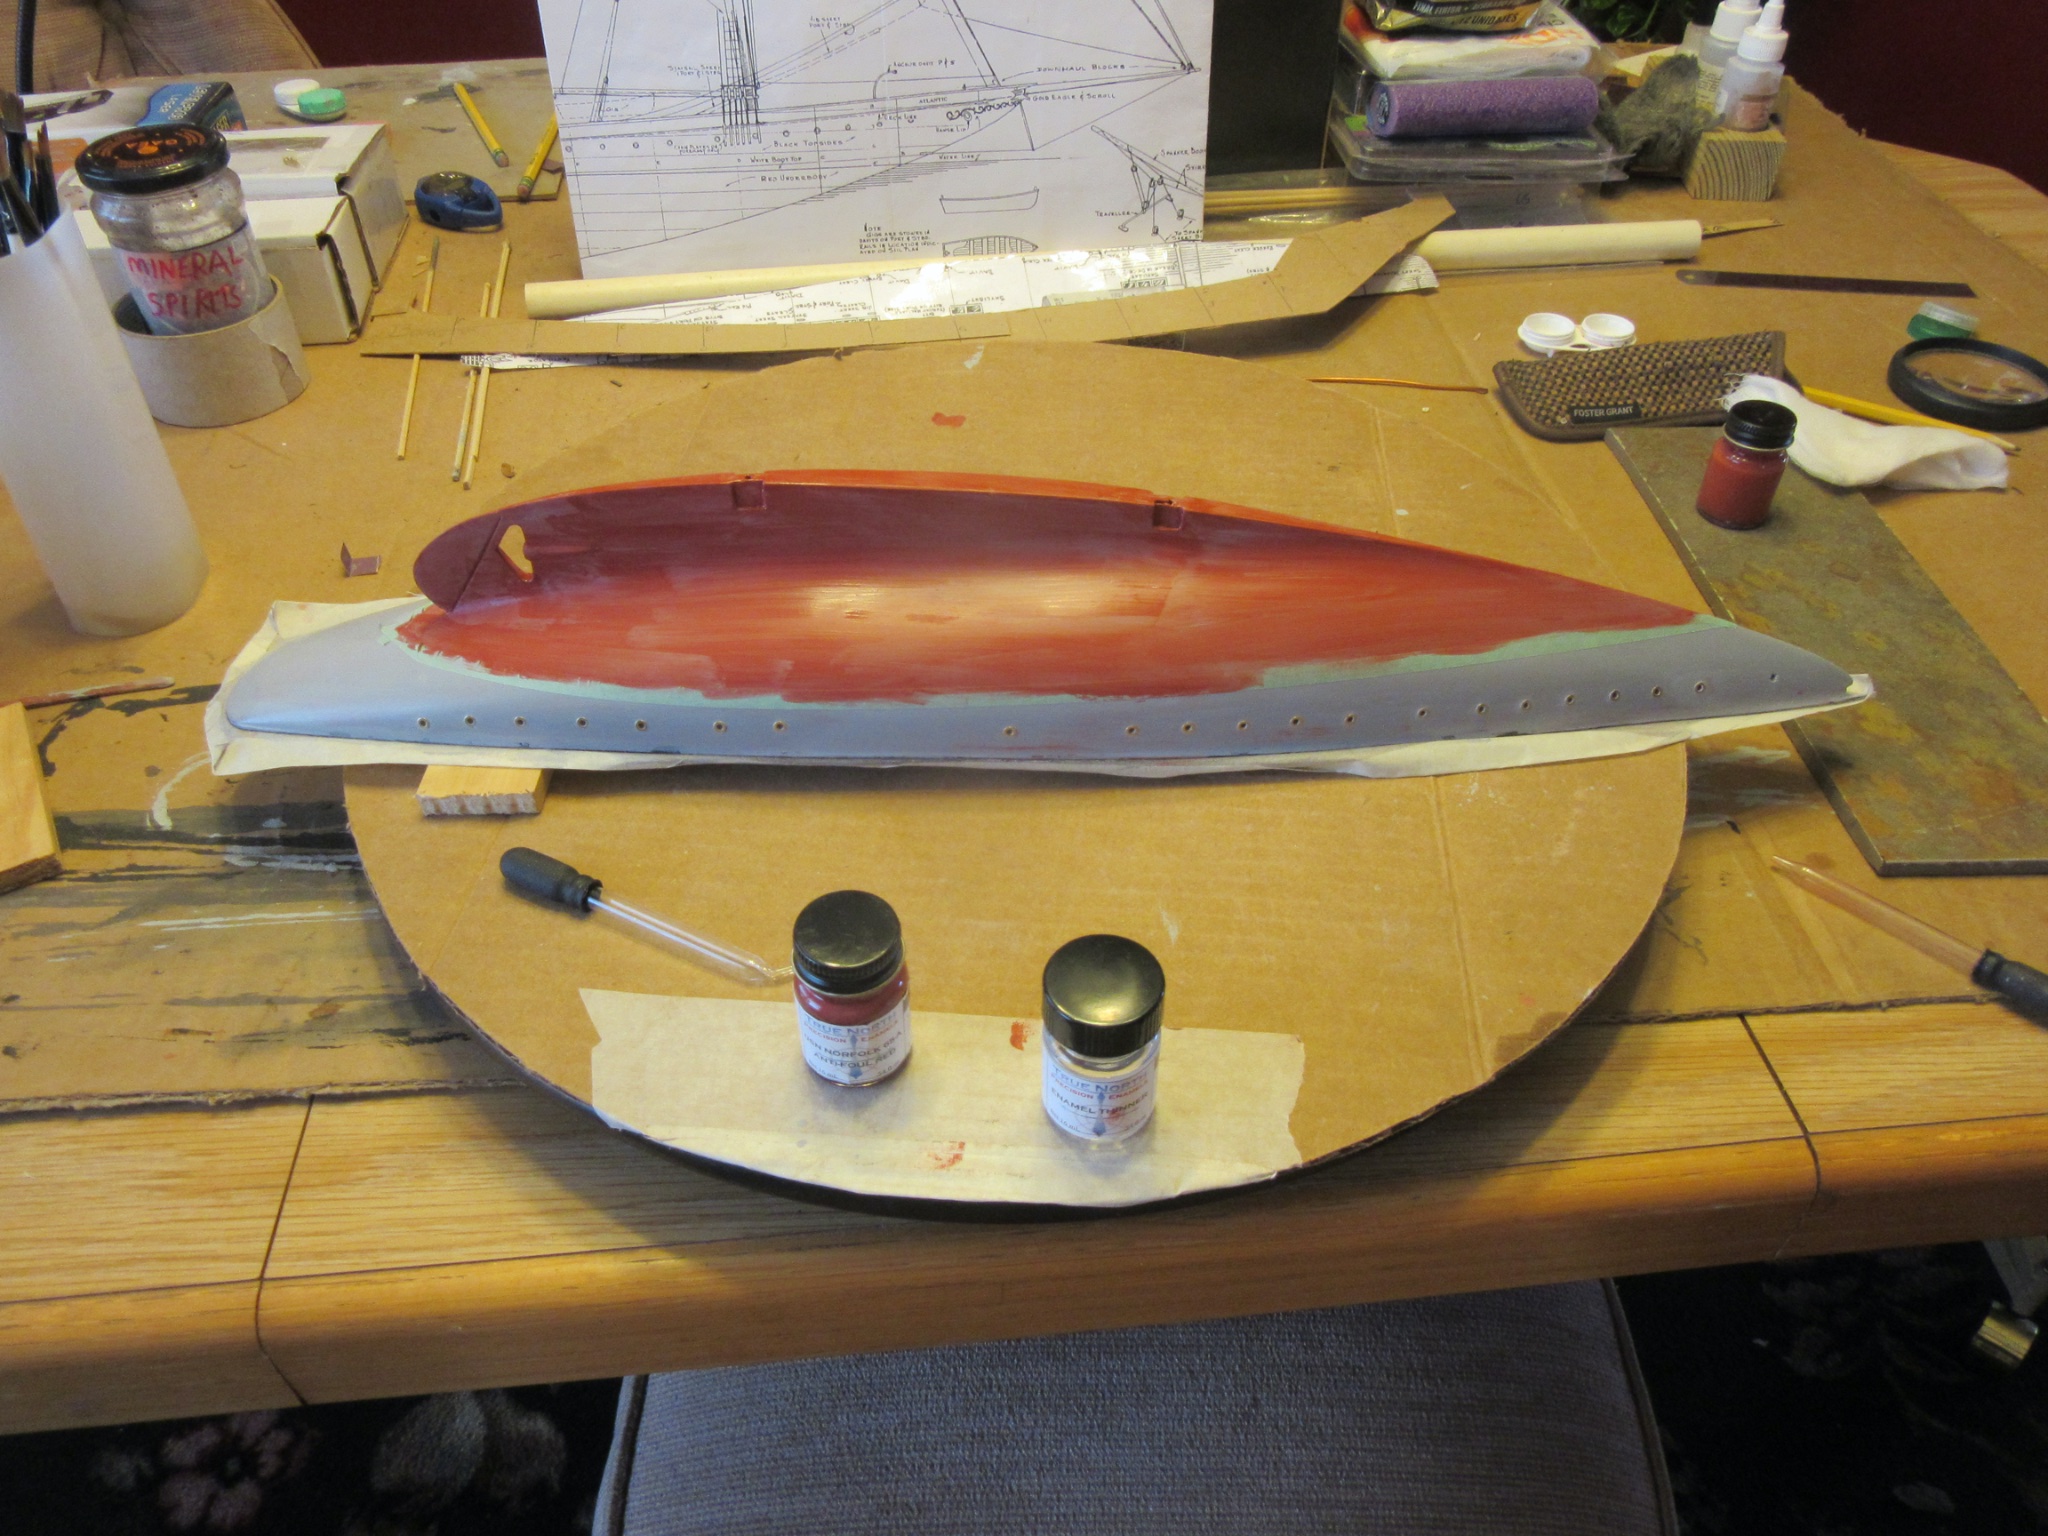
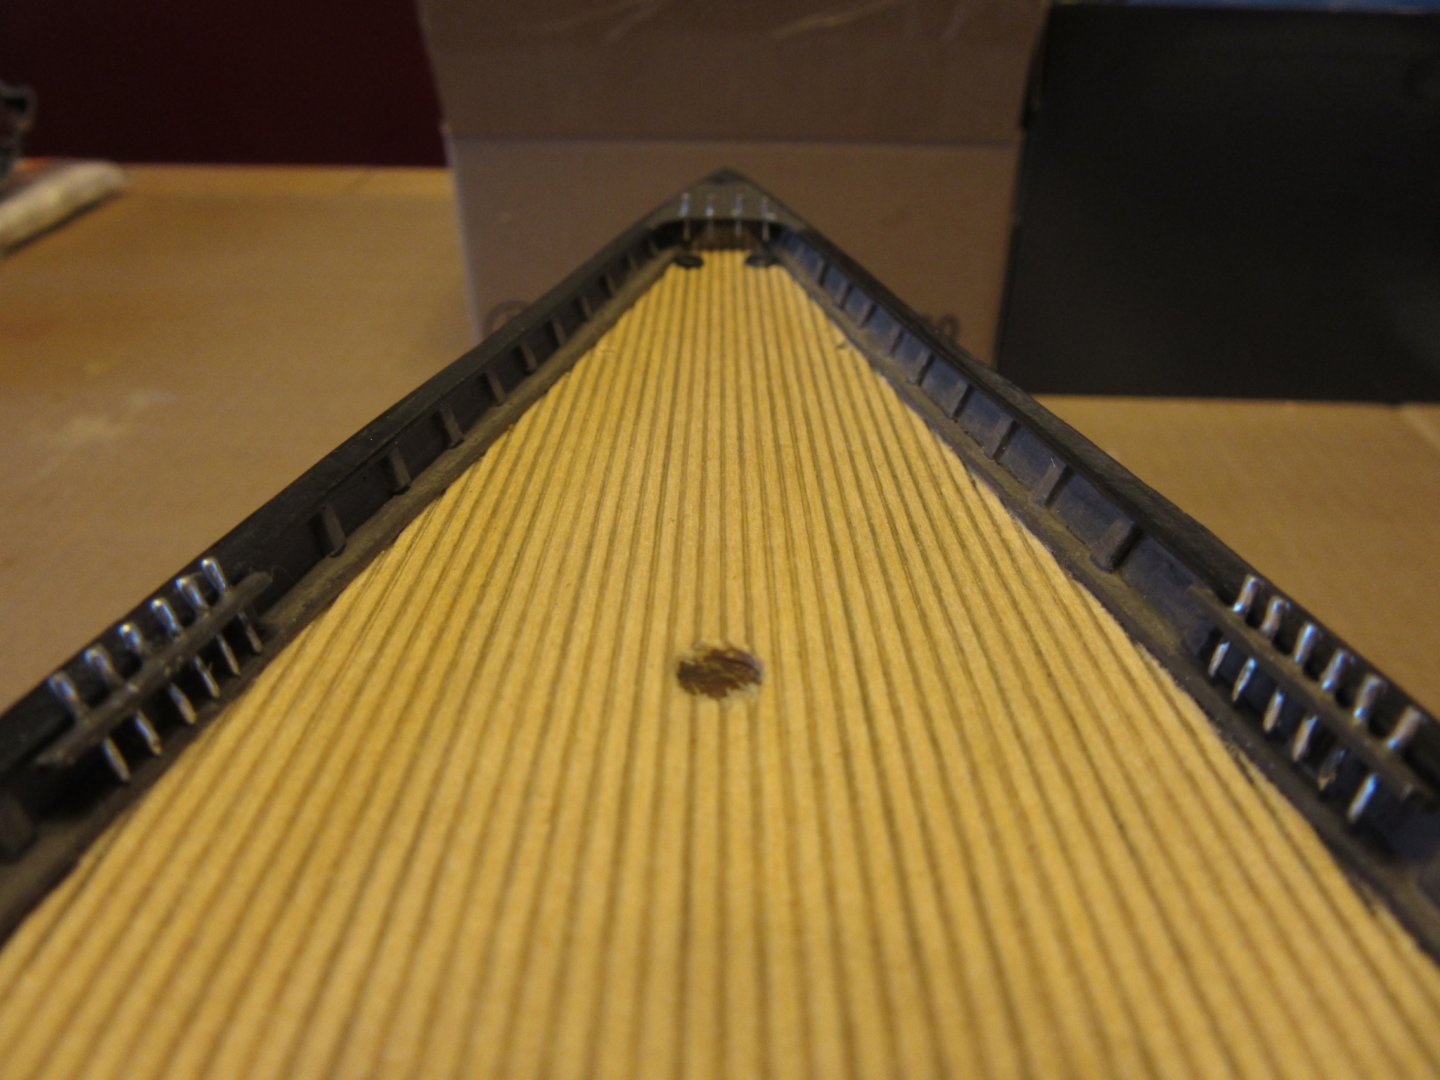
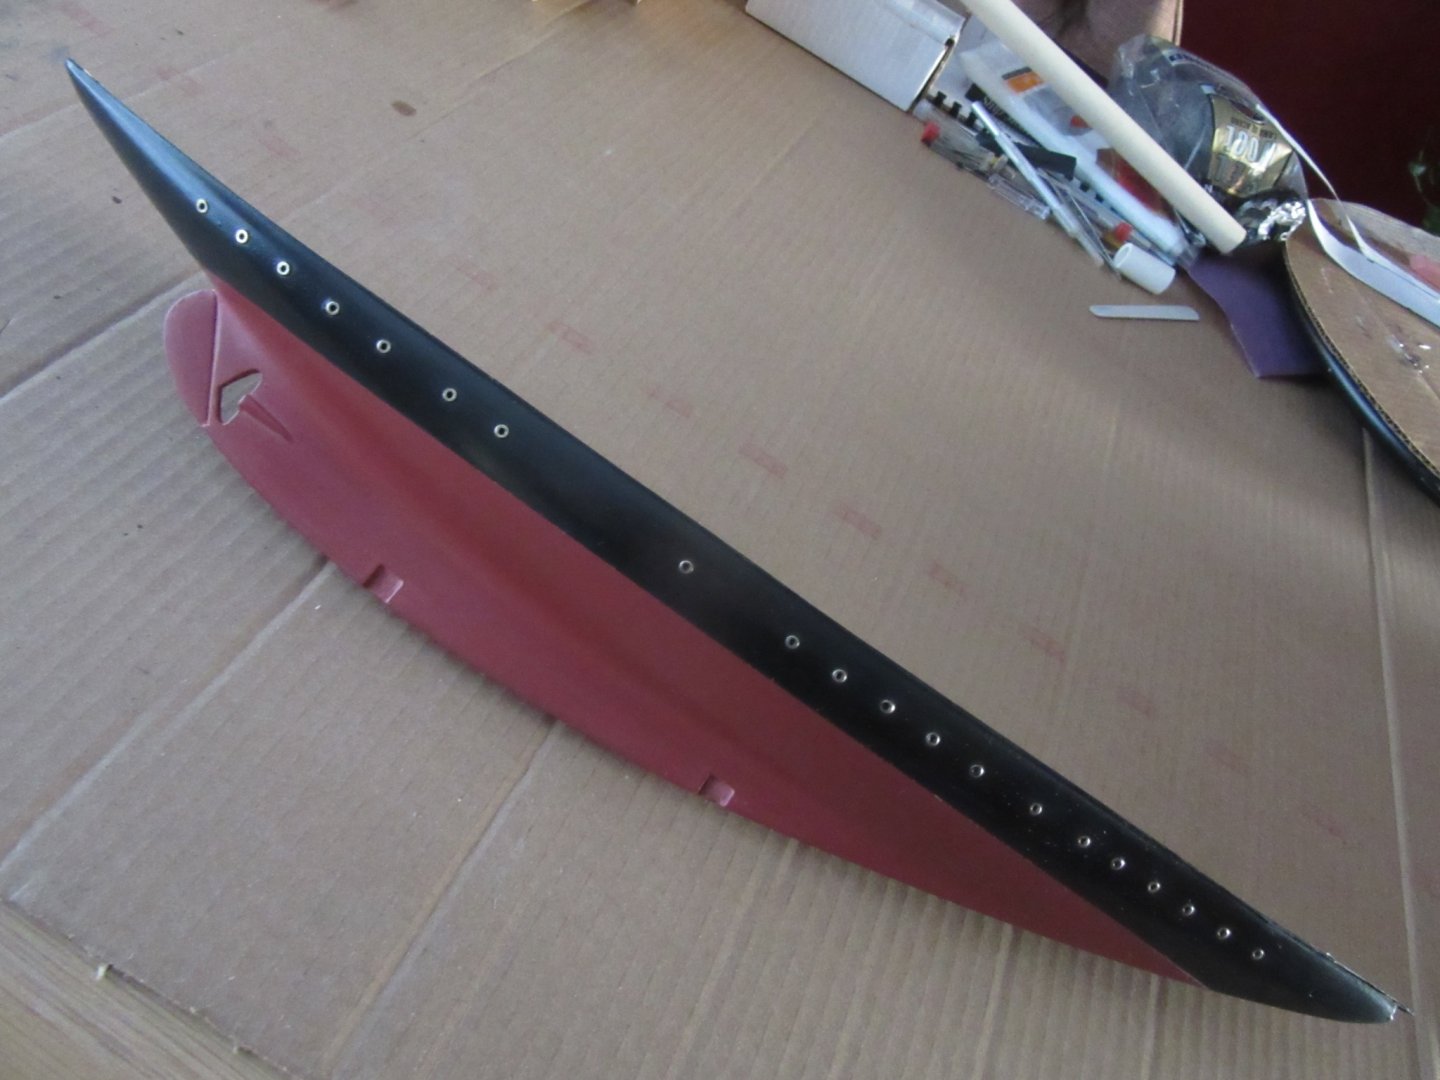
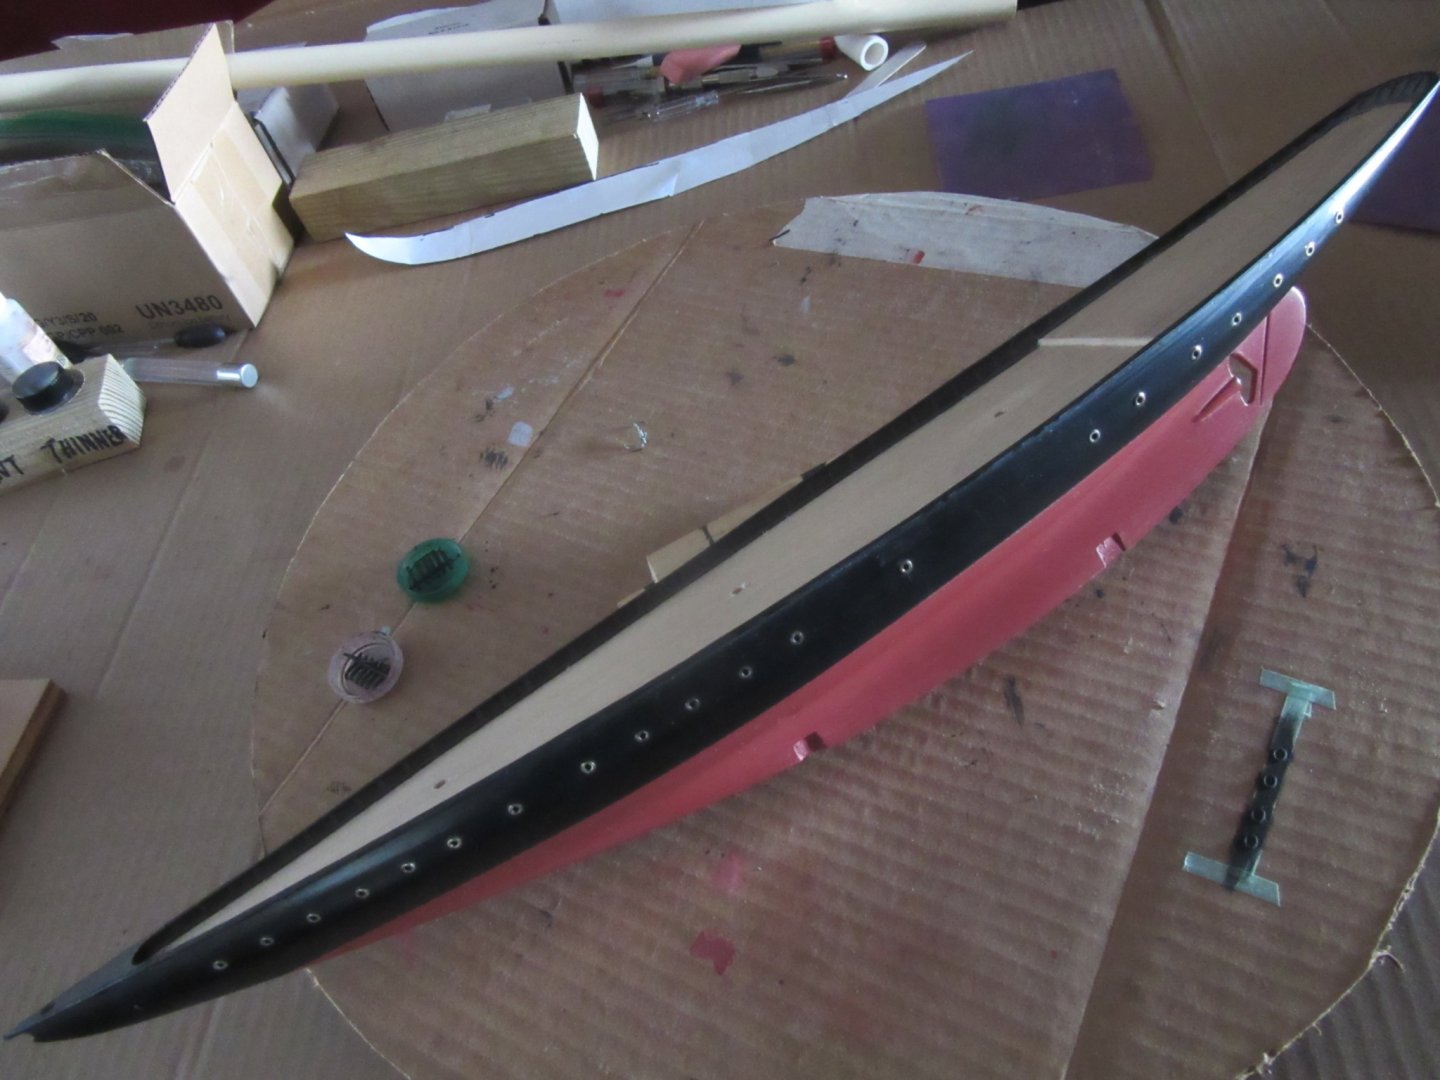
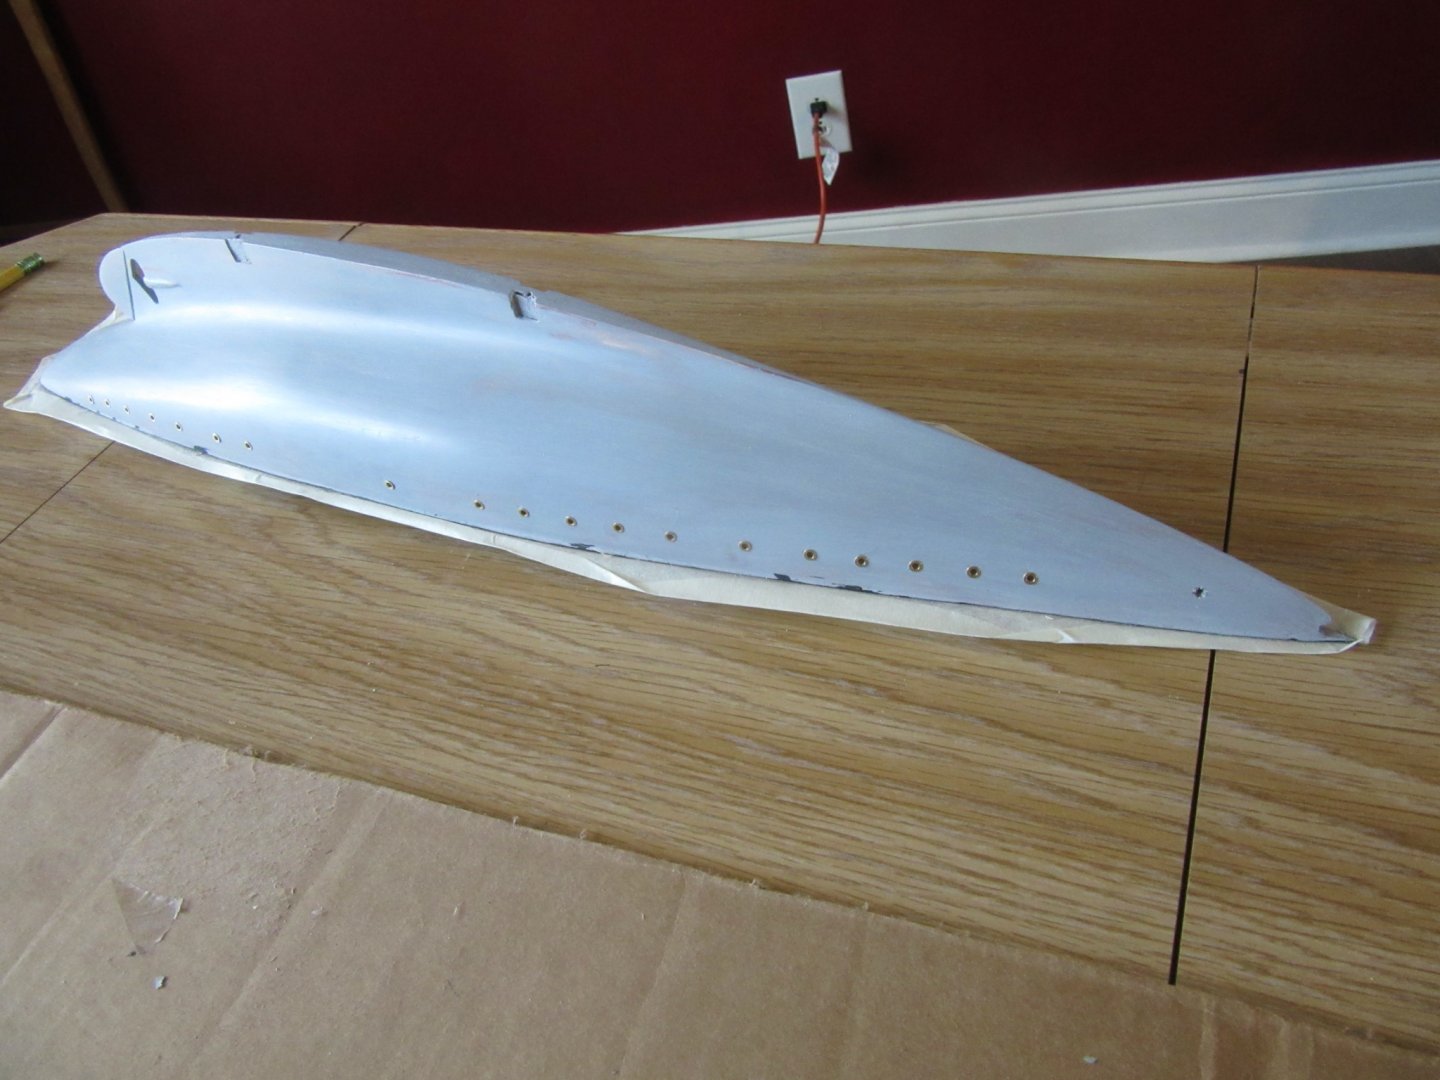
The 9th coat of black at a 50/50 thinner paint ratio produced sufficient coverage for the topsides. After lightly sanding with 0000 steel wool, all tape and paper coverings were removed and the final results exceeded expectations. Only a sliver a primer failed to receive black but it will easily be concealed under the white boot striping yet to be applied. after posting this I noticed the top photo had something on the starboard bow. Checking the model proved the paint surface to be clean and soon realized it was a reflection of one of the Admirals plants behind the photographer.
-
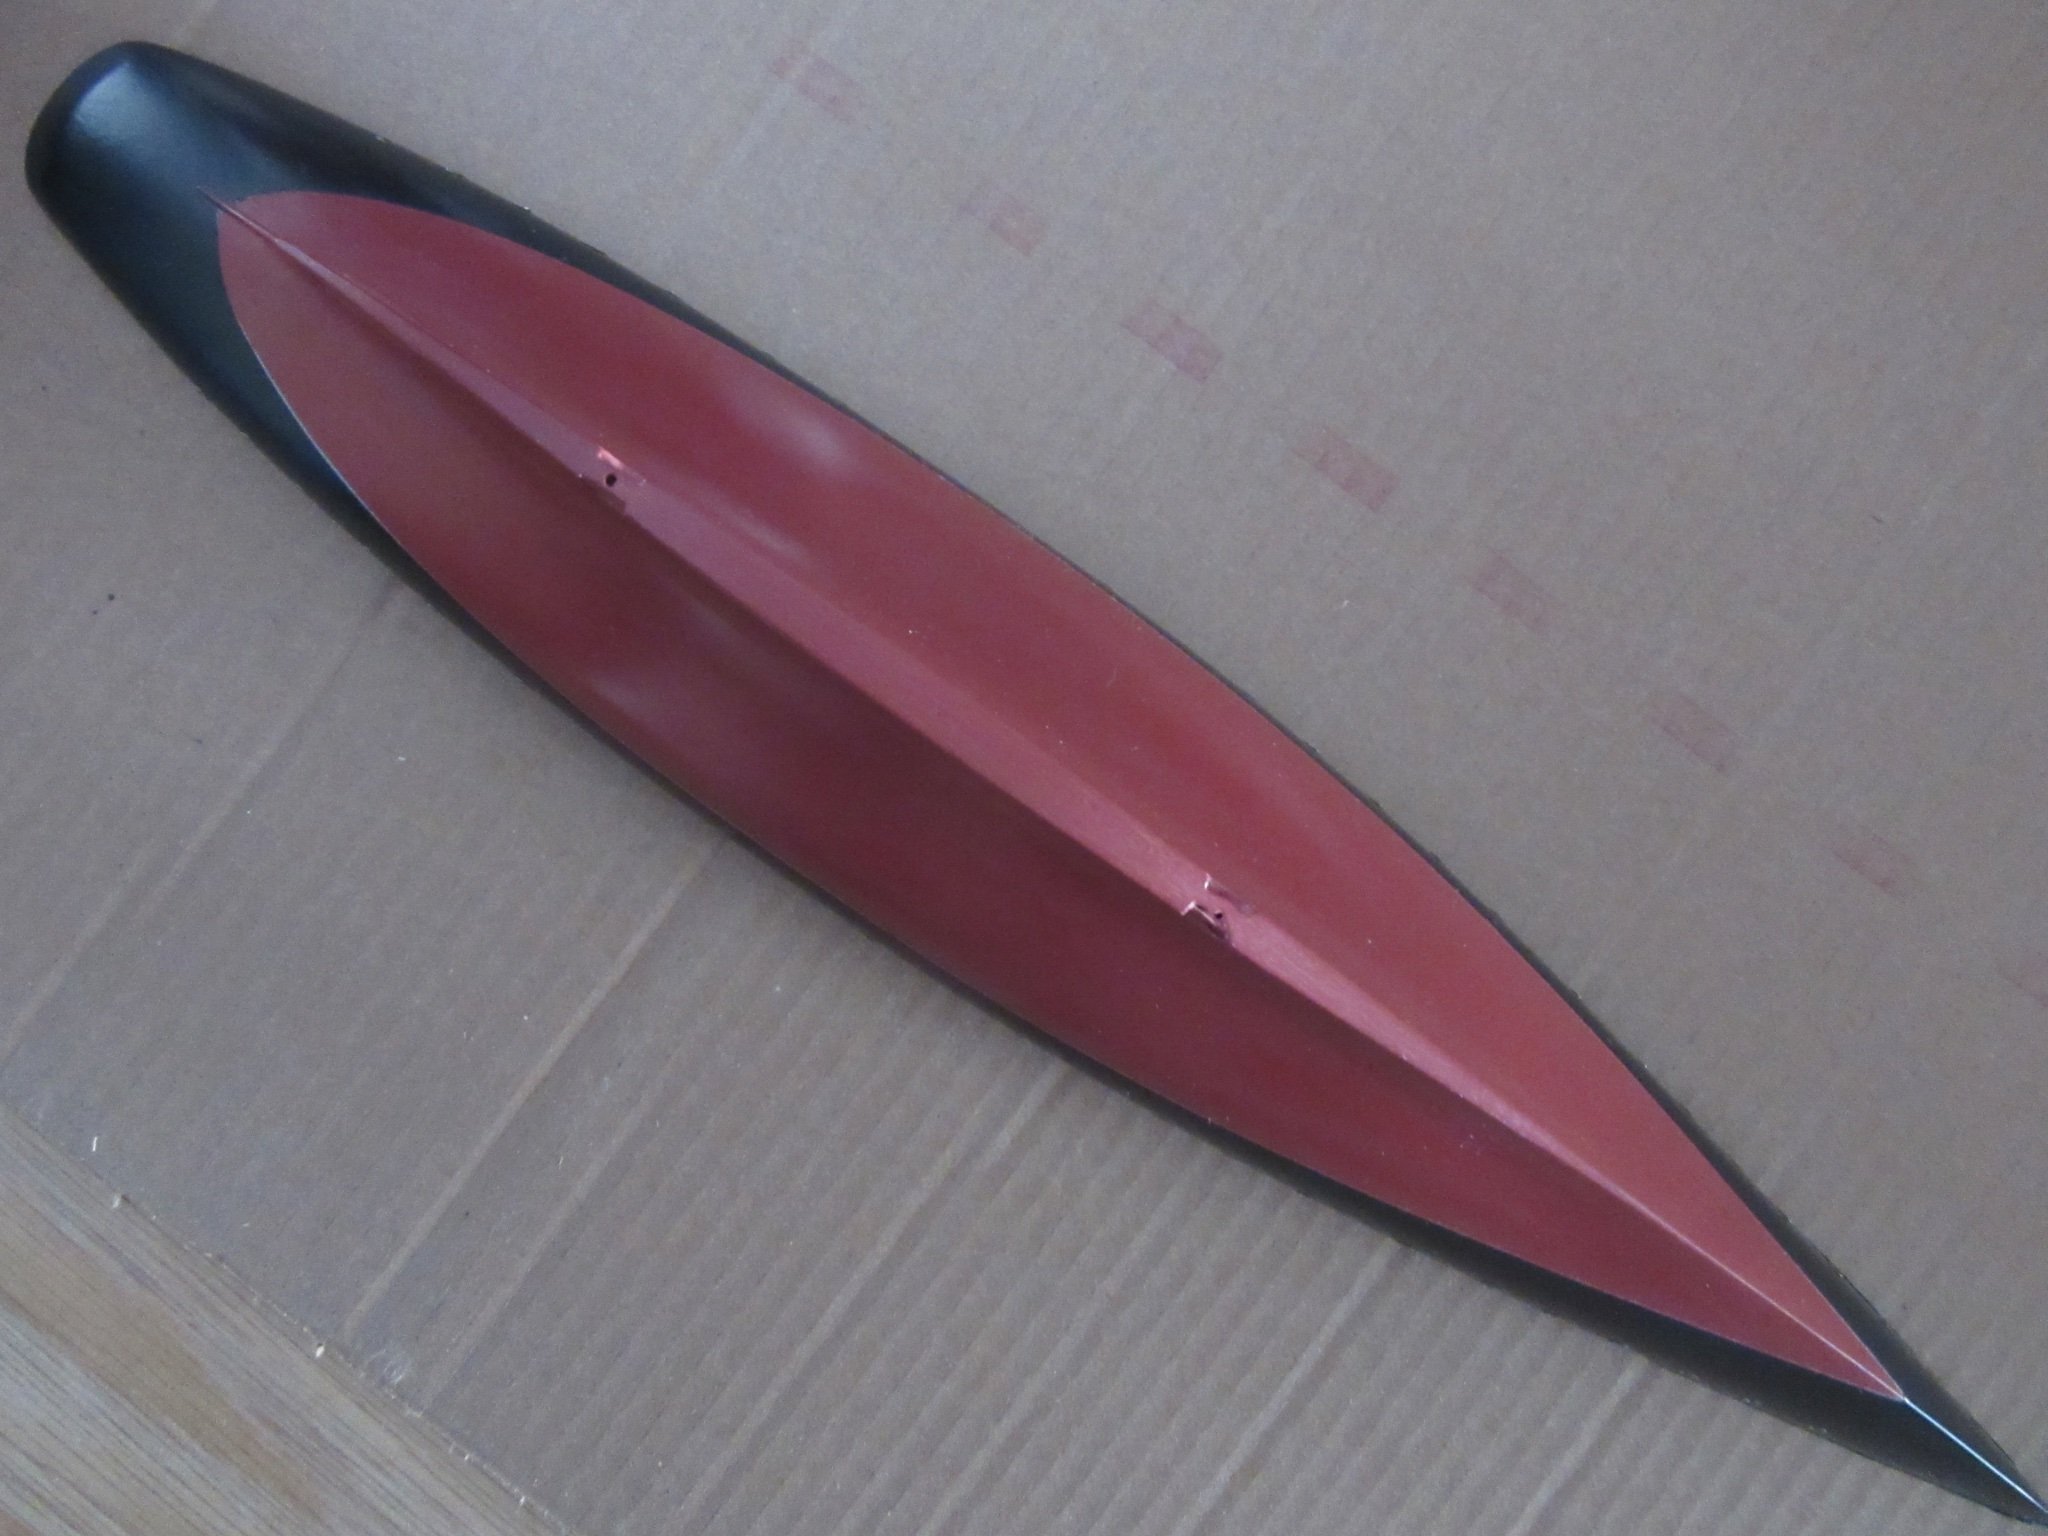
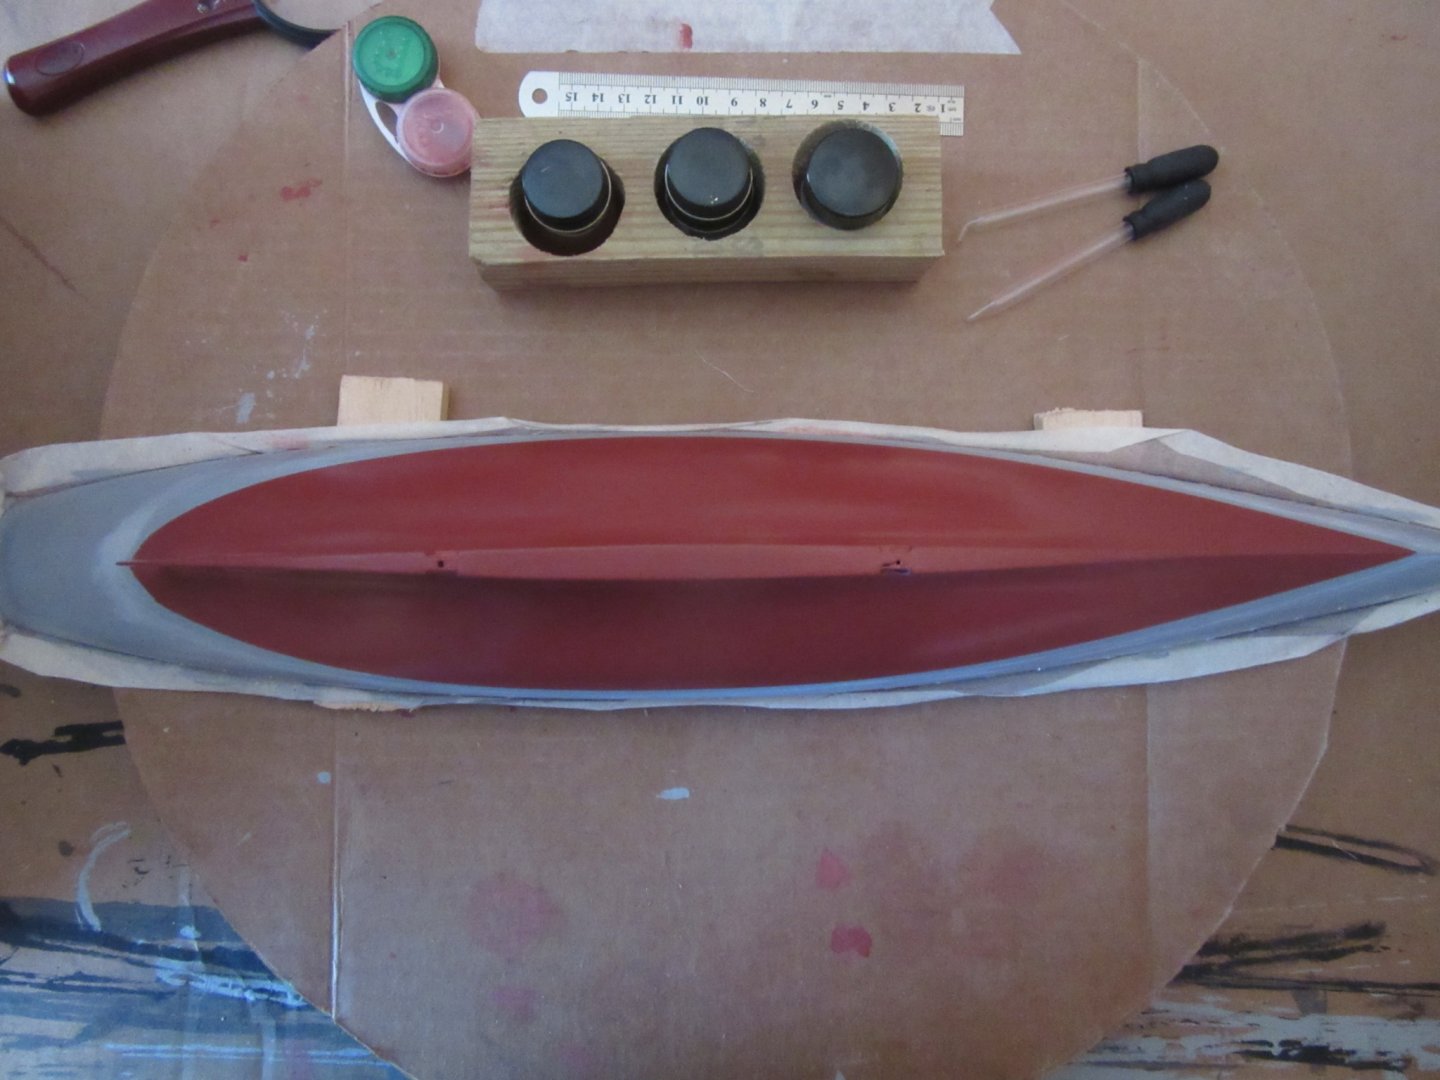
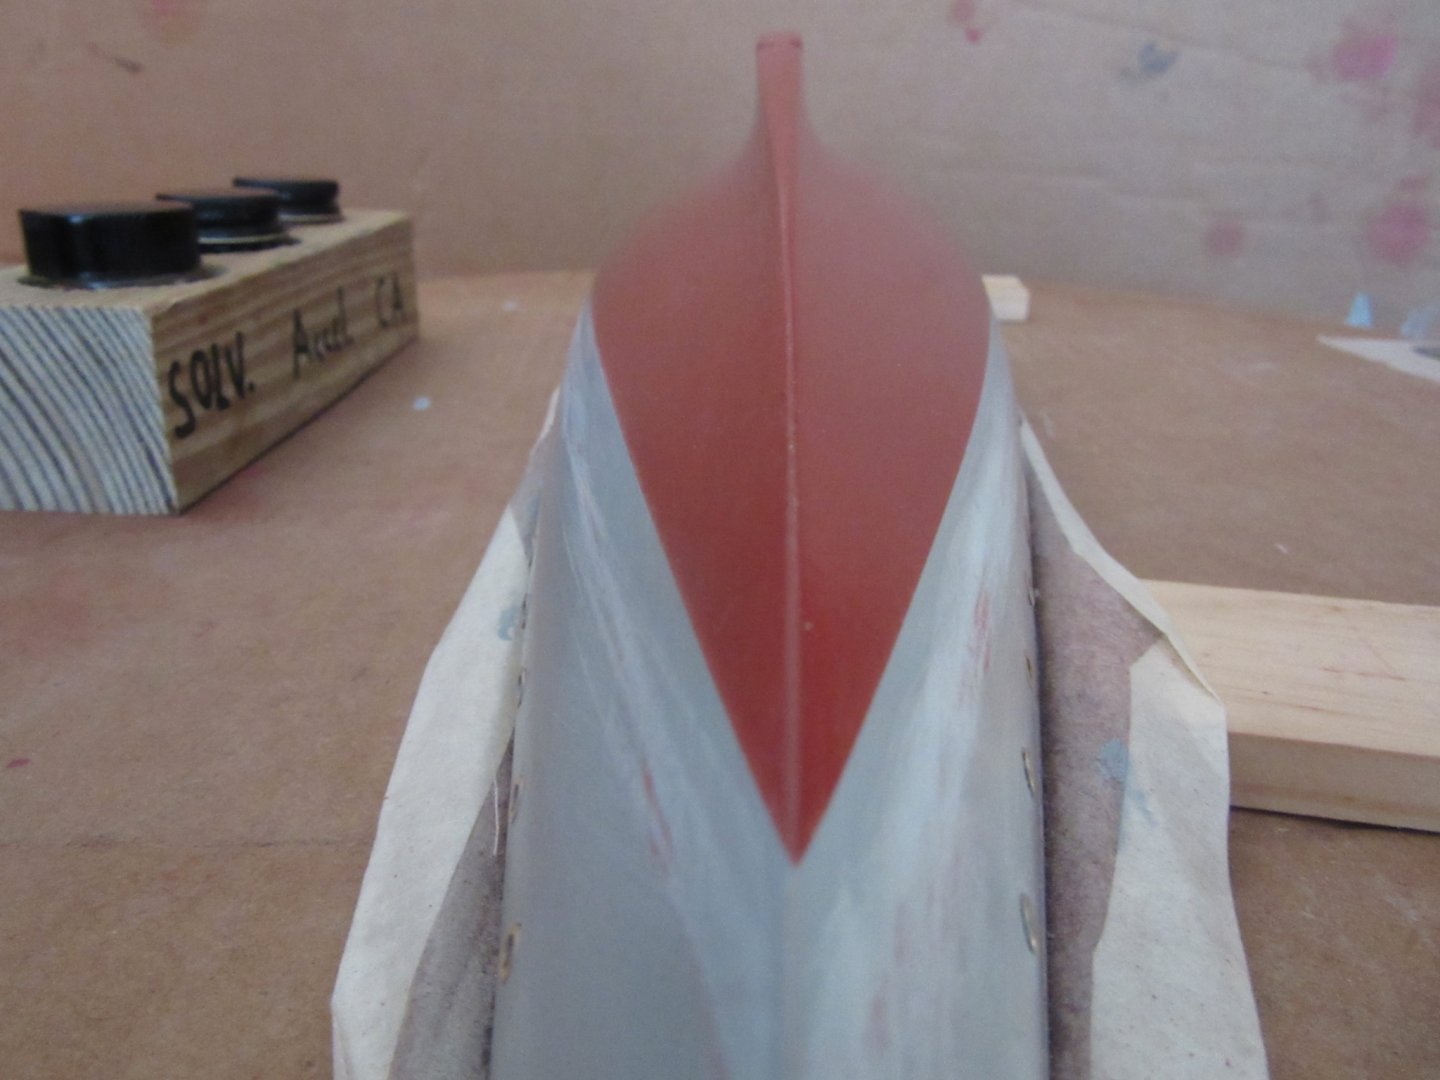
The hull bottom required 11 coats to achieve full coverage. I gently rubbed it with 0000 steel wool to blend it to an even finish. After removing the tape it was quite a relief to see the clean delineation of the waterline with only a small area at the stern that I can easily correct. I applied 1/4" fine masking tape to mark off the hull topsides and put on the first coat using the 50-50 thinner paint ratio as the bottom and allowing 24 hours between each coat. The one glitch was when I removed the masking tape protecting the deck. It left an adhesive residue from it on the cap rails that had to be cleaned and sanded smooth for repainting. I reapplied the 3M fine masking tape over them and covered the deck to avoid a repeat of that situation. All said, I'm quite pleased with all the work so far.

-
It seems as though a thinner to paint ratio at 3 to 10 wasn’t sufficient to eliminate brush marks on the first two coats. I lightly sanded with 400 grit and increased the thinner by 4 to 10 on the 3rd and fourth coats. That didn’t fare any better. On the 5th coat even more thinner at 5 to 10 and still not shaking out the brush marks. The 6th coat I cut to the chase and went 10 to 10 thinner to paint mix. That stopped the brush marks but makes for a coat that has thin spots. This latest photo is of the 8th coat, staying with the 50/50 thinner - paint ratio. The thin spots are becoming fewer but will probably need several more coats at the present ratio. I think I’m on the right track here but if not I’m prepared to sand it down to wood and start over. Comments and input are welcomed. Also finished assembling the chainplates and channels.

-
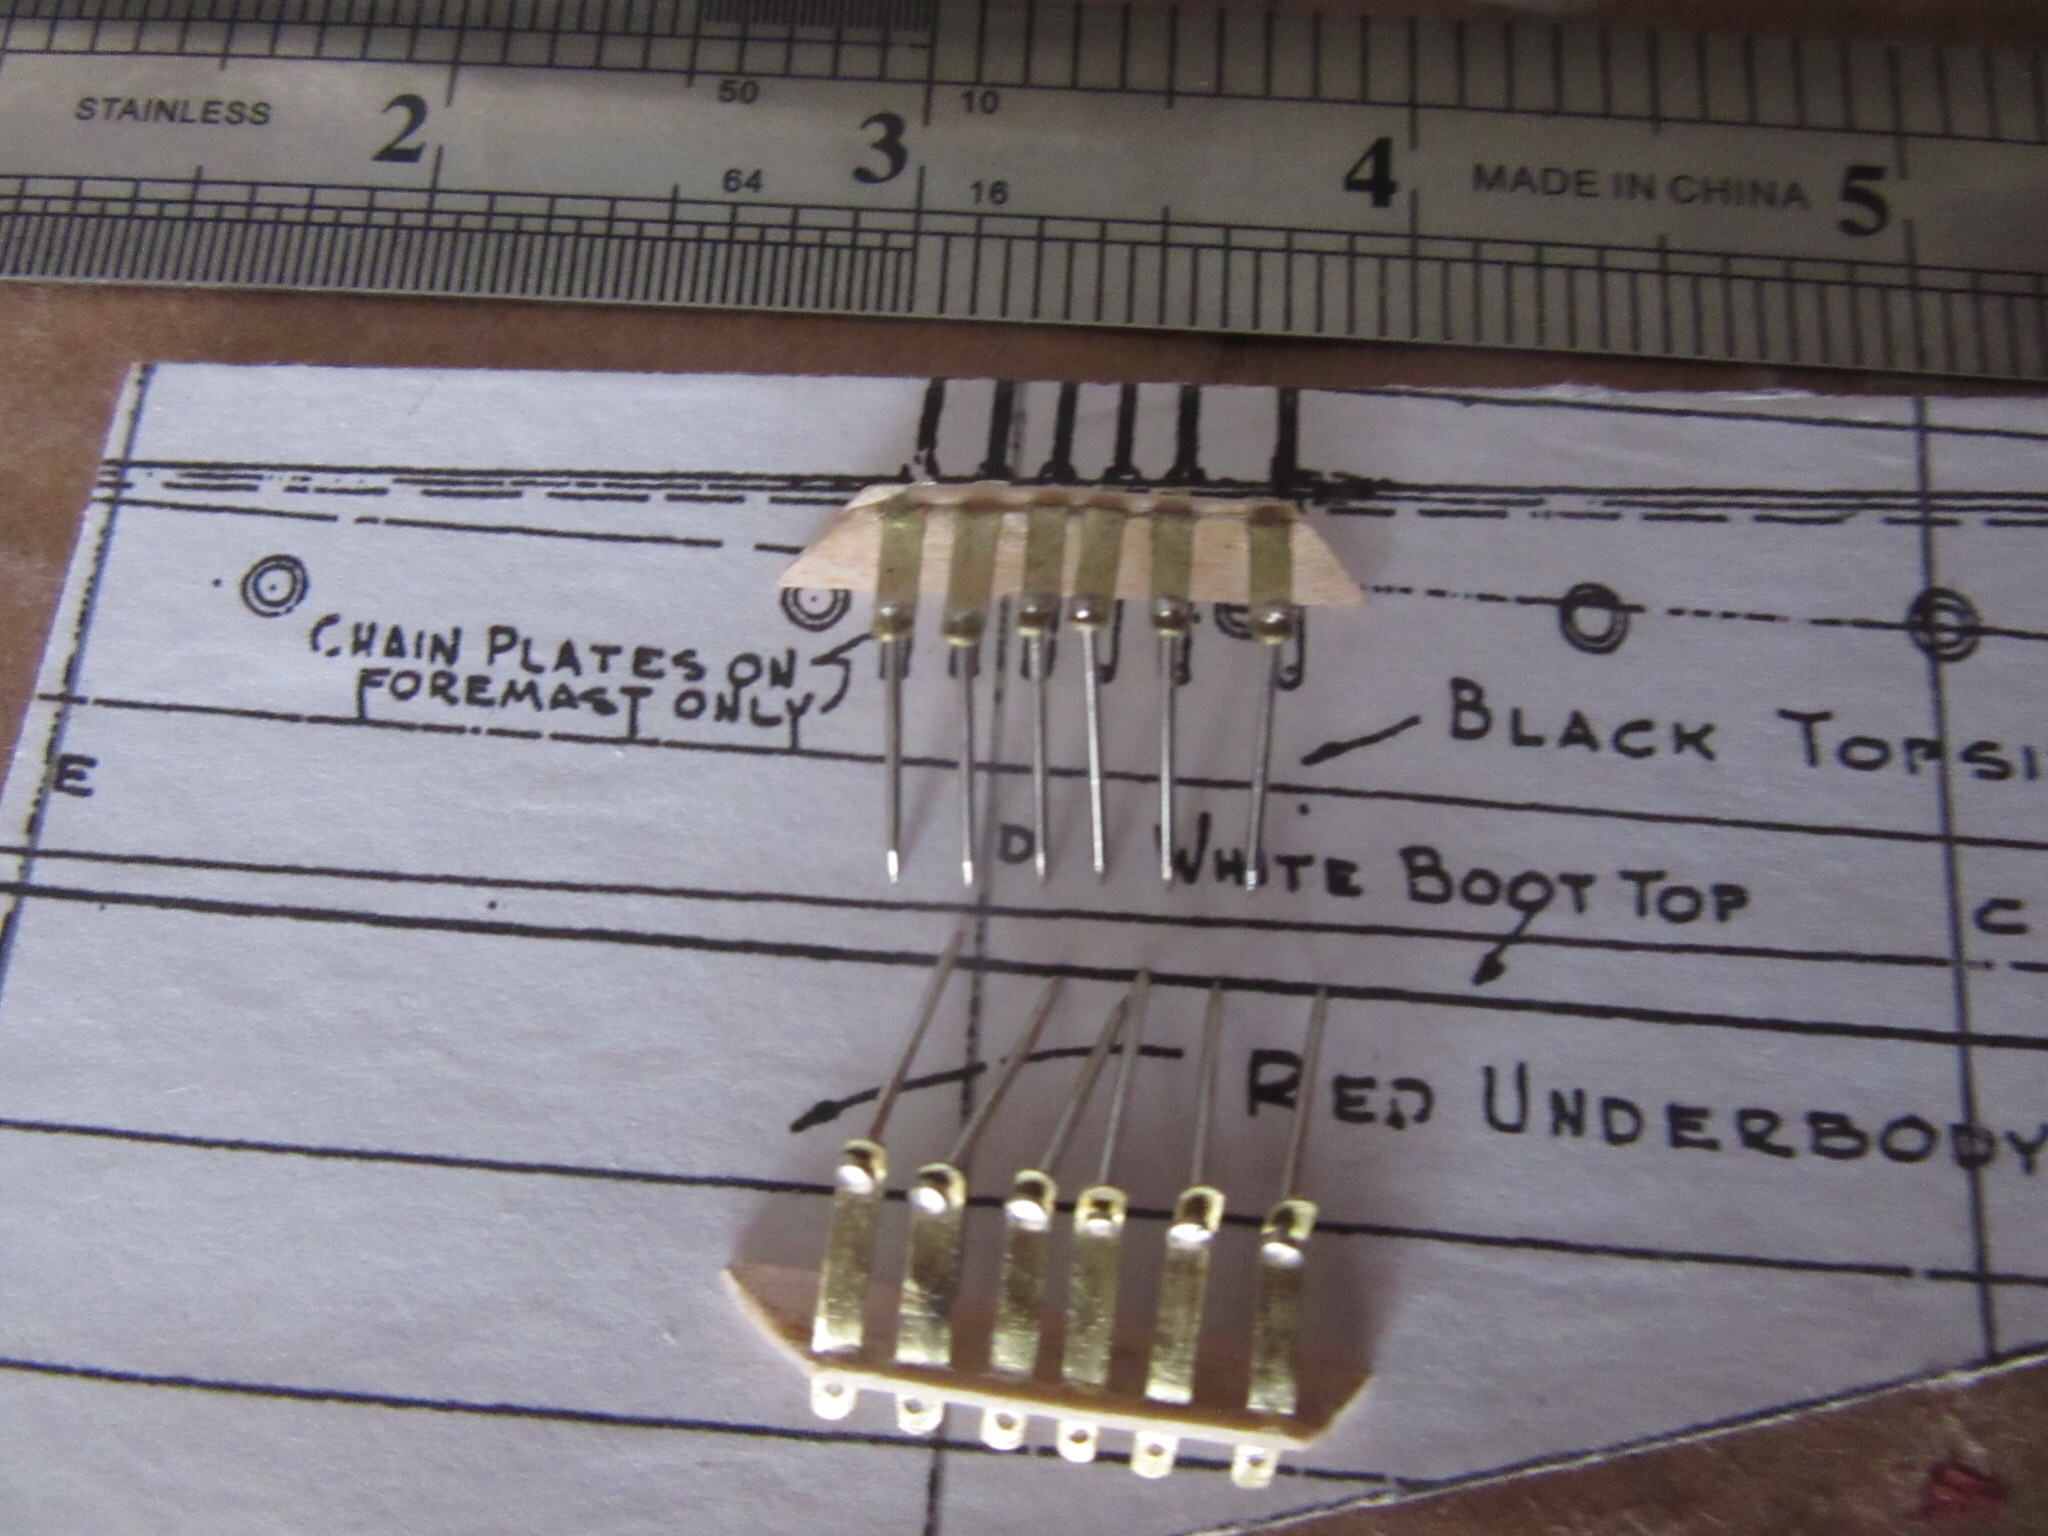
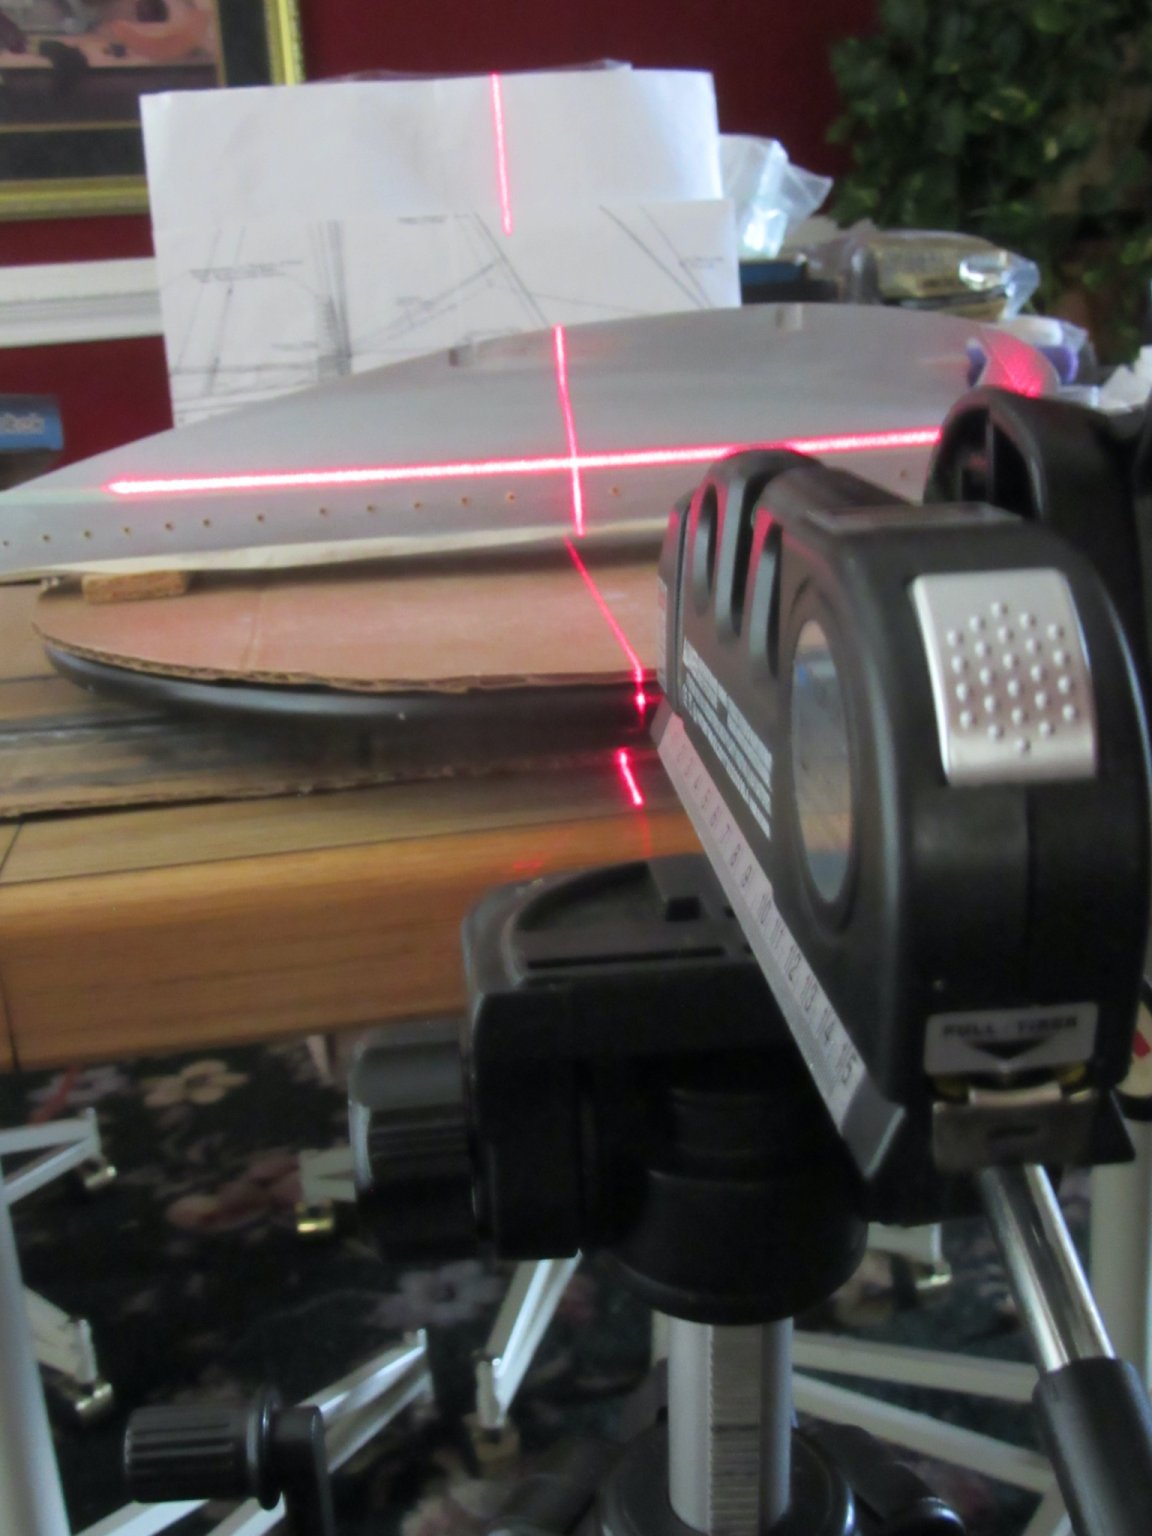
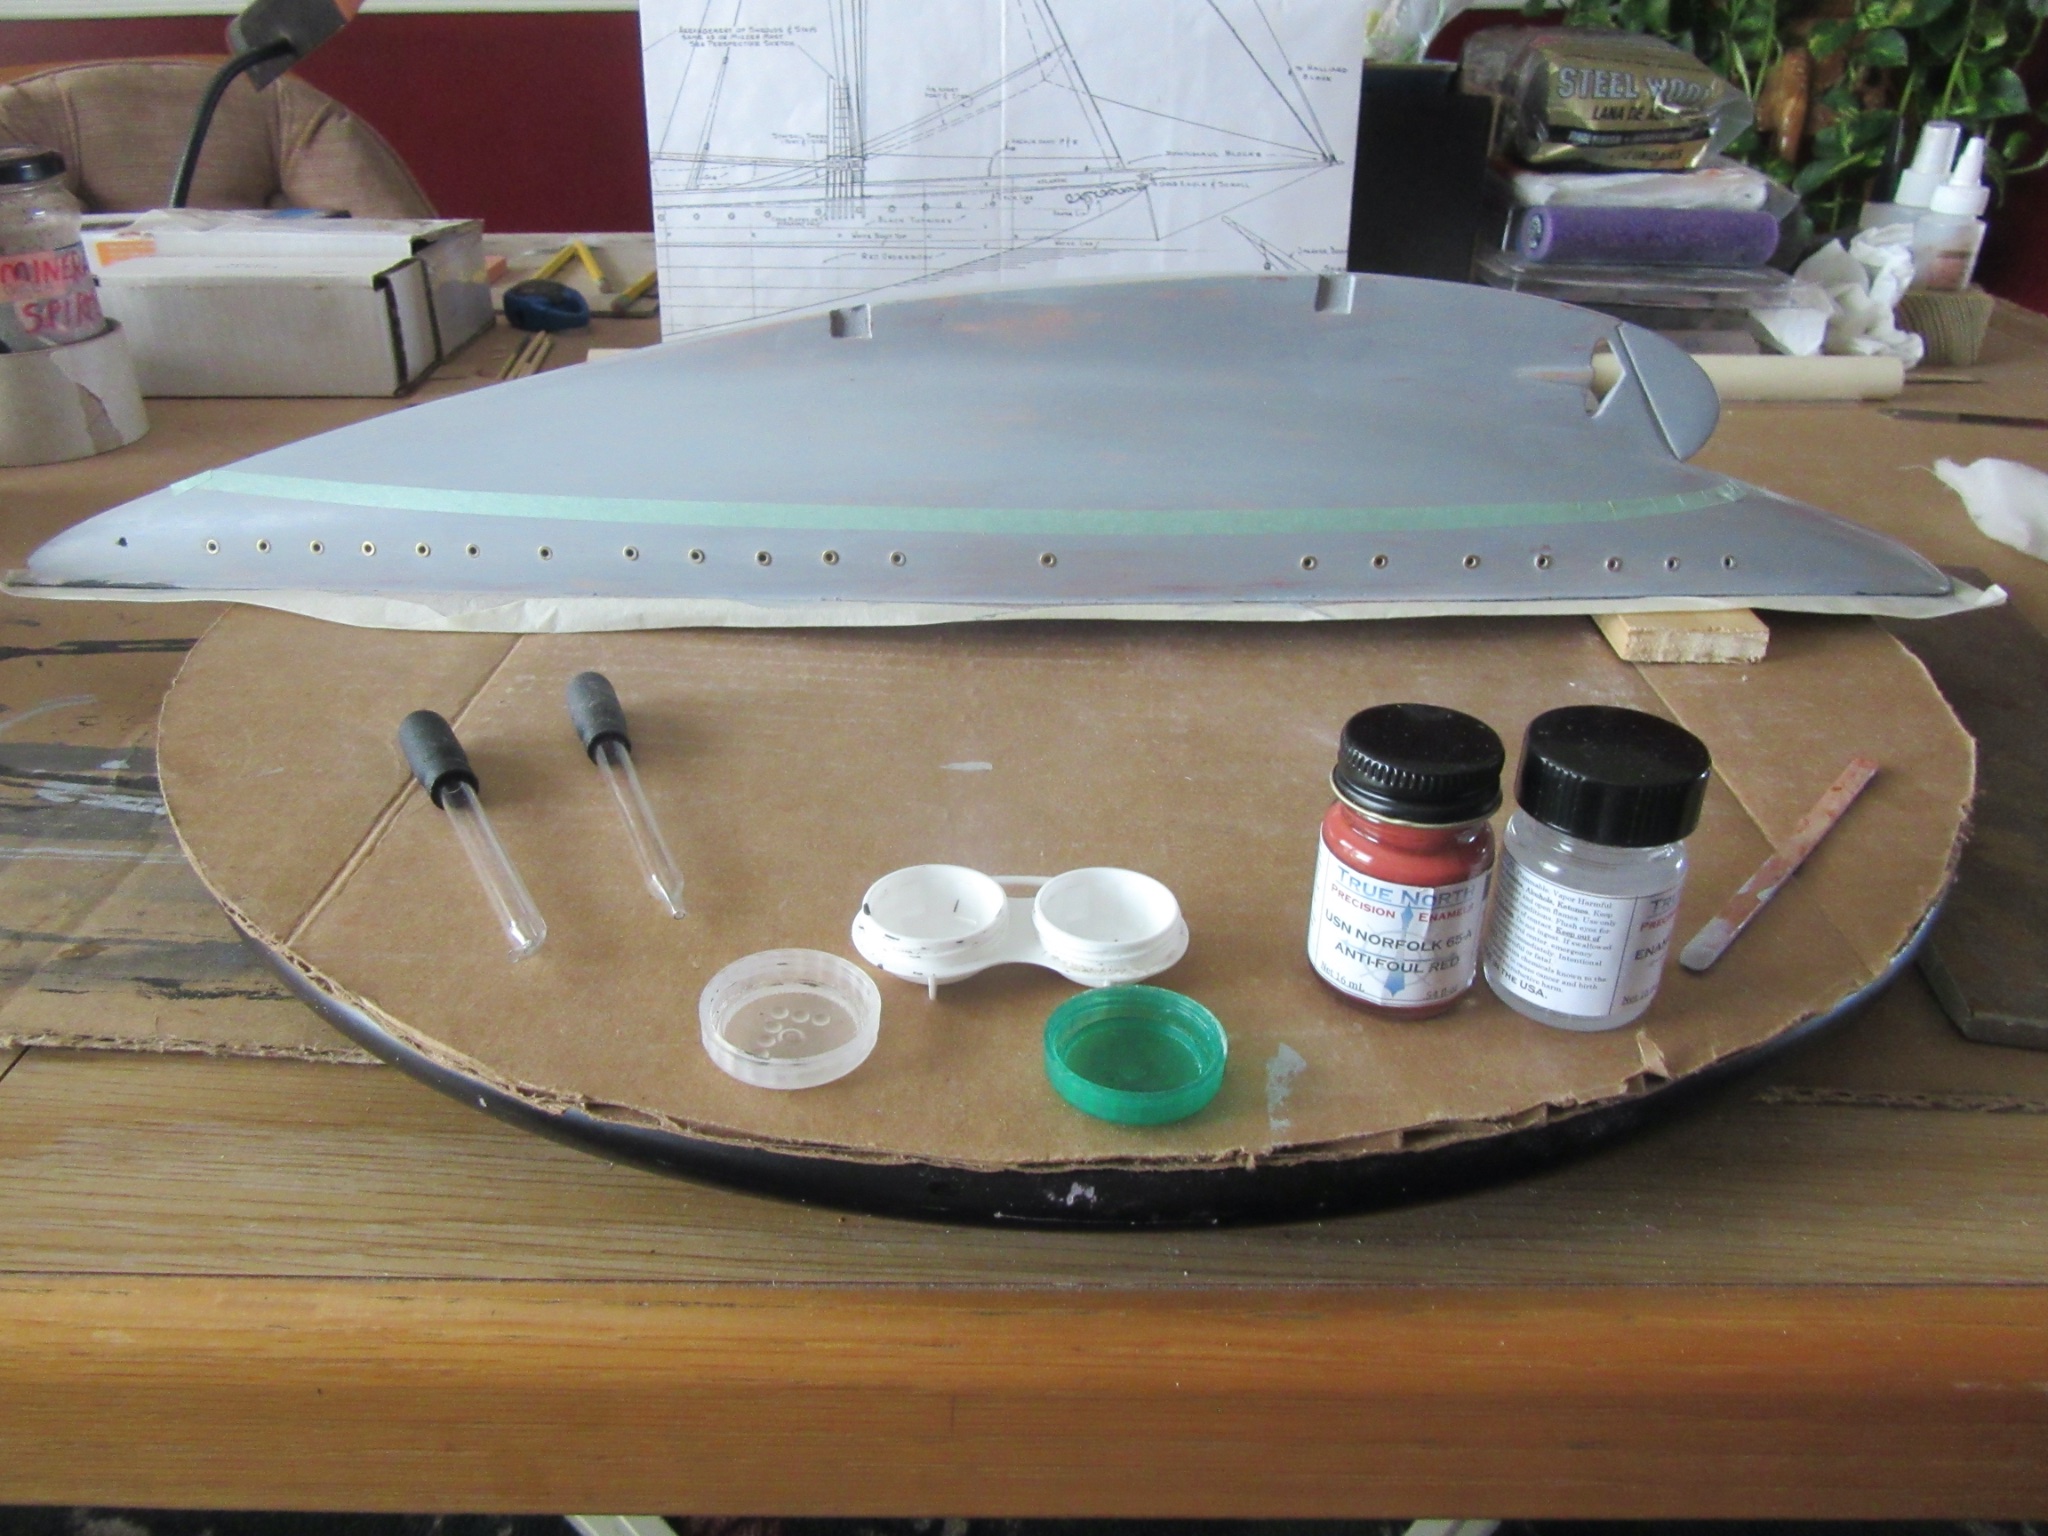
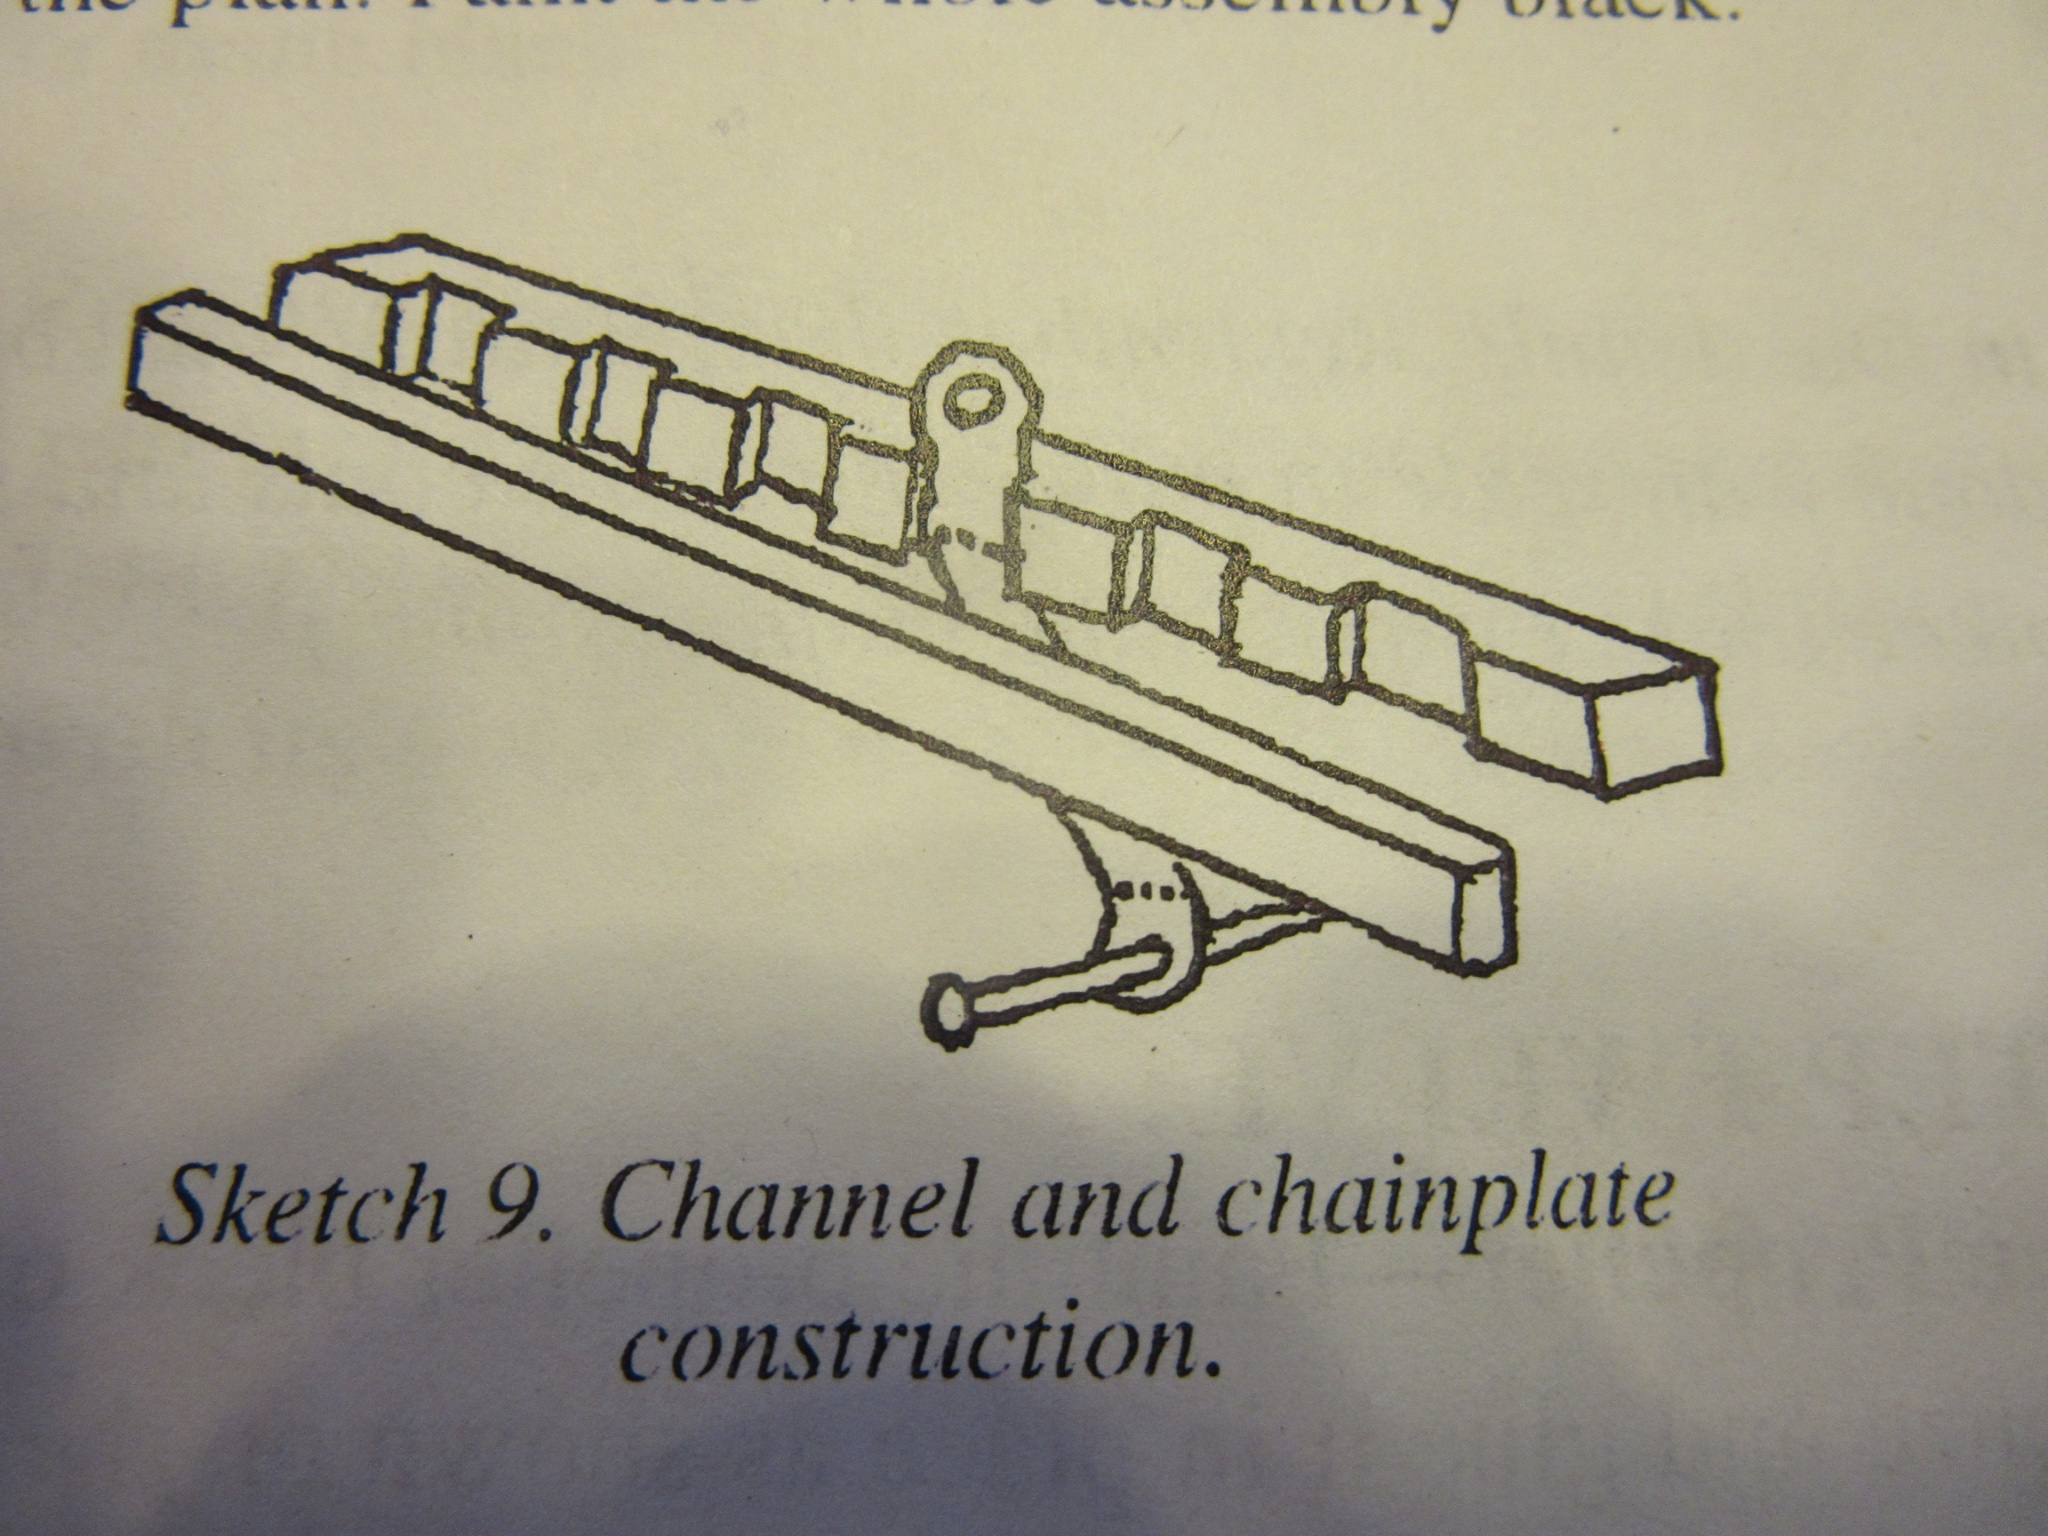
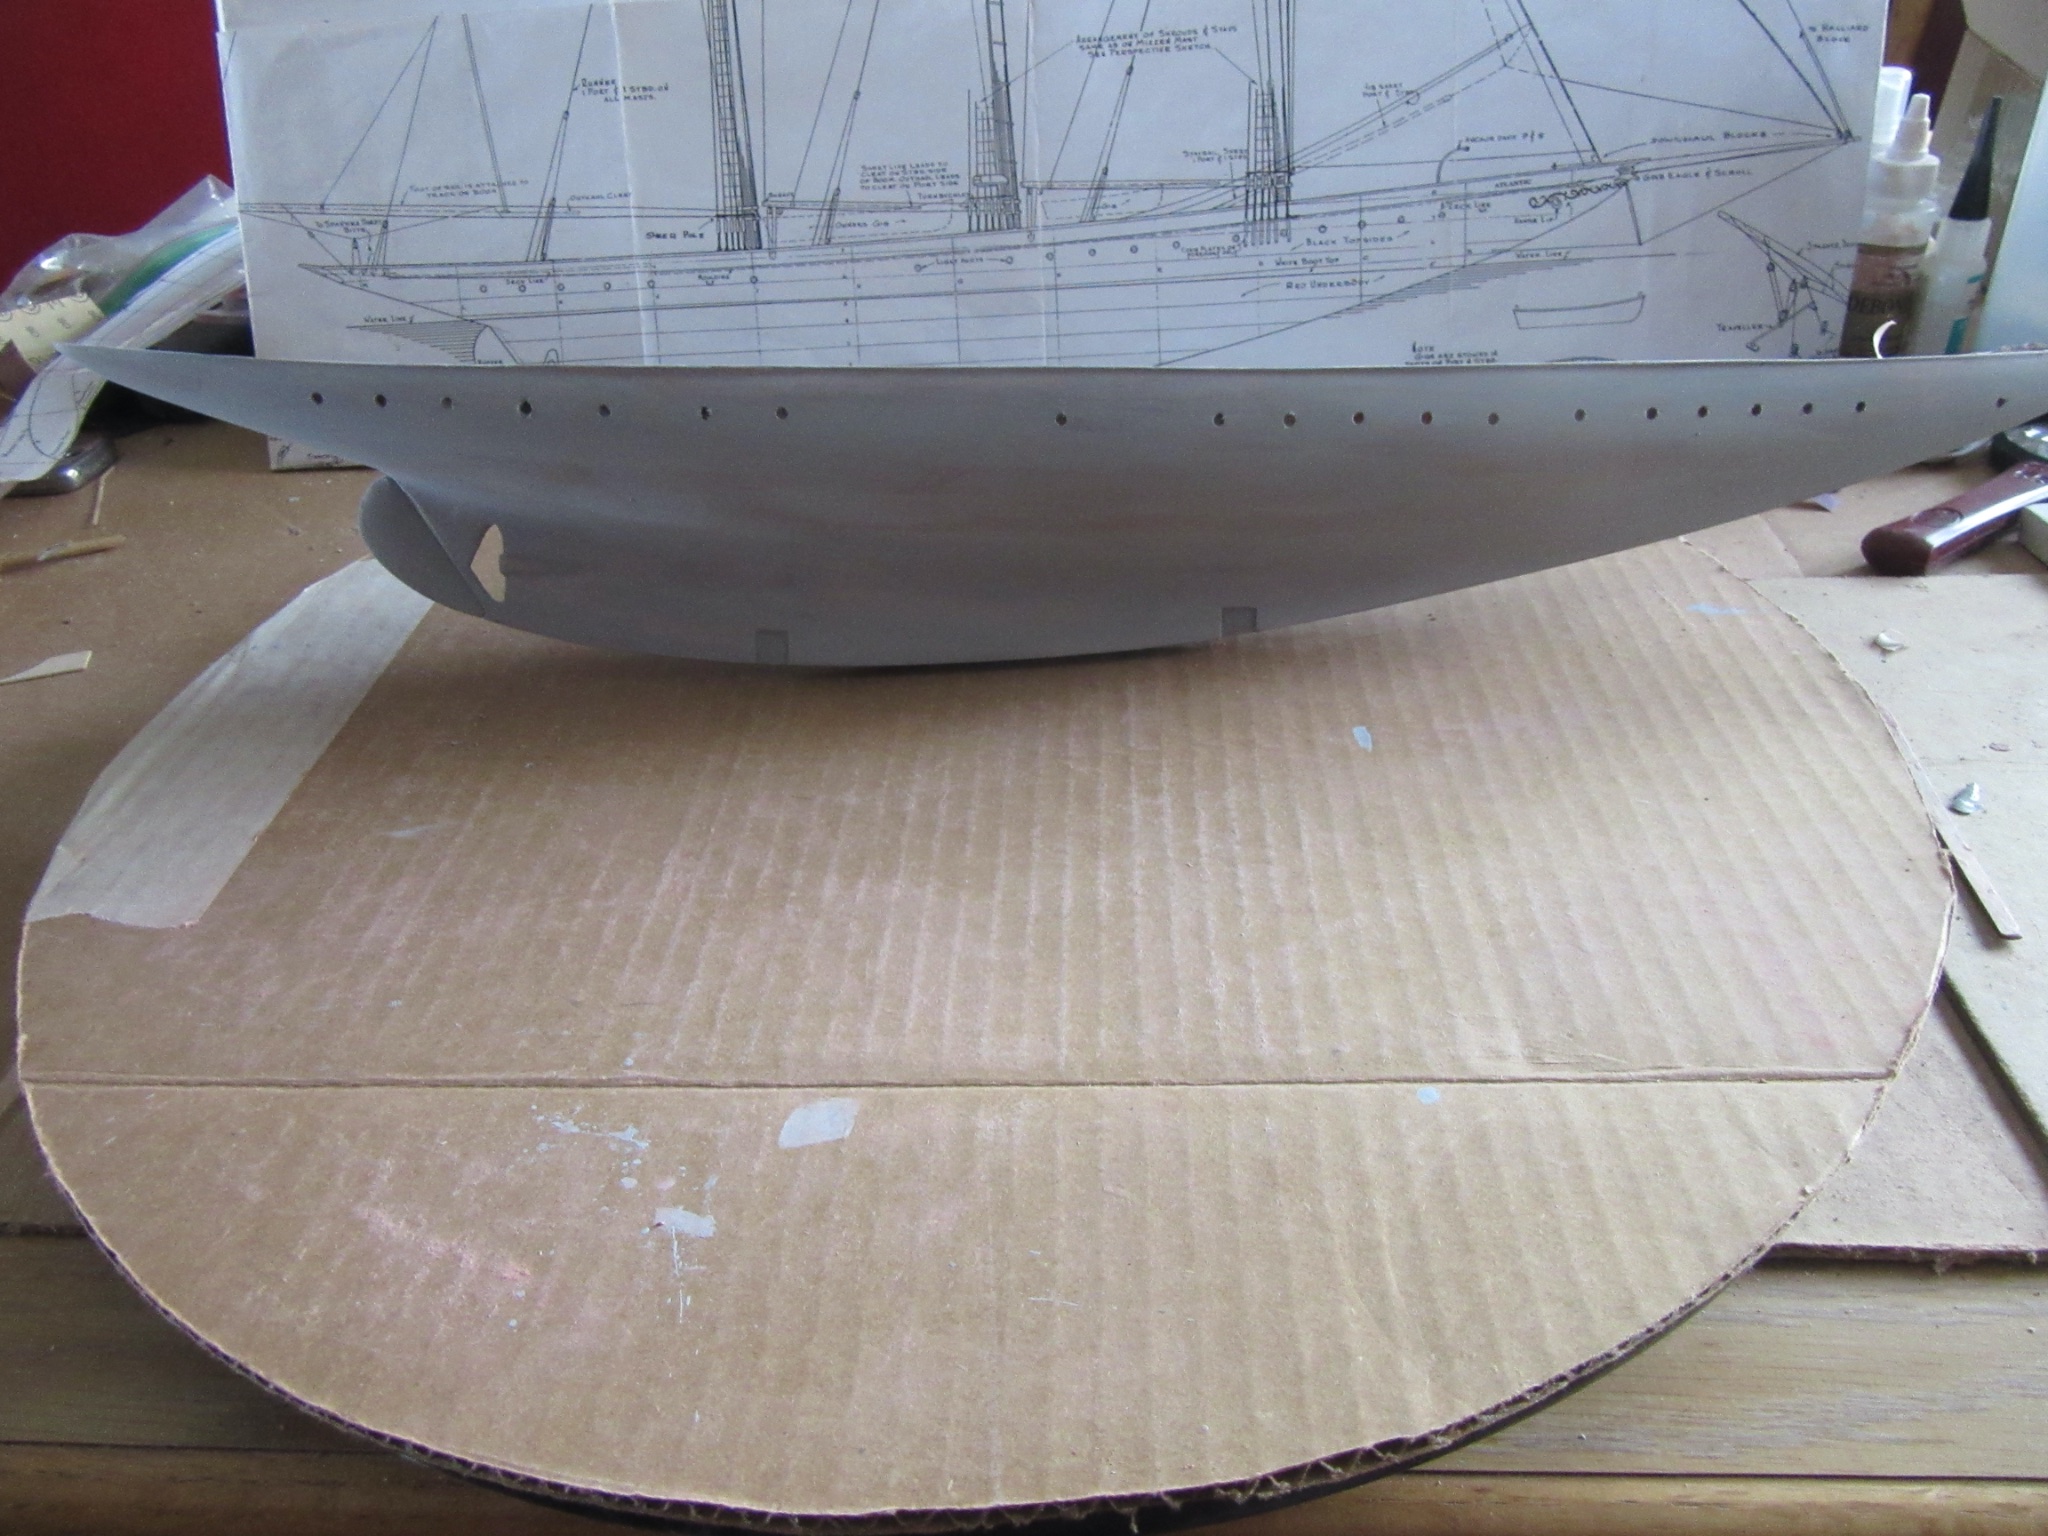
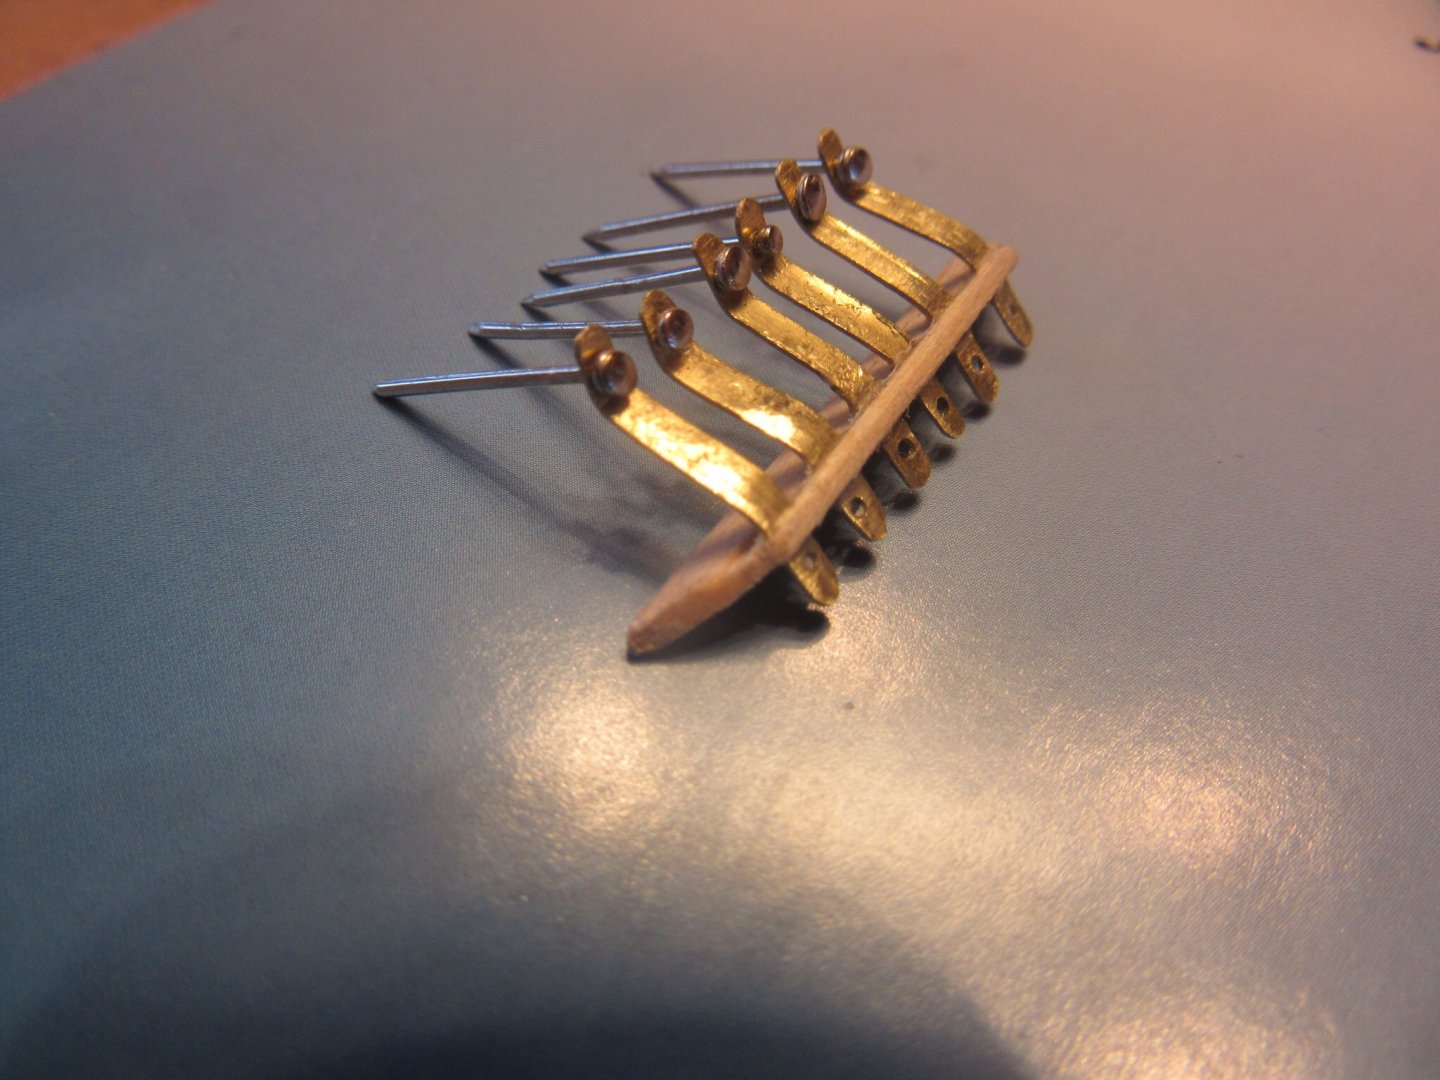
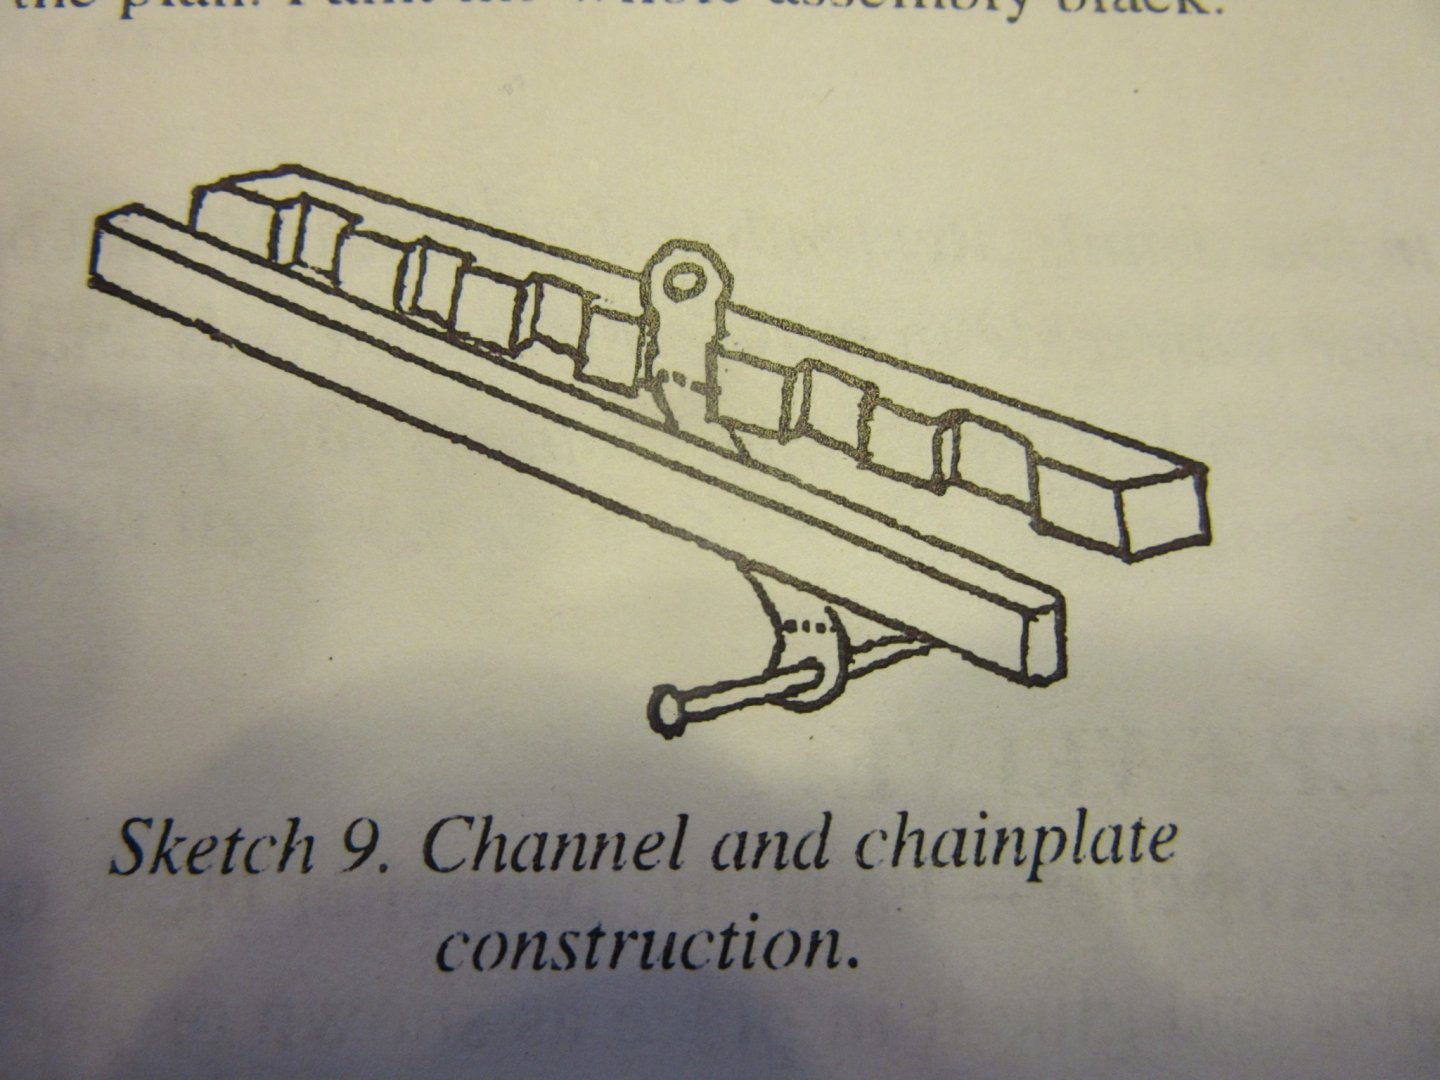
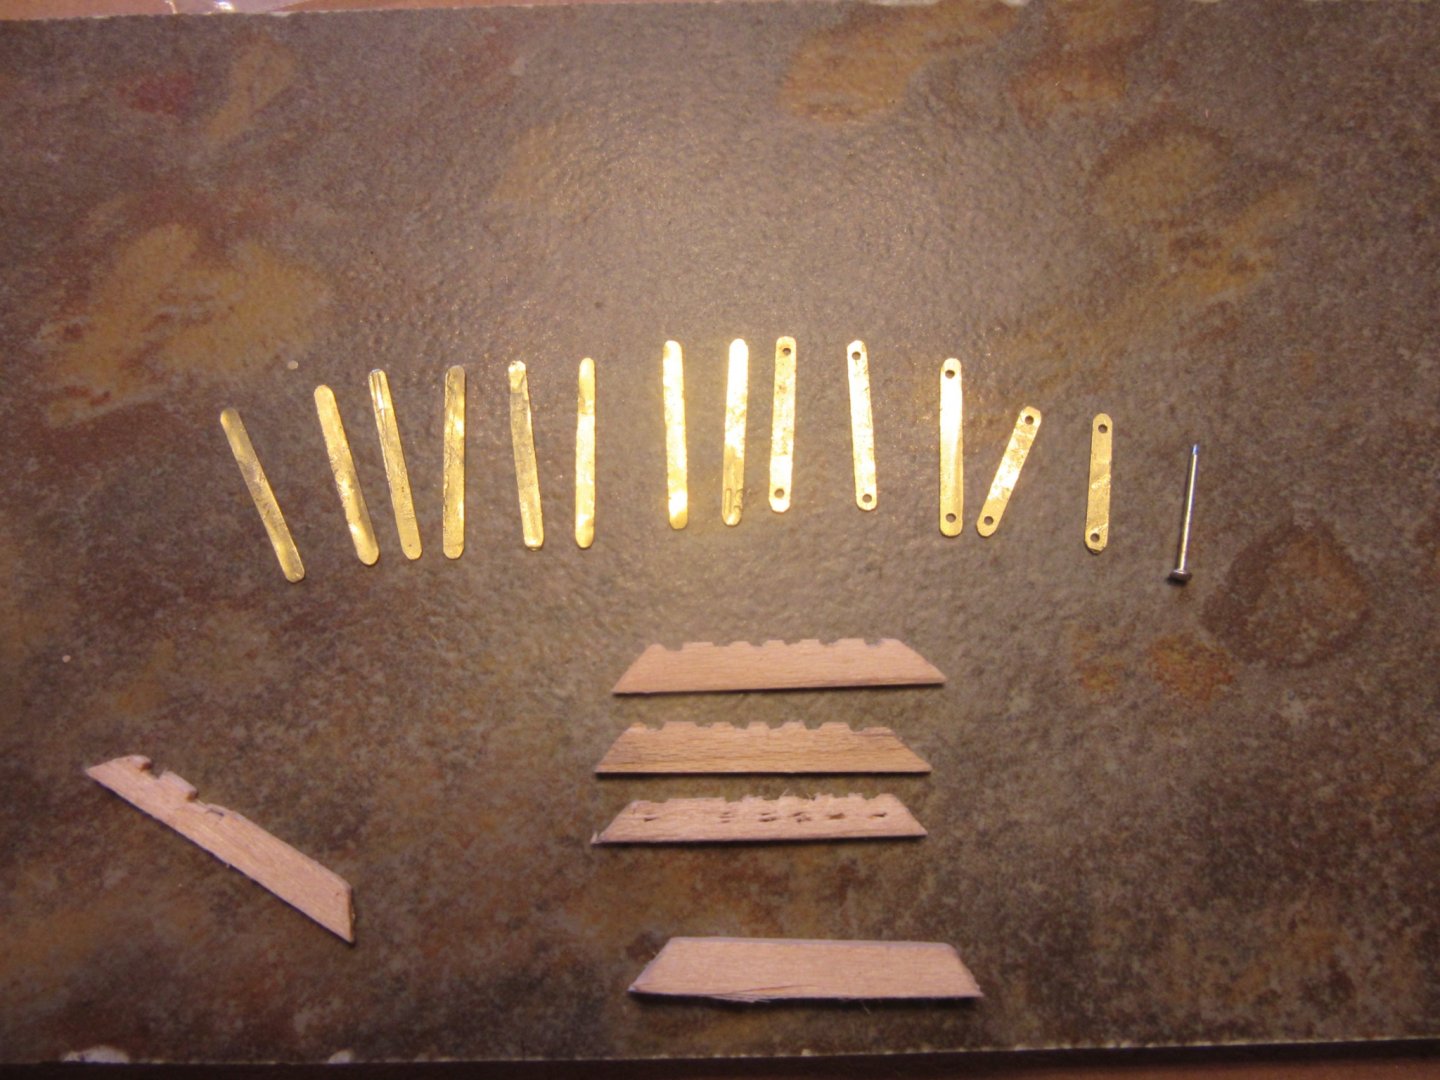
Having fine sanded the prime coat with 0000 steel wool, the waterline was marked using a laser level mounted on a tripod, after being unable to mark it with a pencil per instructions especially around the stern. The 3M fine masking tape was much easier to lay on than trying to get the pencil around the hull. Next the bottom paint was thinned to a milk like viscosity mixing 3 drops thinner to 10 of the paint. The instructions advise to allow the paint and subsequent coats to dry overnight. To kill time between coats I turned a few pages ahead and started work on the channel and chainplate assemblies. These are built from scratch utilizing basswood 1/16 stock and scrape pieces off the etched brass sheet. The heads of the pins aren't to scale so they have to be filed down a little and as for the channels, I'll get them down with a few more attempts. This really gives me an appreciation for the scratch model builders.


-
Prime coating the hull
closehaul replied to closehaul's topic in Painting, finishing and weathering products and techniques
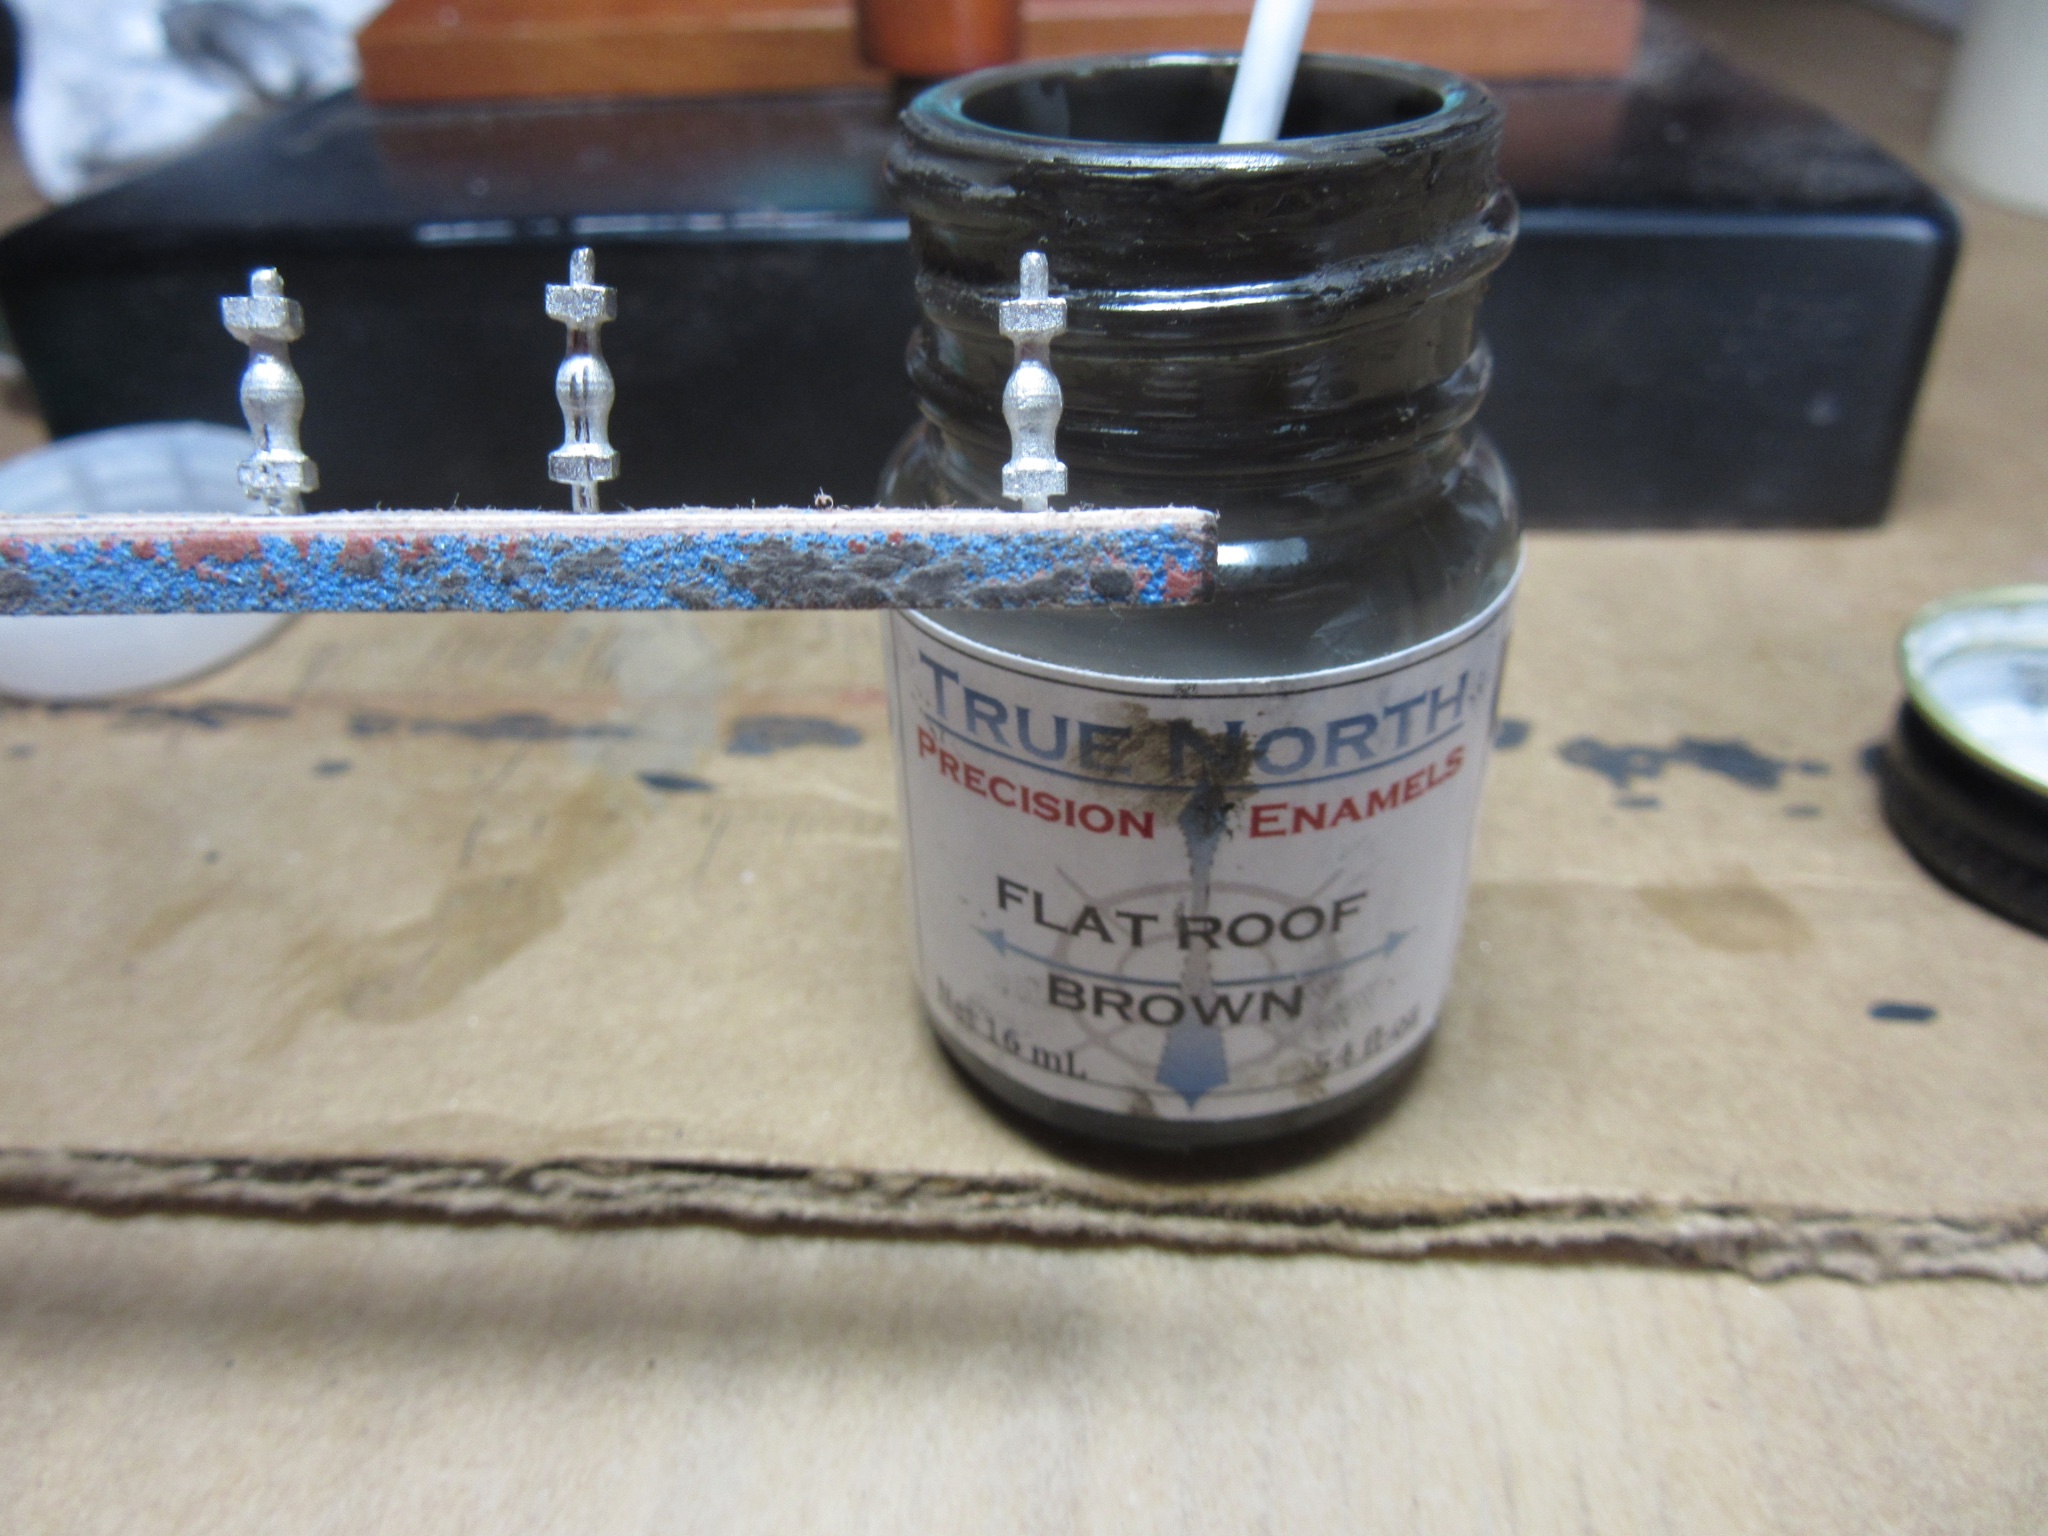
Thank you Wefalk. The primer and paints I'm using are True North brand supplied by Bluejacket Shipcrafters. There are thin spots exposing the wood but I'm covering them with primer and wool sanding as well. And thank you likewise Vaddoc. Its good to hear your comments on the advantage of a smooth primed surface. I'm looking forward to laying down the bottom paint shortly. -
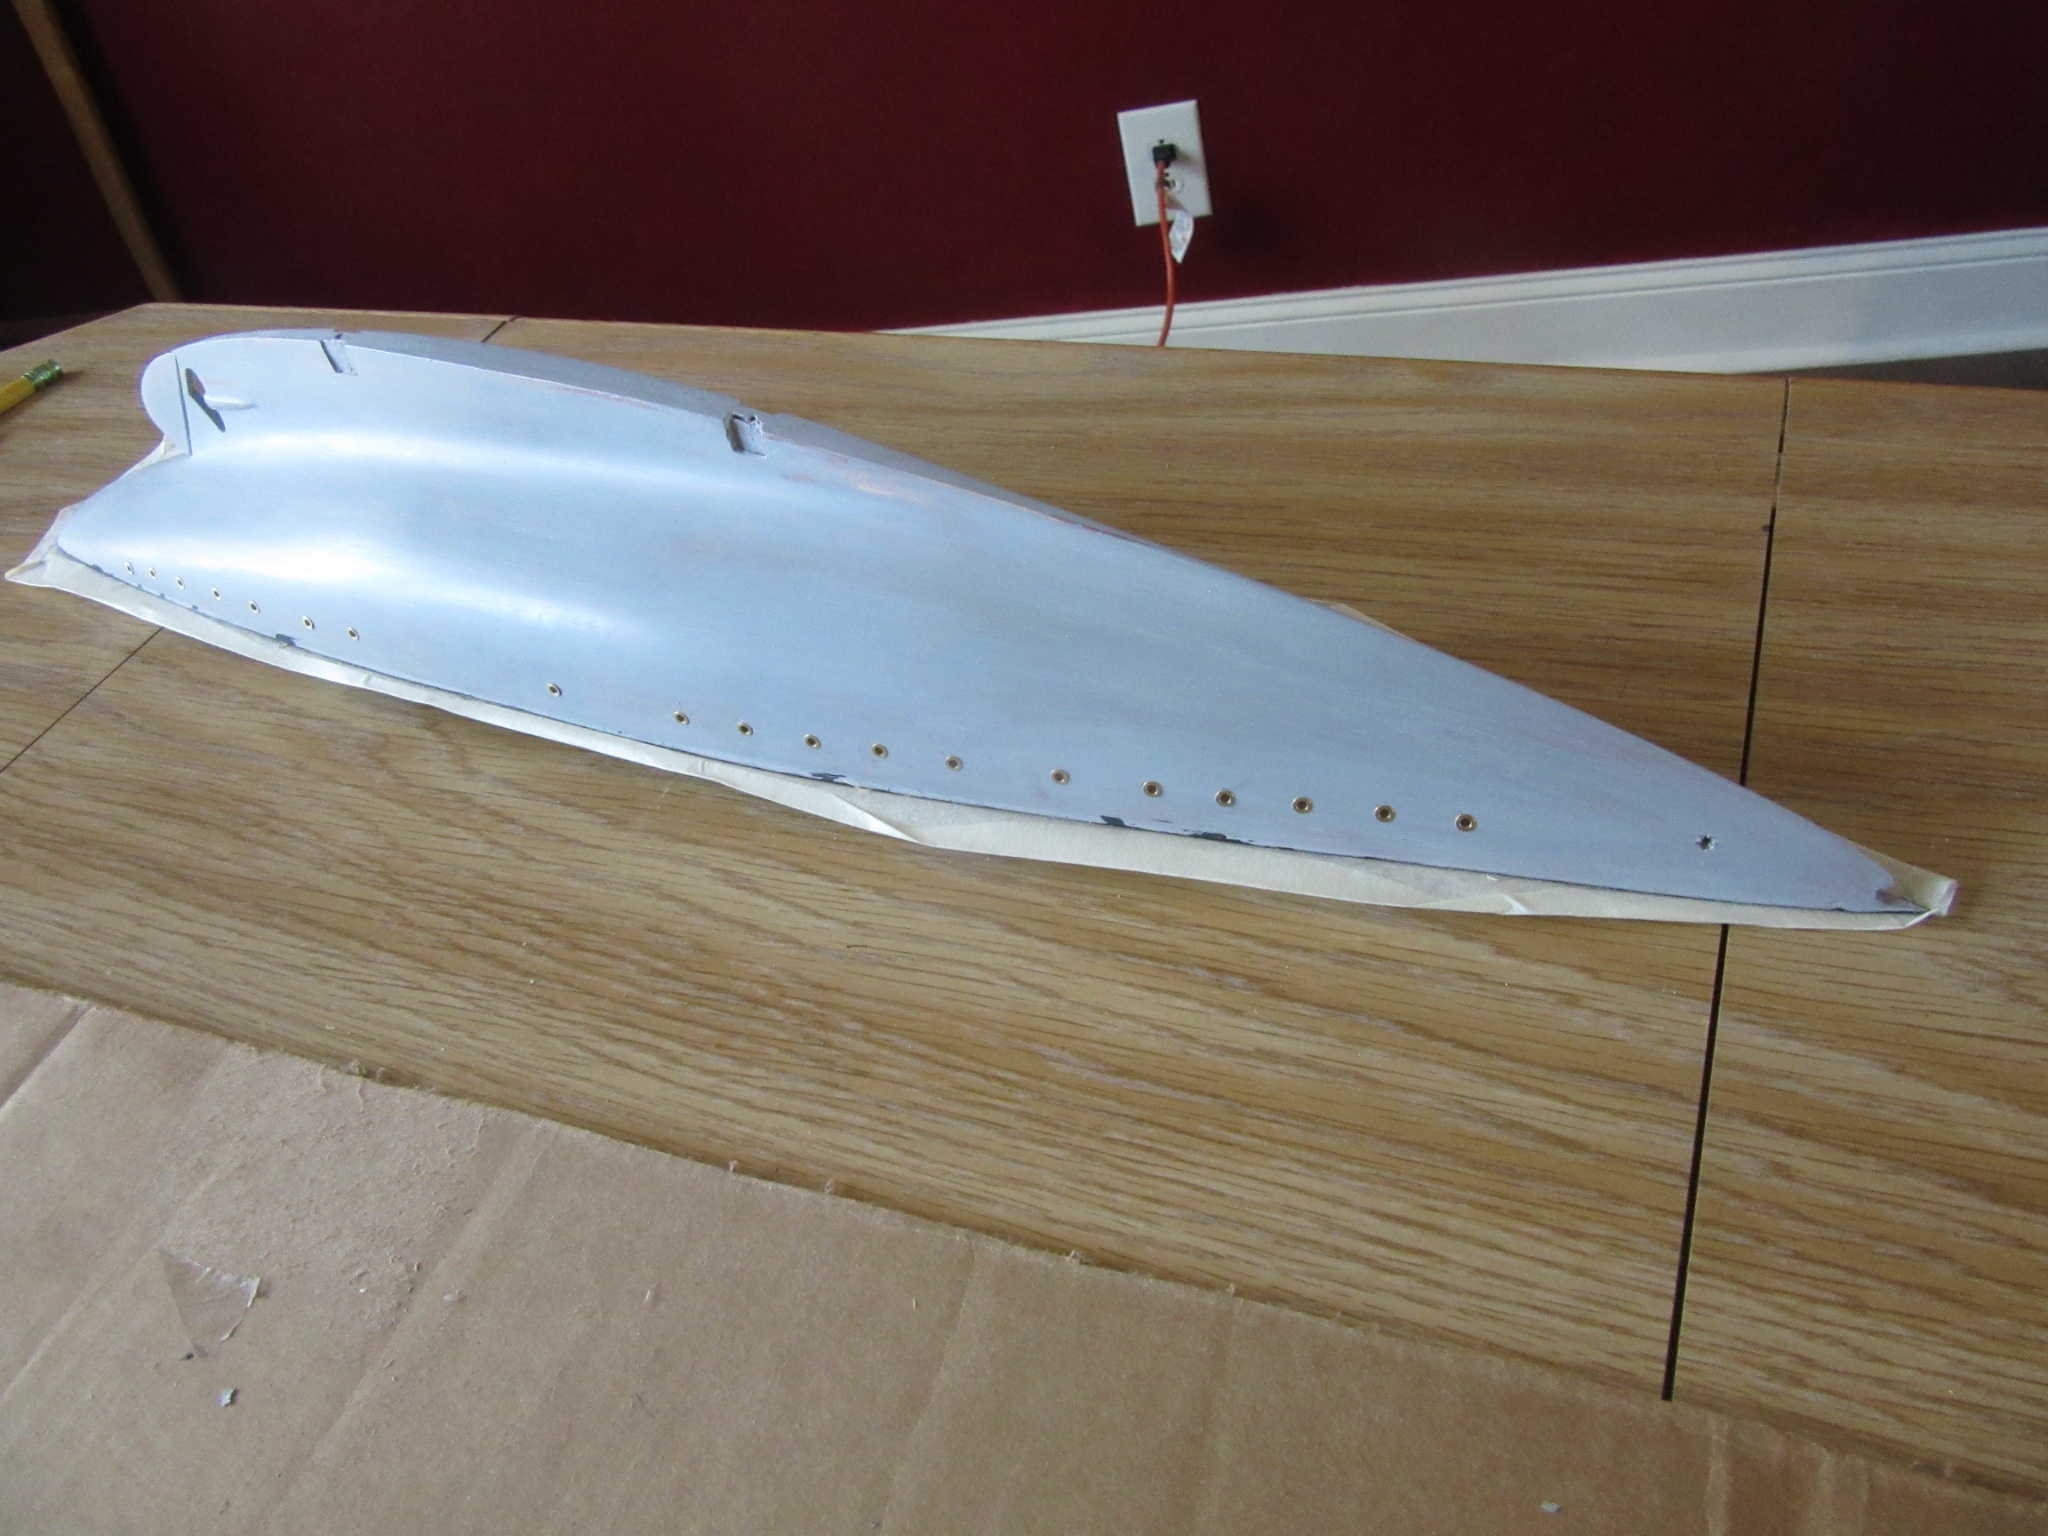
Presently the hull painting of Atlantic is on pause awaiting delivery of a waterline marker. I've been going over the hull filling in, sanding and re-priming scratched surfaces that the primer has made obvious. What I did next was use 0000 steel wool to smooth it down resulting in the hull prime coat becoming as slick and shiny as a cue ball. My question, is this a good thing or a bad thing? And what remedial action needed if any. I searched the website for priming hulls and couldn't find any posts utilizing steel wool for the prime coat.
-
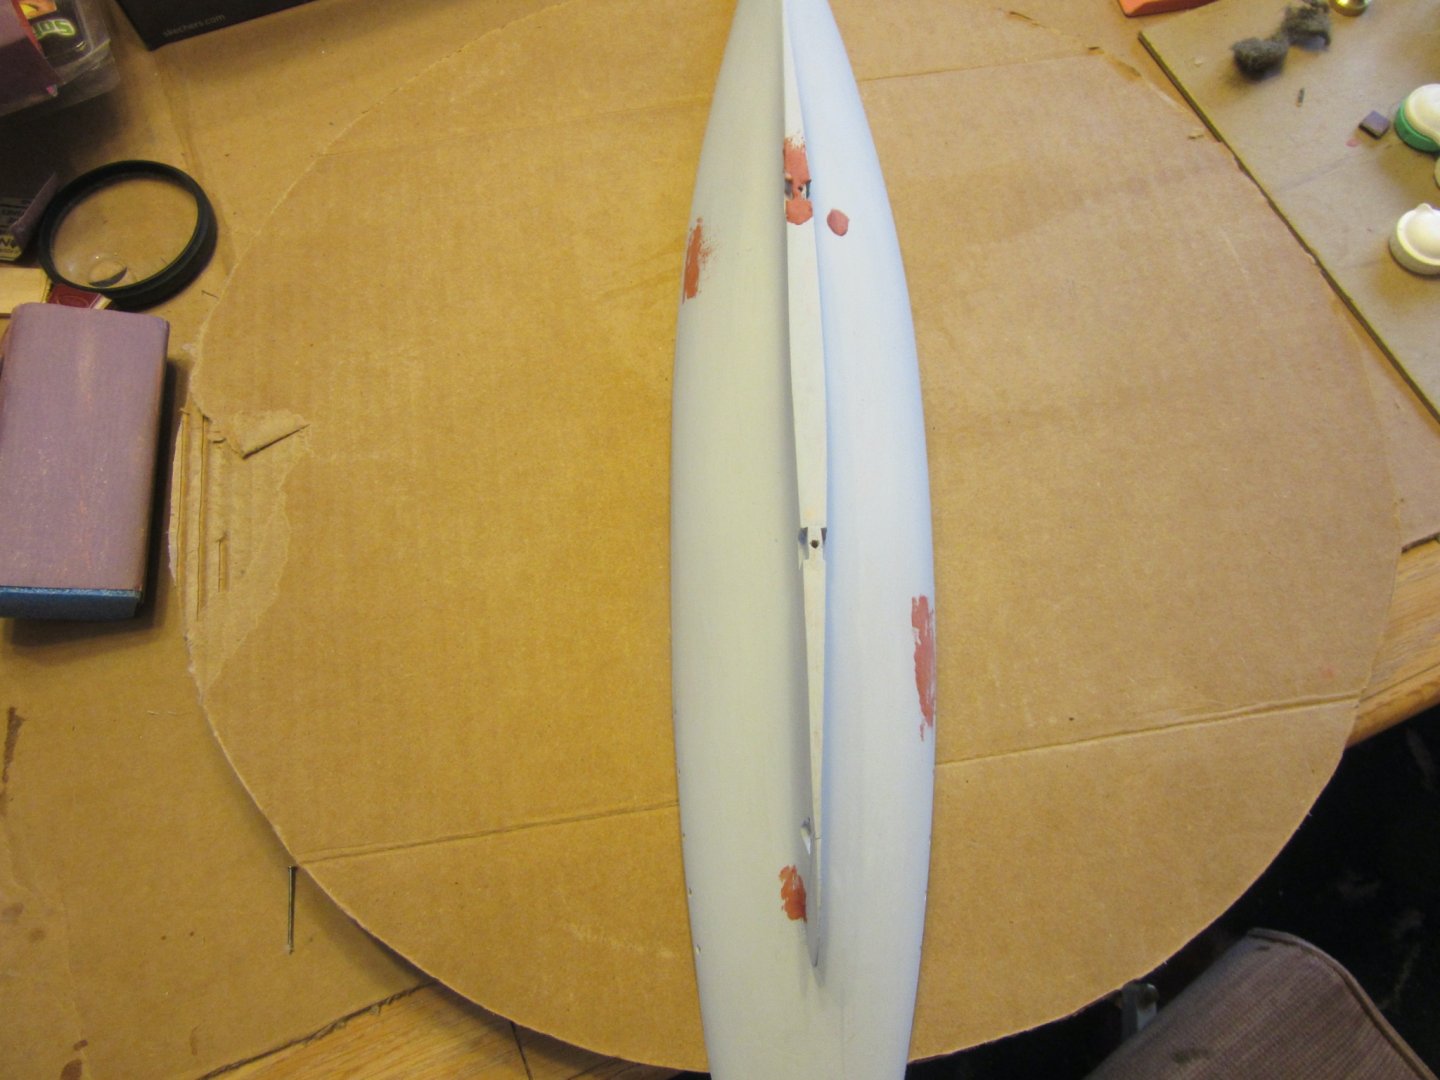
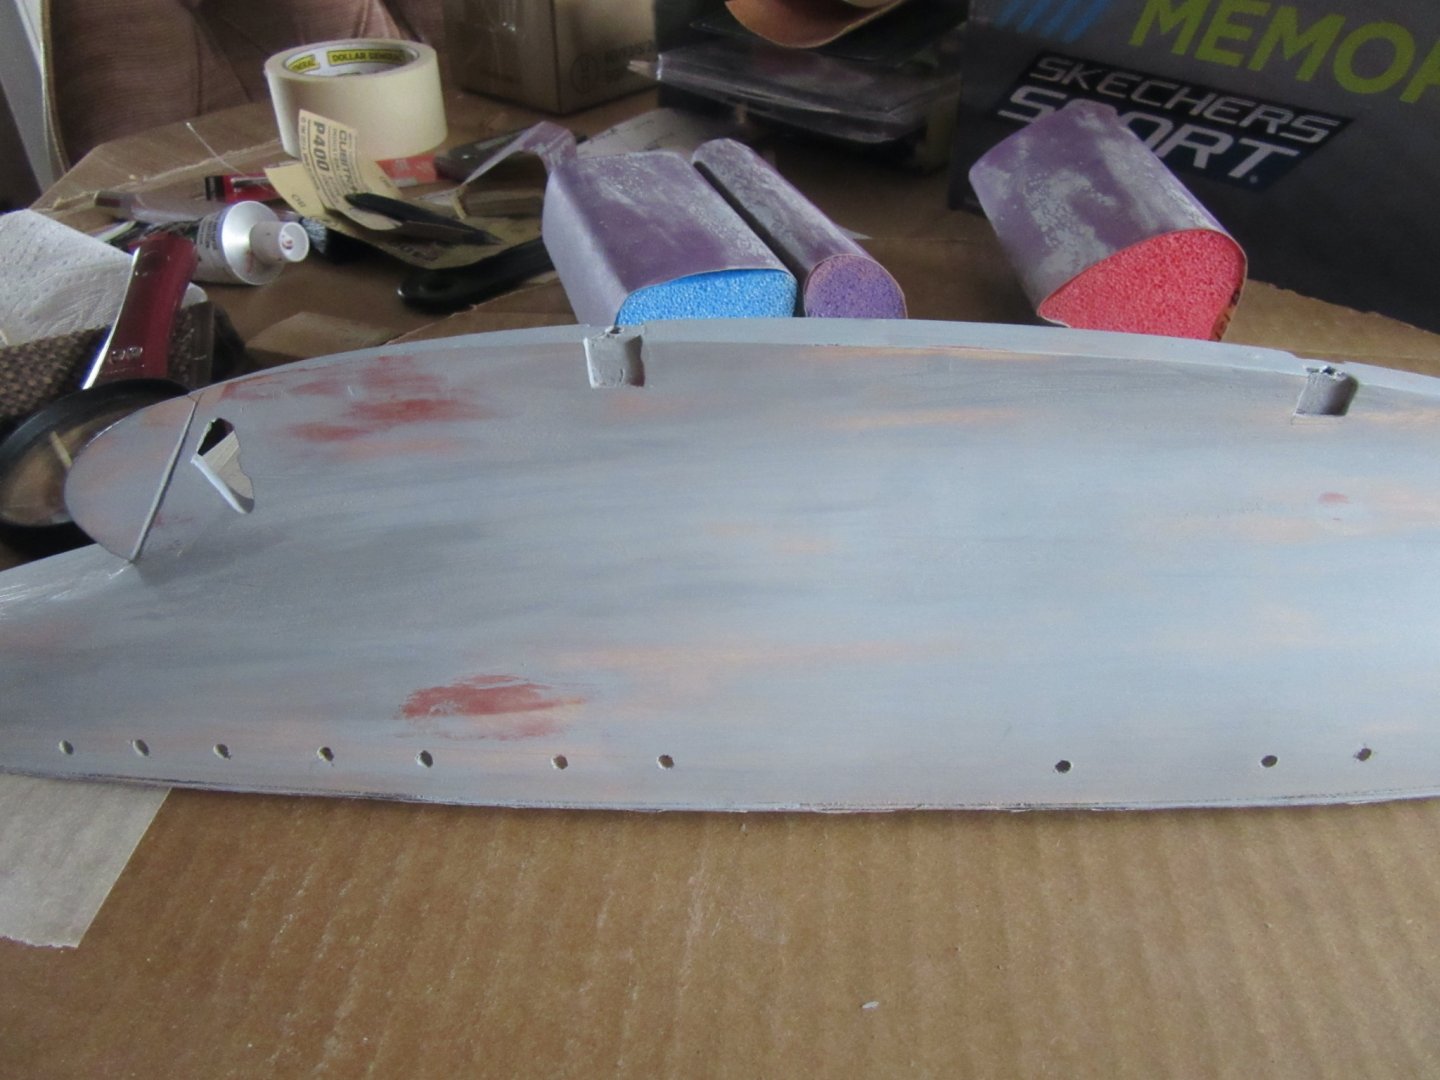
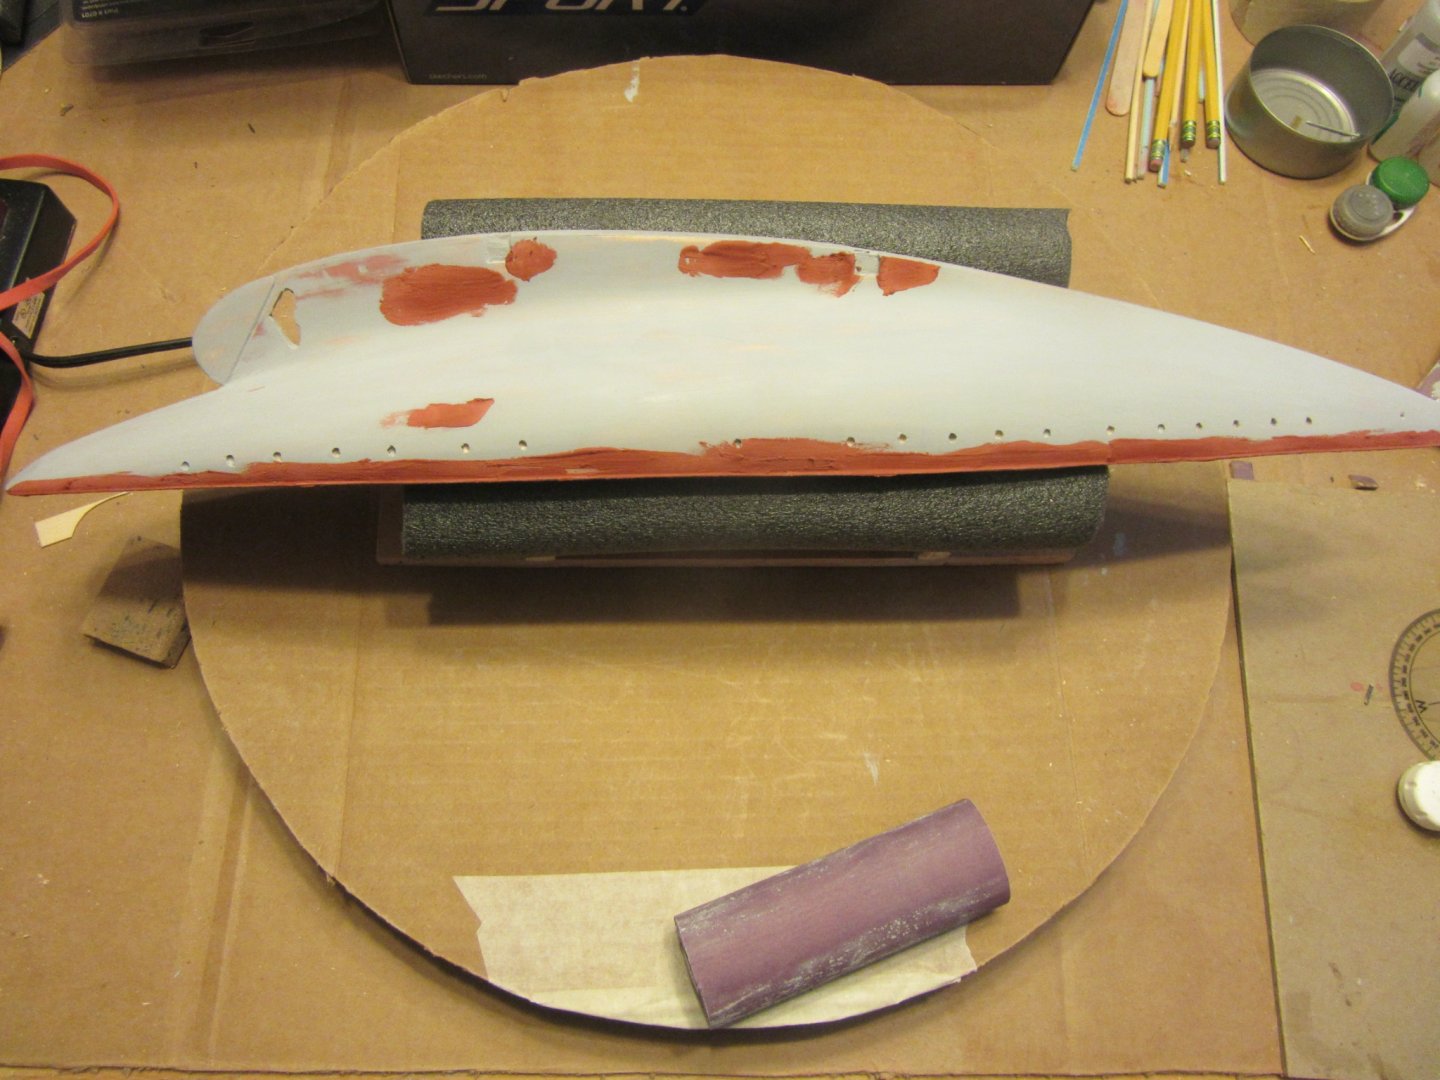
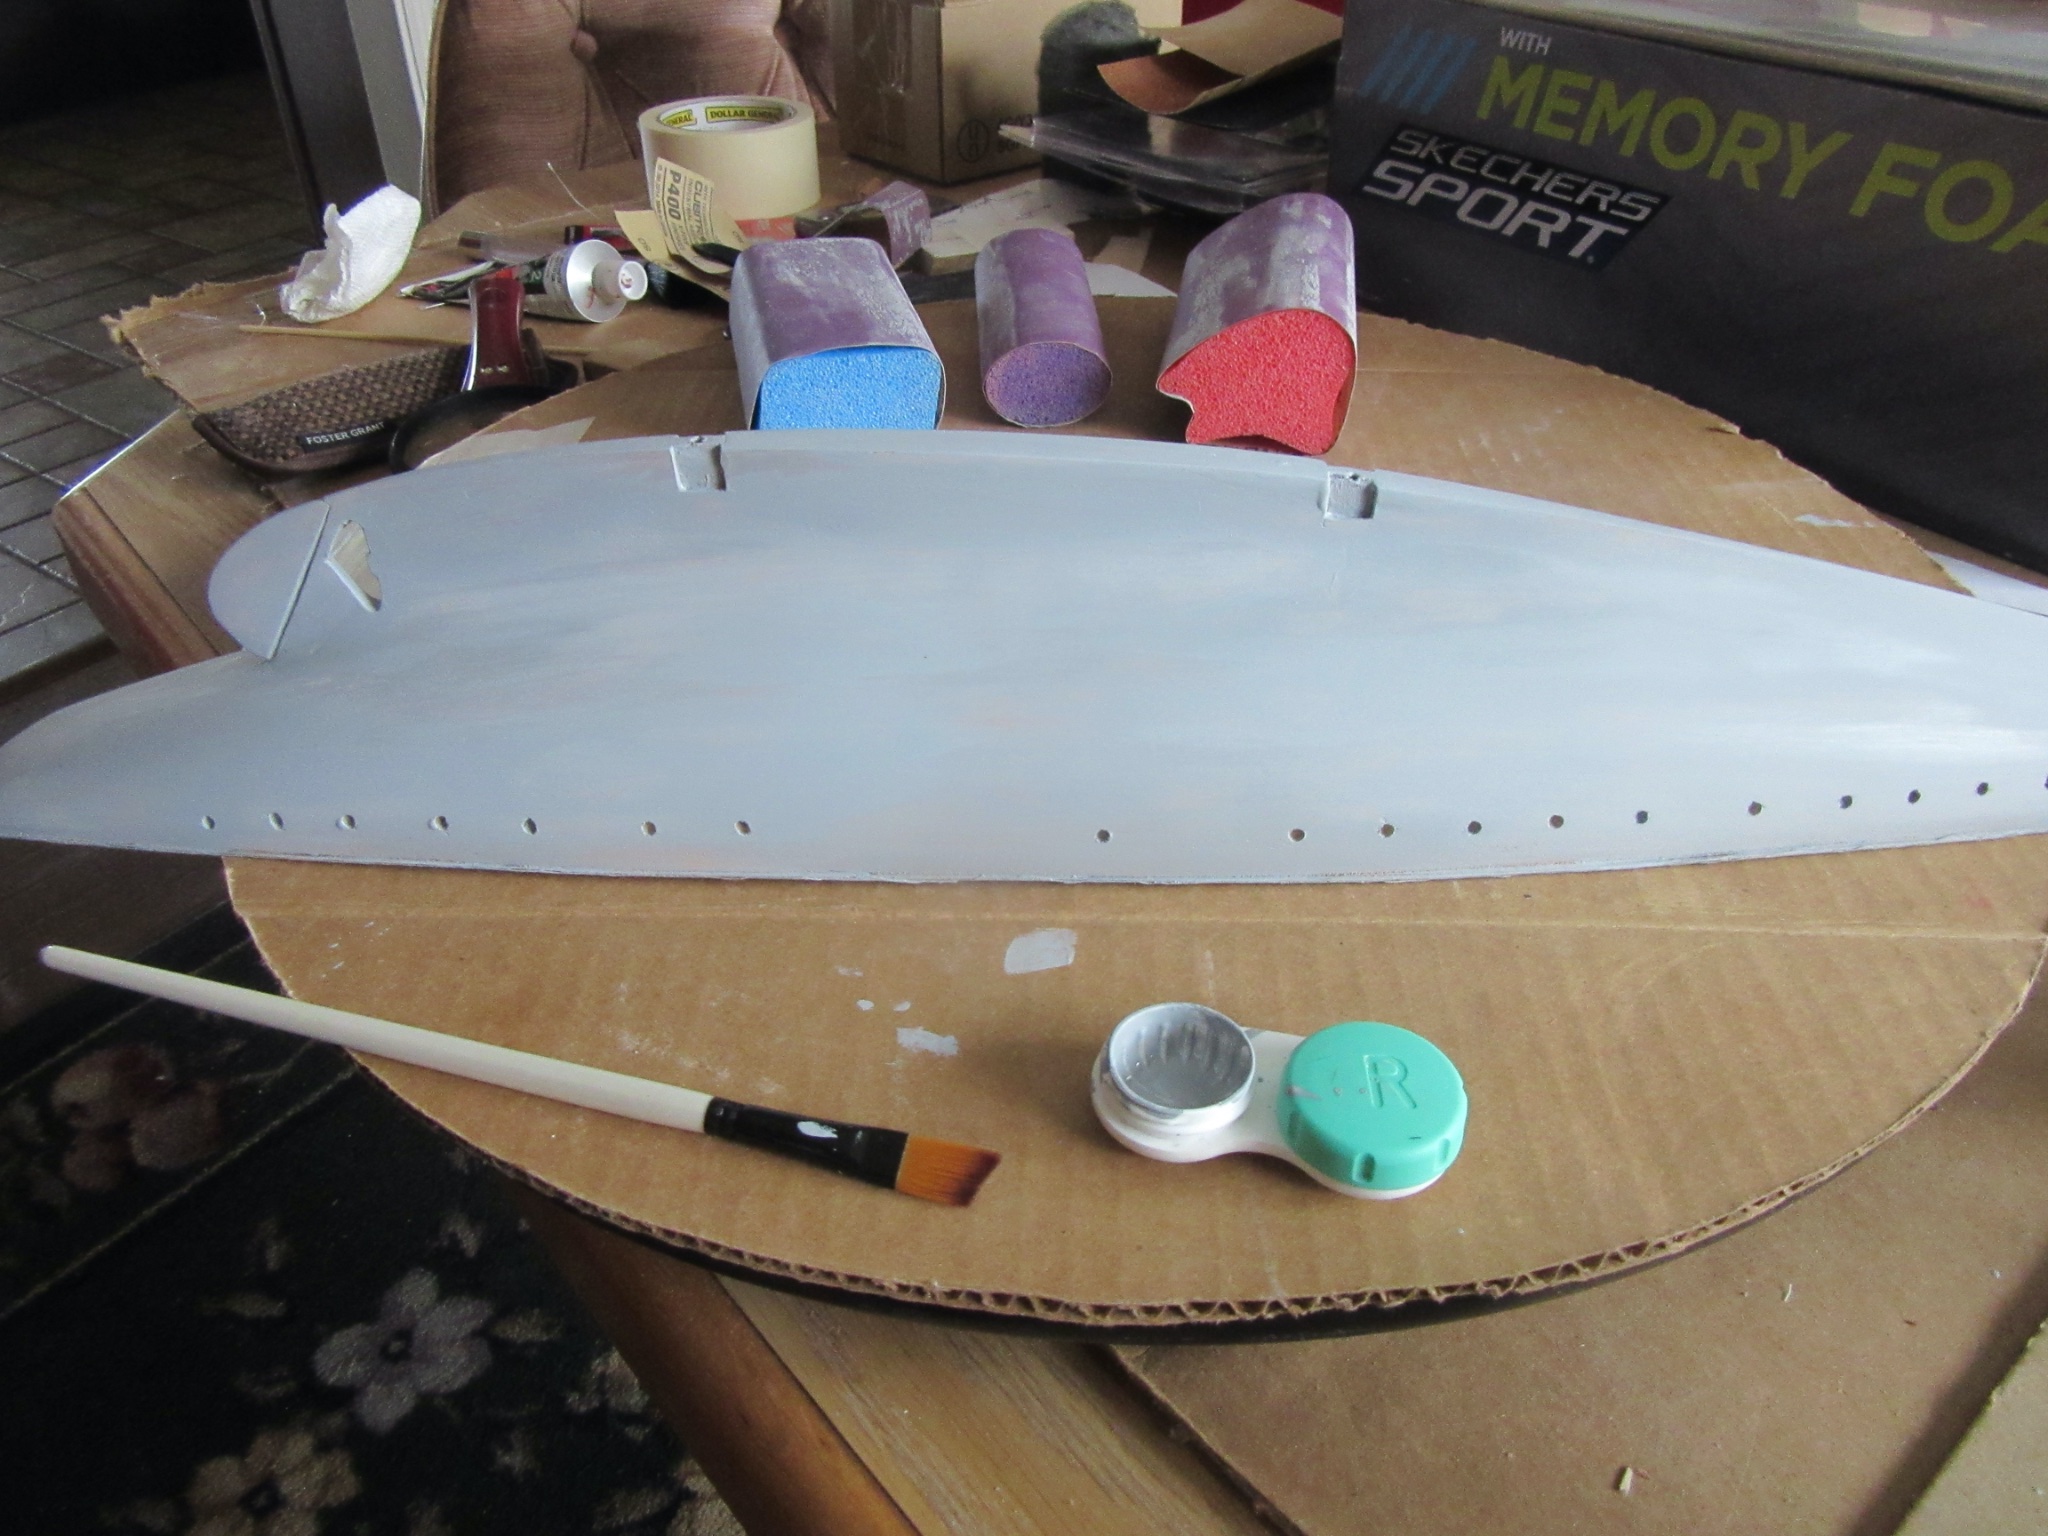
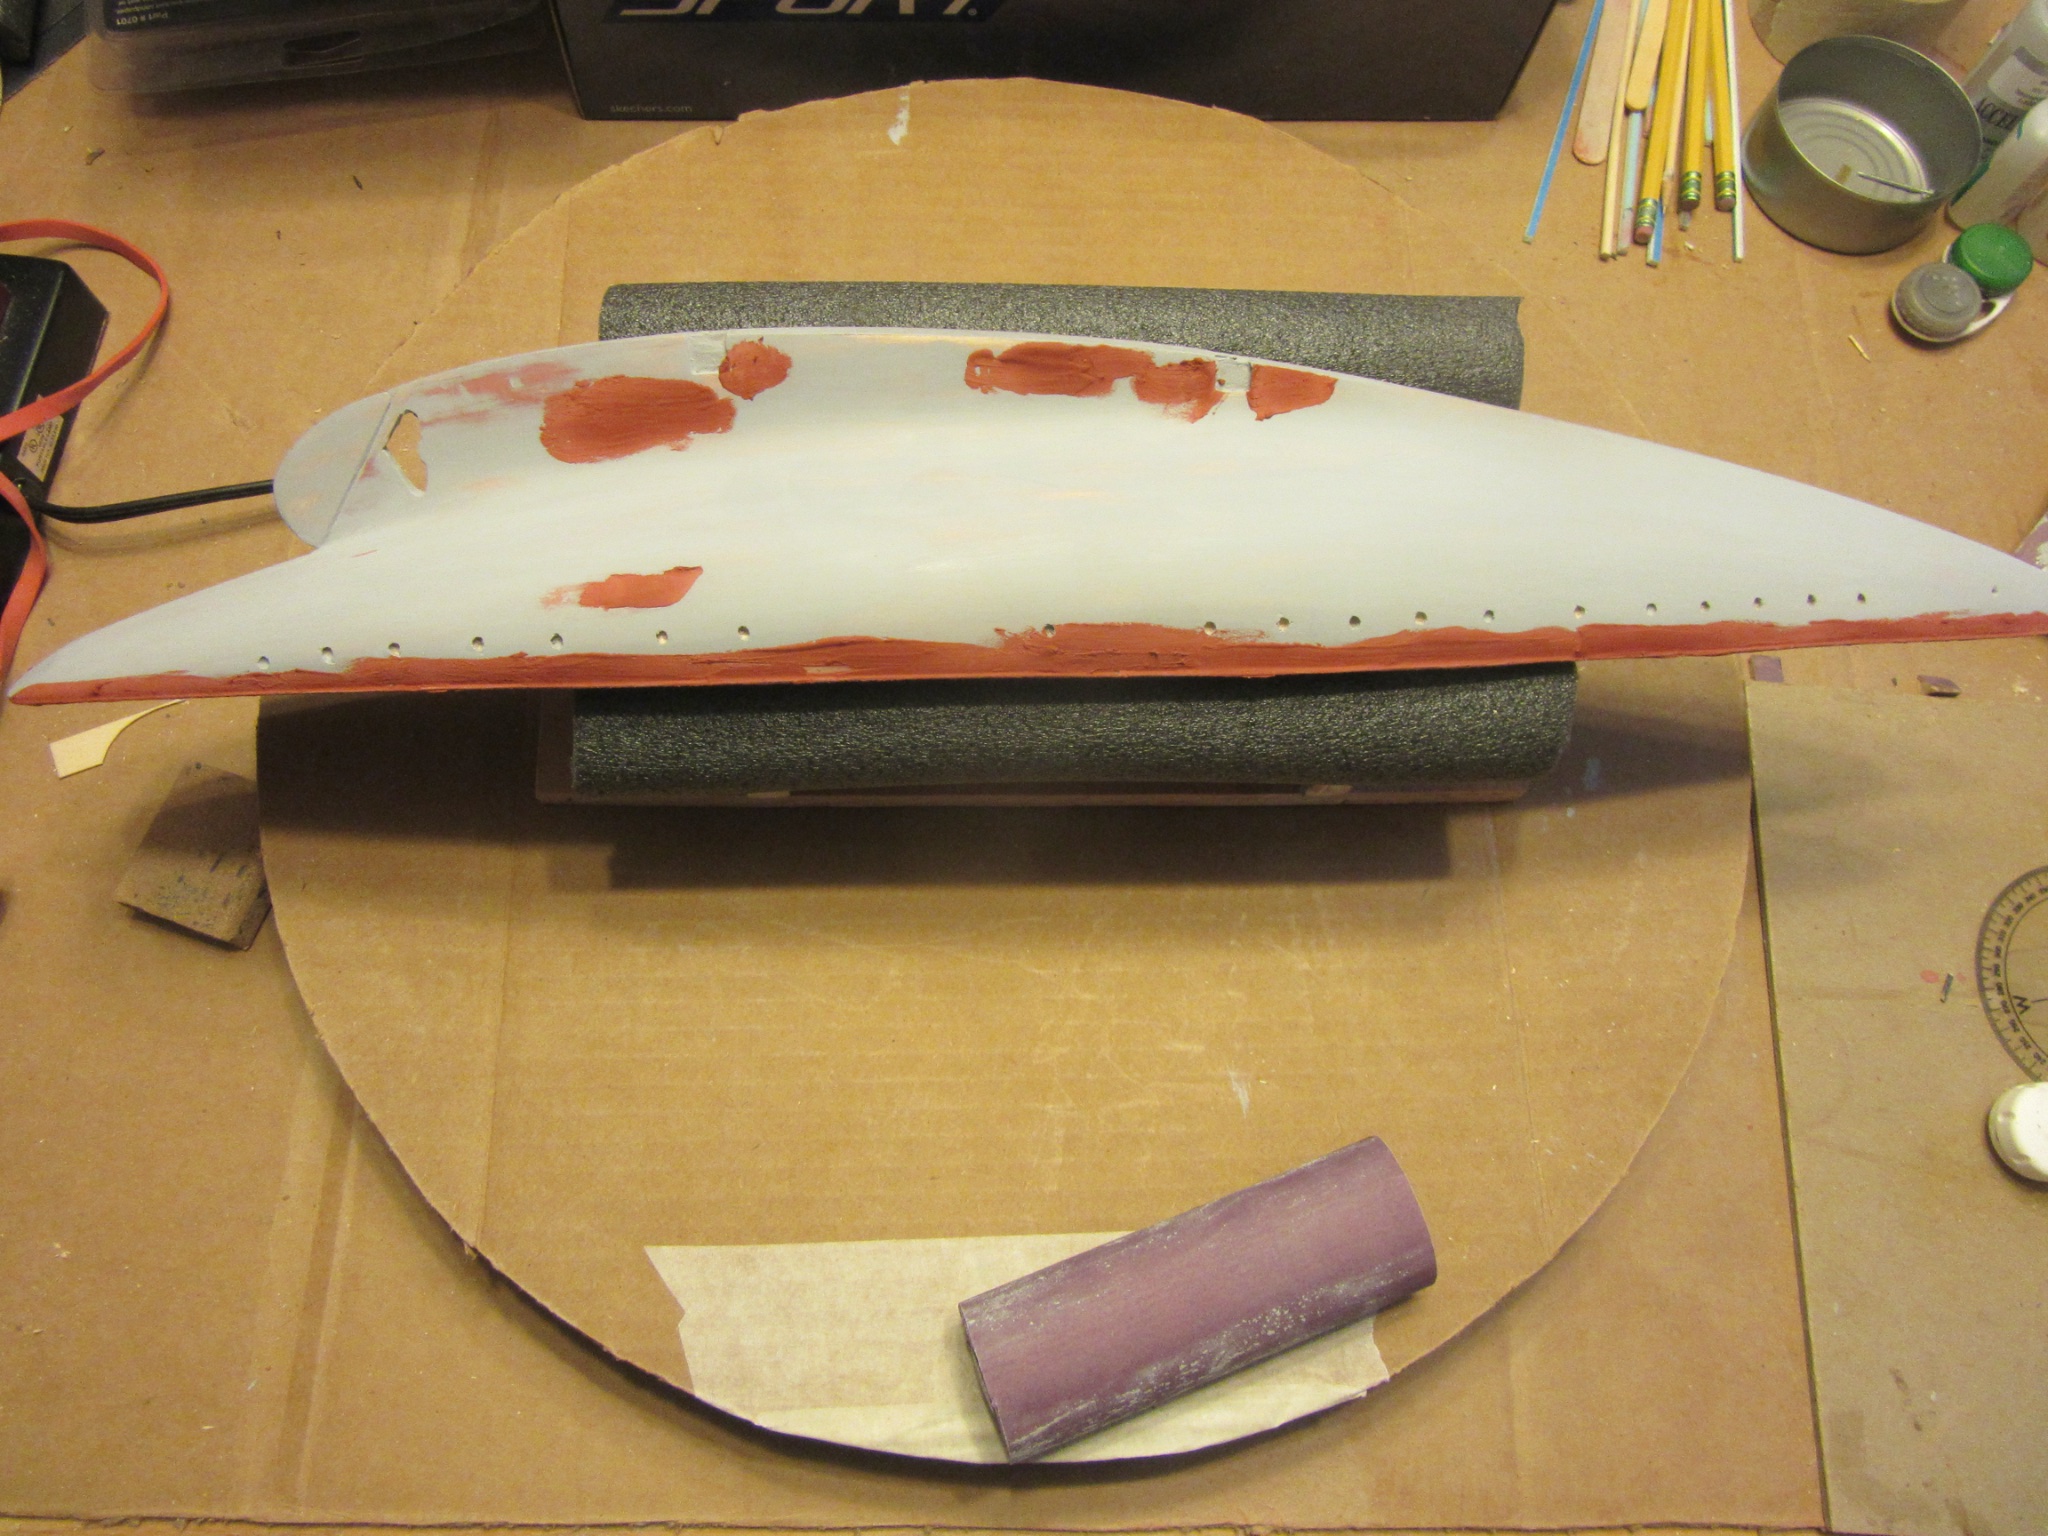
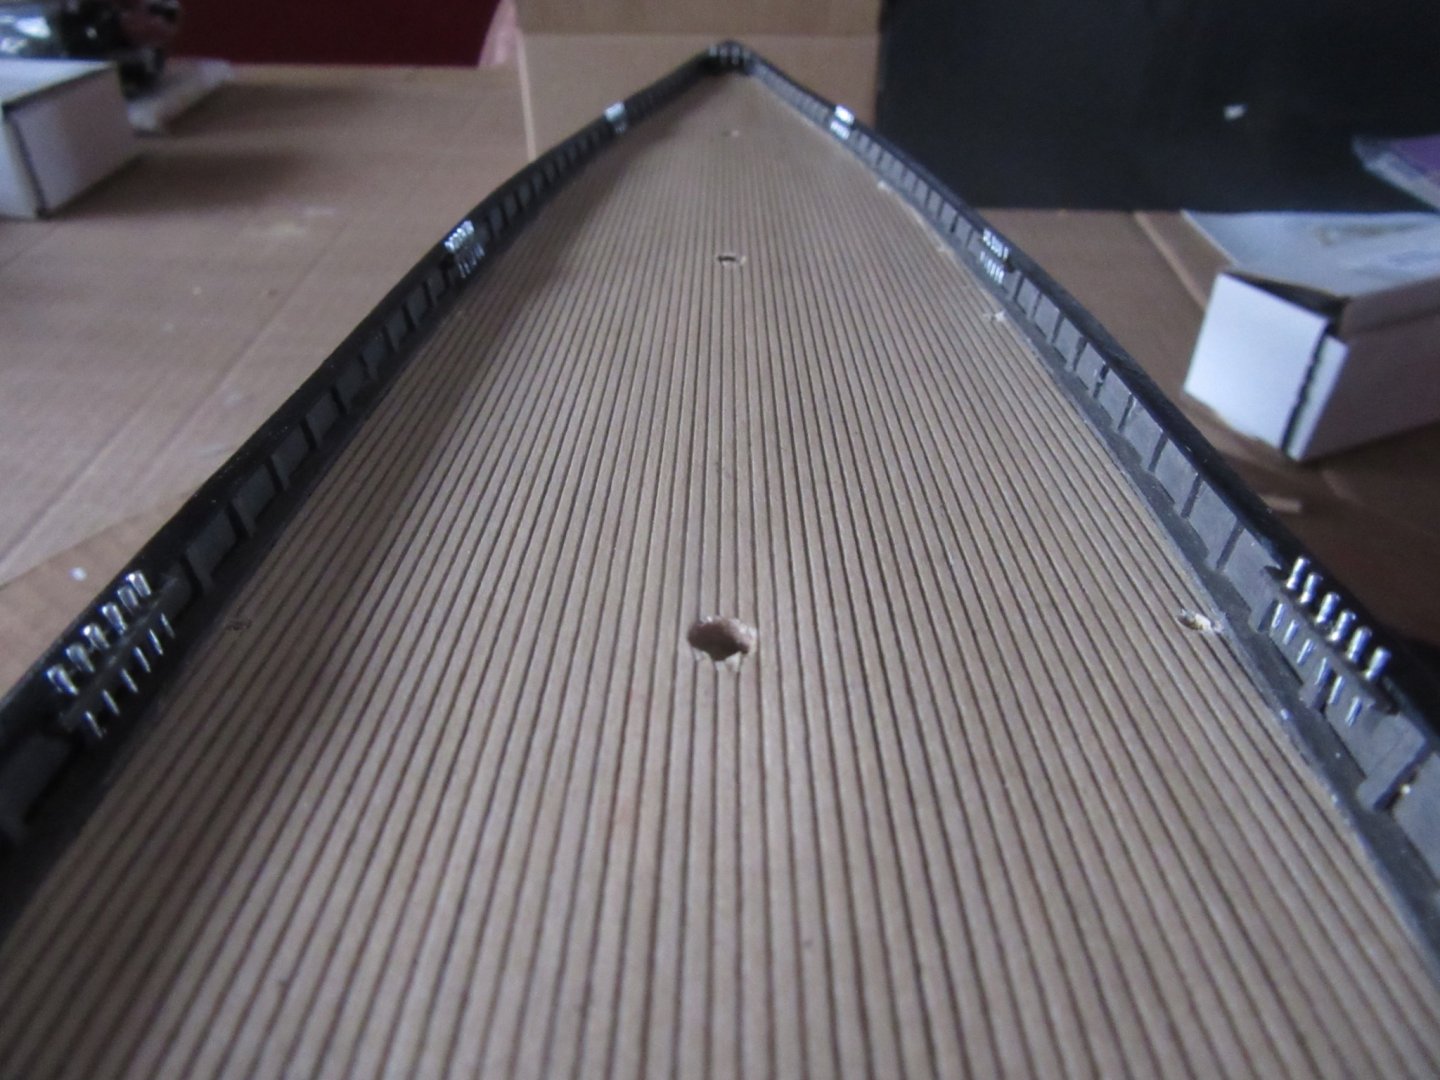
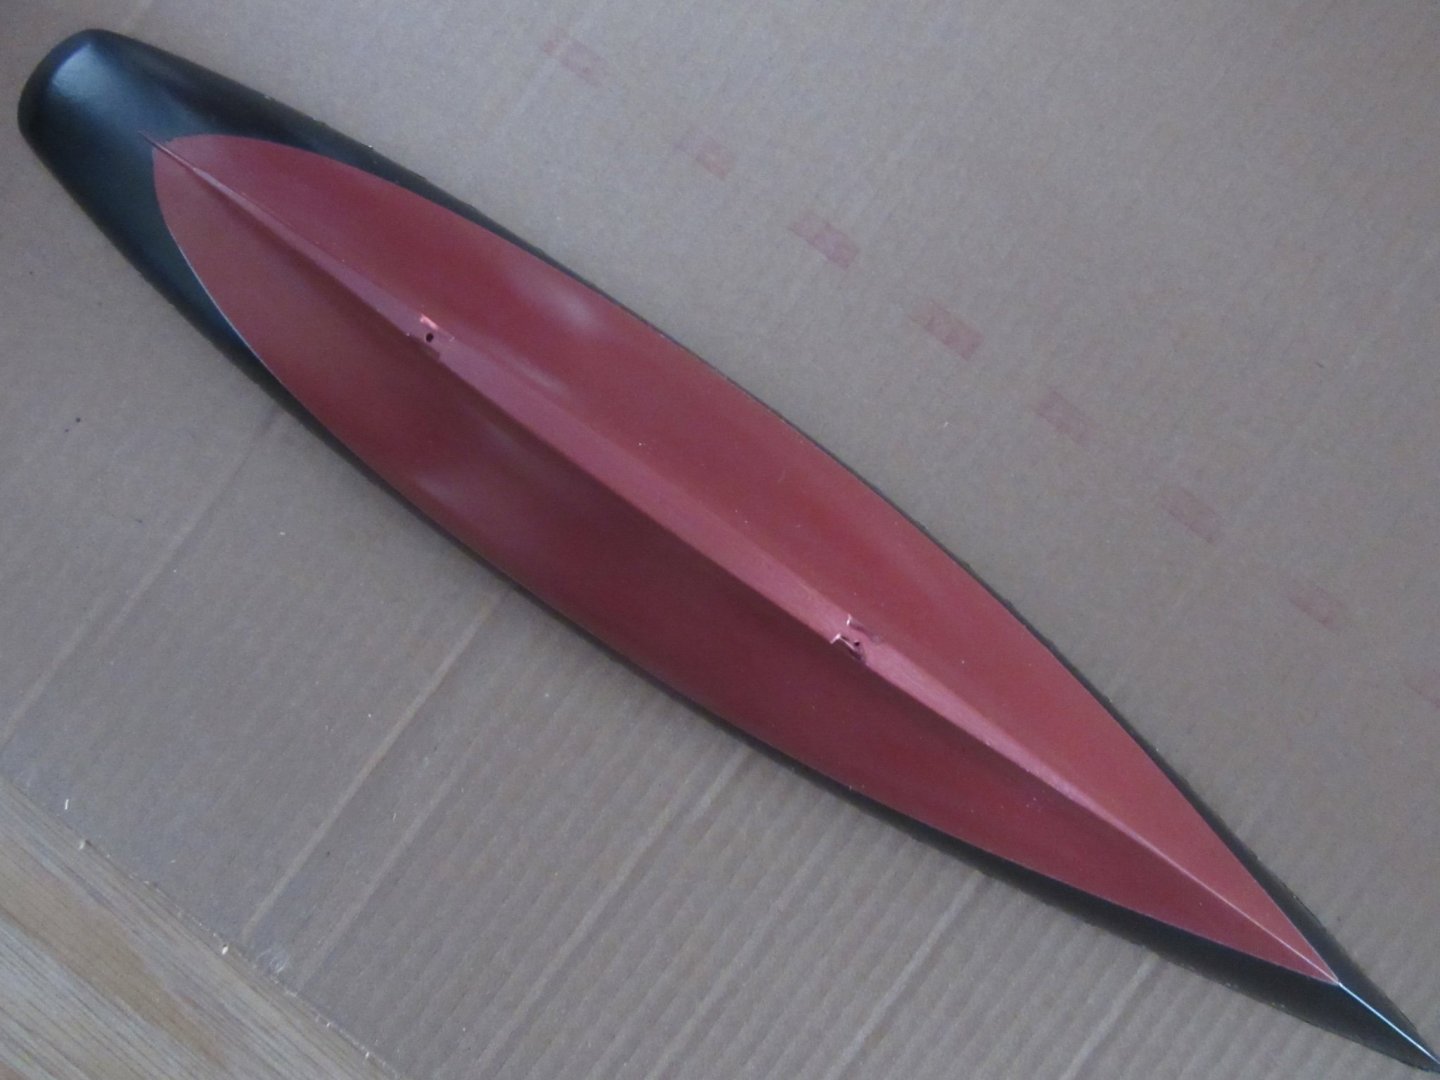
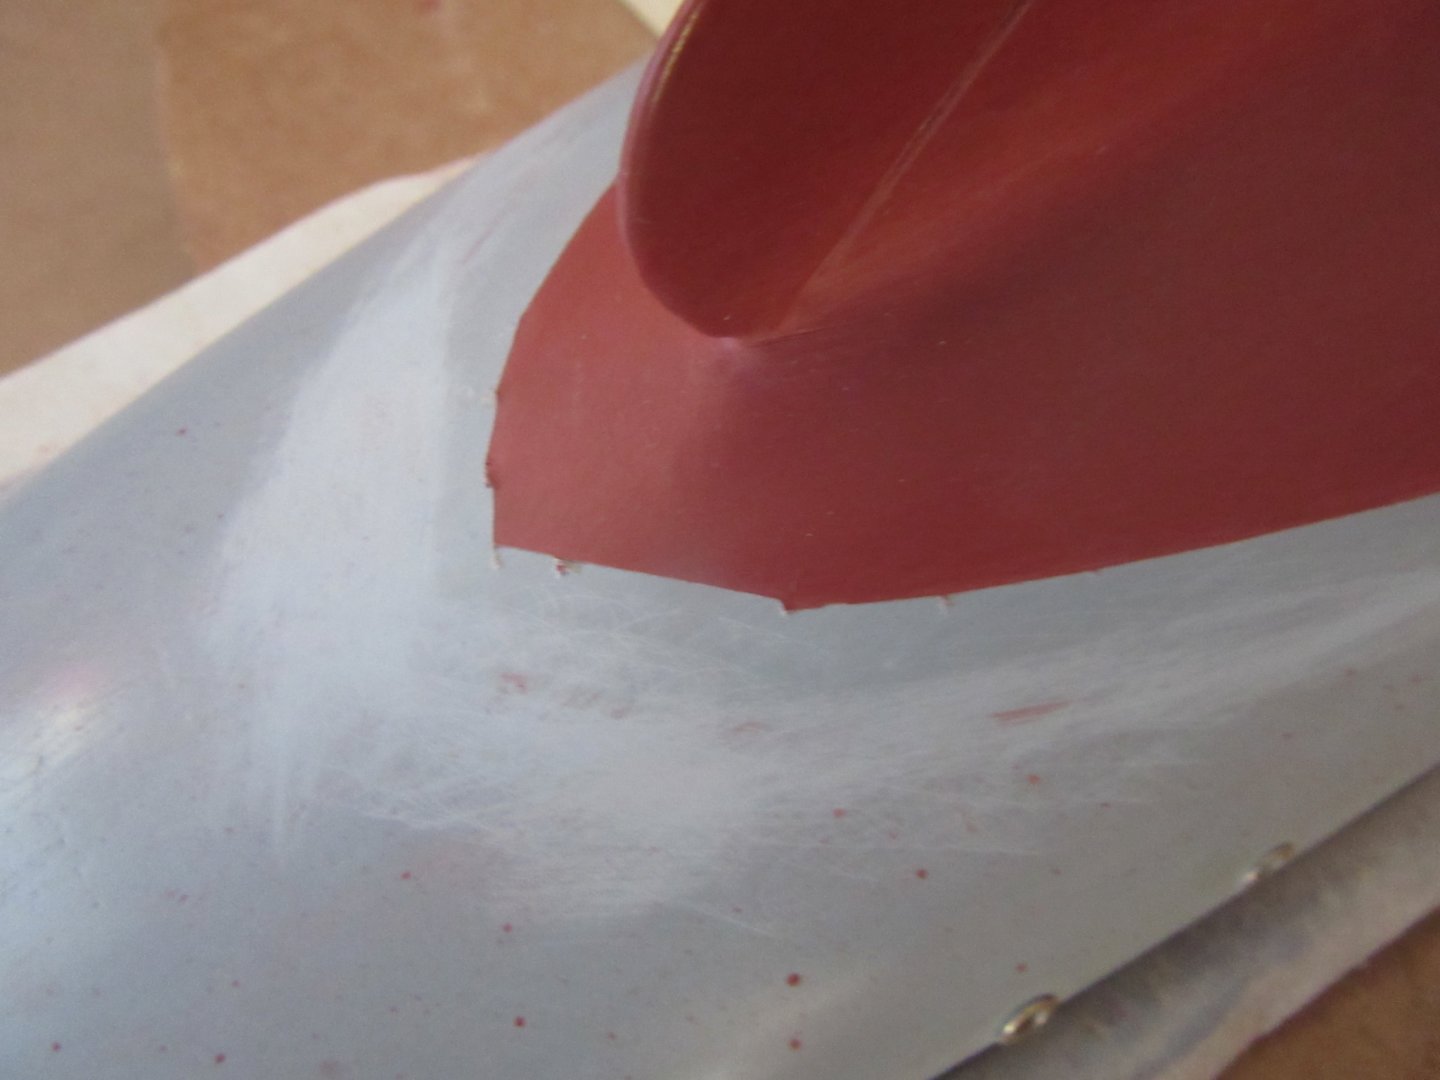
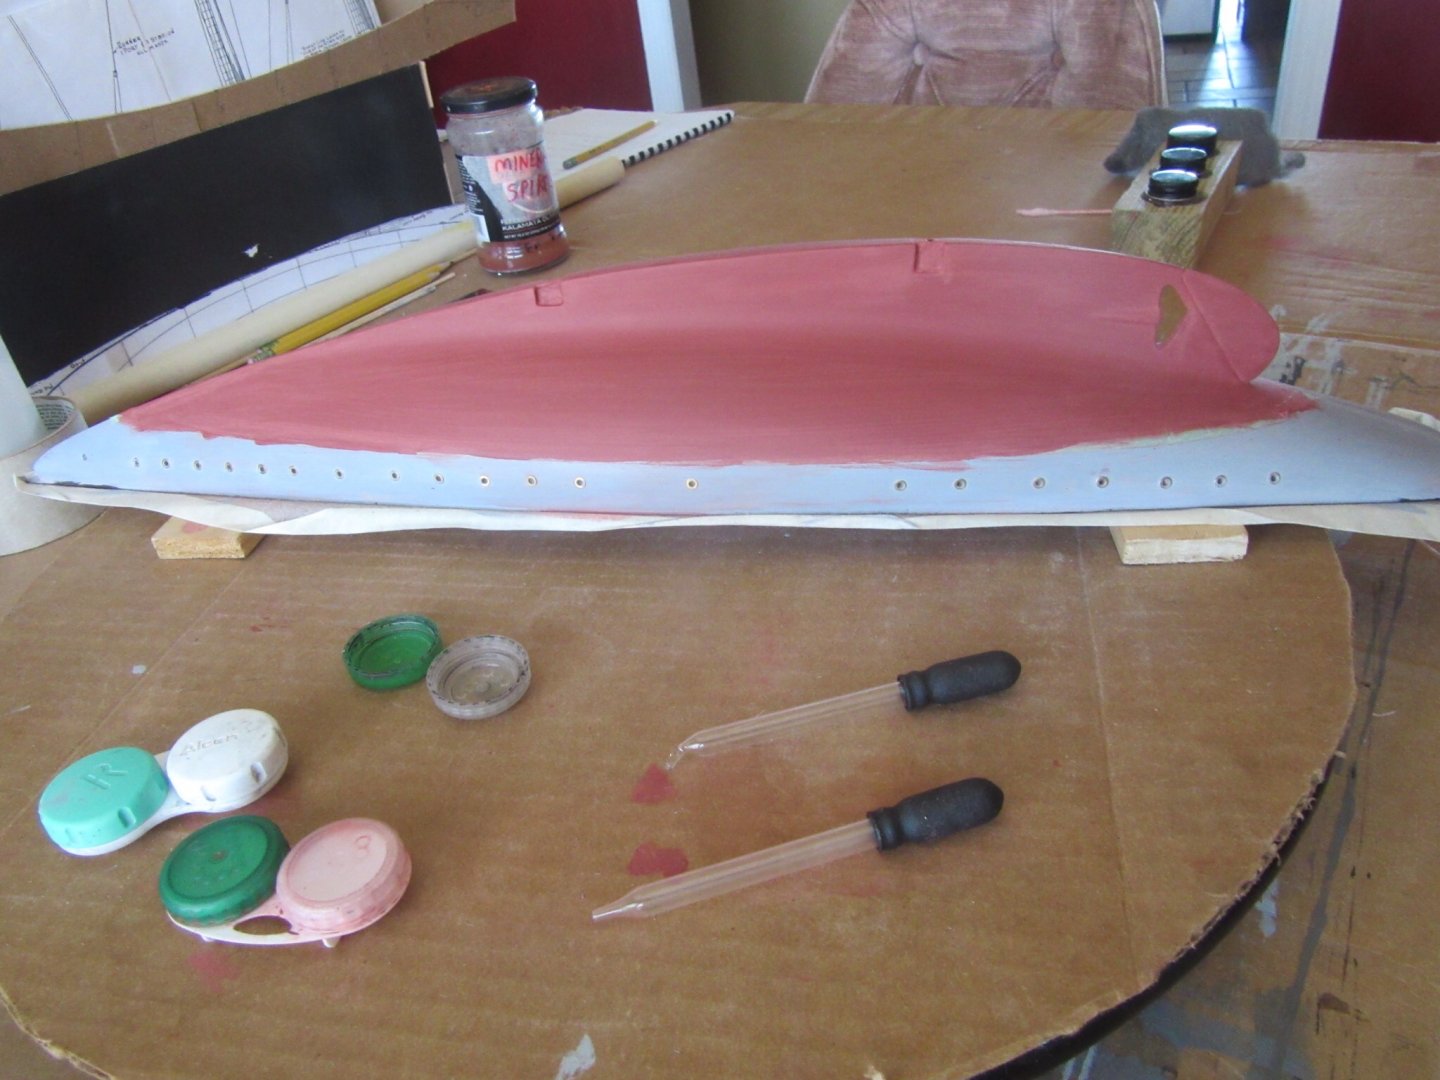
Masts, davits, hawse and port holes have been drilled and decks masked over for hull priming and sanding. After first prime coating the hull I noticed several discontinuities exposed by the primer. This process of priming, applying putty then sanding with 400 grit was repeated 3X's until the final prime coat was lightly sanded with the same 400 grit paper and now ready for the flat red underbody painting.