
closehaul
-
Posts
150 -
Joined
-
Last visited
Content Type
Profiles
Forums
Gallery
Events
Everything posted by closehaul
-
 Why thank you Bob! I’m having fun building this kit and I’ll be posting soon although the holidays slowed down progress.
- 37 replies
-
- 1
-

-
- BlueJacket Shipcrafters
- America
- (and 1 more)
-
Thank you Chris on my Atlantic build. Yes, I ran into the same issue interpreting the instructions. They were vague as how to “wrap it around the top mast cap. Instead I followed the diagram on the sail plan that details the spreader shrouds and drilled holes for them very gently with wood backing just beneath the mast truck. I’m not savey on nautical terms but I think that is what’s meant by the top mast cap. As far as the spring stays are concerned, I Iooped them around both masts just under the mast cap and served them at each end, no holes drilled. I hope I hit it on the head with these insights. Please tag me back if you have questions. Ciao! Ange
-
I’m doing something wrong on my photo order. The first and second photos are in reverse order. That’s not the order they were originally loaded.


-
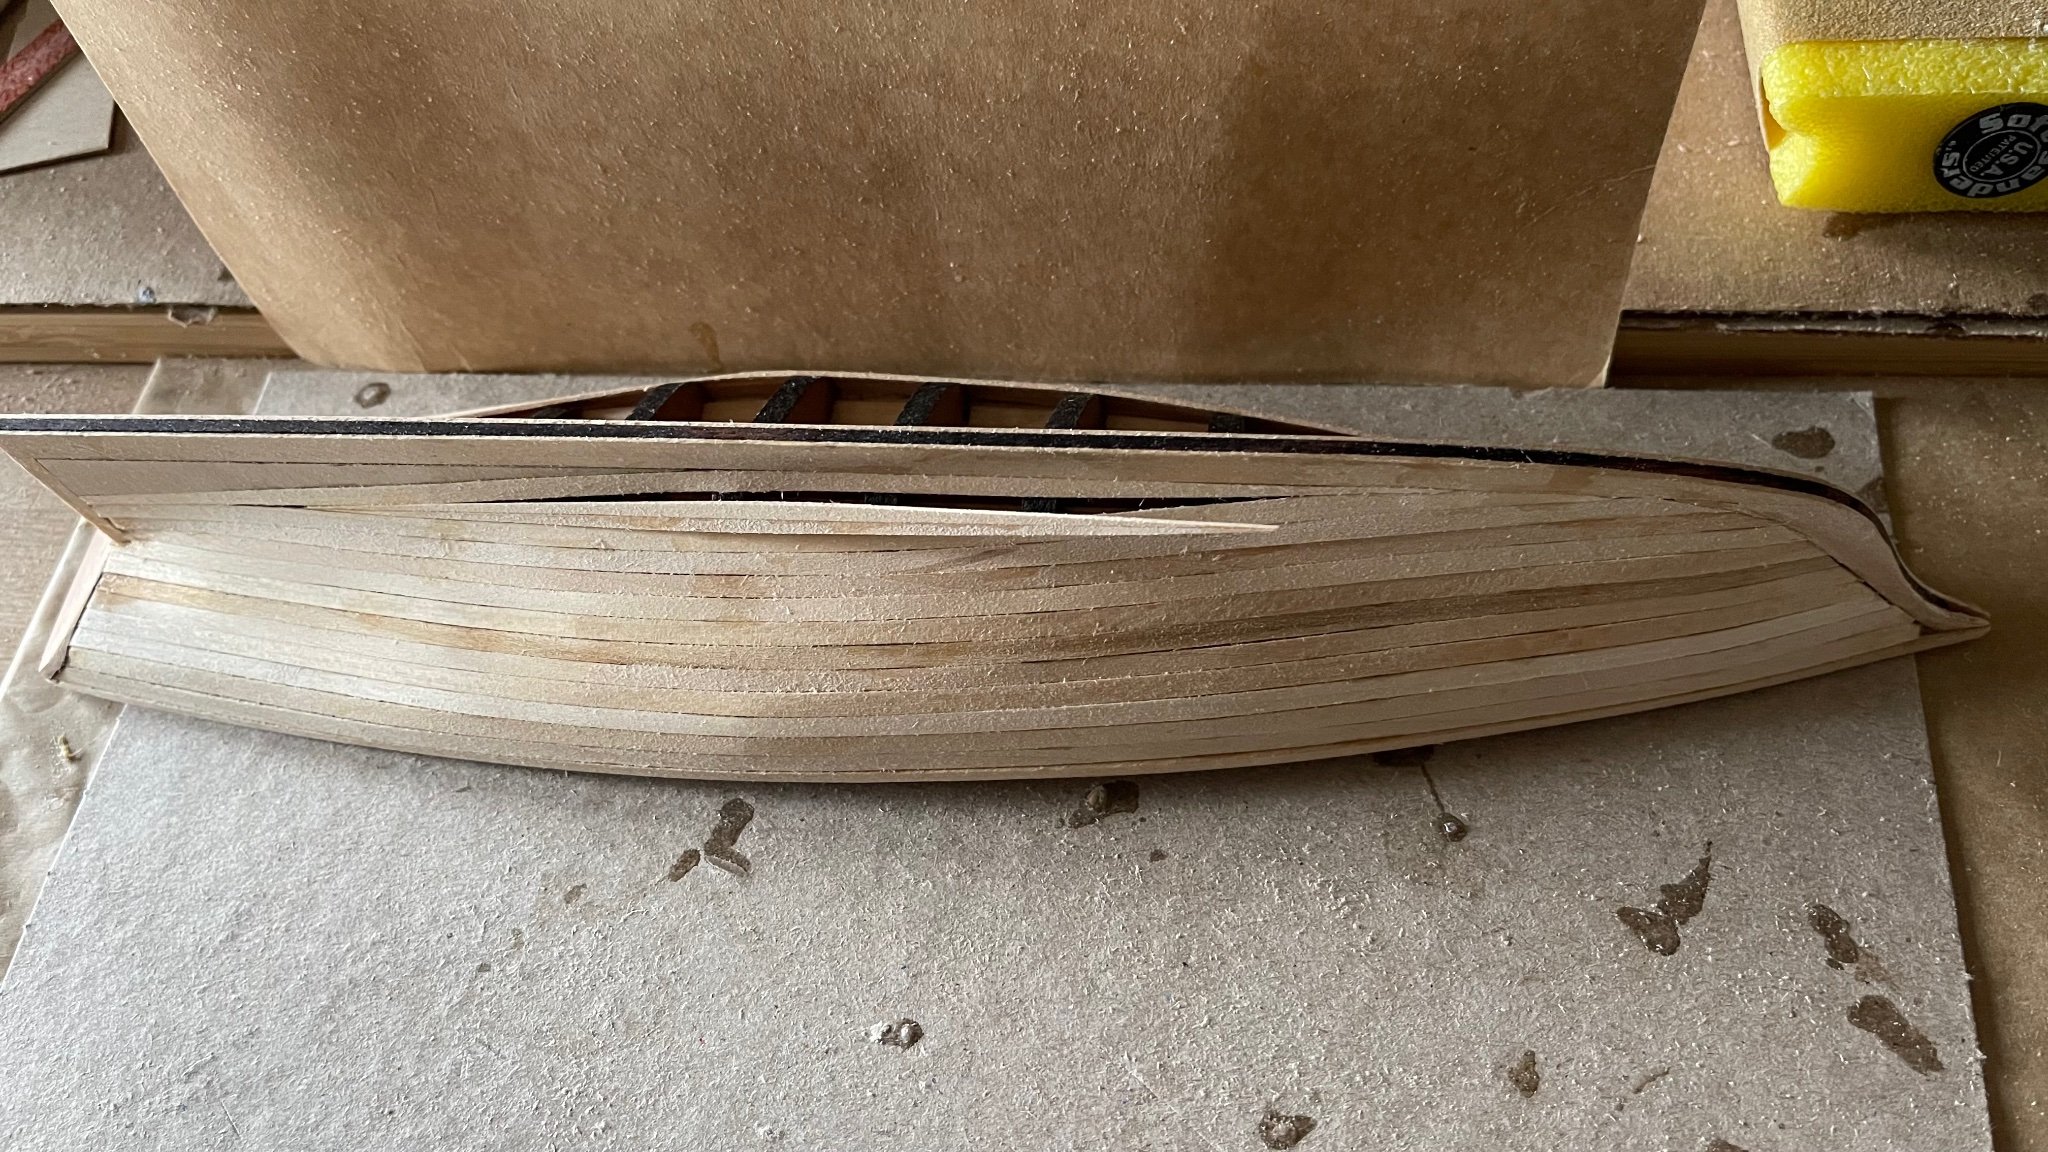
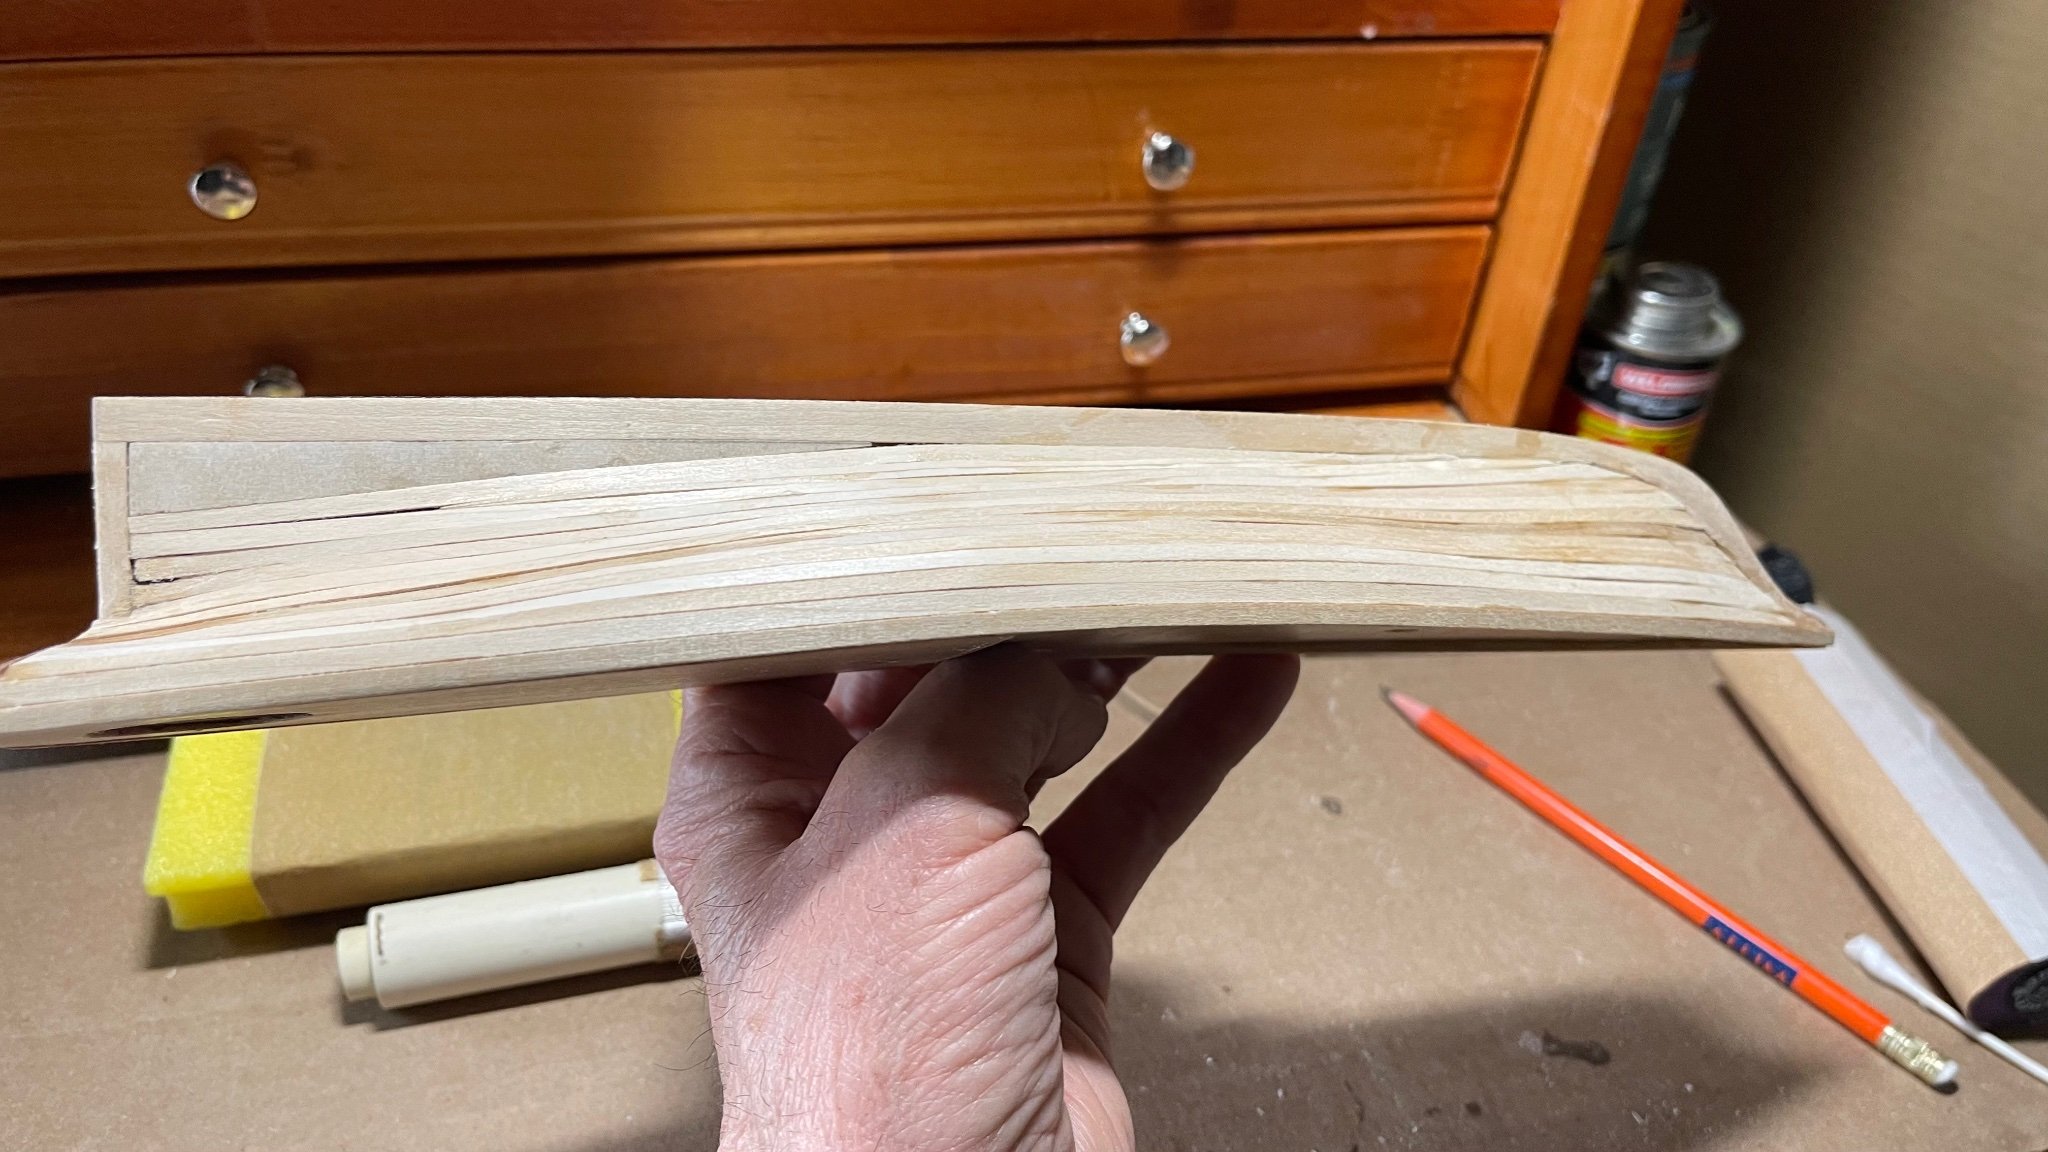
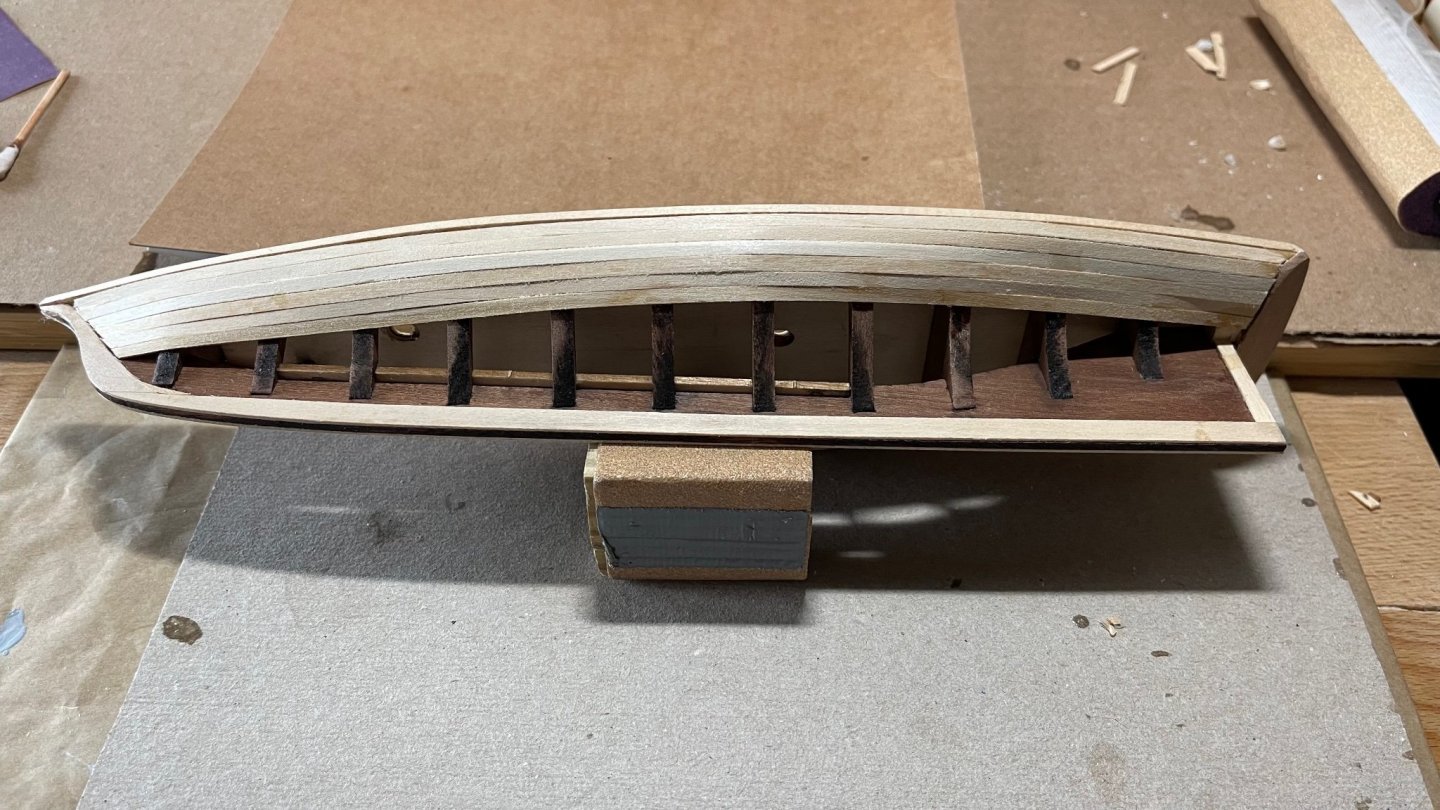
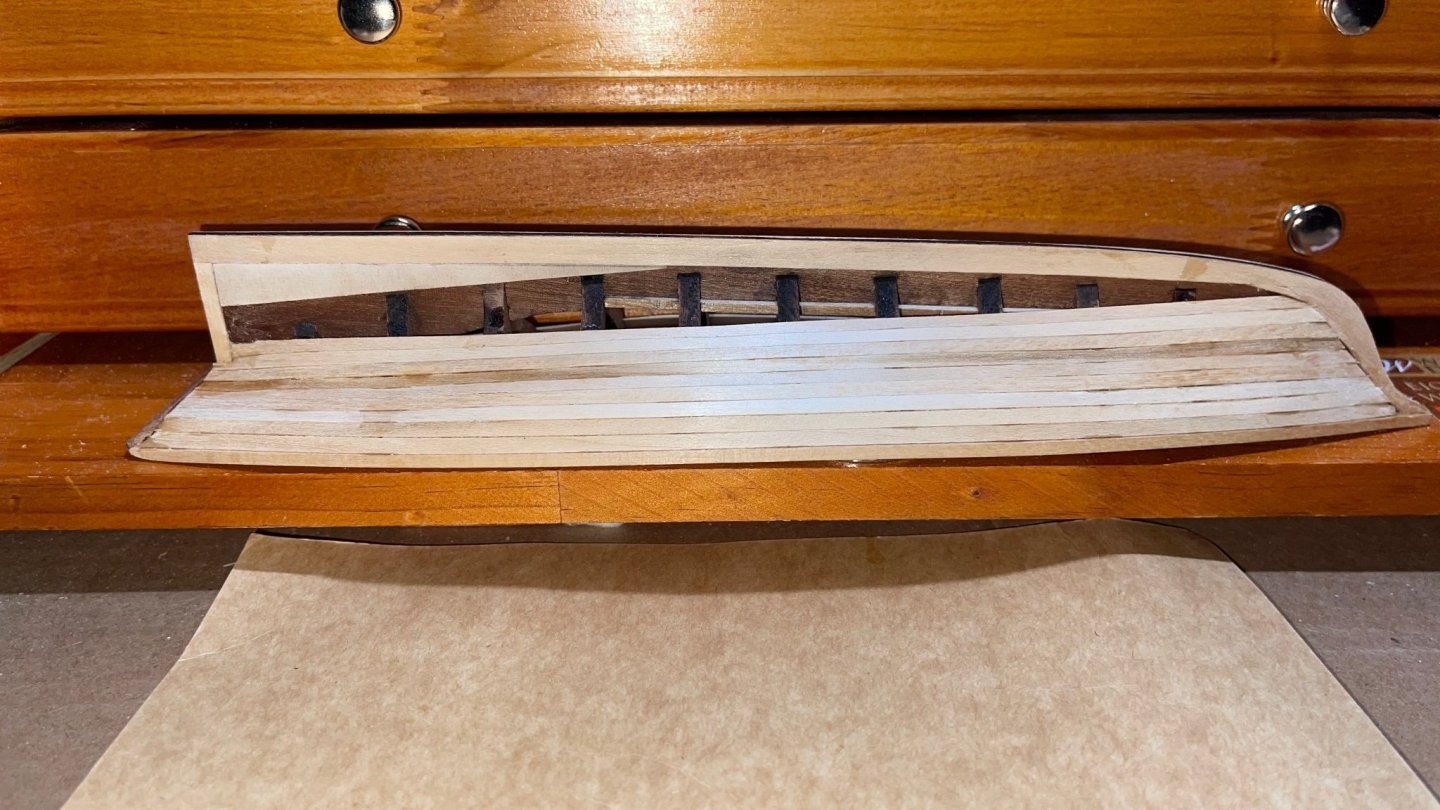
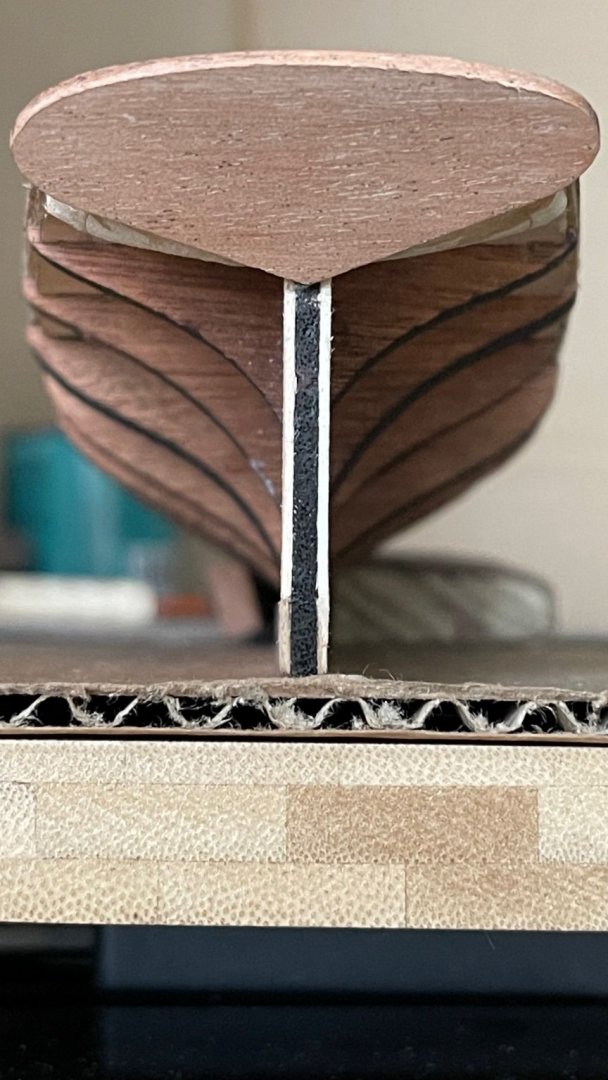
In the top photo the planking is coming along like I thought it would. My fairing of the hull framing leaves much to be desired but I’m cutting my self slack on this as it’s a first time attempt at a pof. The second photo is the stealer sanded to fit along the keel and rudderpost. The third one is of a cheater sanded gradually to fill in the last planking gap portside. Fourth photo down is the raw unworked planking that next will be puttied and sanded smooth for painting. Bottom photo is the dockyard hull format which will be sanded and clear coated.
- 37 replies
-
- 3
-
-
- BlueJacket Shipcrafters
- America
- (and 1 more)
-
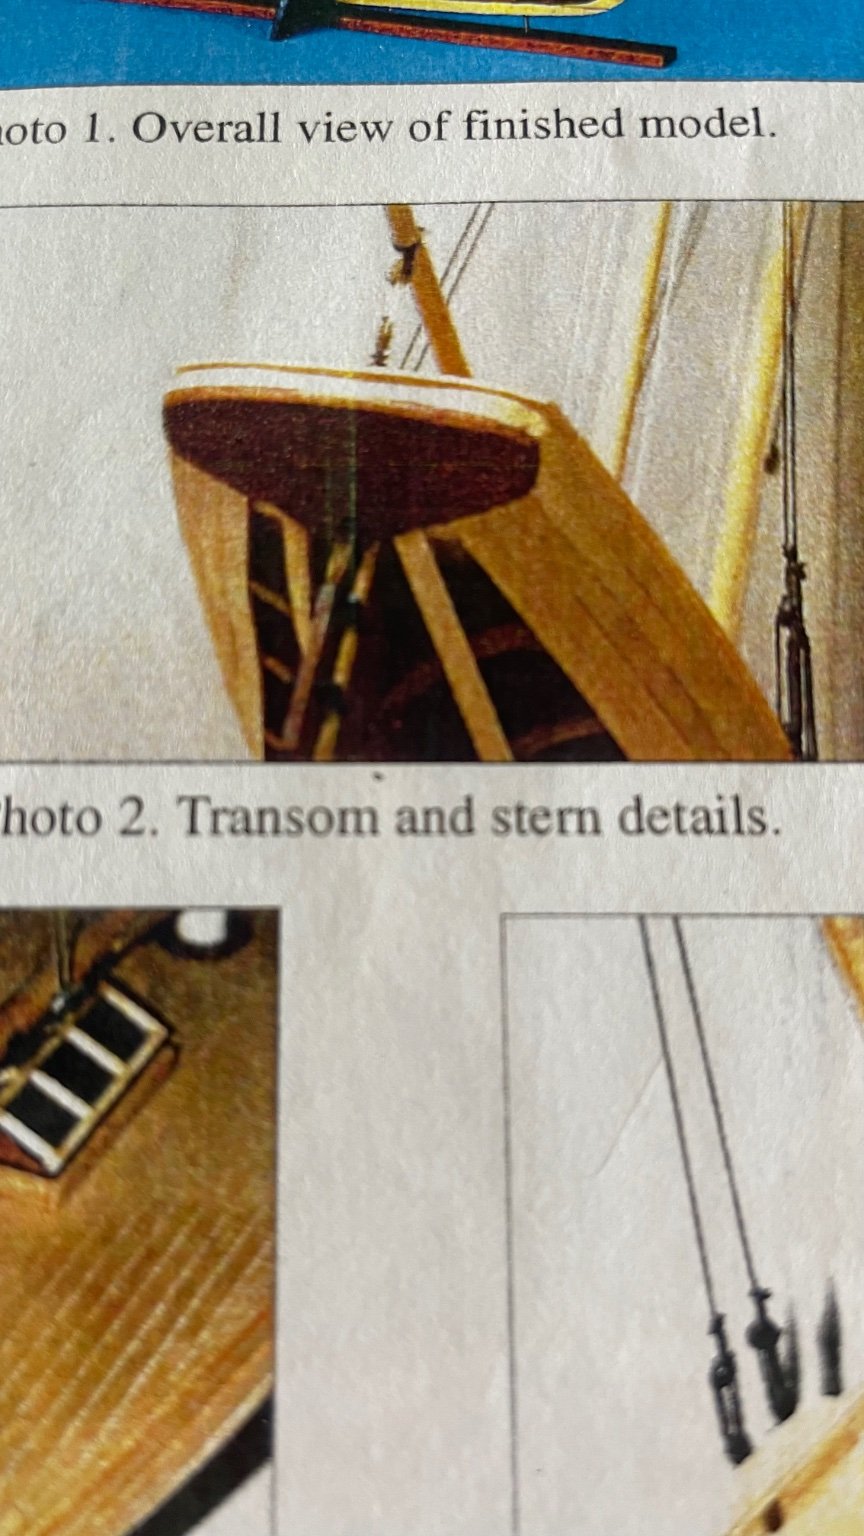
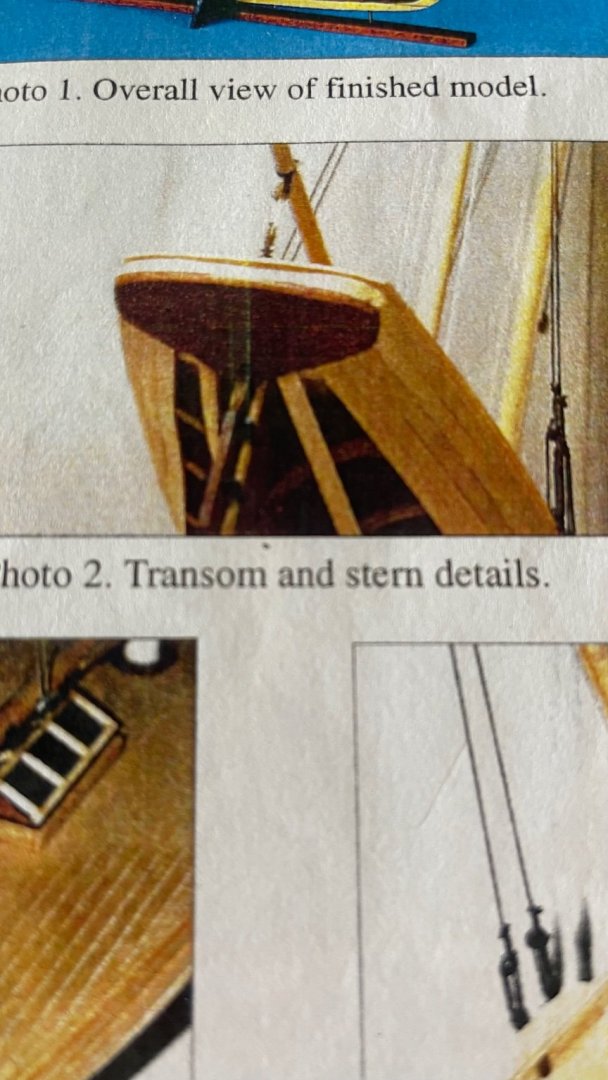
I’ve been really bothered that the transom came out like it did until I noticed the photo of it in the instruction booklet. It’s apparent that they had a similar issue with it as well.

- 37 replies
-
- 1
-
-
- BlueJacket Shipcrafters
- America
- (and 1 more)
-
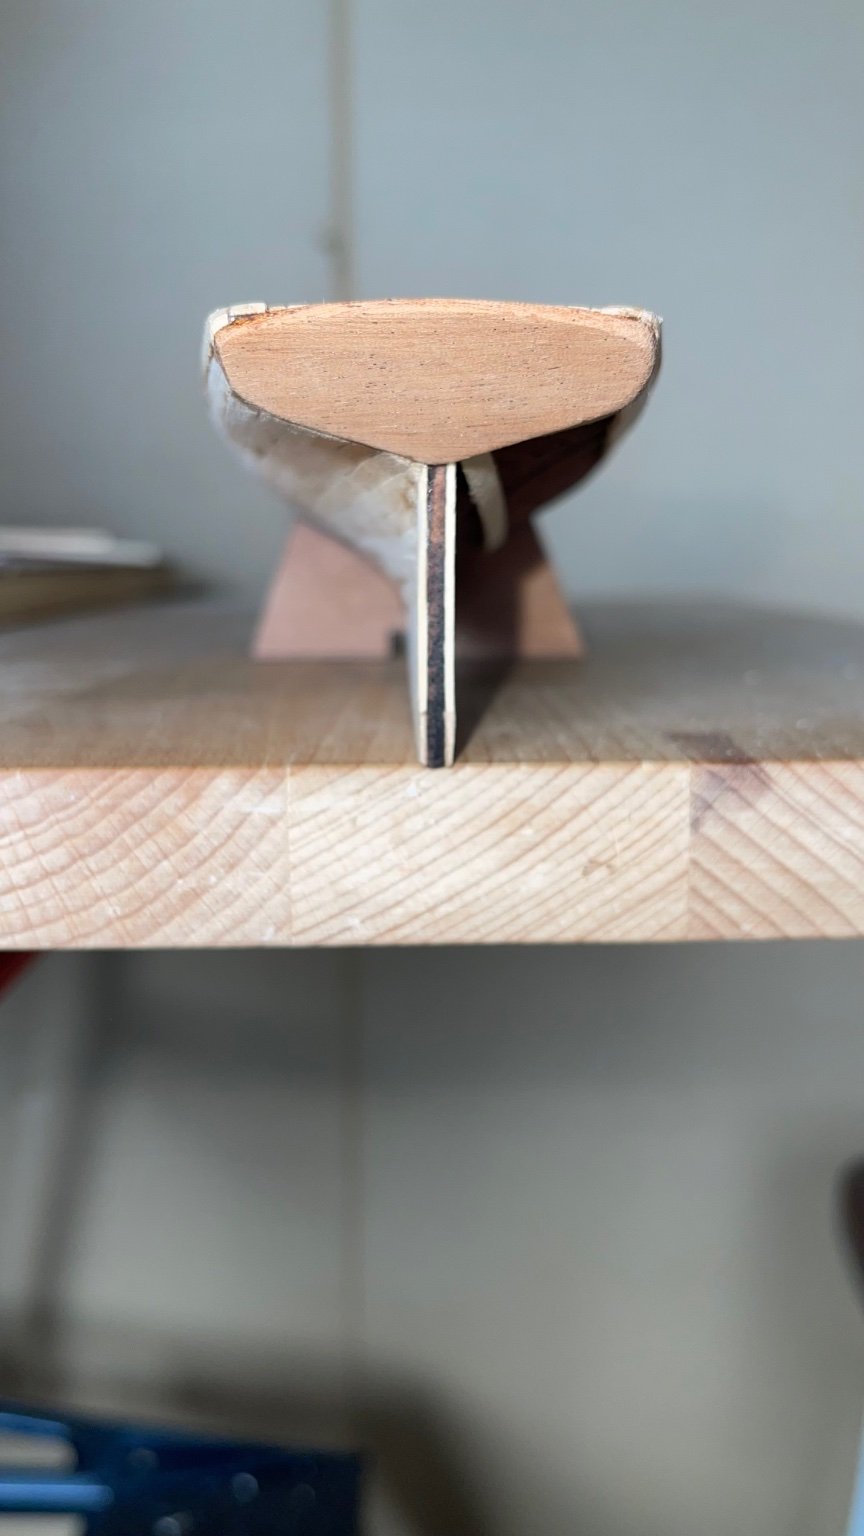
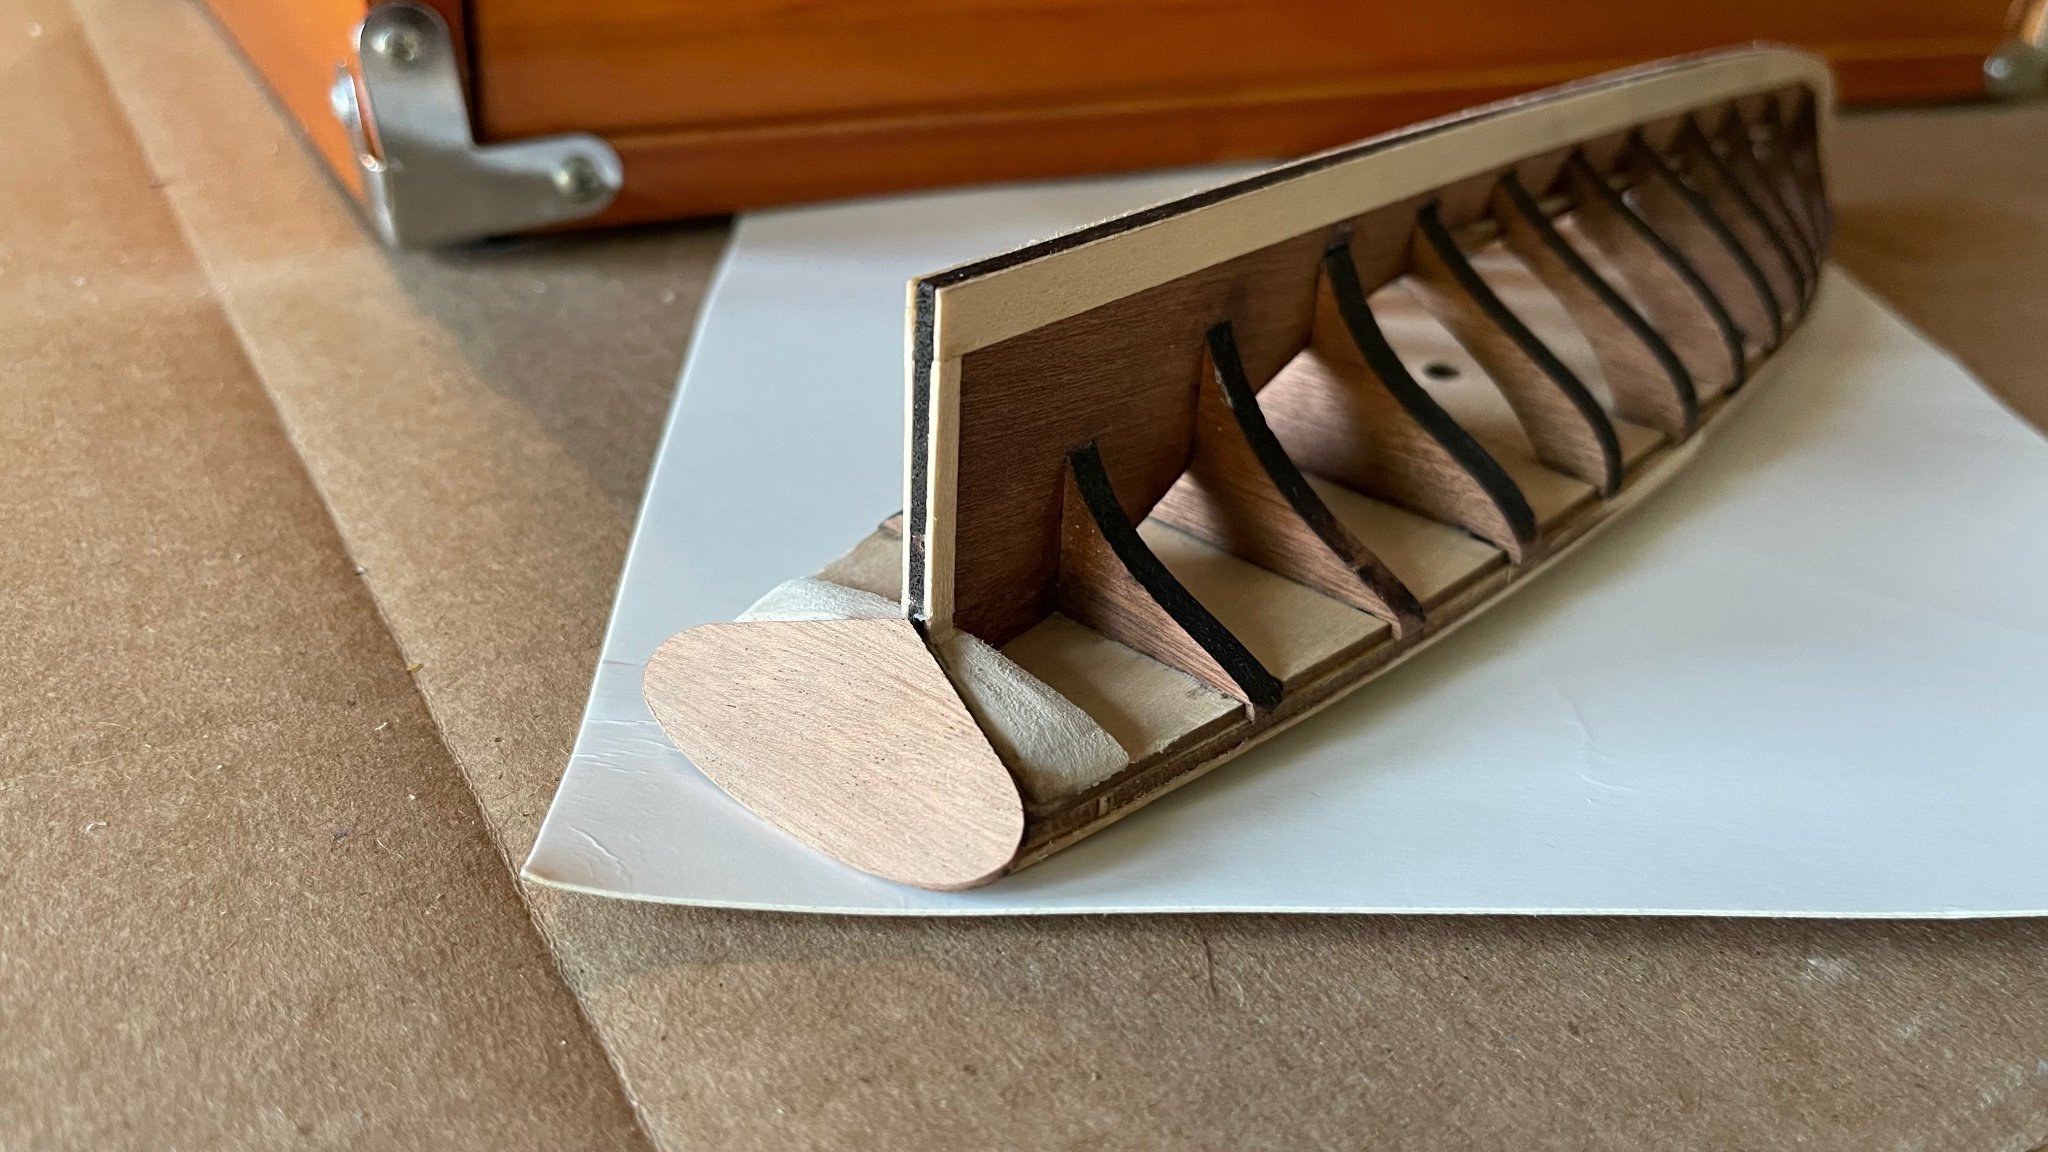
The scribed decking pieces have been glued to their sub-deck with contact cement instead of white glue in the top photo. The next photo down is the laser cut transom that has been fitted on to the filler blocks and the stern of the quarterdeck. In the third photo down there is a closer look at the shaped filler blocks securing the transom at an angle profiling the sail plan. What is not according to the sail plan is the the flat face of the transom instead where there should be a slight transverse bowing of the the transom face. It seemed to short and thick of a piece to risk bending even with steam so it is an inconsistency in the model as it stands. The port strake was tacked on and laid in very evenly using CA glue and likewise on the starboard. (4th & 5th photos). At this point in the build the instructions recommend a decision to plank the hull in the admiralty or dockyard style. I thought I’d do both, the admiralty style (fully planked and painted) on the port-side and dockyard (partially planked bare wood) on starboard.


- 37 replies
-
- 5
-
-
- BlueJacket Shipcrafters
- America
- (and 1 more)
-
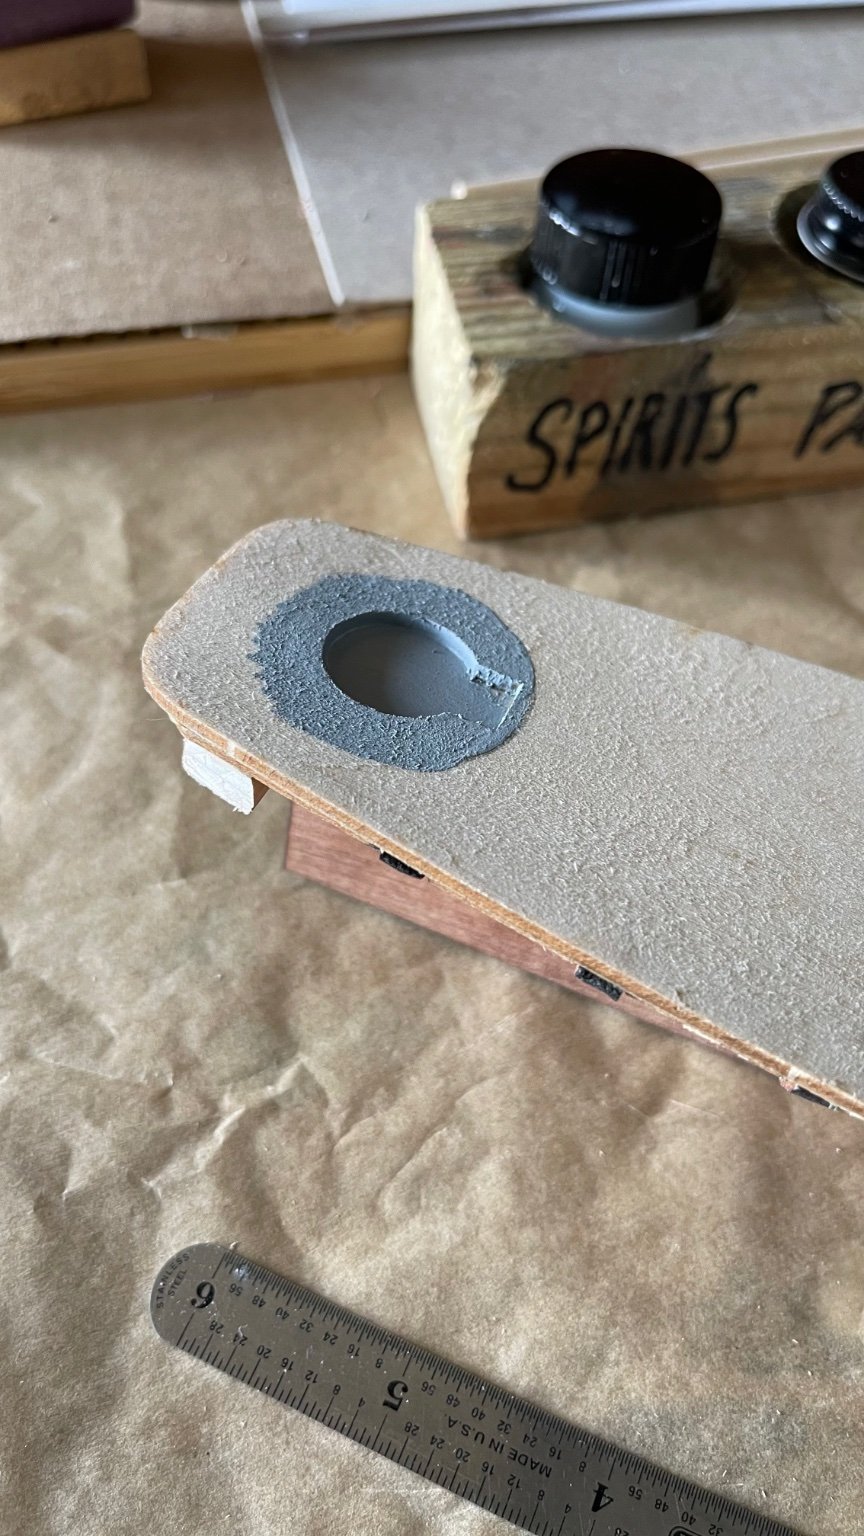
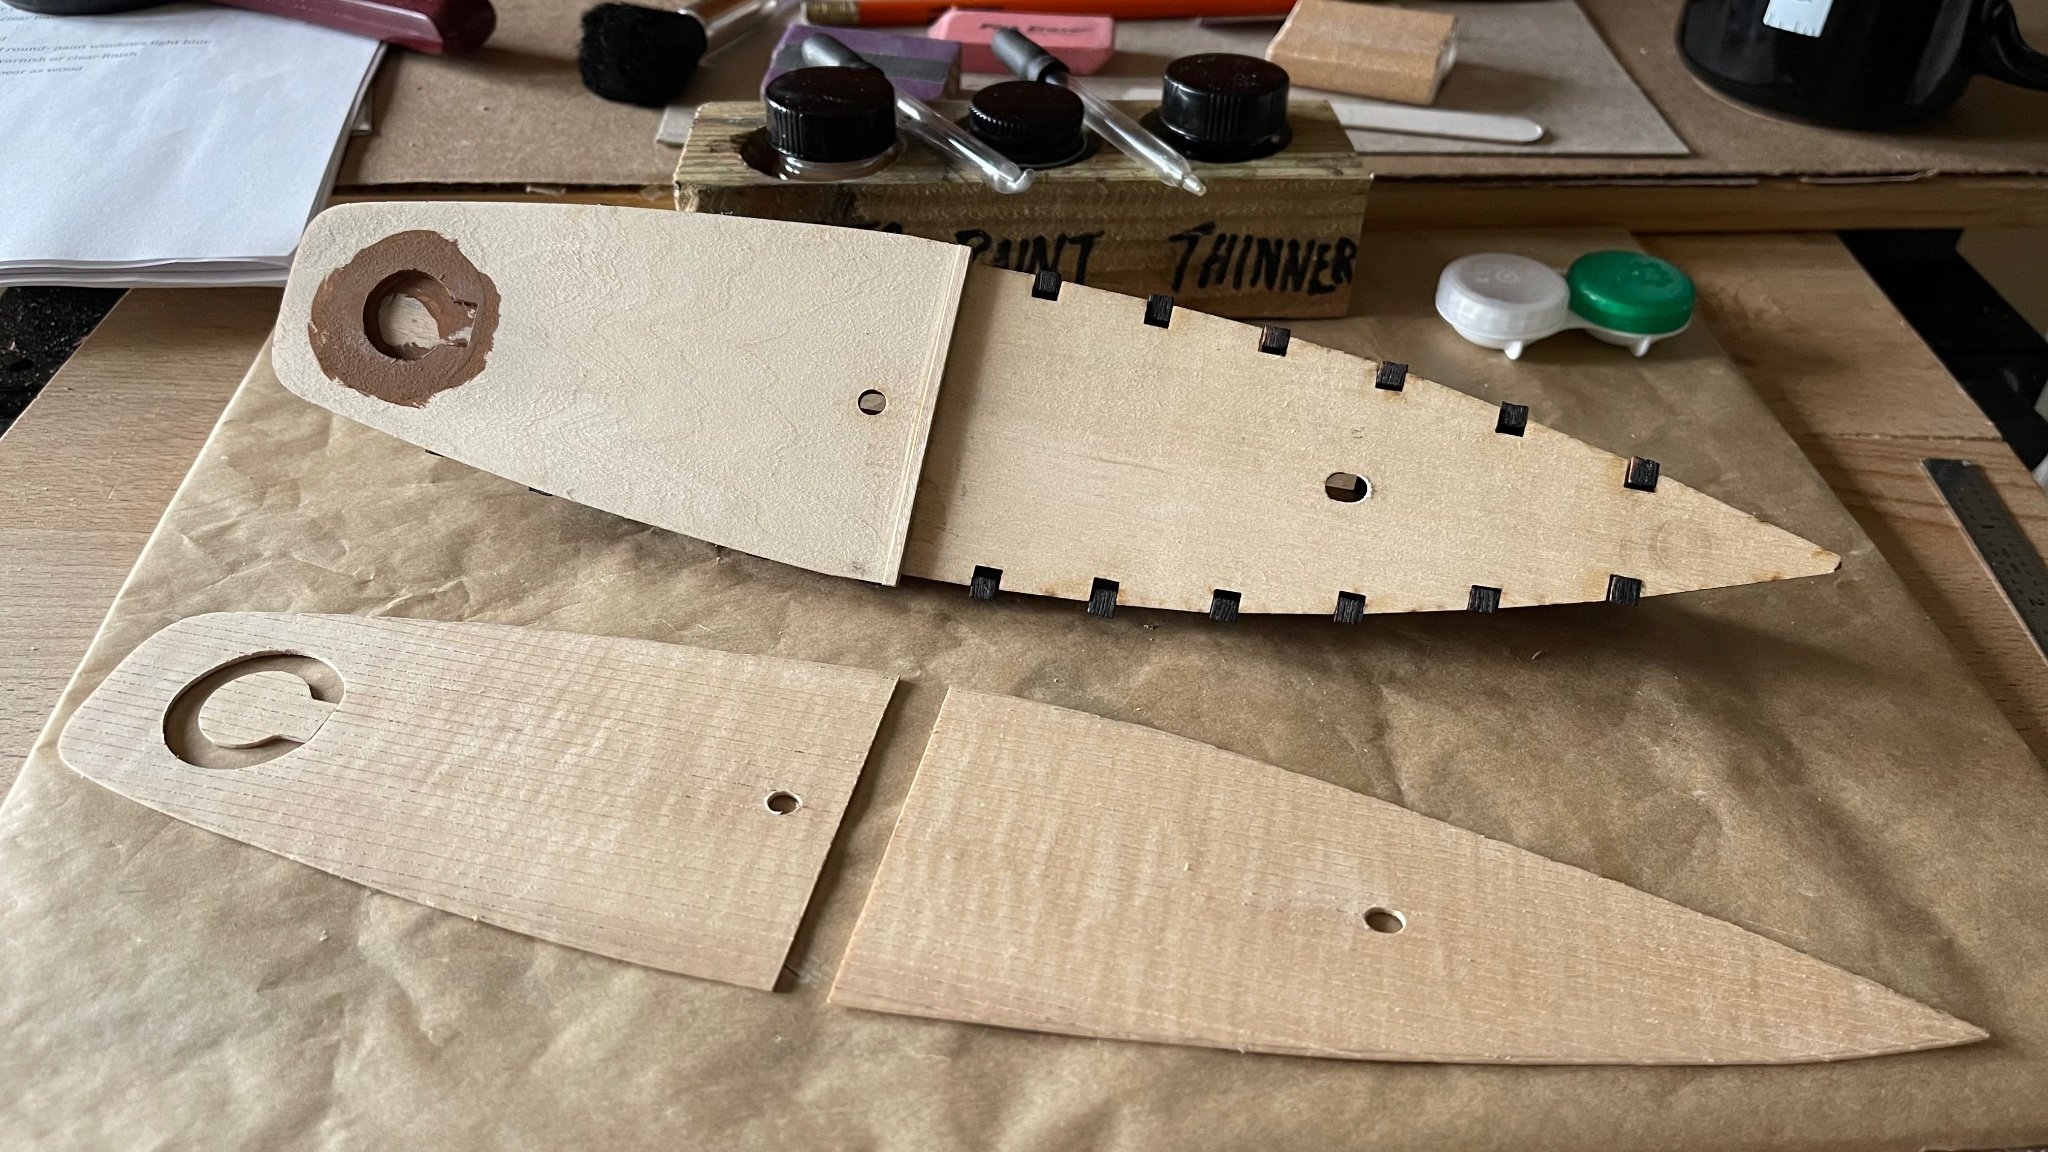
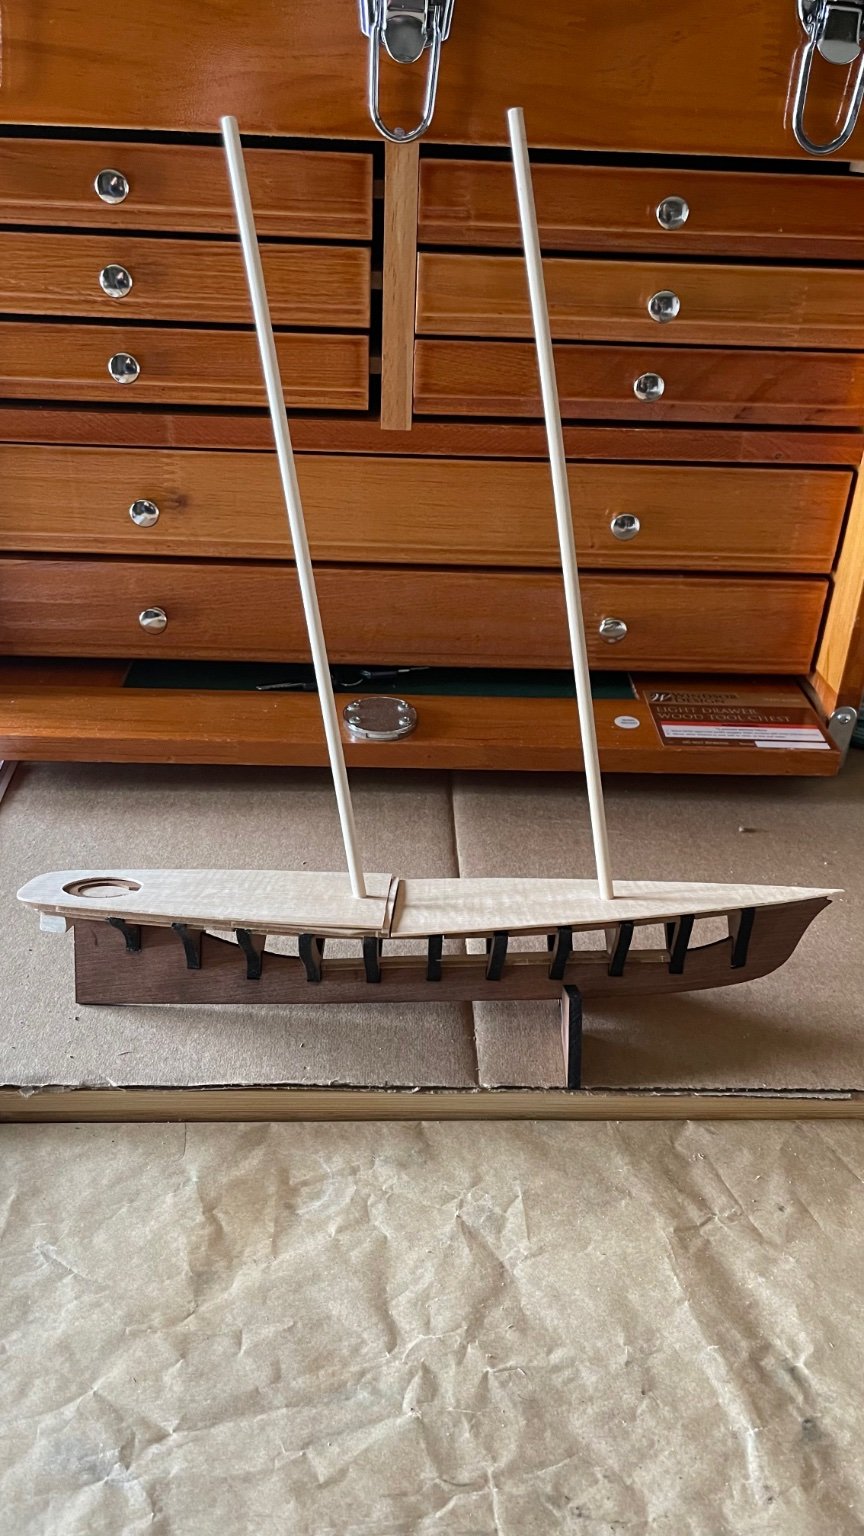
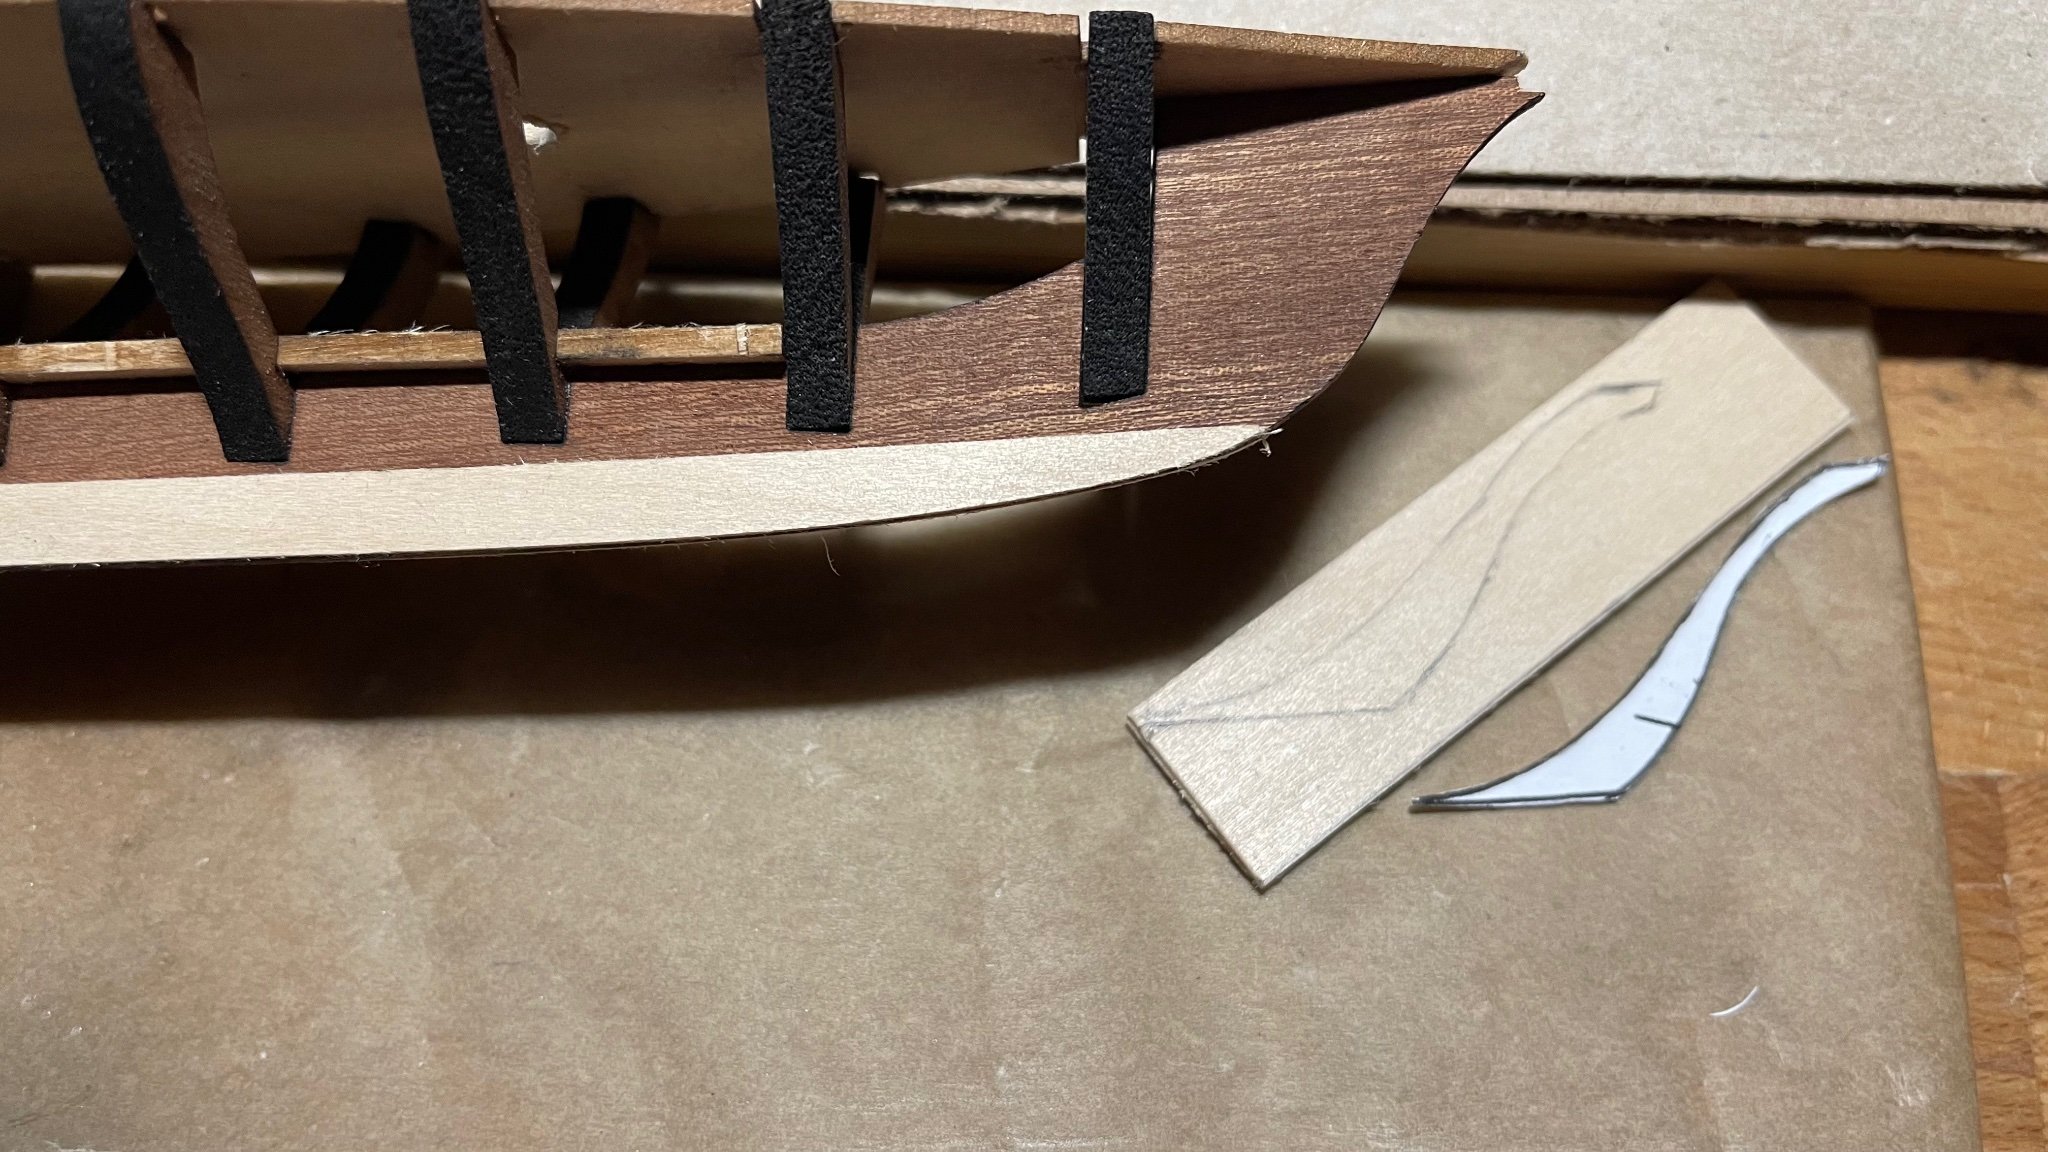
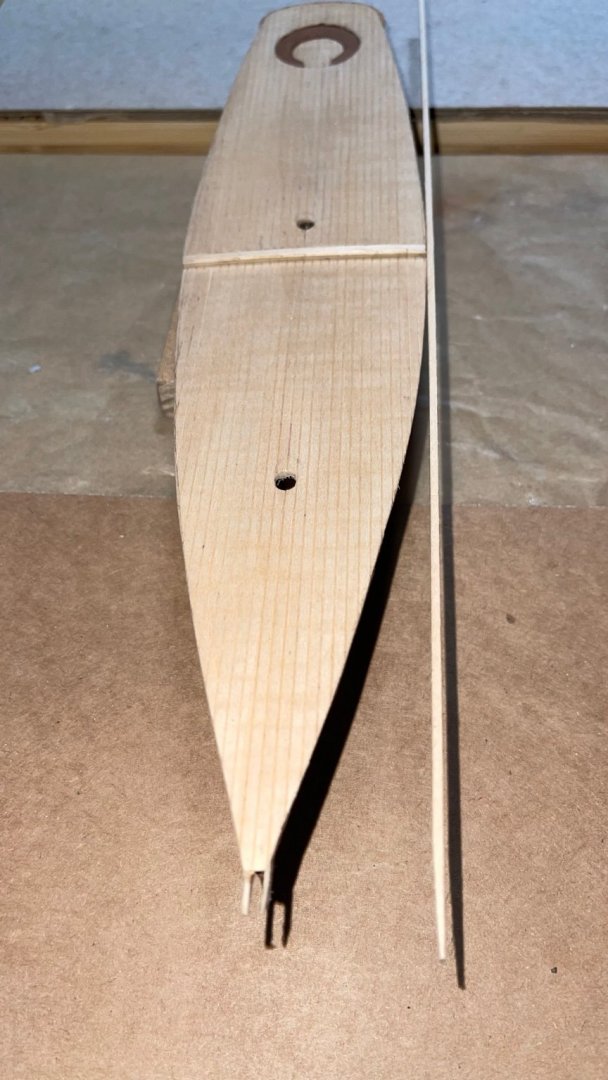
Further progress was made cementing the quarterdeck’s sub-deck onto the main sub-deck and checking the mast alignment through them. Also on this top photo the quarterdeck trim piece and transom filler blocks are cemented as well onto the subdeck. The second and third photos down are the prime and first coats for the cockpit bench. The fourth photo is the scribed main and quarterdecks fitted with mast and cockpit holes cut out and fitted to plan and will be cemented in place once the cockpit bench is fully painted. While I’m sanding (400 grit) and painting the bench with a 50/50 ratio of paint to thinner, the patterns for the 1/32 “ overlays for the stem was traced, cut, fitted and glued to the sides of the keel along with the sternpost and keel section overlays. (Bottom two photos)


- 37 replies
-
- 4
-
-
- BlueJacket Shipcrafters
- America
- (and 1 more)
-
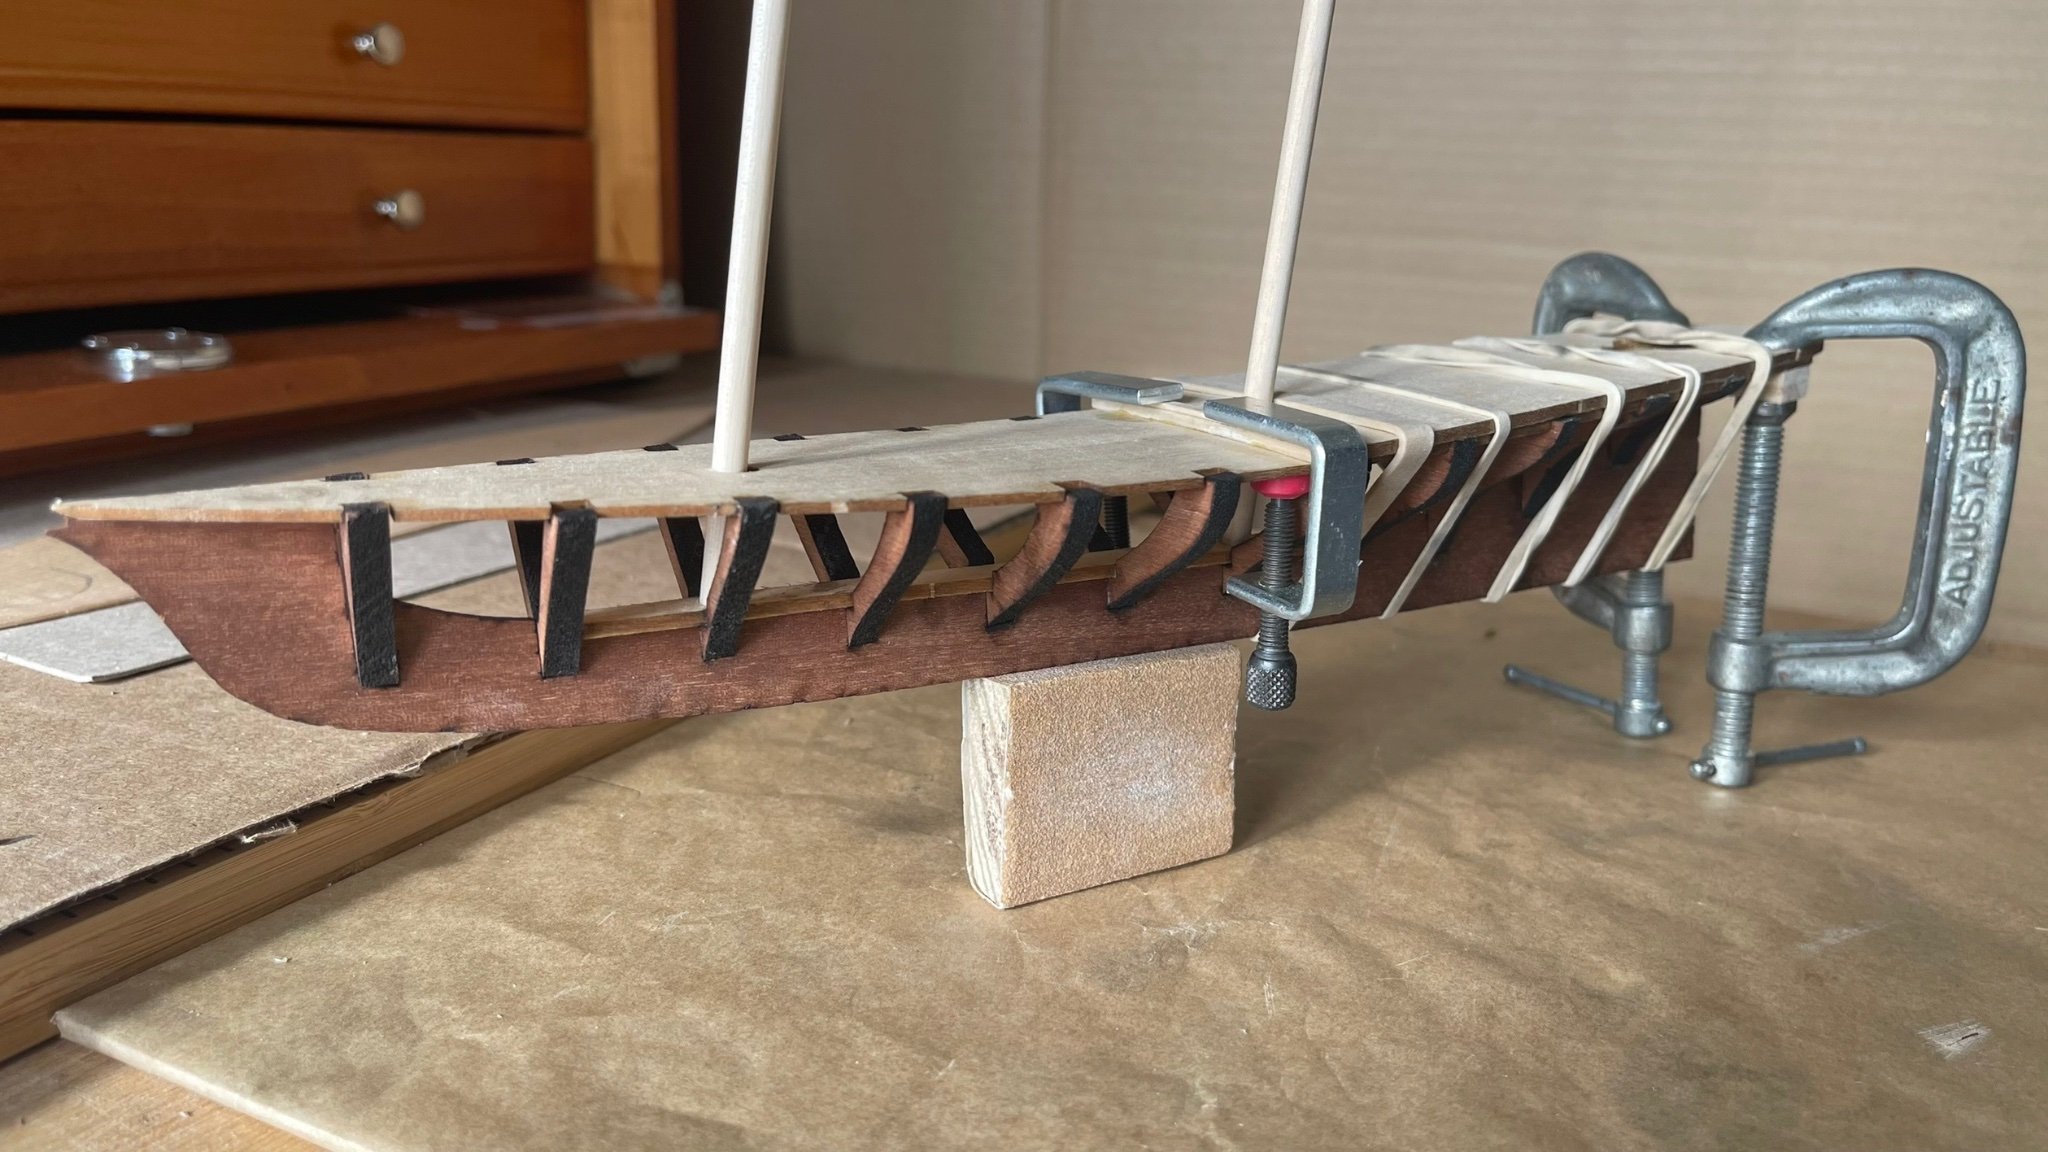
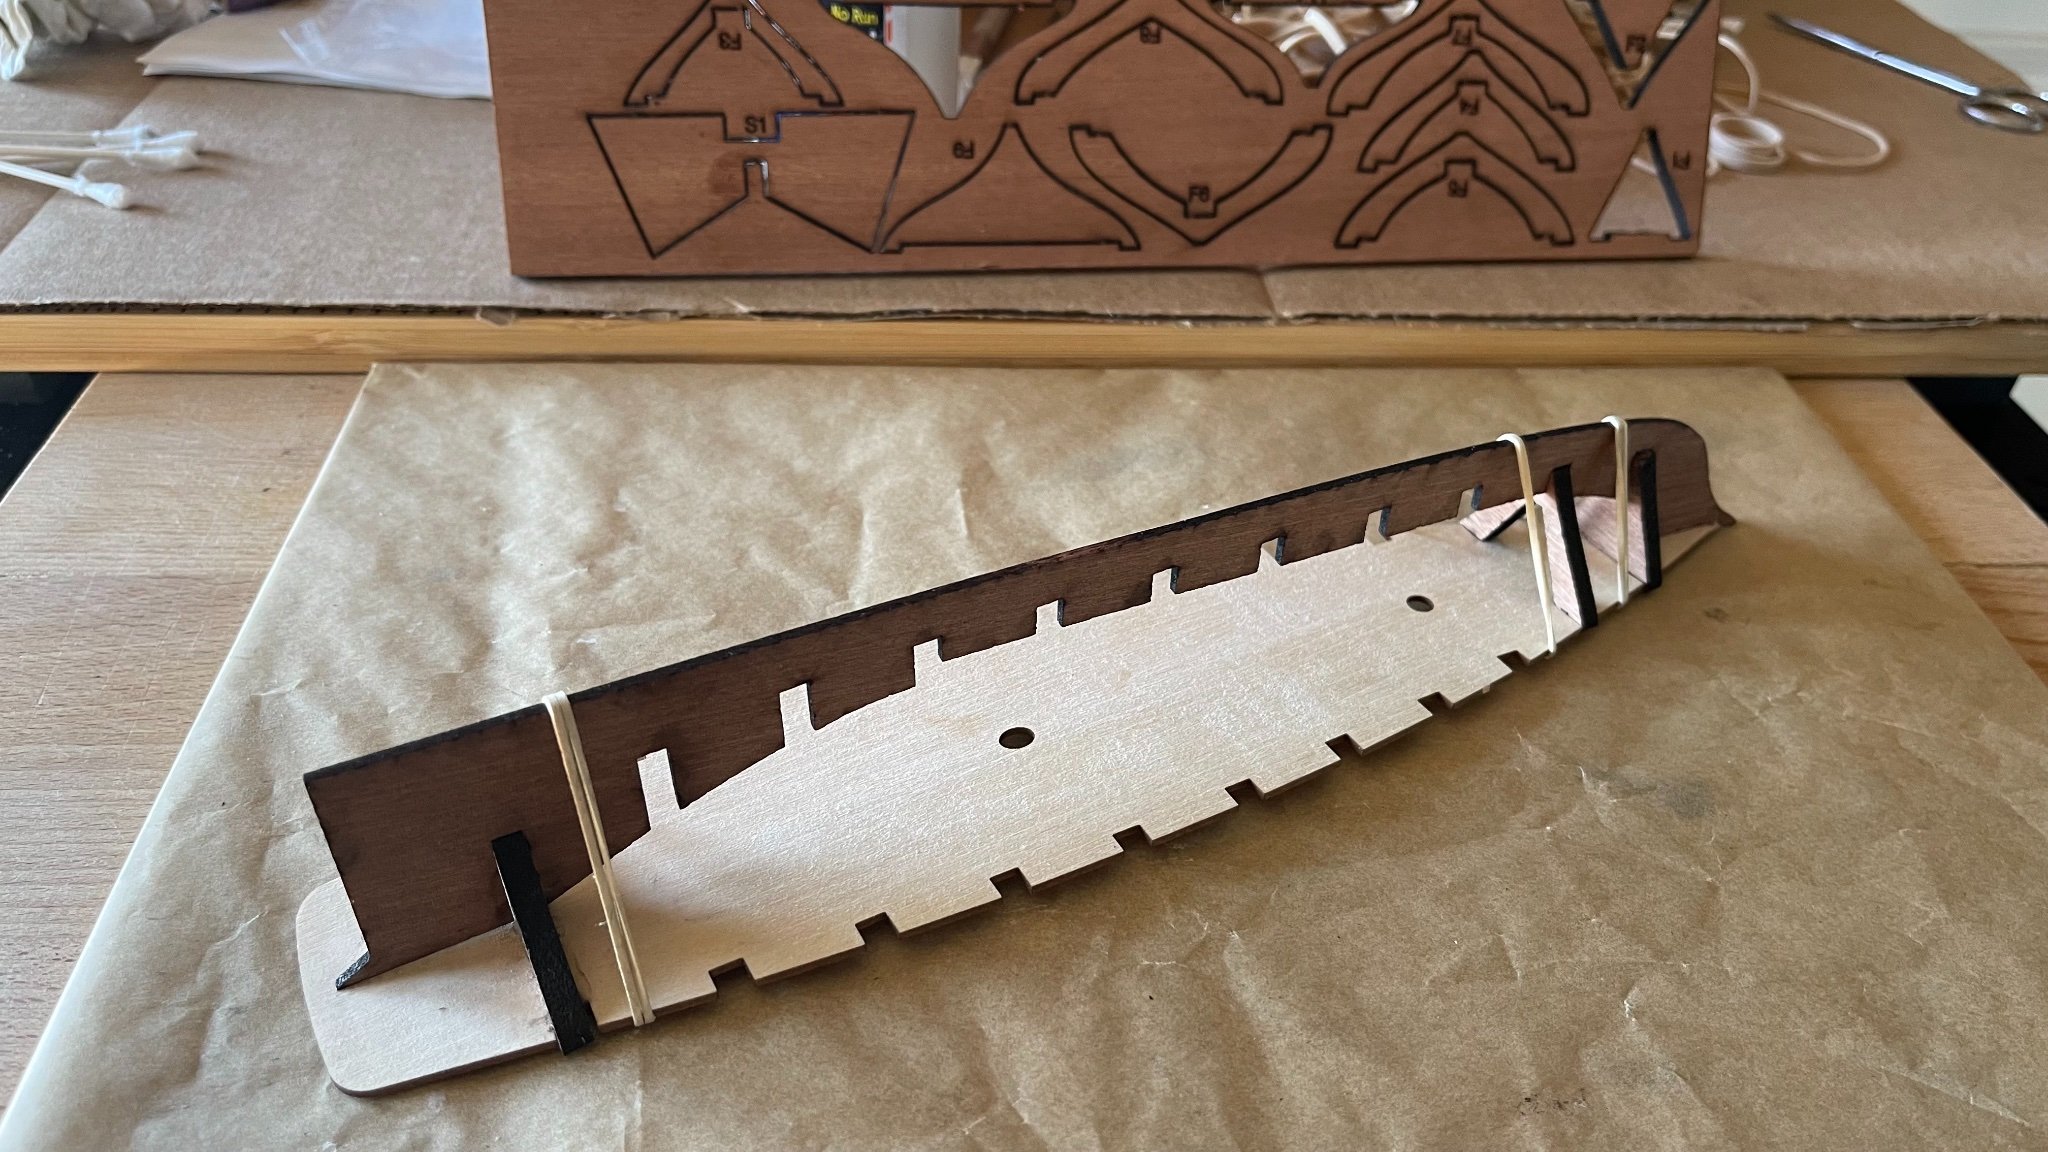
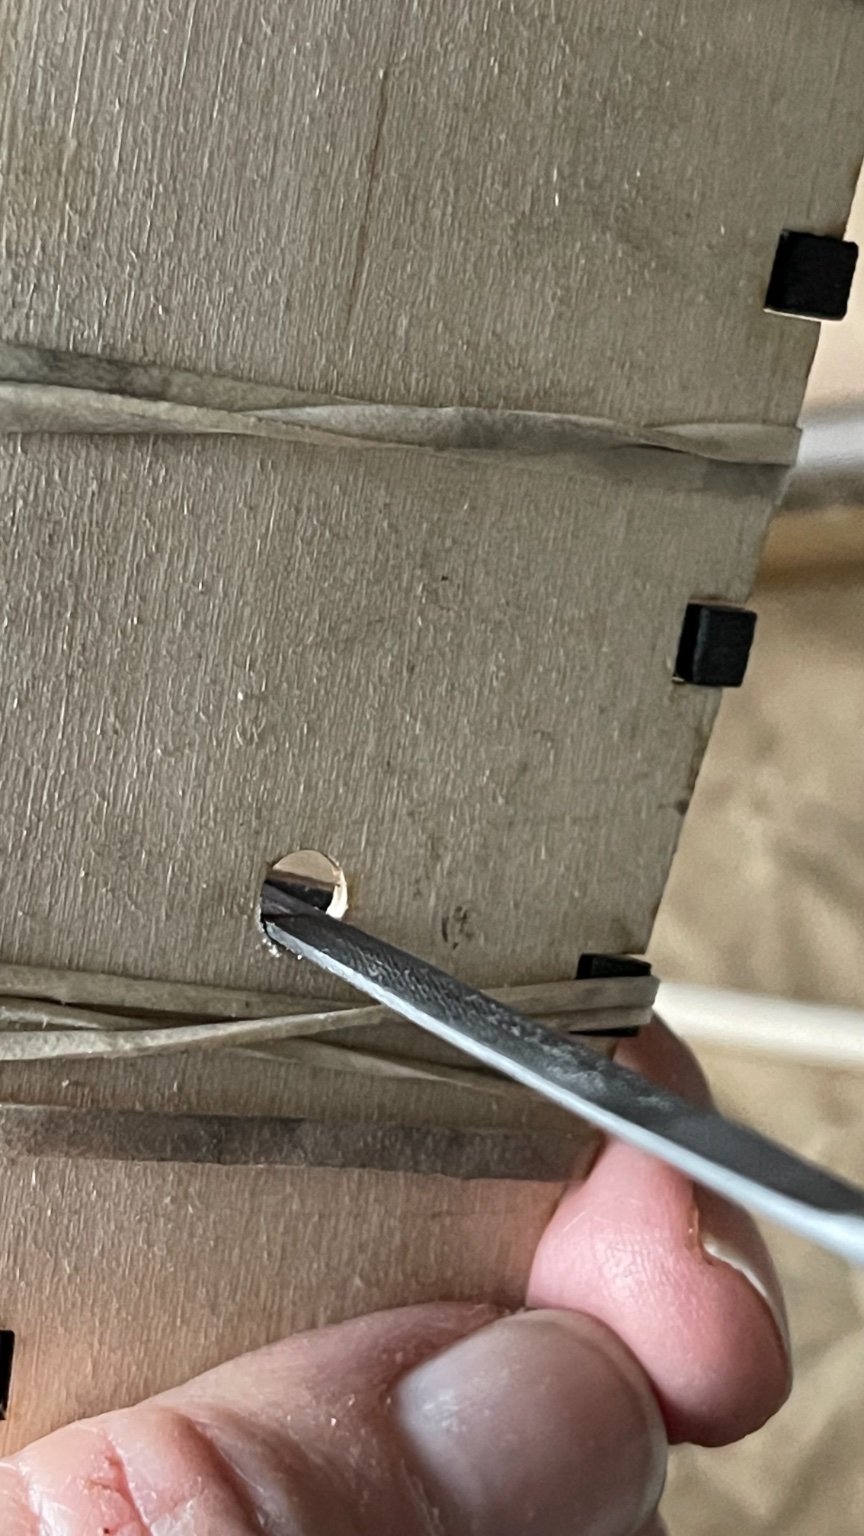
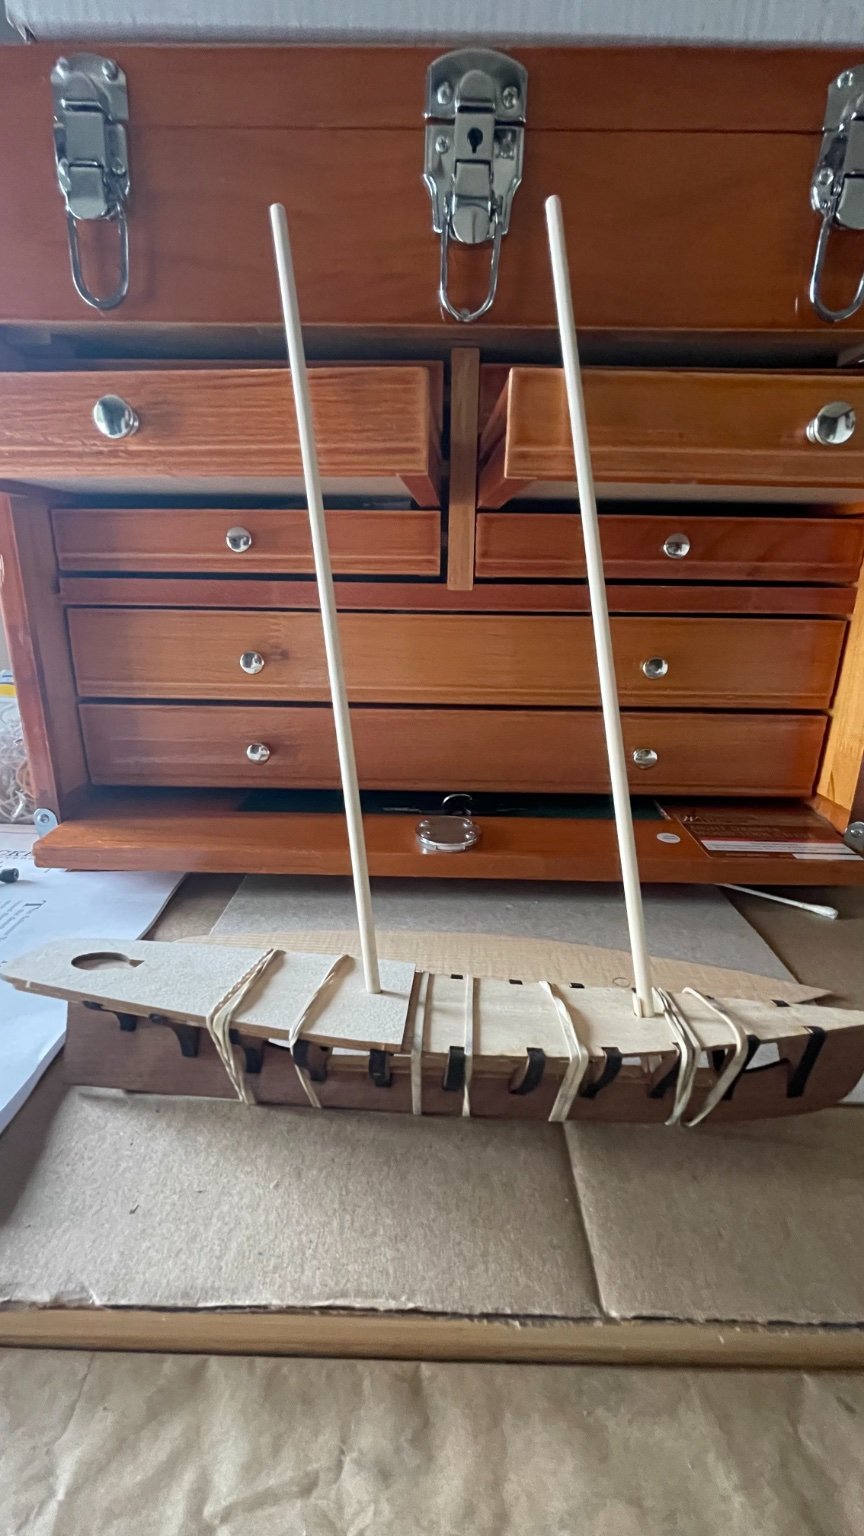
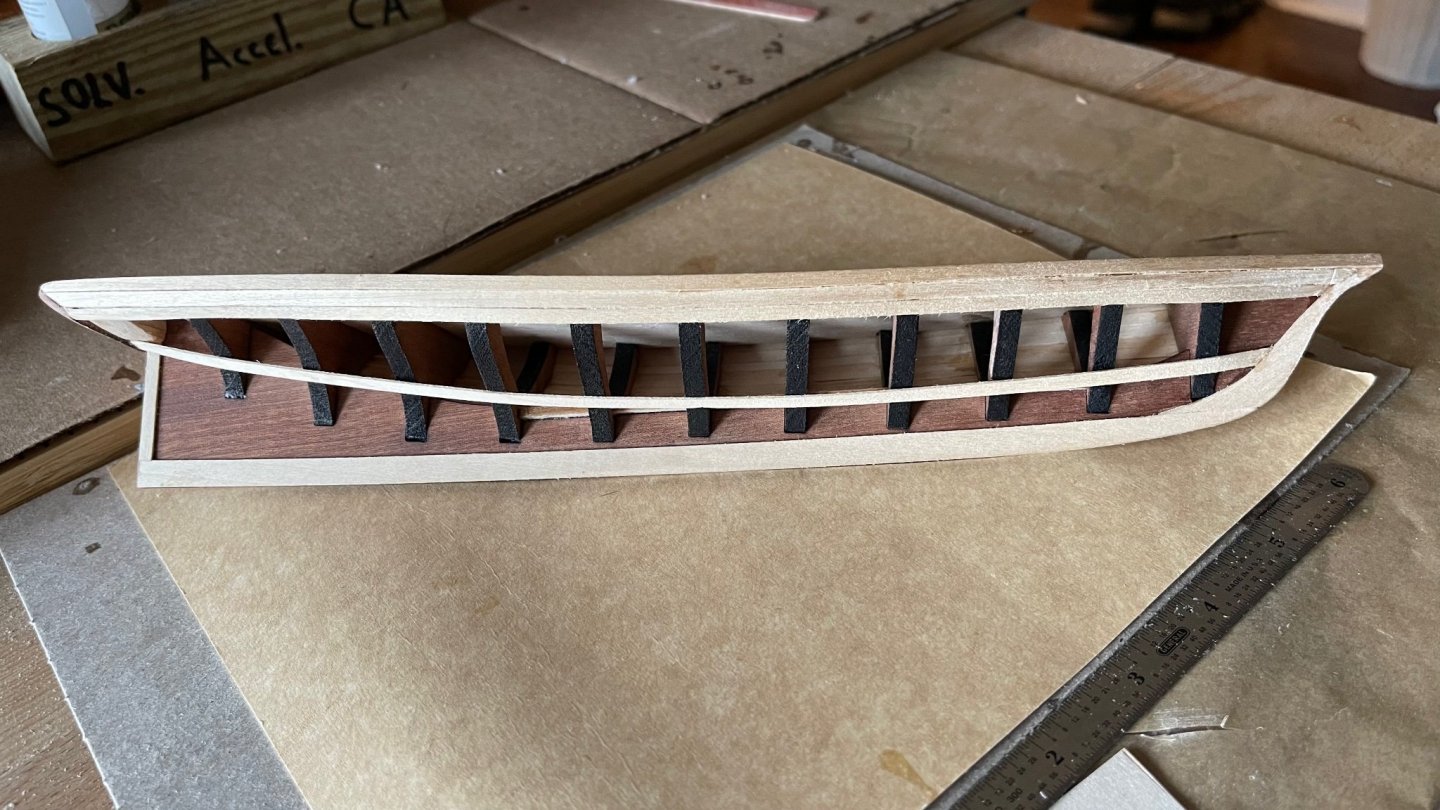
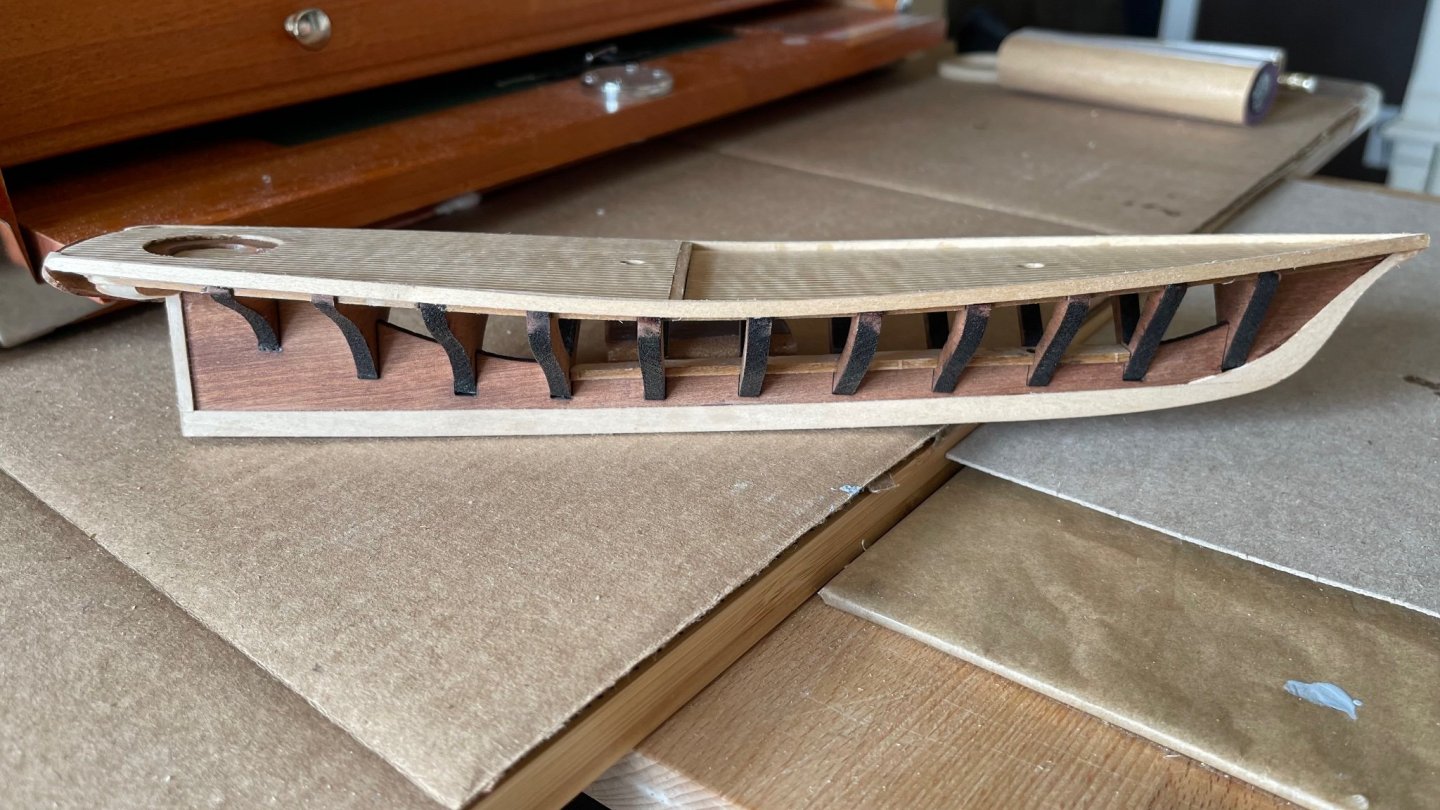
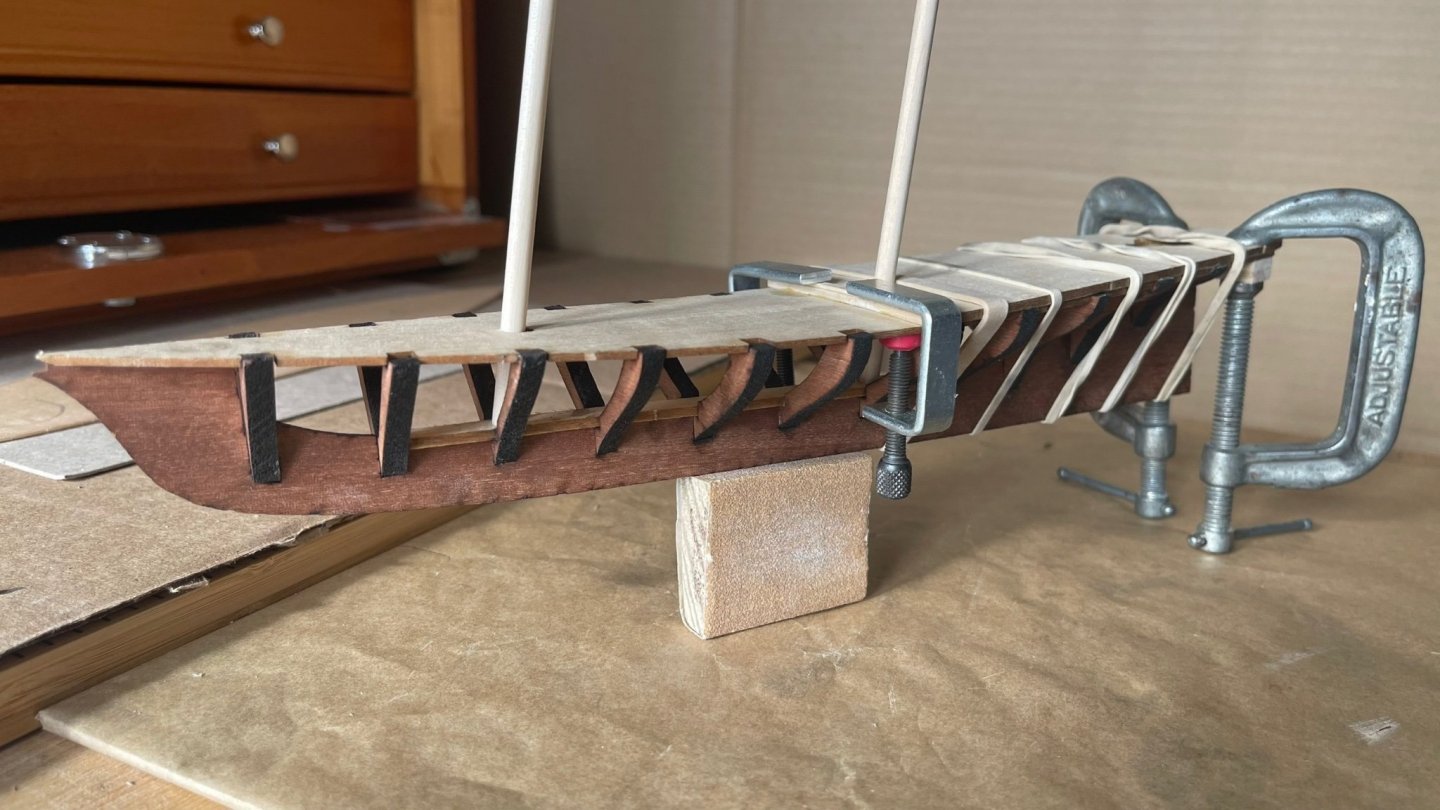
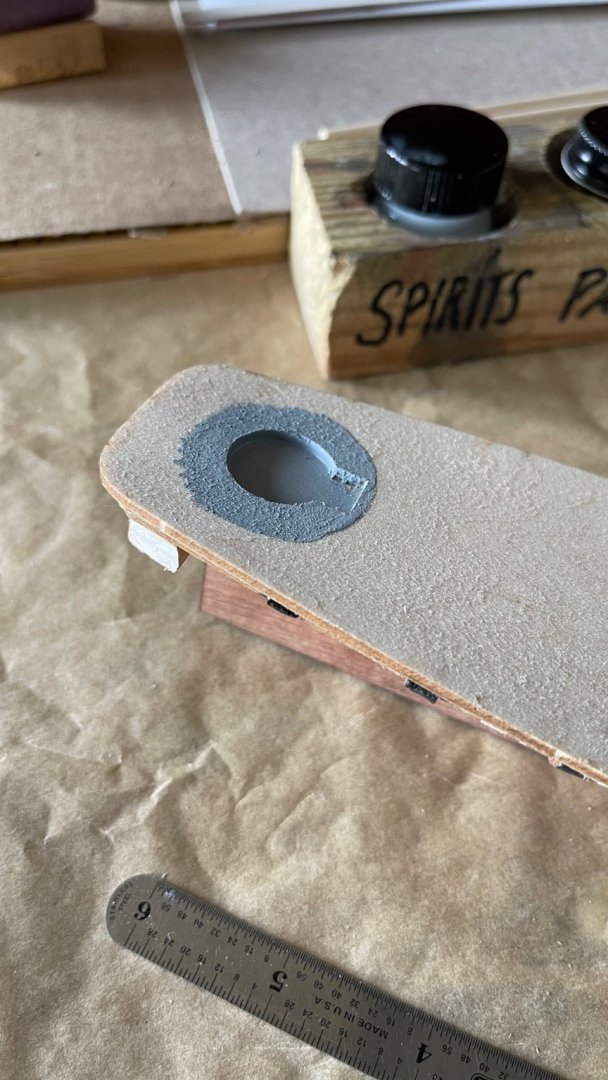
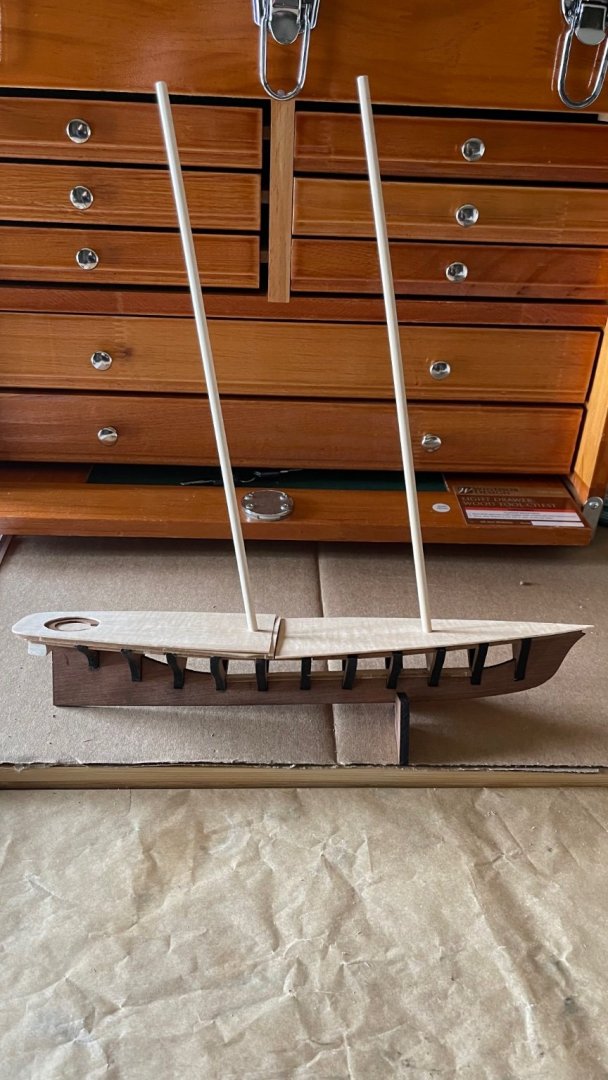
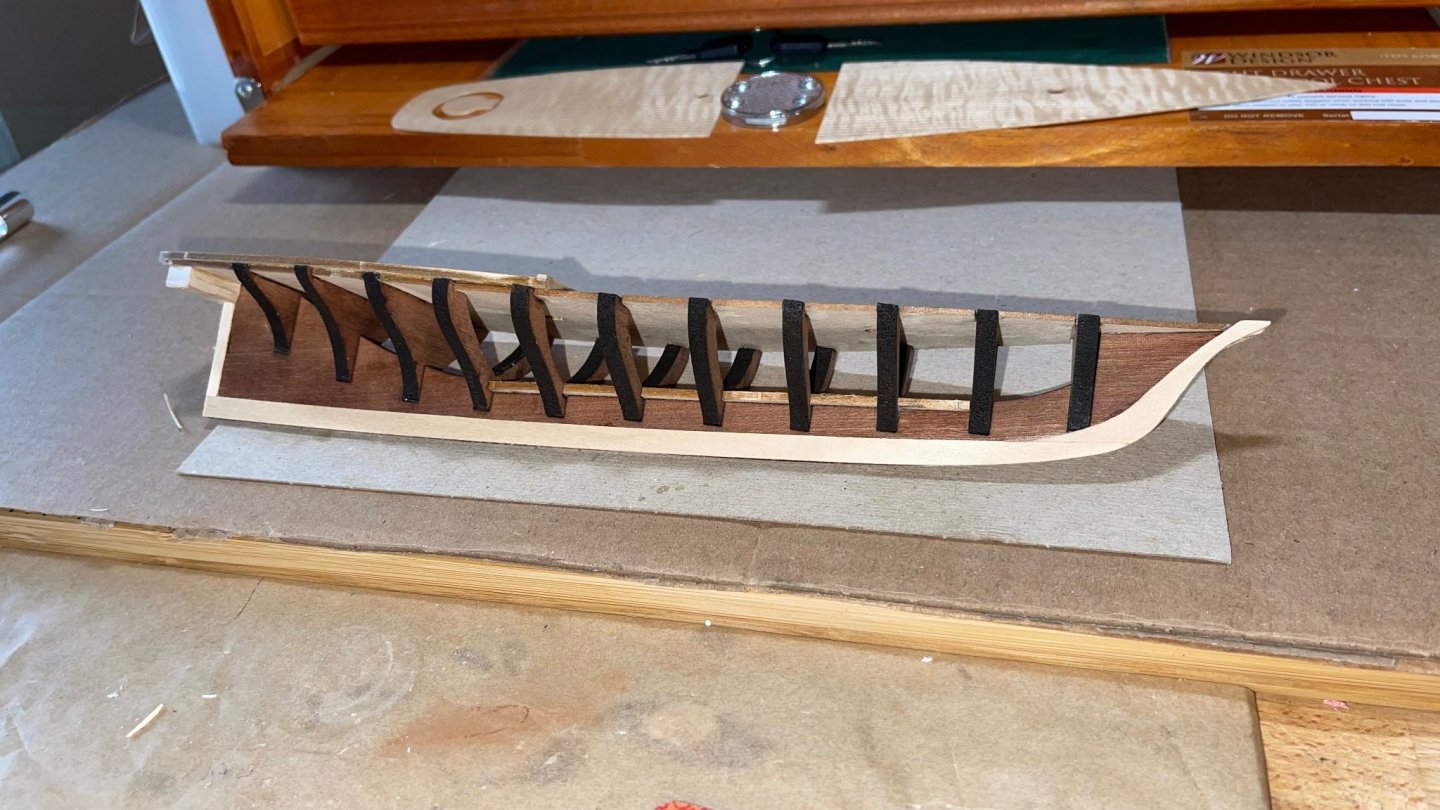
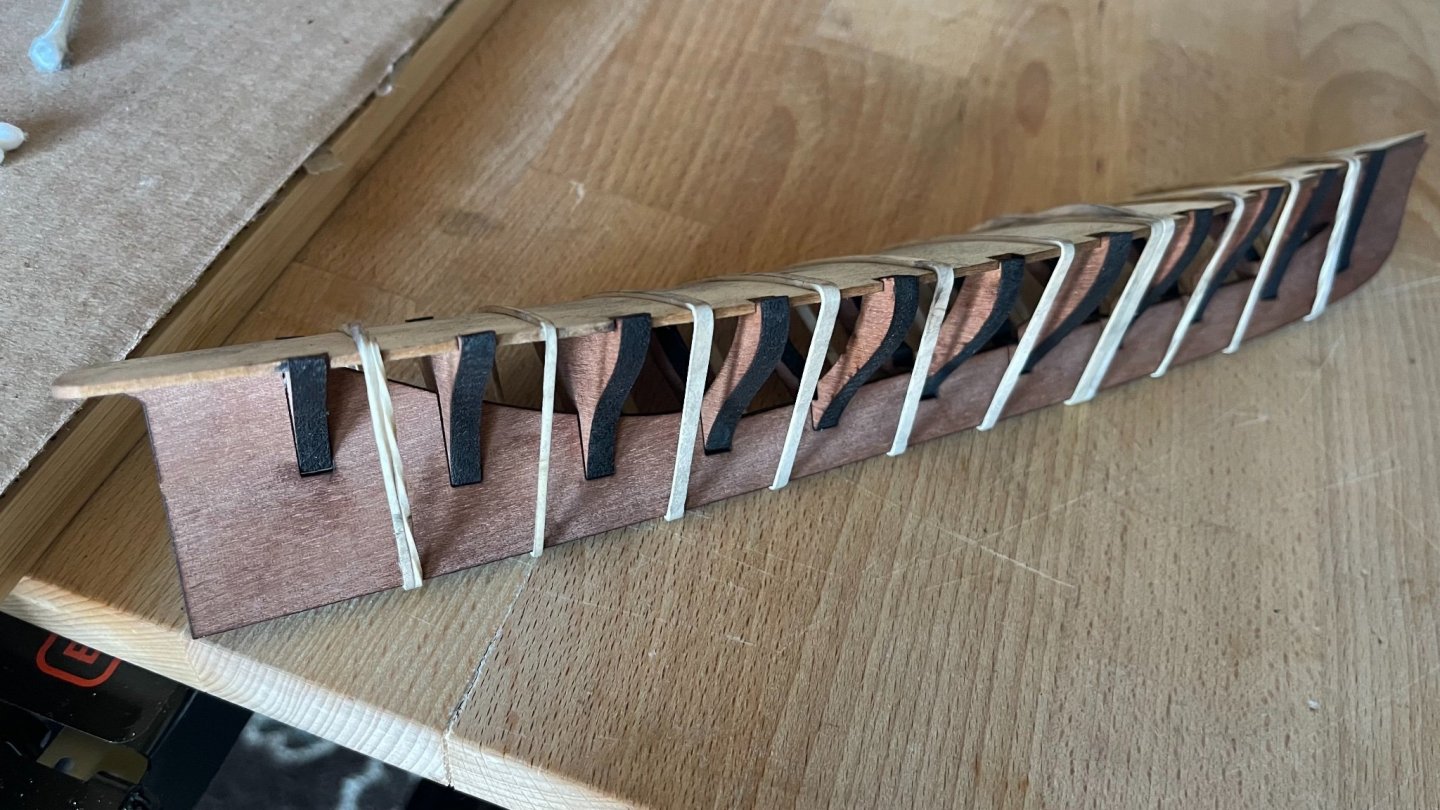
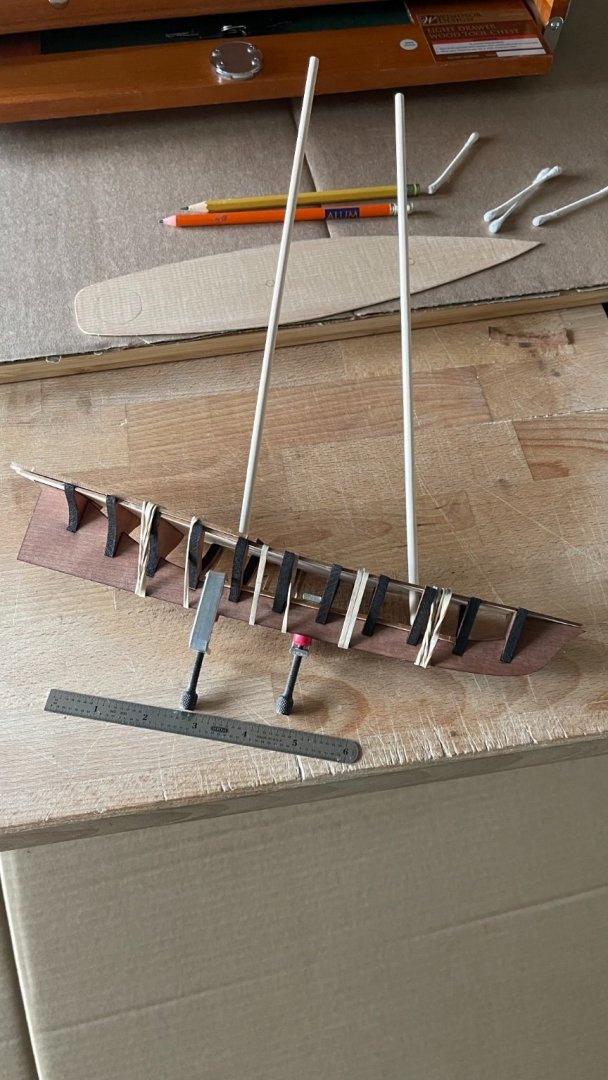
In the second photo below, the laser cut keel is detached and minor burrs are finished flush then likewise for the most forward and aft frames. They are then glued (white glue) and rubber banded to the sub deck. The 1st shot below shows all remaining frames banded and glued. The third pic is the masts step into the precut keel and frame slot. At this point I stepped the fore and main masts into the designated placements below deck and found the foremast raked too far abaft. This was compensated by filing the forward end of the sub deck foremast hole to to bring the mast to its proper rake.


- 37 replies
-
- 5
-
-
- BlueJacket Shipcrafters
- America
- (and 1 more)
-
Thank you Gary, When I called Mr. Bluejacket to order the kit he mention the same observation of the log as well. - Ange
- 37 replies
-
- 1
-
-
- BlueJacket Shipcrafters
- America
- (and 1 more)
-
Thank you Chris, I just noticed your build today because of my latest build (America). That's great work on the propeller hole and sternpost. I'm not by a long shot any kind of modeling craftsman, but building Atlantic was the challenge I wanted and through persistency it yielded a work that is now a centerpiece in my home. Good luck on your success ! Ange
- 19 replies
-
- 1
-
-
- Bluejacket Shipcrafters
- atlantic
- (and 2 more)
-
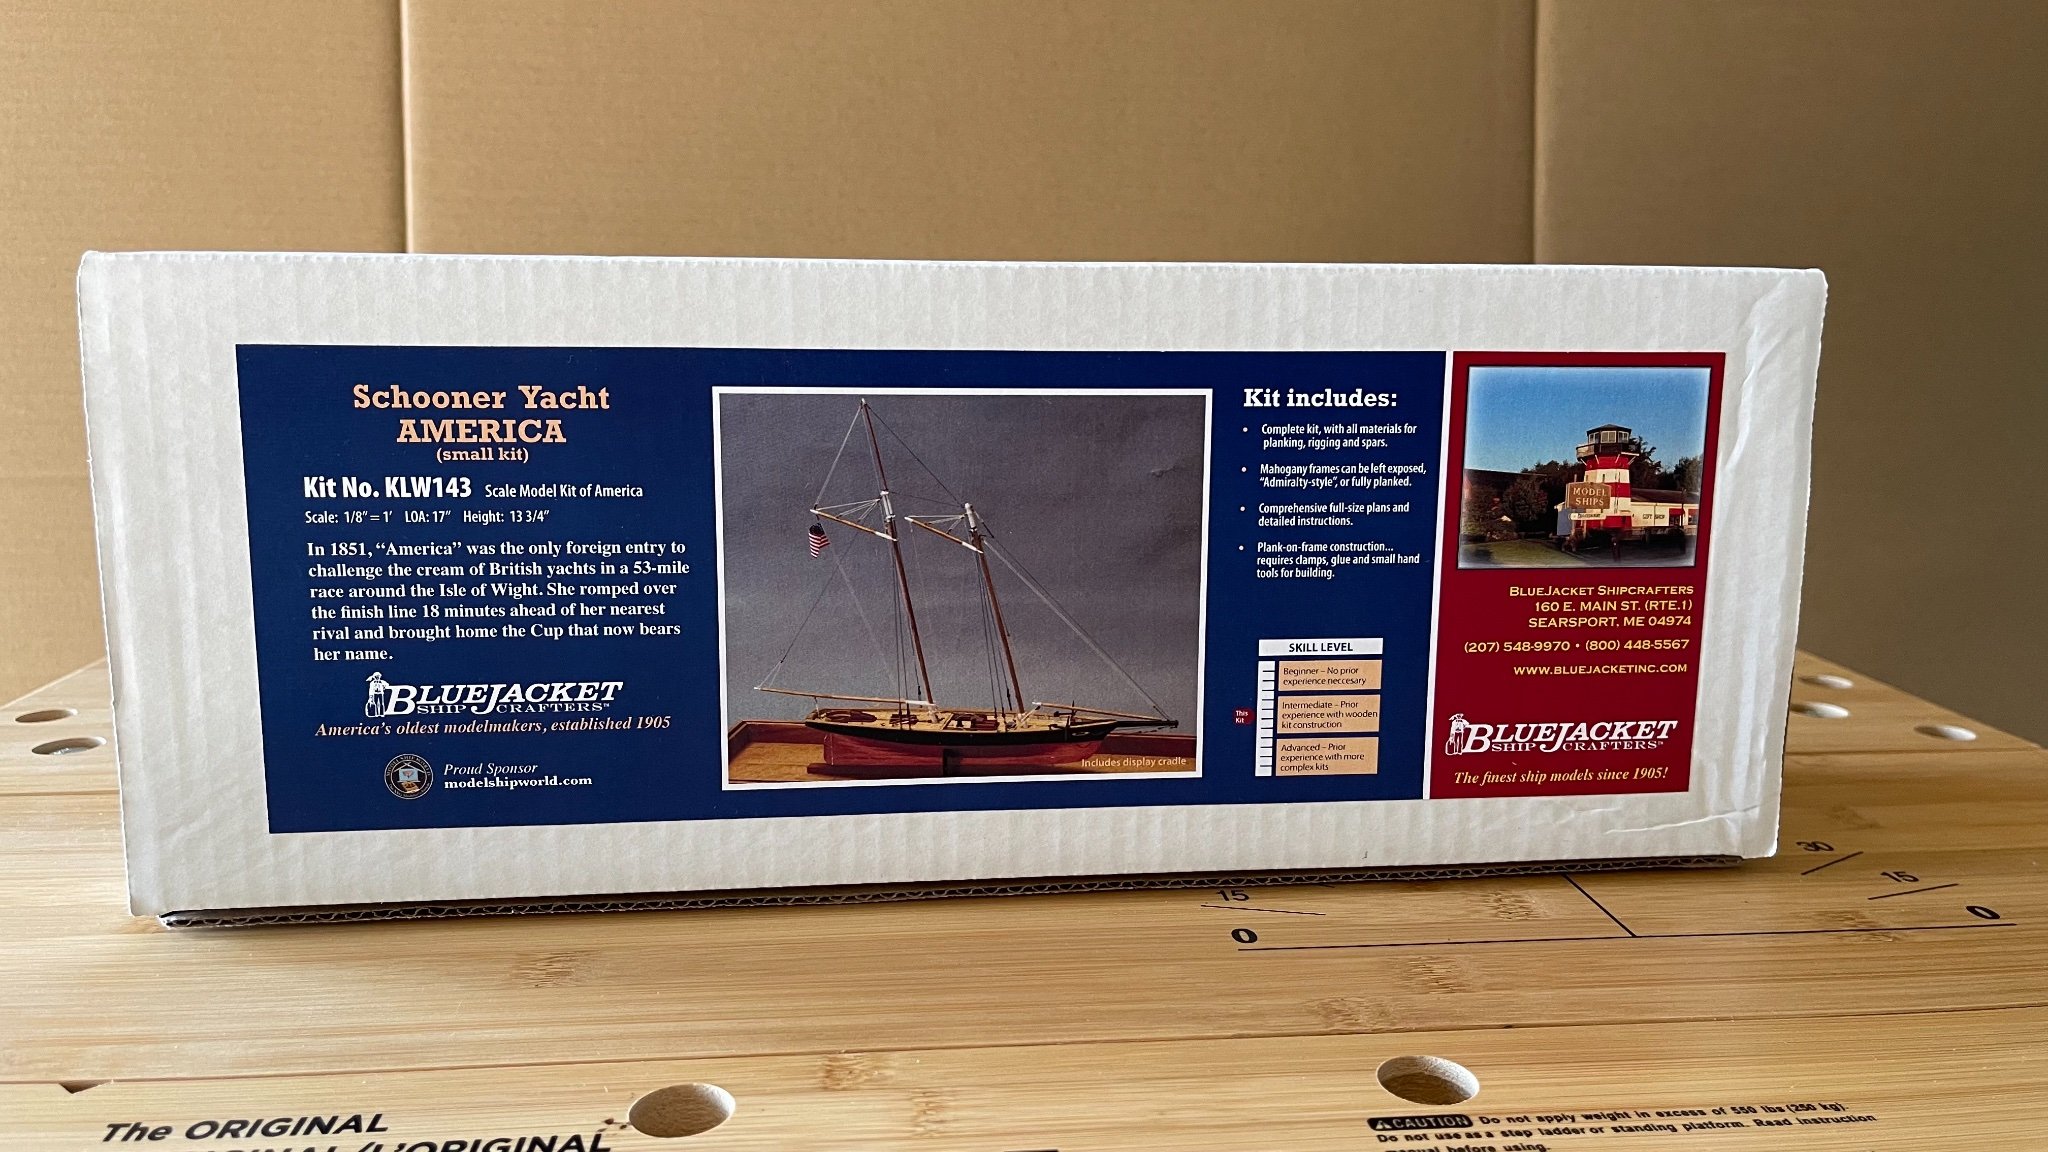
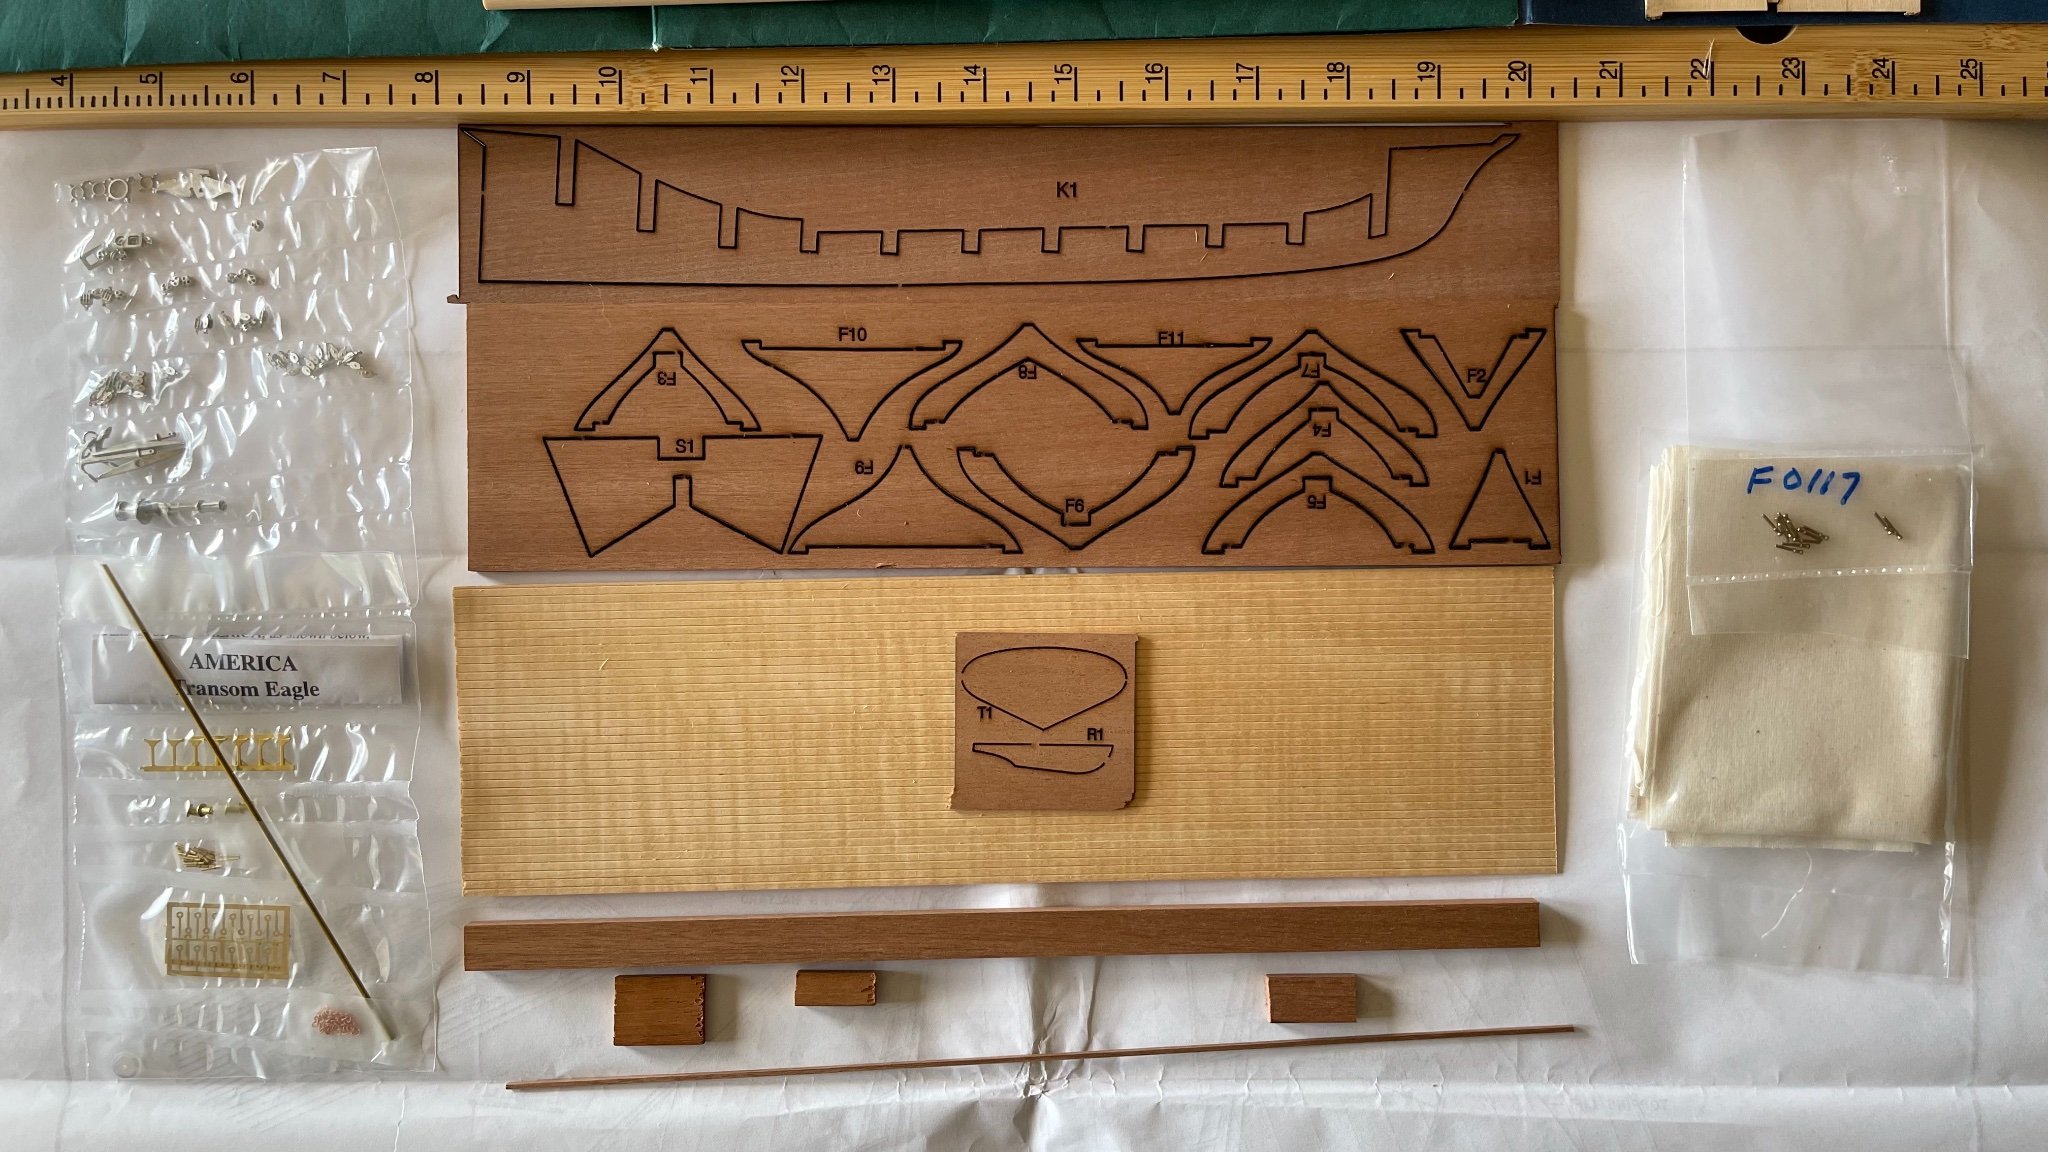
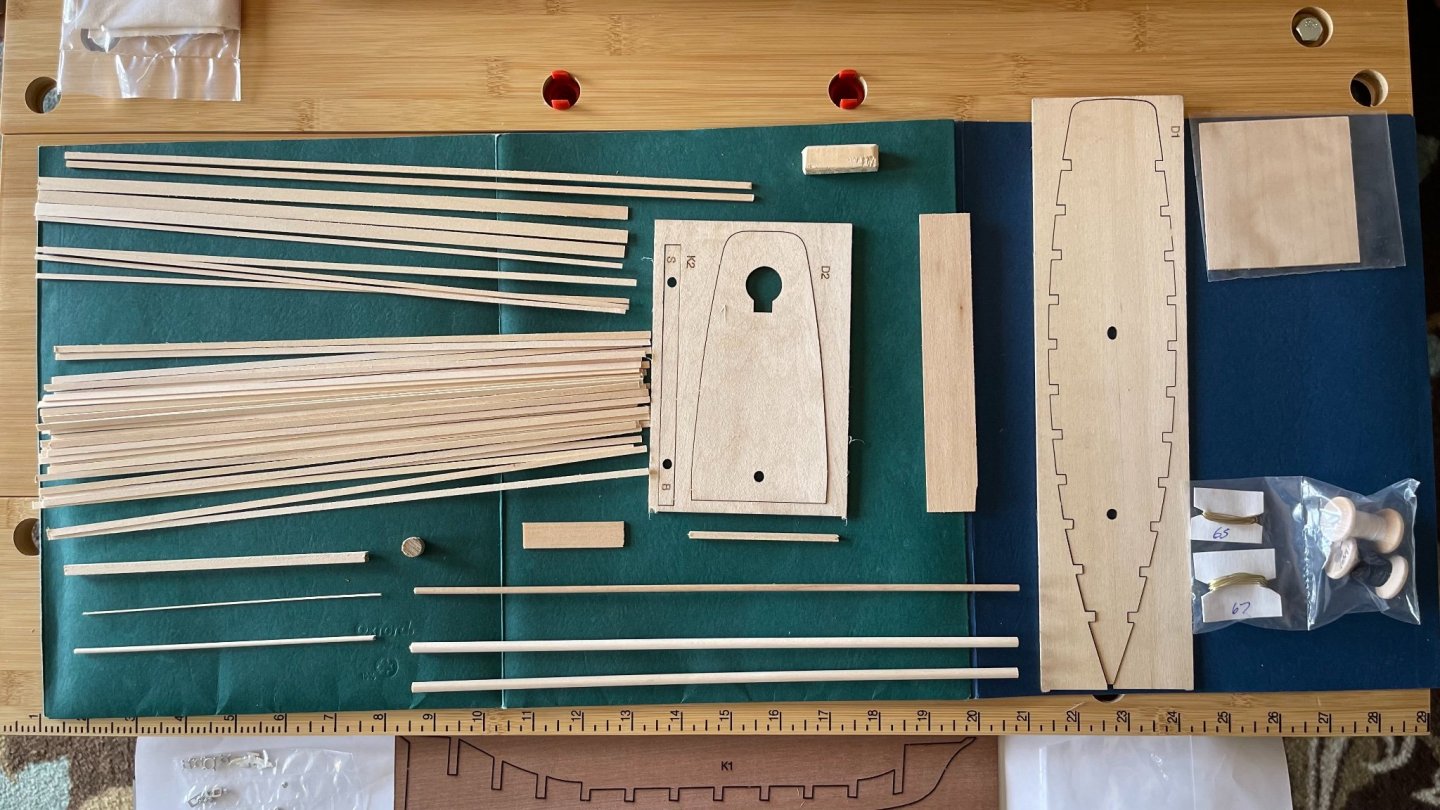
This is the beginning of my second build log on MSW. After a 3 and 1/2 month break I chose Bluejacket’s “America” in 1/8” scale to compliment my last build of “Atlantic” ( same scale) in my collection. Having been inspired sailing on America 2.0 ( a month before the Pandemic hit), I felt that the 1/4” model of the original America by Bluejacket was beyond my skill level. This 1/8” kit naturally is not as finely detailed as the larger 1/4” Bluejacket kit but for a first time POF build it’s a good starting point. Another plus I like are the laser cut parts that should help me out when fairing the hull. Bluejacket rates this kit midway on their skill level bar measure. The three photos show the entire contents of the kit except copyrighted material. I look forward to posting my progress shortly.


- 37 replies
-
- 5
-
-
- BlueJacket Shipcrafters
- America
- (and 1 more)
-
Gracias Eduardo, Thank you for your admiration of Atlantic. I do not know why there are so few builds of Atlantic as you say. Such a beautifully designed vessel I think would be a popular model. On the other hand I can cherish the fact I've had the satisfaction to complete this wonderful kit from Bluejacket. Adios, Angelo
-
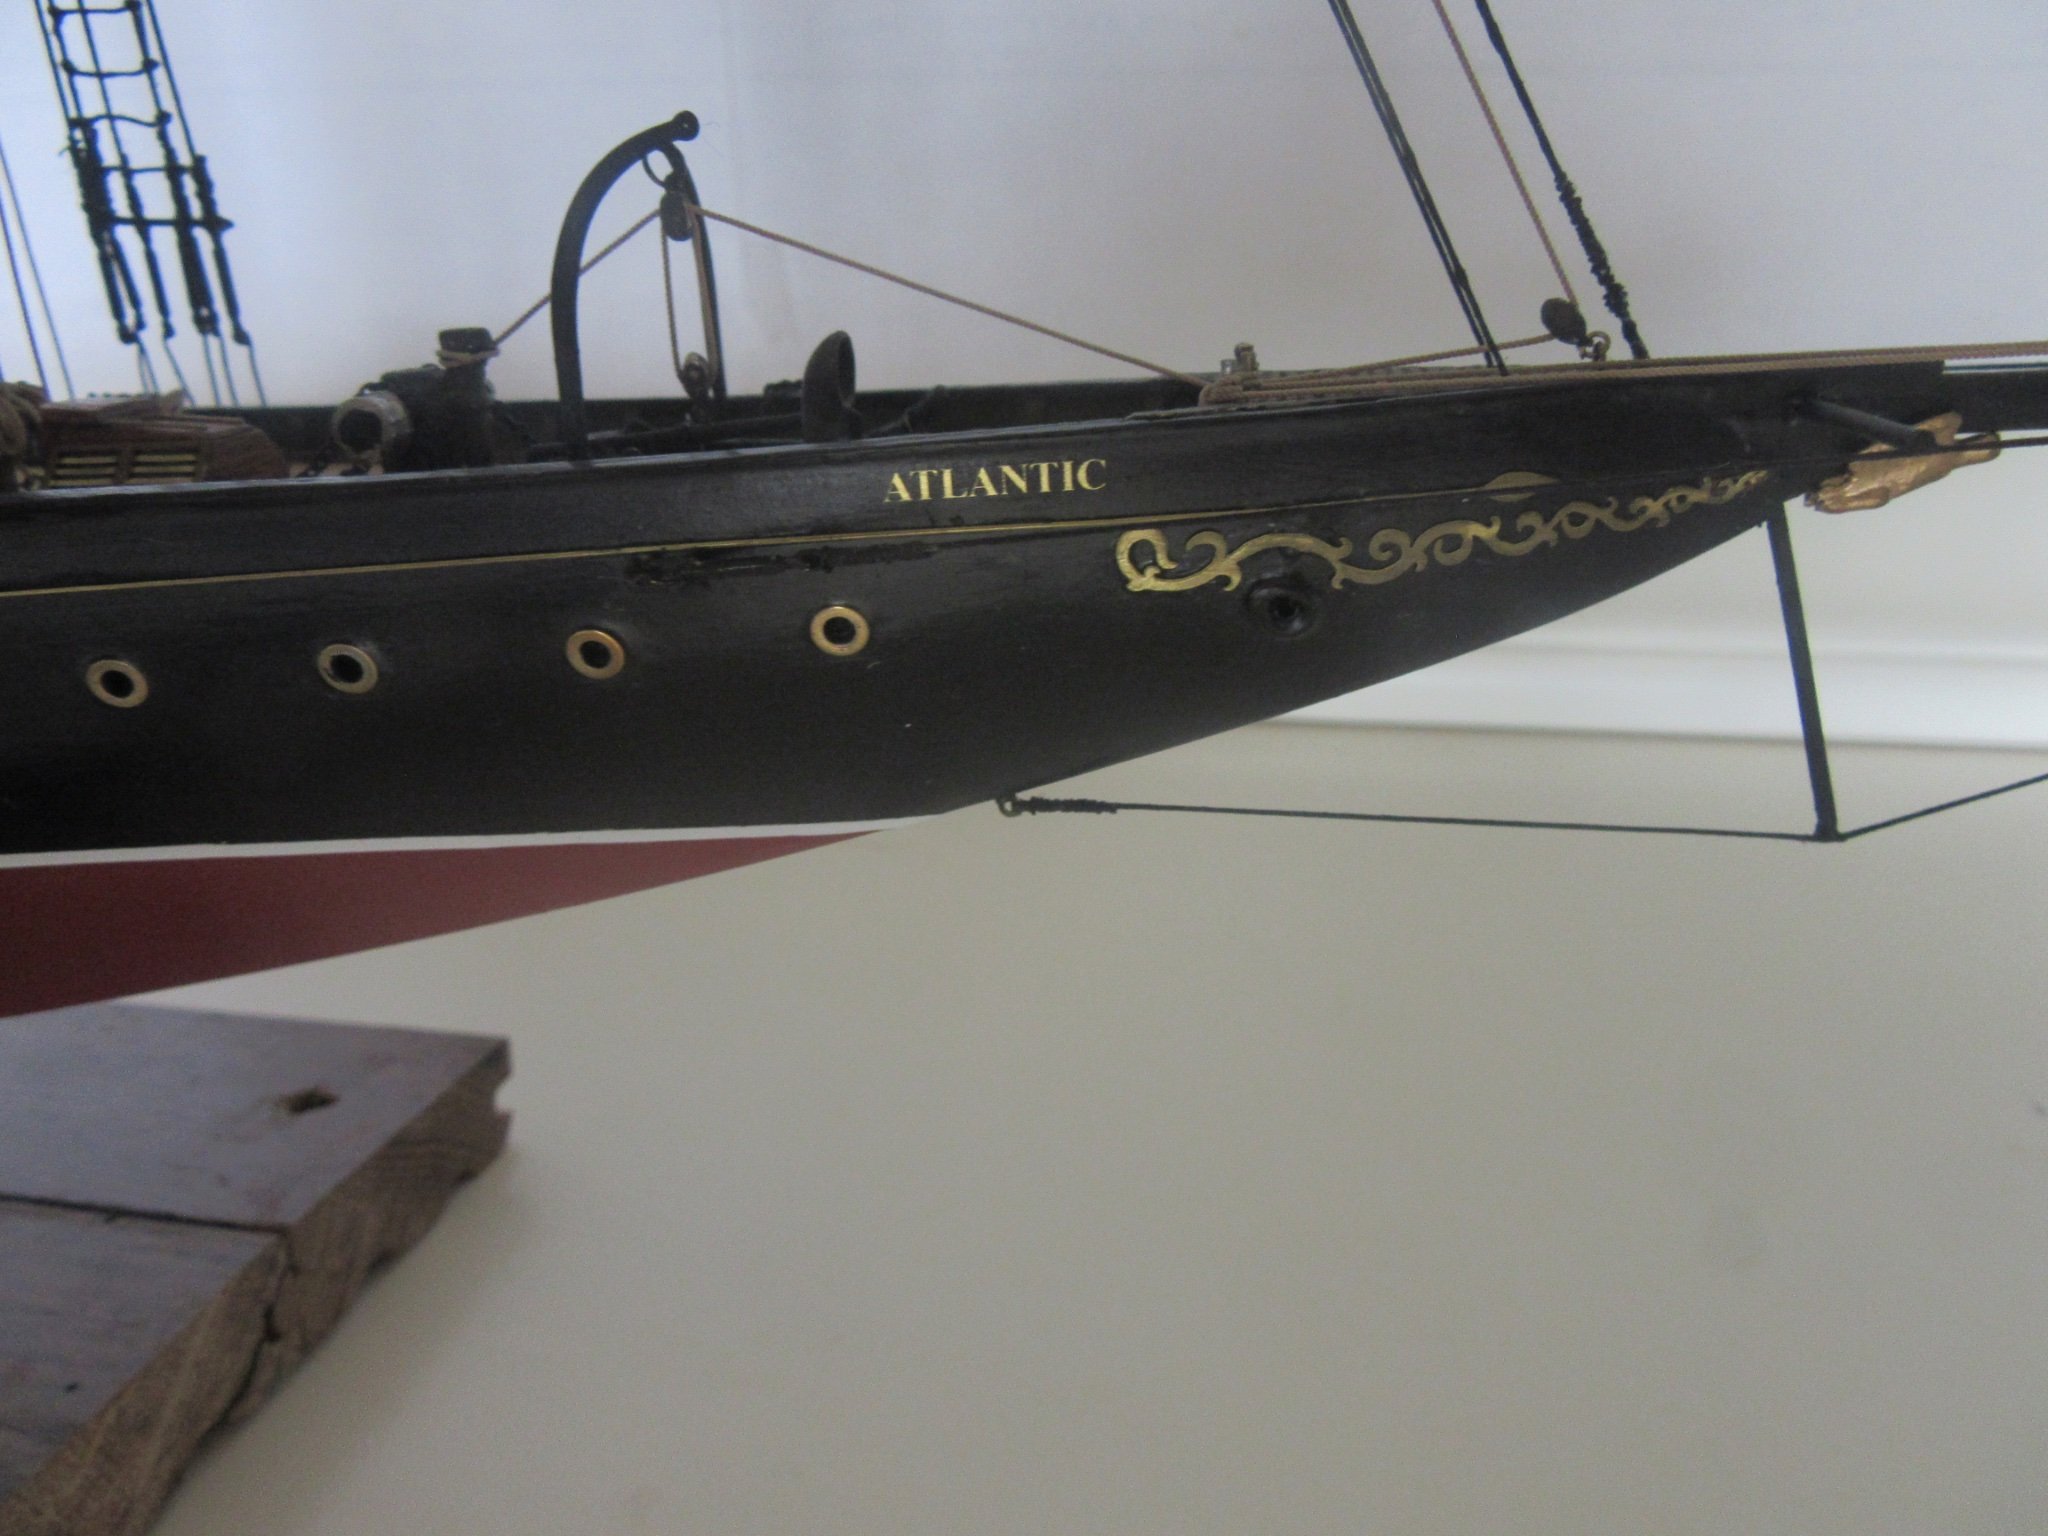
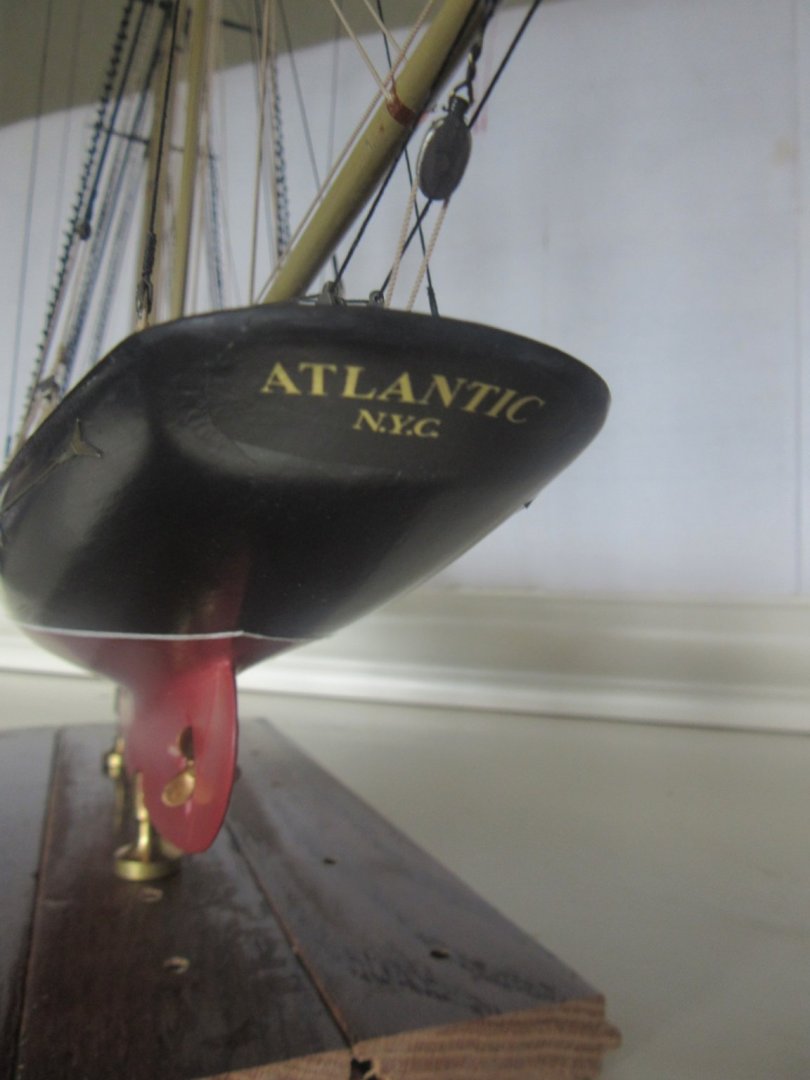
Thank you Mike for the compliment on the build. The display case work was parceled out though. Bluejacket Shipcrafters were spot on with the cherry base dimensions. I then brought the wood base to a local custom glazier who actually specializes in glass bathroom showers. He had a crack at it and it fit the base like a glove. As for the name placement, it’s a single decal of the entire name. I just eyeballed their placement on the hull and was happy they came off their paper backing without a hitch. Regards, Ange
-
I’m grateful for you compliment and interest in my next build of America this fall. -Ange
-
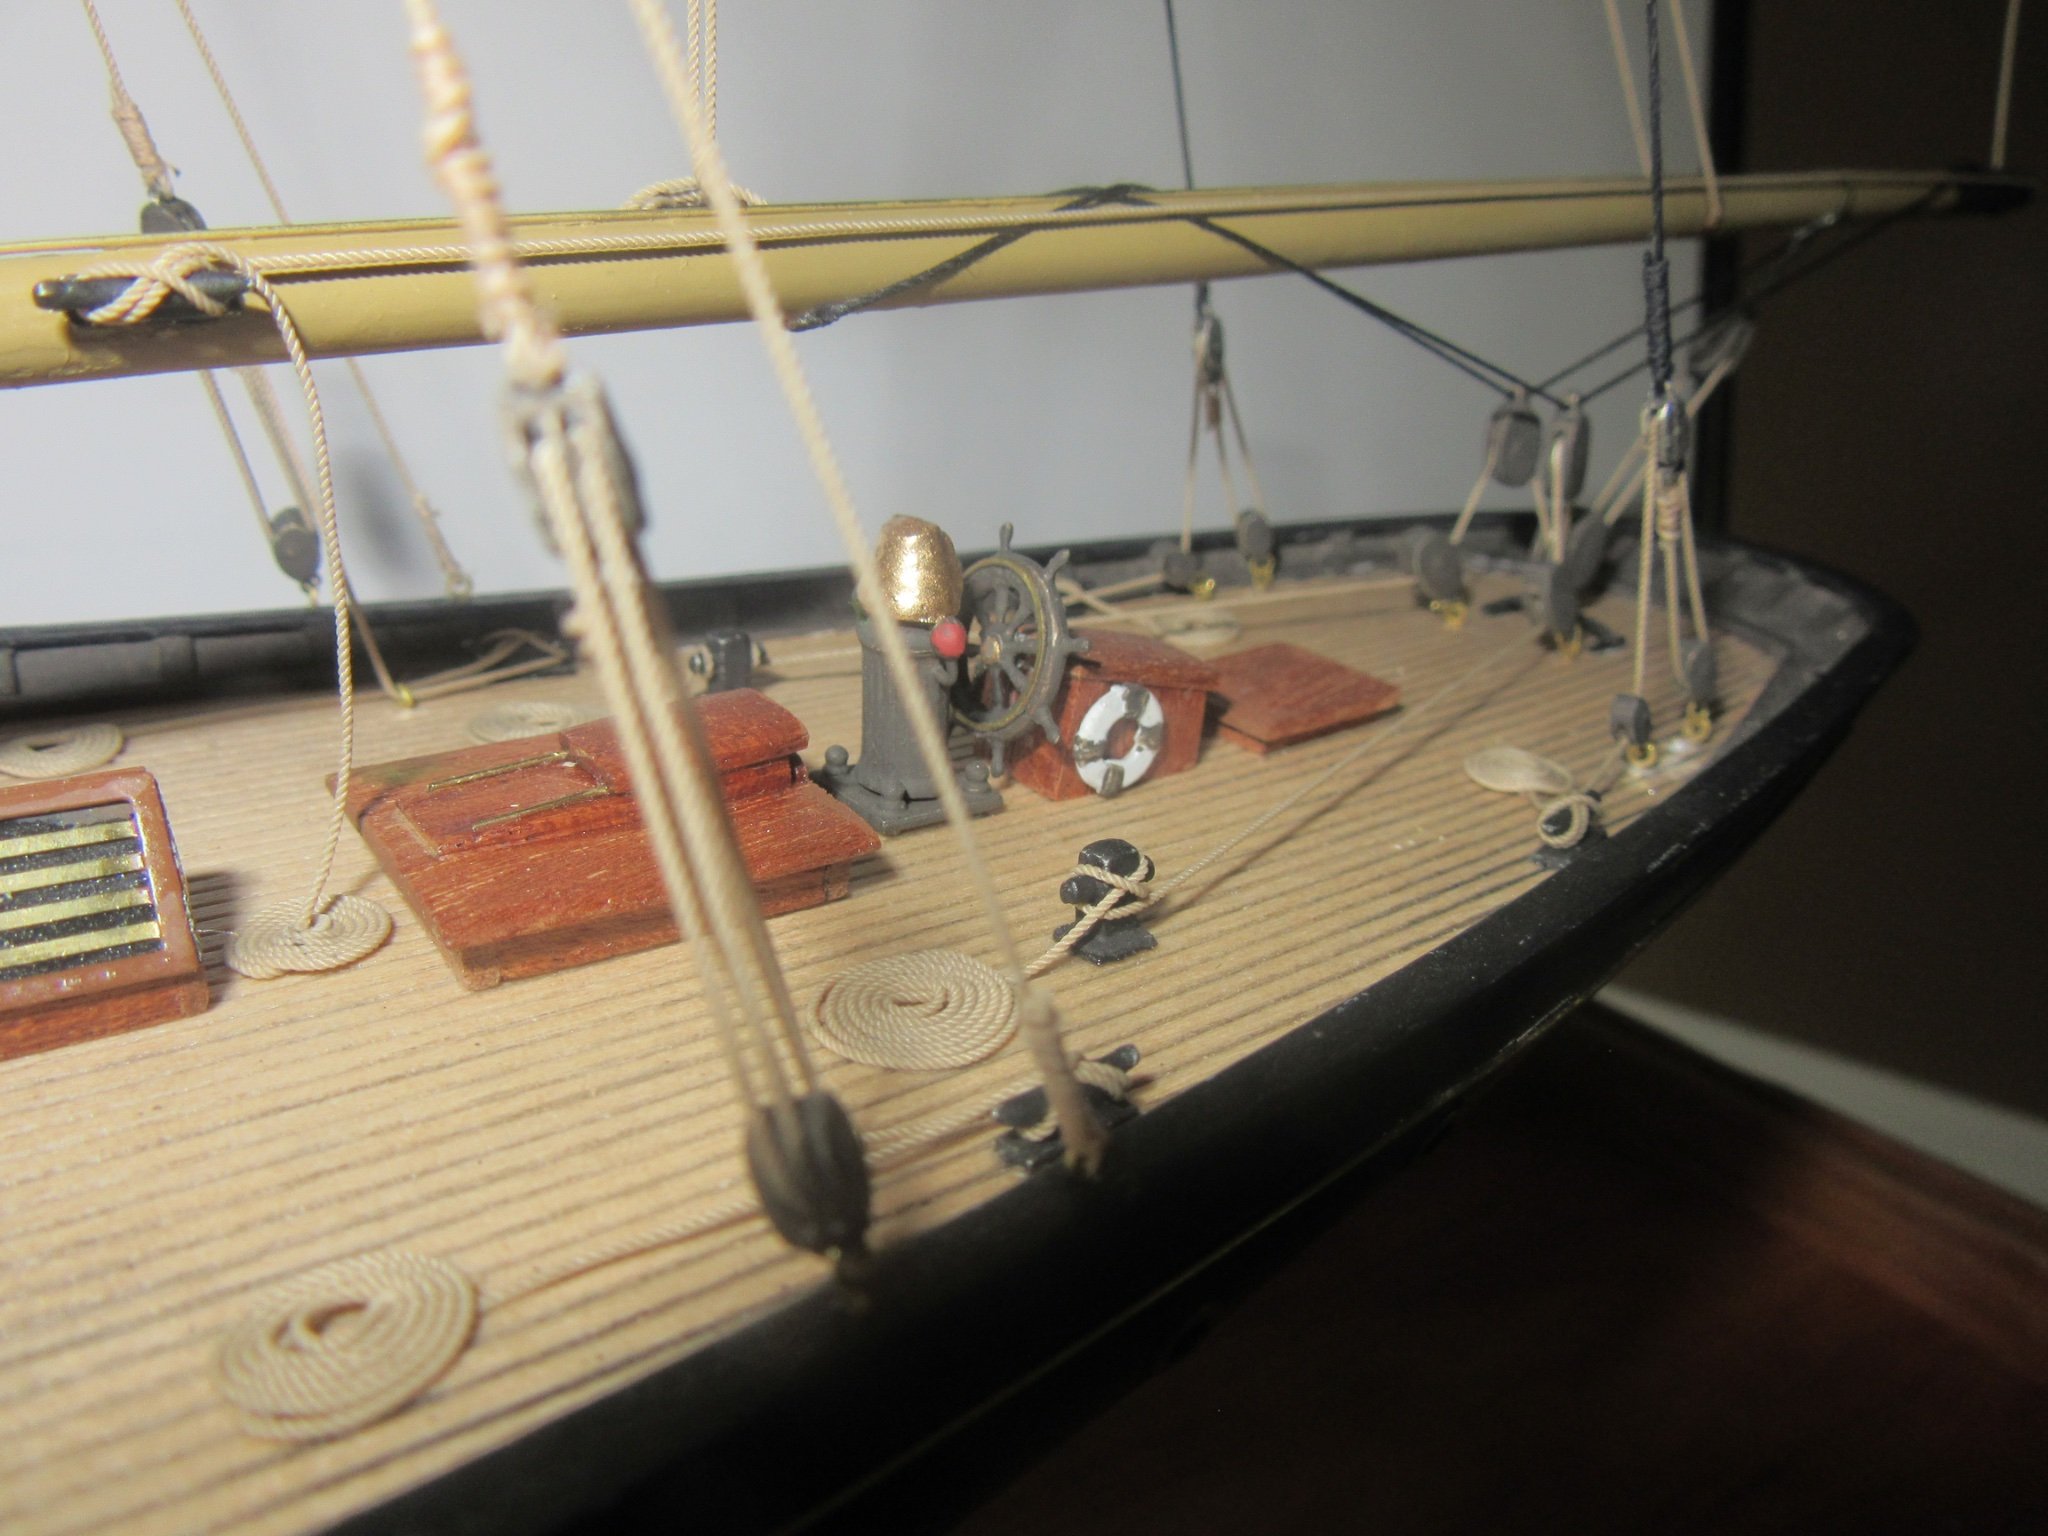
Thank you PRS. The flemish hand coils laying on deck were a joy to do. Buster and I have become thick as thieves. Regards -Ange
-
Thank you Tom. When I first opened the box and seen all those tiny parts Got a lump in my throat the size of an apple. Persistence was the key from there on out. -Ange
-
Thank you Bob for the compliments and also your encouragement throughout the build of Atlantic. The Bluejacket America kit that arrived a couple days ago is the 1/8" scale model. My choice of this scale is two fold. First, I like to have a famous schooner in the same scale as Atlantic for comparative display. Second and more importantly is the fact I had never assembled a plank and frame (or bulkhead) hull before. Bluejacket rates the 1/8" model as requiring less experience than the larger 1/4" scale America which will facilitate my novice level for the plank and frame hull assembly. After I have cut my teeth on America, my long range aspiration is for a larger plank and frame vessel, possibly a warship. Ciao Bob! -Ange
-
I appreciate the compliment Tim. I actually thought Atlantic would be finished before spring not mid summer. Thank you, Ange
-
Thank you Ryland for the compliment. The basic reason I choose Atlantic for a build was the aesthetic form of her hull. Regards, Ange
-
Thank you Gary. Your build of the schooner America concurrent with Atlantic was motivating especially when I was hung up on the anchor placement. -Ange
-
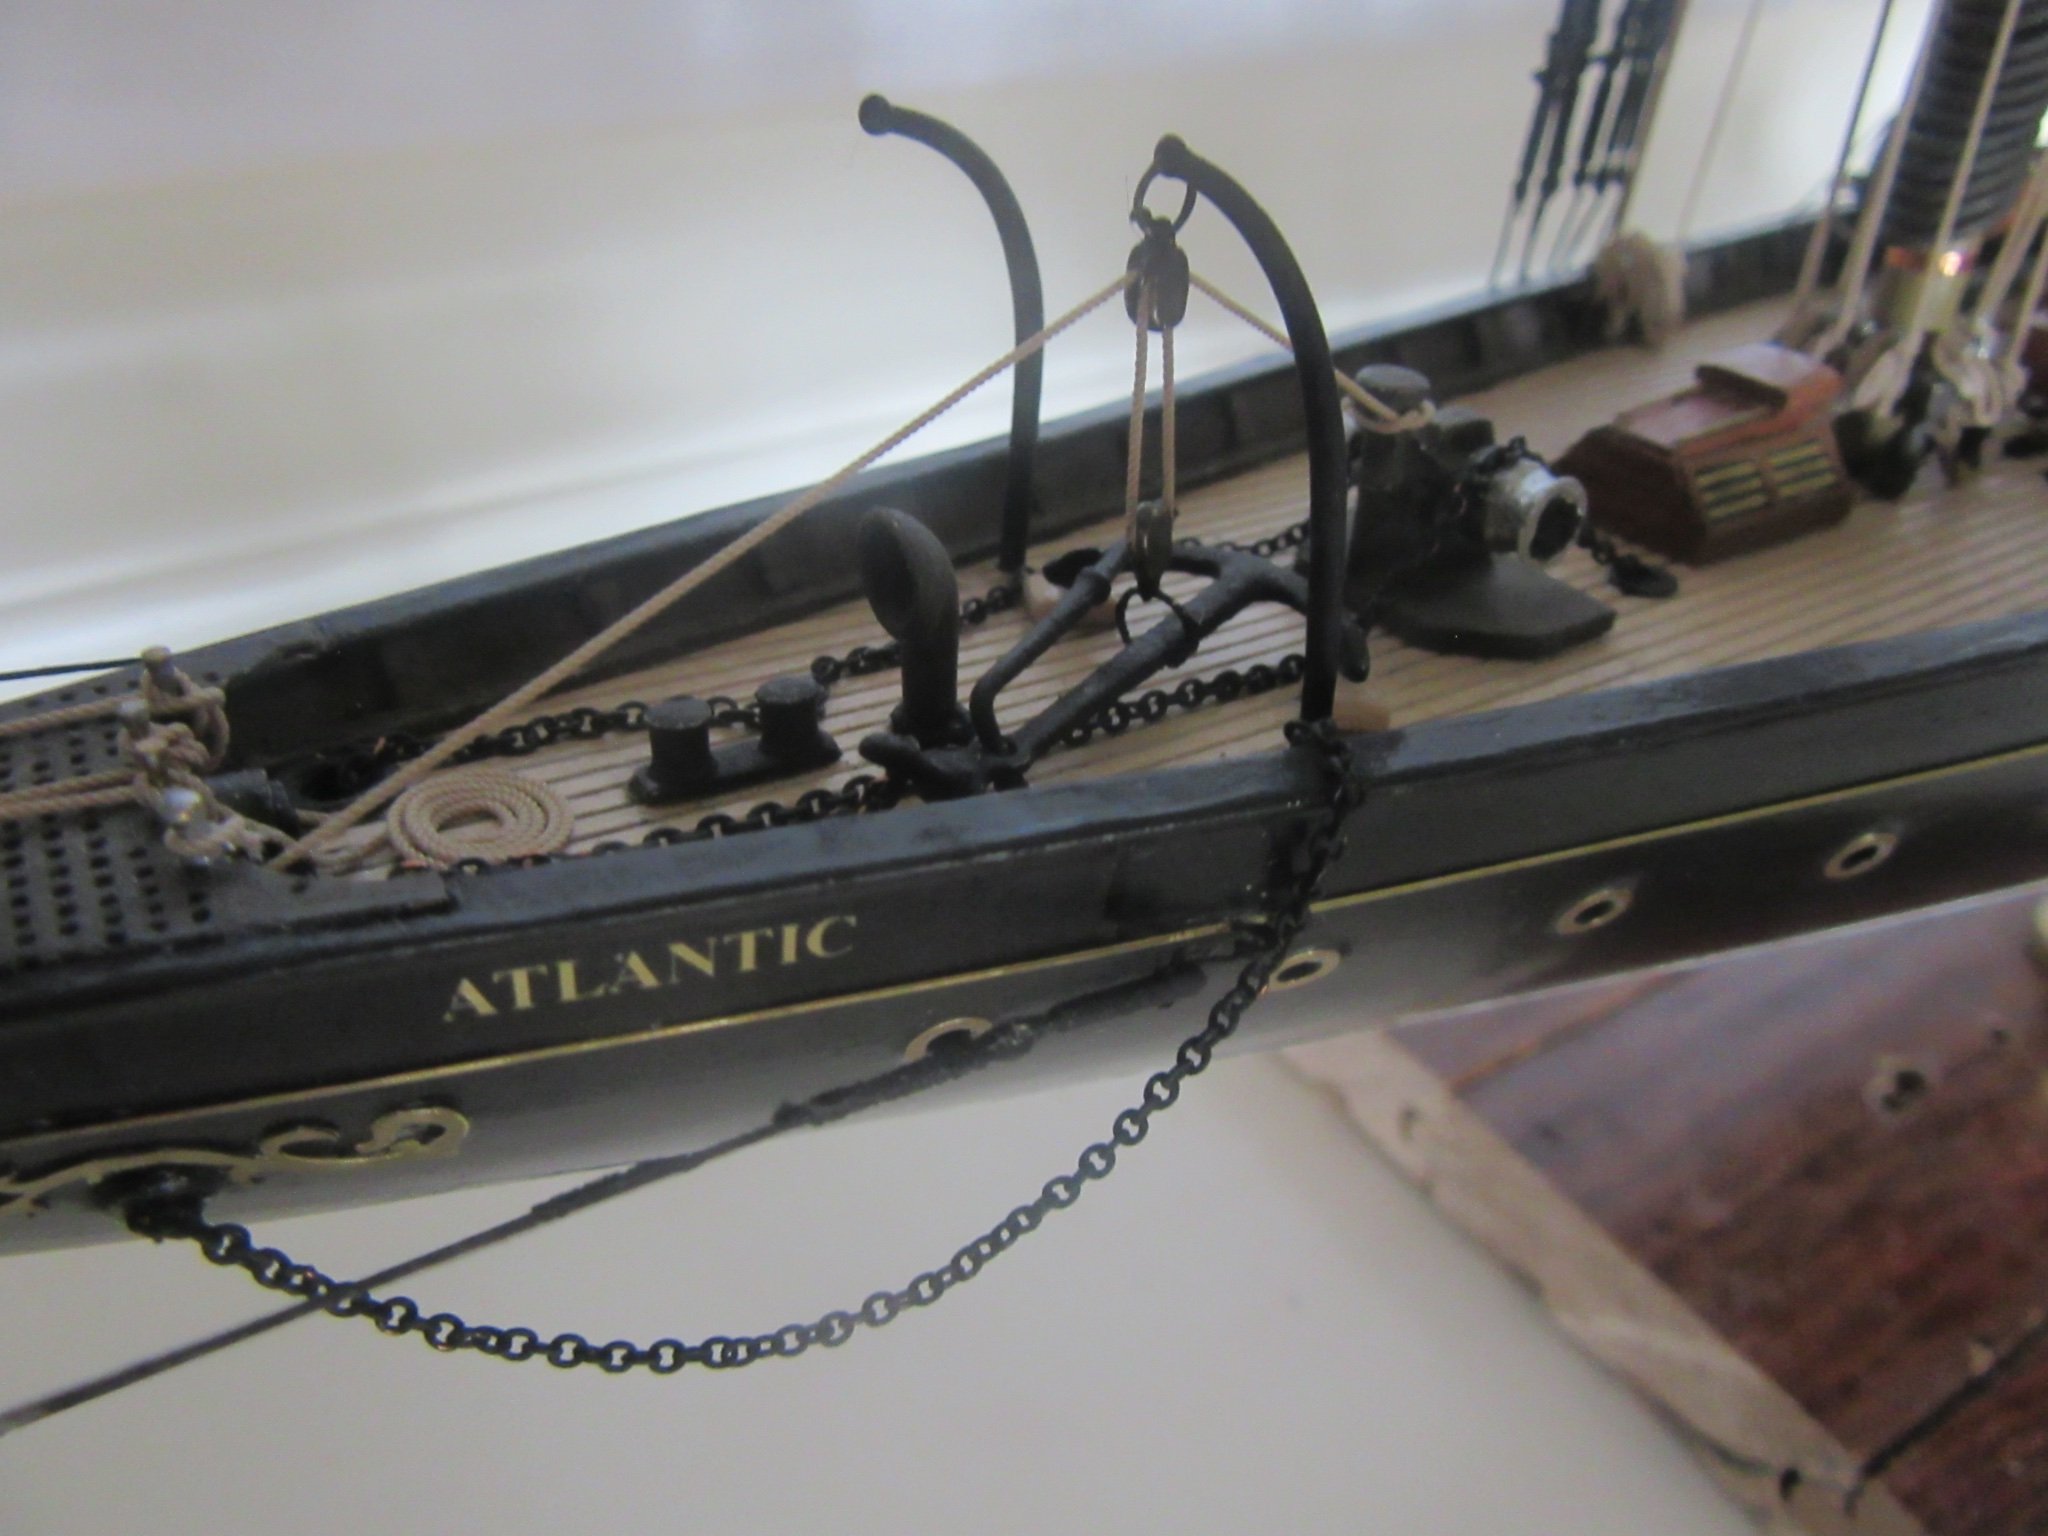
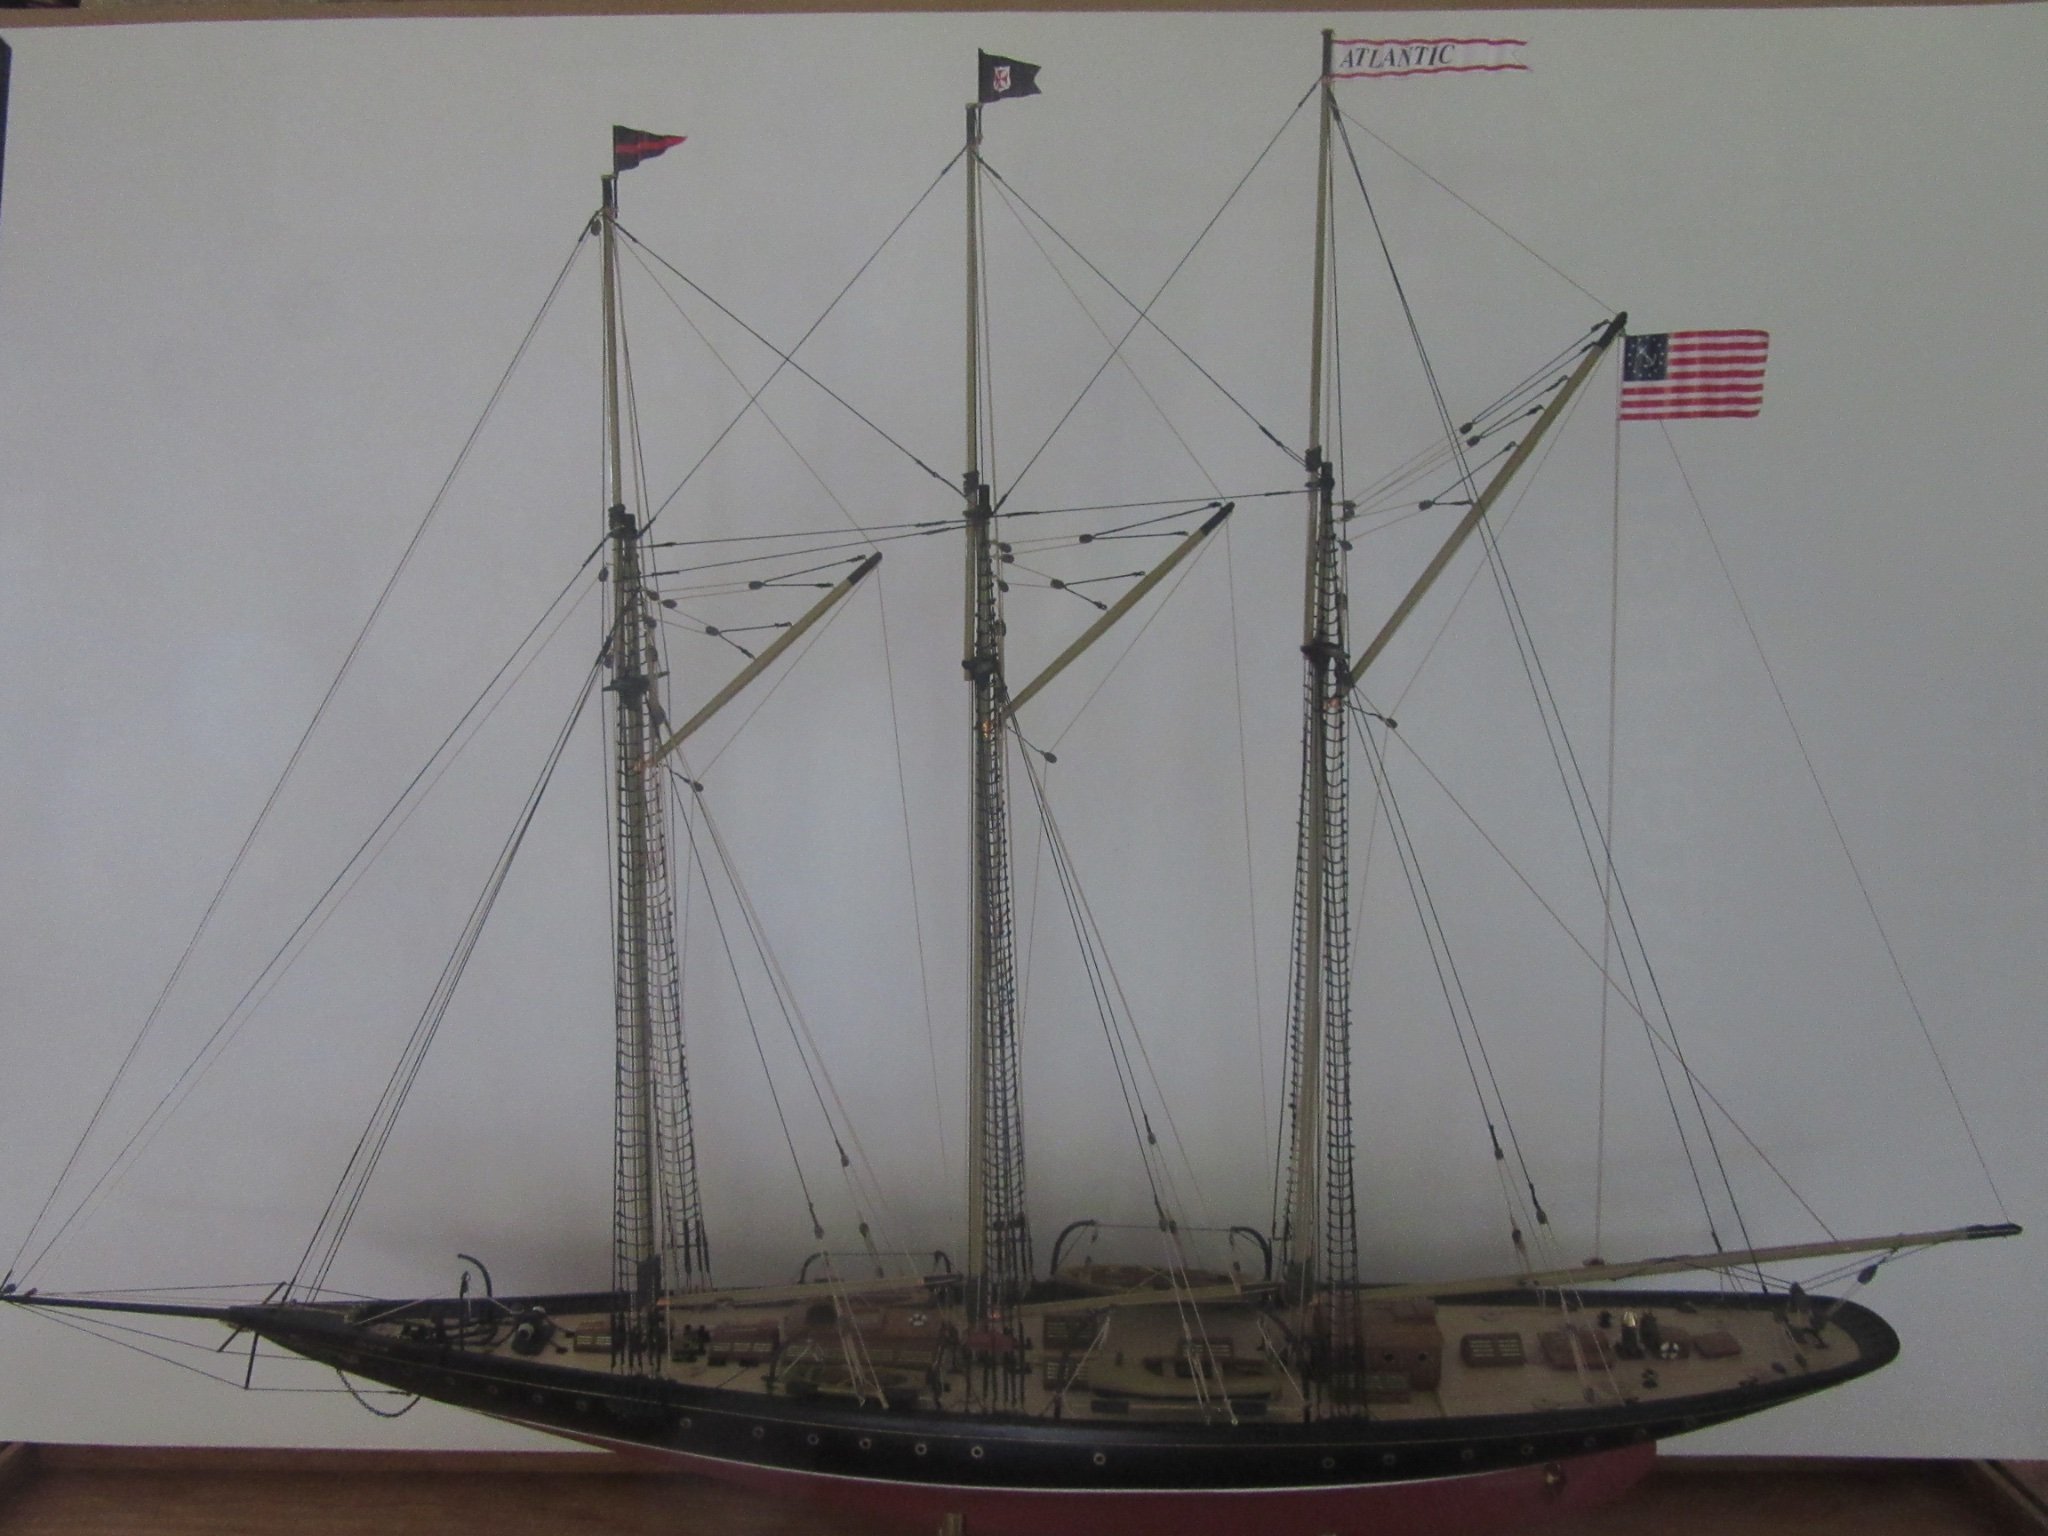
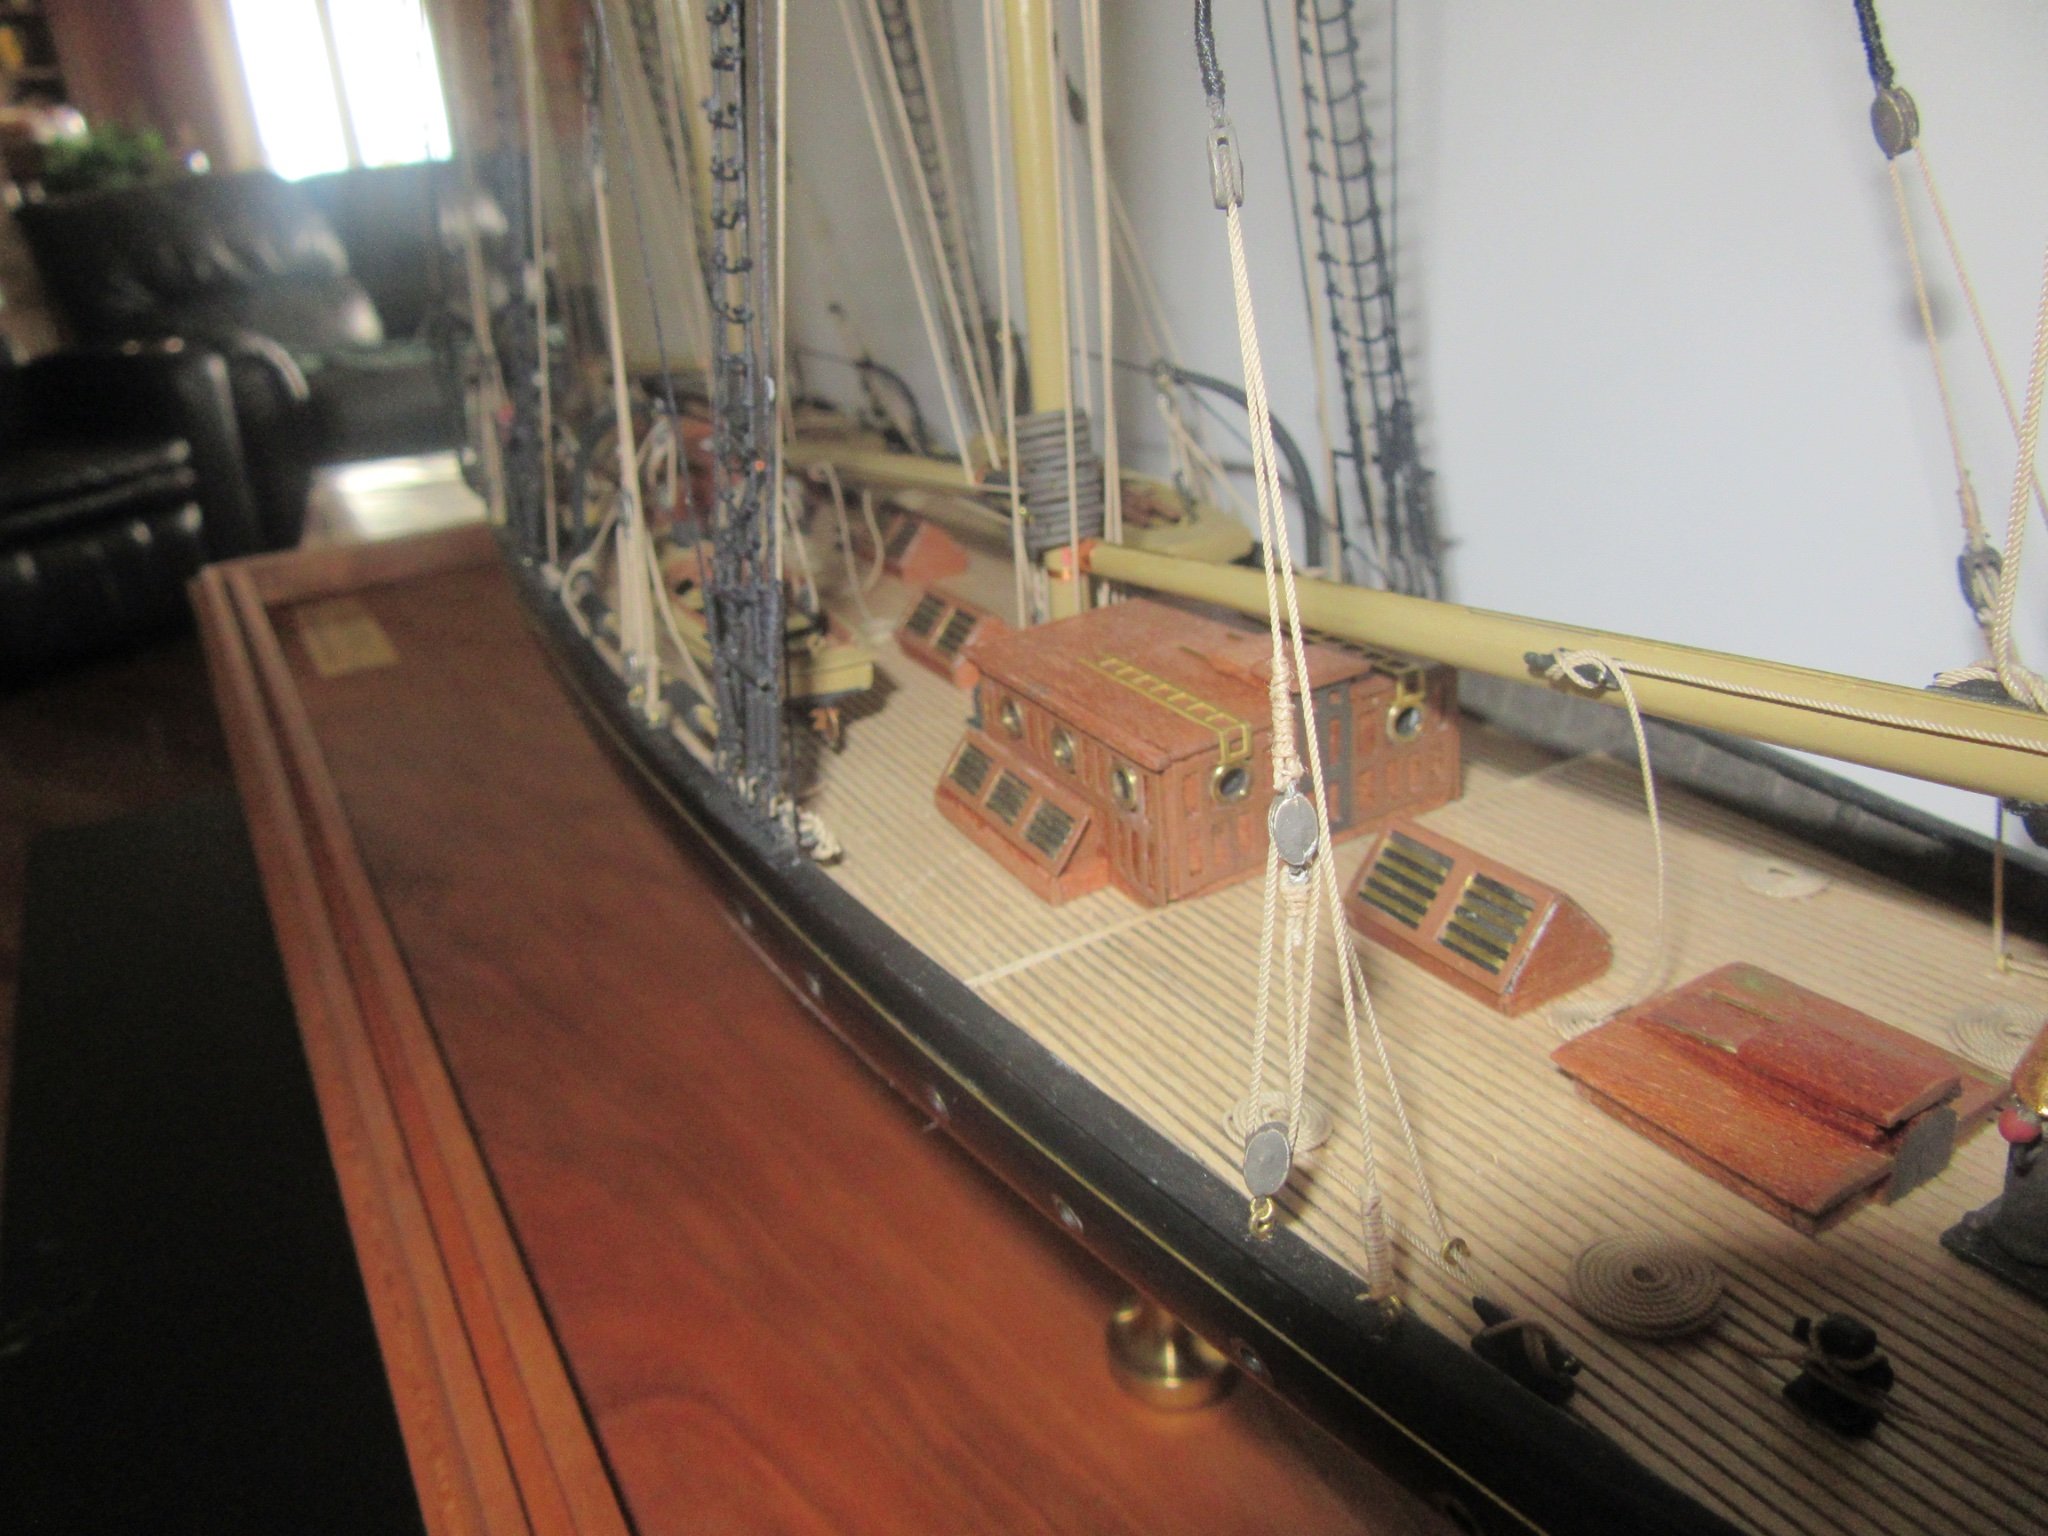
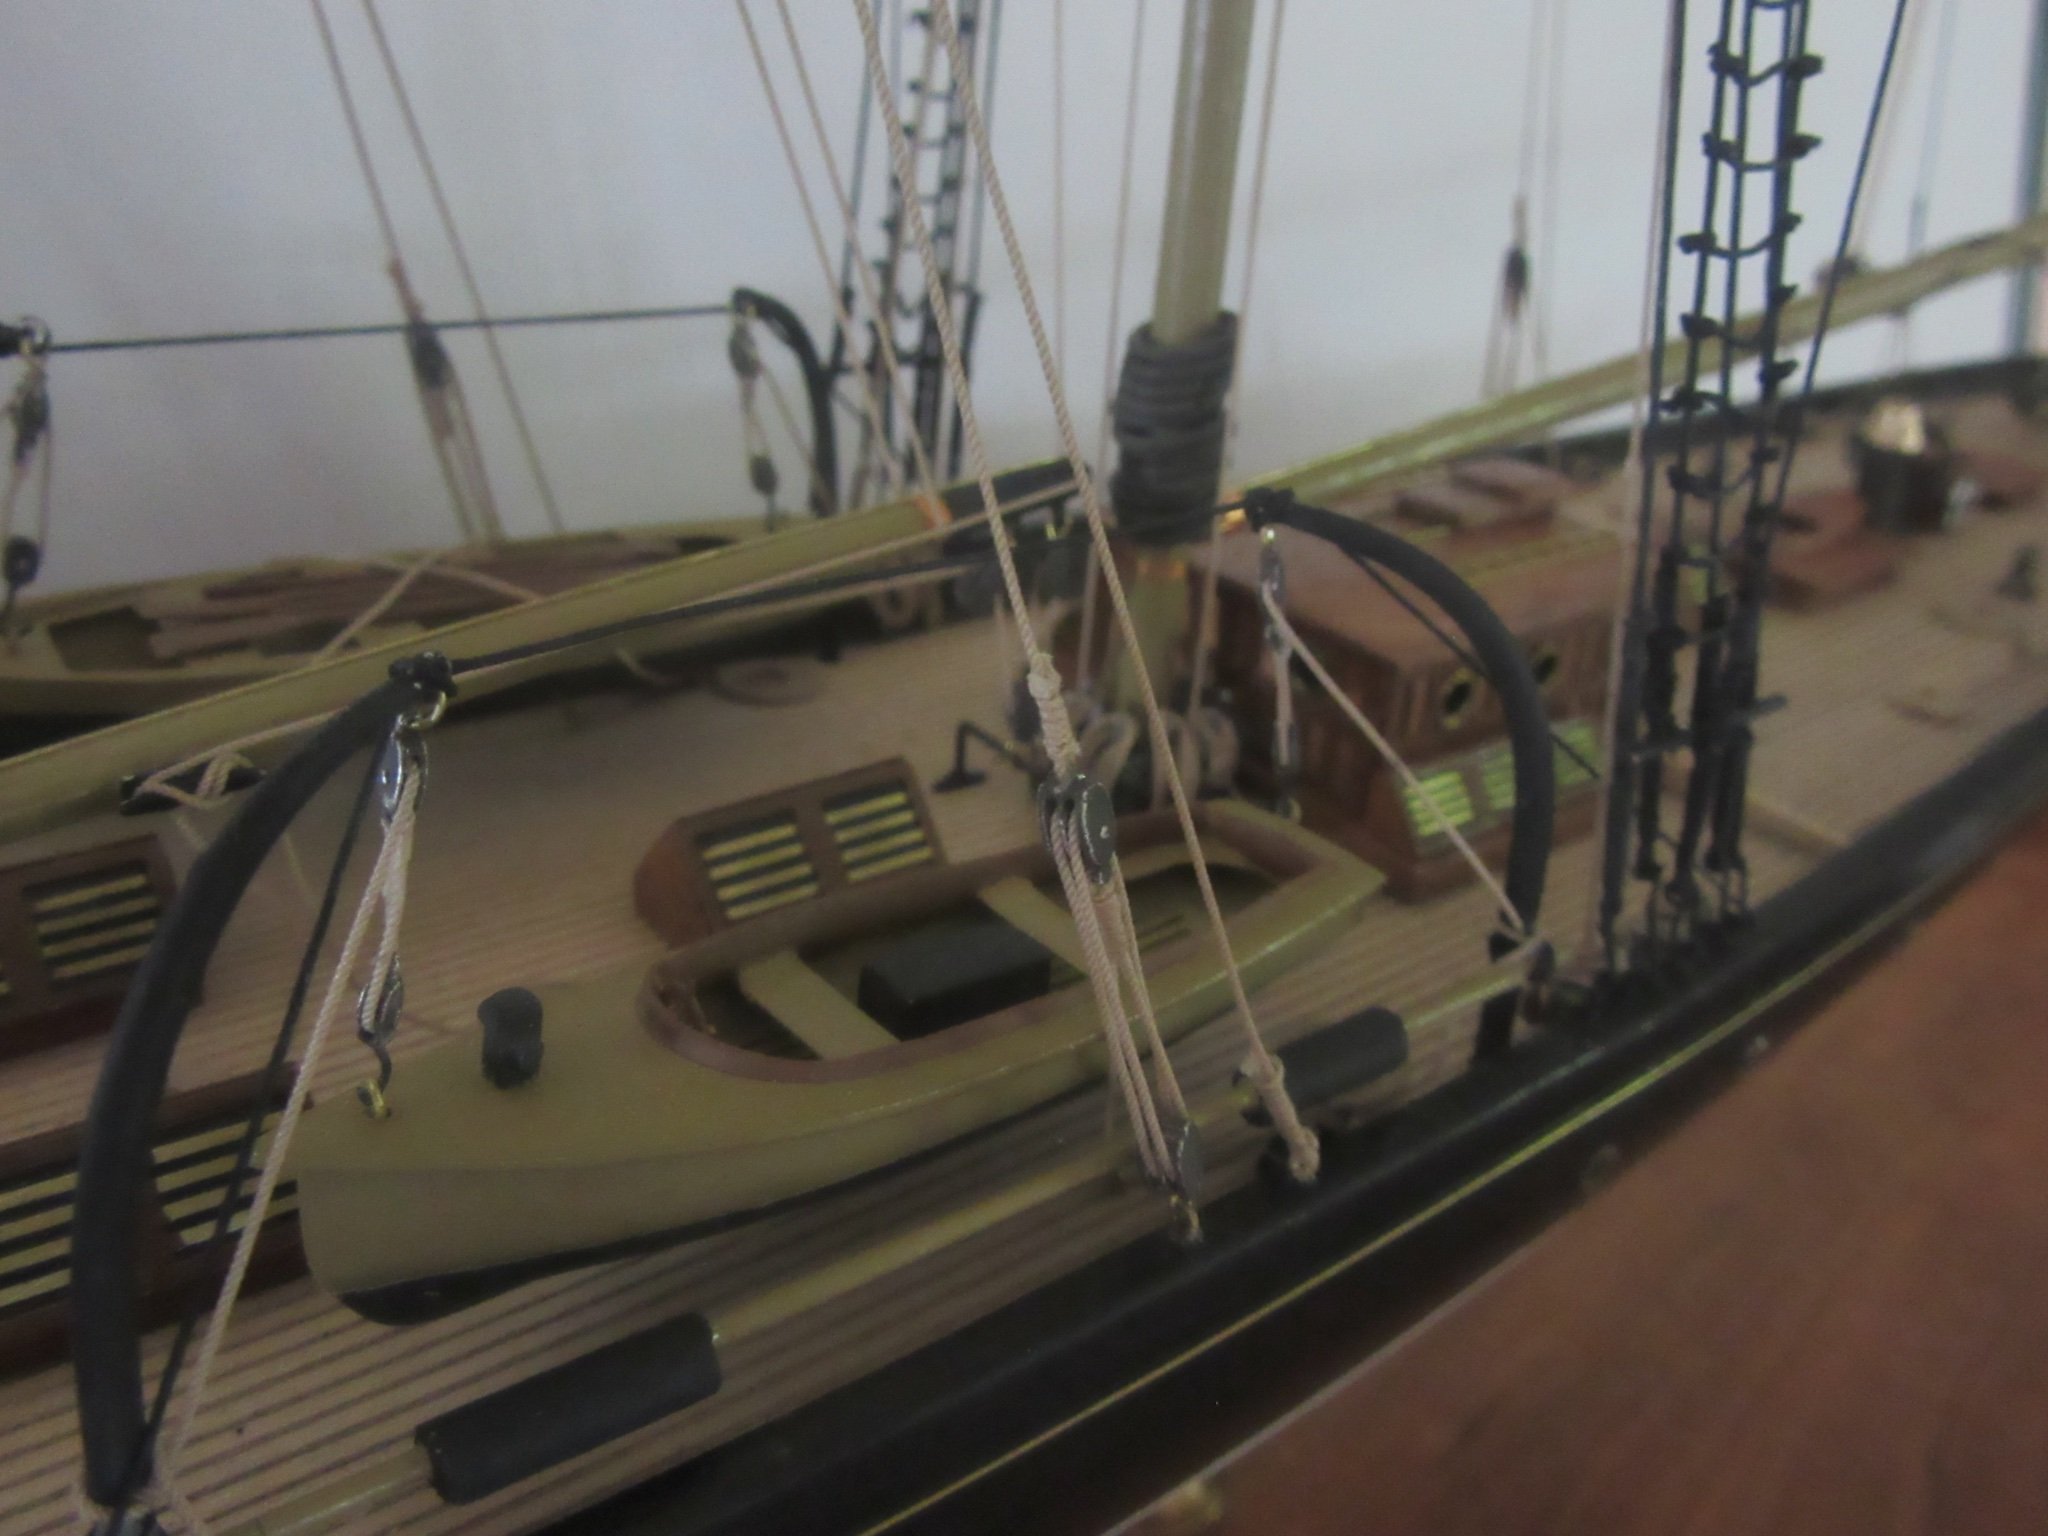
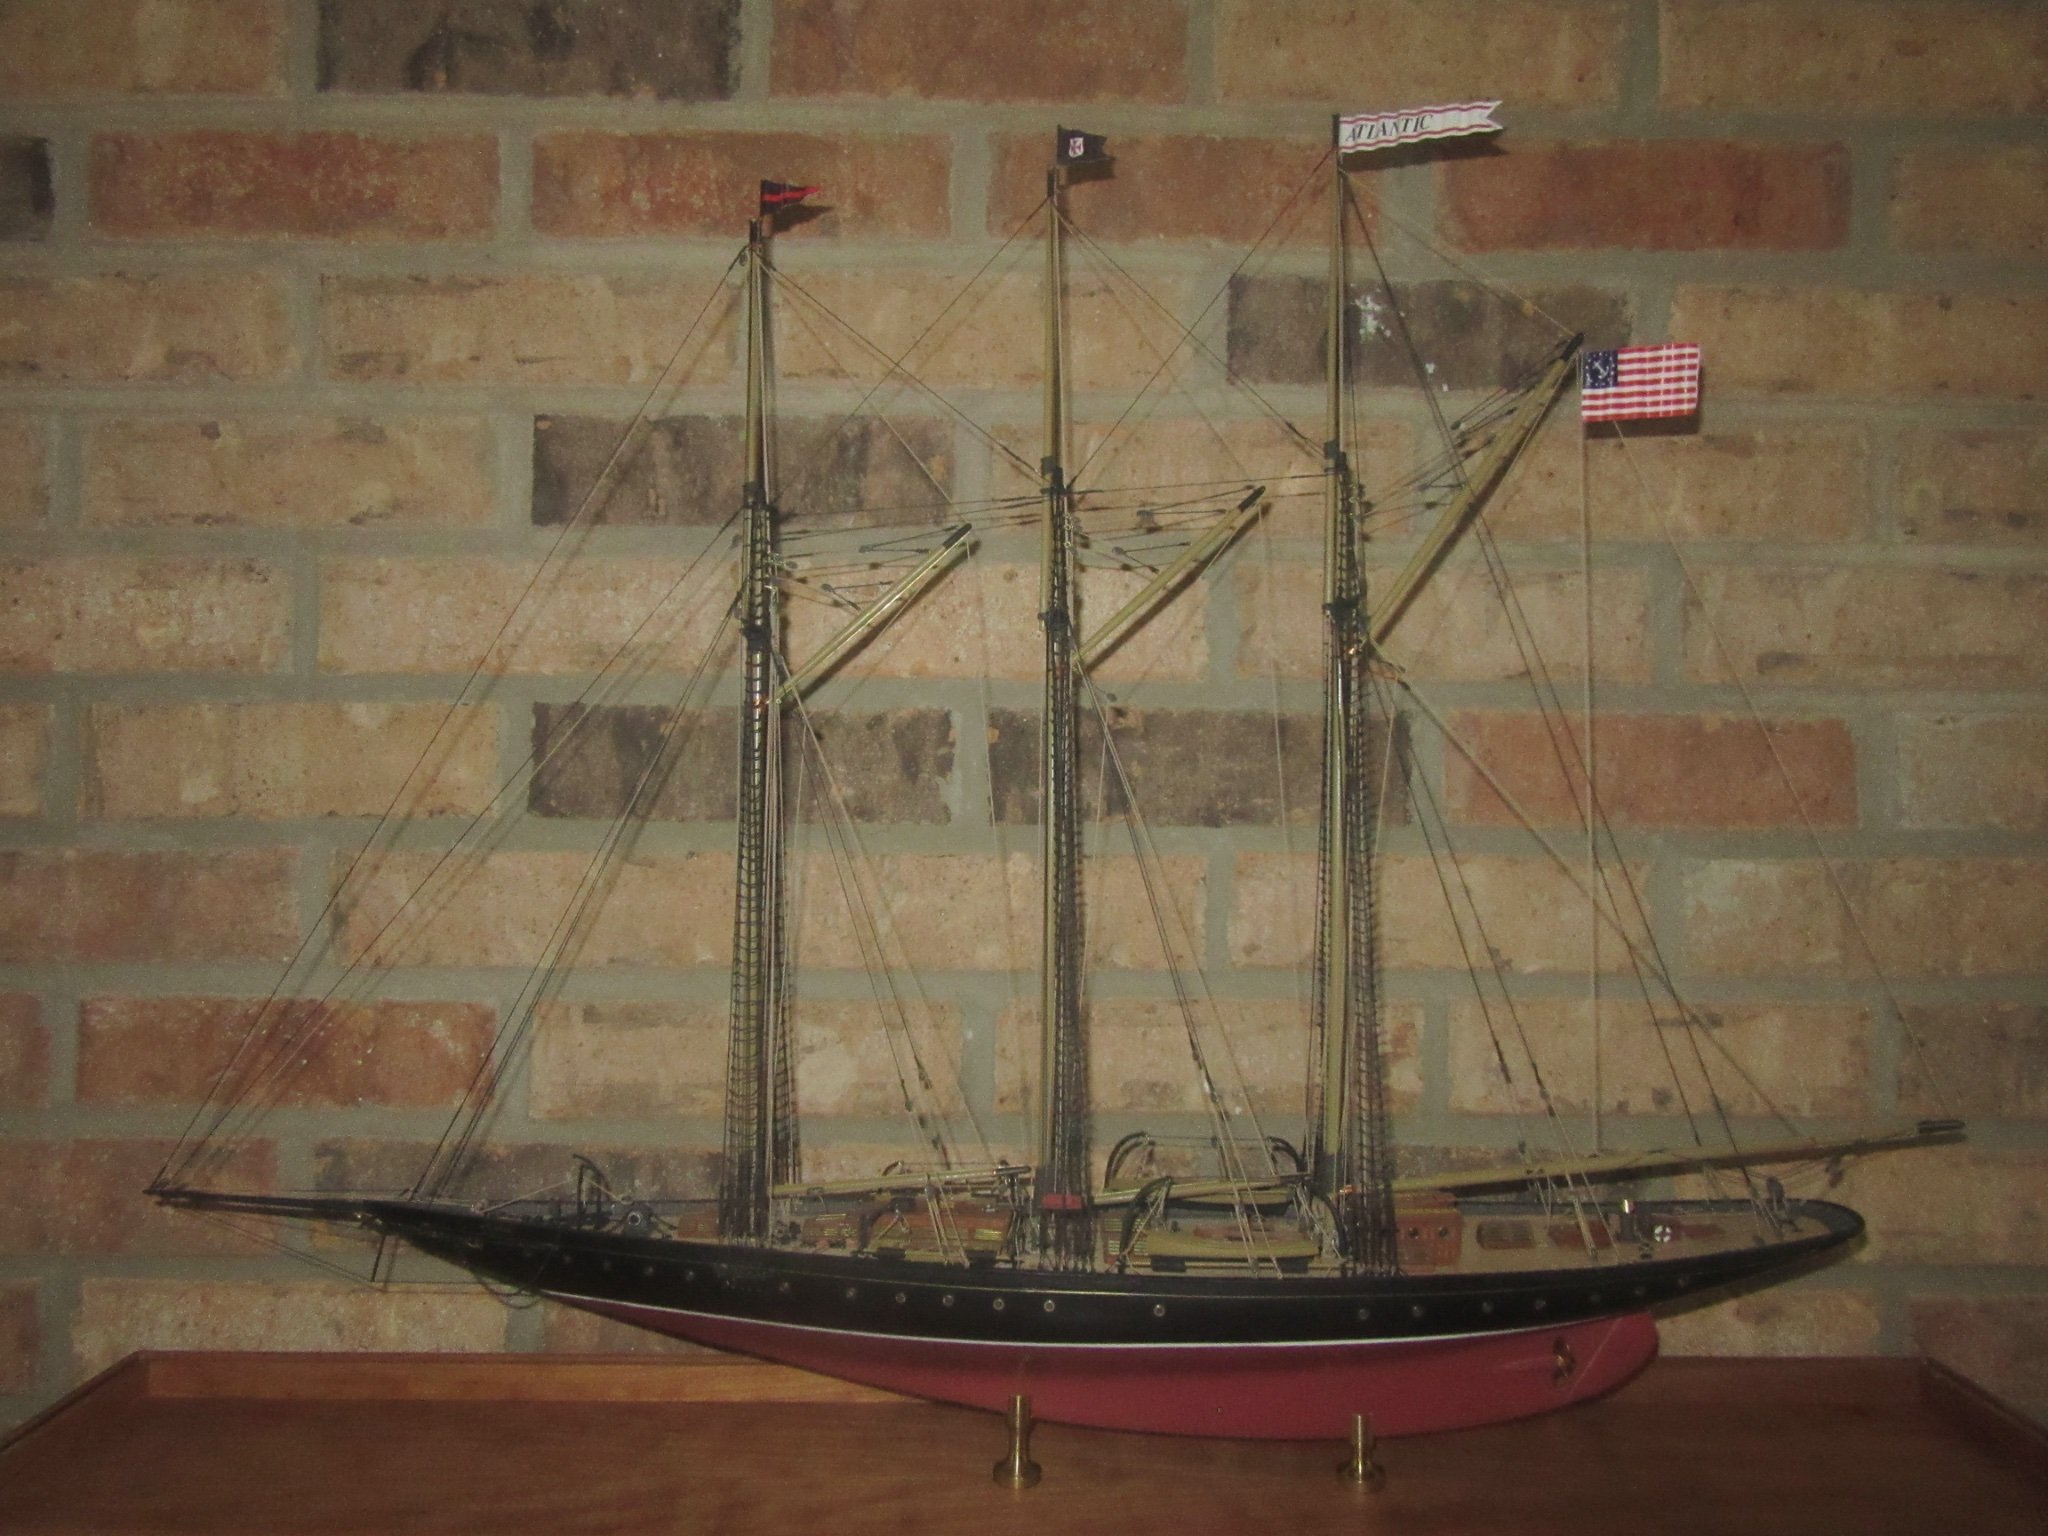
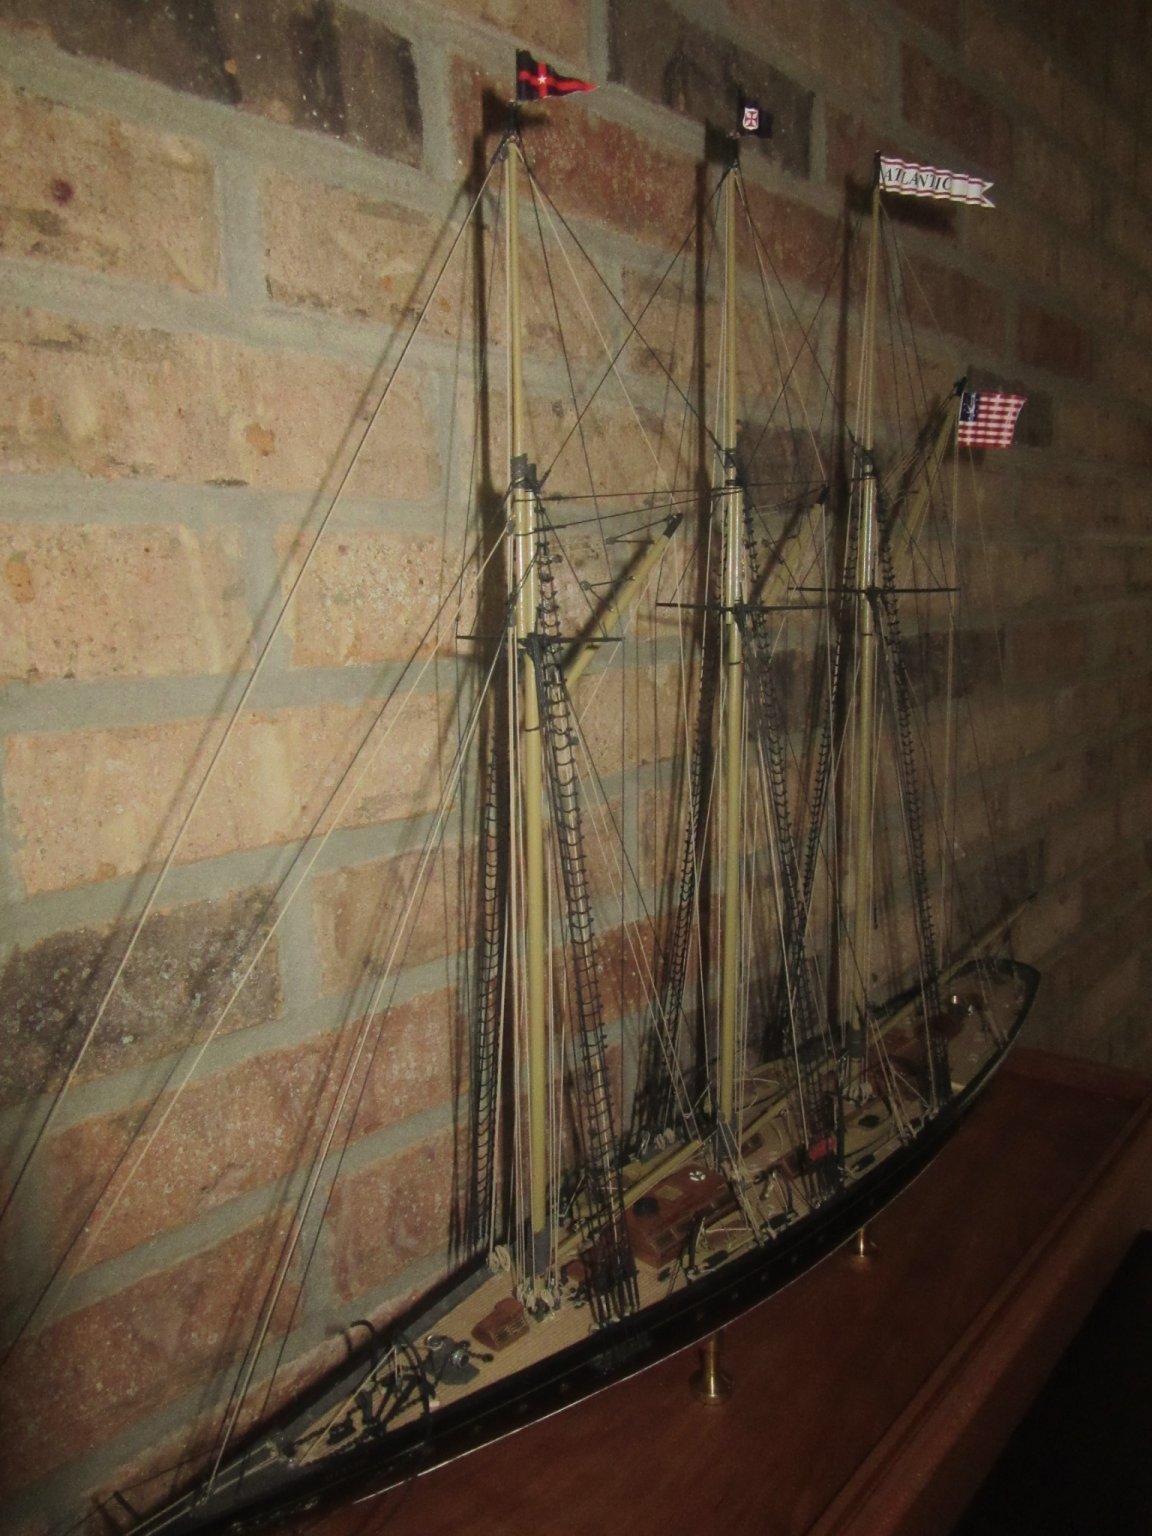
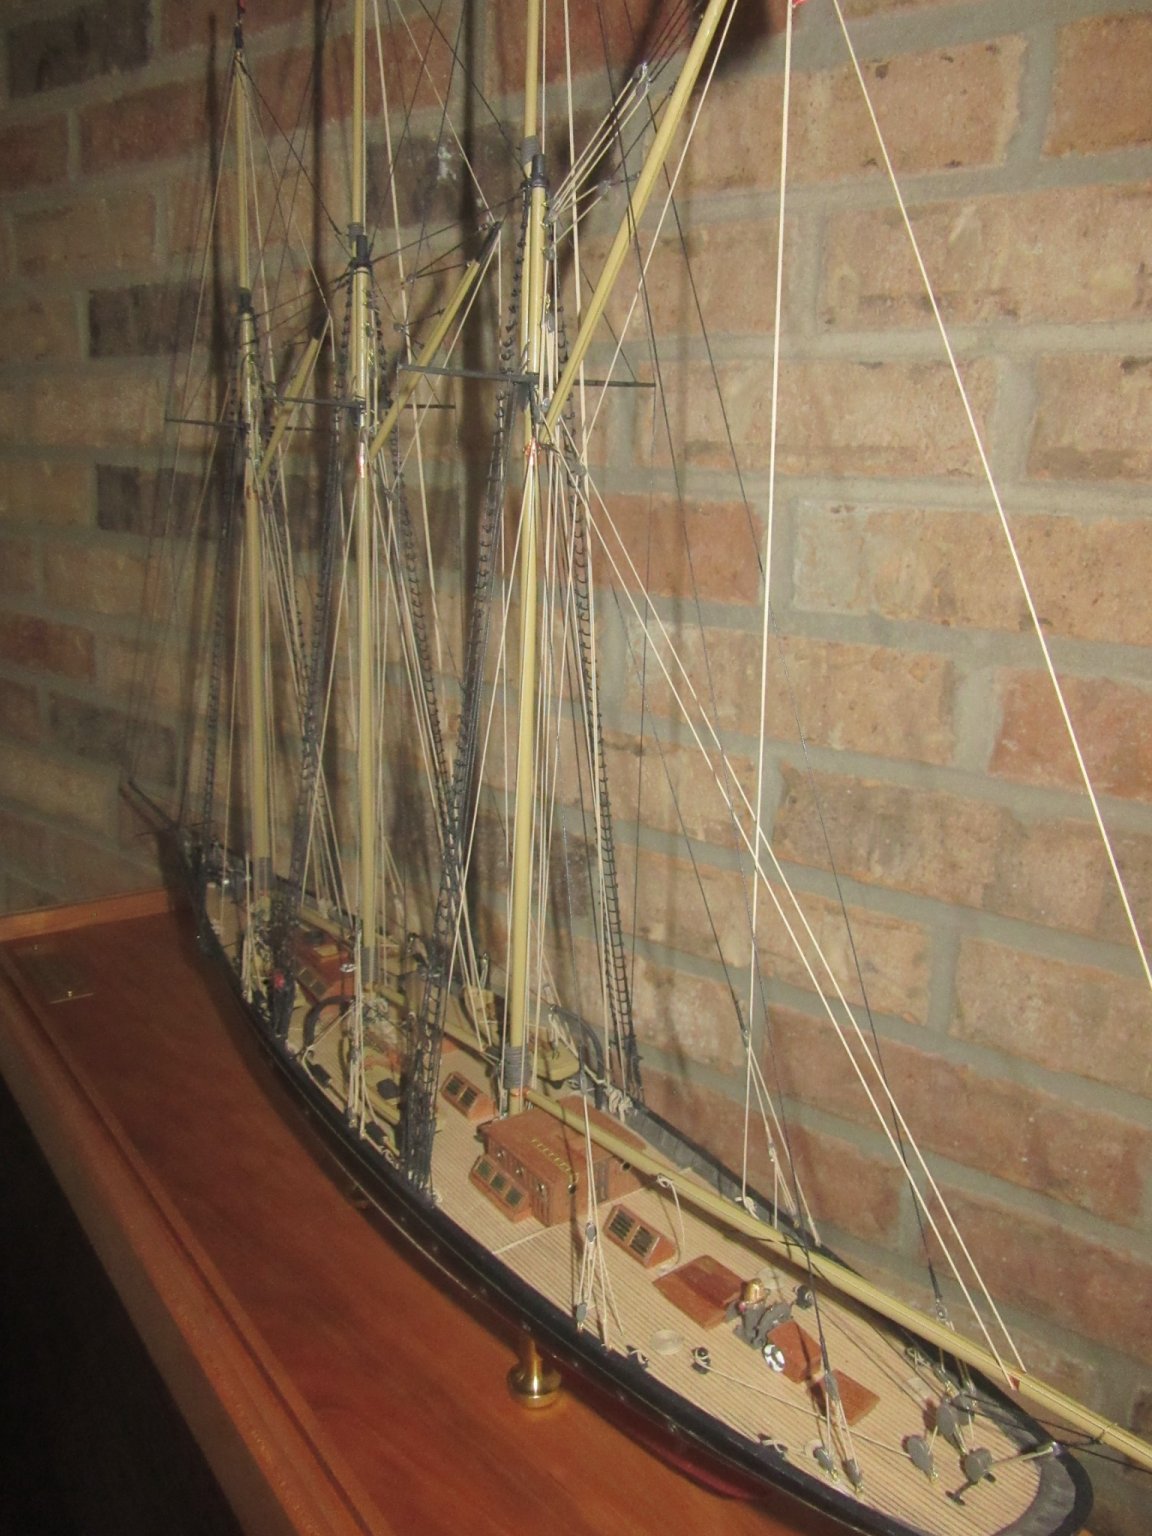
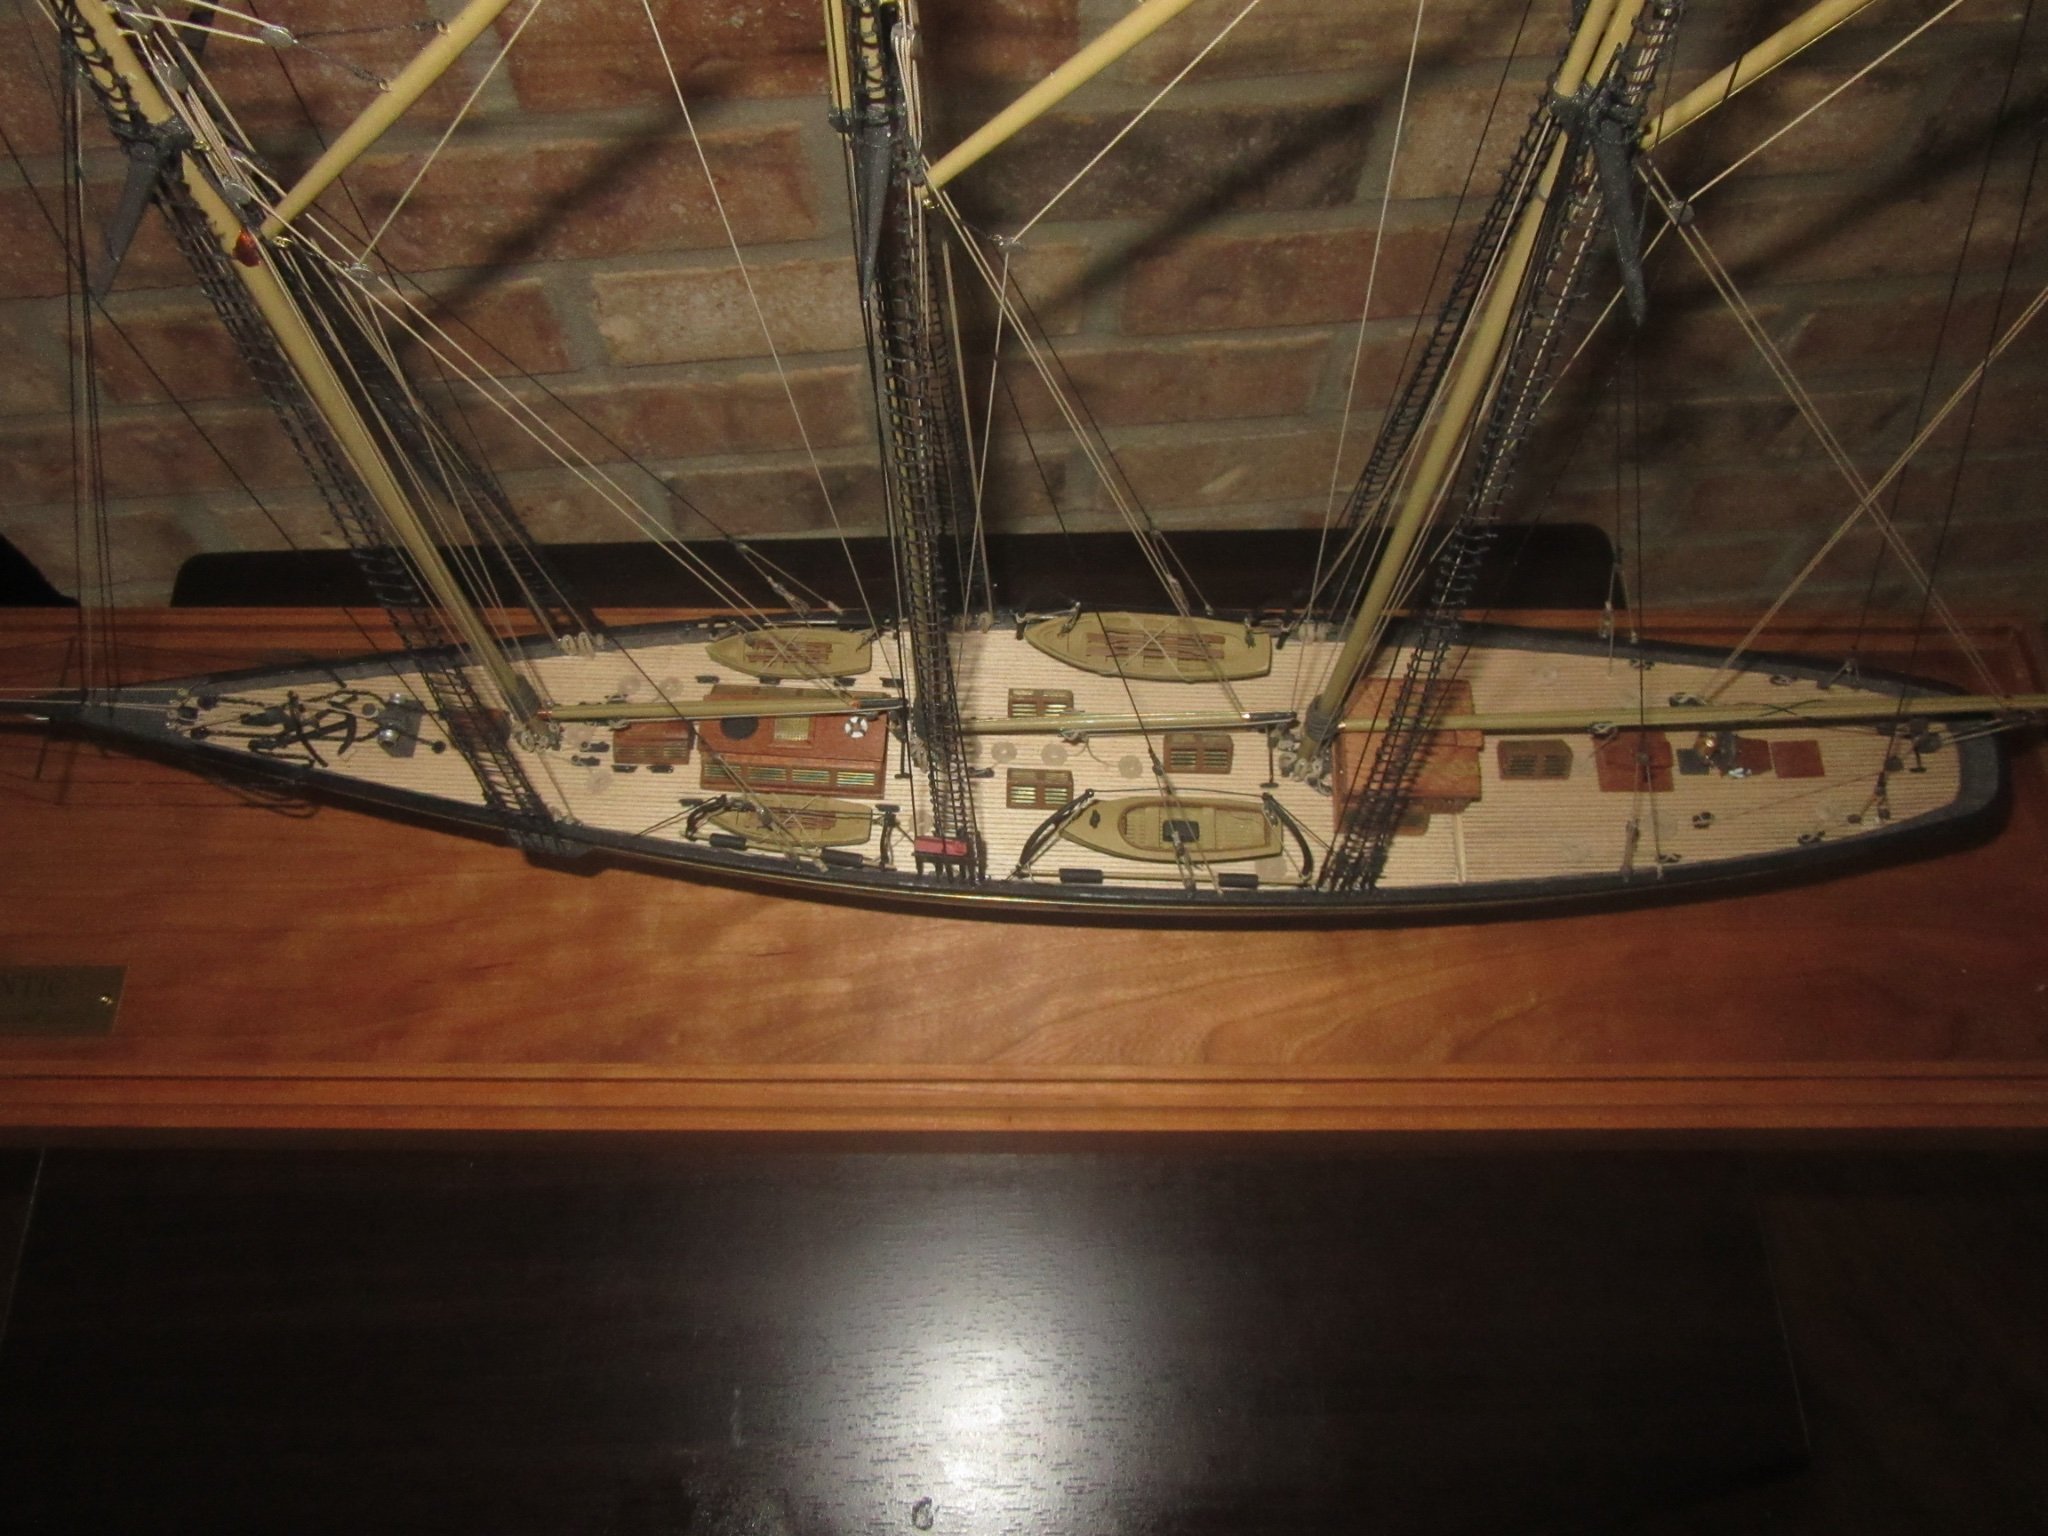
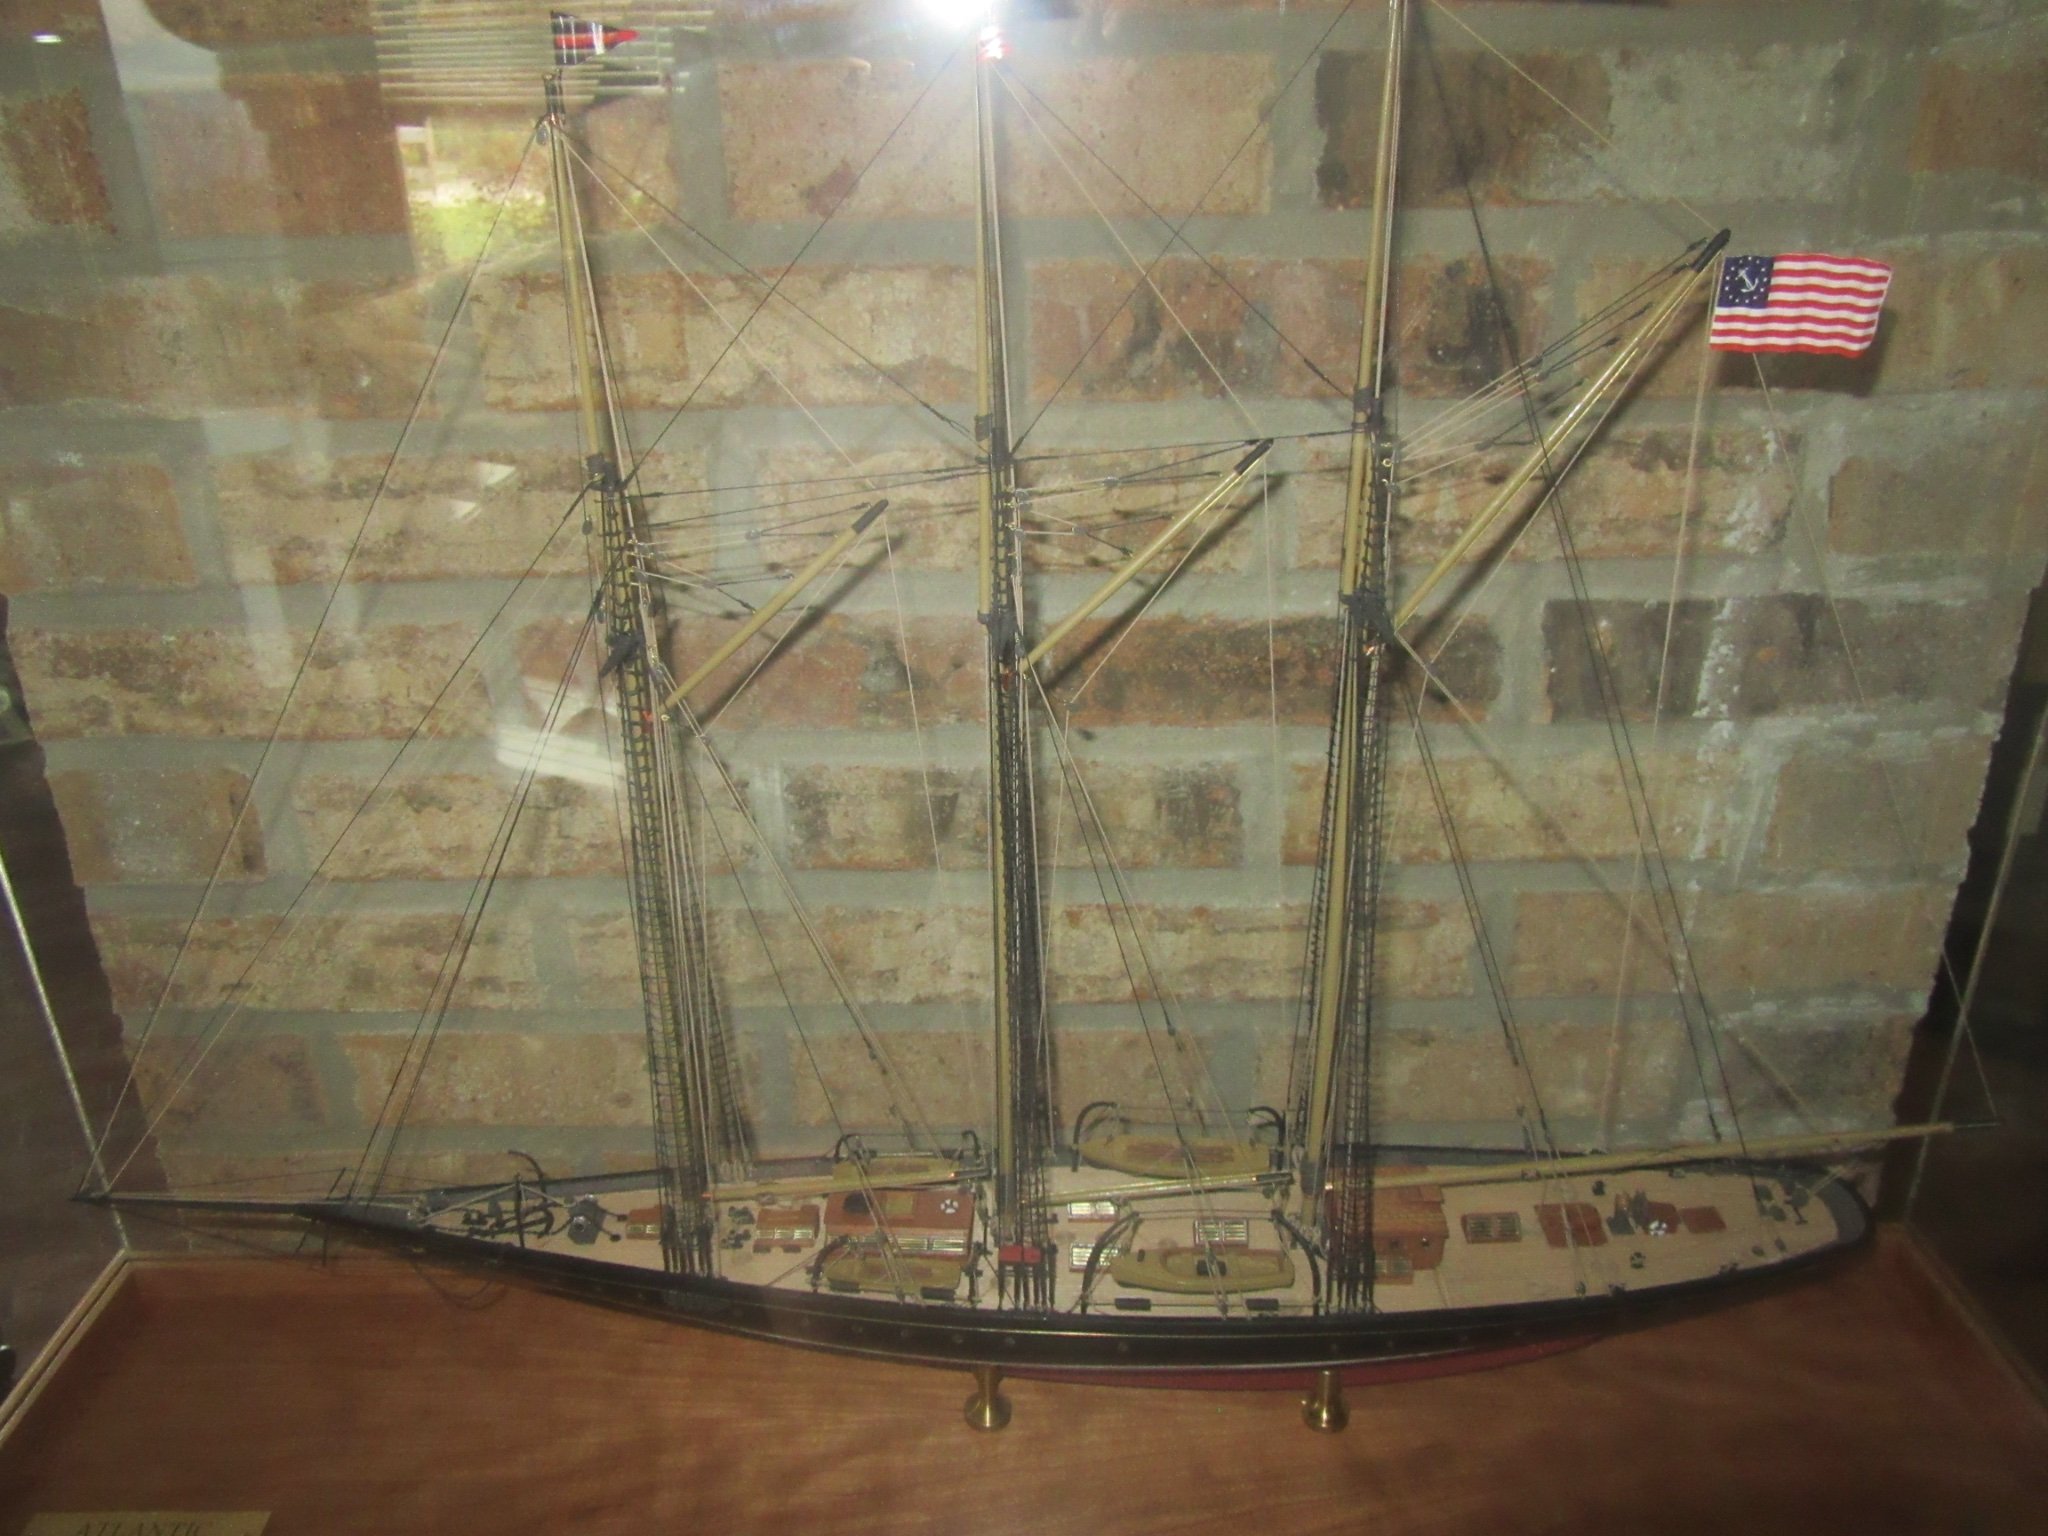
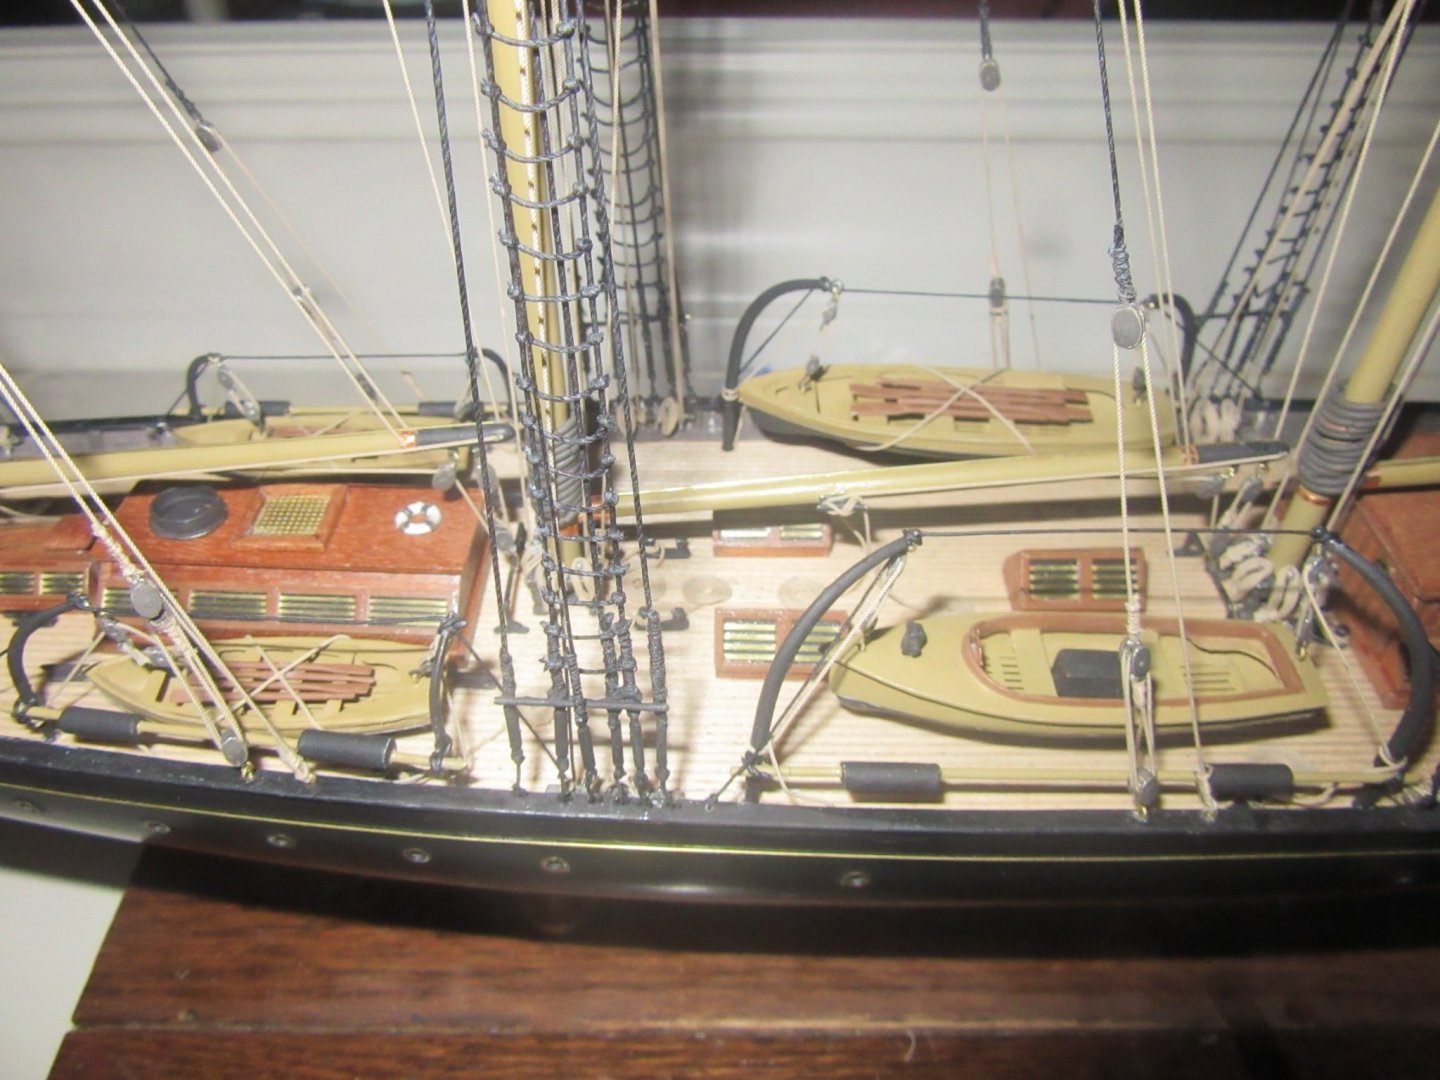
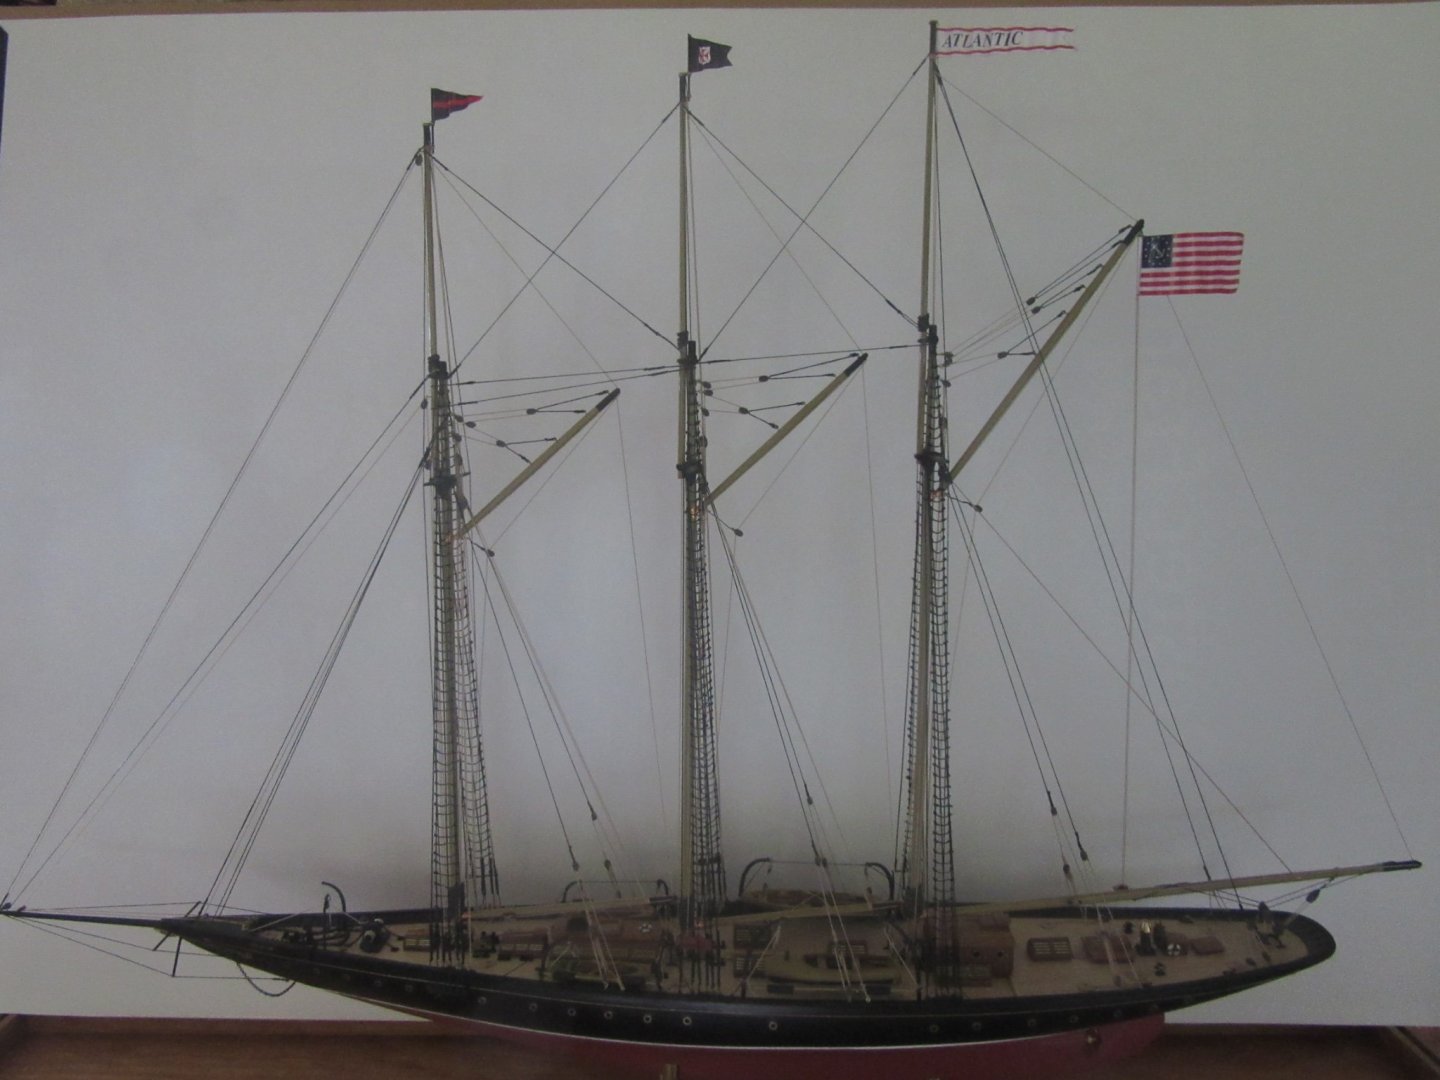
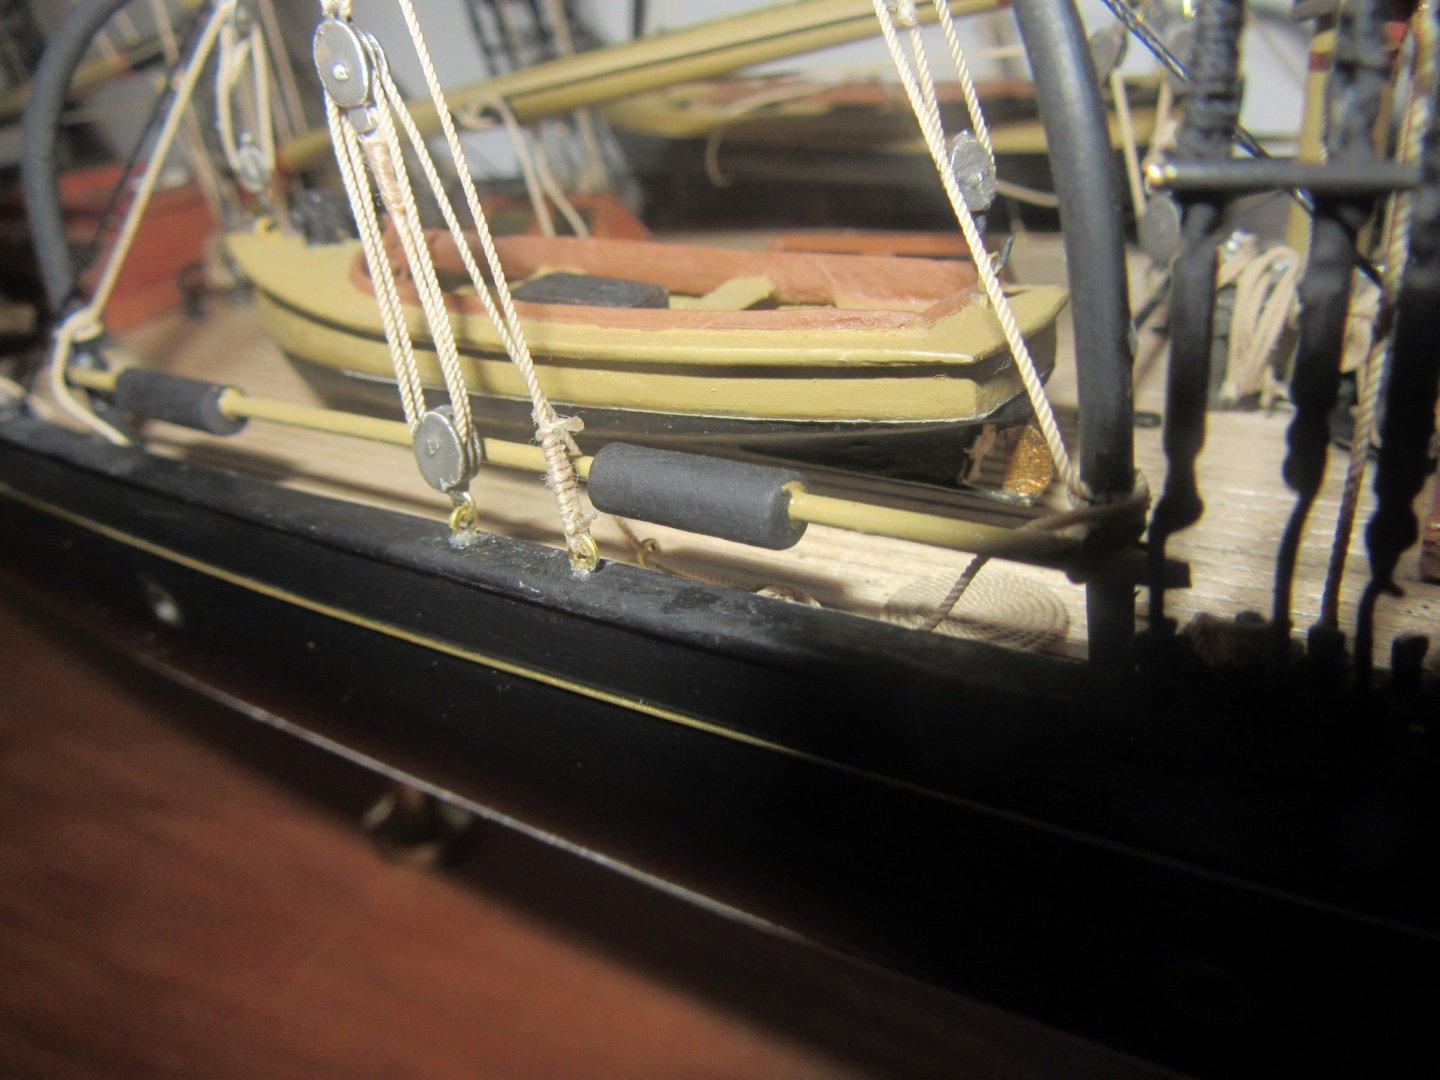
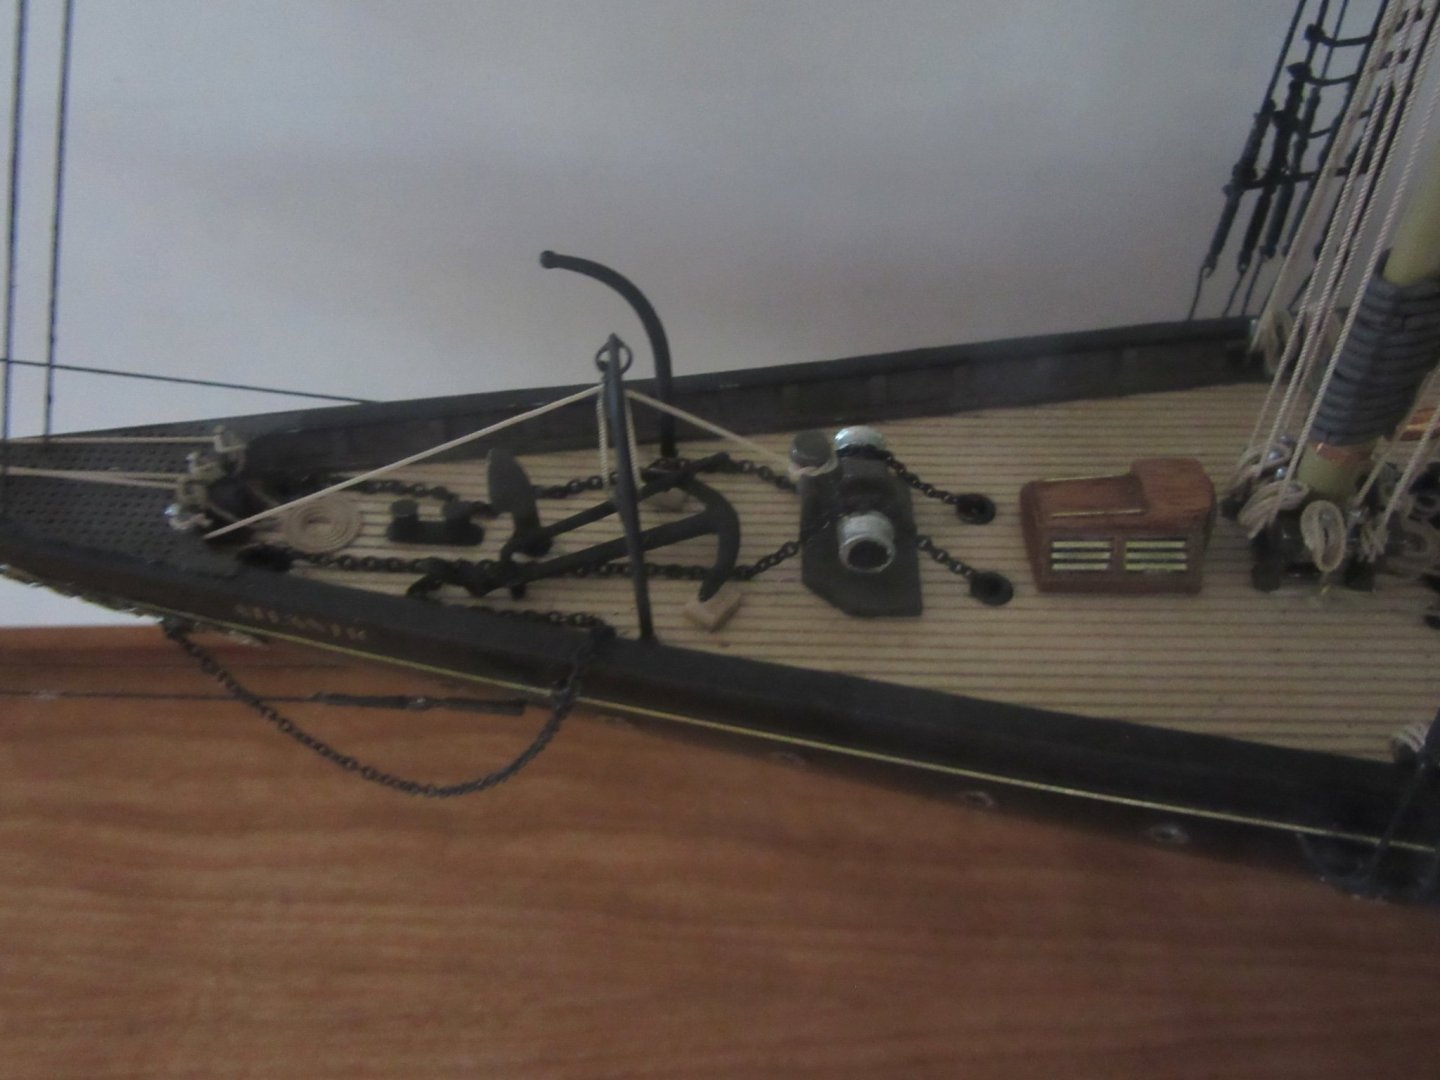
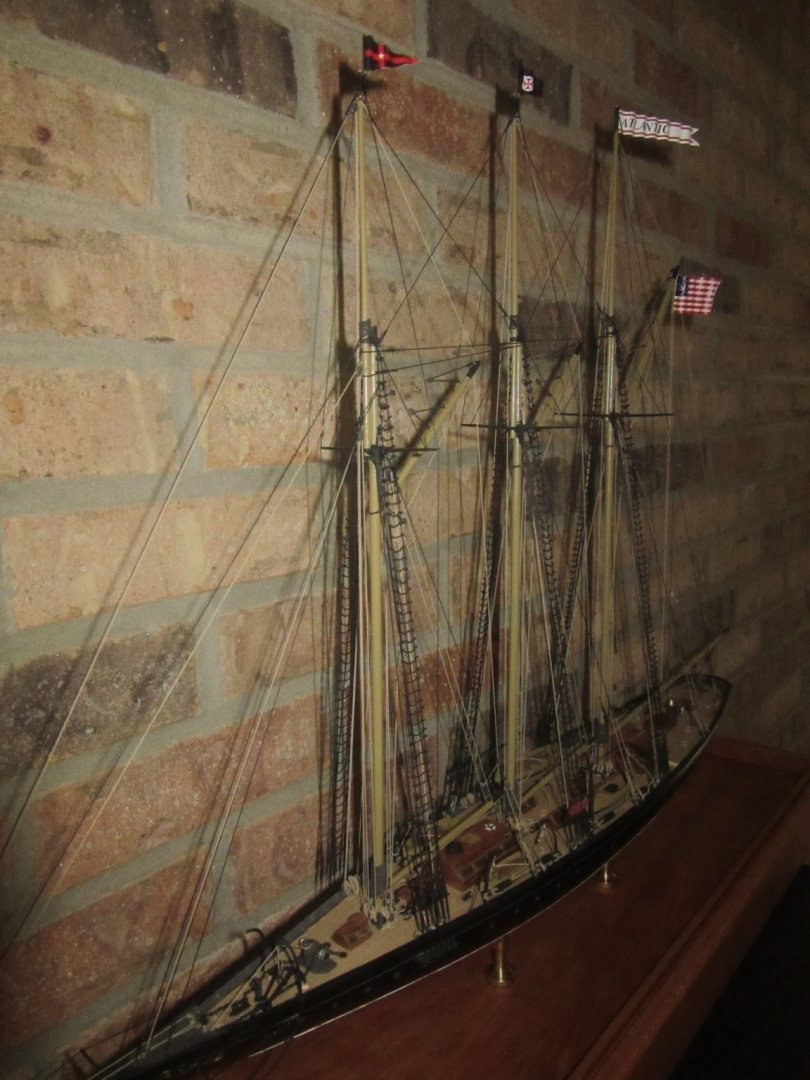
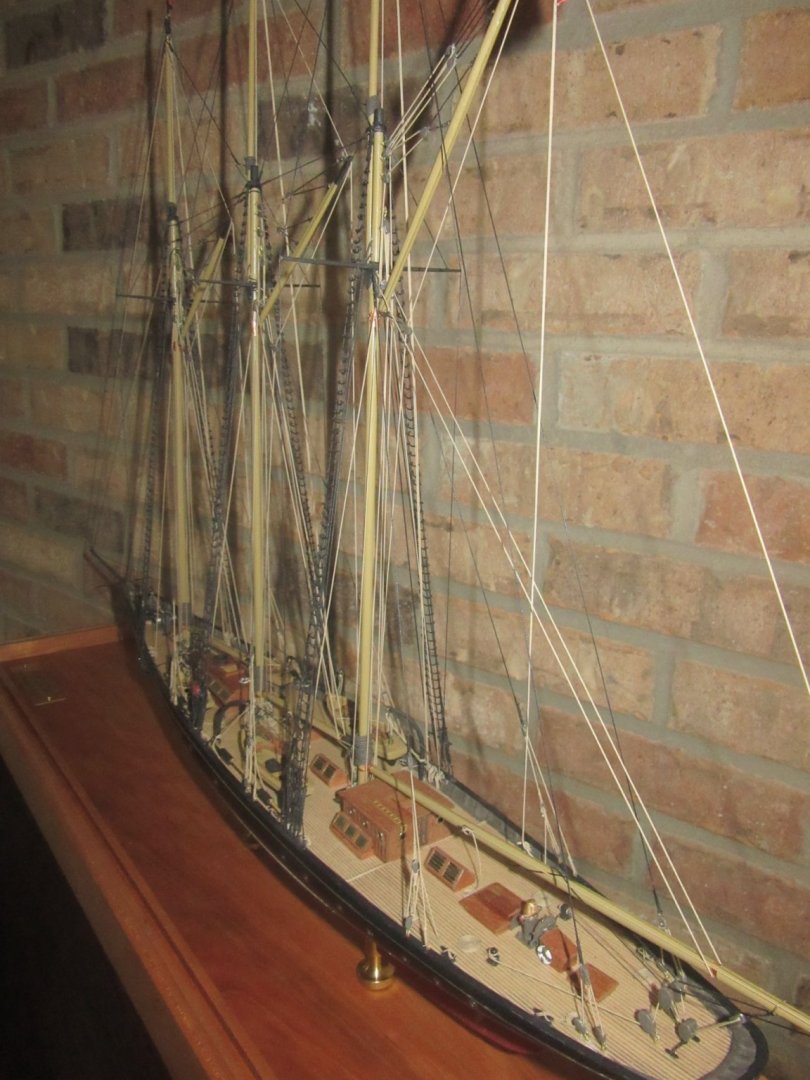
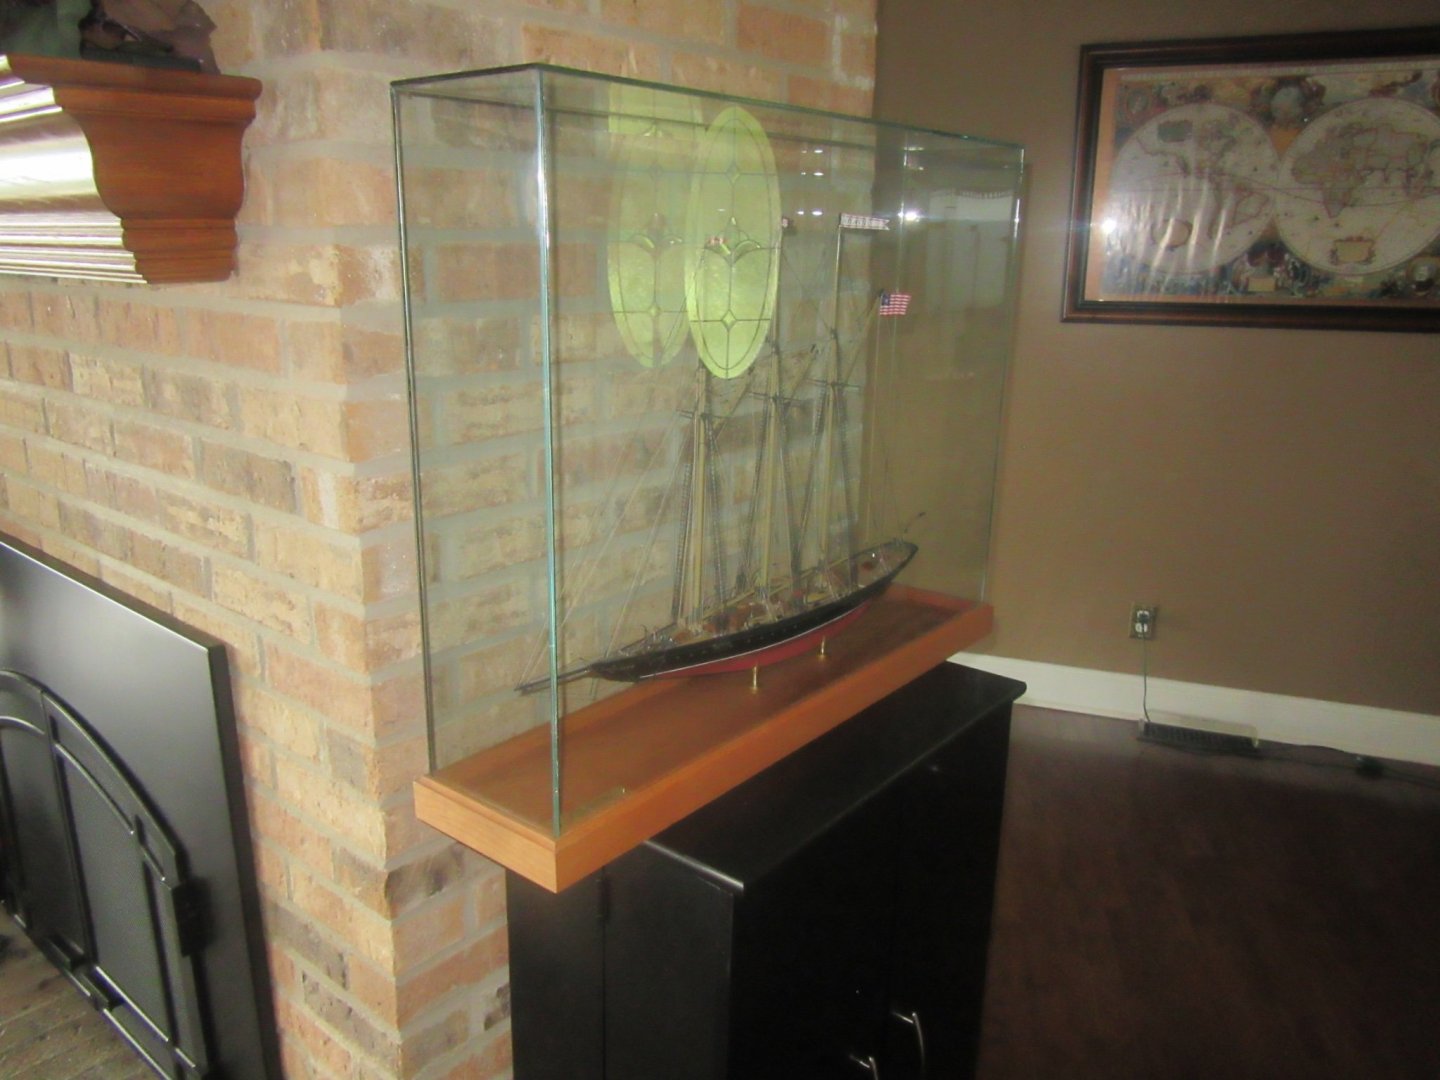
The first five photos are the final assembly steps. Atlantics' motor launch and owner's gig aft of the main mast on their davits and her jolly boats the fore of it. The second photo is the anchor tackle and davit. The third, masthead pennants and the US yachting ensign off the mizzen gaff. The stern and bow decals; the fourth and fifth photo. The final ten shots are of Atlantic finished, the last two photos in her display case and moored snug in the living room. Atlantic was the challenge I needed while sheltered in during the pandemic and proved to be that and more. Even with all the inconsistencies that made me quite aware of my skill level, I couldn't be any prouder to display her as the centerpiece in the main salon. Most of all my acknowledgements to the Admiral for her provision of time, working space, and listening to my frustrations and profanities during the build, her critiques exceeded only by her encouragement, patience and graciousness. Also In the encouragement department my appreciation to Bob G on his supportive comments to my own doubts and the contributions from his build of PenDuick. Nic of Bluejacket Shipcrafters whose advise and remedial input were indispensable, and everyone else who reacted and commented on Atlantics' build. Finally to modelshipworld which made it possible to acquire new modeling skills through their extensive data base. My next Build will be the schooner America in the same scale as Atlantic starting around late fall. Ciao Everyone!


- 127 replies
-
- 11
-
-

-
Thank you Nic. Ordering kit now.