
AnchorClanker
-
Posts
124 -
Joined
-
Last visited
Content Type
Profiles
Forums
Gallery
Events
Everything posted by AnchorClanker
-
 I marked the frame location on the keel. The jig looks very interesting! I may make one for larger projects and maybe for this one as well.
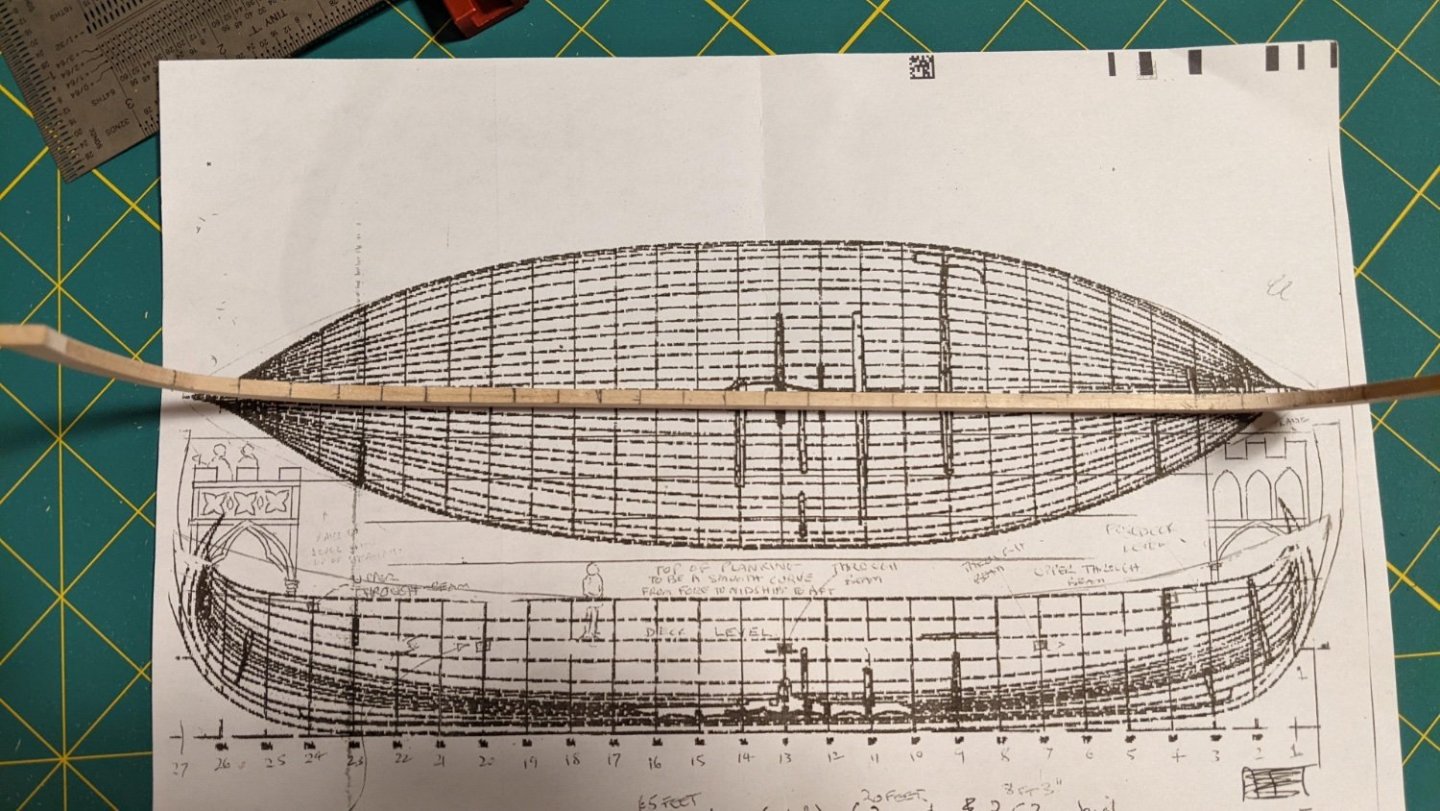
-
Now that I set this up this far, I am rethinking my modeling clay jig & etc.
-
Yes; I have an idea about how to do this. I'm going to read your build log first to see what comes after attaching the frames to make sure I set up attaching the frames properly. As a kid making plastic models, I used modeling clay as a 'third set of hands.' So as not to risk staining the wood with the modeling clay I will use a small piece of wax paper over the wood where the clay will be applied. I'll see how this works. May something more 'robust' will be needed.
-
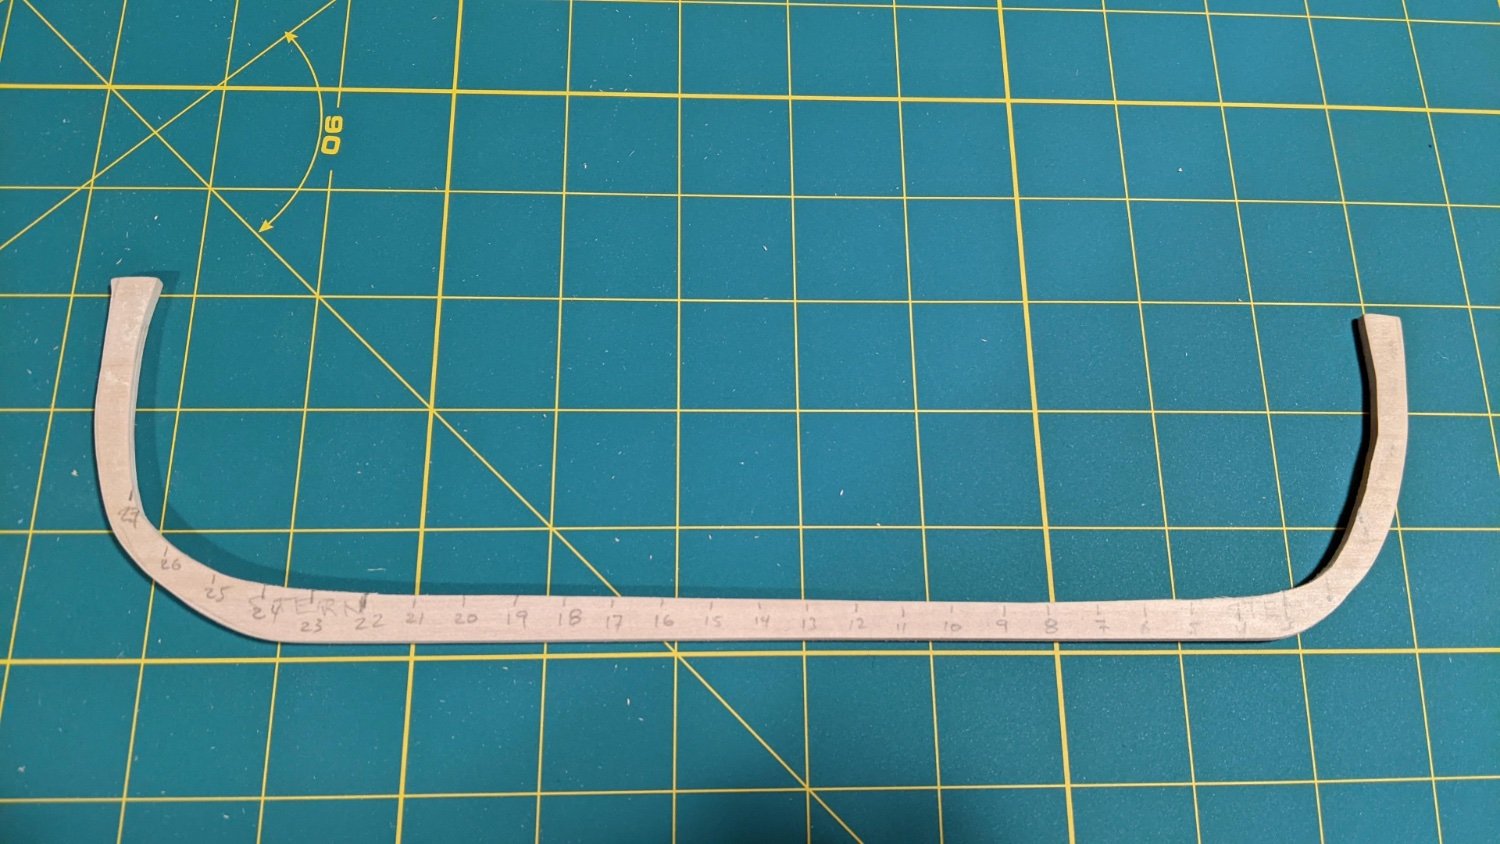
Here is the keel with where the frames will be attached. Maybe there is a better way to do this than writing on the keel. Before attaching each set of frames the markings and numbers will be erased.

-
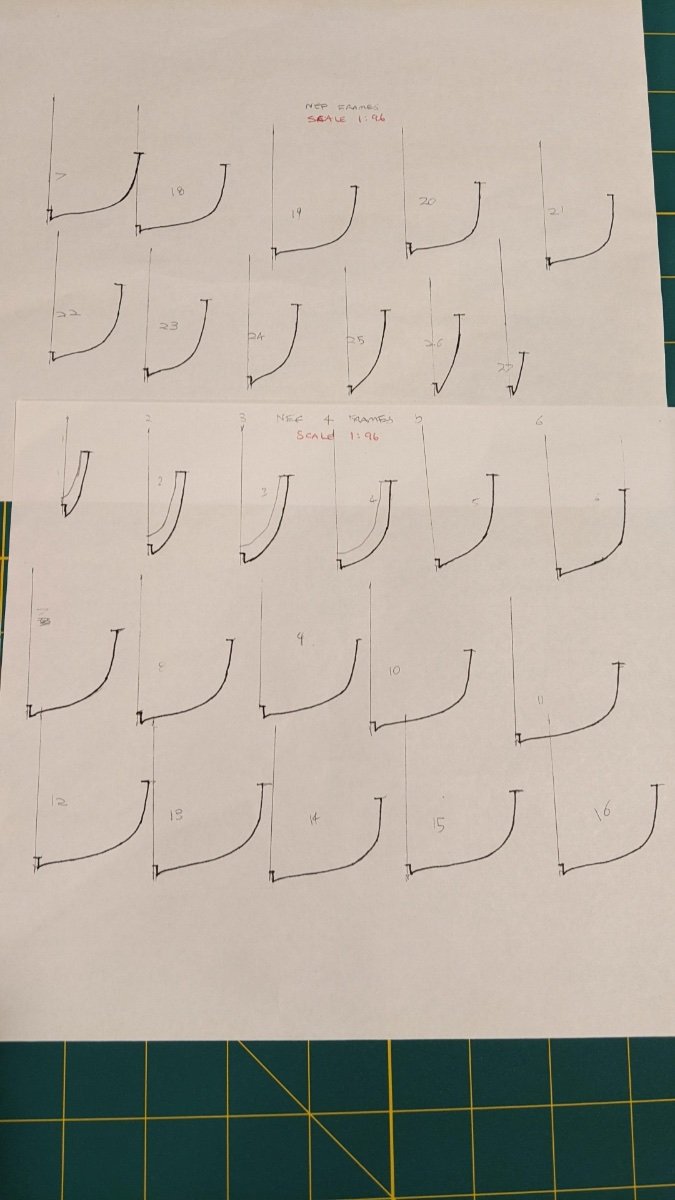
Today time was spent sanding the frames in pair to make them uniform between the two halves. This is performed on a Dremel Router Table with the Dremel tool rotating at a slow speed to reduce the chance of the sanding drum sending the pieces flying. Refer to the attached photo. I am very pleased with the results. Next I will mark on the keel (herein includes the stem post and the stern post, unless otherwise designated) where the frames are to be attached. After sanding with the Dremel tool, I sanded the edges with find sandpaper to rid the frames of the 'fuzz'. It was tedious work, but well worth it! I want to spend some time reading Louie da Fly's build log before proceeding too much further so a step of this portion of process is not missed.
-
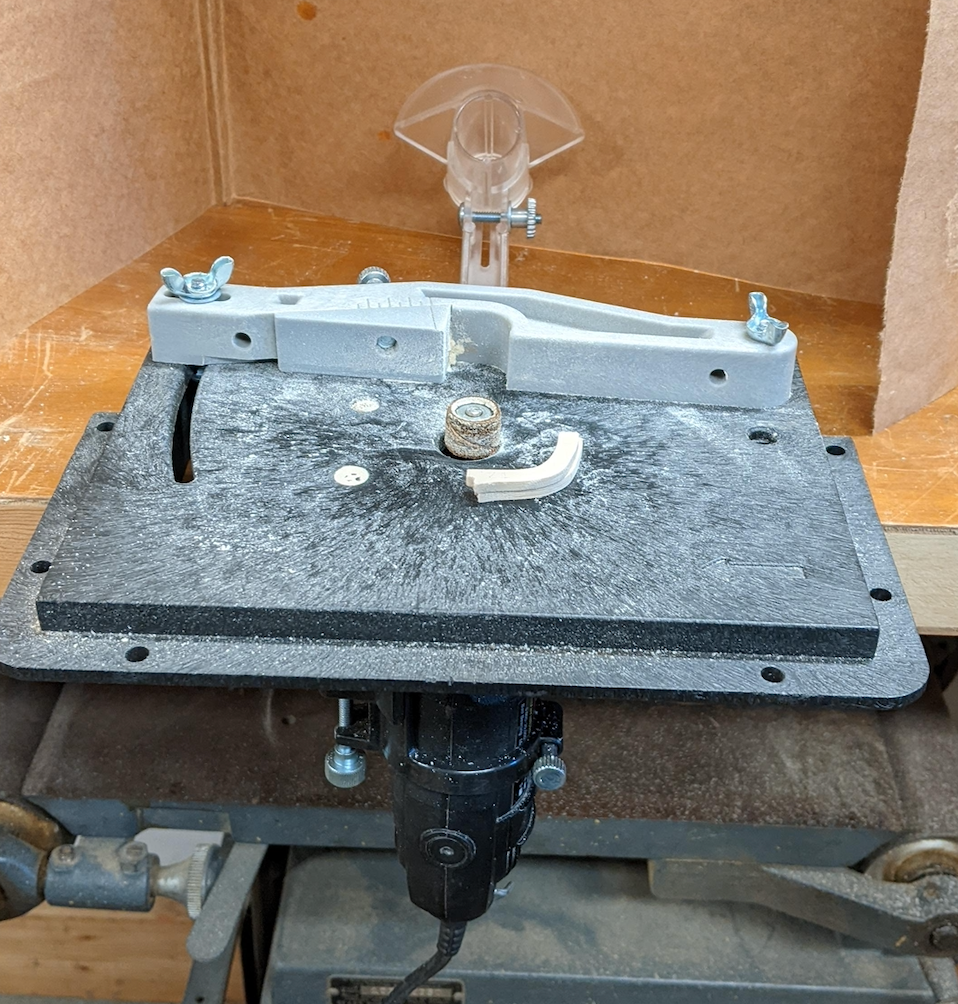
It can also be bolted to the metal table top.
-
The custom table top is made from peg board material. FYI.
-
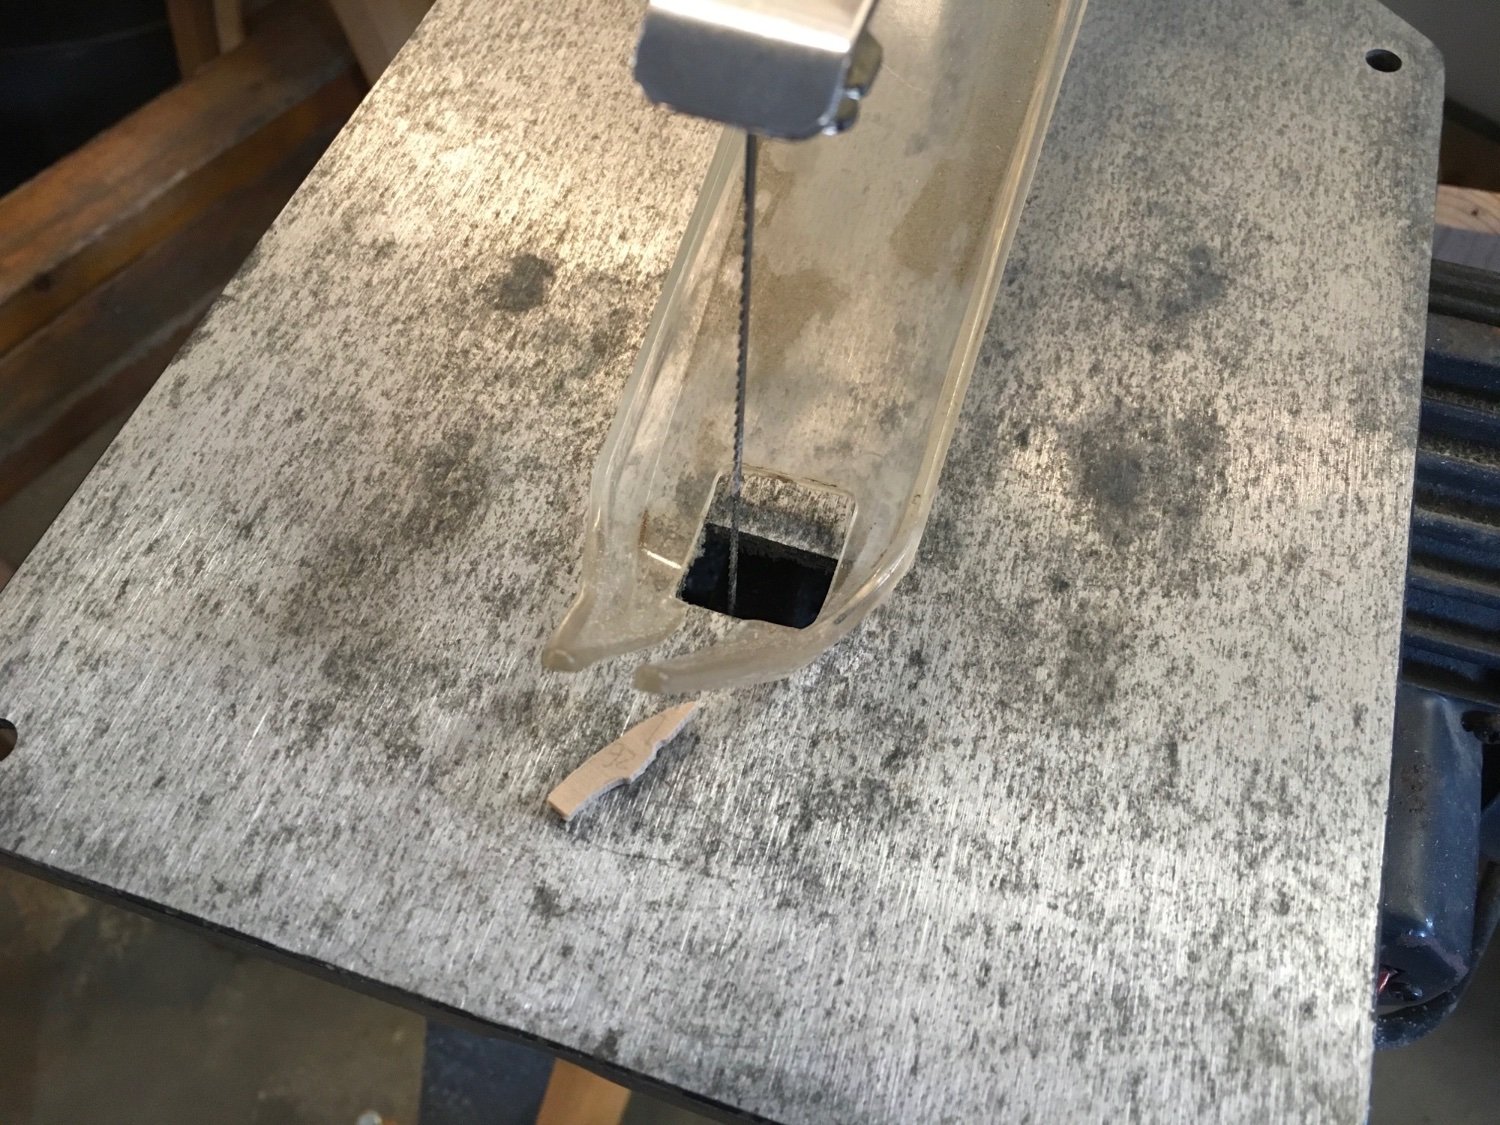
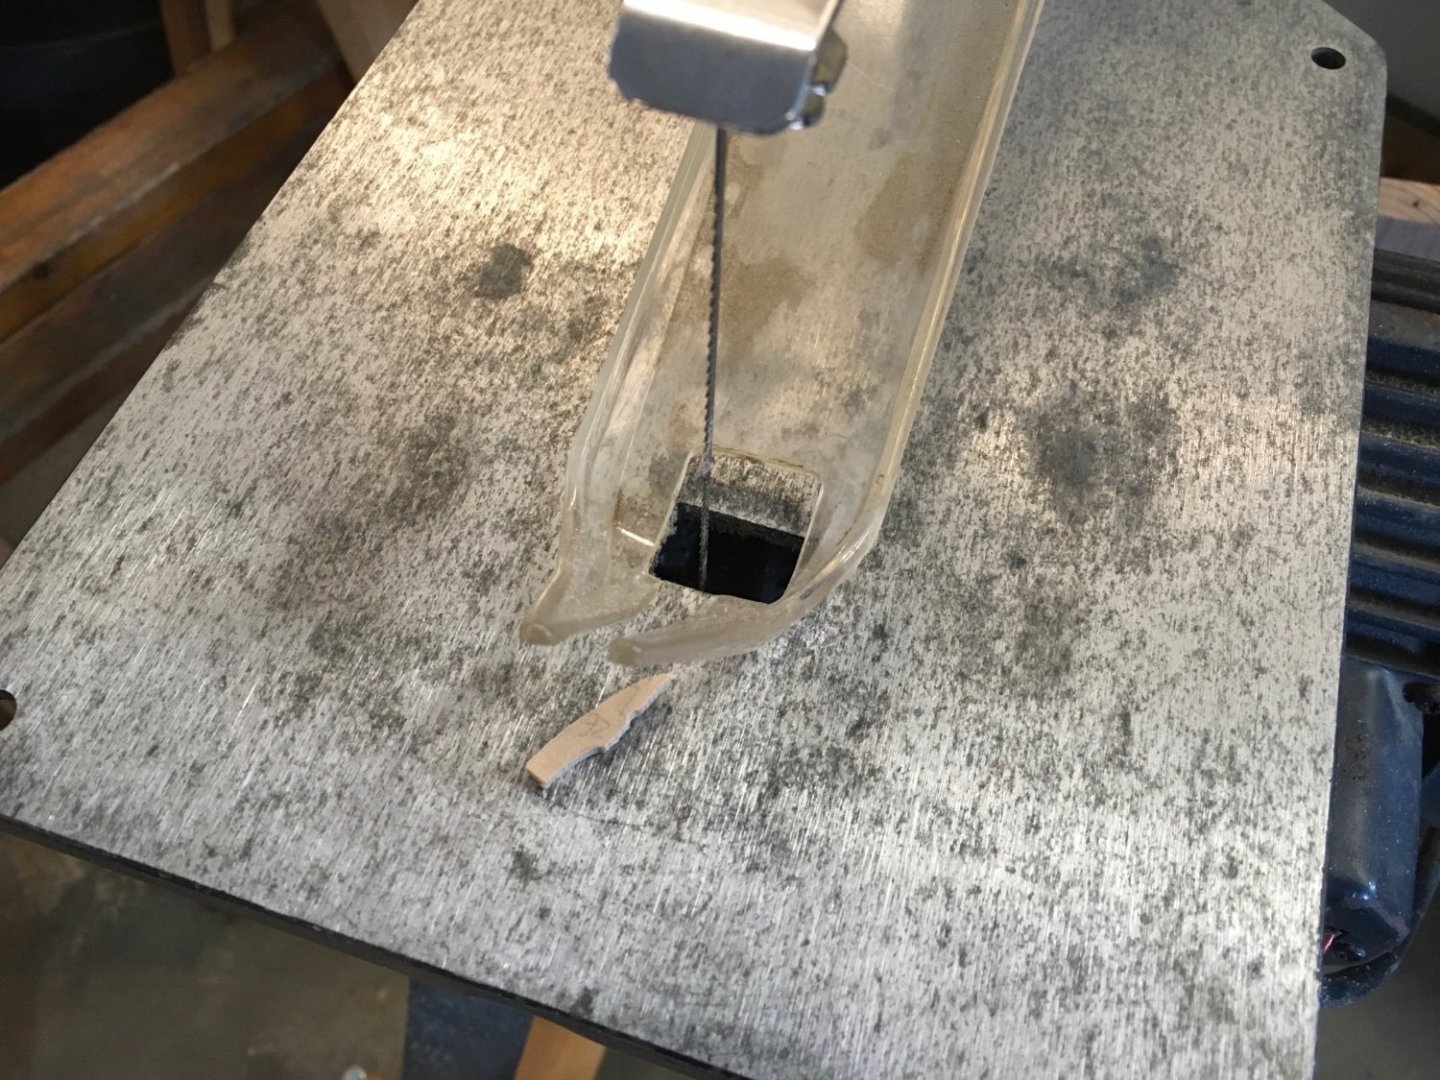
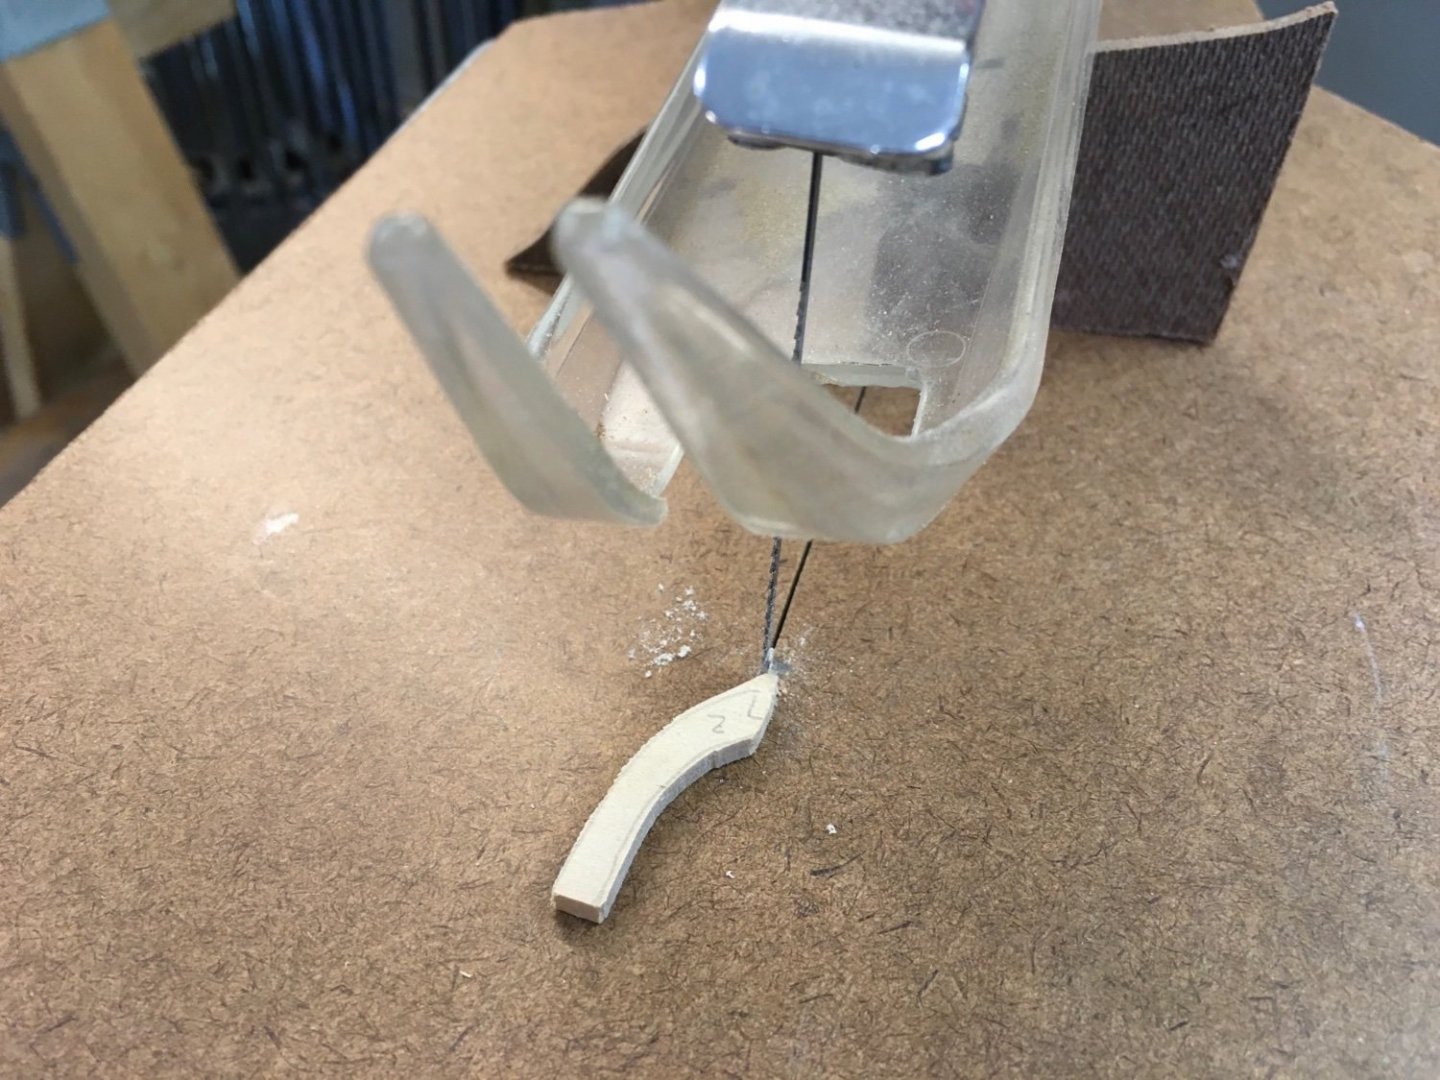
Using a scroll saw to cut small pieces can be touchy. Since I am very attached to my fingers, it seemed prudent to make it safer. I made a custom table top with a slot for the width of the blade. This made cutting the keel notches easier and safer. It has two coats of a clear and very liquid polyurethane. See the two attached photos. Soon the sanding of the keel and frames will be completed.
-
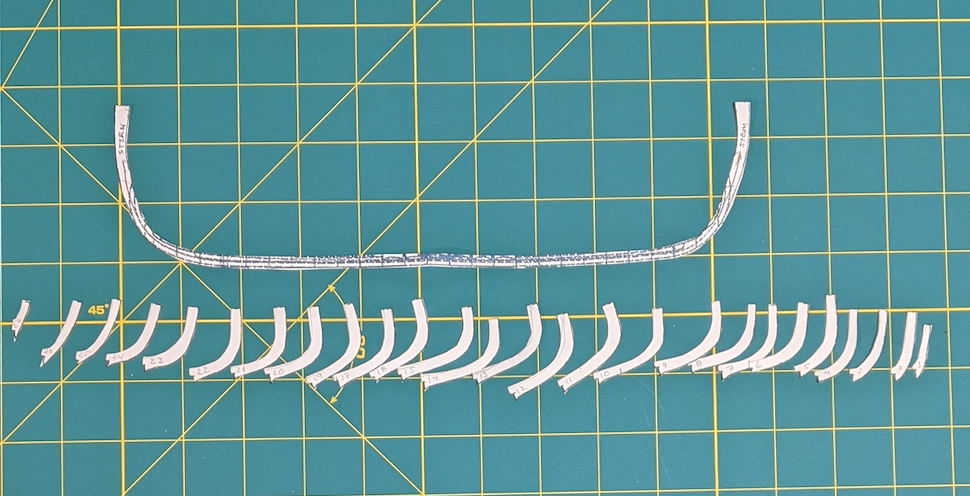
Here are the frames cut and laid out. Today will be refining the frames and then sanding will commence.

-
Some of the notches for the stem post, keel, and stern post need to be cut. Then, sanding the frames in pairs will commence. Hopefully, this will ensure the frames are the same shape & etc. Mark

-
I get the picture, Steve! They are forth coming.
-
I may make a second model of the Winchelsea Nef to see if I can 'duplicate' my own efforts. It will also be to try a different method of making and attaching the frames to stem post, keel, and stern post. Also, I may try lapstrake planking instead of carvel planking.
-
Yesterday I cut out the remaining frames. Today I will sand them and the stem post, keel, and stern post. Next, maybe tomorrow, will be laying out where the frames are fastened to the keel and begin attaching them.
-
Angelwr, Your project is exceptionally cool!! Way to go. After working on a couple of my own projects, I will want to build a Sea of Galilee boat. It was in the back of my mind when planning my own projects. Warm regards, Mark
-
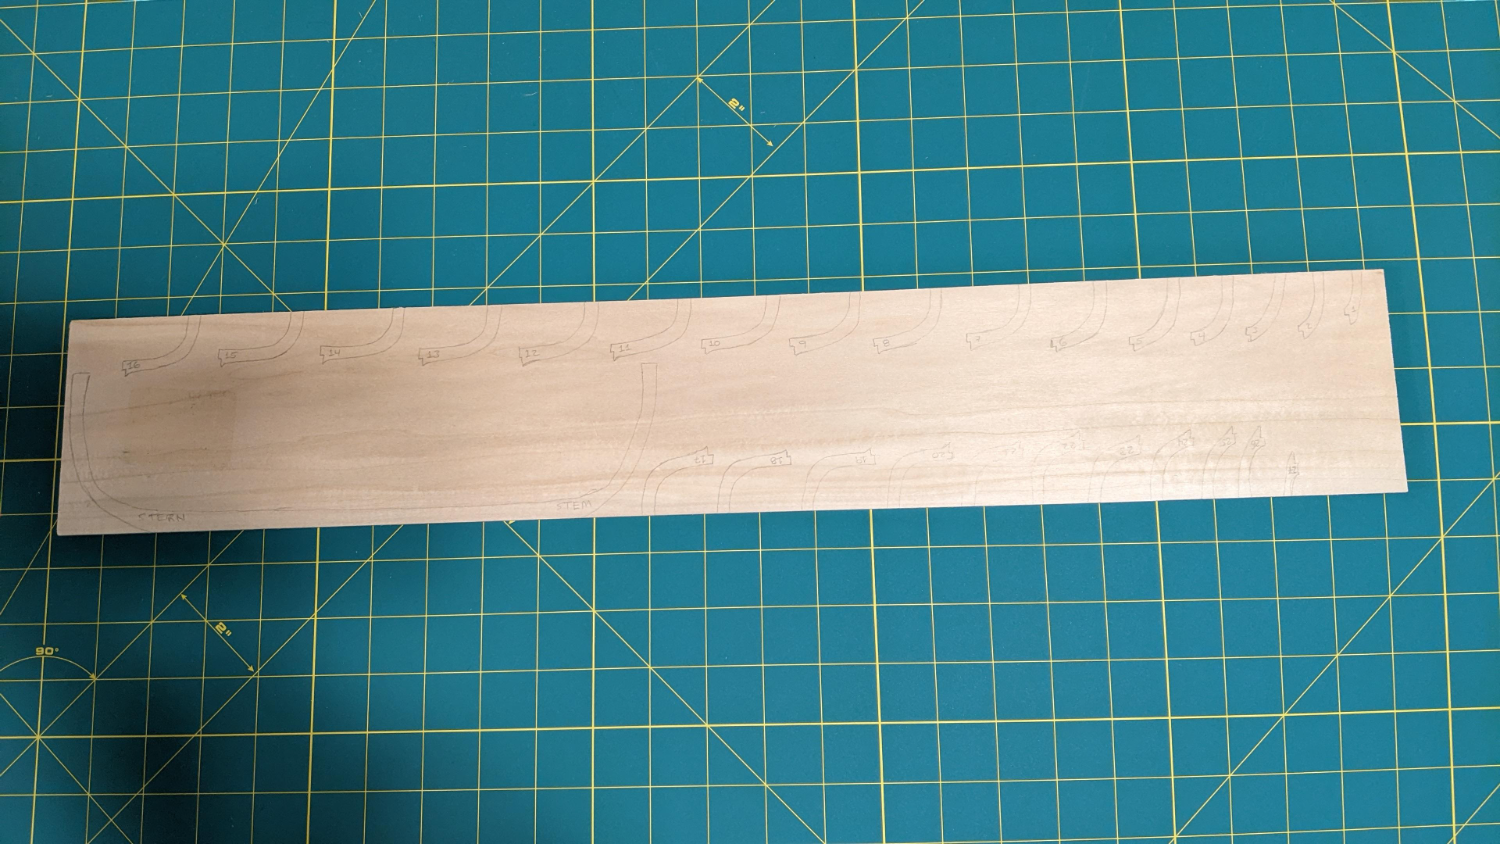
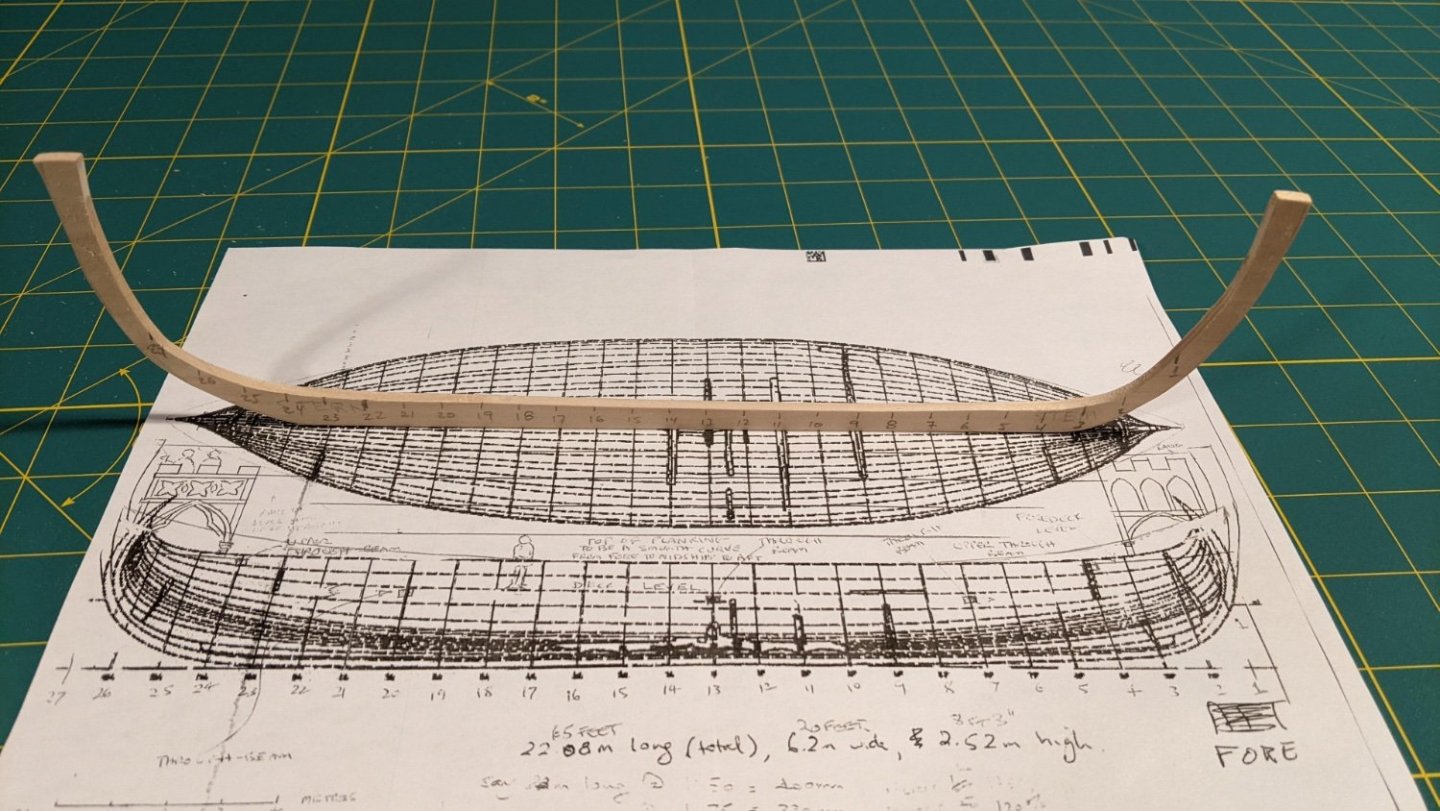
The stem, keel, stern, and the frames are laid out on the basswood. I need another piece of basswood to get the remainder of the frames laid out. It may be hard to see the outlines, but they are there. The basswood is 1/8" thick. I will use 3/32" thick basswood for the planking. As one may guess, this will be a plank on frame model.

-
A relative who has his bachelors degree in model making suggested getting the largest self-healing mat my workspace could handle. The craft store which has the largest variety of sizes and types had a two-pack on clearance. Each mat is 23 X 35 inches. The price was 70% off the regular retail price. I am very pleased to have had only that option on clearance. One mat is for the house and one is for the garage. At least for now that is the way it is.
-
Yes, at last! Before cutting out the posts, keel, and frames, I made sure I numbered and label the parts appropriately. It is 6 below with a new blanket of snow and bright sunshine. With a warm garage, cutting out the posts, keel, and frames will be a comfortable endeavor.
-
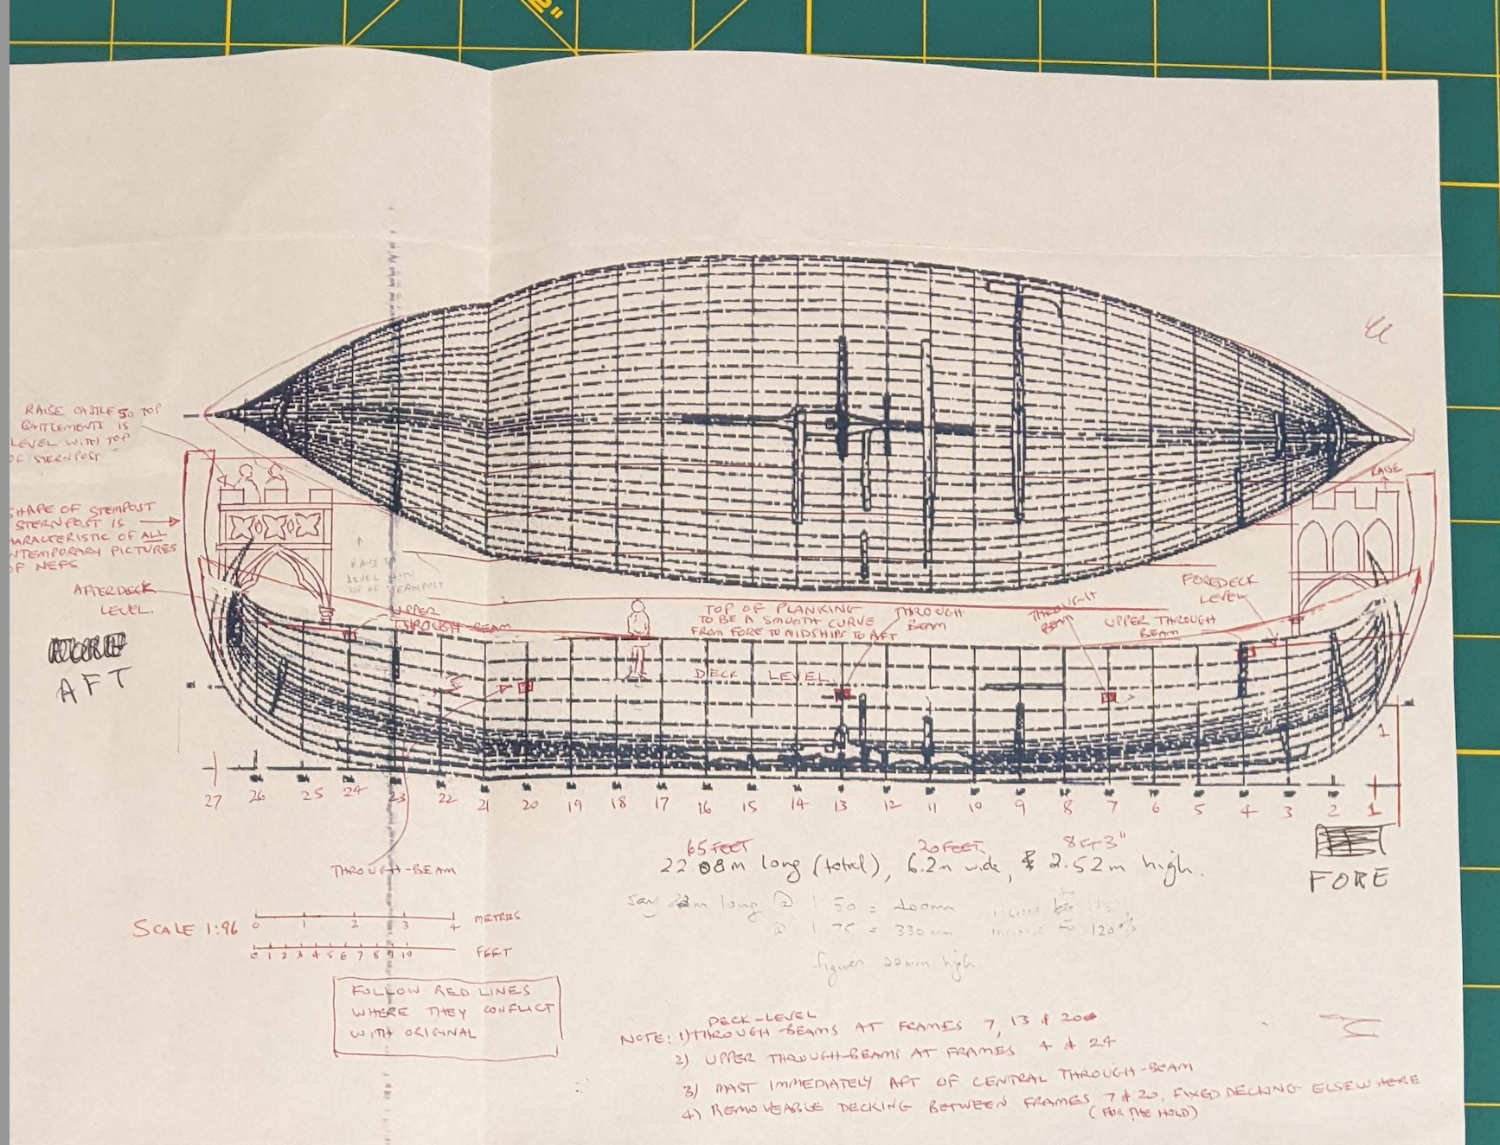
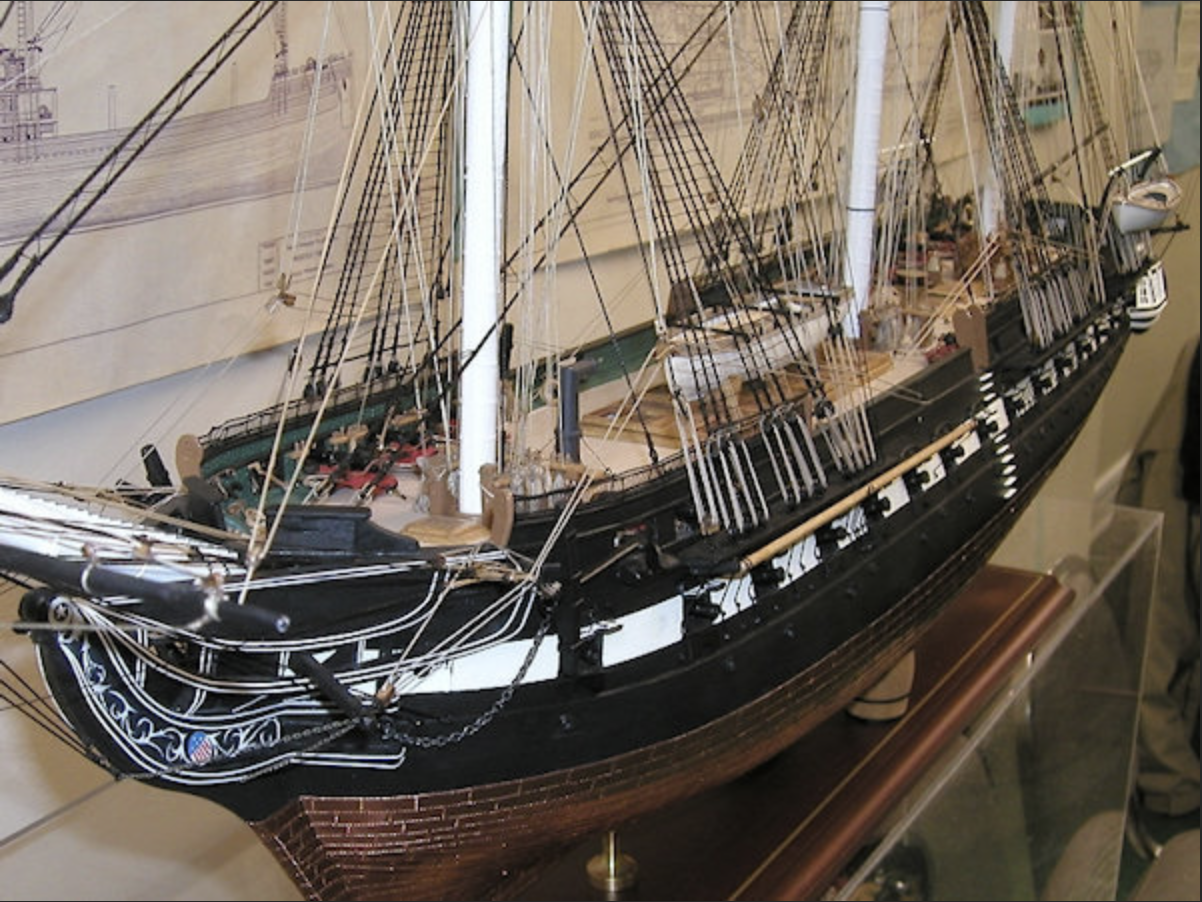
With Christmas and New Years over, I am commencing upon building my model ship. Louie da Fly provided the hull plans including the shape of the frames. After penciling in the remainder of the shape of the frames and the stem post, keel, and stern post, I cut out the shapes. See the attached photos. I will be using basswood. It is a popular wood for making models in these parts. There is plenty available in various sizes and shapes in hobby shops and hardware stores at a reasonable price. Next, I will cut out the stem post, keel, and stern post. After that, is cutting out the frames, two each. Before gluing the frames to the keel and posts, I will make a jig to keep the keel and posts upright while gluing. I named my nef, The Tyburn Treader.


-
Hey Ramsey. I'm in Minneapolis, Minnesota. So, not too far from you.
-
Thank you all for the warm welcome! I am also looking forward to my progress. My garage needs organizing, including a workbench, so it can be used as my workshop. Mark
-
Steve, From looking at the various depictions of nefs, it seems each nef may have been 'one-off' making no two exactly alike. Great work on the model! Keep it up! Chief Mark