Acker
-
Posts
38 -
Joined
-
Last visited
Content Type
Profiles
Forums
Gallery
Events
Everything posted by Acker
-
Thanks bigcreekdad for your comments. Yes - love the look of natural wood and Swiss pear sounds pretty exotic, I admire your dedication in cutting your own planks. Good luck with your build of Supply, with your experience you will find it a piece of cake.
-
Hi Thunder, your comment is much appreciated, thanks. Richard
-
Thanks Jobbie, and well done to you also, your "Supply' looks like it's coming along nicely. Richard
-
Thanks Chris and Doug (your HMS Flirt is the bees knees) for your supportive comments. Thanks also to the people who left the "likes" - much appreciated. The encouragement from everyone really helped me to carry on and complete the build. Thanks Allan, I enjoyed your philosophical slant but I hate Wasabi!😆
- 53 replies
-
- 1
-

-
- Supply
- Caldercraft
- (and 1 more)
-
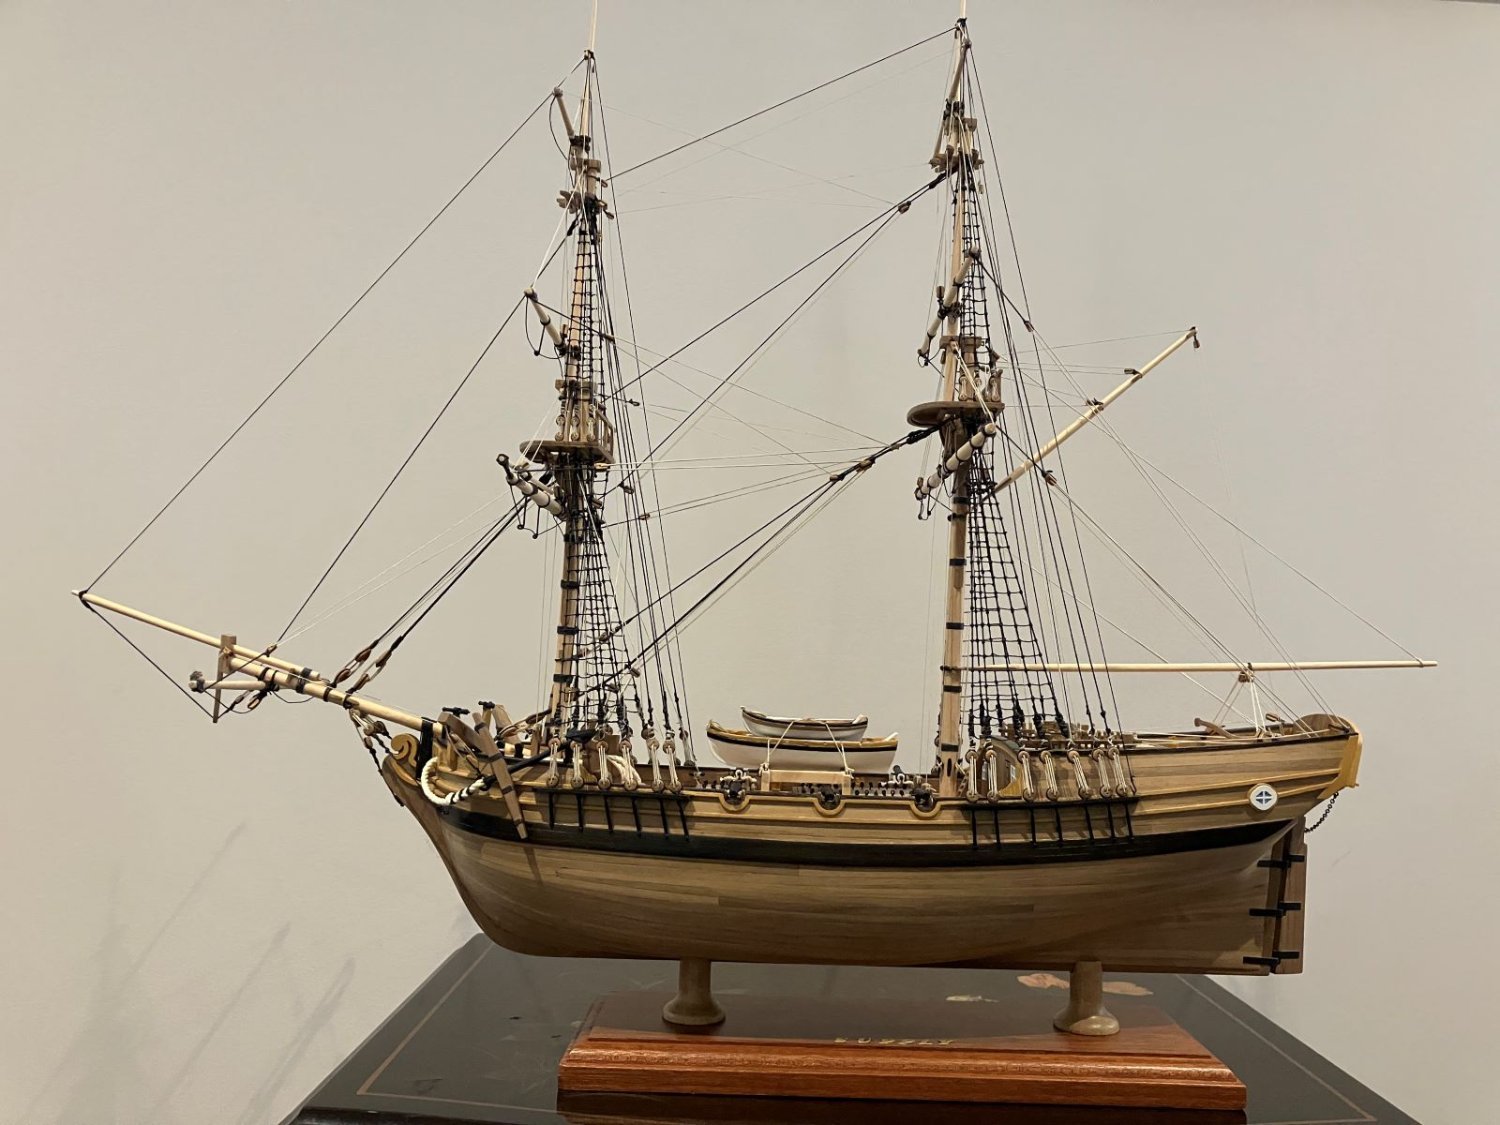
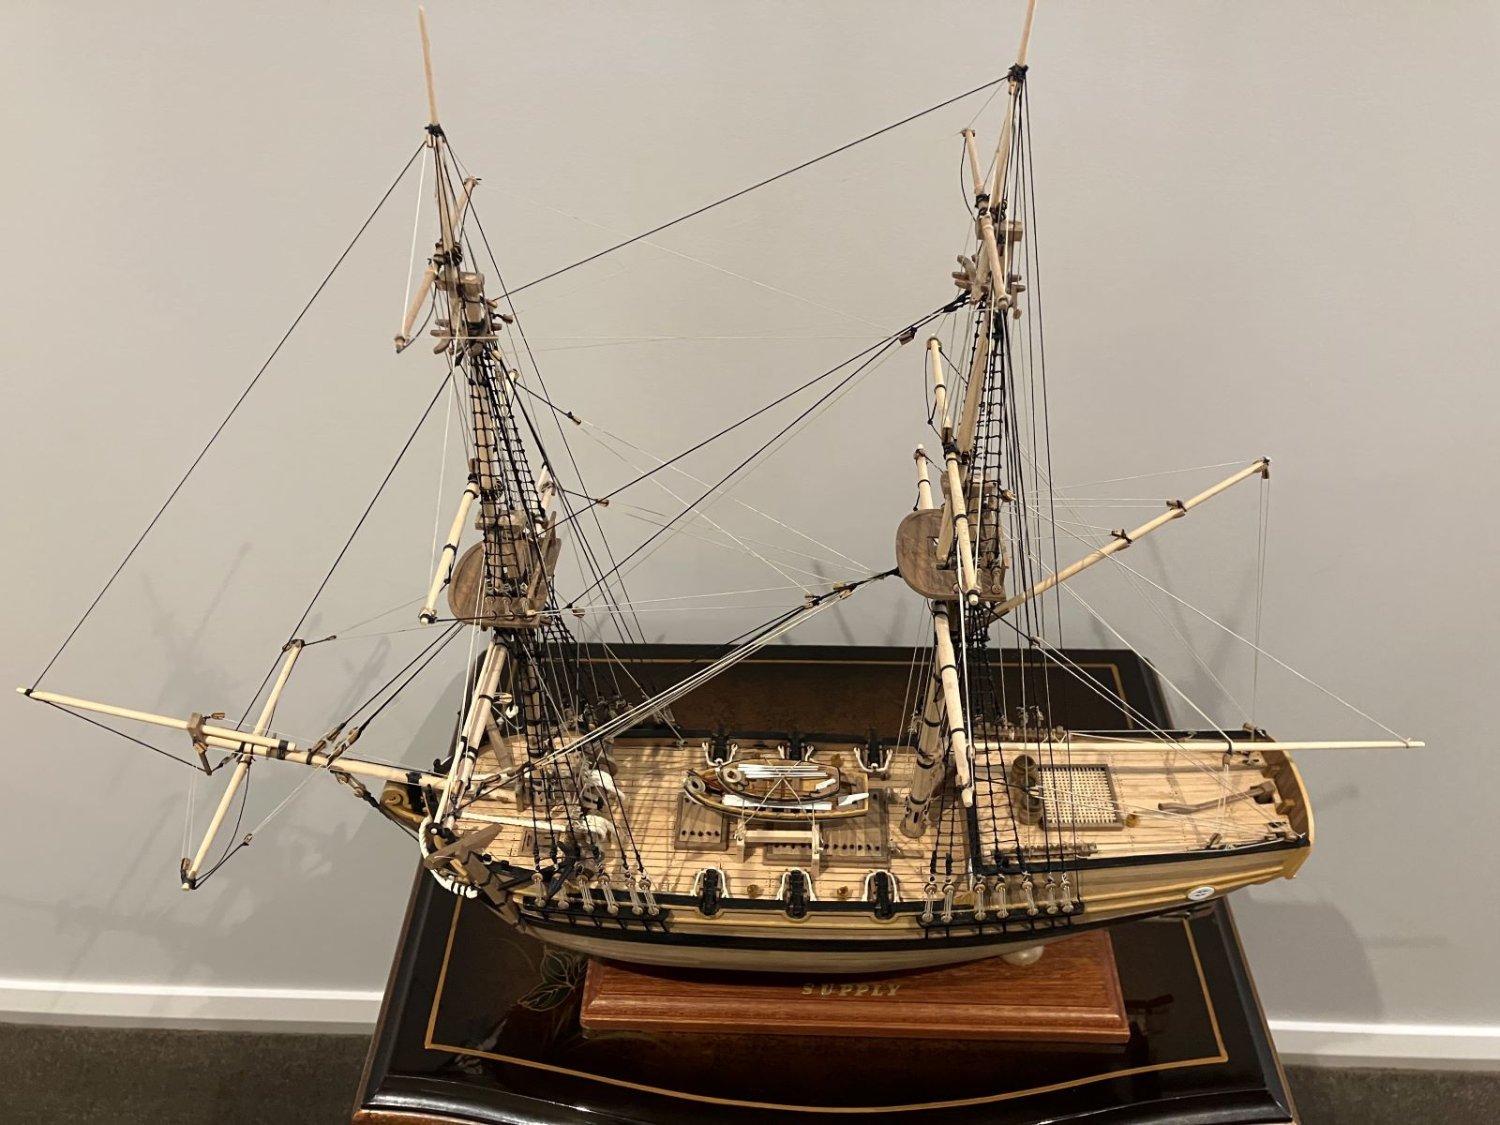
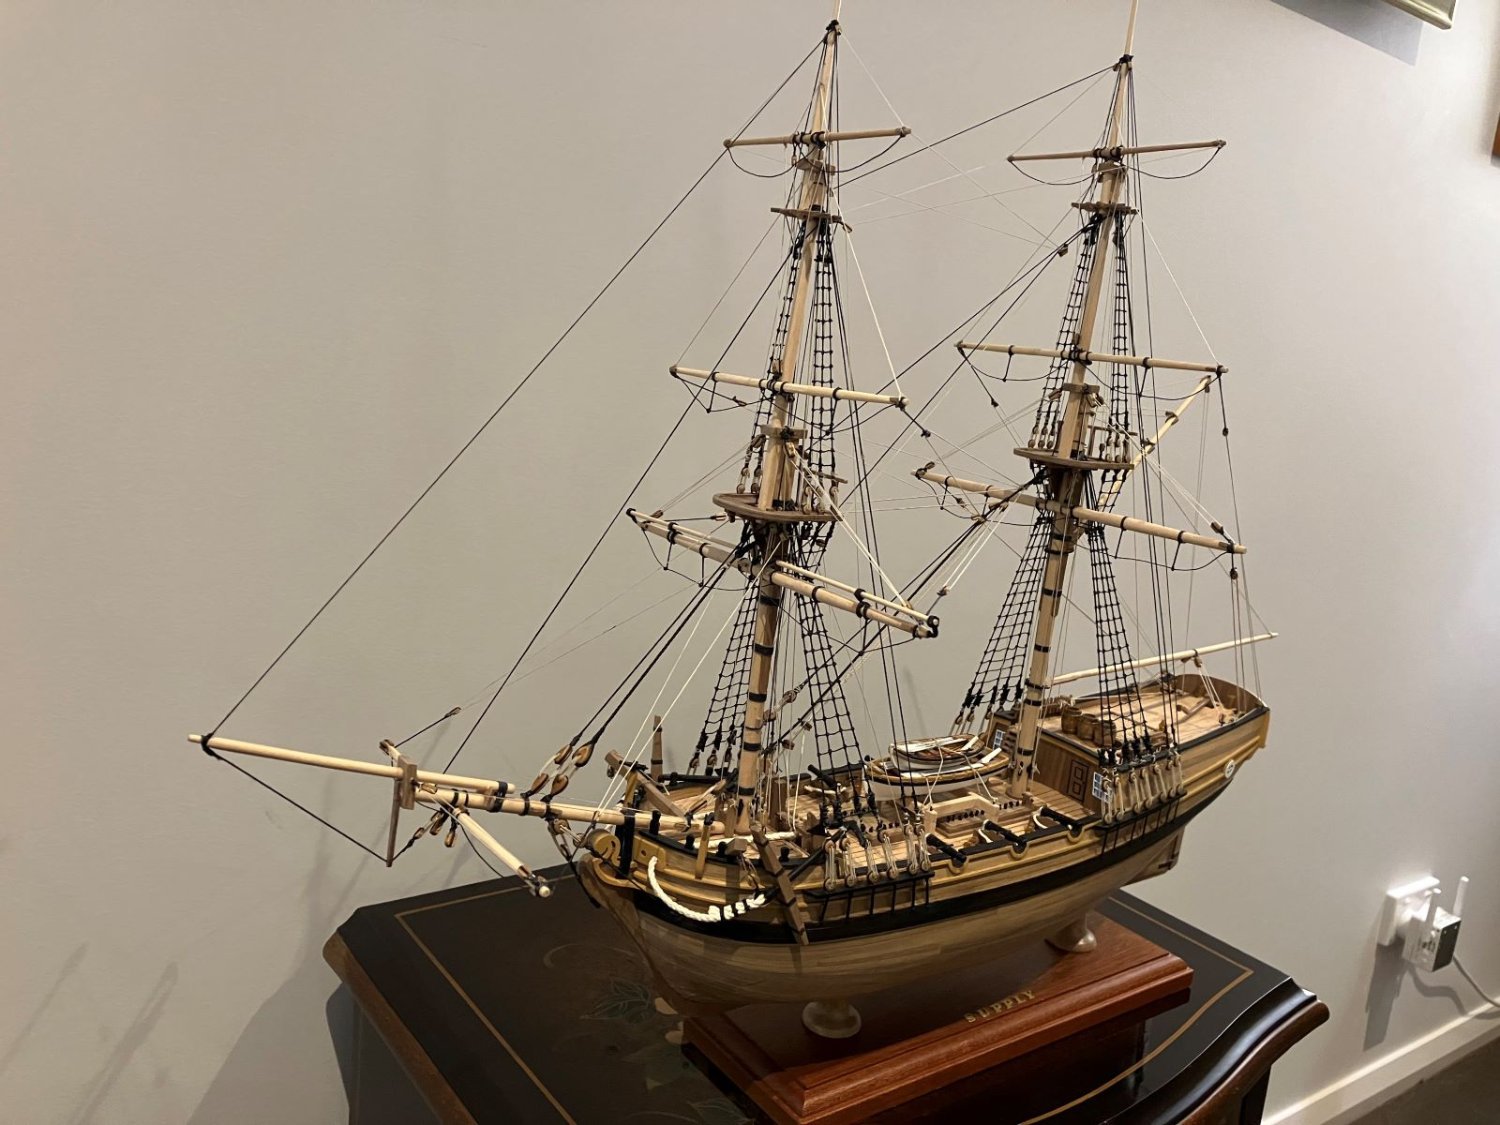
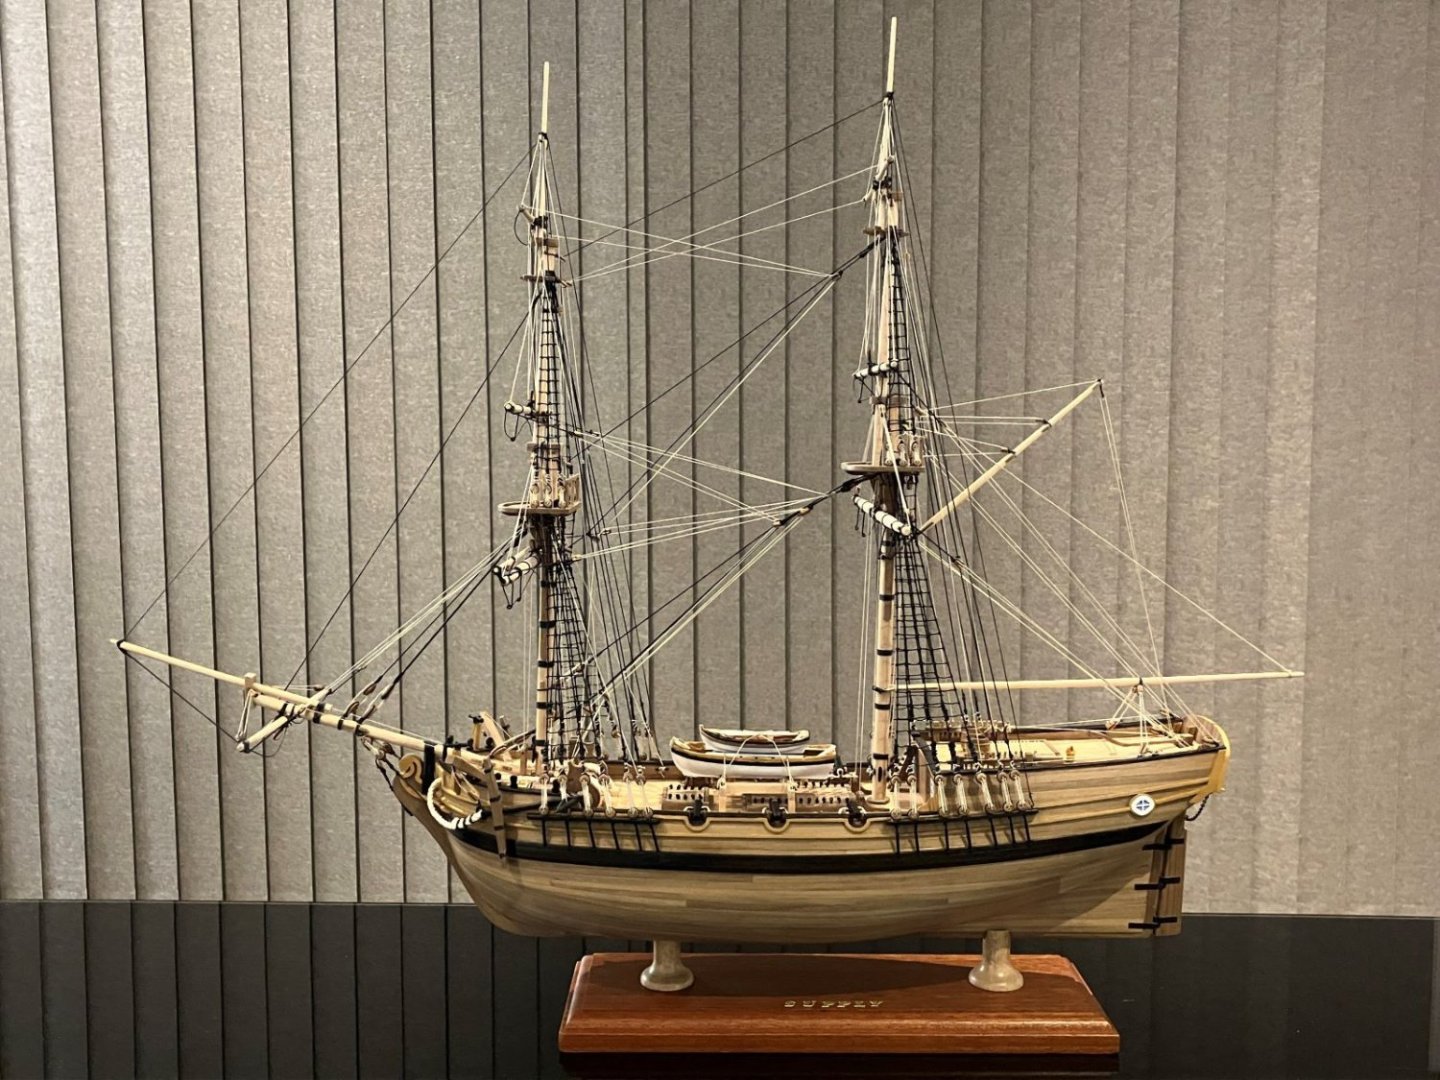
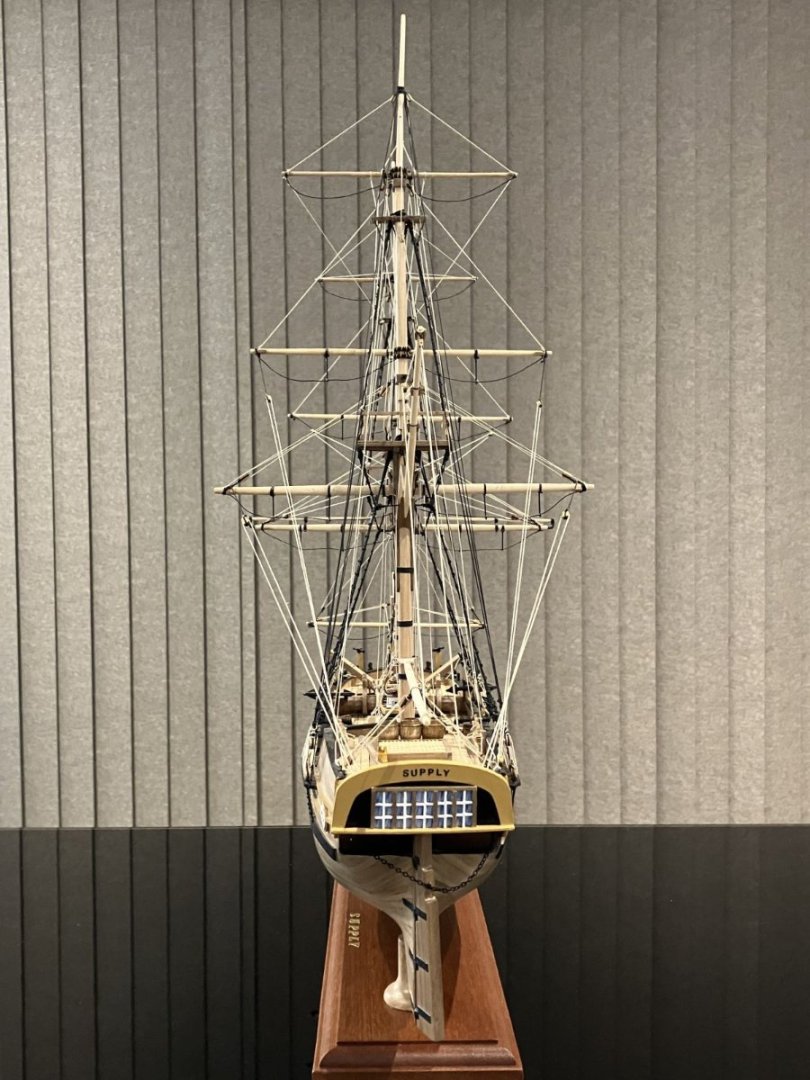
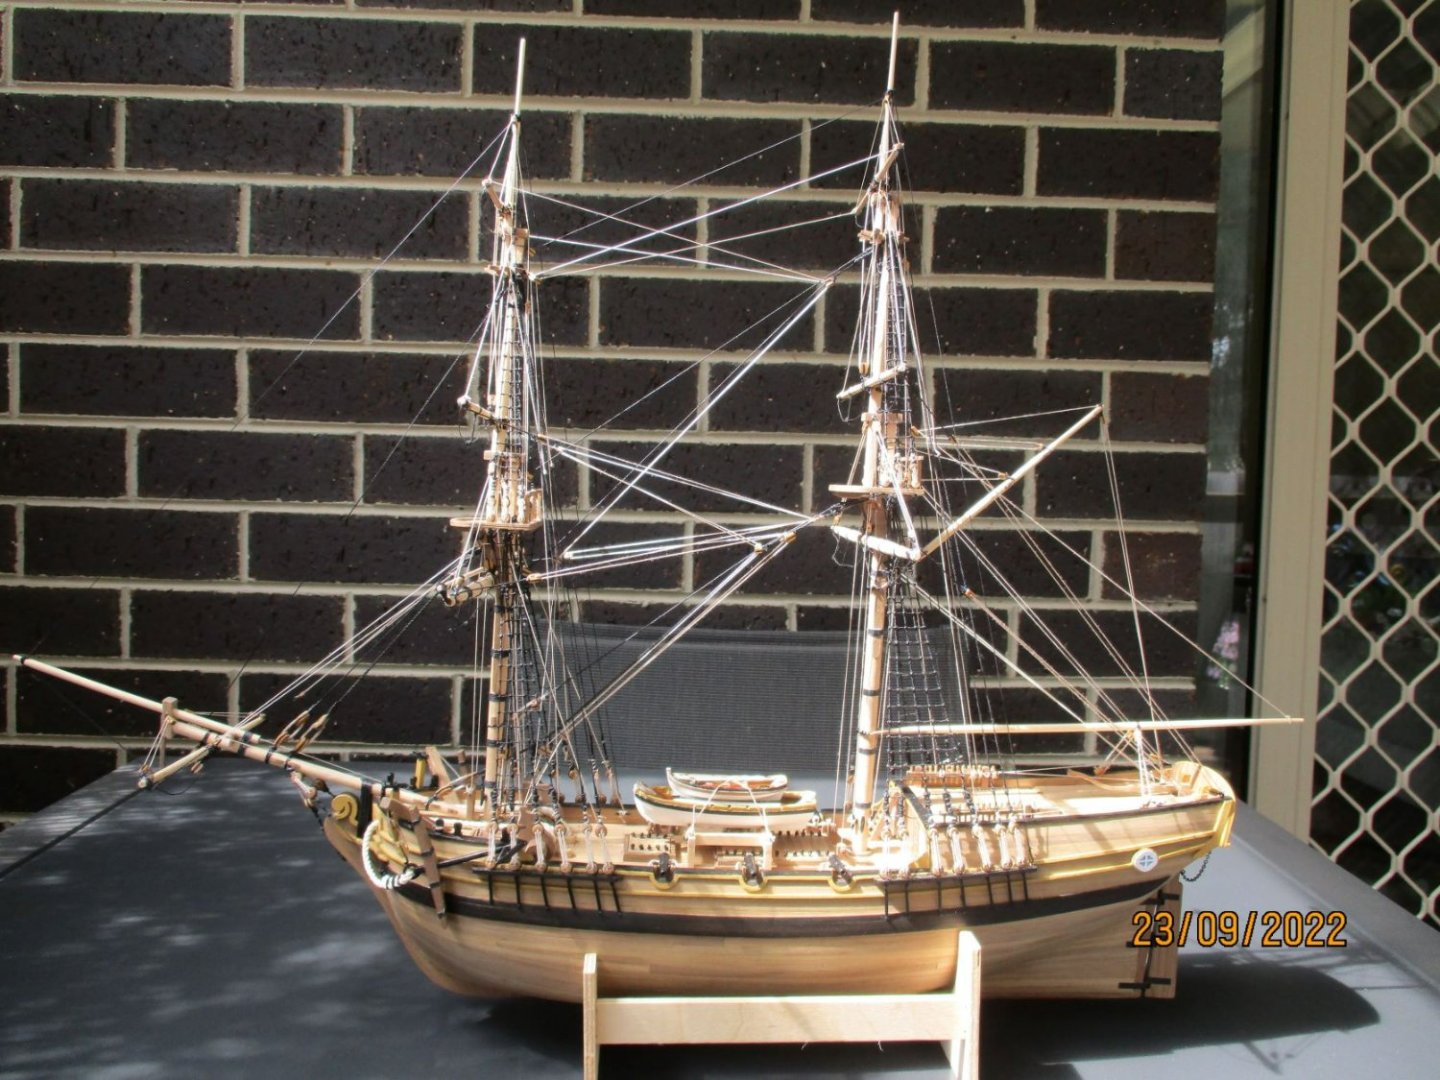
Well guess that's it - finished, I really enjoyed the build. It is far from perfect, I made quite a few mistakes and learned a great deal. I did my best but with hindsight there are many parts that could have been better. With the experience gained I could make a much better job of the next build. Will I do another build - maybe! My thanks to everyone for the comments and grateful thanks to all the other "Supply" builders for their build logs, without them there is no way that I would have been able to complete my build.
- 53 replies
-
- 4
-
-
- Supply
- Caldercraft
- (and 1 more)
-
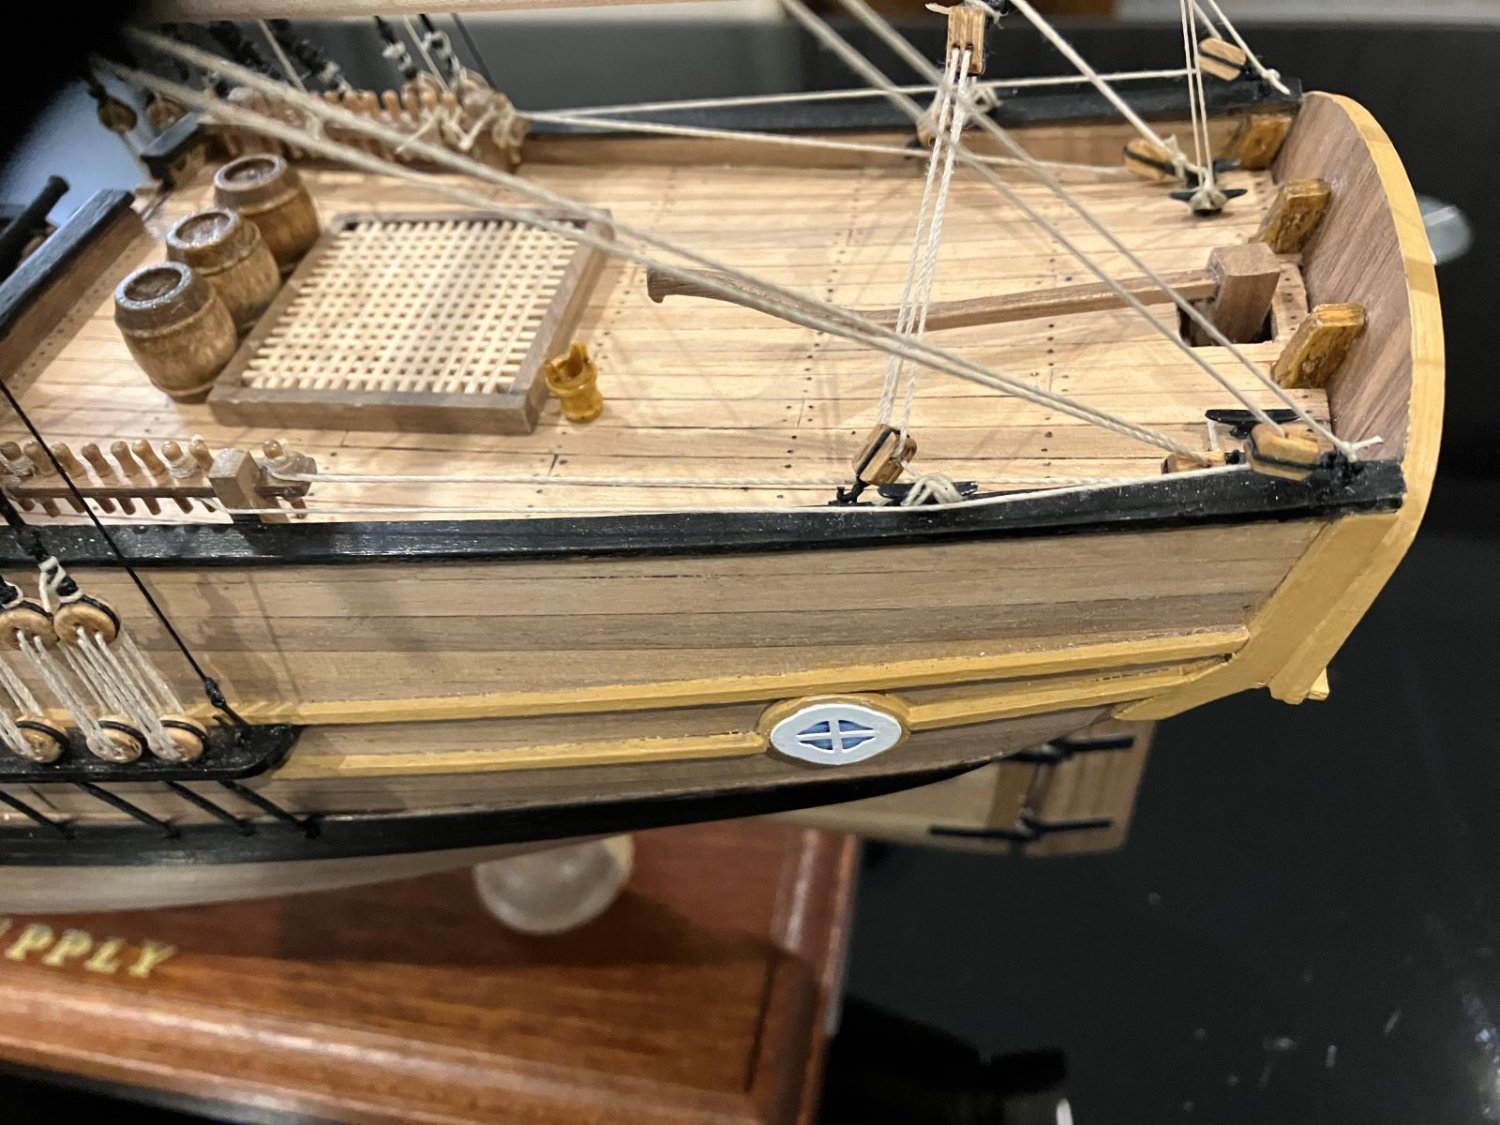
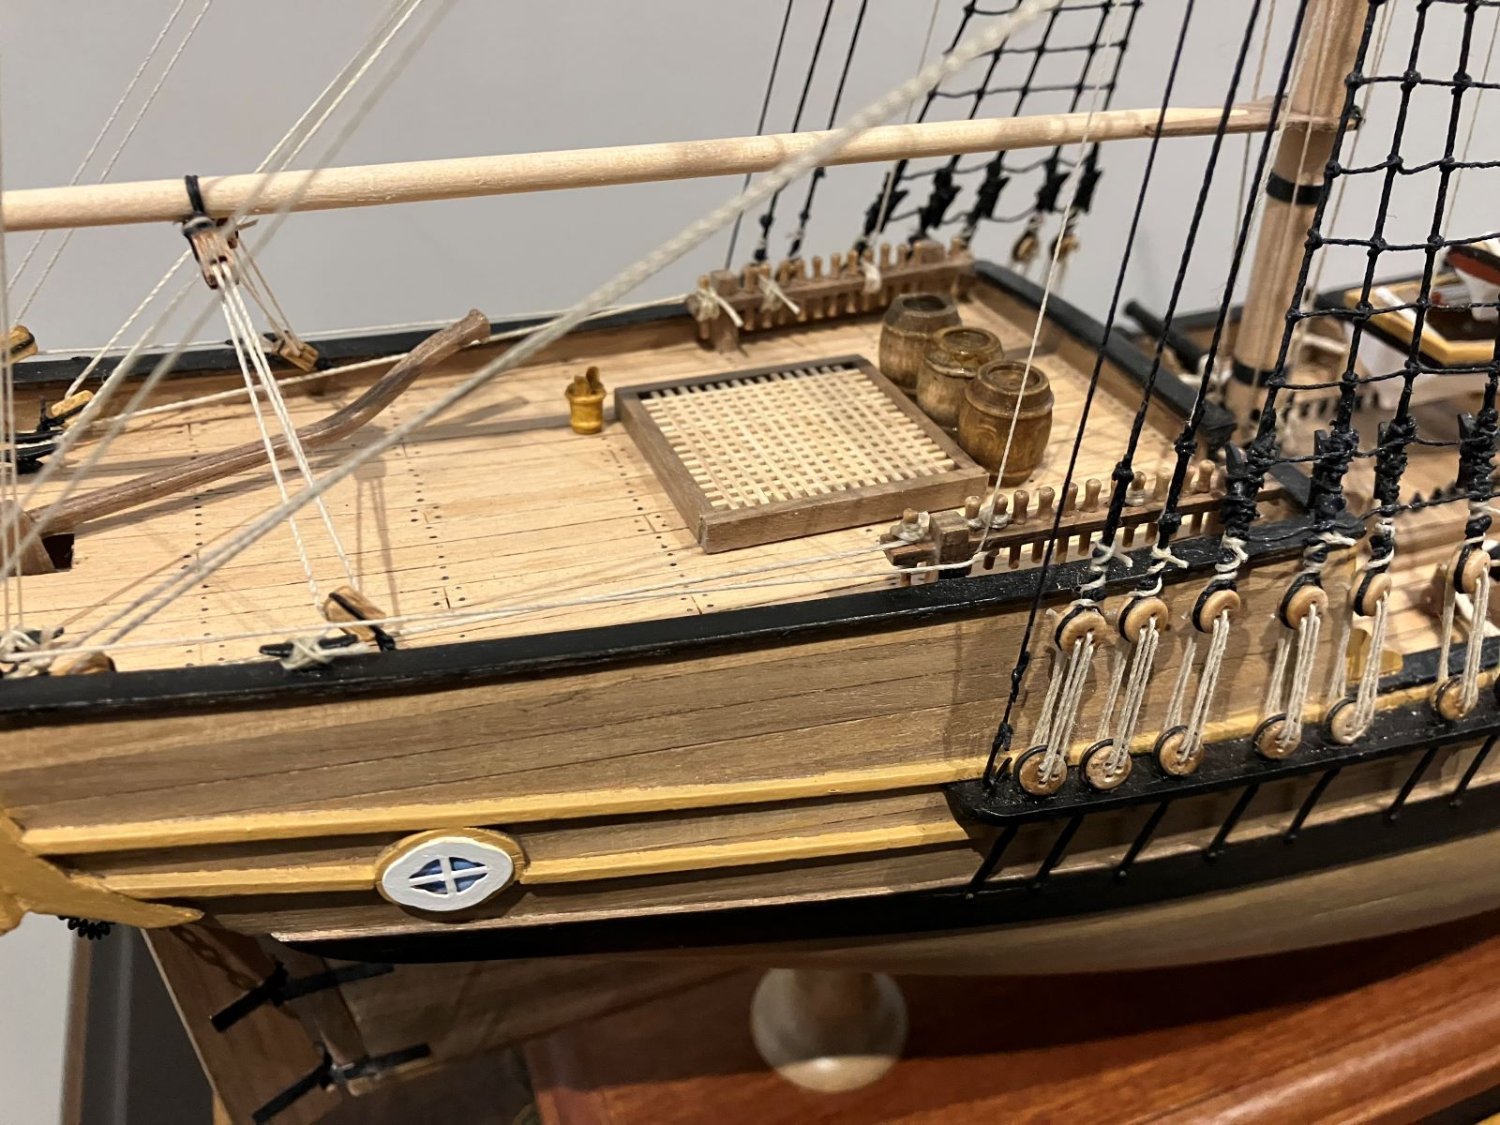
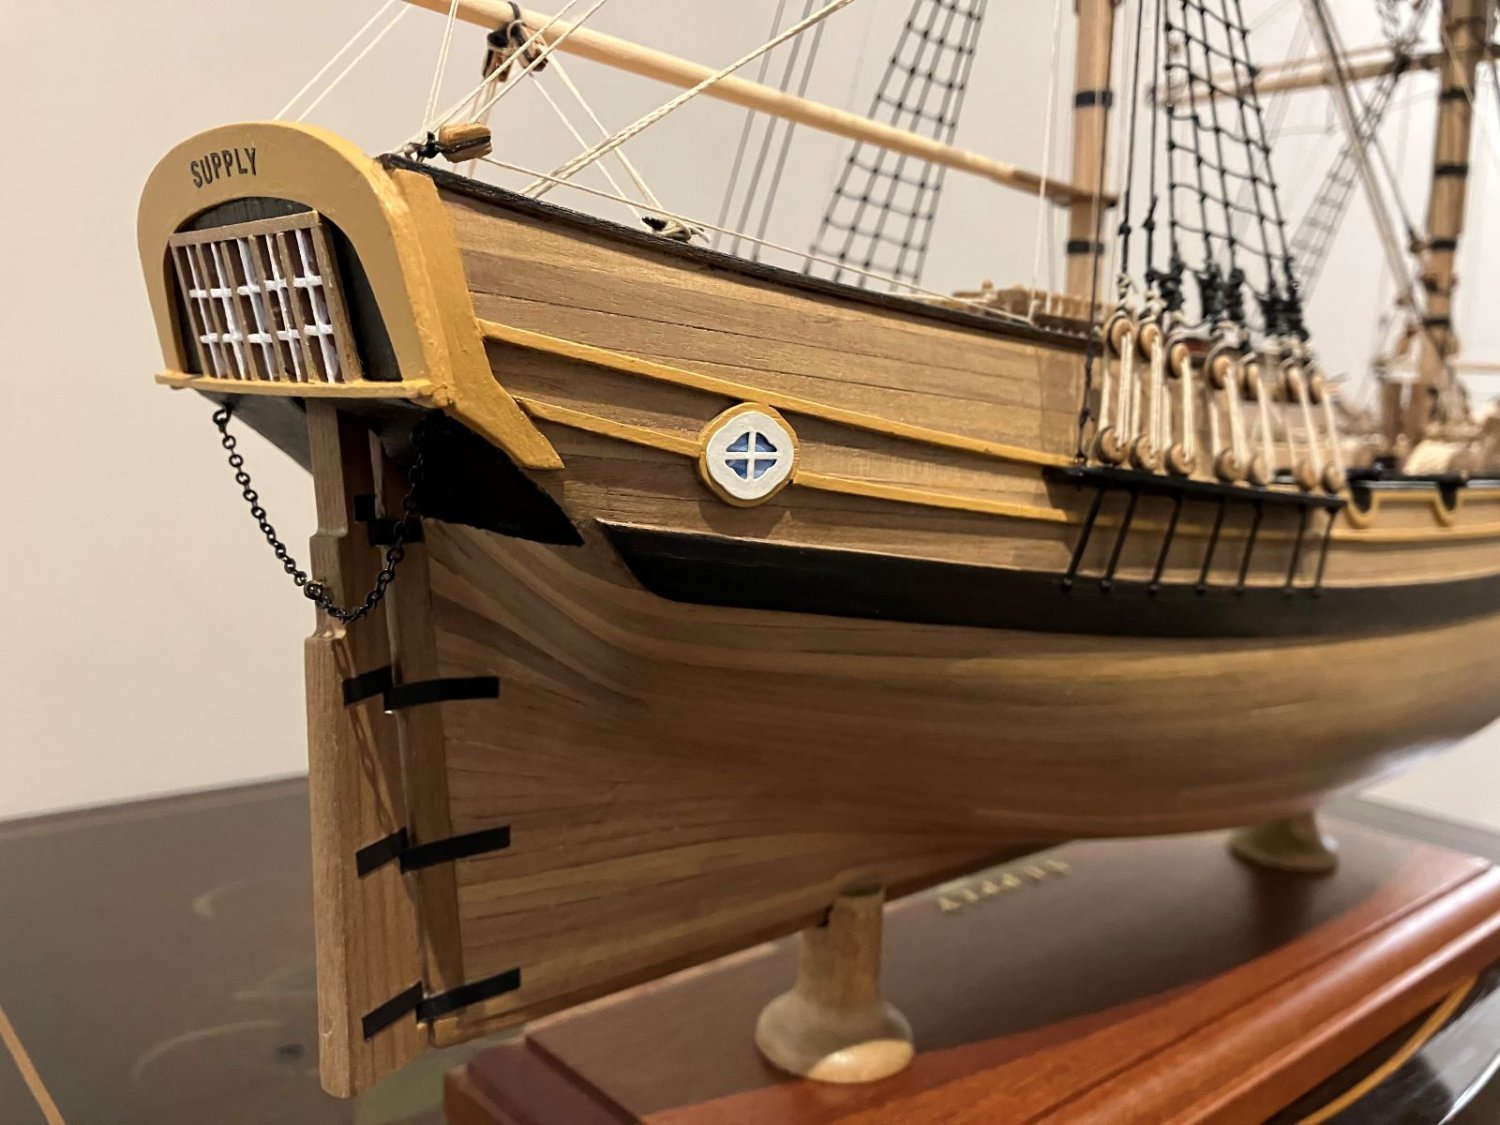
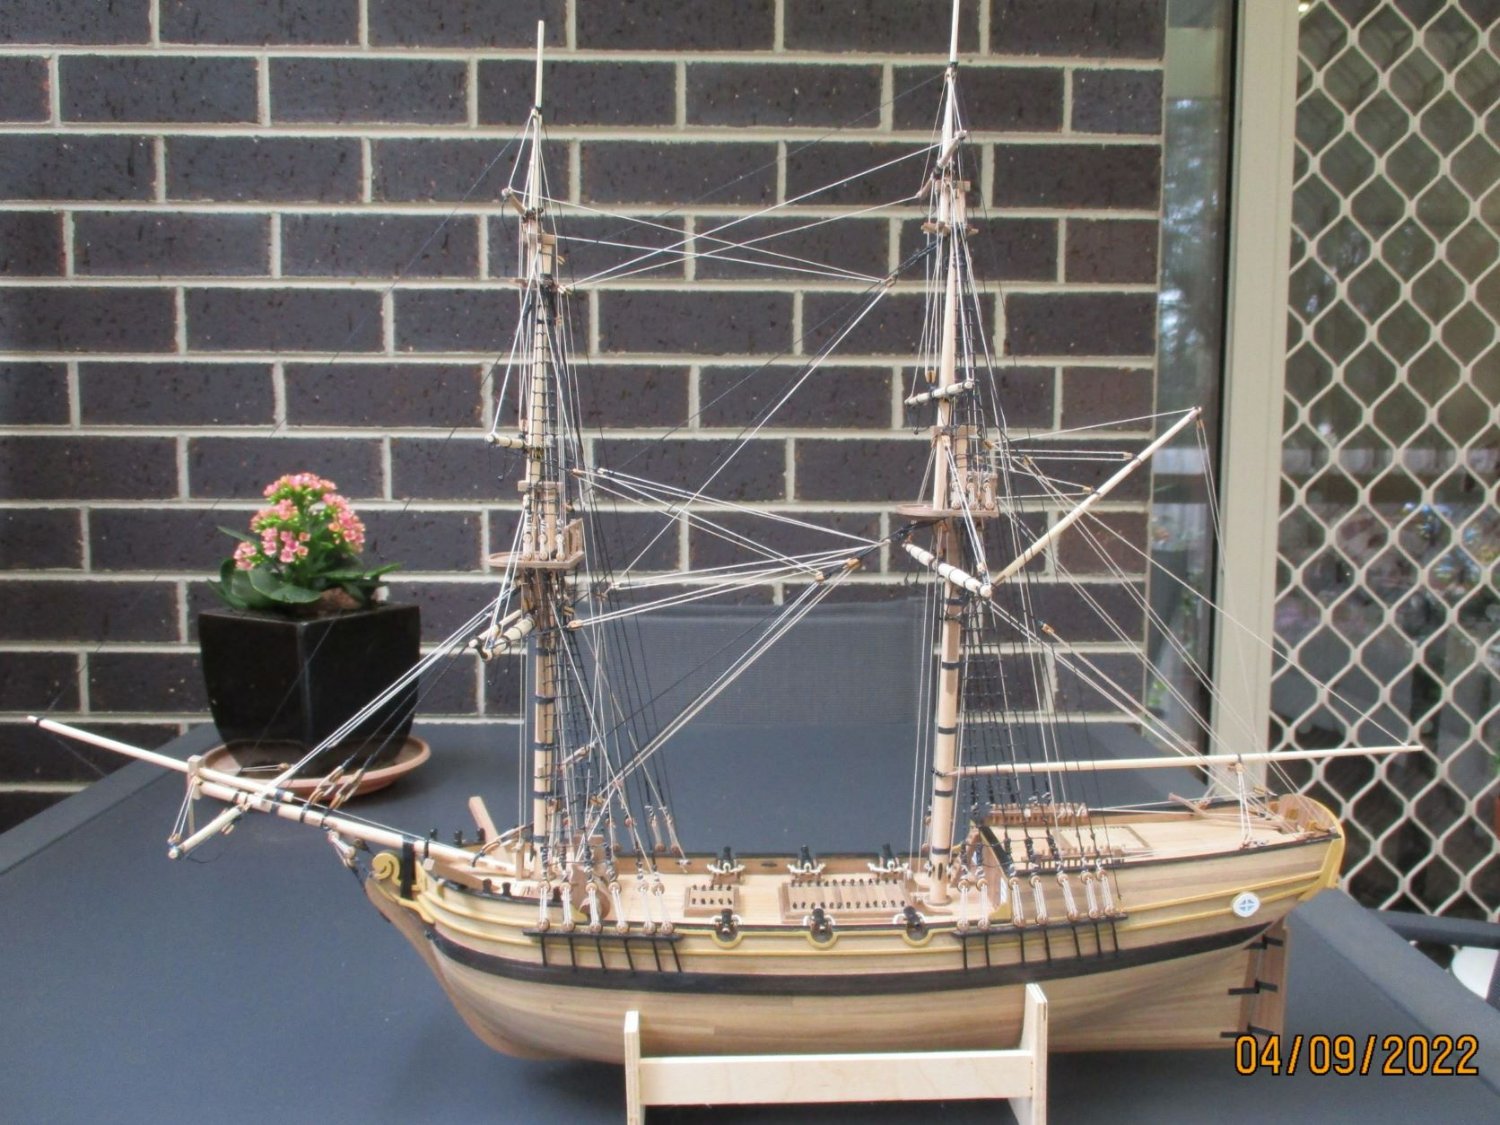
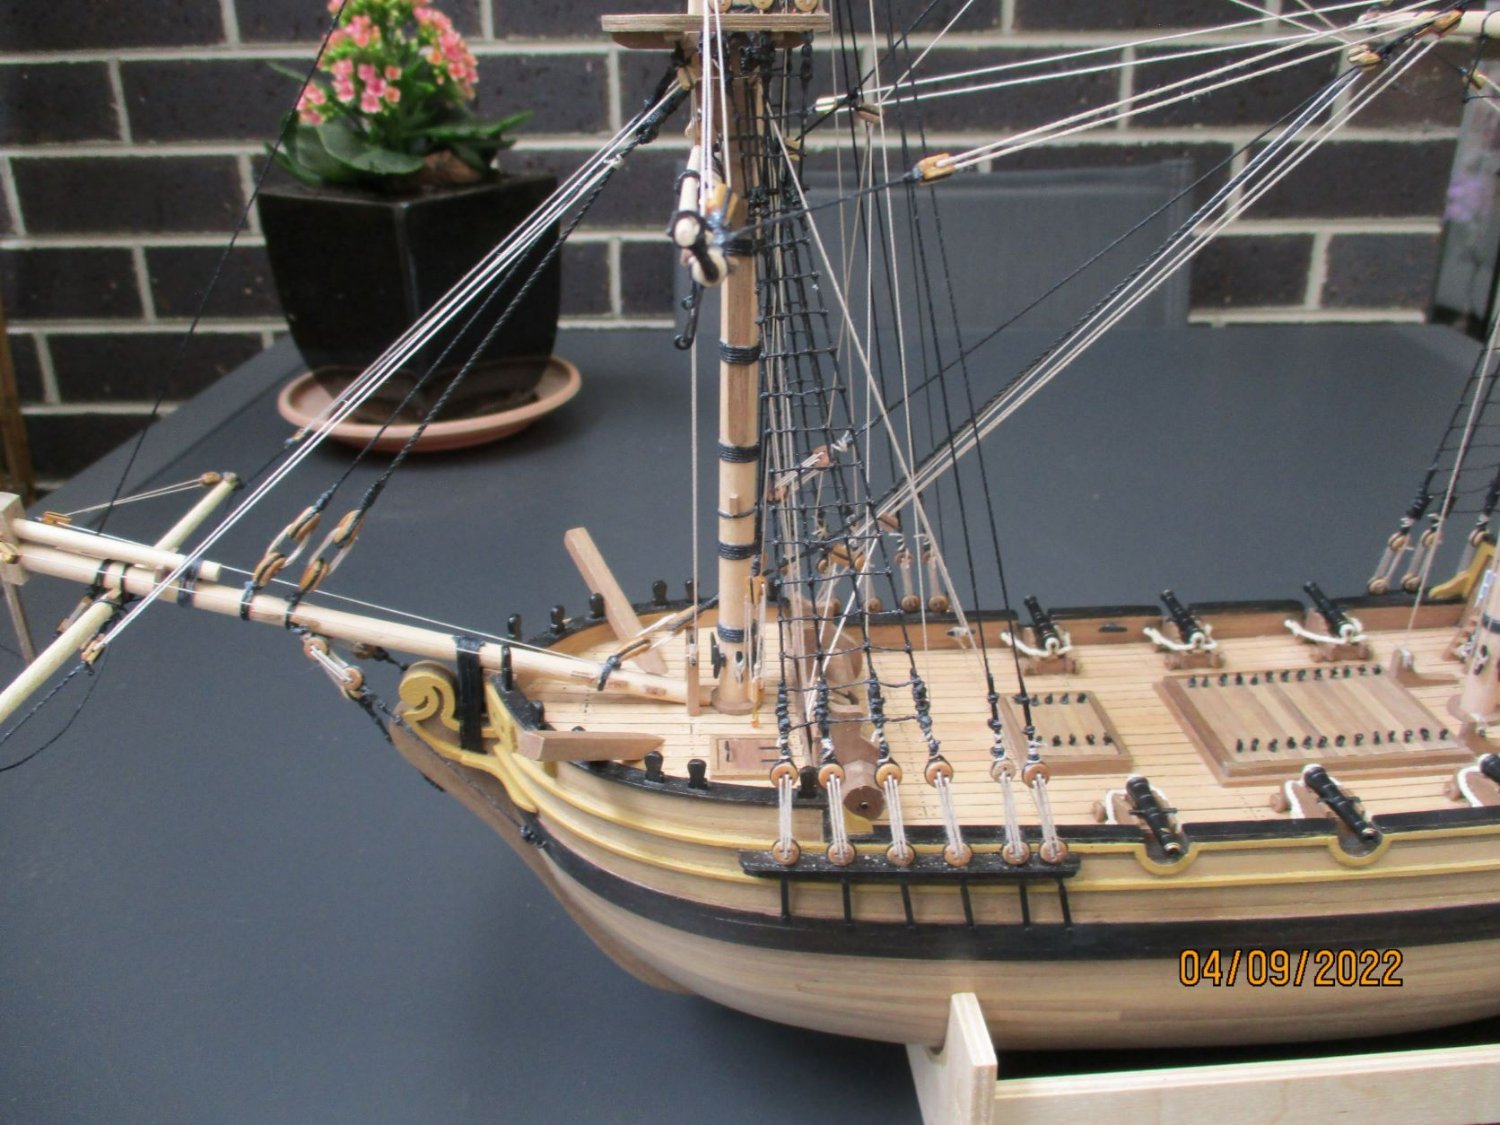
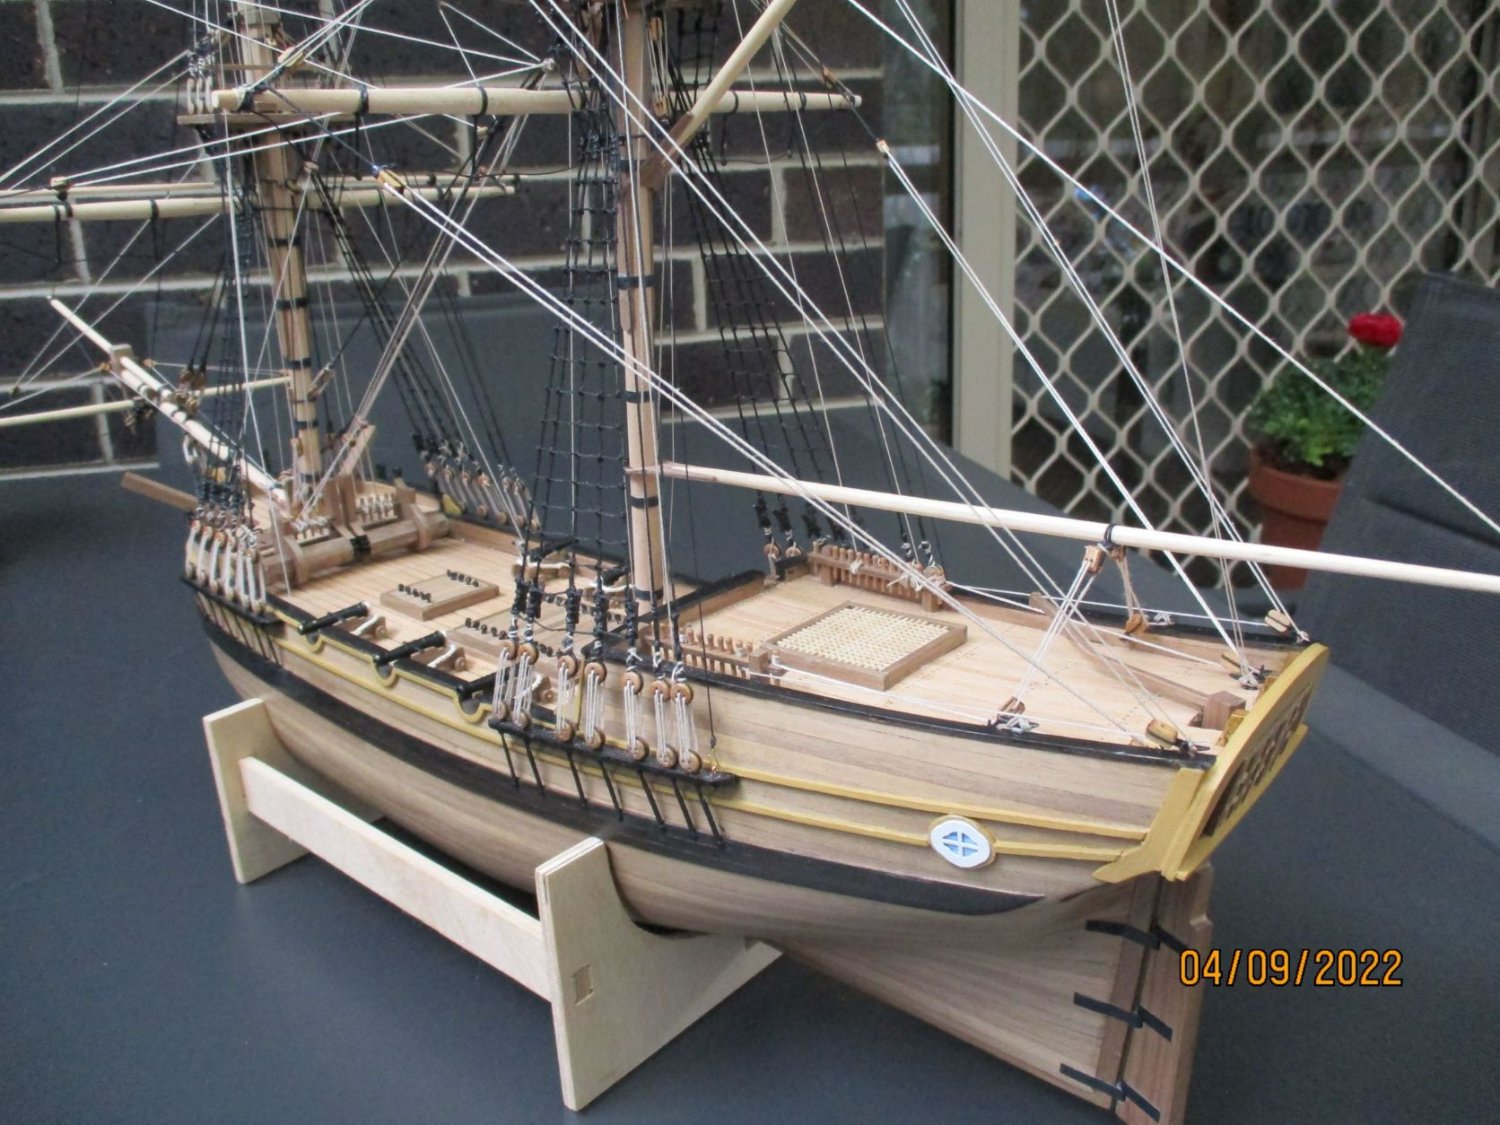
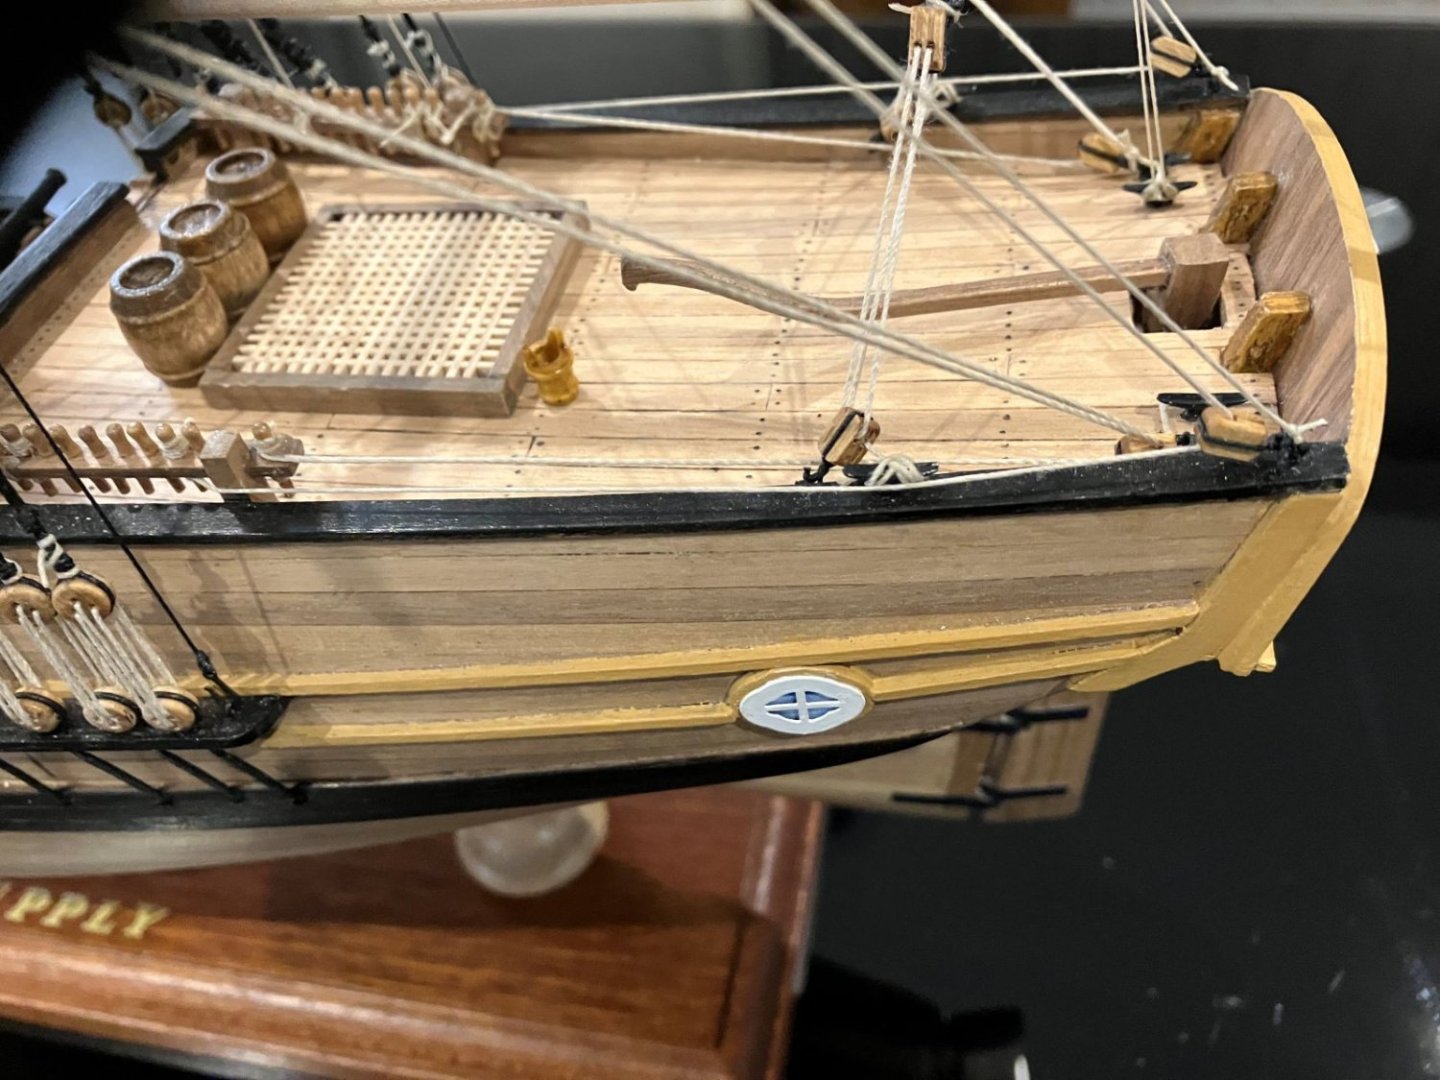
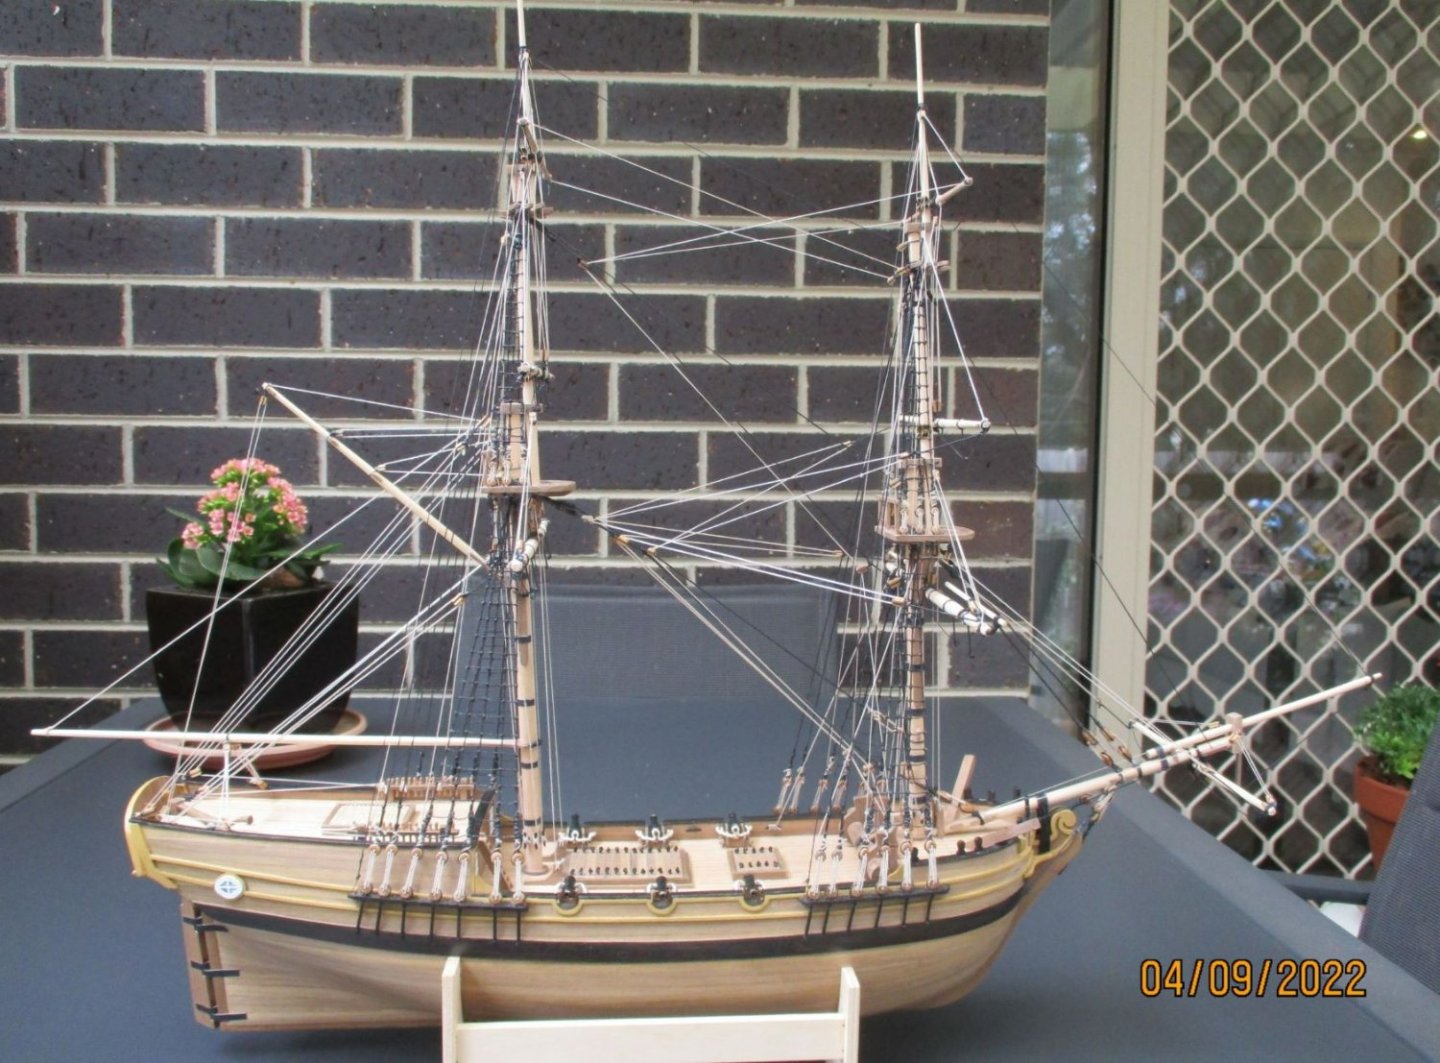
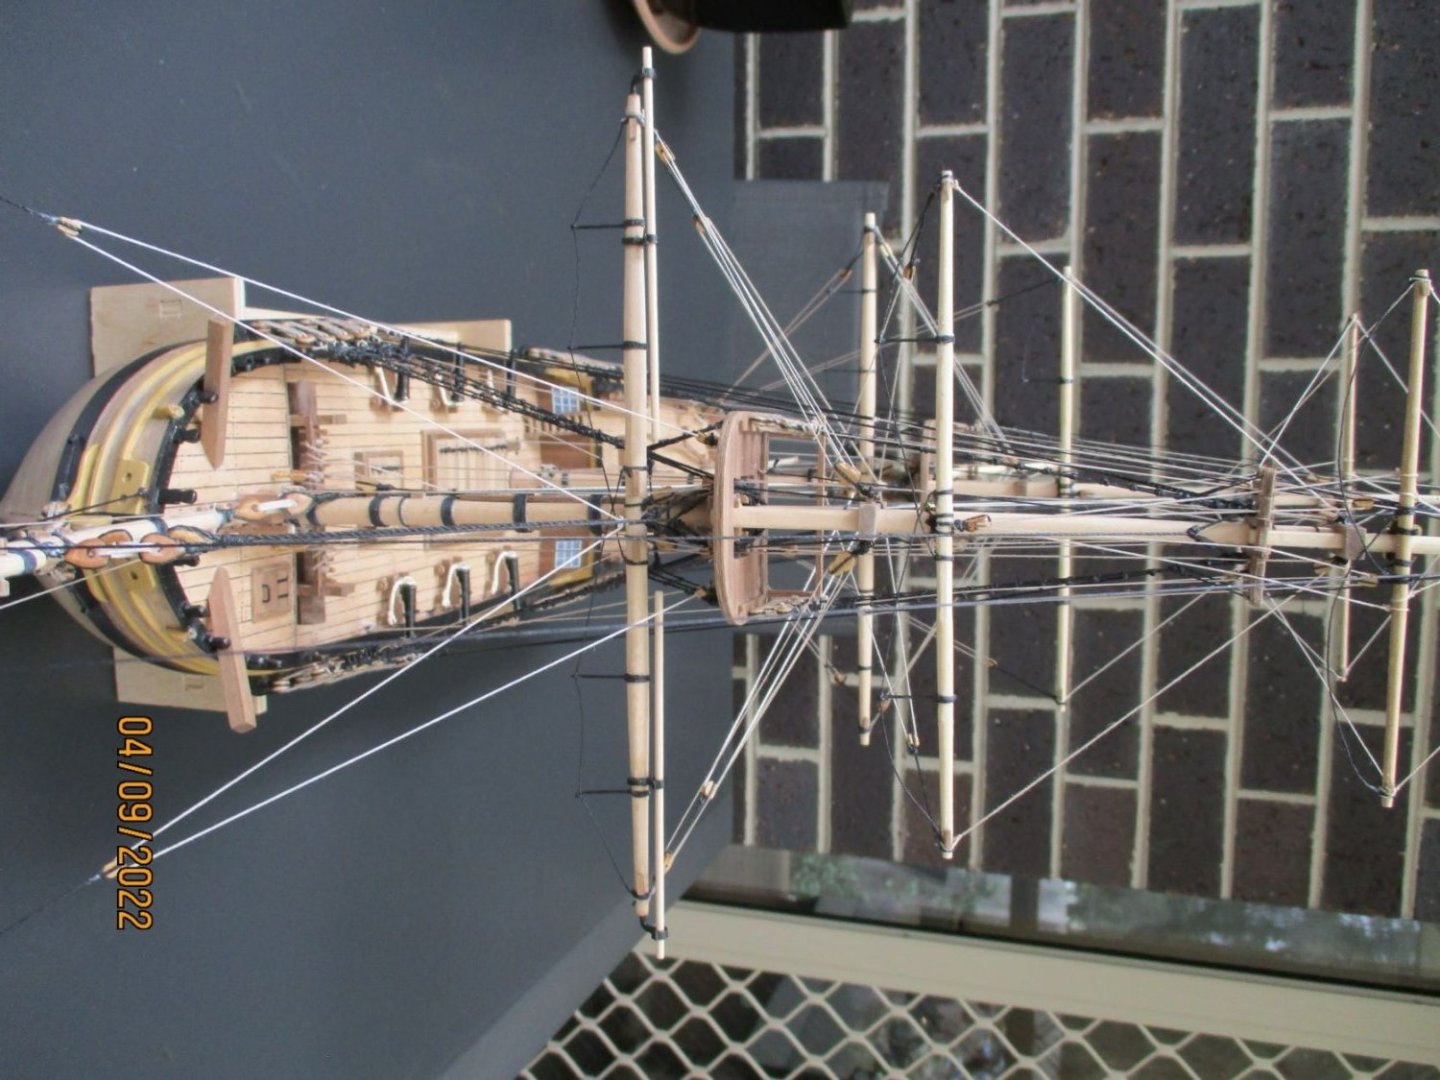
Winter is here, lawn bowls finished for the season, time to complete my build. I ordered mounting plinths, some barrels and buckets from the UK. They took weeks to arrive but the "Supply" is now mounted on a plinth and the barrels and buckets located on the deck. The brass "supply" letters that came with the kit looked to big to me to go on the transom, so I glued them to the base and used some vinyl letters for the ships name.


- 53 replies
-
- 12
-
-

-

-
- Supply
- Caldercraft
- (and 1 more)
-
P.S. A few years ago while I was In Sydney, I toured the HMS Endeavour replica in Darling Harbour. It was very memorable and difficult to beleive that Captain Cook and his colleagues and crew went such a distance, spent so long and achieved so much in such a tiny ship. Amazing experience.
- 53 replies
-
- 1
-
-
- Supply
- Caldercraft
- (and 1 more)
-
Thanks Tararasik, your kind words are much appreciated. The "Supply" is a really nice ship and has a great history. Despite the manufacturers claims I would not class it as a beginners project as the instructions are not really clear enough to follow easily, the later stages of the rigging instructions are particularly difficult to understand. Fortunately for me there were some really good builds logs of this ship and I was able to refer to them when I got into difficulties. A pity you gave up on the "Endeavour", could you not strip off the first layer of planking and start again? It is so good to hear from you in the Ukraine where you have so much conflict and sorrow at the moment. I hope that peace comes soon to the people of your great country.
- 53 replies
-
- 1
-
-
- Supply
- Caldercraft
- (and 1 more)
-
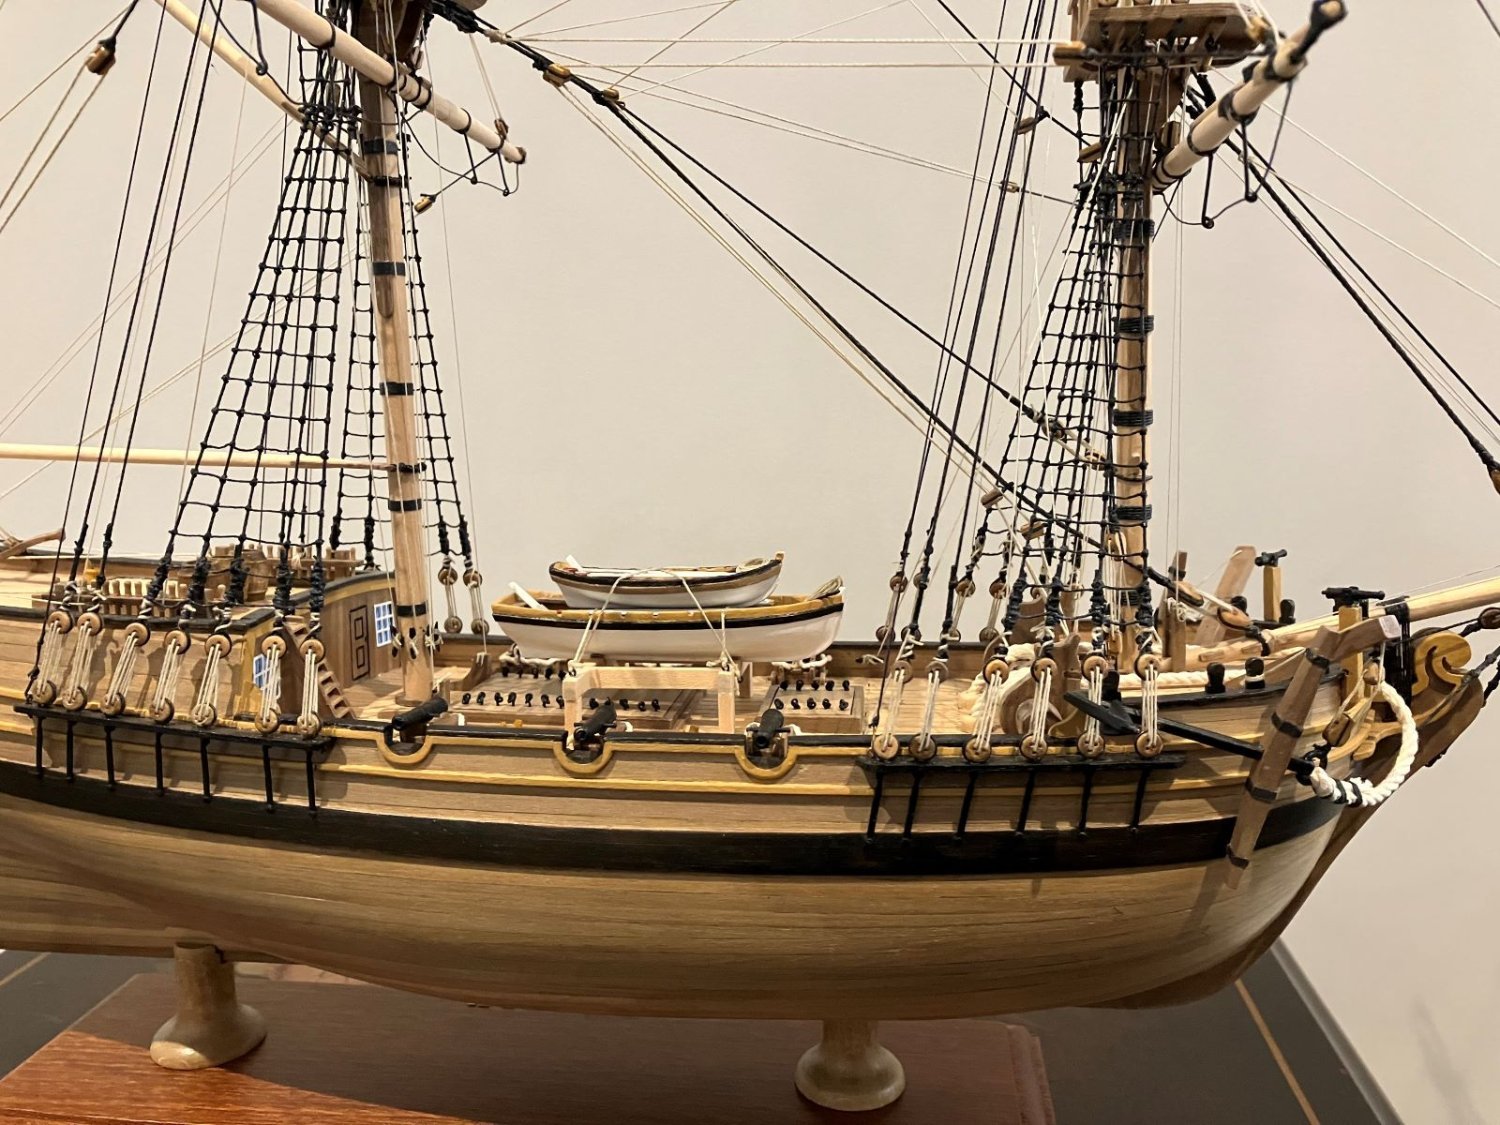
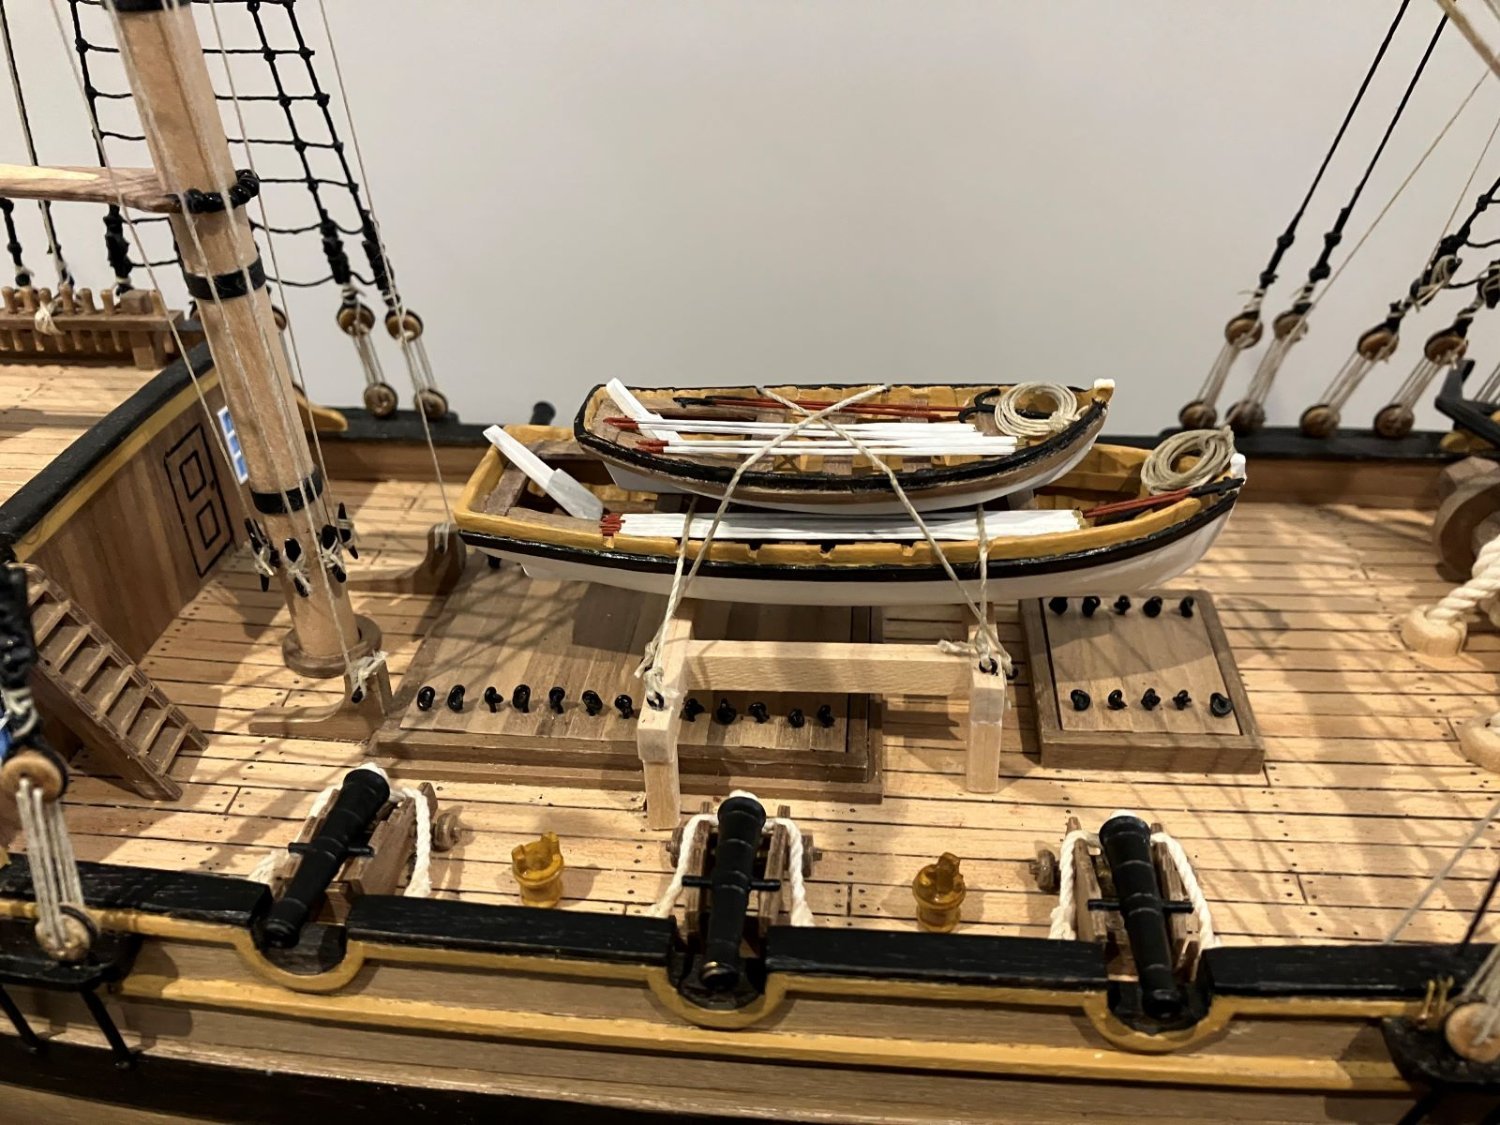
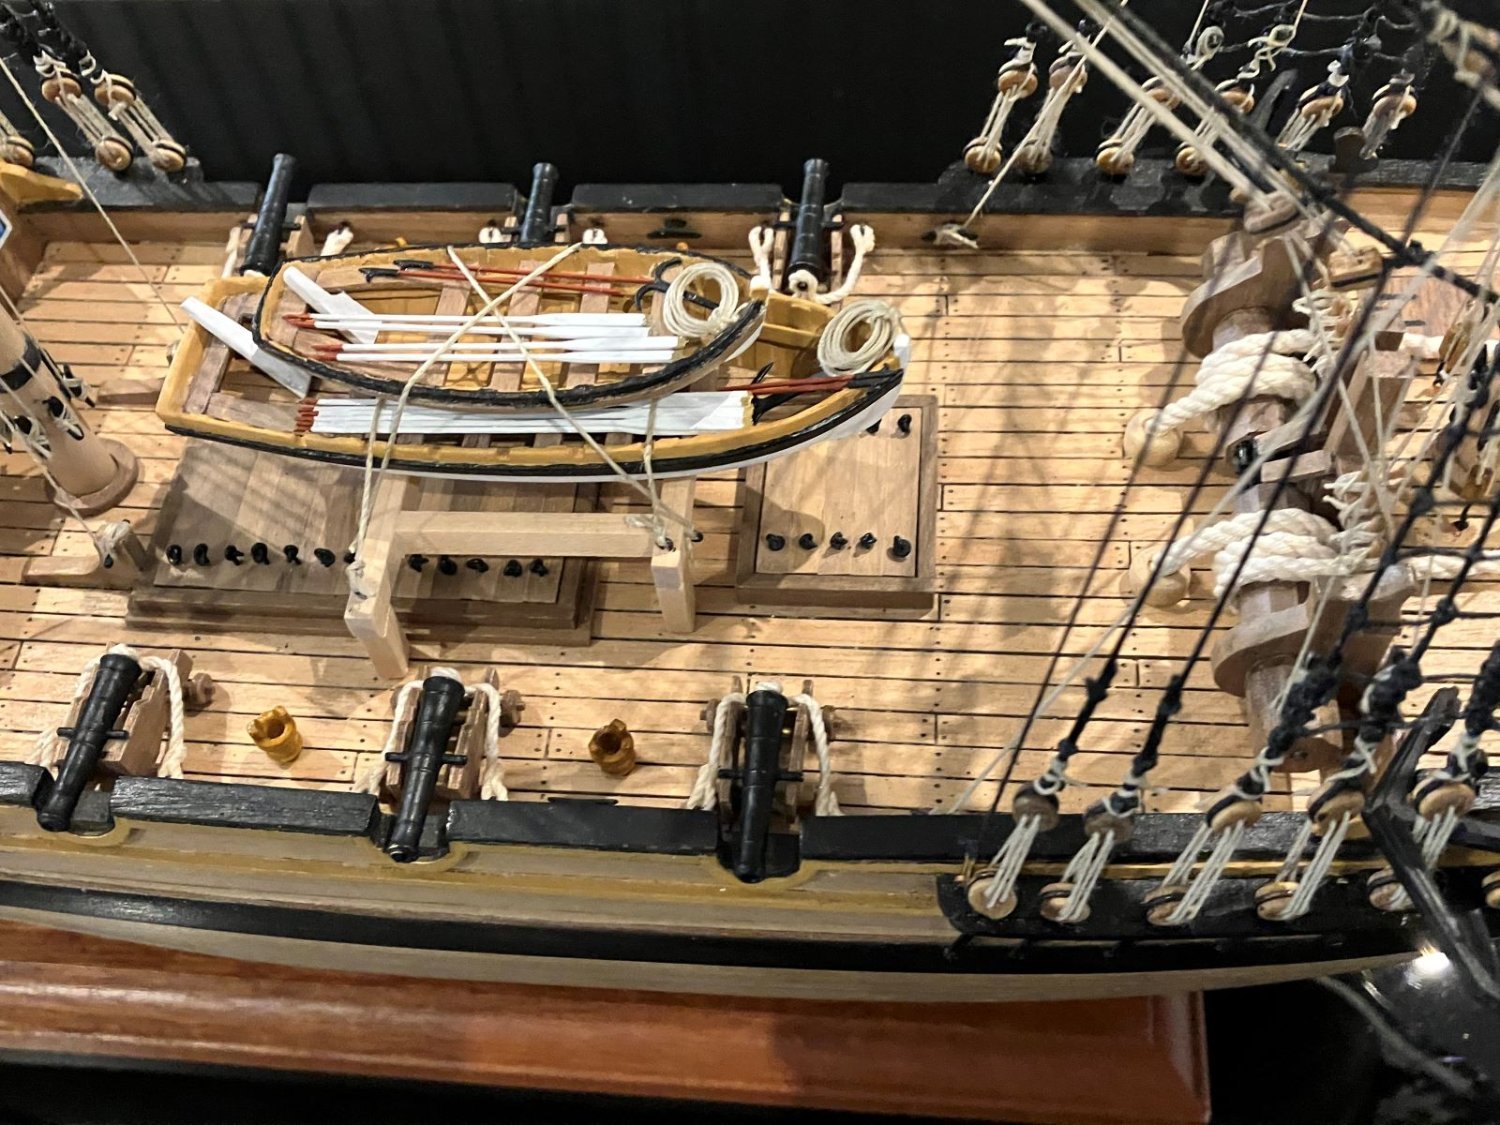
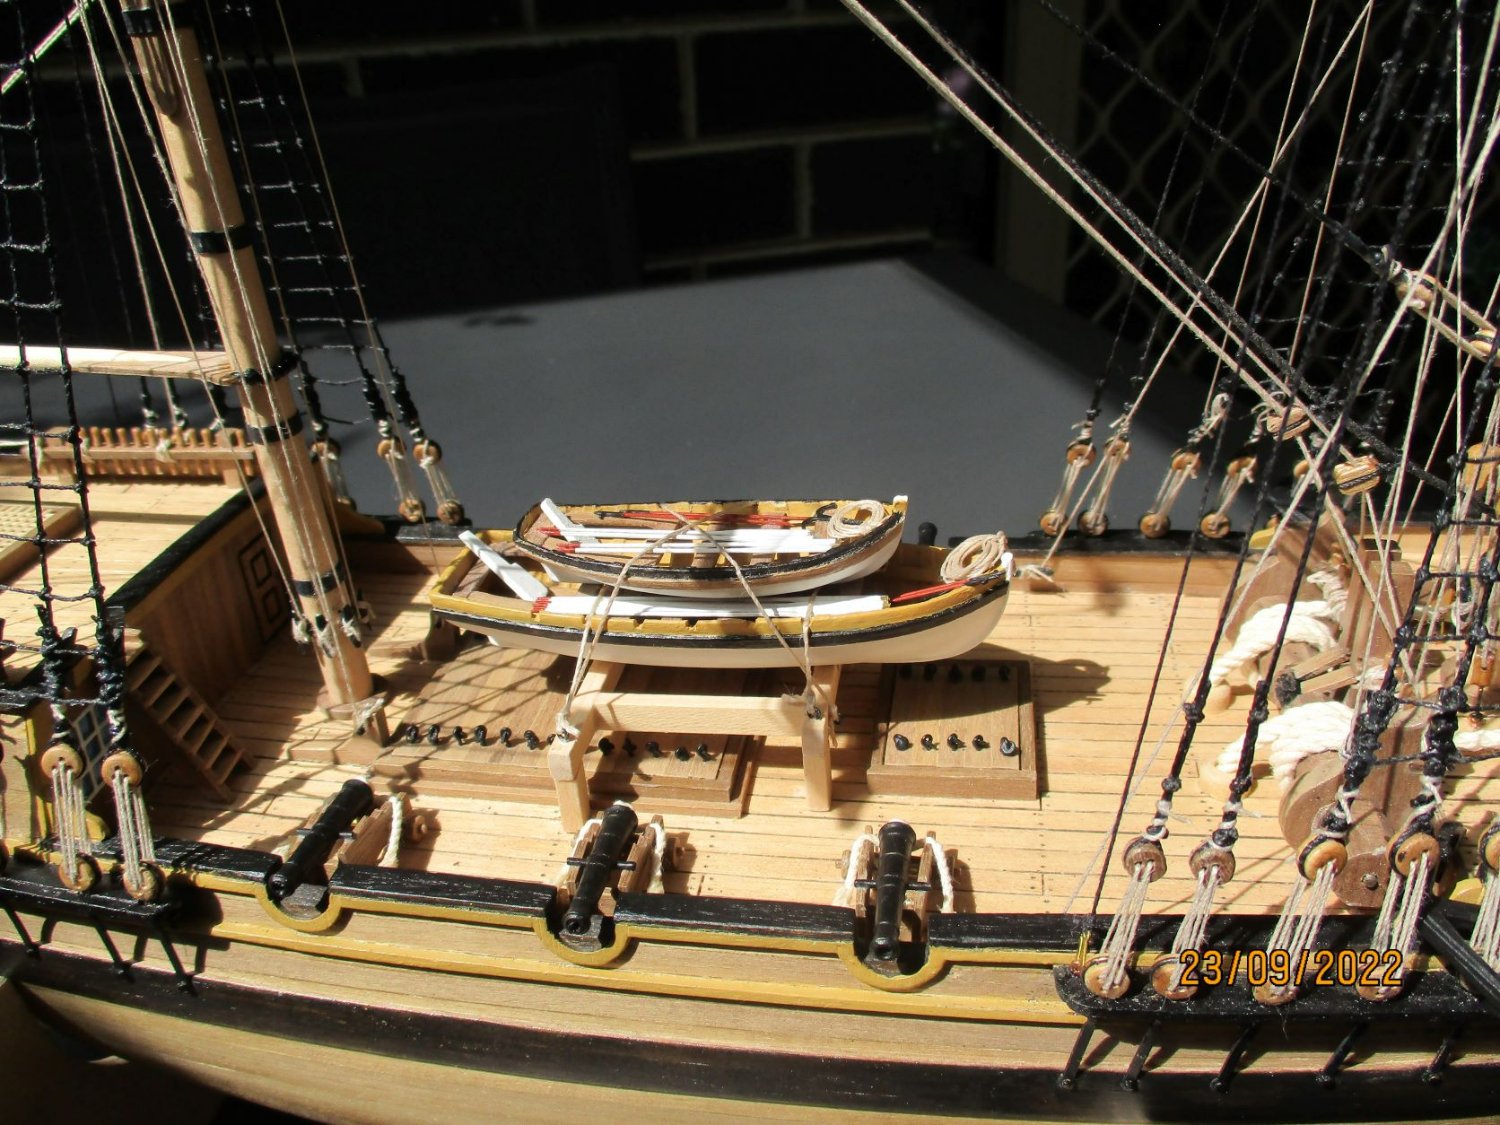
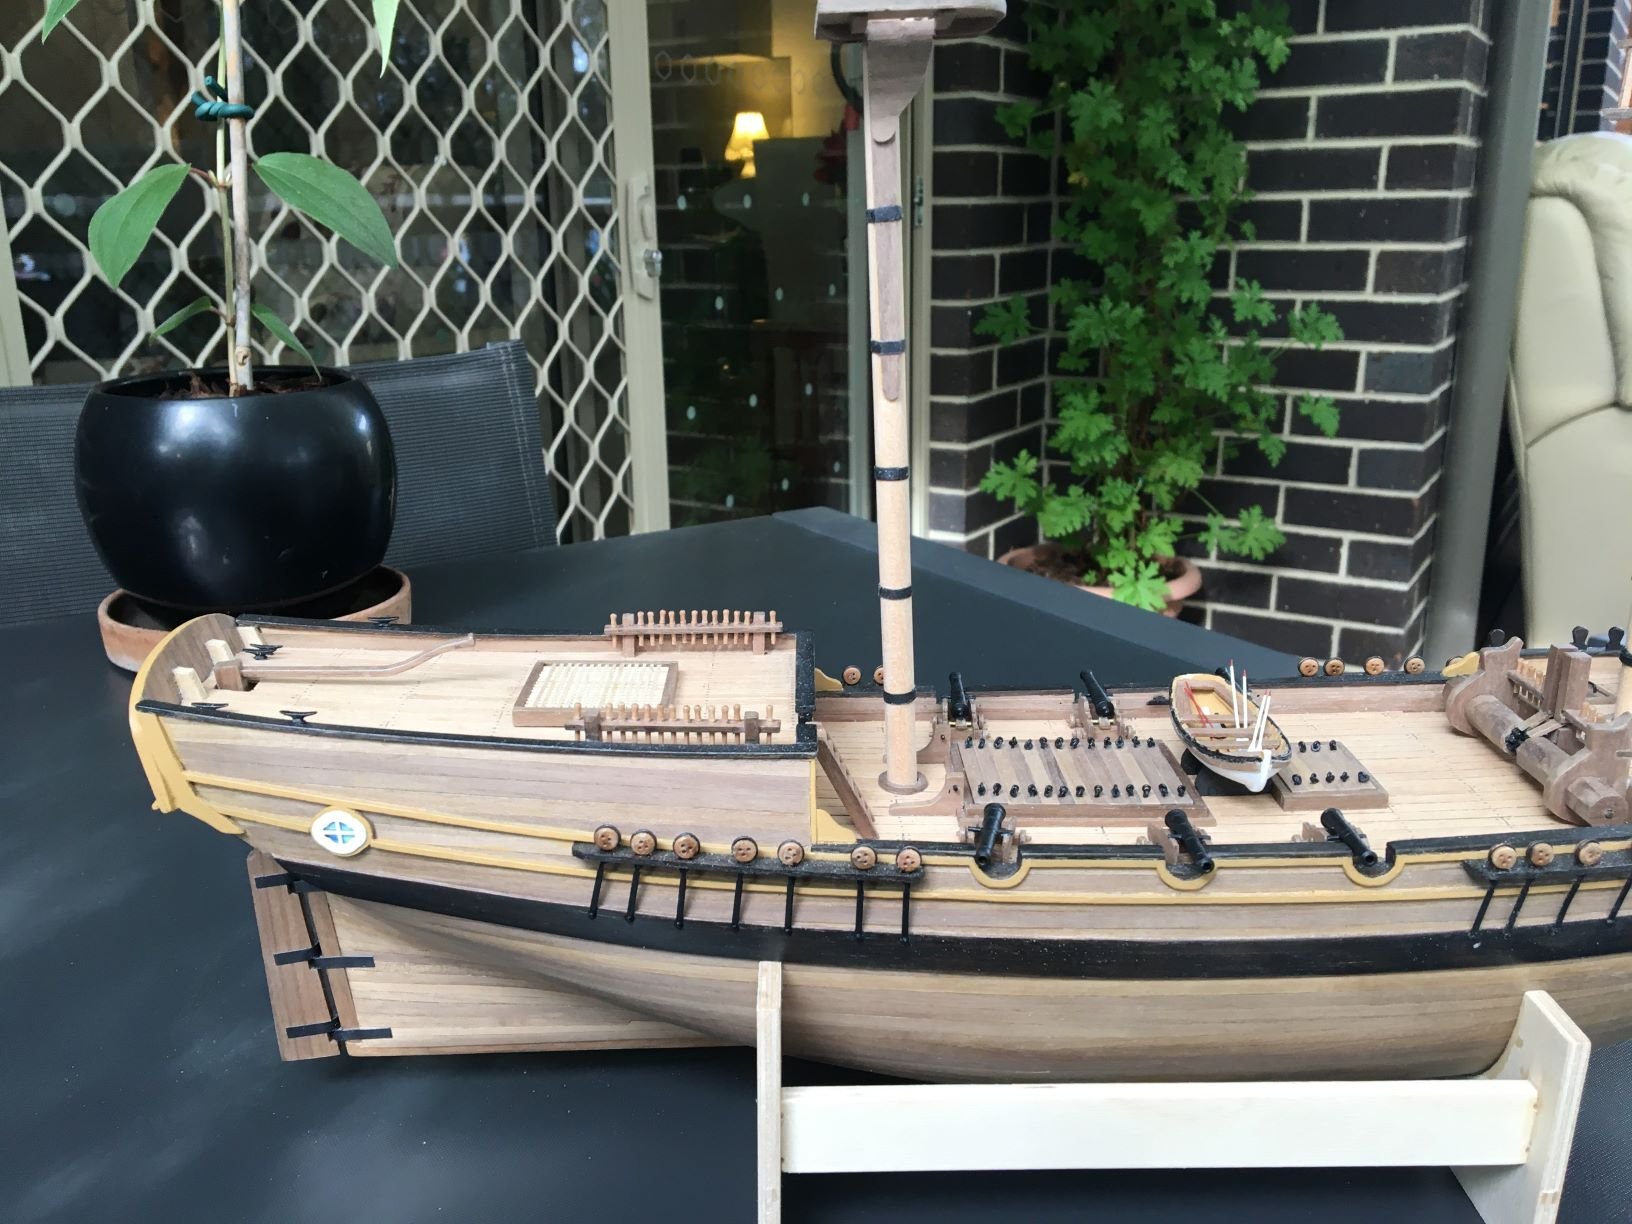
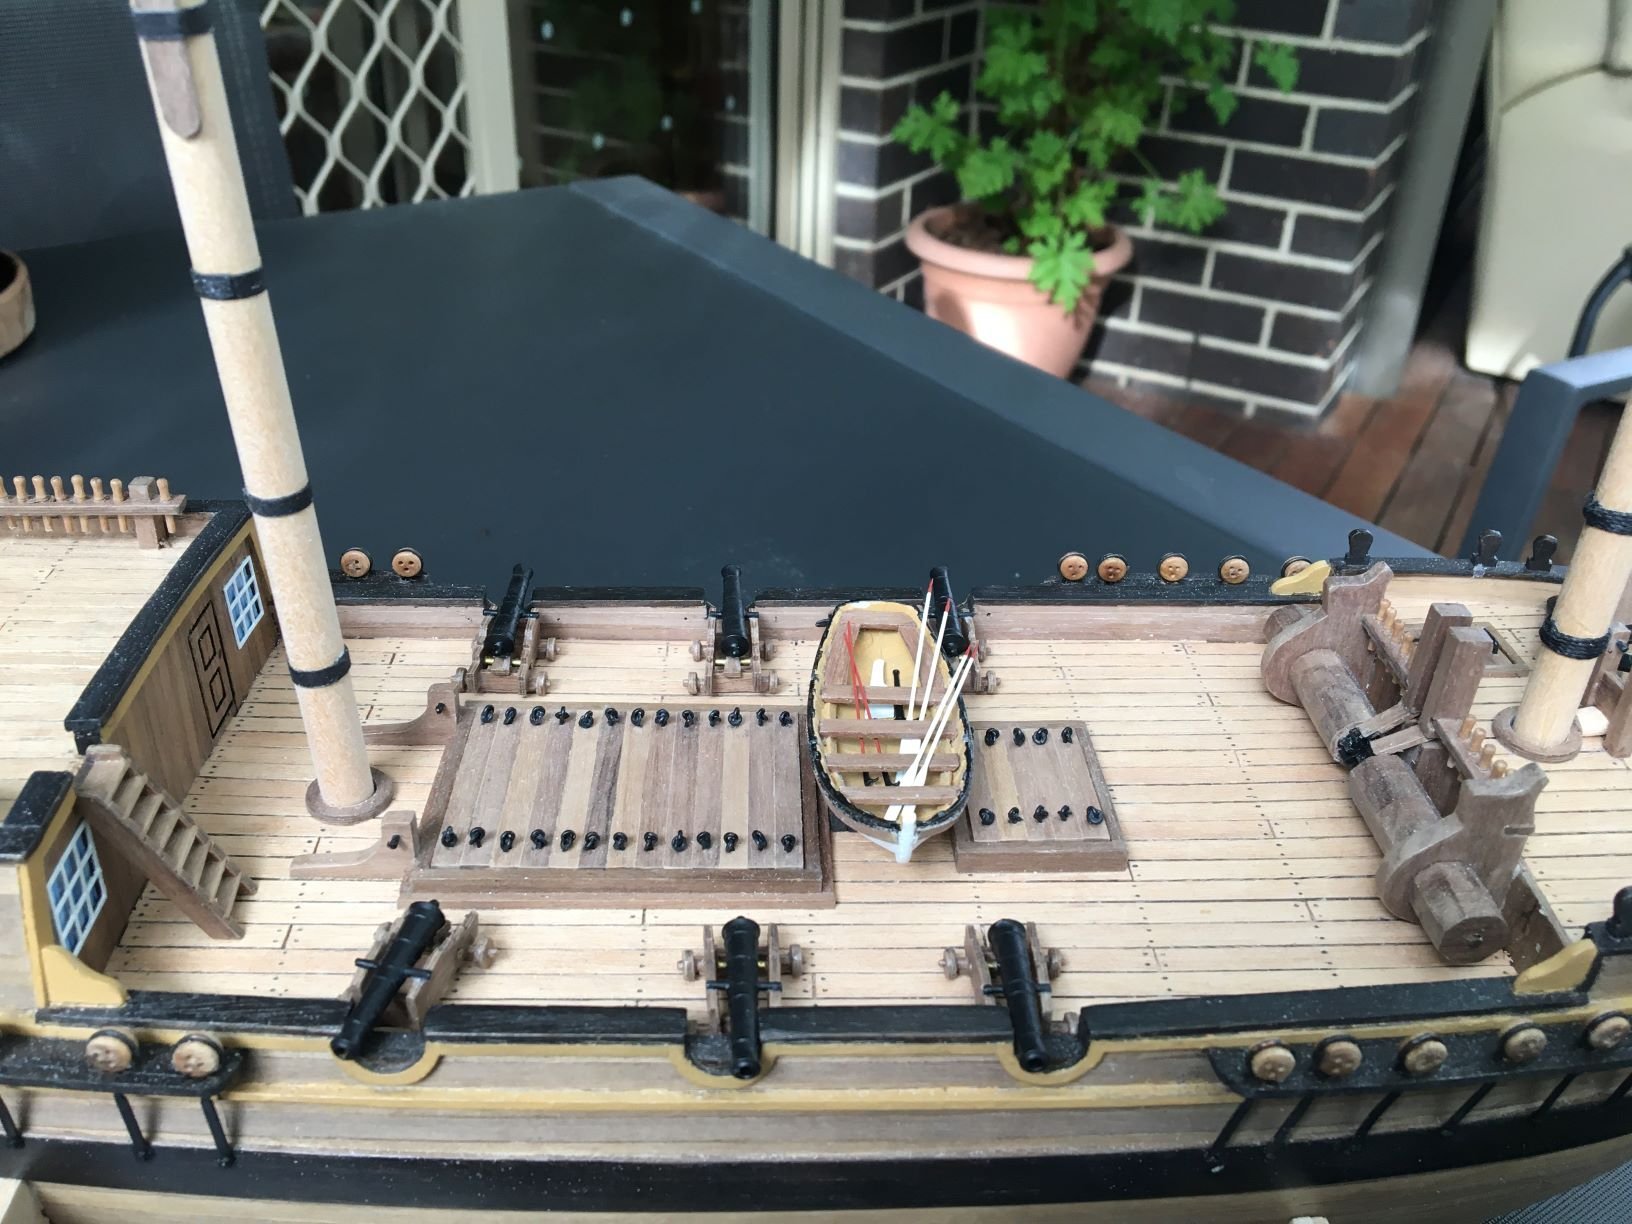
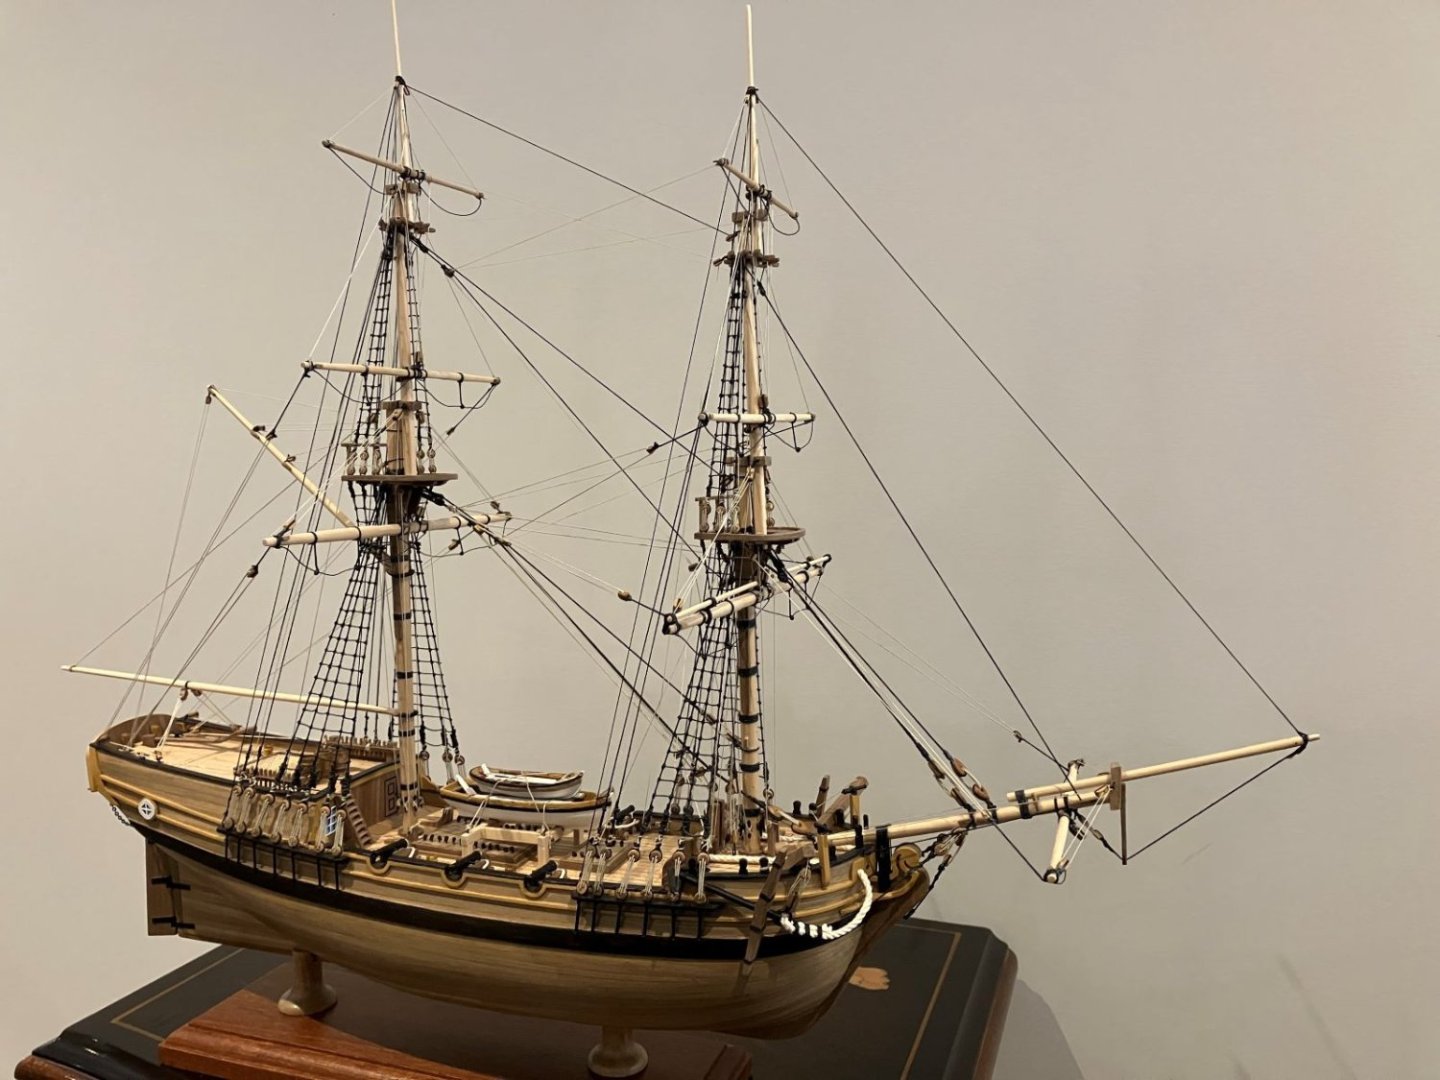
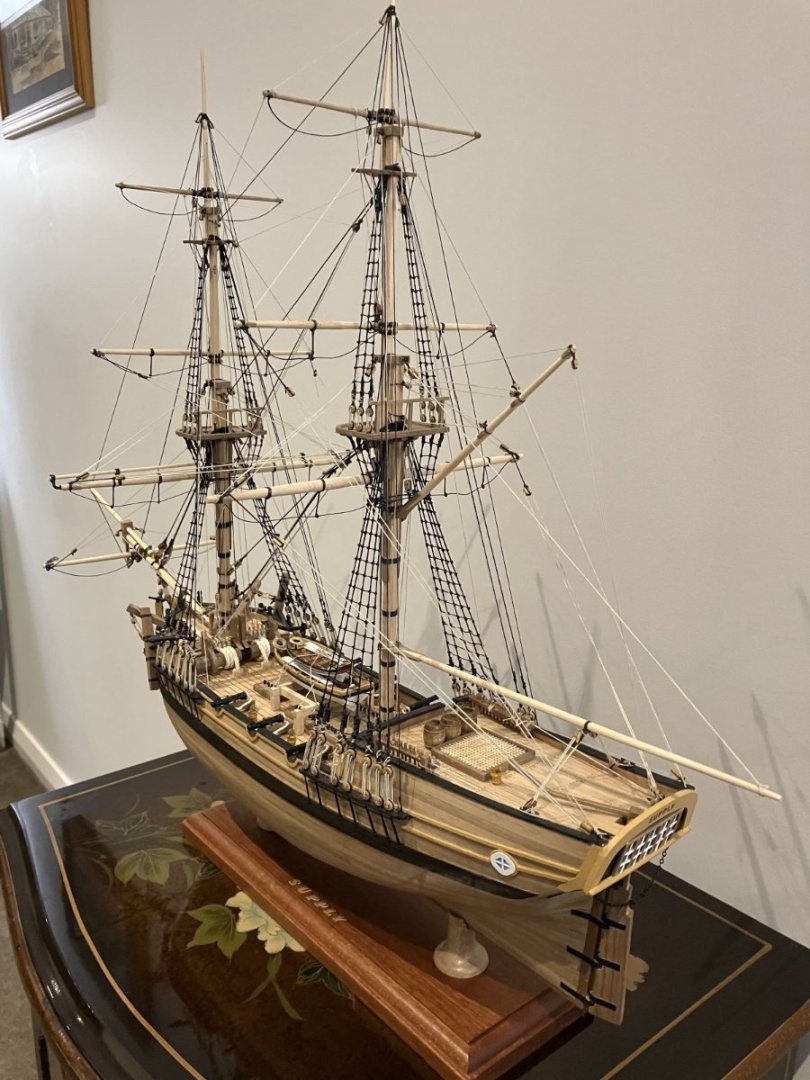
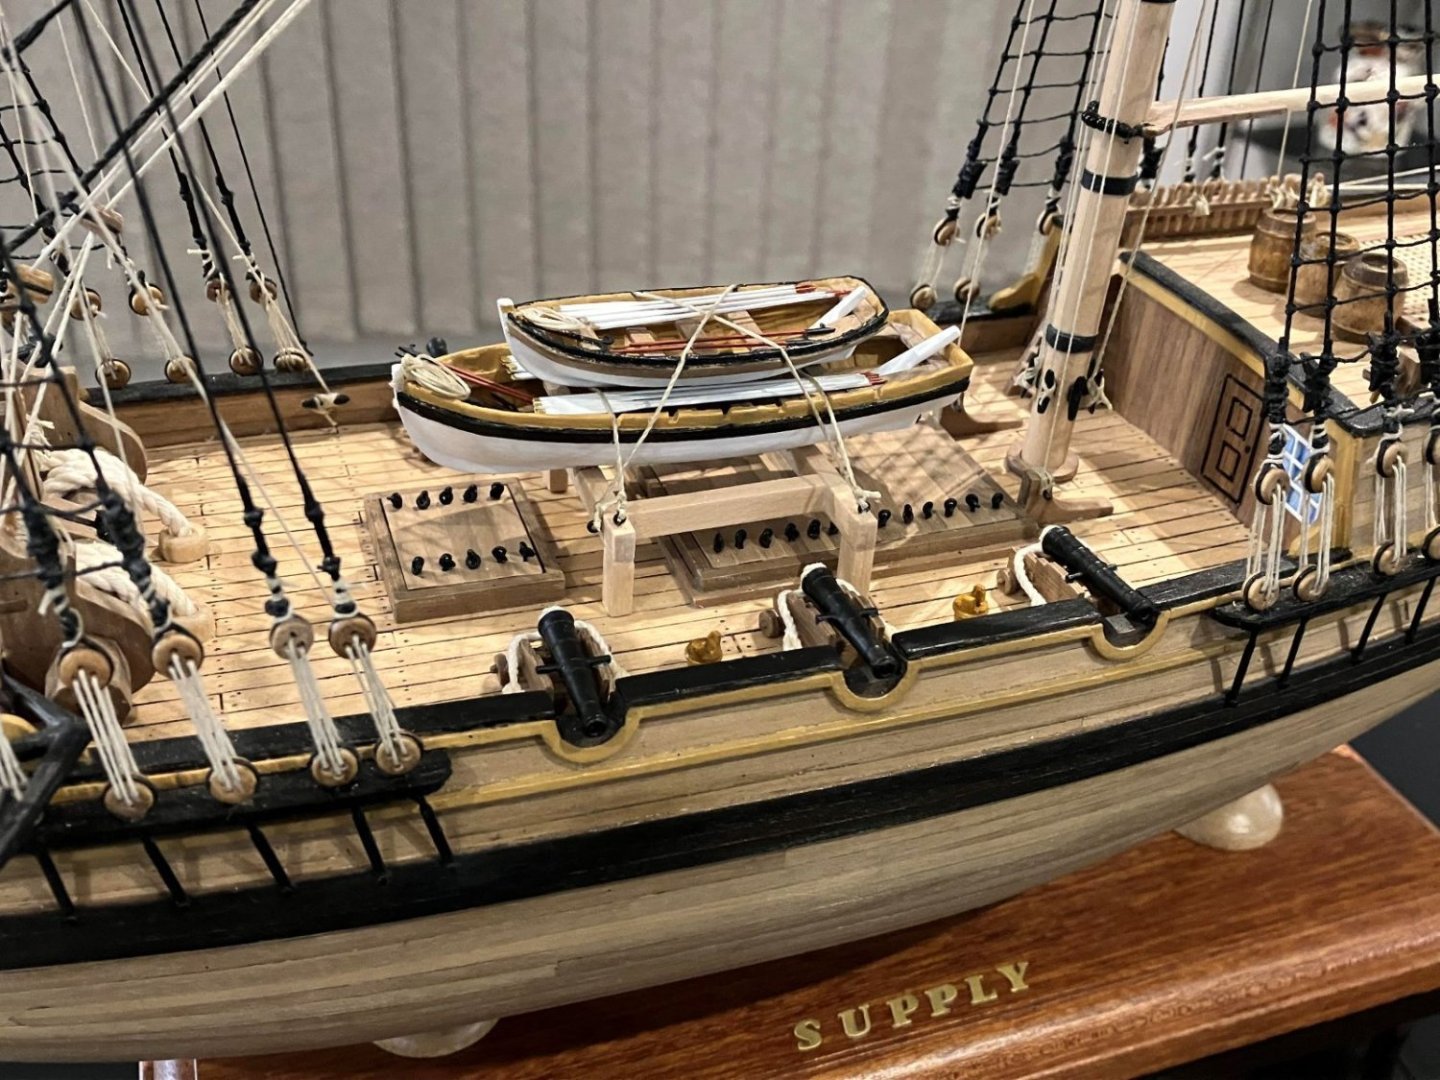
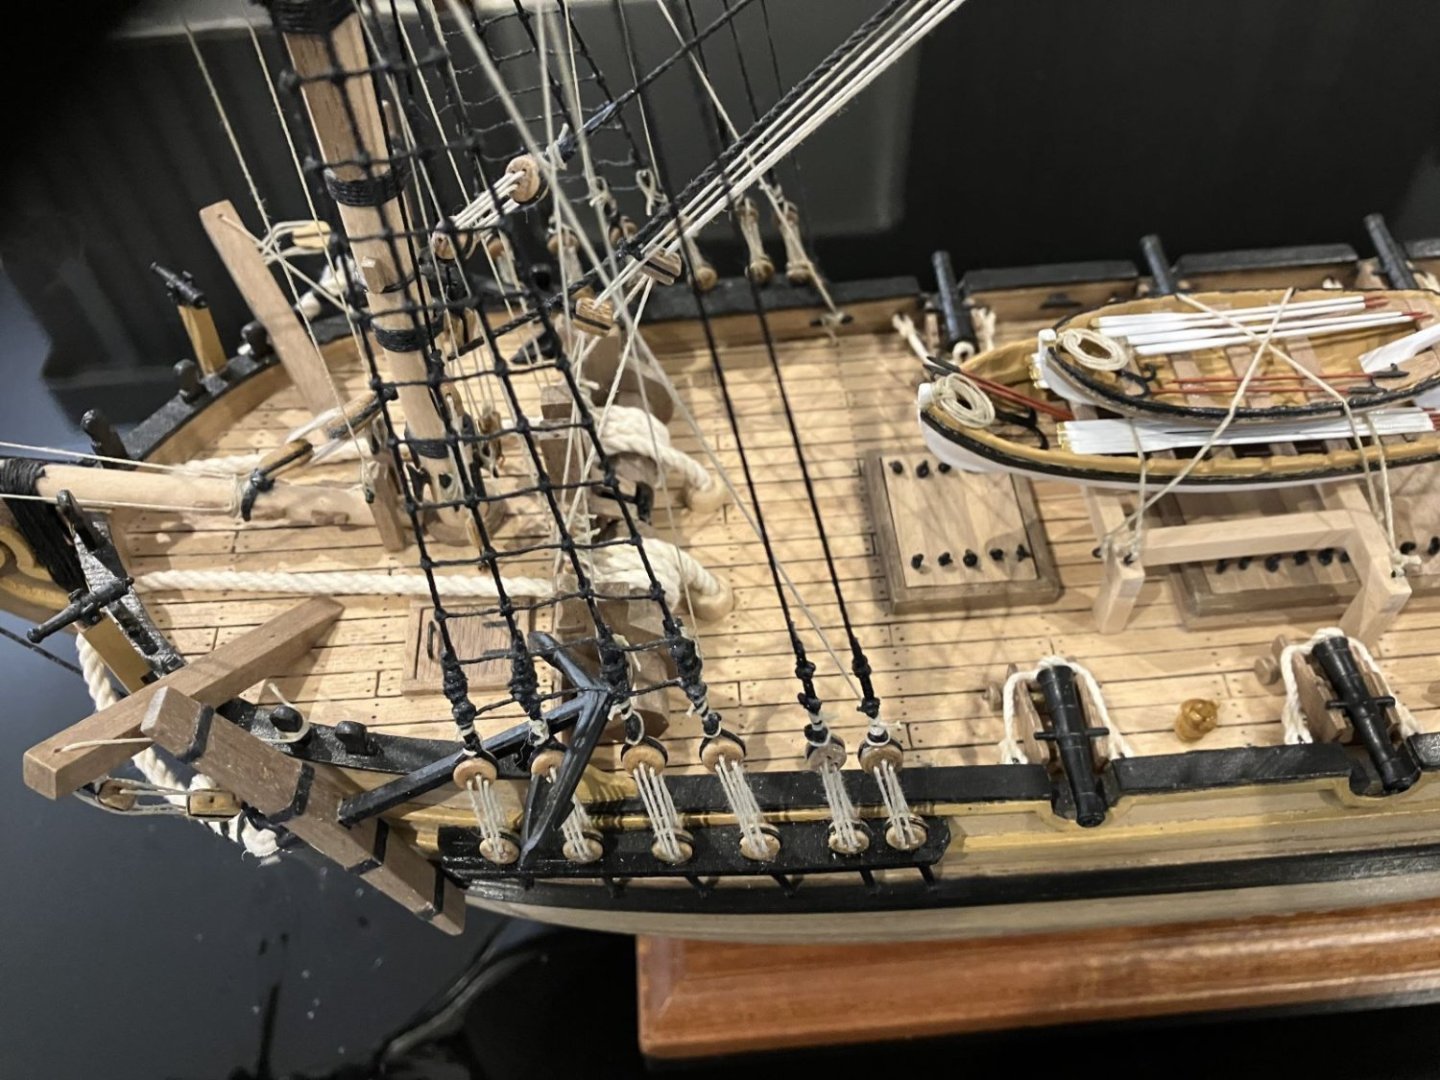
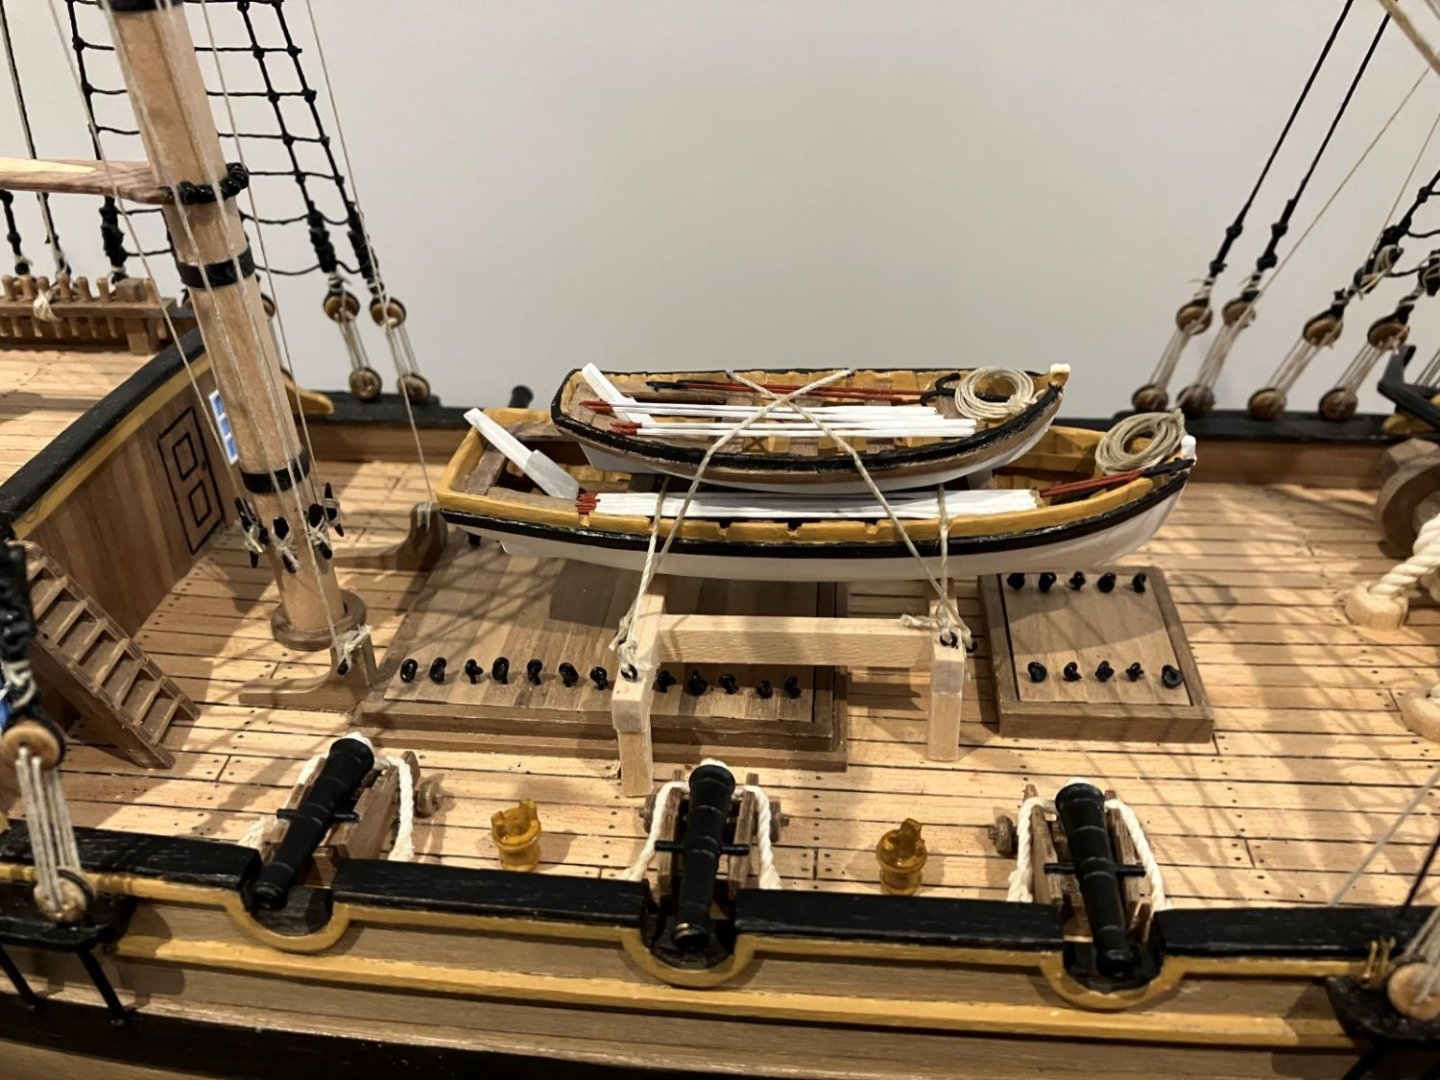
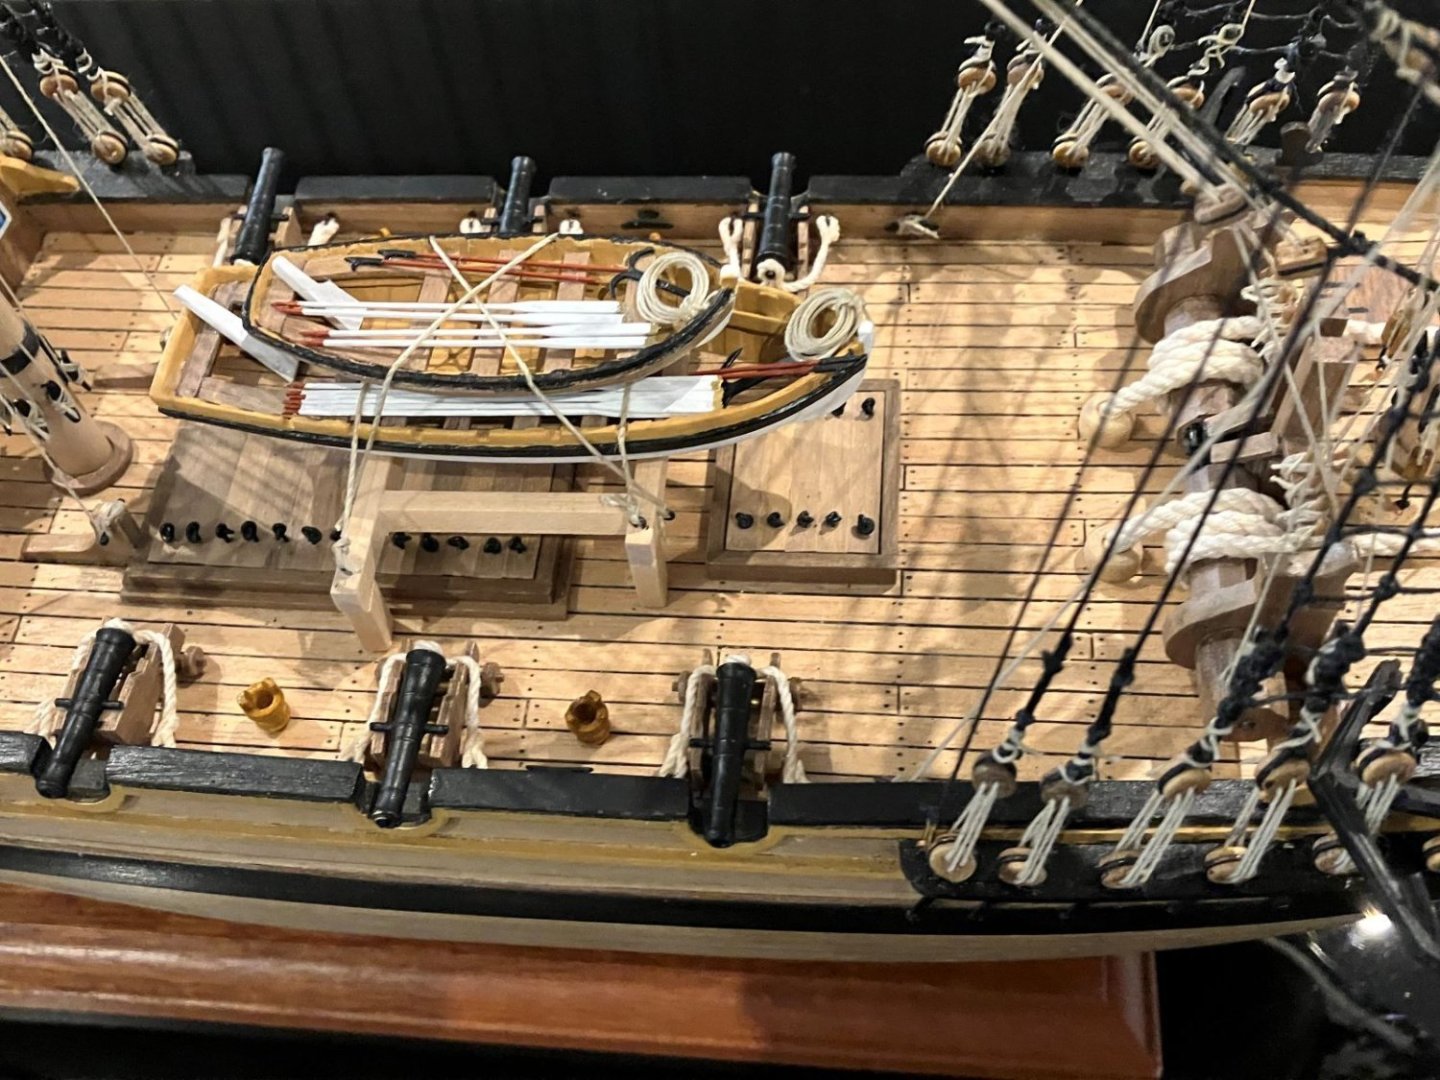
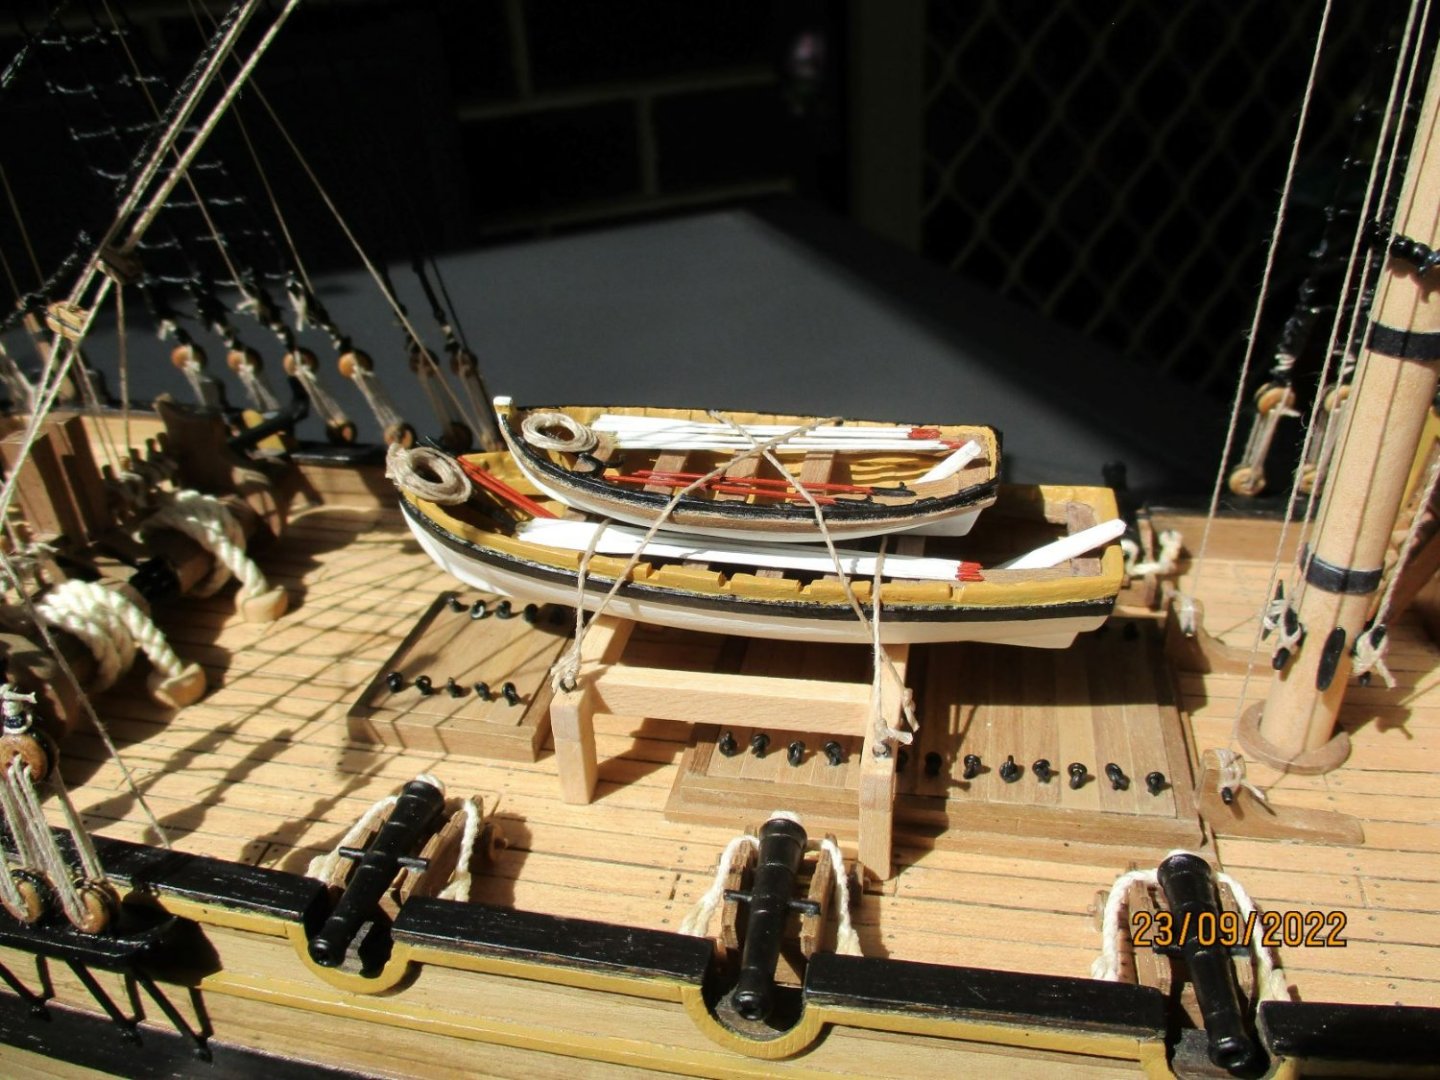
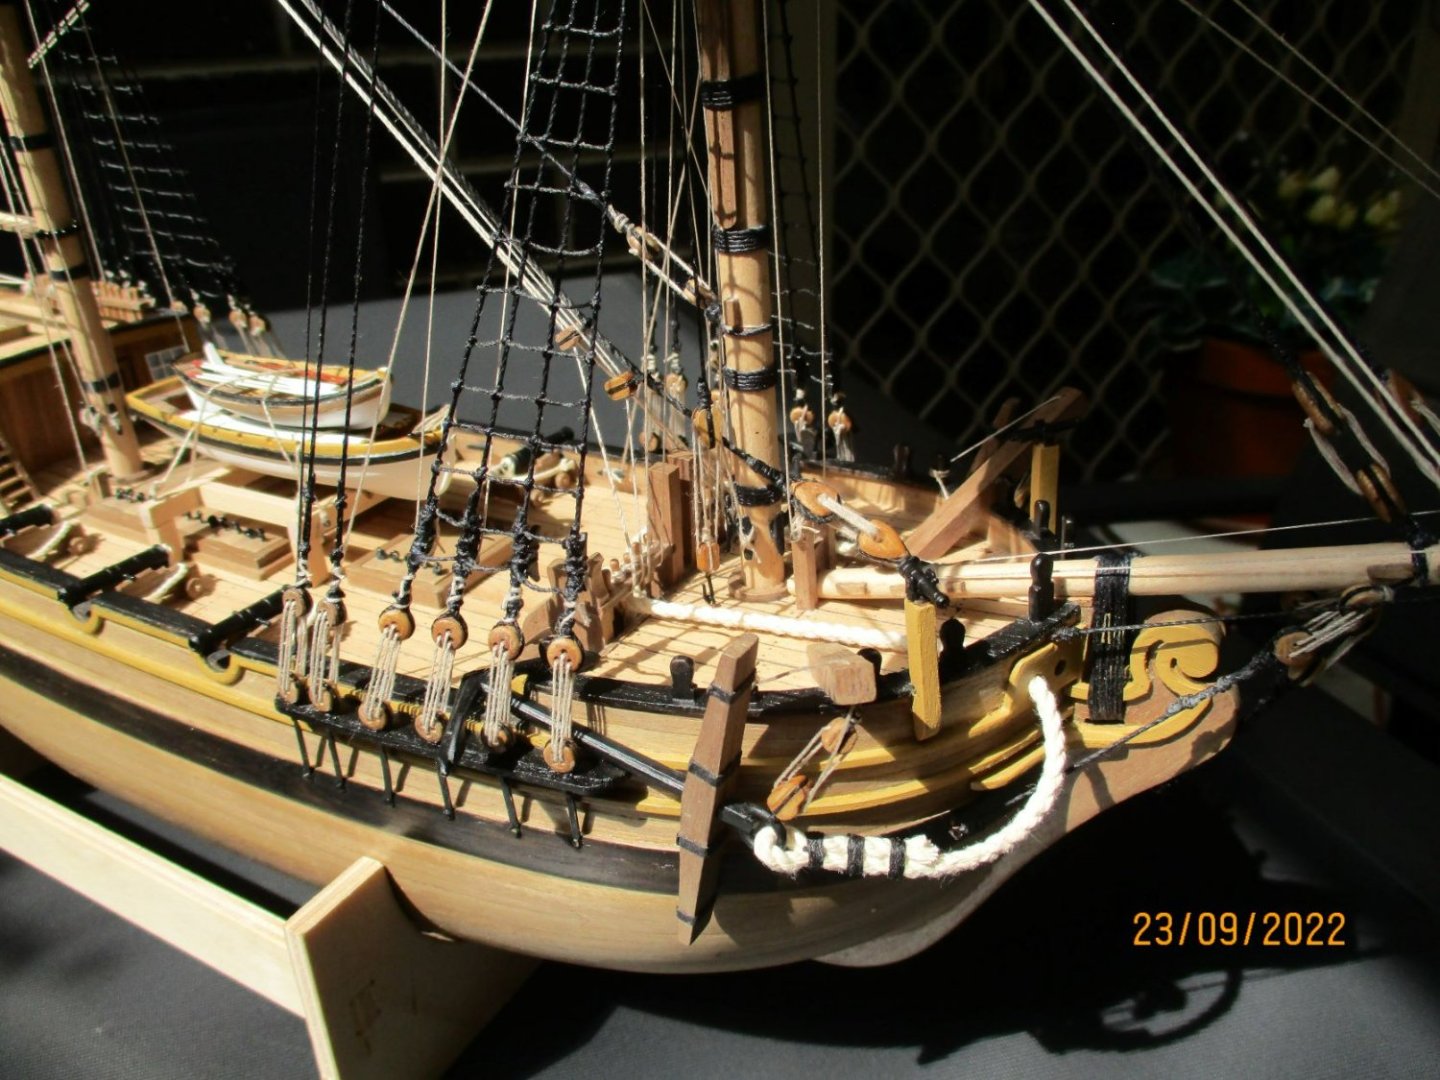
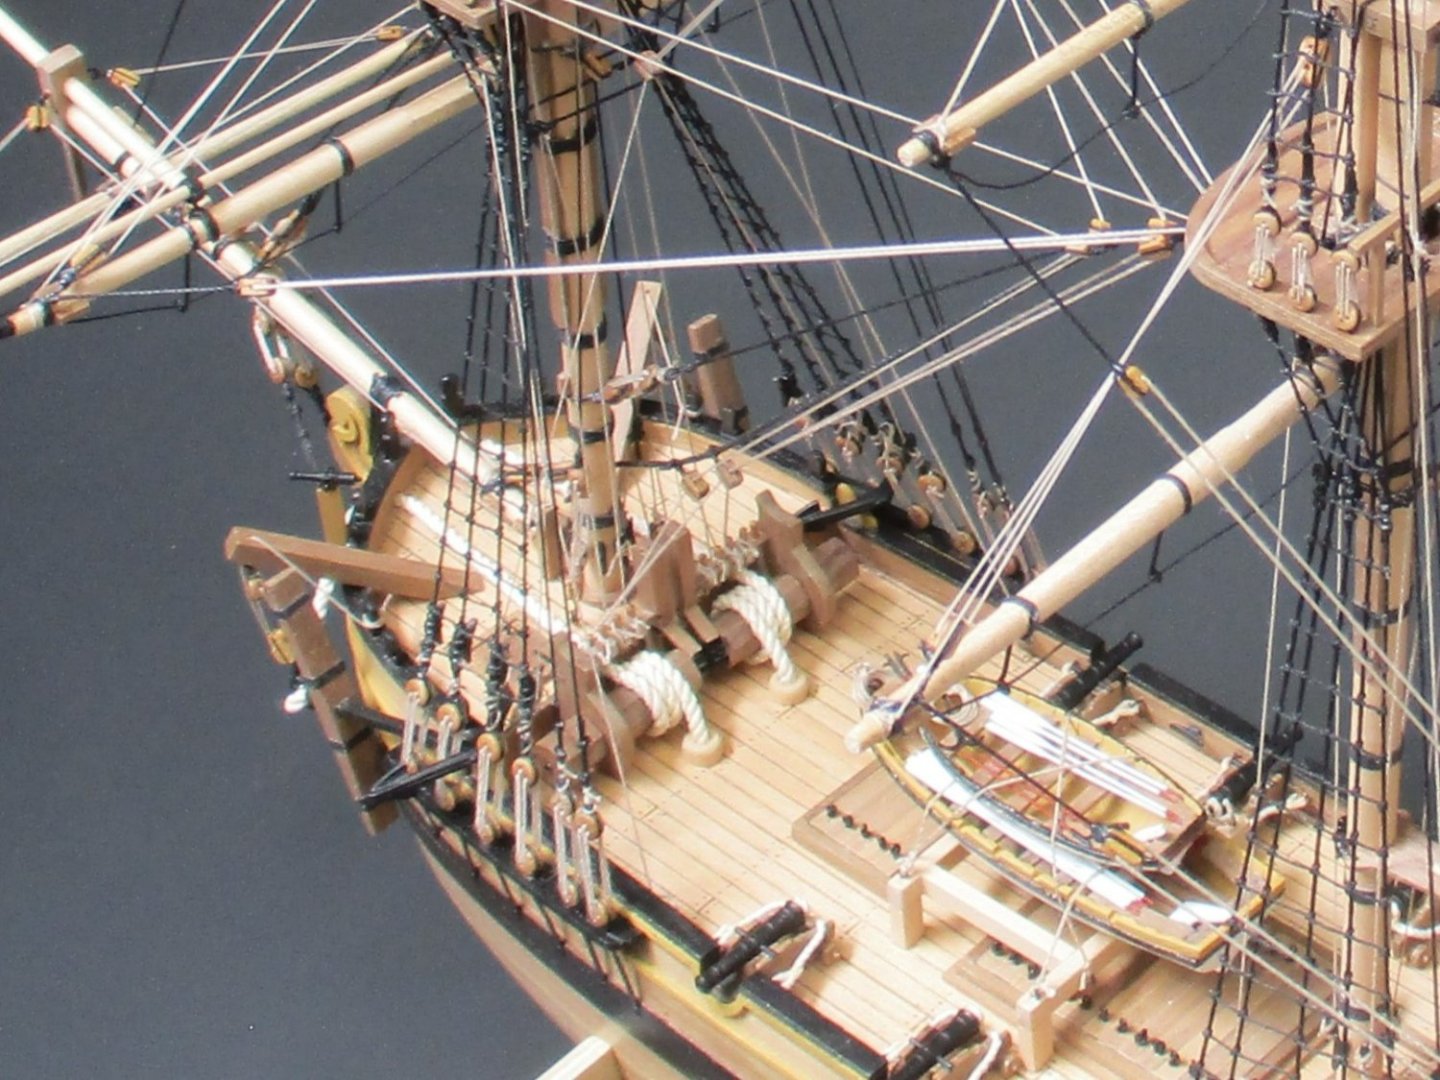
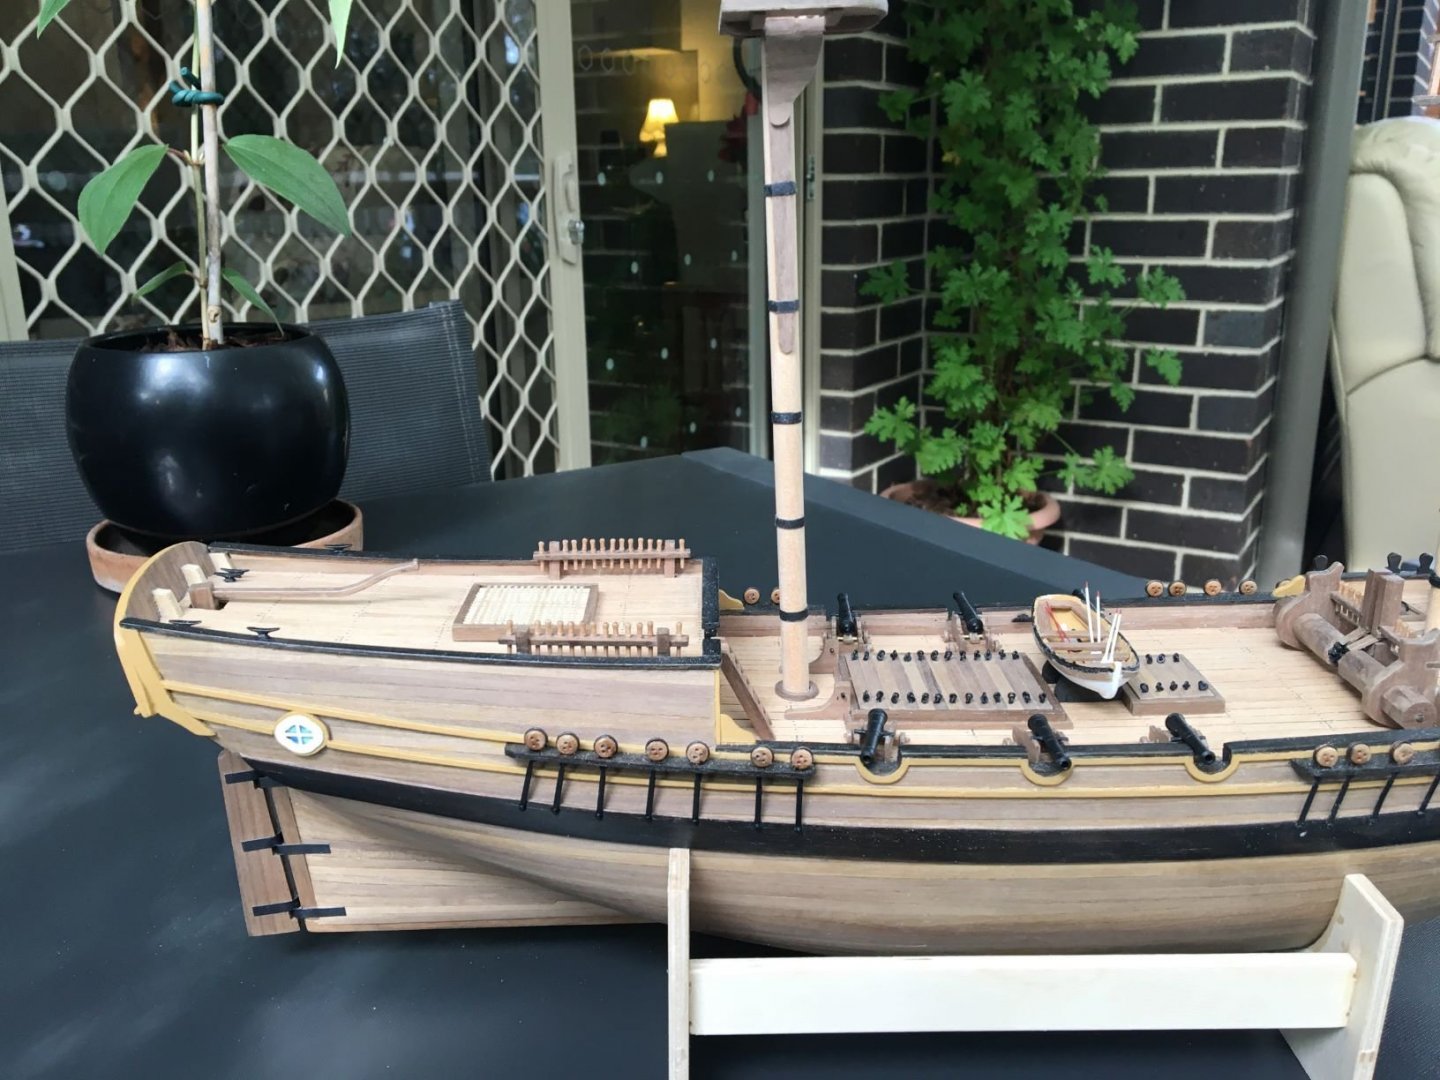
Thanks for your kind words Bigcreekdad, sorry for the slow reply but have been a bit busy of late. Yes its a nice ship and with a great history, not the best instructions from Caldercraft but well worth the effort and I am really pleased with the way it has turned out. I could not make up my mind which ship's boat to add so I ended up getting a jolly boat and a longboat from Caldercraft. I could not find any contemporary illustrations so went with my own interpretation of how I thought two boats would be stowed on a Royal Navy ship of that period. To me the anchors look too big for the ship but that was what was supplied with the kit! Had a look at other builds of the "Supply" to see how they had arranged the anchors (thanks once again Dfell - your build has been a great help for me. I liked the way you turned the rope around the winch and fed it through the deck, hope you don't mind me copying) and then did my own version. This is how they turned out. Nearly finished! Next I need to mount it on a plinth.


- 53 replies
-
- 6
-
-
-
- Supply
- Caldercraft
- (and 1 more)
-
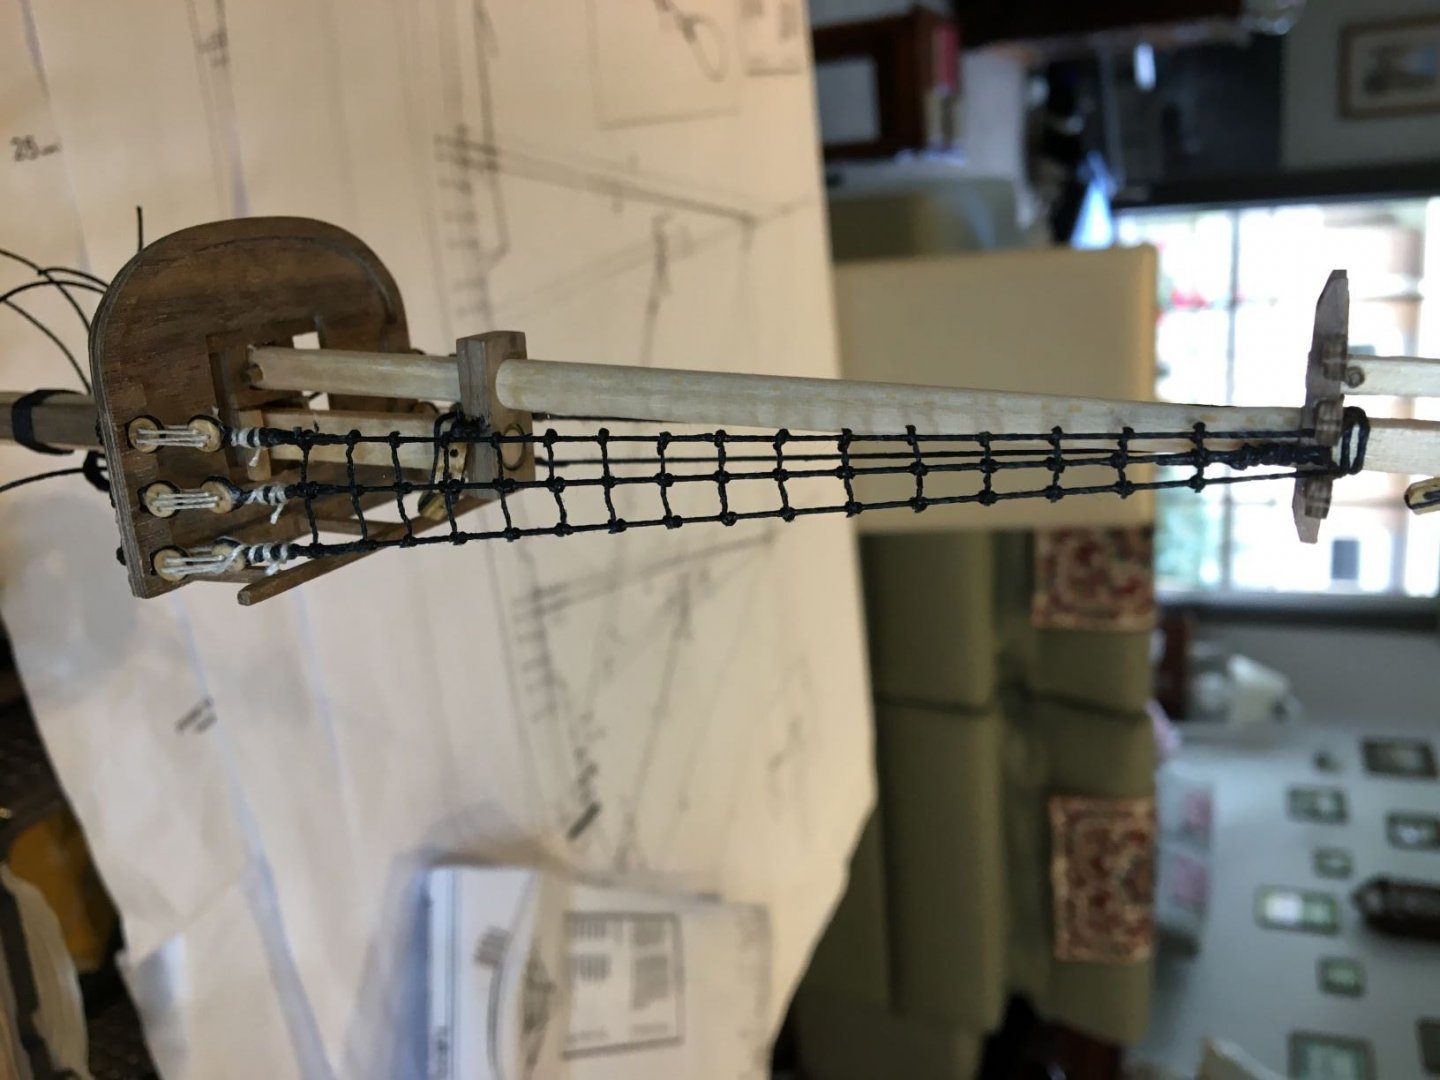
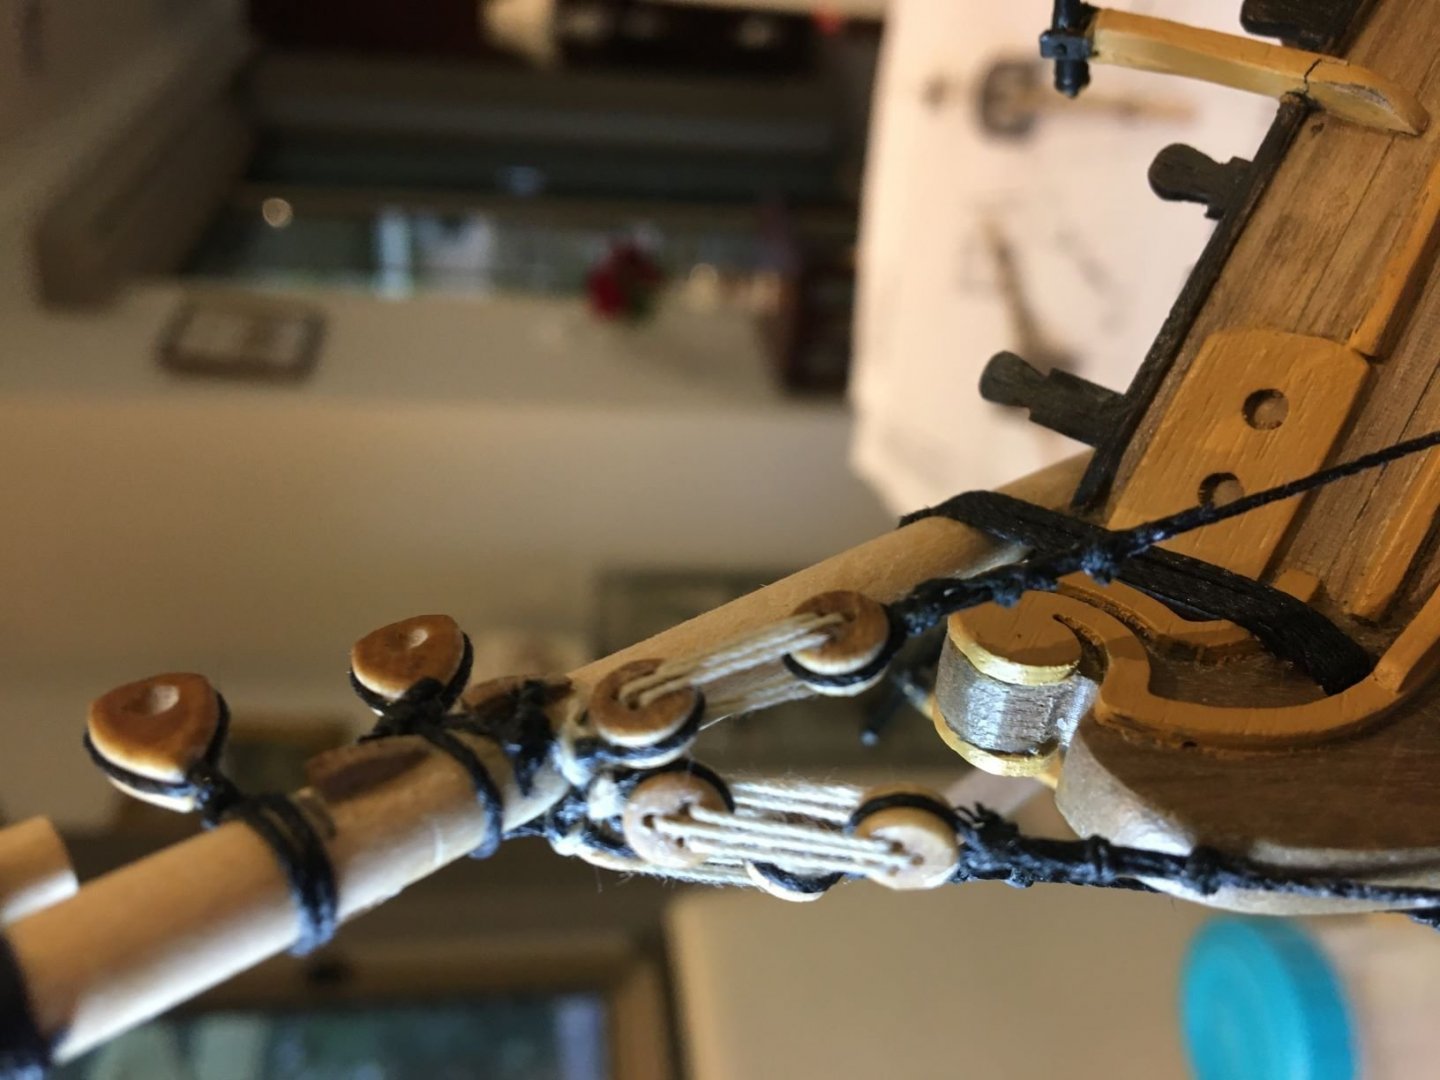
I also found that some of the running rigging crossed or fouled standing rigging in some places, and the lower tops and crosstrees when following the plan. Re-routing the ropes and belaying them to different places was better but there is still a few bits of rigging crossing others and resting on the tops and crosstrees which in real life would not be the case. The running rigging was probably the toughest part of the whole build, not perfect but I did my best. The window gallery still doesn't look right but pulling it off and remaking it would probably do irreparable damage. Will try painting the inner frames white to see if it helps. Now for adding the anchors and boats. I have made up a frame for the boats similar to another build (thanks again Dfell). Really looking forward to this part after all the rigging.
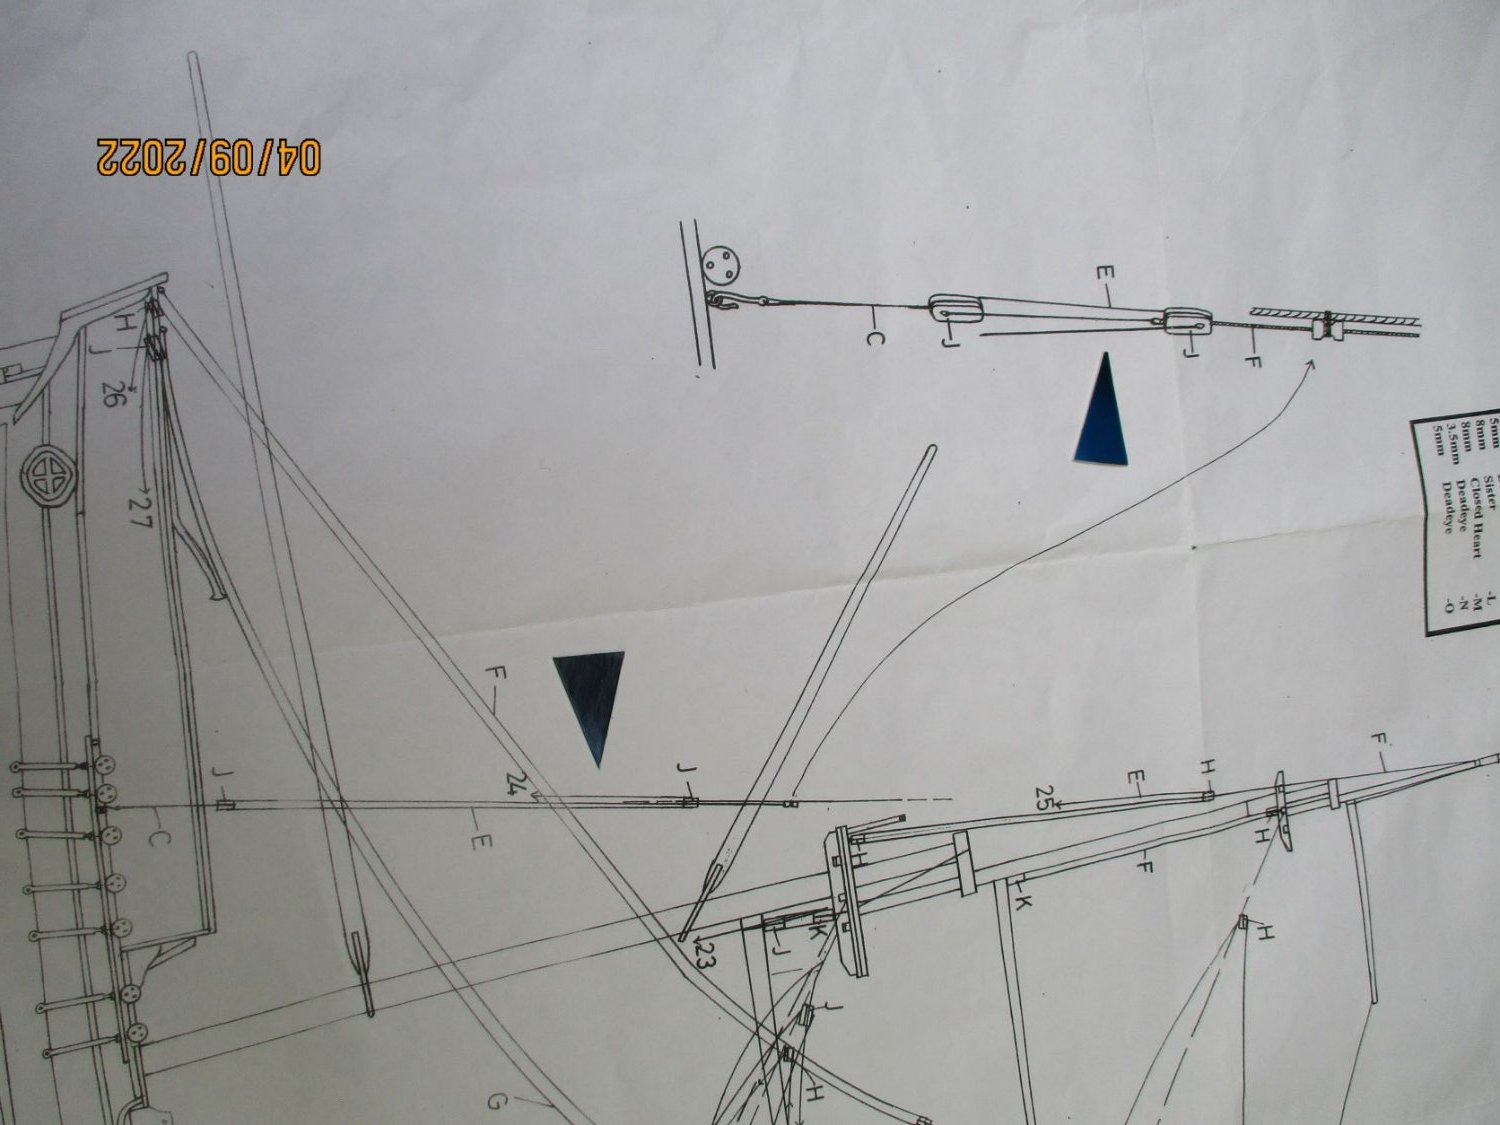
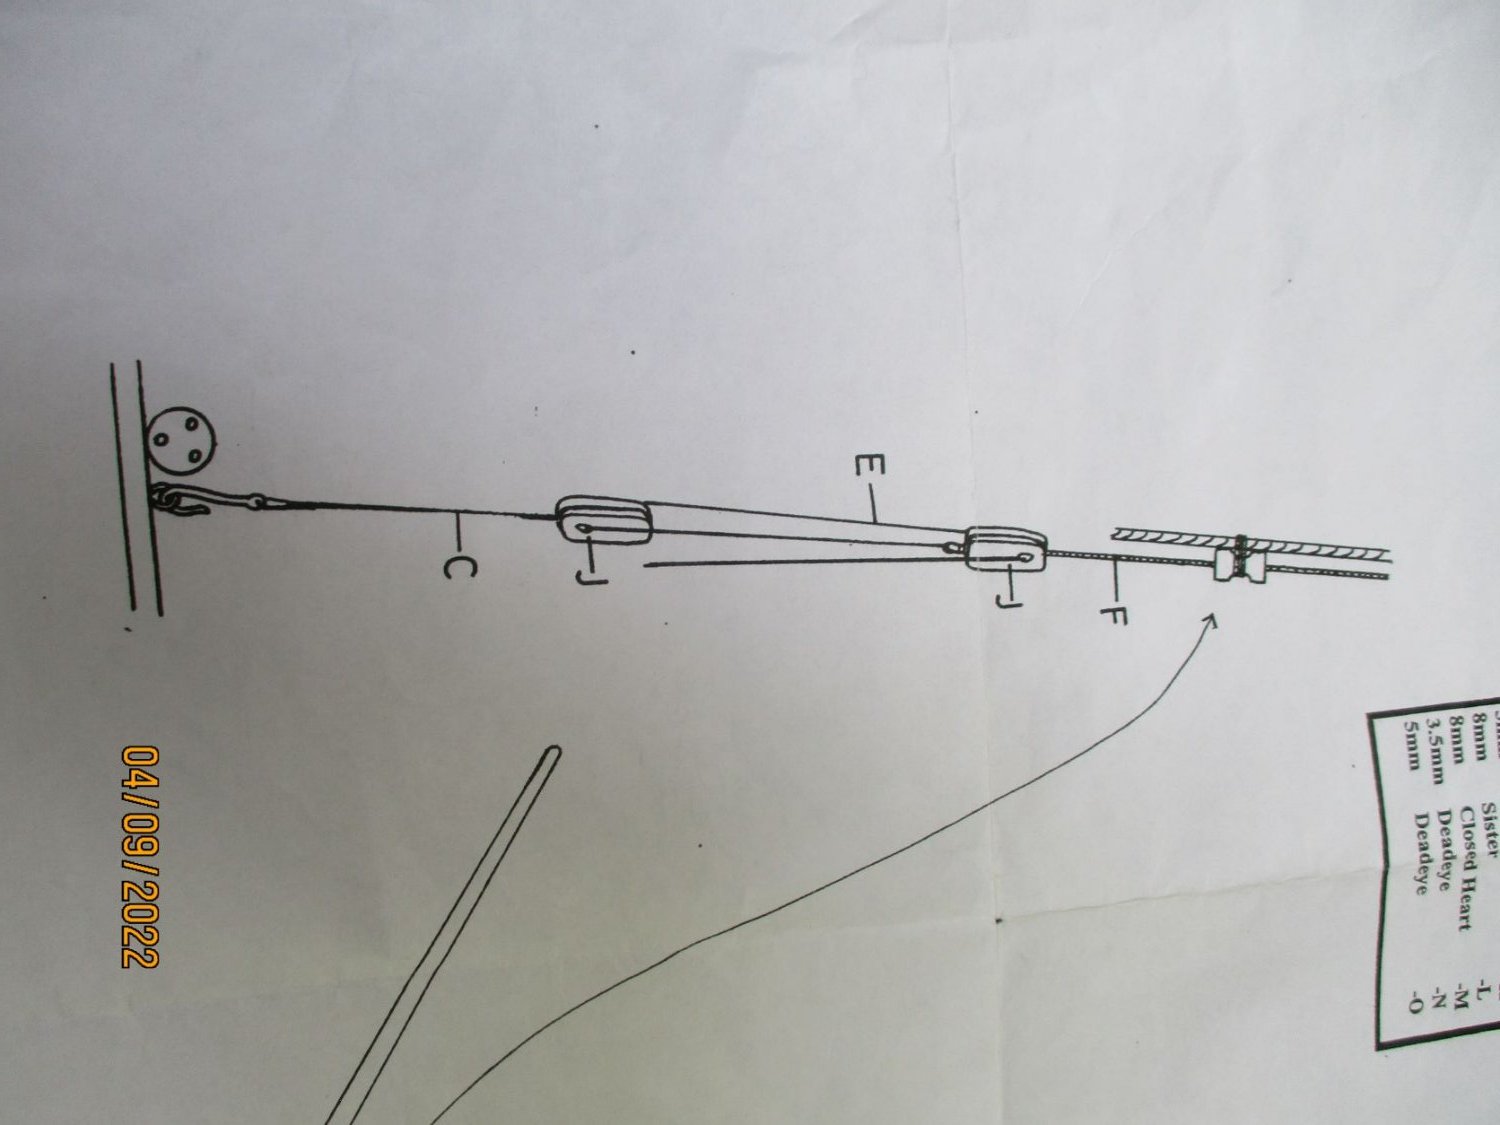
-
I just could not work out where to connect the top of the rope and the purpose of the "trolley" block at the top. I had now run out of 3mm and 5mm blocks anyway (having spent hours making four 5mm double blocks I didn't relish making any more) and couldn't see the purpose of this part of the rigging so I didn't bother with it. Hope this doesn't upset any of the purists out there!


- 53 replies
-
- 2
-
-
- Supply
- Caldercraft
- (and 1 more)
-
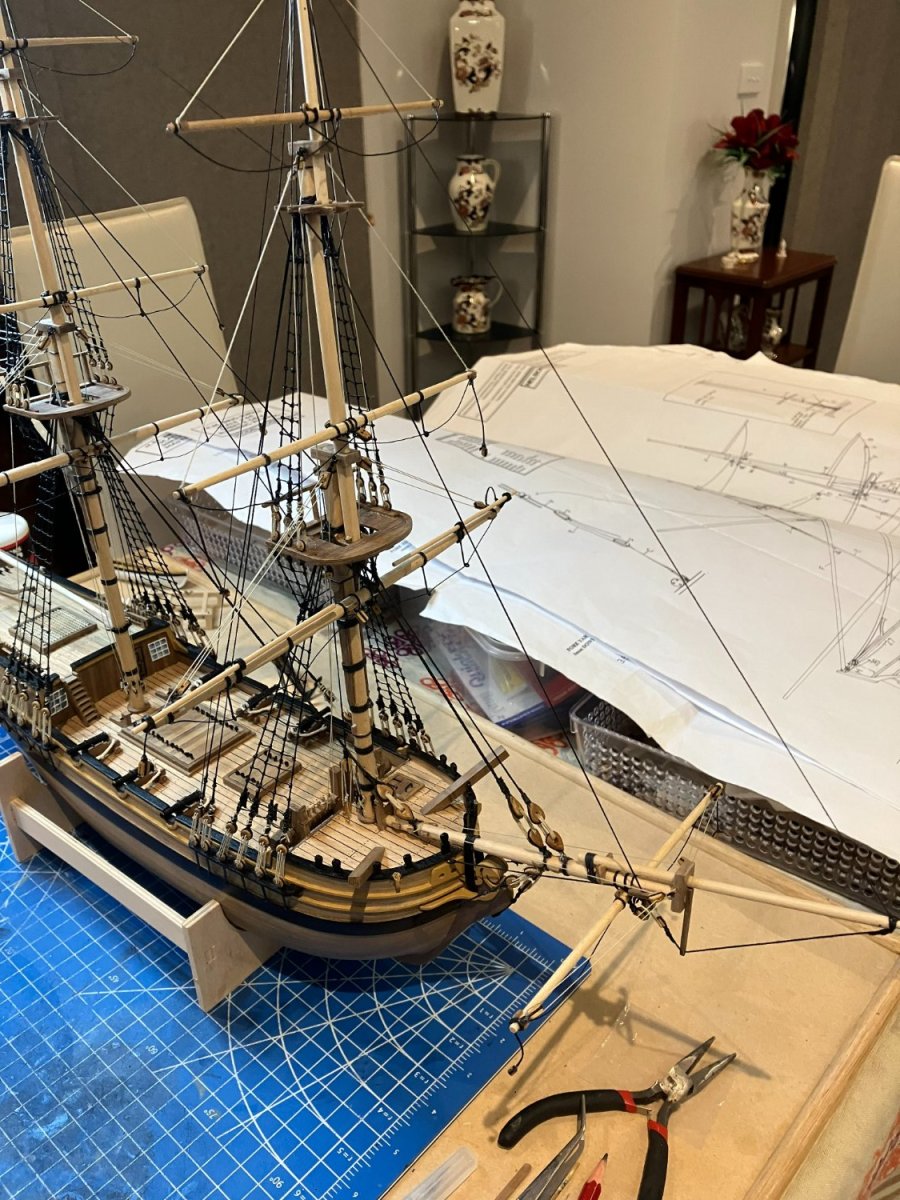
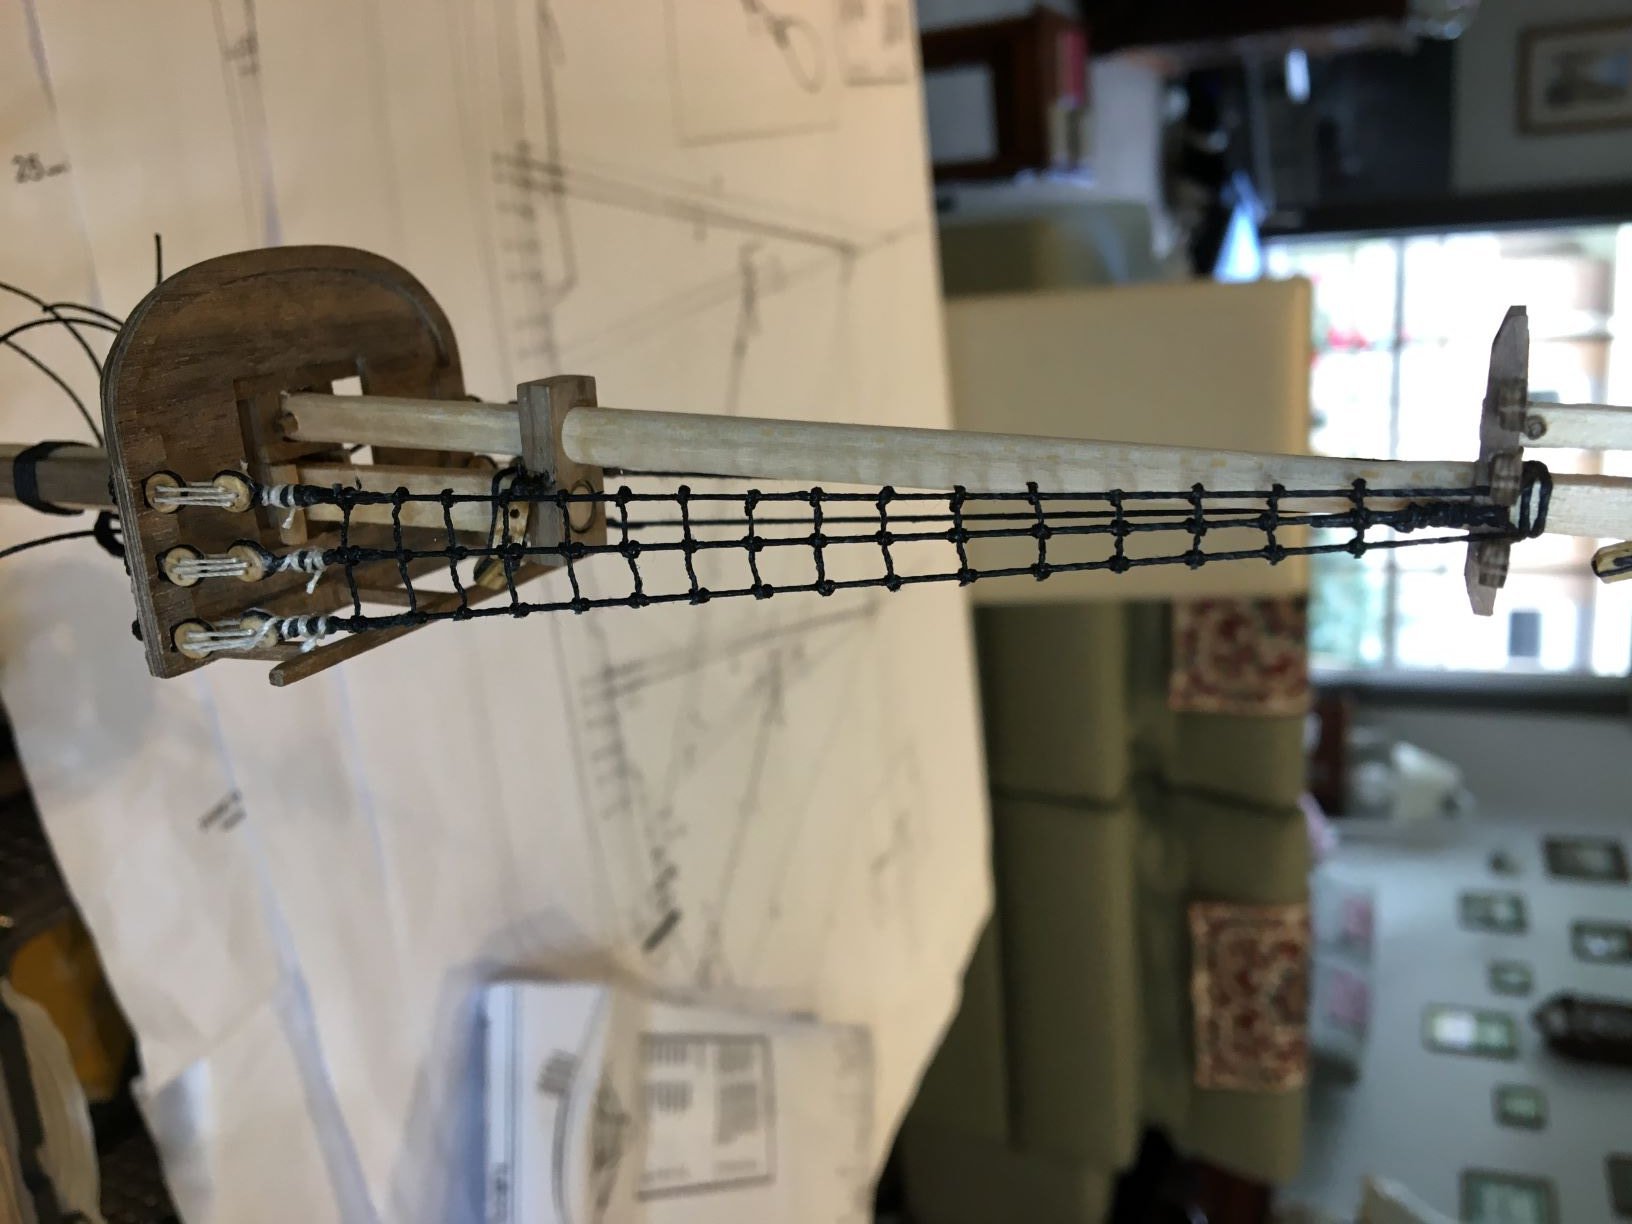
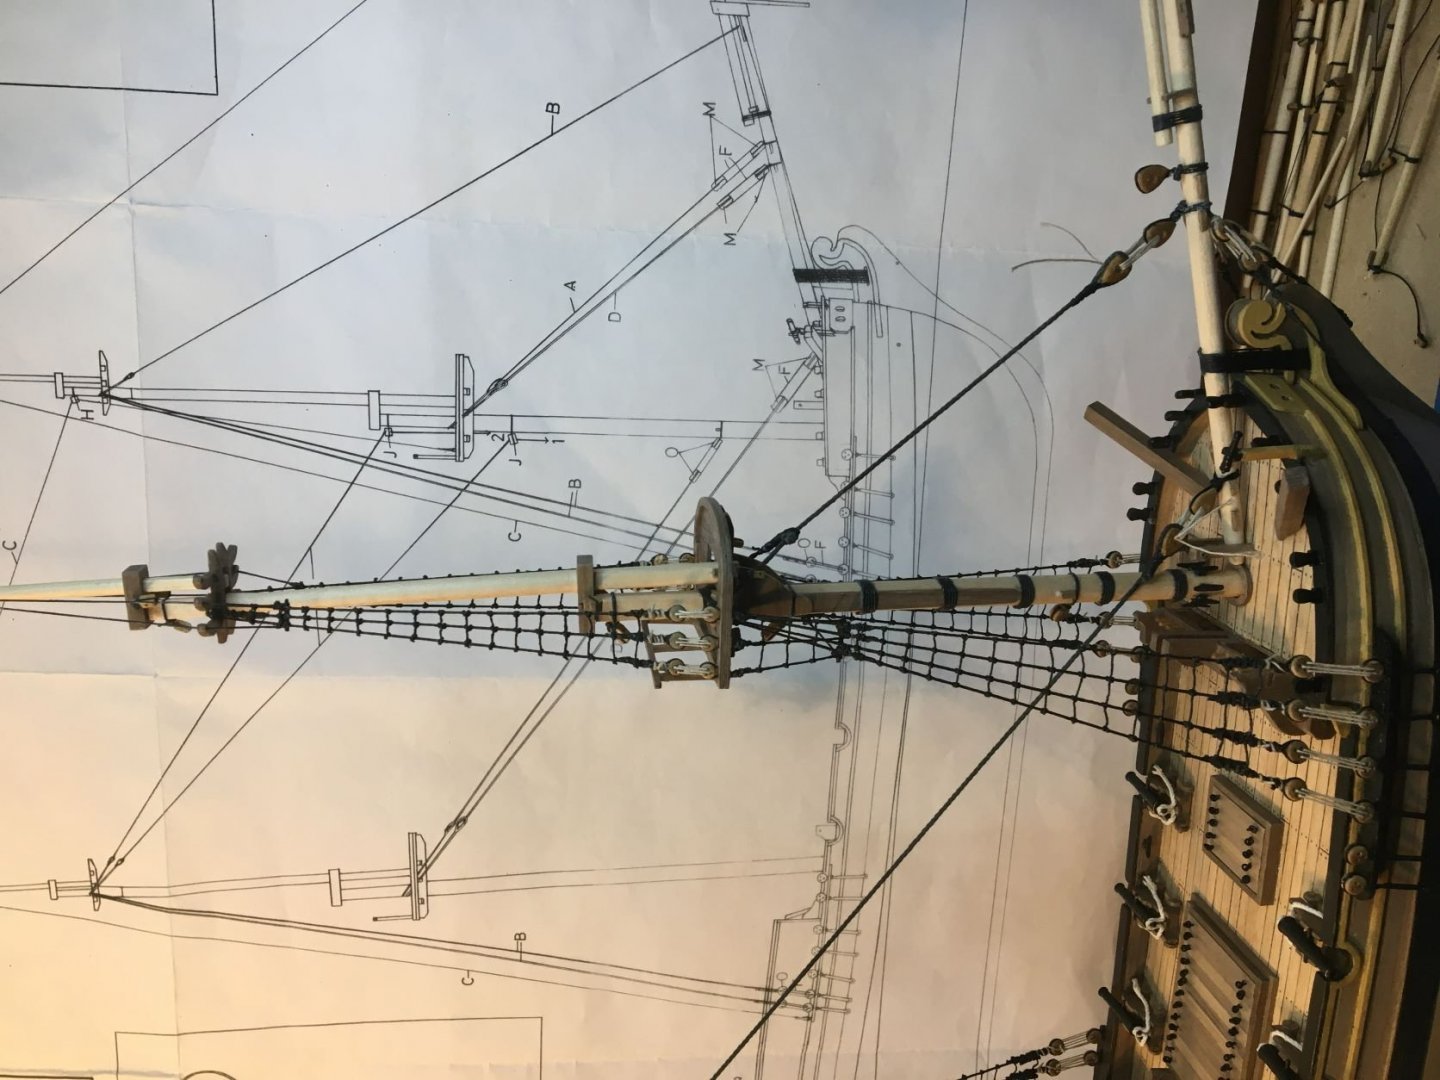
Not sure but I think I may have uploaded the last set of photographs without reducing them to the regulation size (1600 x 1200) - if that is so then my apologies to the moderators. I found sheet 6 (running rigging) difficult to understand and even after checking out other Supply builds (thanks Dfell and Kiwiron) I still found myself making my own interpretations of some of the rigging. I hope I have not strayed too far from what would be found on a real ship of the period. Part of the sheet 6 was completely incomprehensible to me - see photos below...
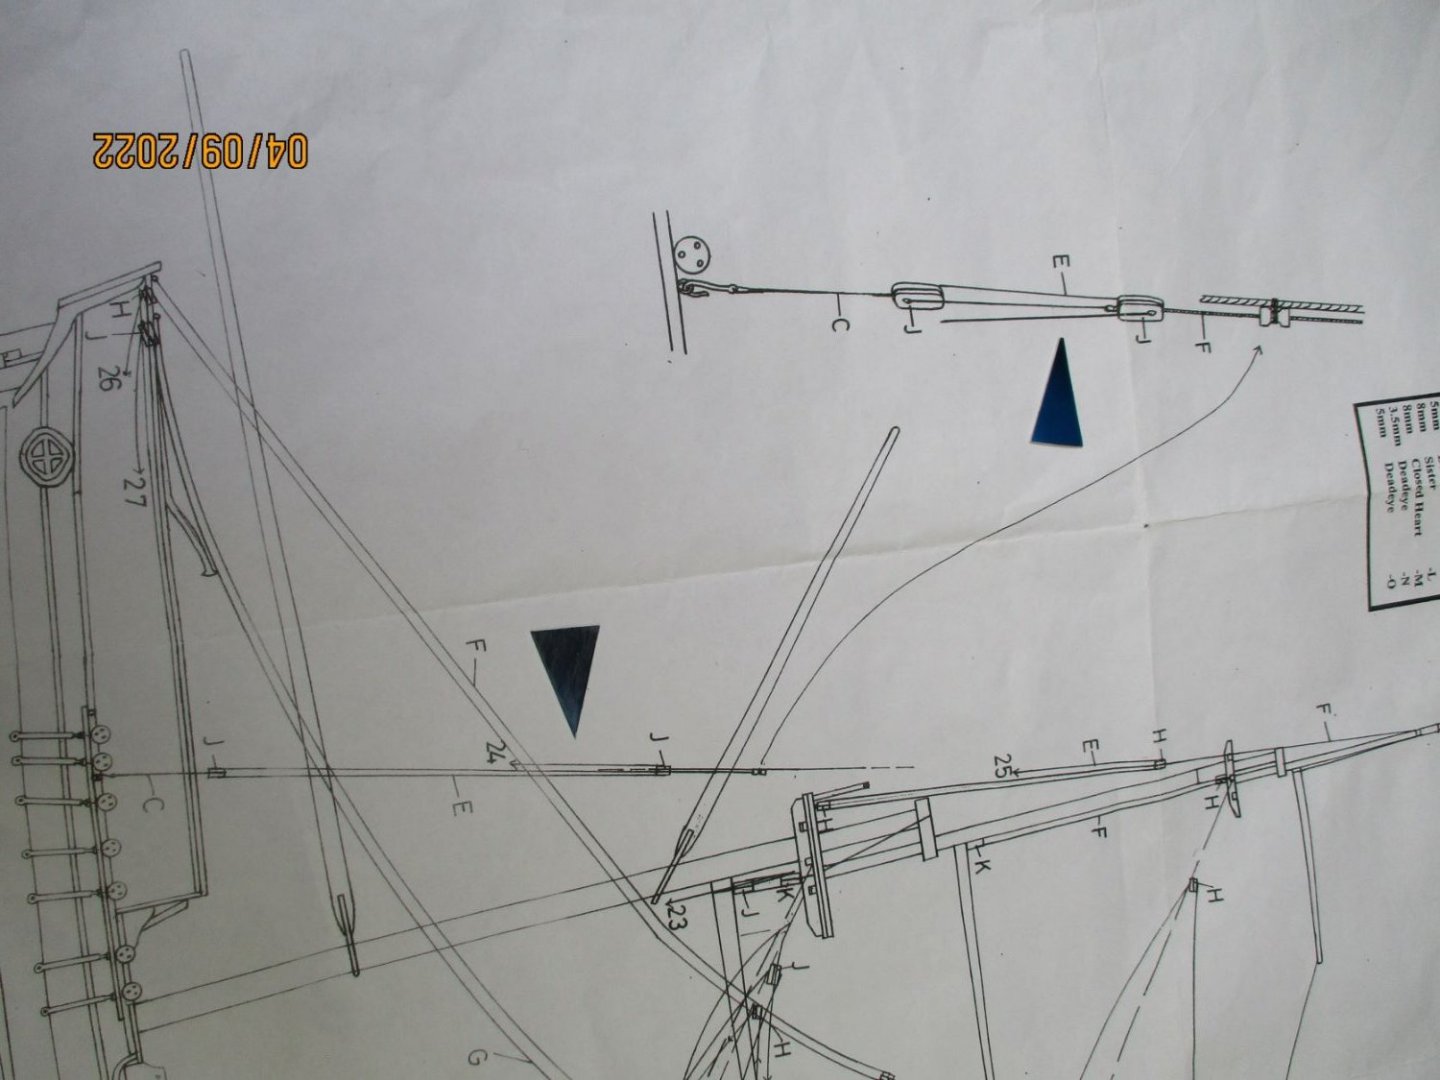


-
Now for further fun and games with plan sheet 6!
-
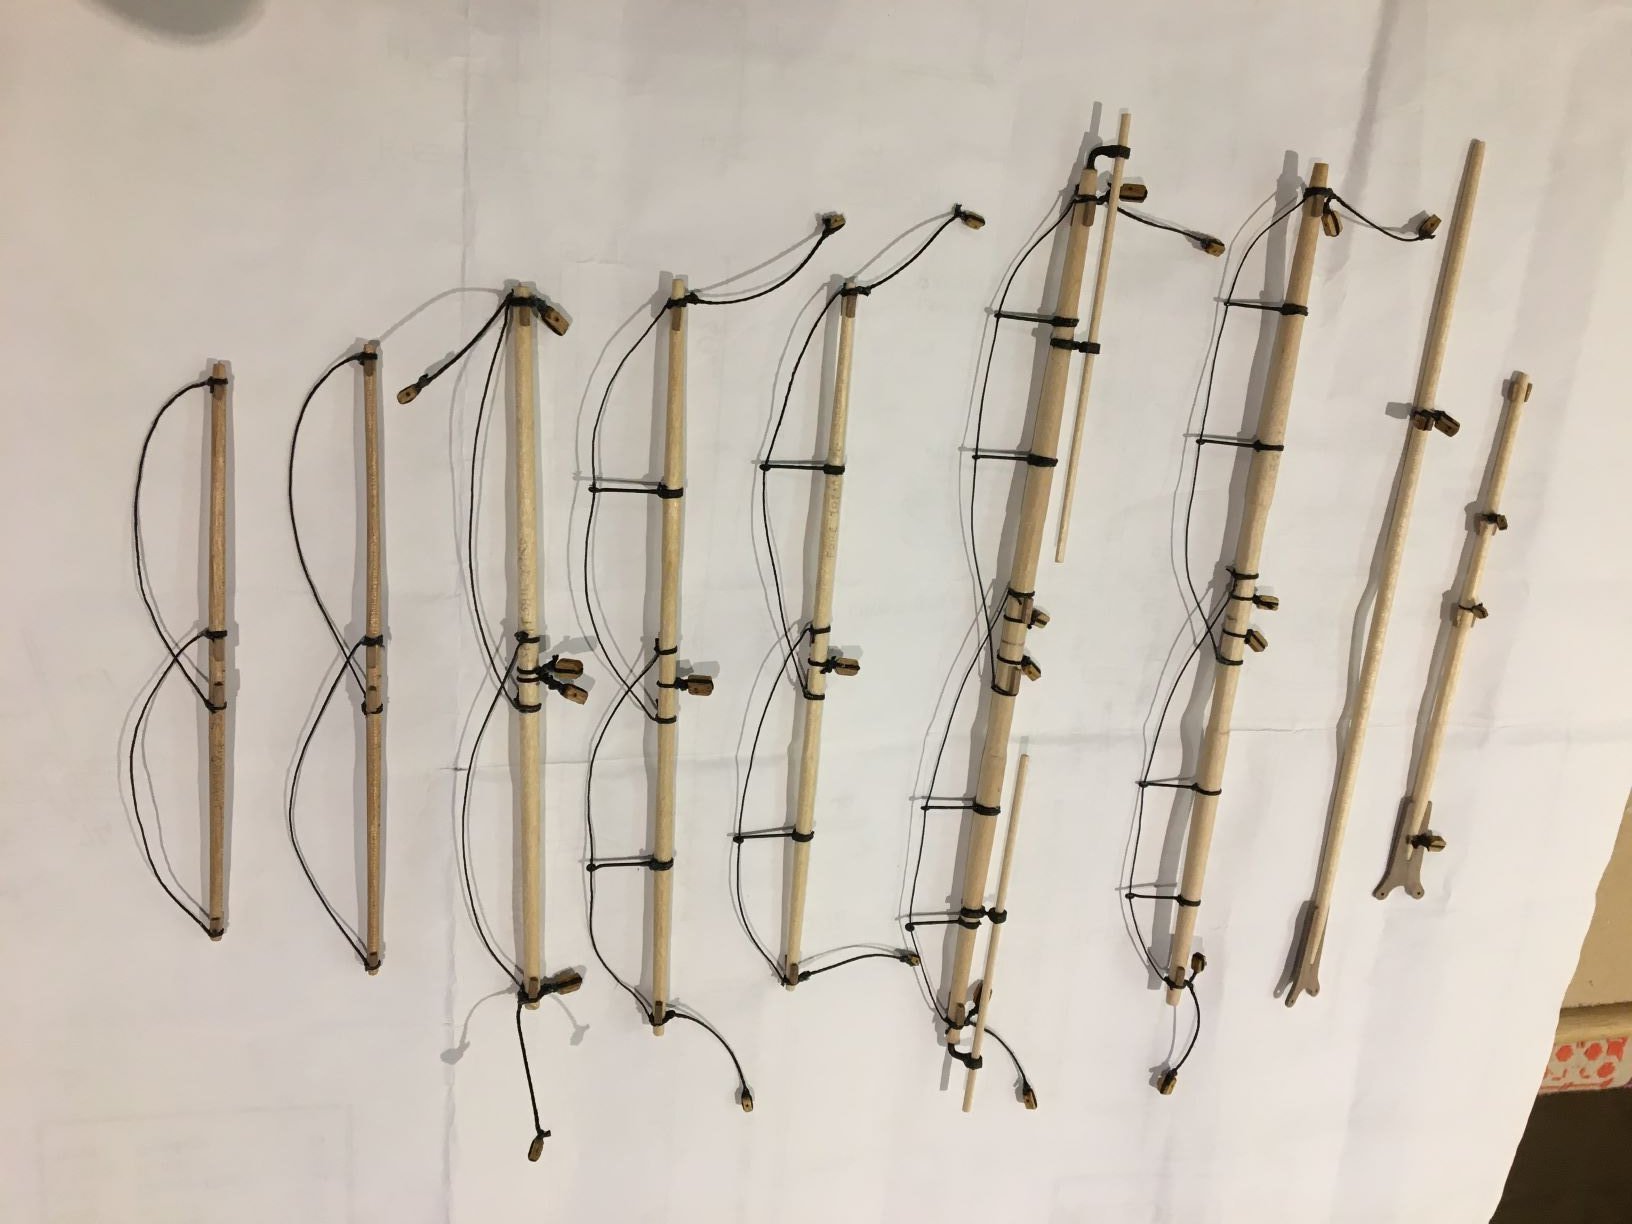
Can't believe that my last post was in October 2021! Reason for this is the lawnbowls season started and other interests left no time for ship modelling. Two bouts of covid, one following the other, nearly killed me but even worse it prevented me from playing in the bowls finals and that was really annoying! Recovery took a while but I finally got over the dissapointment of not being able to play in the finals and recently started back on the build. Plan sheet 5 was very confusing. By looking back on the earlier plan sheets and also checking with sheet 6 and referring to other Supply builds (thanks Dfell, Kiwiron, Riverboat and others) was able to work out what I thought was supposed to happen, but it was far from easy. Anyhow the yards and fixed rigging now completed. now completed.

- 53 replies
-
- 4
-
-
- Supply
- Caldercraft
- (and 1 more)
-
Thanks GrandpaPhil, the likes are much appreciated and encouraging. Enjoying fitting the standing rigging but kept busting the swivel guns off the bow. Note to anyone building the Supply - never mind what the instructions say, don't fix the swivel guns until right at the end! I will have to make new fixings and put them back on later. Also managed to break the very top of the mainmast above the topgallant, have glued it back on but it is now a bit crooked and I might have to remake and fit a new topgallant mast [strong swear word deleted]. Plan sheet number 4 - standing rigging completed, photos following. Now for fitting the yards - plan sheet 5.


- 53 replies
-
- 4
-
-
- Supply
- Caldercraft
- (and 1 more)
-
Shrouds and ratlines finished at last. Found the shrouds to be the most difficult process so far on this build, getting the correct tension and getting the deadeyes level was very difficult, but liked doing the ratlines. Attaching the shroud cleats was also tricky at first but got easier after the first couple. Started on plan sheet number 4, hooray. Forestay and mainstay fitted. Still in lockdown and new covid cases in Victoria rising exponentially.


- 53 replies
-
- 3
-
-
- Supply
- Caldercraft
- (and 1 more)
-
Thanks Jobbie, it has taken me just over a year so far but I didn't start my build log until the end of June so it only looks like rapid progress. Your "Supply" was one of the build logs that inspired and motivated me in the earlier stages so I can blame you for getting me into this malarkey! Thanks for that.☺️ I am rigging the lower shrouds at the moment and getting the deadeyes roughly level and the tension right is proving tricky but I am nearly there, then on to the ratlines which I enjoy. Thanks also to Landlubber Mike and Fernando E for your likes, and Dfell - who was also partly responsible for helping get me into this modelling madness!👍
- 53 replies
-
- 1
-
-
- Supply
- Caldercraft
- (and 1 more)
-
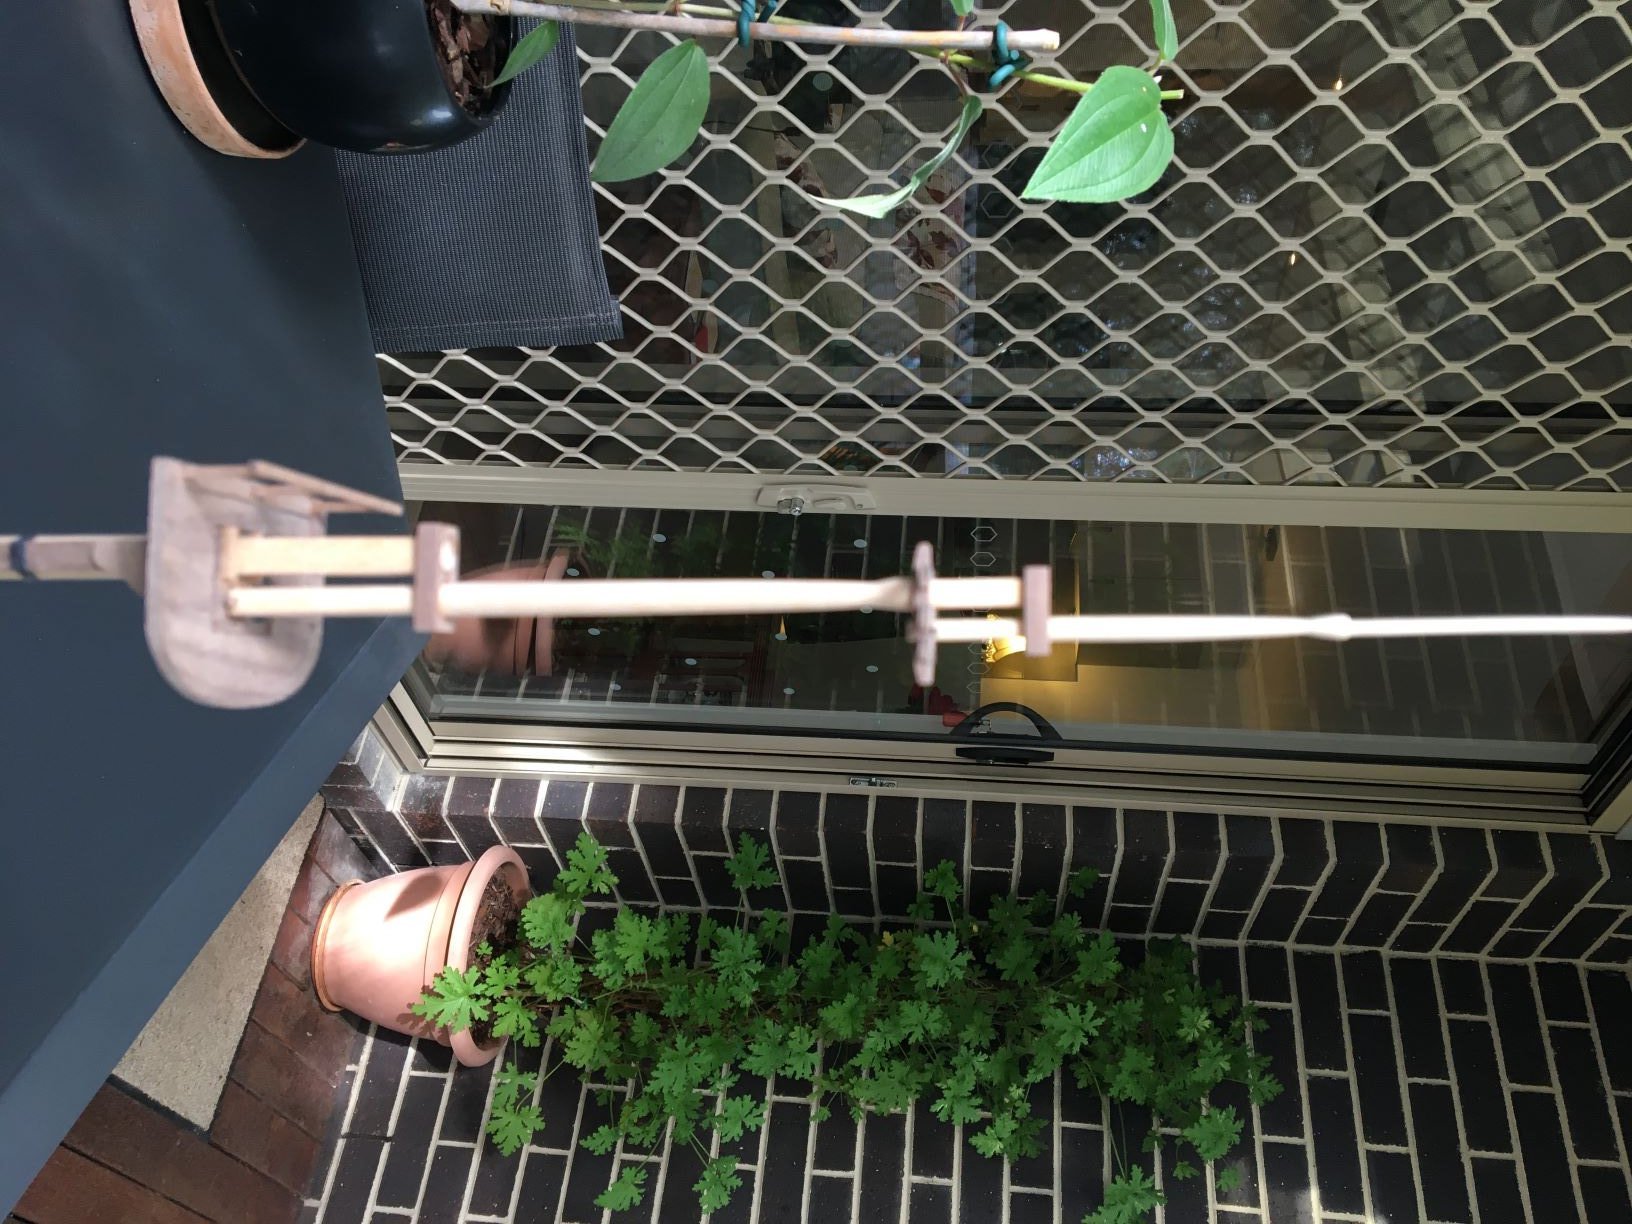
Is there anyway to get photographs in portrait orientation to stay in portrait when they upload to the build log? Covid lockdown number 5 ended two weeks ago. Lockdown number 6 just started, what a shambles but I guess it may save help some lives. My first attempt at shrouds on the topmast. Reminds me of my old school reports - "could do better"....
- 53 replies
-
- 7
-
-
- Supply
- Caldercraft
- (and 1 more)
-
Rigging !!! 3mm deadeyes !!!, shrouds !!!, ratlines !!! Covid lockdown number 5 !!! If I wasn't so bloody stubborn I would have given up. Well I read up as much as I could and battled on. My first experience with deadeyes on the bowsprit....
- 53 replies
-
- 5
-
-
- Supply
- Caldercraft
- (and 1 more)
-
Thanks Mike your comments are much appreciated. All the best with your Lady Nelson - looks like you're getting some good advice and it's coming along nicely. Thanks also to Chris Watton, nzreg, Rockin Budgie, CiscoH, BenD and Dfell for the "likes" - it's great to receive the encouragement. Richard
- 53 replies
-
- 2
-
-
- Supply
- Caldercraft
- (and 1 more)
-
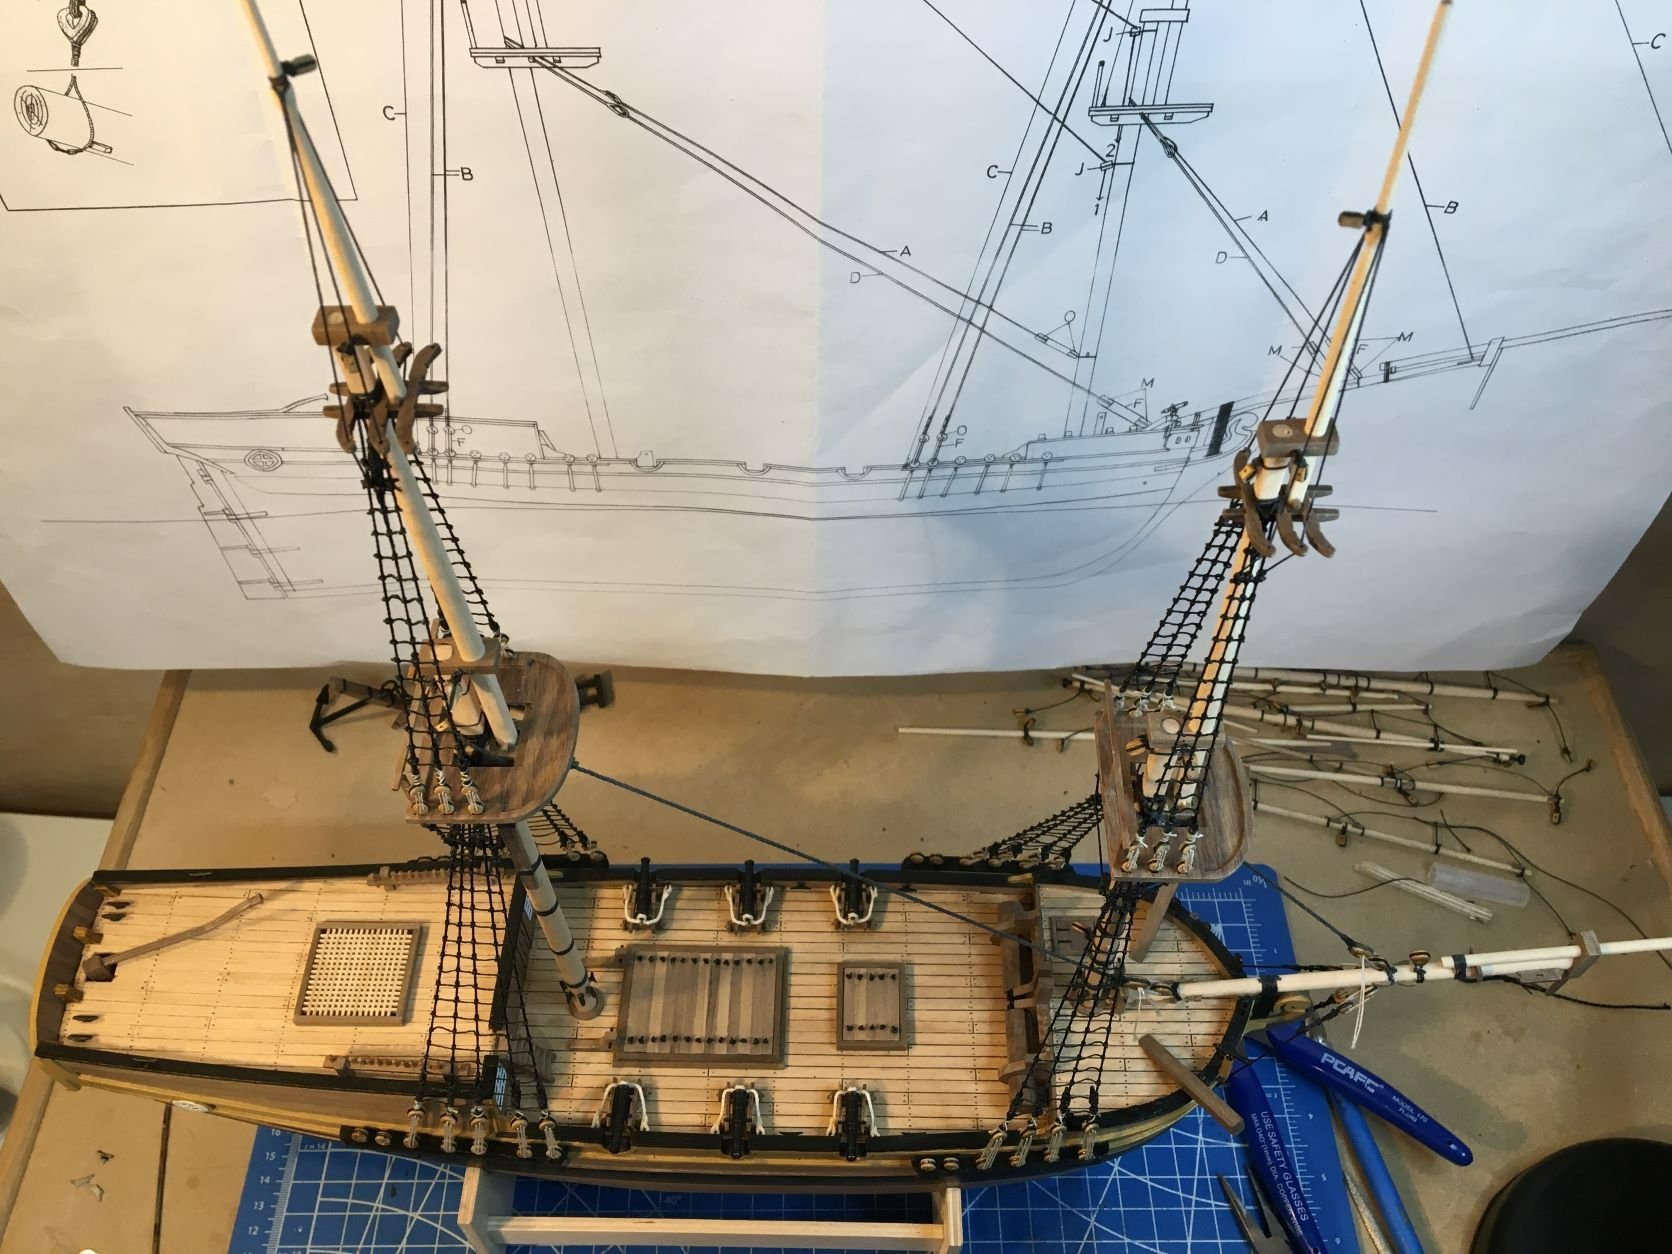
Now to try and find out where all the remaining deadeyes need to be located before attempting the shrouds. The drawings are not much help!
-
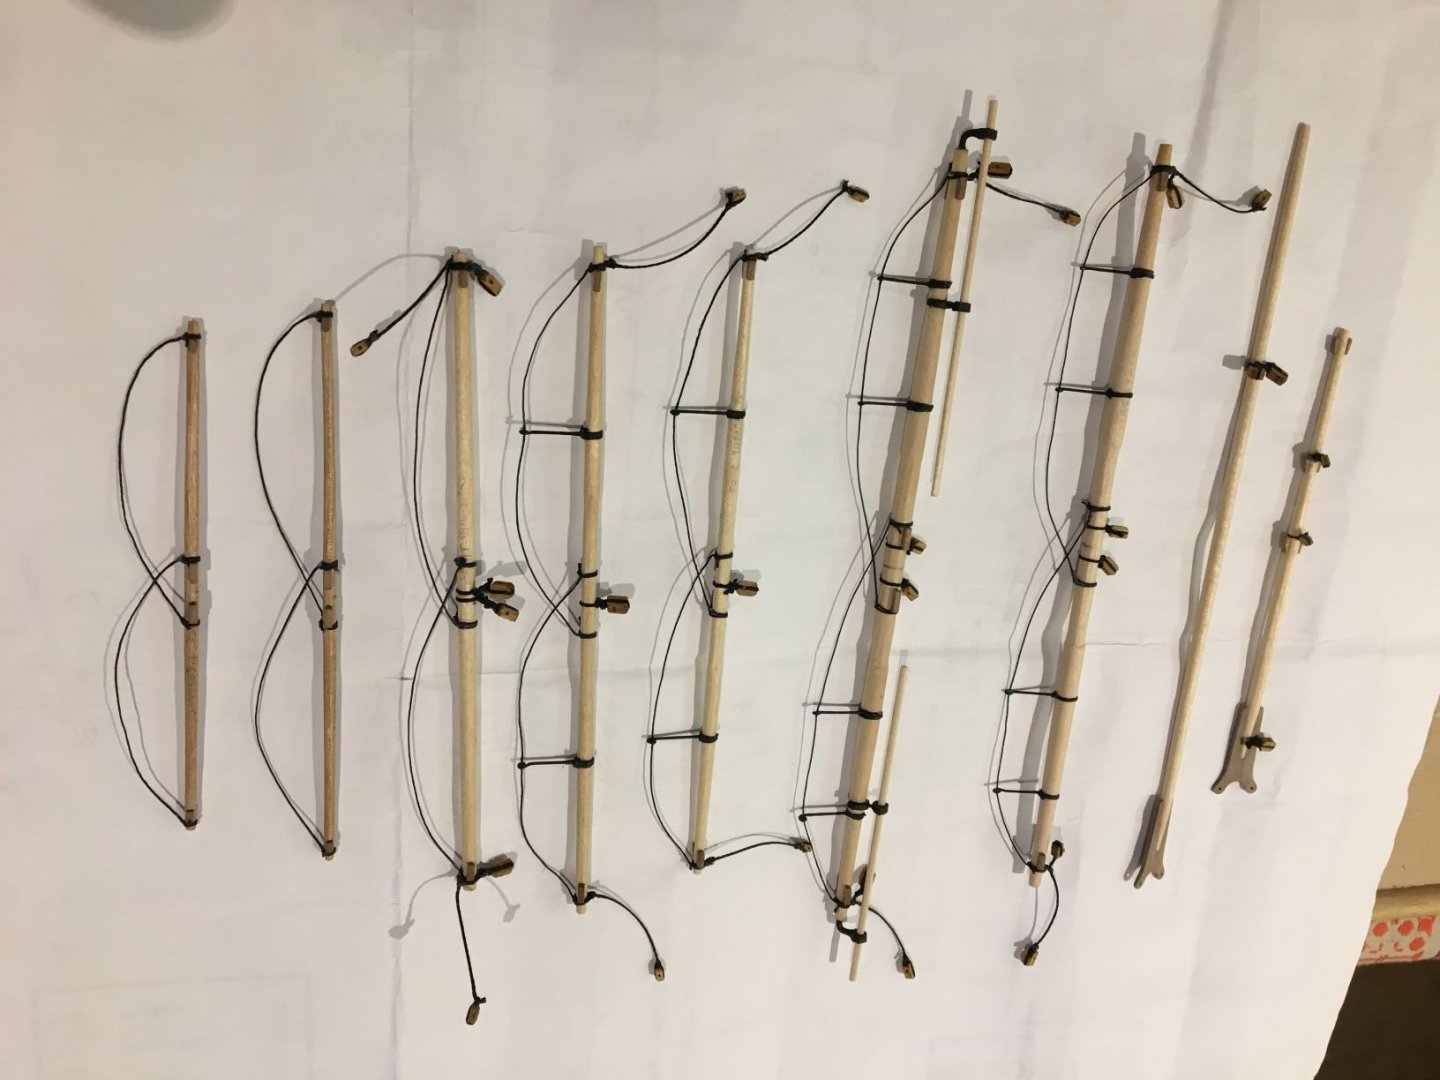
Yards done. Anyone have any ideas about the treatment of the yards? I am inclined to stain them with walnut stain then finish with clear matt varnish but would welcome suggestions about the yards and Masts.
- 53 replies
-
- 6
-
-
- Supply
- Caldercraft
- (and 1 more)
-
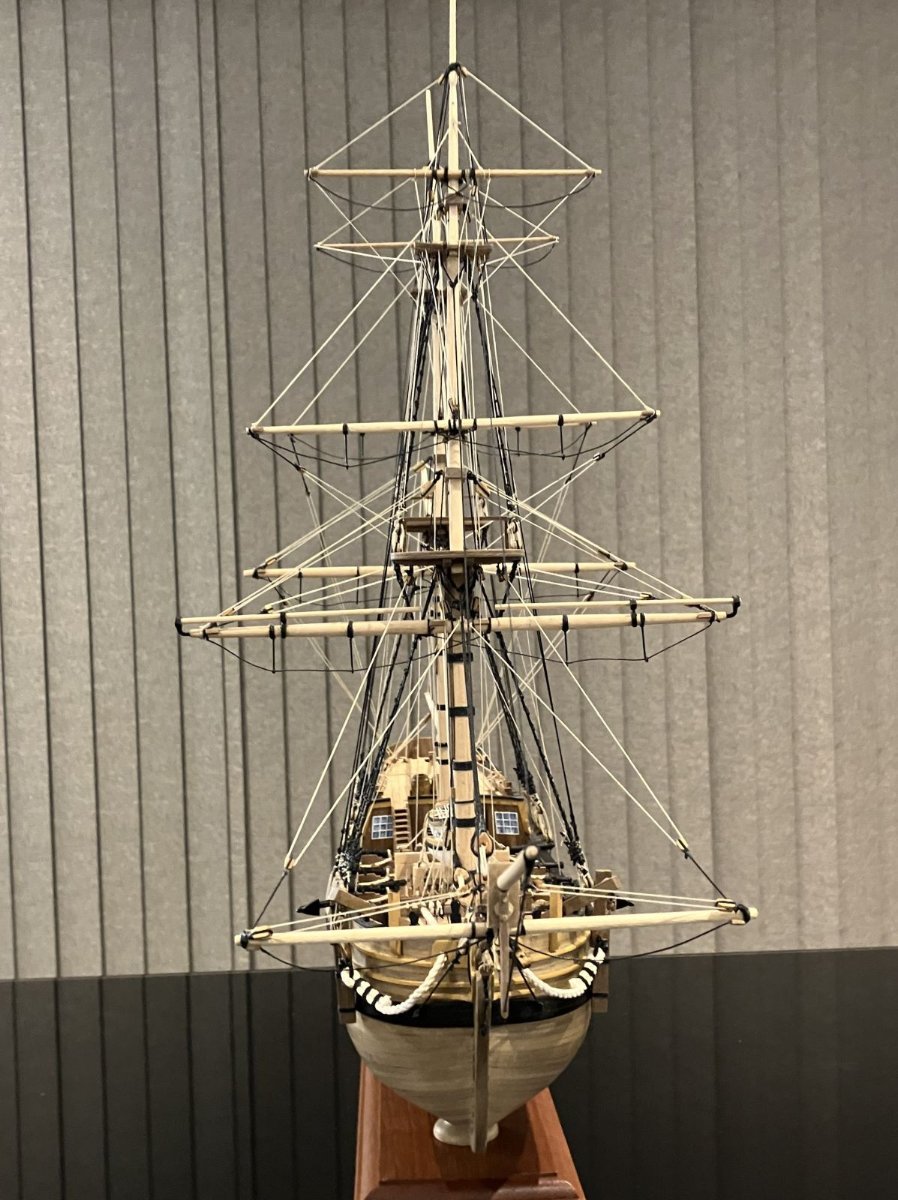
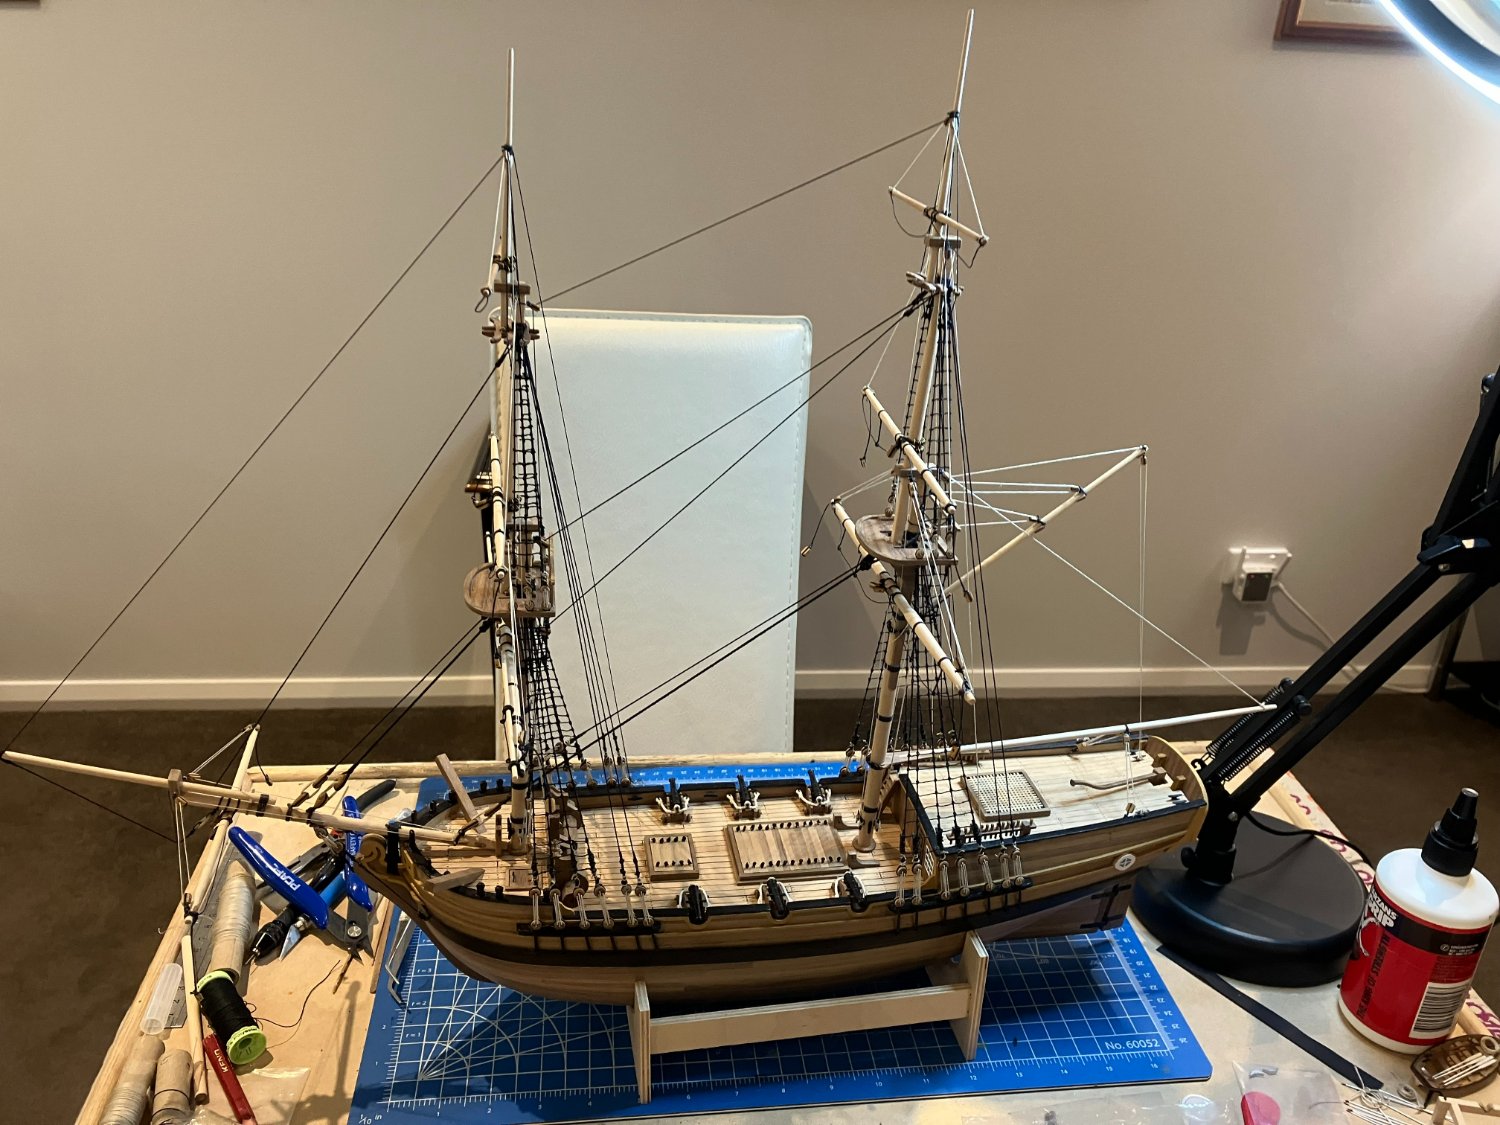
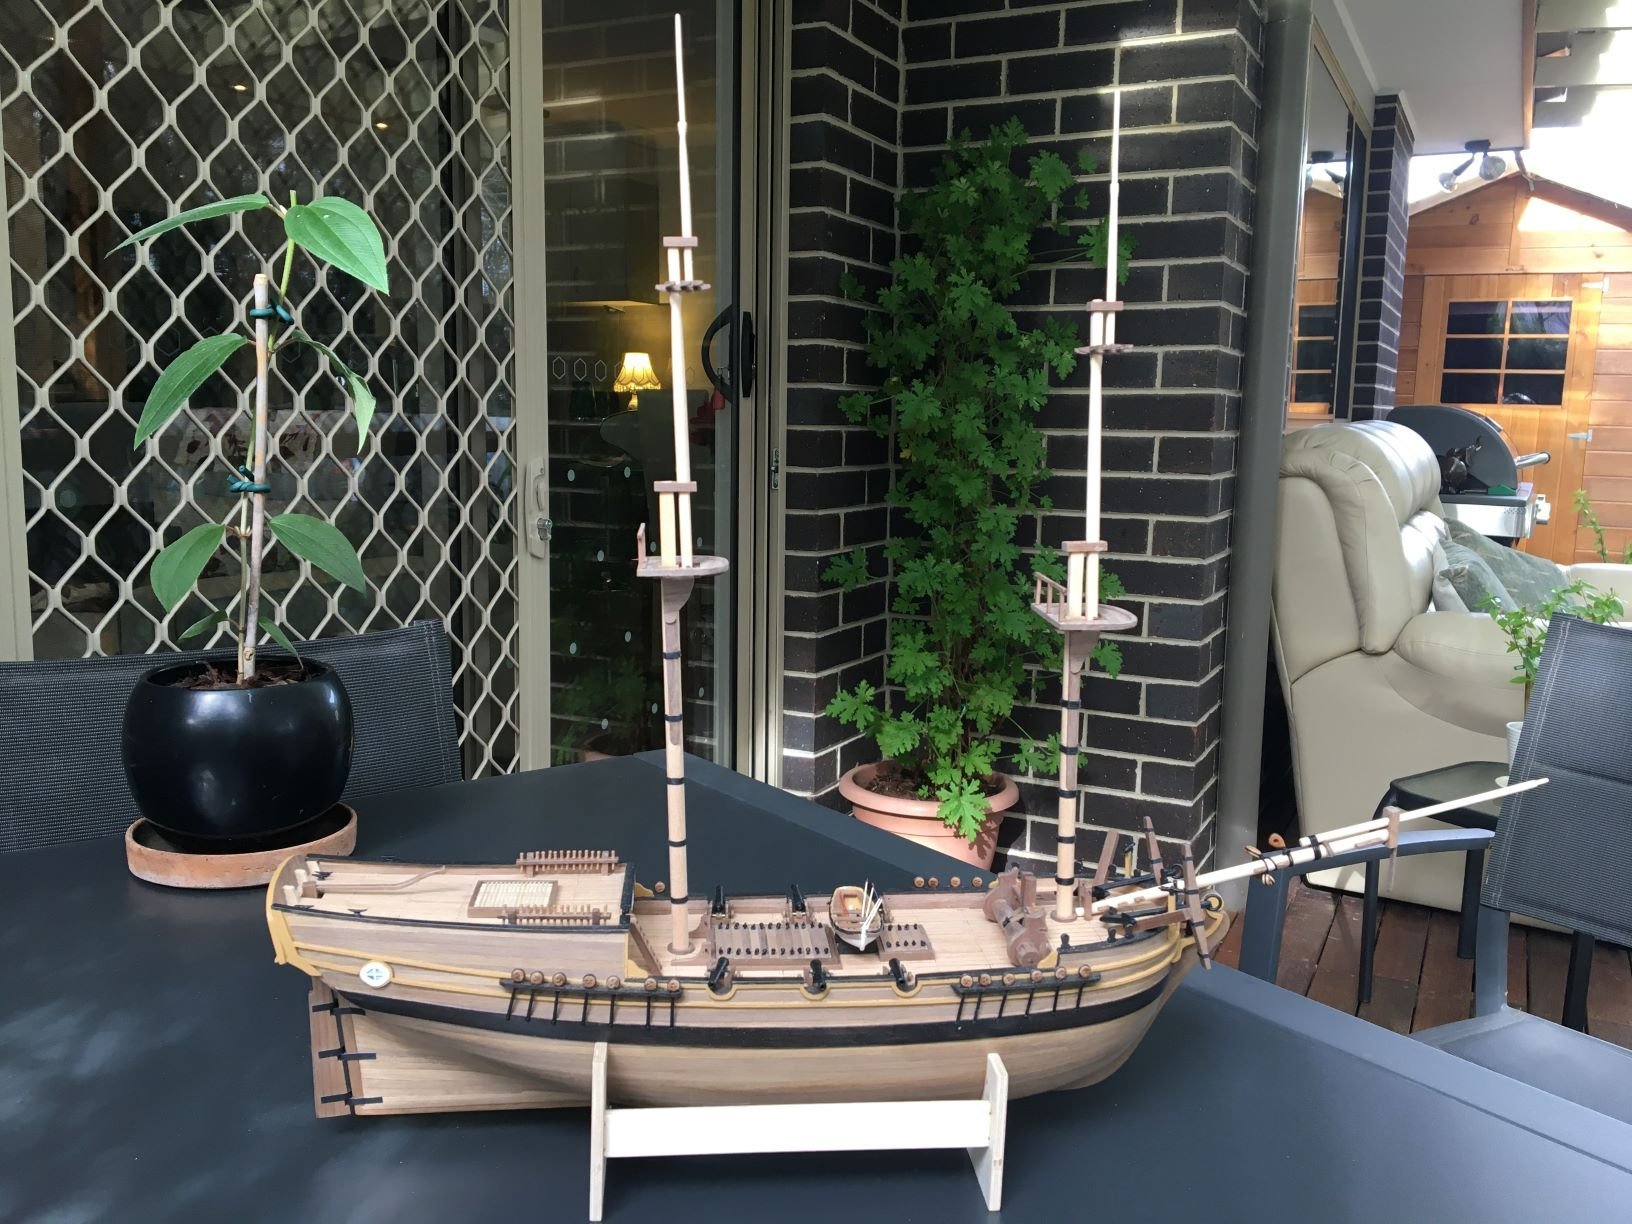
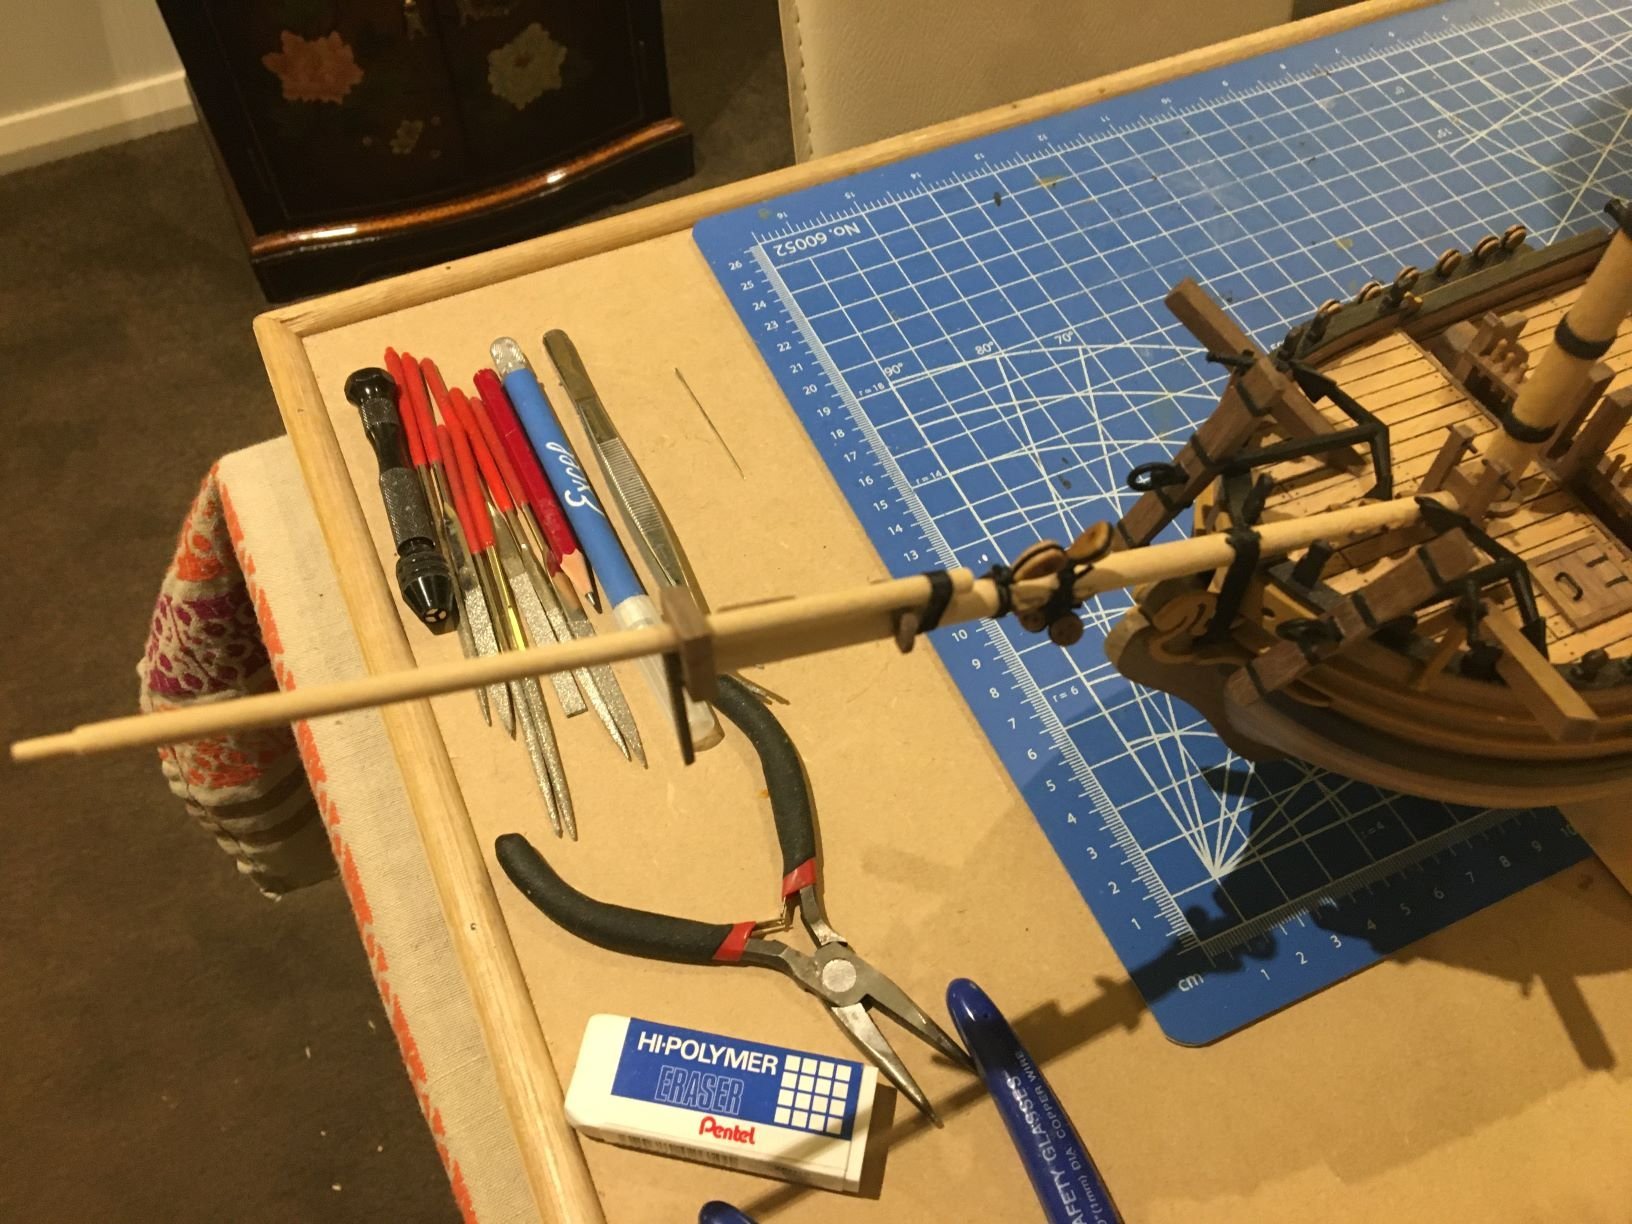
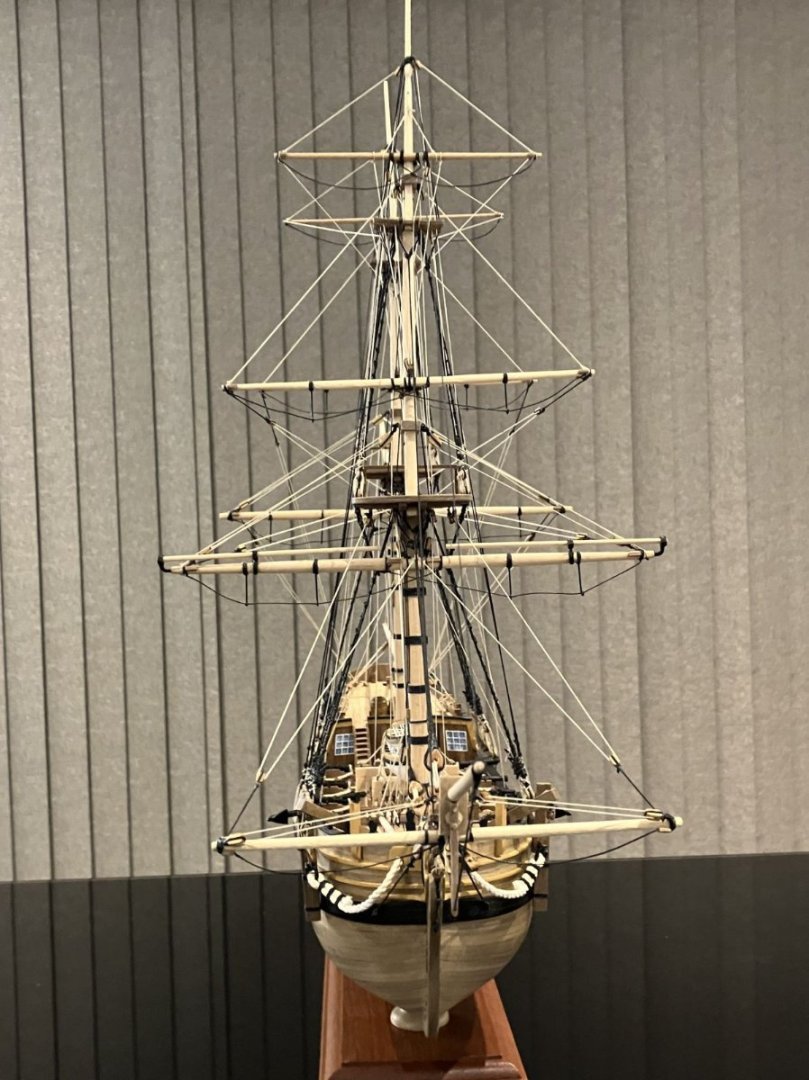
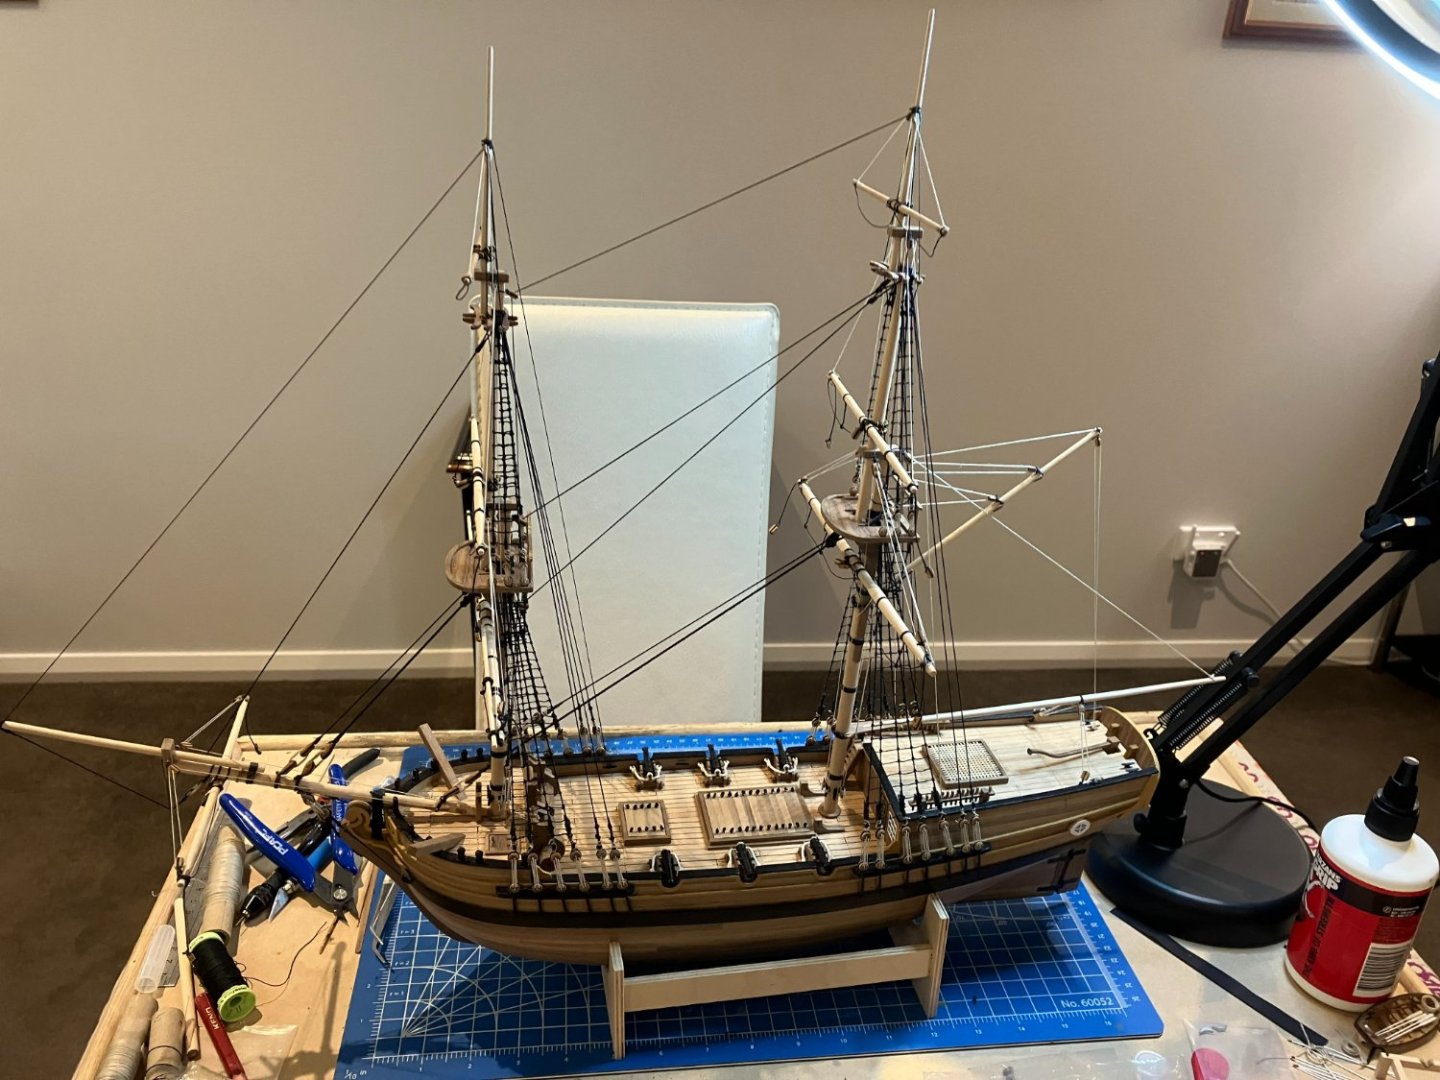
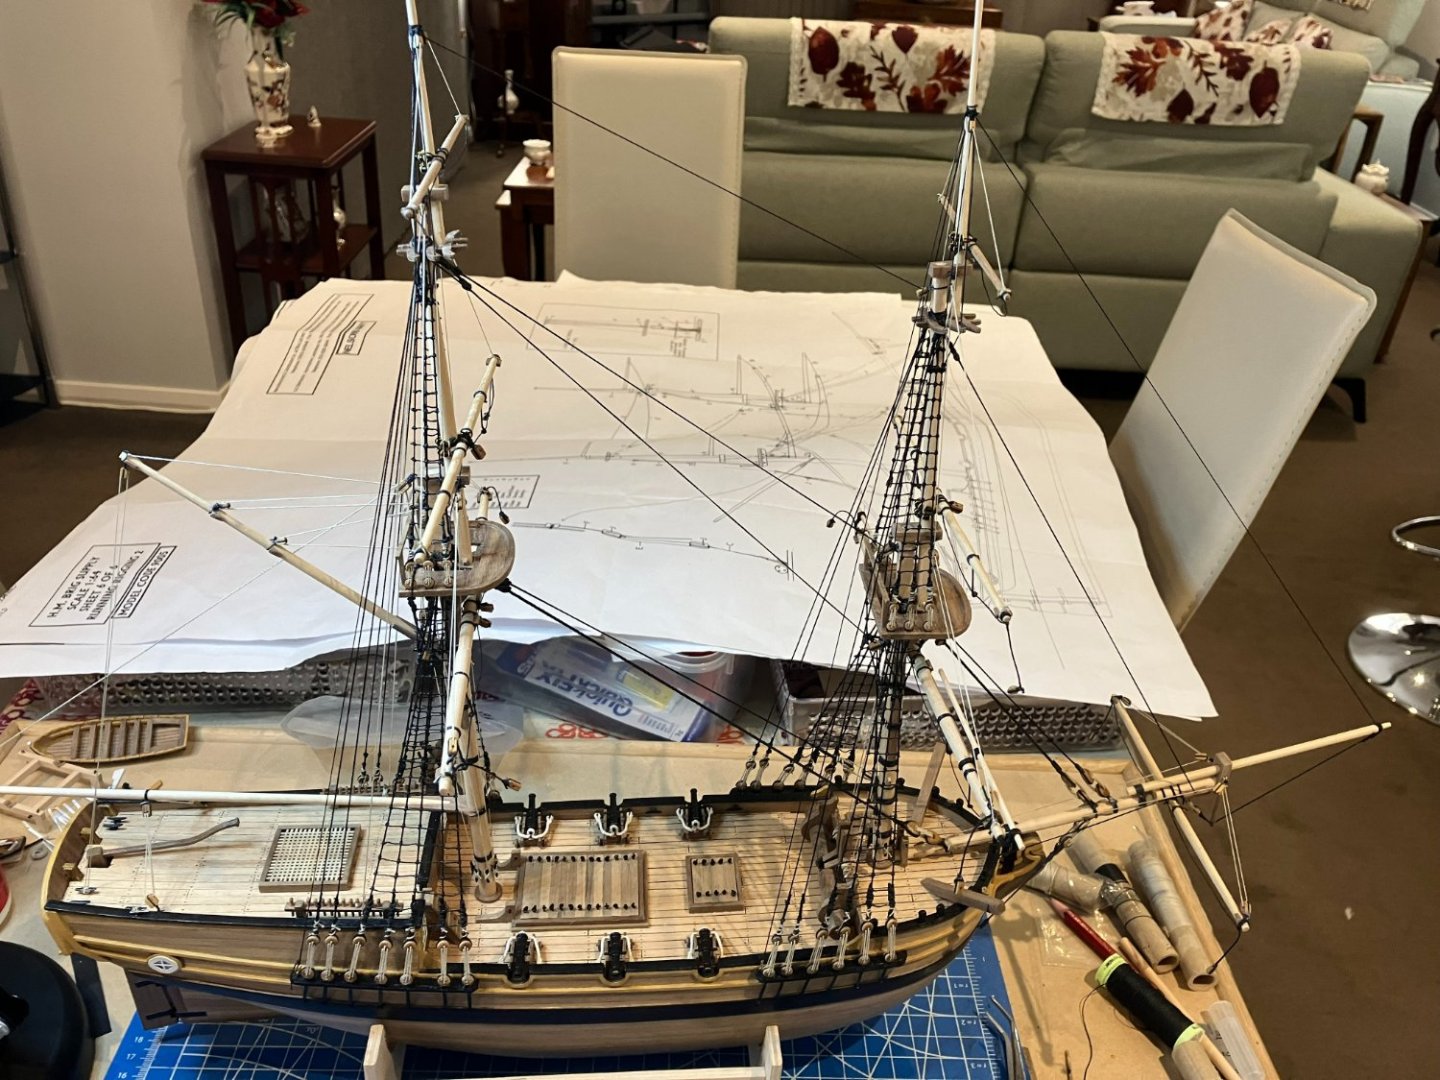
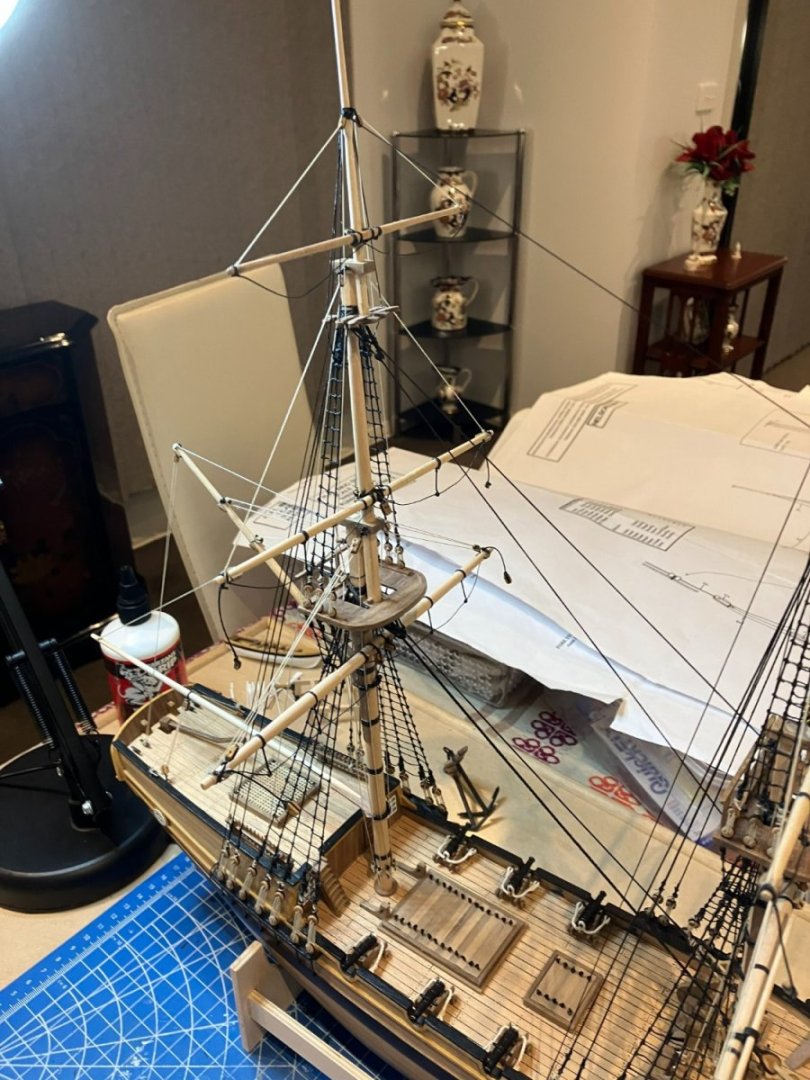
This is the current state of my build, now it's time to finish the yards.


- 53 replies
-
- 11
-
-
-
- Supply
- Caldercraft
- (and 1 more)
-
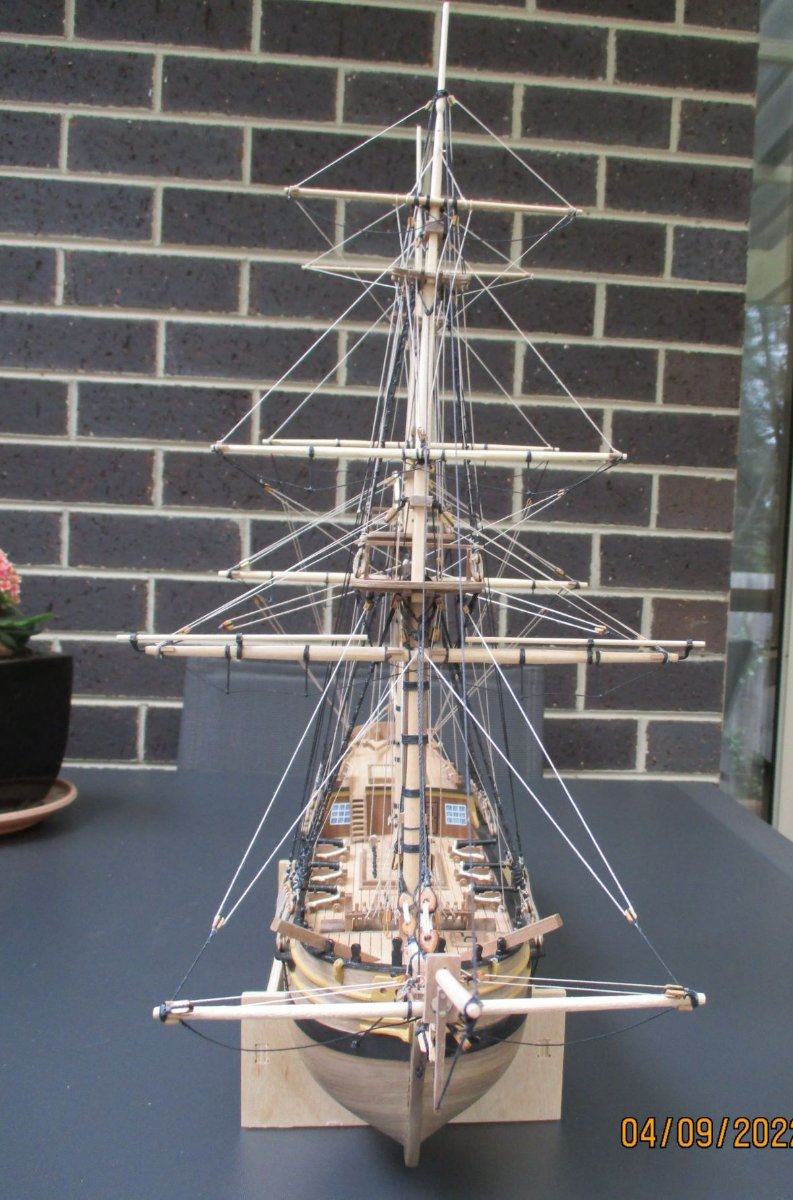
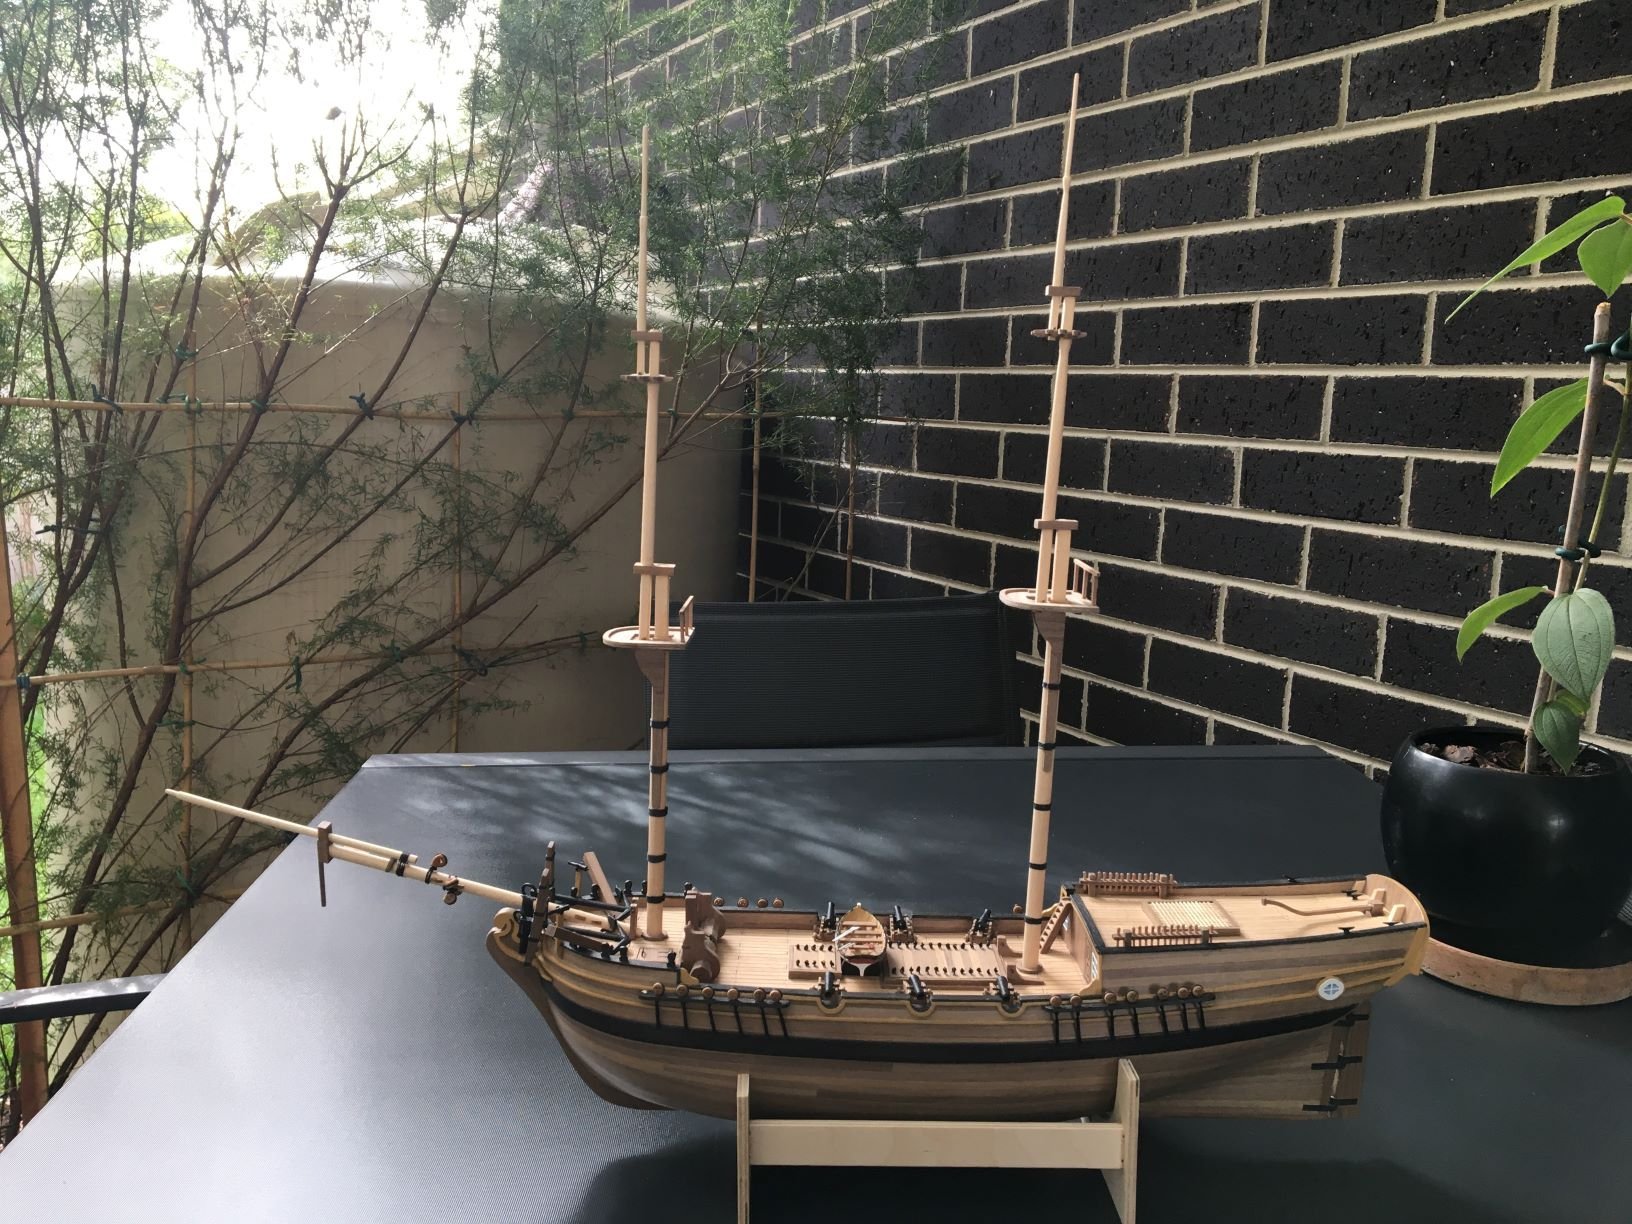
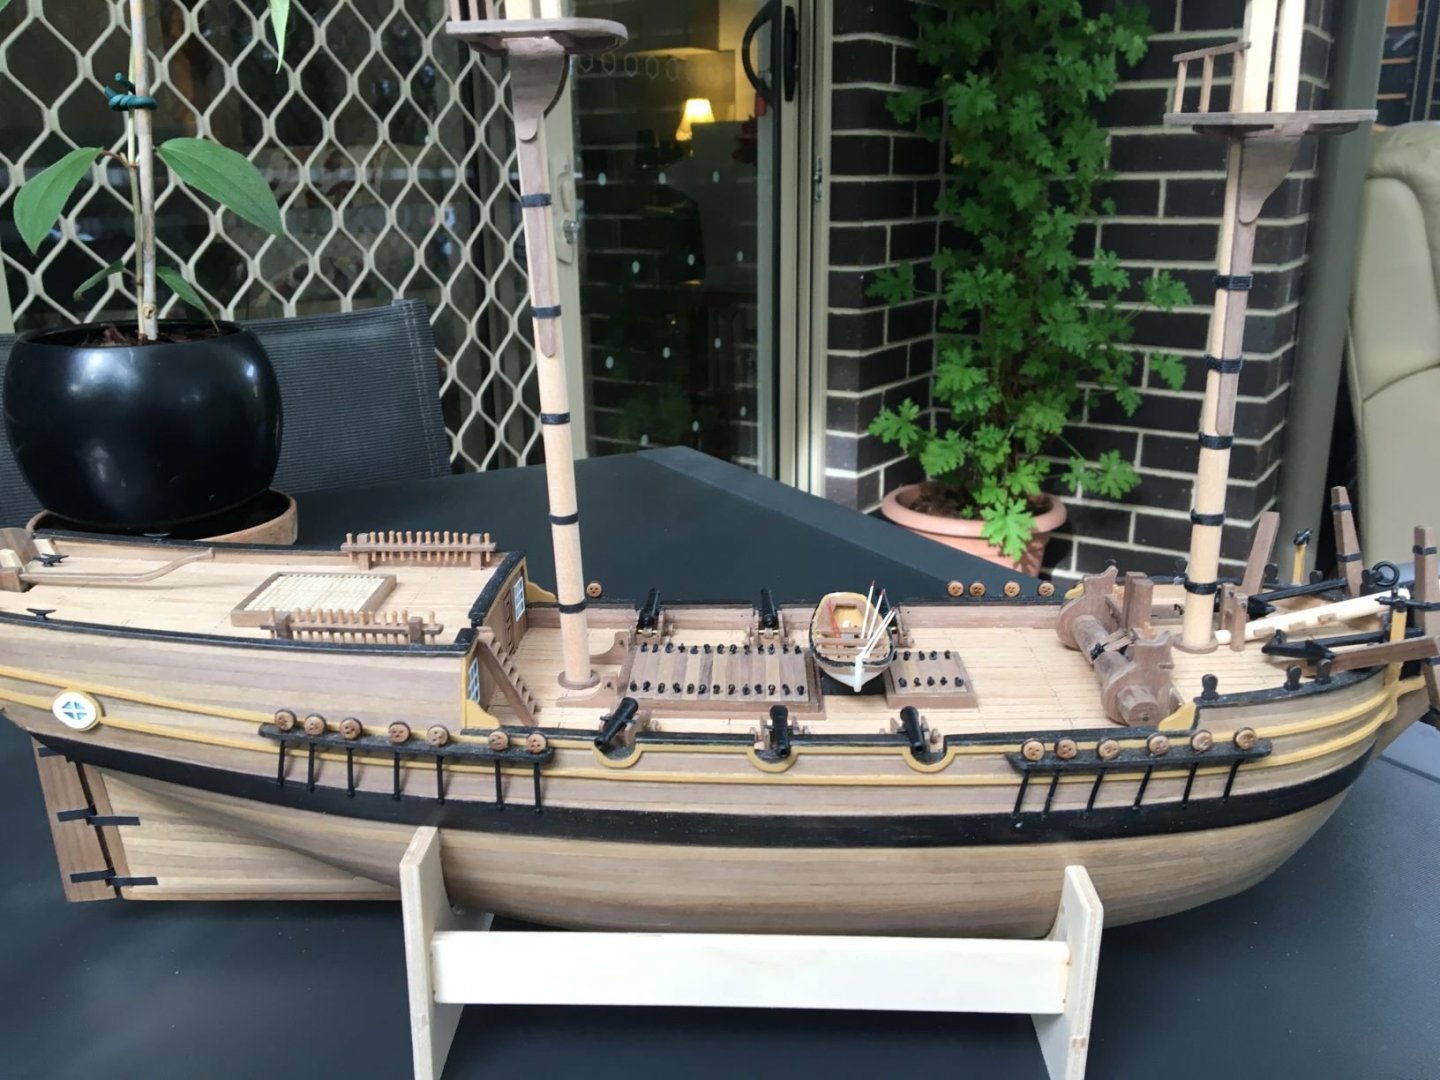
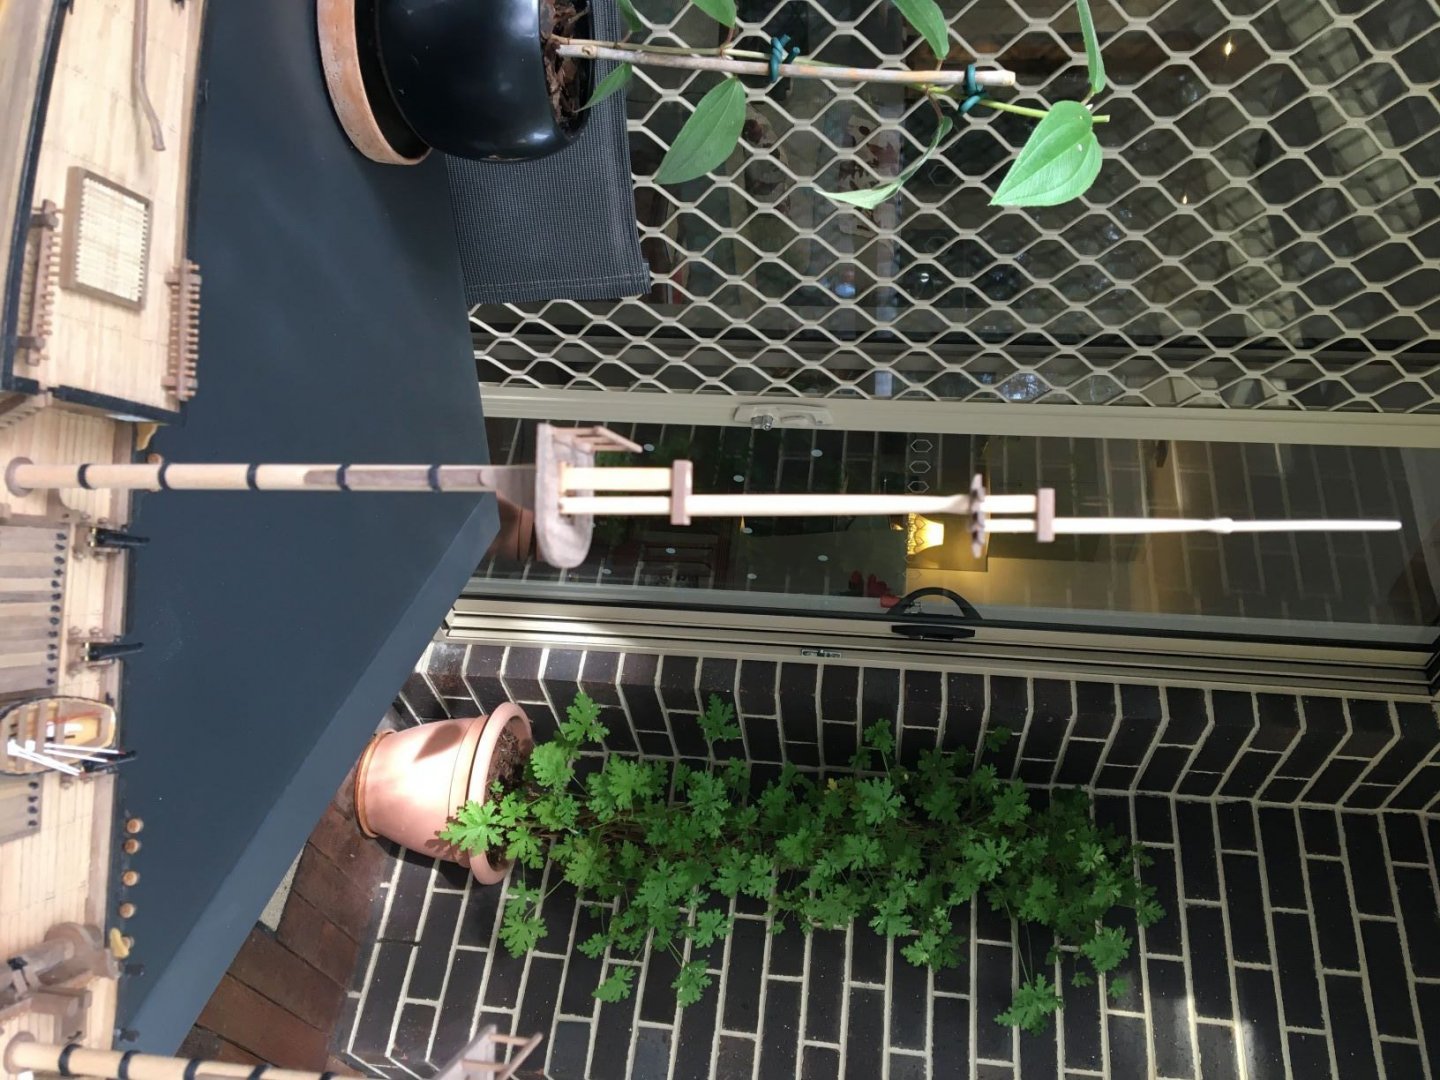
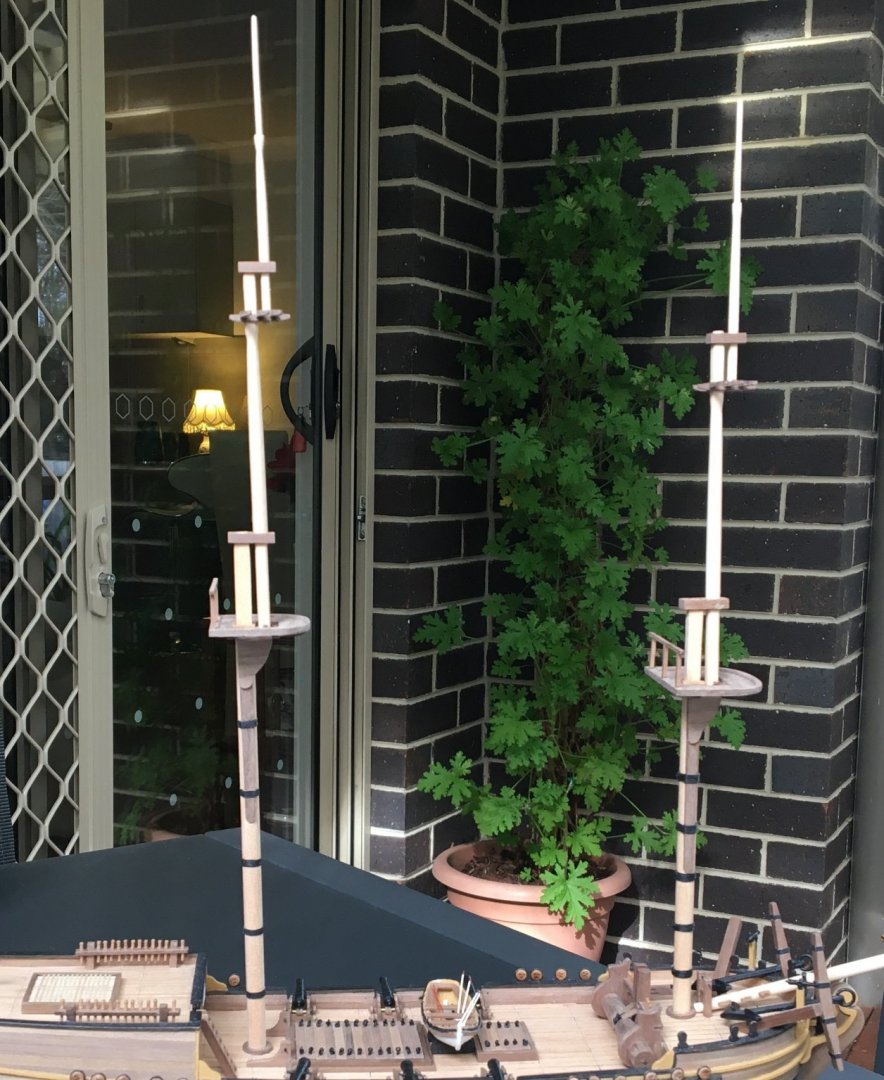
Made and assembled the masts, crosstrees and trestletrees etc. Really enjoyed this part of the build. Wondered why the woolding to the foremast was rope and the mainmast was iron but did it as per the instructions? The masts are not actually diverging, it looks like this in the photo due to parallax error. Tried rotating the first two photos every which way before loading but they always came out landscape!

- 53 replies
-
- 4
-
-
- Supply
- Caldercraft
- (and 1 more)
-
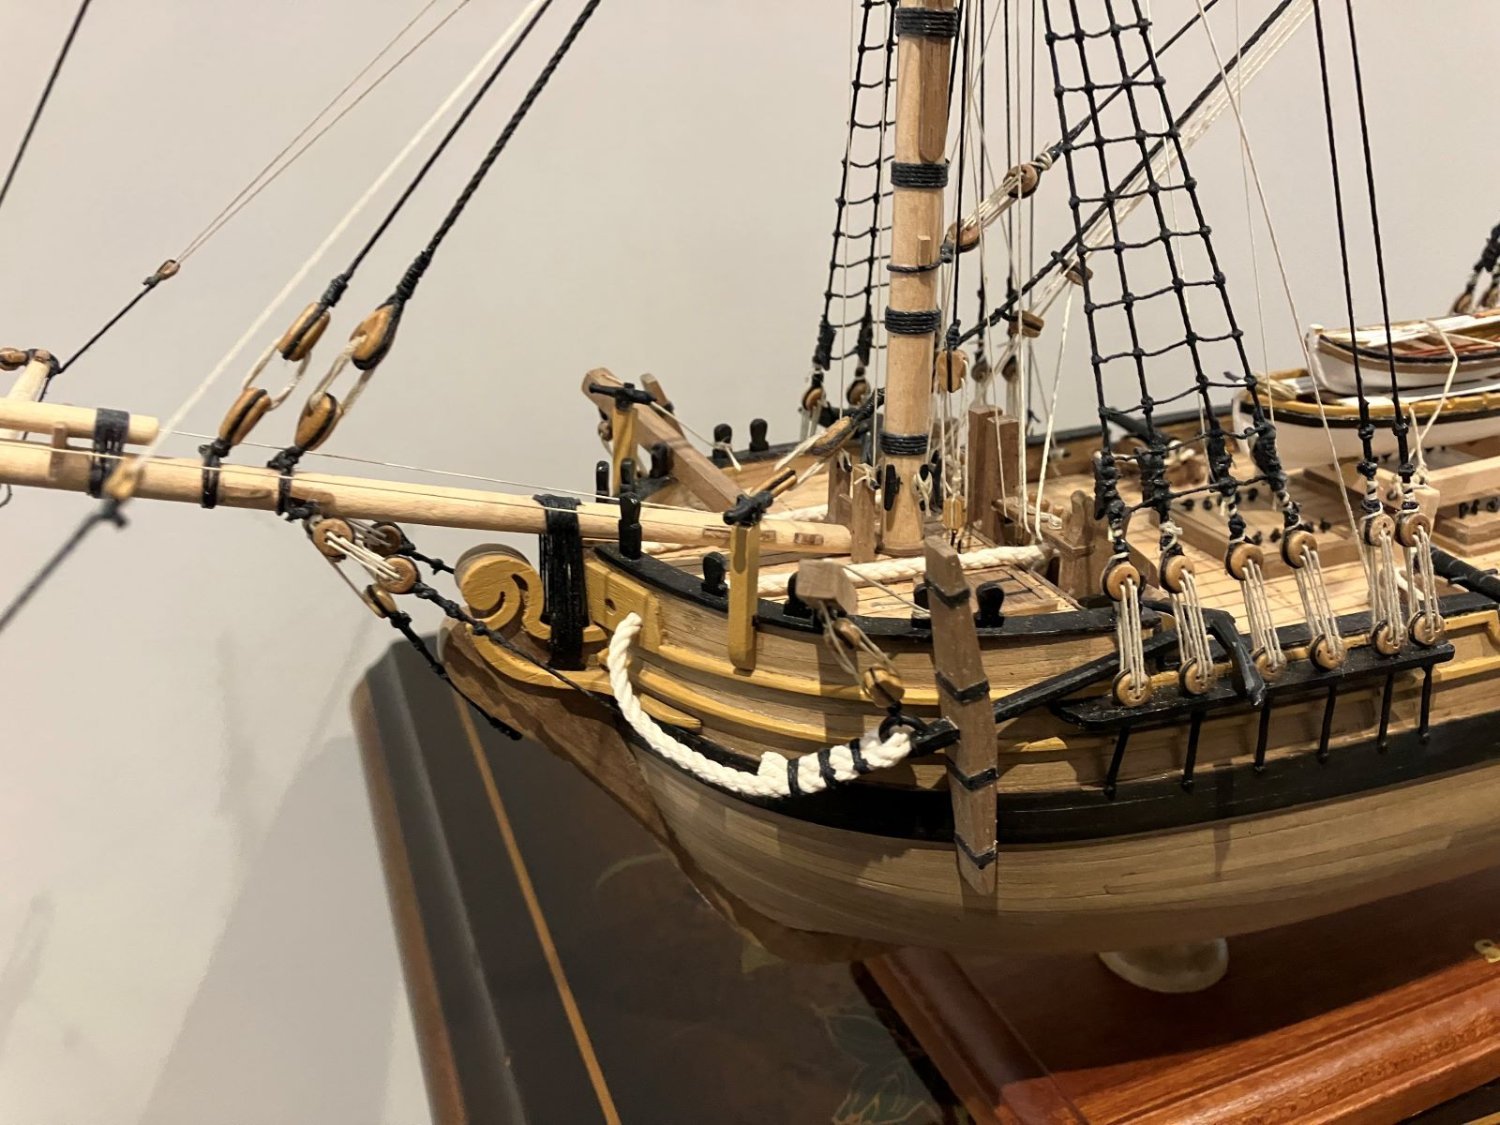
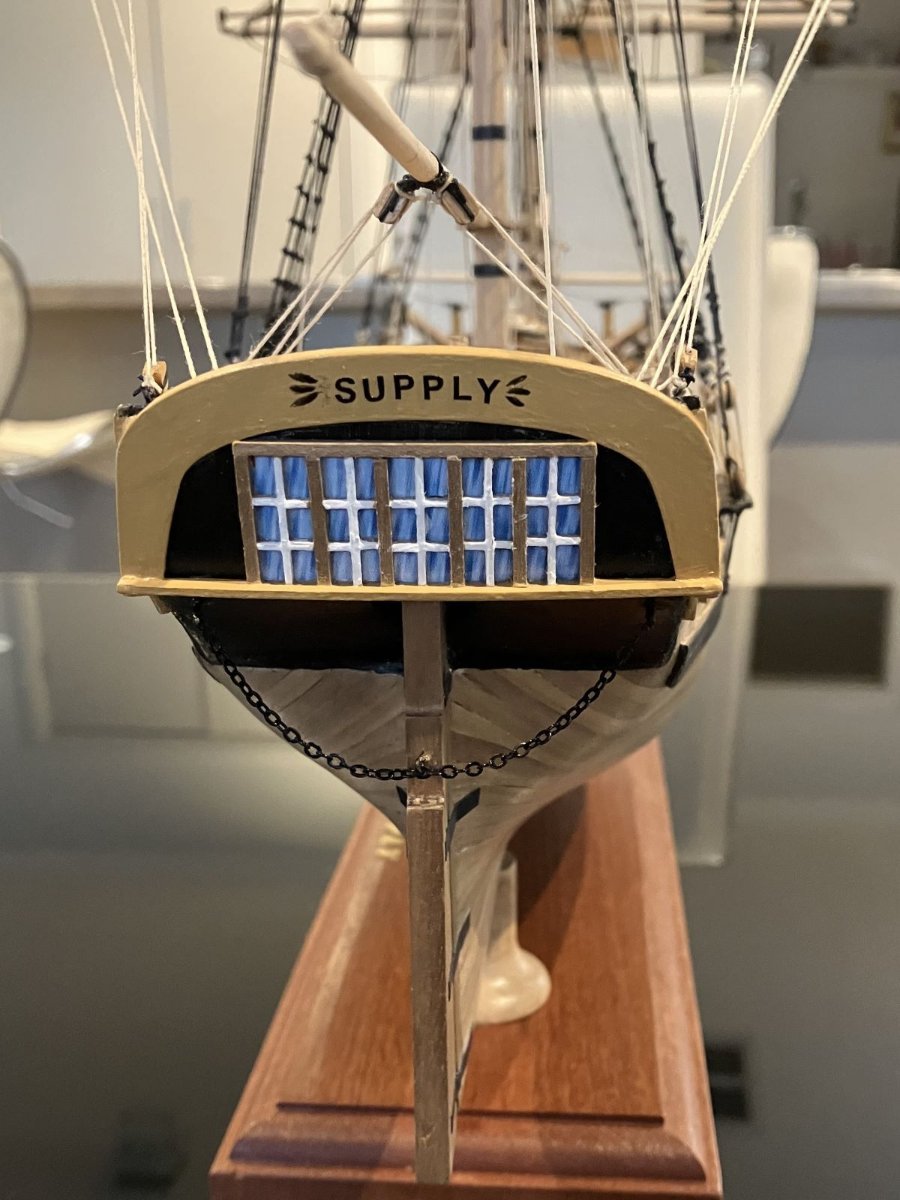
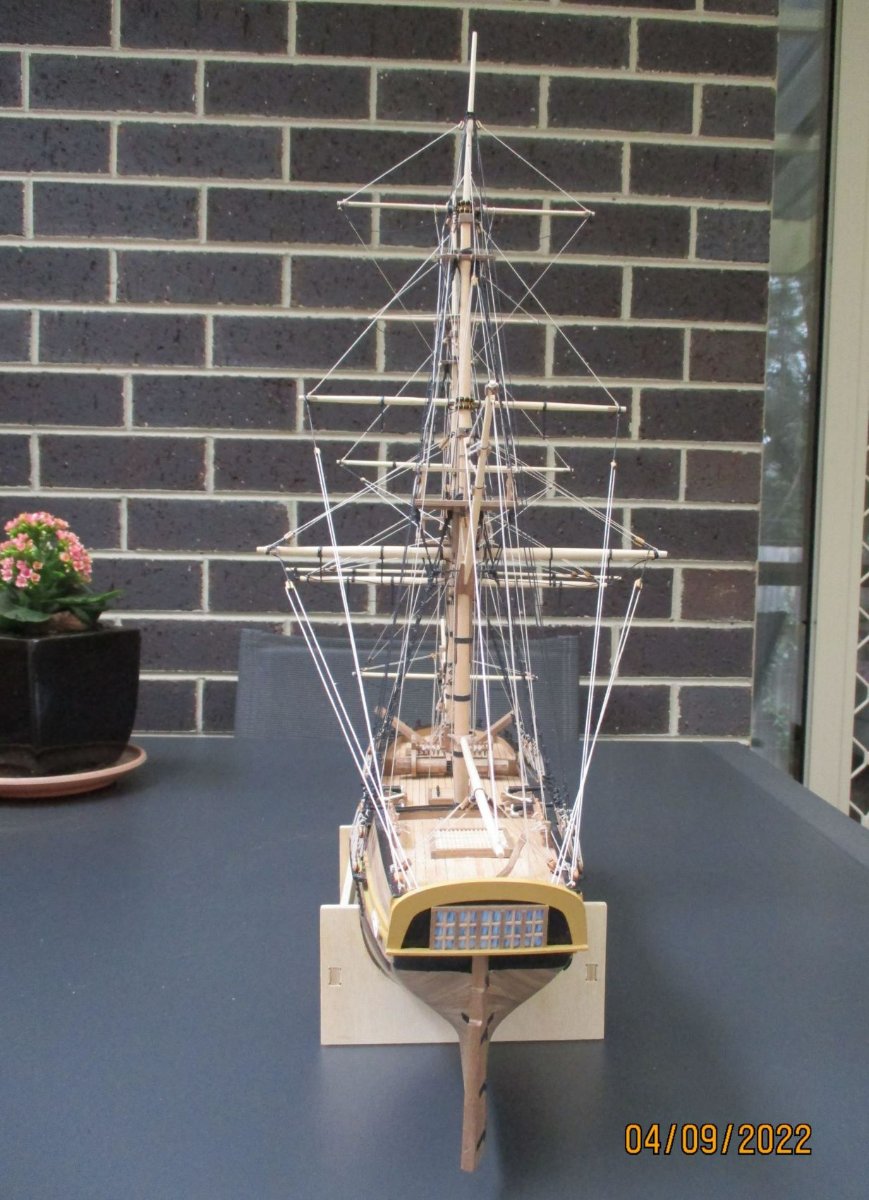
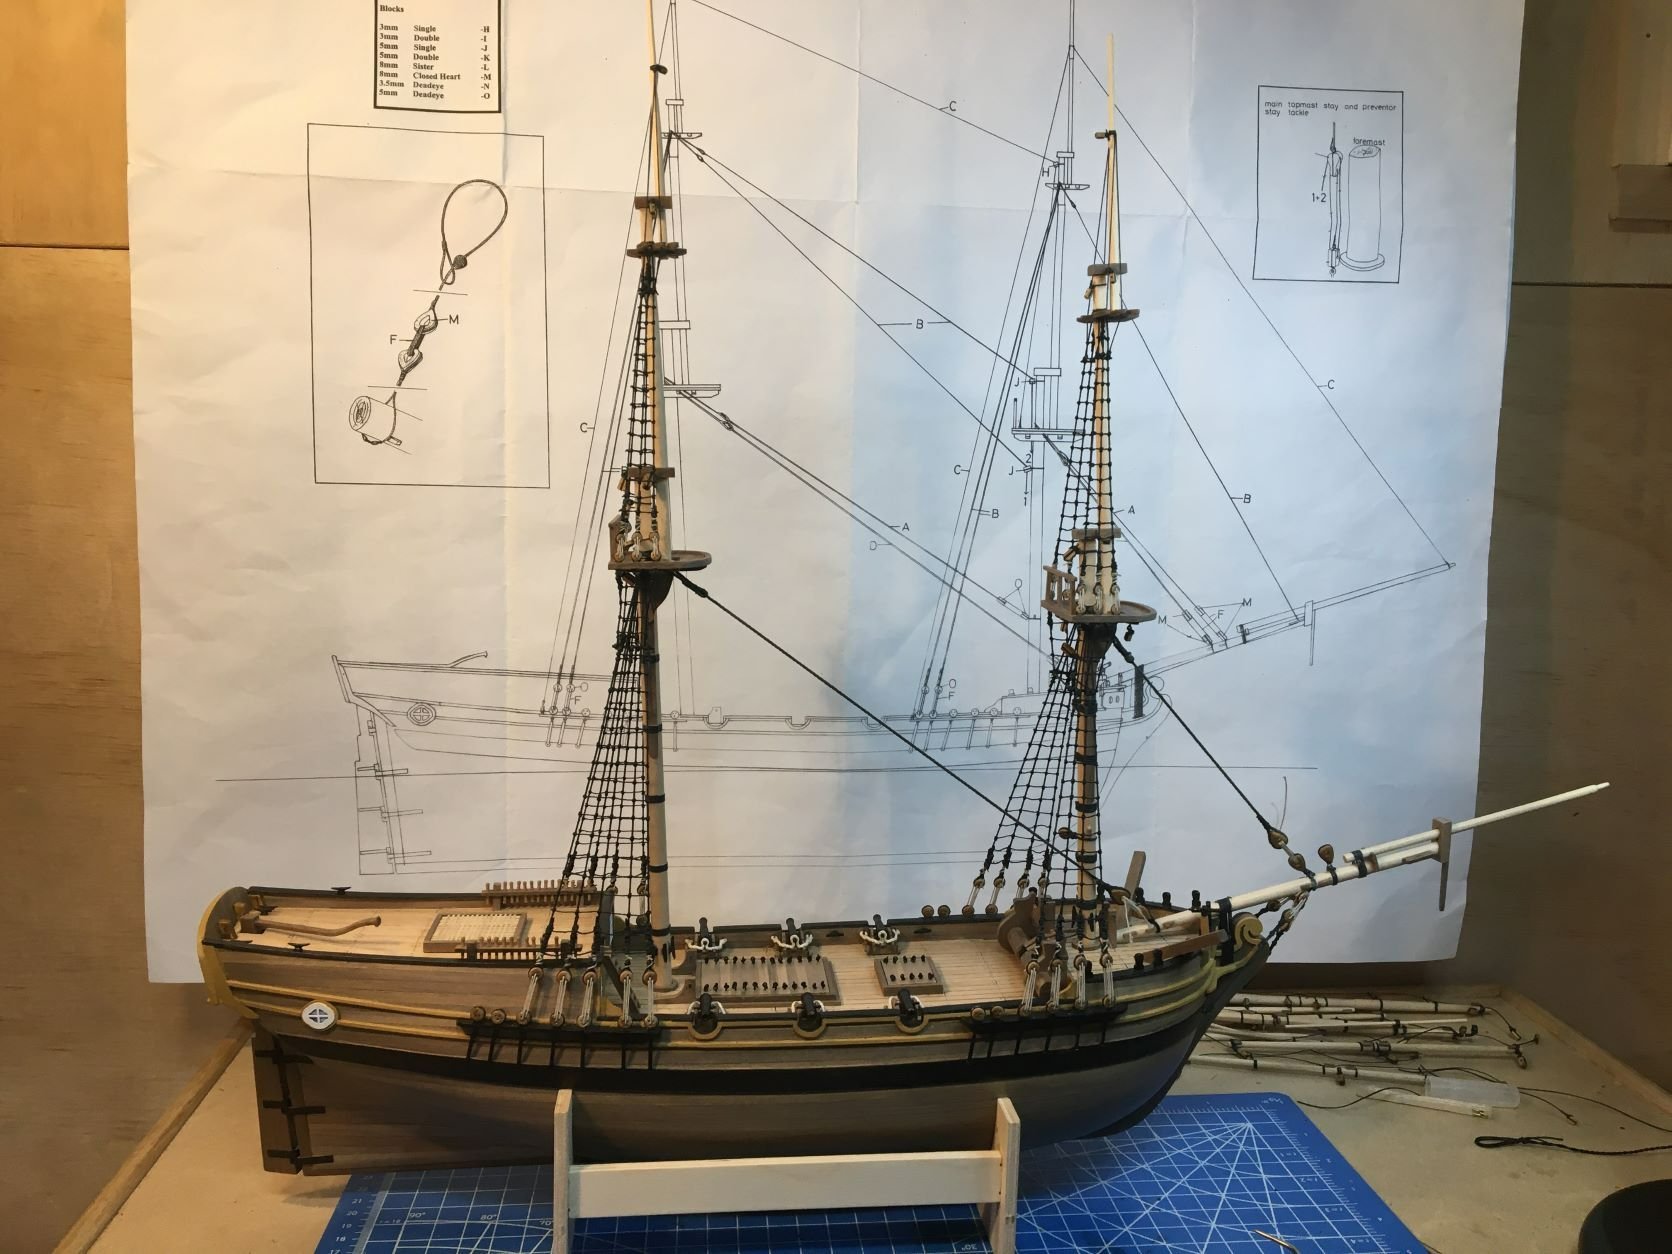
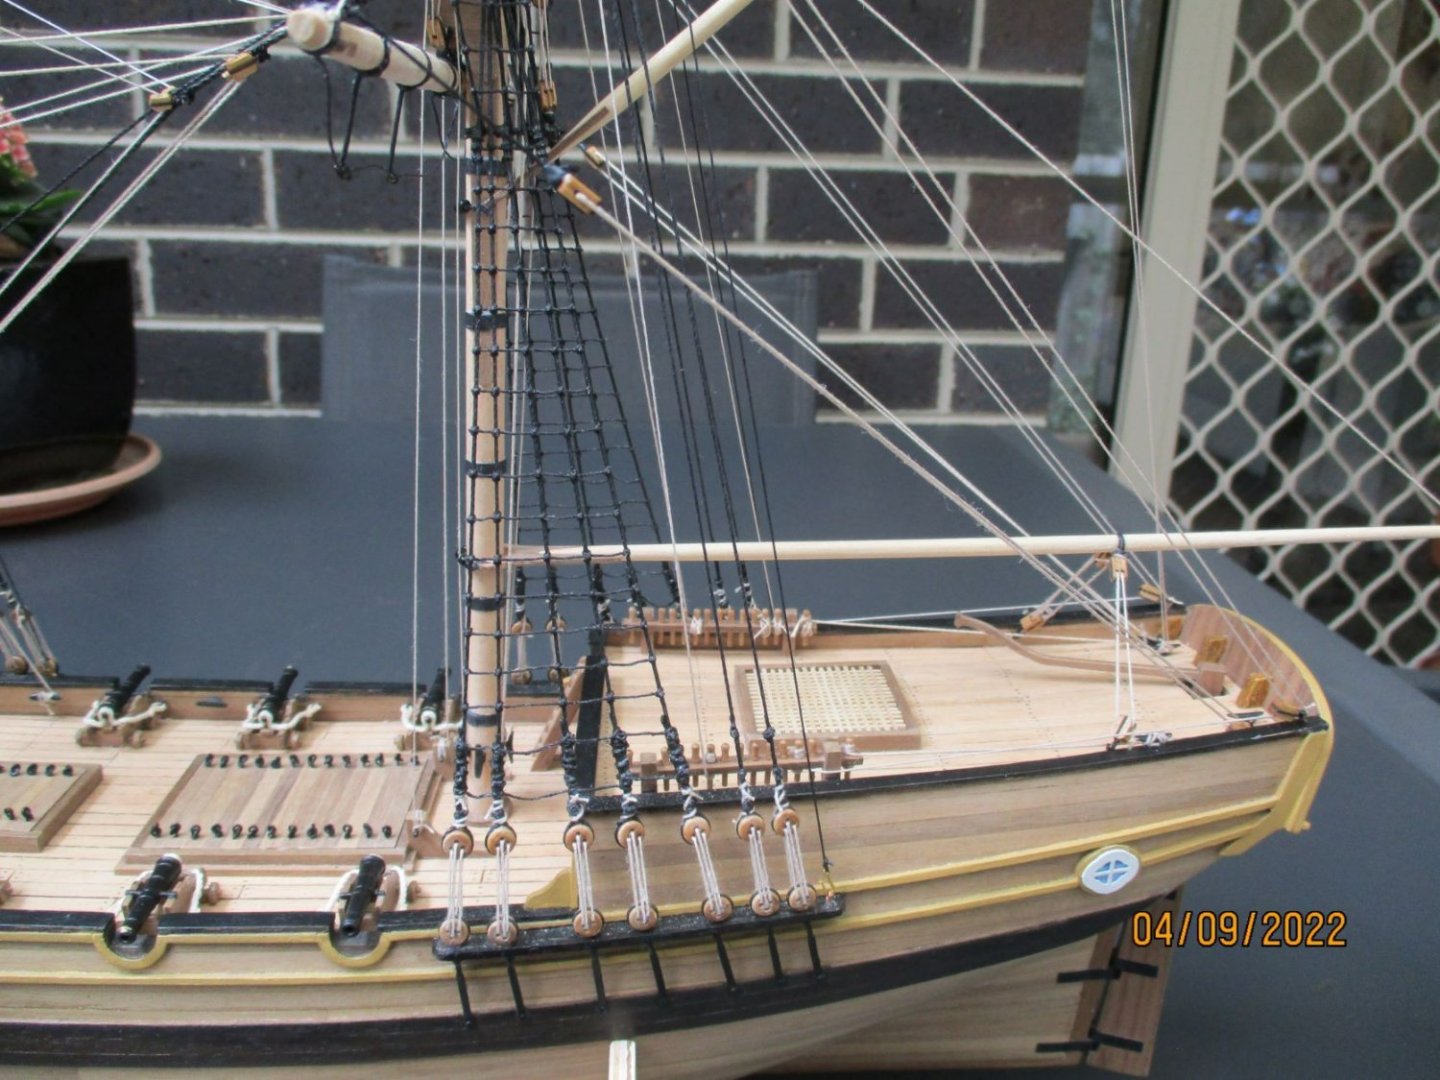
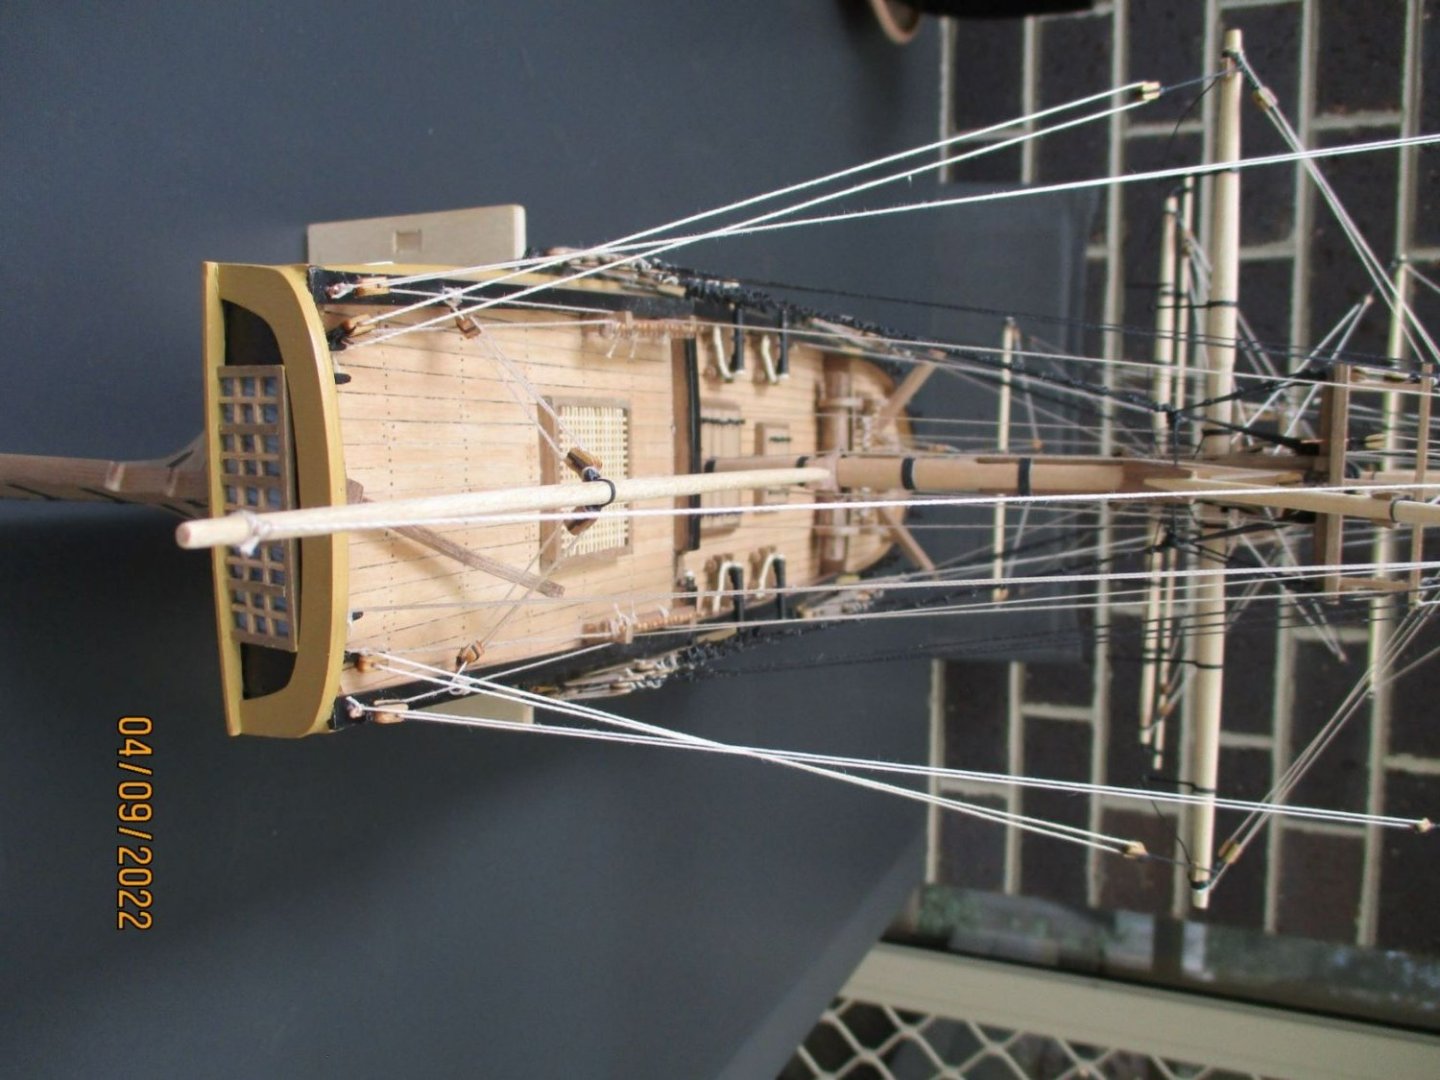
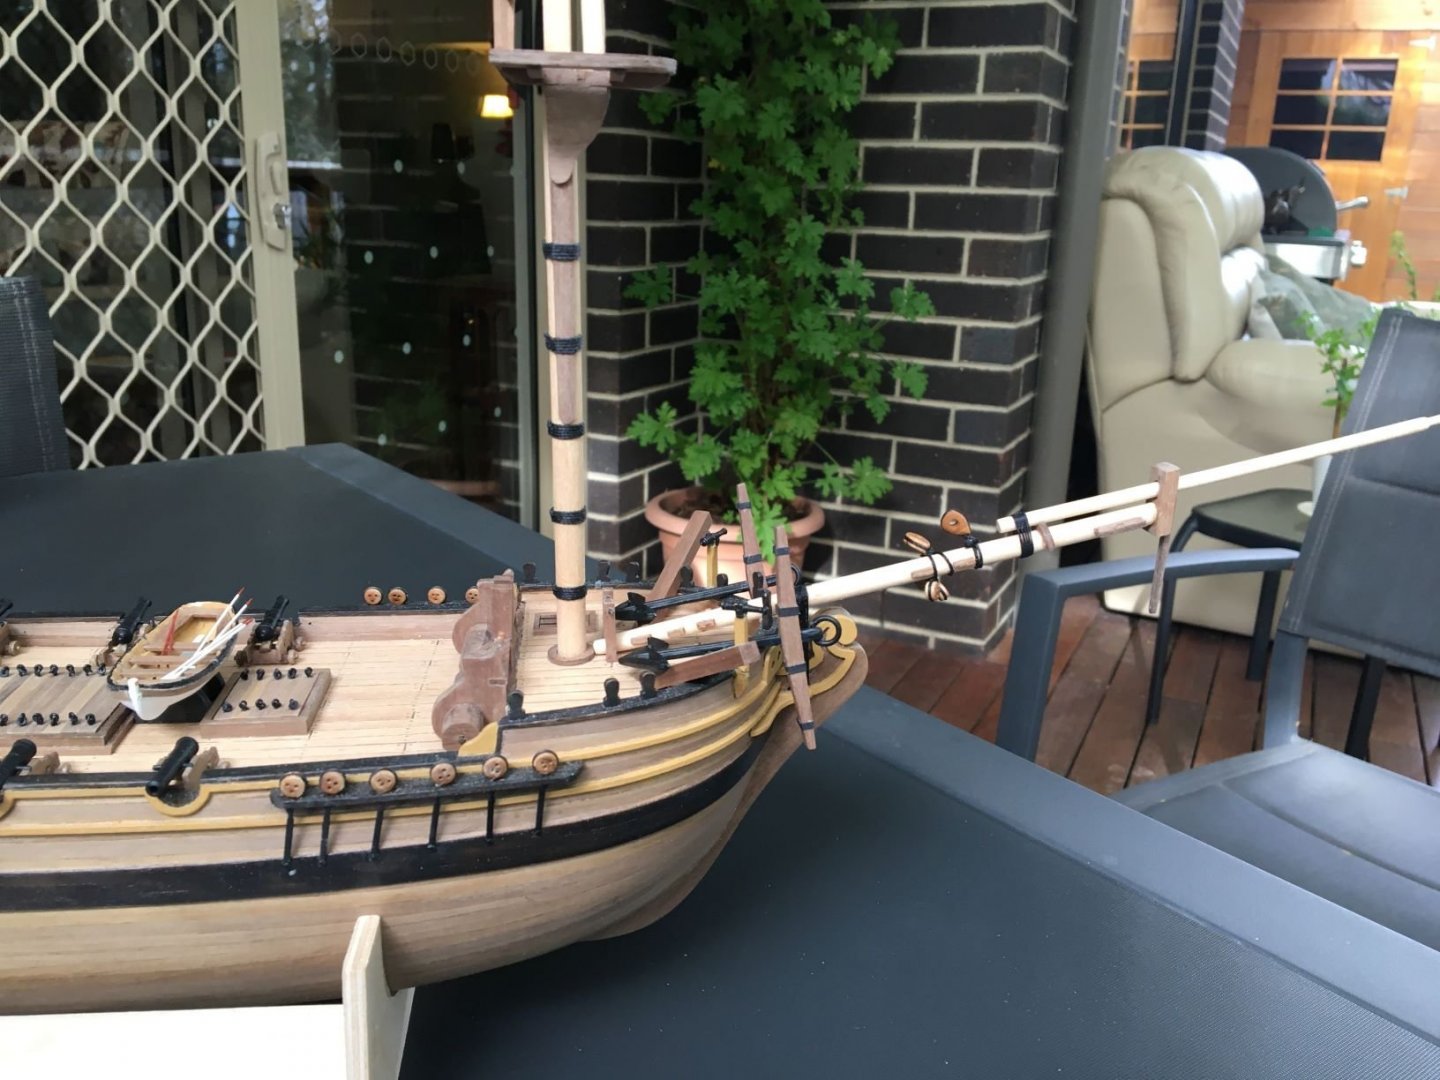
Not really happy with the tall stern windows and would welcome comments from other members. Also undecided how to finish the masts - whether to stain and varnish or just varnish. Undecided also whether to paint the yards, crosstrees and trestletrees areas black as per Nelsons Navy colours. I stained the main wale with dark walnut stain and am happy with the result but I like the look of the natural wood on the rest of the hull and was not planning to paint it, just clear varnish it. Again would welcome opinions on this. Bowsprit fitted after considerable puzzling over the drawings but think I got it about right.

- 53 replies
-
- 4
-
-
- Supply
- Caldercraft
- (and 1 more)