ASlrWnt2C
-
Posts
20 -
Joined
-
Last visited
-
 jeffzcuban reacted to a post in a topic:
USS Constitution by ASlrWnt2C - Revell - 1:96 - PLASTIC
jeffzcuban reacted to a post in a topic:
USS Constitution by ASlrWnt2C - Revell - 1:96 - PLASTIC
-
thibaultron reacted to a post in a topic:
How much slack in breeching Lines?
-
thibaultron reacted to a post in a topic:
How much slack in breeching Lines?
-
Marcus.K. reacted to a post in a topic:
USS Constitution by ASlrWnt2C - Revell - 1:96 - PLASTIC
-
Marcus.K. reacted to a post in a topic:
USS Constitution by ASlrWnt2C - Revell - 1:96 - PLASTIC
-
Marcus.K. reacted to a post in a topic:
USS Constitution by ASlrWnt2C - Revell - 1:96 - PLASTIC
-
Marcus.K. reacted to a post in a topic:
USS Constitution by ASlrWnt2C - Revell - 1:96 - PLASTIC
-
GrandpaPhil reacted to a post in a topic:
USS Constitution by ASlrWnt2C - Revell - 1:96 - PLASTIC
-
GrandpaPhil reacted to a post in a topic:
USS Constitution by ASlrWnt2C - Revell - 1:96 - PLASTIC
-
GrandpaPhil reacted to a post in a topic:
USS Constitution by ASlrWnt2C - Revell - 1:96 - PLASTIC
-
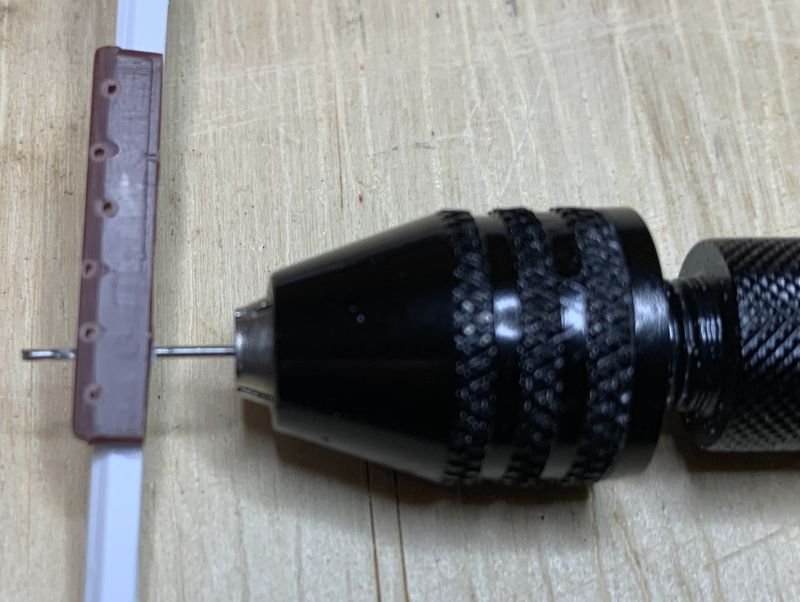
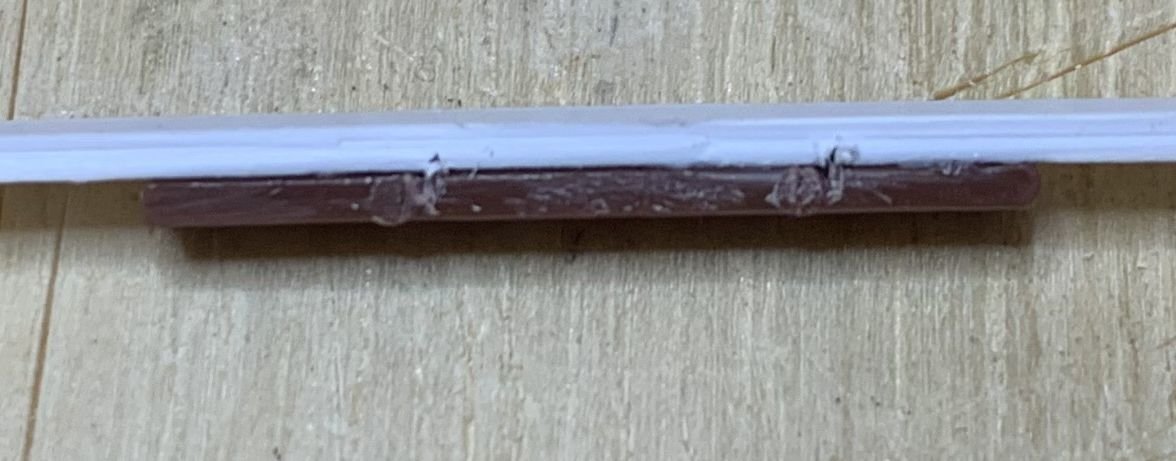
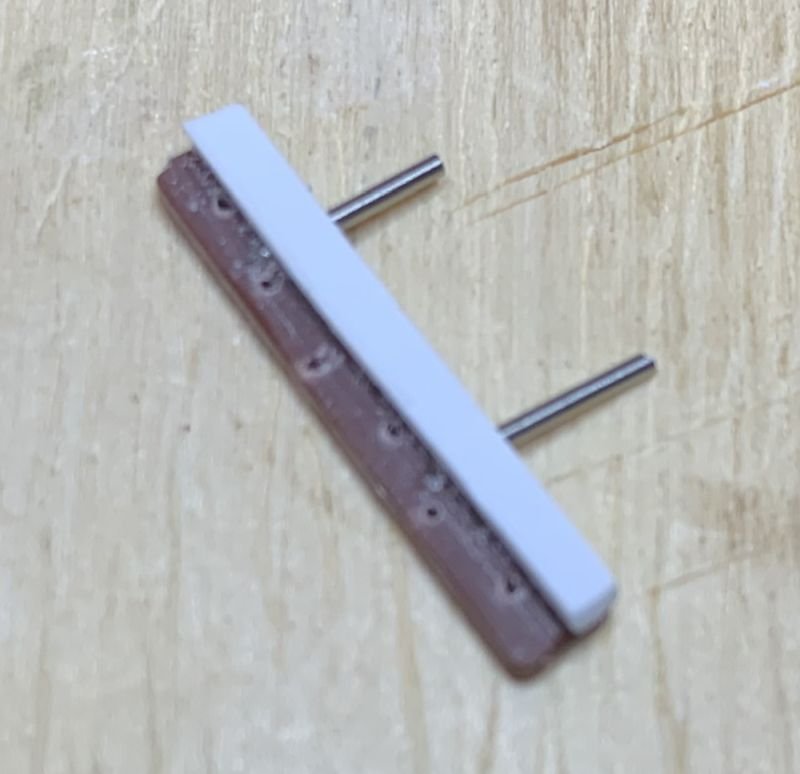
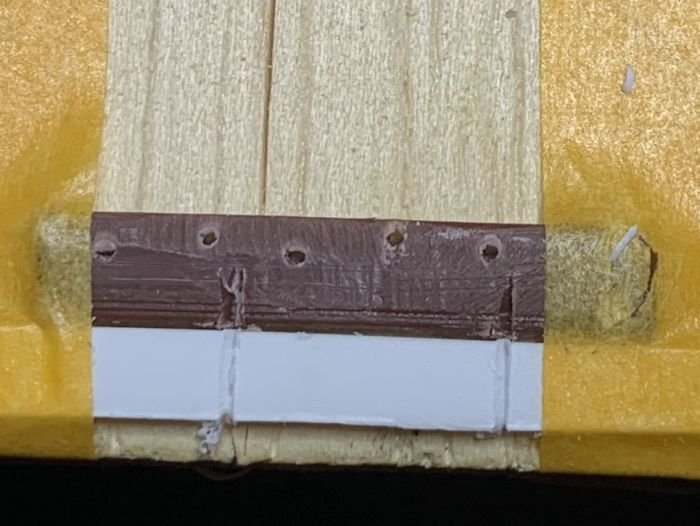
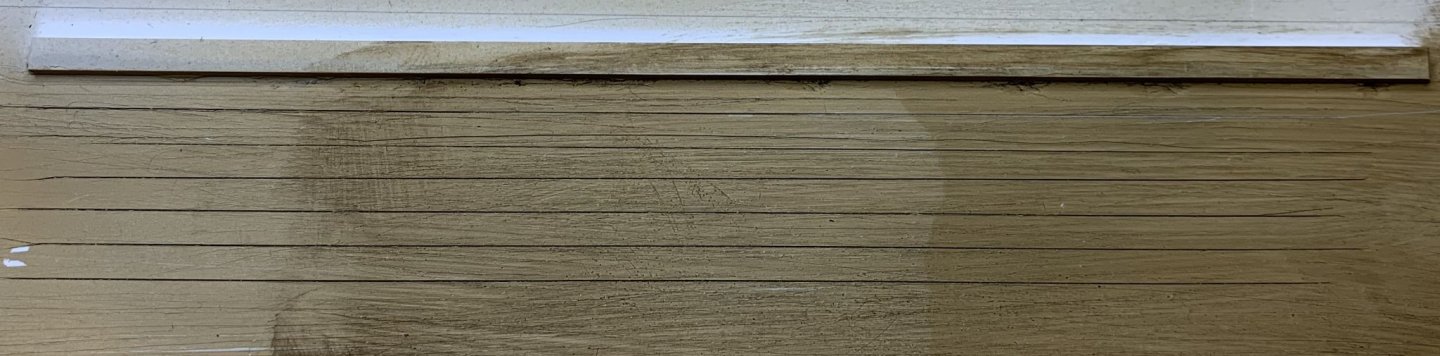
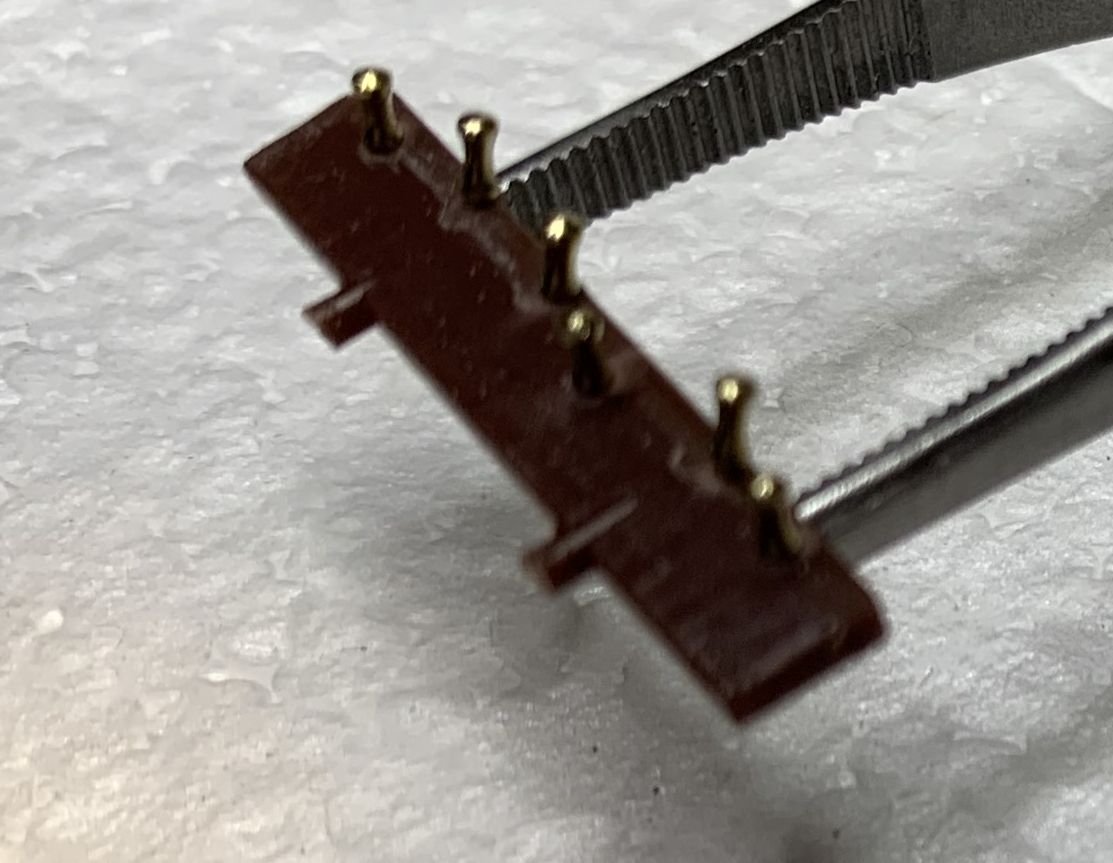
 I reckon I owe the group a comeback, even though this has strayed a bit into the realm of "Jigs and Building Tips" The smallest steel pins I could find are .8mm, but My Fife rails are only about 1mm. It seemed to me that even if I could drill a horizontal hole through the rail with the setup described by @Bob Cleek that the rail would be weakened too much. So I decided to glue on another strip of plastic to support the pin, and I got an idea about how to drill the hole perpendicular. First I cut a strip off a .02" sheet, approximately the width of the rail behind the Belaying Pin holes (so that there will still be pins exposed at the bottom to belay to. Then using a scriber I cut a perpendicular channel in both the rail and the strip. Now when the strip is glued to the rail, I have pilot holes that are very close to perpendicular in both dimensions. Drill through. (I will get better with practice I hope) The finished part looks like this. I oscillate between thinking that this is a clever solution, to thinking that it's obvious, to thinking that there must be a better way altogether. I guess the only way to find out is to run it up the halliard ... Thoughts?
-
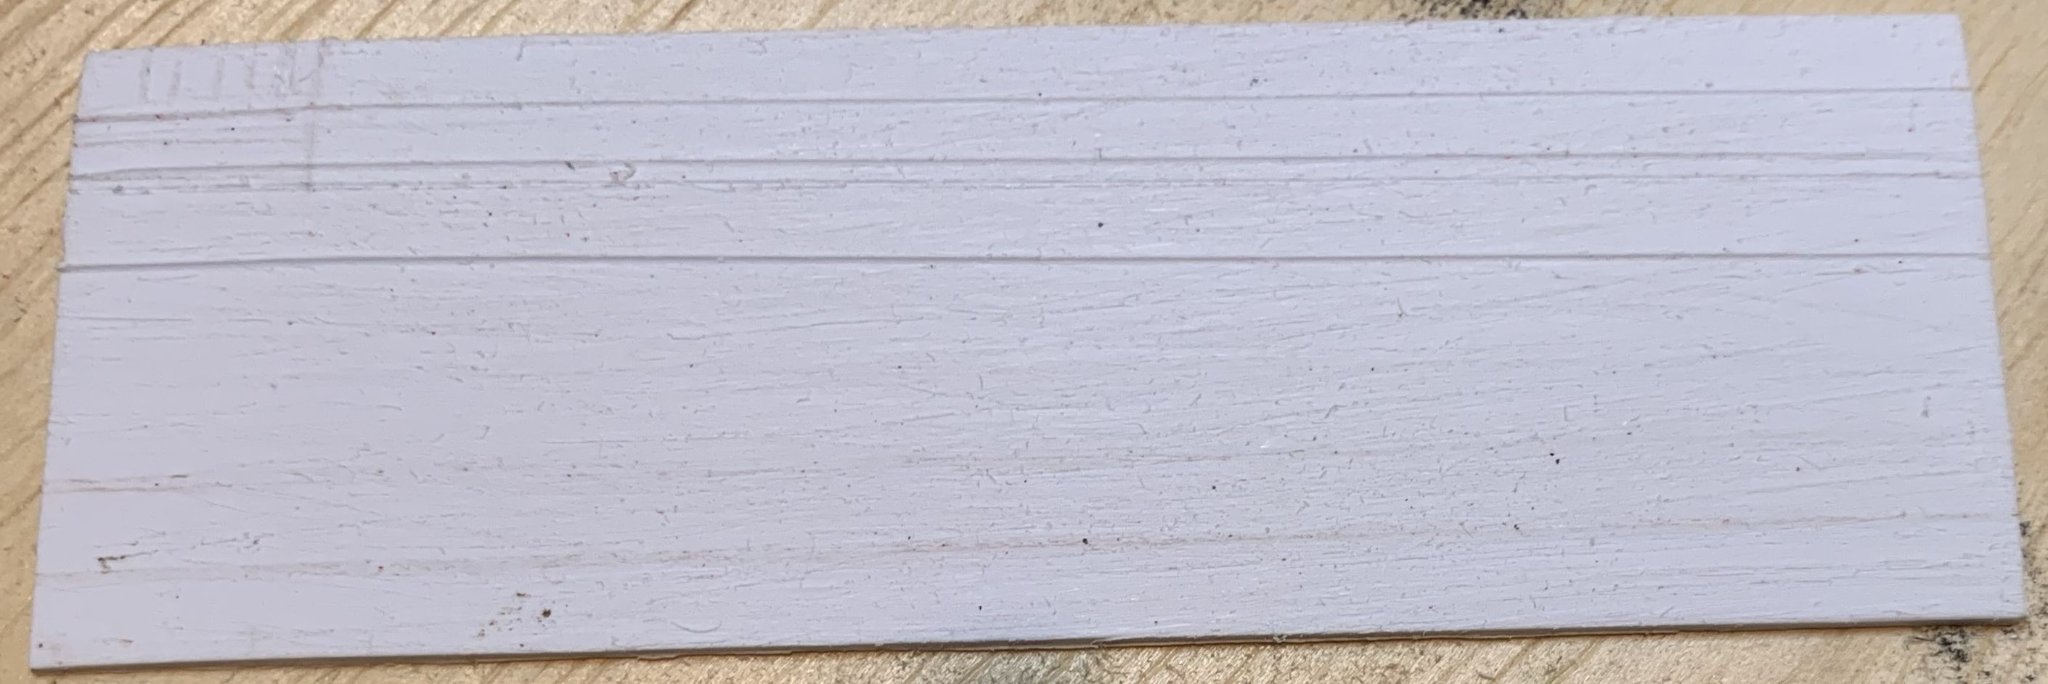
I reckon that I owe the group a comeback on what I did with the information posted here. I'm a little shy about posting my work since I can see that I am in the presence of master craftsmen. Please keep in mind that I am just a beginner. I marked the video from @P_Budzik as "the solution", since I thought that was the single most helpful post. I purchased the UMM SCR-01 as recommended by @kurtvd19 I love using this tool. I like the way it pulls a chip out of the groove it is cutting. Anyway. I haven't started on the actual deck piece yet, but here is my test piece: after sanding with 80 grit and scribing the plank lines. after priming with airbrush. Then I brushed some Raw Umber acrylic into the scribe lines and wiped the piece with paper towels. after painting with airbrush. Much to my suprise, the plank lines were not obscured by the tan color. But I wanted more "texture". I had planned to wash the piece with more Raw Umber thinned way down. I was a bit afraid that the wash would mix with the paint layer and muddy the colors, so I got the idea of using a lacquer barrier layer between the paint and the wash. The section on the left just the airbrush tan over the primer and fill. The section on the right was airbrushed with Testor's Dull coat. Then the right and middle sections were washed with more Raw Umber thinned way down, then dry brushed. My technique could be better, but i'm reasonably happy with the section on the right. That is the process I plan to use on the spar deck. When I get that far I will post a picture of the finished project. Thanks again for the useful information and the interesting discussion.

-
Thanks, @Bob Cleek I think I understand the manual jigs. I'll give them a try. We'll see about getting power tools. Christmas is coming!
-
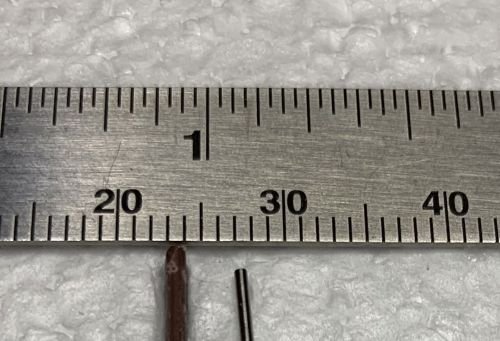
Here is an update.... The pins arrived and I am in the process of drilling 135 holes with my pin vise. I guess I didn't realize how tiny they would be: It's one thing to talk about a pin that is 5mm long. Quite another when you drop one on the floor. Which brings up another question. @ah100mmentioned that he pinned his fife rails to the hull with brass nails. And I am aware that others have done this. But I don't see how it's possible to drill a hole for the a pin horizontally in the fife rail. You can see that I have some consistency issues even drilling vertical holes. Maybe a drill press is required for the consistency I would like to have. But I don't see how a horizontal hole could be drilled in this fife rail, even with a drill press. Hoping that @ah100m or others can provide some insight. Everybody is so helpful here!
-
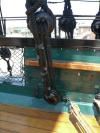
Thanks for the helpful information @popeye2sea, @Kris Avonts and @Dr PR That makes sense. I will rig the lines accordingly
-
Hello, I'm working on the Revell 1/96 Constitution. Before too much longer I'm going to be assembling the gun deck and rigging the breeching lines that absorb the cannon's recoil. Something that is puzzling me is how much slack would have been in those lines? It seems like you'd want as little as possible when the gun was run out, to be effective, but if so, how would they have run the guns in for access to the muzzle with long handled tools? I thought I had it figured out. They must have unlooped the breeching line from around the cascobels and let the gun slide under the breeching line when it was run in. But I have seen some pictures of real ships where the cascobel has a ring, and some models where a cut splice is in place around the cascobel. So that can't be right. Of course many details on the gun deck won't be visible in the model. But I would still like to know how this worked for my own satisfacation Any thoughts?
-
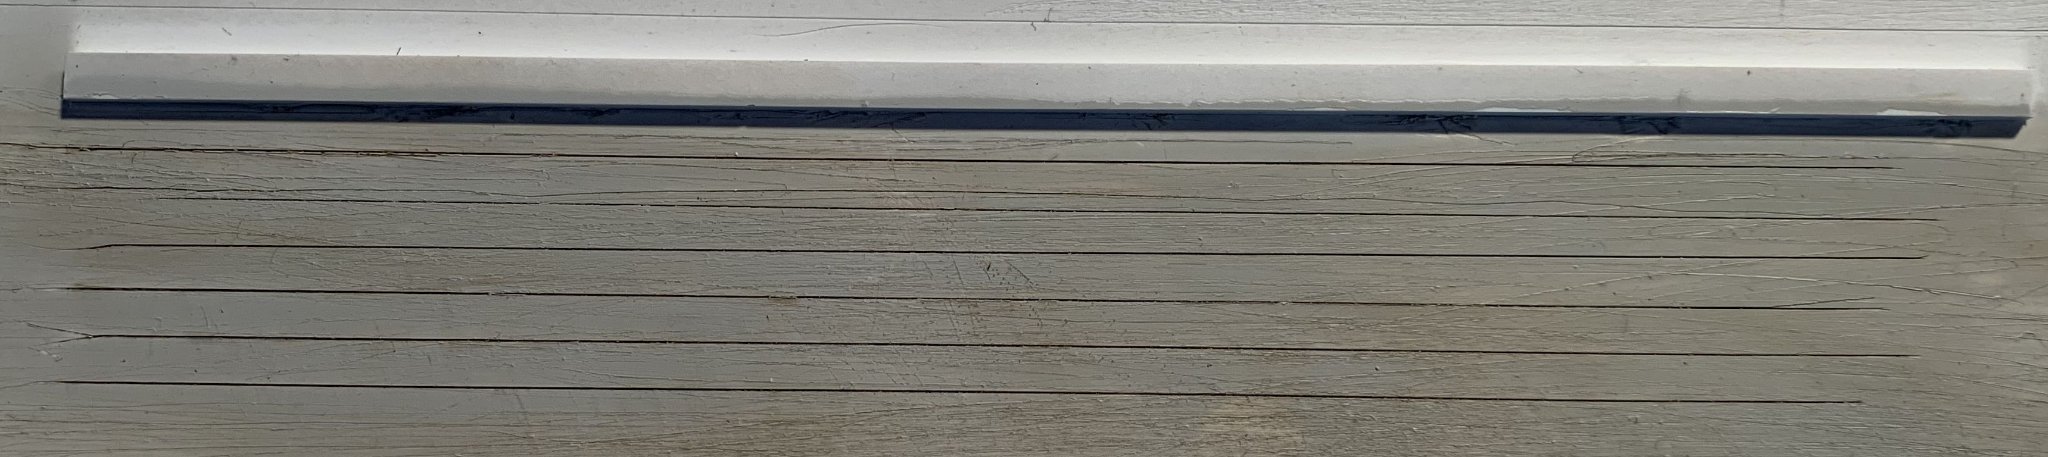
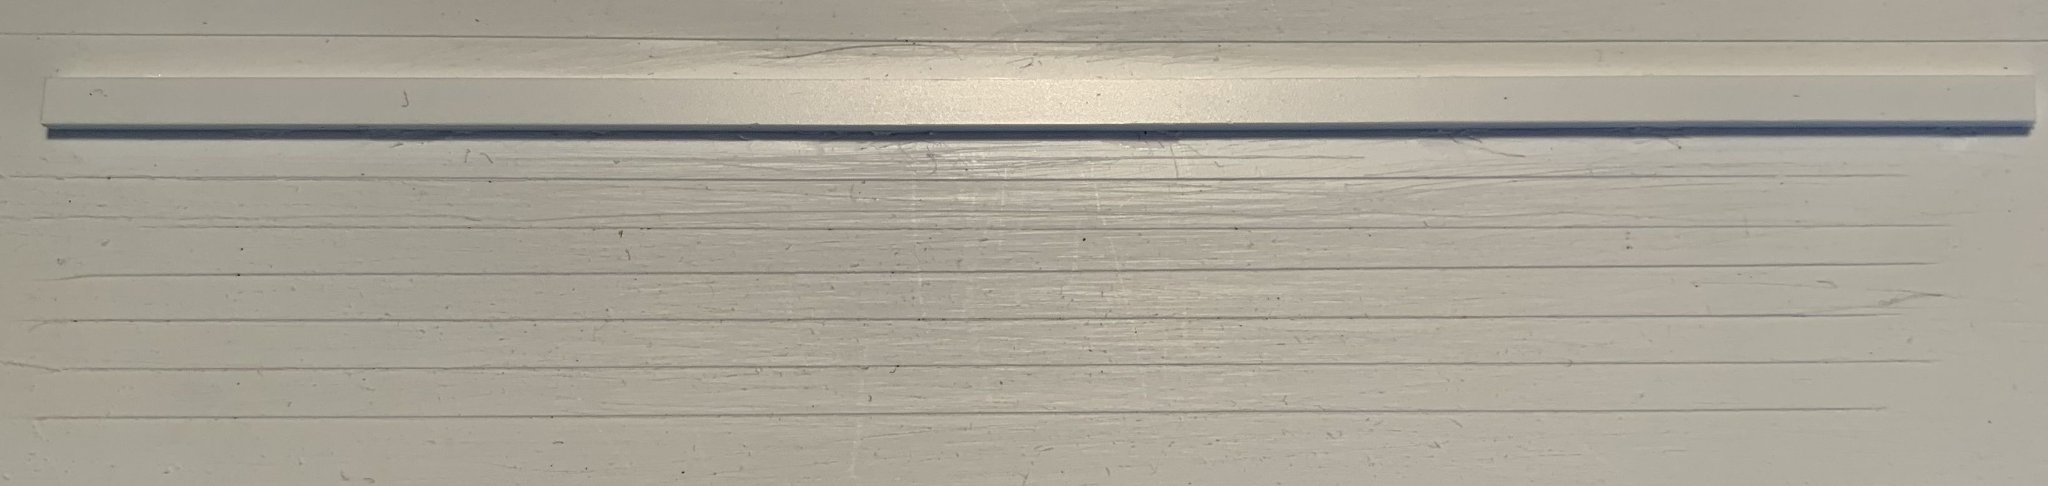
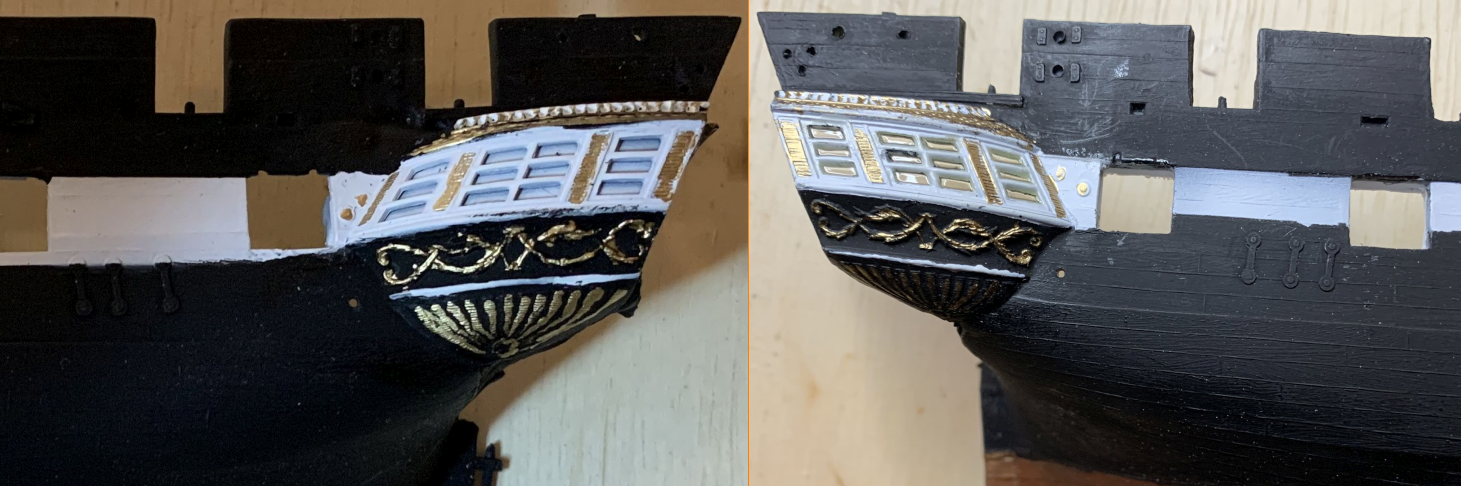
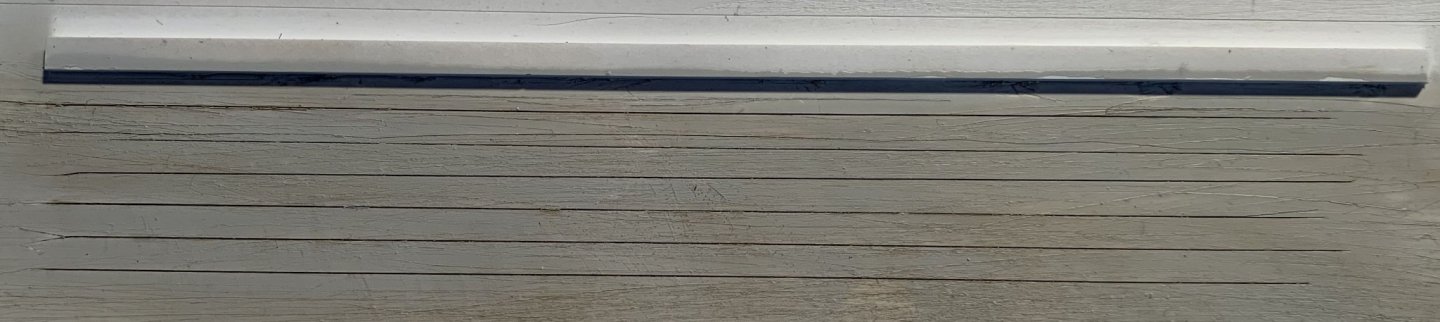
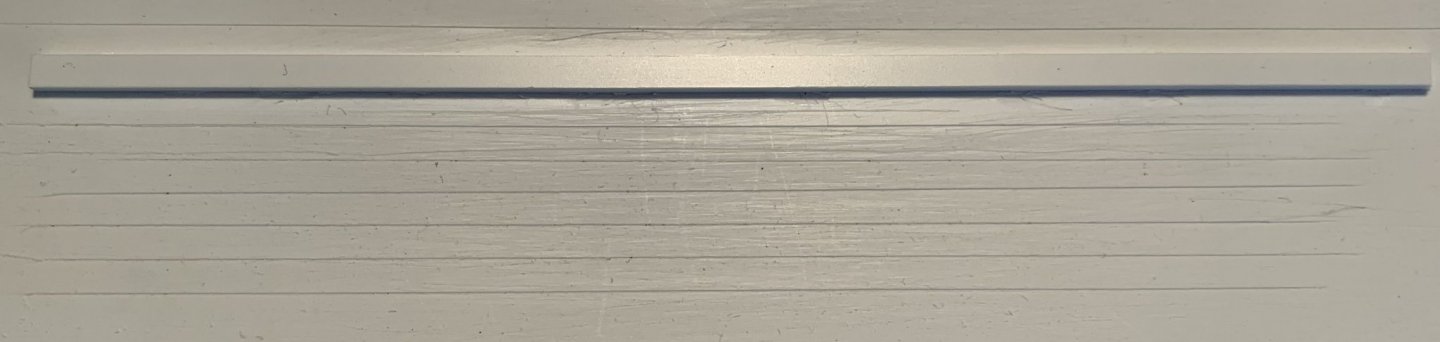
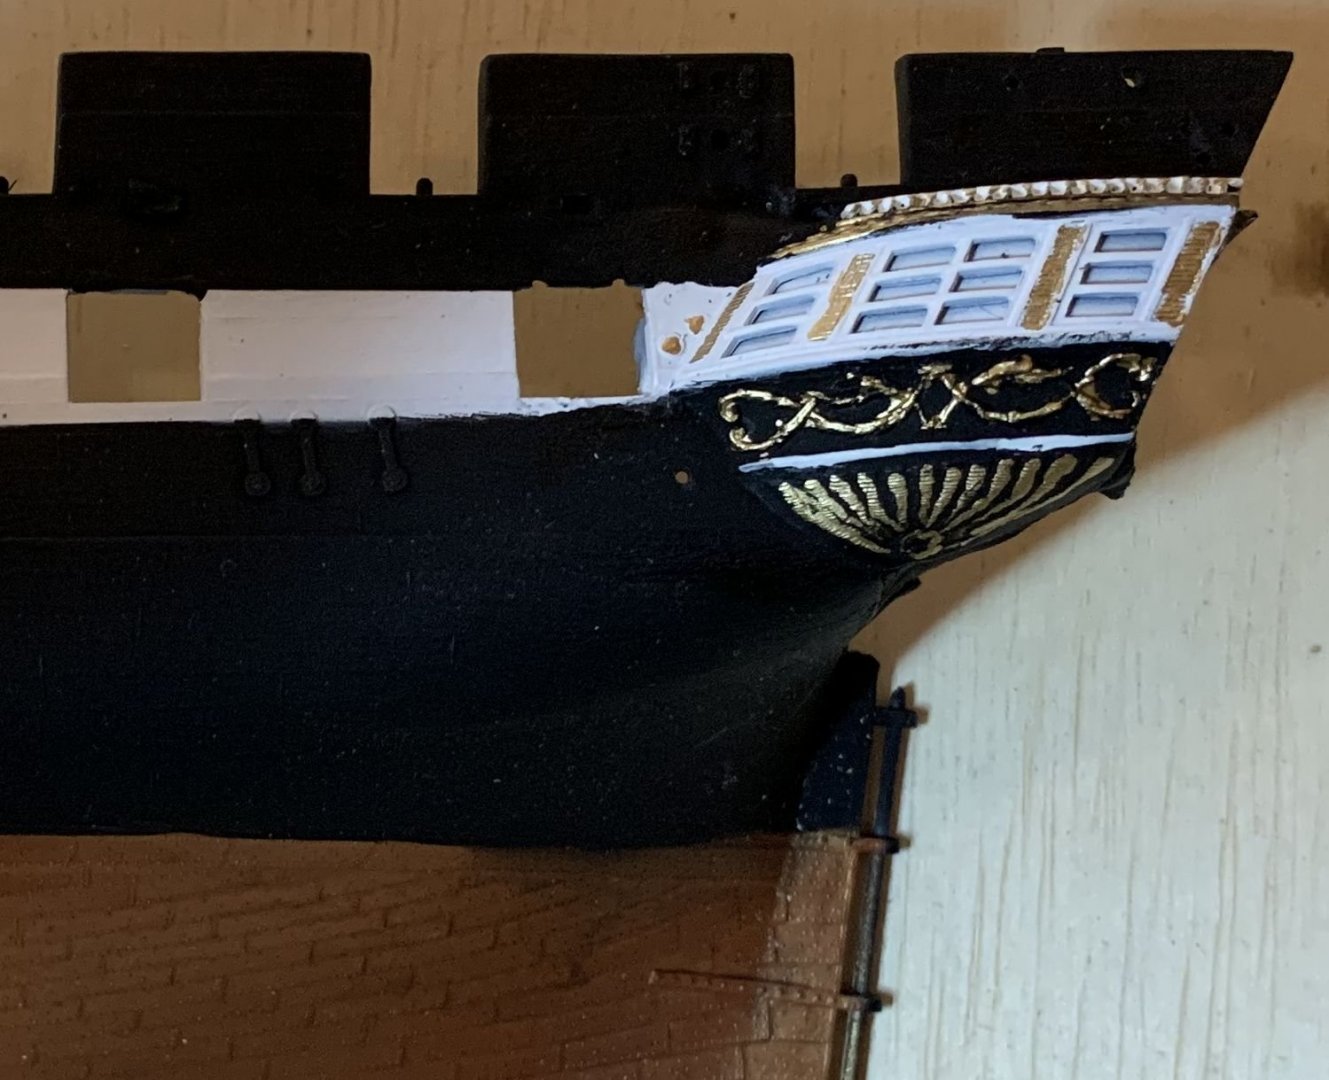
Hull Painting and First Big Mistake It seems like the conventional wisdom is to glue the hull halves together and then paint the whole thing. But I wasn't aware of that guidance at the time, so I decided to paint the hull halves separately. I reckoned that the detail work on bow and the gallery would be easier with the hull half laying flat on the bench. I'm not sure that was wrong. Inexperience came to bite me in other ways though. I wasn't nearly as careful with the masking as I should have been and in particular I got the bottom boundary on the gun port stripe completely wrong. I did wonder why the ridge was going through the bottom port of the gun ports, but I taped off at the bottom of the ports. but it wasn't until I was looking at some other build logs here and working on the Gallery and bow painting that I realised that the stripe is supposed to end where the ridge is (of course, why else would they give you the groove?). I do still imagine that this would look kind of clumsy with gunport doors closed. But I'm leaving doors off entirely except for the two most forward, and they will be open. I see that it makes much more sense to stop at the ridge to blend in with the bow and the gallery. Easier to mask and paint at the ridge line as well. What was I thinking? So I masked it correctly, and sanded it down... and repainted. I still have some cleanup to do, but This looks a lot better to me. I think it's also interesting to note that there is a lot more space between the edge of the gunport and the gallery on the starboard side than on the port side It's kind of embarrassing to be going public with these blunders, but I recovered. ...and I'm learning. Until next time, smooth sailing! Paul


- 8 replies
-
- 2
-
-
- constitution
- Revell
- (and 1 more)
-
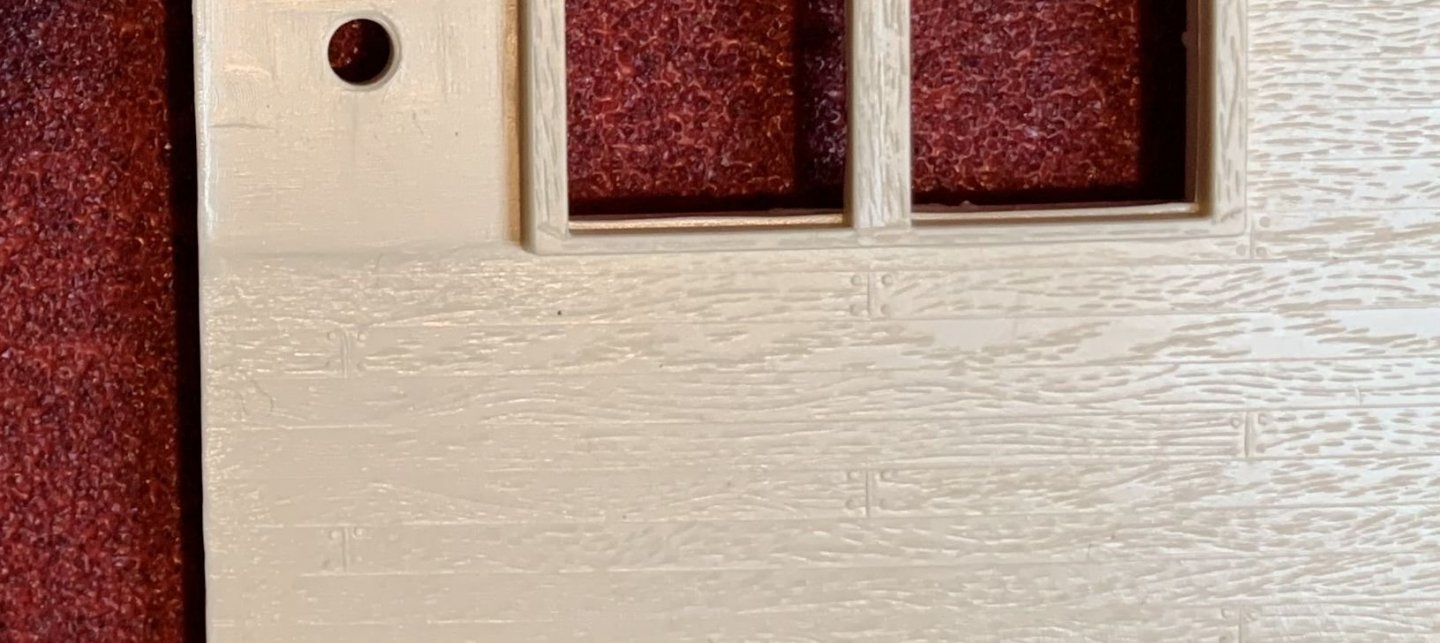
Thanks everyone for the practical and philosophical advice. I have been thinking about this alot and I hope it won't offend anyone if I offer a different perspective. First of all, I don't think it's inherently wrong to make visible the details that you know are there but wouldn't ordinarily see. In some sense I think that is the purpose of a model (at least for scientific and data processing models, but I think the principle applies). Second, a quick experiment inspired by @shipman's post. Here is photo of the actual Constitution spar deck: This isn't a great photo for my purpose, but it was the best I could find. I resized the image so that the deadeye matched the size of one from the kit. As a sanity check, the space between the plank joints (which can be plainly seen) are about 1/8" = 1 foot. I don't see any grain, but I do see the plank lines, since (as indicated by @Roger Pellett because of the paying )they are much darker than the wood wood. Just for some context around why I want to do this, the decks from the kit have a wood grain pattern and plank lines moulded in. This is what the spar deck looks like out of the box. This is my finished Gun Deck (airbrushed tan then washed with raw umber acrylic) I don't think this looks too bad, although I would like to see more plank lines. If I could get the spar deck to look like this without a lot of fuss, I'd be more or less happy. I'm content to leave the Gun deck in three pieces since it will be (mostly) hidden, but I really want to eliminate the athwartship(?) seams between the three spar deck pieces. After I fill and sand those seams, the embossed pattern on the spar deck will be ruined and I need to recreate it. So I guess I will consider the suggestions for scribers made above. Thanks so much guys. Good Conversation!

-
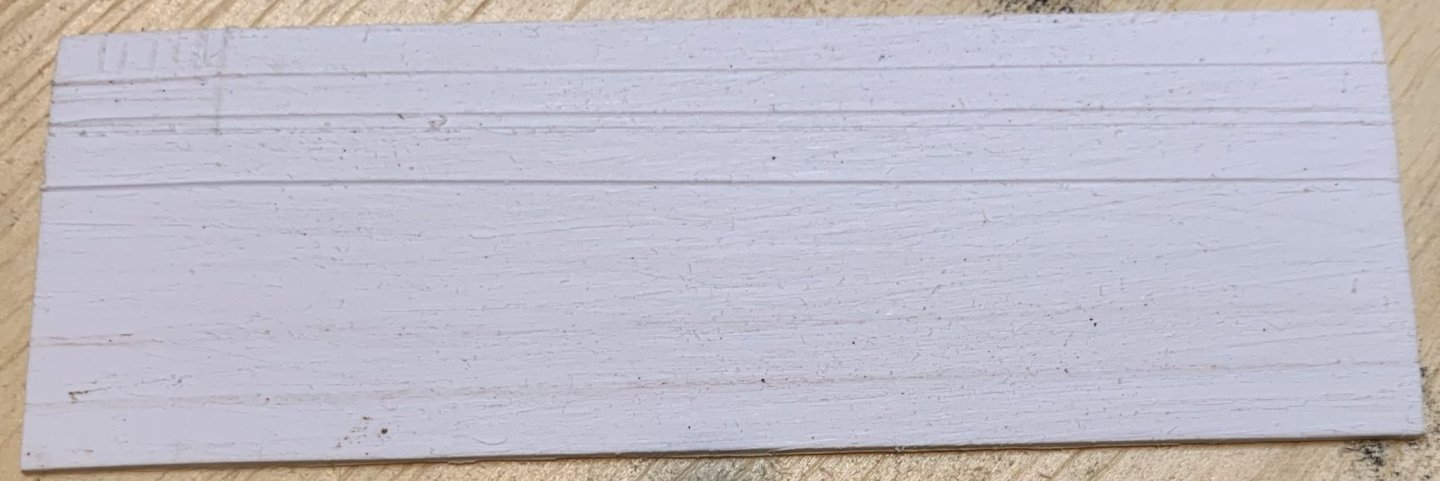
Hi, I hope someone can give me some guidance. I'm building the Revell 1/96 Constitution. I'm planning to glue up the three spar deck pieces, fill the seams and then scribe the planking as done by force9. But I have never done this before and I'm not sure what scriber will give me the best results. To get some Idea of the look I'm going for, here's a photo of my bulked up inner hull which is made from actual "planks" of .04x.156 Evergreen strips, which I sanded with 80 grit to get a wood grain I also hit the corners of the strip to get some chamfering Hmm... I see at this magnification that I have some cleanup to do, and the seams aren't as consistent as I would like. Still if I could get the deck to look like this I'd be happy. Here's a piece of scrap that I hit with the 80 grit and then used a #11 Excato to scribe the lines. I'm not really happy with this. The Exacto seems to be raising ridges as it cuts instead of making an actual 'V' like I have with my planks. If I sand this the seam all but disappears. I tried a straight pin with the head cut off in my pin vise, but that result isn't even worth showing. Much too fine. I found a carbide tipped scriber at Home depot whose tip was about the size of a toothpick. That seems too big. From what I have been able to learn there seem to be two types of plastic scribers available. Those like the Tamiya work like a box cutter - you drag the hook along to scribe the piece. But will this really be any different than my Exacto? Those like the ANSAI look more like chisels, but I guess you use them like an Exacto (I don't see anyone pushing them like you would a chisel). I don't see how any of these could take out a "V" shaped channel which is what (i think) I really want. I'd sure like to hear some opinions before I commit one way or the other. Of course I will test before I start on the deck but I'd prefer to make a more educated guess. Also I may be completely missing the point. Any guidance will be appreciated.

-
Thanks everyone for the great historical and practical advice. Amazon does not quote the diameter of the pins I'm contemplating but they sound a lot like the ones ah100m is using successfully. Is there a product that blackens brass? I seem to remember a comment in a build log that "the fittings are soaking in Blacken-It" or some such. I guess I could paint them since they won't actually get much use. I'm still torn between the aesthetics of leaving them bright or the accuracy of blackening. I suppose that if I left them bright they would tarnish over time. Maybe by the time I get to the rigging at the rate I'm going.
-
First Steps Hello all, I see I have picked up a couple of followers. Thanks for that. I'll try to keep things interesting for you. I don't have many photos from the early days of the build, since I wasn't contemplating a build log at that time. But the very first thing I did after pouring over the directions for a few days was to clean up the Hull halves. This meant filing off the tabs on the keel for the stand I'm not using and generally cleaning up the flashing(?). It wasn't easy at first to tell what was supposed to be there and what wasn't. Forewarned by comments from other builders, I checked the fit of the stern piece to the hull and discovered that I had big gaps on both sides. Here is how I patched that: I secured the hull halves together with masking tape. Then I wrapped the stern piece in plastic food wrap to keep the filler from sticking to it and taped the stern piece in place. Then I ran a bead of putty into the gap. After curing I took the stern piece out and gingerly removed the plastic wrap. Then some filing. it took several iterations but I eventually plugged all the gaps. Thank goodness that the areas that I had to fill are not too conspicuous, because it was very sloppy work. But overall, I'm happy with How I overcame this first challenge. I was flying by the seat of my pants here. So if there are better ways of doing this, I'd love to hear about them. Thanks for following along. Calm seas and favorable winds to all!

- 8 replies
-
- 1
-
-
- constitution
- Revell
- (and 1 more)
-
I'm working on my 1/96 Revell Constitution and have decided that the pins molded into the various rails are way too fragile. I'm going to save myself some grief (I hope) by filing the plastic pins off the kit rails and drilling holes for aftermarket pins. I have more or less decided on these pins, but thinking about this has raised the question of What were the actual pins on ships of that era made from? I guess I always assumed, without thinking deeply about it, that the pins would have been made of some kind of hardwood. But recently I read C.S. Forrester's classic Mr. Midshipman Hornblower and in that story Horatio intends to dispose of a package of sensitive documents by weighting them down with a belaying pin and throwing them overboard. He ends up "skirting" the problem of safeguarding the dispatches, but it got me wondering if the pins would have been made from metal of some kind. I don't suppose it would be plausible, for me to leave the bright brass finish on my pins? I think I would like the look of that, but not if it doesn't make sense. As a side question, you often see in books and movies, spare belaying pins being used as weapons. Wouldn't they have been secured in the rails? And wouldn't they all have a line tied to them? Thanks for any insight you can offer.
-
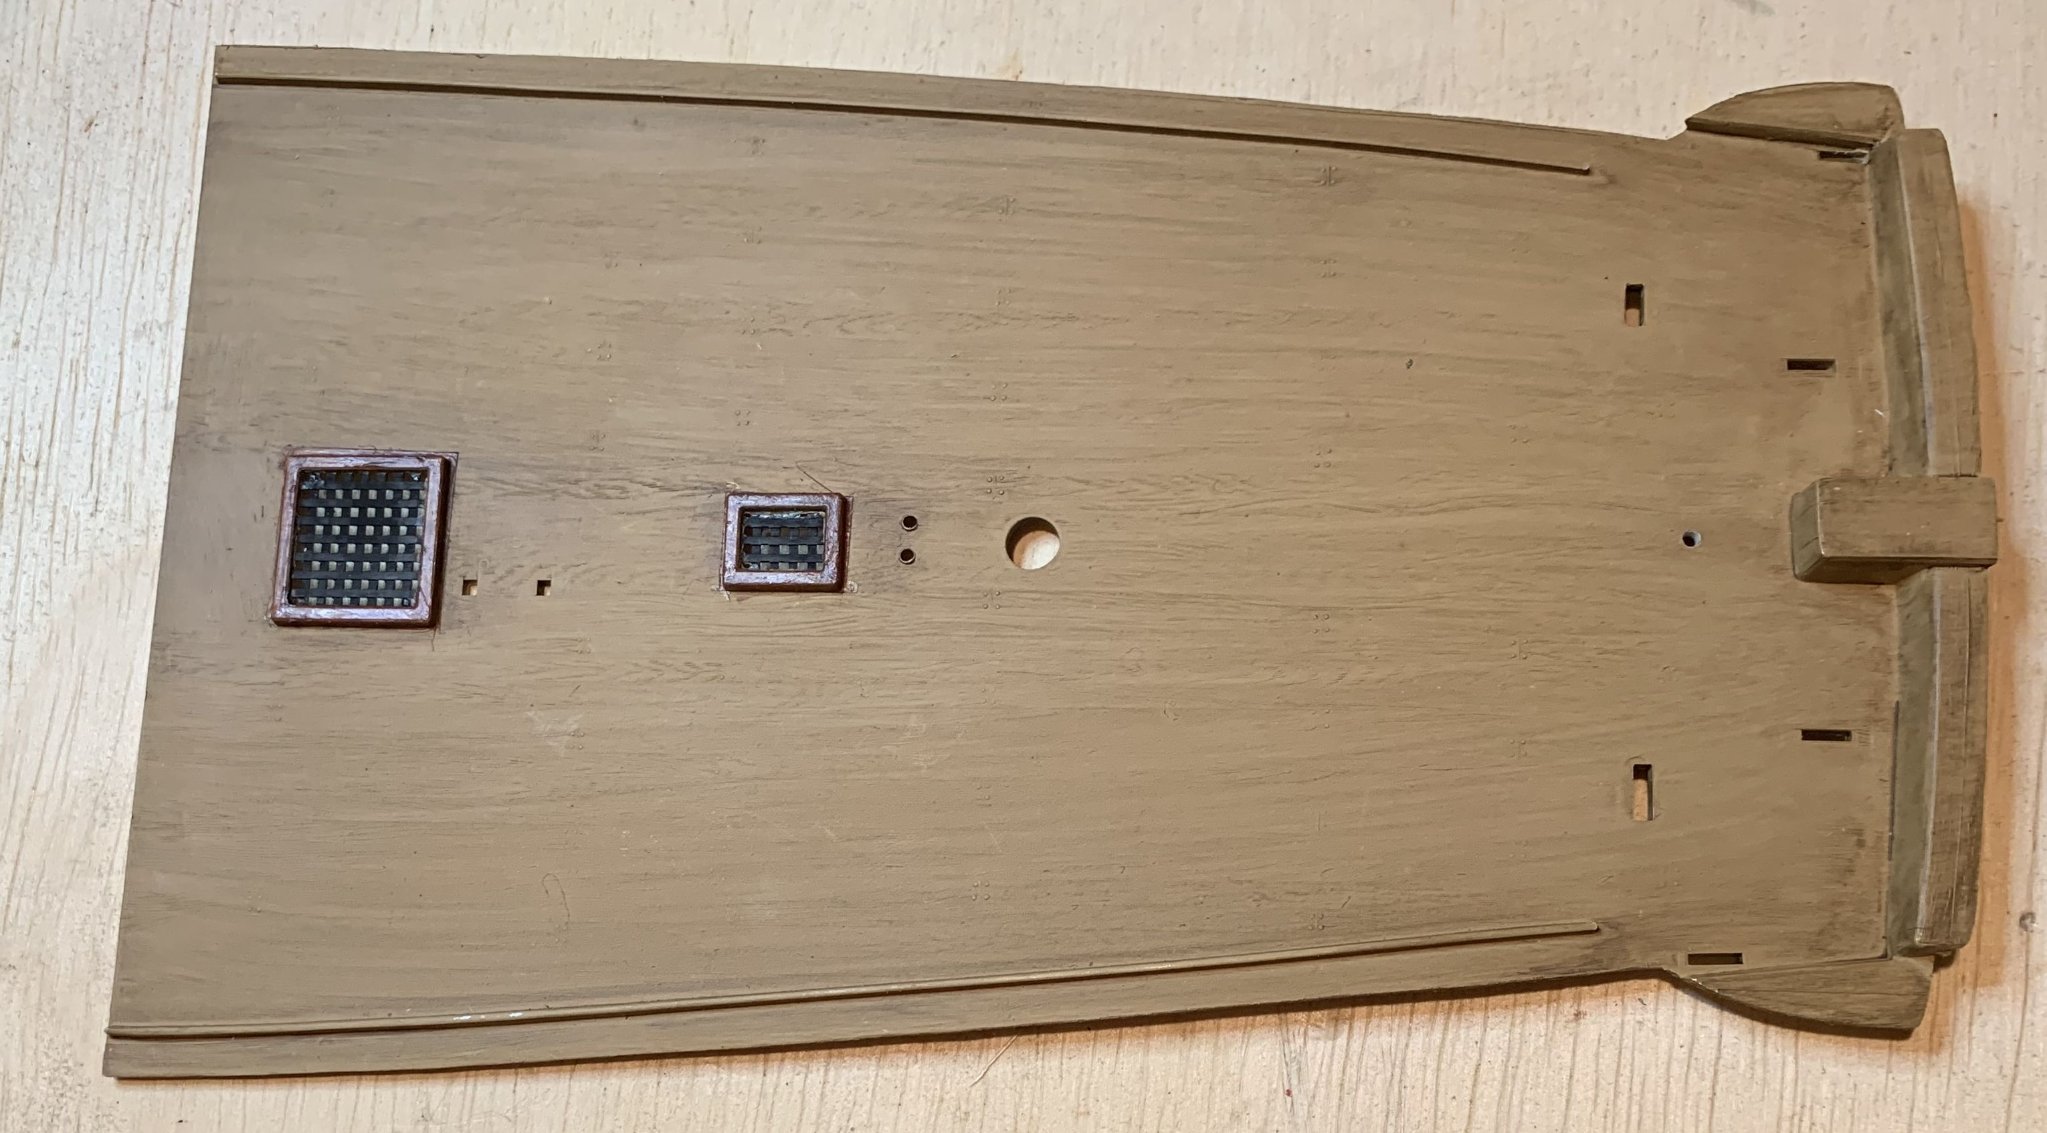
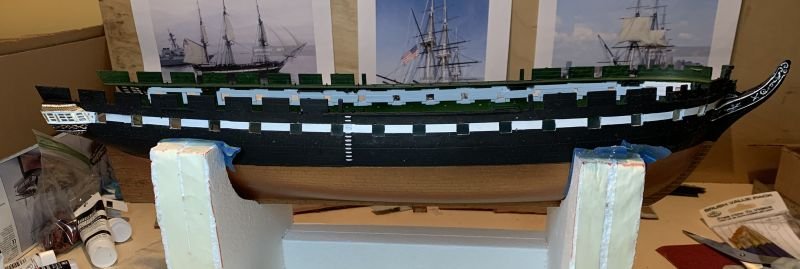
Decisions and Plans "You can't please everyone so you got to please yourself" --Ricky Neslon This is the final preliminary post, before I get caught up on the actual status of the build. What I plan to do here, it document the key decisions I have made about modifications to the kit. It's partially a plan for me and a way to document how my thinking evolved through the process. It really never occured to me to do anything except follow the instructions, until I started hanging around here. In this endeavour, I'm going to try to balance the following principles. Aesthetics - what looks good to me. I should note here that if possible the ship will end up living on the fireplace mantle which is only 8 1/2" deep. Since I'm not going to make the mantle wider (see Practicality below) I reckon that I will have to brace 'round the mainsail yards. Plausibility / Accuracy - I couldn't hope to match the level of historical scholarship demonstrated in Force9's Build Log. Fortunately, there seems to be a lot of ambiguity associated with the Constitution, which I think opens the door to something I will call "Plausibility". I'm more interested in how she might have worked than in capturing any particular phase of her life accurately. So for example, If I have to brace the yards around too much to fit her on the mantle, I may end up putting her on the book case instead. Practicality - I must keep in mind limitations on my time, and modelling ability. It's very tempting to go down rabbit holes, trying to imitate all the stuff I'm seeing in other build logs. Fun - related to aesthetics, I guess. But what I have in mind here is doing things that build my skills and that I enjoy doing. I doubt if most readers will care much about this, but I felt I needed some kind of "mission statement". Here's what I have decided on so far: Hull Stripe - White (as she currently is) Copper hull - Process as described by Robin Louis in Weathering a copper hull. Just enough wash to give the edges of he plates definition (Aesthetics won out over Plausibility) Gun Ports - forward two ports with Doors open per instructions. Other ports have no doors. Notches and holes filled with putty. I'm not a good enough modeler to make the split doors she has now, but it seems that it was common practice for her to stow the doors below. Certainly better for fighting Bulk up the bulkheads - Build logs from AgeOfSail and Force9 convinced me to do this more as an exercise to improve my modelling skills than anything else, though I'm hoping the extra width on the bulwarks will help me get the walkways in place more easily. This decision caused a big error on sequence, since I had already painted the hull halves. You can see the work in process with this pictured above. Interior Bulwarks painted Green - but not the exact shade you see above Cloth Sails - for the three topsails, the main course, the spanker and the two jibs. The main course will be "brailled up". I understand that this was a common fighting configuration at the time. Courses were furled or brailled up to avoid catching fire. Furled sails - on all other yards, using Landlubber Mike's technique for furled sails Ships bell -- I'm going to try to make a belfry from Evergreen plastic stock. Wish me luck Brass belaying pins -- The pins molded into the kit's fife rails look so fragile, I'm afraid that rigging won't be any fun if I break a bunch of pins. Spar Deck -- I really love the deck veneers in in the builds by Boats Billy and MikeU48. But I'm resisting the temptation and attempting to take on the project of filling and sanding the seams and texturing scribing the plank lines as done by AgeOfSail and Force9. I hope I can produce an acceptable result Lighting the Gun Deck /Gallery -- my first thought about lighting was, "too cheesy" but when I saw classicPlastic101's video on what this could look like. I decided to attempt this. Stand -- I'm discarding the kit's plastic stand in favor of two brass rods supporting the keel on a wooden base. I plan to use the gussets(?) provided inside the hull, sort of like how MikeU48 put his bolts in. But I'm going to use brass tubes, one of which will be a conduit for my lighting wires. So that's the plan. We'll see how well I do
- 8 replies
-
- 2
-
-
- constitution
- Revell
- (and 1 more)
-
Overworked724 -- Thanks for your words of encouragement, Patrick . I took a quick look at your Syren build, and I'm now REALLY Glad I didn't start with a wooden Kit.