
builder_Nick
-
Posts
52 -
Joined
-
Last visited
Content Type
Profiles
Forums
Gallery
Events
Everything posted by builder_Nick
-
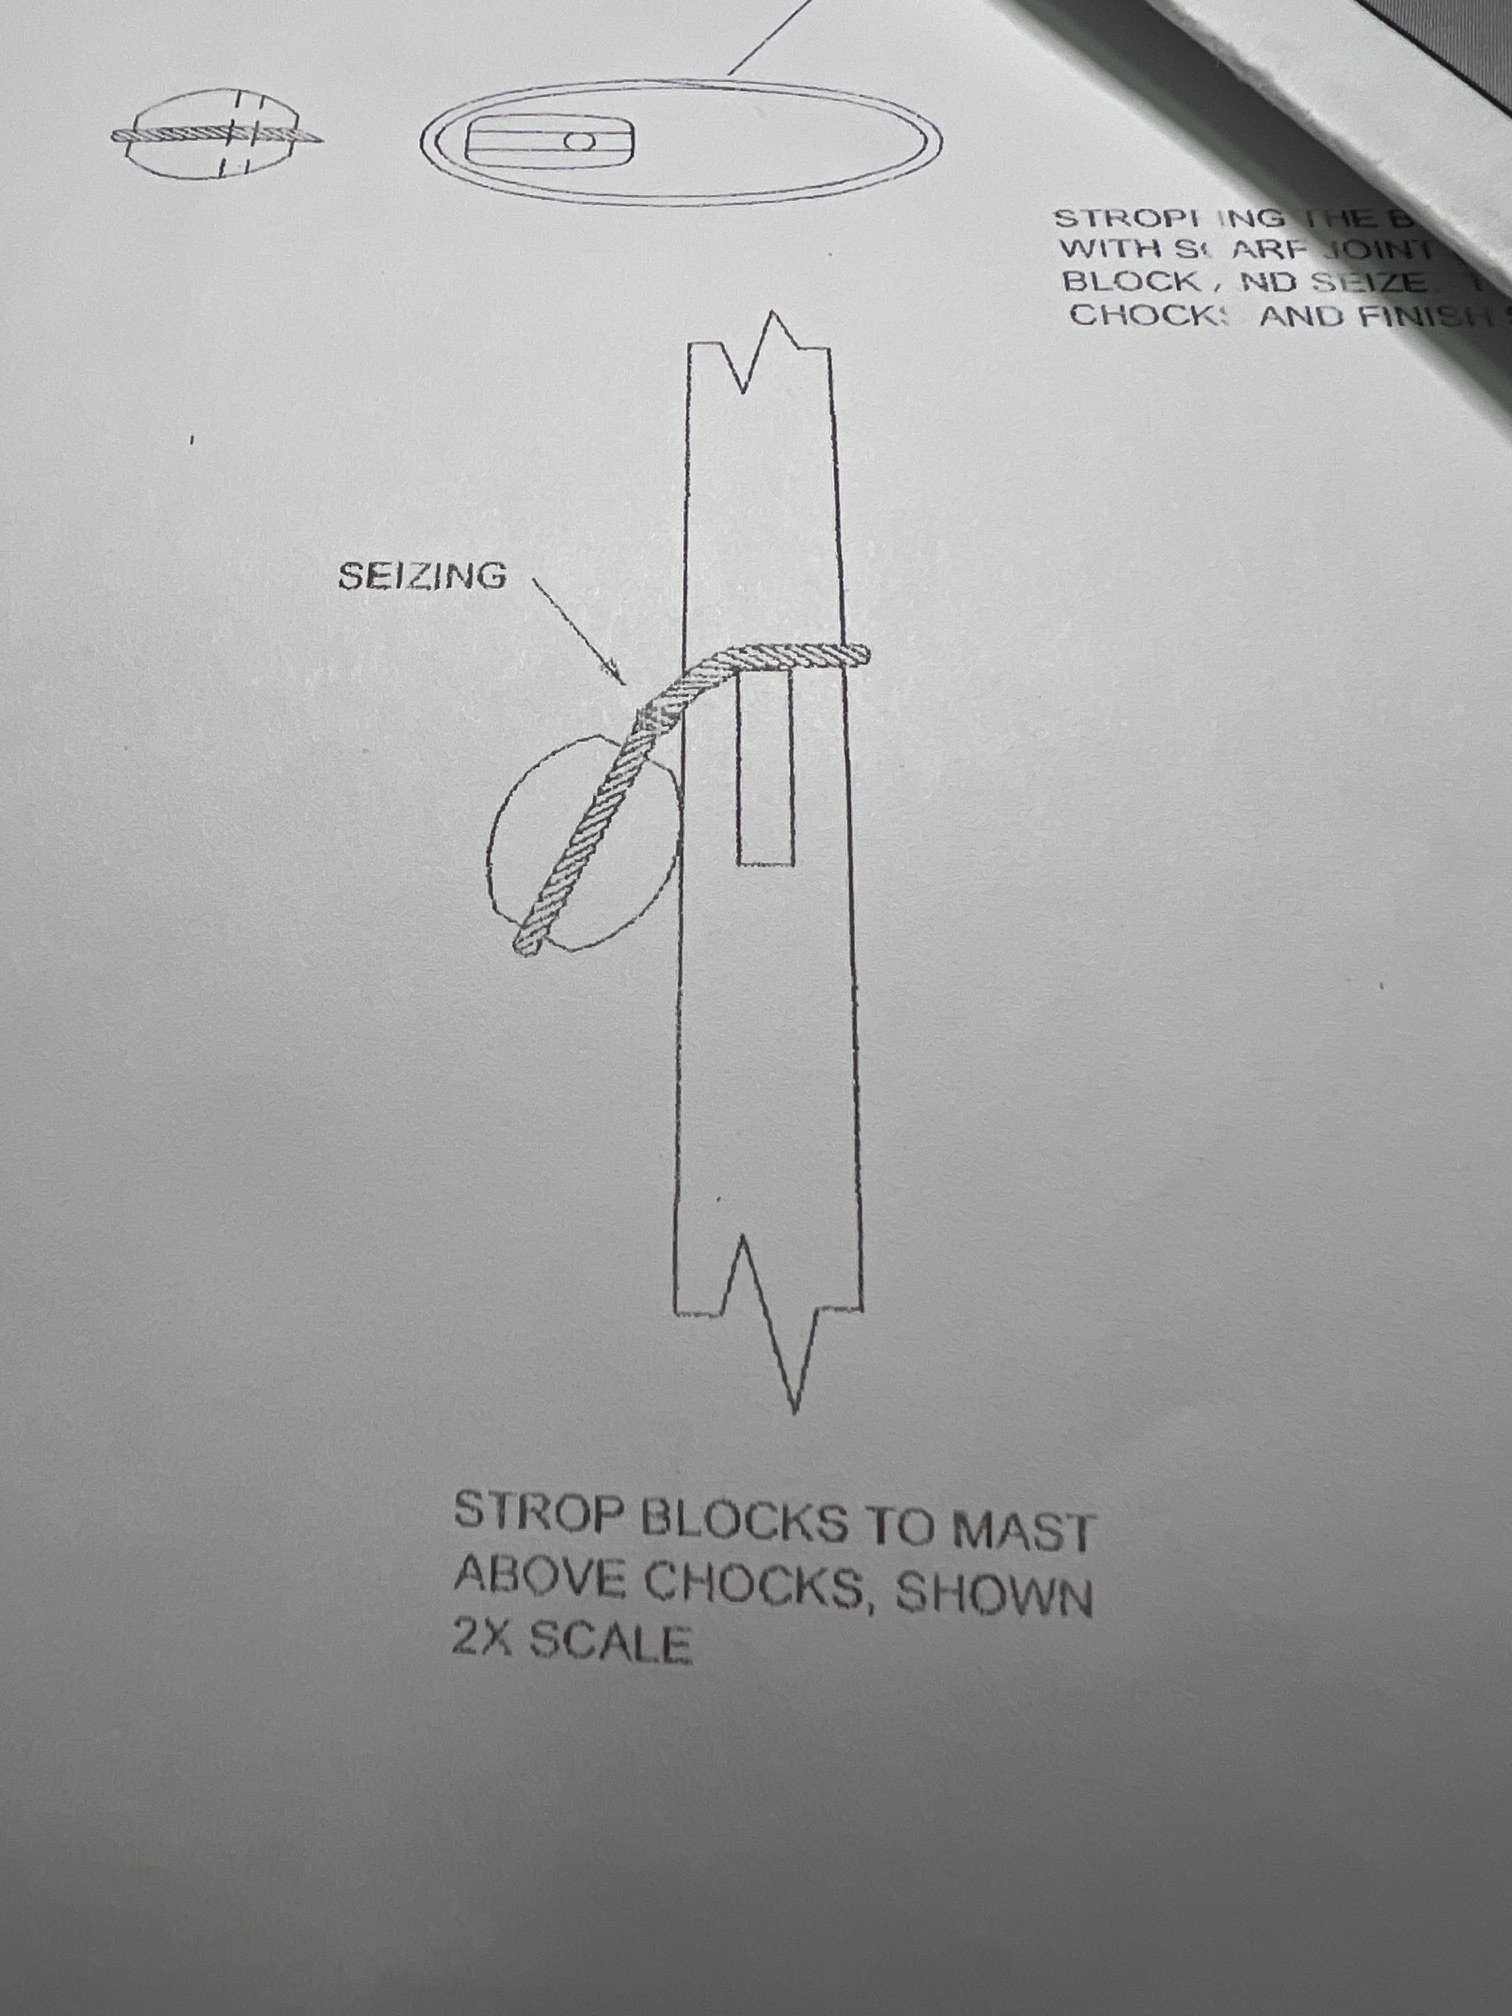
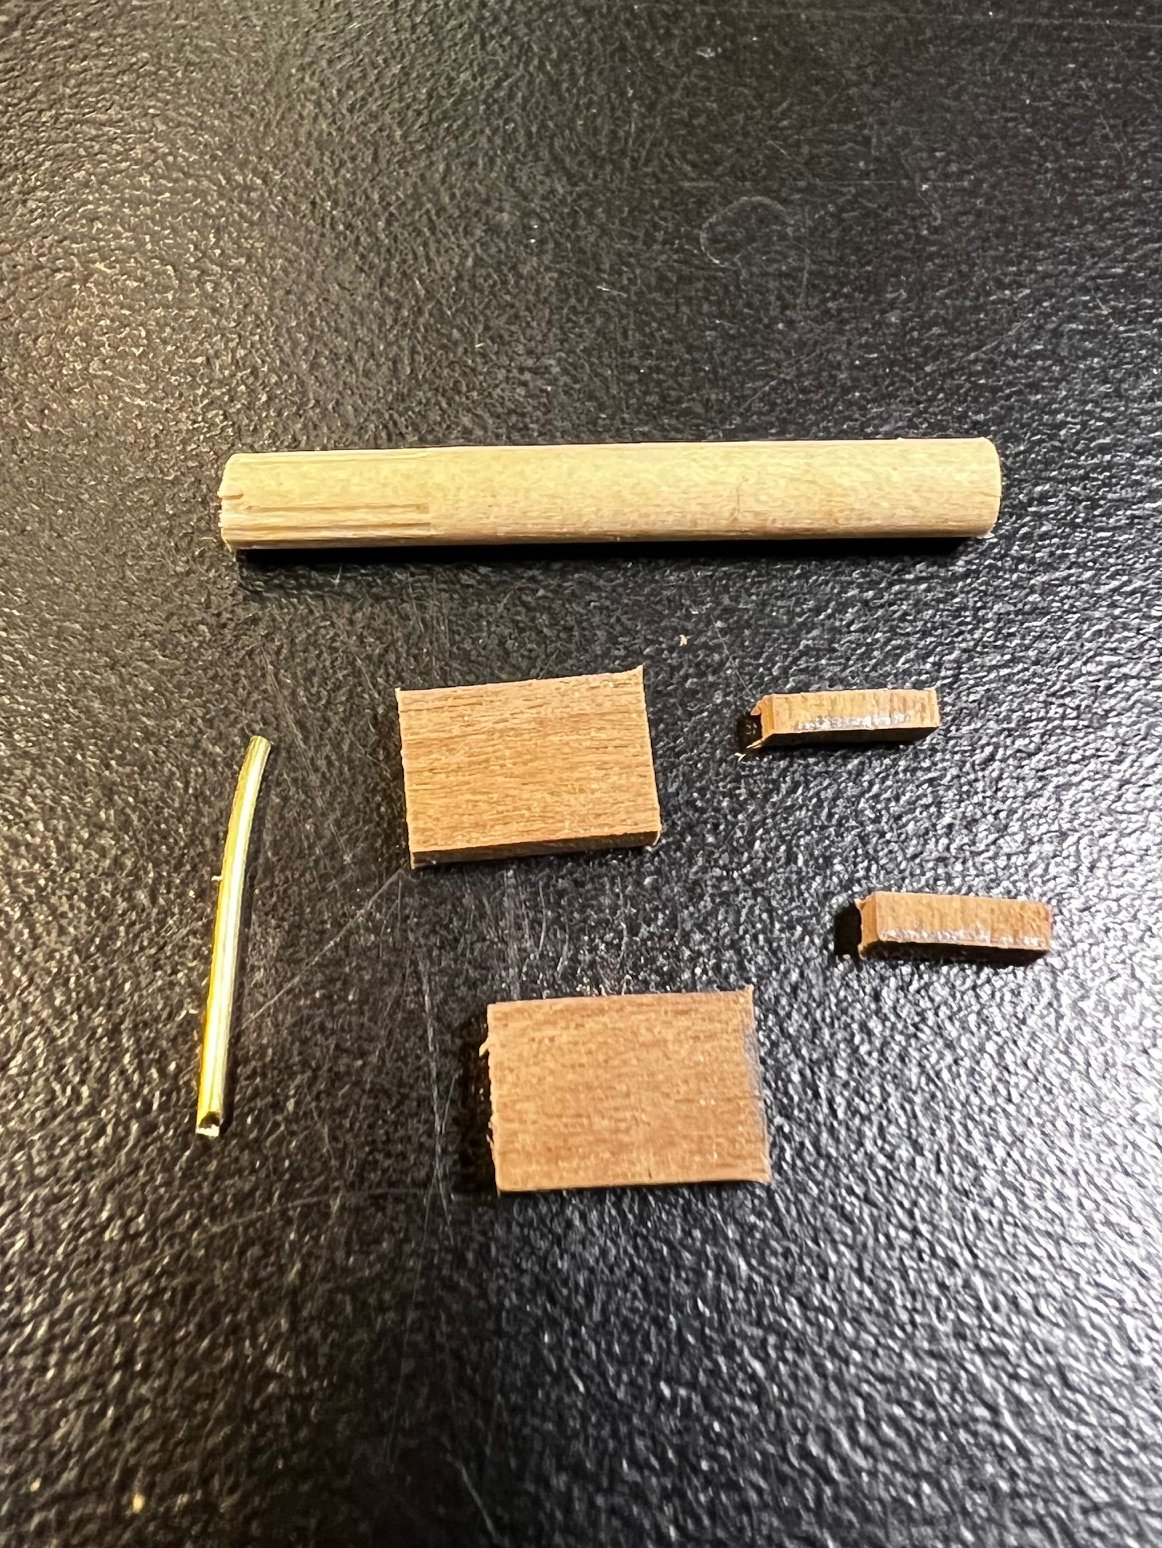
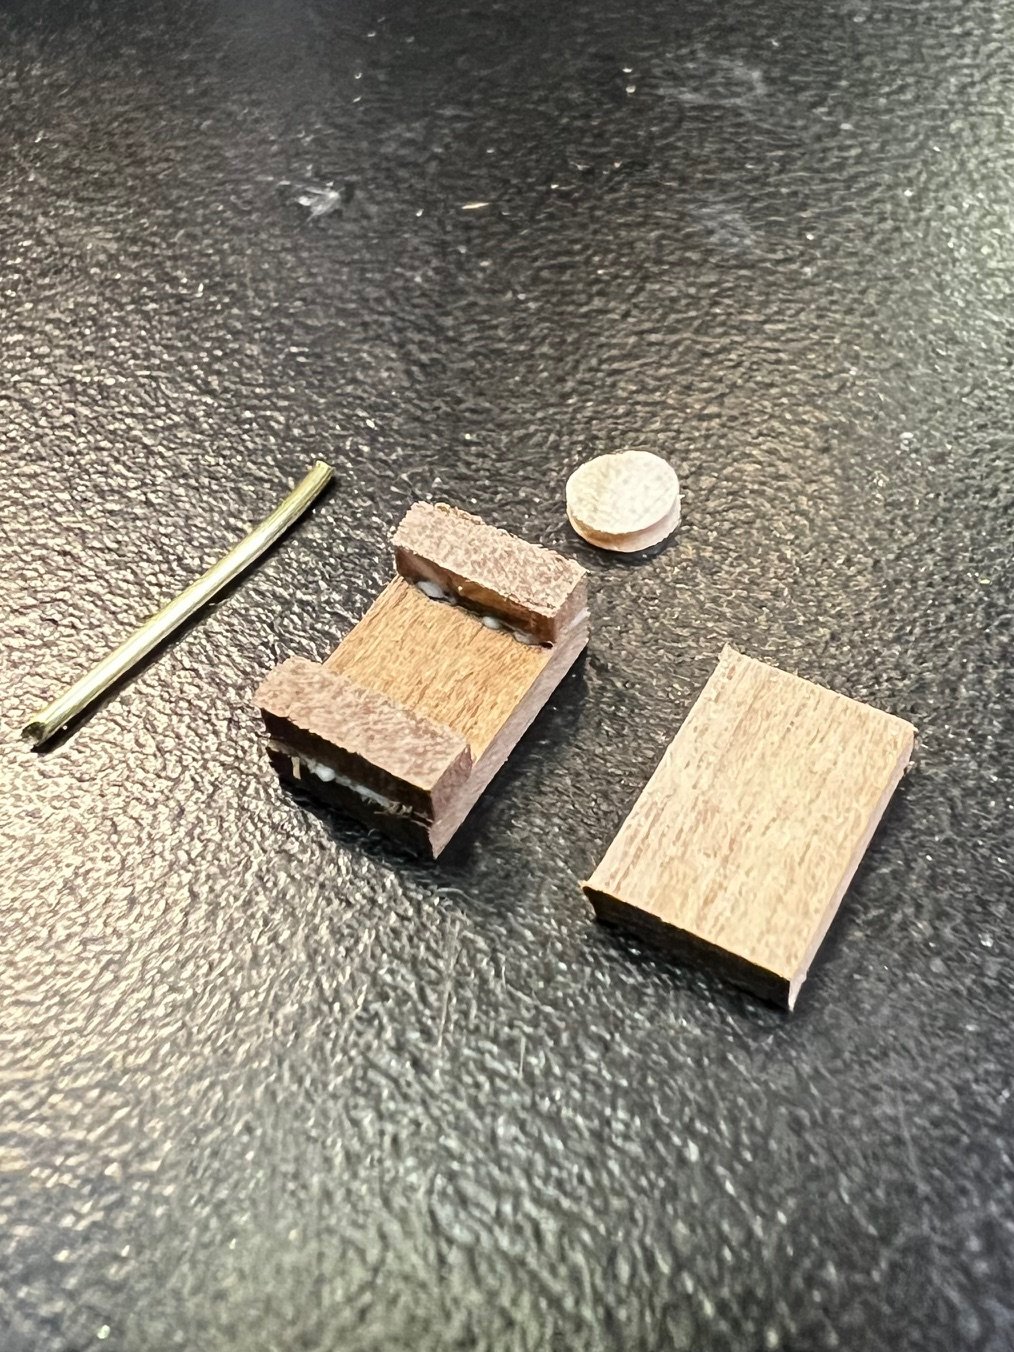
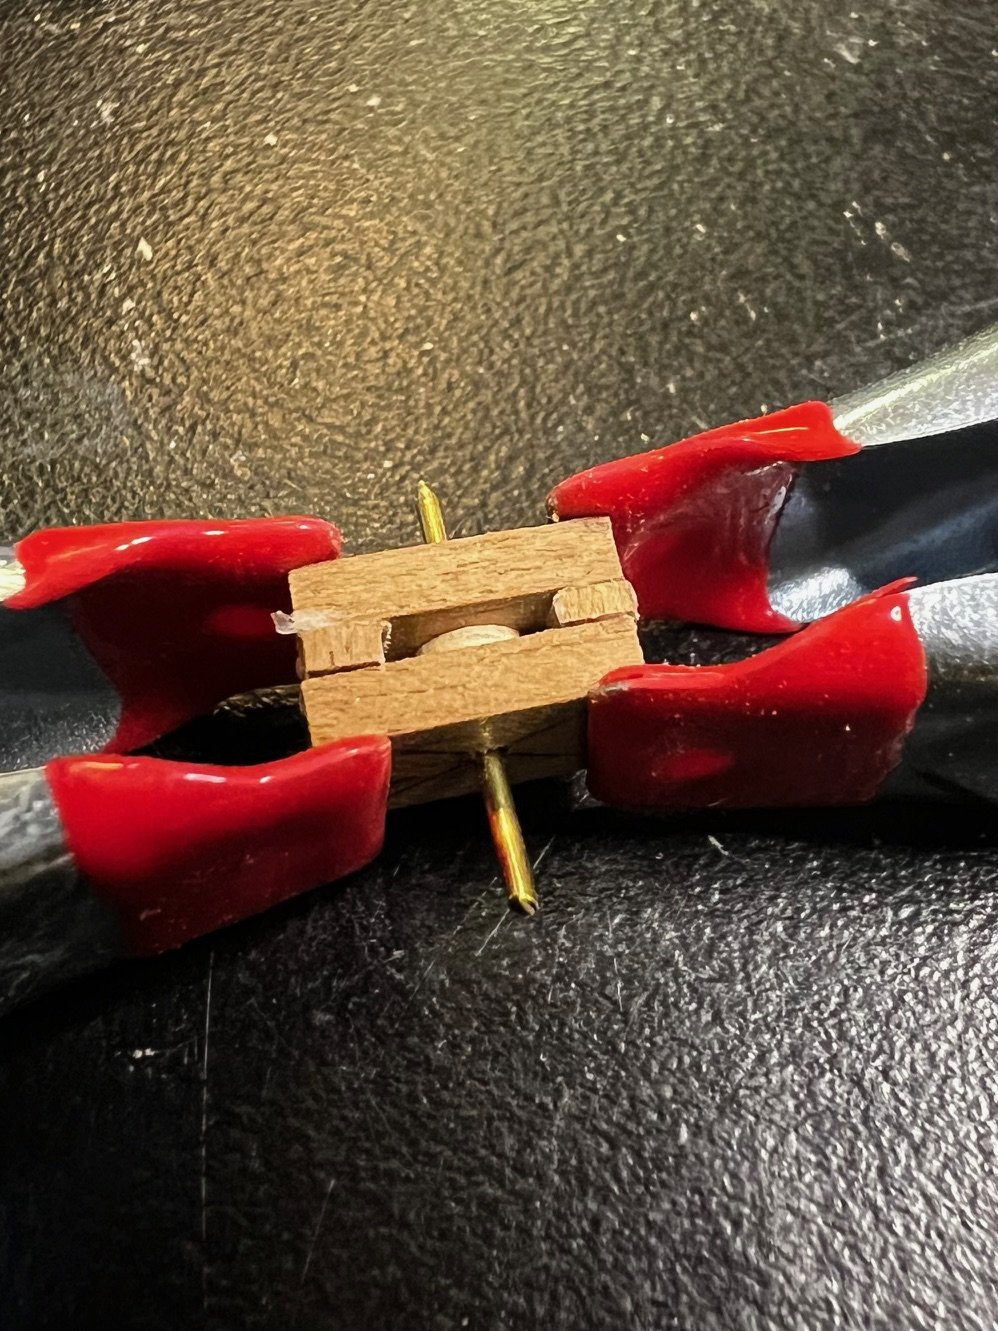
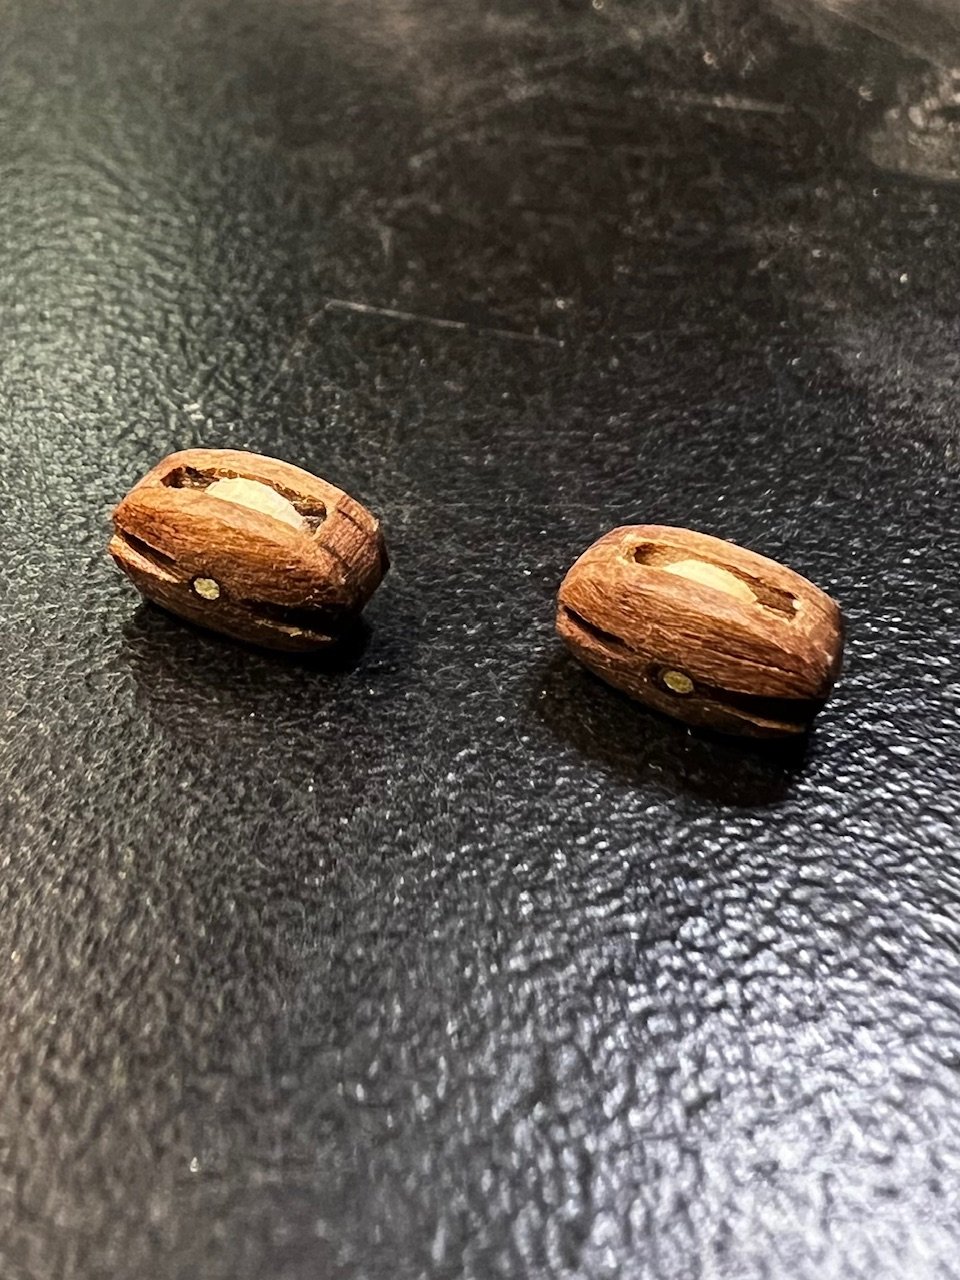
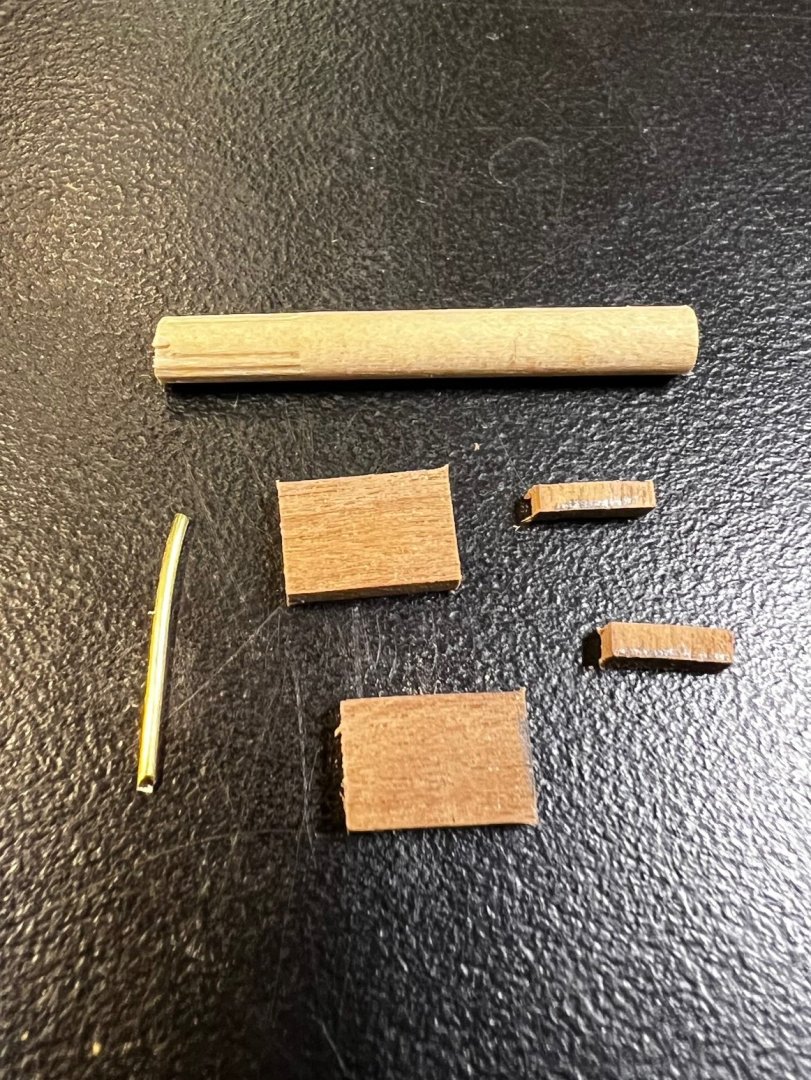
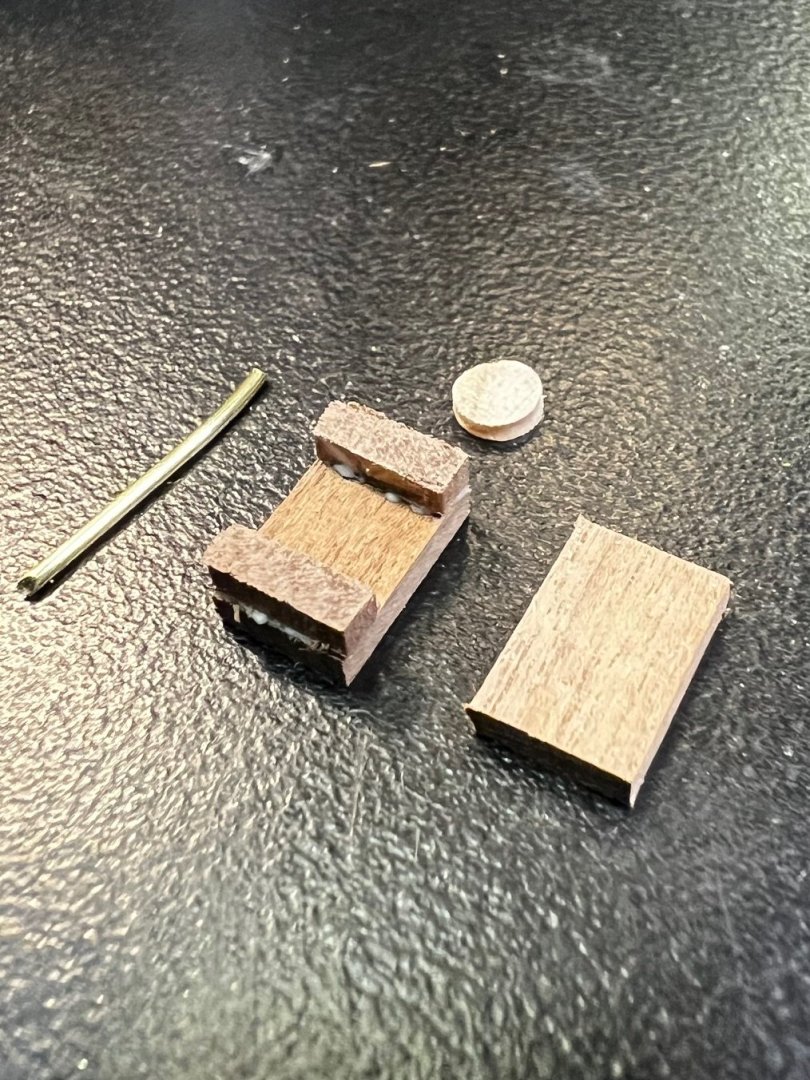
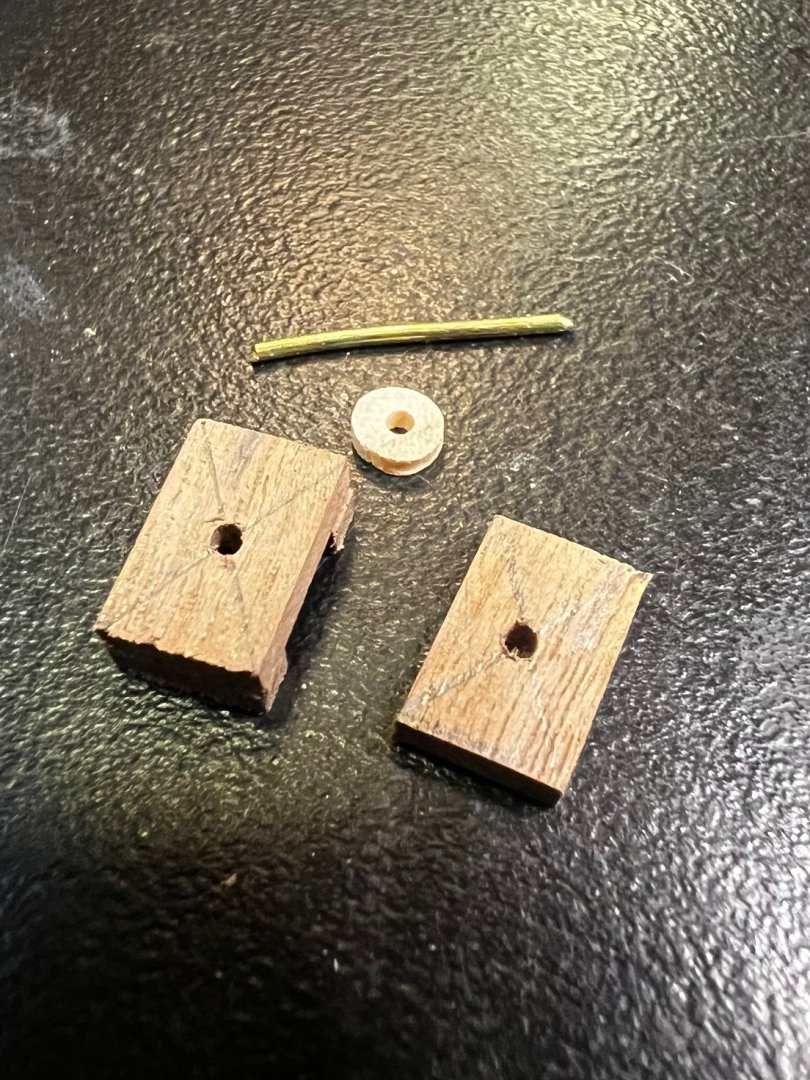
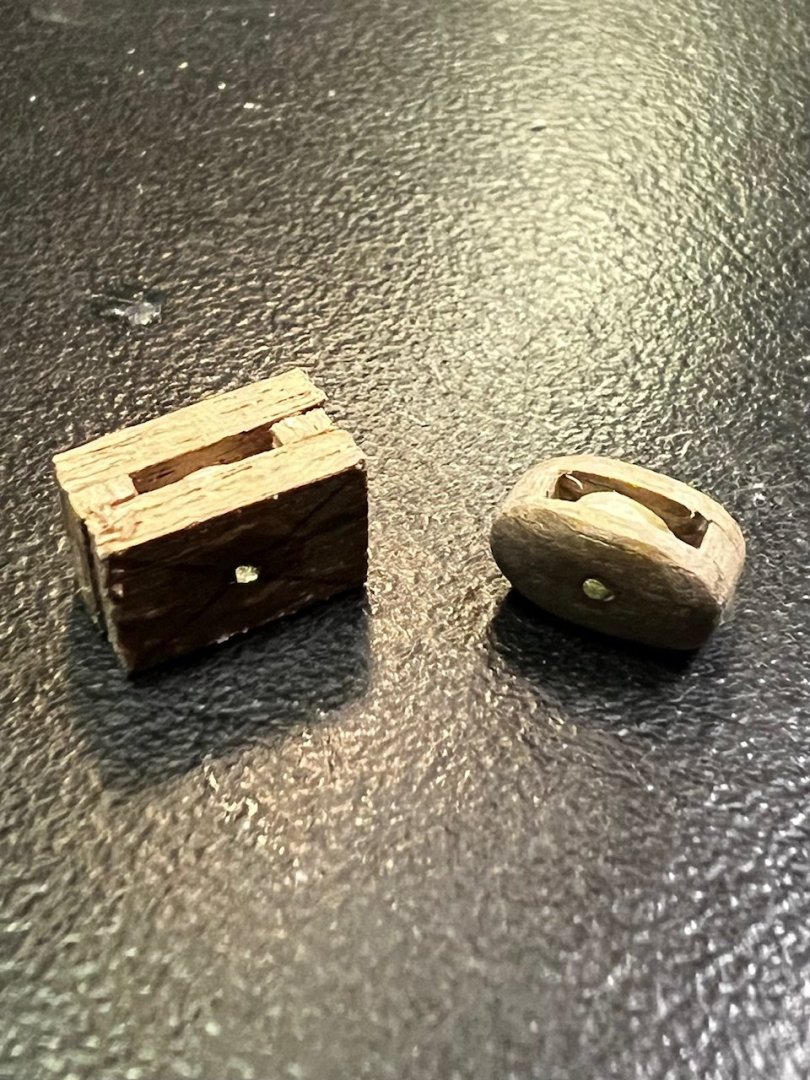
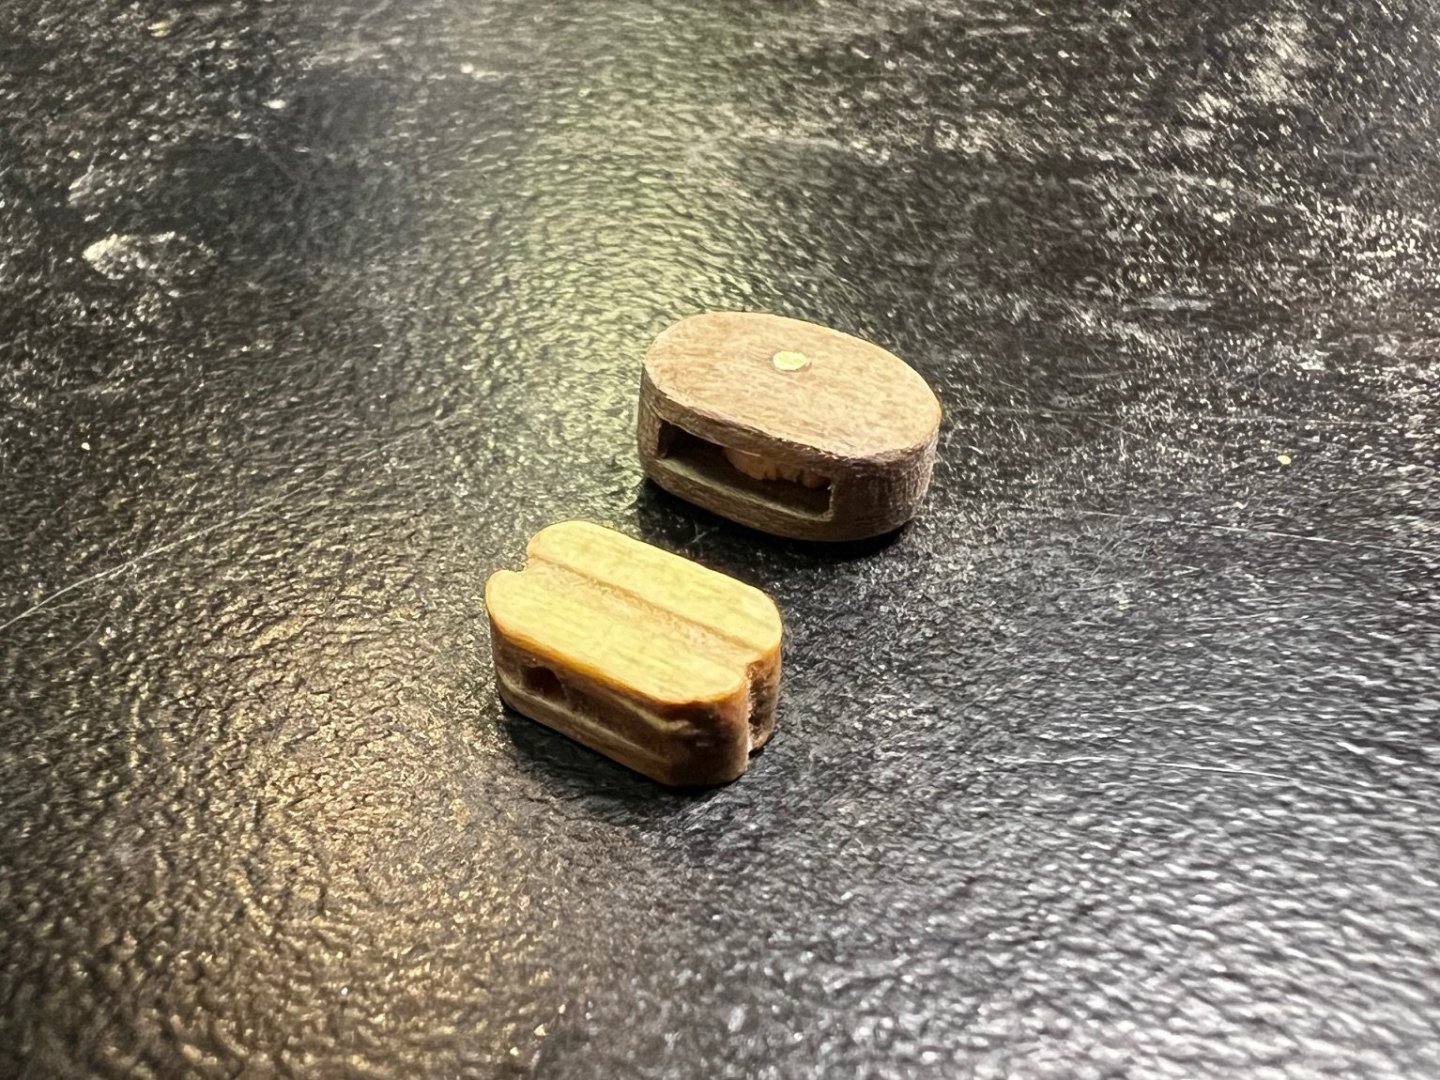
 I wanted to try making functional single sheave blocks to replace the supplied blocks. The following pictures are my process.
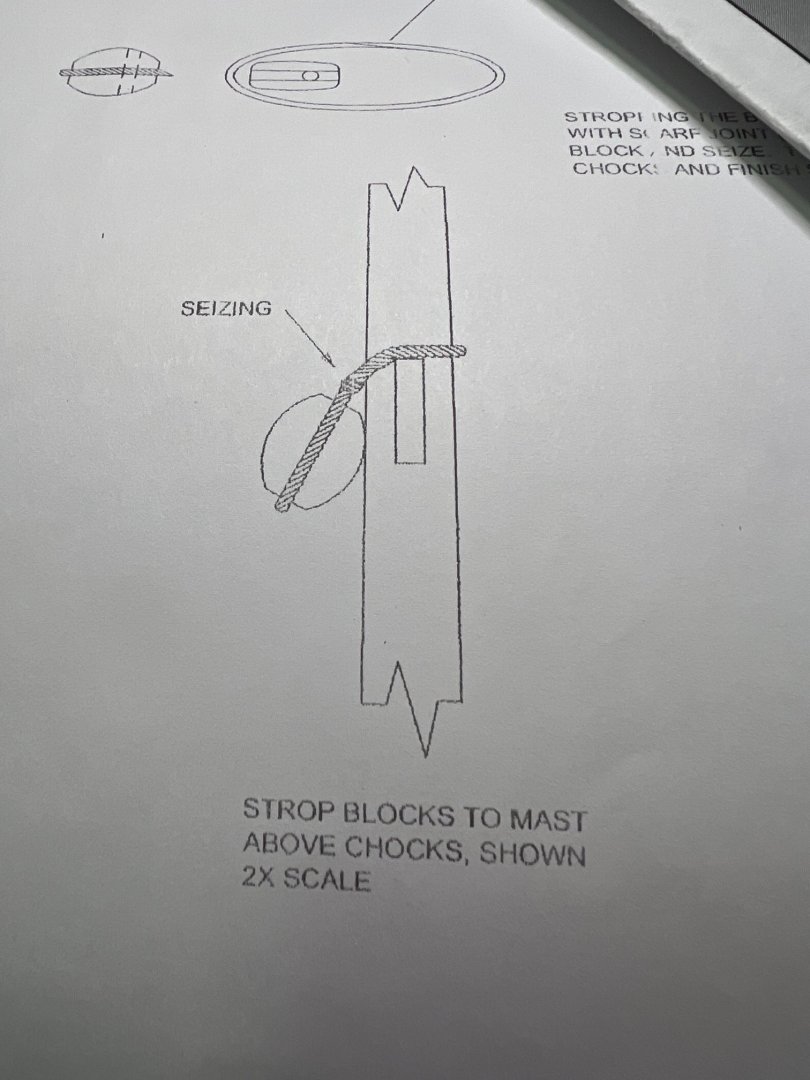


-
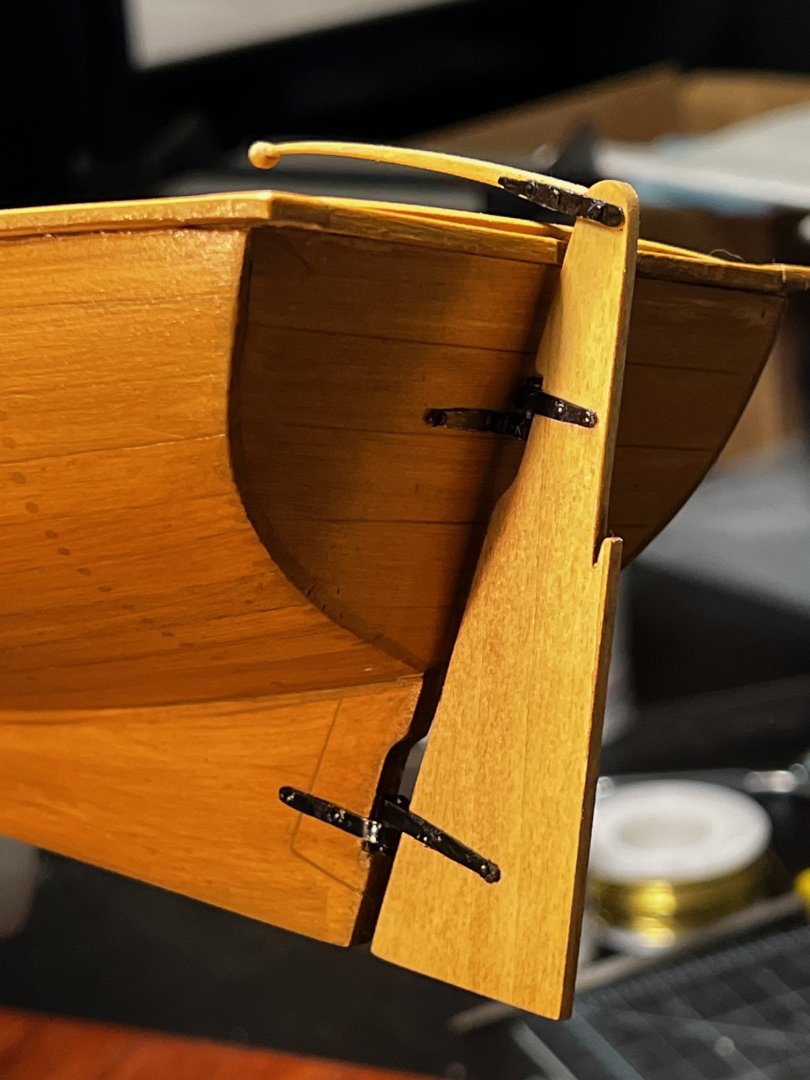
Rudder and tiller are installed. I used a scribe to mark hole locations and a Dremel to drill. The parts were attached with short pins and final coat of black paint.
-
Not that there aren’t belaying points but their location. I have seen a few discussions and a few examples that gave me enough pause to do more research. I believe that the full size replica in Norfolk has no holes in the thwarts.
-
In thinking ahead, I need to do some research on how to handle the rigging. I didn't drill holes in my thwarts to add belaying pins because I thought I had read somewhere that this would not have been used on the real boat. Am I correct or not? And if so, would anyone be able to point me in the right direction for proper rigging attachment points?
-
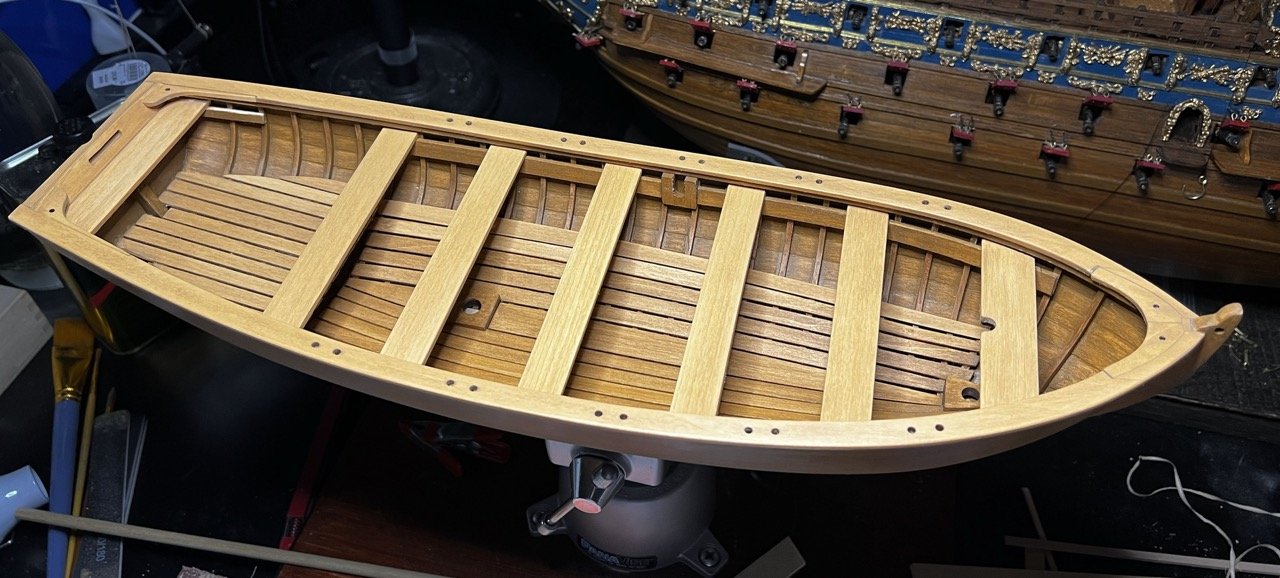
I installed the thole pins and mast partners. These parts were straight forward, not much to add regarding the work. I also decided that the decking was too similar of a color to the thwarts so I added a darker gel stain to get more of a contrast.

-
Masts are cut to length and tapered. I put the mast into a long clamp that would hold it at an angle with one end flush and the other protruding above the surface. This made it easy to sand down to the surface of the clamp creating a tapered faceting of the mast. I did this multiple times rotating after each facet was sanded. Final sanding was done by hand to remove the transitions from facet to facet rounding the surface. I tried to take pictures of the process, but they didn't seem clear enough to be helpful.


-
Thwarts- Mast cutout added, clear finished, and glued in place. Before I move on, the next big step was cleaning up my work area. It gets cluttered quickly.
-
I made new thwarts to fit the slightly wider hull. More to do, but I roughly placed them to compare the stain color to the rest of the boat. I'll add the cutout for the rear mast and clear finish them.
-
The instructions leave out any mention of the quarter deck. This step requires use of the plans for a general idea of what to produce. I made slight adjustments to keep the supports at a proper height and level. I also installed the rear thwart area. It was nice to complete this area as it was the last unfinished area of the hull. Stain and a coat of poly was applied to the newly installed parts.
-
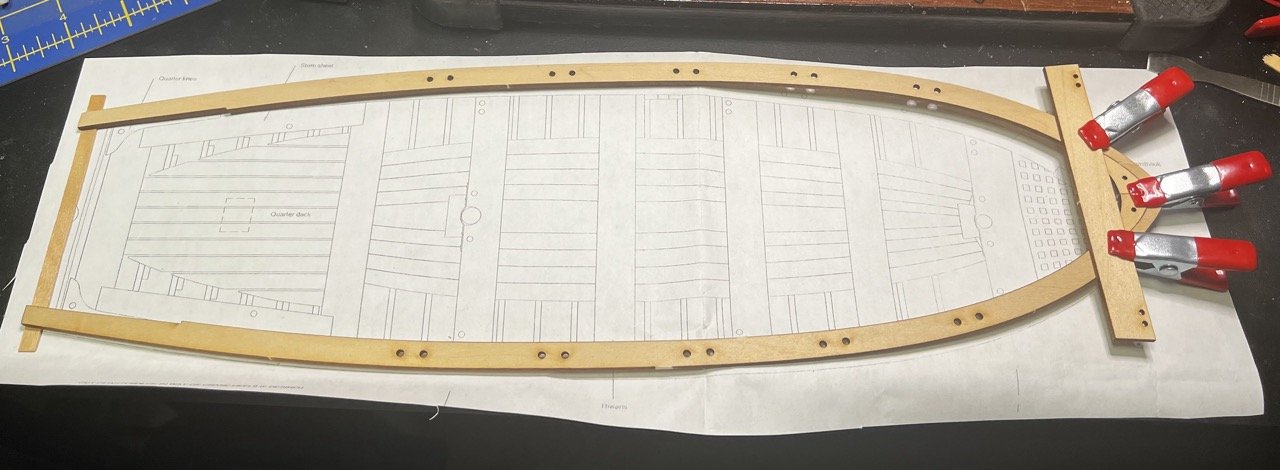
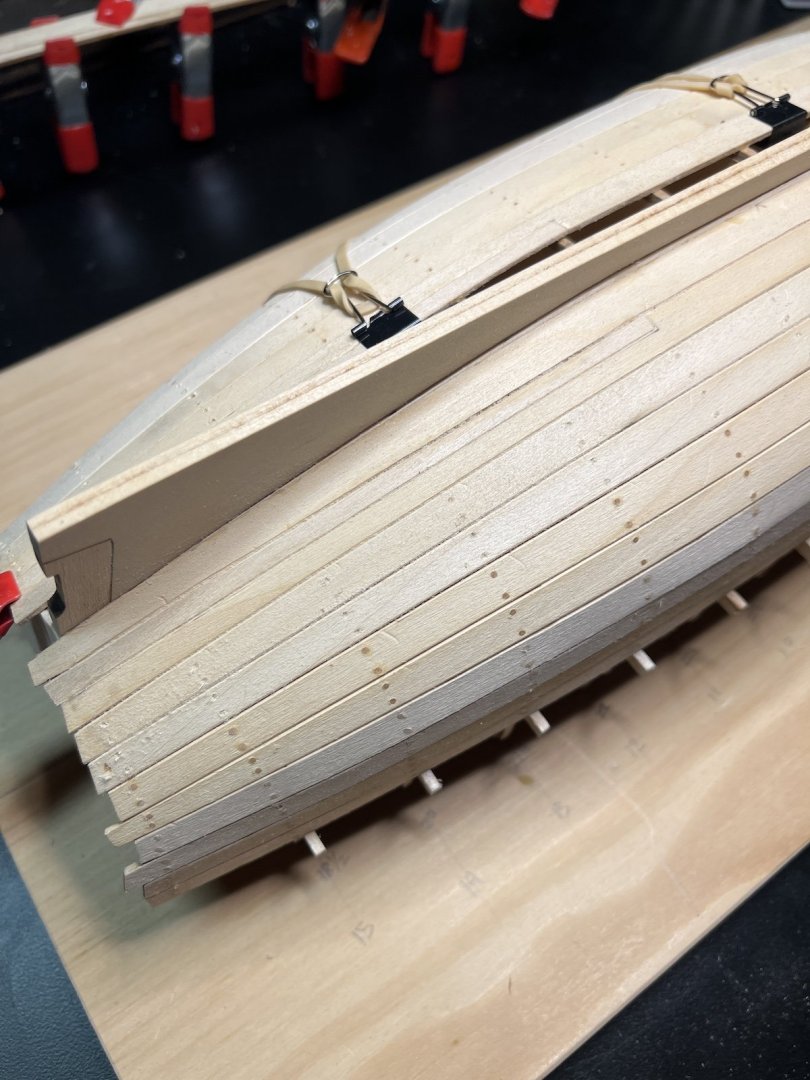
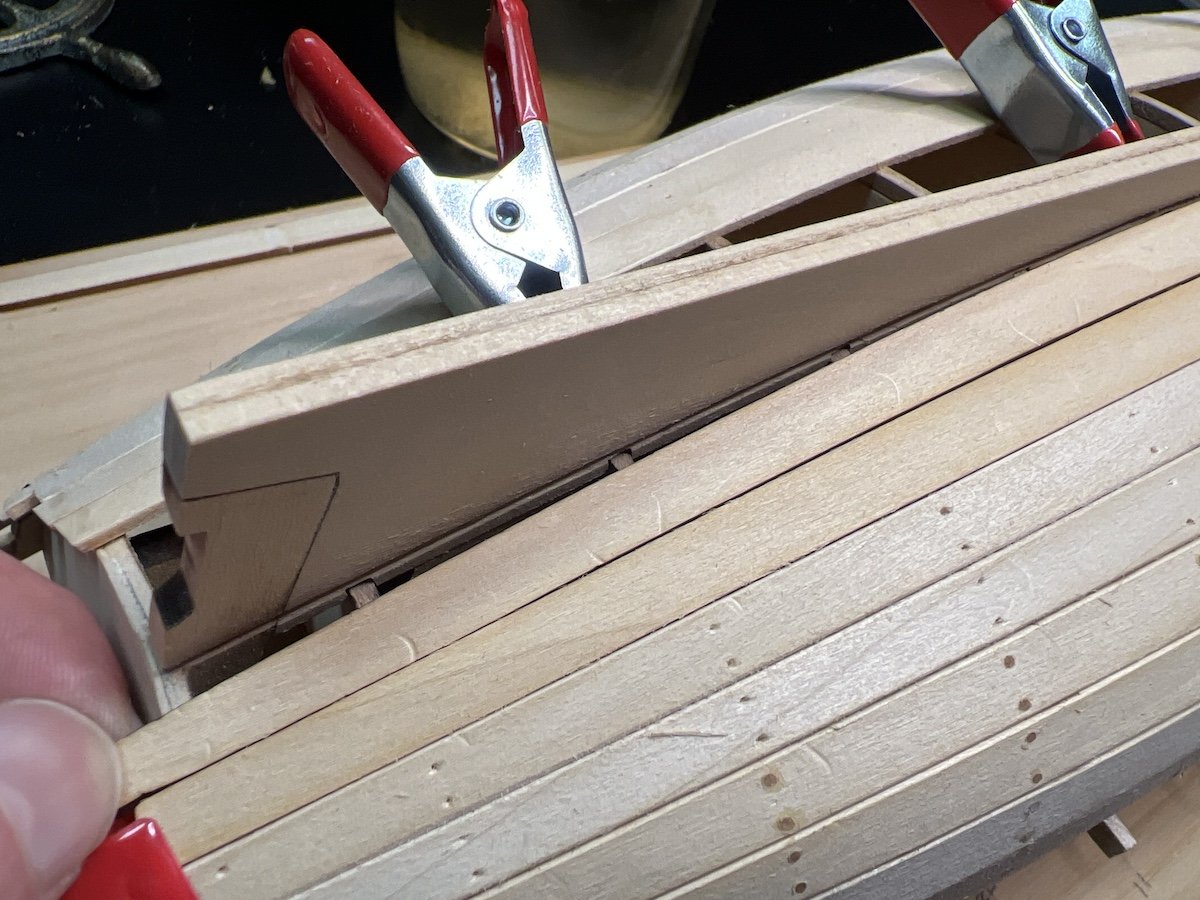
I did my best to adjust the assembled gunwales to fit my slightly wider hull. Steam helped to reshape the pieces to a better fit, but required more physical manipulation when gluing and clamping.

-
The Gunwales... The parts were easy enough to prep and assemble together. I ran into the same issue as many others. My hull ended up wider than the plans and assembled gunwales.
-
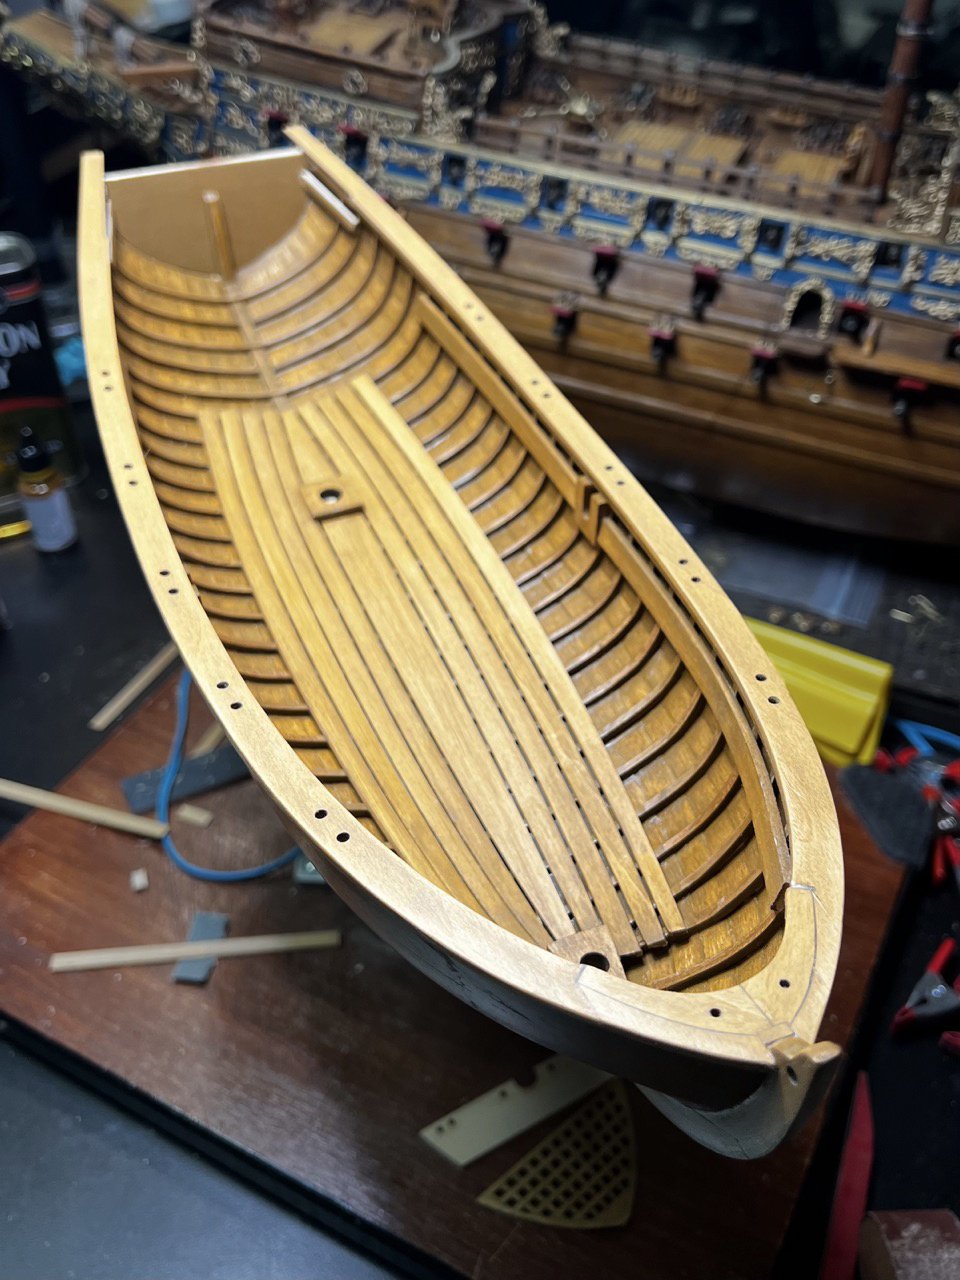
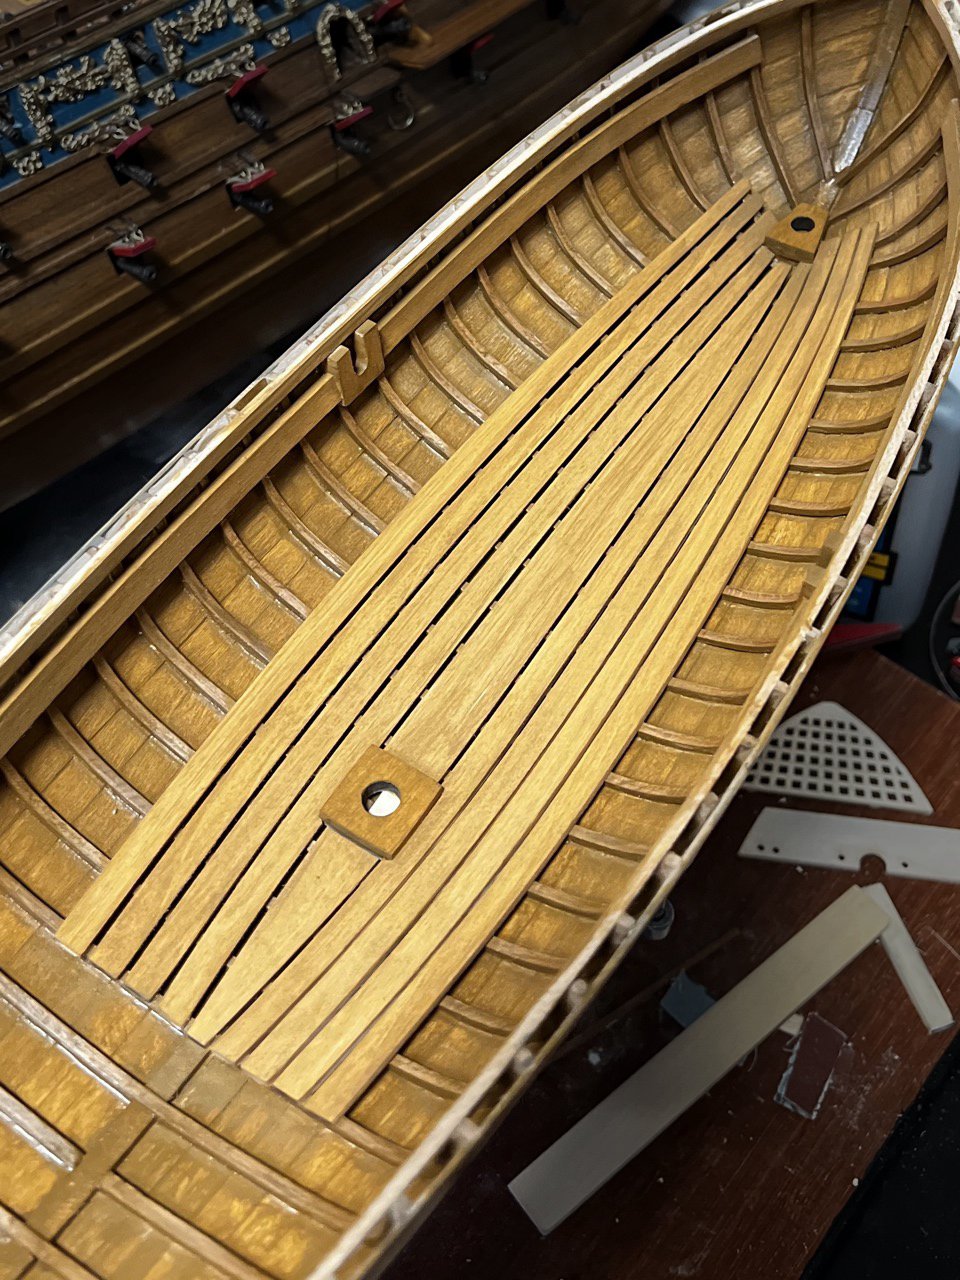
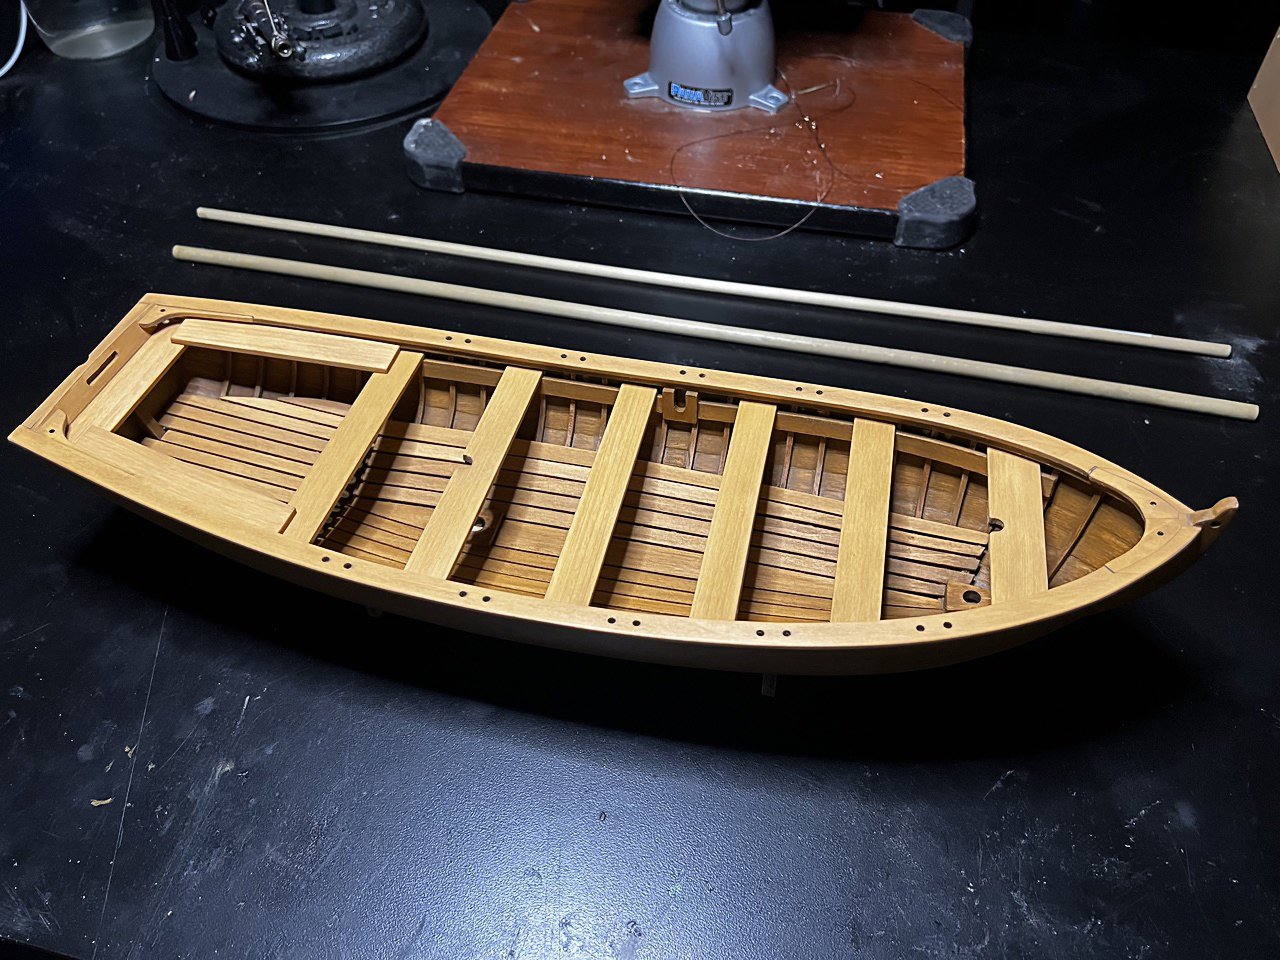
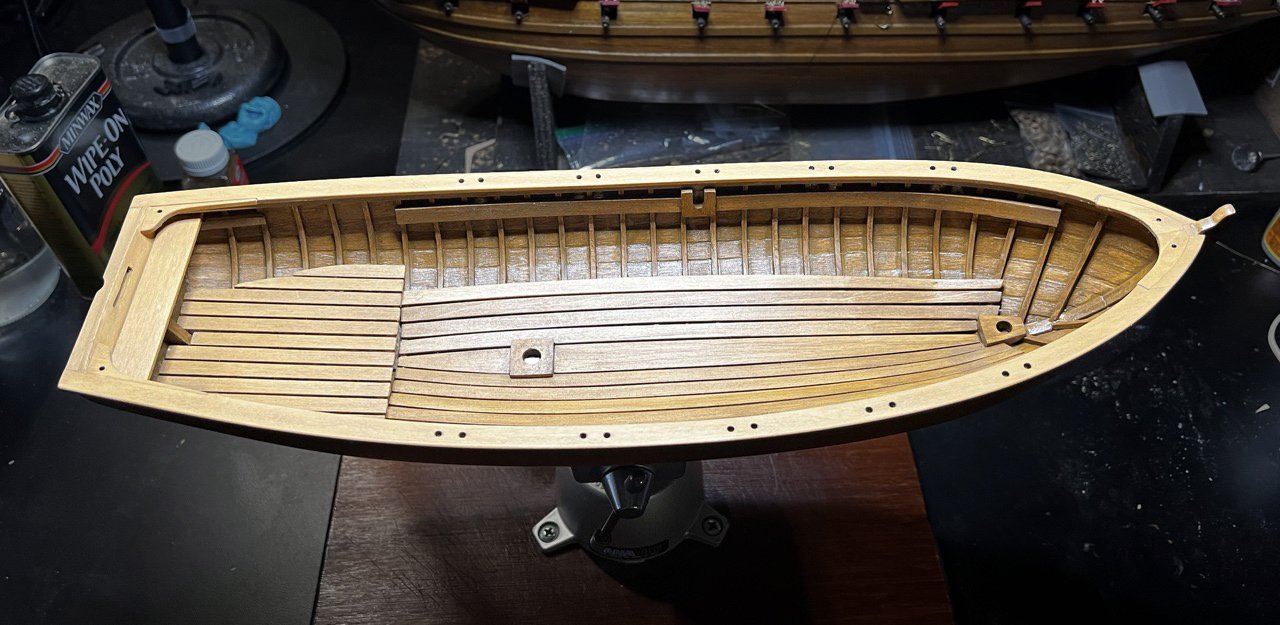
Floorboards installed, stained, and a coat of poly.

-
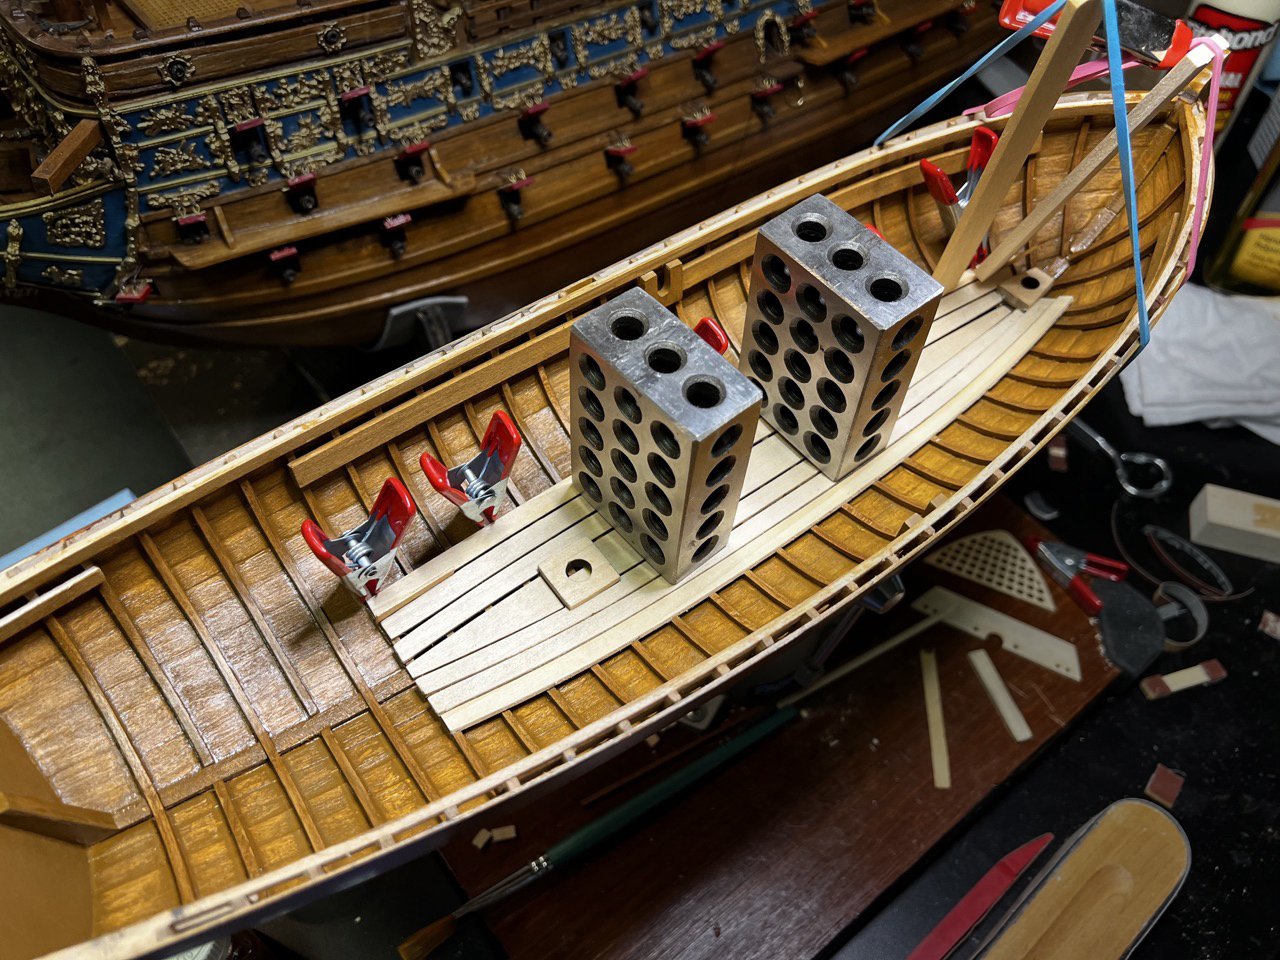
Progress continues on the launch. The interior staining involved some experiments and adjustments. It's like a dance, one step forward and two steps back. Stain was applied, sanded, and then corrected. The result is better, but lessons were definitely learned. The stain also added more gloss than expected, which was also compounded with a clear coat. I'm planning on addressing the sheen later down the road. I also started adding interior components. Creative engineering was used in the moment to hold everything down.
-
Thanks for the information! It’s interesting to see the differences between kit design and actual construction practices. It makes sense that working in small scale may require different approaches, but I can see why those looking for more accuracy get into scratch built.
-
I appreciate that you like my planking! As to your question, yes the sheer plank is referring to the inboard plank. Others may be able to provide insight as to its potential use in contemporary plans. My only experience with it is in this kit. It may be just a model design feature to add structure.
-
Thanks! I had read through enough builds to see some of the issues others had encountered.
-
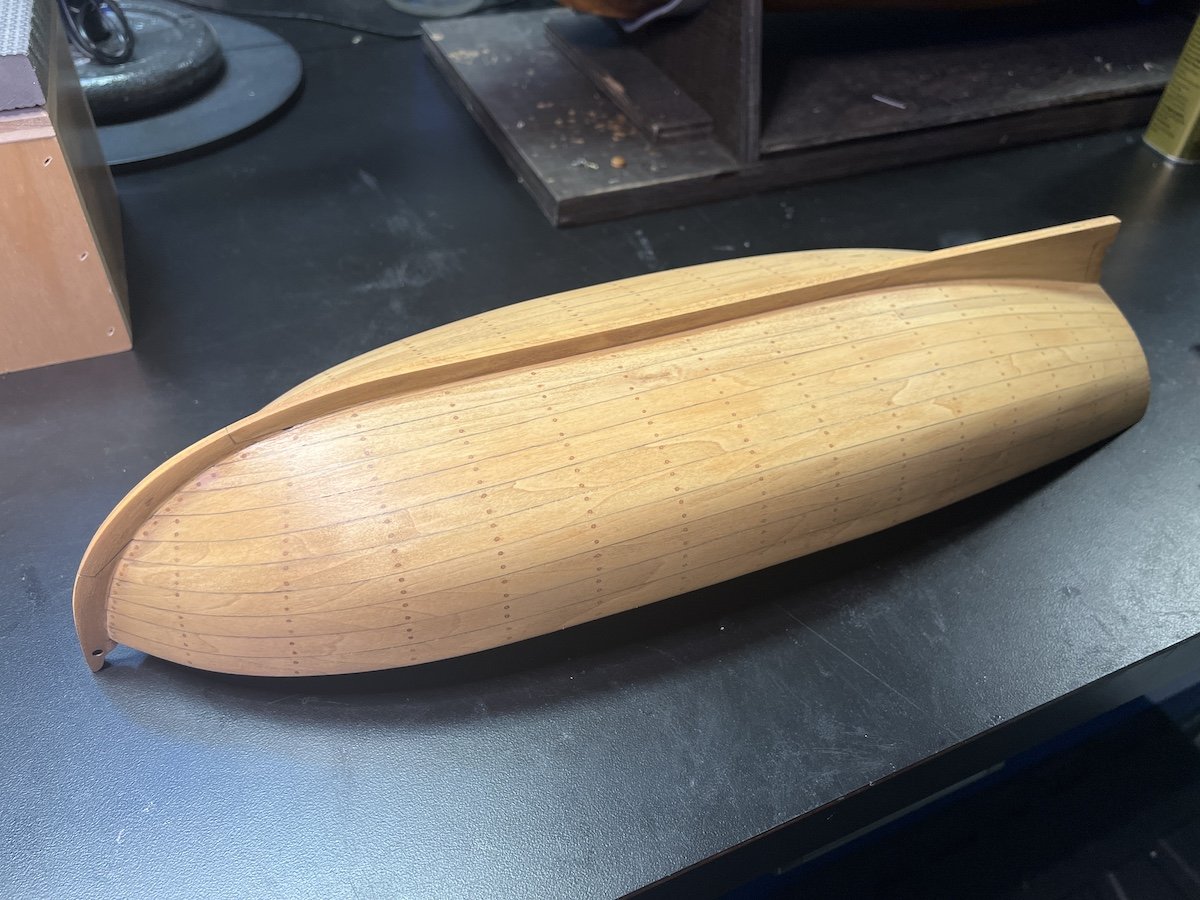
I then moved on to sanding, staining, and finishing the hull. I wanted to scrape rather than sand, but scraping skipped over the trunnels leaving a ridge. I gave it a sealer coat of finish followed by a gel stain and then wipe on poly.
-
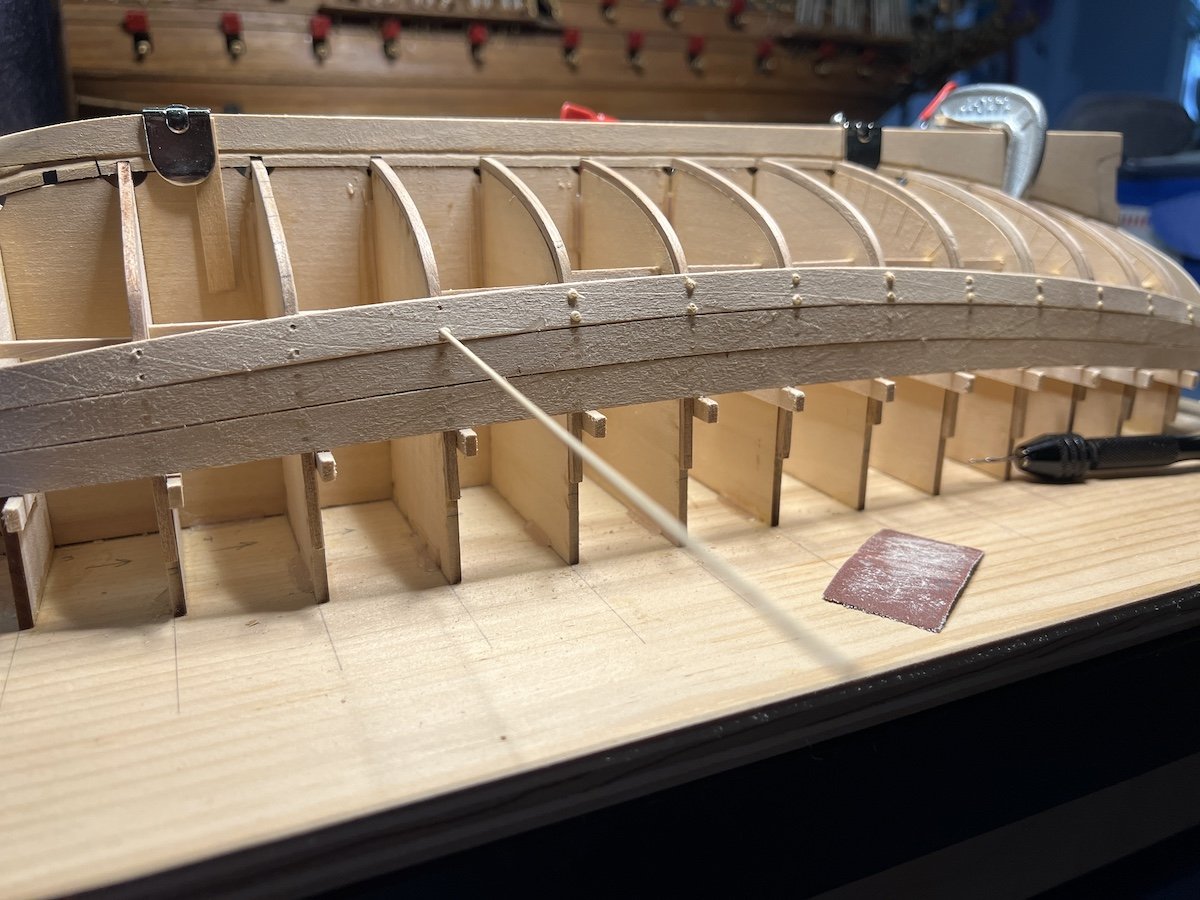
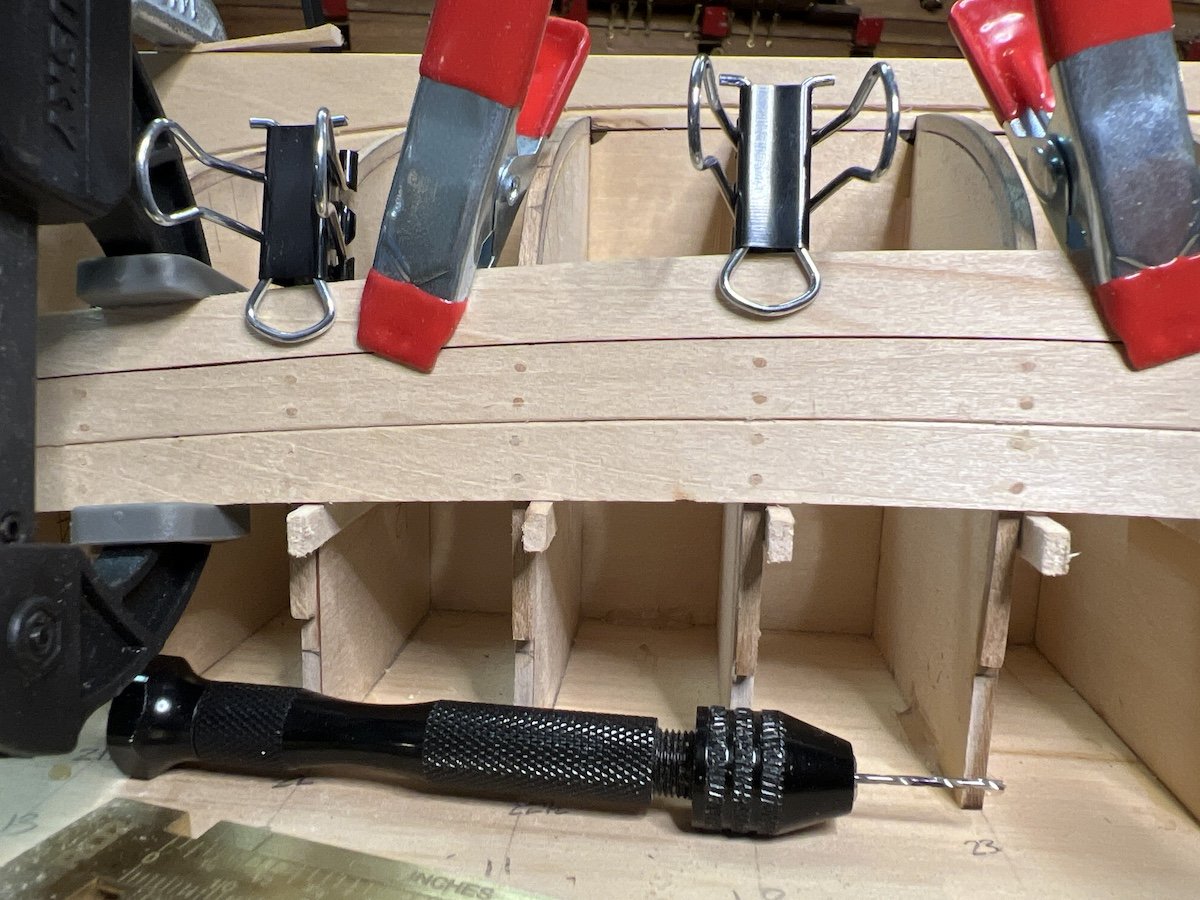
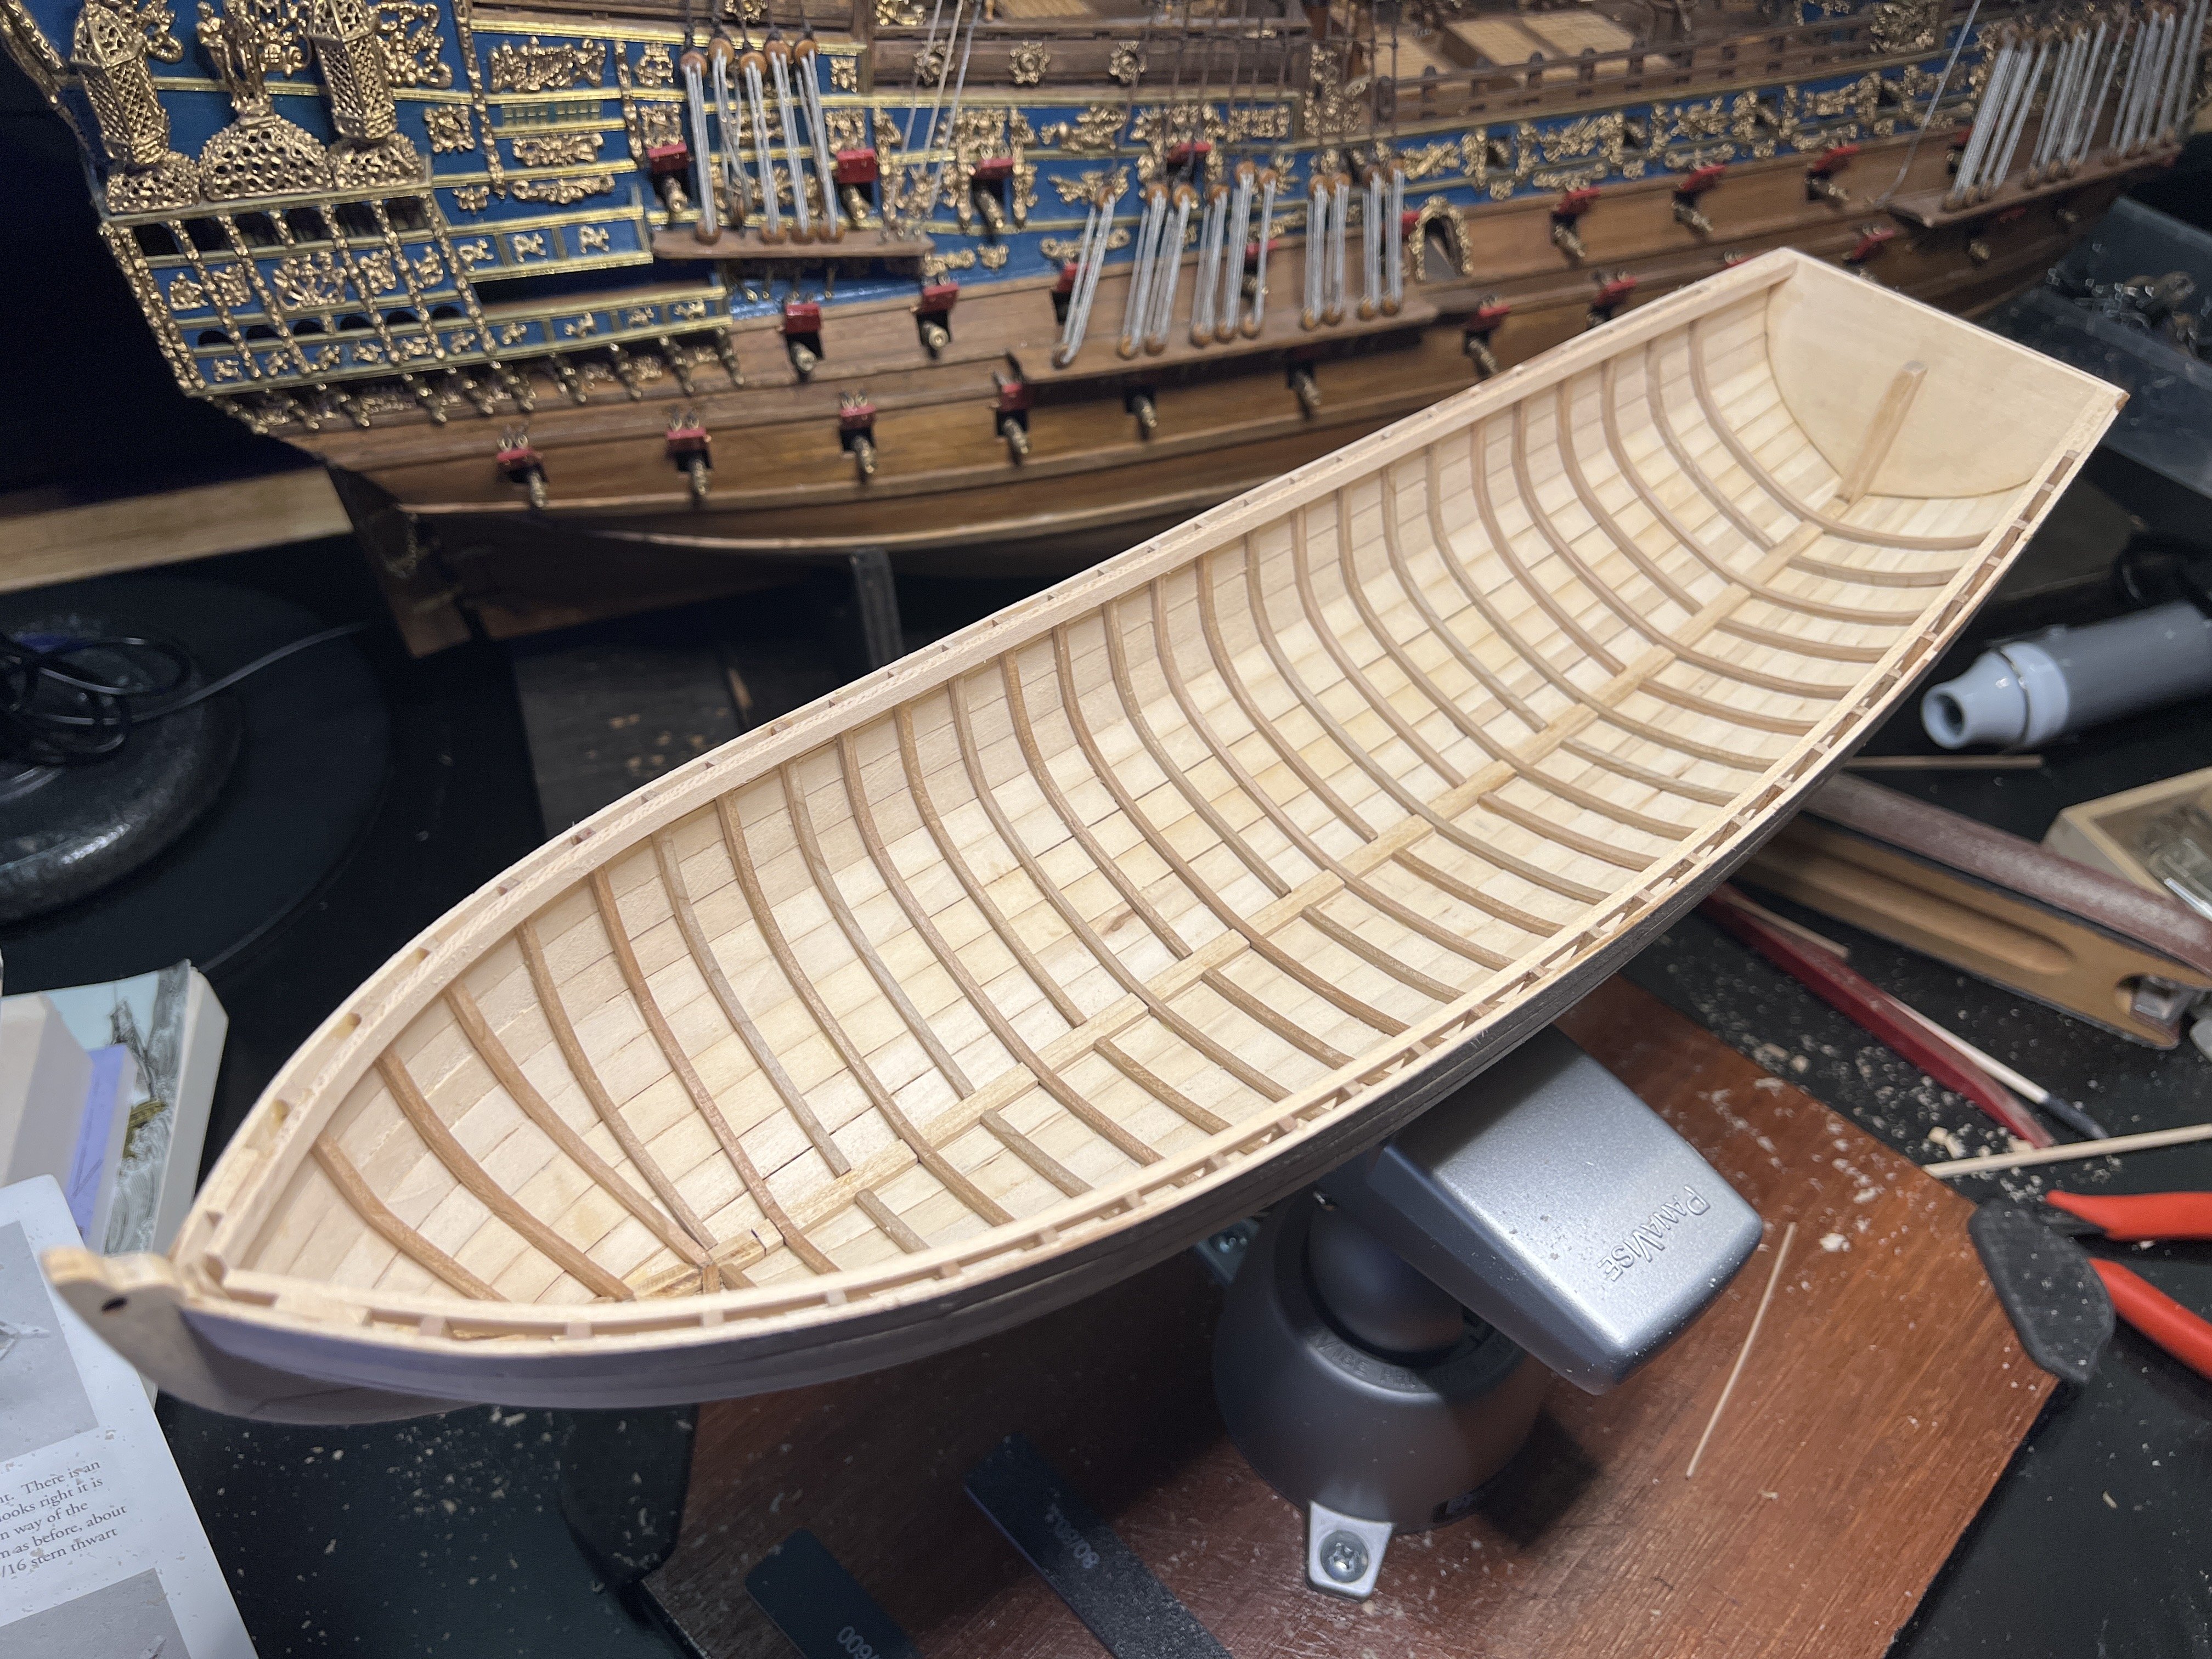
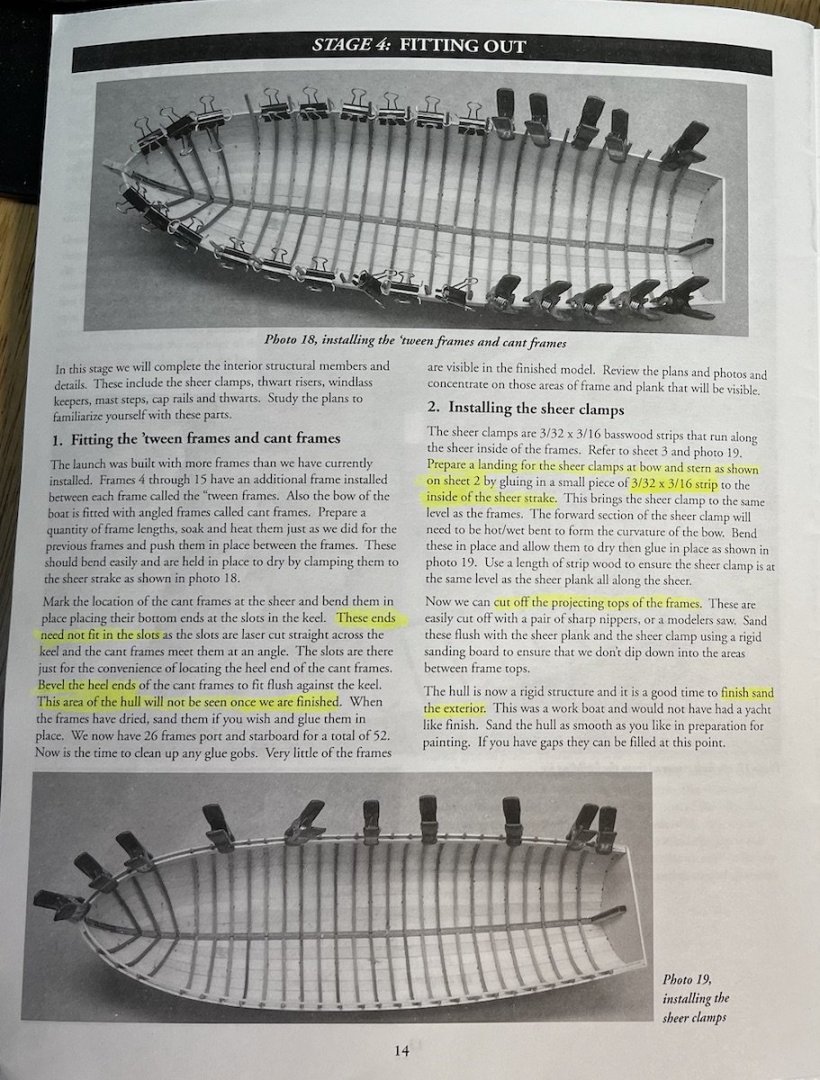
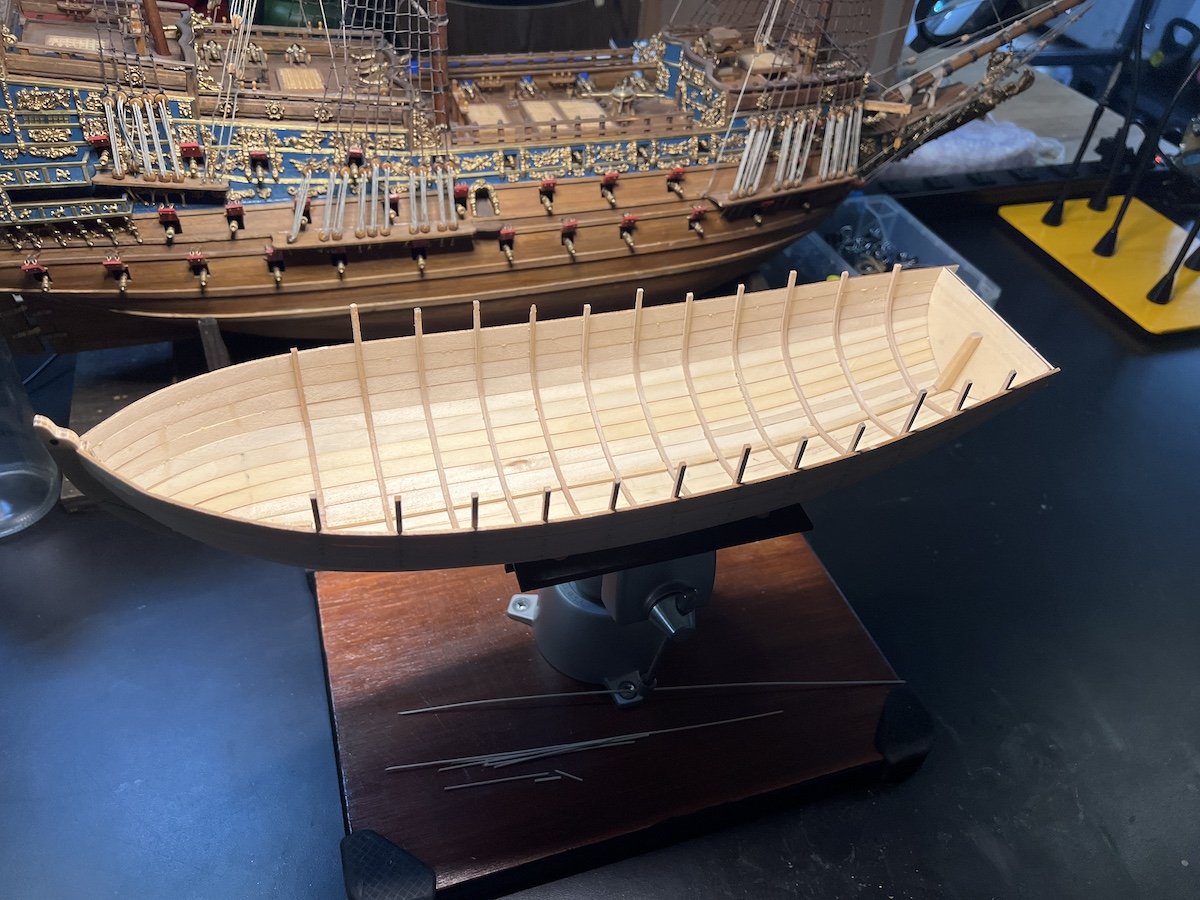
Sheer clamp installed. This really helped add security to the frames and made the boat feel less fragile while handling. I trimmed the frames down to the sheer and did a little sanding to even it out.

-
Next was adding the cant frames. The uneven gap in frames seemed visually off even if it may be correct. I decided to add a frame into the gap to even it out.


-
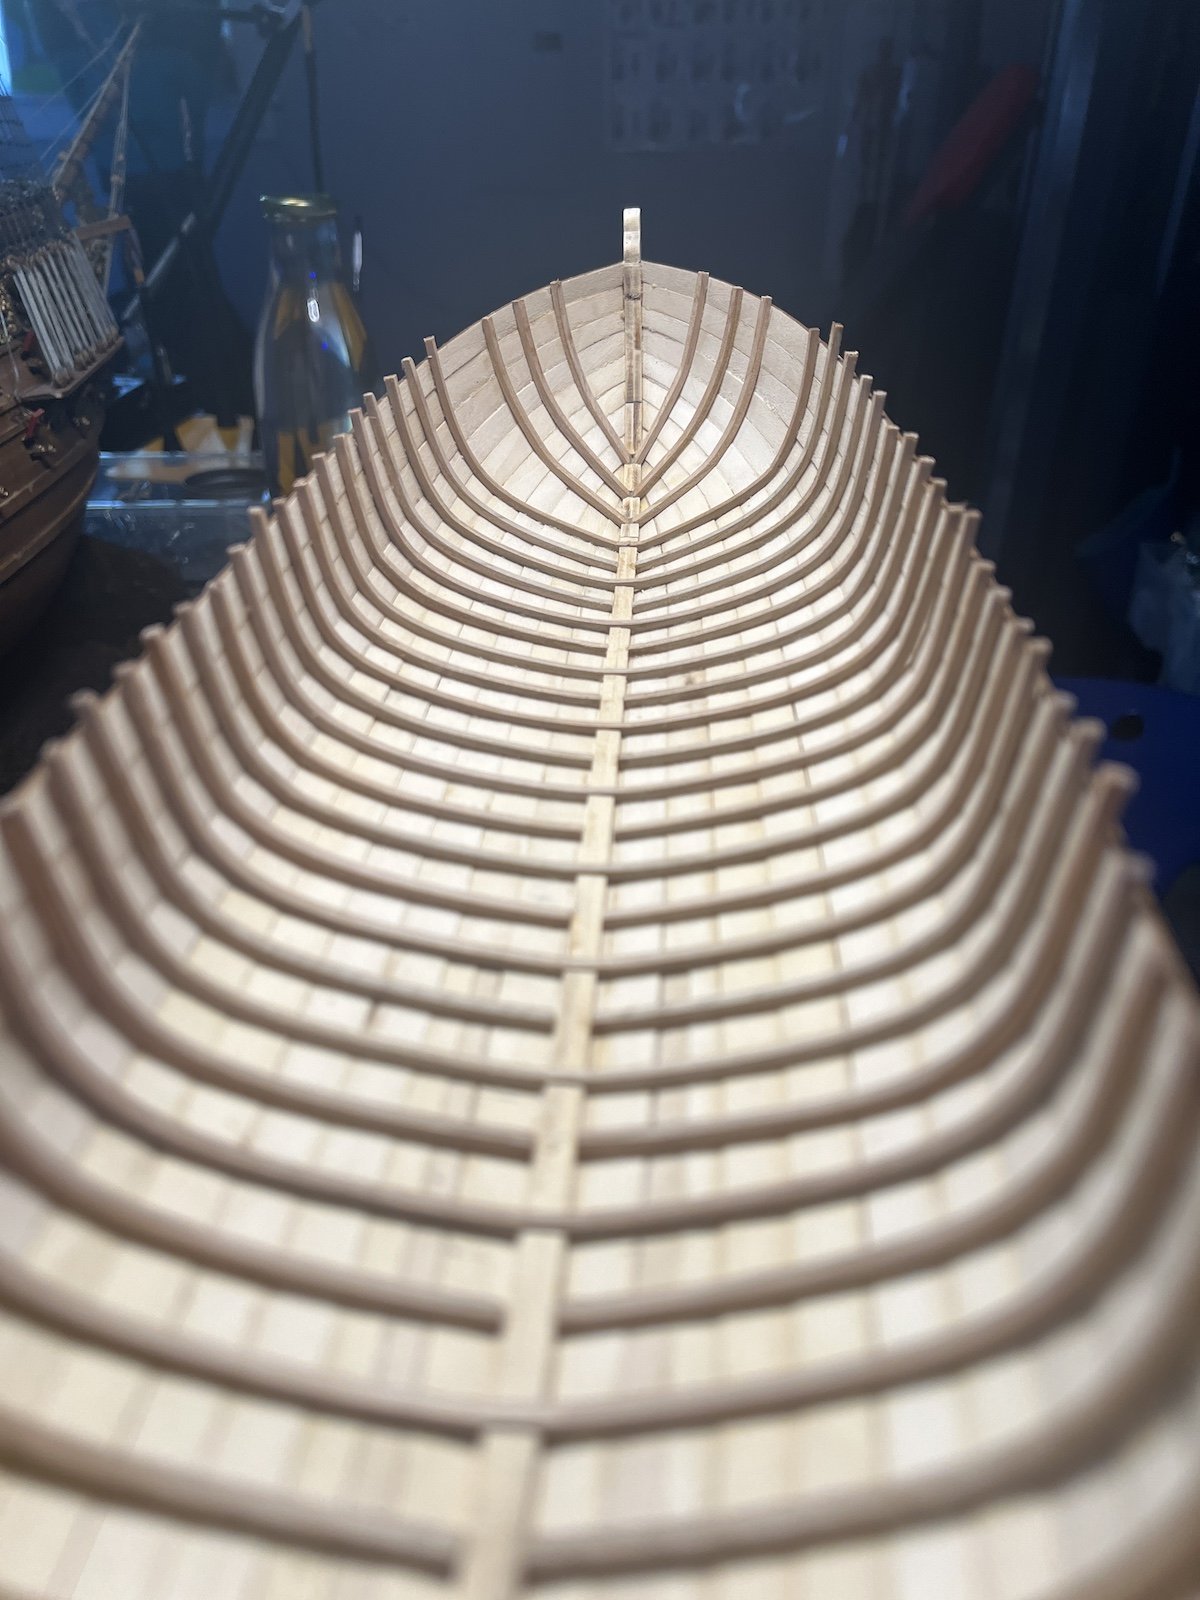
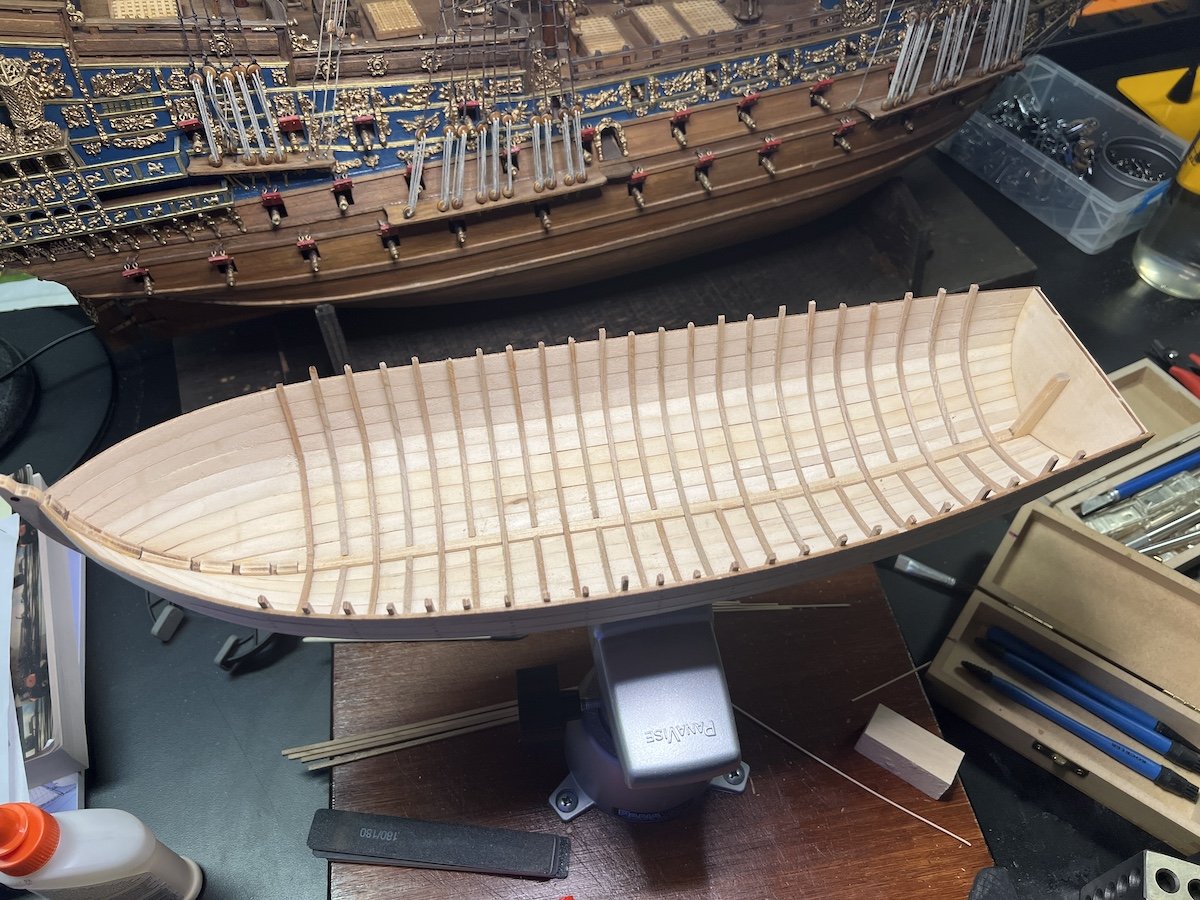
The second set of bent frames fit in perfectly. It may be easy enough to bend the frames into the hull like the instructions, but having them pre-bent on the mold was very nice. All that was required was trimming out for the keel.
-
Removed from the mold and ready for more frames.
-
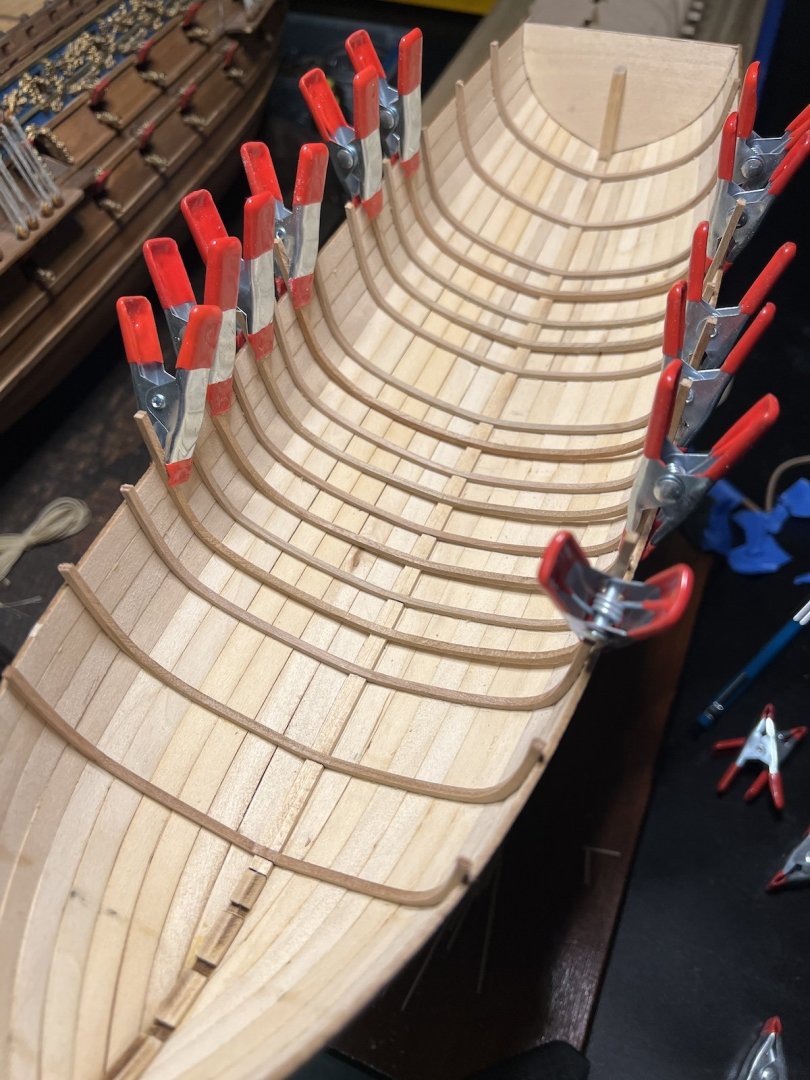
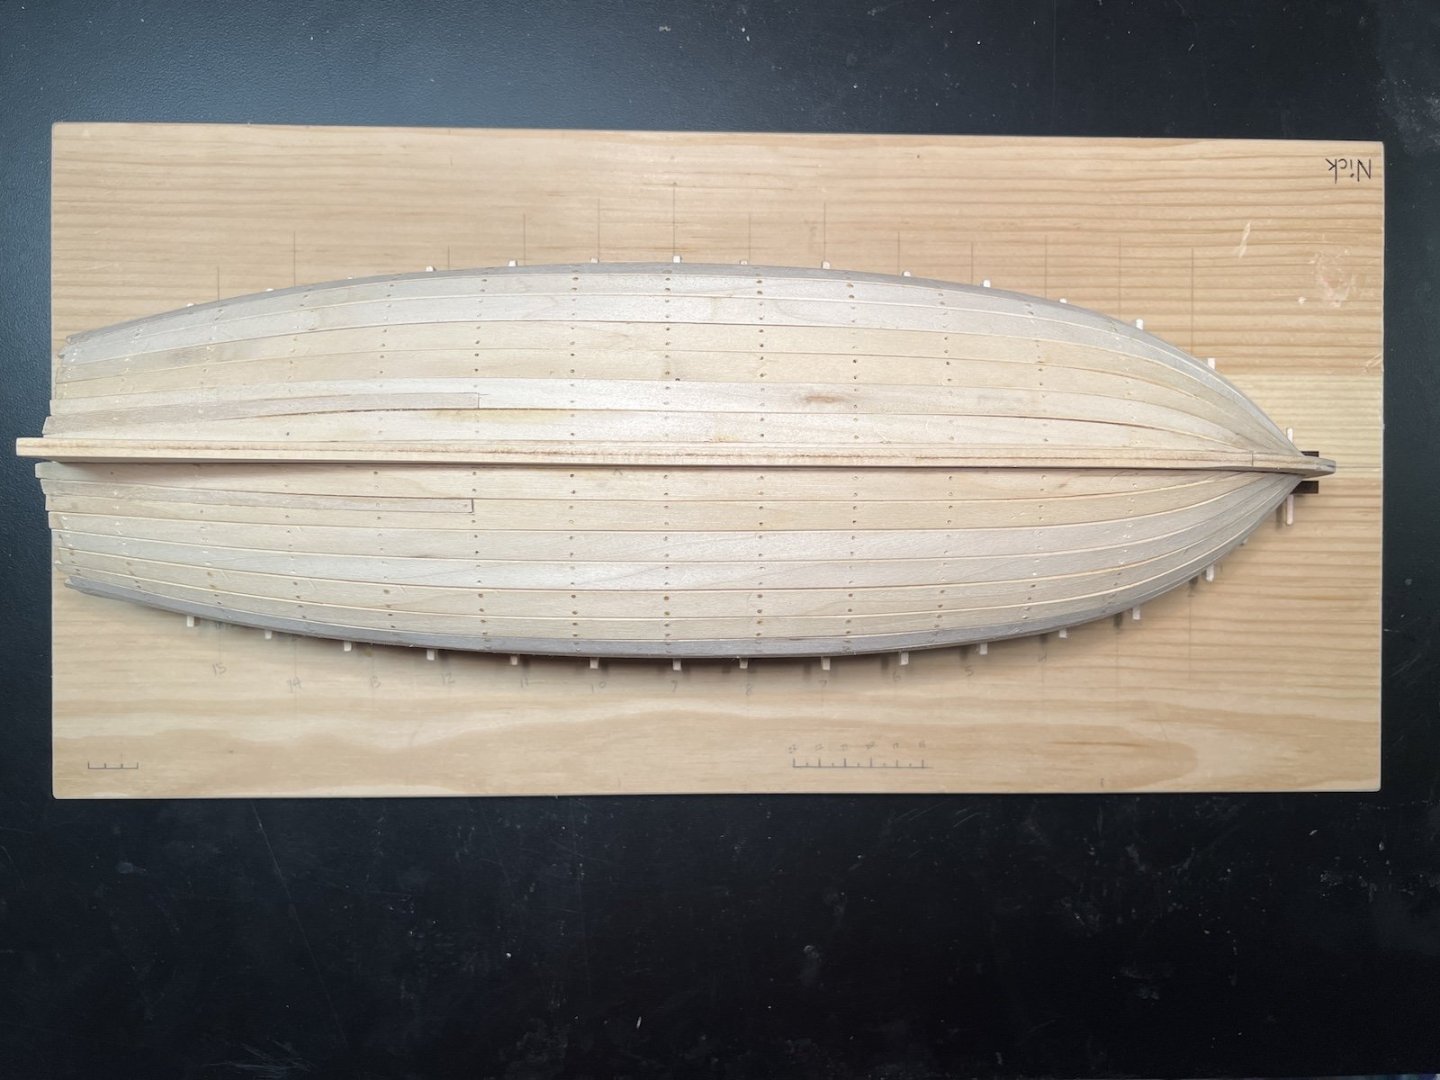
Planking is done with a stealer added on each side to make up for the gaps.
-
And there is the problem... I ended up with a nice little gap. I knew this was going to happen, so I figured it would be better to deal with it where it won't really be seen. Time to add a stealer.
-
One strake at a time...

-
I decided to add trunnels to the boat. The 1:16 scale seemed big enough to warrant the extra work. I used a draw plate and basswood (same material as the planks) to create the treenails. The size ended up a little big (1mm) but it was as small as I could go without the material falling apart as it was pulled through the plate.