


Cmm4000
-
Posts
60 -
Joined
-
Last visited
Content Type
Profiles
Forums
Gallery
Events
Everything posted by Cmm4000
-
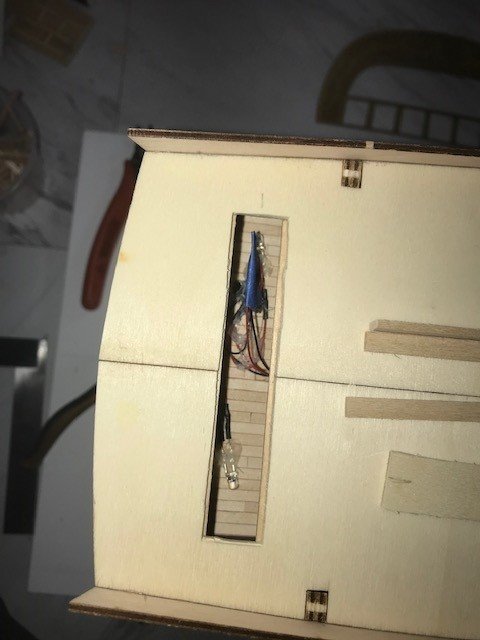
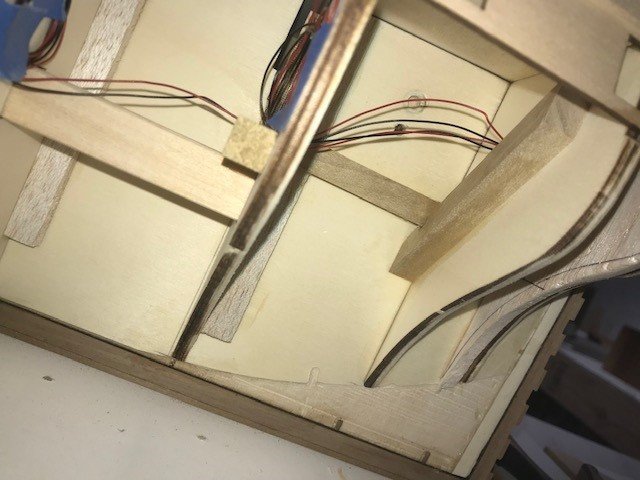
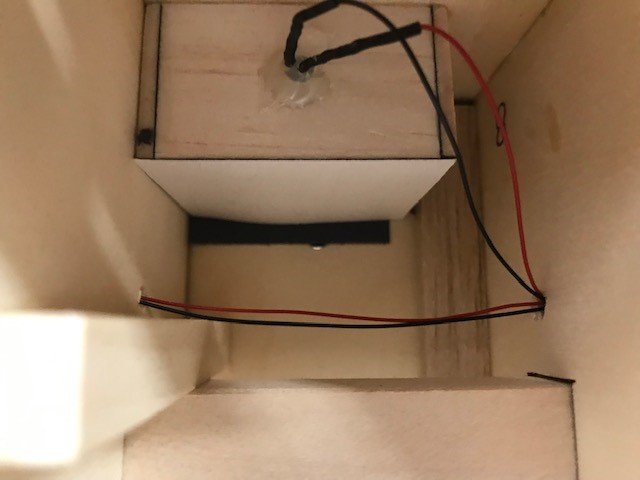
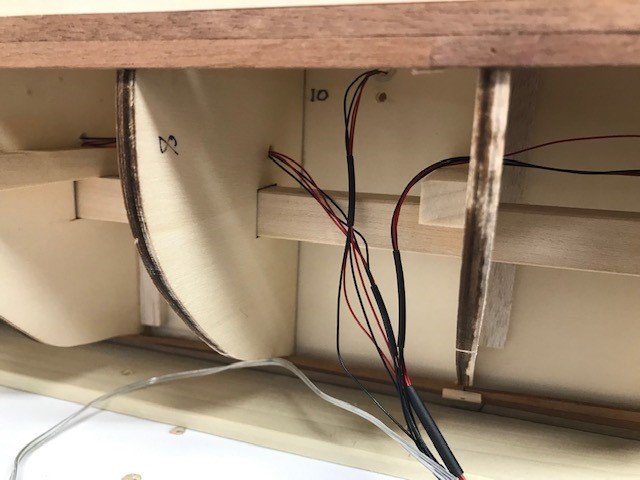
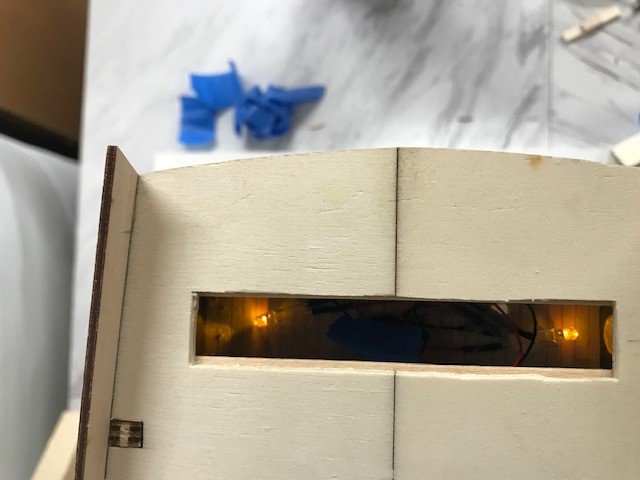
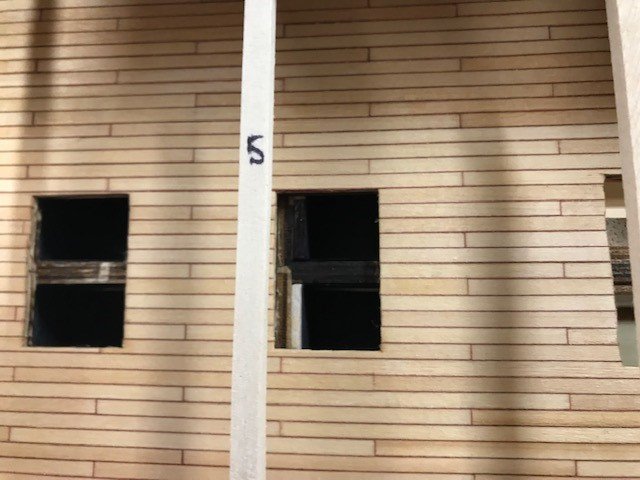
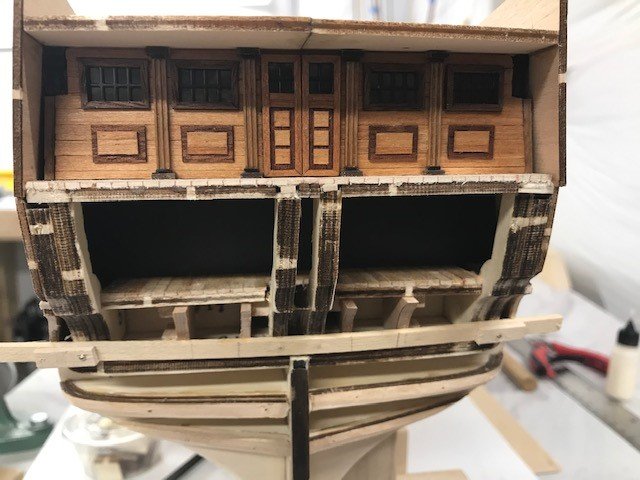
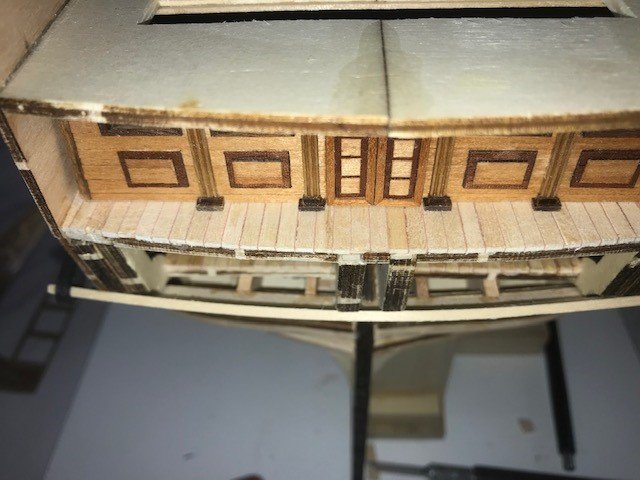
 LEDs. I am using the kit from Artesania Latina (their part # 27950) comes with LEDs, wire, solder, heat shrink and battery holders. The LEDs twinkle so all you have to do is wire them up. I am going to light up the stern gallery, the waist grates, the deckhouse and the stern lanterns (still working on the details for that but the wire is wrapped up in the access I cut in the deck). Still working on how to get the wire out of the bottom of the keel (thinking brass tube) gonna go scope for parts this weekend at the hobby stores. Oh, I drilled all the holes in the bulkheads for the wire to pass through before I glued them in place. I drilled a hole in each bulkhead one each side of the false keel just in case.
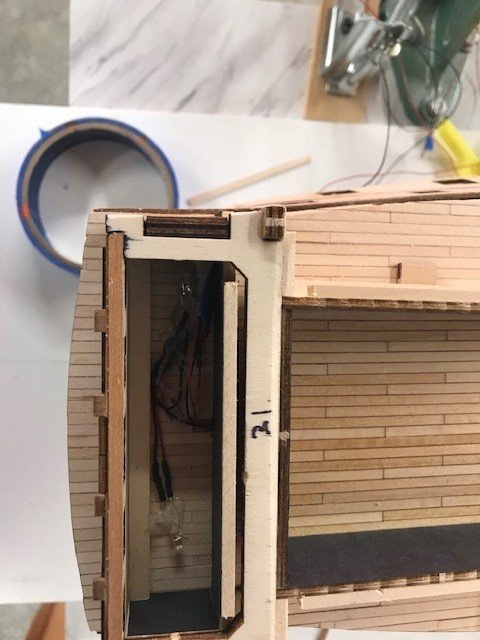
-
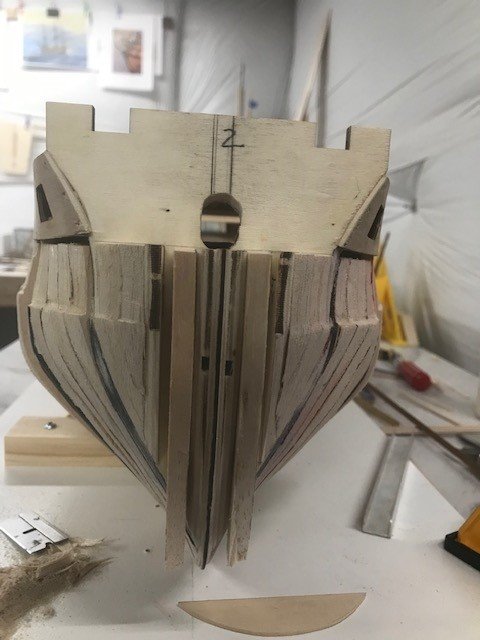
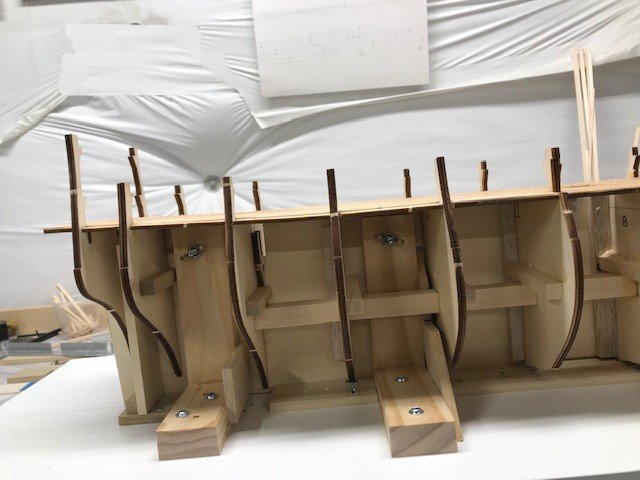
Putting on the keel. I put a dowel through the keel at every bulkhead. the planks are in the slots to align the stem.
-
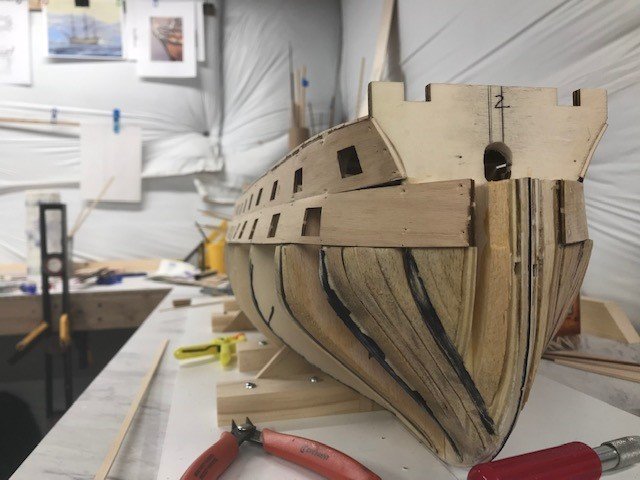
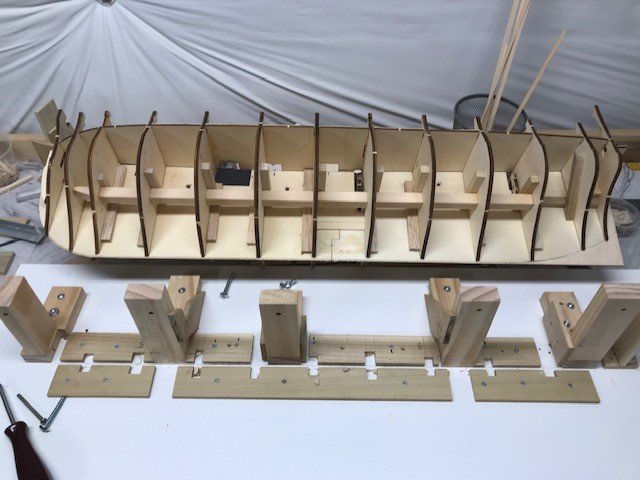
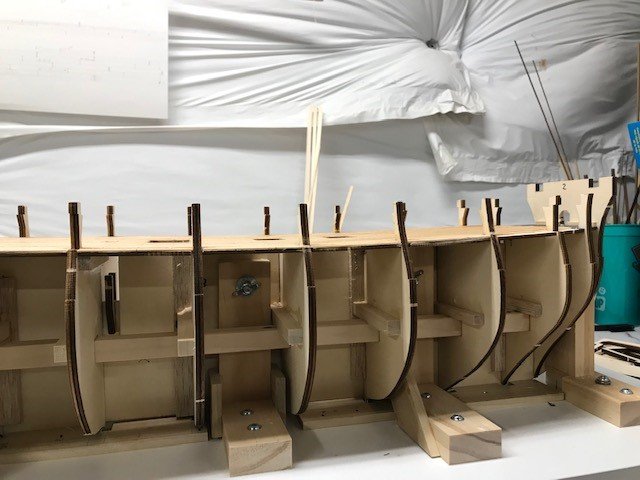
Adding the deadwood and the plywood formers. I was worried about soaking the plywood per the instructions. I was afraid the plywood would dis-bond but no issues. I also bent the bow plywood over a big metal can first then nailed it place let it dry then glued it on. On the bow I left two slots so I could put planks in to align the stem. Also added some vertical reinforcements on the stern for the rear gunports.
-
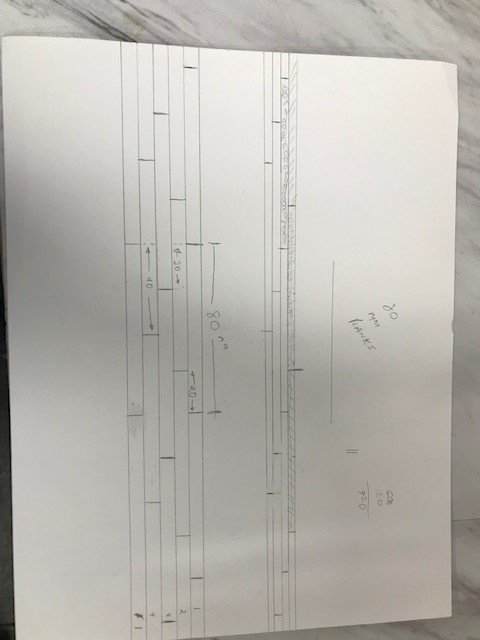
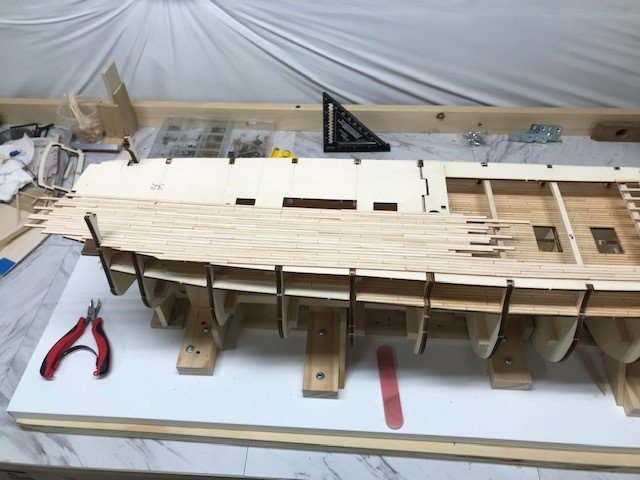
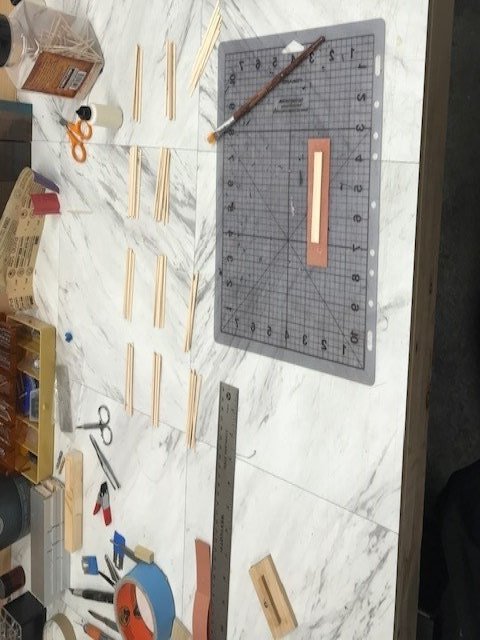
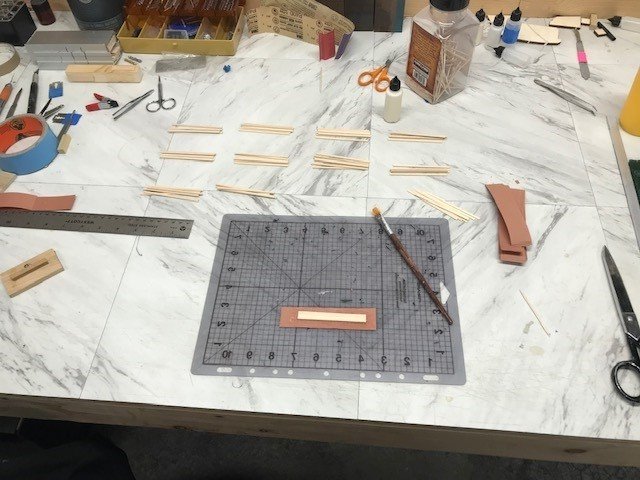
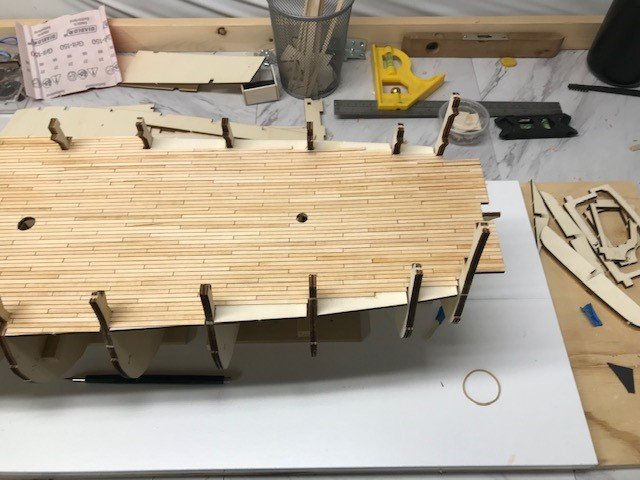
My guide for doing the deck planking.
-
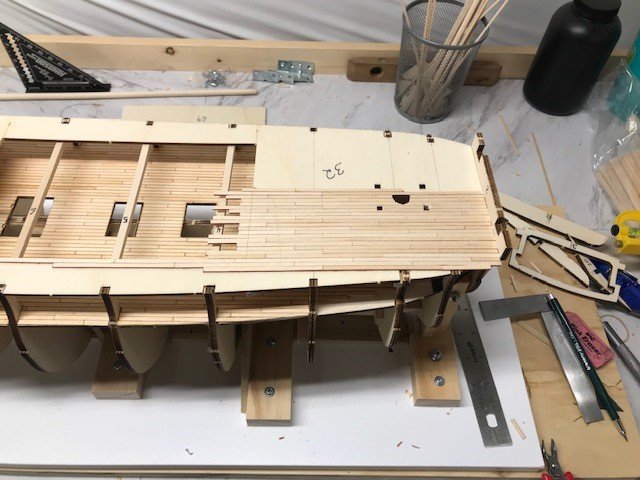
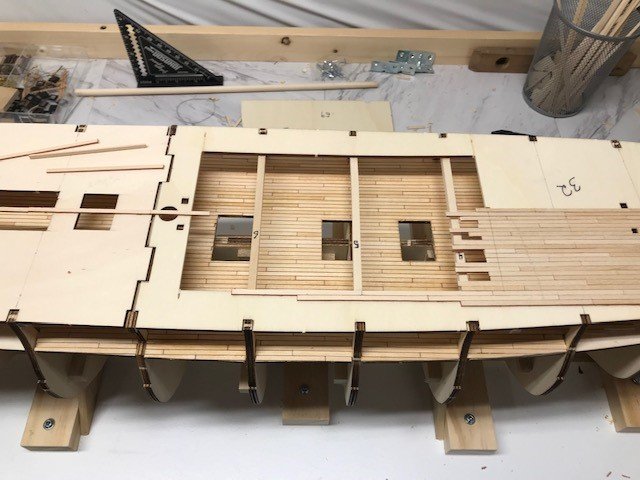
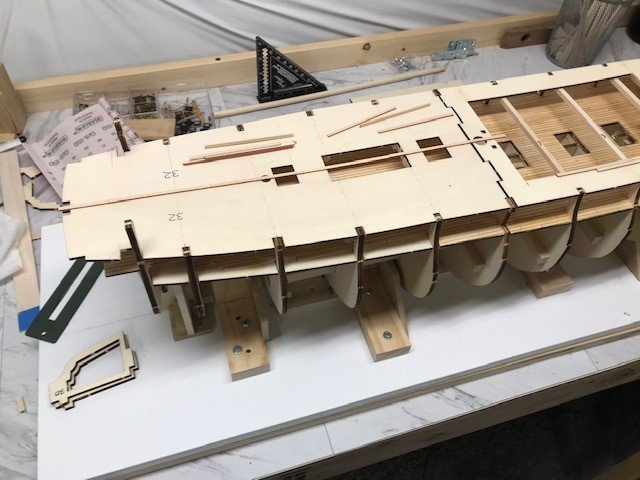
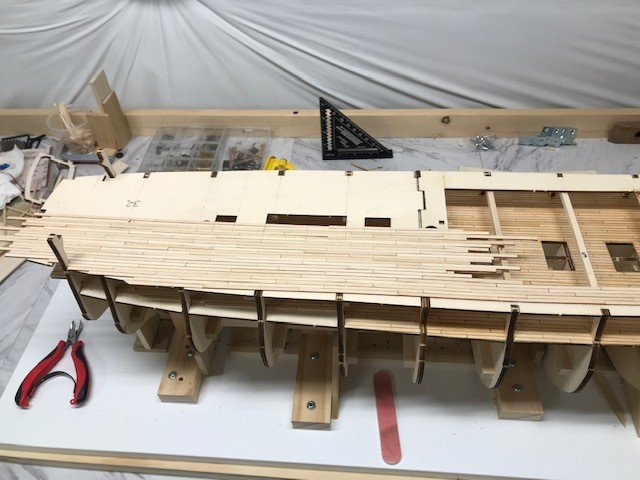
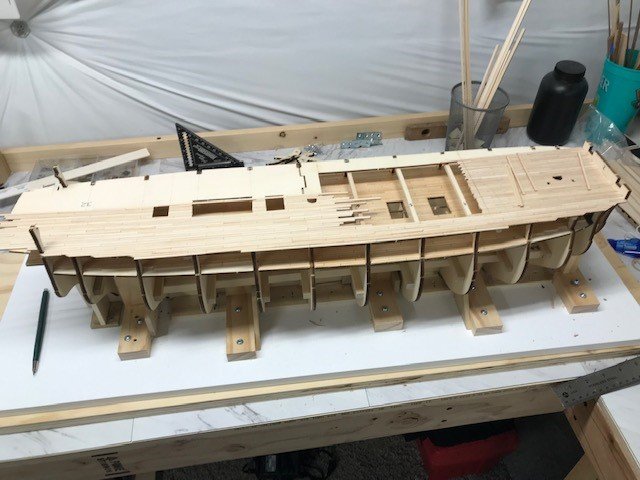
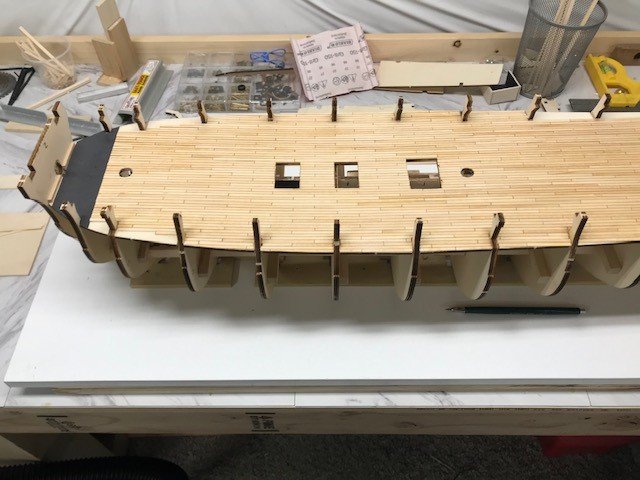
The second deck has been installed and planking continues. I also sanded and sealed the first deck before starting on the second.
-
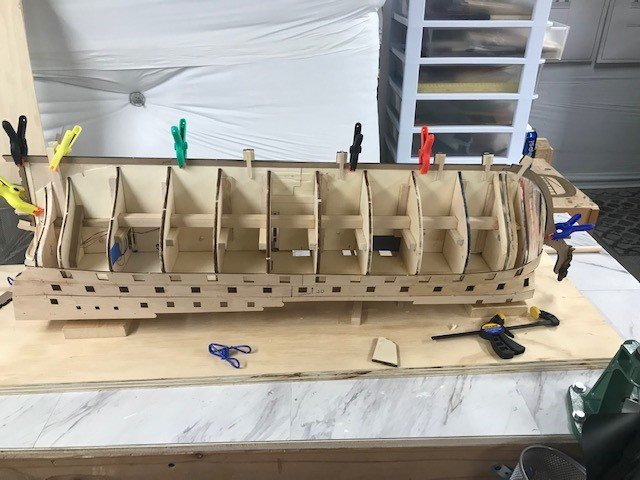
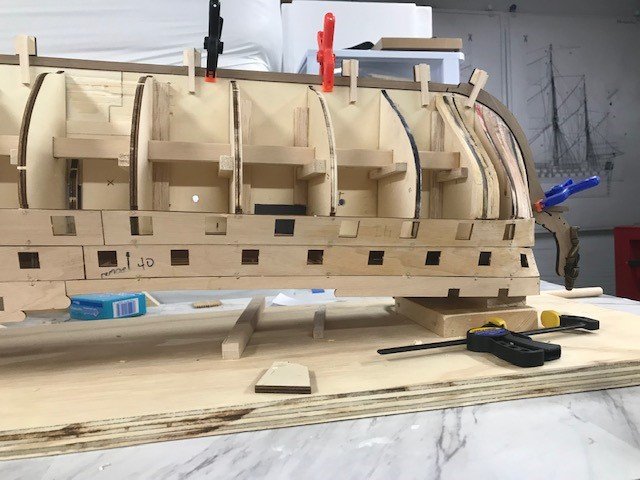
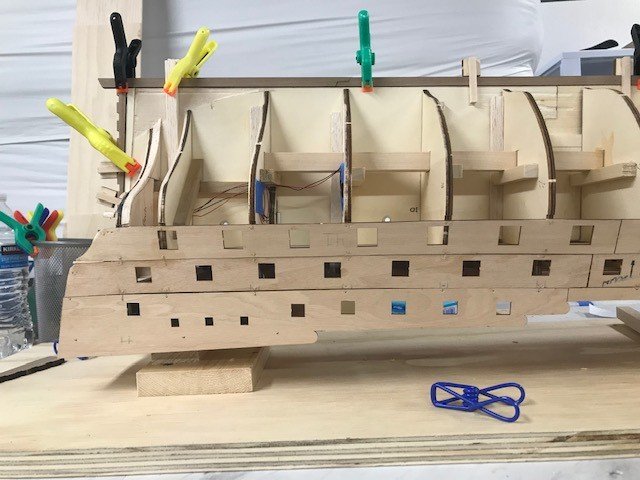
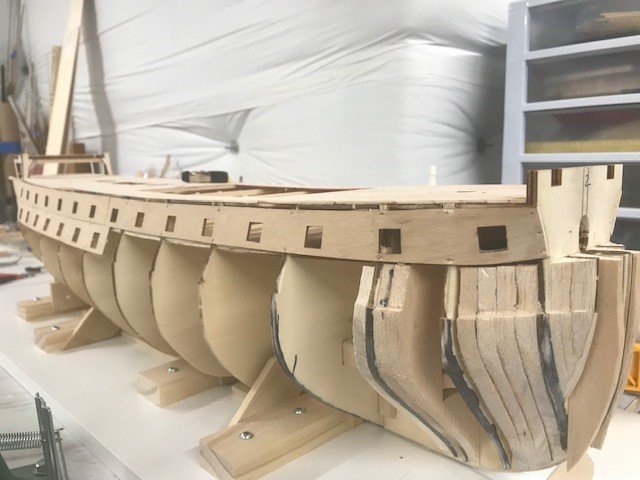
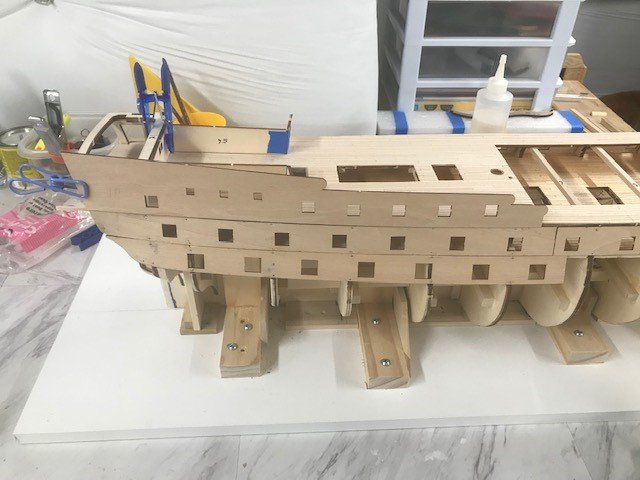
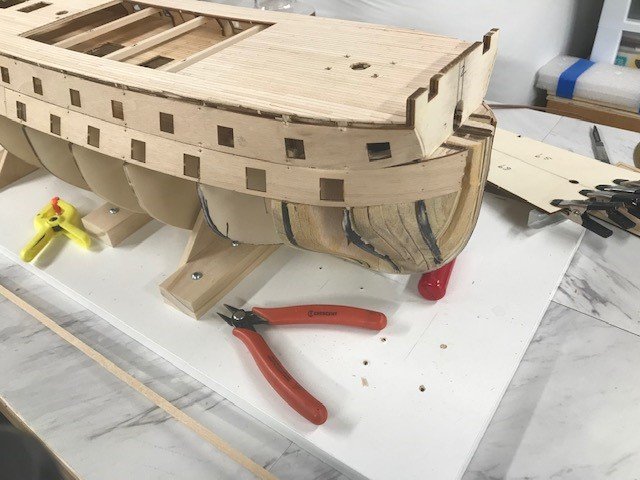
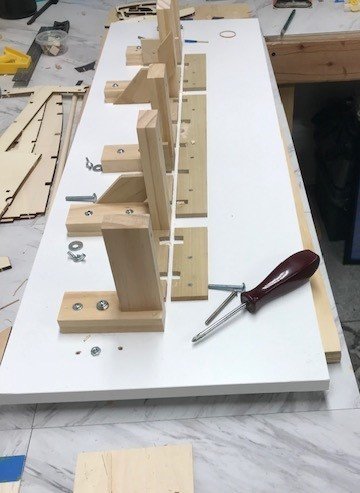
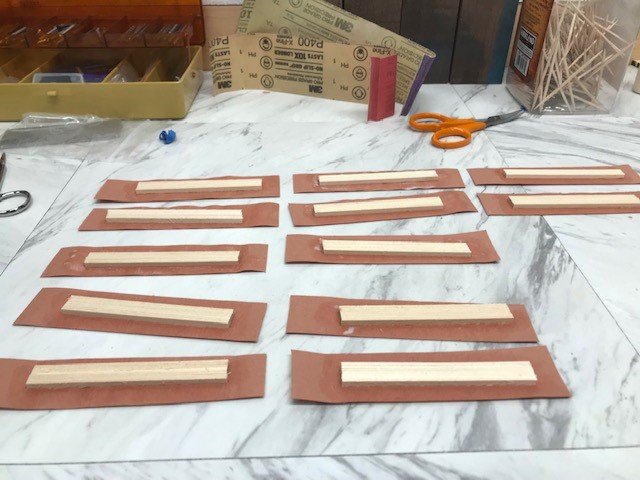
Greetings All, Build log for the Occre Montanes. Pretty happy with the kit everting was nicely packaged and wrapped. All the ply was flat and not warped all the strips and dowels nicely banded together and all the small parts in plastic compartmented trays. The instructions are good, there is a book of photos and a separate book of instructions. The plans for the masts are nicely printed at 1:1 scale. I did take the plans to my local copy shop and have them single side printed and had the plan for the side view enlarged to 1:1 scale instead of 1:3. My last ship had double sided plans and it got old constantly flipping them over. This is my third build and I wanted to work at a bigger scale, this ship is big! I had to build another bench to make things easier. For the build board I went to my local home improvement center and got a melamine shelf board, a "premium pine" furring strip and poplar strips for the bottom slot. The shelf board gives a nice flat smooth surface and I have a piece of 3/4 ply underneath, roughly $40.00 for materials. I Made sure the uprights were perfectly squared then made sure they were in line using a 3' steel level. The notches in the bottom boards are for the bulkheads. The notch down the center is to keep the false keel straight. On my first kit I didn't take much time with the build board and the false keel twisted. I was able to fix it, but I had to remove a lot of planking and add reinforcements to the false keel not fun! For the frame I cut the rabbet and the bearding line with a Proxxon mill. I sanded all the bulkheads, so they were snug but not tight and dry fitted everything at least ten time before I started gluing things together. I stated with the bow bulkhead and worked to the stern. the big square reinforcements were sanded so they would slide in without being forced. I squared each bulkhead to the false keel and plumb to the build board. I also added a lot of bracing (might have gotten carried away a bit but I don't want the disaster I had with my first kit). The instructions show planking the decks then gluing them in place. I don't know how I could have gotten them glued to each bulkhead correctly as the have significant slope towards the bow and stern, so I opted to pin and glue the decks in place first then do the planking. I Deck Planking: Decided to use the method I saw here on MSW with construction paper. After consulting with the admiral and her staff, decided the light brown looked best. (Tried black, dark brown, pencil and sharpie). The hardest part here (other than making what seemed to be an endless number of planks) was getting the glue consistency down. Too think and the paper does not bond well, too runny, and it gets between the planks. I also found the brushing the glue on worked best for me. I used watered down PVA. When gluing the planks to the paper make sure they are snug with each other. After the glue dried, I separated the planks using a double-sided shaving razor blade. Oh, and put tape on the blade to avoid nasty little cuts! After the planks are separated repeat the process for the ends. You only need to do one side and one end for the planks. I used a four-plank shift starting from the centerline. Not hard just have to keep track of where you are and make sure the construction paper caulking is facing the right way. I didn't take the planking all the way to the first bulkhead since it will never be seen.

-
Hi Allan, Sorry so long getting back, Thank you! Yes I noticed that about the kits. I have been rounding up as much info as I can but it varies so much between the sources I might go with the pins as it's easier to tie to pins then wrapping around a rail. Guess I'll decide when I get to that point. I was leaning towards brass pins I tried to turn the wood down but like you said just too small. Curt.
-
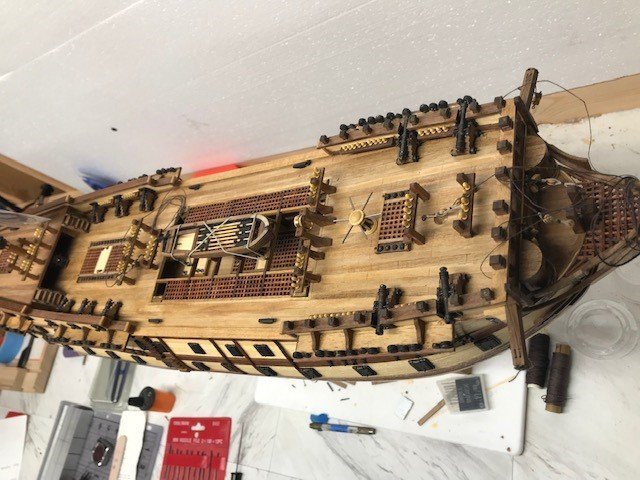
Hi all, Currently building the Occre Montanes just starting the frame. I recently finished the AL San Juan Nepomuceno. On the Nepomuceno (see photo) the belaying pin racks adjacent to the masts have belaying pins. On the Montanes kit and all the images I have been able to dig up it looks like the racks do not have pins or they are maybe just not shown on the historic drawings. From the kit plans the lines are tied around the rack (to me seems rather archaic). Anyway on with the question, should the pin rack near the masts have belaying pins or not or is there something I'm missing? Curt
-
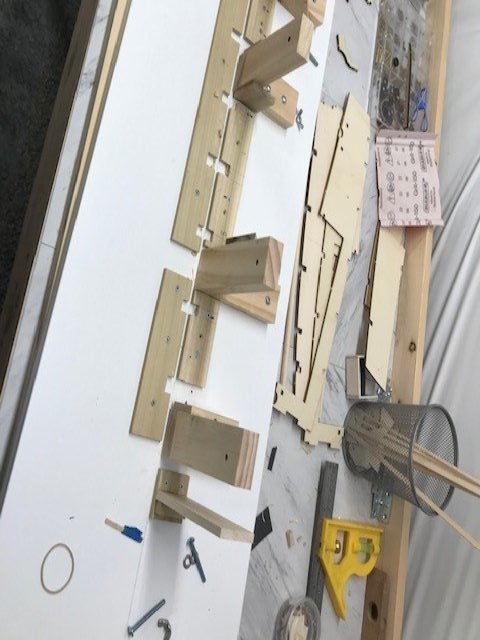
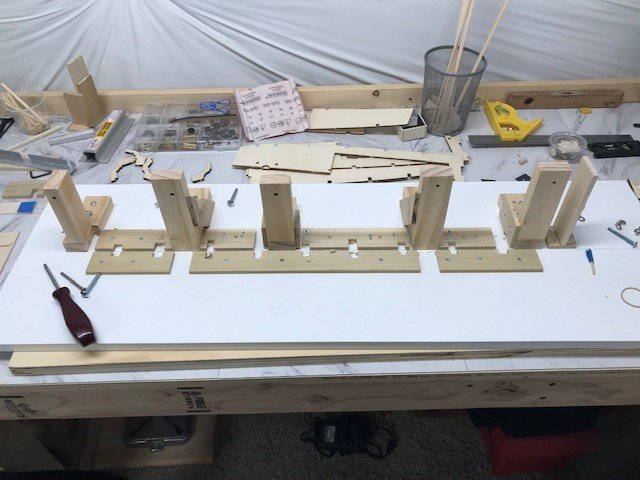
For lack of better term I used my Dremel as a poor man's mill before I got a Proxxon. The Dremel drill press attachment was not very expansive and I would build various jigs to hold parts for sanding, drilling, milling. Long set-up but I learned a lot and I wanted to make sure the investment in the Proxxon was worth it. For example I used my press and home made jigs to drill the holes in all the pin racks and I used a fine sanding disk to square up thick laser cut parts, again using homemade jigs, and a machinists vise. I had to rig a hose clamp to hold the press in position. One very valuable lesson I learned is practice on a piece of scrap first and test your set up before you make lots of expensive scarp wood!

