
Cmm4000
-
Posts
60 -
Joined
-
Last visited
Content Type
Profiles
Forums
Gallery
Events
Everything posted by Cmm4000
-
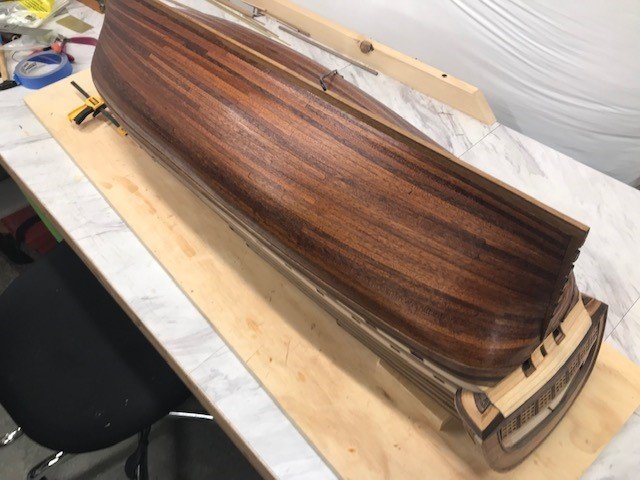
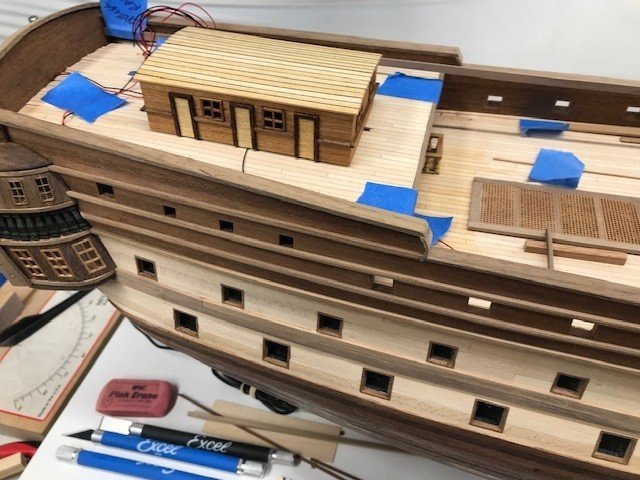
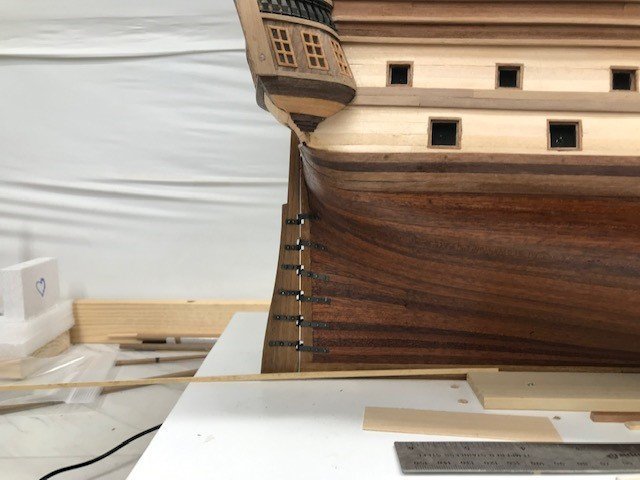
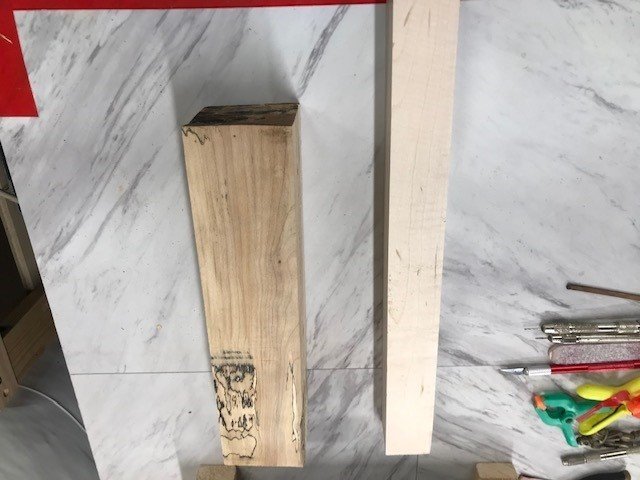
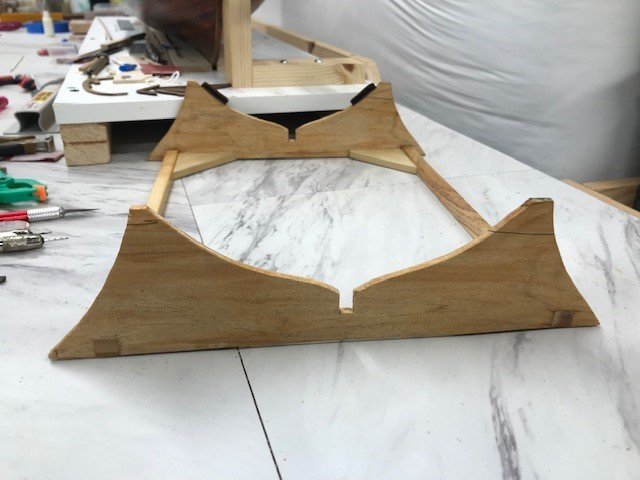
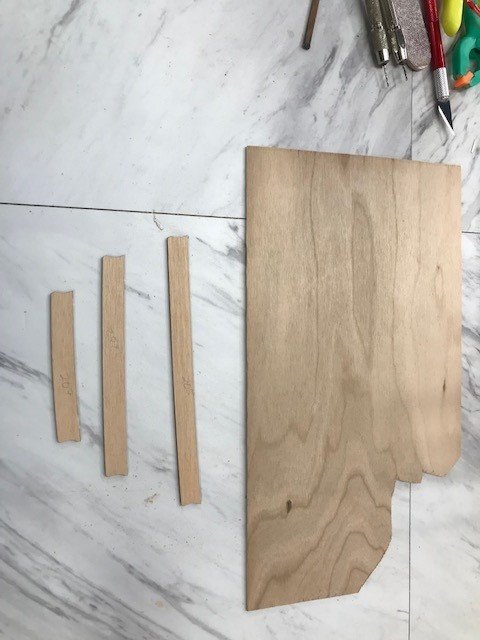
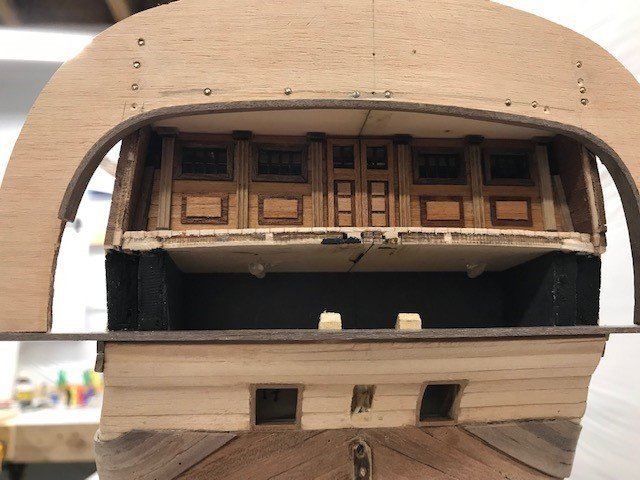
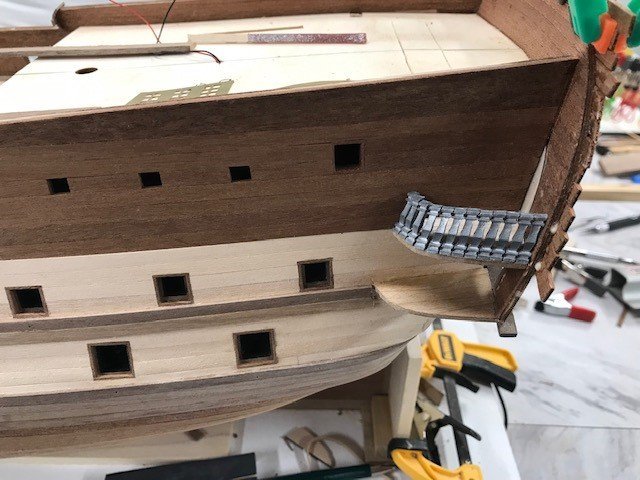
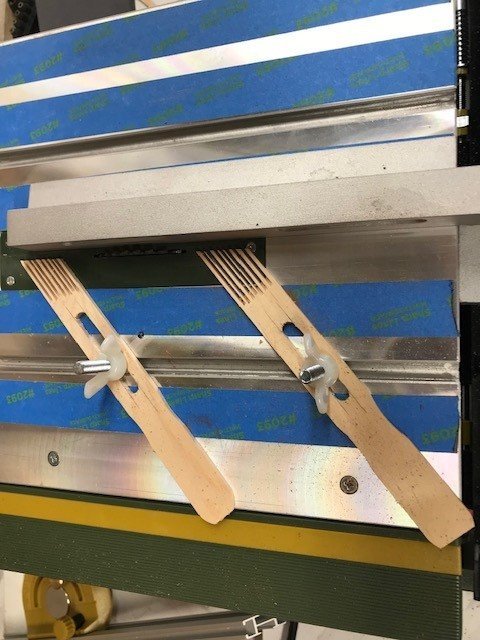
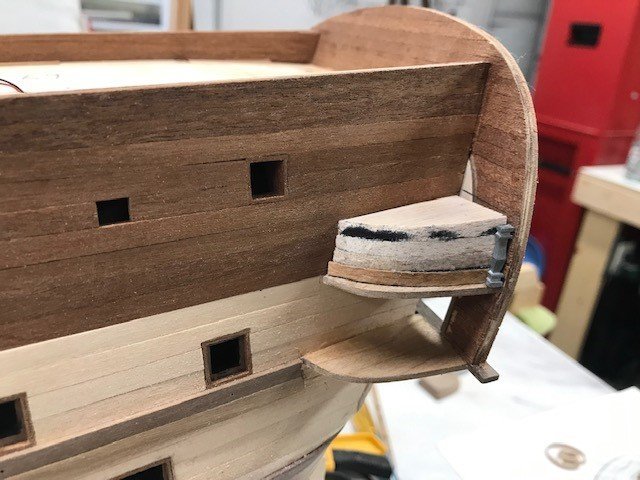
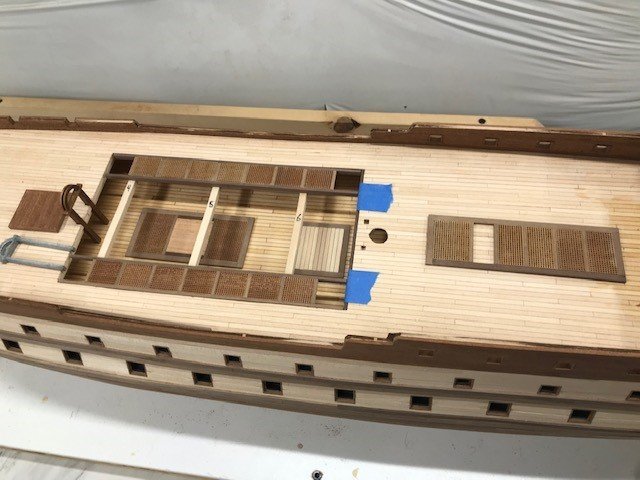
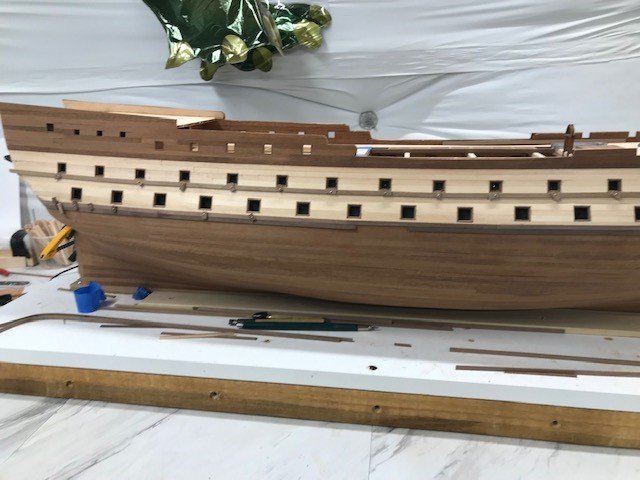
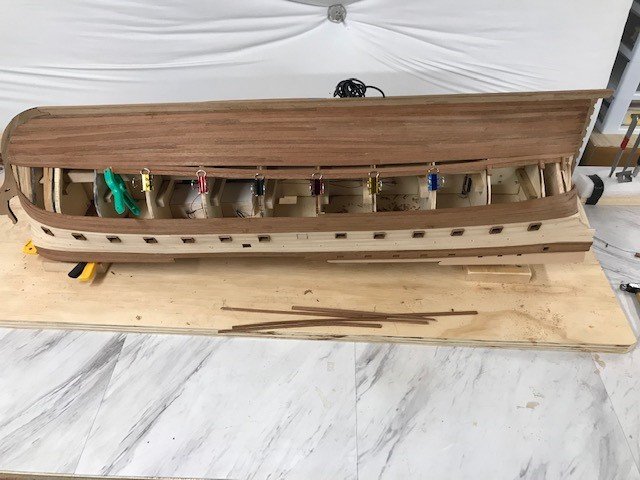
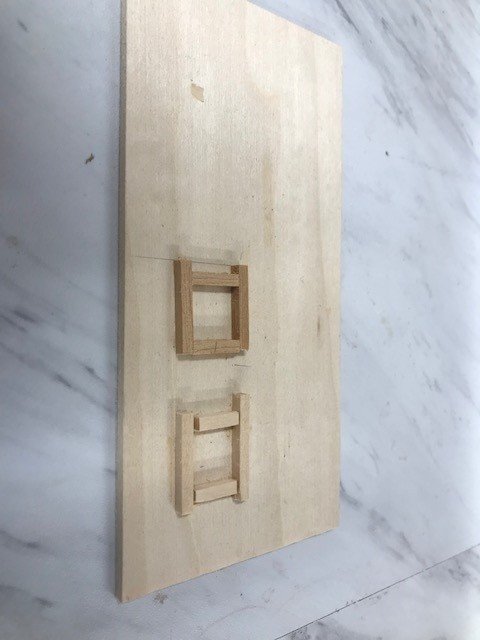
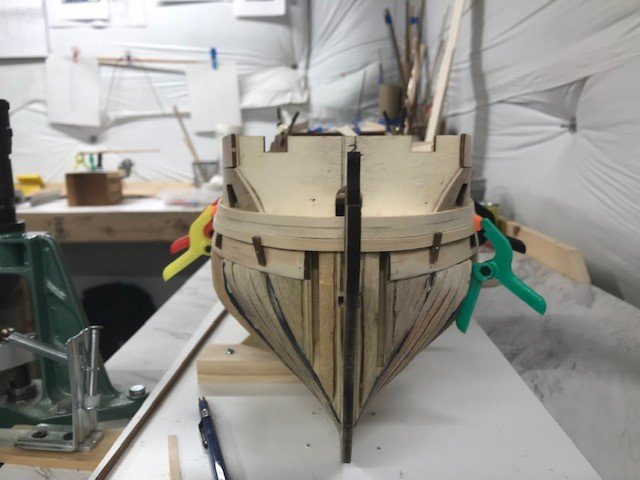
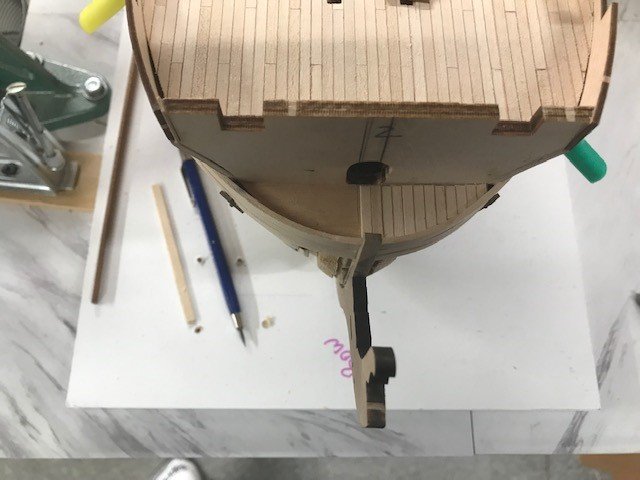
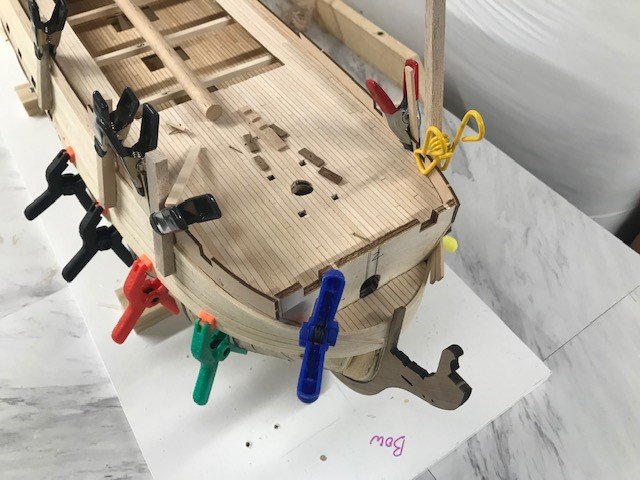
 Chris and Chris, Thank you for the thumbs I must be doing something right! Lots of progress but I have been away from posting for a while so here are updates. Finished the lower hull with seven coats of sealer and installed the rudder. Construction of the official's cabin and the jig for building the doors and windows. Constructed the display base out of spalted maple that I got from the cutoff box at the wood store also scored some curly maple. I have plans to use this on the ship in dry-dock the Norske Love. More of the official's cabin installing the hinges and door handles. Made good progress on the bow one side is finished. The jig to build the ladders and the ladders and fenders installed (I used beech for the fenders I could not get the walnut to cooperate, I also did them in two layers then doweled them in place. More of the deck furniture made. The channels from the kit are plywood and seemed to be to short so I have a longer set to cut and see how it works out I don't want to run out of channel for the standing rigging and I can always make them shorter. Also decided to use belaying pins per my question about the SJN. I think El Capitán got into the rum as he later fell and passed out on deck. Oh and now I get to do the other side.
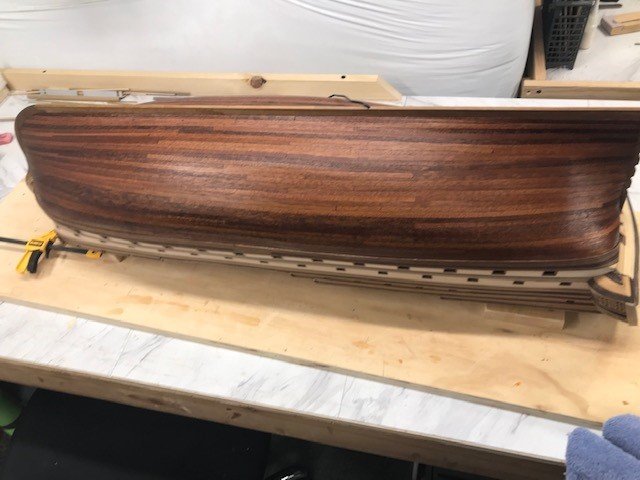


-
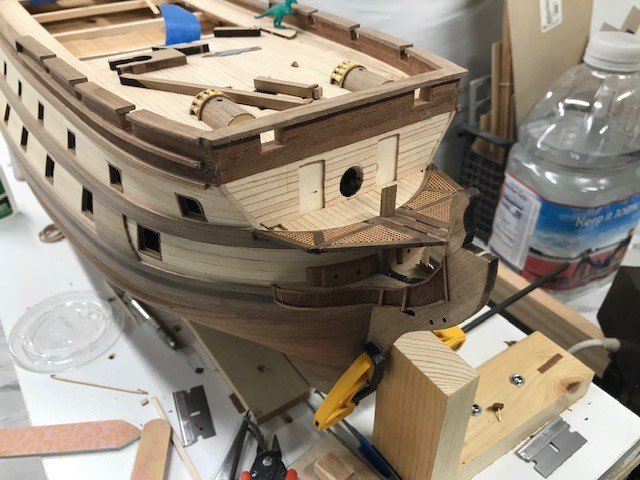
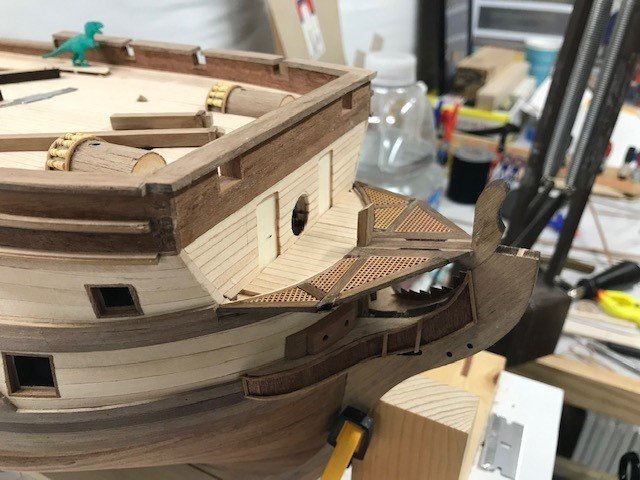
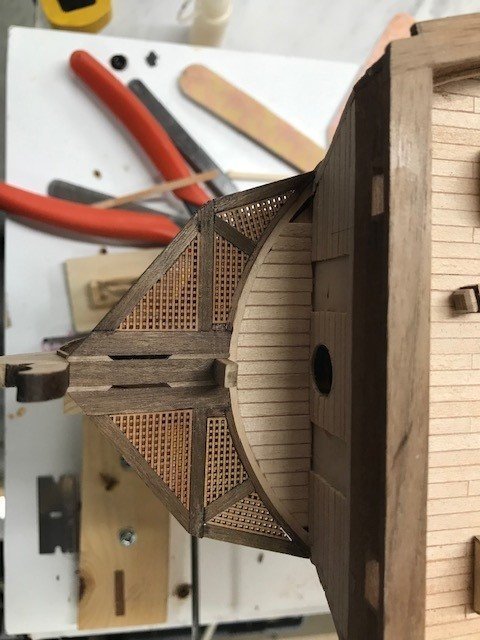
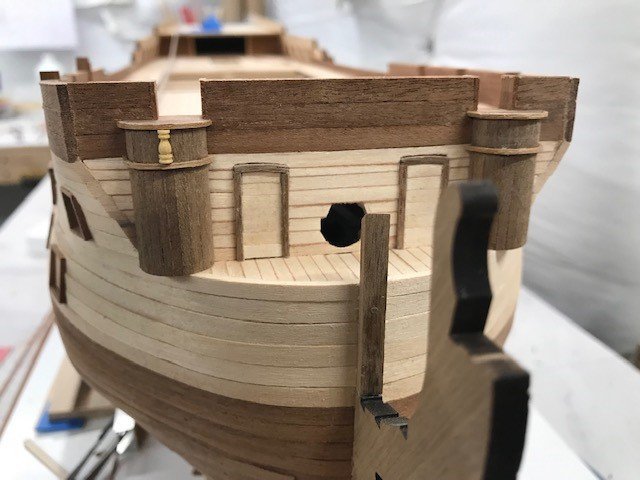
Work continues on the bow and details.
-
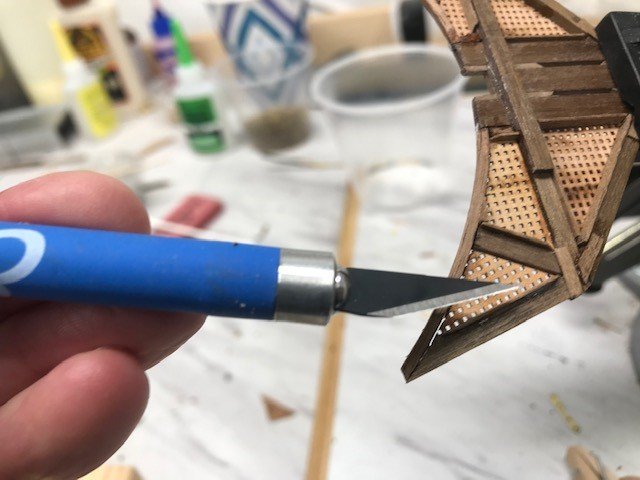
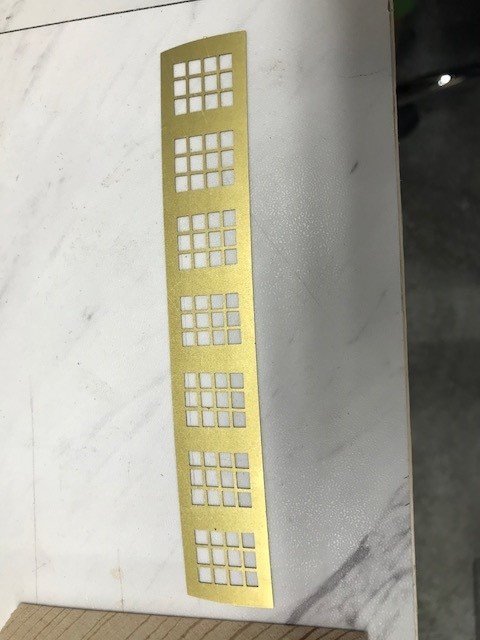
Scratched the bow grating the kit stuff IMHO is way out of scale. Work on the bow details continues. Stove vents built, used brass black on the supplied parts, pretty happy with the results with a sooty look.

-
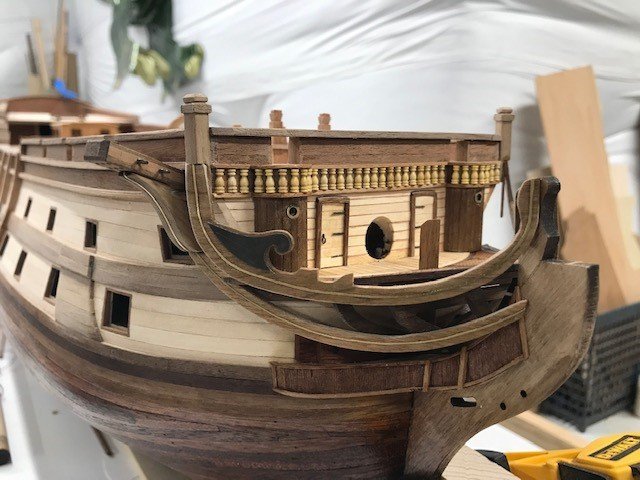
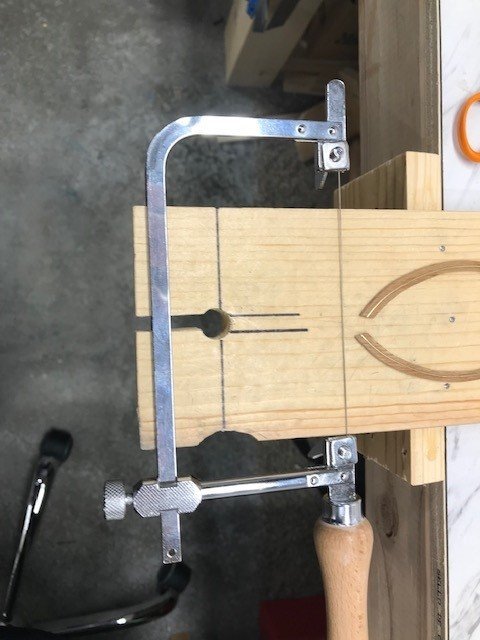
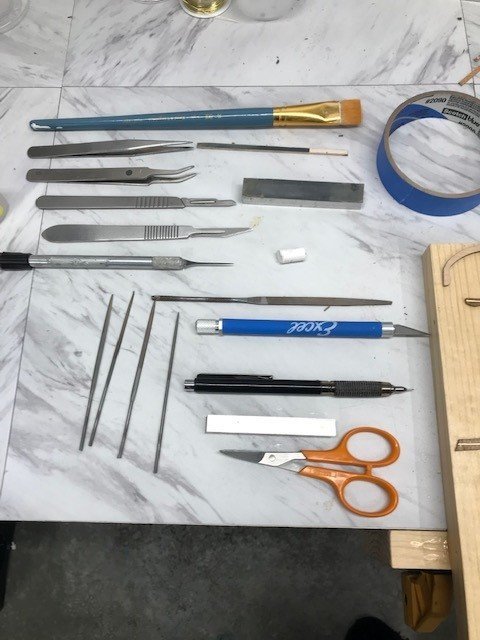
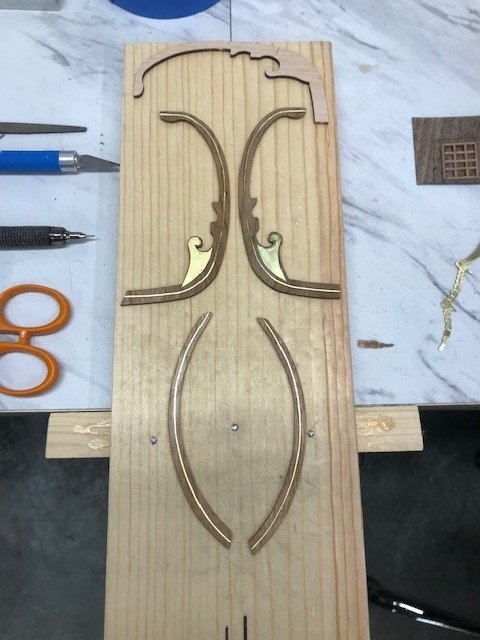
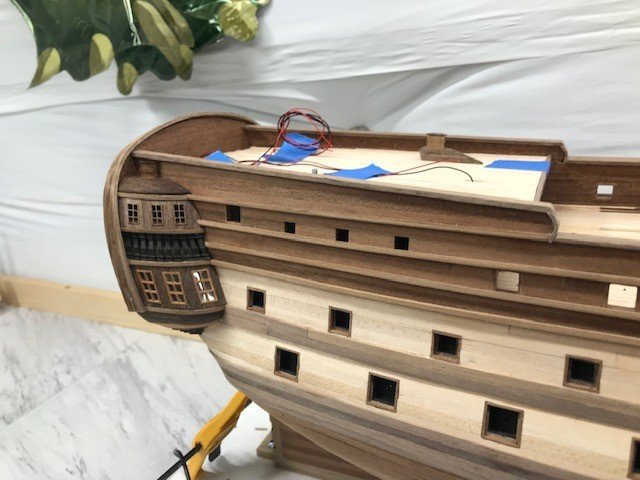
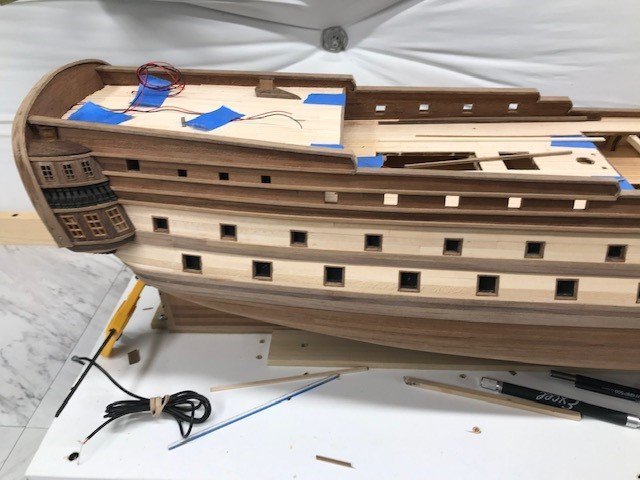
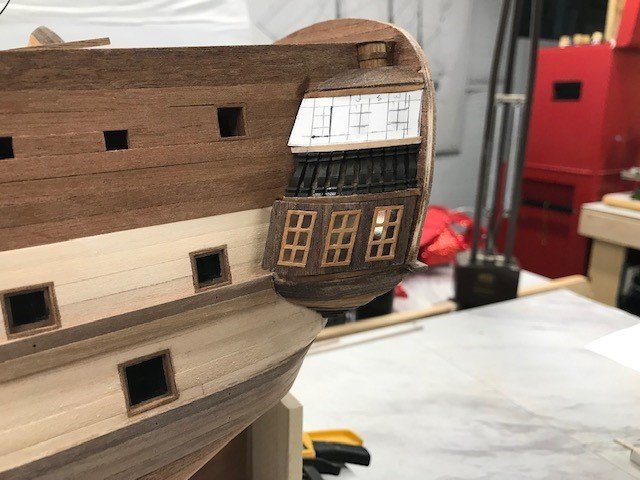
Hi Martin, Thank you for the compliment! My jeweler's saw set up and inlay tools. Mad some big progress with the stern and railing. The wire is for the stern lanterns and the official's cabins LEDs.
-
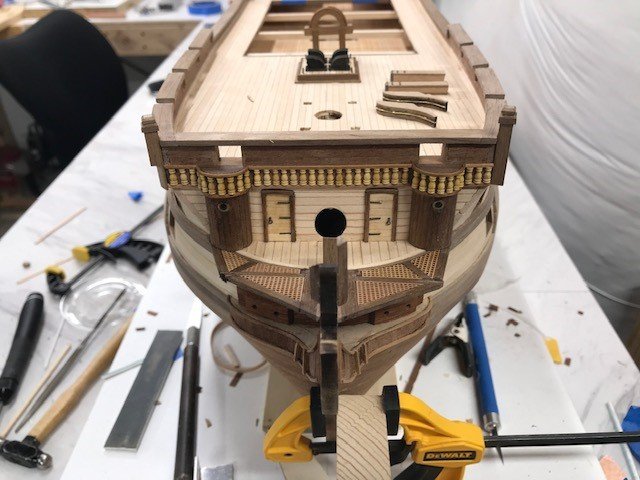
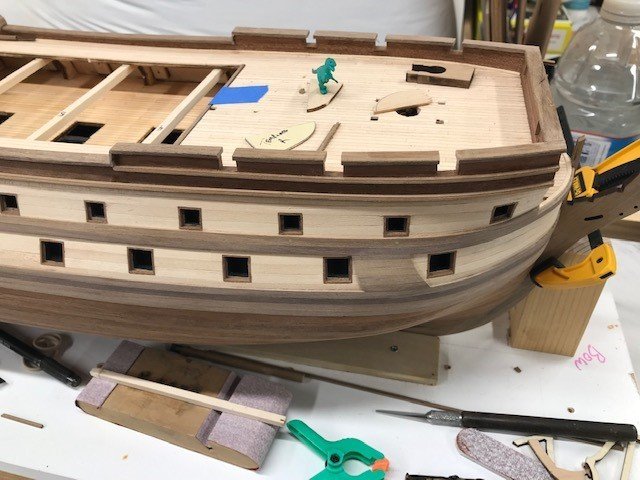
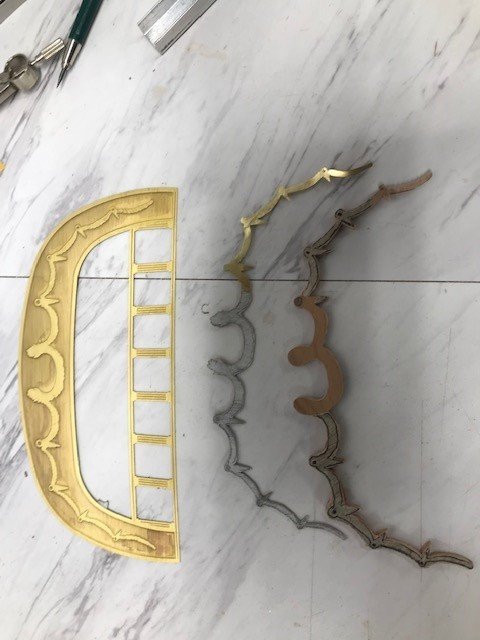
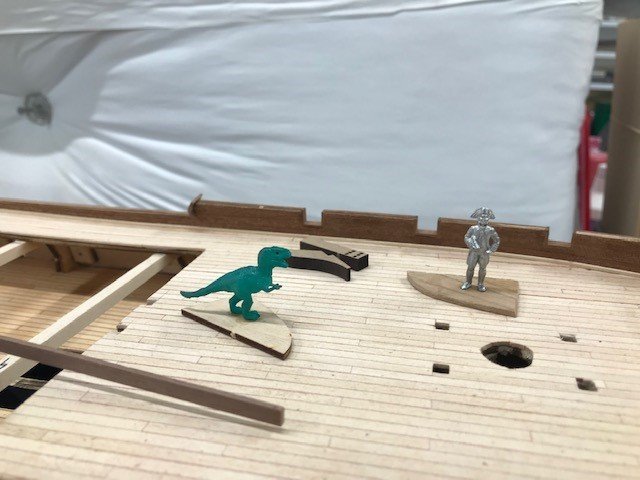
Hi Biker Mart, Your Montanes is looking good! Been kinda busy so haven't posted for a while so here is some new pics. Alot of stuff lately is figuring out how to replace the PE/Cast parts with wood and manufacturing detail parts. Also made some feather boards for the Proxxon table saw just paint sticks and some hardware with Teflon wing nuts. Not going to use the PE stern gallery or cast parts so working on the detail in wood and brass to see which works/looks best. Wiring installed for the stern lights and planking begins on the poop deck. And last but not El Capitán and his favorite pet raptor on deck (he is a little big so I will be ordering his clone in a smaller scale


-
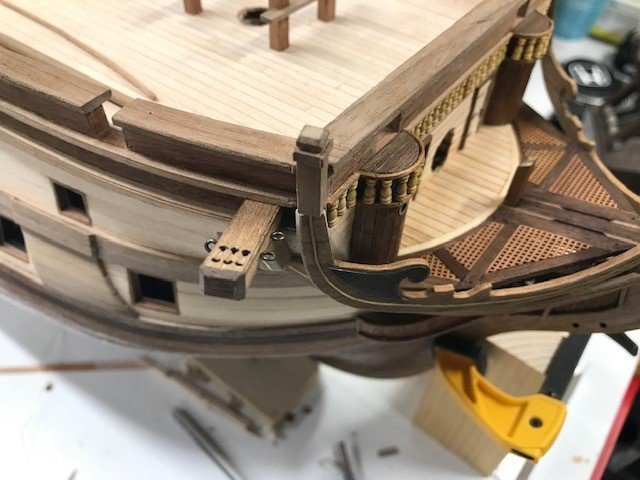
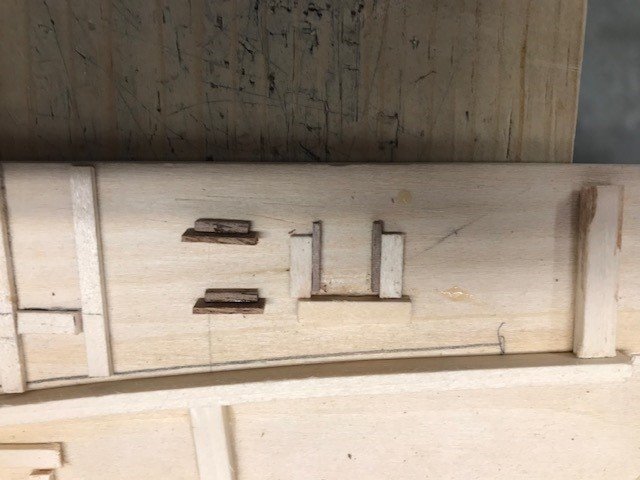
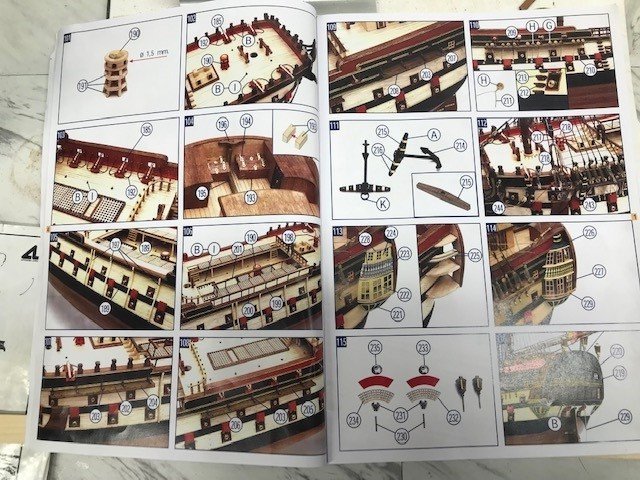
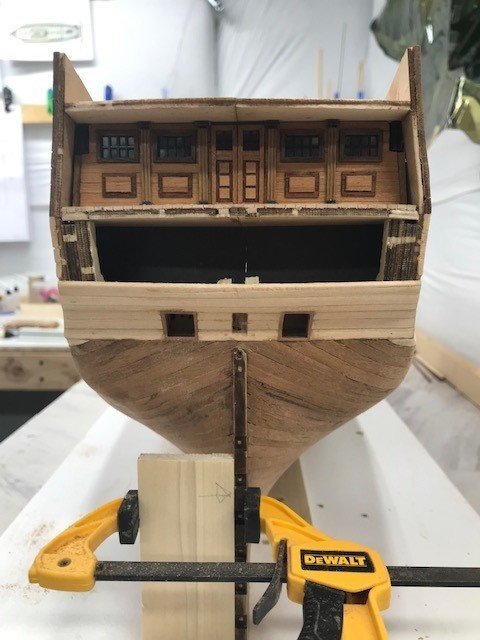
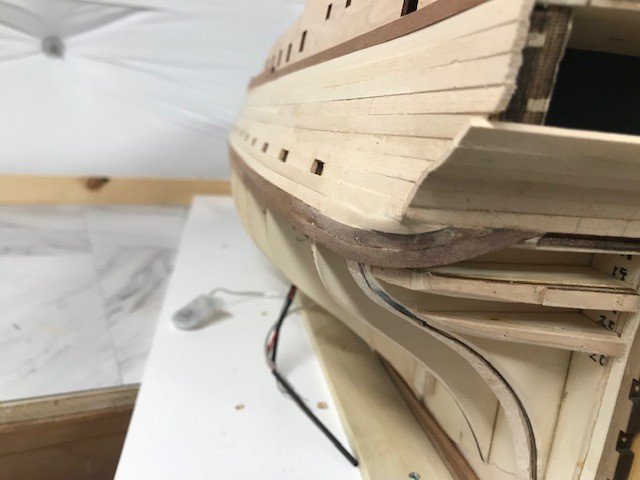
BikerMart, Allan, I actually read the instructions that come with the manual, my mistake the horizontals are called rubbing strakes, and the verticals are called fenders, on the manual pictures 105 and 106 which makes way more sense. Also some pictures of the plans and text. More work on the hull. The rail is the kit supplied ply with walnut fascia and stained, not crazy with the look will probably fabricate one. Gonna play with some options this weekend. Started the work on the transom windows to replace the PE
-
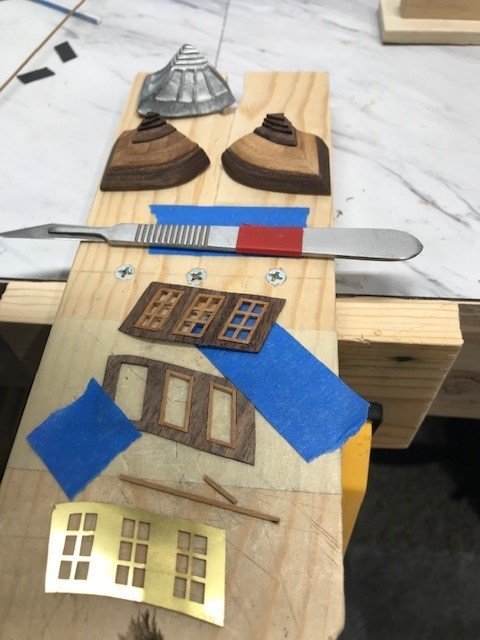
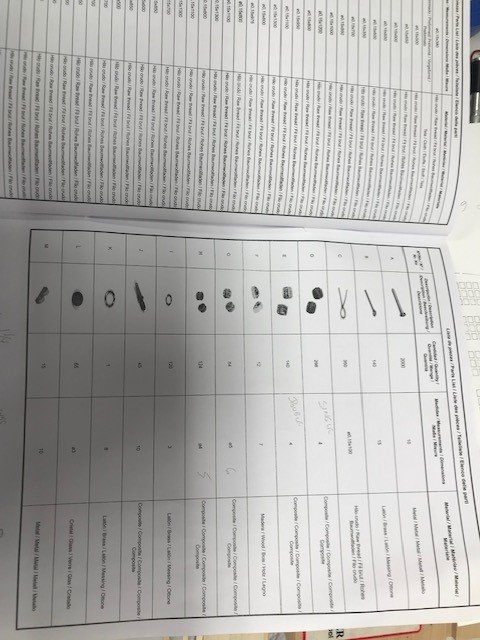
Sirs, You are correct the instructions, if I recall correctly, refer to them as fenders and I'm guessing maybe due to translation from Spanish to English? For me the most valuable instructions are the book of photos the plans and the parts list with the dimensions/what the part is made of. For the most part, IMHO, the instructions say something like "build this," so it looks like the plan or the photo and I'm guessing that's why this is such a cool hobby, sometimes it takes a few days just for me to figure out how to make a part. Like the bell tower, the kit part is metal had to go, I couldn't get the top cut right from a solid piece of wood so I laminated several strips together over a dowel and capped it with thin walnut squares. Port side is done, more of the deck furniture started and work begins on the starboard side.

-
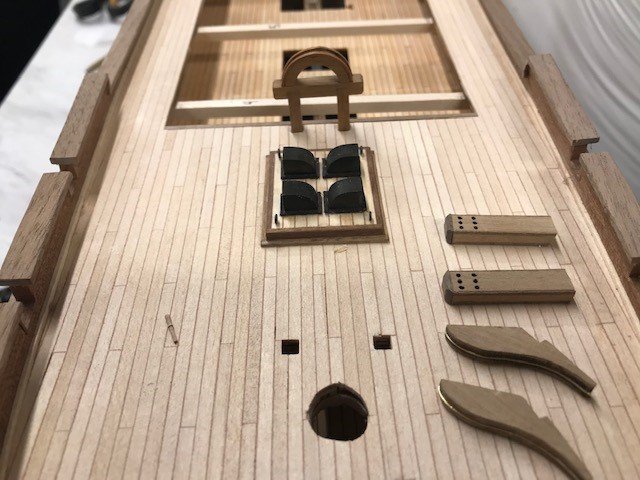
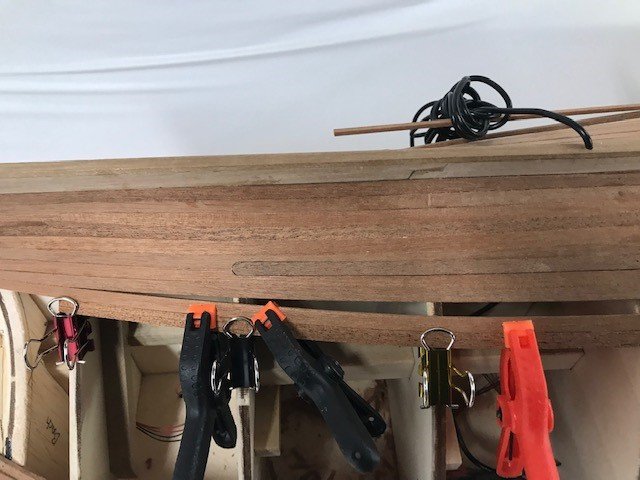
Work continues on the grates and hatch covers. Making the top for the bell tower laminating walnut with my high-tech jigs. Decided to go with the kit supplied walnut for the fenders really nice wood. Had to thin it to 1.5mm I could not get the 2mm to bend on the stern wood processed and test bend successful!

-
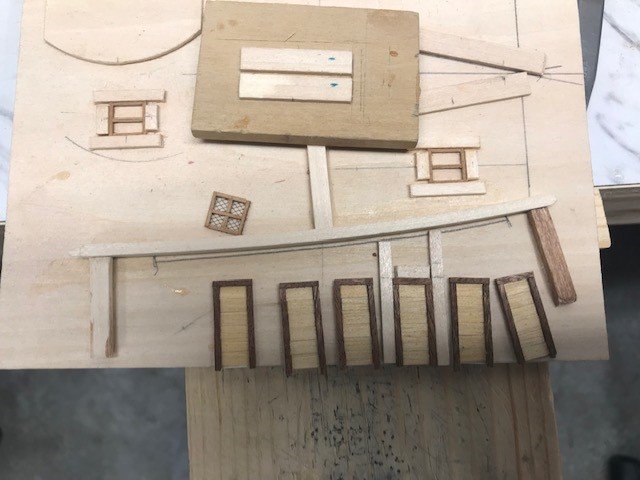
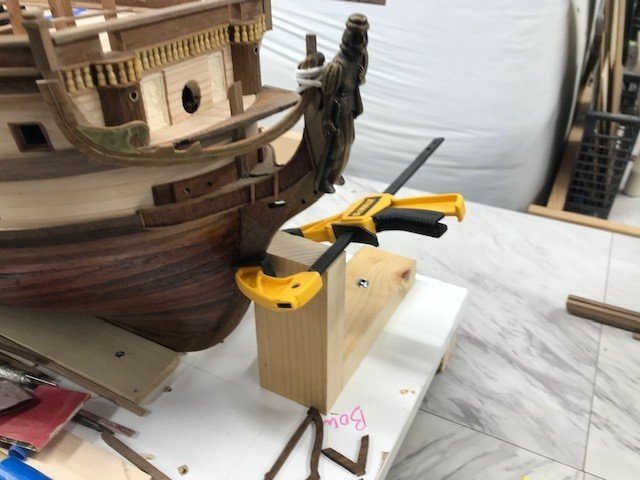
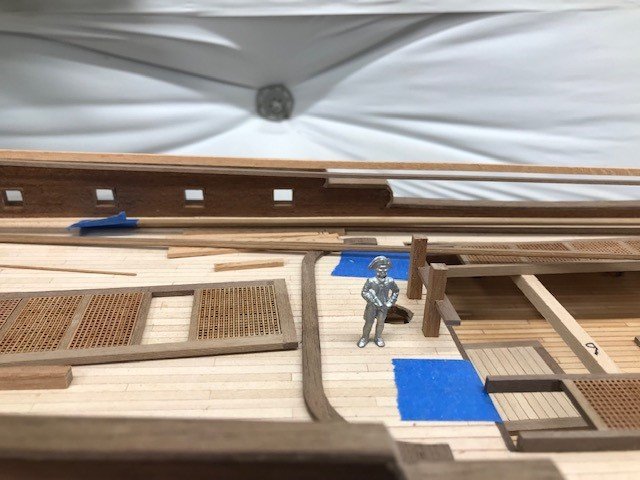
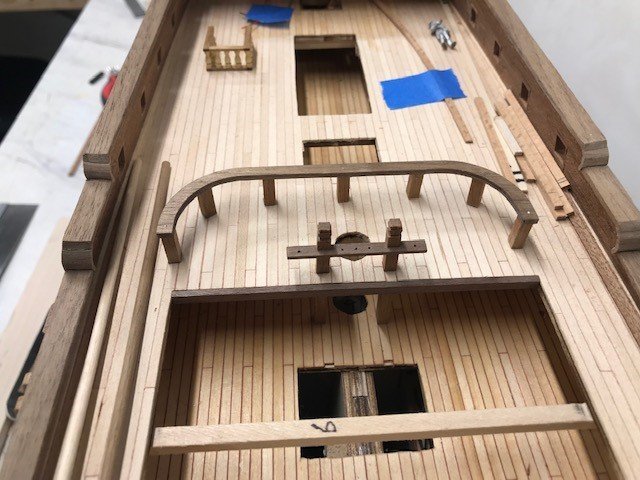
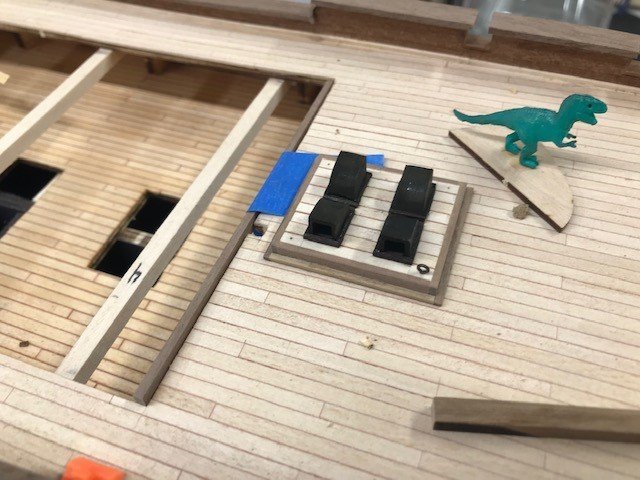
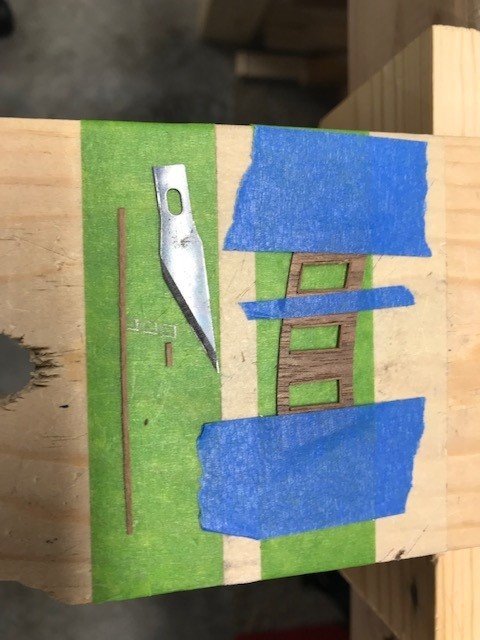
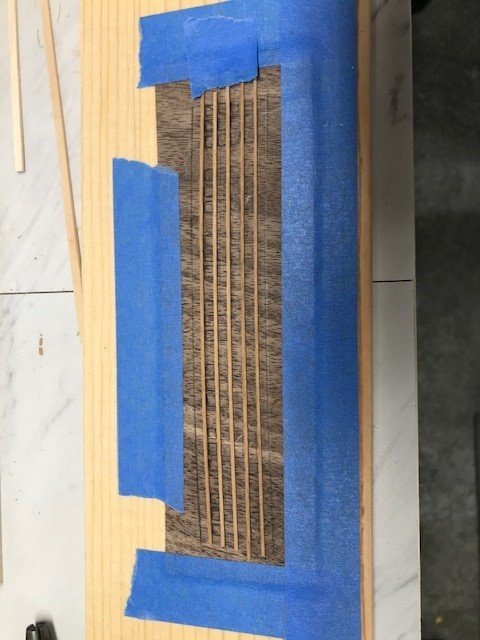
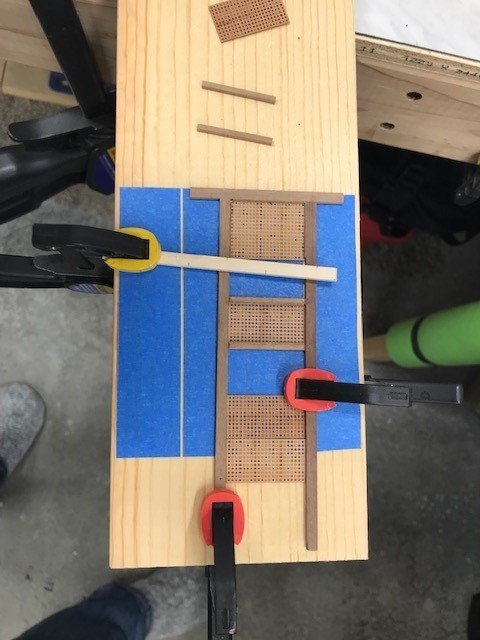
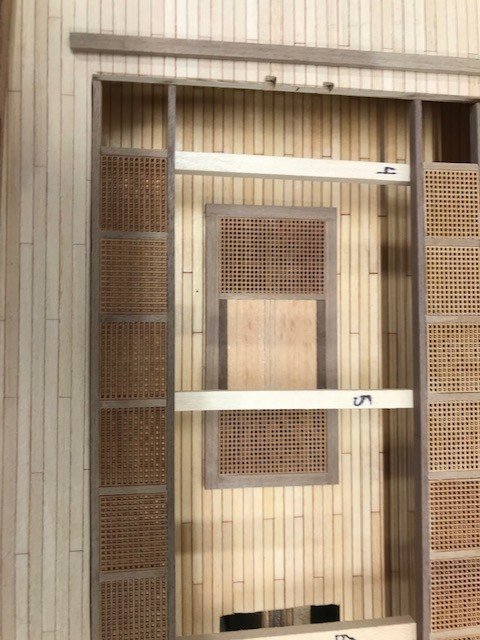
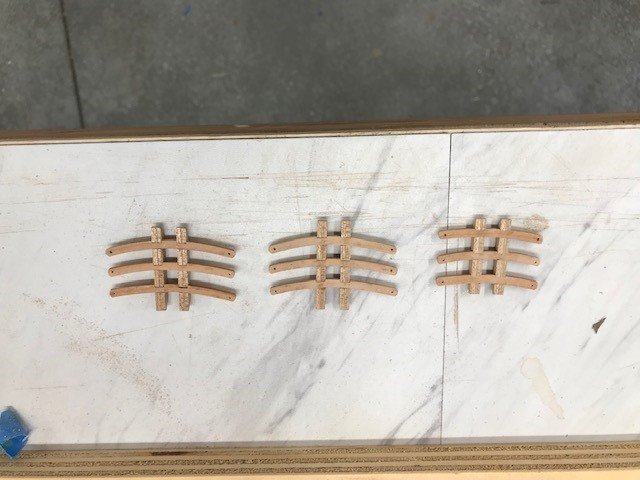
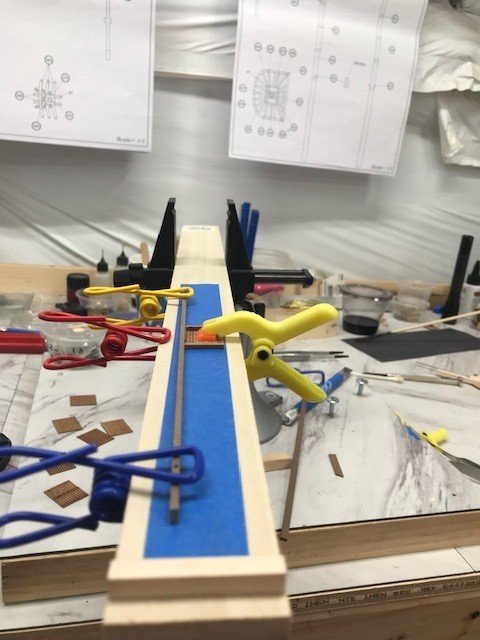
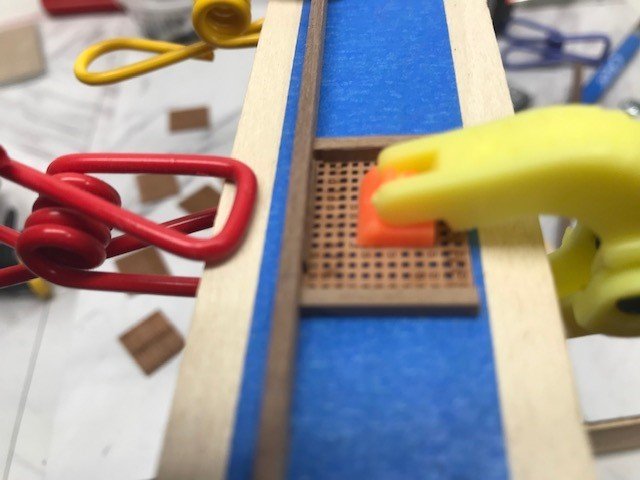
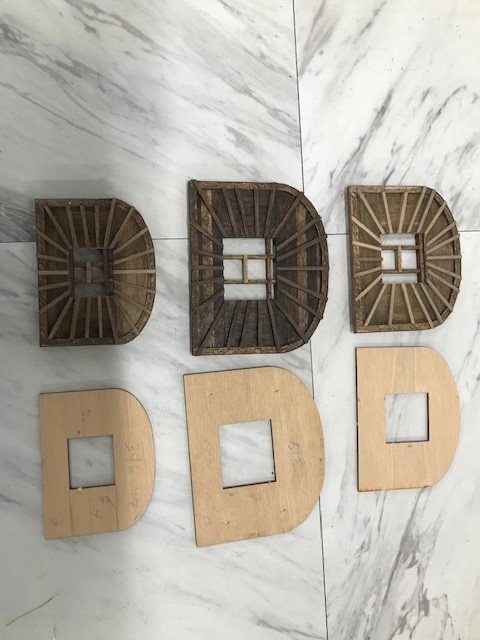
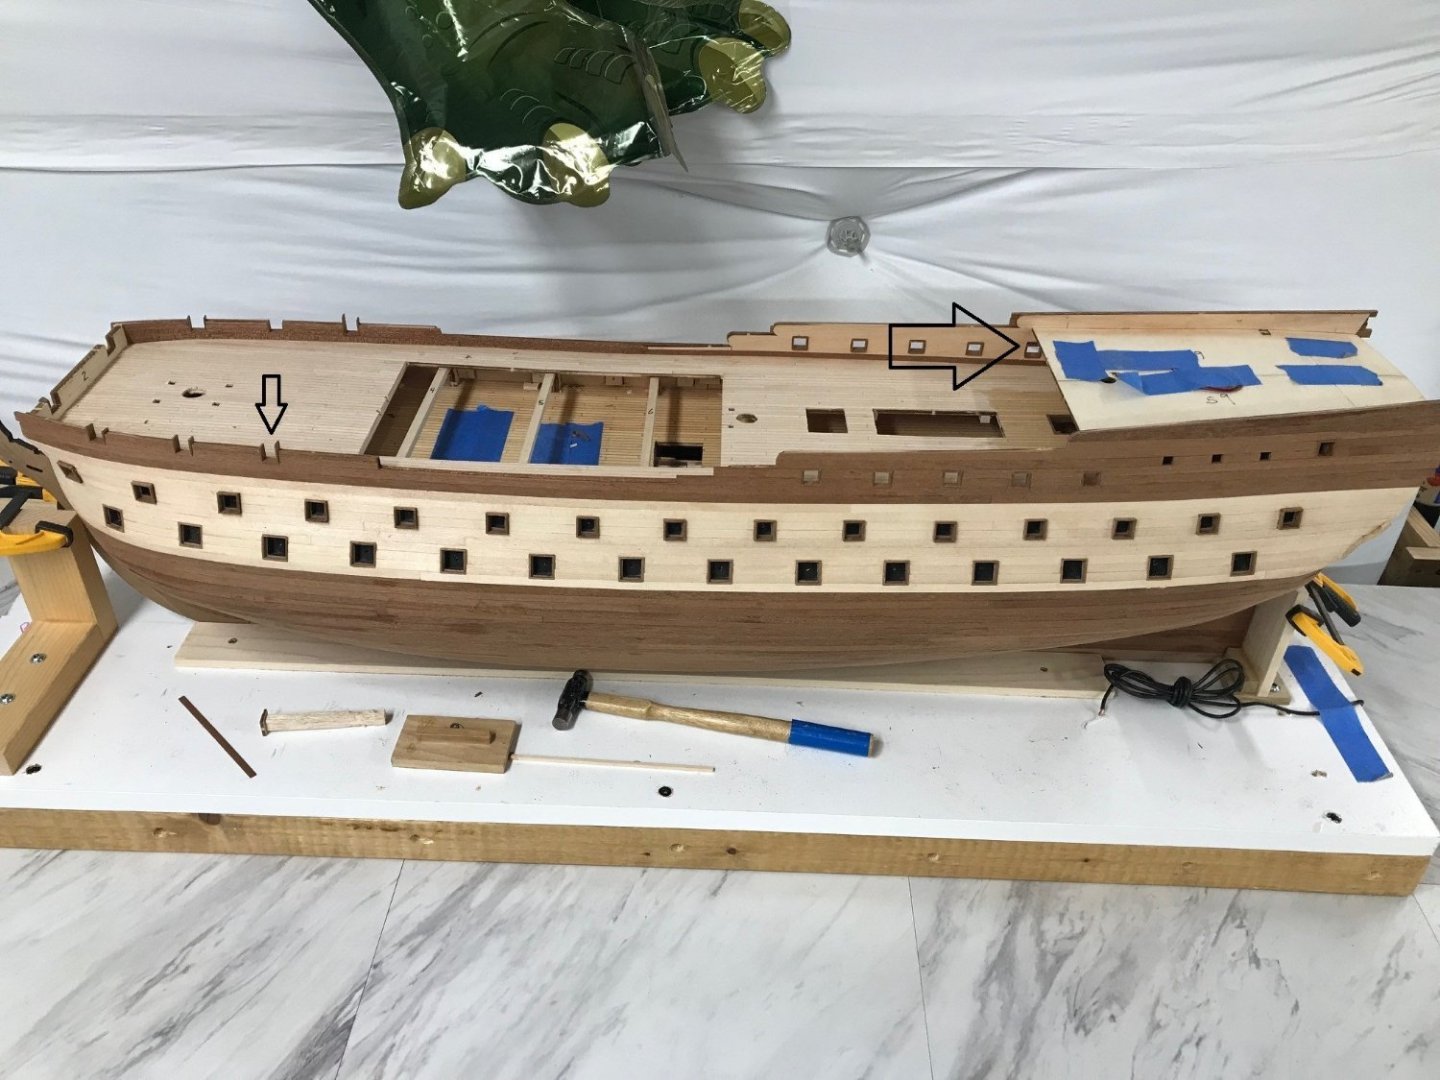
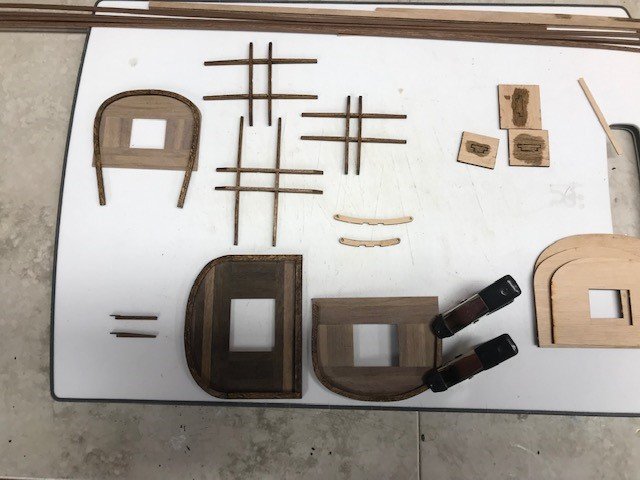
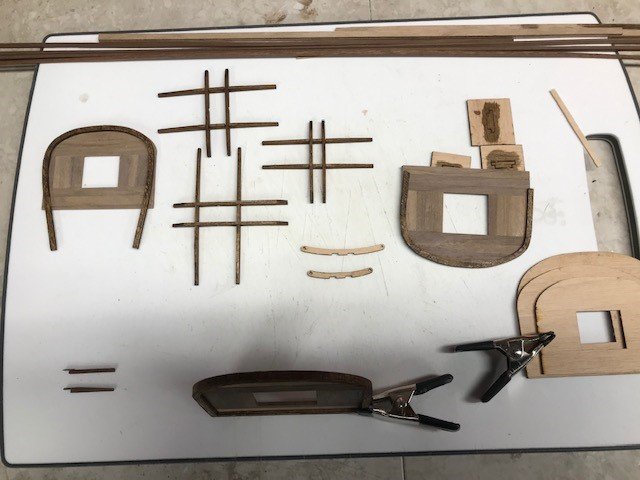
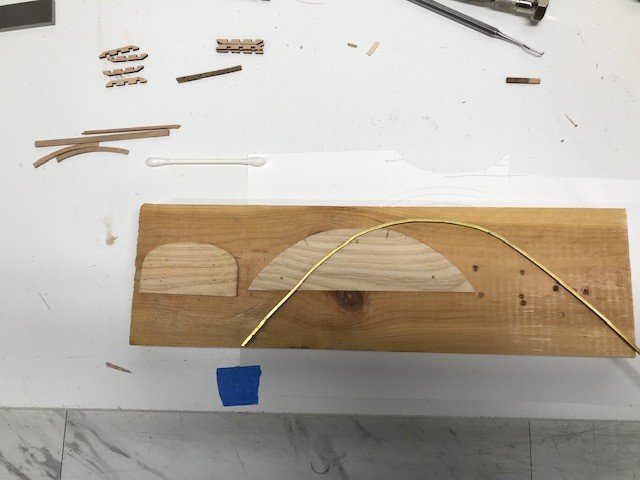
Crosstrees completed. Stern gunports cut in and lined. First hull sanding done (sand-vacuum, sand-vacuum, ugh). More of the bulwark lining done. Been messing with what to make the fenders from, either wood soaked in black dye or dark walnut. Both are soaking for bending so while I was waiting for that I made the waist grates. The kit grates are nice but IMHO way out of scale (the openings look way to big, I have a 1/72 scale sailor and his foot would almost fit through the opening), so I used laser cut grates from Falkonet with much smaller openings. One very important thing my Nepomuceno taught me is the importance of building assembly jigs. This is a piece of poplar from my local home improvement store with blue tape for a reference and a square block of bass for a stop. I keep a couple of these poplar boards on hand as they are great for making push sticks, sanding blocks, shims, vise jaw protectors, drill press jigs, etc. and they are really cheap too!
-
Got the heads and doors roughed in and the first test column to replace the kit PE. Mast tops major construction completed to replace the kit supplied ply w/ (walnut, cherry, birch, sapele). If I was going to paint the plywood the laser-cut is top notch but I'm a wood guy. The ply parts make excellent templates though. The jigs for the cross trees and making the cross trees (cherry and birch). The next big steps are sanding the hull and cutting the stern gunports, not looking forward to the all the sanding and mess, so I've been building these other parts to get motivated.
-
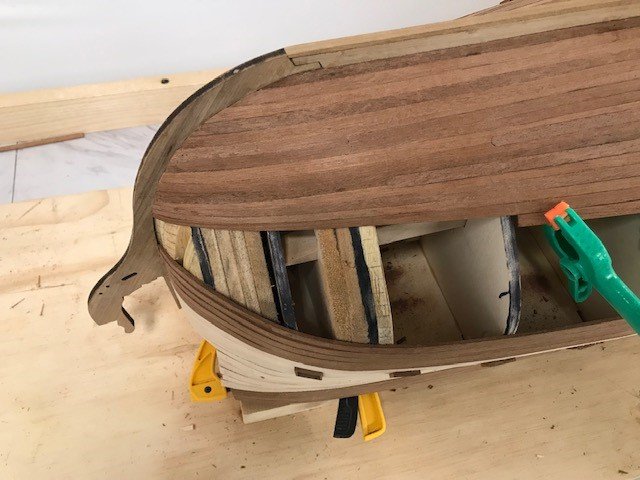
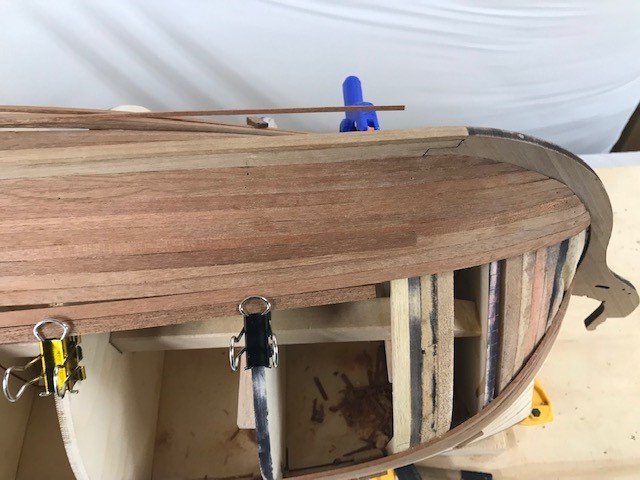
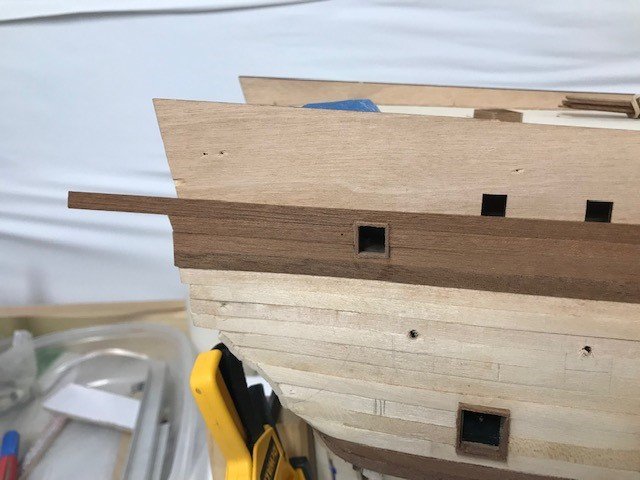
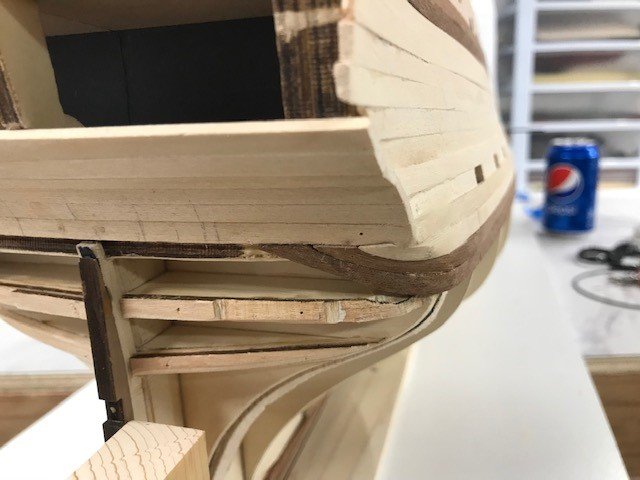
Started work on the bow. Sanded the plank flush with the prow and roughed in the doors. The plans call for rectangular doors and not inset I prefer the rounded top and inset matching many of the drawings I have accumulated.
-
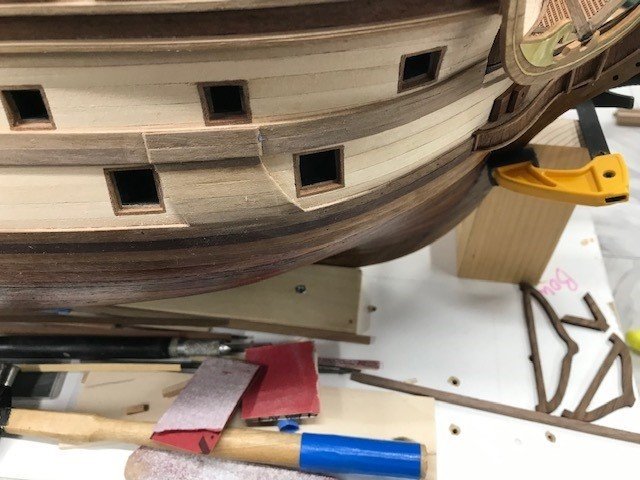
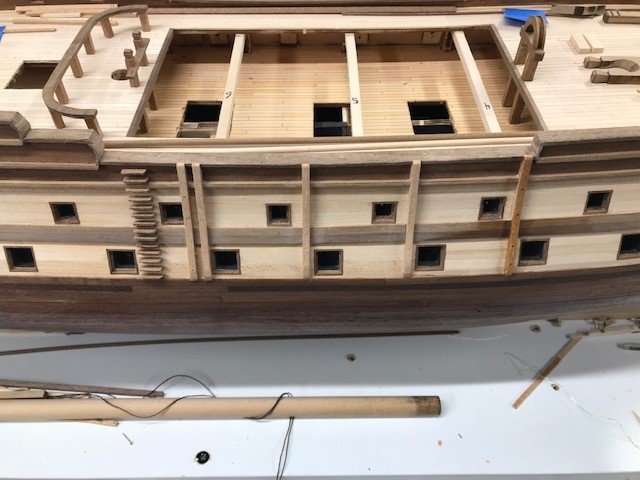
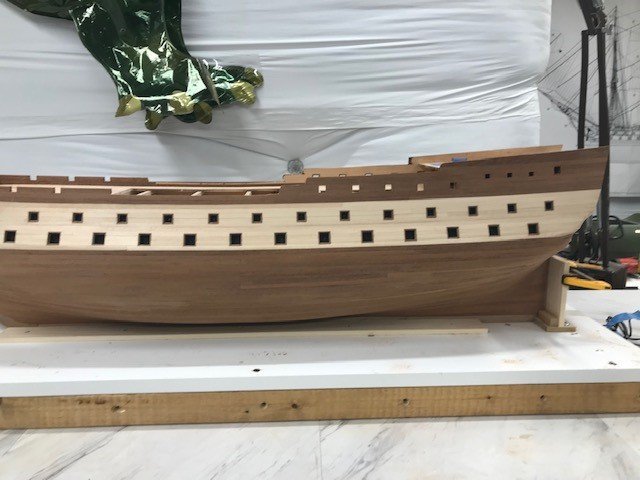
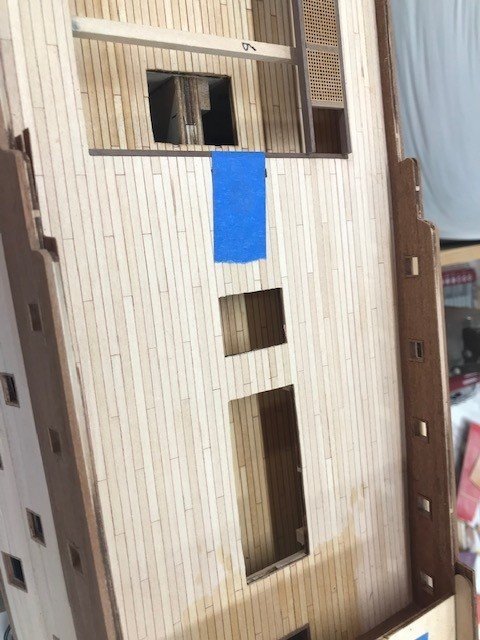
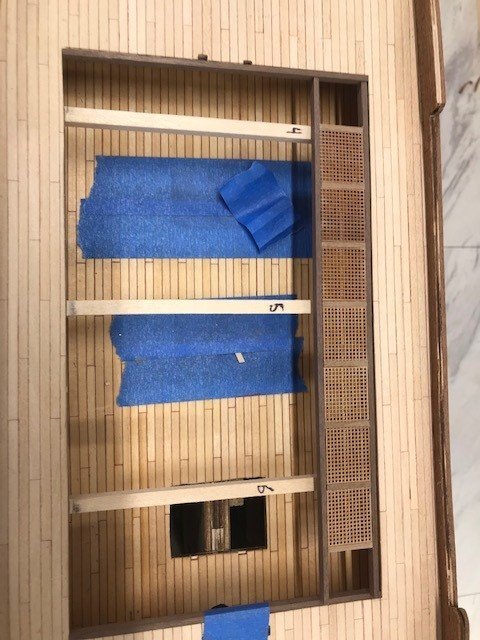
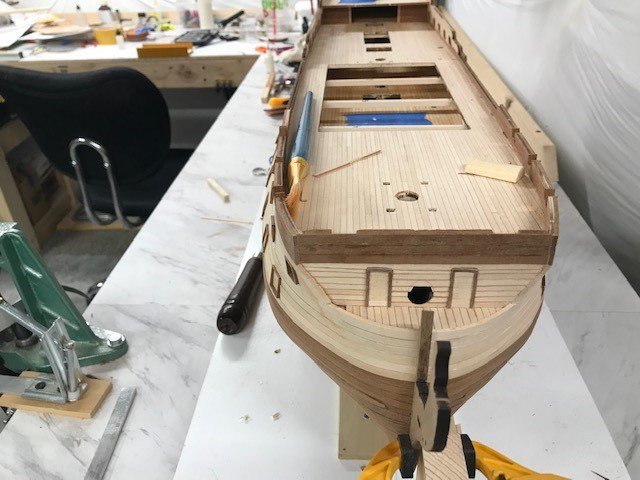
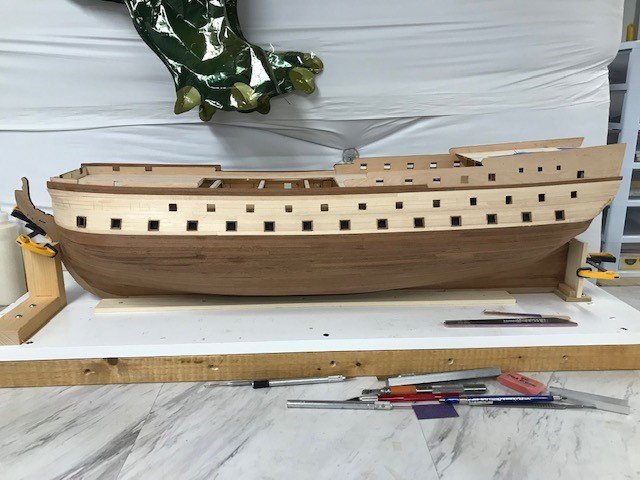
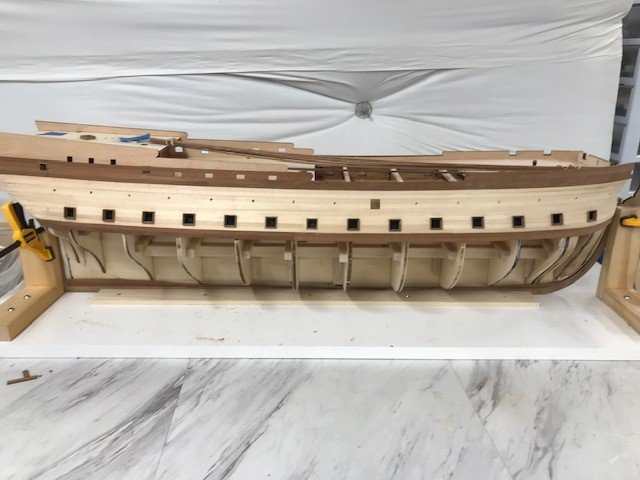
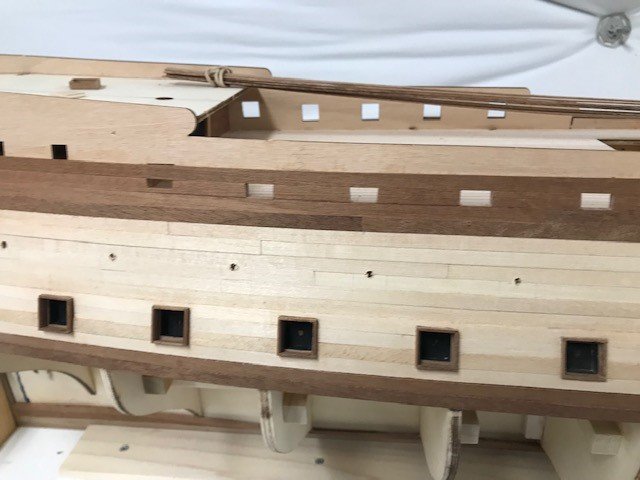
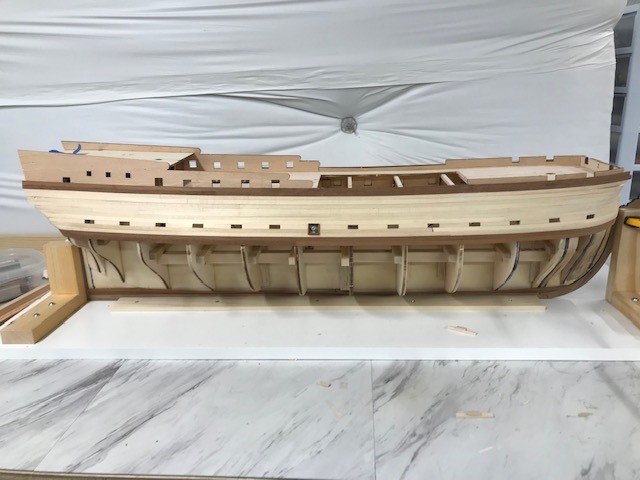
Finally got all the gunports installed/lined. Added a third port back from the bow on the upper deck. Missing in the kit plans/not precut, many of the drawings I have show this third gunport so I decided to add it. Also, the 5th gunport back from the waist was too high so I had to move it down to the correct height for the cannon.
-
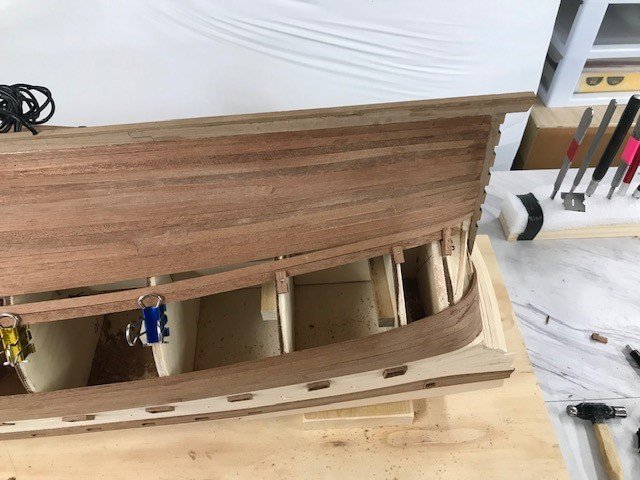
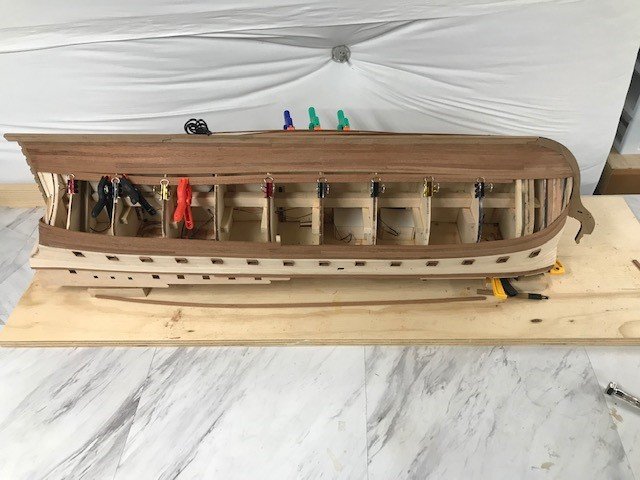
Hi Martin, Glad you liked the gunports! Lower planking finally done! Now cutting more gunports and finishing upper planking.
-
Hi Martin, Can you post a picture of what you are talking about? If you are talking about the plywood strips with the gunport cut-outs I did the top ones first. I used full length planks the cut the lower gunports in. Once I finish the planking I will cut the next set of gunports. One side of the lower planking is finished yea!
-
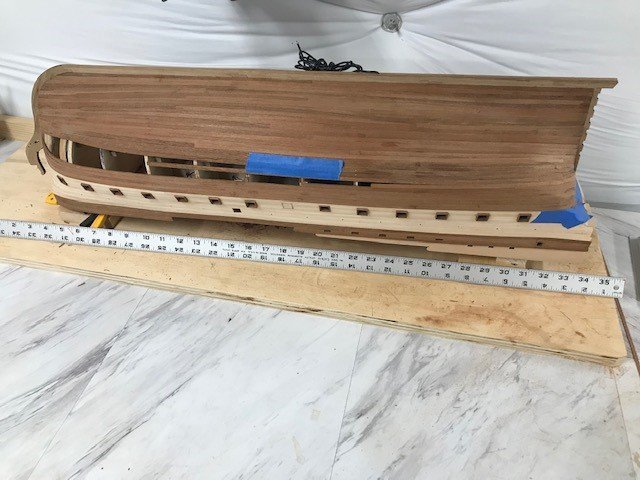
Hi all, Been away for a bit, planking recommences, looking forward to having this part being done.
-
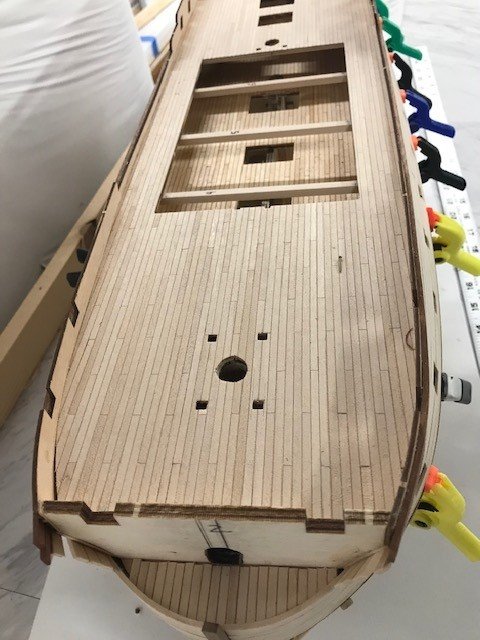
Hi Martin, Sorry for the late response and being away for so long been kinda busy. If I understand the question. I did not follow the instructions for the plywood decks and planking especially with the way the decks slope. I glued and nailed the ply to the bulkheads and then started the planking from the center outwards to both sides. My thoughts were how would you make sure there were no gaps between the plywood deck and the bulkhead? And there would be a giant gap running right down the center of the deck. Sanding the gun deck was a little tricky working around the bulkheads and I also varnished the gun deck before placing the main deck. I think the instructions sometimes focus on doing things faster, but I agree the deck stuff just didn’t make sense to me either. Hopefully I answered your question, let me know. Curt
-
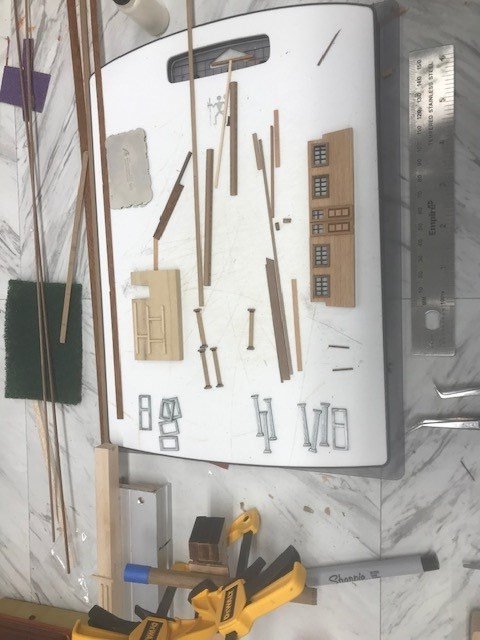
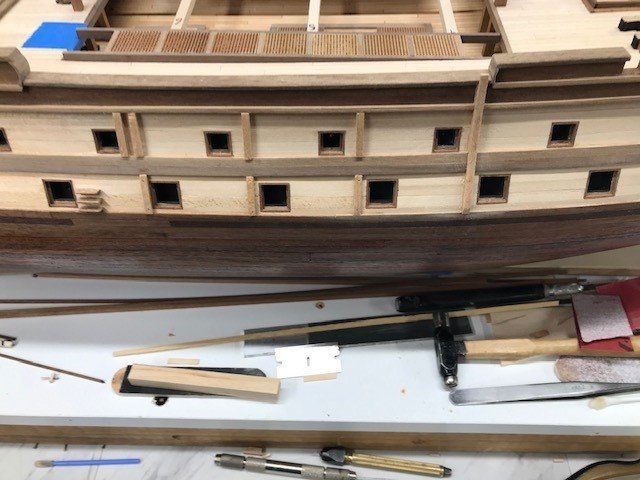
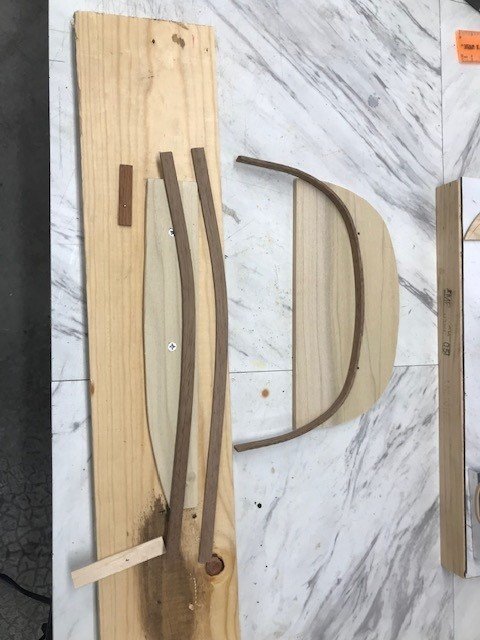
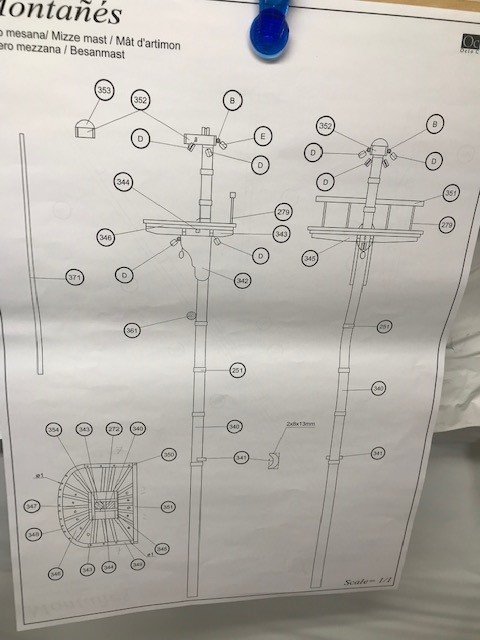
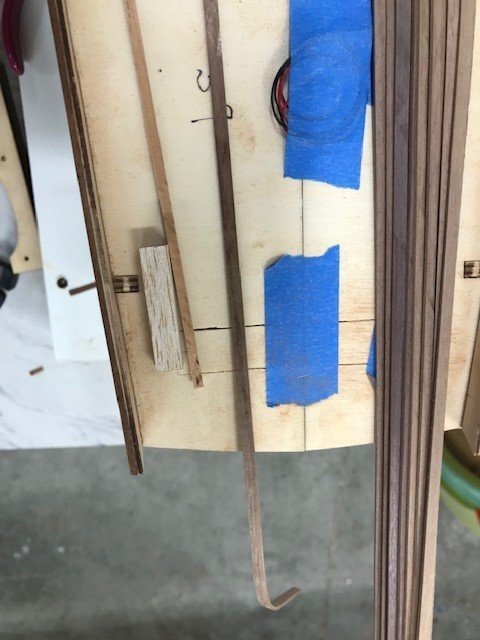
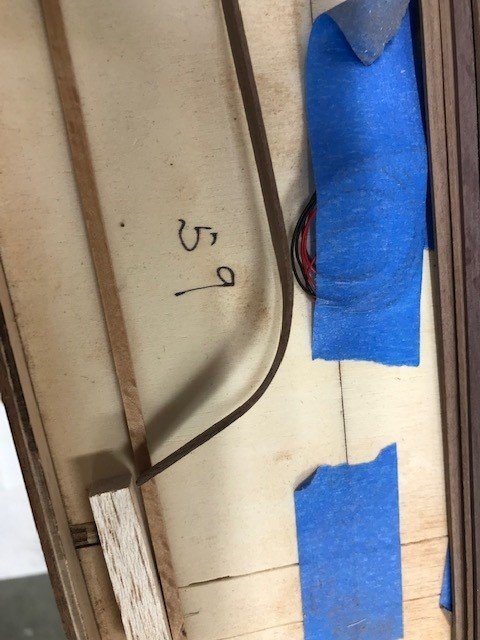
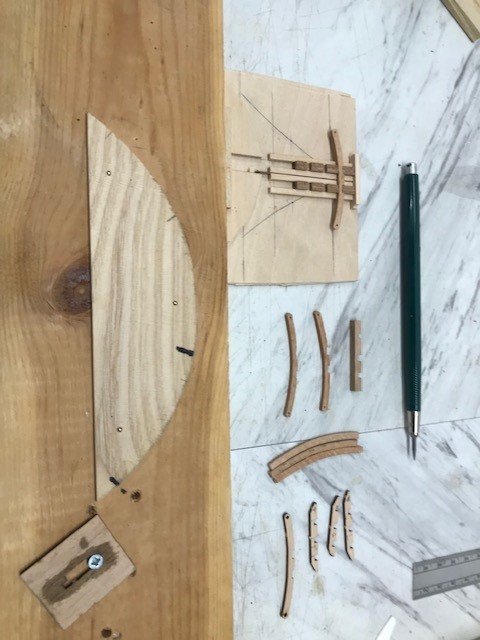
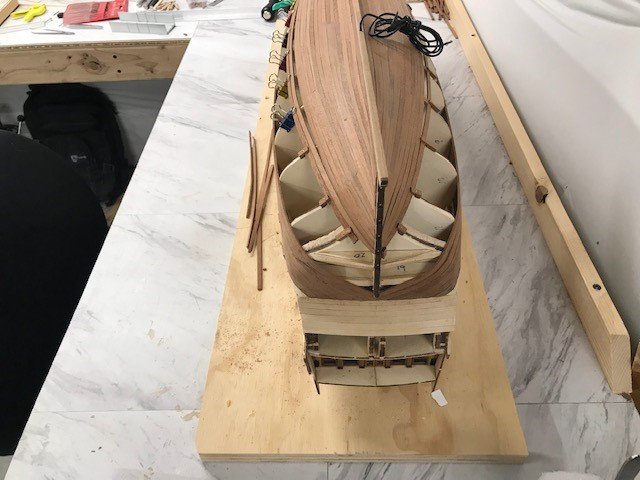
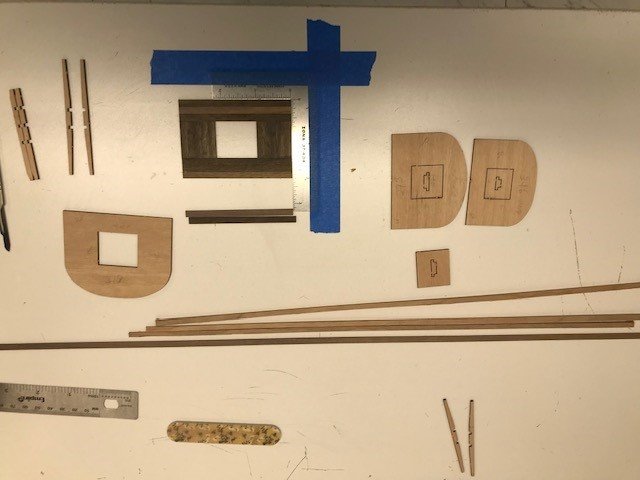
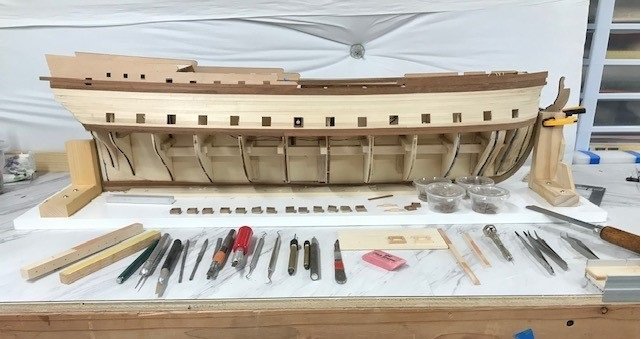
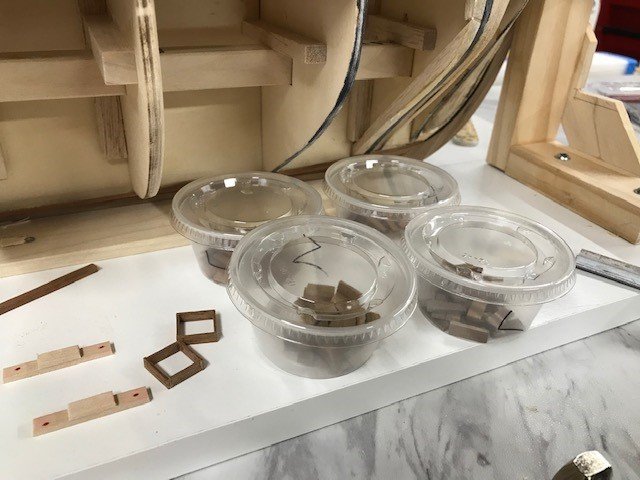
Sorry haven't posted for a while been kind of hectic. Planking continues, hopefully my measurements come out OK so I don't end up with any weird planks. More on the mast platforms (walnut, beech, and sapele laminate), cross trees (cherry). I have also made some prototypes for the ribs (bottom left of the build board). I'm thinking the bottom one, just have to make lots of them and build a jig for the tapering. Also, a picture of my hi-tech bending jig, I use an iron to heat the wood. I couldn't get the beech to bend nicely for the upper trees so I'm going to try cherry and walnut.
-
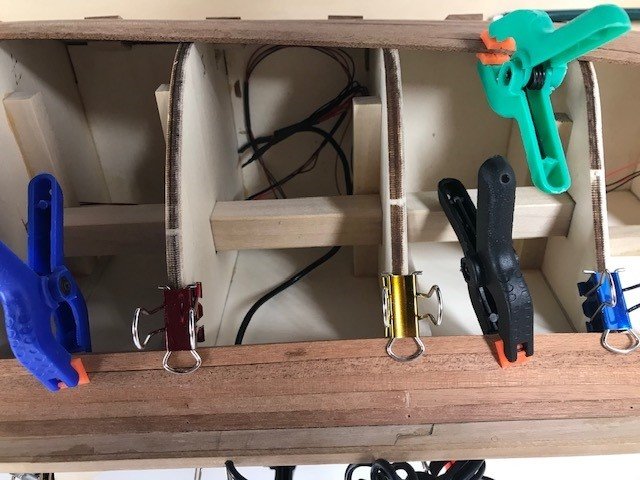
Planking continues. Figured out the power for the LEDs using a power cable from an old cell phone charger through the keel. Cut in the first of several steelers. Started the mast tops replacing the ply from the kit with walnut and cherry for the crosstrees. The keel looks pretty rough at the joints, but I plan to cover it with walnut veneer that I just got in the mail a few days ago yea!


-
Hi Cisco, Curt (CMM4000) nice work (especially on the scale you are working at)! Looks like you are a tool geek like me and do other woodworking as well. If you are already doing this I apologize, I have had good luck making mini scrapers from single edge razor blades. I clamp the blade in a vise and use an old screwdriver shaft to burnish the edge. They don't last super long but the blades are cheap. I used this on the deck of my Montanes sure beat all the sanding I would have to do. Cheers! Curt.
-
Ok more gunports so I can get back to planking. The starboard side is done (at lease for the bottom deck) and I have made a test door also. I'm not a fan of painting anything on my models, that is made of wood, it's just to pretty to paint so I used several types of wood on my SJN (that did not come with the kit for the different colors). I have some nice dark cherry to line the bulwarks to simulate the red for the Montanes. Work begins on the port side.
-
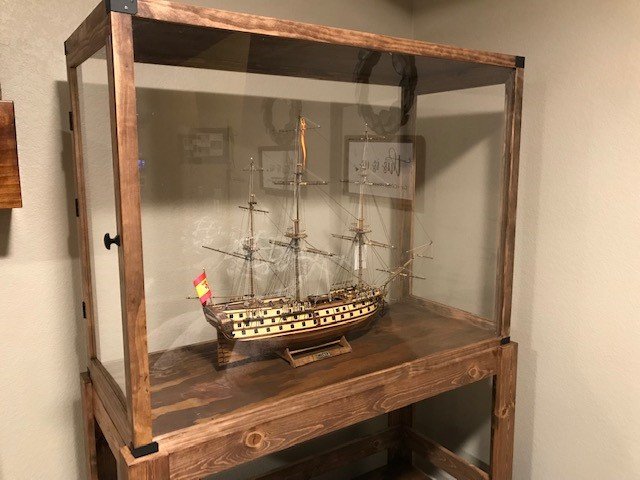
Allen, Cisco. Thank you for the comments. Learn something new every time I get on MSW. Never thought about using a heat gun for lateral bends. I have used an iron and warming the wood (wrapped in damp paper towels) in the microwave. I will also let the wood soak at least overnight. I would really like to build a small steam-box someday, maybe for the next project... Something else I have been kicking around is to get a kit like the Montanes and double the size say to like 1/32 scale. That would require tools I don't have like a lathe to make the cannons and the deadeyes but the level of detail you could put on a model that size would be amazing, and another problem is where to put it when it is done. Here is a picture of my San Juan Nepomuceno in the case. This was my second kit the Montanes is my third. Curt
-
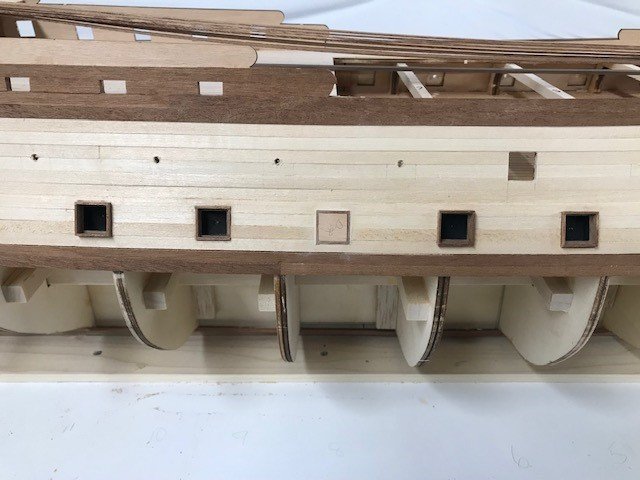
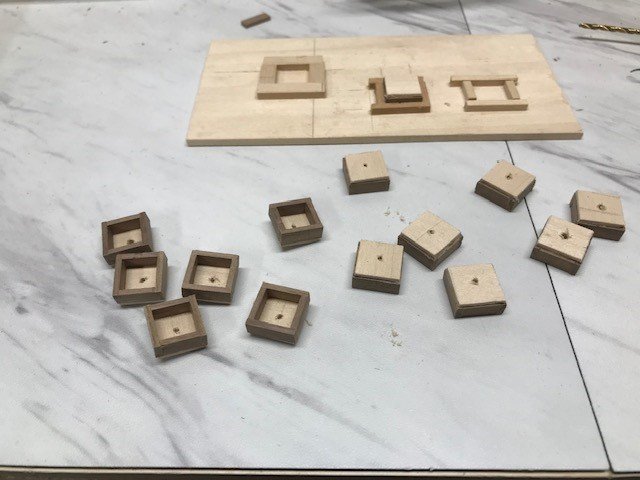
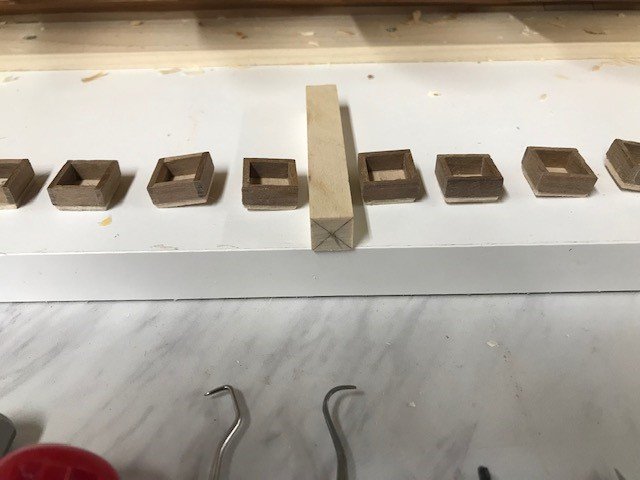
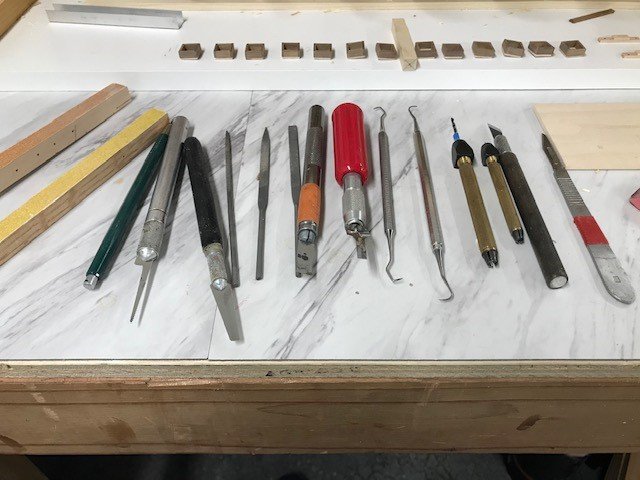
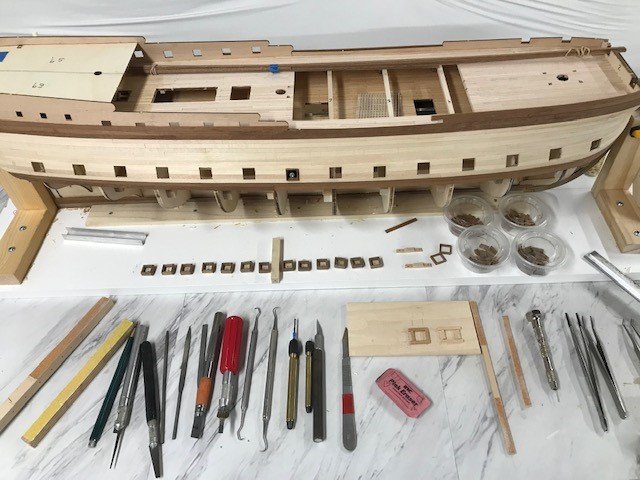
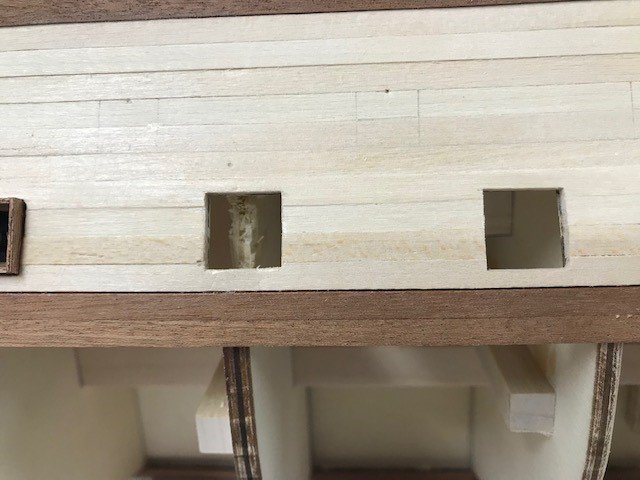
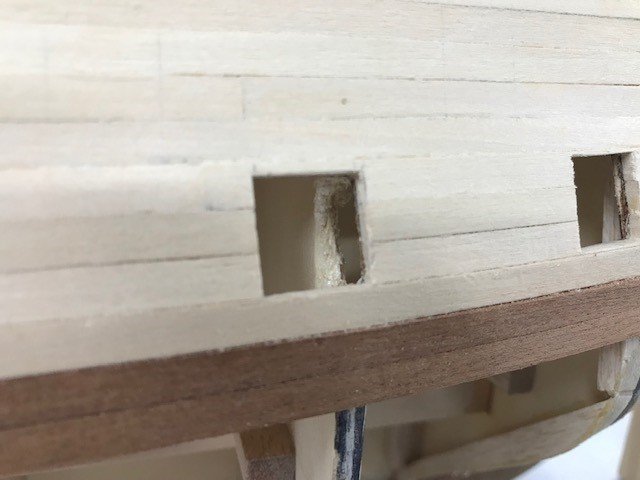
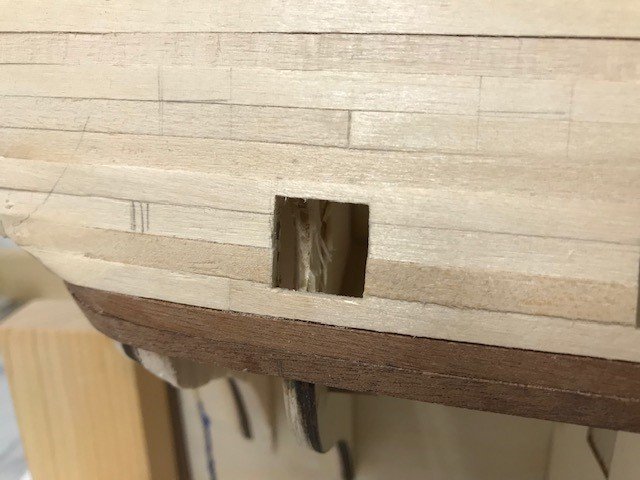
More work on the gunports and the tools used to cut the ports and make the frames. Had to cut four bulkheads back to accommodate the boxes. The stick and square sanders are homemade I make sure the sandpaper does not protrude past the edge, so the corners stay square, and the sandpaper does not cut a line into the adjacent side. The square stick by the frames is to mark the center of the frames for the dummy guns. I use a drafting triangle to make sure the sides of the gunports are vertical to the build-board.
-
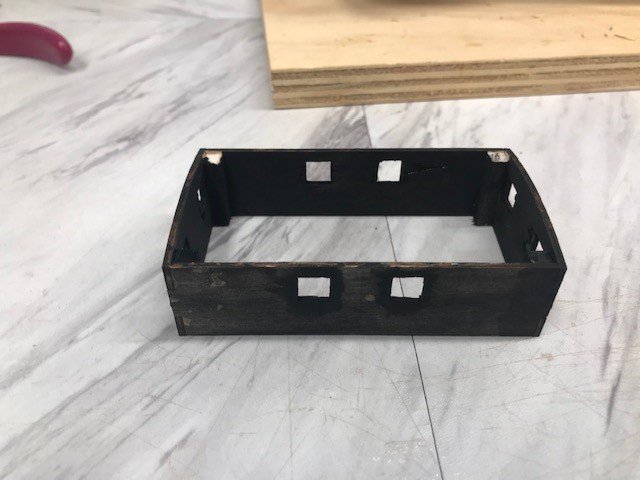
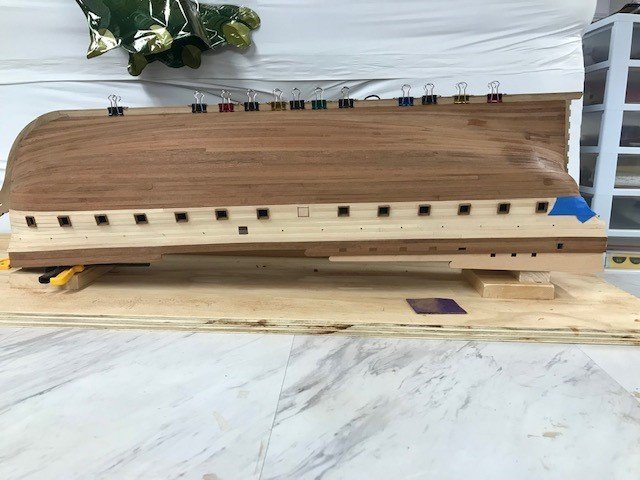
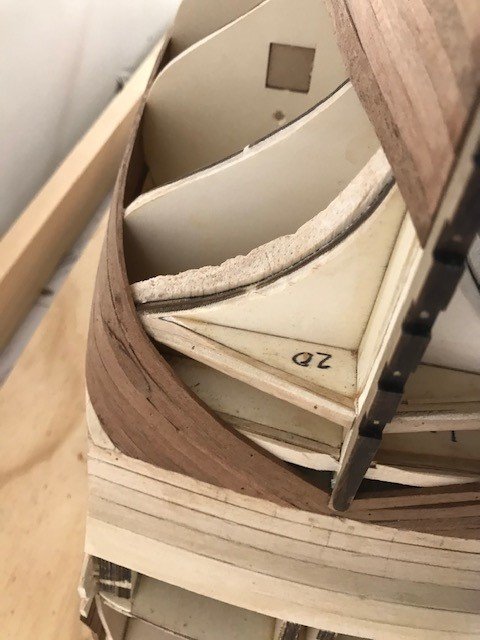
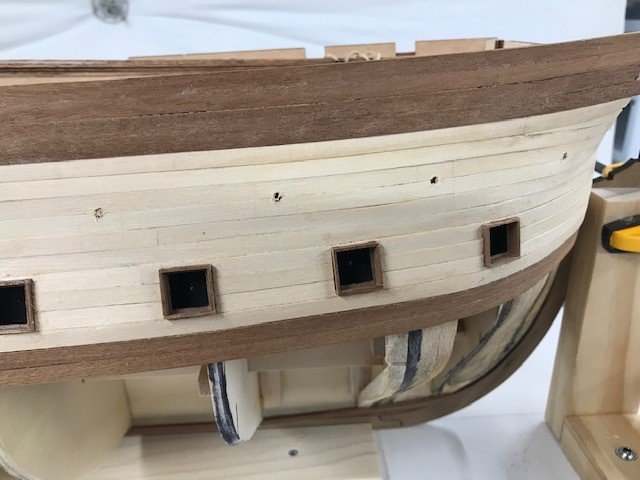
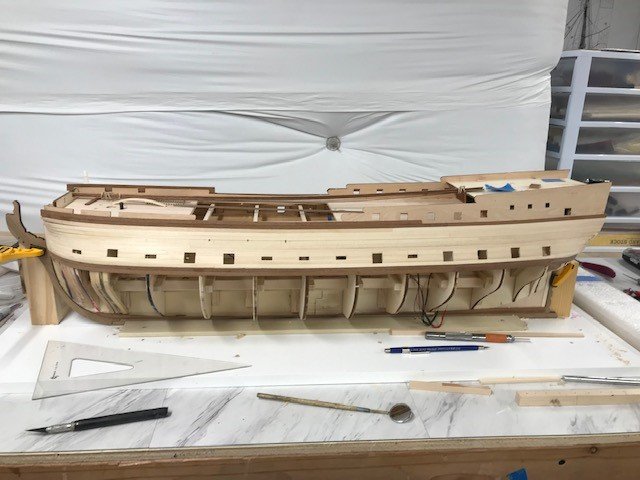
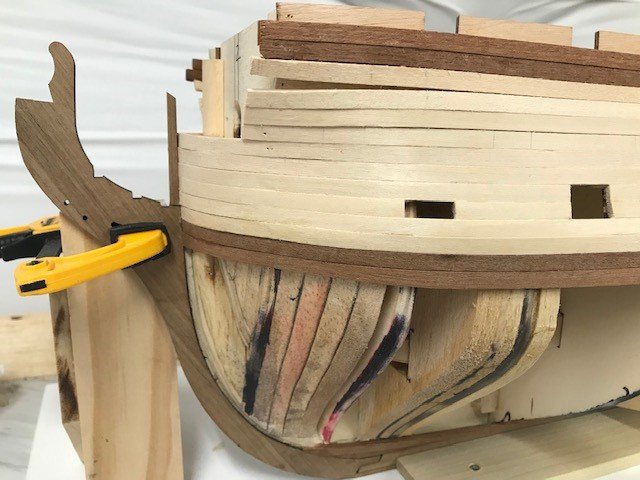
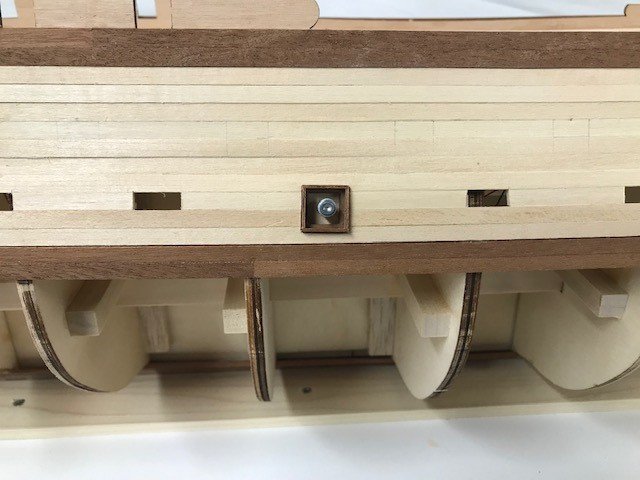
More planking. Have the four hardest planks (IMHO) per side done, the first two below the wale and the first two above the keel, and I need to add a stealer to the gap in the bow. I used an electric plank bender (looks like a soldering iron) for the stern. The brown wood is a little harder to work so I let it soak for two days and really took some time with the bends. I overbent the stern planks so I did not have to fight them into place. Going to pause on the planking so I can put in the lower gun deck ports in while I can still access behind them. Pretty happy with the first gun port, the inside box is 1.5 mm walnut the outside box is 1mm supplied with the kit so the box will have an inside lip. I am going to sand the outside box flush with the hull and stain the inside box black for depth. Now the fun part cutting the rest of the ports, making 27 more boxes and gluing them in place. Once that's done, I'll pick back up on the planking. I'm going to use the tapered plank method from the tutorial on the MSW site. Still have to do the tick strip stuff but I figure I'll have plenty of tome to figure it out while doing the gunports. I also made another jig for making the gunports.
-
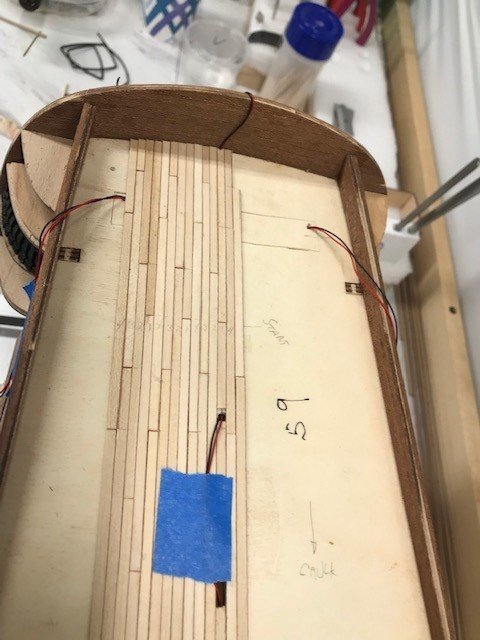
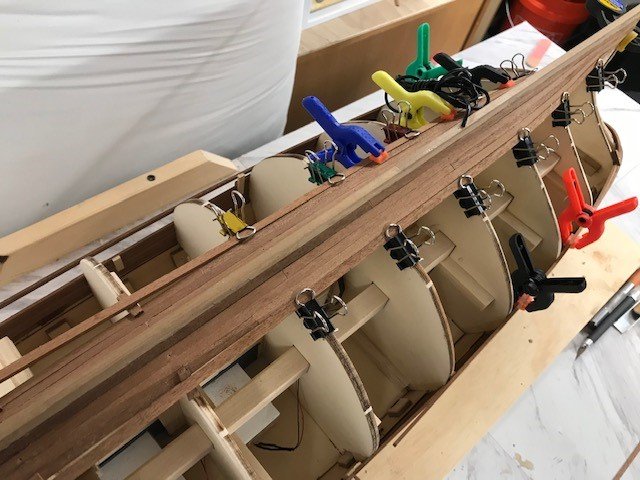
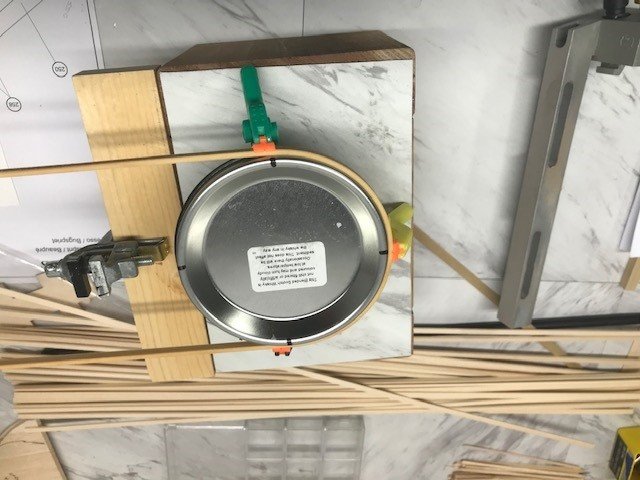
Planking begins. I could not tell from the pictures in the instructions how the fist plank lined up with the head deck, so I ran the plank slightly above the deck to have a reference to trim the plank, so it is flush with the deck. The whitewood supplied with the kit is nice to work. I have let it soak for at least 24 hours and use my hi-tech plank bender (lid from a scotch tube) to start the bend. I clamped the planks in place and let them dry overnight before gluing them in place.

-
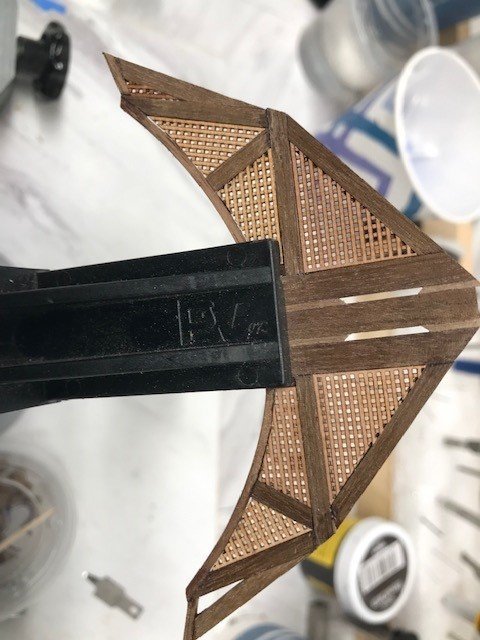
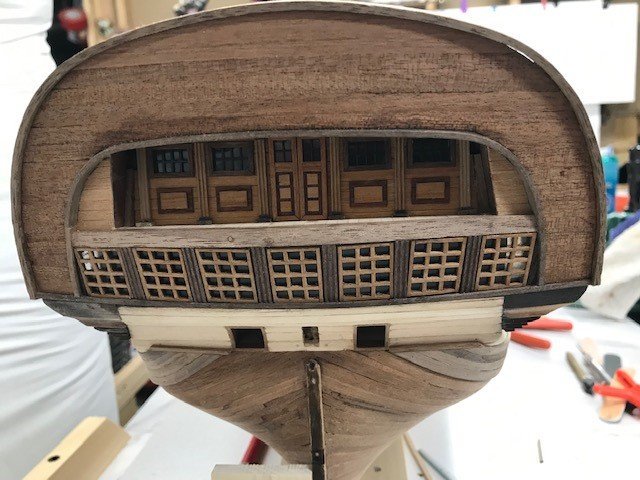
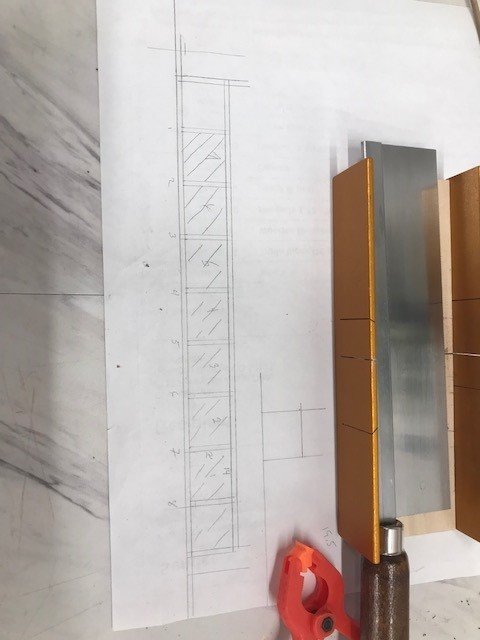
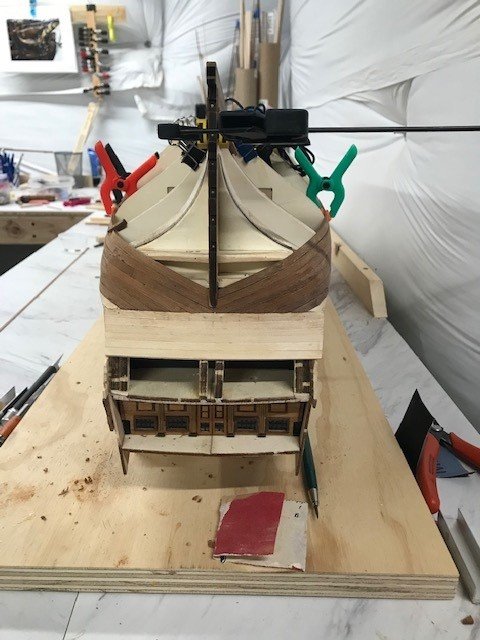
Stern gallery. Was not crazy about the cast metal parts form the kit the only parts I used were the plywood bulkhead and the PE brass window frames. The wood is cherry strips for the planking, walnut for the door/window frames and some scrap veneer for the details. I used the AL scrapers to make the detail on the columns and built a jig to make the doors and windows and columns