Organ tech
-
Posts
125 -
Joined
-
Last visited
Content Type
Profiles
Forums
Gallery
Events
Everything posted by Organ tech
-
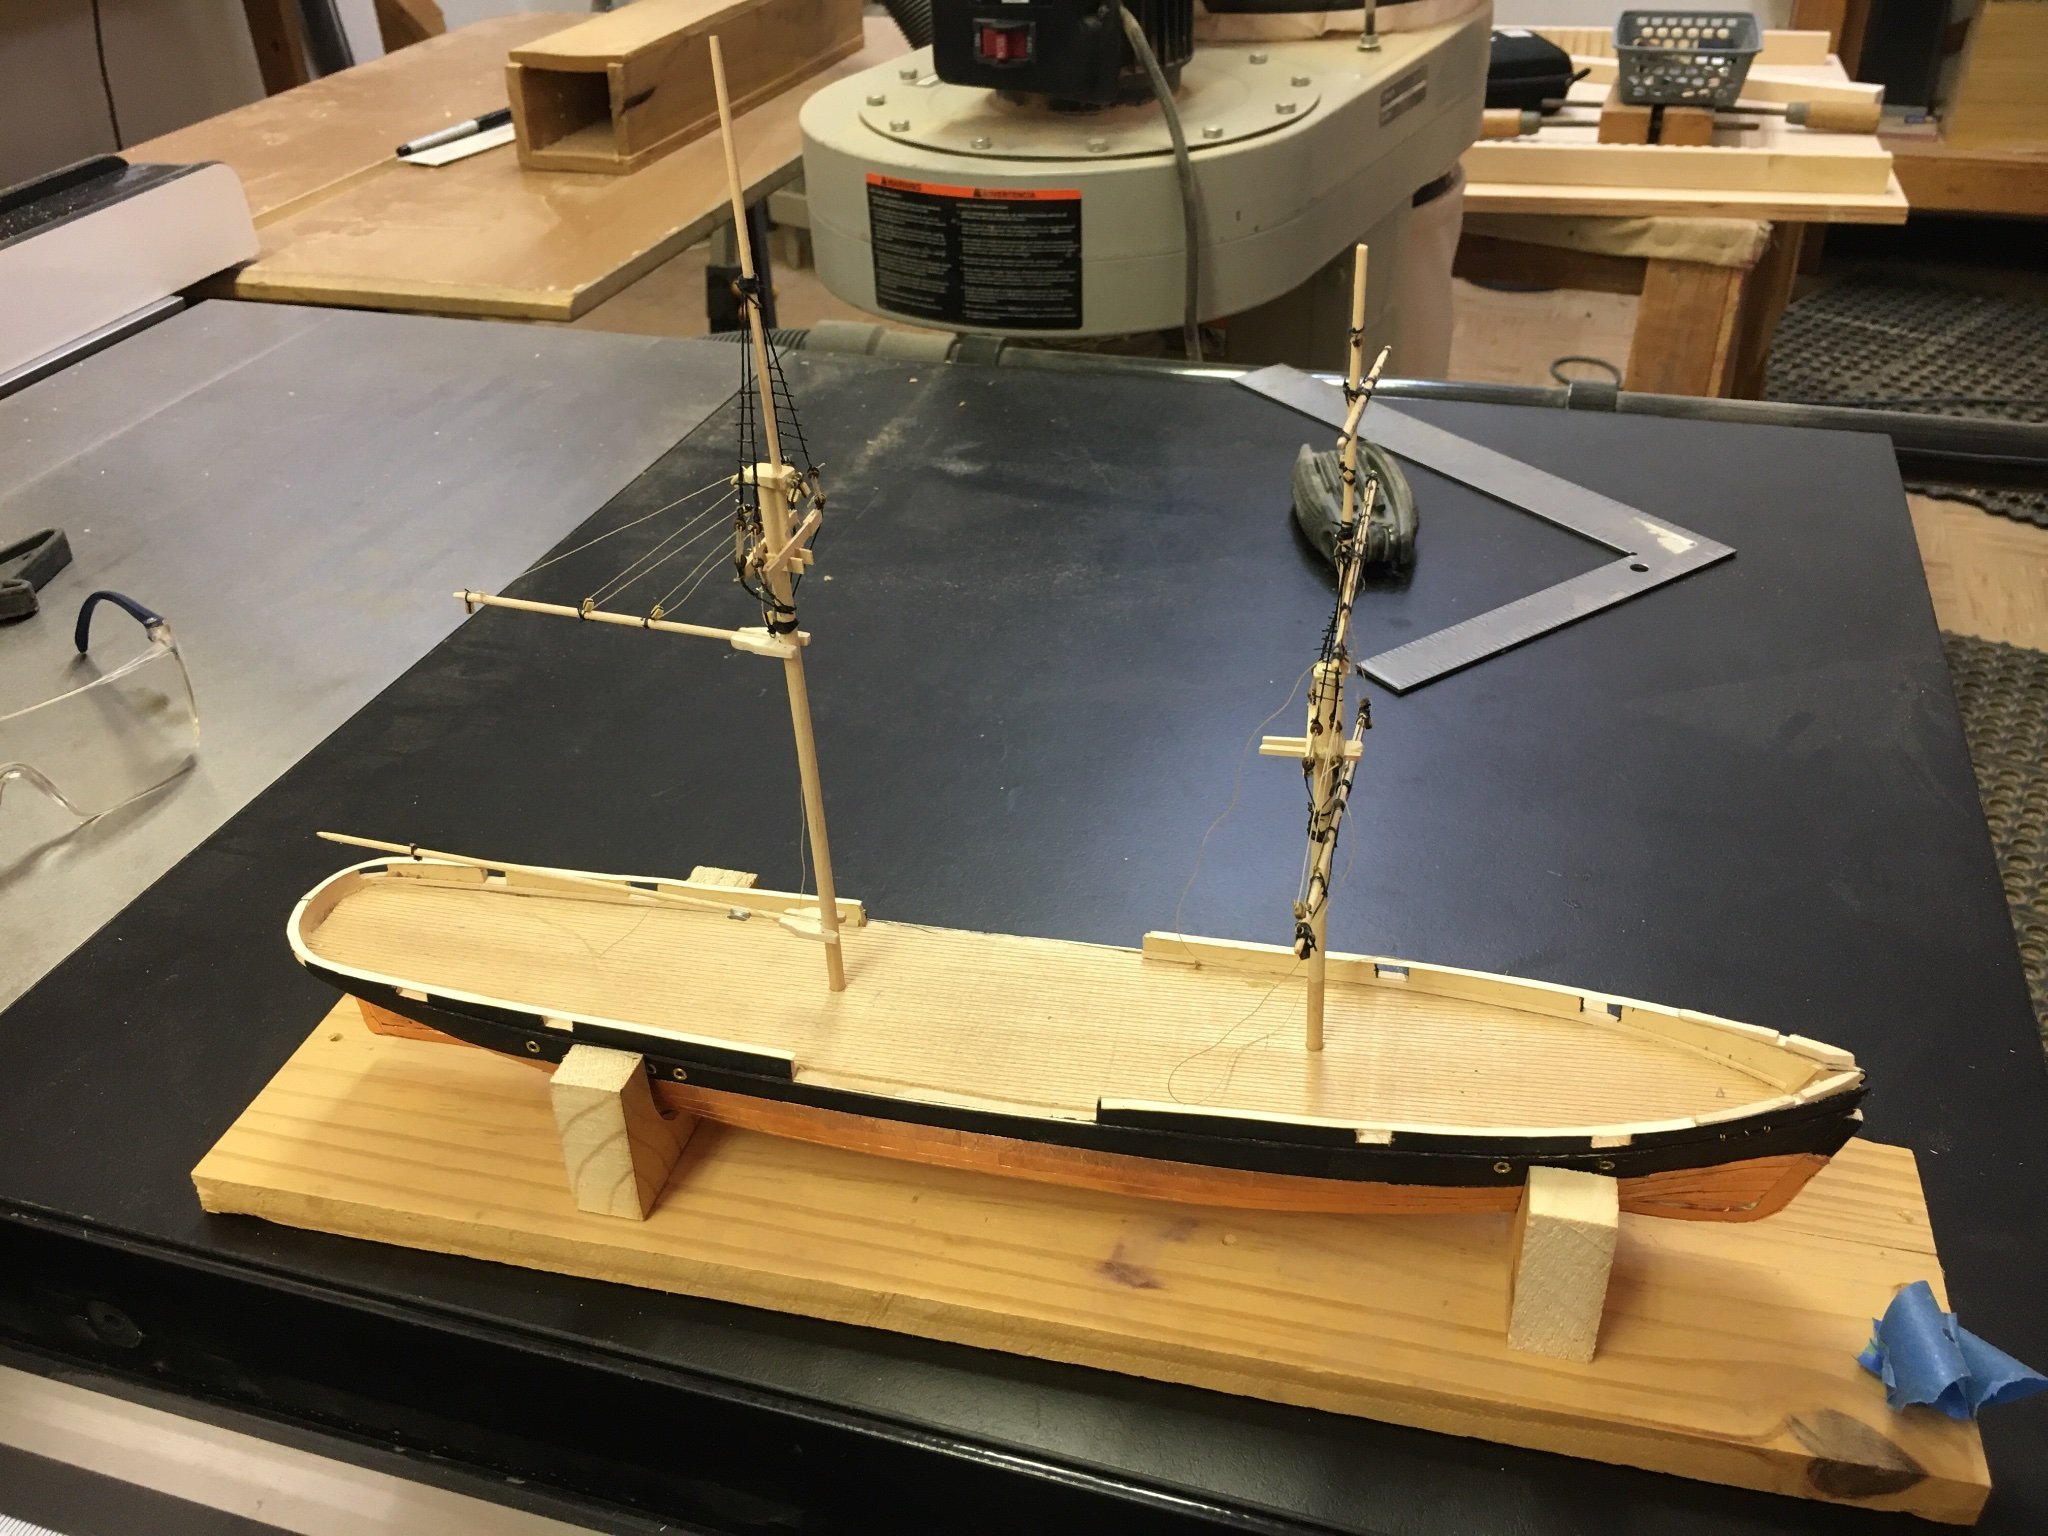
 Holes drilled. Mainmast a little toward the port side. Otherwise, the masts look good in place. The pencil marks are where the deck- pilot house goes.
-
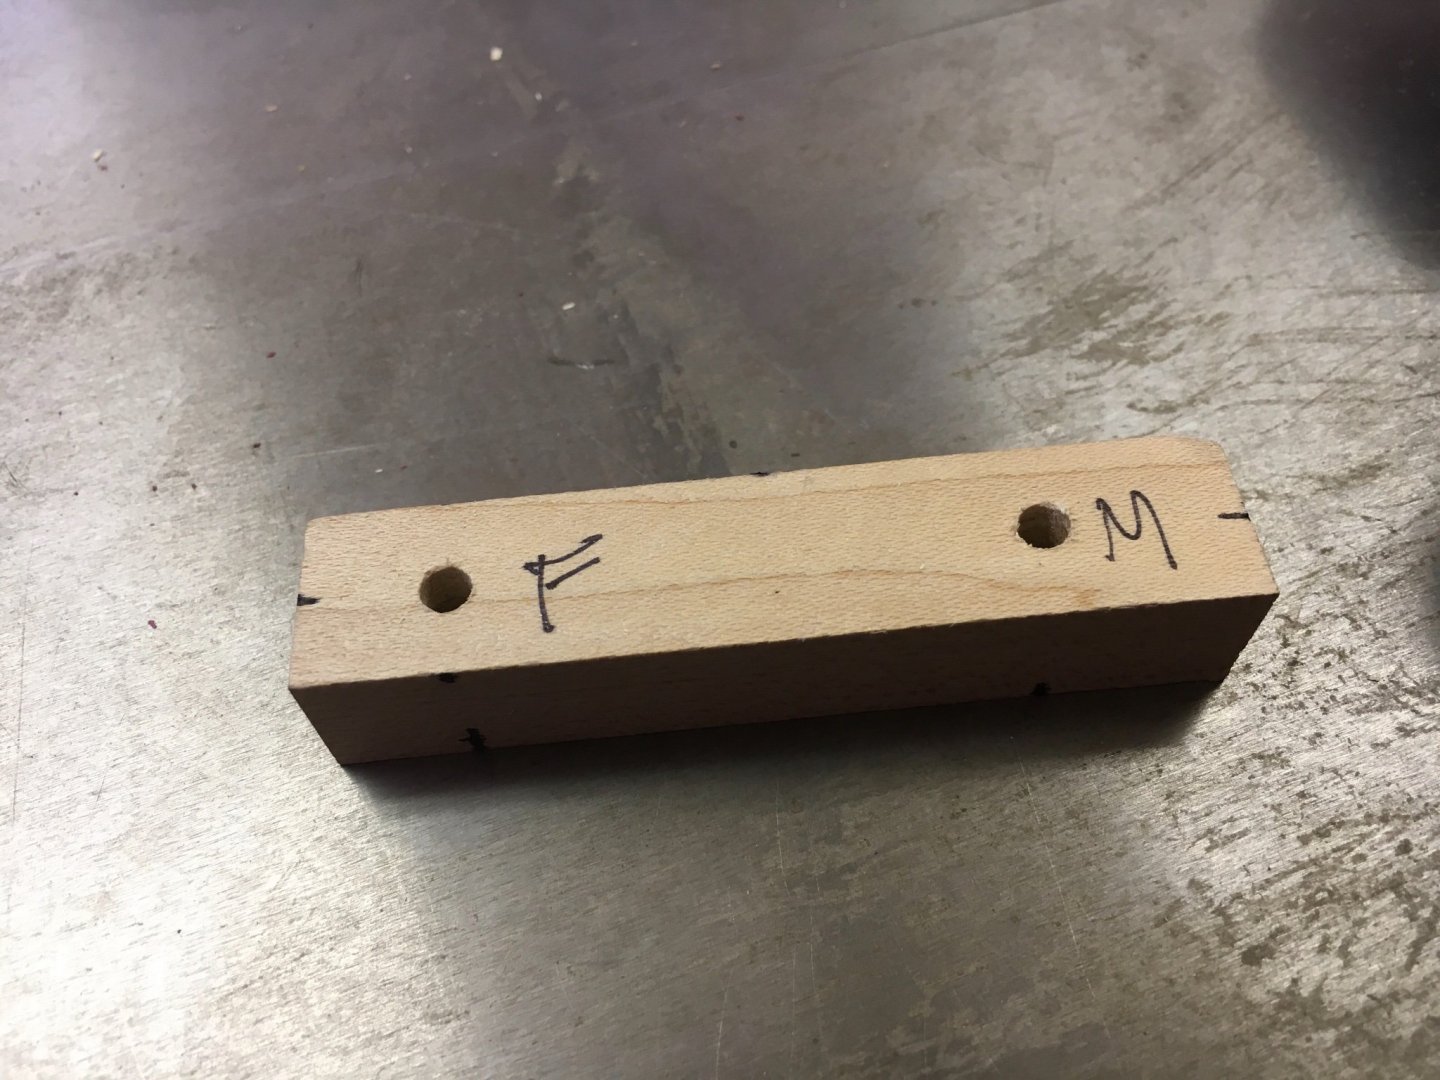
“Precise” locations for mast hole located. Jig made on drill press with the slight back tilt for the (F) fore mast and greater back tilt for the (M) main mast, for accurate drilling.

-
I have my cradle made to drill the mast holes and add the other sub- assemblies to the hull.
-
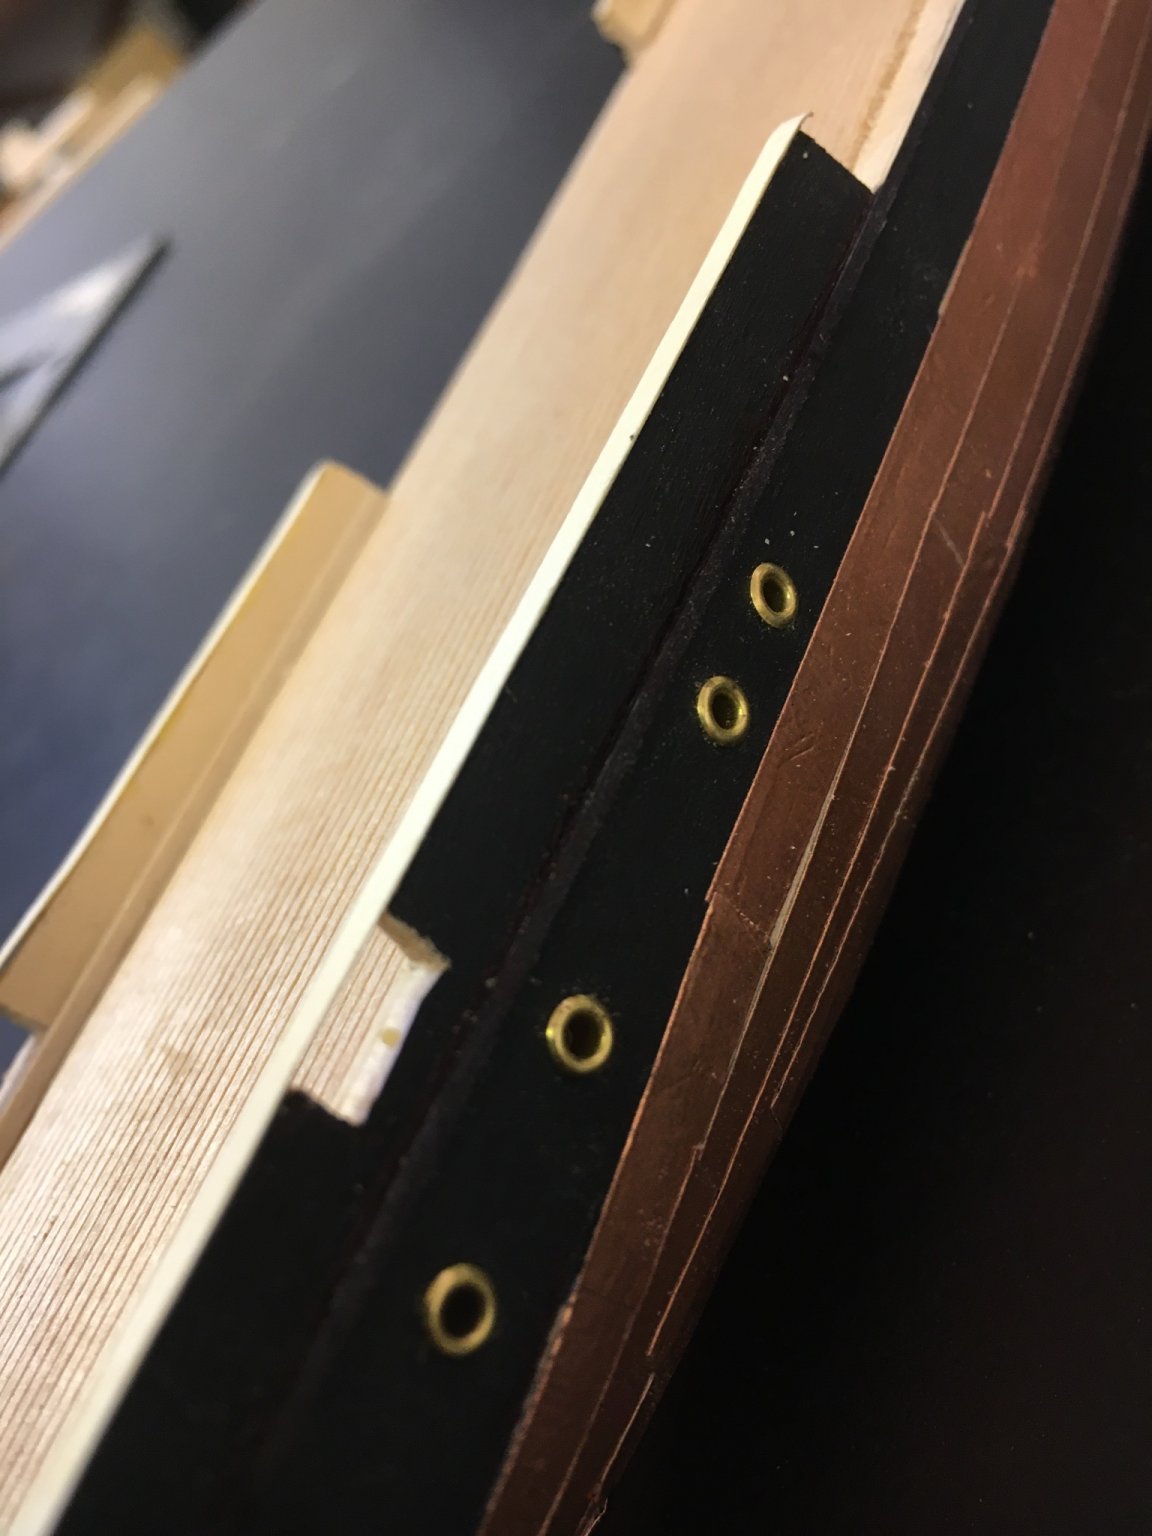
Shearstrake an portholes in place and fitting eight eye bolts in the bow area for the bowsprit stays and rigging. I held the grommets, used for portholes, on a 16 penny nail and pressed them into their pre- drilled holes.

-
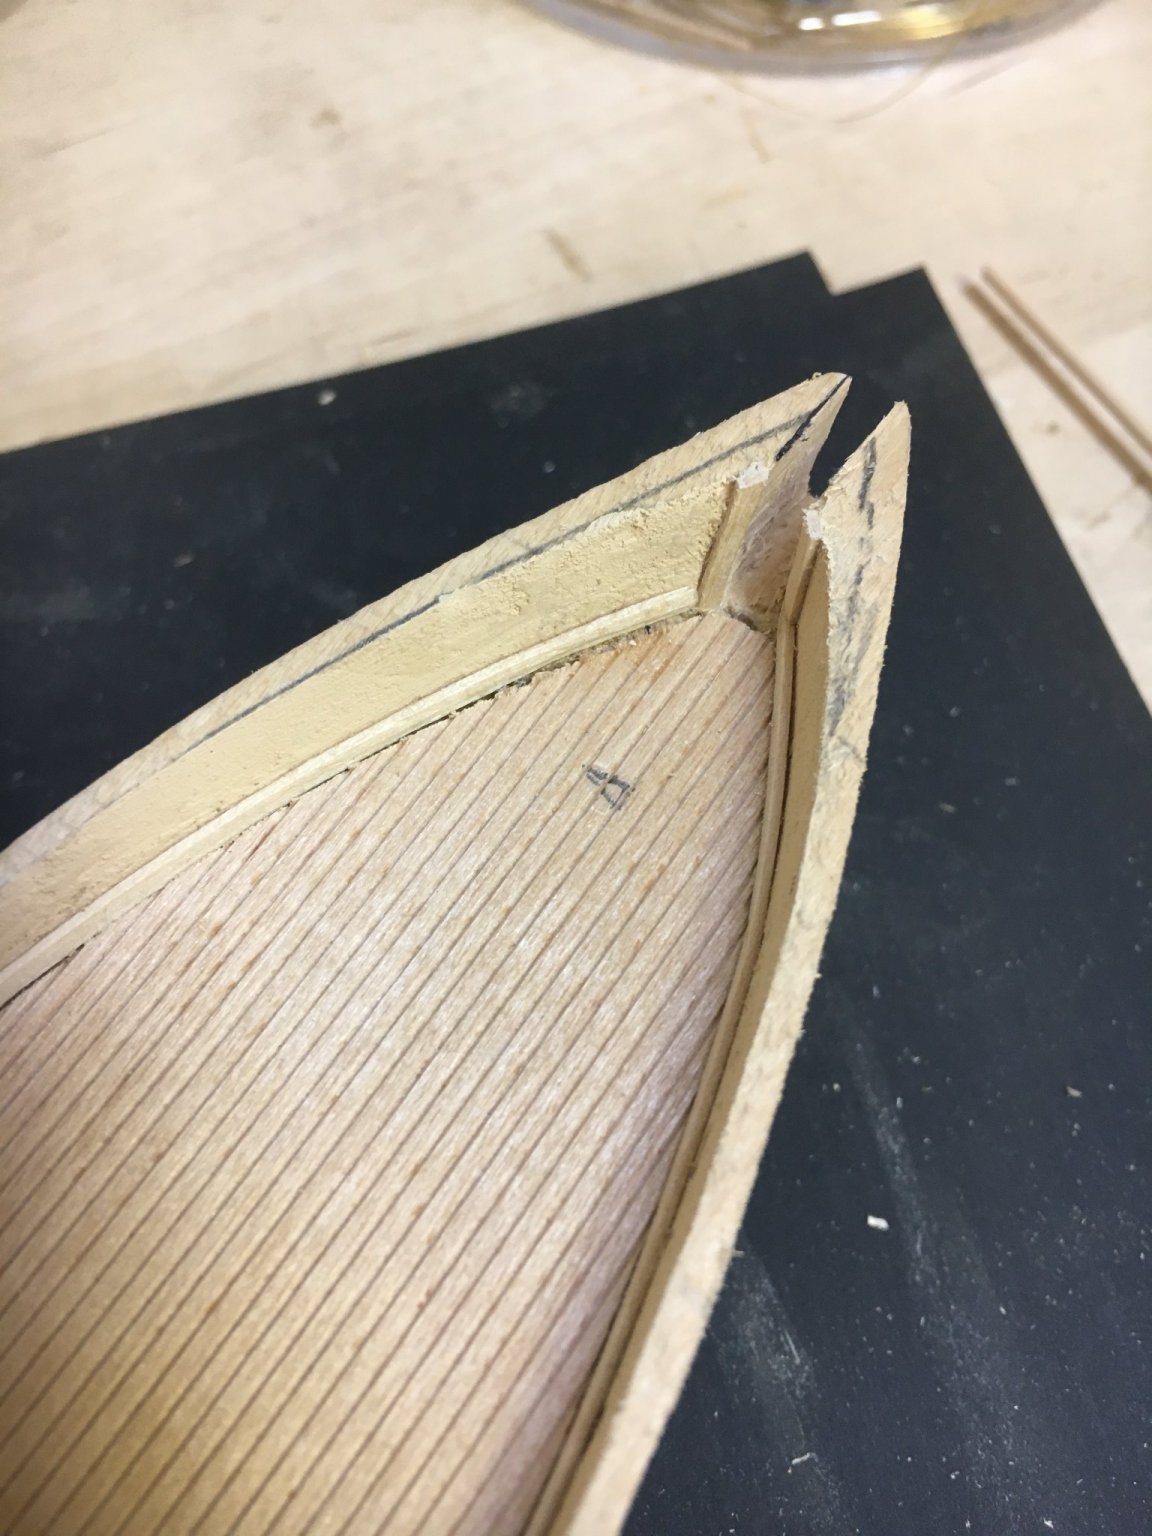
Bow rails and front cap rails. I am using file folder cardboard for the cap rails. Most wood is too delicate for this scale for me, where the grain runs across the curve.
-
Thanks for the clarification Chuck. I suspected that this was the intent, but it was not clear to me in the wording of the guideline.
-
Am I permitted to share my own model progress on Facebook?
-
"Material posted on MSW shall not be shared with other forums in any manner. This includes but is not limited to the information being made visible to members of another forum or to the public on another forum or to the staff of another forum by any means." Does this mean that I cannot share my own model building process on a forum such as Facebook, in addition to here on Model Ship World? If so, I will comply.
-
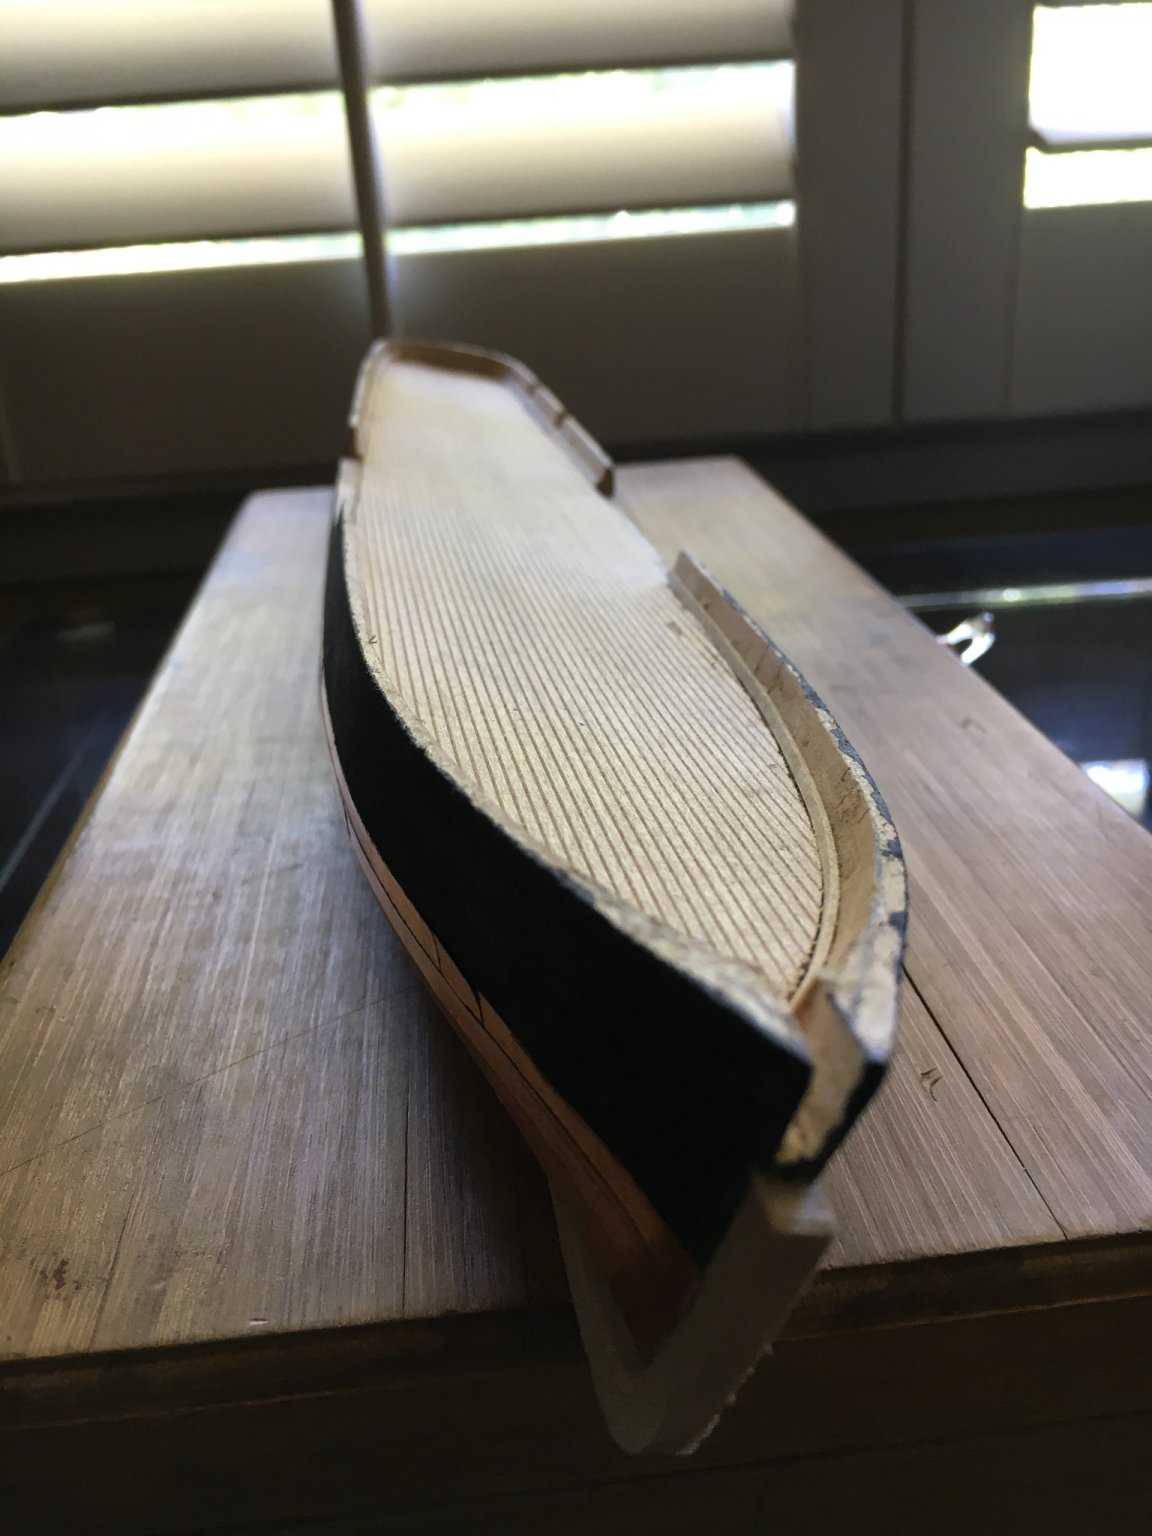
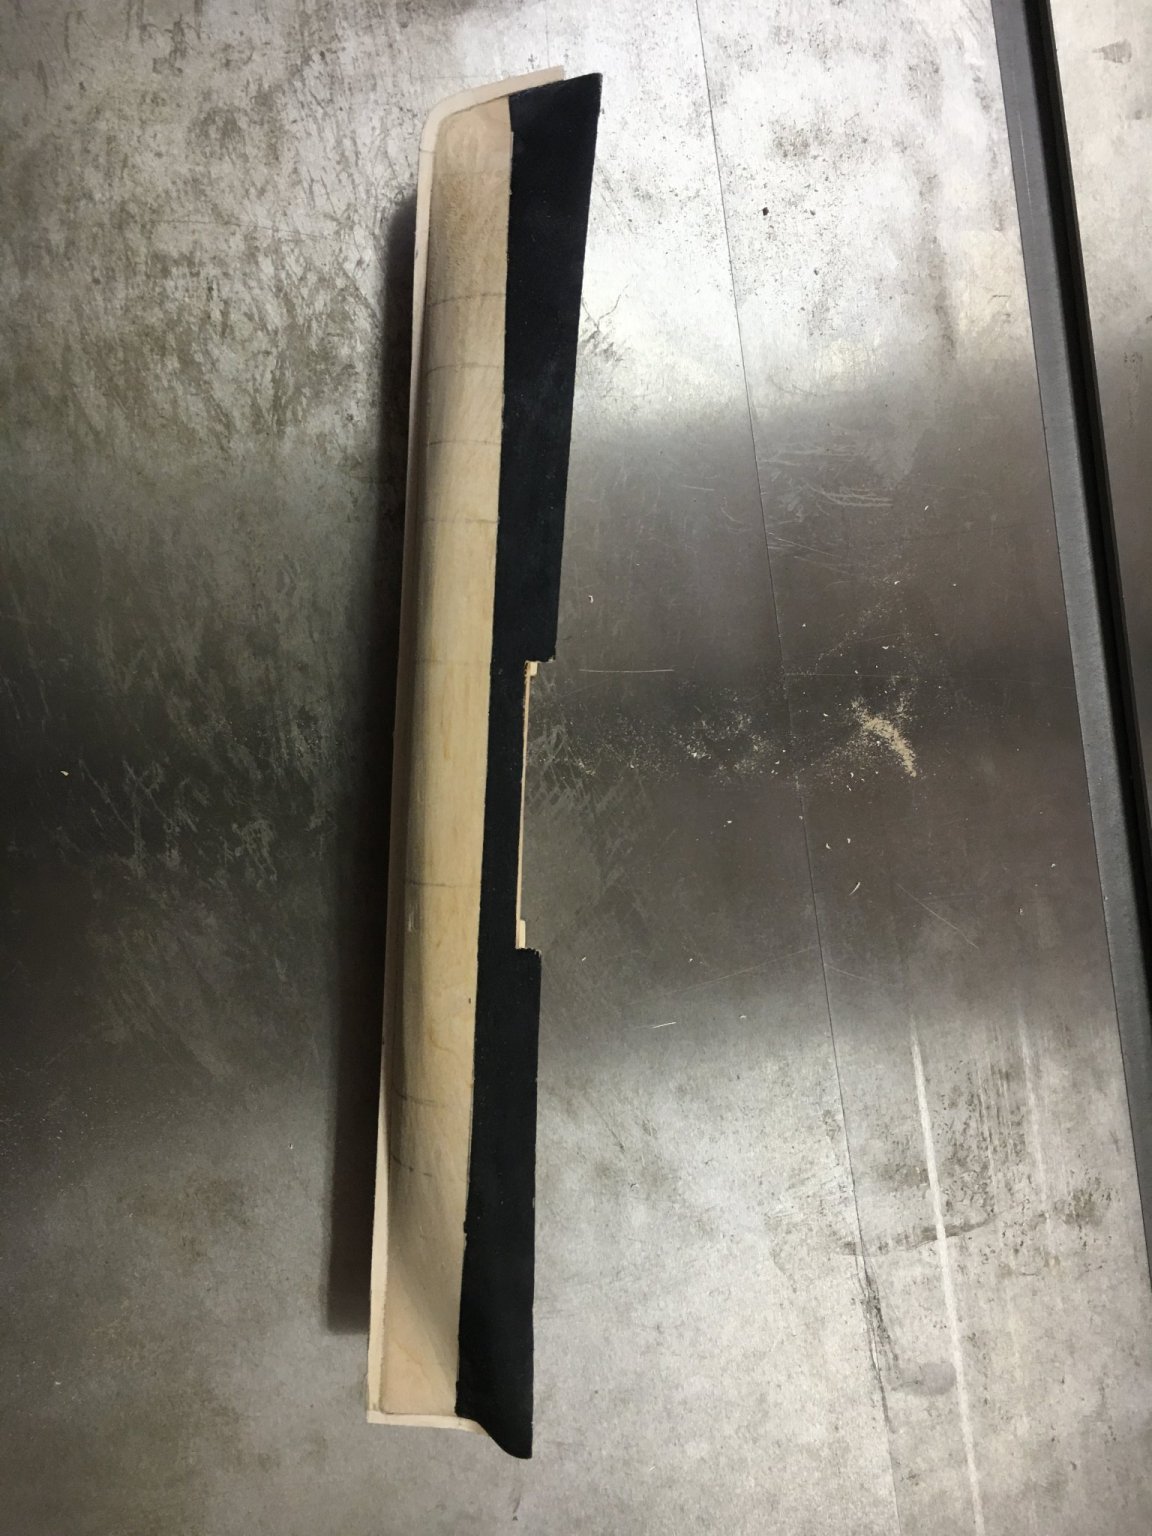
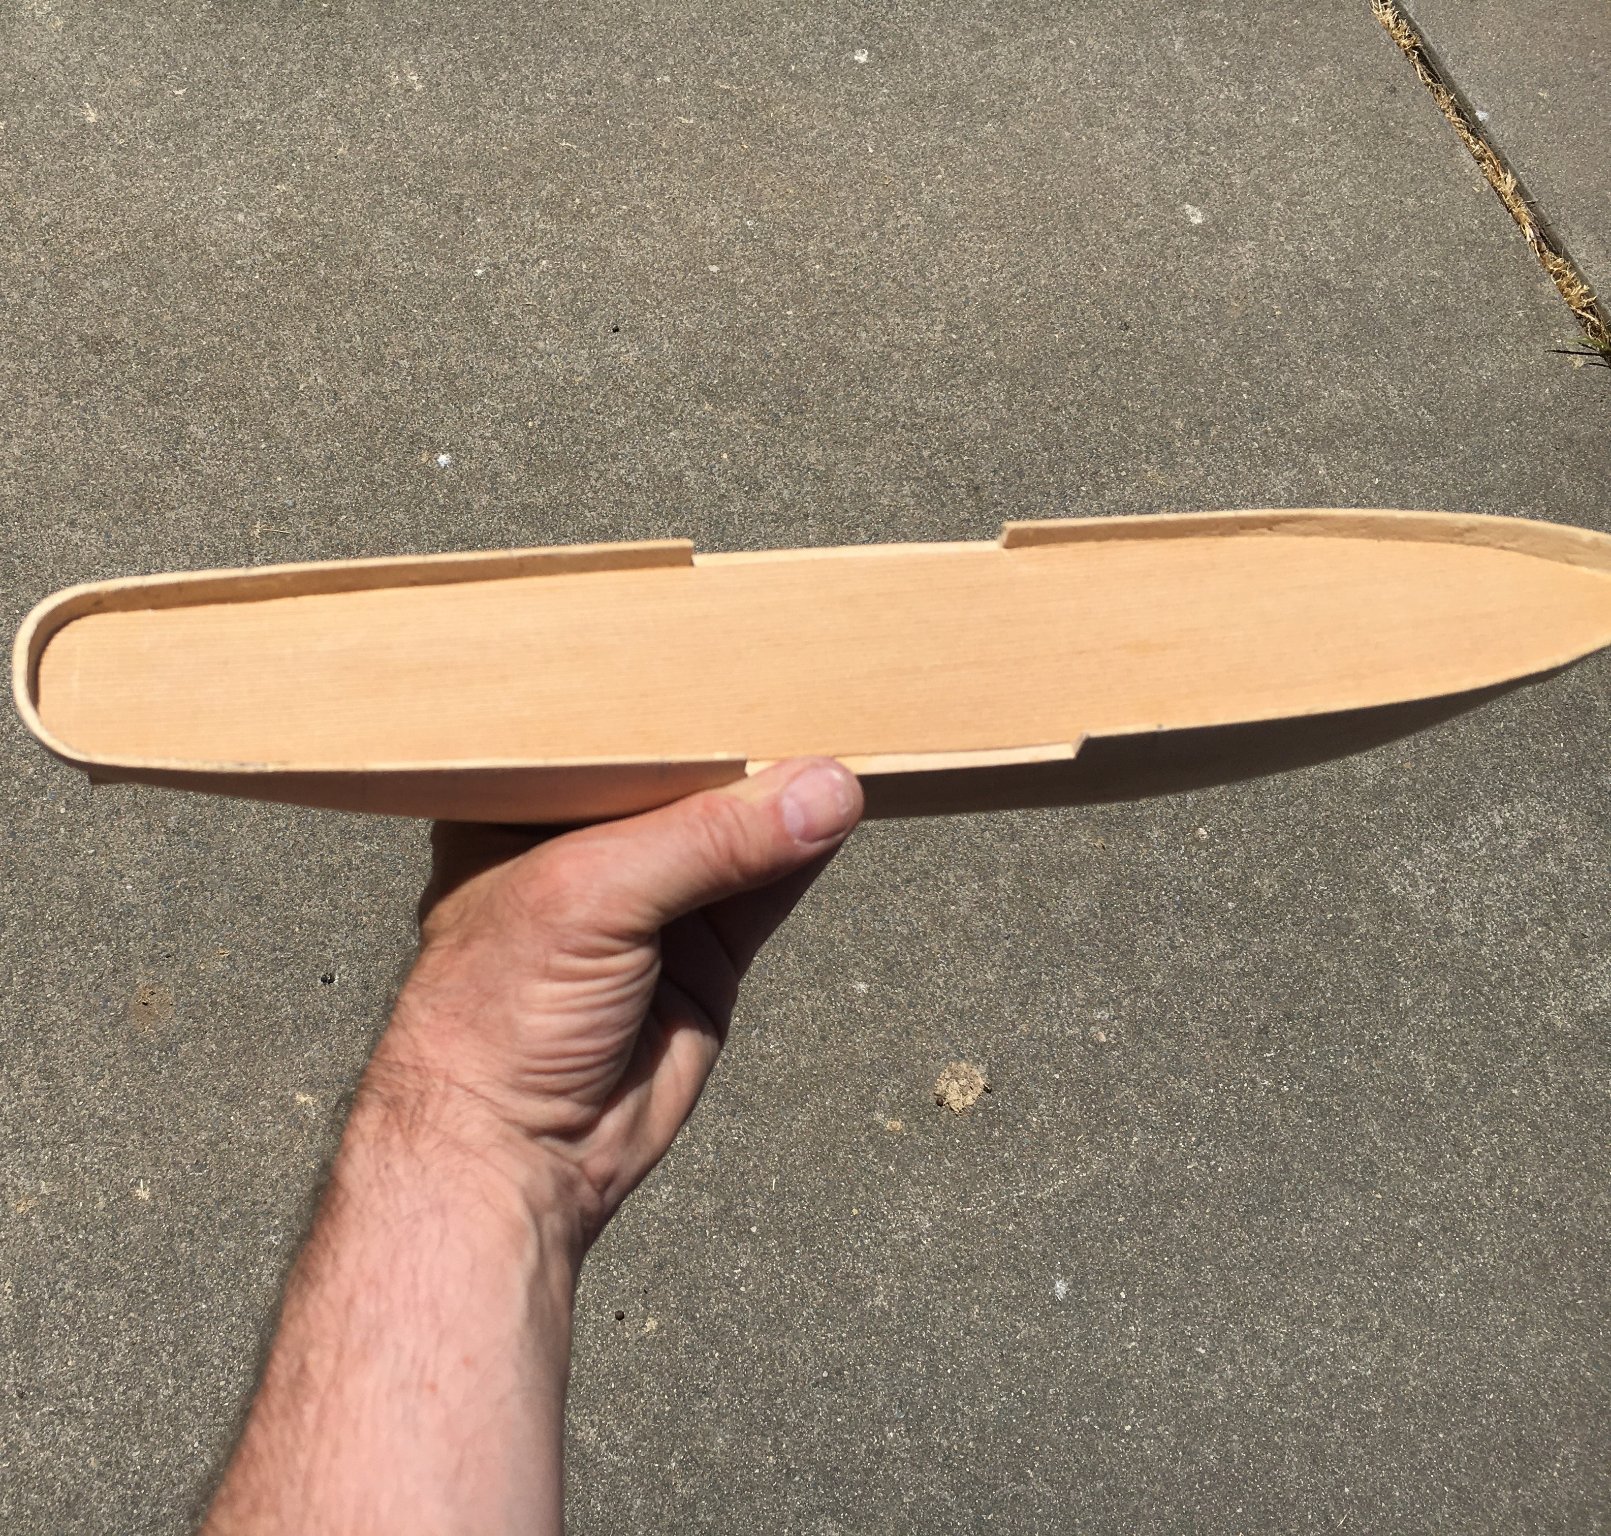
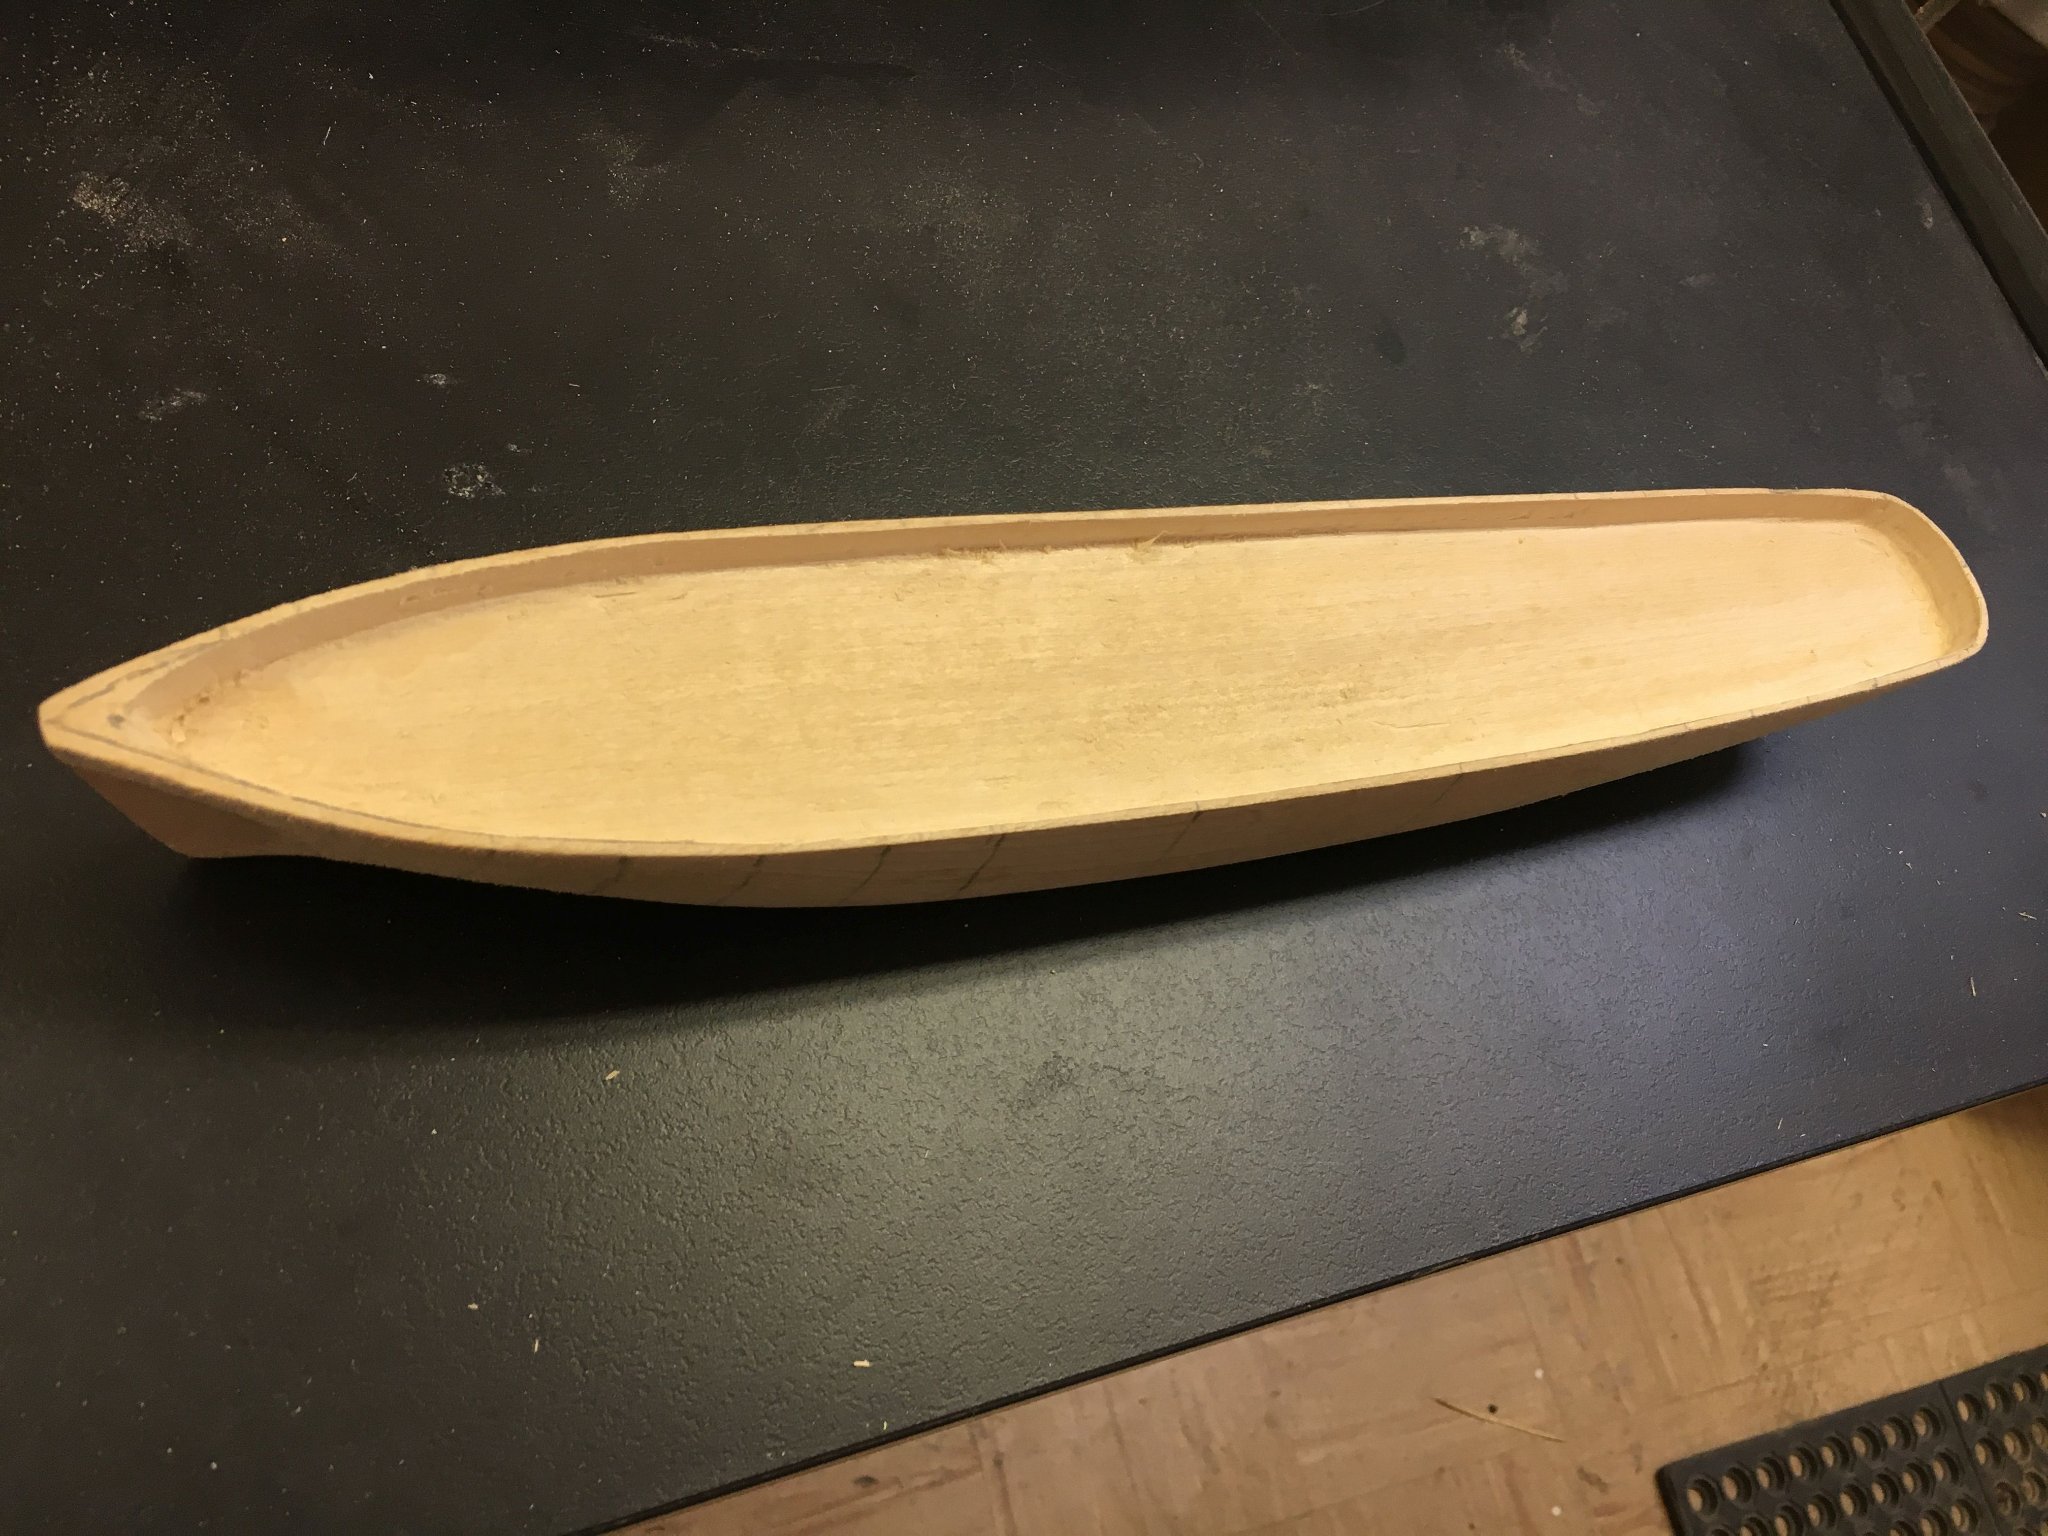
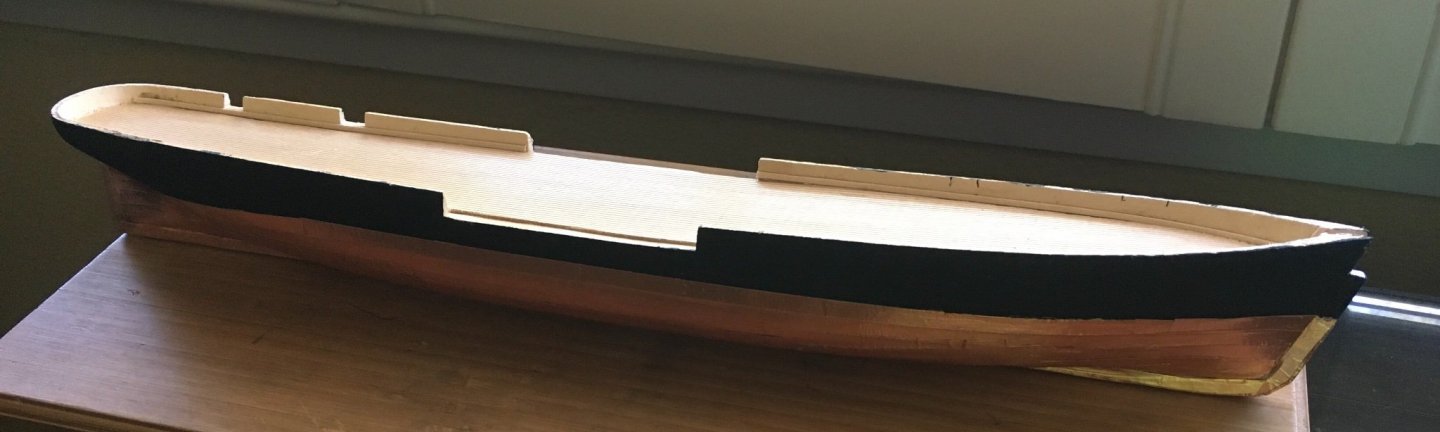
Sheathing done. Tomorrow the rudder, railing, shearstrakes, and finally adding sub assemblies to the hull, masts, bowsprit, and paddle wheels. Though not obvious in the pic, the keel has sheathing.
-
Thanks— I will do that🙂🤙
-
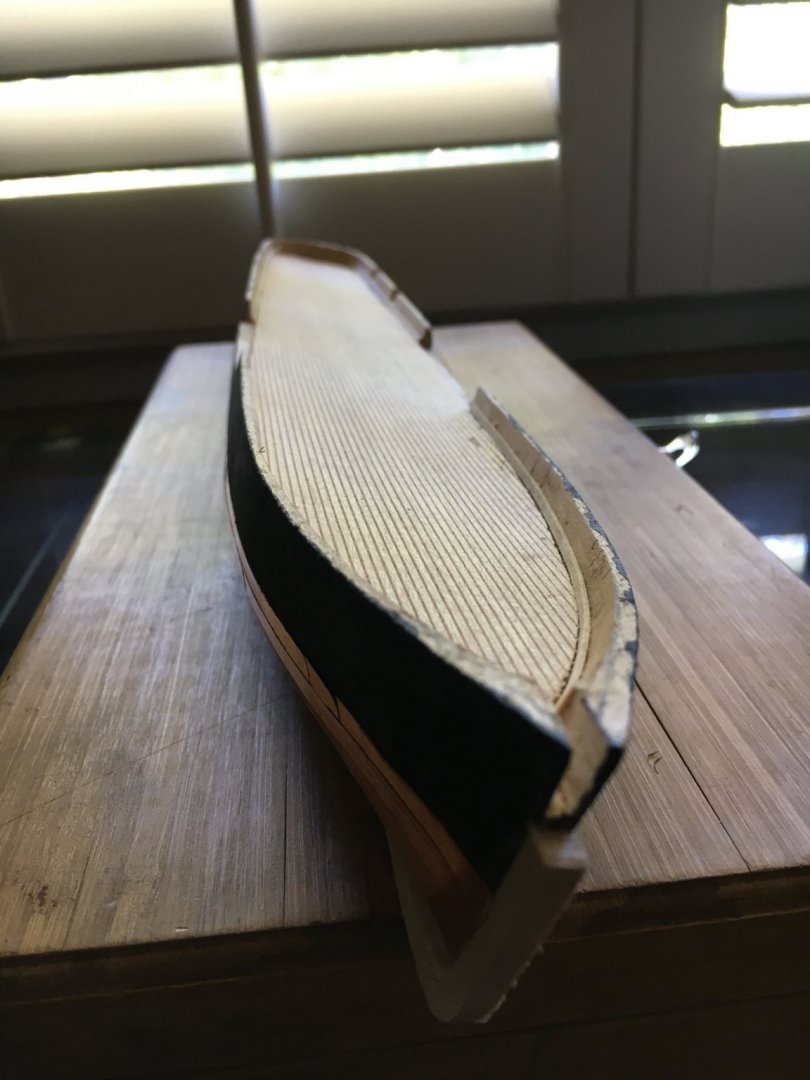
My painted hull is missing its shearstrake as it will be easier to add it after the paddlewheel sponsions are in place, following up with a black sharpie.
-
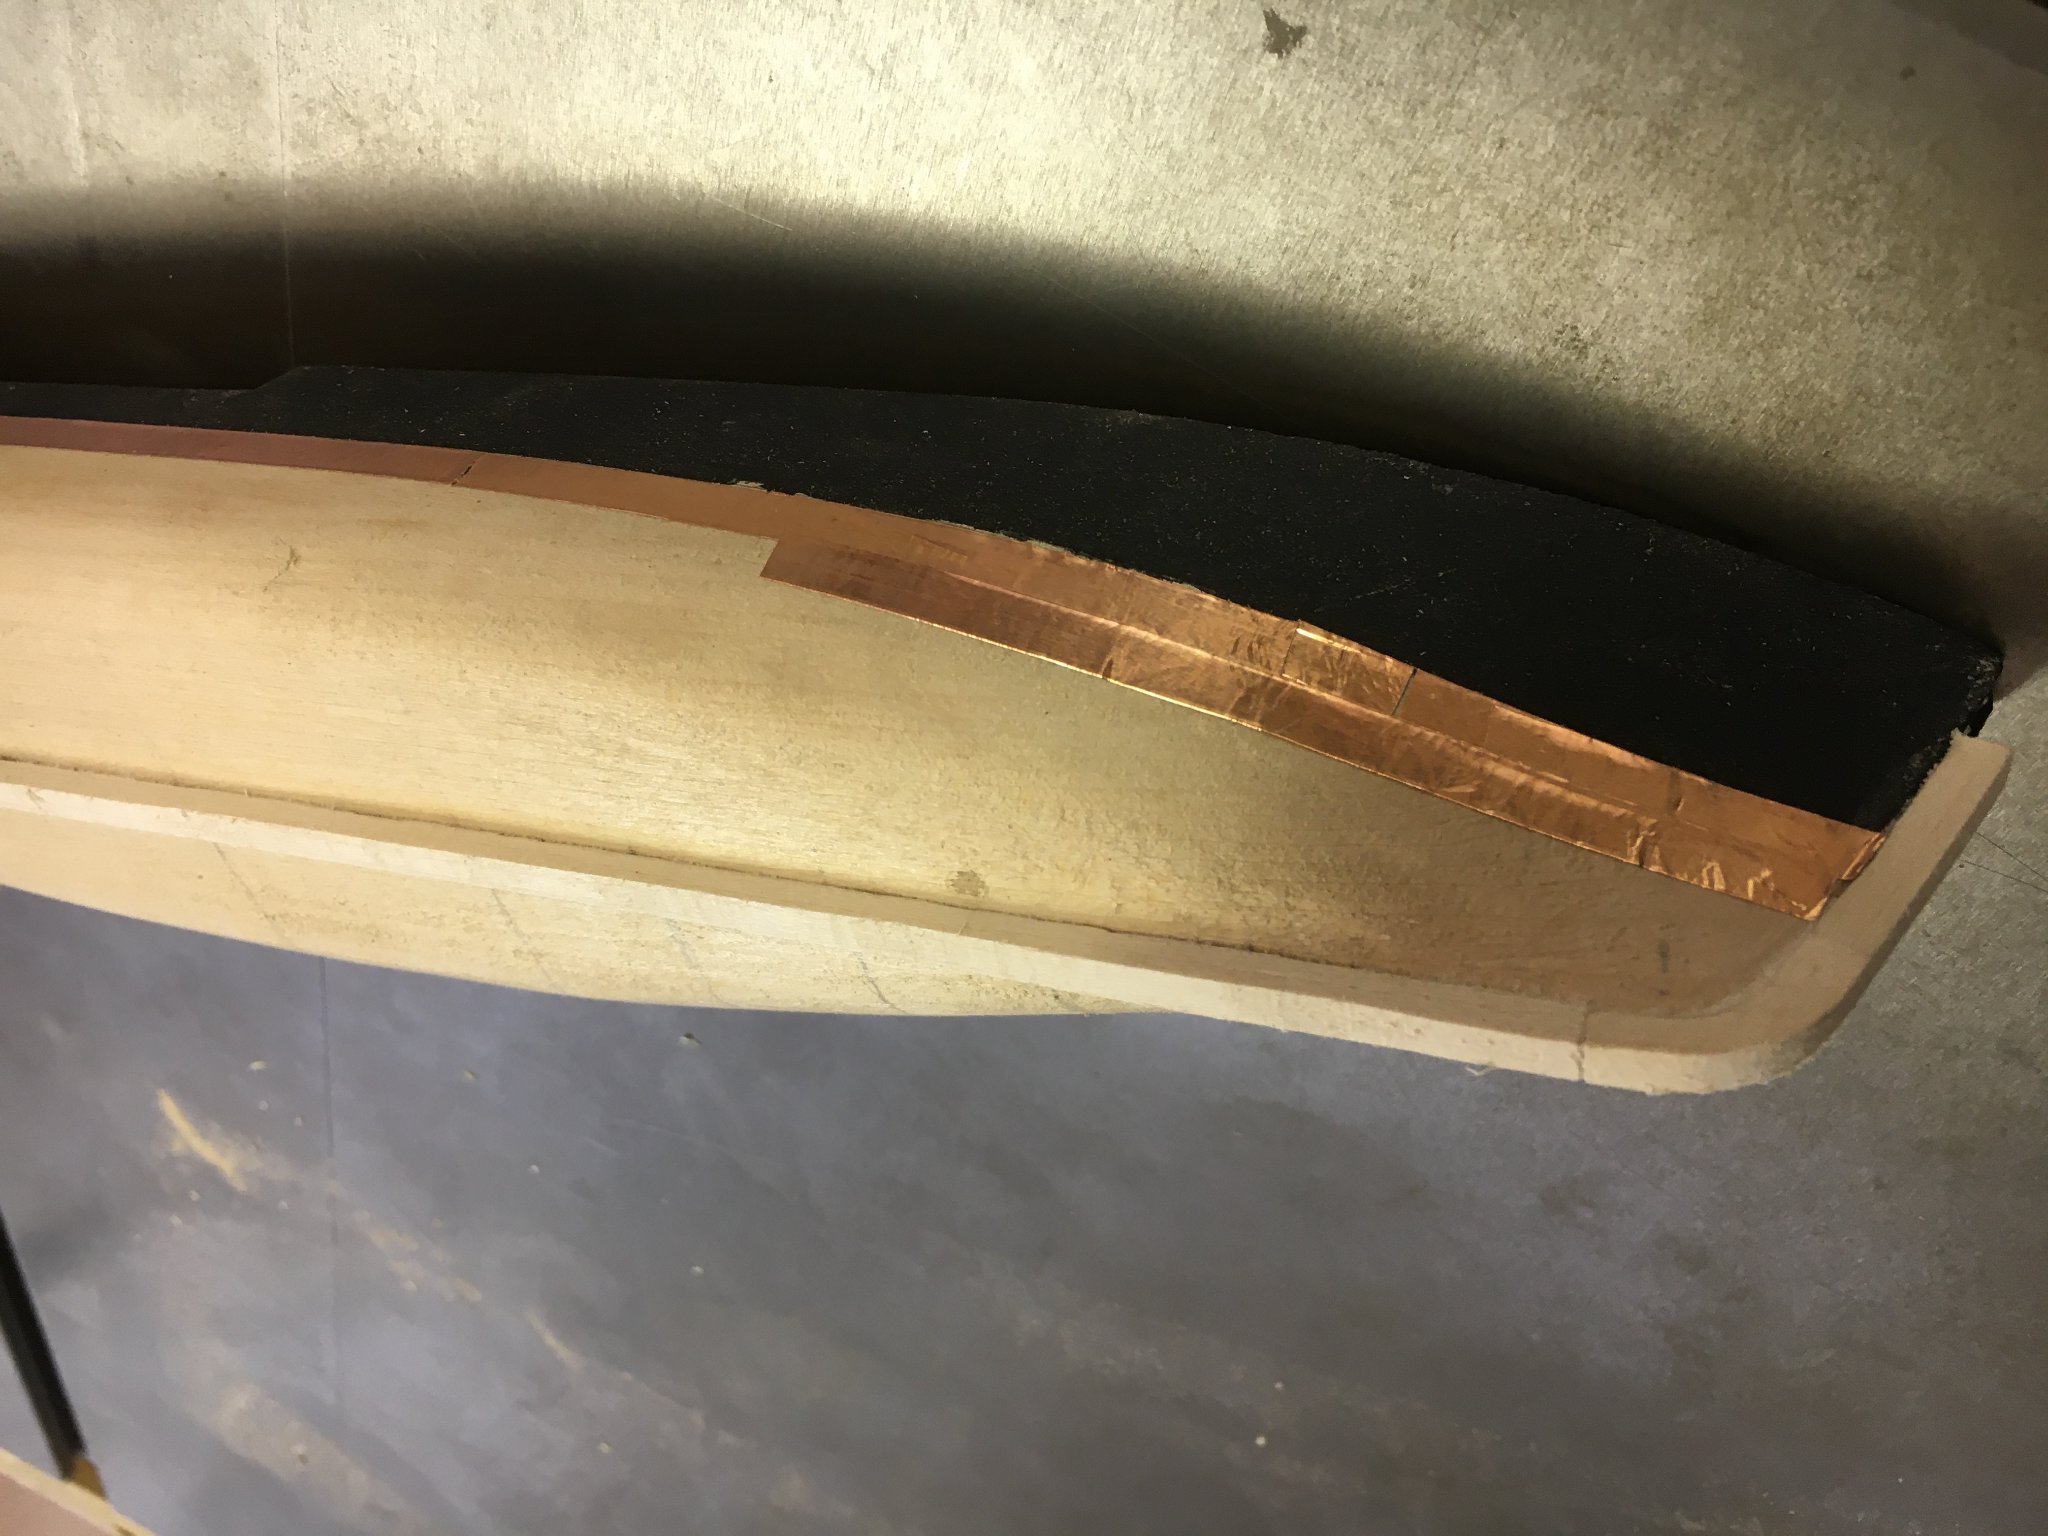
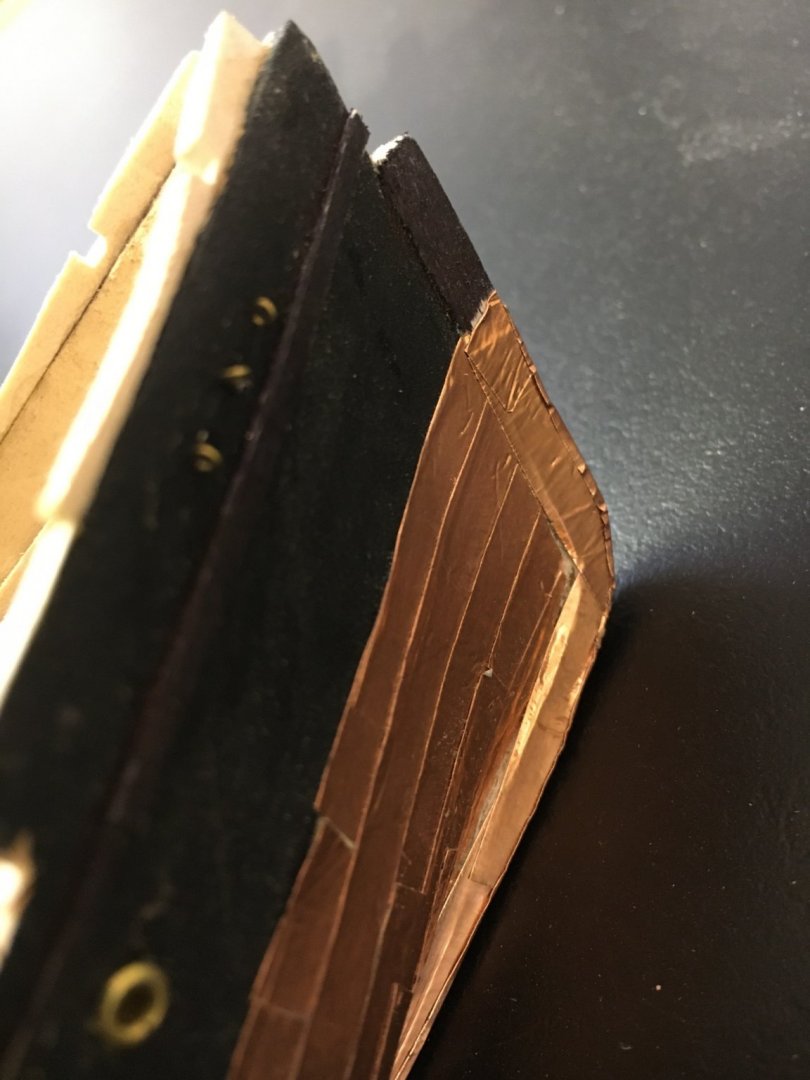
I am working on other hull details such as cutting the gun ports and adding the copper below water sheathing. The better quality copper was mostly missing from my kit, save for a few inches. I bought some stained glass flux, from a hobby supply, to use as a satisfactory substitute.

-
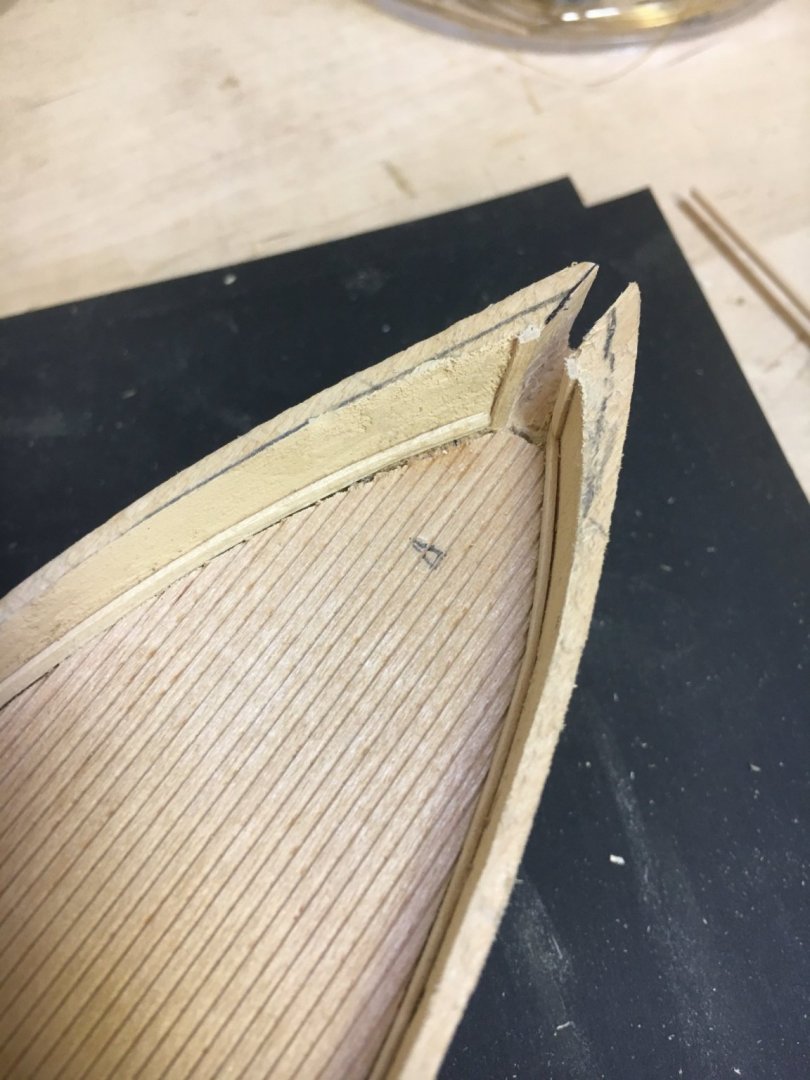
More hull work. I have added the keel. Making the transition cure involved trial and error.
-
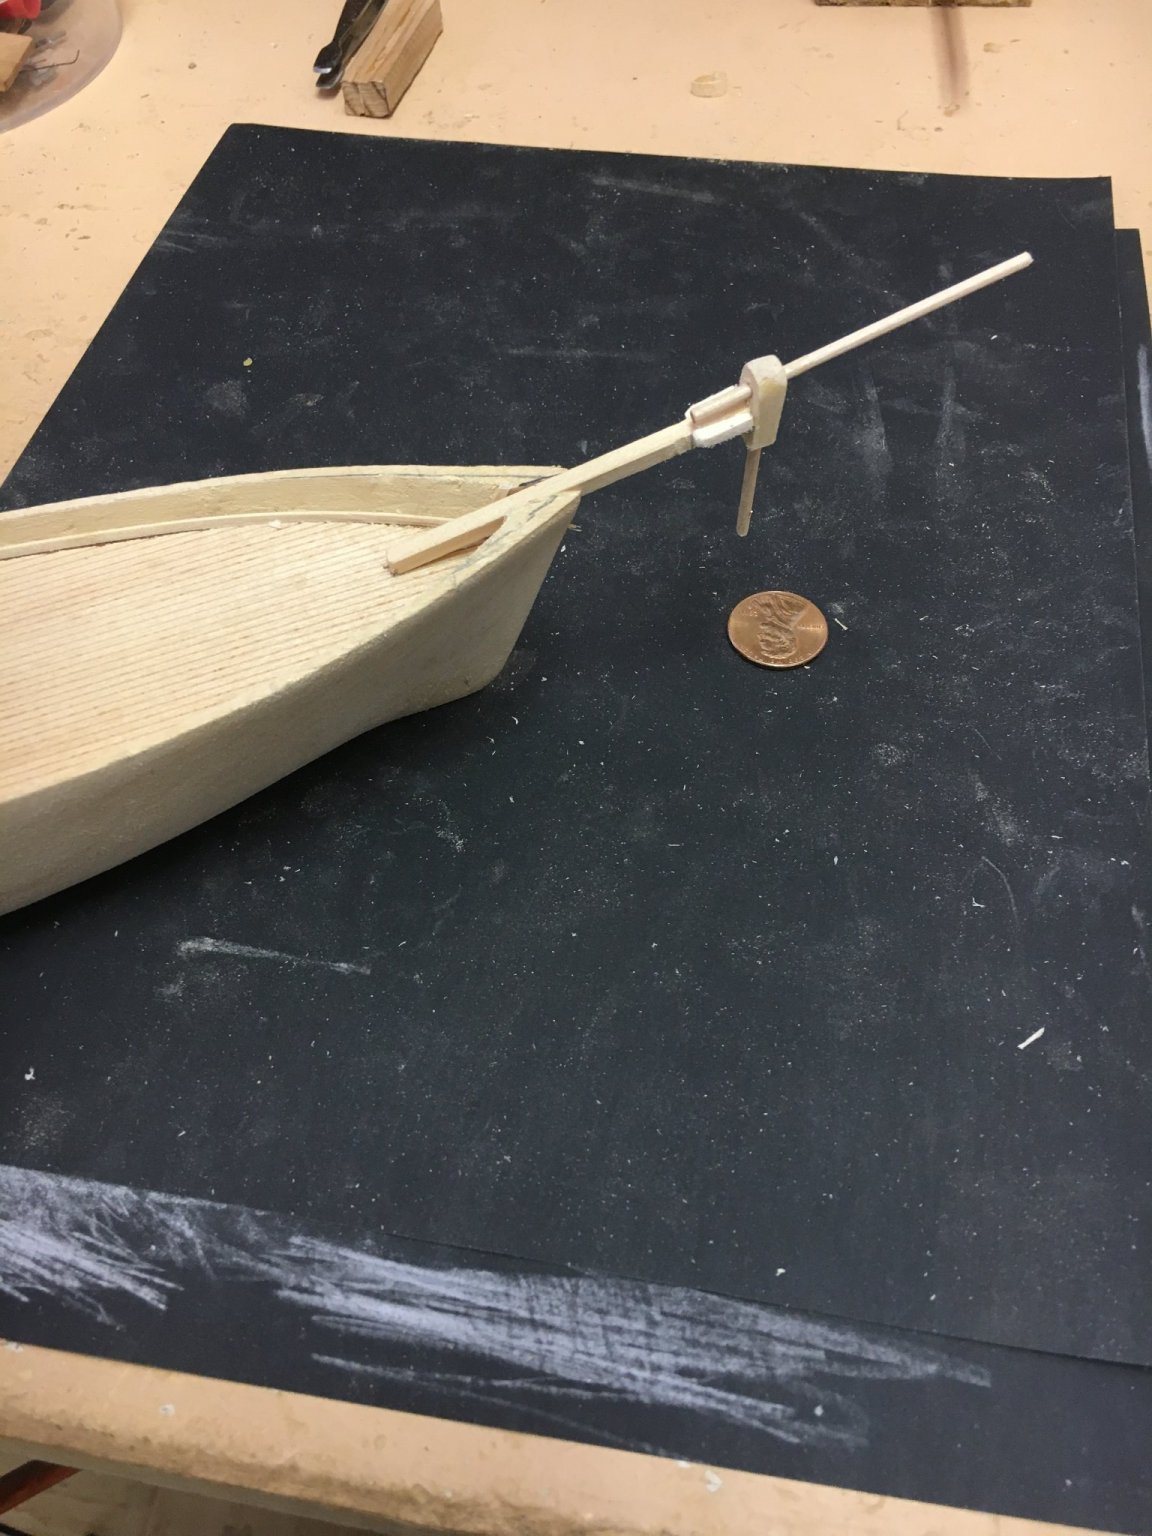
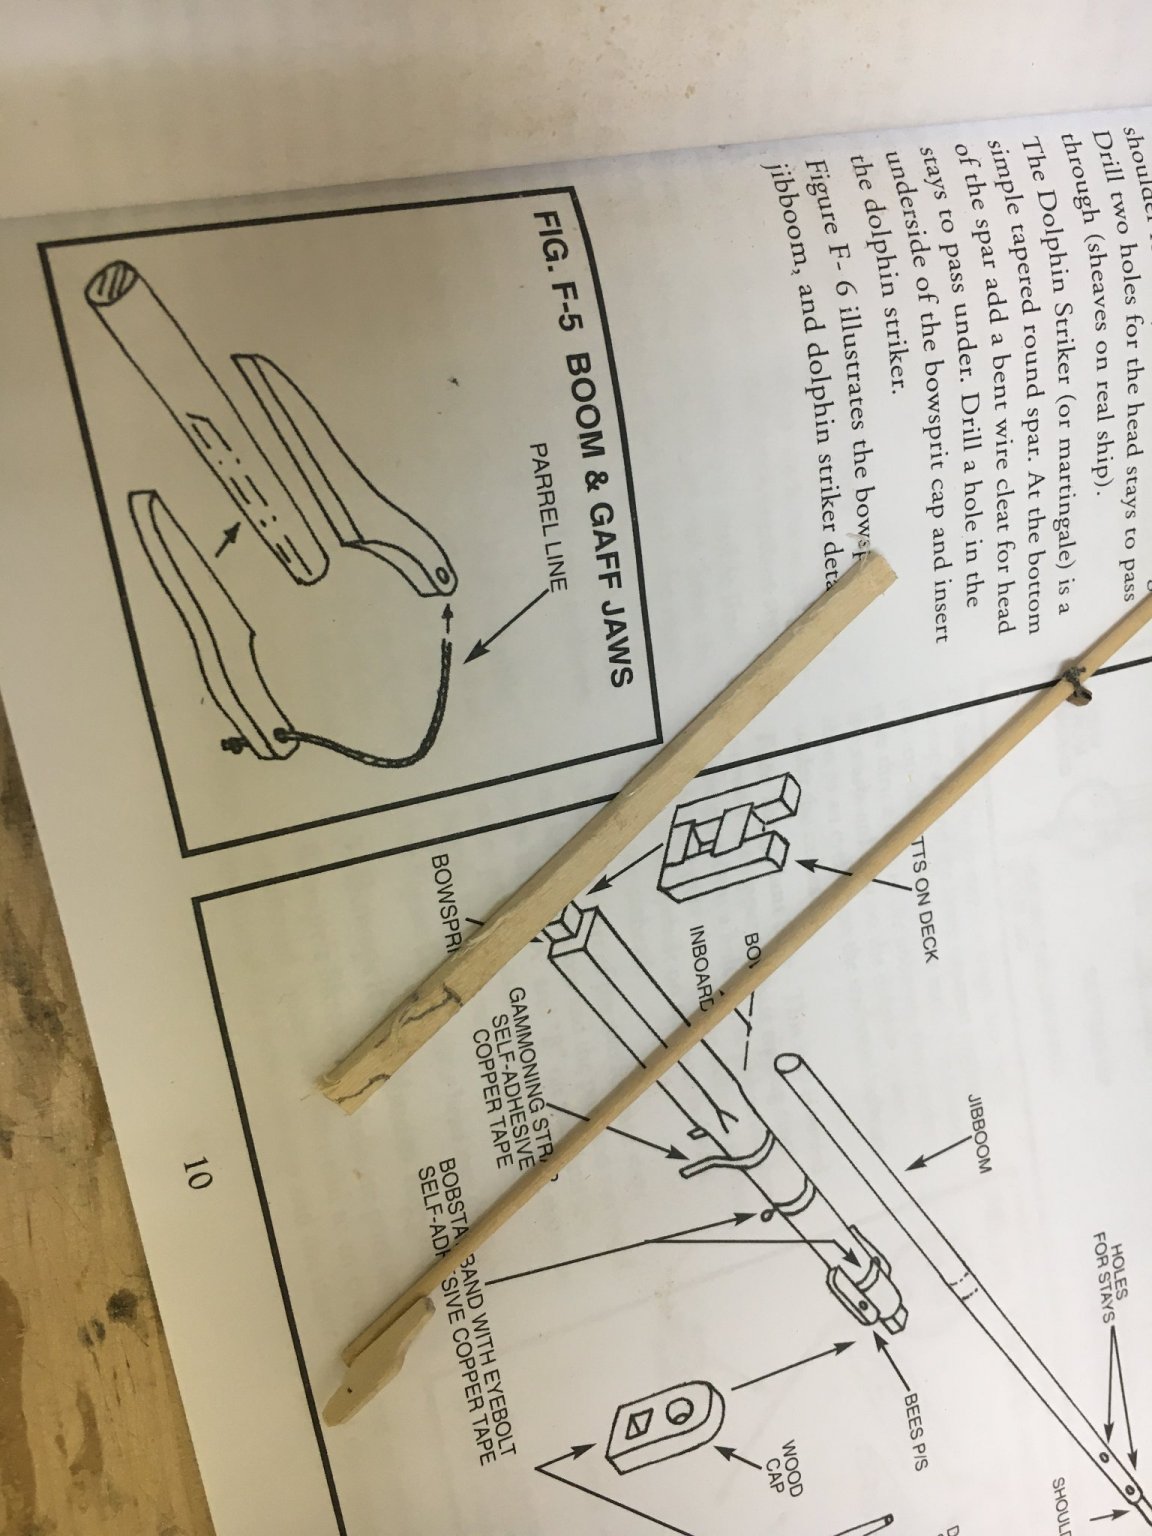
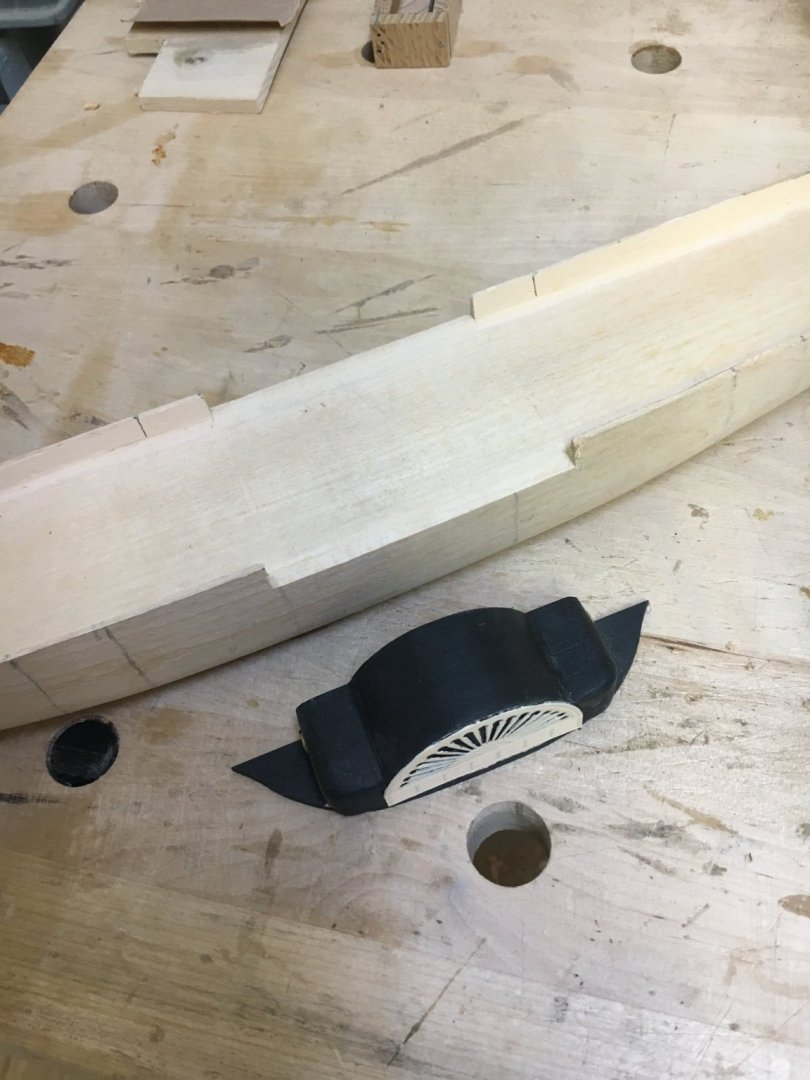
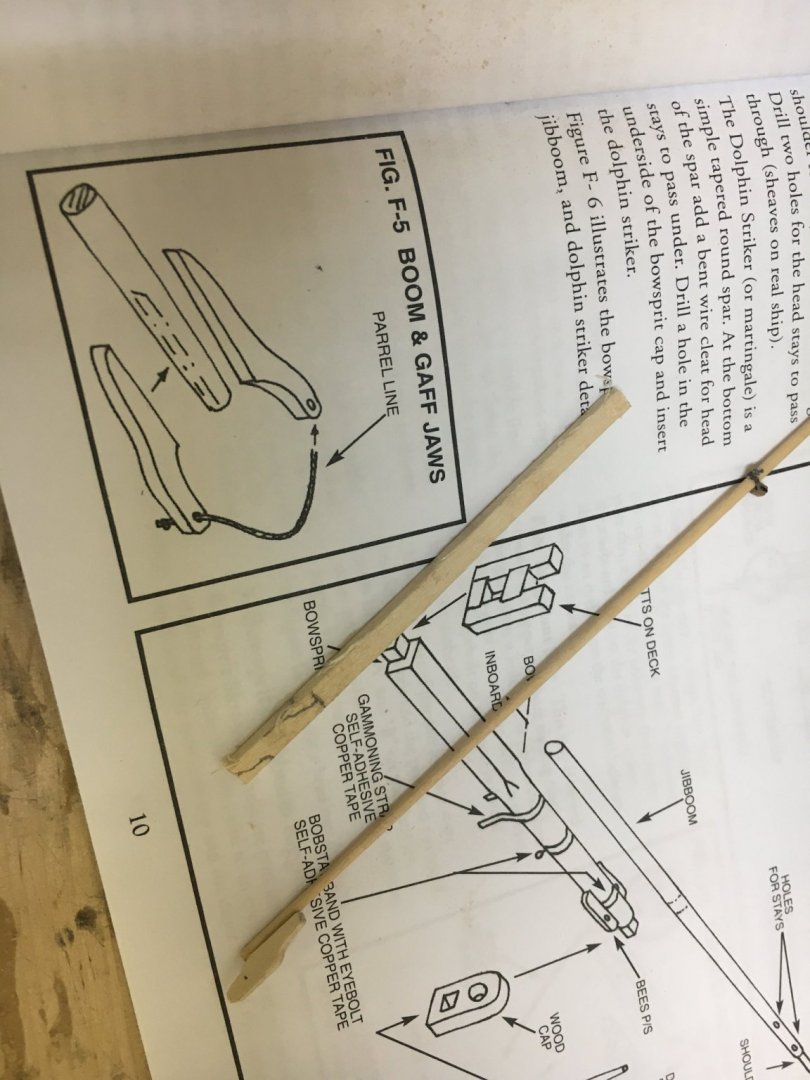
I made a new bowsprit. 1st one was sloppy. This is model is not going to be done tomorrow so why rush? The old bad one, top is destined for D J's locker. The new one is on the bottom. The new bowsprit fits well in the bow.
-
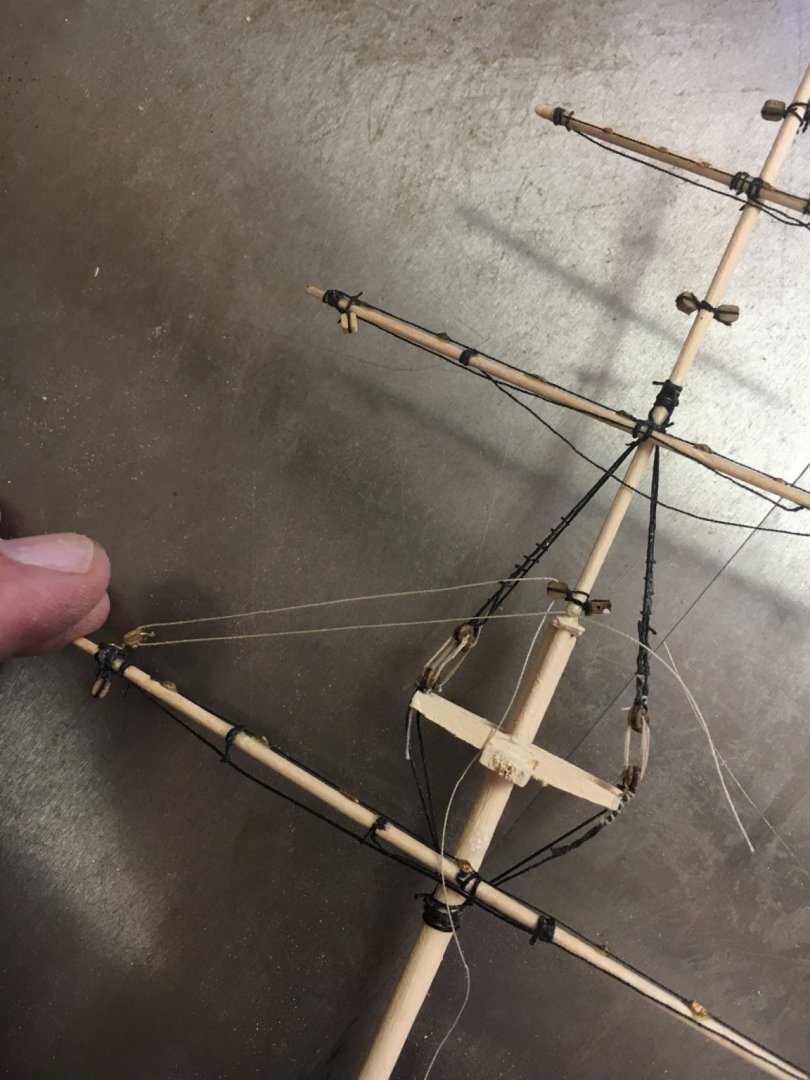
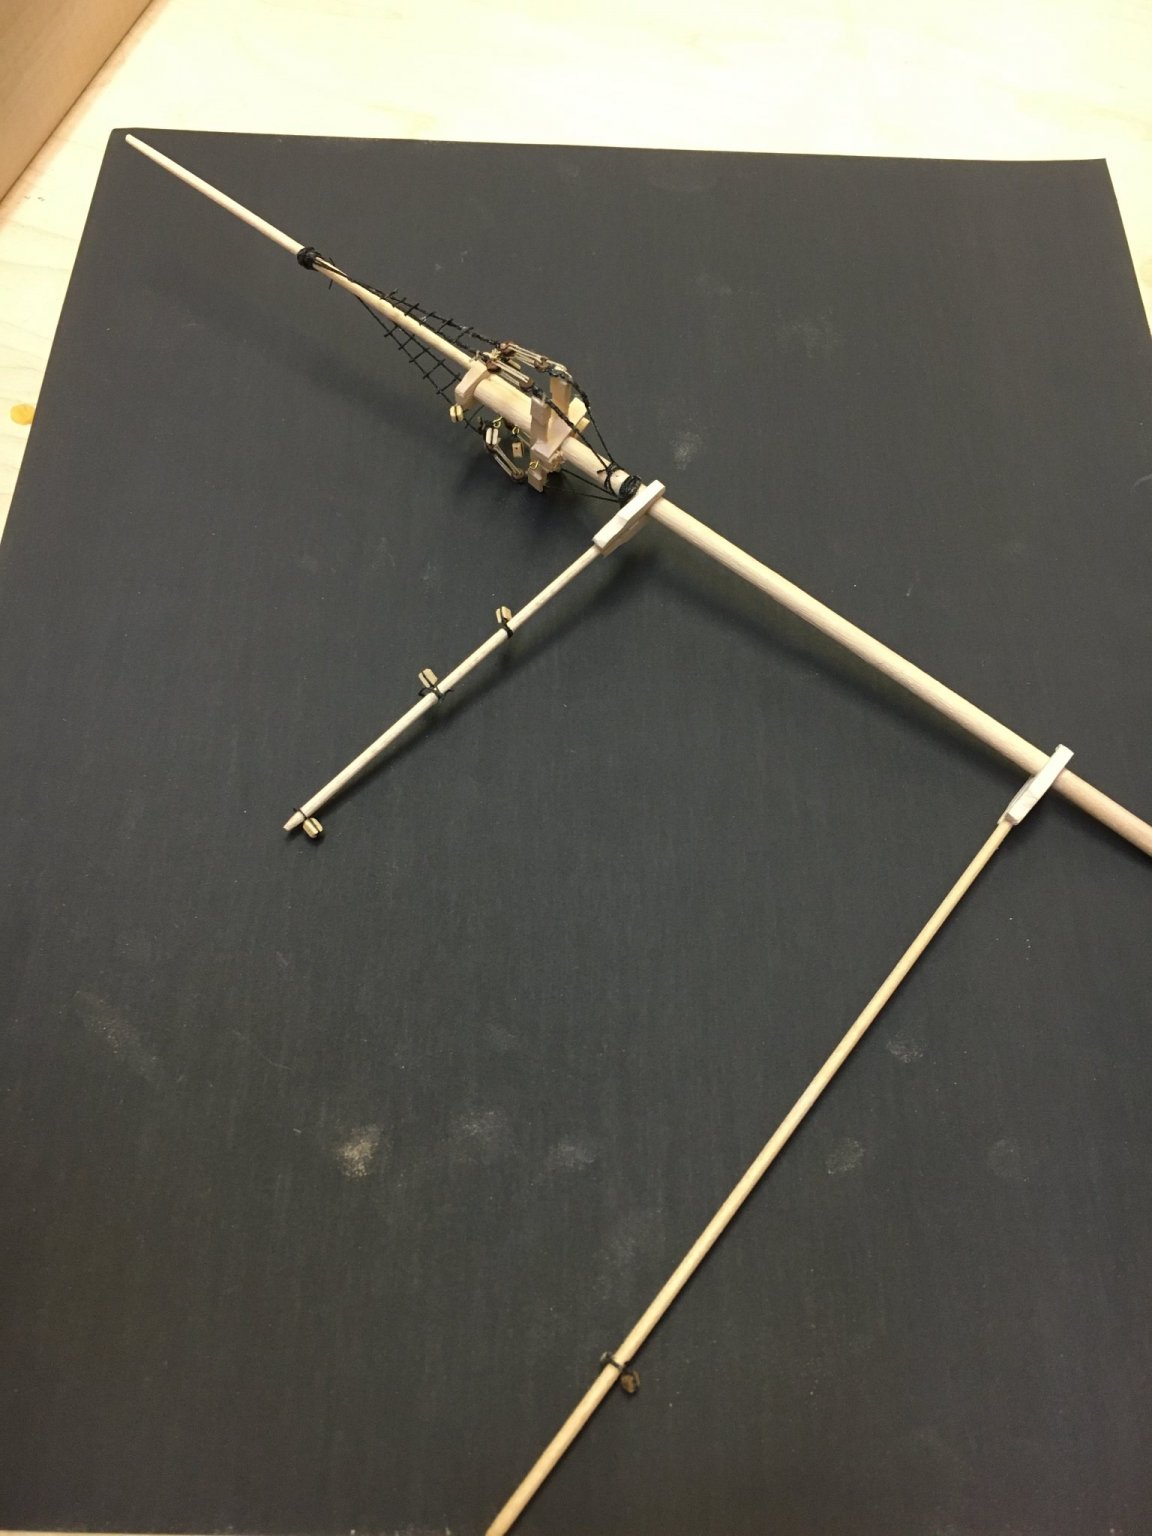
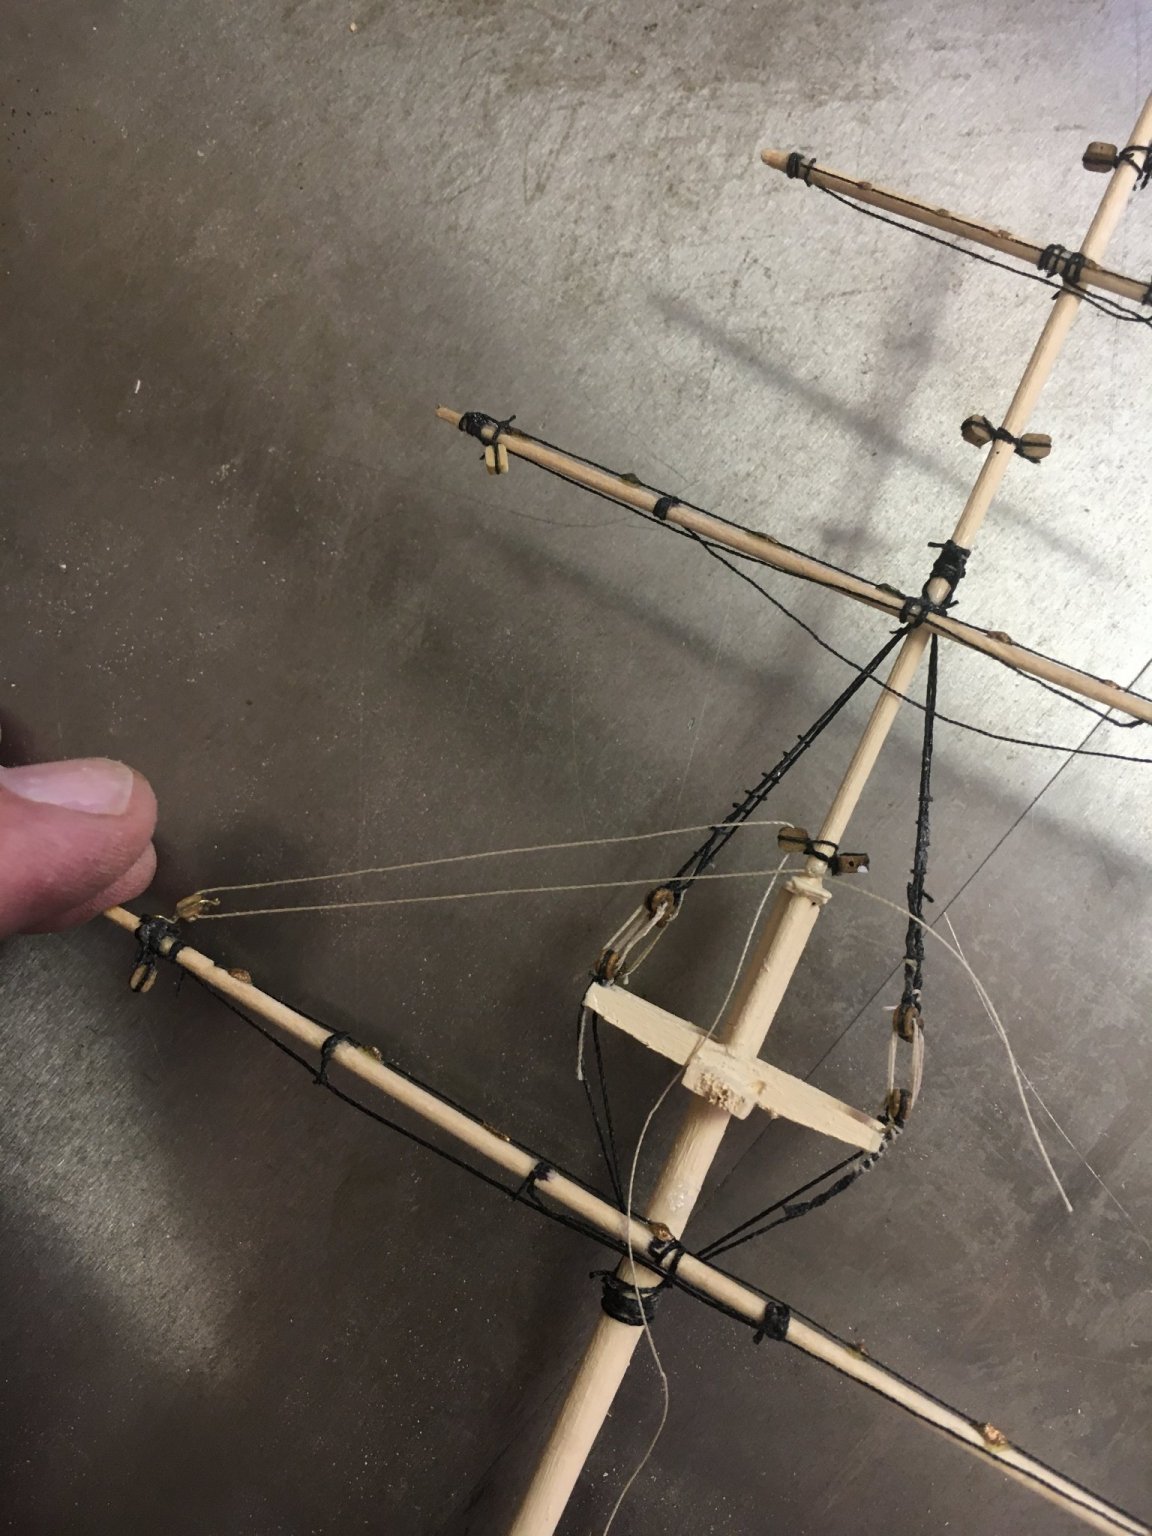
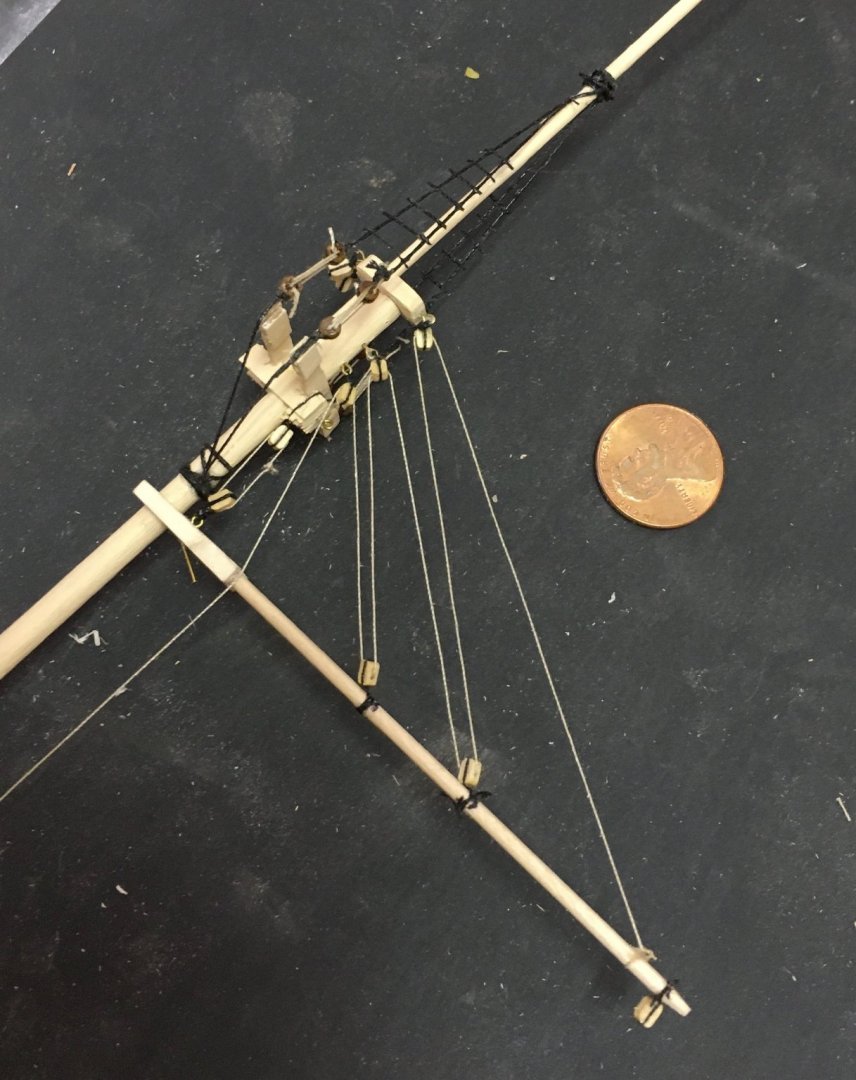
I added the lift for the mainmast gaff. The line passed through six blocks and belays or cleats in the deck area.
-
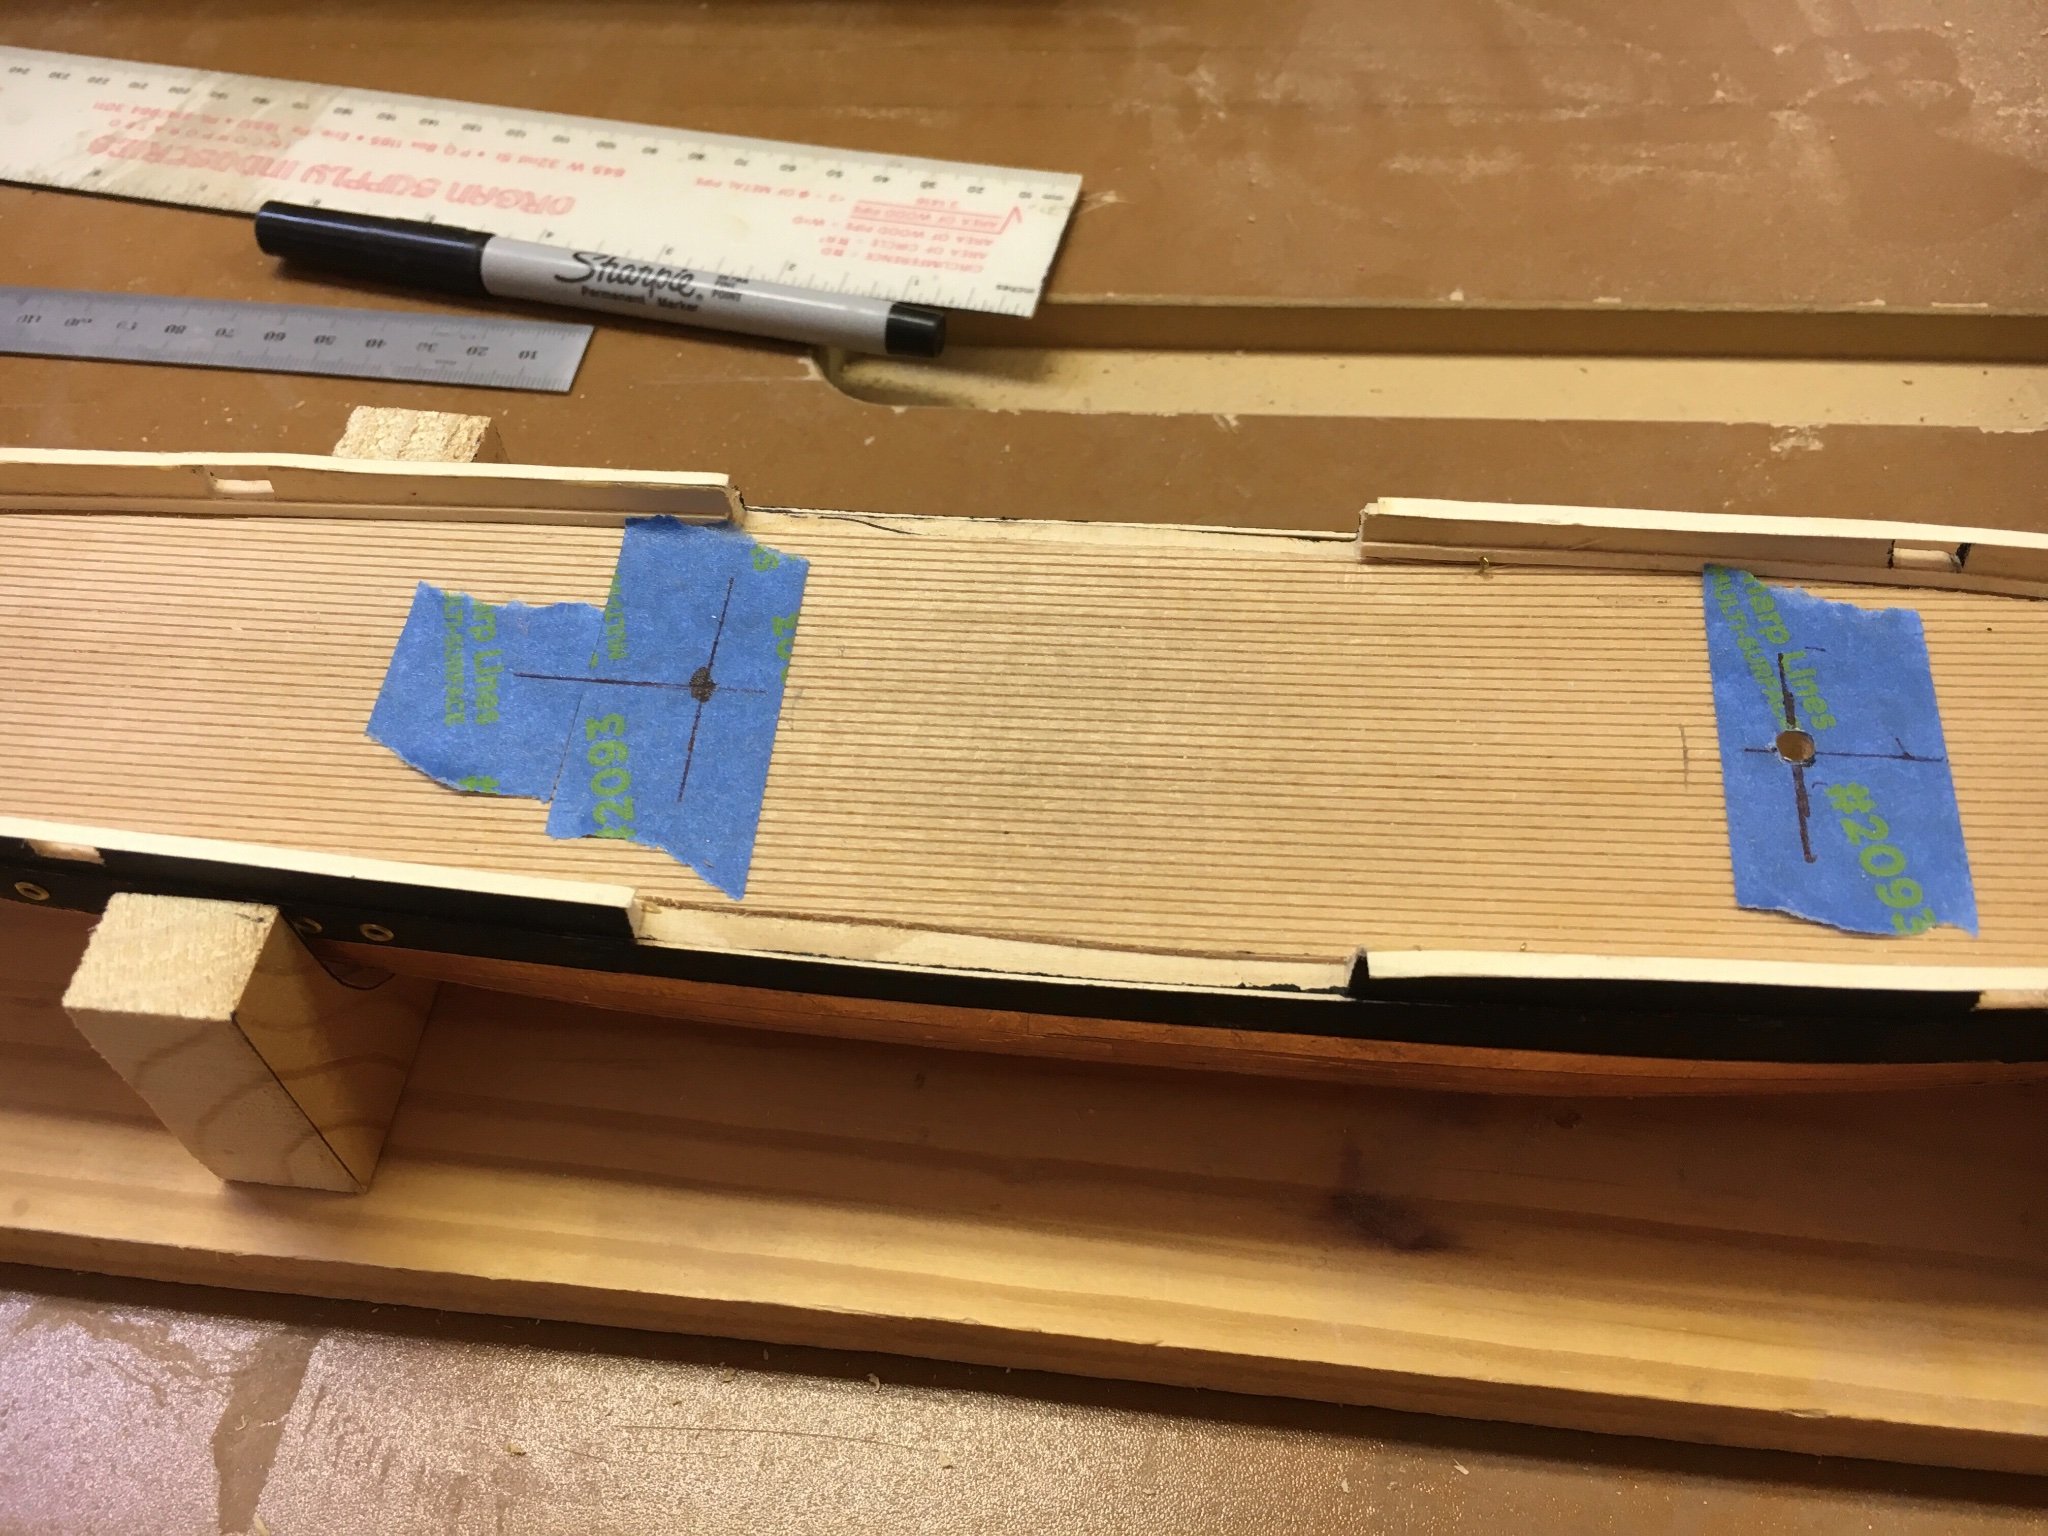
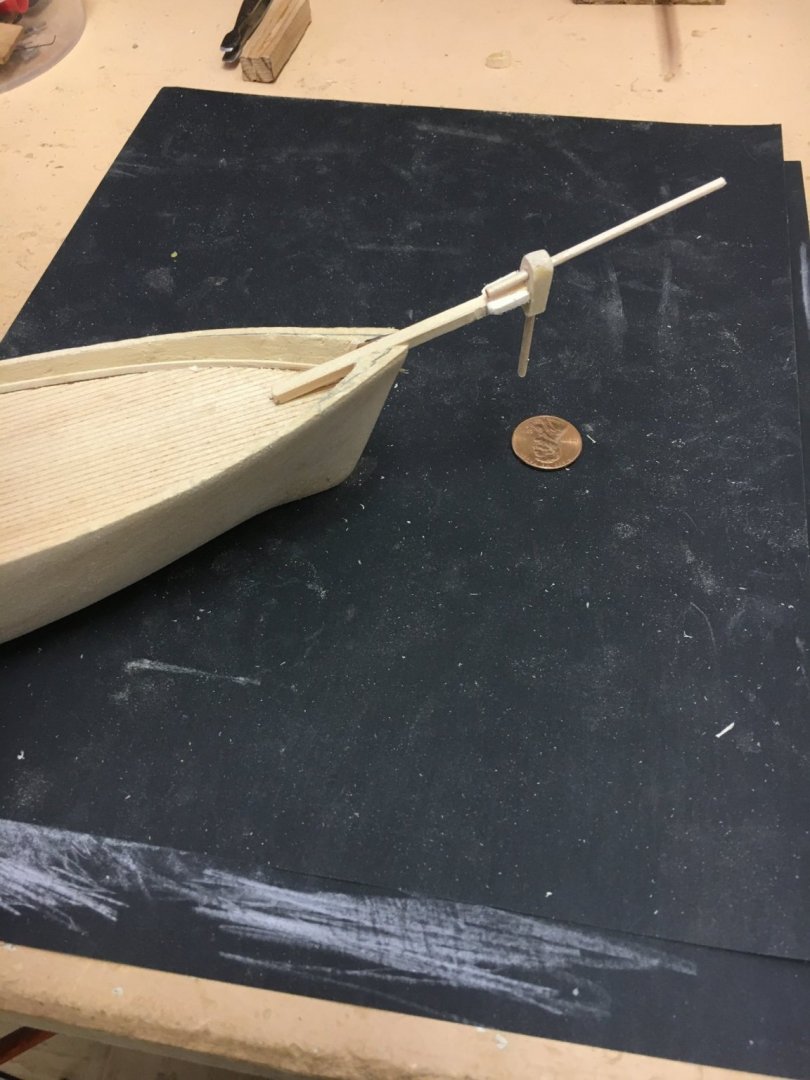
I have prepared the bow area for the bowsprit assembly. I also added the "waterline" molding along the deck.
-
Thanks Stevinne- I am a rank beginner. This is my 1st. I will always point out my goofs to help others avoid them 🙂
-
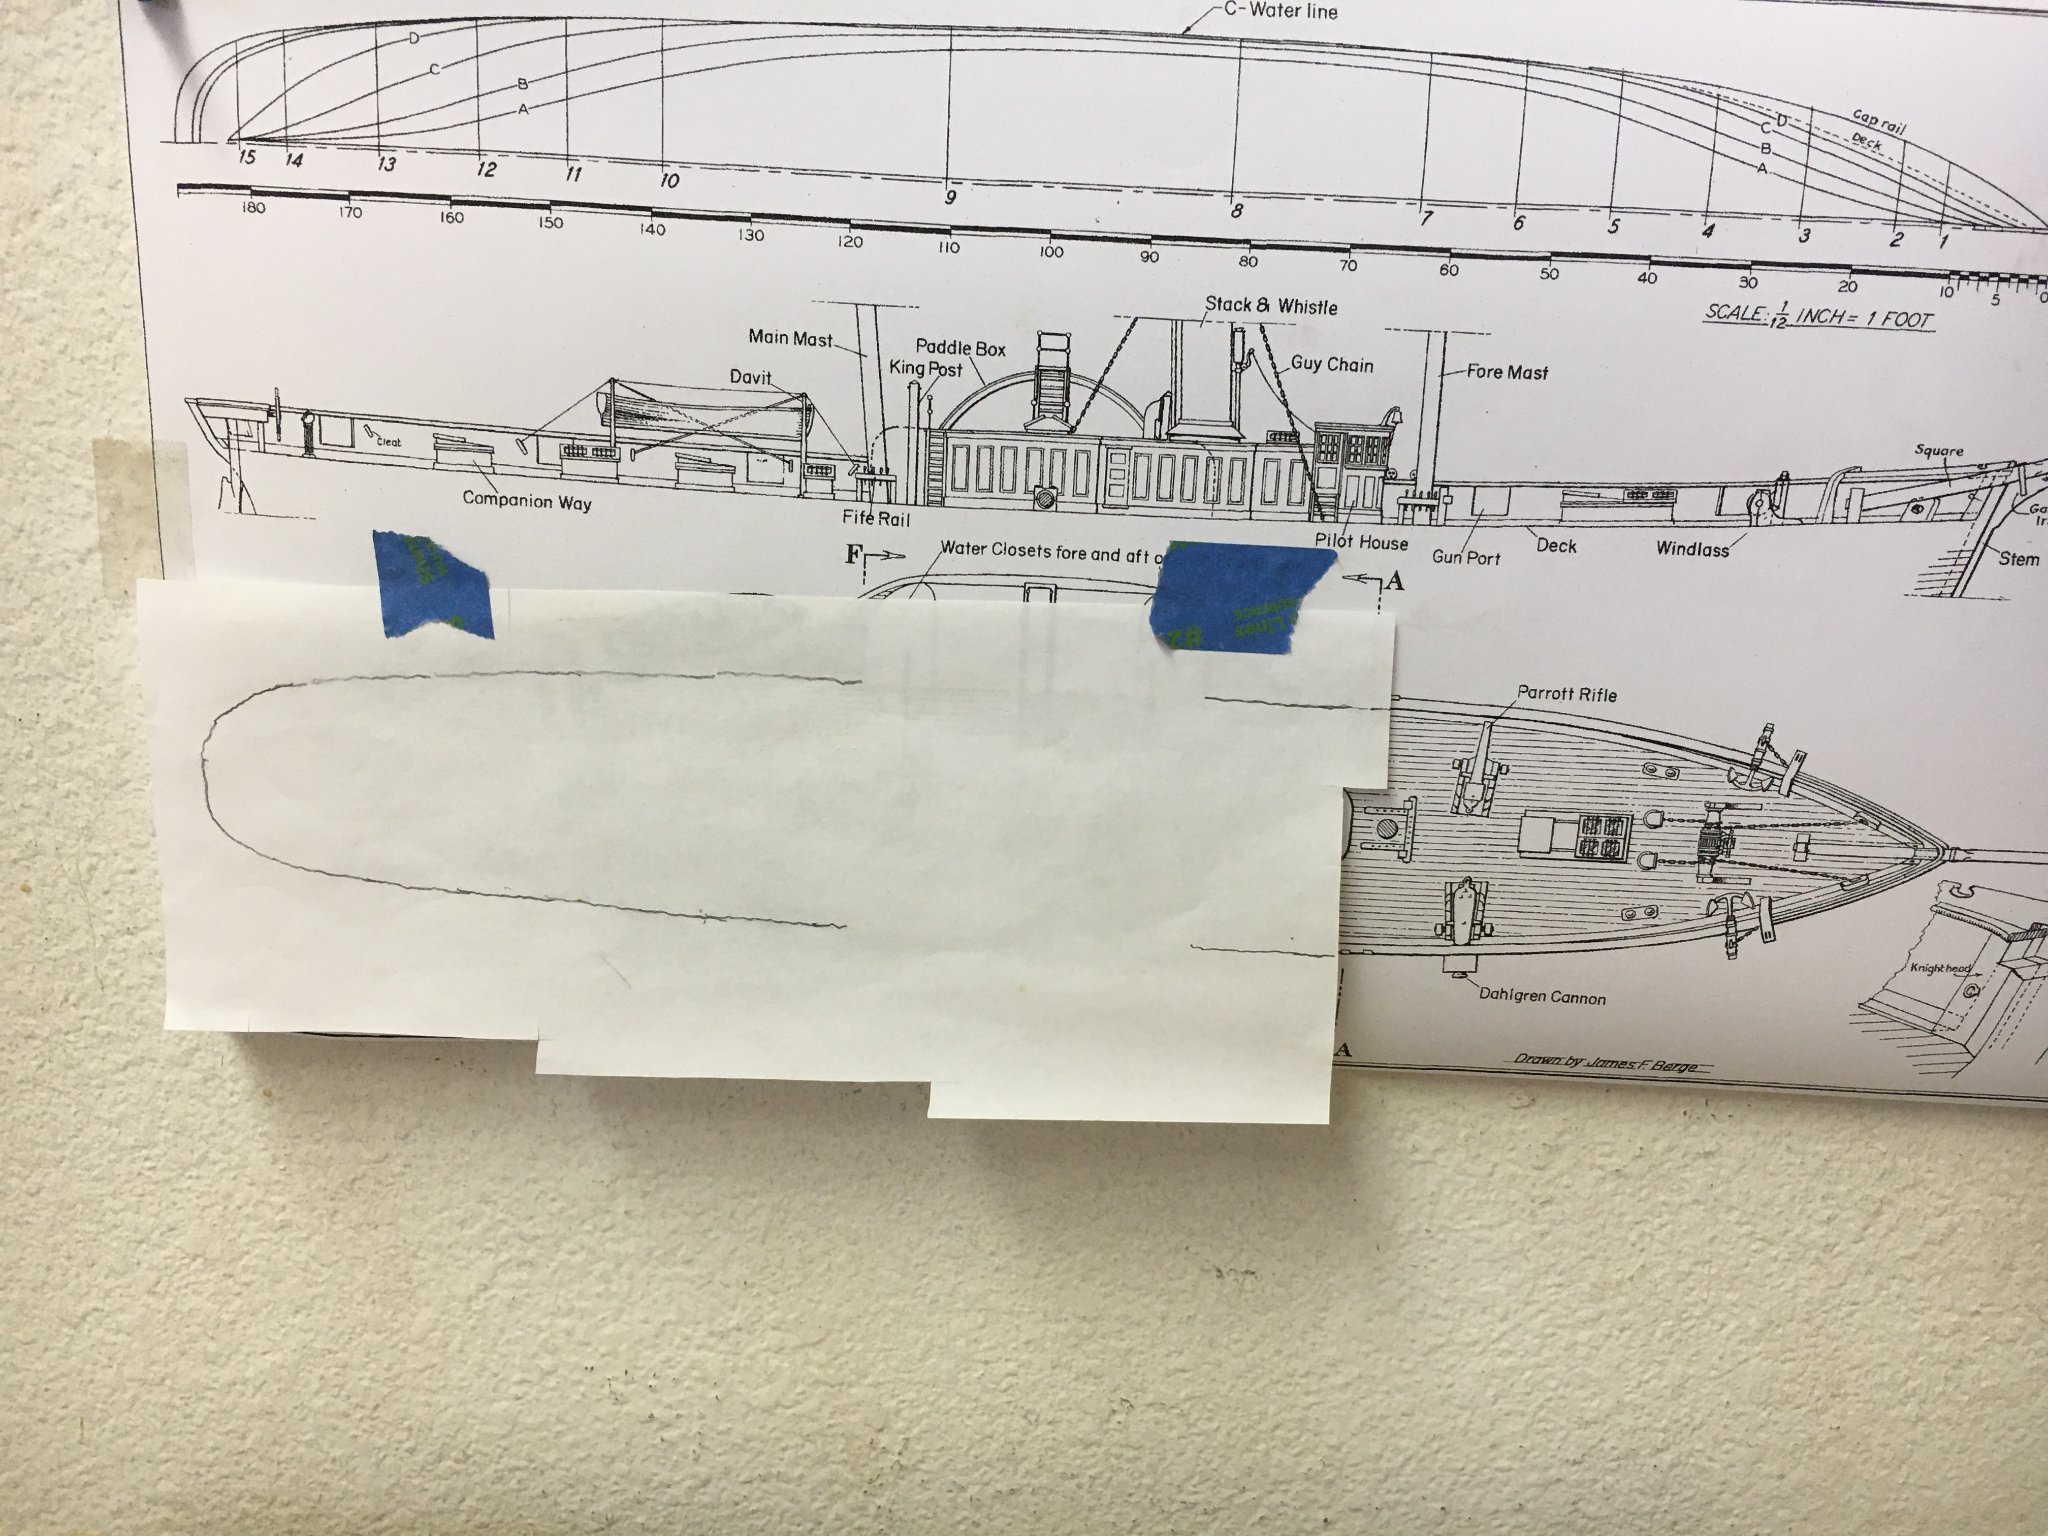
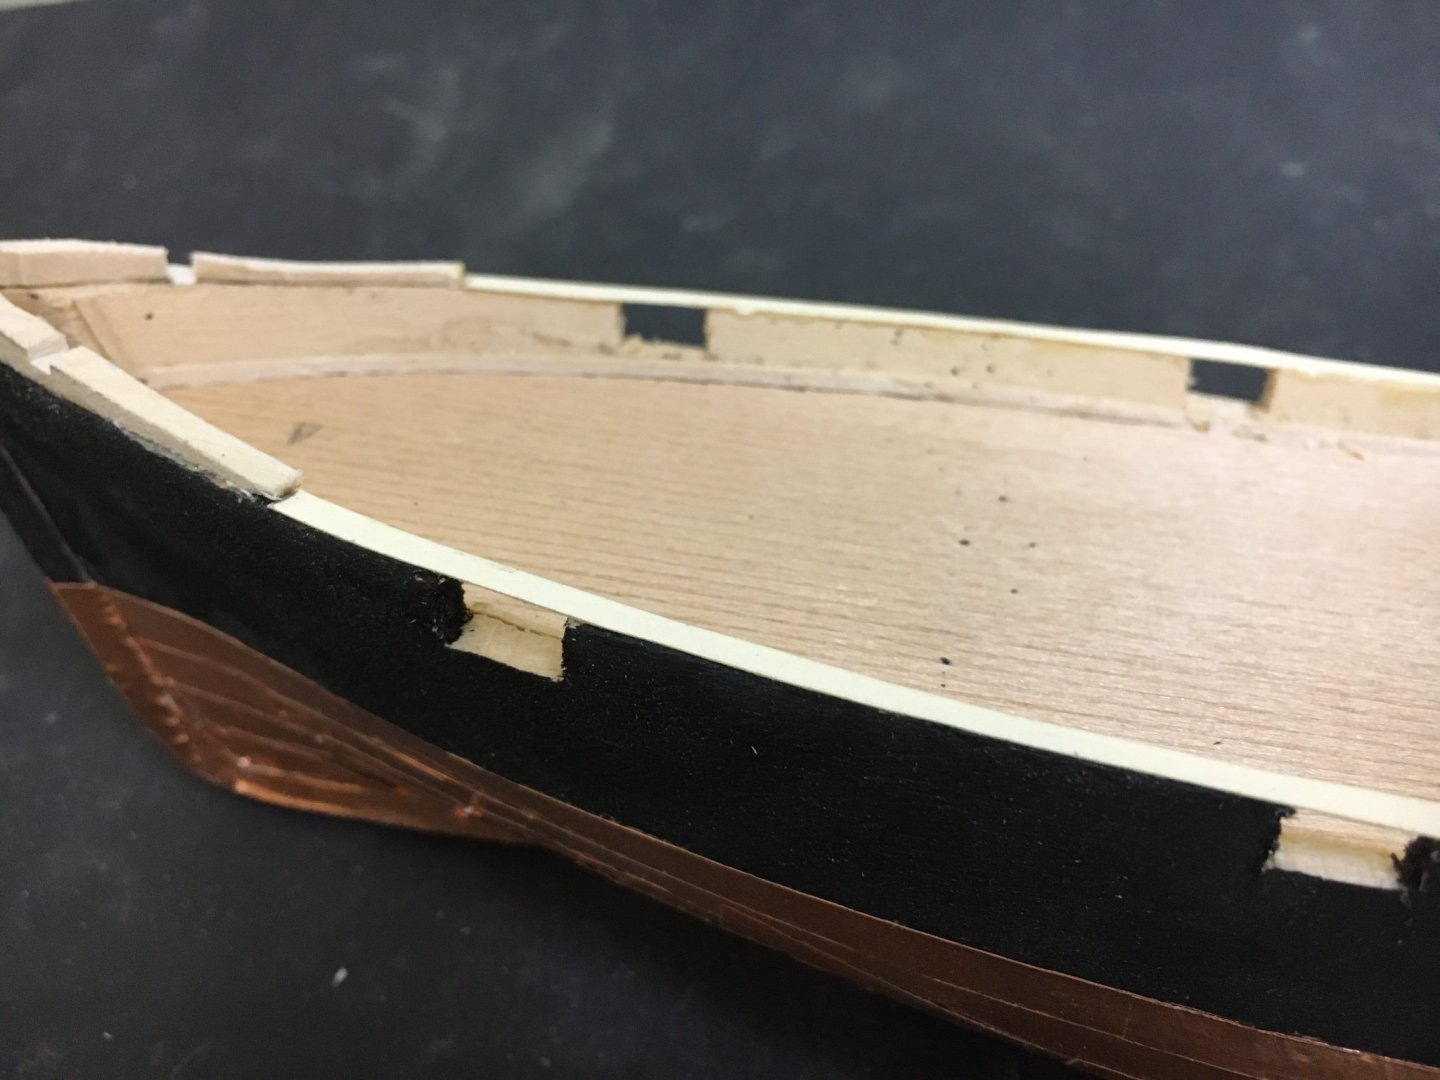
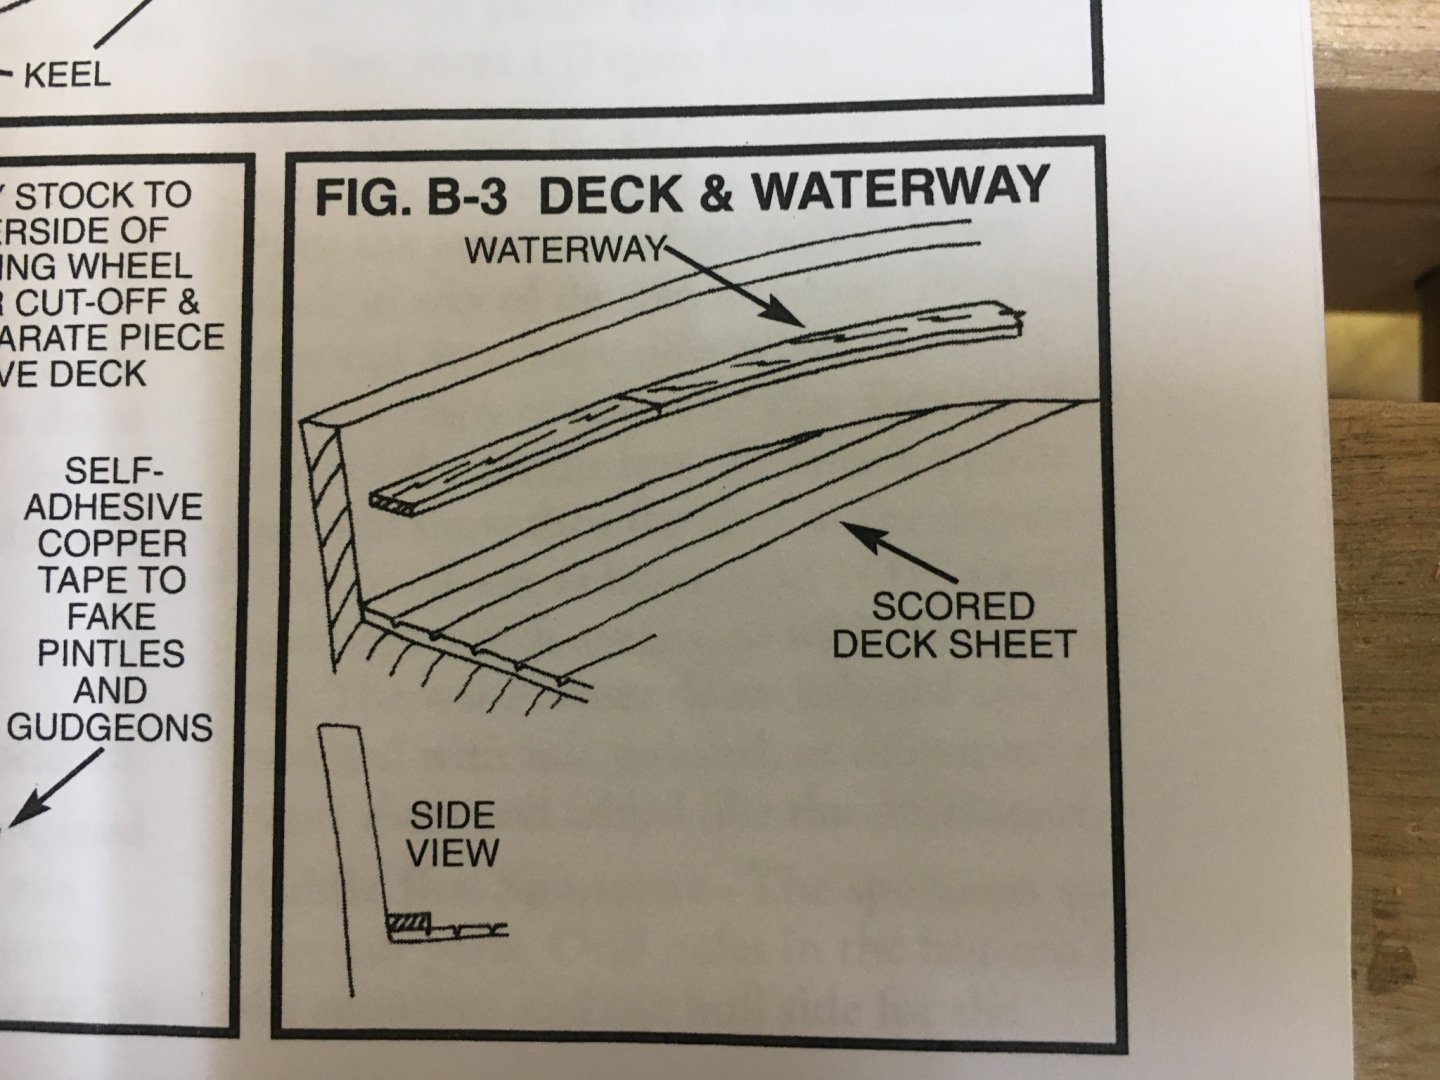
When satisfied with the pattern, I anchored it to the basswood deck sheet with a couple dabs of rubber cement, and cut it out with a razor knife. The deck sheet was barley large enough, but adequate. I used contact cement to glue it into the hull. My fit is good enough where the waterline "moldings" shown in the instructions, will cover any gaps between the bulwarks and deck. small pieces will need to be glued between the sponsions and deck. Coming up---gun cutouts, outside hull painting, and copper sheeting, as well as keel and rudder.

-
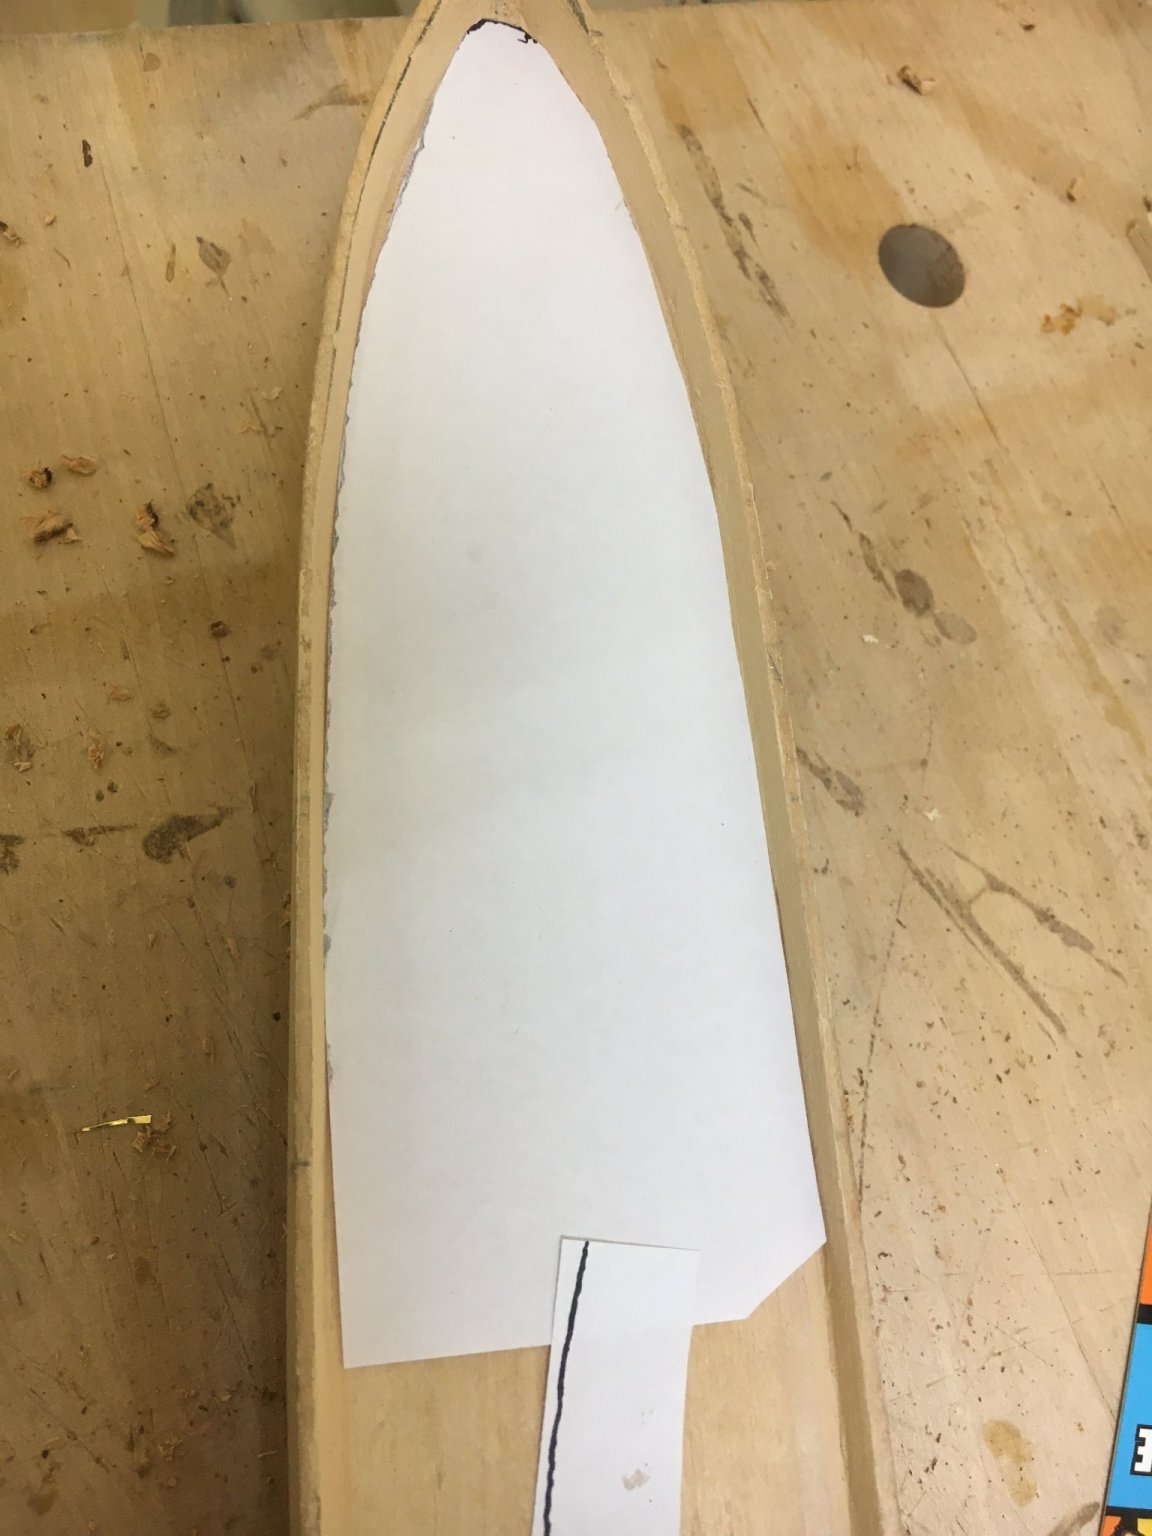
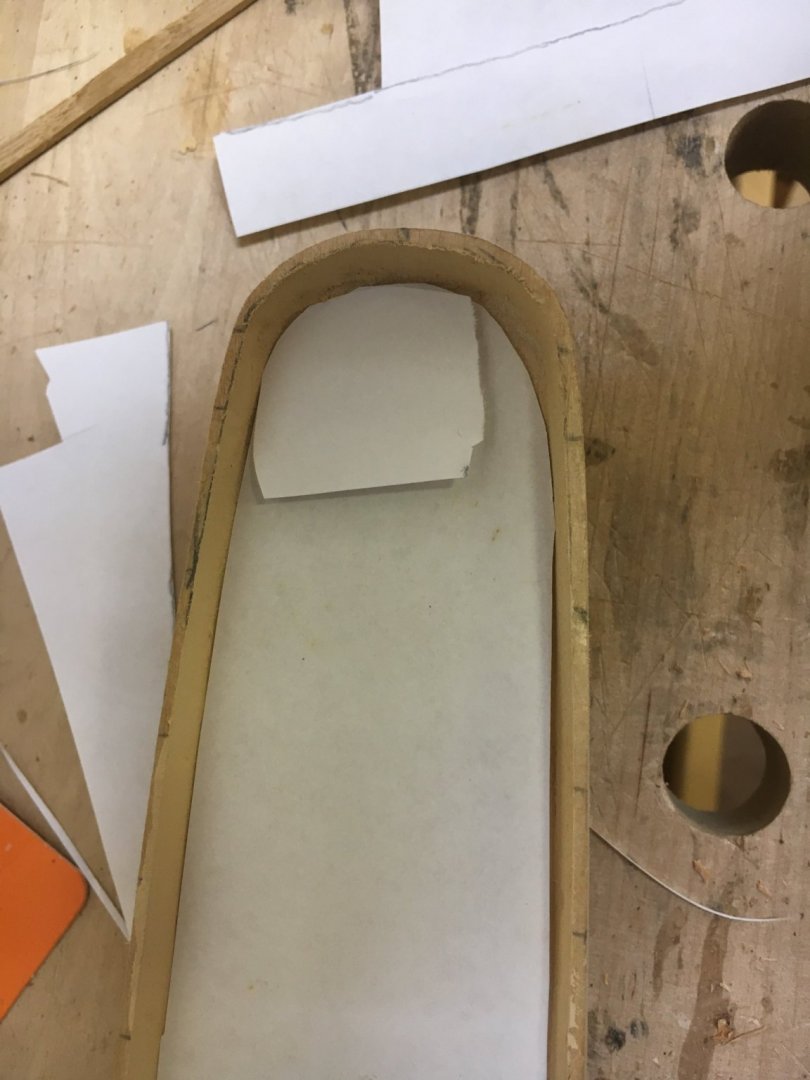
Next, I traced the paper patterns for the deck, a thin basswood piece, suppled with the kit, scored with lines to be the planking. For logical reasons, this pattern will only be approximate, and need to be corrected, with paper "shims" to accurately conform to my actual bulwark outlines. Reasons for correction---paper and wood both change size slightly with humidity, micro-deviation of my my bulwark carving from the paper pattern, to name a couple. Pics show the tracing, paper inserted in the hull with a "shim" at the stern. My pattern was pretty close.


-
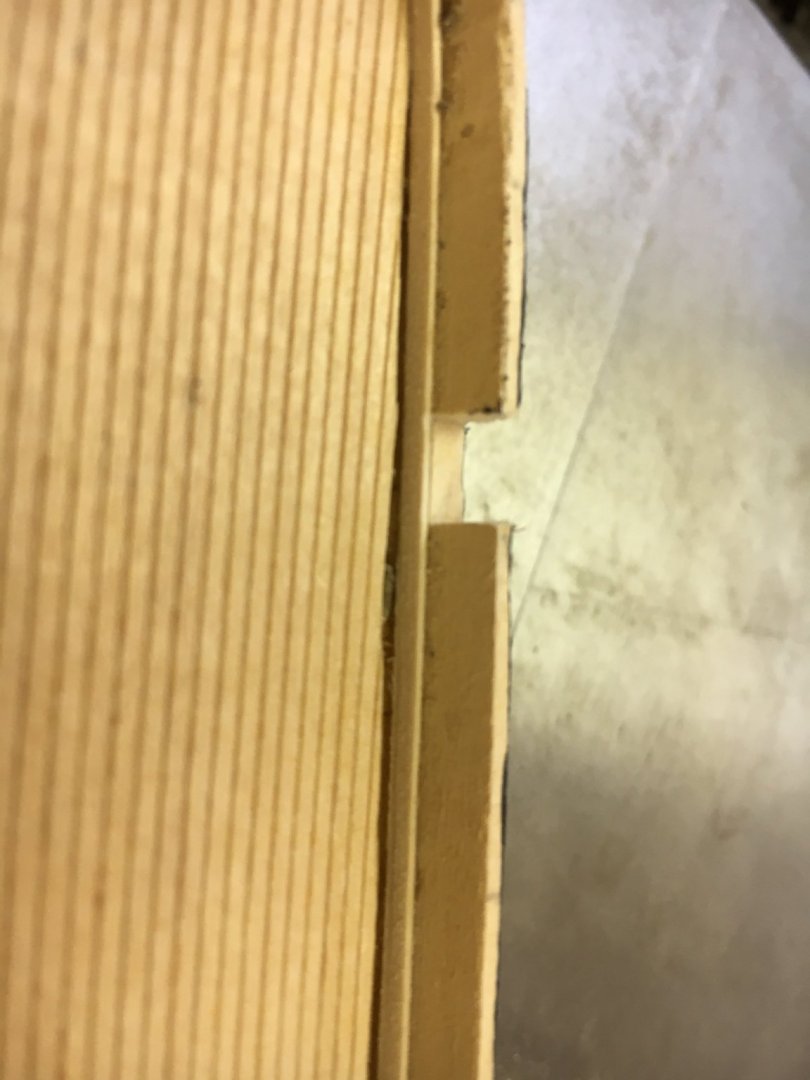
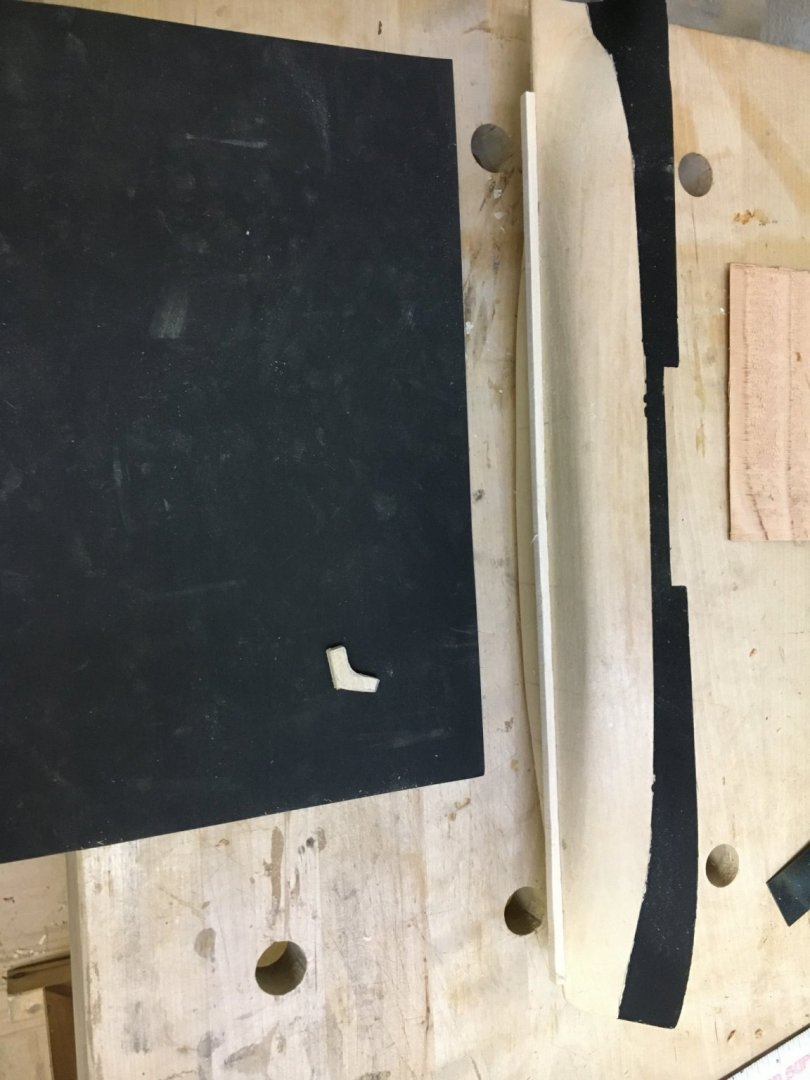
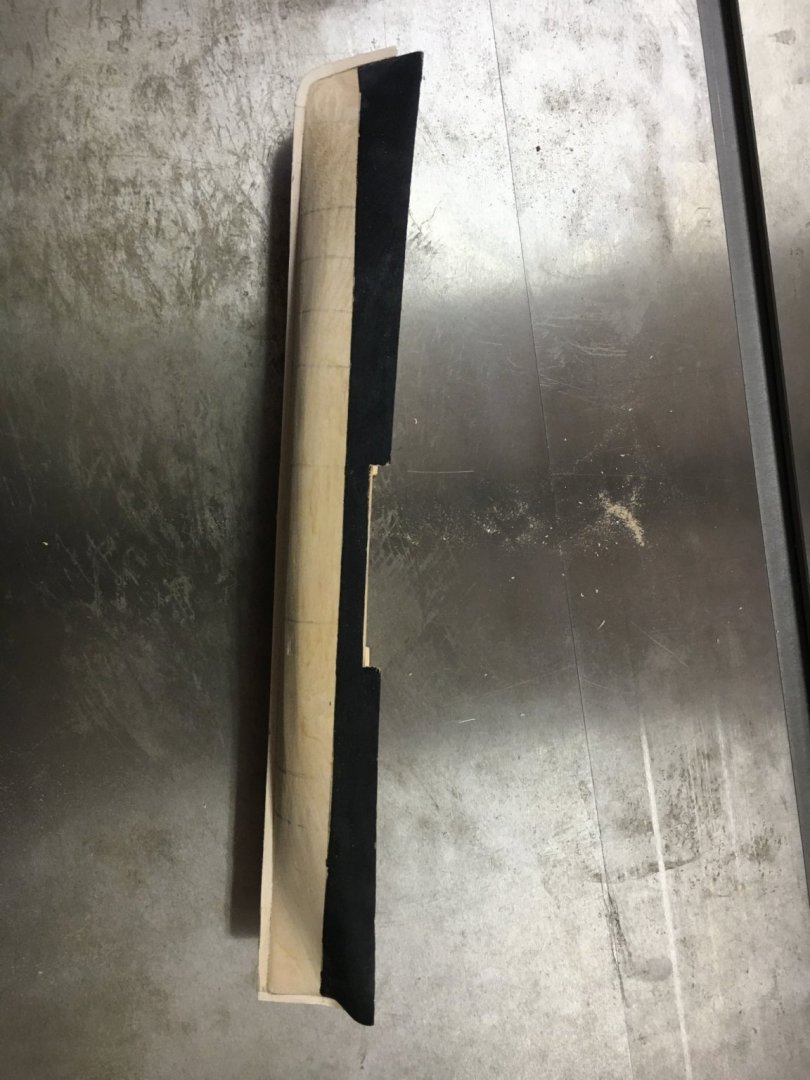
Since the sponsons and the deck are at the same level, I cut out the bulwarks where the paddle wheel-water closets will go. Slightly too wide so some putty and paint will be used here later.
-
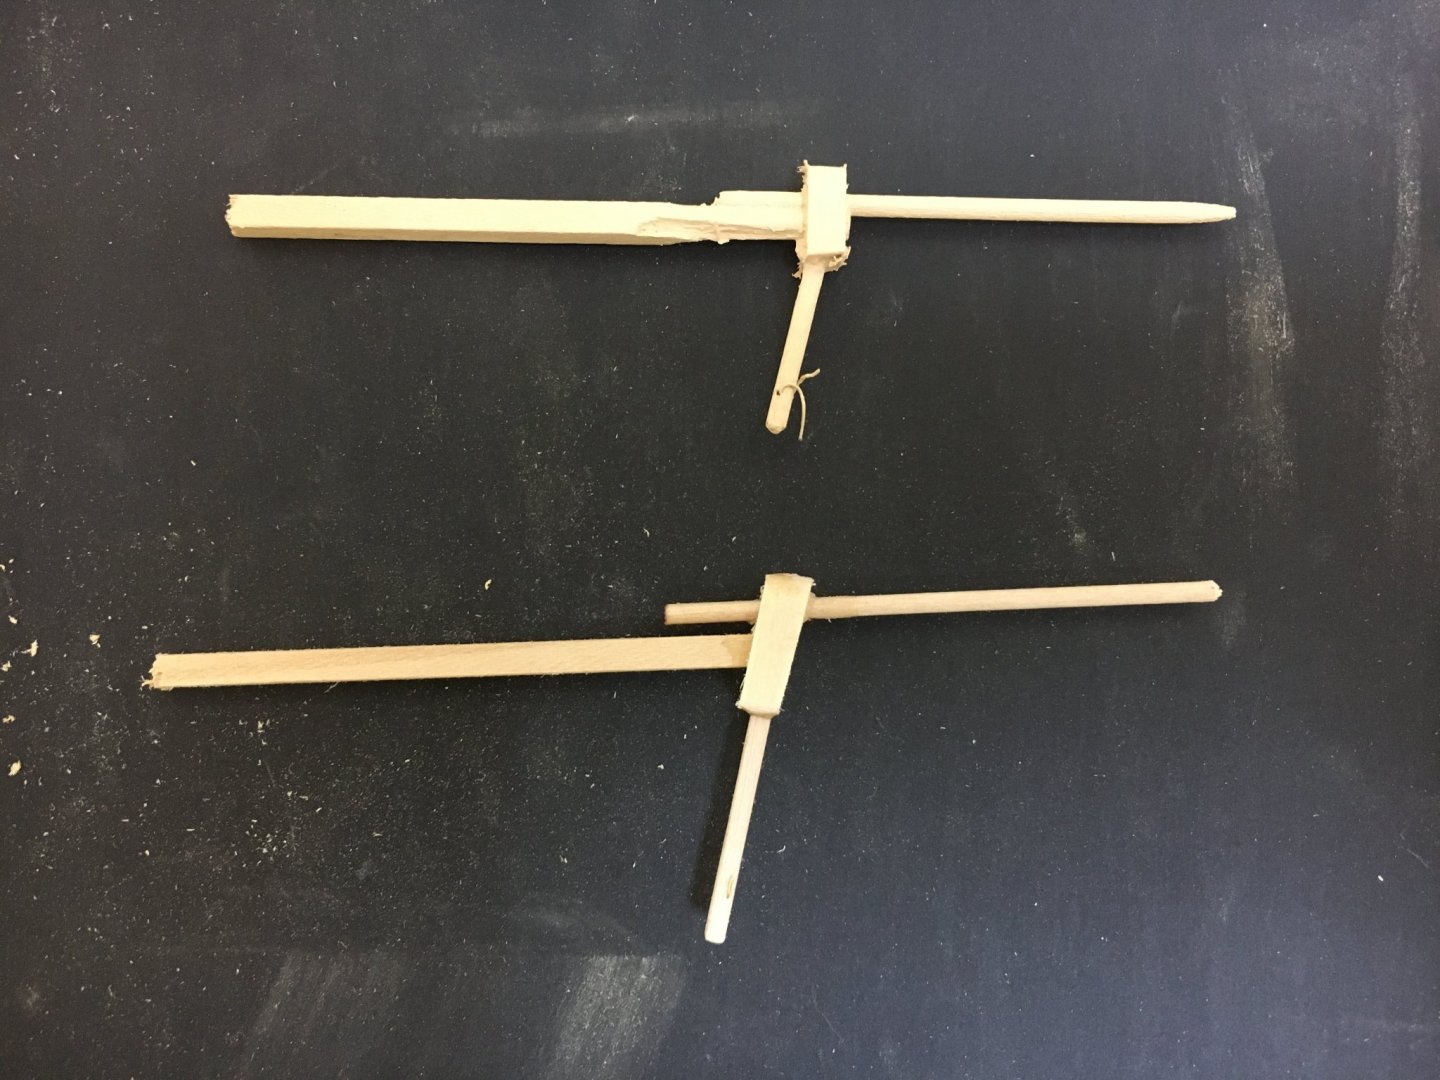
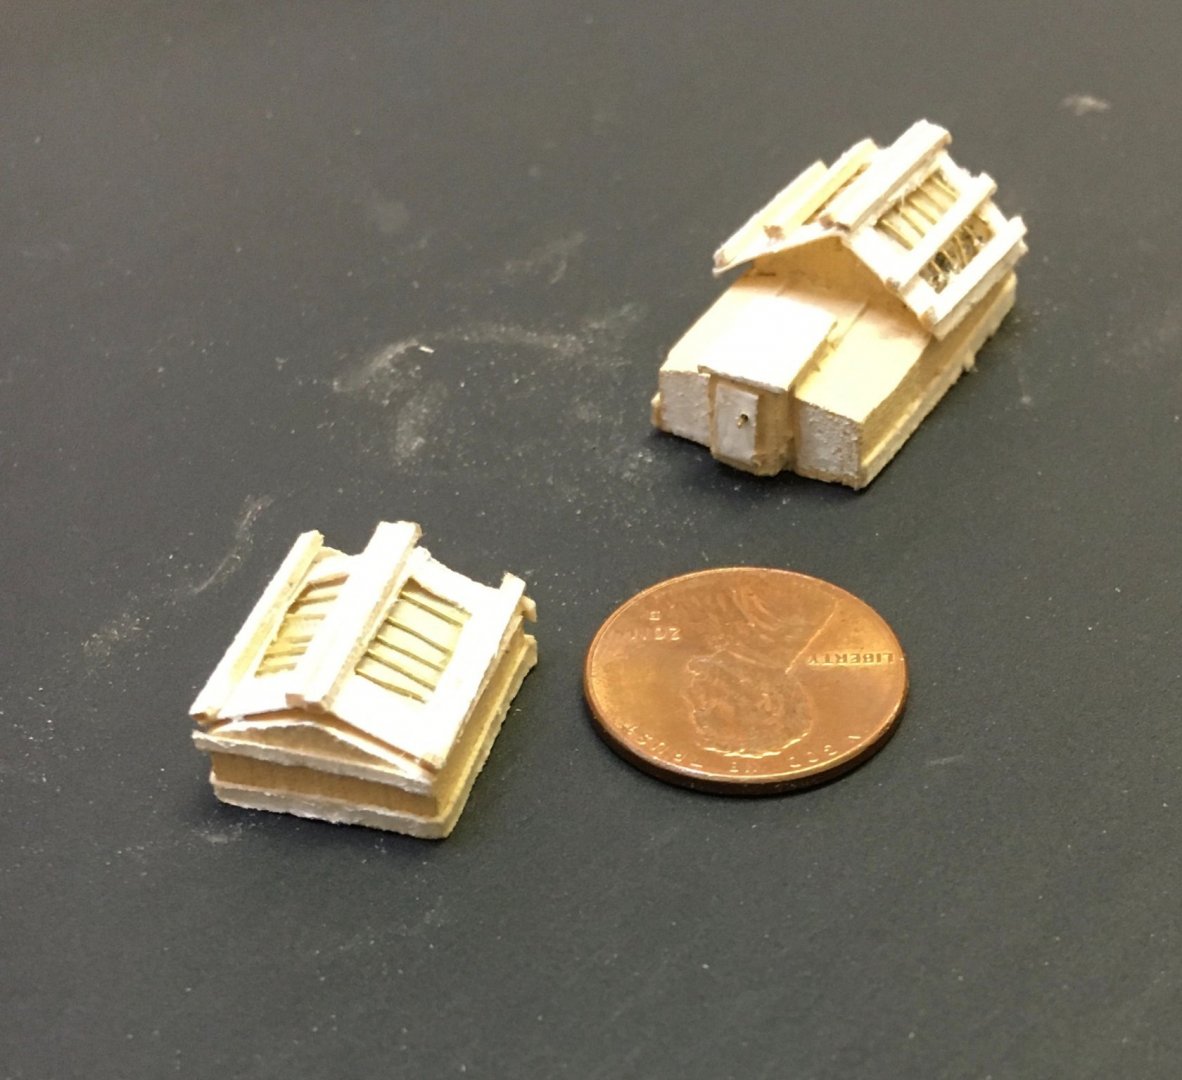
I bought some wood dough to help smooth the inside of the bulwarks before I paint the inside of them, then add the prepared decking, suppled with the kit. Meanwhile, I made an fitted the jaws for the mainmast boom and jib. They fit the mast snugly. I worked more on the forward companionway and one of the deck skylights. These look OK, viewed with the naked eye, fuzzy and rough in the picture.


-
Thanks!
-
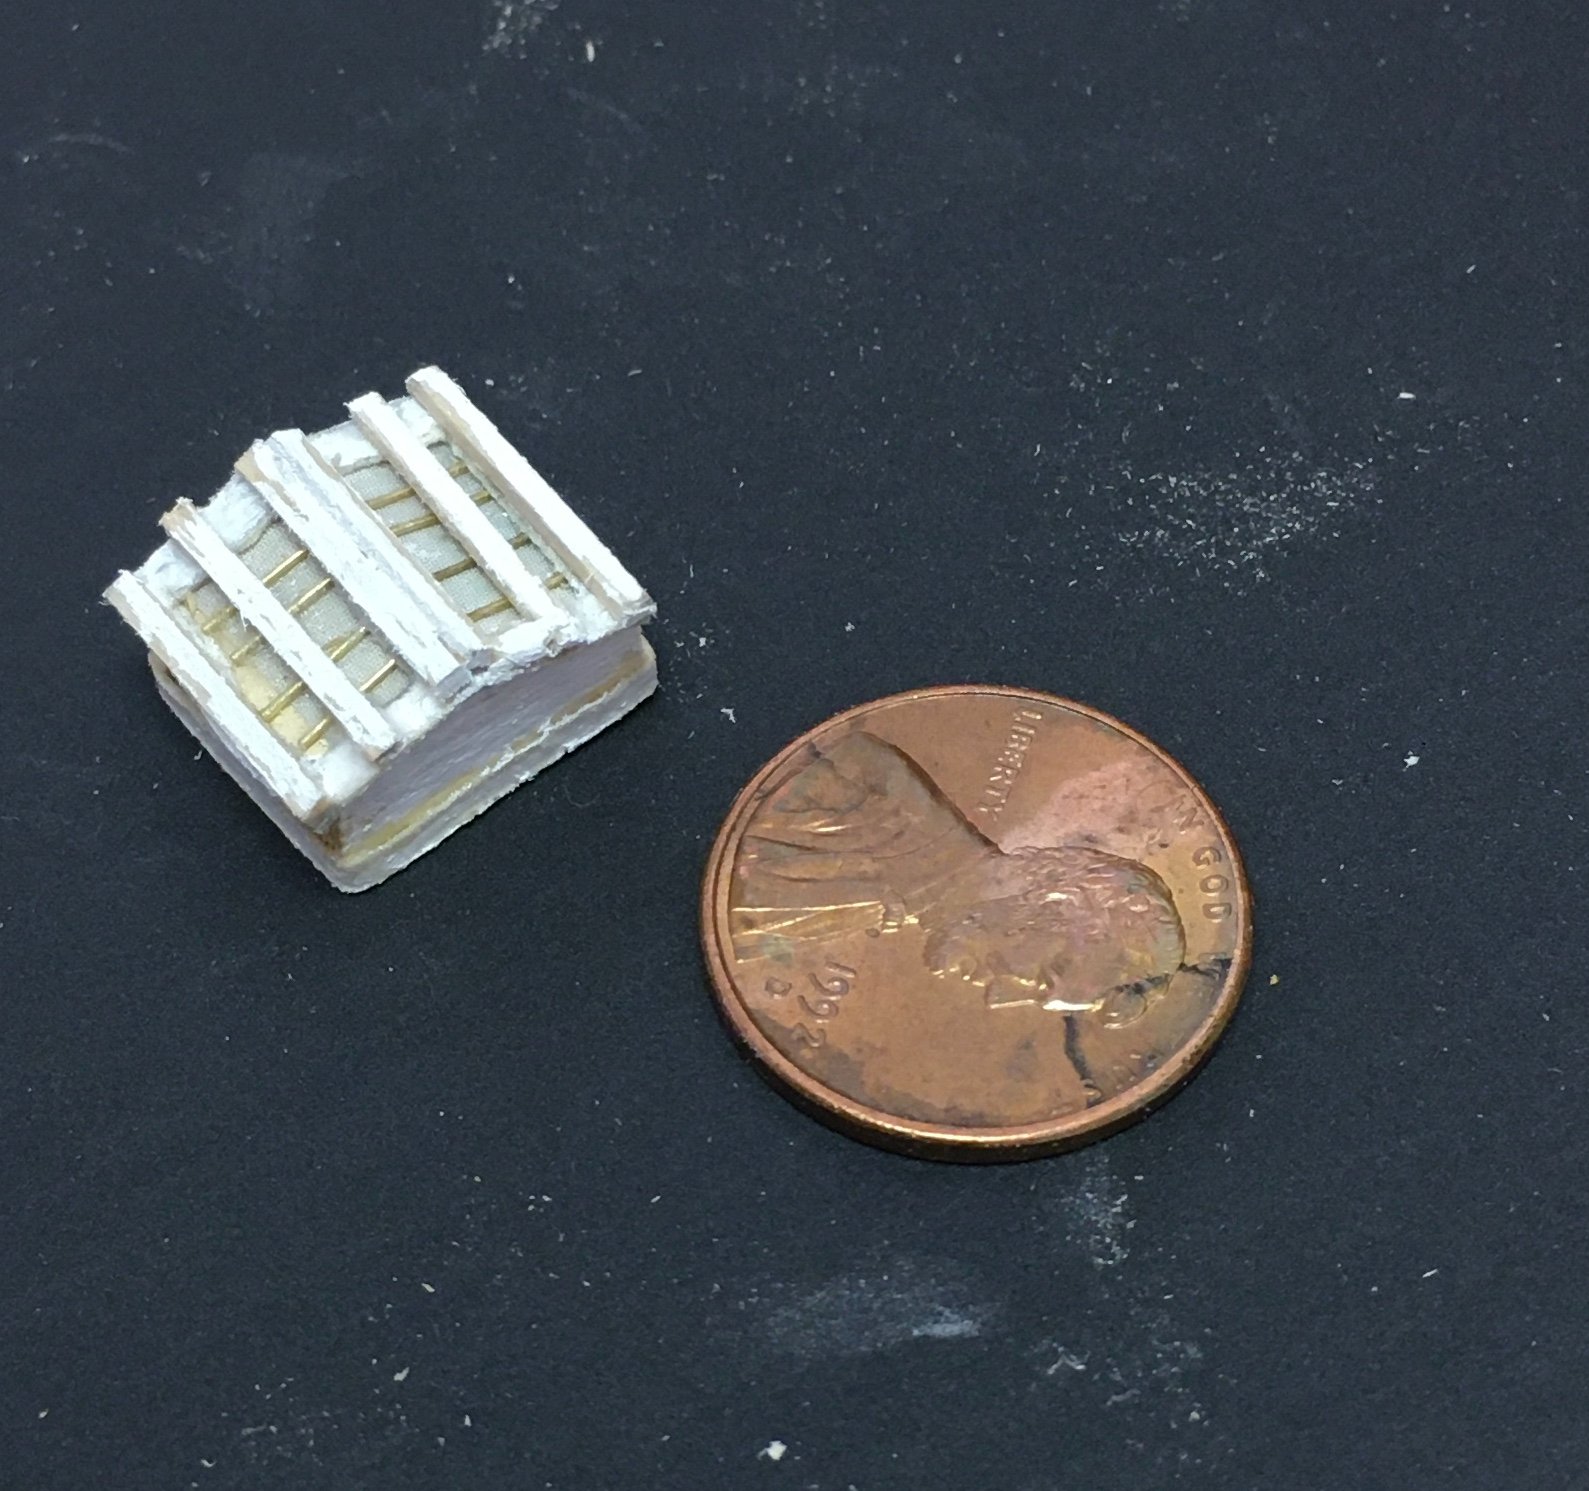
Skylight about as good as I can get it. If I do this again, I will use bone, rather than basswood, for the tiniest pieces. I am about ready to move on with the hull, after bringing the bulwarks to their final thickness. I took a Dremel tool to smooth the area at the stern.


-
Thanks for checking in ERS Rich. I look forward to following your build. 🙂
-
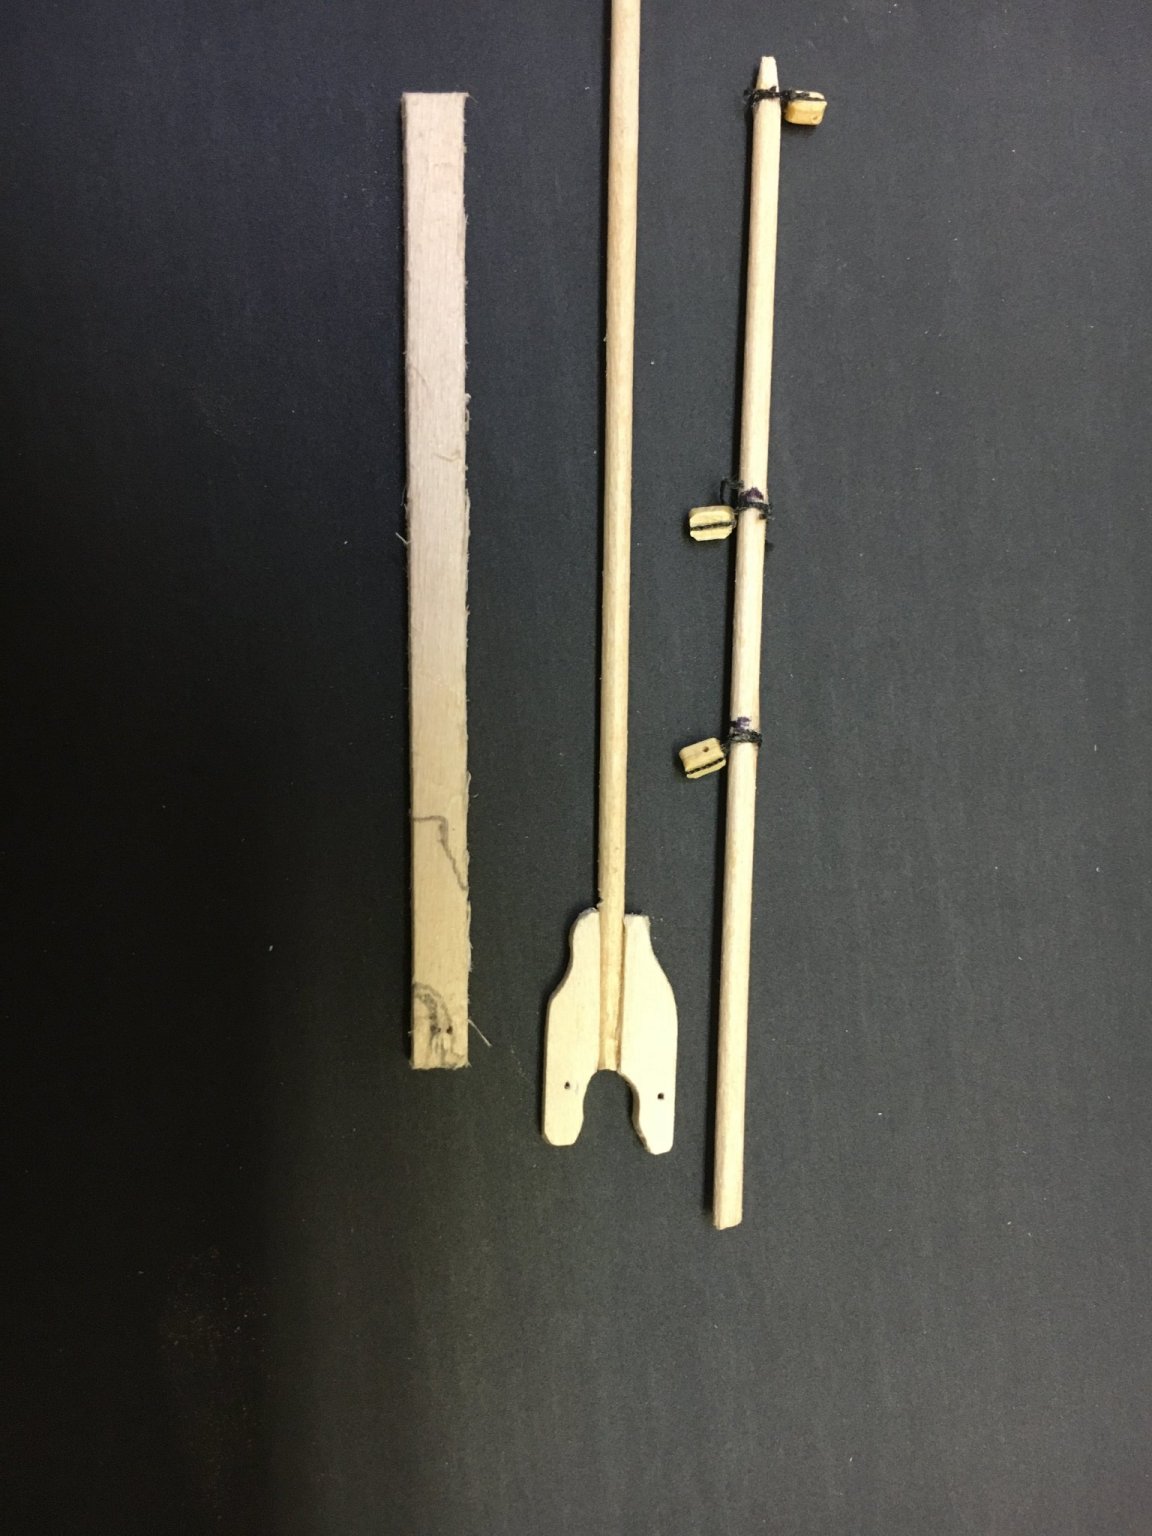
I added the yards to the foremast with clove hitches and am adding the halyards or lifts. Here I have the lower yard starboard side lift threaded in.