JLong
-
Posts
121 -
Joined
-
Last visited
3 Followers


-
 JLong reacted to a post in a topic:
Rattlesnake by Ed Ku20 - Model Shipways - 1:64
JLong reacted to a post in a topic:
Rattlesnake by Ed Ku20 - Model Shipways - 1:64
-
JLong reacted to a post in a topic:
Rattlesnake by Ed Ku20 - Model Shipways - 1:64
-
JLong reacted to a post in a topic:
Speedwell Battle Station Kit 1752 by CiscoH - Syren Ship Model Company - 3/8" or 1:32
-
RossR reacted to a post in a topic:
Fair American by JLong - Model Shipways - 1:48
-
JLong reacted to a post in a topic:
Rattlesnake by Ed Ku20 - Model Shipways - 1:64
-
Dave_E reacted to a post in a topic:
Rattlesnake by Ed Ku20 - Model Shipways - 1:64
-
Dave_E reacted to a post in a topic:
Rattlesnake by Ed Ku20 - Model Shipways - 1:64
-
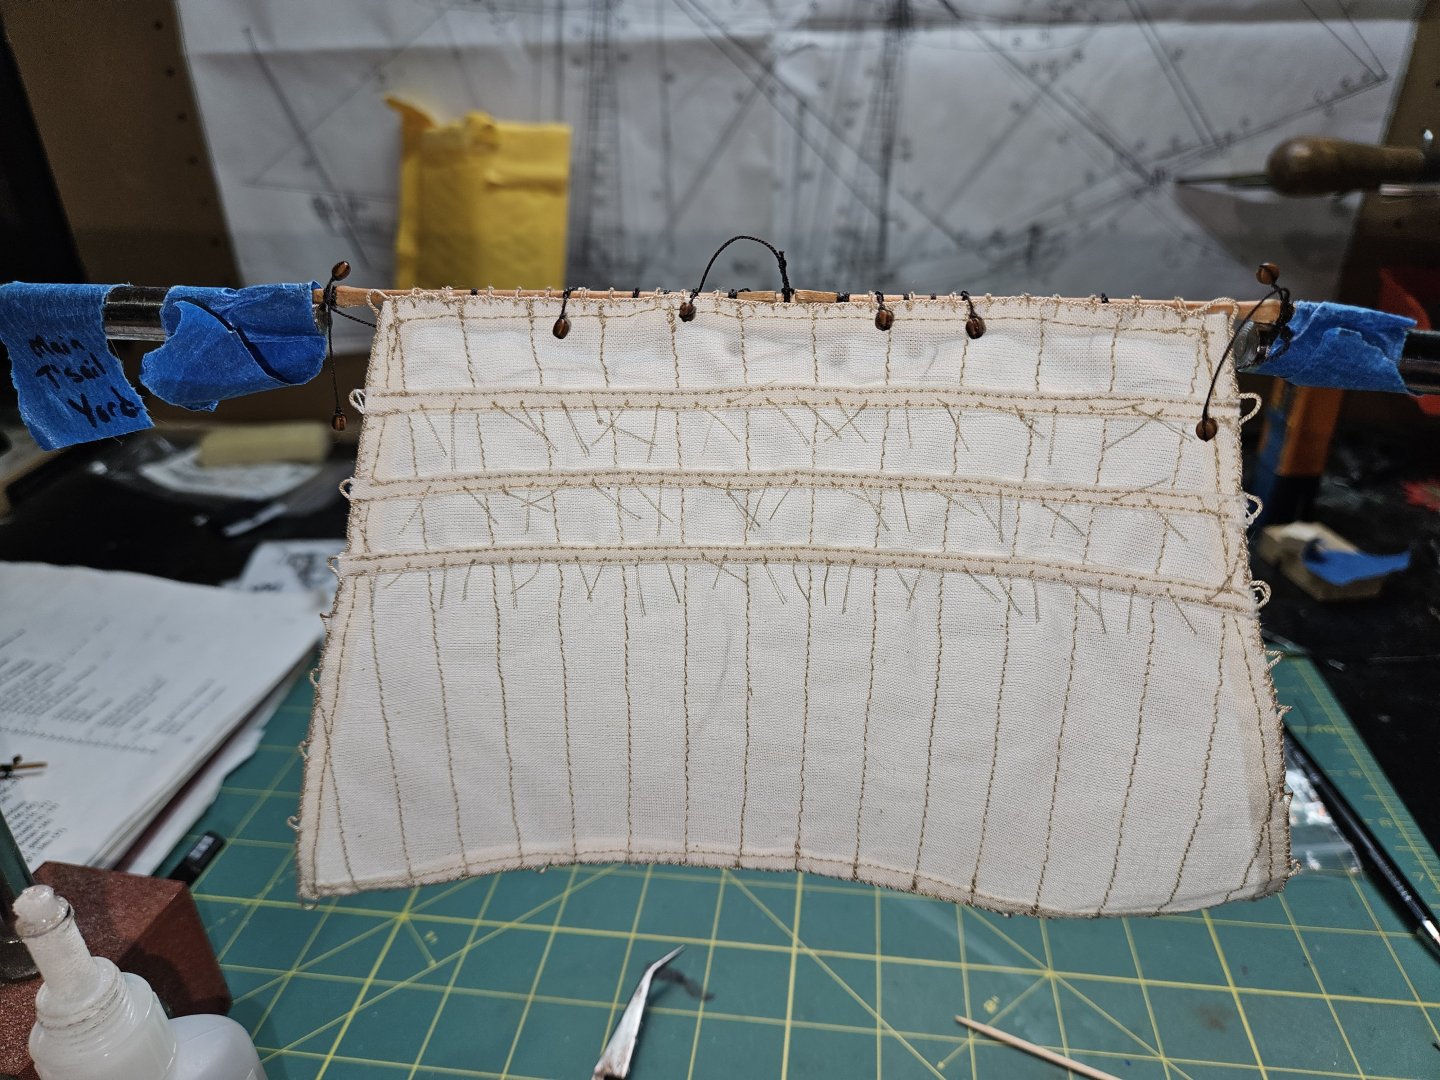
 My kit for Fair American doesn't come with sails, but I'm currently rigging them. Of course, it adds 2x the amount of rigging to do, but I wanted to challenge myself. Good luck!
 -
JLong reacted to a post in a topic:
Rattlesnake by Ed Ku20 - Model Shipways - 1:64
-
Ed, Nice job on planning out all the rigging, in an organized manner. You'll have no trouble figuring out what goes where and how; I've struggled with that on my build. I too, really enjoy the rigging - its challenging and intricate and cool looking! Keep up the great work! -Jason-
-
JLong reacted to a post in a topic:
Rattlesnake by Ed Ku20 - Model Shipways - 1:64
-
Ryland Craze reacted to a post in a topic:
Fair American by JLong - Model Shipways - 1:48
-
ccoyle reacted to a post in a topic:
Fair American by JLong - Model Shipways - 1:48
-
Coyote_6 reacted to a post in a topic:
Fair American by JLong - Model Shipways - 1:48
-
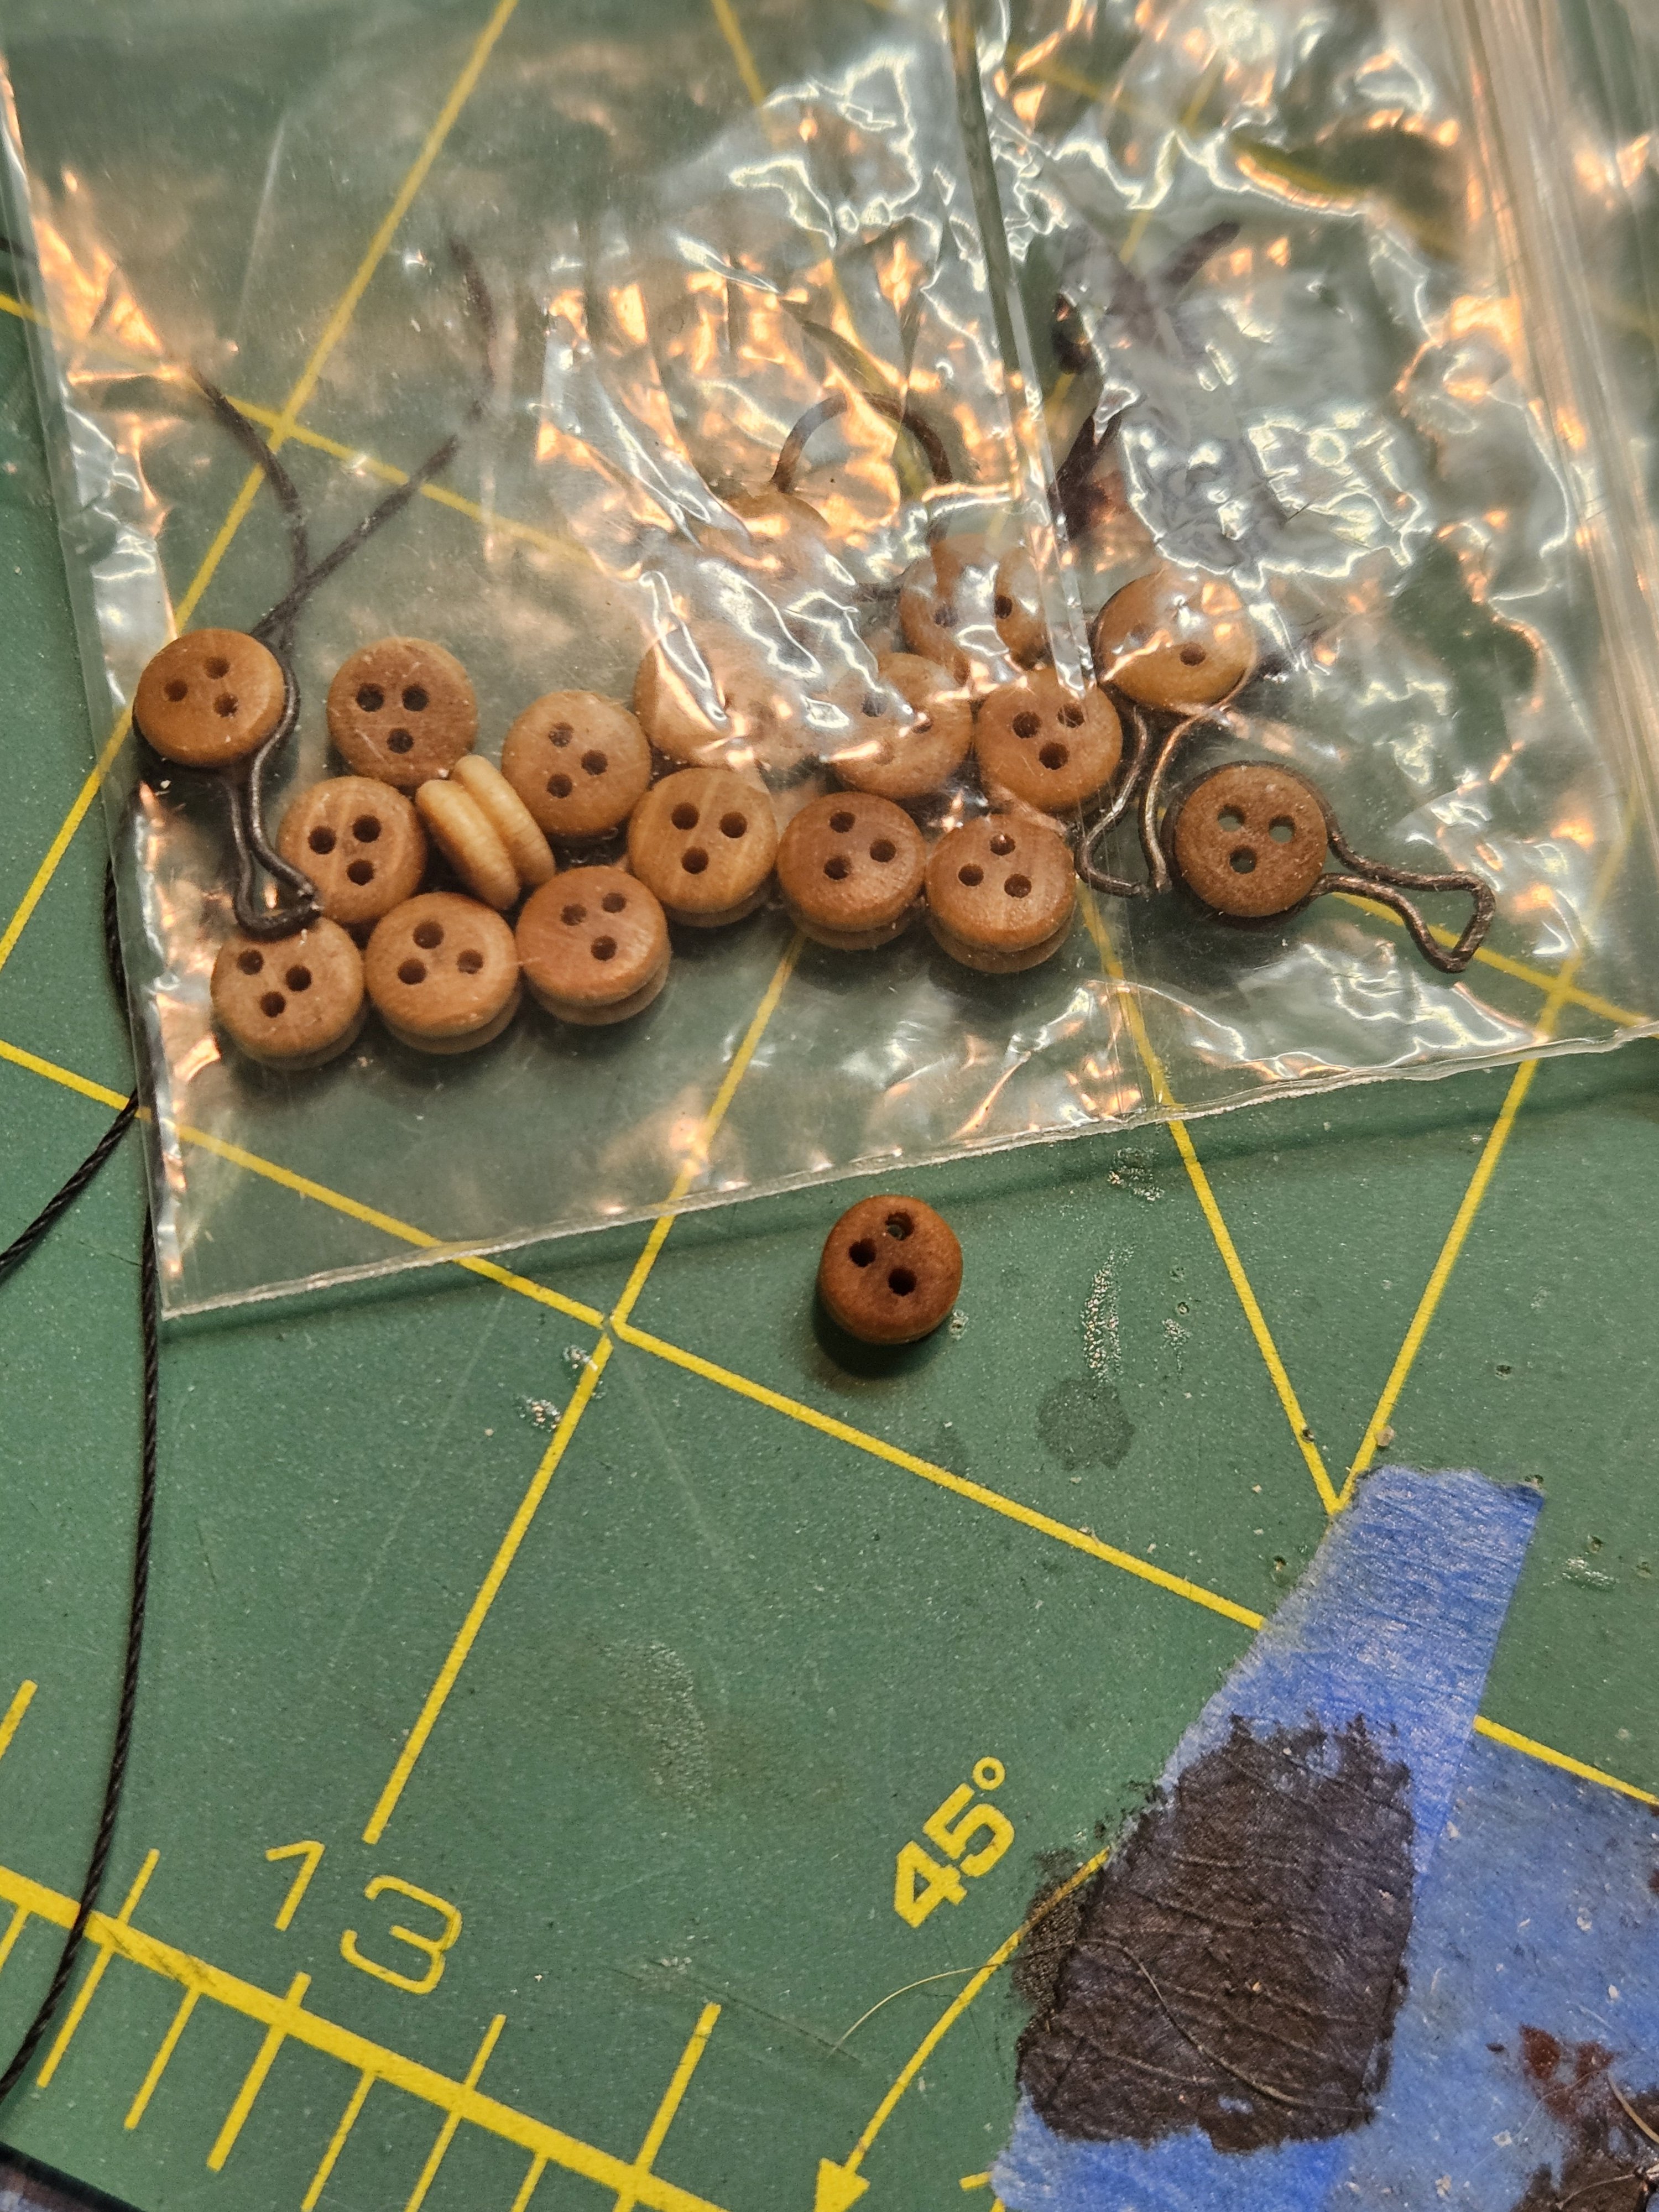
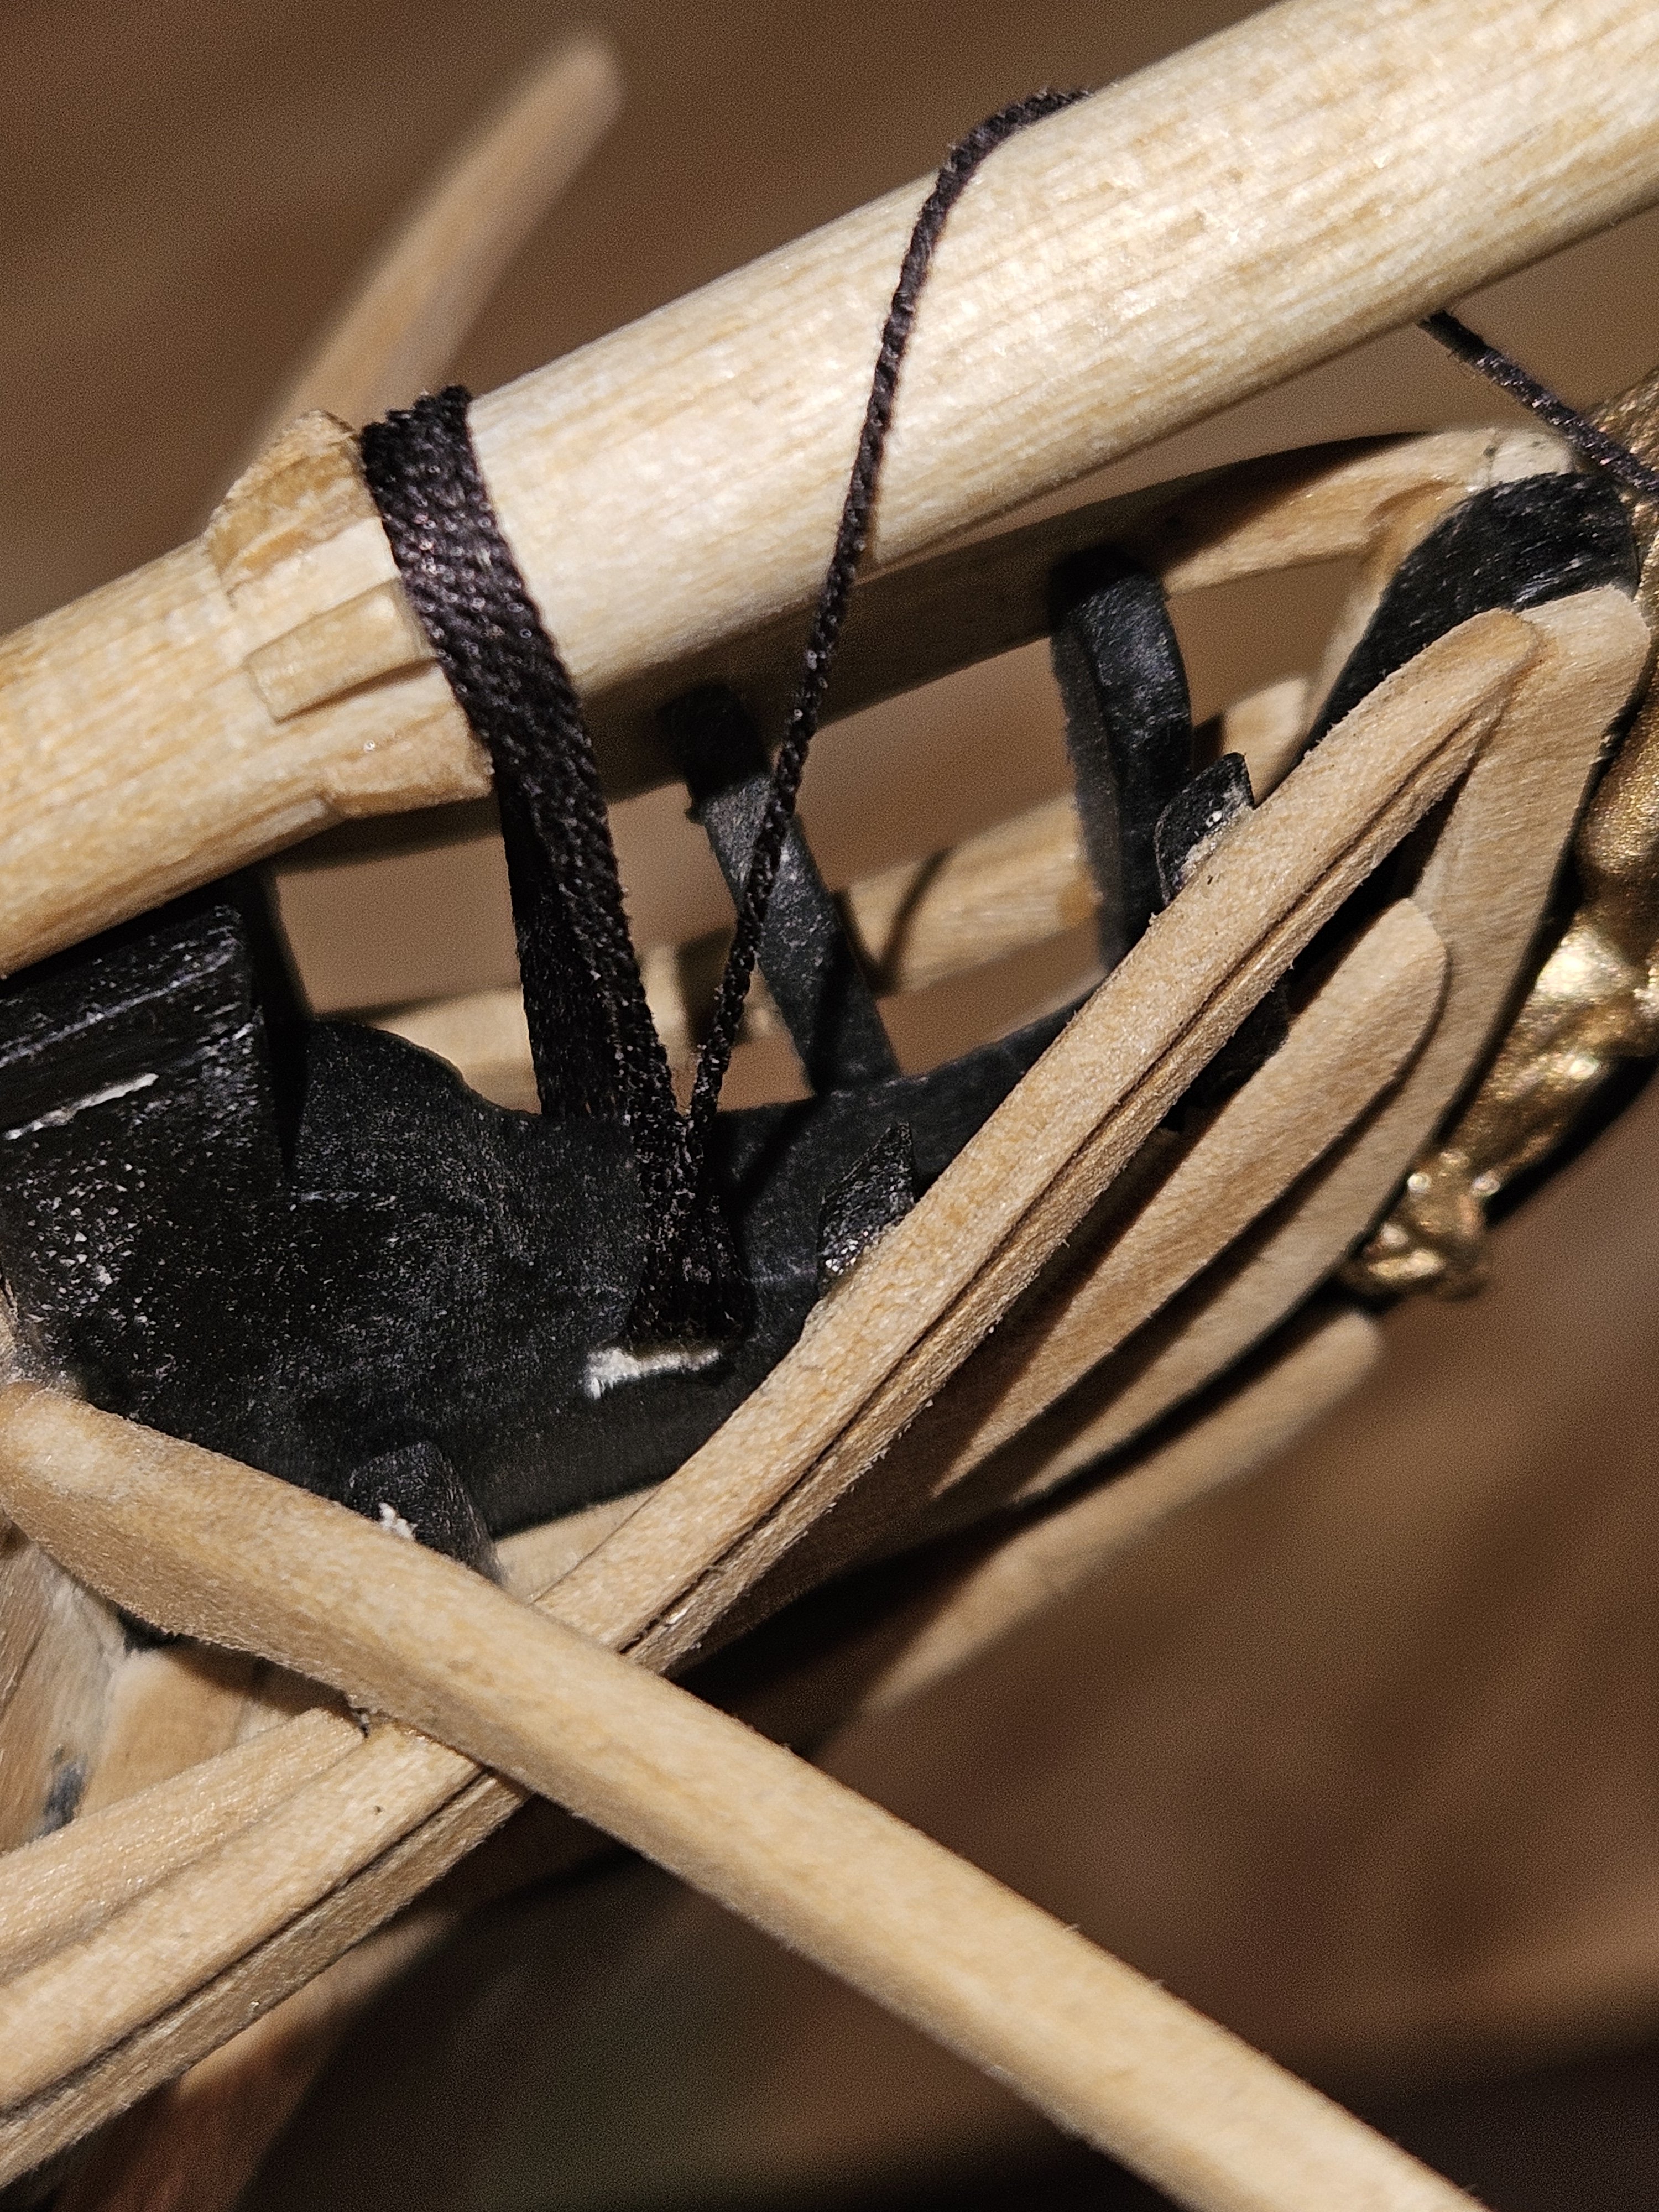
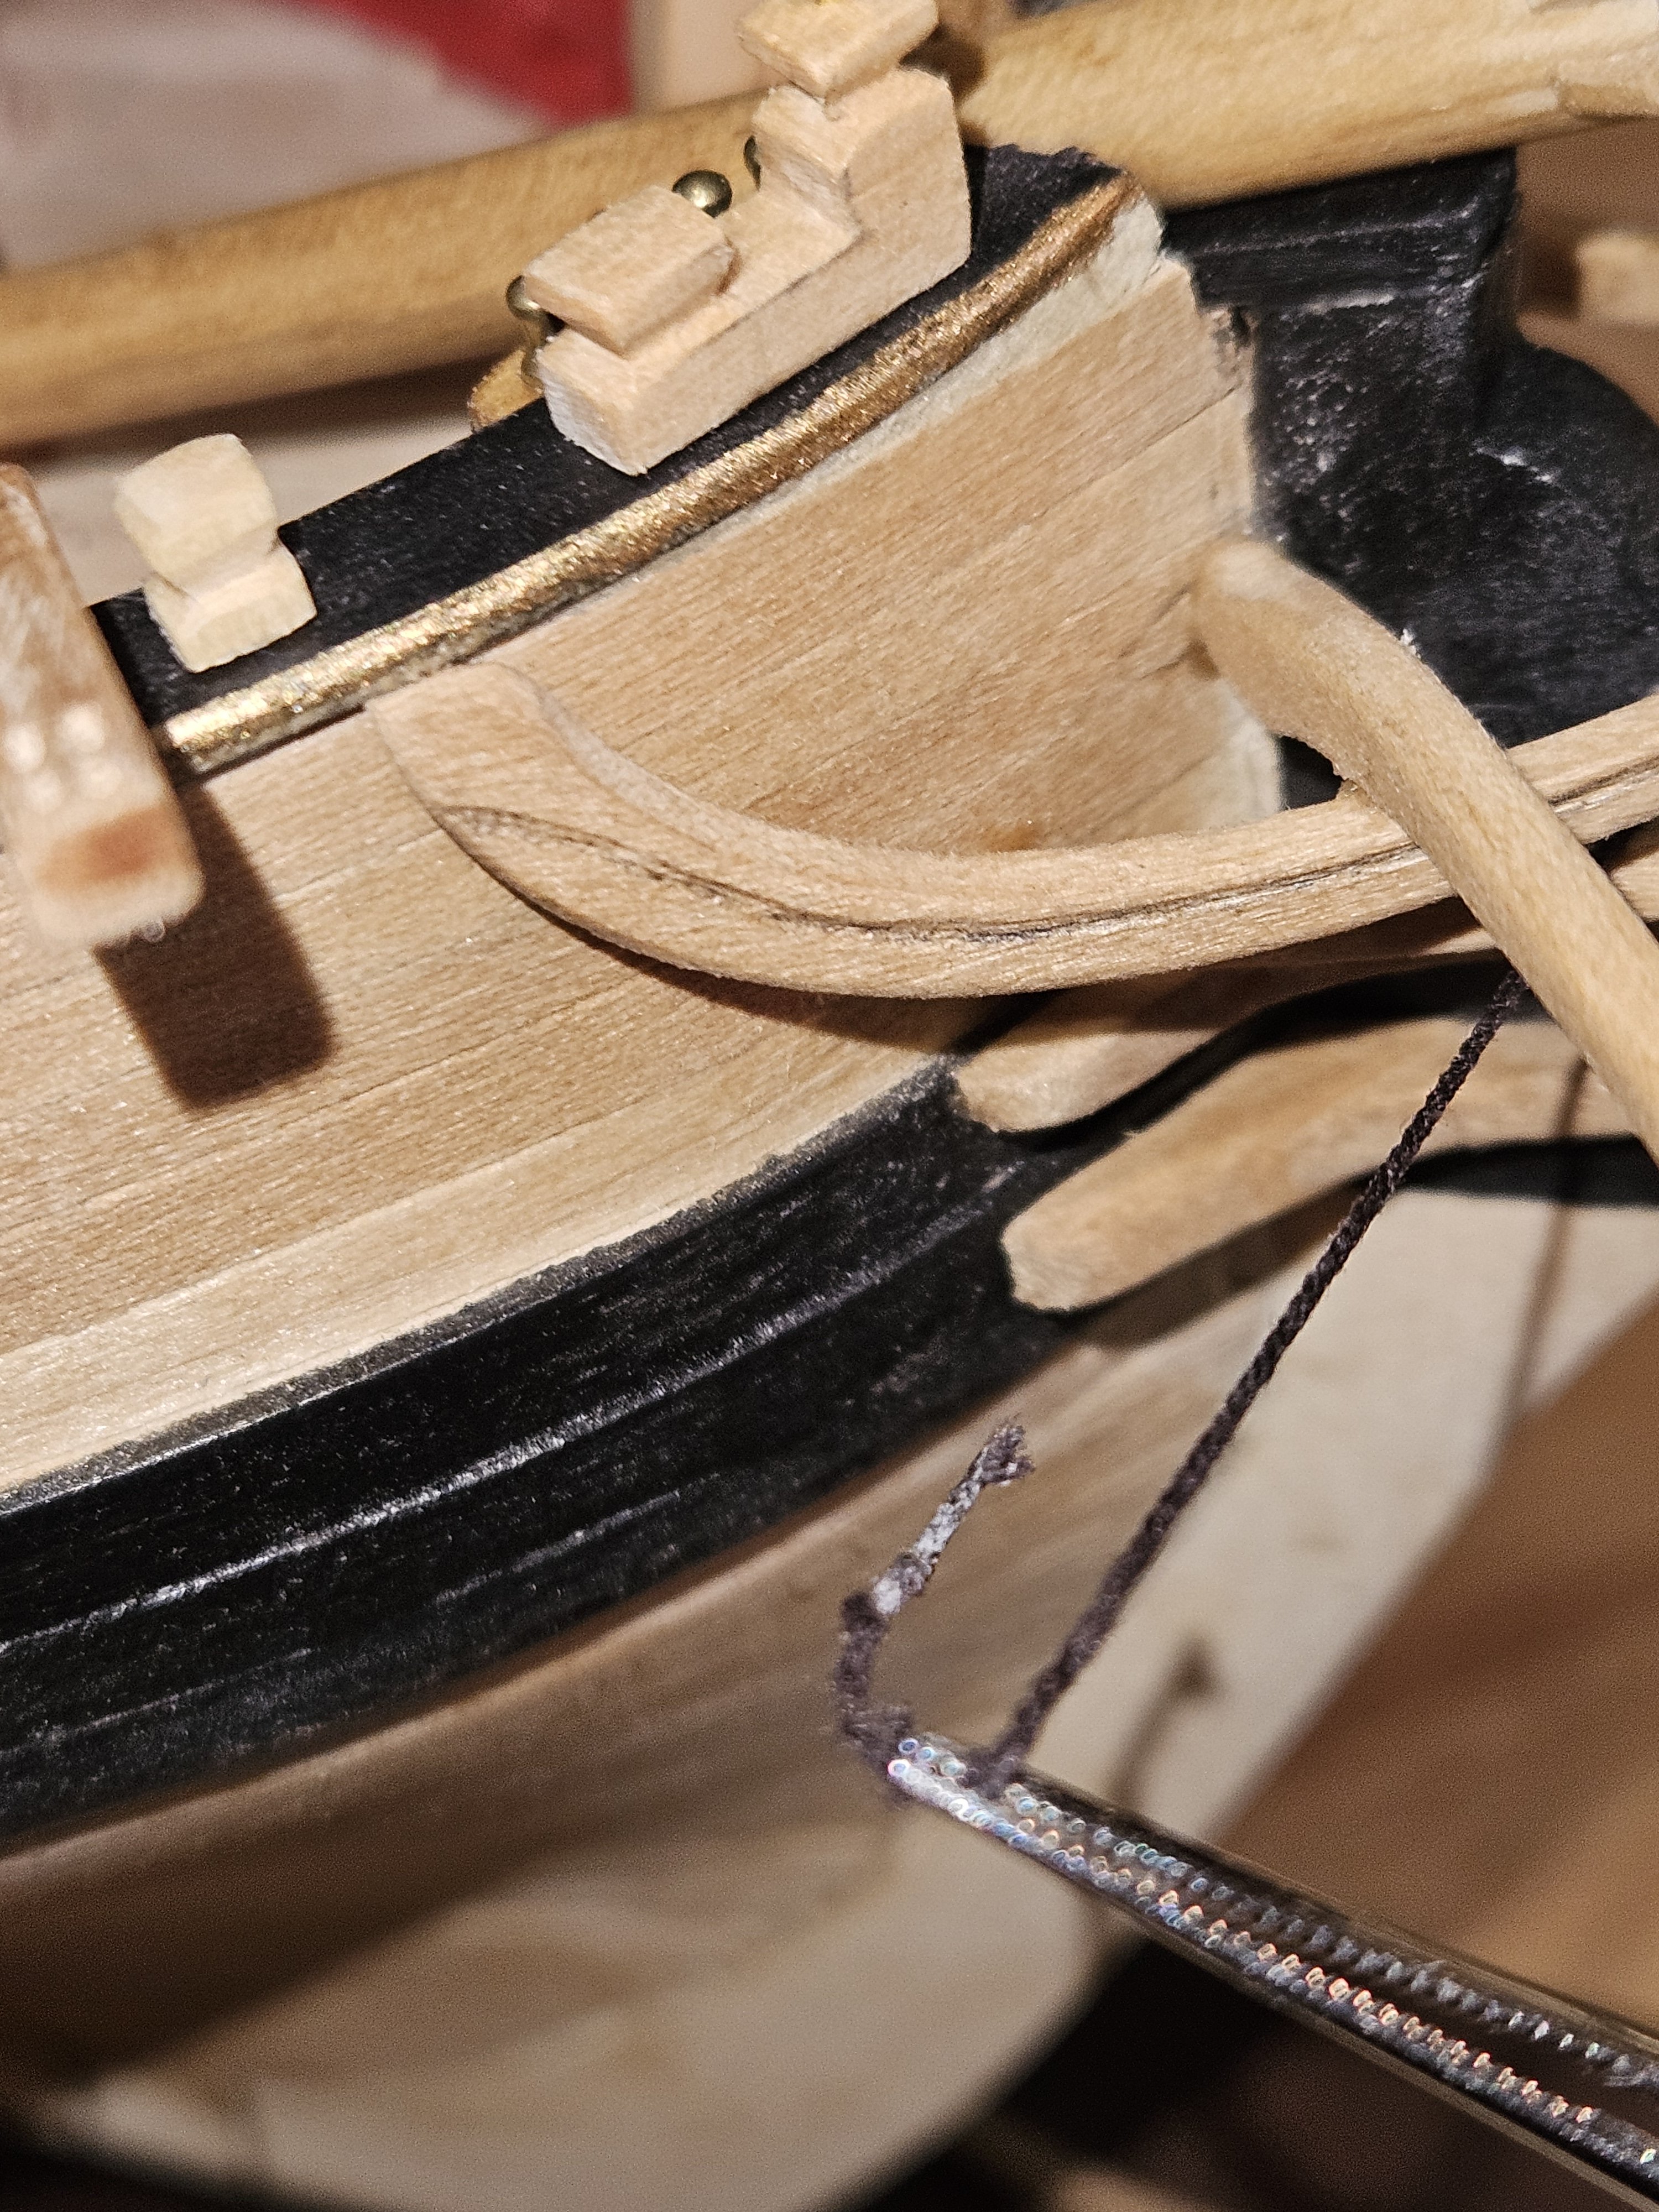
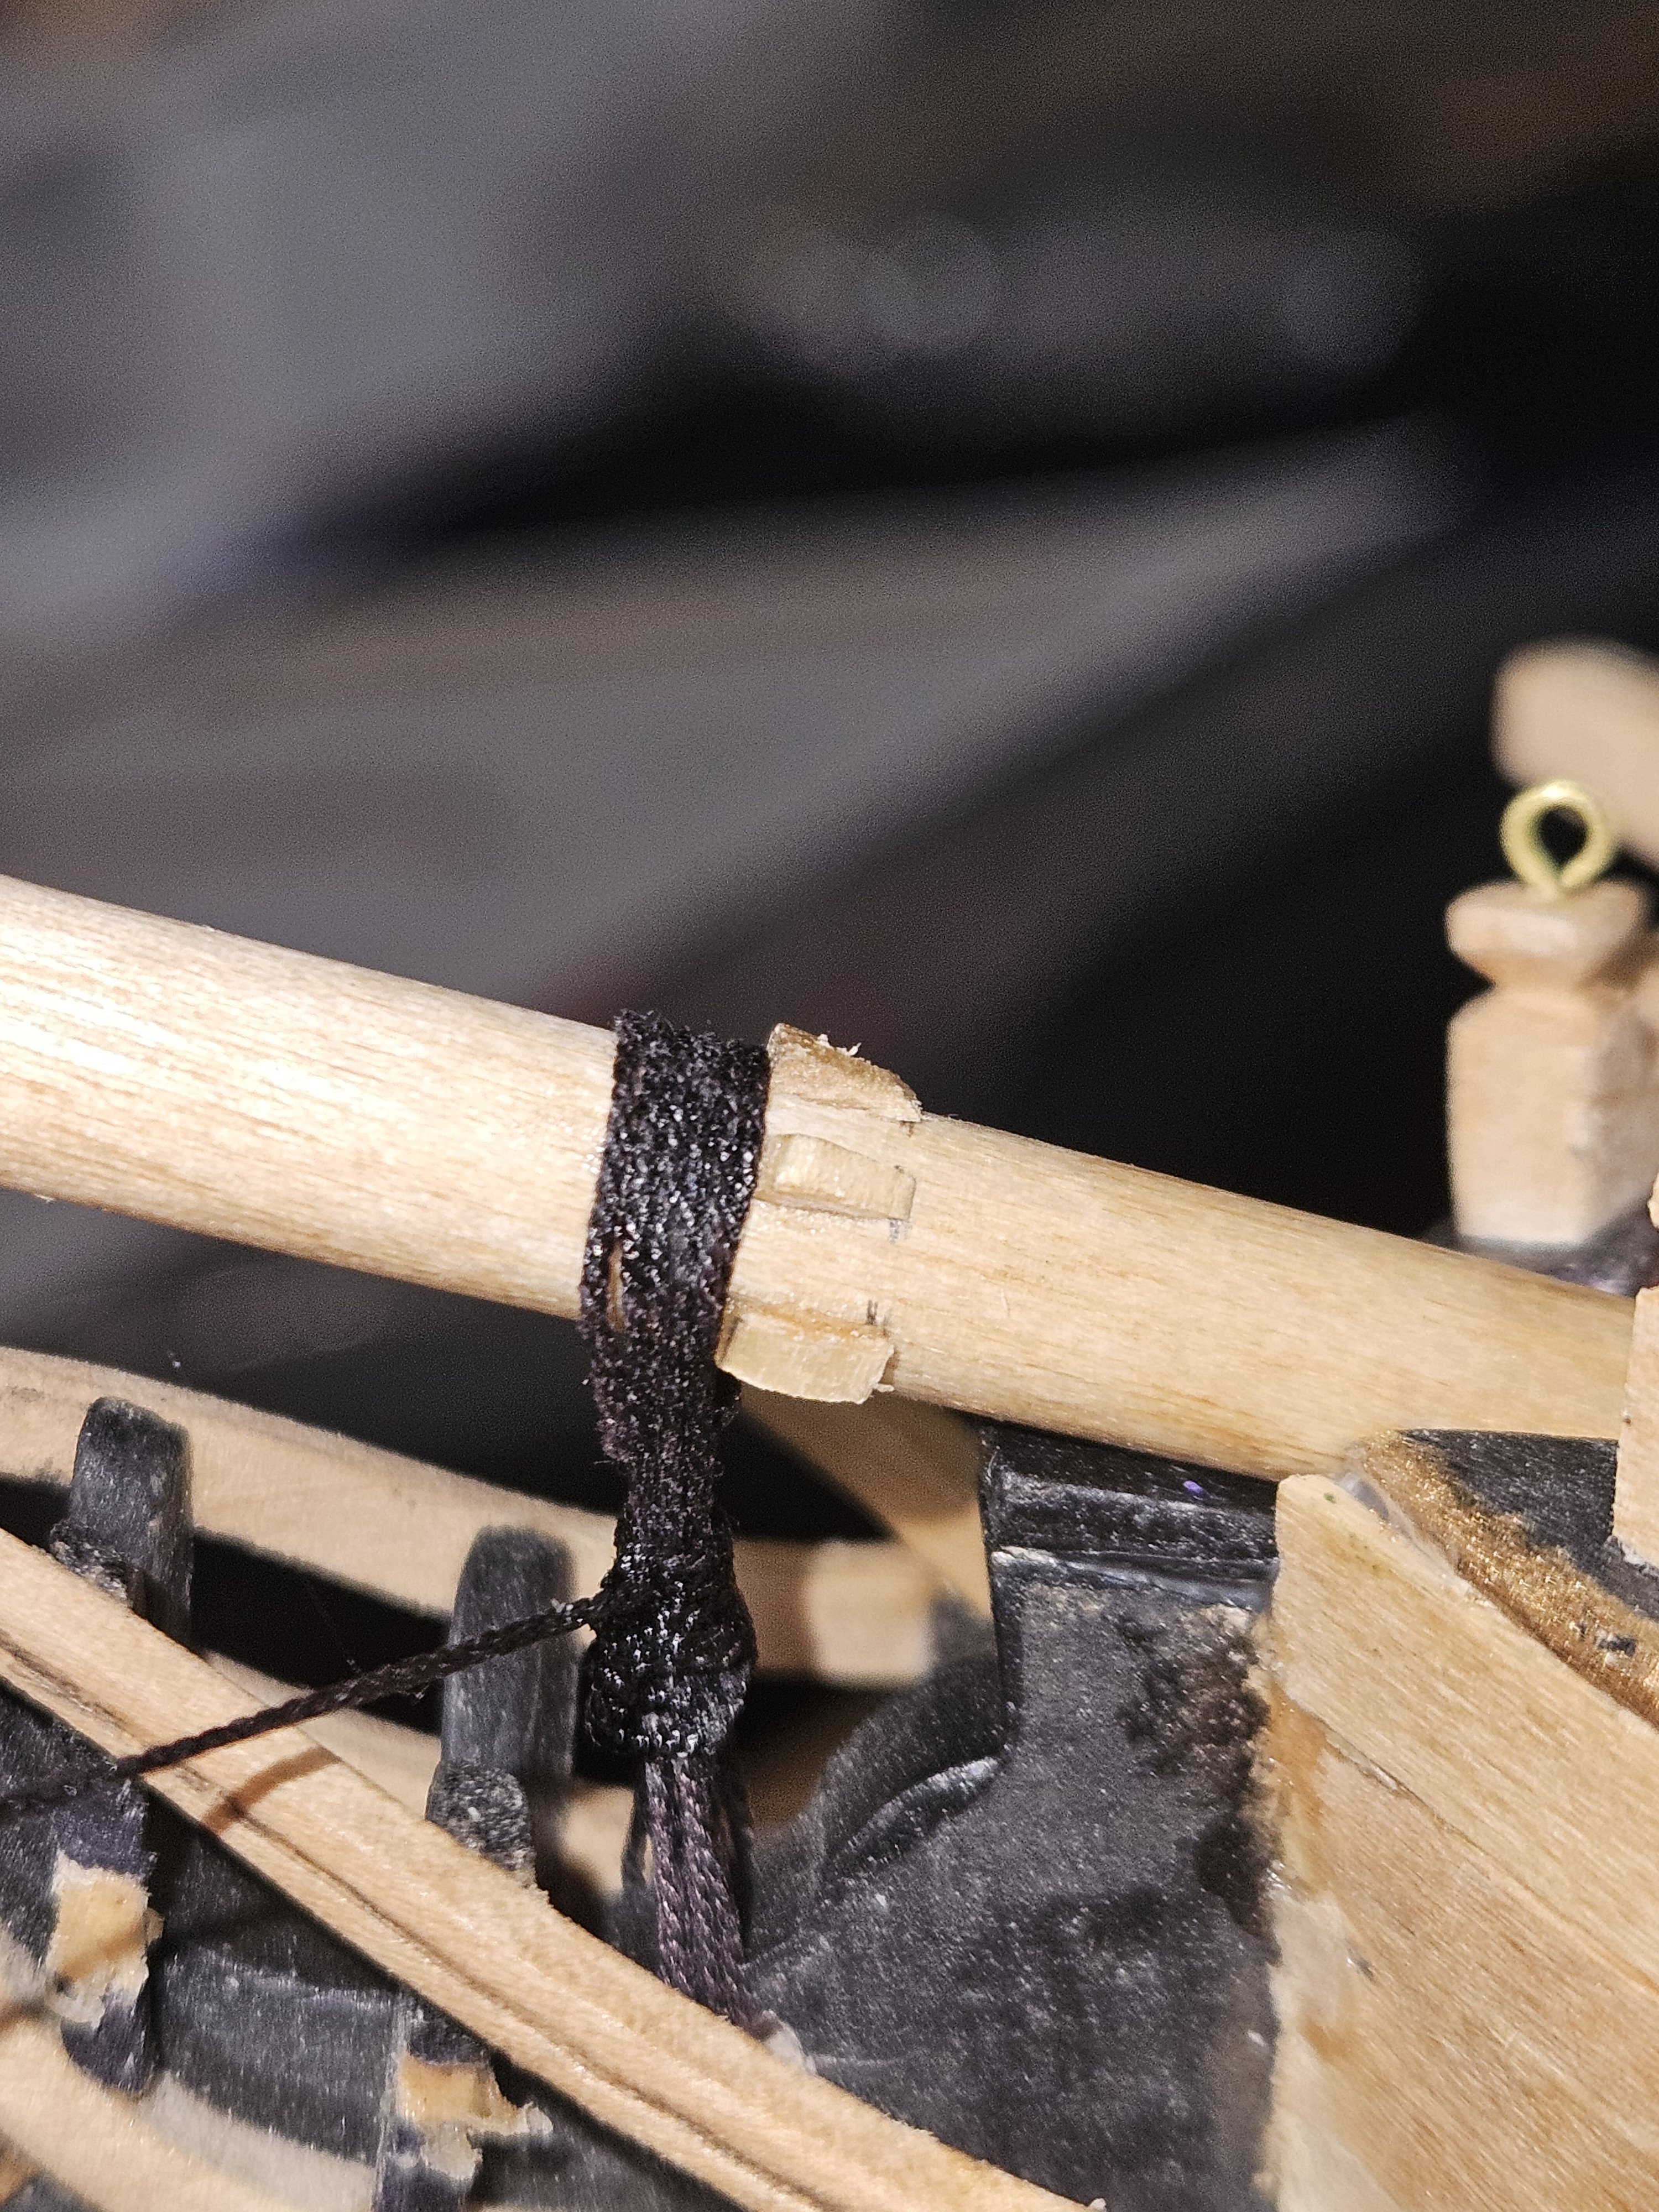
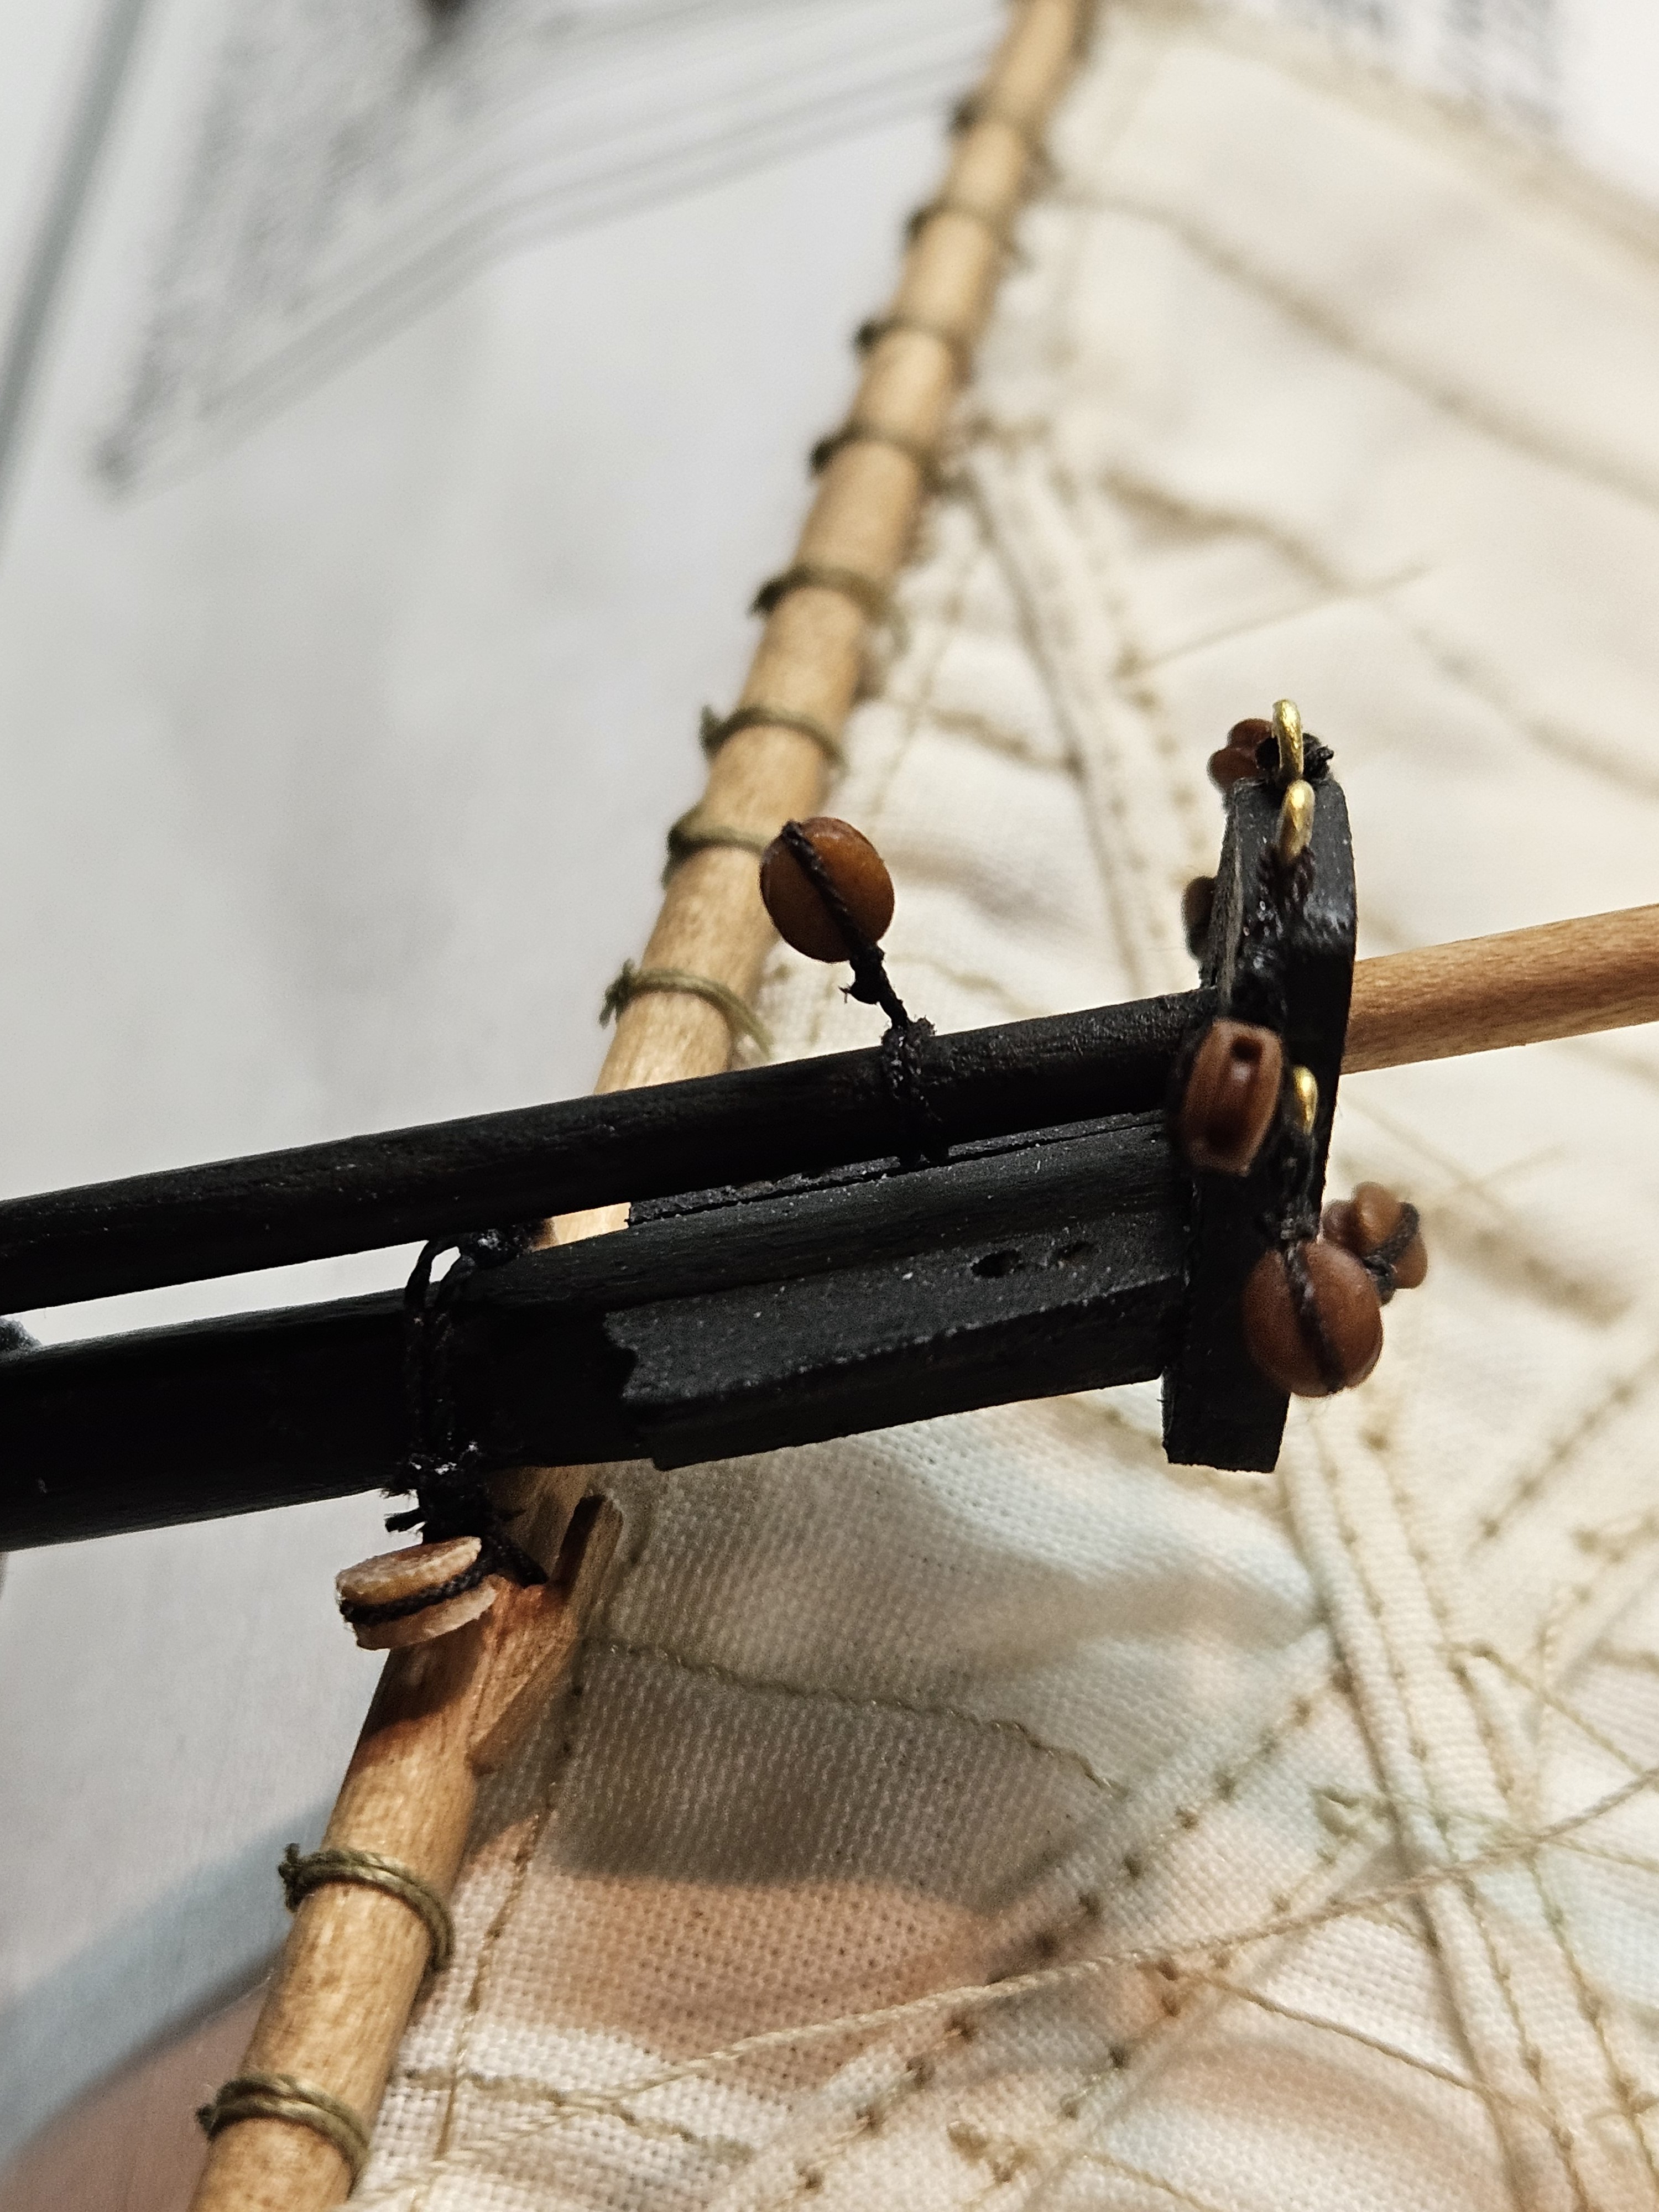
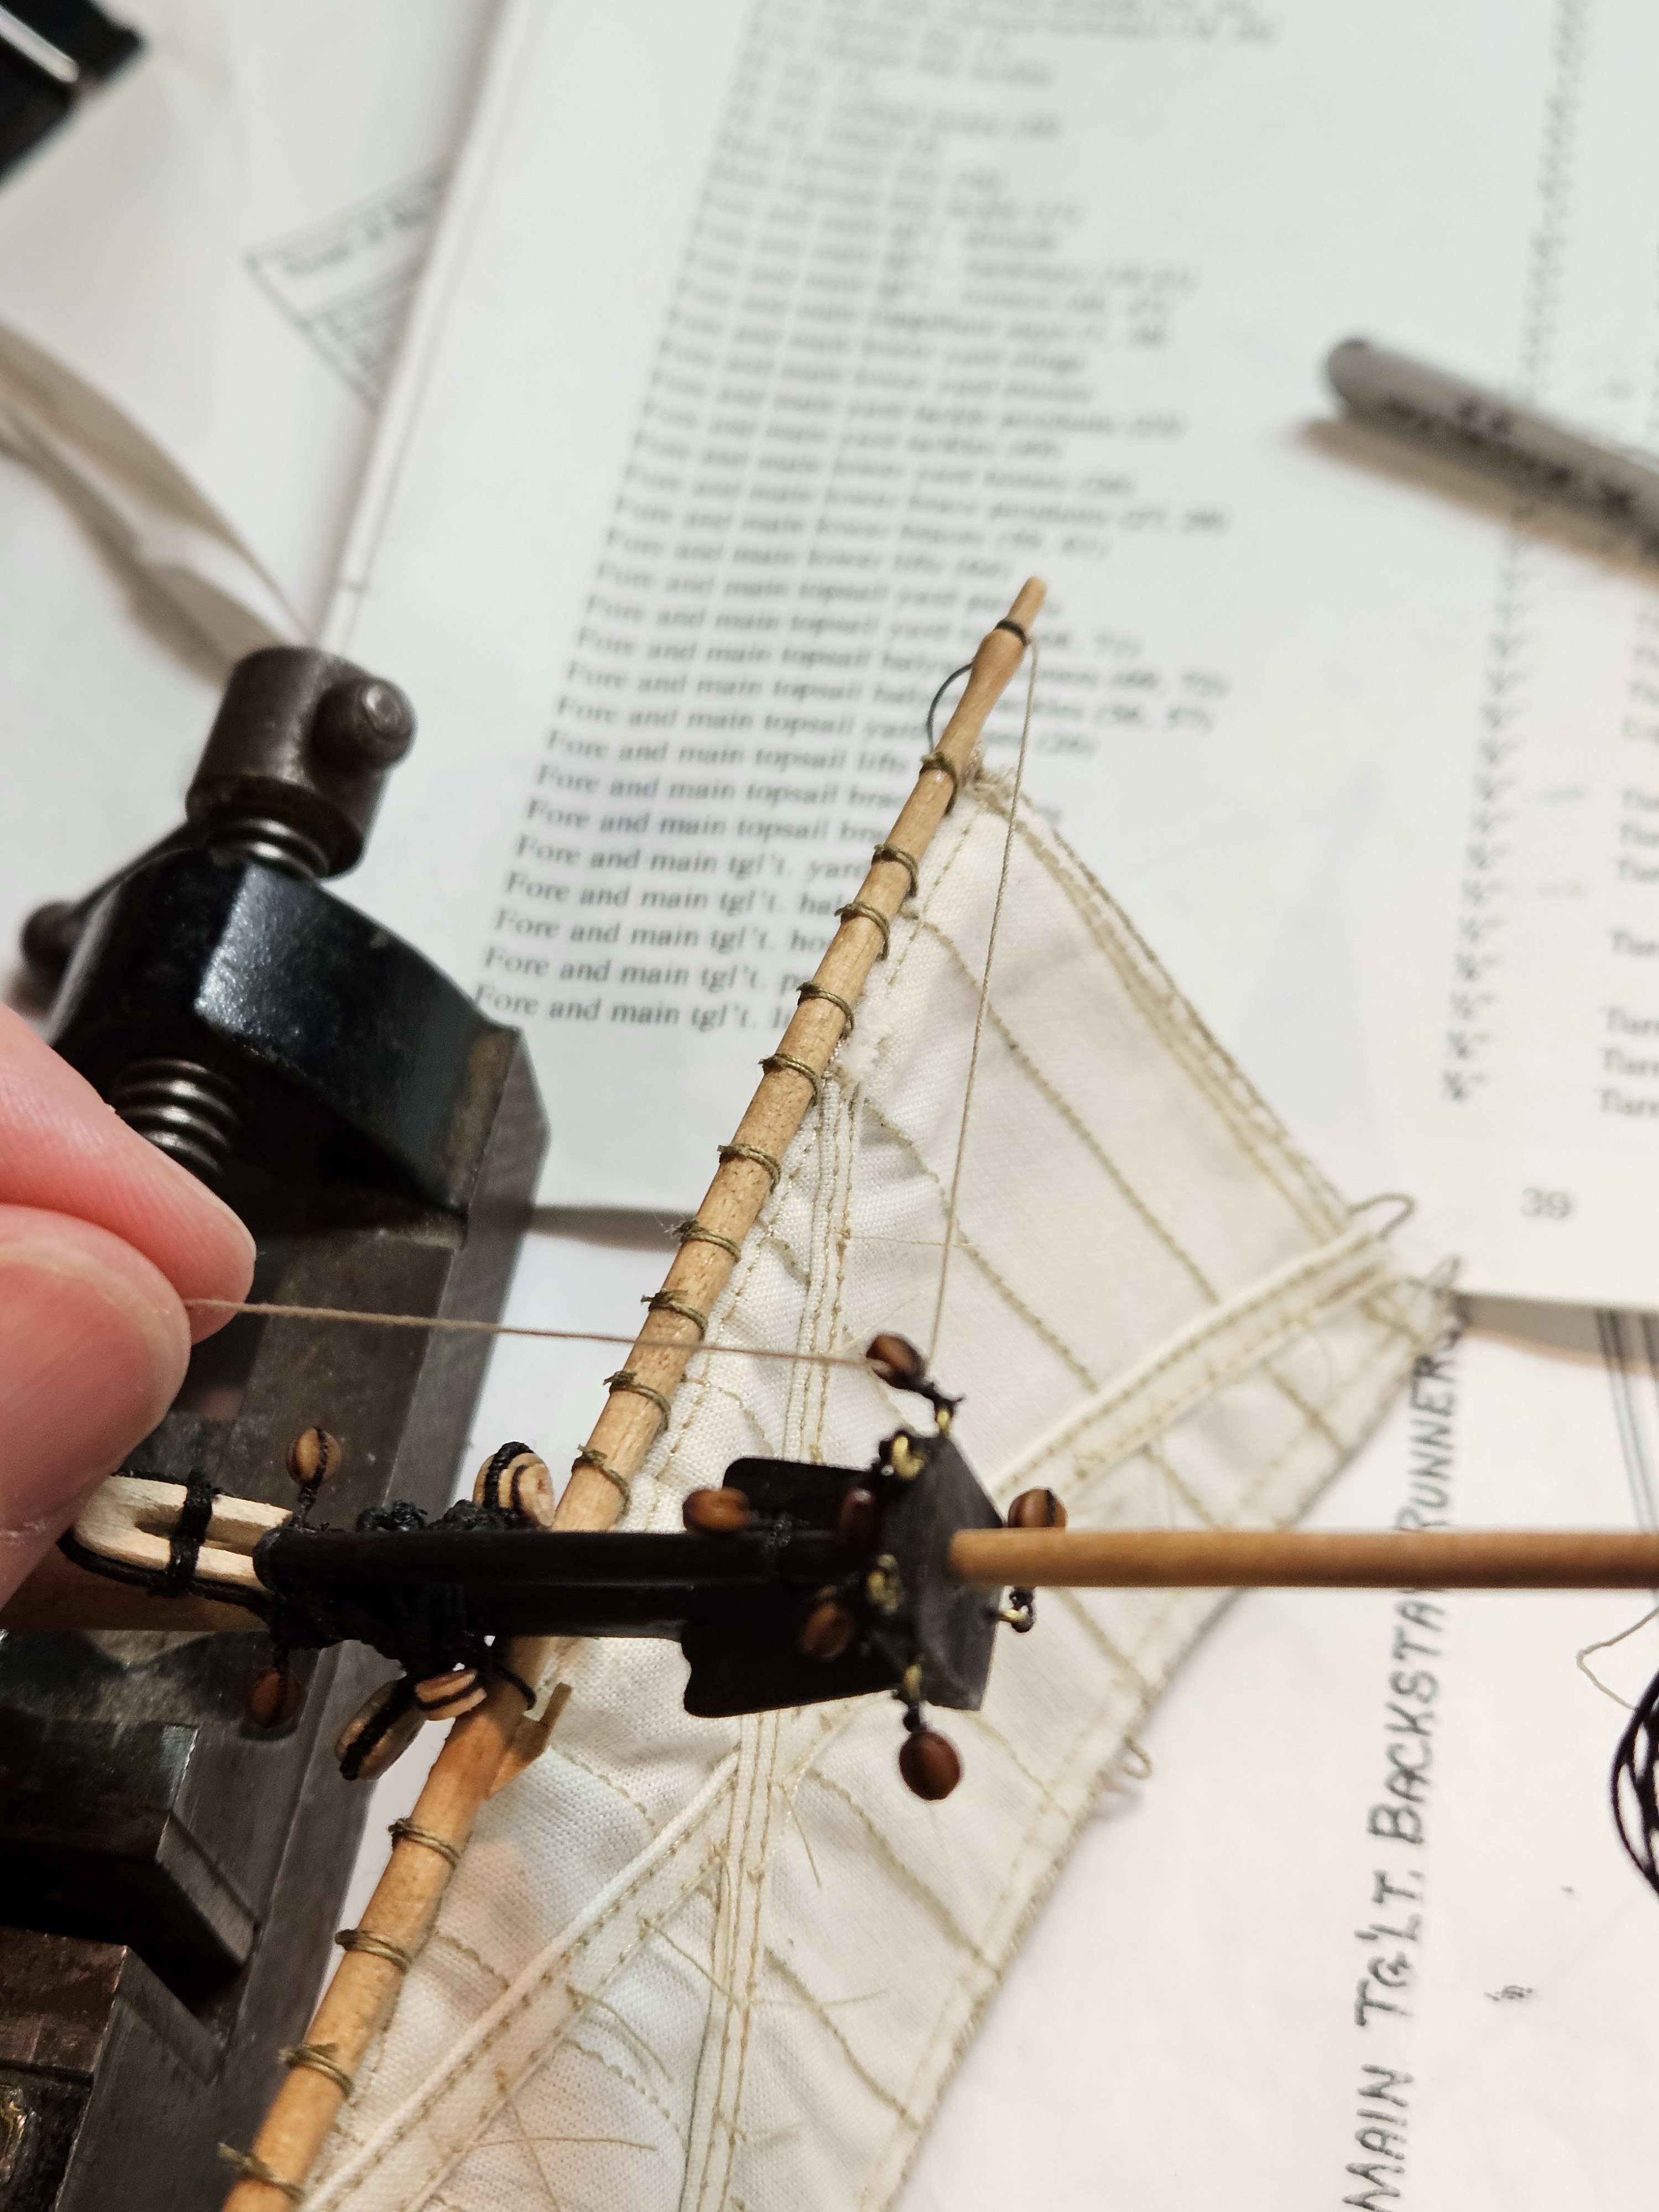
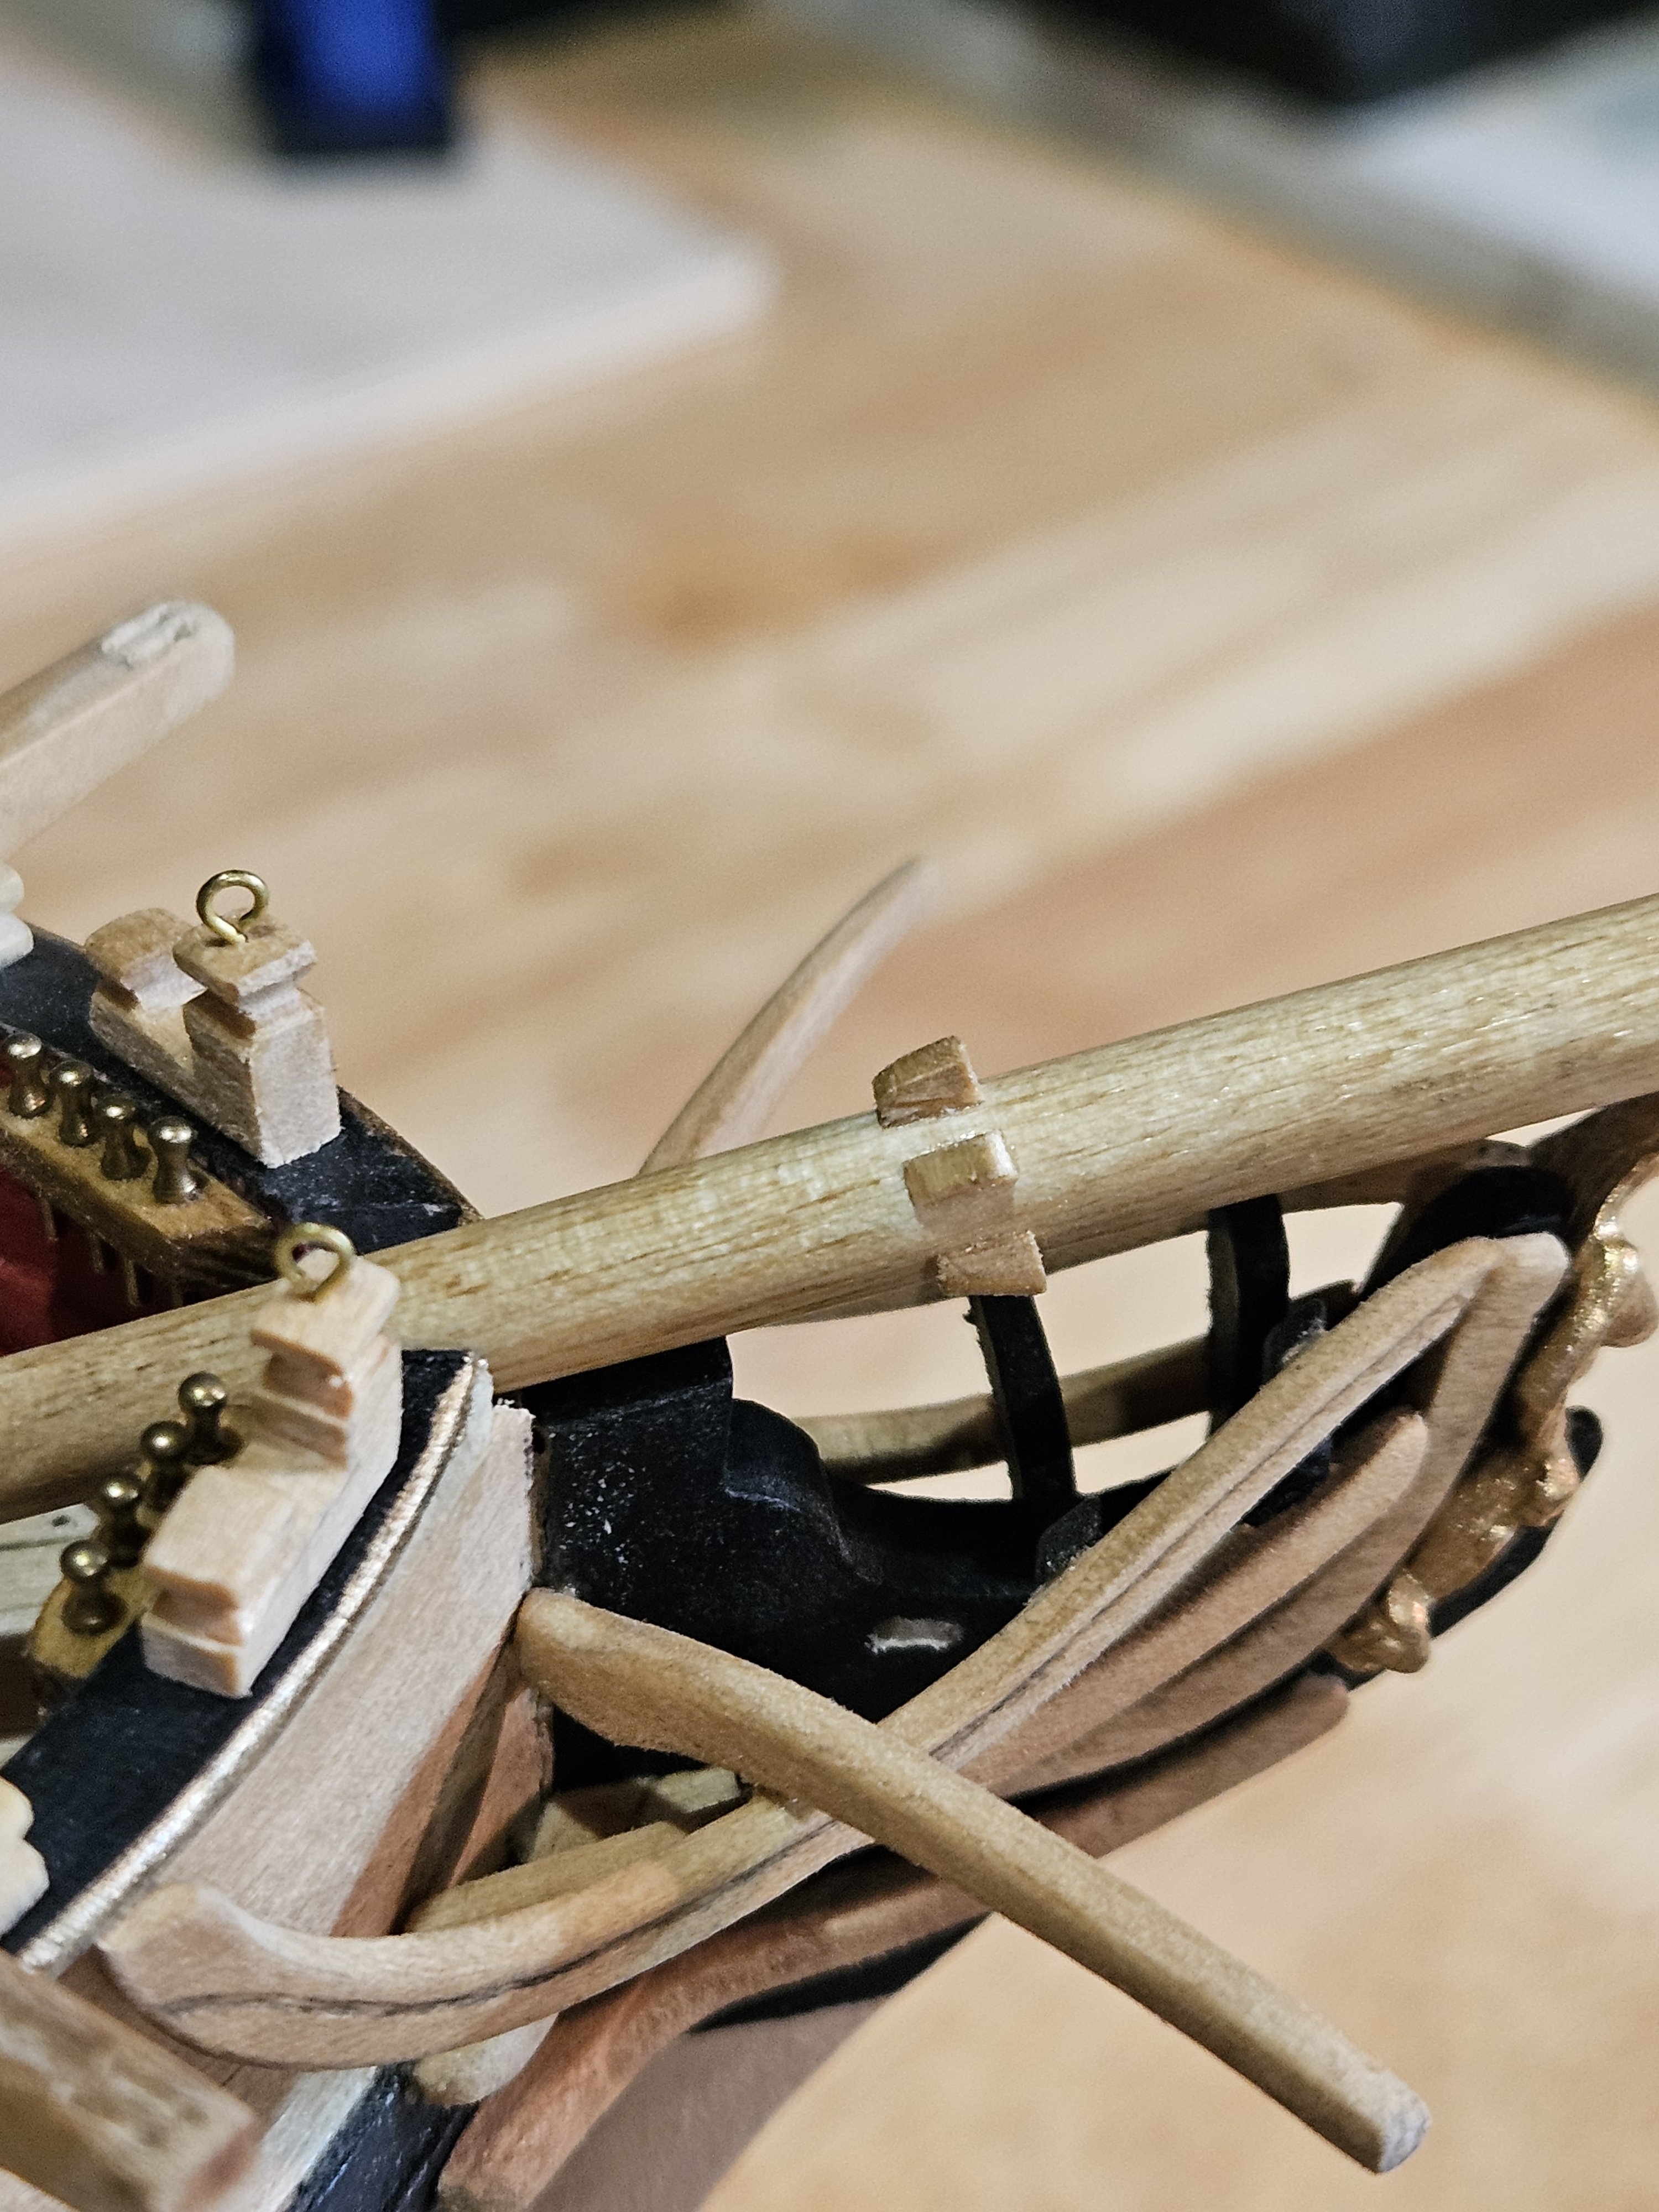
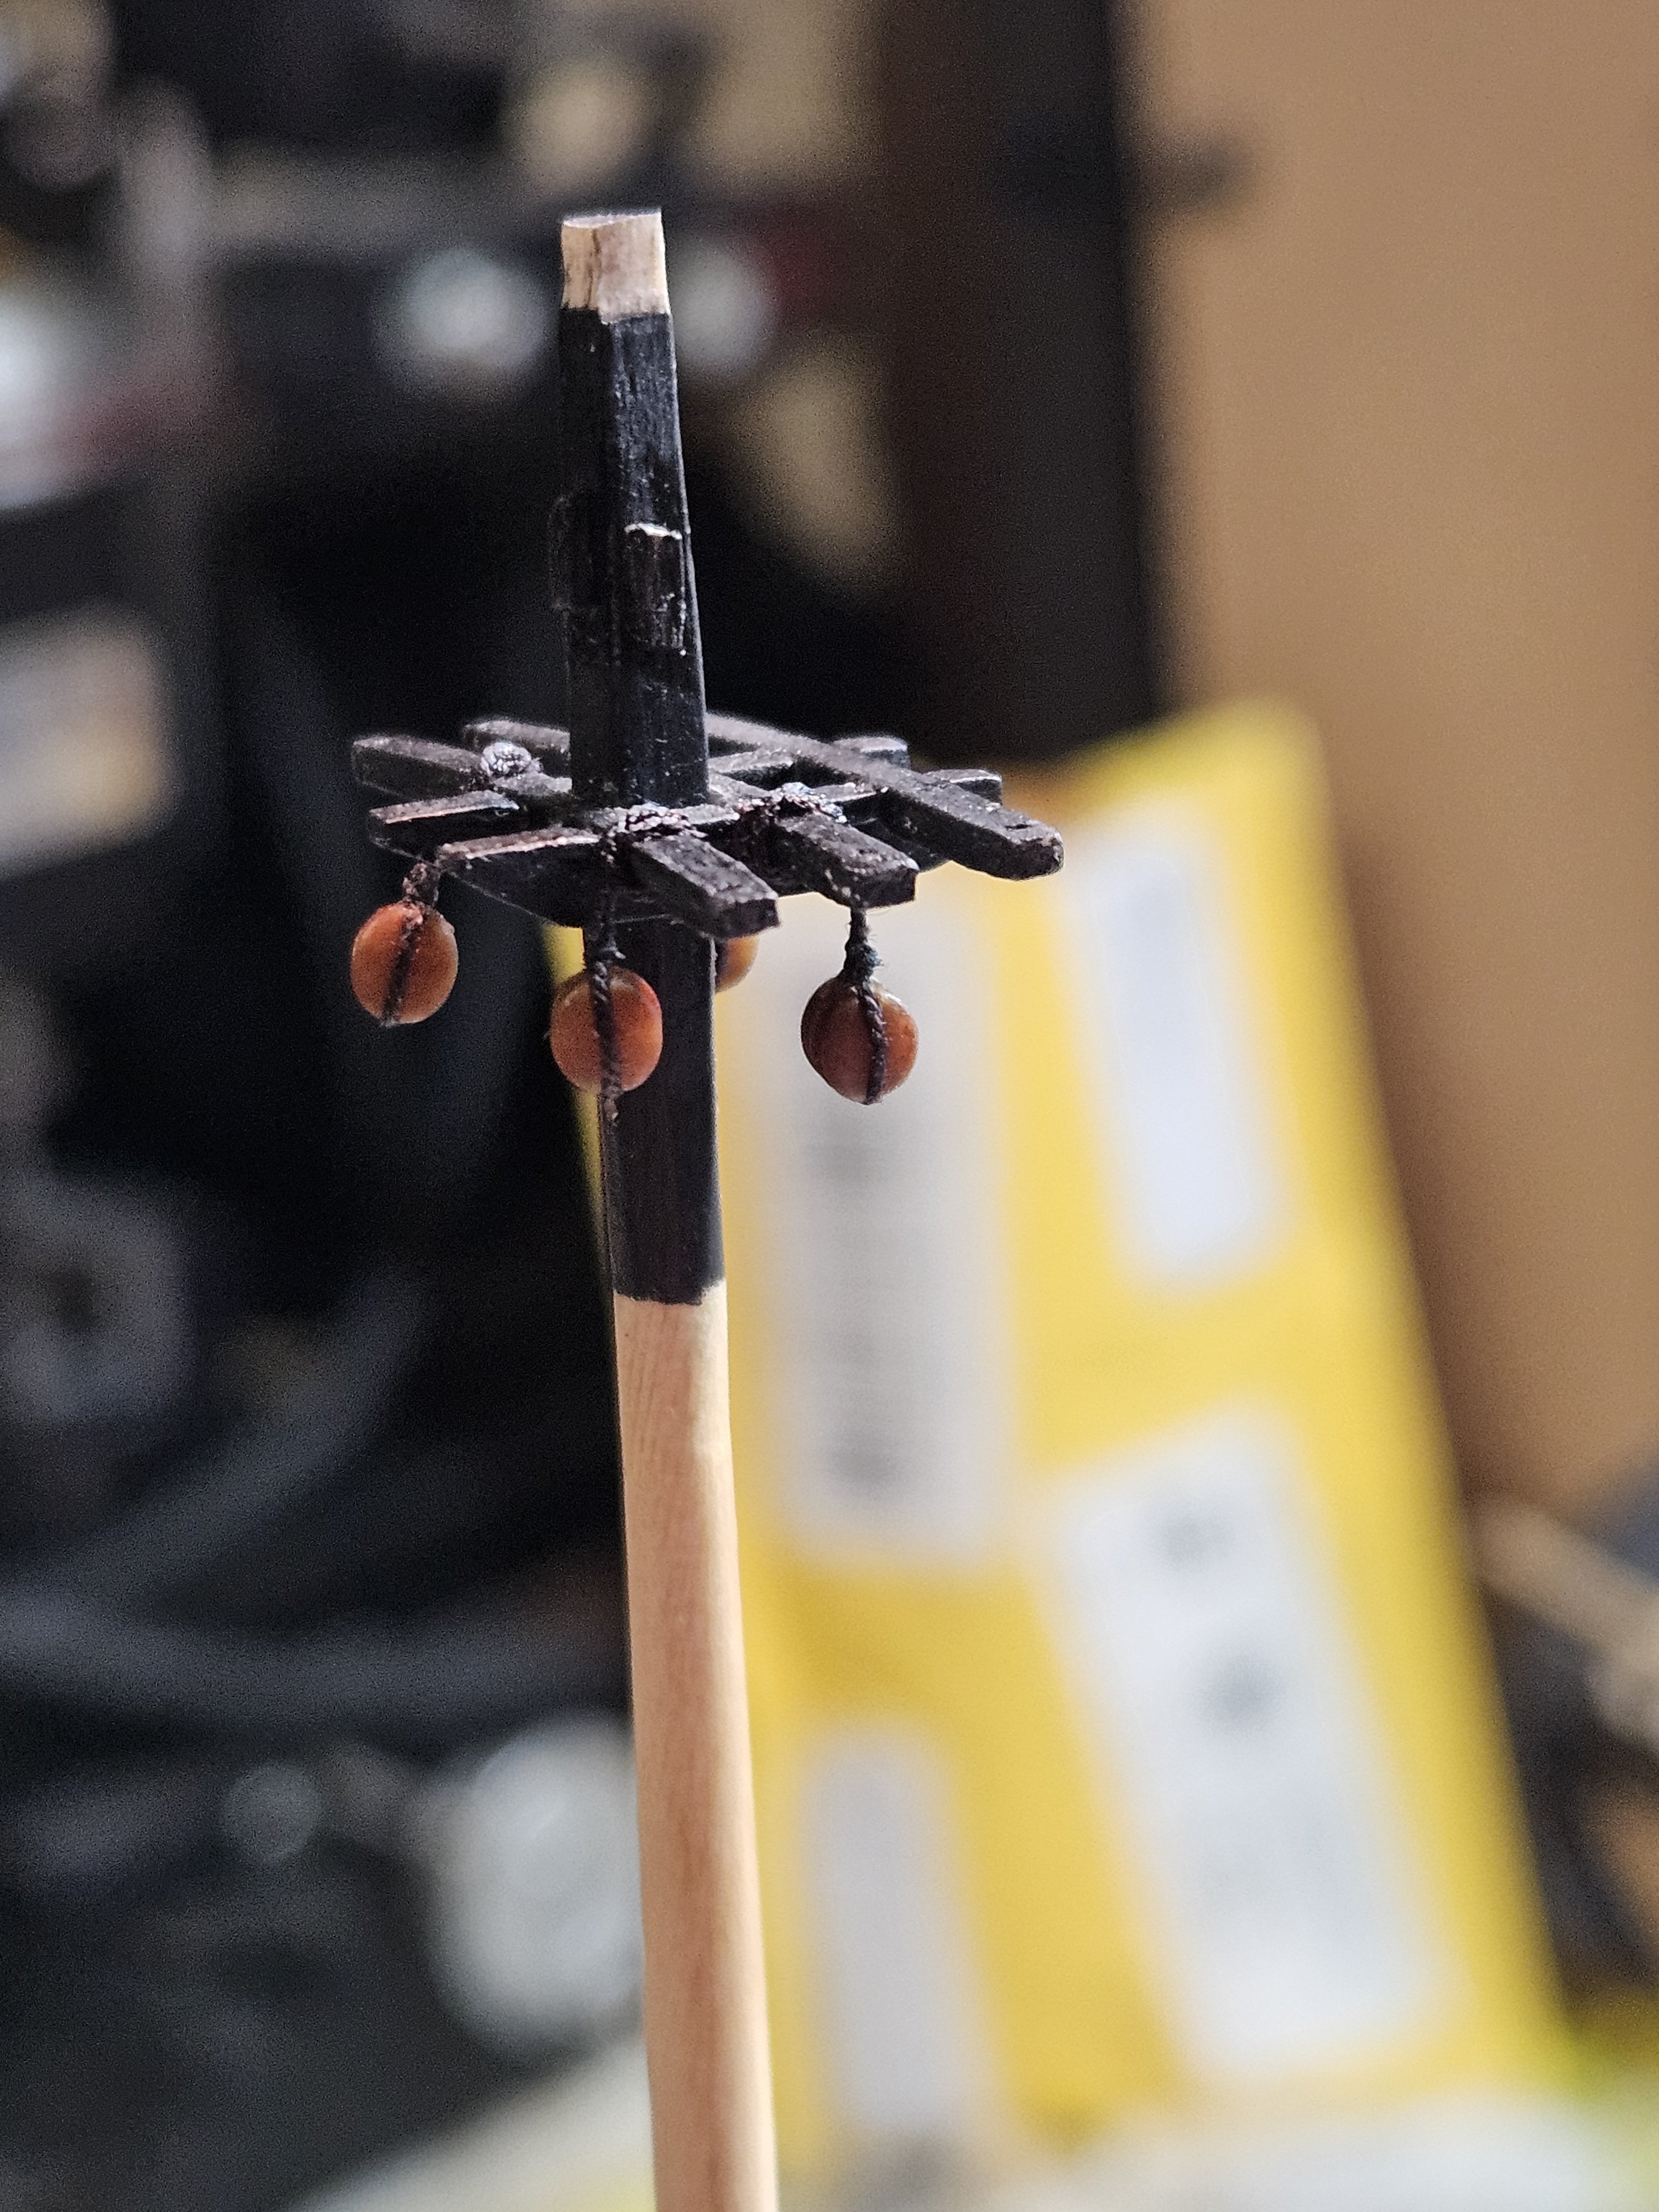
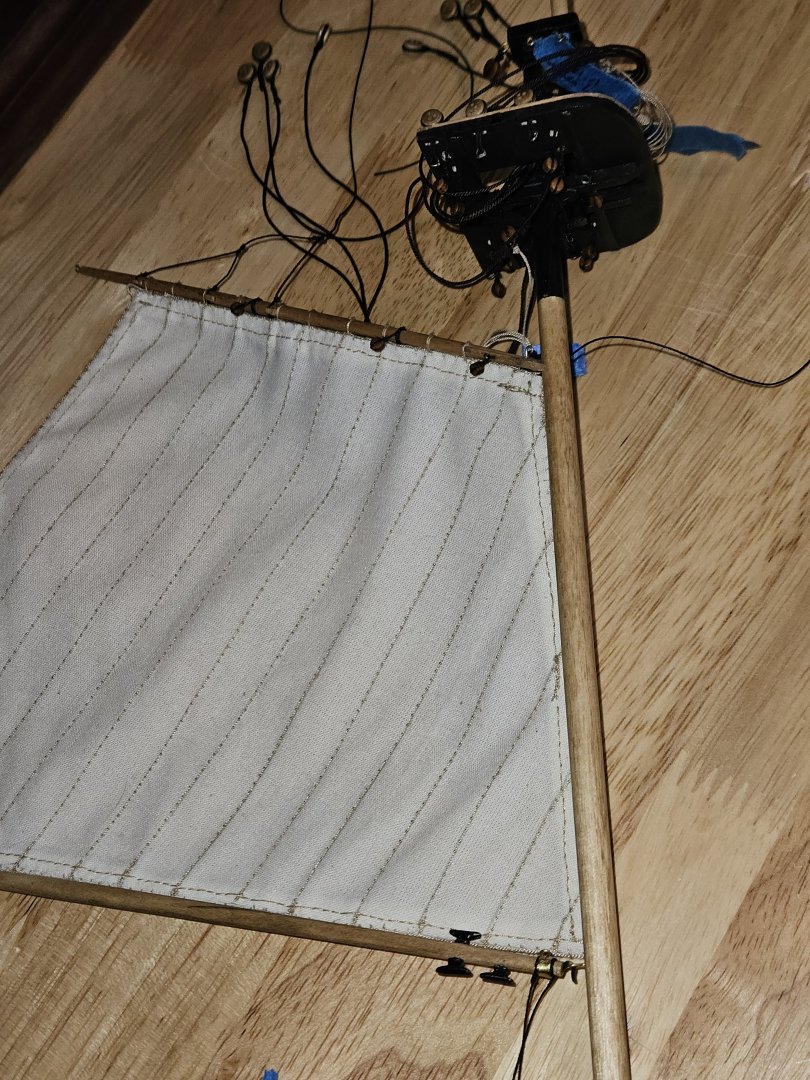
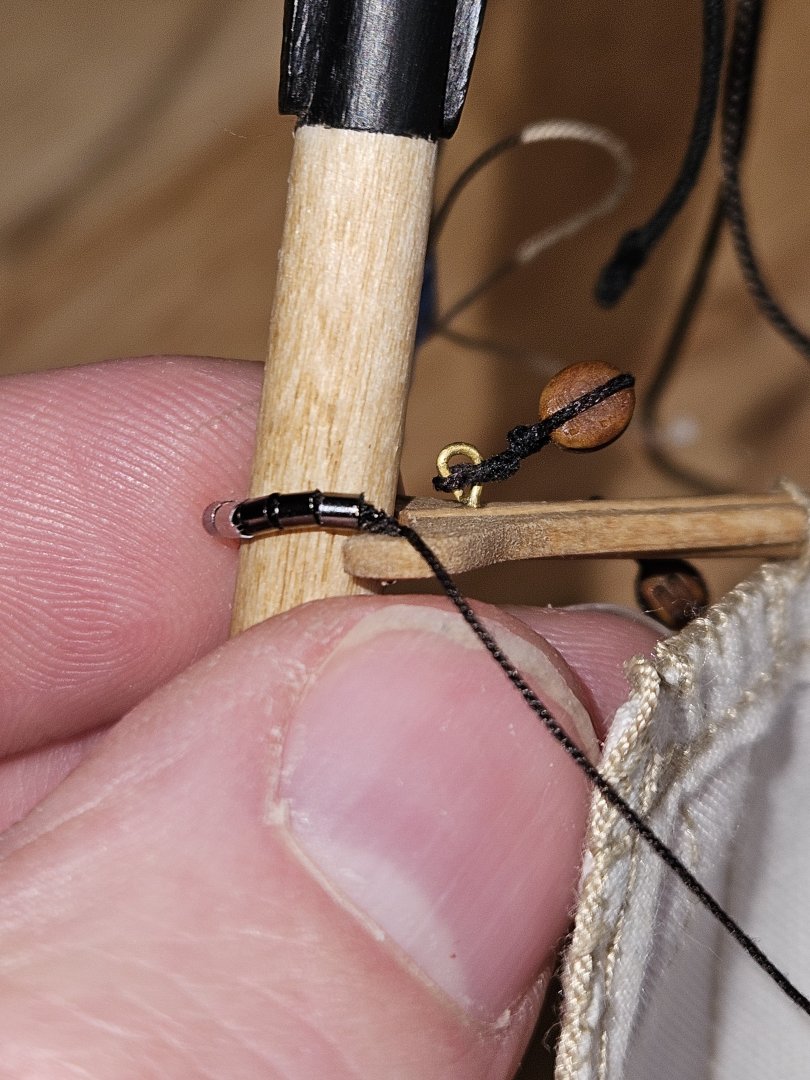
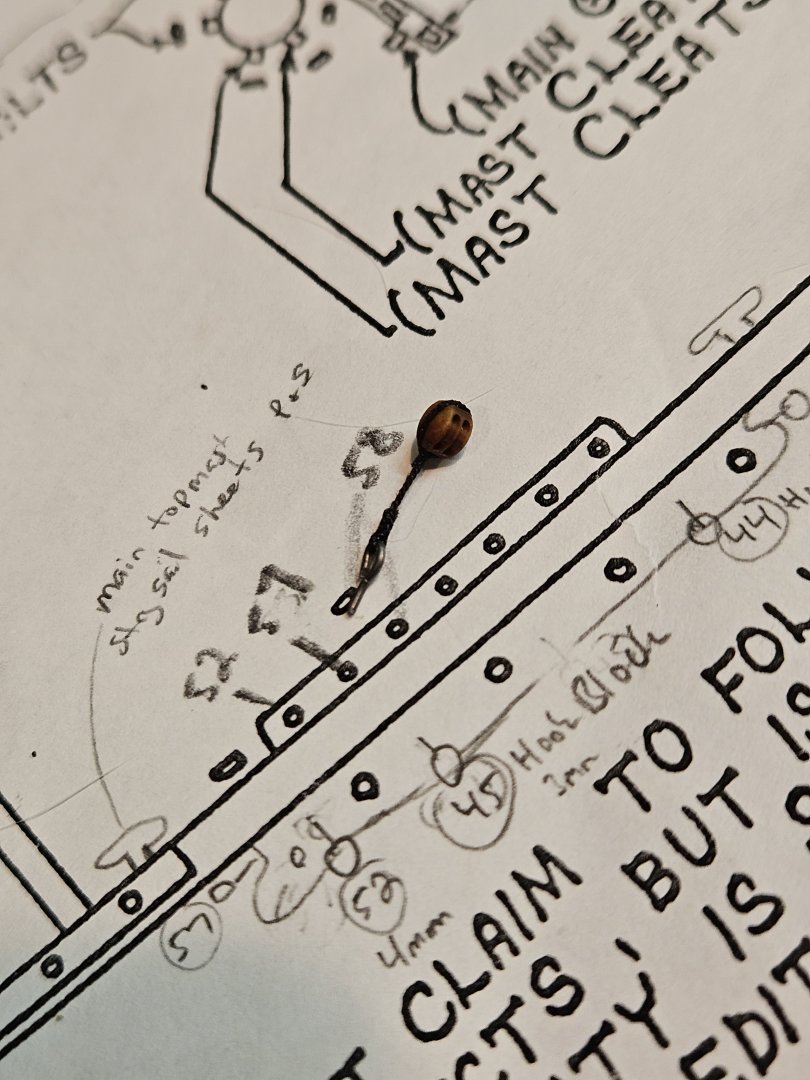
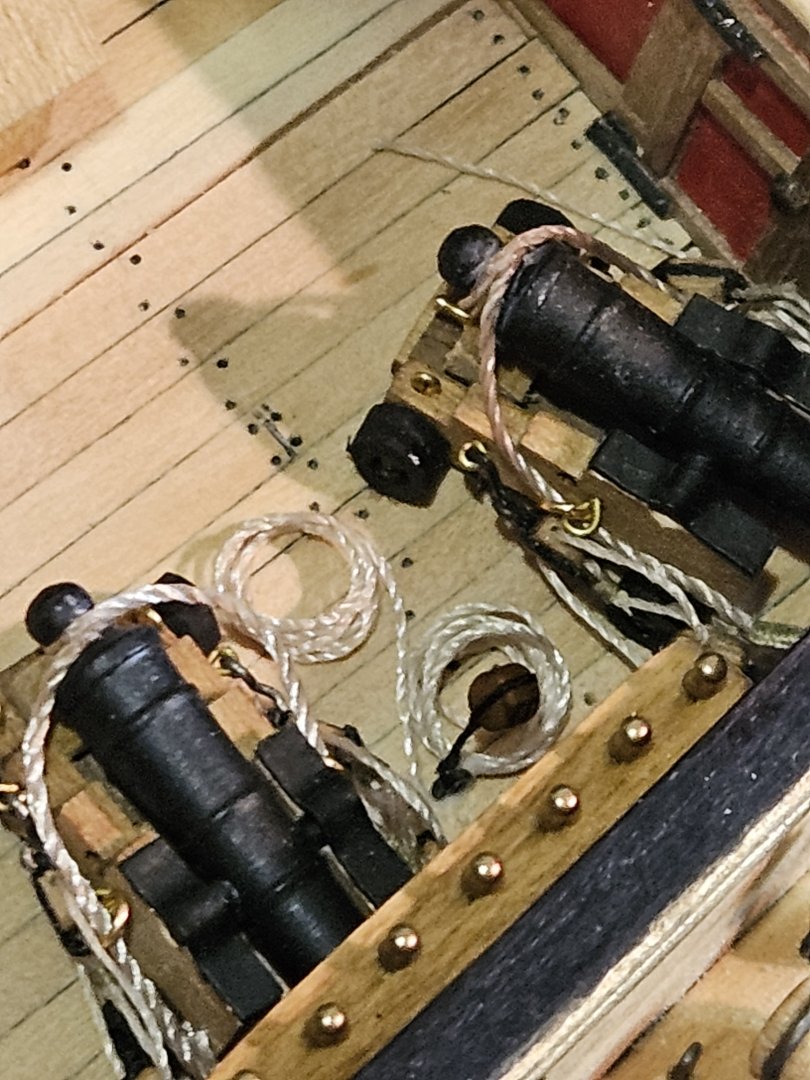
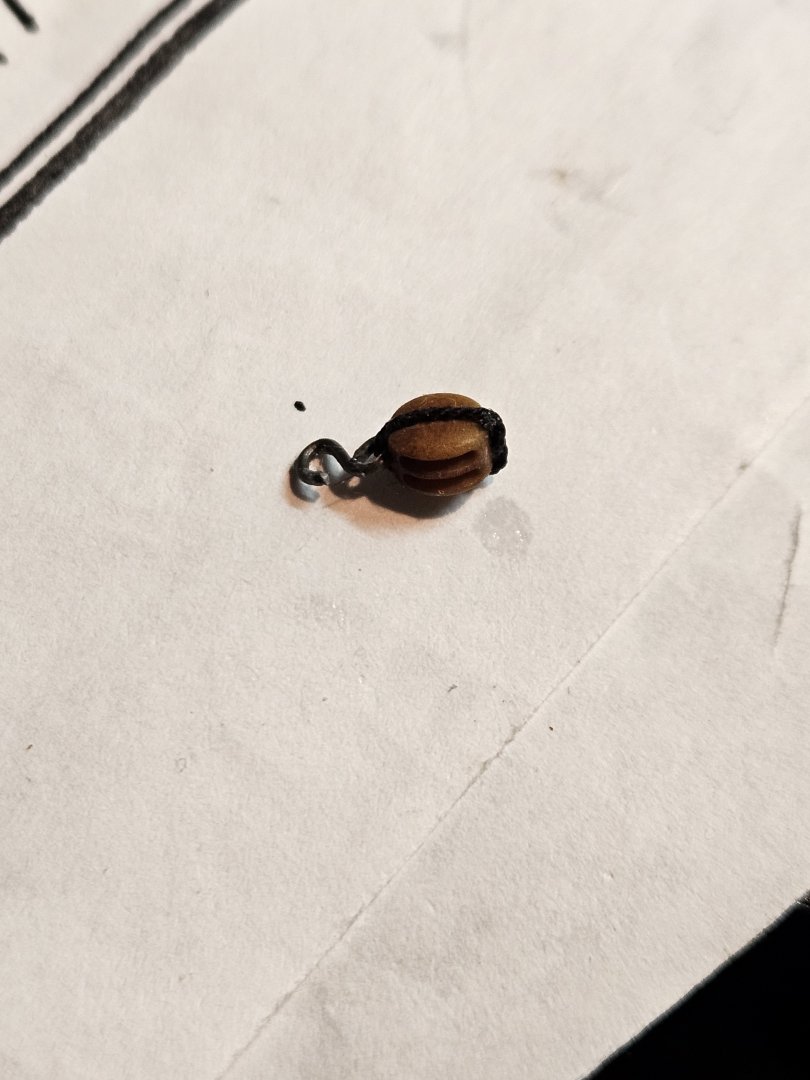
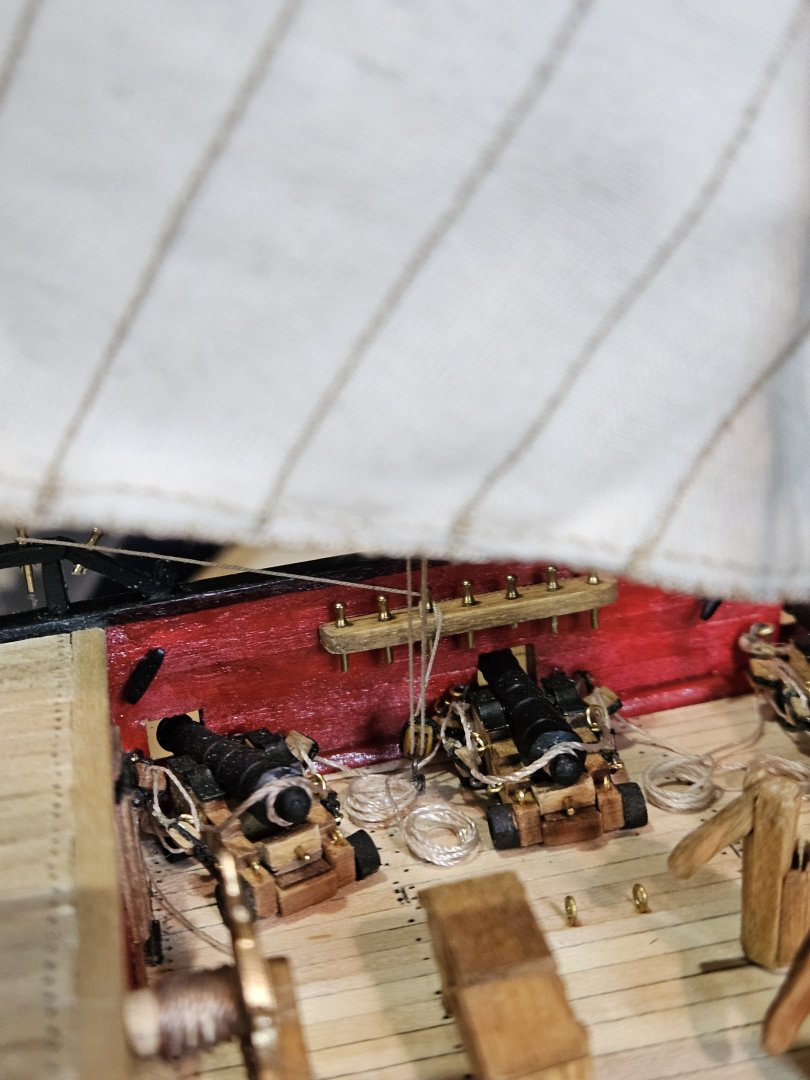
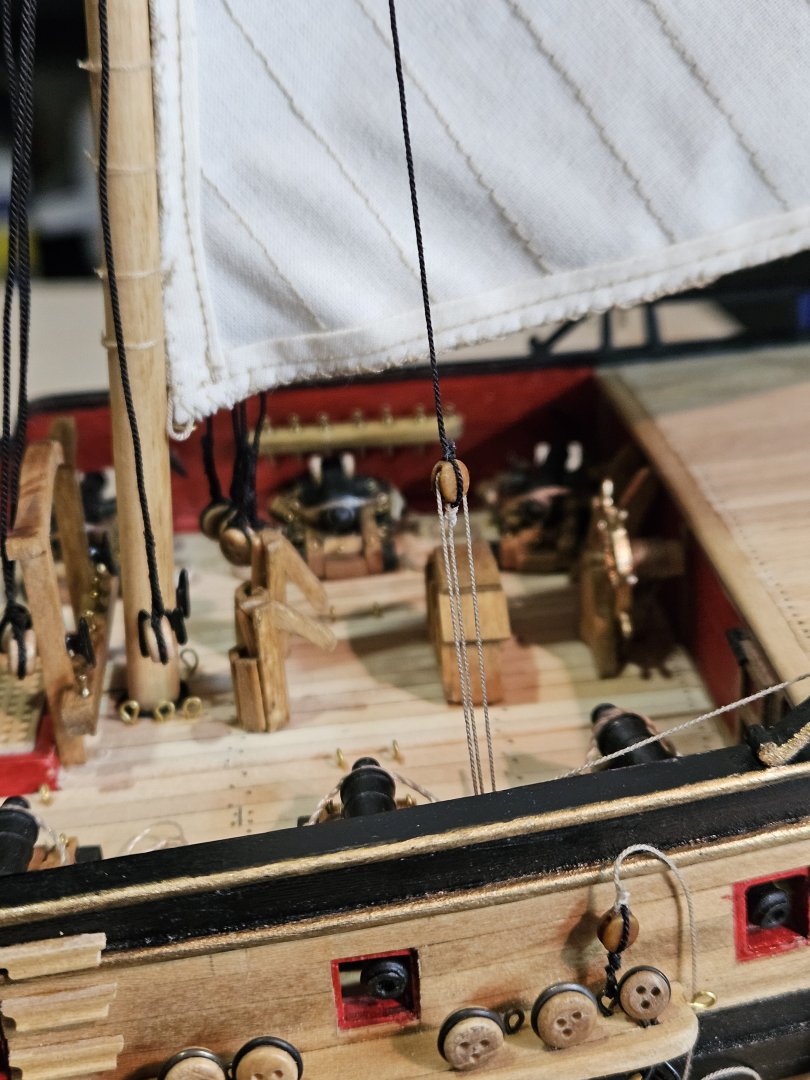
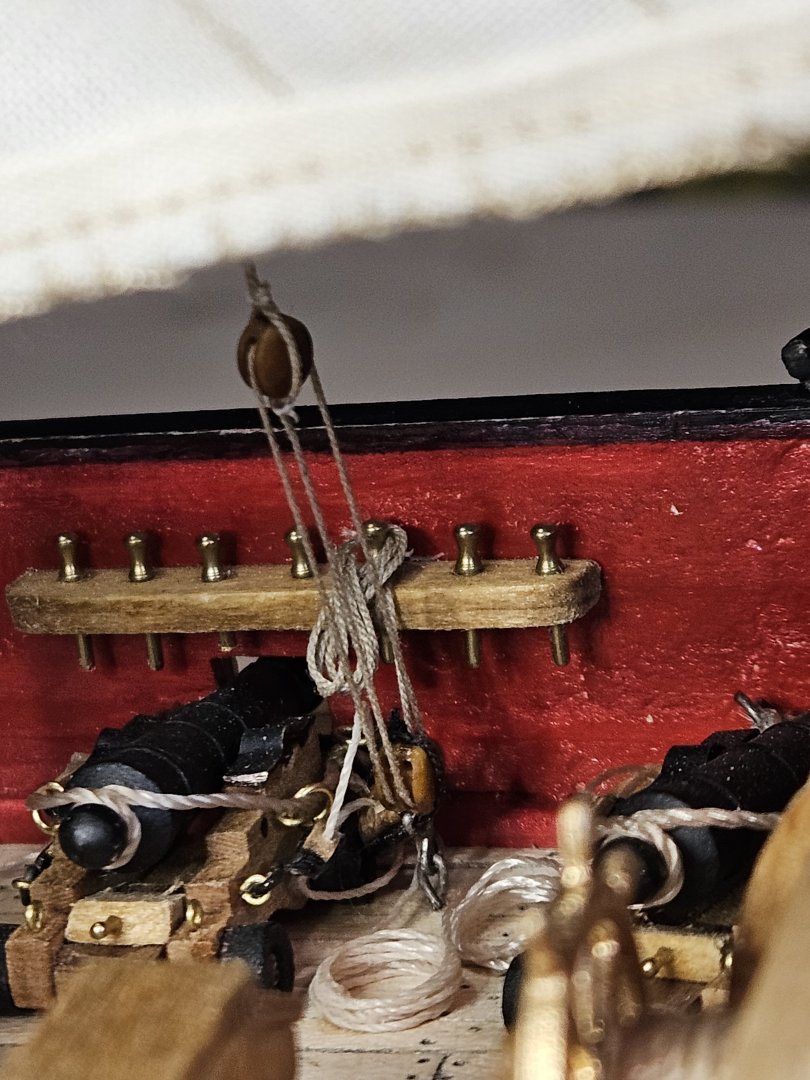
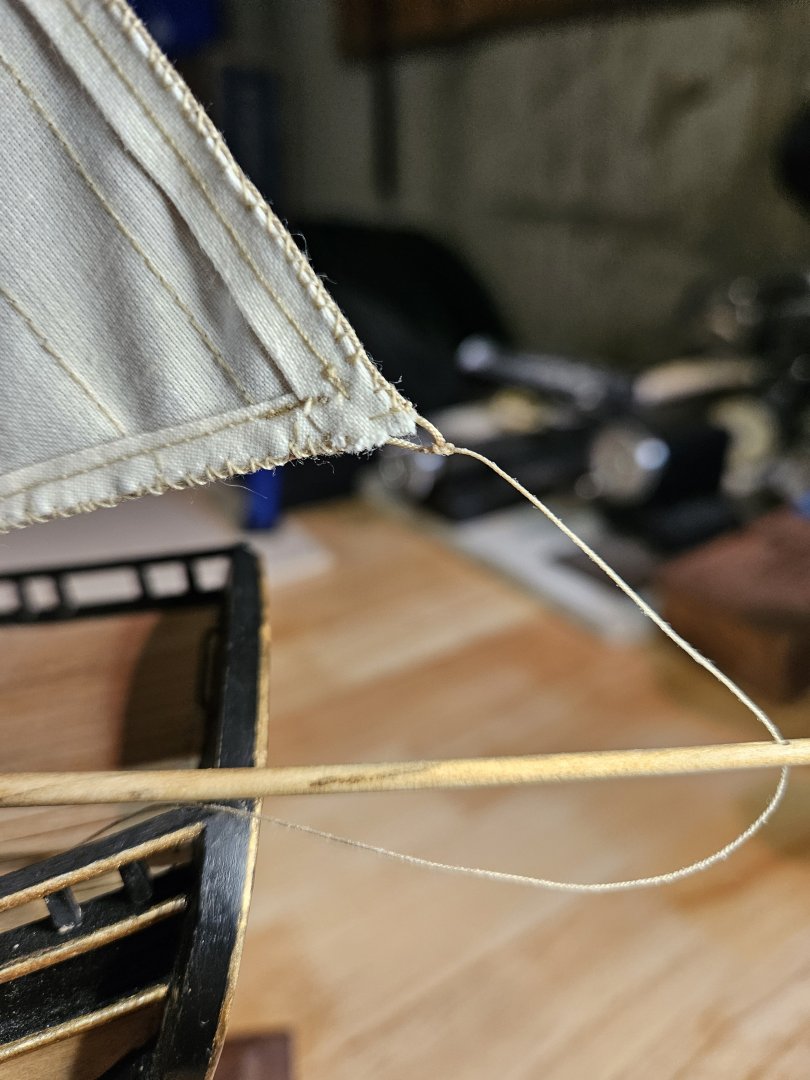
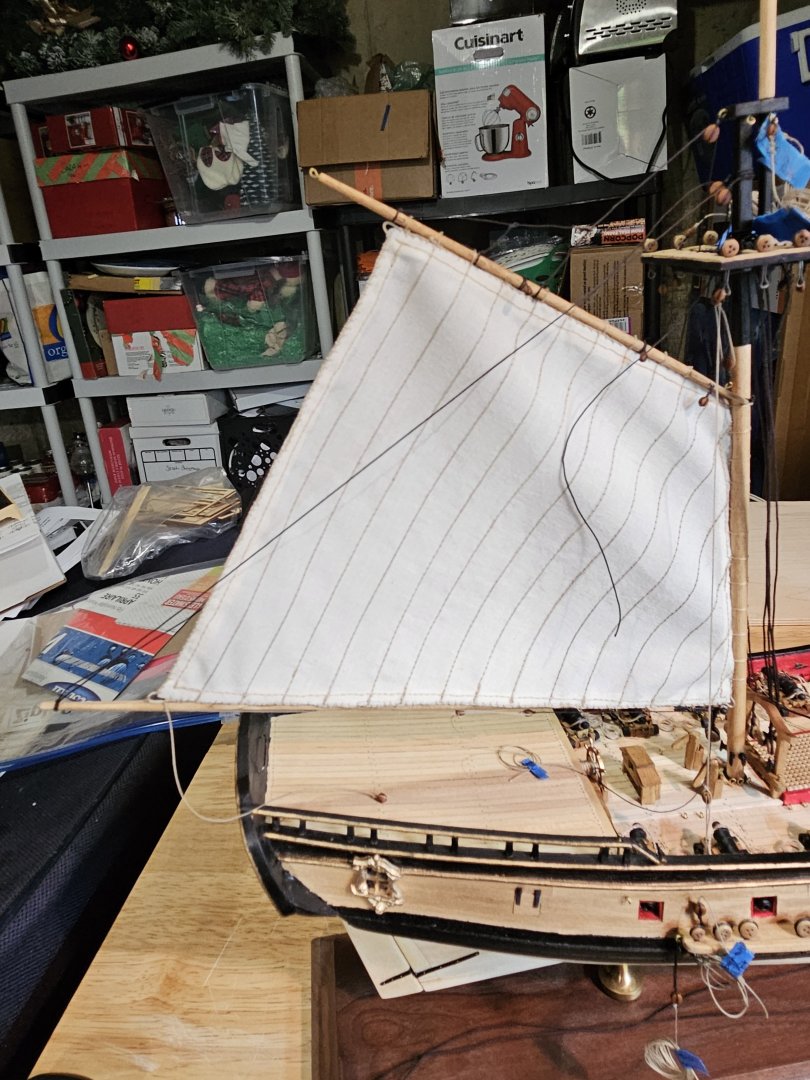
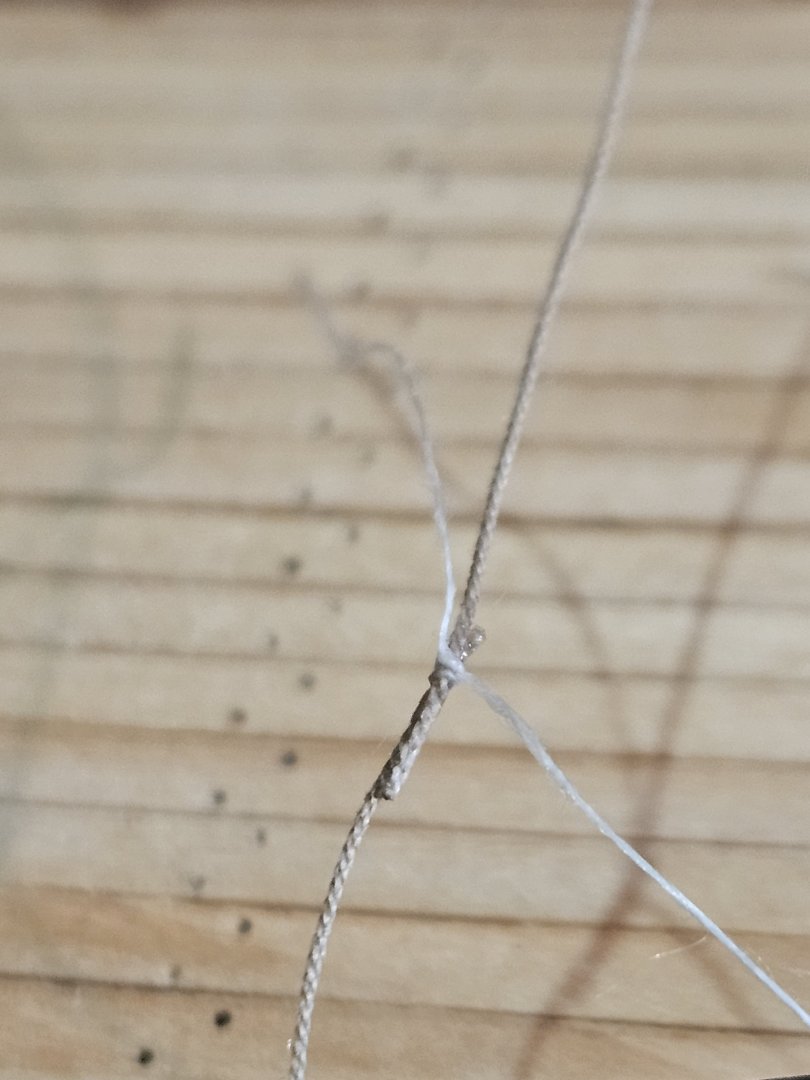
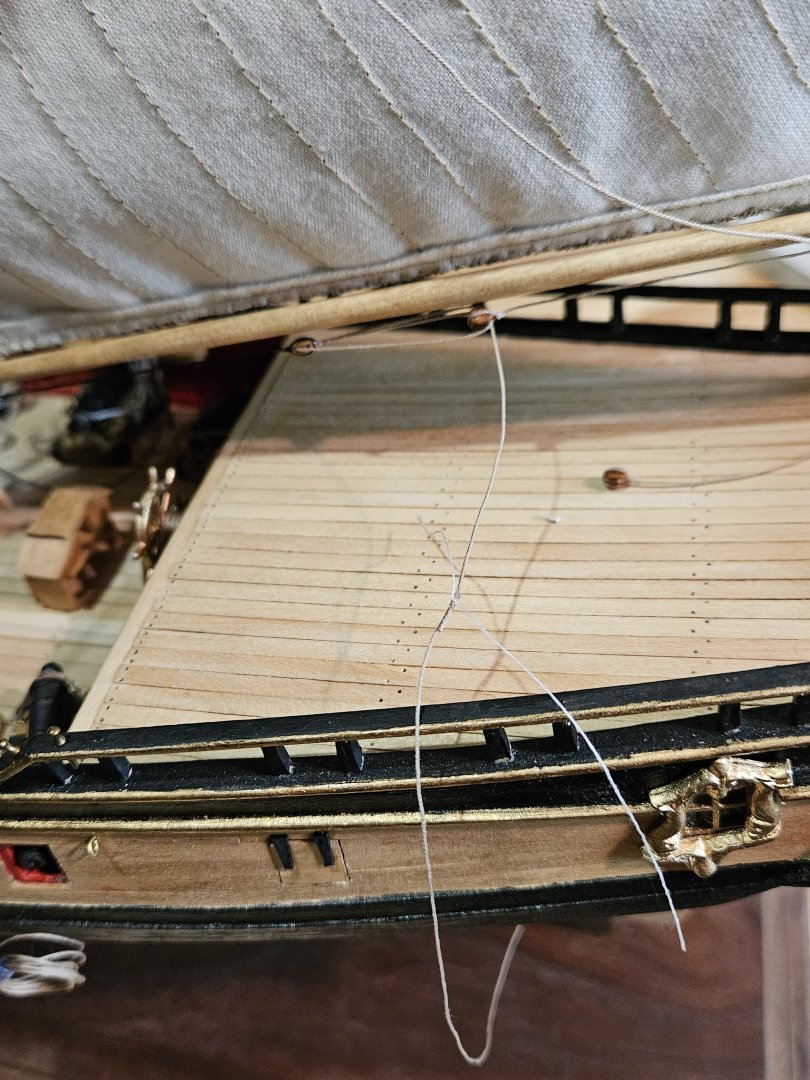
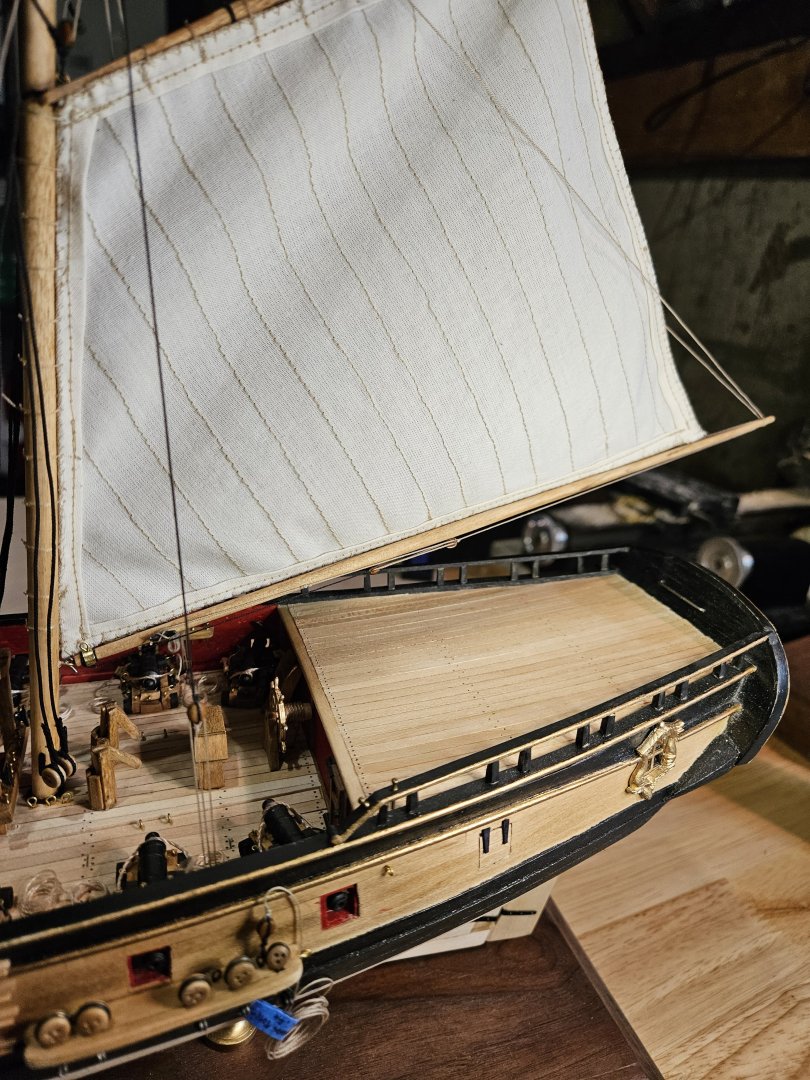
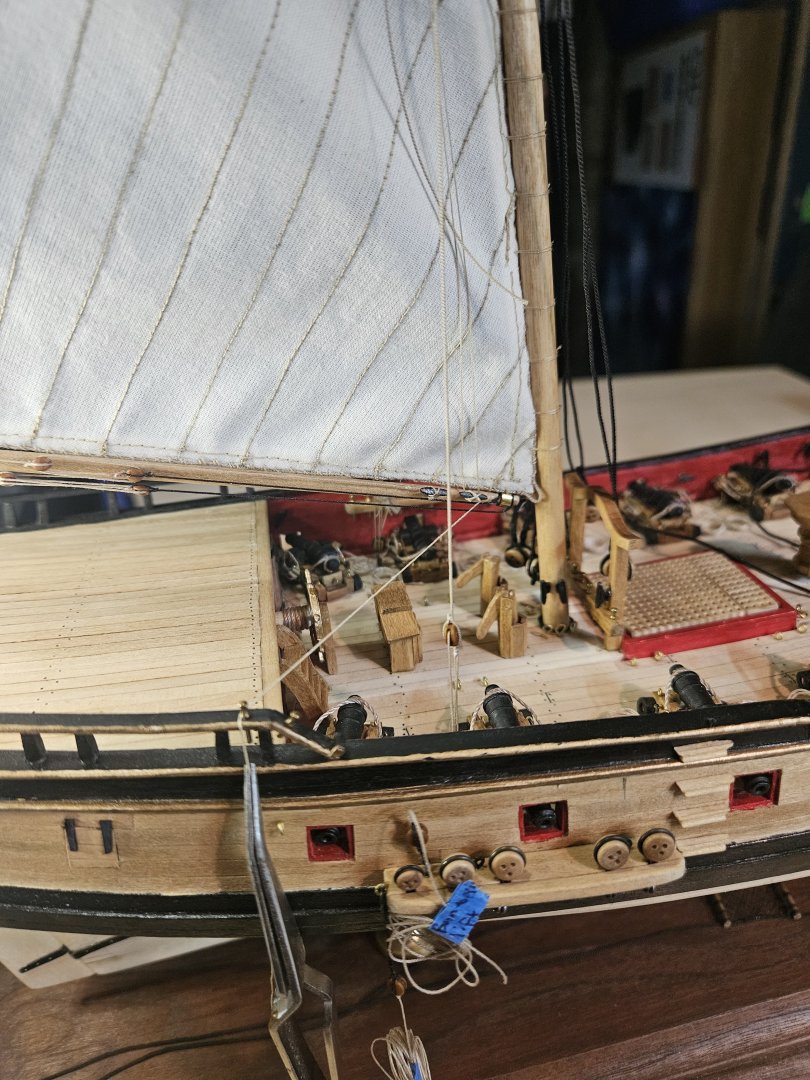
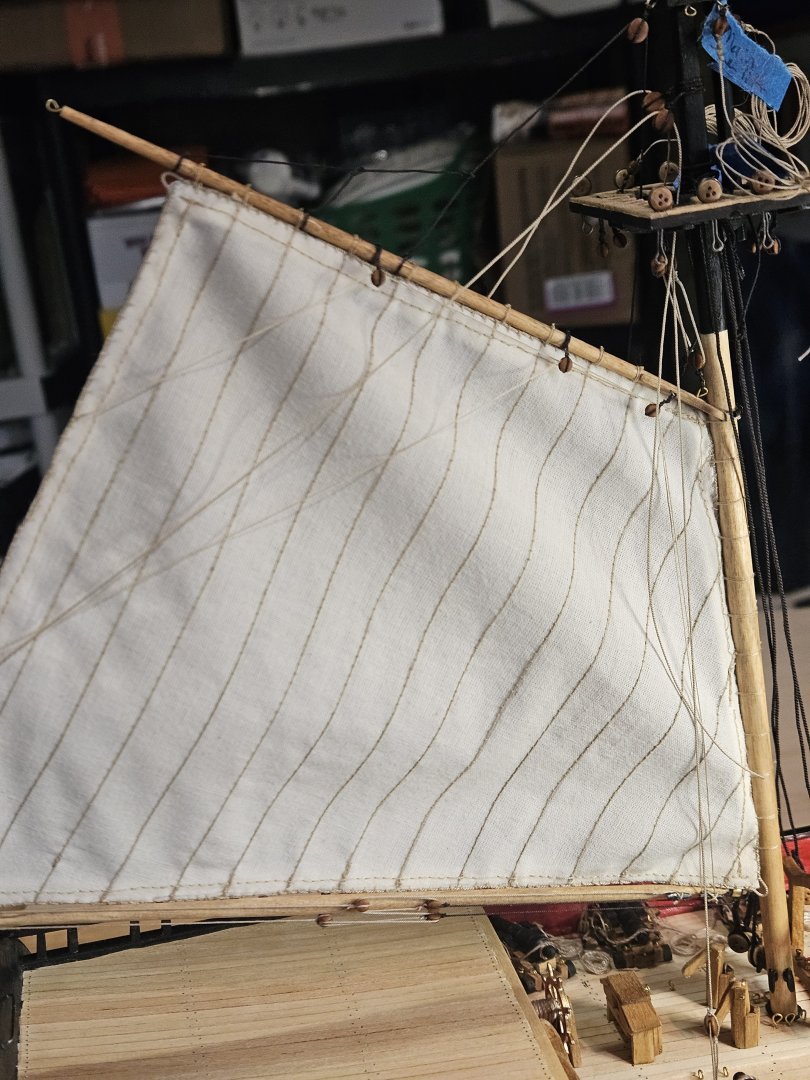
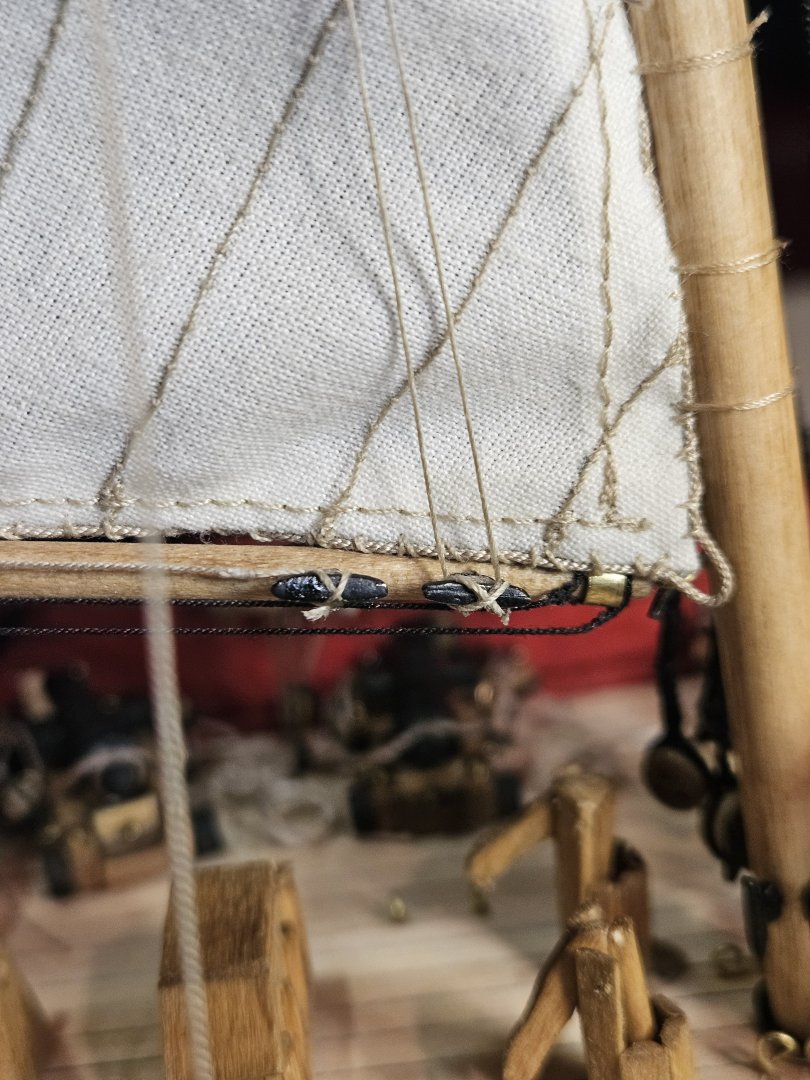
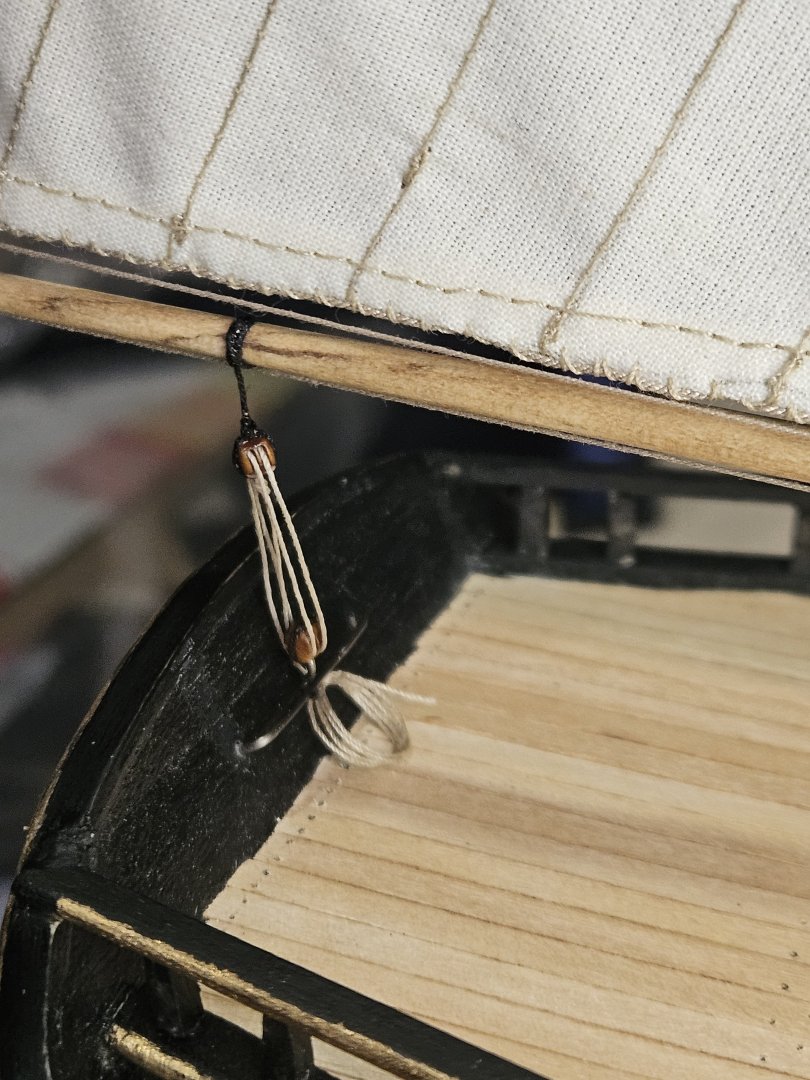
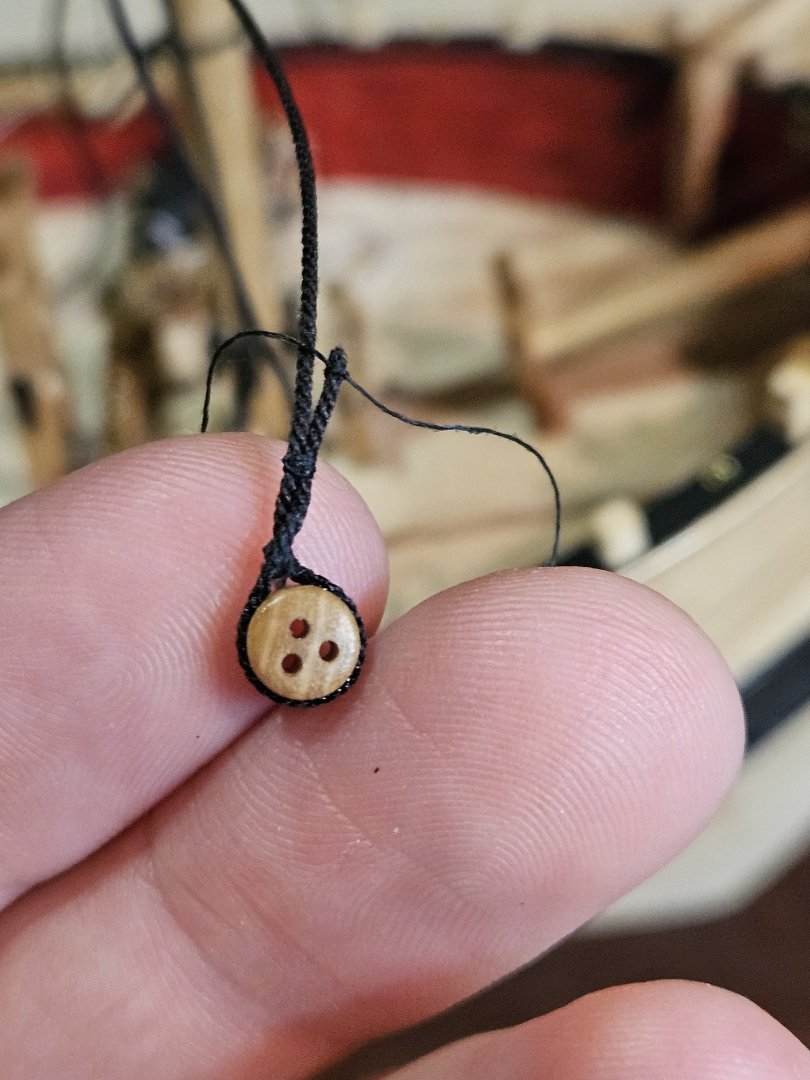
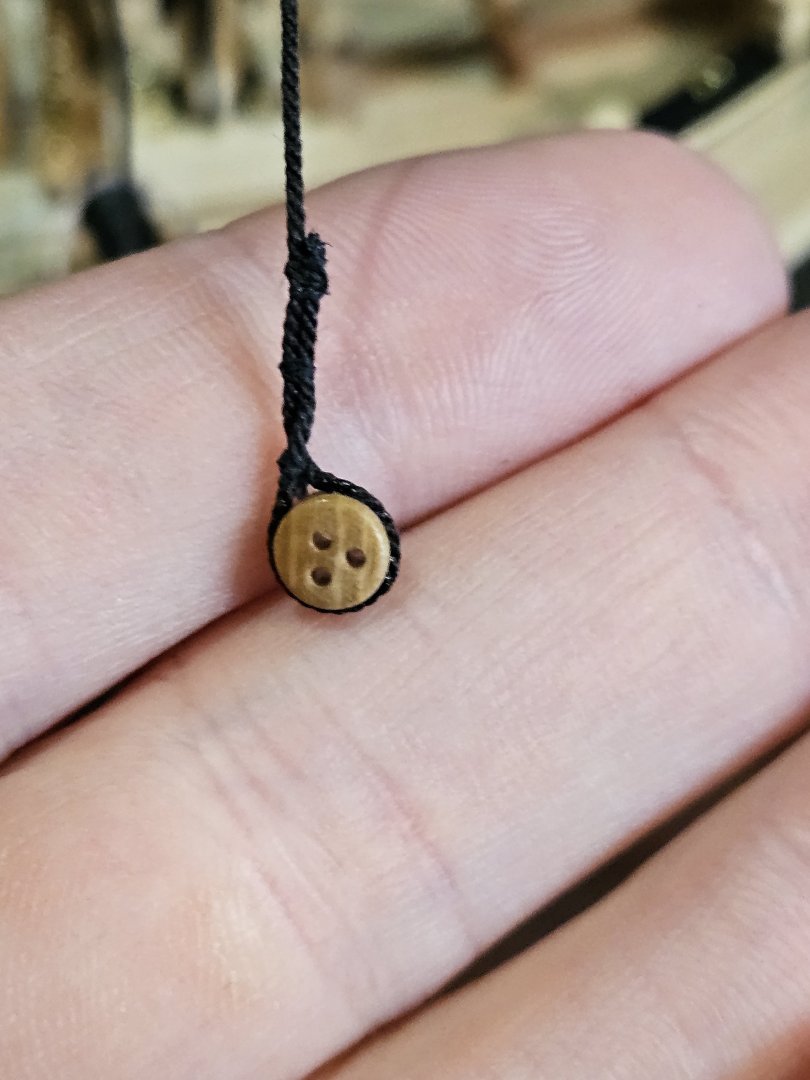
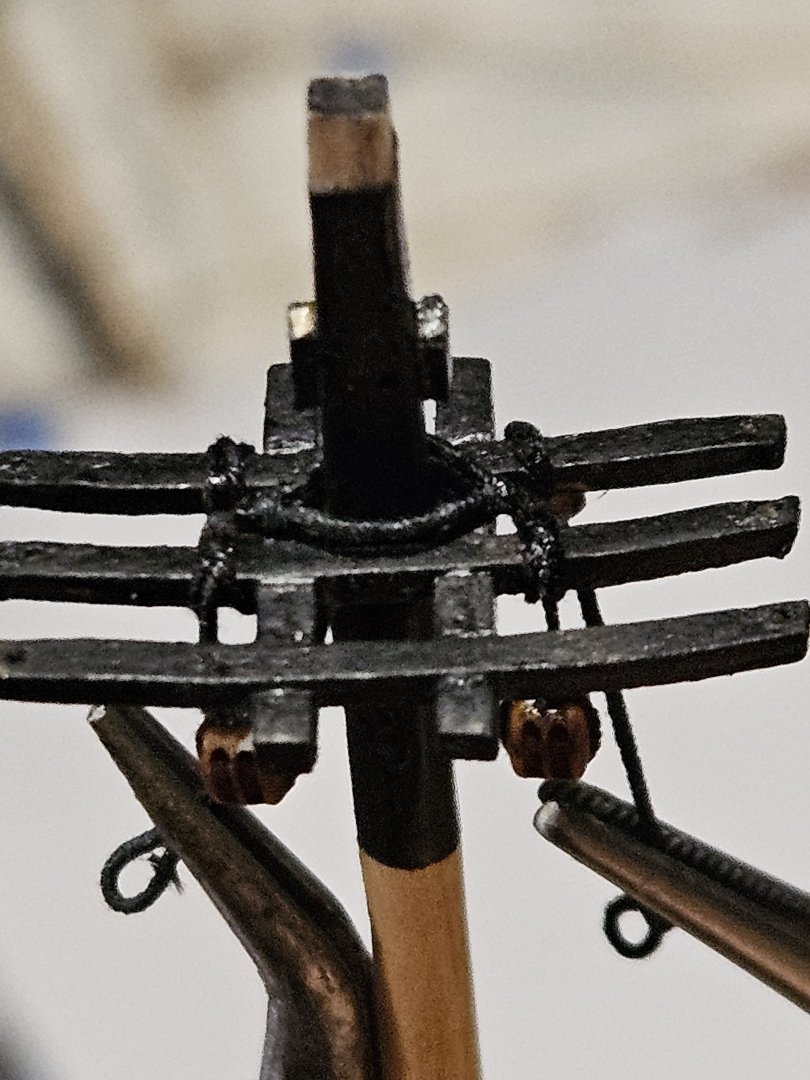
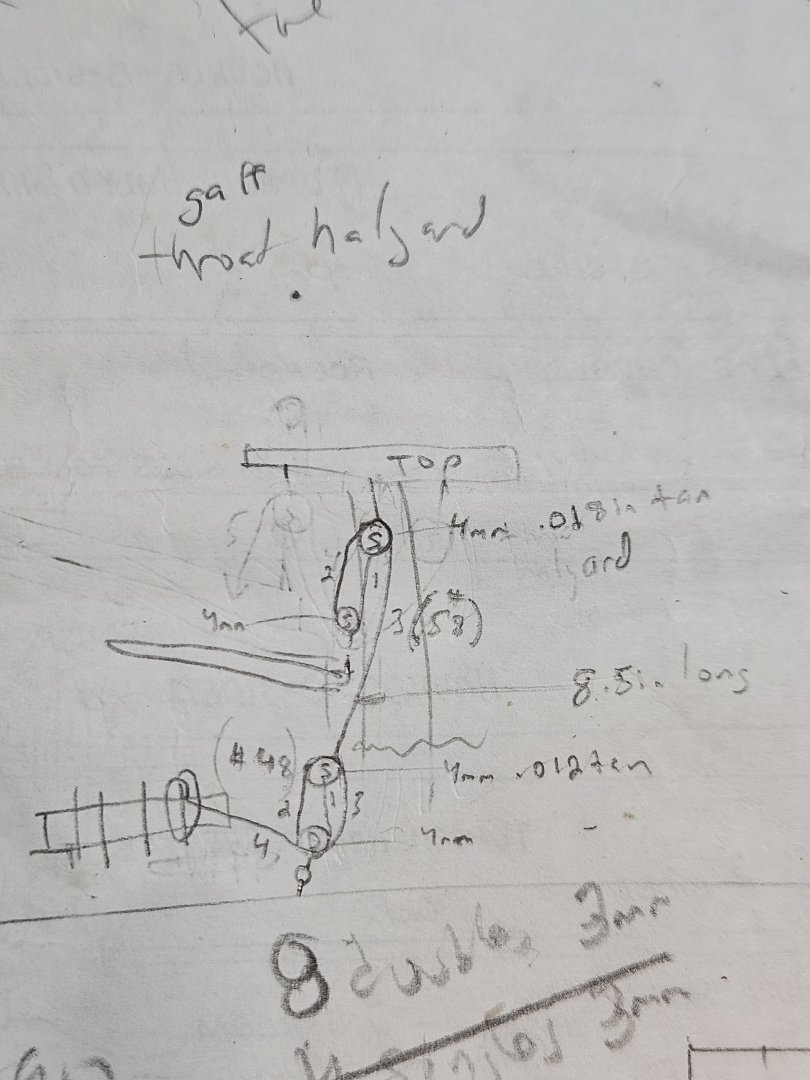
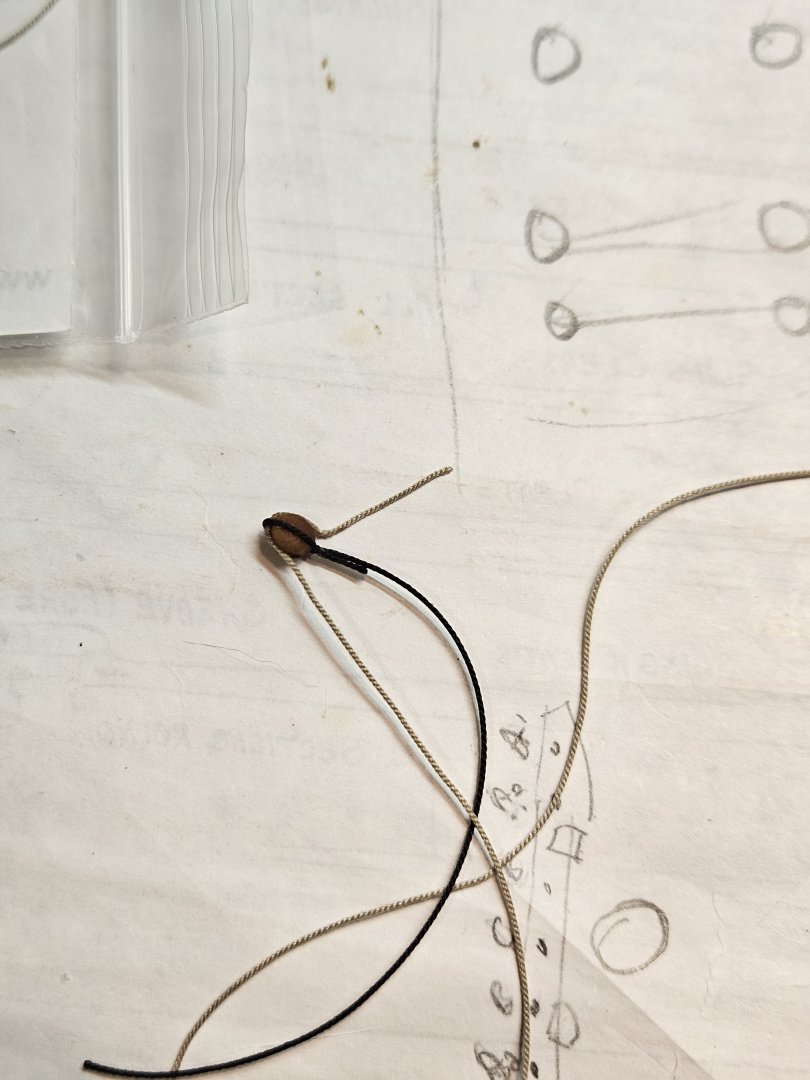
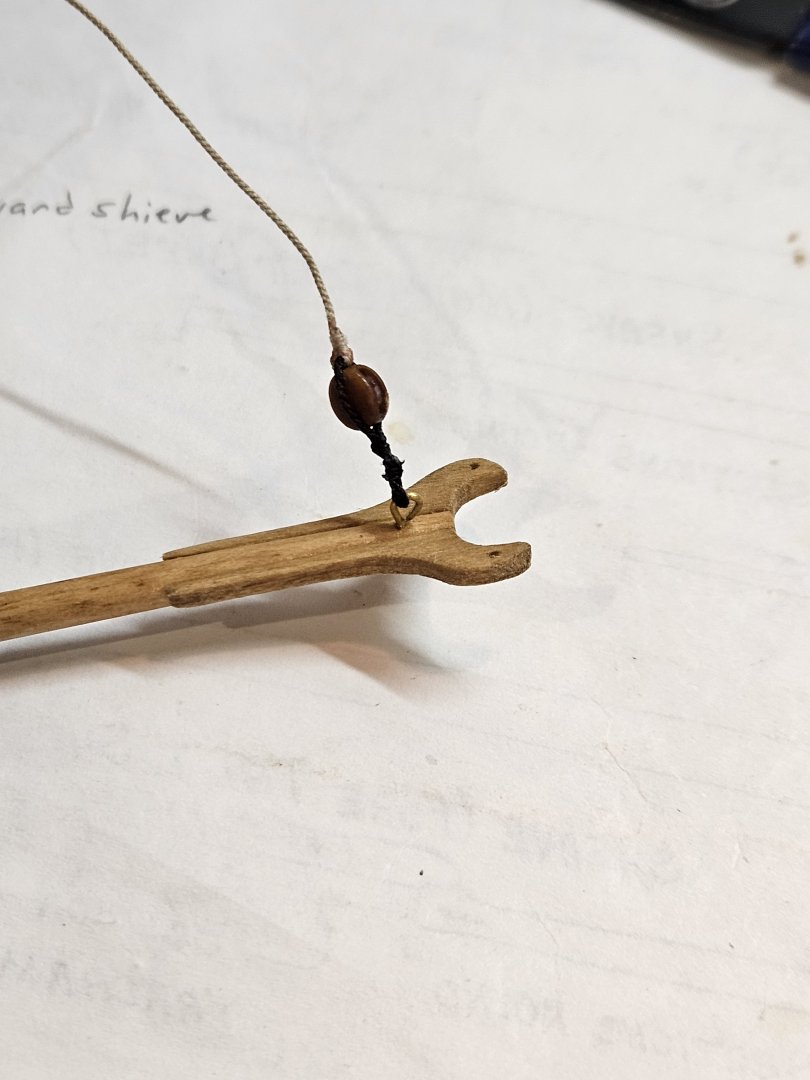
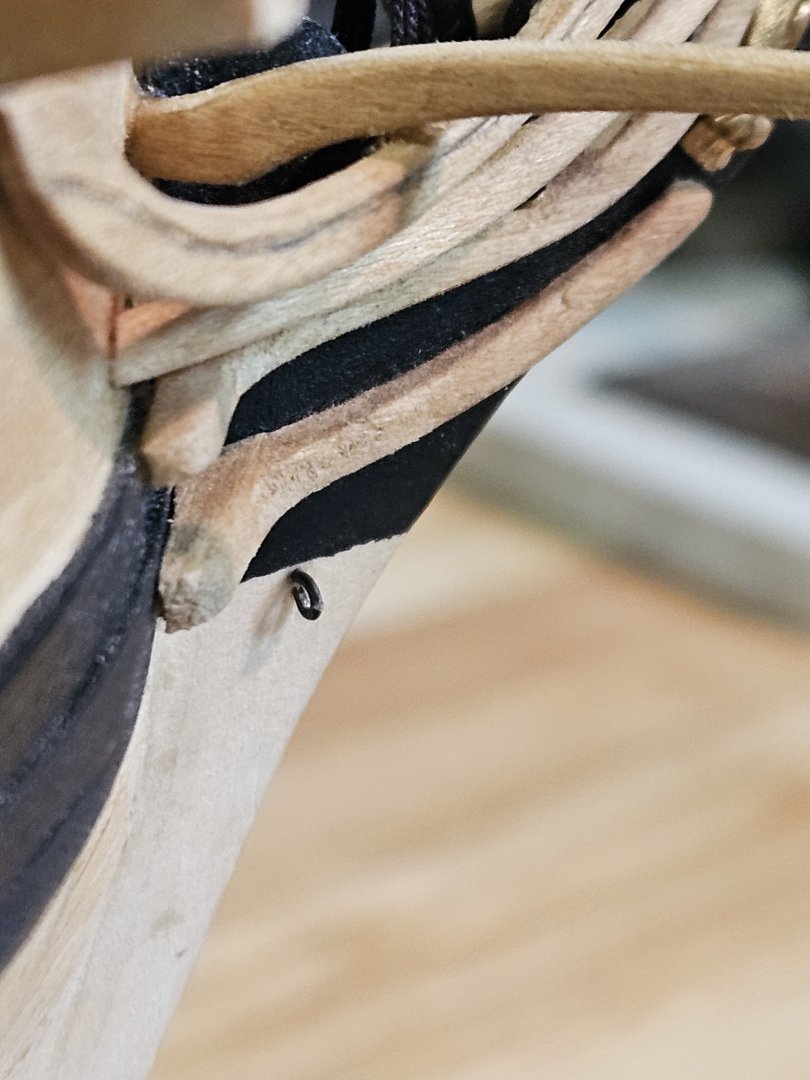
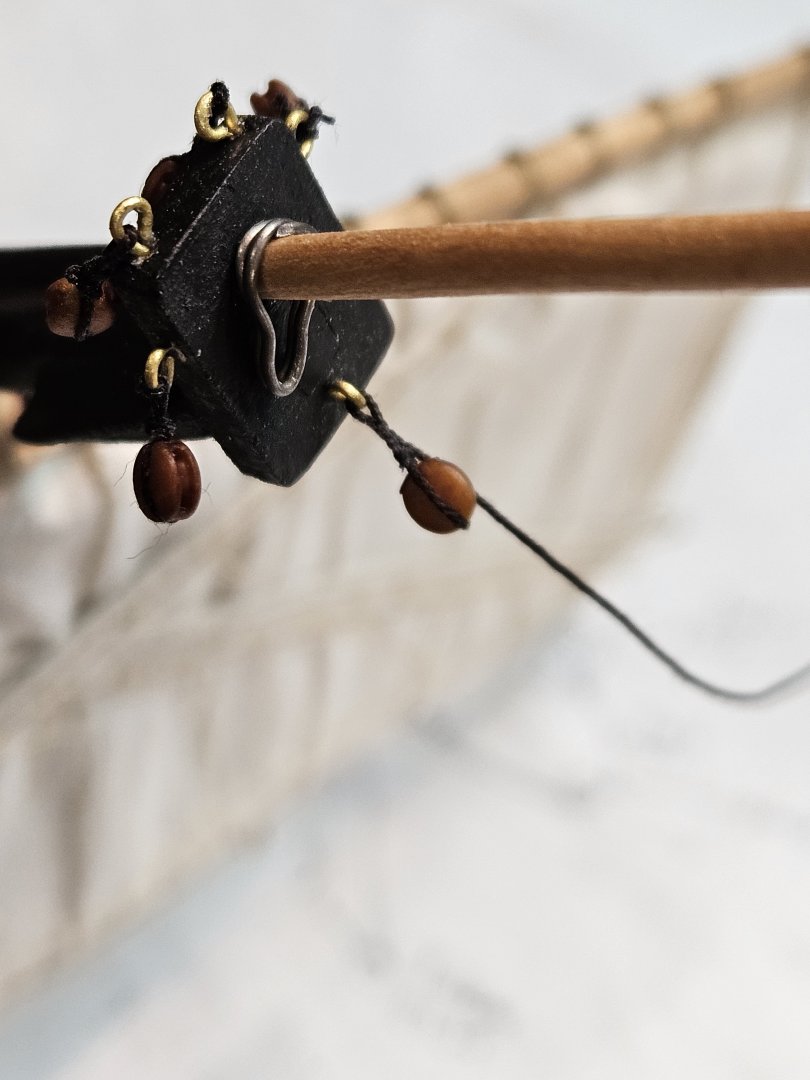
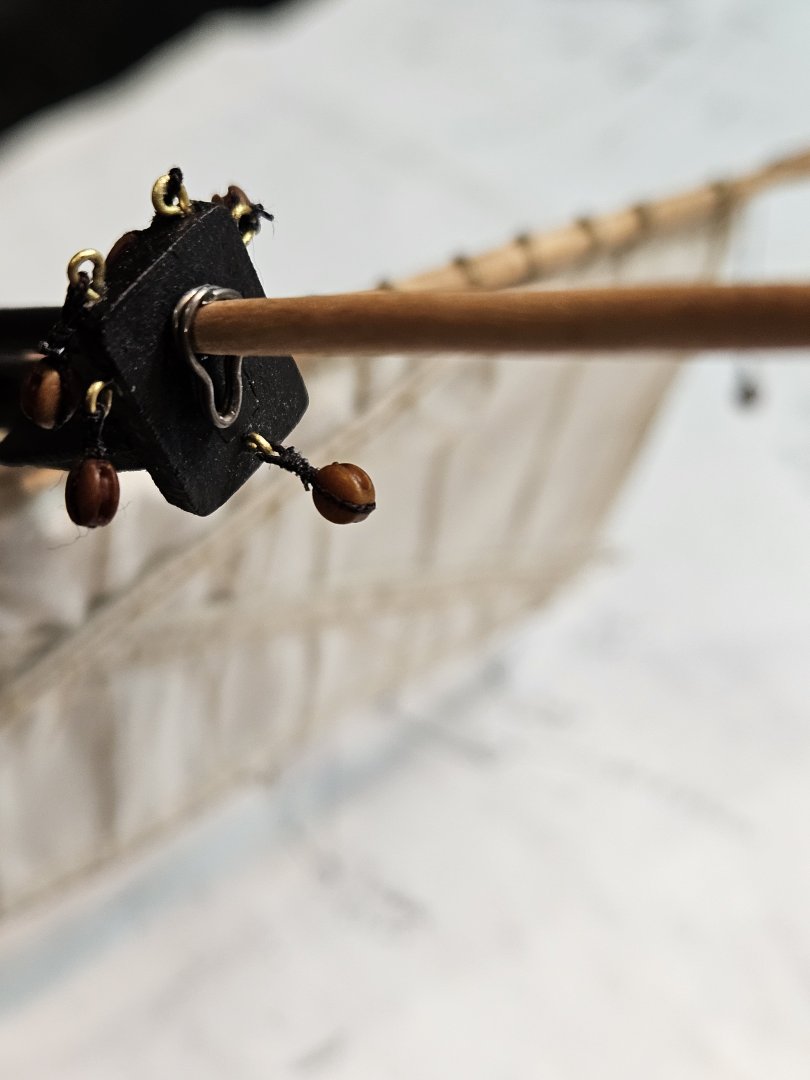
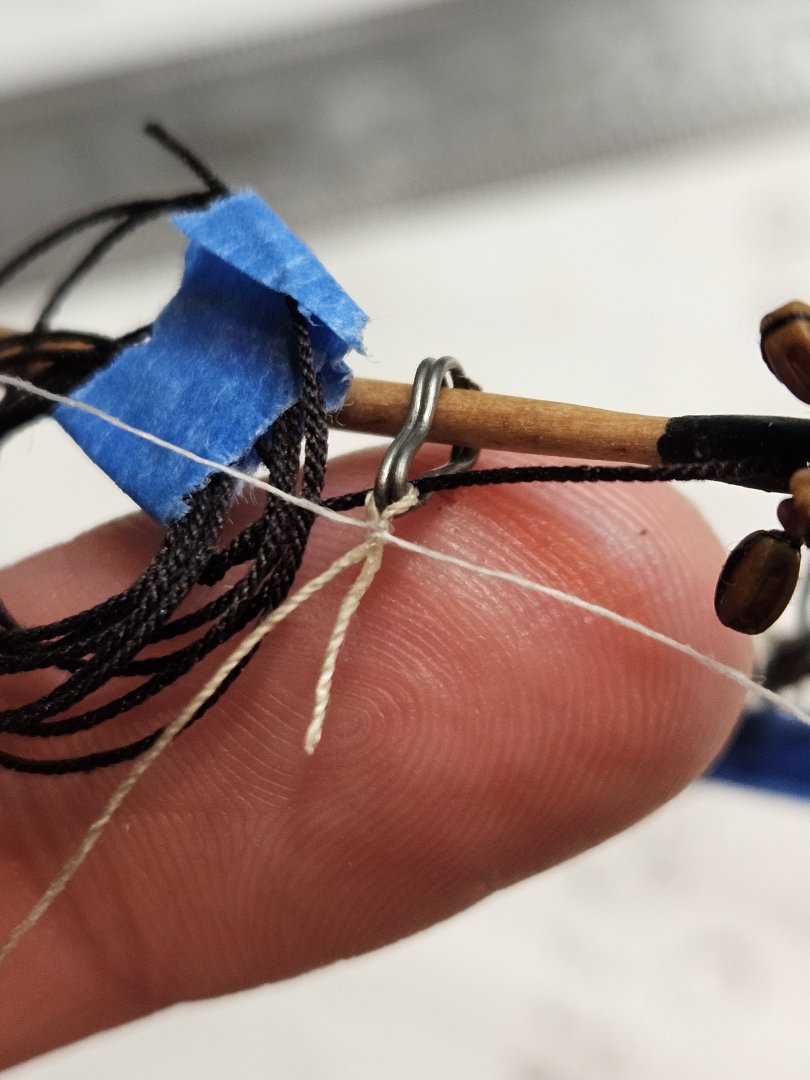
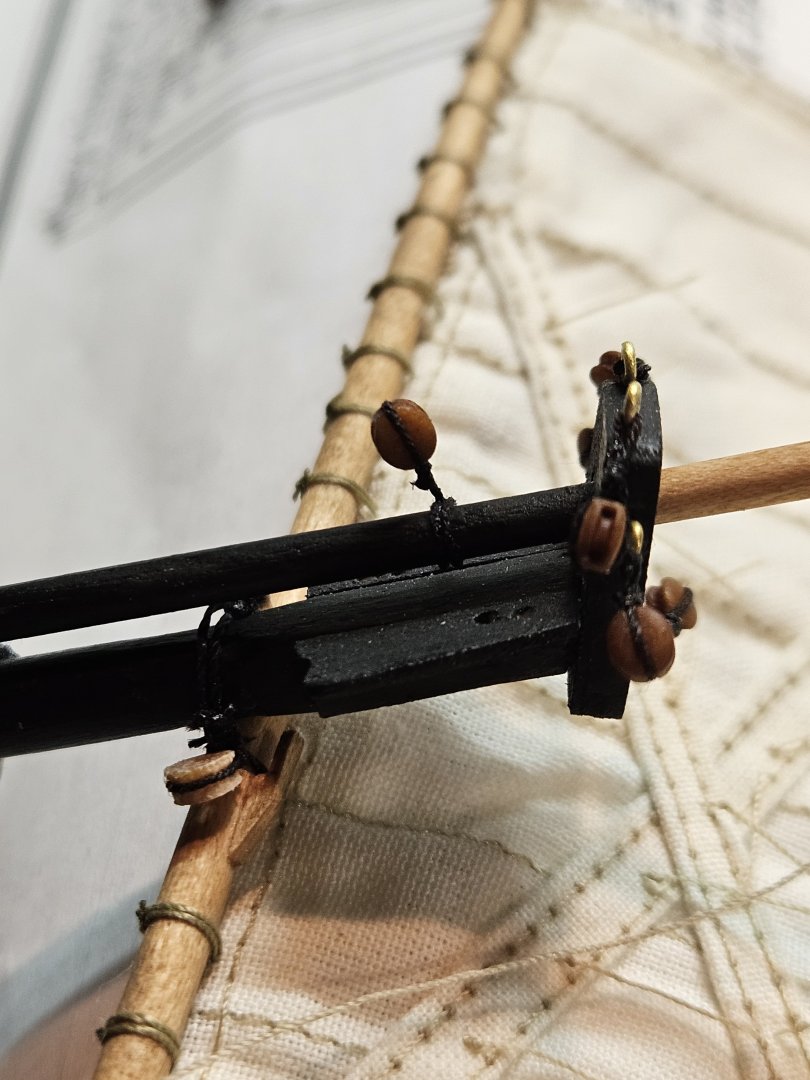
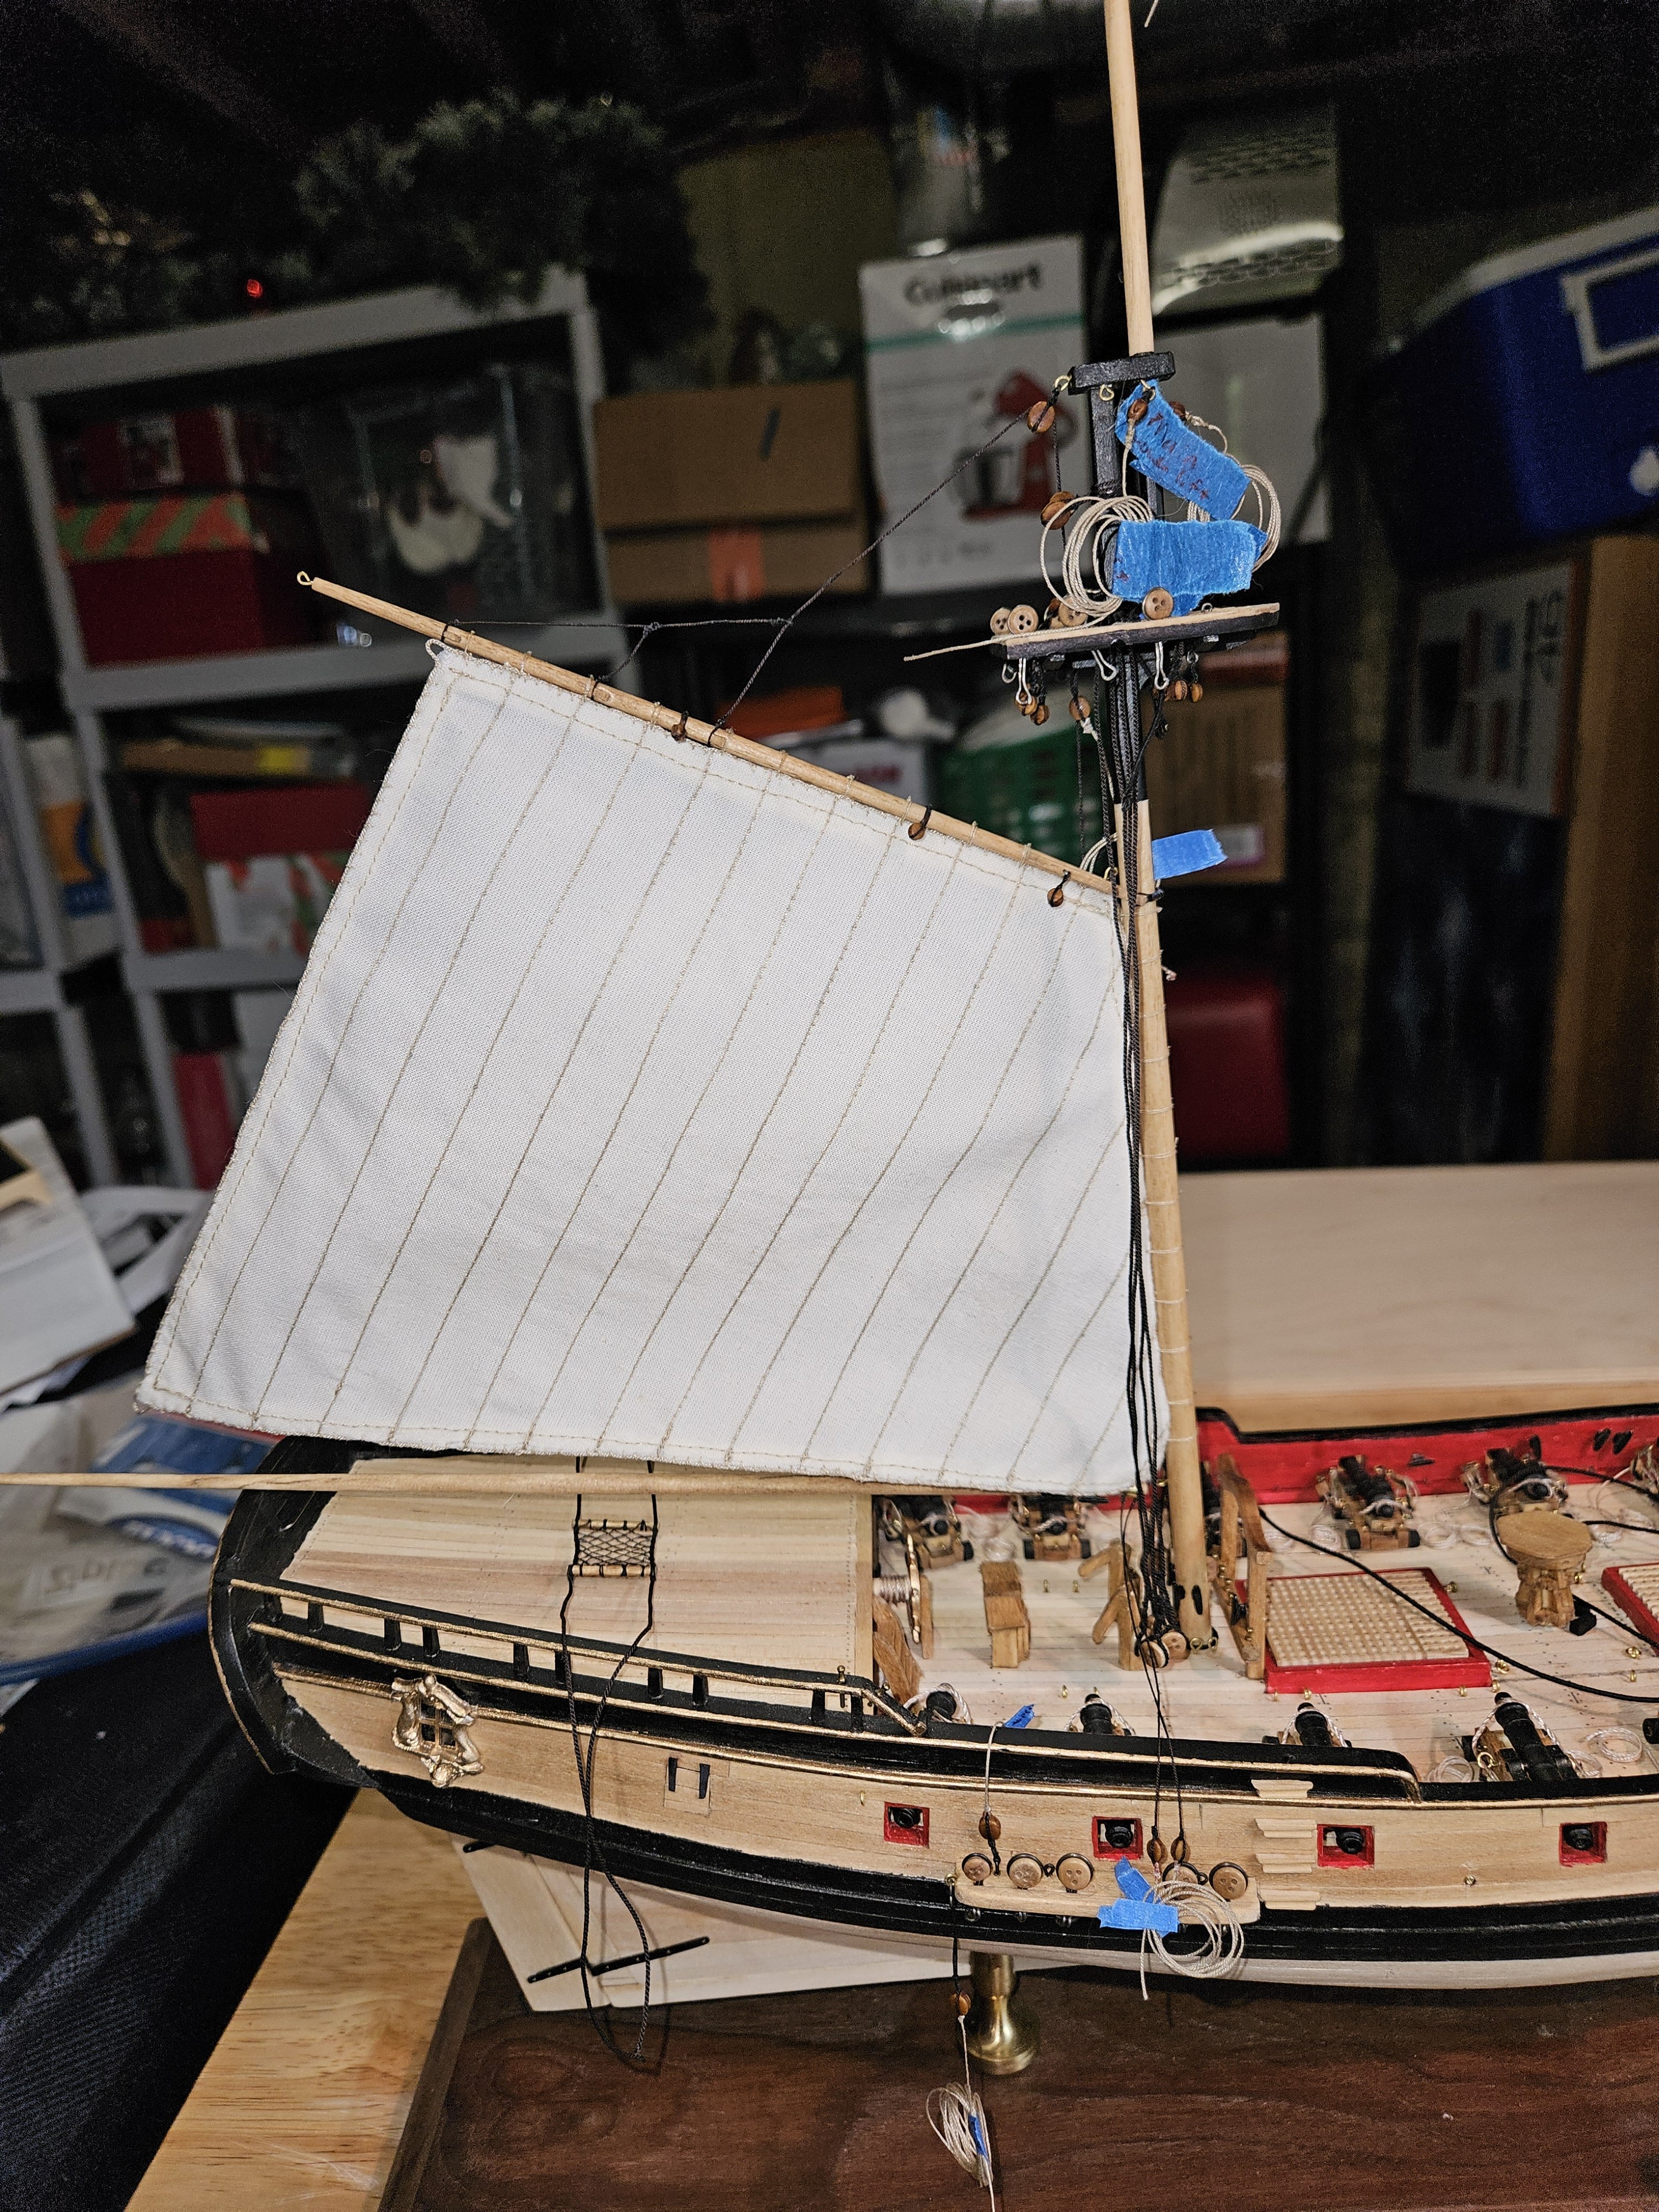
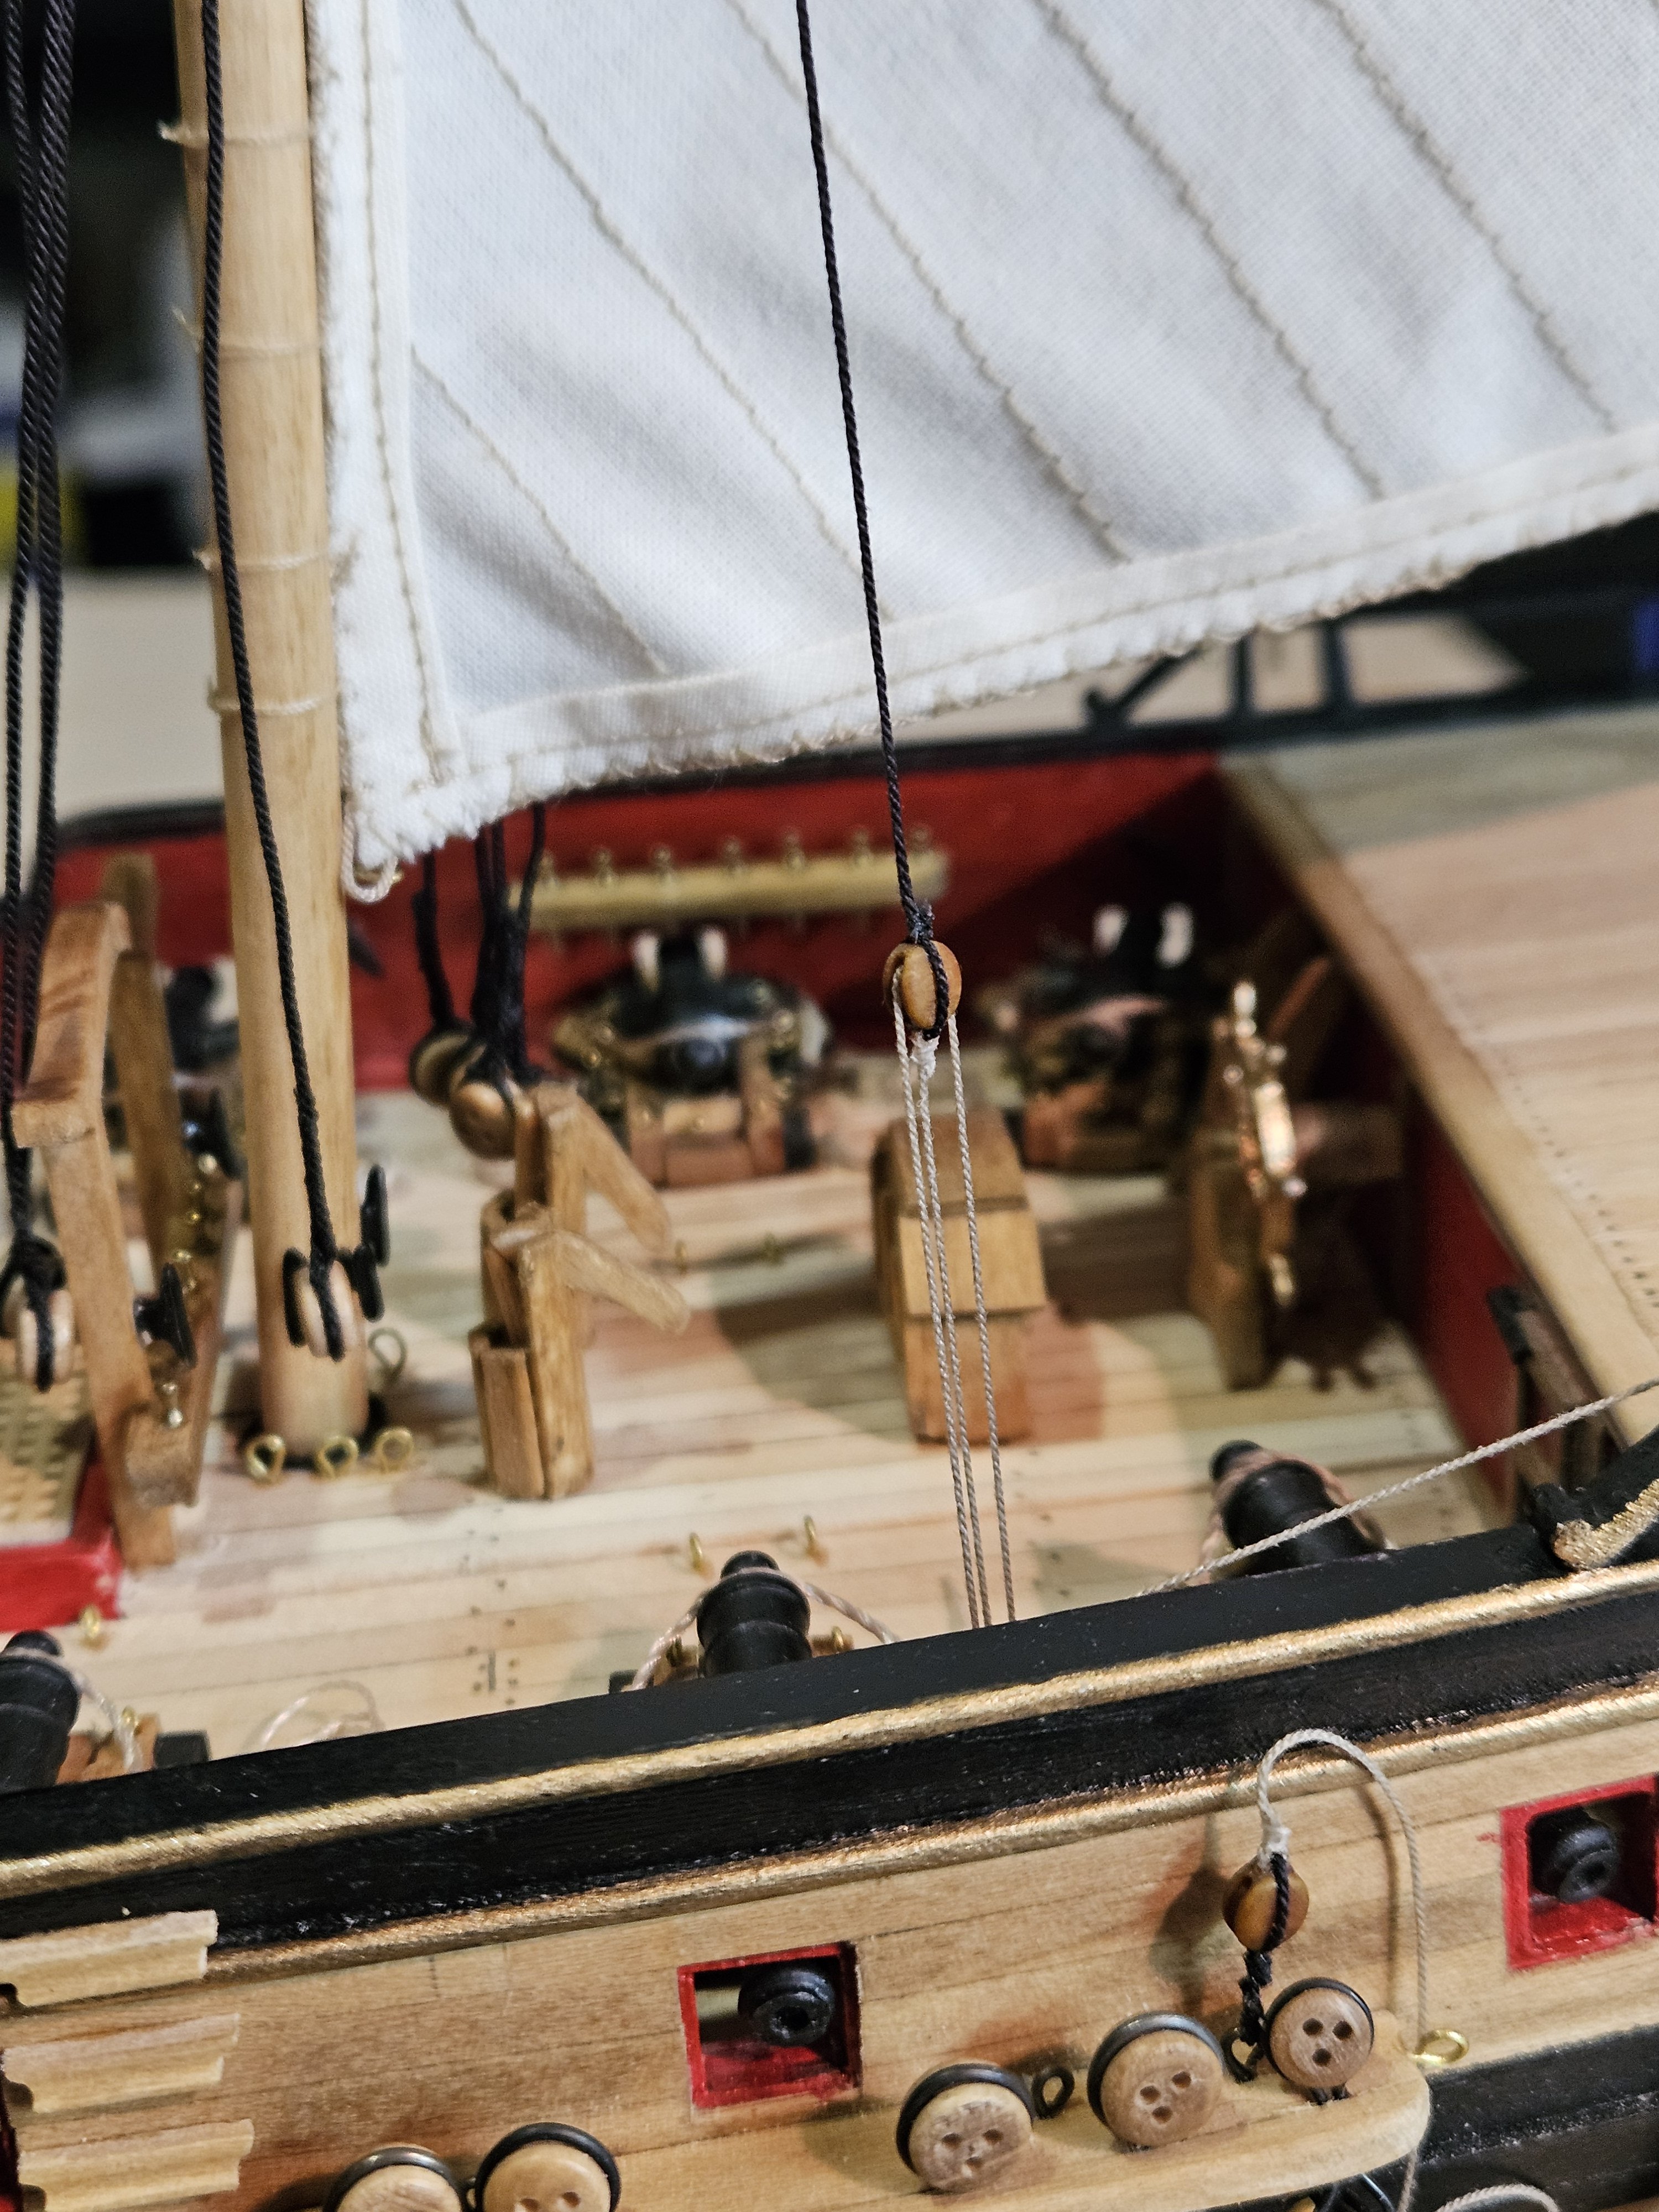
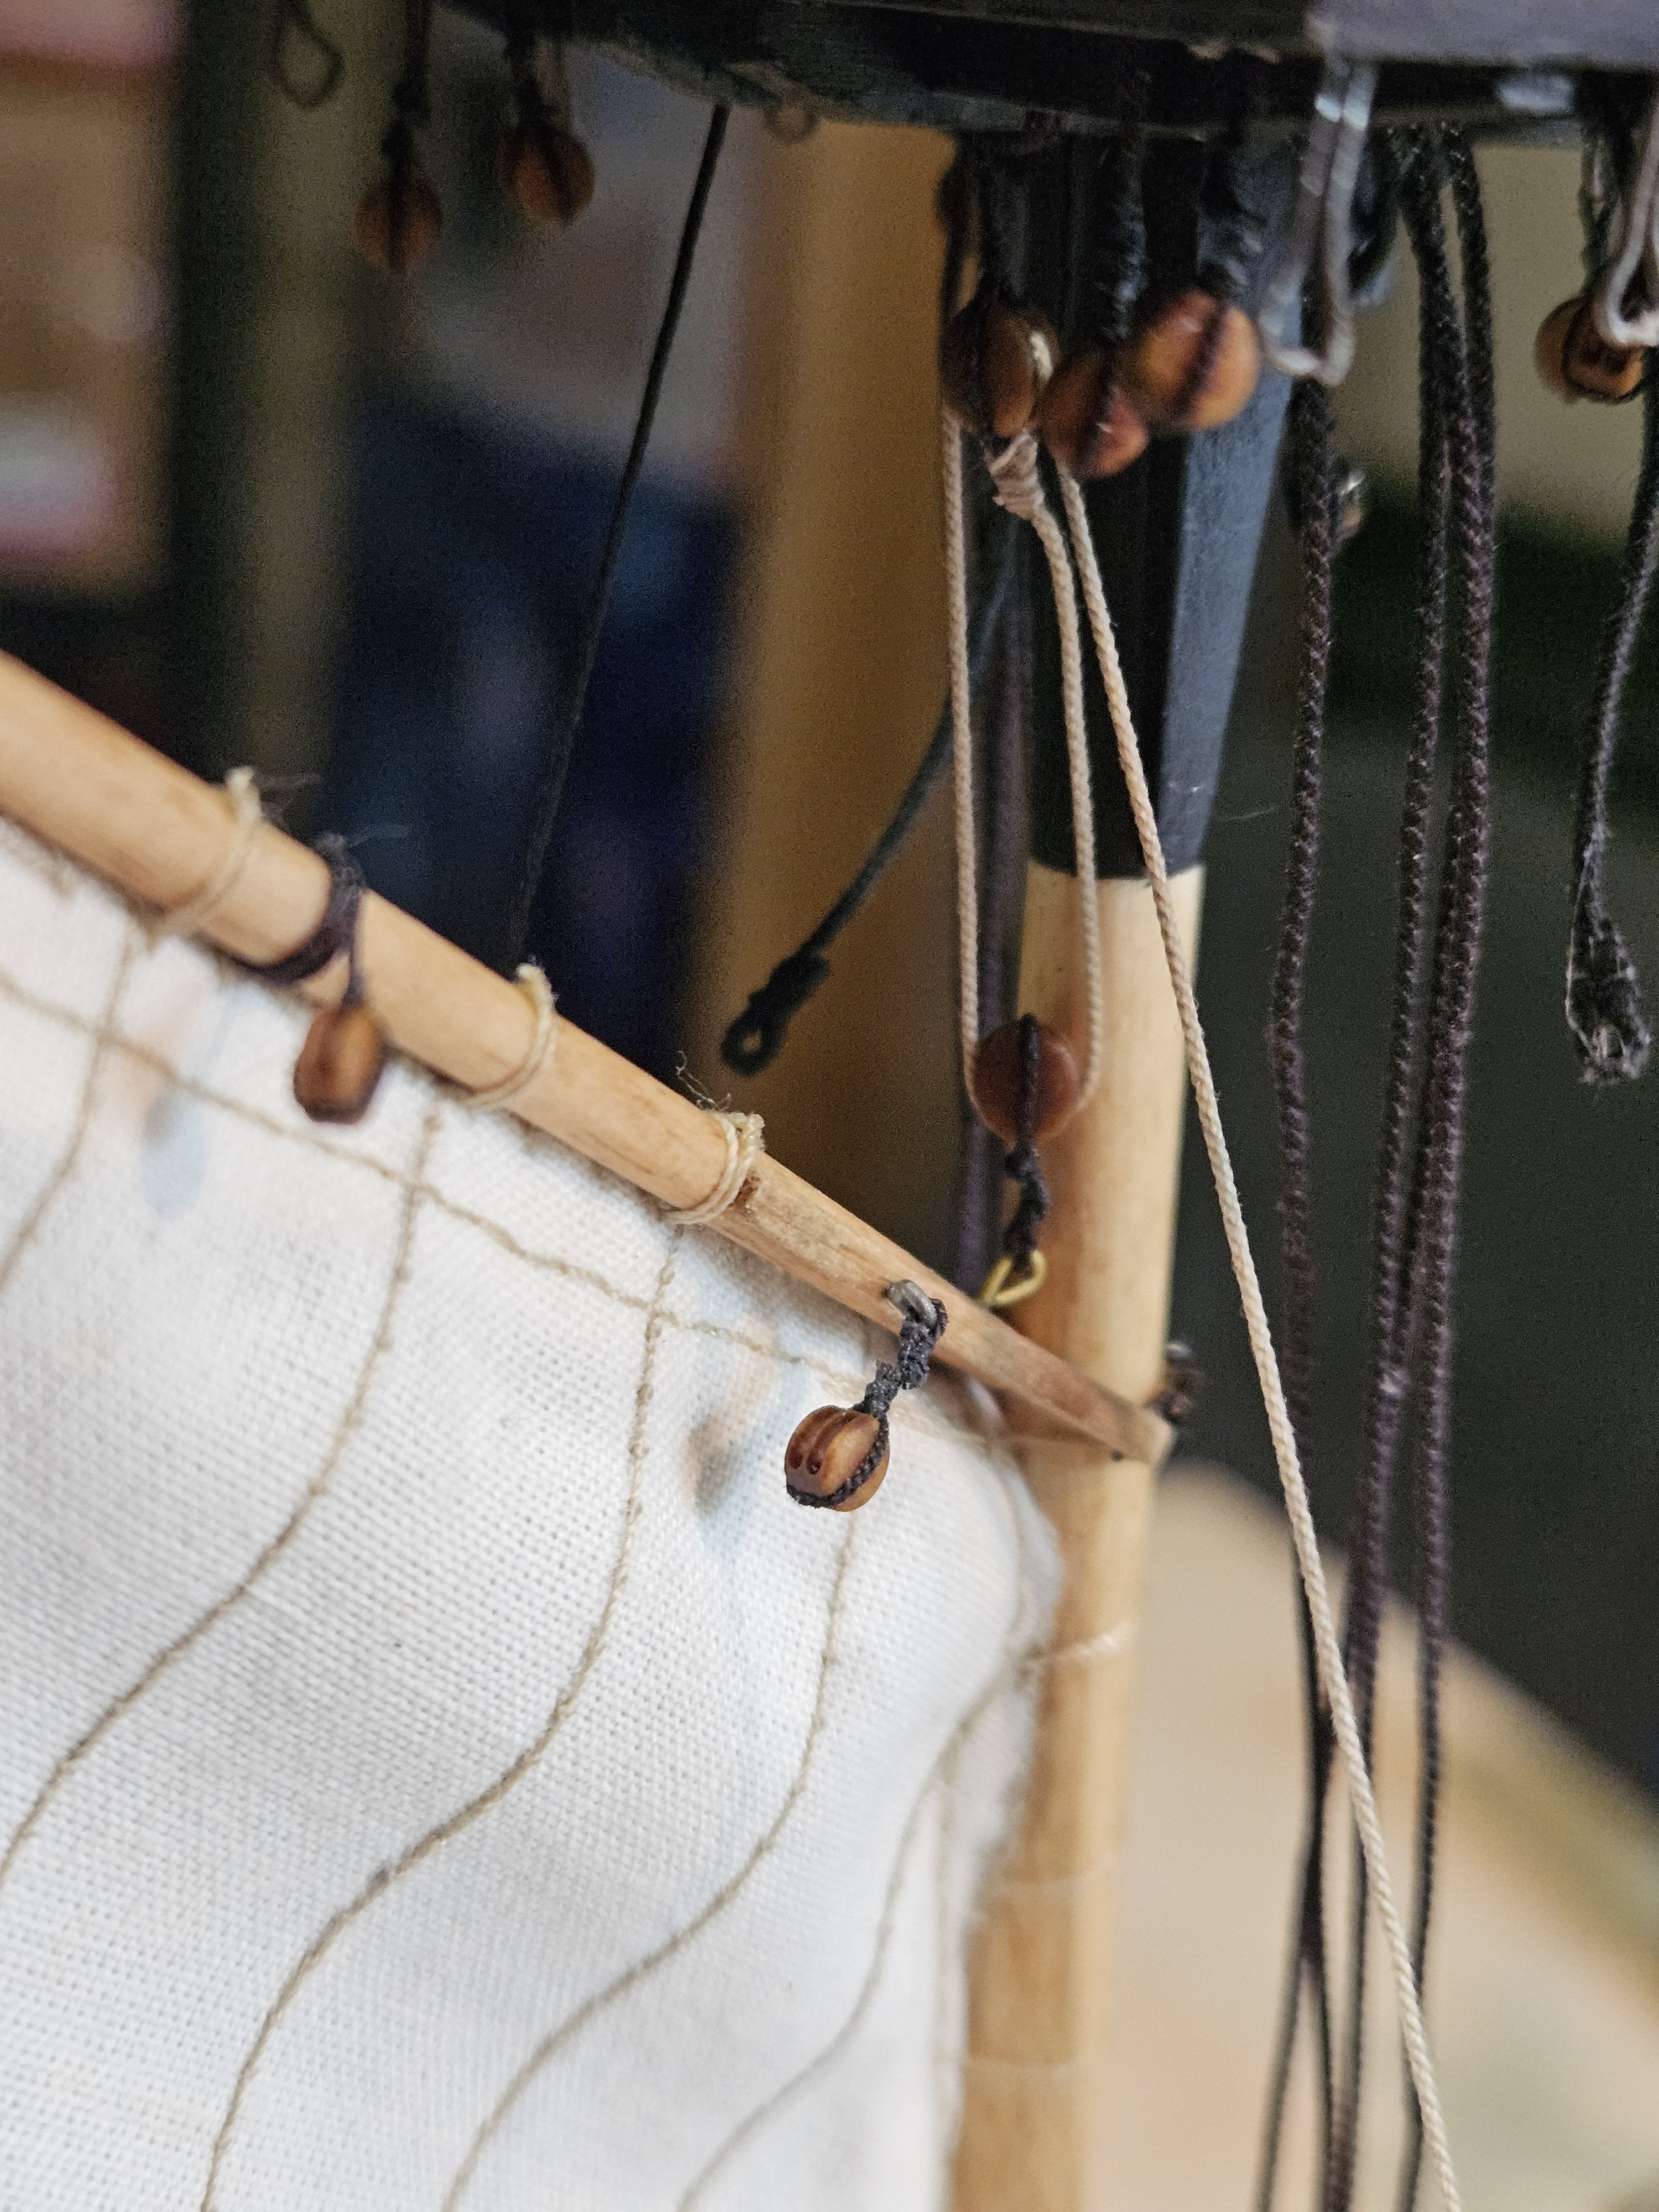
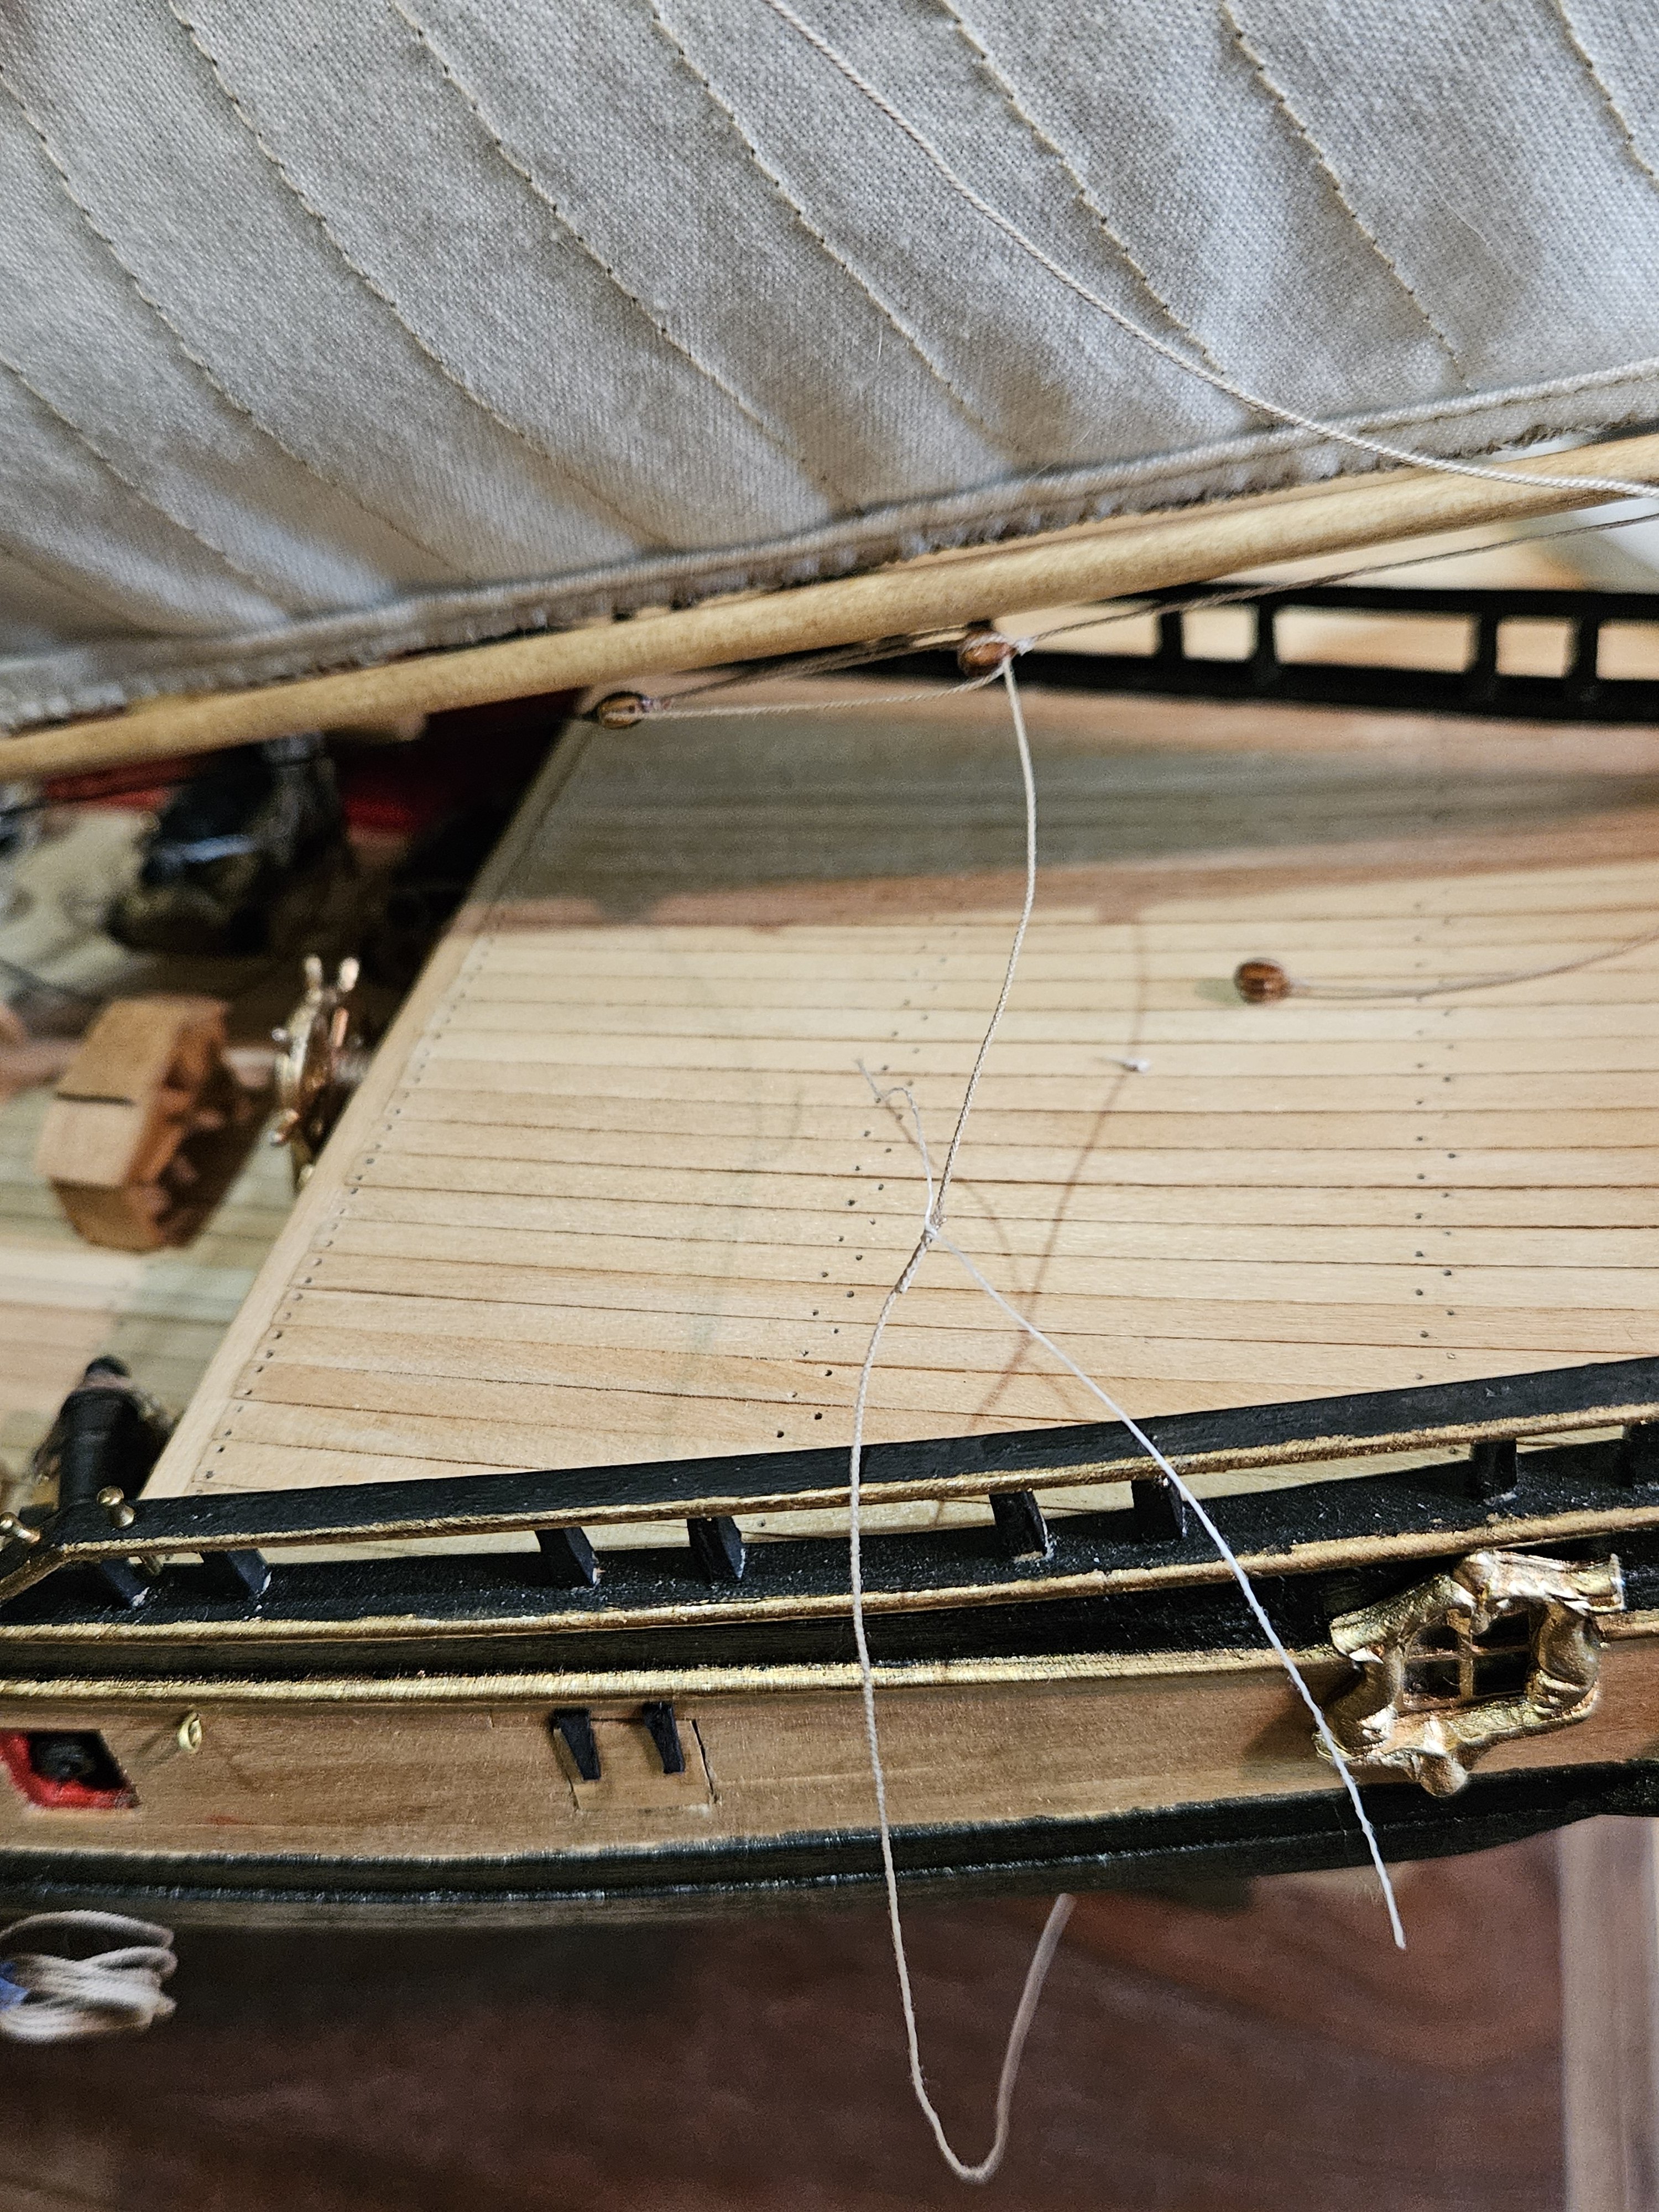
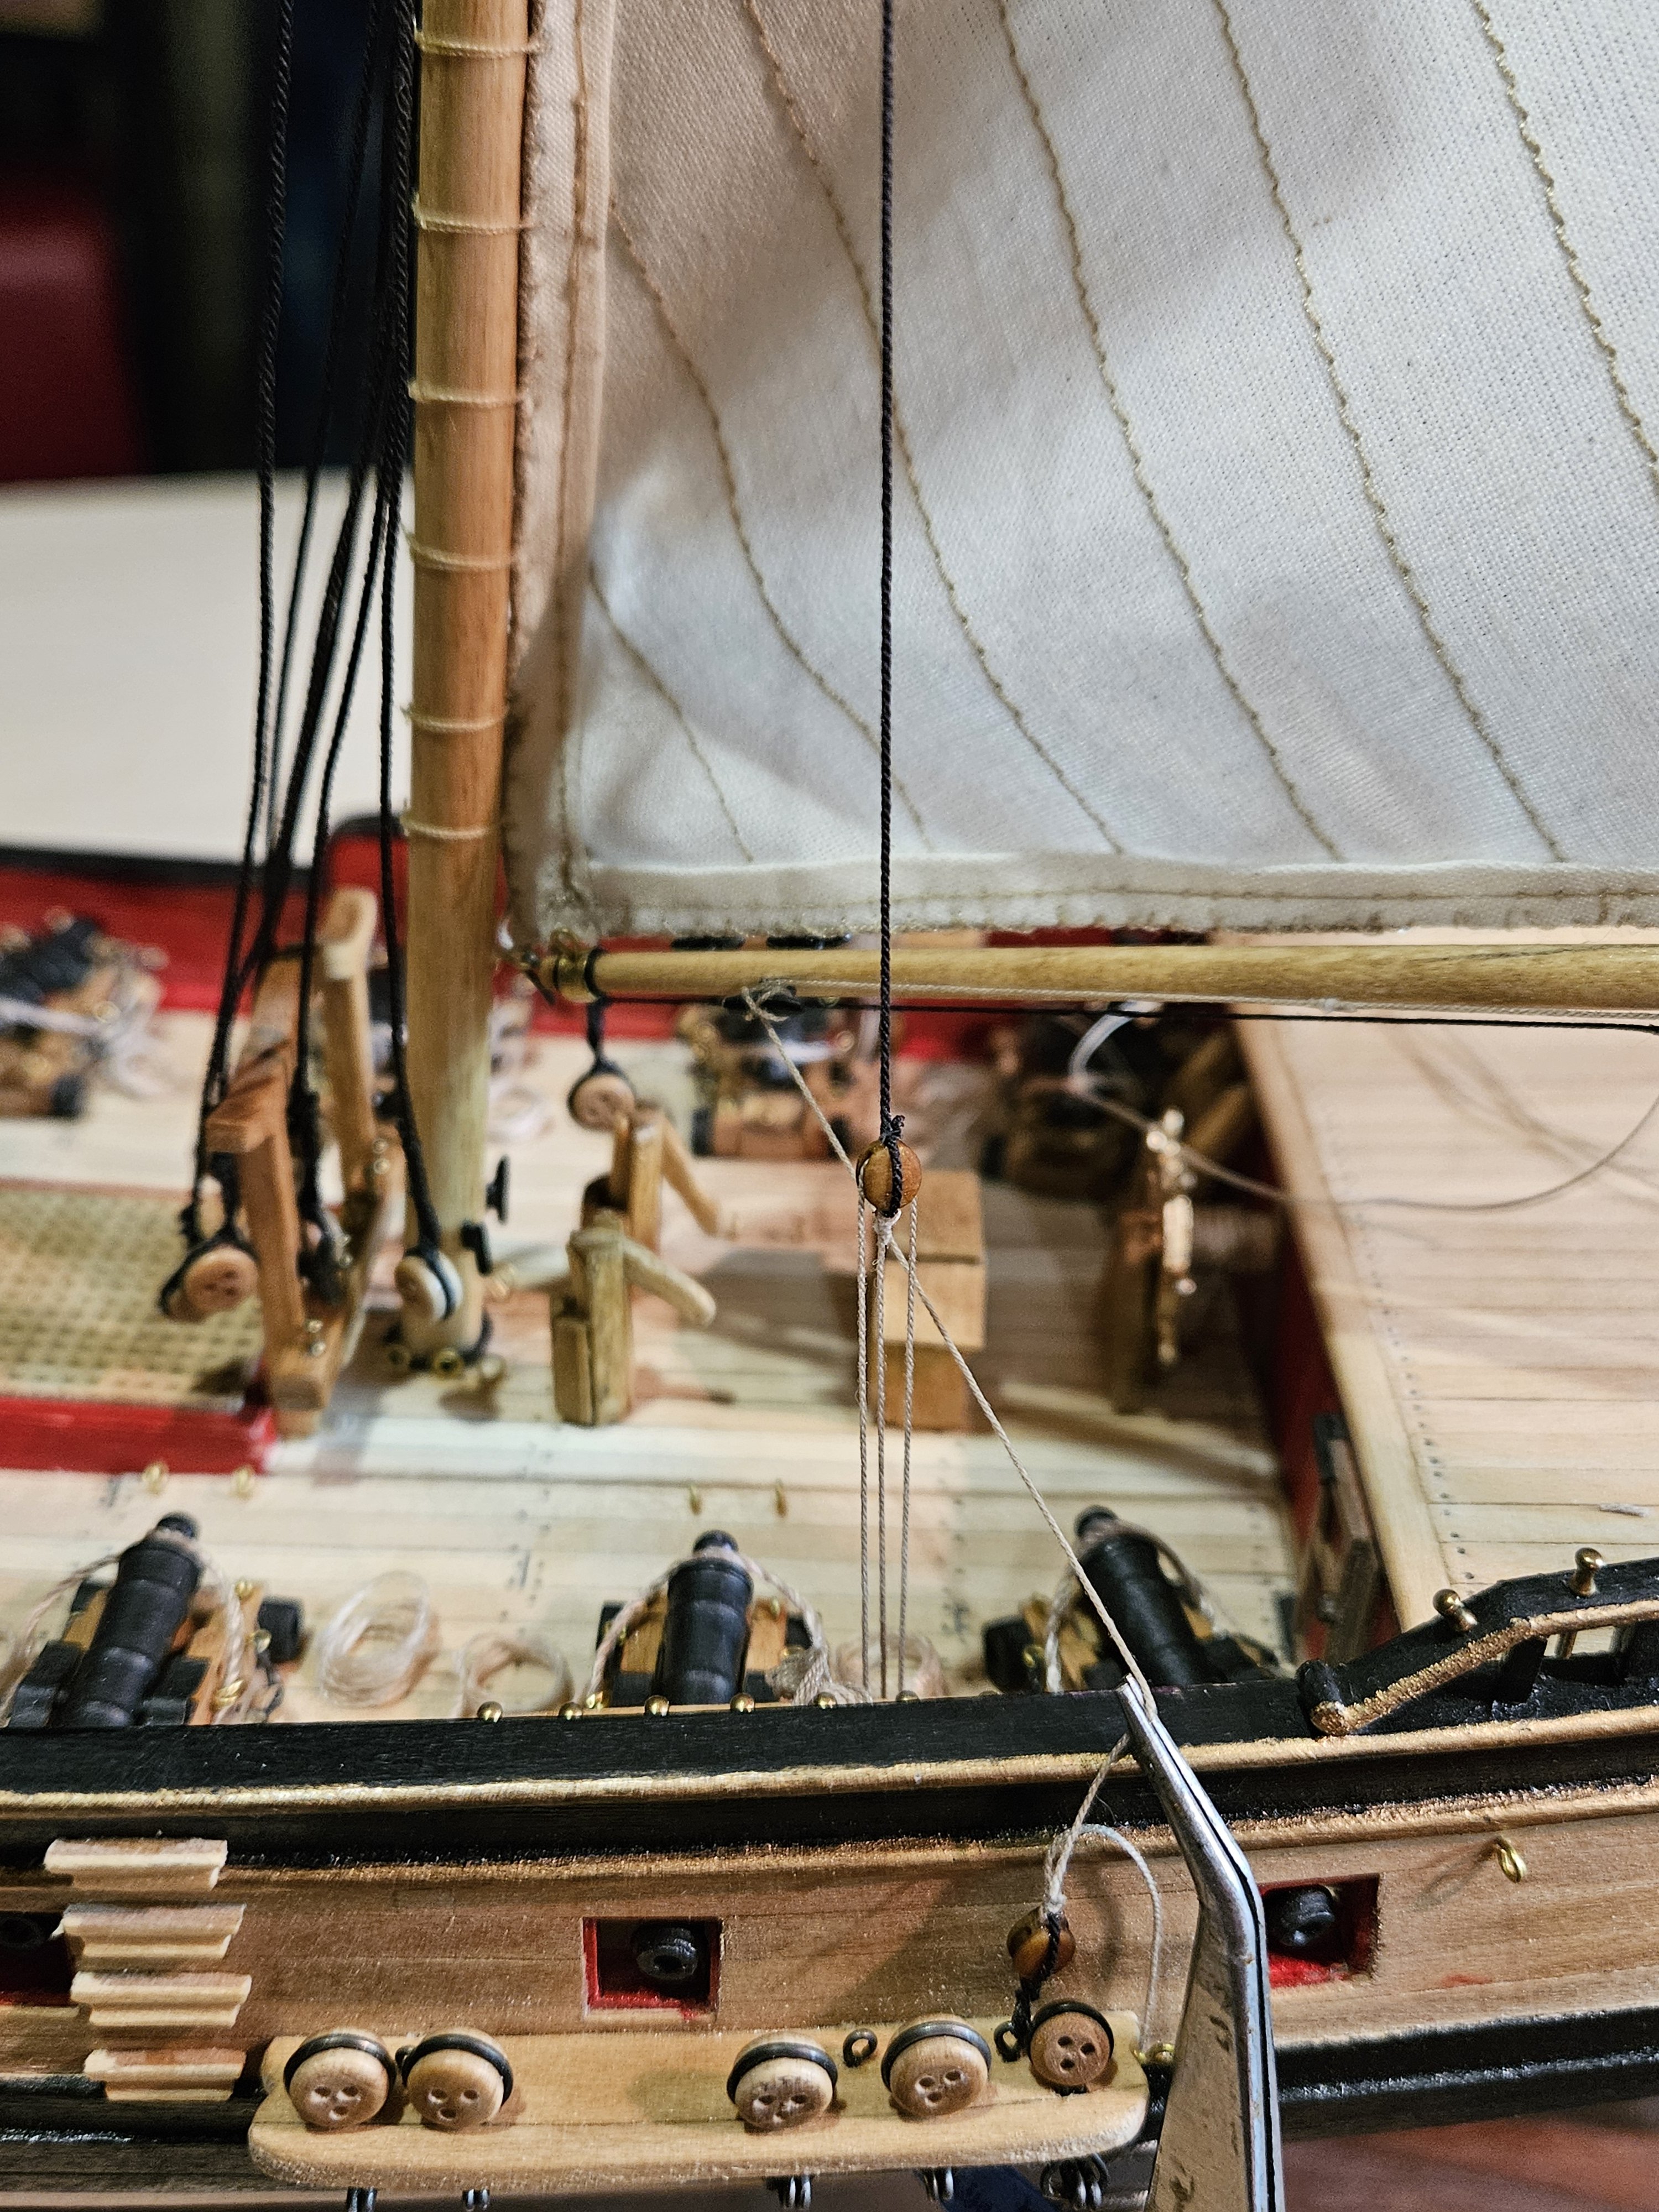
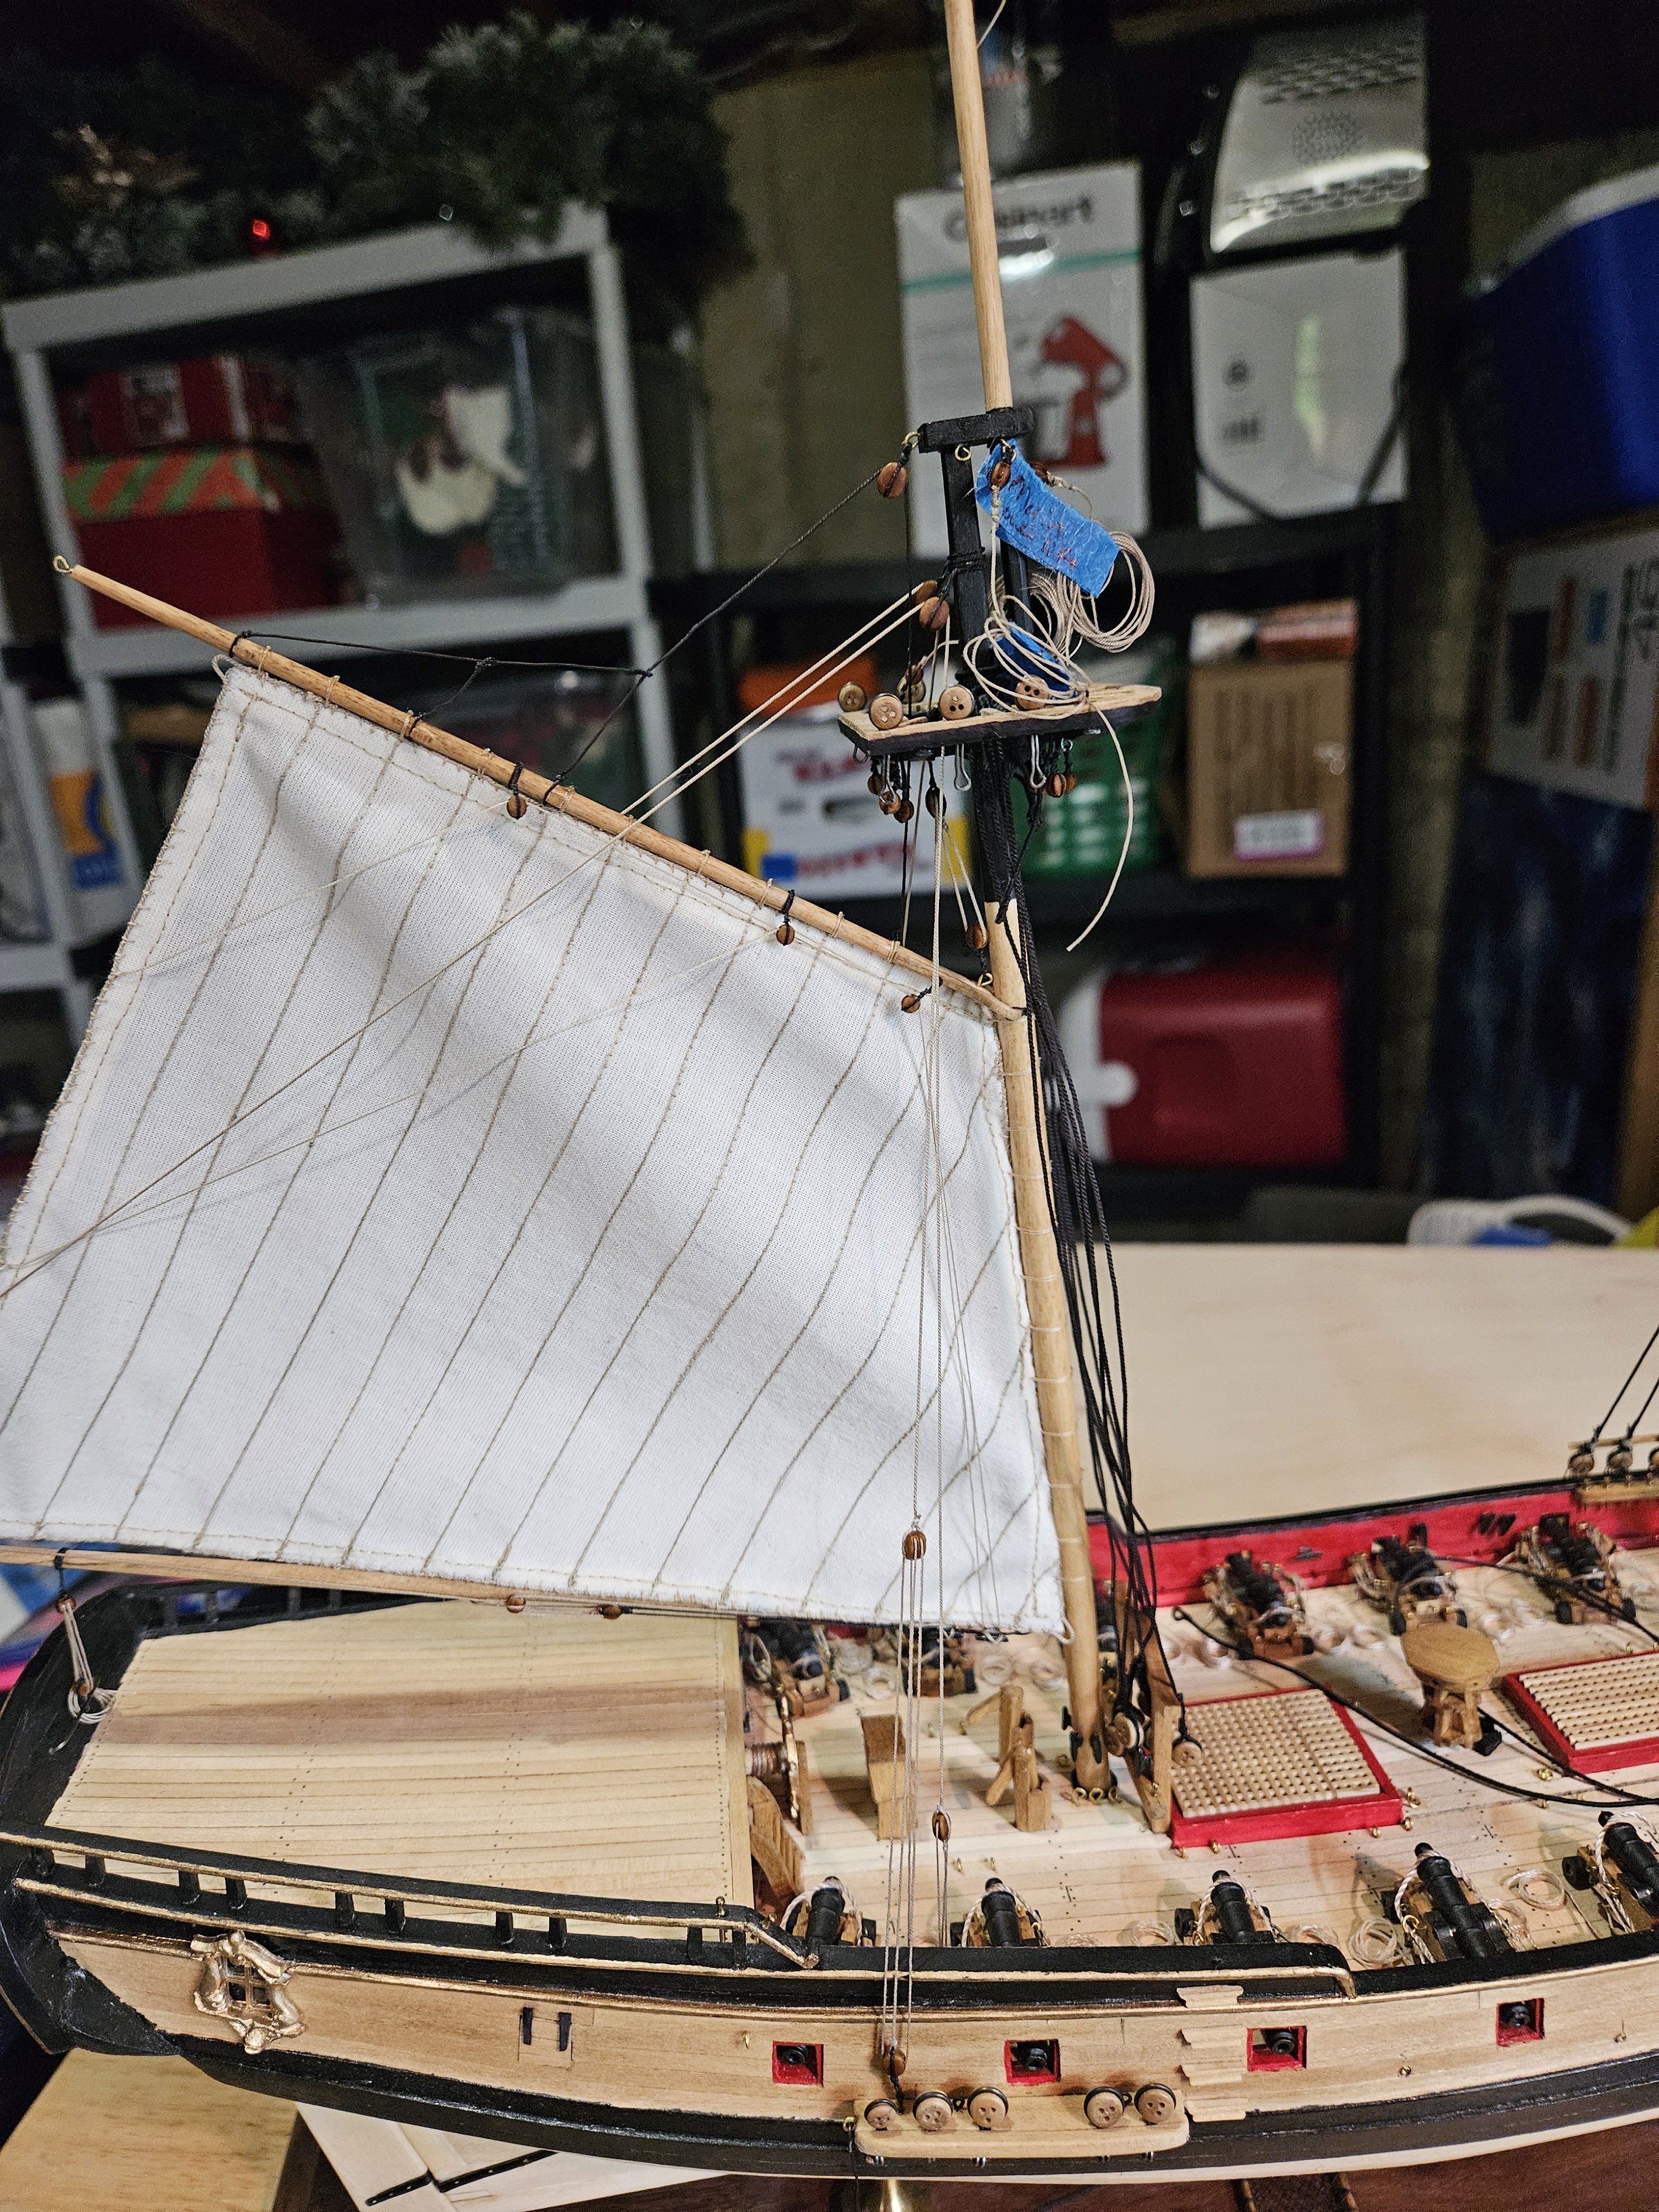
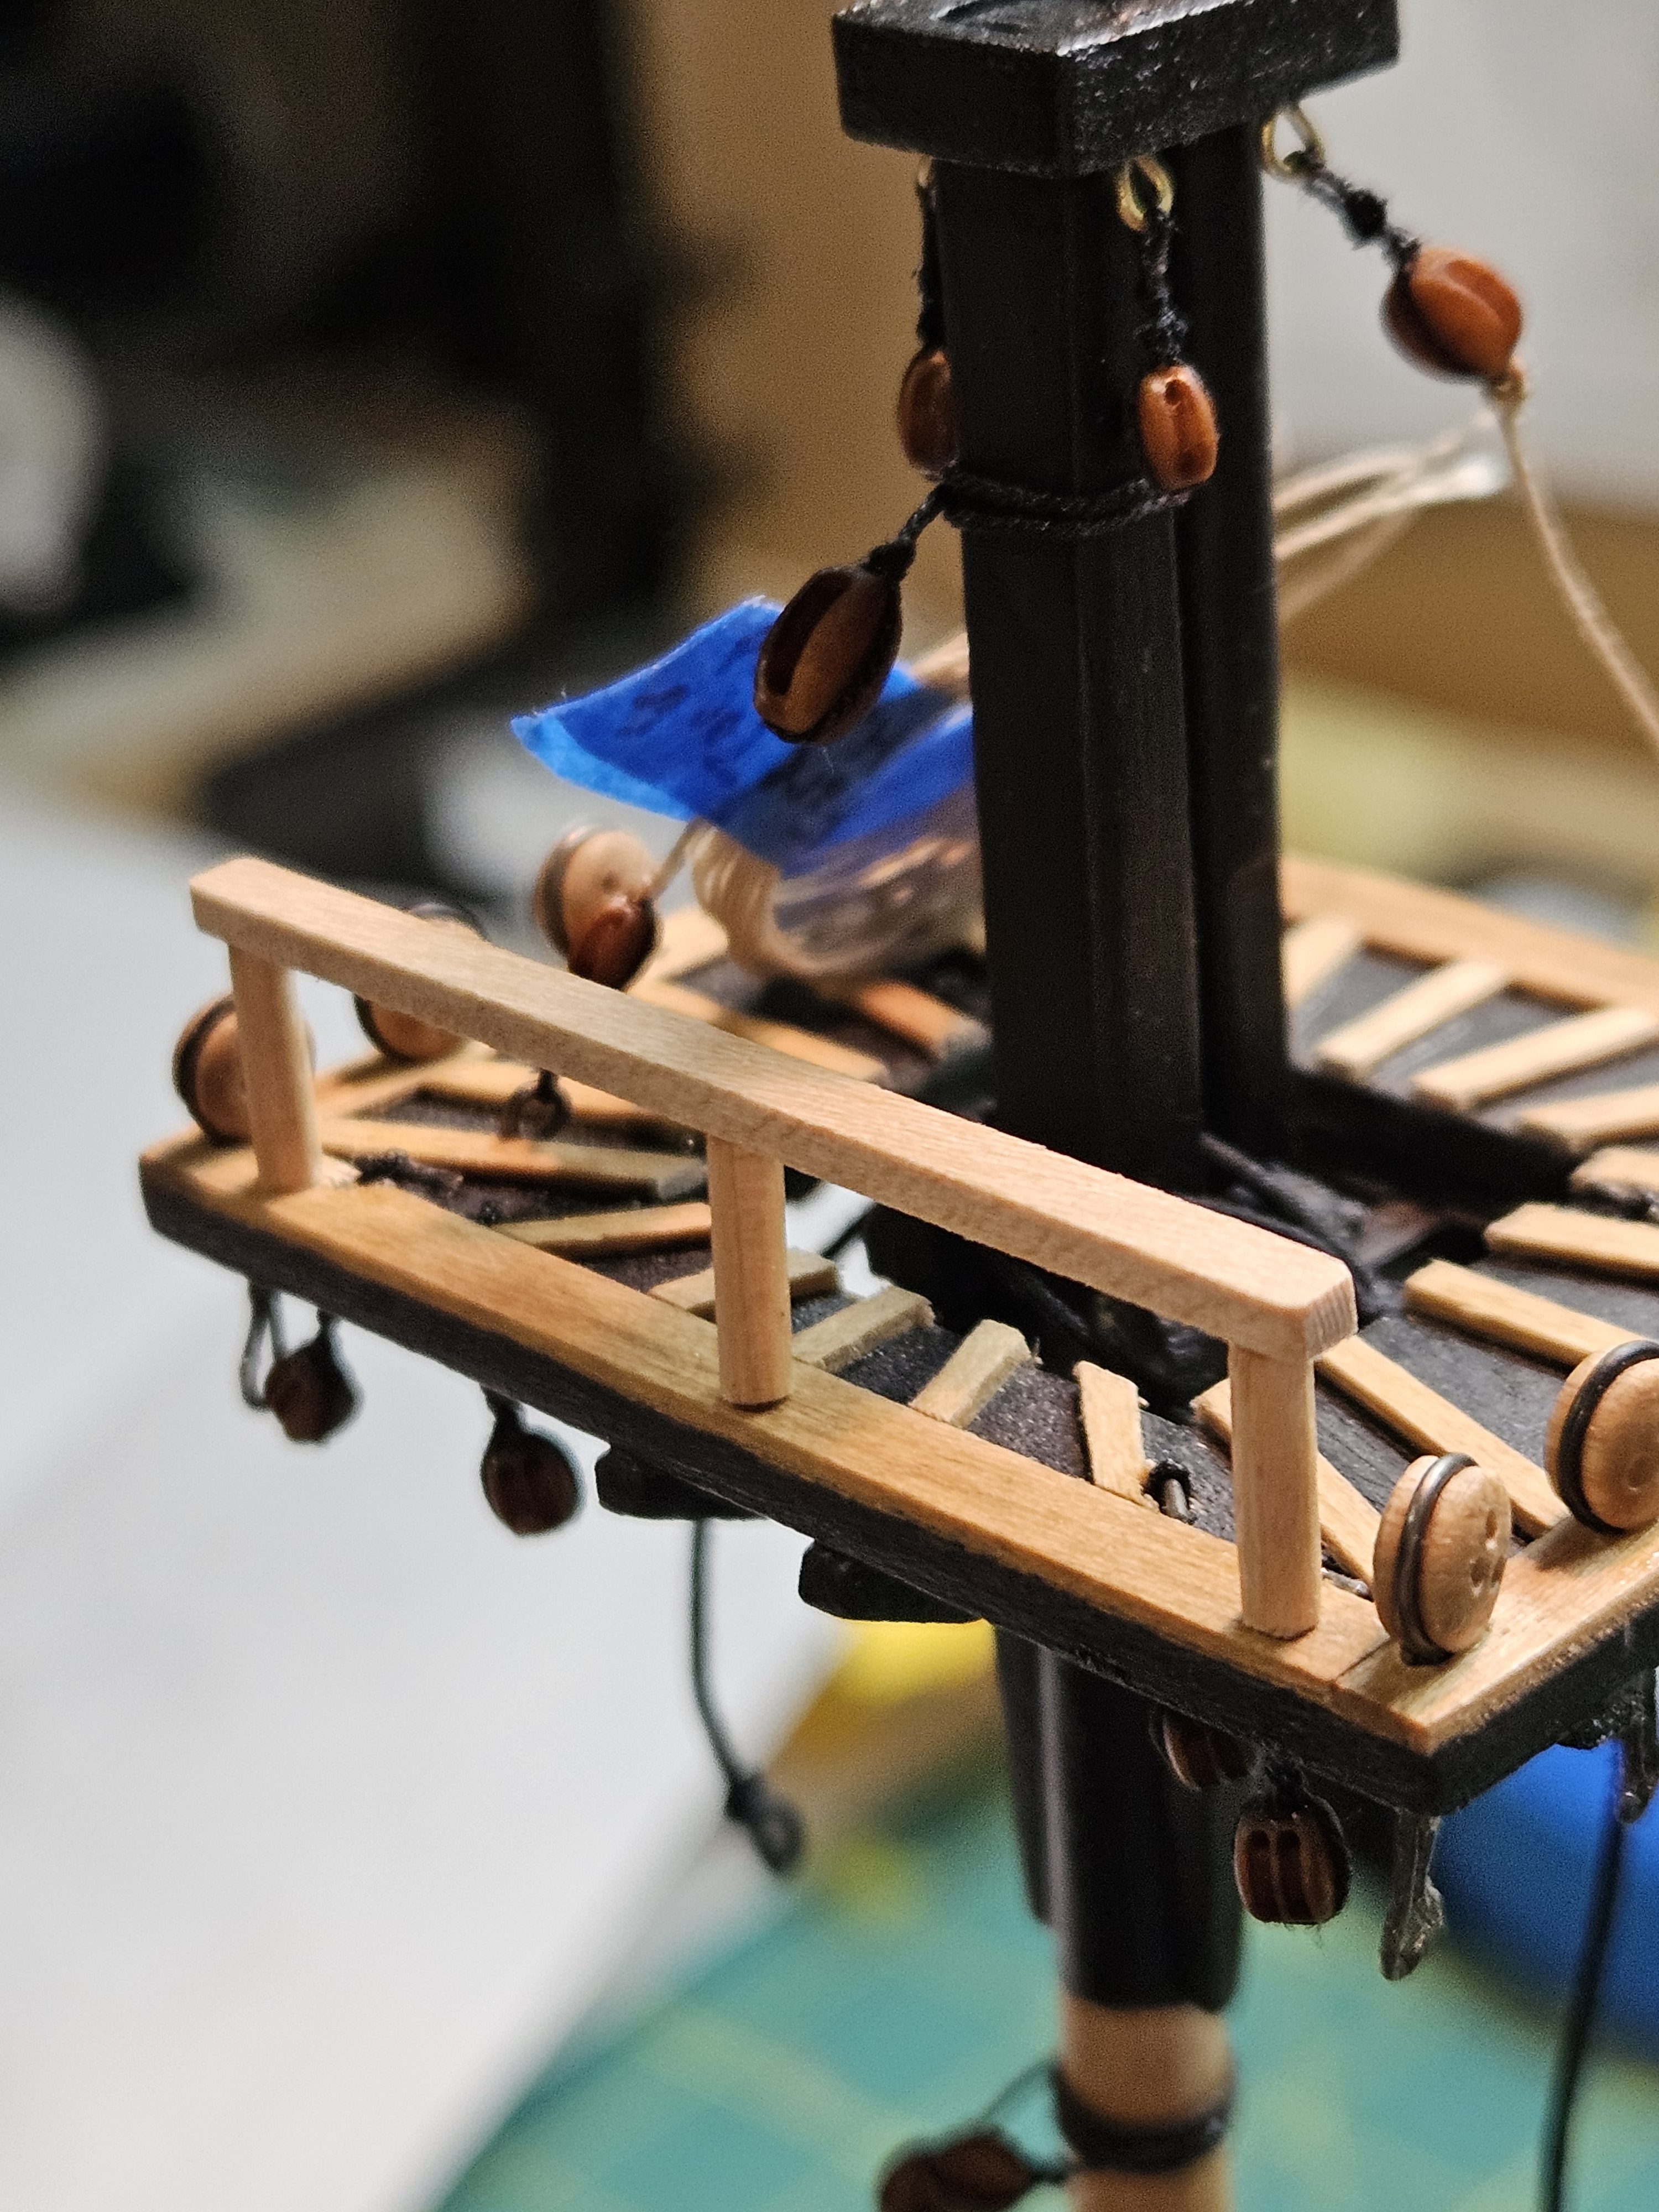
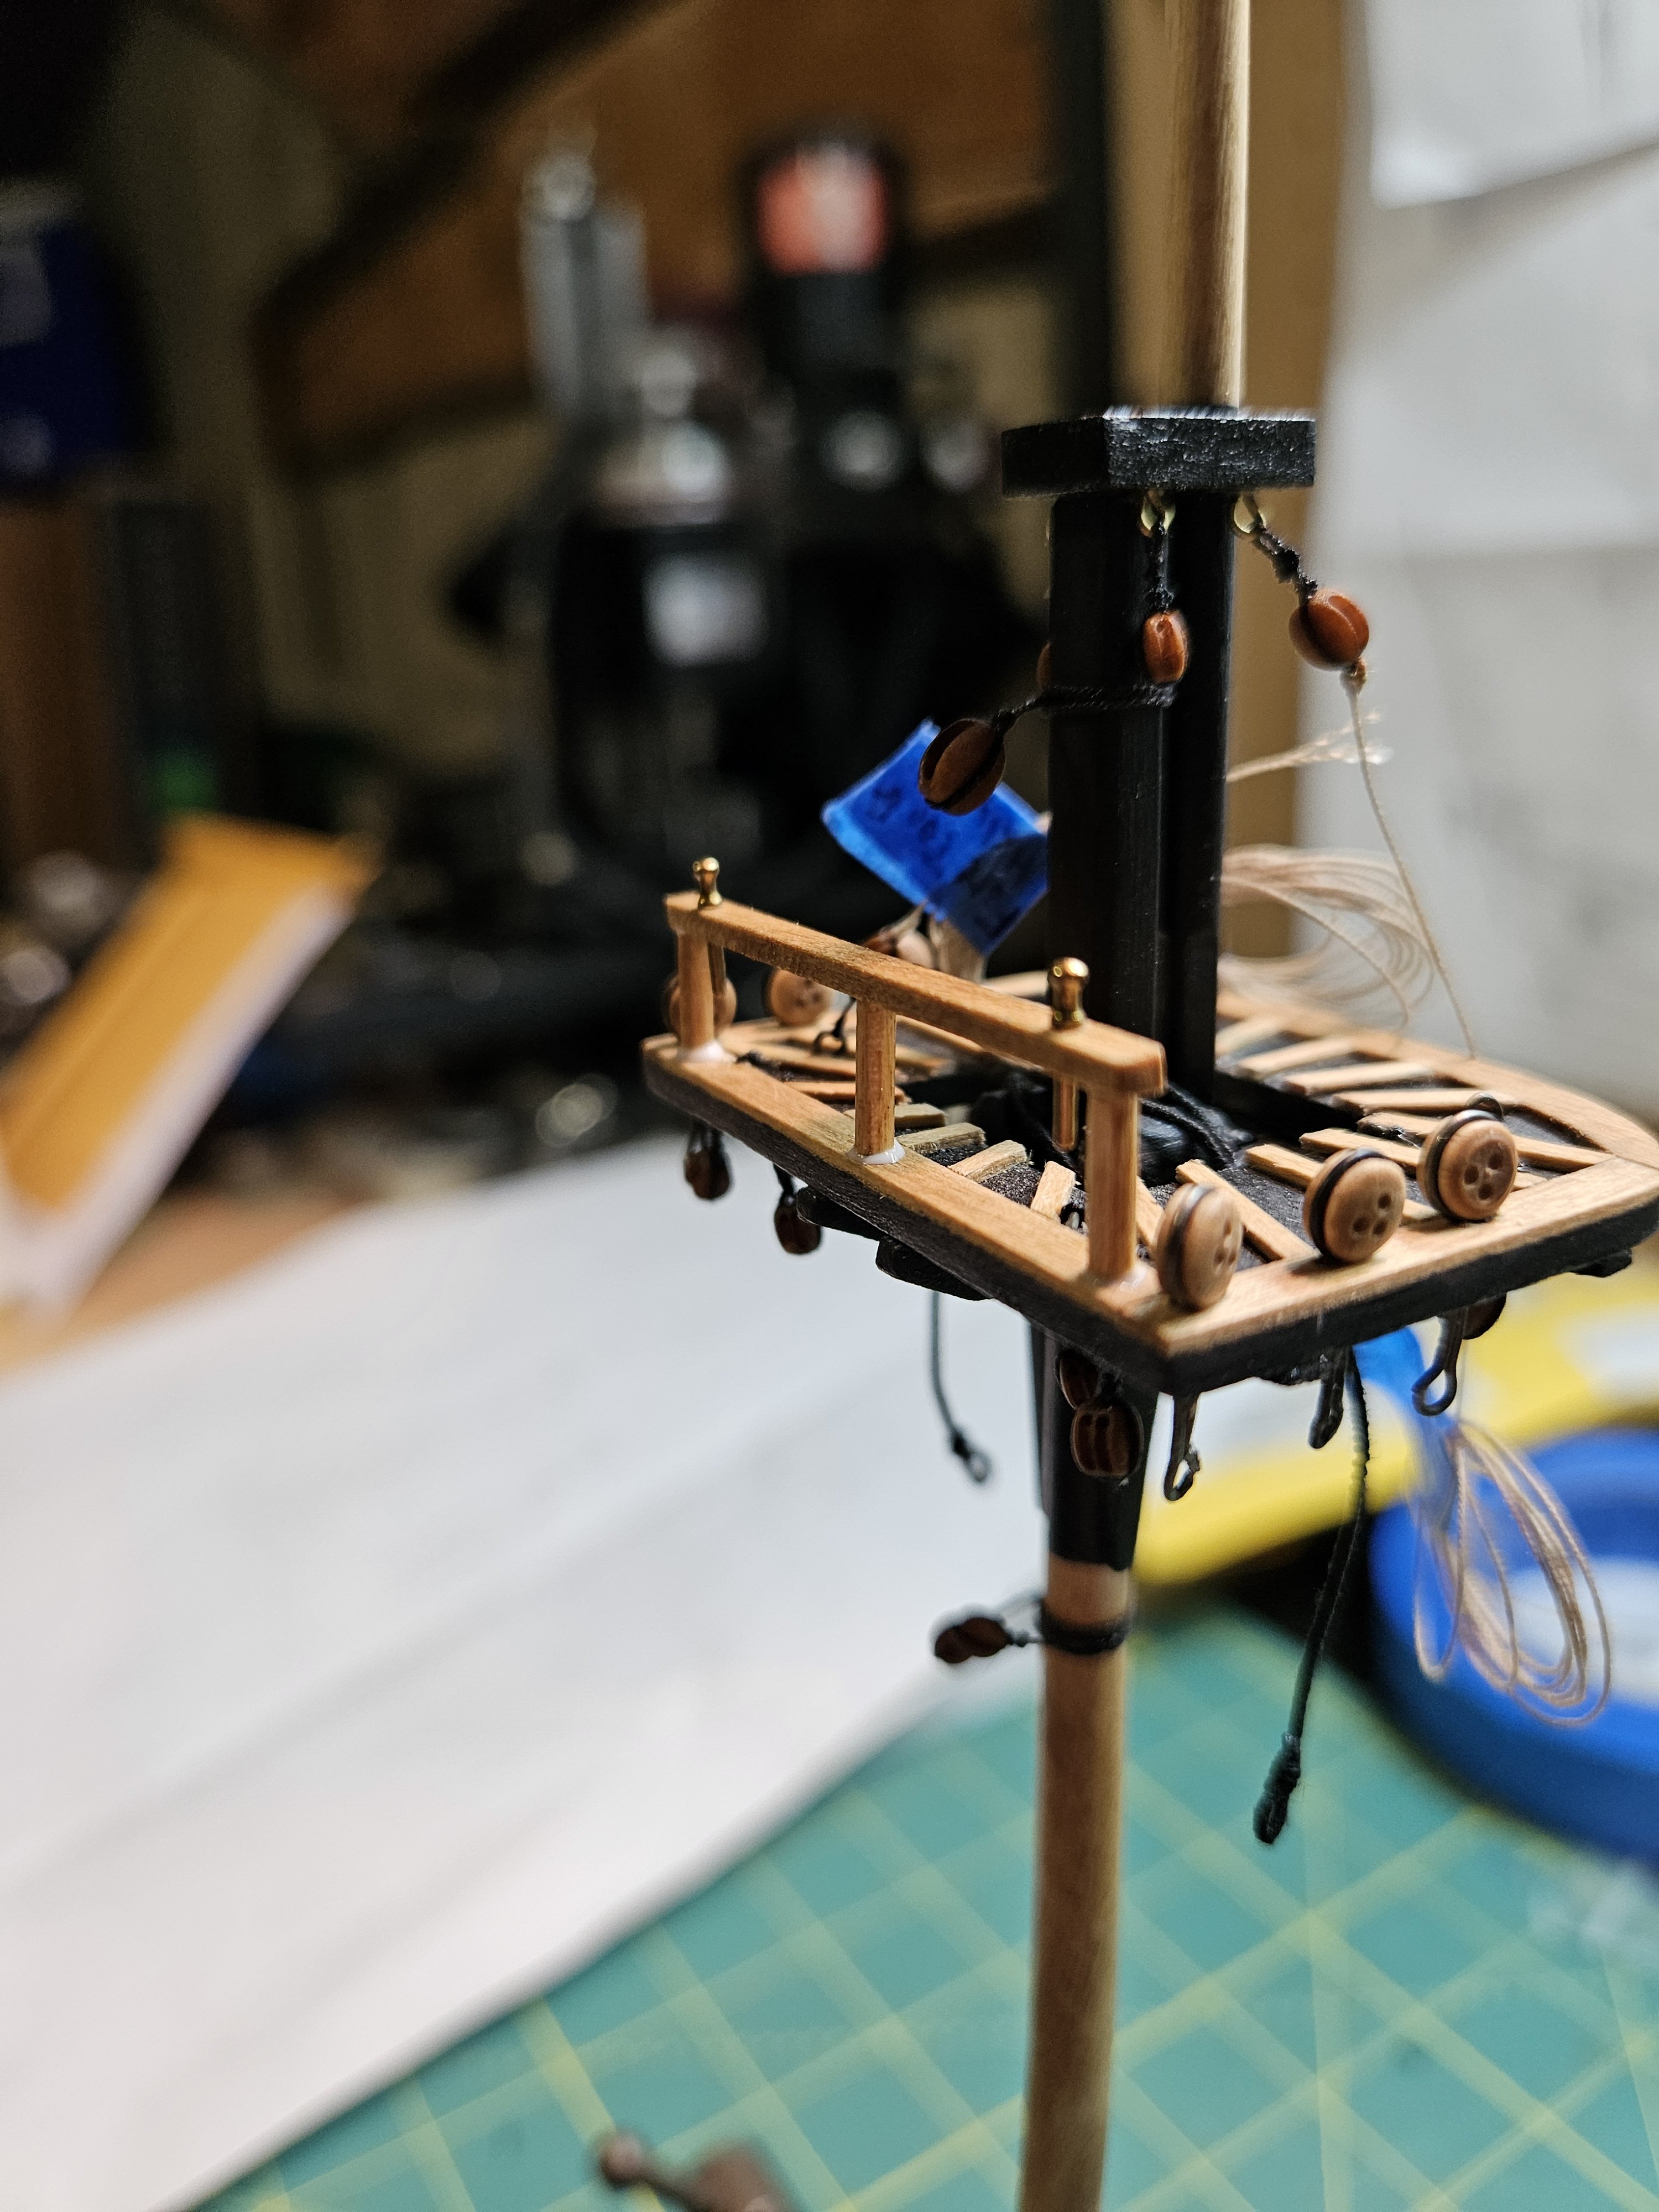
Bending Spanker Sail and relevant rigging for the Fair American.... Lot of content this post, and a lot I didn't get good pictures of along the way, or any at all. So, much of this is after the fact and not as detailed as I would have liked. But, that ship has sailed... Before I rig the shrouds for the Main Mast, I want to tackle the spanker sail while I still have access to do so. I rigged/bent the sail to the main gaff, using robbands as before. I also added two single 3mm blocks and one 3mm double block for the brails. These have to tie off somewhere, and my instructions don't say where, so I've added some cleats to the main boom. Starboard forward is the brail cleat, starboard aft is for Inhaul, port is outhaul. I saw this in Petersson, so I'm adopting that here. Additionally, I added two black standing ropes for inhaul/outhaul and blocks (not shown). Furthermore, I also added the peak bridle, which I'll reeve through its block later. NOW I'm ready to start...I hope.... First up was a parrel for the gaff jaws. My instructions don't say how to do this, so I'm using small beads, as before and a rope parrel seized around the main mast, similar to what I read in Lee's. There are holes in the jaws, so after pass through the beads, the rope goes back in again, and seized on the other side. I also added a block for the throat halyard. It's ready to go when I rig that later. I temporarily tensioned the peak bridle to see where the gaff would raise to. I didn't want the bridle to sag unnaturally, so once I got the height approximated, I can see where the sail falls - I want it close to the main mast so I can attach the robbands. These are probably meant to be rings, so it can slide up and down the mast, but I want to move along in the build, so not this time. I made sure the sail wasn't bunched or overly stretched beyond the where the boom hooks to the mast. What I'm most pleased with is the measurements of the sail, when sewn, has turned out to fit! I had to scale the dimensions of the sails to fit my model, down from an online source. For the Peak Halyard, the running end goes to two double blocks, then up to the pin. I've attached the bottom/deck block to an eye bolt, which I'll glue on deck, as per the instructions. After reeving through the 5mm block on the mast cap.... Now it gets seized with a 4mm block, with the tan running rope end starting here. After trying and failing to feed the rope through the double block on deck, I decided I needed to do this ''off-deck'', then hook the block after. Little tough to see, but I managed to get it reeved and started belaying to the pin, holding some tension while I glue with a dab of CA. Now I can do the same with the throat halyard. I've previously attached the single 4mm block to the top, so this was the easy part. You can also see the double 3mm block in the foreground for the spanker brails. Its seized to an eyebolt so that it faces and hangs correctly and the ropes will go straight down to the cleats. I belayed the throat halyard on the starboard side, as per the instructions. I made a crude rope hank/coil to hang on the pin. These were tough to make, and this was before Chucks recent rope hank tool he shared. I later made a little jig of my own to make rope hanks - it still a work in progress for this scale. I attached the running end of the outhaul rope to the sail cringle.... And the inhaul to the same cringle, as shown in Petersson, then to 3mm double blocks. I also added the boom topping lifts with black rope, which I later changed to tan after reading the instructions. Yes, my basement storage is in plain view in the background. I didn't have a spanker sheet big enough to hide it 😉 When running rope through the blocks, they ended up being 2 inches short of the cleat! I underestimated how many turns it takes through the blocks before the cleat. I fashioned a little rope extension, which will be small and hidden behind the boom. After tying with fine thread, small dab of glue, and trimming very close, the end result isn't bad. Almost invisible... So now it reaches the cleat. After a little dab of glue, it gets trimmed close with a razor blade later. Tweezers help hold tension while the glue dries. I kept the tweezers in place while I did the inhaul side, so the sail is balanced and extended on the boom. You can see the outhaul tackle under the boom. What also has happened, is the head of the sail buckles slightly. It's not perfect, obviously, and fiddling with it will just make things worse. I'm hoping when I add the boom sheet blocks, it'll pull the sail back a little more taut, but I won't force it. So I have the outhaul and inhaul tackle tied off. Now to tackle the brails. Both will go to the same cleat. I'm using the tweezers again to add tension to the rope while the glue dries. I'm not pulling hard on the brails, so the sail stays flying and doesn't bunch. Each brail line was seized to the bolt rope, then rove through the single blocks to the double block, down to the cleat. There's another rope extension in the picture below. Can you find it? I'm also still deciding whether these cleats need rope hanks or not. Thoughts? I also attached the Spanker sheet tackle to the quarter deck, as per the instructions. This I intentionally left a little loose, so as to not pull the peak bridle and other tackle too tight. So now almost all the elements for the spanker are in place. The vang pendants still remain, but I'll add those later. I'll be able to do the main shrouds now, without bumping into them. Getting access to the cleats and tackle would have been difficult (for me). This is the fun stuff I have been looking forward to - the rigging. It still amazes me how sailors back in the day would have to handle all these lines in order to make the ship go! More to come soon. - Jason -


-
JLong reacted to a post in a topic:
Rattlesnake by Ed Ku20 - Model Shipways - 1:64
-
JLong reacted to a post in a topic:
Syren Ship Model Company News, Updates and Info.....(part 2)
-
CiscoH reacted to a post in a topic:
Speedwell Battle Station Kit 1752 by CiscoH - Syren Ship Model Company - 3/8" or 1:32
-
Jack12477 reacted to a post in a topic:
Speedwell Battle Station Kit 1752 by CiscoH - Syren Ship Model Company - 3/8" or 1:32
-
dvm27 reacted to a post in a topic:
Speedwell Battle Station Kit 1752 by CiscoH - Syren Ship Model Company - 3/8" or 1:32
-
Don't light the fuse, until all the lines have seized tight - you'll shoot your eye out!
- 27 replies
-
- 3
-
-
- Speedwell
- battle station
- (and 1 more)
-
JLong reacted to a post in a topic:
Speedwell Battle Station Kit 1752 by CiscoH - Syren Ship Model Company - 3/8" or 1:32
-
JLong reacted to a post in a topic:
Nice videos about rigging
-
ERS Rich reacted to a post in a topic:
Fair American by JLong - Model Shipways - 1:48
-
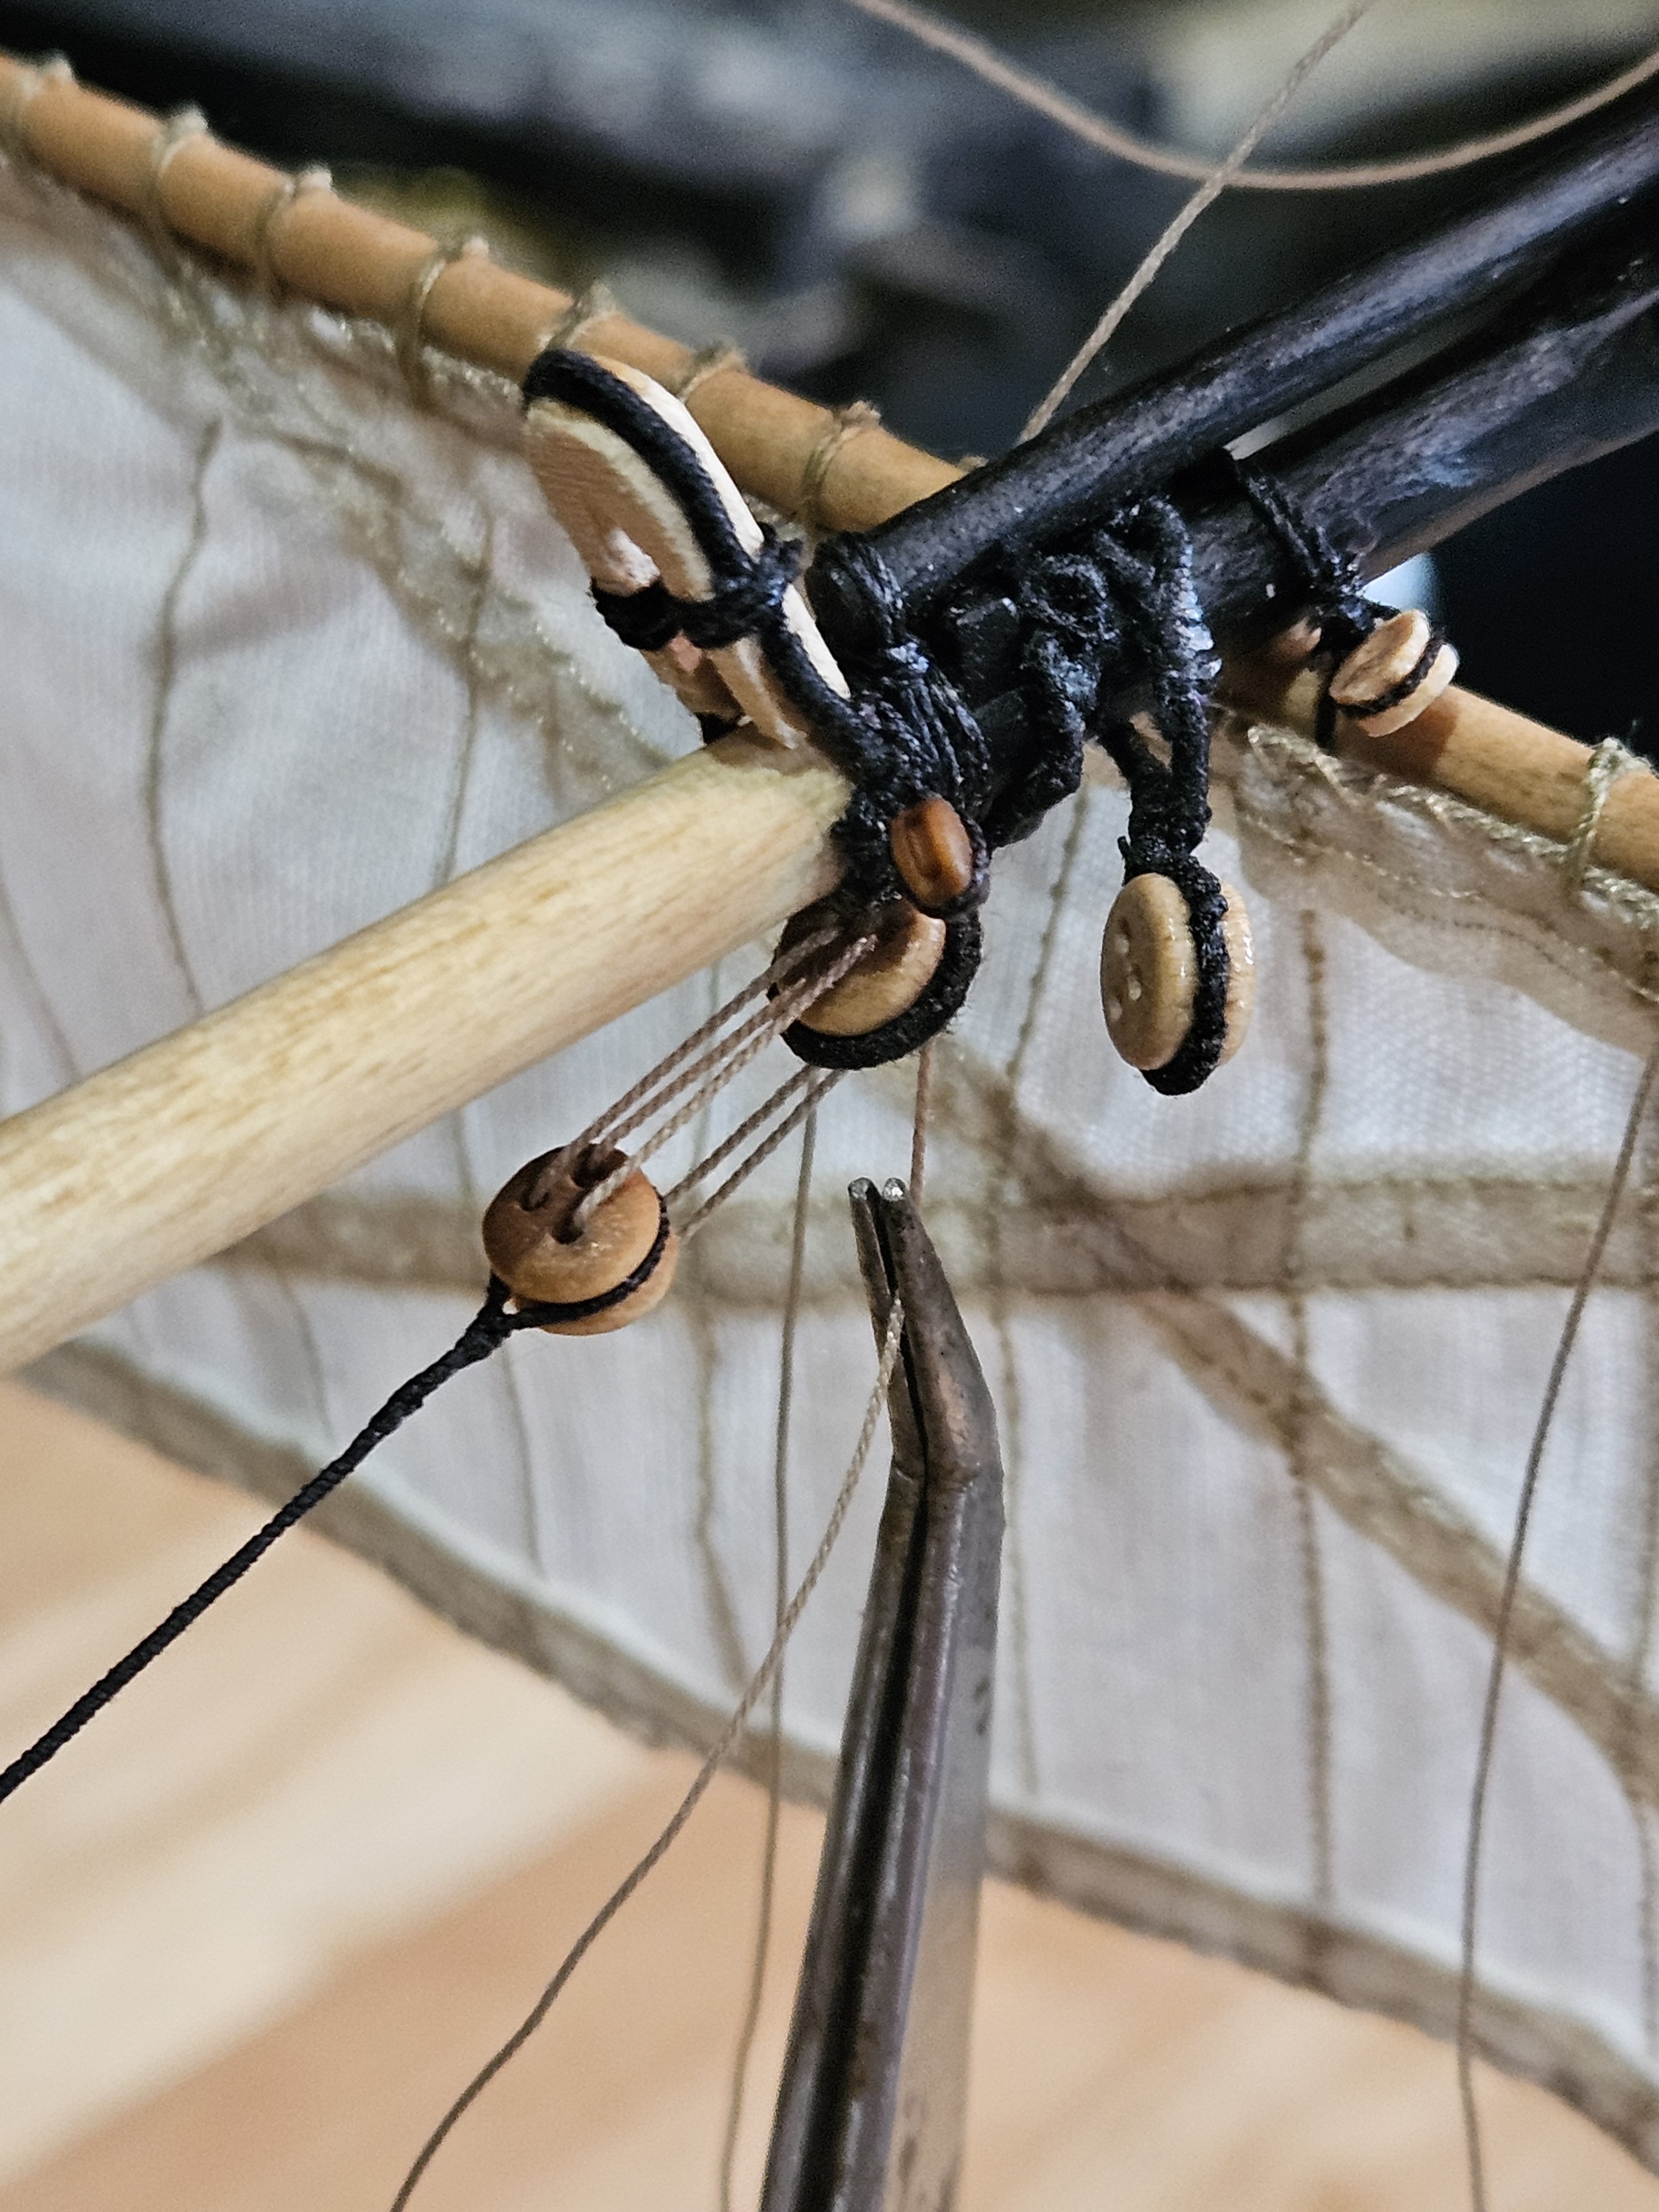
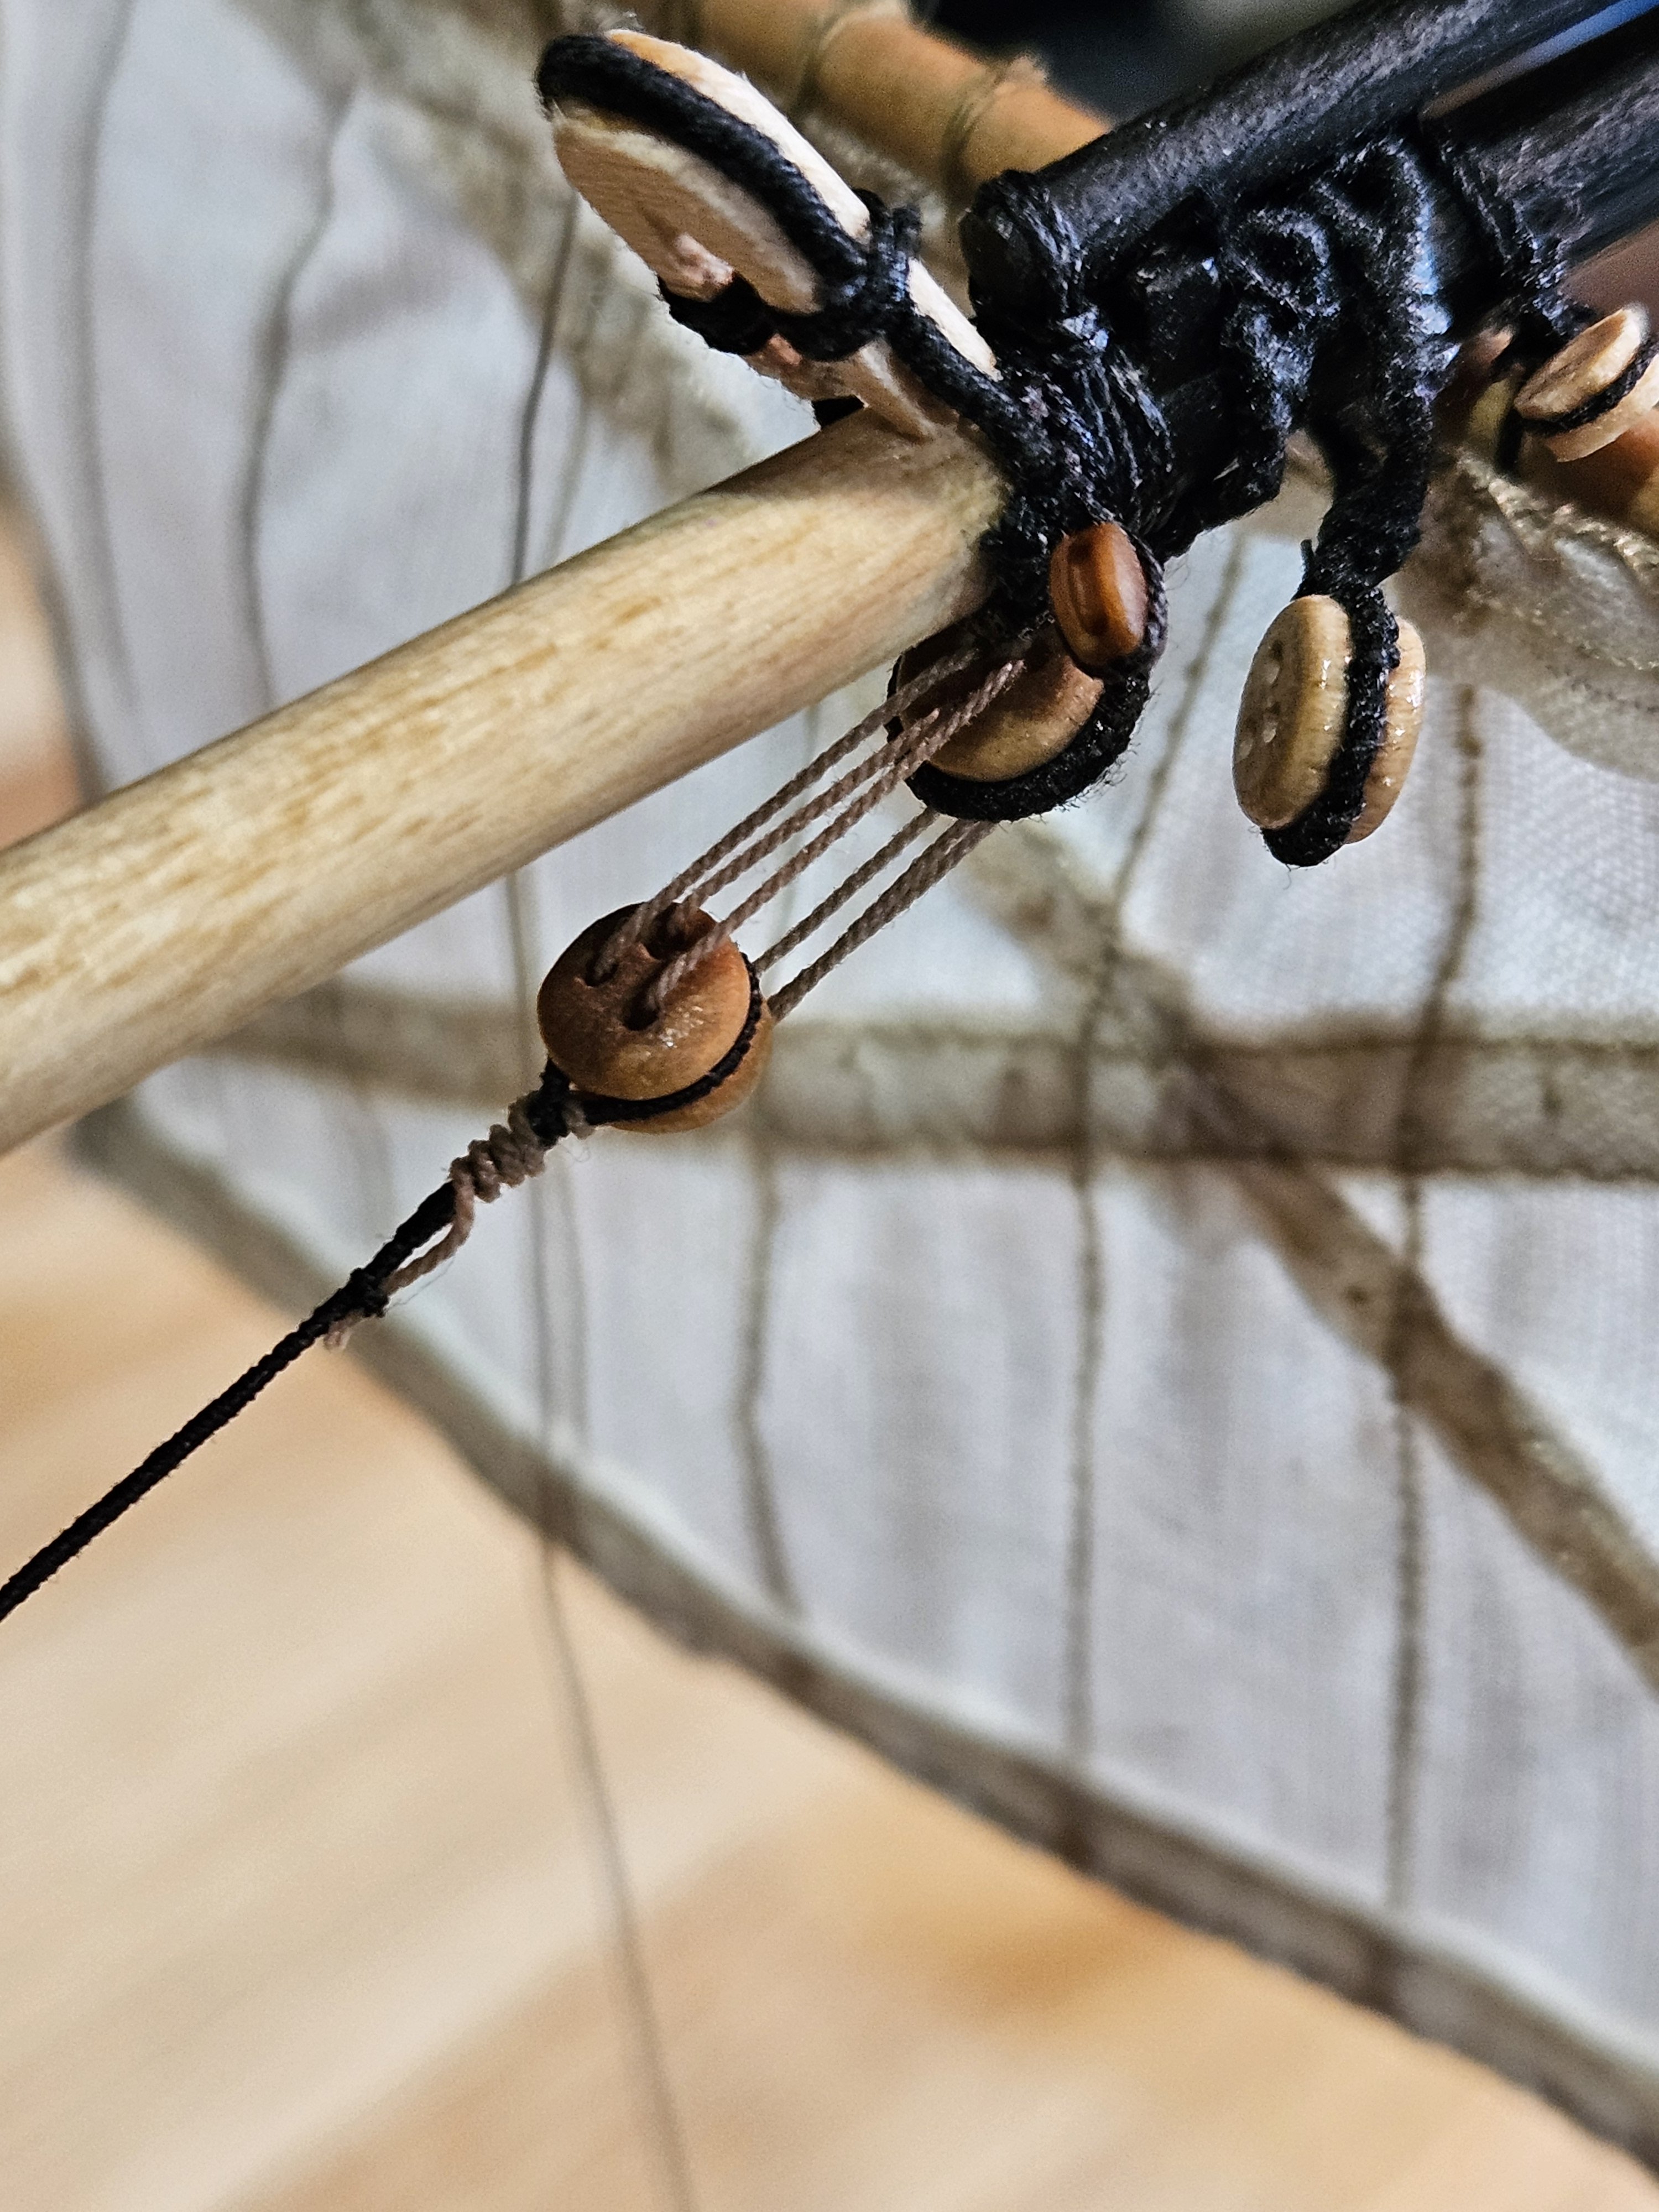
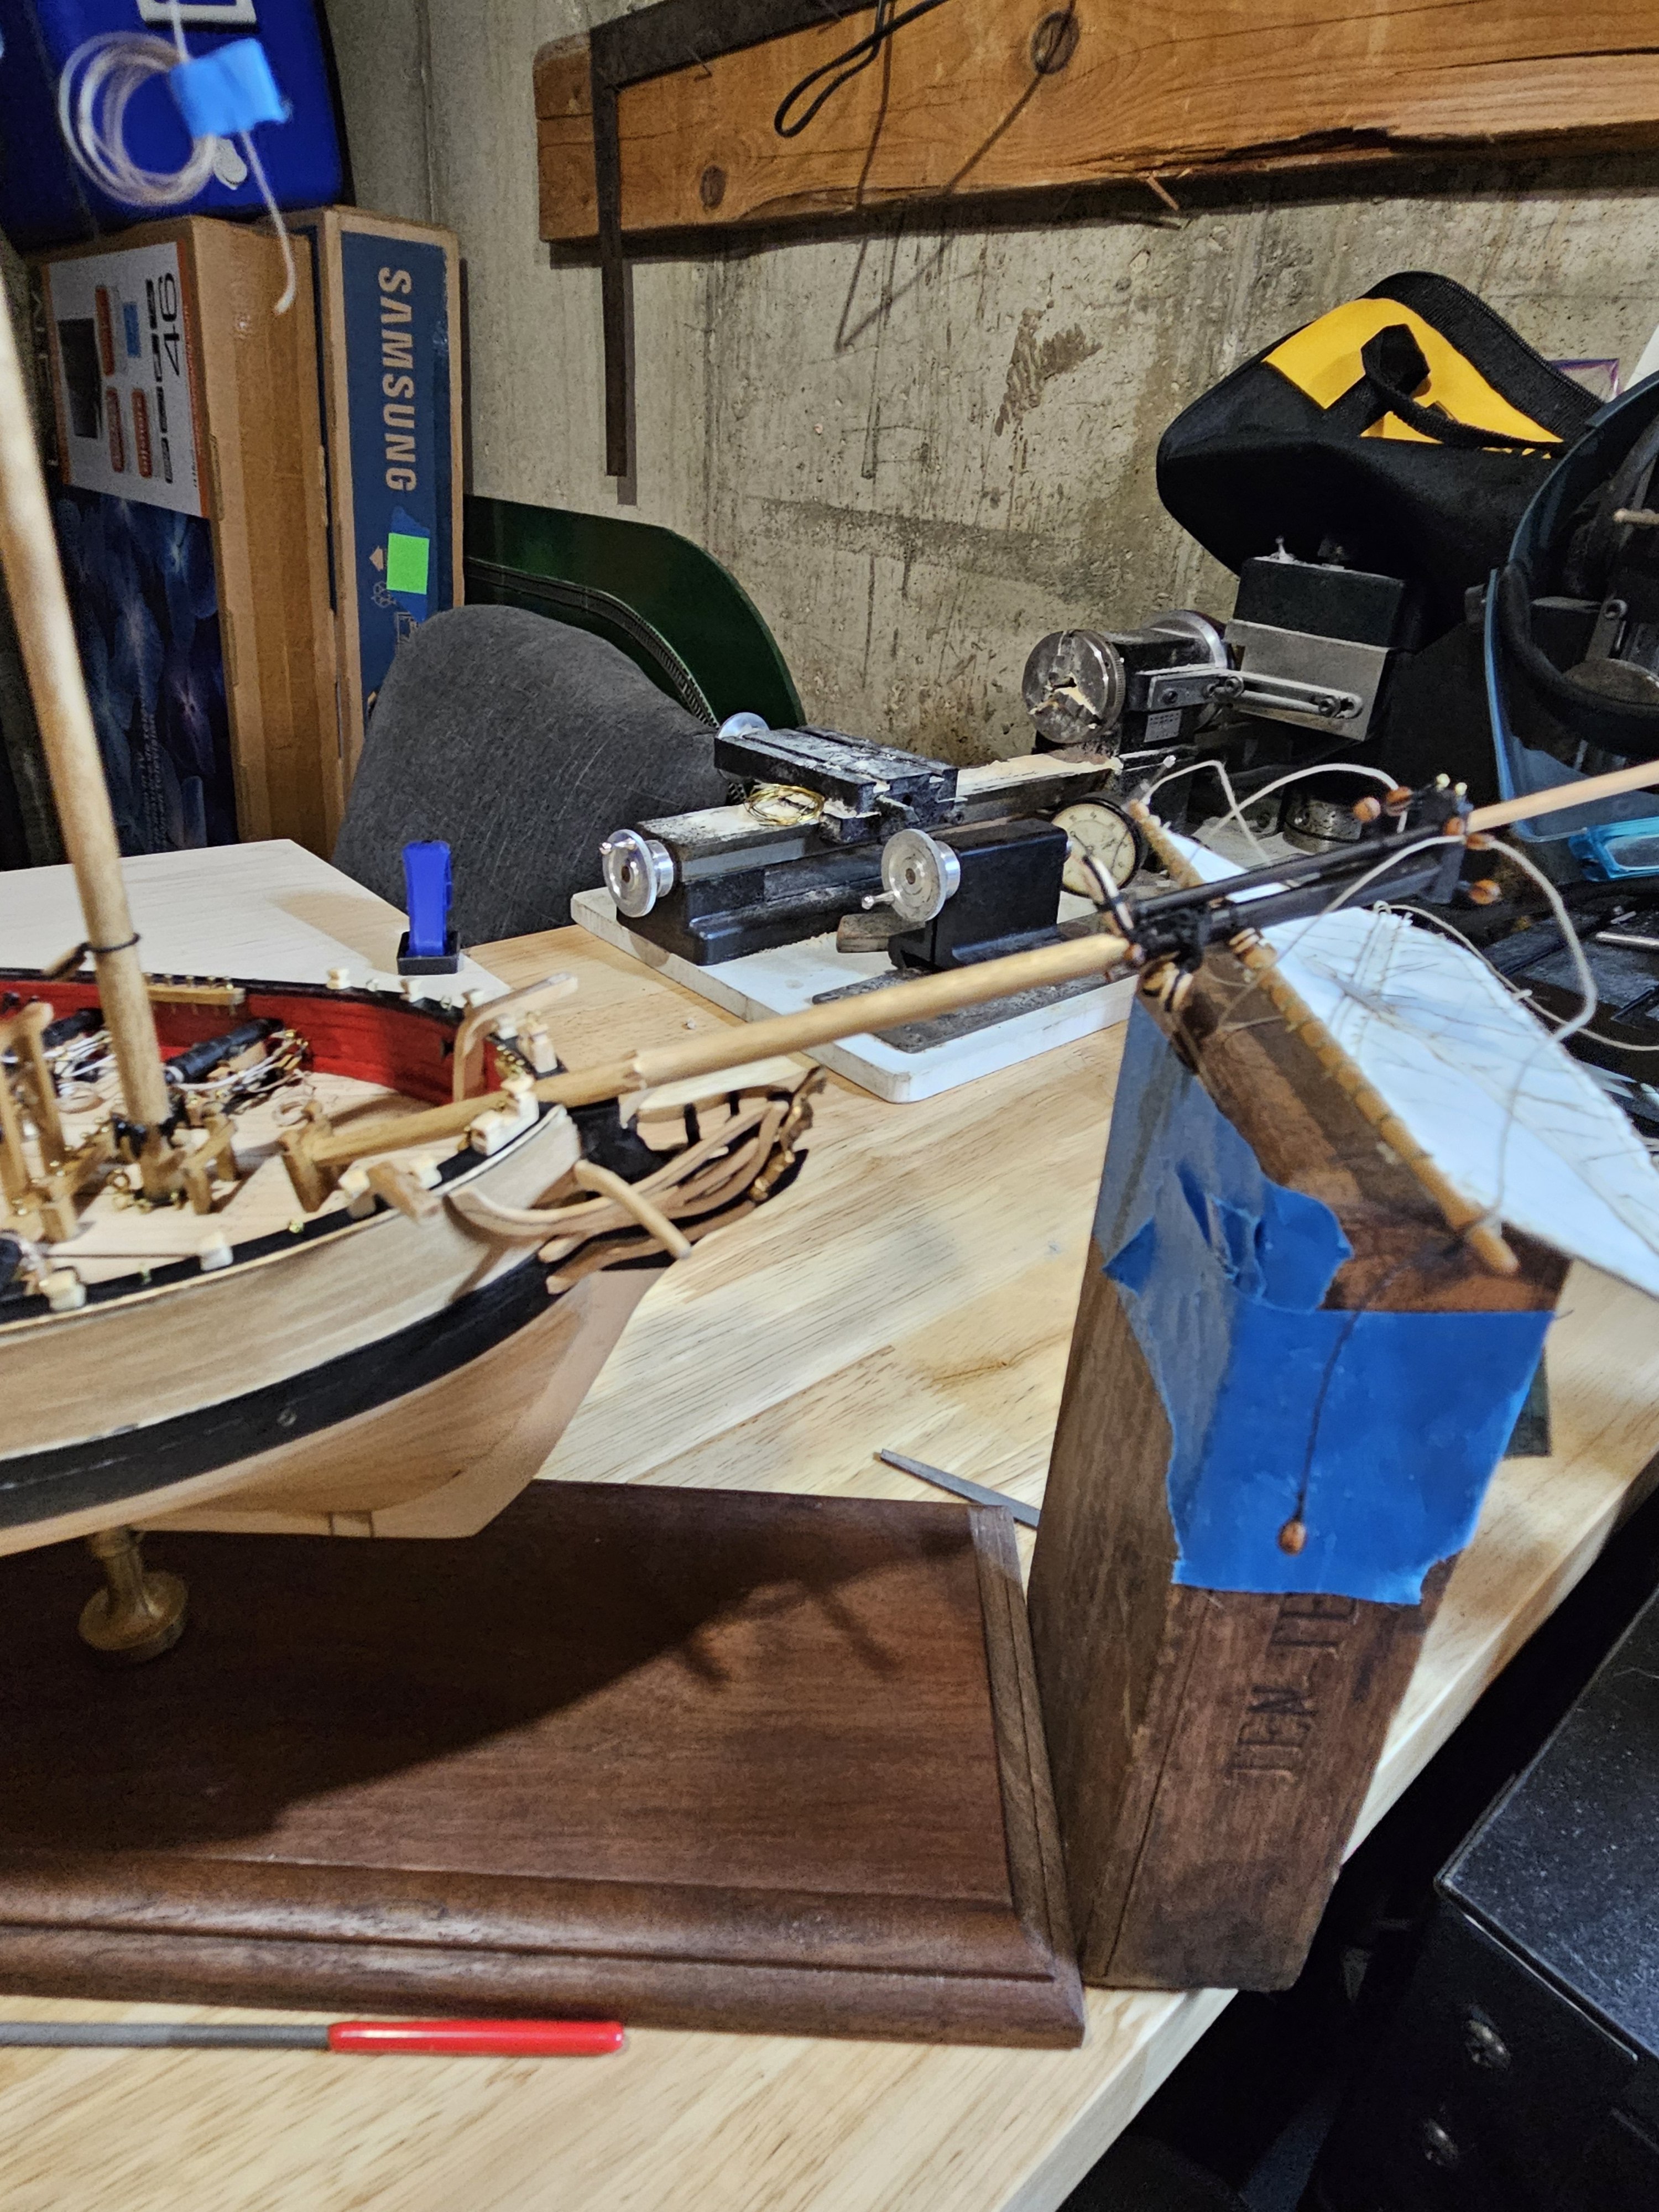
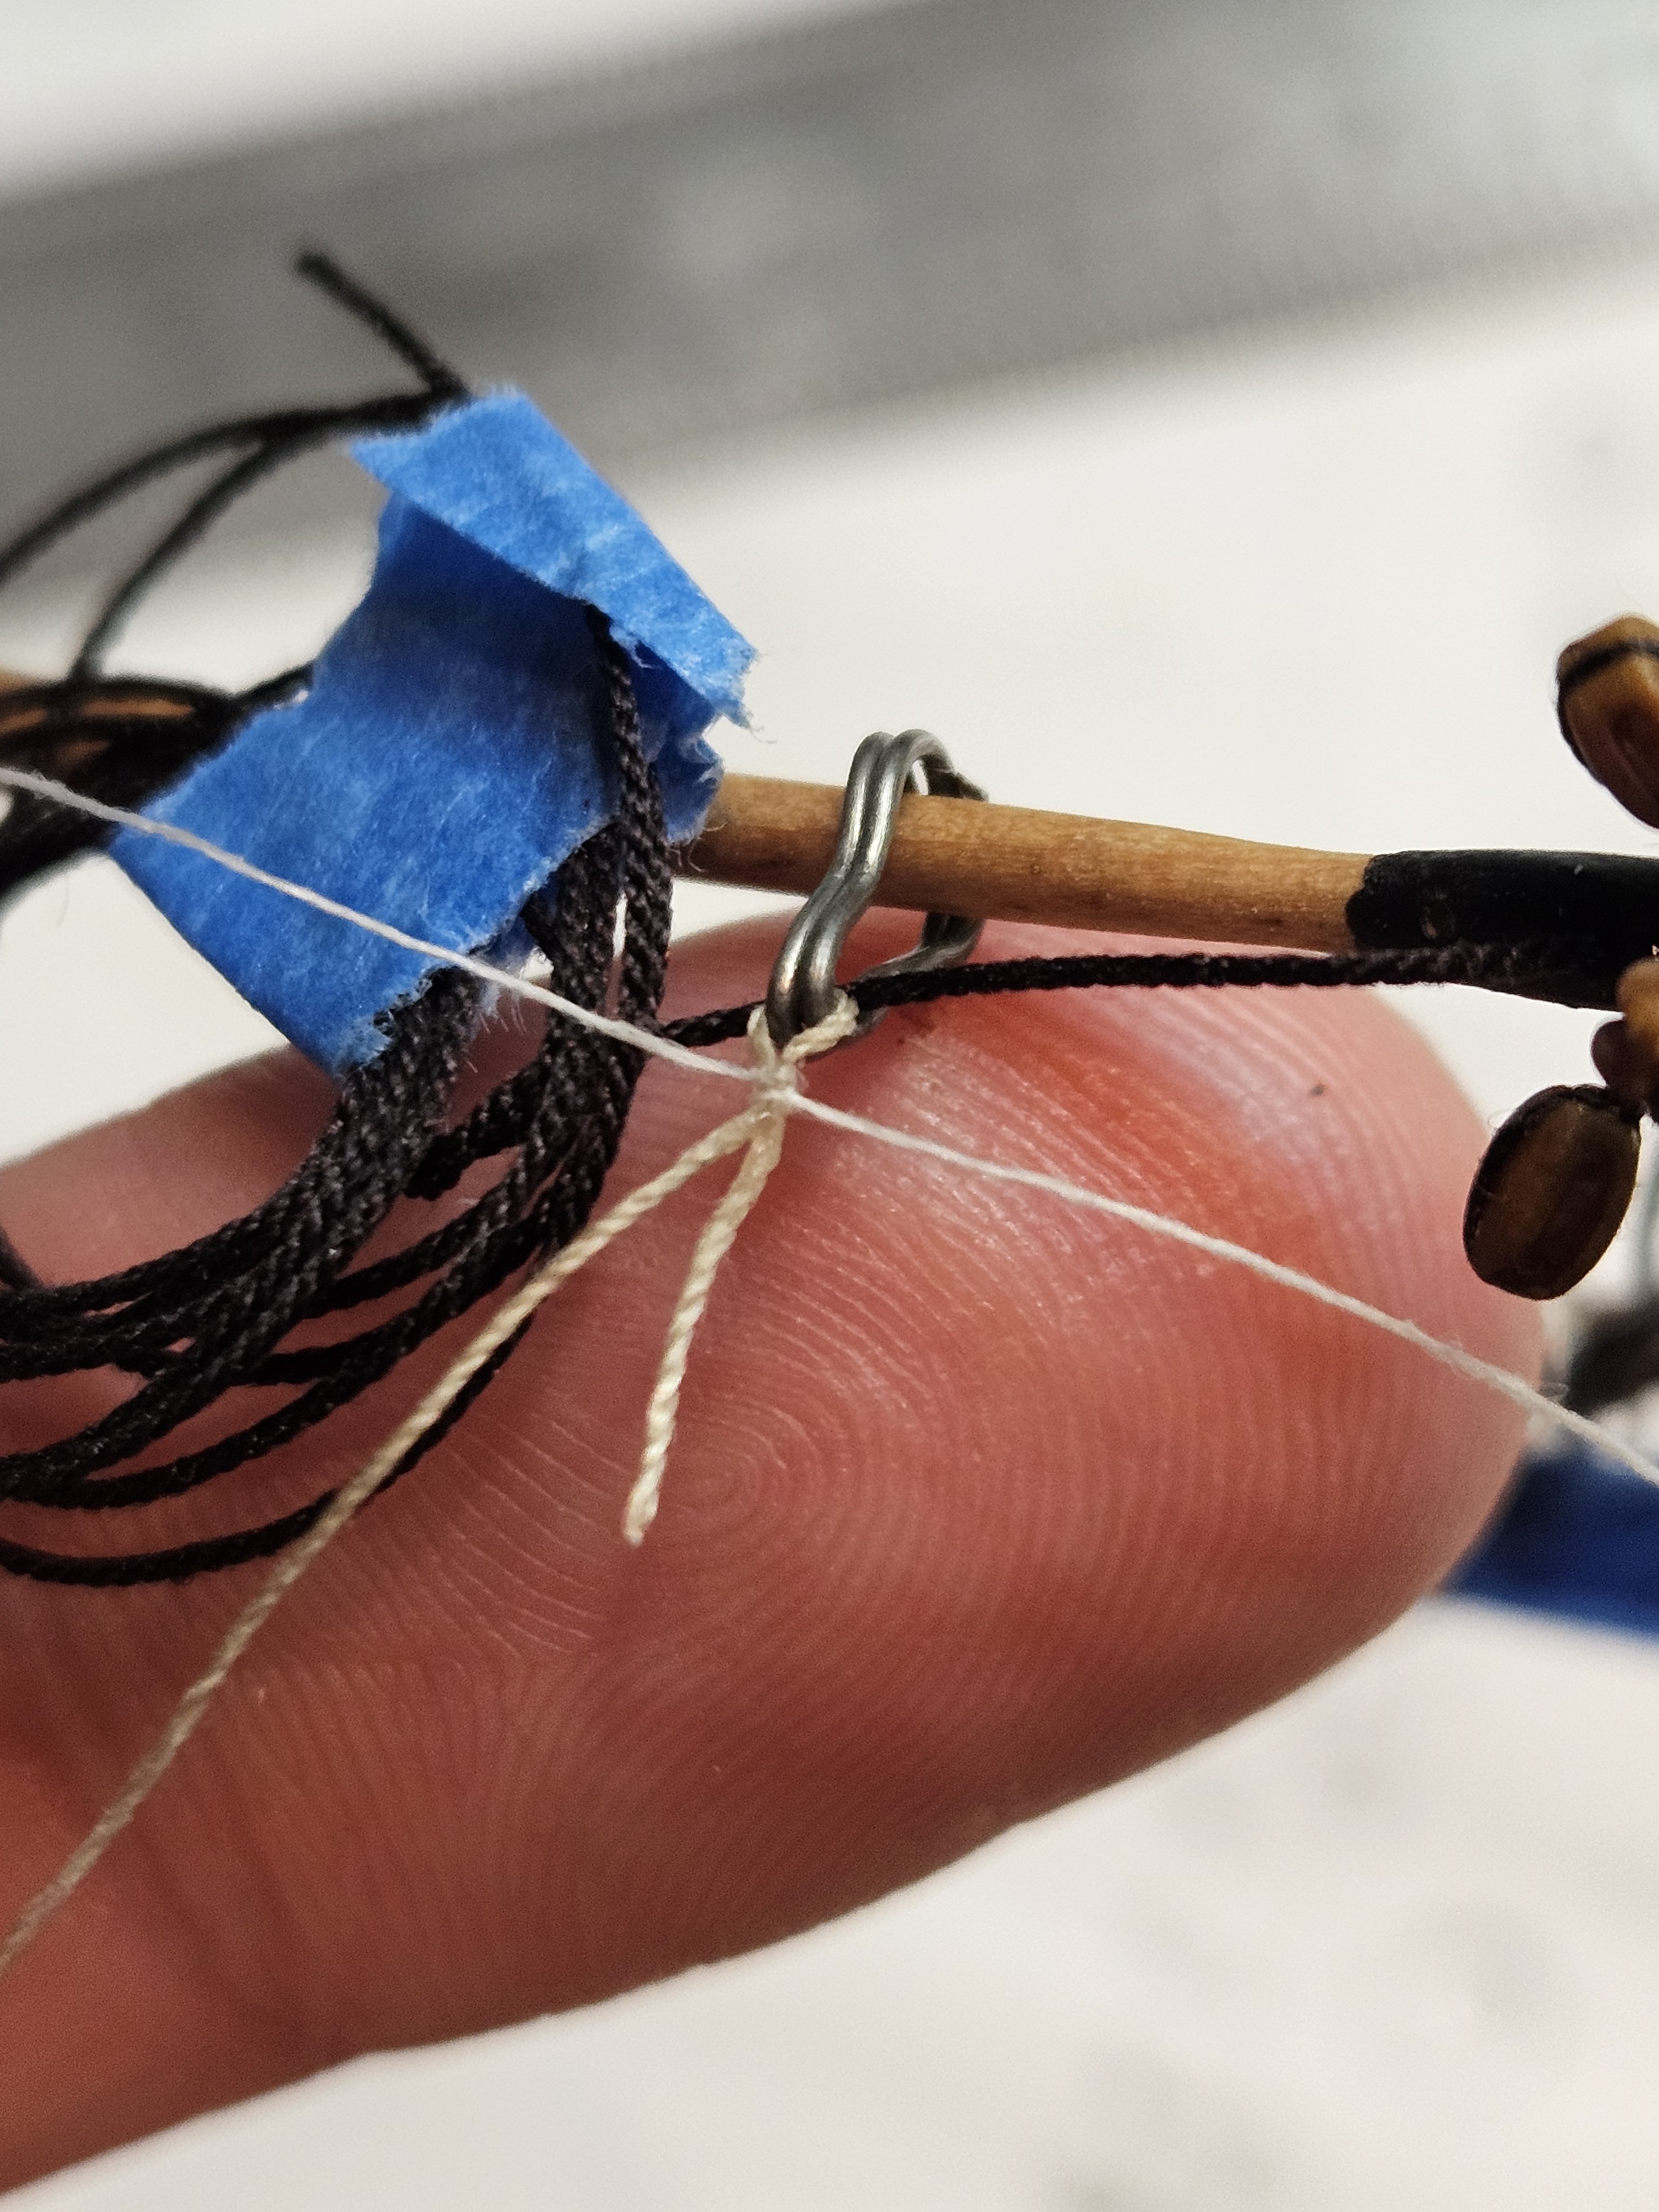
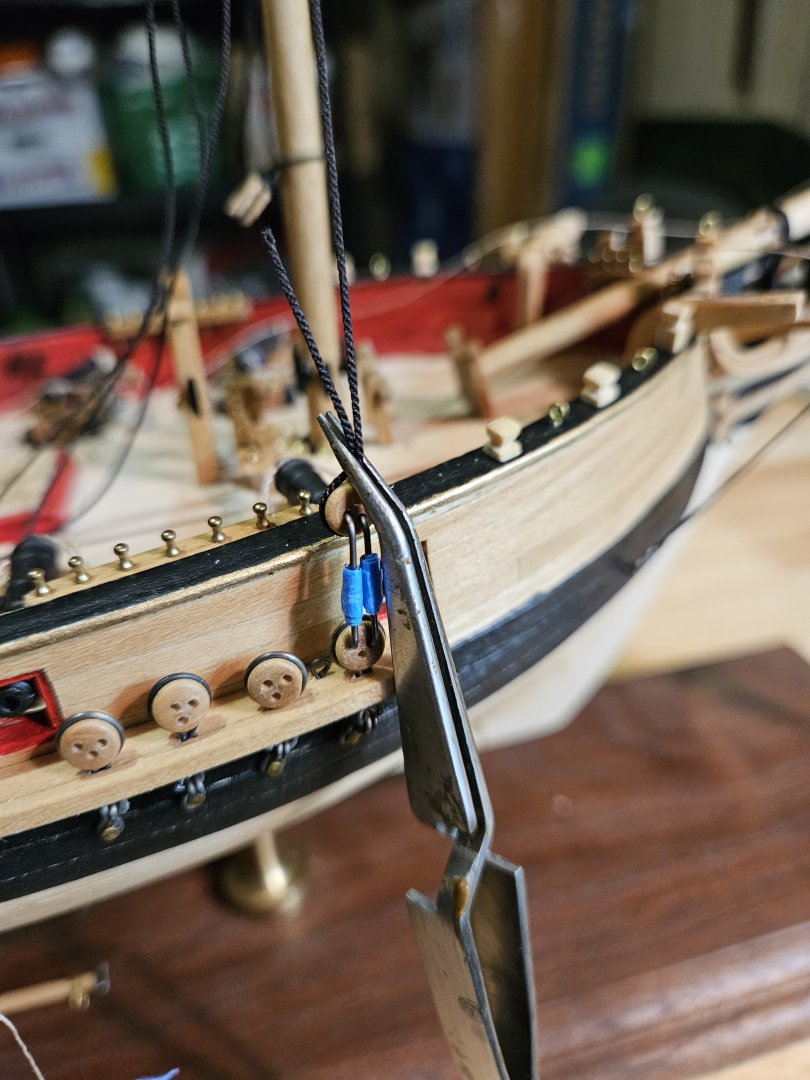
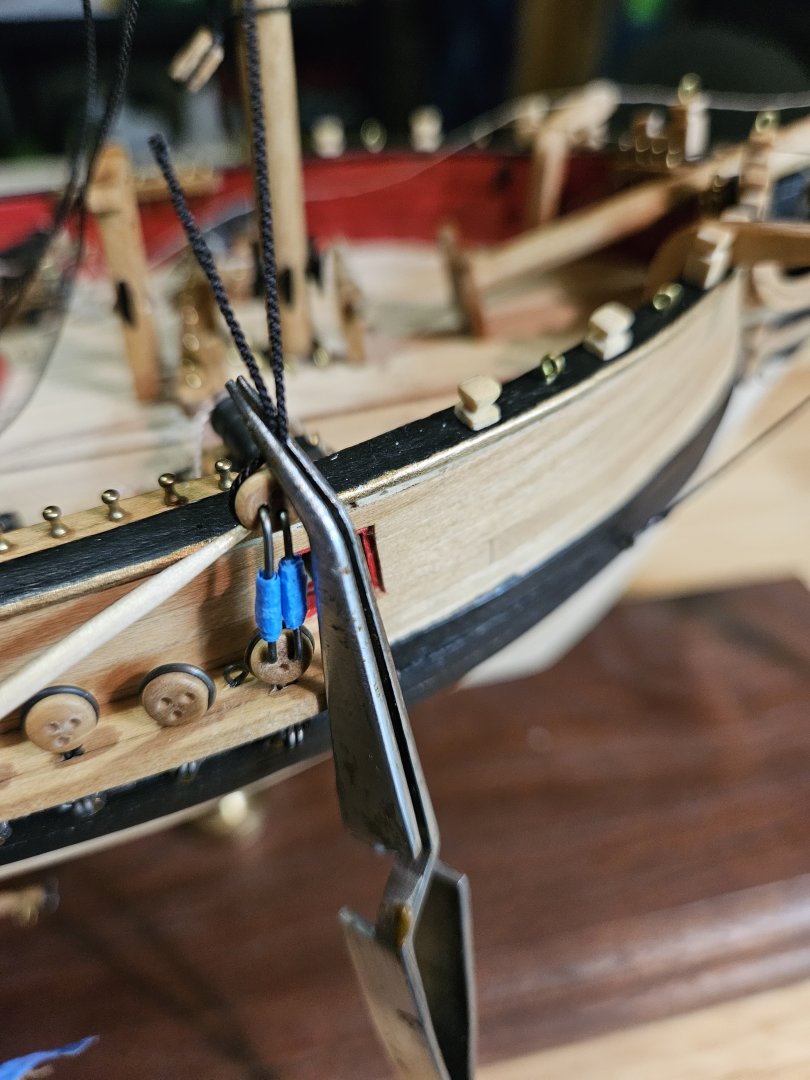
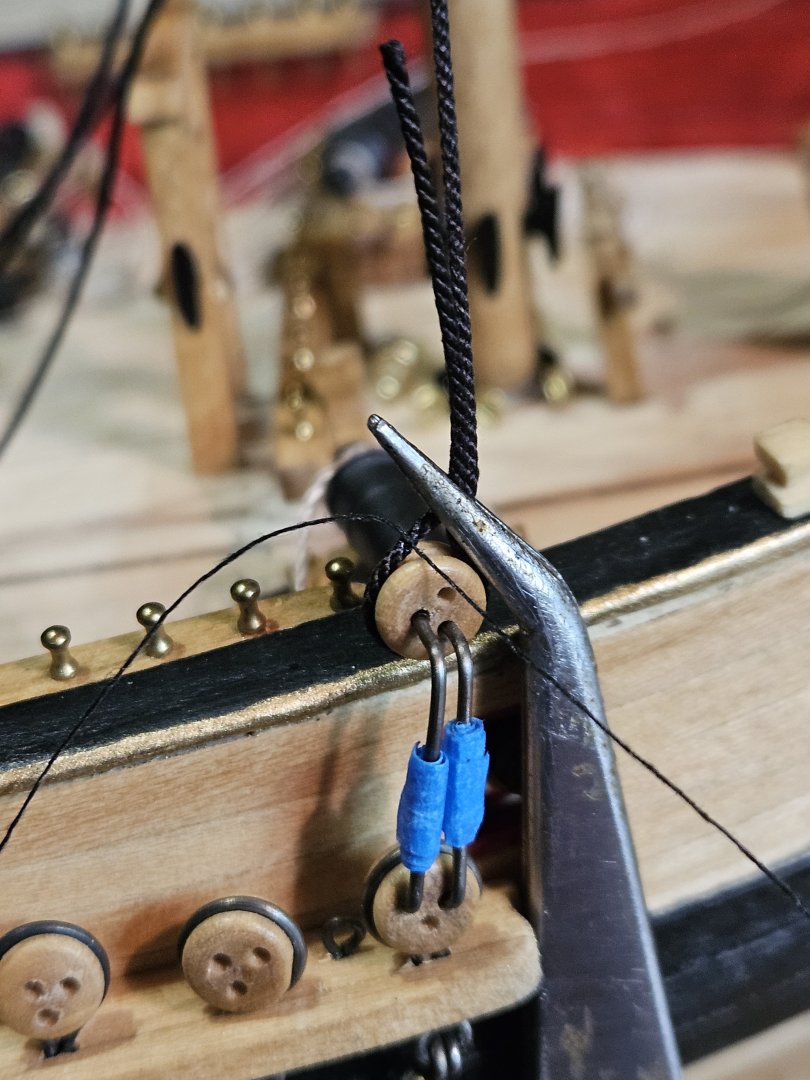
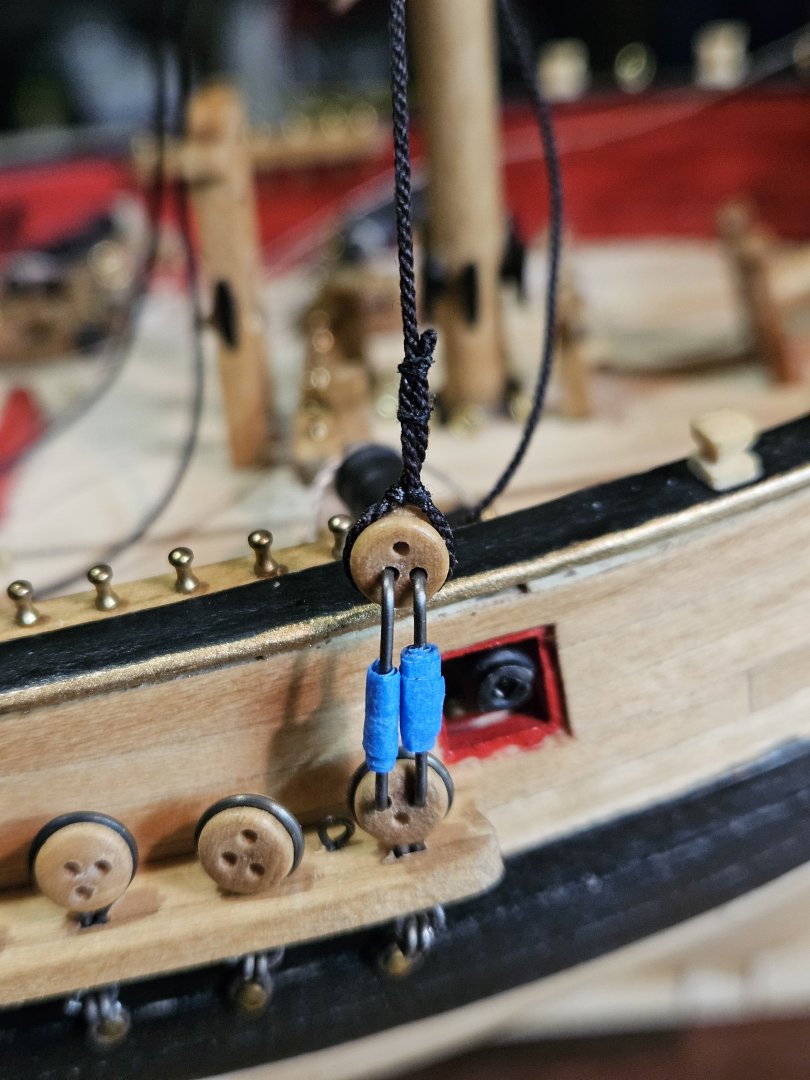
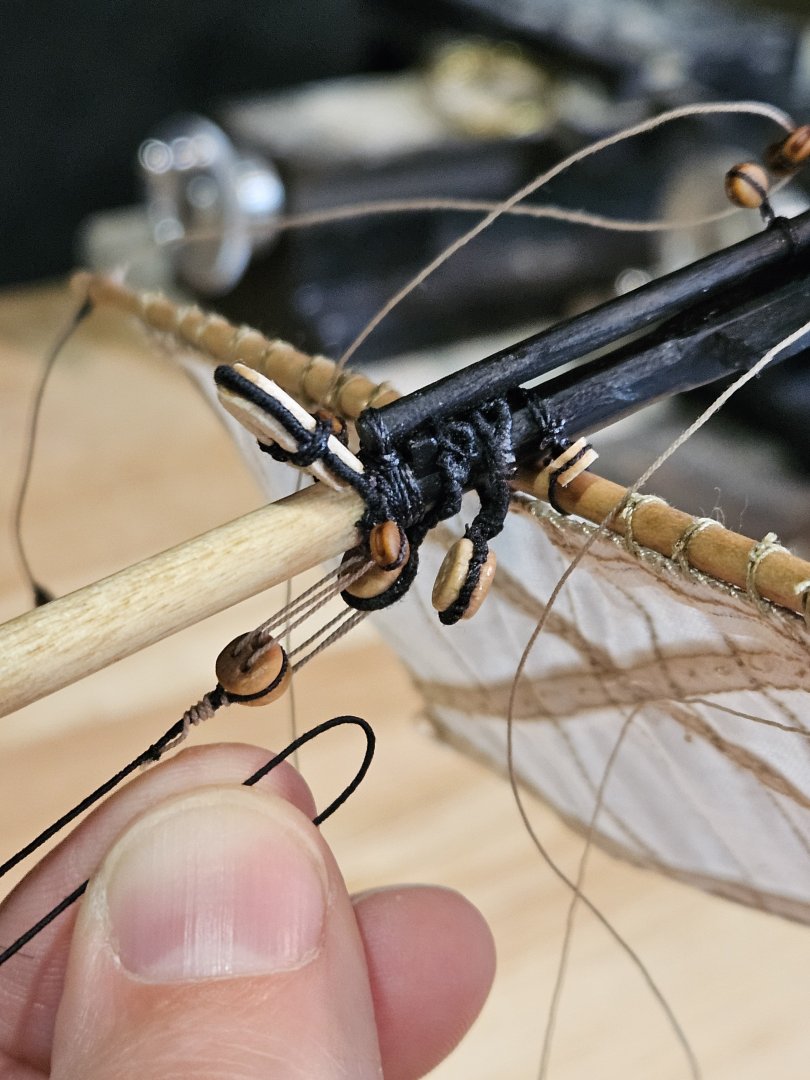
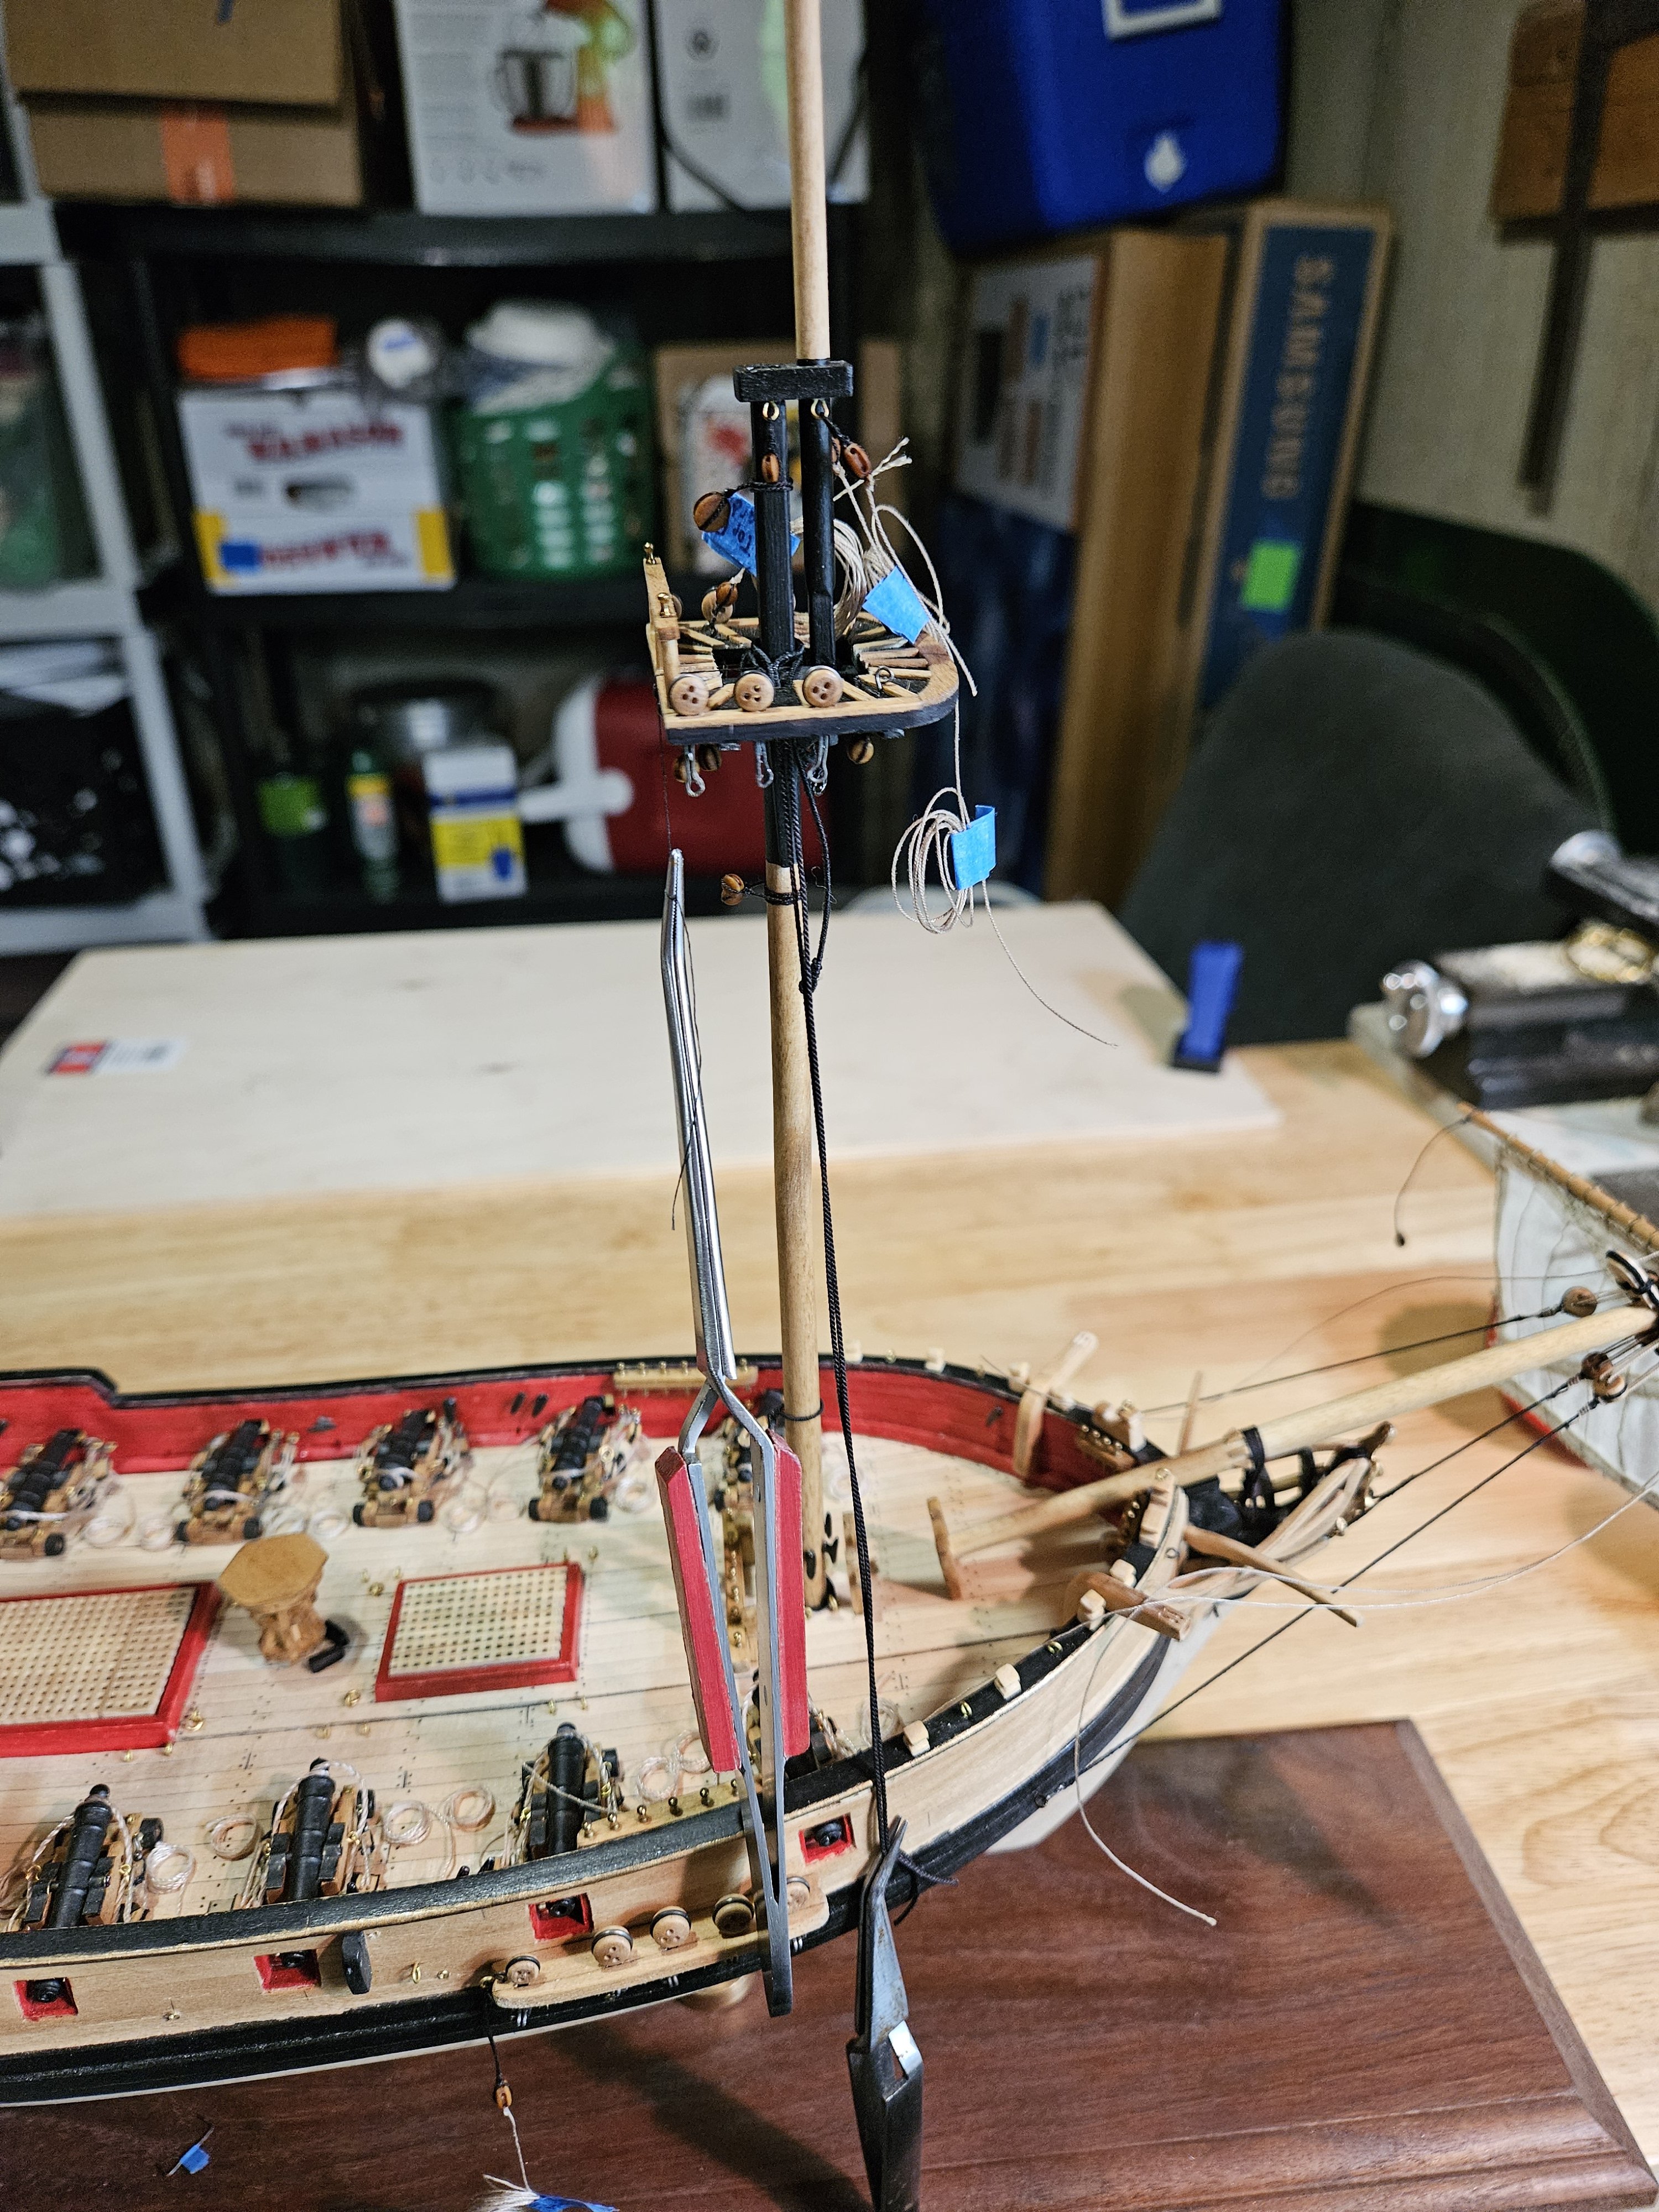
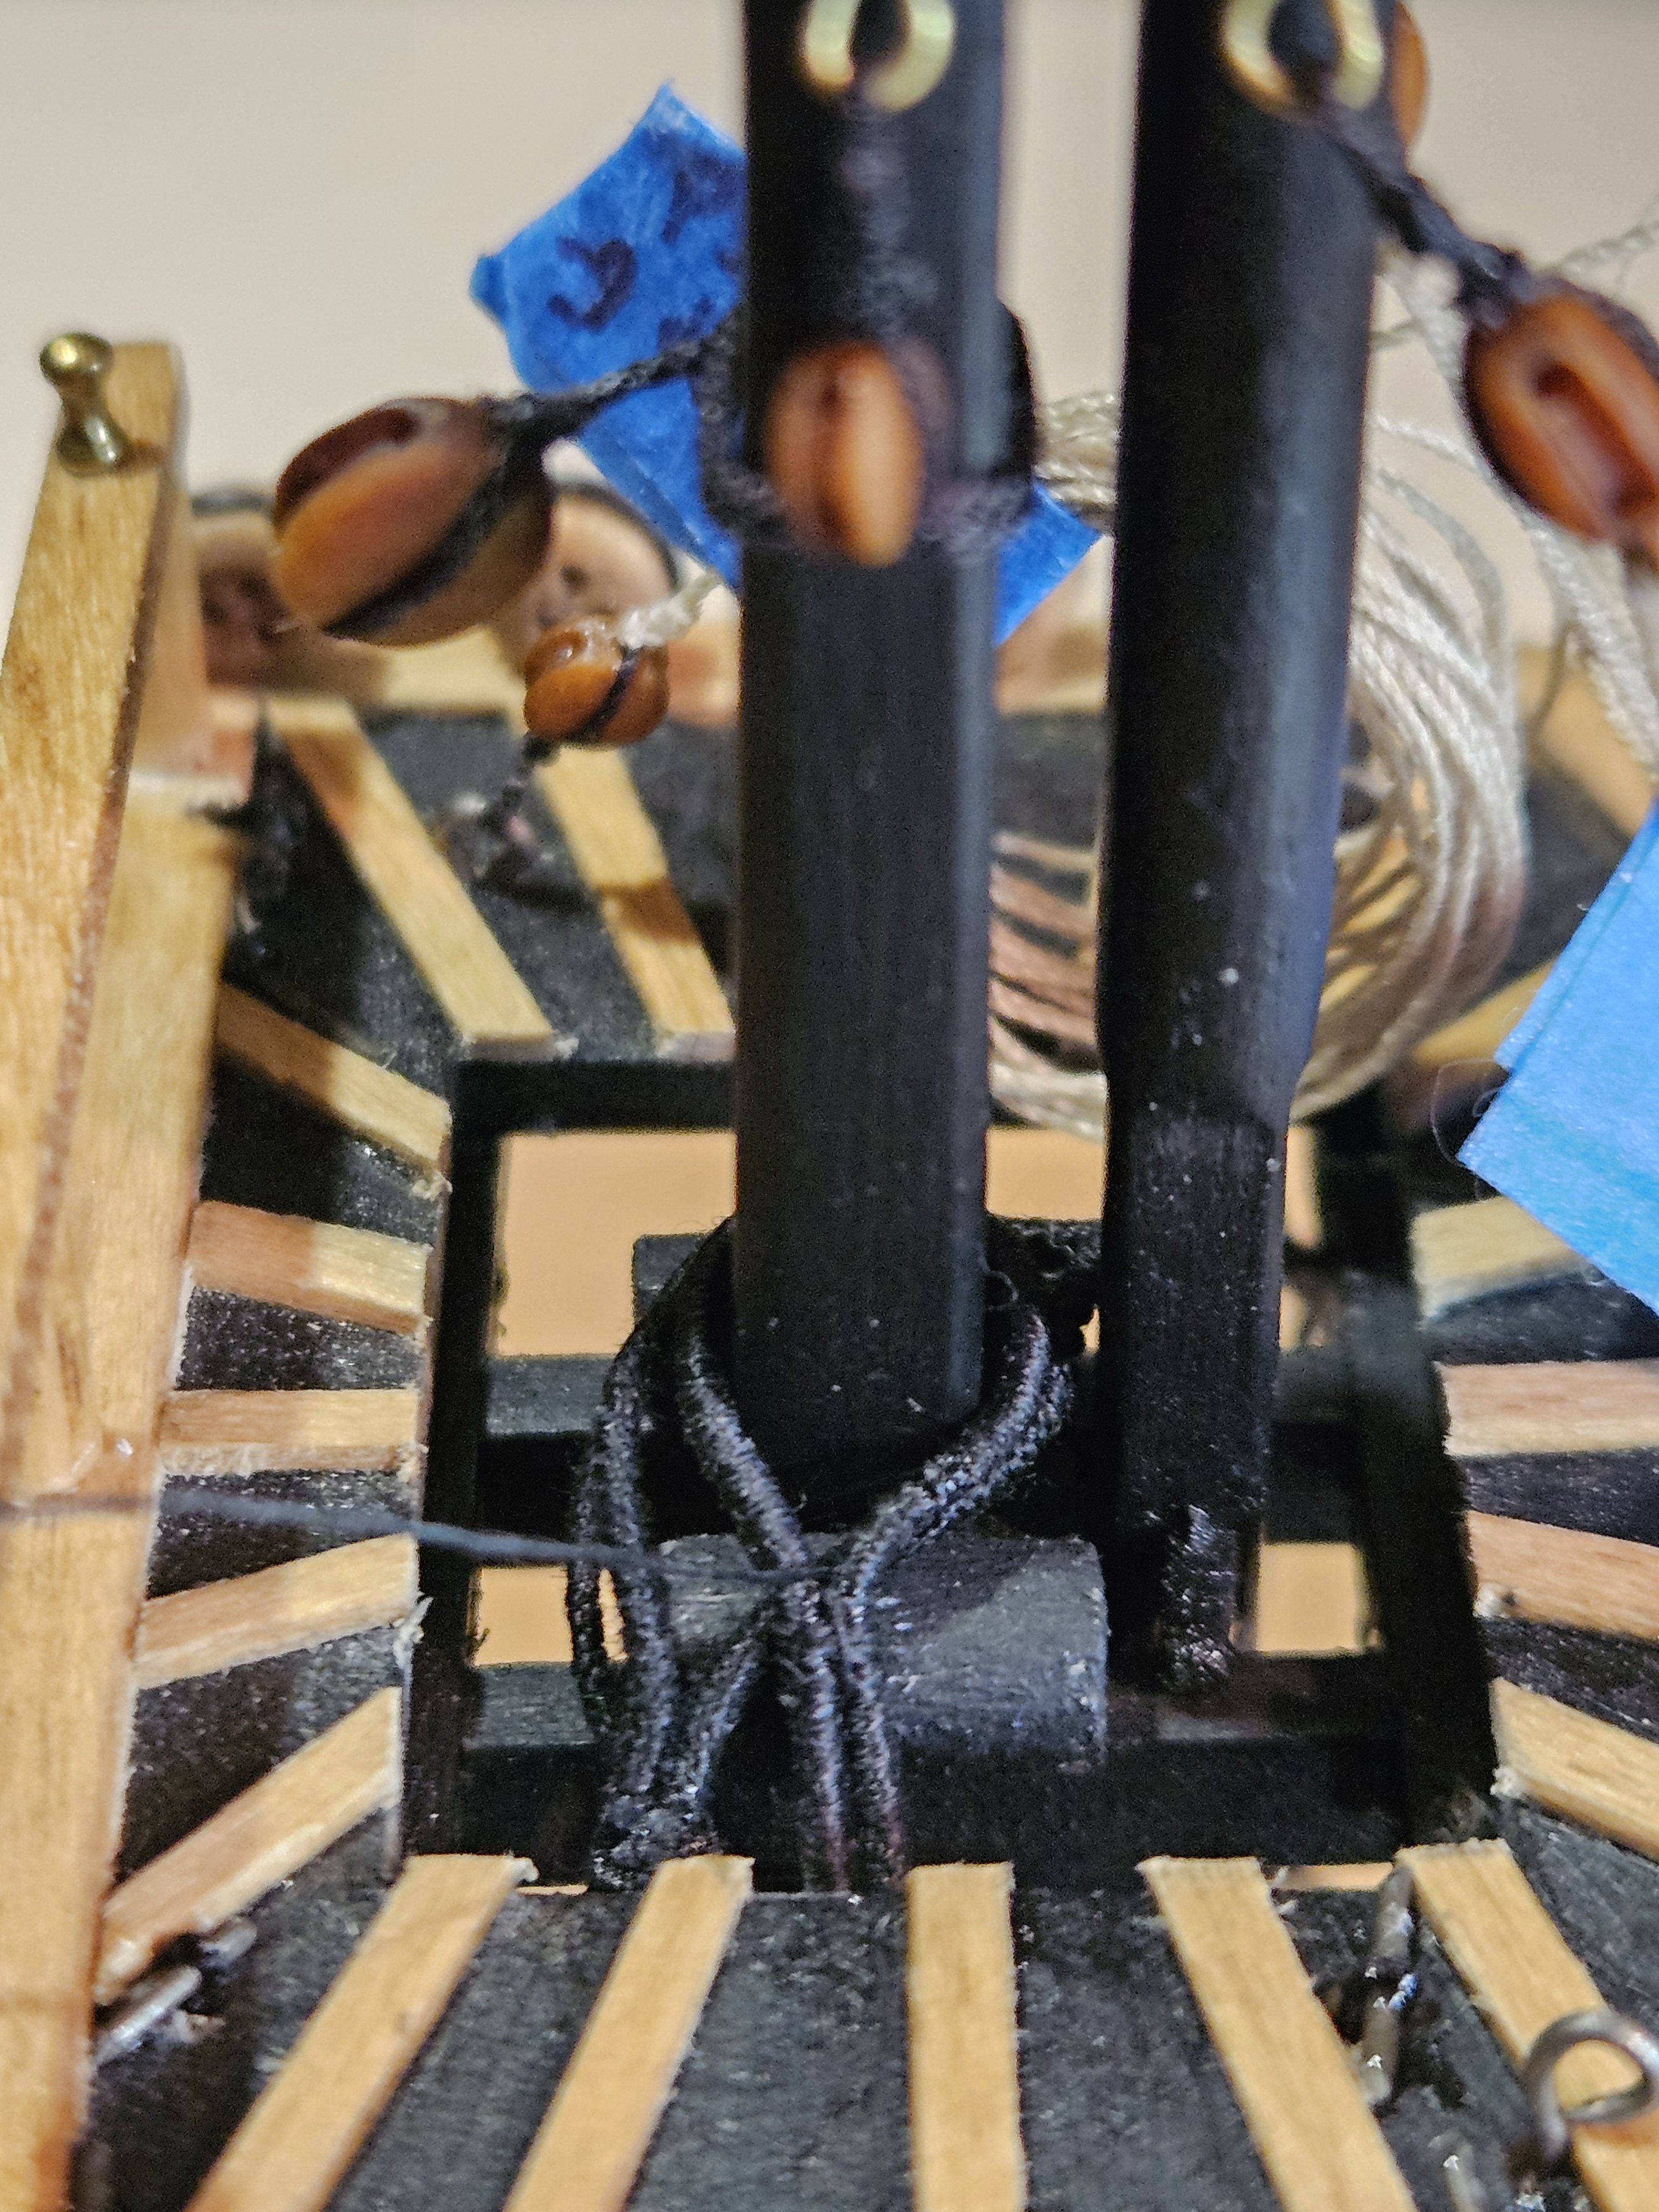
2026 Progress on the Fair American... This starts year 7 of the build. The final year if it kills me! Finally ready to reeve the lanyards for the foremast shrouds. In order to keep the mast from tilting starboard as these are added, I'm balancing the tension by holding the opposing port deadeye with the spacing prongs. I'll remove them when I reeve the lanyards on the port side obviously. As per the instructions, I started by making a figure 8 knot, but it ended up not being big enough to prevent popping through the hole, so I also added an overhand knot on top, and a dab of CA glue - this proved to be enough. The instructions call for .008in Tan, but I think it looks too small for lanyards, so I'm using .012in. Reeved through top and bottom deadeyes, and pulling on the end until the top deadeye is in the proper position level with the cap rail. Once in place, making a few turns around the shroud and temporarily securing with a hitch. As per Petersson's illustration, I'm going to make a small coil with the lanyard end, which I think will look really neat. Once the first starboard shroud was reeved, I did the same process (in reverse orientation) with the port side. I needed to use a small needle to help feed the lanyard through the throat-seized hole. So now I have both sides for the first pair done. I look from the bow and the stern for straightness of the mast. I didn't need to do any adjustments just yet, it was pretty straight. Went on to do the second pair, the same as the first - using the spacing prong to hold the port deadeye in place. And thats all four pairs done! As per the instructions, I'm letting the ropes stretch for a few days before making final adjustments and adding the sheer poles. Once everything settled and stretched, I undid the ends and snugged up the lanyards slightly on both sides, checking the mast to ensure it's still straight. I used a straight edge to check the tops of the deadeyes for parallelism with the channel and rail. At this point, I added a small dab of CA glue behind the deadeye where the lanyard comes through the hole - they're set. I filed a sheer pole down from a toothpick. It's meant to be 1/32" square, but its too fragile to handle, so this is more like 3/64". I tacked it to the shroud above the deadeyes with CA glue - no easy feat - it likes to fall off under its own weight, but I got it done holding it with tweezers. Same for the port side. After being tacked, I used fine thread to tie it to the shroud, and trimmed really close with a sharp scalpel. Now as per the illustration from Petersson, I'm re-wrapping the small coil, and adding a small dab of glue to keep it from unraveling, while I hold it taught. Then pulling it up and seizing it to the shroud with fine thread. It's not perfect, but I like this little detail. I did all four for the starboard.... ...and the port side. So the foremast is done! No going back now. This work was tedious, especially waiting for glue to dry on each and every seizing before trimming. That time adds up, which is why this is taking so long. The main mast will be next, but I need to work on the Spanker Sail and booms first before I run out of room with shrouds in the way. That'll be next time. Have a good week. - Jason -


-
Thanks Greg. Ive actually only loosely lashed the lanyards, and let them stretch for a few days, as per the instructions. I re-aligned the deadeyes when tightening and lashing, after they were all raised, as you mentioned. They're pretty straight, now with the sheer poles. Ill update soon. Thanks for all the suggestions!
-
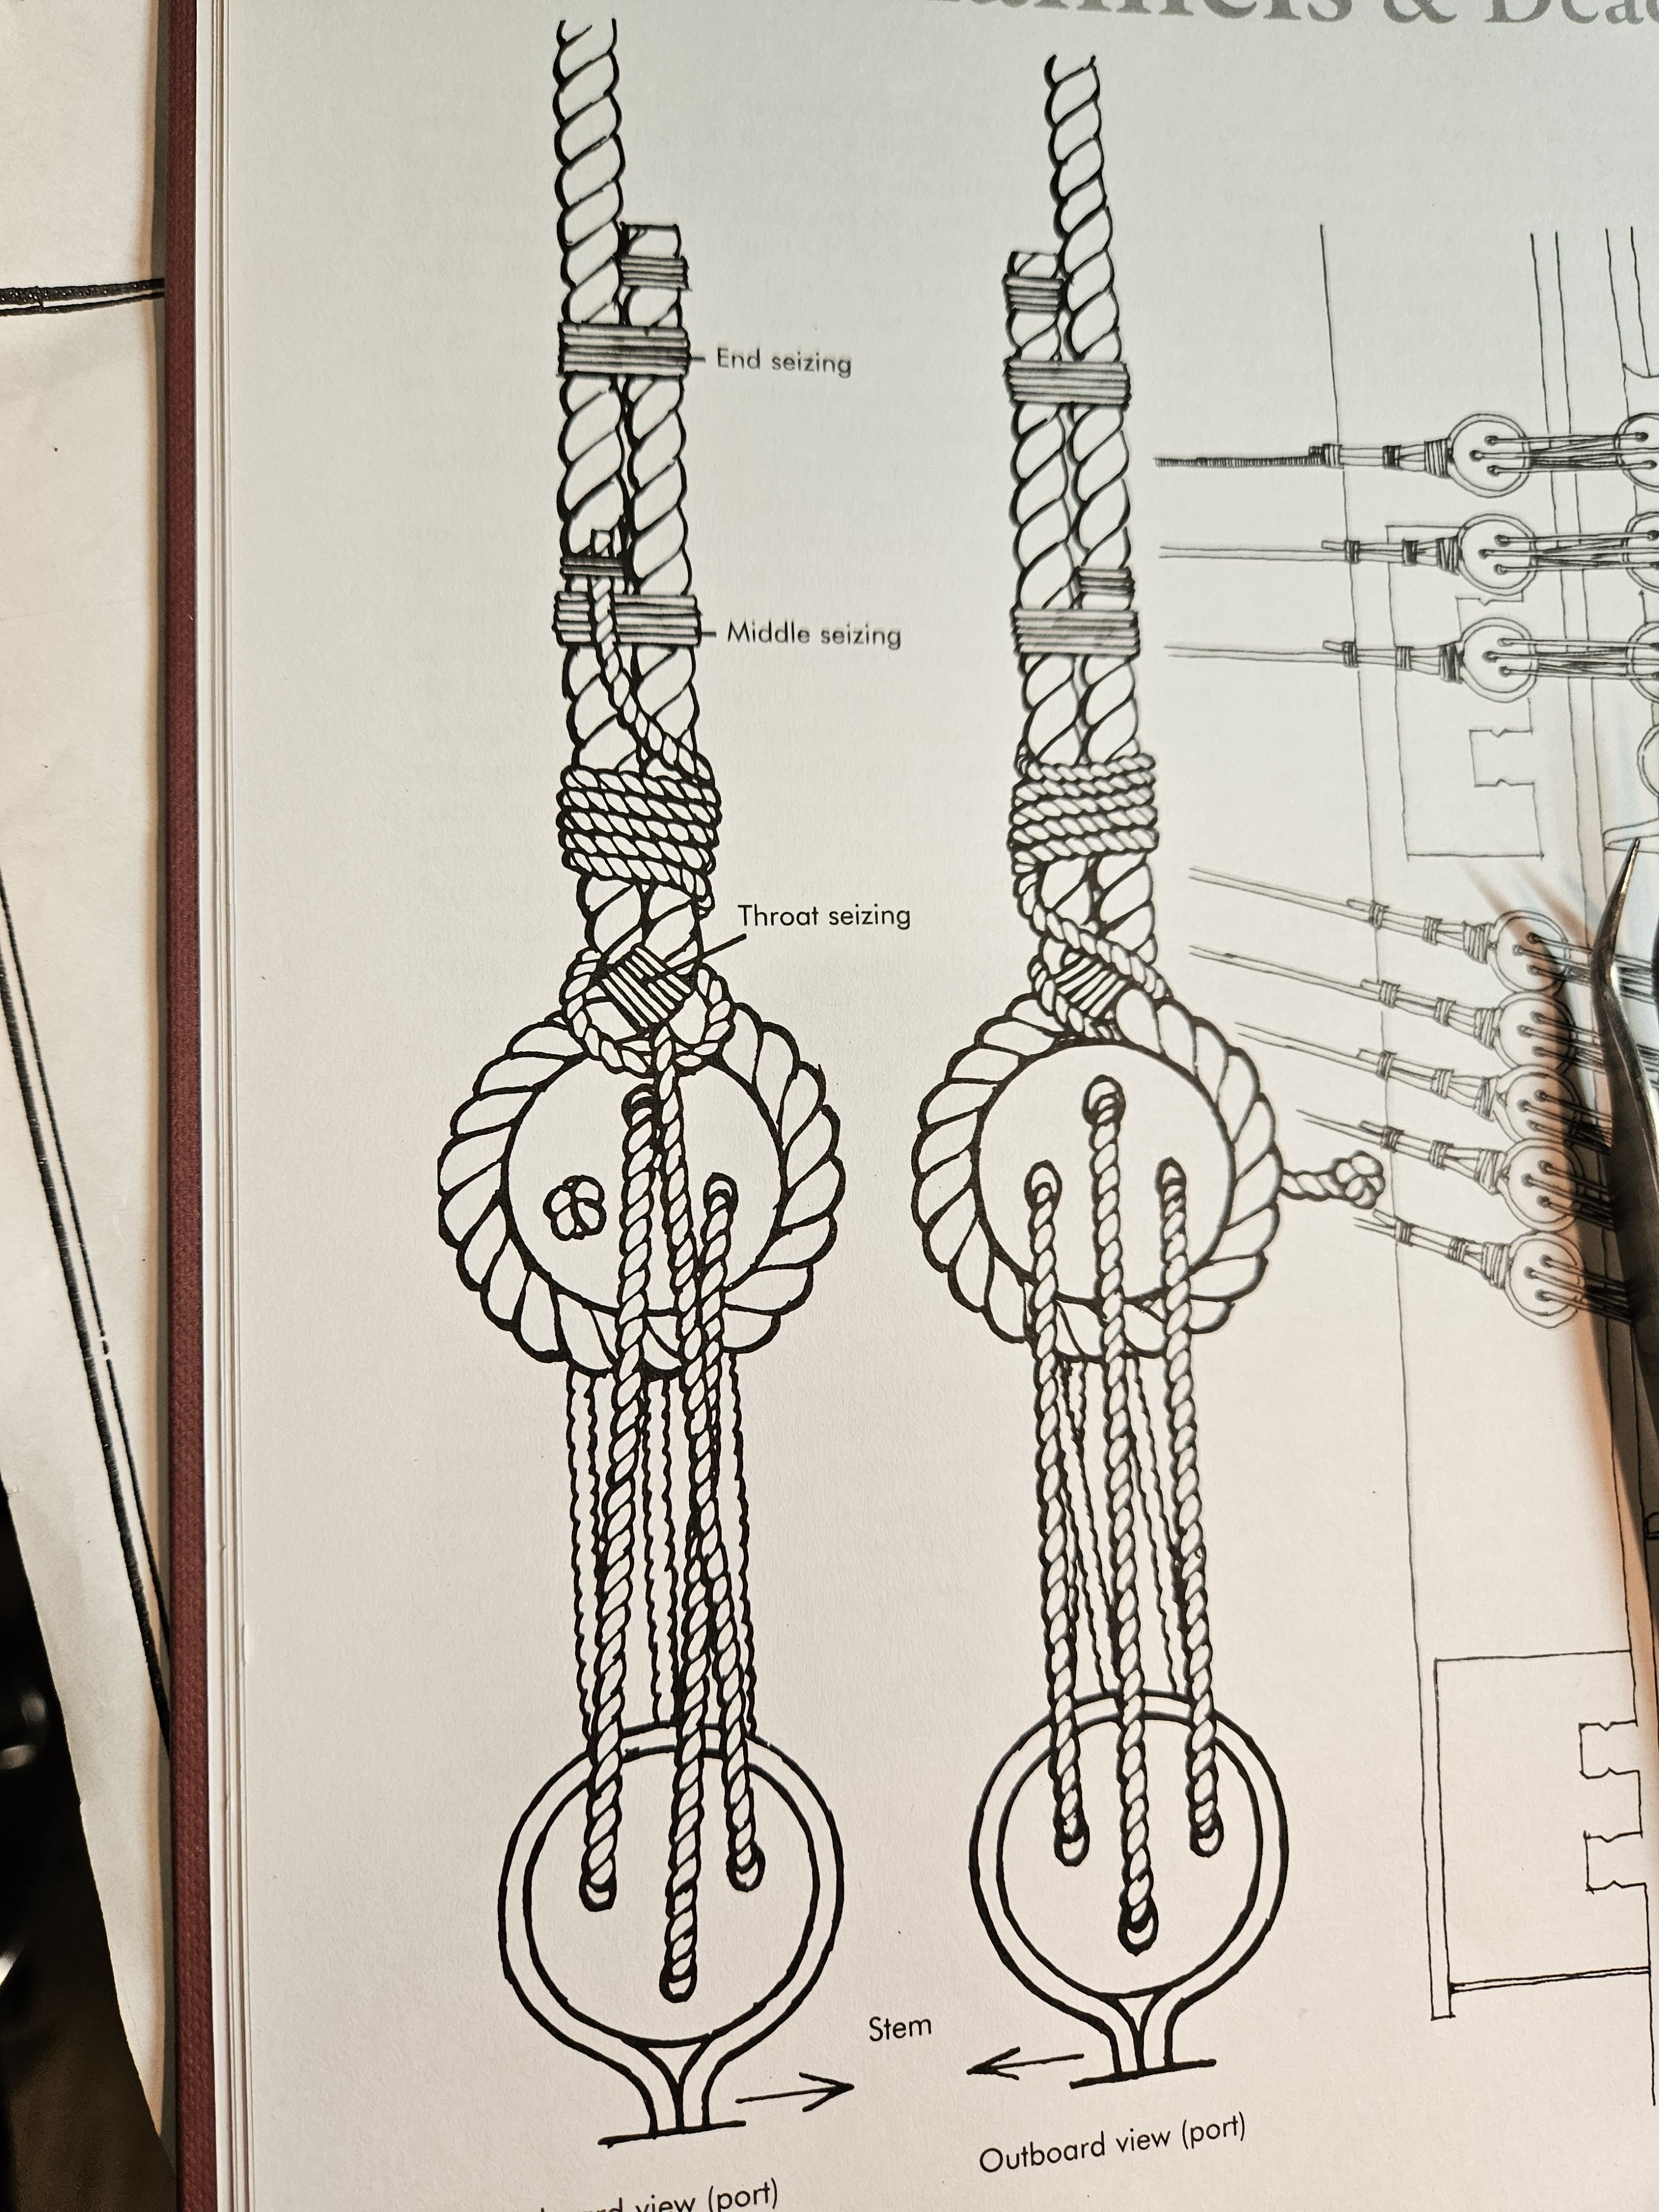
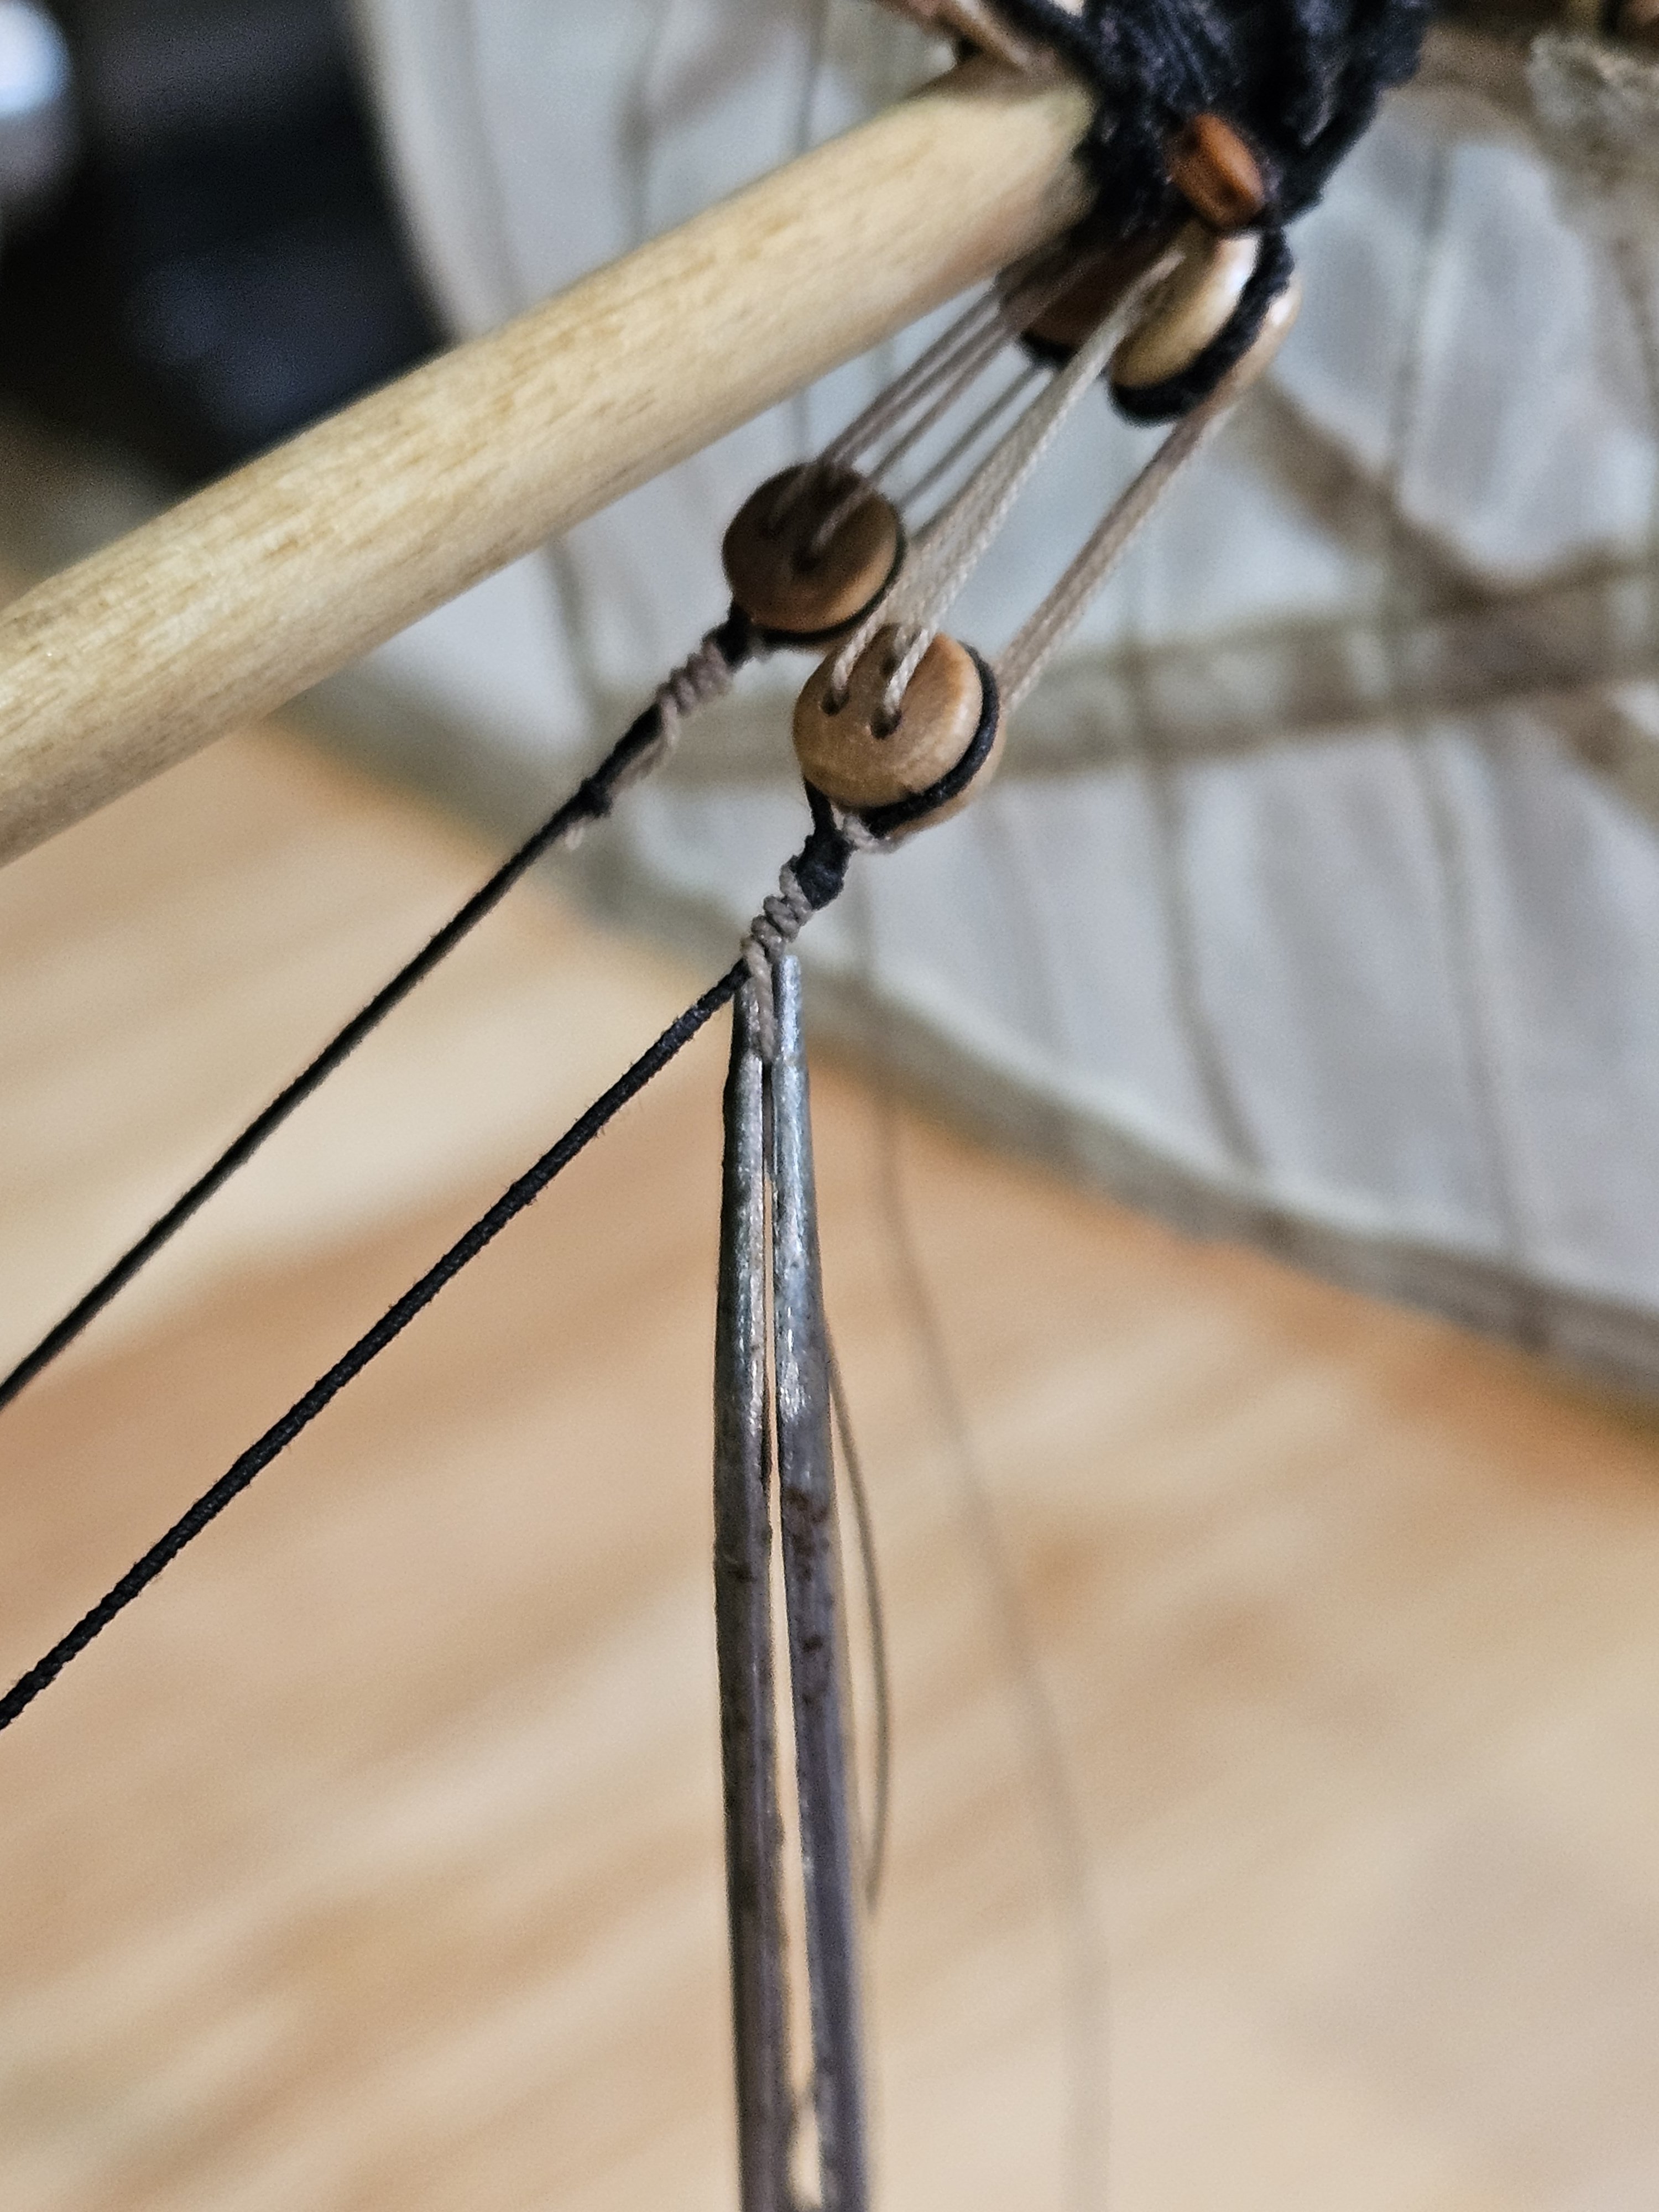
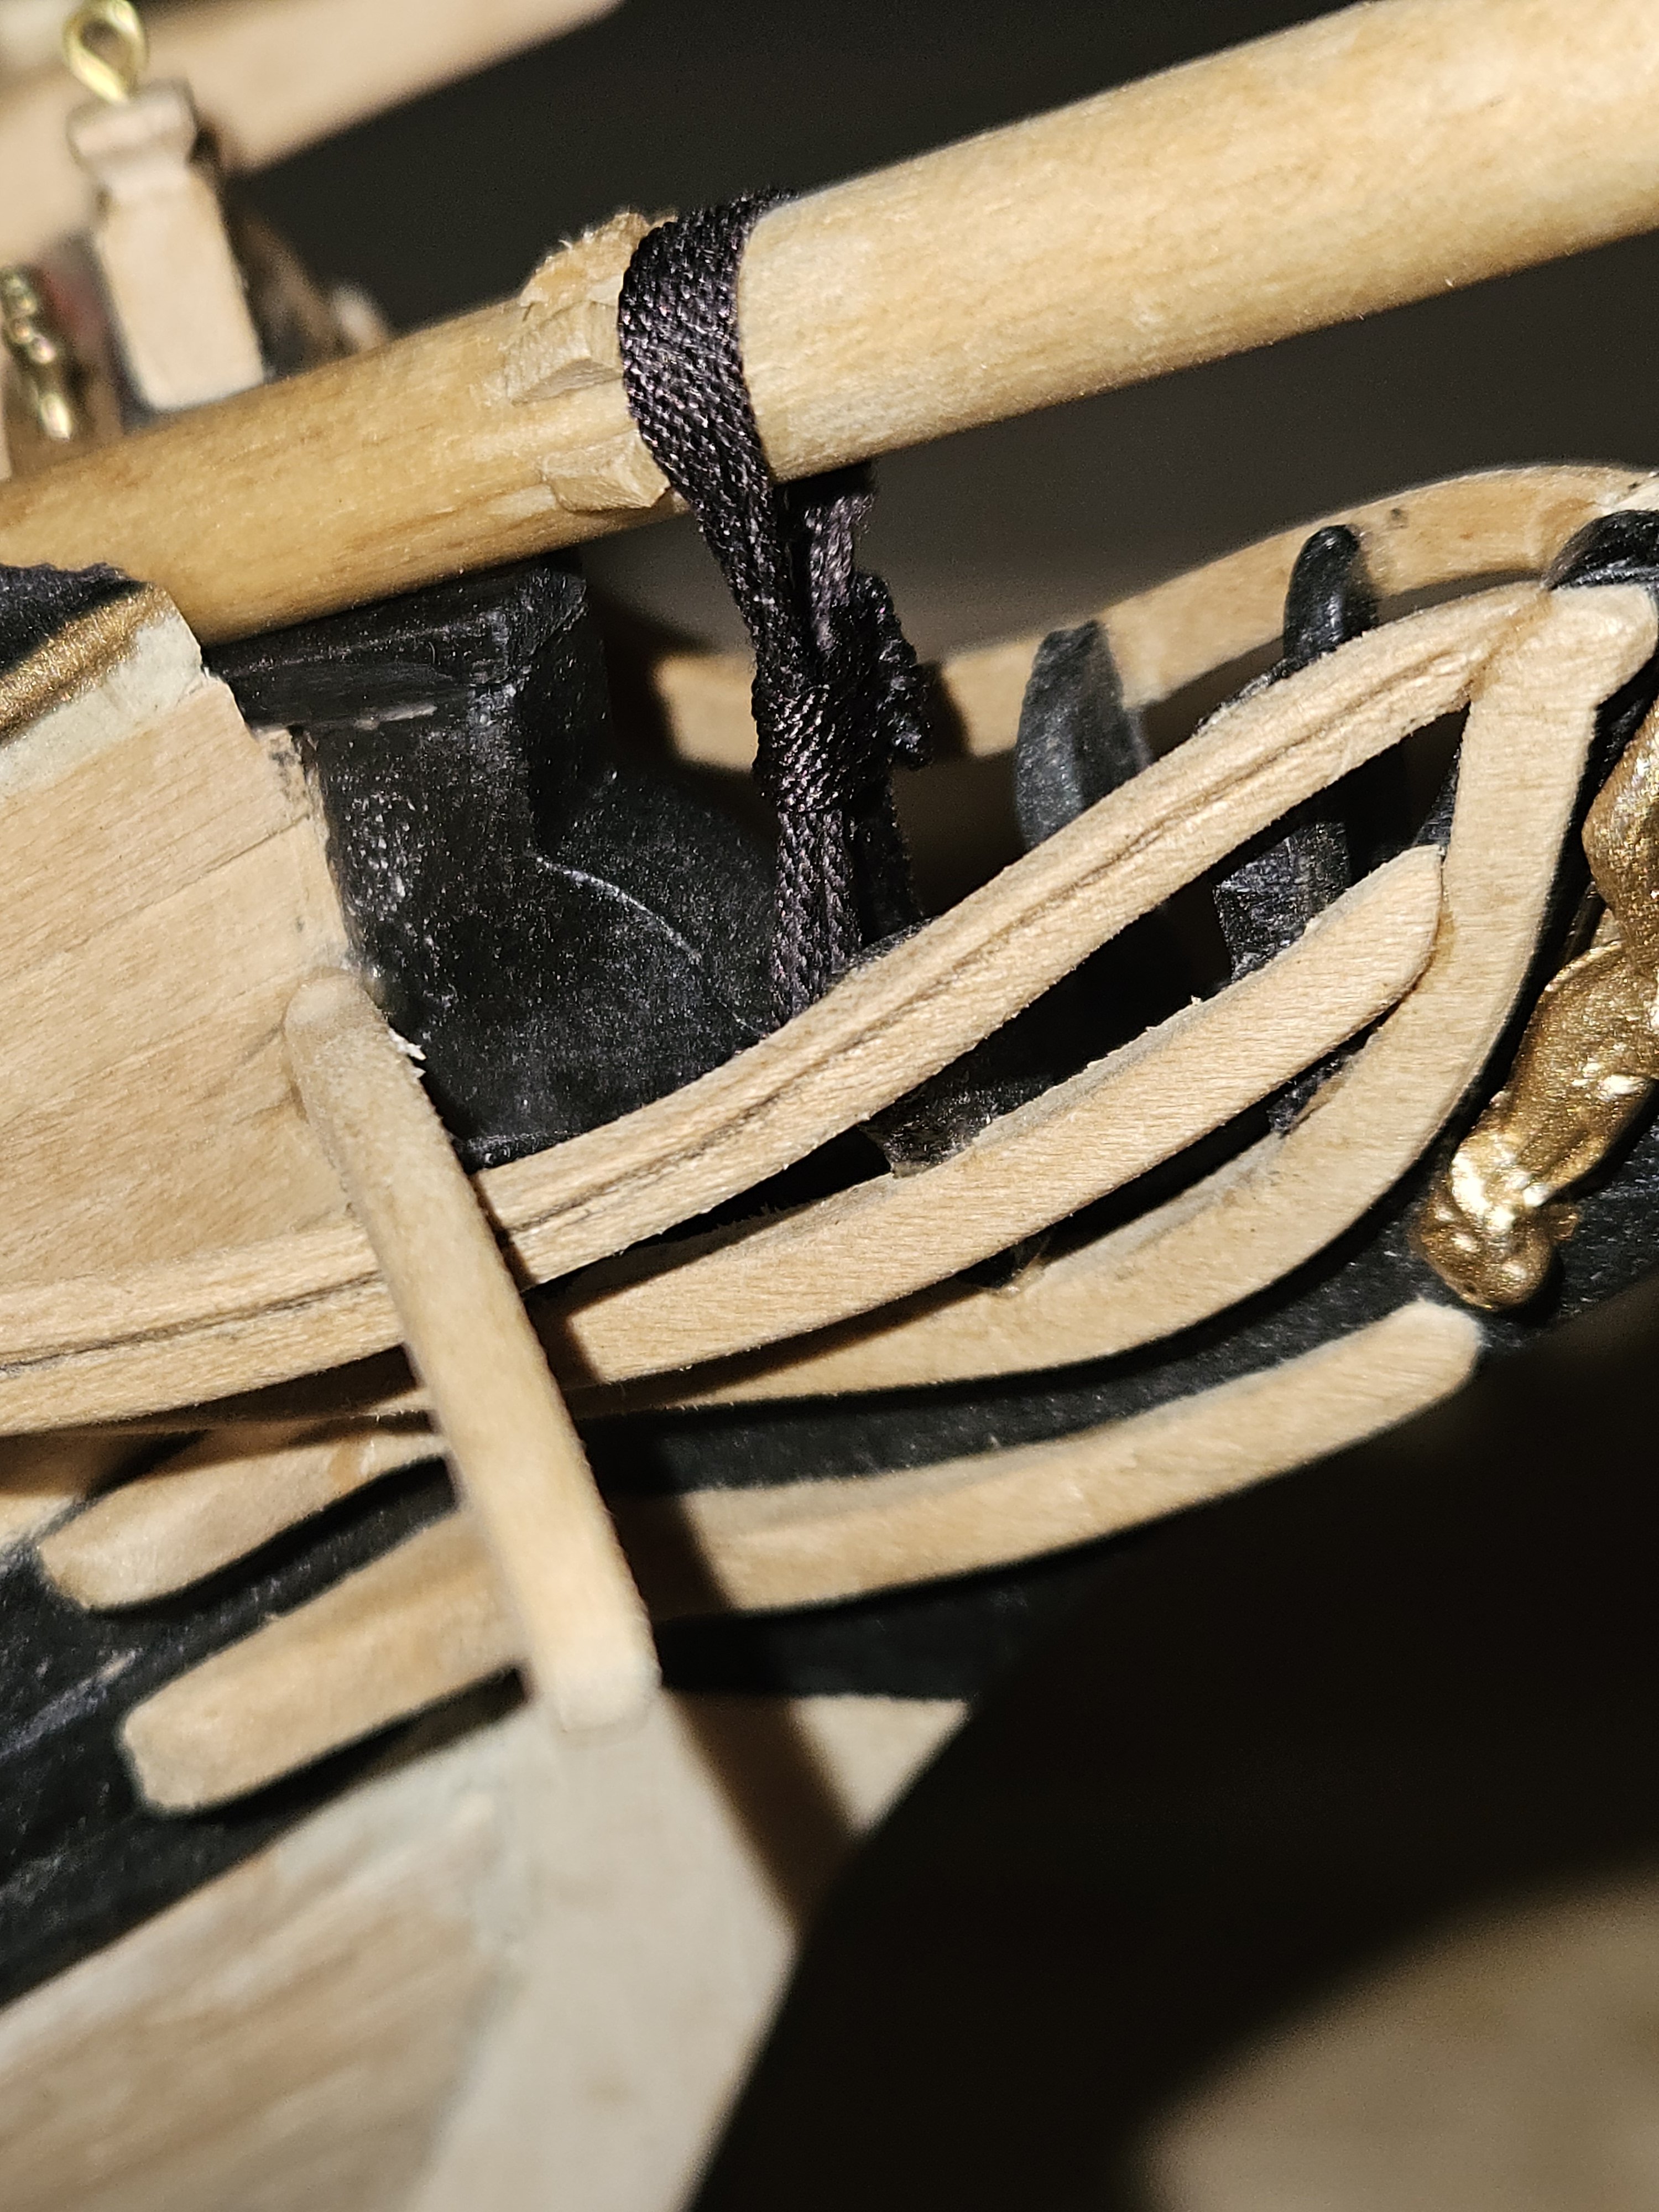
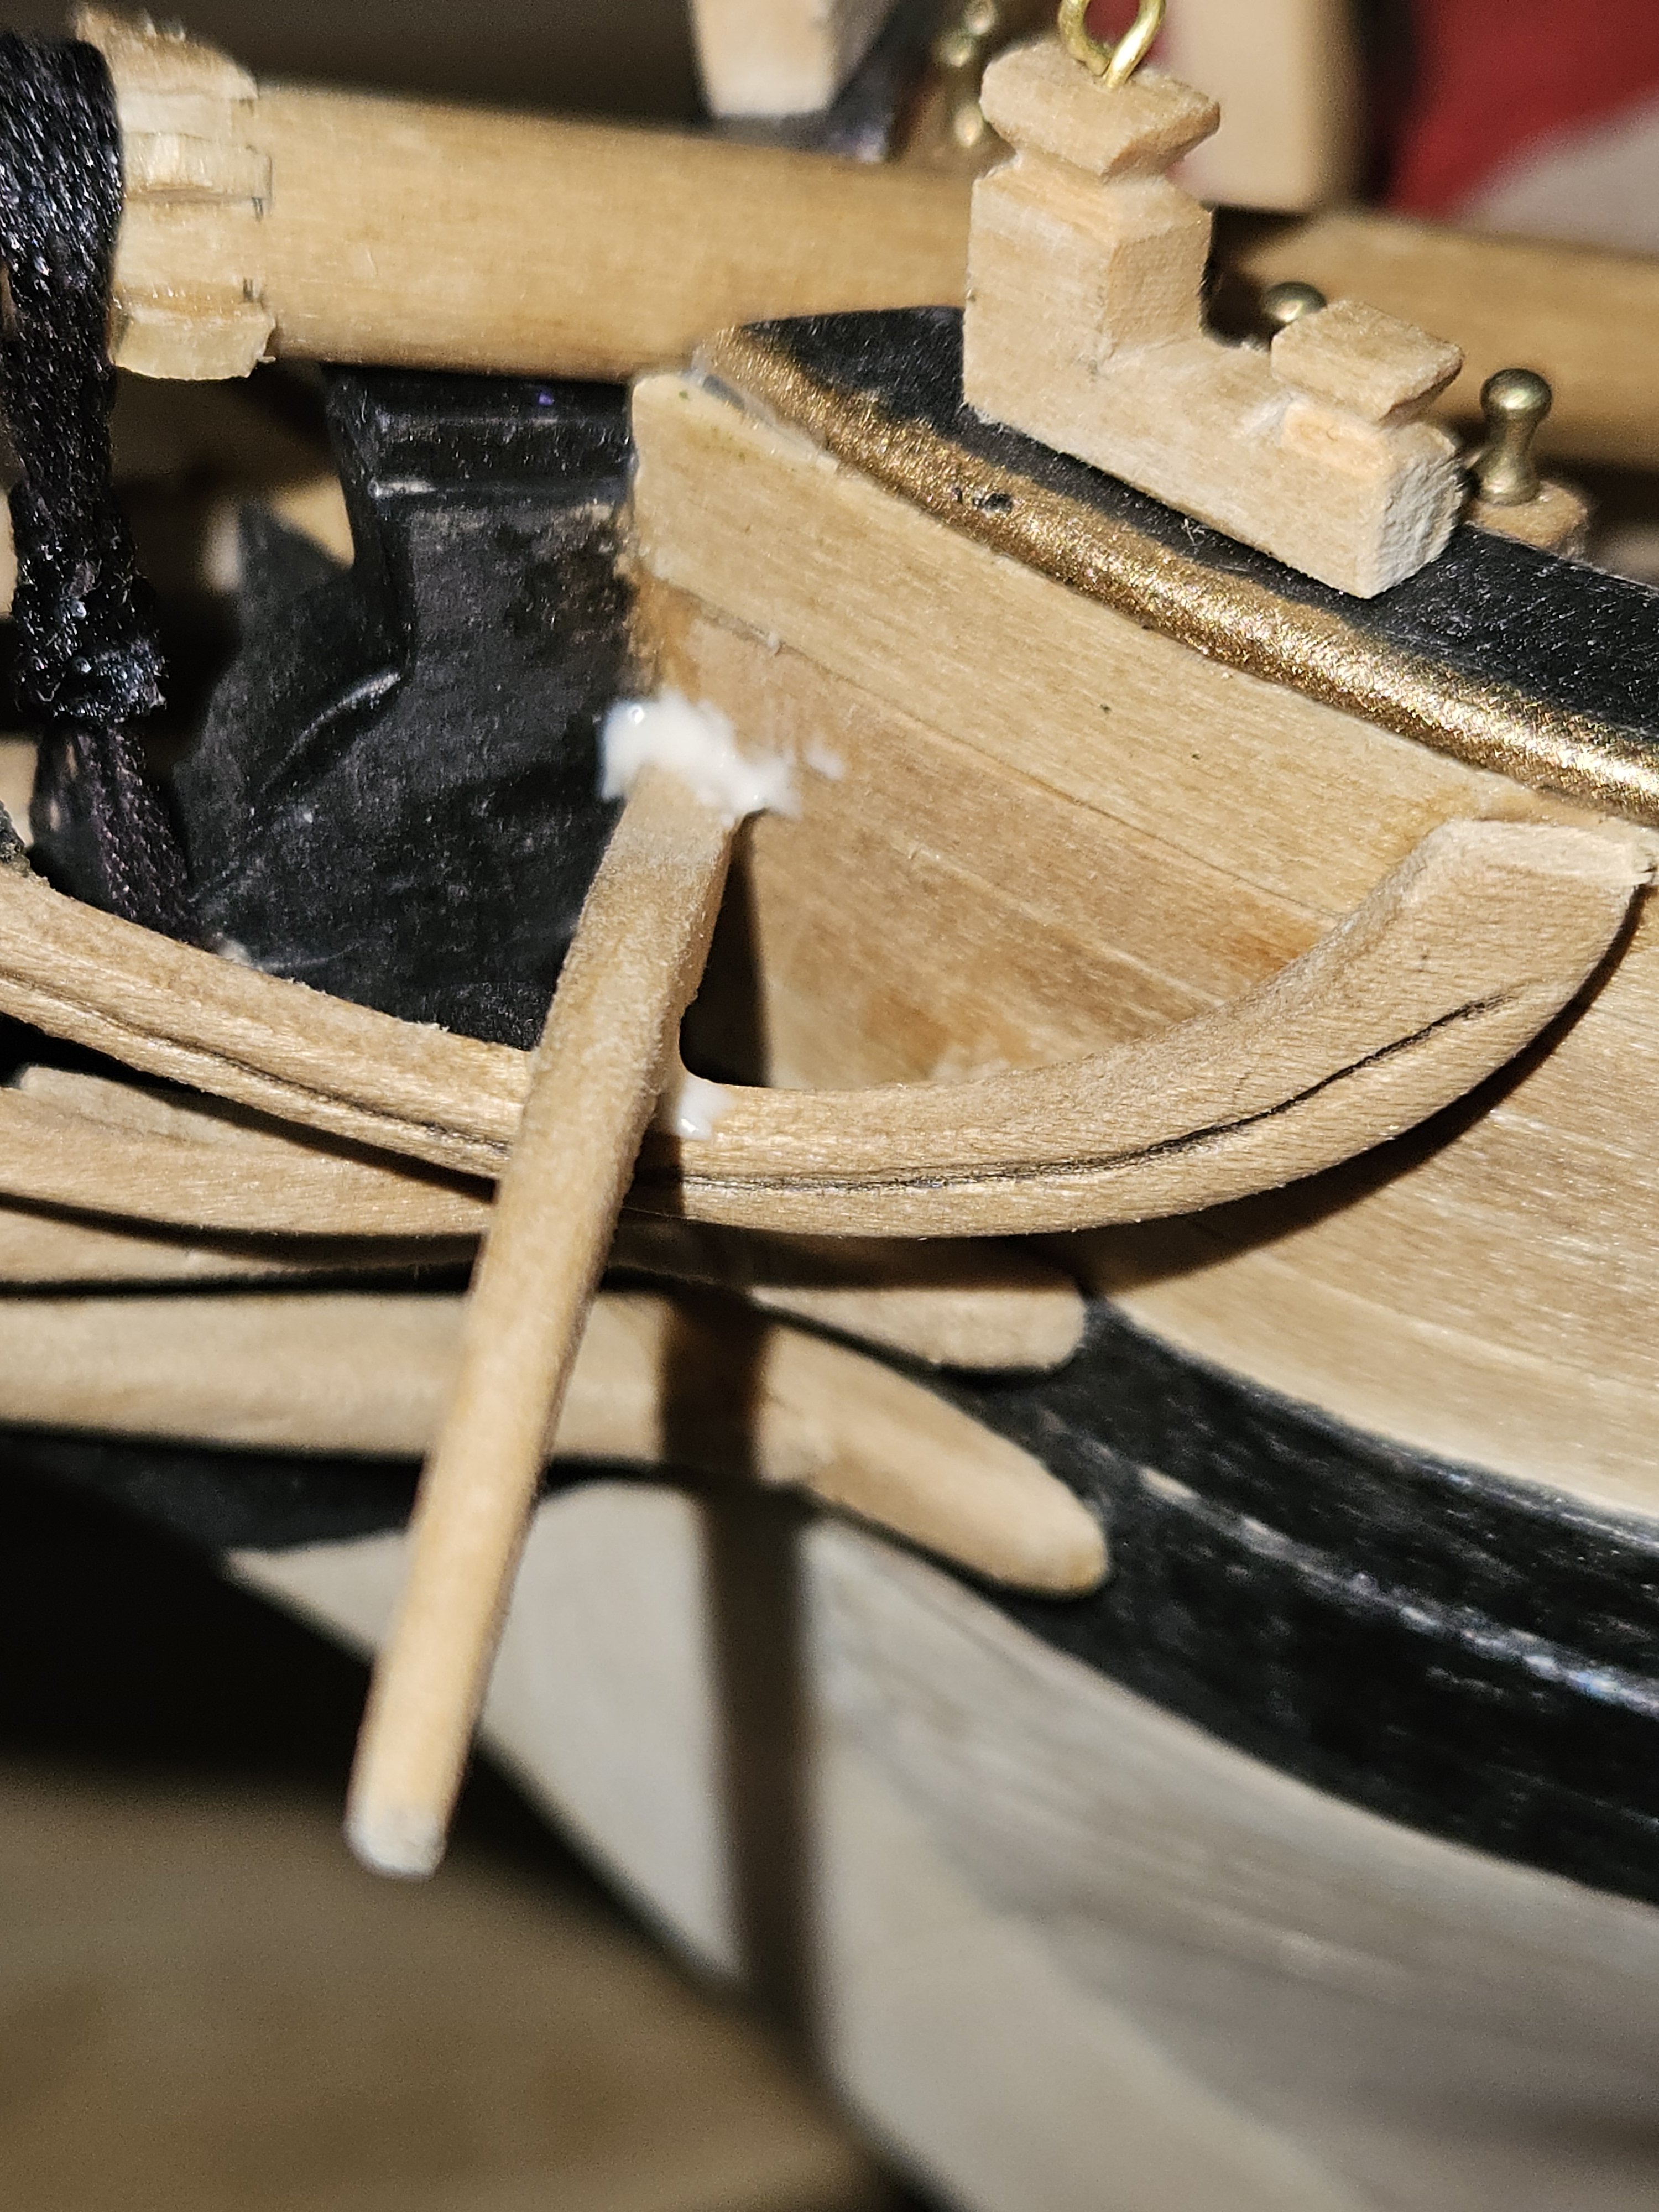
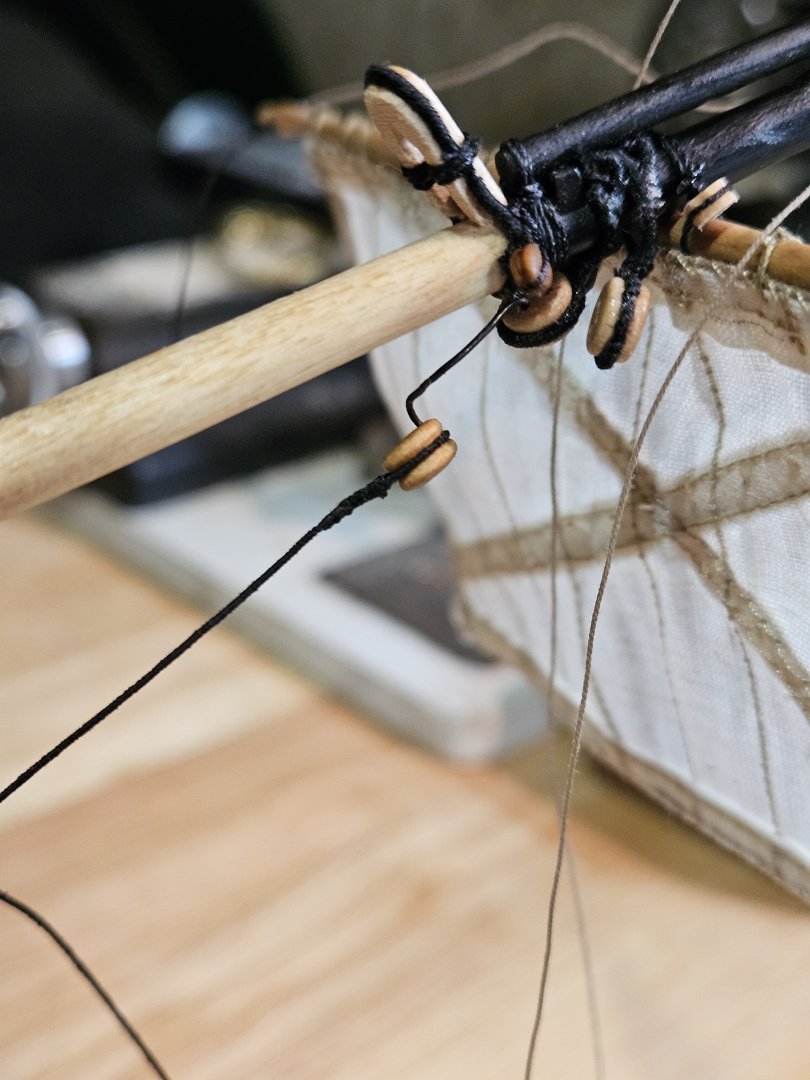
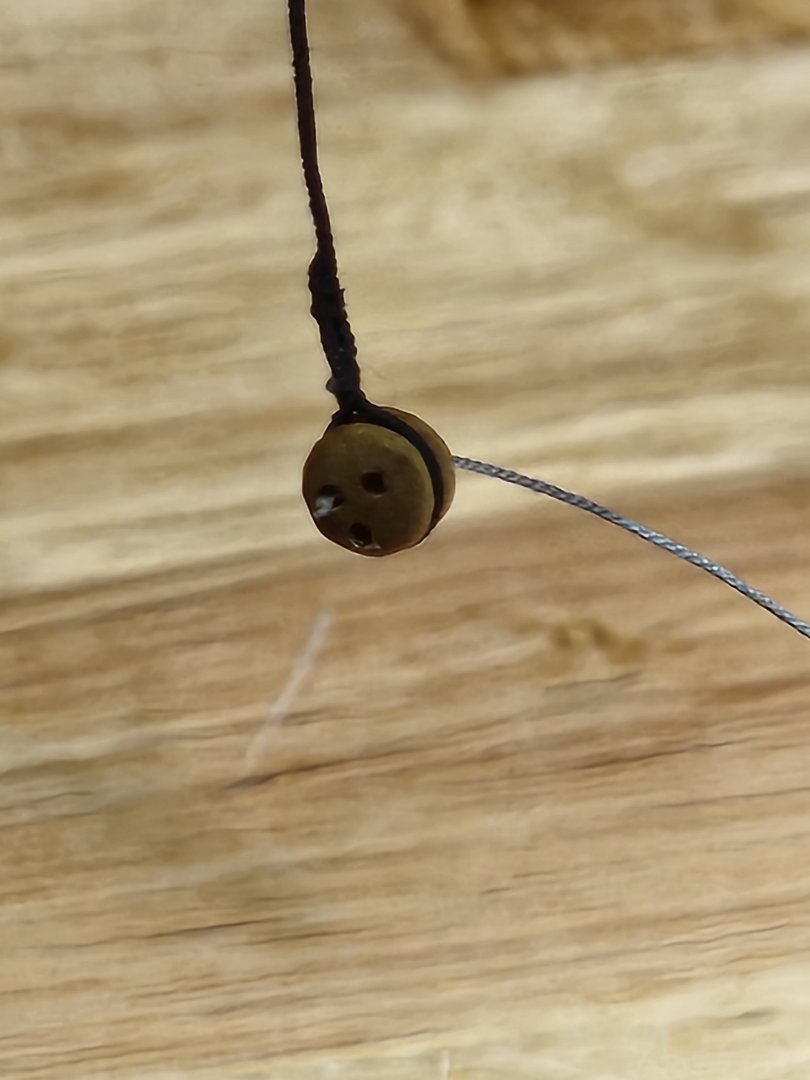
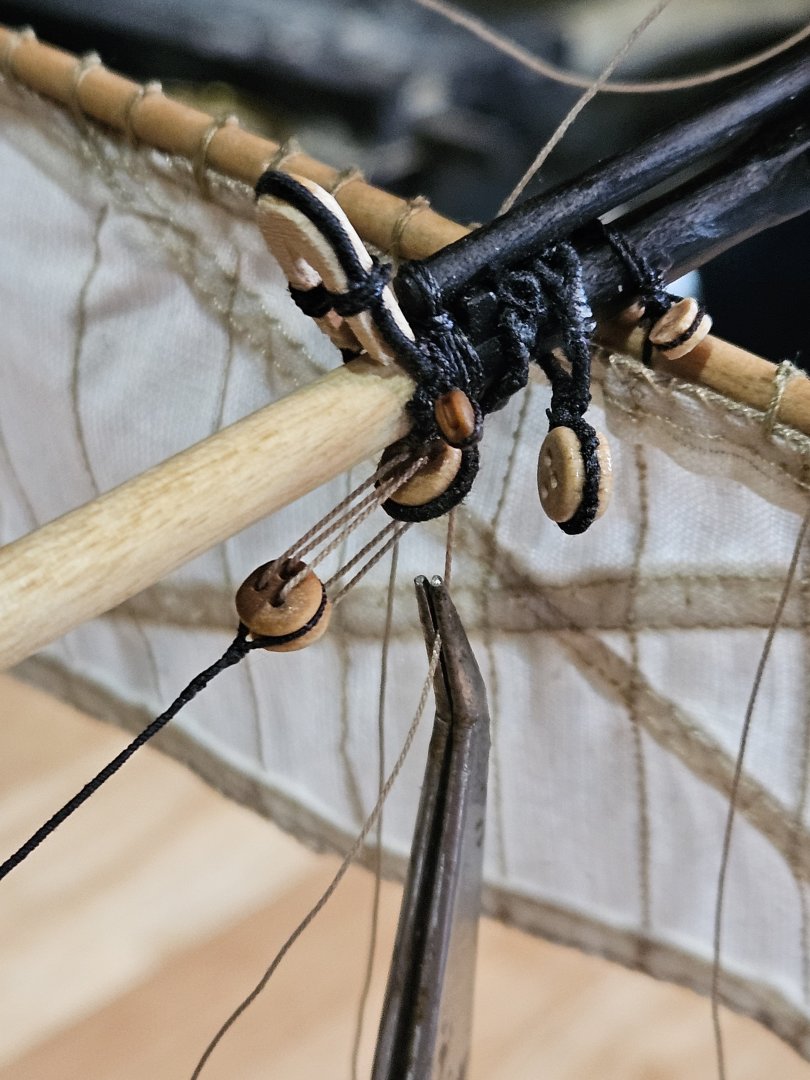
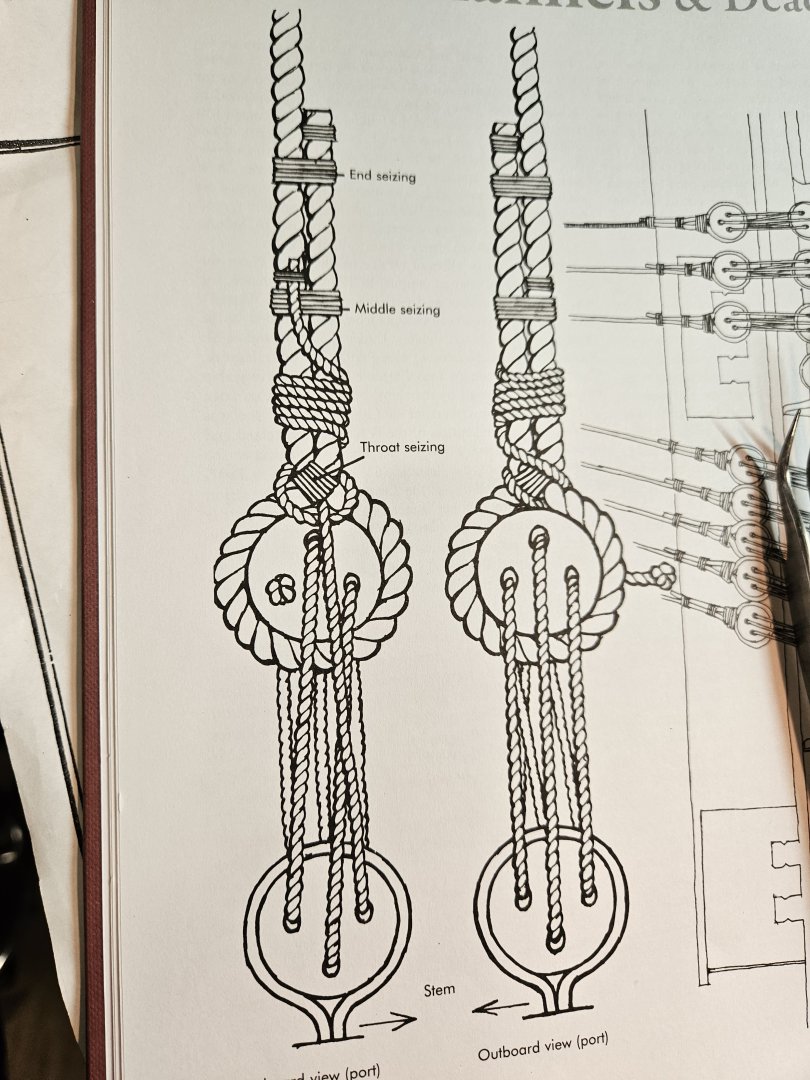
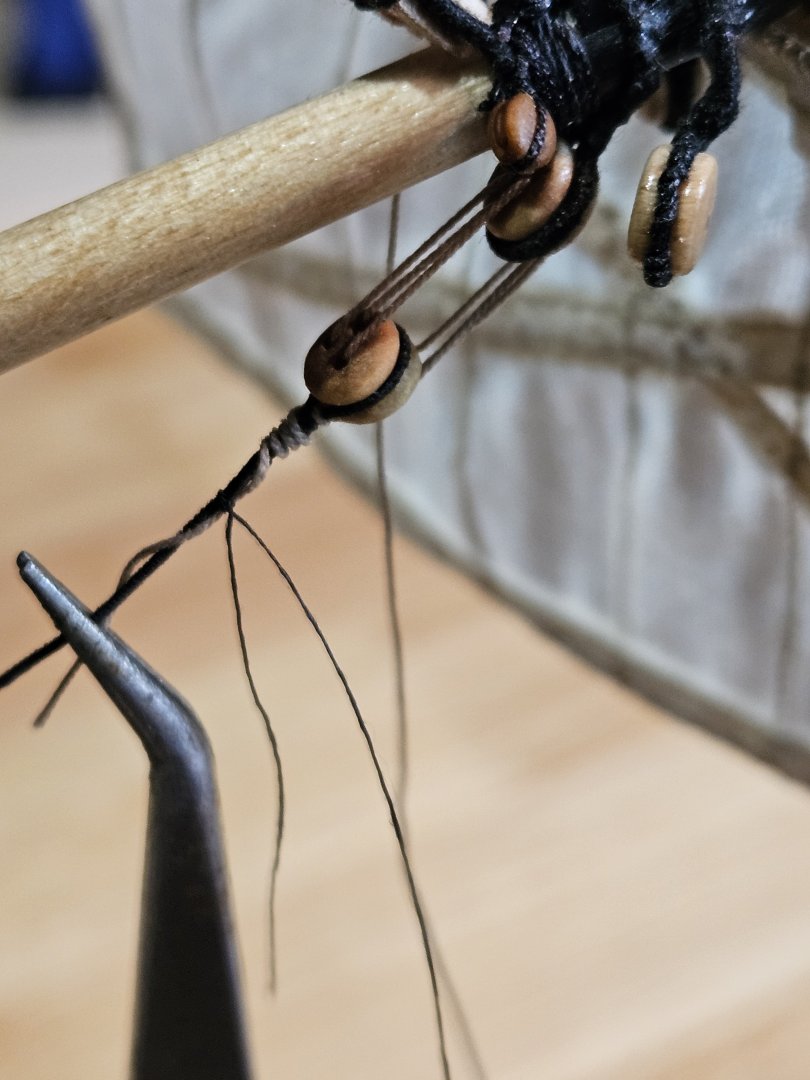
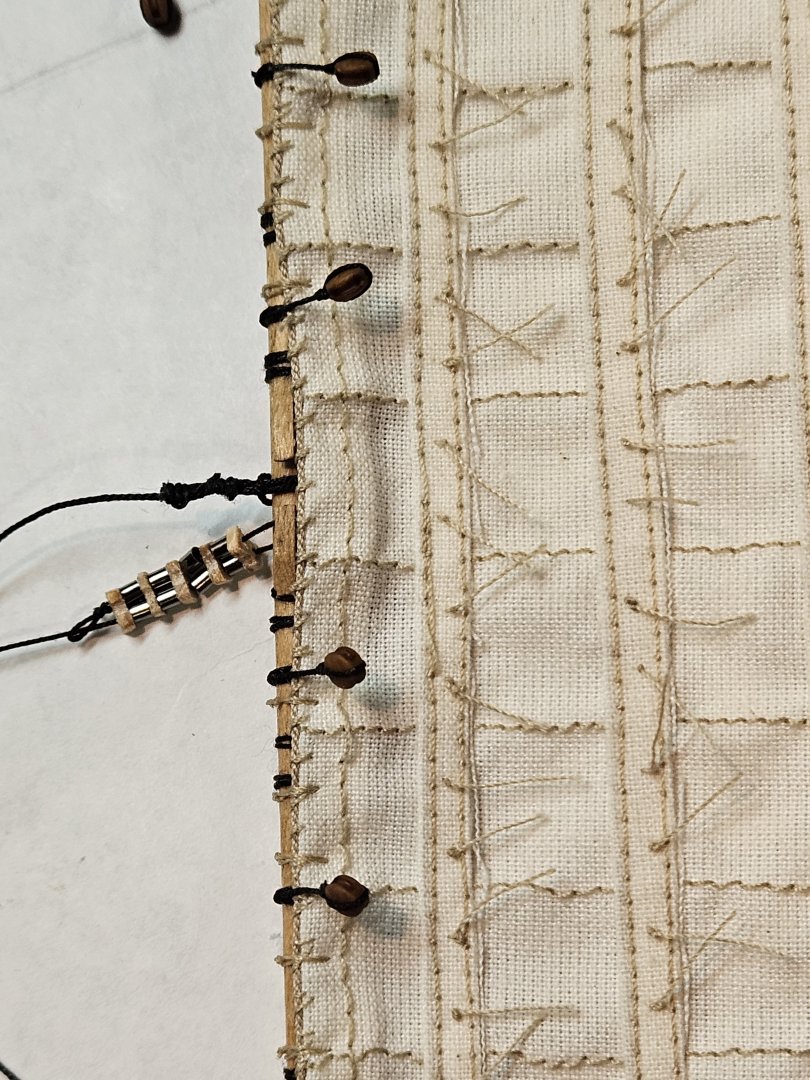
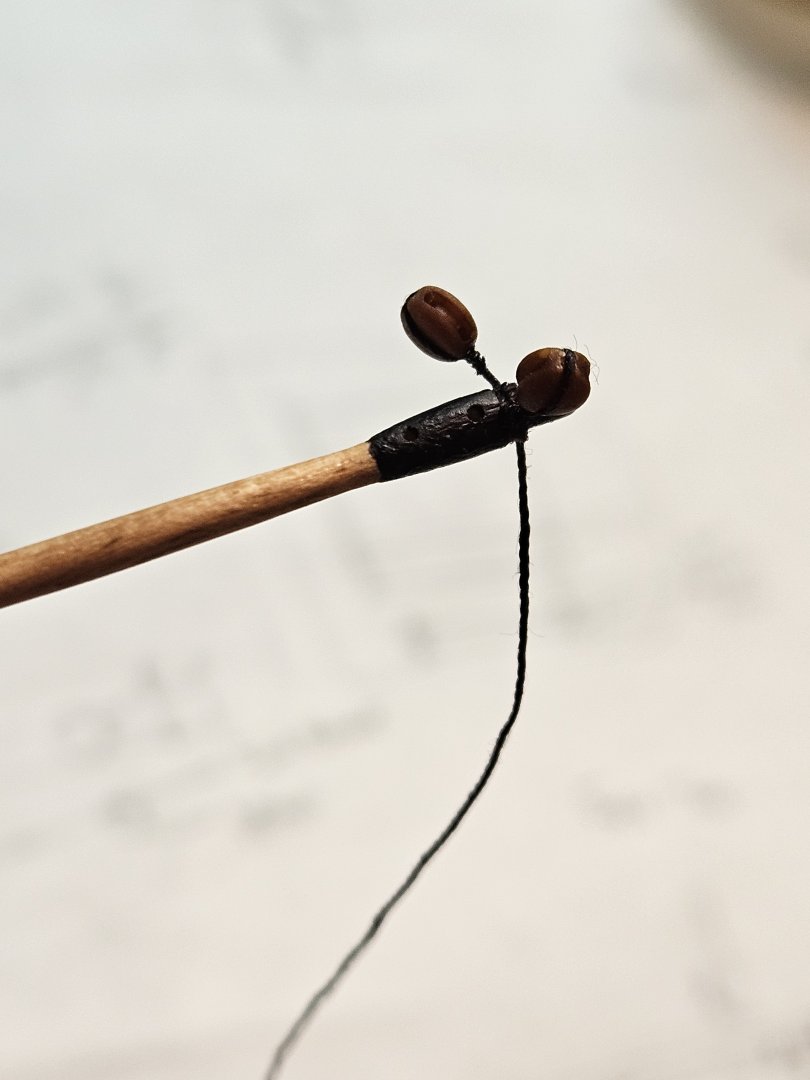
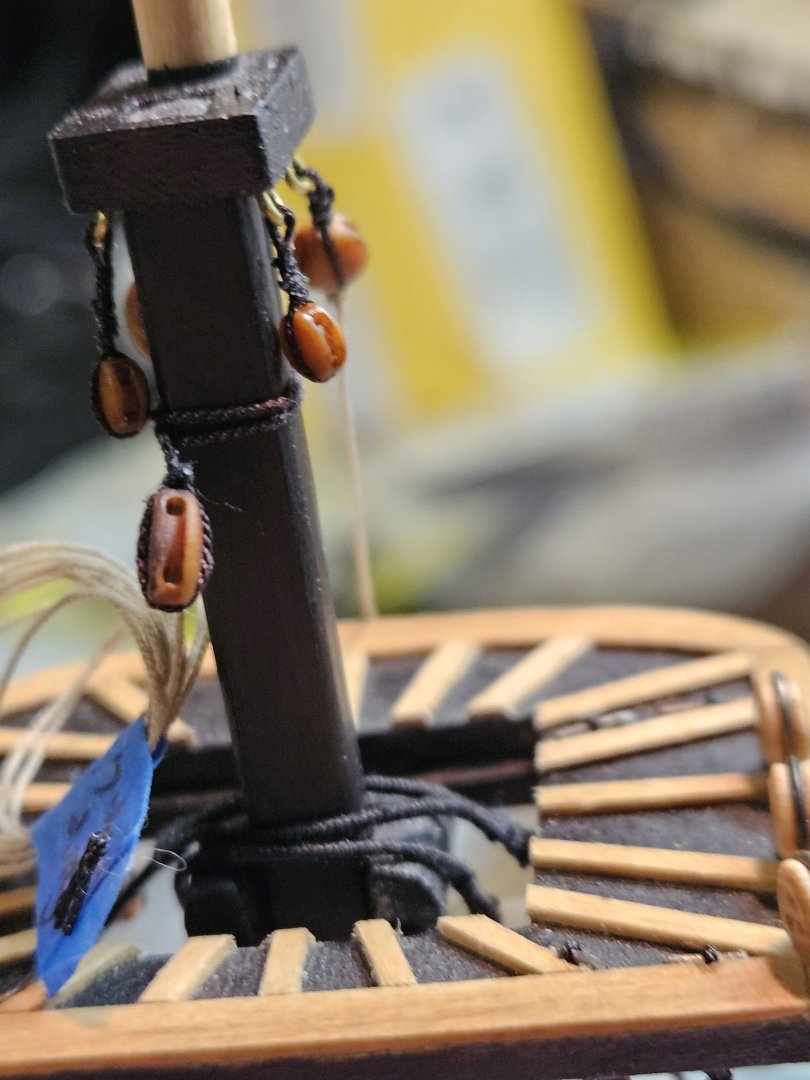
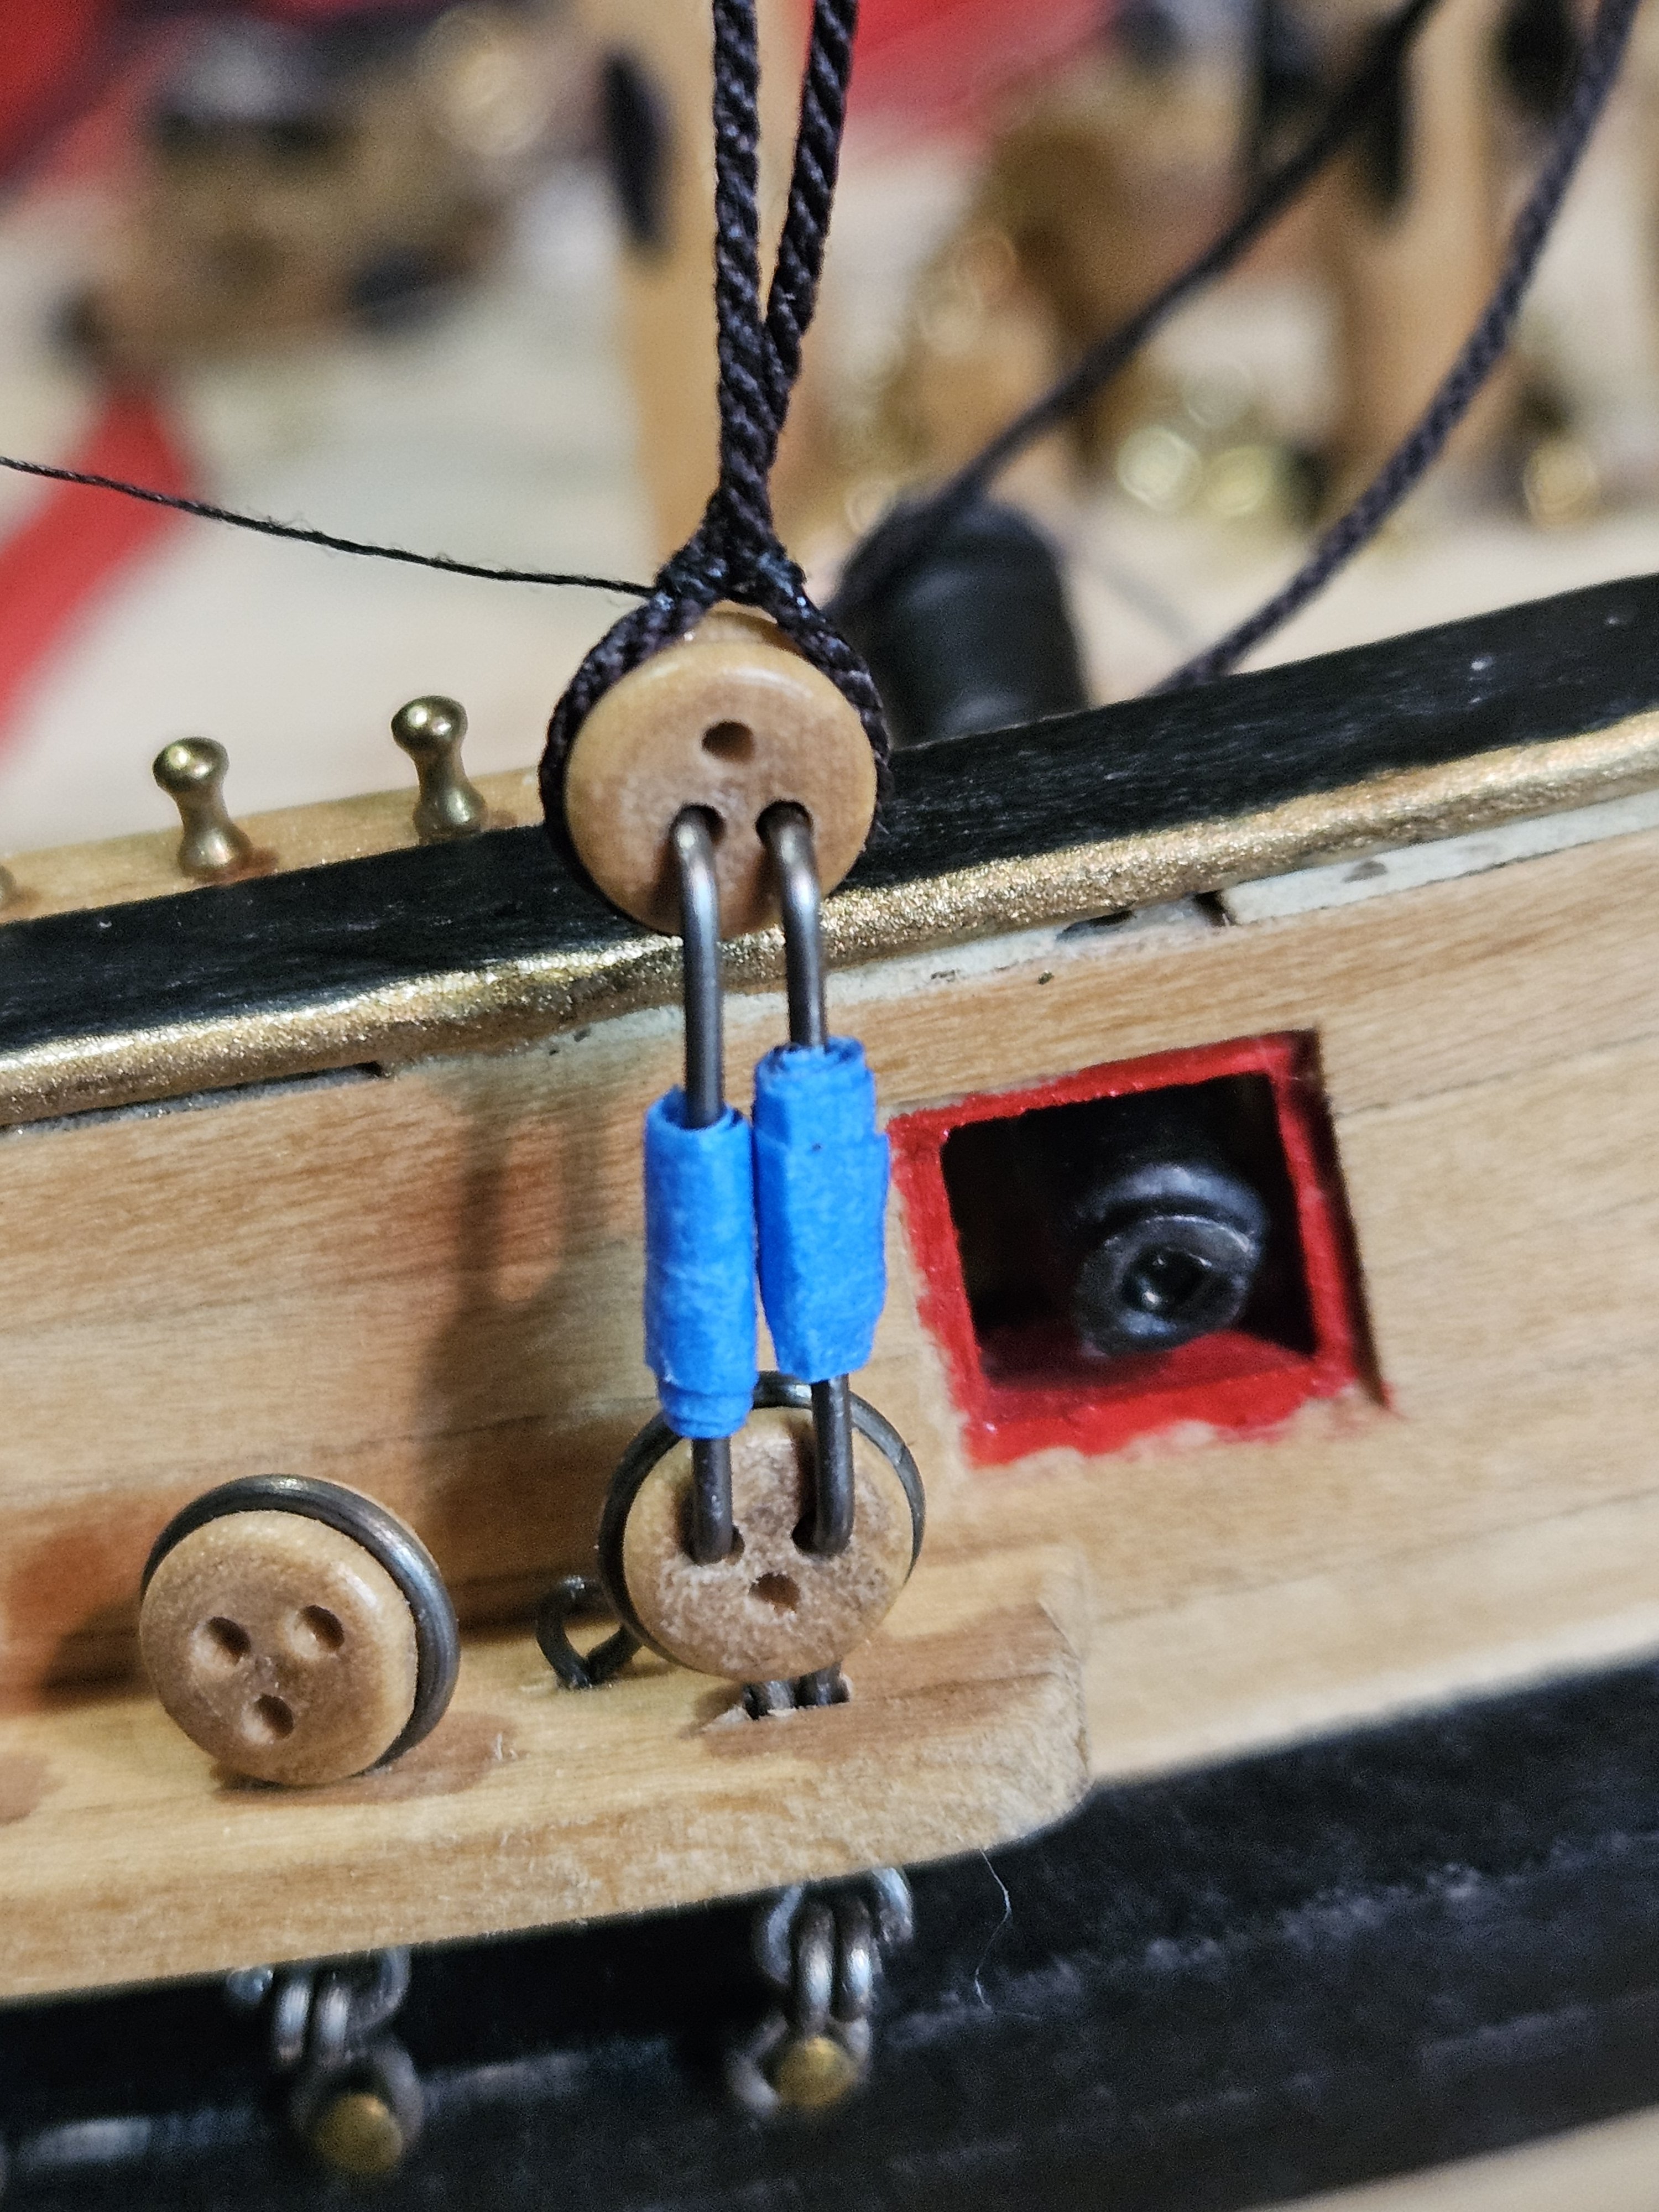
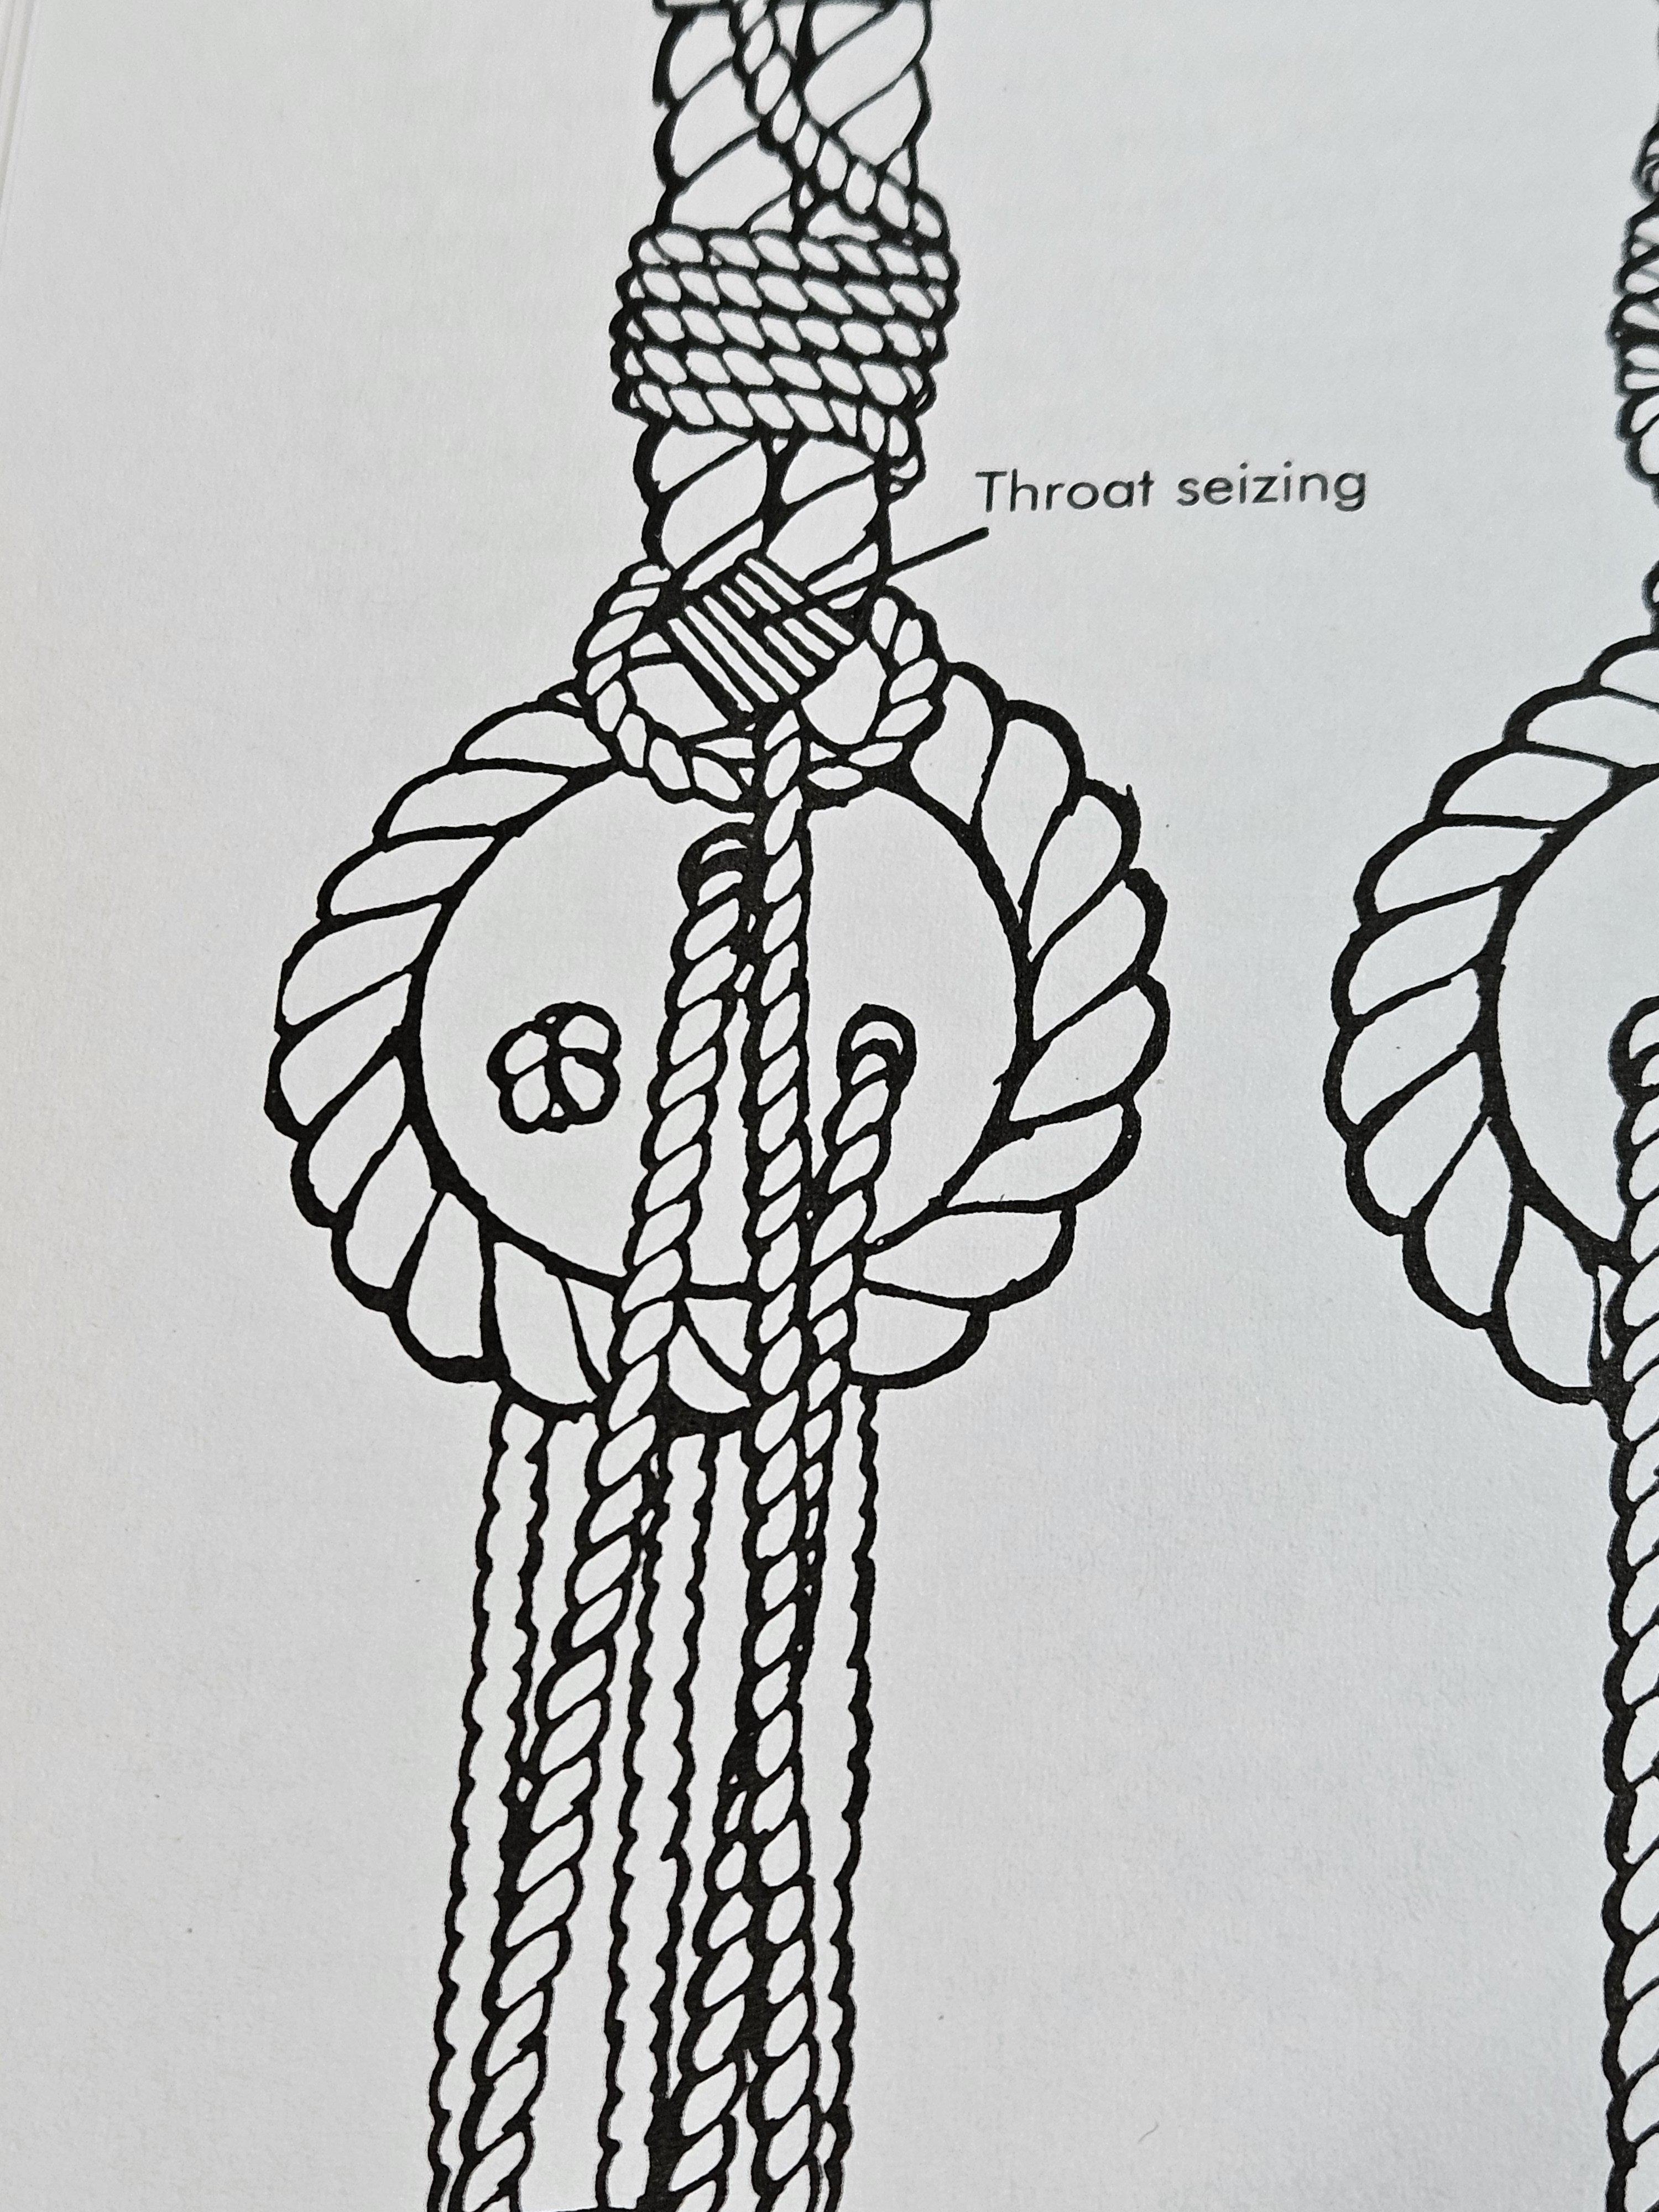
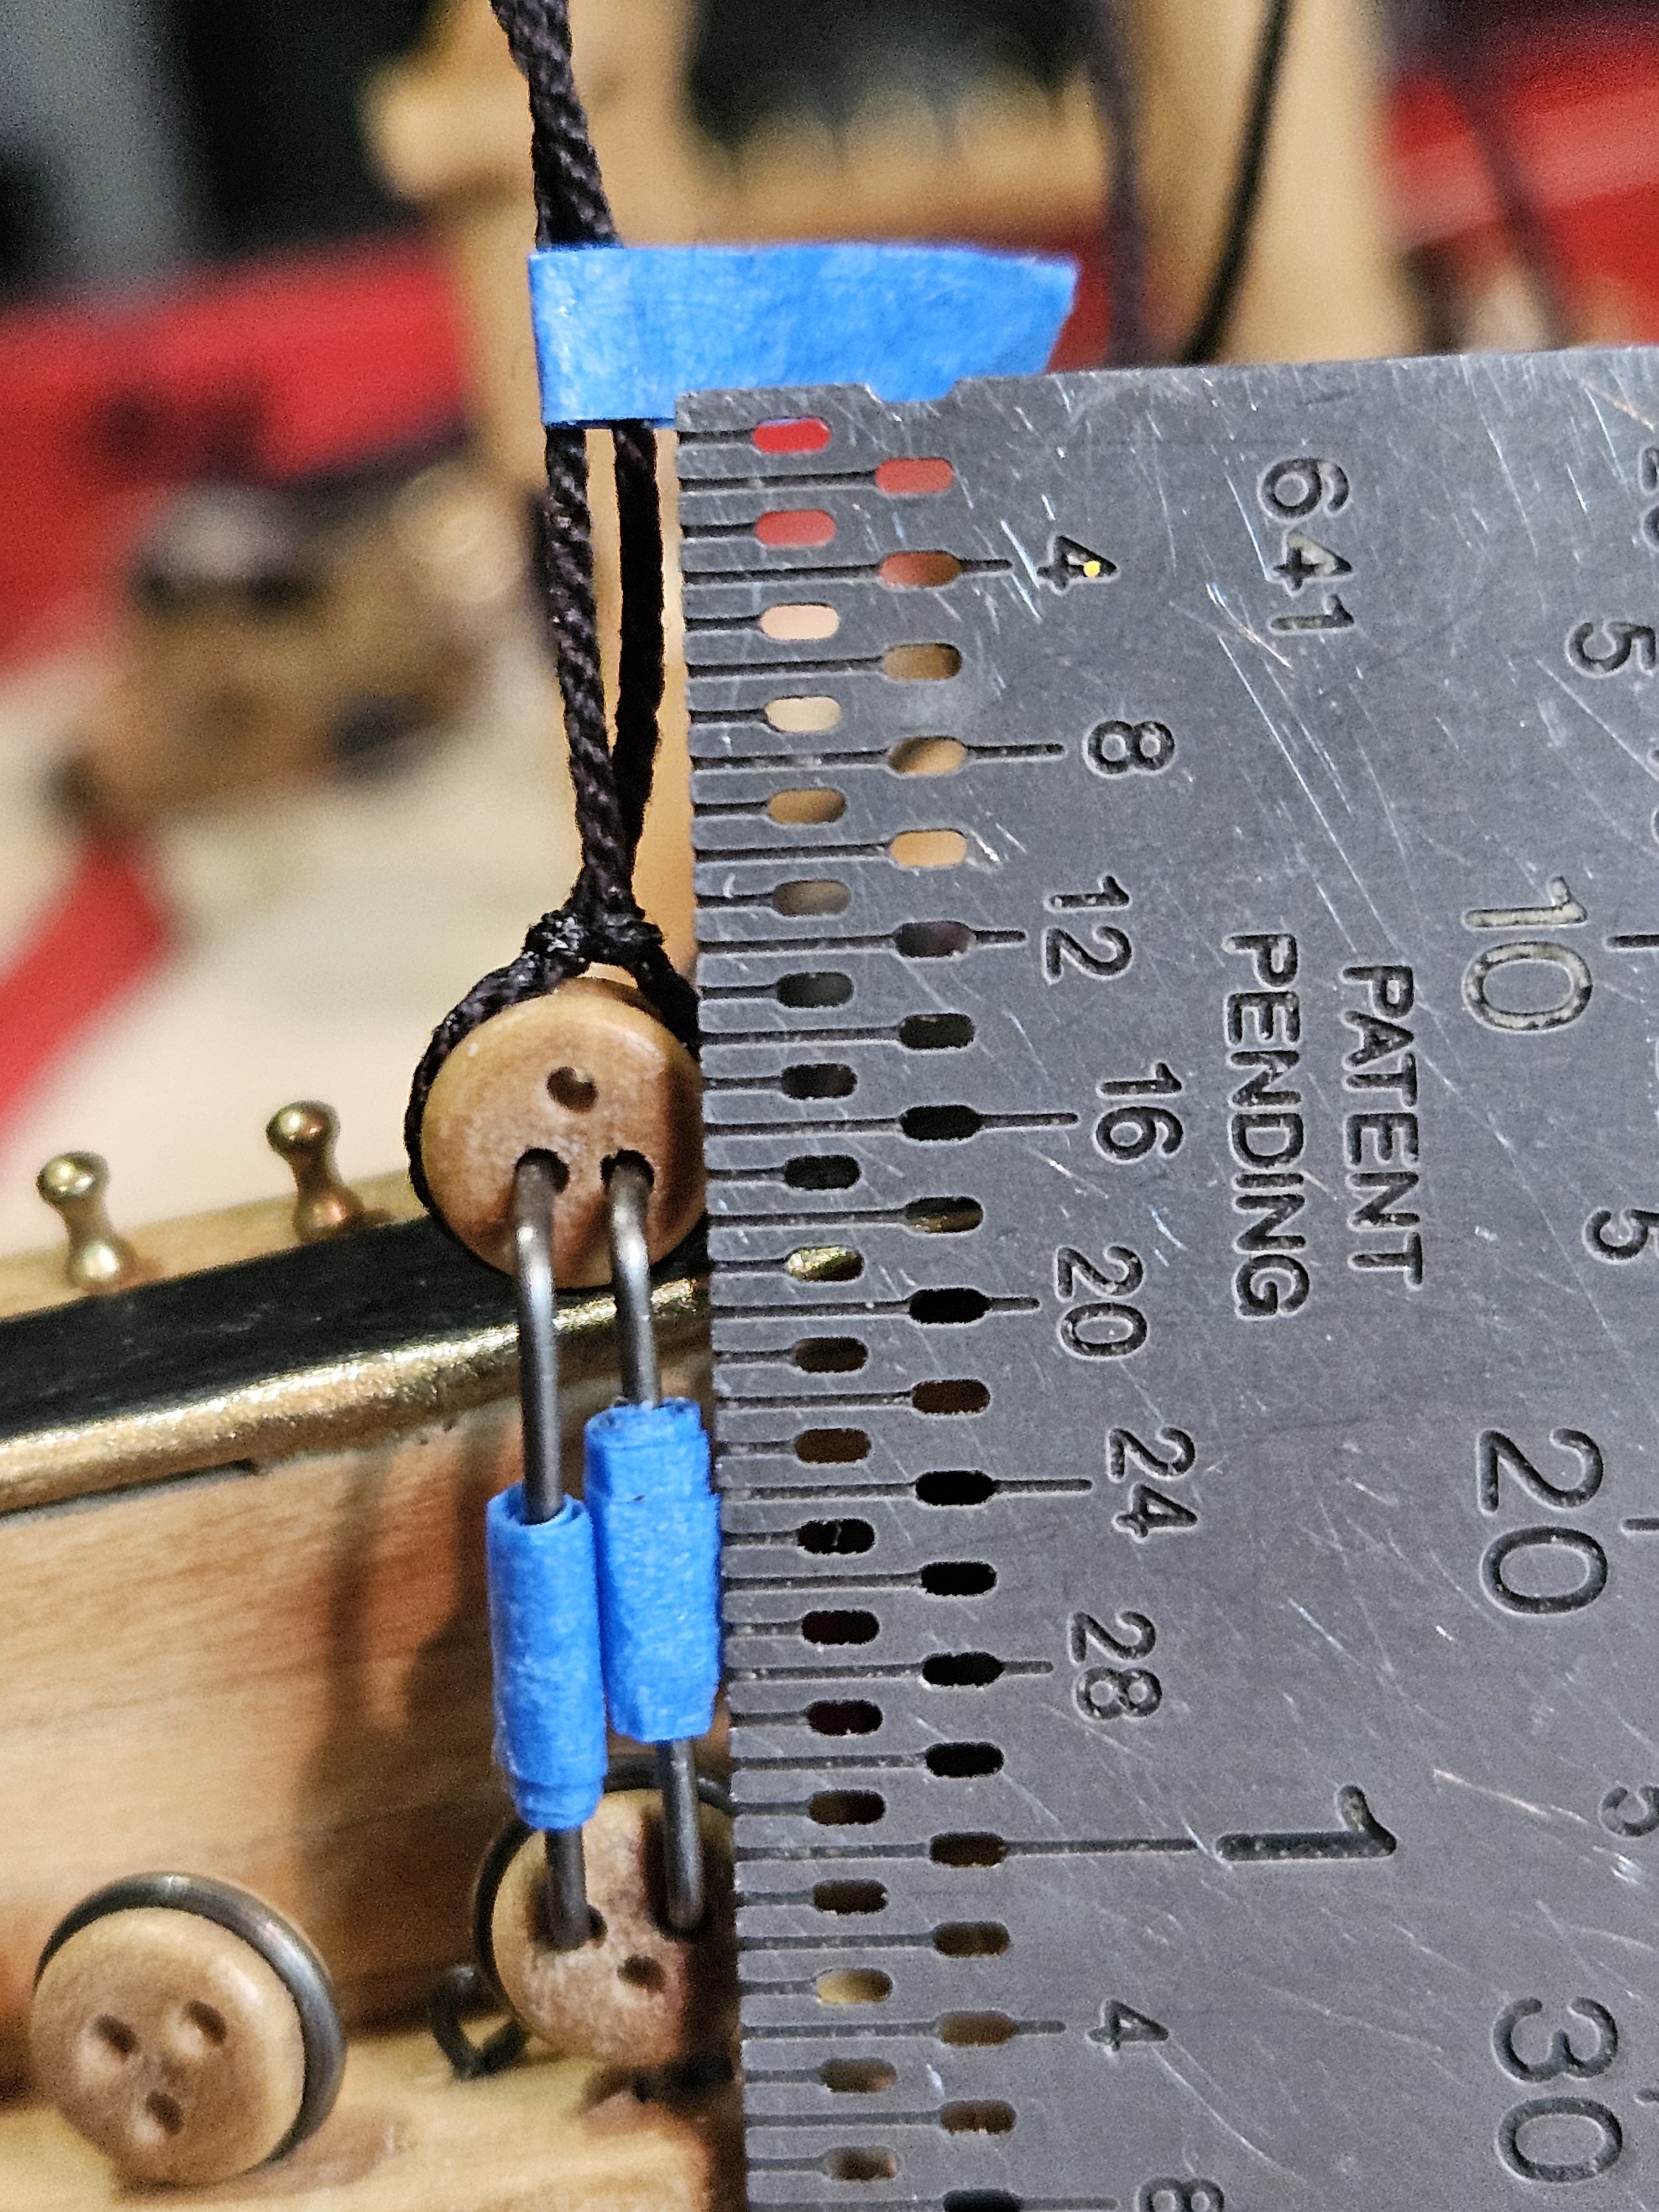
Moving along with the Fair American build... Had a nice Christmas with the families, so shopping, wrapping and interruptions abound! From Petersson, the Topgallant bowlines go through sheaves in the trestle trees, then down to a rail. My kit obviously doesn't come with one, so I built on with some scrap basswood . It couldn't bee the entire length of the top, because it'd run into the deadeye. This is before gluing... And after, with the belaying pins in place. This thing is delicate, and broke of several times, so here I added some more white glue at the bottom to further secure it to the top, then stained. Some other elements I'm adding are belaying points for the Staysail sheets - I'm using a cleat here. And the Topmast Staysail sheet.... Here they are installed on the inner bulwarks. I'm finally moving onto the shrouds, starting forward. According to the instructions, the 'head' is served, so that comes first. I purchased some more of Chucks rope (.030, .035, and .045in) - he's go the good stuff. I'm measuring out approximate area of 1.5in to serve with flags. Then, starting with the starboard side, making the first shroud pair. I added a blot of CA glue to tack them together, then used fine thread to start seizing. This needs to be tight, so I'm using tweezers to hold the ends taught while glue dries. Hard to see, but I did several turns and a single thread cross seizing. About as secure as I can make it. The end is long enough that when I add the deadeye later, I've got enough rope. I kind of have only one shot at this, to get the length right. After the starboard side, I did the port side pair. Using a fine needle helped tremendously with the seizing. The other ropes and lines I had in place and coiled got somewhat in the way, but I was able to work around it. After finishing all the pairs, alternating sides, I've got them all done, or 'ready' for deadeyes anyway. The seizing thread is the same size as the serving, so it blends really well - I think that's the point. Once all the shroud pair are pre-paired, lol, I am adding the deadeyes. As per the instructions, I made a little tool with some steel wire to space it out, according to the plans. I rotated the deadeyes, so the middle 'eye' is in the middle, and not crooked. This will make the lanyard neater and straighter - I hope. This part was tricky to figure out how to do. I failed several times. I ended up using the reverse tweezers to grip the rope above the deadeye.... Then tack with CA glue using a toothpick, towards the back side to 'hide' the glue. I let it dry for a while, so it wasn't tacky before I let go with the tweezers. The spacer tool fell out VERY easily, so I had to keep lining it back up all the time - a real pain. I also started a knot with fine thread to do a 'throat' seizing.... In Petersson, this throat seizing looks a bit odd. I'm not entirely sure how it's done. Something like an over-and-under technique. Mine doesn't quite look the same. Its more of a throat securing, rather than a seizing. I also want a little hole underneath for the lanyard to pass through later. Now that its secured, I want to terminate the ends. On the rigging sheet, this termination is rather short - <0.25in long. I want enough space to show off the lanyard coil, so I'm making it ~0.375in long, using a flag as a guide. I added two seizings with fine thread, and CA glue to the very end of the rope so it doesn't unravel when I cut it. Of course the termination is supposed to be on the aft side of the shroud, so I had to flip it. All the other deadeyes were terminated on the correct side after this. I could have seized with tan rope to make it stand out more, but this works fine for me. That's one! I have 15more to do. It's tedious, and I did it over several days, as time allows, but I got it done. Next up is the lanyards. These should be fun. Thanks for reading. Have a nice New Years, all! - Jason -


-
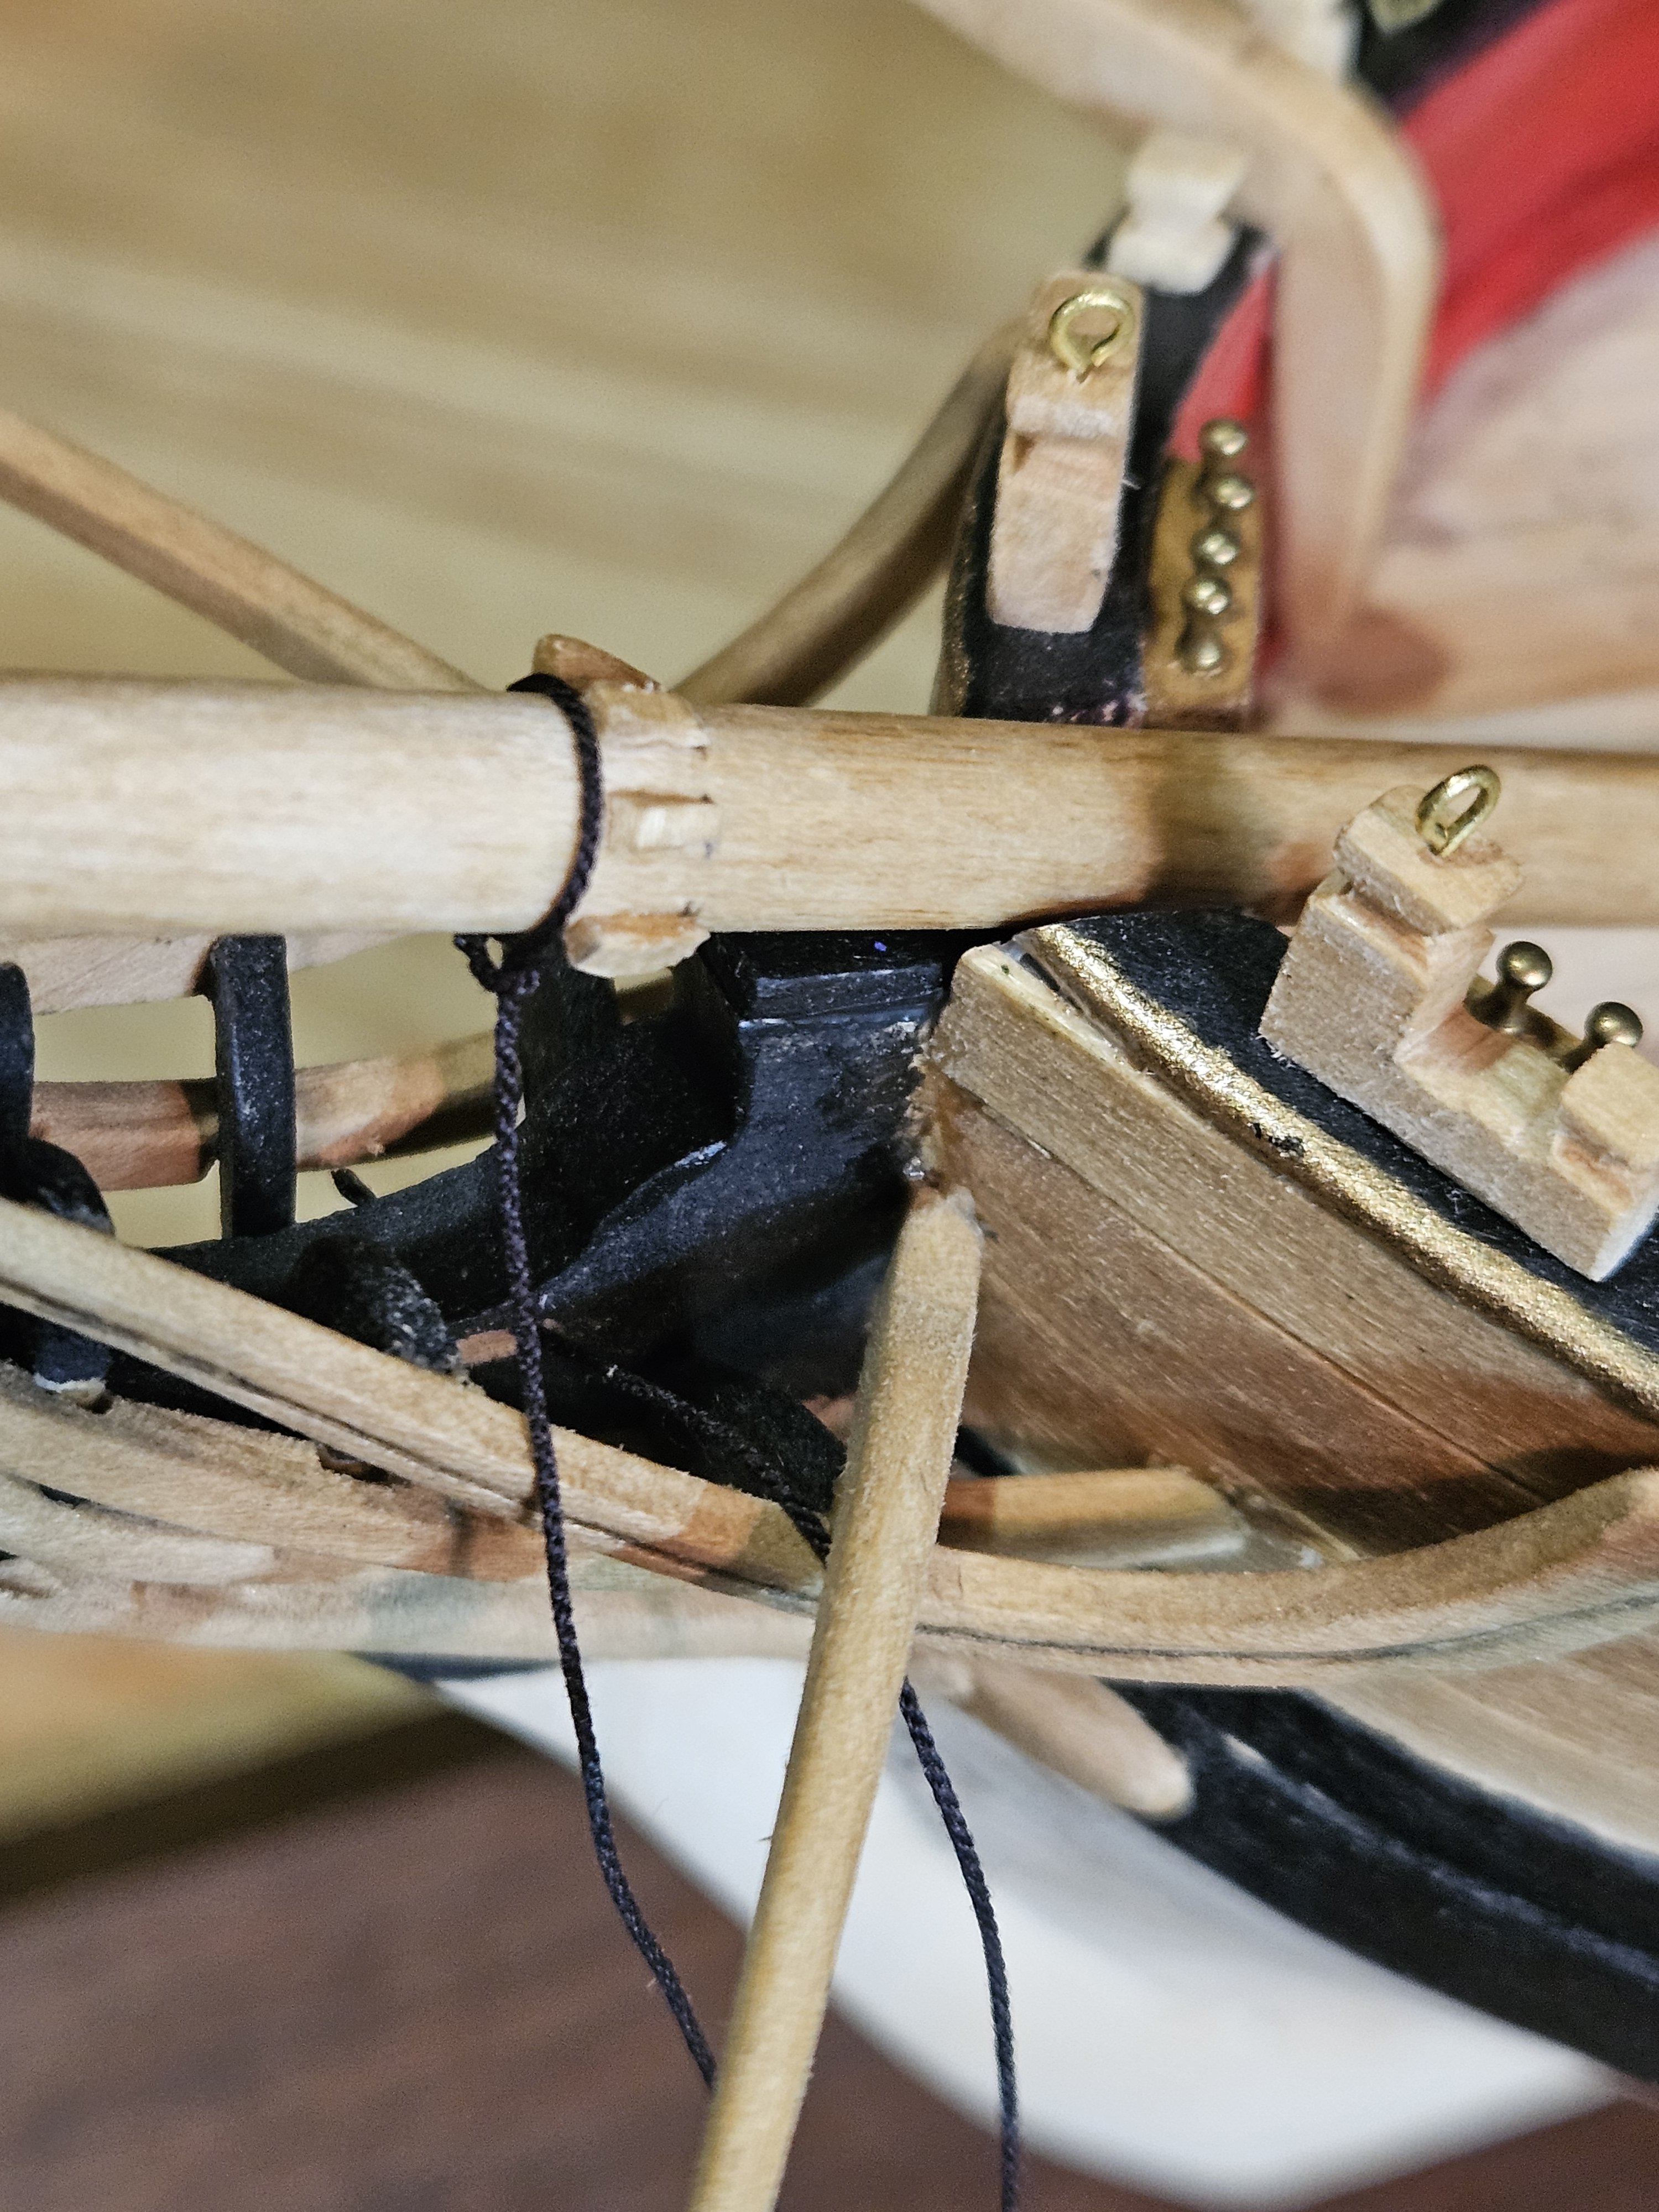
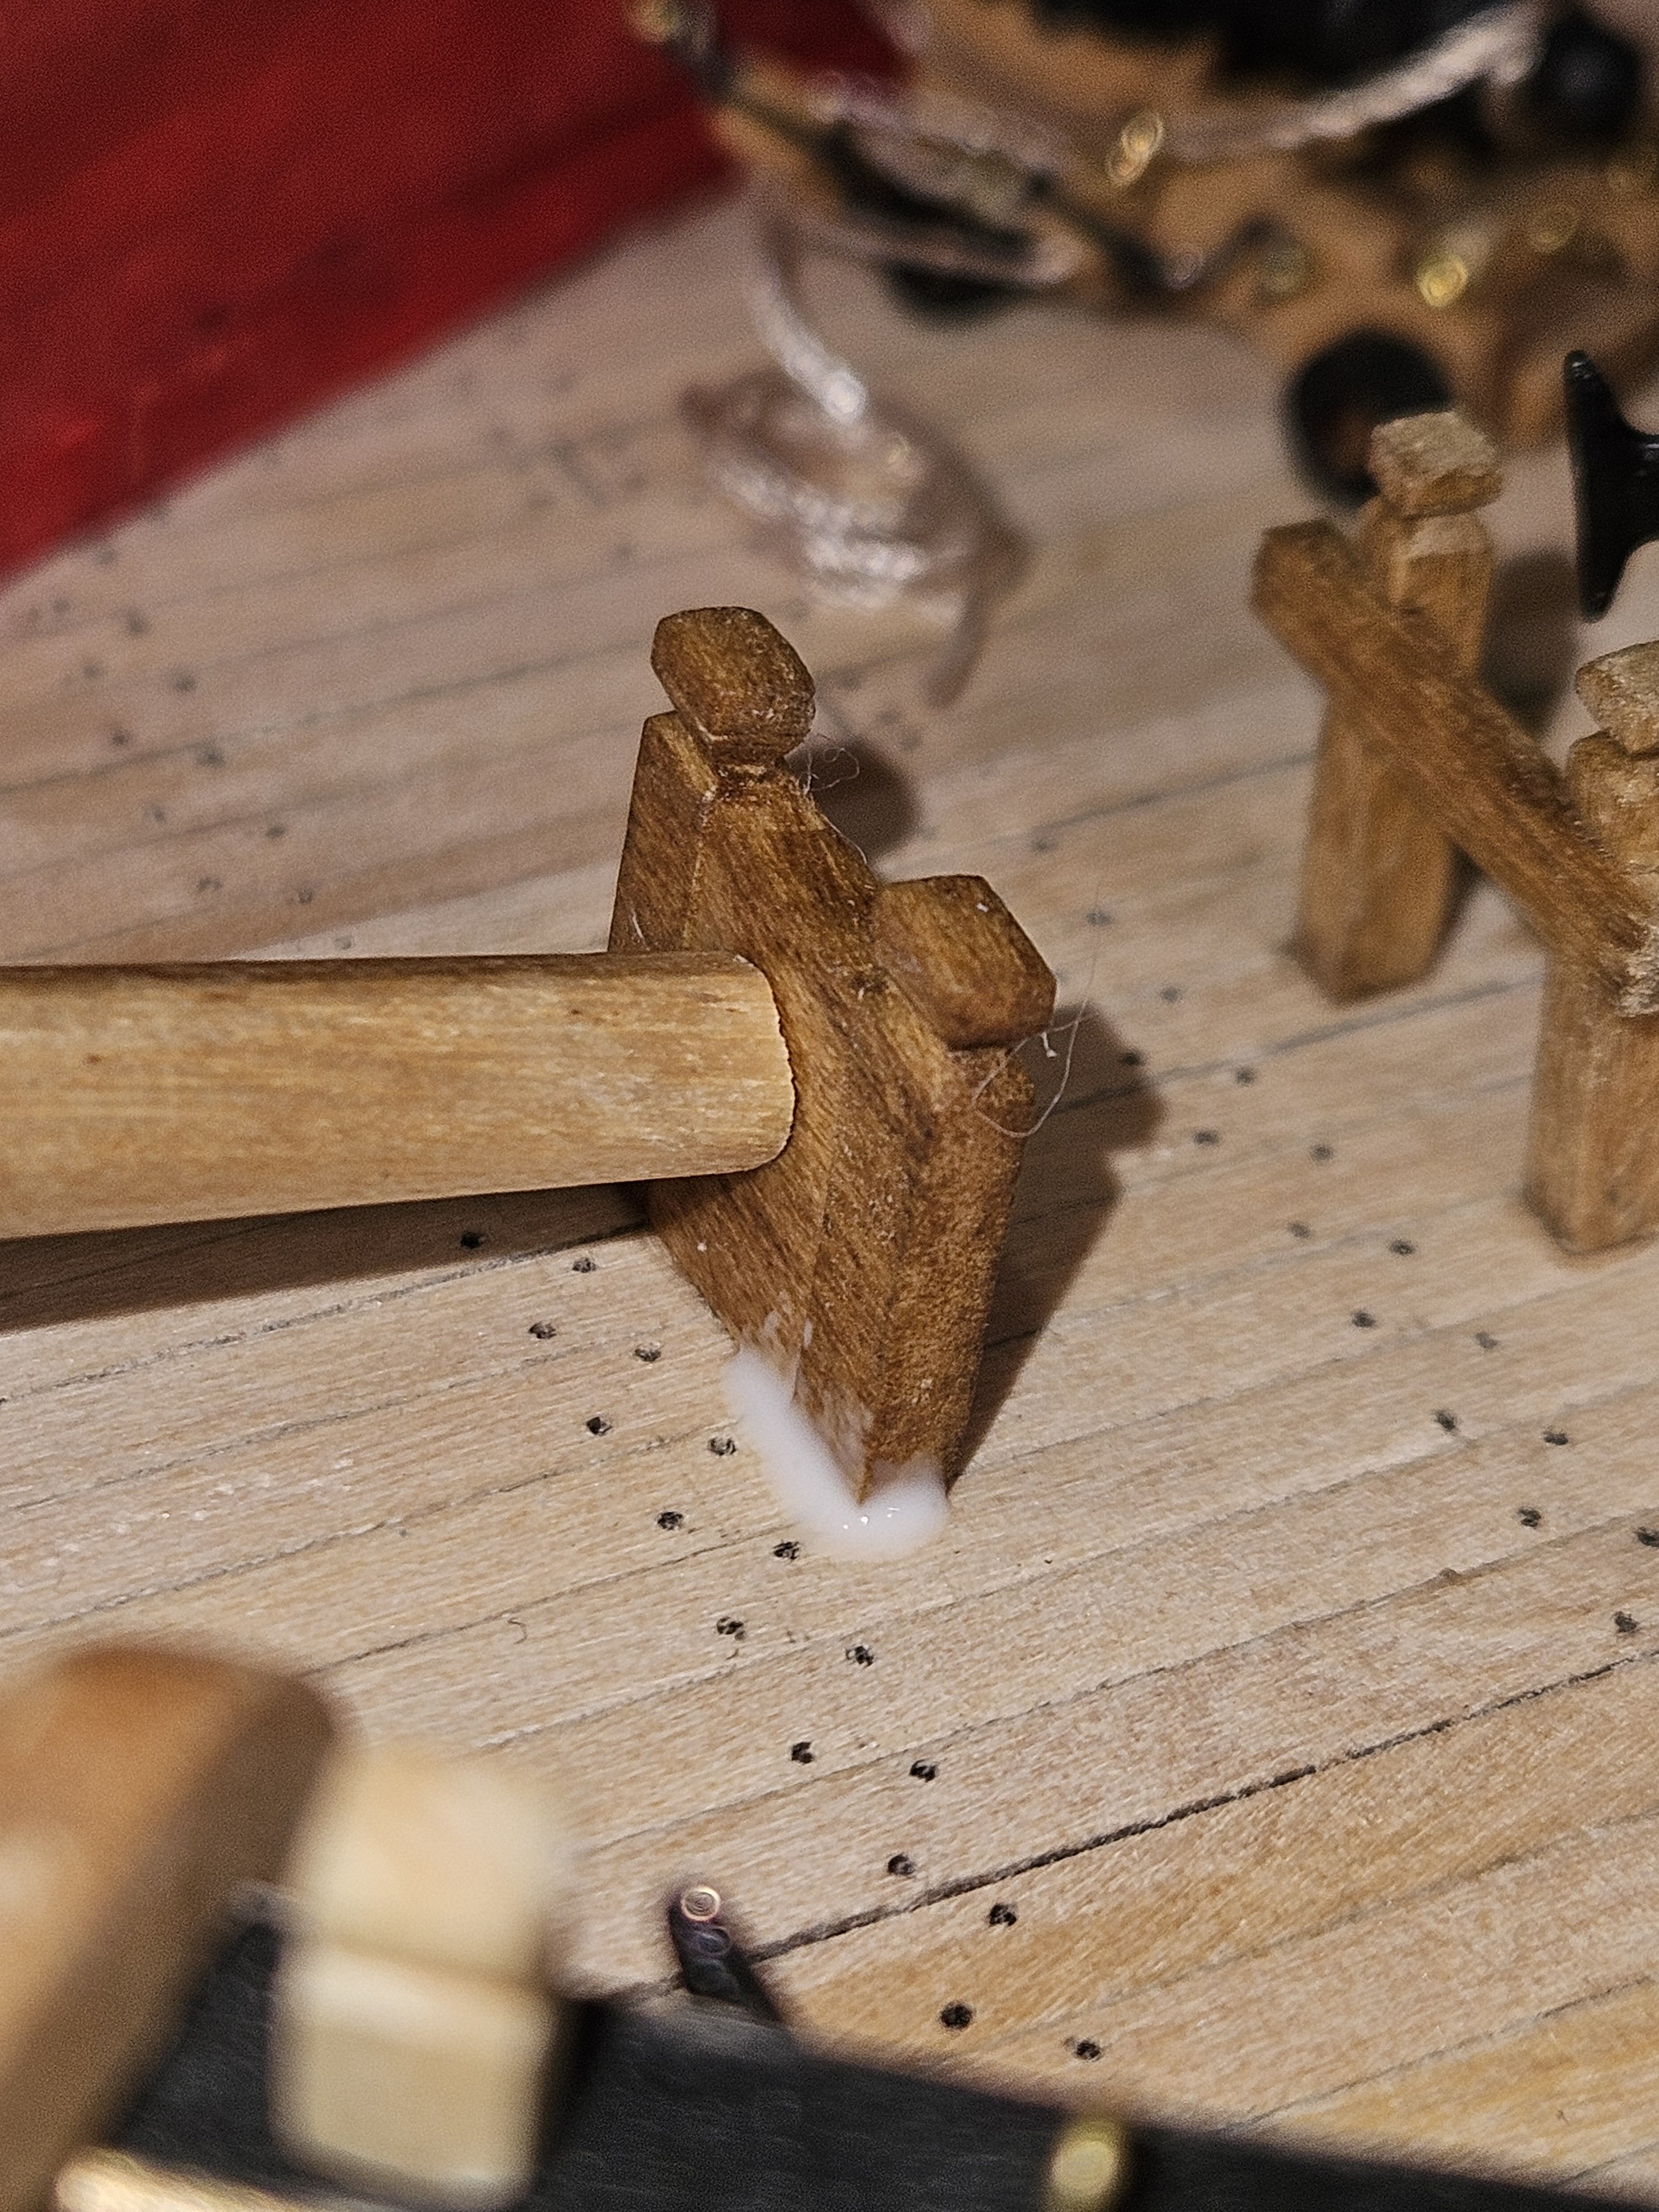
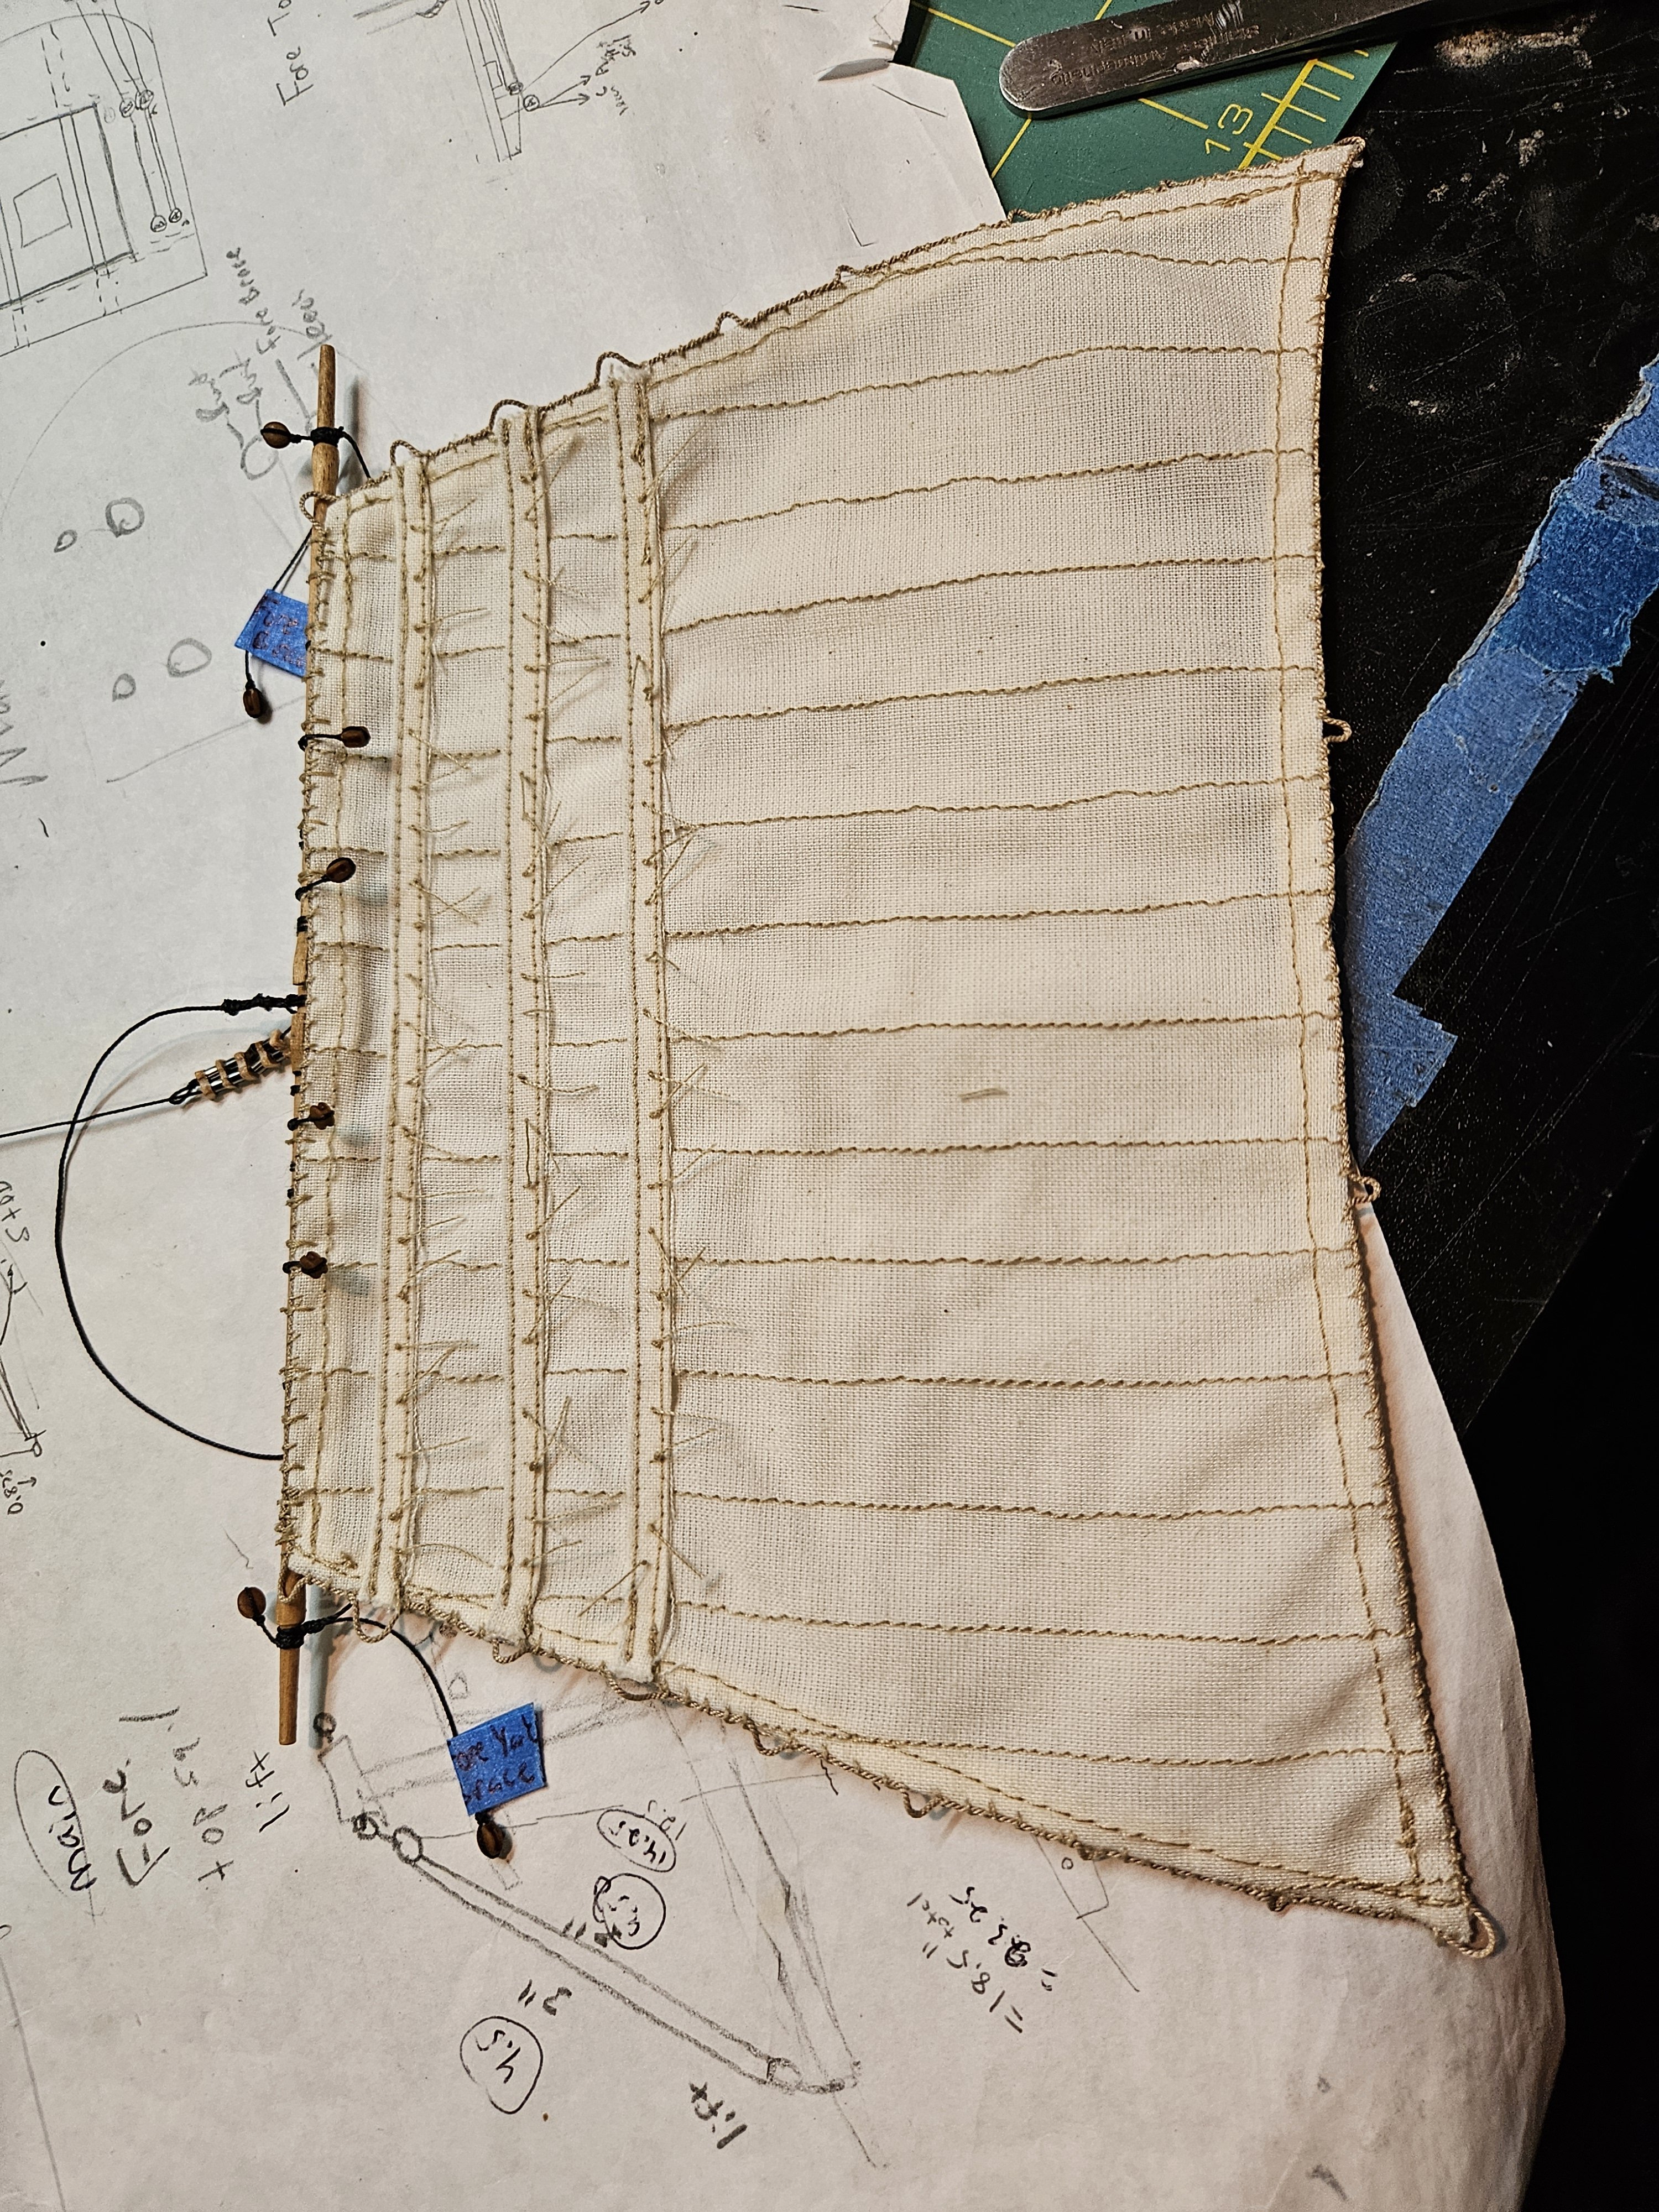
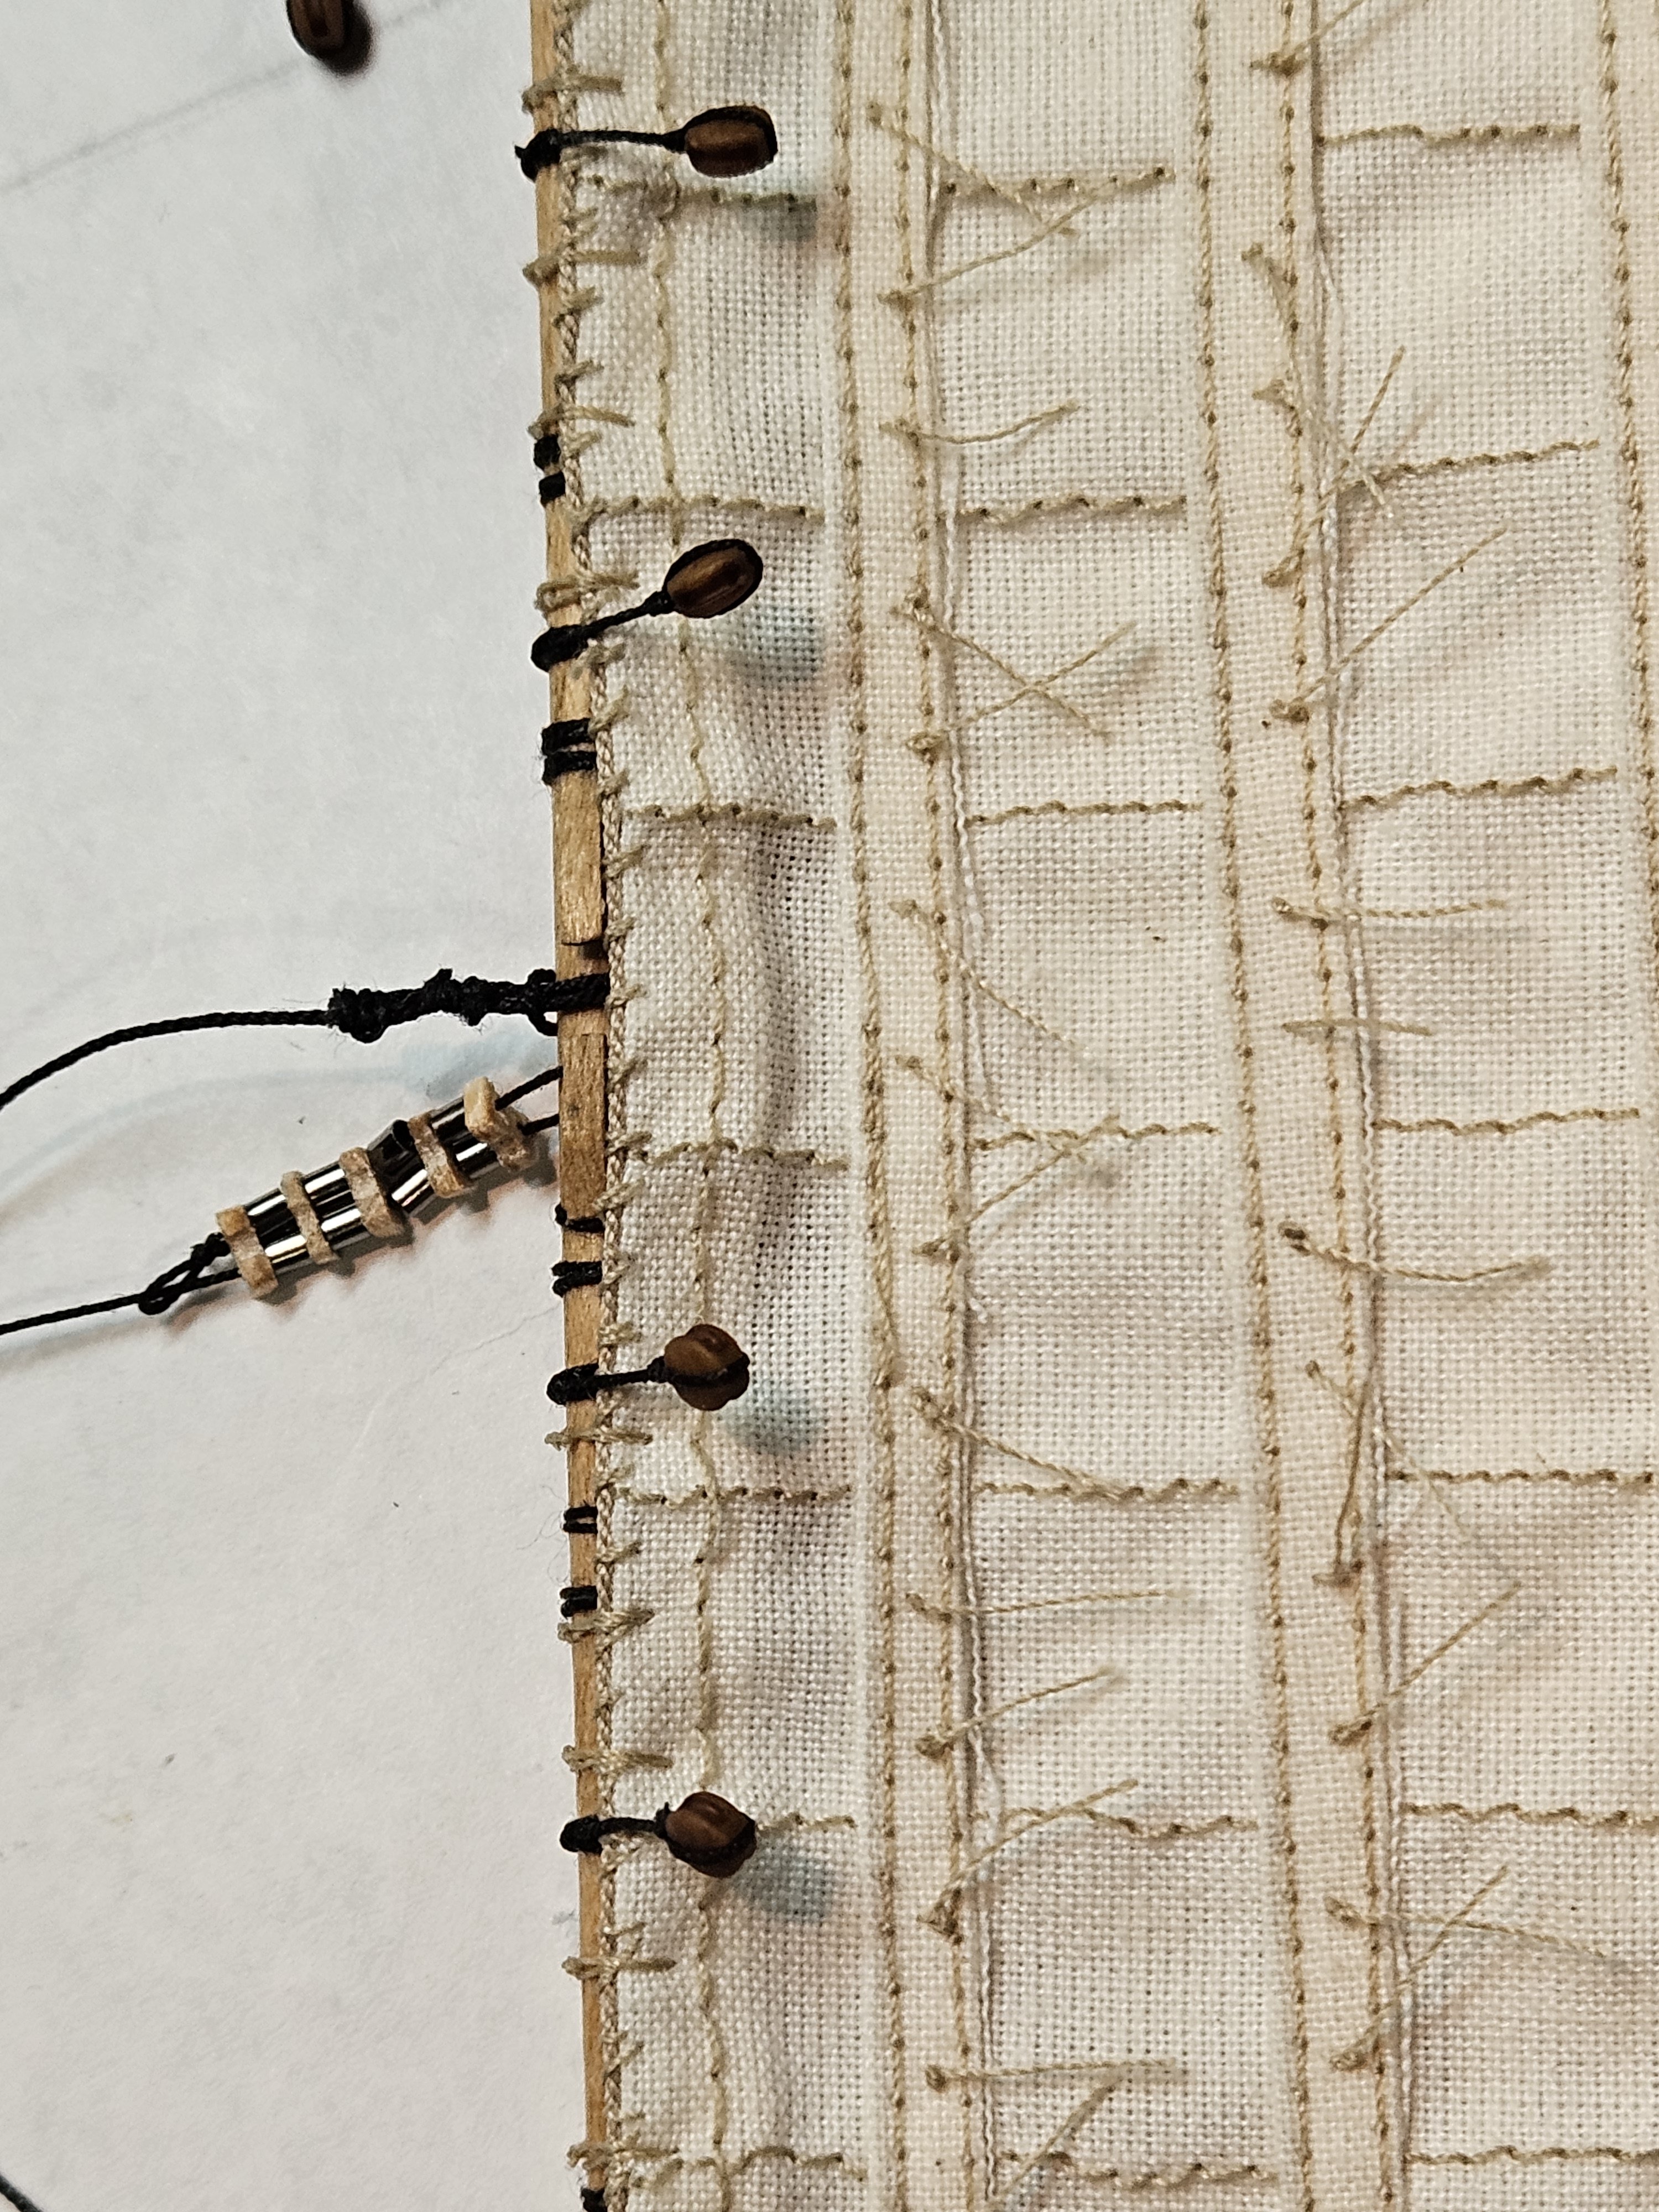
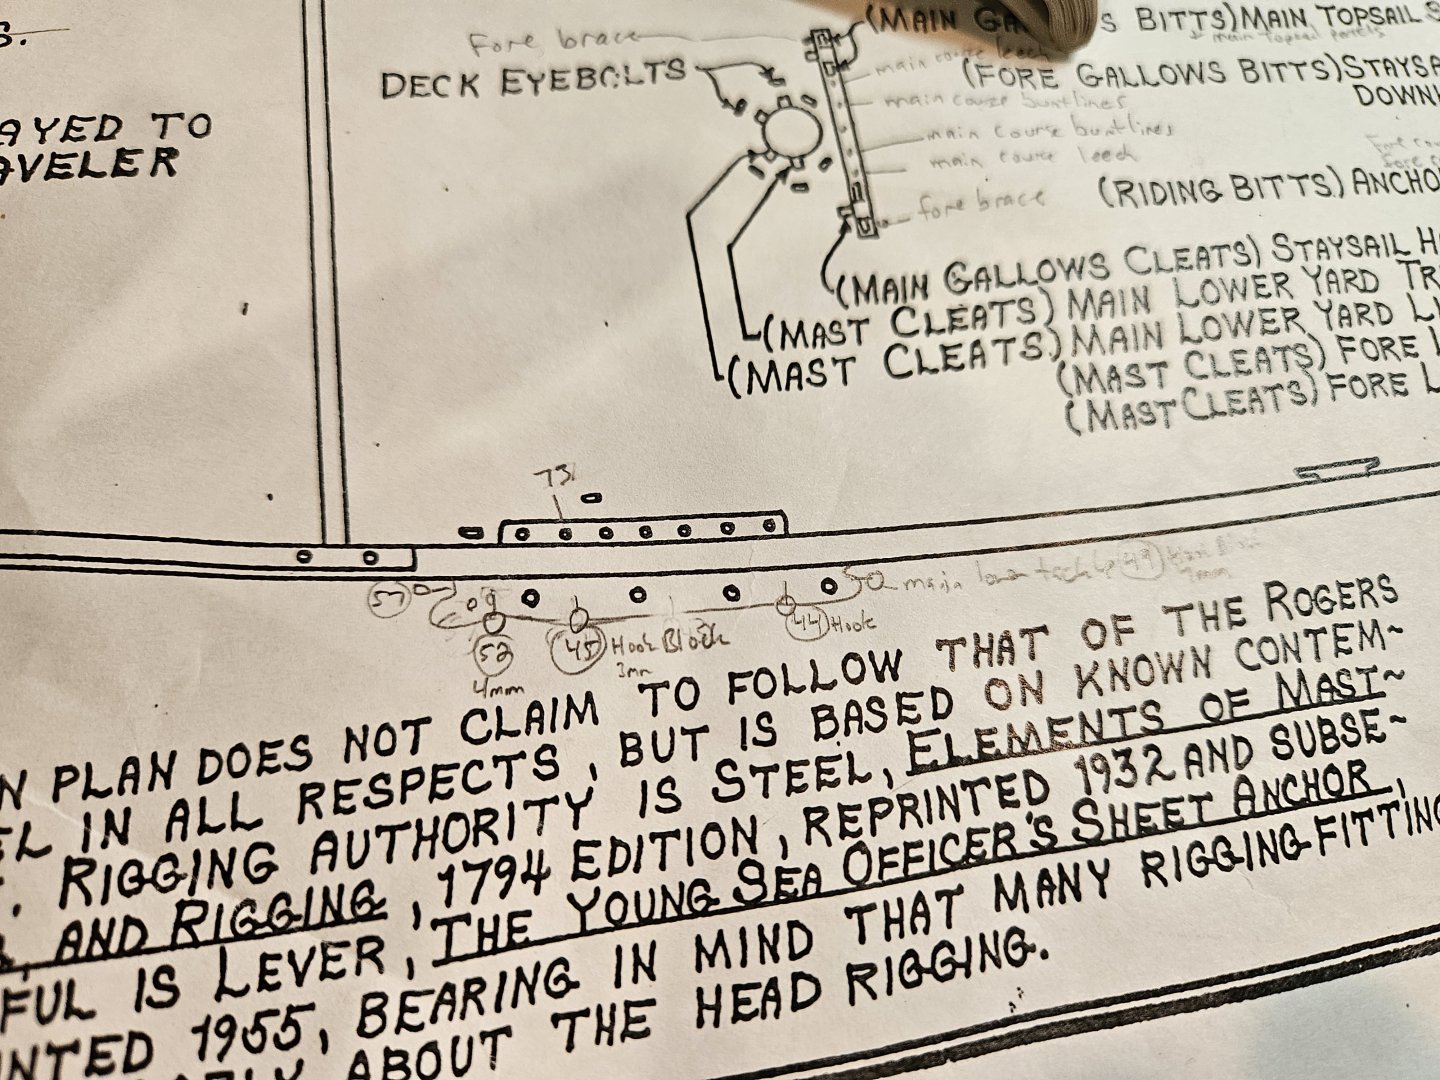
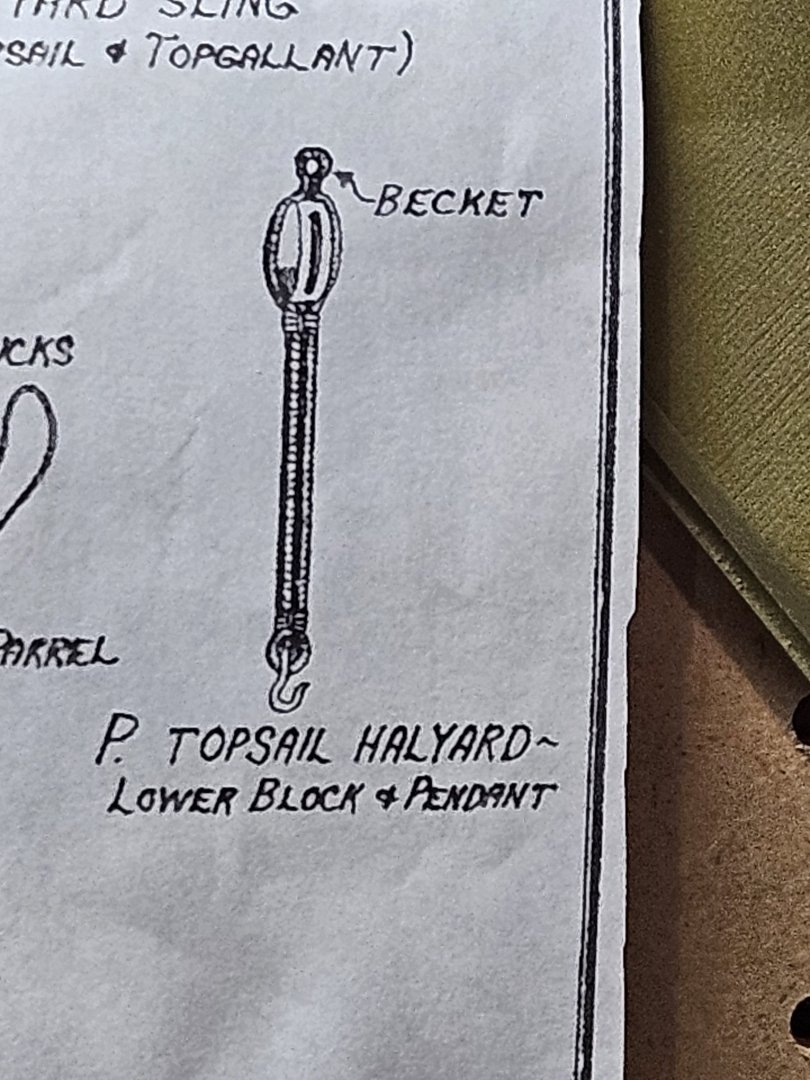
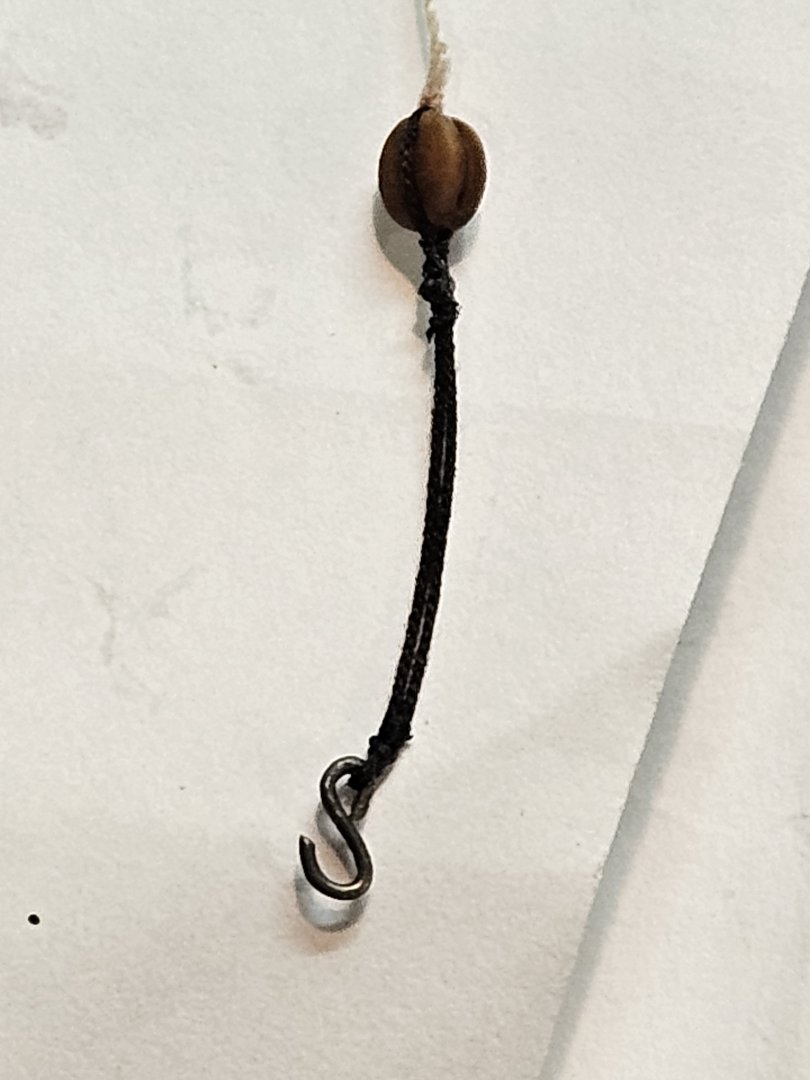
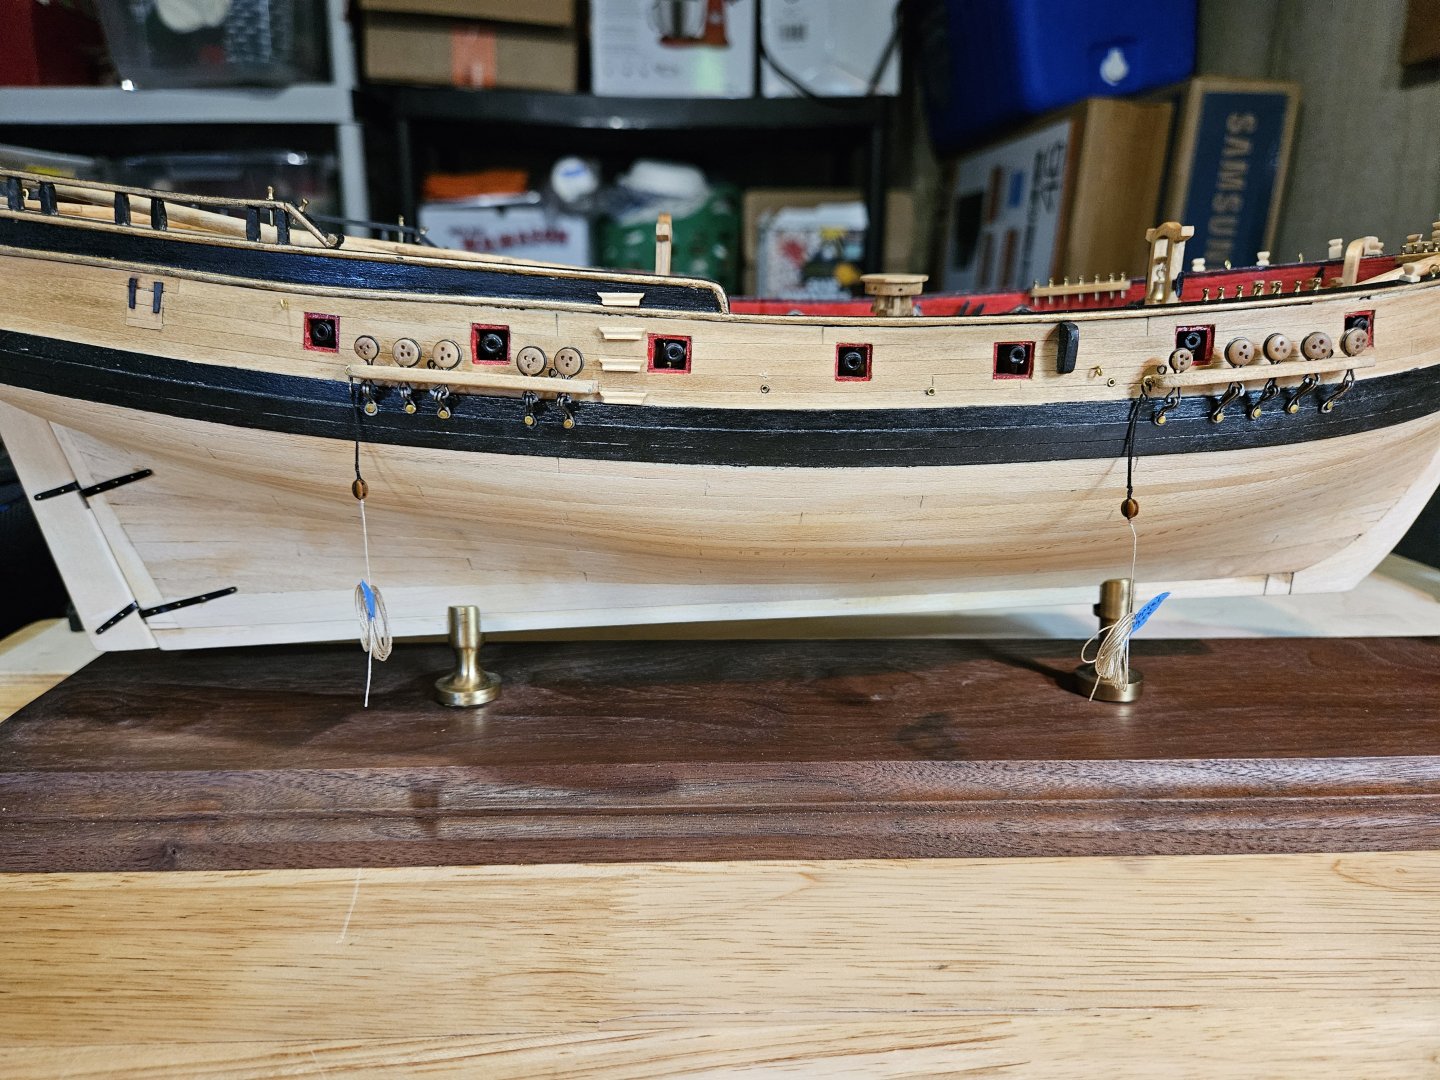
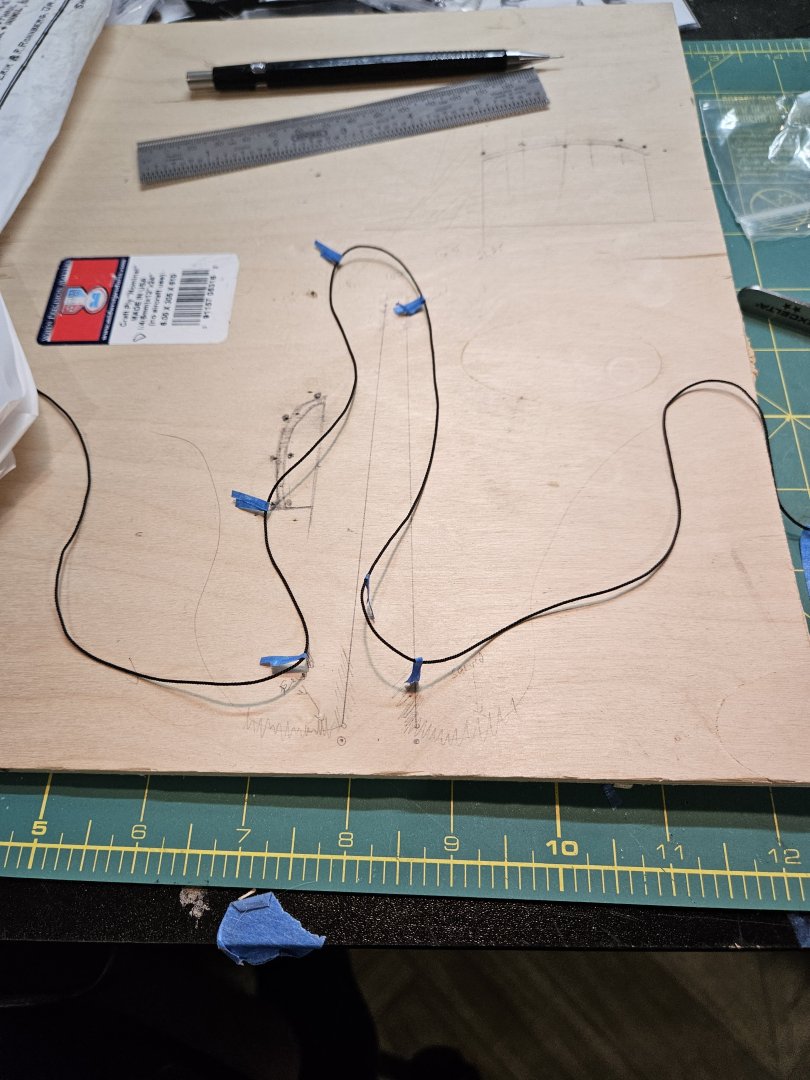
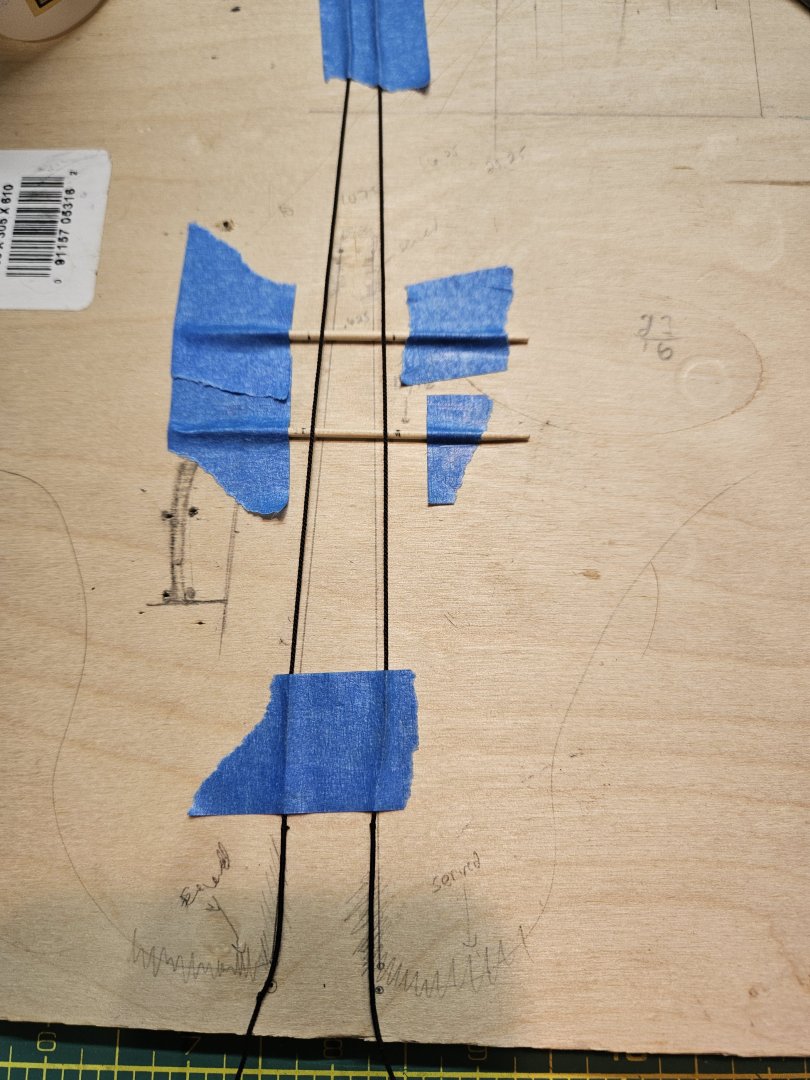
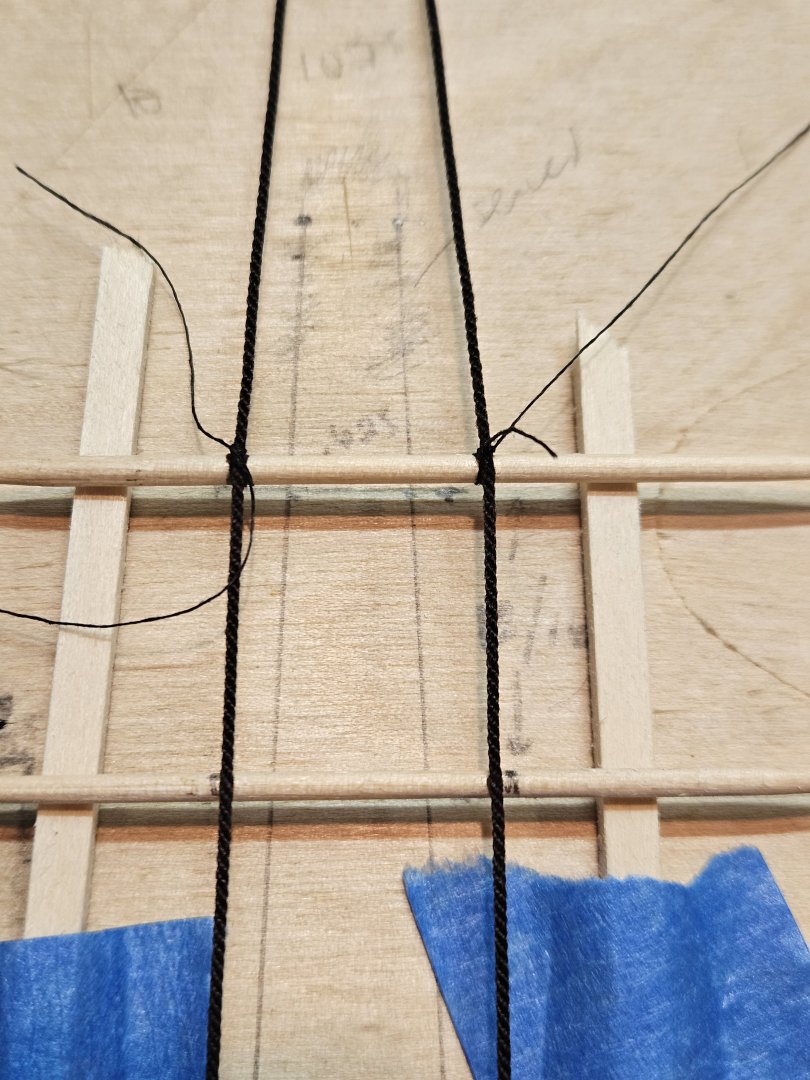
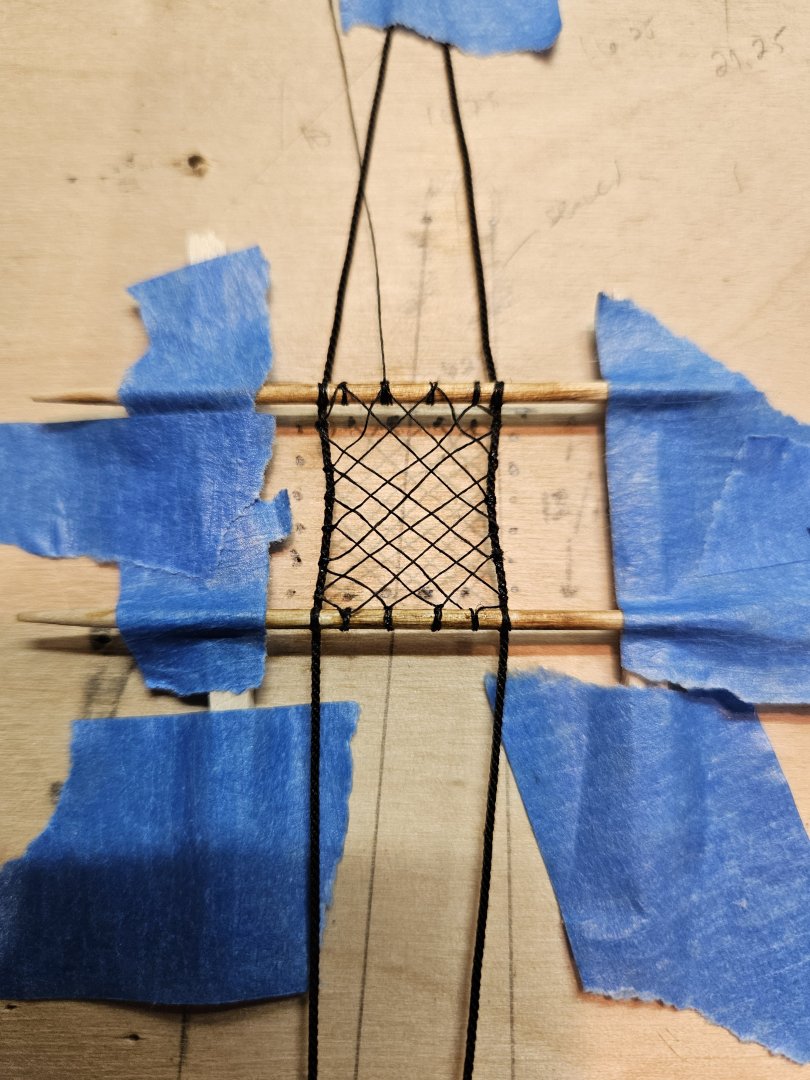
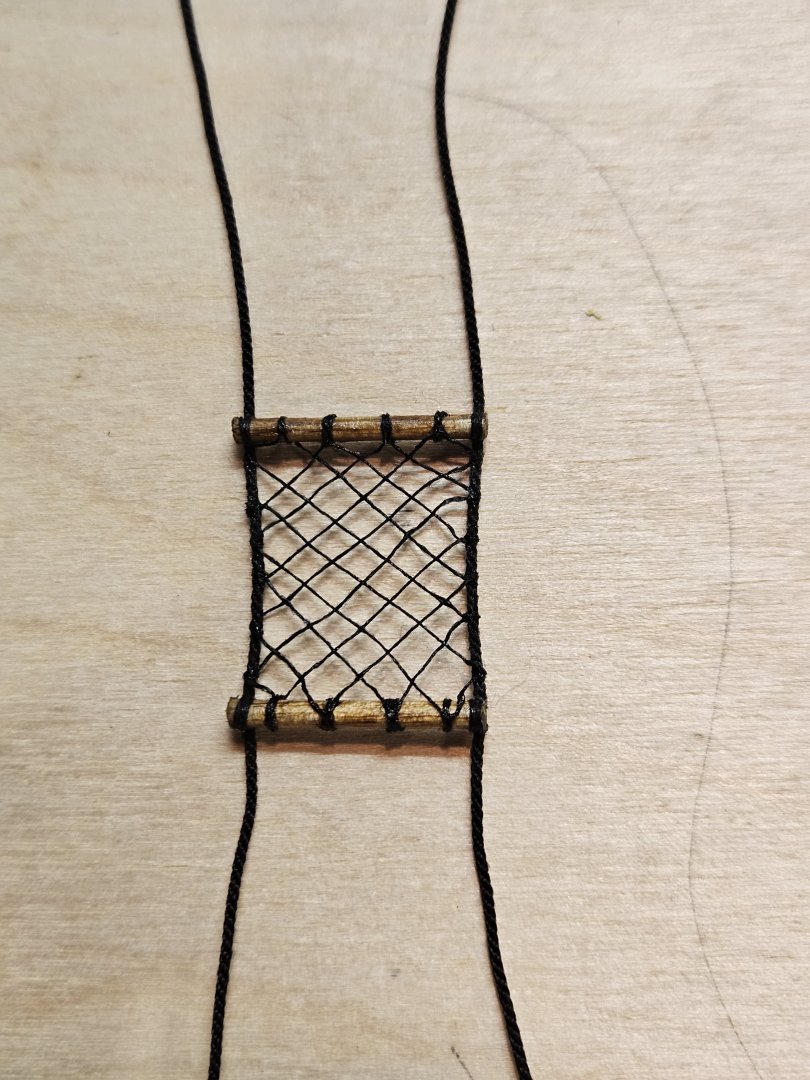
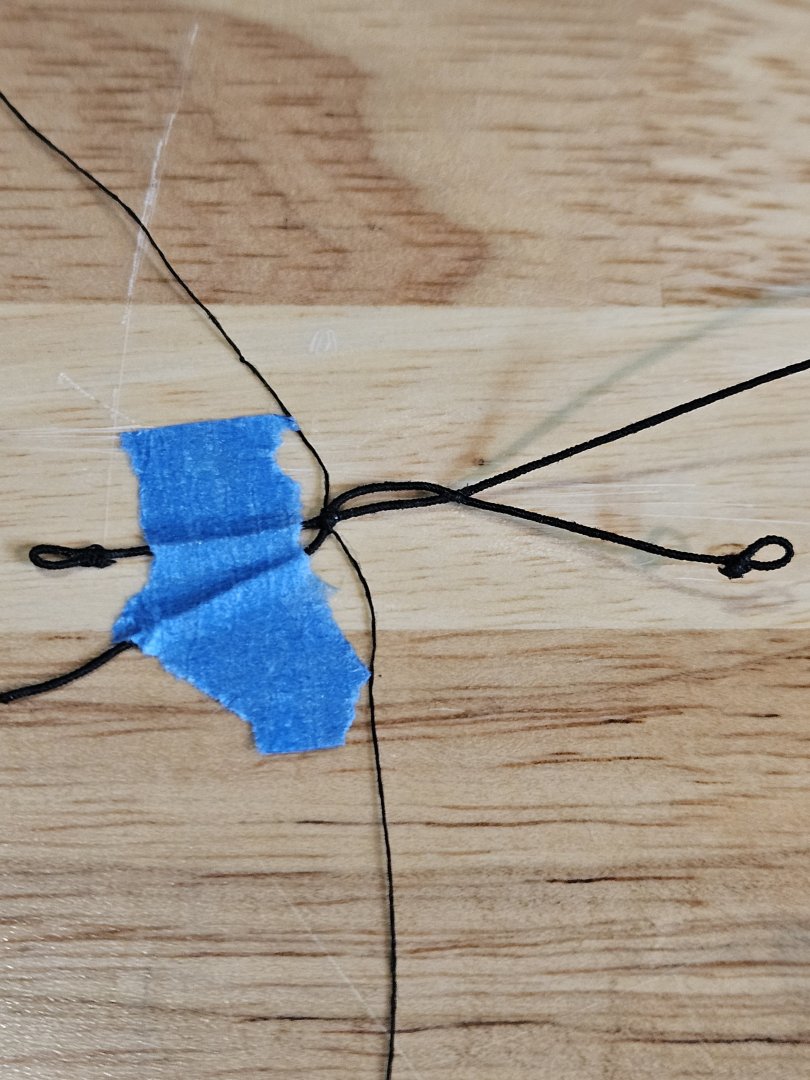
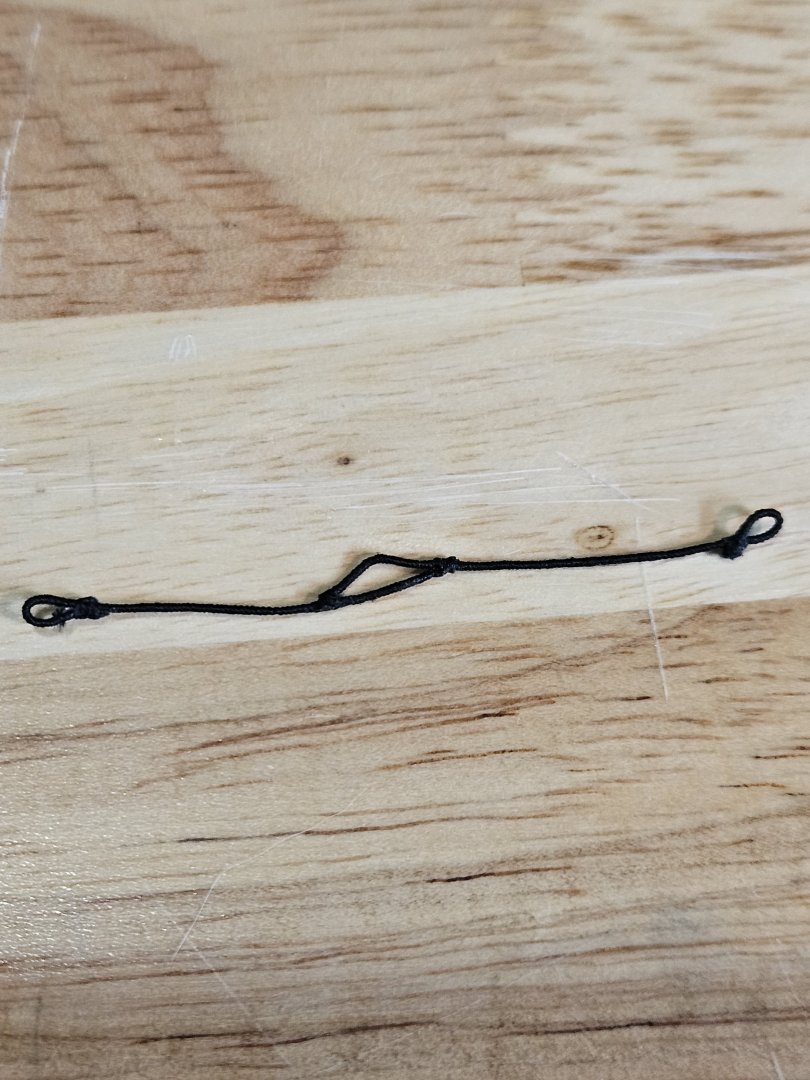
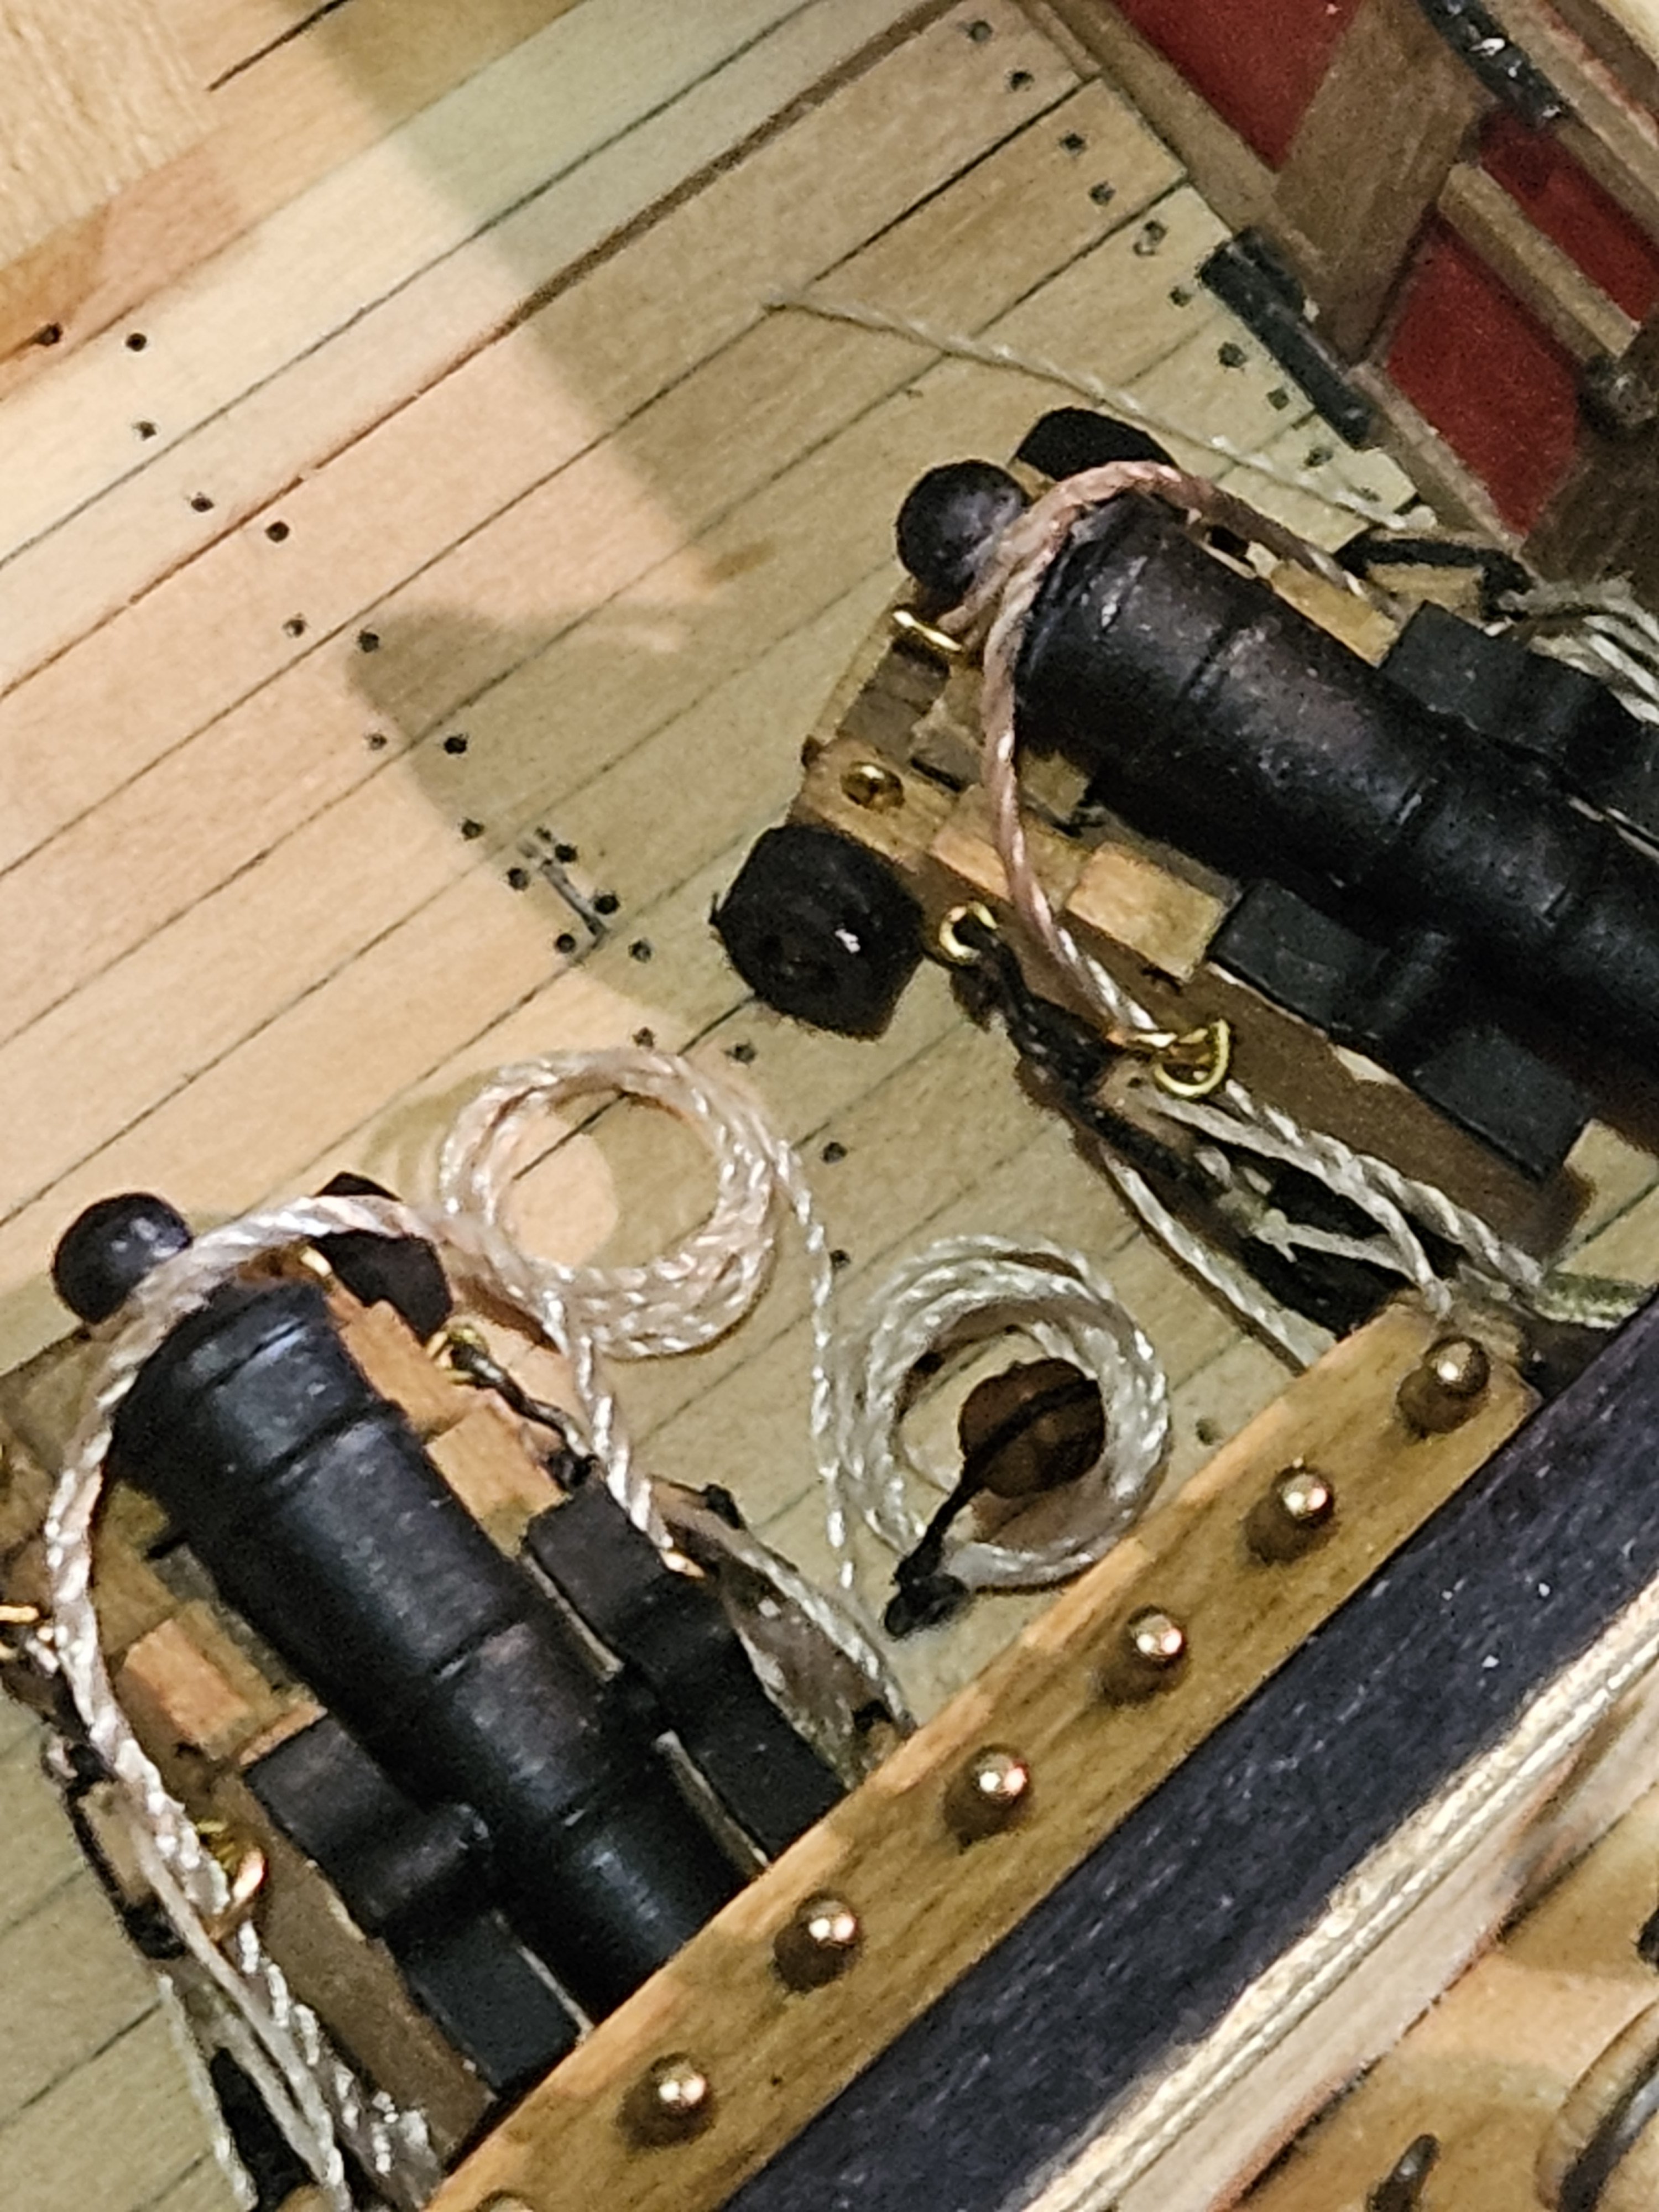
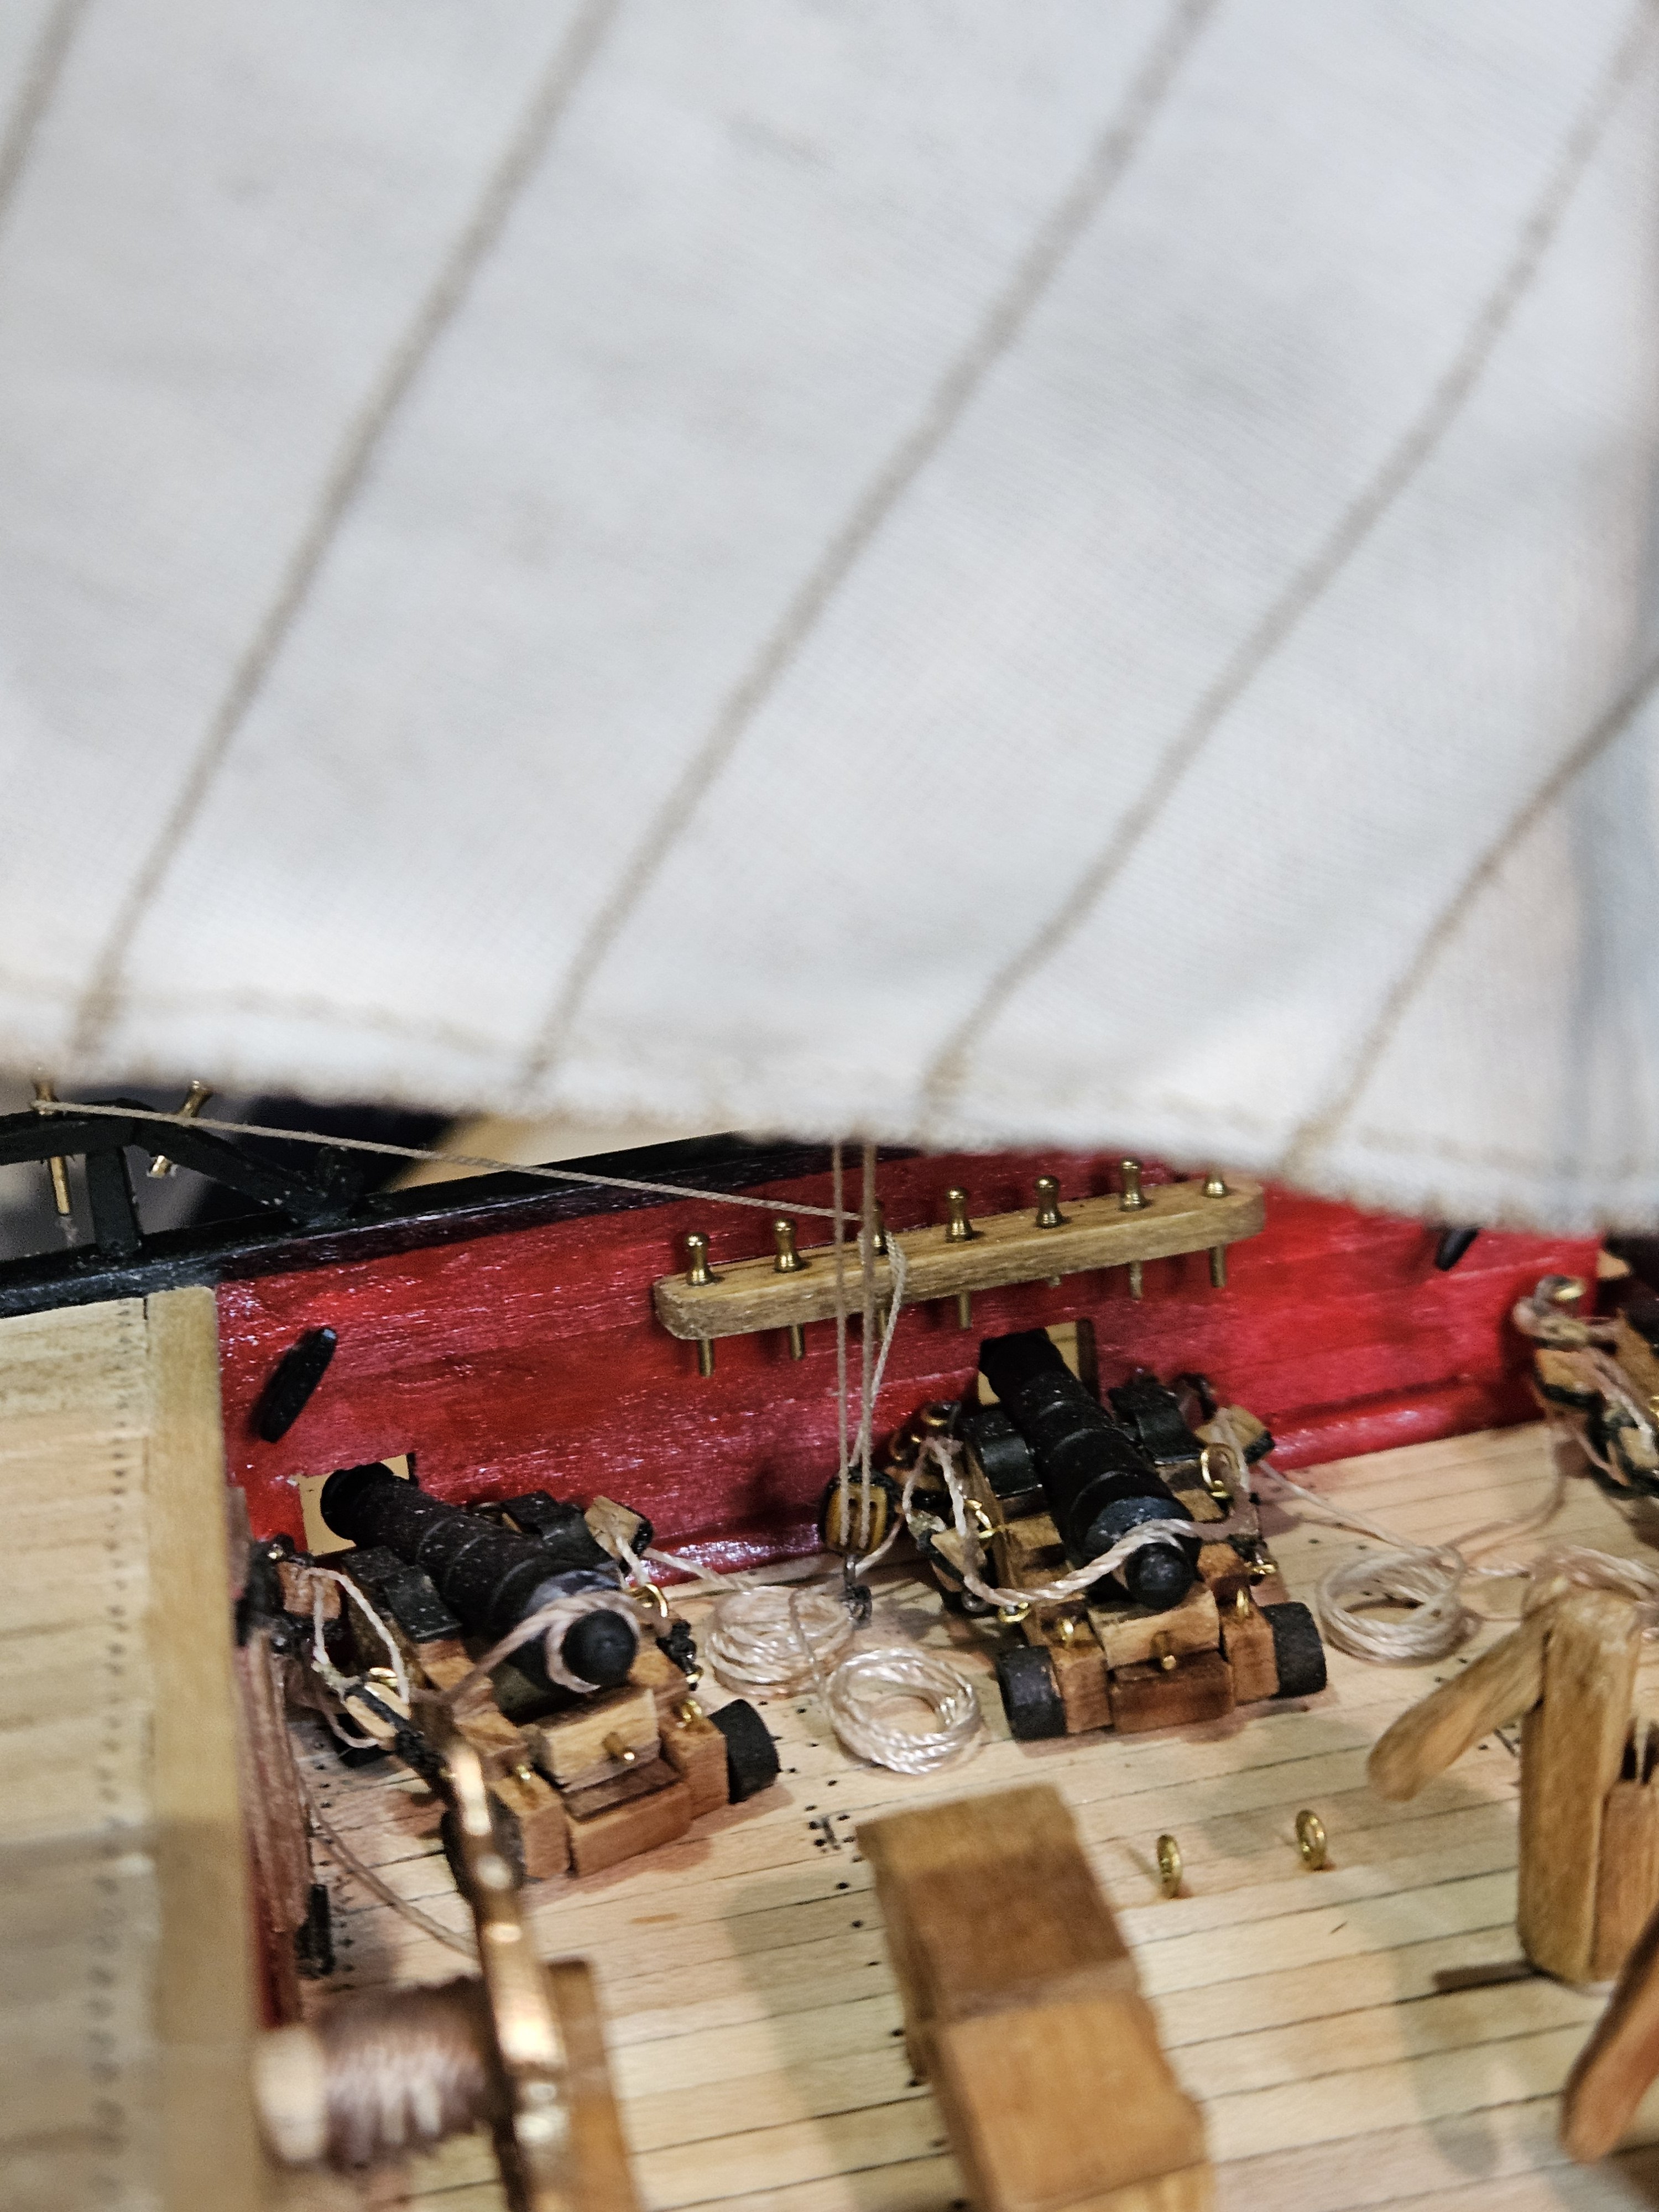
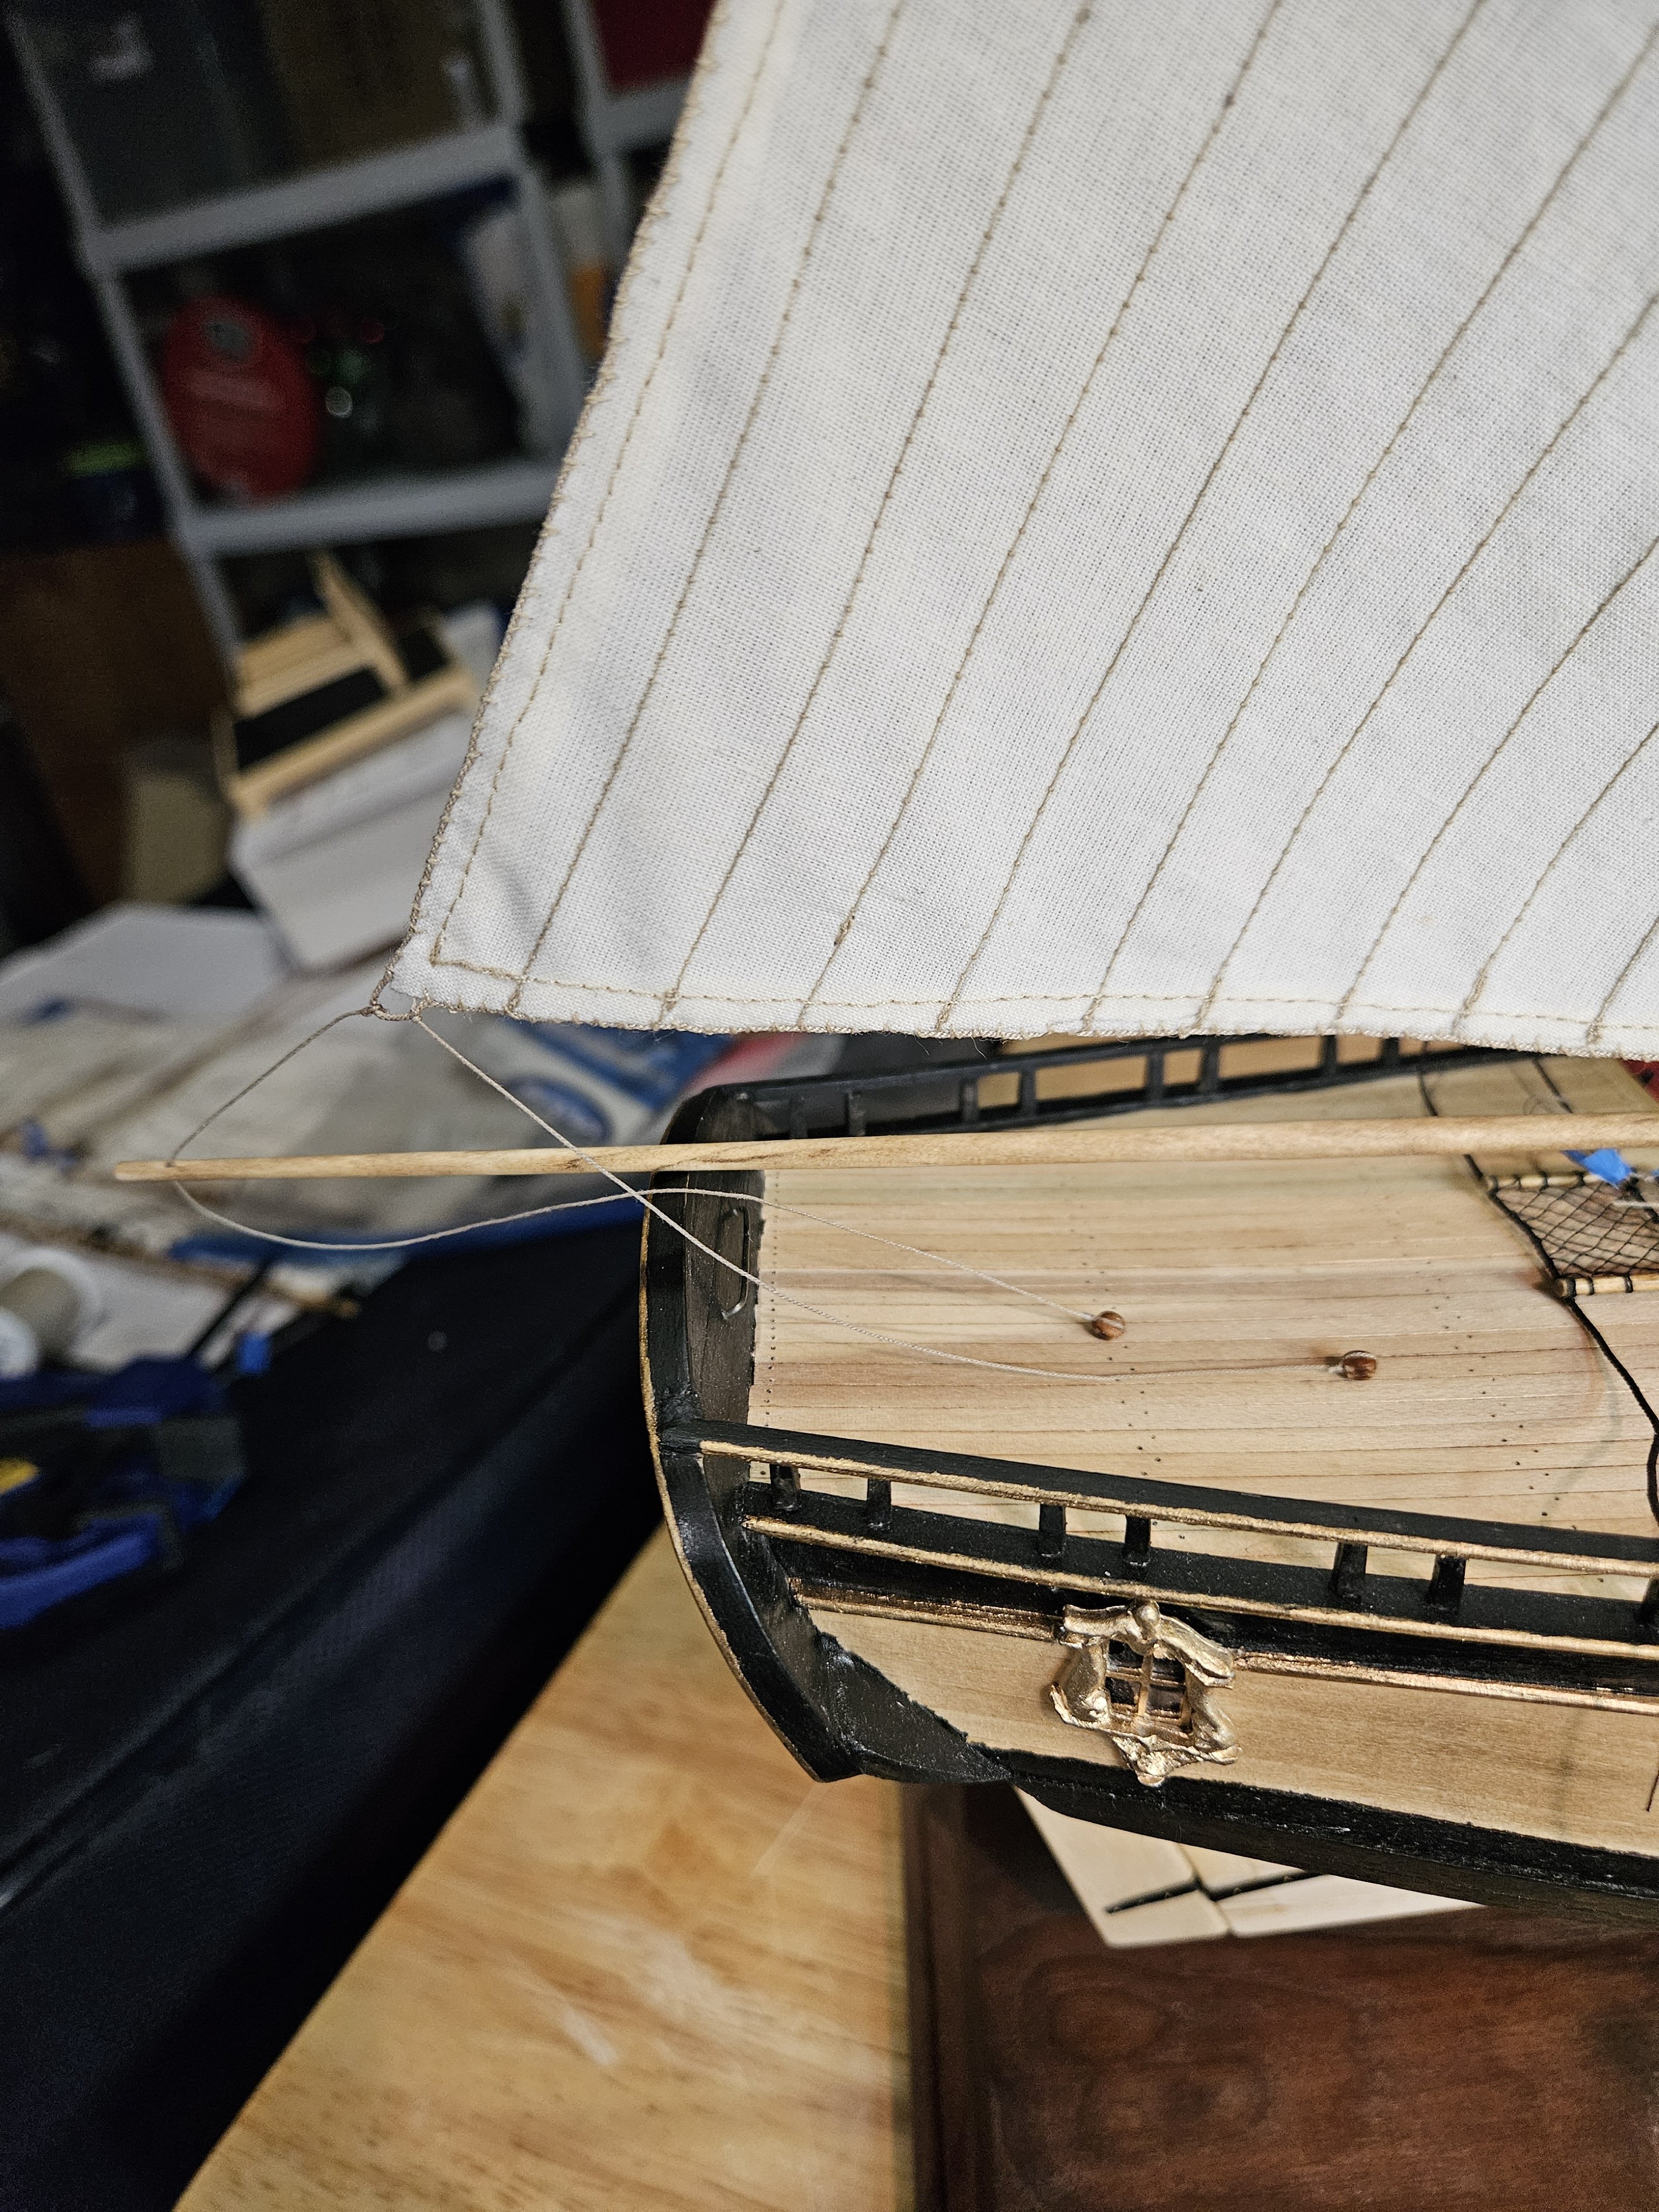
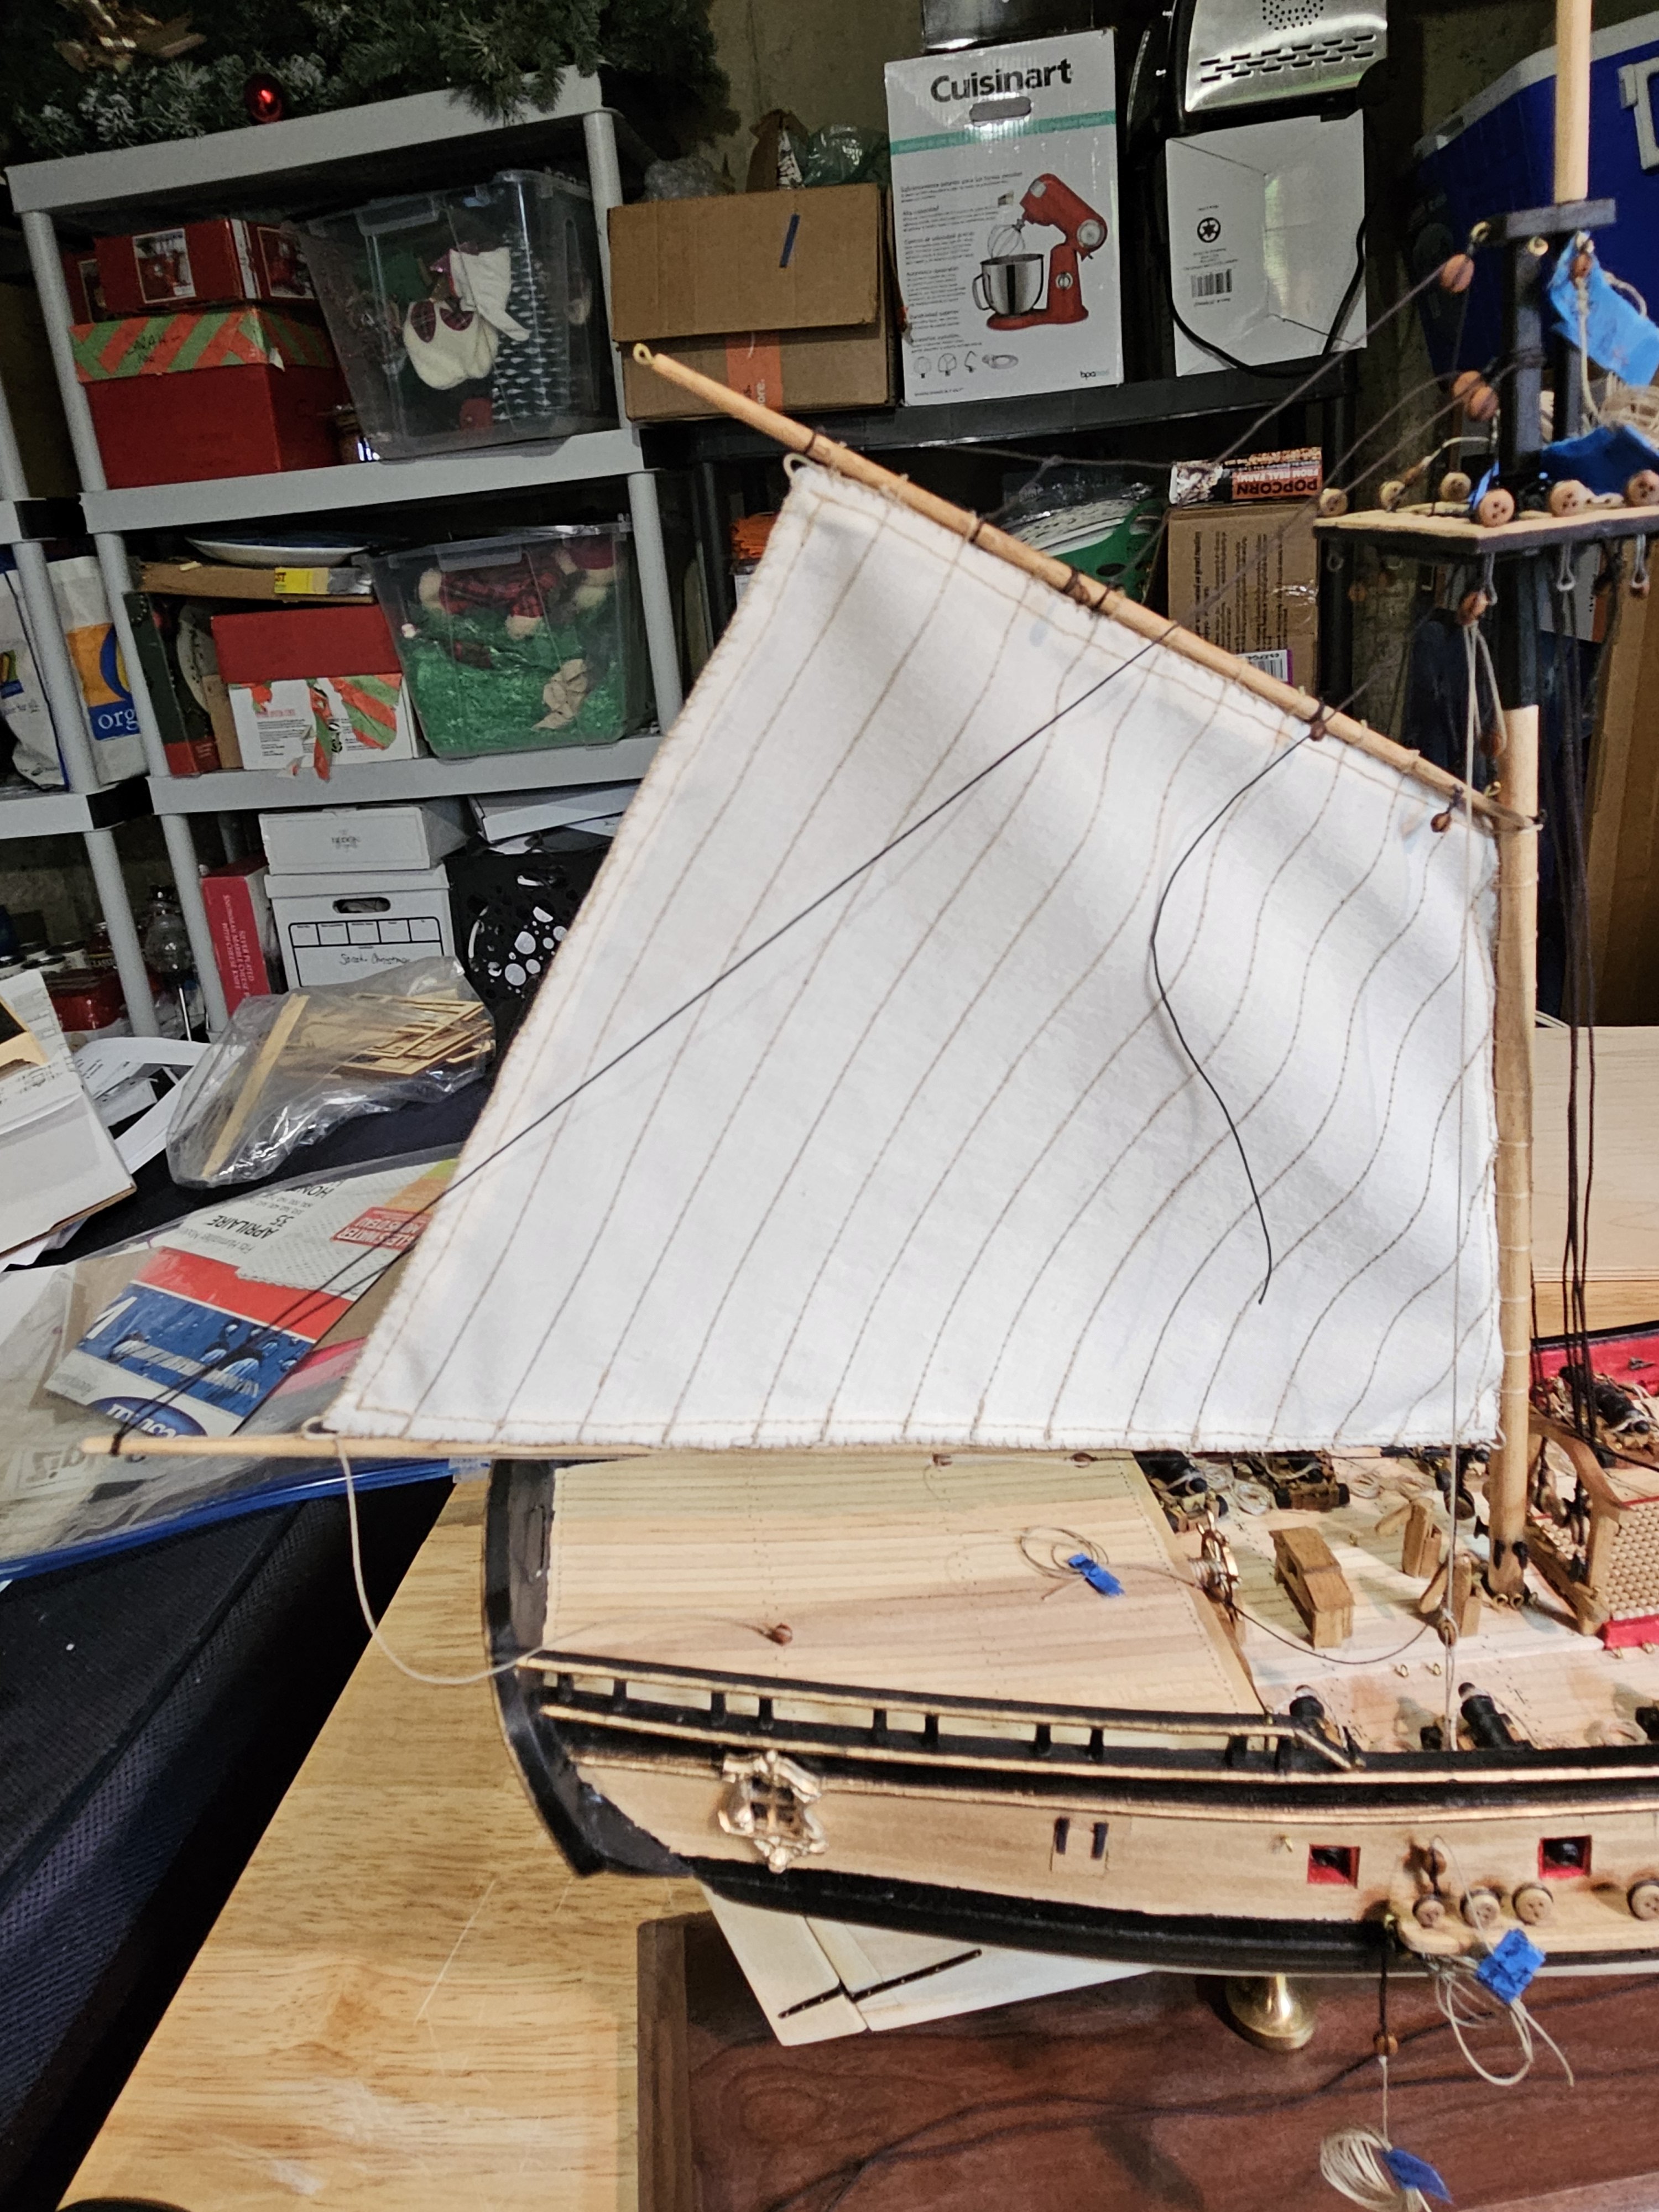
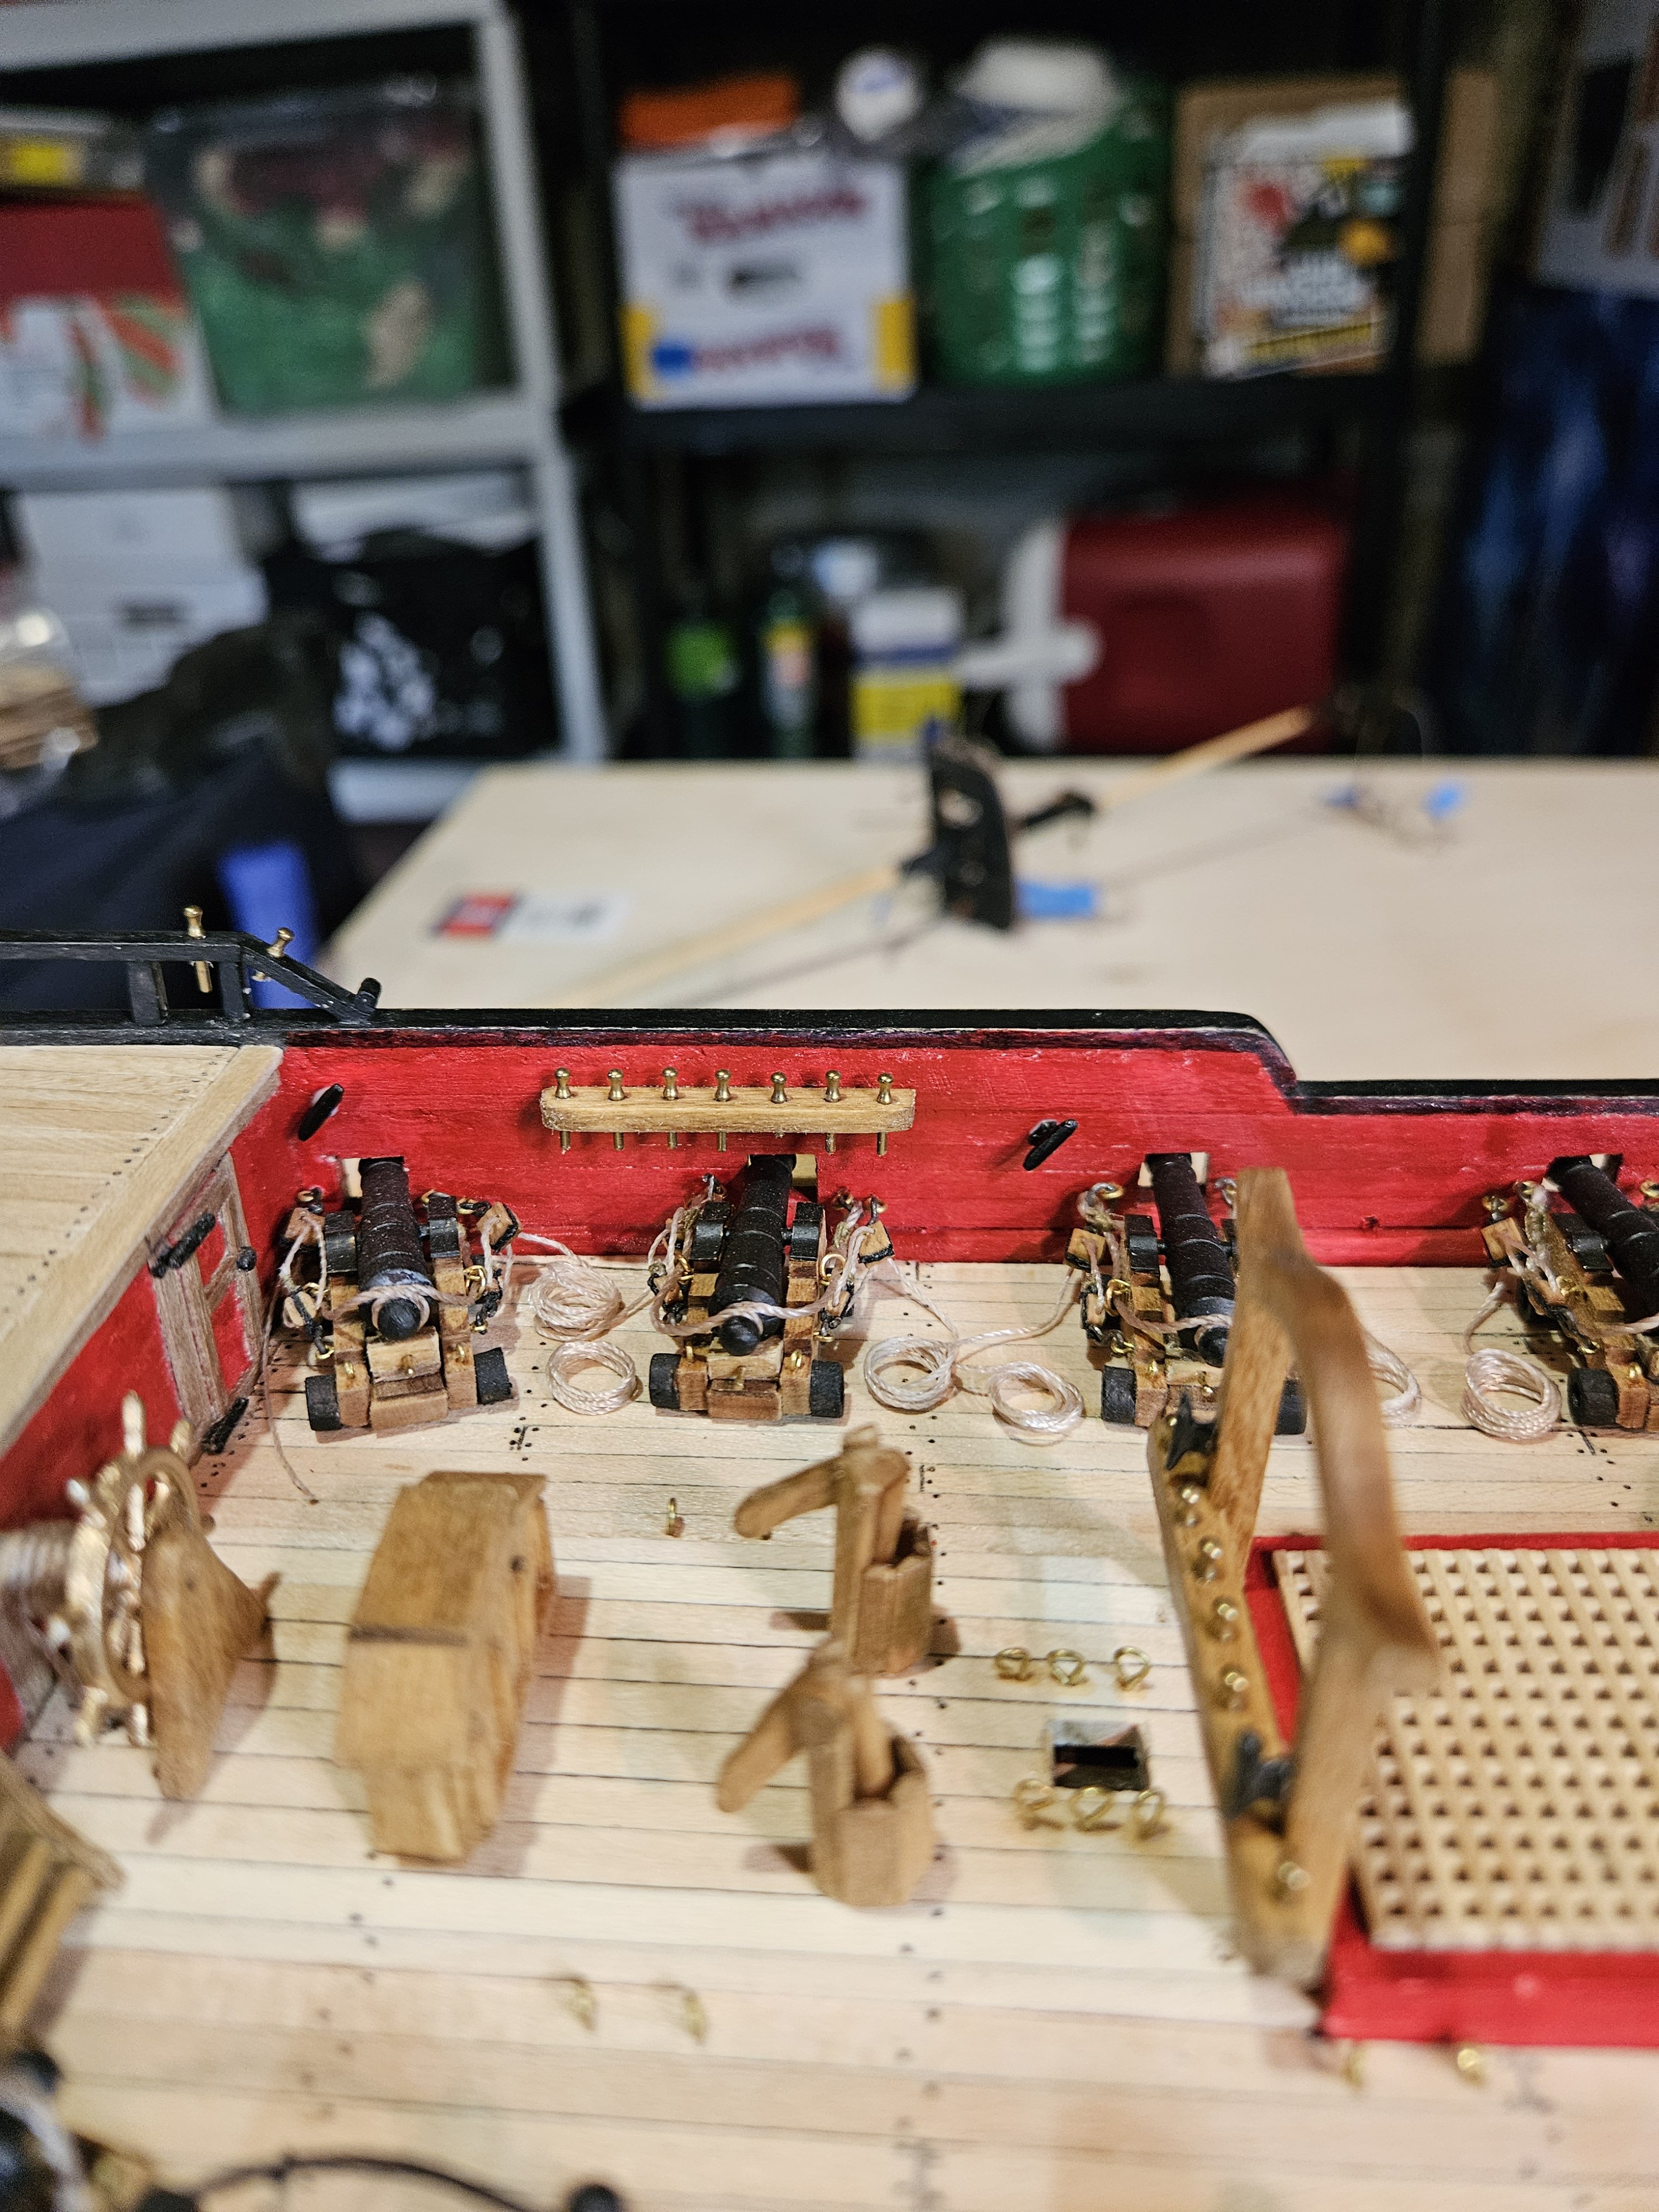
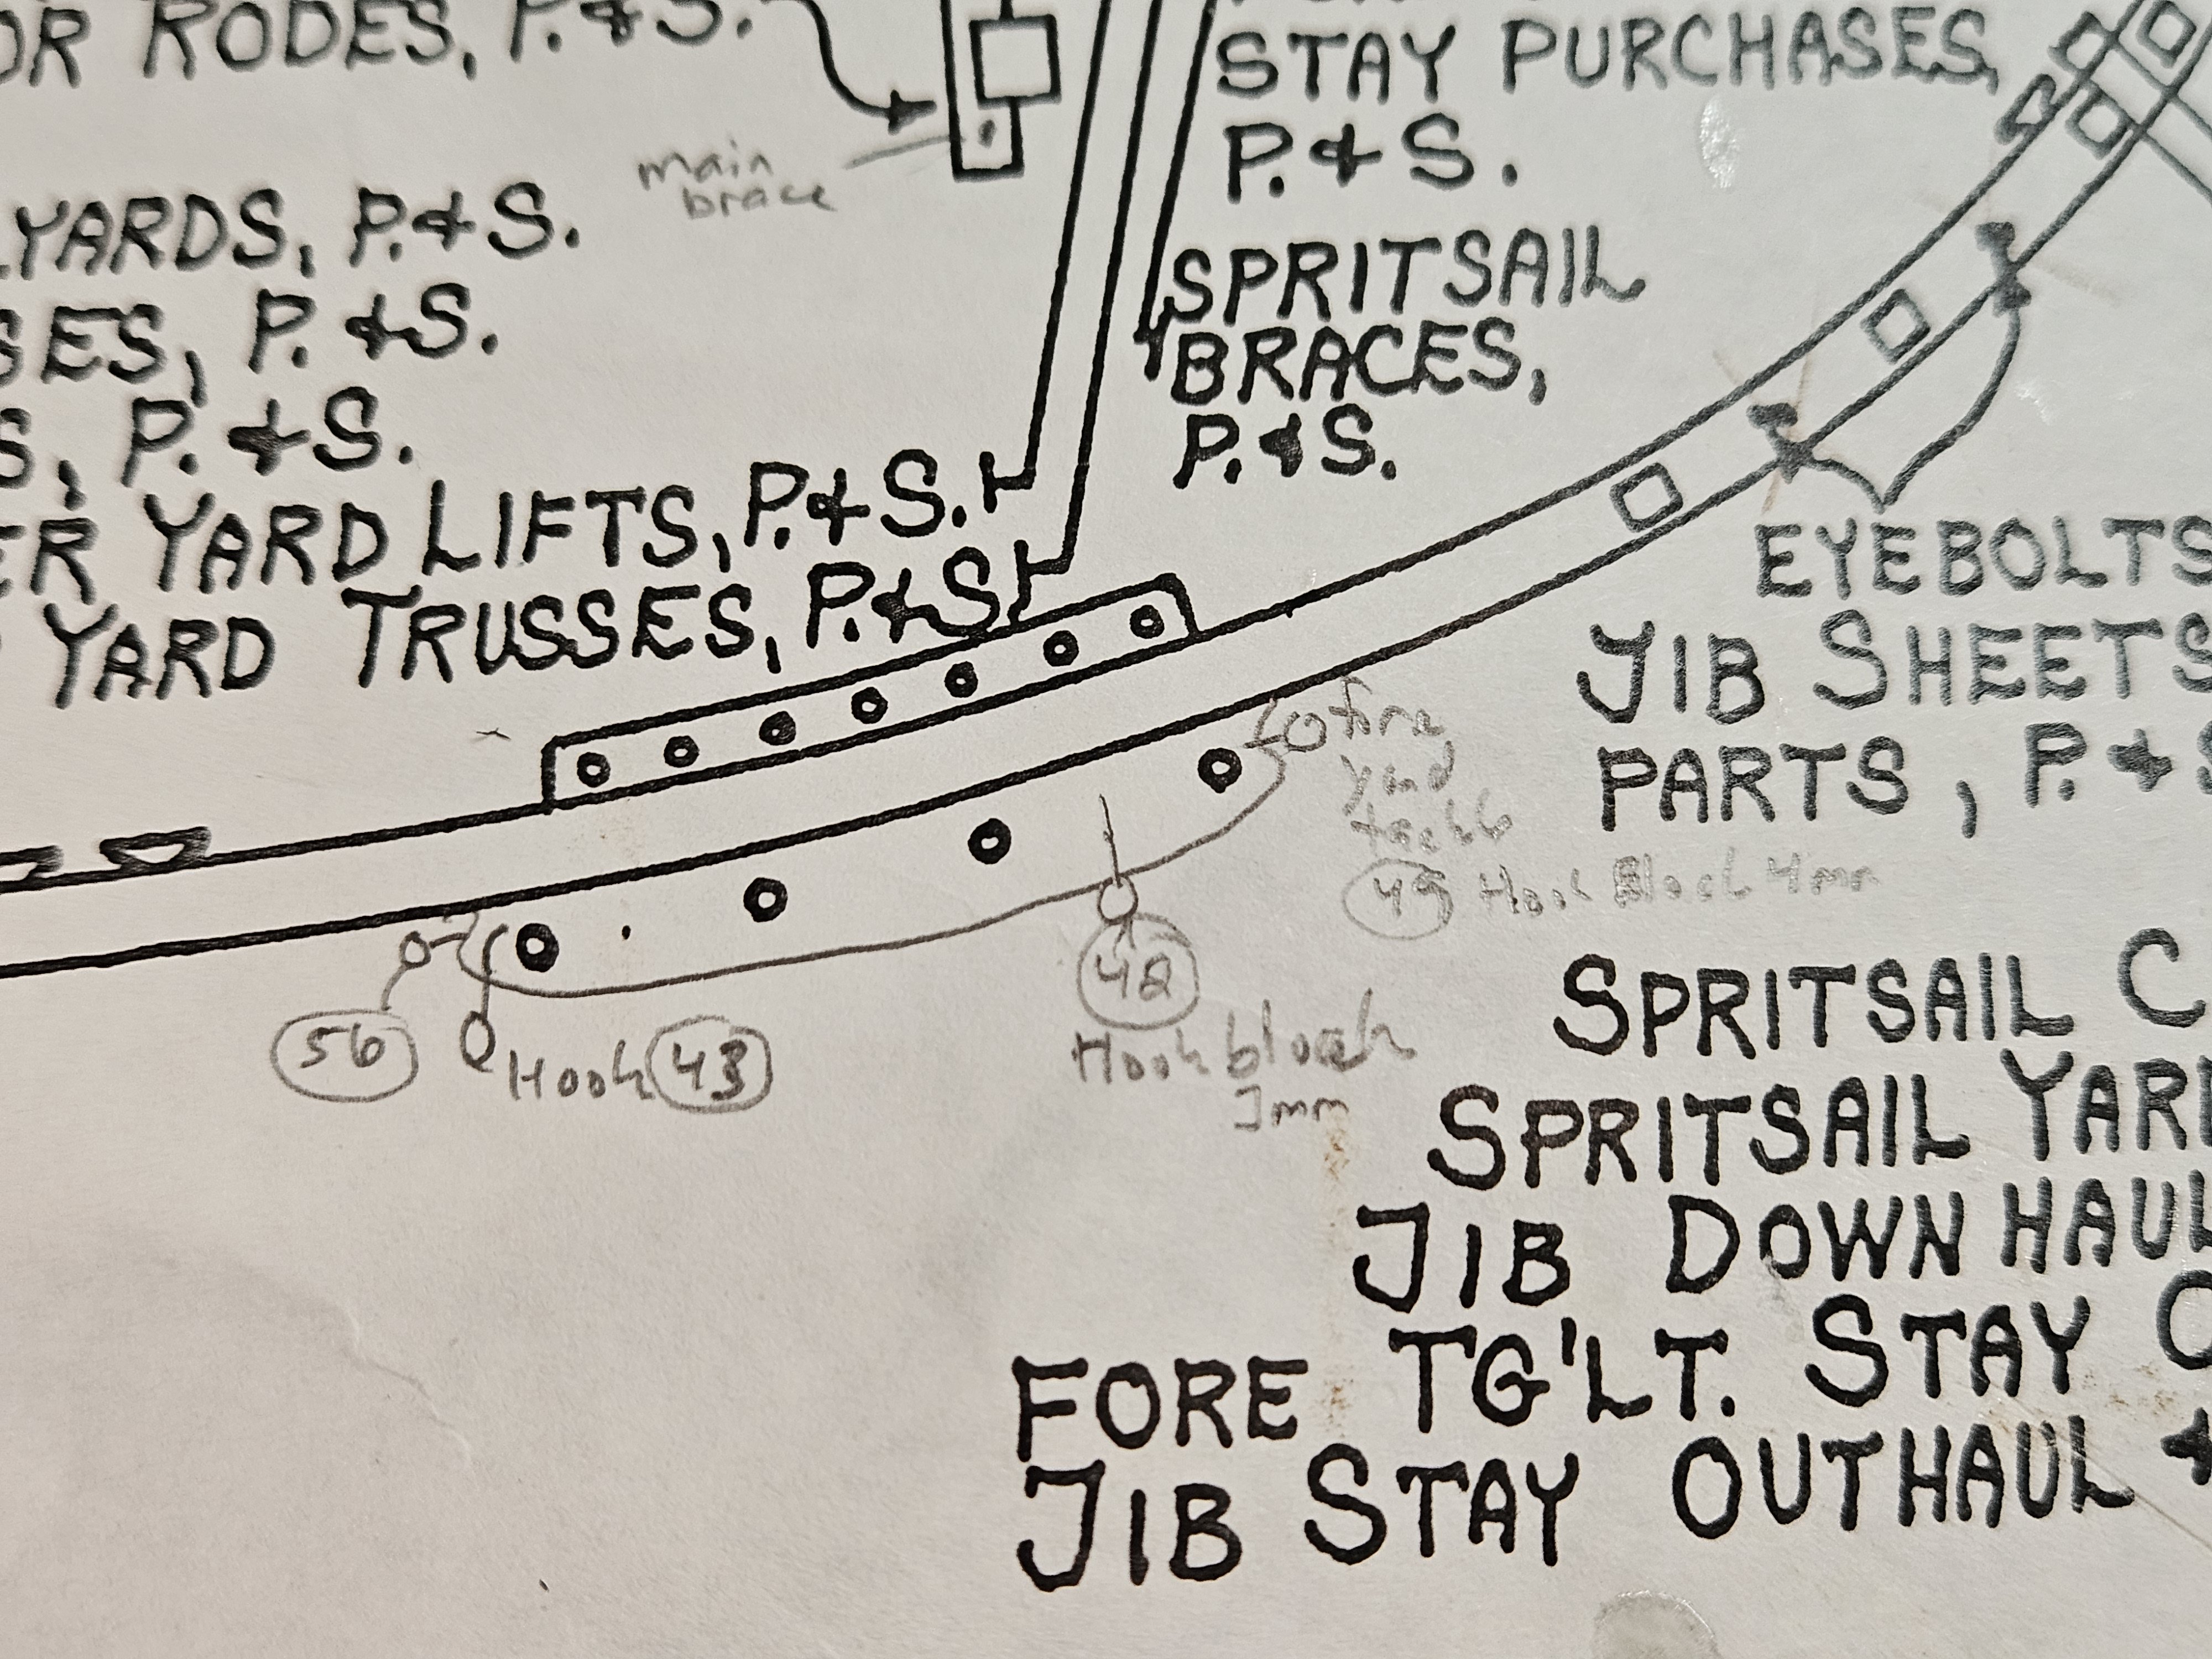
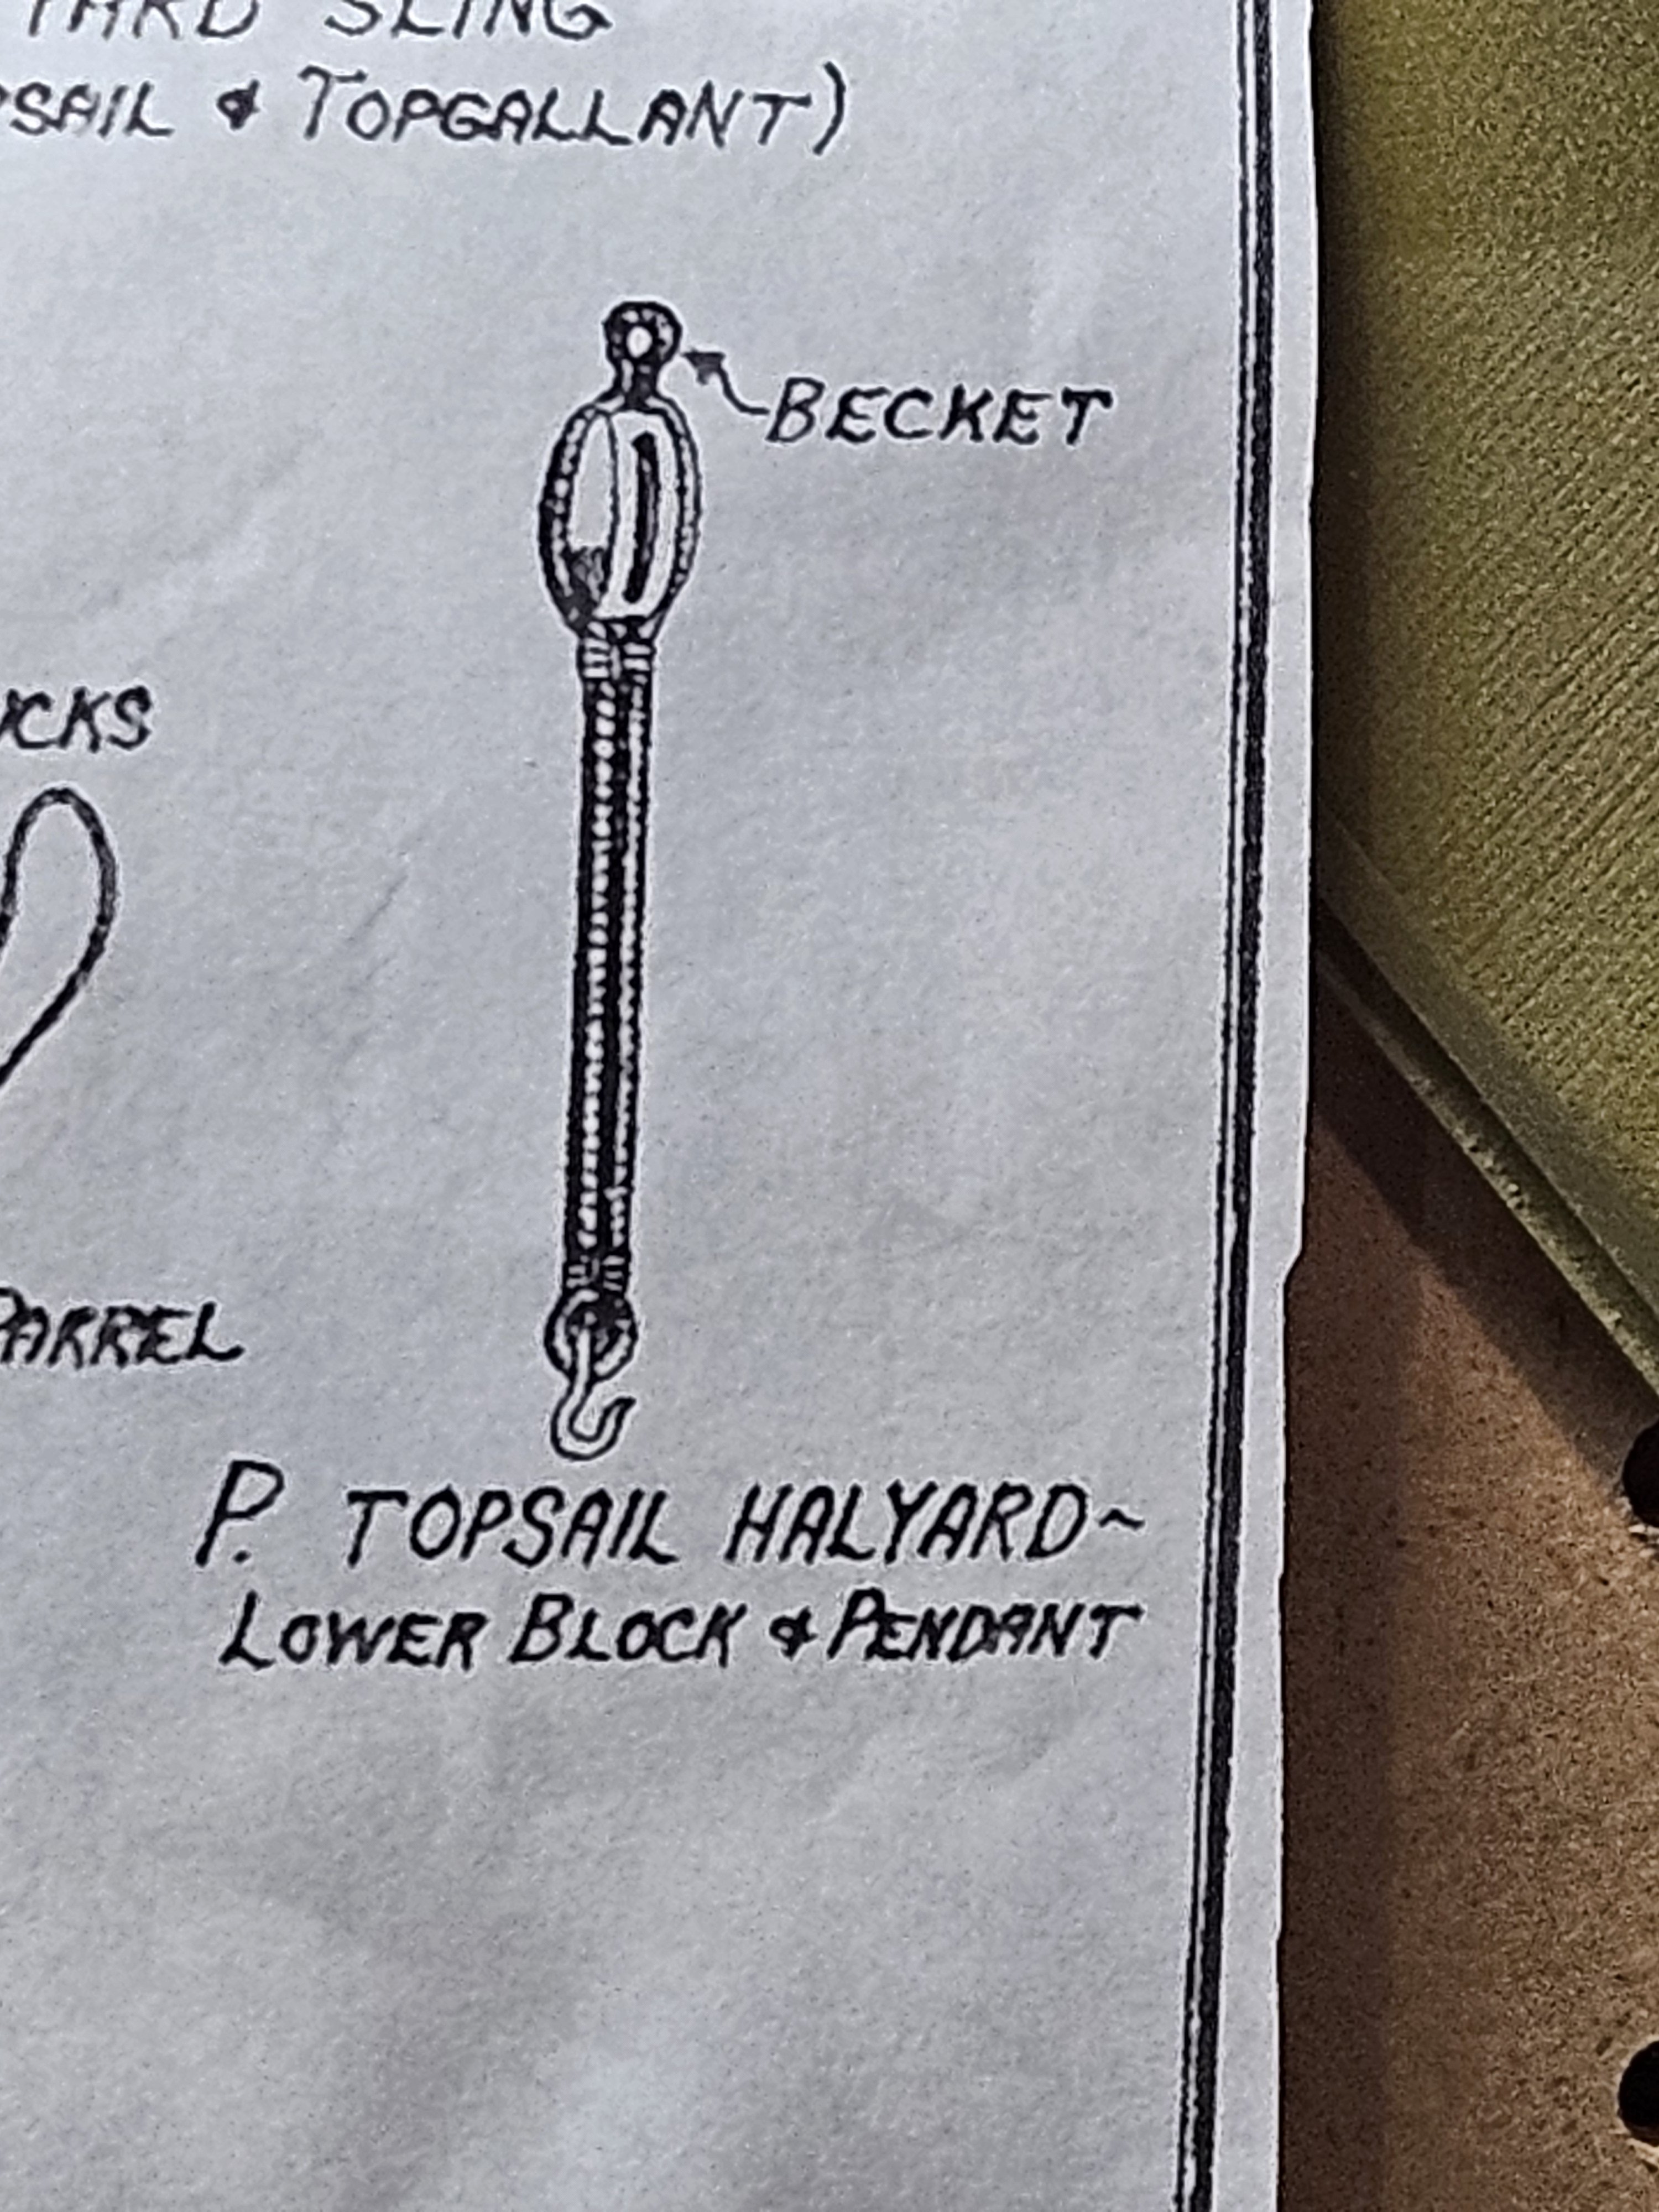
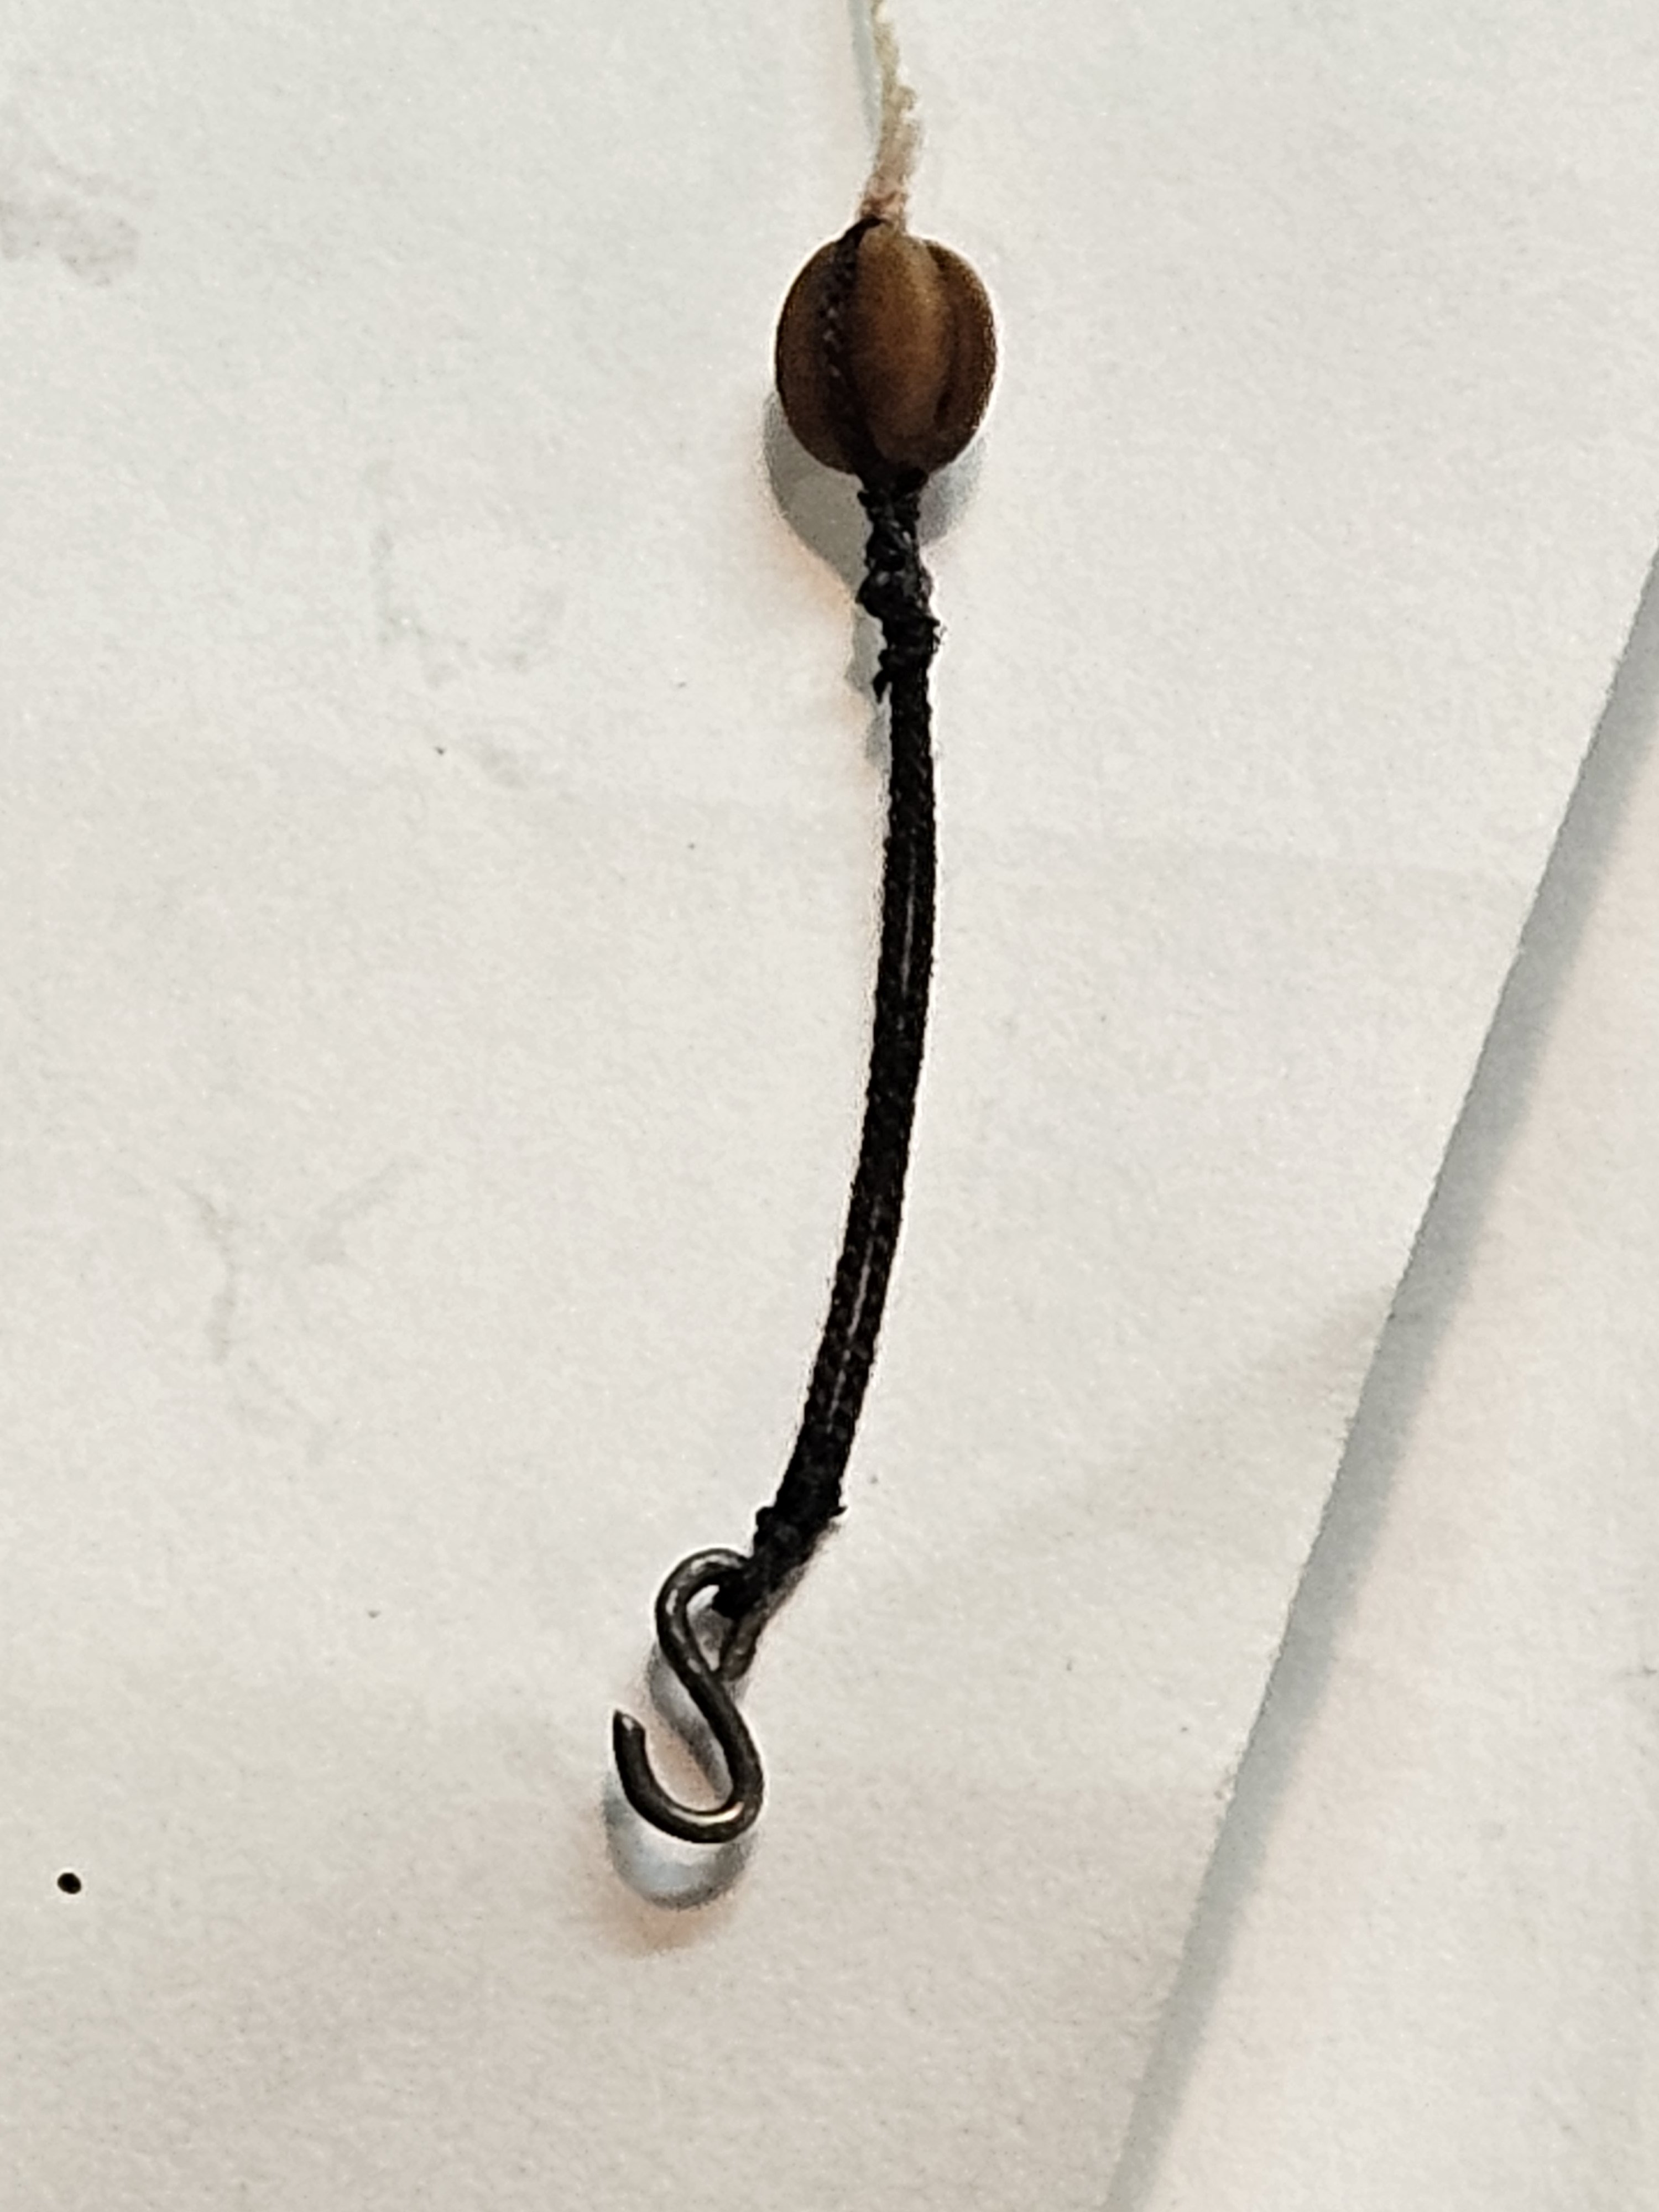
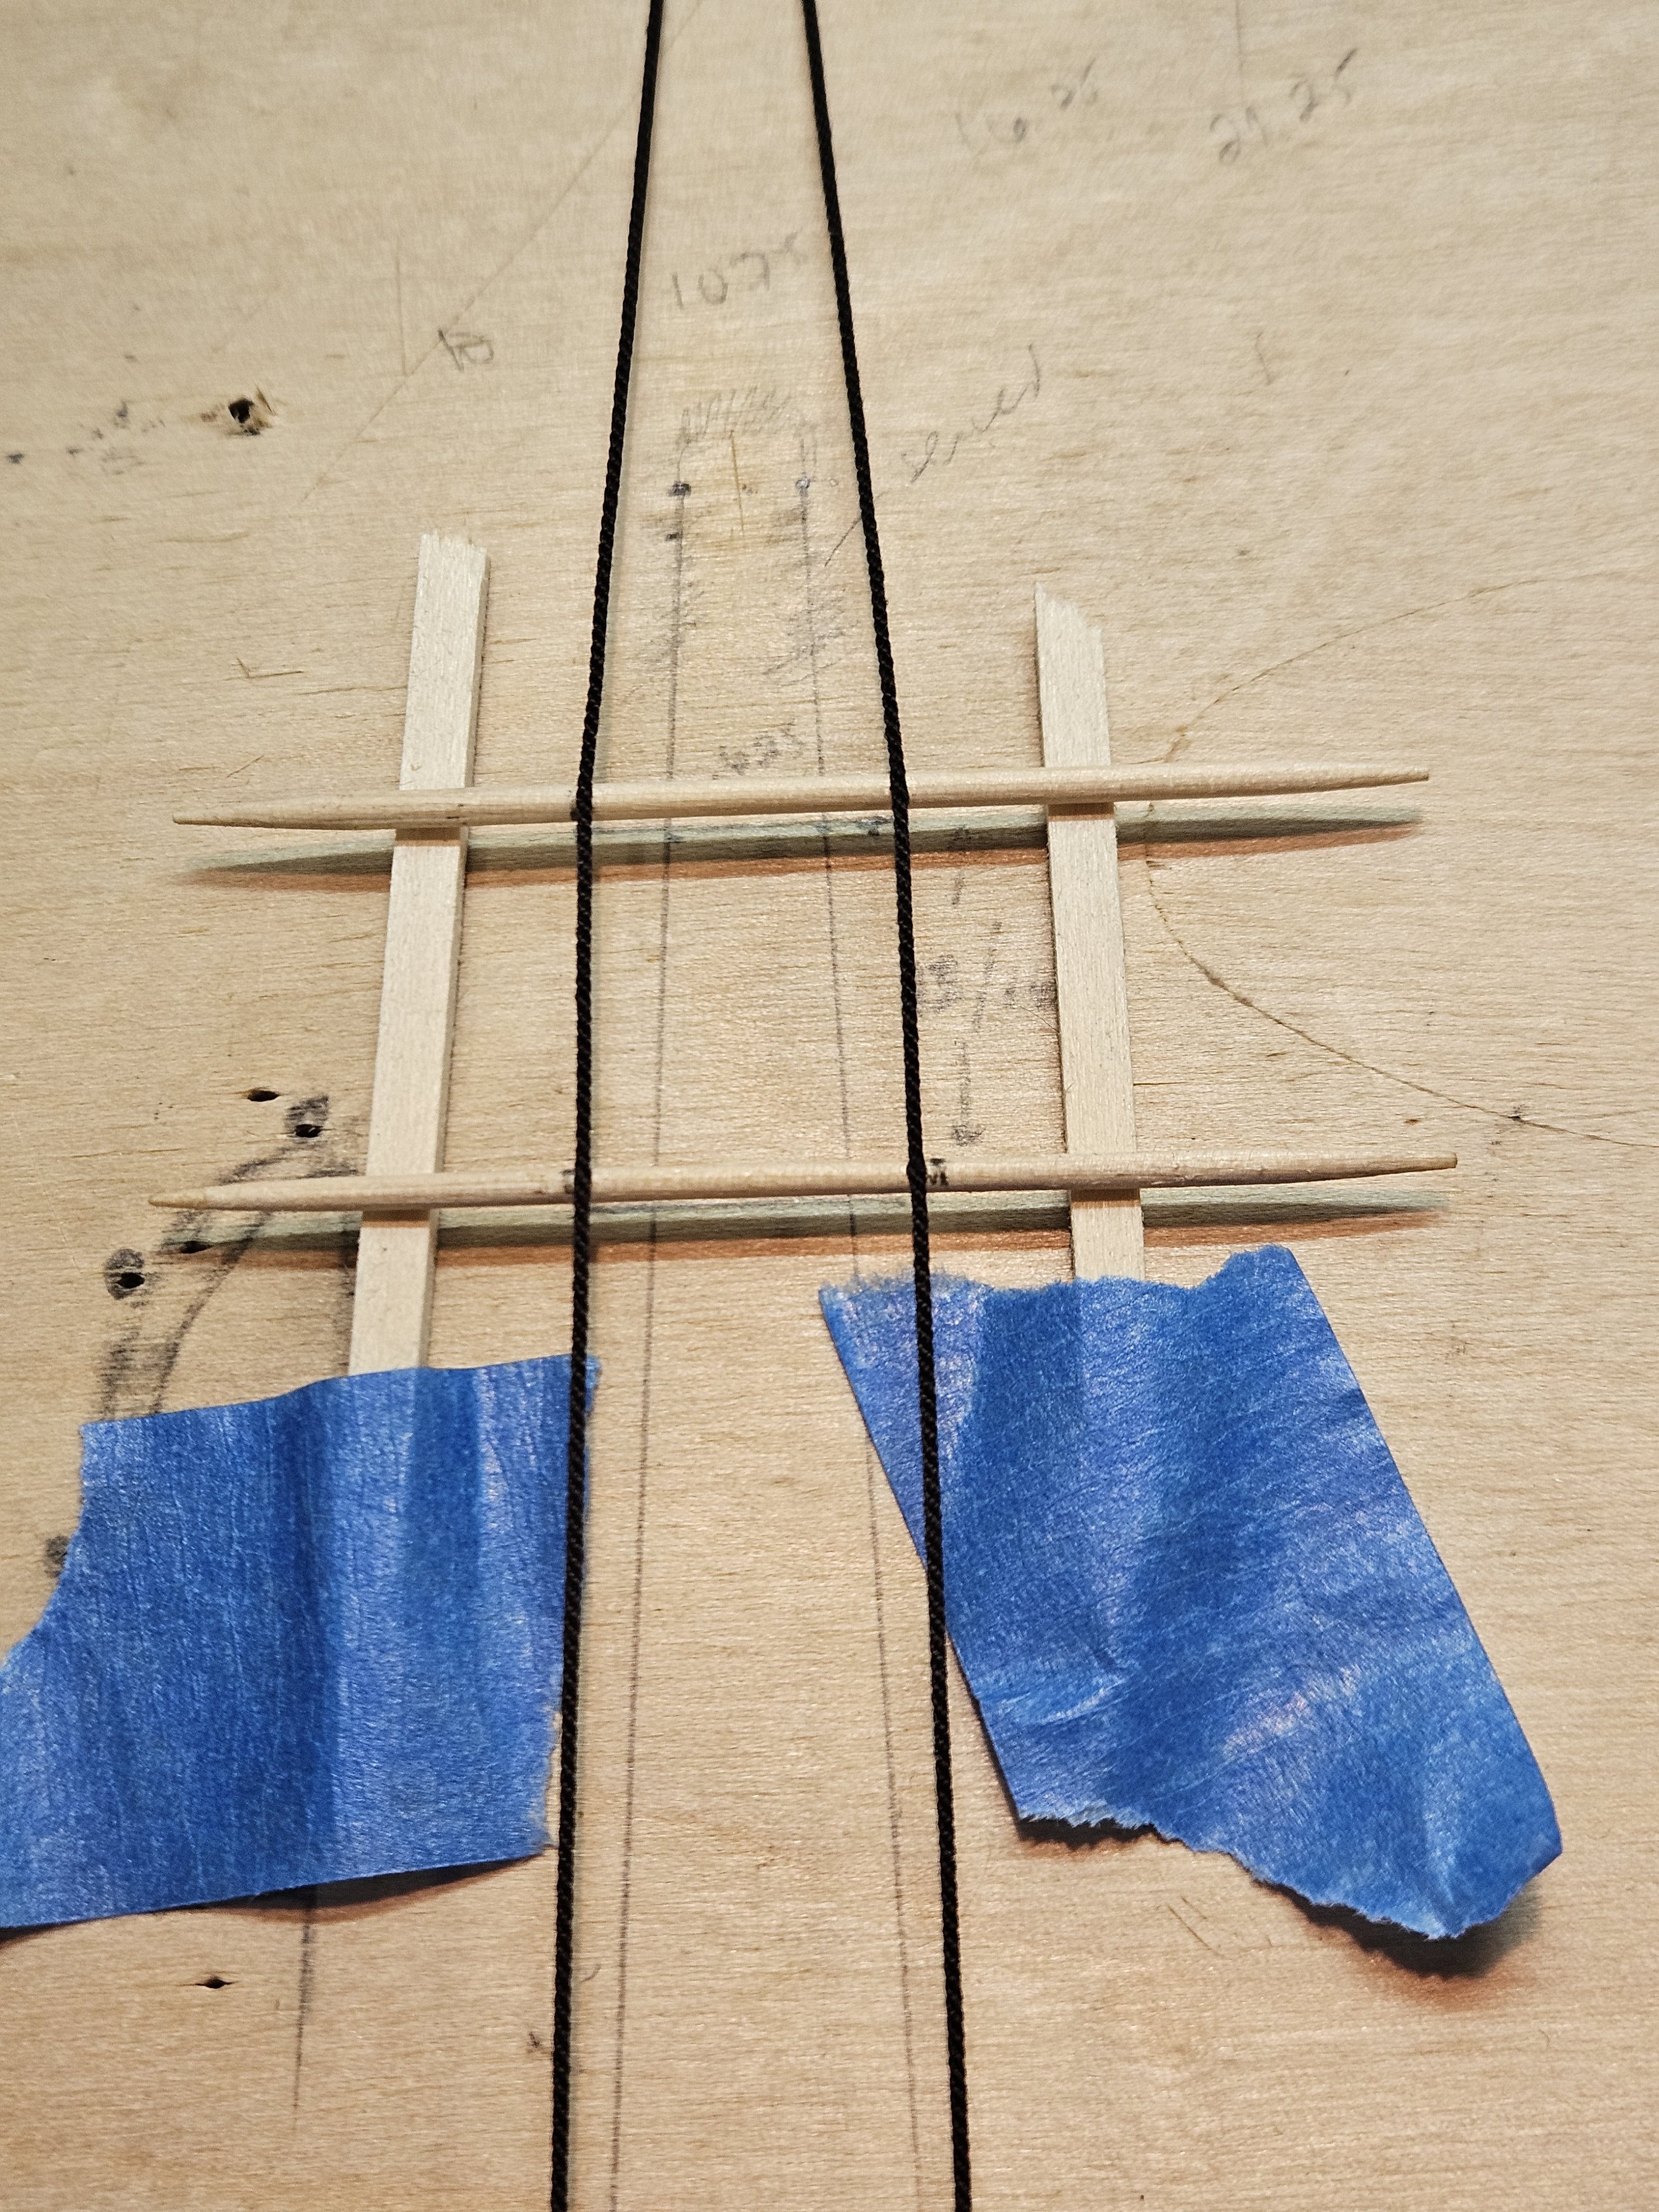
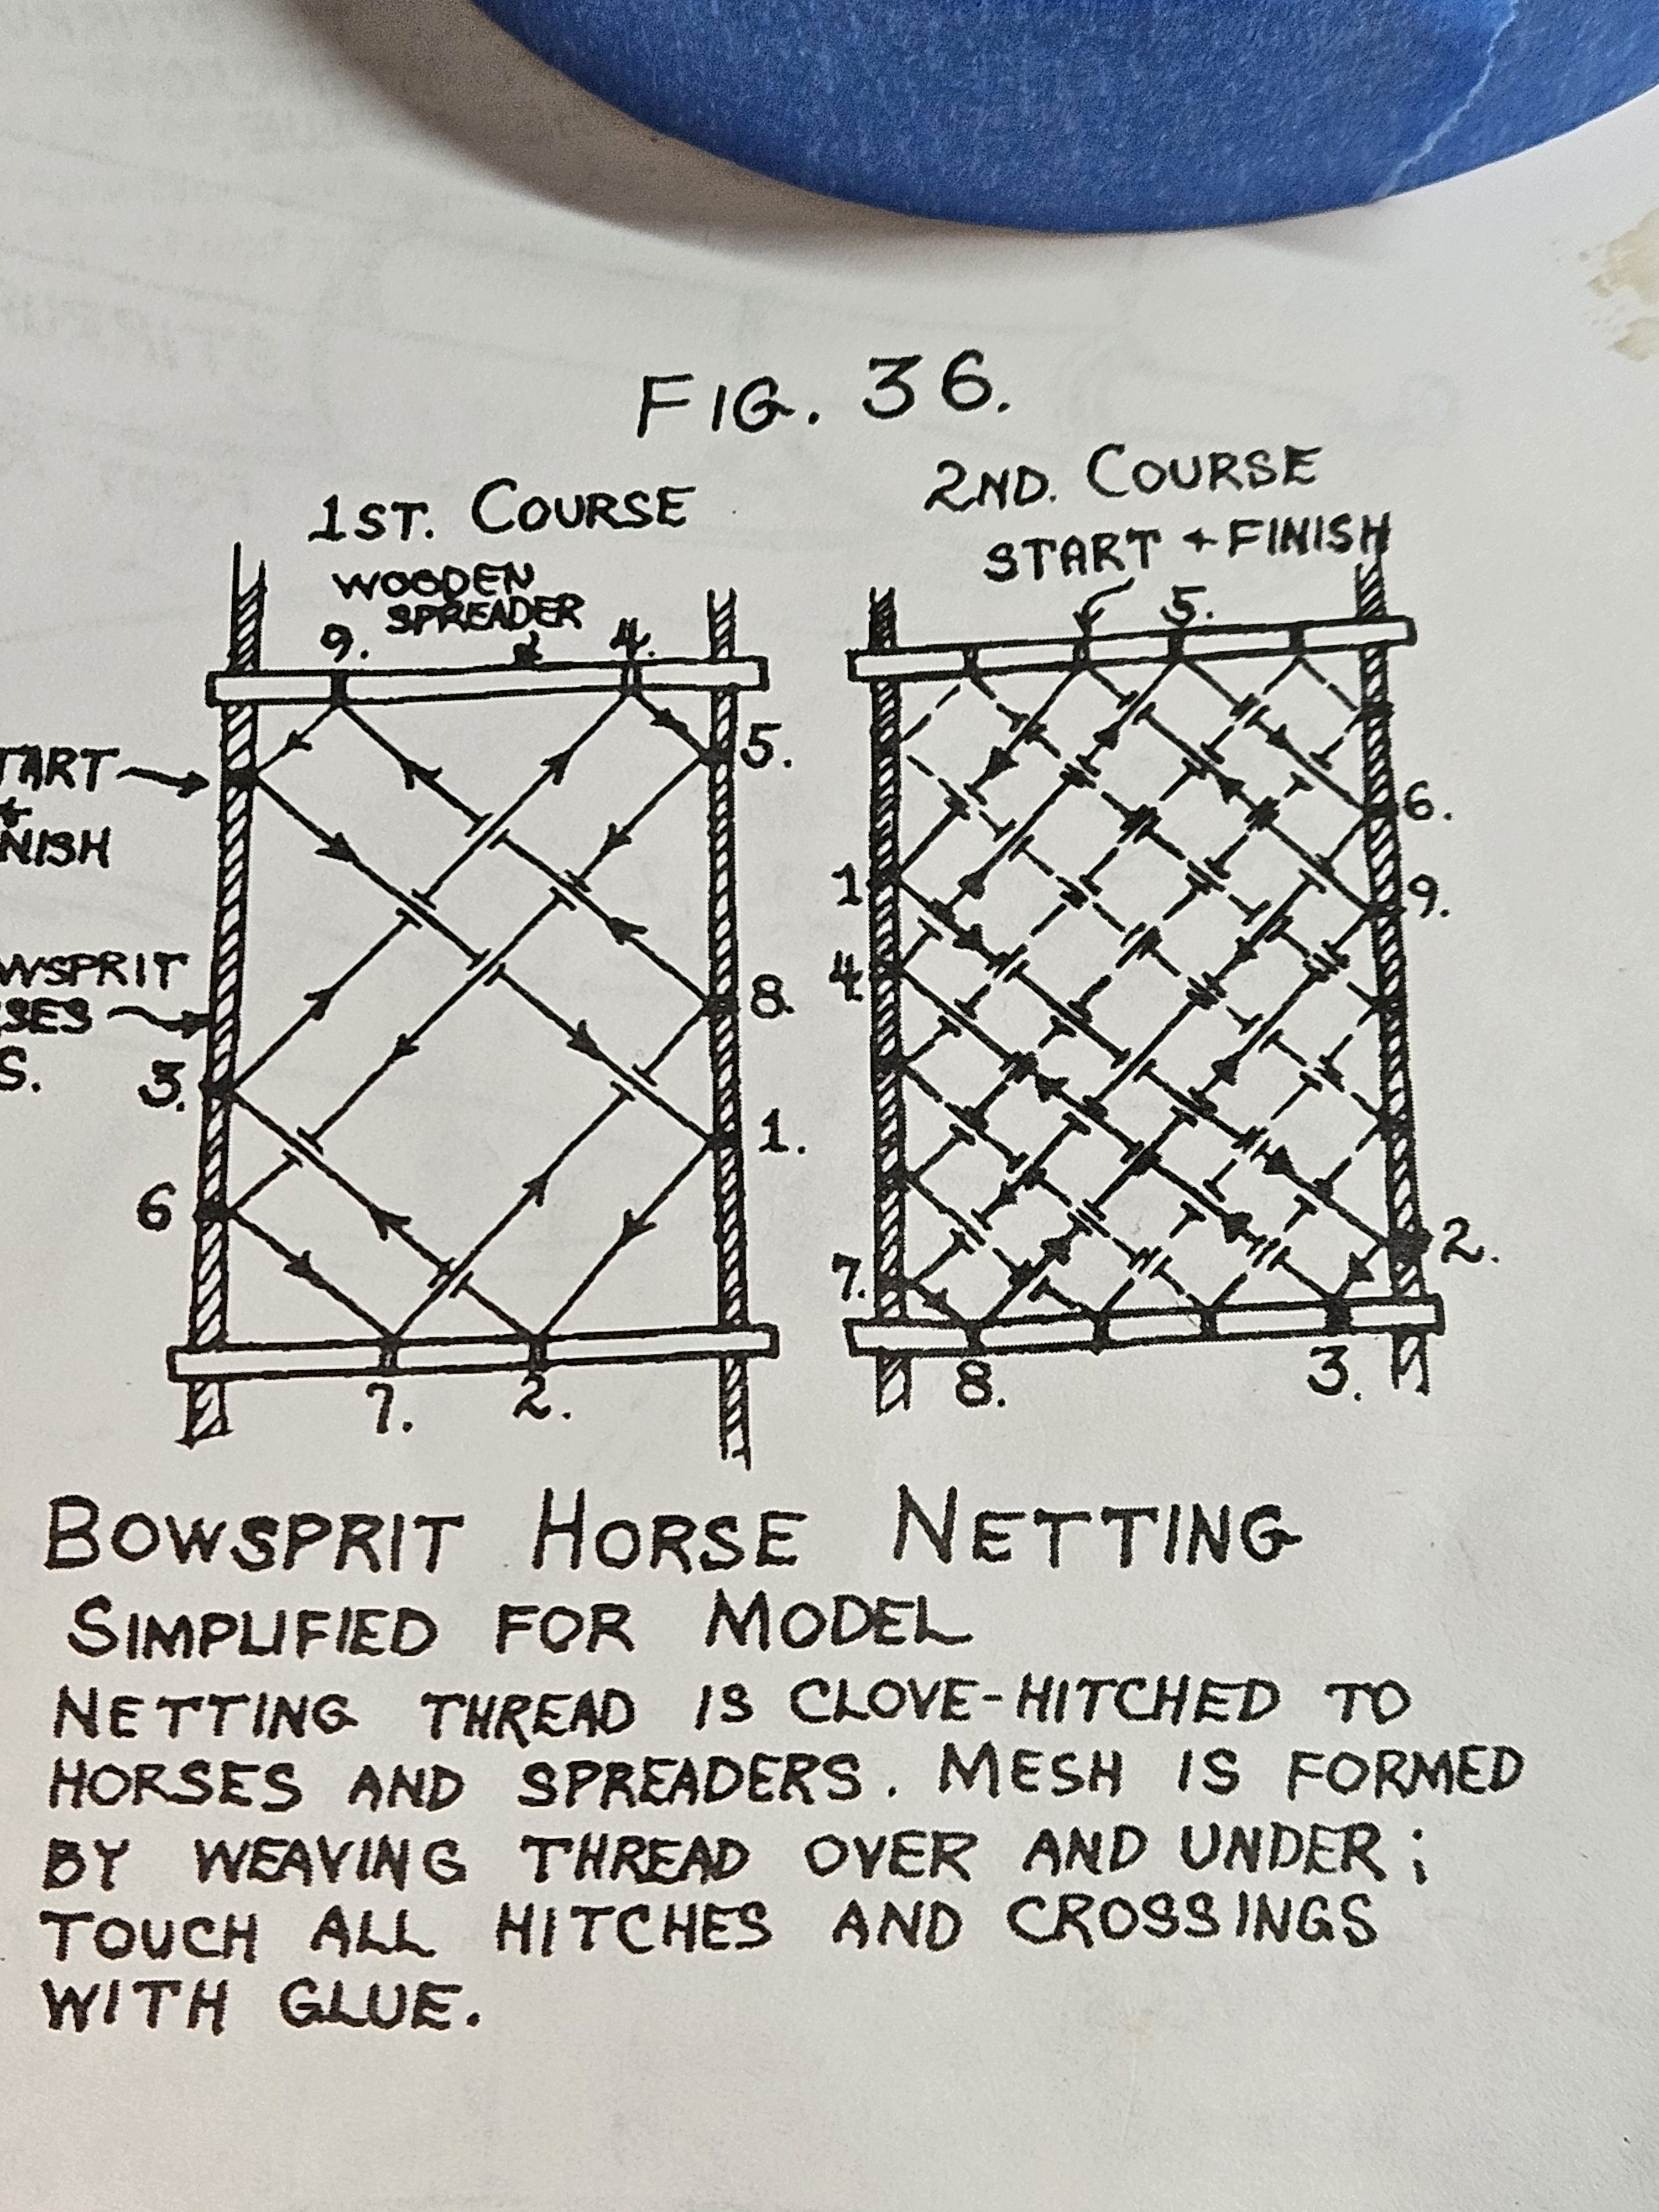
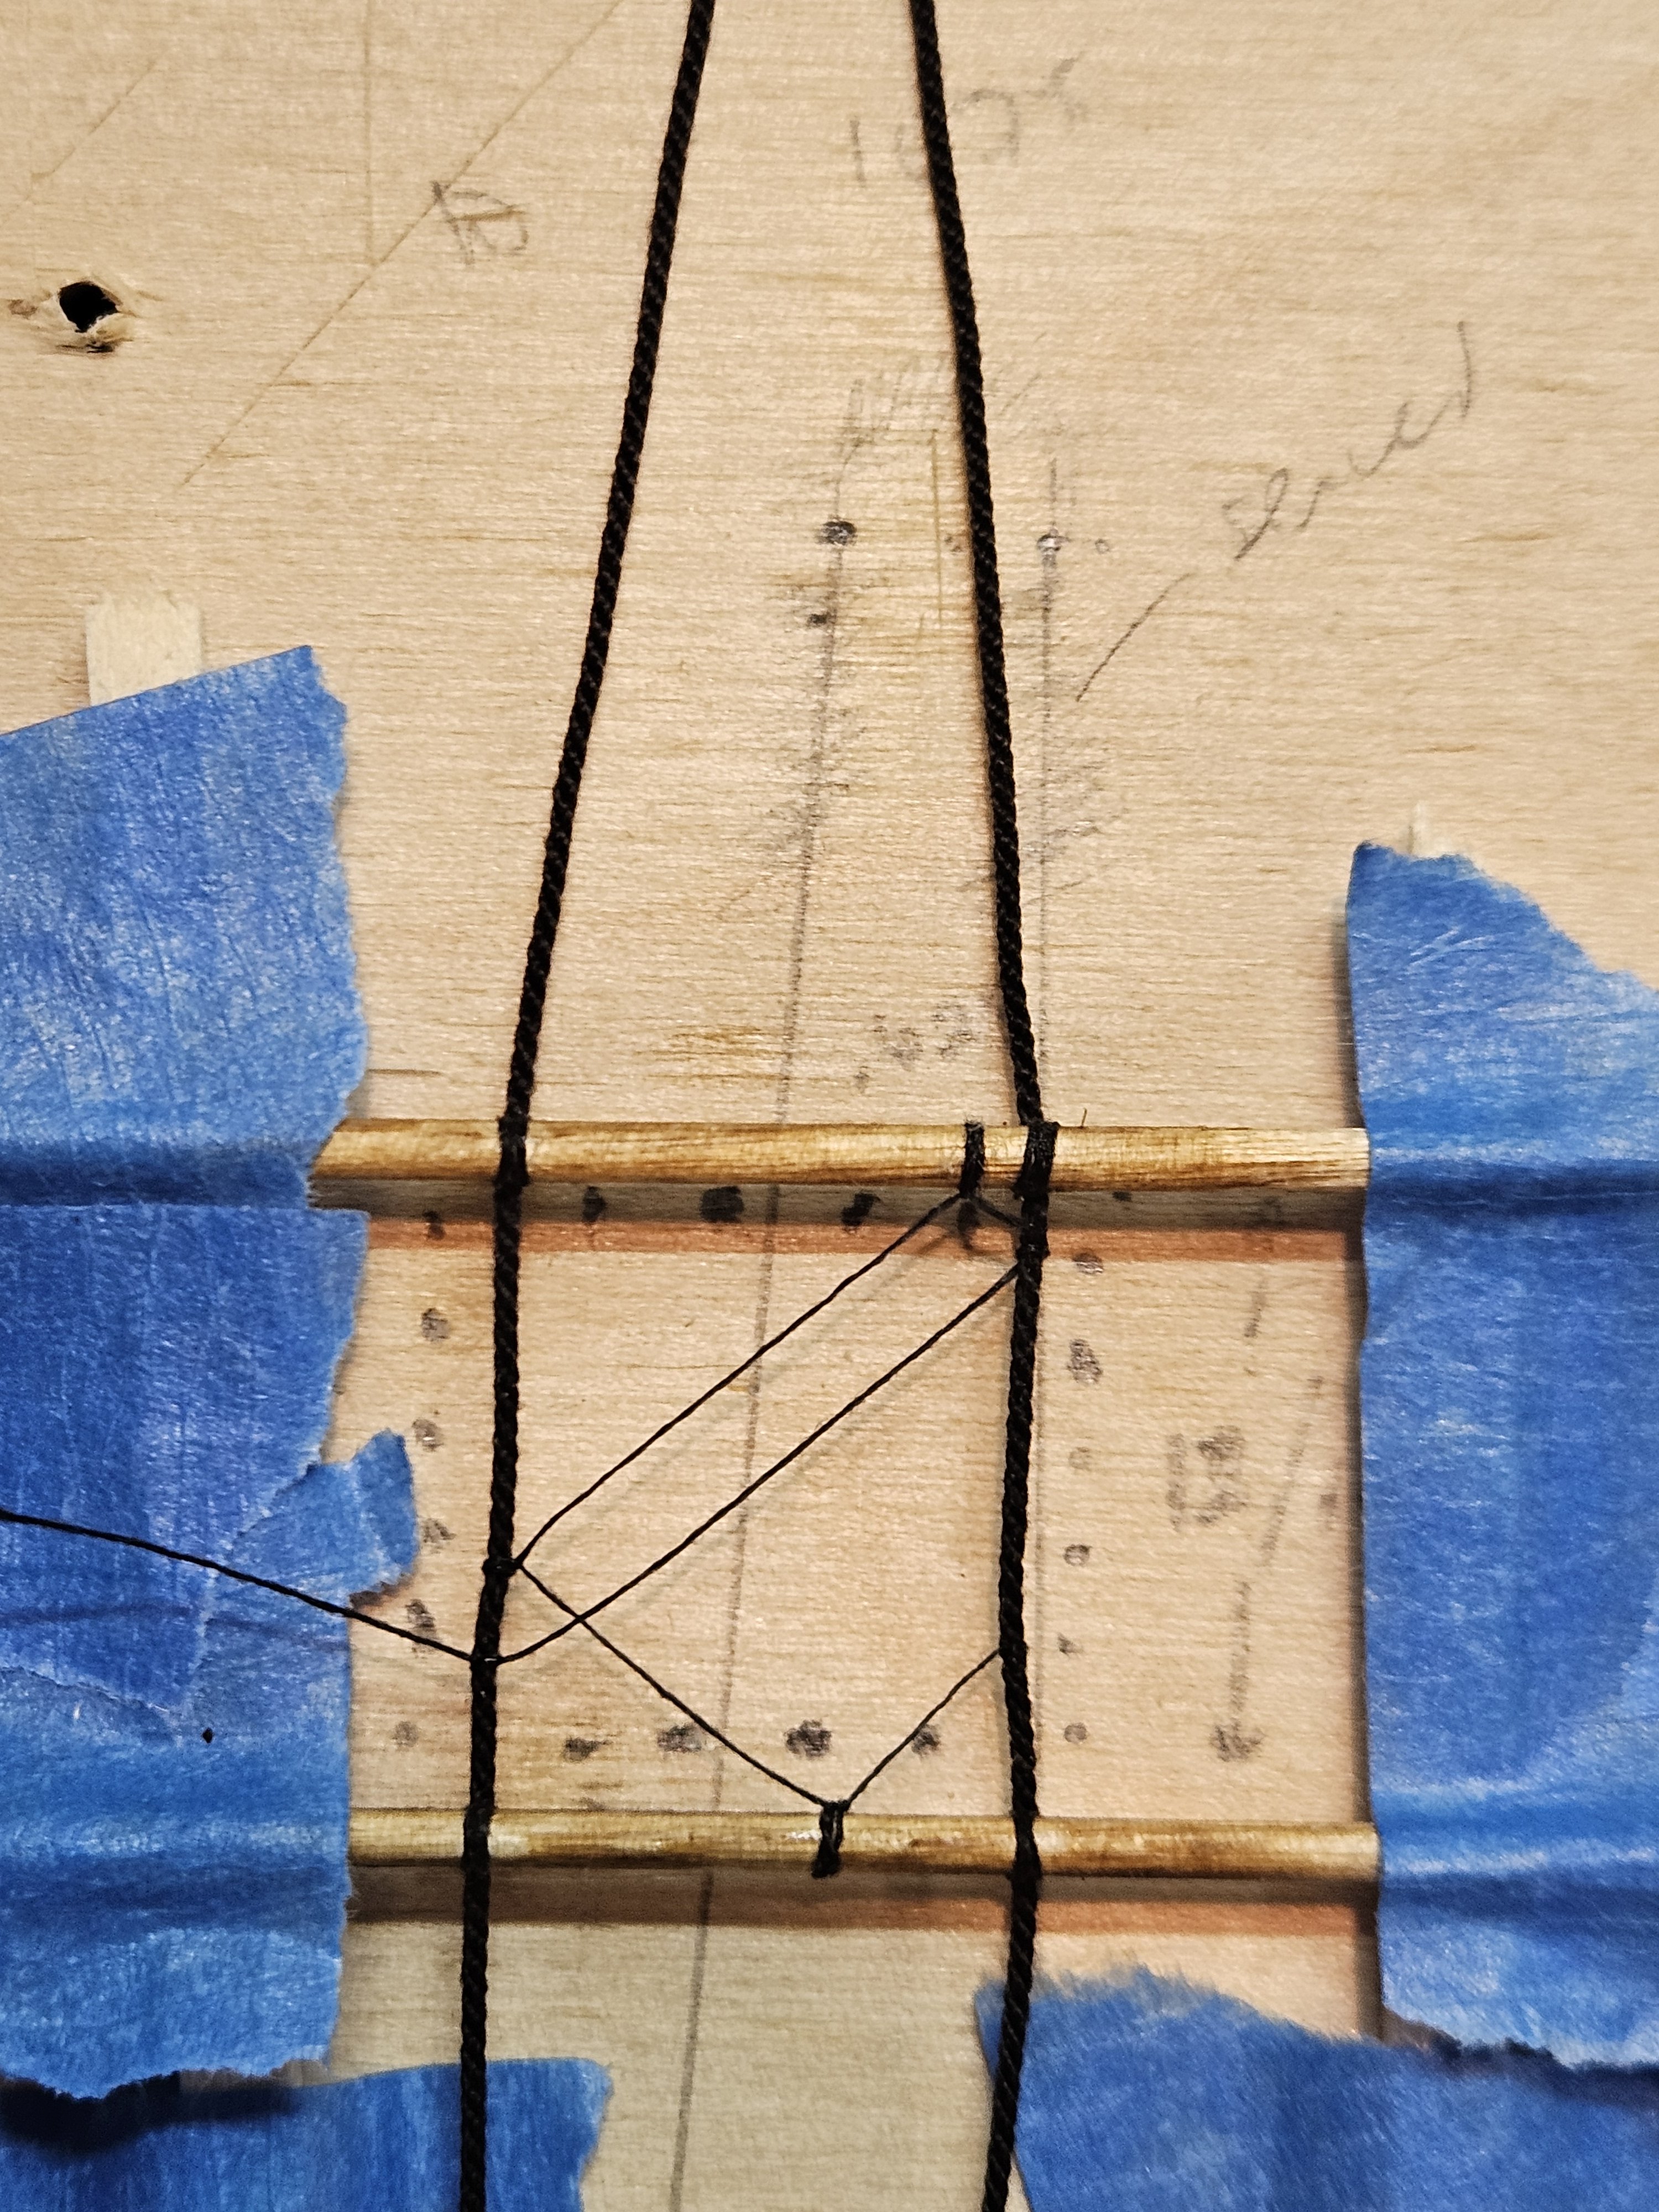
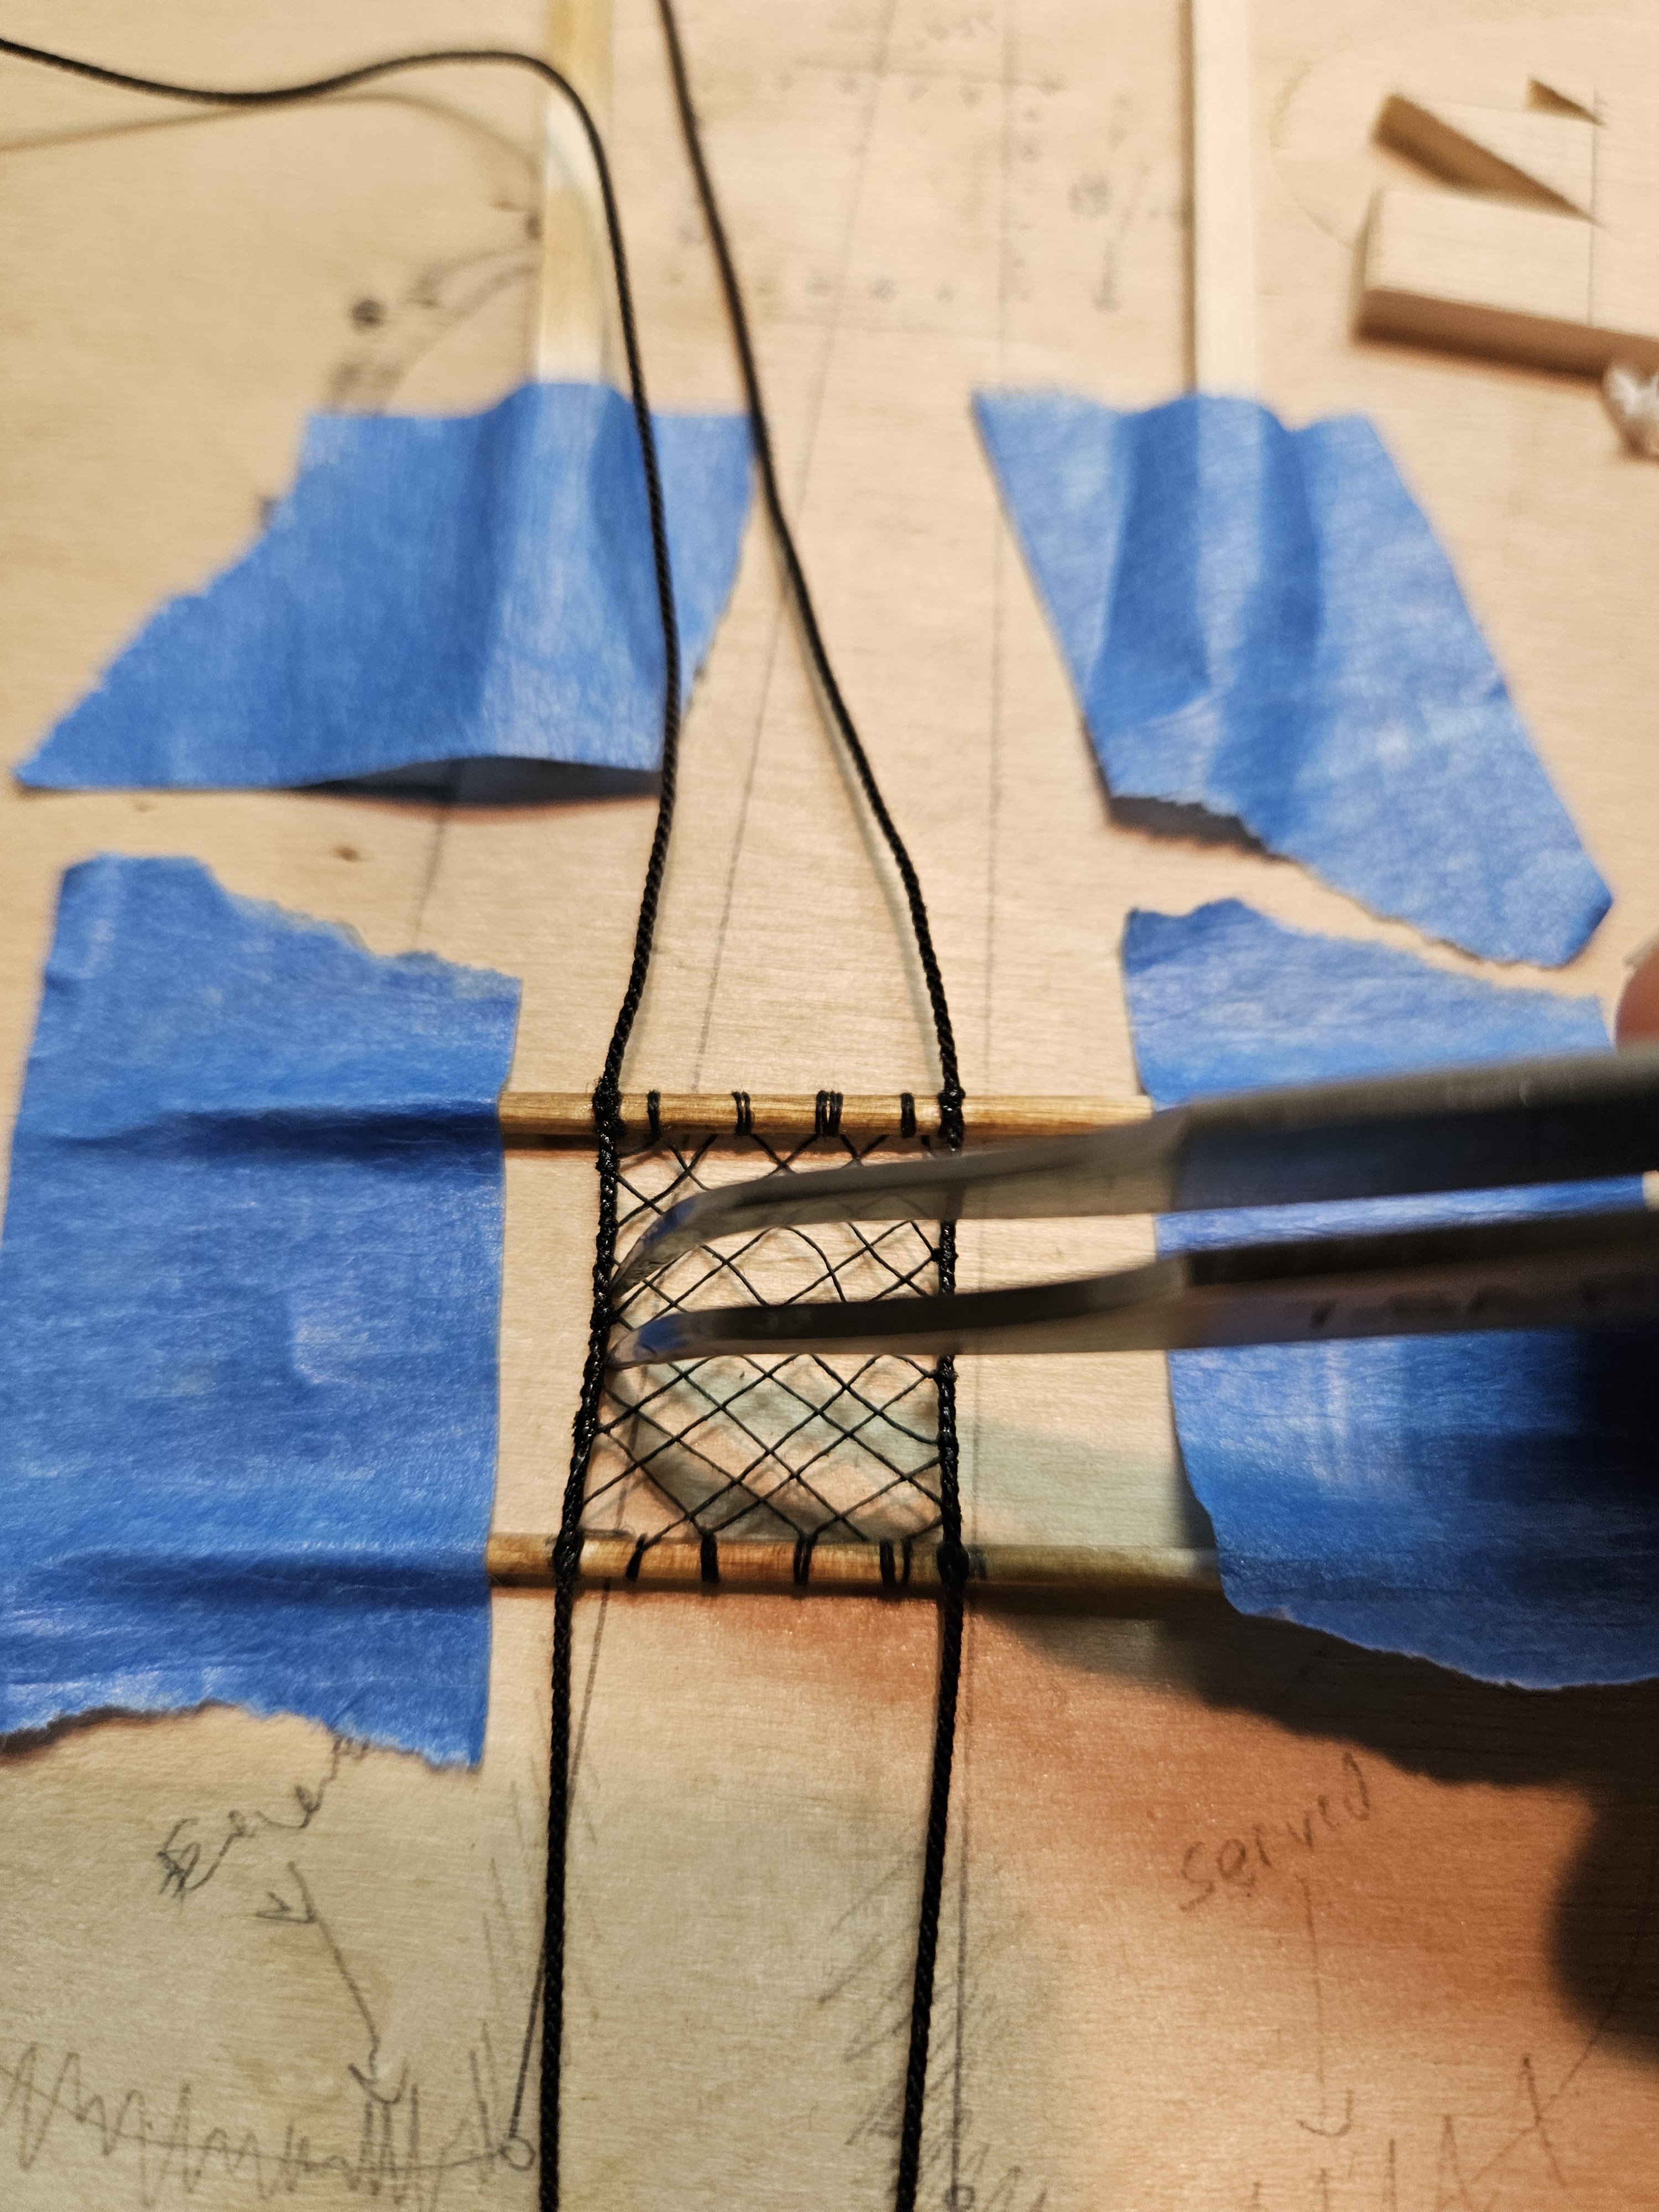
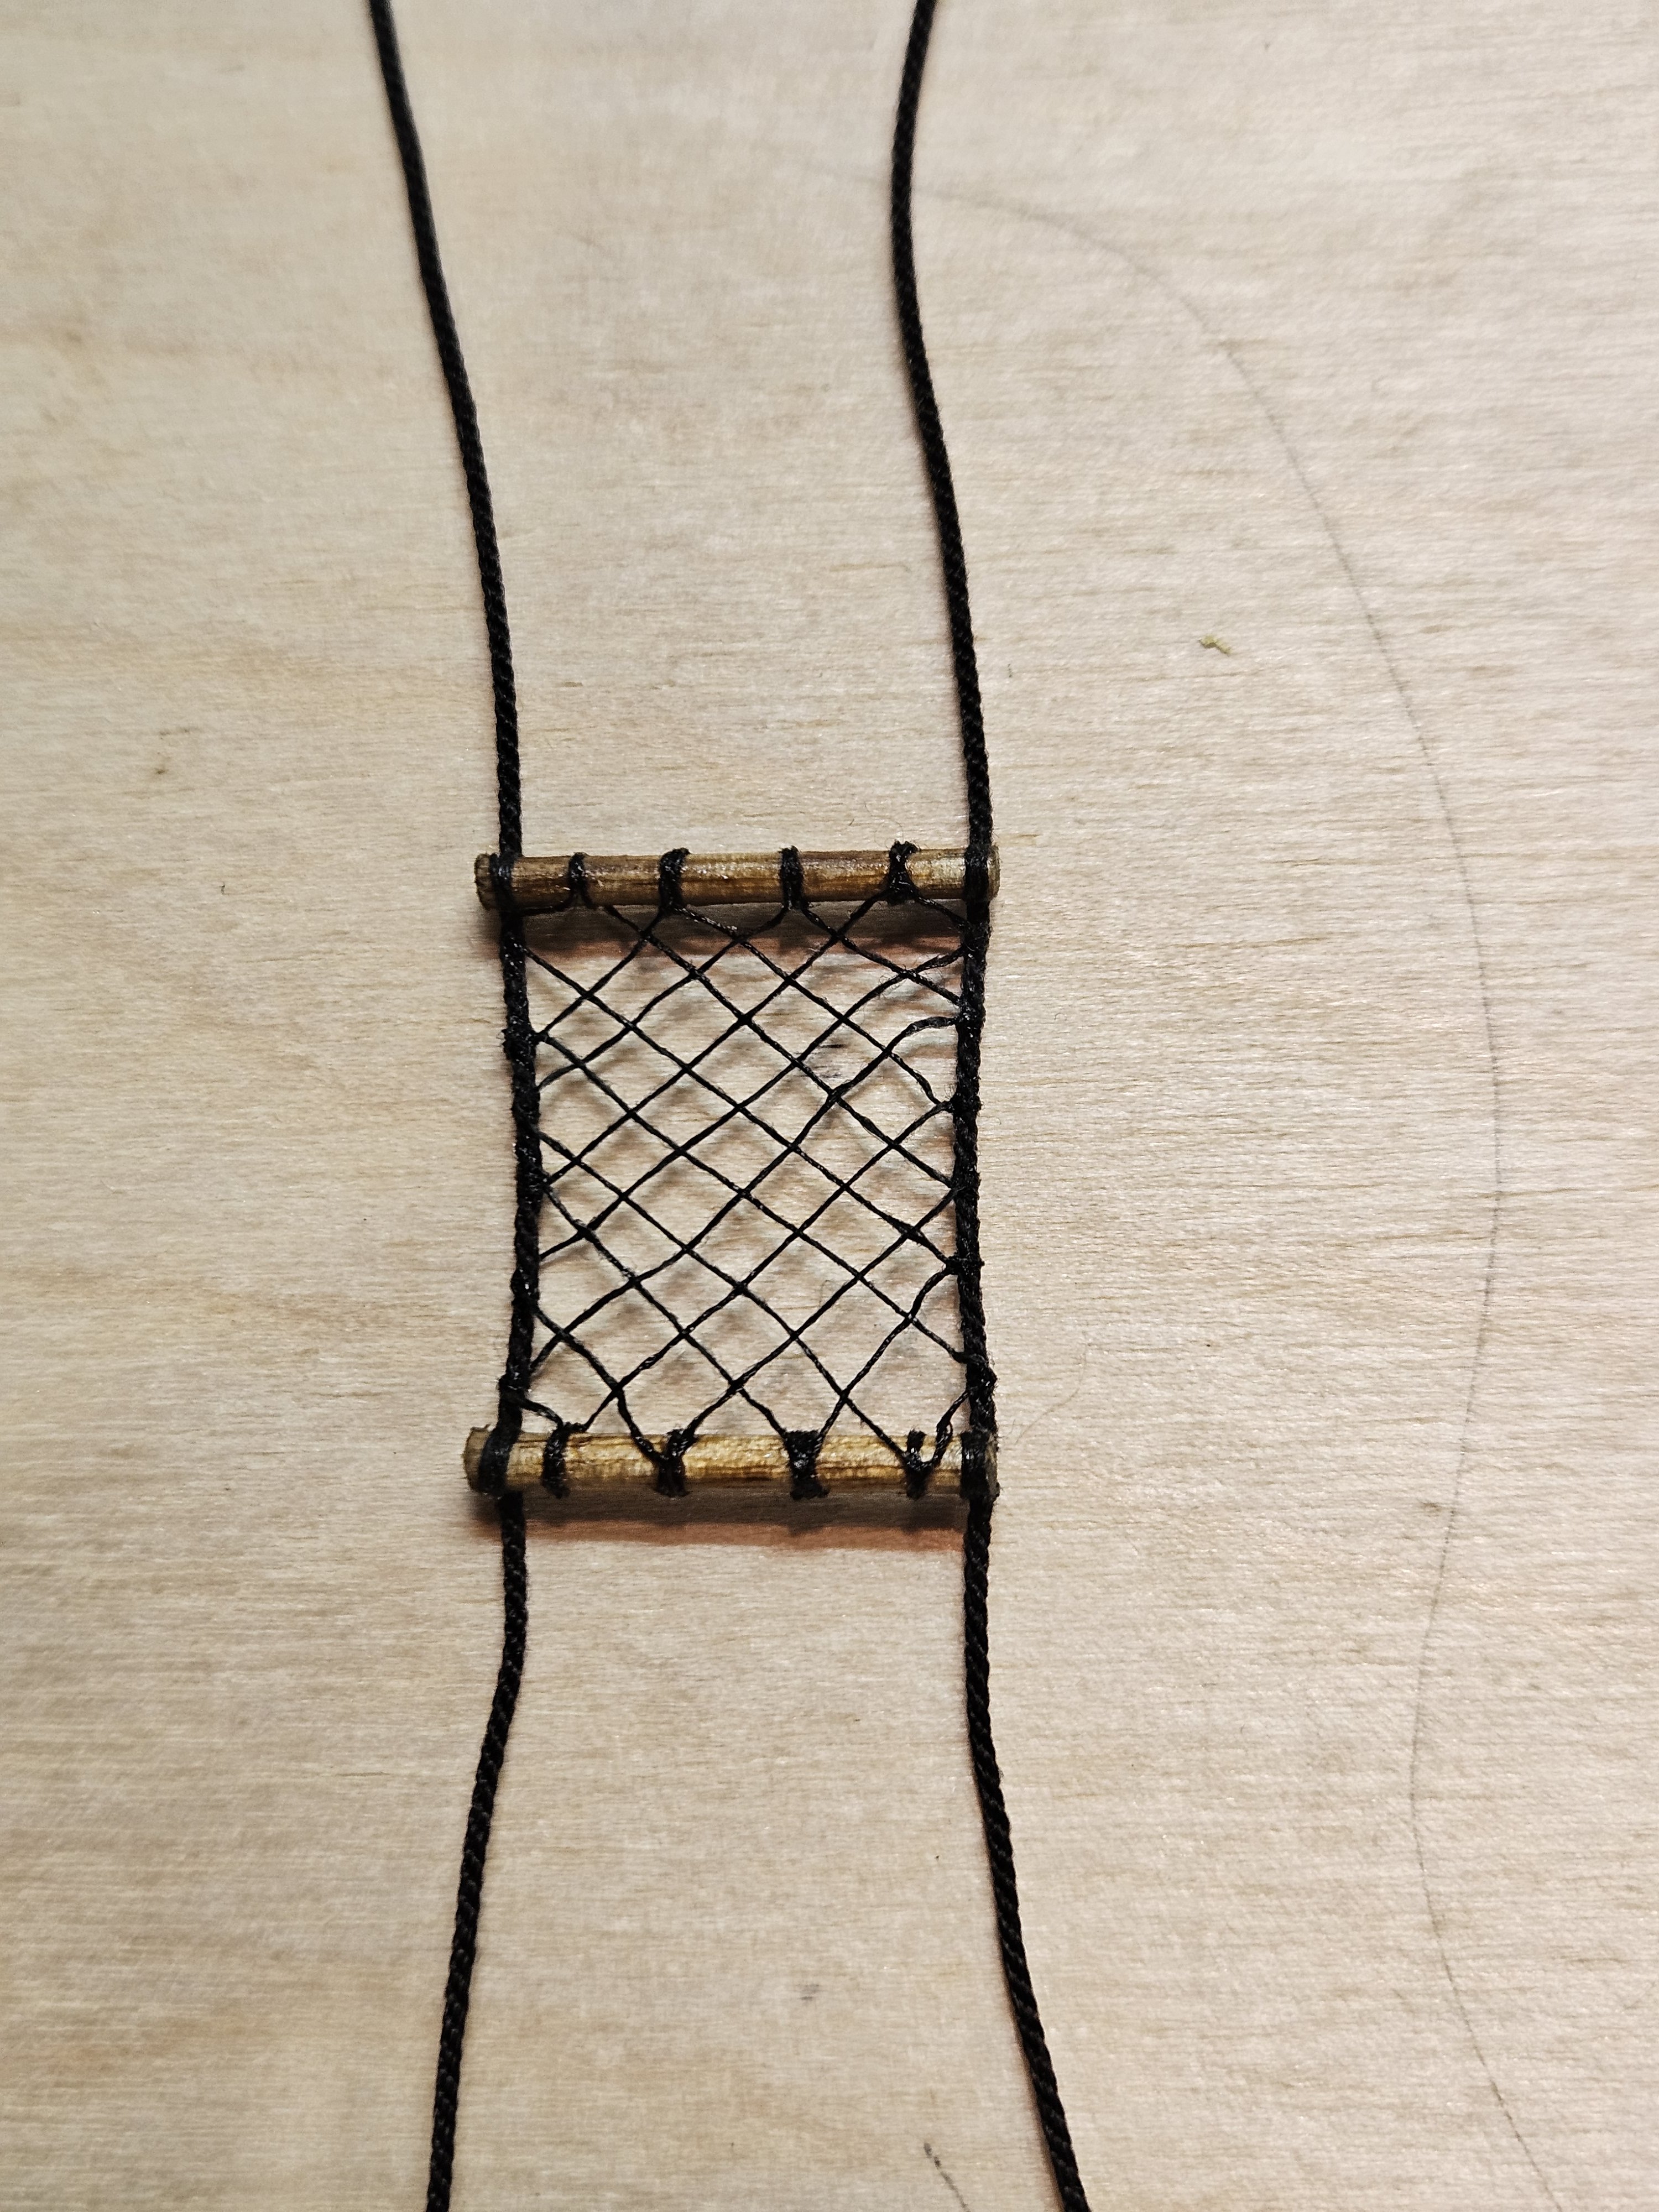
More steady progress with the Fair American There were some elements needed to be added on the channels, looking ahead at the rigging plans. The original rigging sheet shows eye bolts for lift blocks and halyards inboard on deck, but there really isn't room with the cannon right there. So, I'm adding eyebolts, etc on the channel instead, which is what is shown on the rigging plans. These sheets don't match, I'm finding. Also, adding eyebolts and blocks for the tackle, as needed. Once the shrouds are up, there won't be easy access for these later. Pre-drilled these holes for the eyebolts. I've learned, from doing the cannons, that its easier to attach a block FIRST, then put the eyebolt in. If you try to seize a block to an eyebolt after it's already installed, there's no access. So I hope I'm being forward thinking enough. Making the Fore Topsail Halyard ahead of time. This is the tackle; the brown rope end will go on an eyebolt BEFORE gluing it in place. The running end also starts FROM this block, so I coiled it for when I need it later. Its difficult (for me) to create a satisfactory becket at this scale, so I'm just going to make the 2-rope hook end look representative. I made a hook with some annealed wire, then looped the rope back over itself and seized near the block and the hook. I estimated the length from the plans. Once seized, I added some CA glue to stiffen just a little. Now they're hooked in place and ready for use later. I've also managed to add the Main Topsail to the yard, complete with bunt and leech lines. The reef points don't look as good as I'd like. I used pretty small (lower quality) rope at the time. I may elect to change them all out with Syren rope. There were so many!!! Next up was the Bowsprit Horse Netting. I doubt I'll get it to look anything near this, but the instructions aren't too bad. I made a crude, but to-scale drawing of the attachment points and features of the rope. I made measurements on the actual model for this. I'll use this as a template. I want to make the rope from one piece, so i don't use it all up, and I can serve it in sections, with extra. Thats the plan anyway. Sort-of like this. I added 'flags' to approximate where to serve, since the instructions call out the ends being served, not the whole length. After serving, I laid out the rope where I needed it, and taped in place. I'm using toothpicks as wooden spreaders. Now with the template, every thing is located how it will be on the model. I also raised up the toothpicks so I have room to weave underneath, and not directly on the board. I tacked the heavy ropes to the toothpicks on the marks I made and let them dry overnight. Then carefully seized with fine thread. These need to hold the rope spread, and not let go, so I made them pretty tight. Making little marks on the board for where the thread goes, helped somewhat early on. Clovehitching the ends was a bear - especially while holding them taught. Really tricky. The result is not very neat at all. The weaving took forever and the spaces are not consistent. The rope bowed inward, due to the tension. My fix was to glob CA glue on the rope, and push it outward with tweezers to let it dry in a semi-straight state. It helped a little bit, but could have been better. I attempted to dab the cross over points with glue and move them to position. After everything was dry, I stained the pole with some MinWax dark pine and trimmed the ends off. I didn't want to paint it black. It didn't turn out bad, but I wanted to do better. I won't install it until I have the stays in place, so it'll be stored for later. Next time, I'm doing the shrouds - another milestone! Deep breath! - Jason -
.thumb.jpg.d4762c4ceafc75991fdd65e4d633ae93.jpg)


-
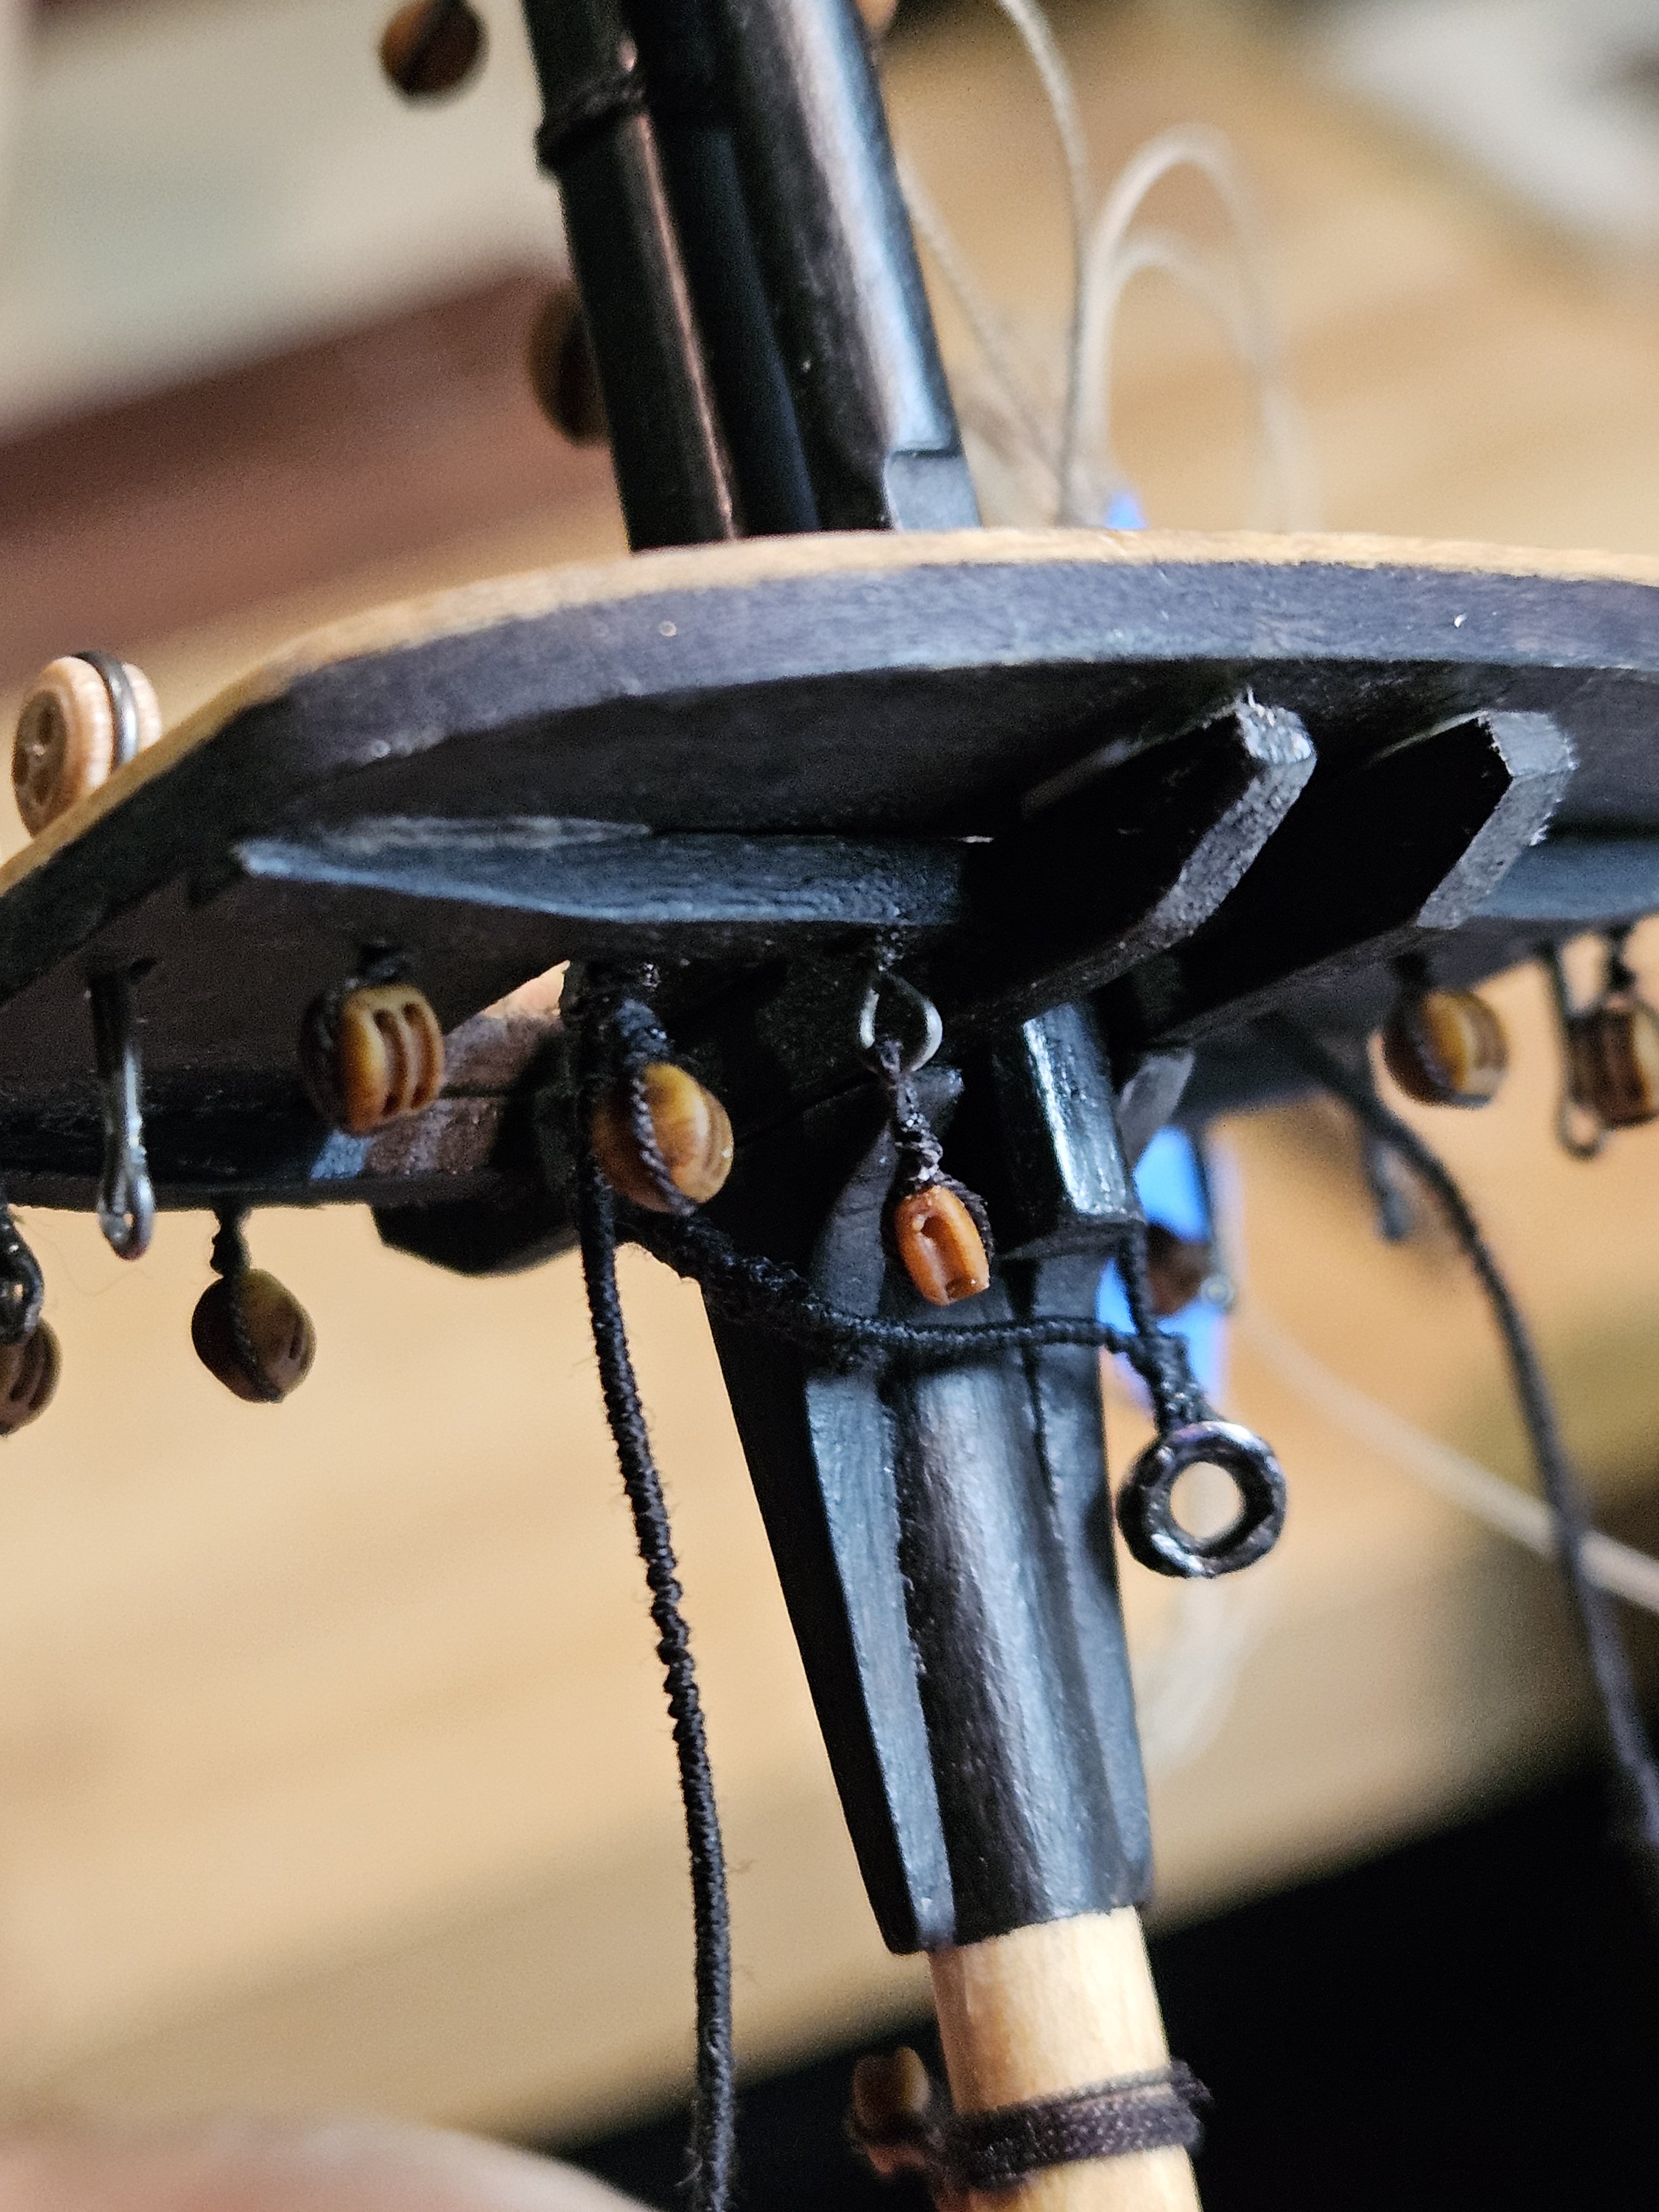
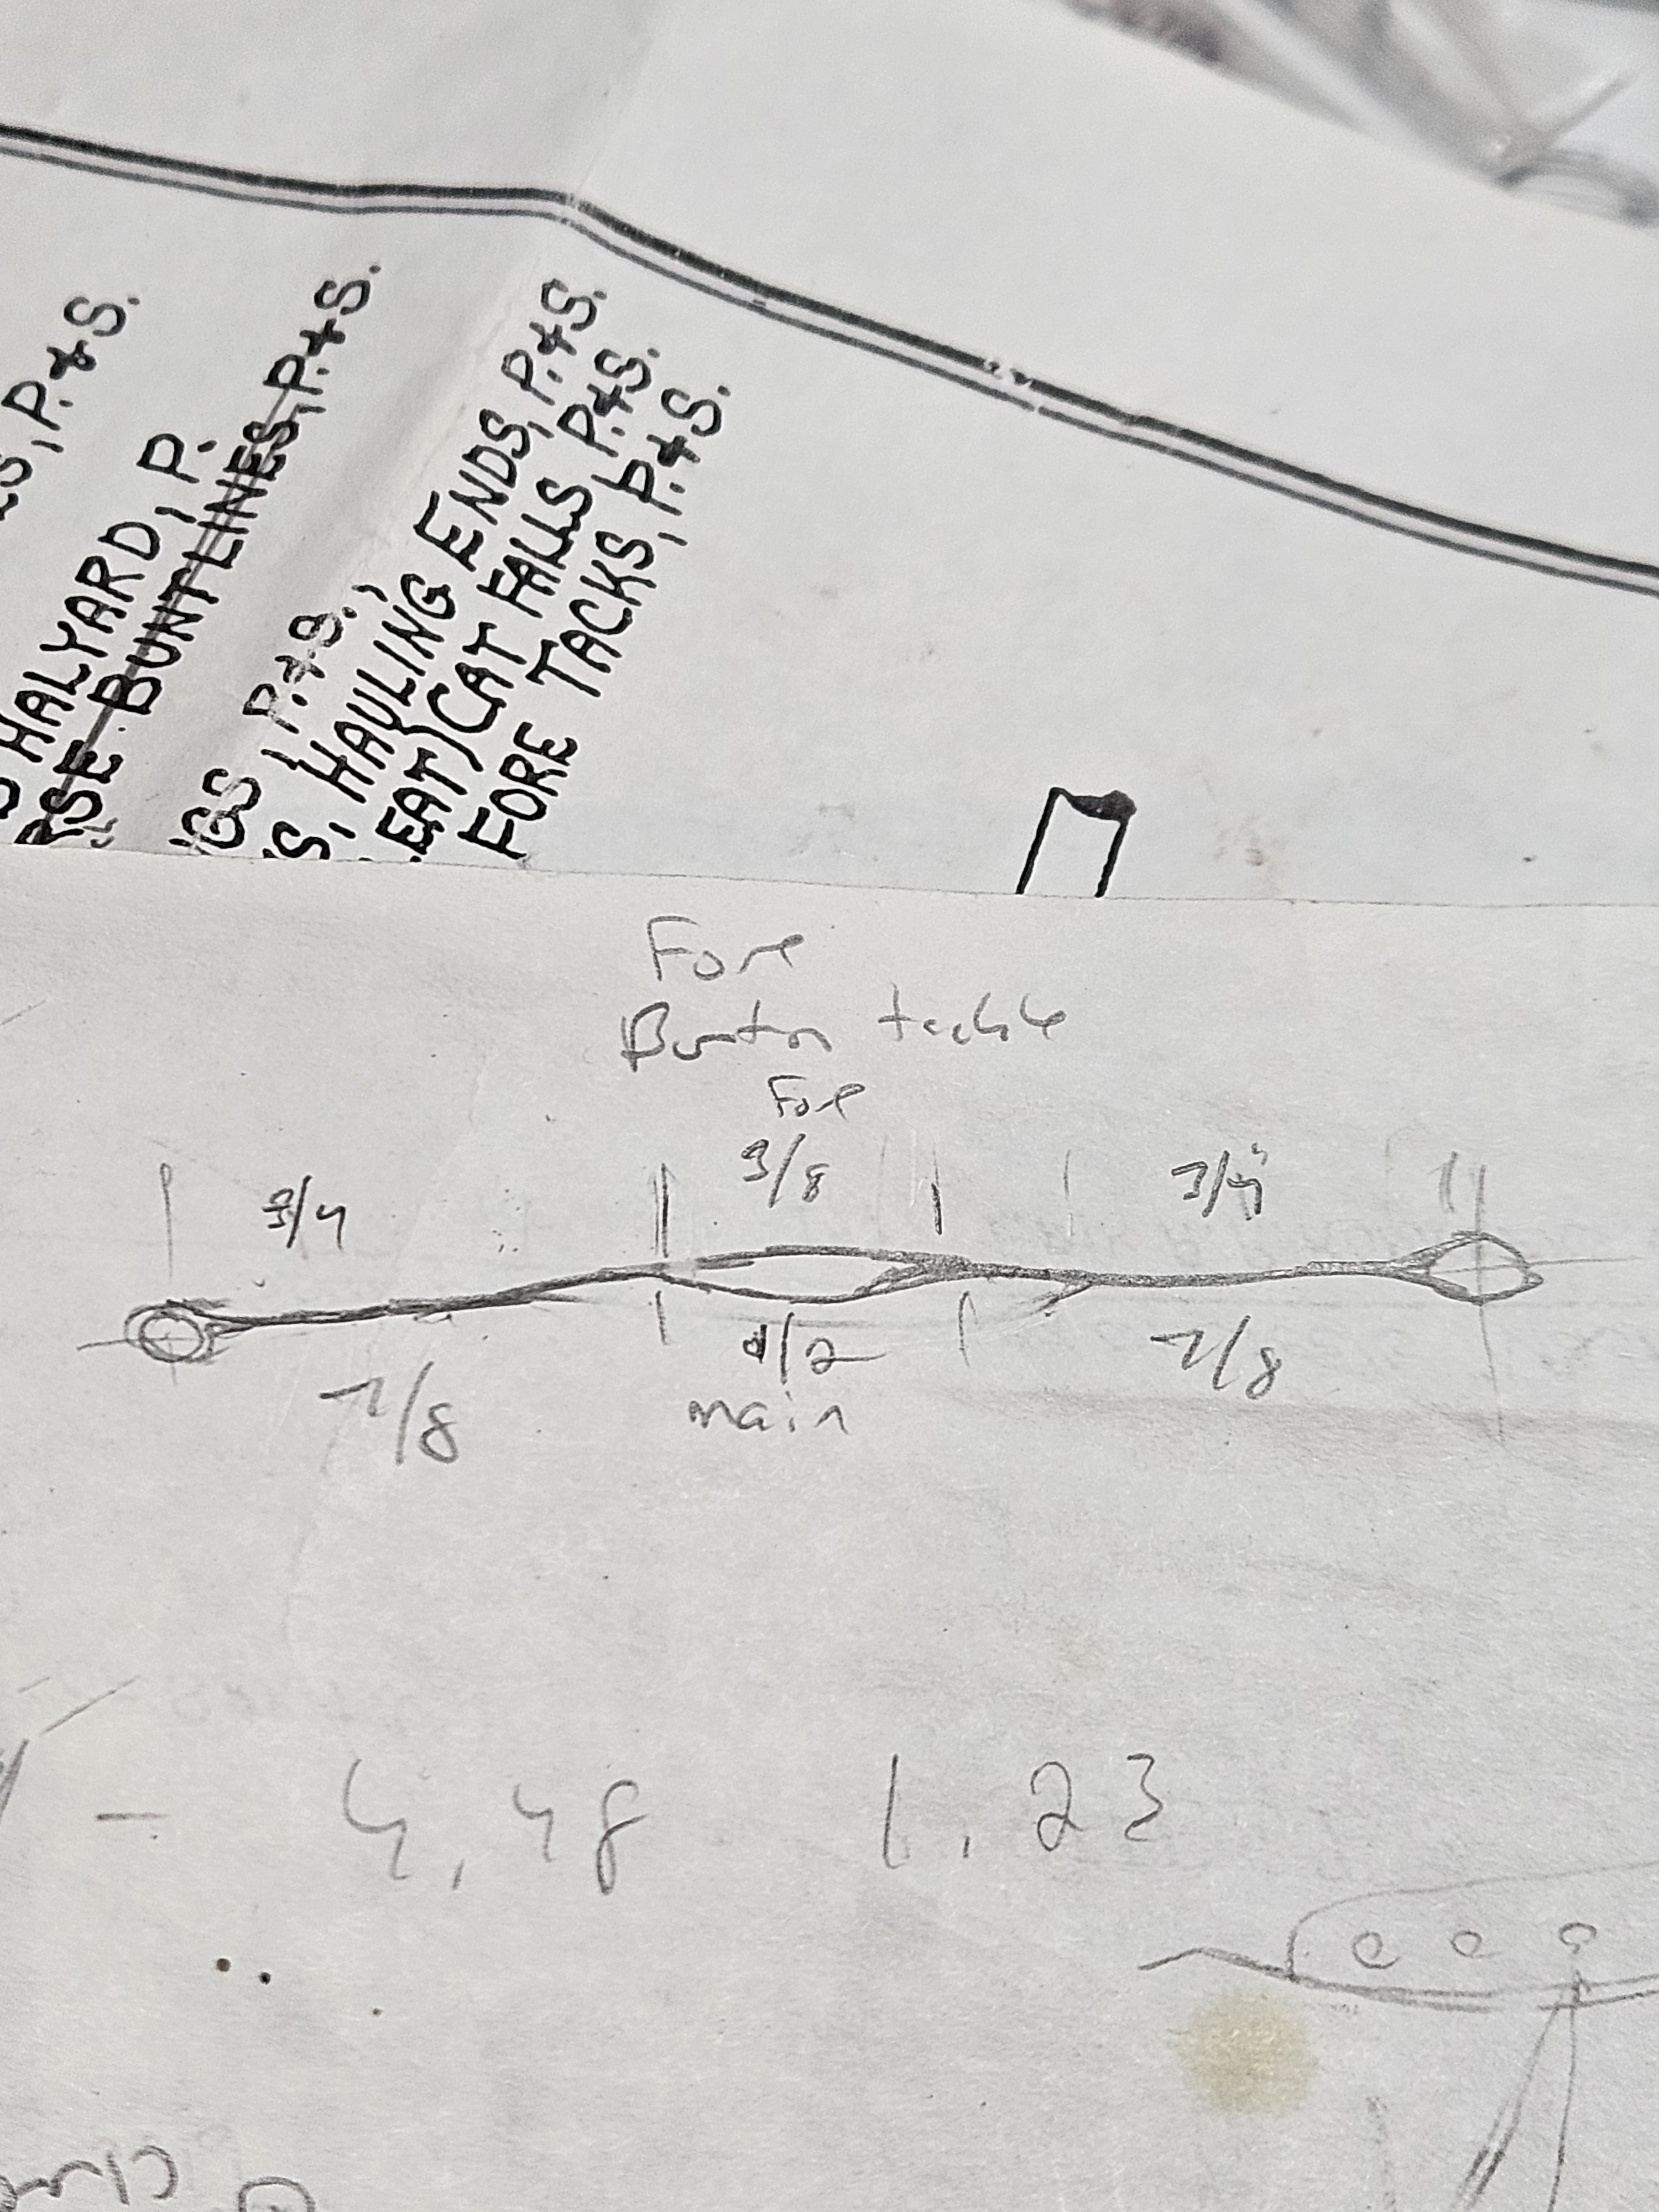
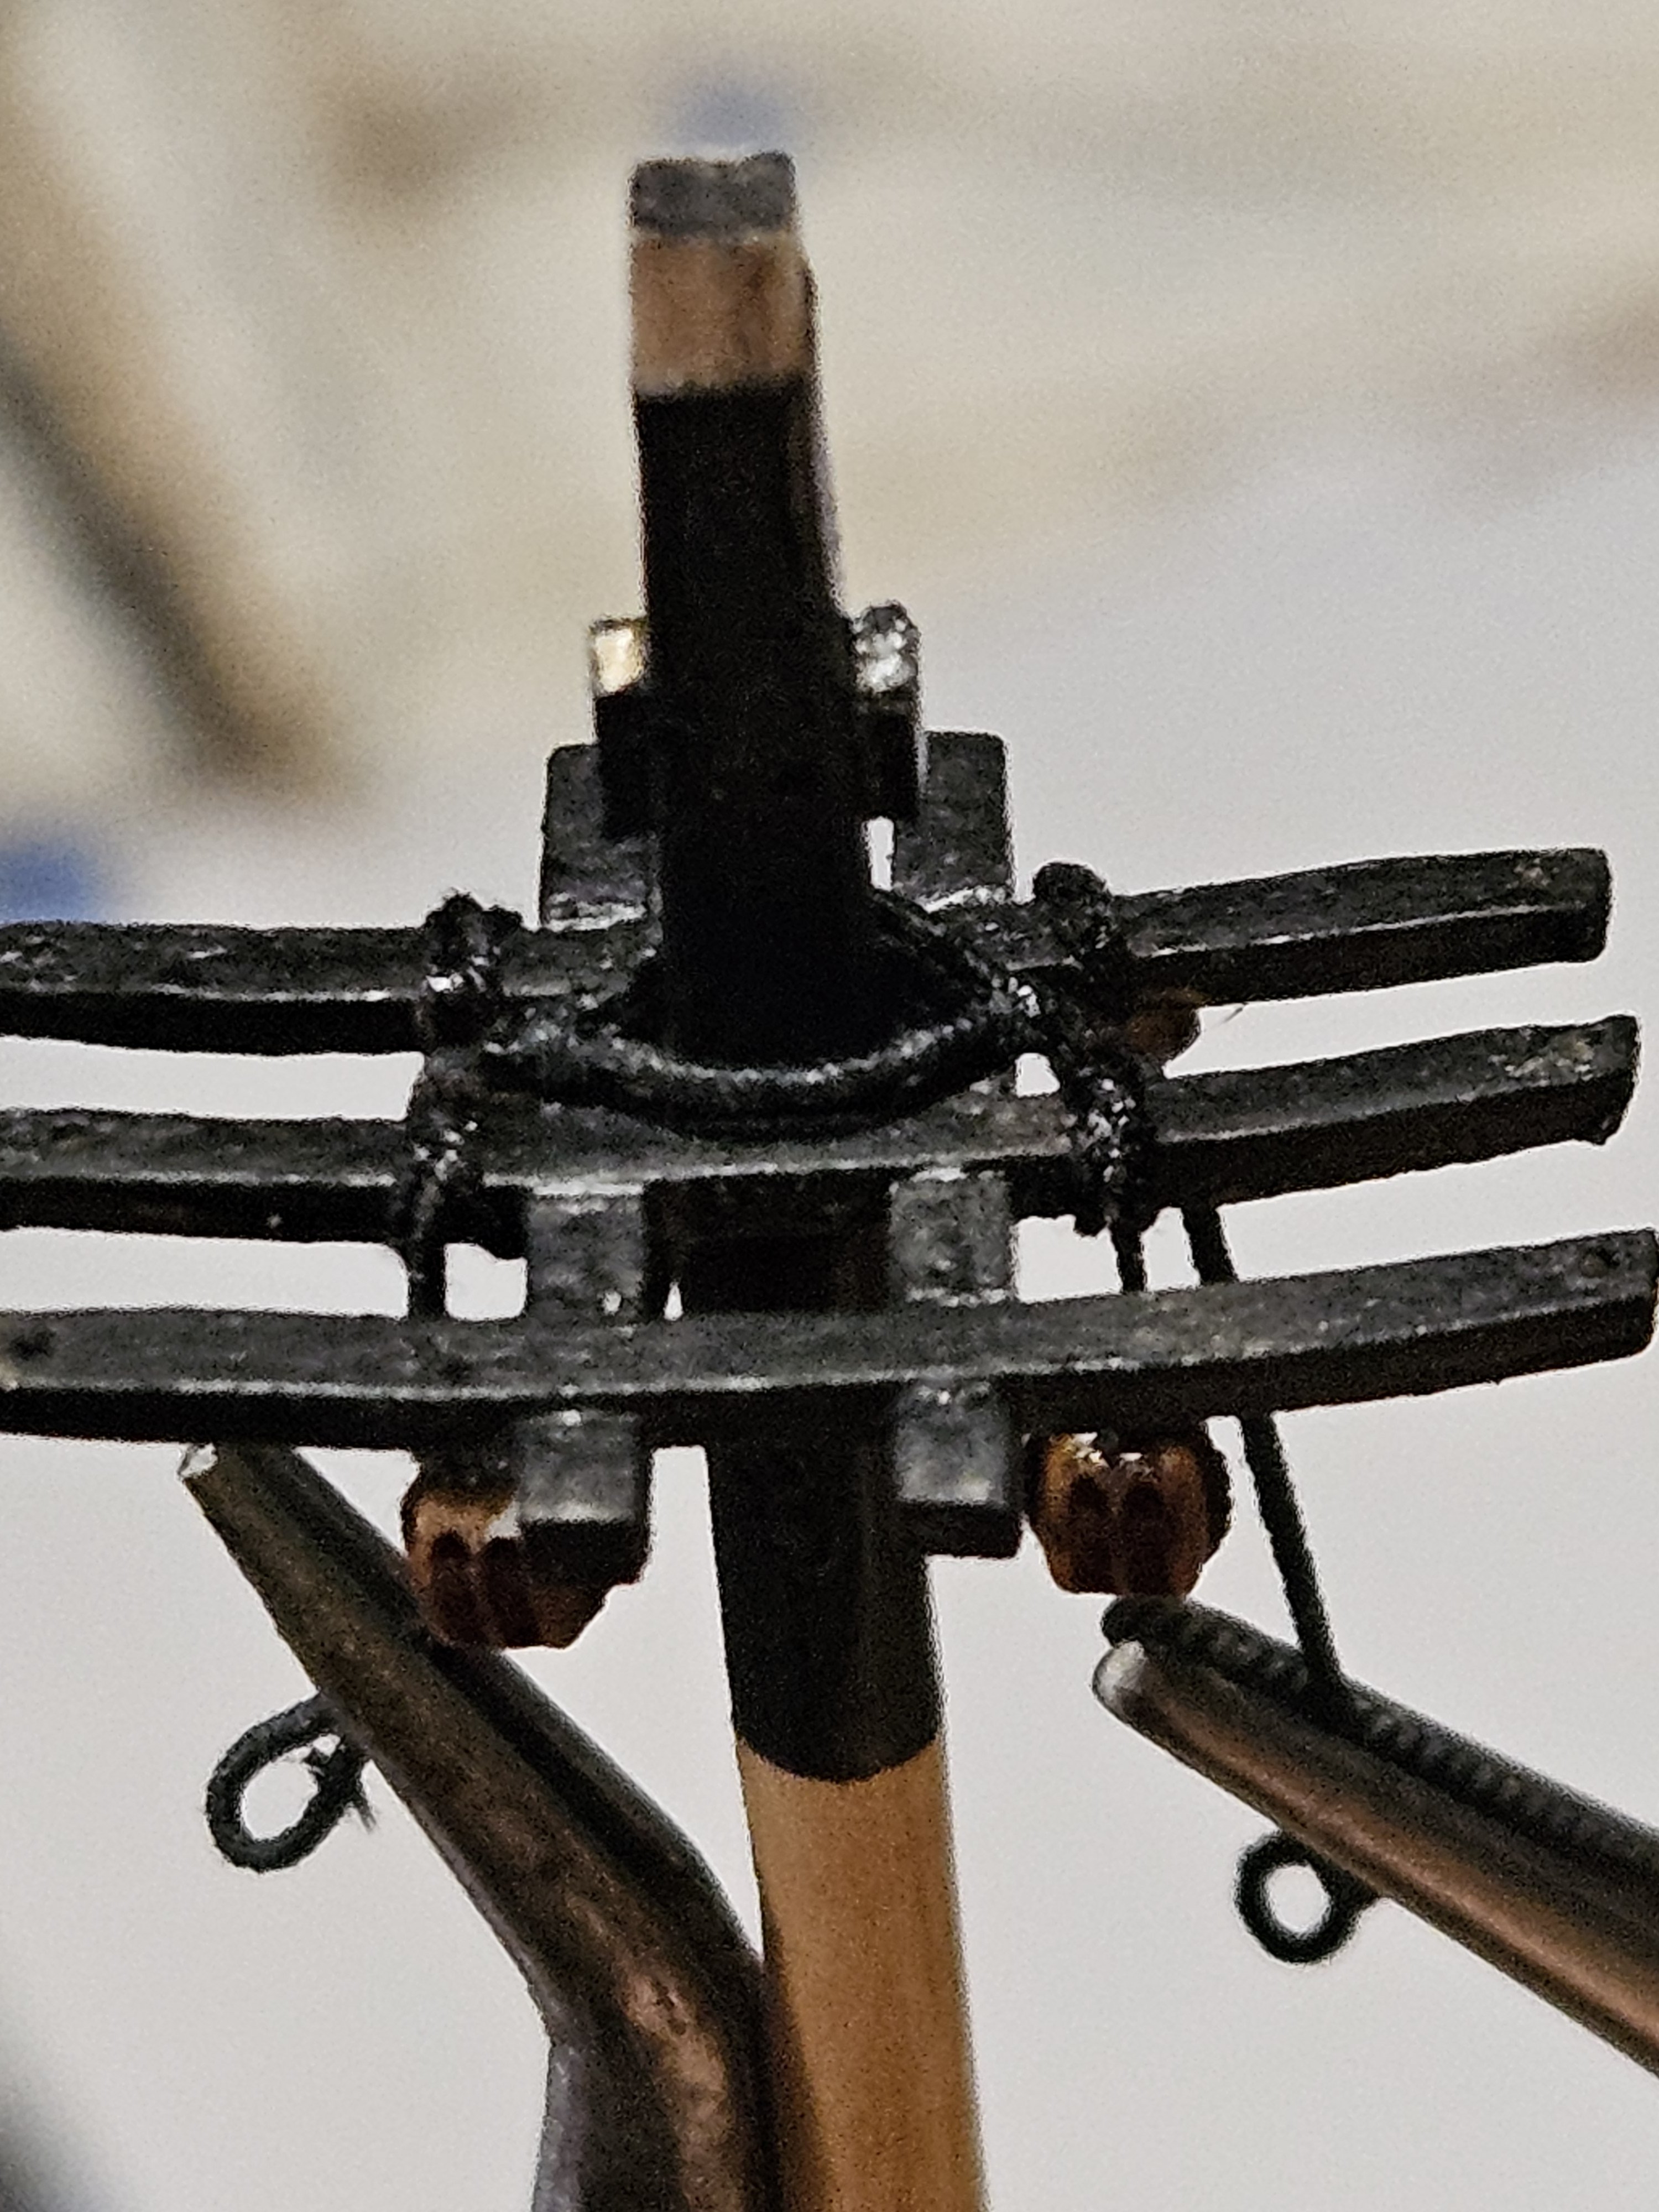
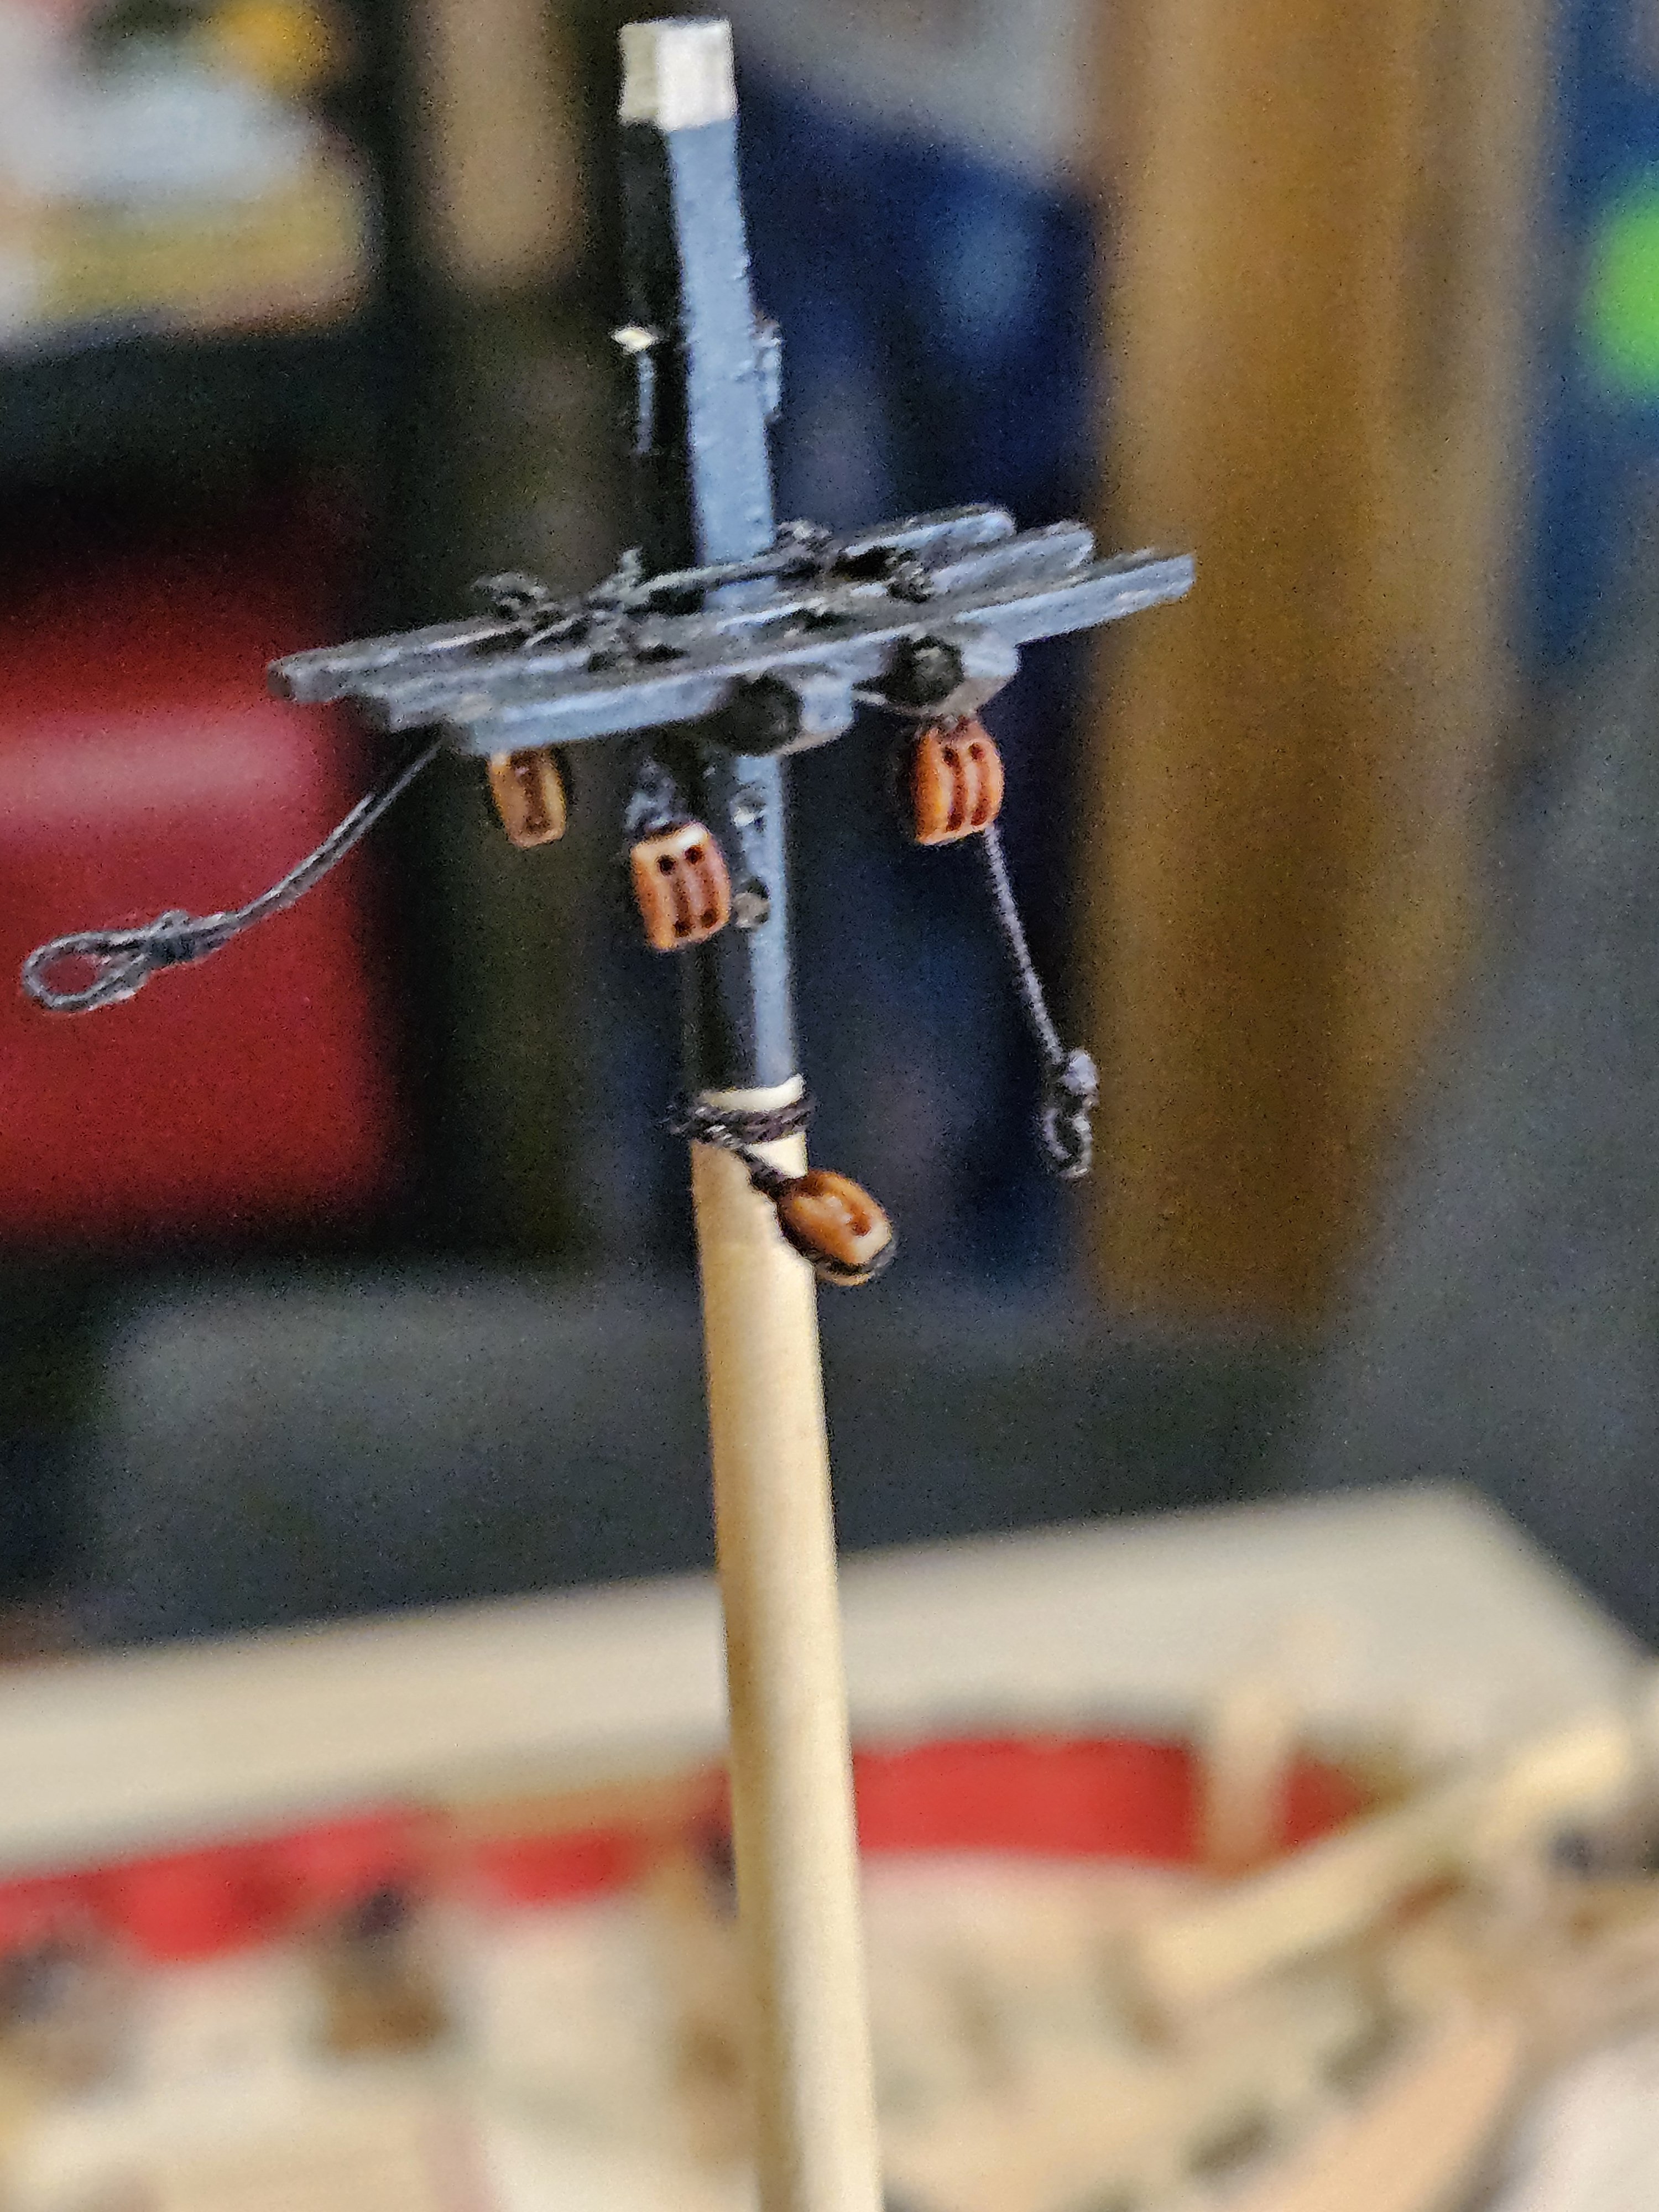
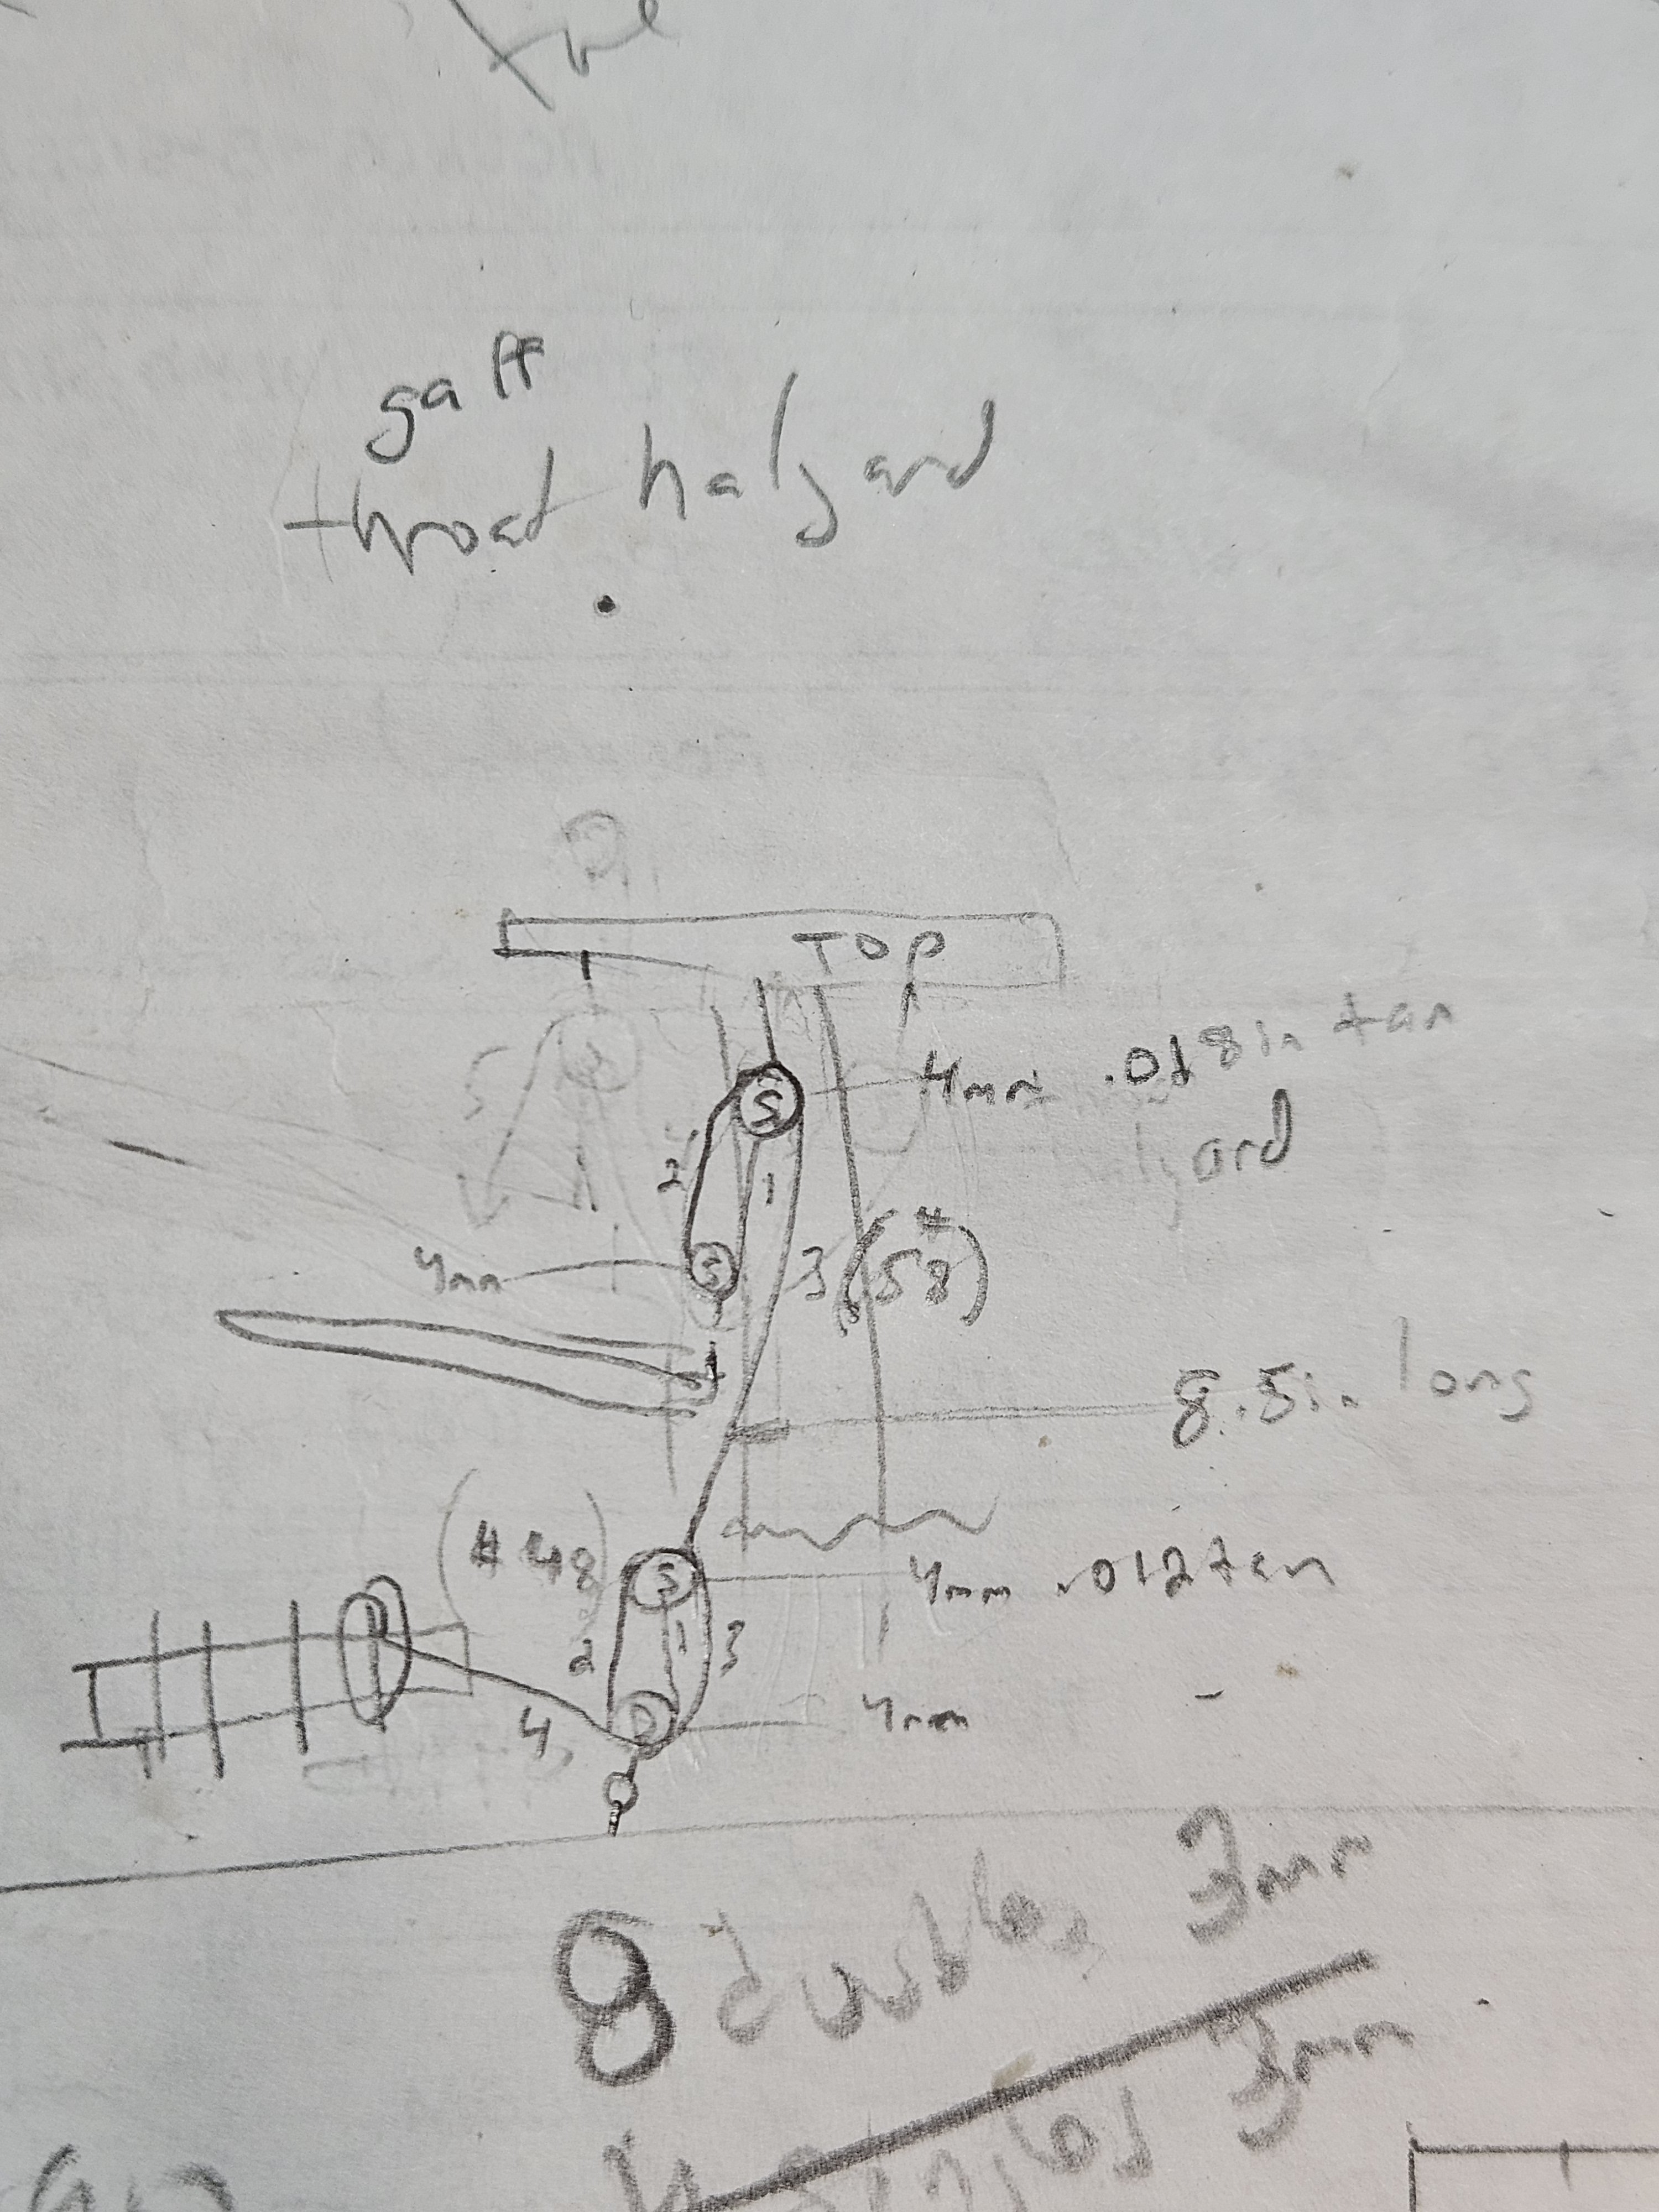
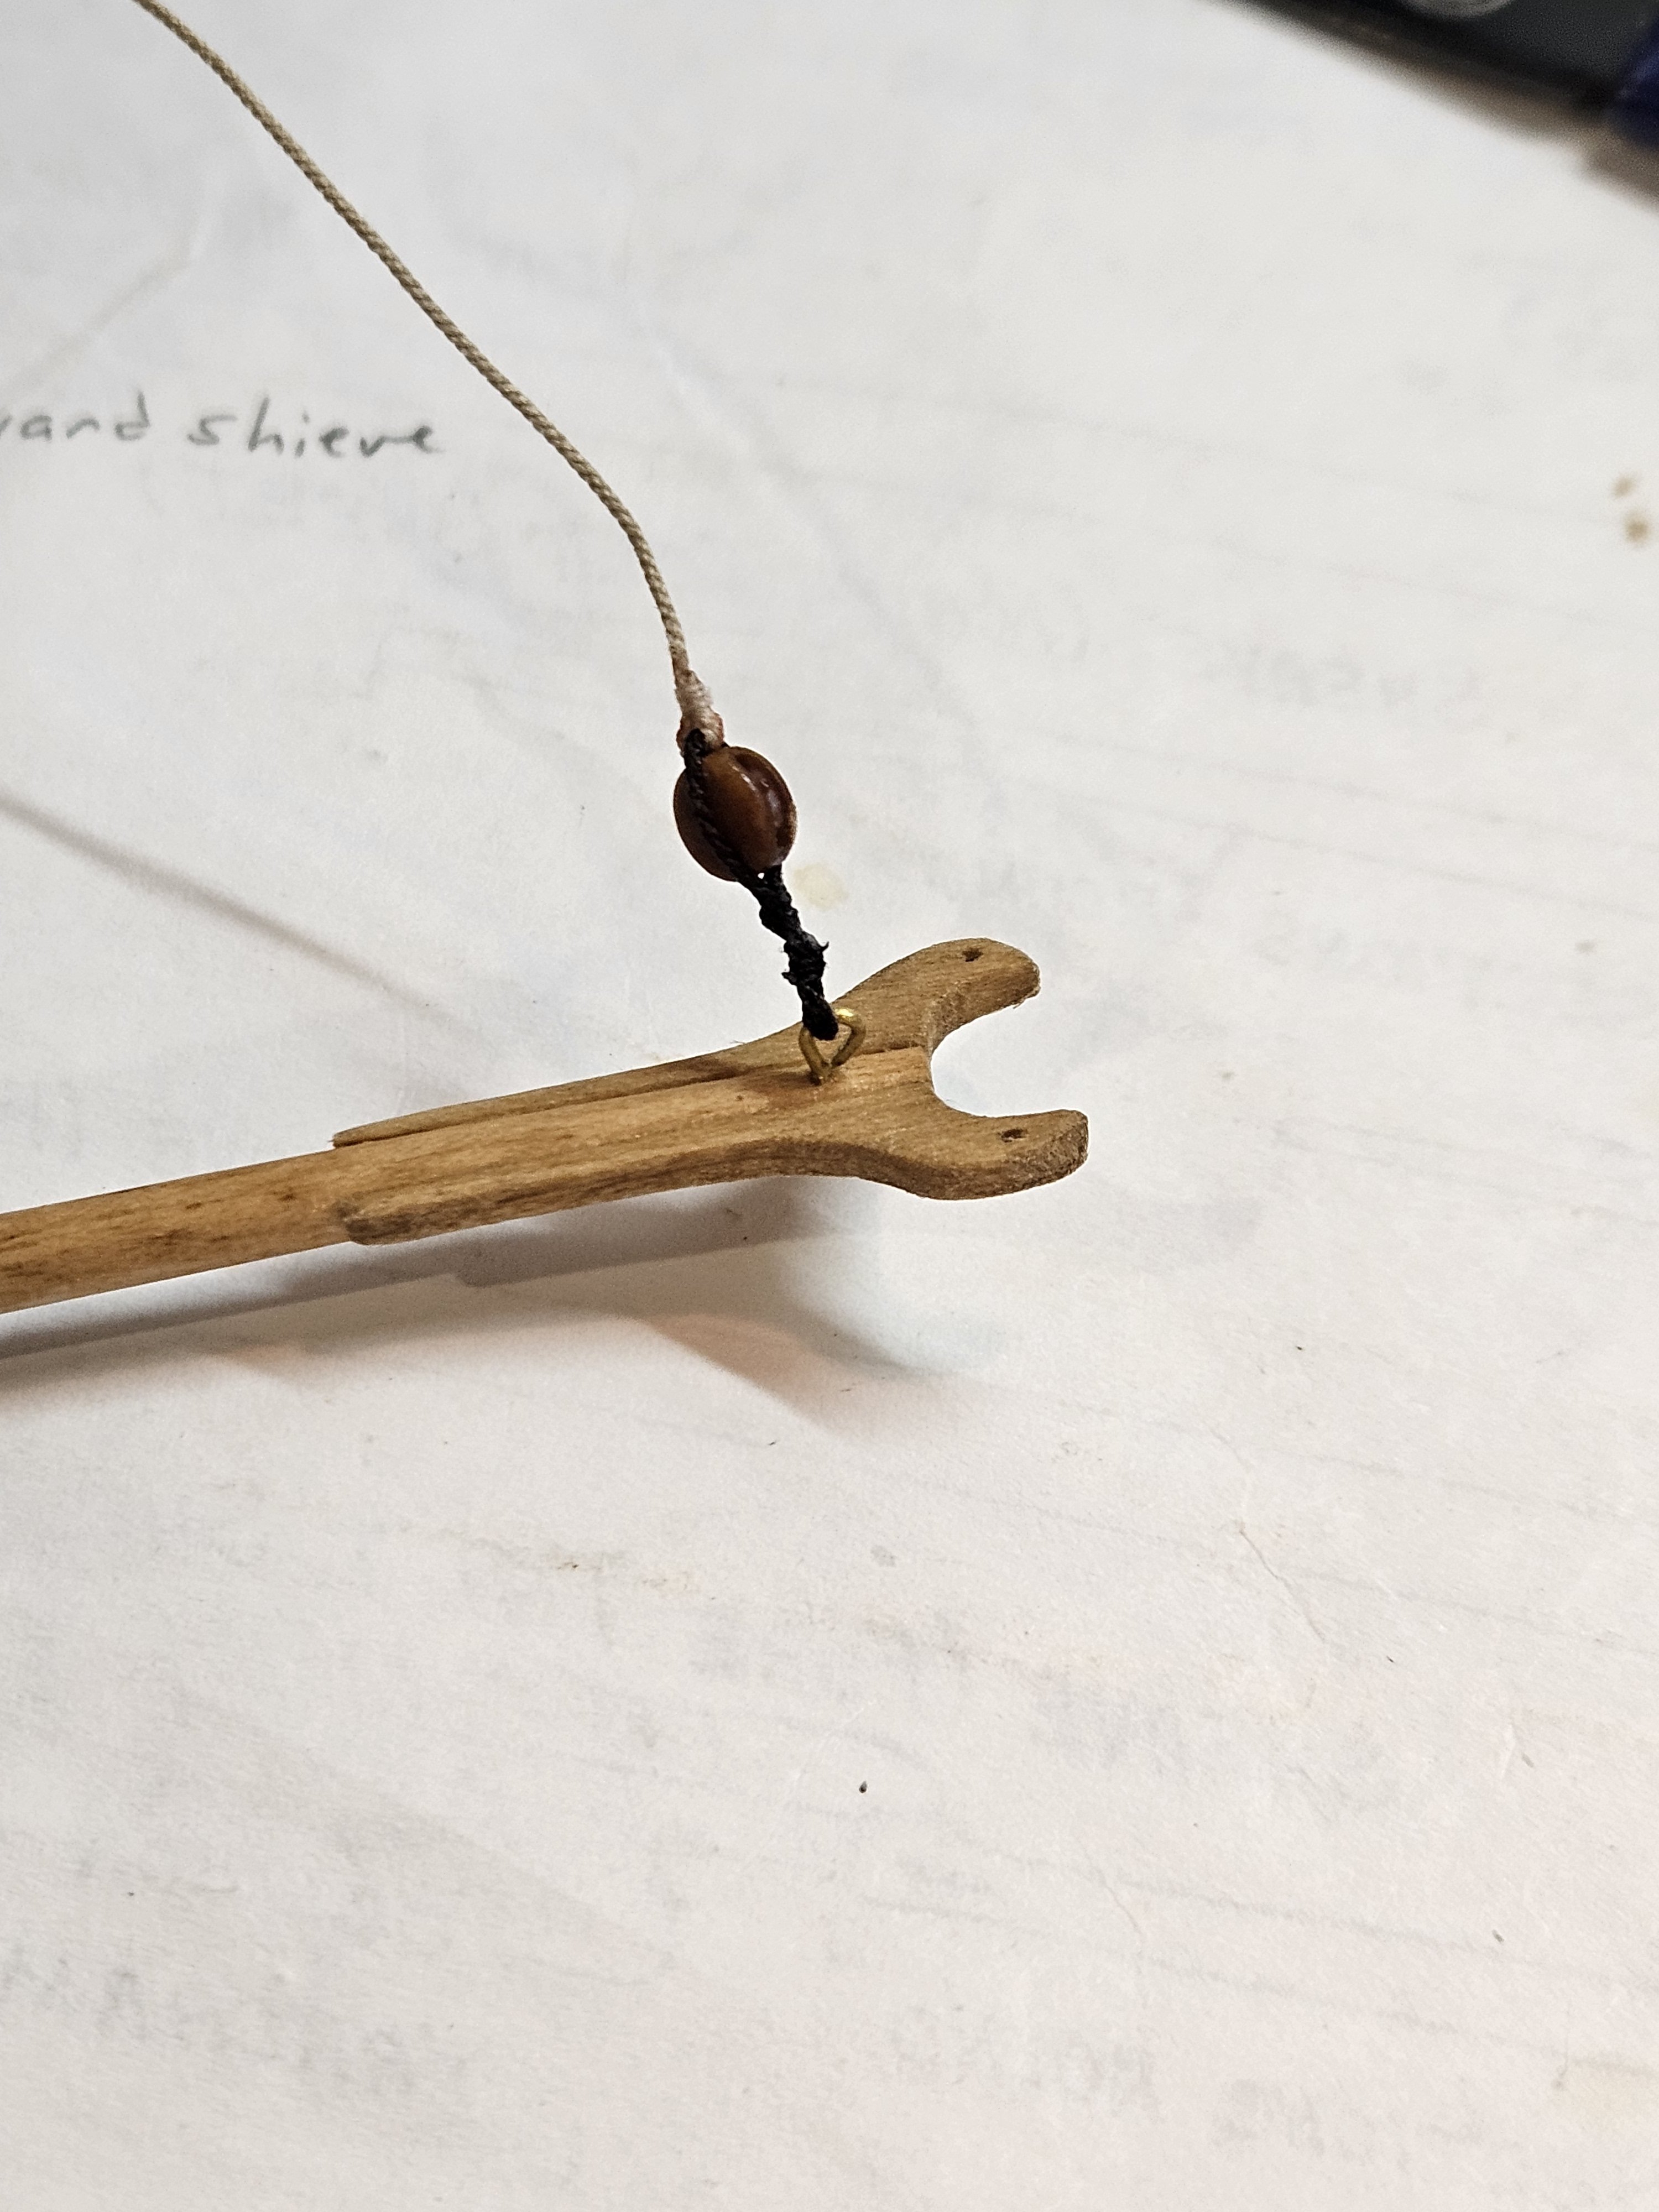
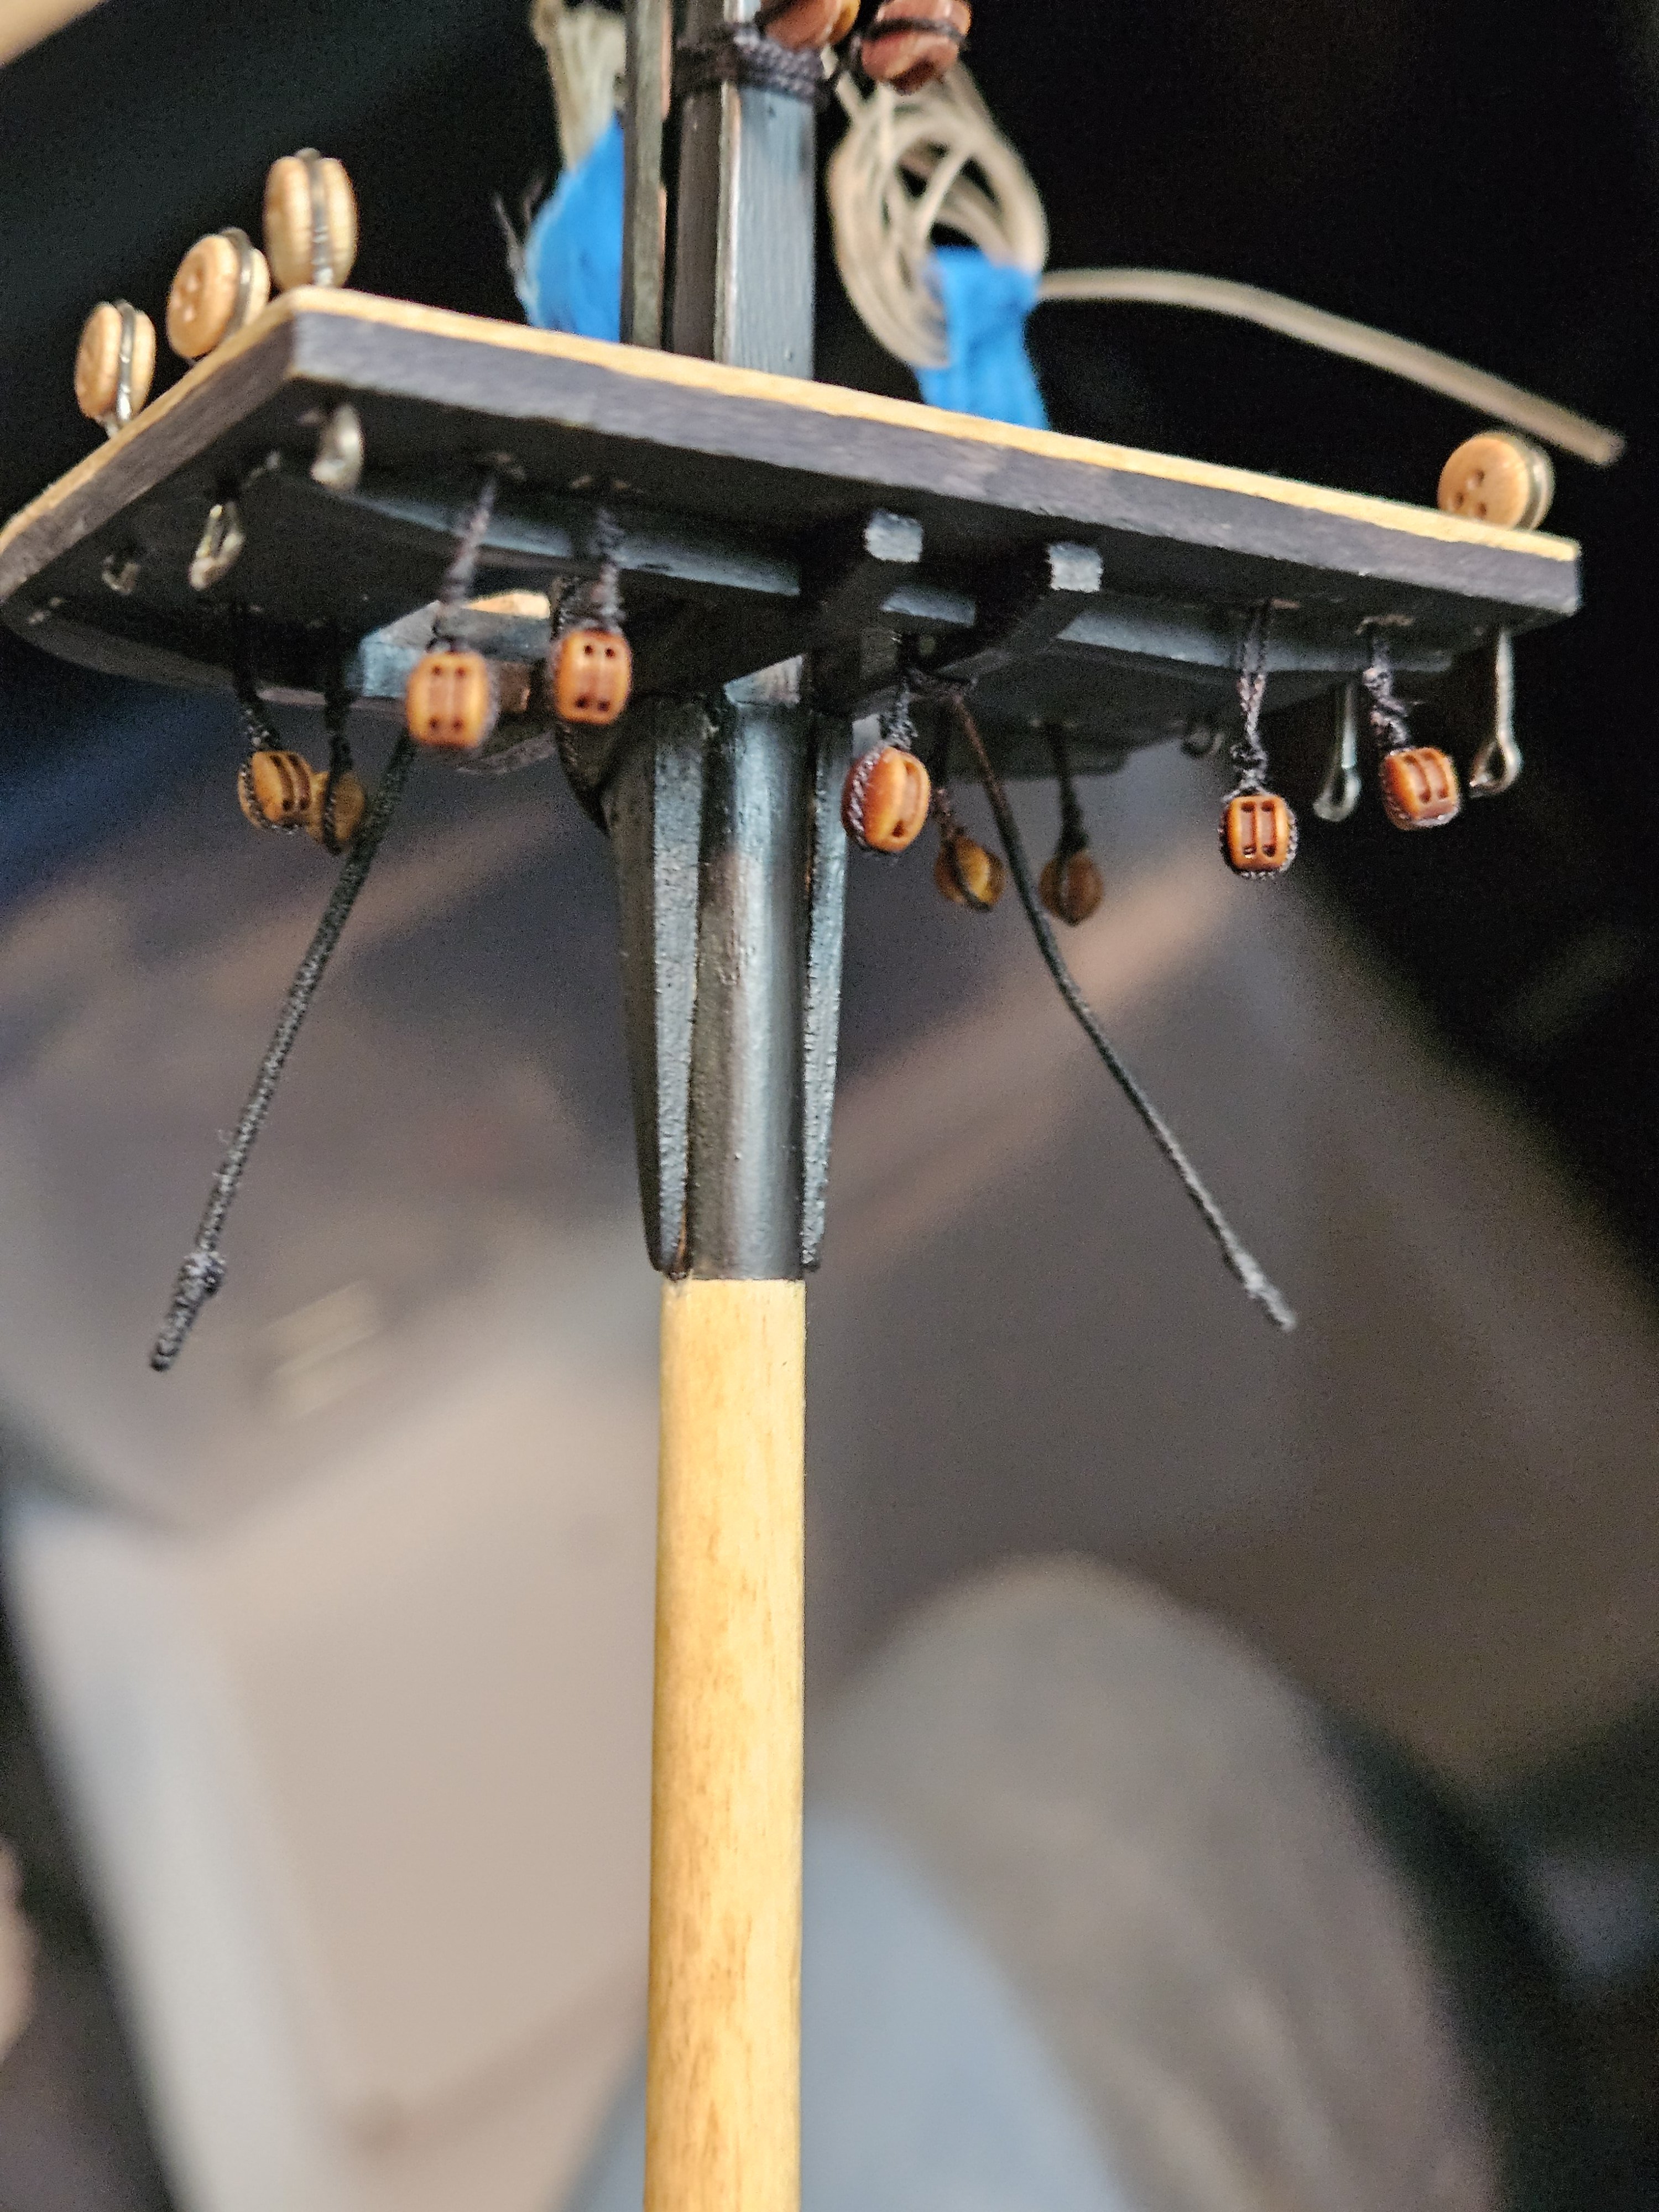
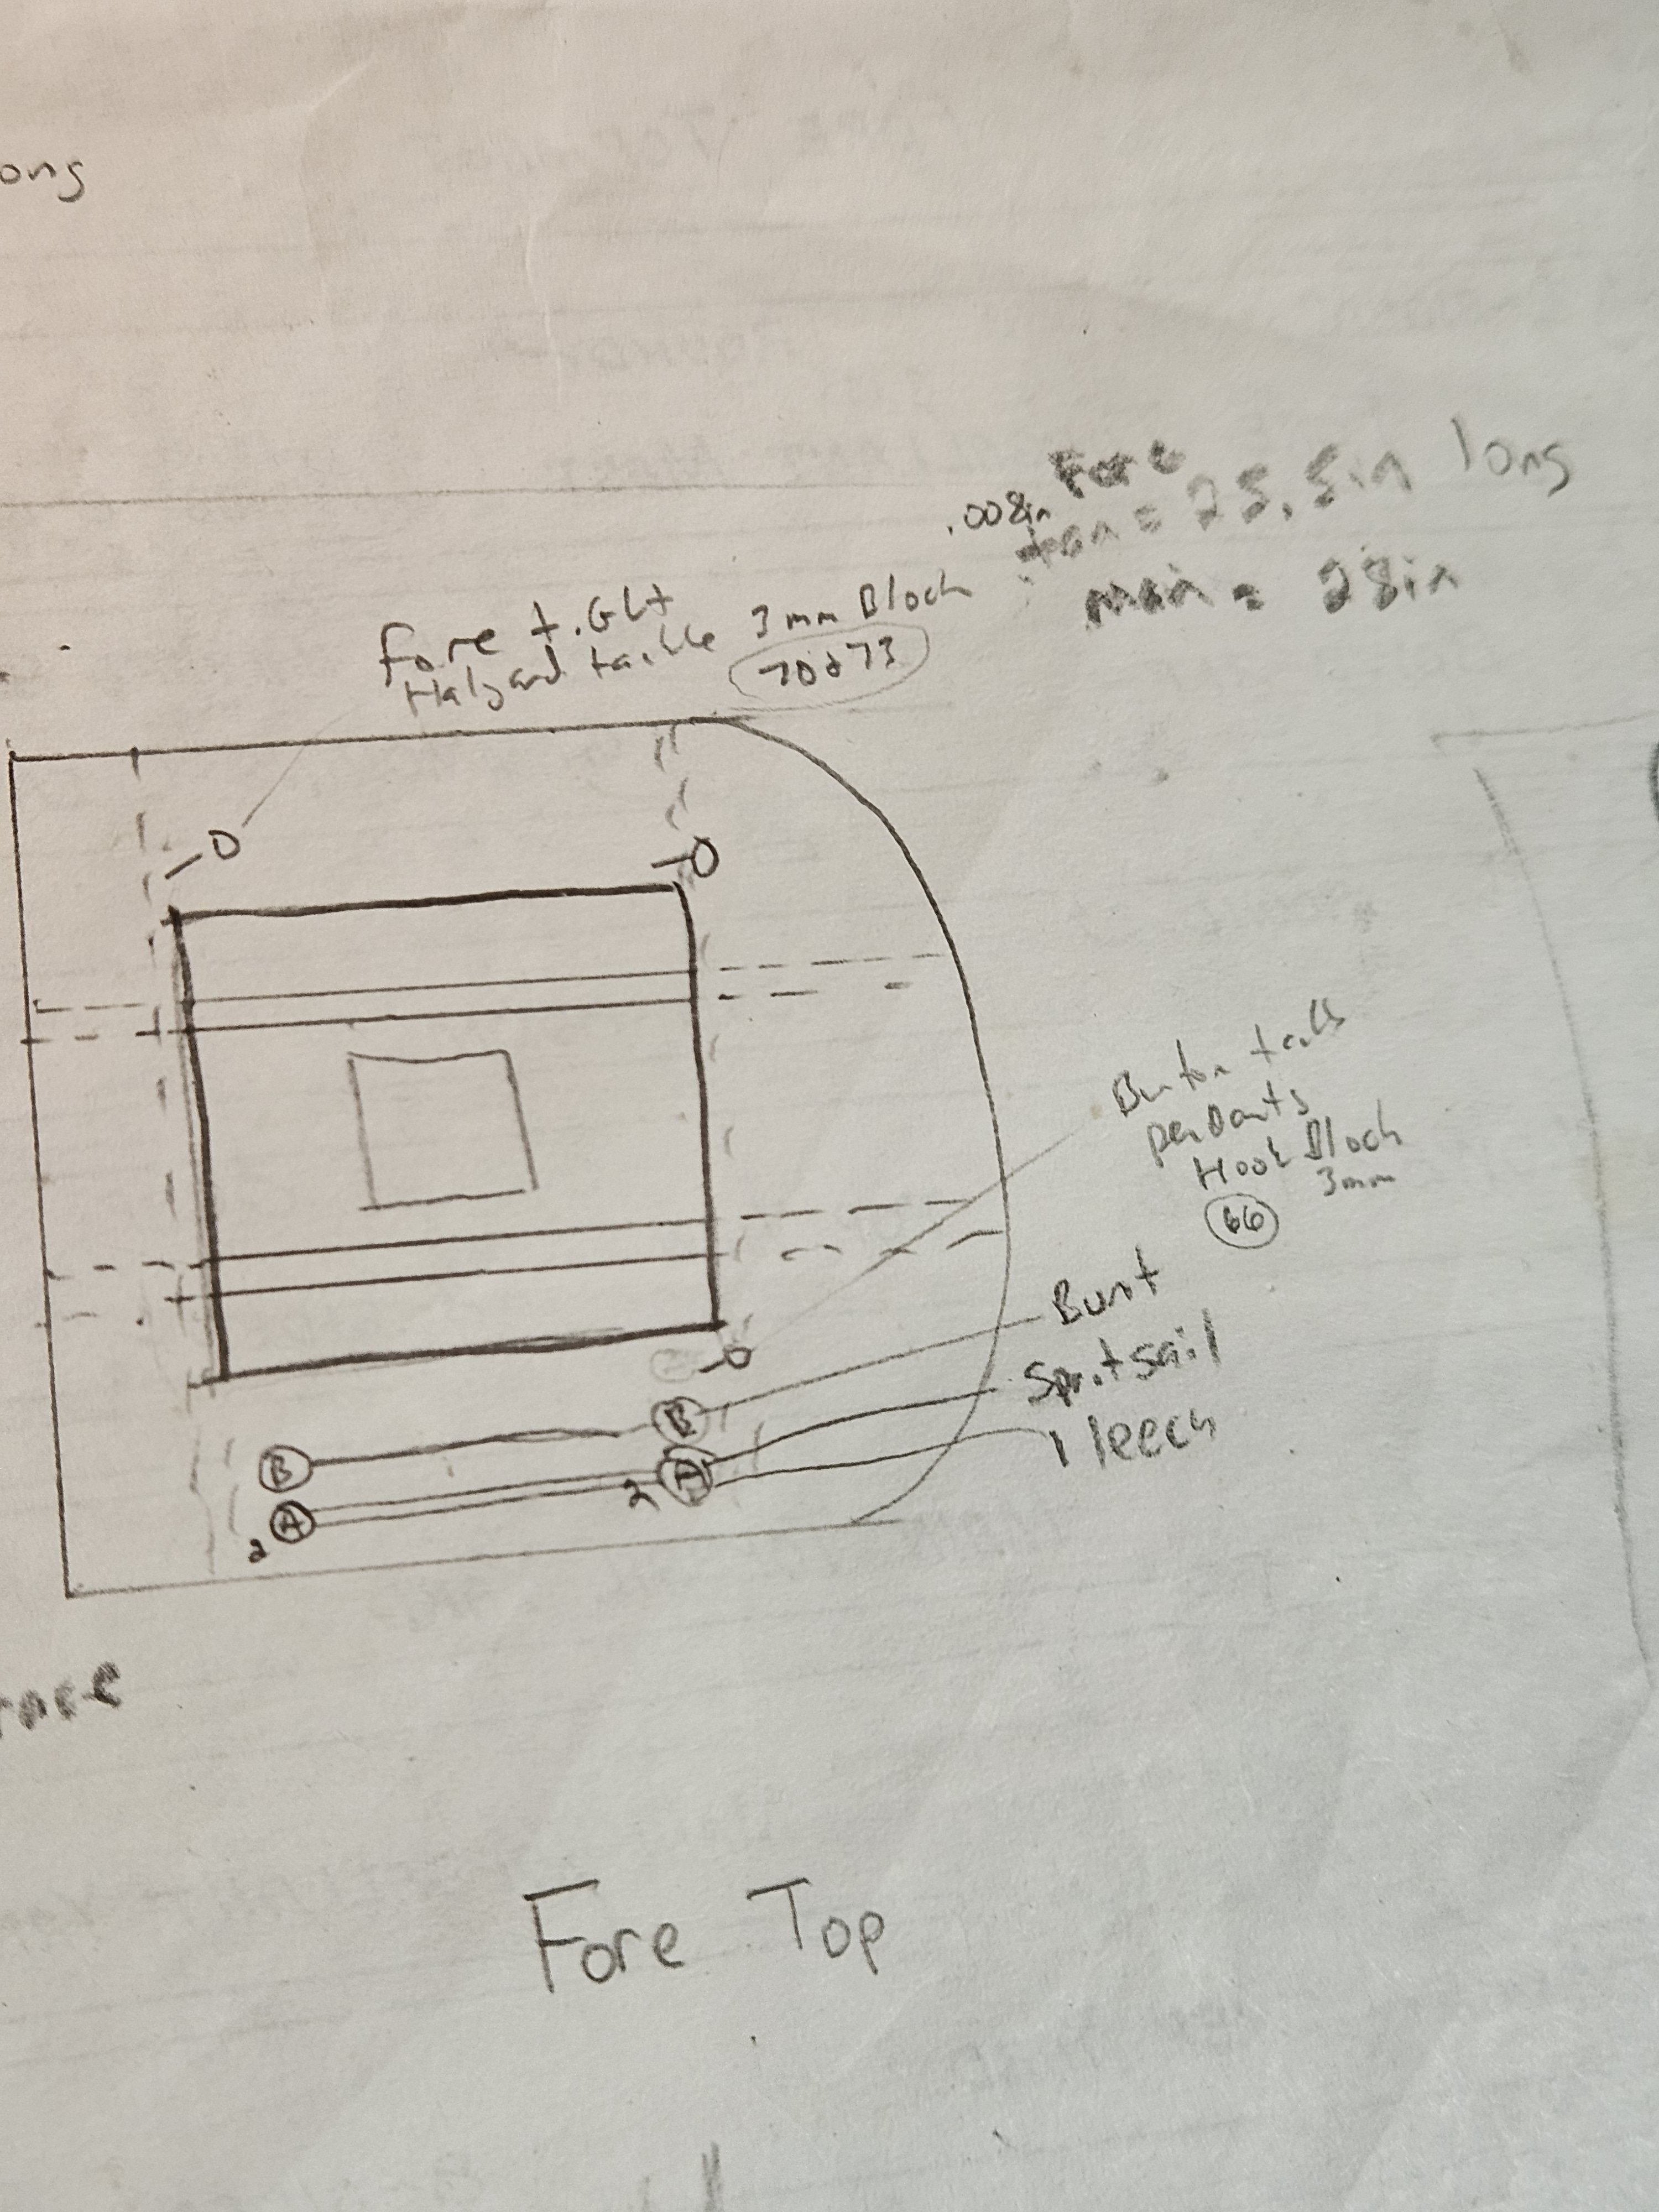
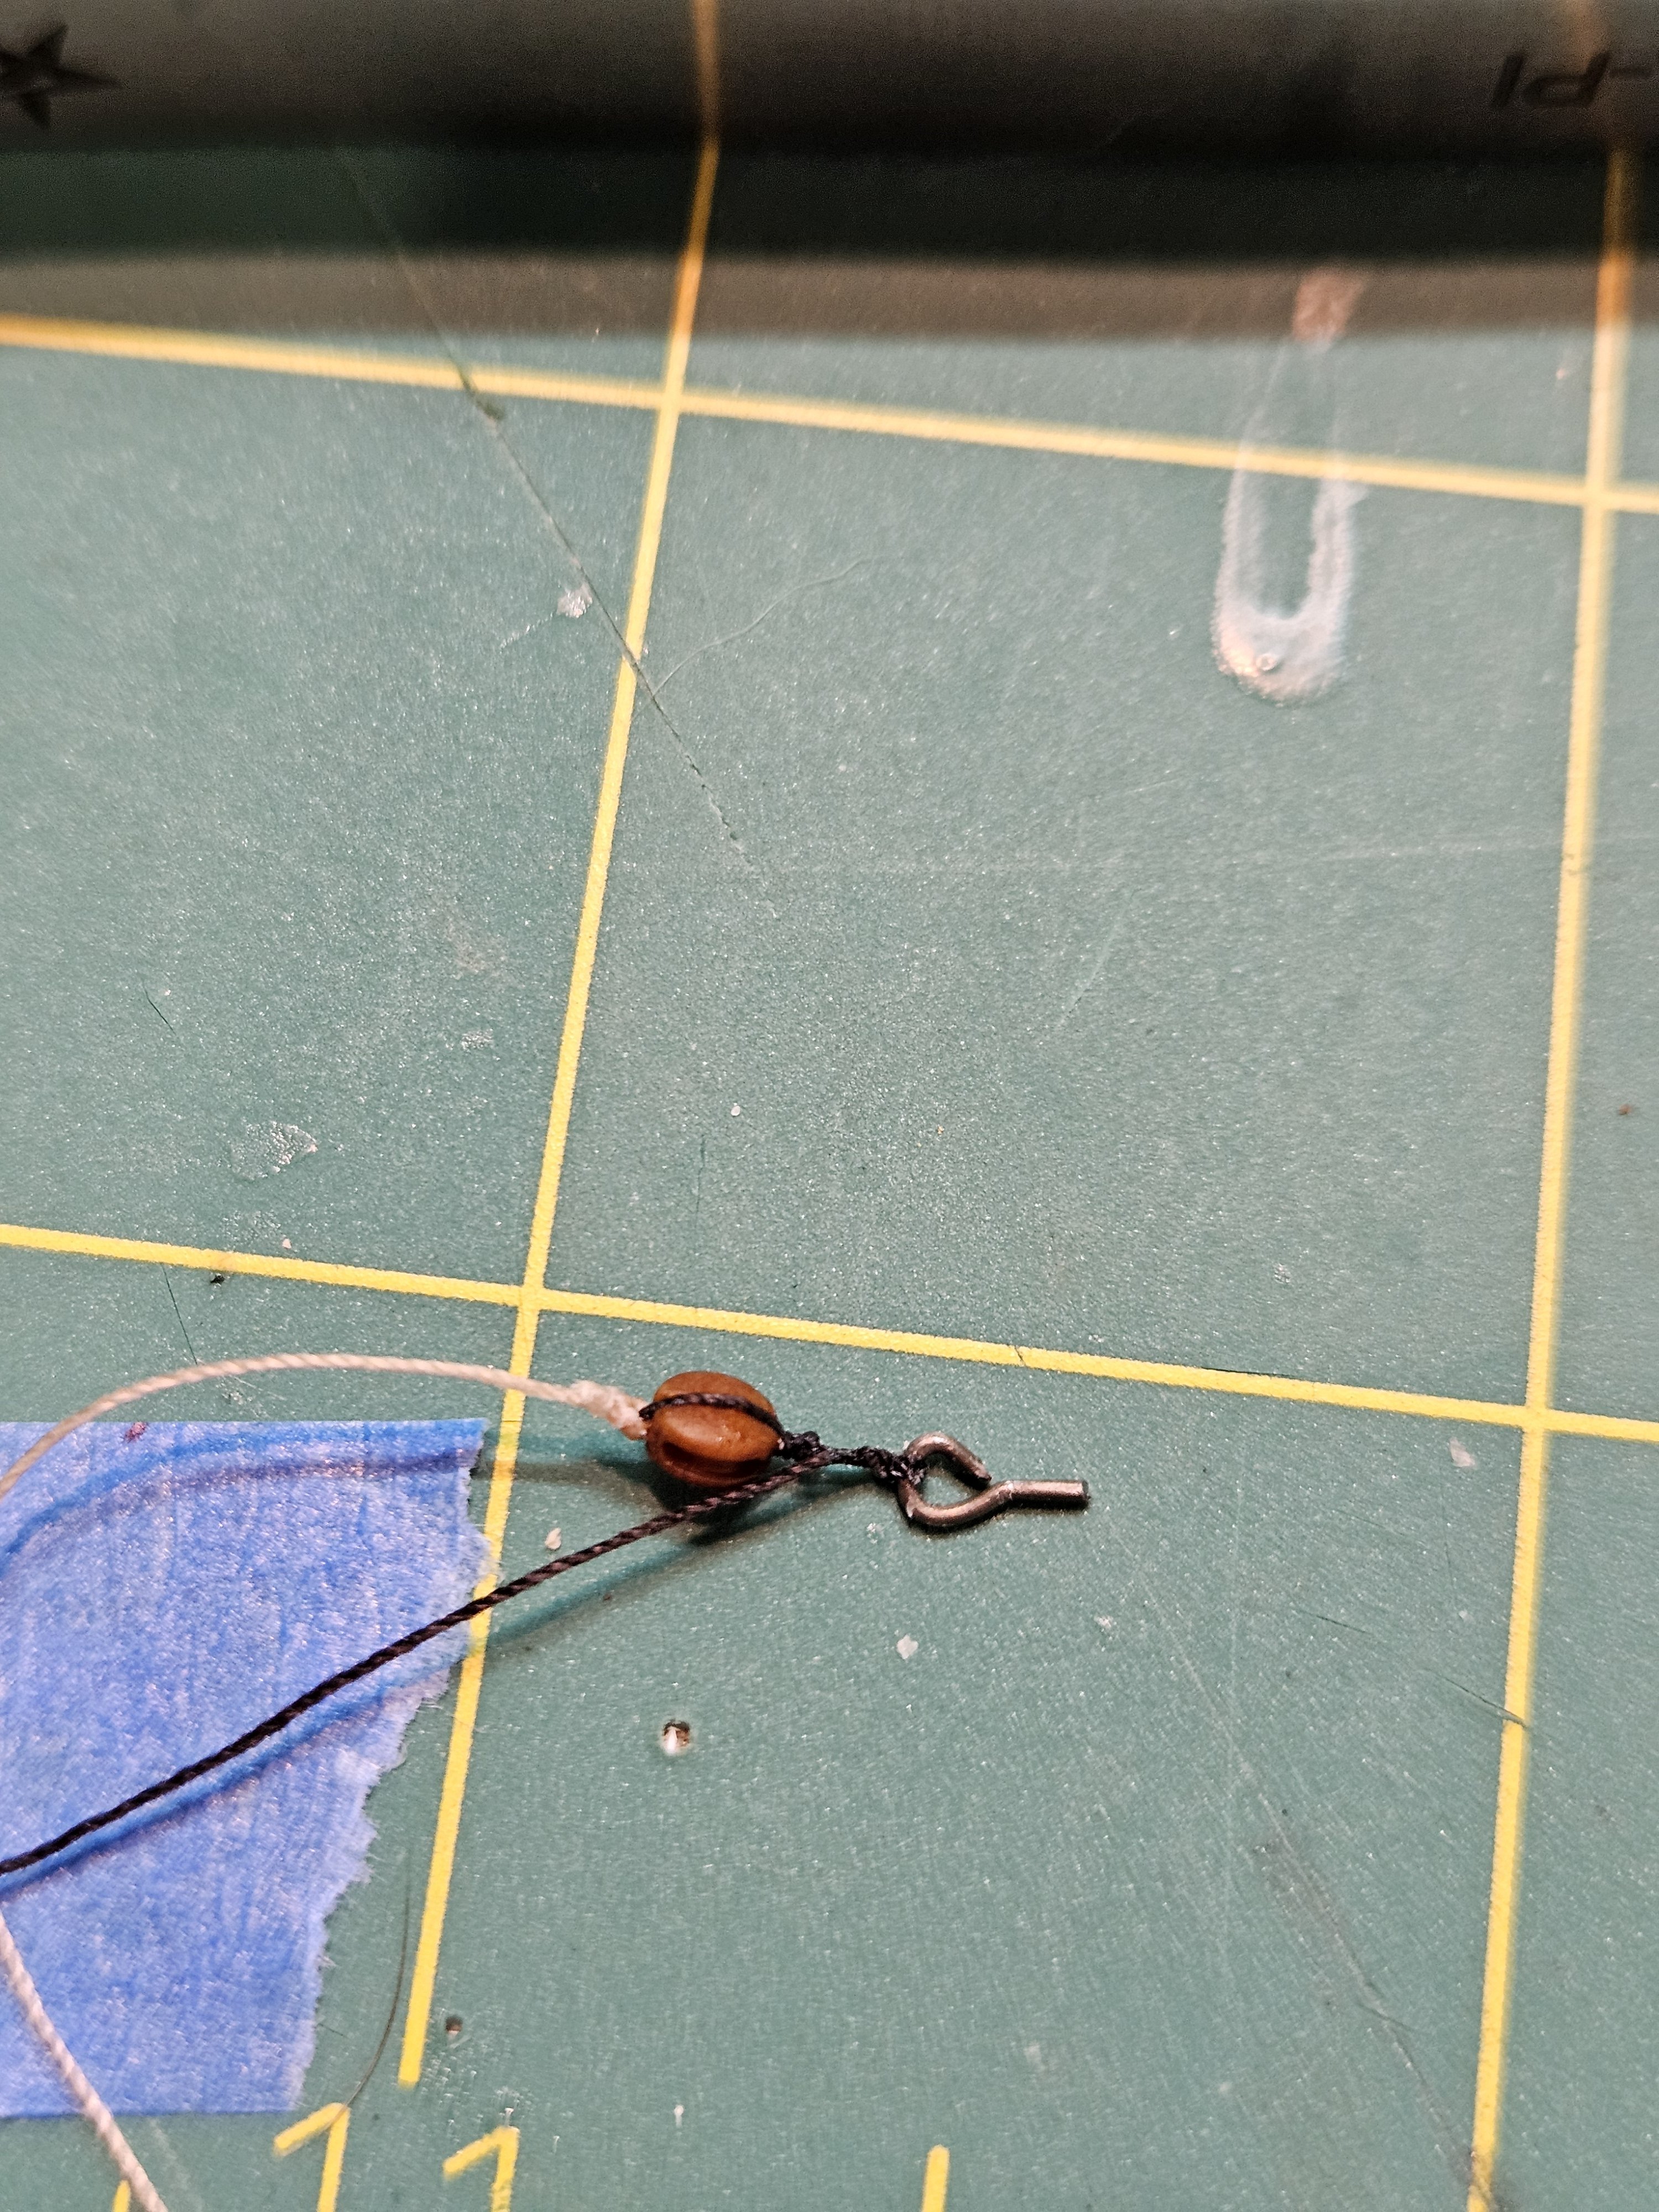
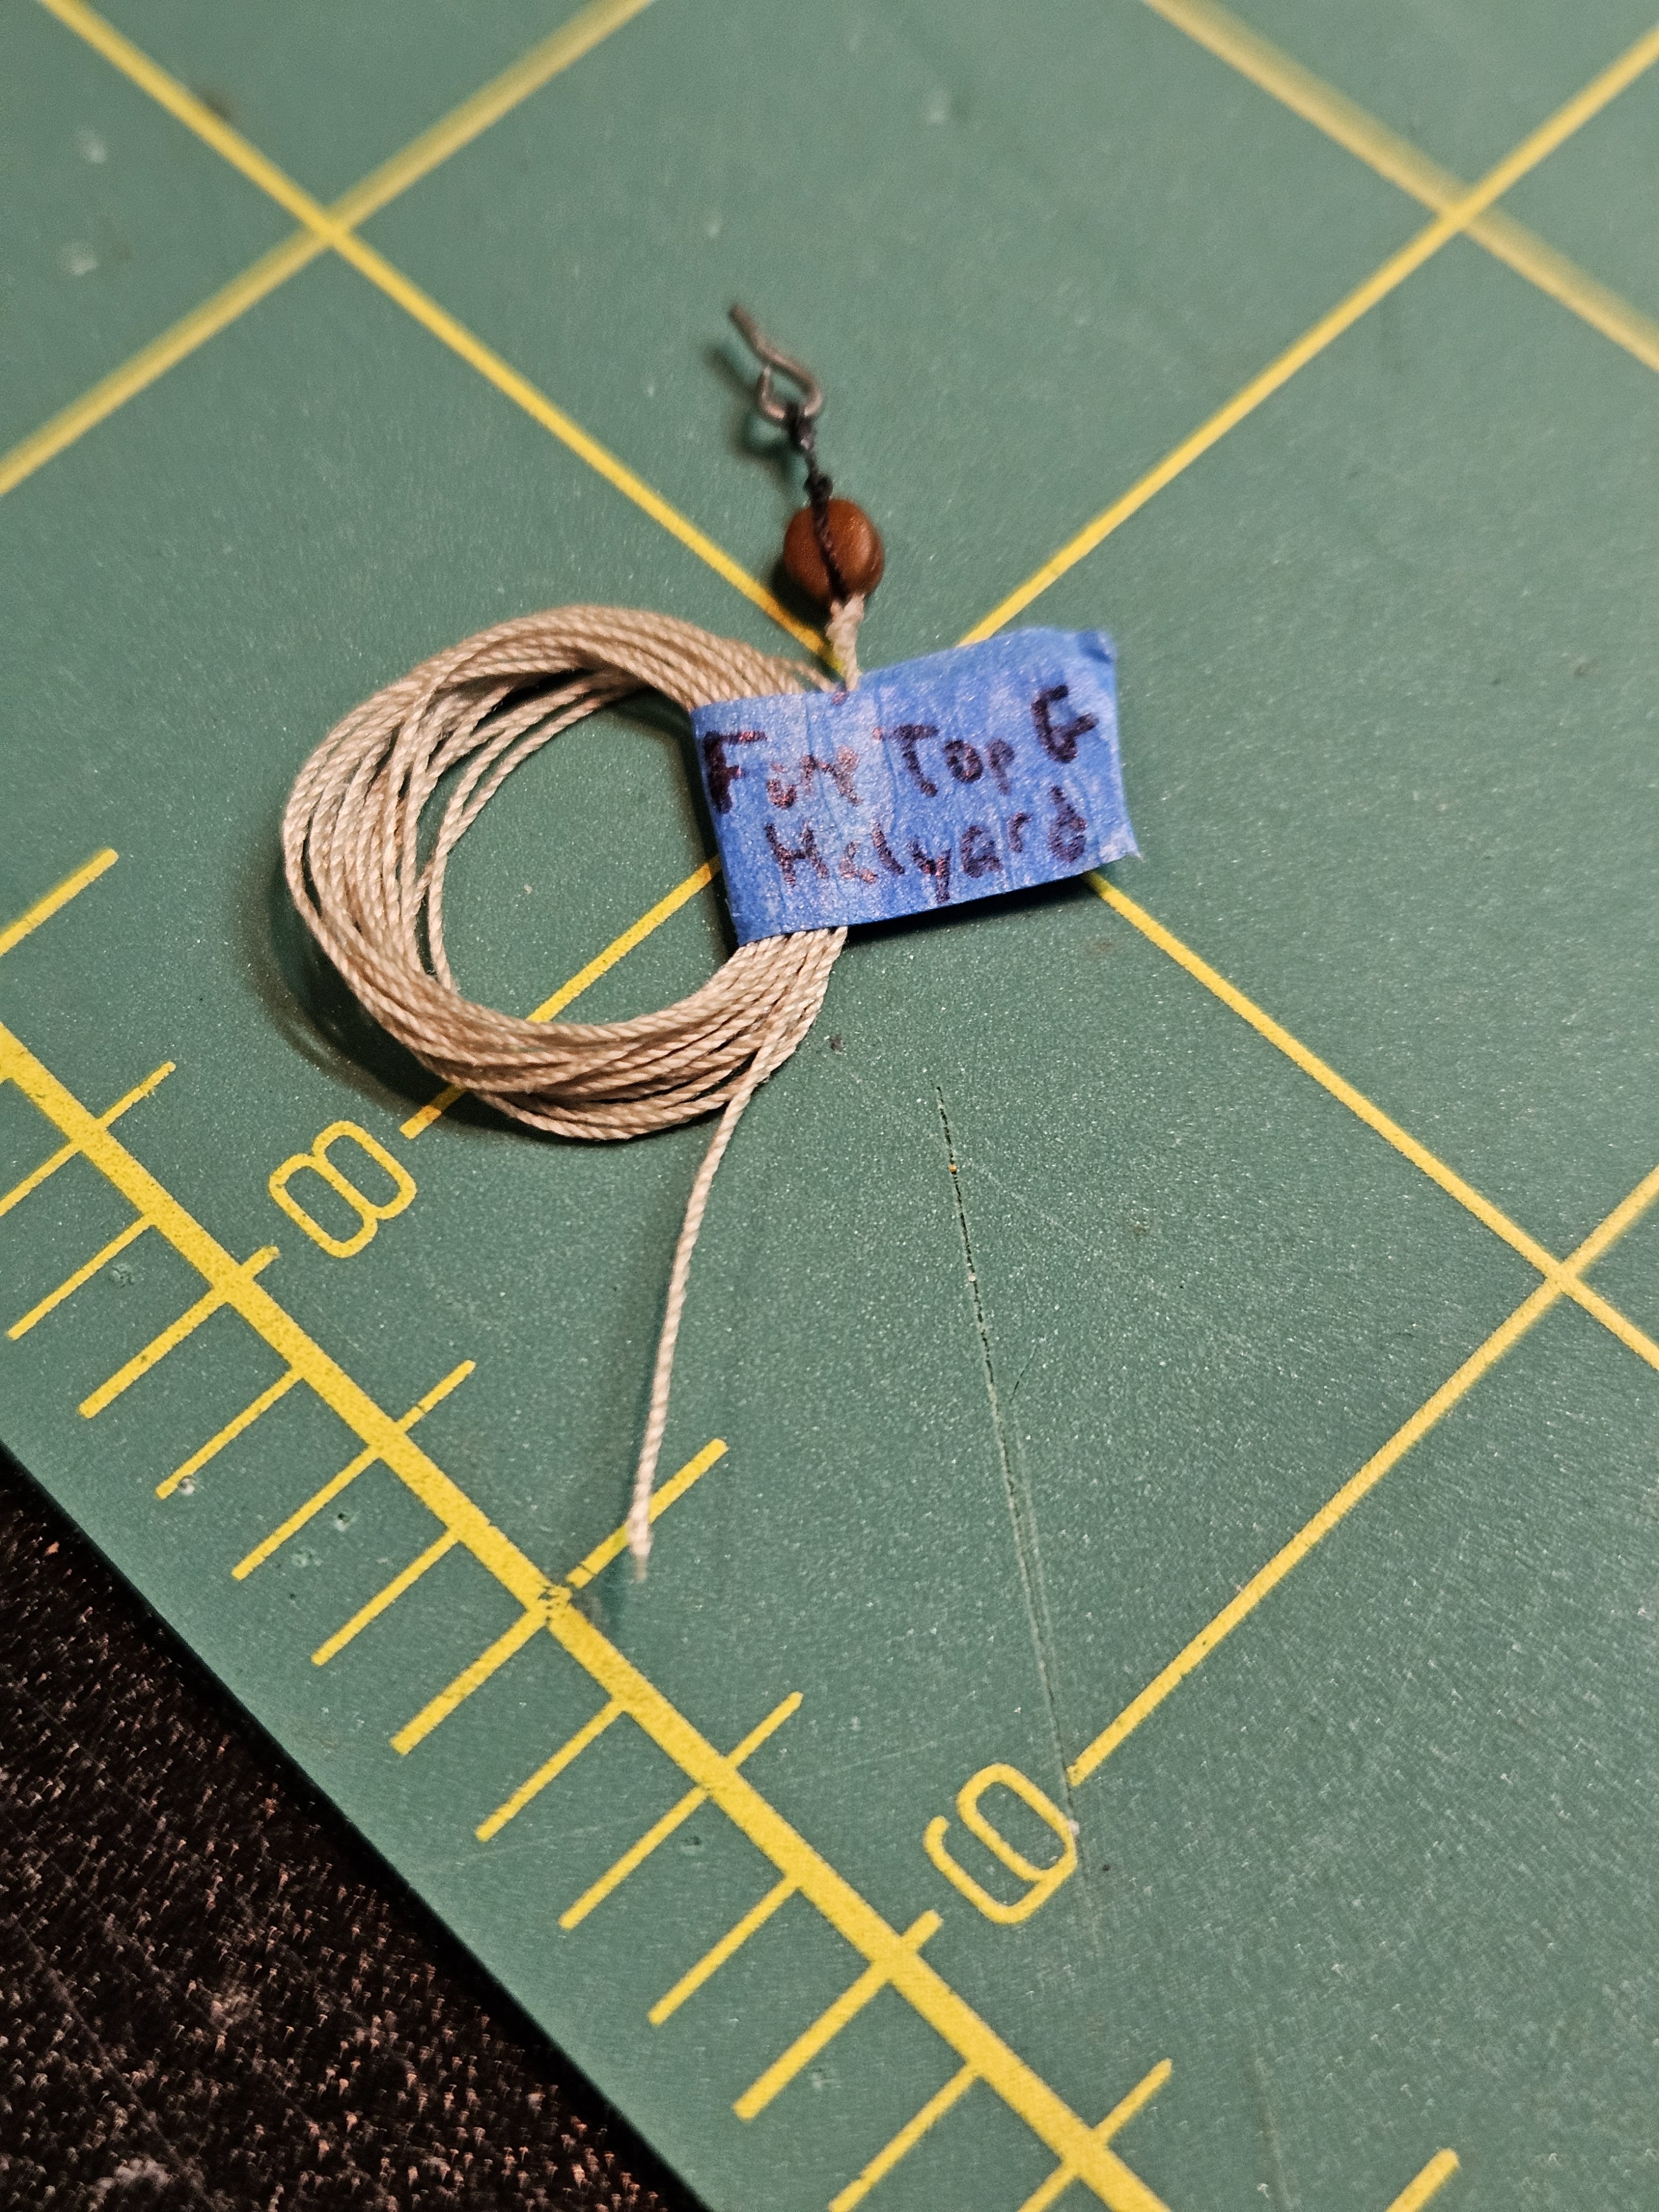
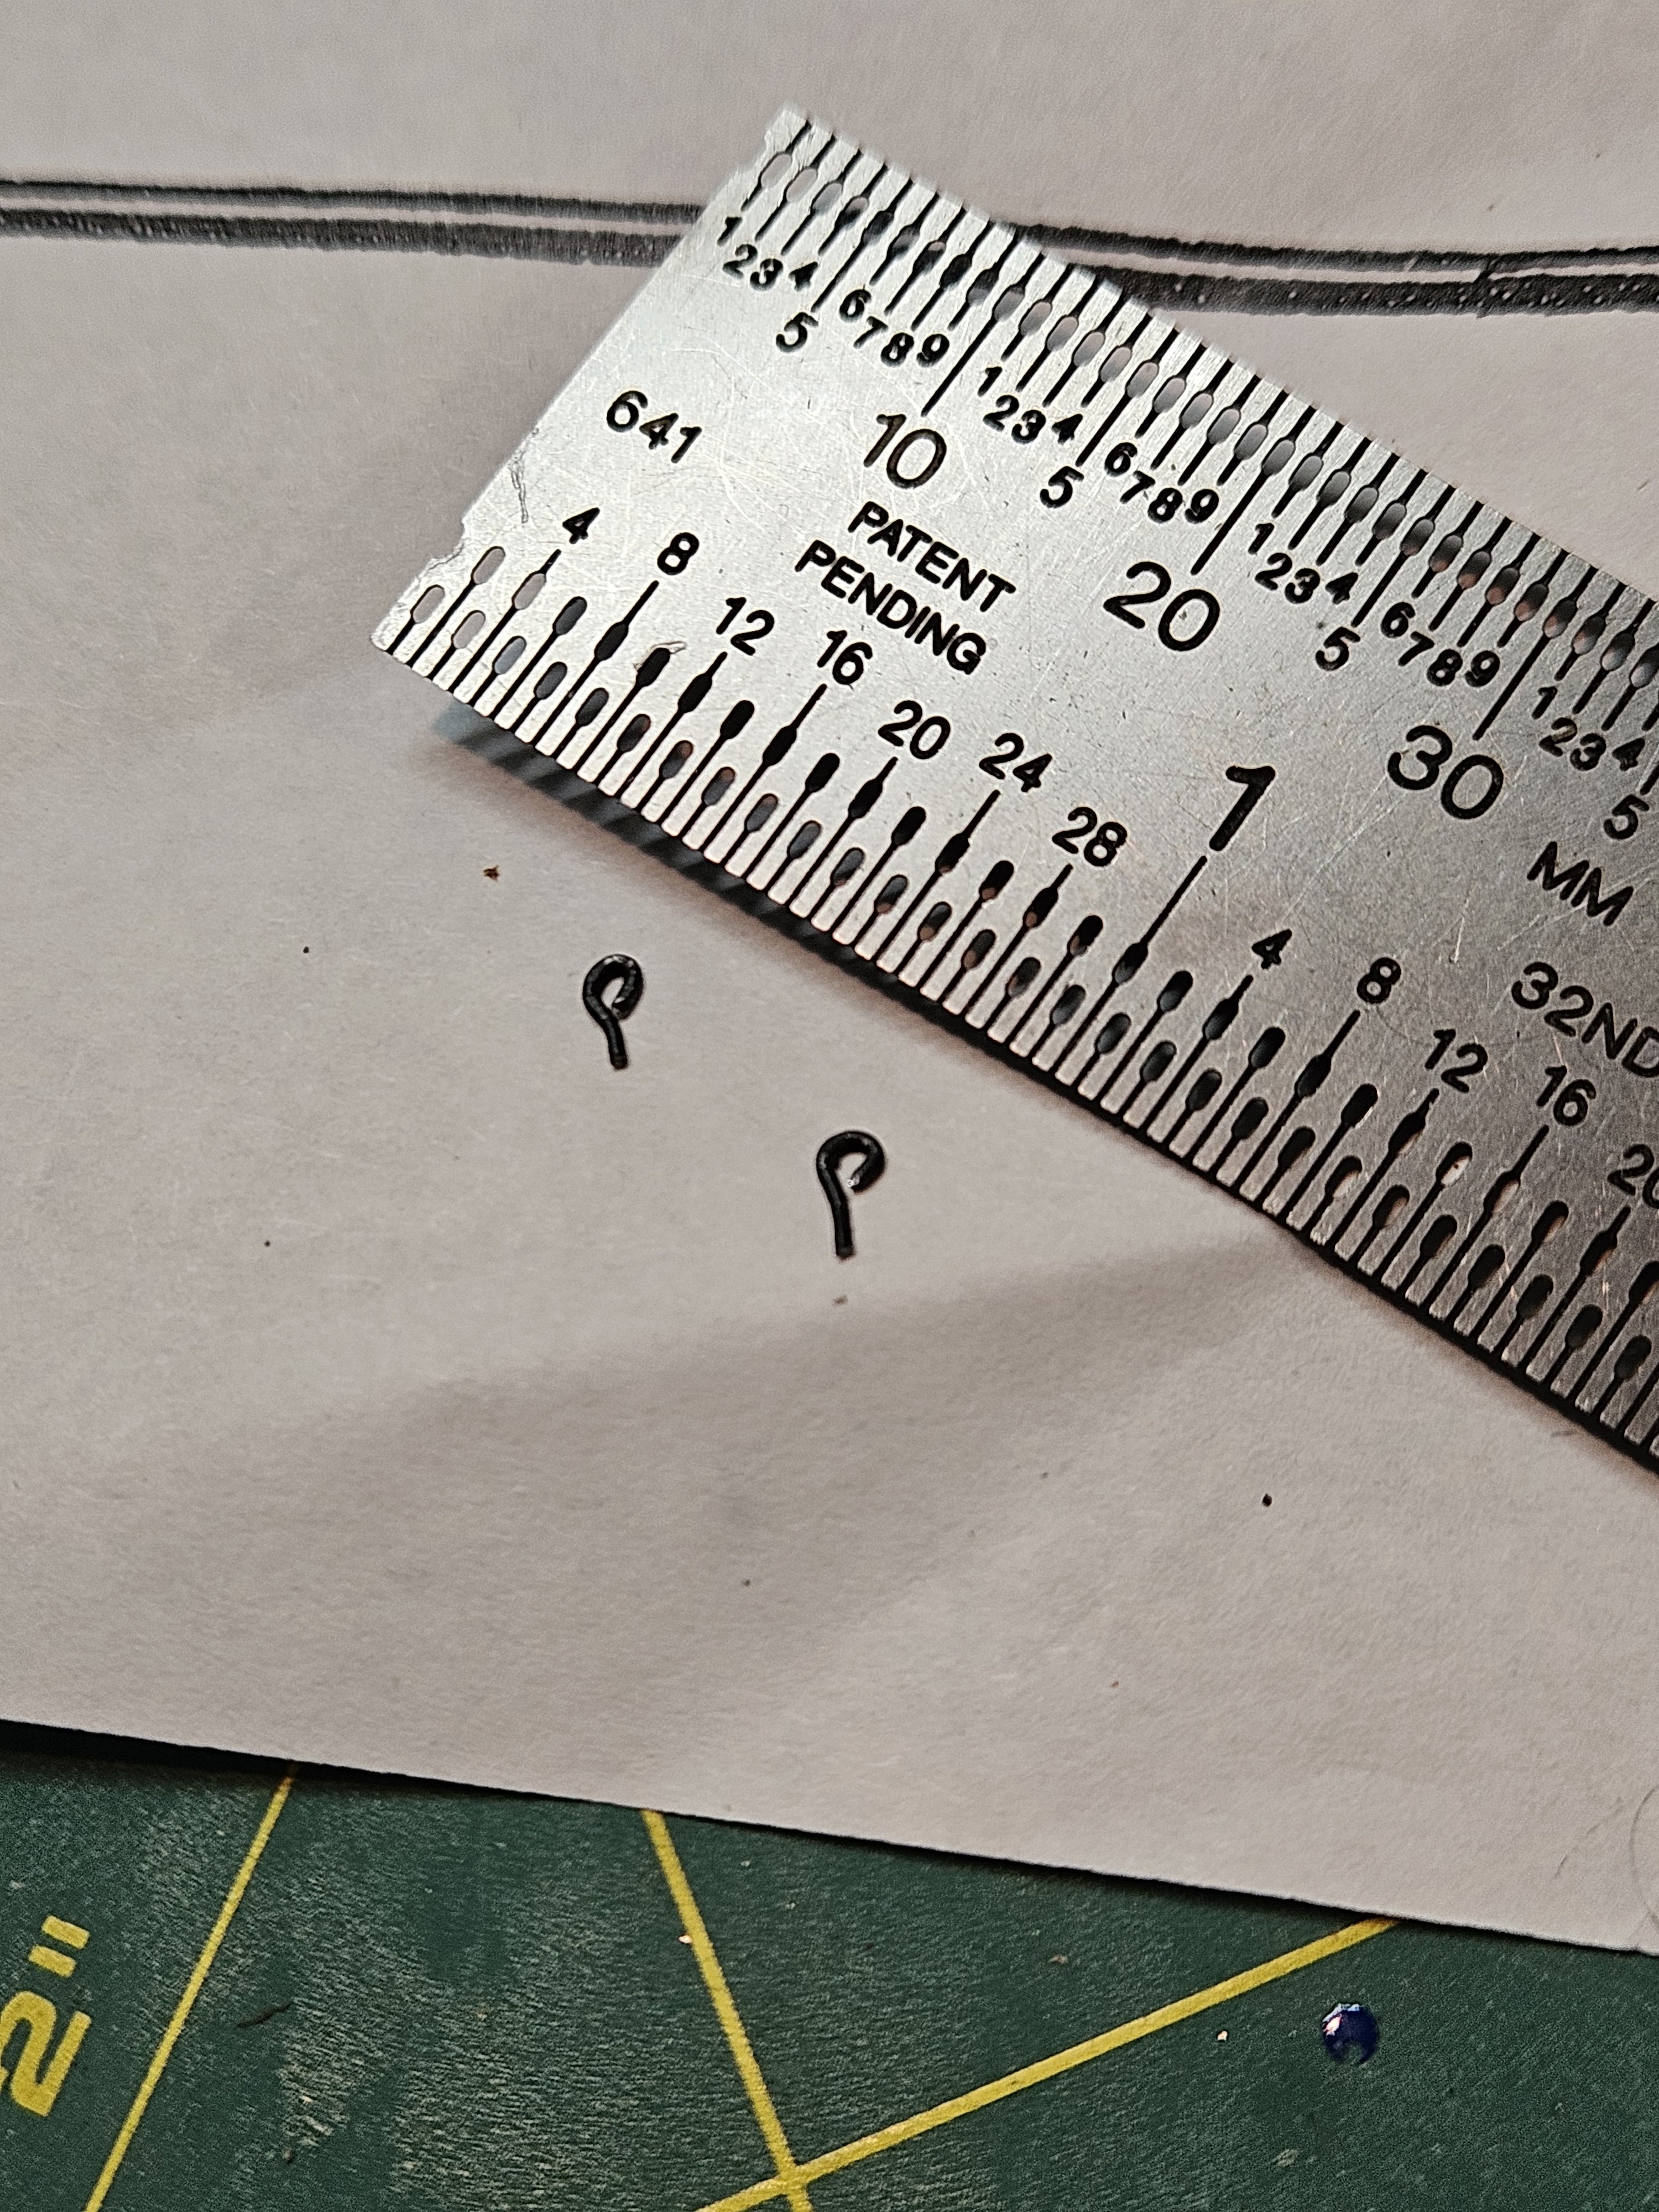
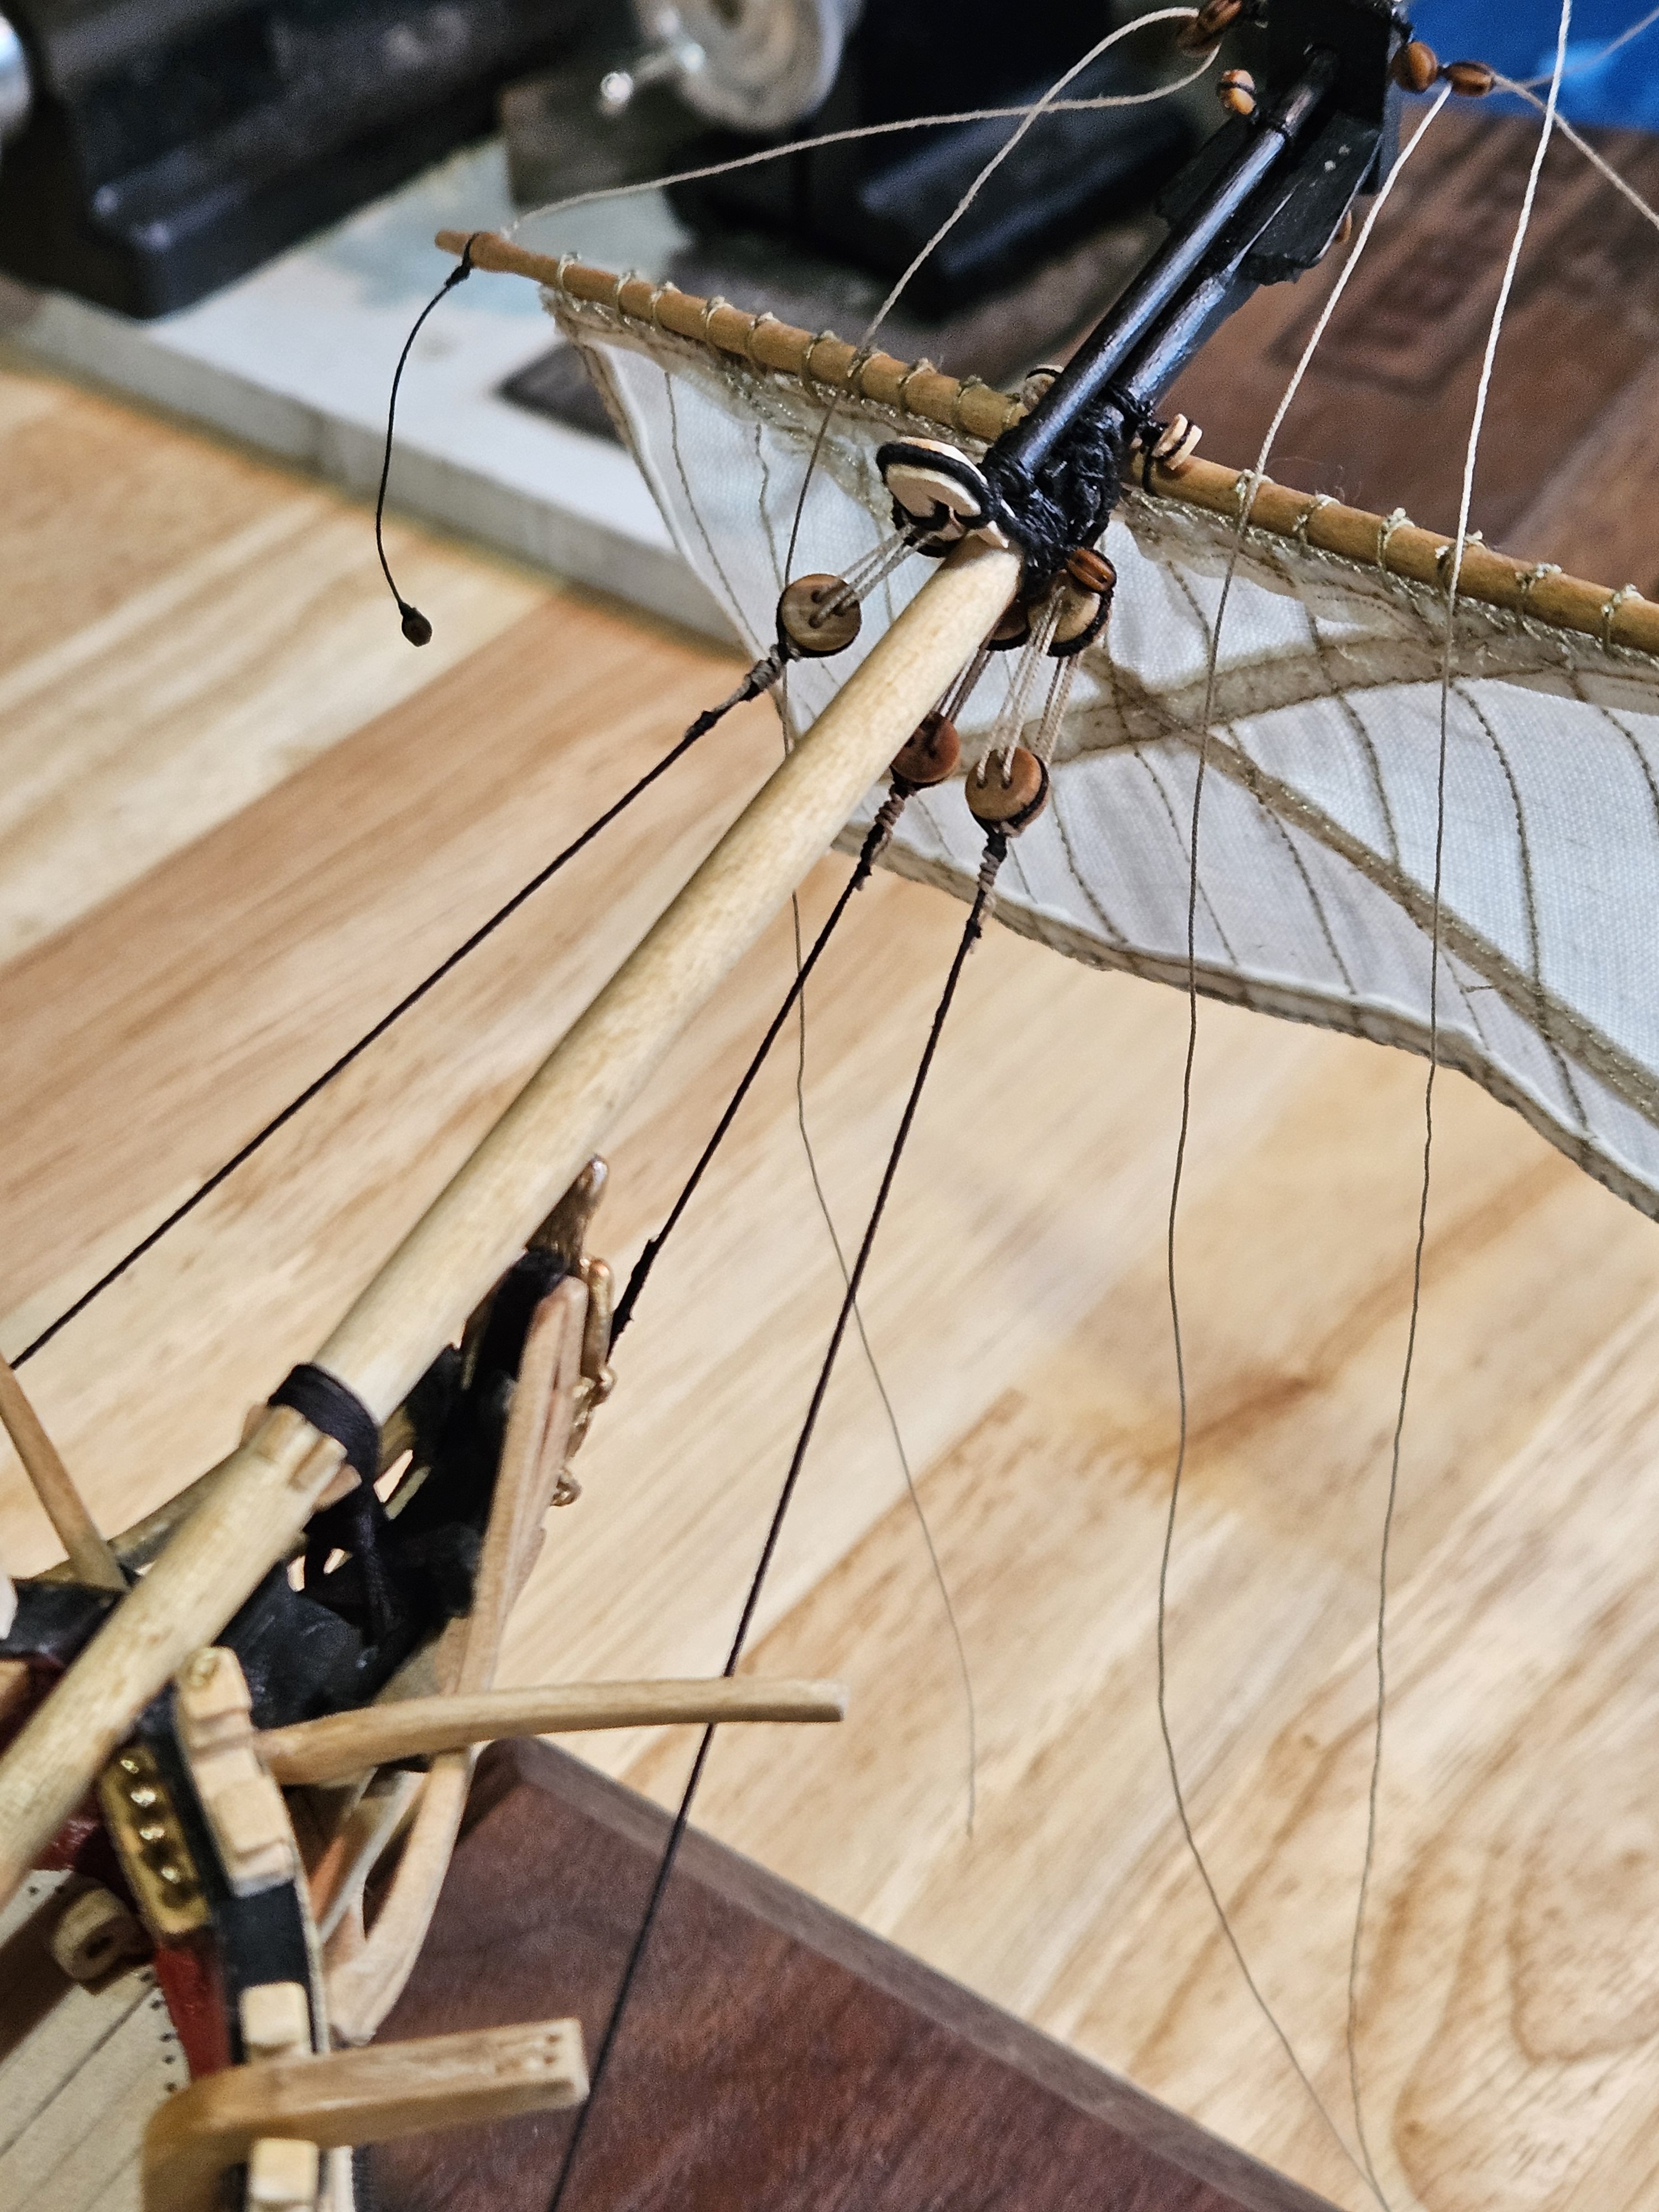
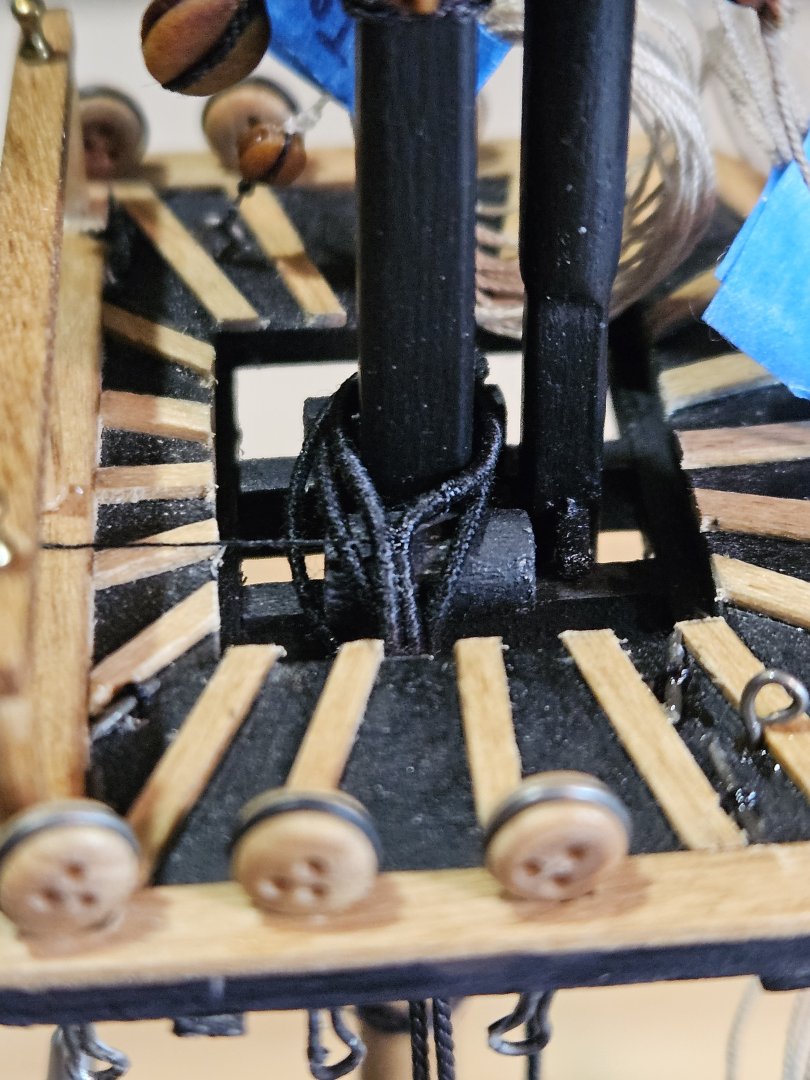
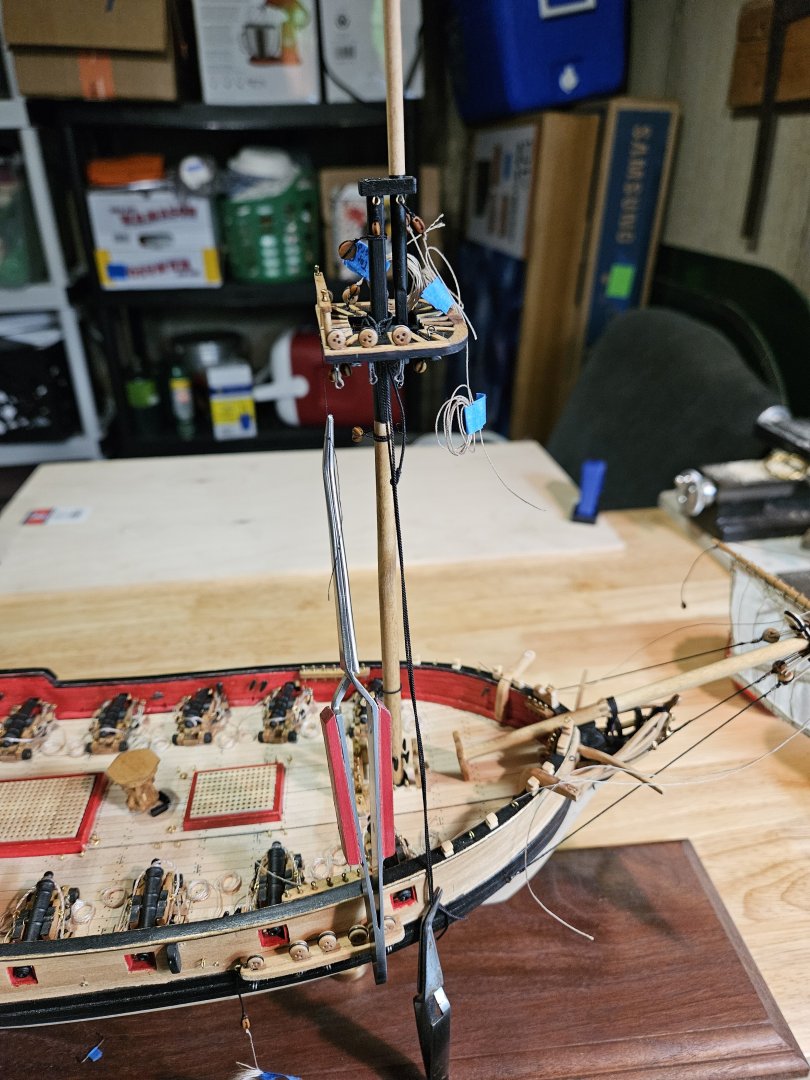
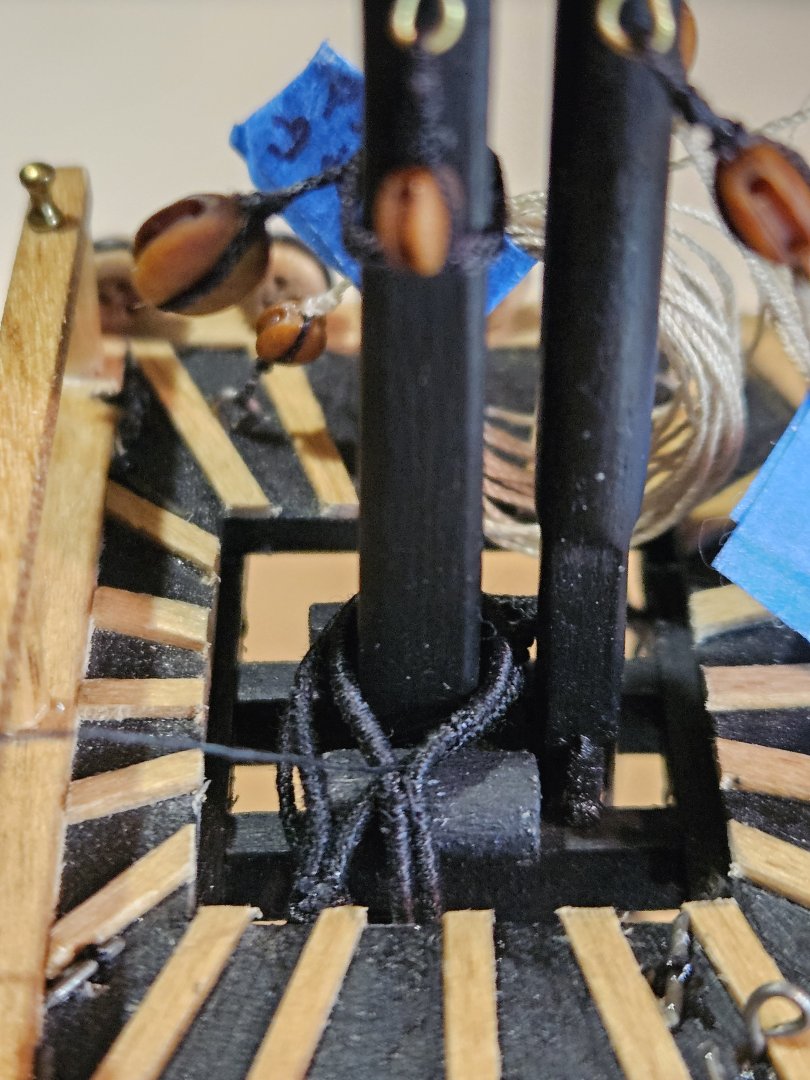
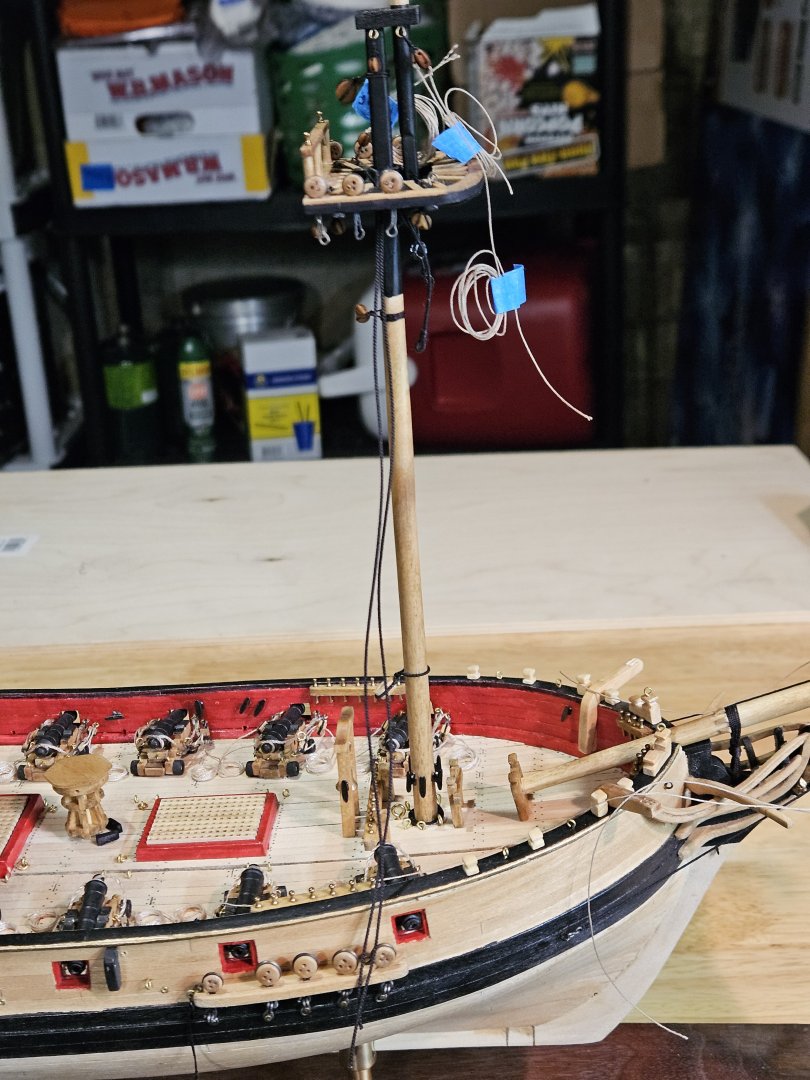
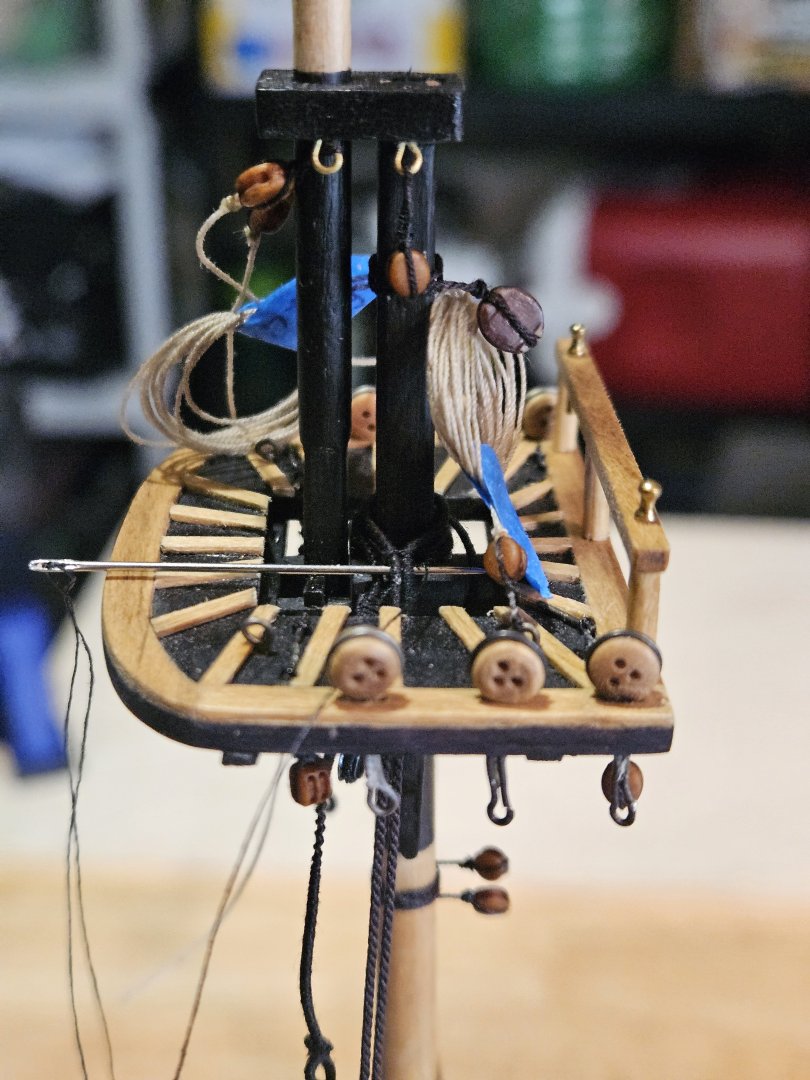
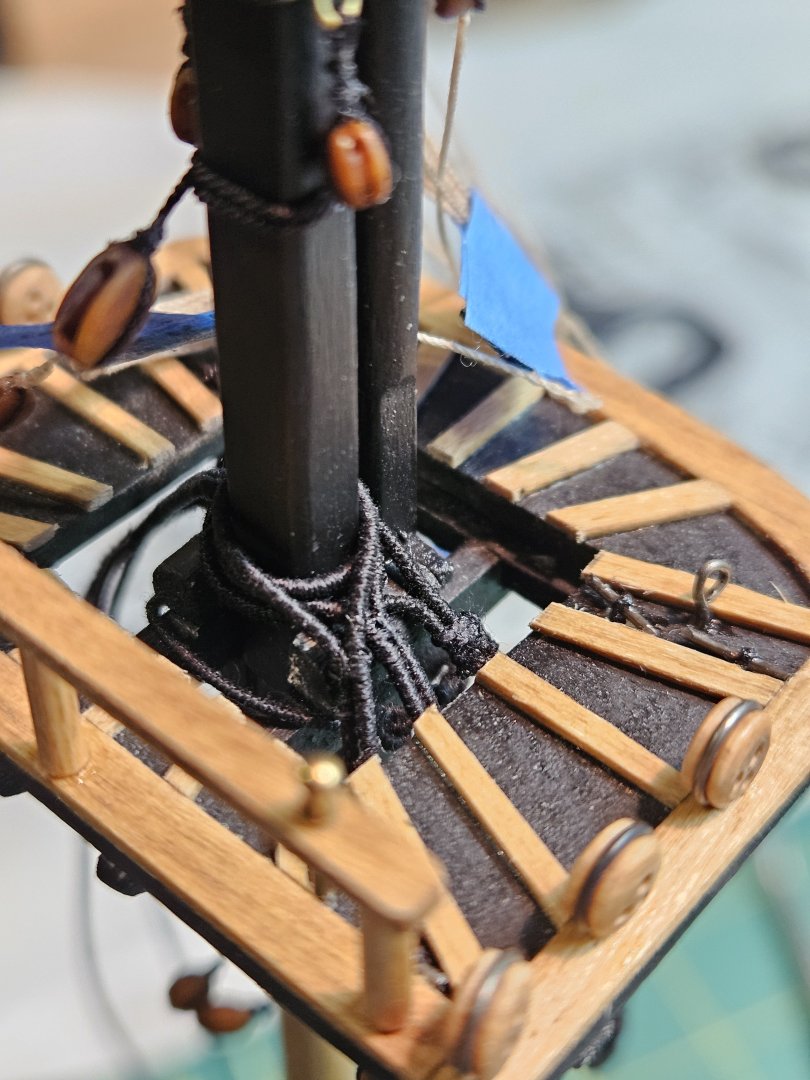
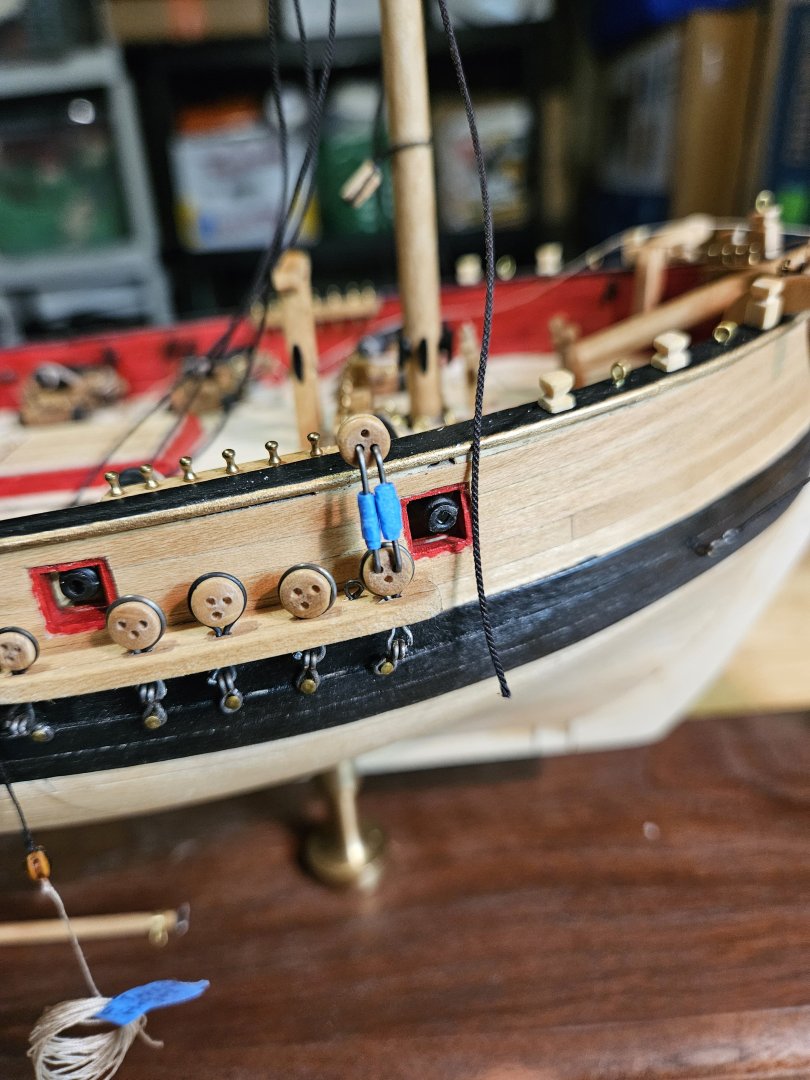
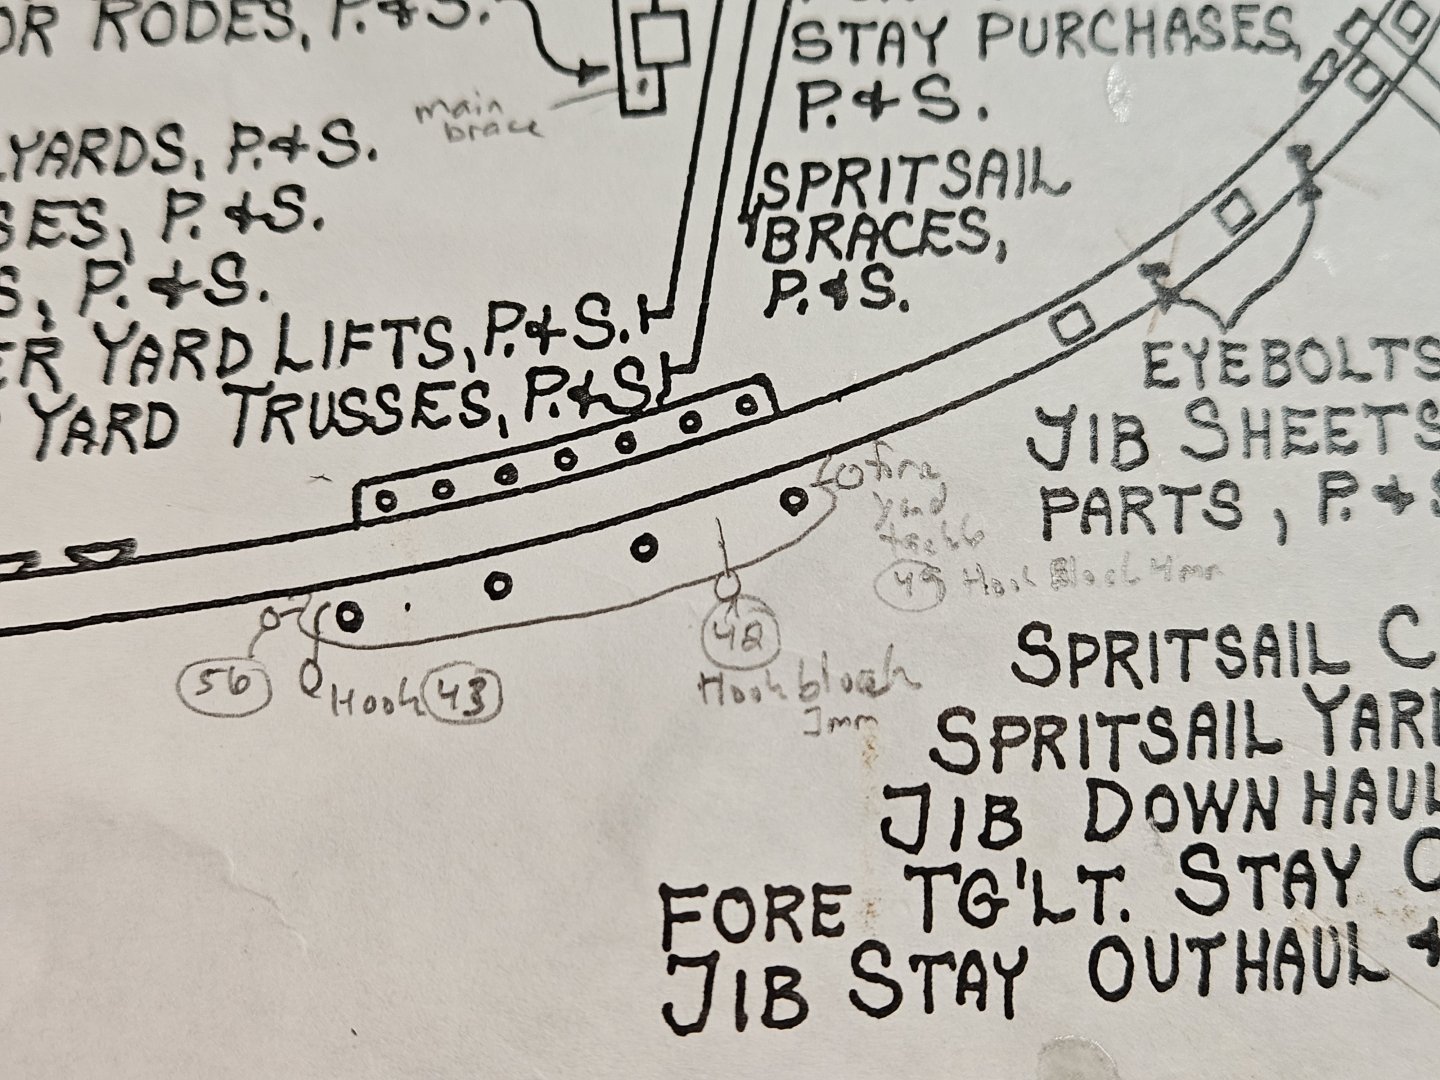
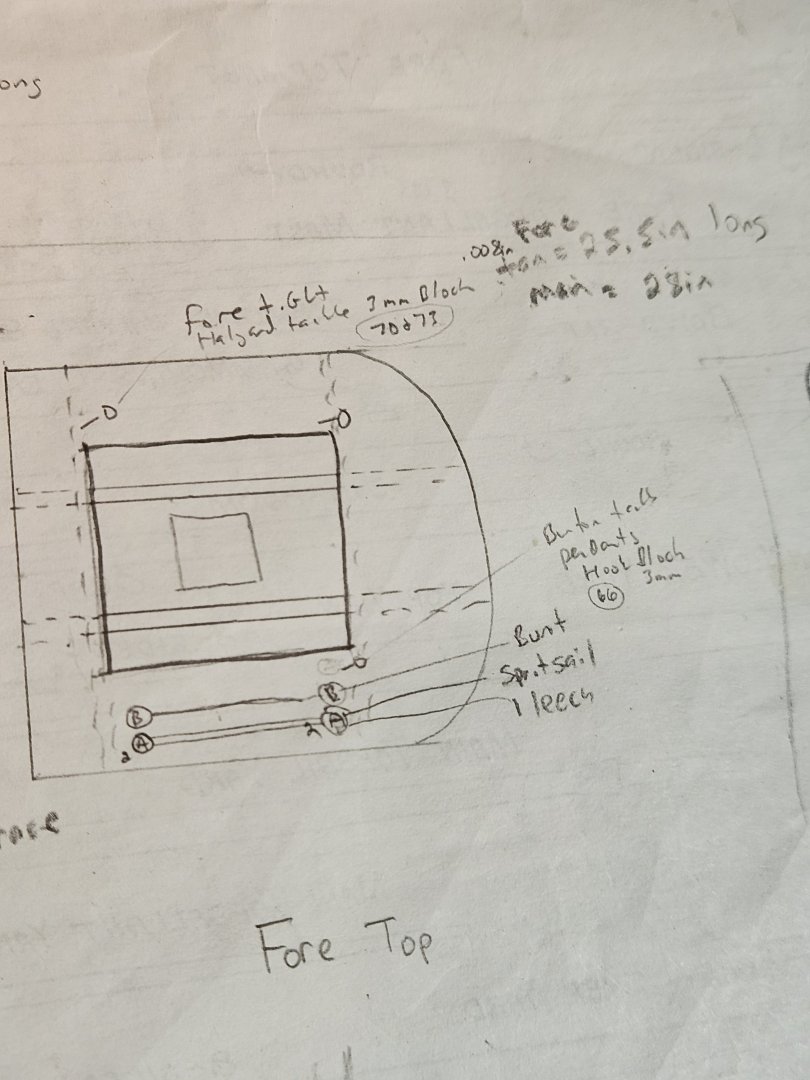
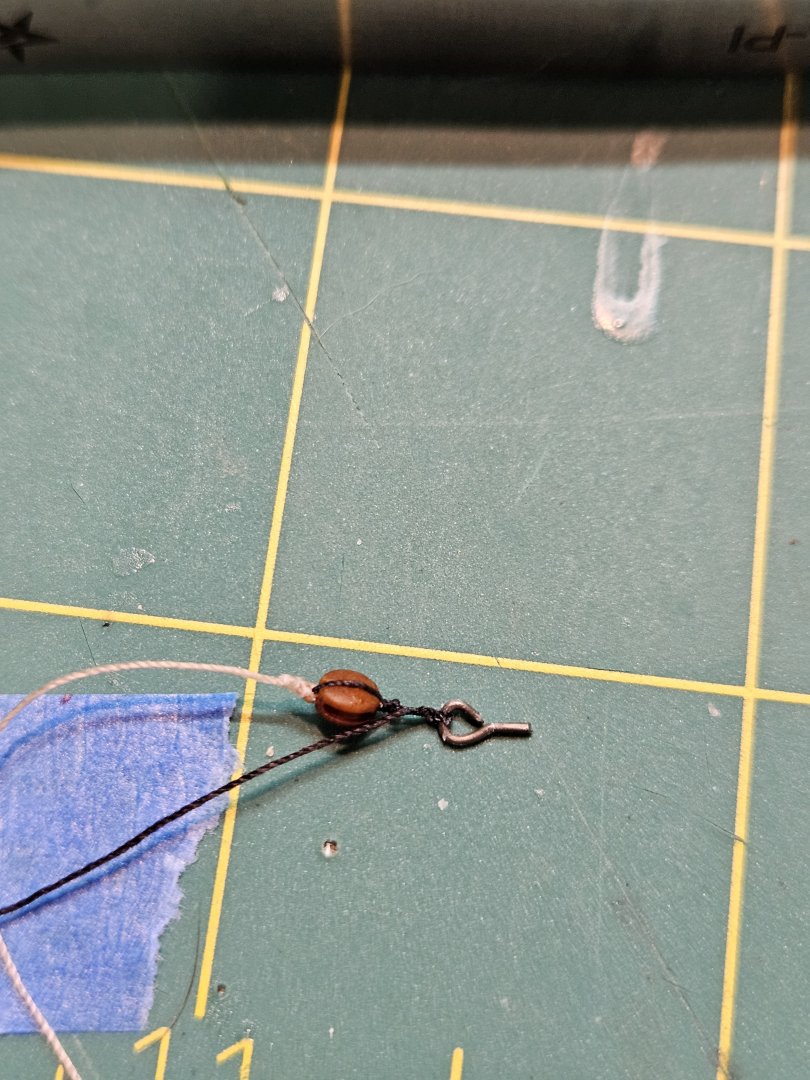
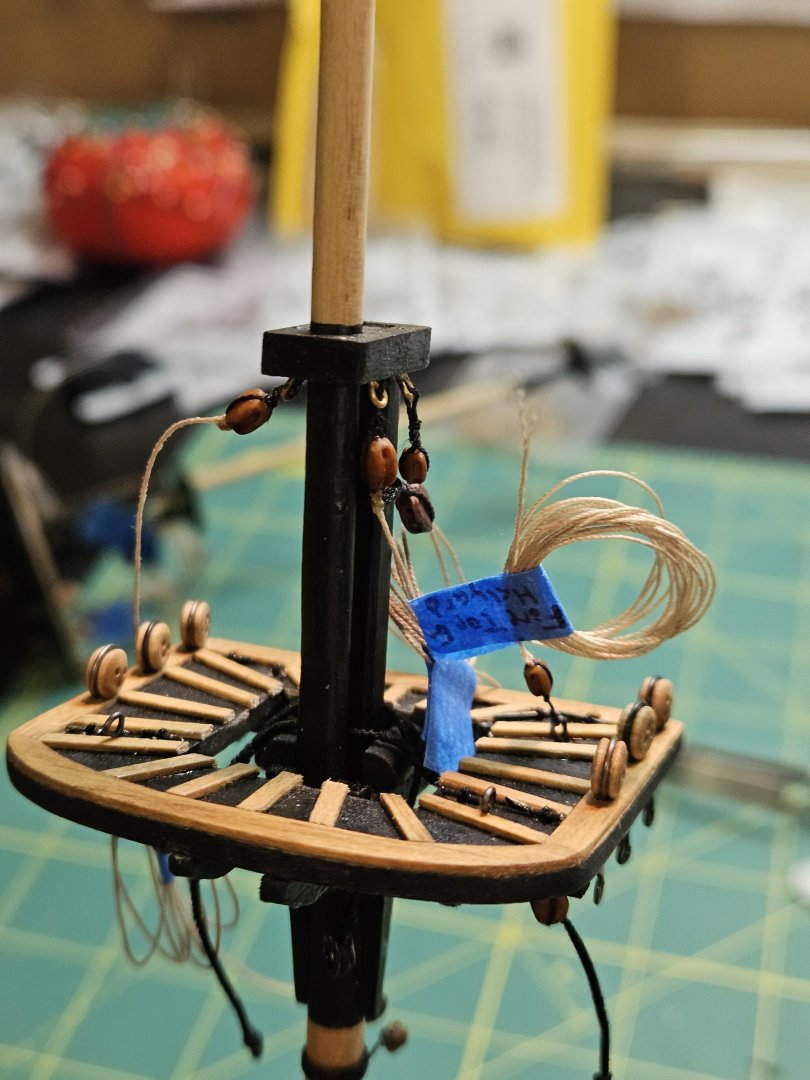
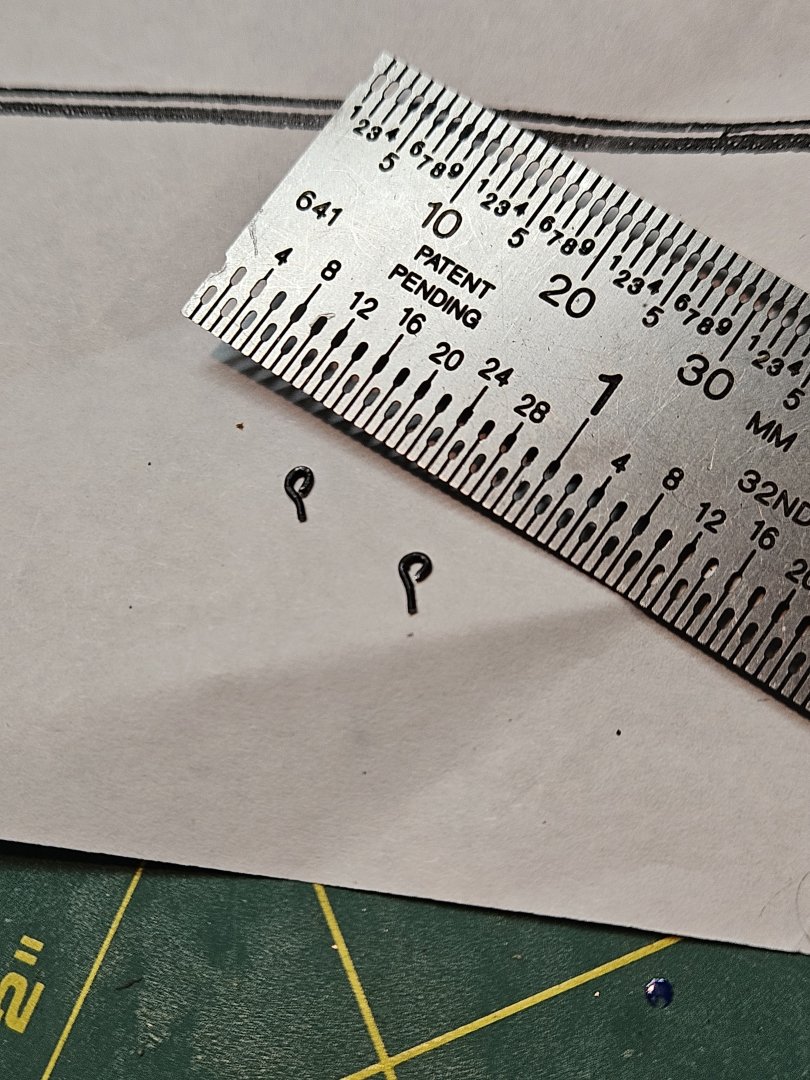
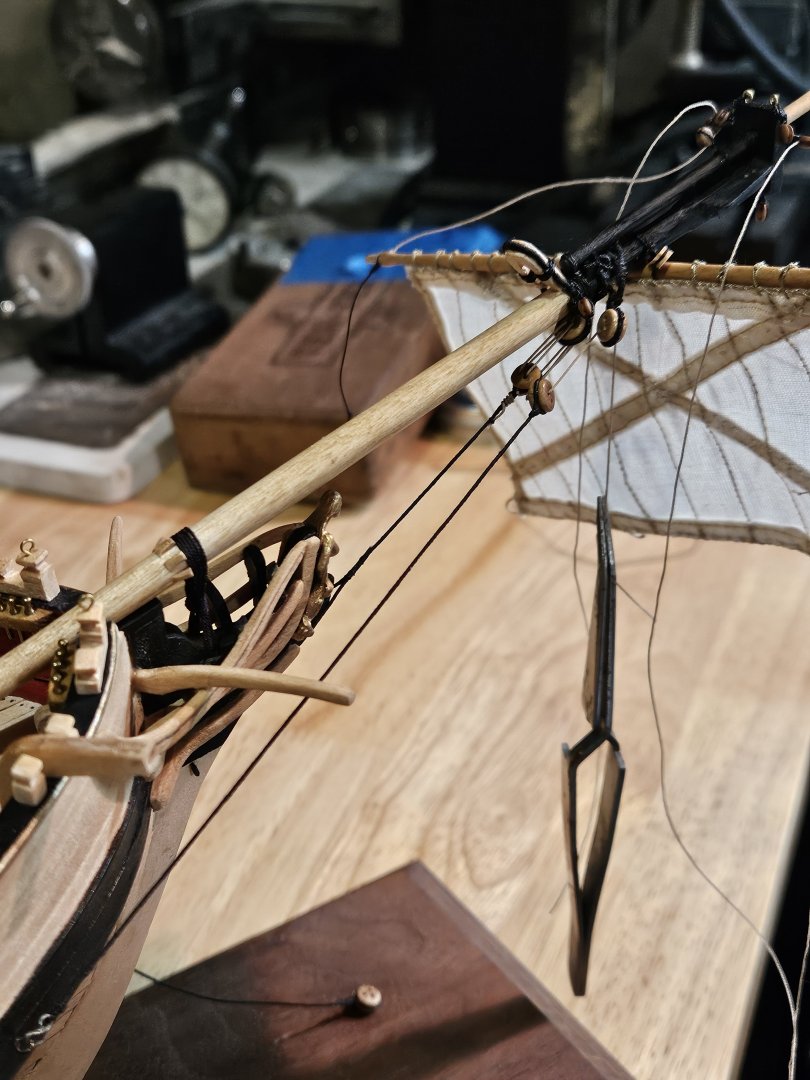
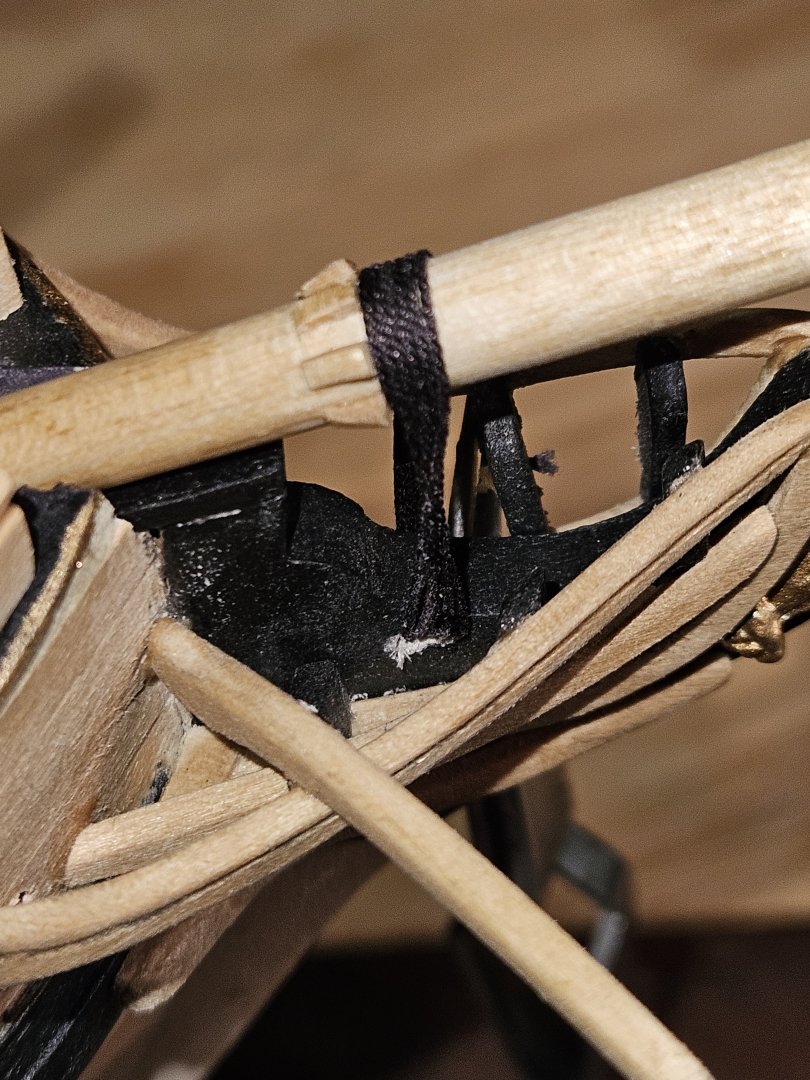
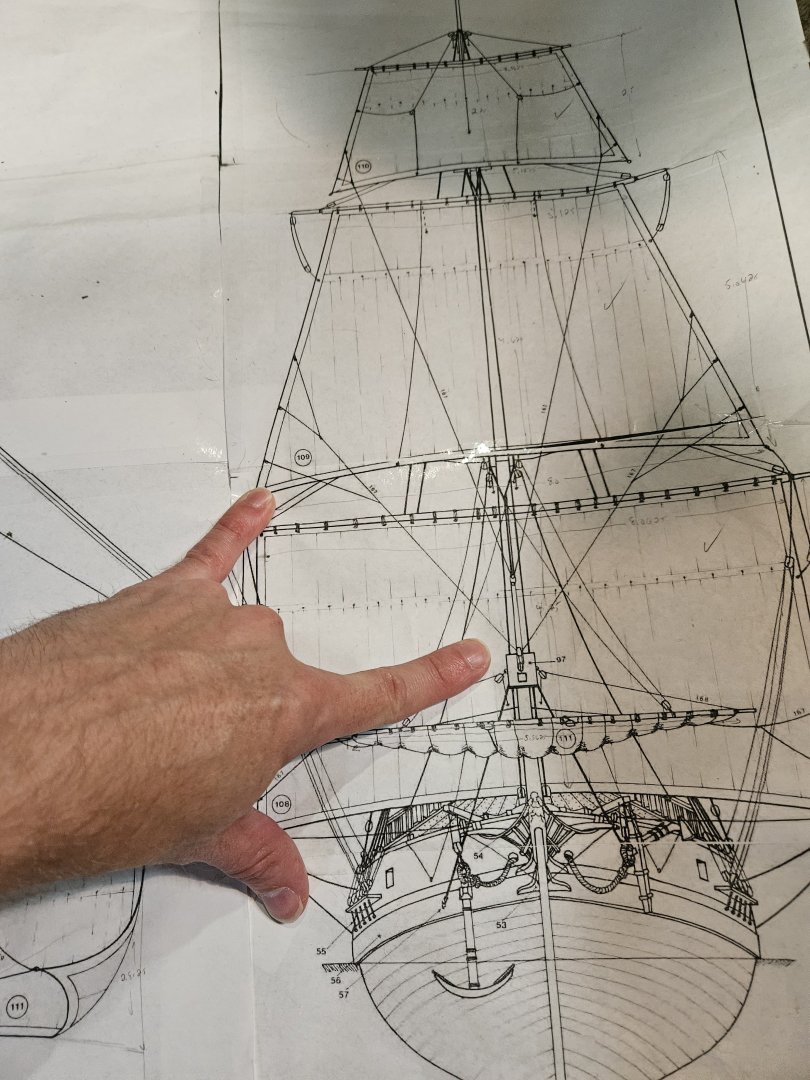
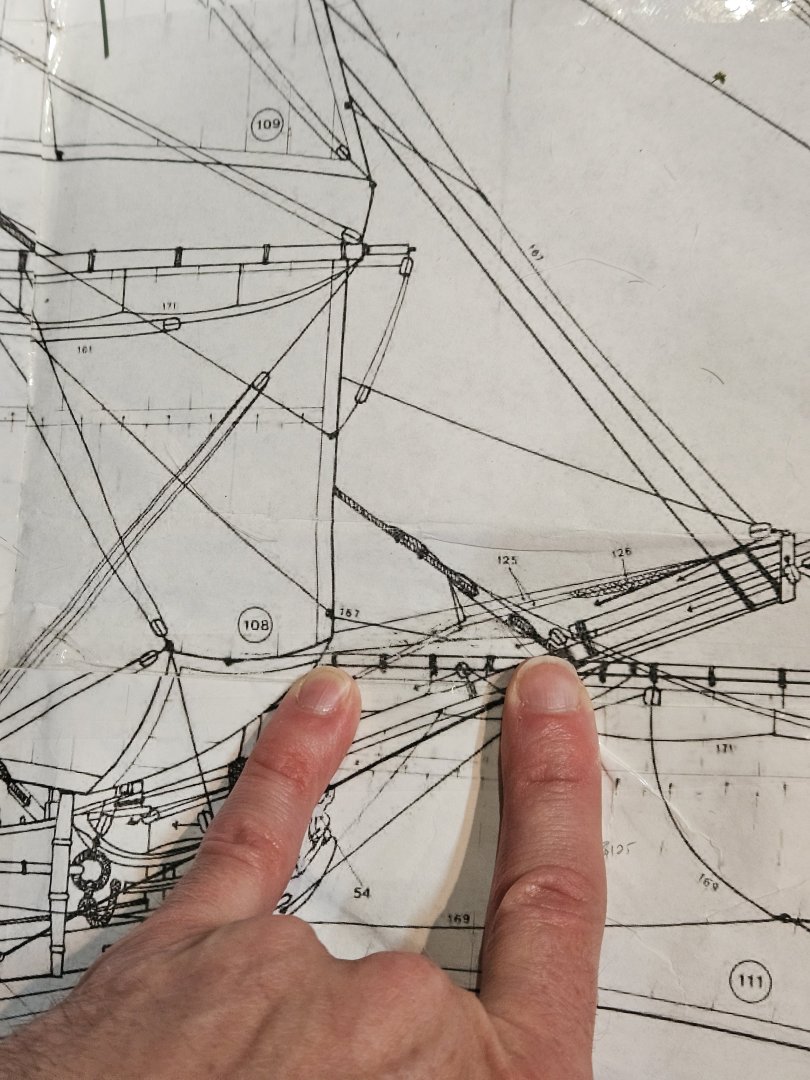
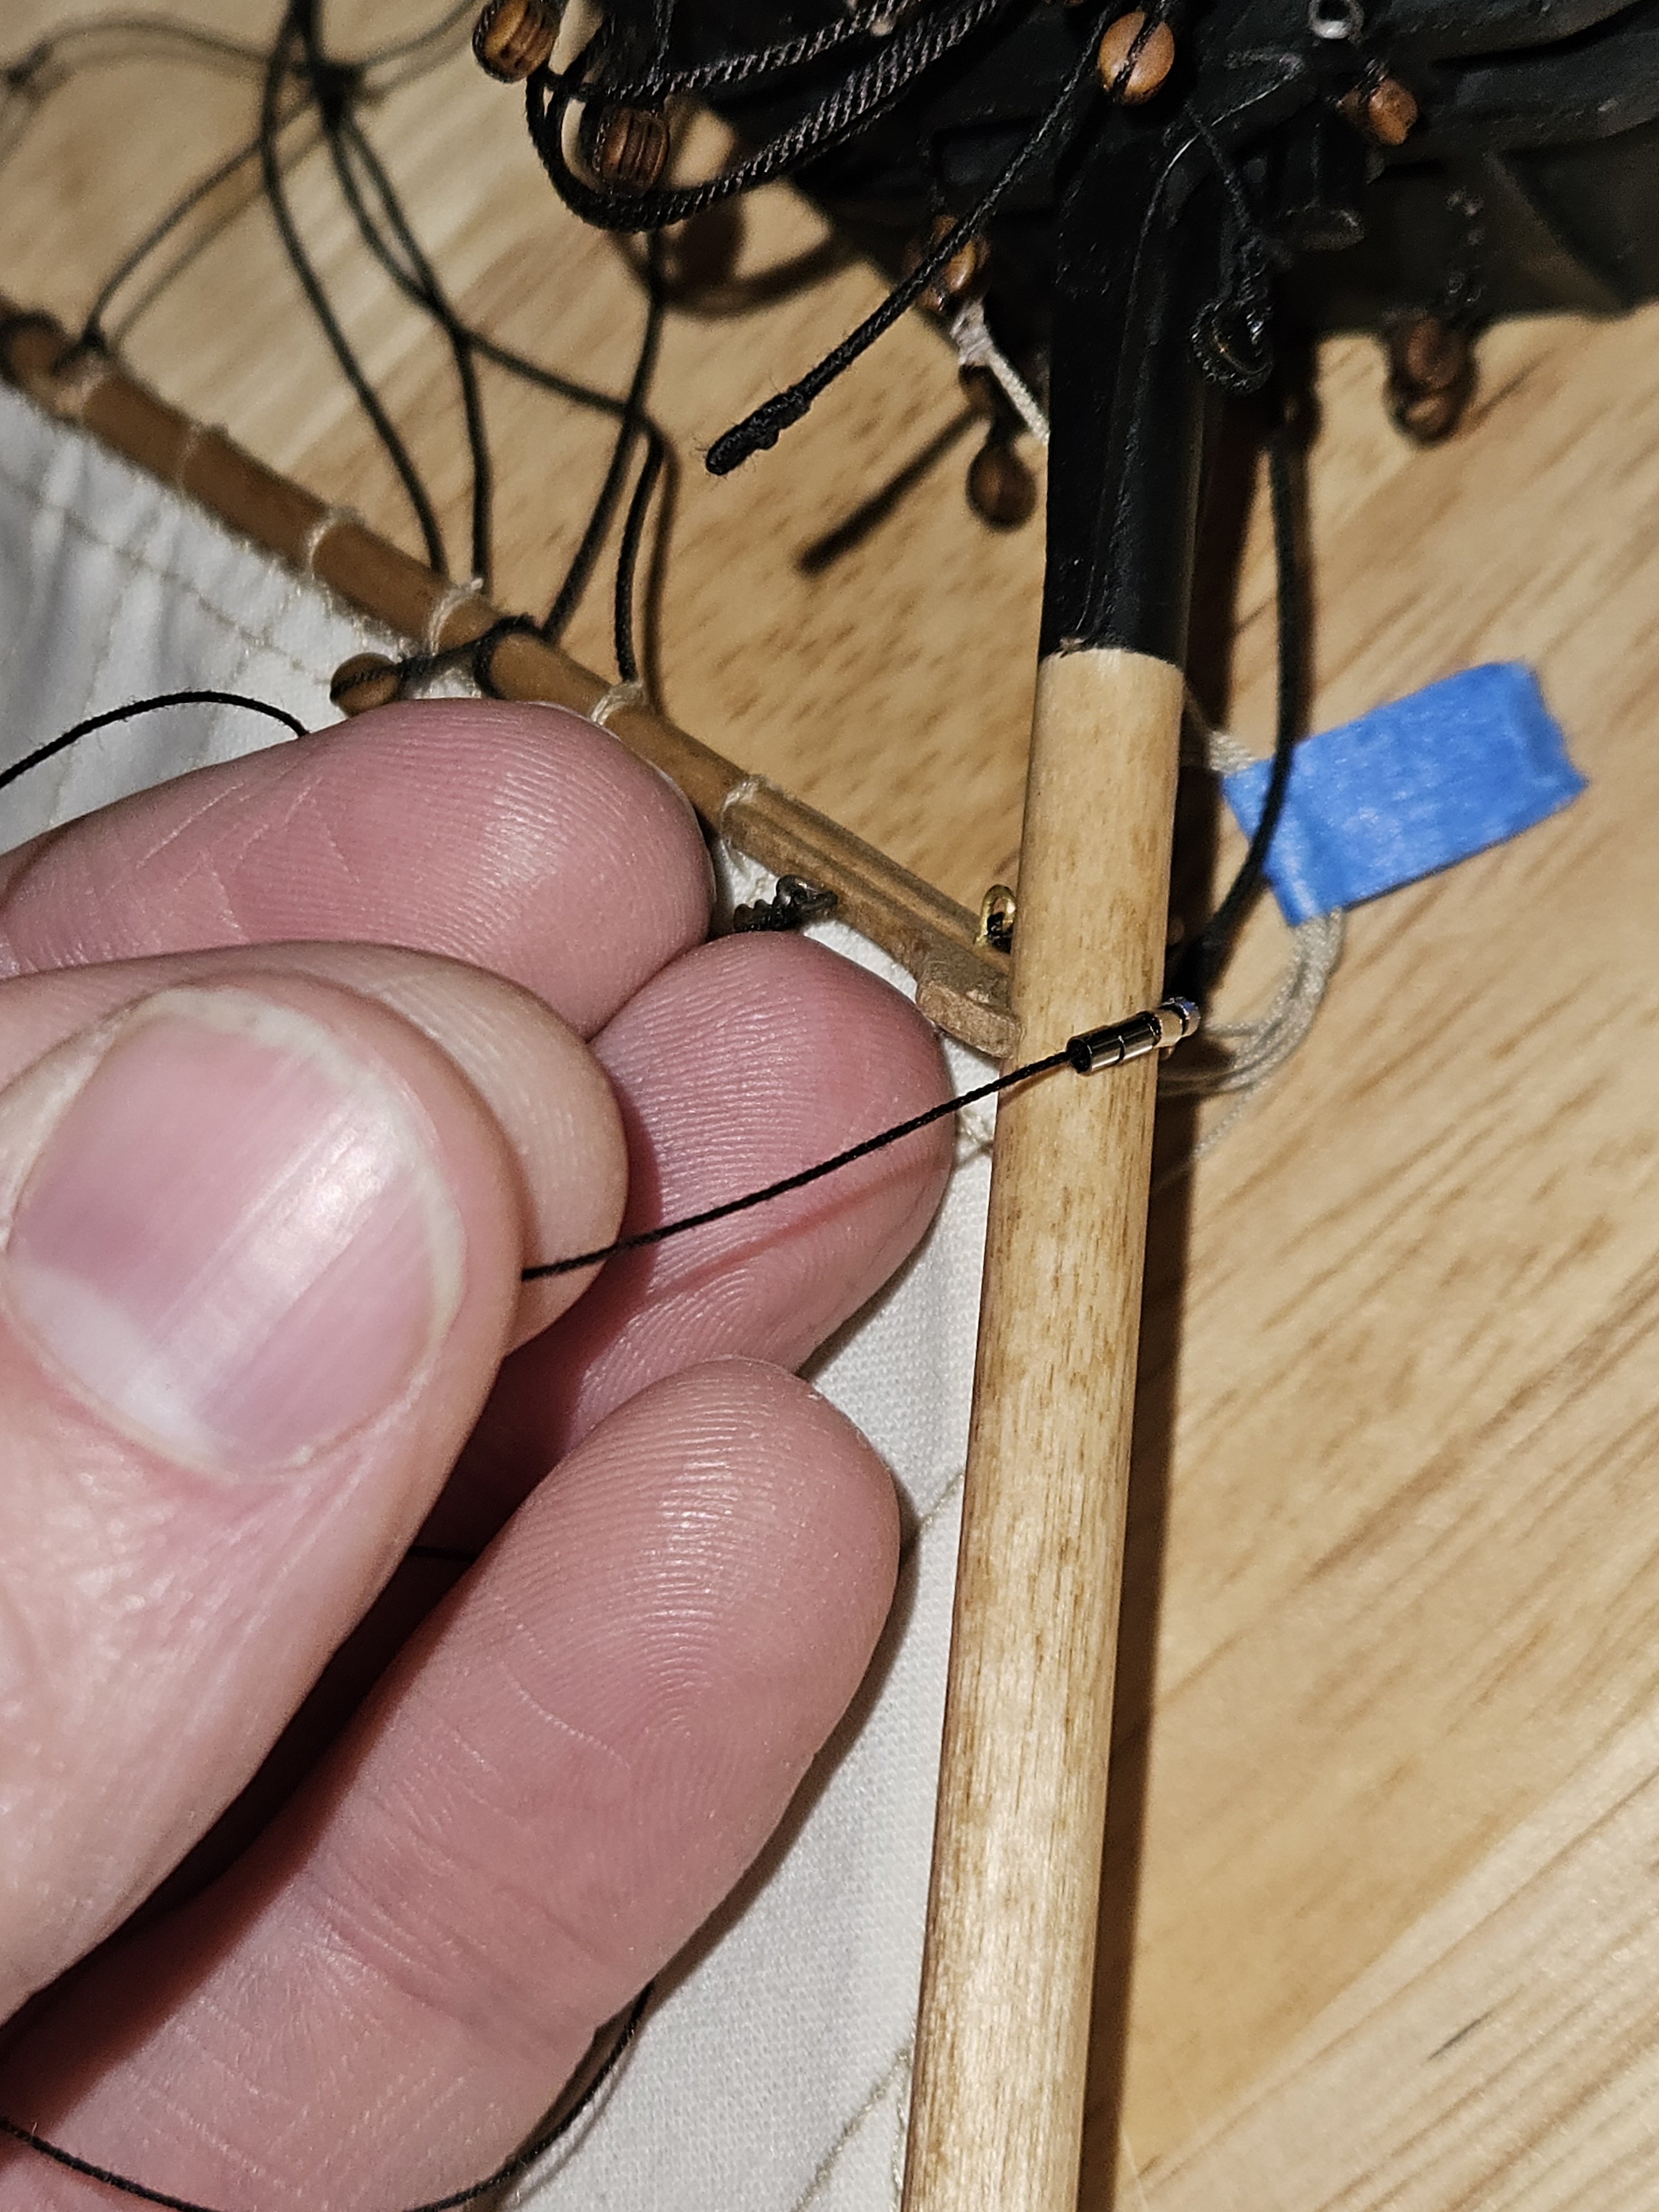
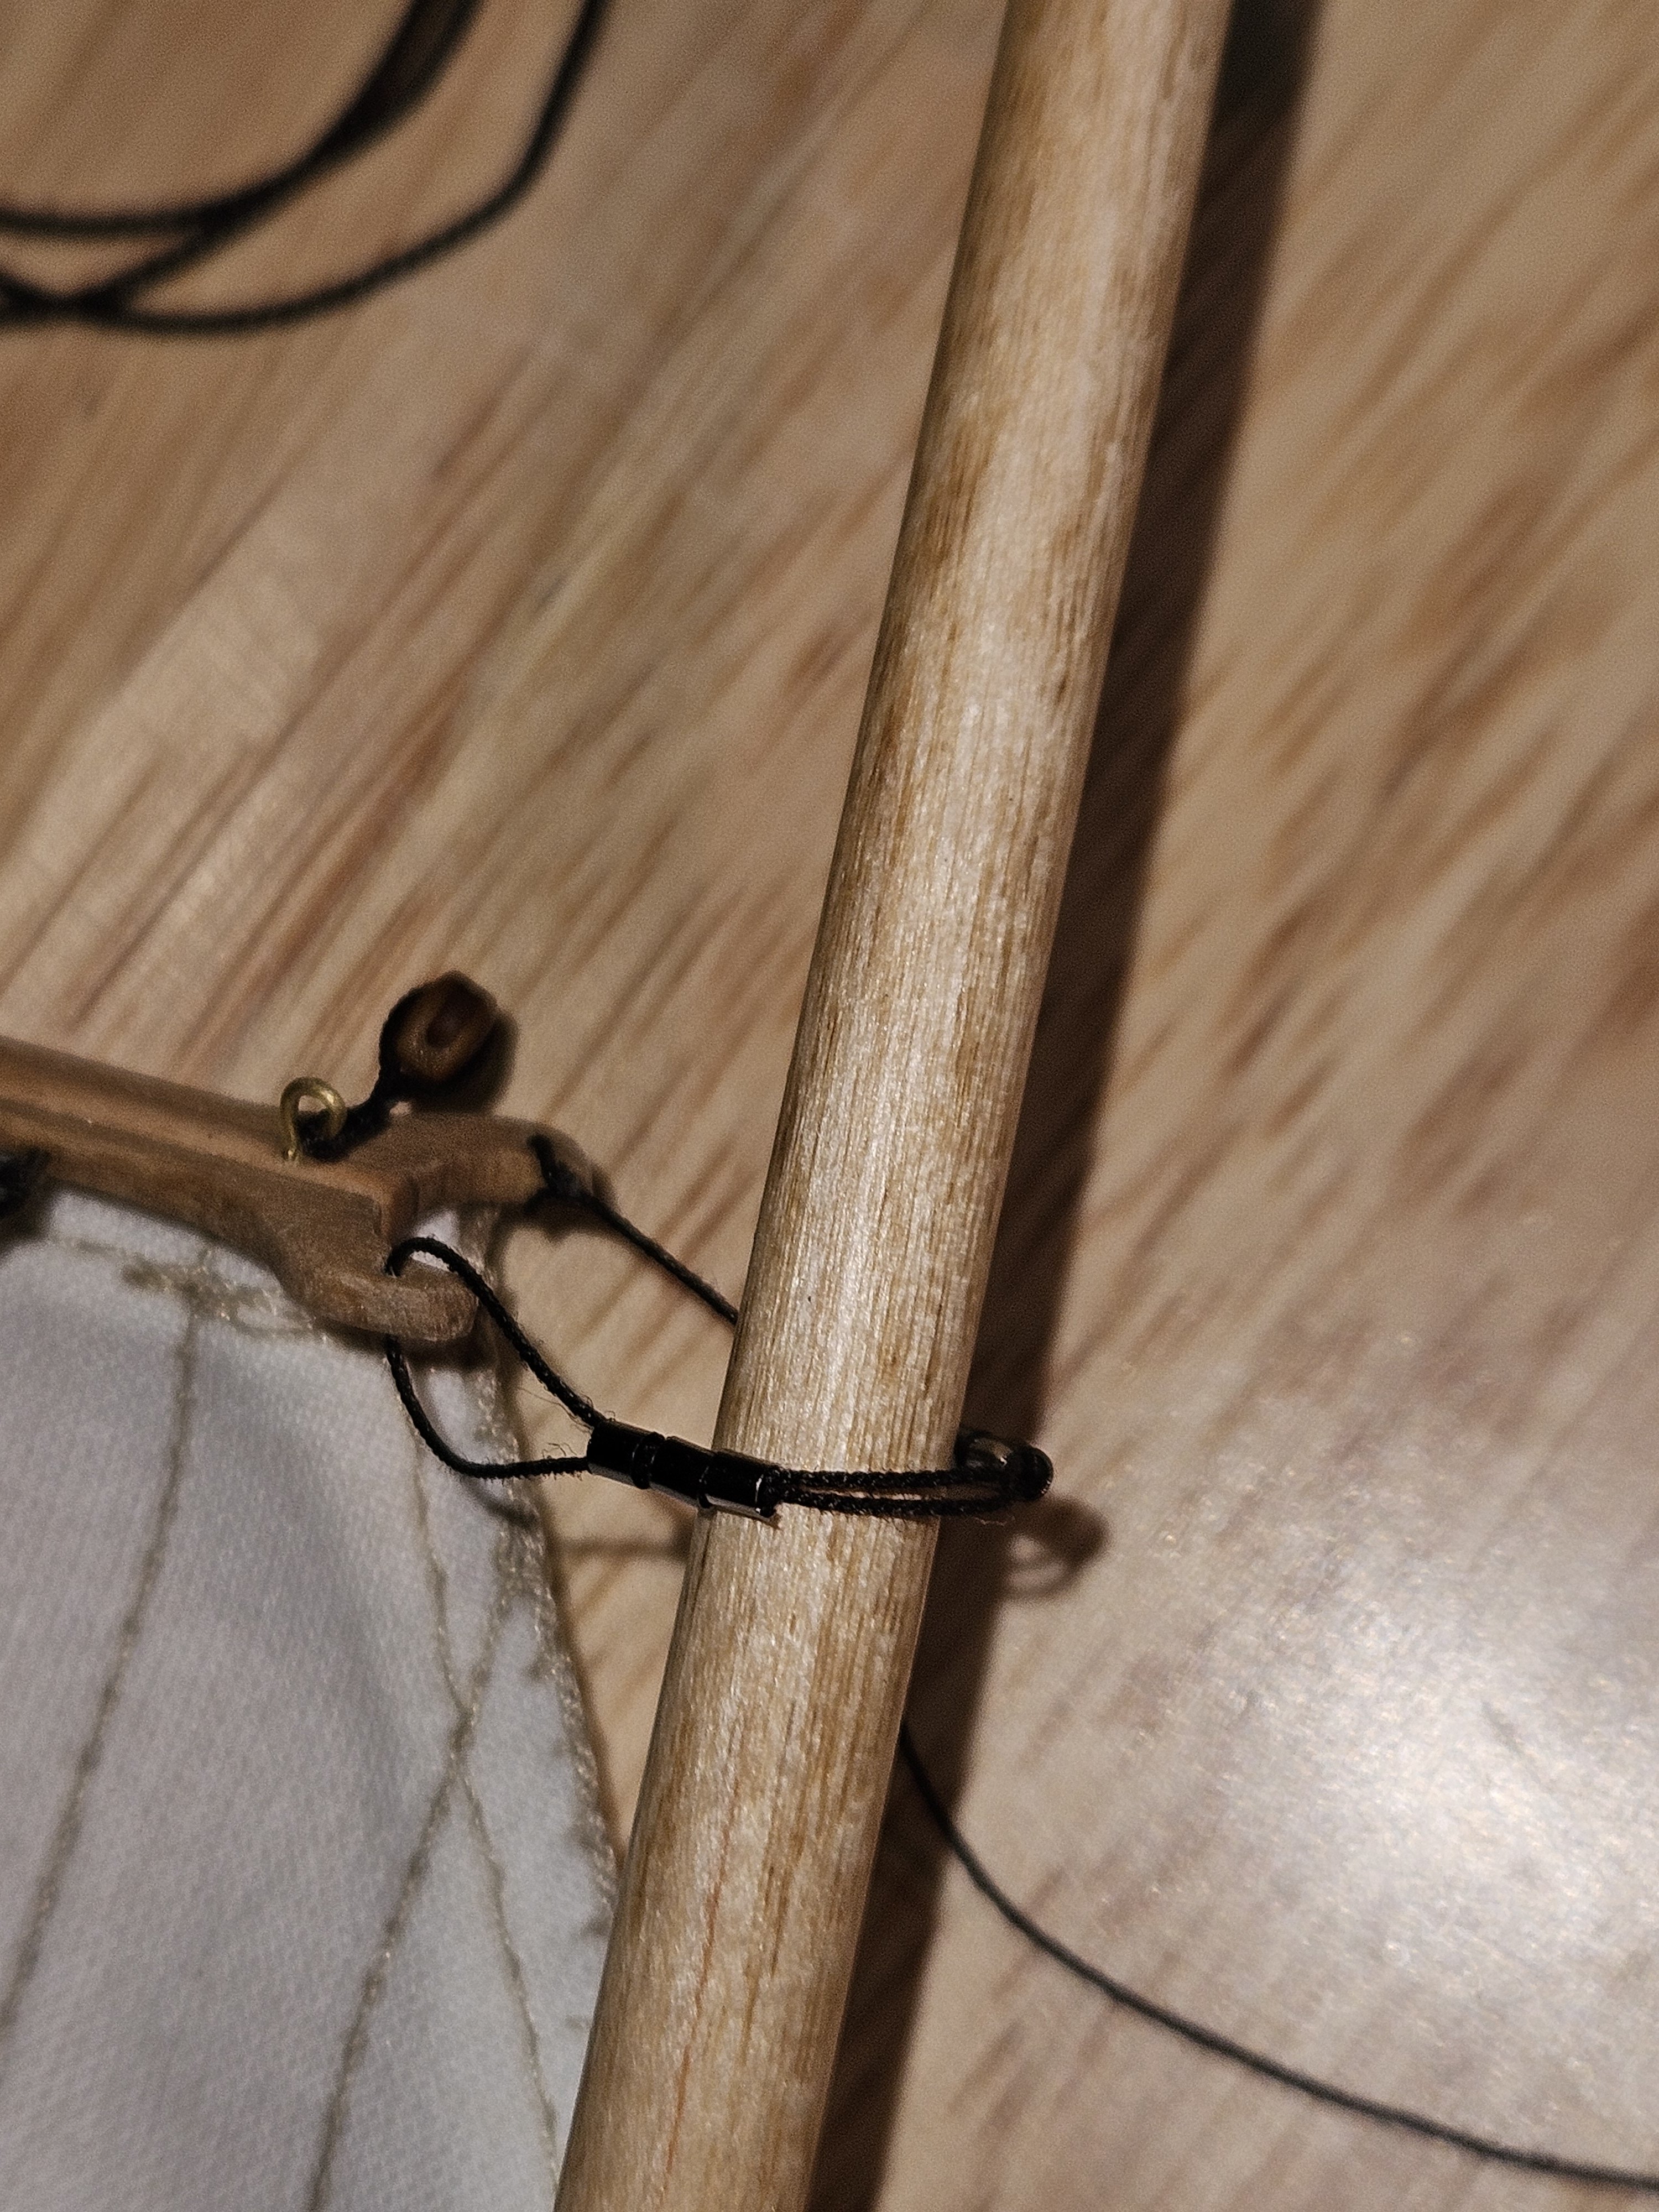
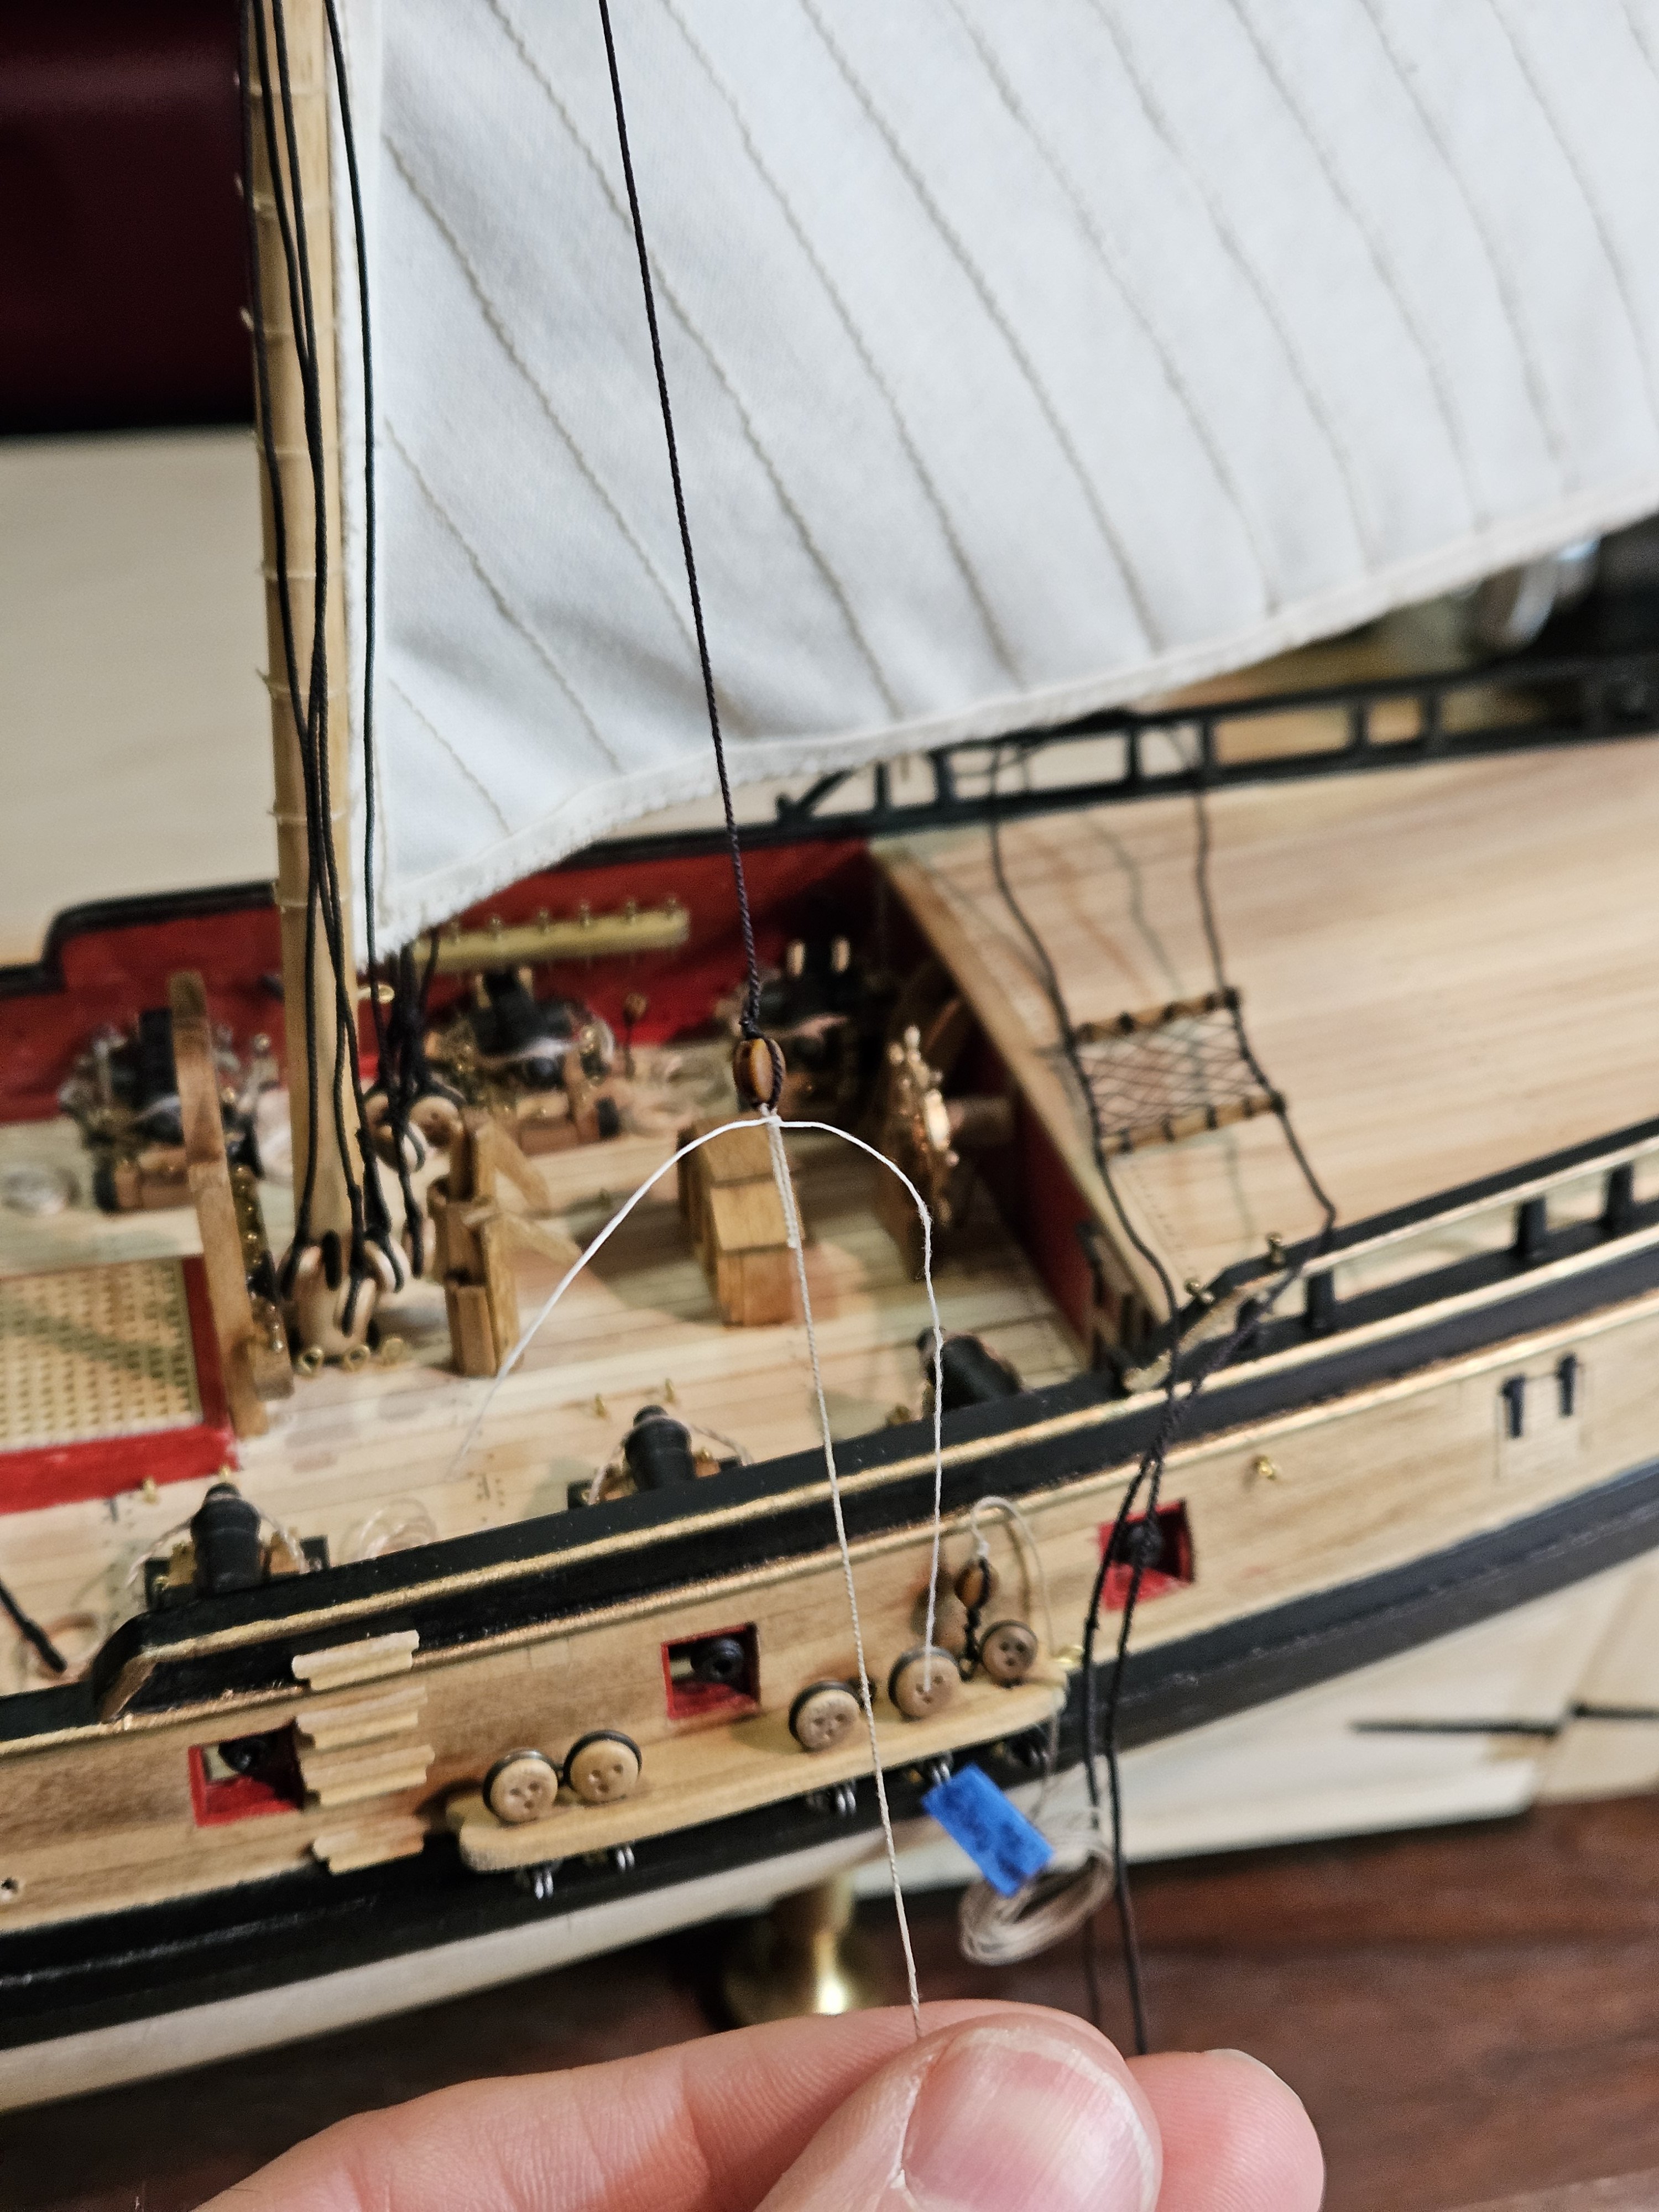
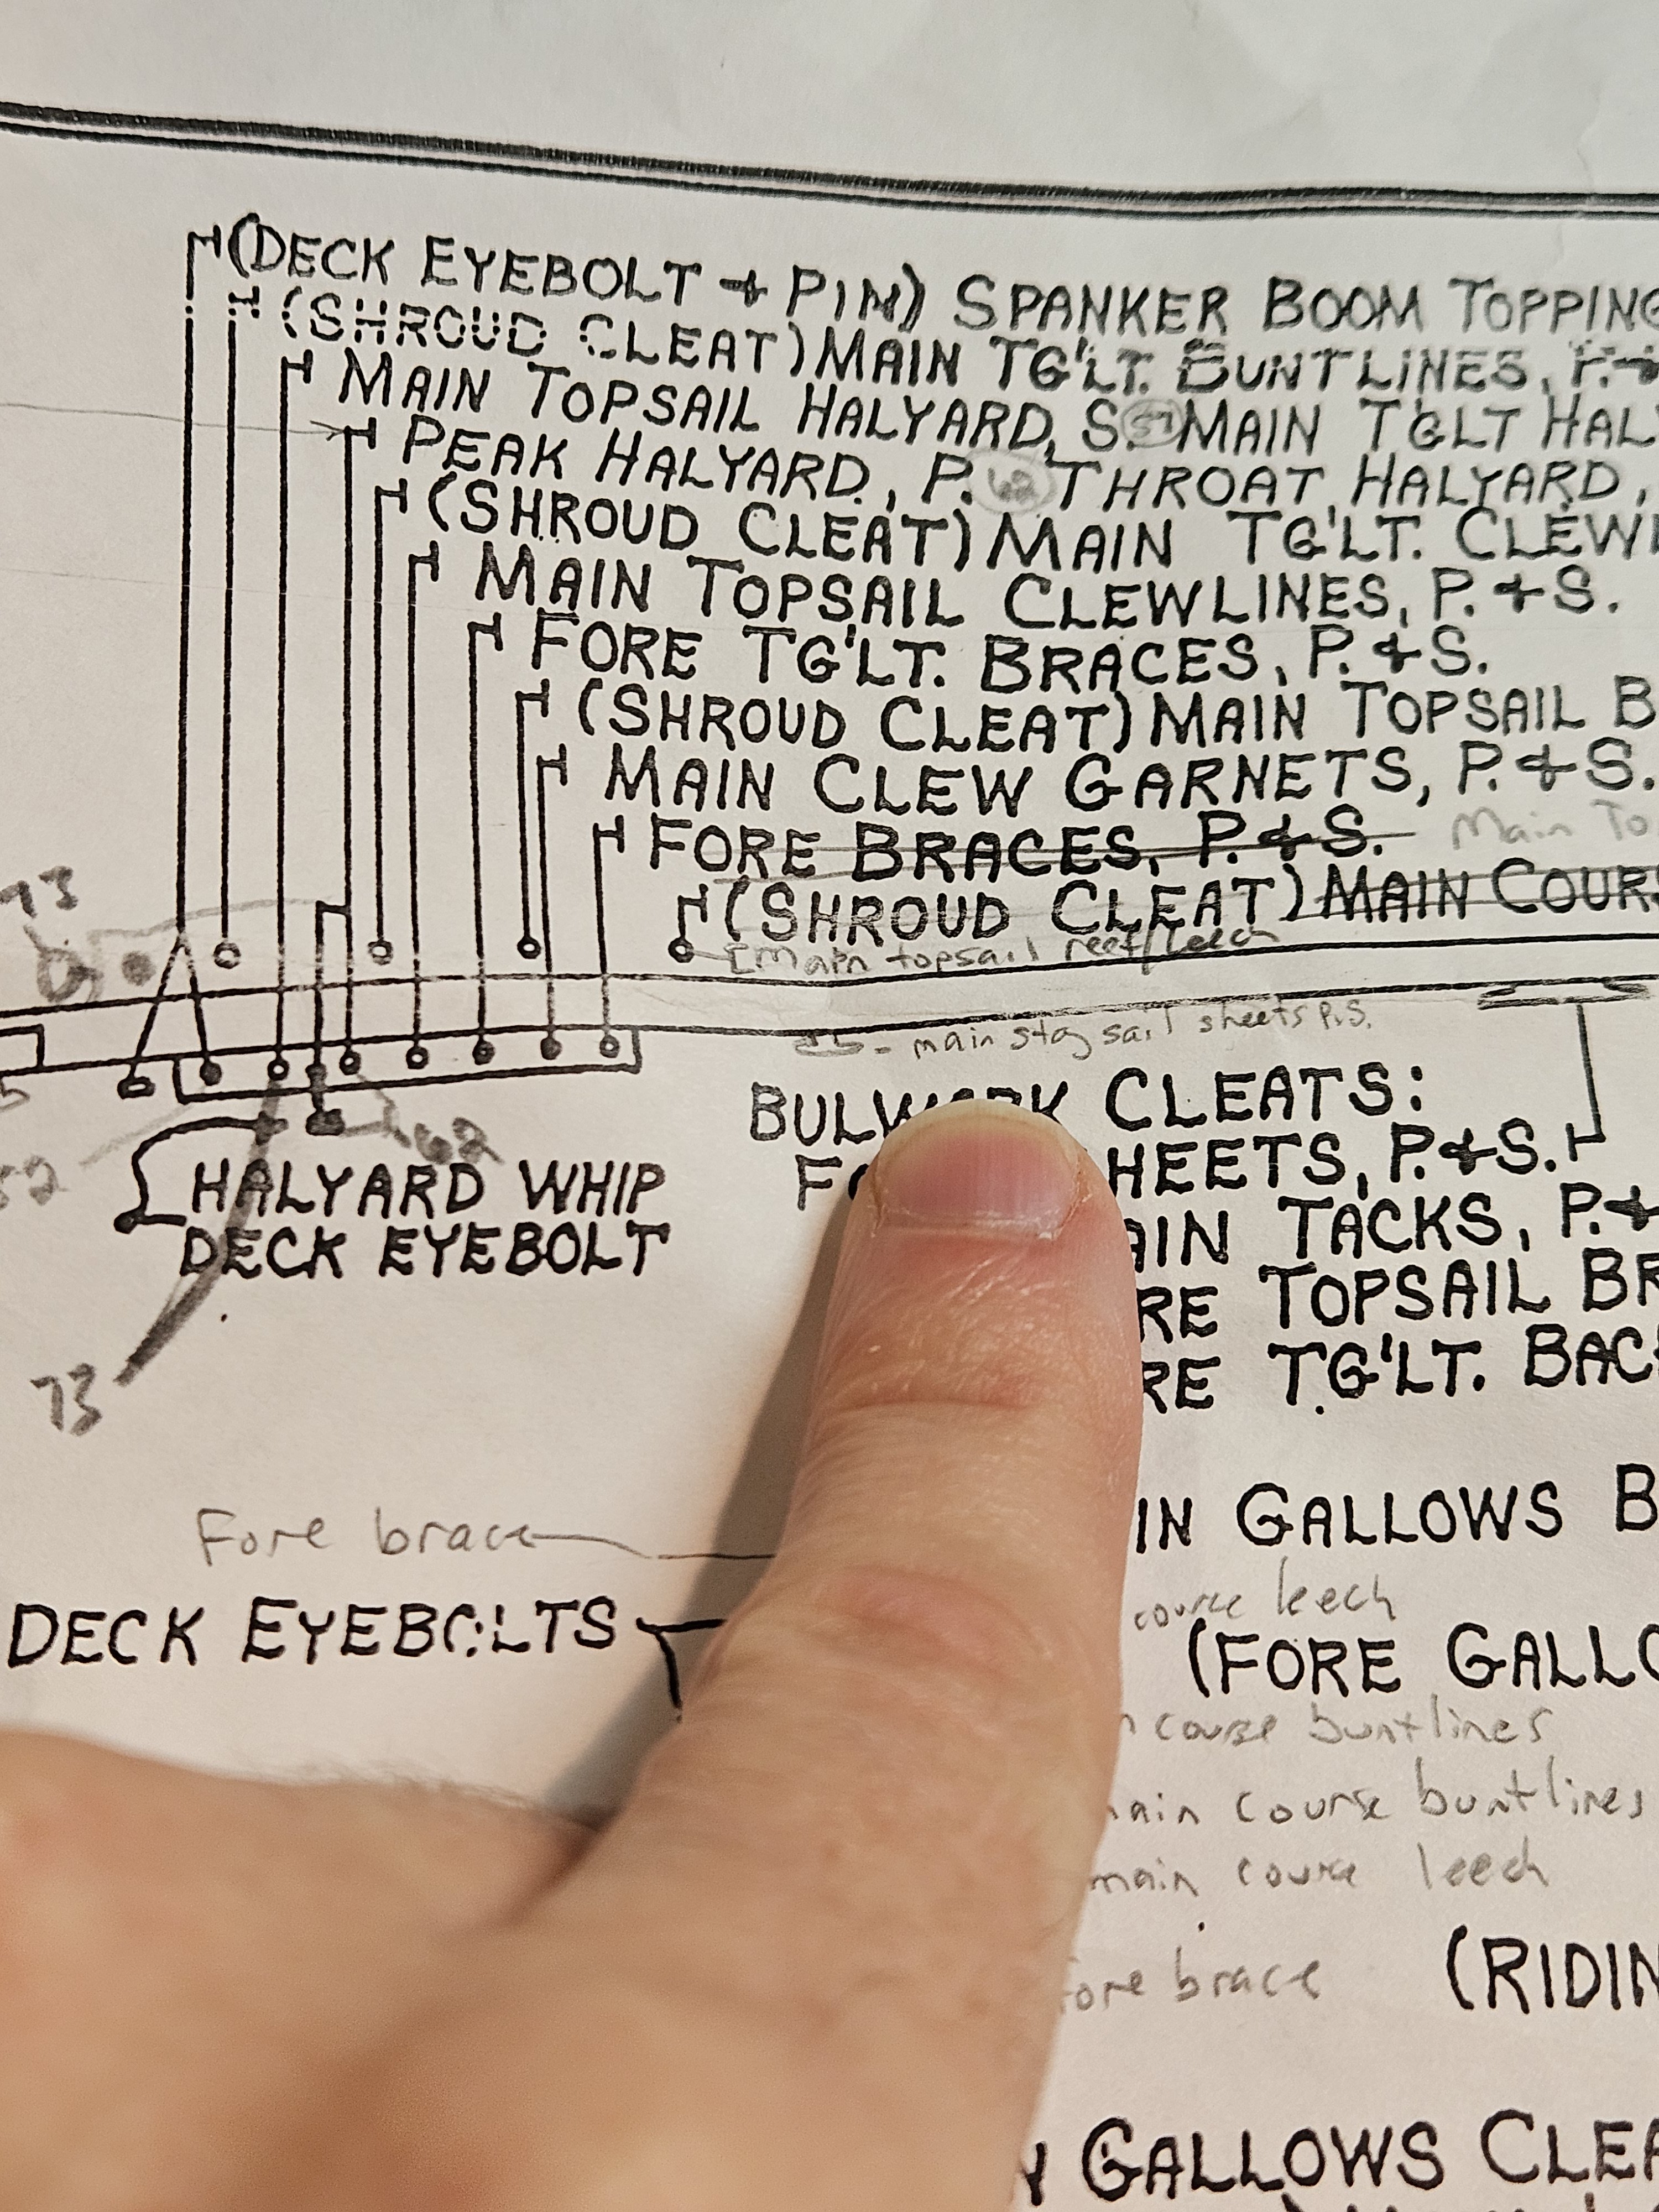
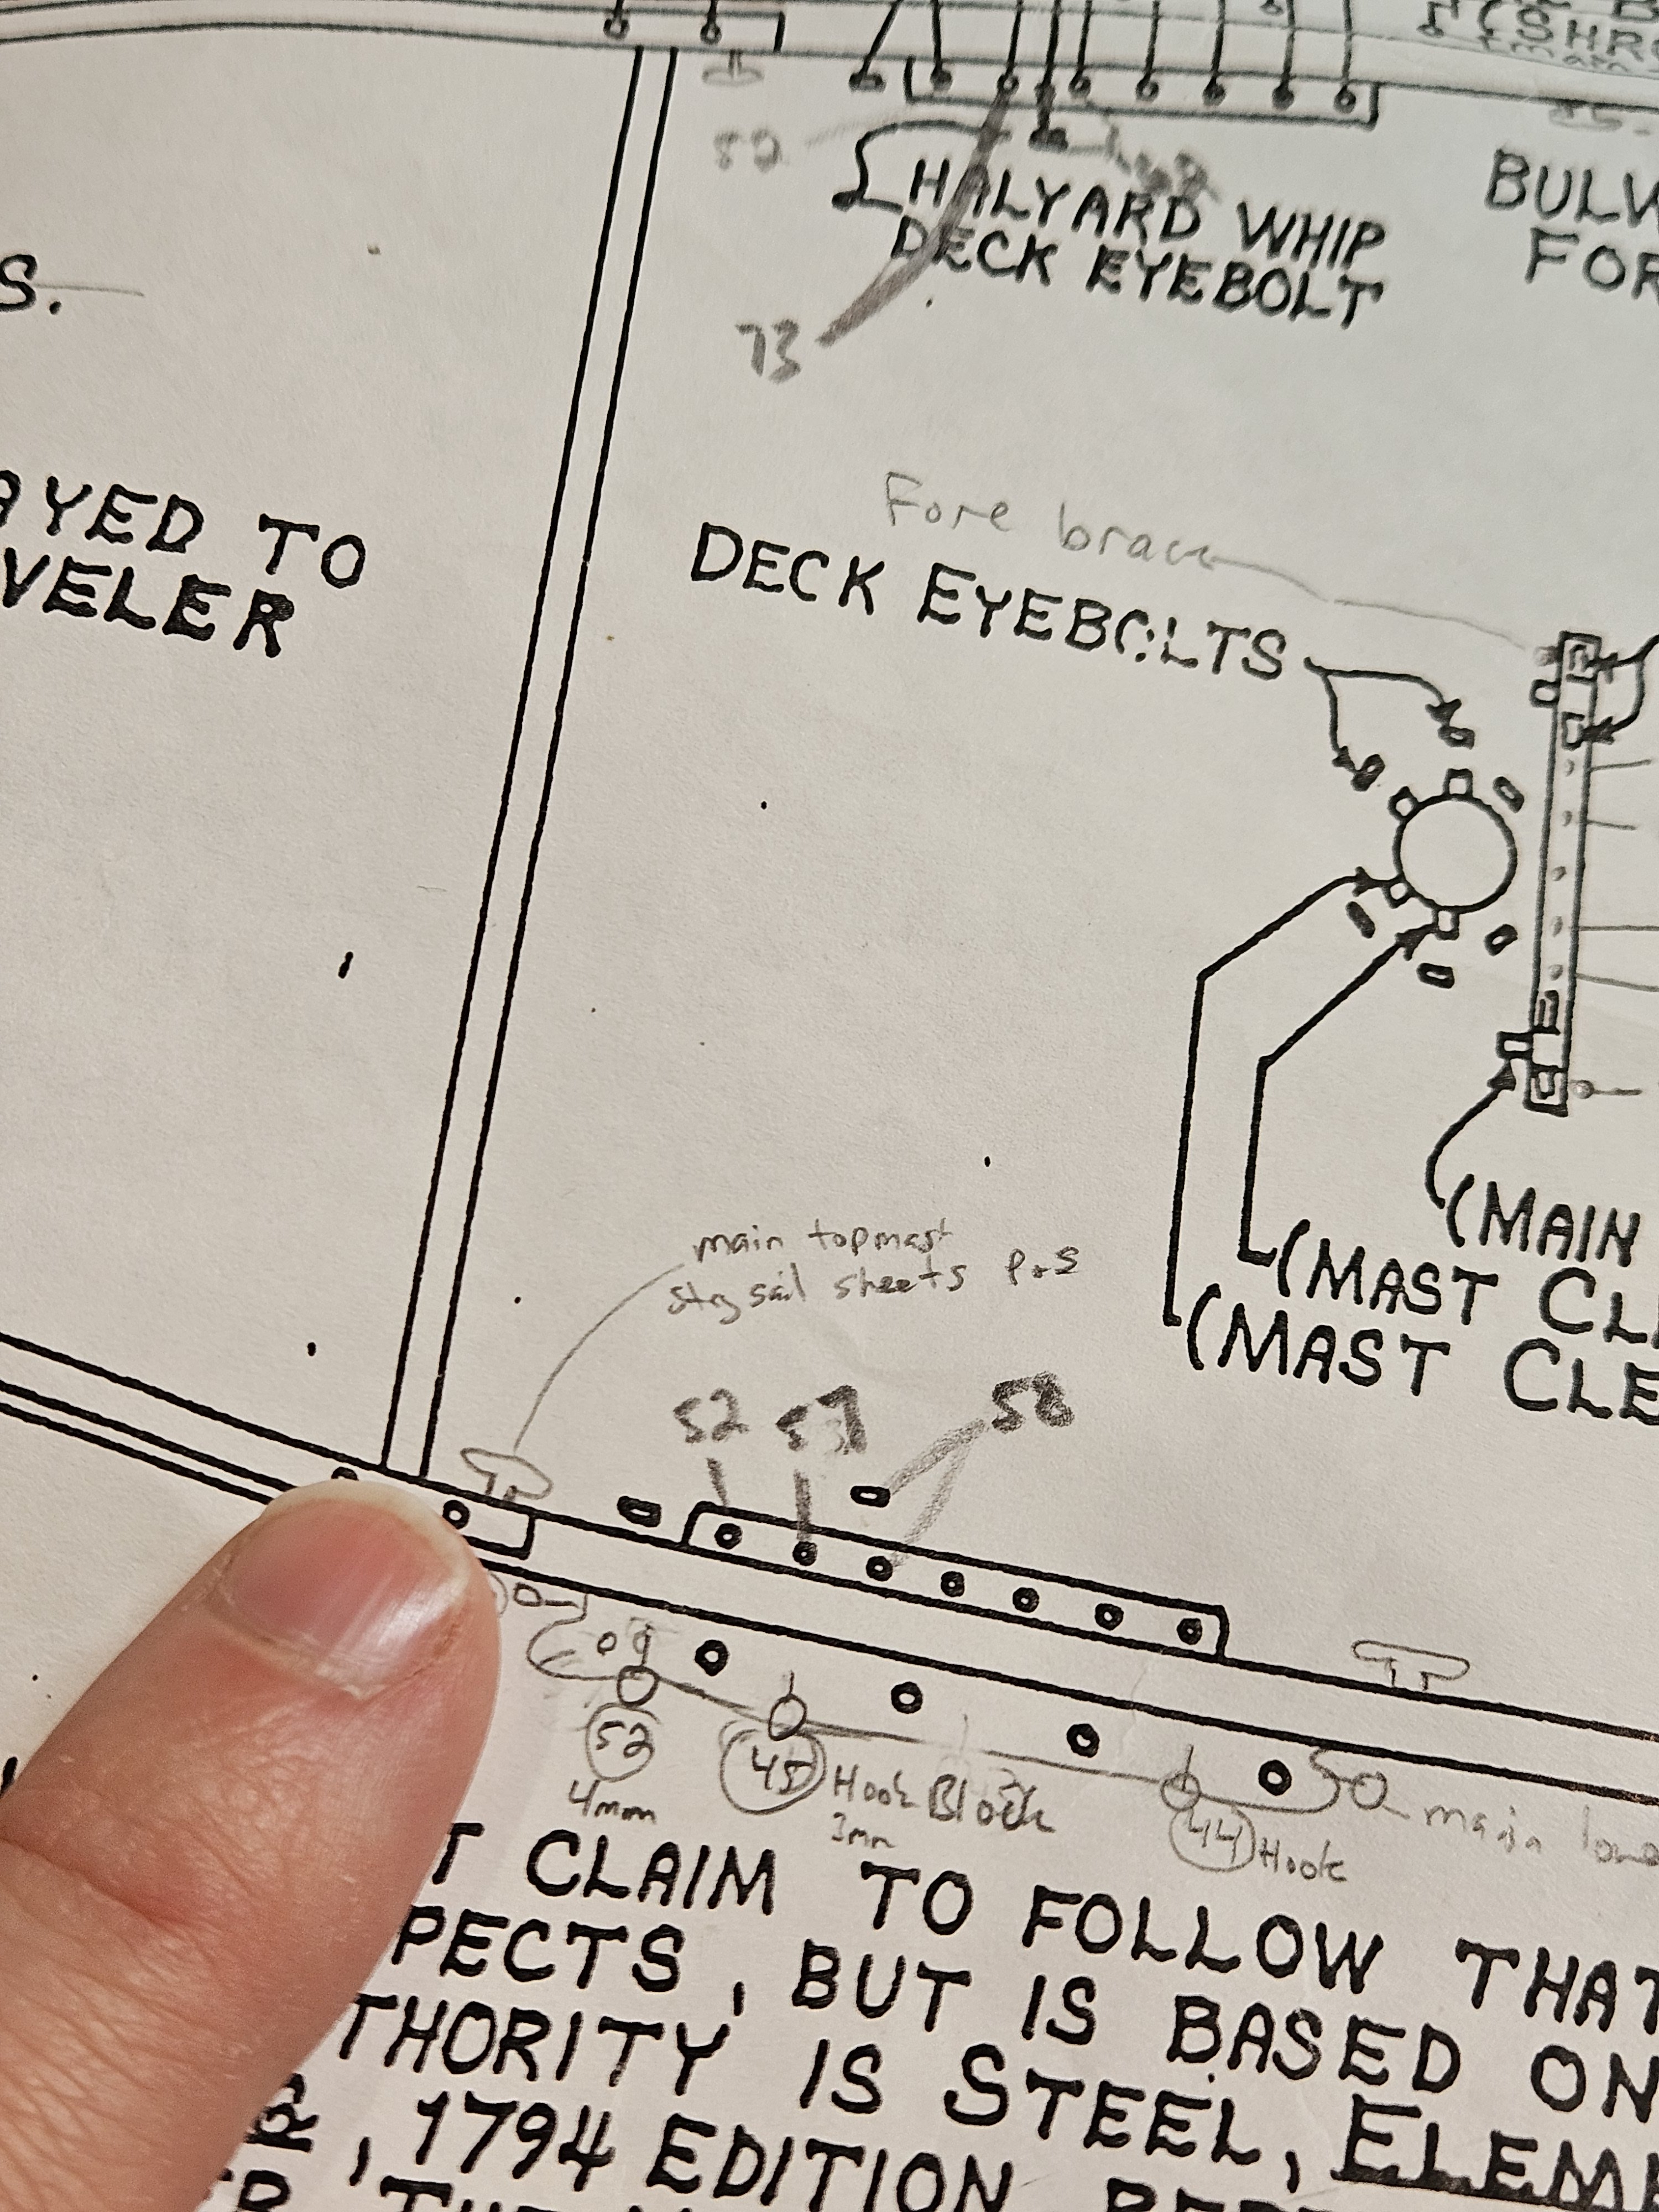
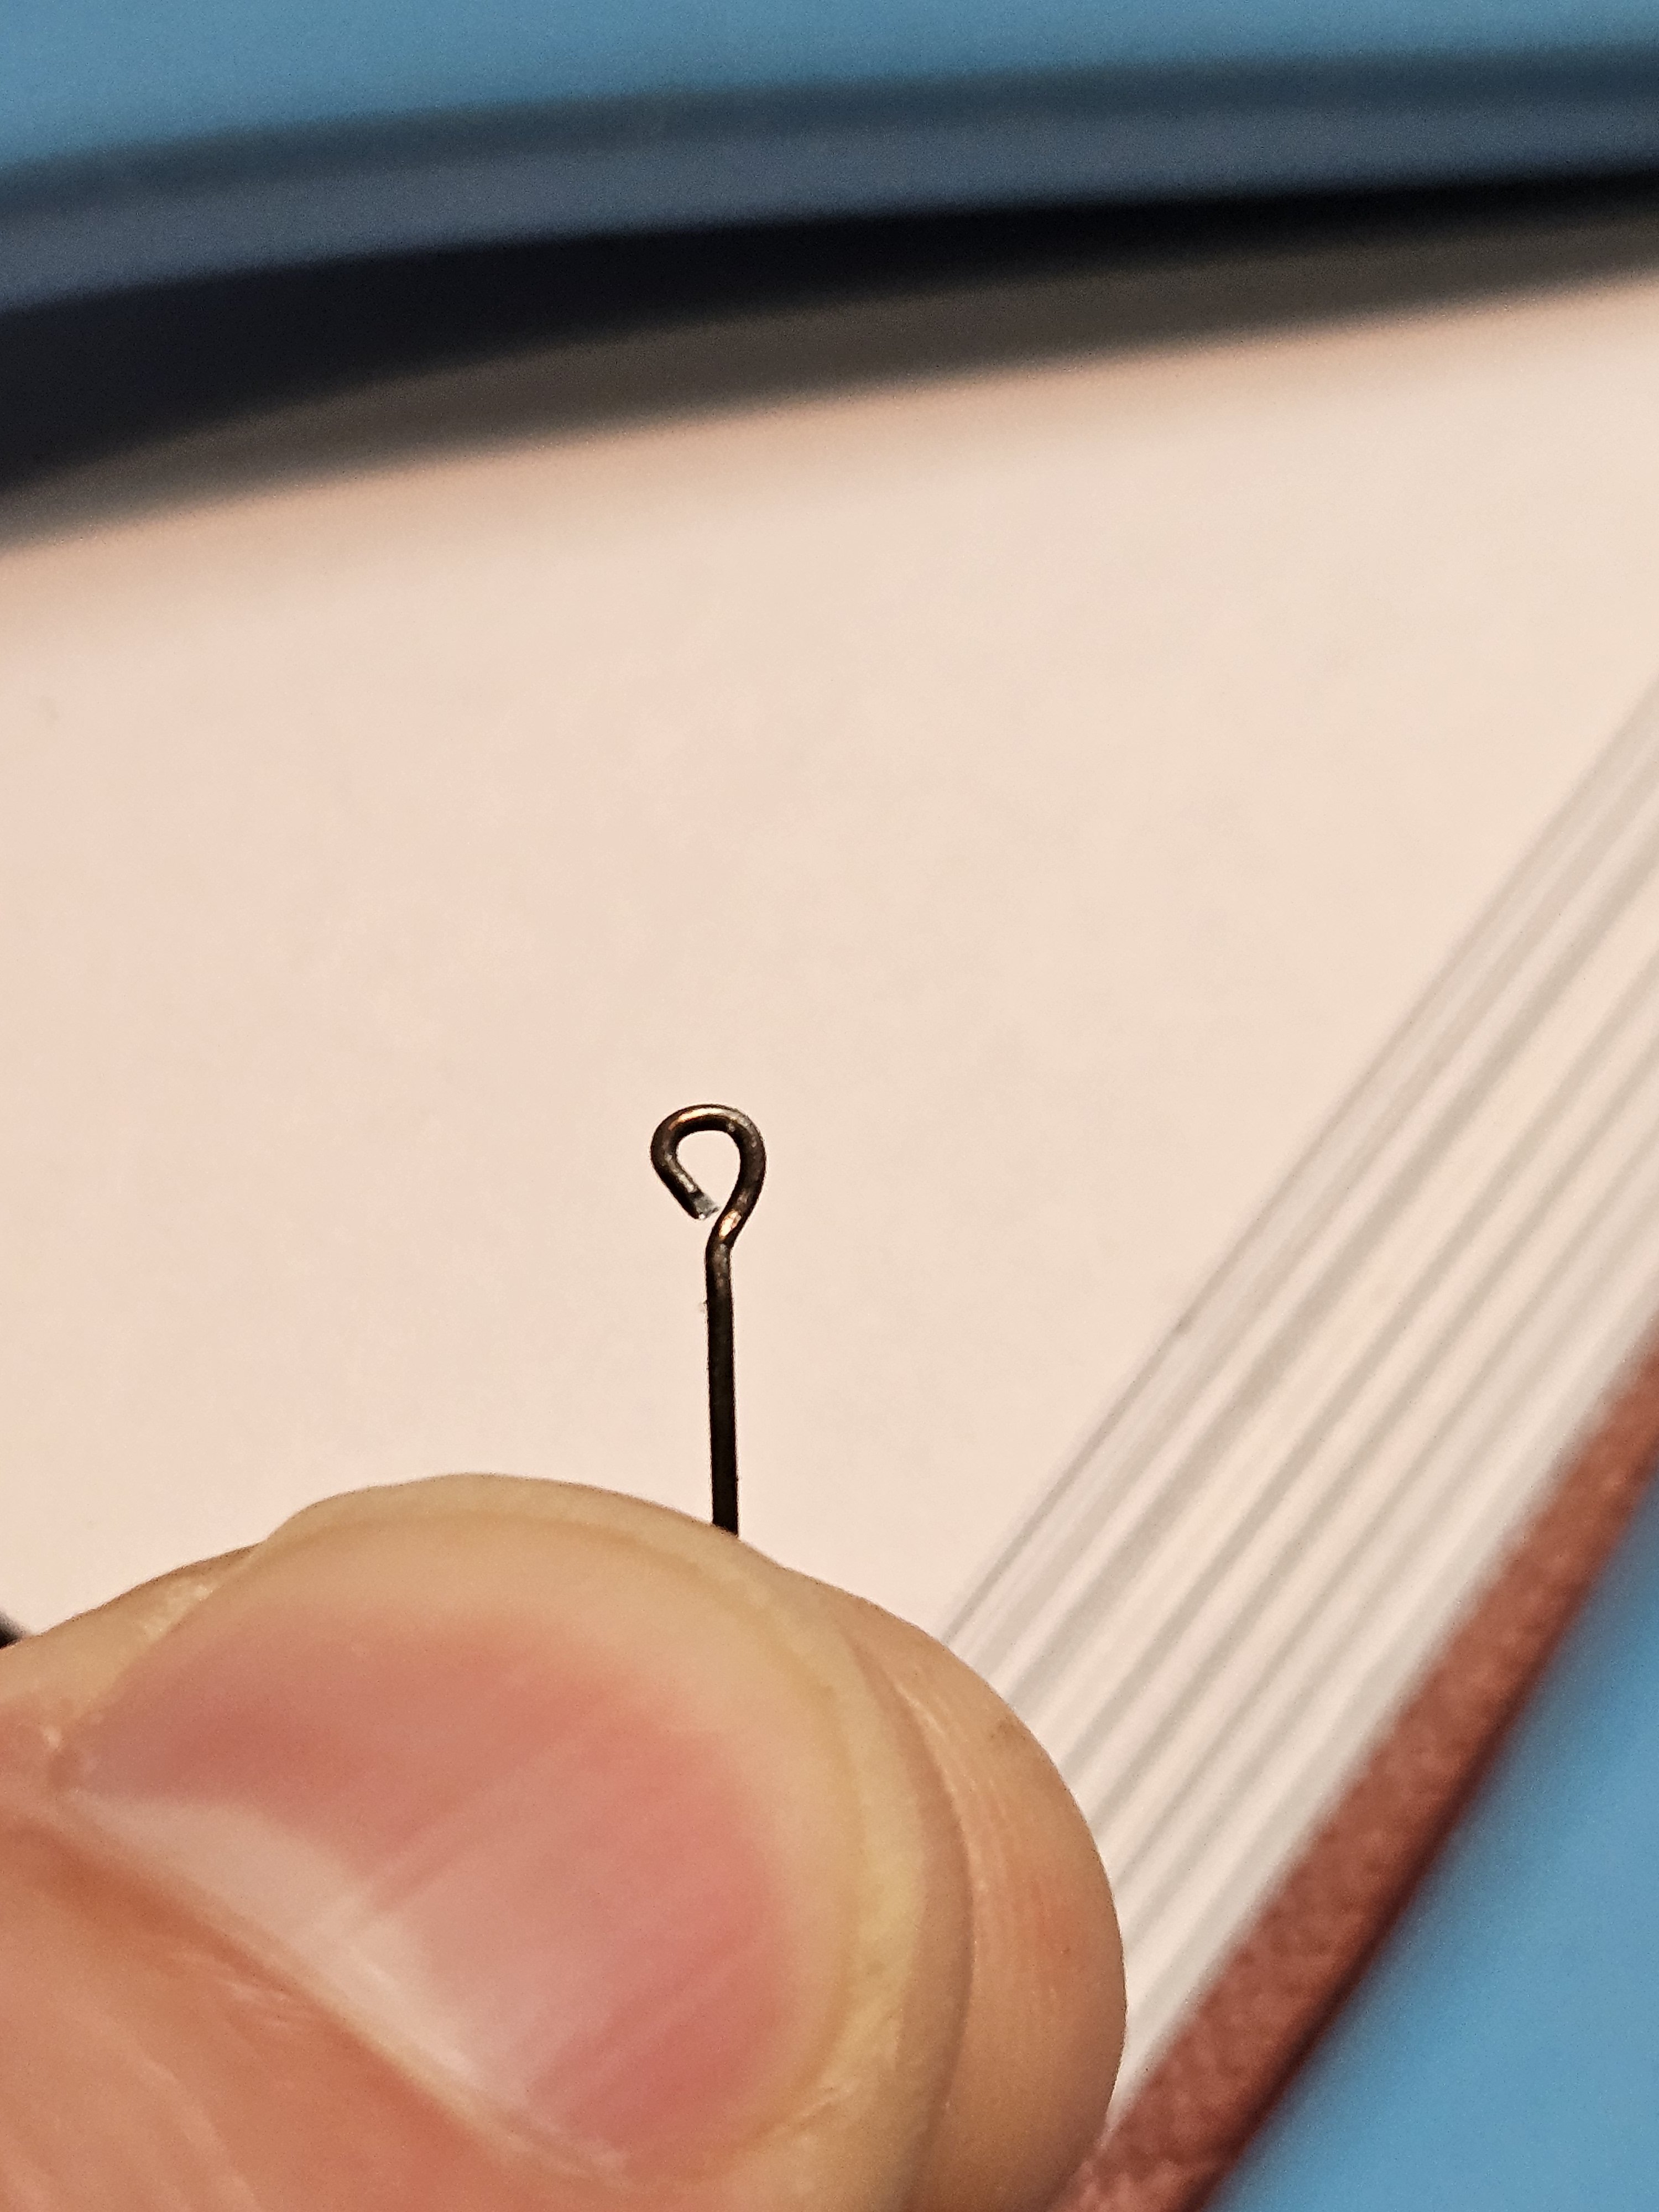
Continuing to pre-rig the Fair American model ship. Before the shrouds are rigged and in the way, I want to get as much on the masts and hull as I can. There will be sails needing additional halyards, so I'm attaching those now. The jib and main stay sails are first on the list.... For the stay sail halyard, I'll need a single block on an eye mounted under the main top....just a small one... I bend these by hand using the ultra fine long needle nose pliers: wrapping annealed wire around the very end of the pliers, then close the eye and then bend the stem straight. Trying to attach a block once the eye is in place will be near impossible to reach, so I'm attaching it to the eye first. Then it gets glued under the top, on one of the cross trees. I moved on to the fore and main burton tackle pendants. Based on the plans and estimating how much length needed to go around the mast head, plus some extra. I wrote the dimensions for Fore on top and Main under. I used the serving machine to make the .030in rope needed. I'm now using the fine black thread for serving, but I still struggle to make satisfactory eyes without them looking bulky, like the right one. After measuring lengths and taping in place, I'll cross over to form a middle eye, add some CA glue and 'tack' to each other. Then follow with seizing with fine thread. The result, again, isn't as neat as I'd ideally like, but it'll have to do. I'm figuring this out as I go, with no clear instructions on how to do this work. When slipping over the top mast, I ran into a problem with the fore burton tackle. the chocks. They were just wide enough to give me trouble sliding the eye down. I REALLY had to work on it, without breaking anything, but I got it down. Used reverse tweezers to hang the ends so they dangle more naturally. They're on there now! Before I do the main lower shrouds, I'm going to need to have access to the gaff and main boom for the spanker sheet now. The throat halyard is in a particularly tight spot. I made a very crude drawing of what I'll need: A block on the gaff jaws, and under the main top, a runner to another single block, with starting tackle for a double block attached to an eyebolt on deck, then belayed to the pin rail. Lots of lengths to get right, so I make sure to add in extra, just in case. You'll remember from several posts back, about how I attach the running and standing rope end (tan and black respectively) to the same block. The reason is the running end has to START on this block and go down; the rope needs to be attached to the block ahead of time. Now I can feed it through the eye made in the gaff jaws for hauling (halyard) up the mast. I'll need to figure out how to do a parrel of some kind later on, because obviously the instructions make no mention of one at all. Seizing the standing rope end over itself with a few turns, then trim close. That's as clean a job as I can manage. And on the after end of the main top, I added a single 4mm block, similar to the stay sail halyard block. This one was tied to the trestle tree and trimmed close. Still working on halyards, and the burton tackle pendants had to attach/hook somewhere on the top. I made a crude schematic for that too. Again, I won't easily be able to access or attach these blocks later on, so I'm making the blocks with running ends, and attaching to eye bolts and attaching the eye bolts to the top now. I won't let the running end of the halyard just hang there, so as with other rigging, I'm coiling it up and labeling with painters tape for later. Here is the finished result. You can see the empty eye bolts for the burton tackle ready to be hooked later. These details are not shown in the spar plan, so I'm discovering these as I go. So it may not look like a ton, but making all the blocks takes time. Plus double checking the measurements and looking at books and the Niagara plans as a guide of how rigging is done takes time. These details can't be rushed. I realize much of what I'm doing is probably not historically accurate, but rather made-to-work-for-me. Do other modelers have this much trouble knowing where everything goes, or is it just experience? As a model ship newbie, I'd love to hear how others have faired. Thanks for reading along. - Jason -

.thumb.jpg.9a6fd5cec2a51f43da52dfccbb5df888.jpg)


-
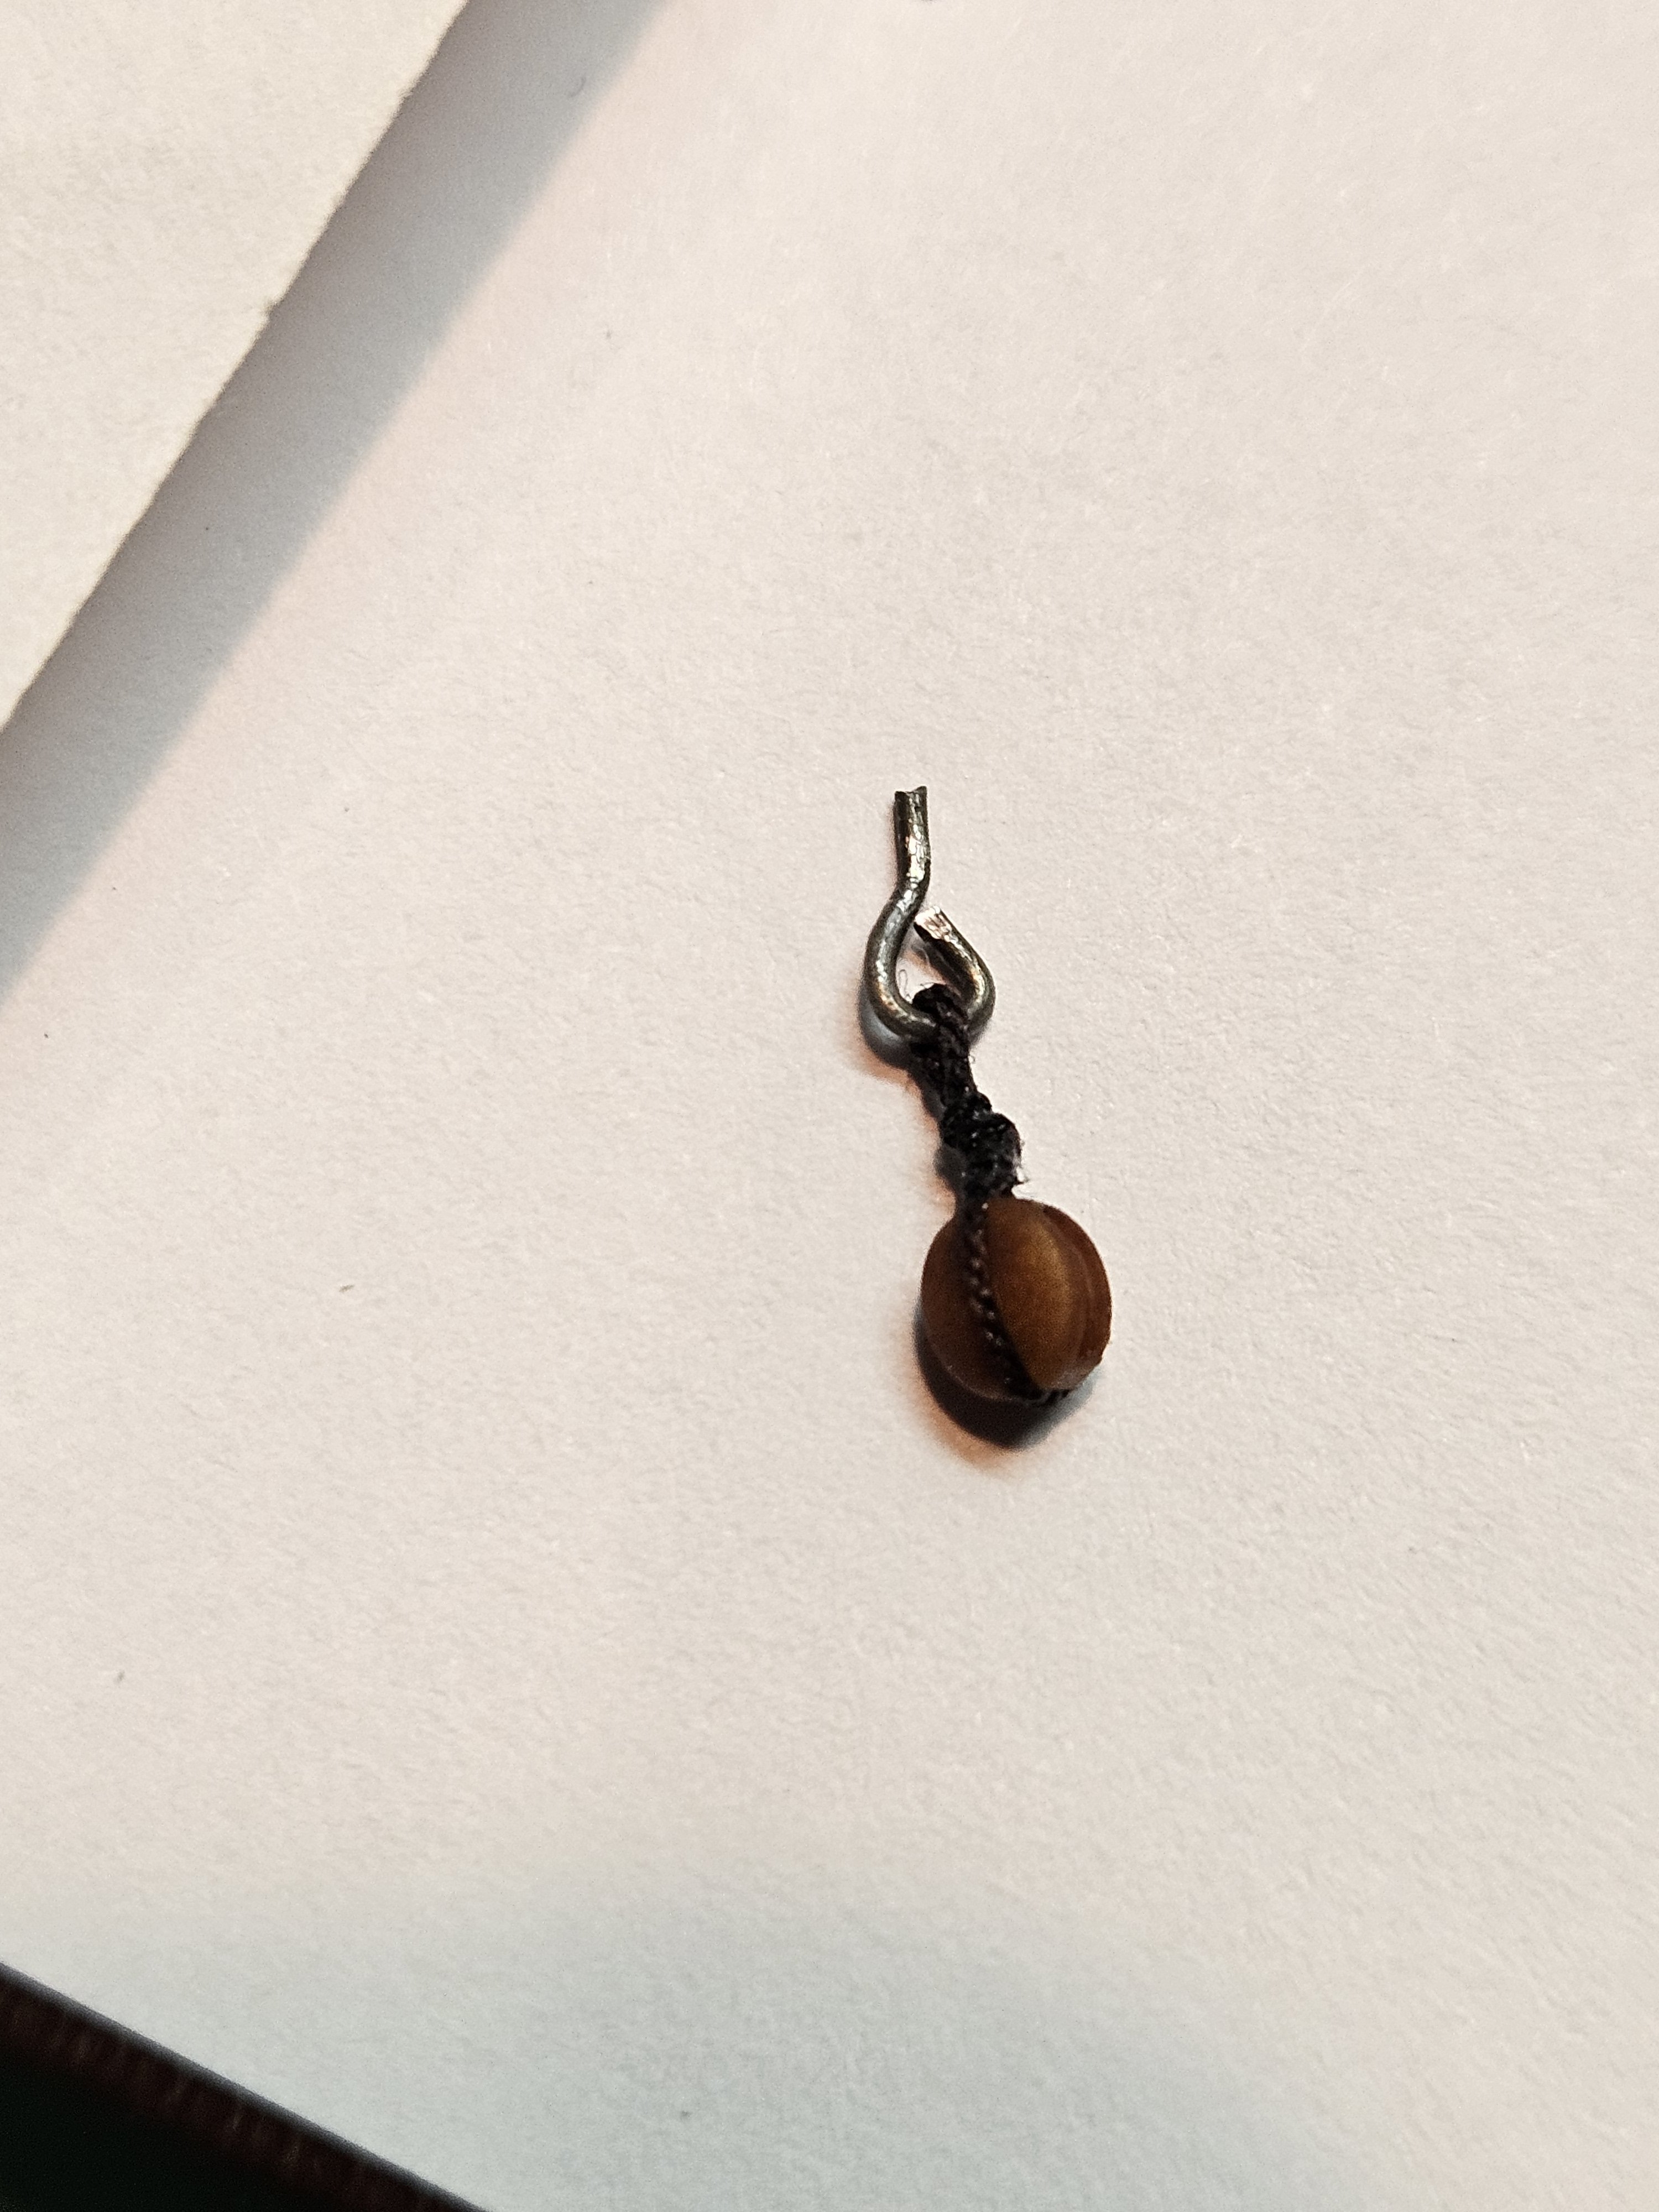
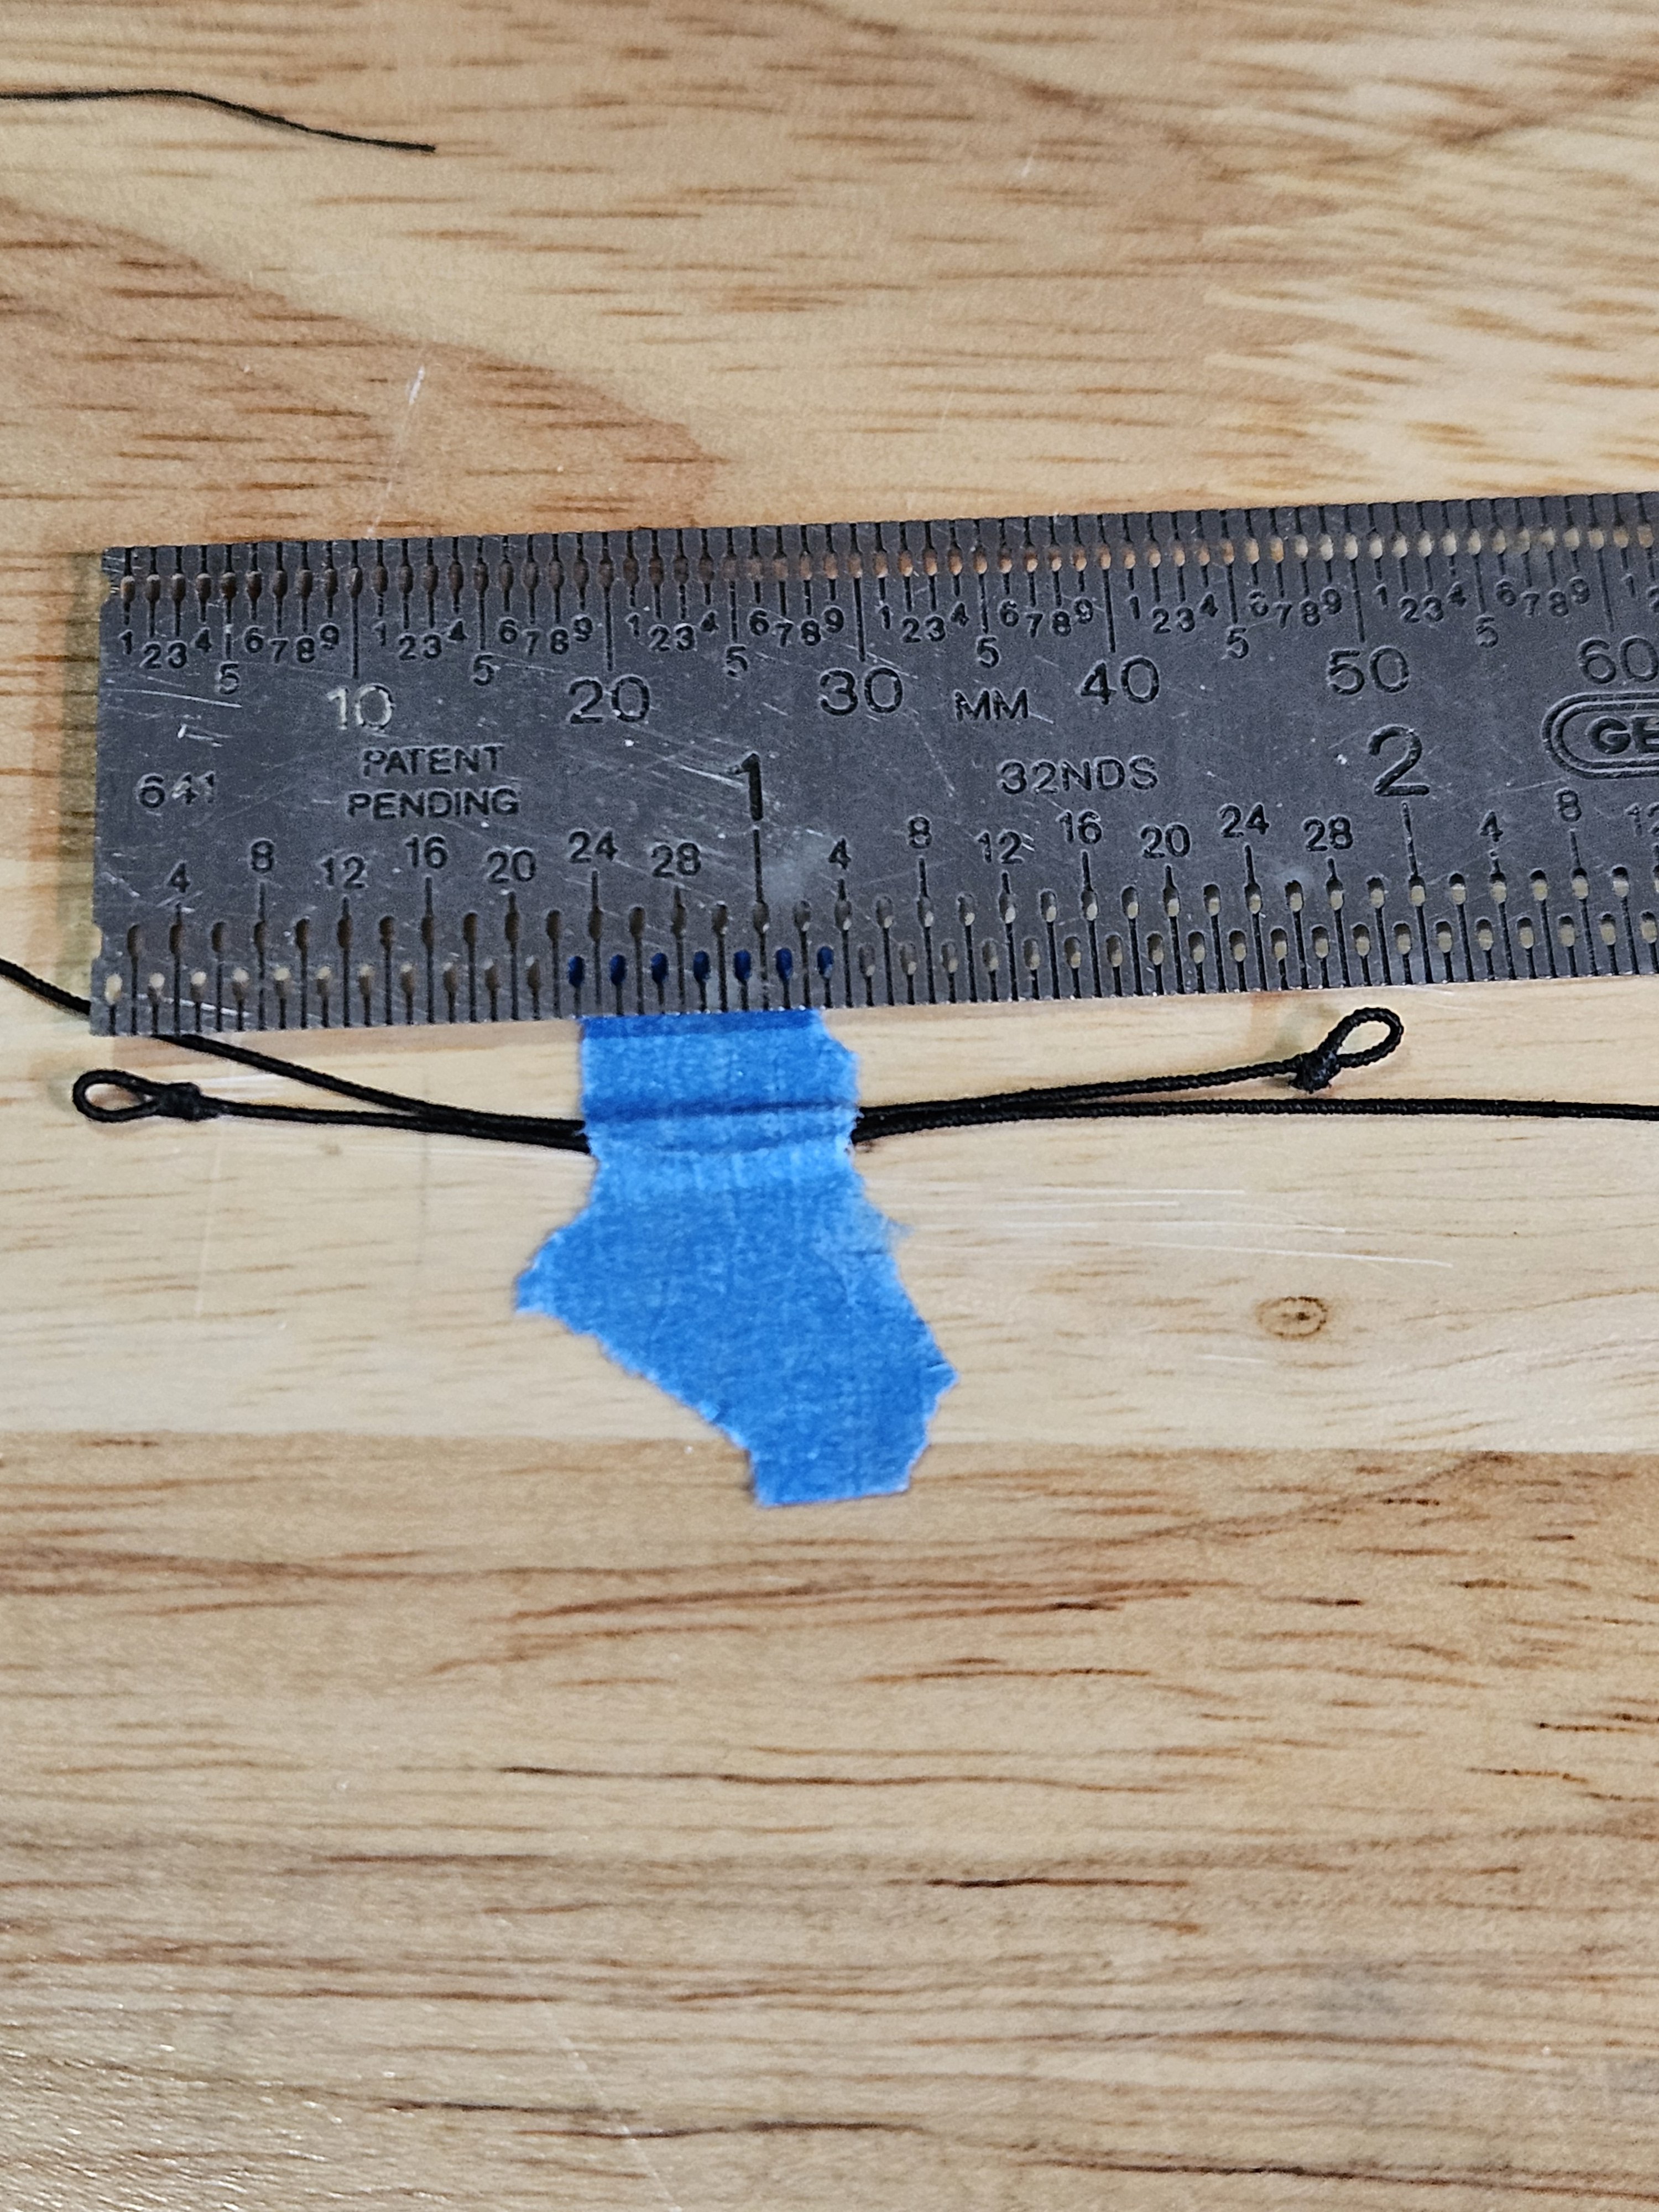
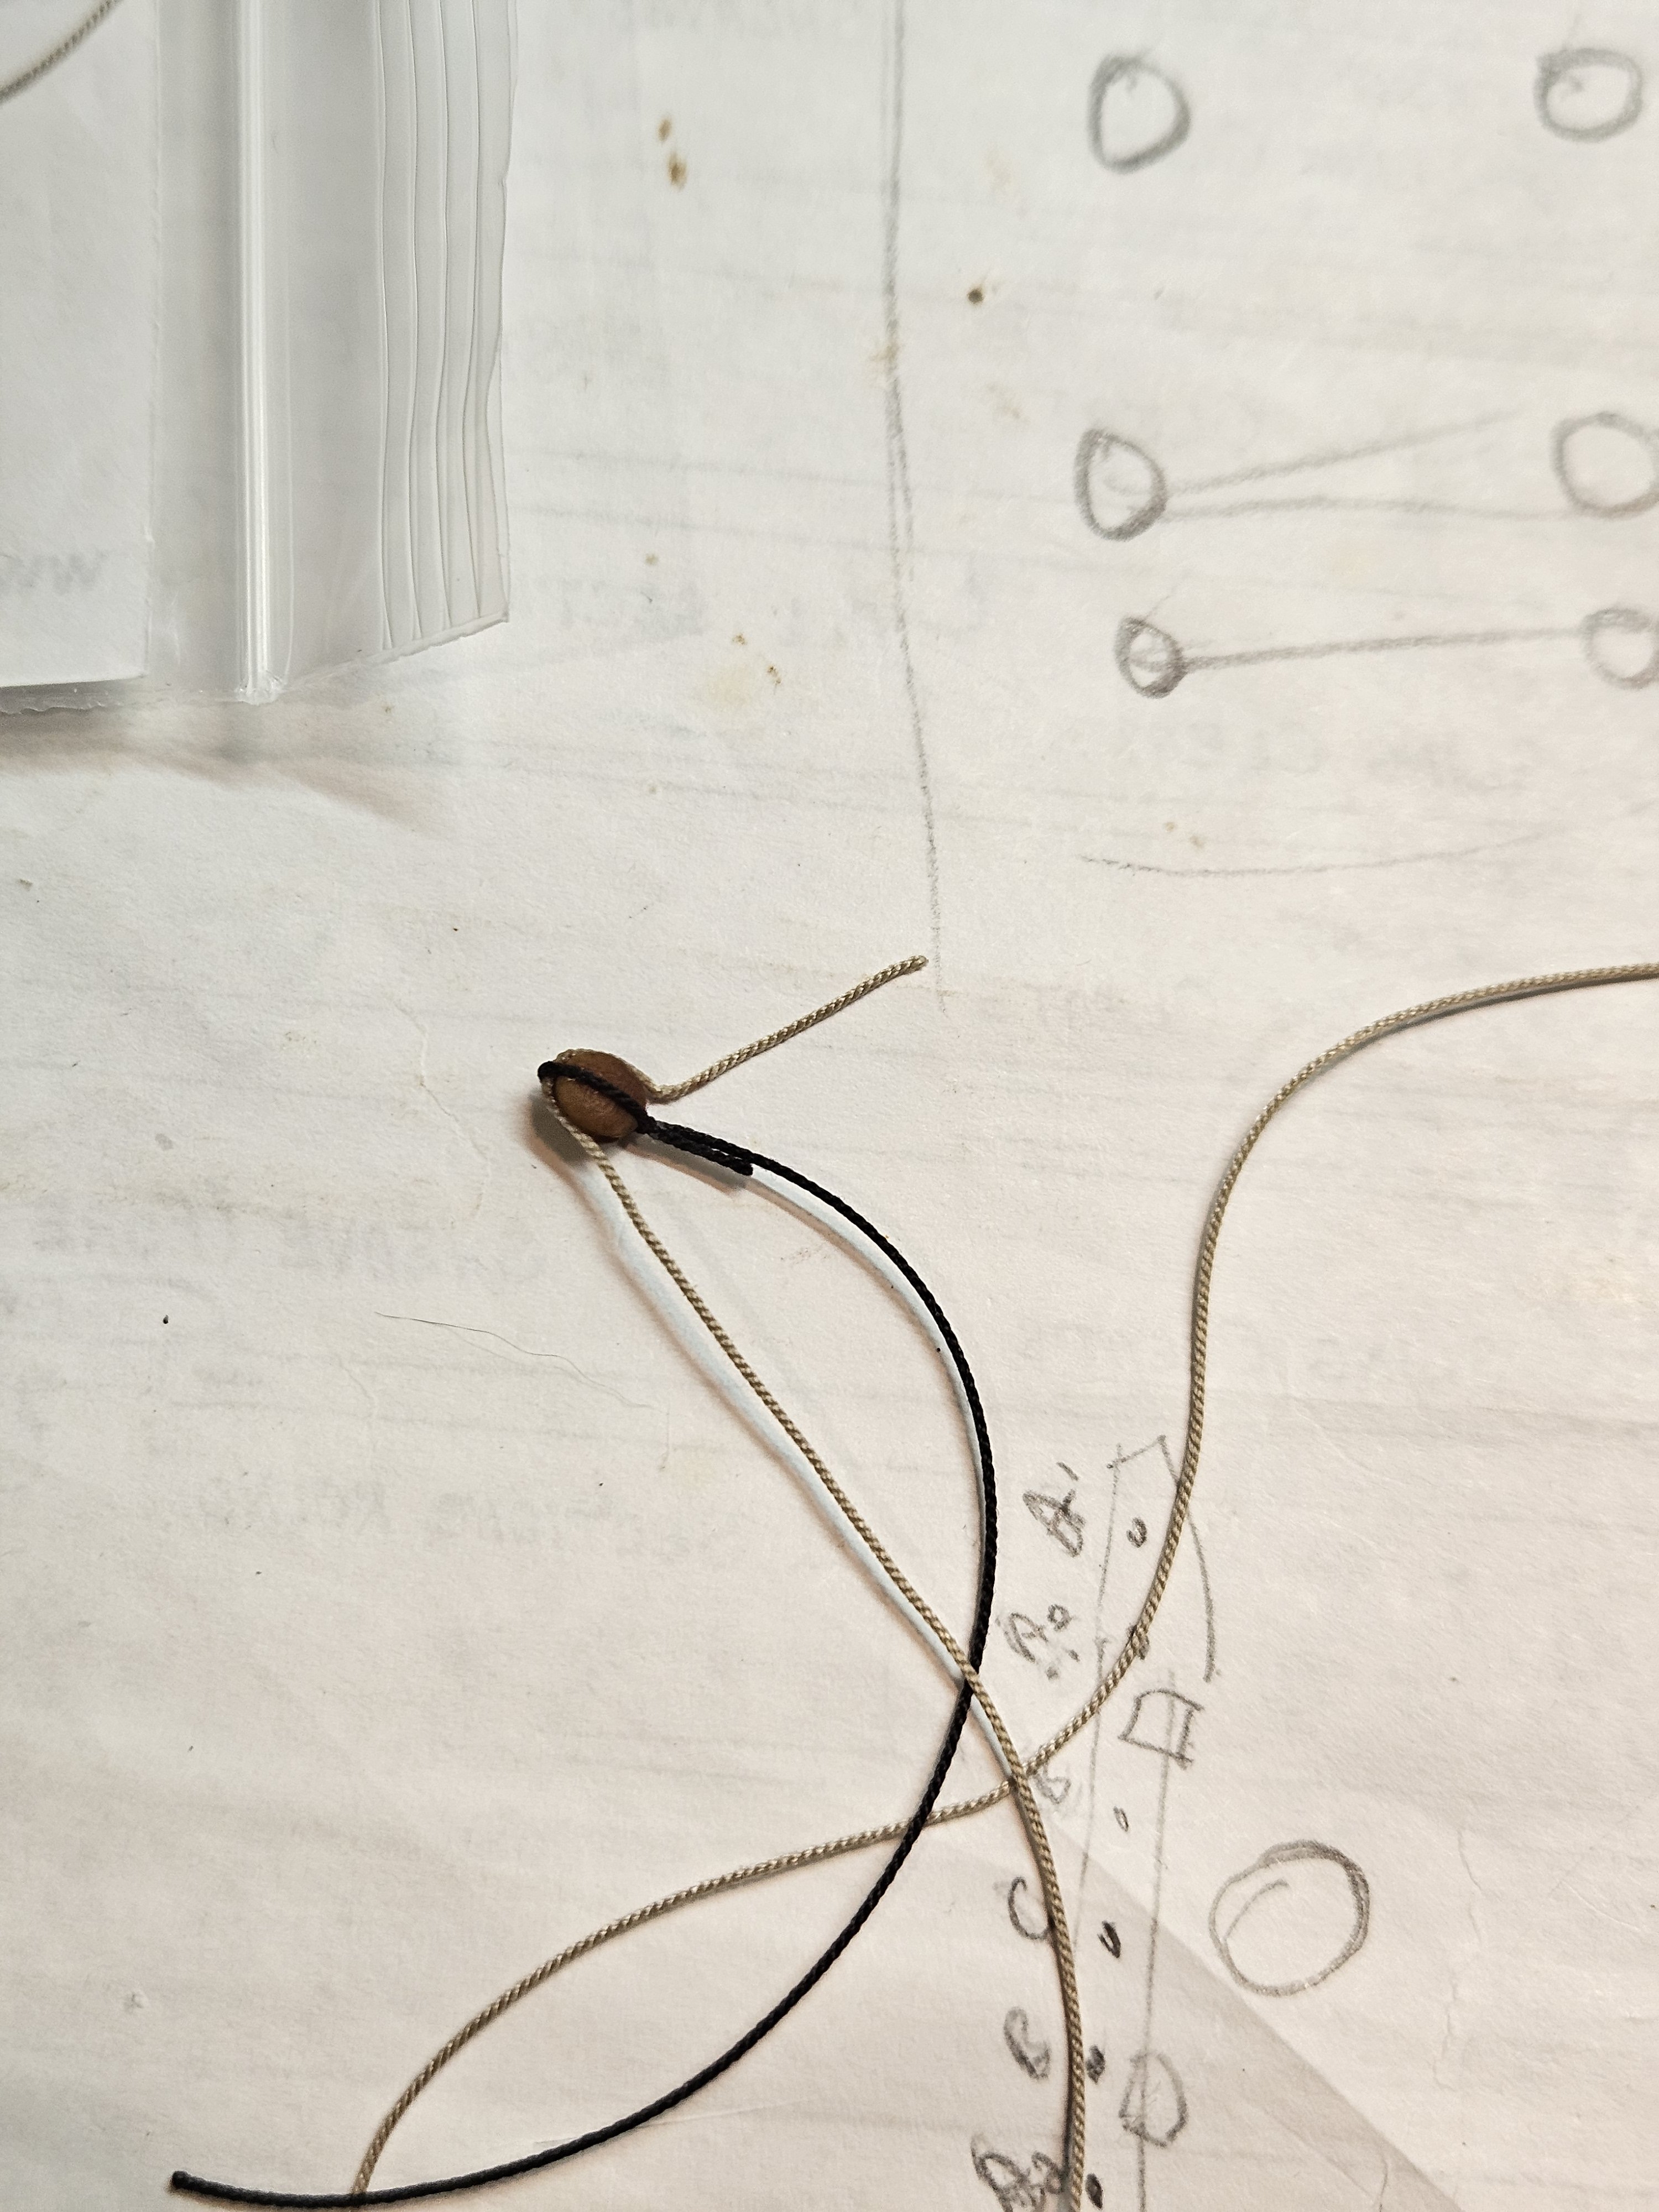
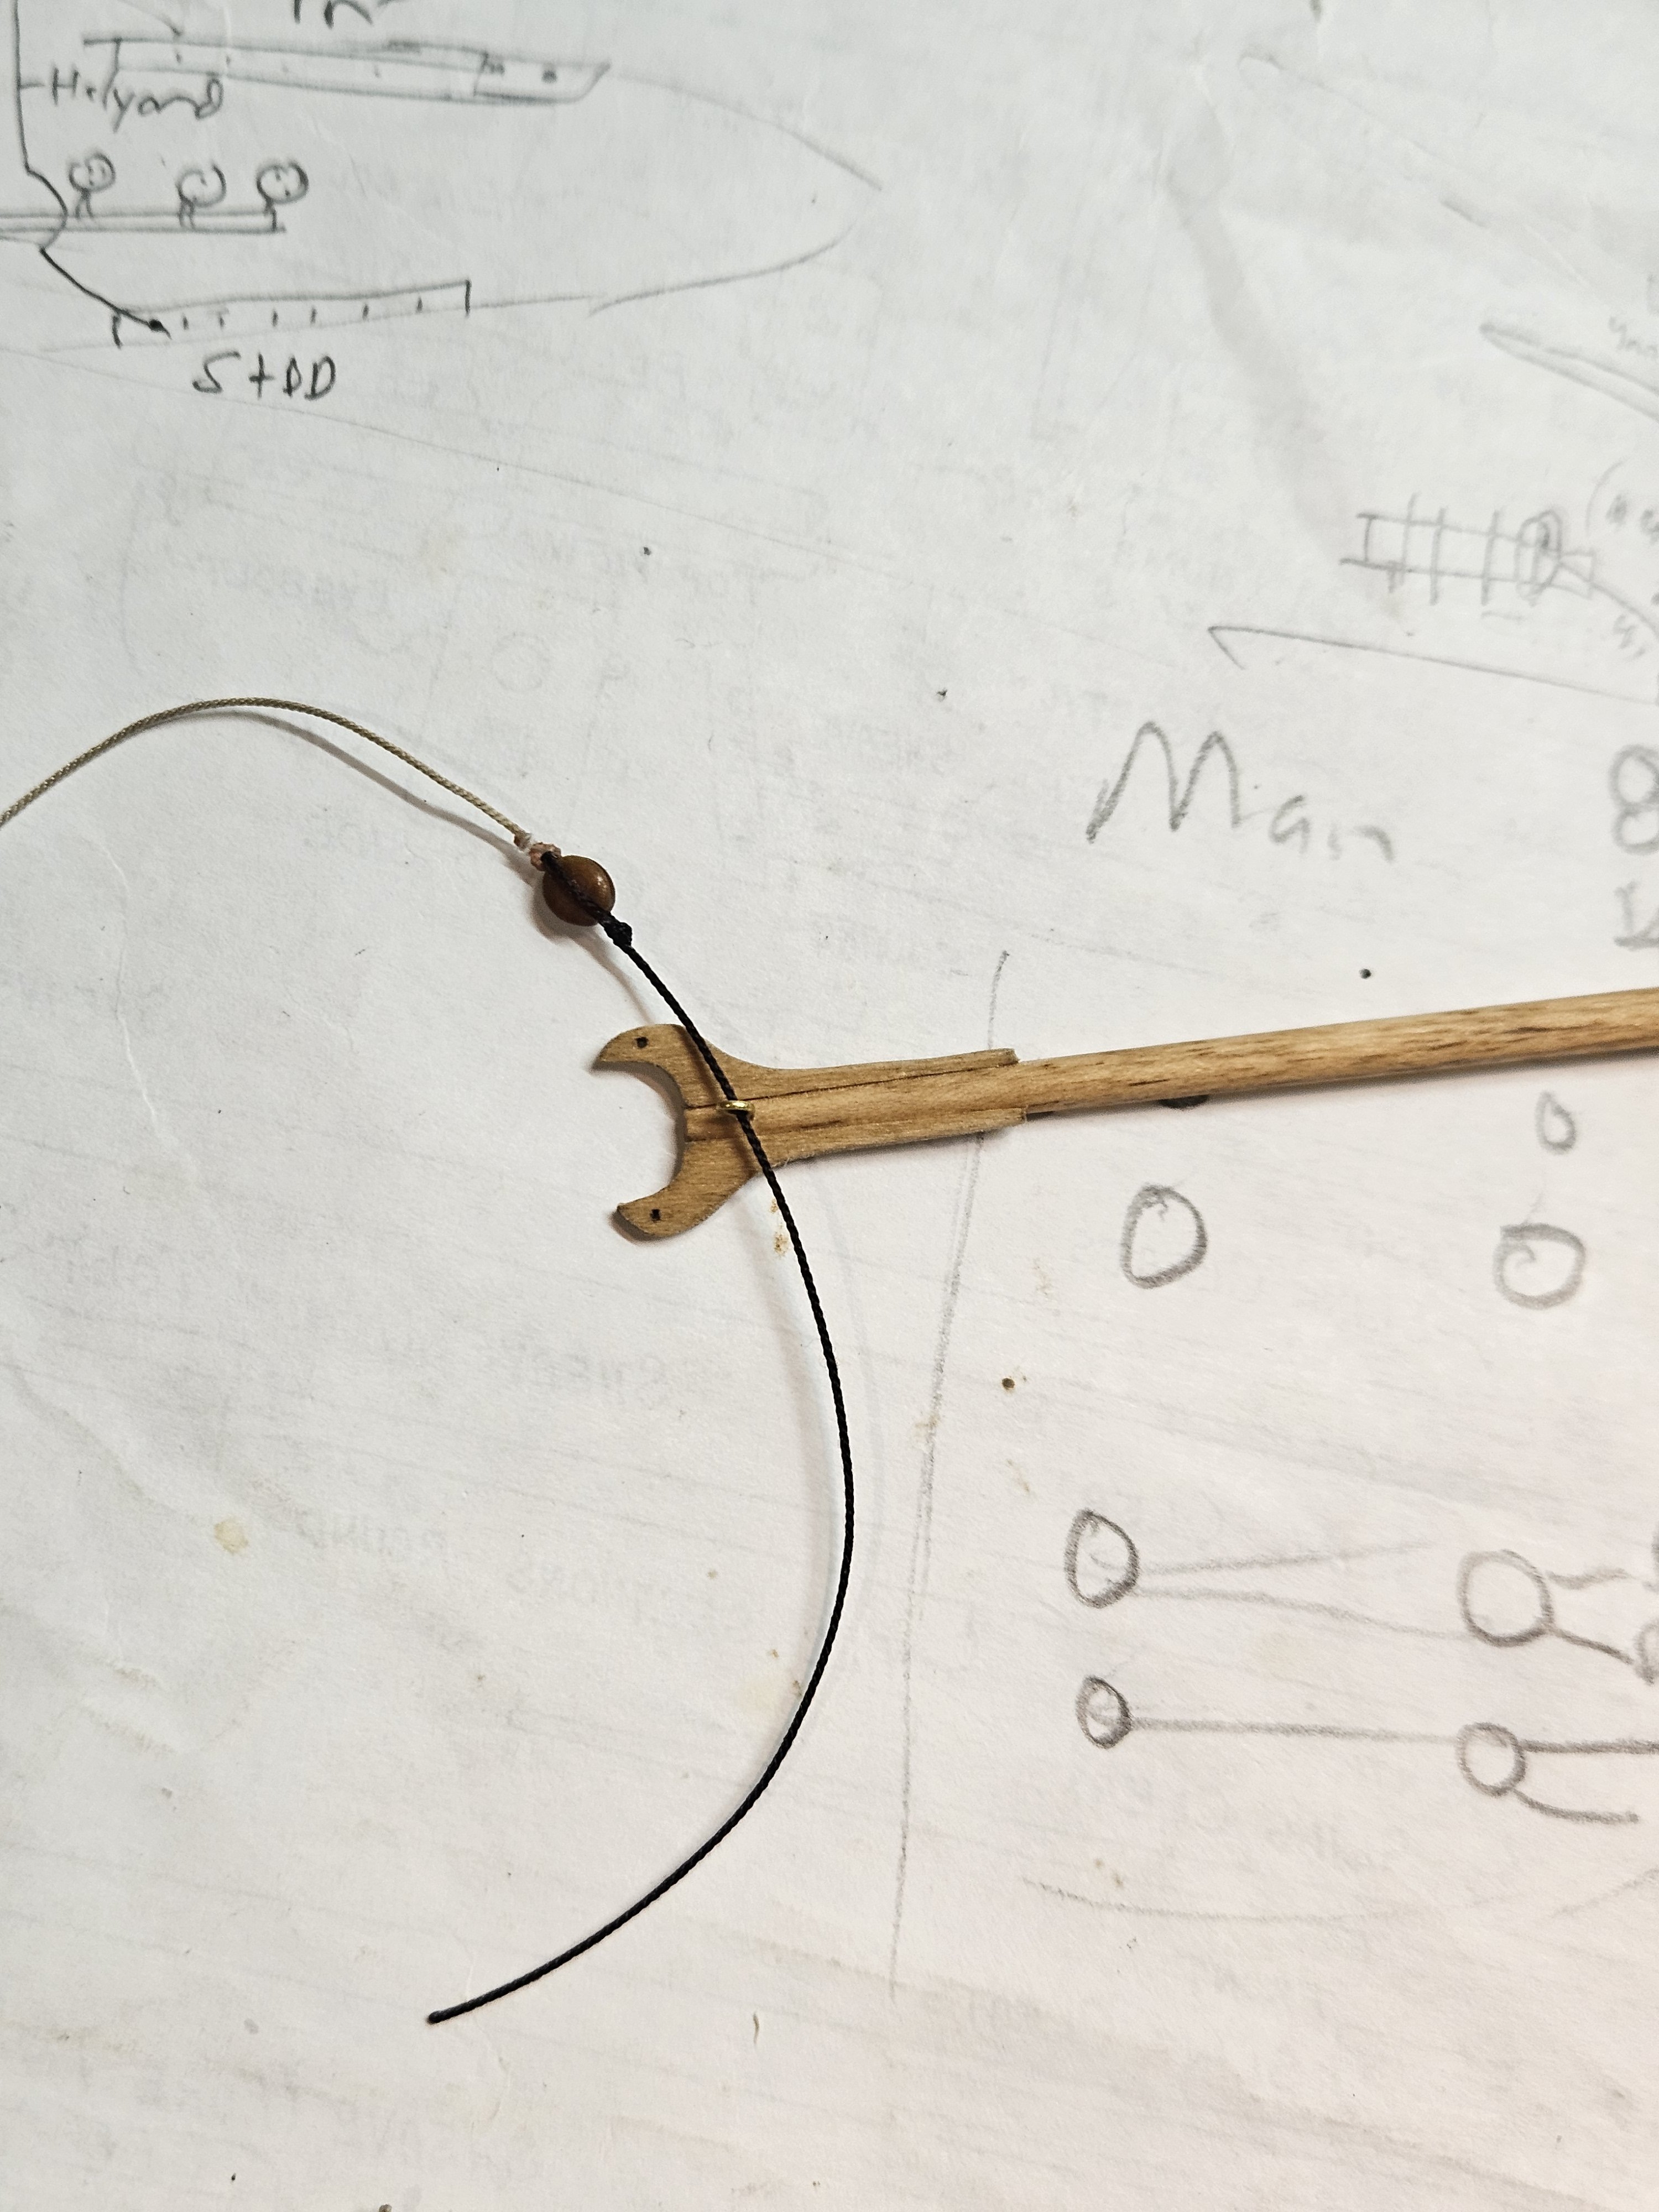
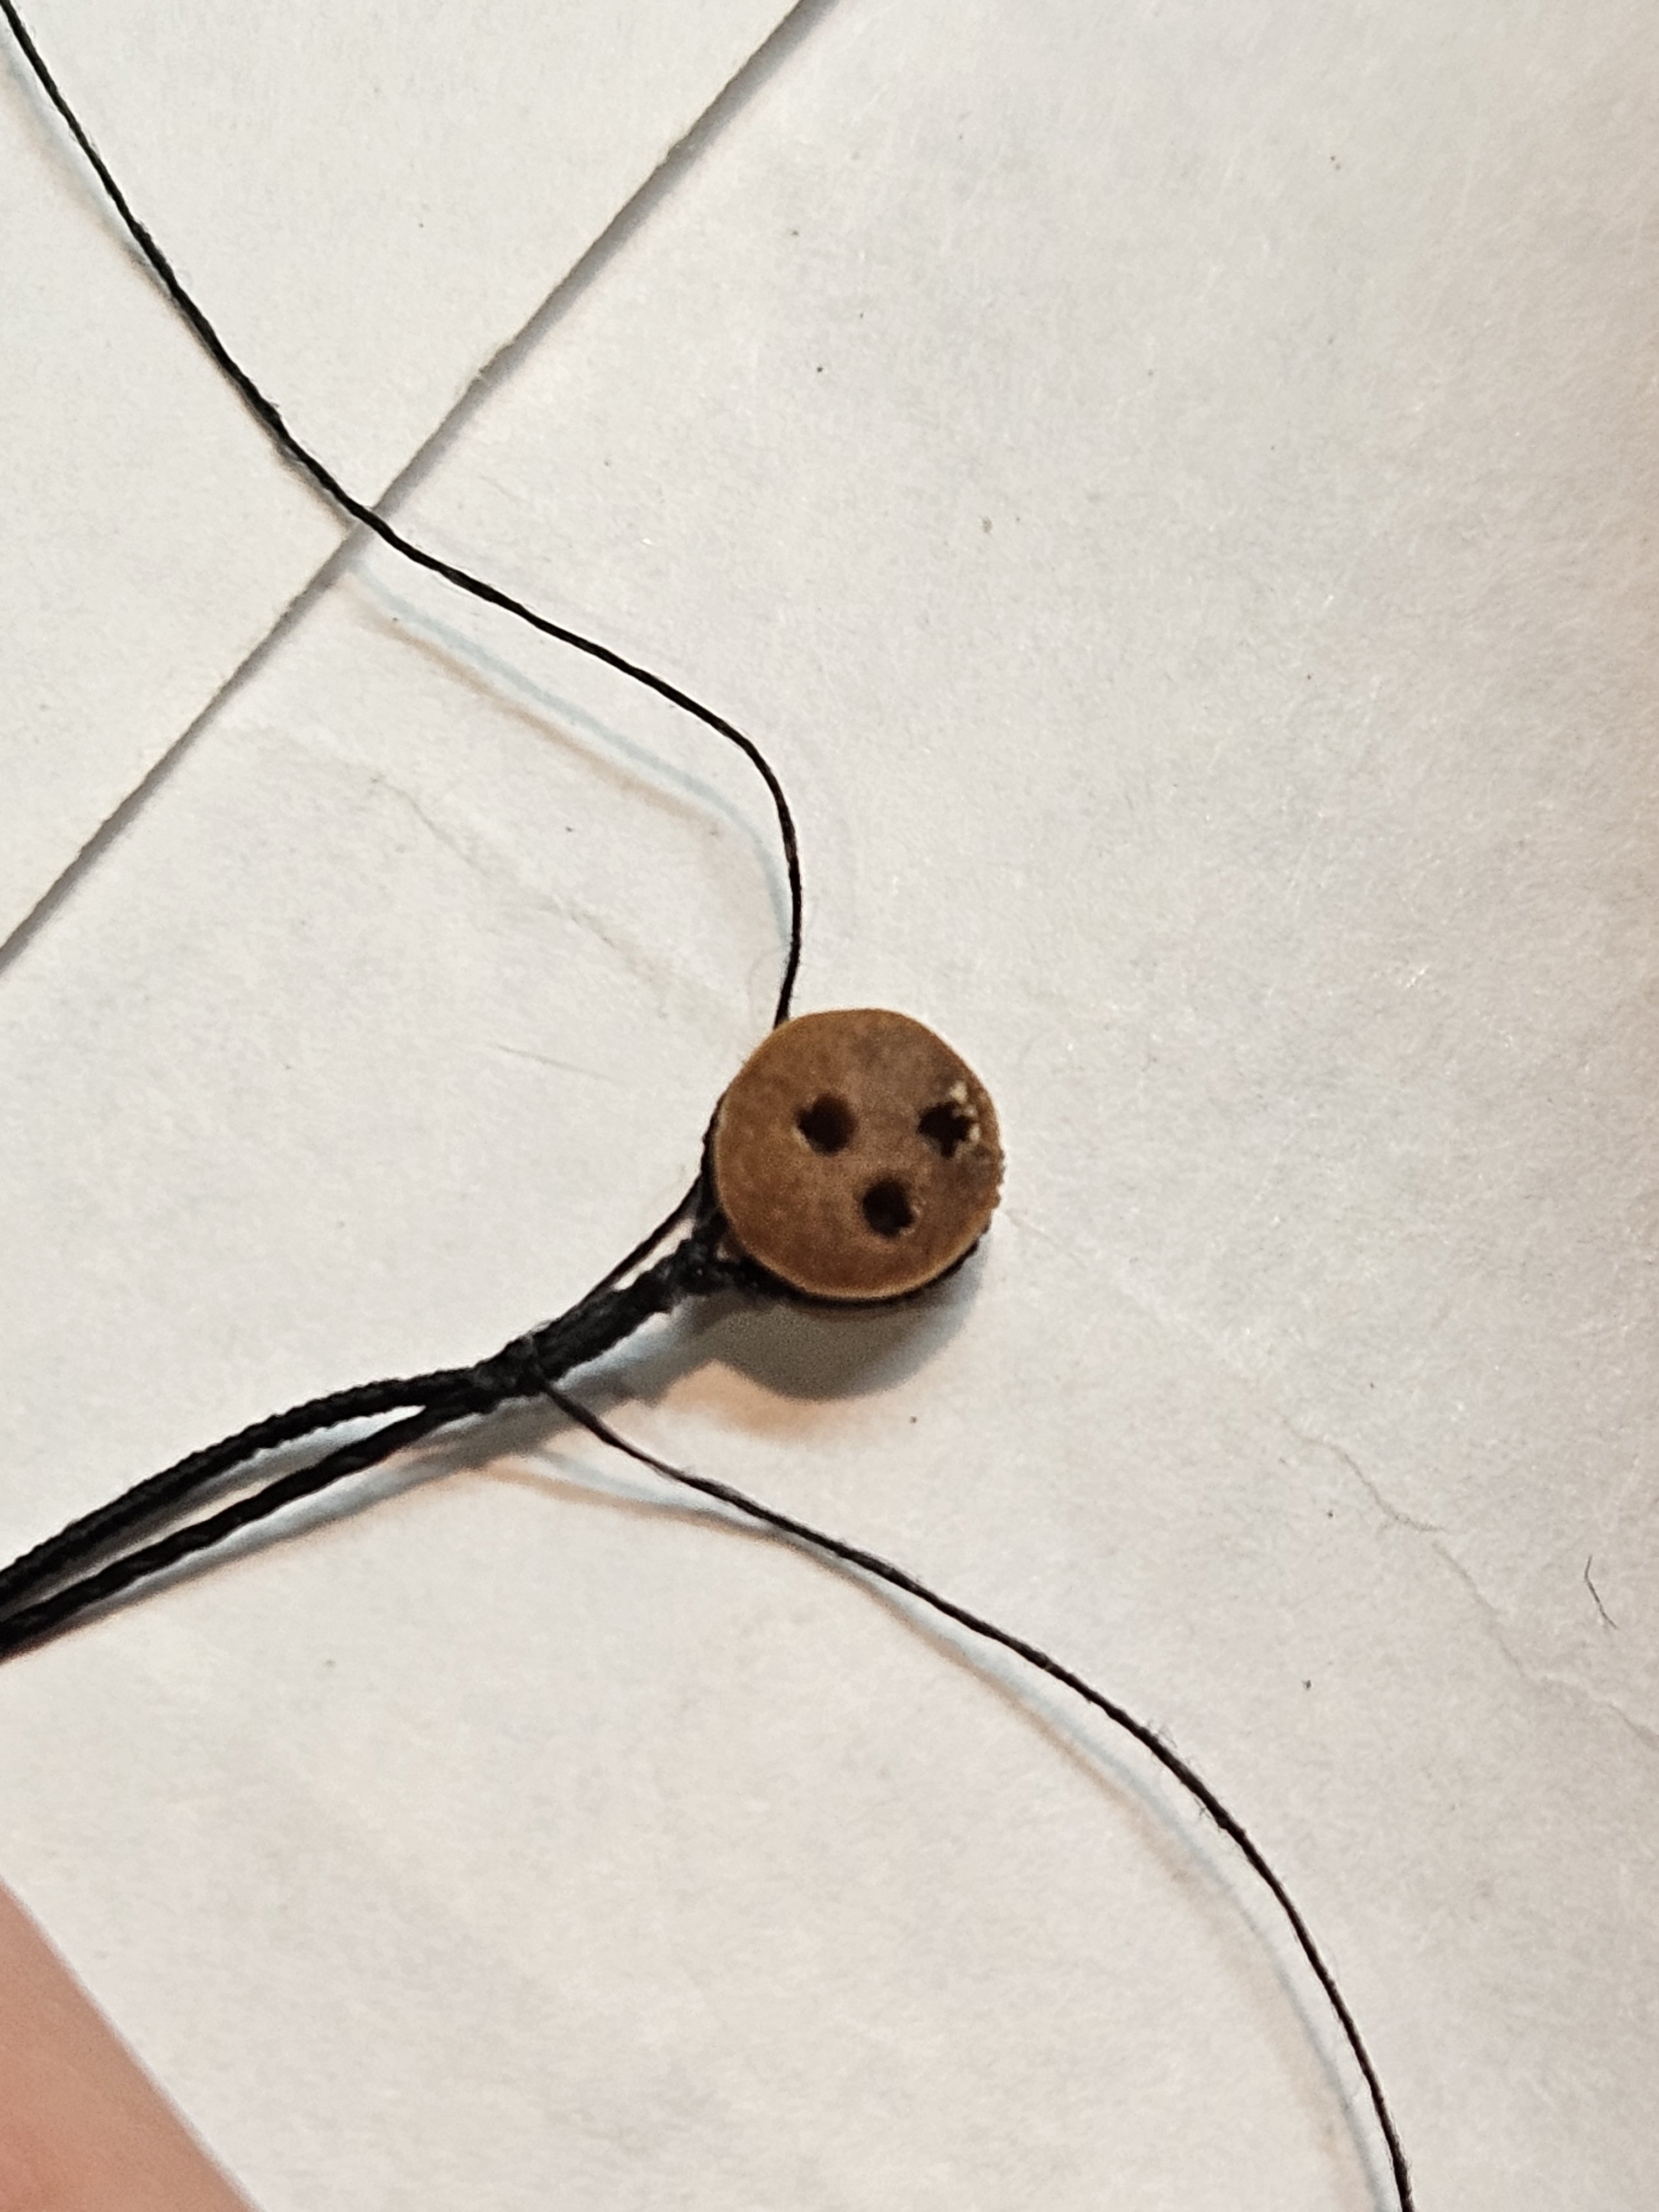
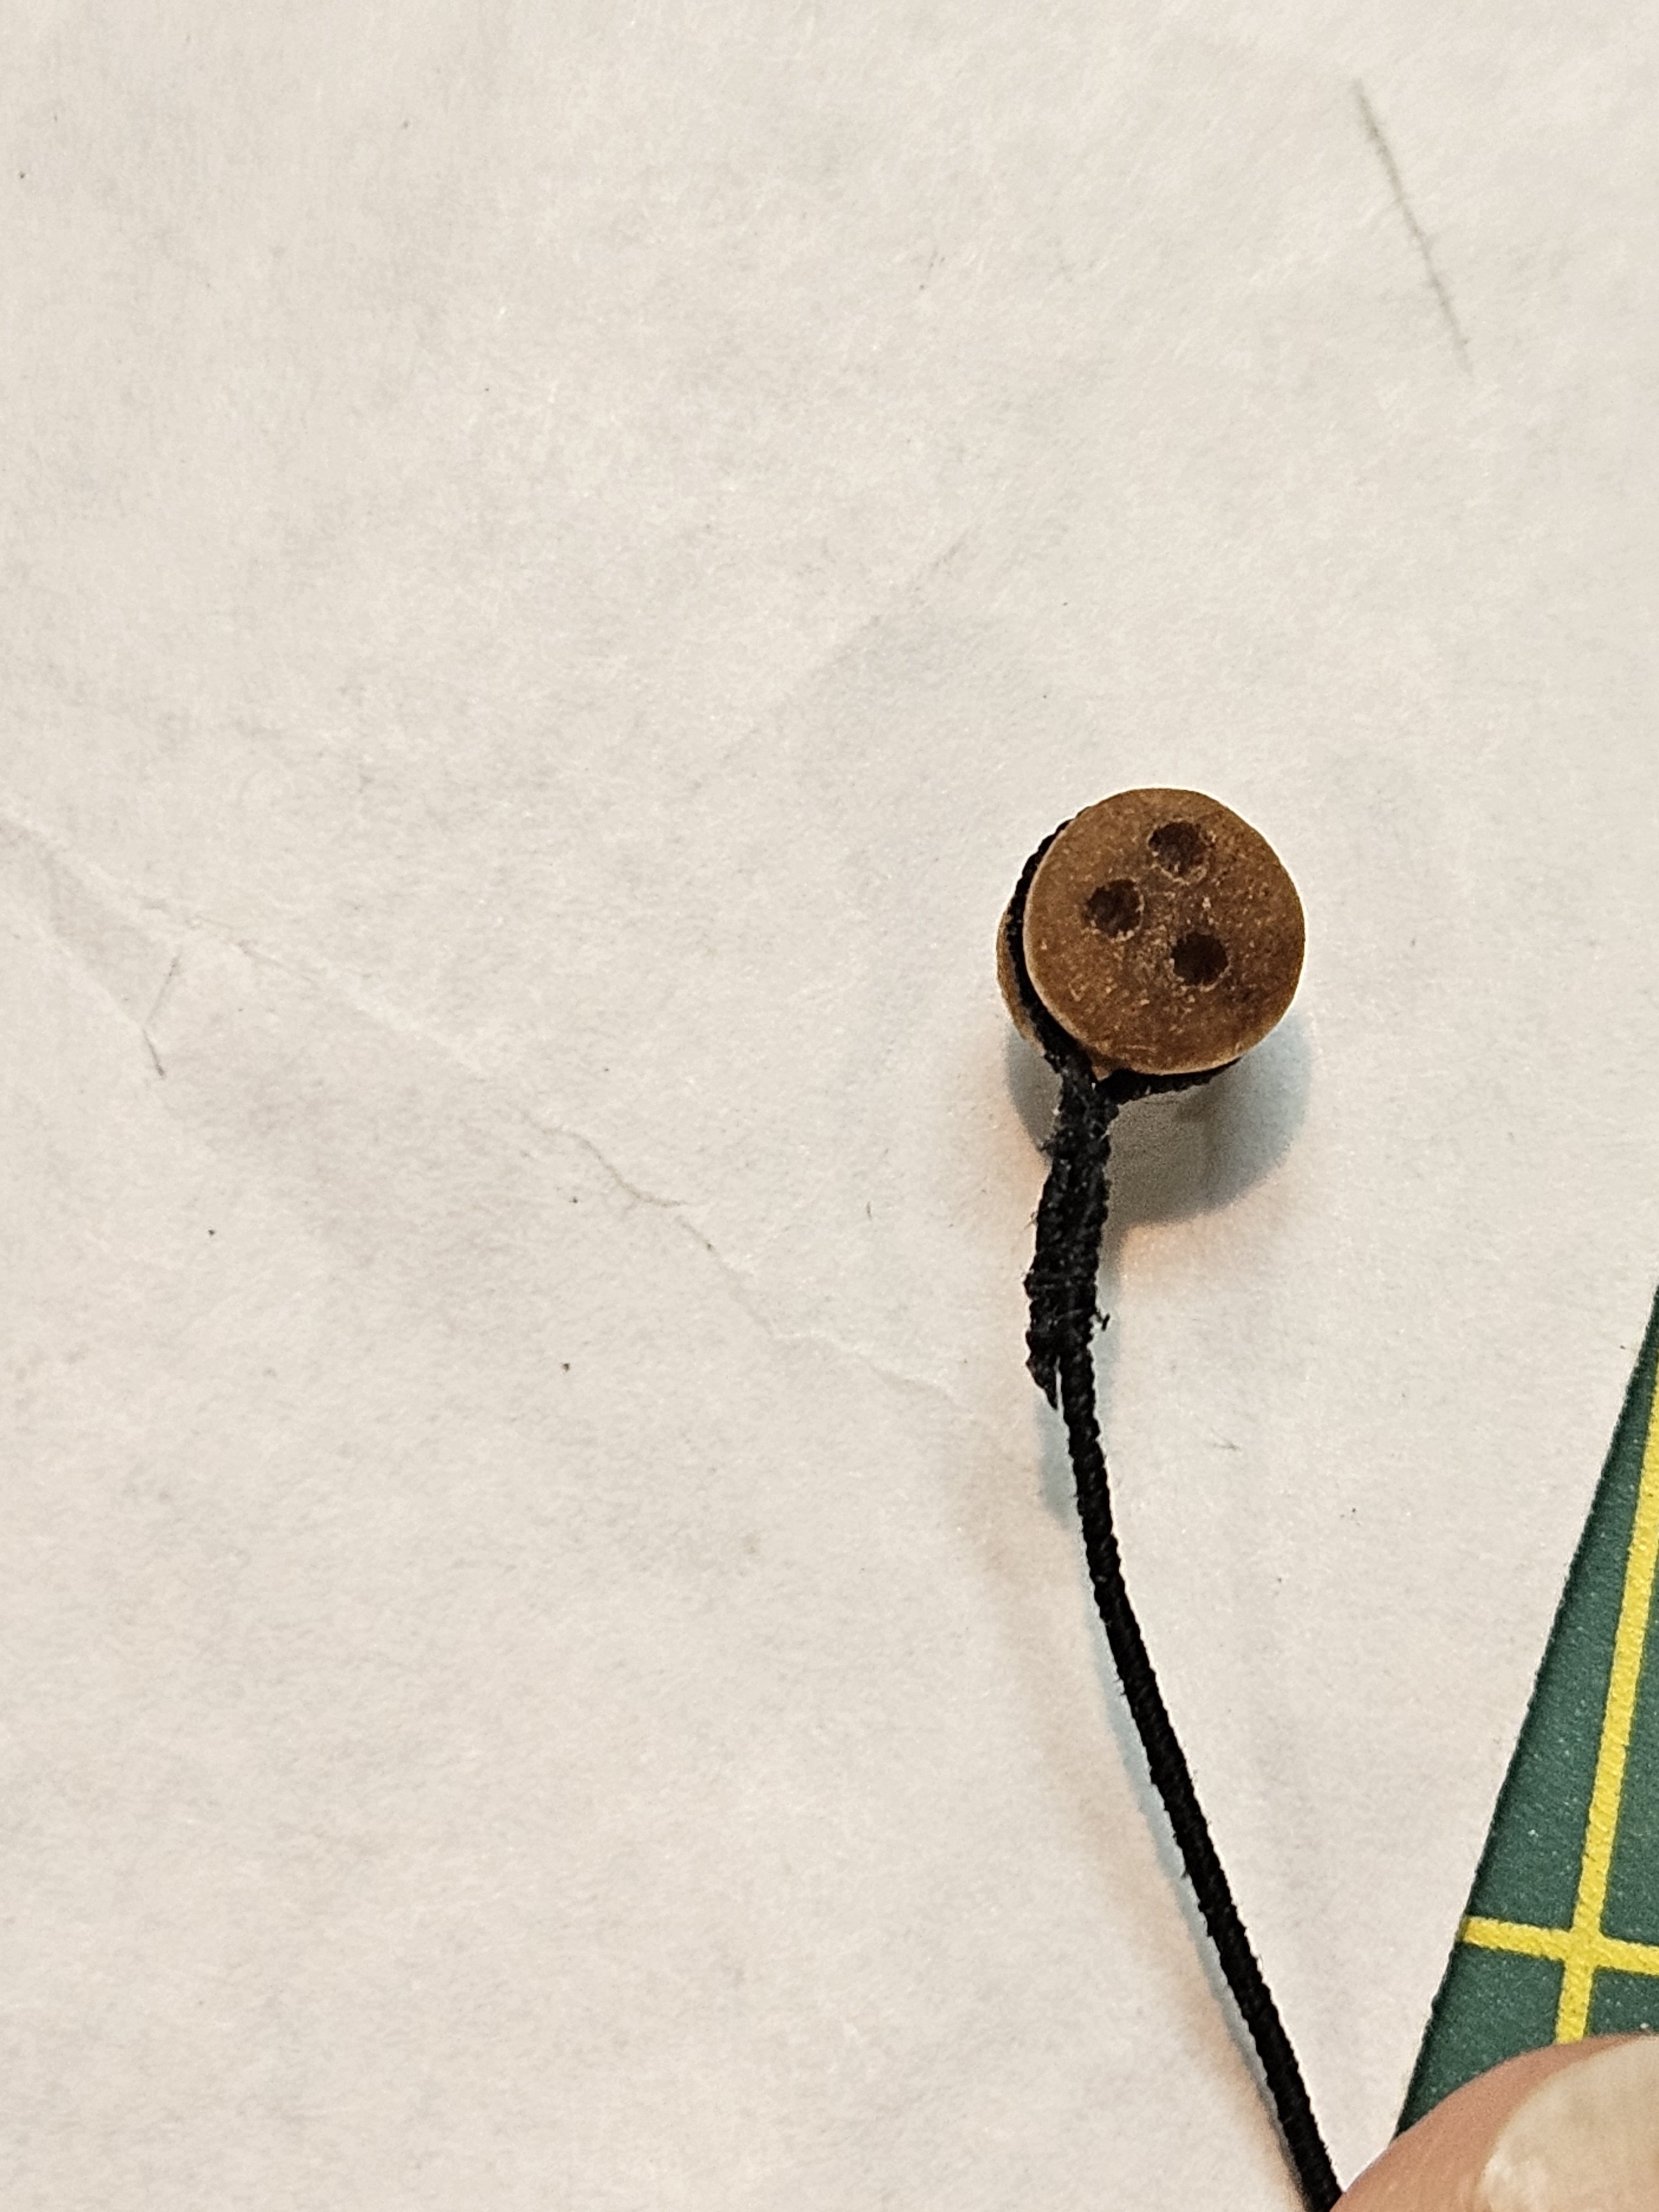
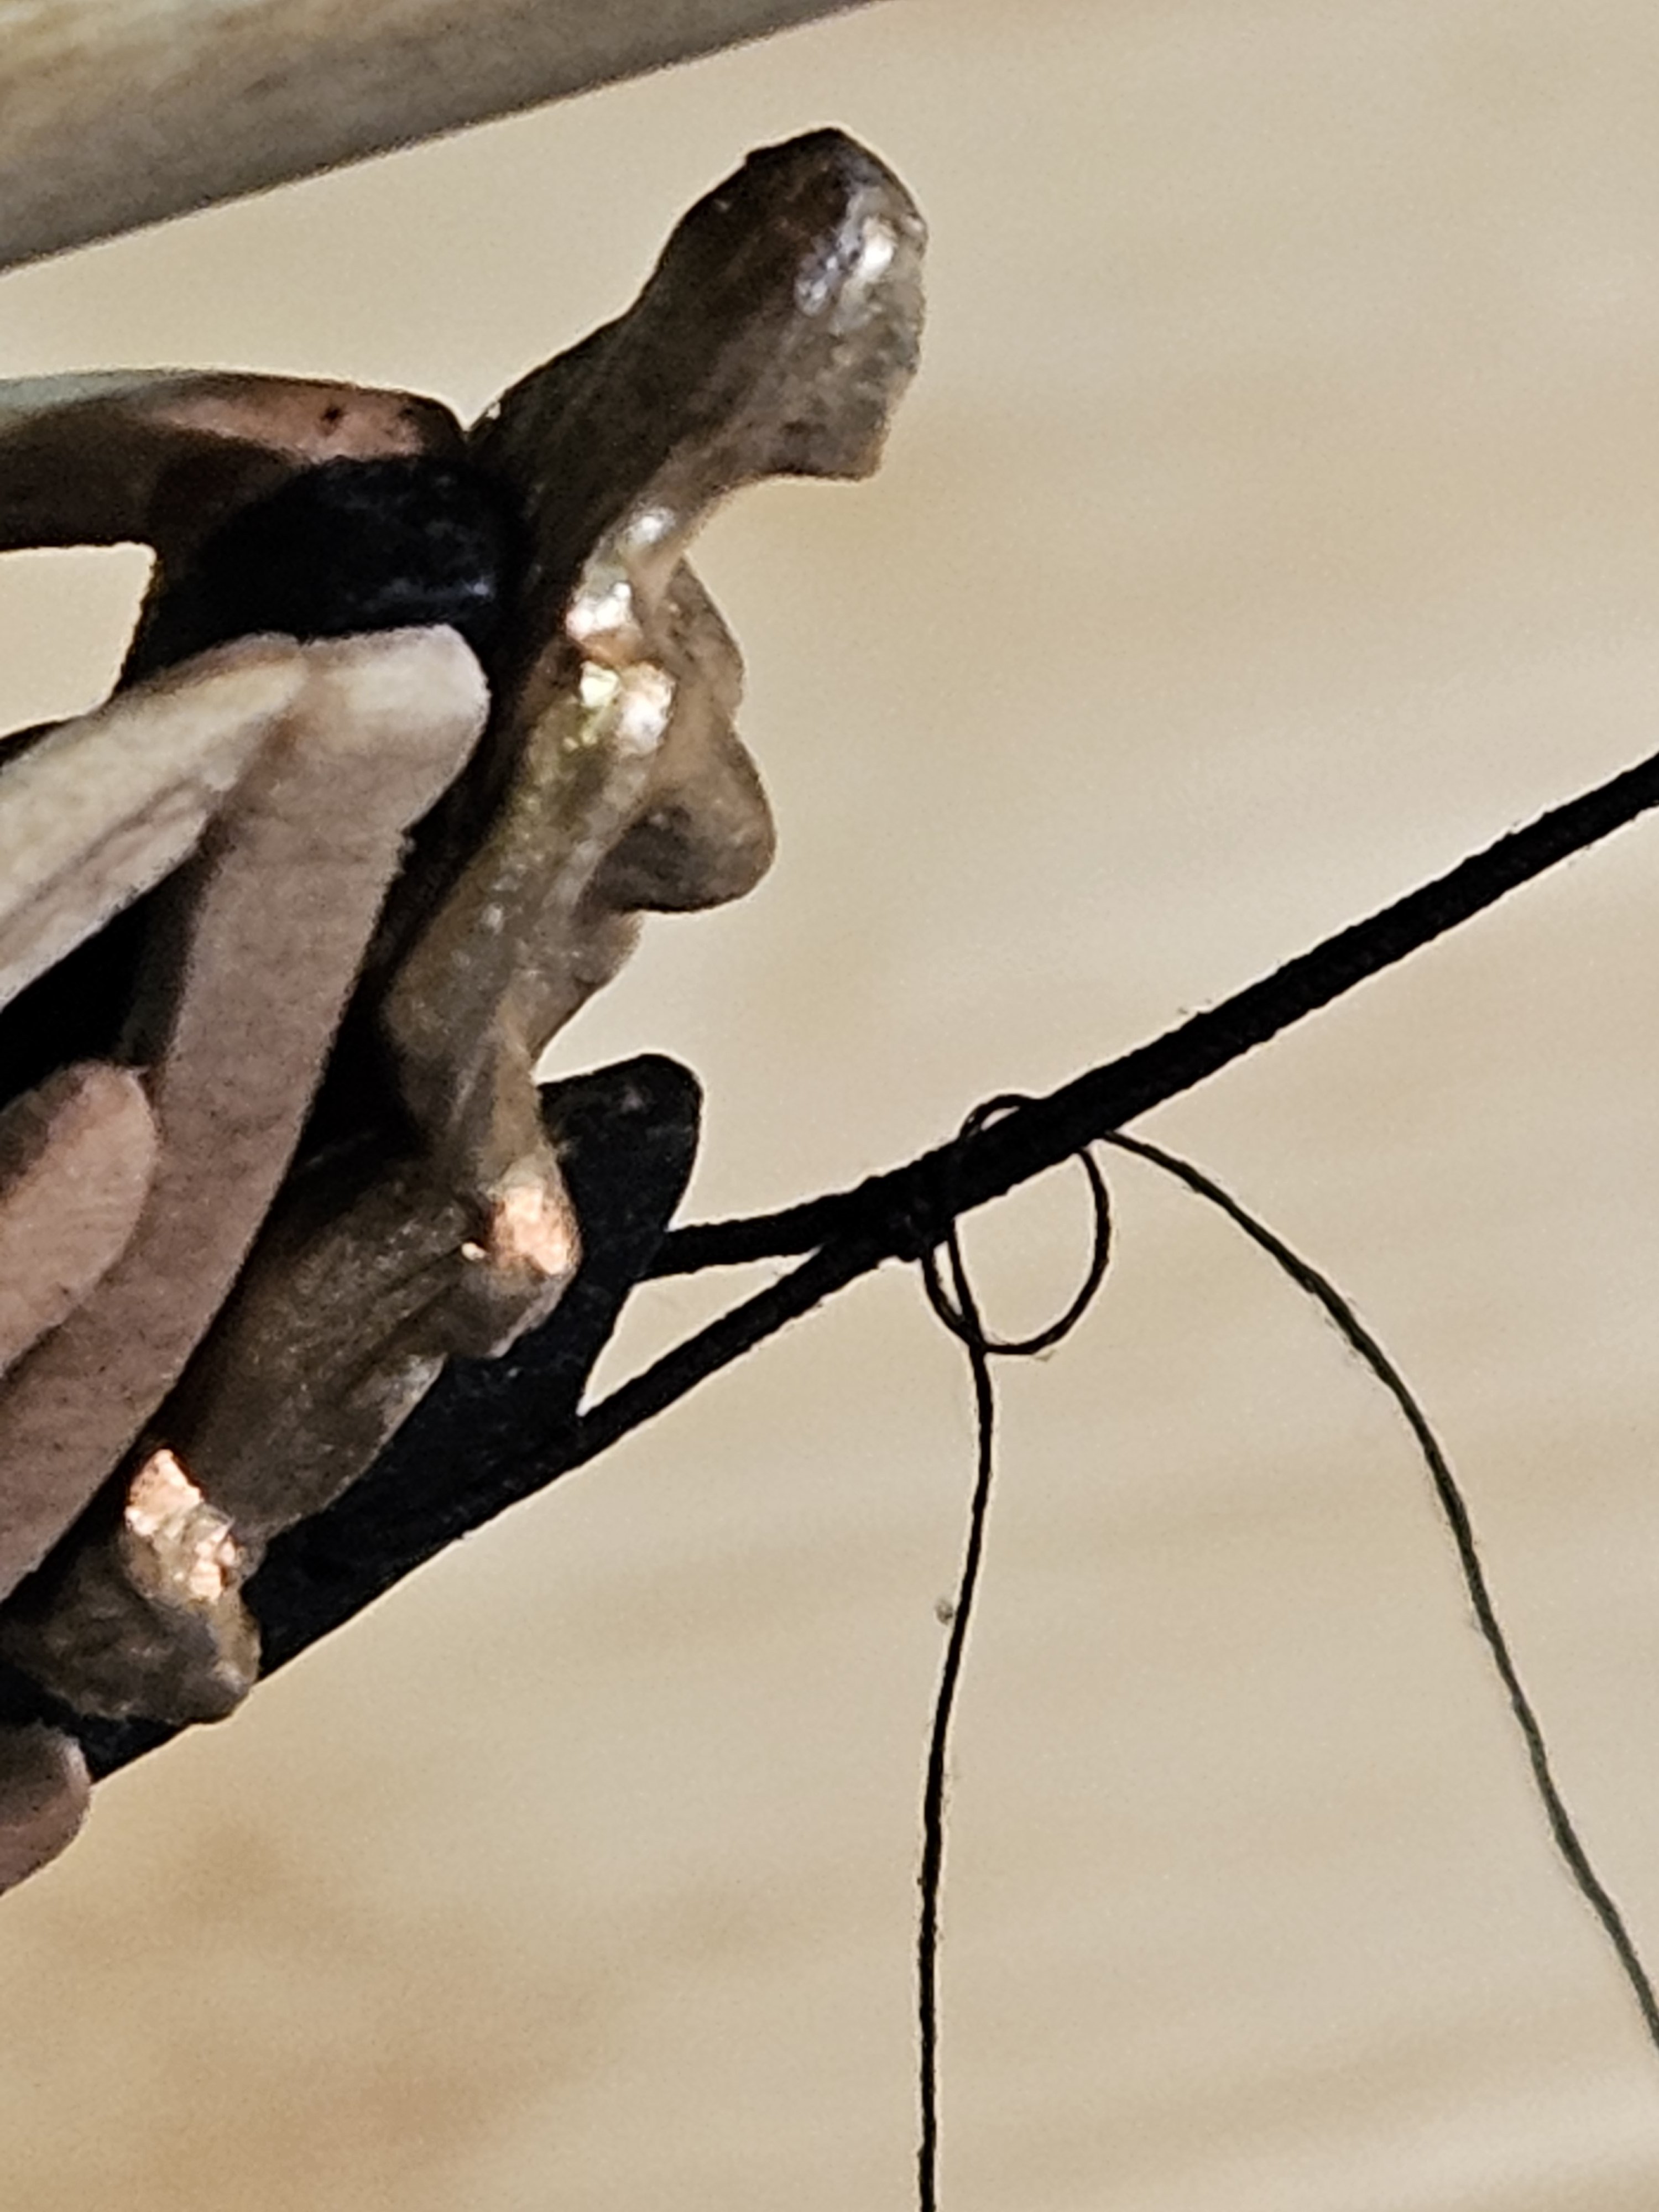
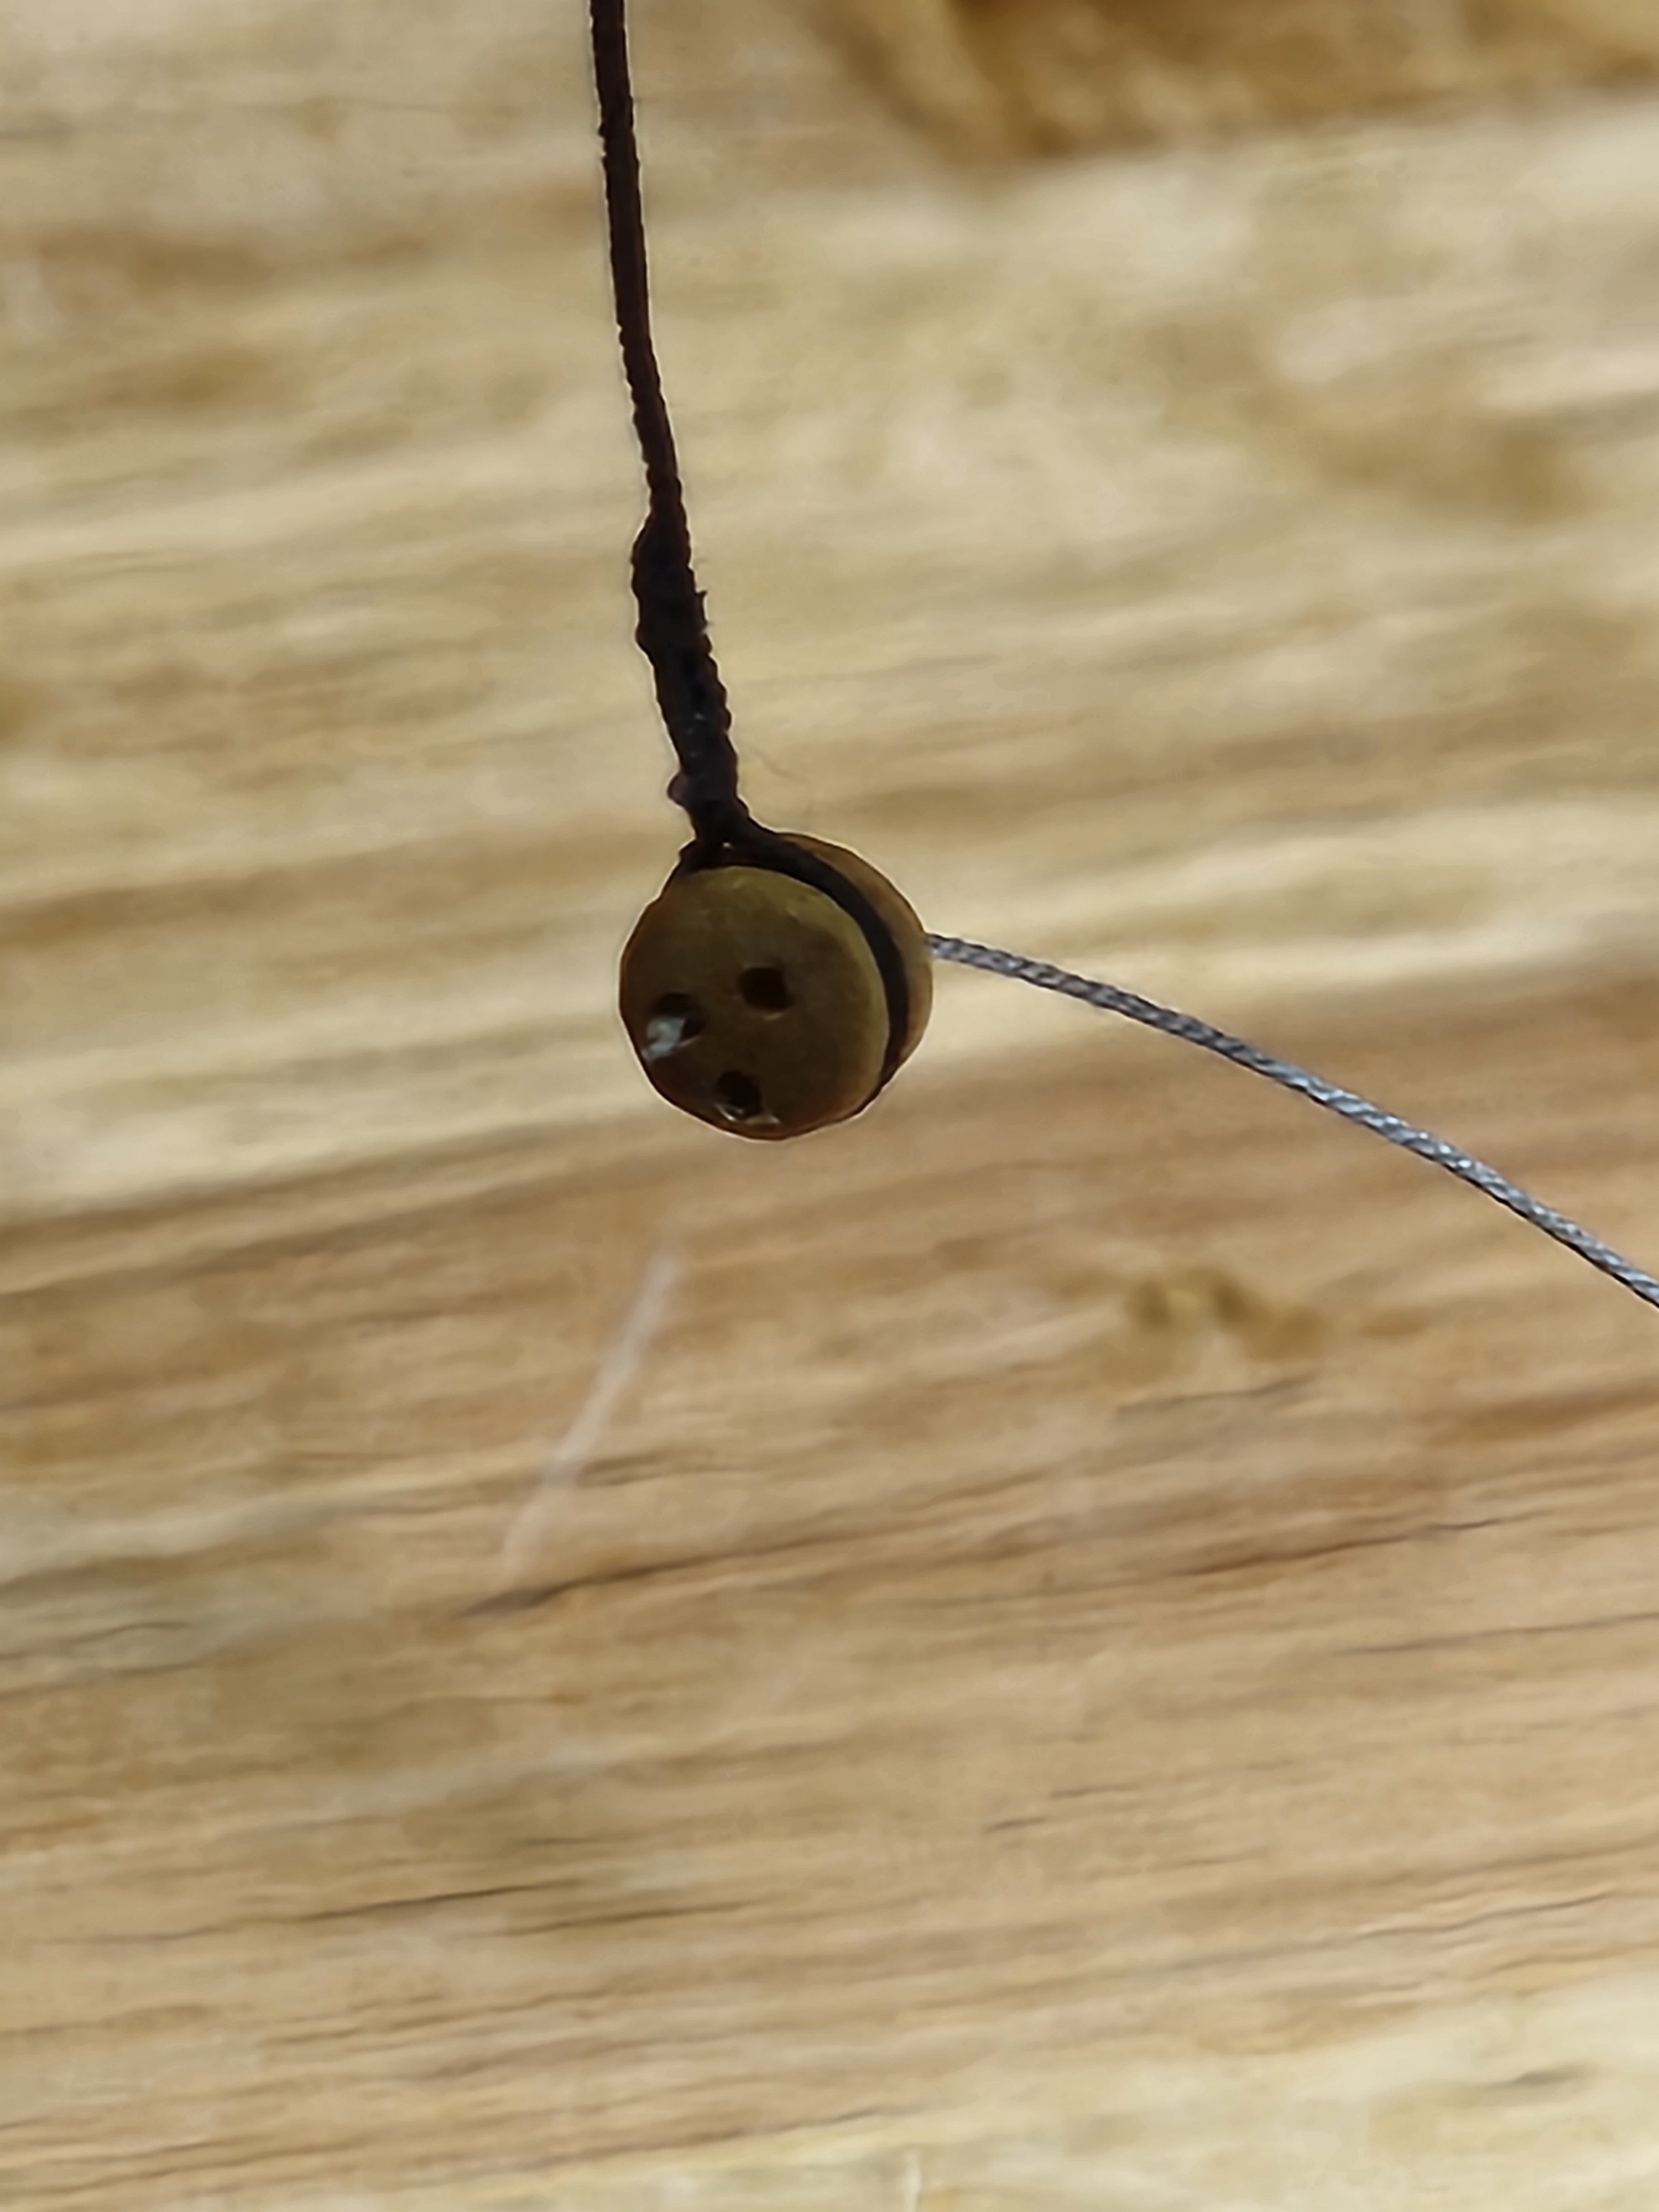
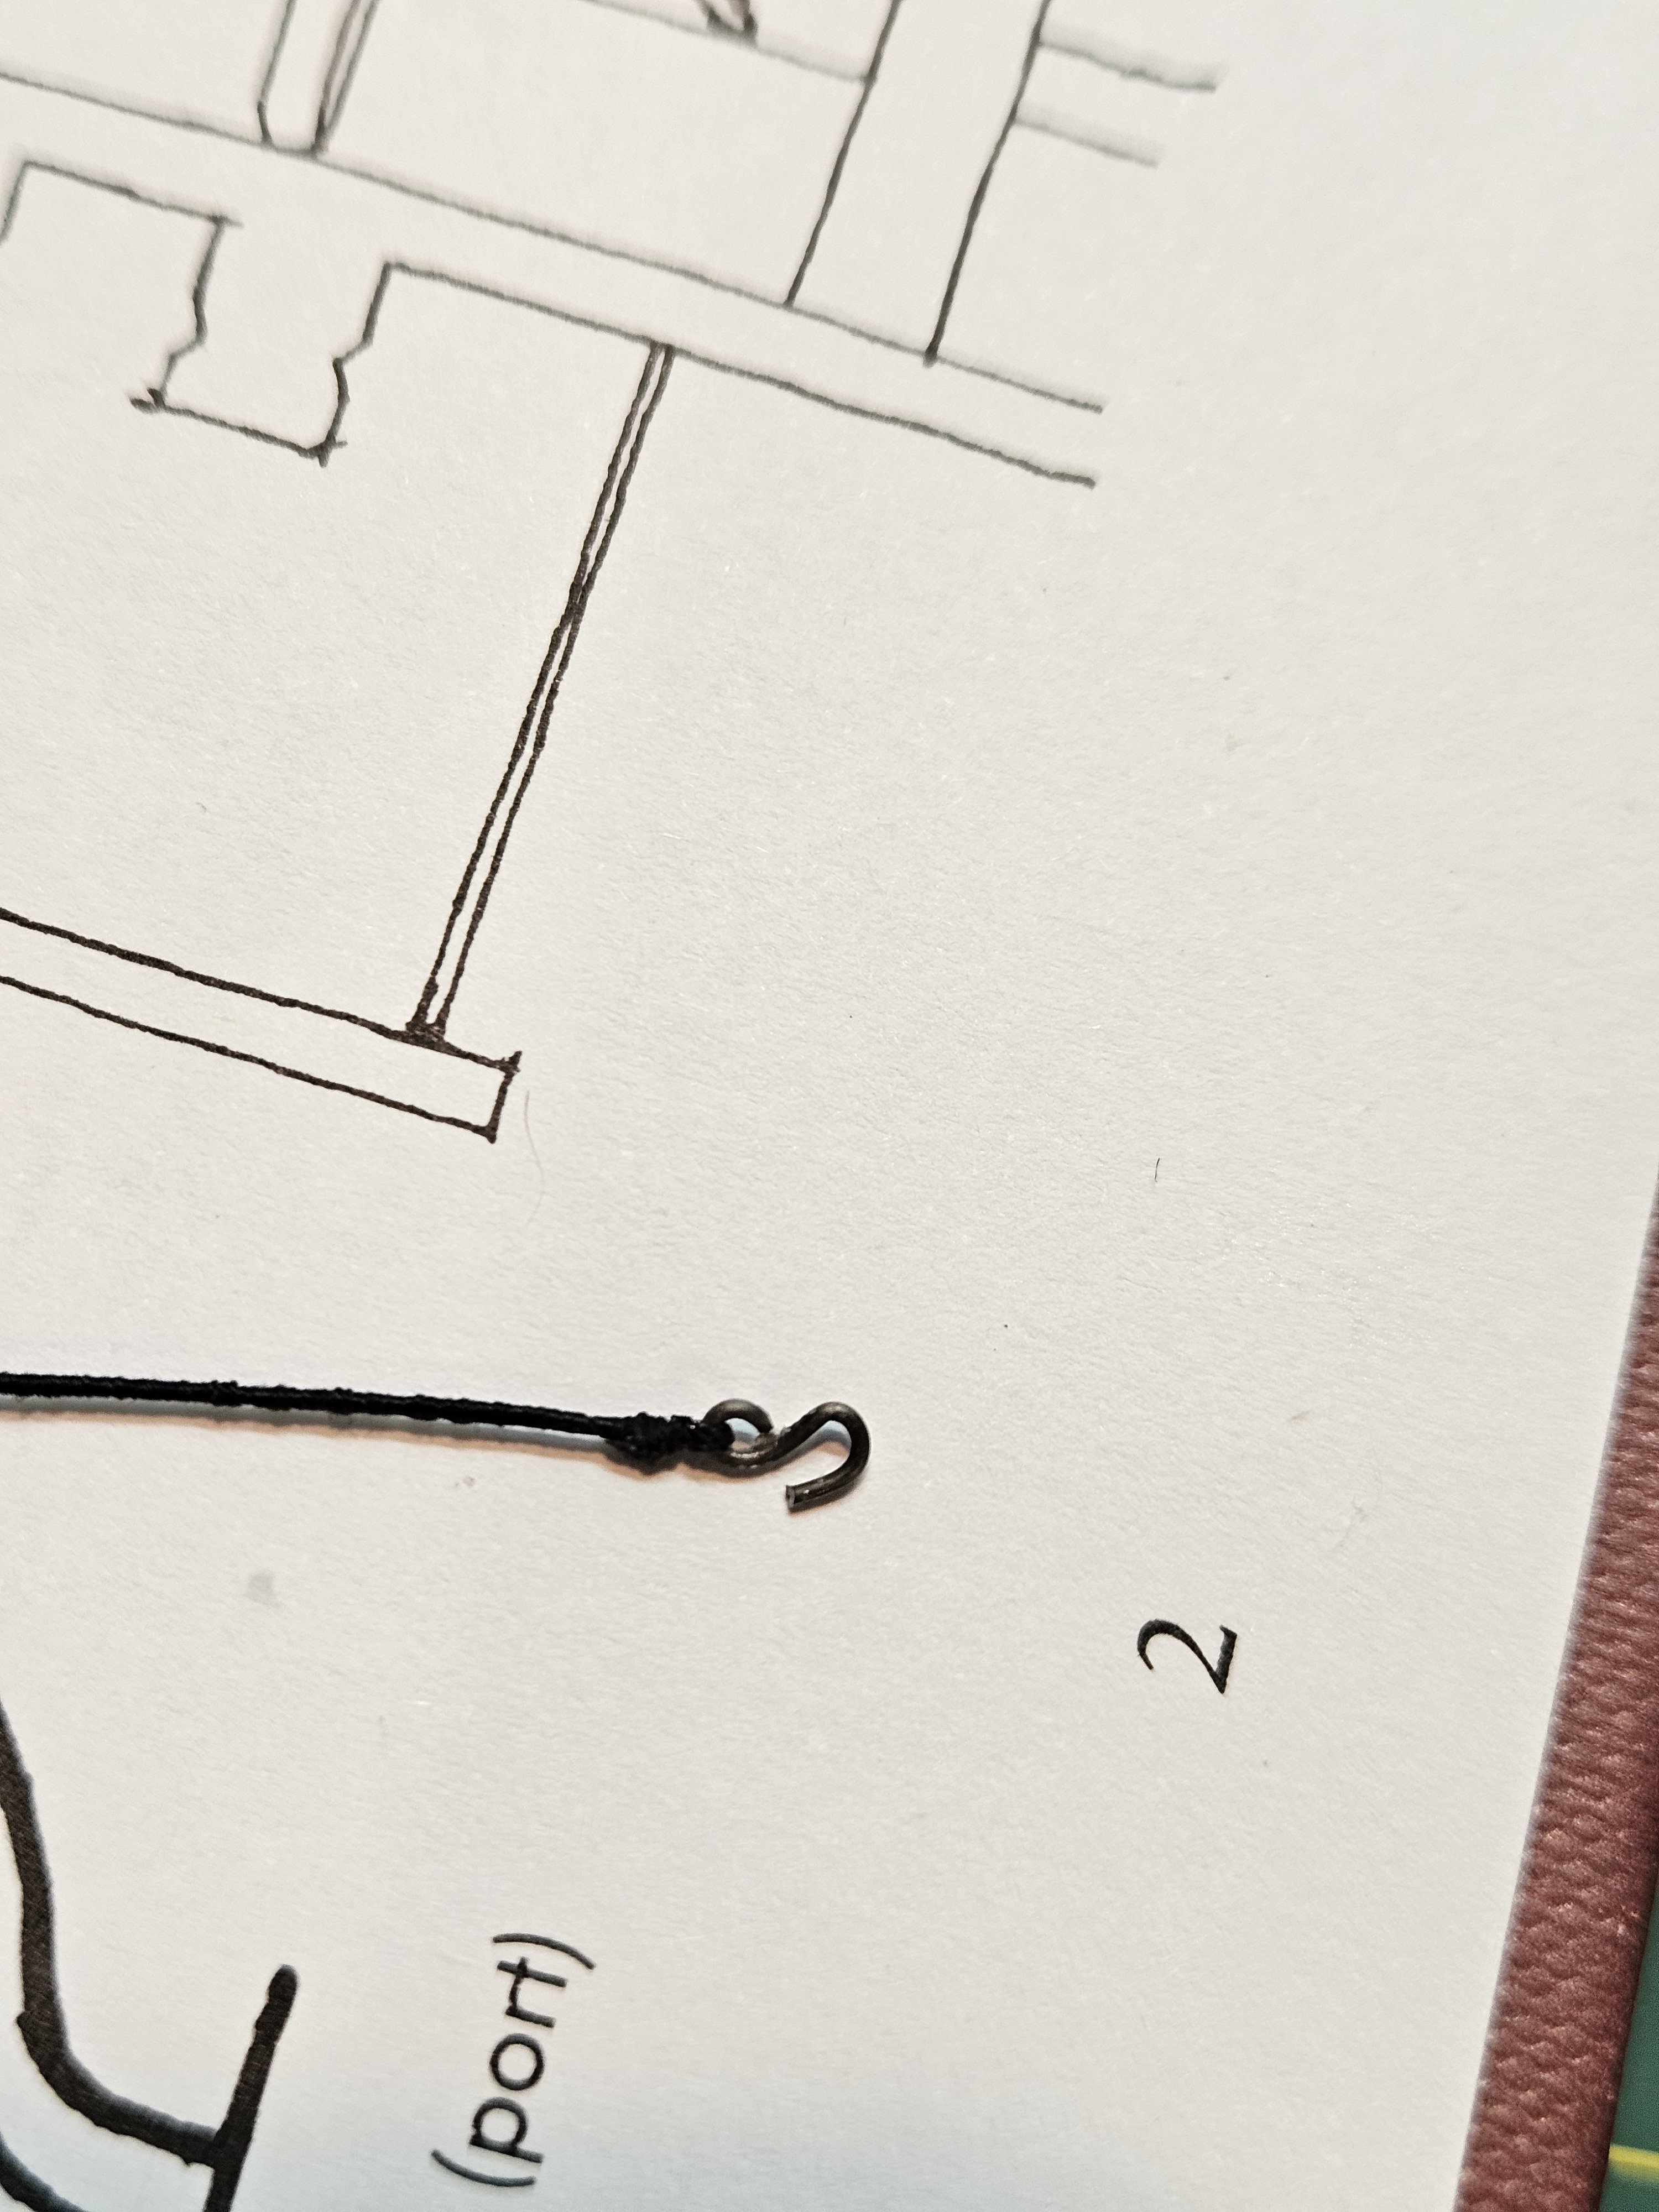
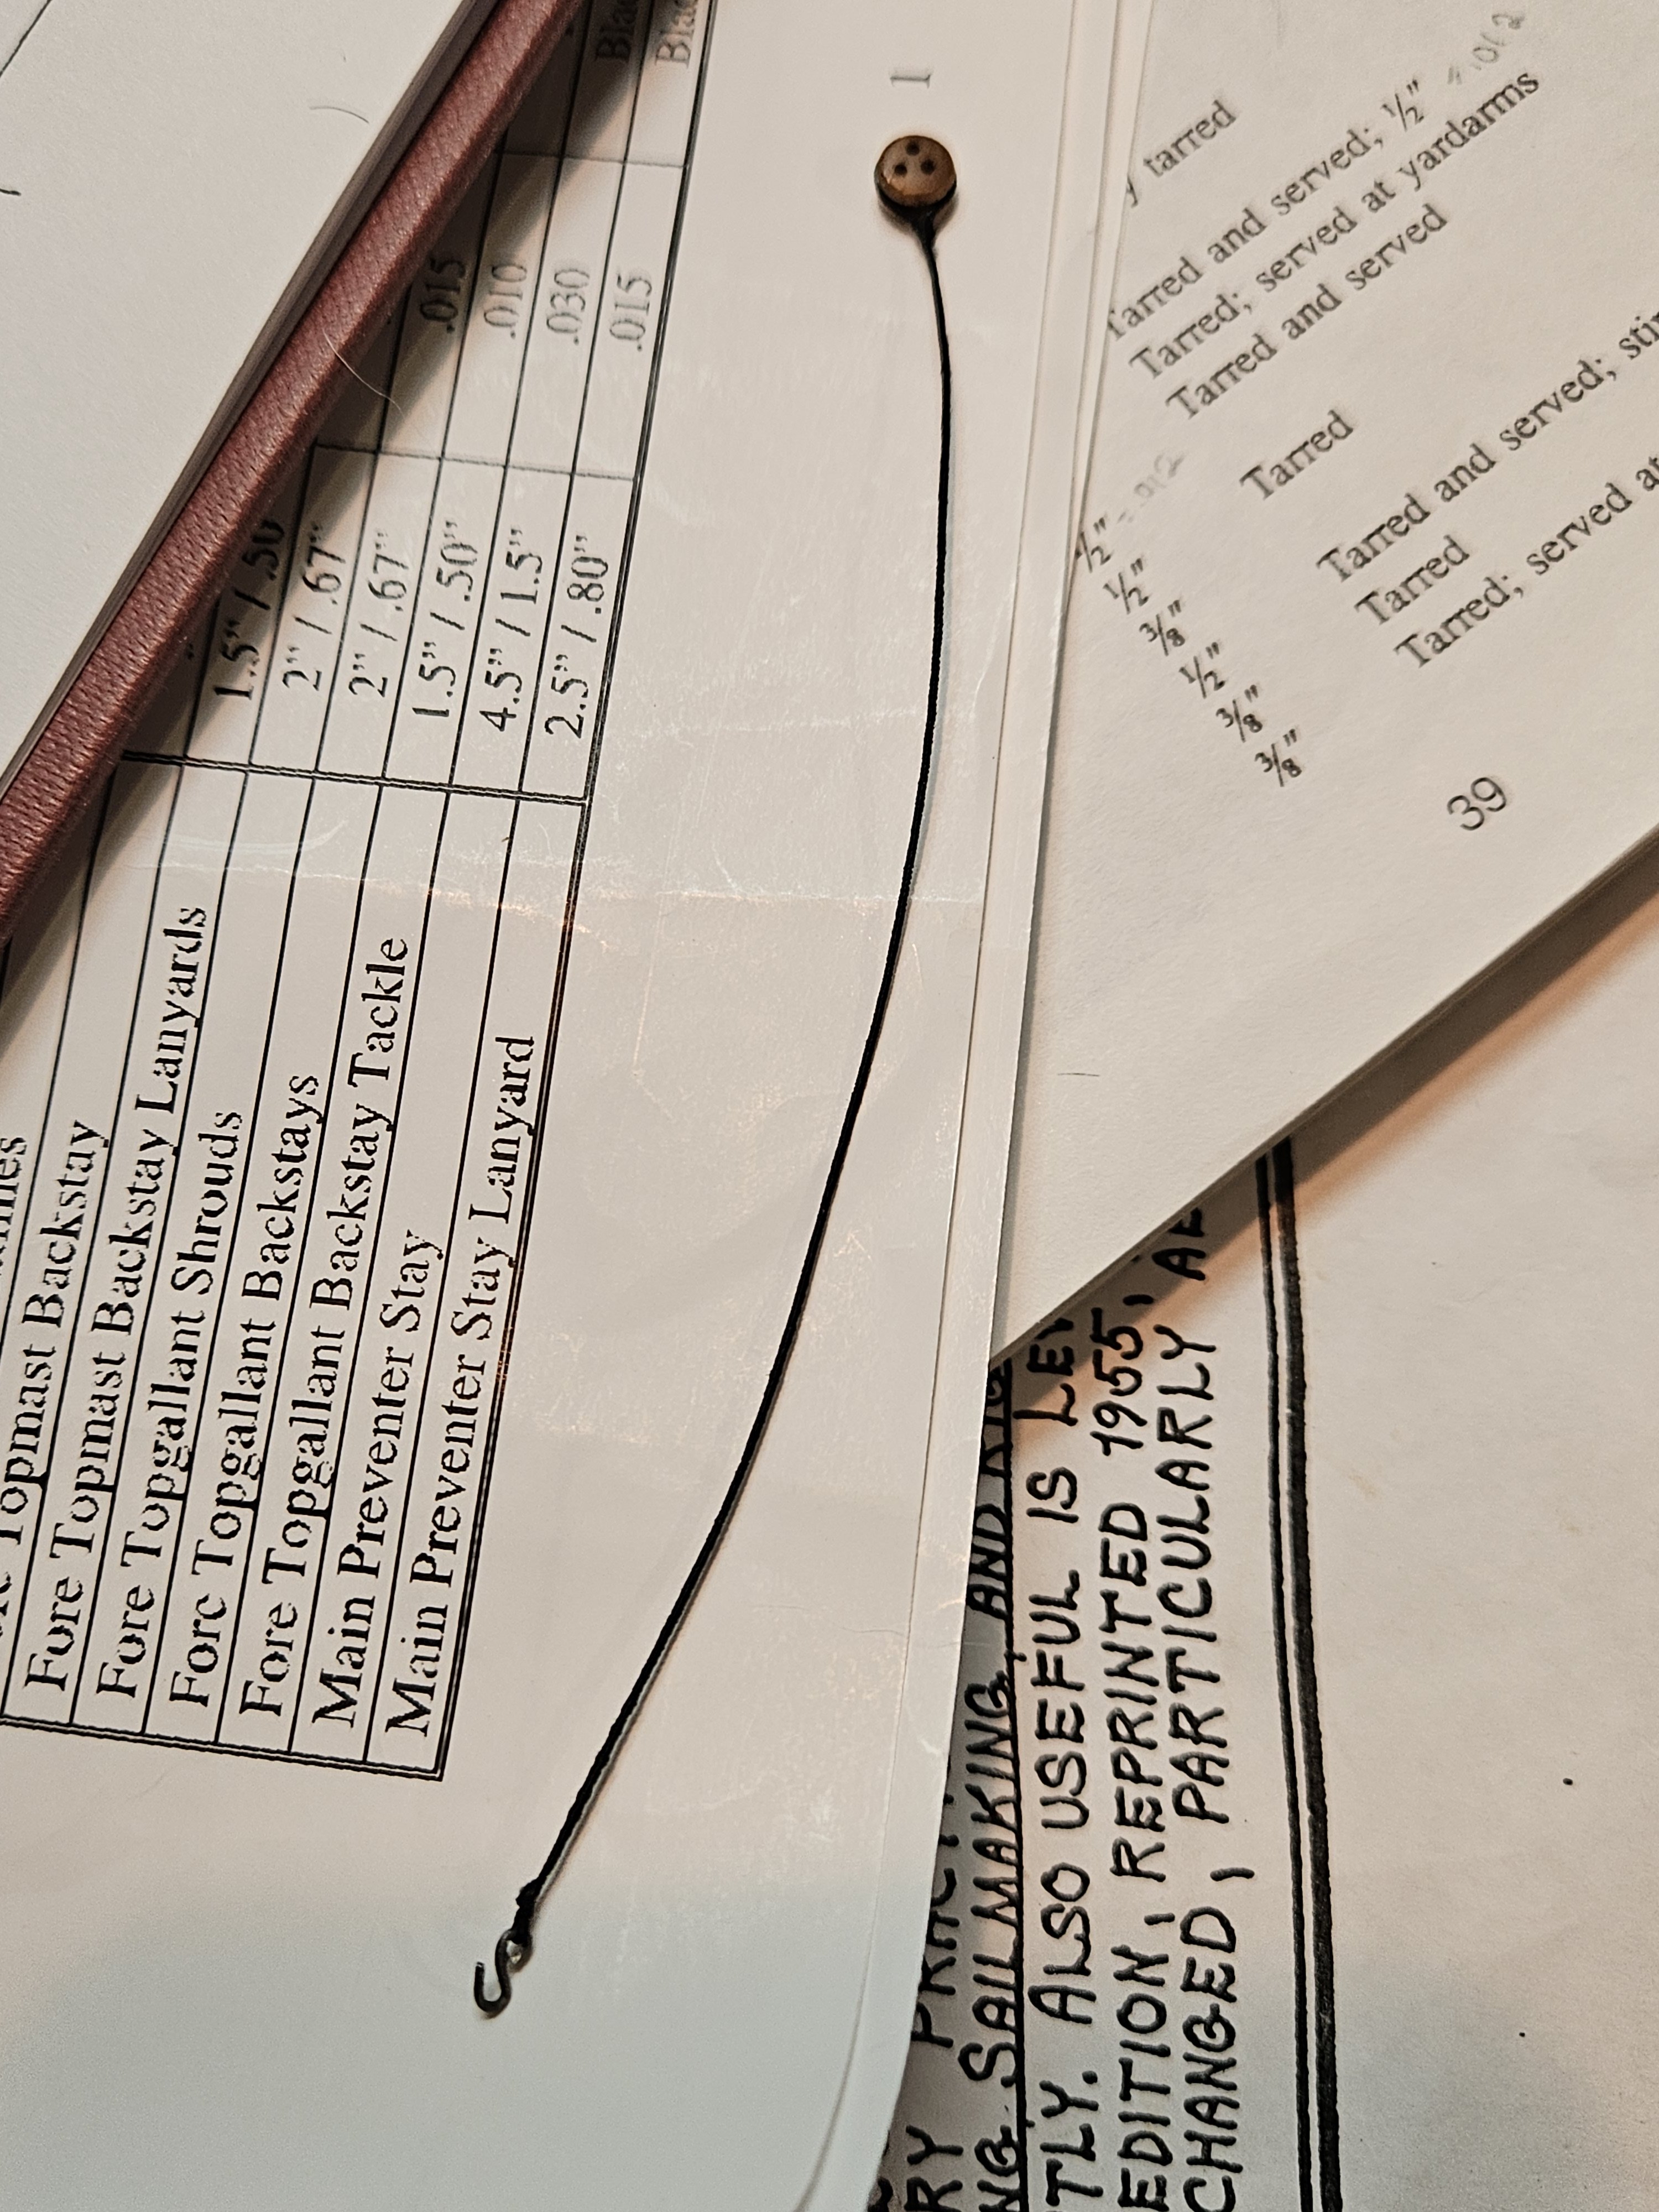
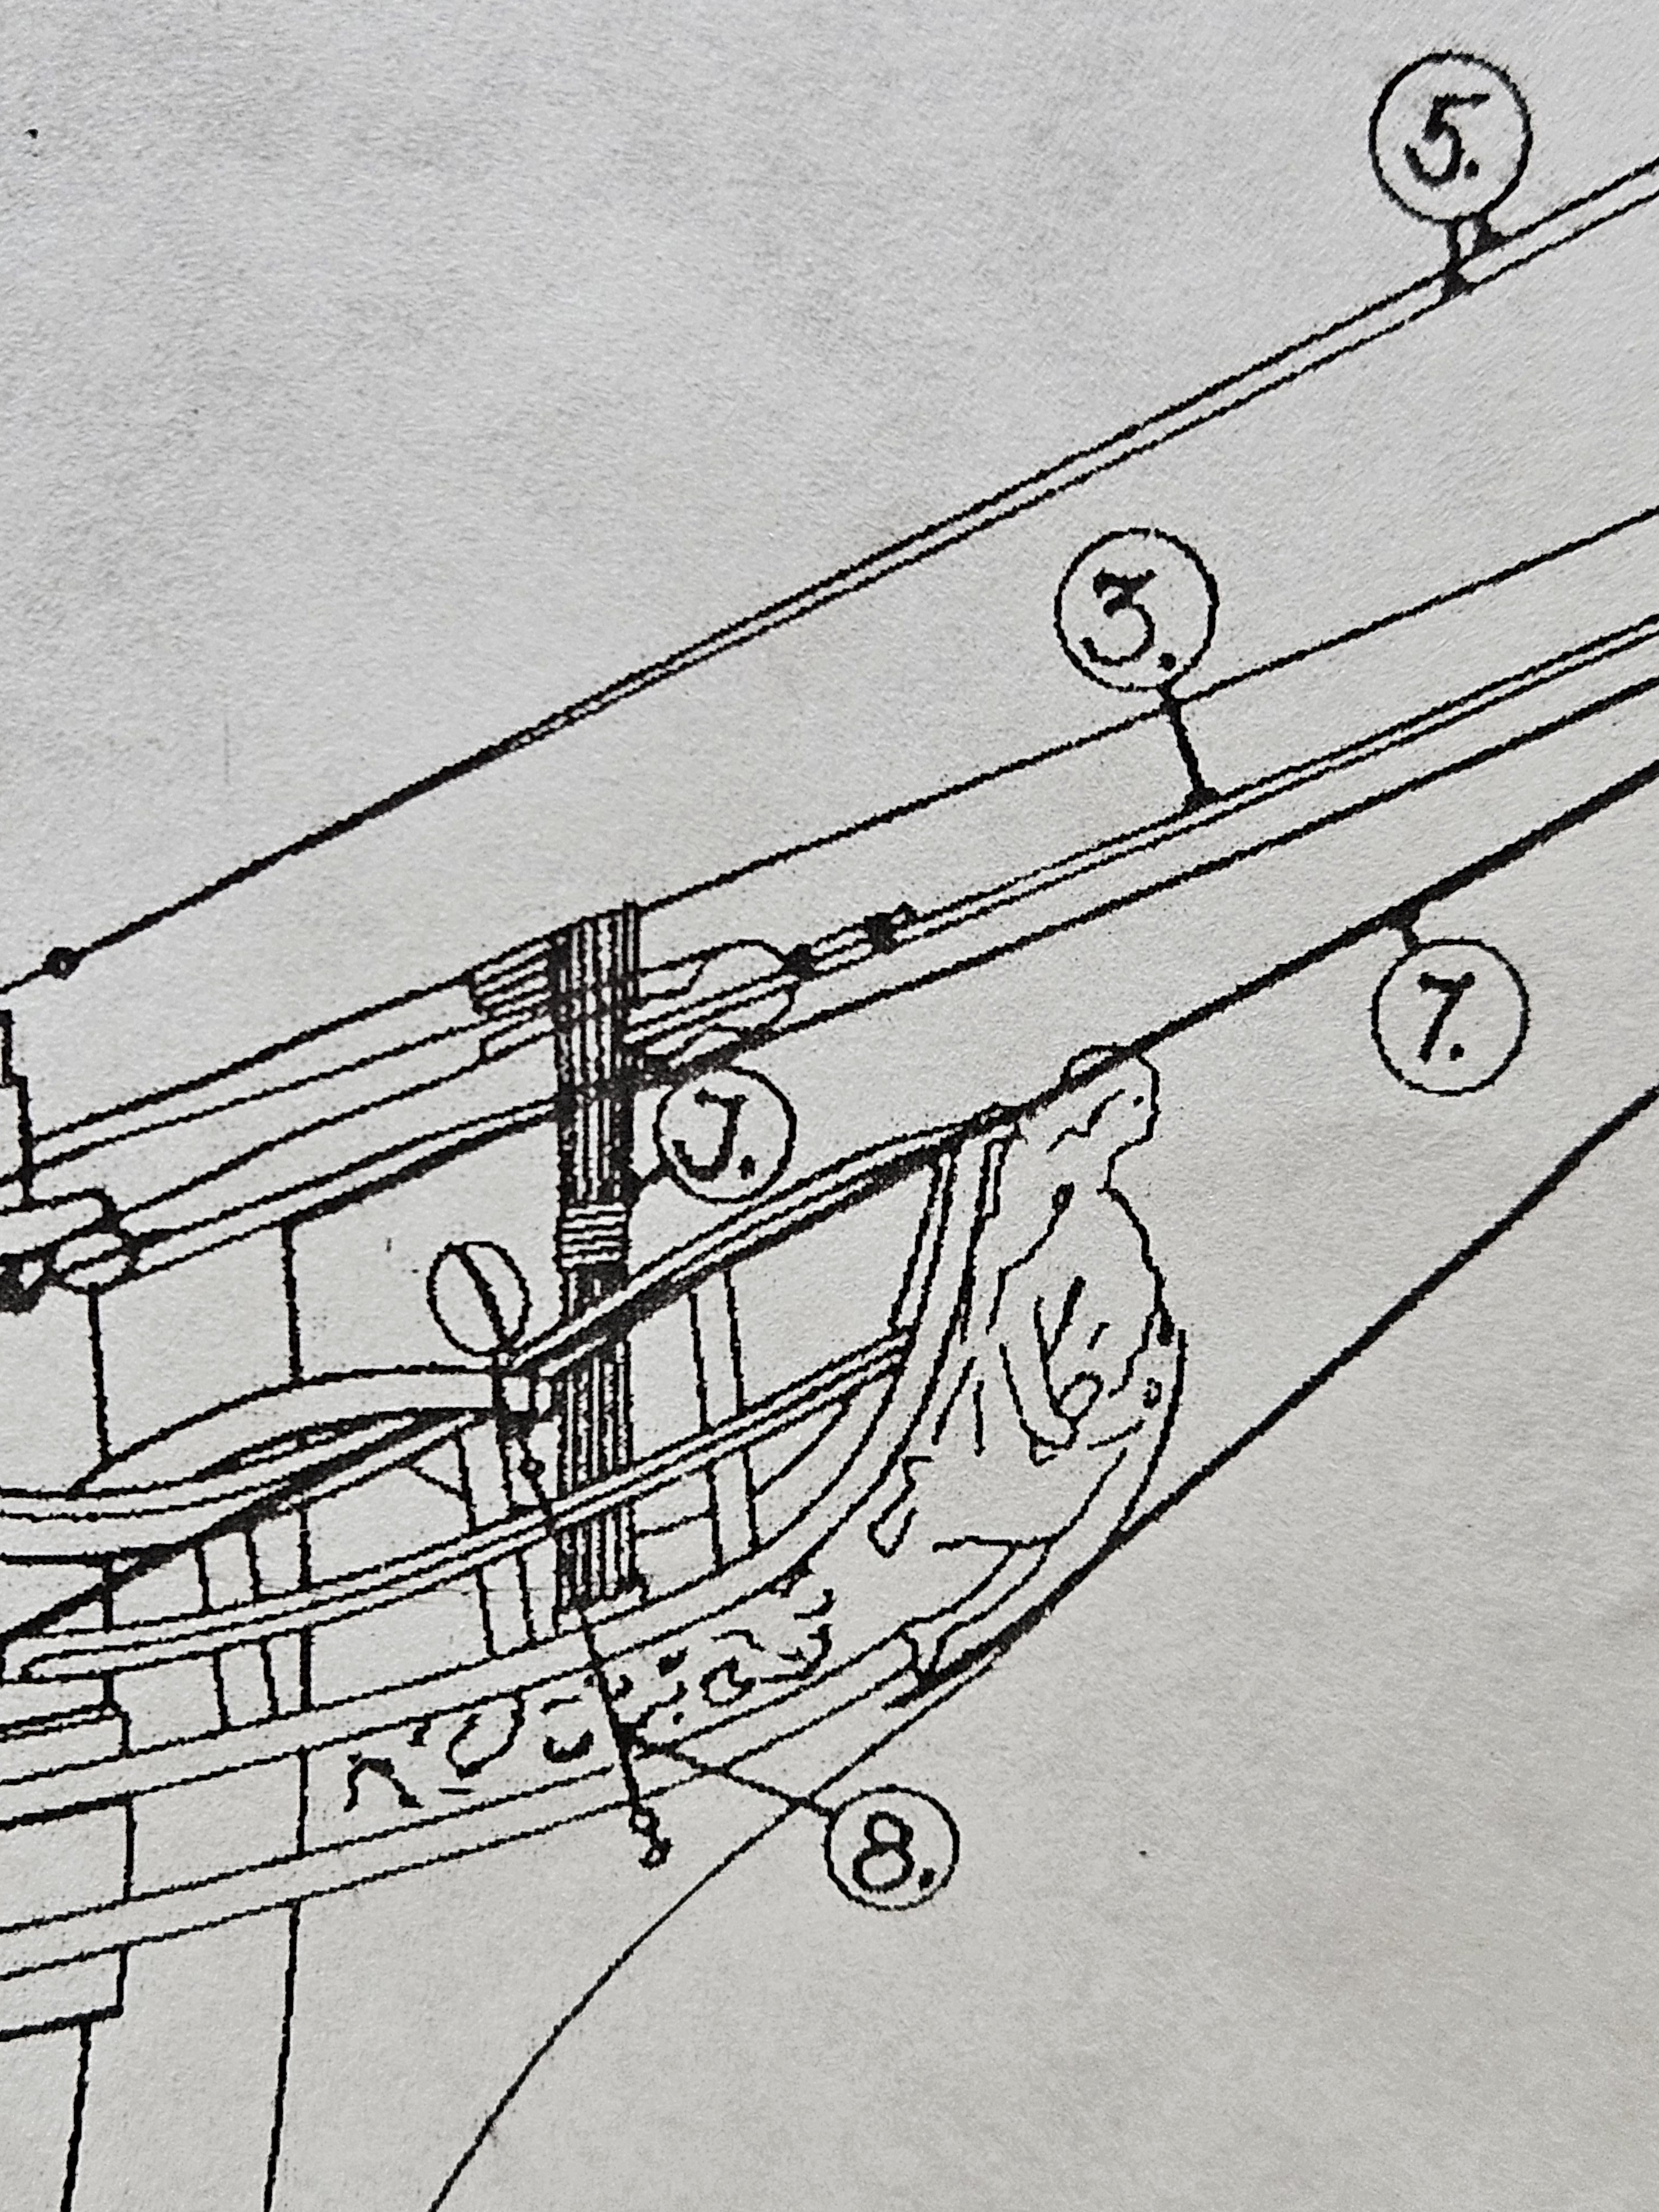
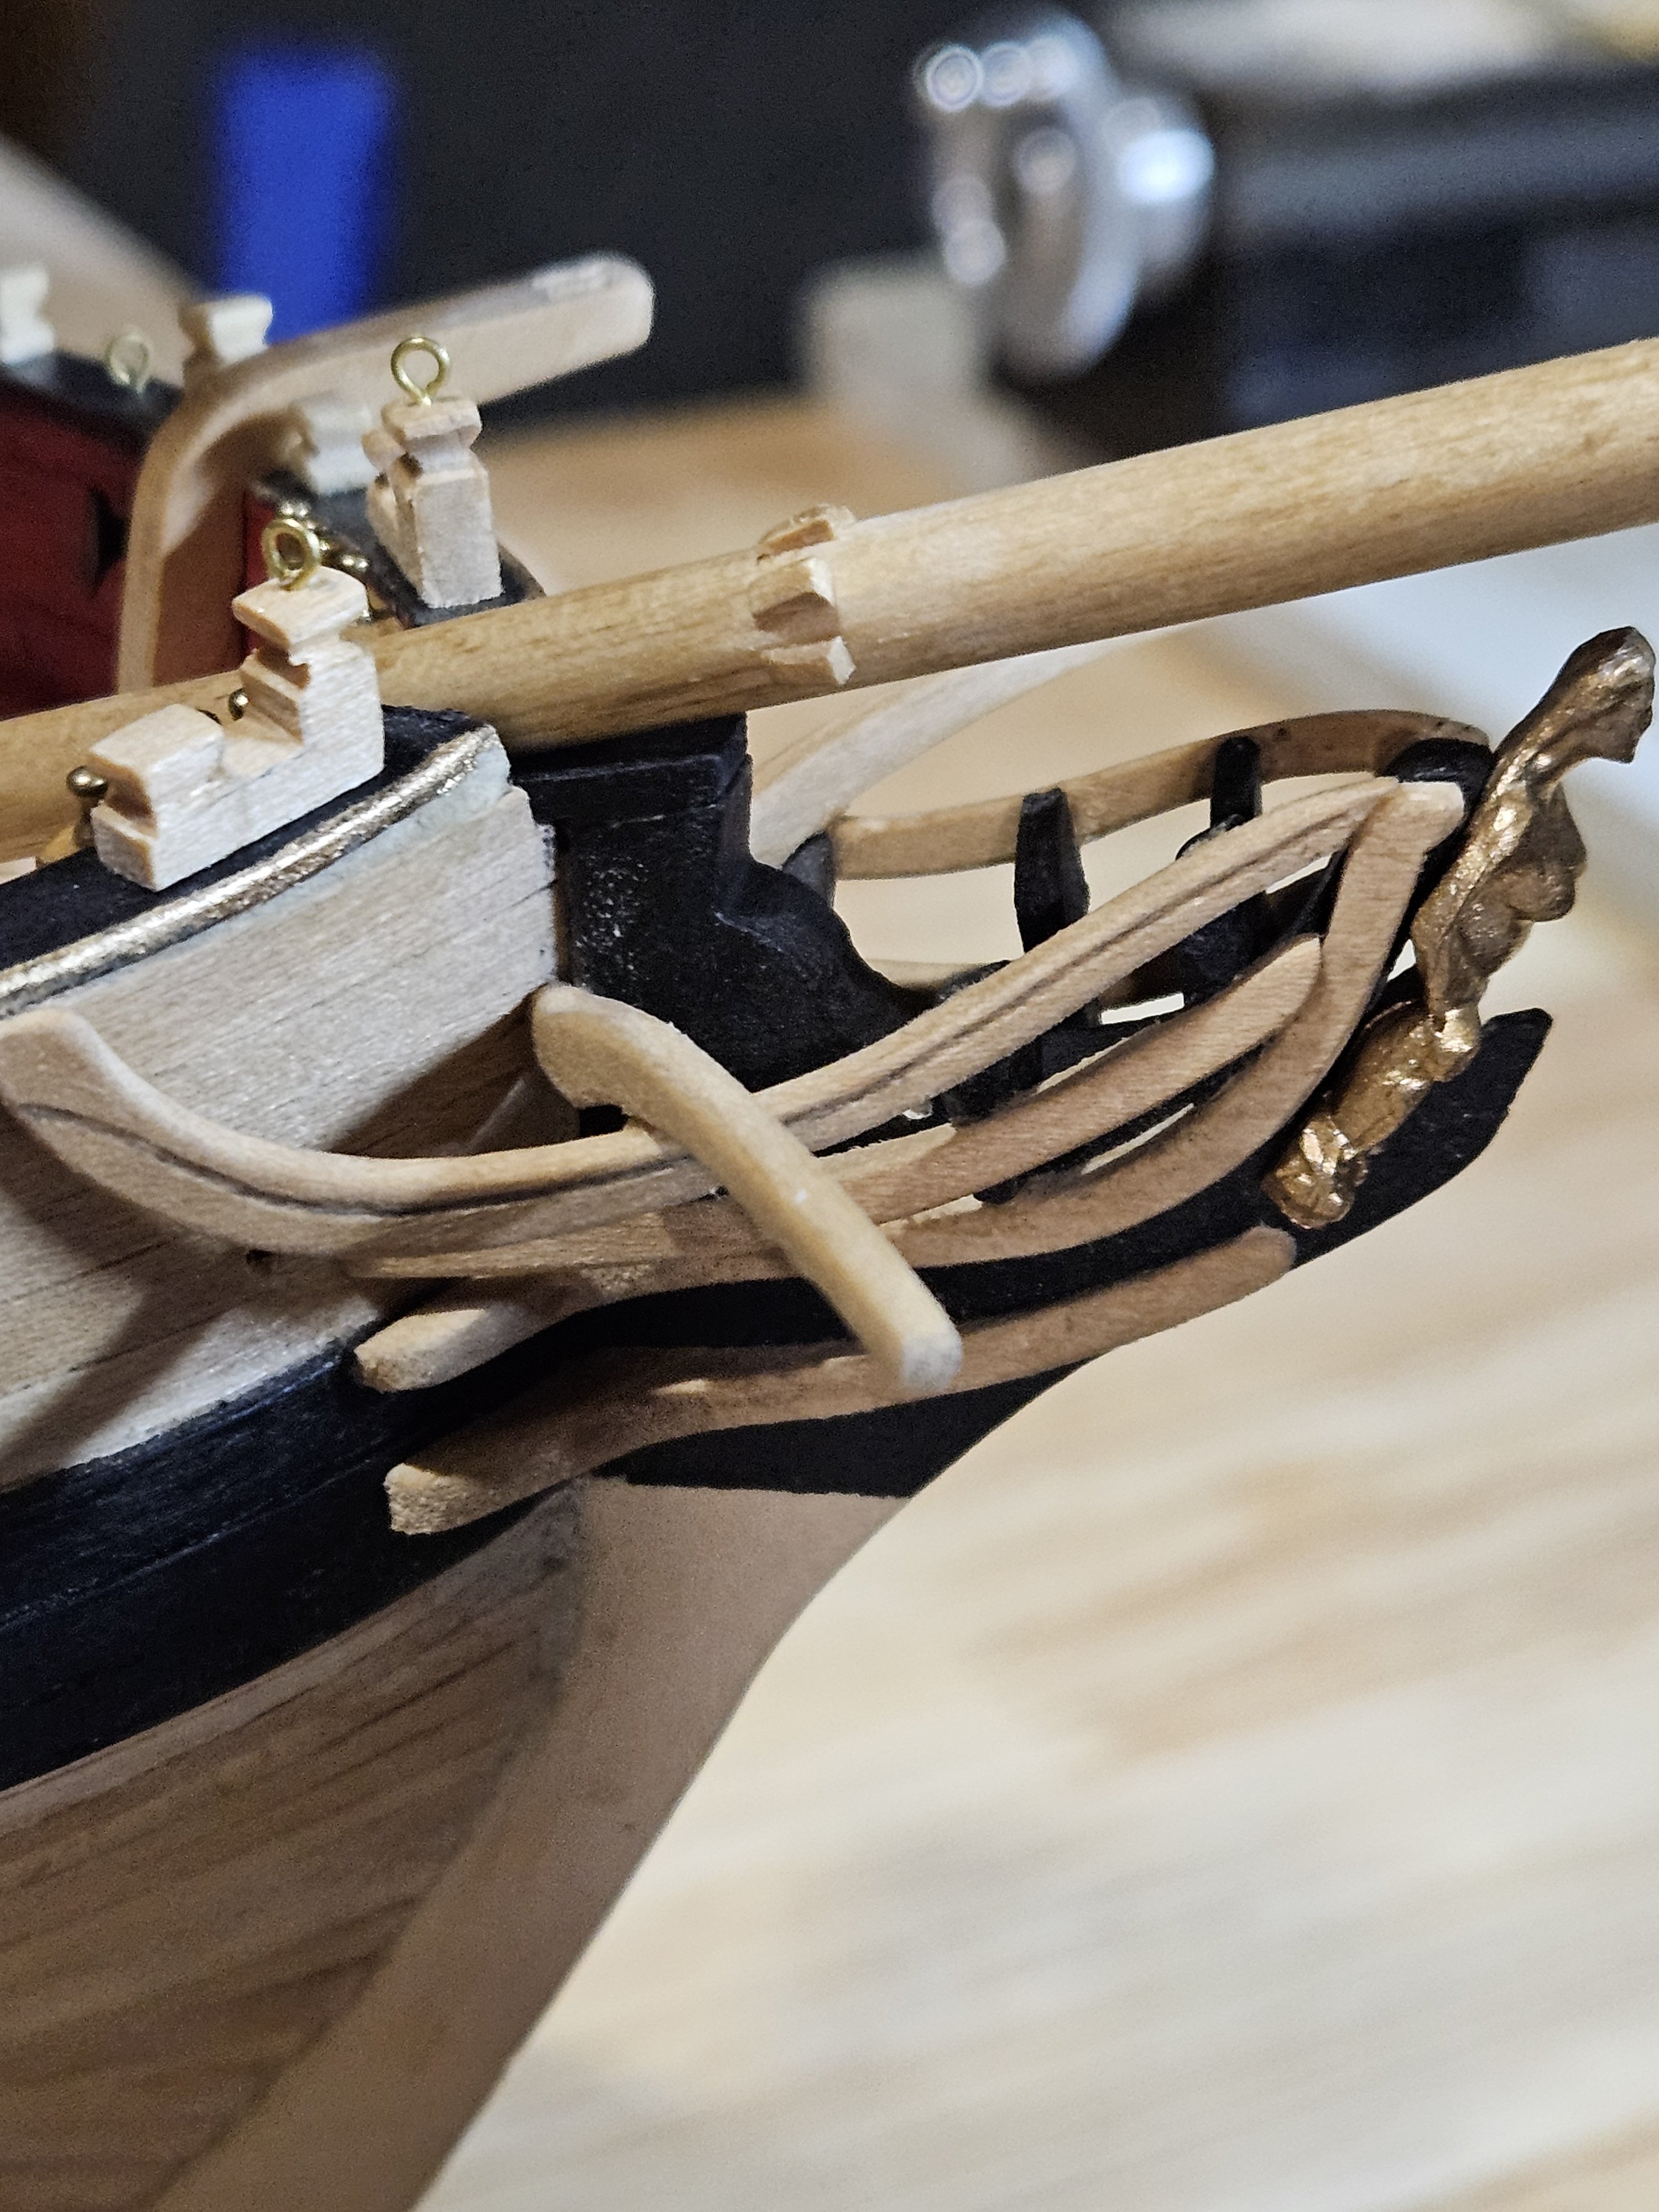
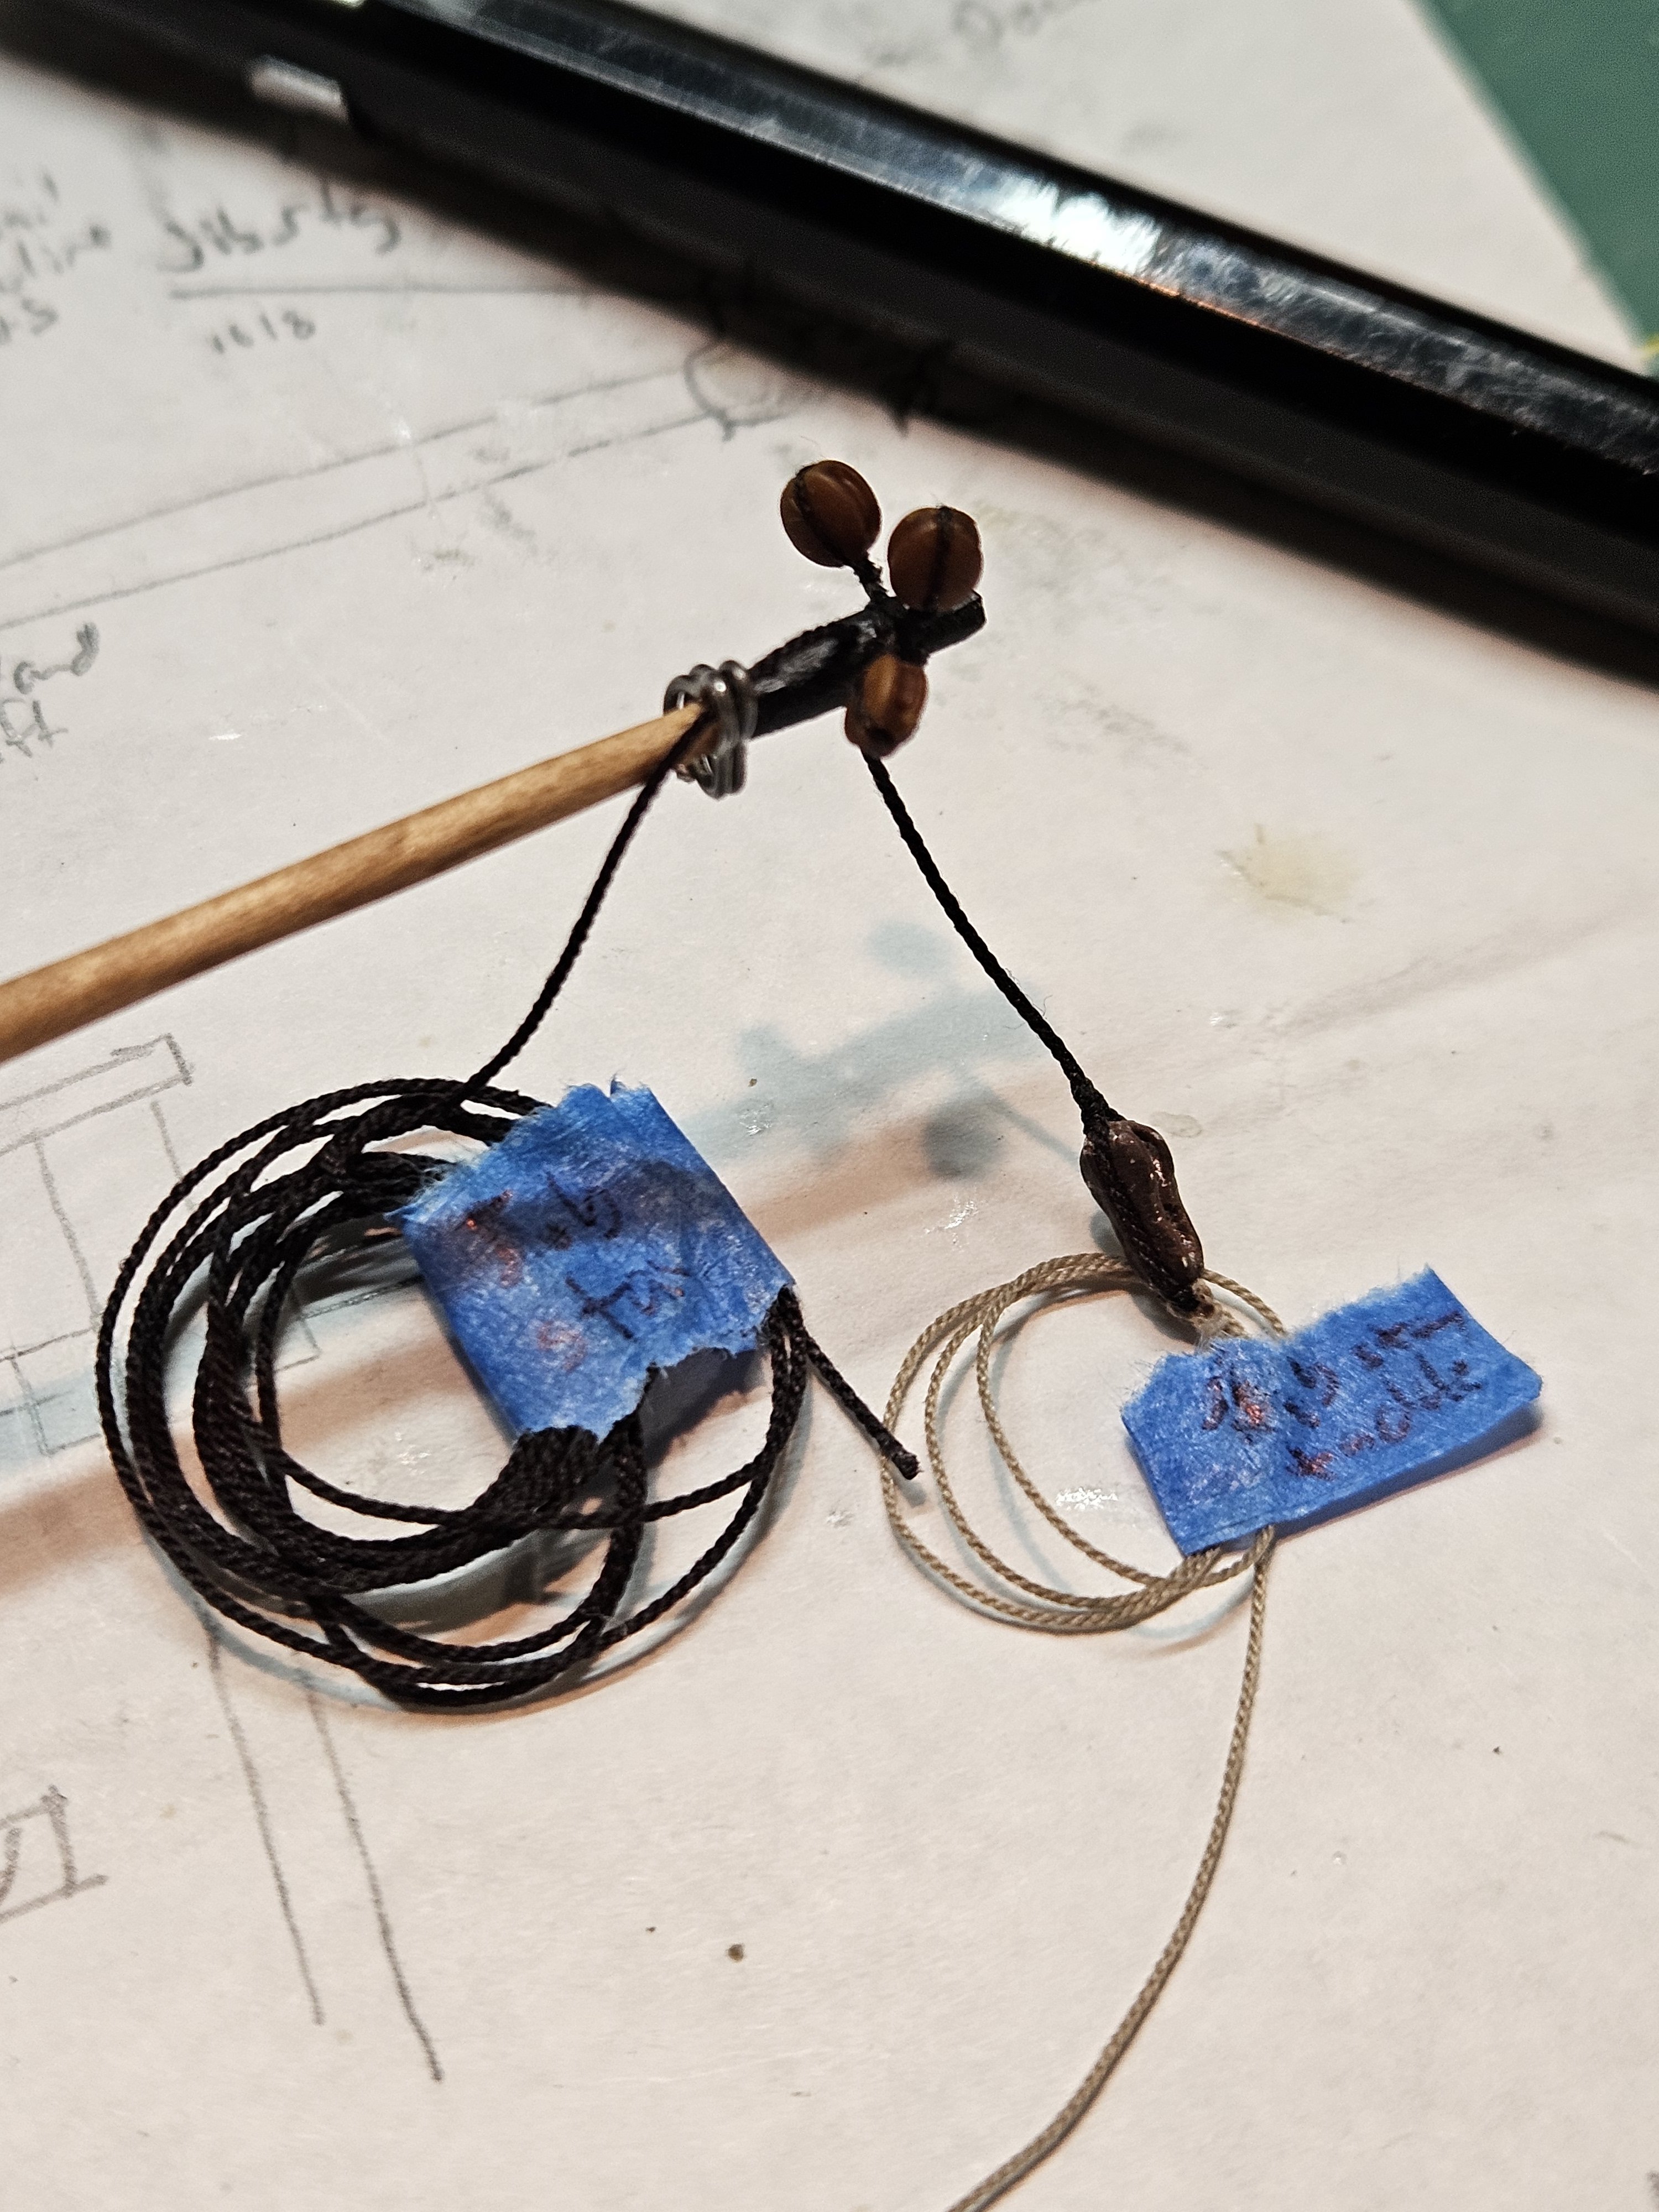
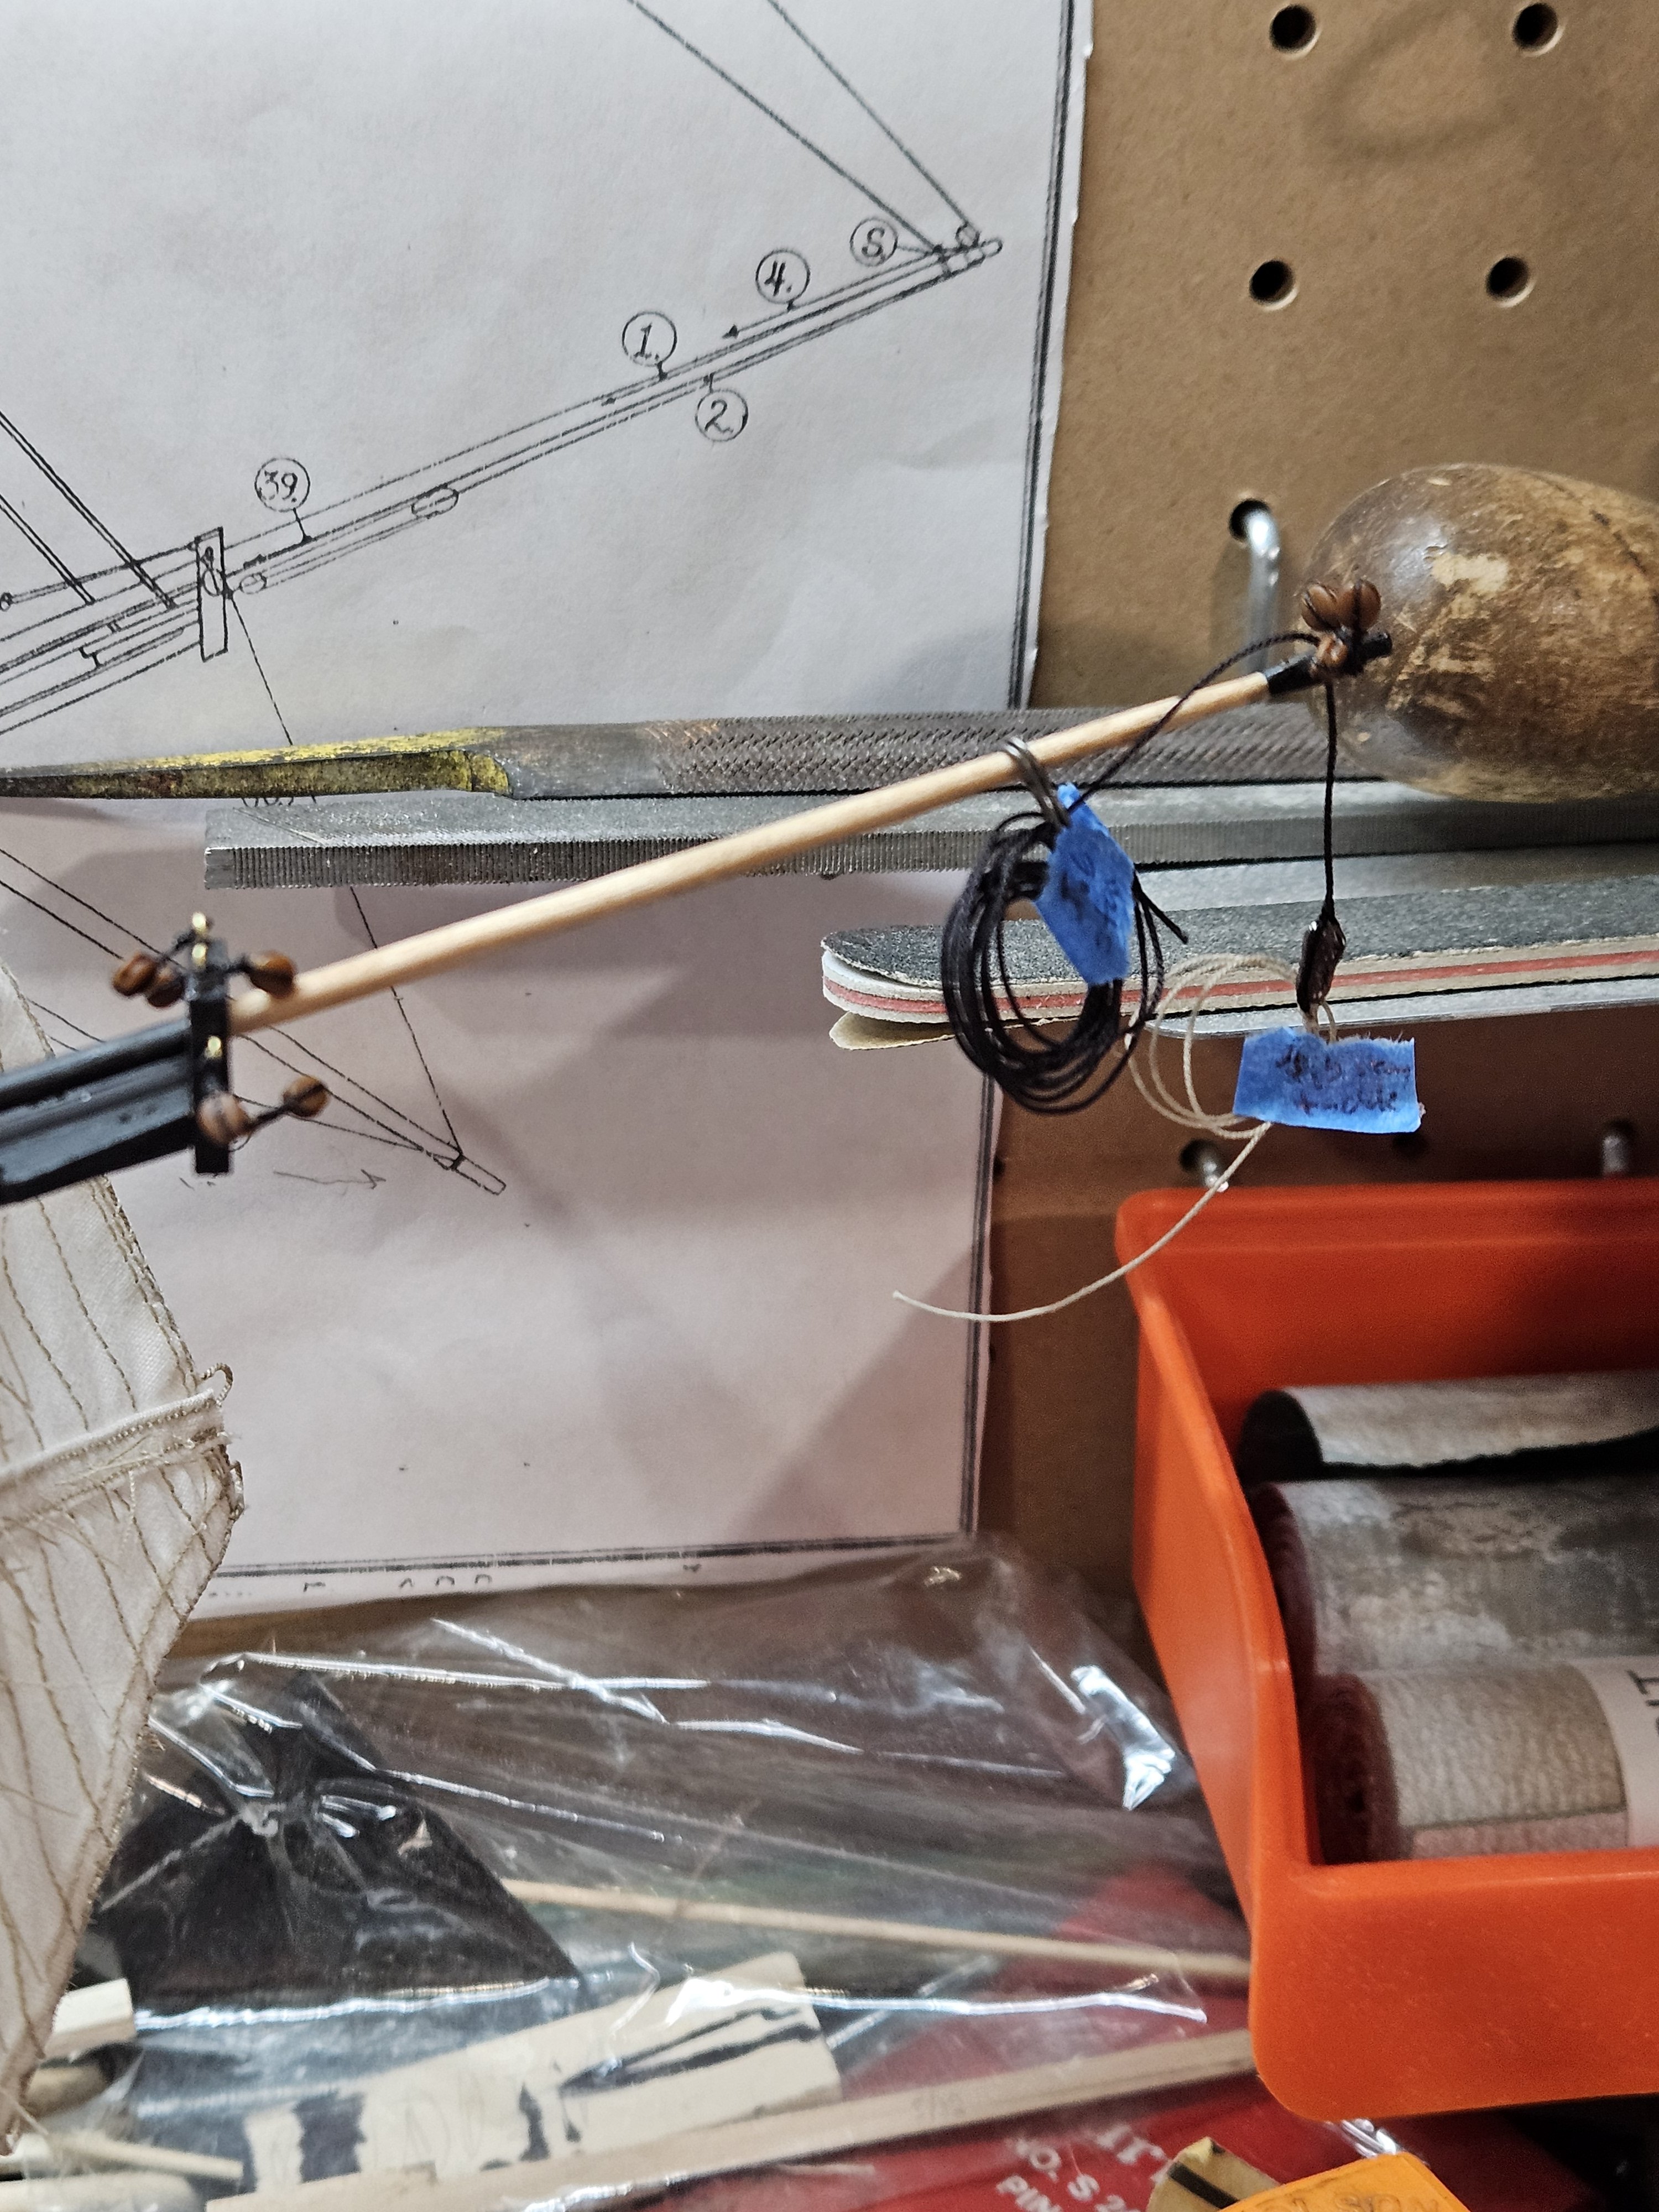
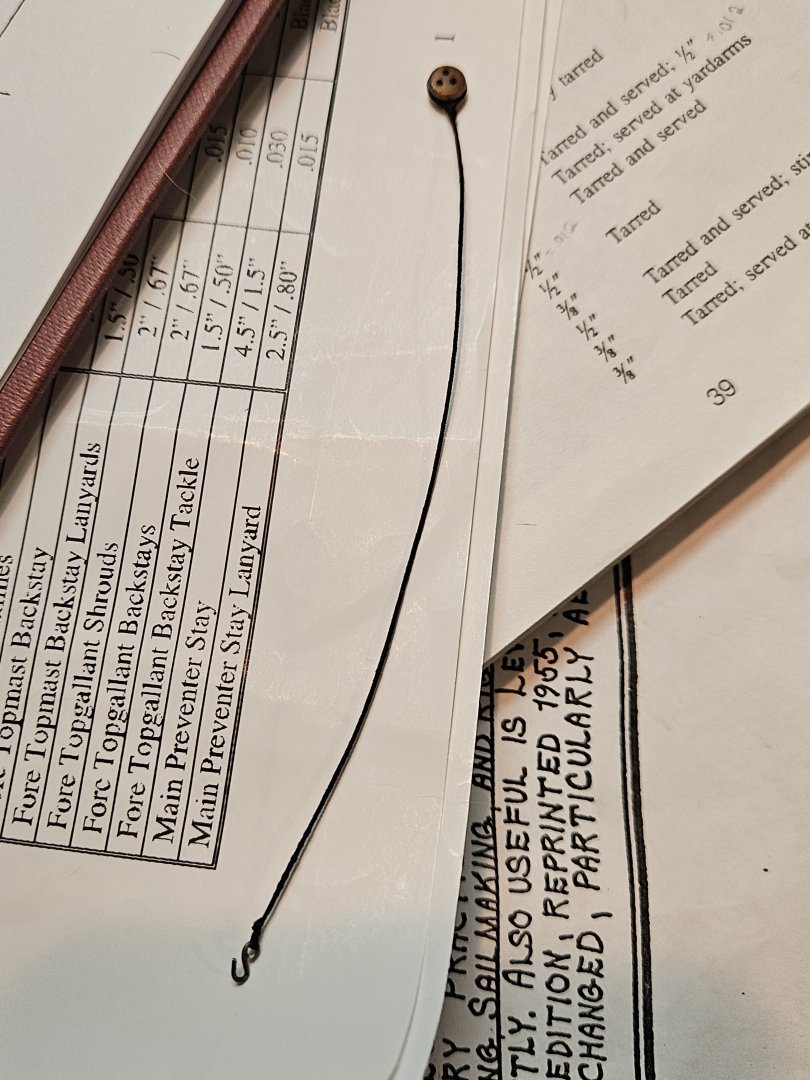
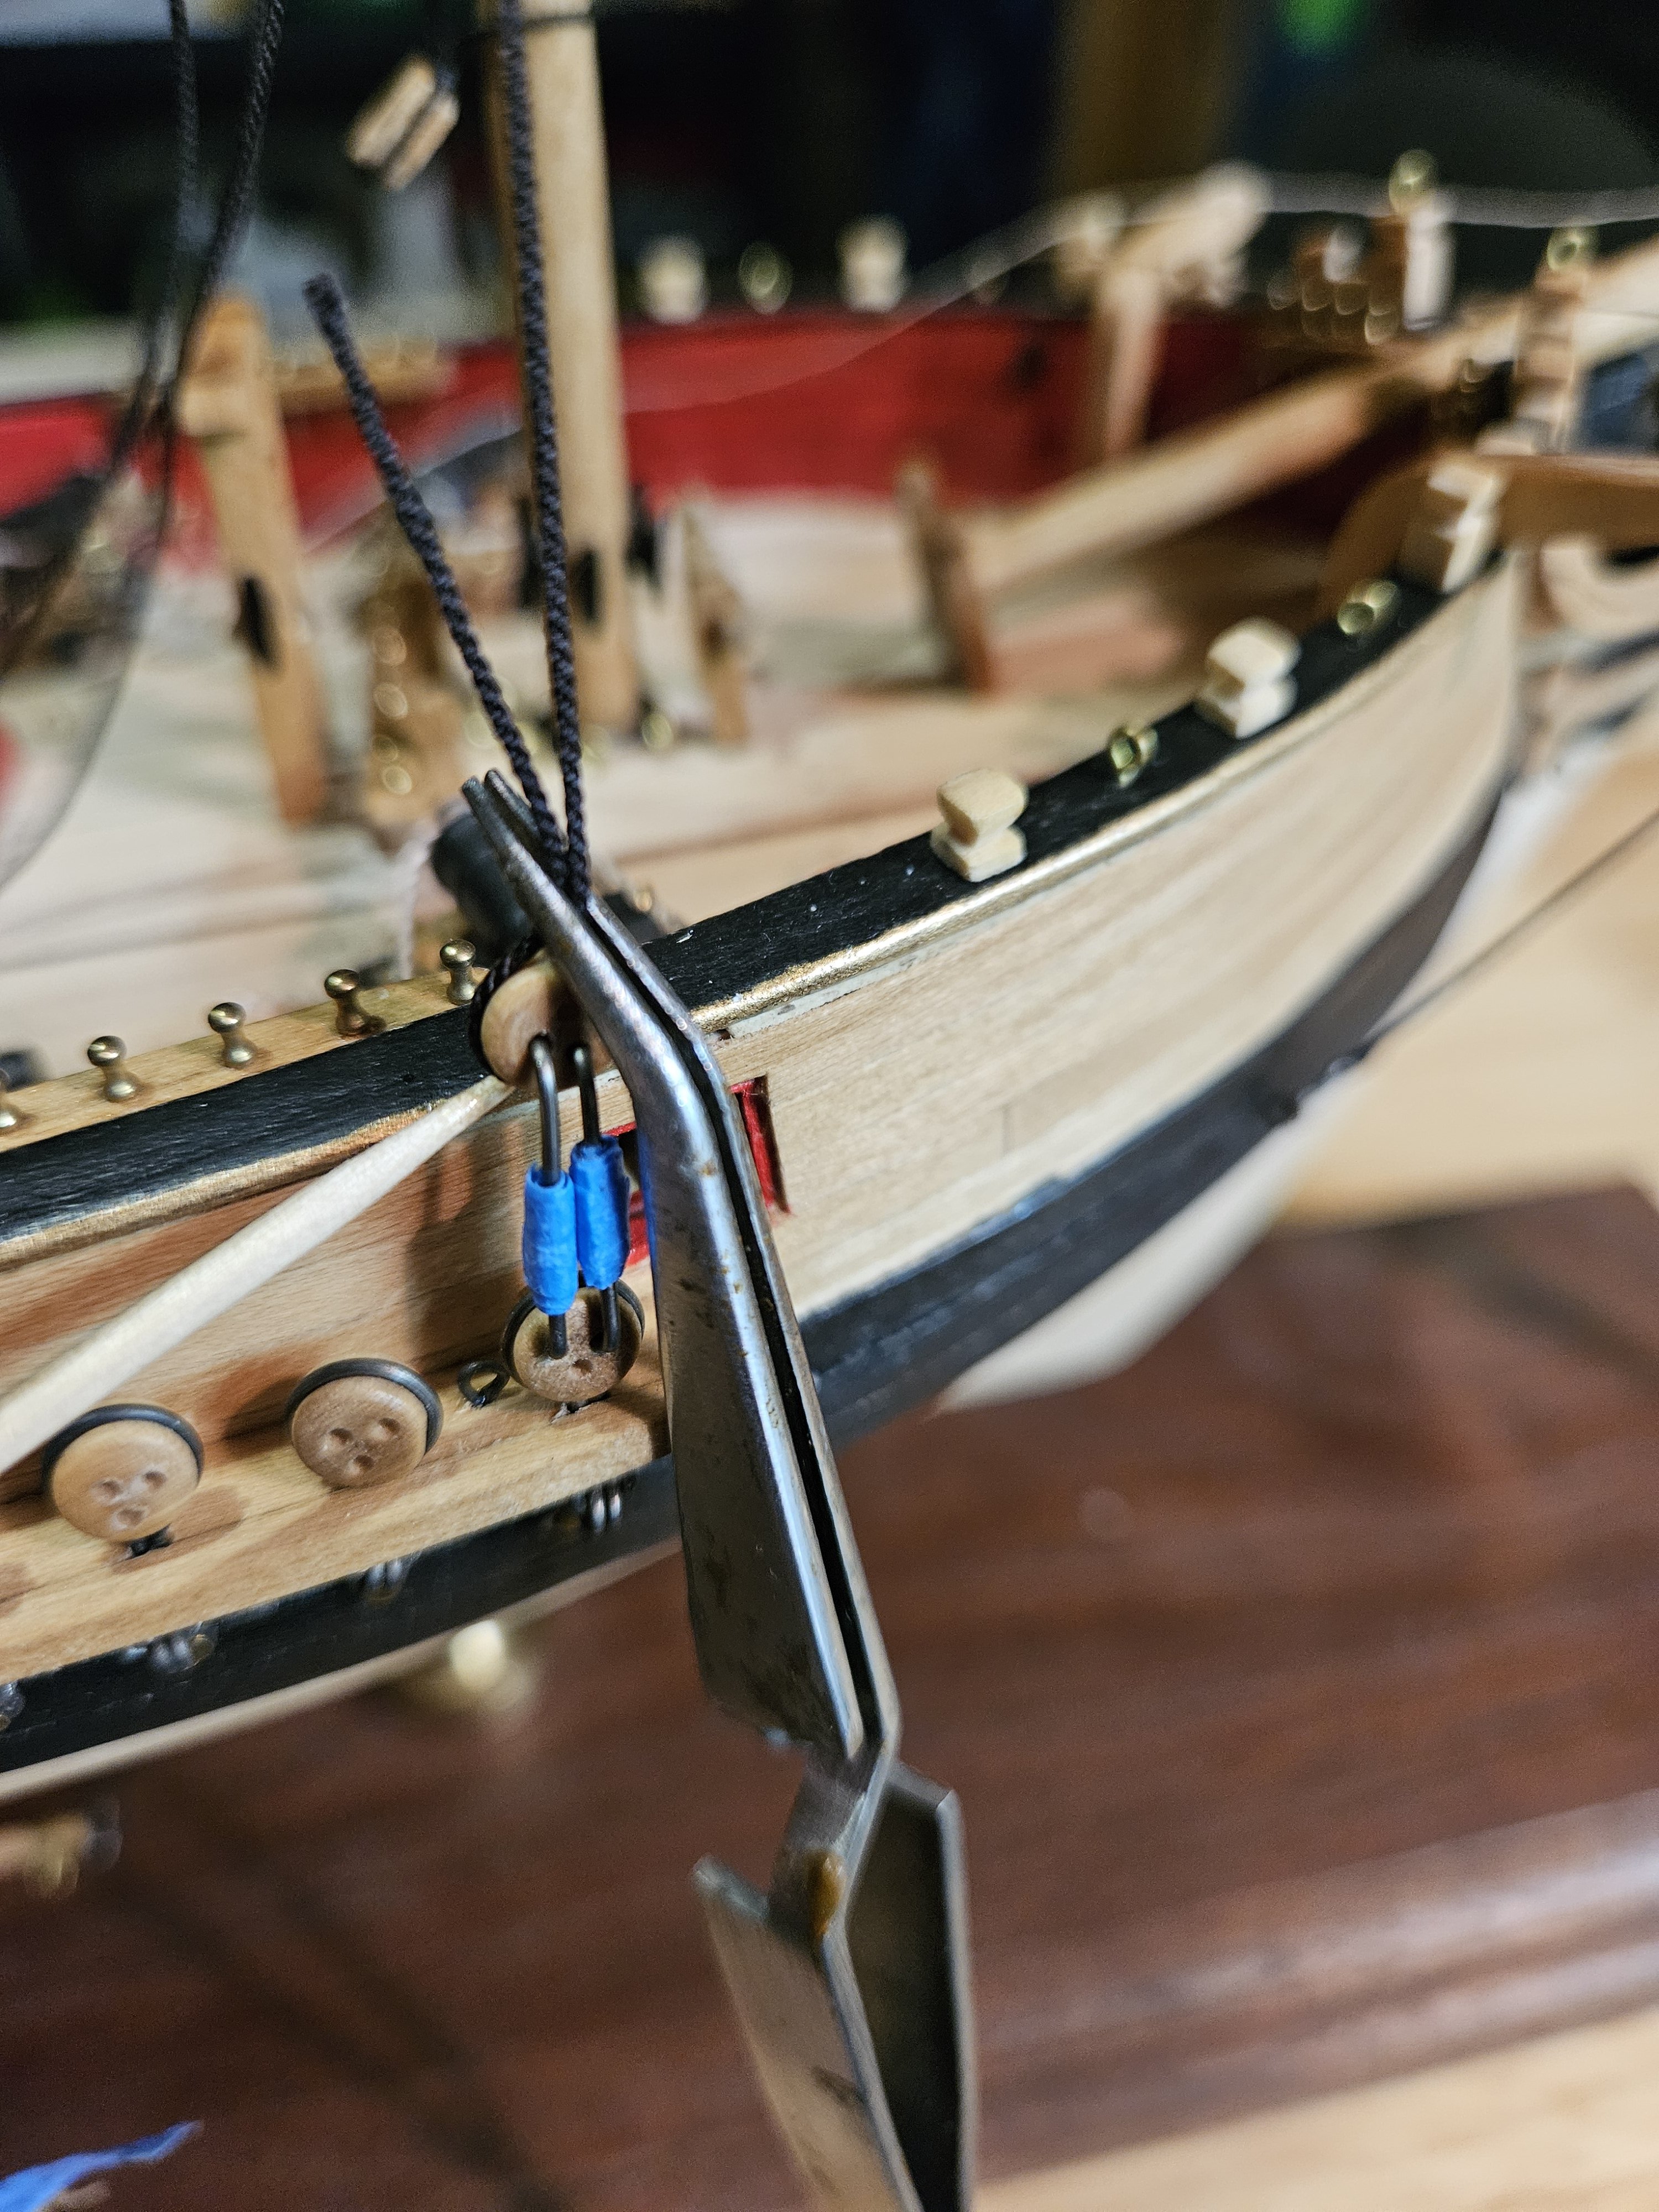
More progress on the Bowsprit of the Fair American: Now that the Gammoning is done, I've moved onto the Bobstay and shrouds. First I needed an eyebolt on each side of the bow stem. Just using some annealed steel wire to make little eyes. Once you get the hang of how to make these with the needle nose pliers, its not so bad. I apparently forgot to mount this years ago, so I'm adding it now. I also made hooks that will 'hook' the eyes for the shrouds. The bobstay will be the first to be rigged. I made a long length of .018 rope, and served it, leaving the ends long so I have enough to trim and mount later. I have a bag of deadeyes waiting, so this is the first one, since i mounted the fore and main deadeyes to the channels and chain plates years ago. Hard to see, but I wrapped the deadeye and tacked the ends close with CA glue, making sure to fold the ends over each other. Once they were tacked, I made a makeshift throat seizing with fine thread, then added two more short seizings mid way and at the end of the rope. Afterwards, the thread gets trimmed close with a razor blade. As shown in the plans, I made a little lanyard spacing tool to go through the hole in two deadeyes for a consistent distance every time. I measured the spacing from the plans a close as I could. The other end gets fed through the hole in the bow stem (which I had also forgotten to drill until now), then back over itself to form an eye. I pulled this tight, and tacked with CA glue and pinched with tweezers to hold until it dried. Once tacked, finished seizing with fine thread and later trimmed. For the lanyard, I made a sort-of figure 8 knot, as per the instructions, but added an additional knot so it wouldn't pull through the hole. I'm using .012in tan rope for the lanyard. After the lanyard is reeved, using tweezers to add some positive tension, while I tacked some glue on the bottom side of the rope to keep it from unraveling. From Petersson's book: Rigging Period Model Ships, it has this really drawing of the deadeyes. I am using this as a guide for how I'm going to do mine. So, after feeding above the deadeye, I made a few turns of the running end of the lanyard, CA glue tacked to stay in place, then seized the very end with black thread. Again, using tweezers to hold the rope in place until I'm ready to trim. It makes a very nice little lanyard. I prefer the tan rope to the black for this part, and I like the contrast it creates. Now for the shrouds, I added hooks to the ends to the eyes mentioned earlier. I have to somewhat guess at the approximate space for the deadeyes to go, since the plans show only a side view, but it has some lateral orientation, so its actually longer than is shown. As before, once I had the deadeye seized in, I have the whole shroud ready. Starting the lanyard and using tweezers to hold in tension while I tack with CA Glue on the underside. And finishing the lanyard with a few turns, to make it look all nice. When I repeated on the port side, it must have been an 3/16" longer, and the deadeye on bowsprit shroud must have been a little twisted higher, when seized: the port shroud is higher and longer than the starboard. Its not horribly obvious, but and obvious mistake on my part. I would likely have been whipped for this, back in the old days but luckily this vessel will not actually be put to sea. As long as you don't look down onto the ship from 3ft above the fore mast, you can't see it. I have a lot of other details to add to the ship to get it rigged, so I will move on. More pictures of progress soon. - Jason -


-
Fair American by townpiper
JLong replied to townpiper's topic in - Kit build logs for subjects built from 1751 - 1800
https://www.shipmodell.com/index_files/0PLAN1C.html This is where I found them. The Fair American plans with sails are in there, but they are very challenging, since the kit doesn't come with instructions for sails. The sails need to be scaled up 1.1:1 to match the kit dimensions for the yards. Thats what I had to do. There is a significant amount of additional rigging needed for sails, which you will need to develop yourself. -
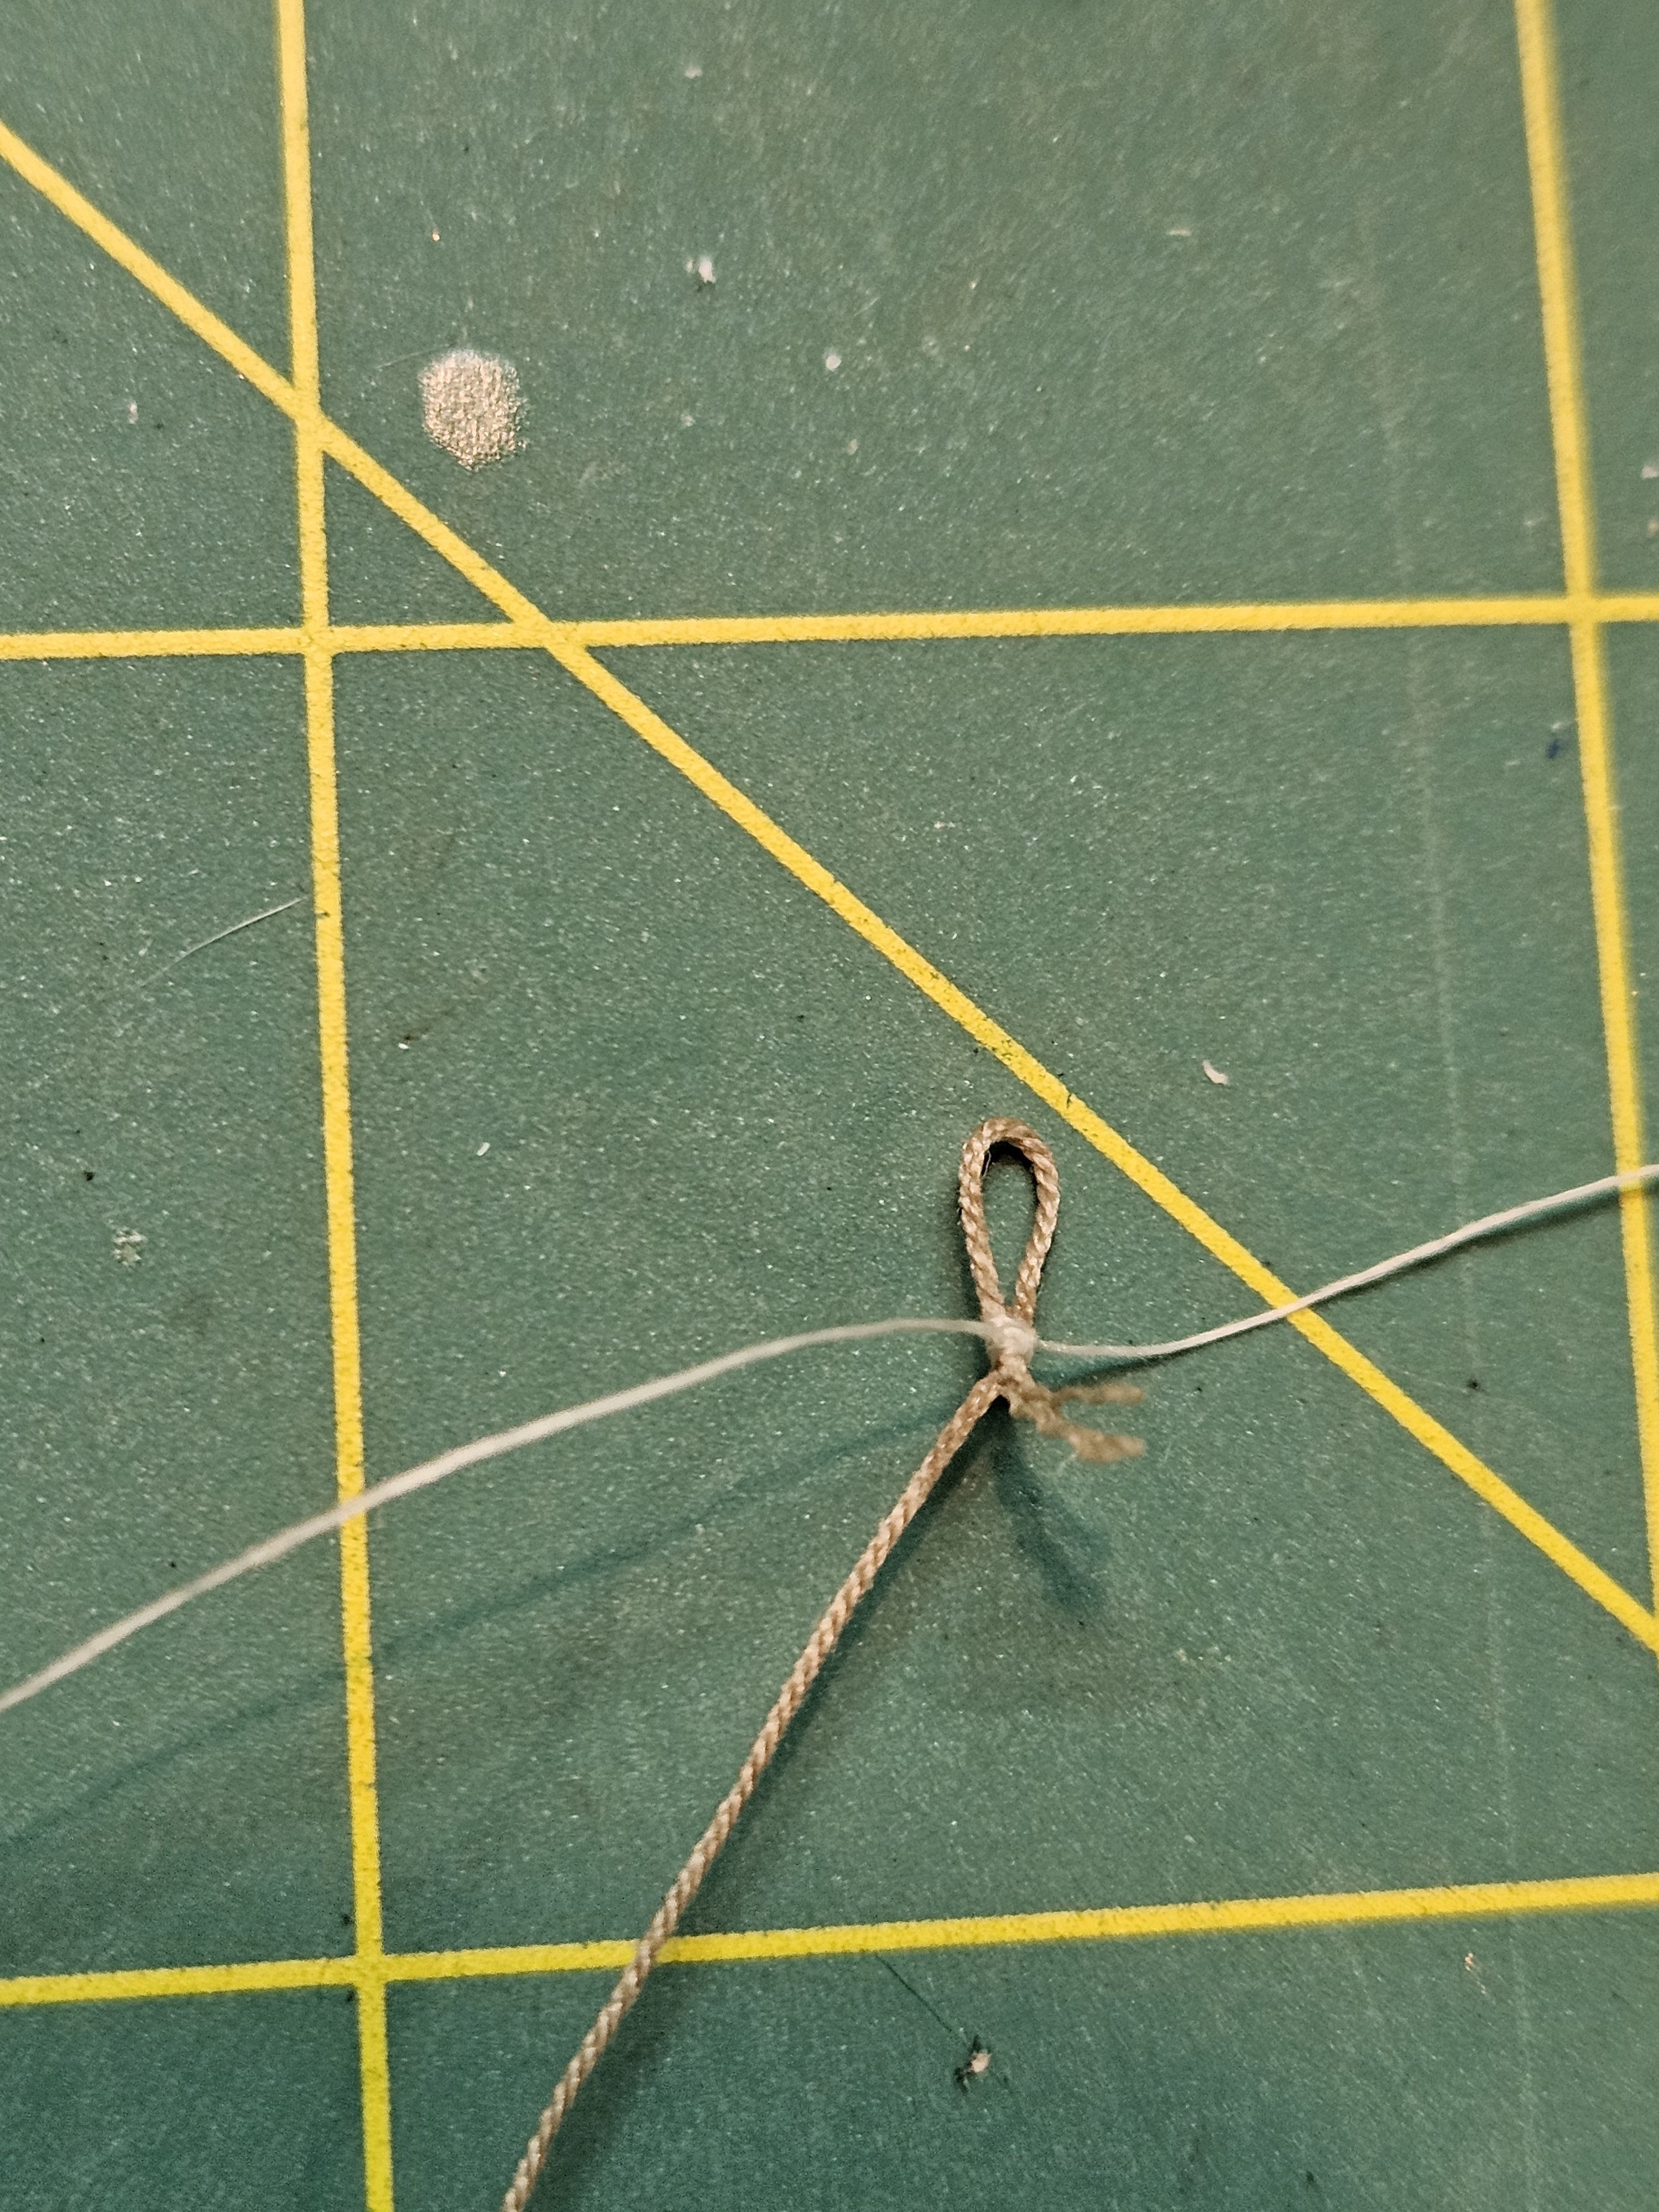
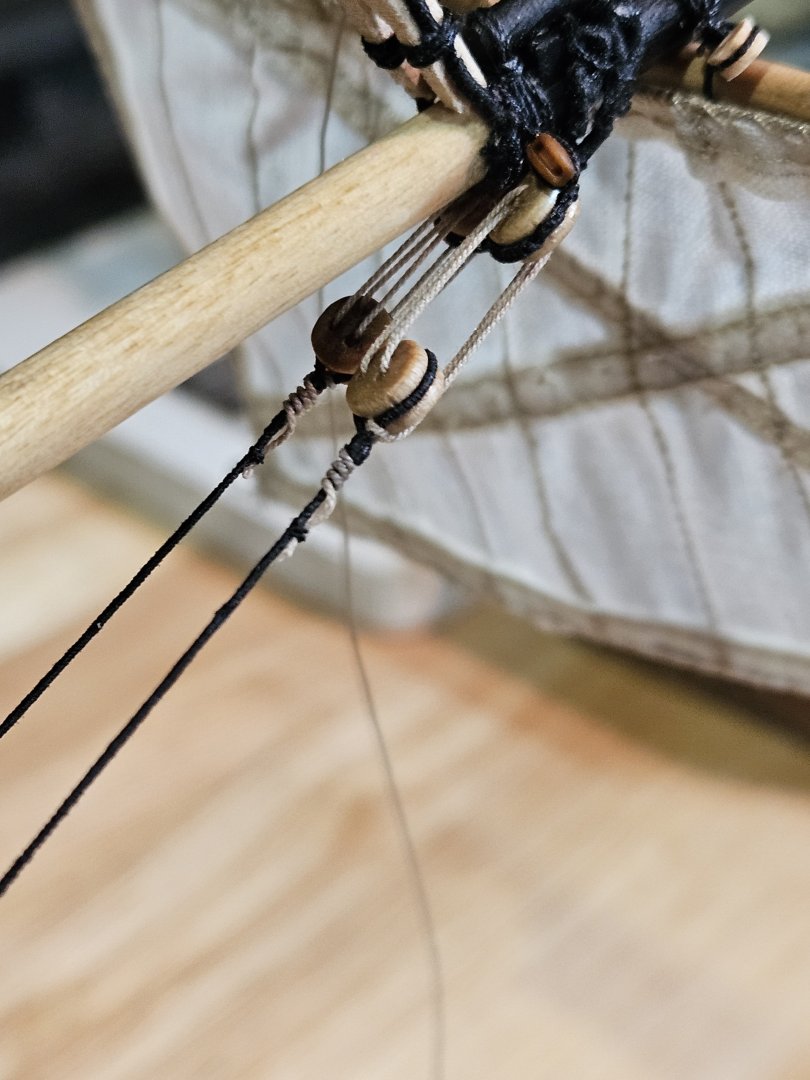
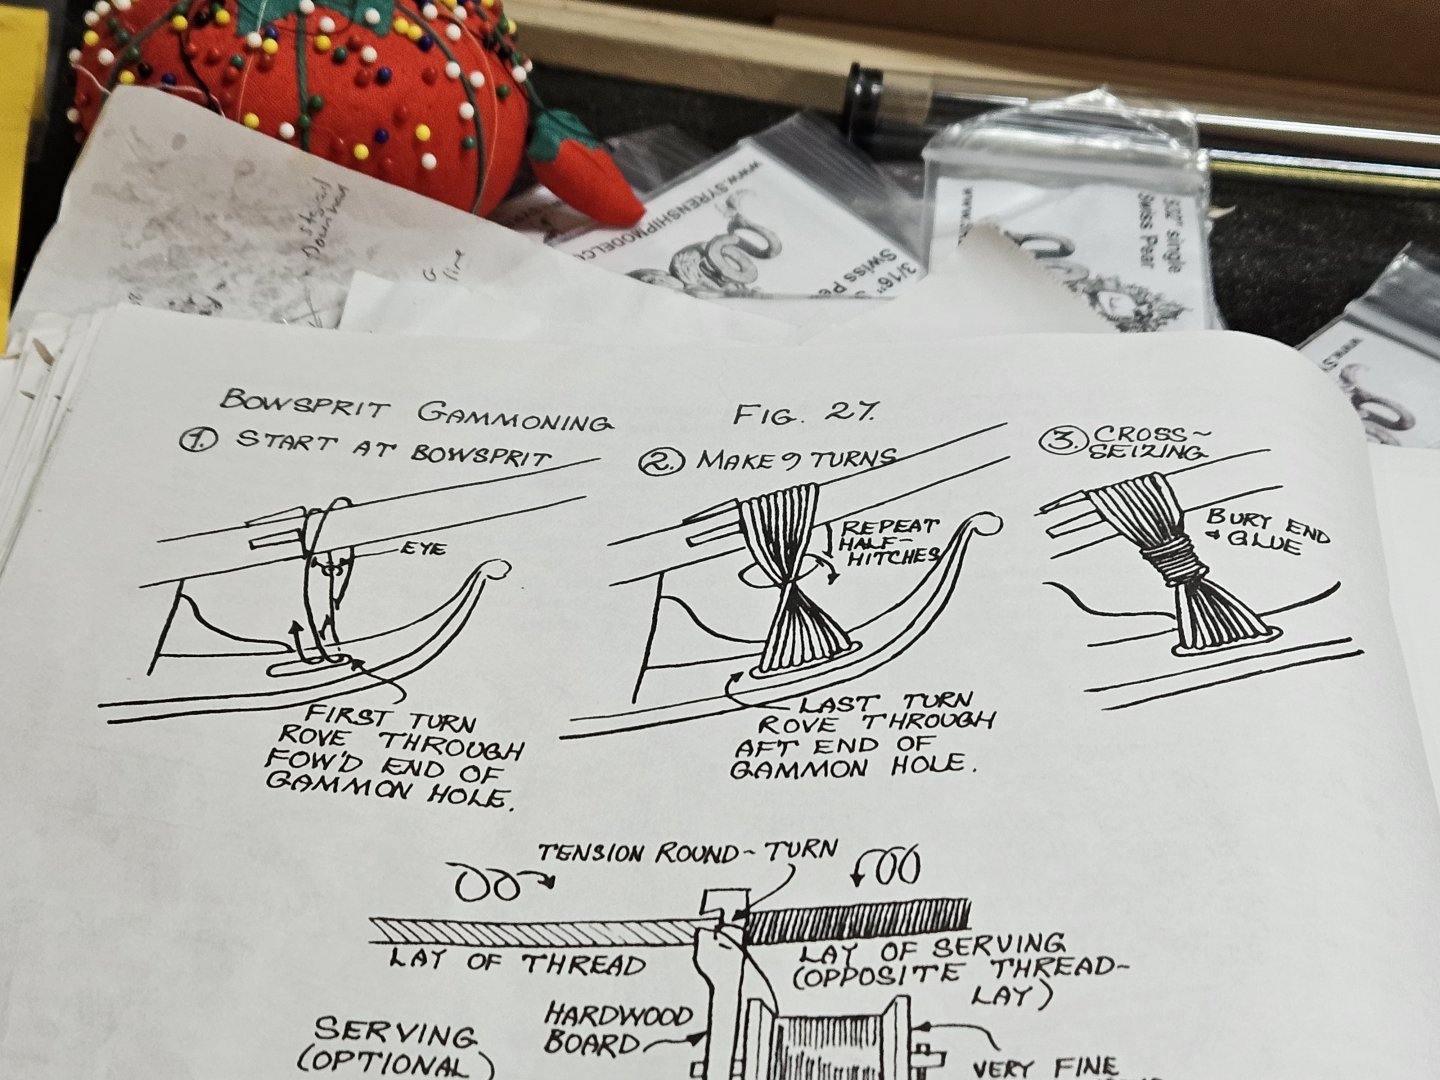
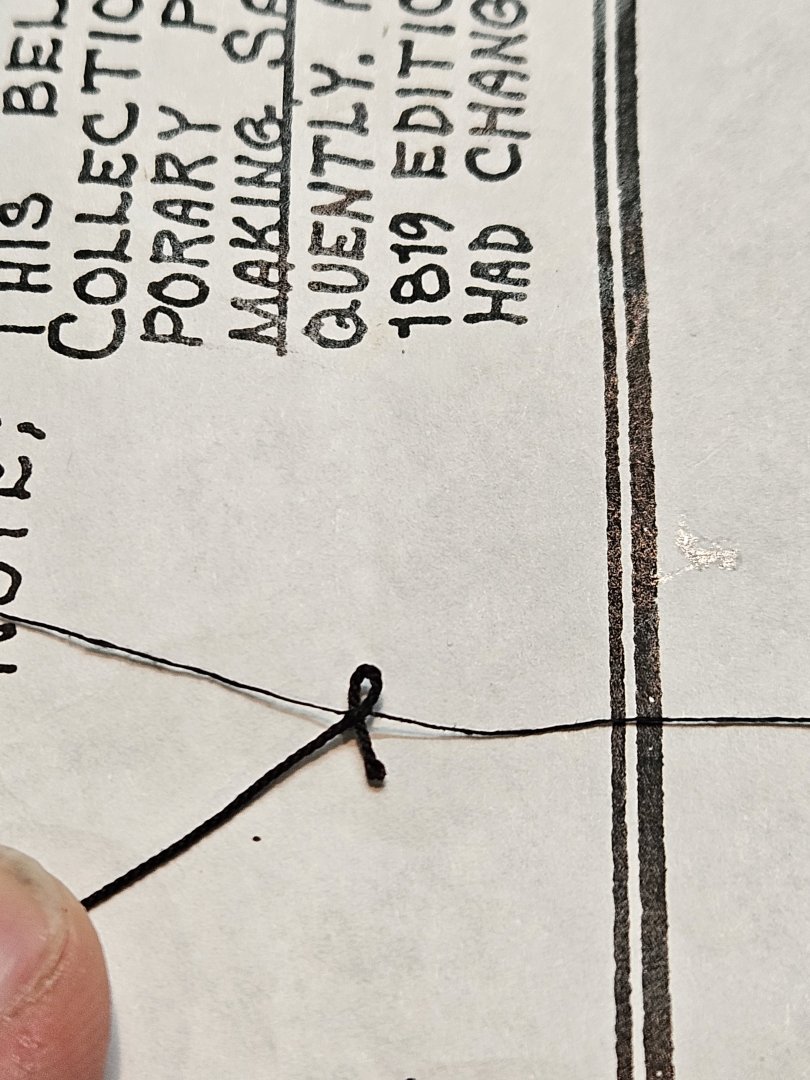
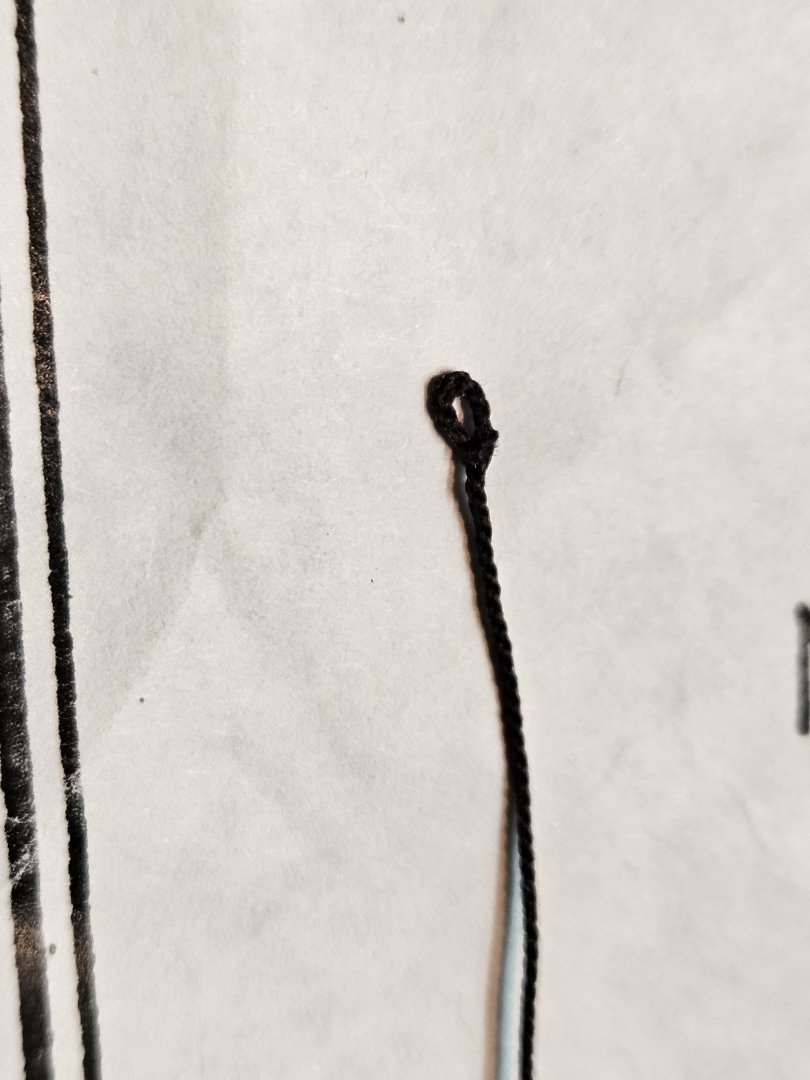
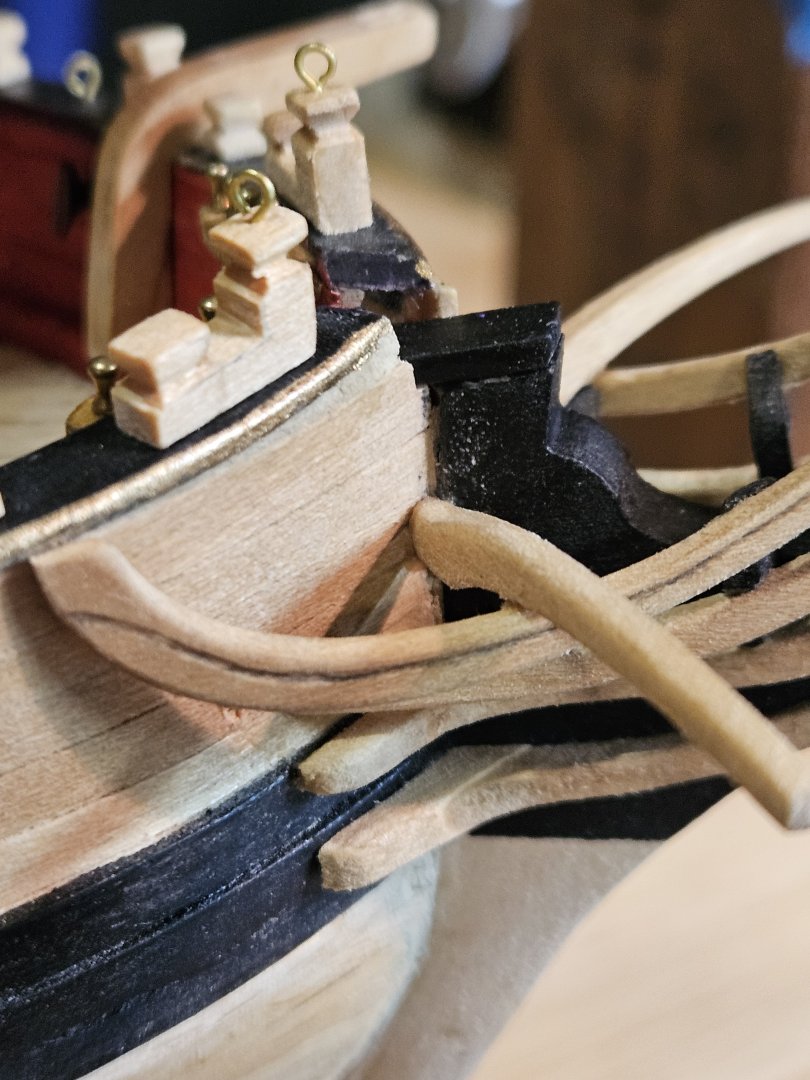
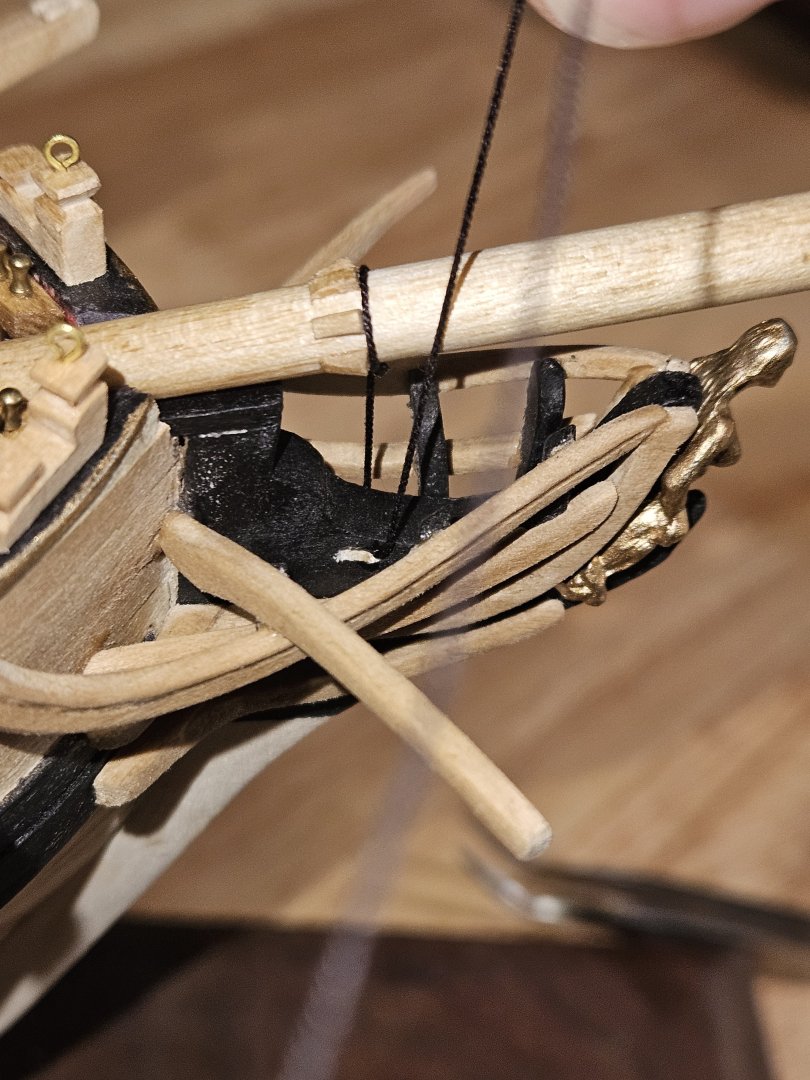
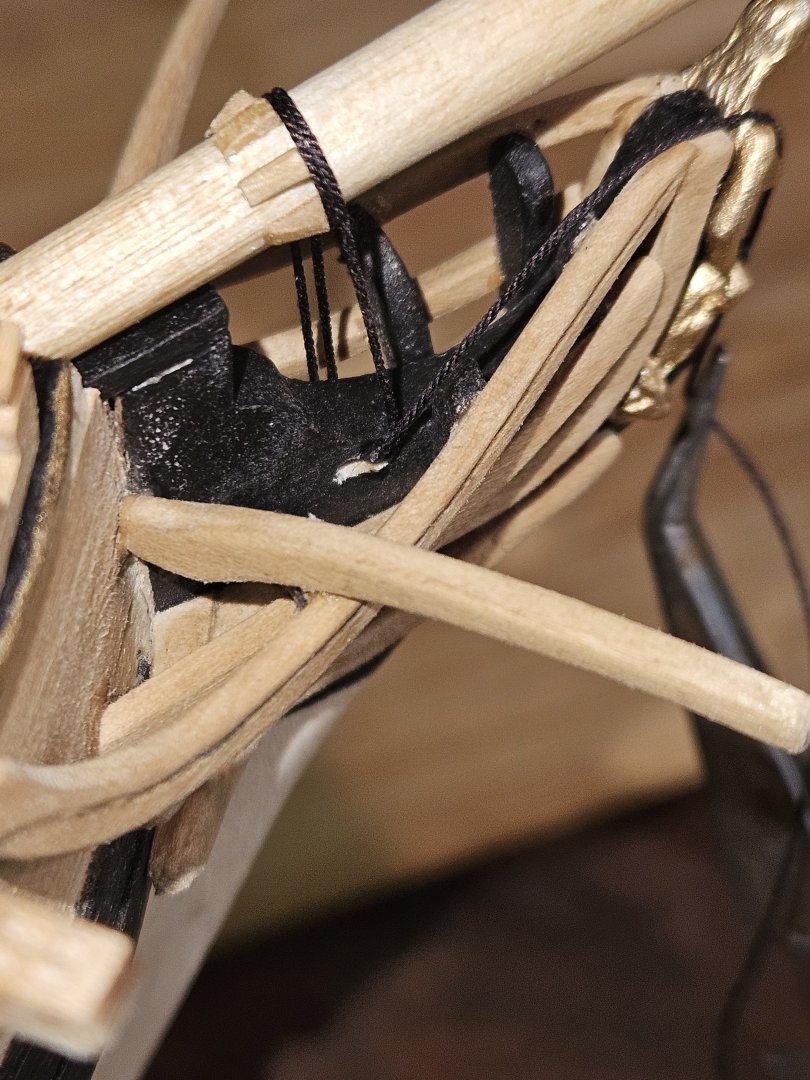
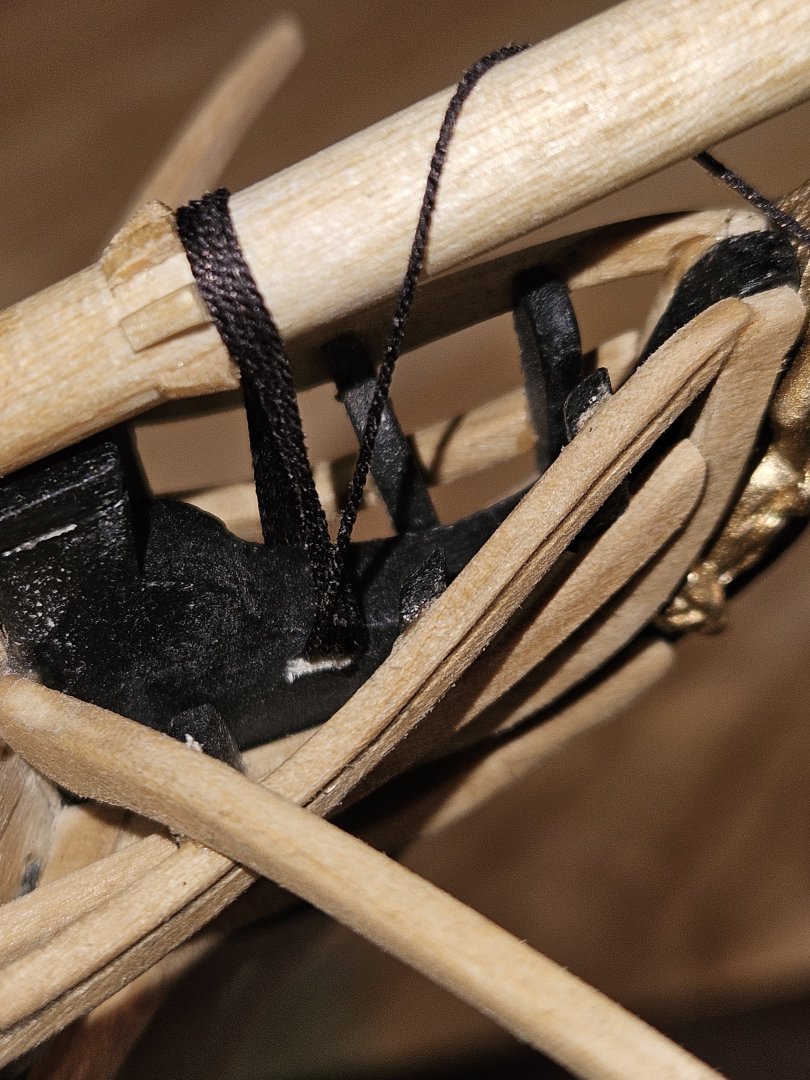
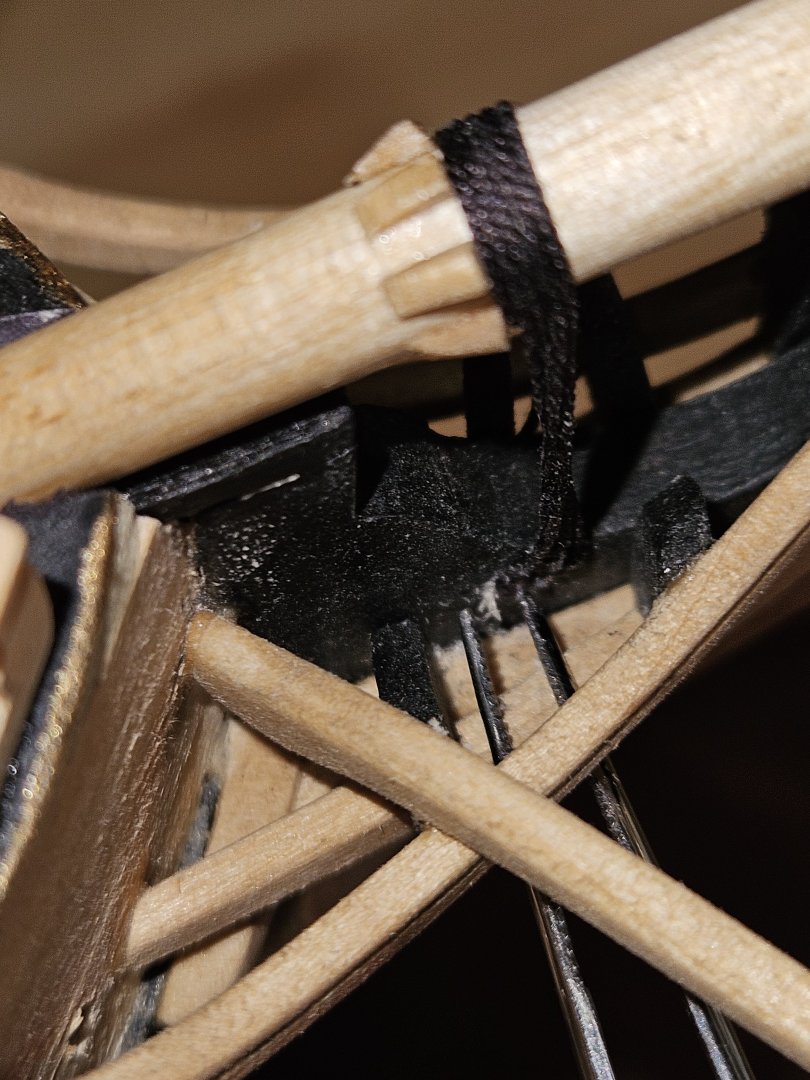
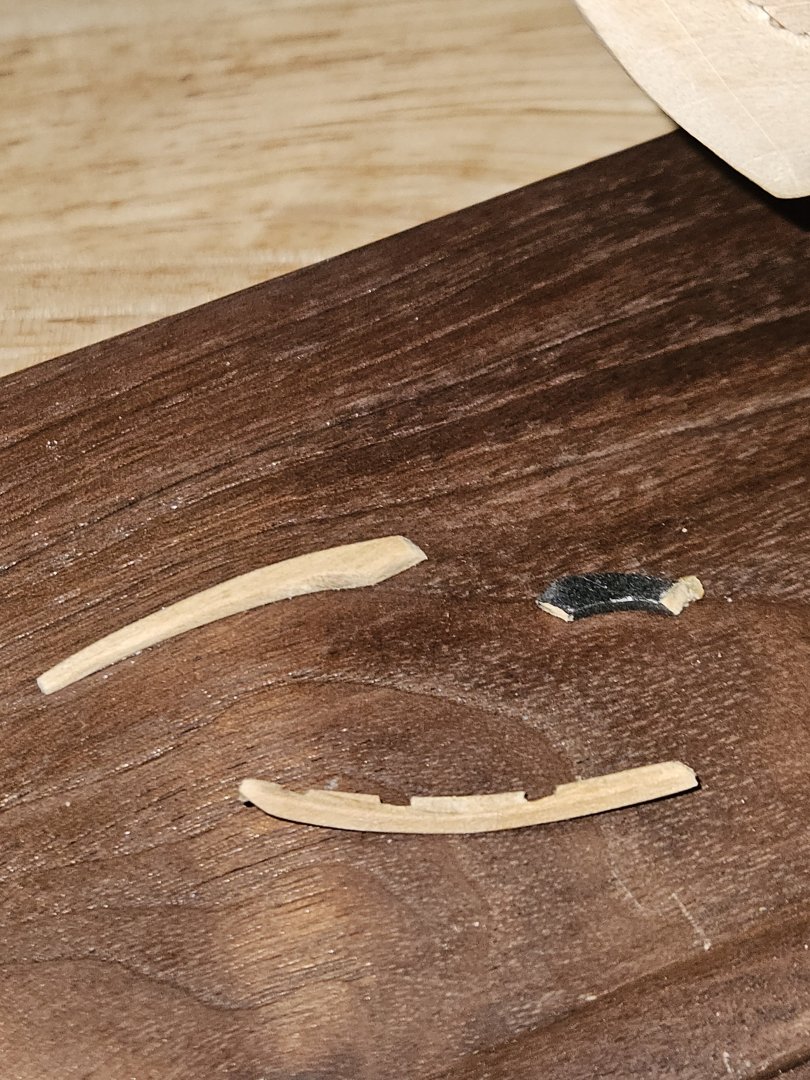
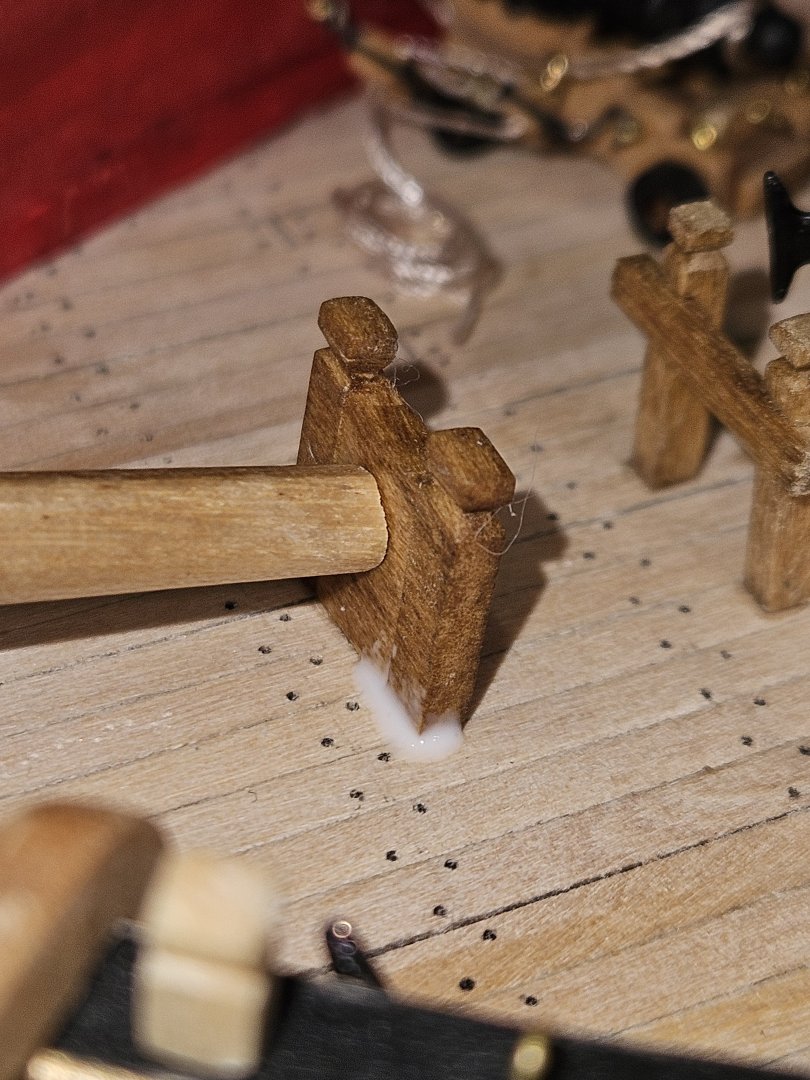
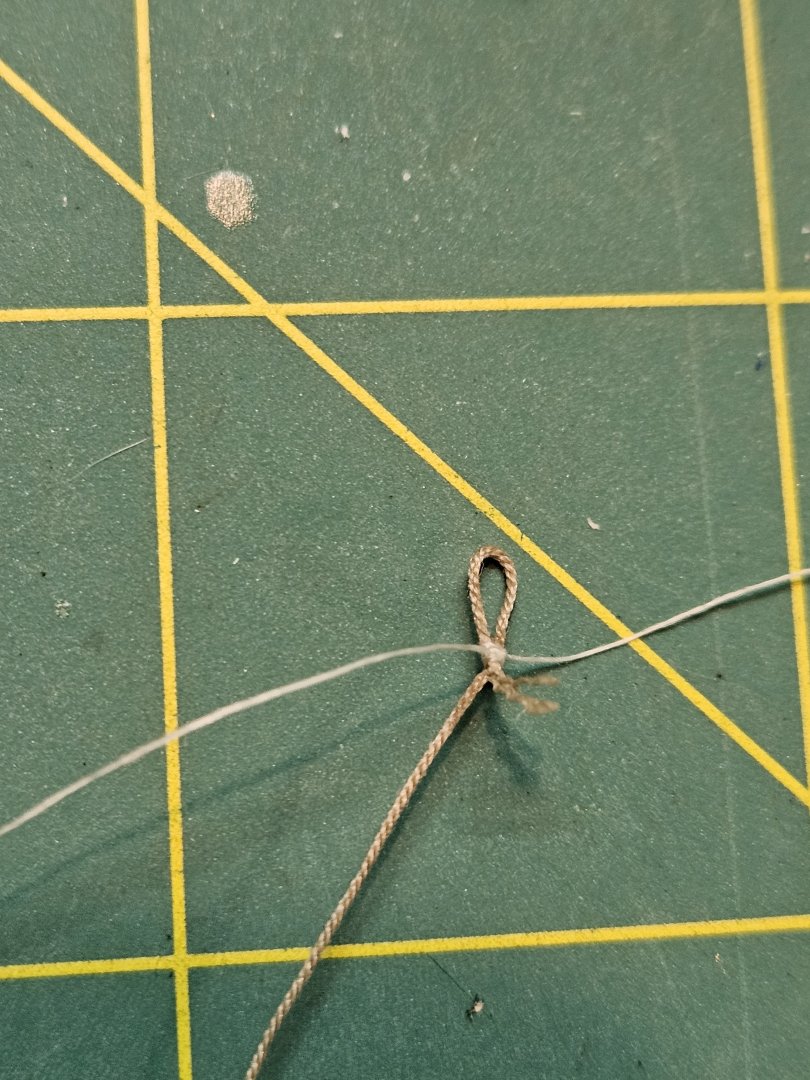
Mounting the Bowsprit to the Fair American: This is the first ''mast'' that will be added to the ship. Once this is glued and gammoned, it isn't coming out, so I have to get this right! According to the instructions, I need 9 turns for the gammoning, using .025in rope. I could only manage 5, as you'll see... To start, I needed an eye, so after roving it through itself, I seized it with fine thread. And then trimmed it close. I doesn't need to be super pretty, since it will be primarily hidden in the gammoning, all said an done. I noticed one problem though: the bowsprit is very close to the head of the figurehead. According to the plans, it is supposed to be farther raised up. So I needed to fix this somehow. My solution was a small chock of 3/16" wide scrap basswood. With this underneath the mast, it looks more correct. So after sanding and painting, it actually matched up pretty well, even though this is a really close-up shot. Much better. I feel confident in the placement, so I can move on with mounting. I glued the bits to the deck, and the bowsprit to the bitts. This is my one shot to get it right, I can't/won't unglue it after this. I've been putting this off for a long time, so that I had all the blocks and other pre-rigging done before attaching this. While it dries, I propped it up on a little lathe tool box so that the bitts doesn't dislodge from the deck. I have to be EXTRA careful as I move the ship around now, so that I don't bump into the bowsprit and break something off. Up until now, I've been able to remove the bowsprit whenever I wanted. Now its time to start the gammoning. Making one turn over the mast, and then through the gammon hole. Following the steps in the instructions for working forward on the mast, and backwards on the gammon hole. After each turn, I would dab the rope with glue and let it ''tack'' before starting the next turn. I wanted this to be as neat as possible, so I'm pulling on the rope end as it dries so it won't sag later. I'm also tacking the gammon hole with glue so that the rope doesn't fall out of place as I wrap it. You can see how I've used reverse action tweezers to add tension while it dries. When I got to the 4th turn, I realized the gammon hole is not long enough to carry 9 full turns. I might get 5, if I'm lucky. There's no way for me to expand this now. The rails are already in place and I am not taking them off. There's no angle for a drill or a file to reach either without damaging existing rails. I'm going to resort to just 5 turns. This was a oversight 6yrs ago when it got drilled. The 5th turn almost broke me, and the ship. The 4 turns of rope were already really stuffed in the gammon hole, that I couldn't get it through. I literally spent 2 days trying before I fed it through. This consisted of stiffening the end of the rope with CA glue and stuffing it in the hole. Then it got stuck....majorly. I also attempted to use a needle to push it through - wouldn't budge. I also couldn't grab it with tweezers, because it wasn't long enough. I had to walk away one night, and come back the next day or I'd lose my cool. Finally after 3hrs of pushing with a tiny drill bit, there was just enough of the end peeking through that I could grab with tweezers. After it came through, it was really shredded. What a relief, though; I got it through. In the process though, on the port side, some things broke. Nothing important of course.... I decided to deal with this later, after I took a few days off to cool off. I needed a mental break. Of course, I also didn't make the gammoning rope long enough to finish the cross seizing, so I just tacked it in the middle on the port side. I used a separate length of .025in rope to do the cross seizing, then trimmed it short. The bitts needed to be glued some more, since it came loose. I just used some white glue on the deck line which dried clear overnight. Even though there are only 5 turns for the gammoning, it still turned out okay-looking. Last thing was glue the rails and knee back in place A lot of frustration, but the Bowsprit is mounted! A milestone for me! Now I have to not bump into it and break off the jib boom. Its starting to look like a ship now. Thanks for following along - Jason-


-
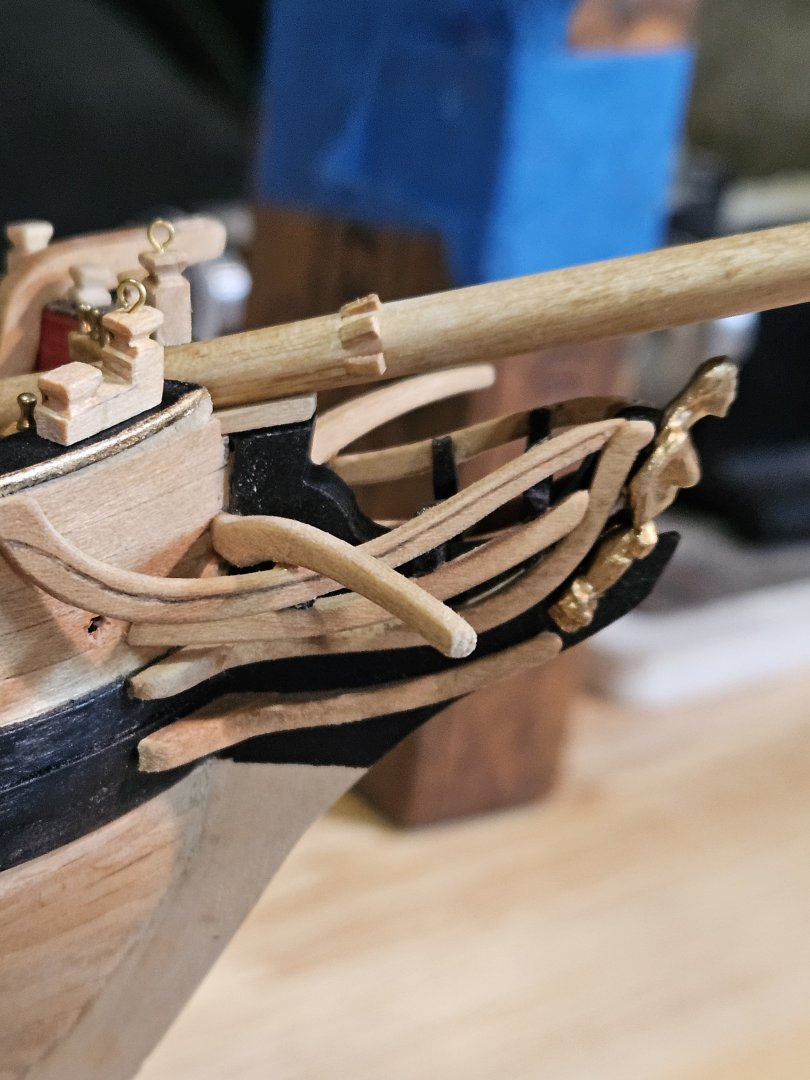
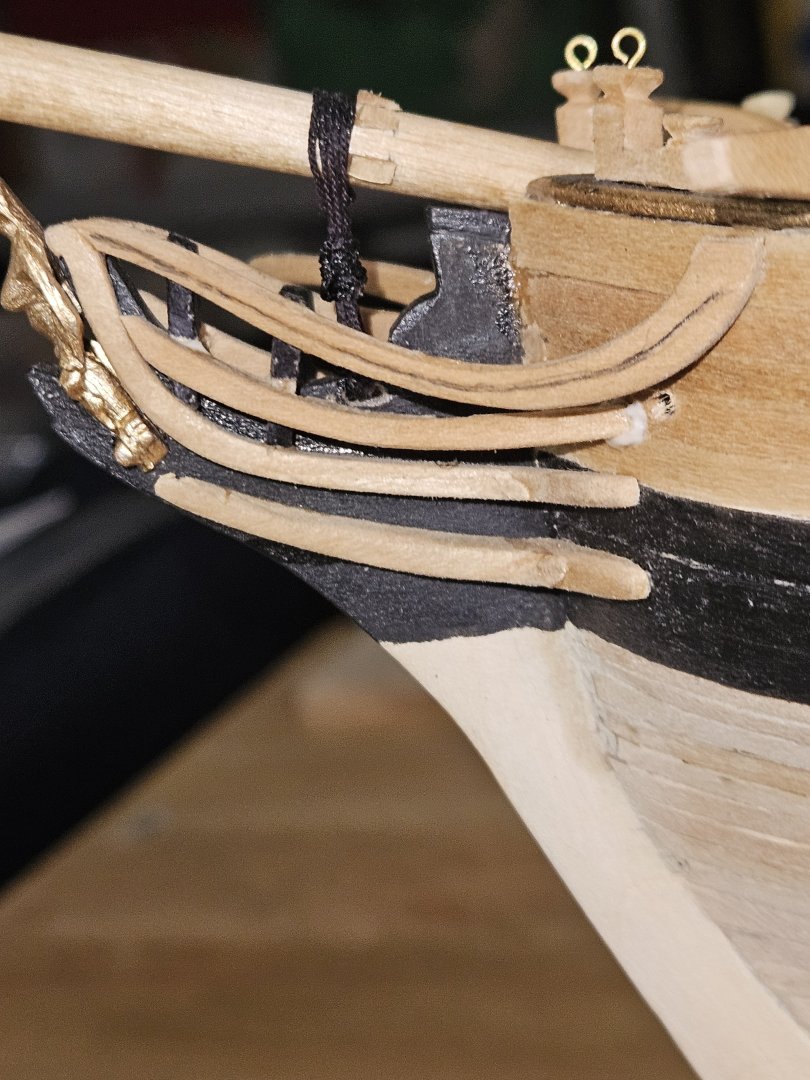
Progress at the bow of Fair American... Continuing from last week, another little block to stuff in 'somewhere' is the inner jib staysail downhaul block, as seen below. It goes aft of the cap, forward of the horse netting. Not the prettiest work, but it'll do. I am also starting to work on the Jib stay tackle. I made sure to add an eyebolt on the front of the cap to attach this block. Again doing the 'tack' the rope ends with CA glue first..... Then seize it with fine thread. I rigged the fid block with the running end, and the long standing end of the Jib Stay. I rove the standing end through the sheave in the jib boom and coiled it for later. I really didn't want to try to seize the block at a later time and risk bumping into other elements. It'll dangle a bit for now, but I'm okay with that. It also gets fed through the traveler that I smartly added to the jib boom before attaching previous blocks. I don't want to have to bend it to shape WHILE on the boom. Another thing needing to be added was the traveler downhaul. I'm using .008in tan rope for this, and the fine white thread for seizing. After the glue dries, it turns the white a little darker, so it blends pretty nicely once it's all trimmed up. Next came the spritsail yard lifts. I made small eyes with .012in tan rope. All the ends get trimmed neatly before adding to the yard, obviously. Just showing the technique, a bit... Now I was just having some fun, after feeding through the block. Seeing how the lift adjusts the yard by pulling on one rope or the other, was too cool. Maybe in a future build, decades in the future, I'll have a motorized rope action of some sails/lifts/halyards I am just about ready to mount the bowsprit to the ship, and add the gammoning. Nervous and excited. HOWEVER - the chocks for the gammoning rope is too far forward on the bowsprit. You can see the unpainted gammoning hole, just above the head rail. If I leave it, the ropes will be overly angled forward, and not in a pleasing way. They have to be moved back. So I took them off, leaving most of them intact, and sanded the mast down smooth. I marked with pencil lines where the aft ends of the chocks are supposed to go. Then I reglued them. They actually look a bit better than they did previously, in my opinion. I added a little bit of golden oak stain to the original sanded spot, and it blends in nicely So now they're back in a better position...I'm happy with the fix. Up next is the gammoning, and mounting the first mast to the ship! Fingers crossed Have a good week. - Jason -


-
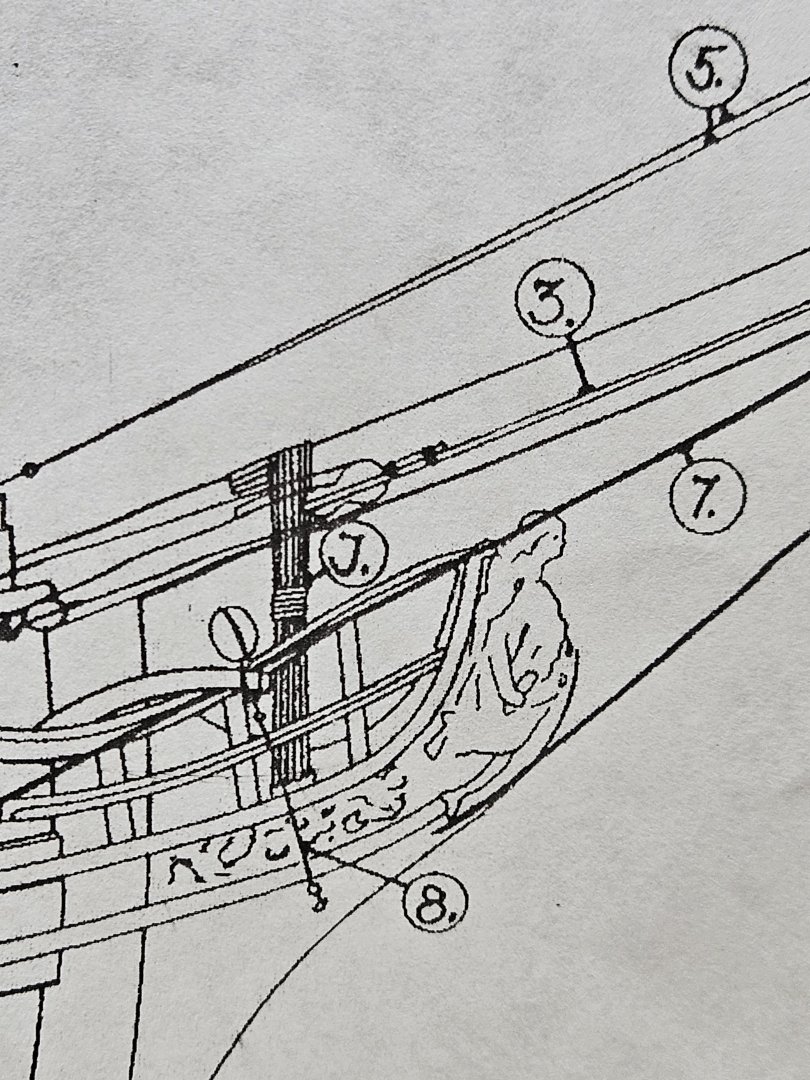
Thanks Greg for referring to my build. Paul, looking at your build, I think the filler blocks are in the wrong location. The thicker/meatier part of the block should face inwards towards the sternpost, and the pointed end faces outward towards Port/Starboard. I think if you take the starboard block and put it on the port side, with the pointier side facing port, and the opposite for the starboard side, it will be correct. These blocks are meant to shape the transom to the sternpost. Not sure if that makes sense, but I believe that is what is going on. I will admit, that the transom 'shape' took some long term staring at the plans to get right. Some of the frames are tilted outwards just slightly, and it took me a while to really understand how it is constructed. Good luck! Jason
-
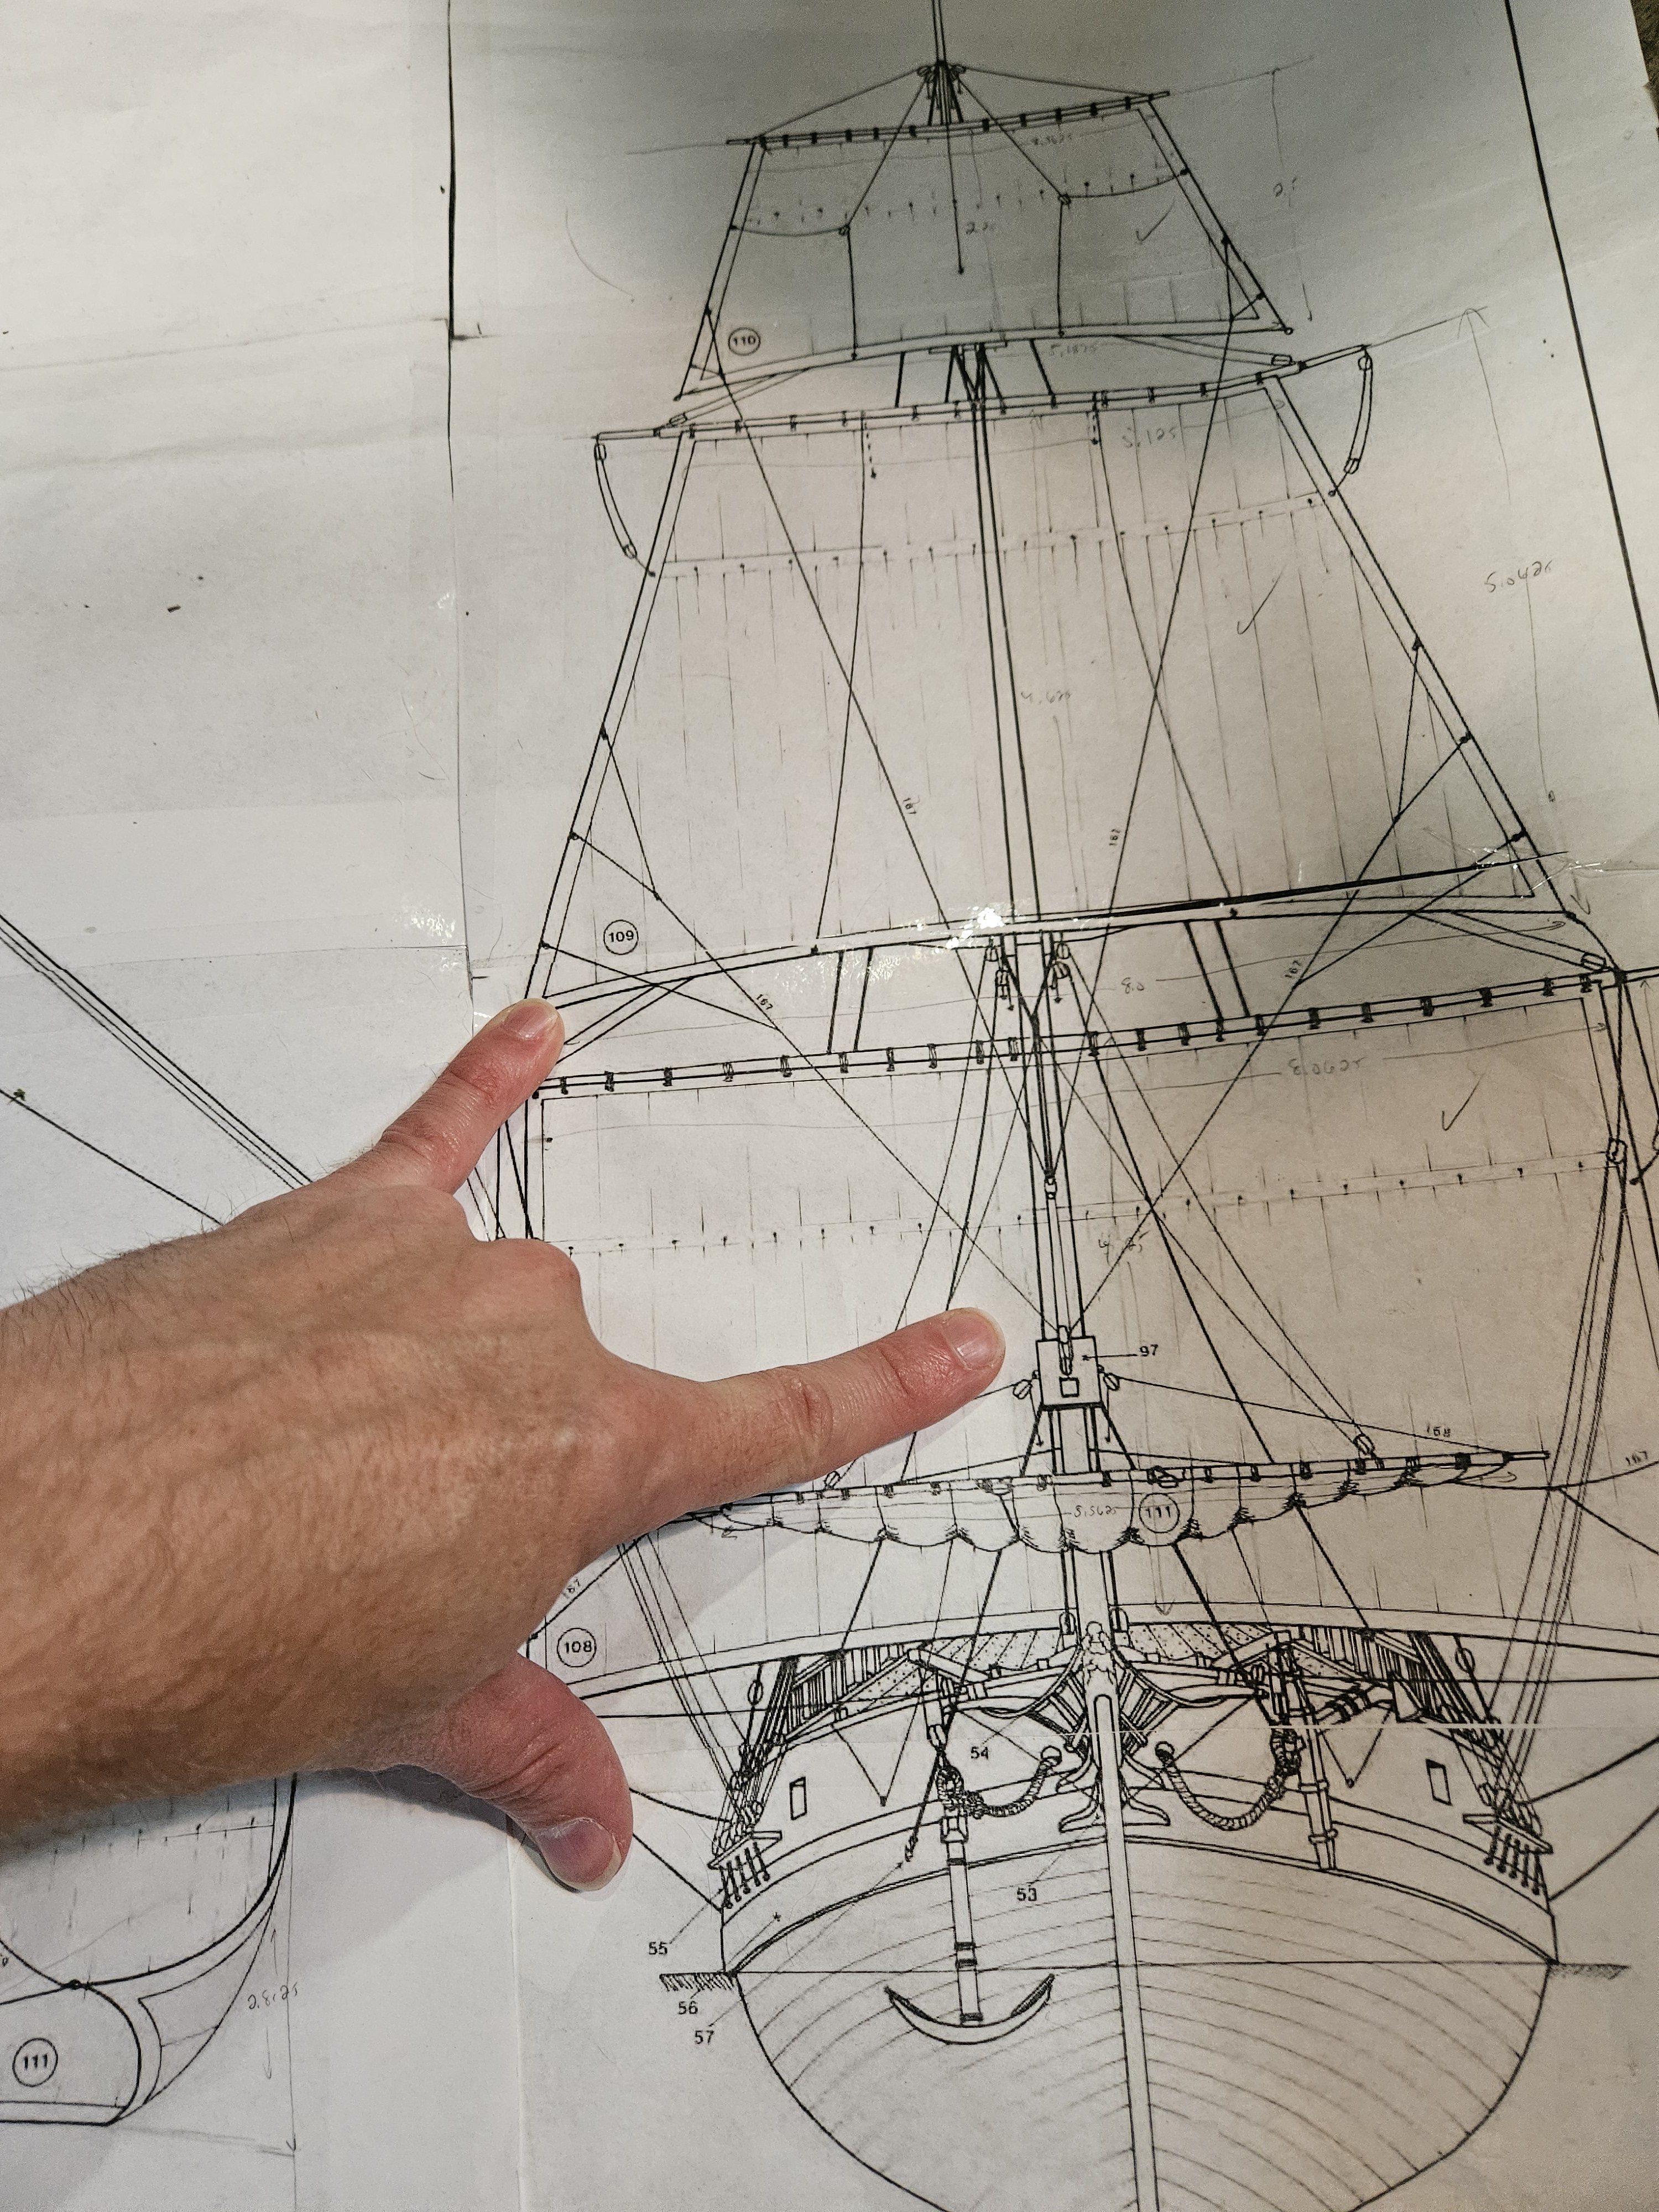
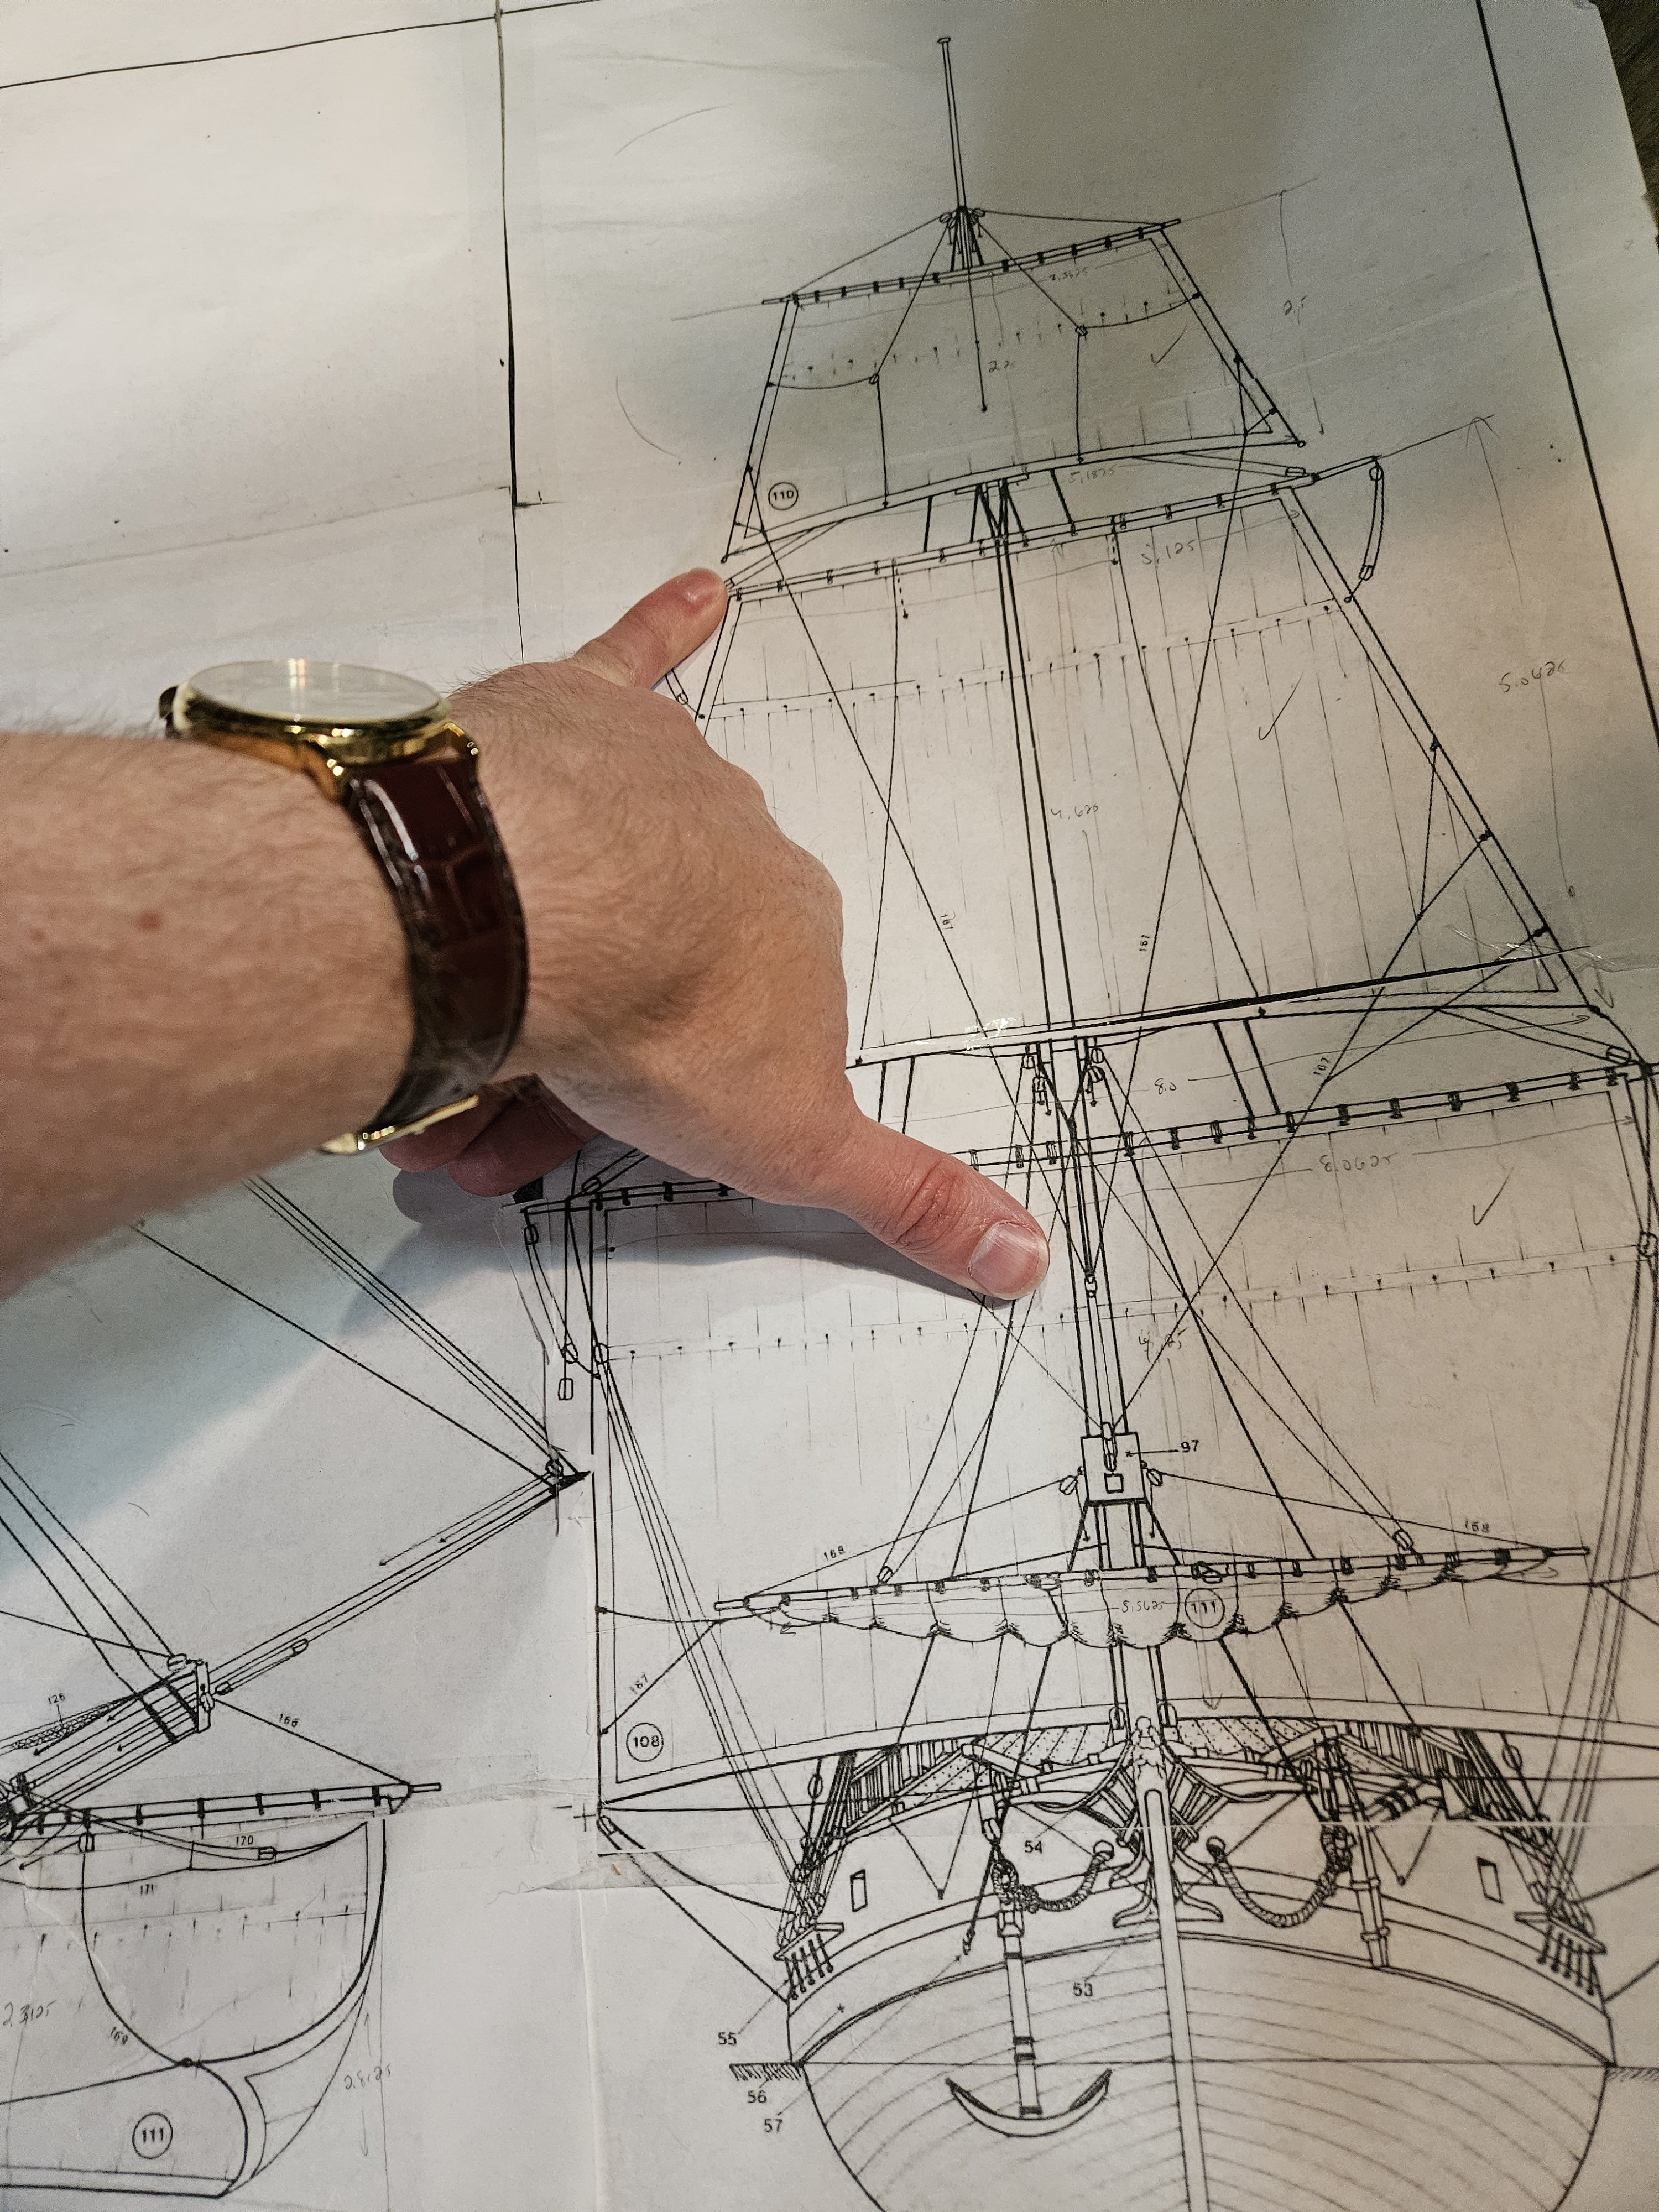
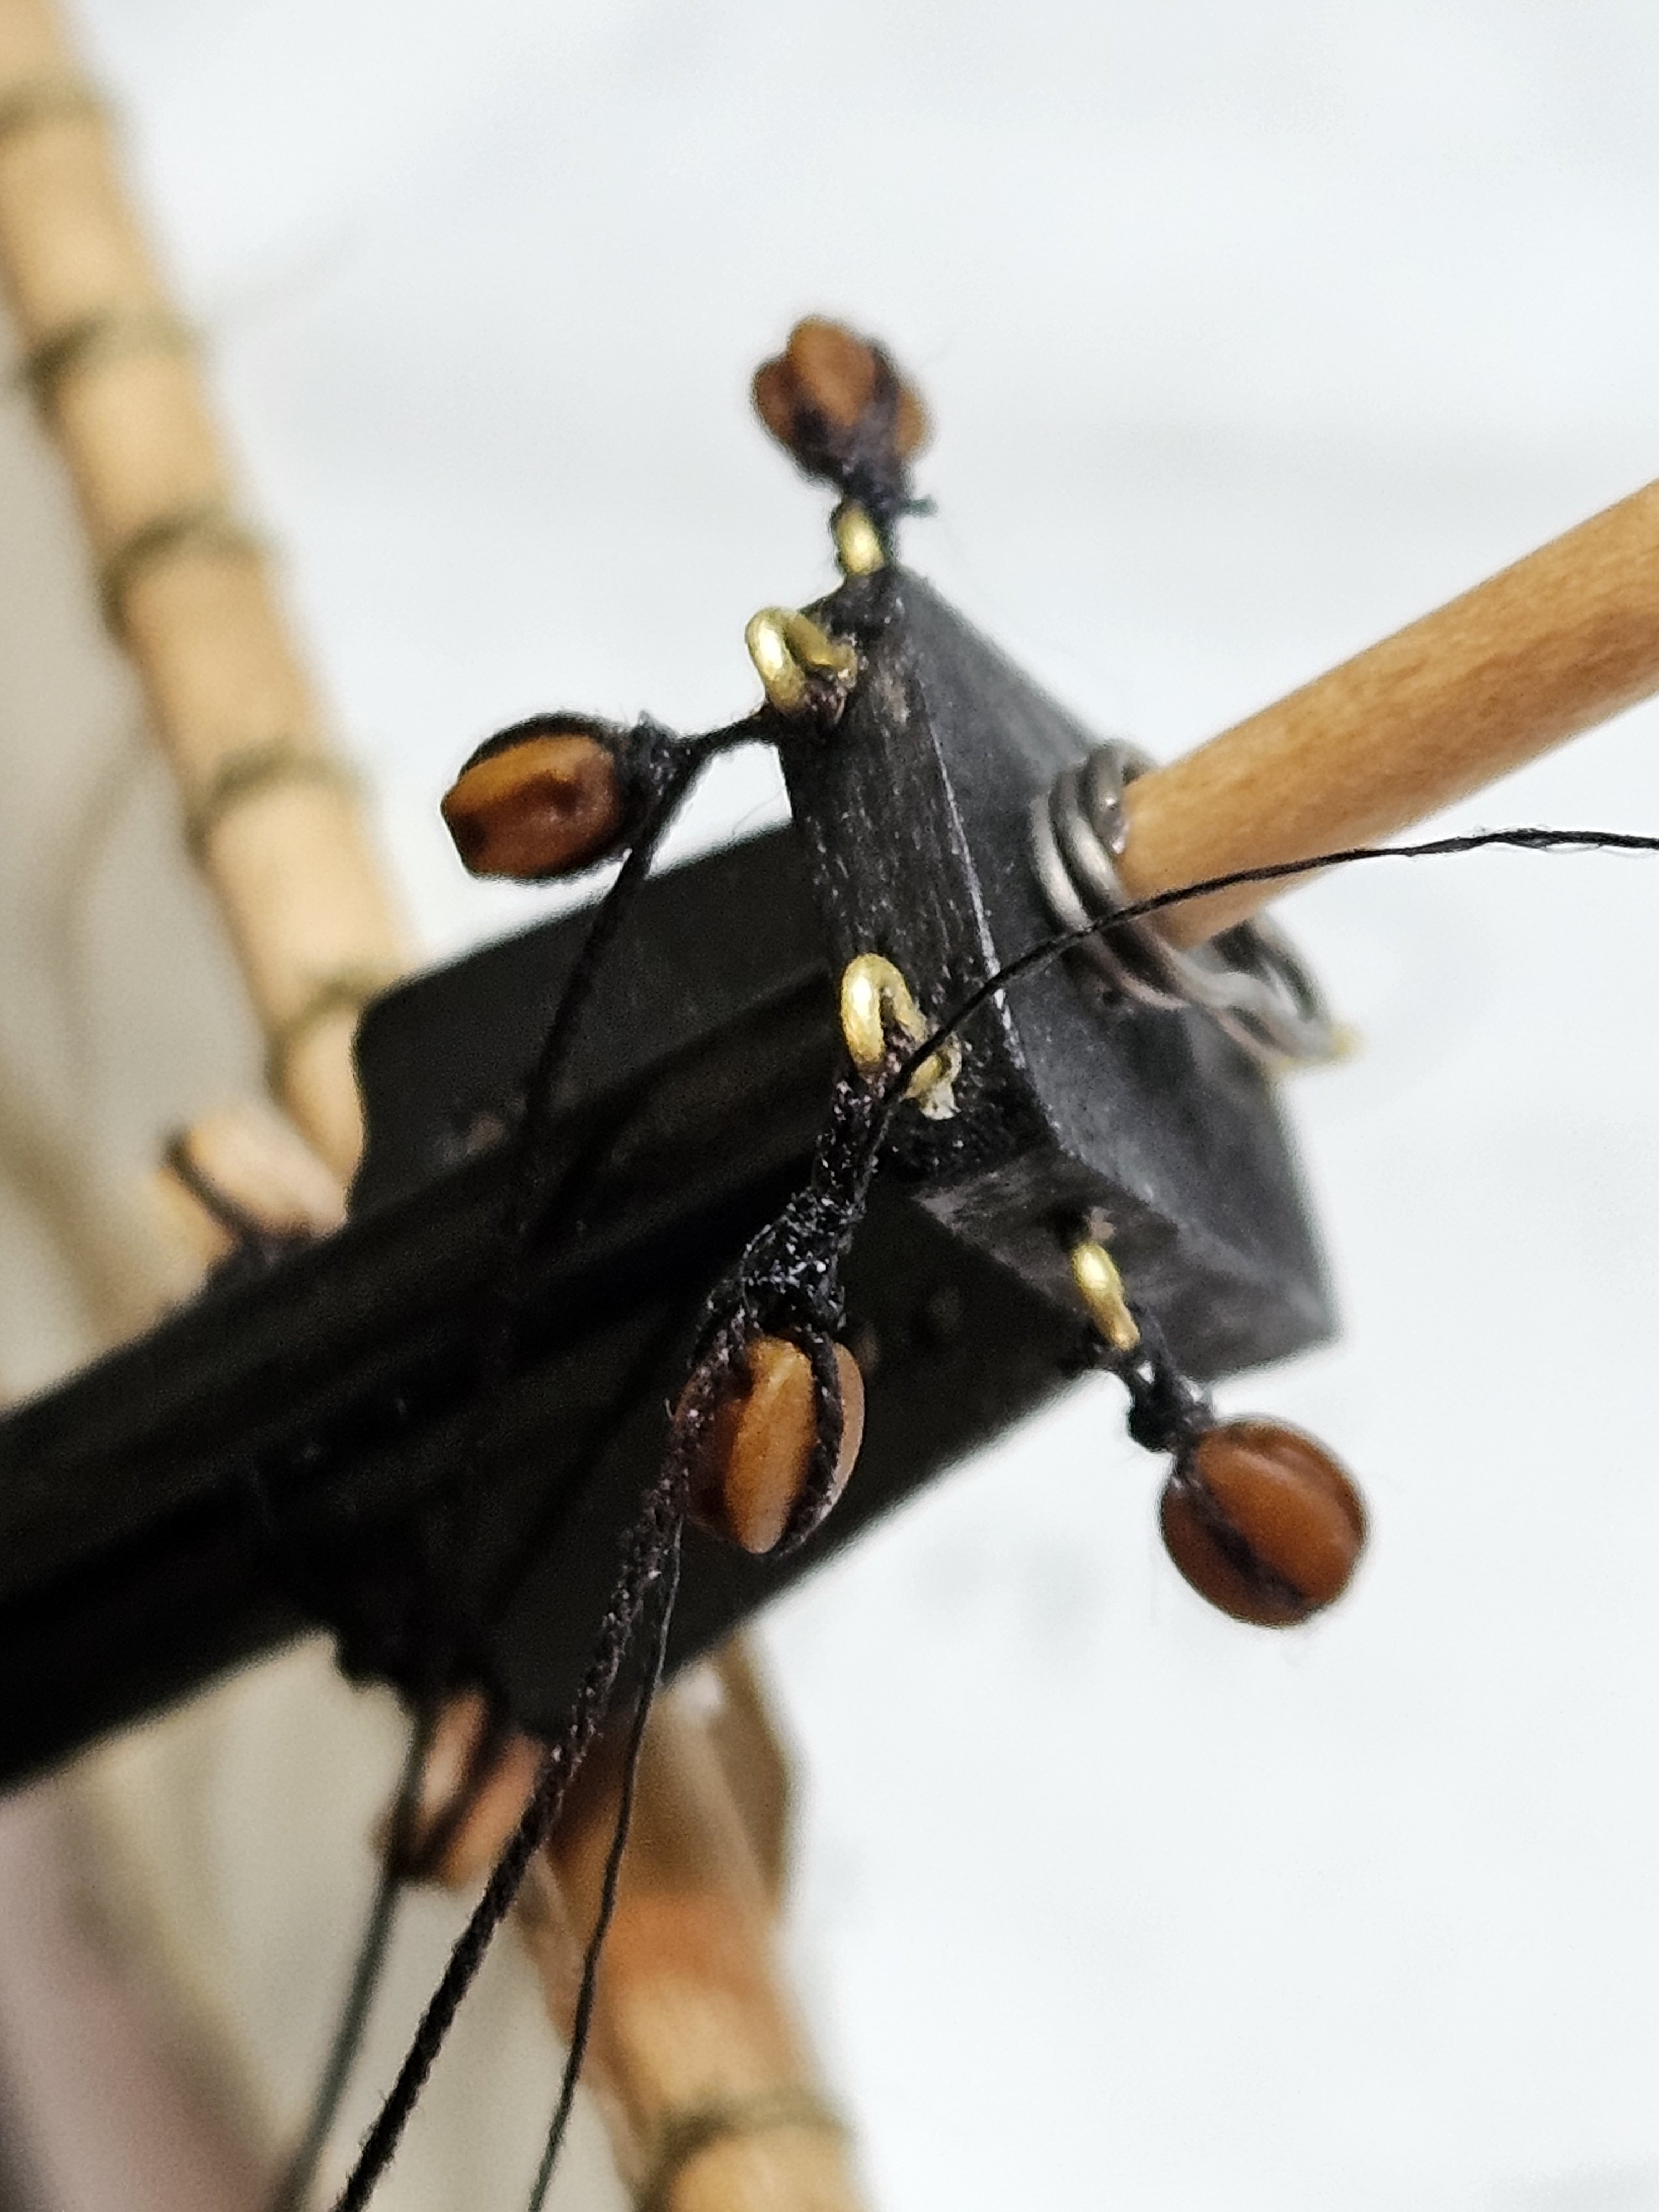
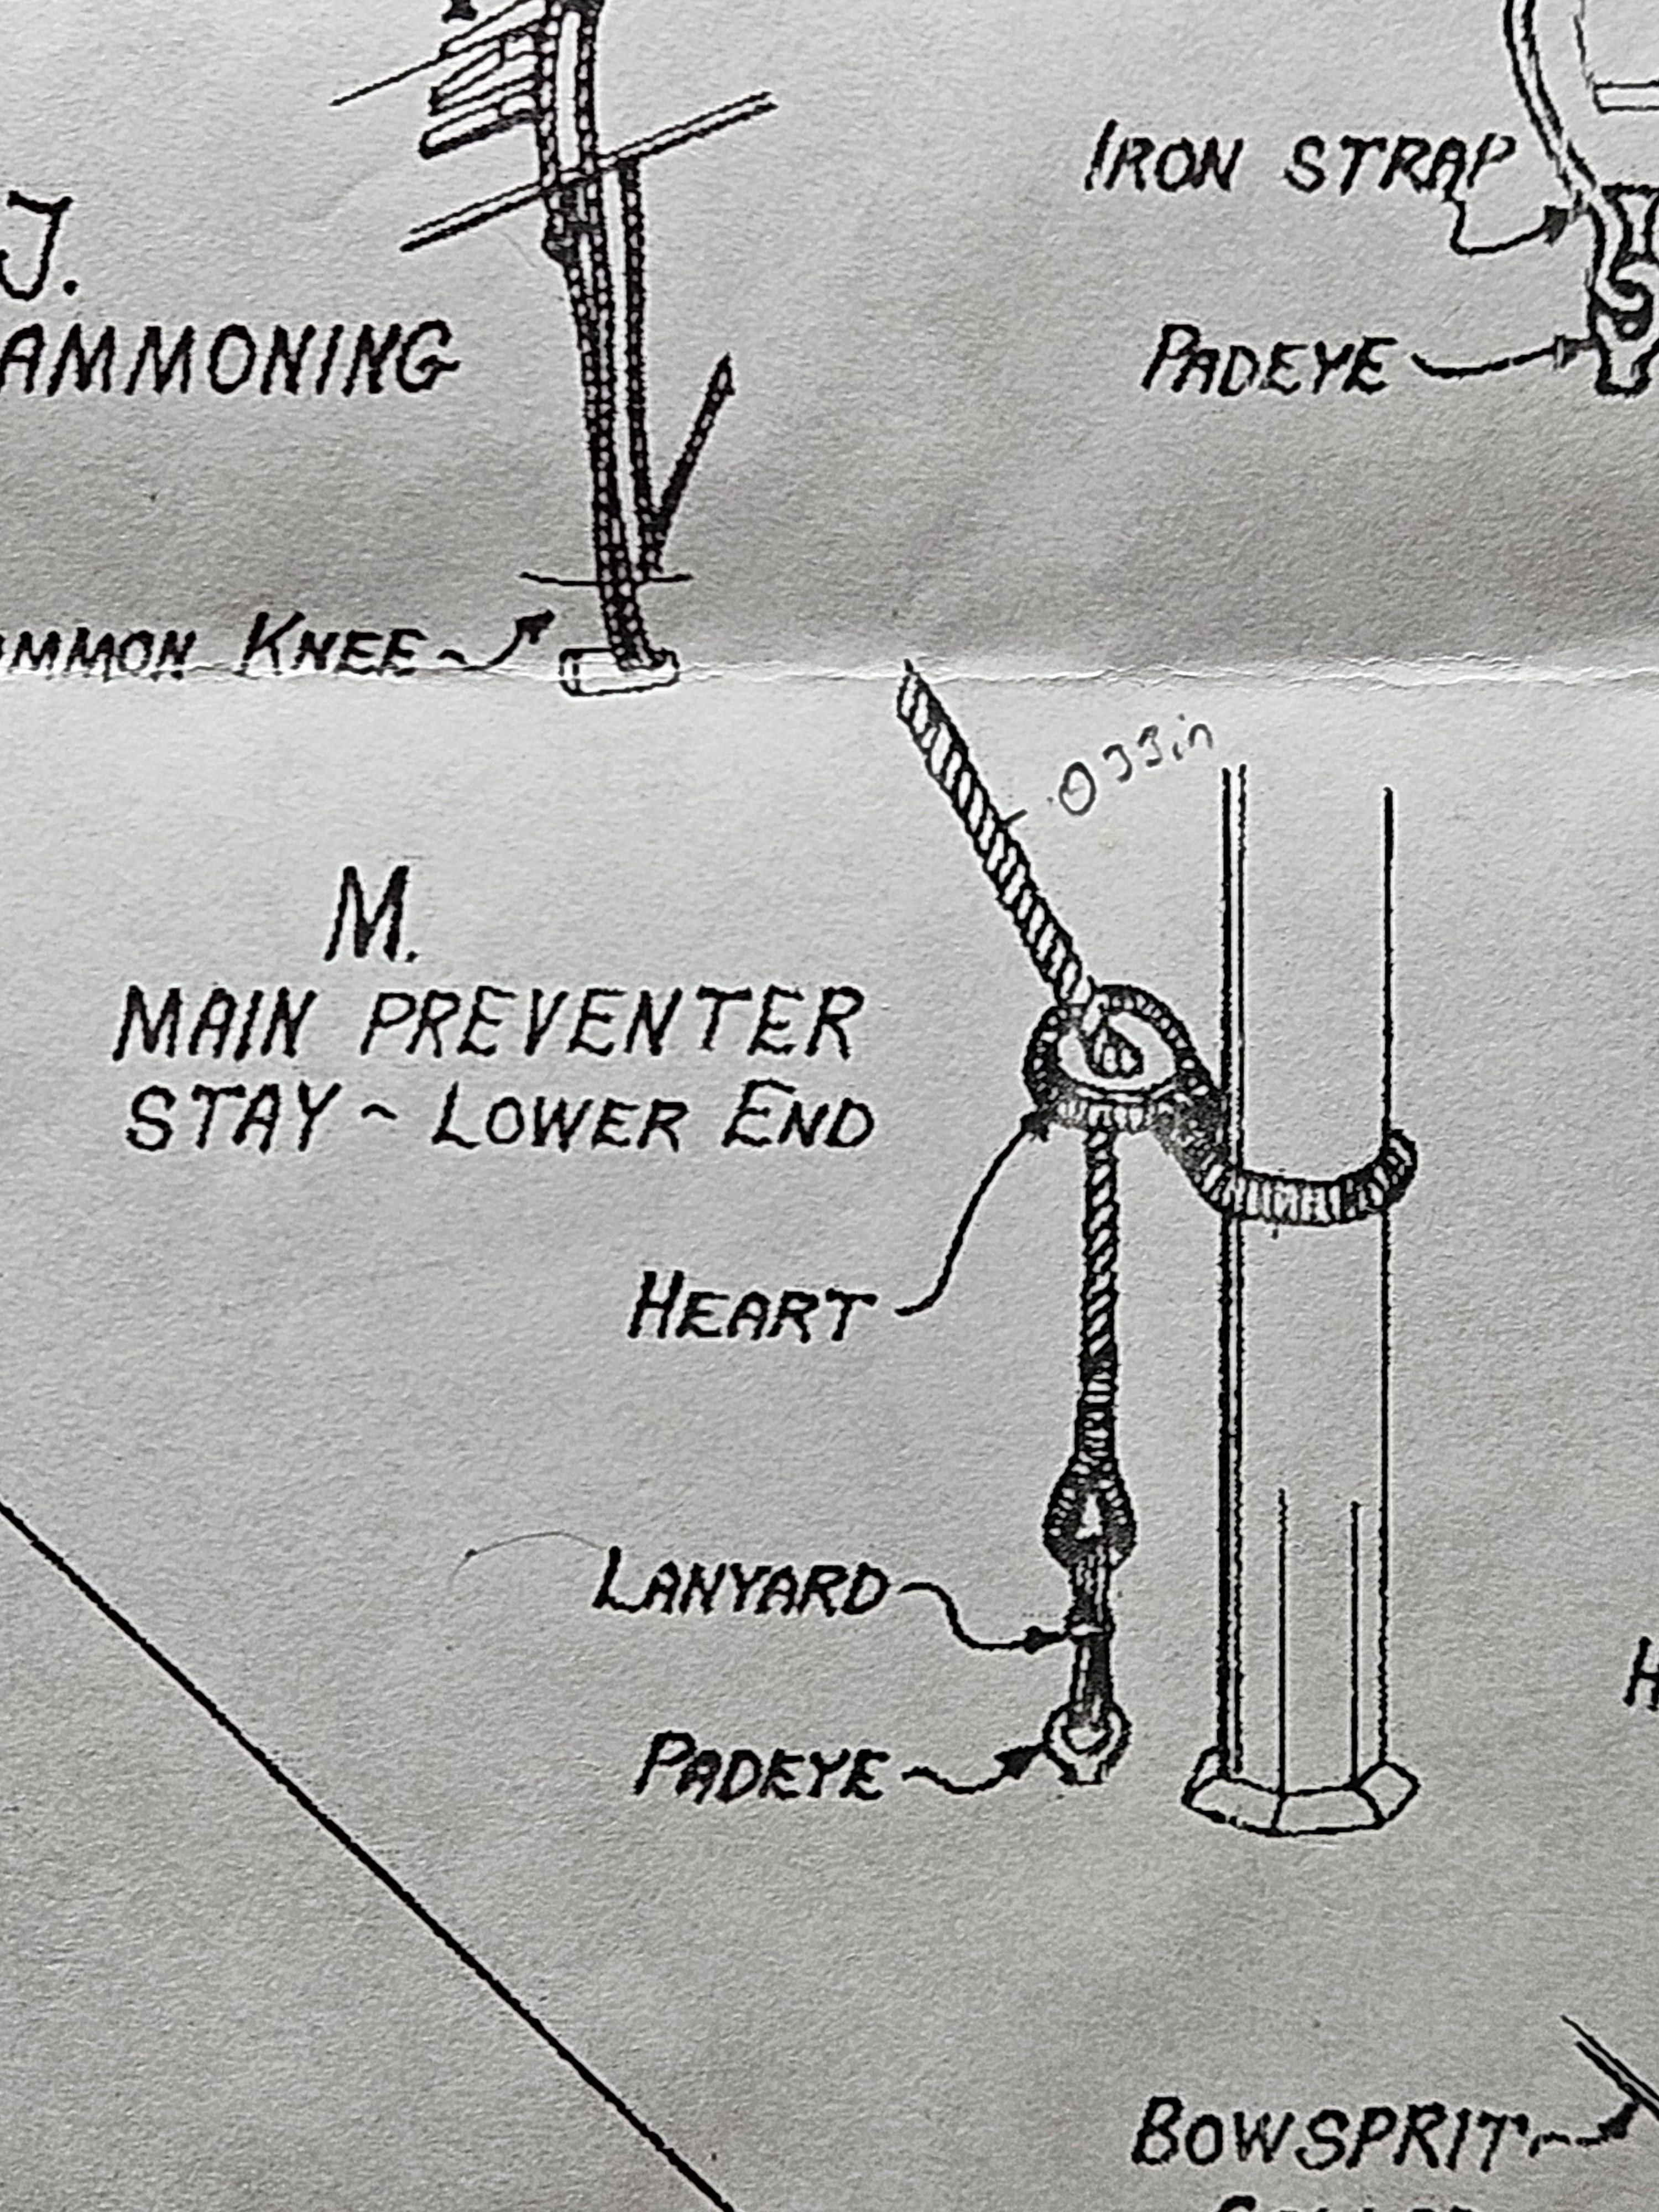
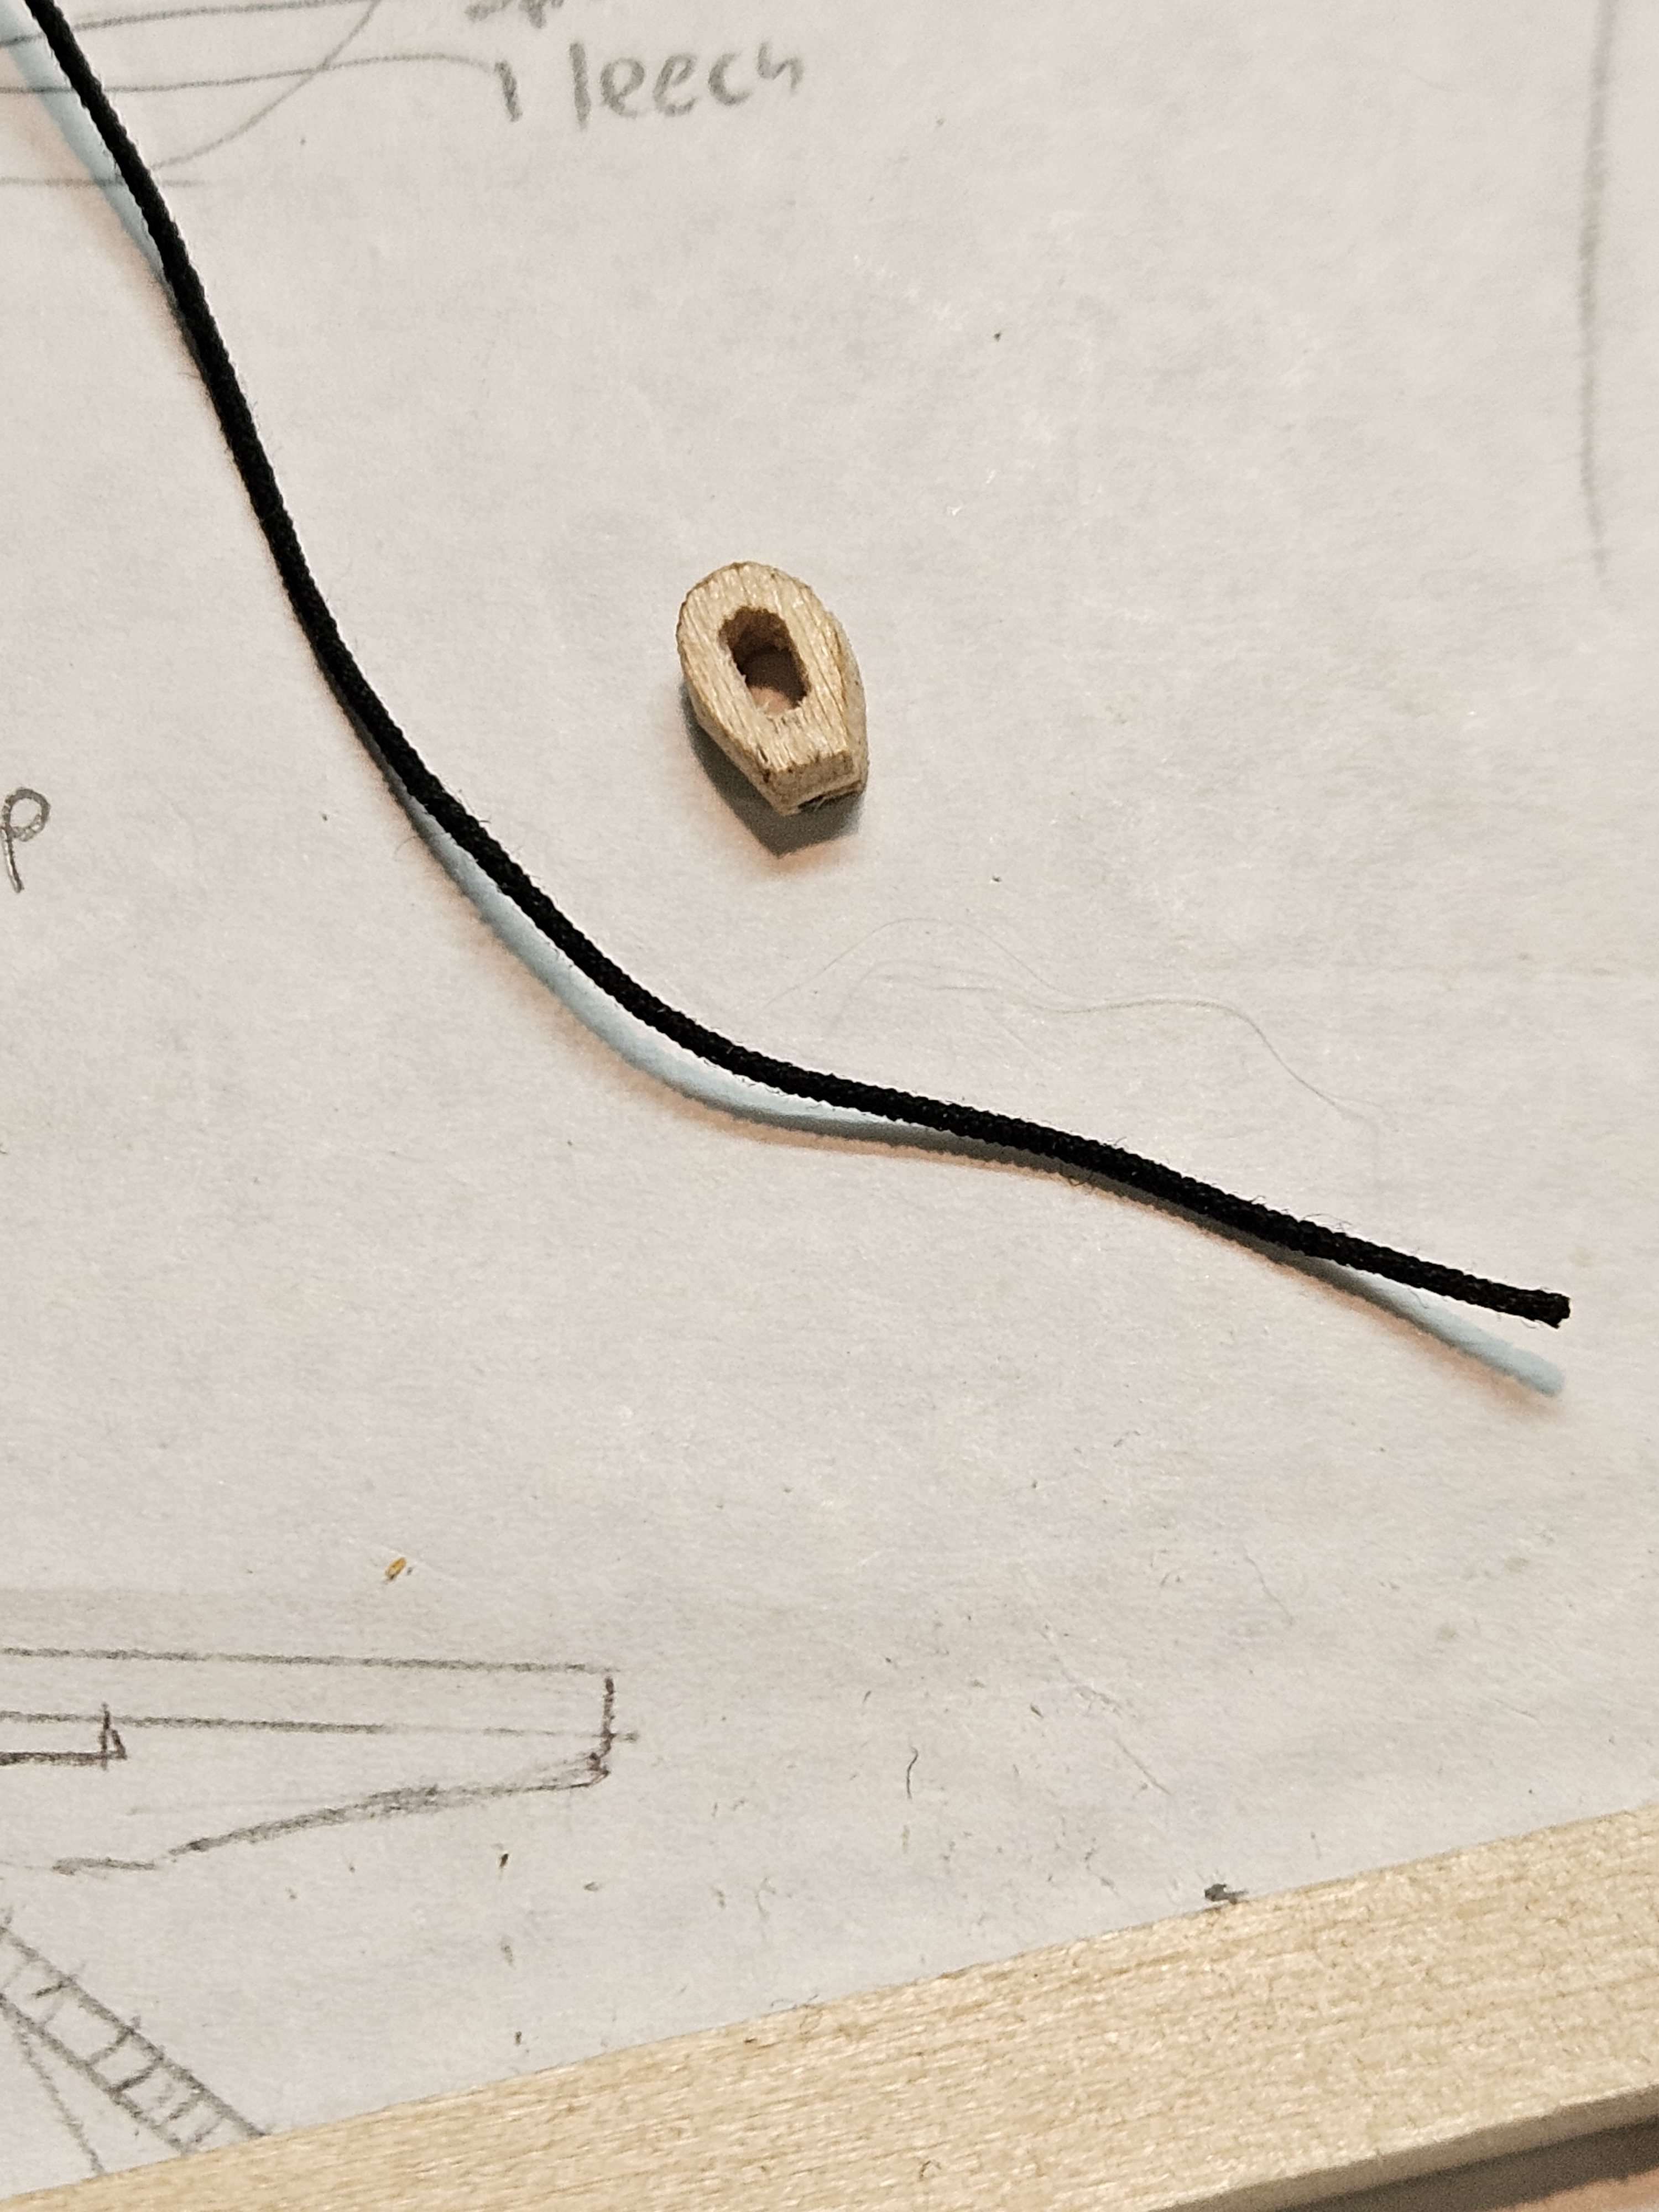
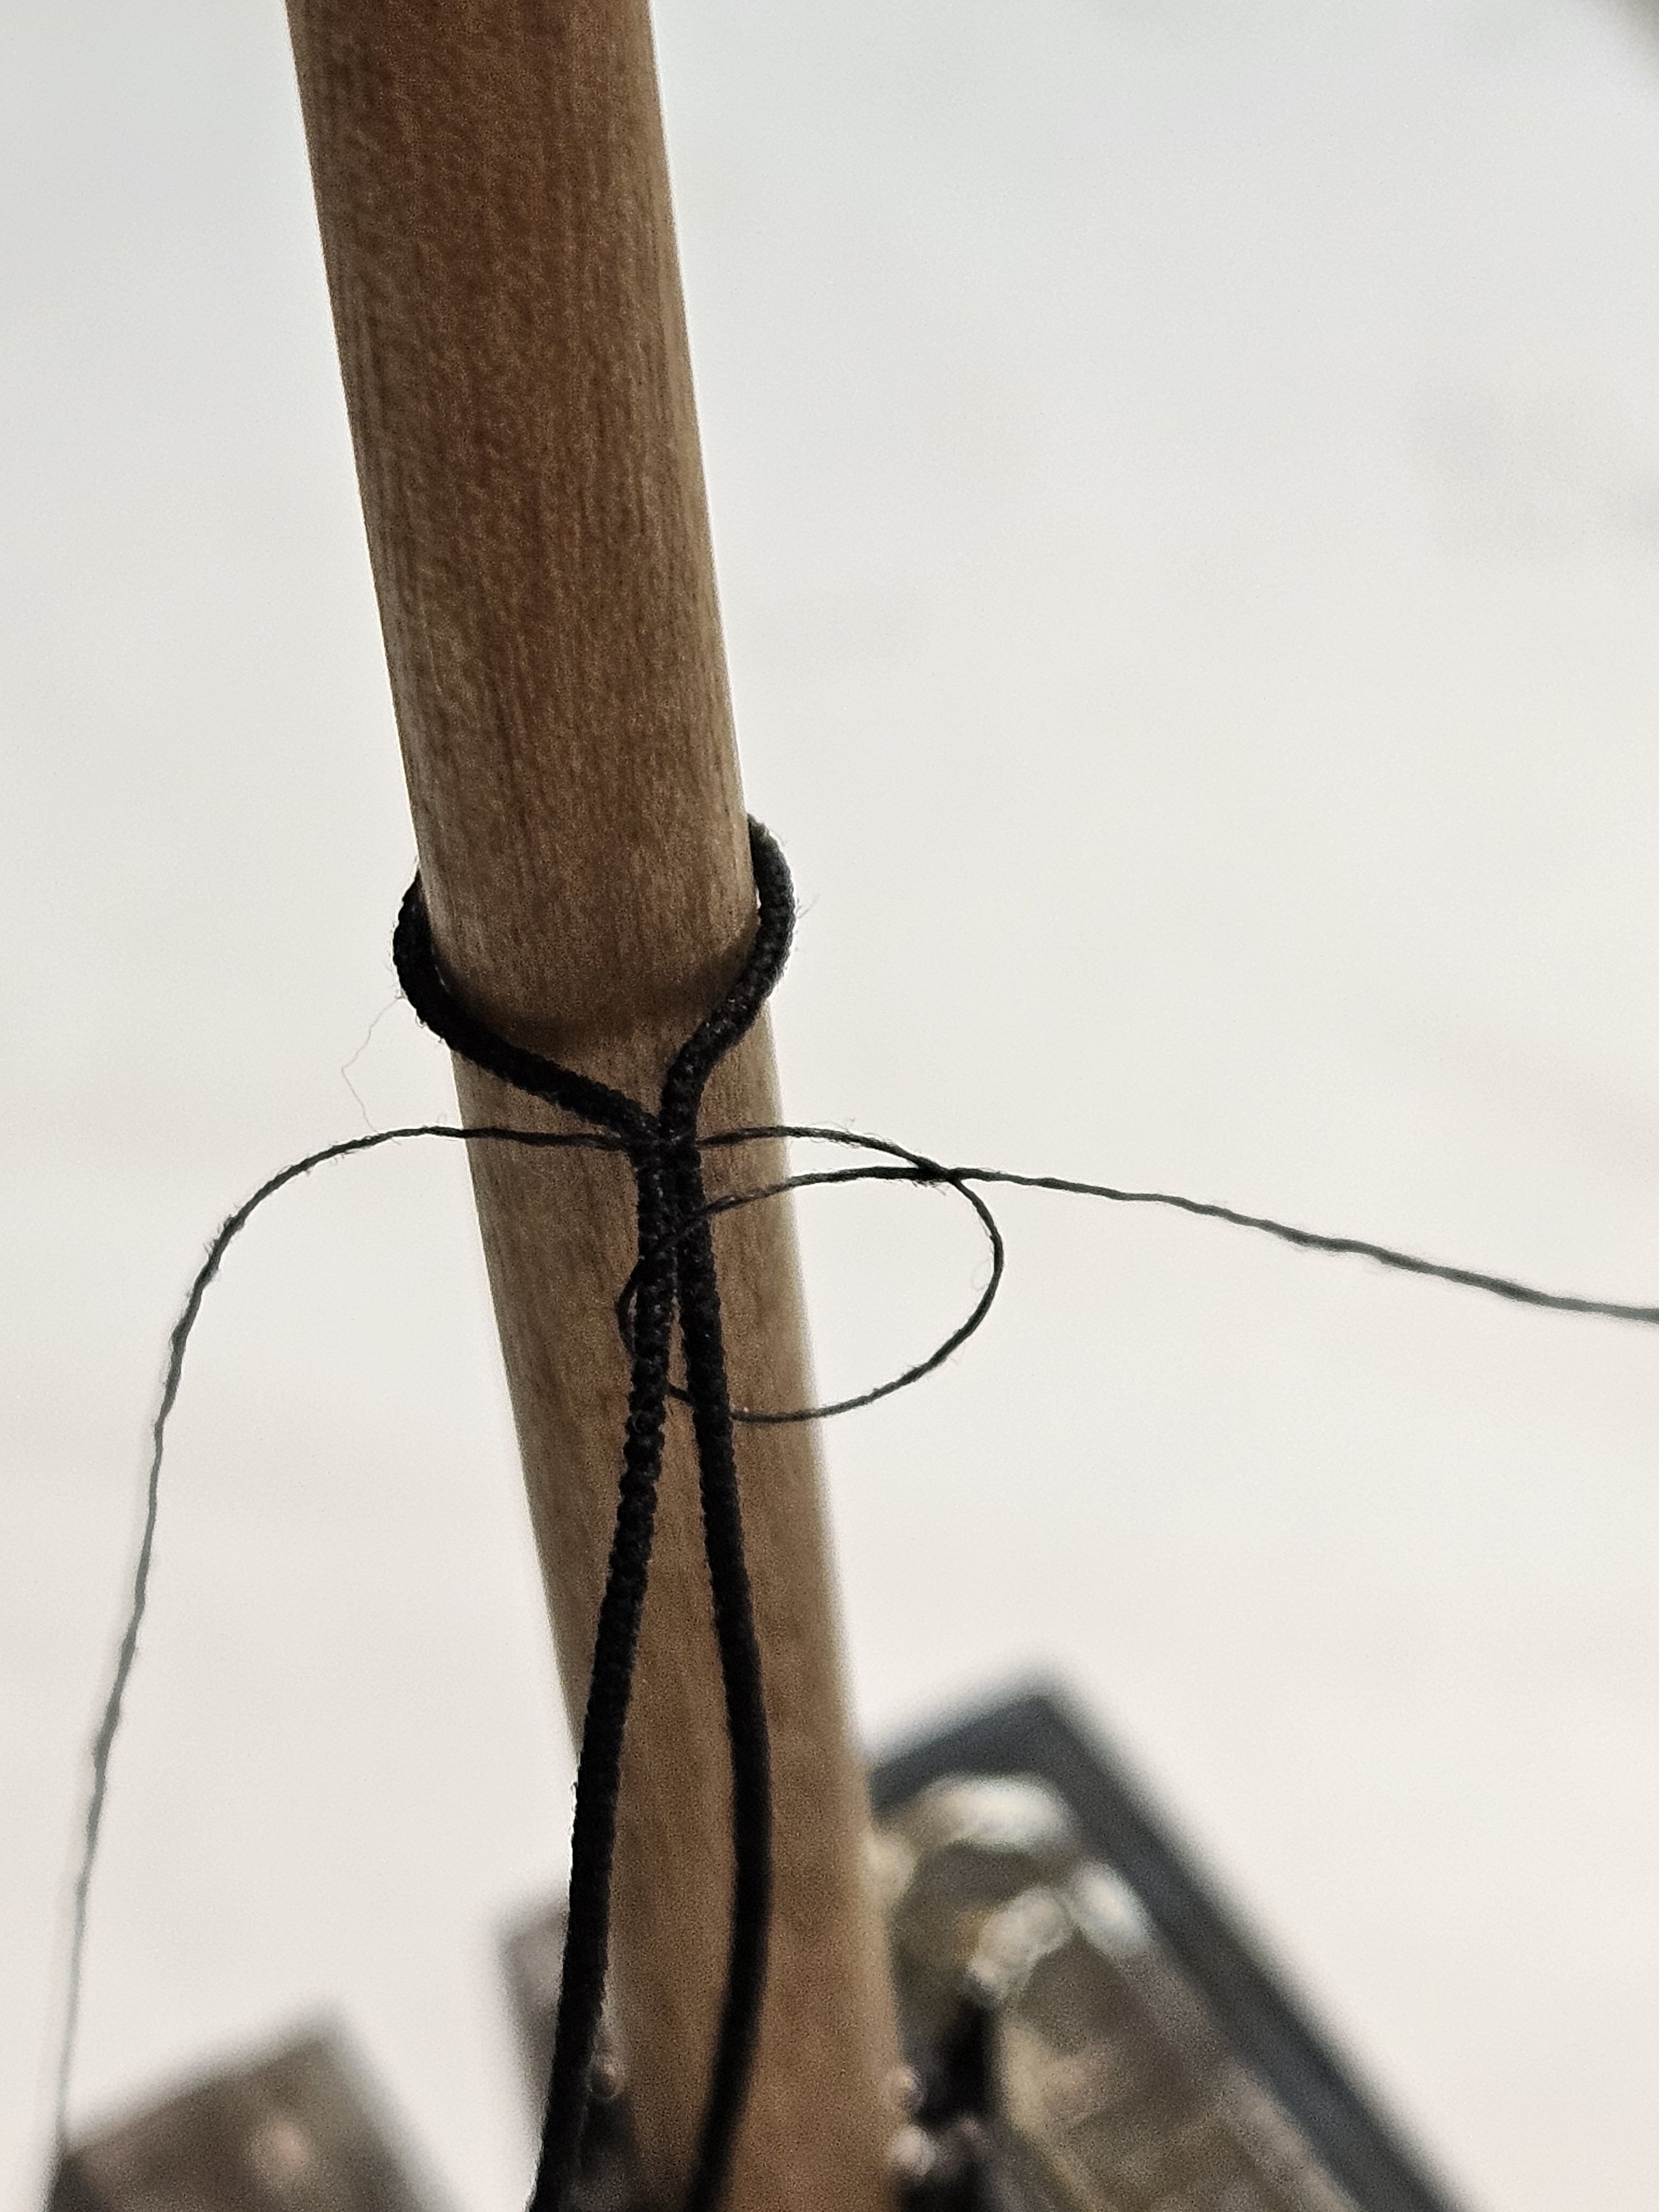
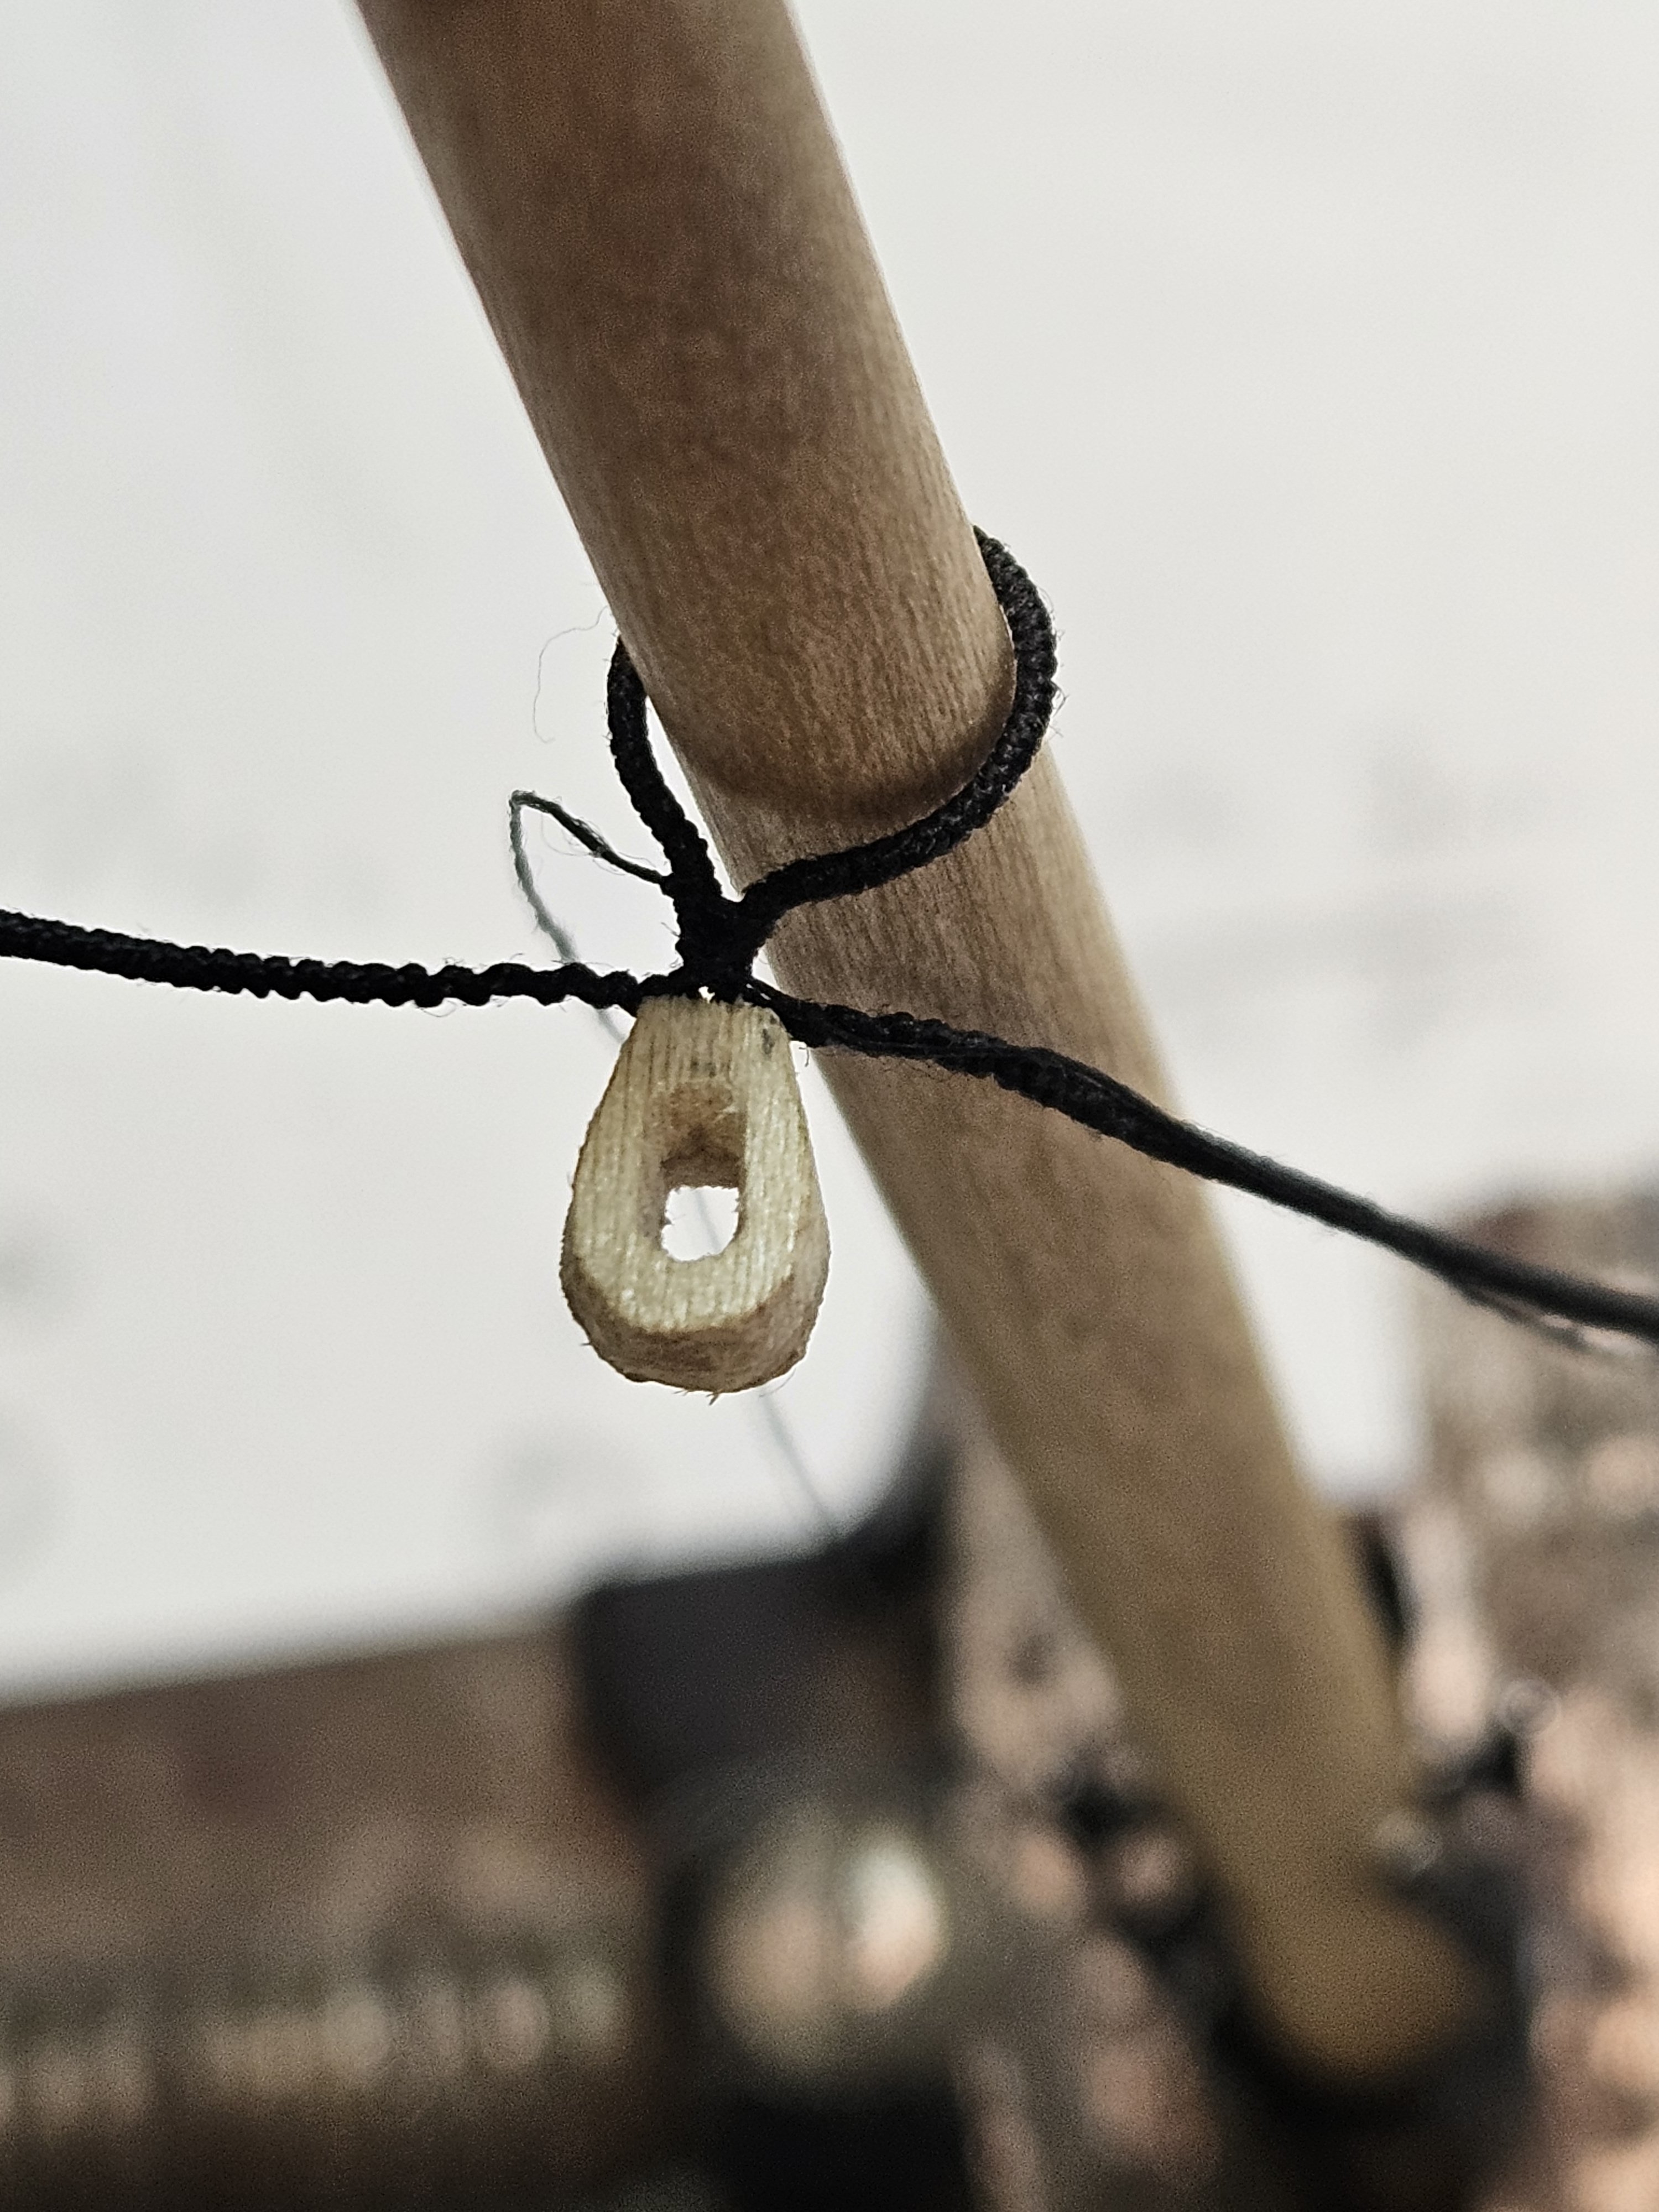
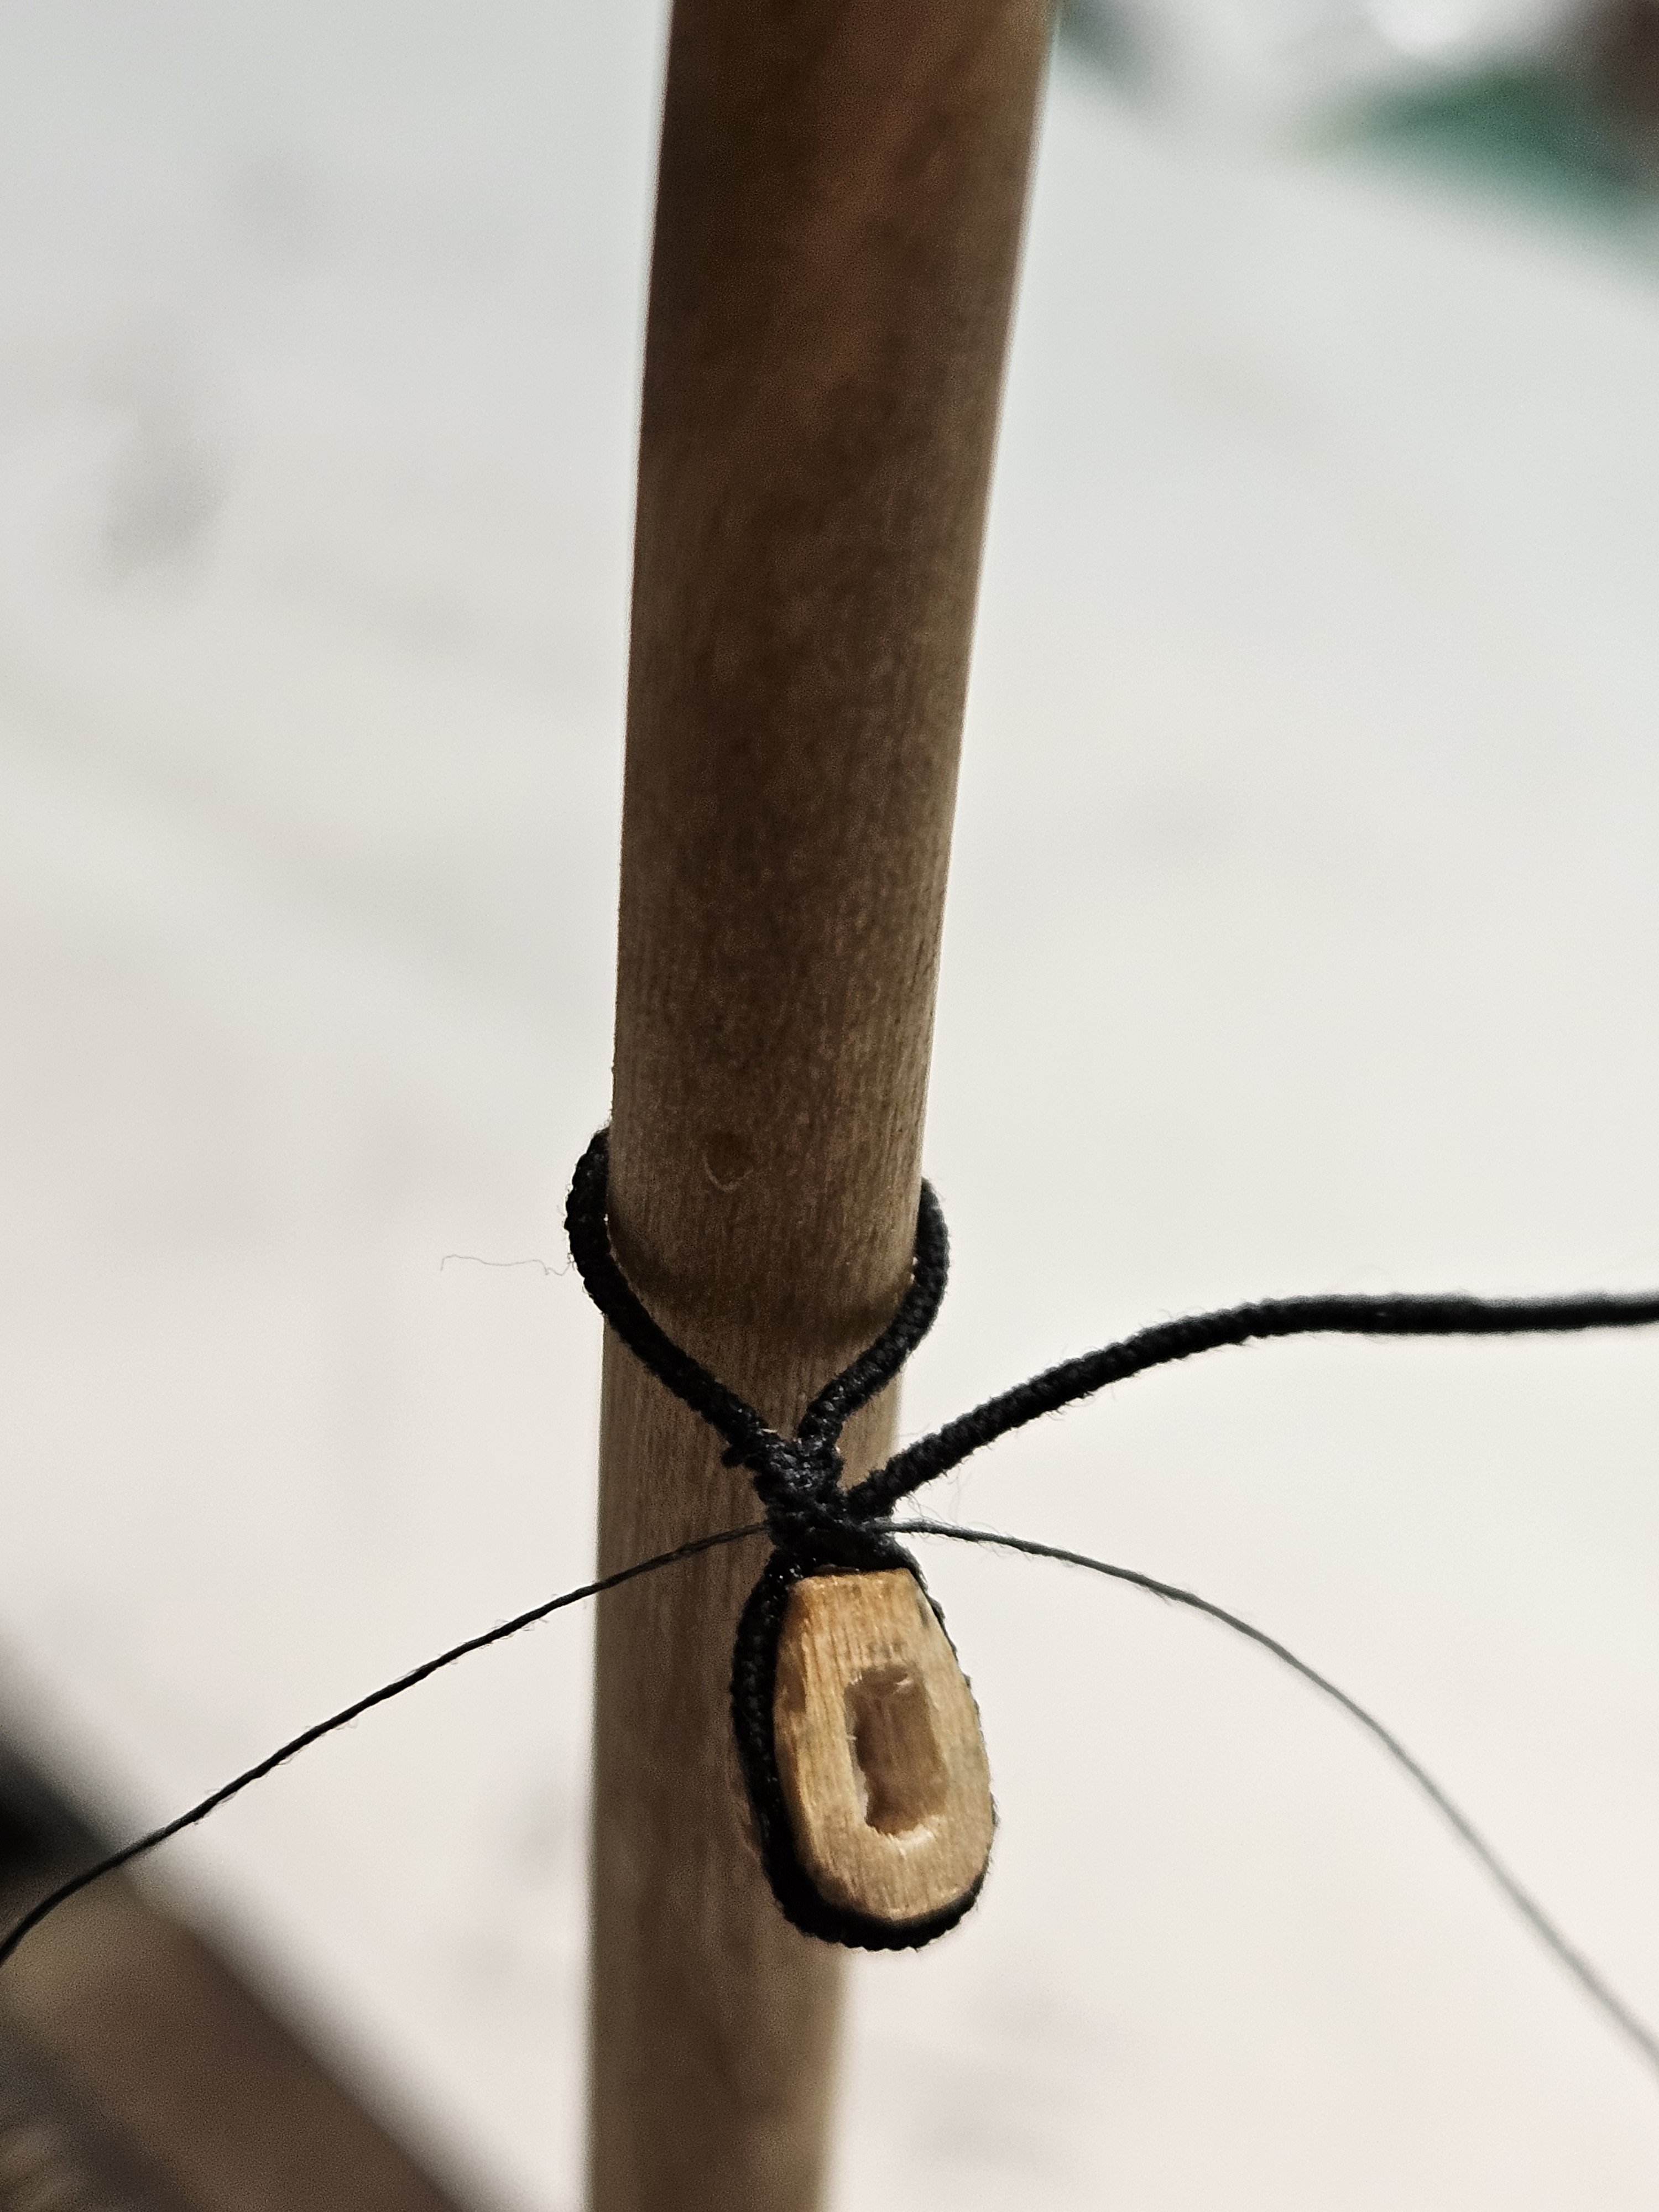
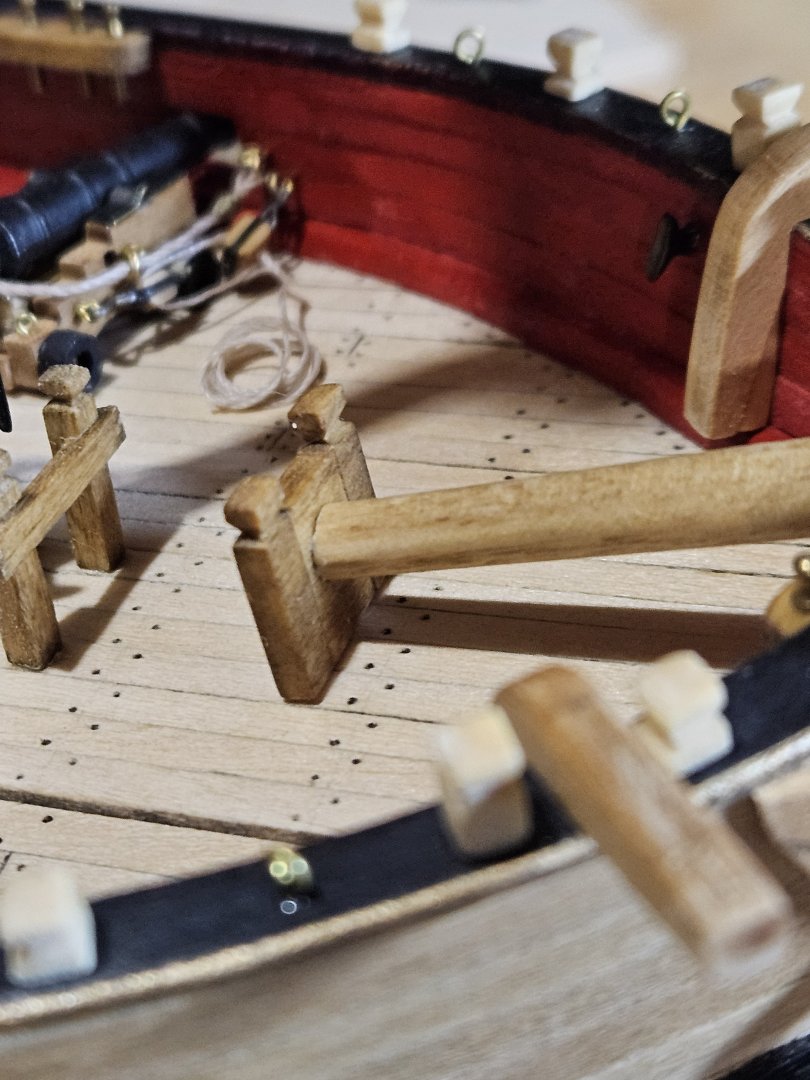
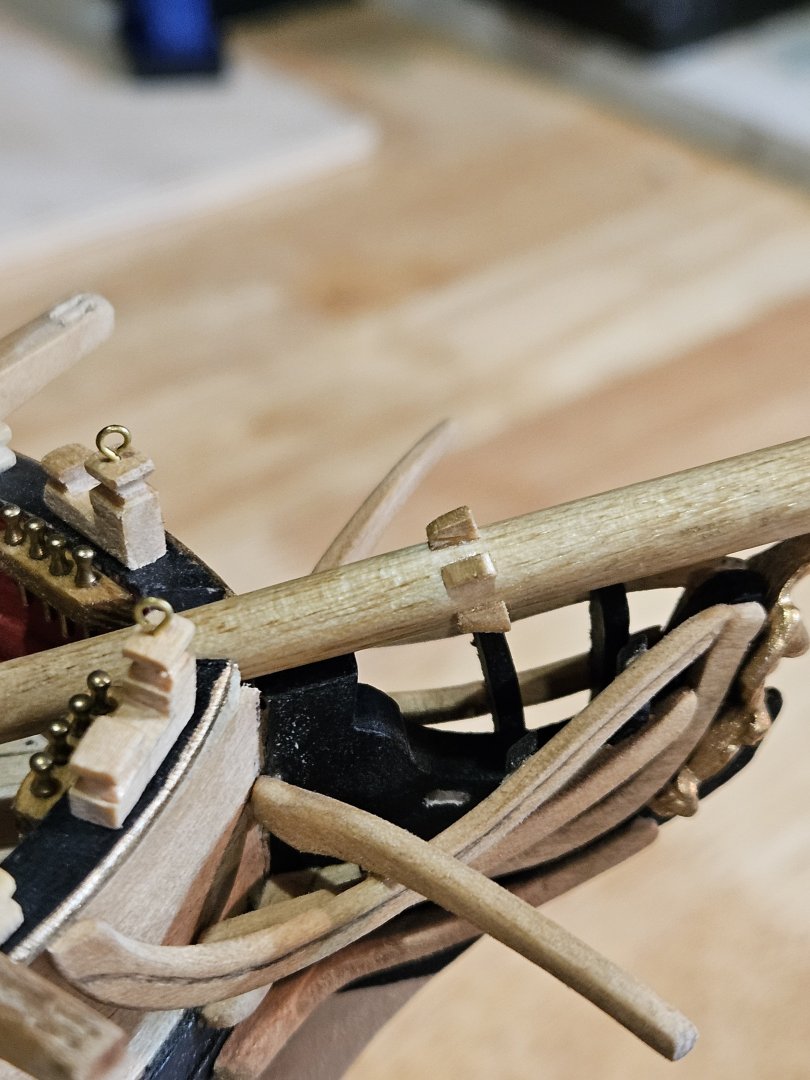
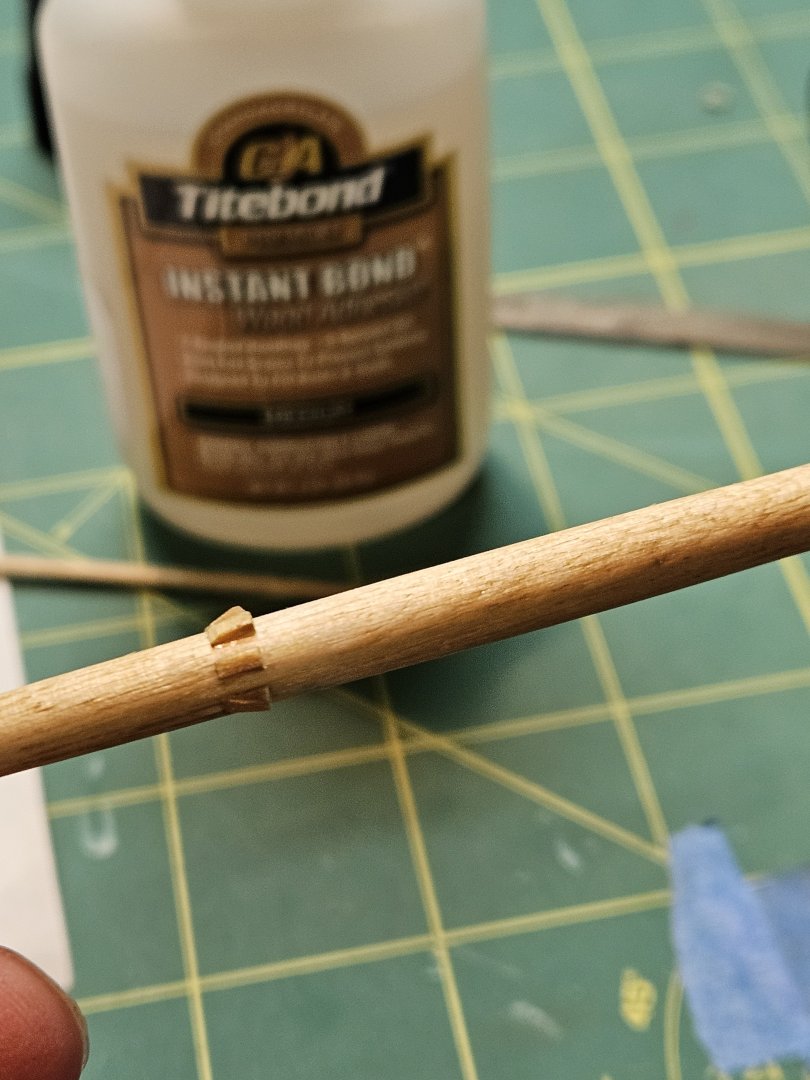
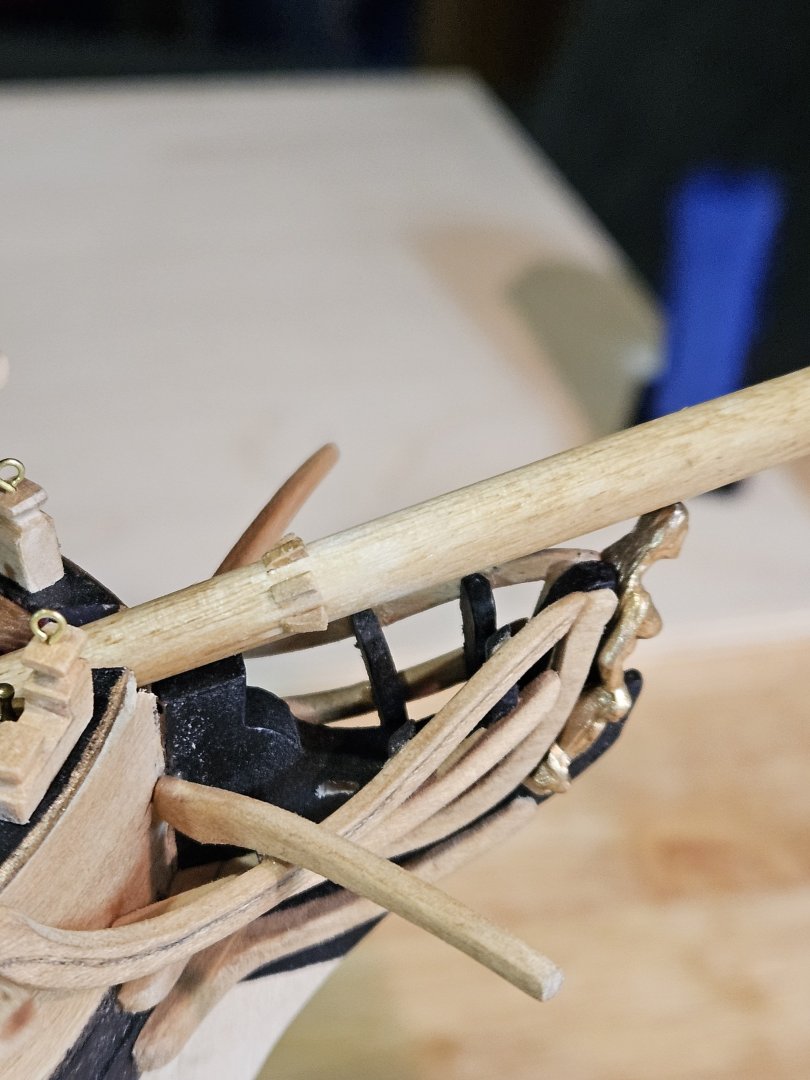
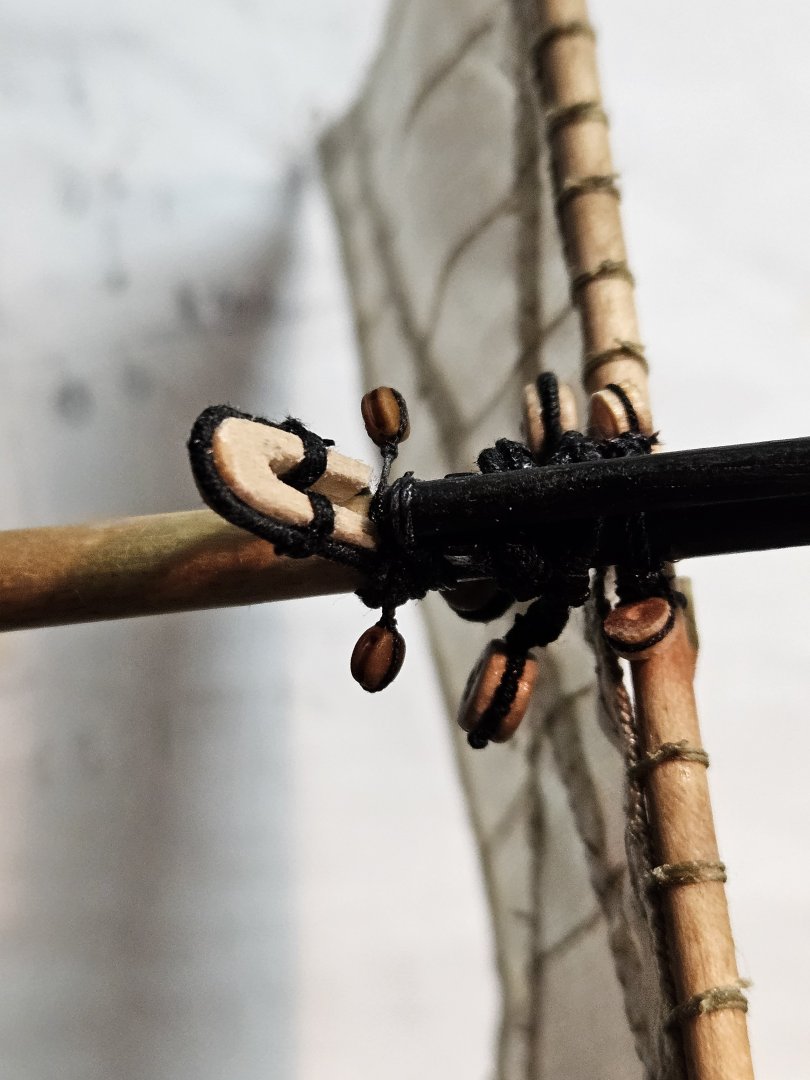
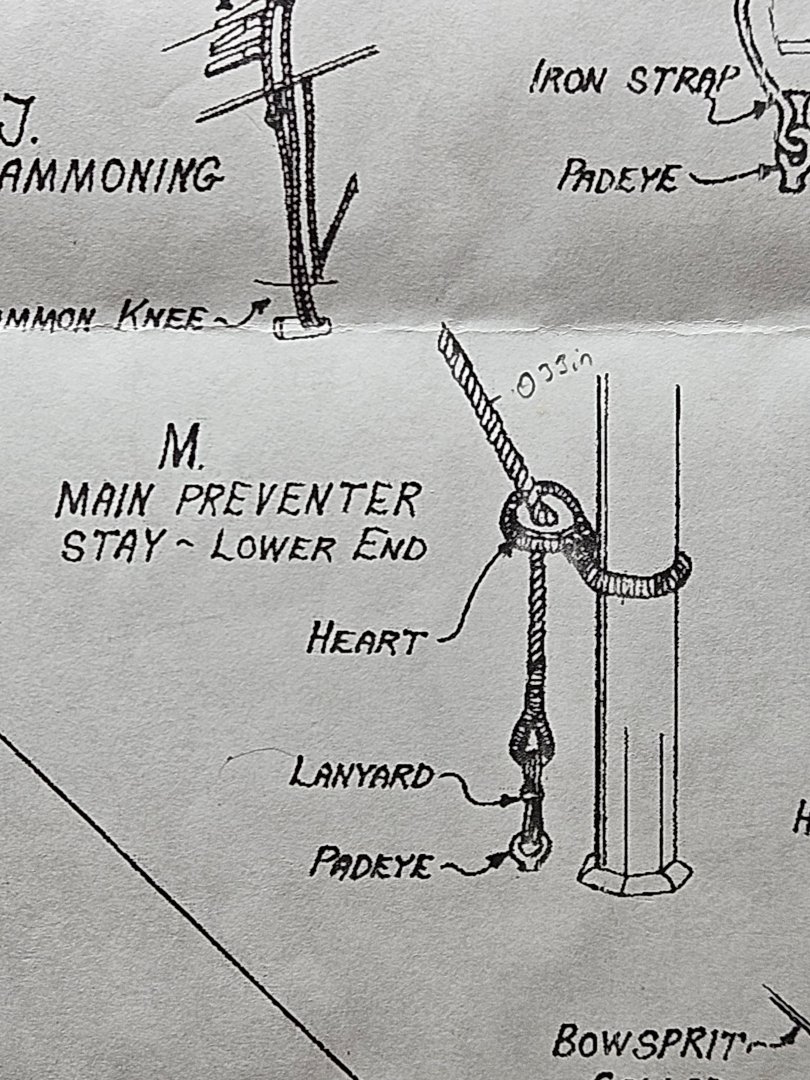
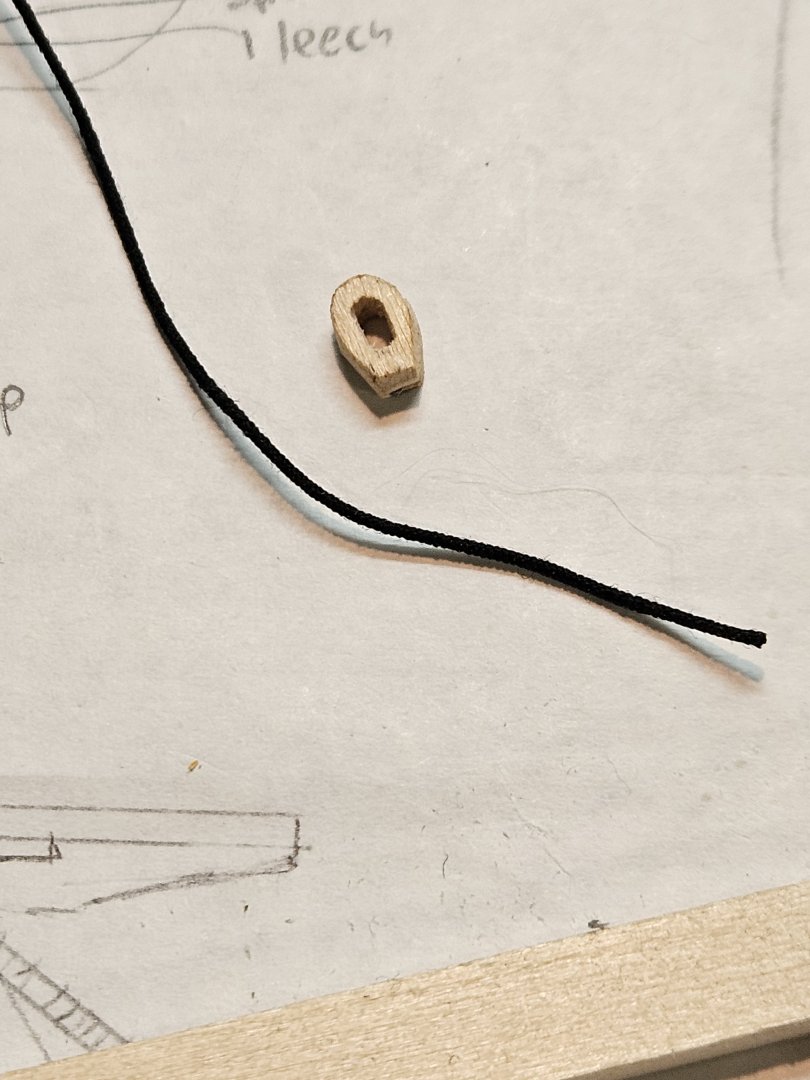
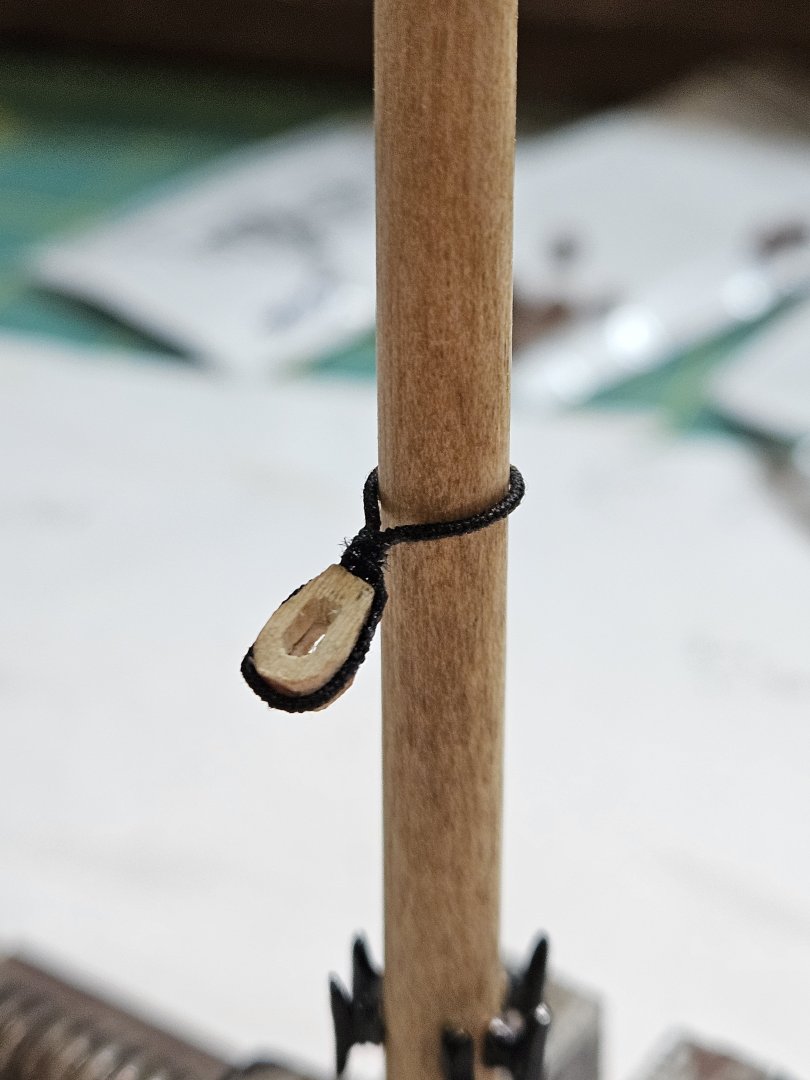
Continuing to make progress on the Fair American: Prepping the fore Topsail with buntline and leechline blocks. It's much harder to clovehitch these underneath the sail, once the sail is on the yard. I could have attached these first, and tucked the sail underneath, but I felt that they'd get in the way. I ended up using a needle to help feed the rope under the boltrope of the sail. Sort of worked, but still difficult to 'grab' the ends and also have them dangle in a way I was happy with. But it's done, and I'm happy with how the blocks hang. The leechline blocks are about halfway along the head of the sail, on the yard. The buntline blocks are not directly above the cringle, but just inward. I also placed it between other existing ropes for clue/sheet blocks, which are aft. In continuing to prep for the sails and all it's components, I am also going to add bowlines. The blocks for these need to be in place on the masts before I really get to the rigging. I'm doing all of this up front - i hope it pays off. We have the Fore Topsail bowlines, which go forward to the bowsprit cap ''somewhere''... The Fore Topgallant bowlines, which go to blocks on the Jibboom And Fore course bowlines reeve through blocks behind the Fore Stay... On the Jibboom, I already had a block for the Topgallant stay, but I am repurposing it as the Jib staysail downhaul, and the existing holes/sheaves will be for the stay itself. There is VERY little room up here, so attaching the block(s) were extremely challenging. The strop-rope kept un-looping. itself. Kind of crammed in there, but I got it done. Two bowline blocks ready for 'service'. Though they don't exist on the original plans for the bowsprit cap, I added two eyebolts to attach the topsail bowlines blocks to. Forced some room in for the remaining Fore Course bowline blocks. I'm looking at the wealth of books and plans I have for the belaying points for bowlines. With the existing pins on the ship now, I may end up doubling up on some pins. More on this later. Moving on to the preventer stay and heart next. Once the lower shrouds are rigged, I won't be able to get access to attach this little guy, so I'm doing it now. I'm not sure what size standing rigging rope to use here, so I'm going with .018in. After serving it with .005in Mara 220 thread that Chuck suggested, that adds .010in in diameter, so it's about .028in I carved the heart to this very specific shape and dimension. It was very easy since the plans and instructions provide absolutely no measurements whatsoever. This is best attempt. I'd wrap around the mast, and add a drop of CA glue and ''tack'' the rope ends together, and let sit overnight. I don't want it coming apart when I add the heart. I added some turns of 220 thread to keep it together. Then I spread the running ends out forming a 'flat' of sorts, and a blot of glue to tack the heart in place. It worked initially but then kept falling out when I went to finish the long ends around. VERY annoying. The serving also started to unravel, so I needed to fix it...somehow. I ended up abandoning this two rope end approach, and cut one off. Instead, I wrapped the long end all the way around the heart past the flat spot. I fashioned a sort of throat seizing there. Getting it tight enough and not-falling-out-enough was very difficult. Tweezers and rope and fingers got in the way everywhere. Finally got something satisfactory, and kept seizing with fine thread. Trimmed the end close....It turned out better than I thought, but what a pain. I also added a small drop of glue to the mast below where it will finally rest, then slid the loop down. I don't want this thing sliding up and down the mast, so it's where it belongs now. I also managed to add the main topgallant brace blocks, for the running ends to the Fore trestle trees. The final thing I went about making was the Lead block for the Main Topmast stay (Letter I.) This needed to be a 3/16in block, so I used .018in rope to secure it to the mast. Because of the square cross section, it was difficult to clove hitch and have the block at center, so having it just to one side, and a slight tail - it will be centered enough. There were no chocks on the mast to support its height, so just a few dabs of CA glue, blotted with my fingers was sufficient. That's all for this week; I plan to post more progress next week, if I can. I've got some momentum going... Thanks for reading/following along - Jason -


.jpg.ea5939b1123656e4ca94dd4acd4c4bd6.jpg)


.jpg.0308c648f2915ba0132af7d50657e322.jpg)