JLong
-
Posts
121 -
Joined
-
Last visited
Content Type
Profiles
Forums
Gallery
Events
Everything posted by JLong
-
 Thanks so much. Most of the time its me staring at the plans and the model, trying to figure out how to do it. How to reach it. How to hold it. I will say, the serving did turn out much better than I thought.
 -
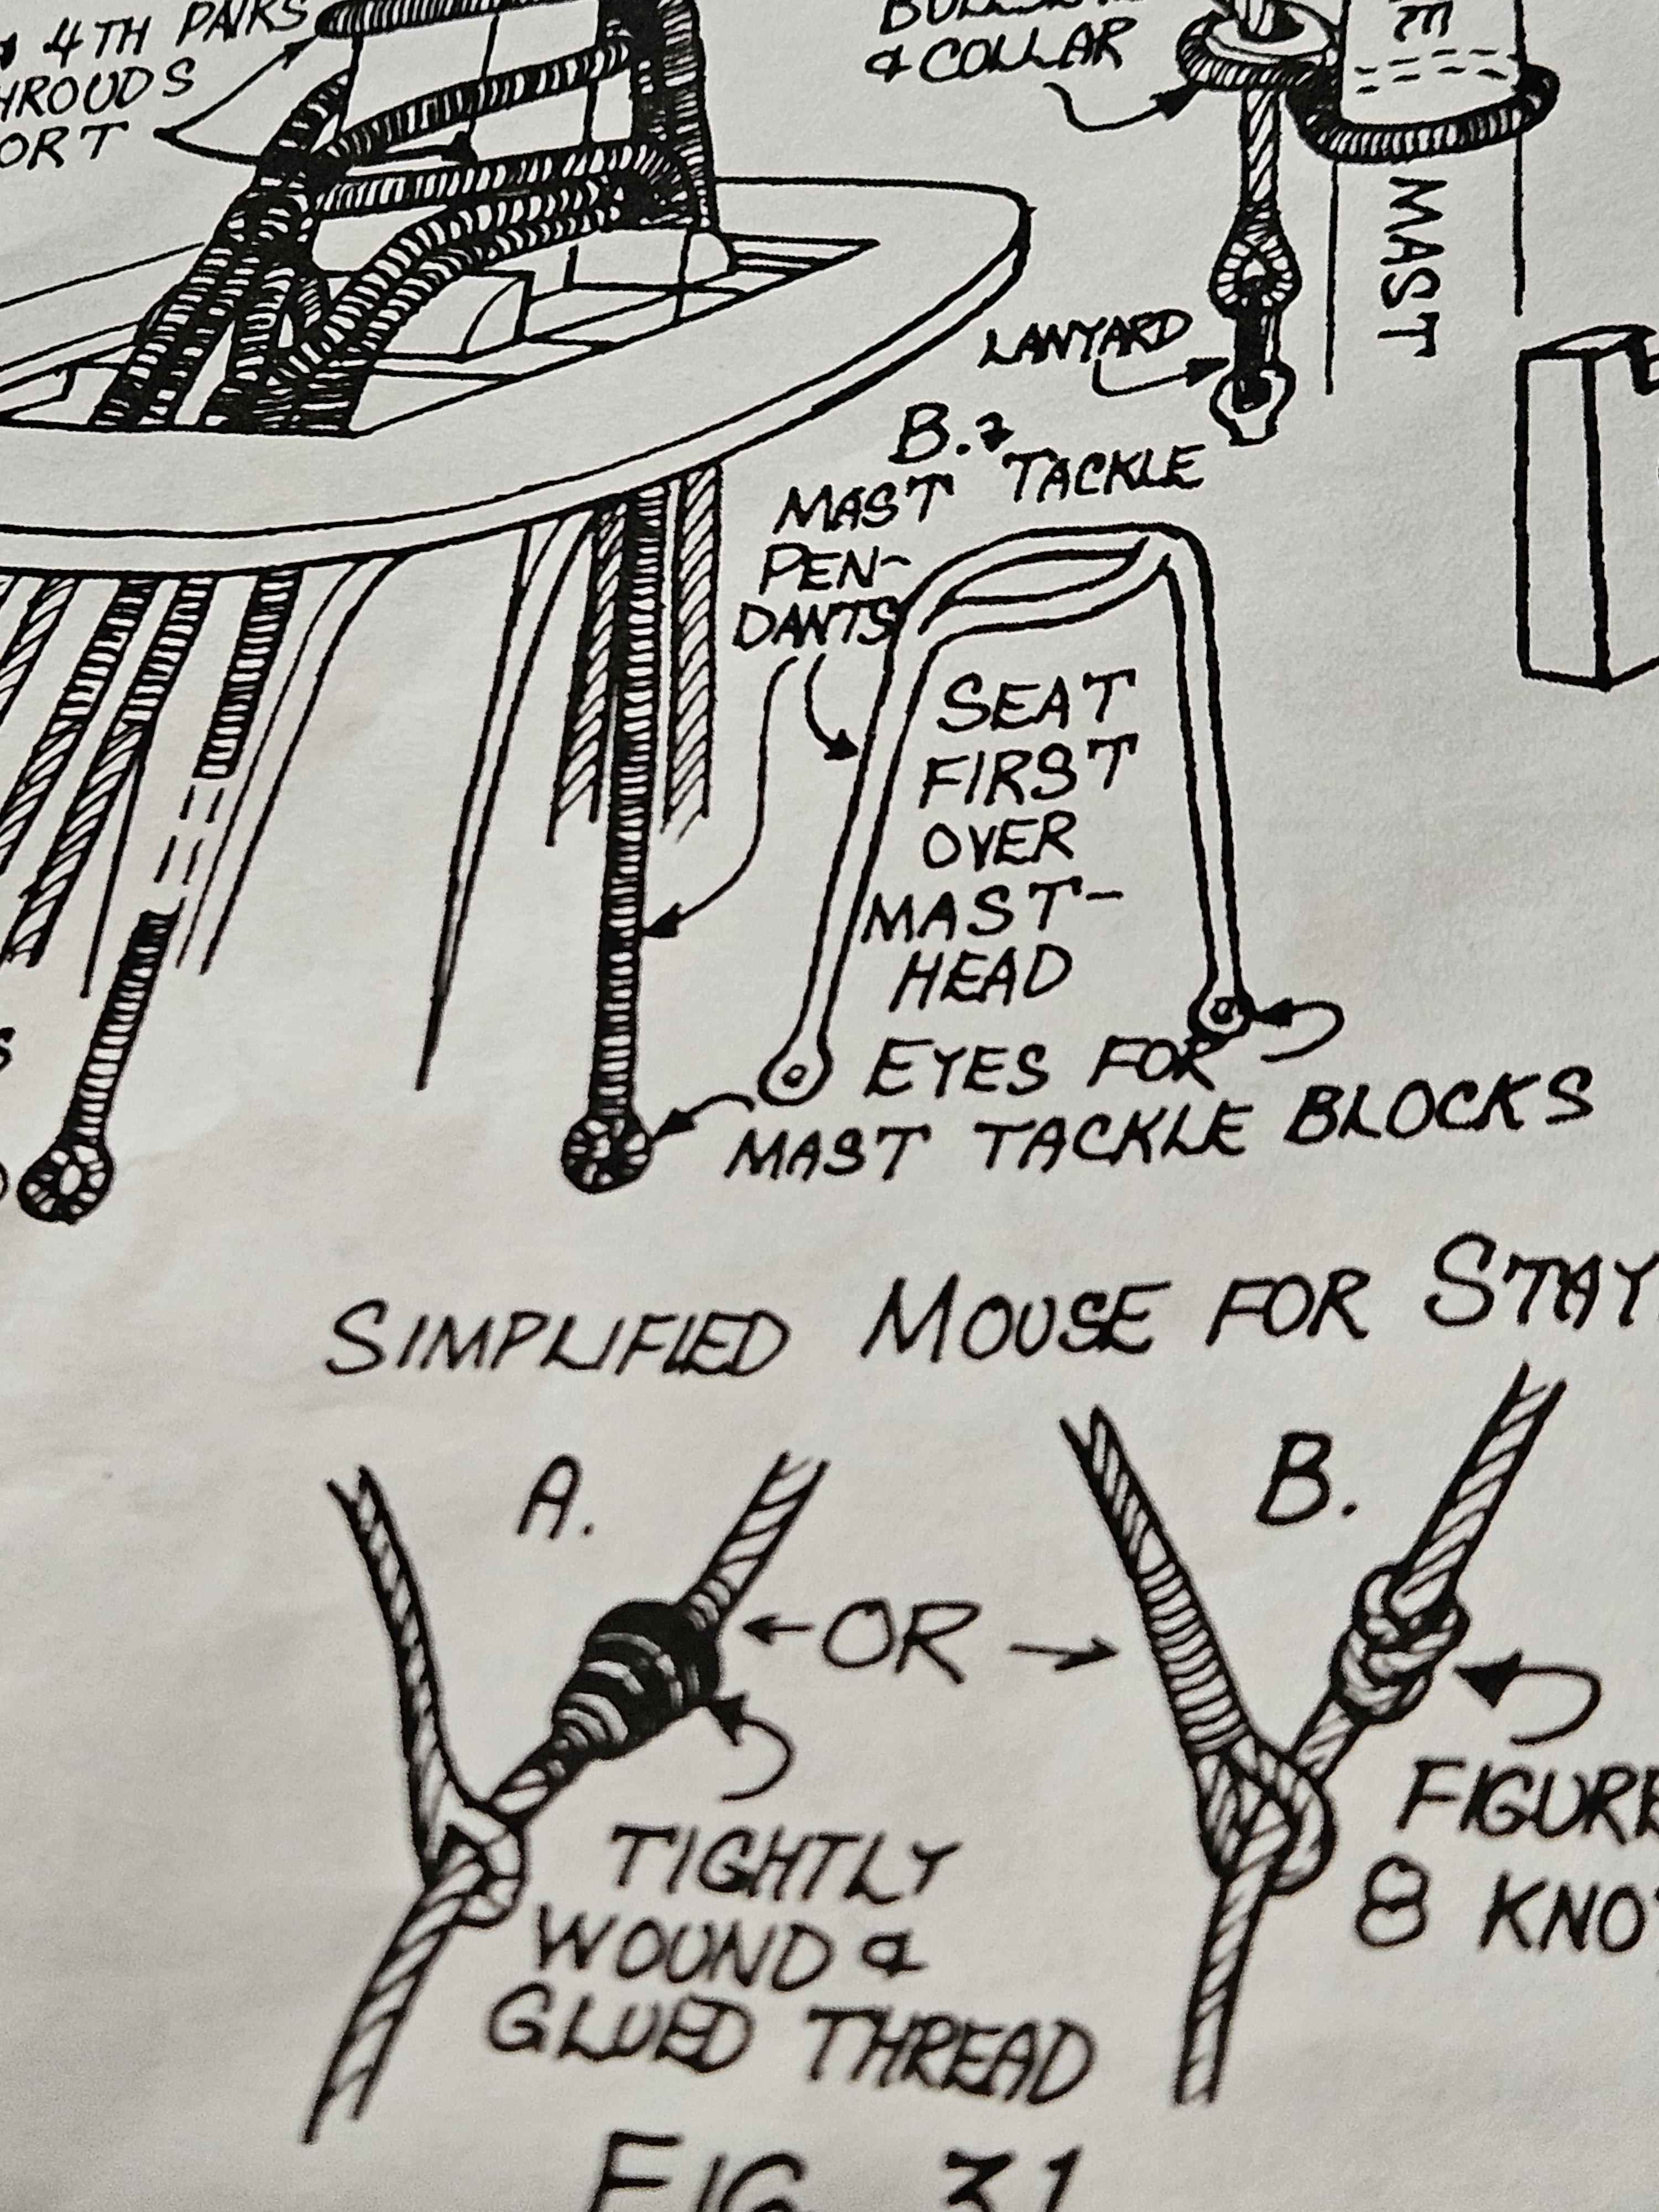
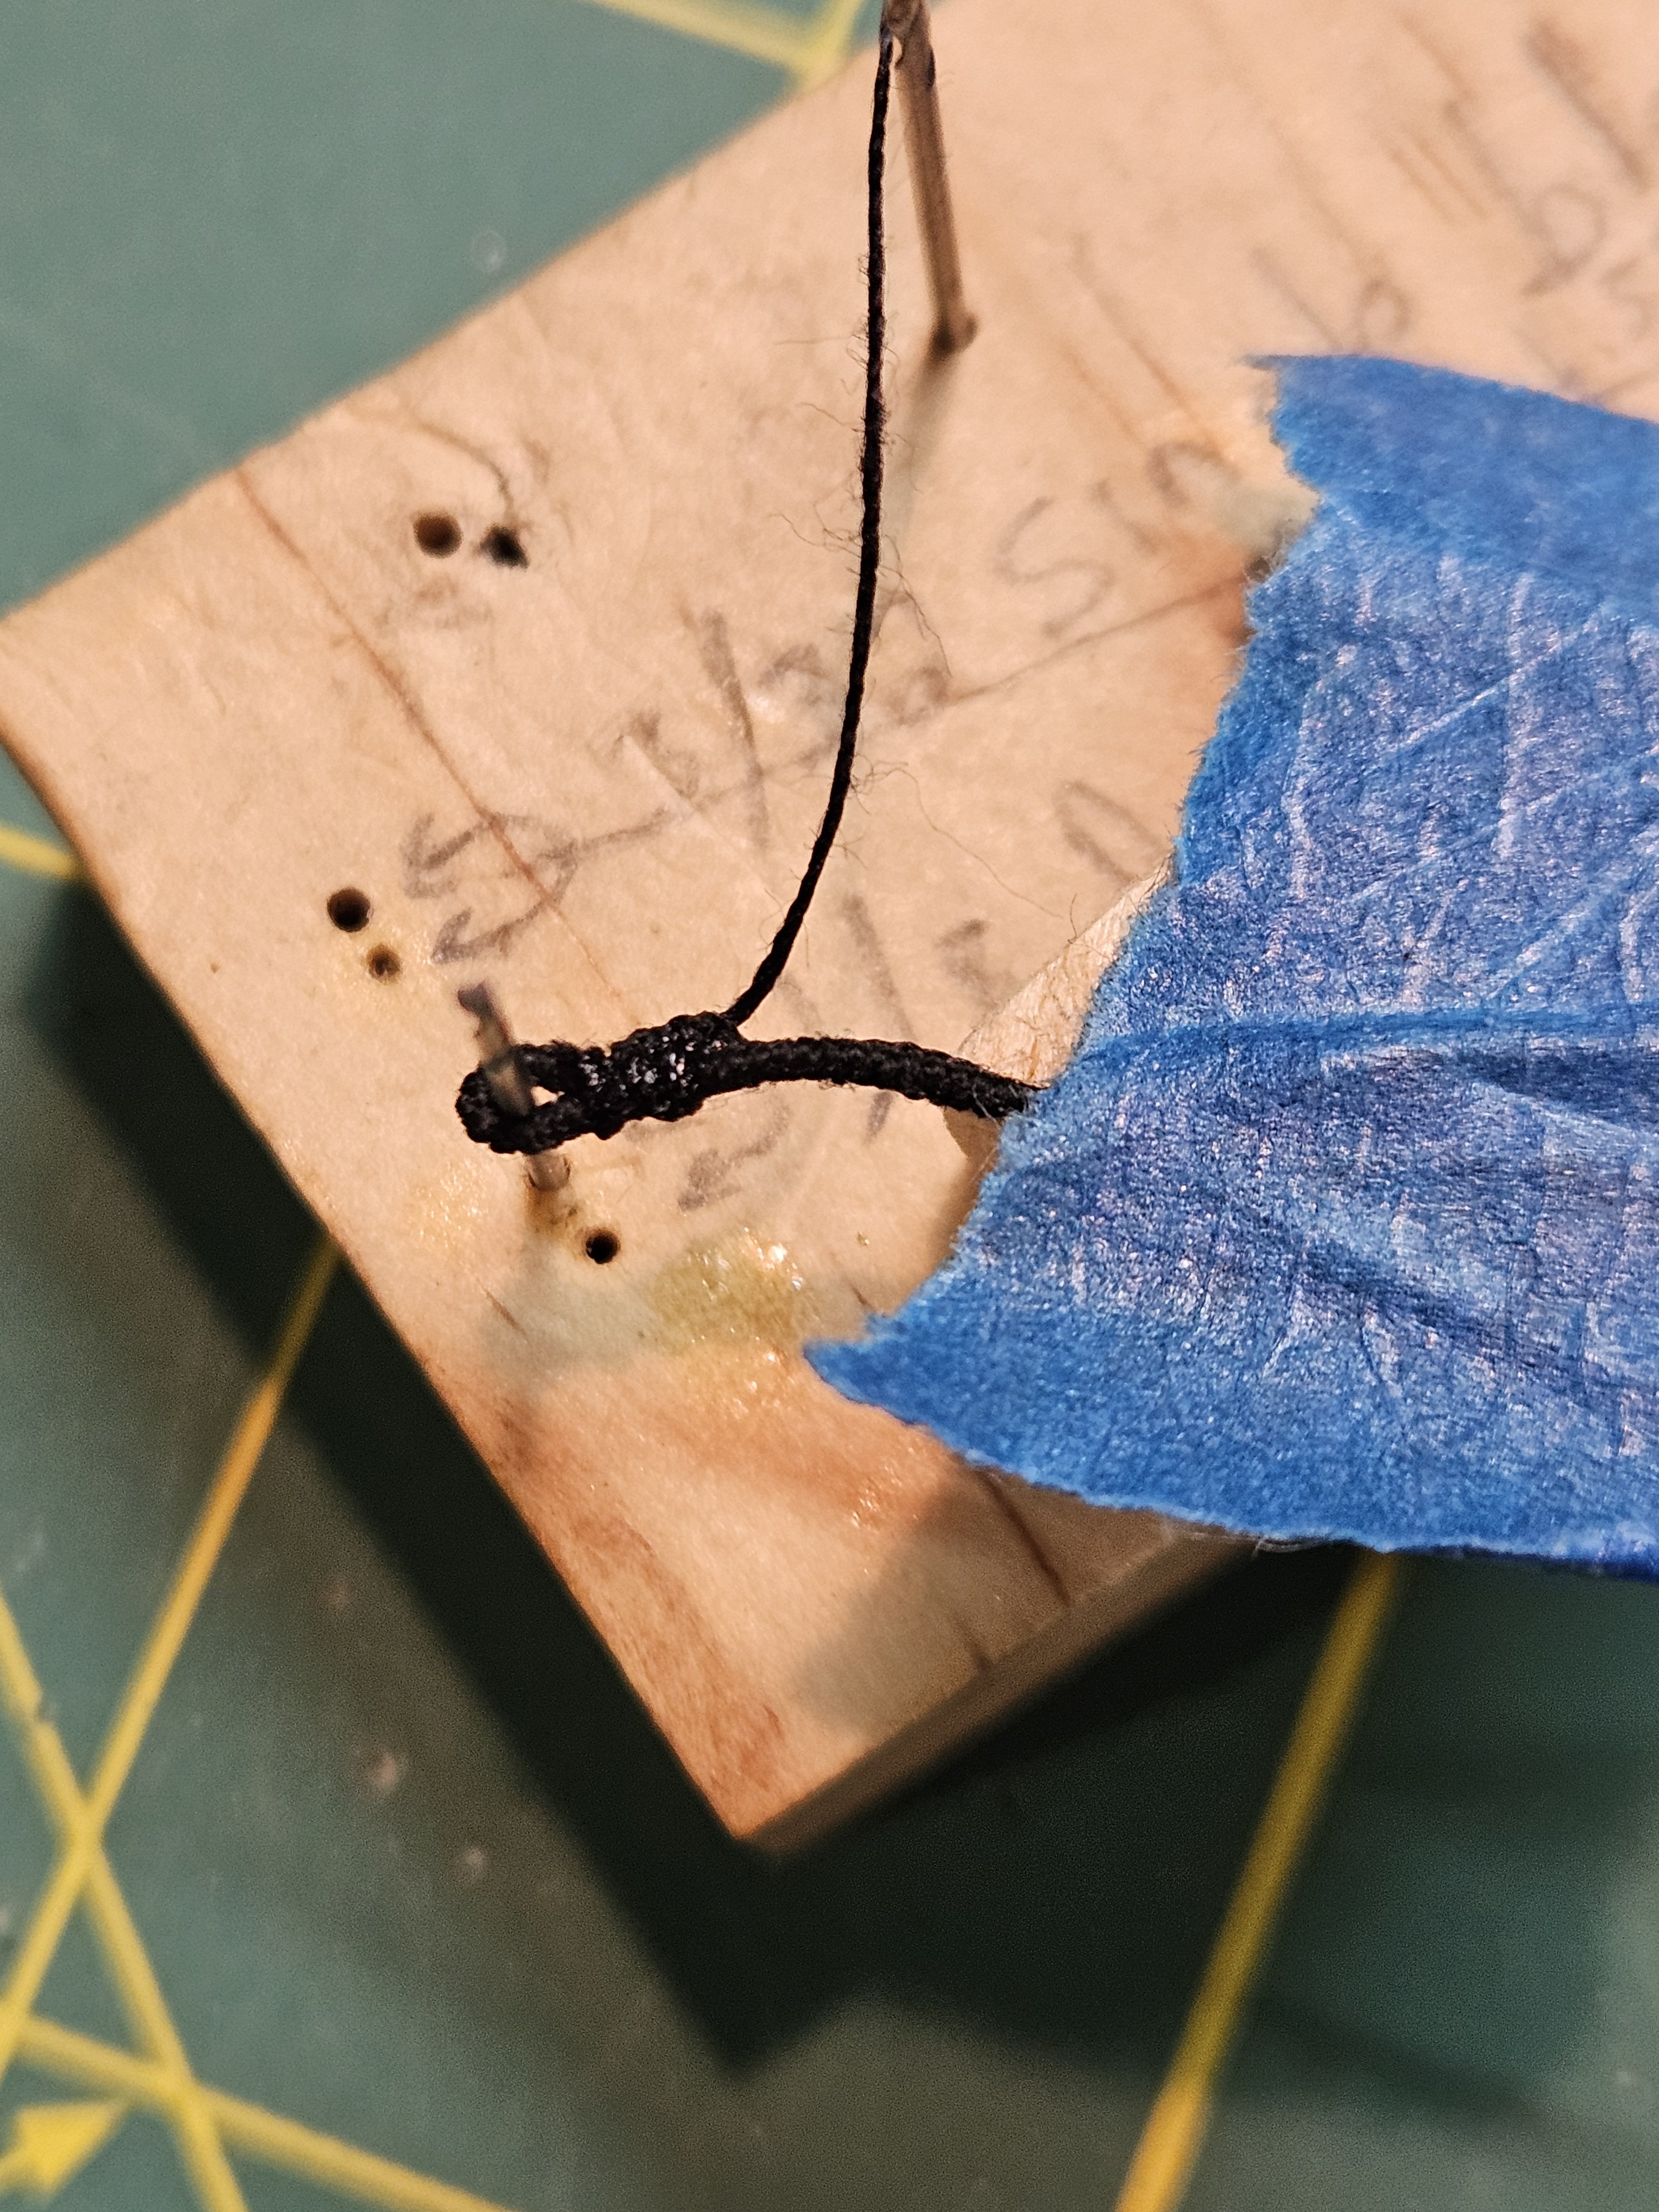
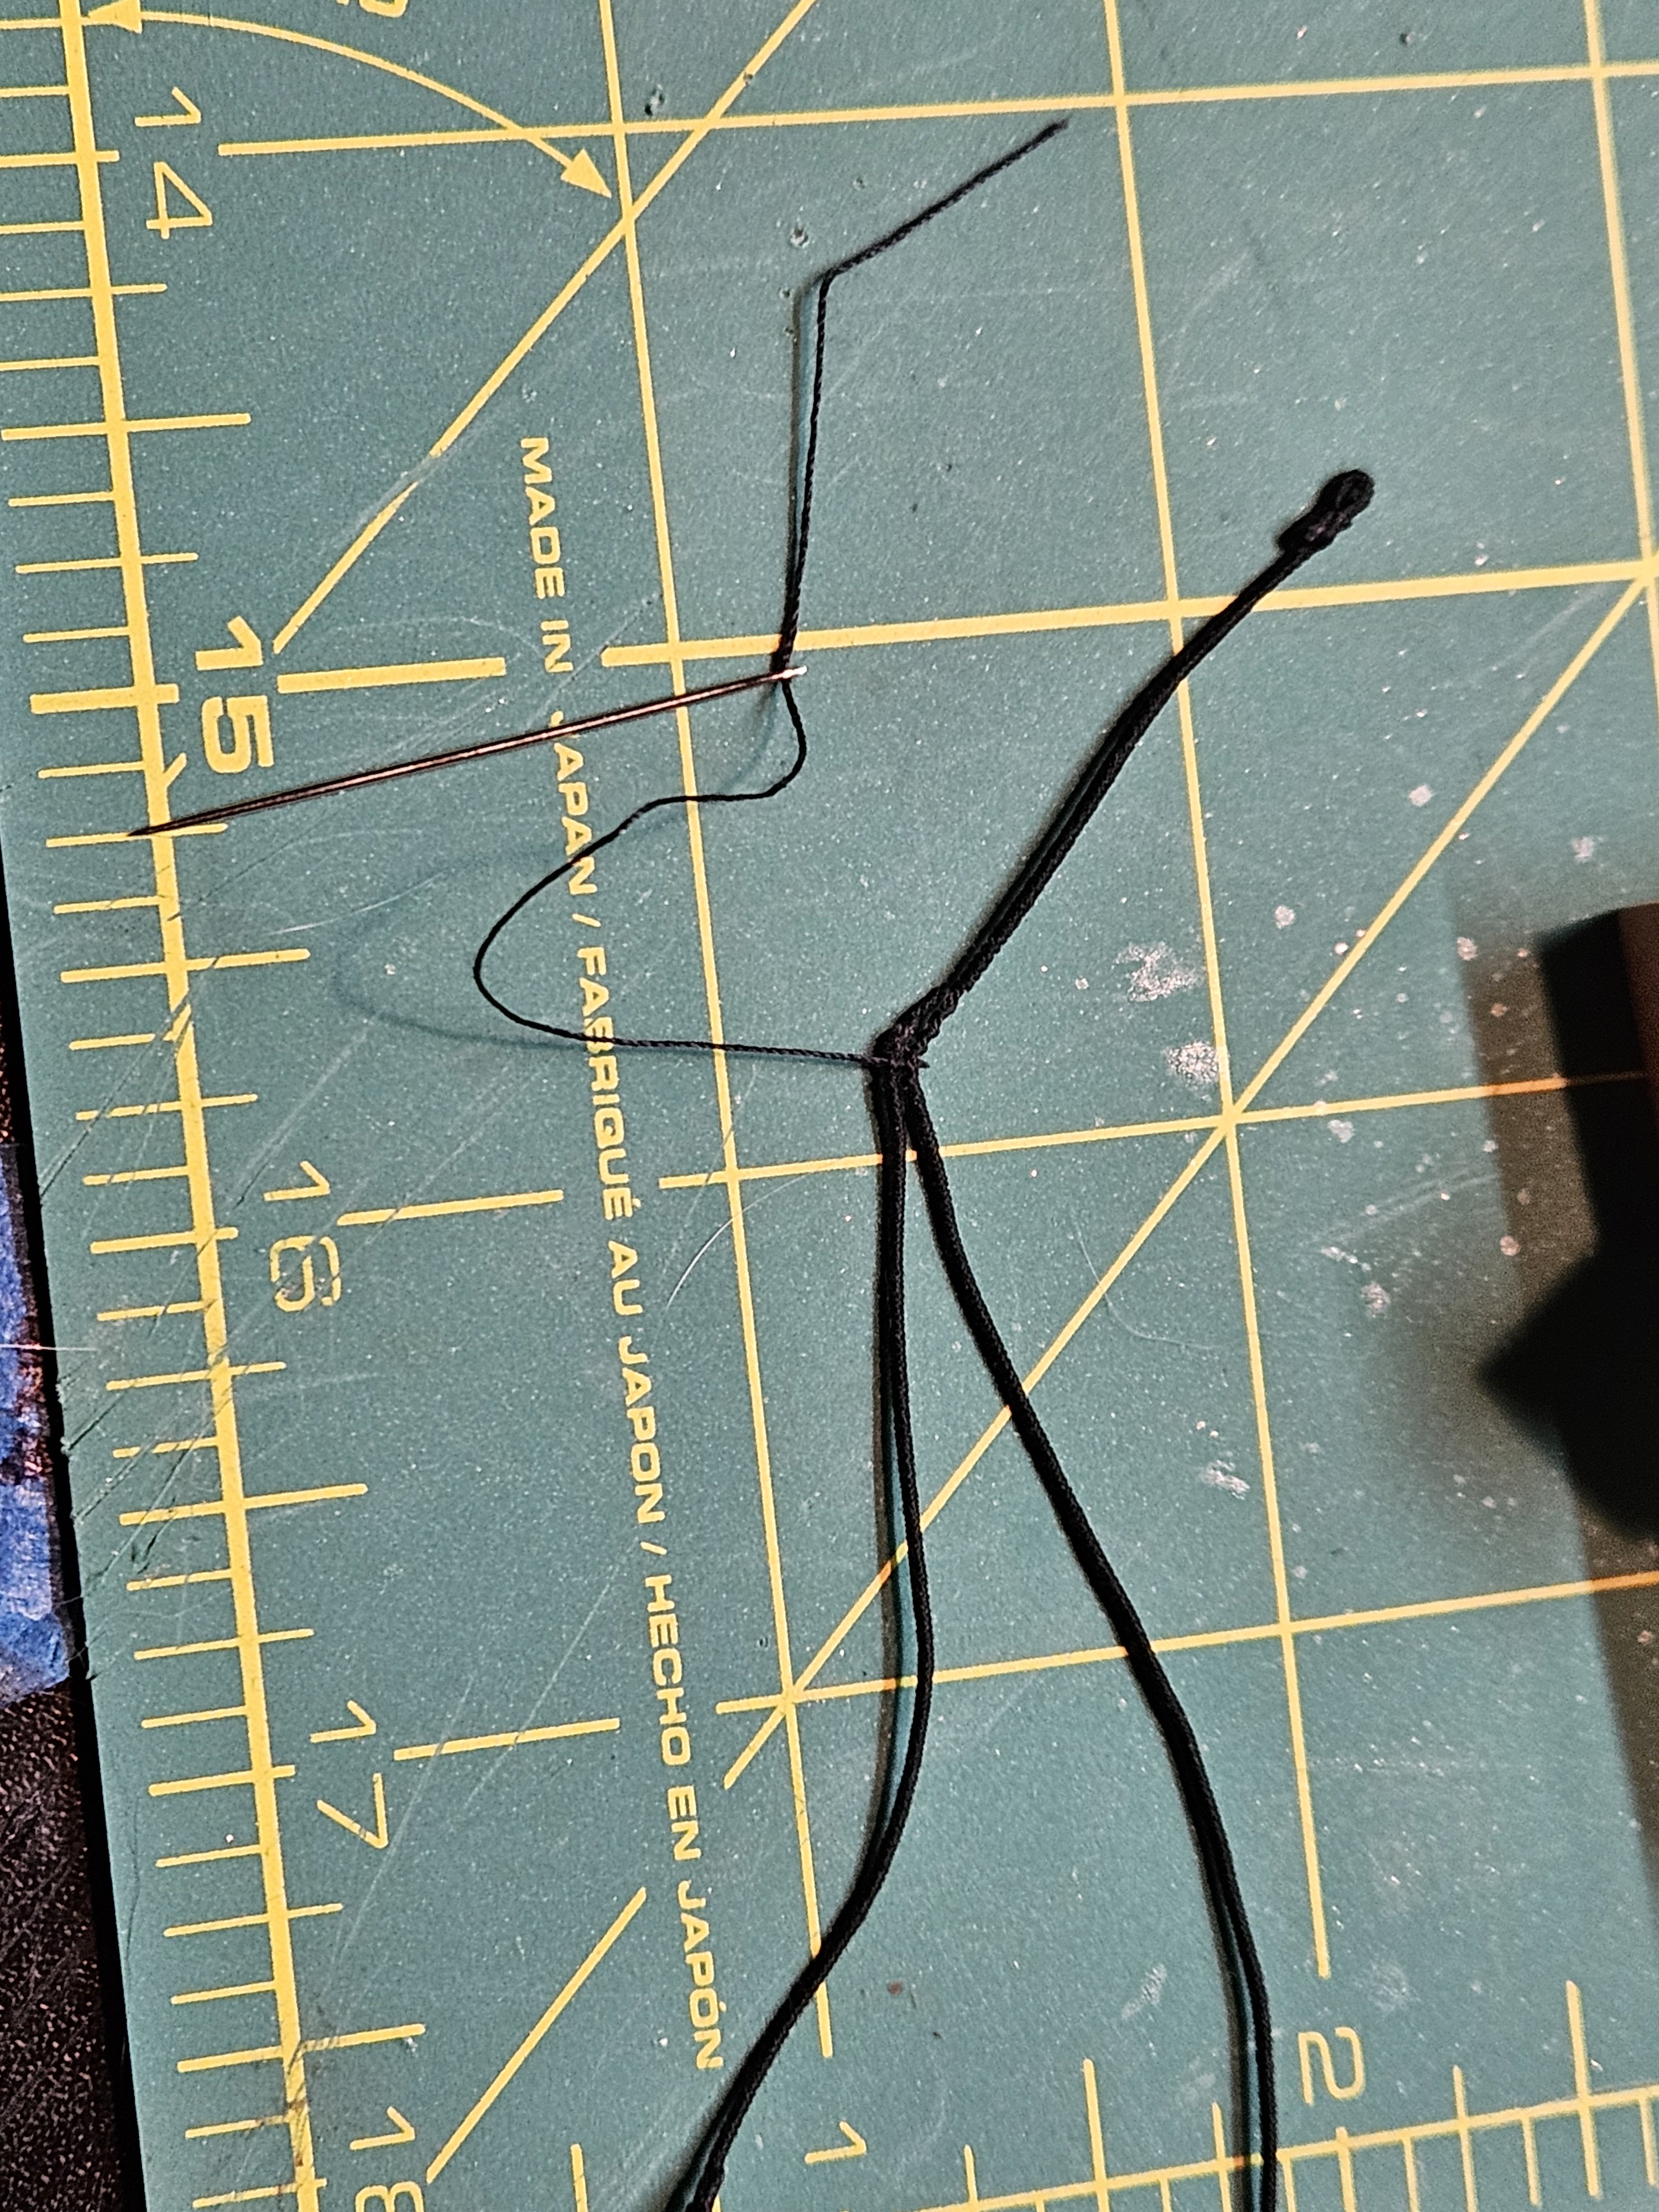
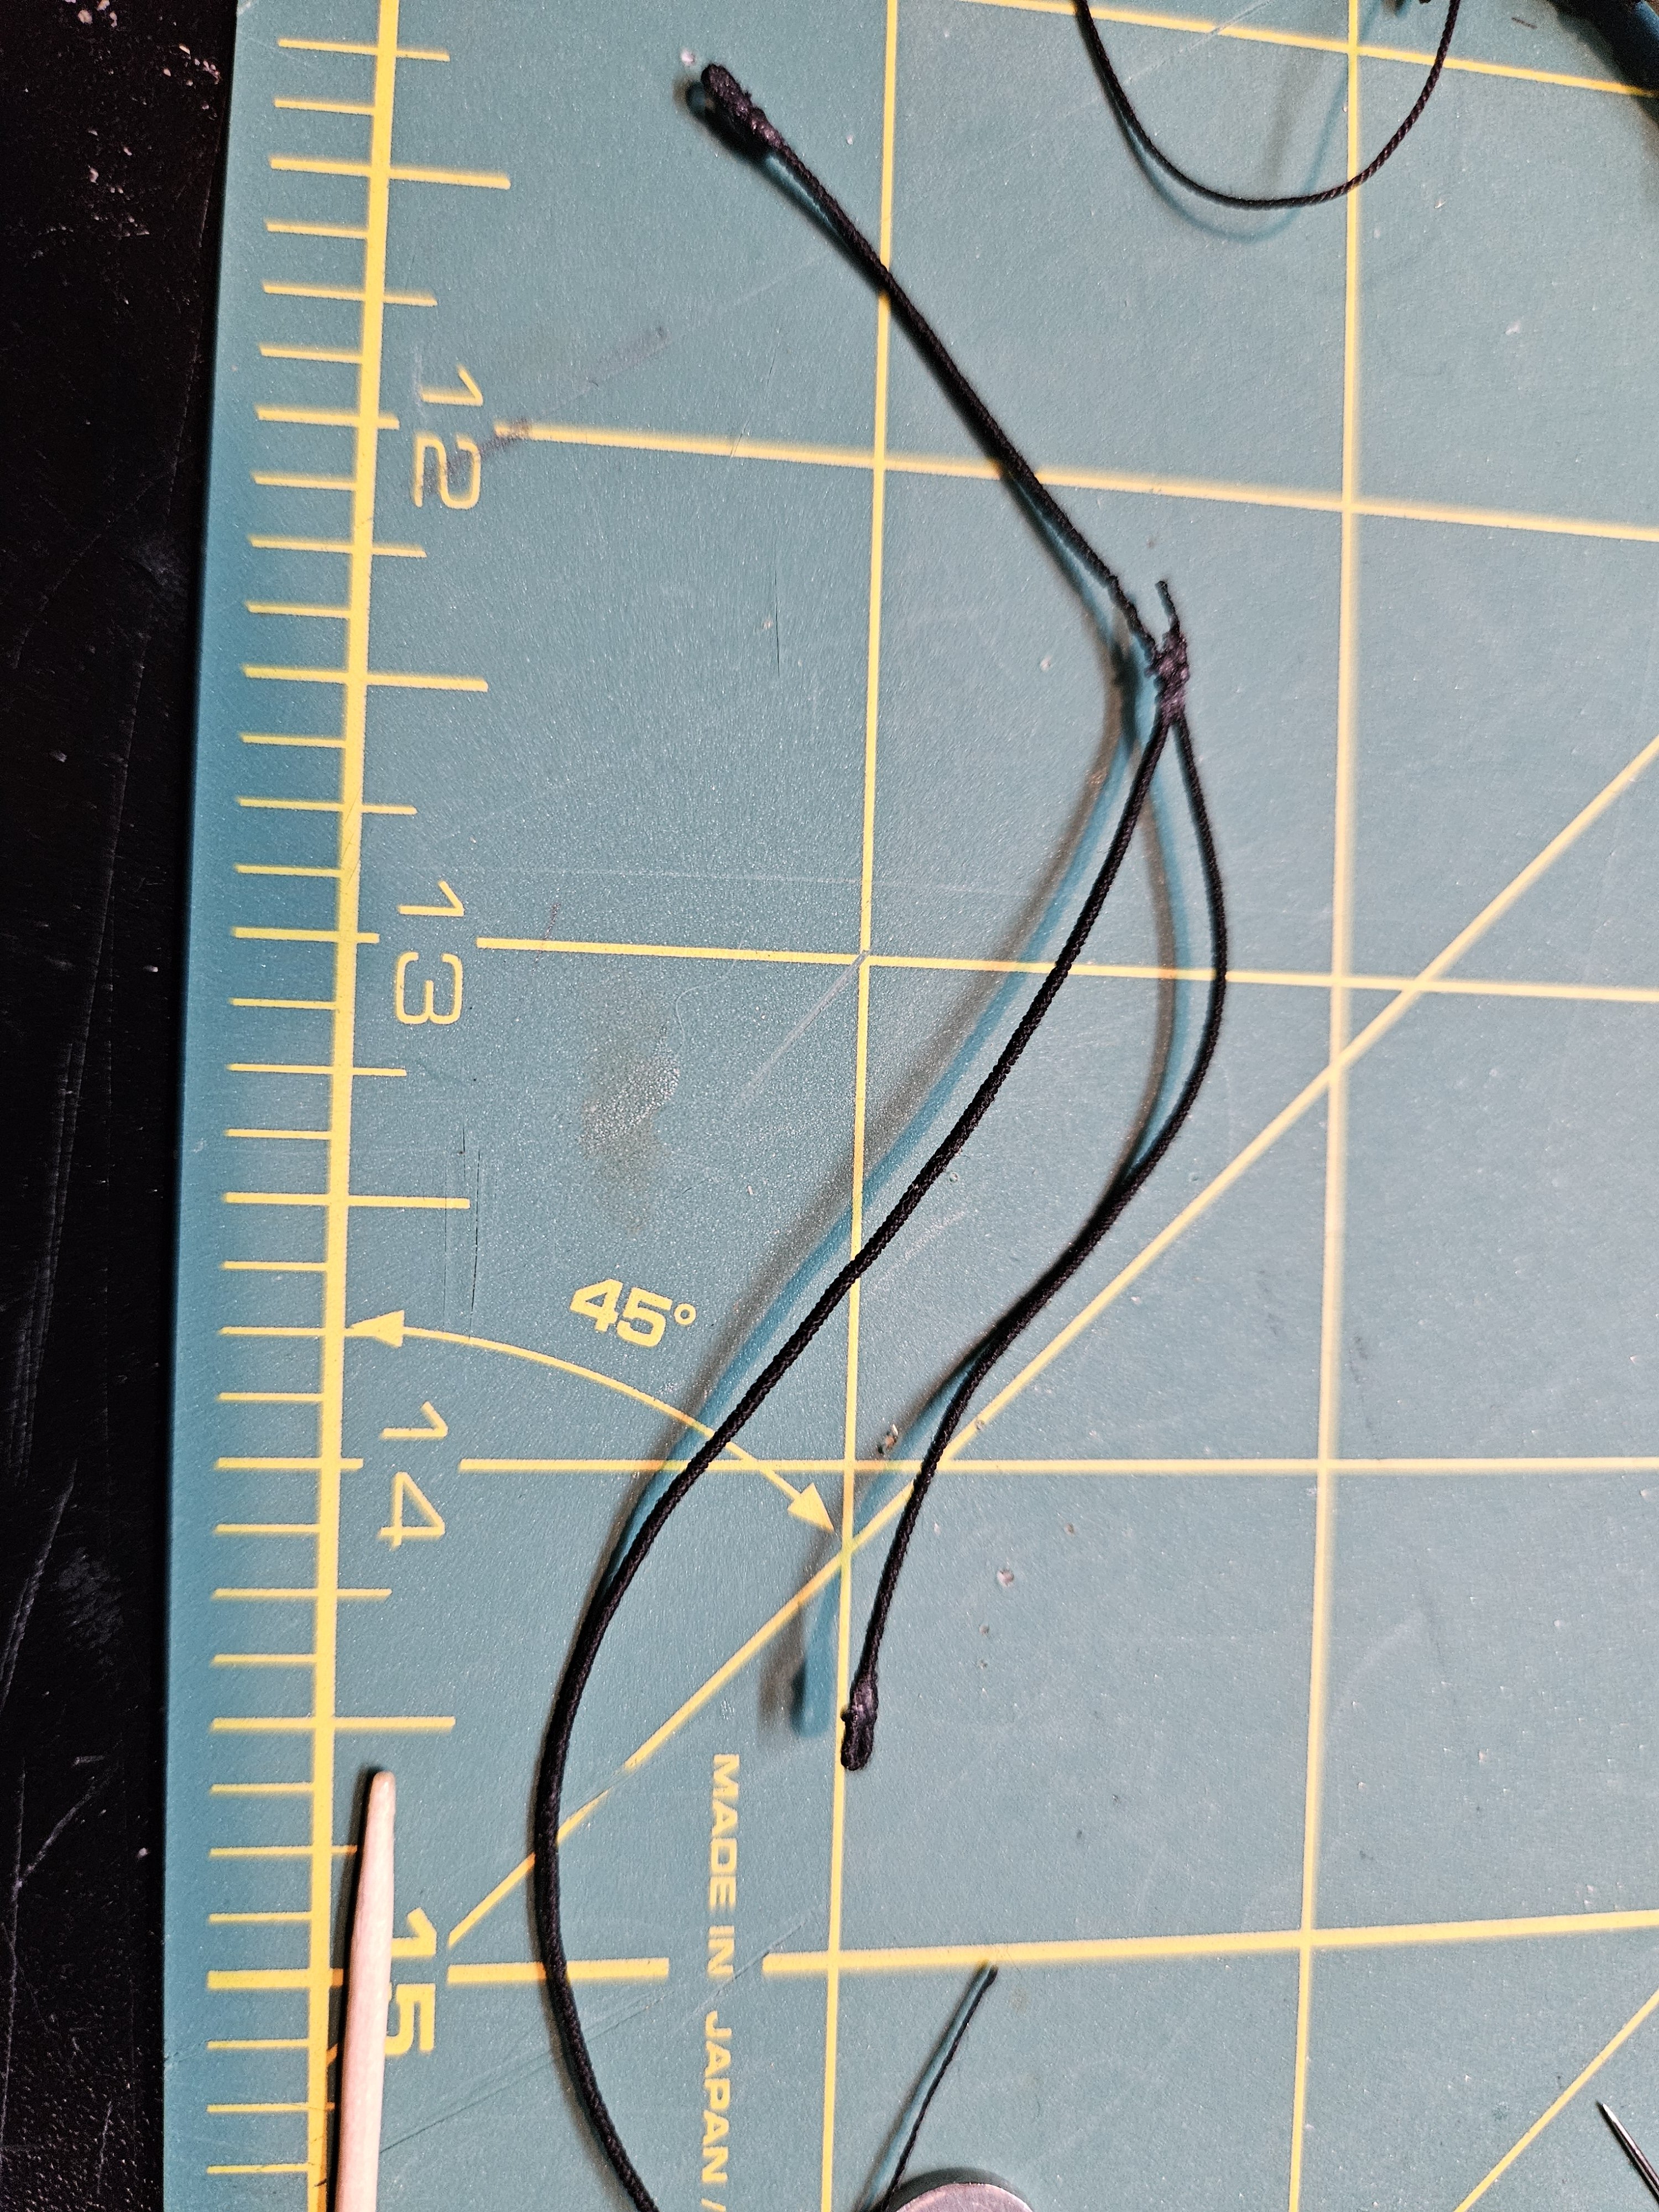
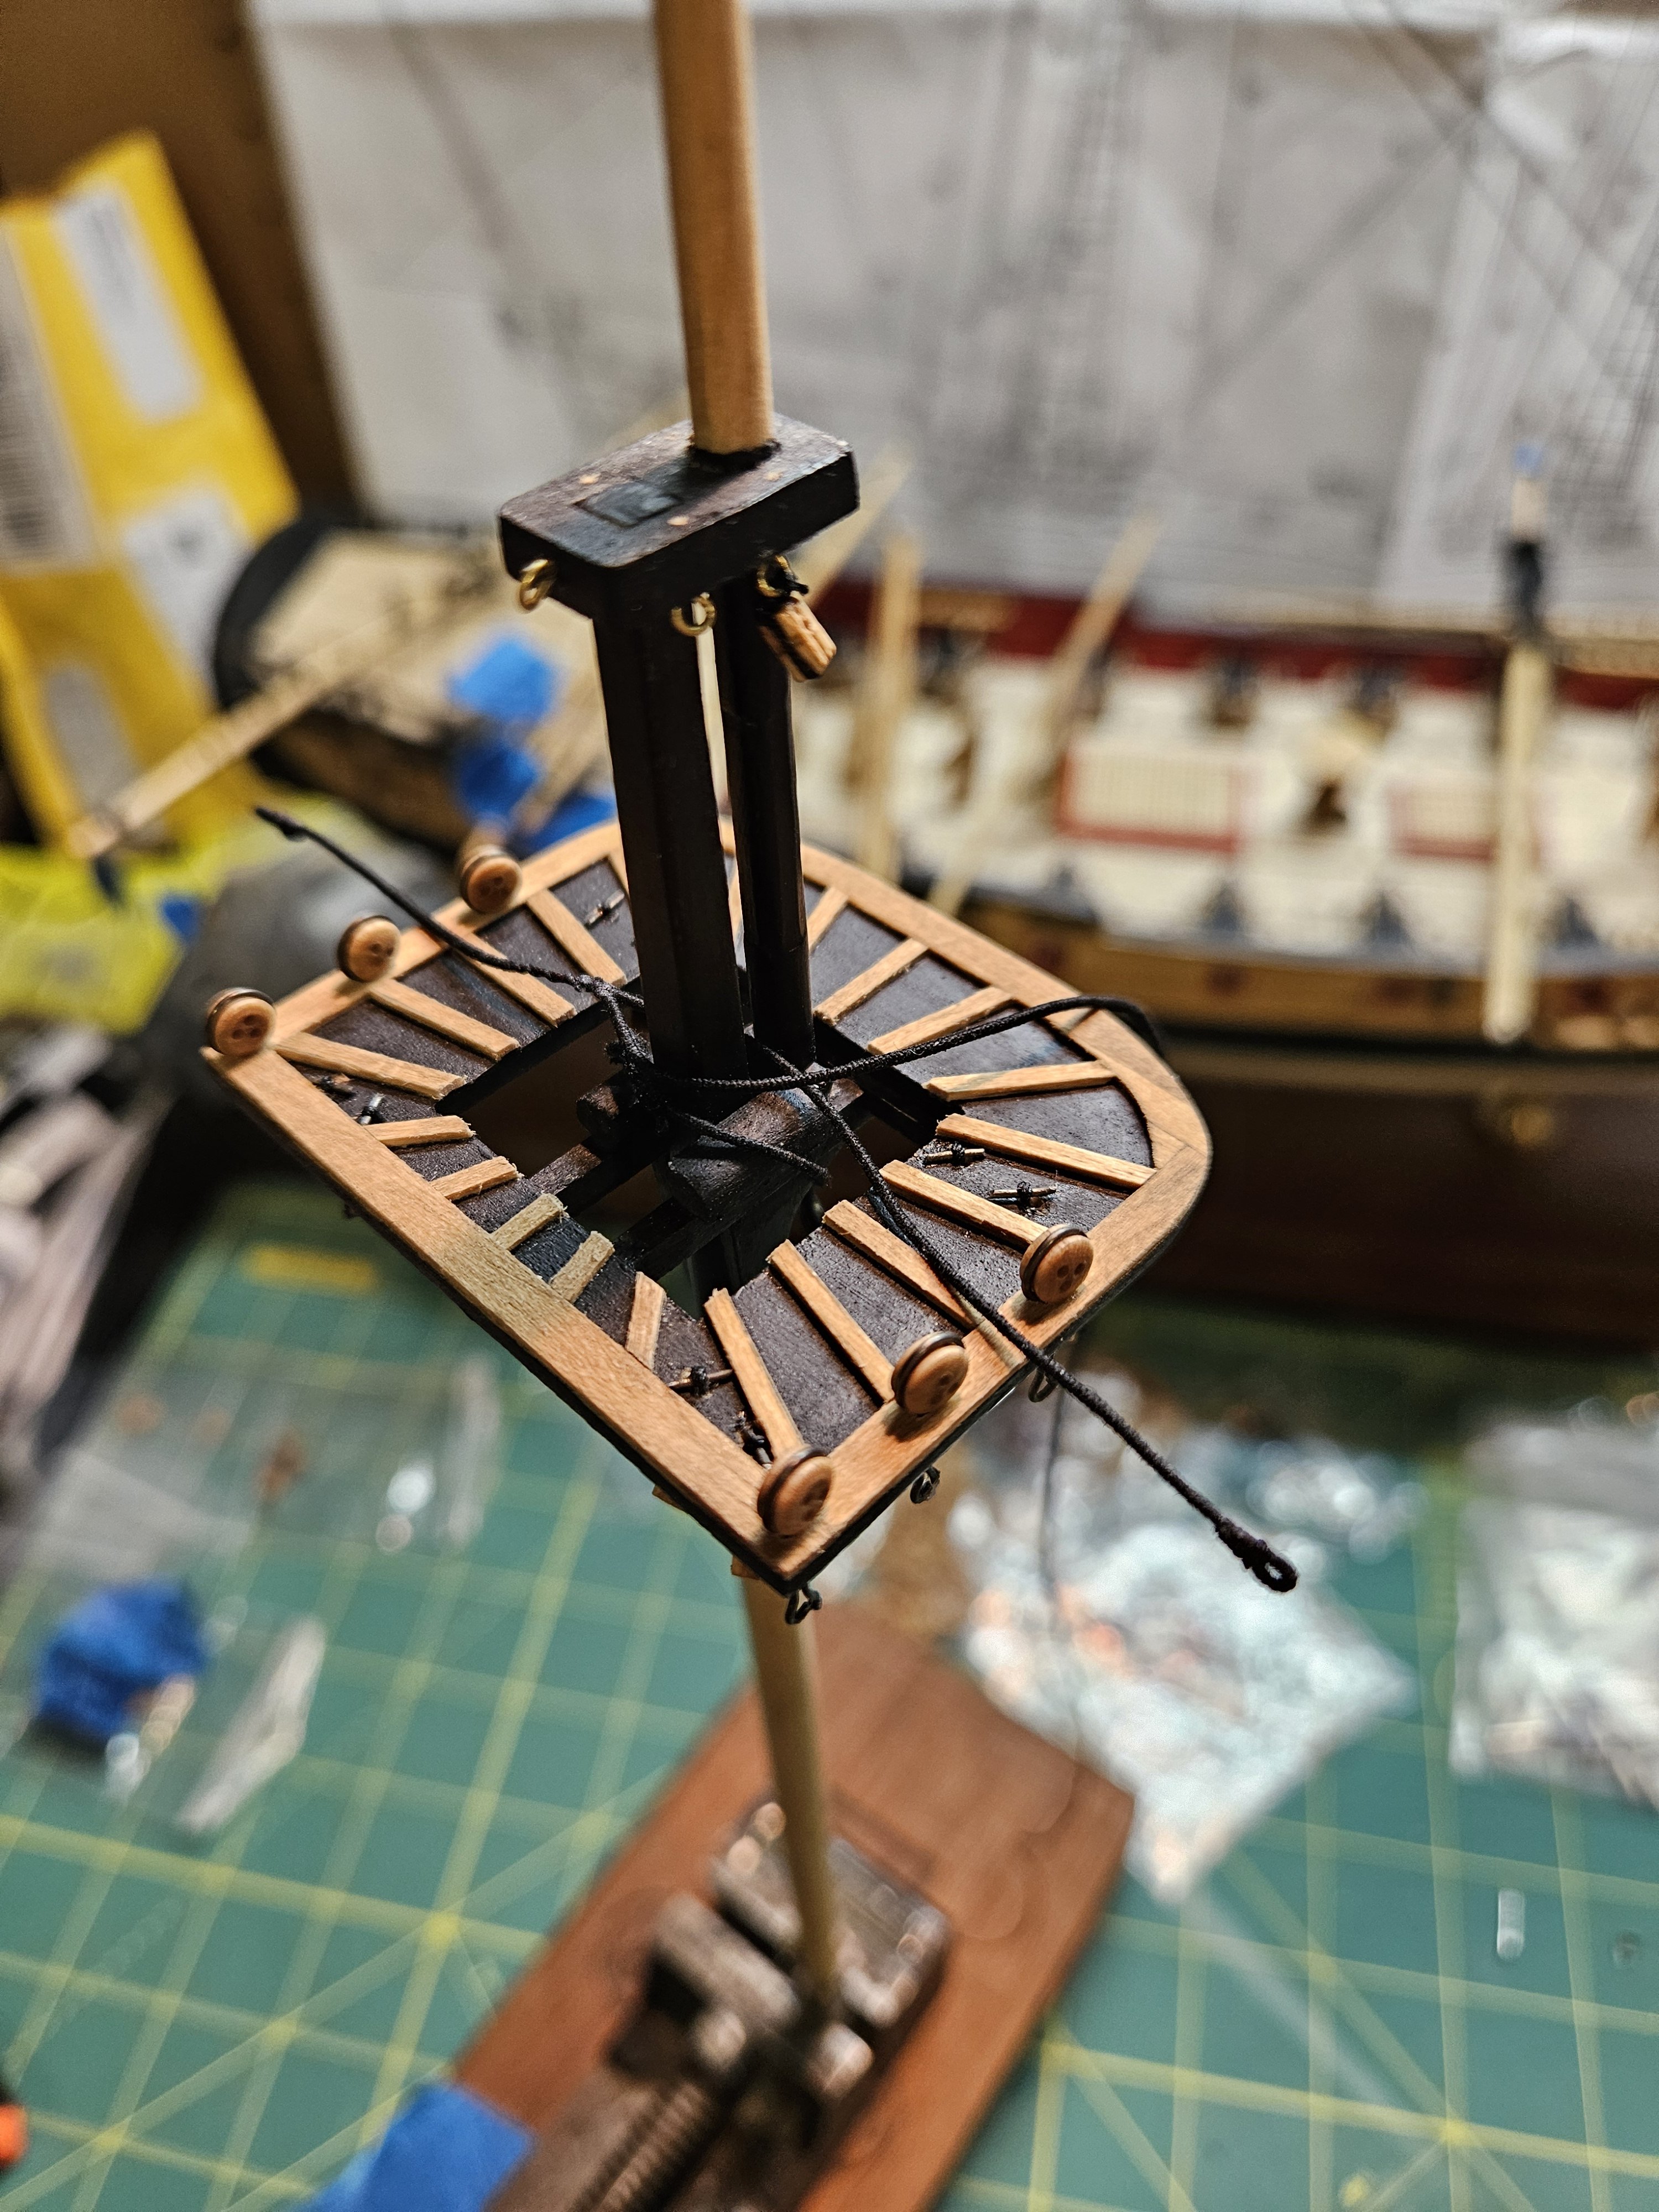
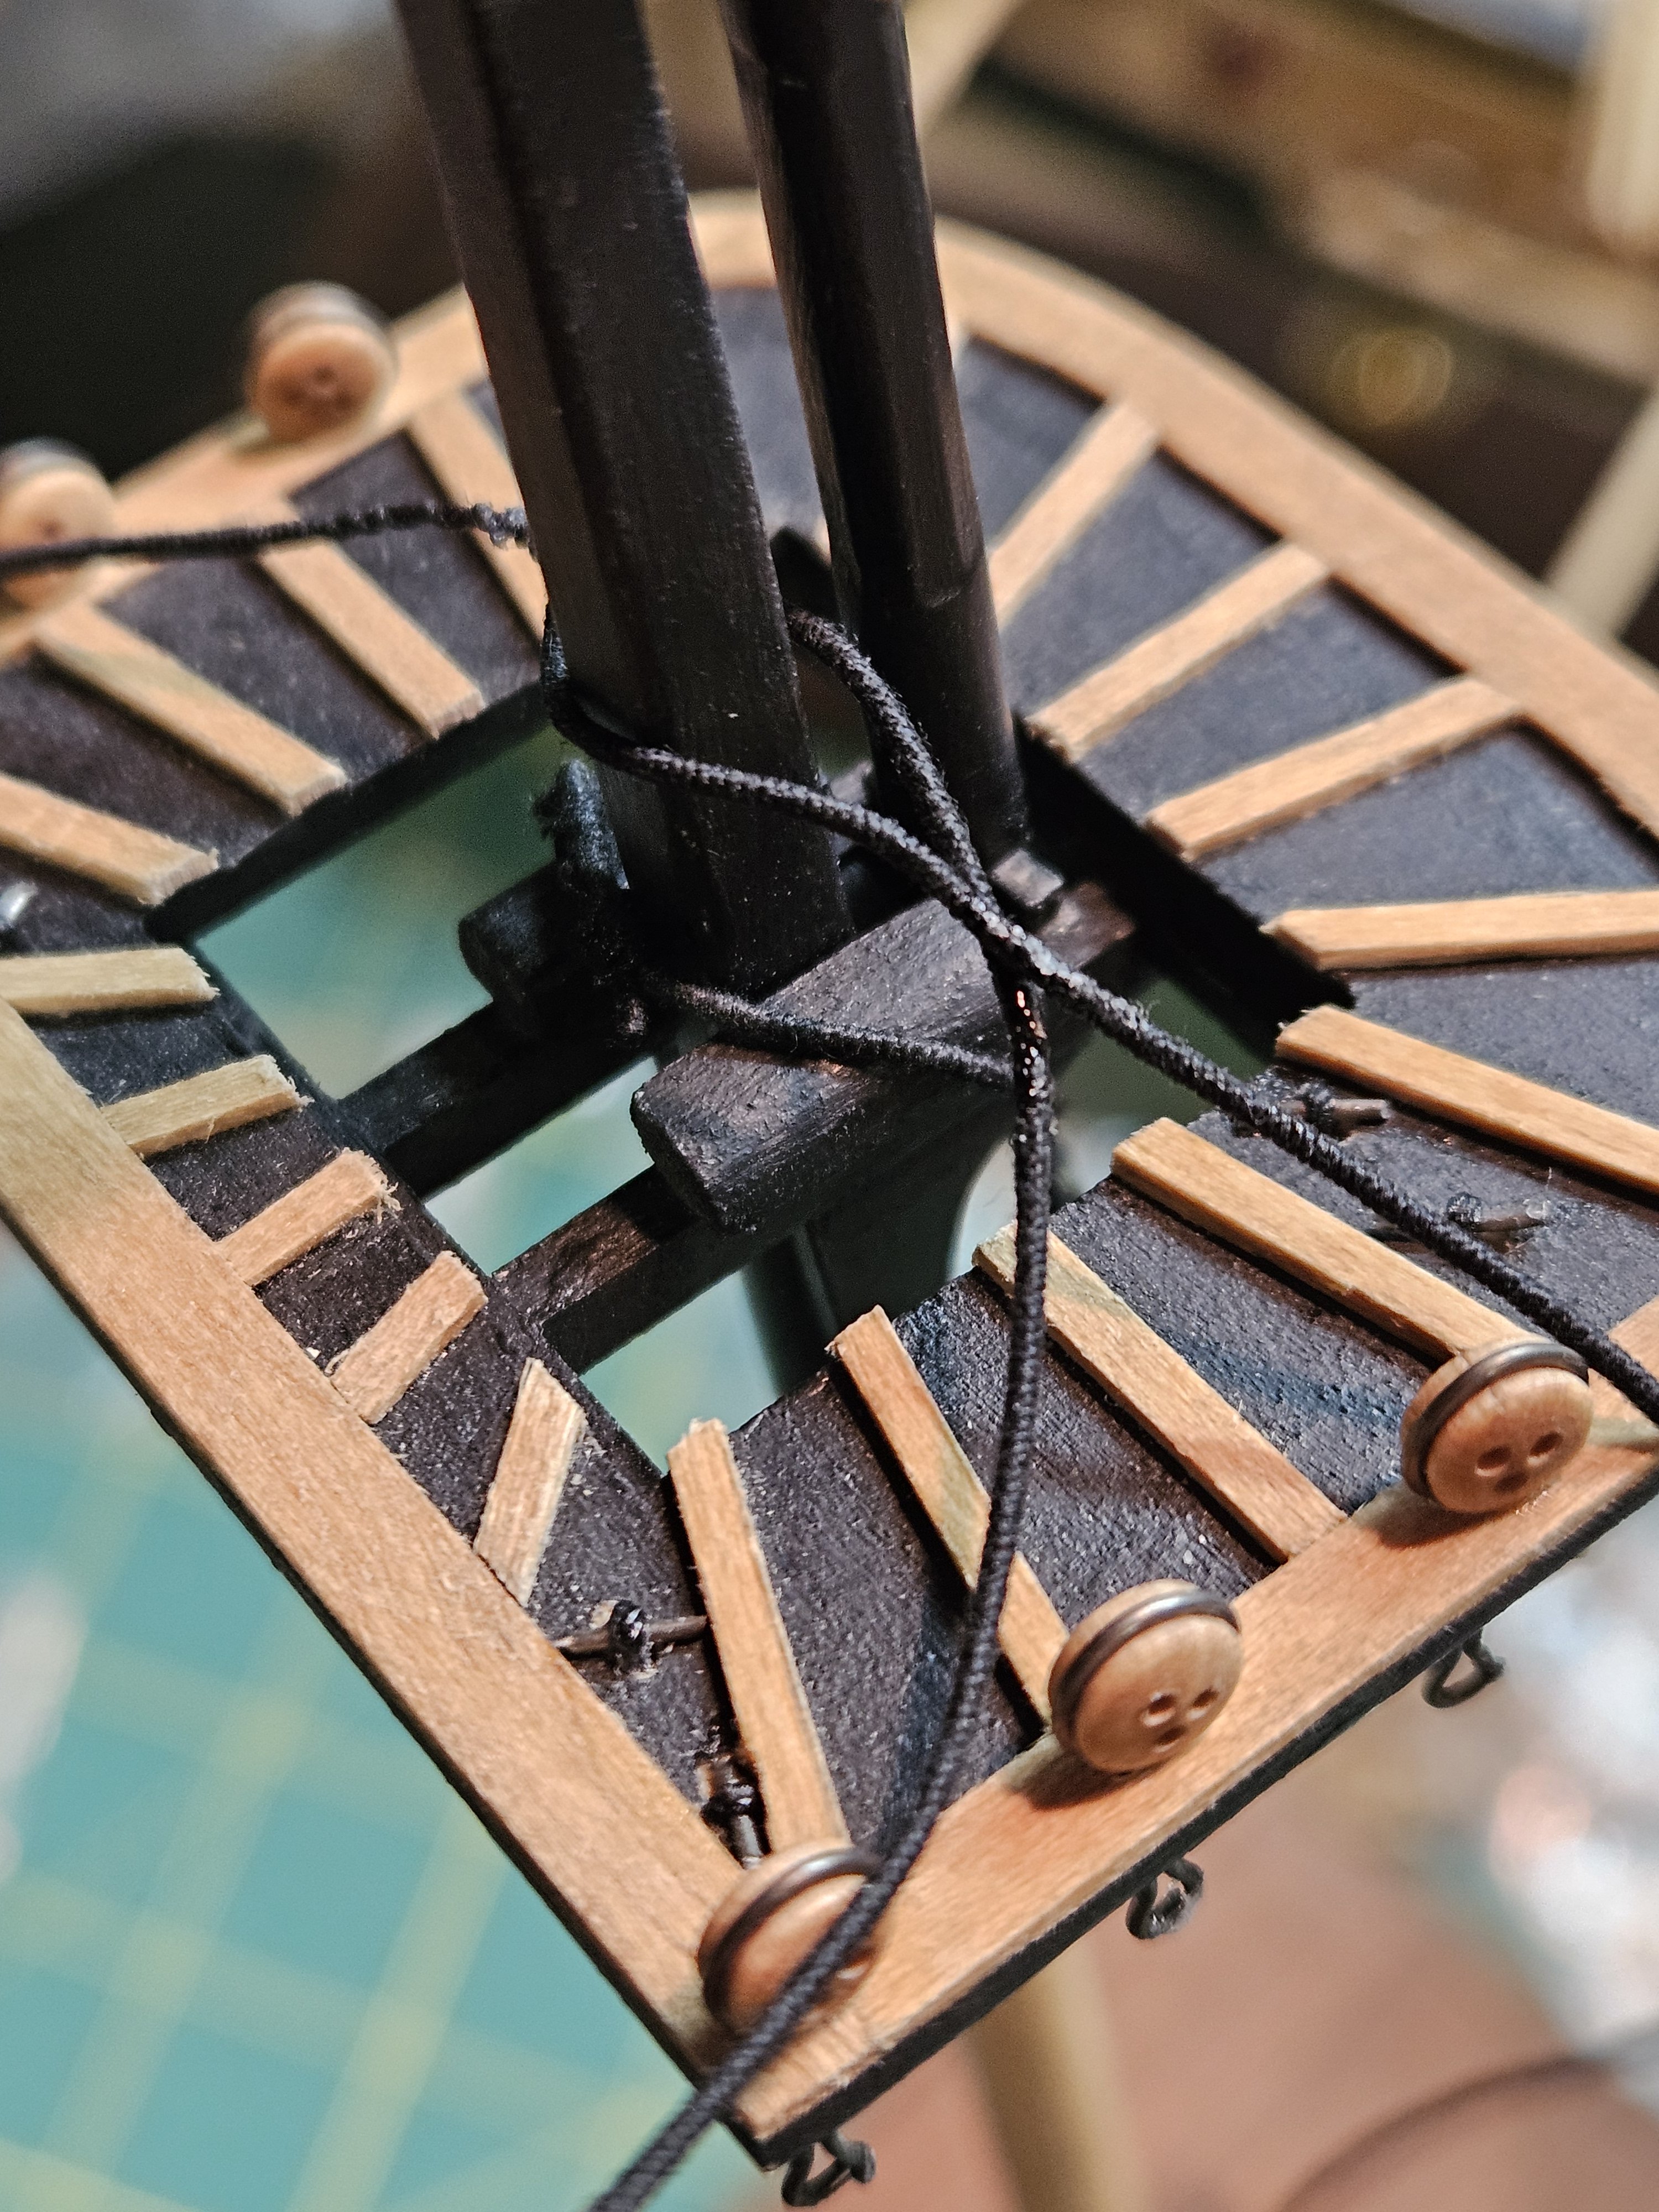
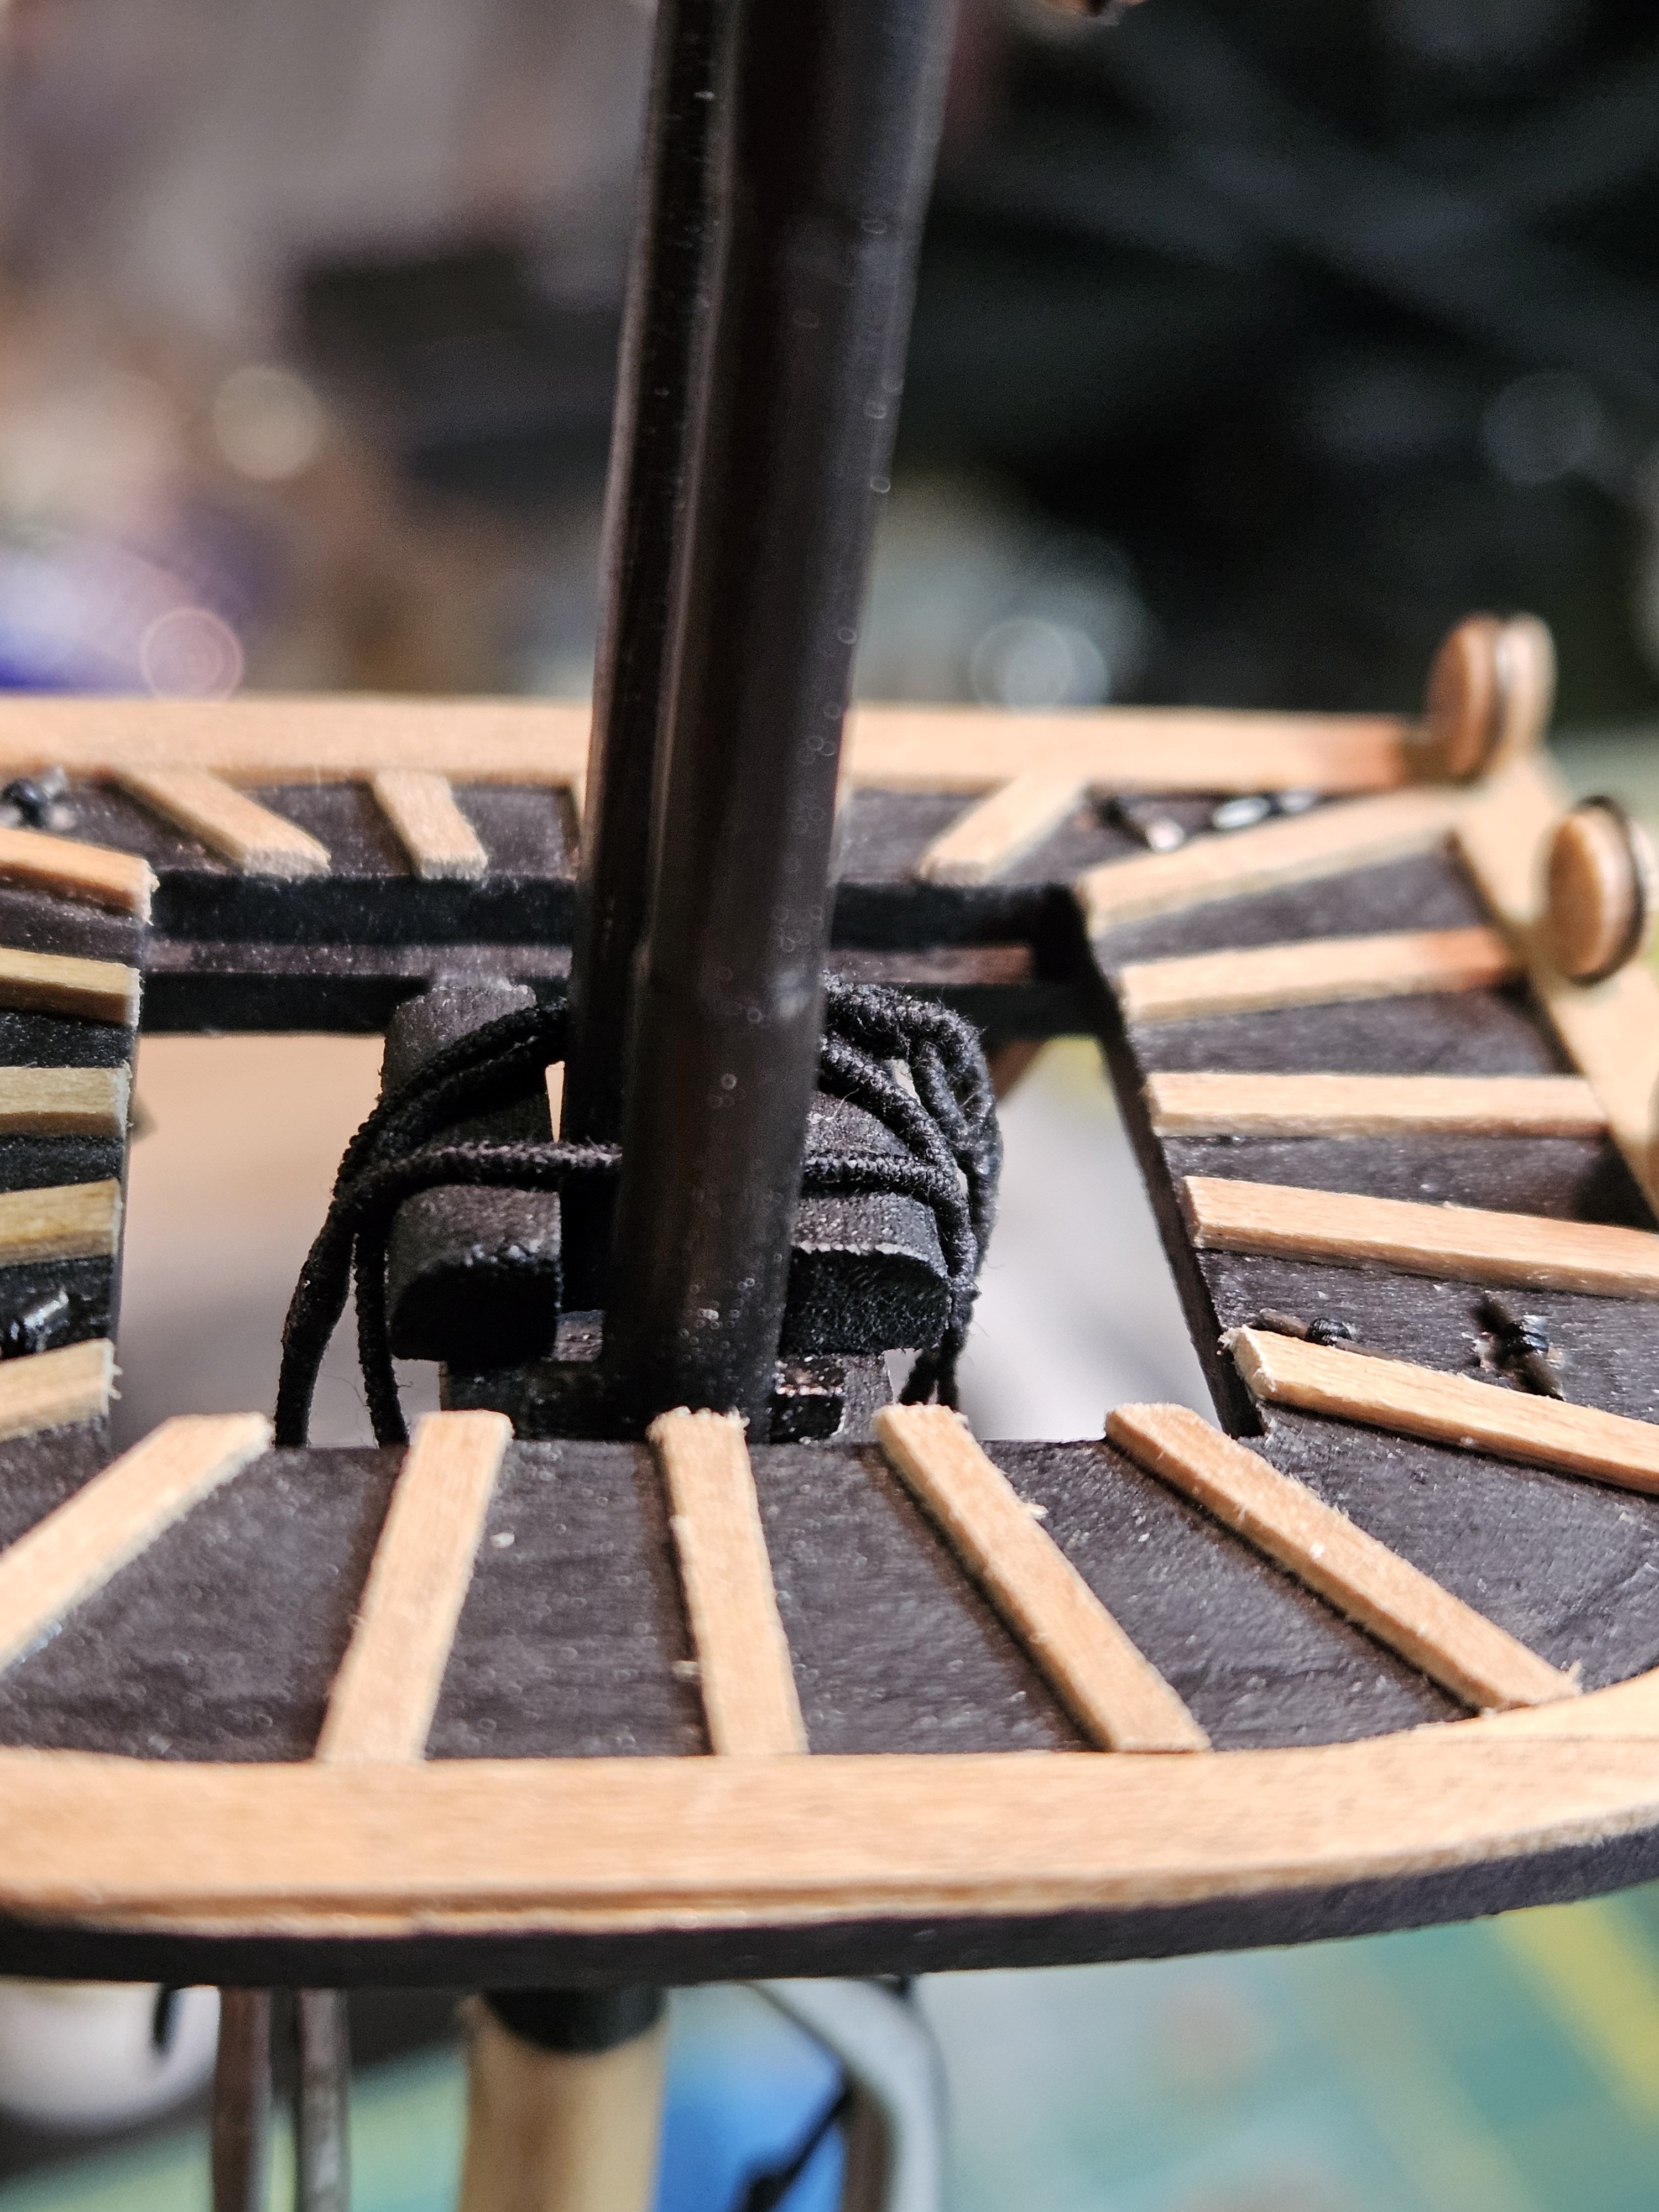
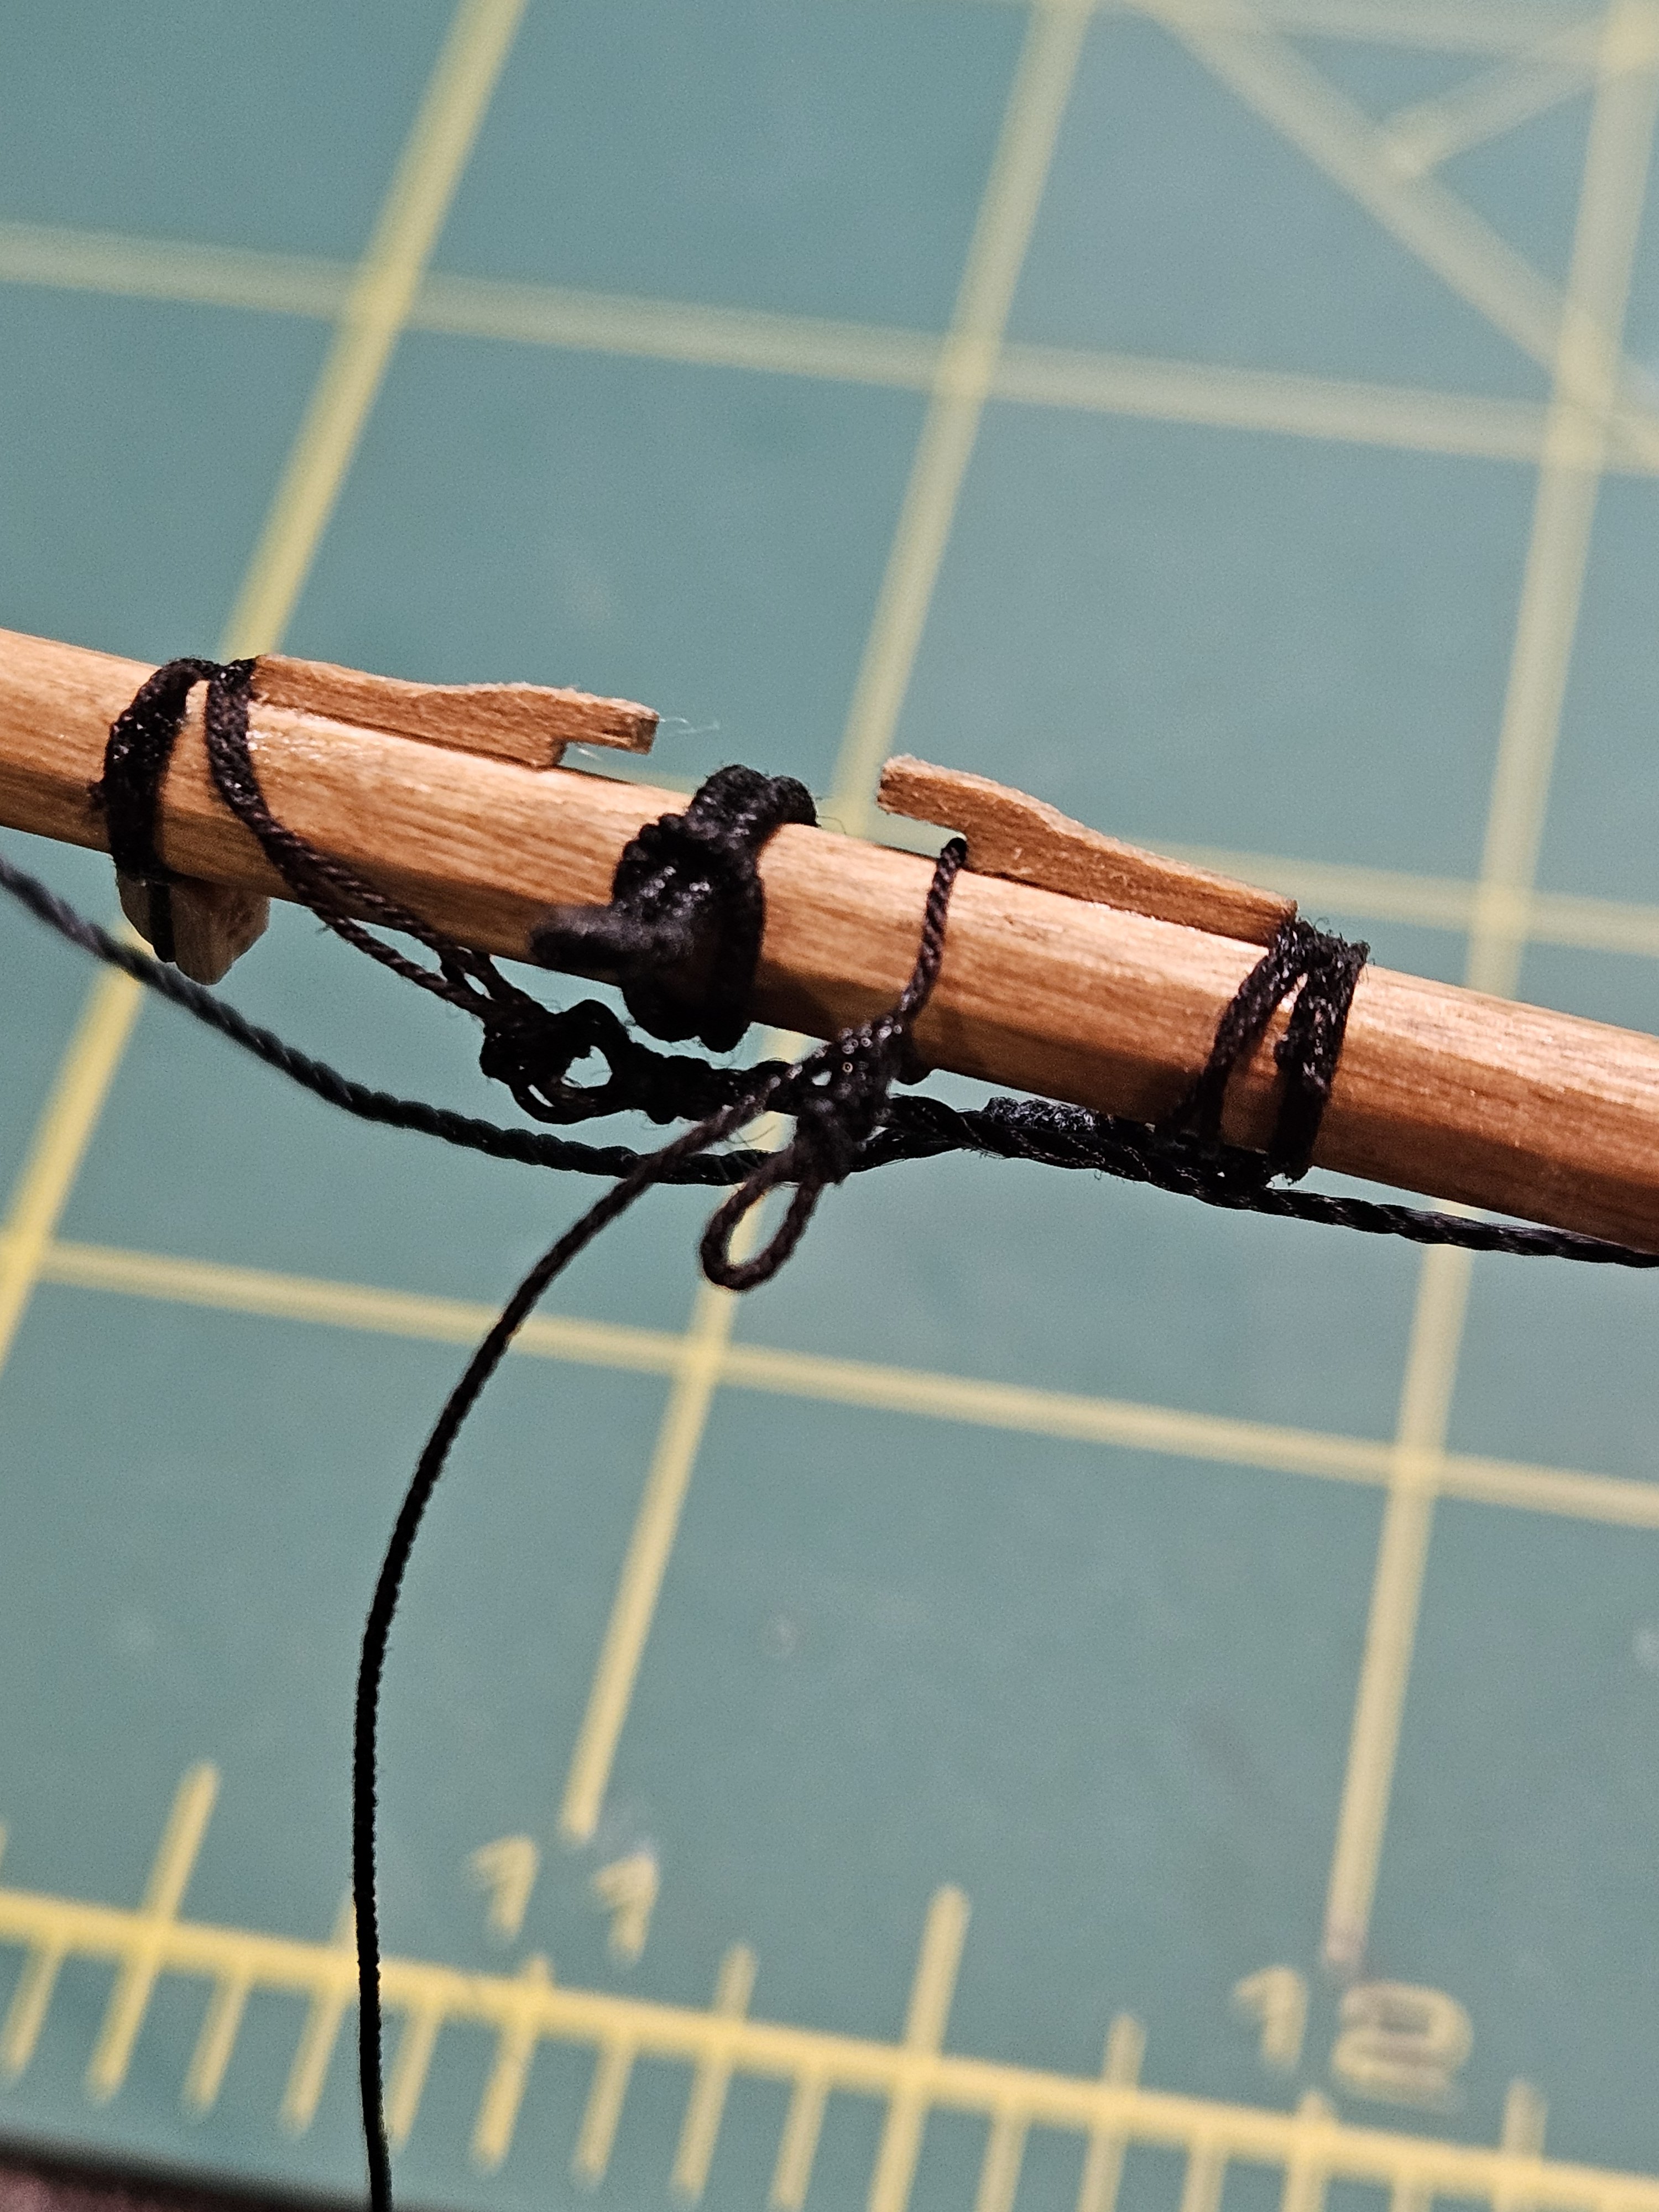
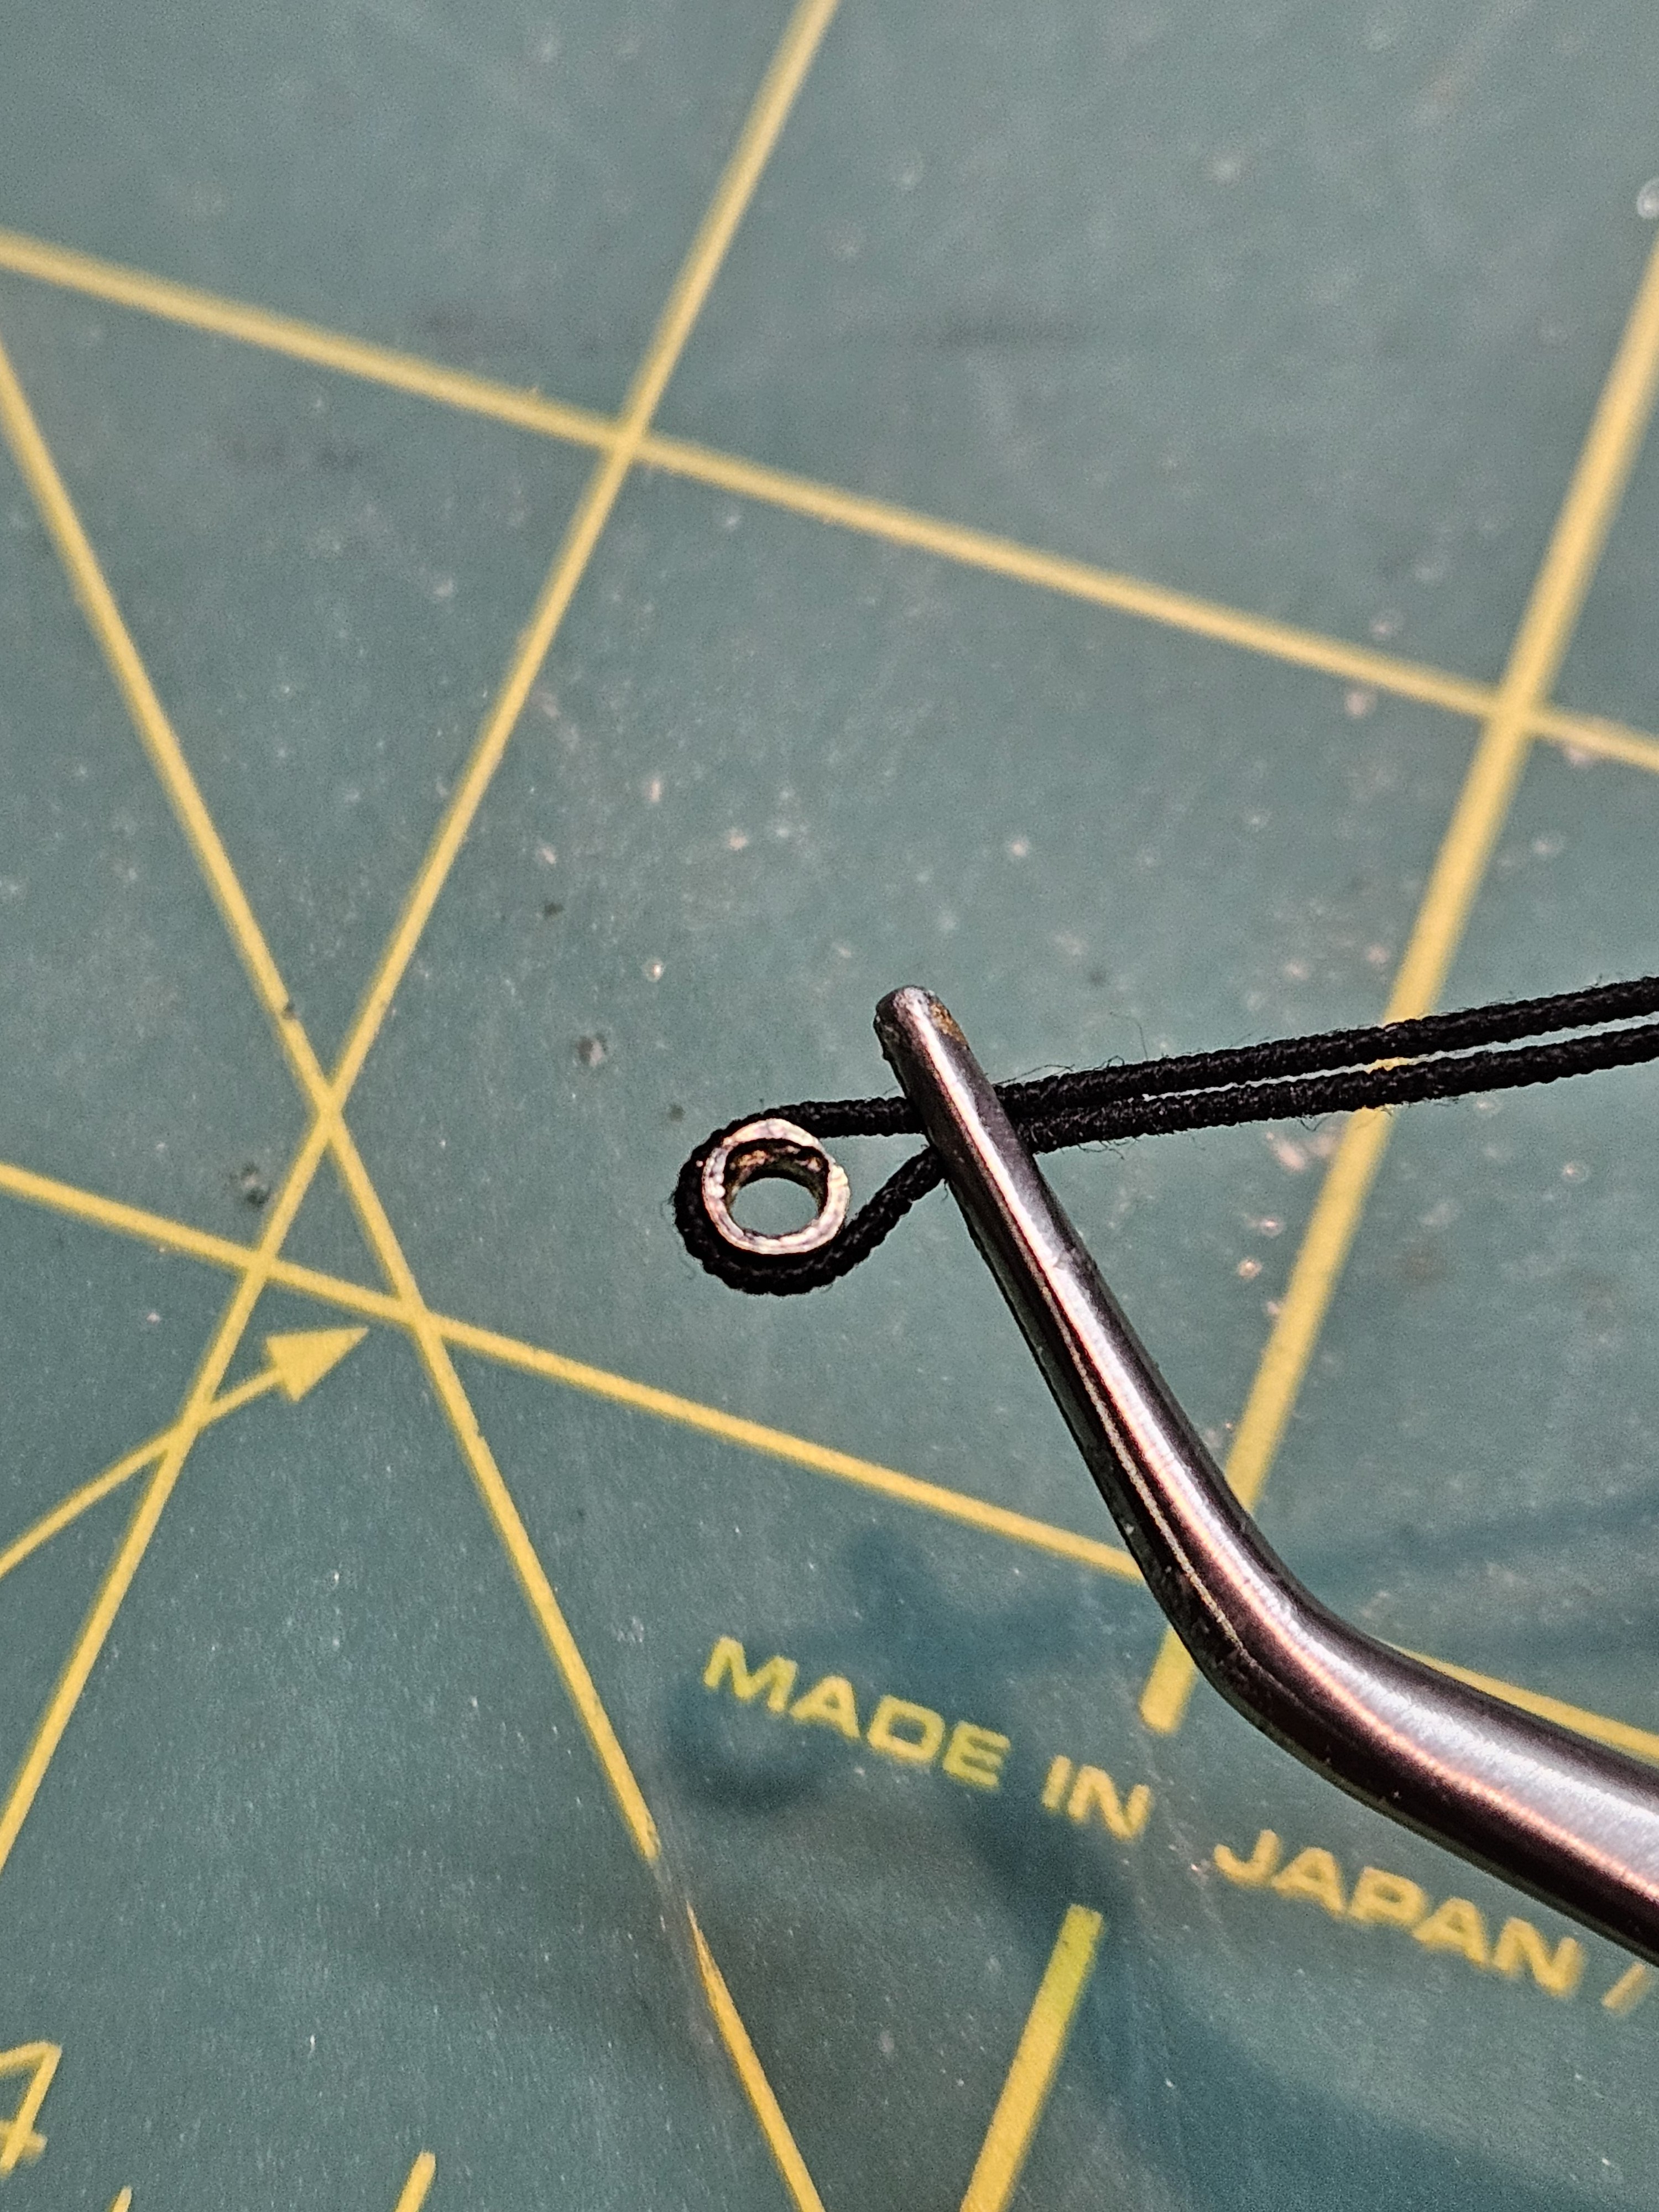
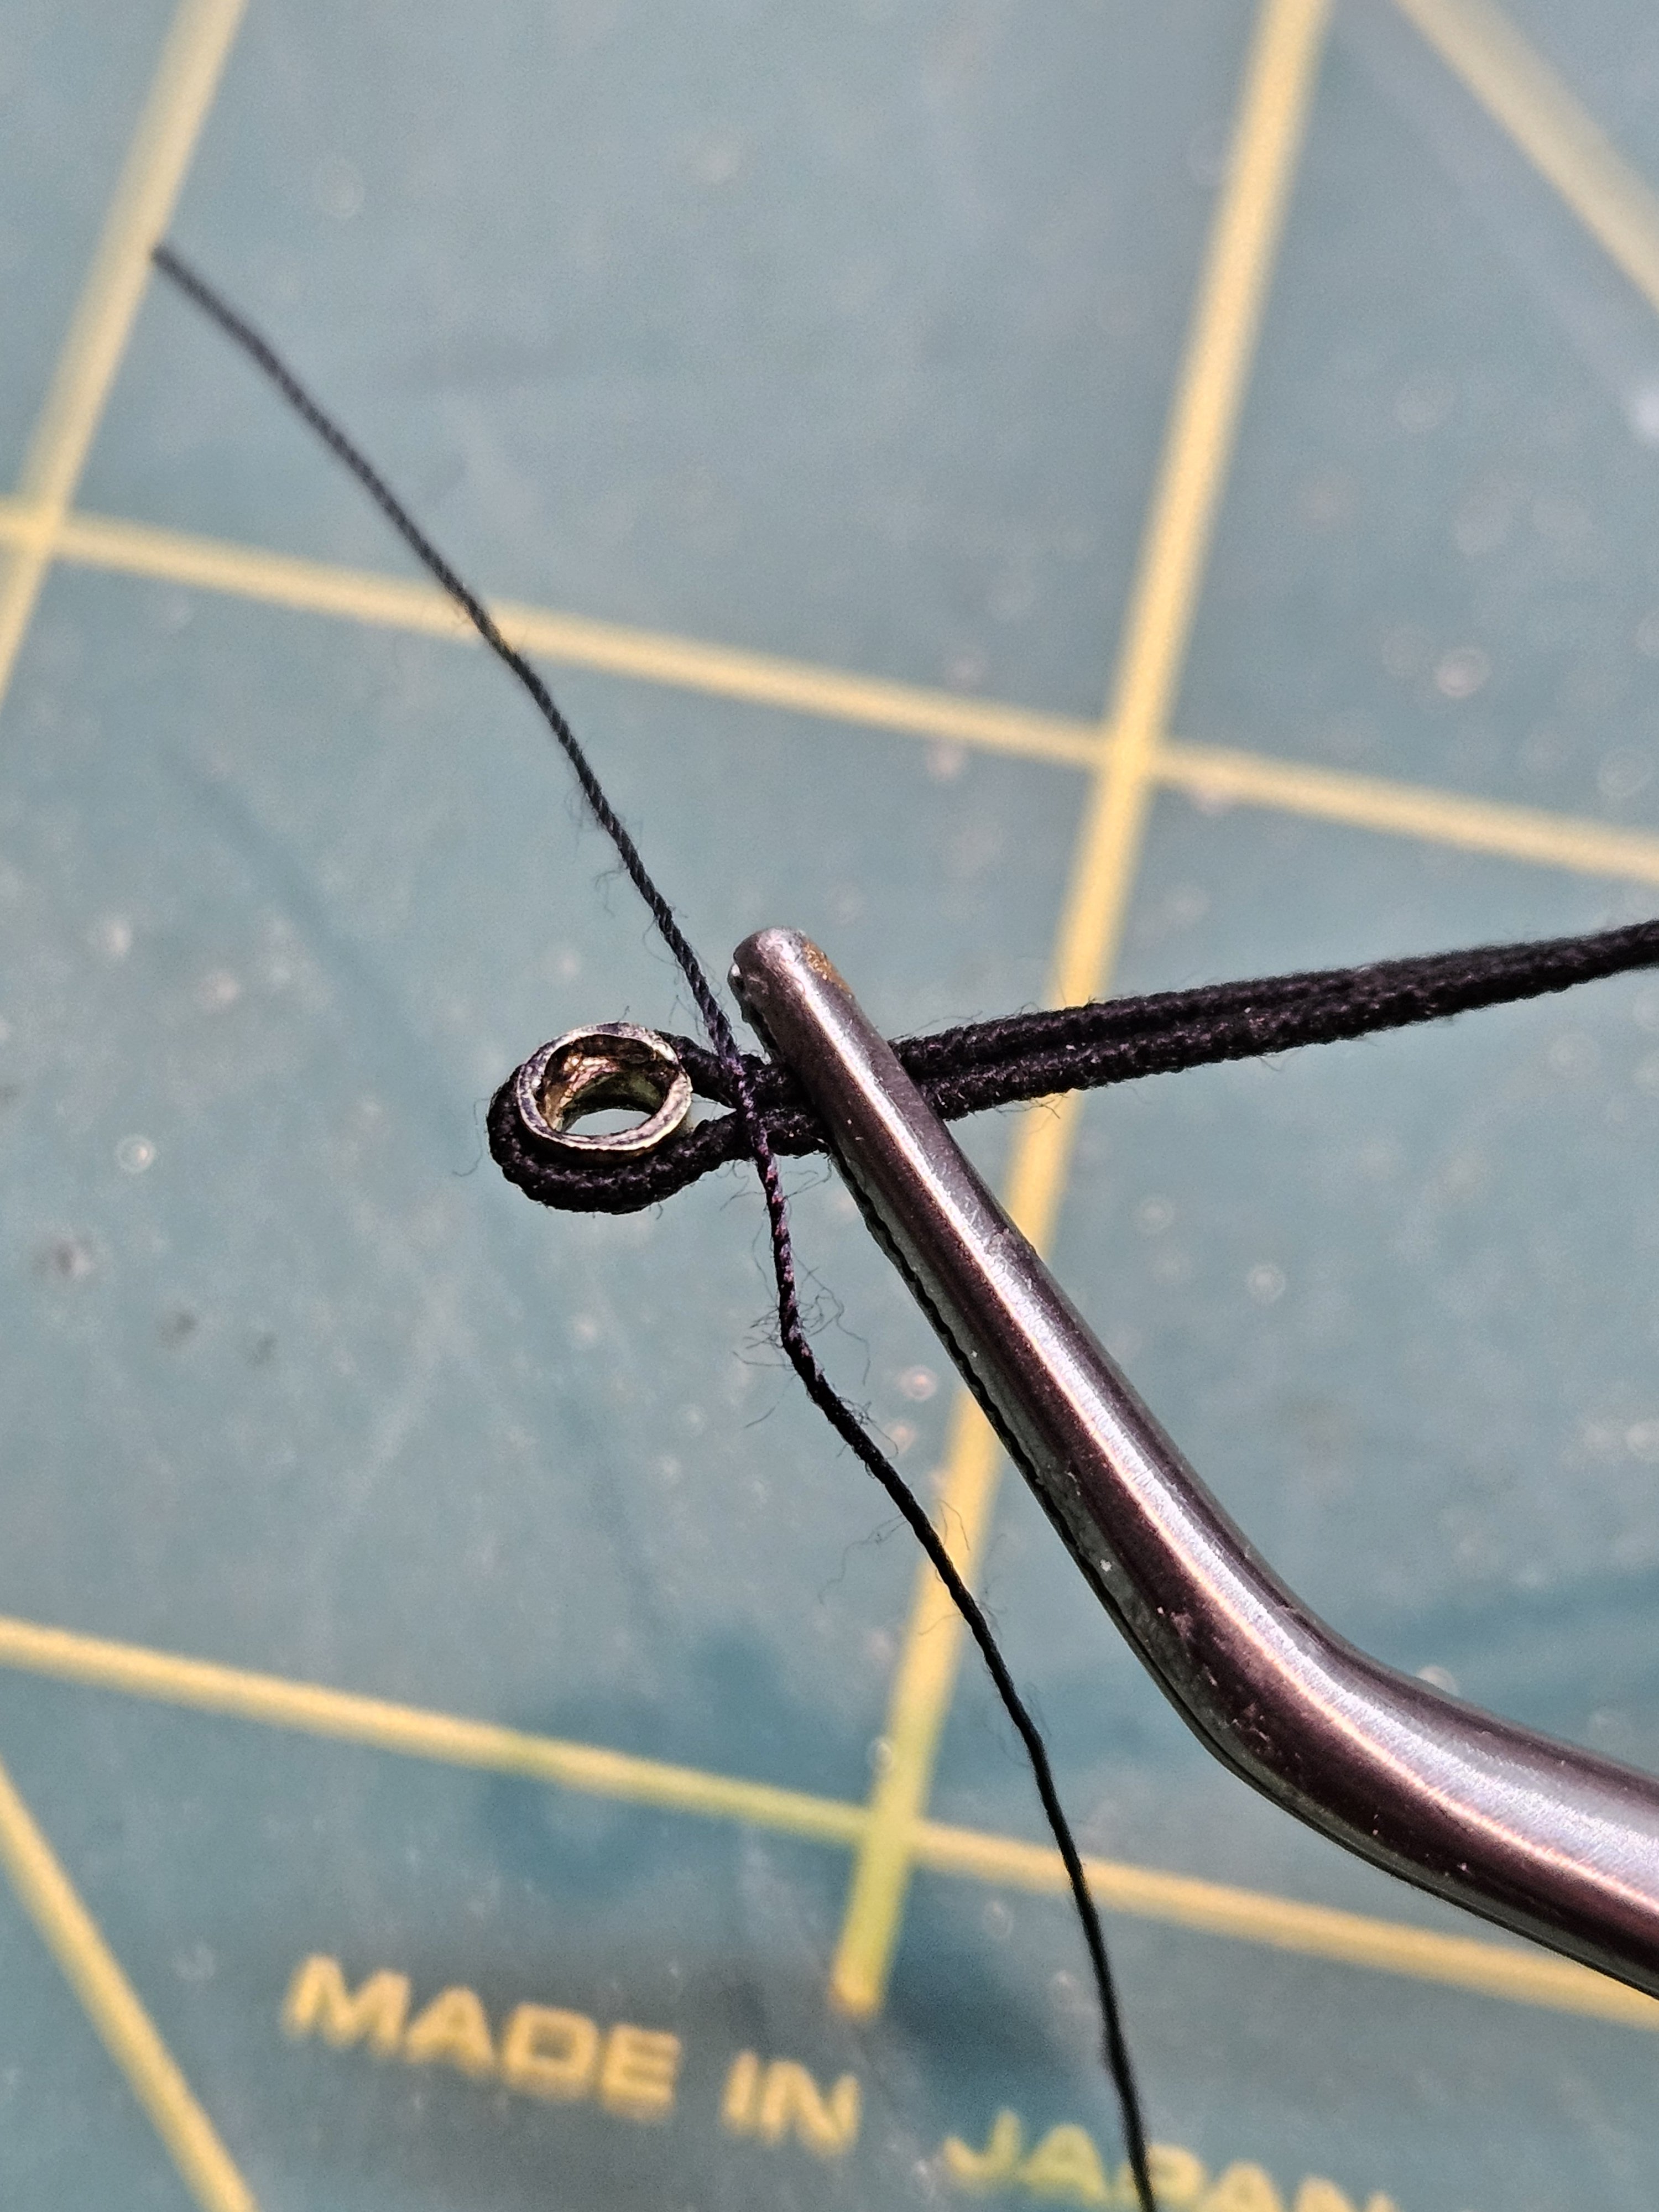
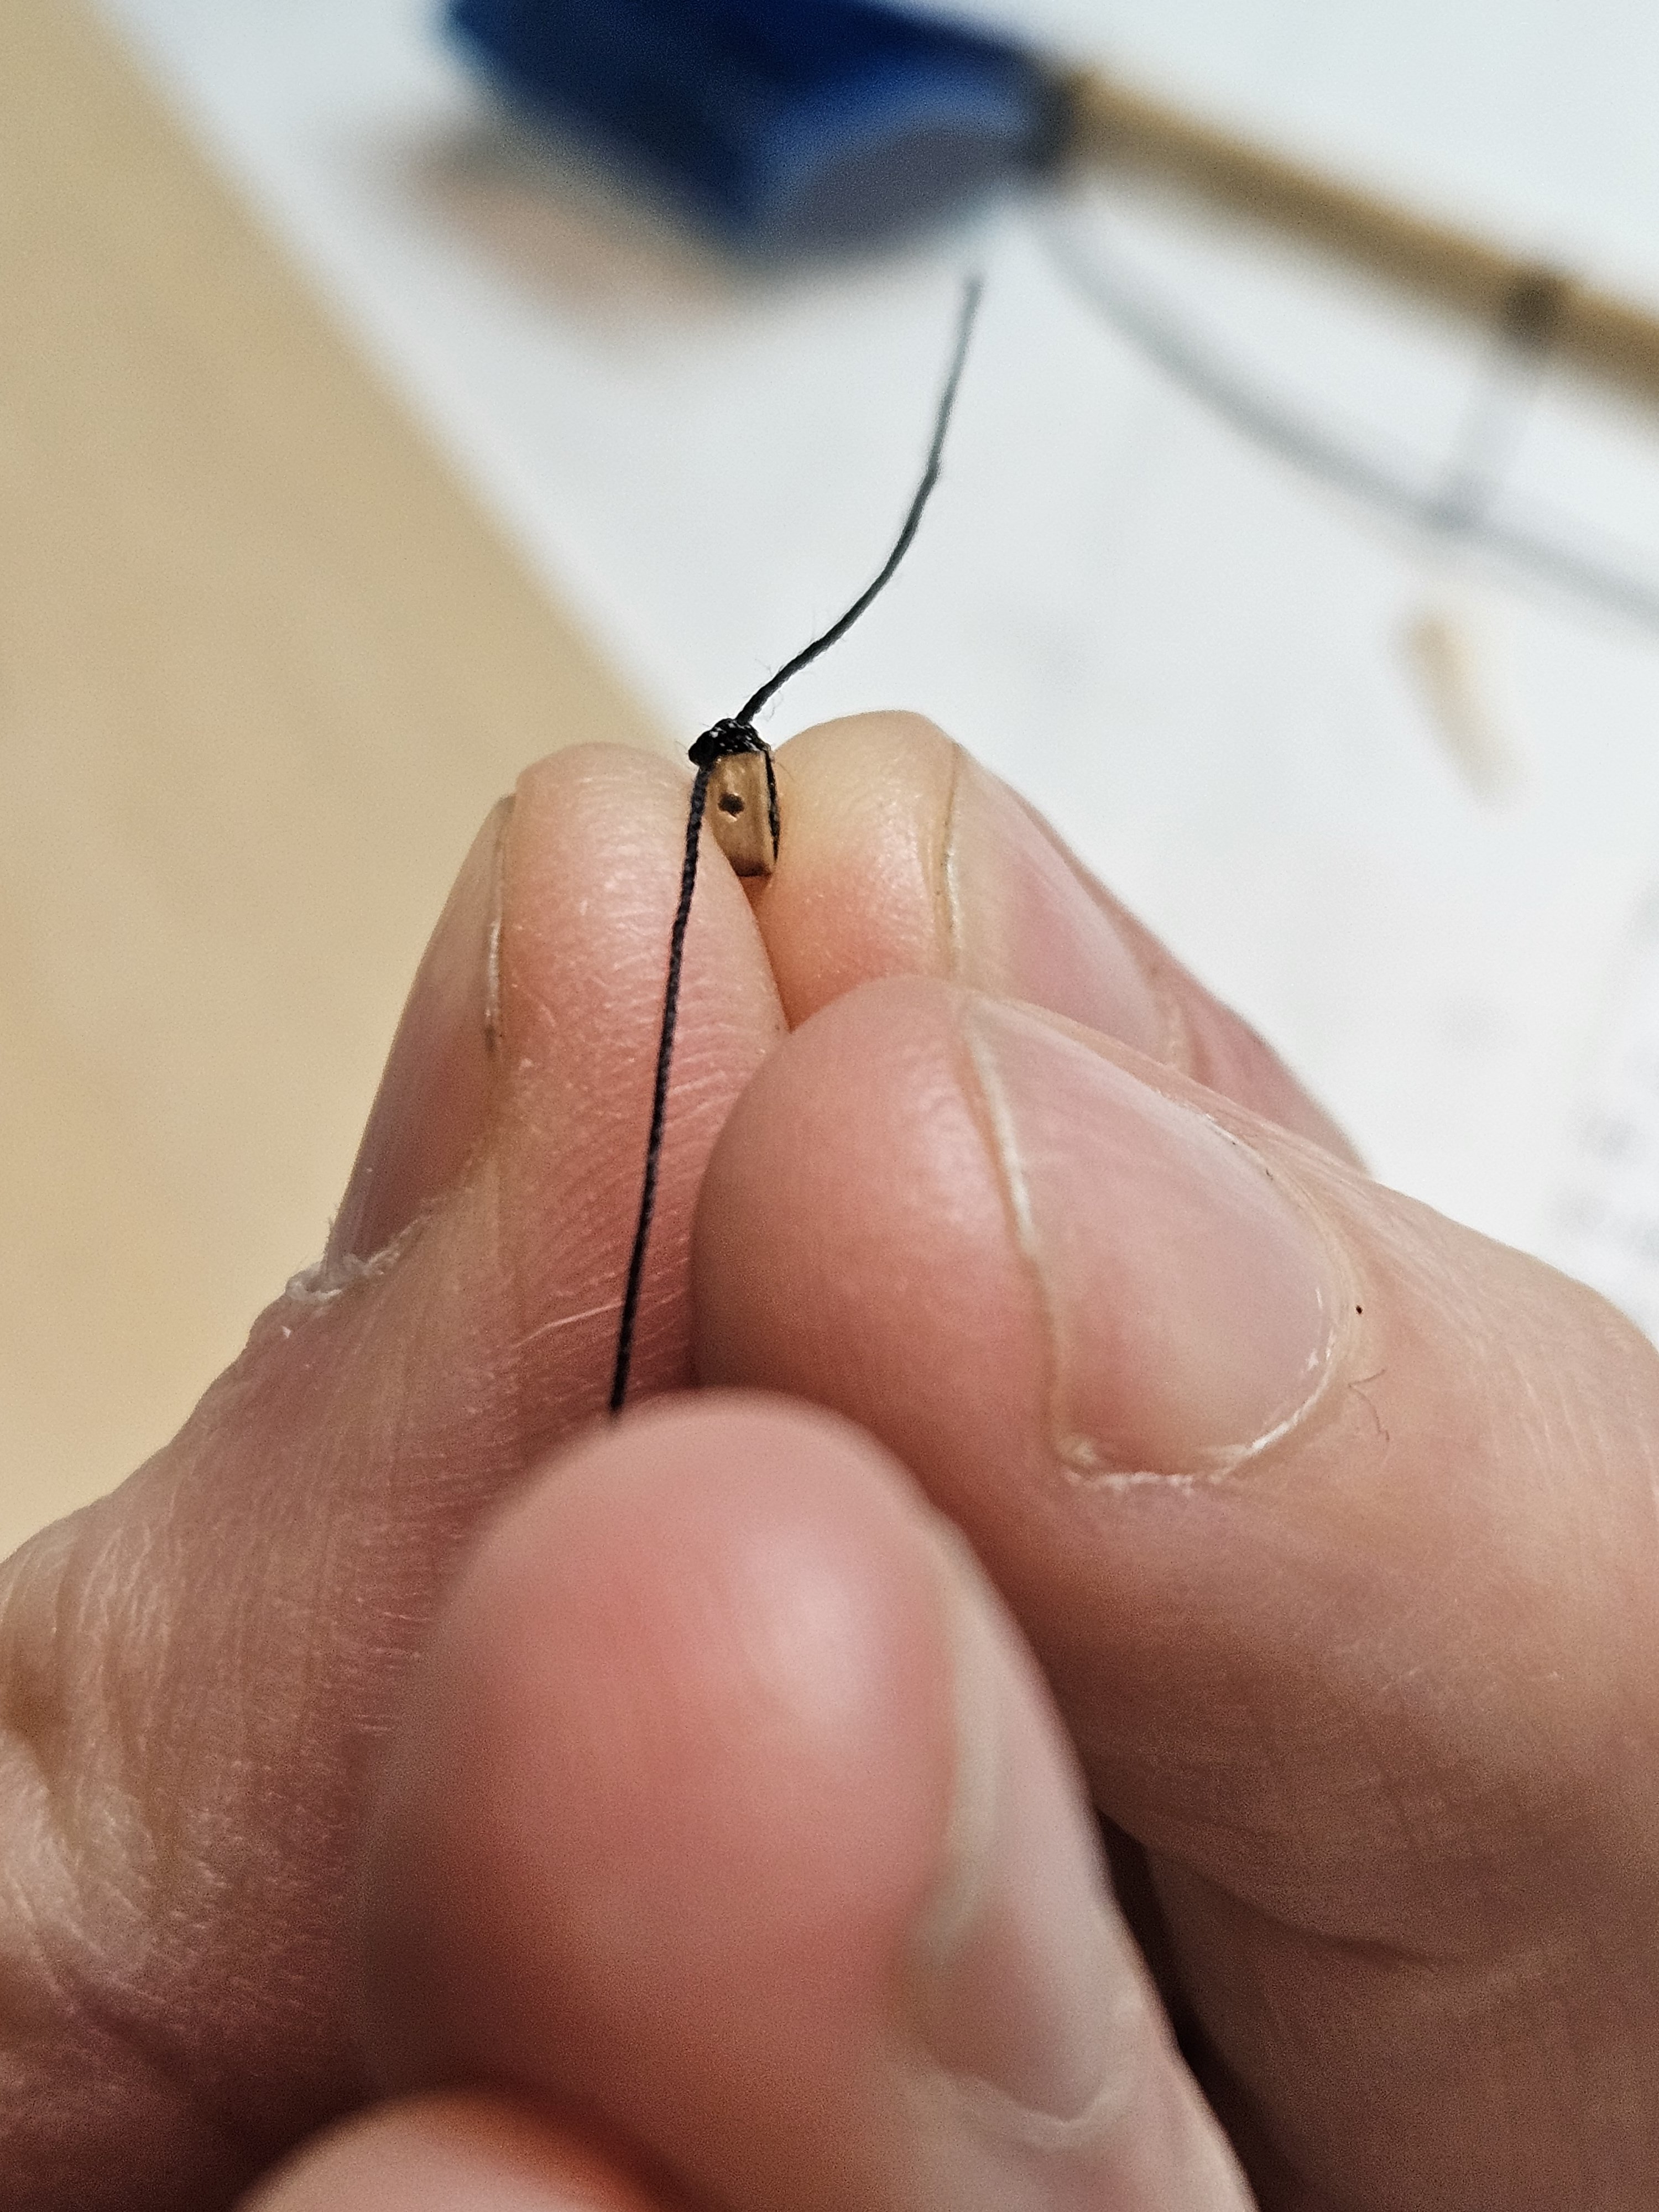
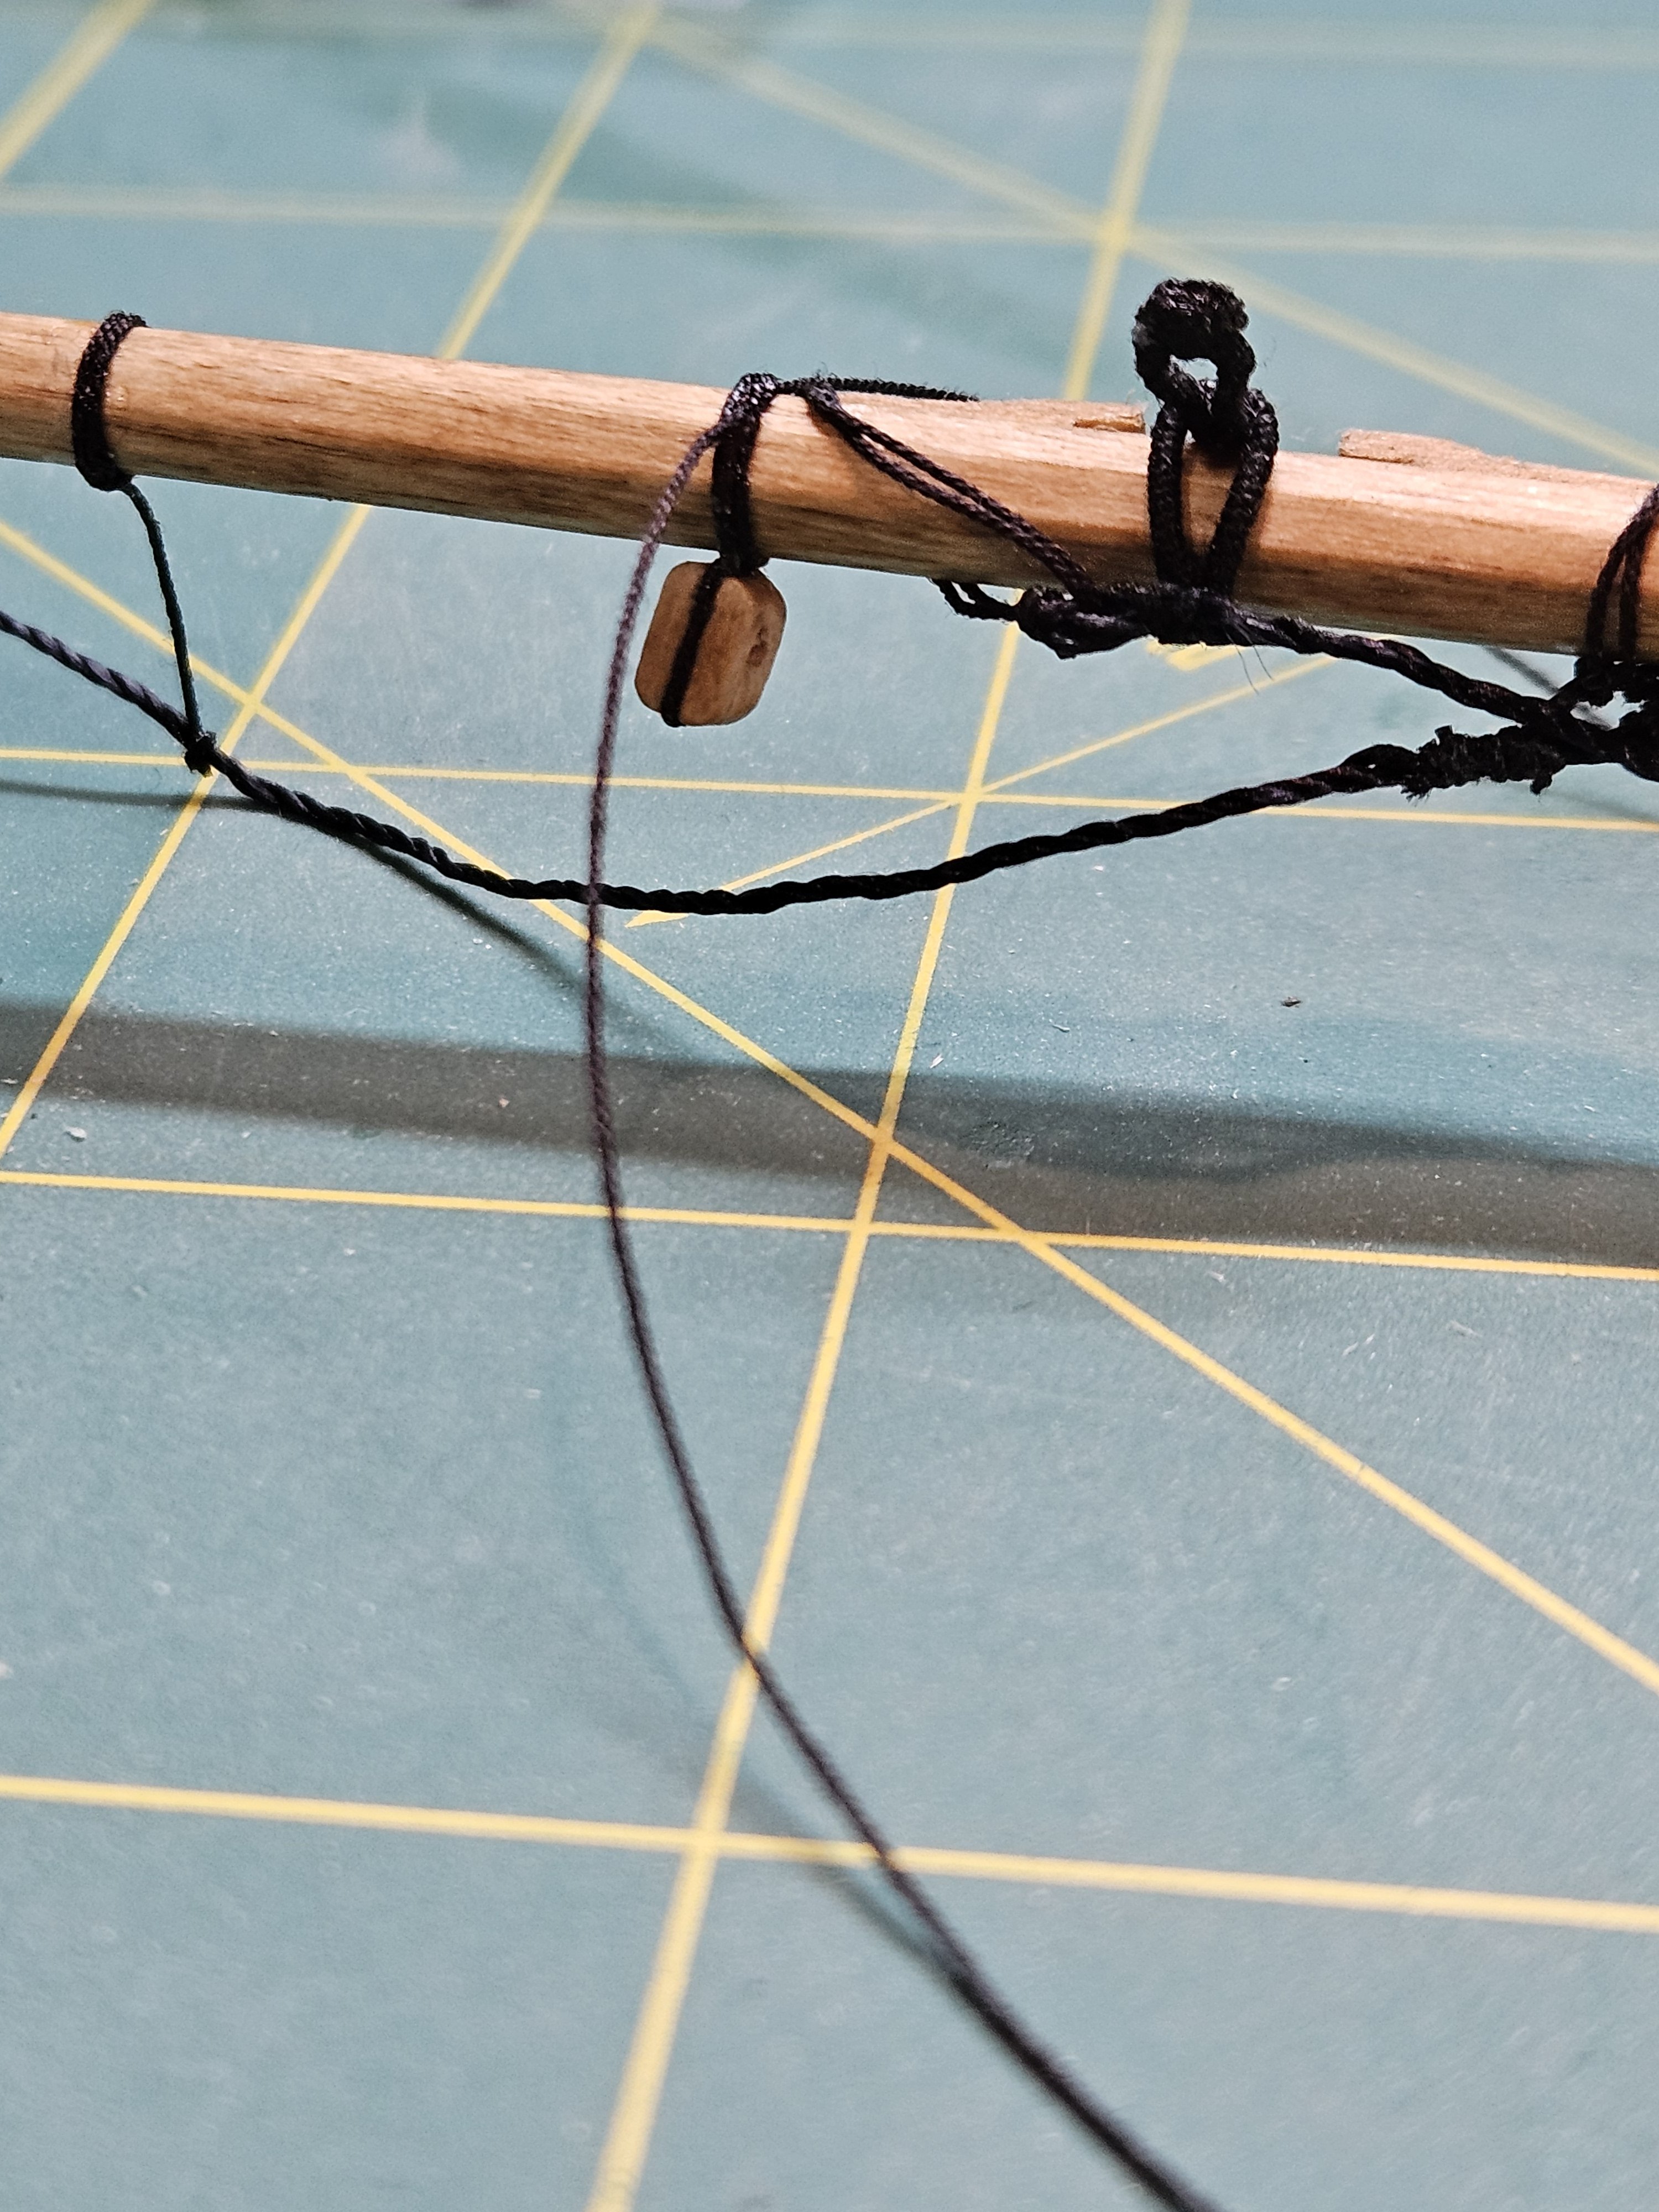
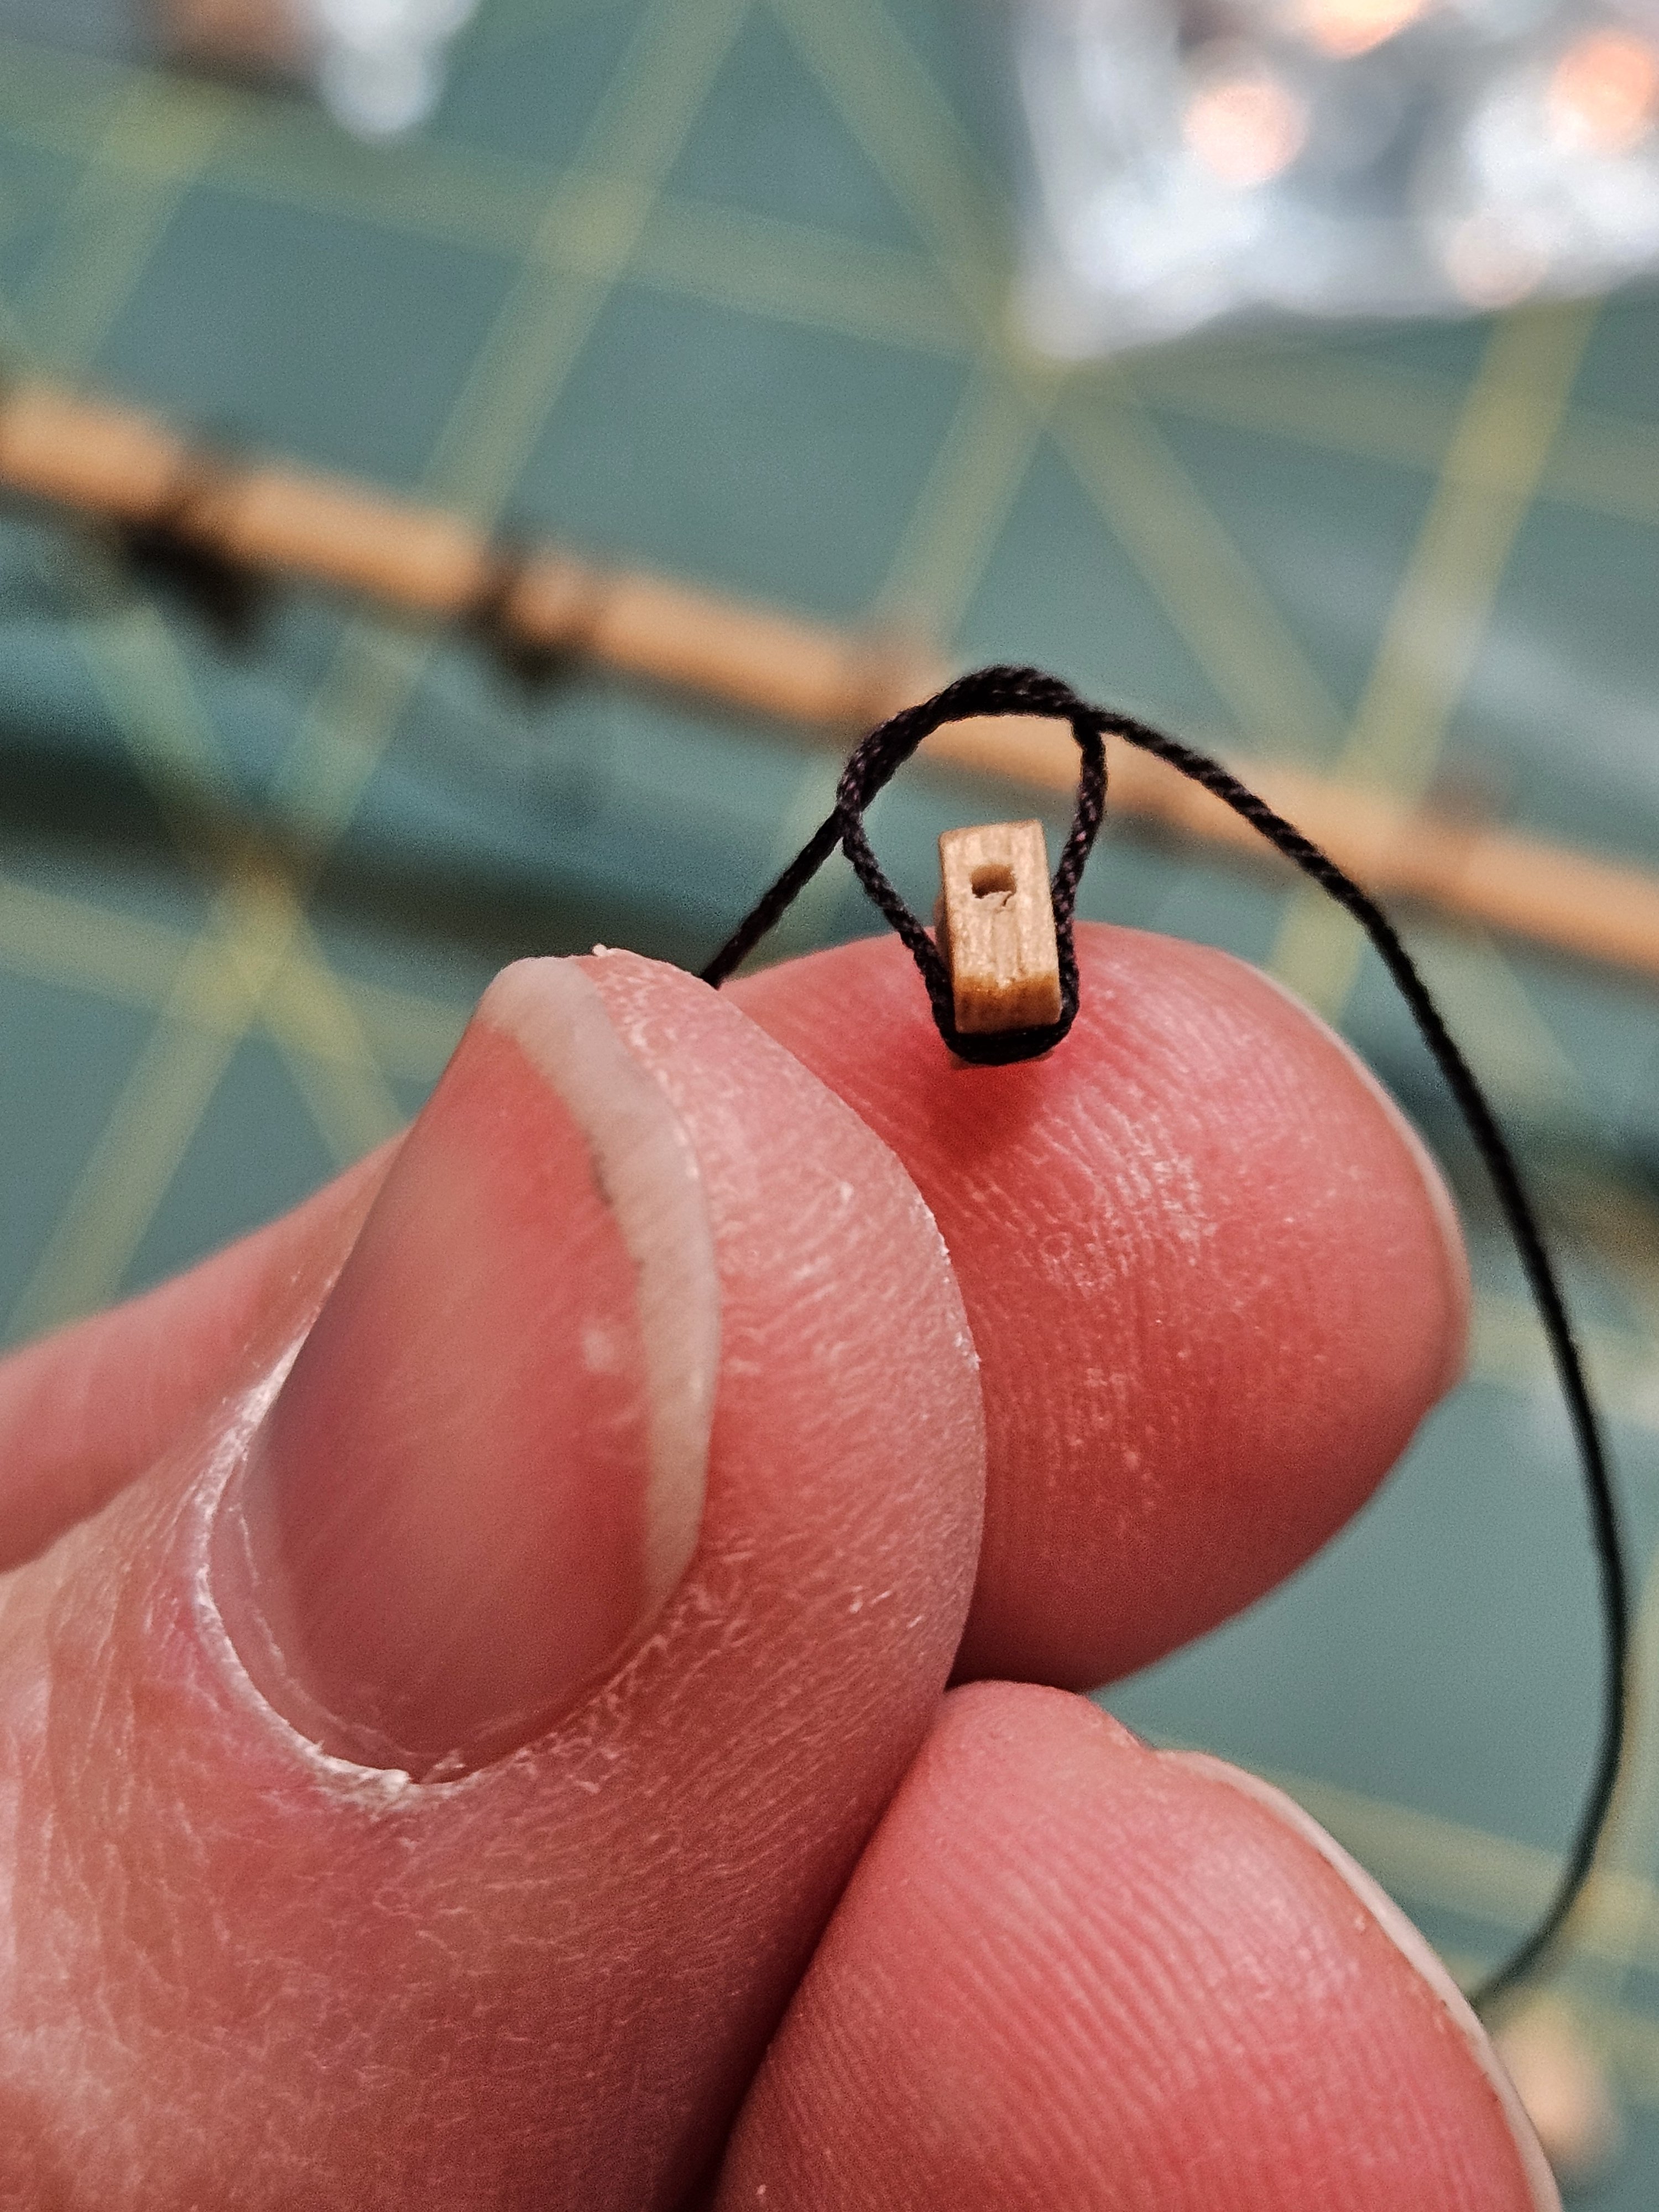
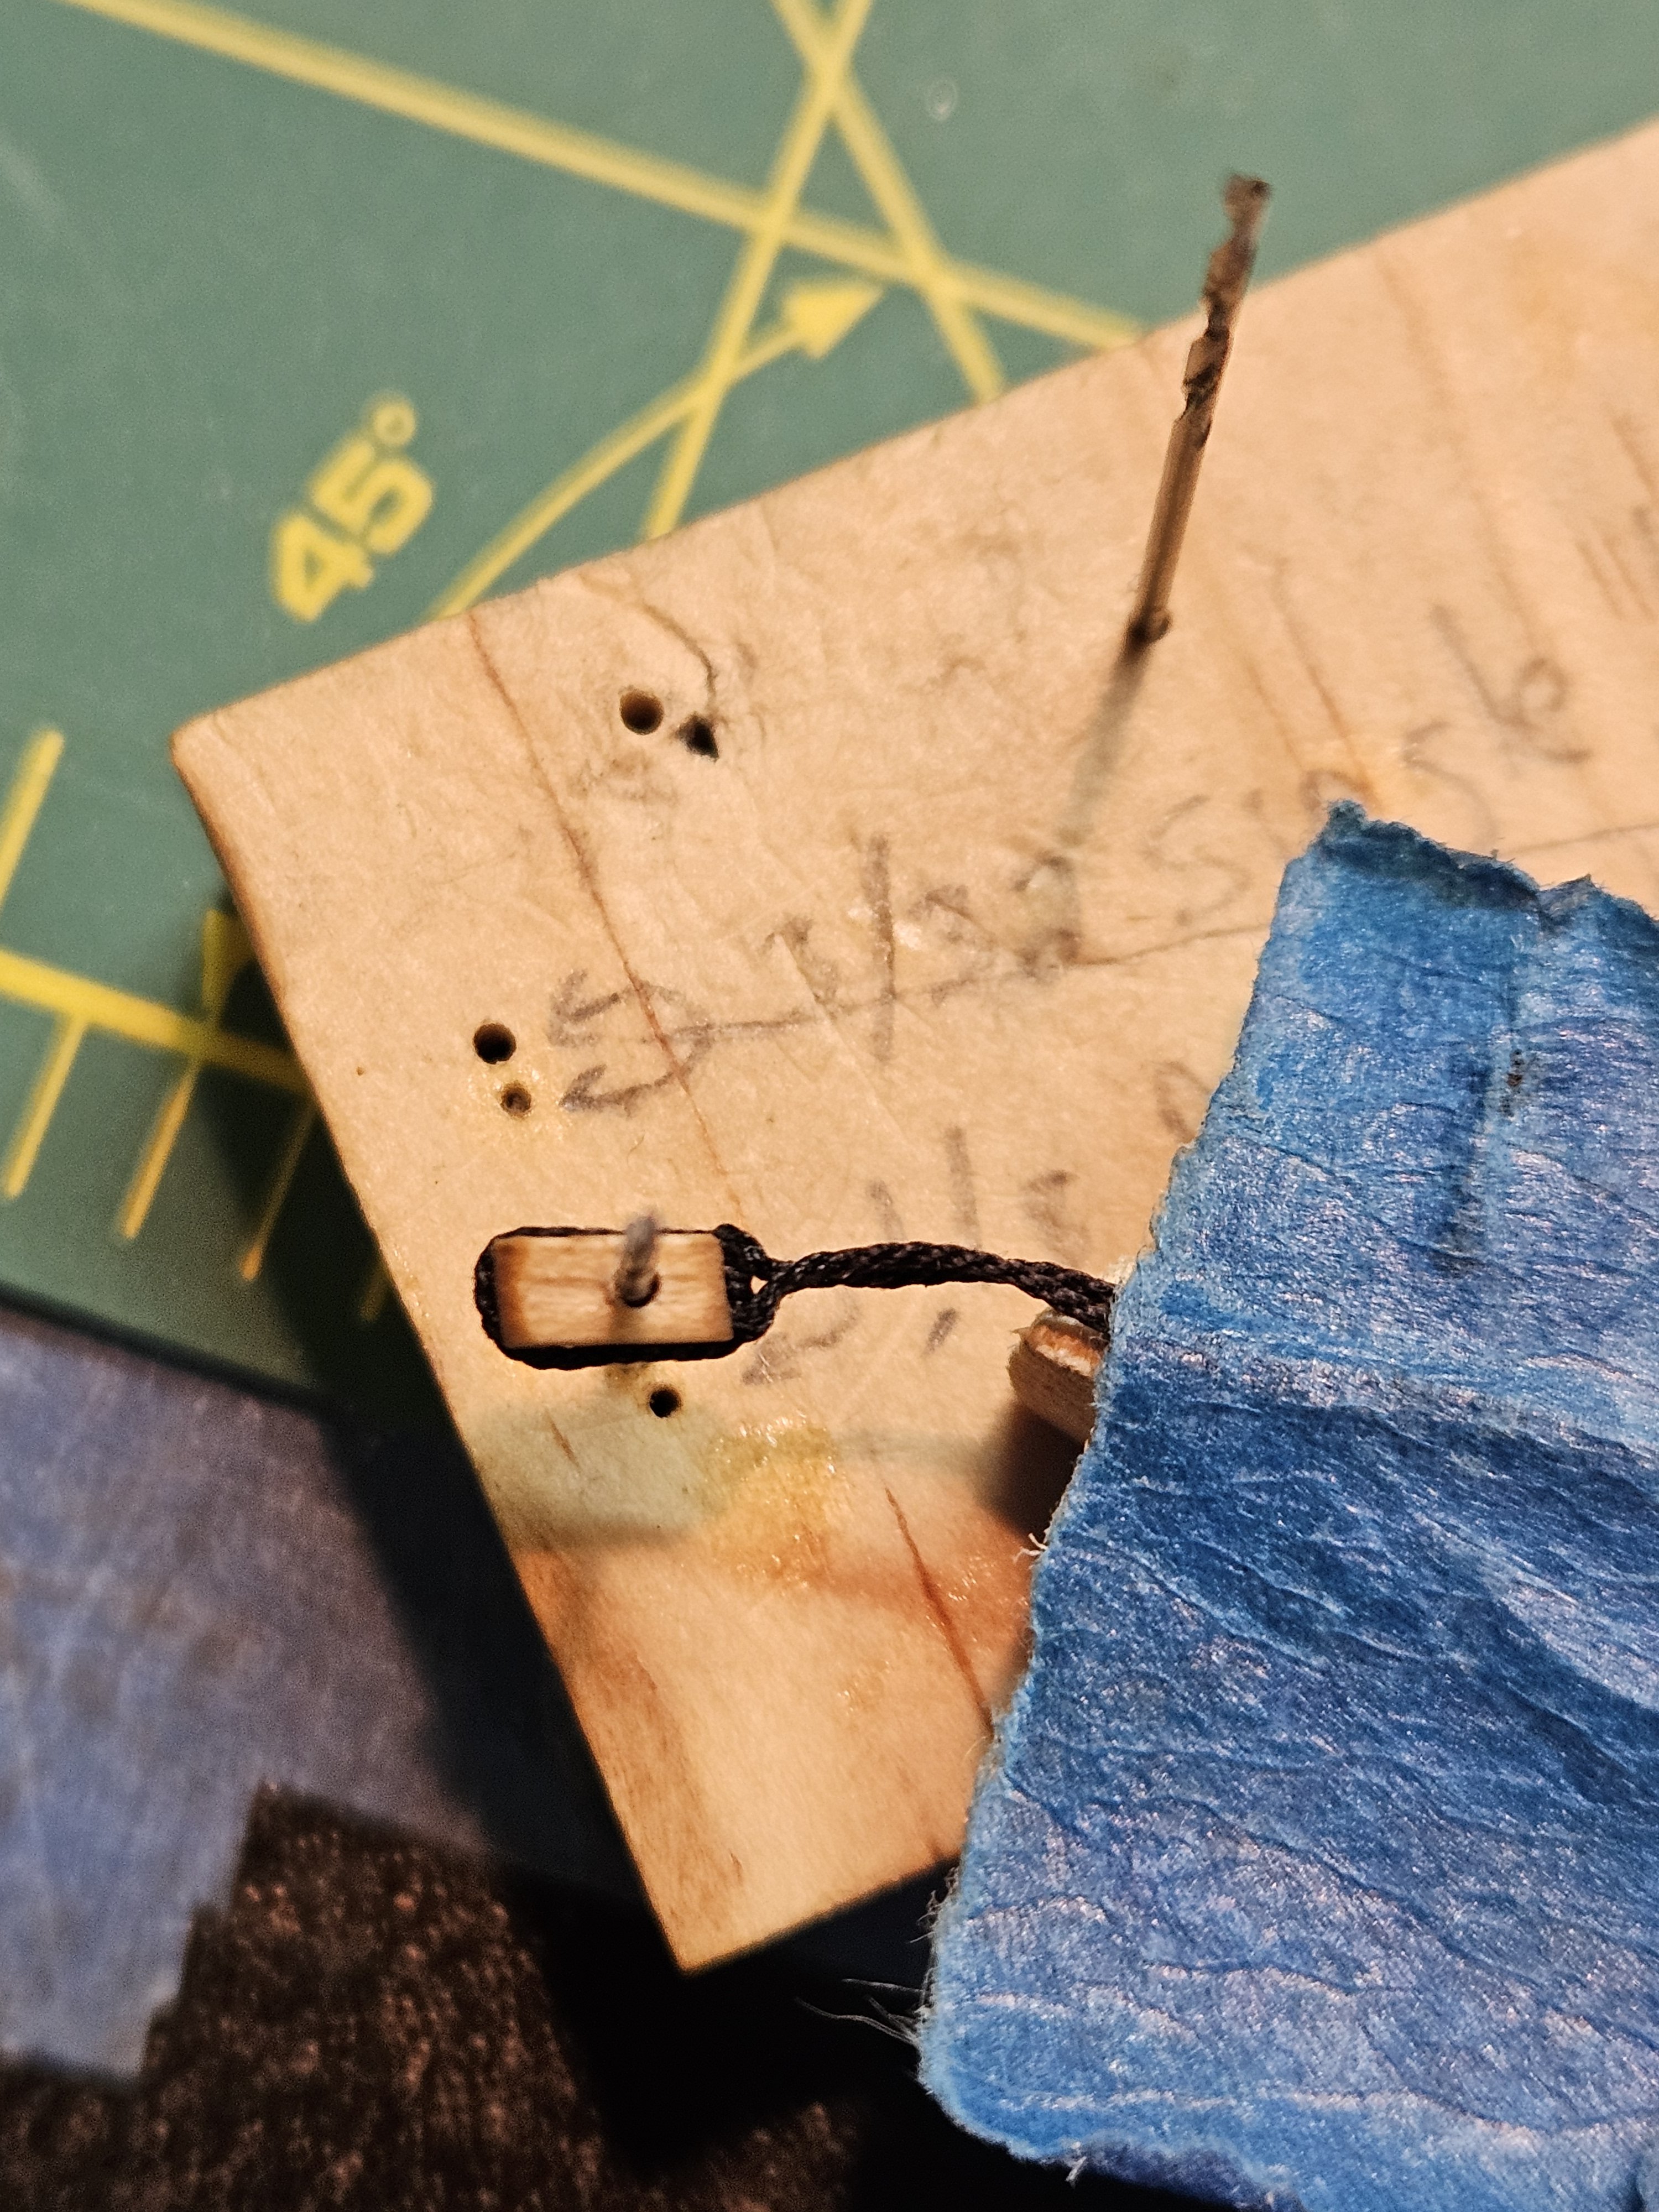
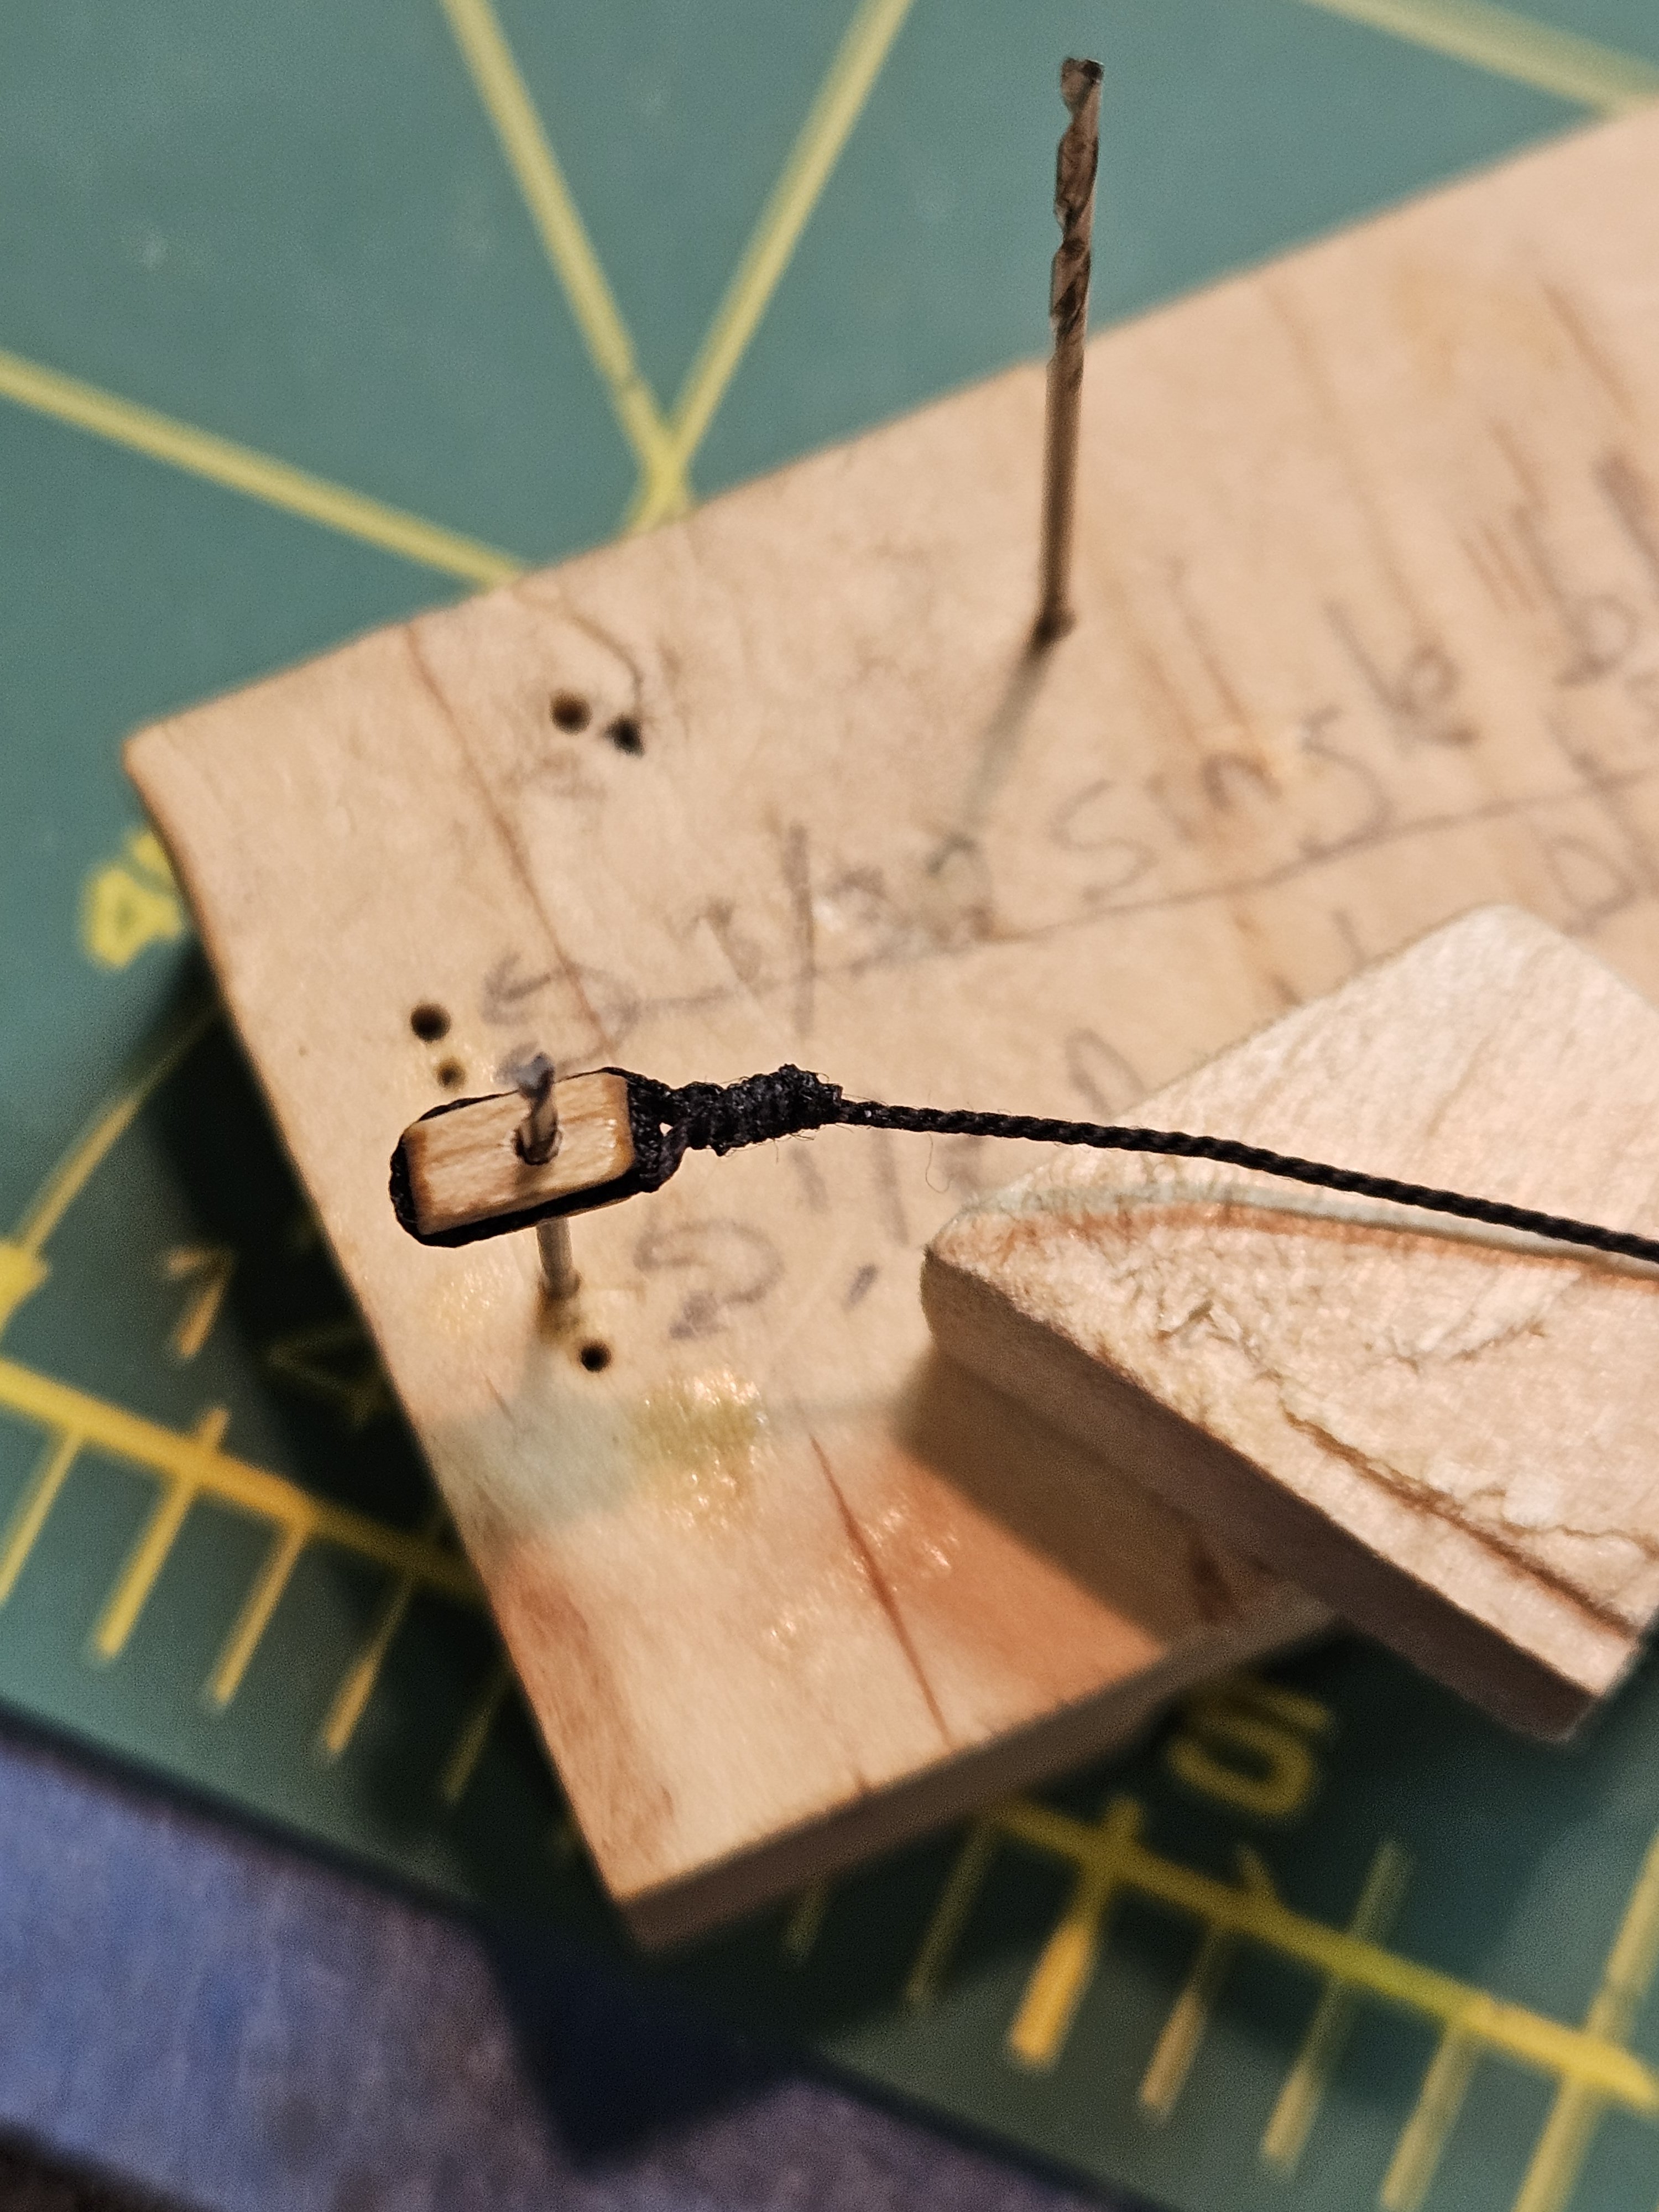
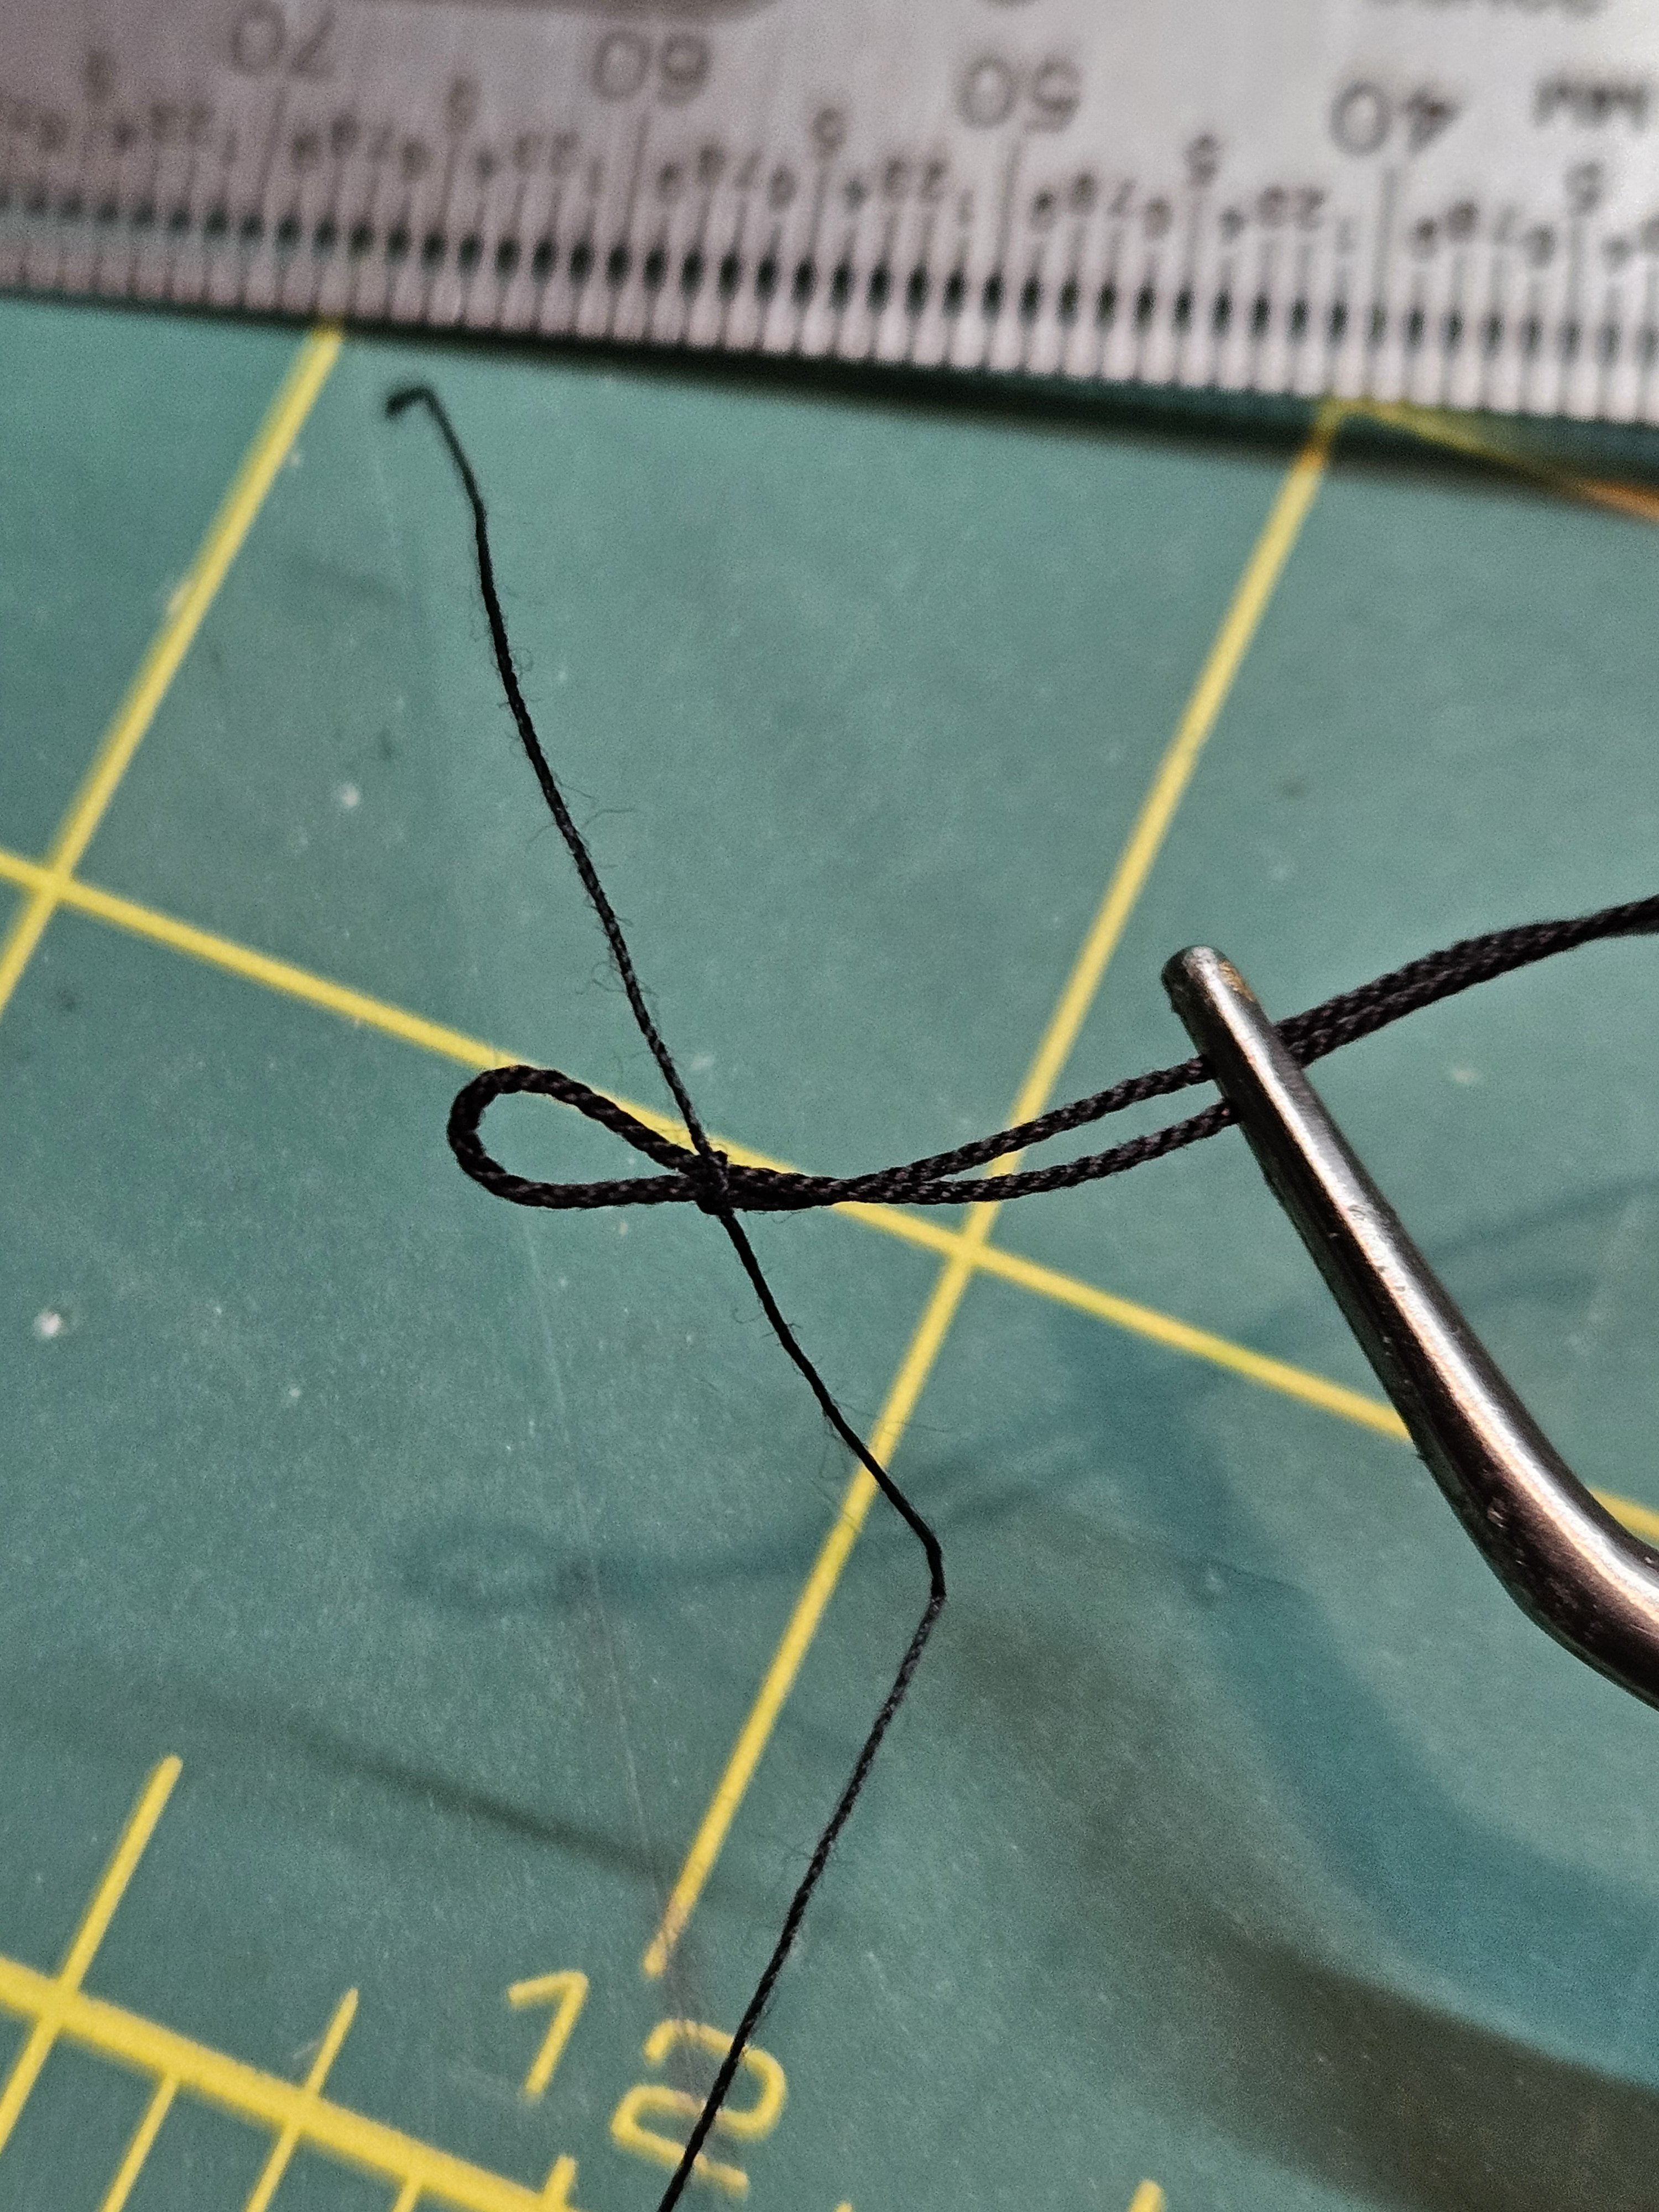
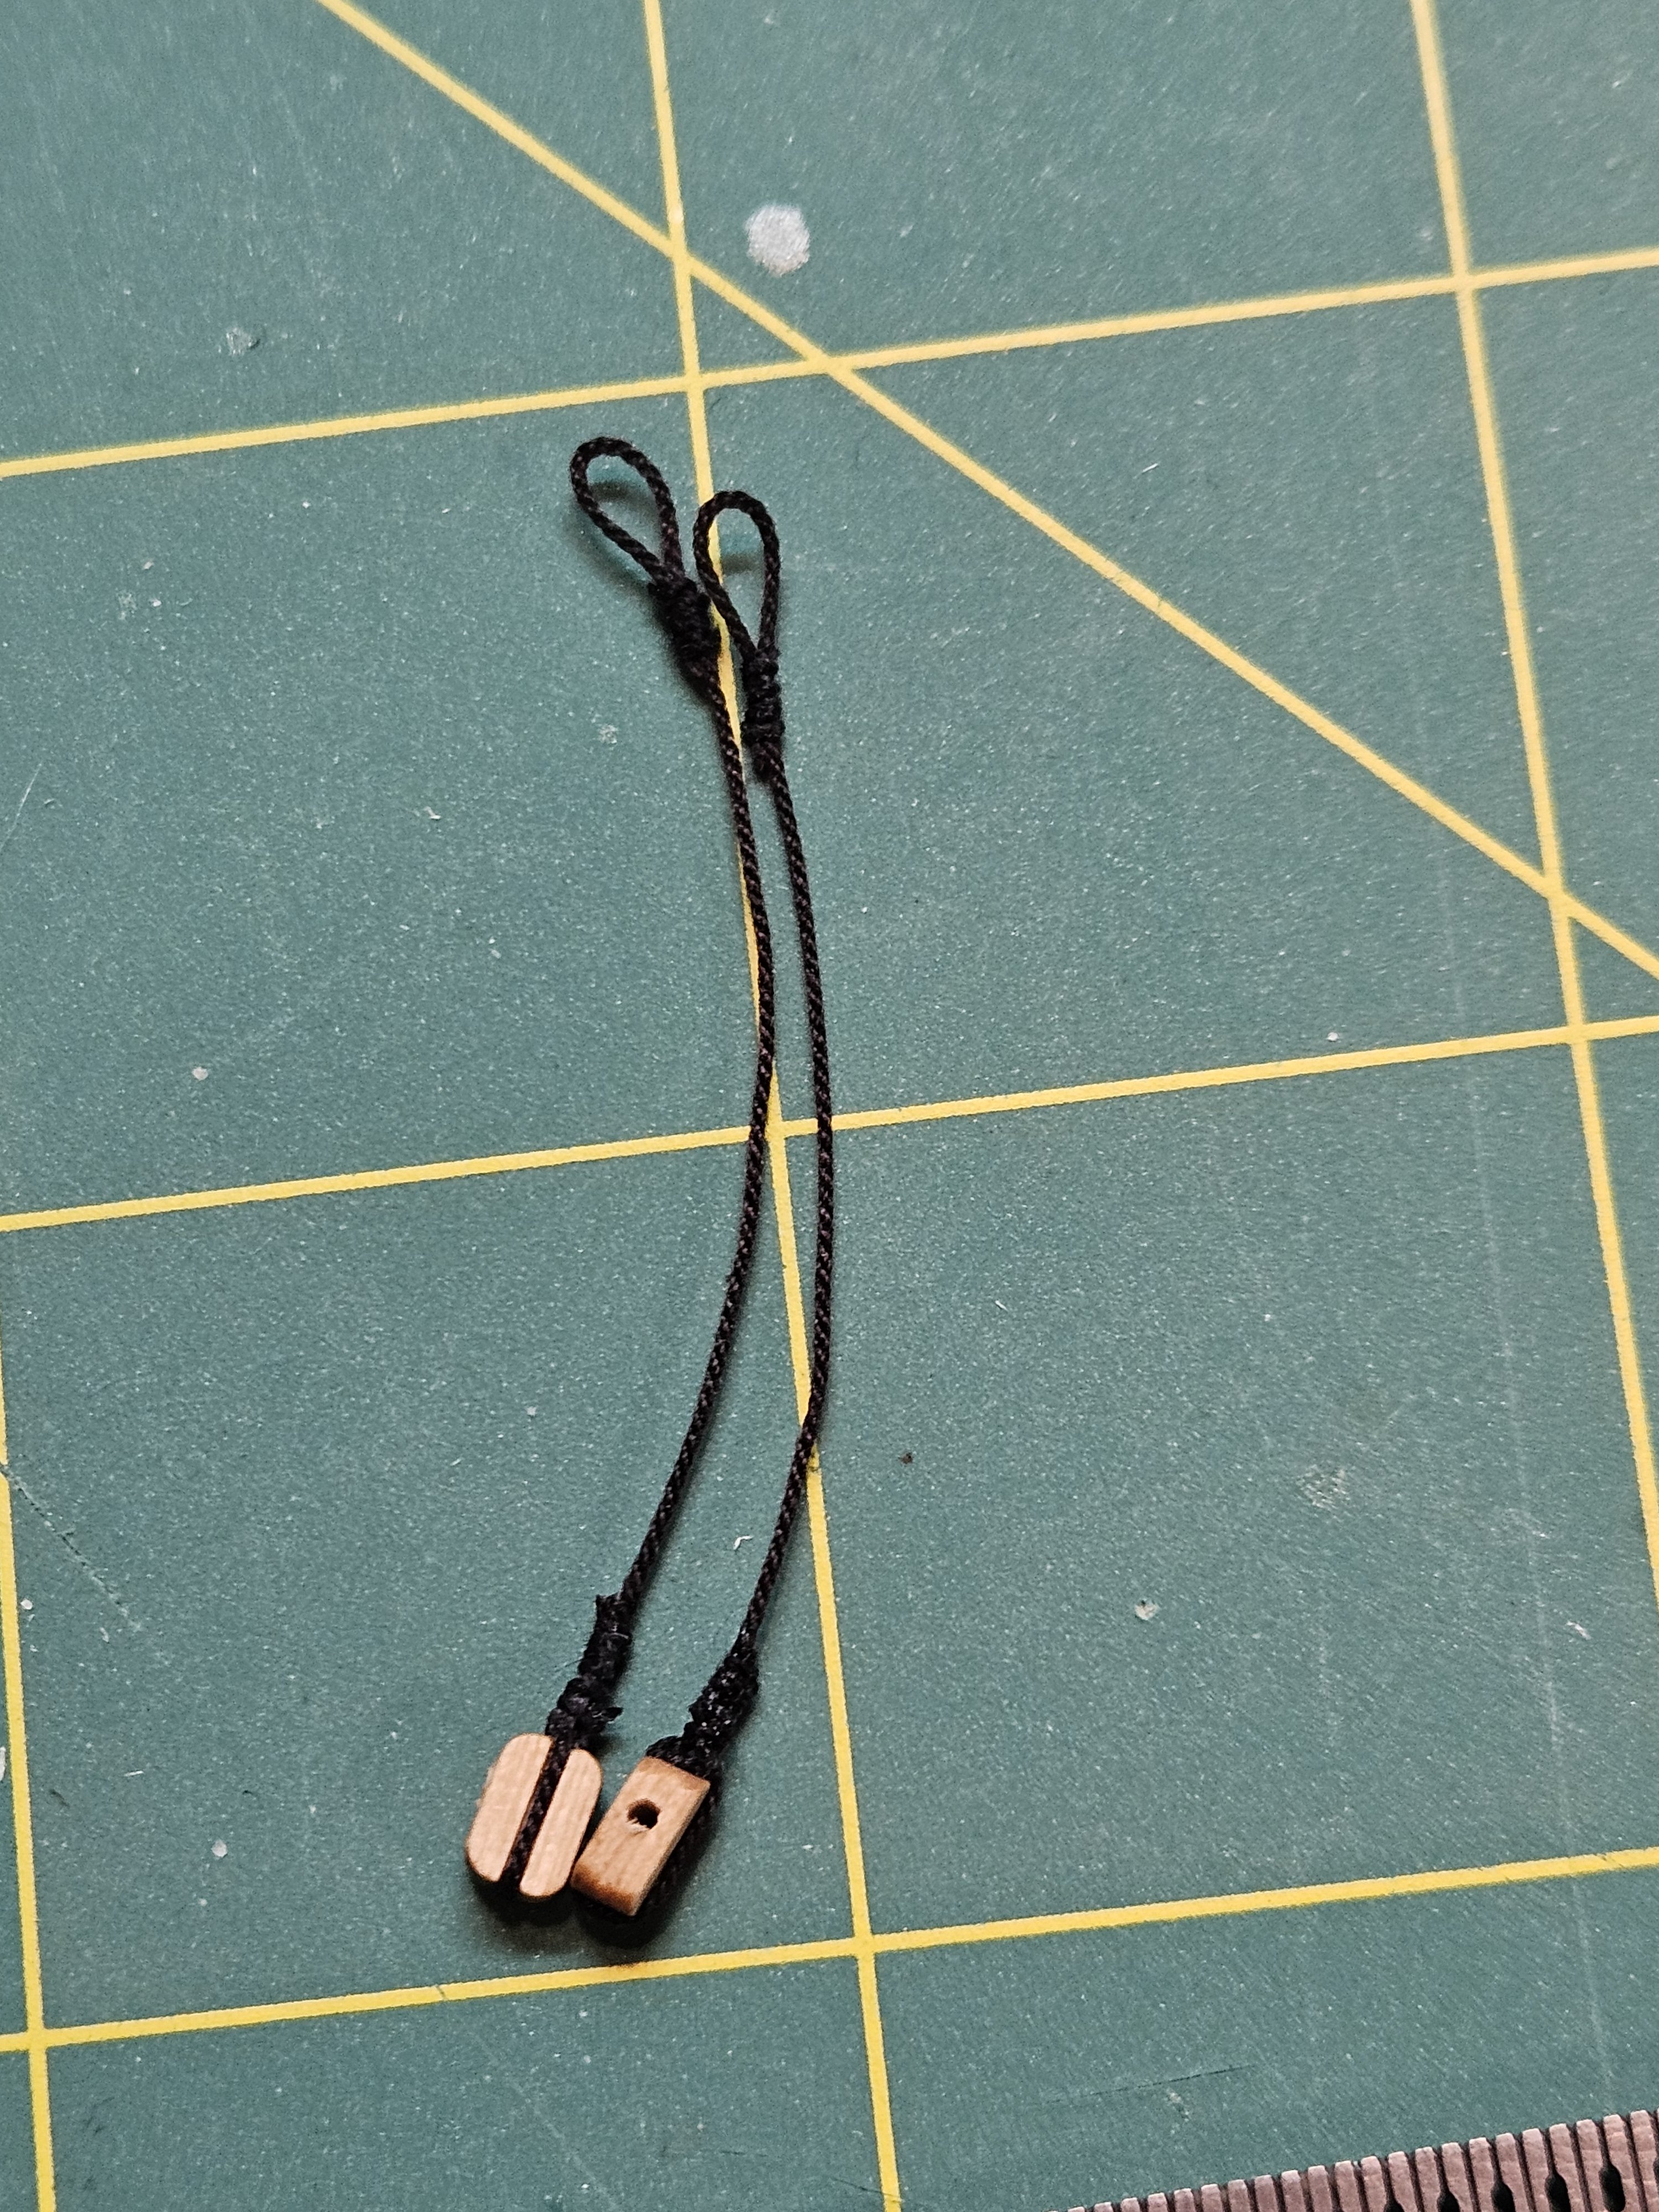
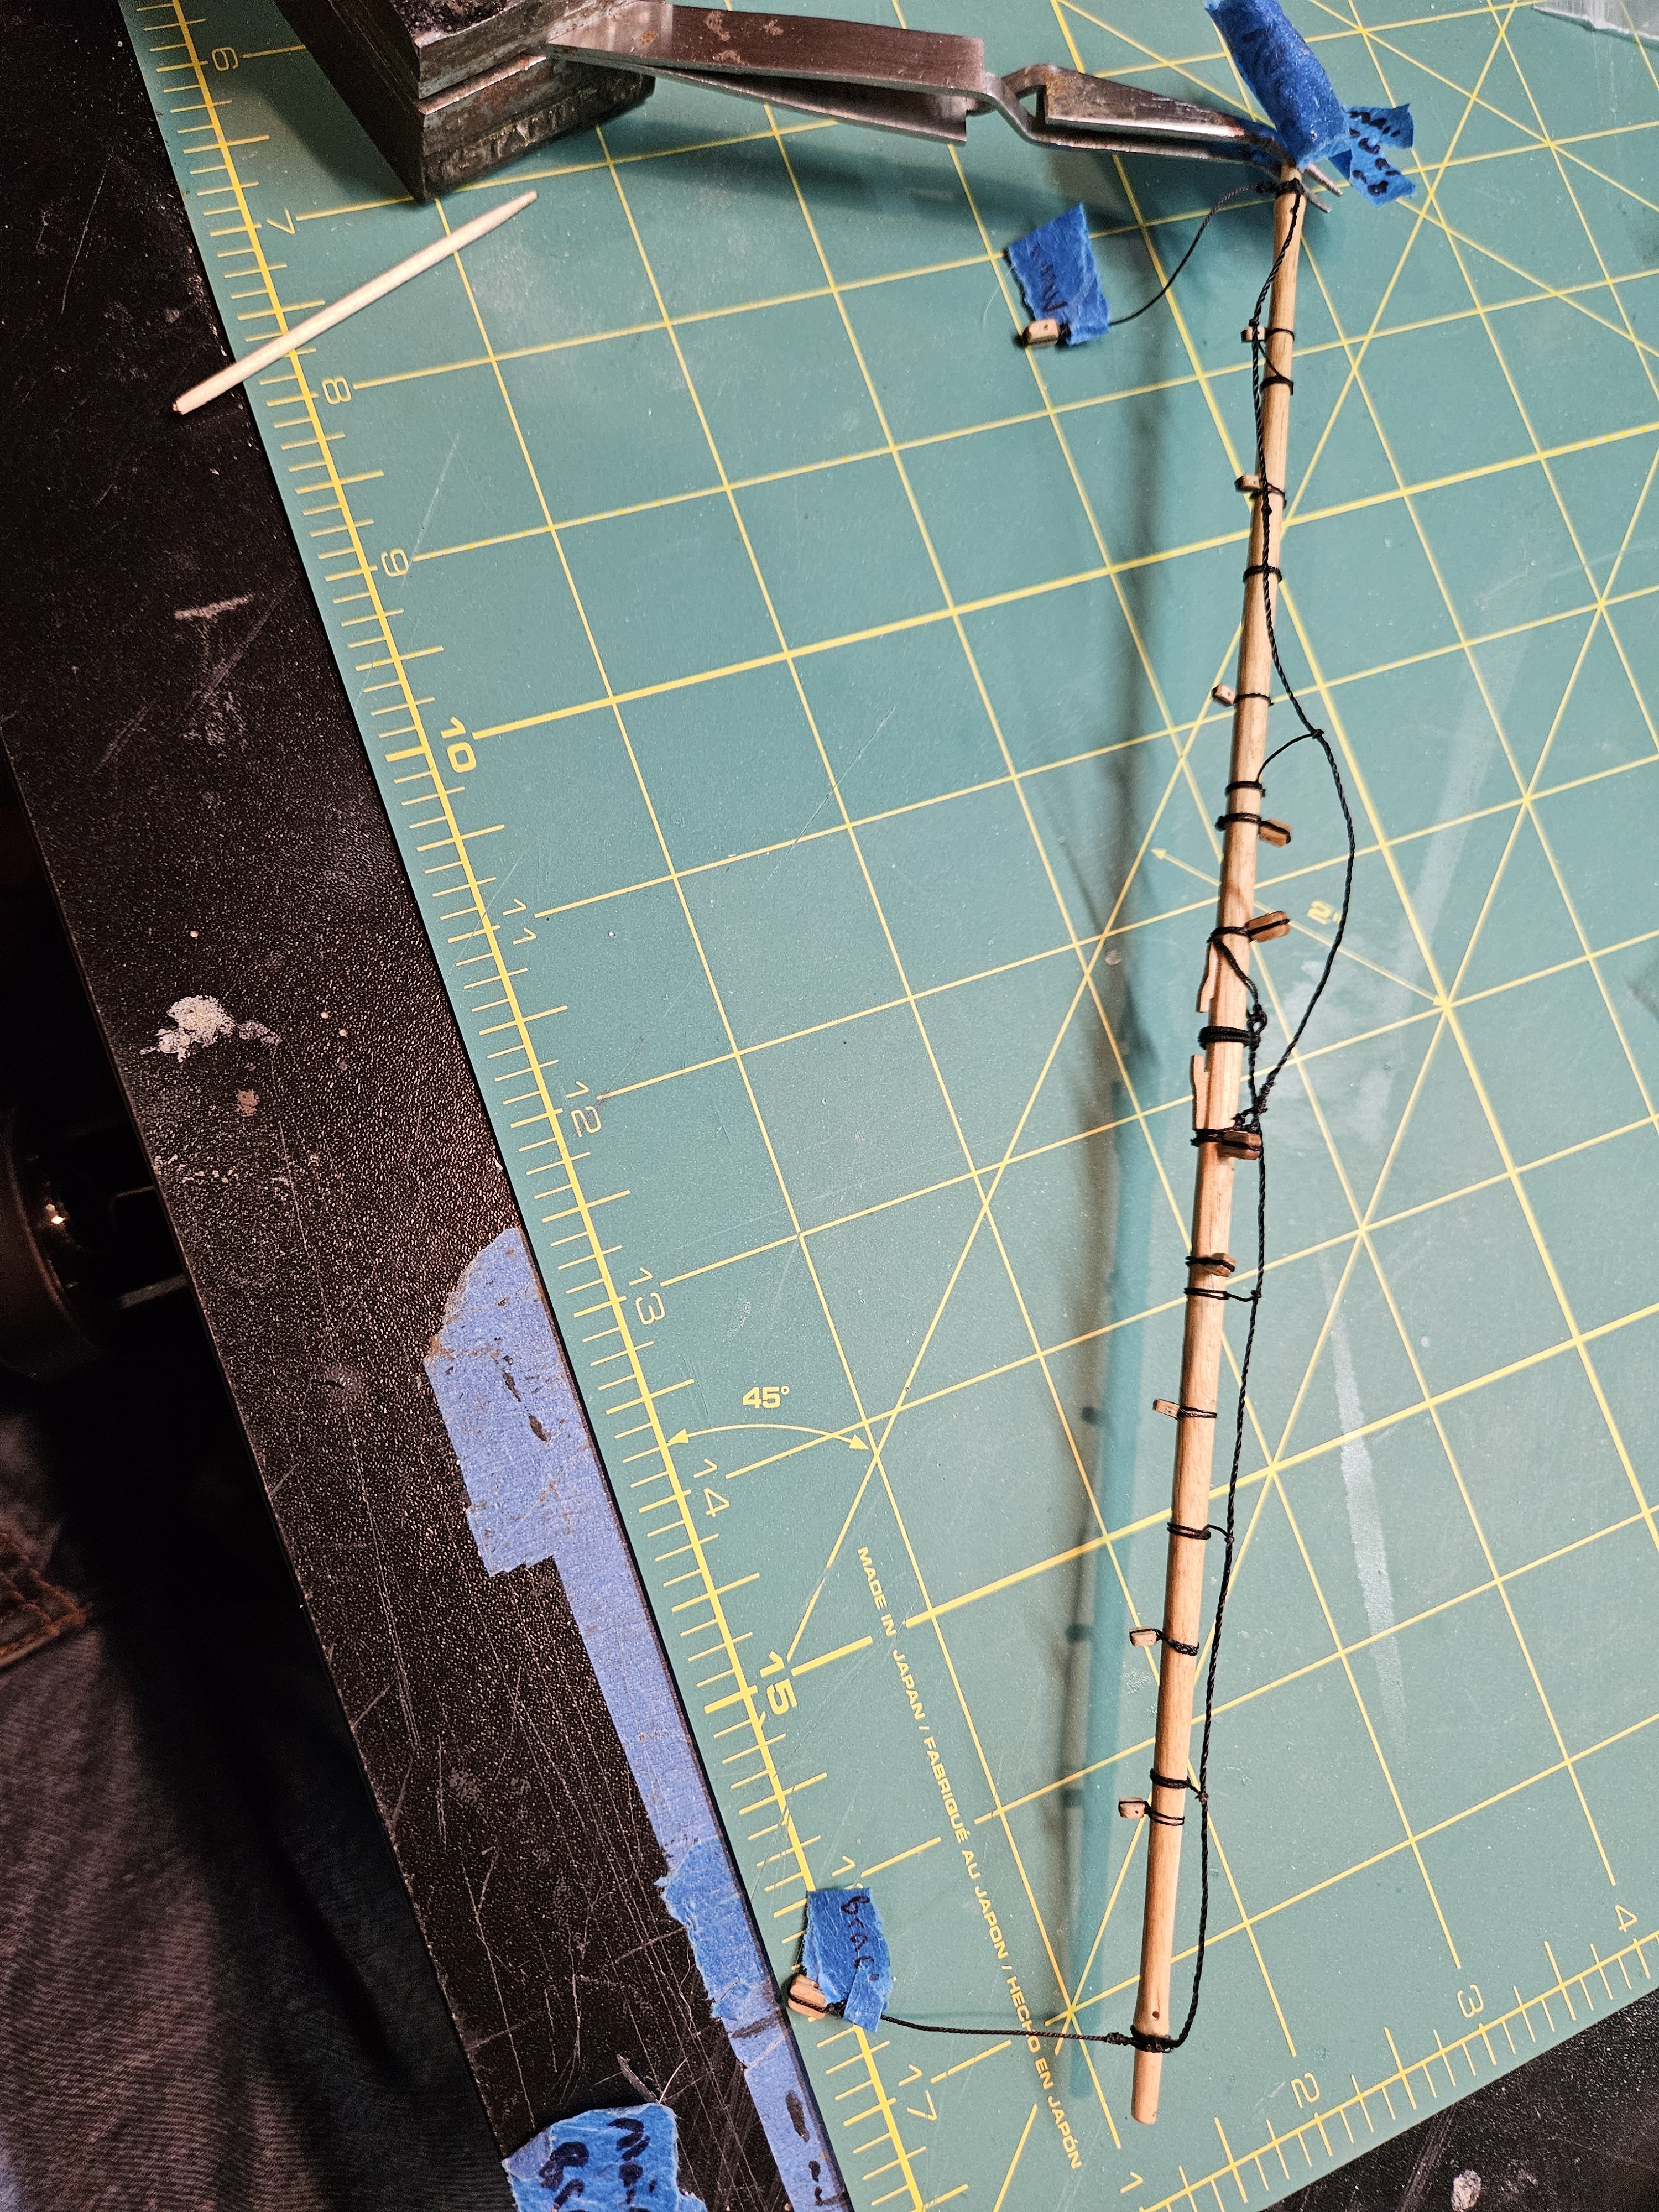
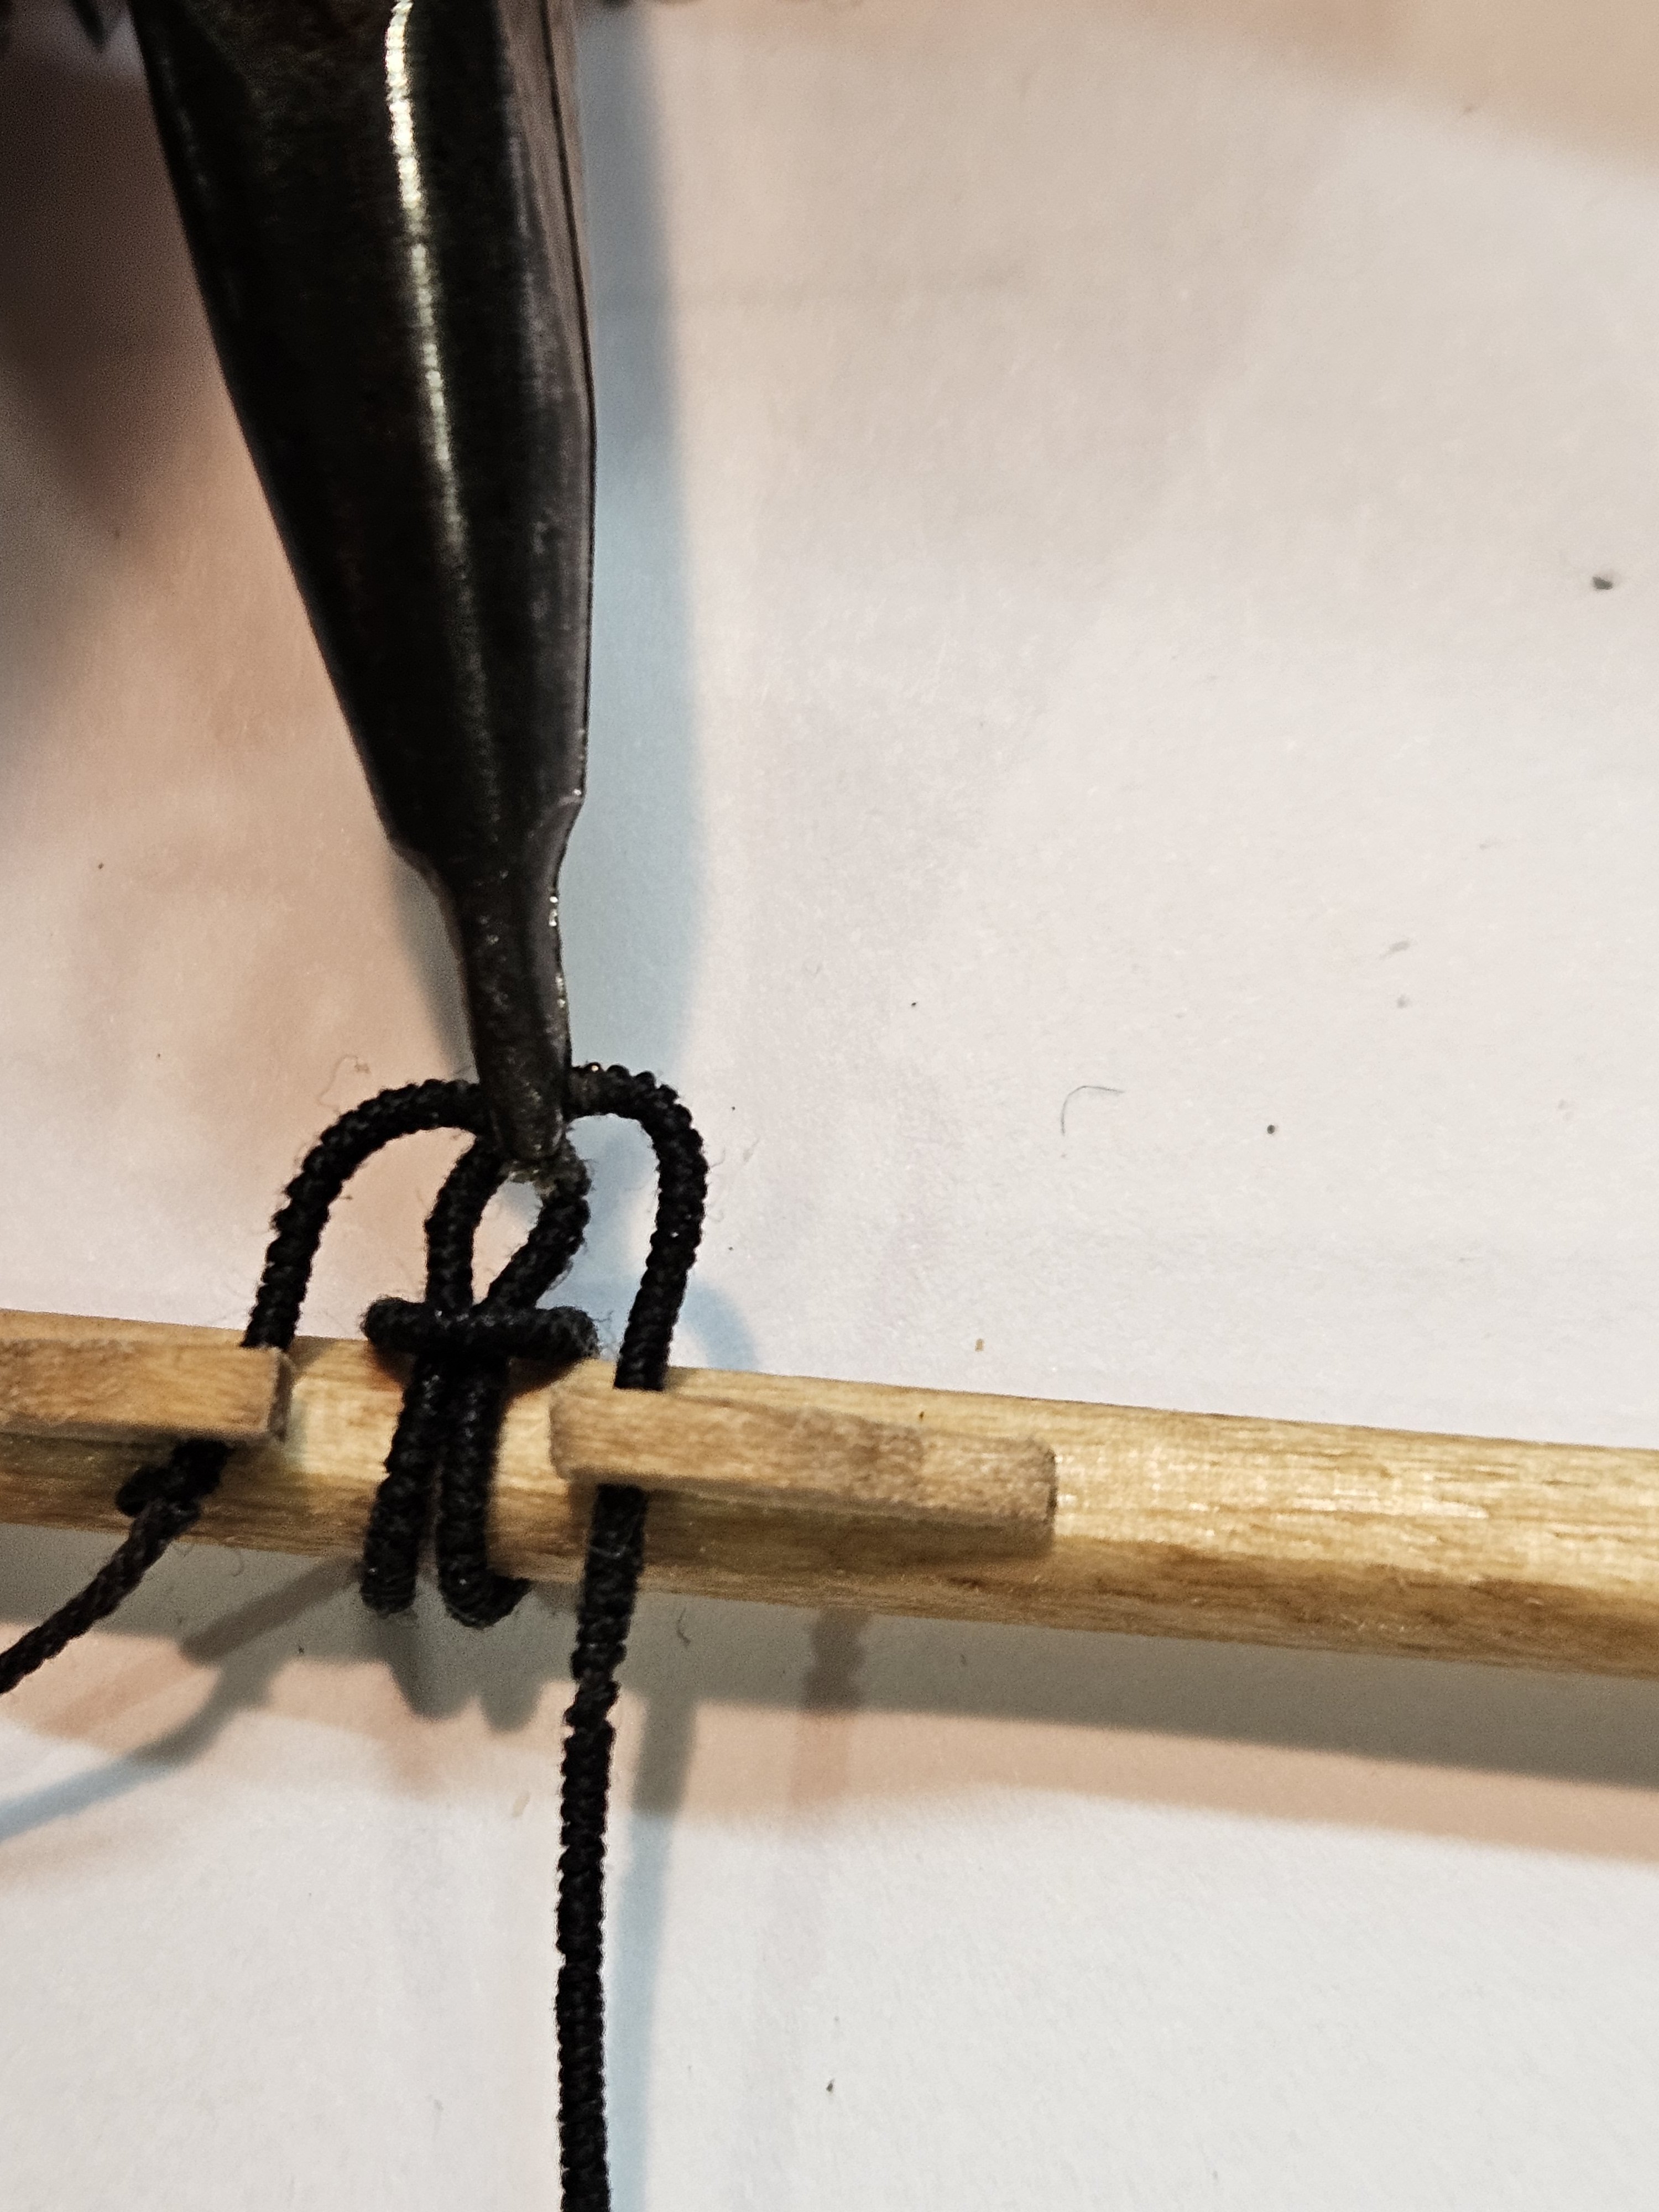
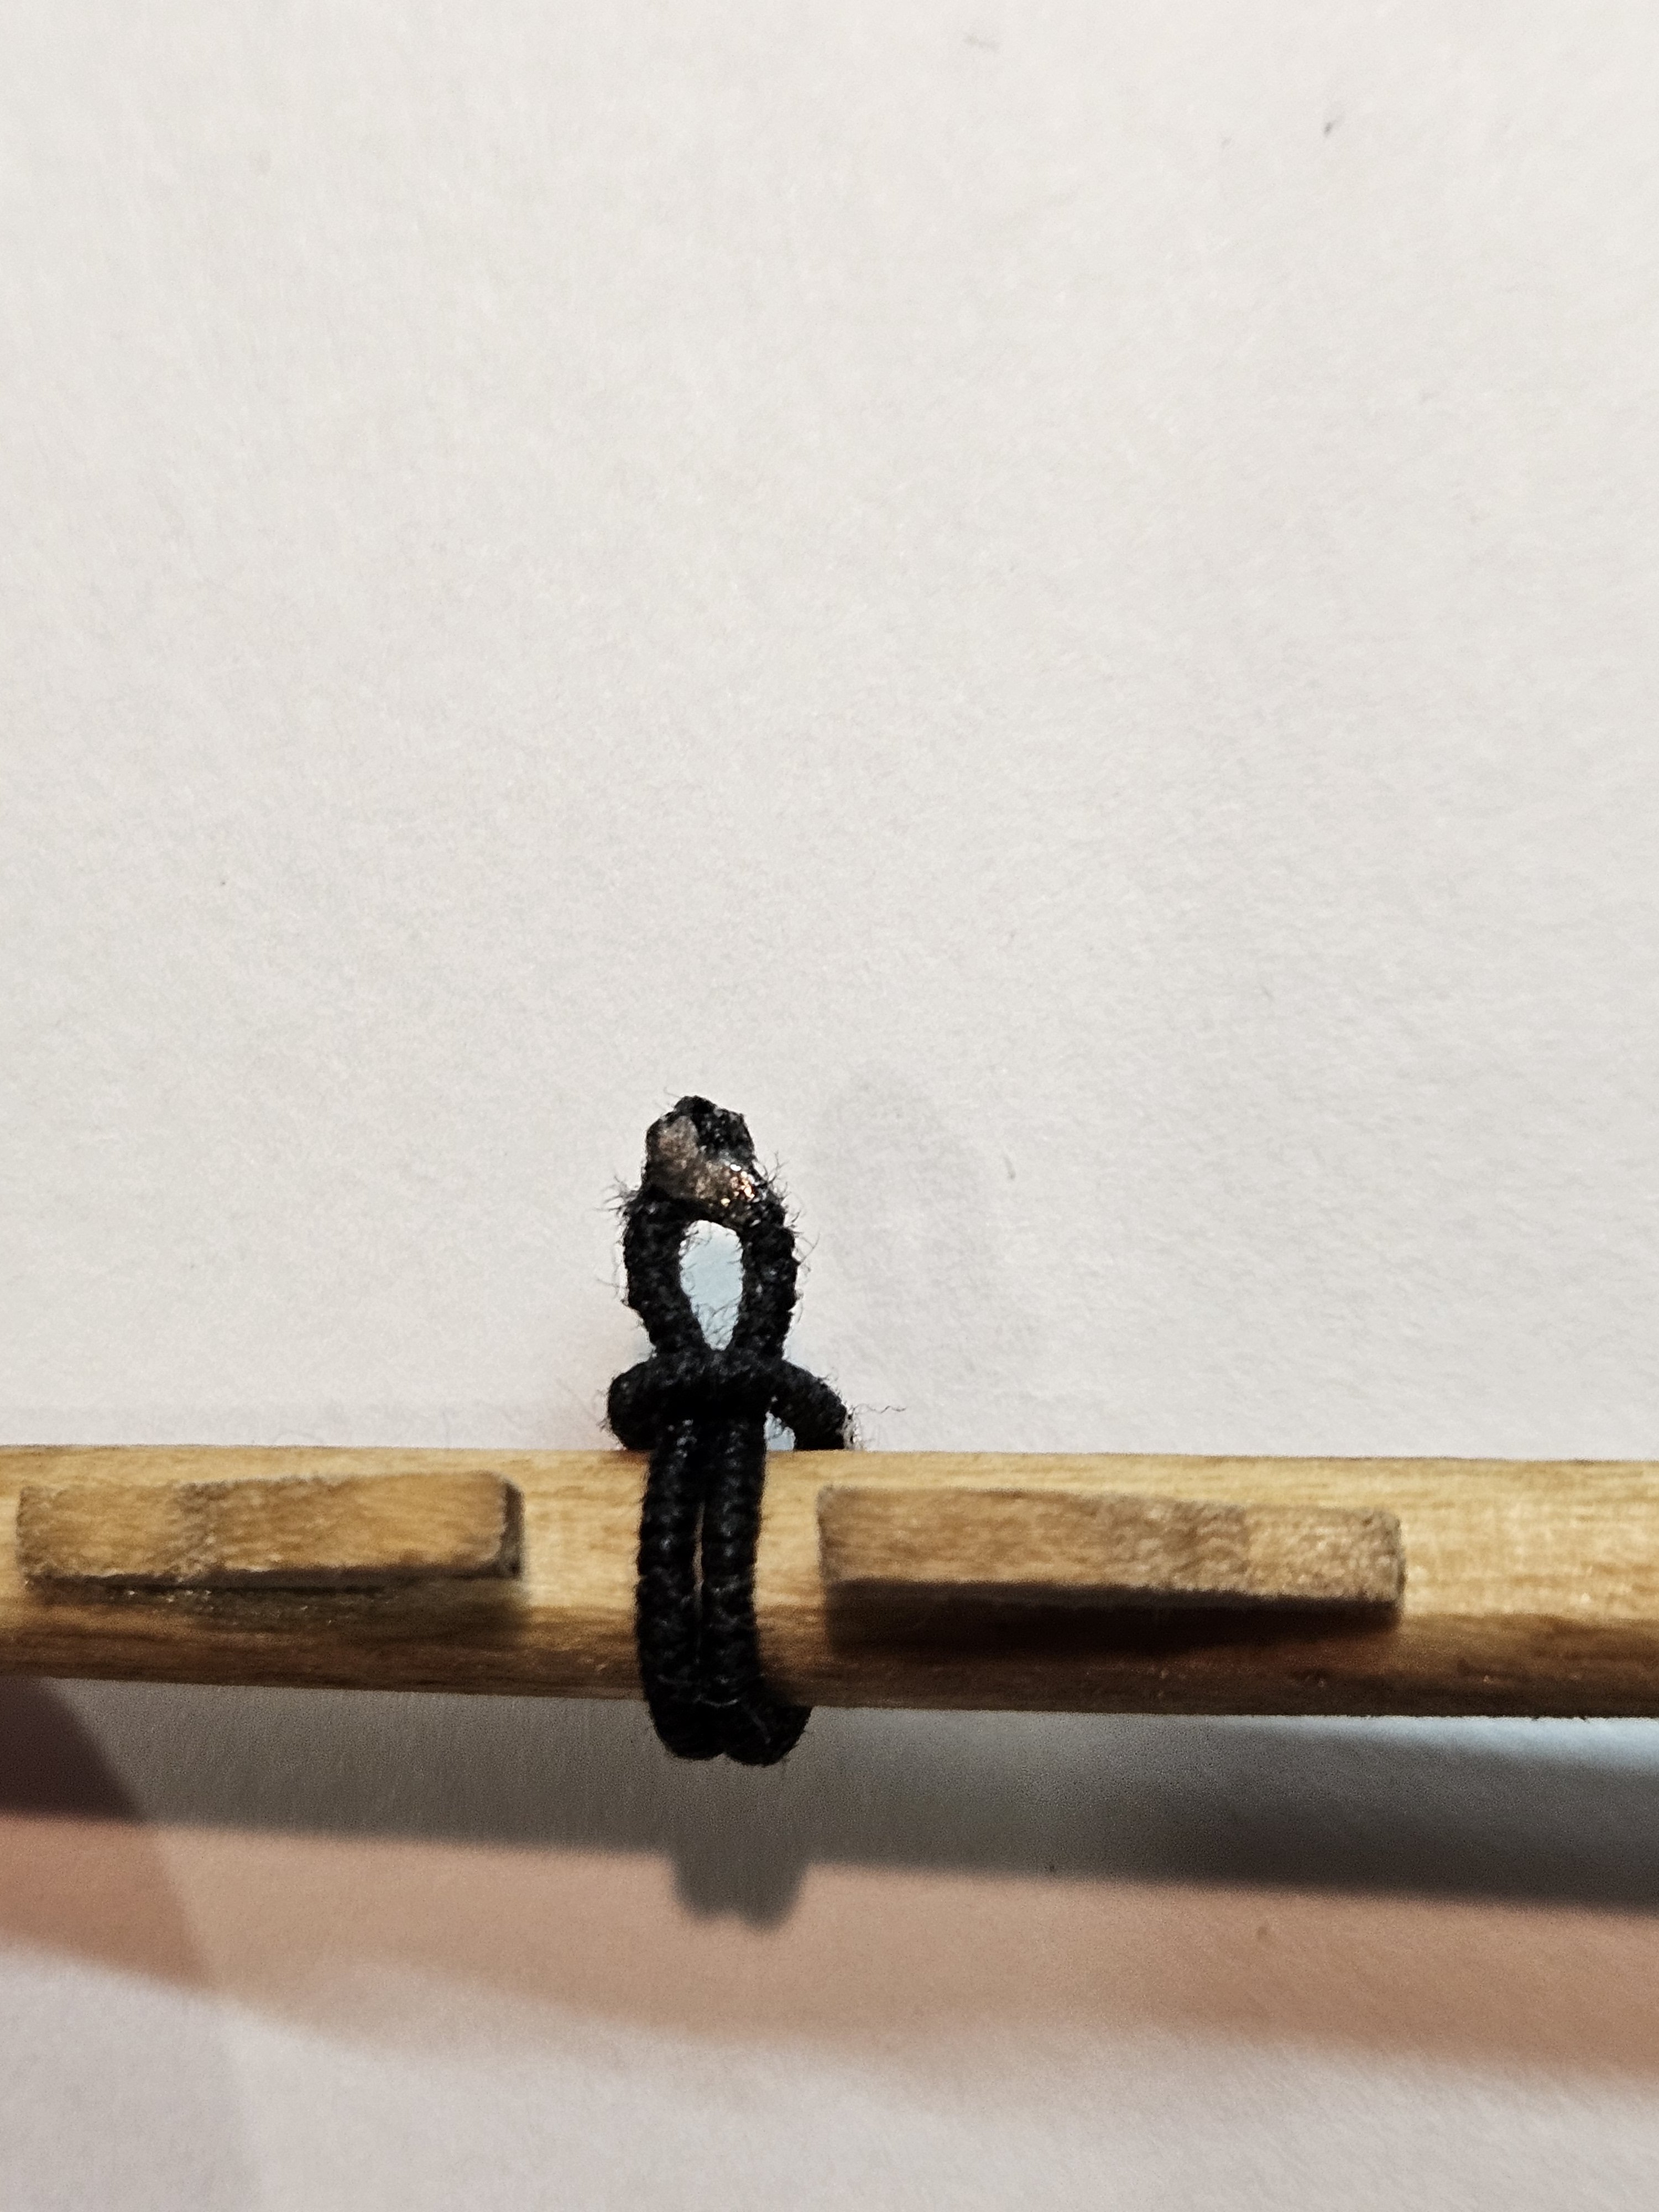
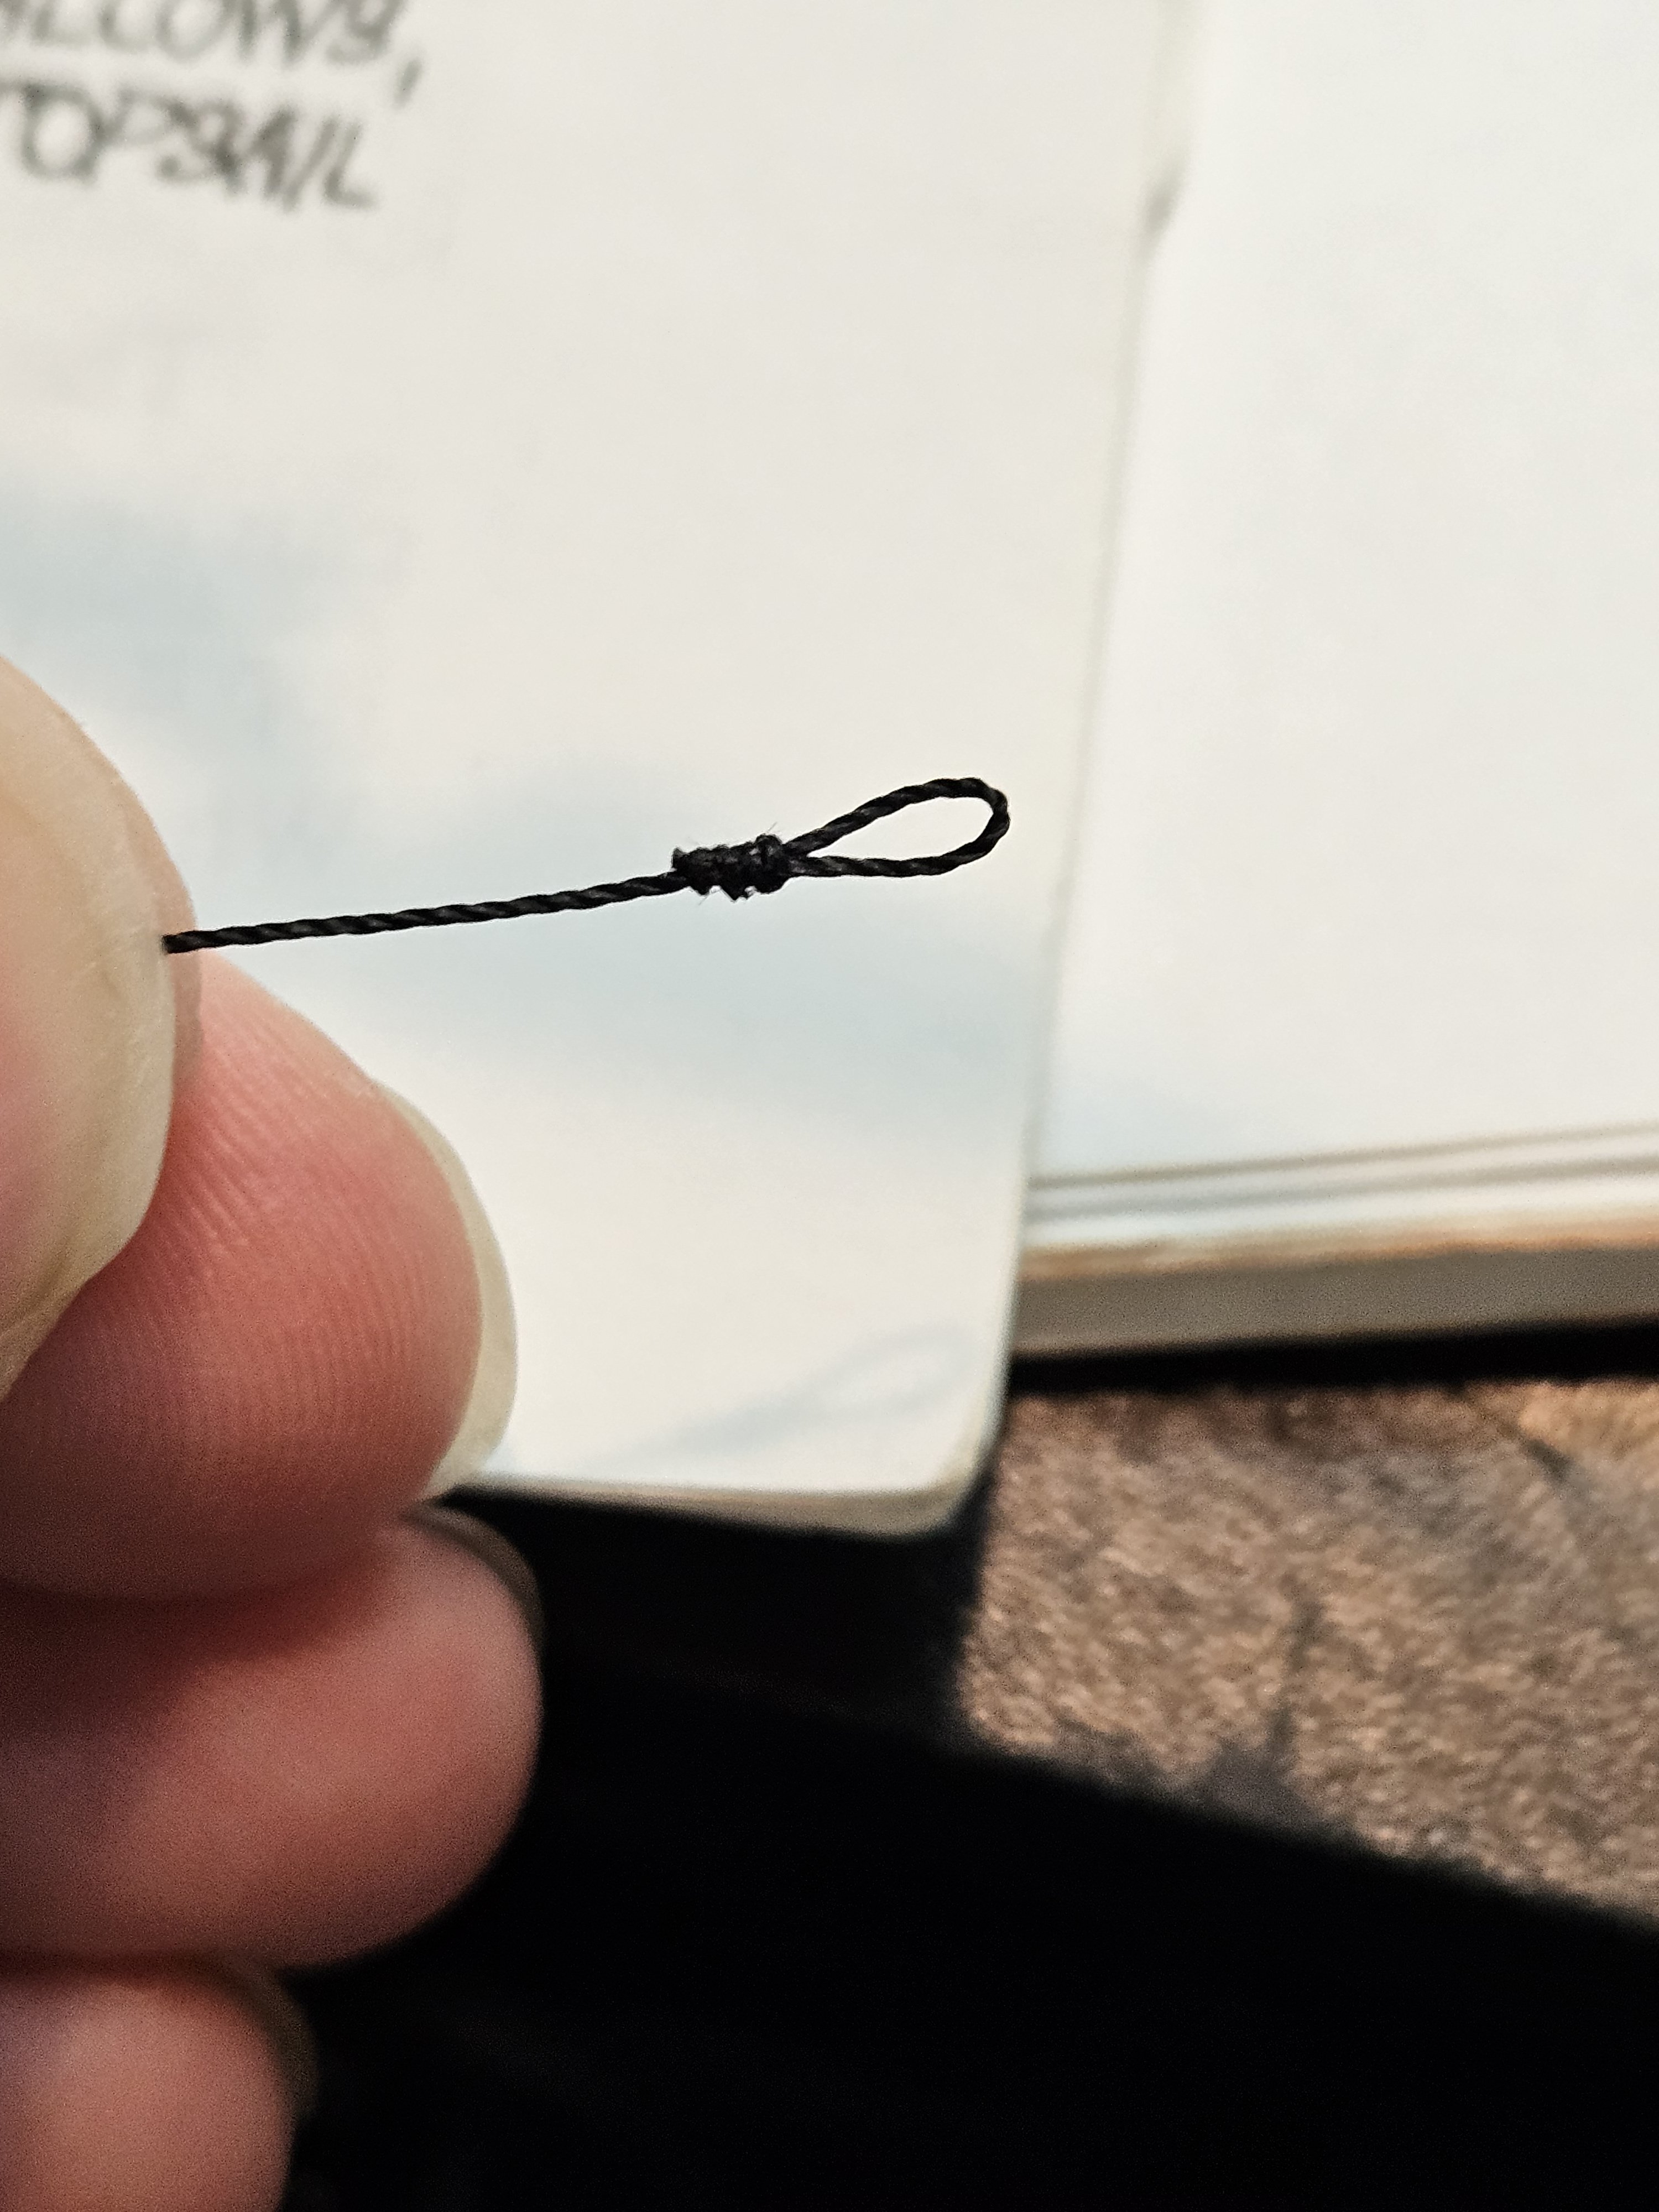
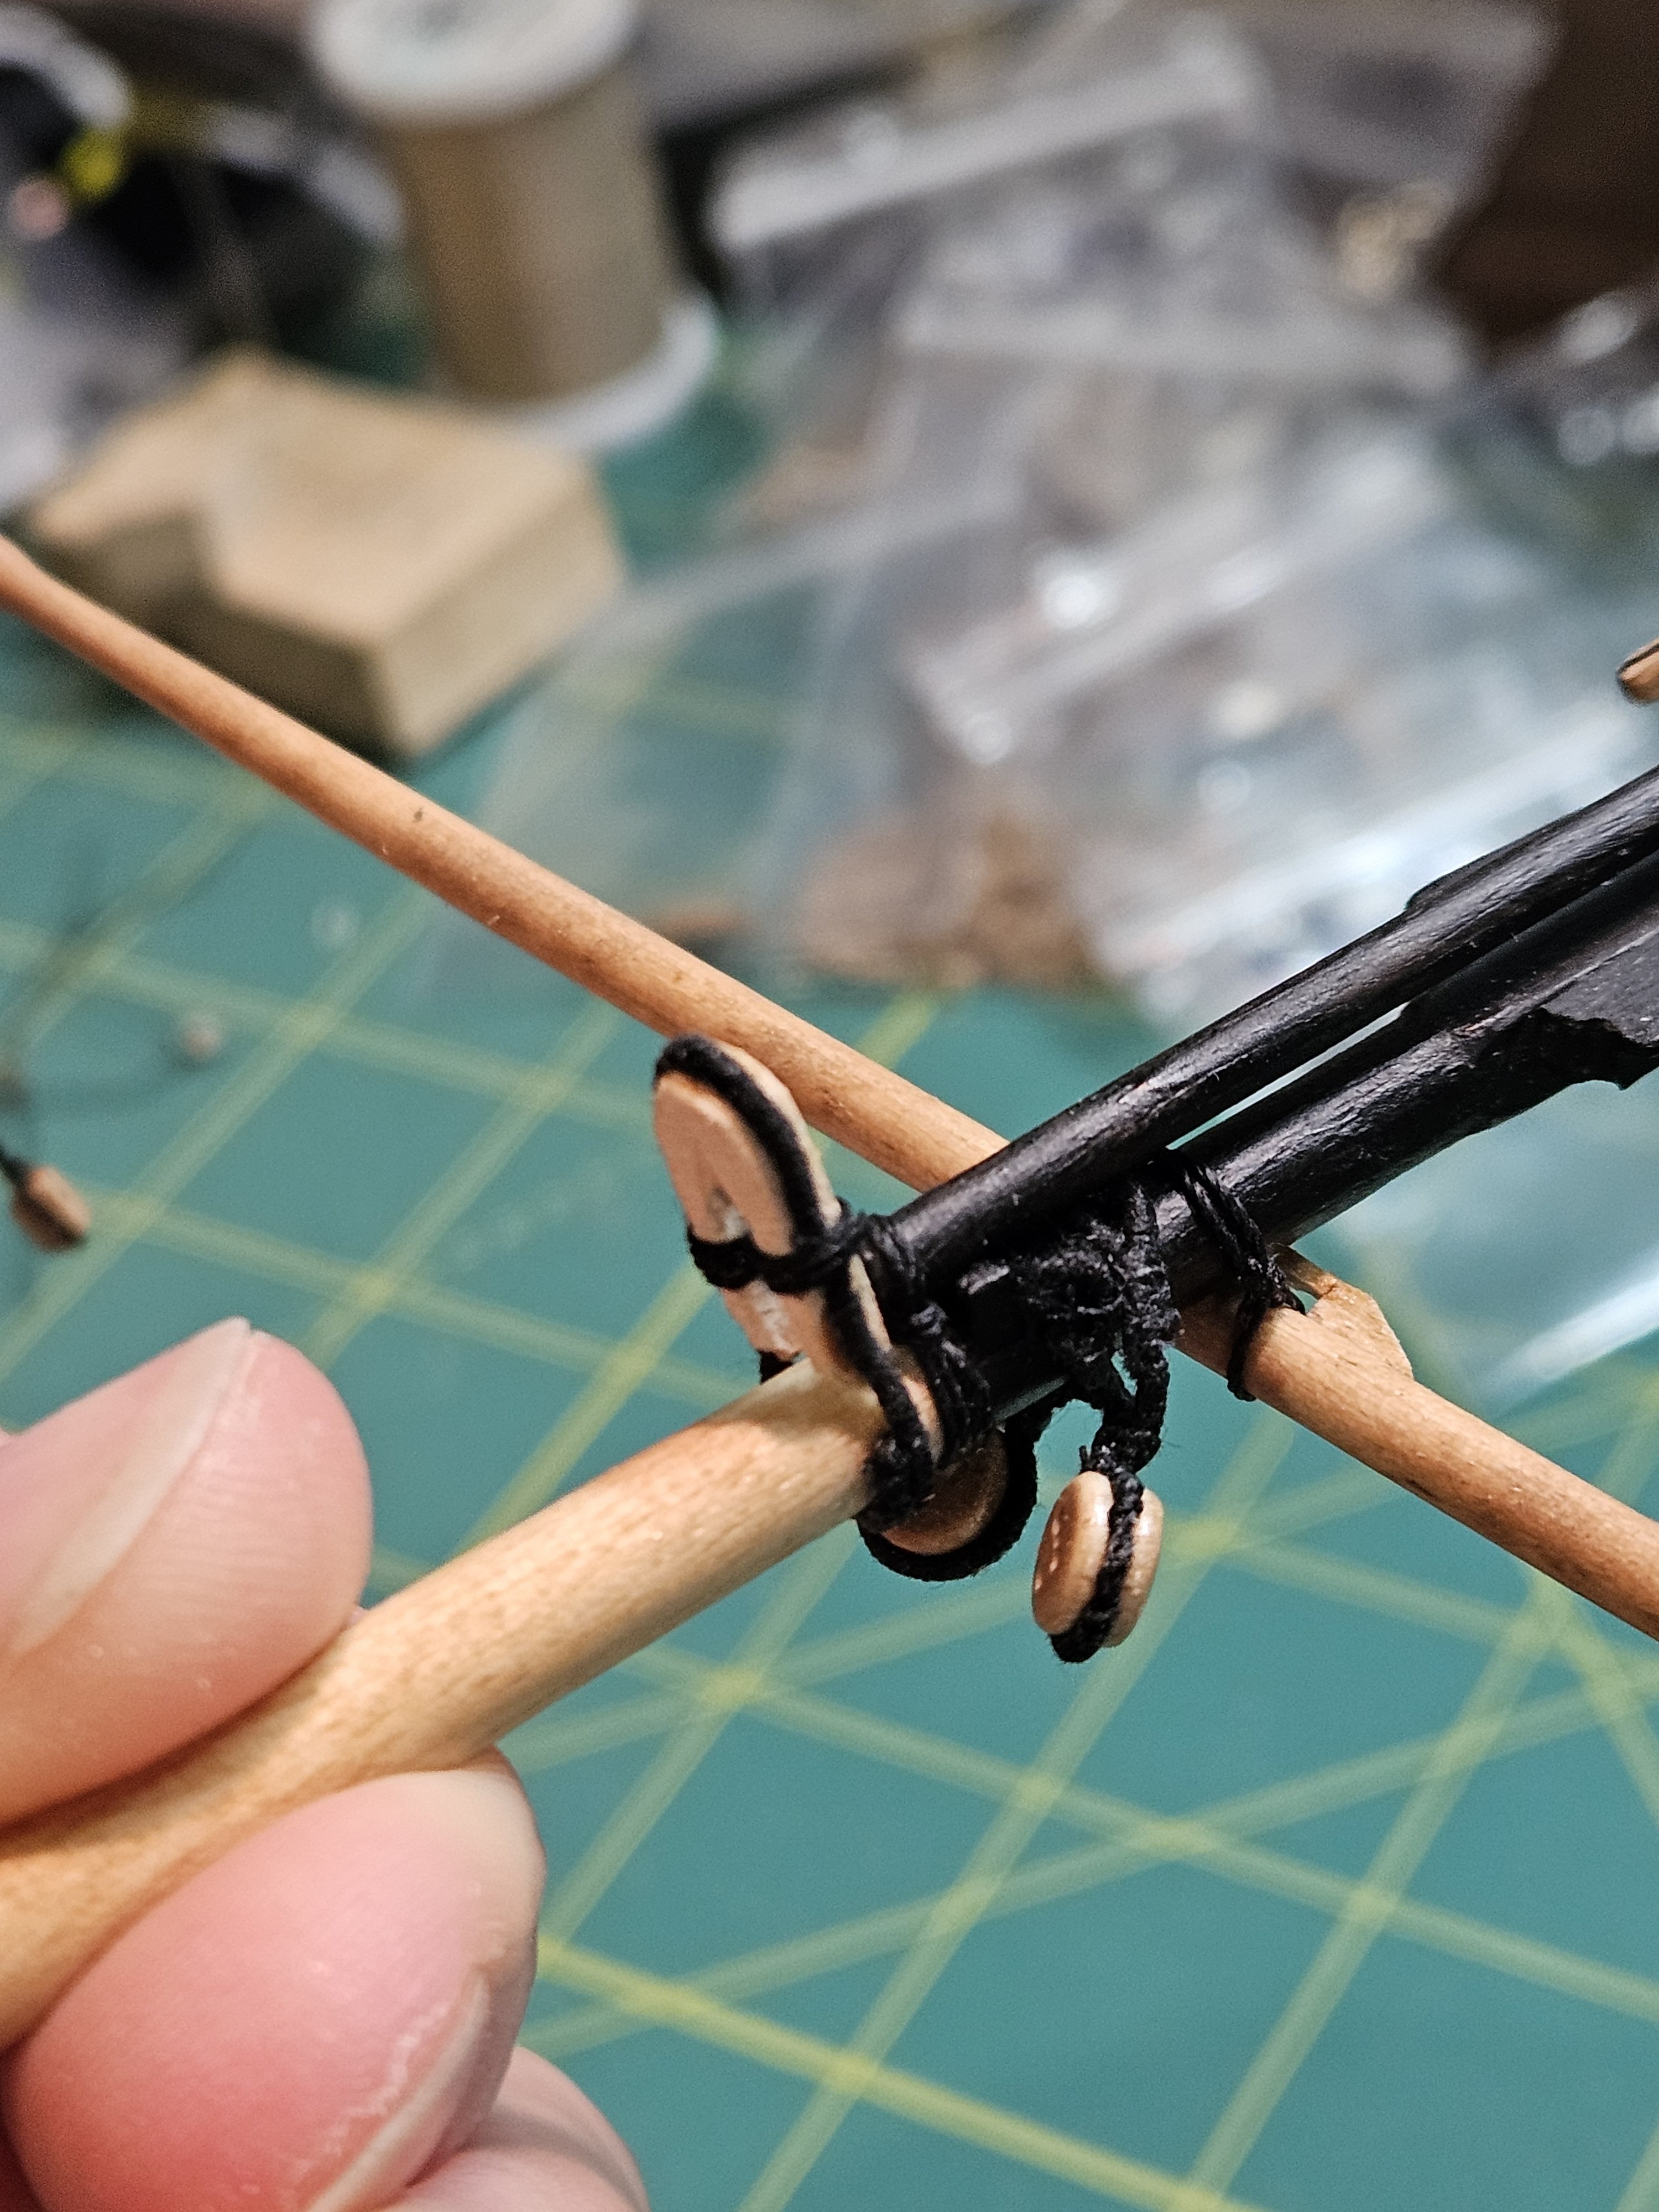
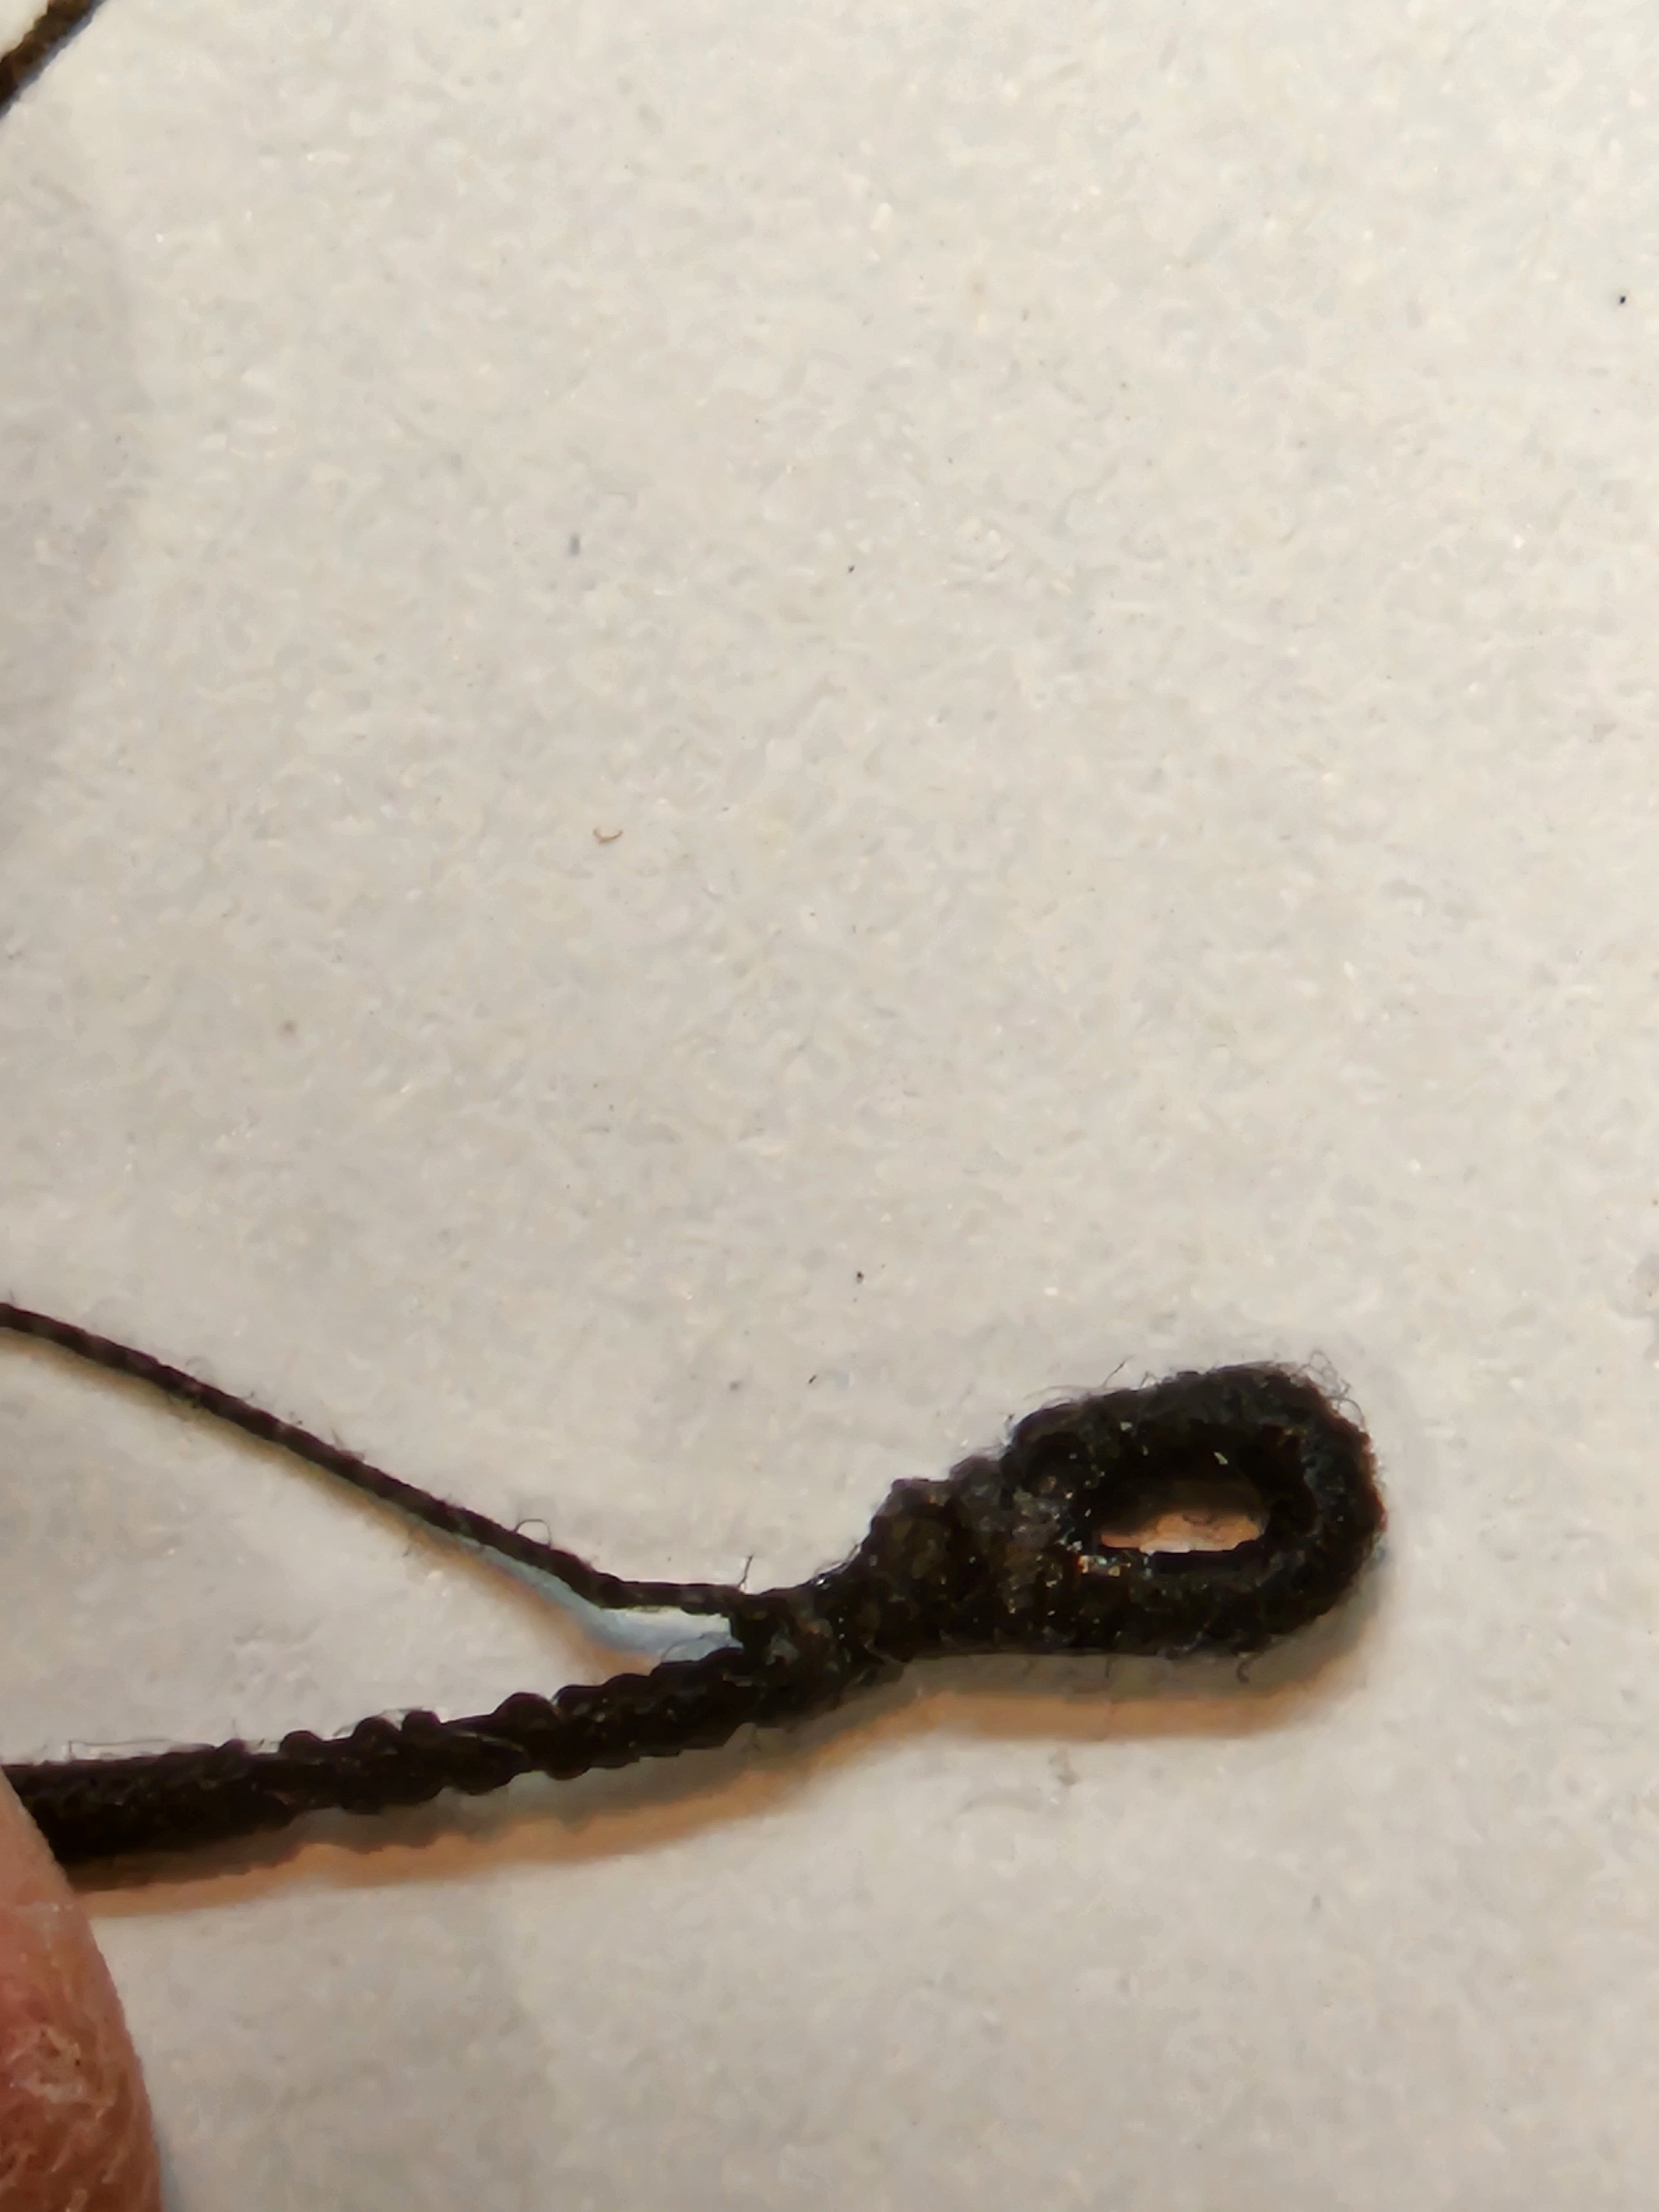
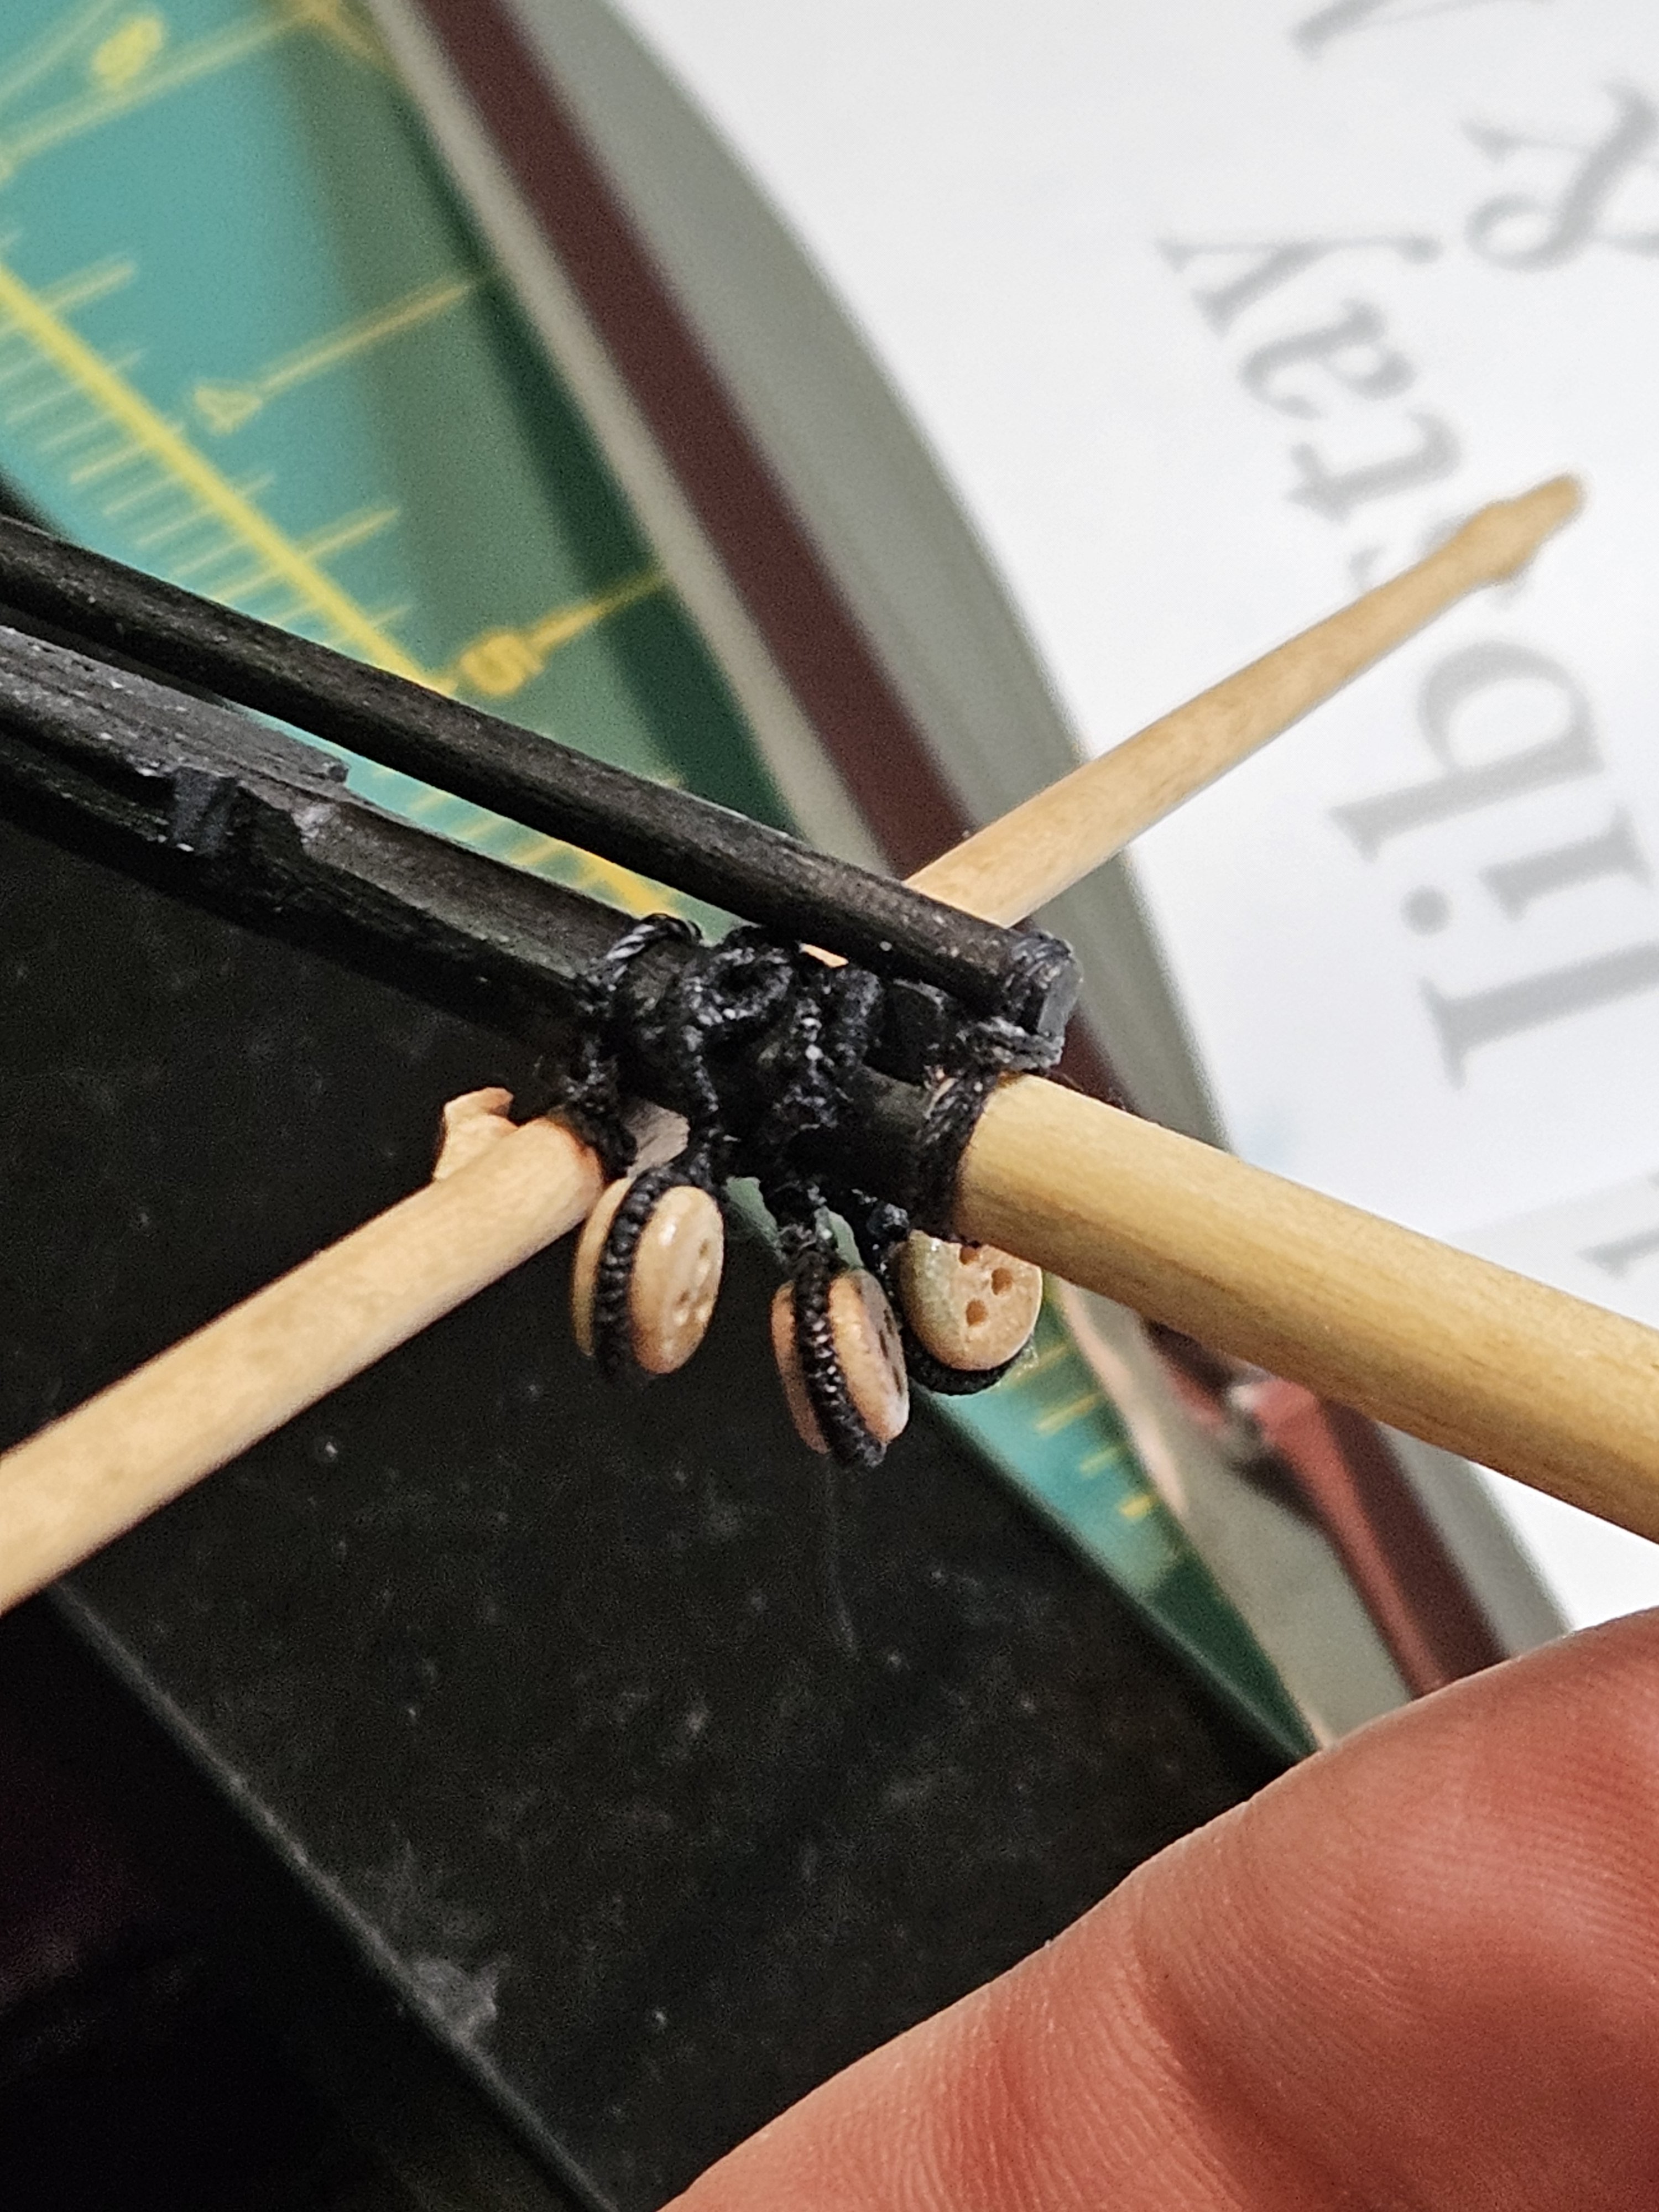
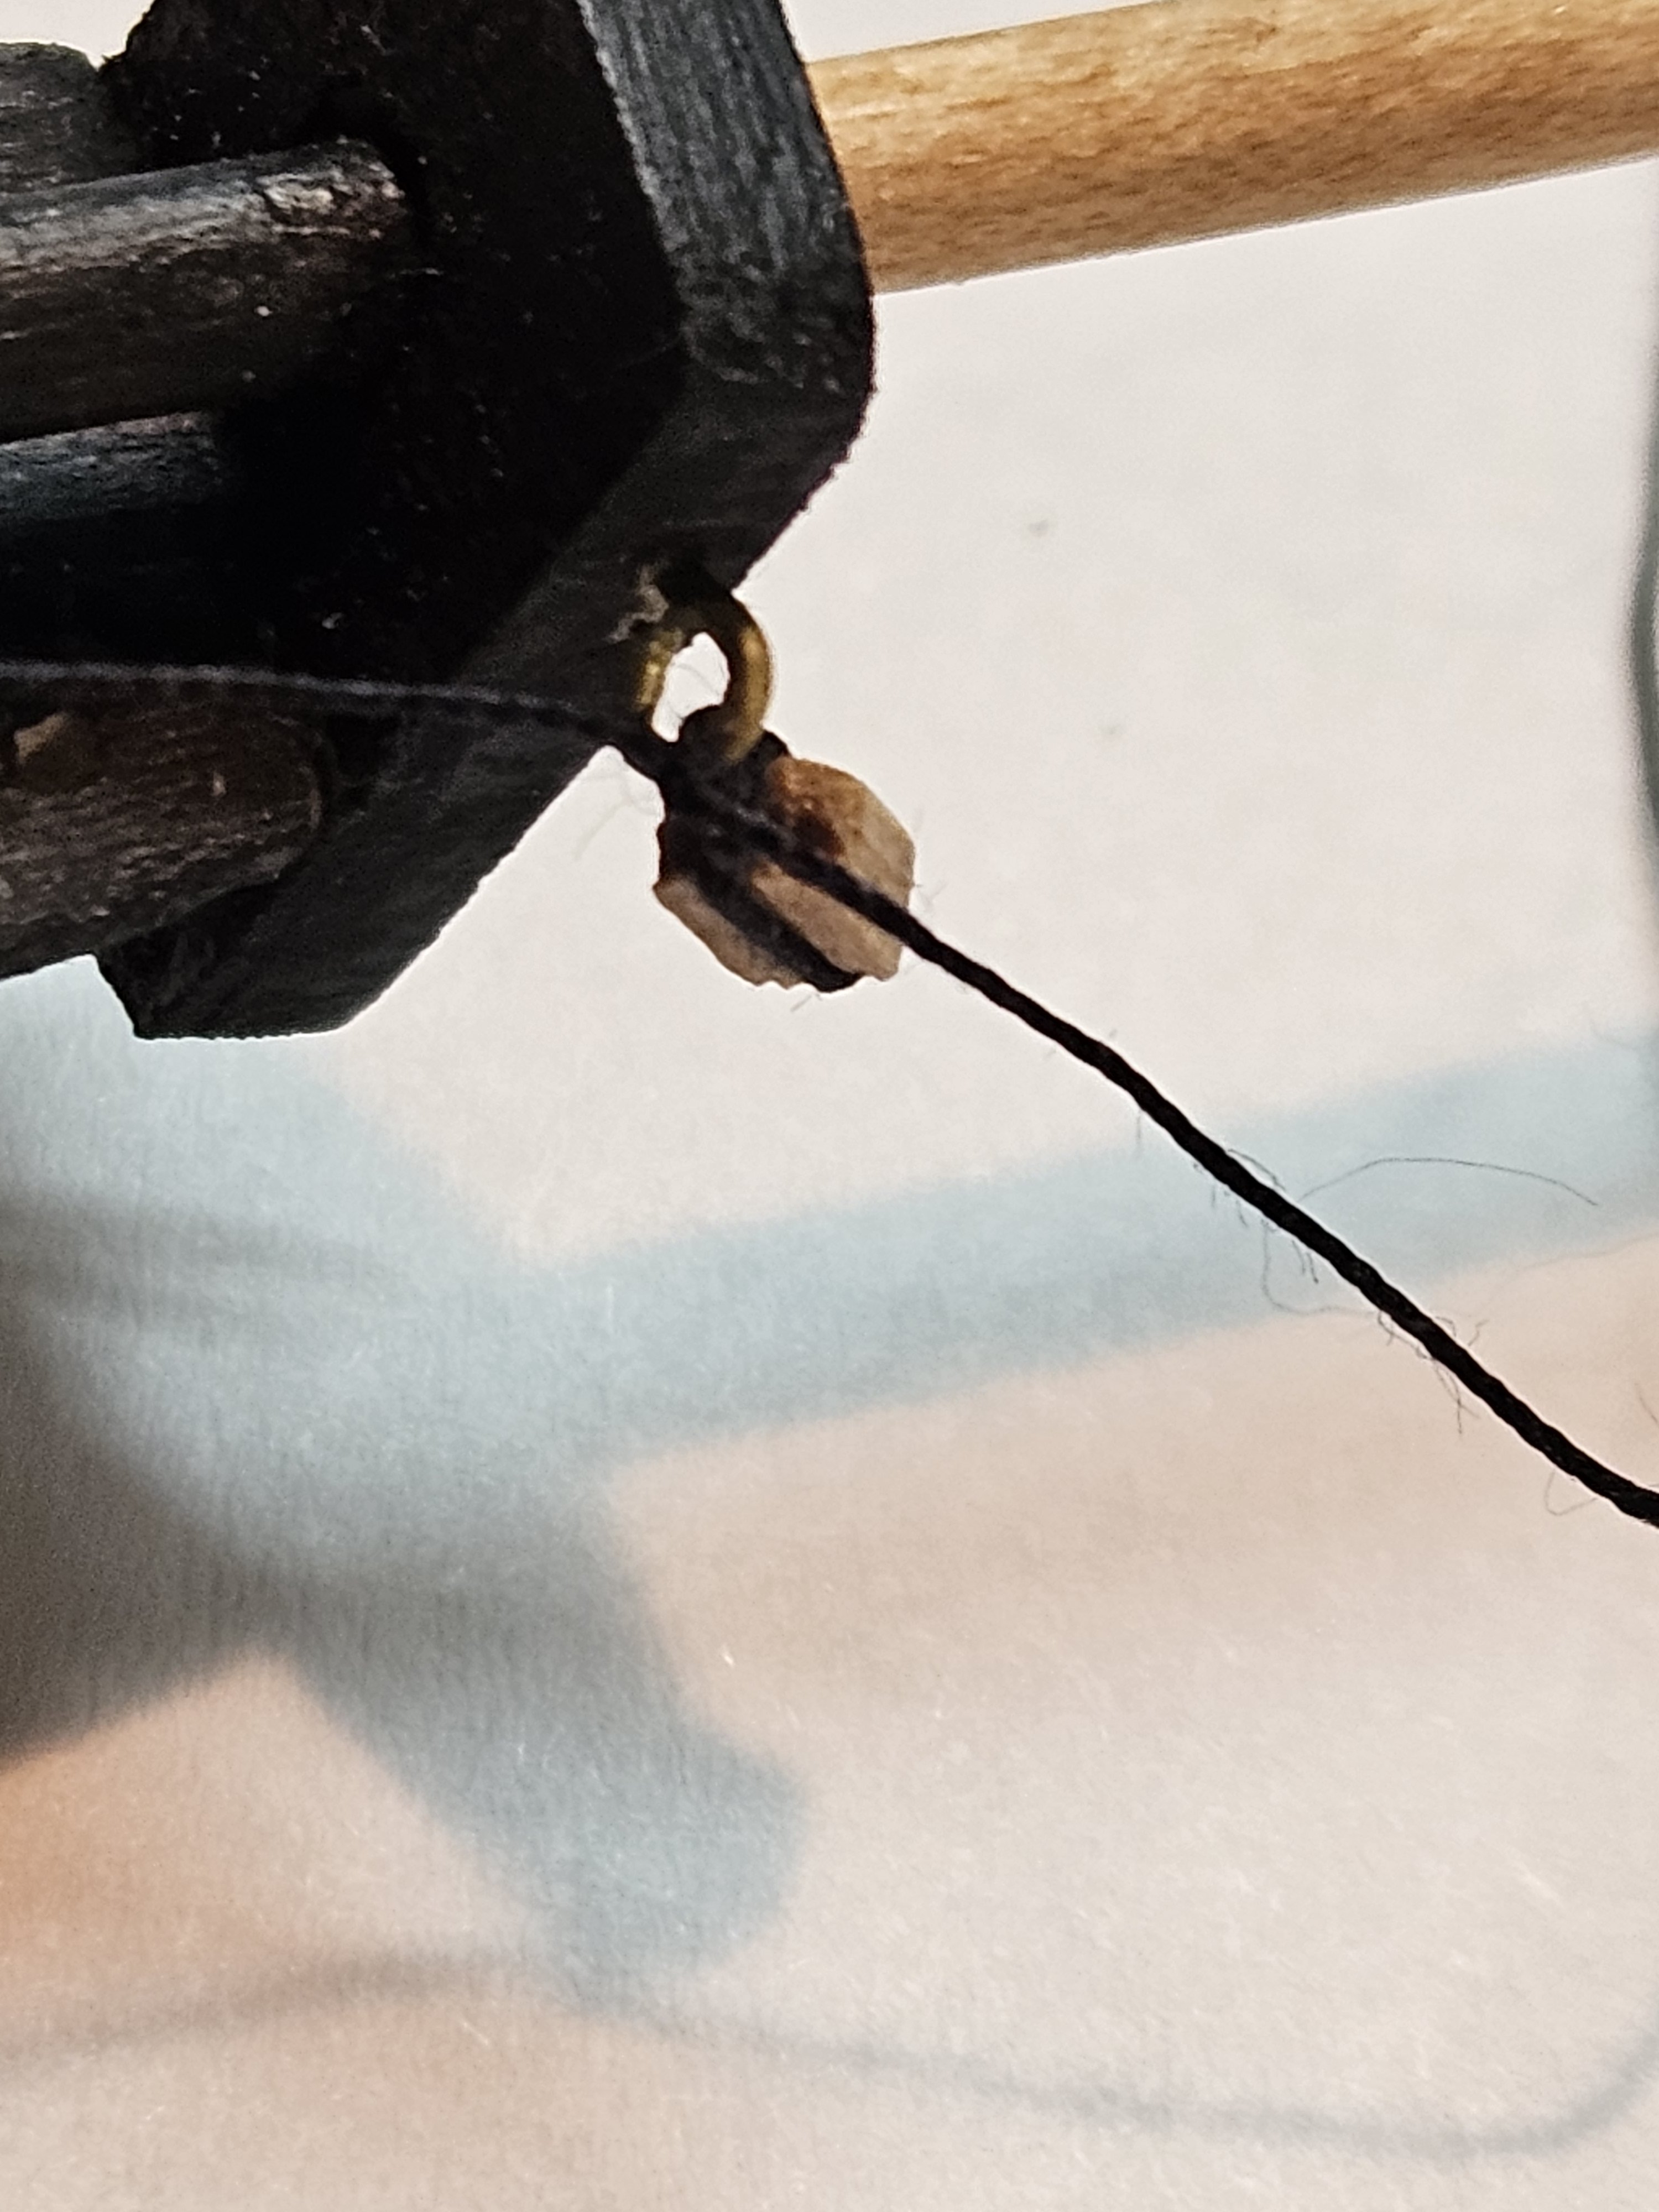
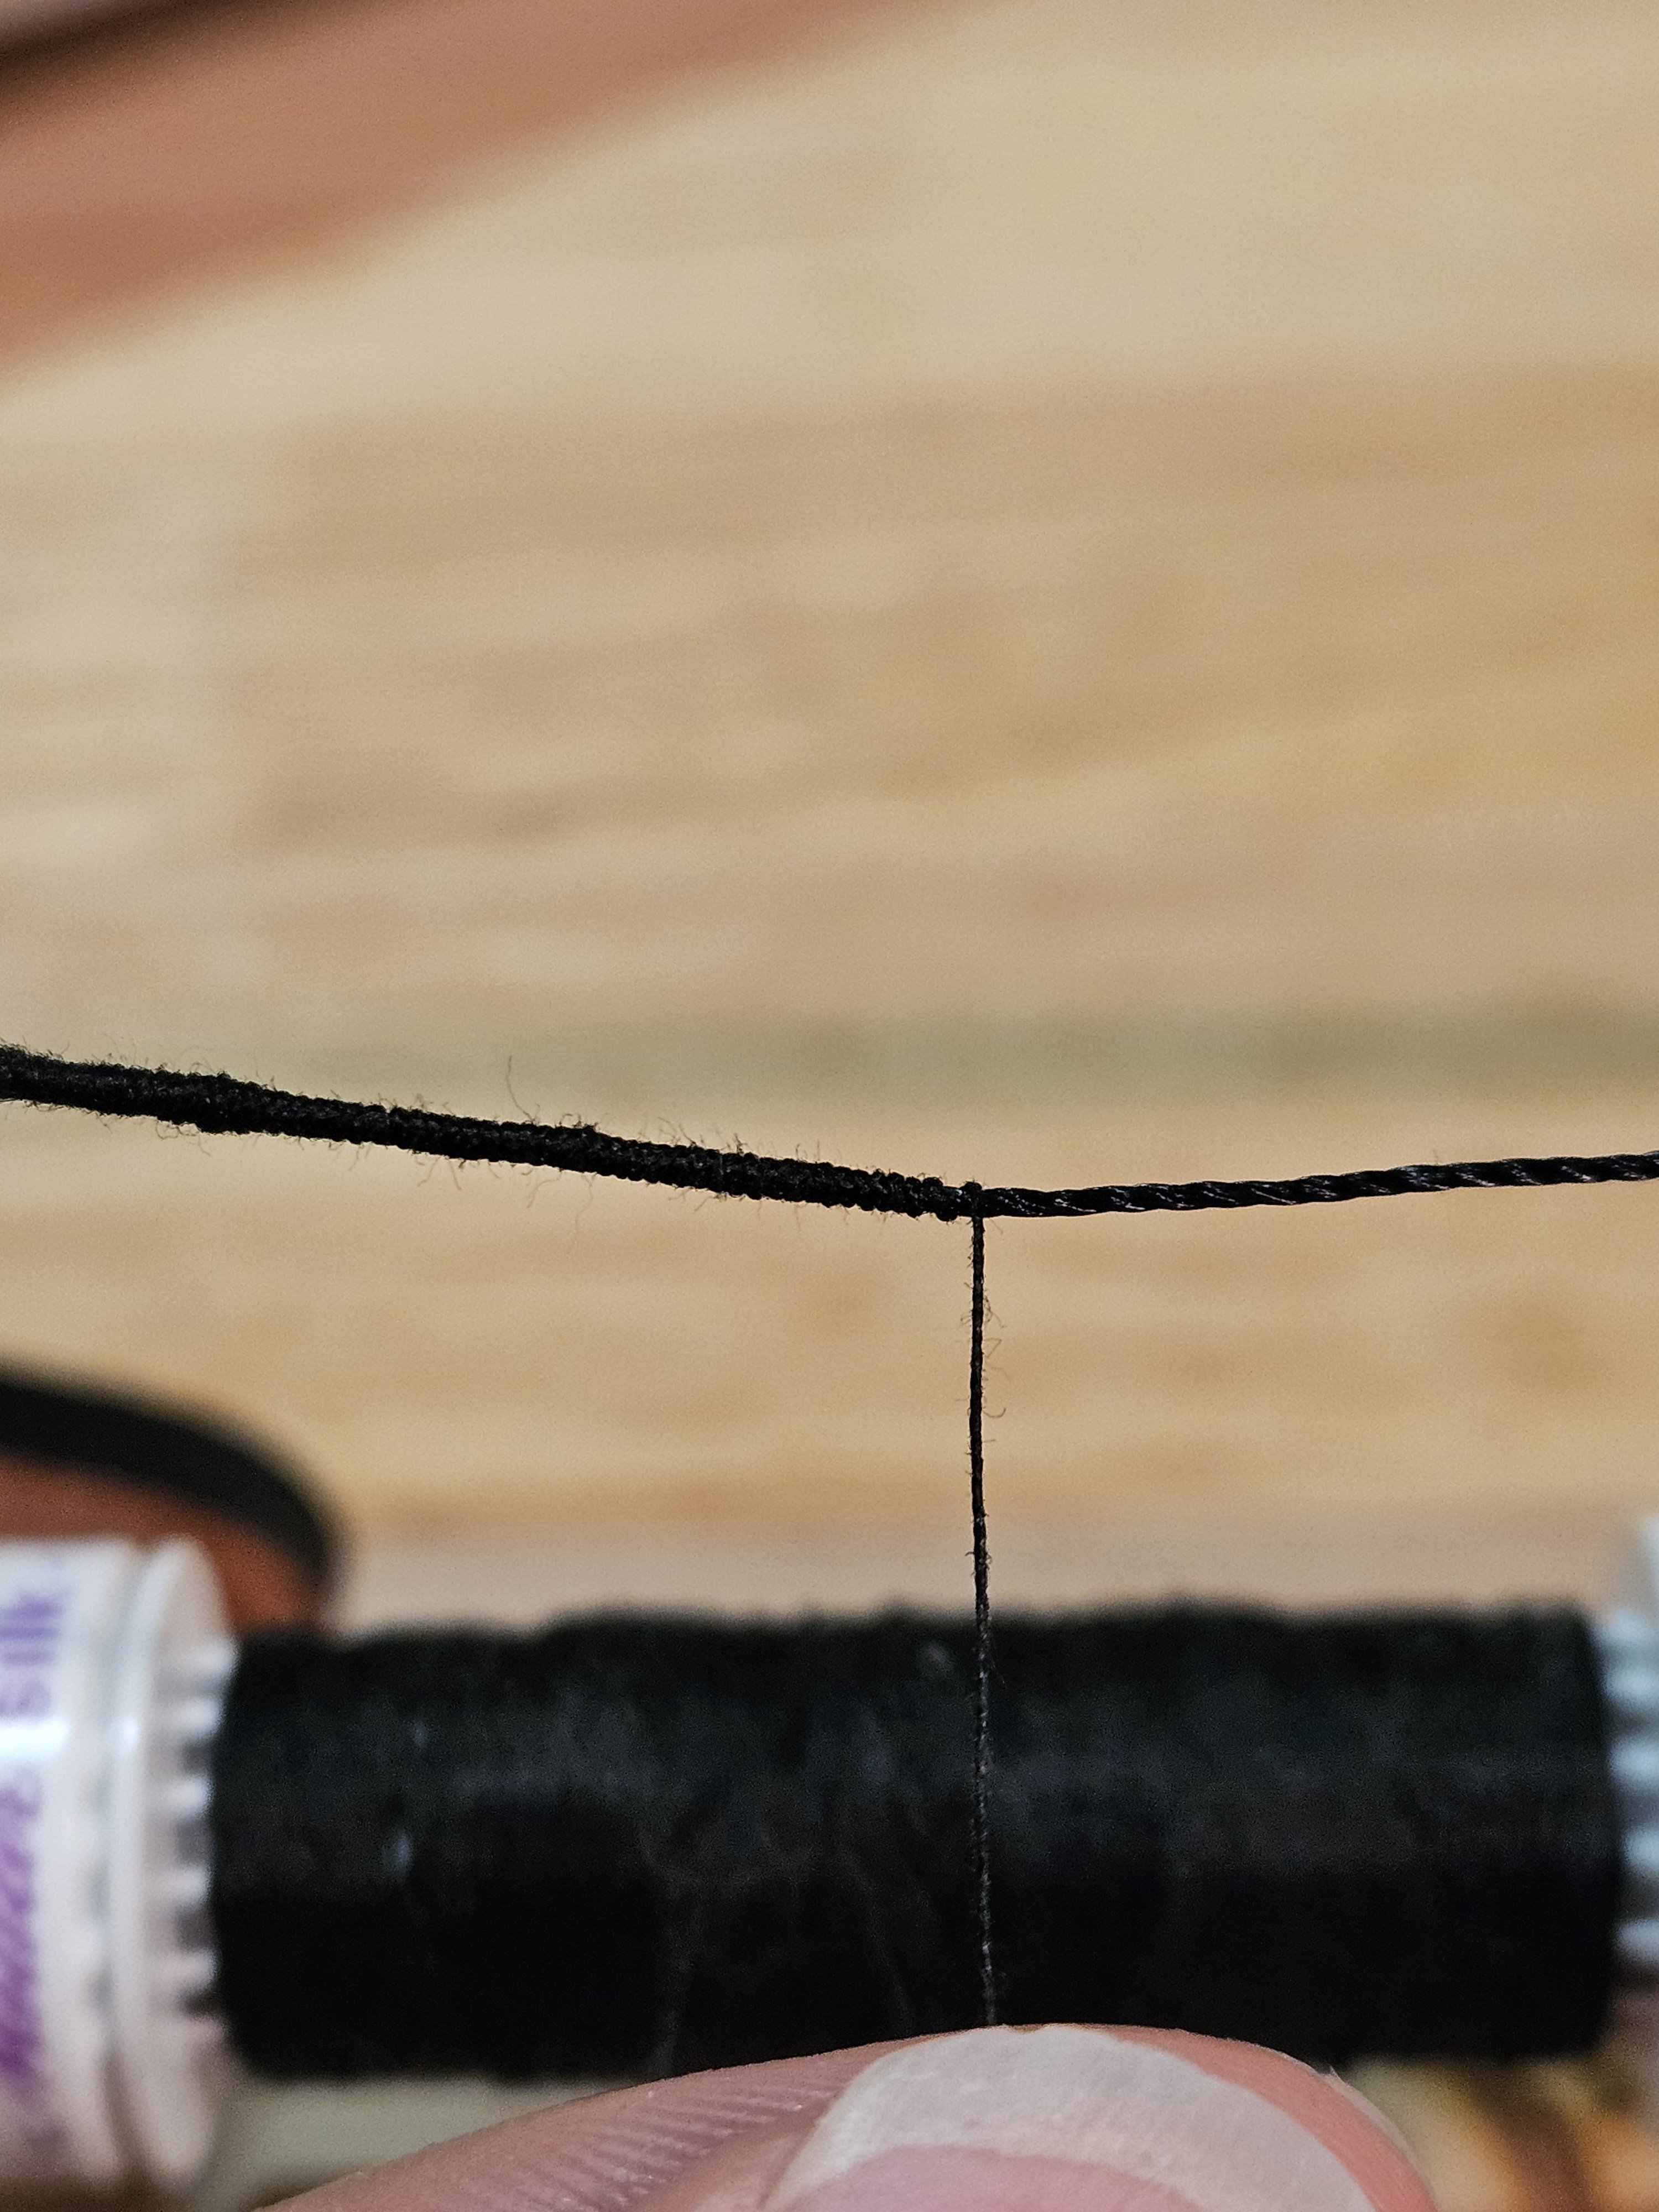
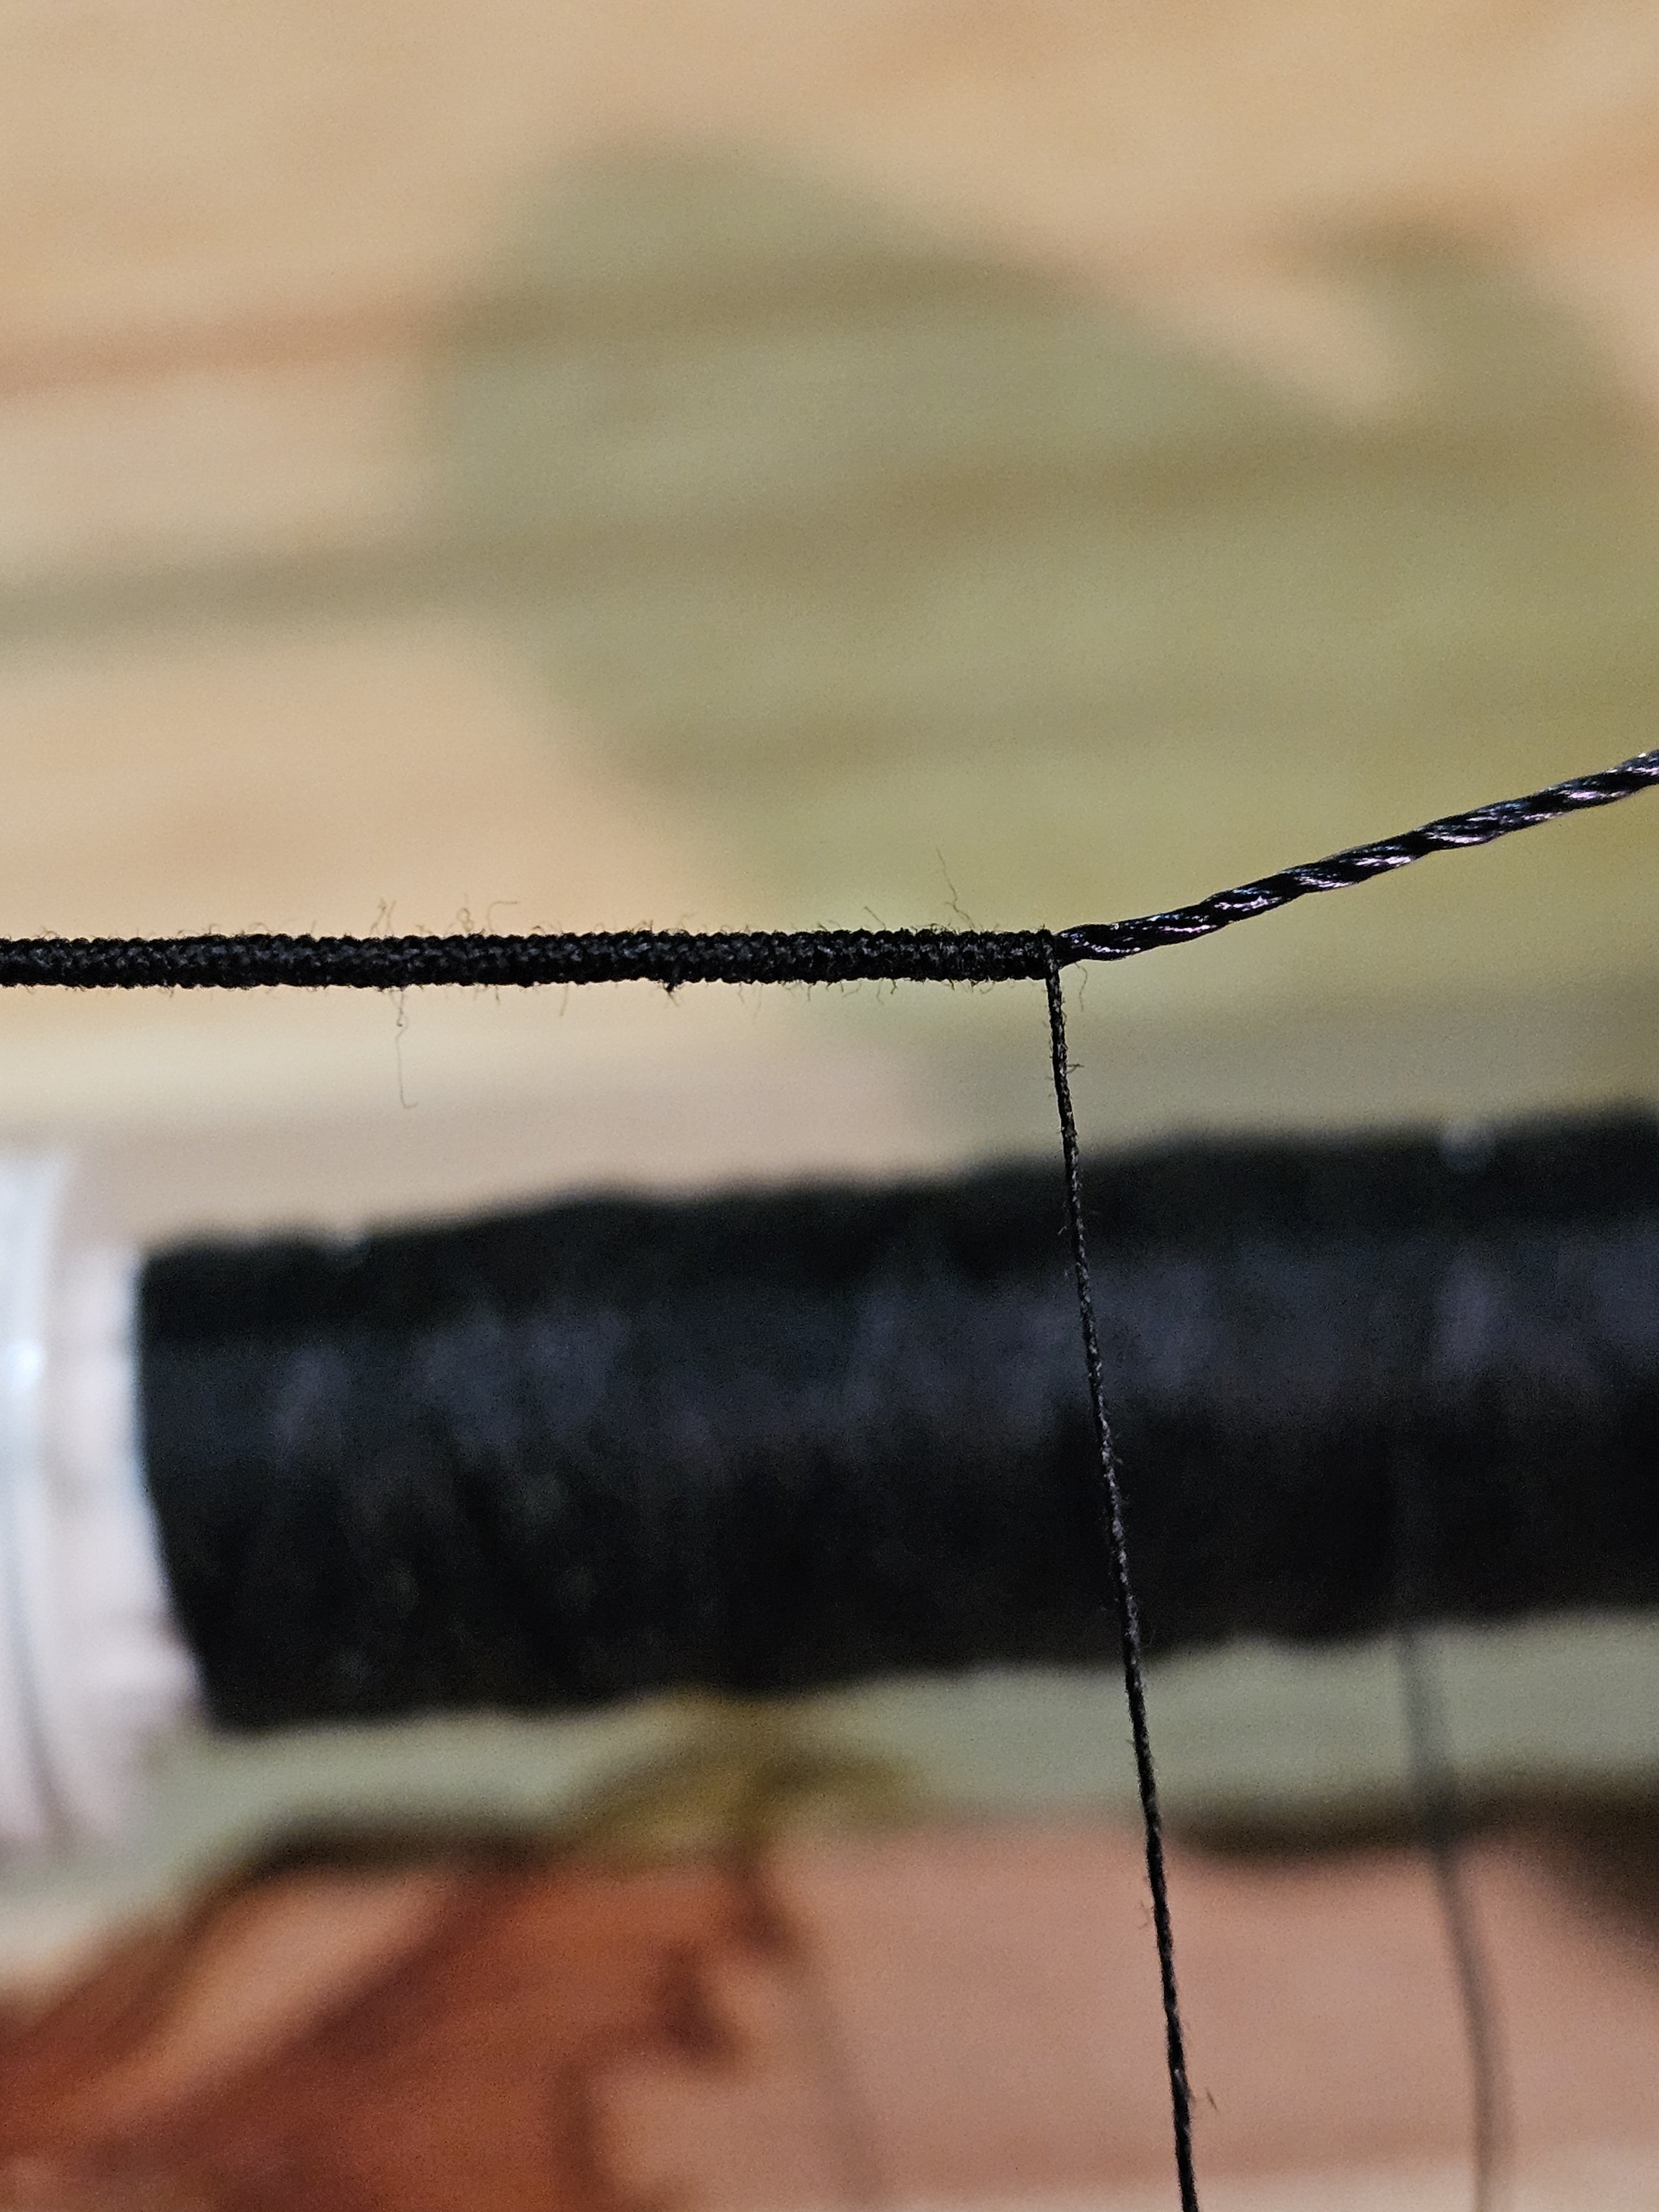
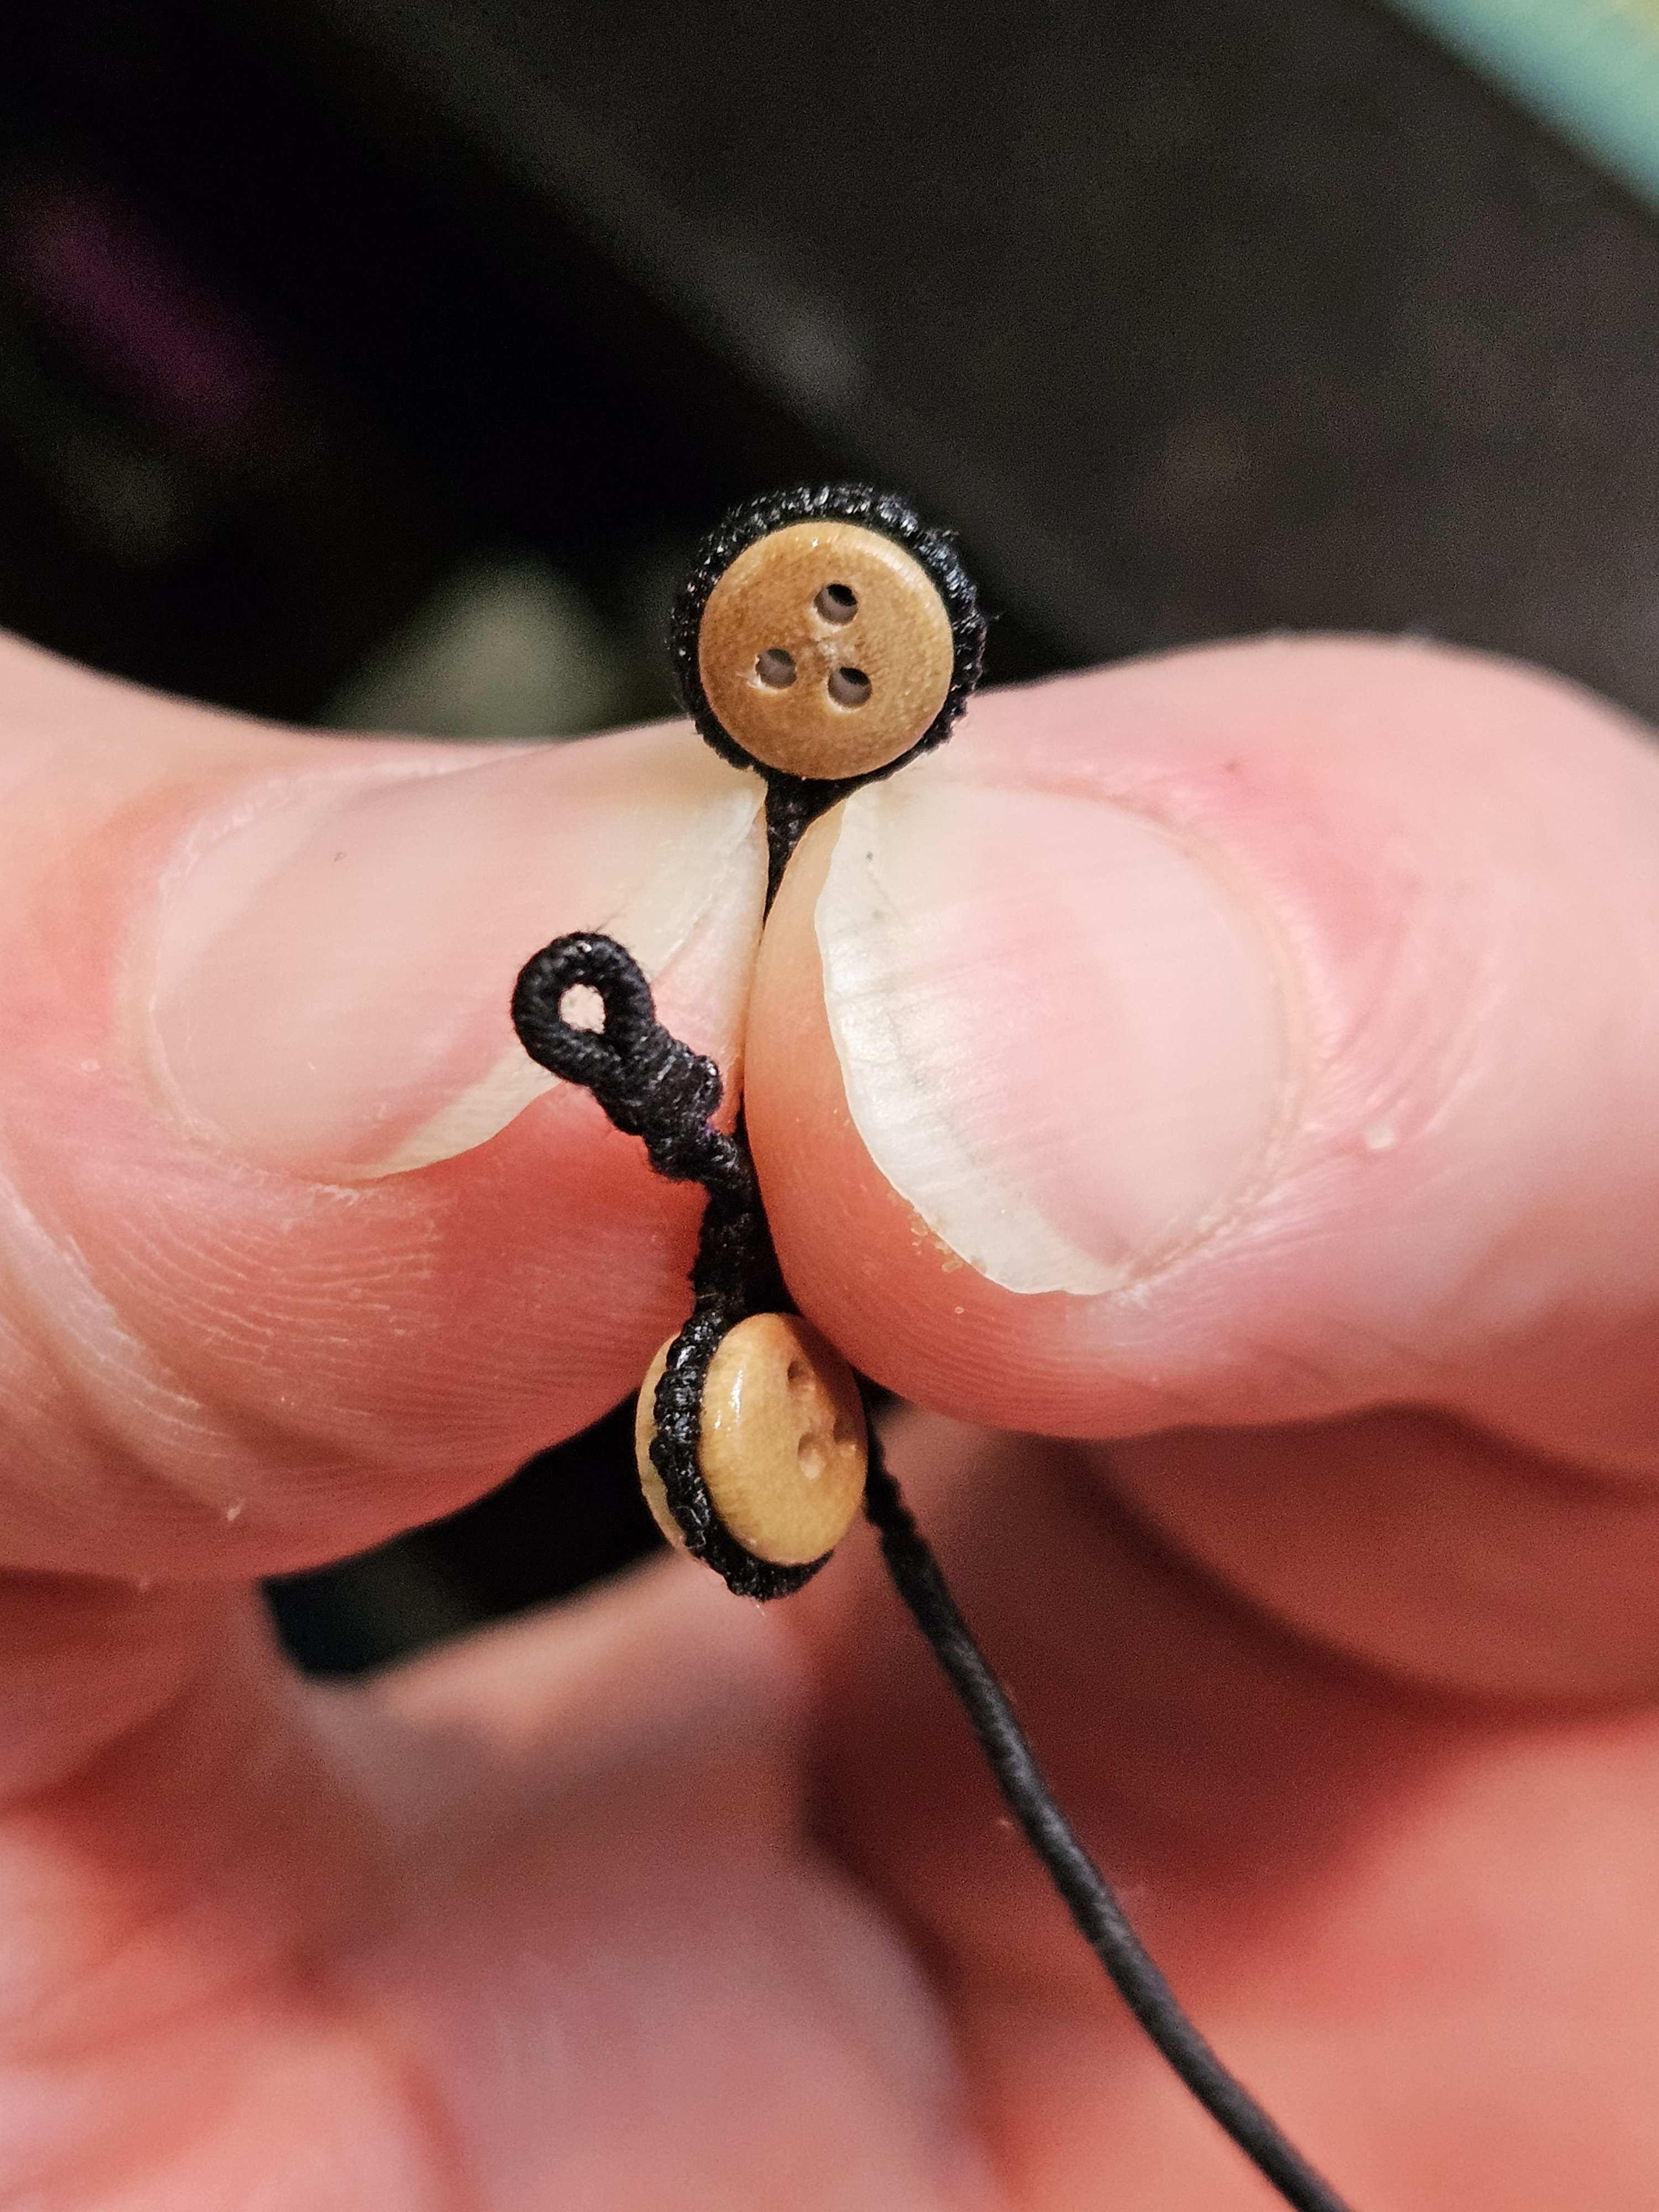
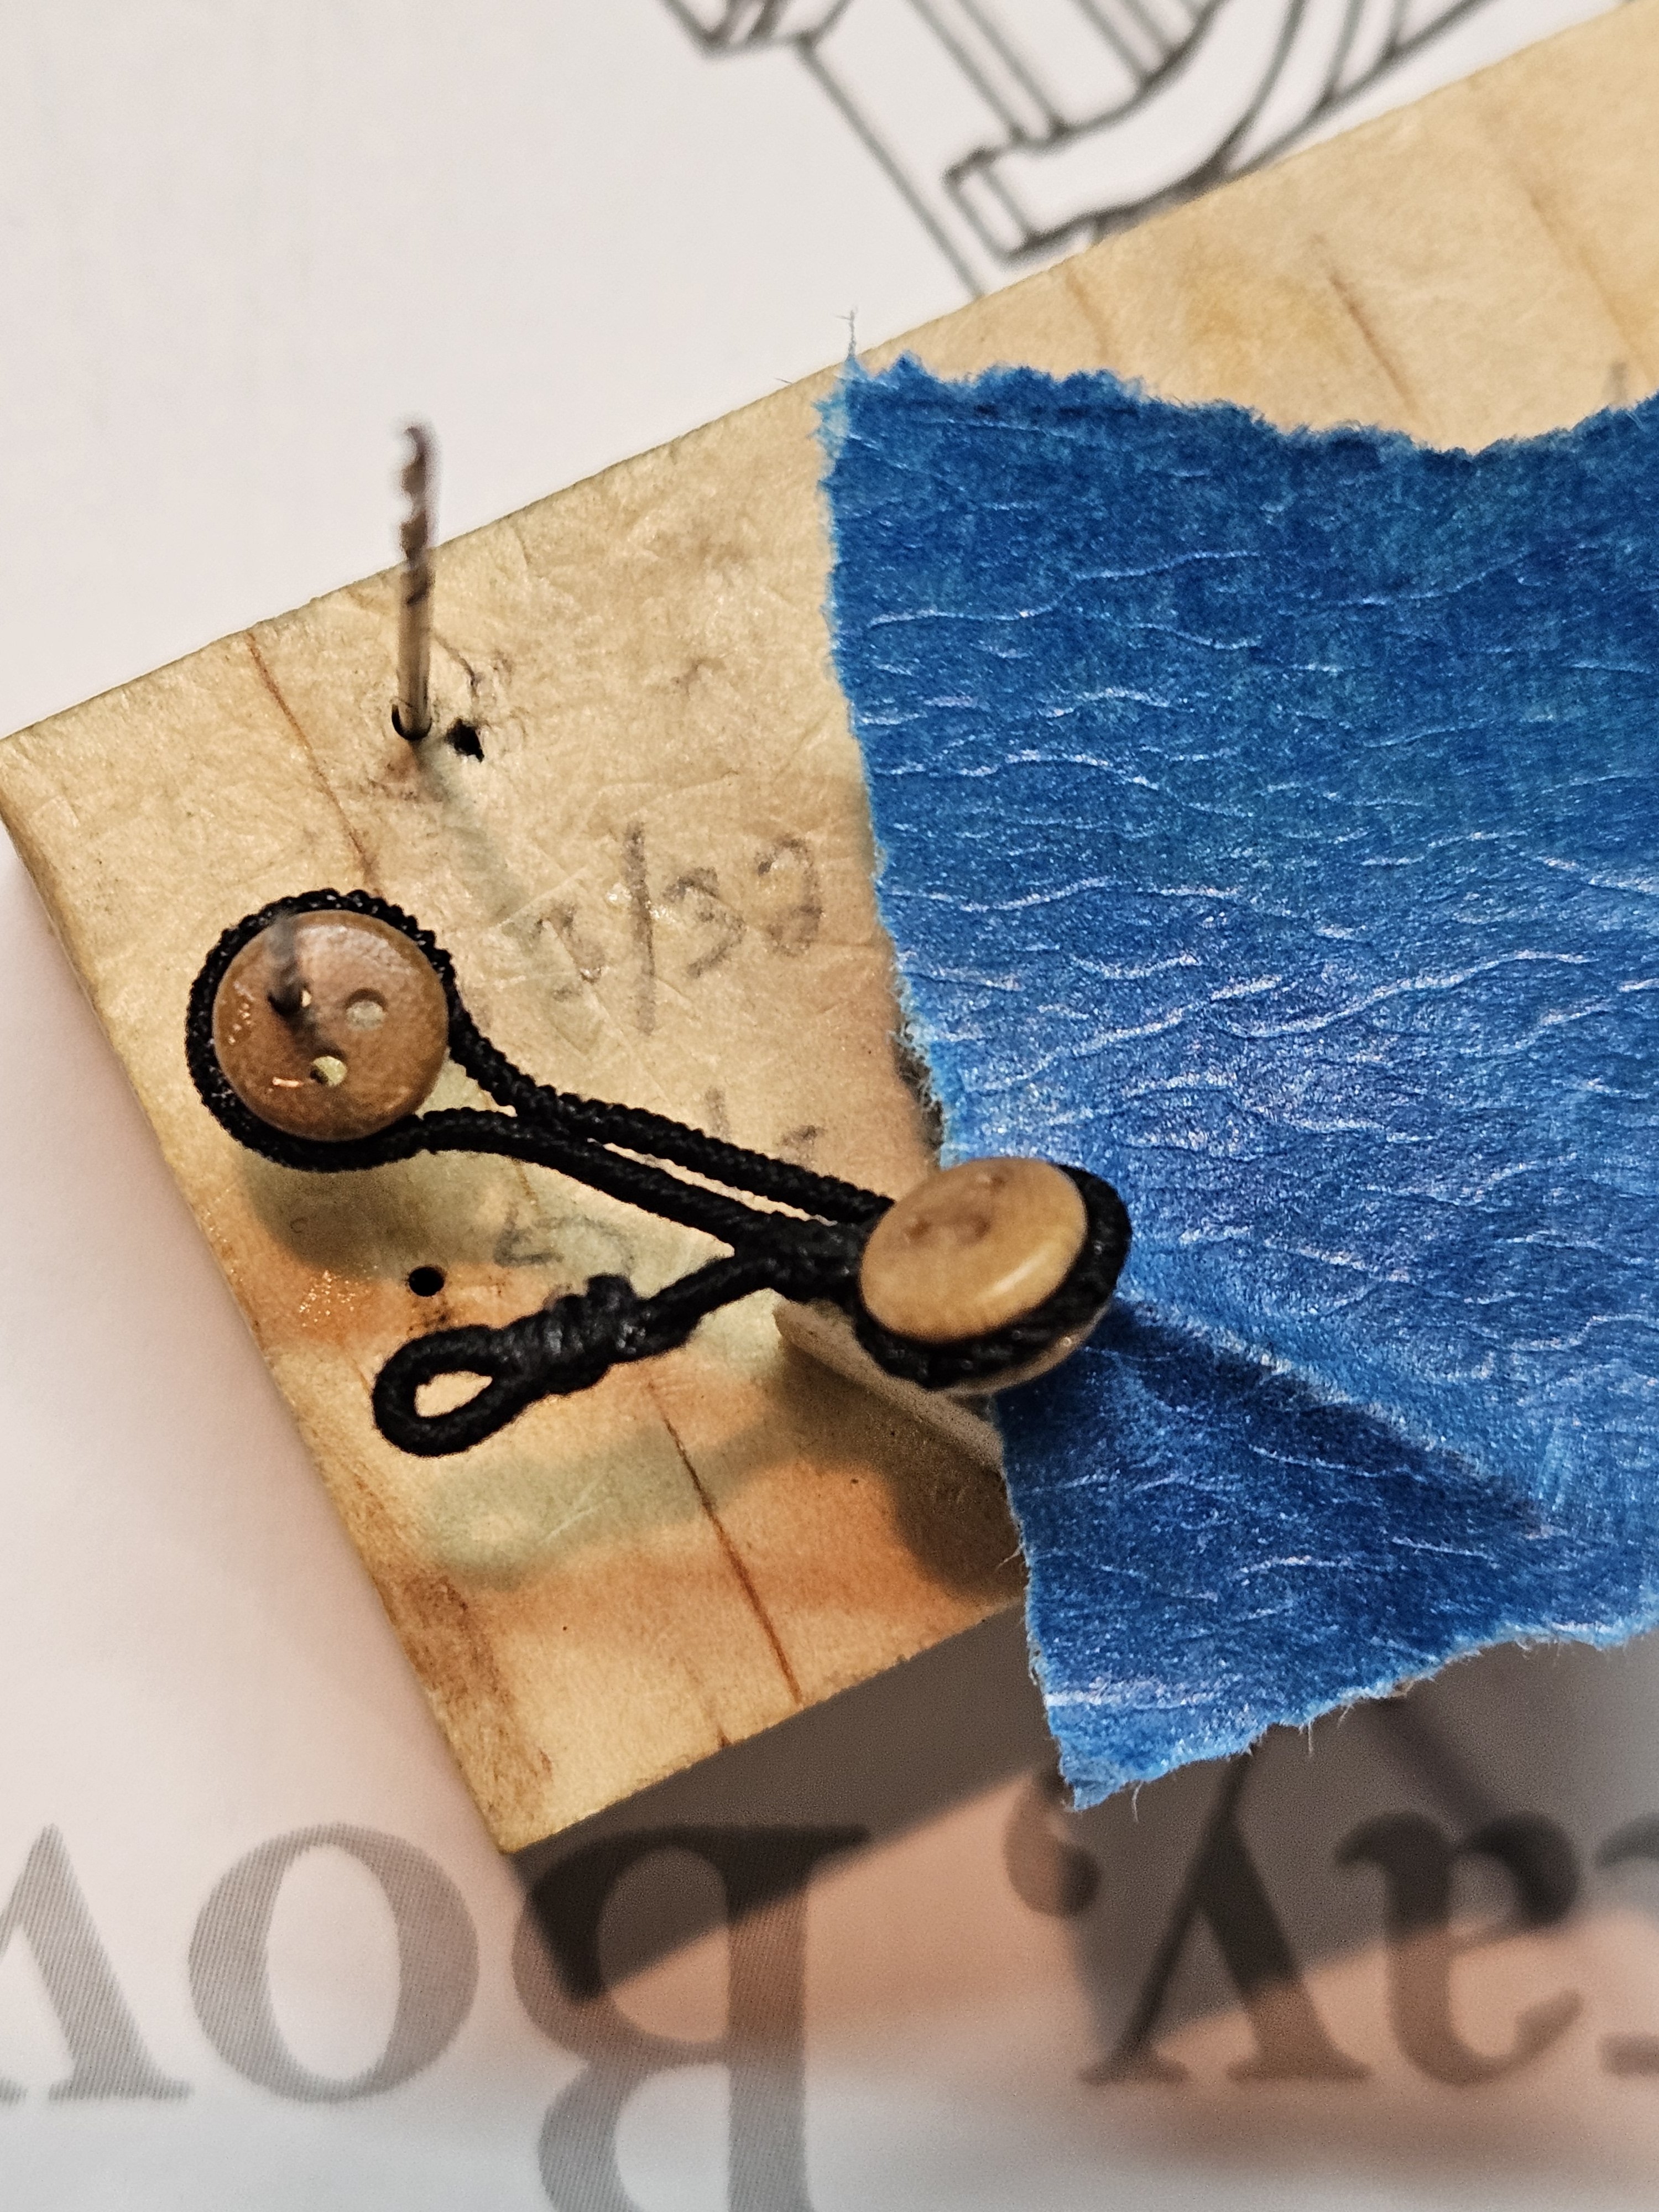
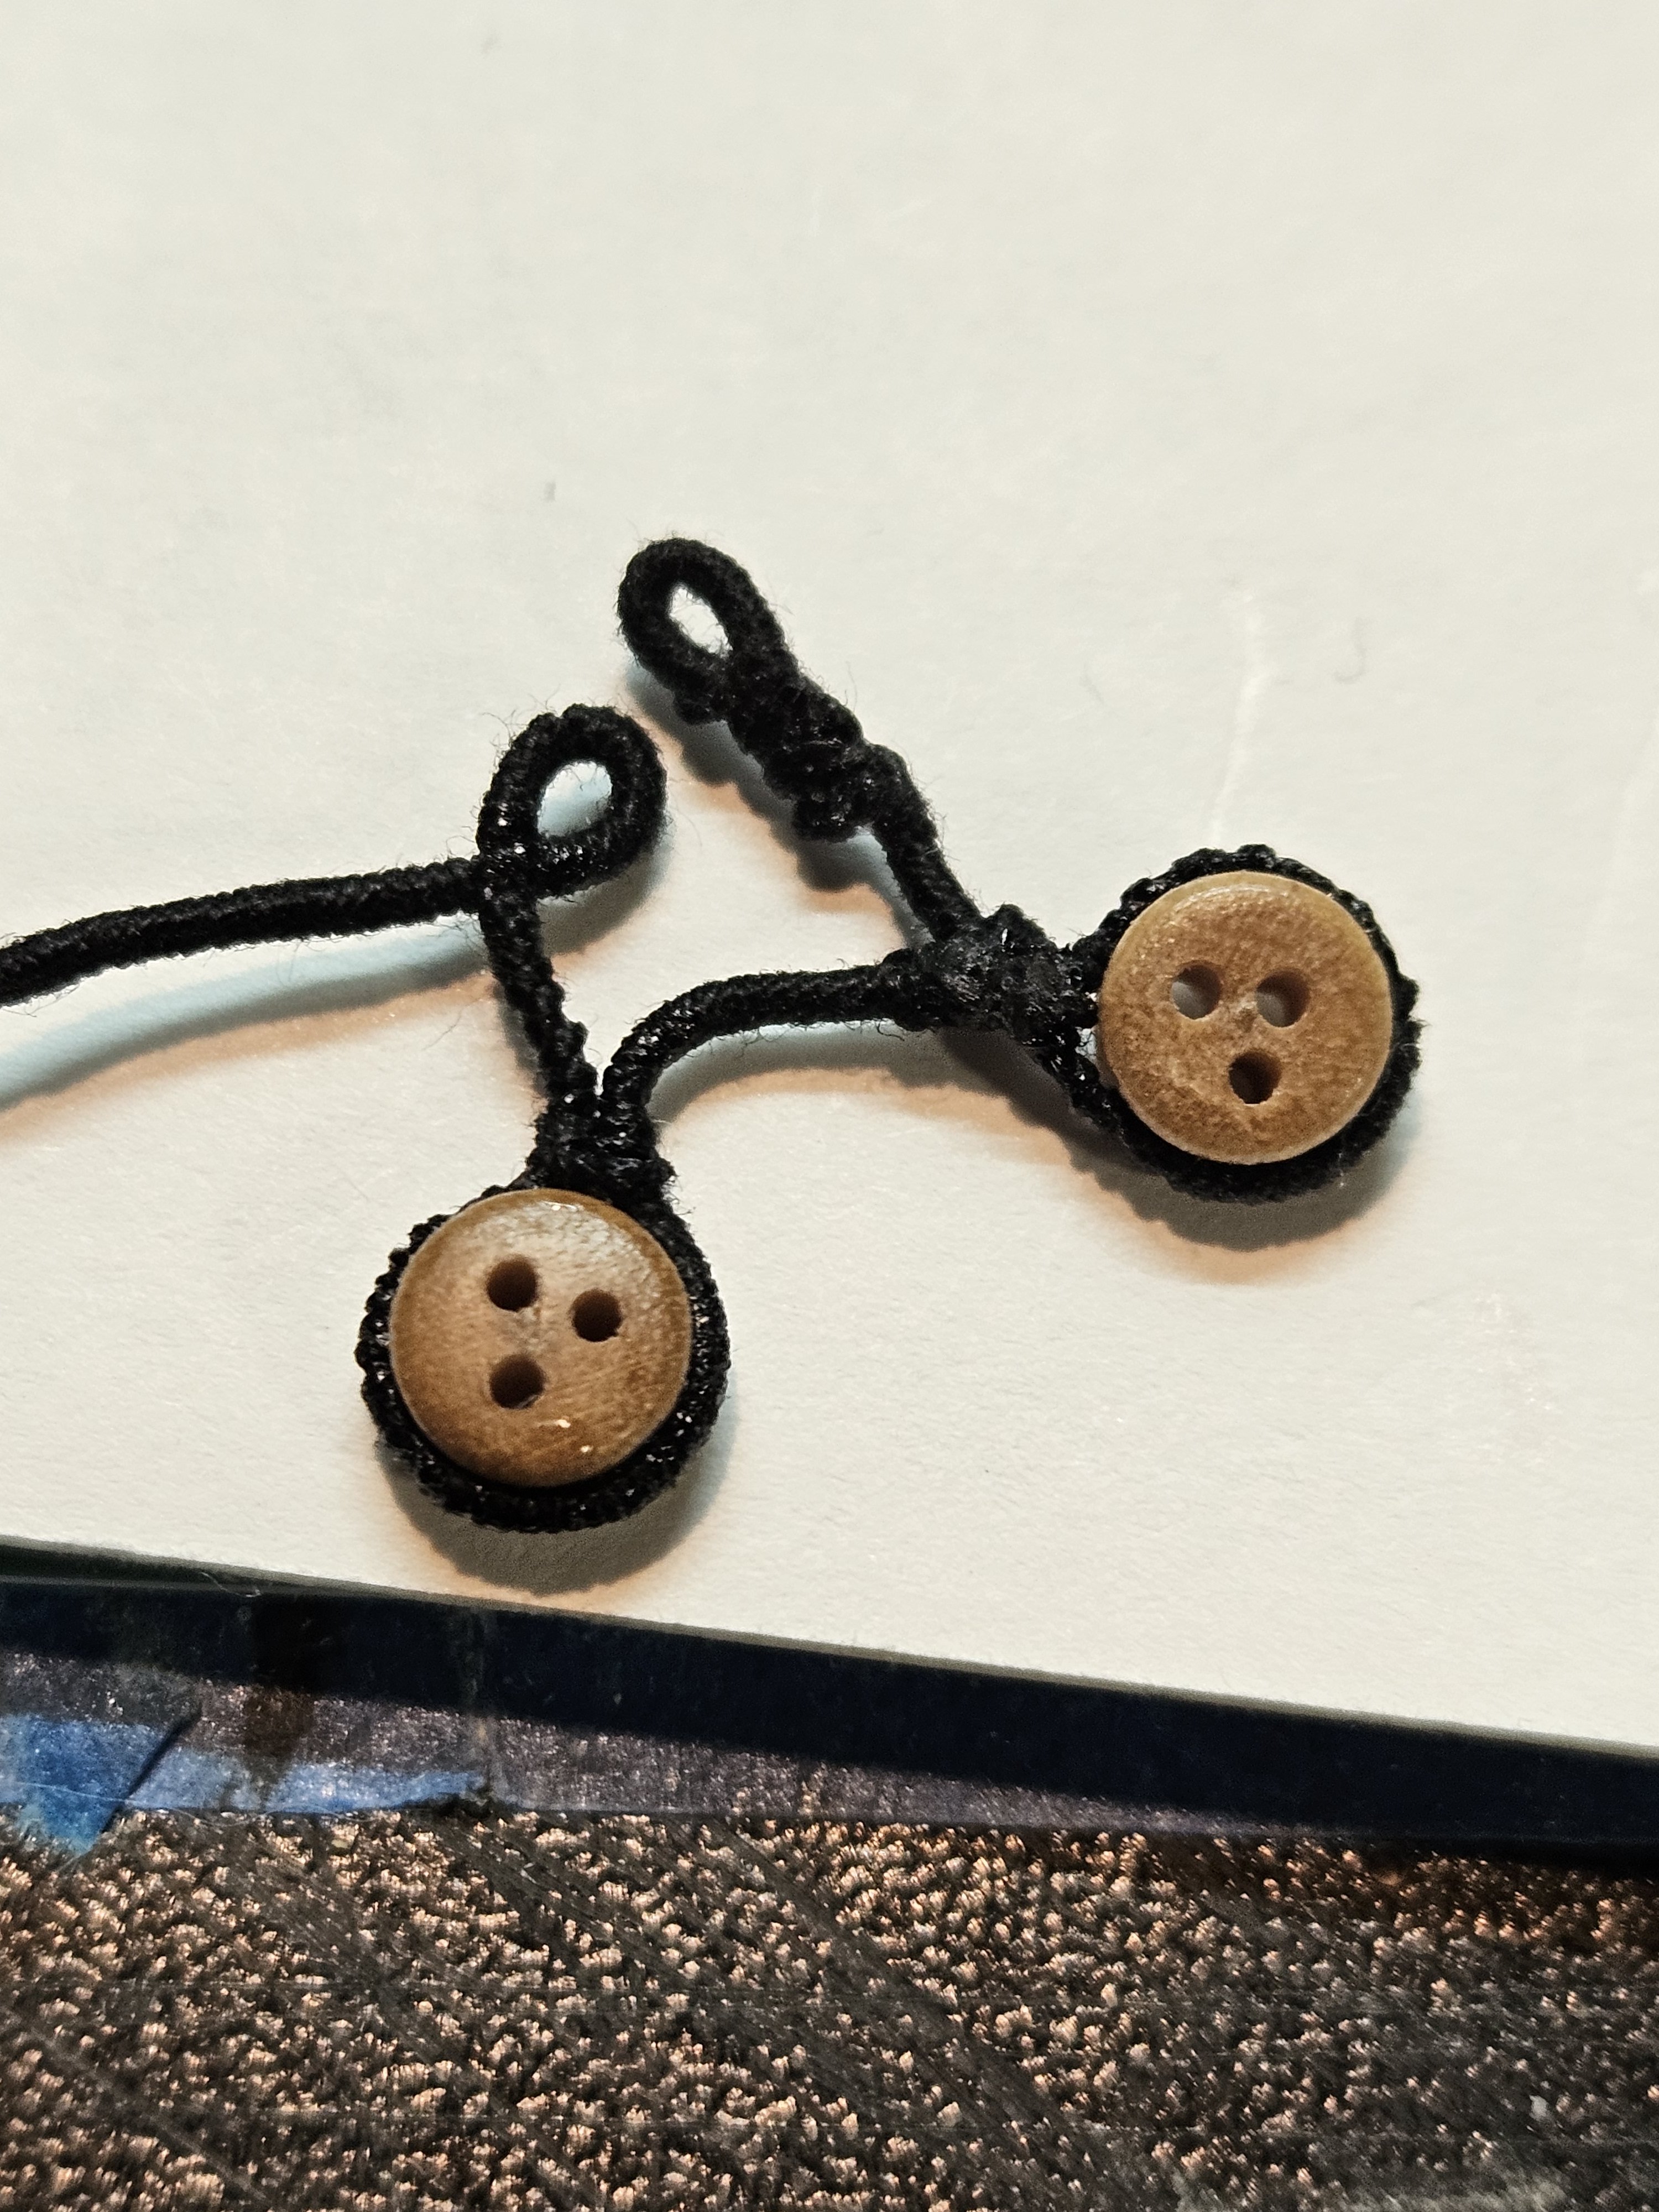
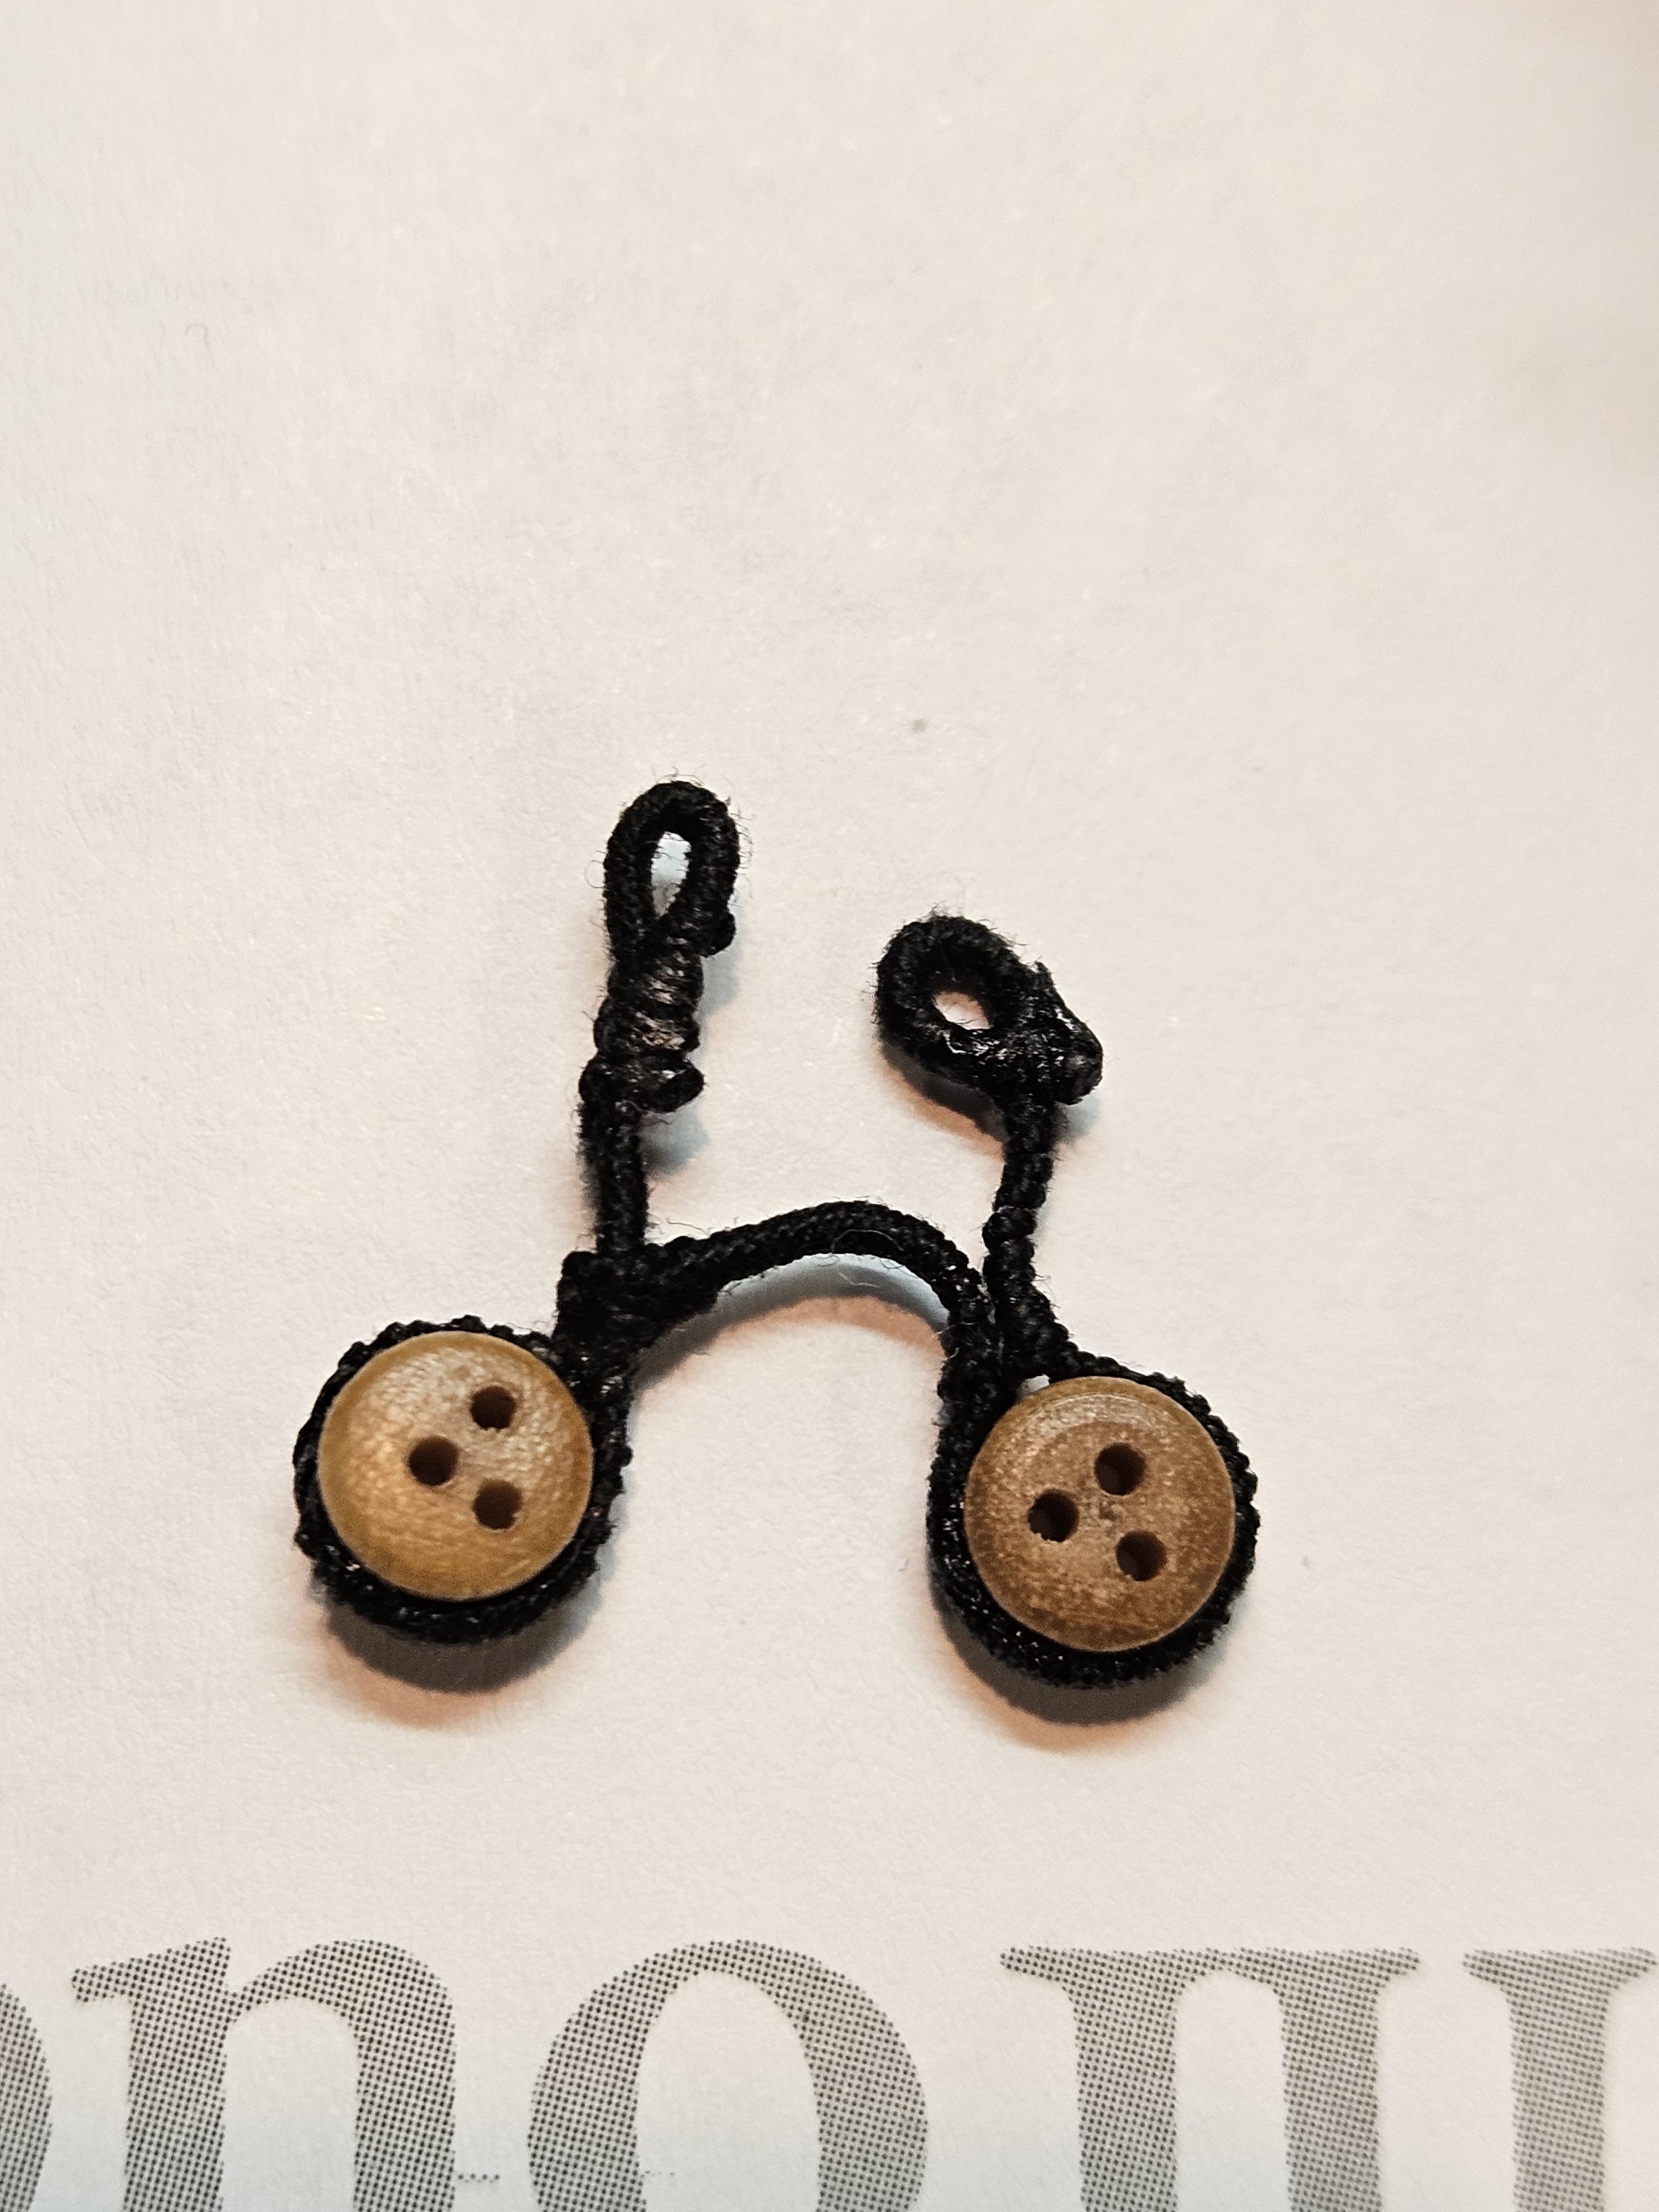
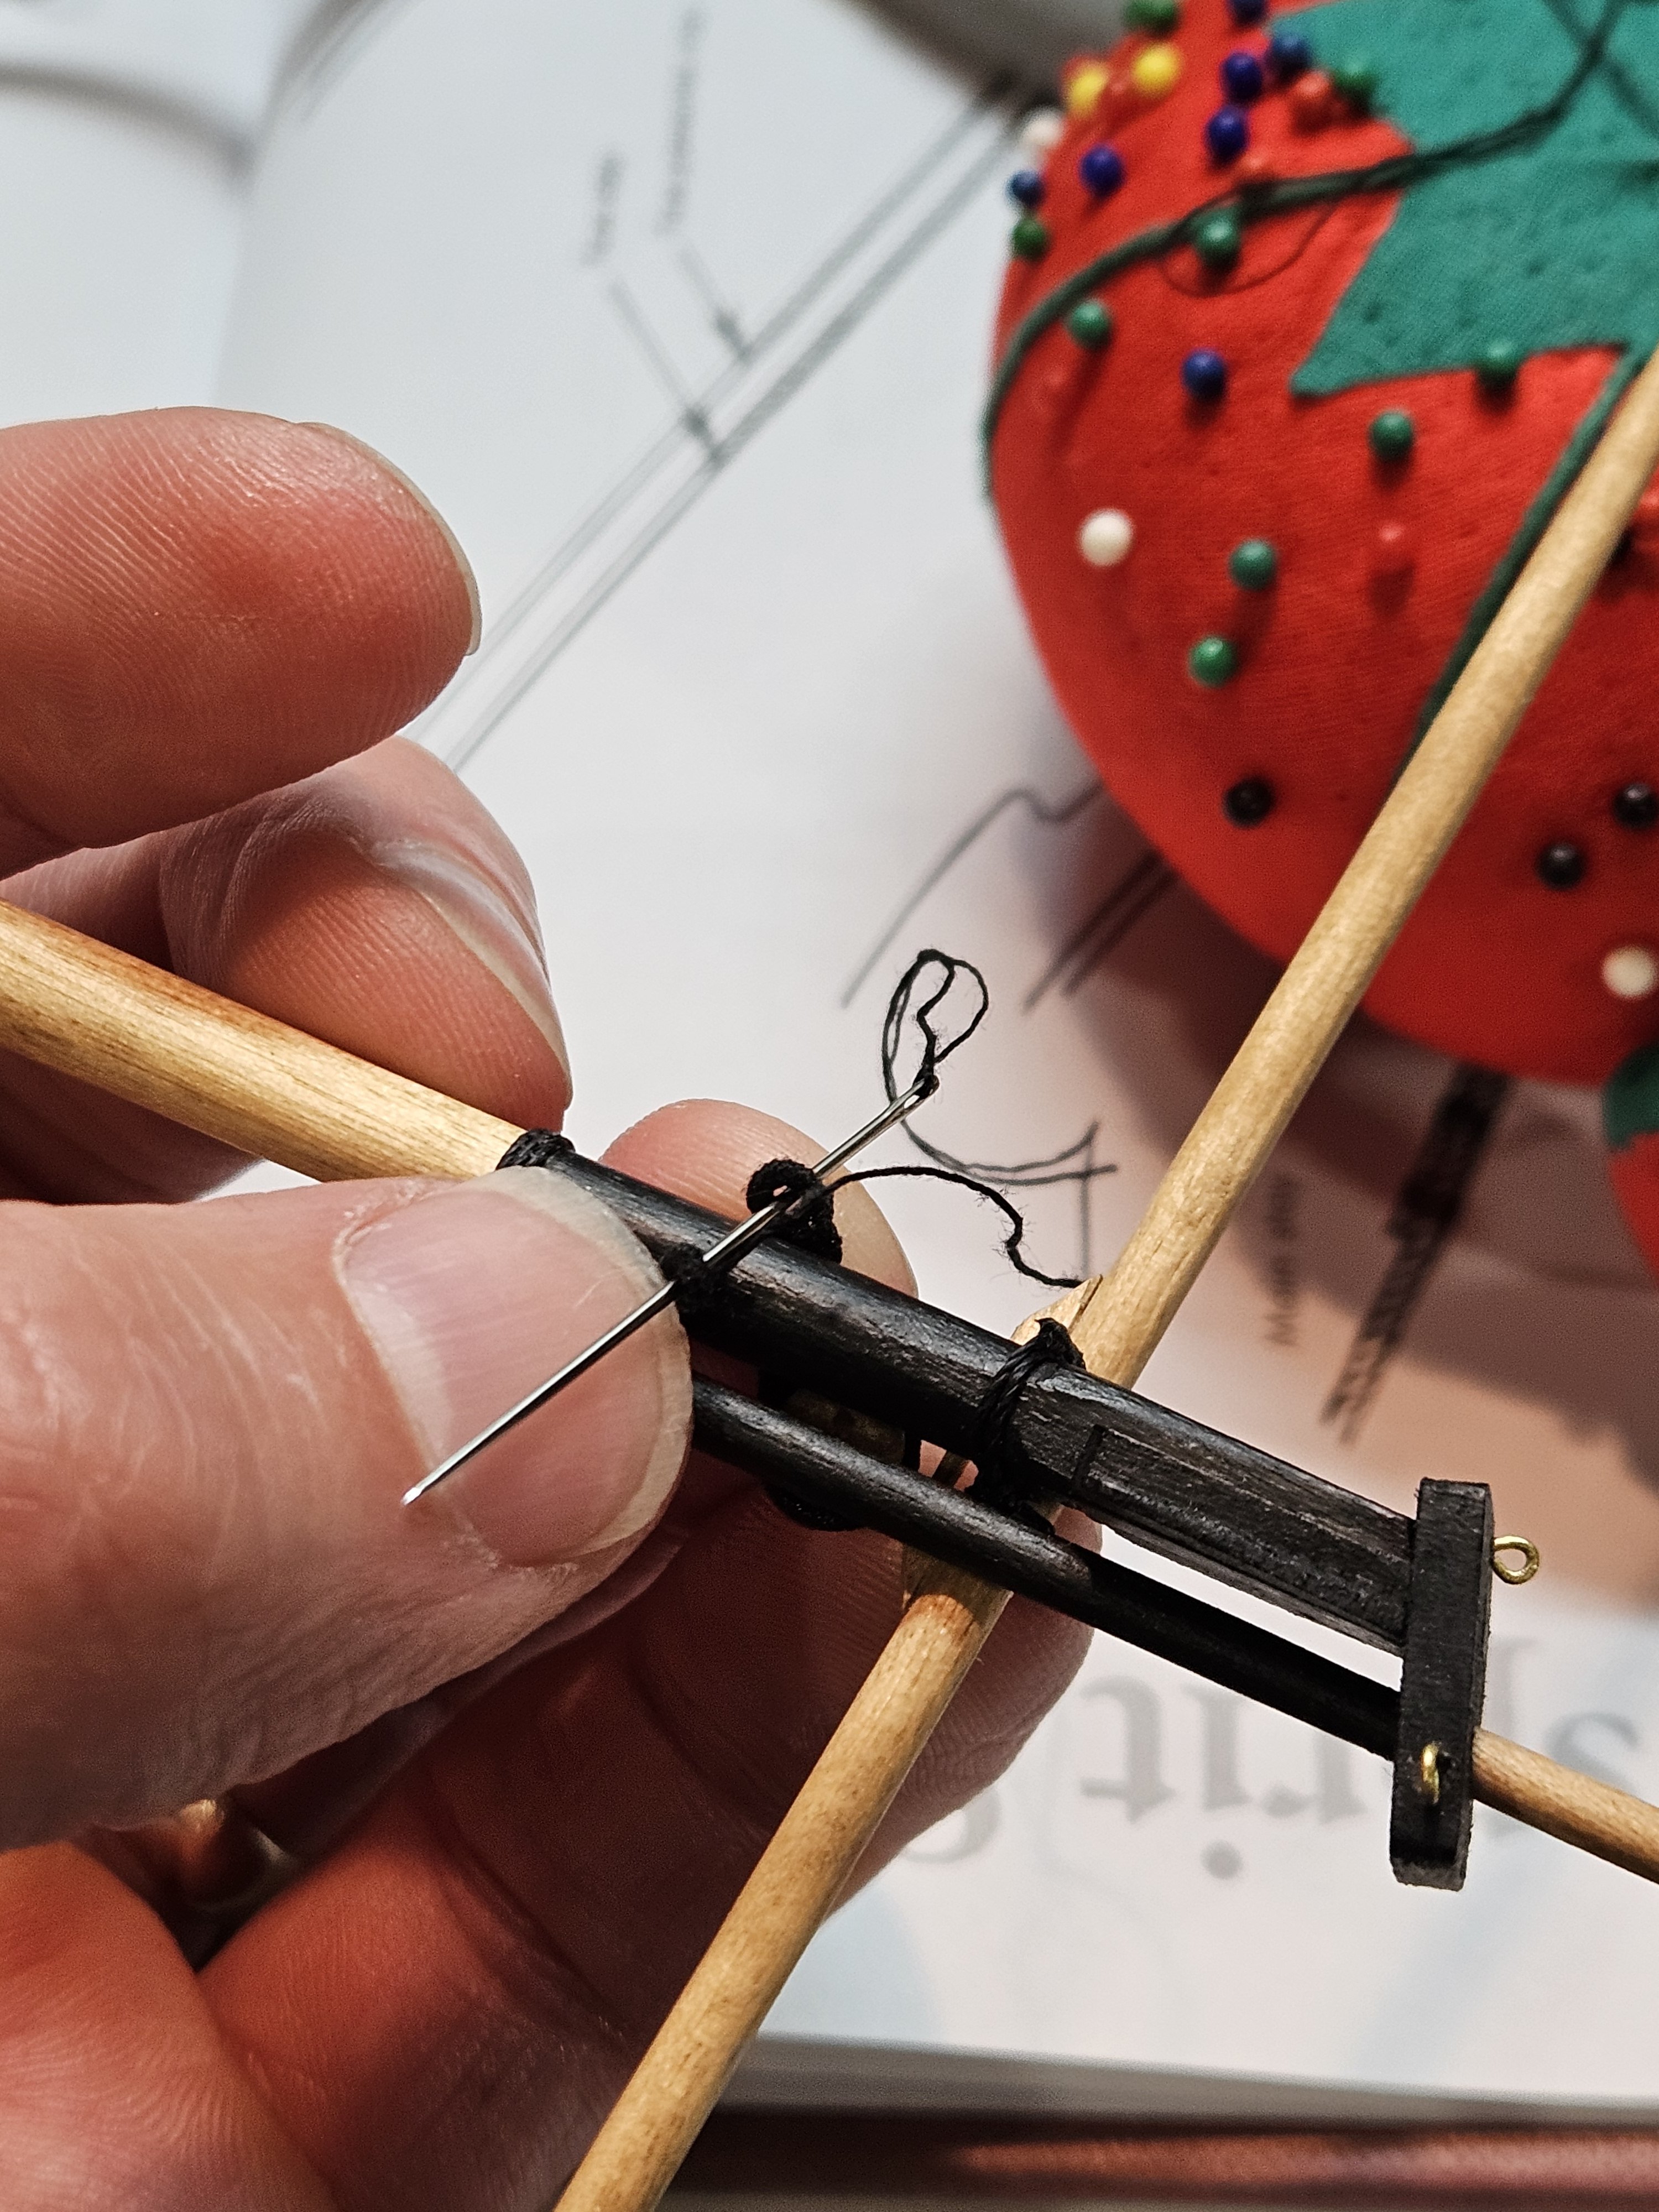
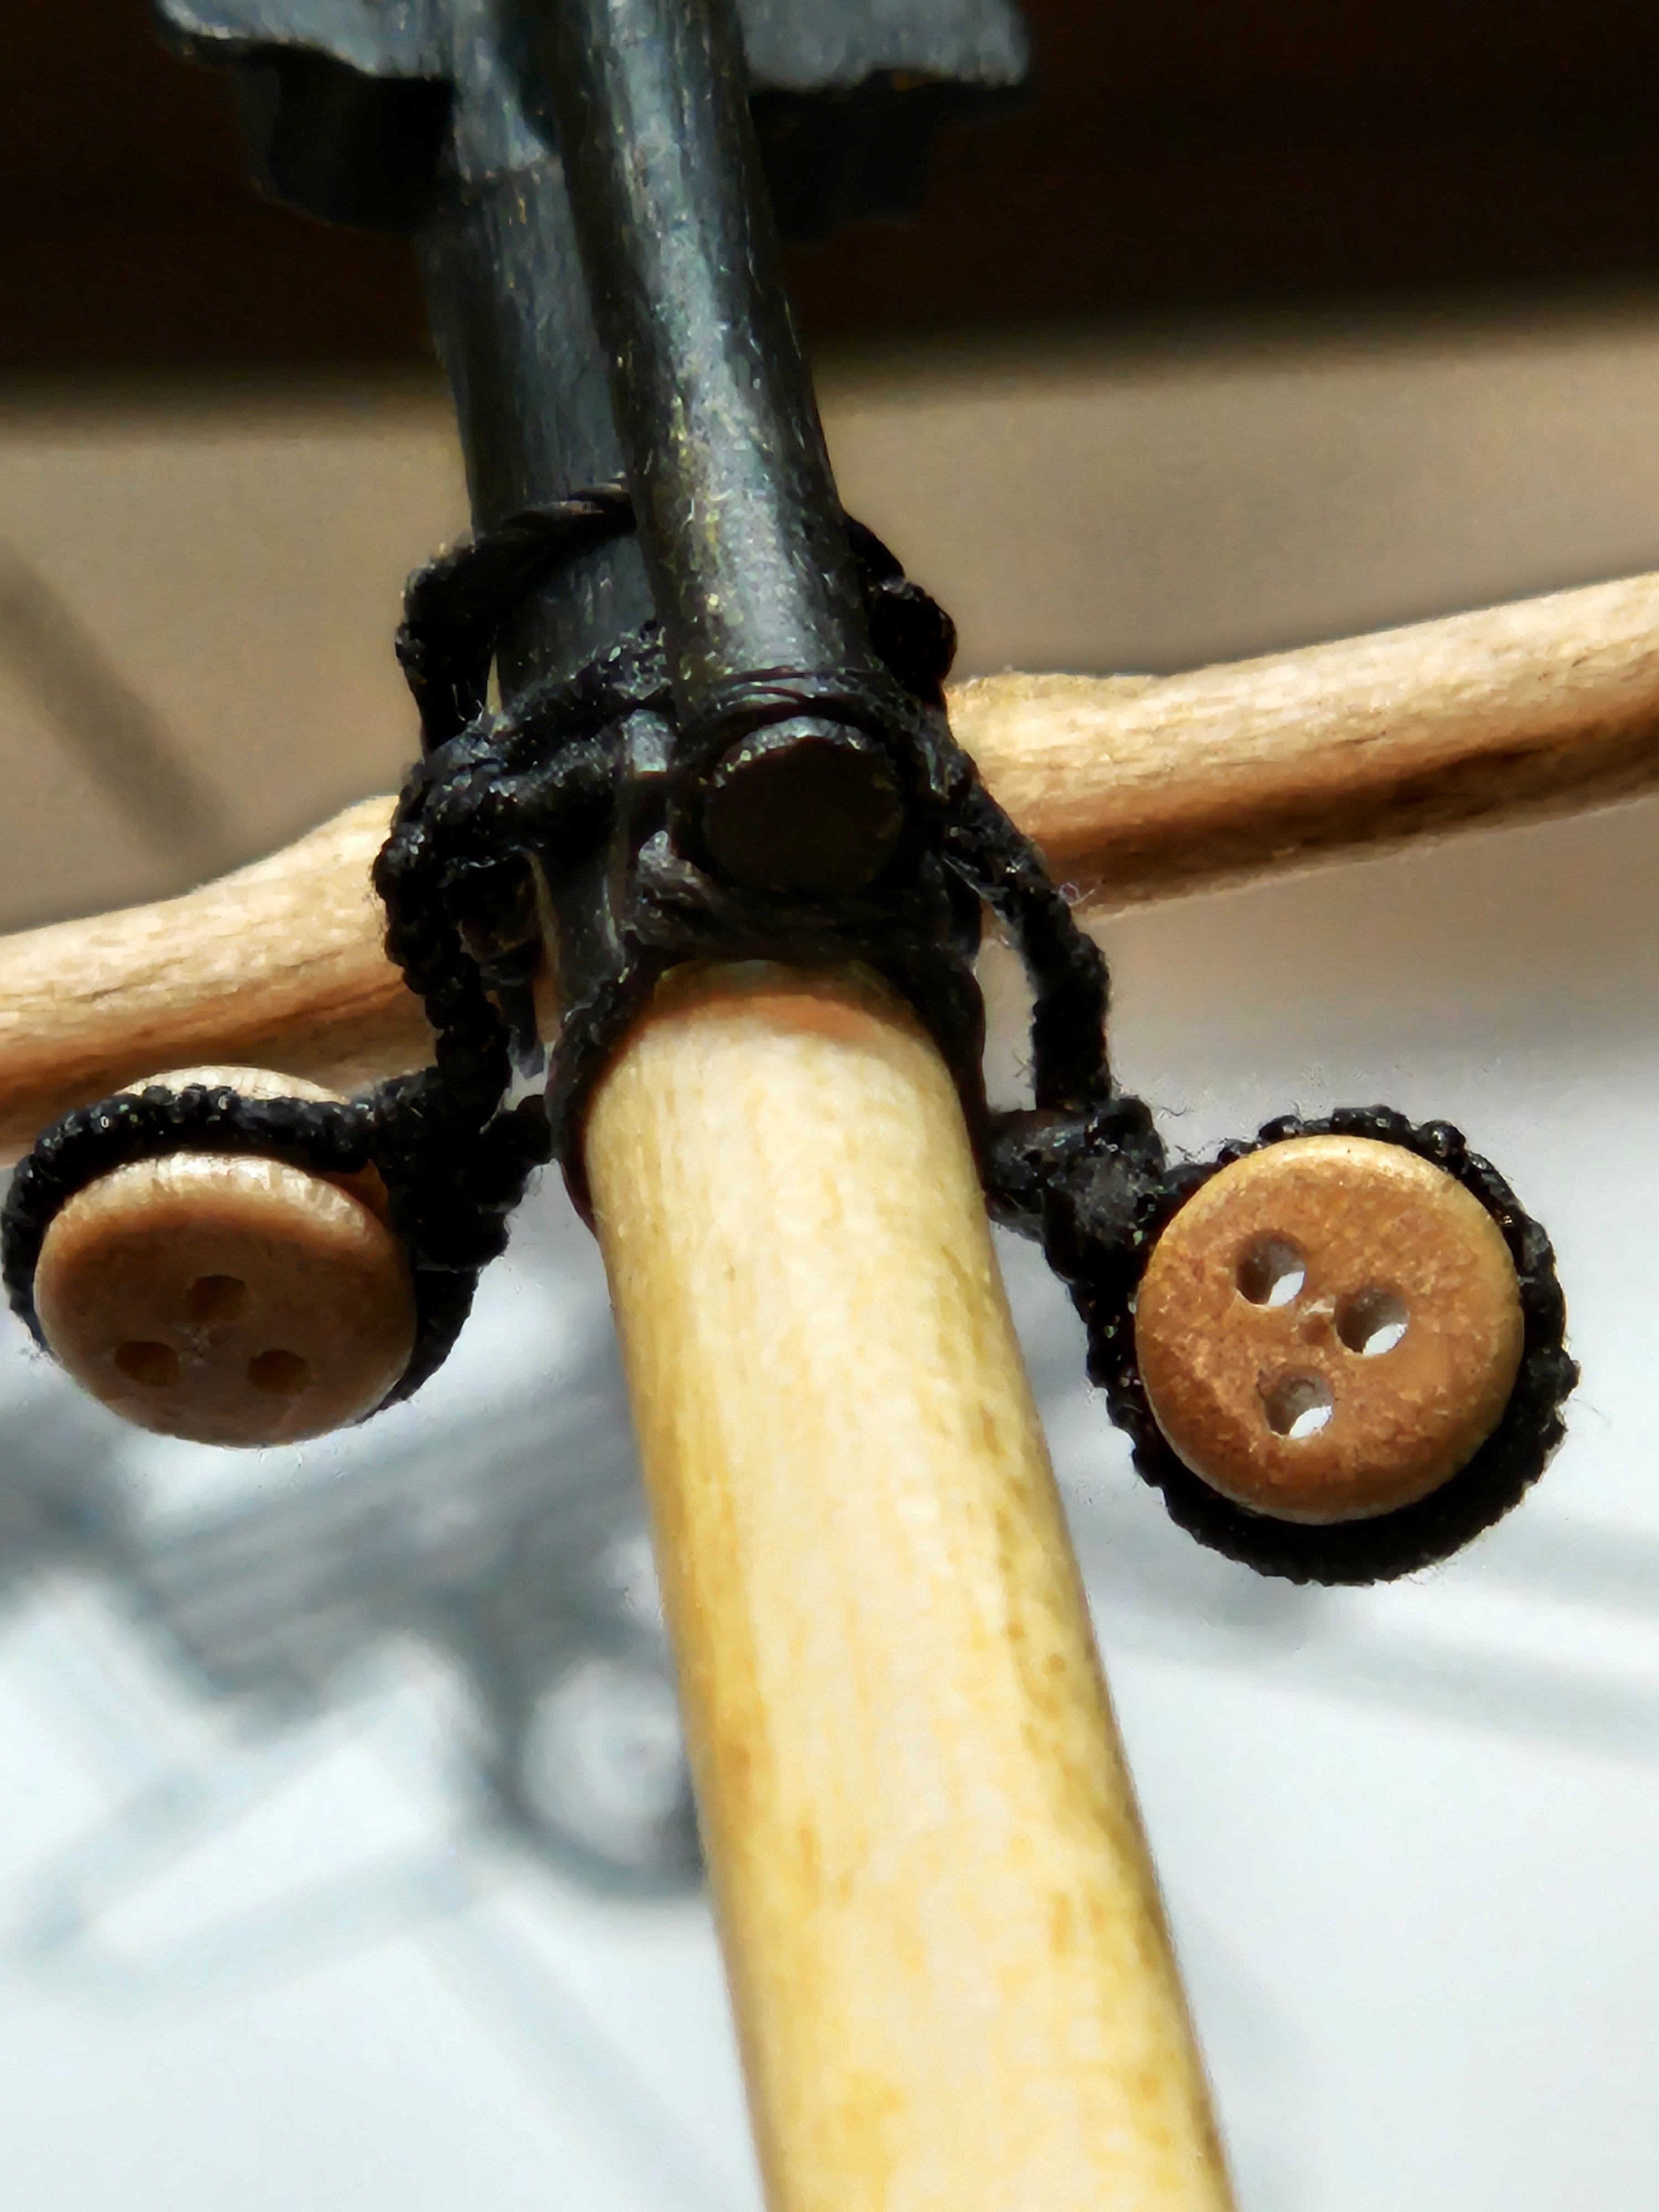
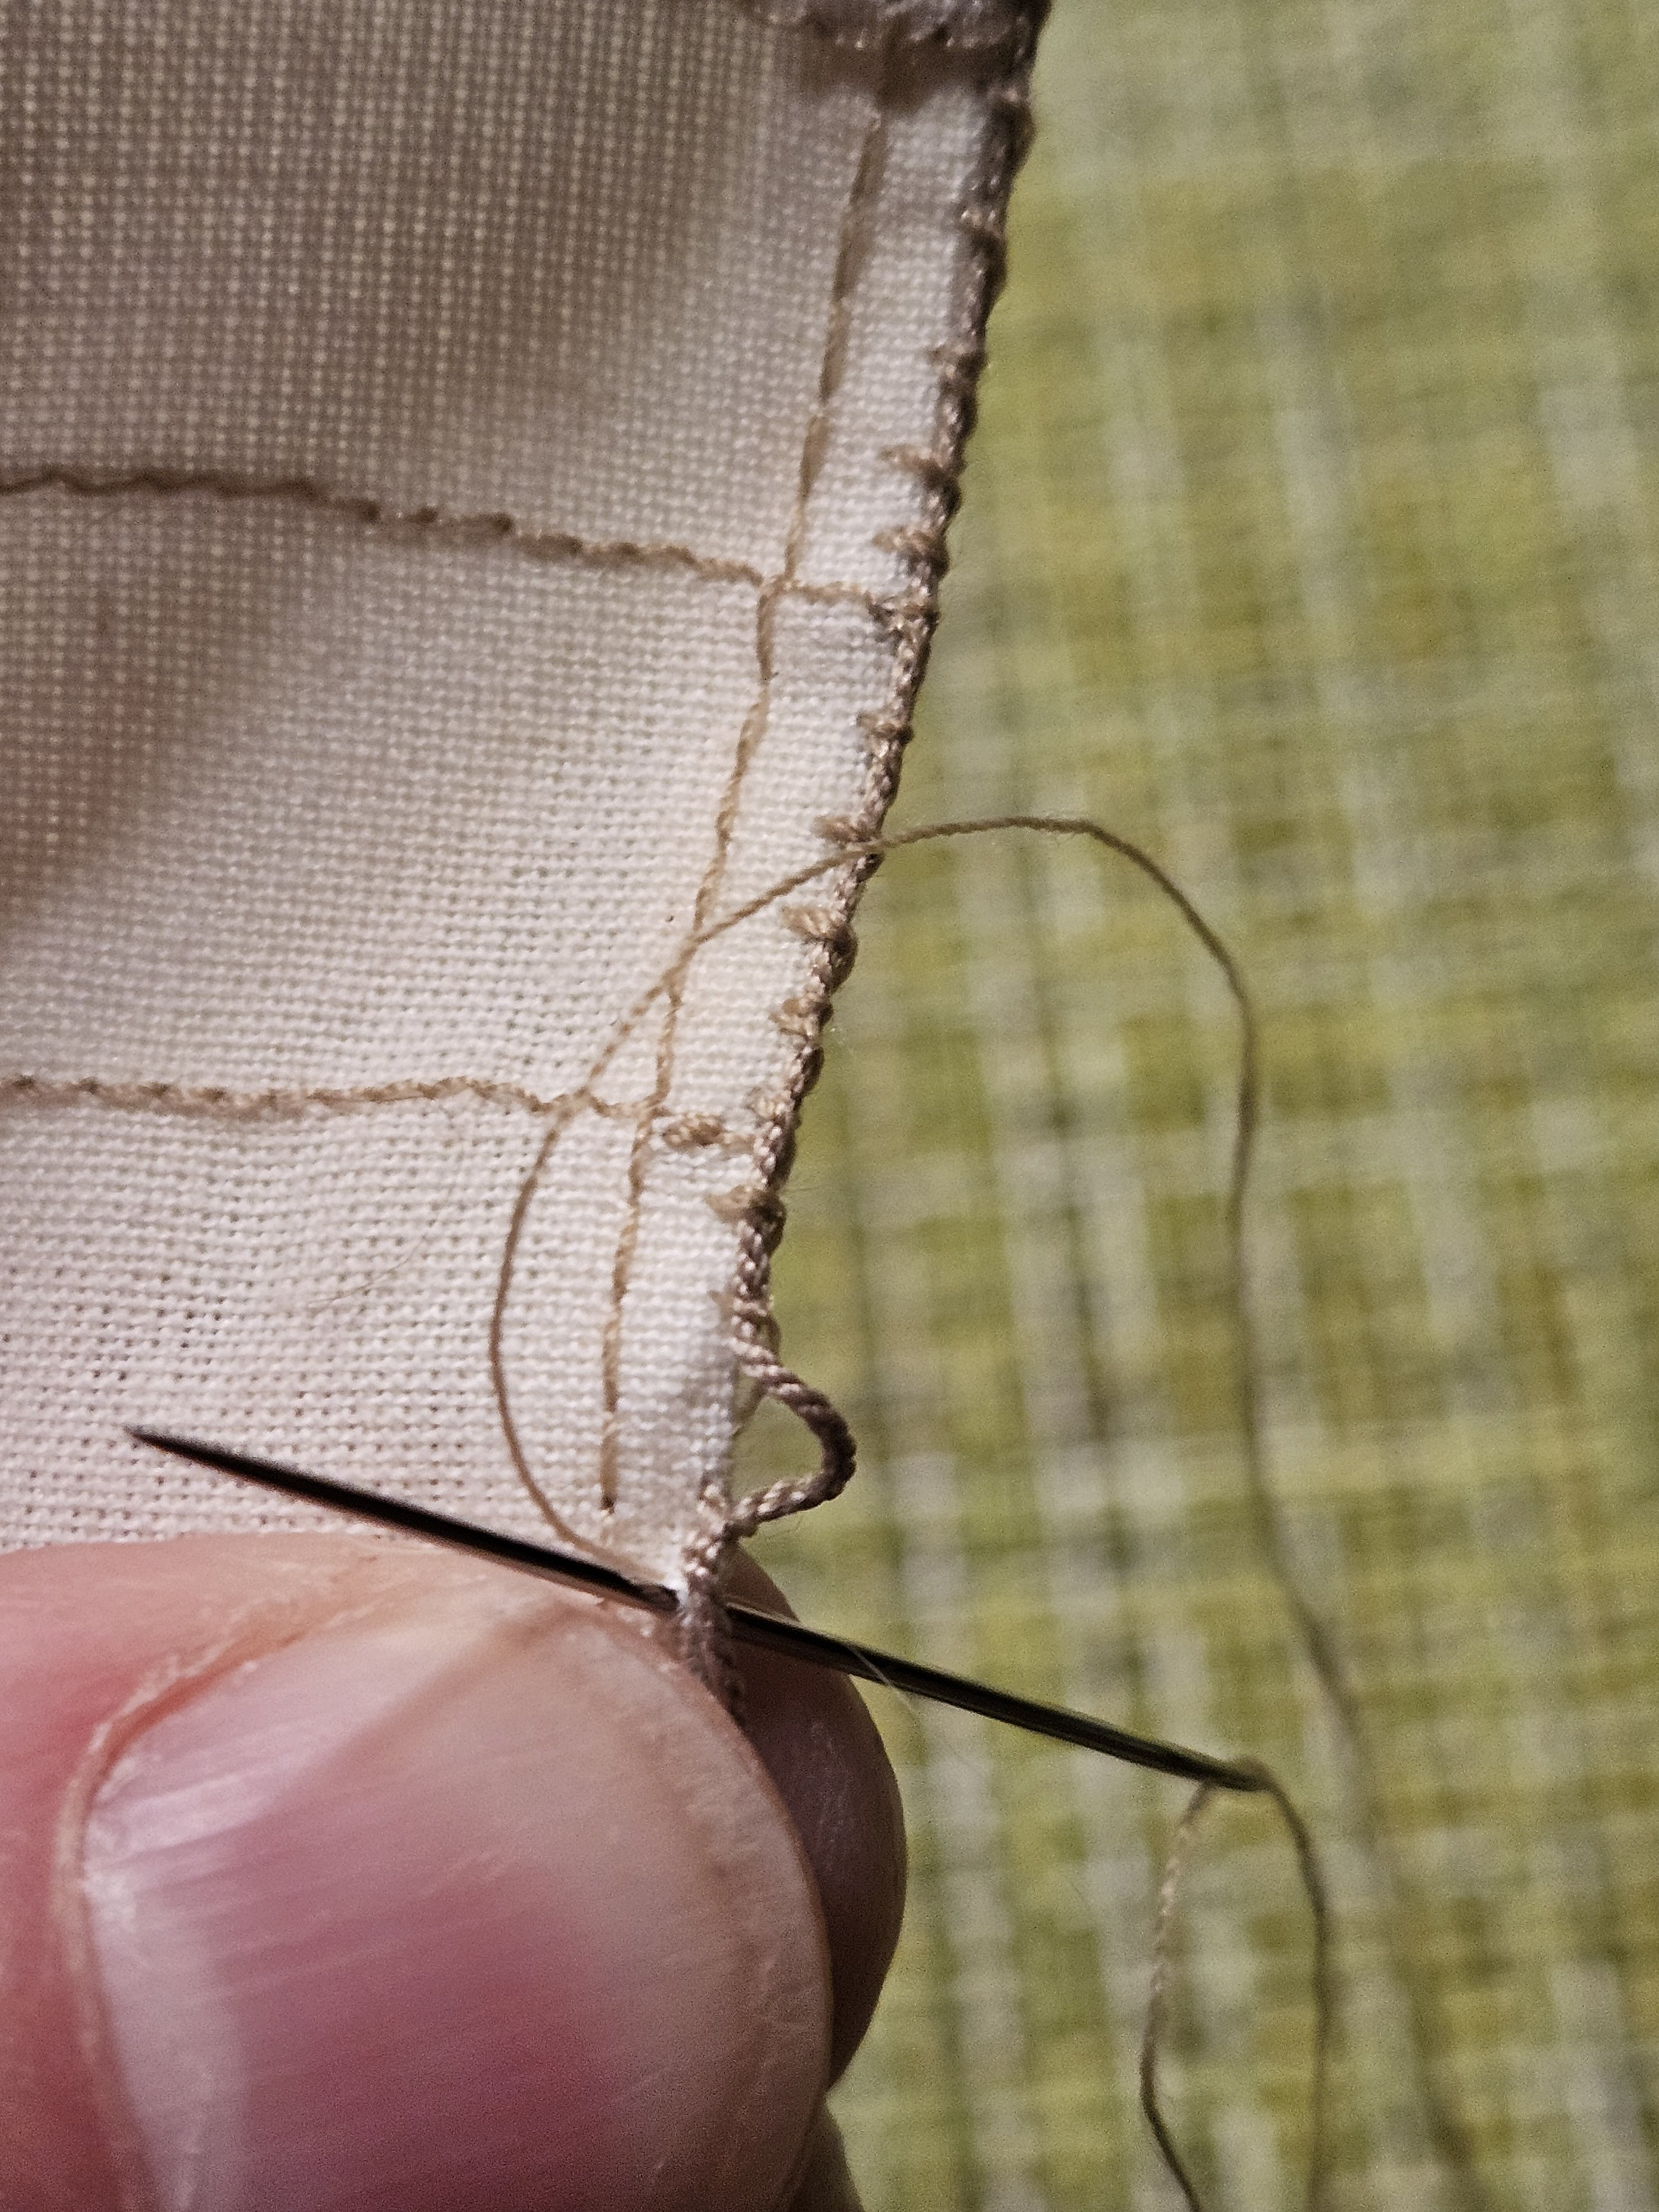
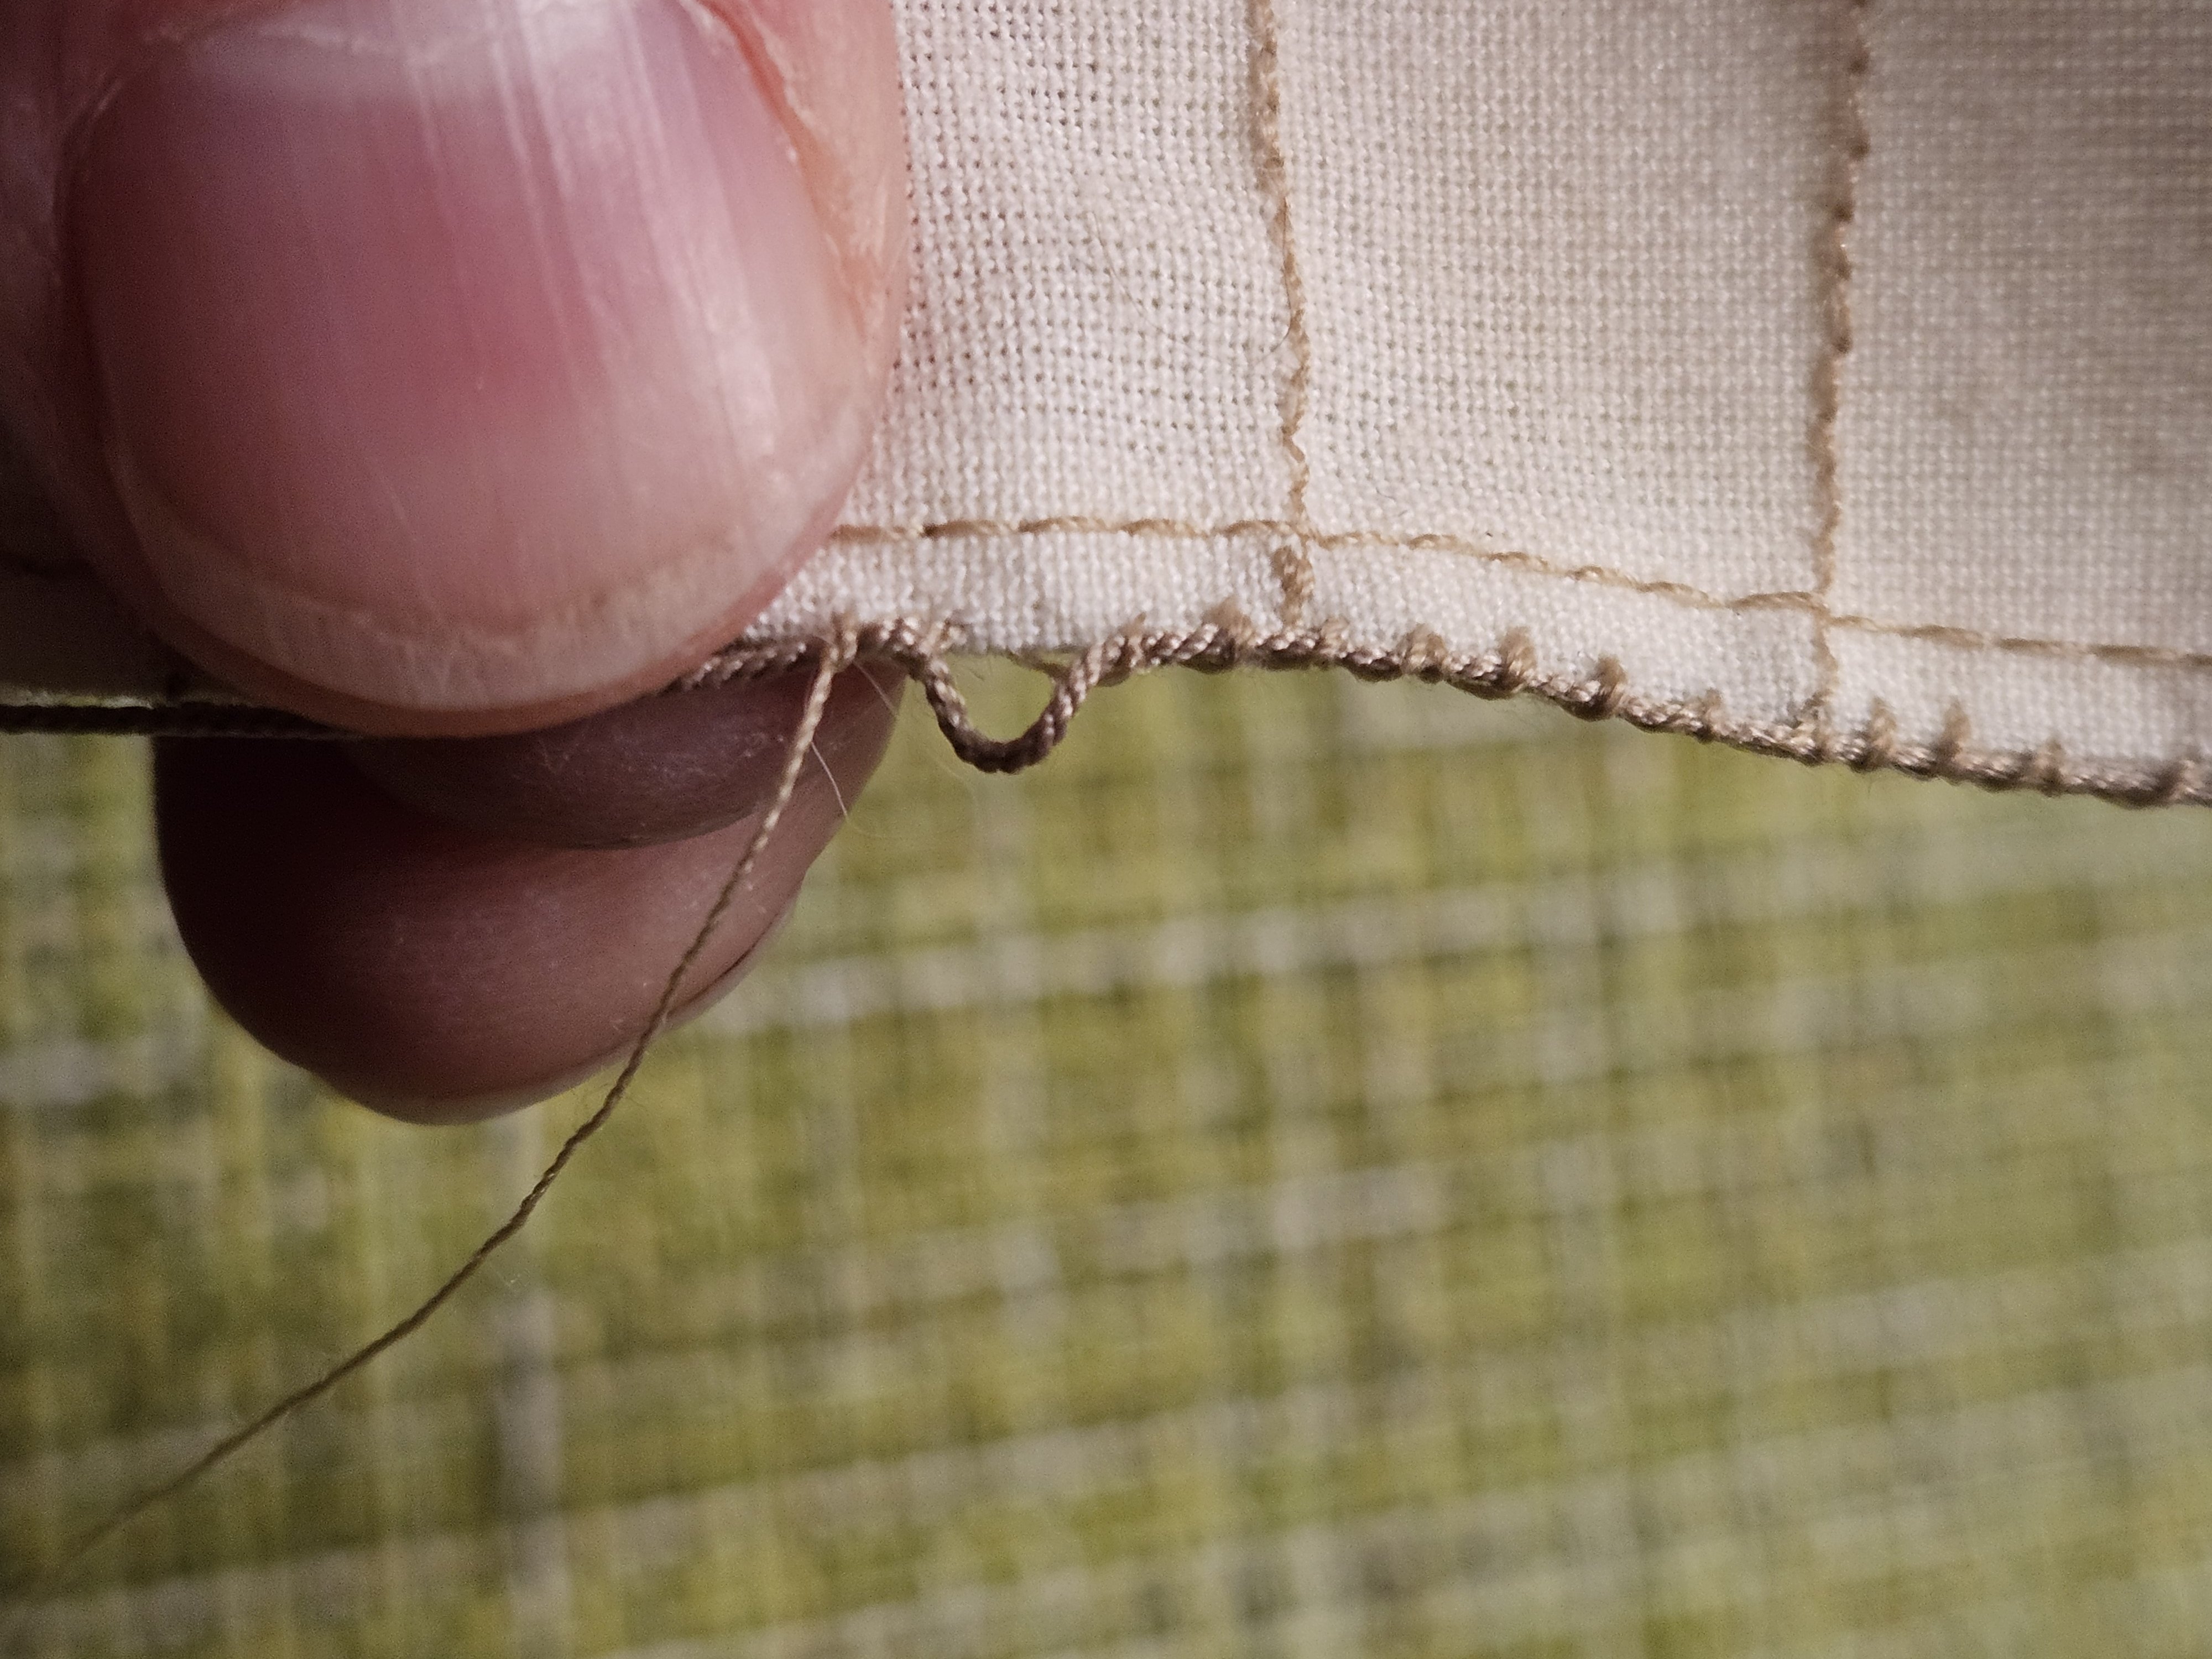
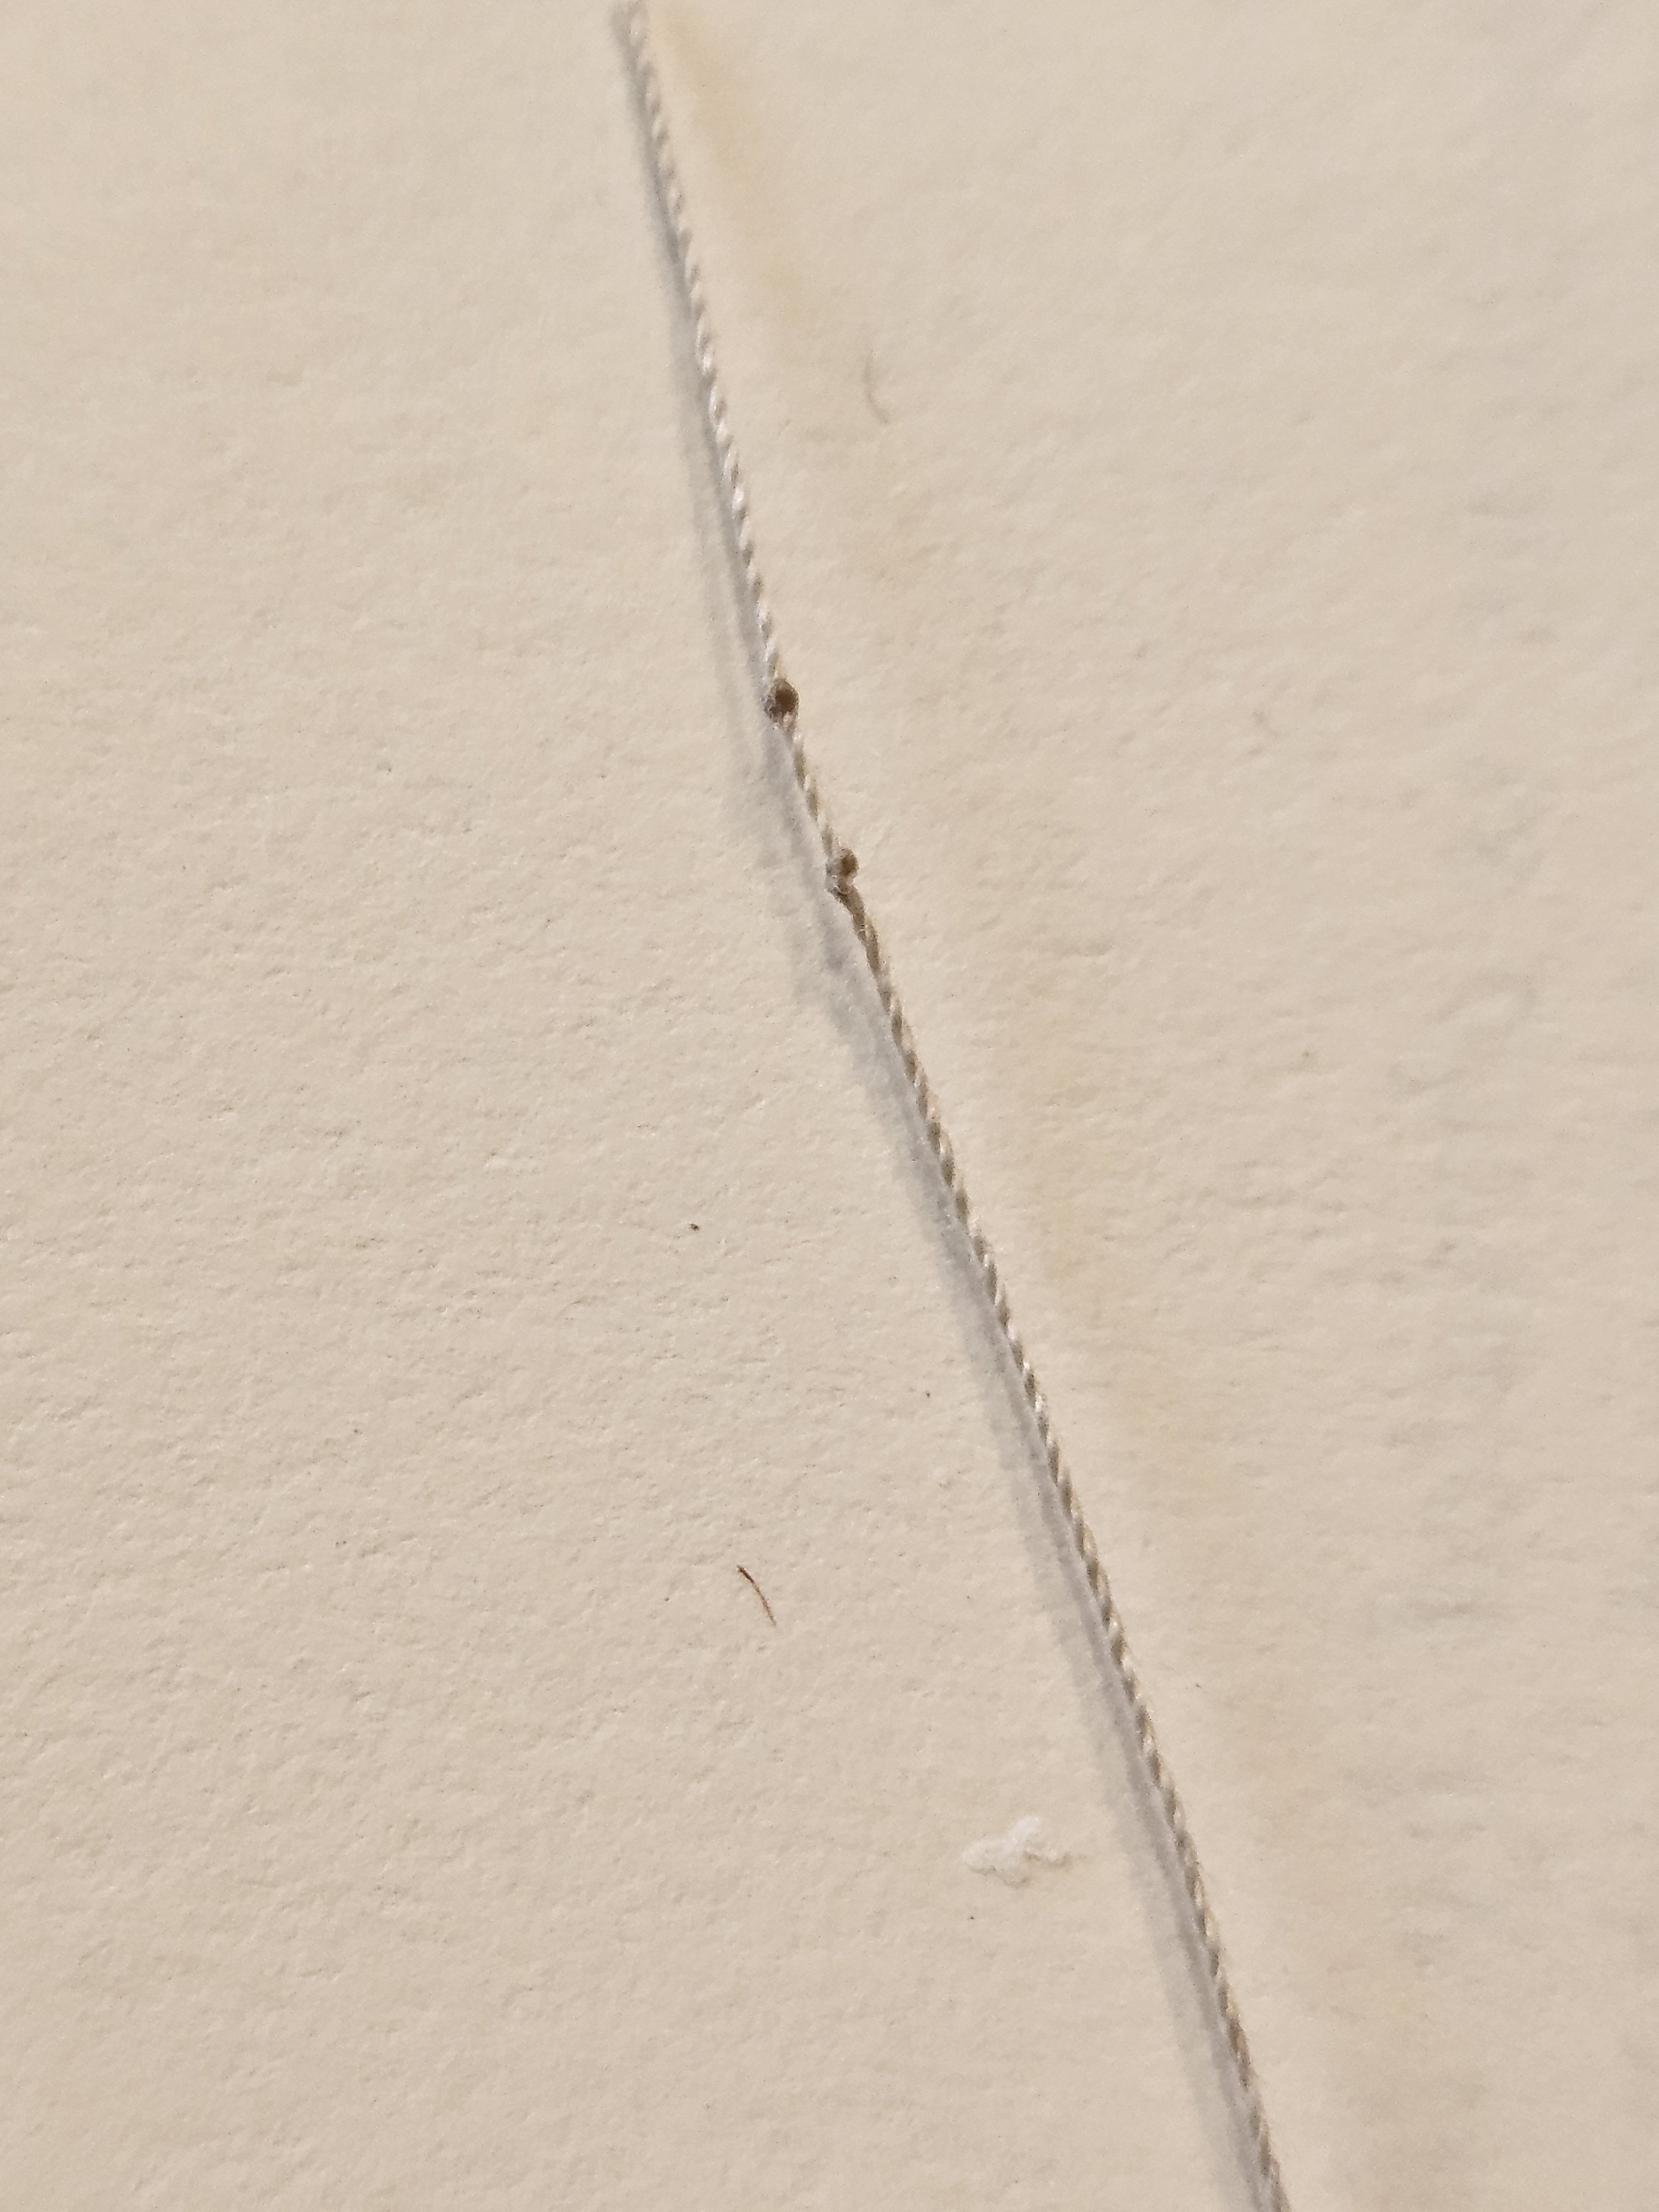
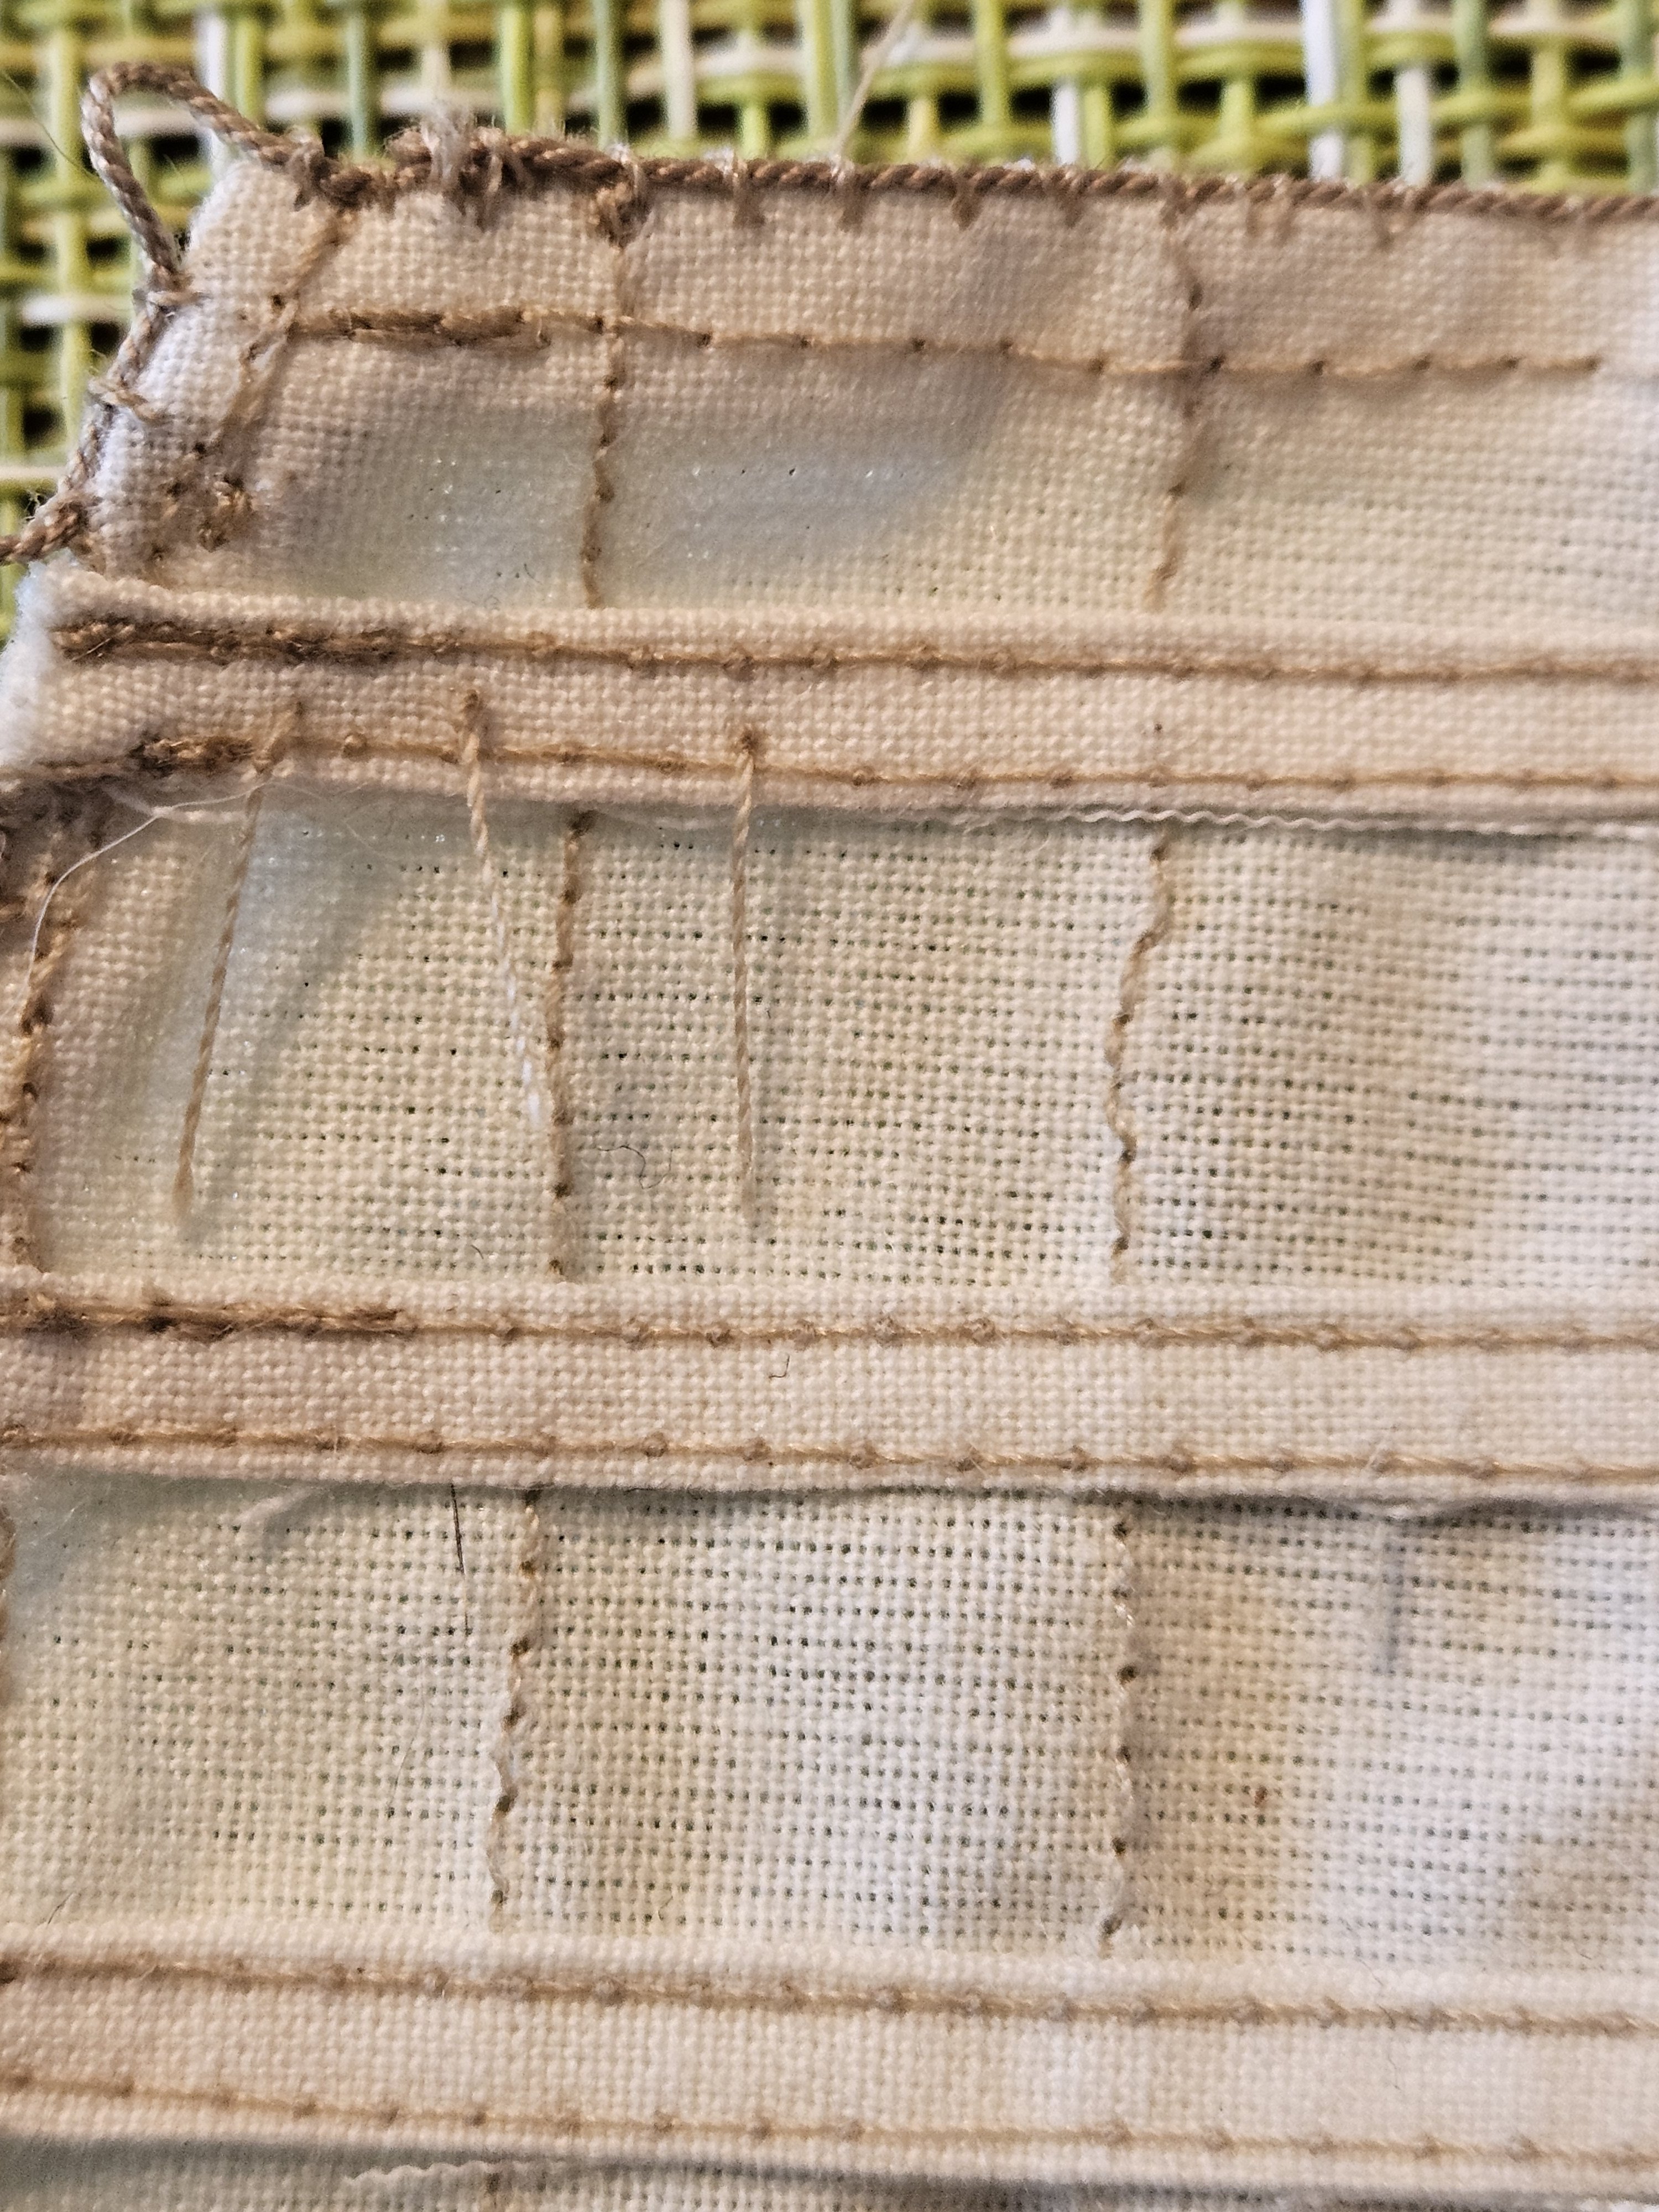
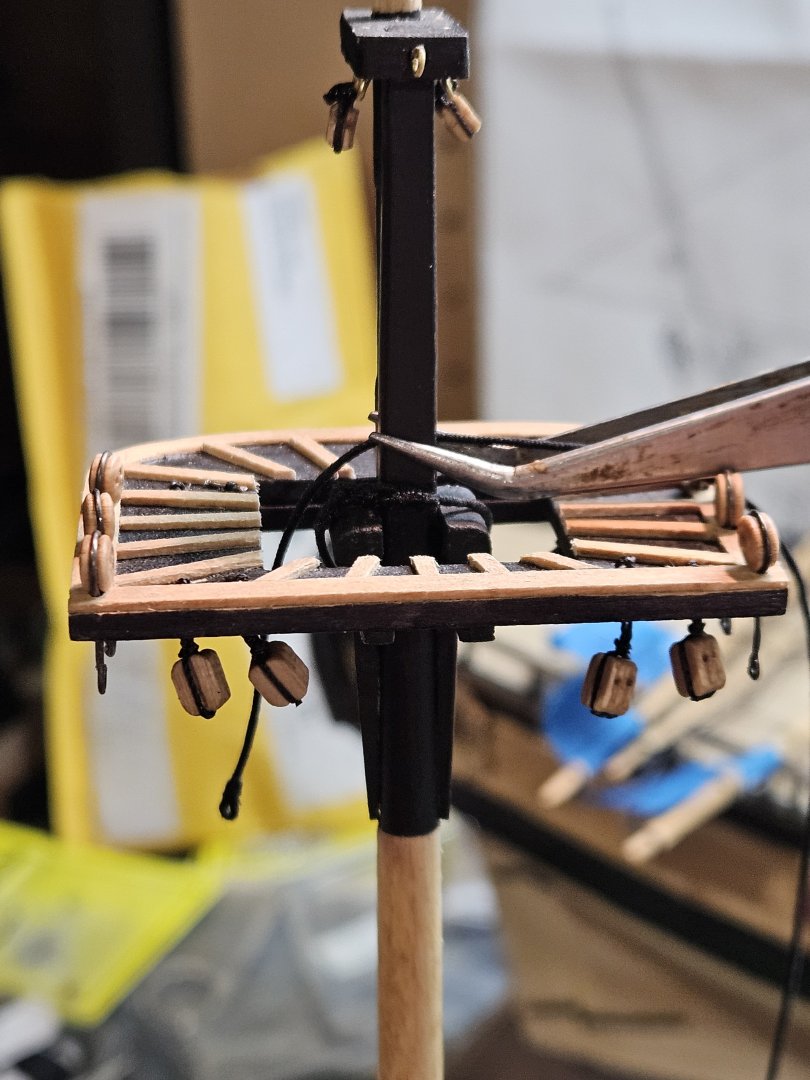
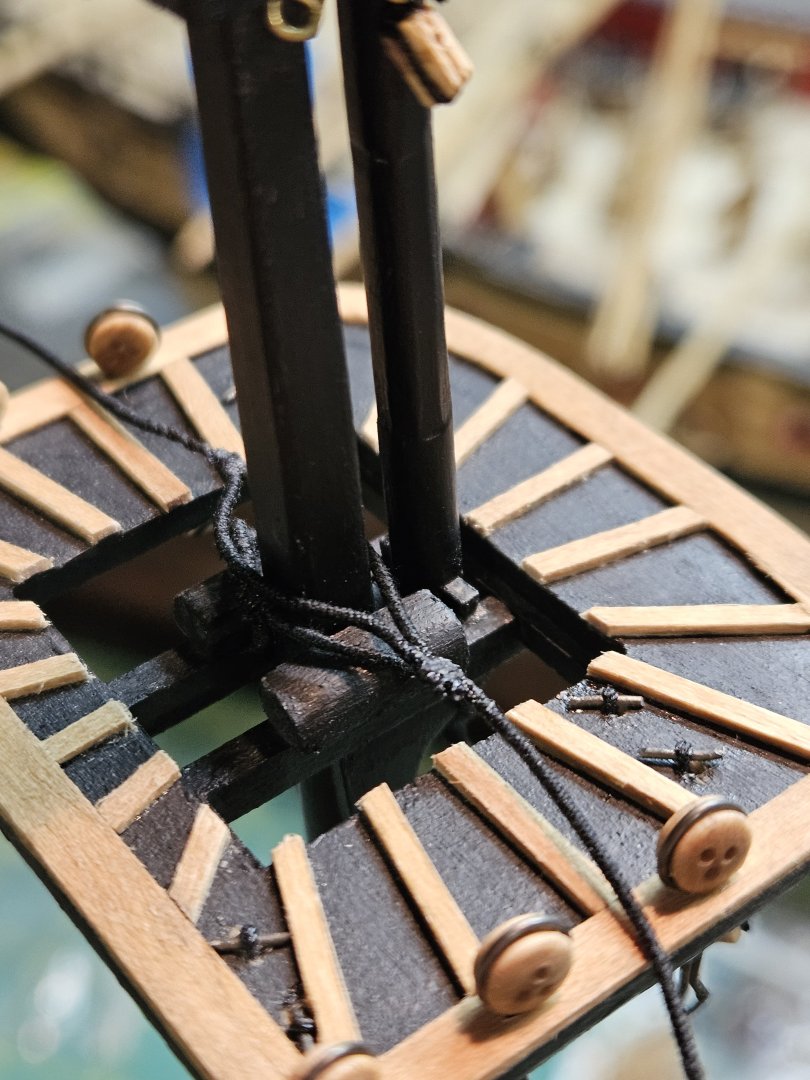
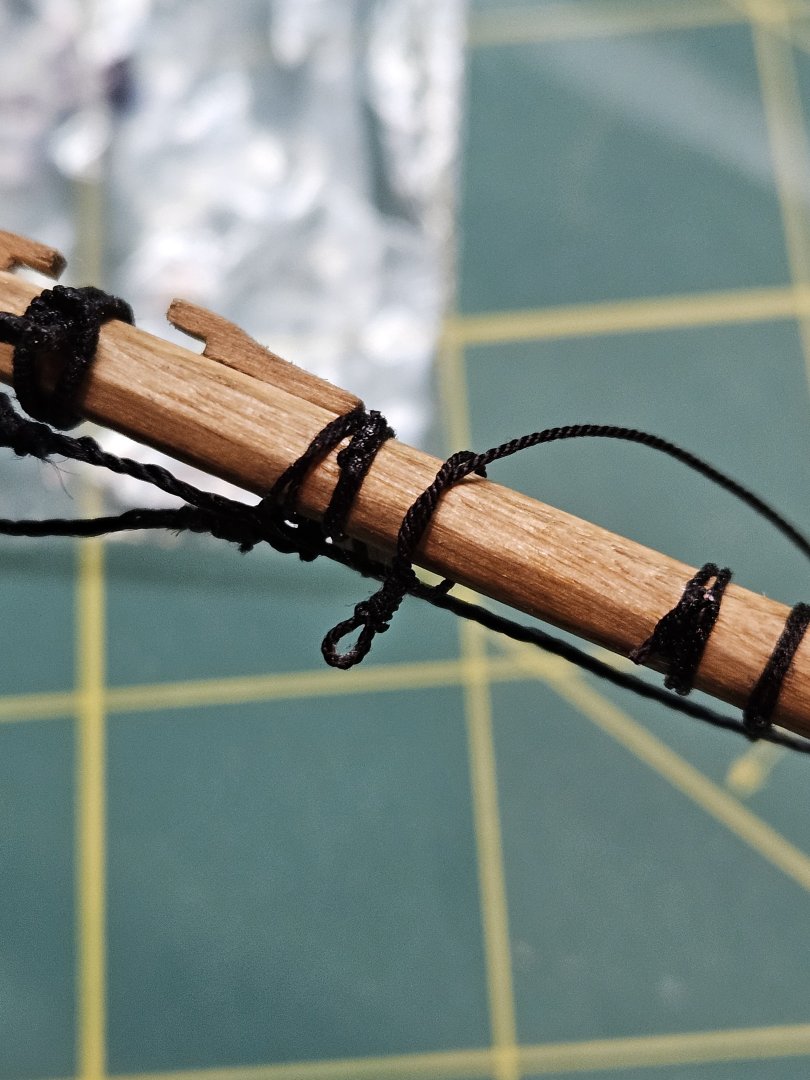
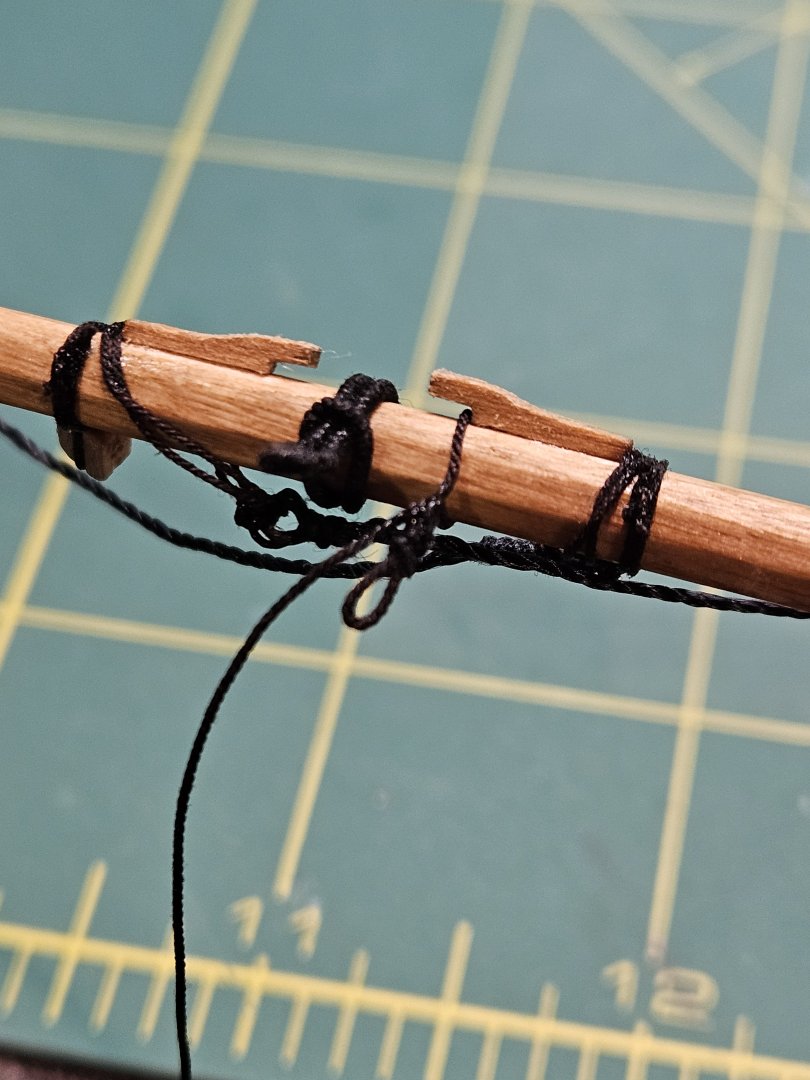
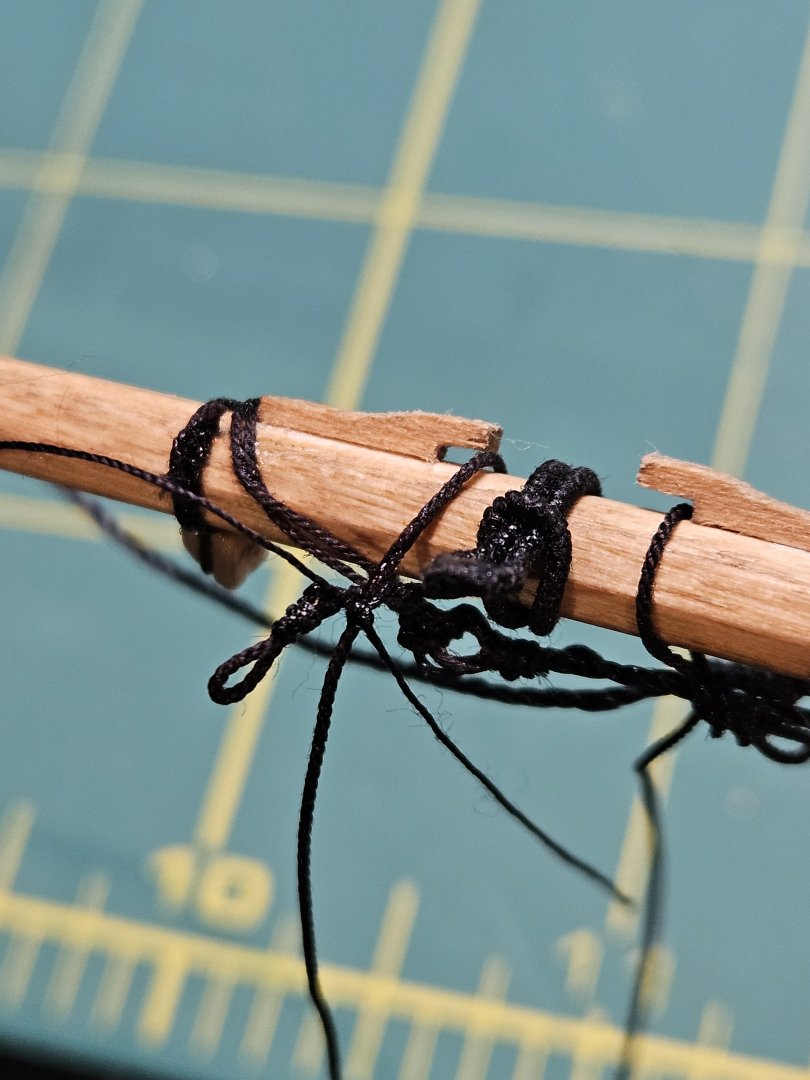
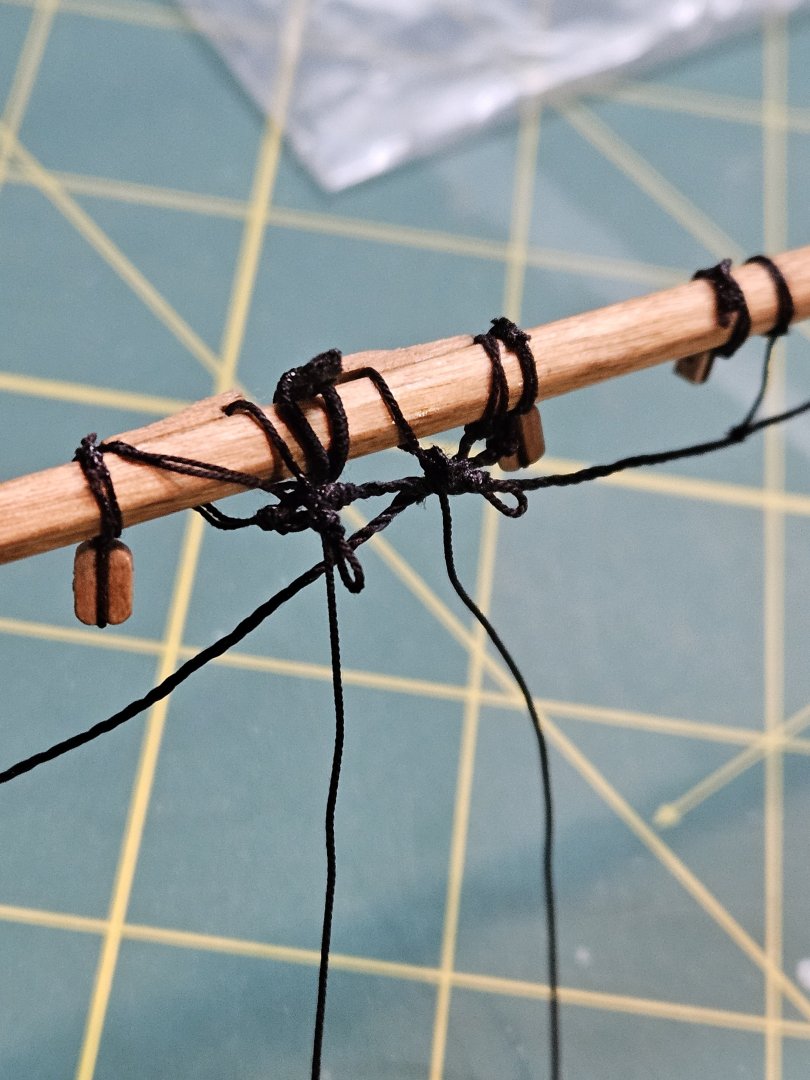
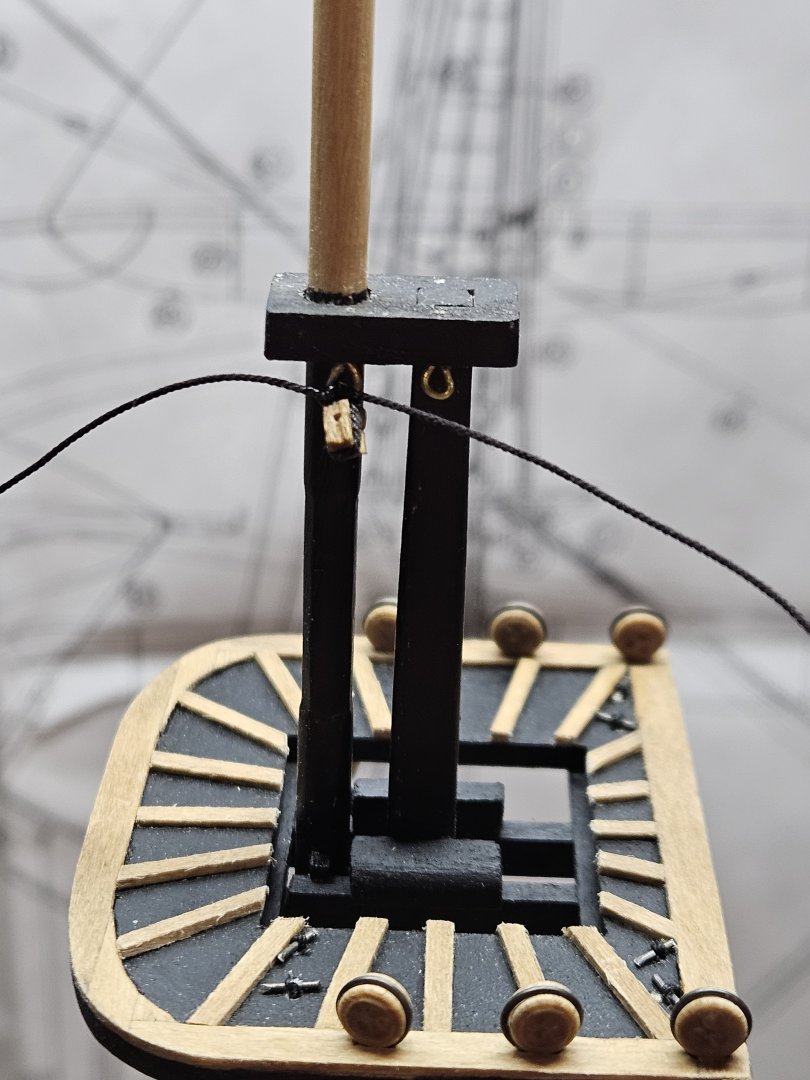
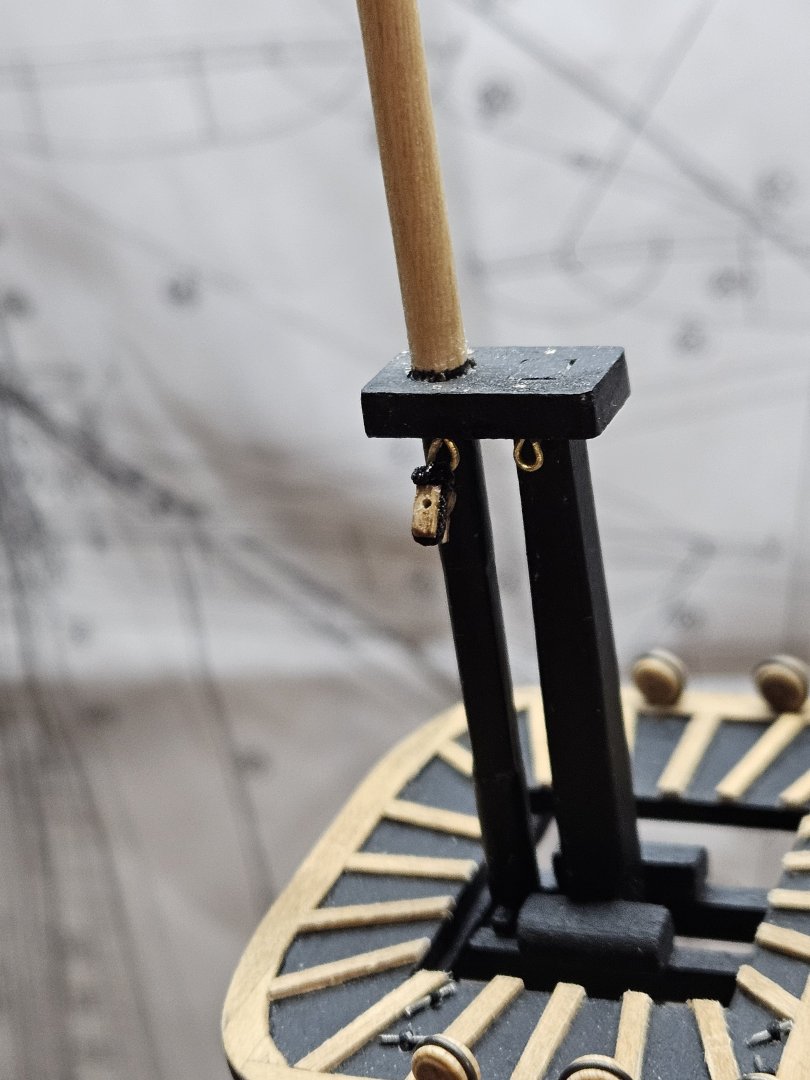
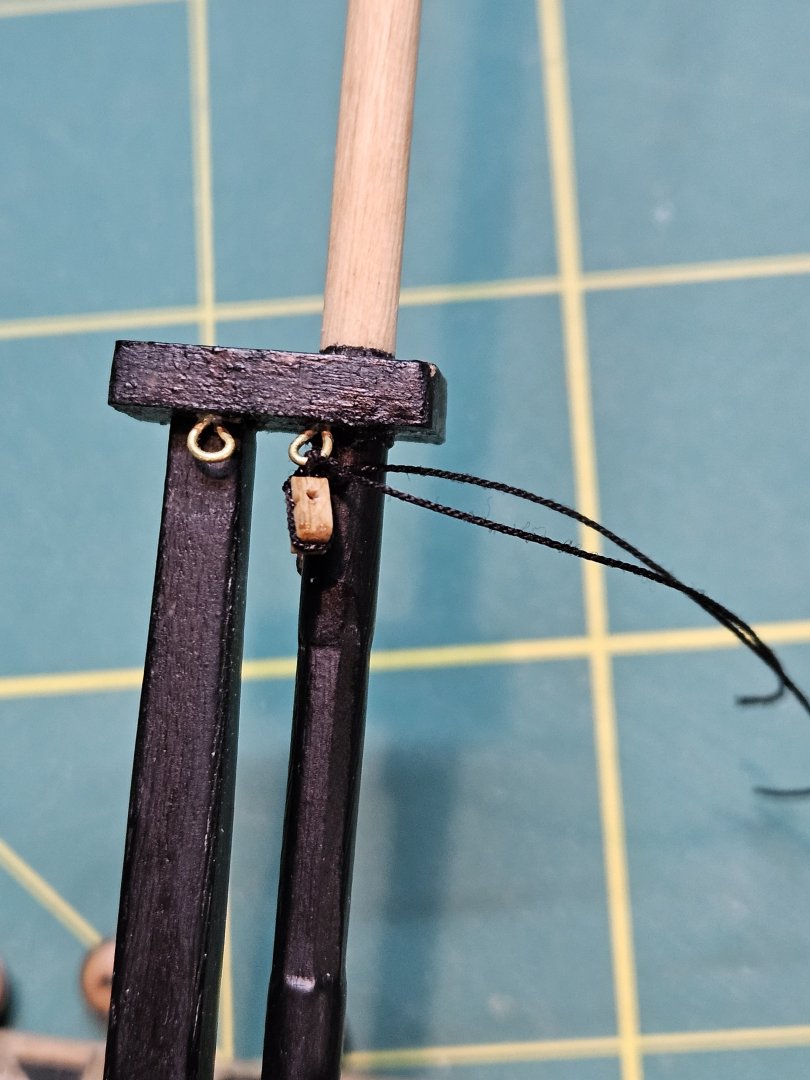
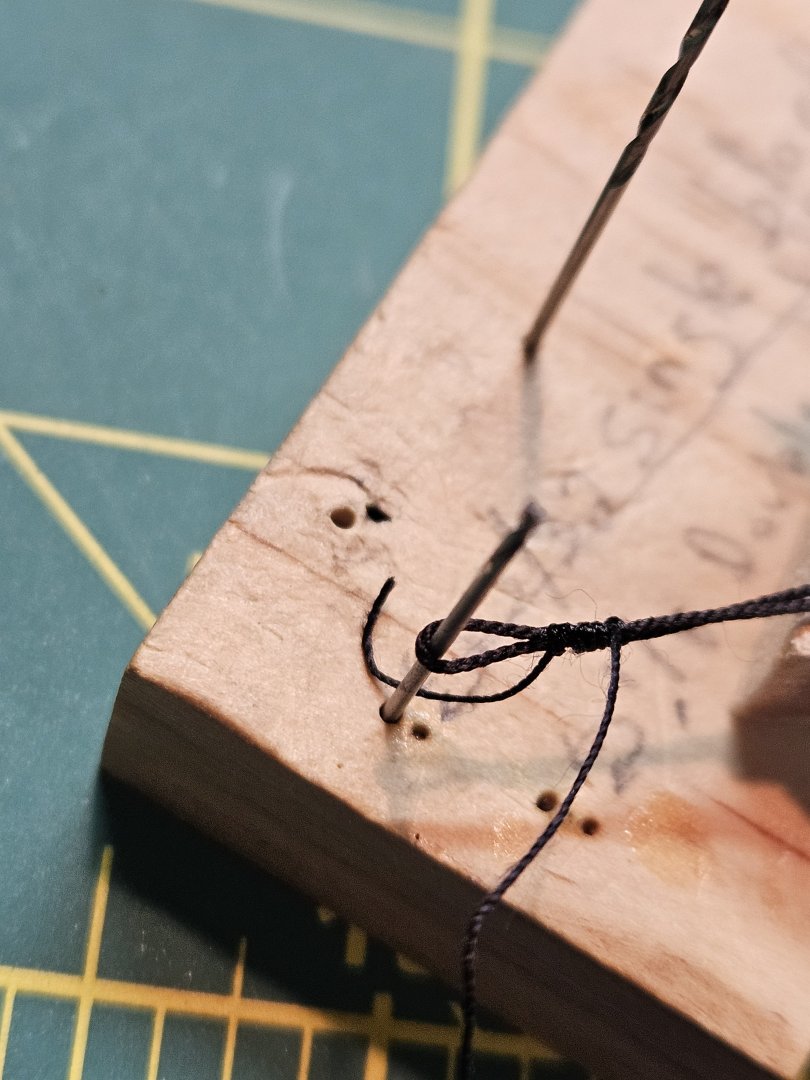
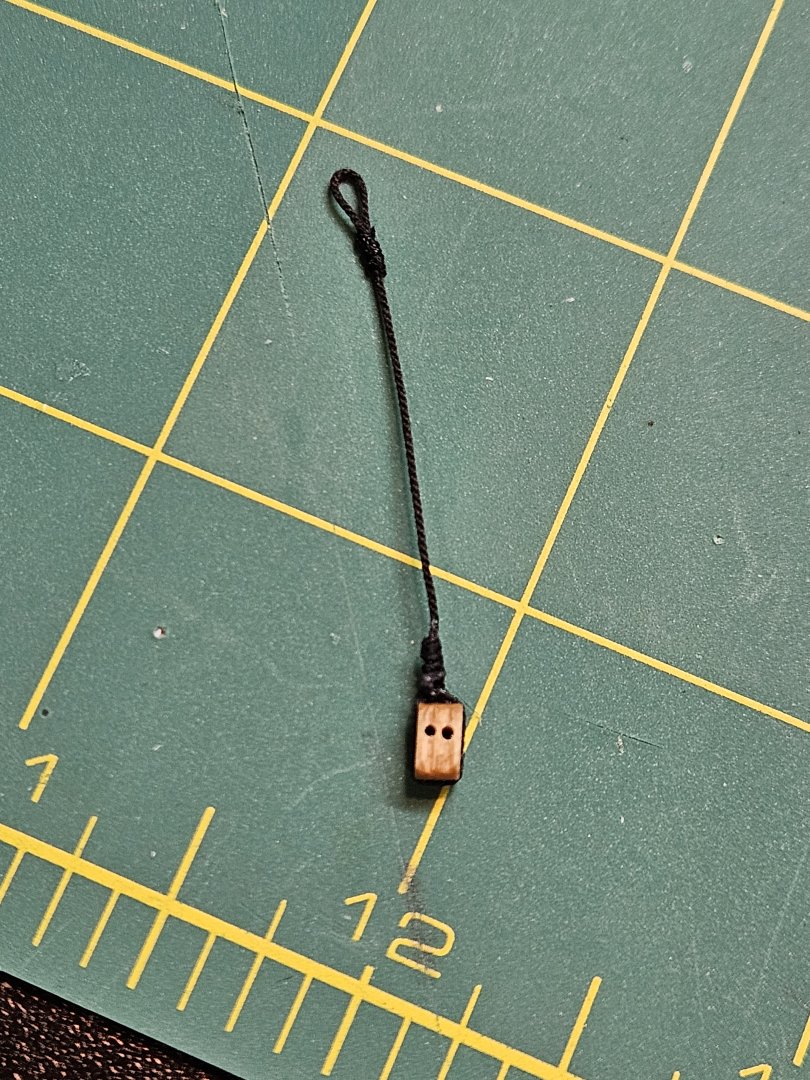
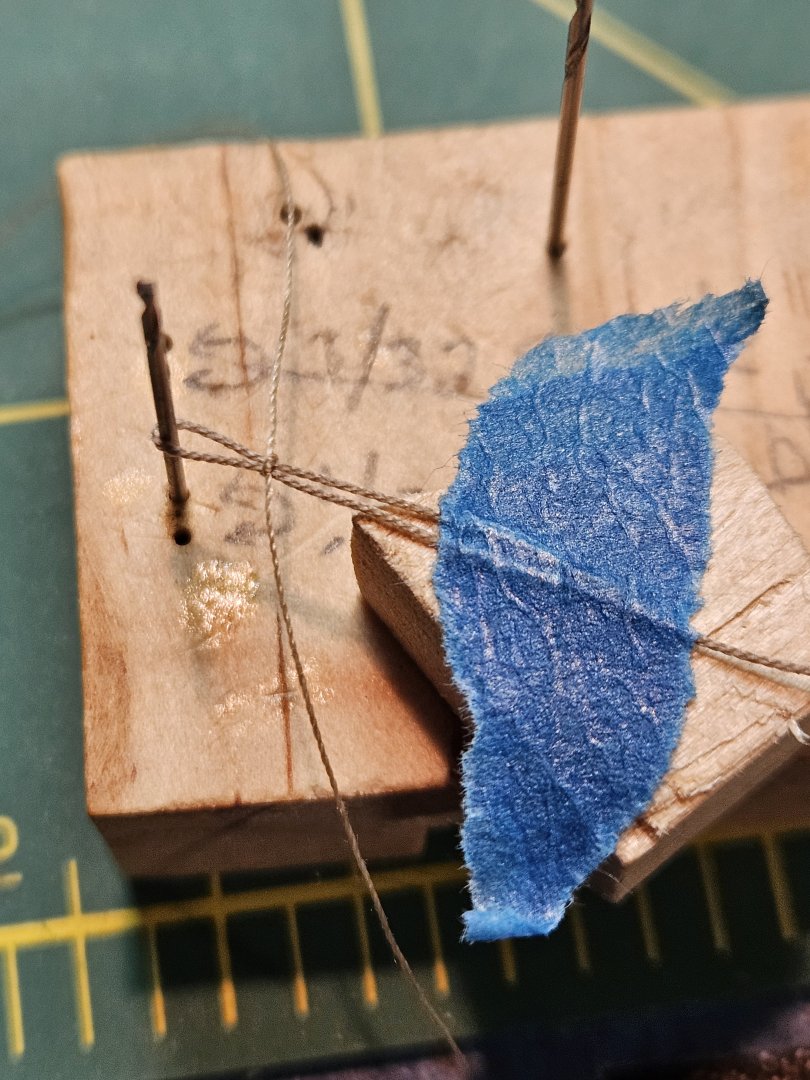
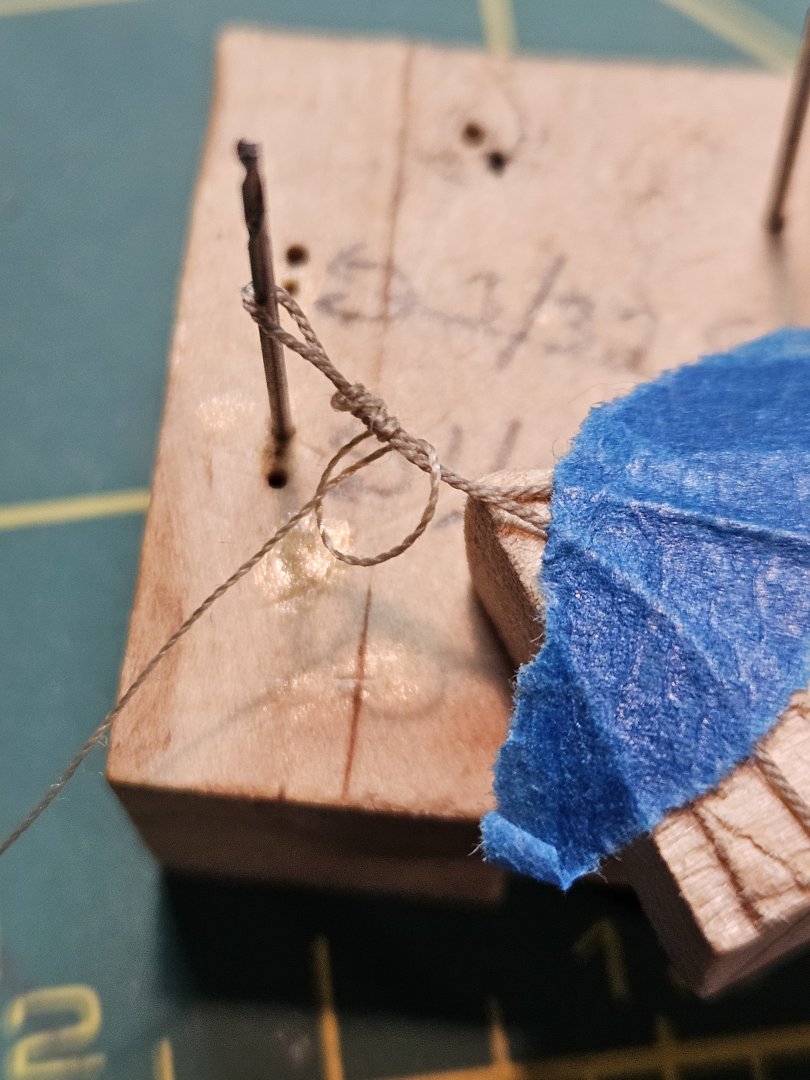
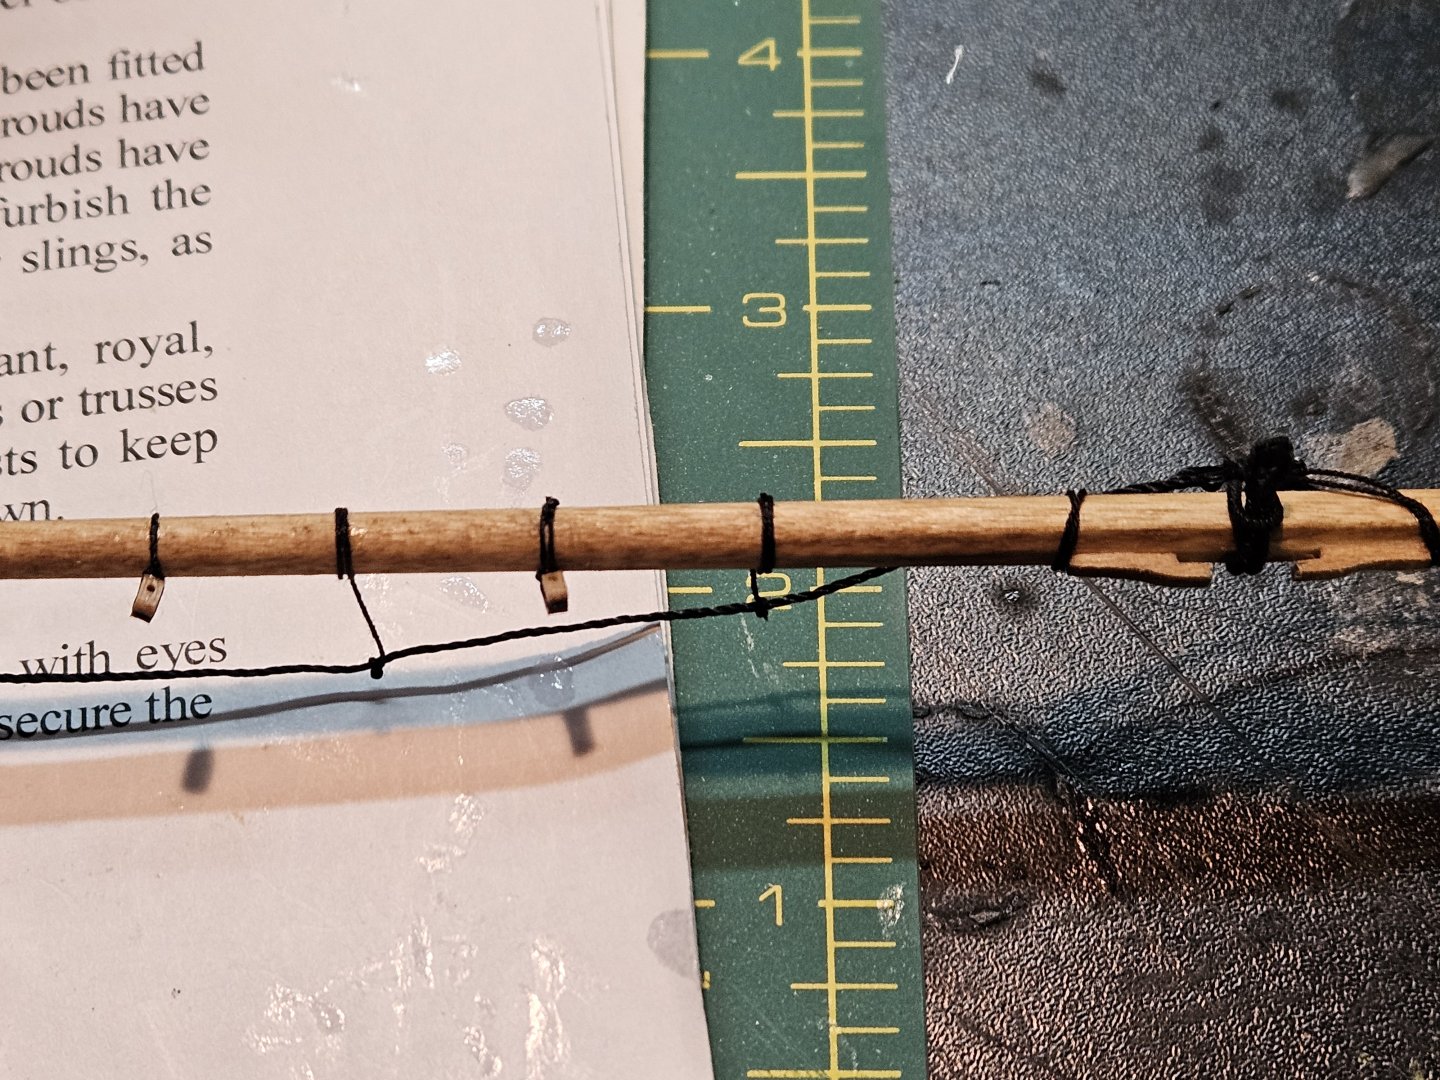
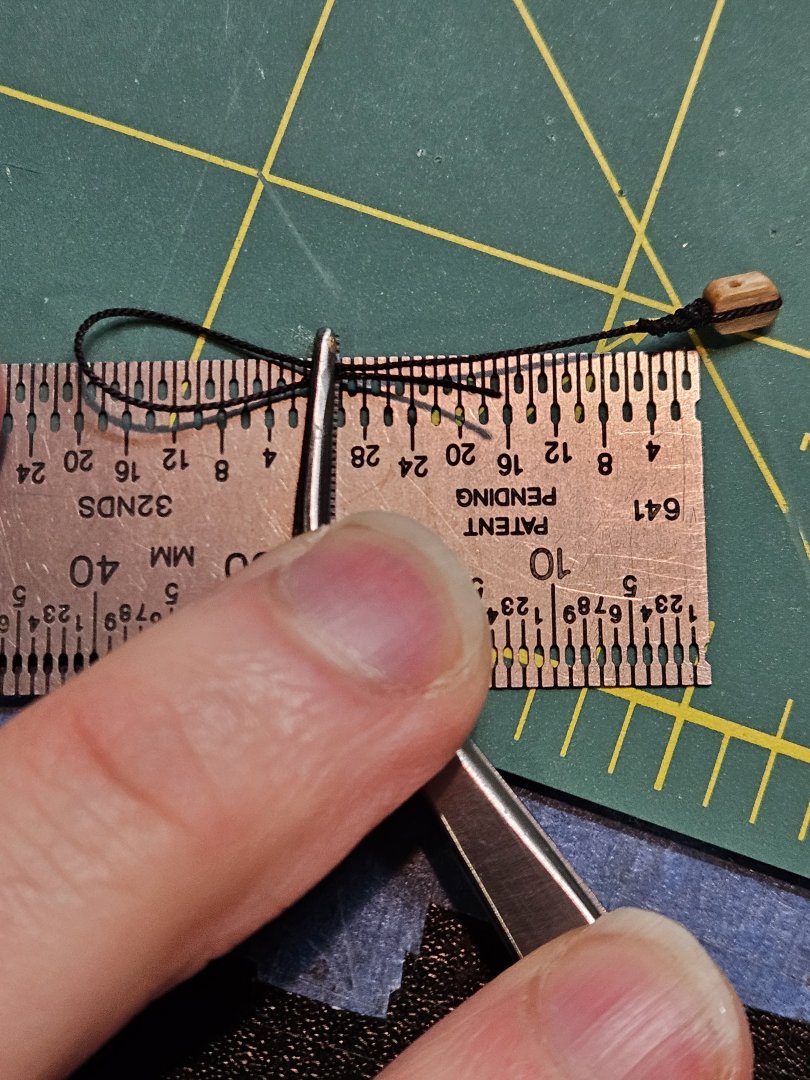
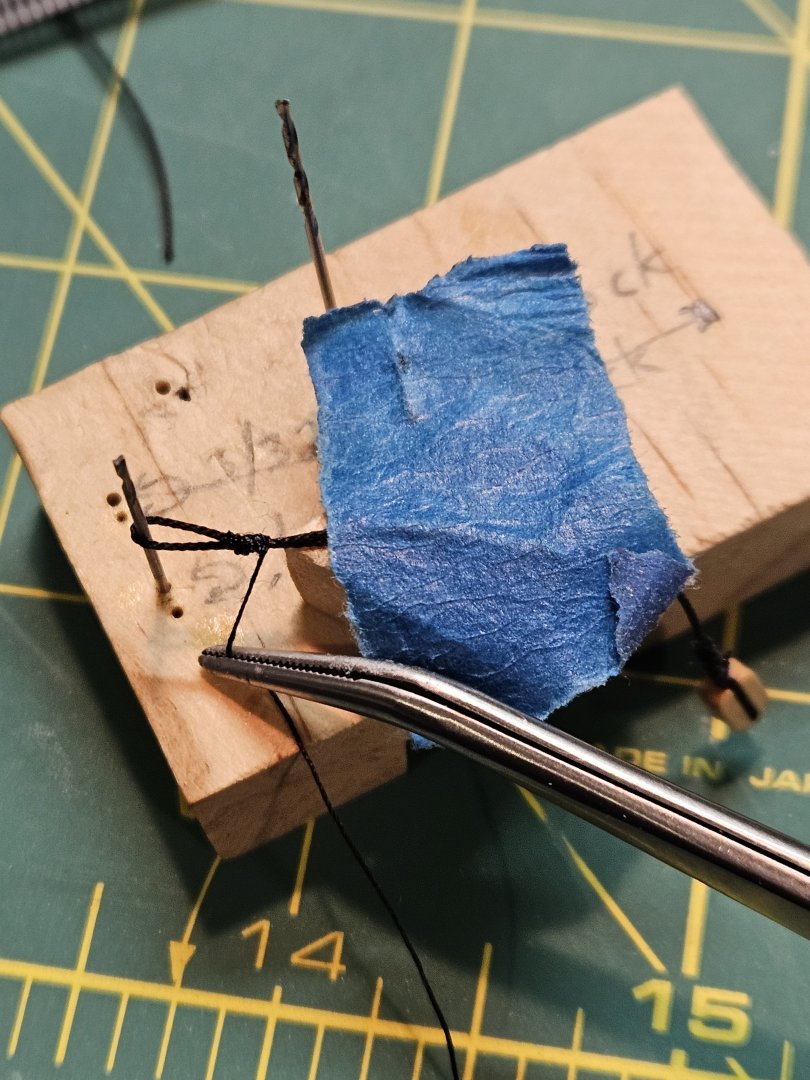
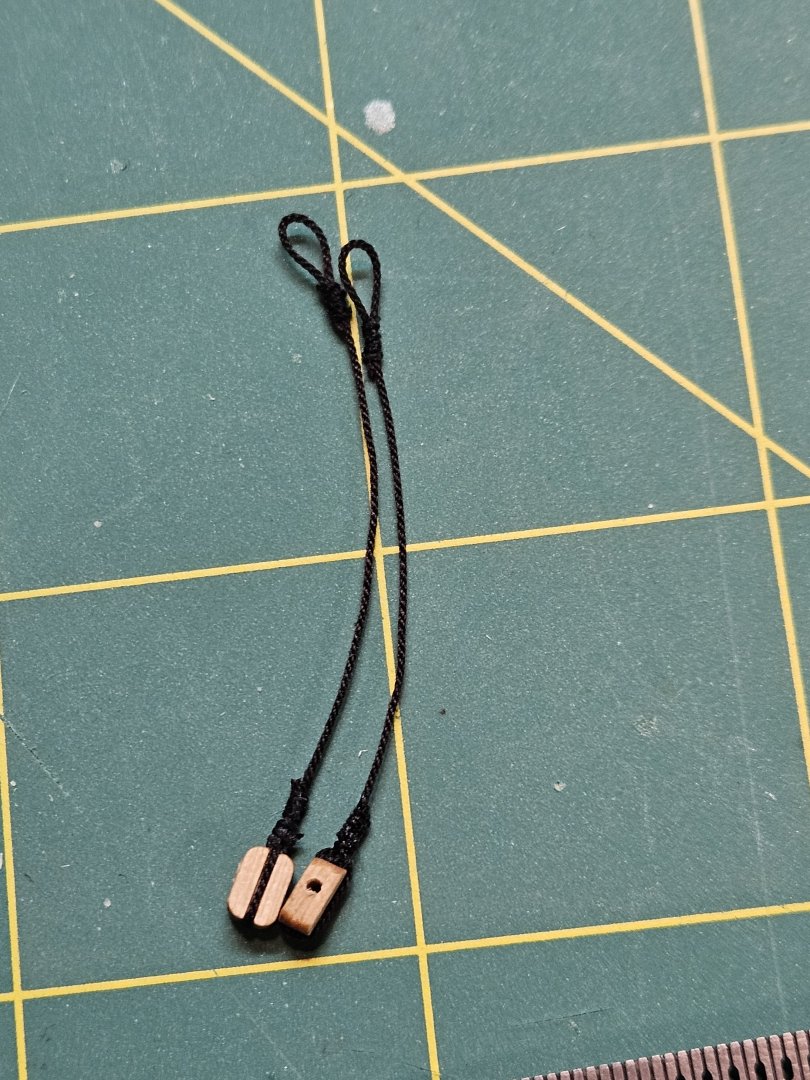
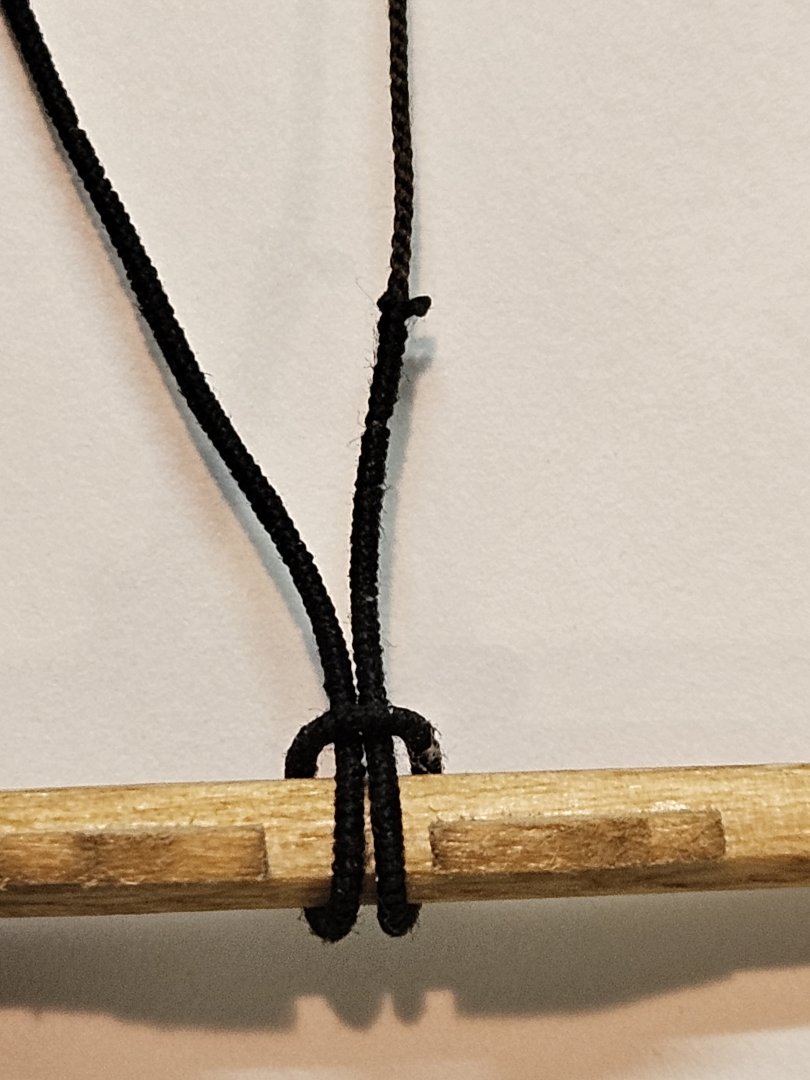
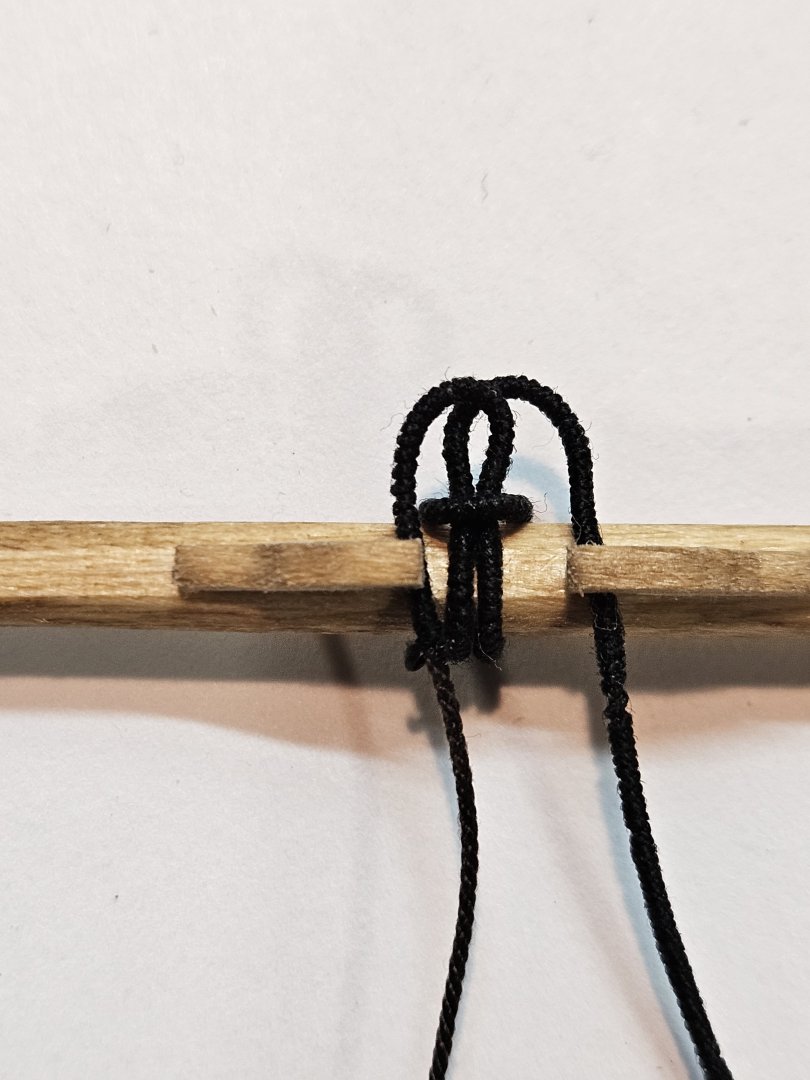
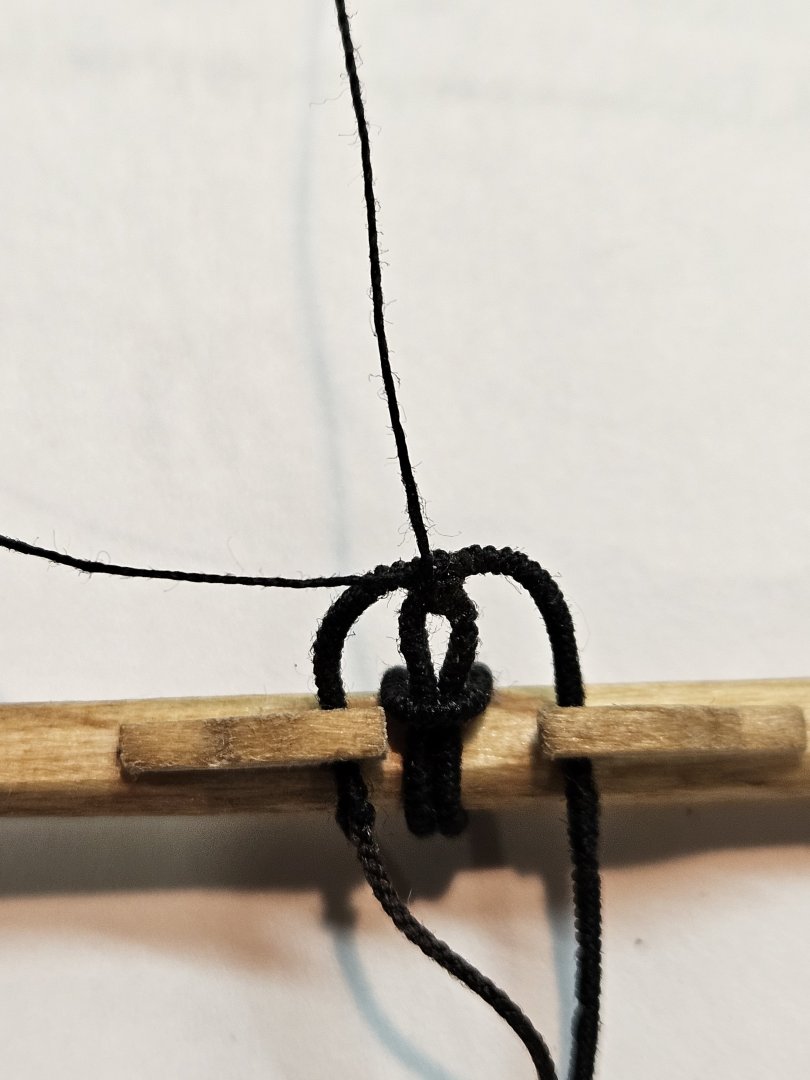
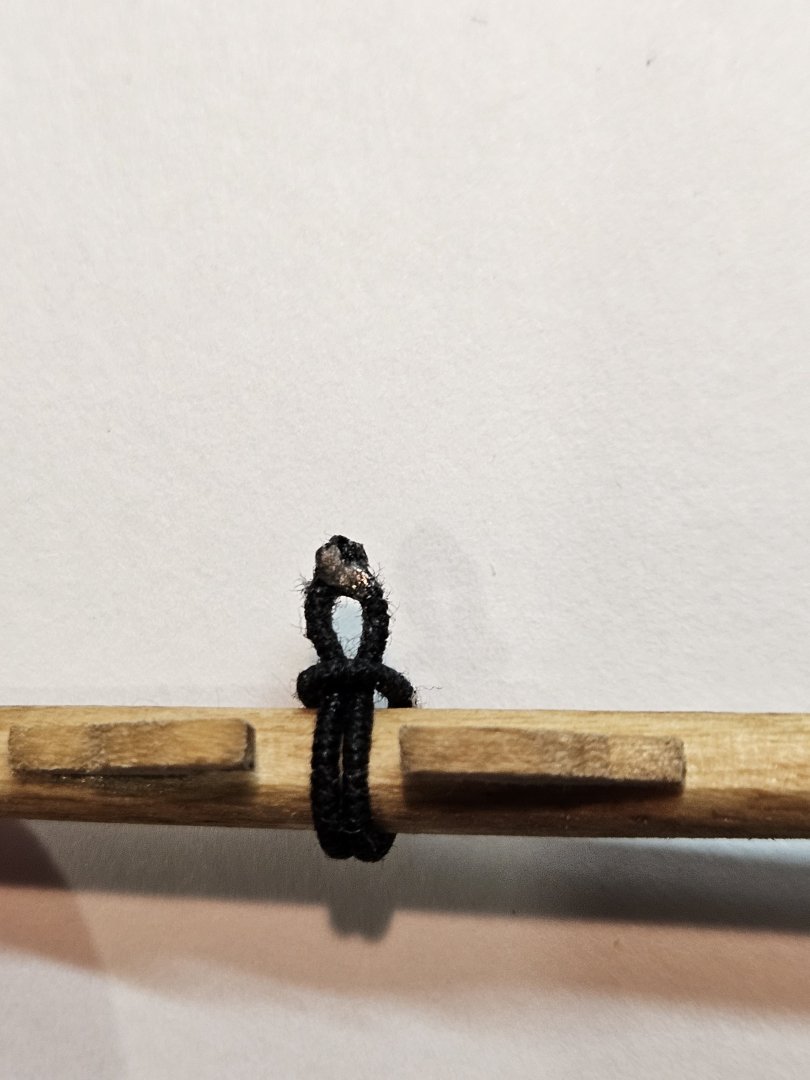
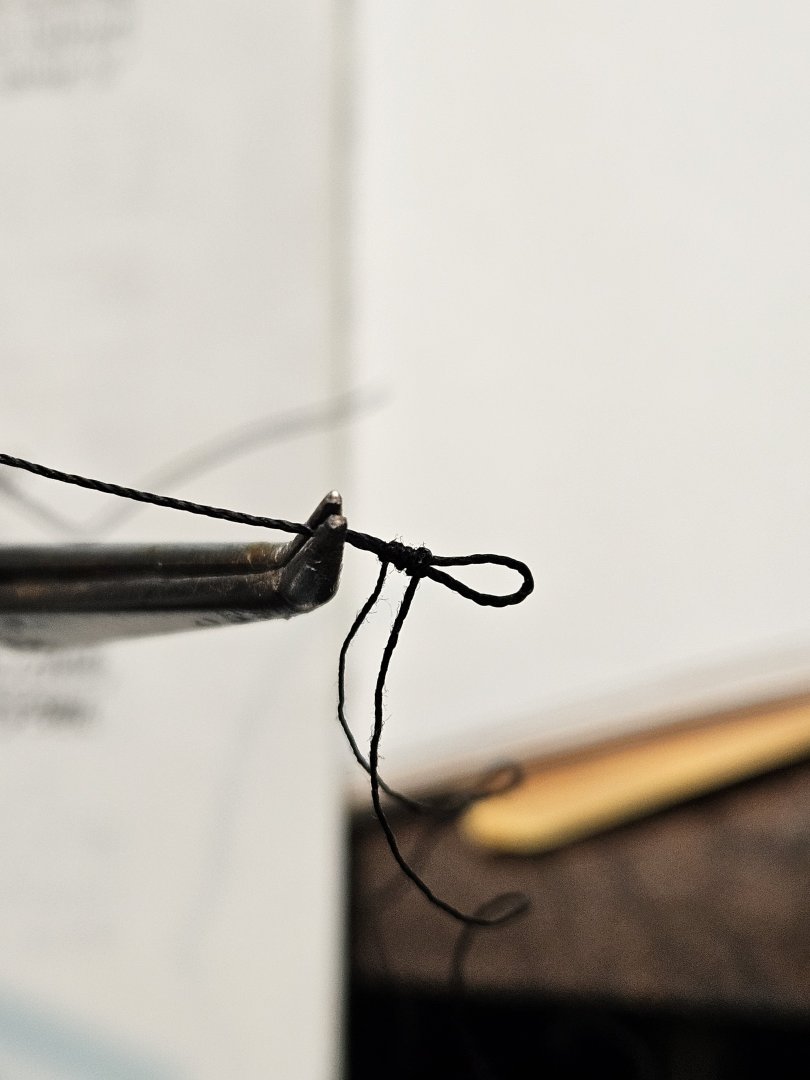
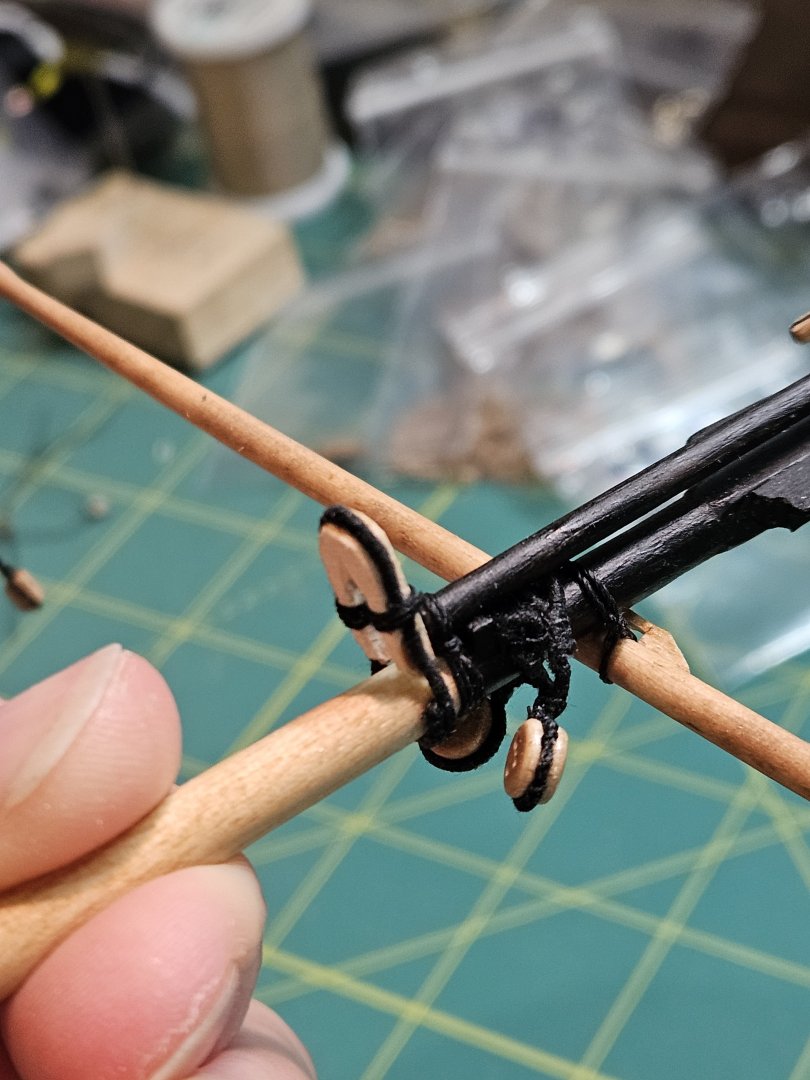
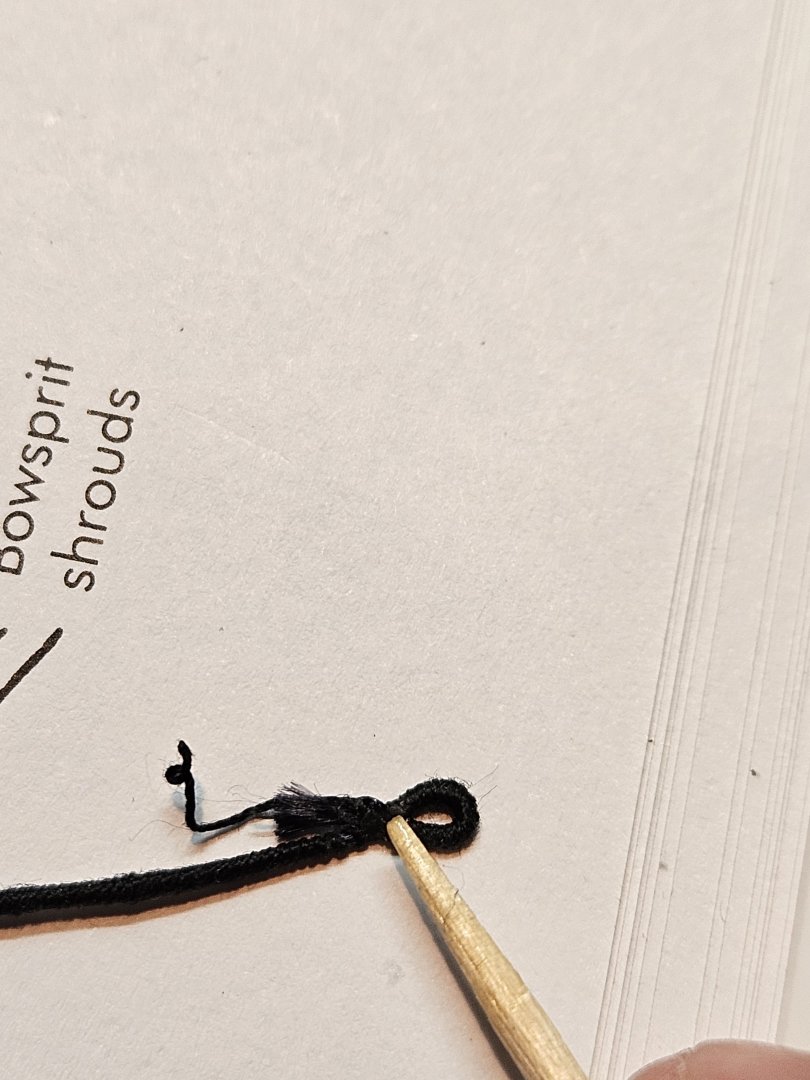
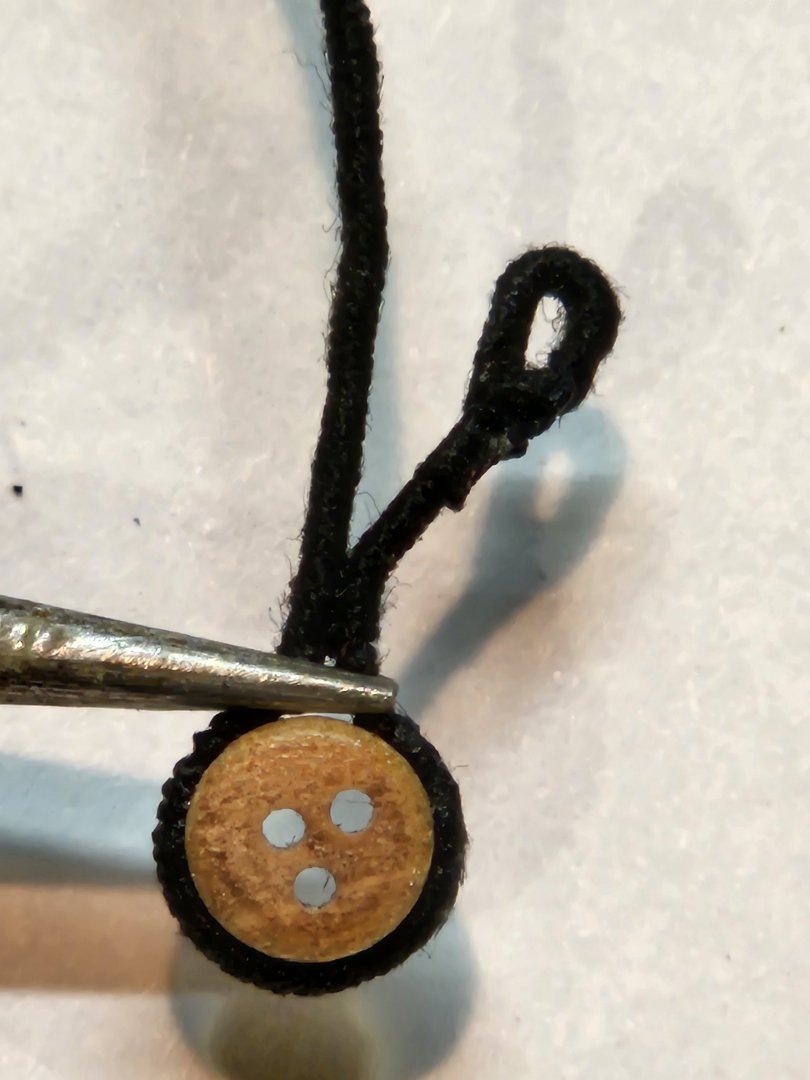
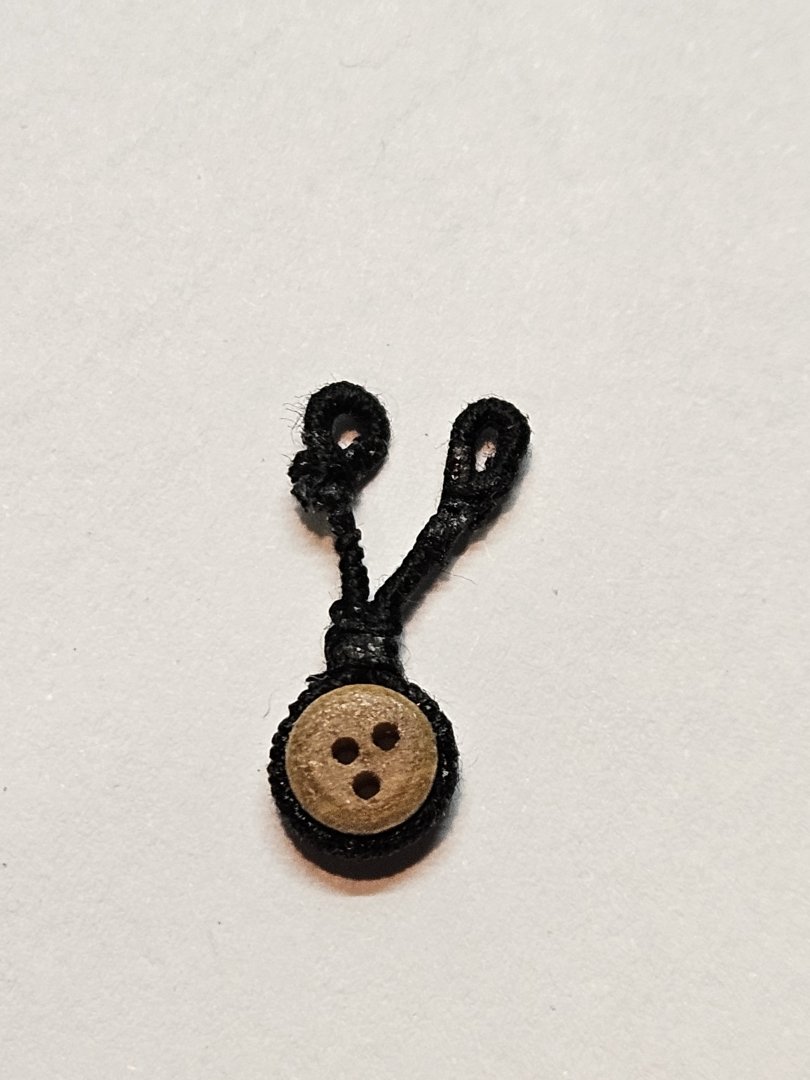
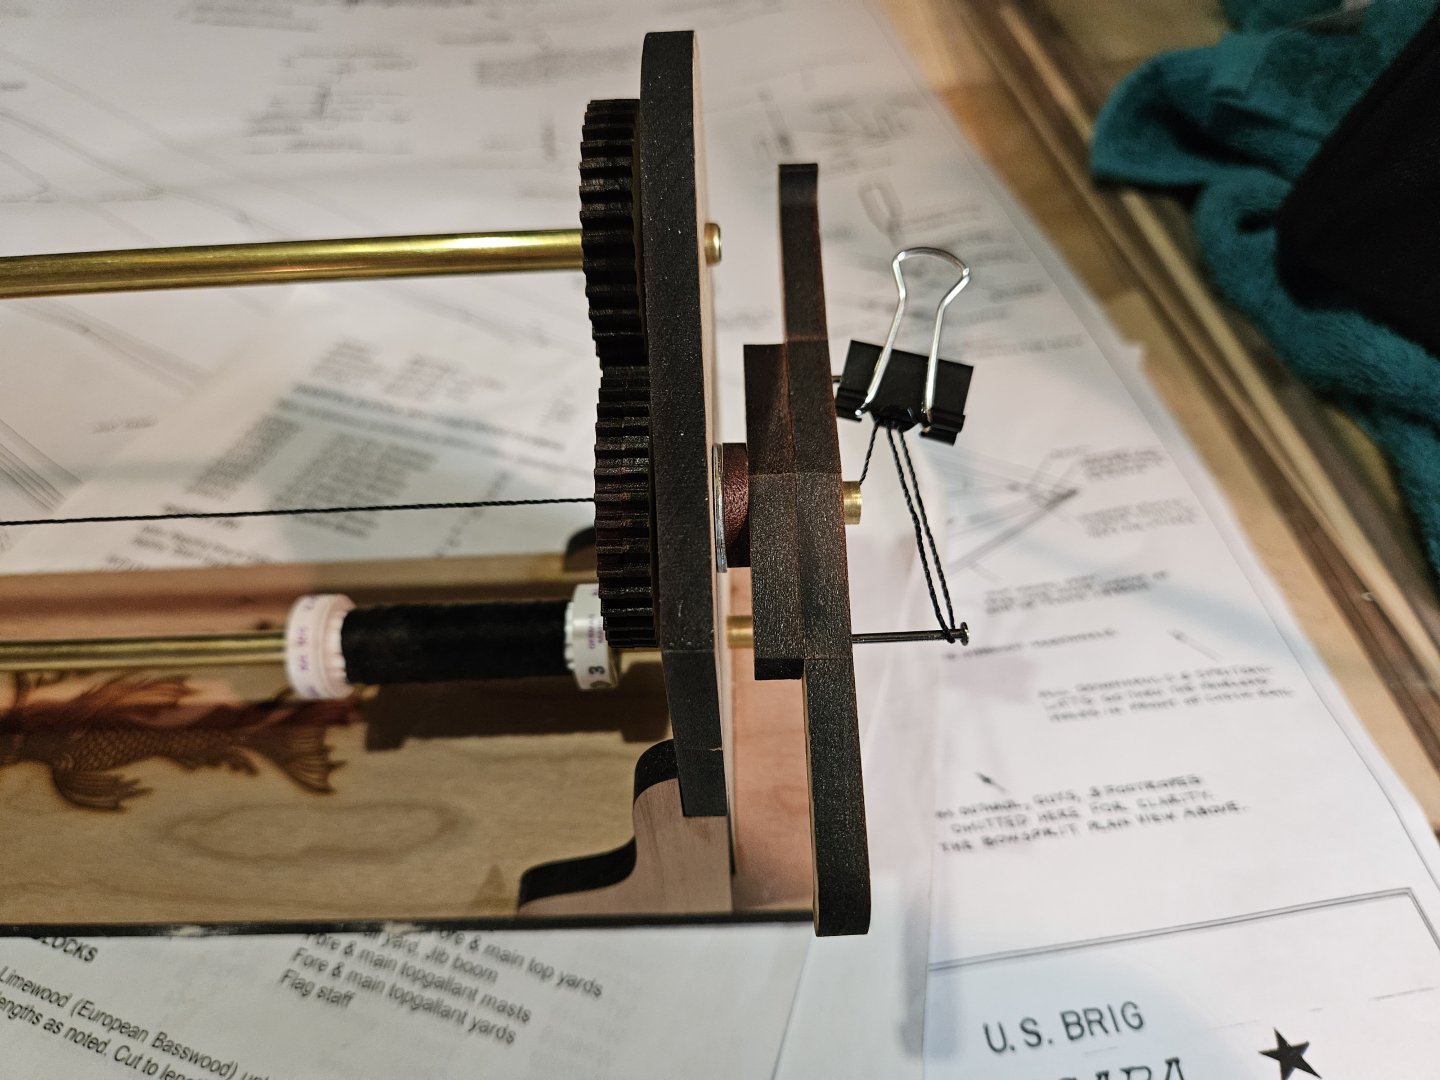
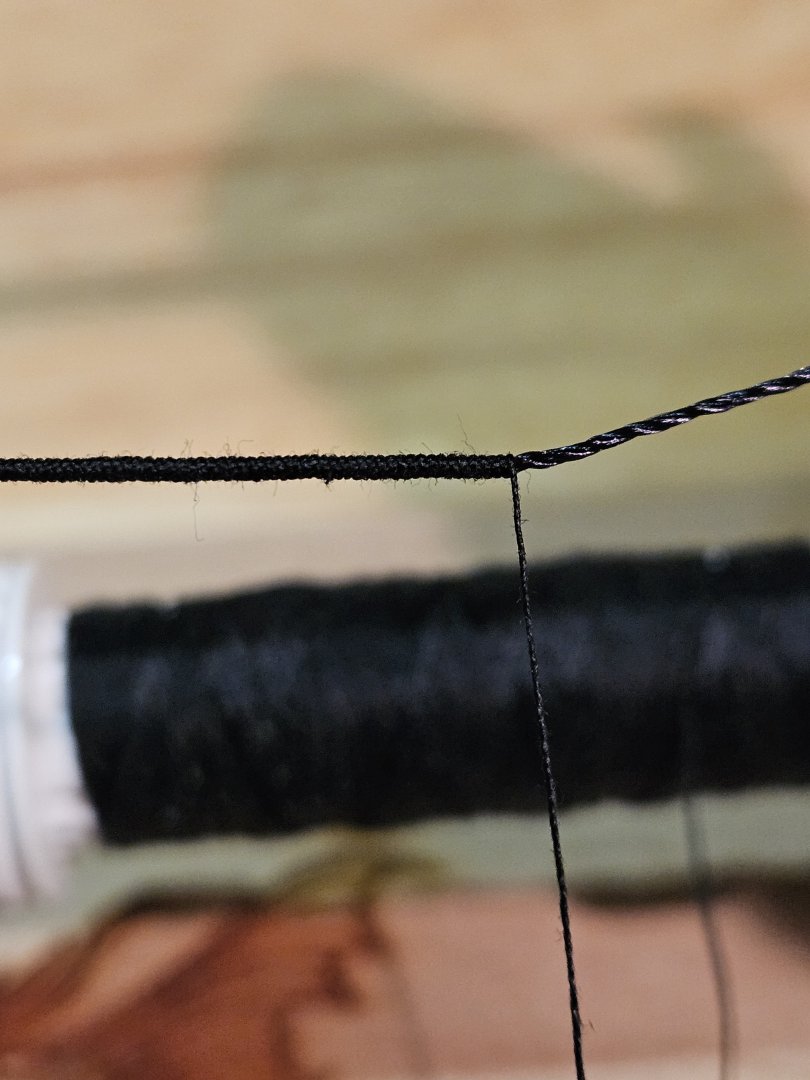
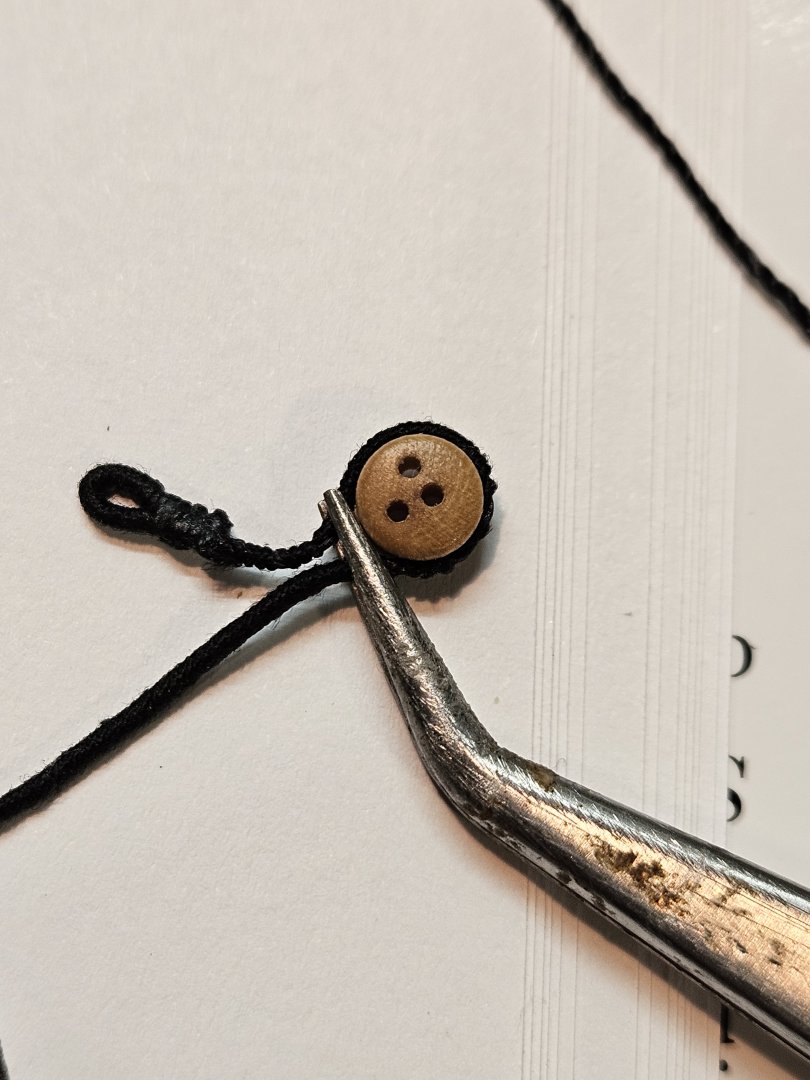
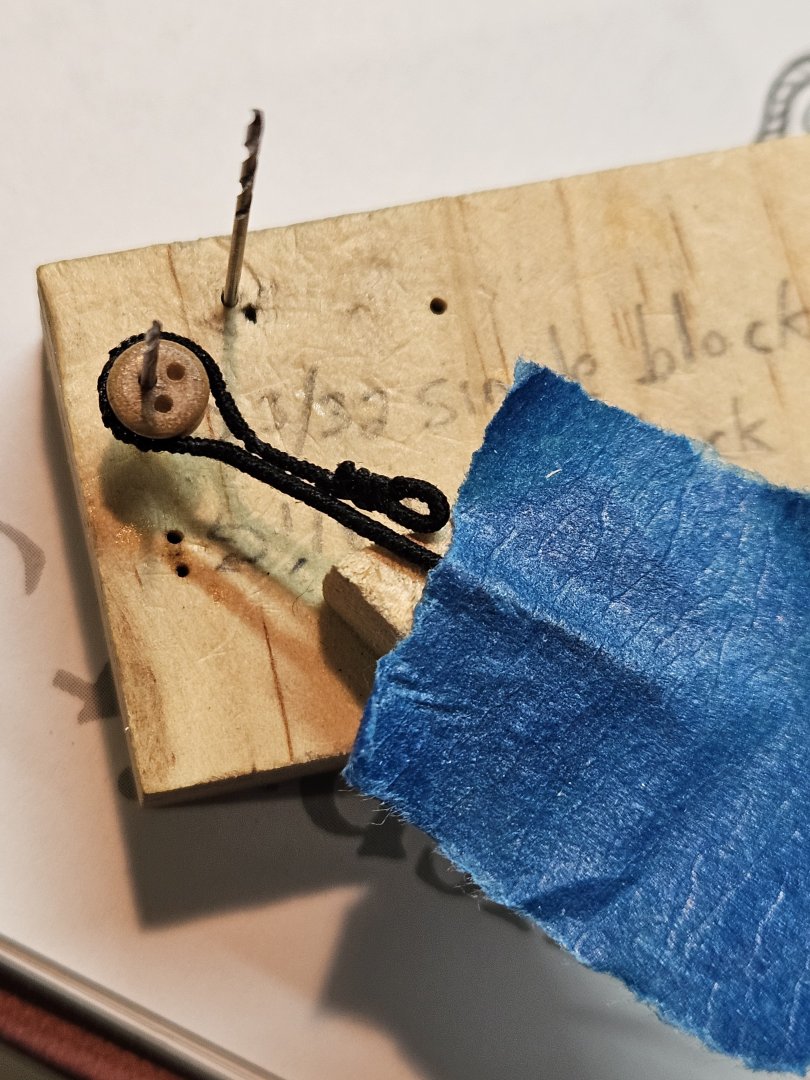
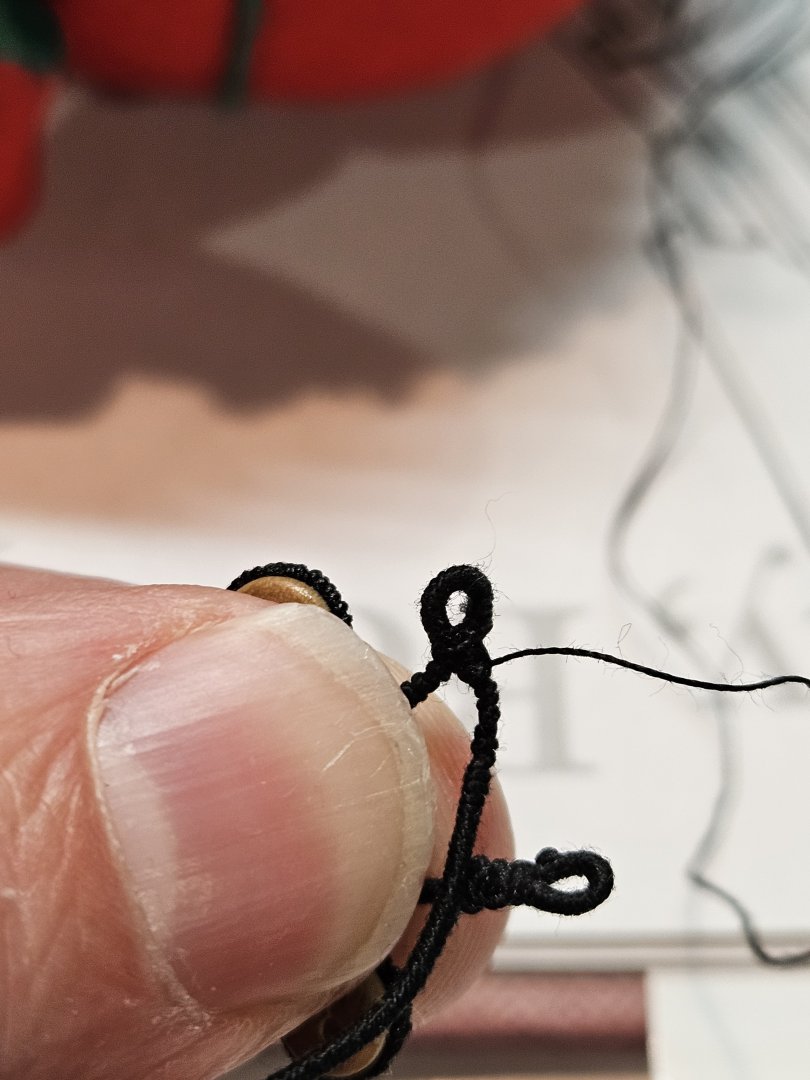
Continued progress on the Fair American: As mentioned previously, the mast tackle pendants needed to be added now, before any other rigging is going to be in the way. From the instructions, these are to be 0.025in served rope, and are seized into an eye around the mast head. No real idea of how to do this, so this is my take. I started with using .012in in rope, and serving some long lengths with 0.008in black thread, which makes ~0.028in size. I used my little jig to form the eyes first, with long running ends to work with later... I went pretty close to the end of the serving, where you can see the knot close up. I'll trim this off after it's secured with thread. As always, I do as neat of a job as I can manage, and trim... Using the pinch tweezers, I'm able to hold the pendant in the approximate spot hanging down, according to the plans. I started some black thread in a spot where I could attach the other pendant rope to, also making sure it hung to the correct length. The serving started to unravel a little bit, even though it was dilute-glued as per the serving machine's instructions. Not much I can do about it now. It just happens. Now off the model, I could finish securing this side of the eye with thread. Again, I'm leaving the tail end long so I can work with it on the model next. Now wrapping around the mast head, bringing the port side of the 'mast eye' as close to the mast as possible. The tail end I crossed over close on the starboard side. The best approach I could muster, without pulling my hair out, was to 'tack' with CA glue, and let it dry.....for a LONG TIME, before handling it. Once the glue was dry, I could start using the thread to finish the eye, as neatly as possible. I'm not sure how this is meant to be done, but this is my method, which worked well for me. Couple of stacked turns and knots got the job done. With some plier smashing and glue, trimming, etc, it forms a relatively neat knot Tucking the pendants back through the hole in the top yields a very attractive profile, if I do say so myself. Lastly, using pinch tweezers to hang the pendants so they're not so stiff. I'll leave them overnight to settle Thats all the progress for now. Have a great week; Thanks for reading. - Jason -


-
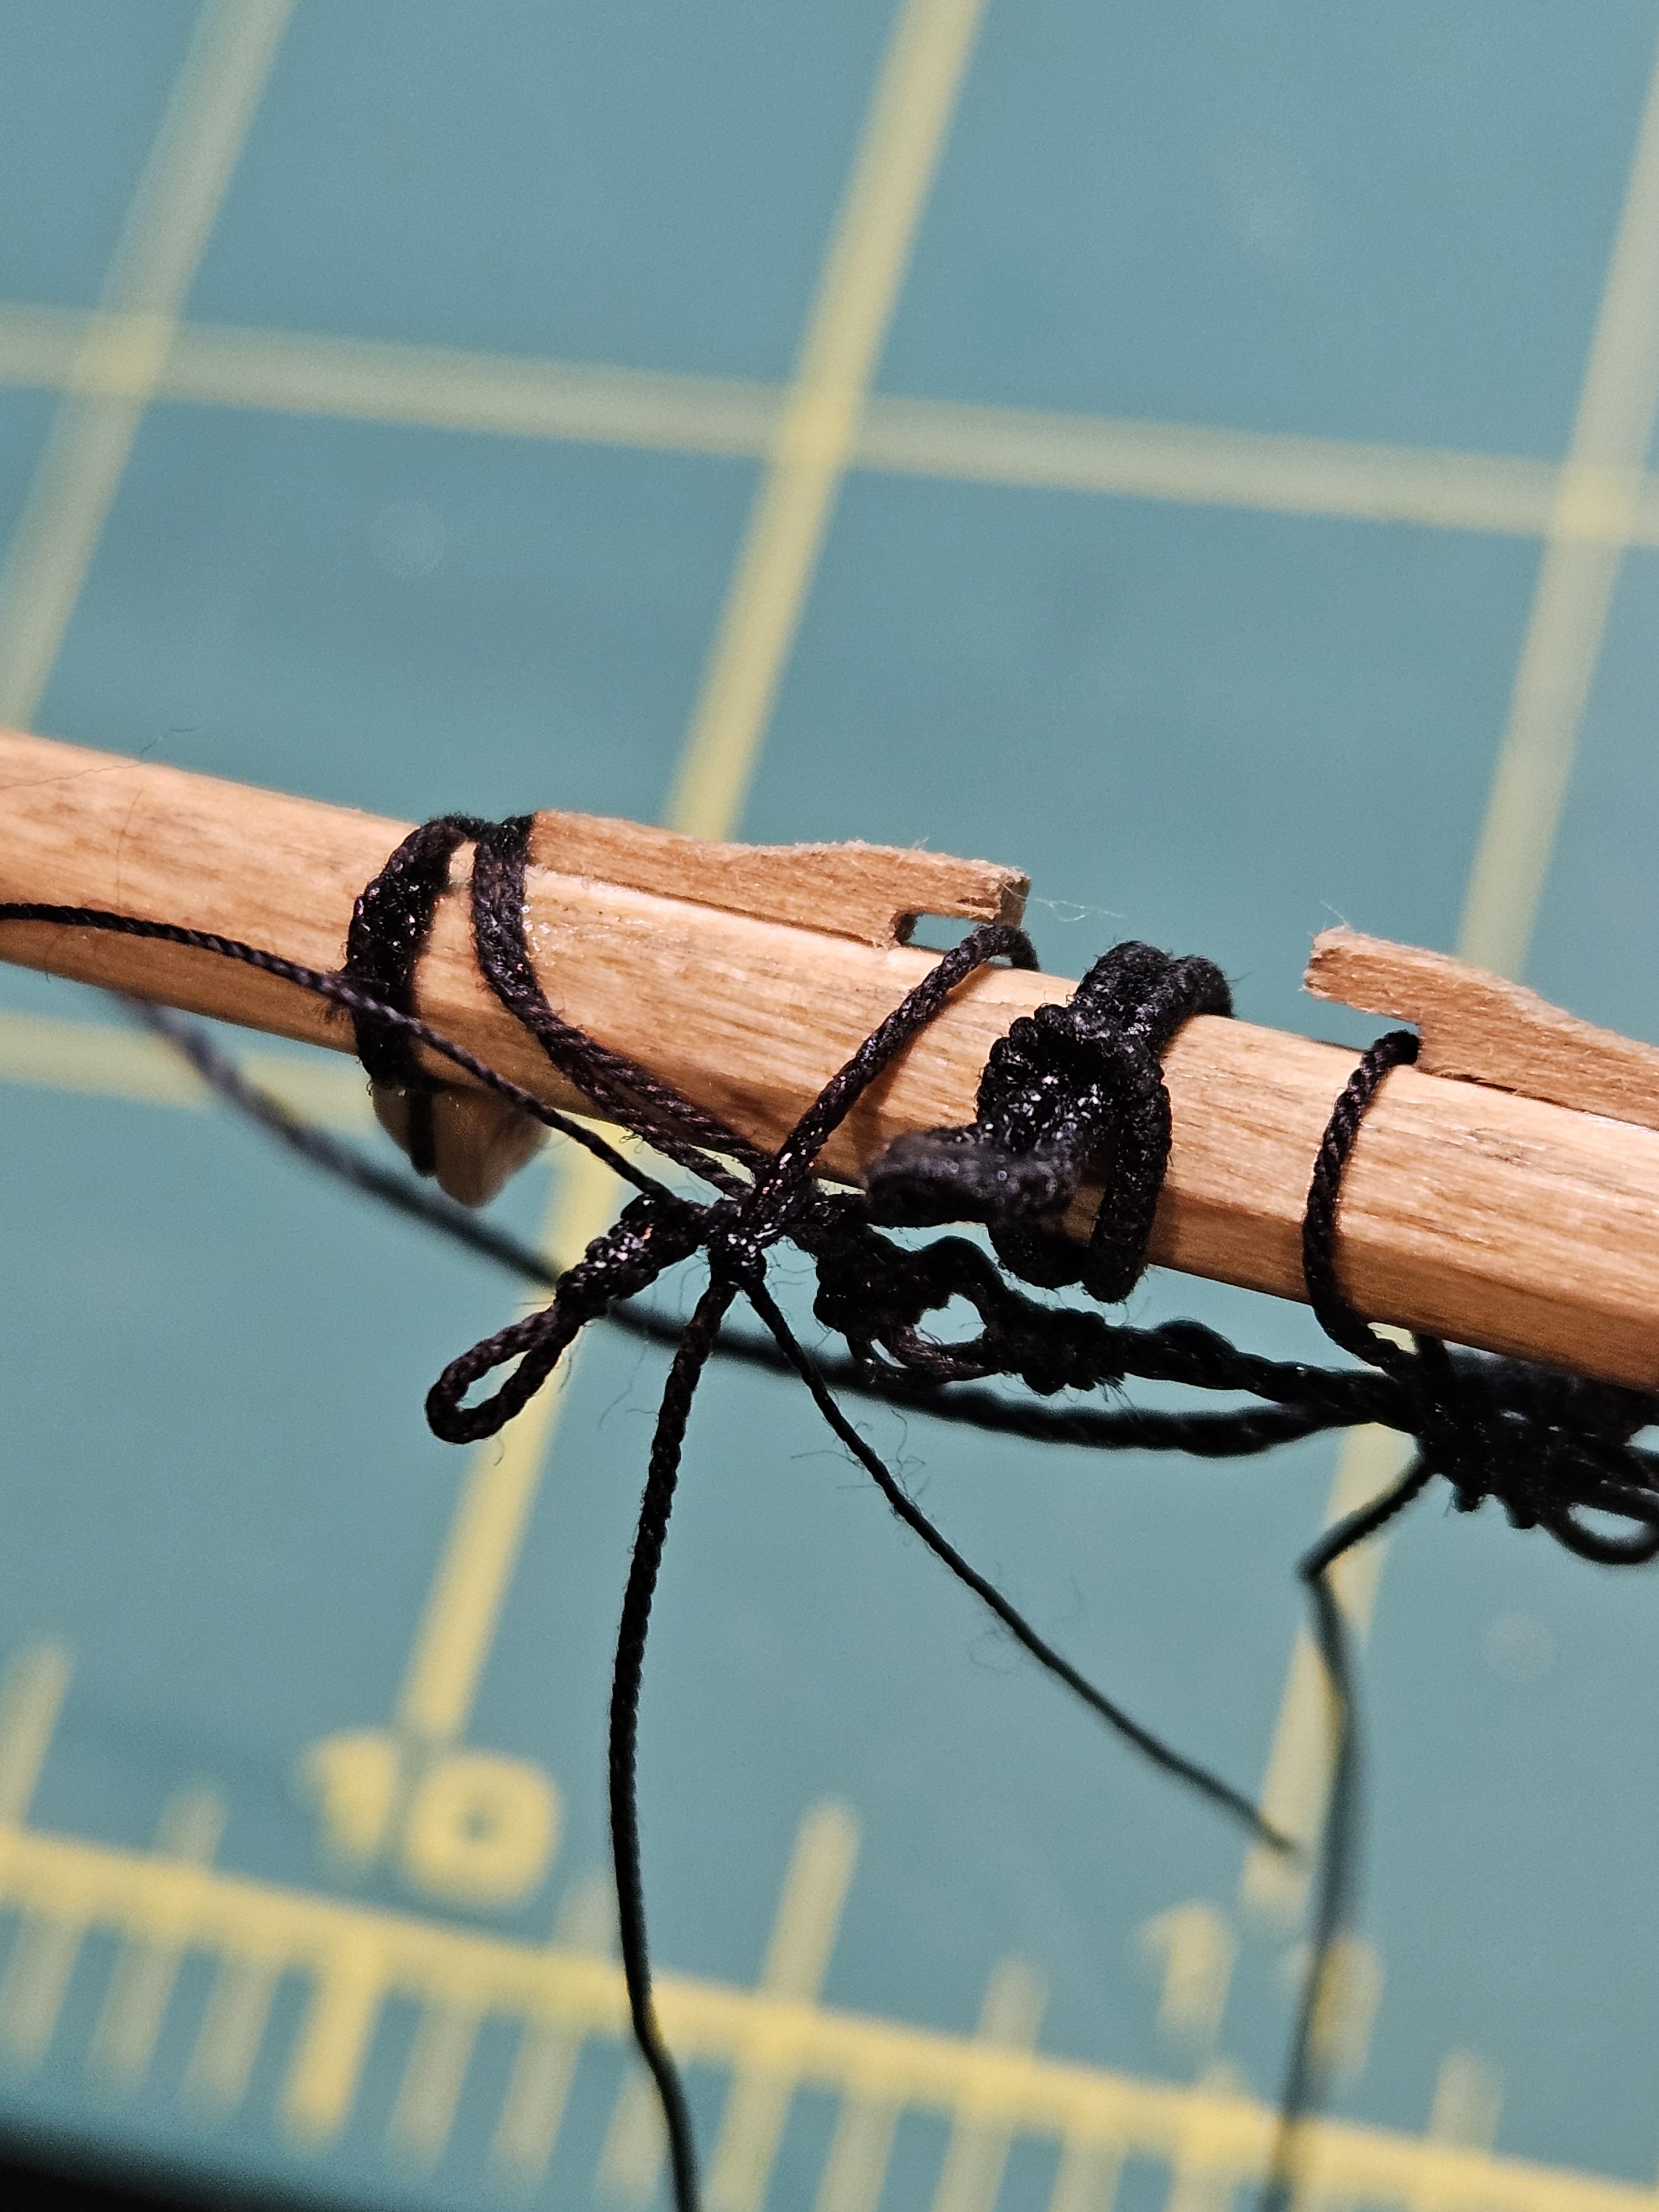
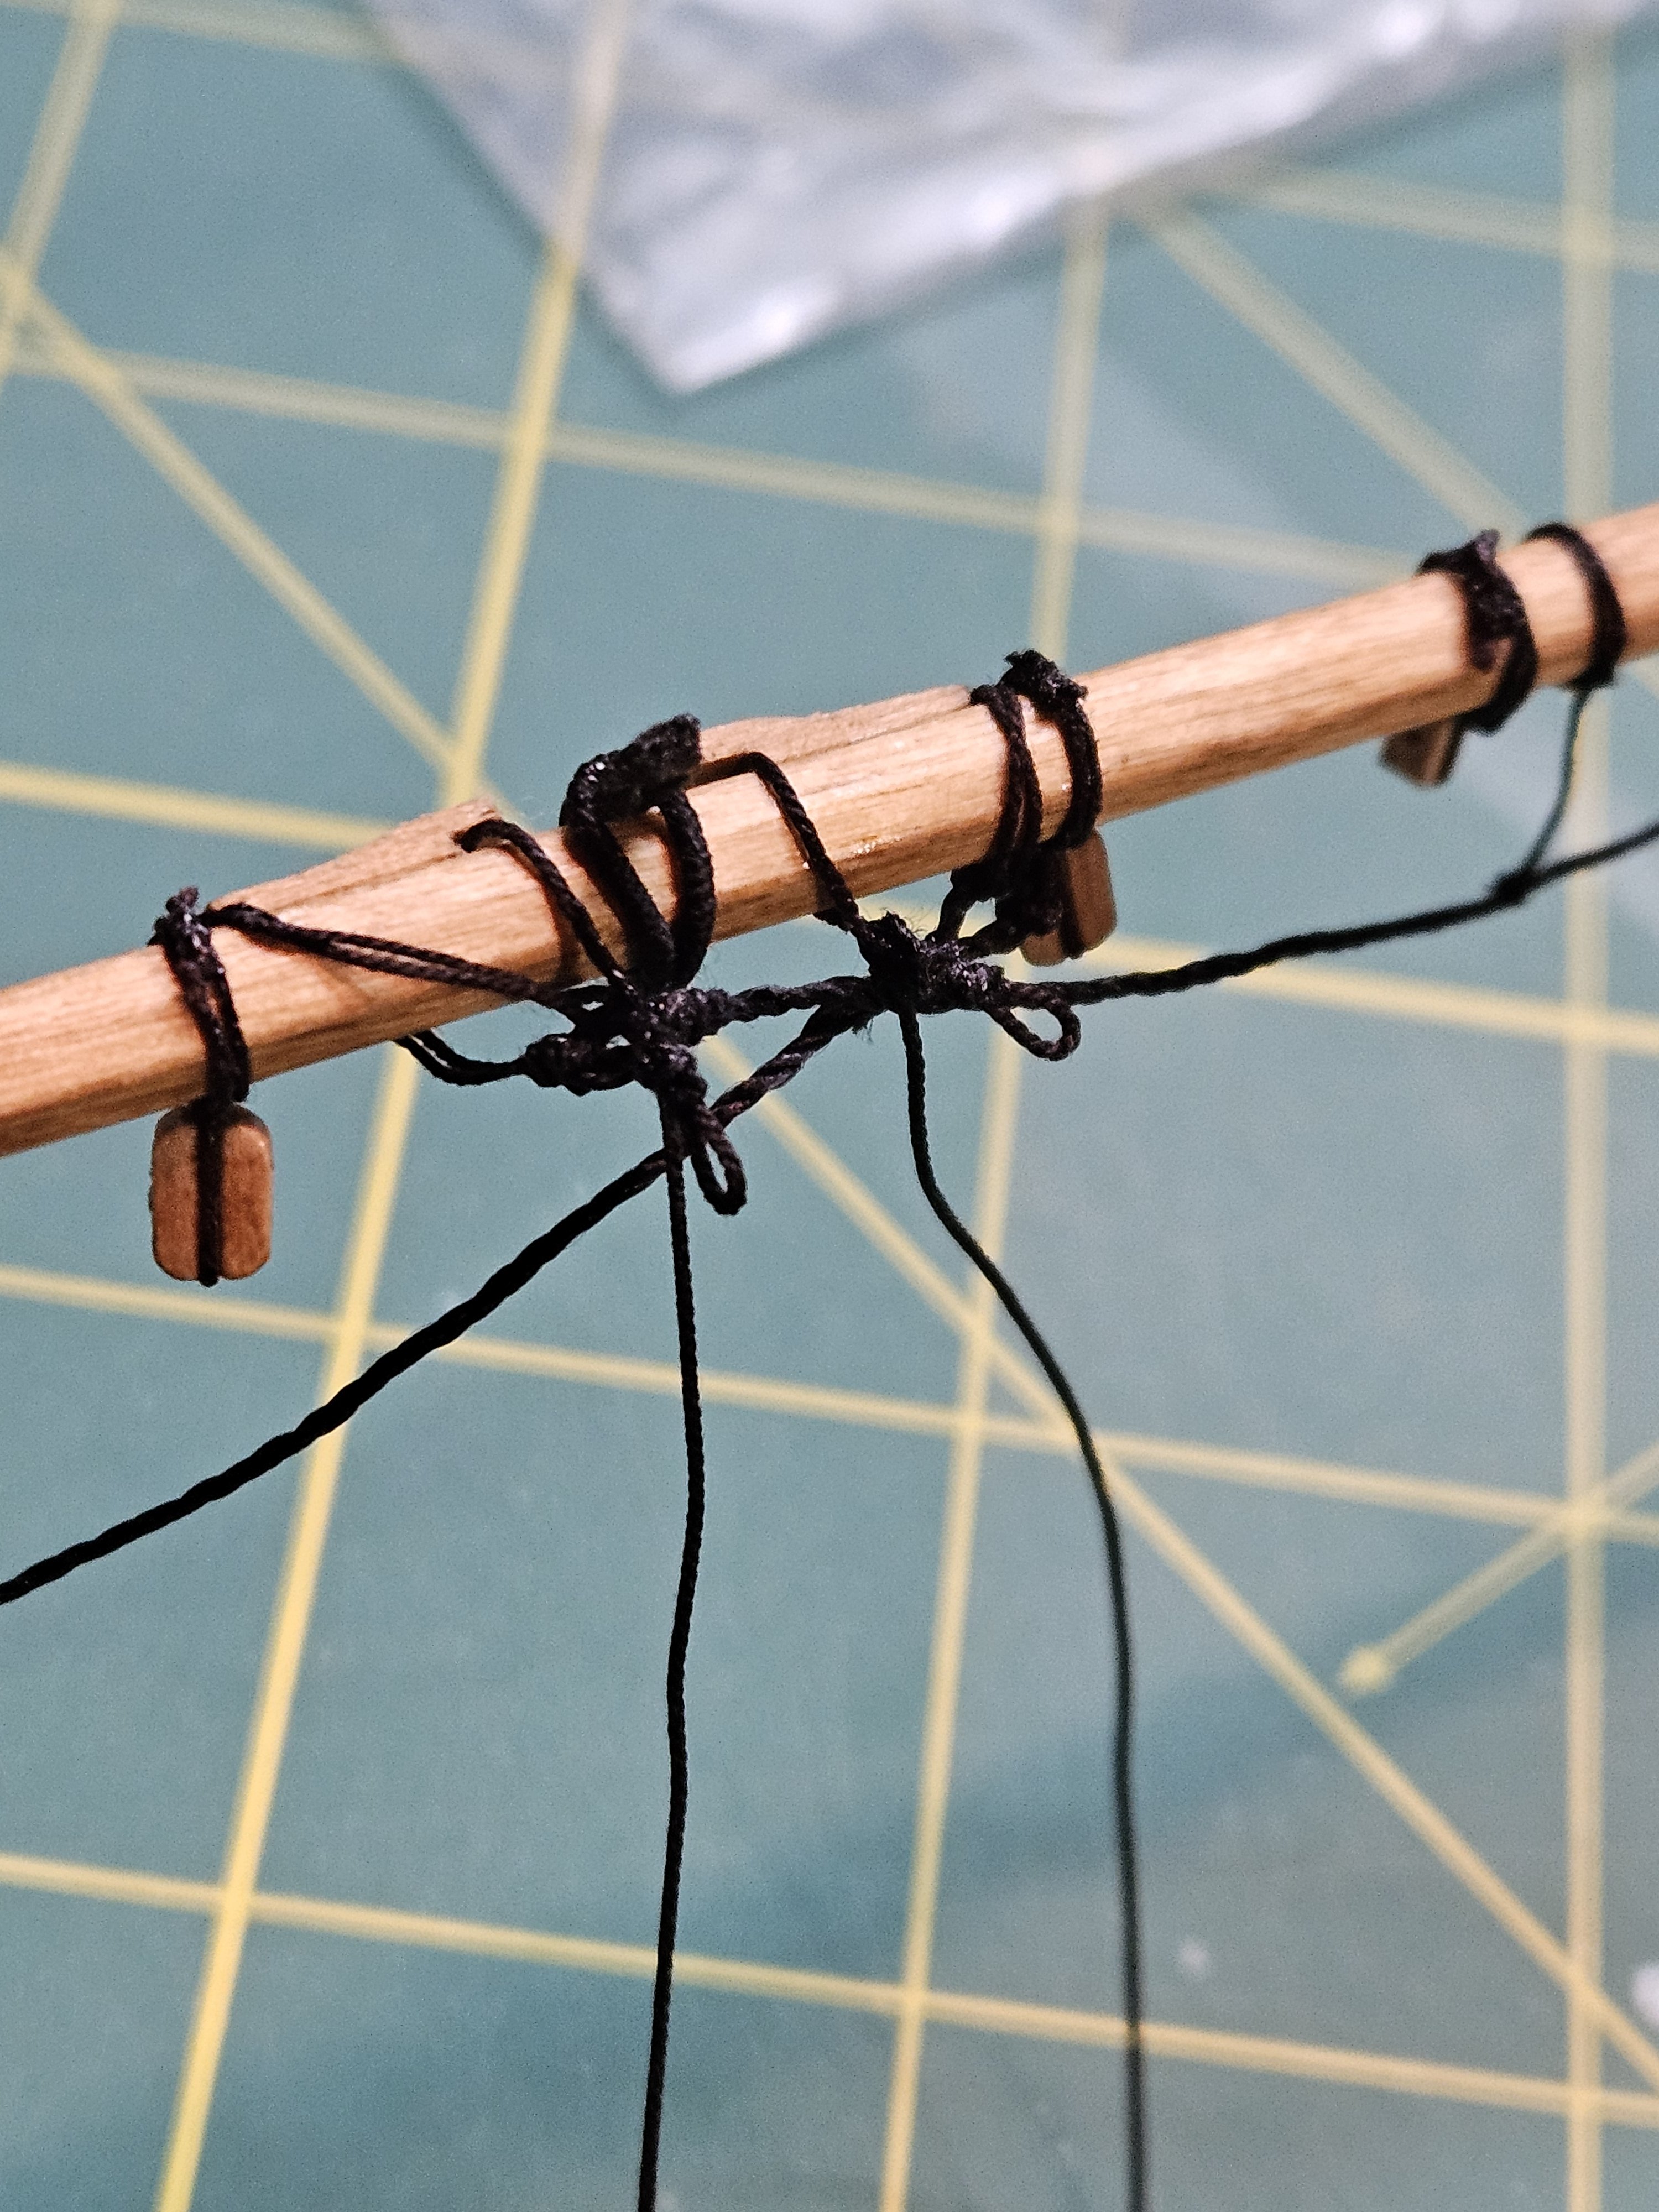
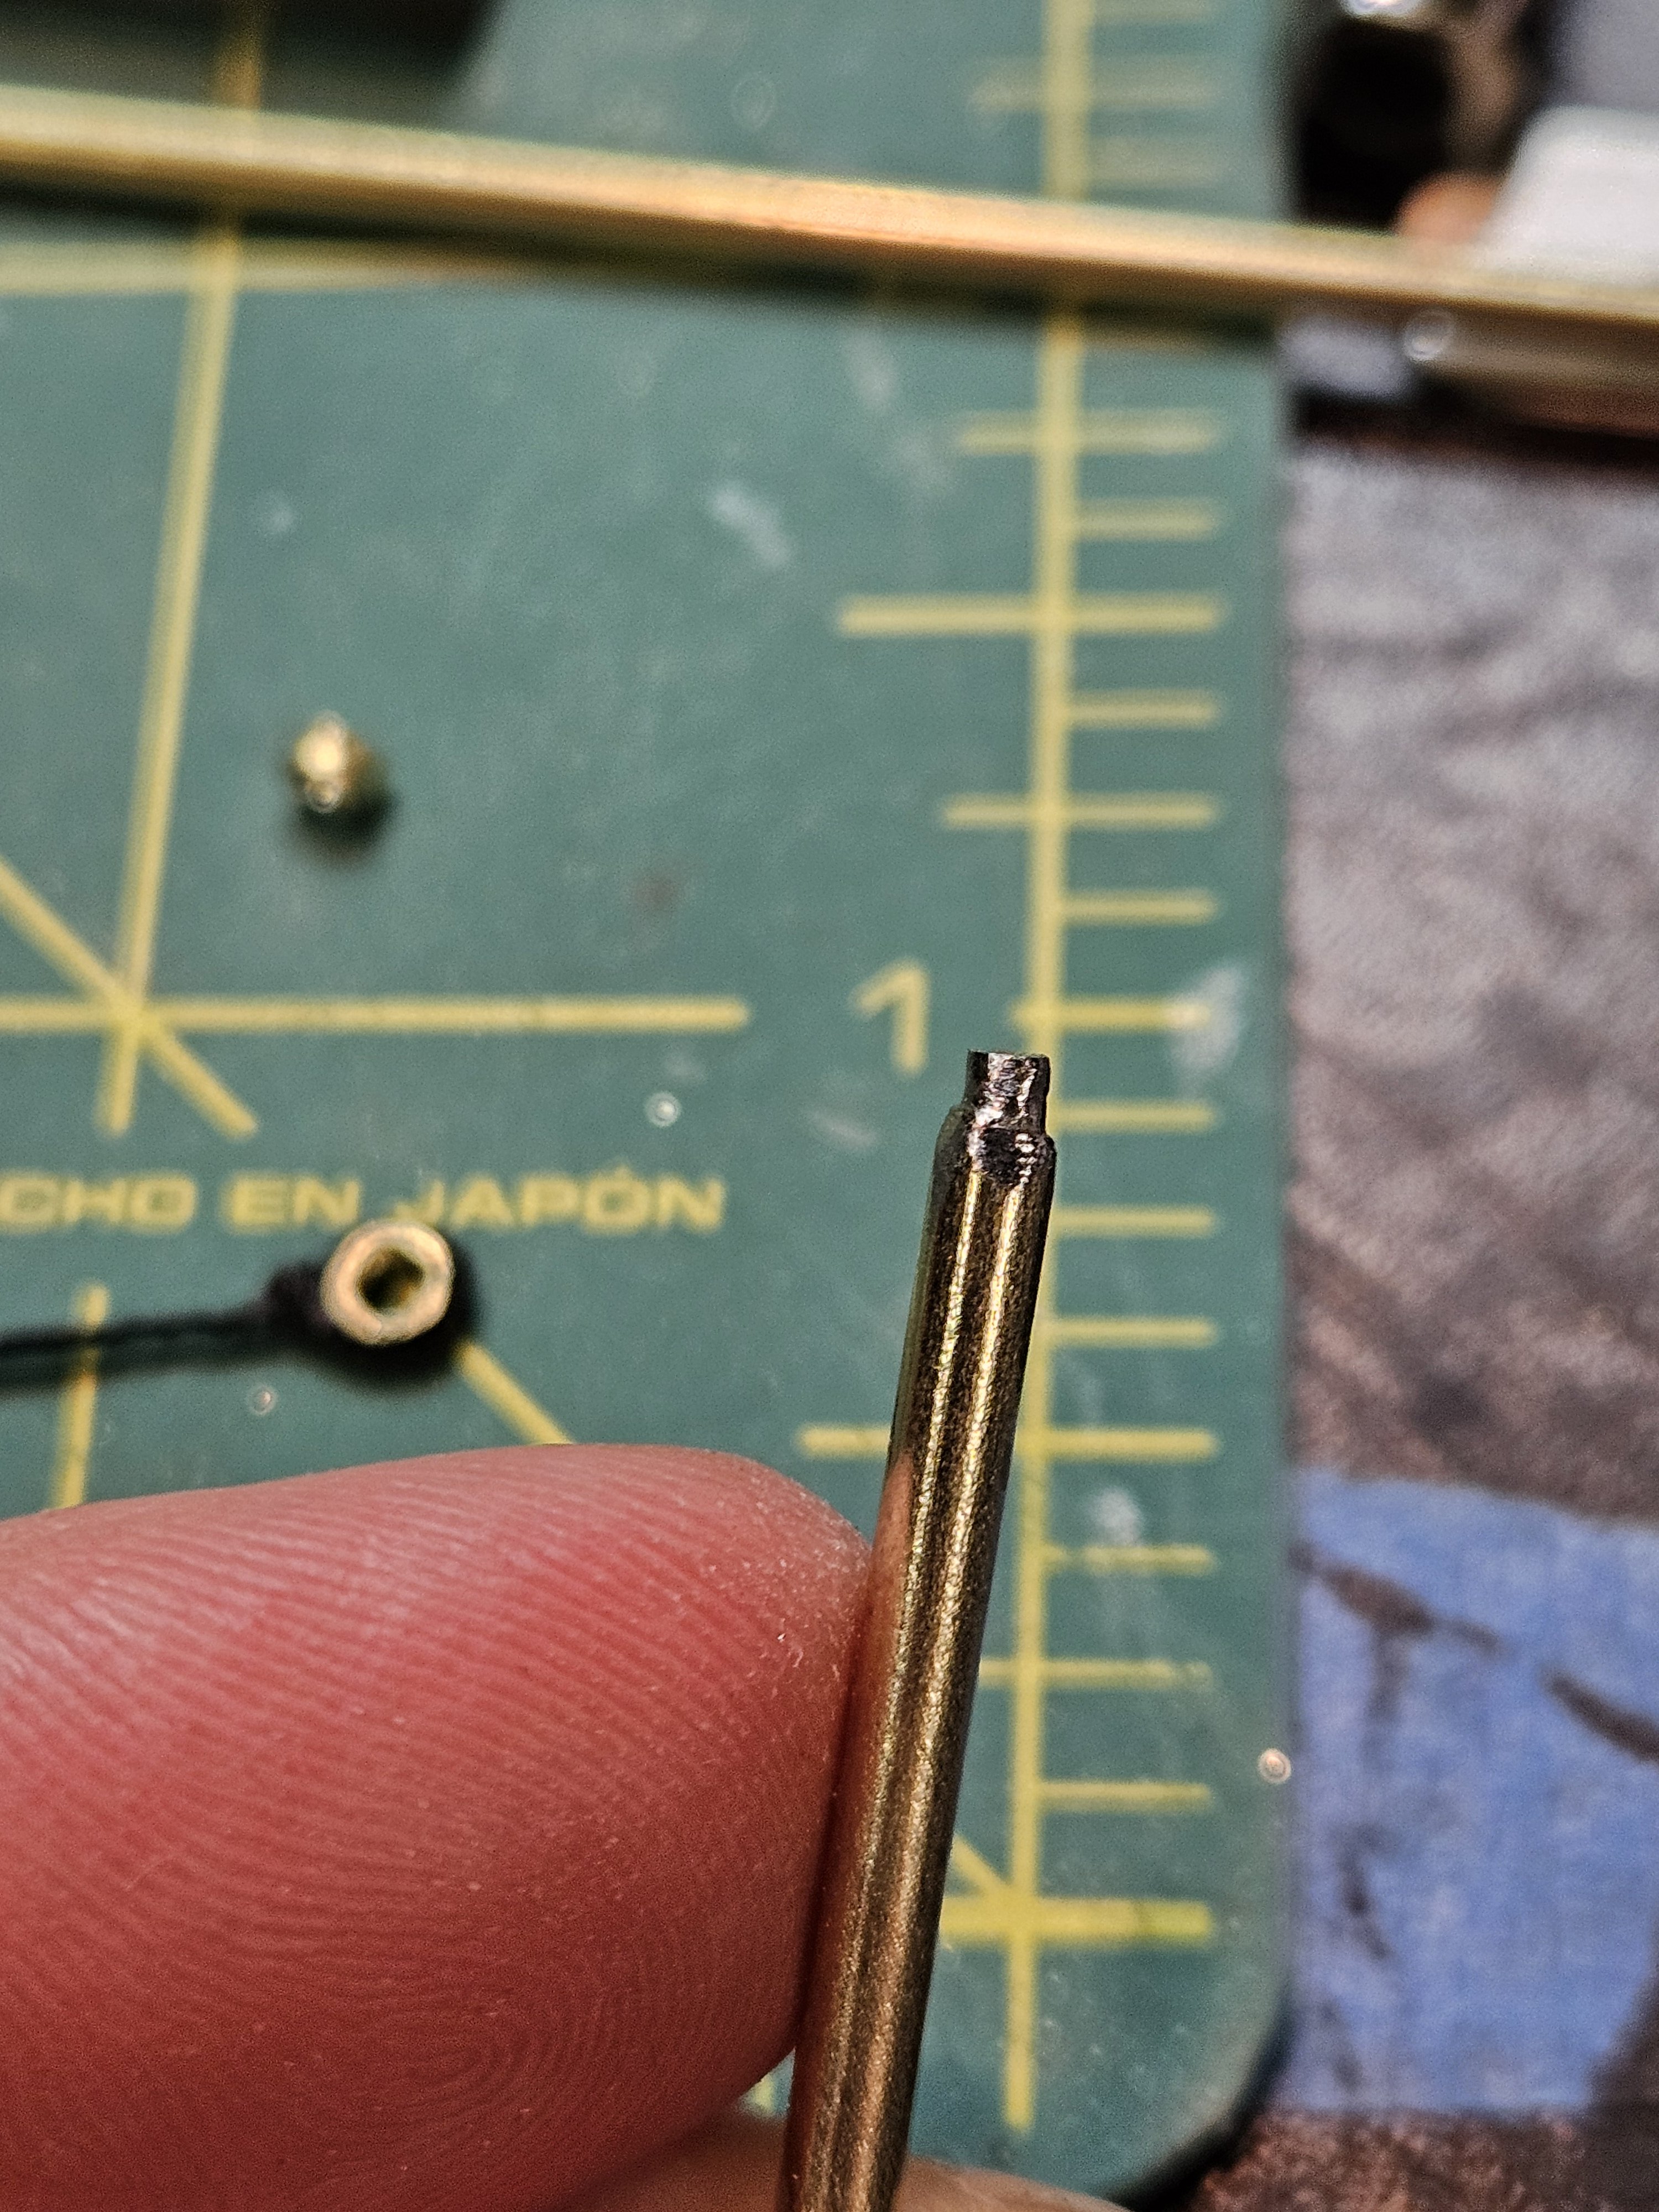
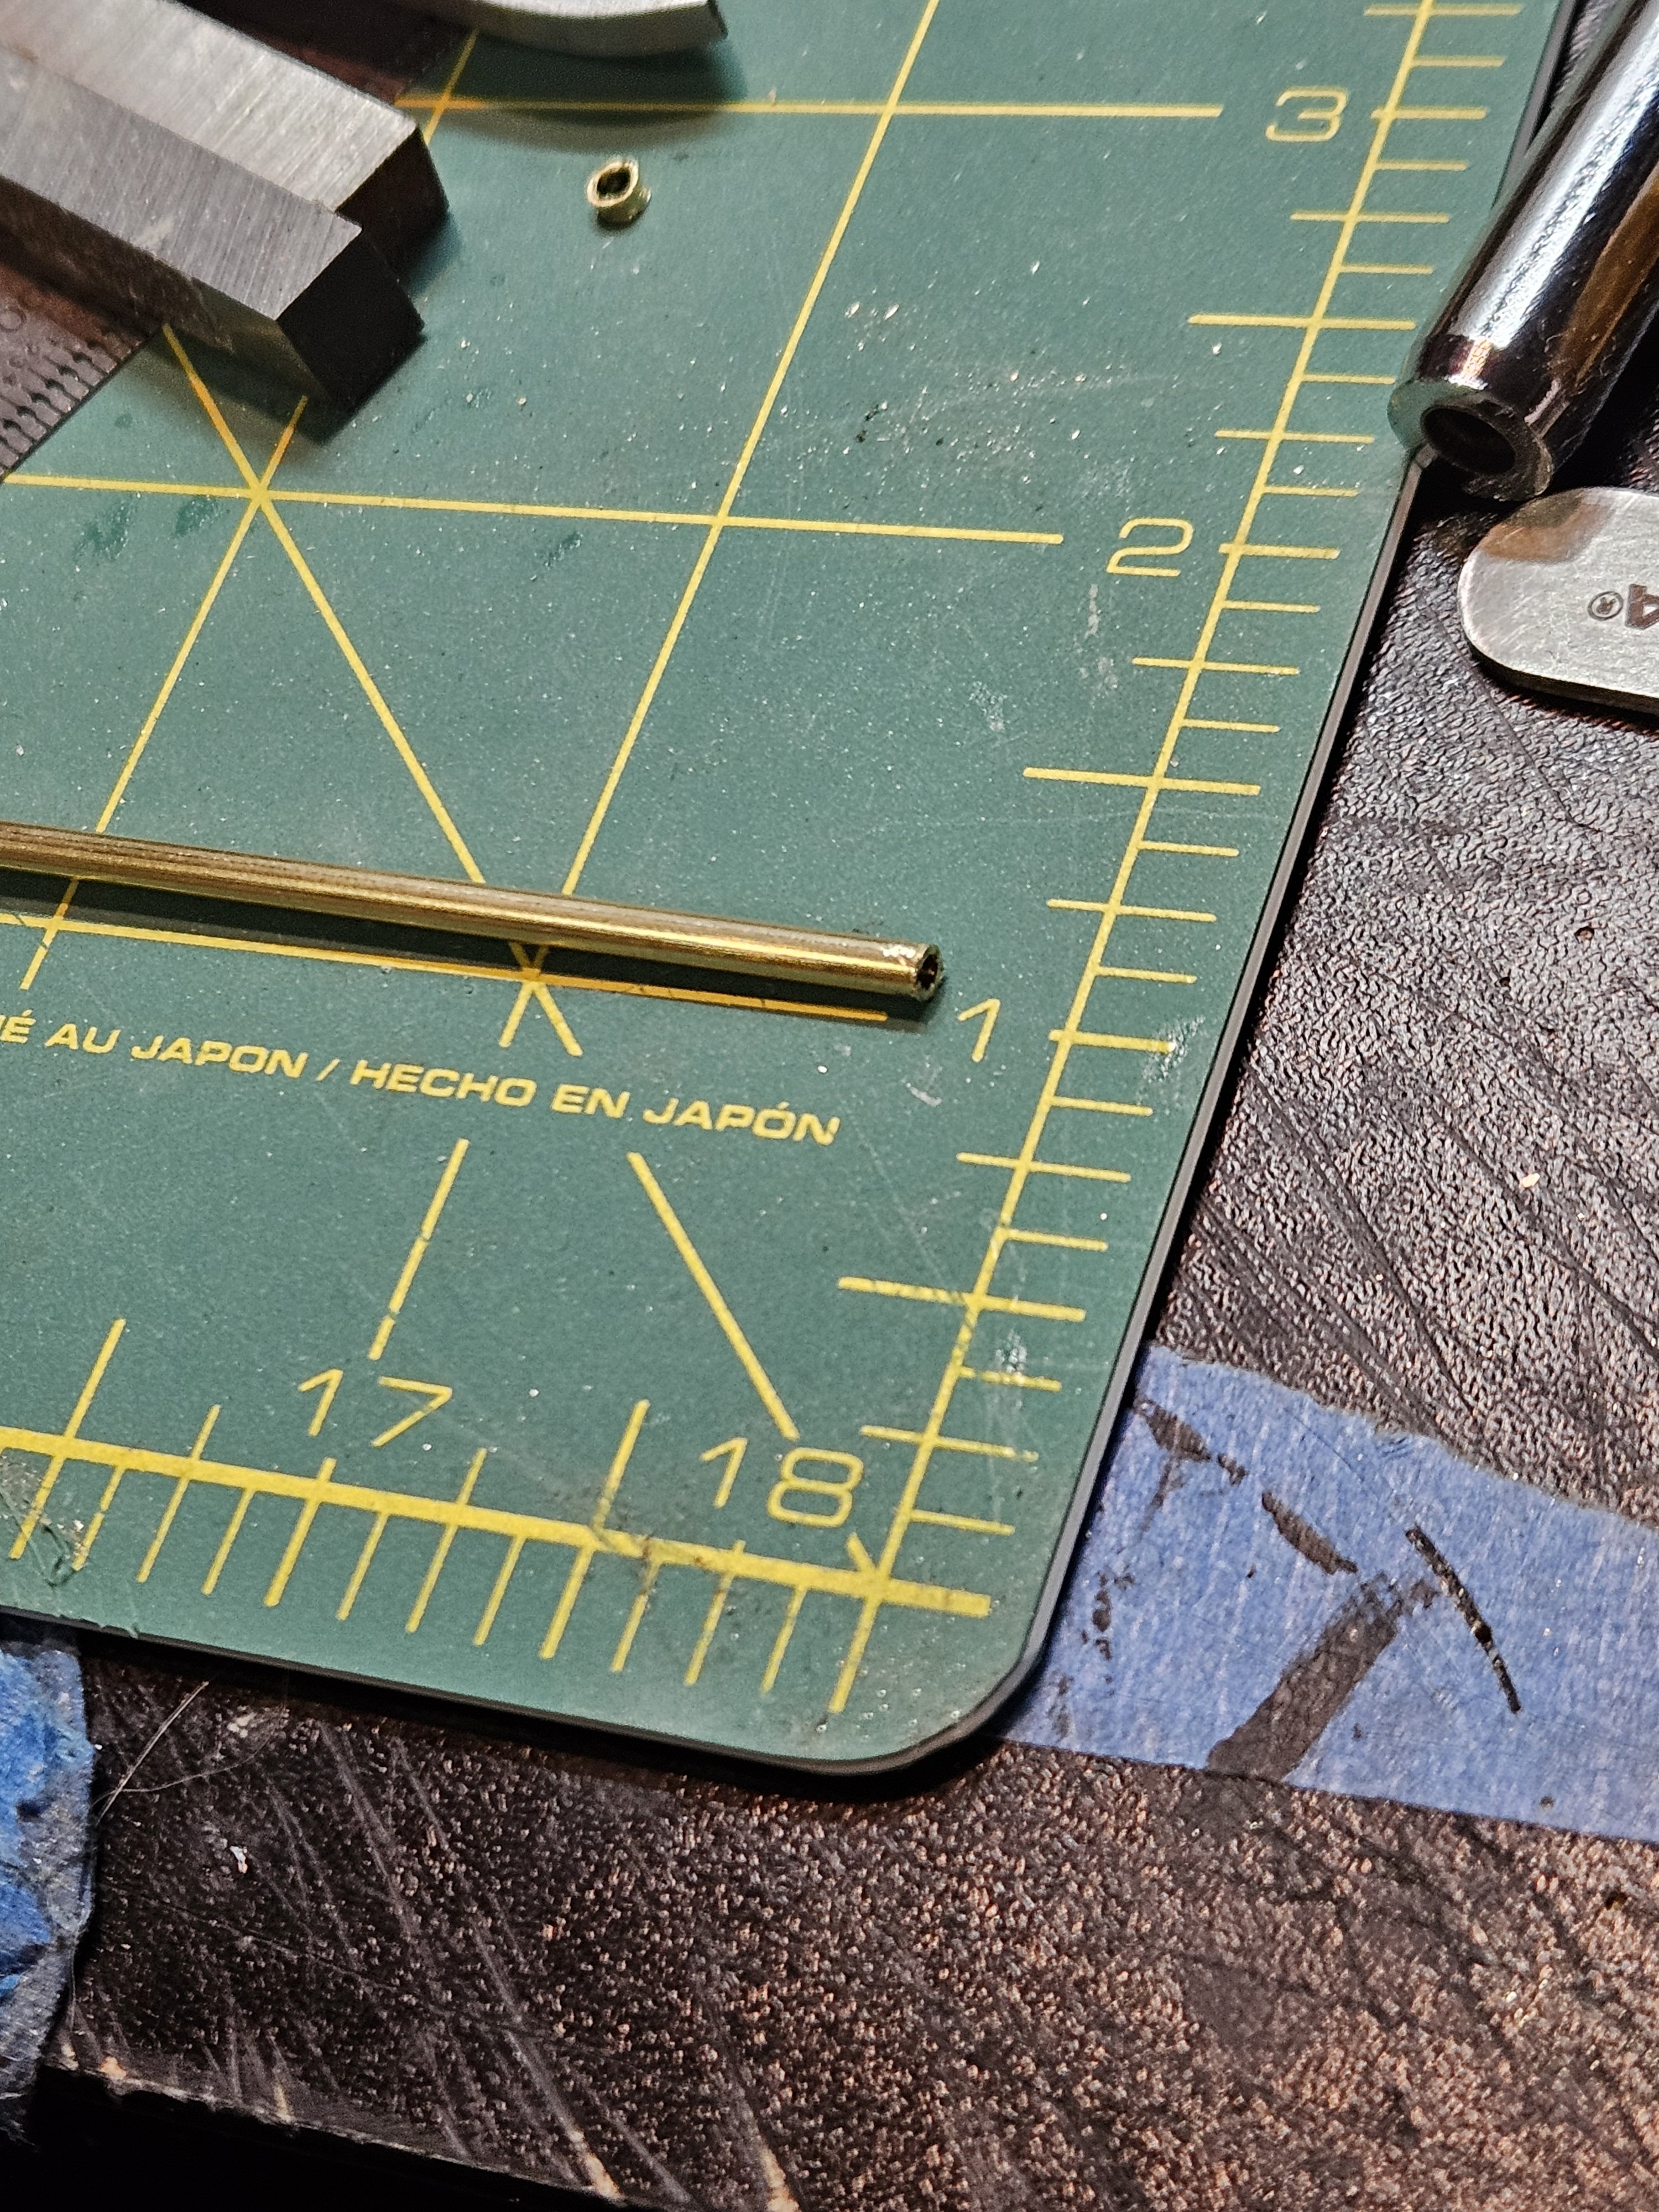
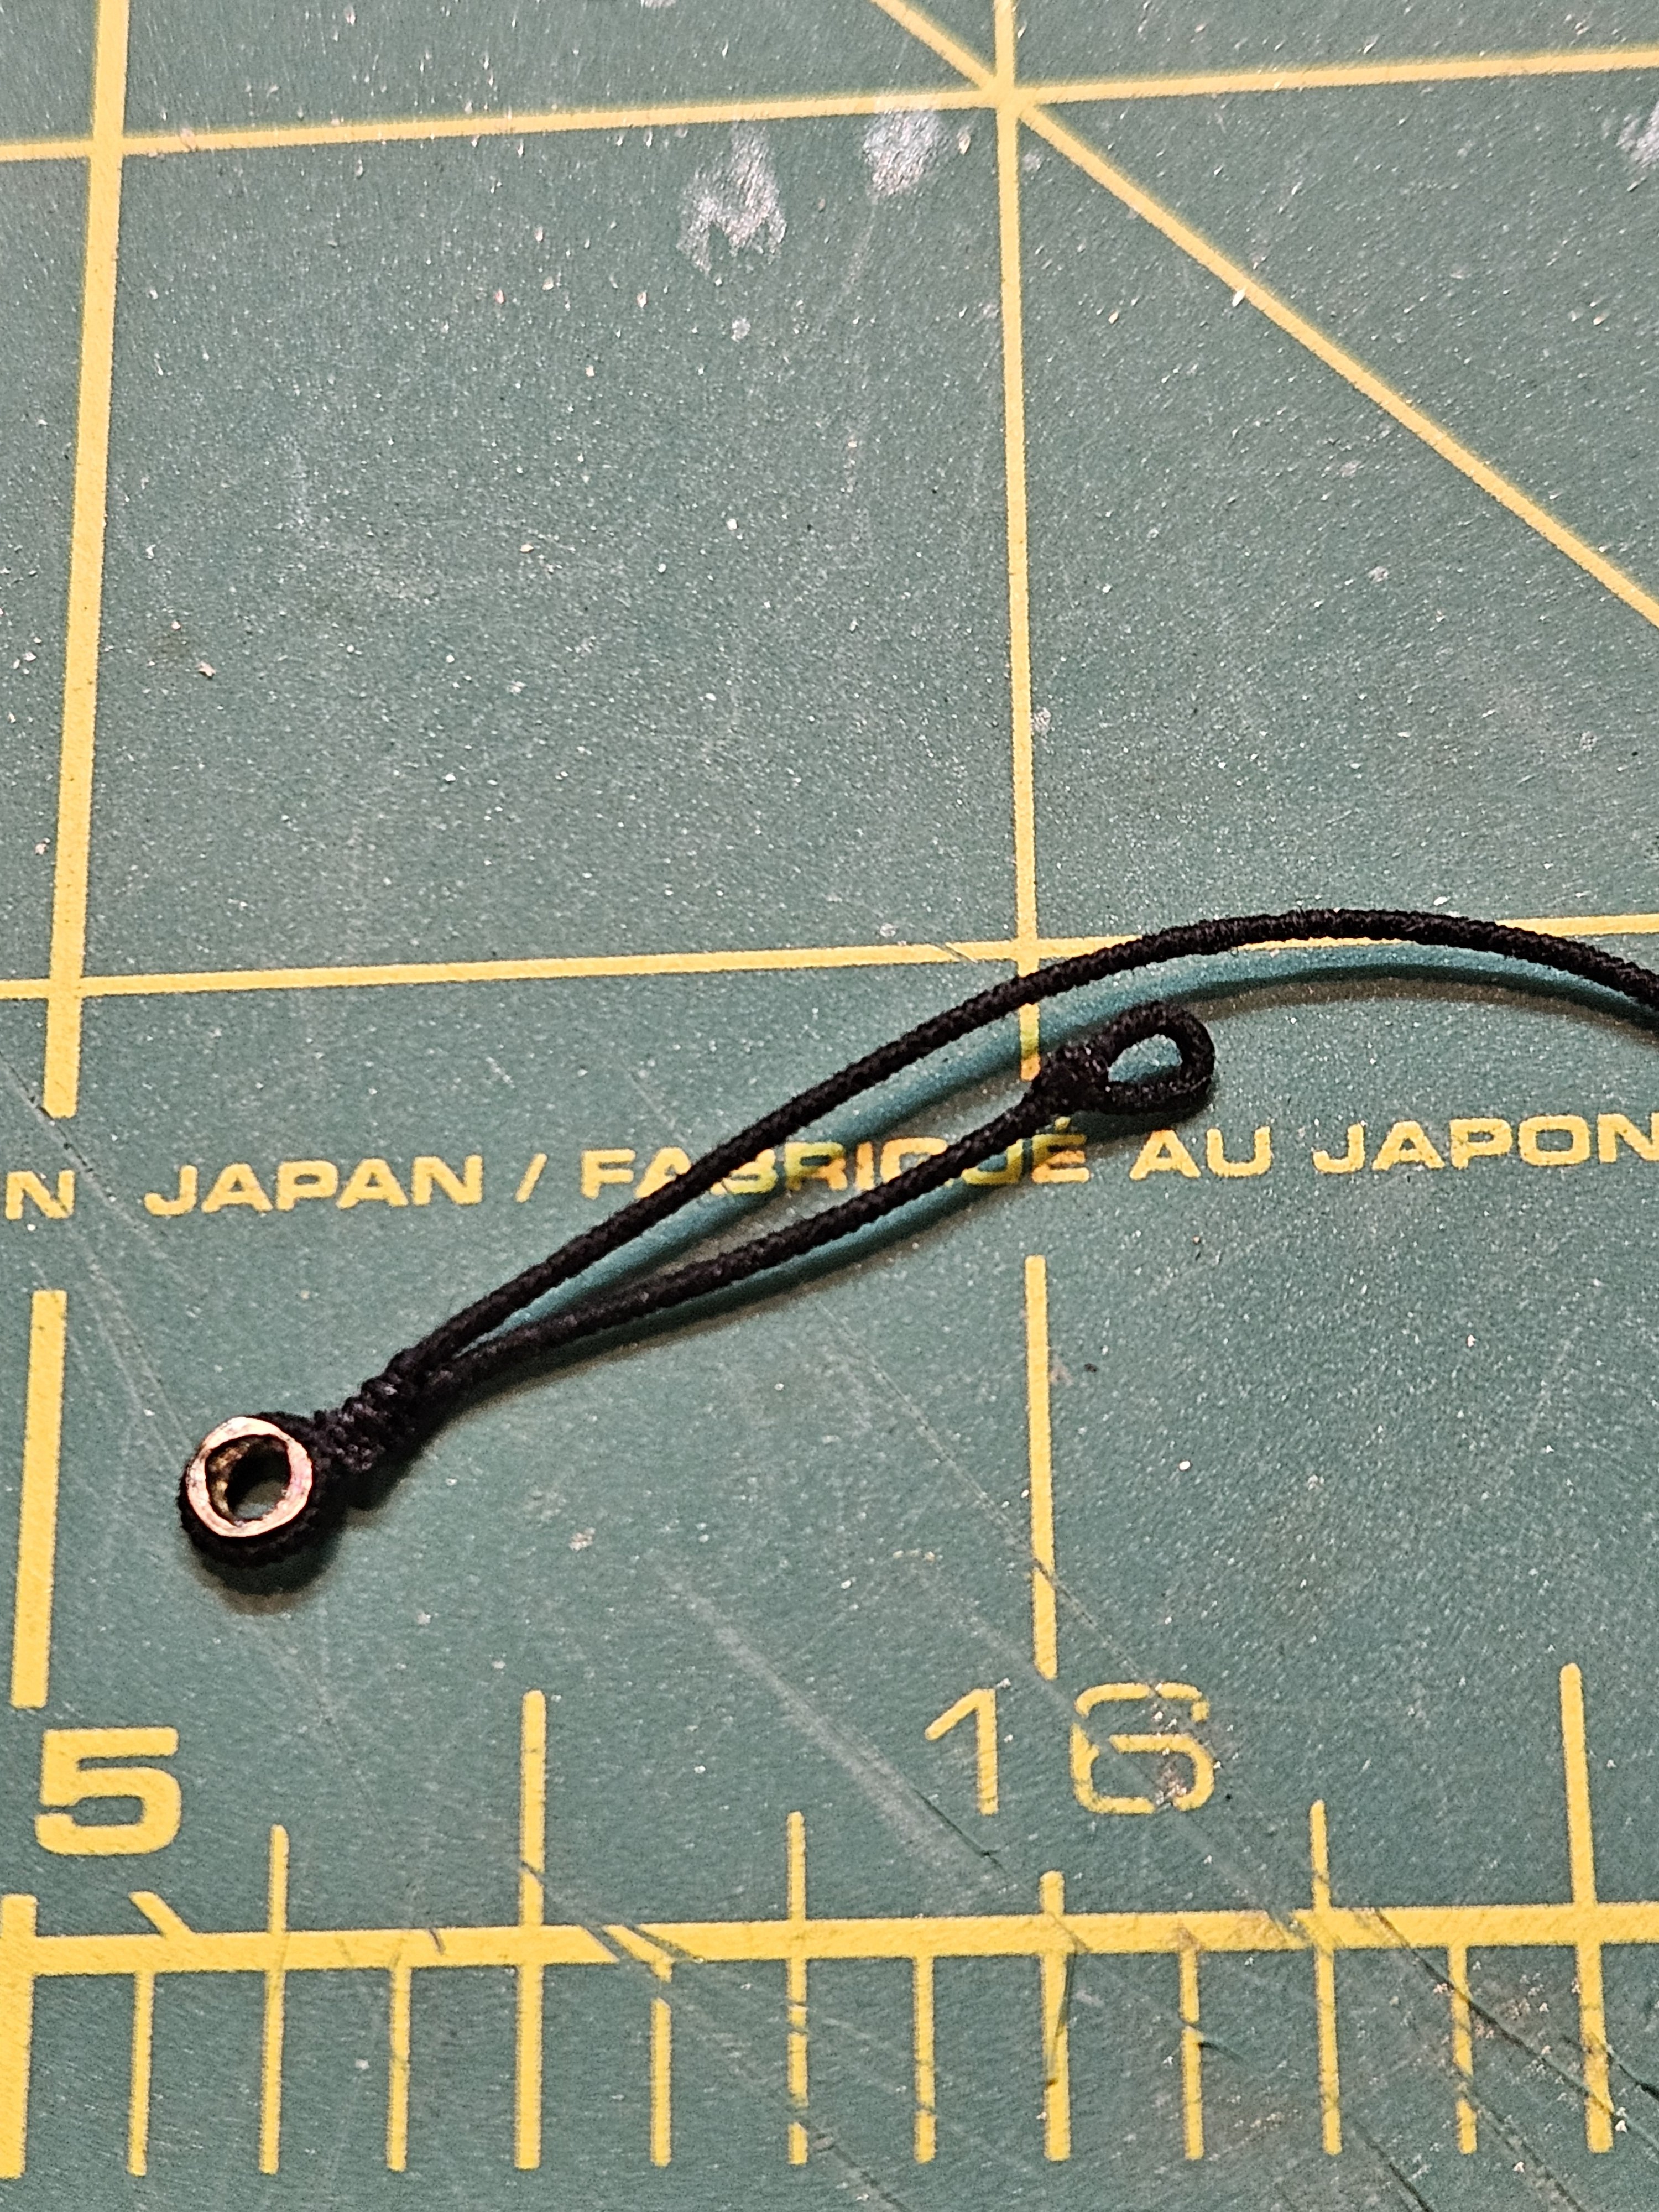
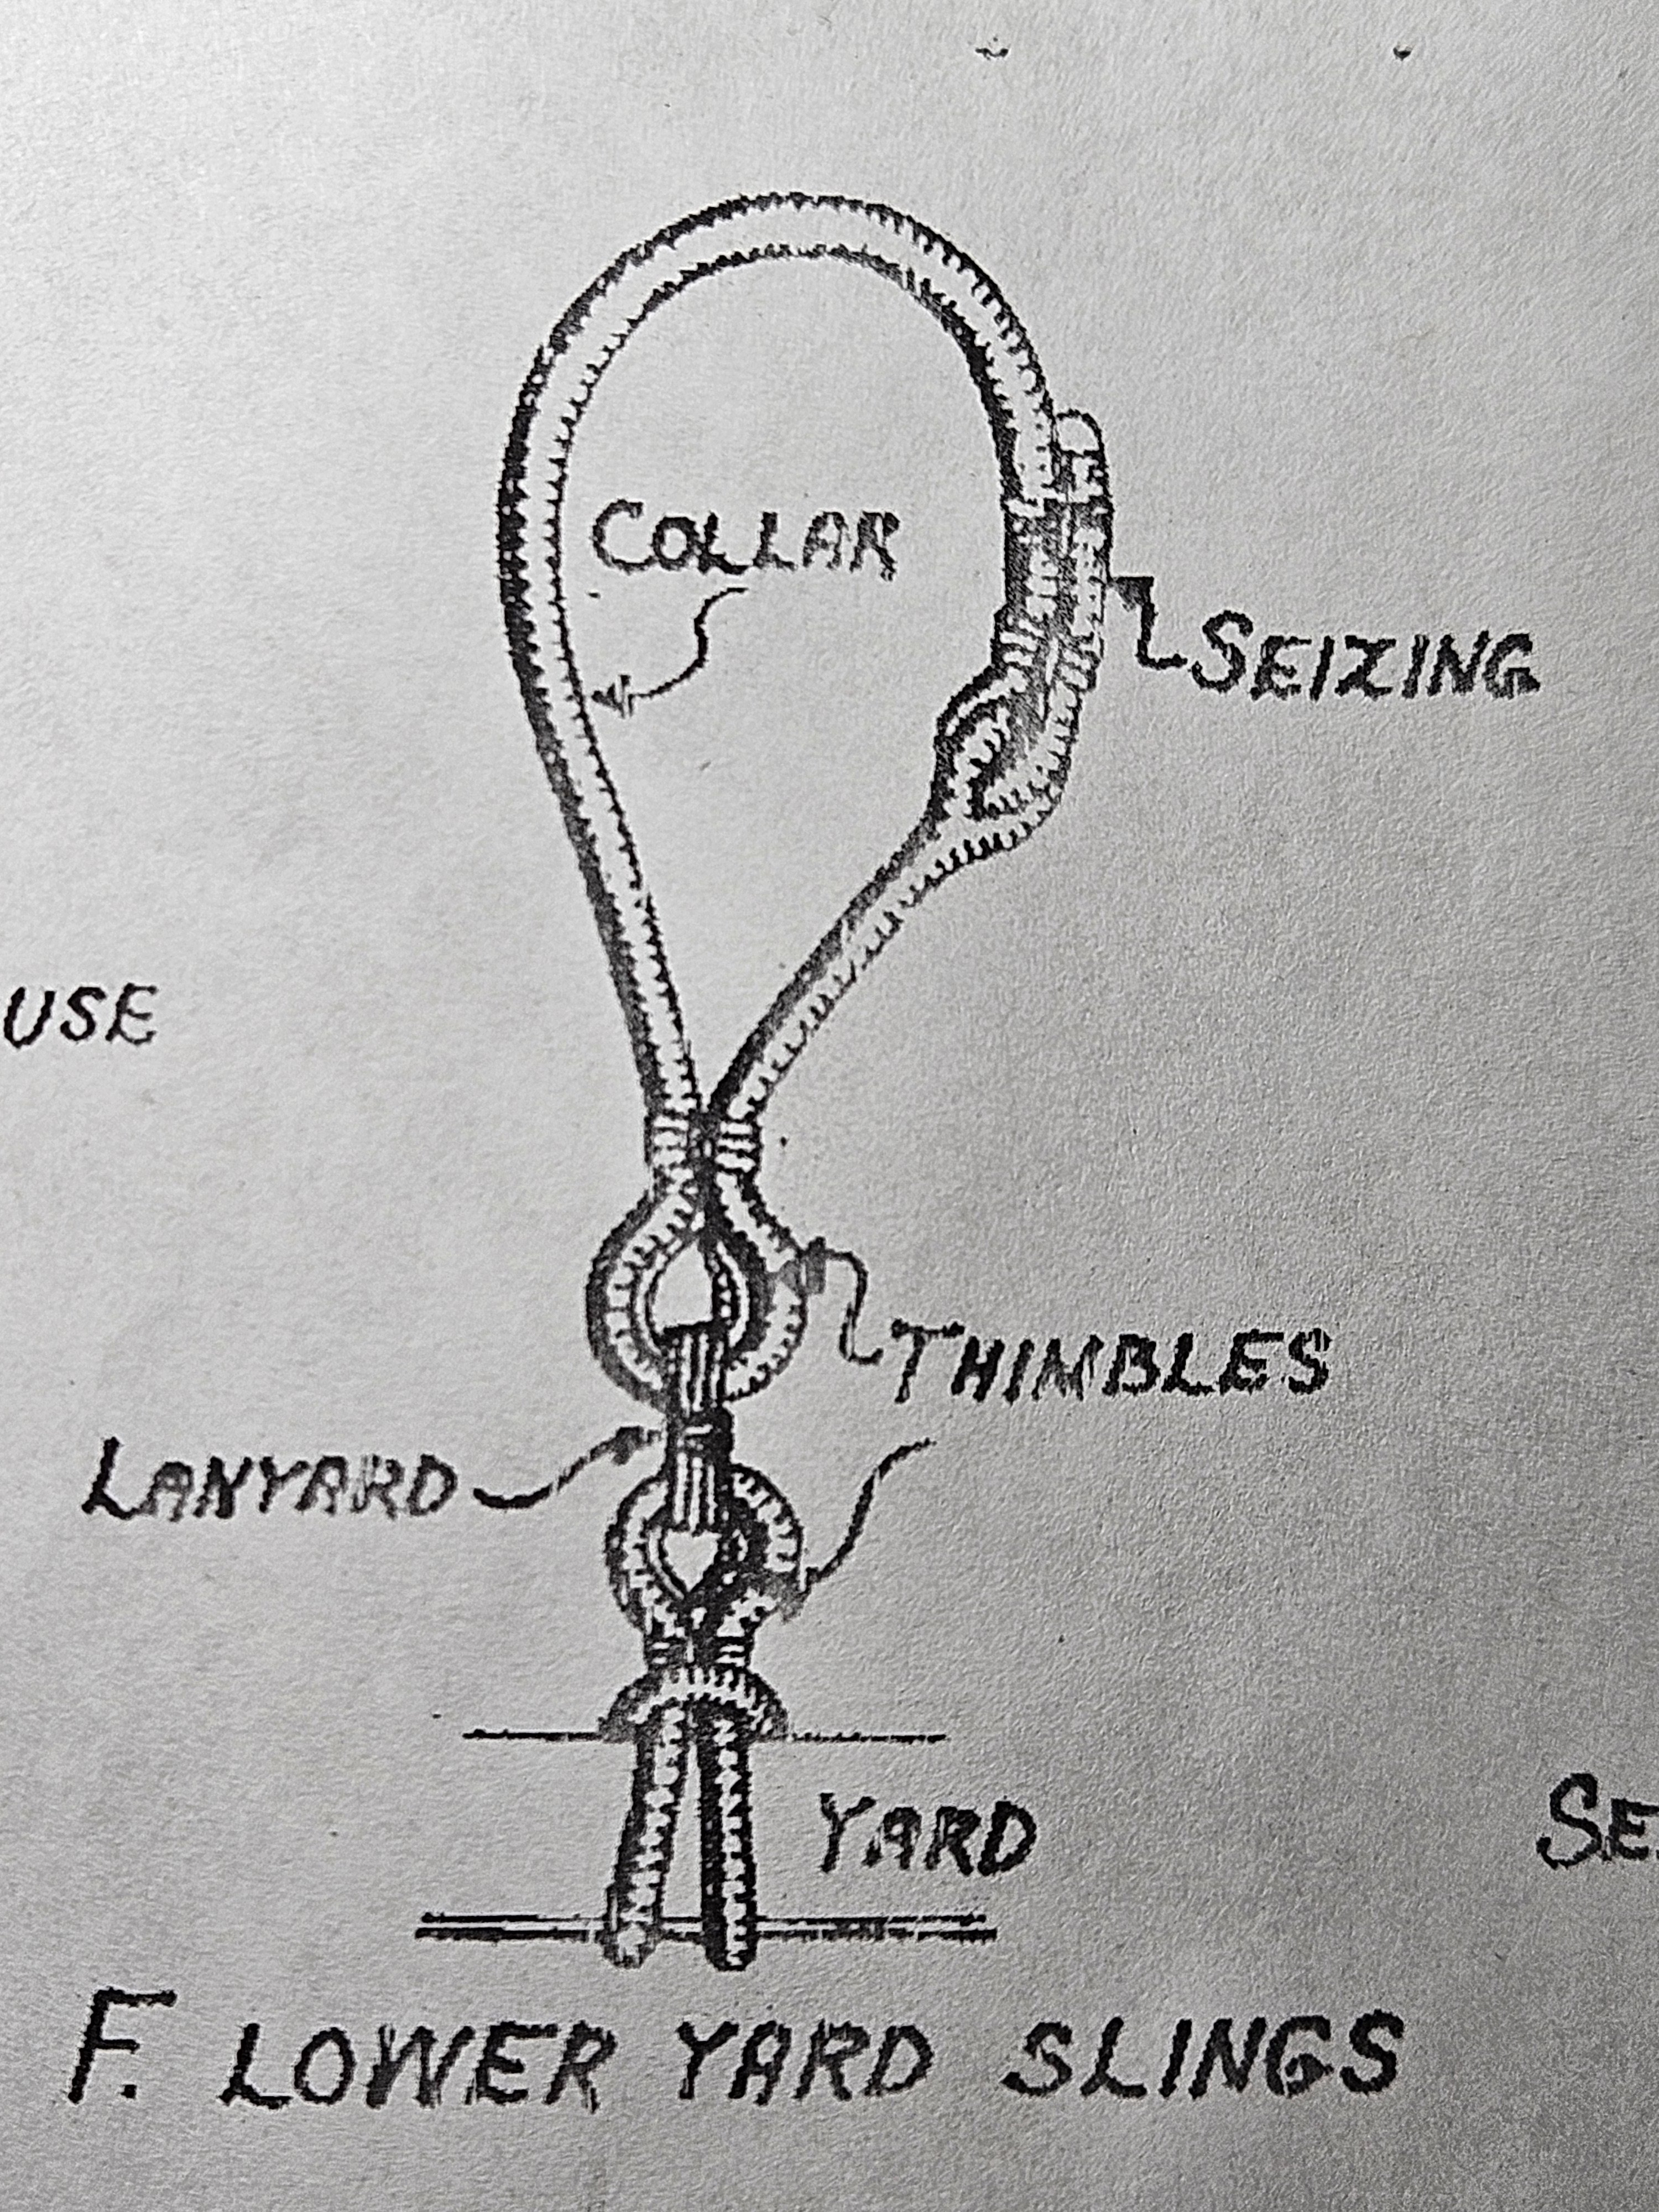
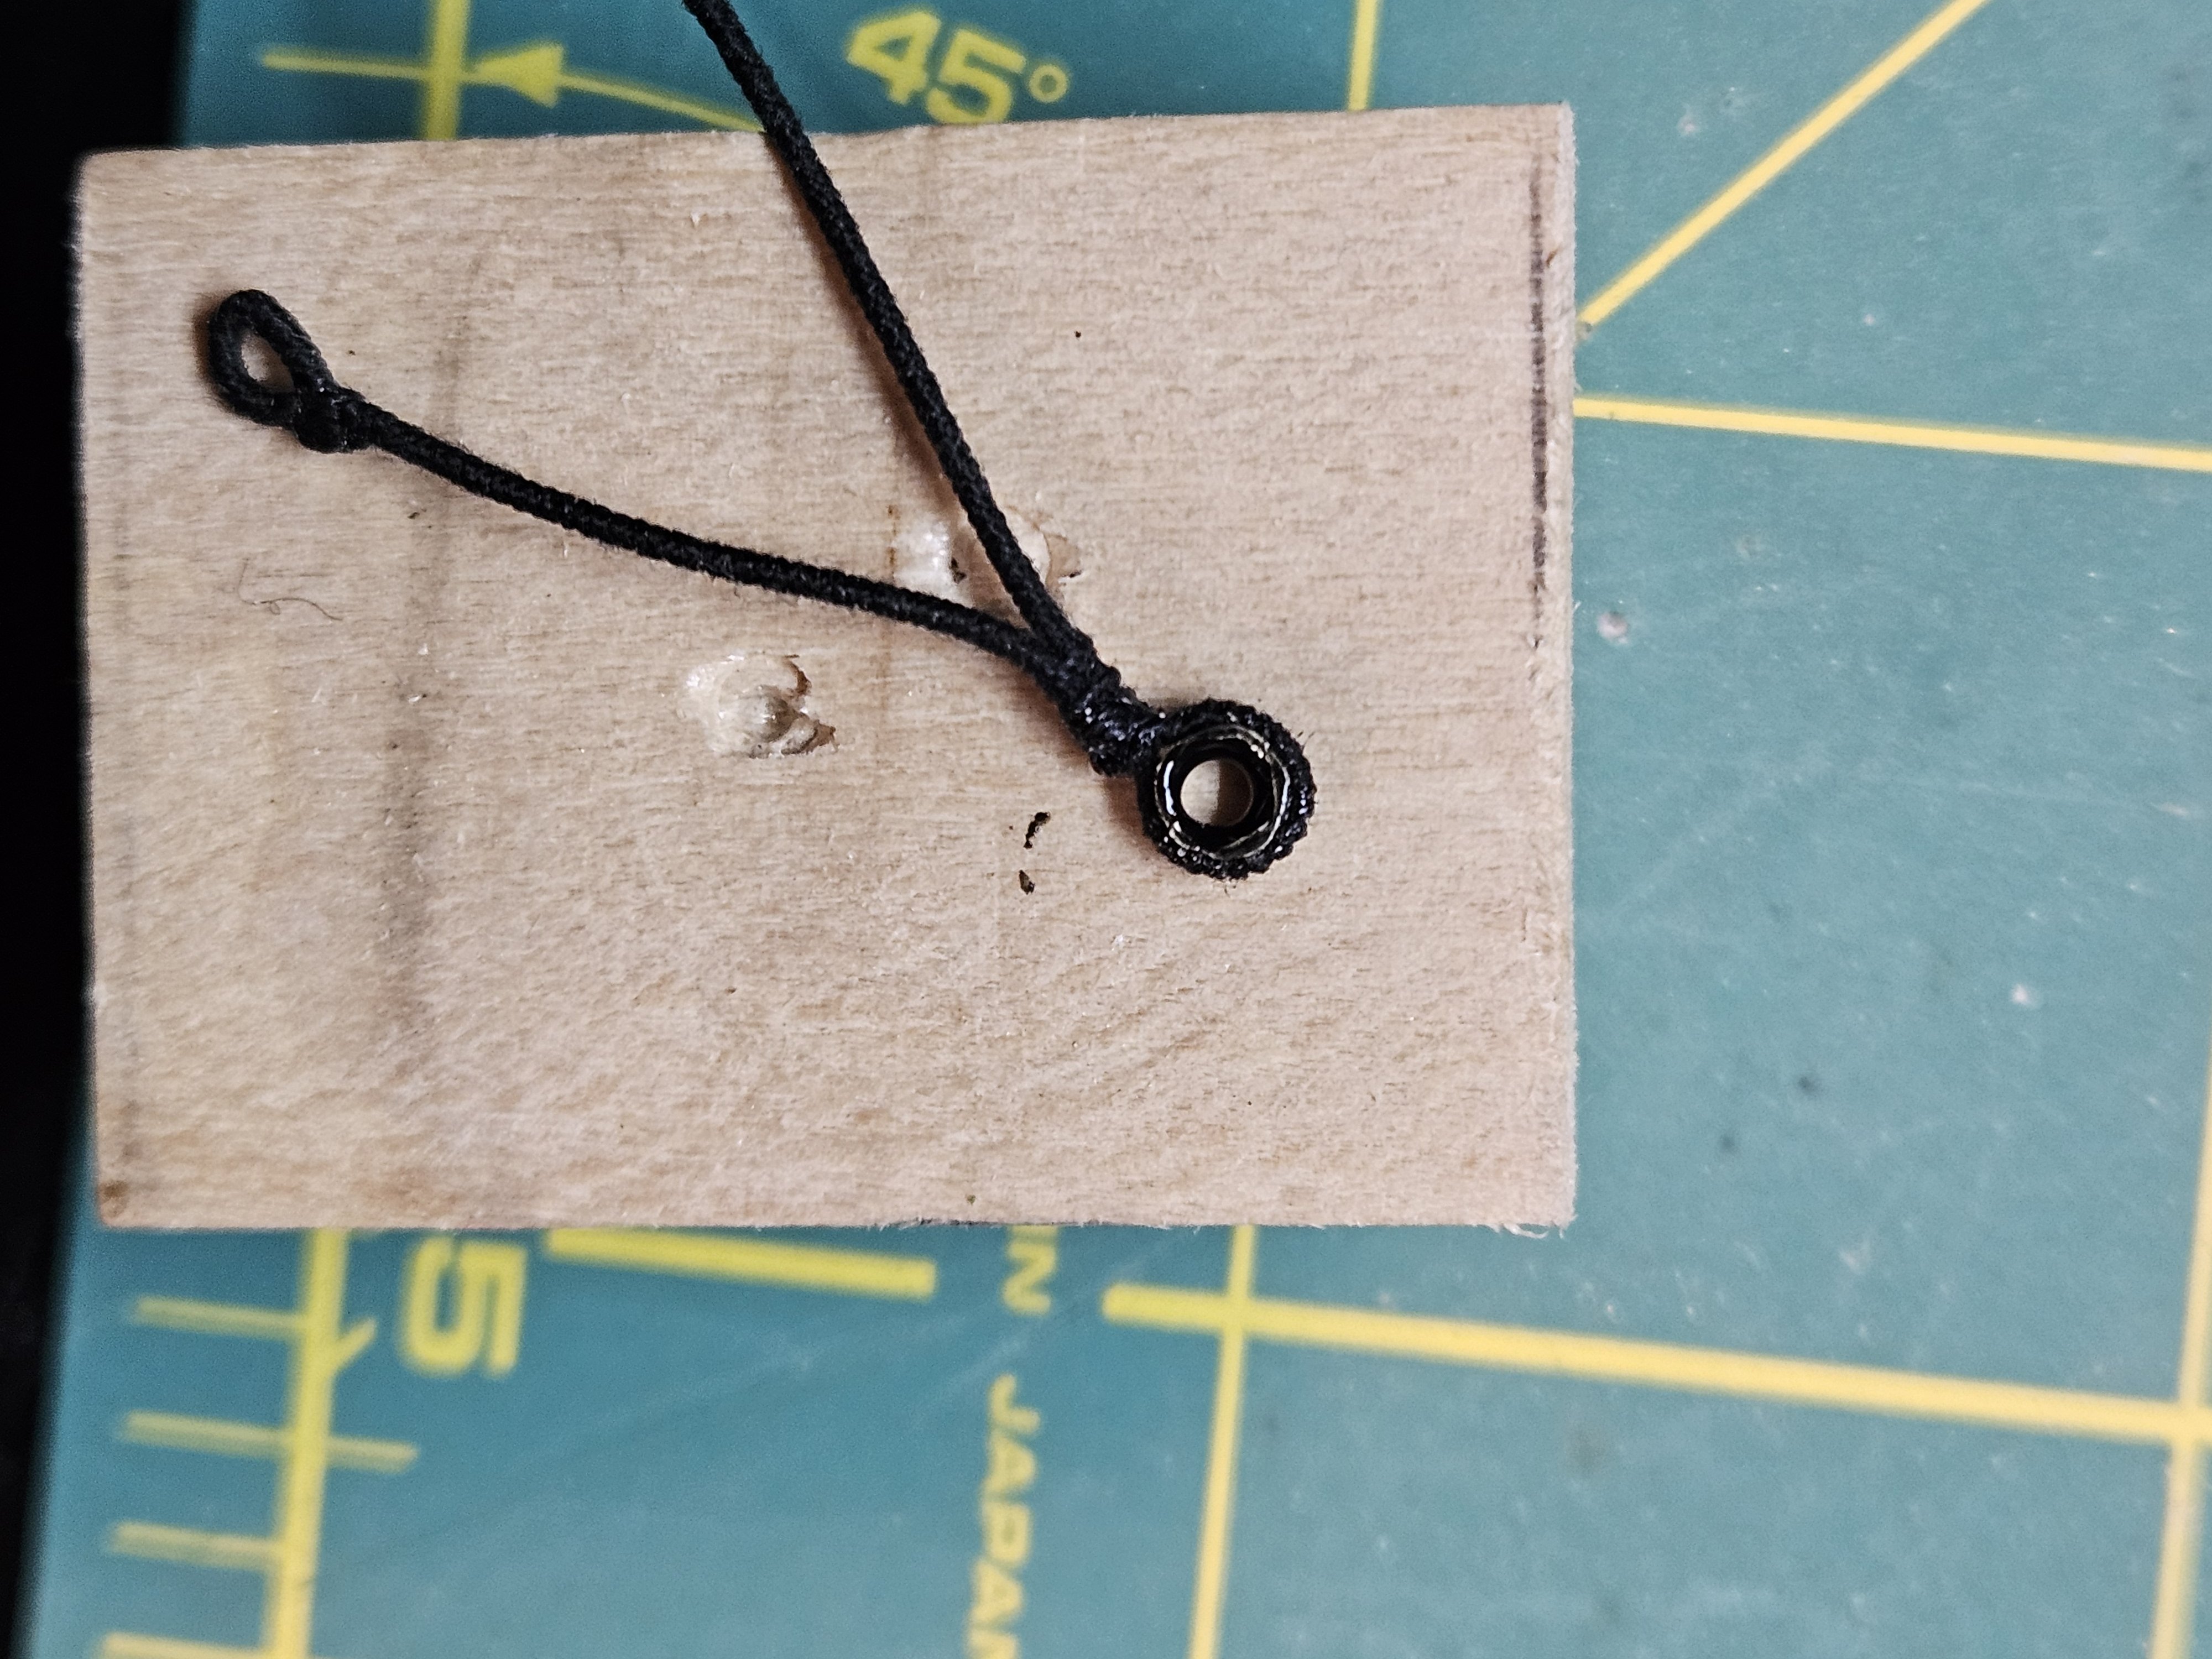
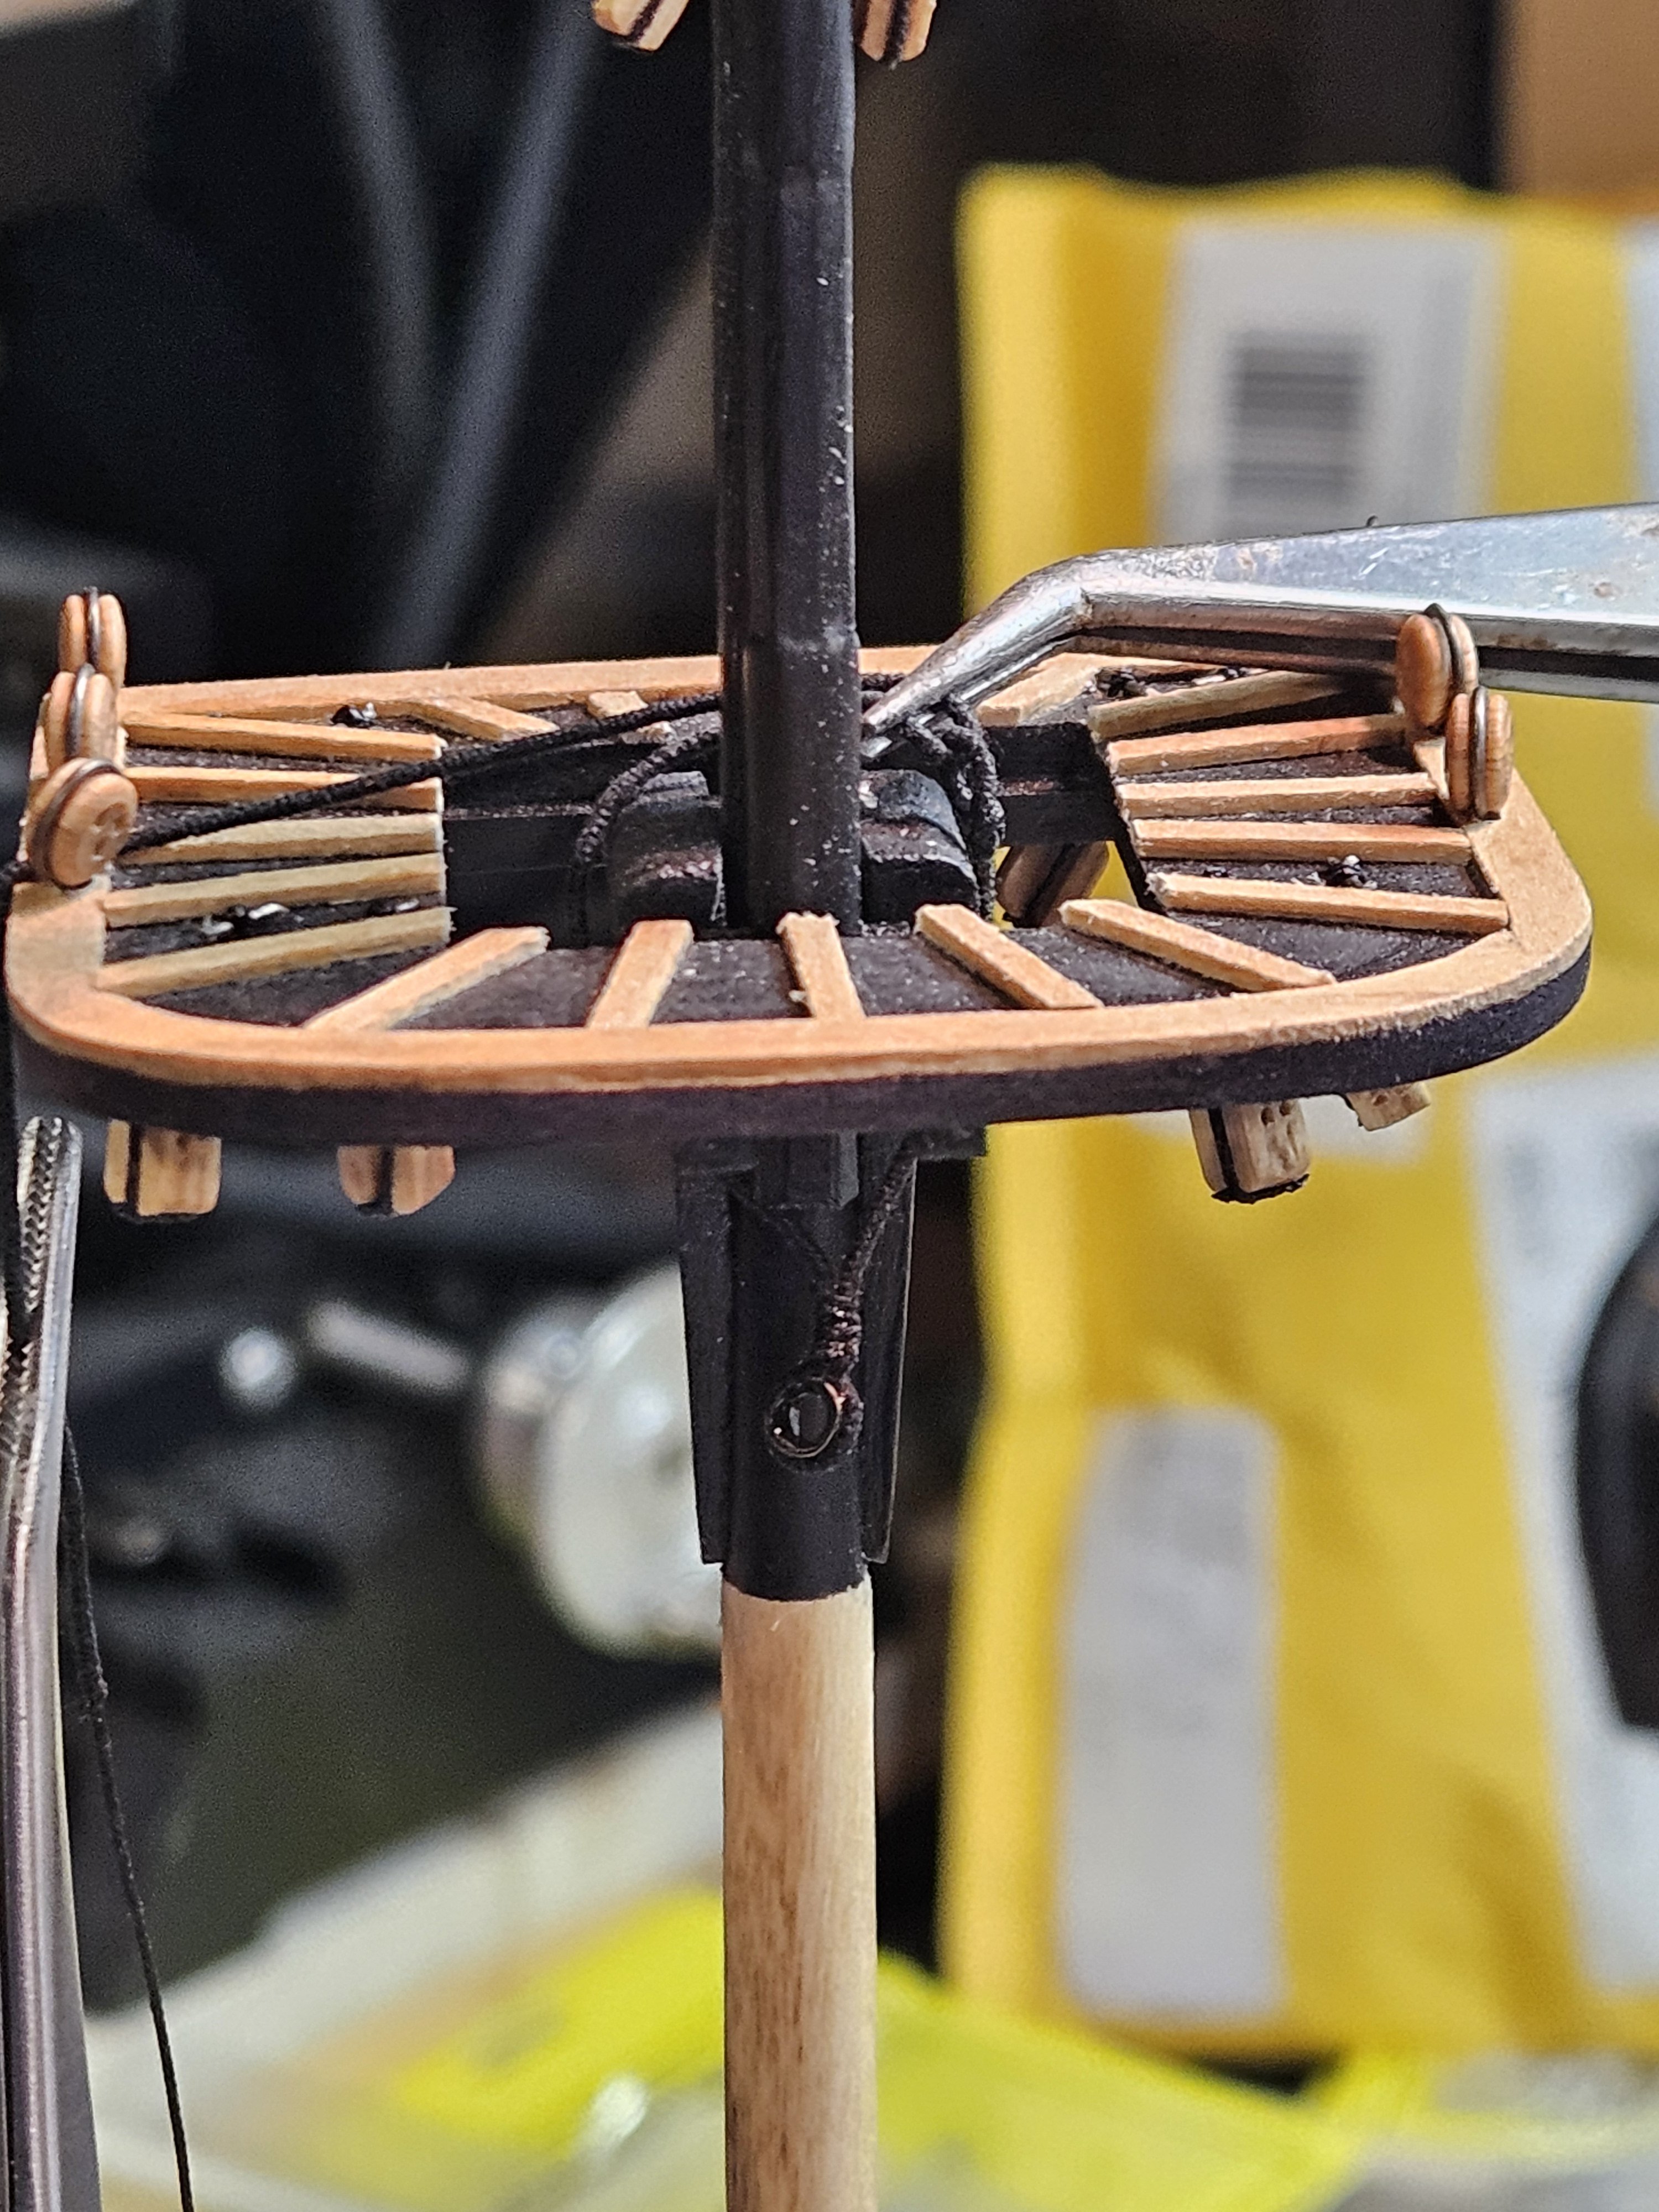
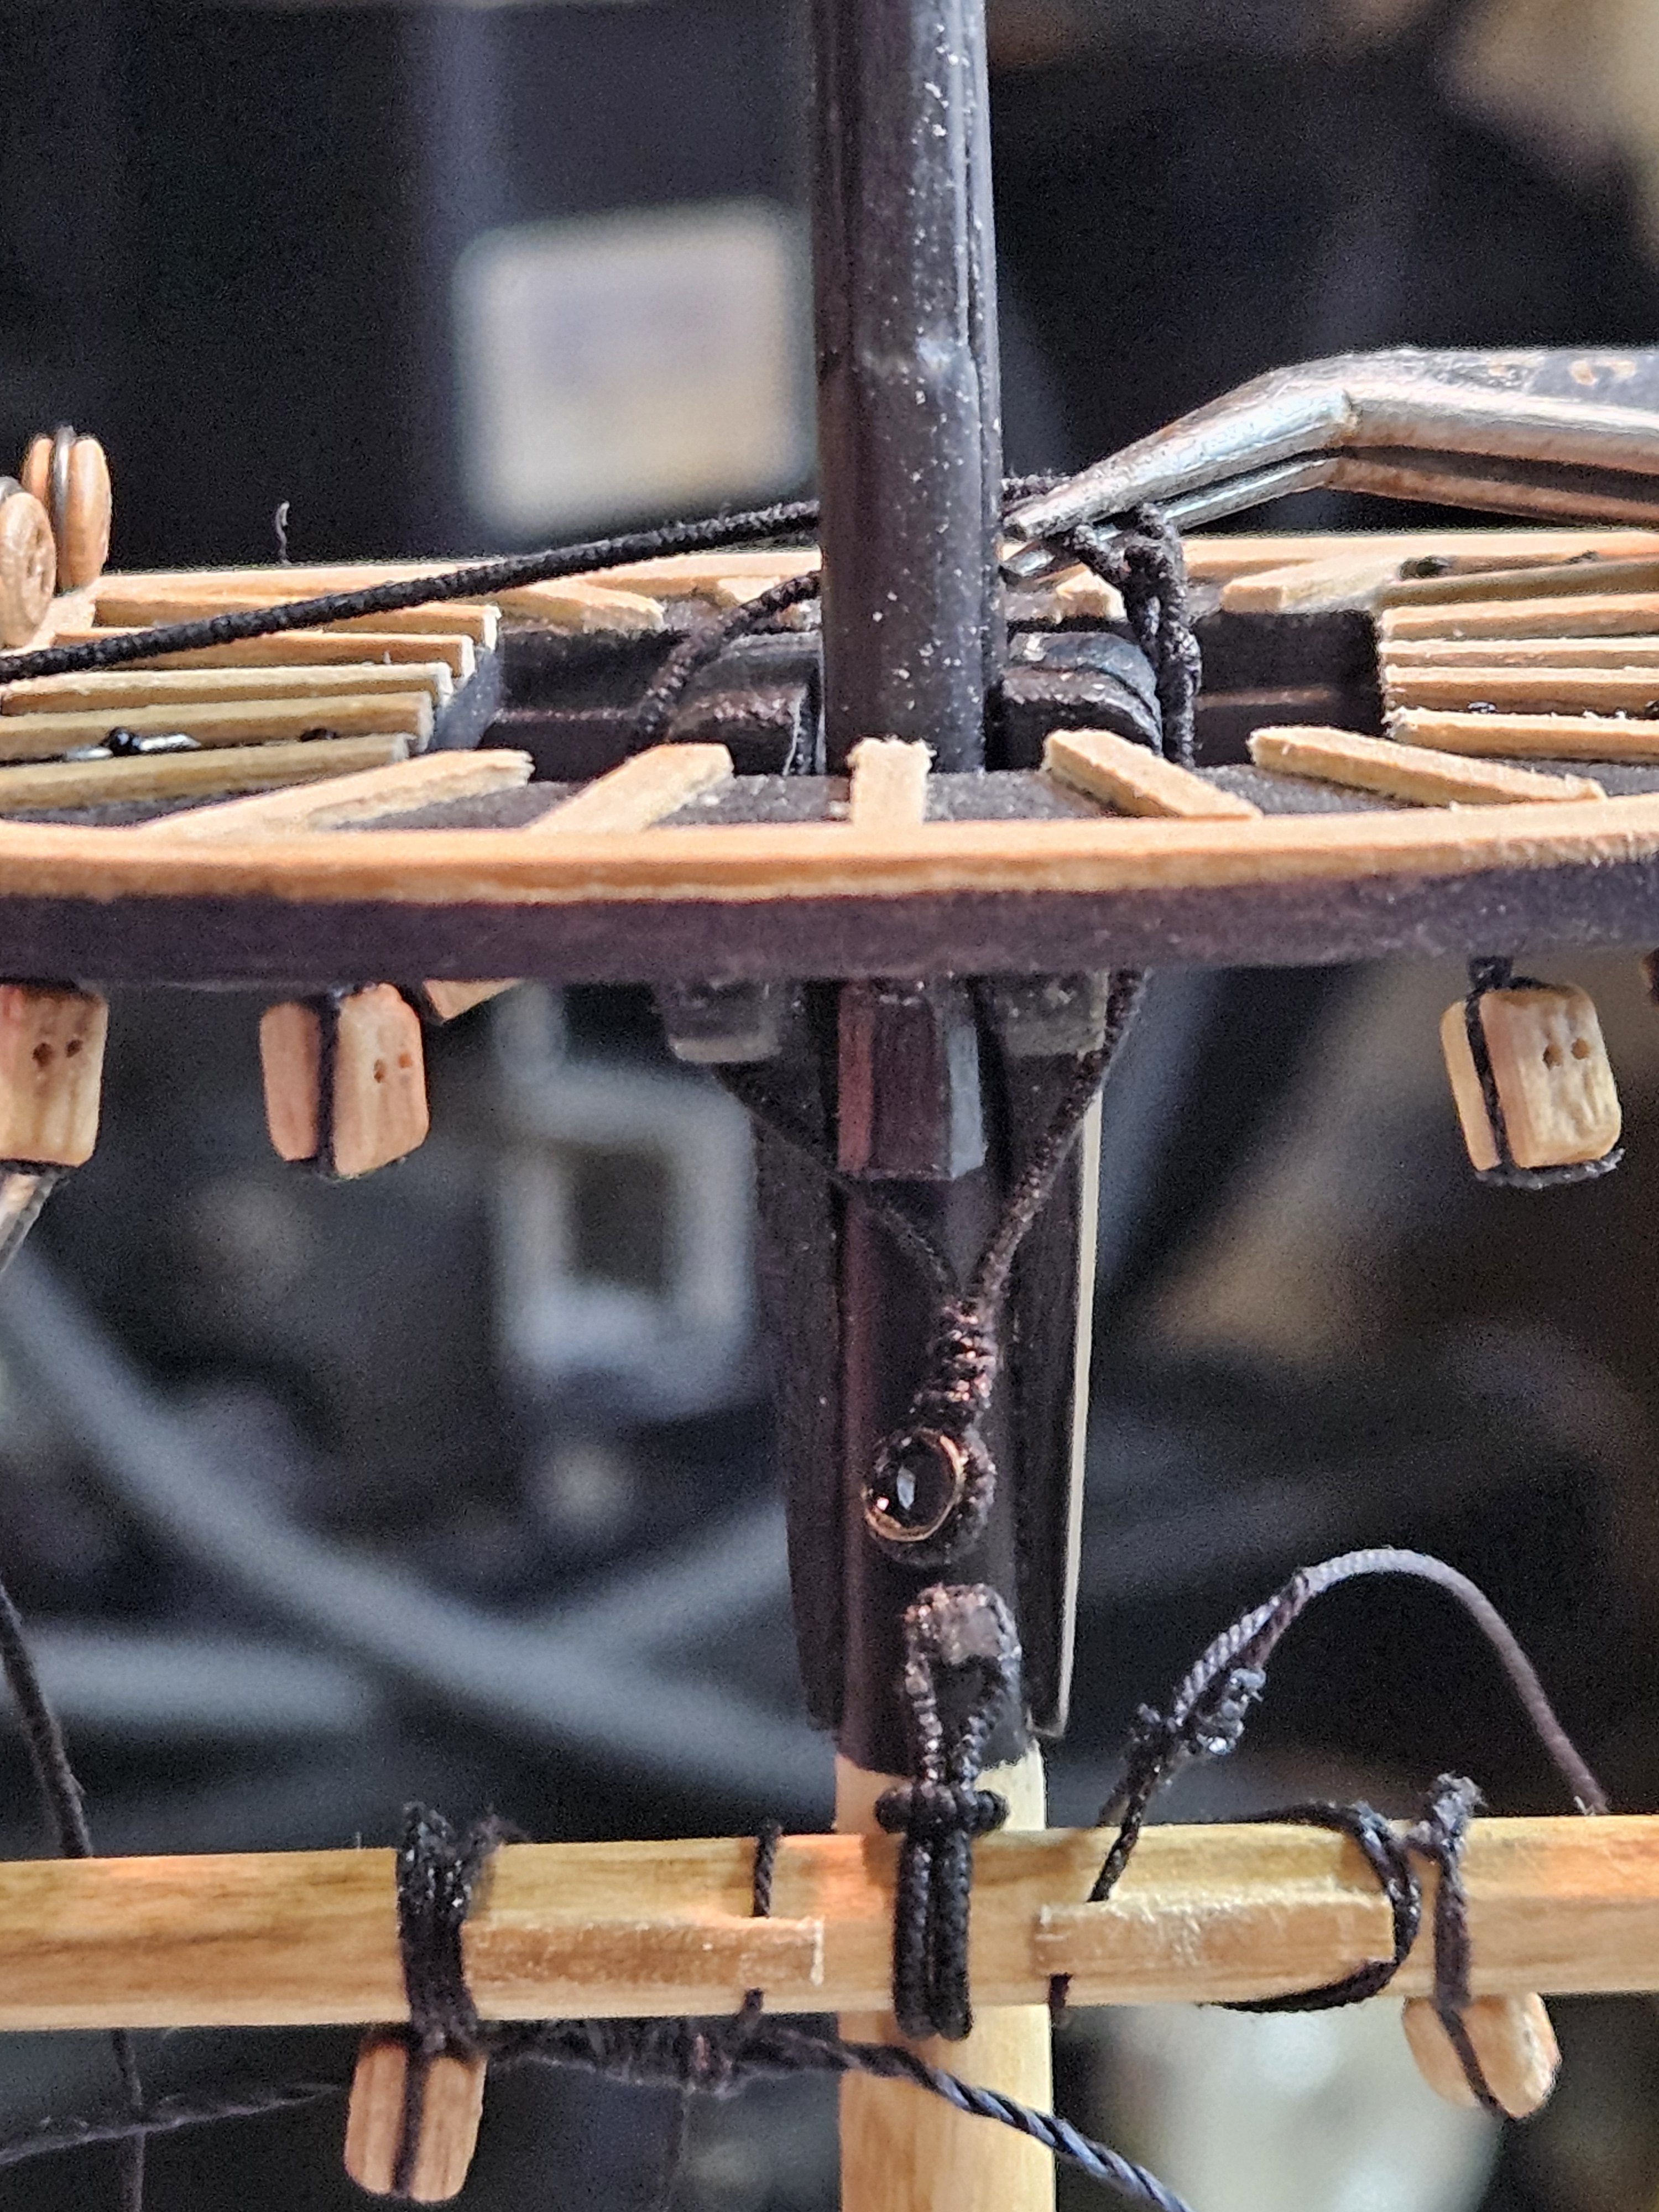
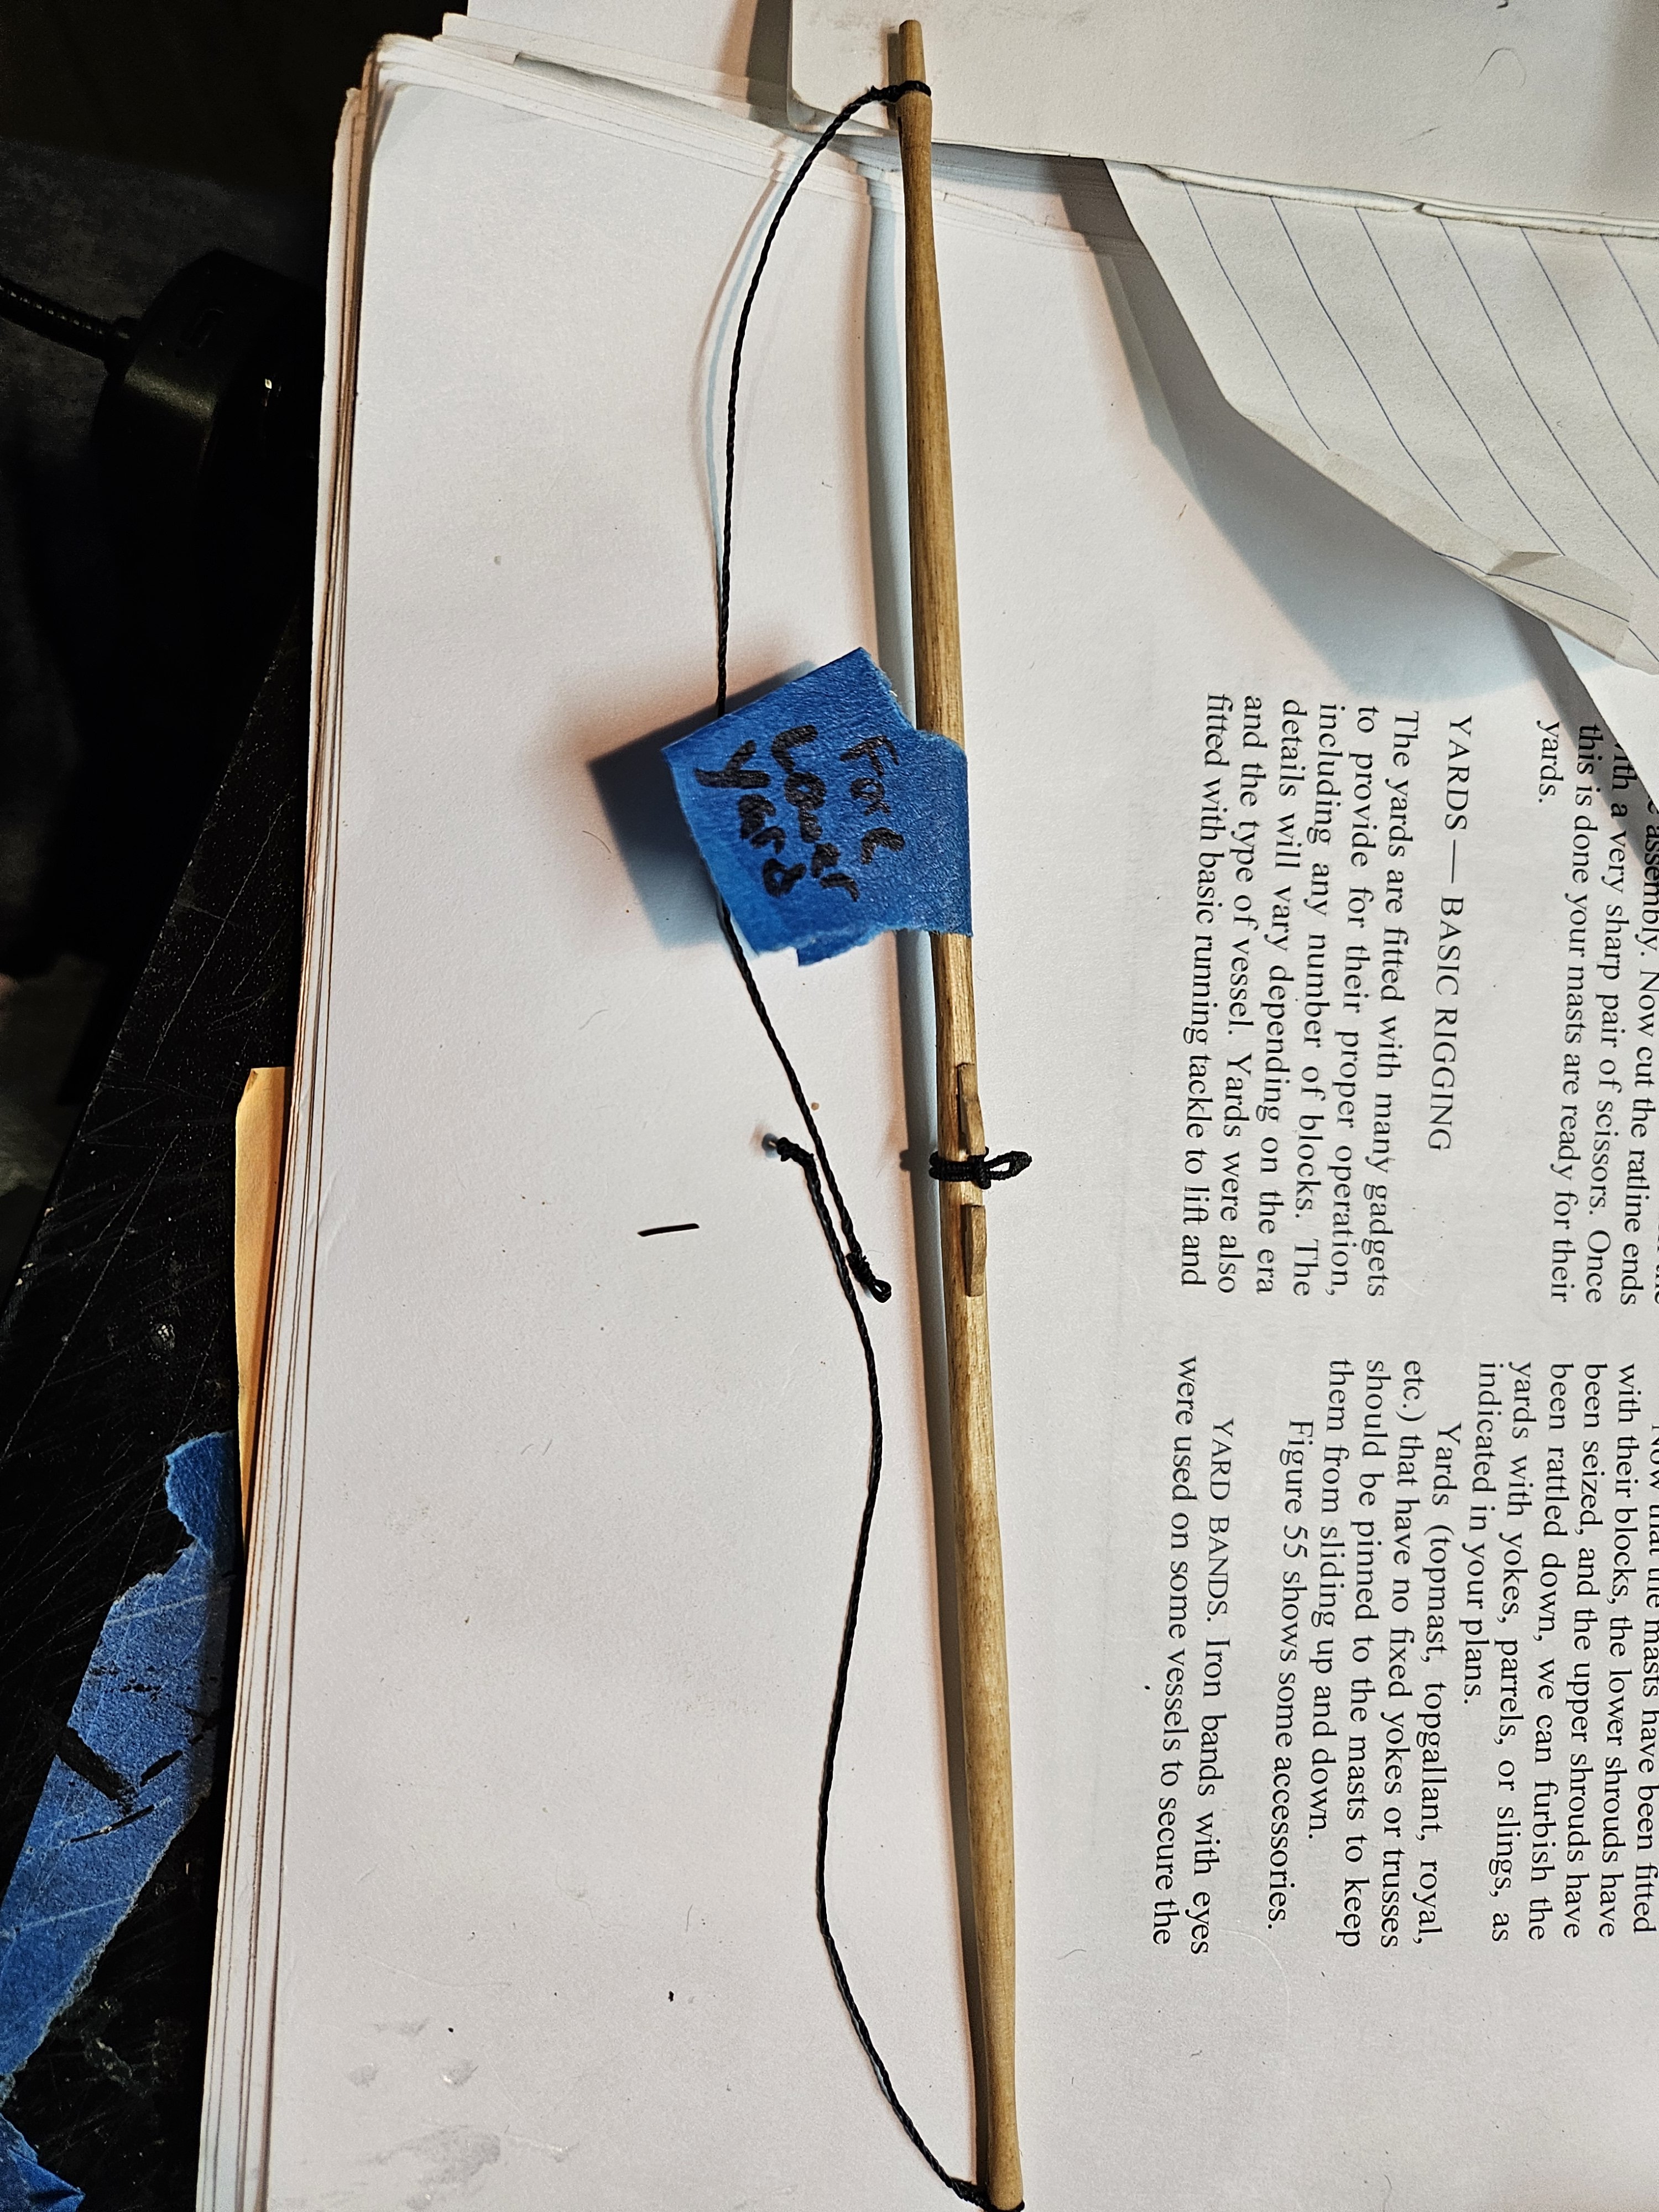
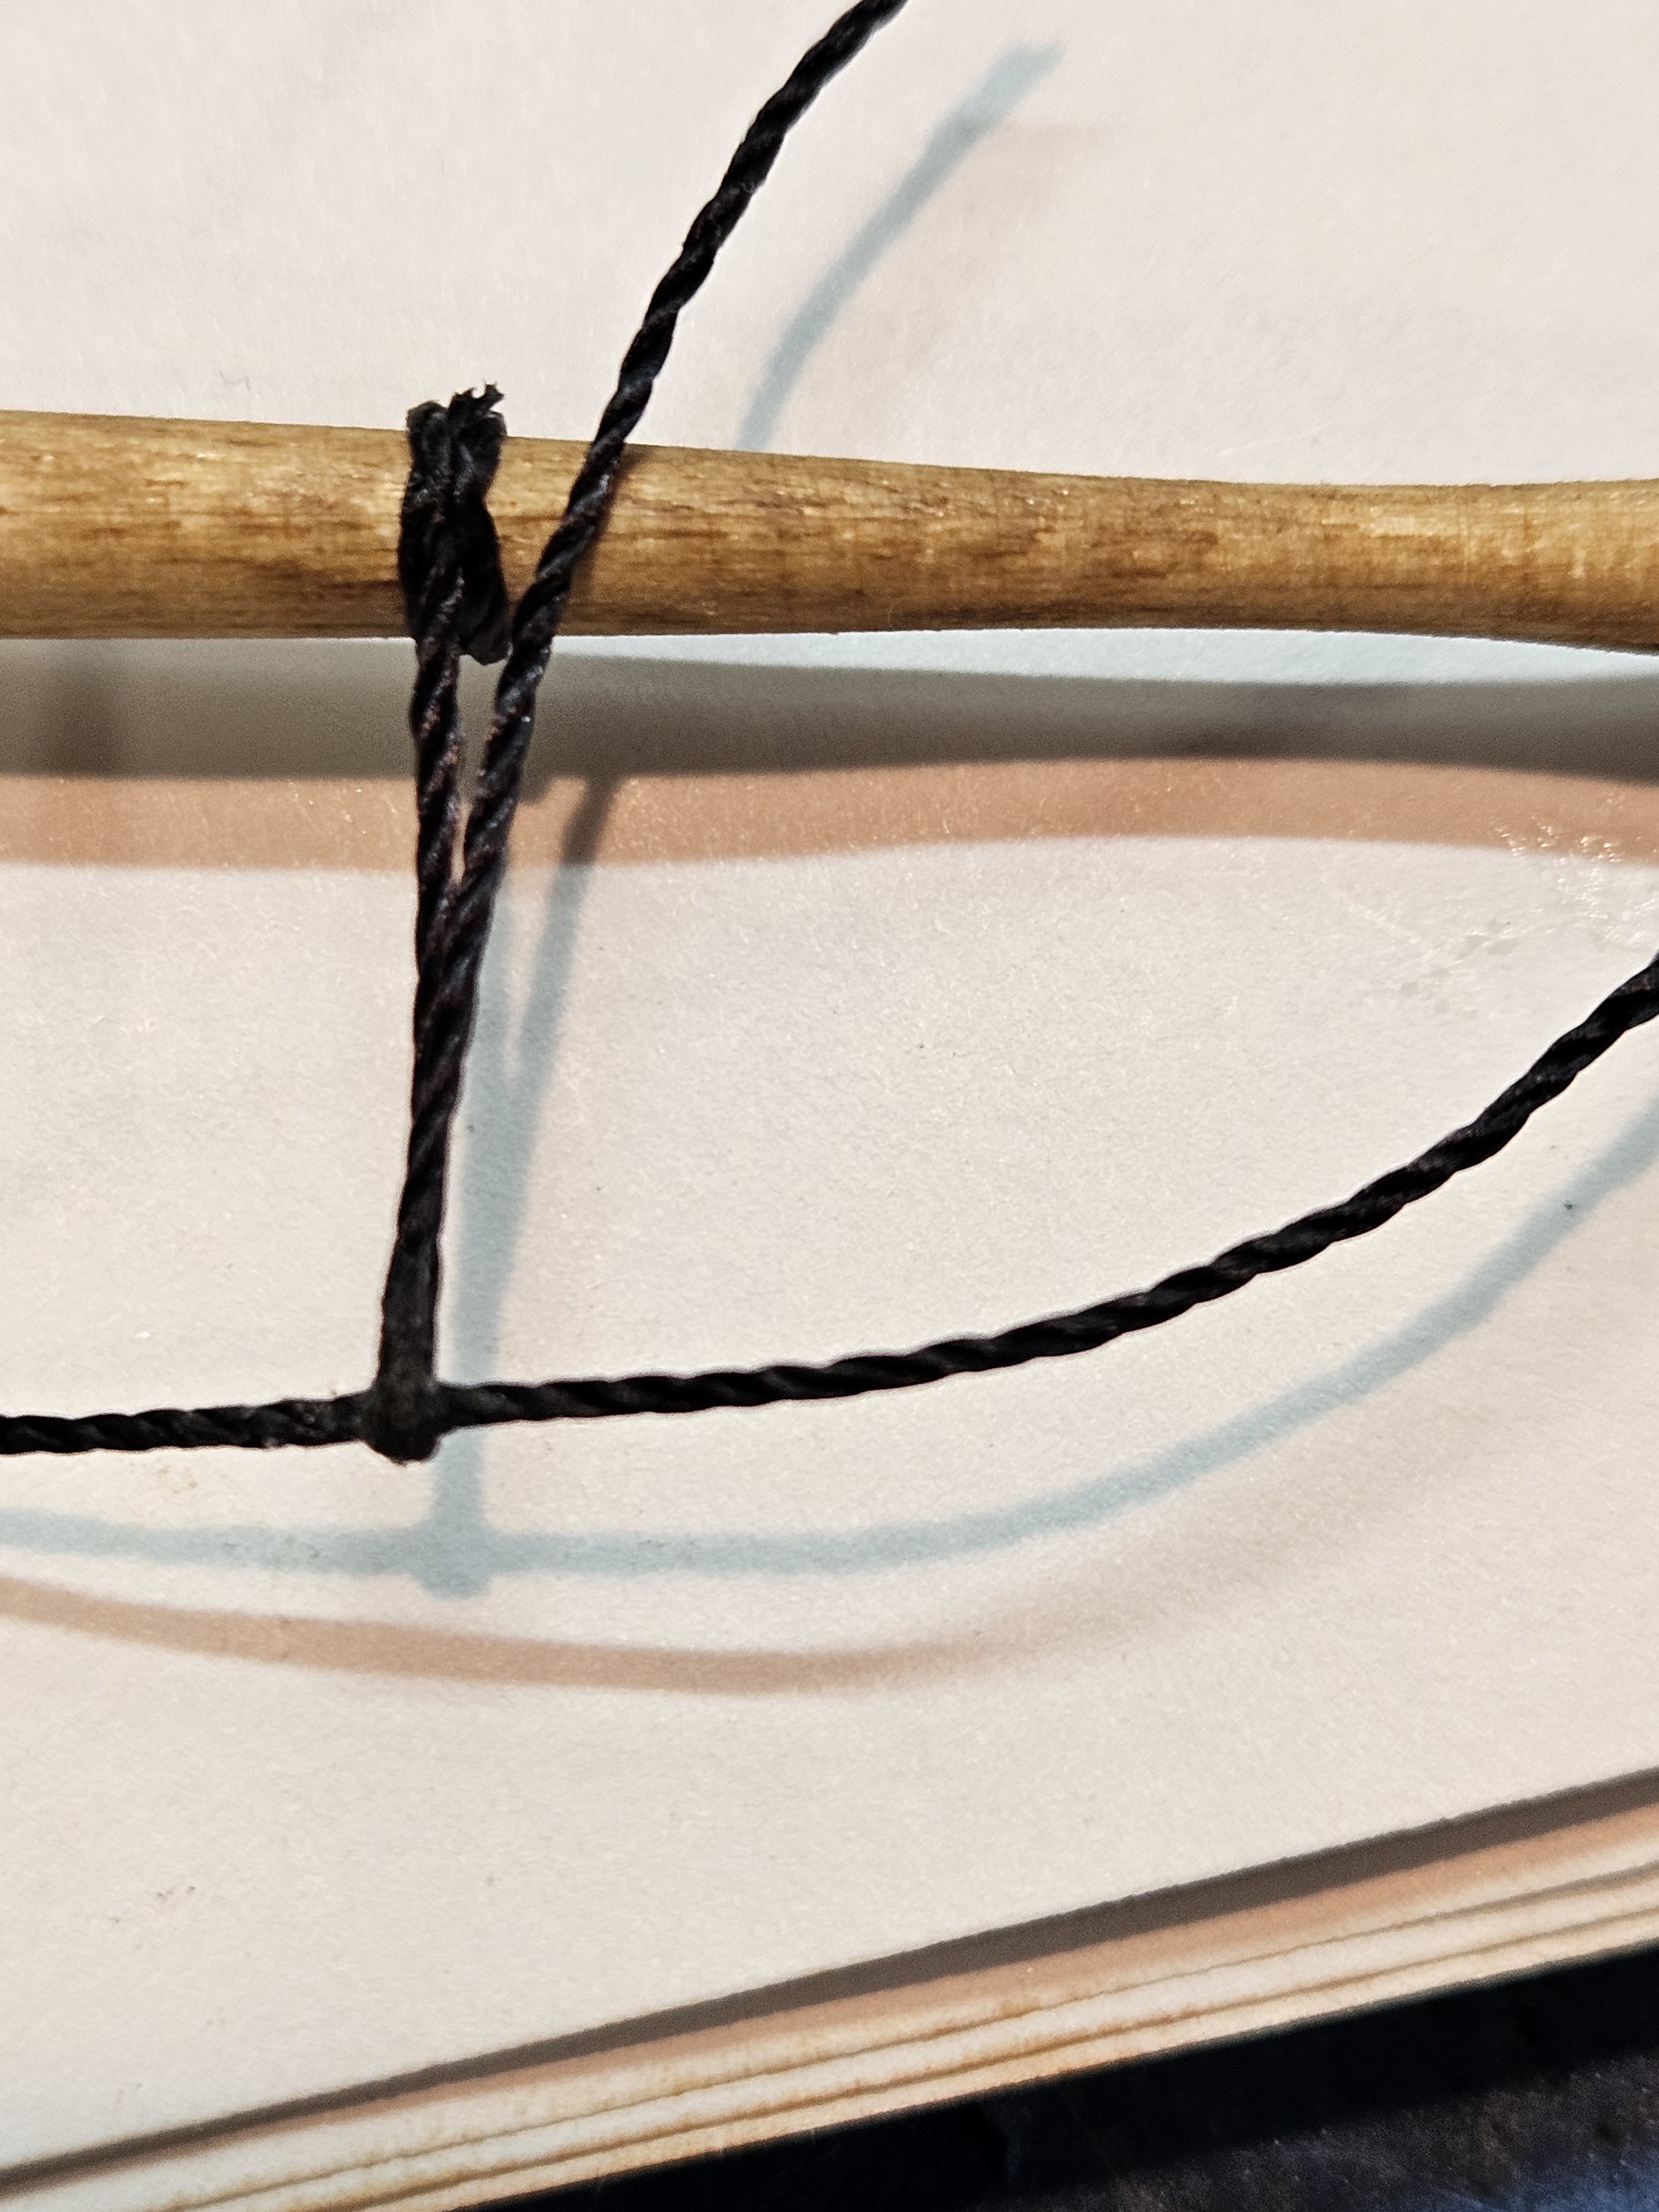
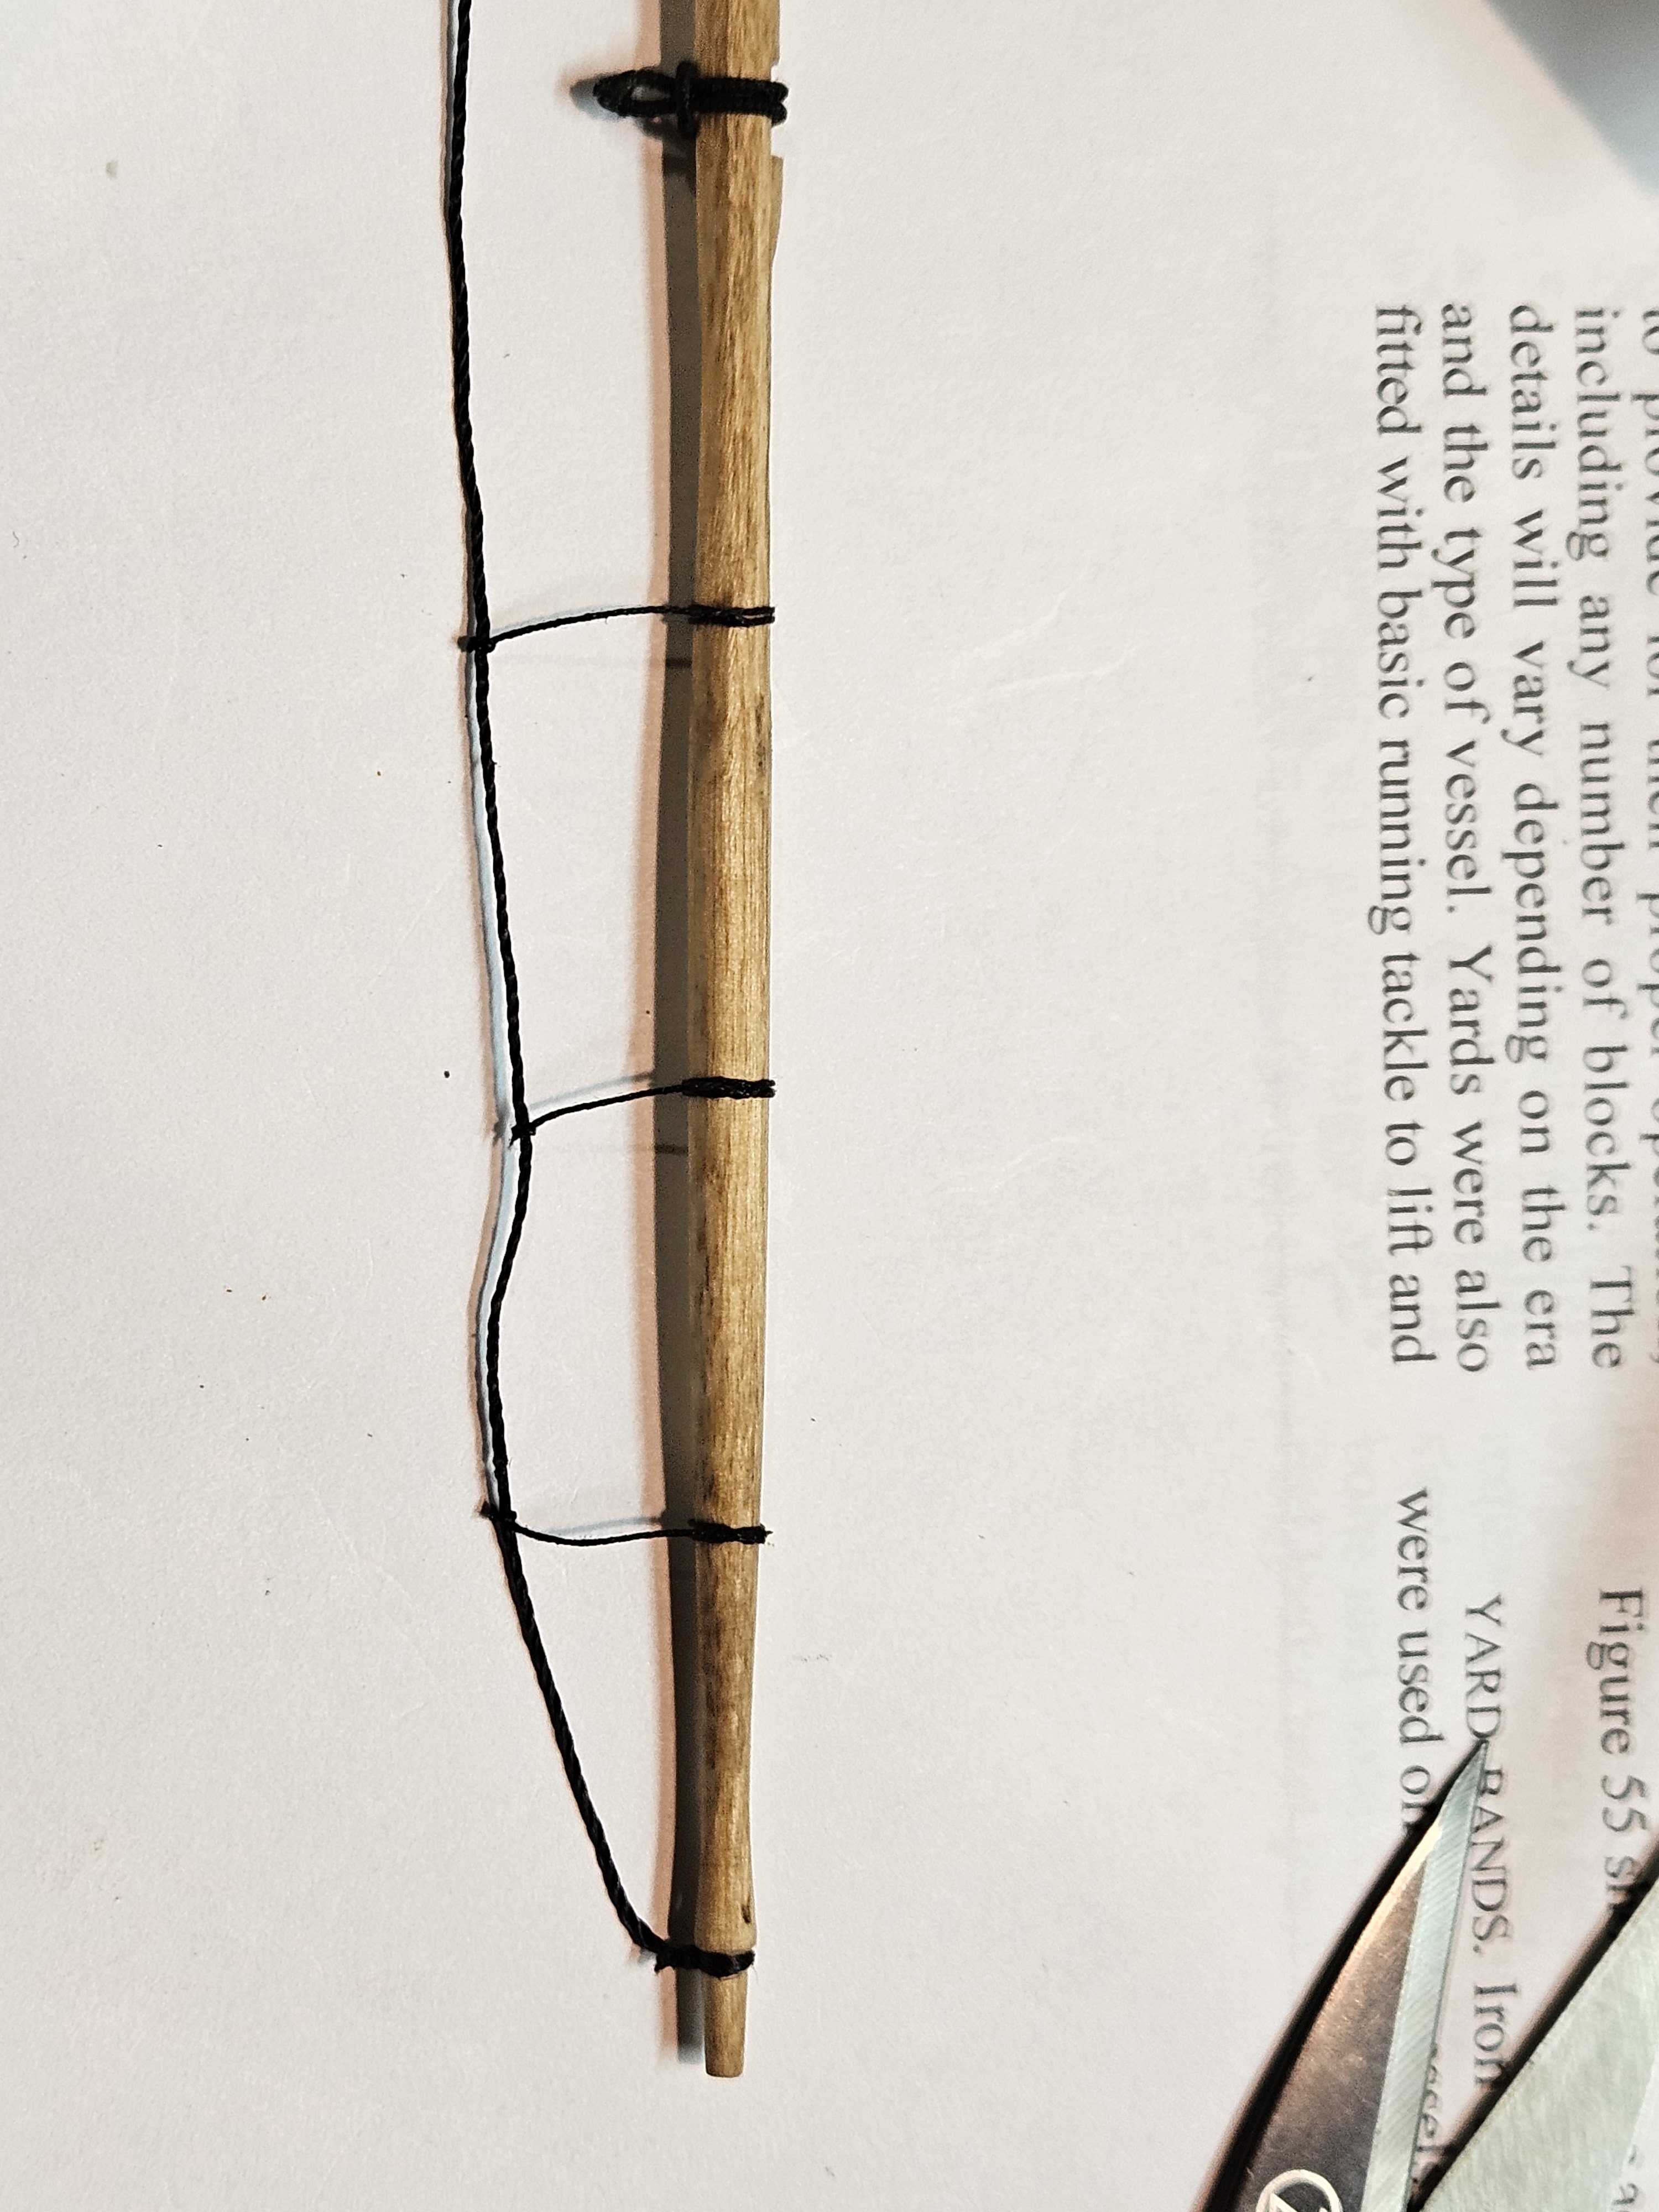
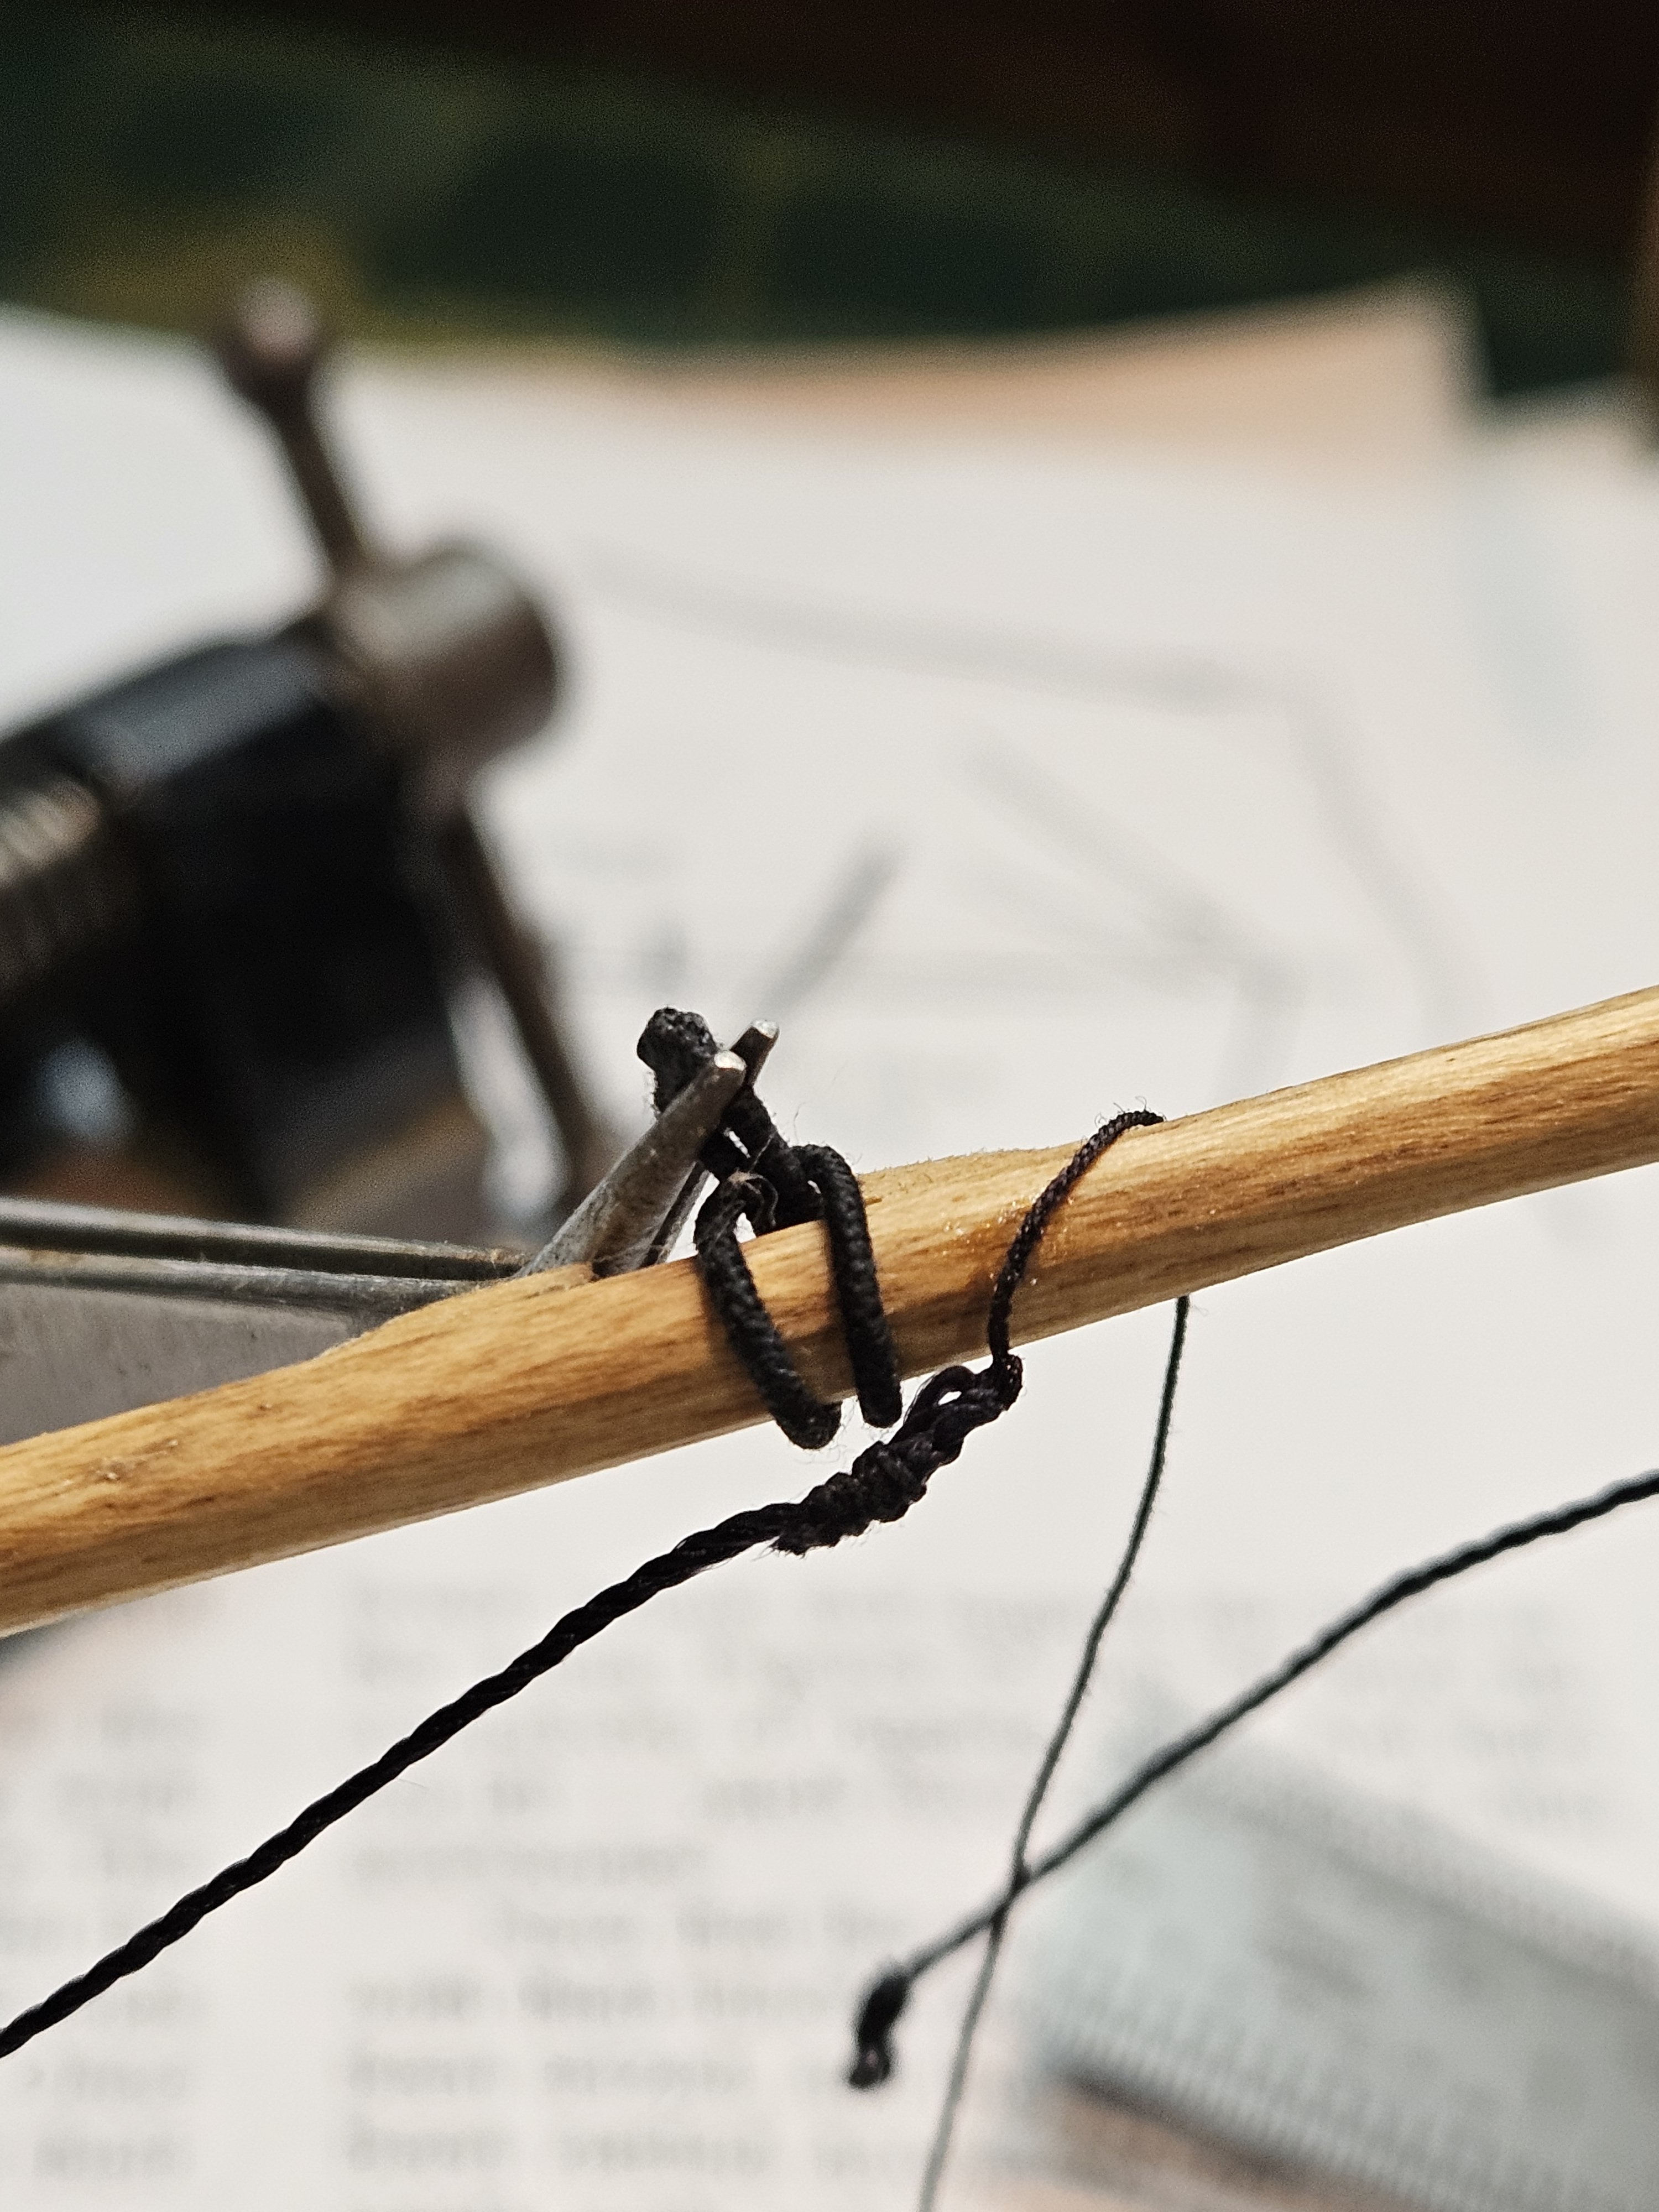
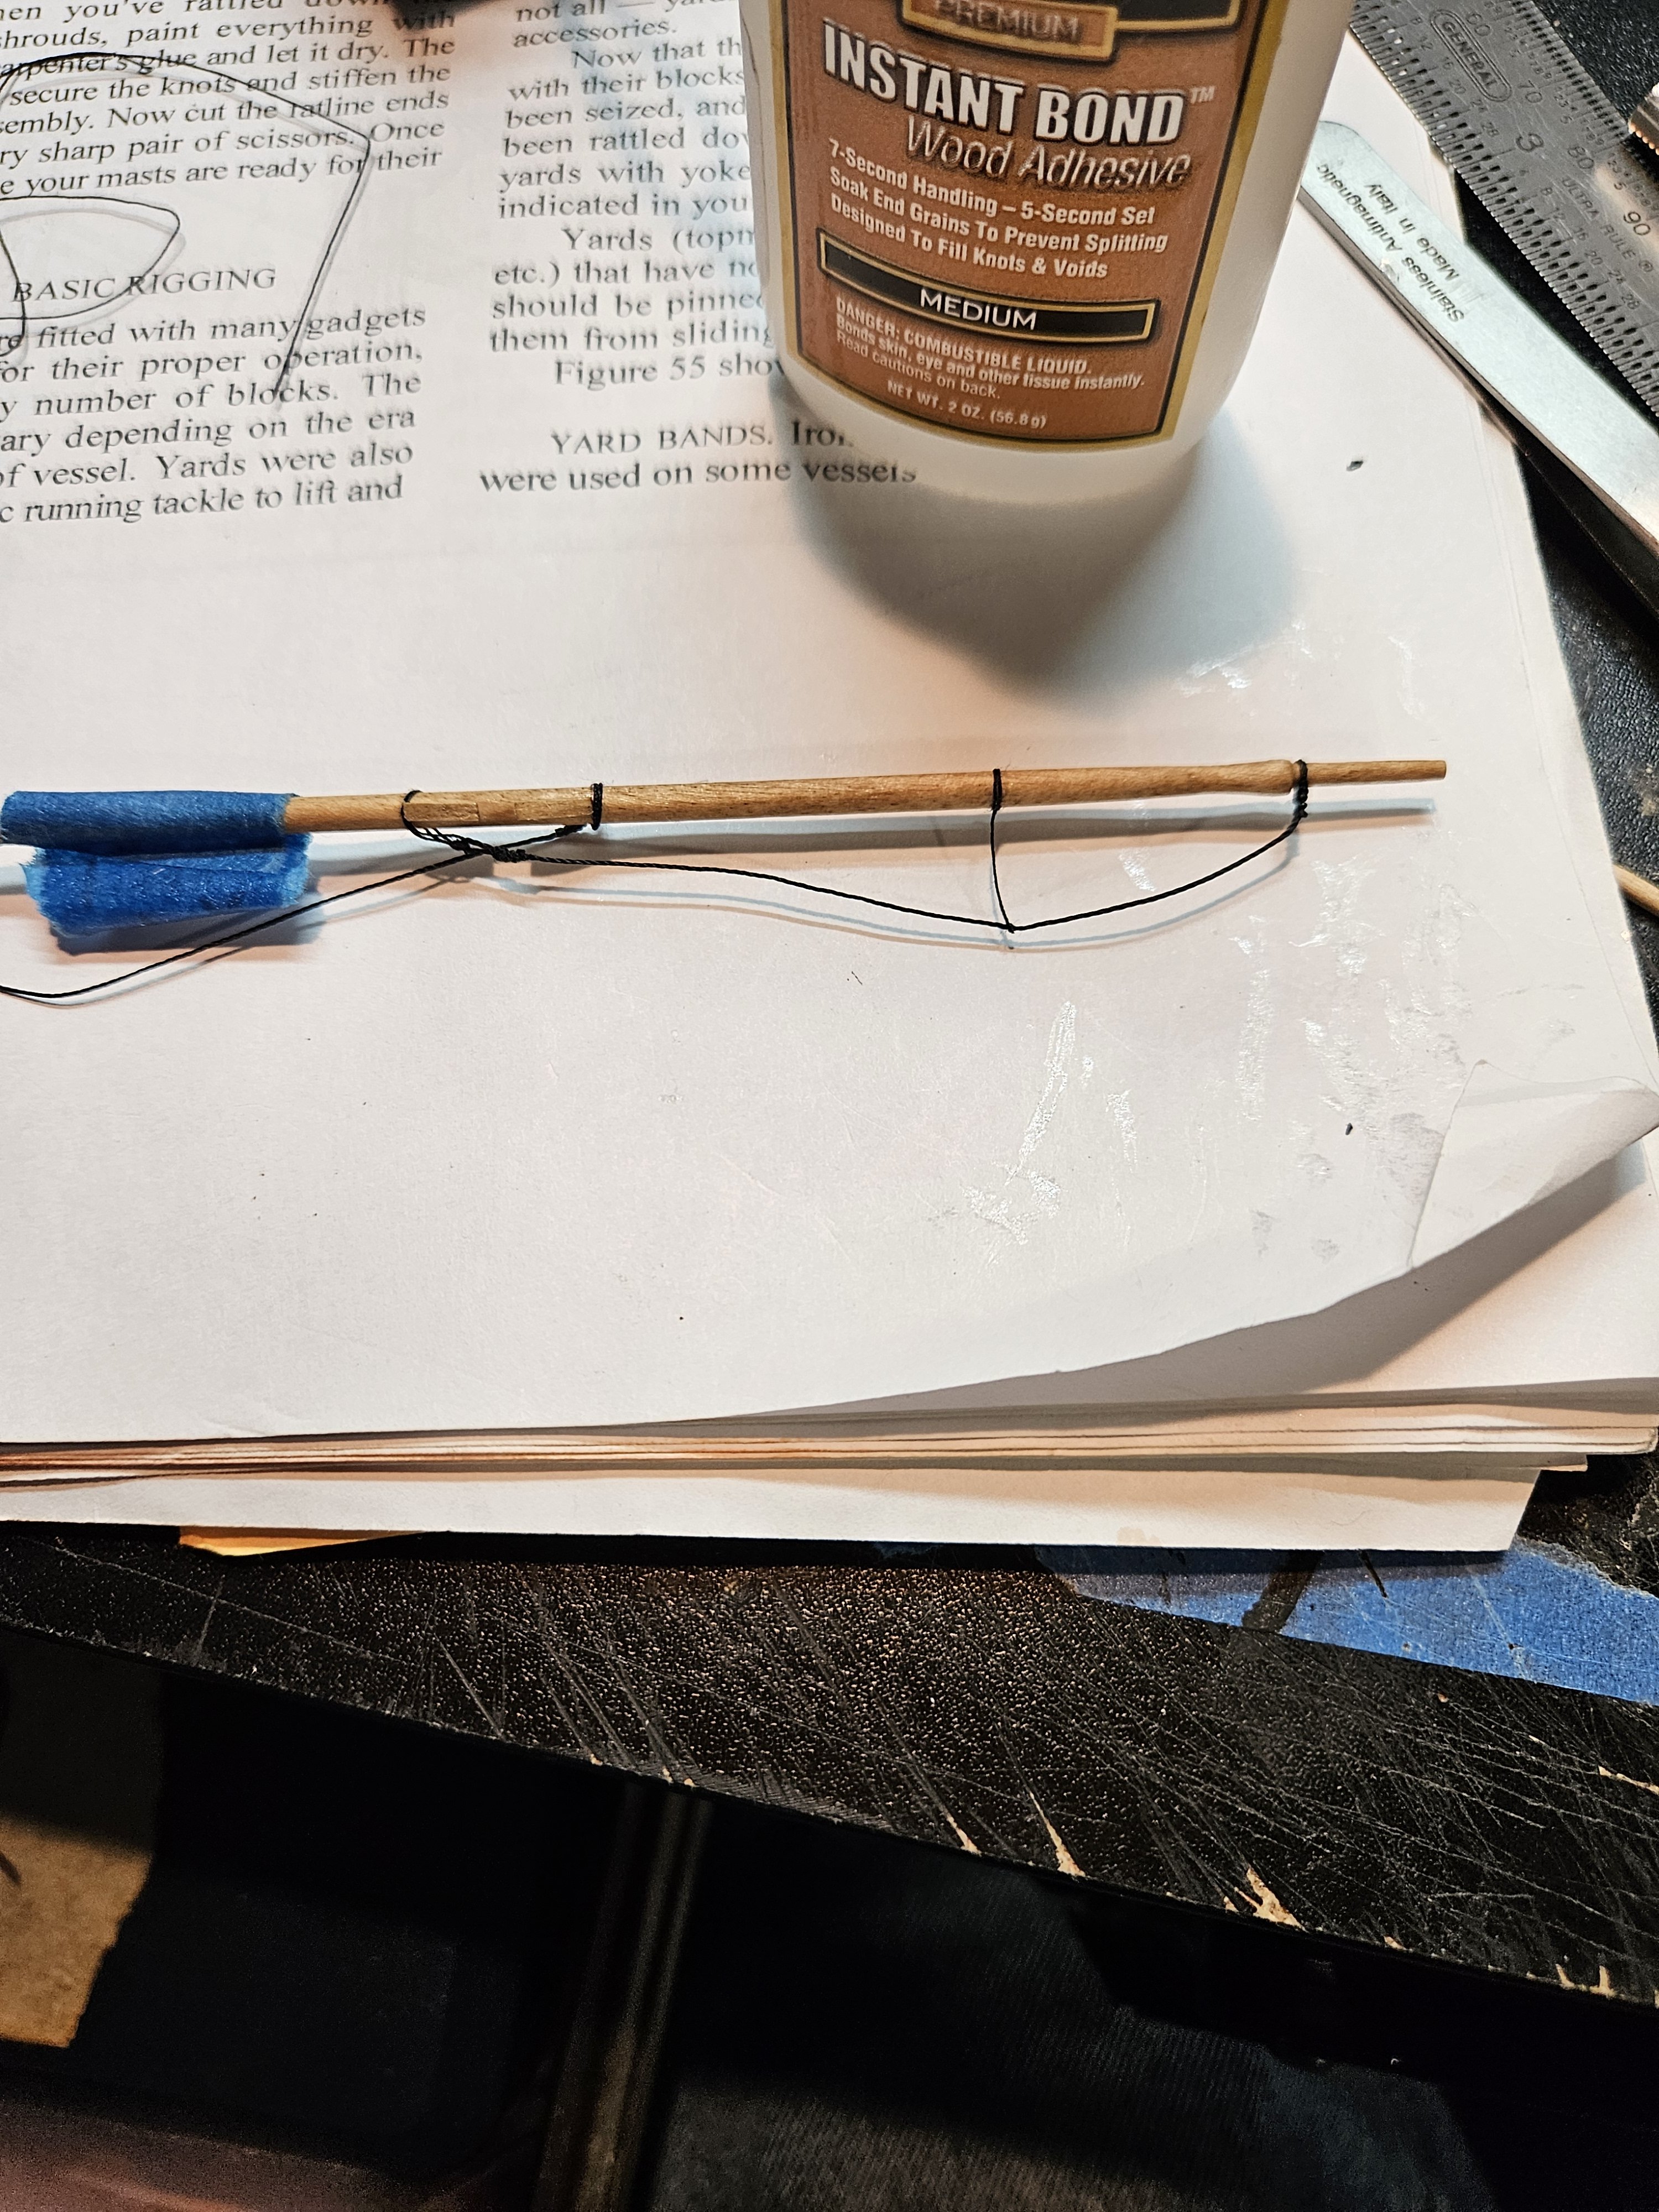
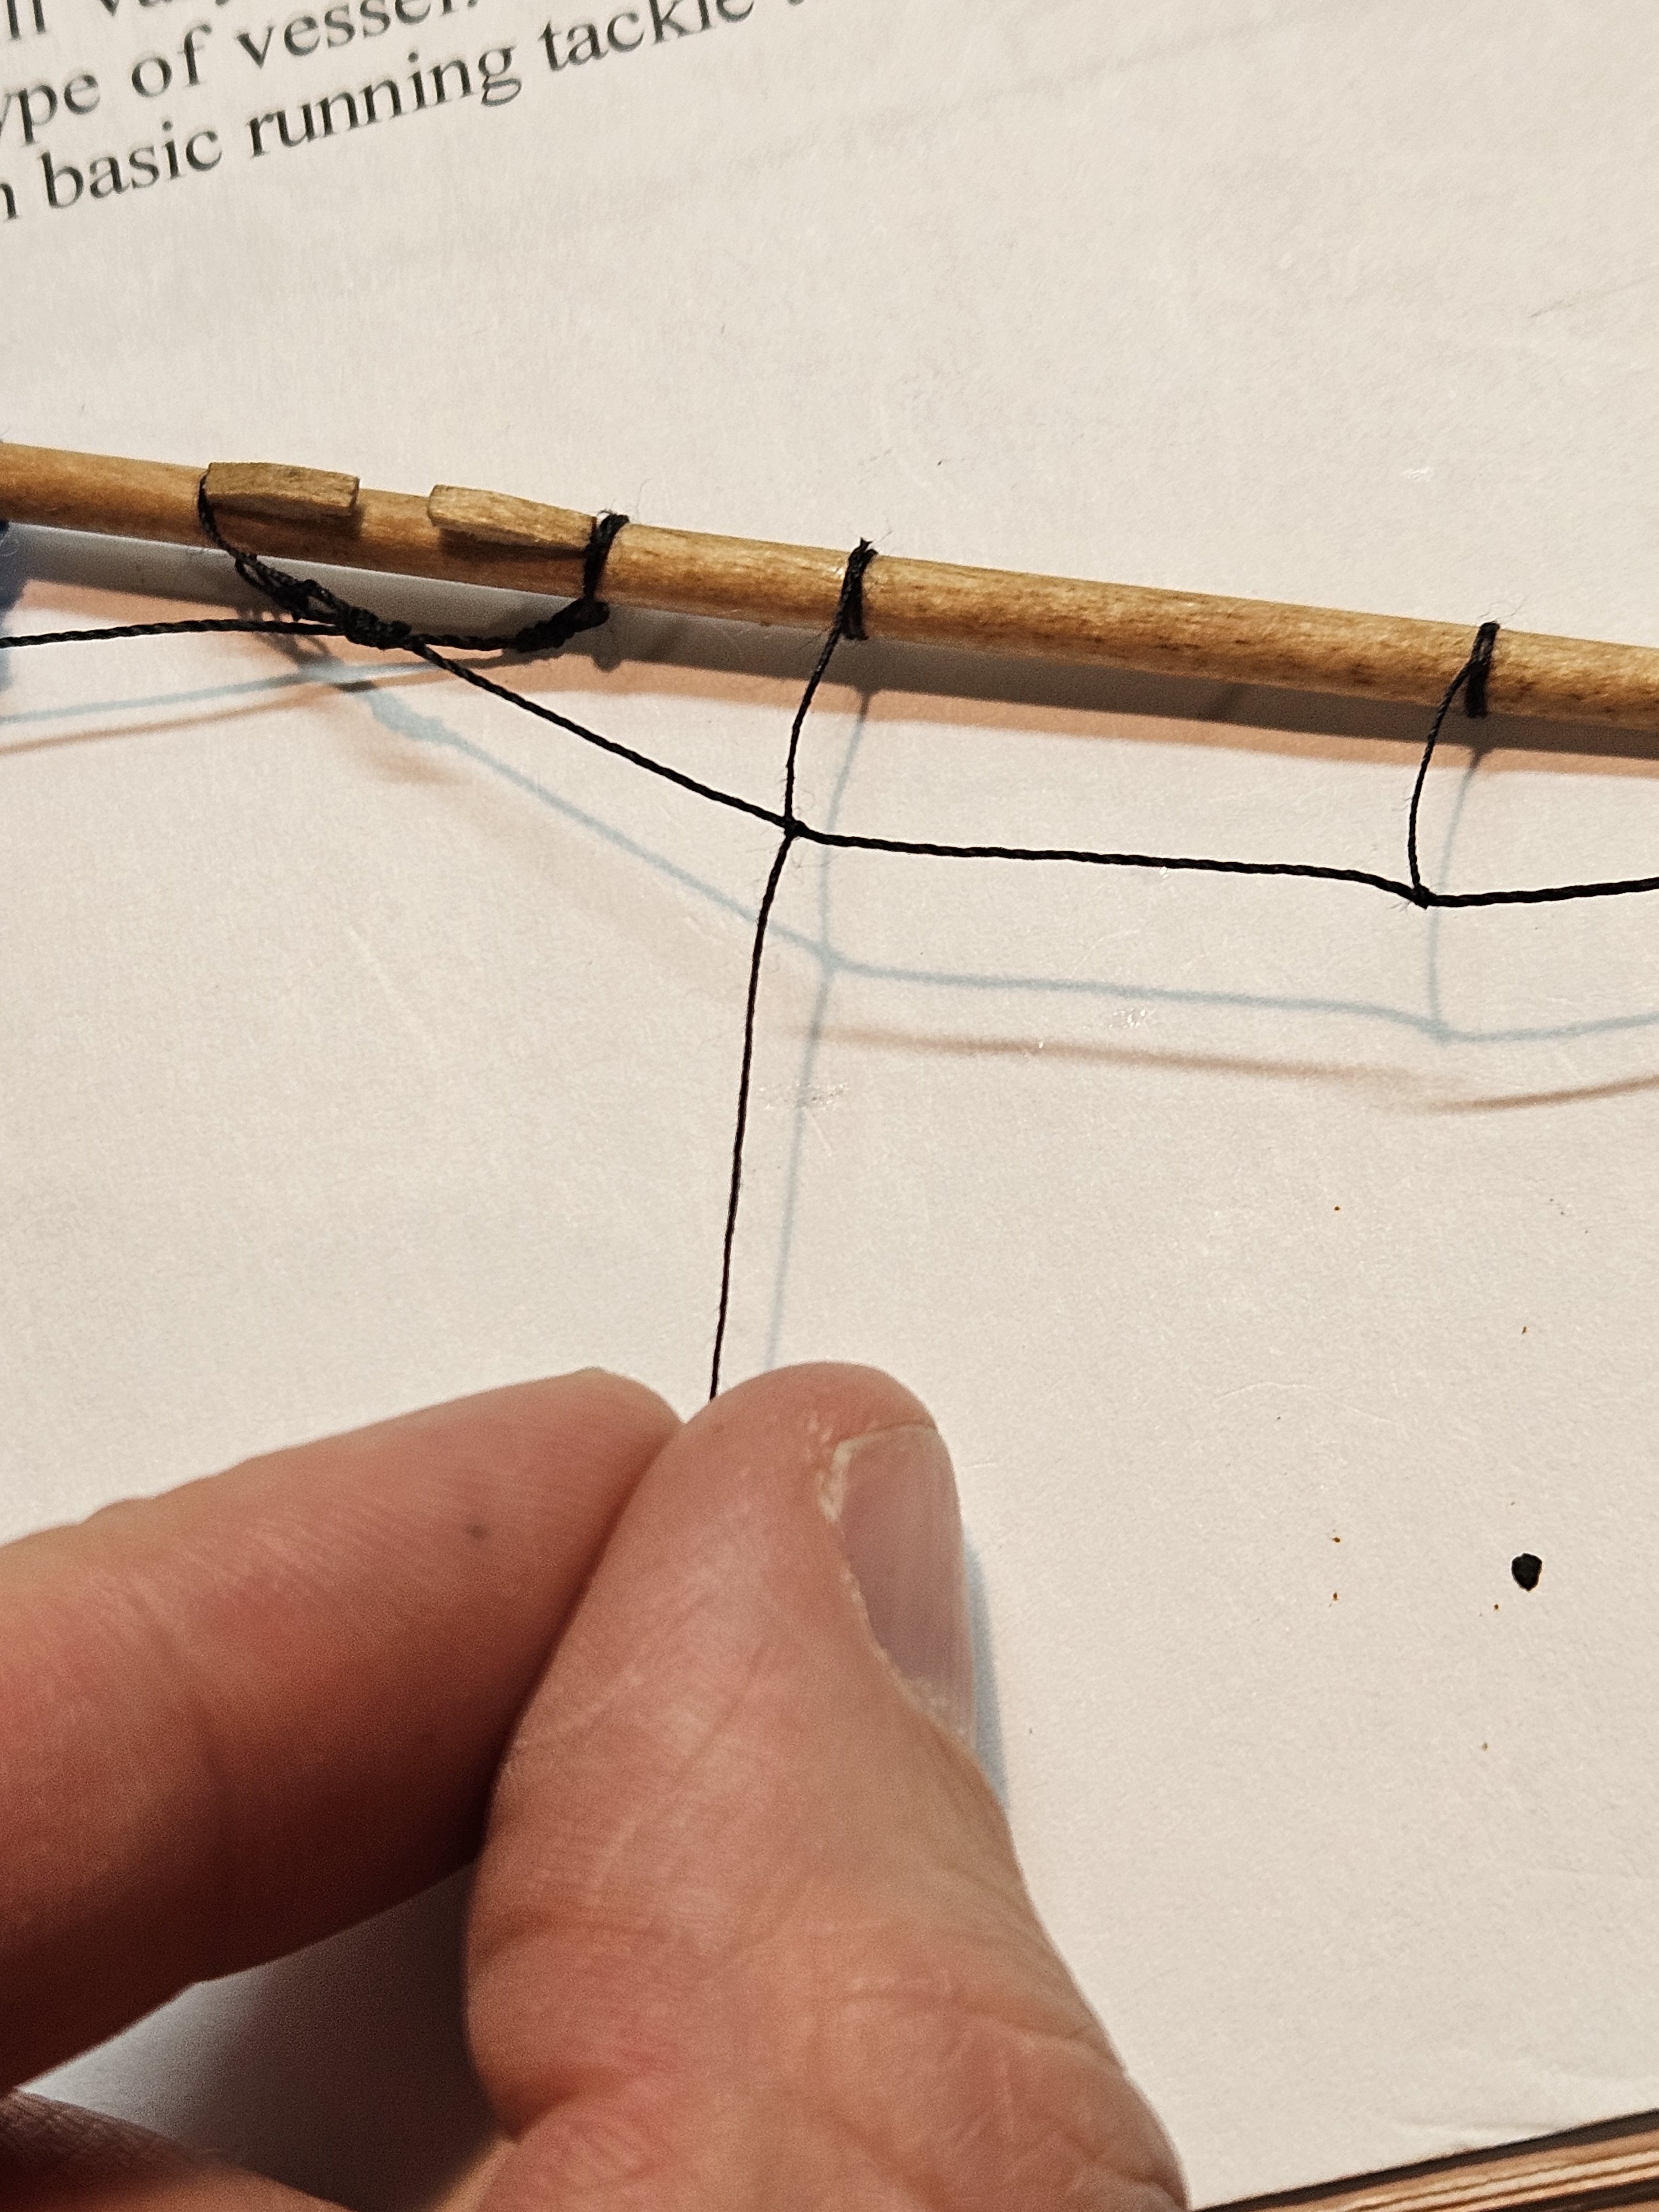
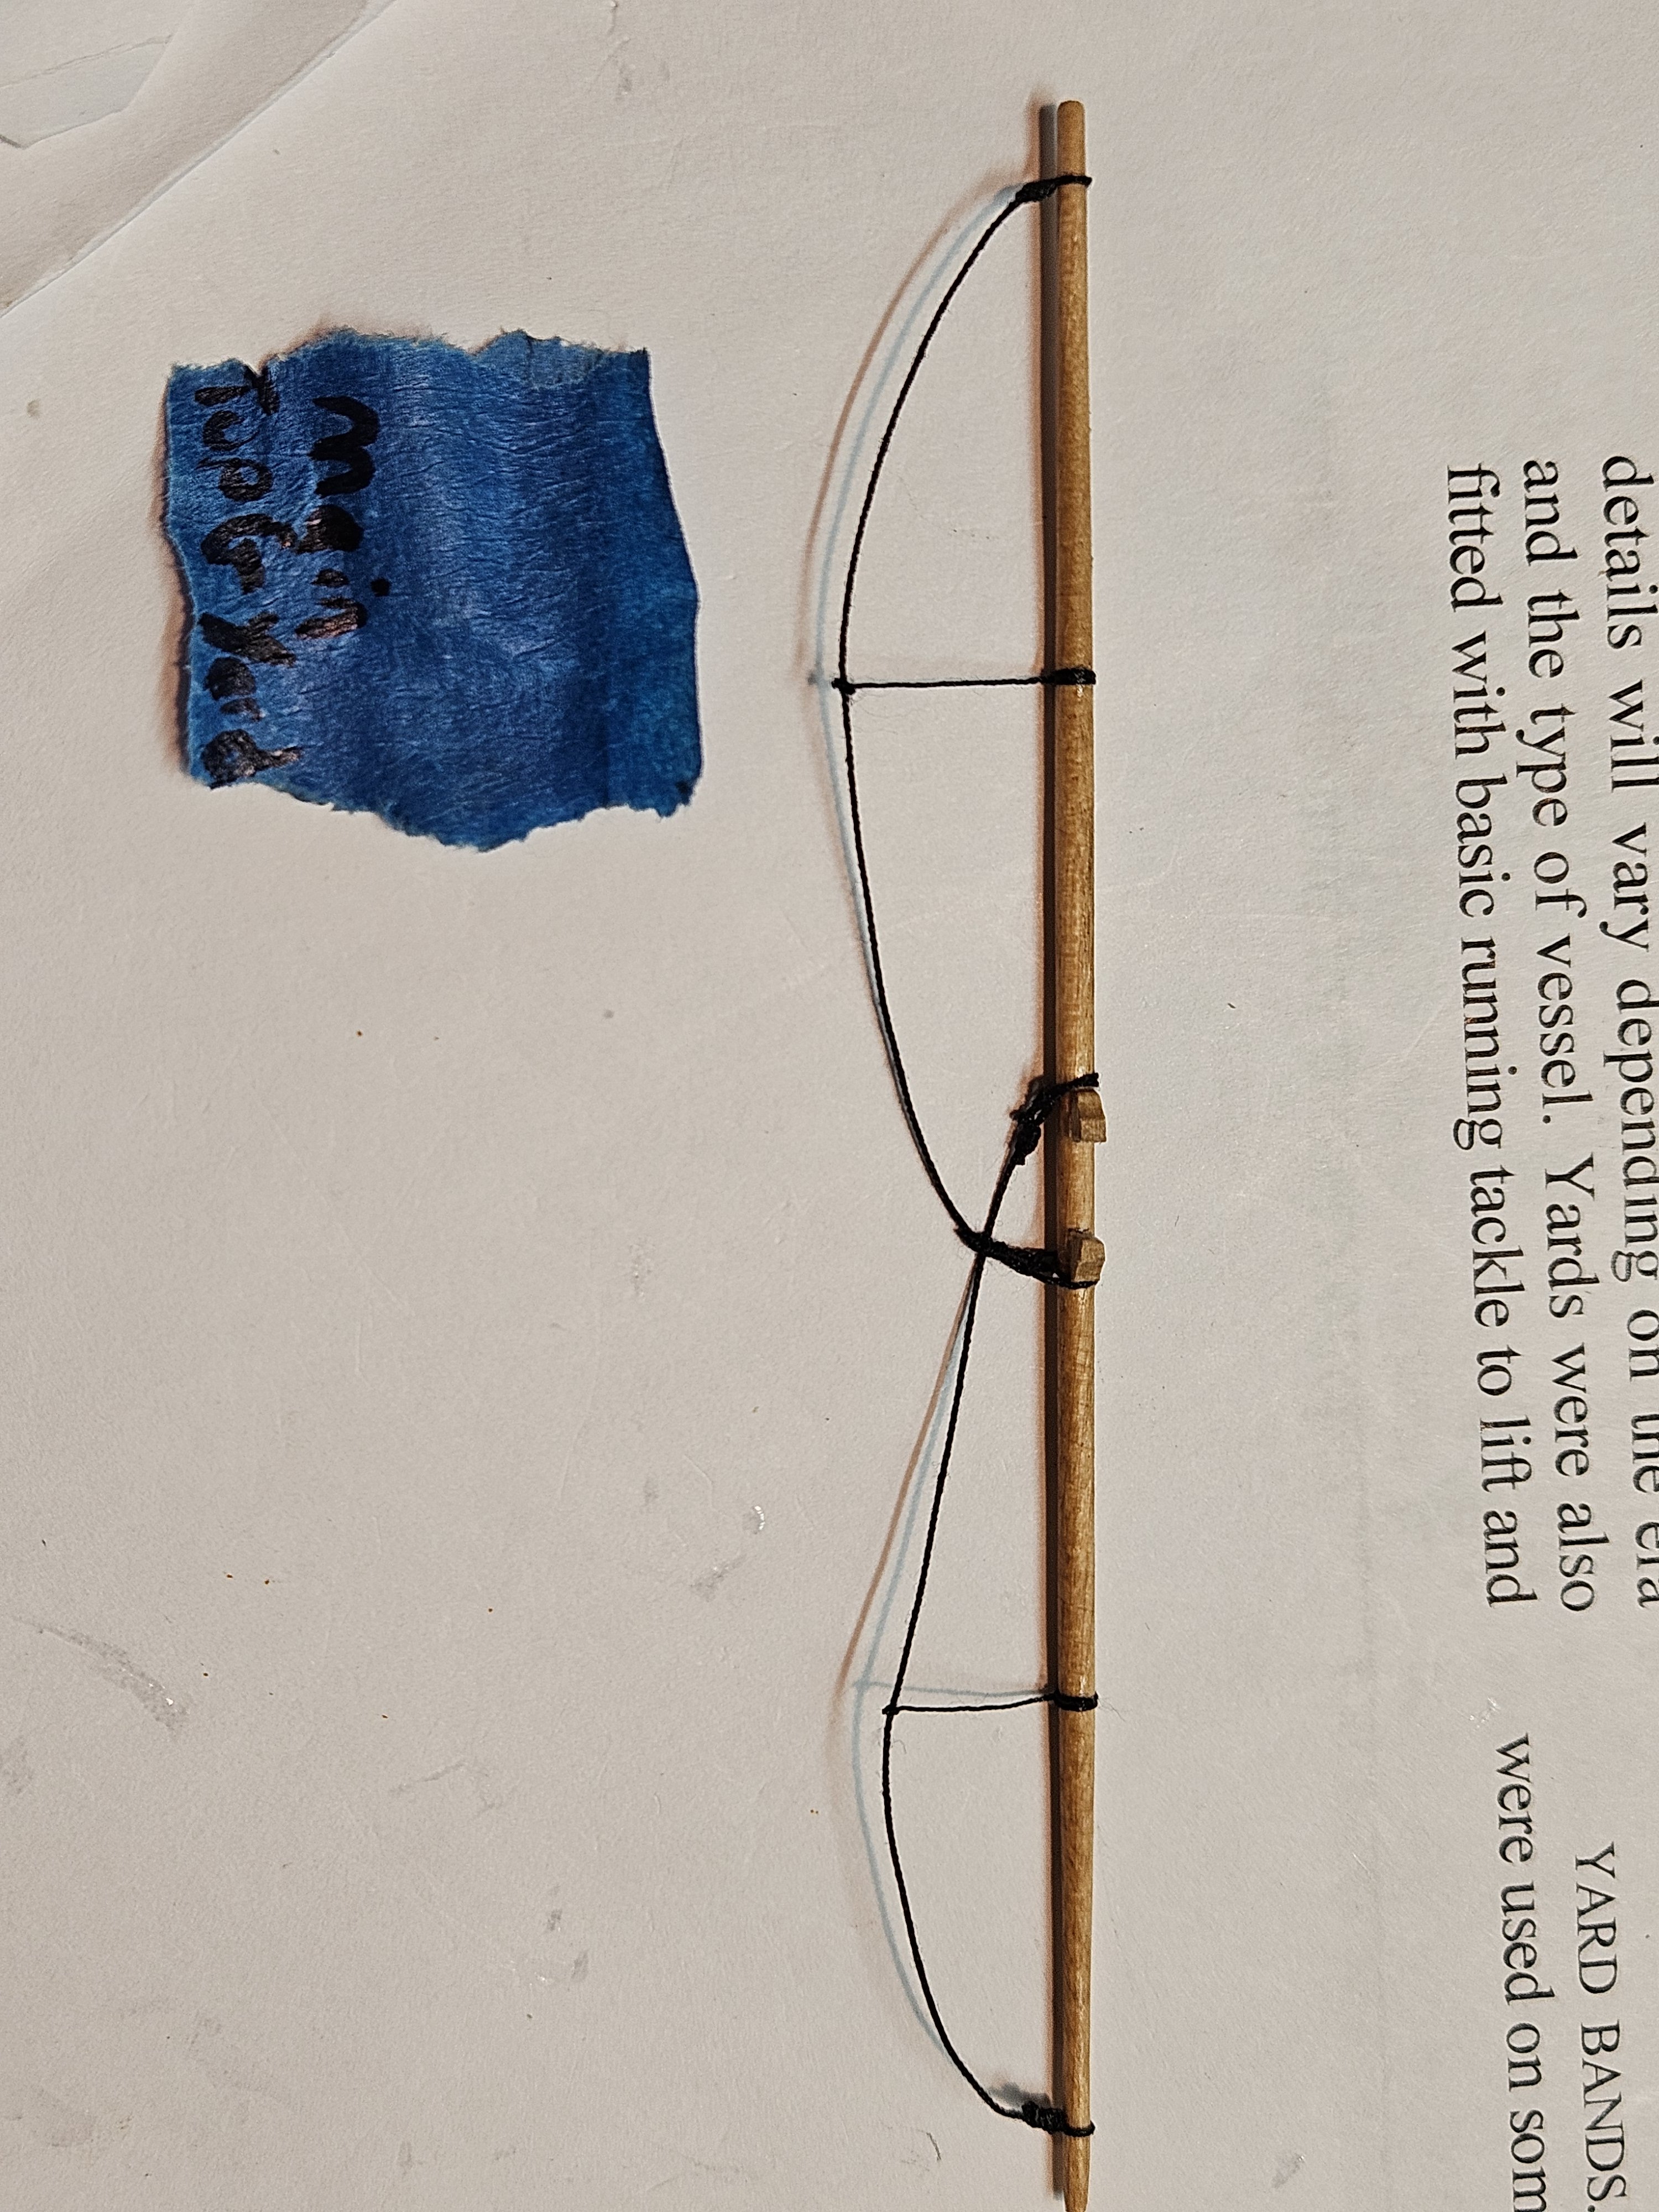
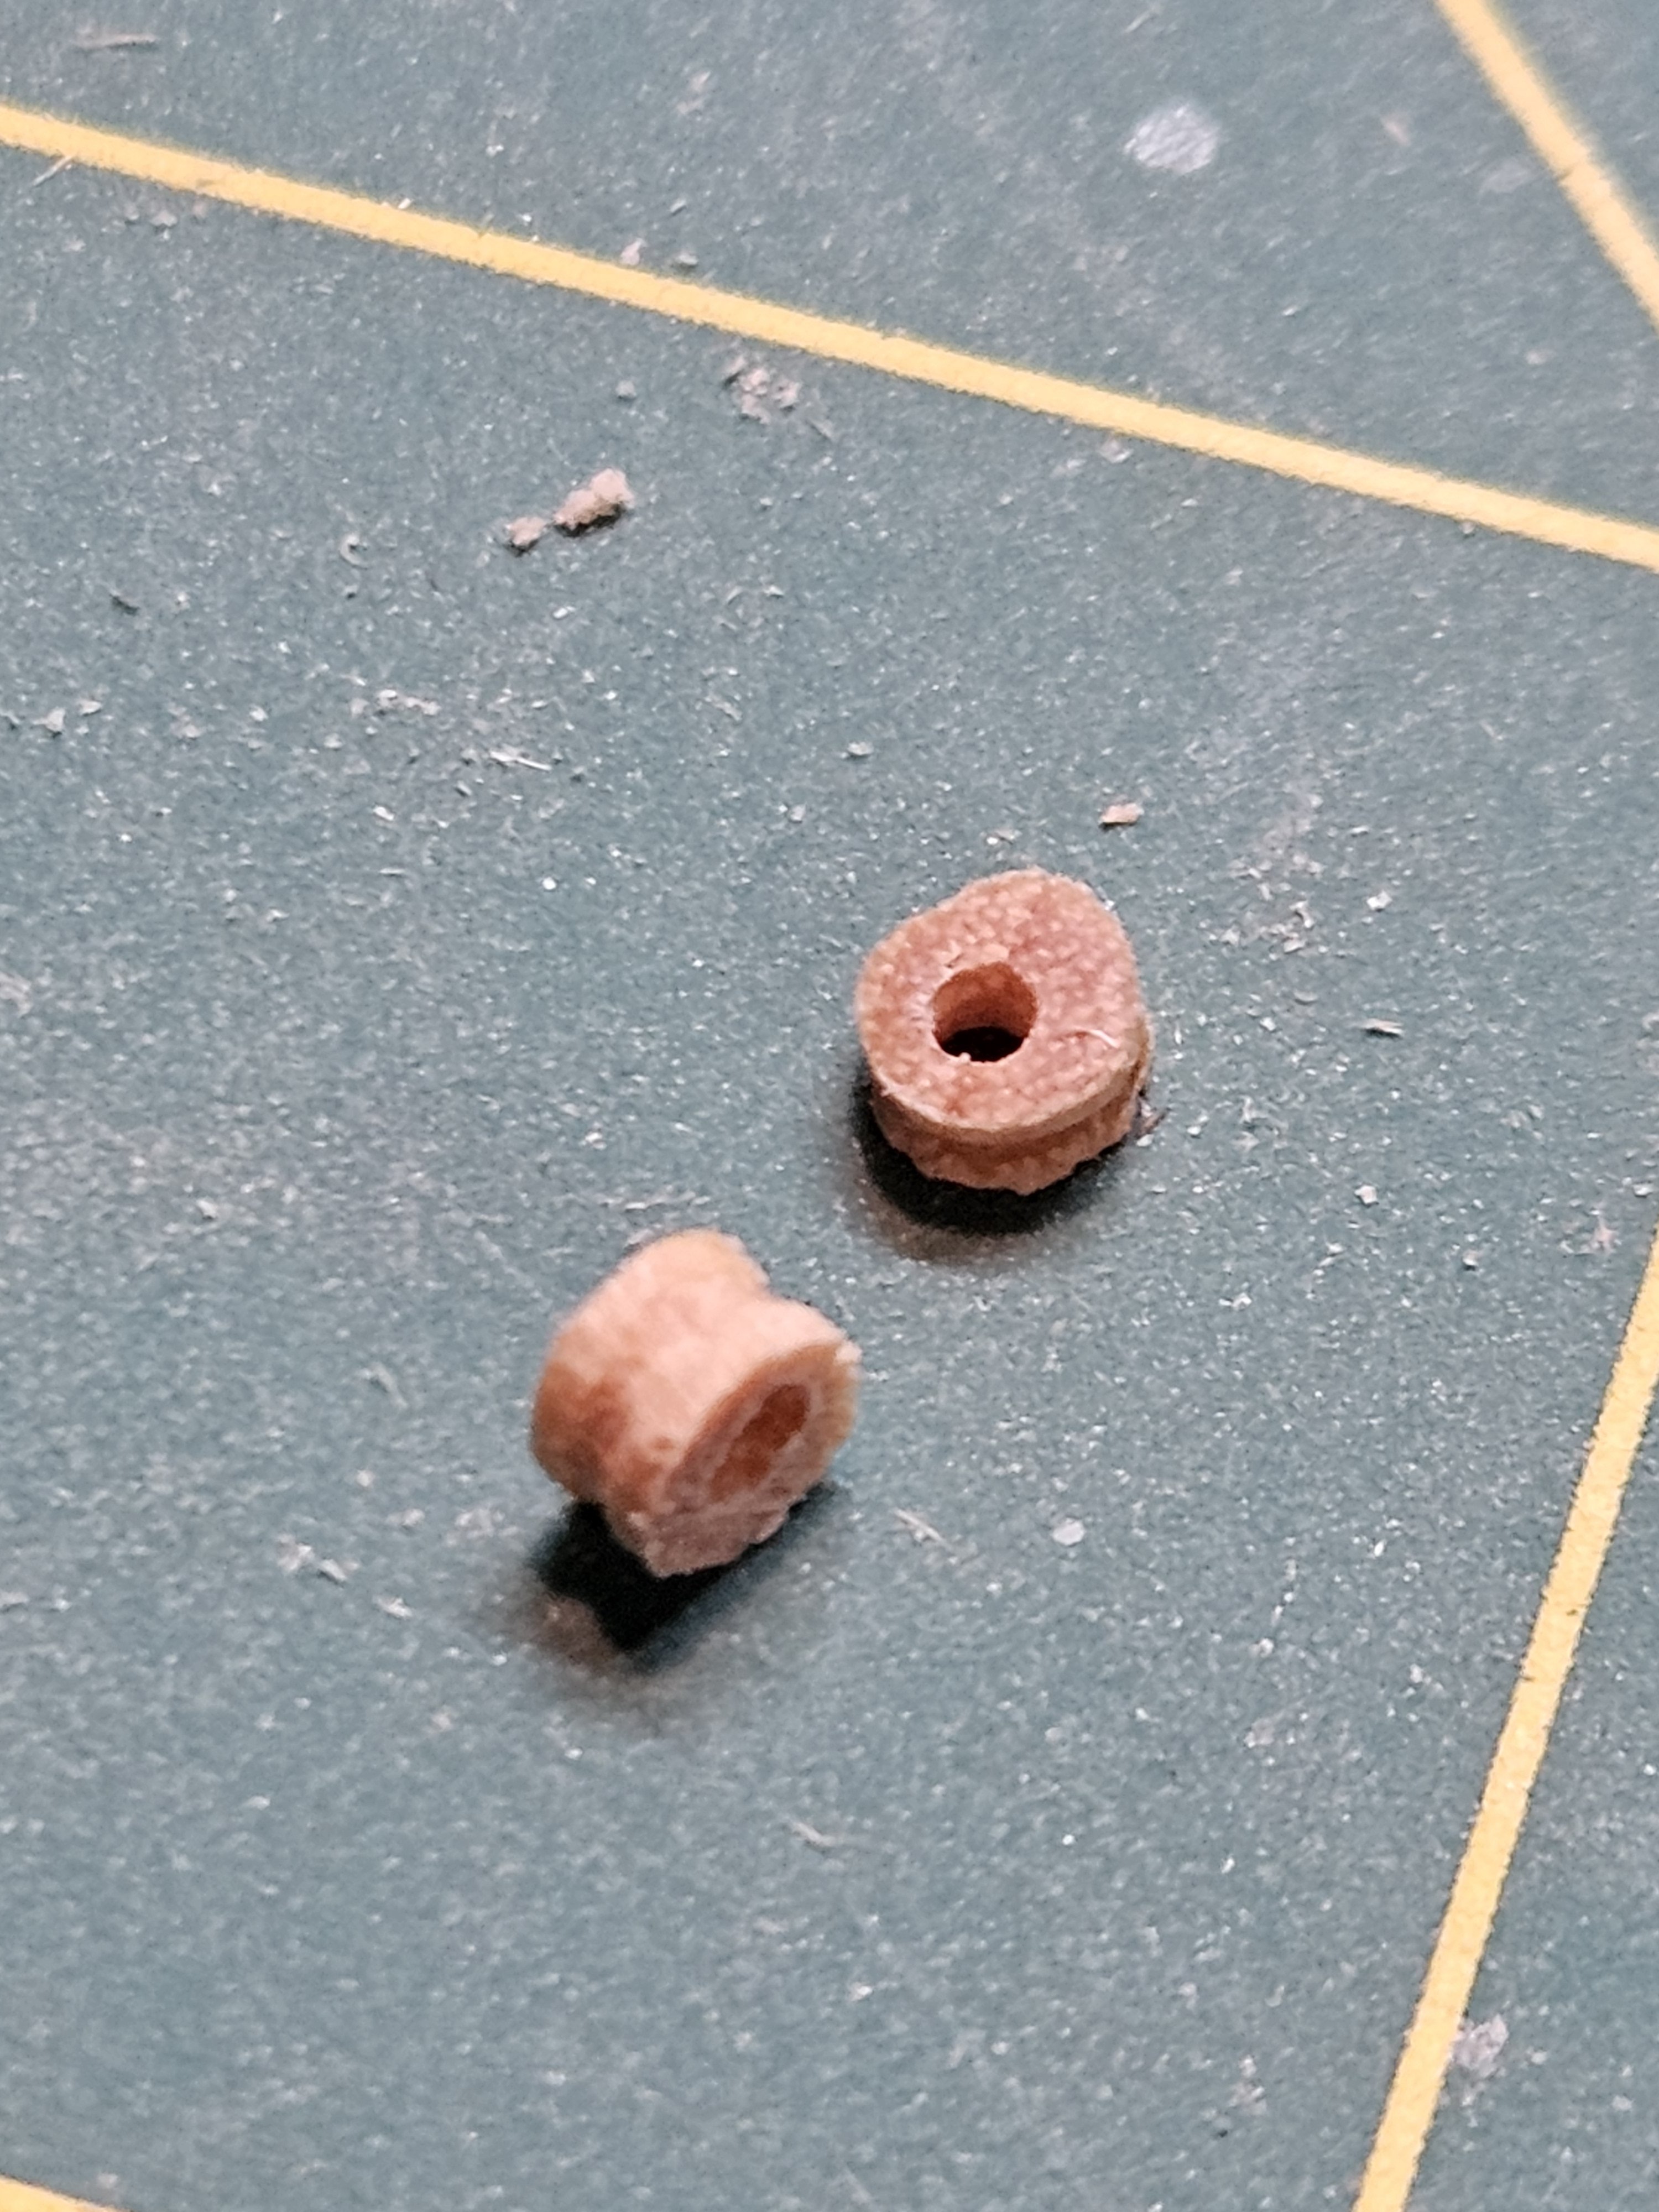
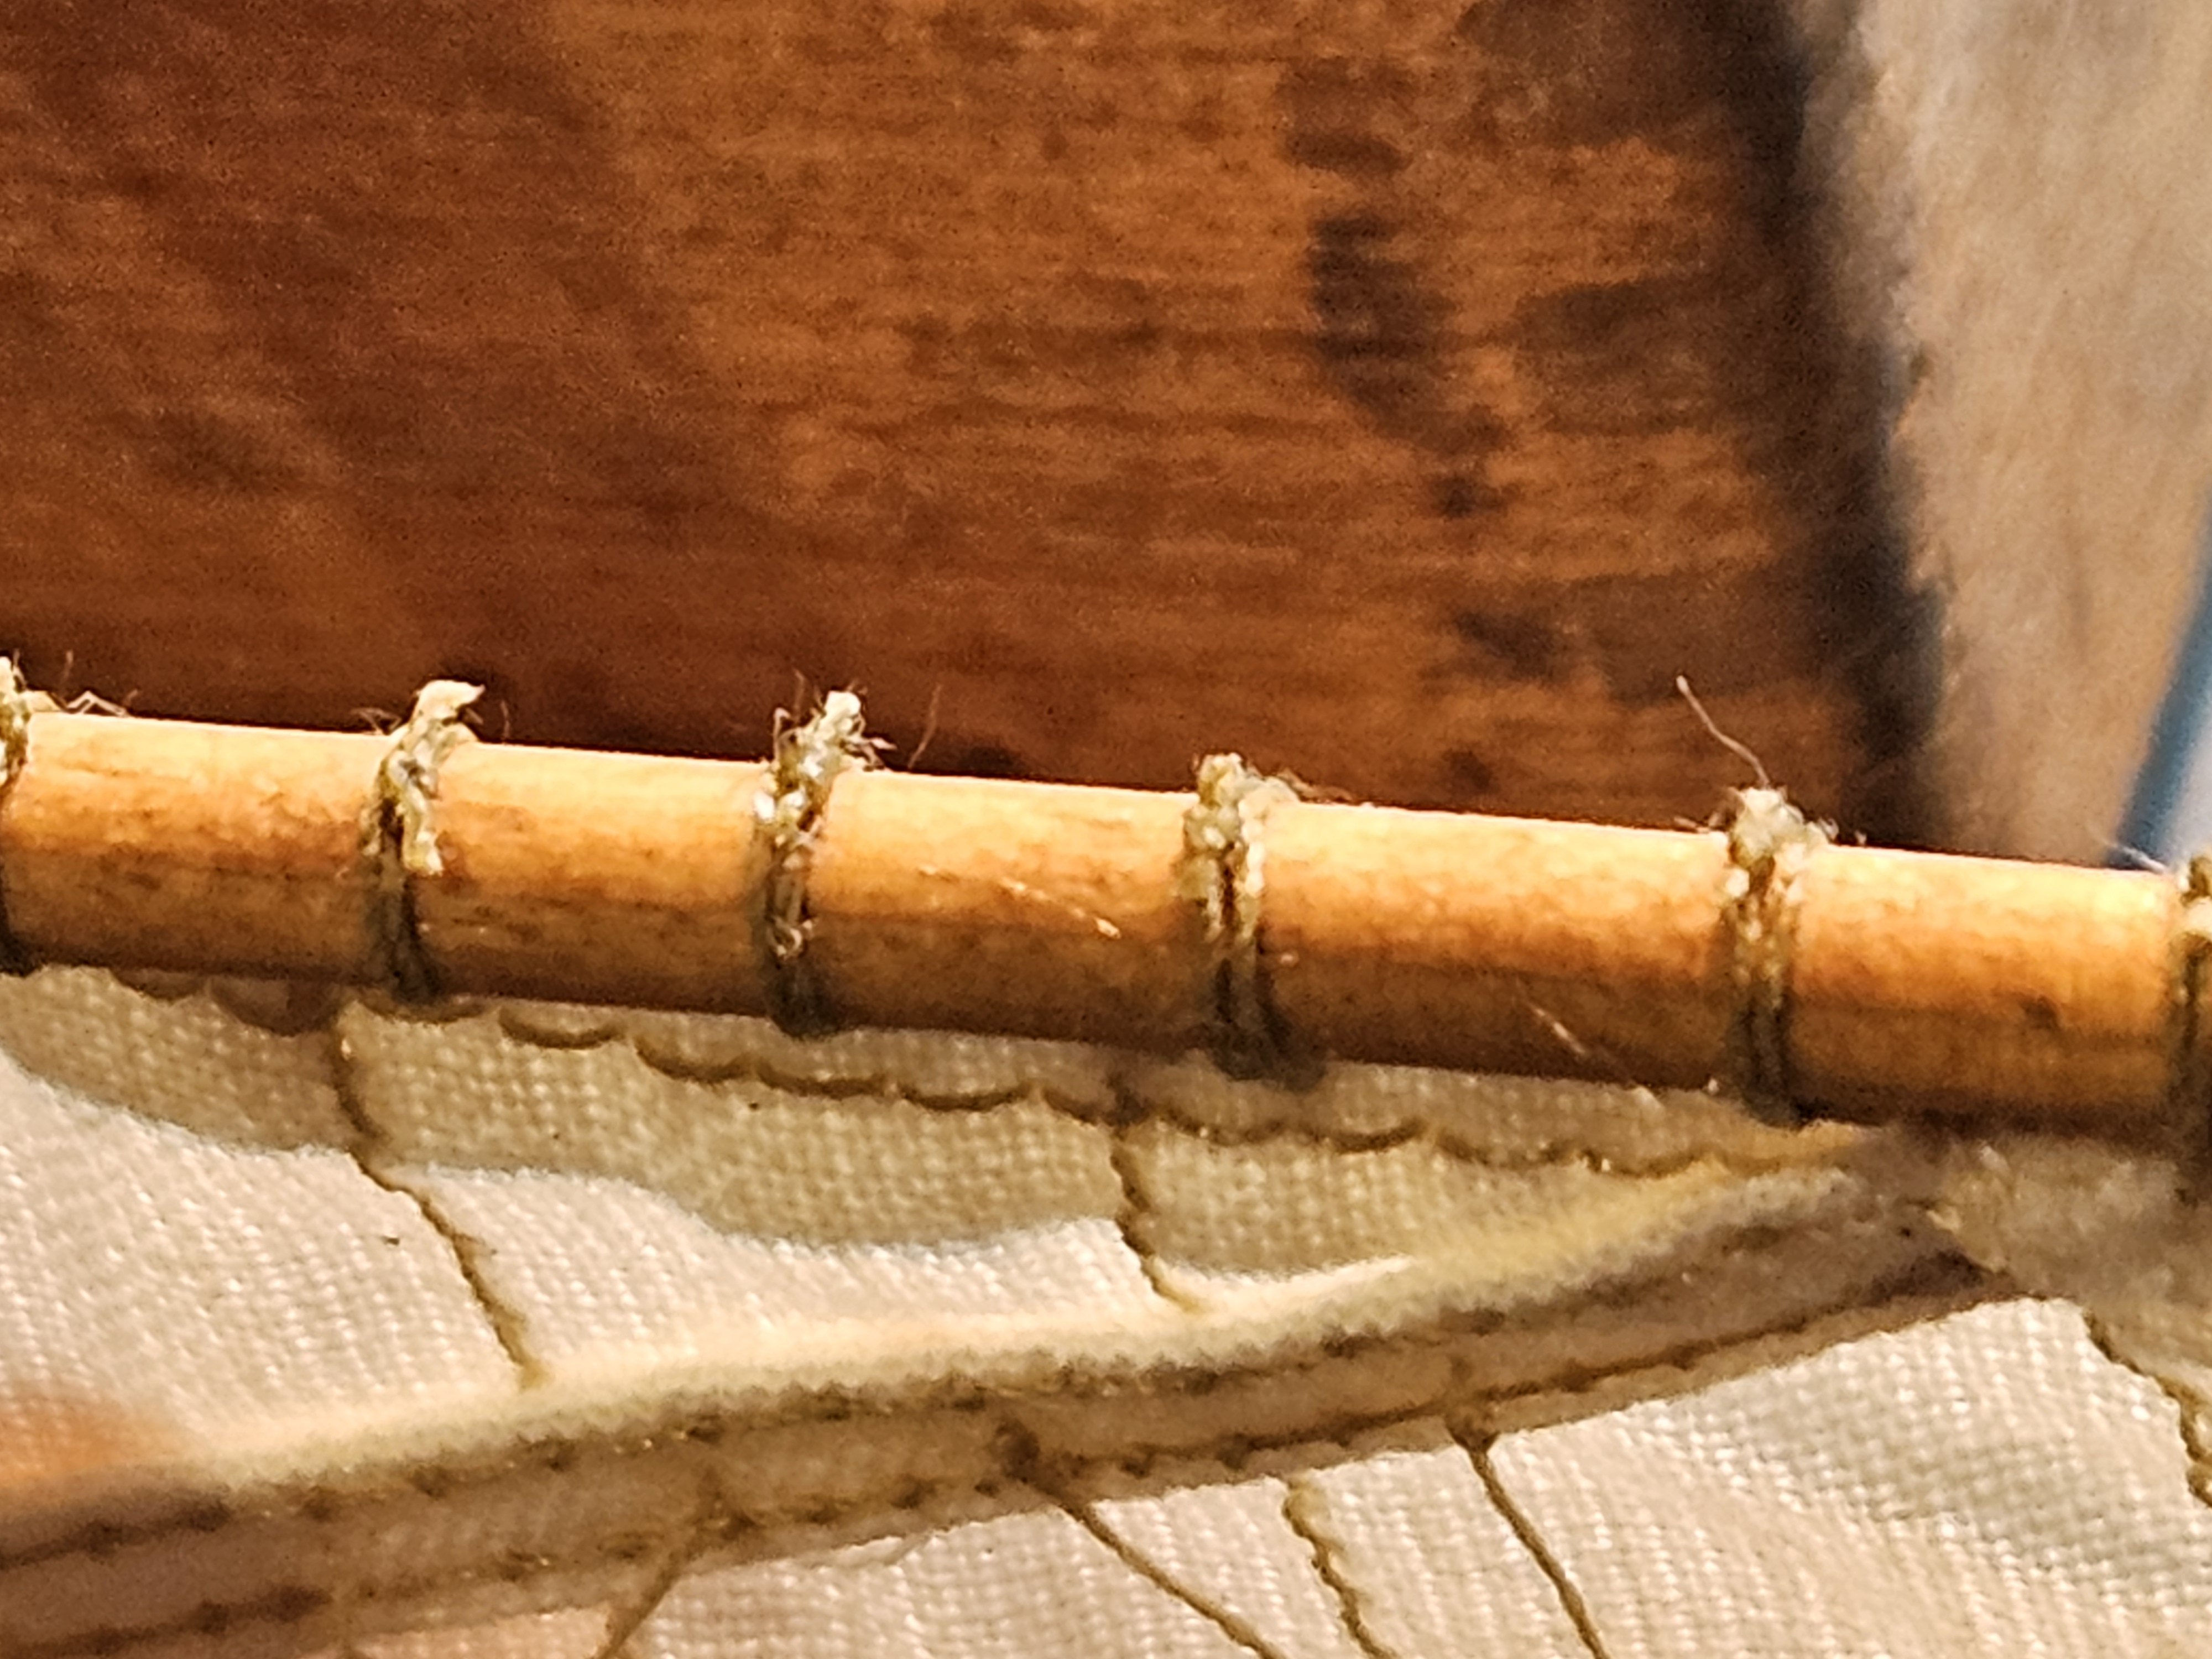
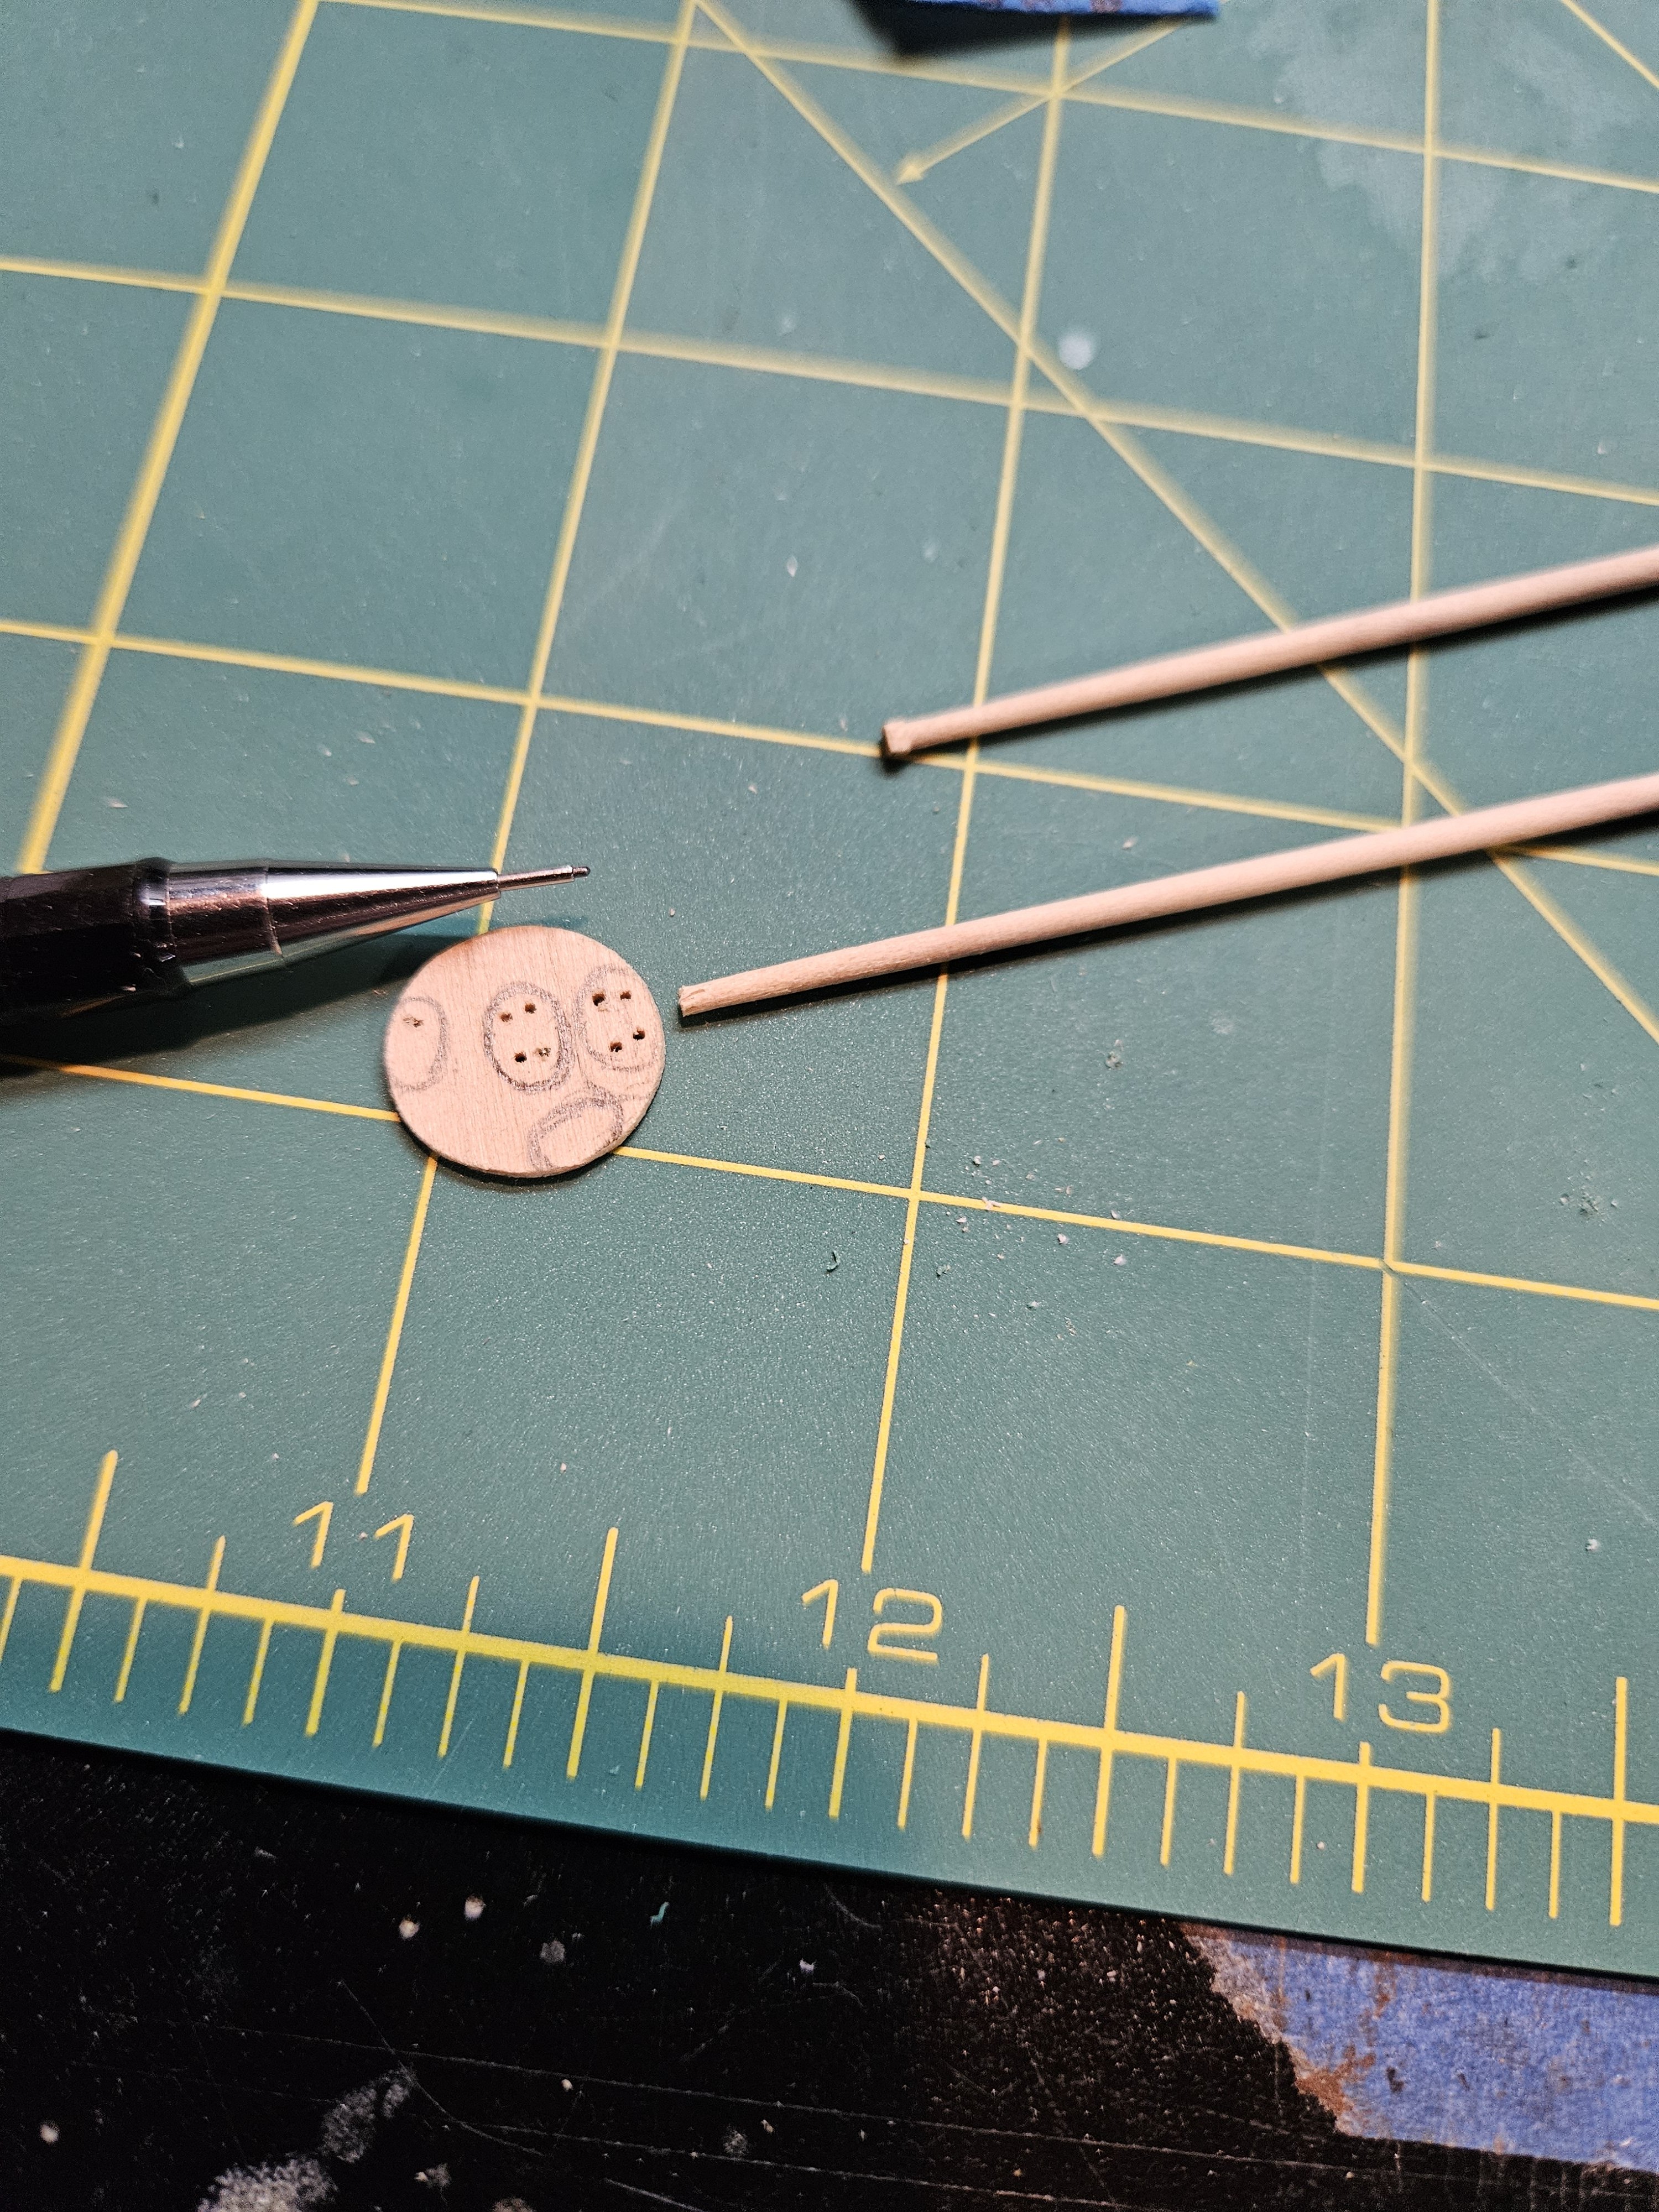
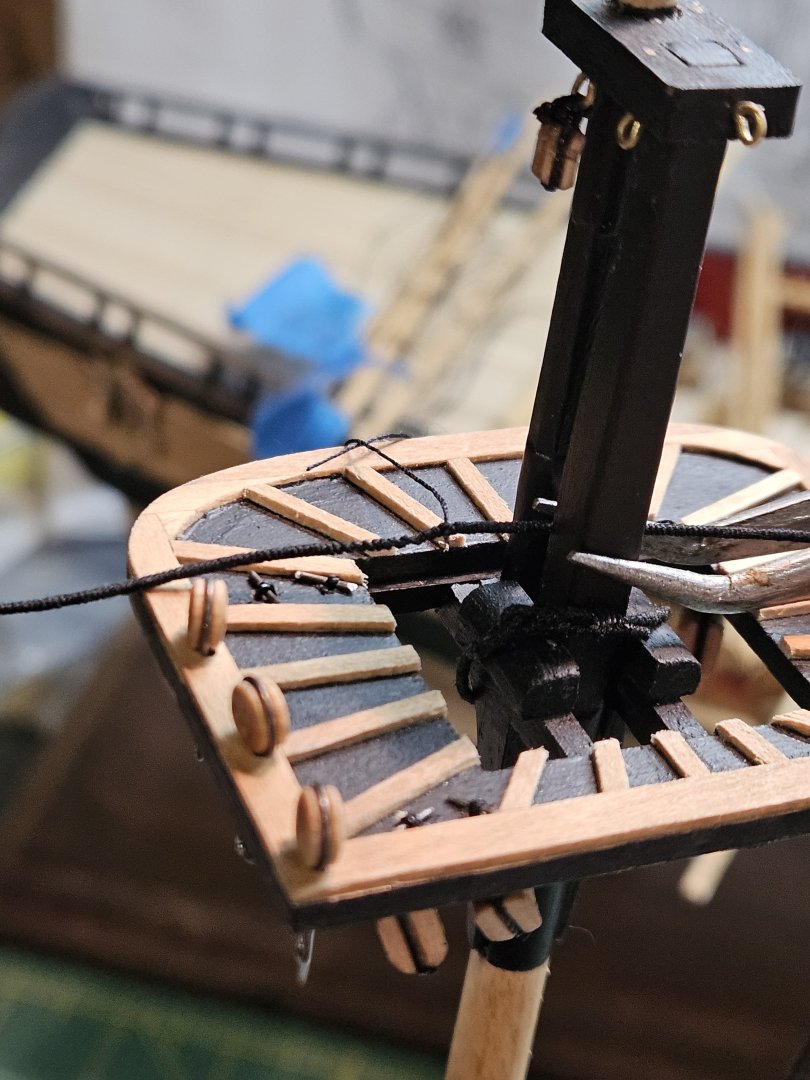
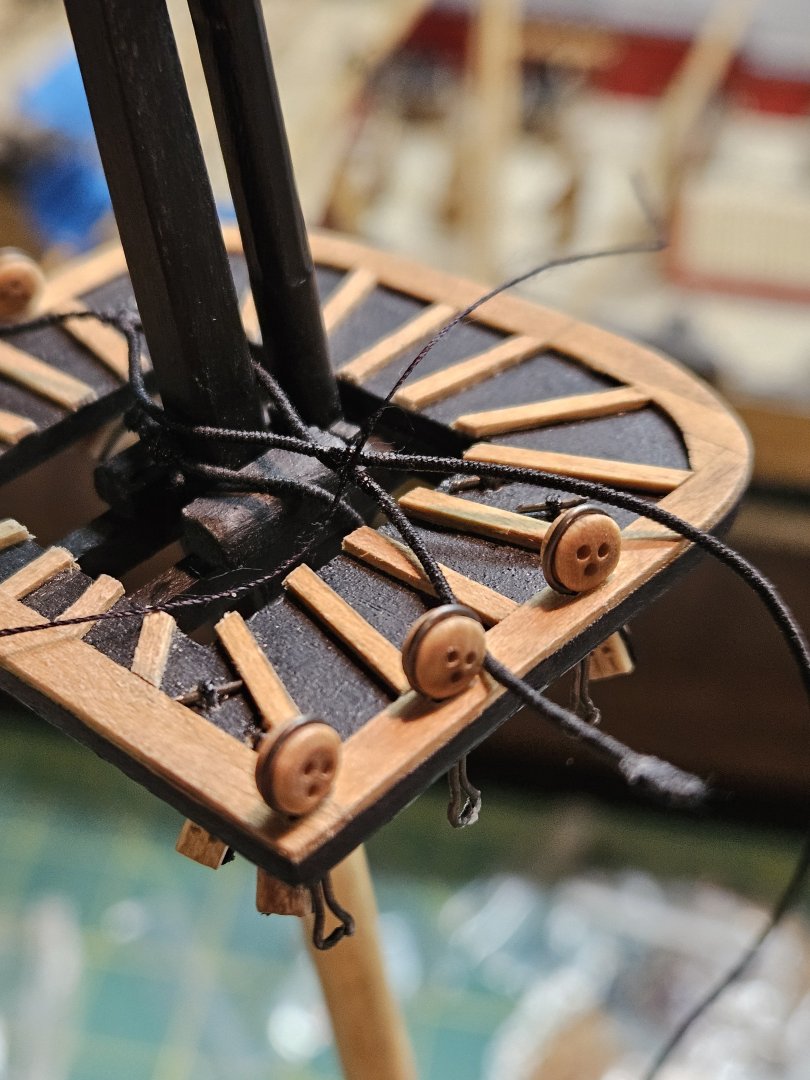
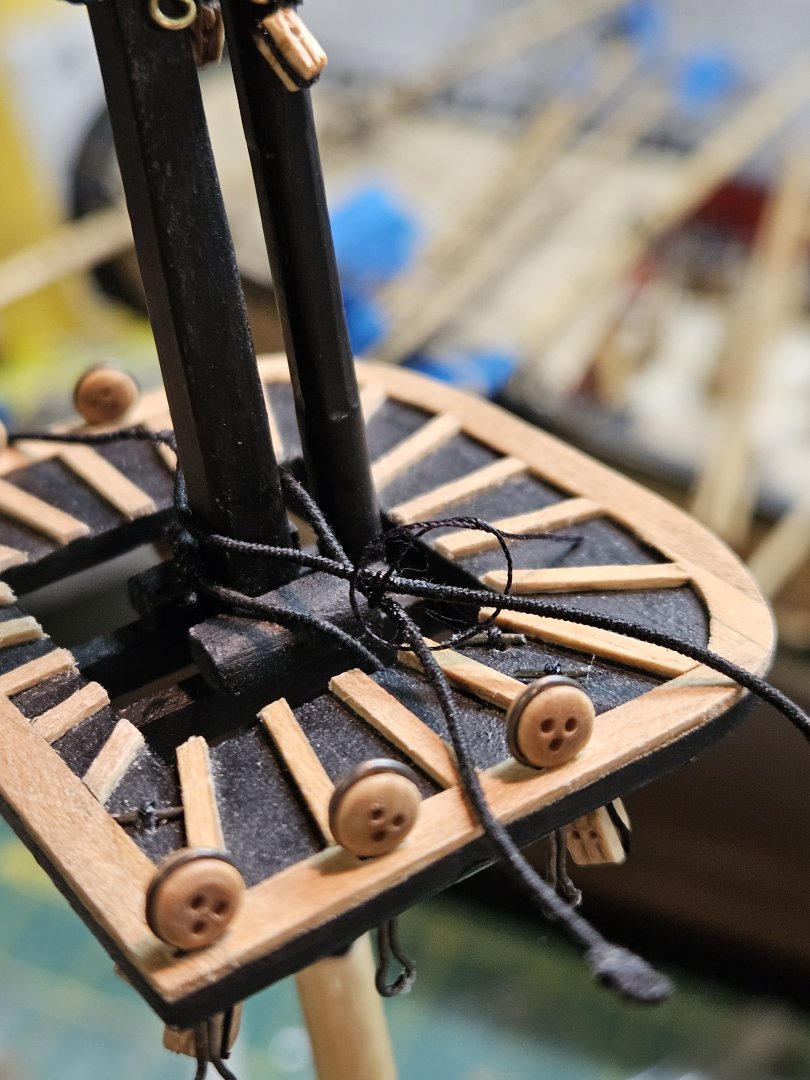
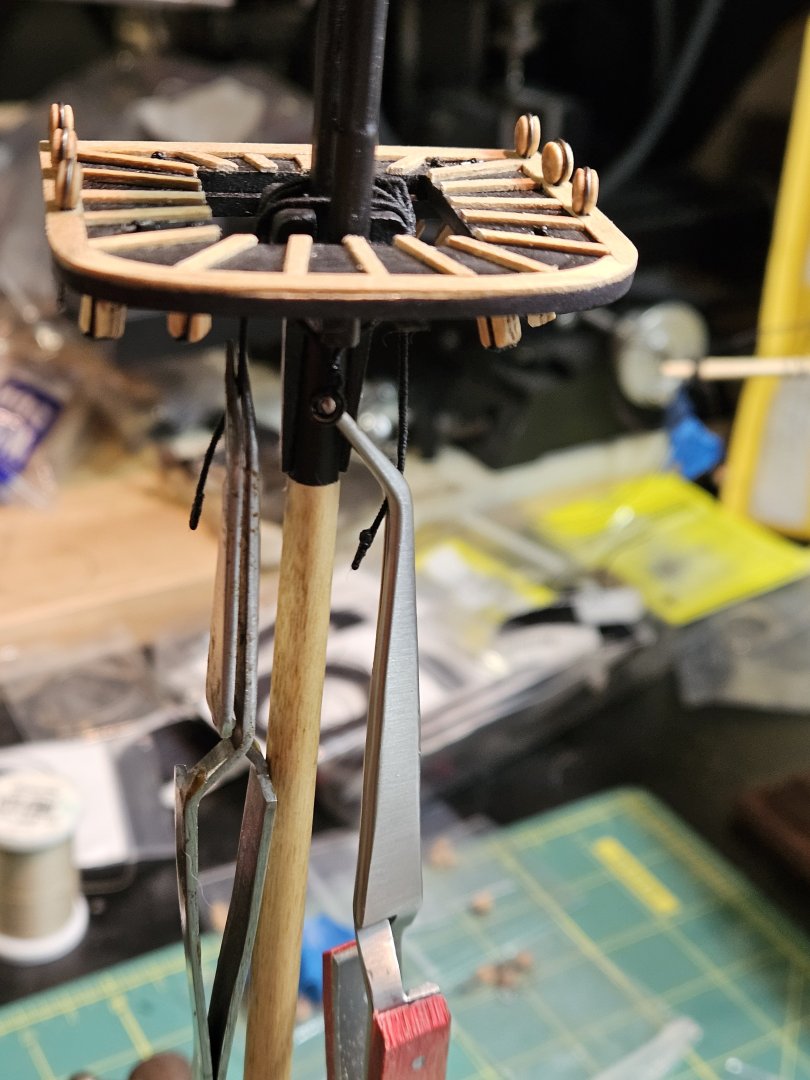
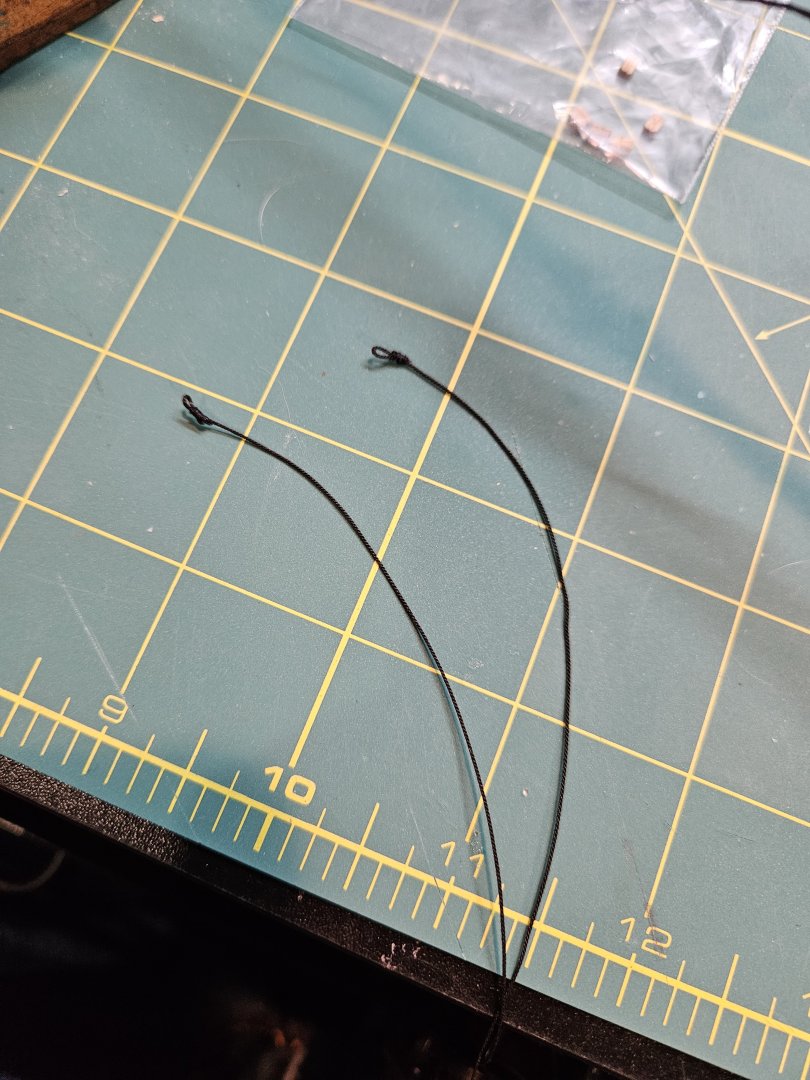
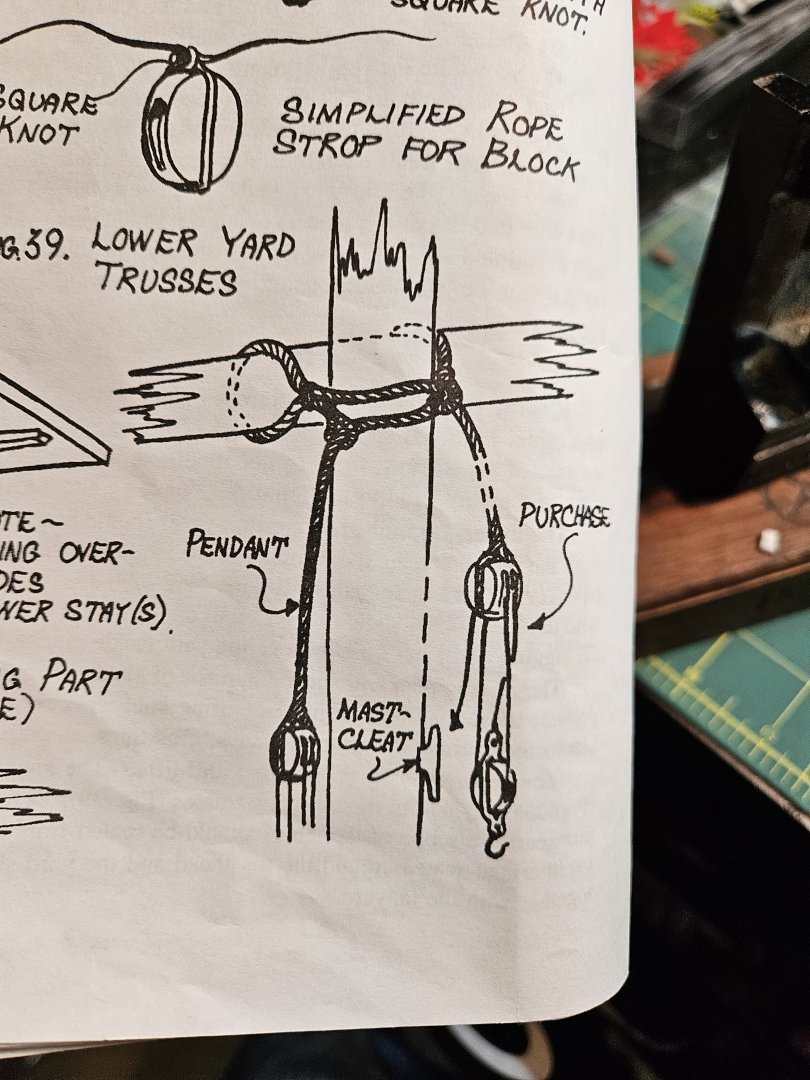
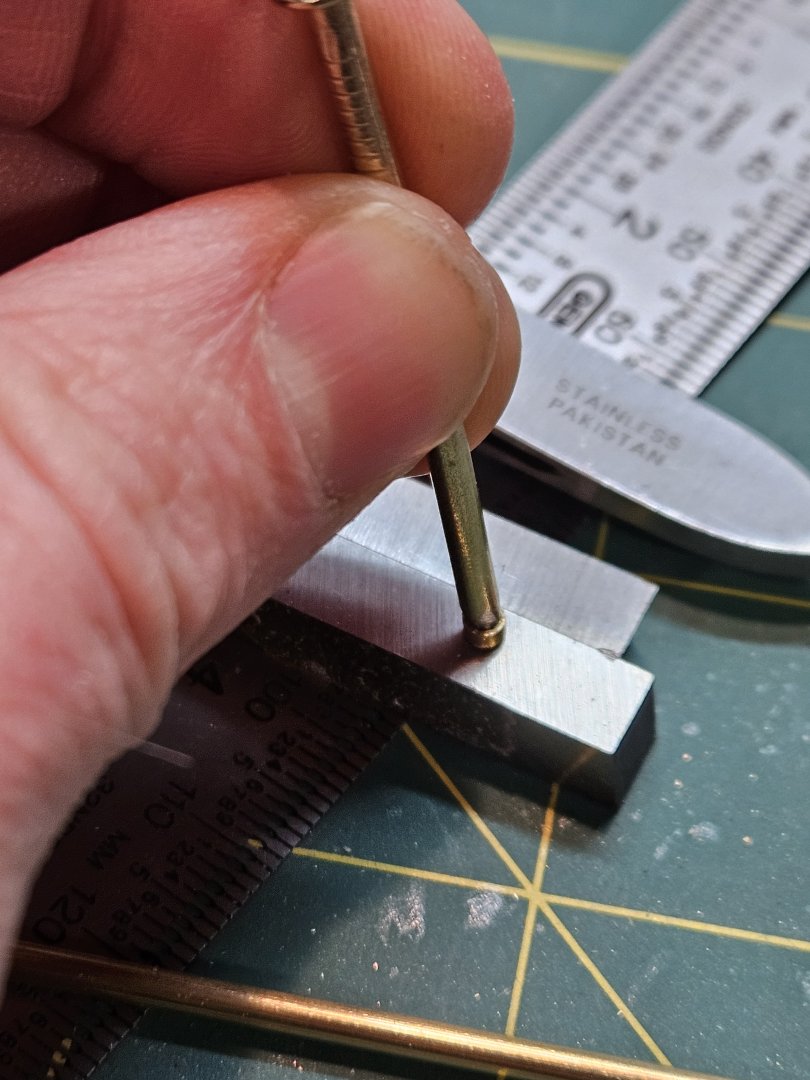
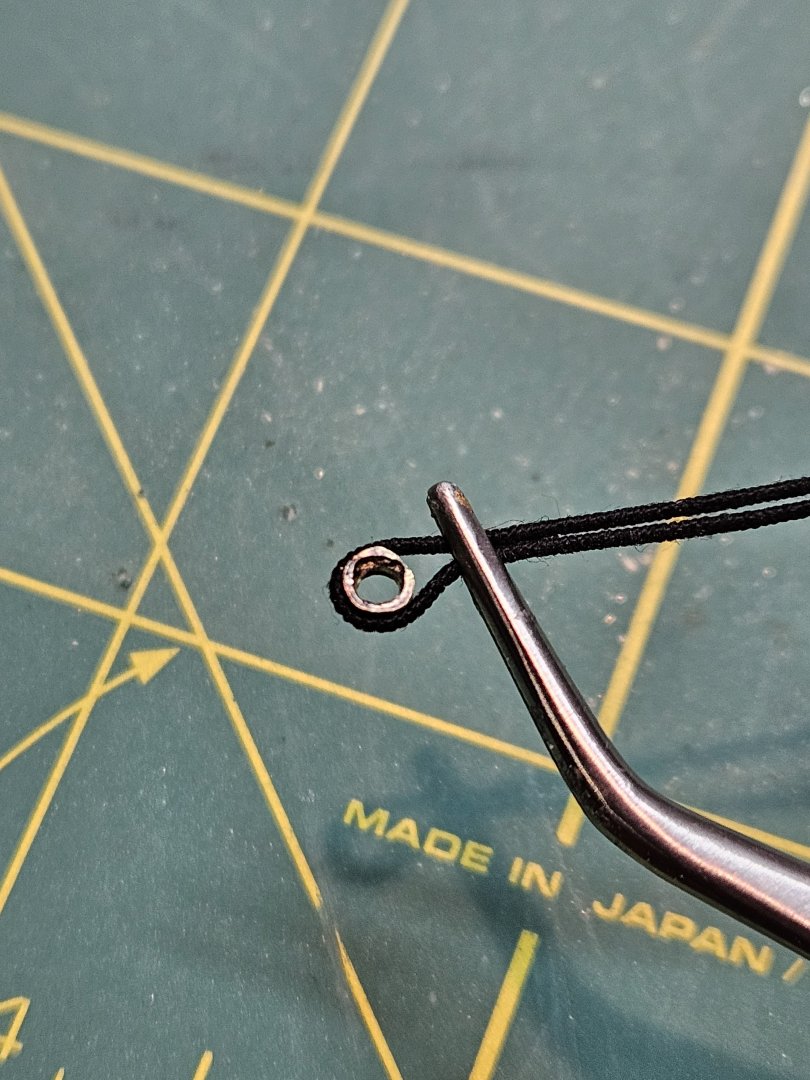
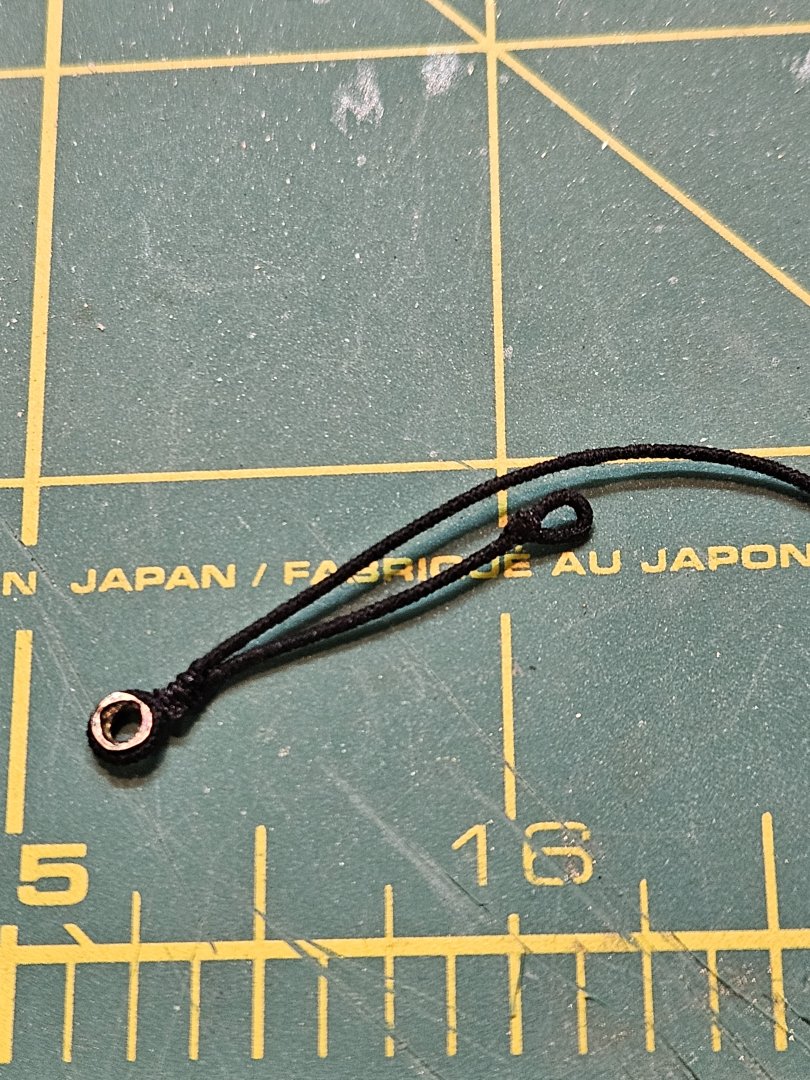
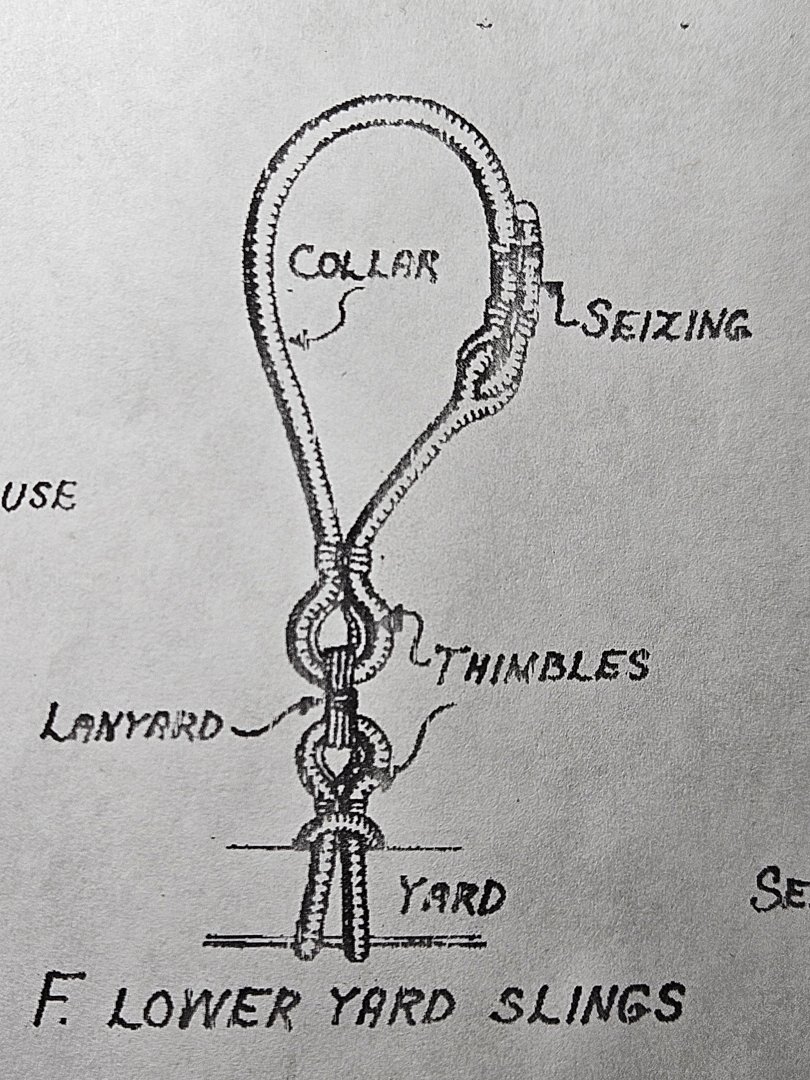
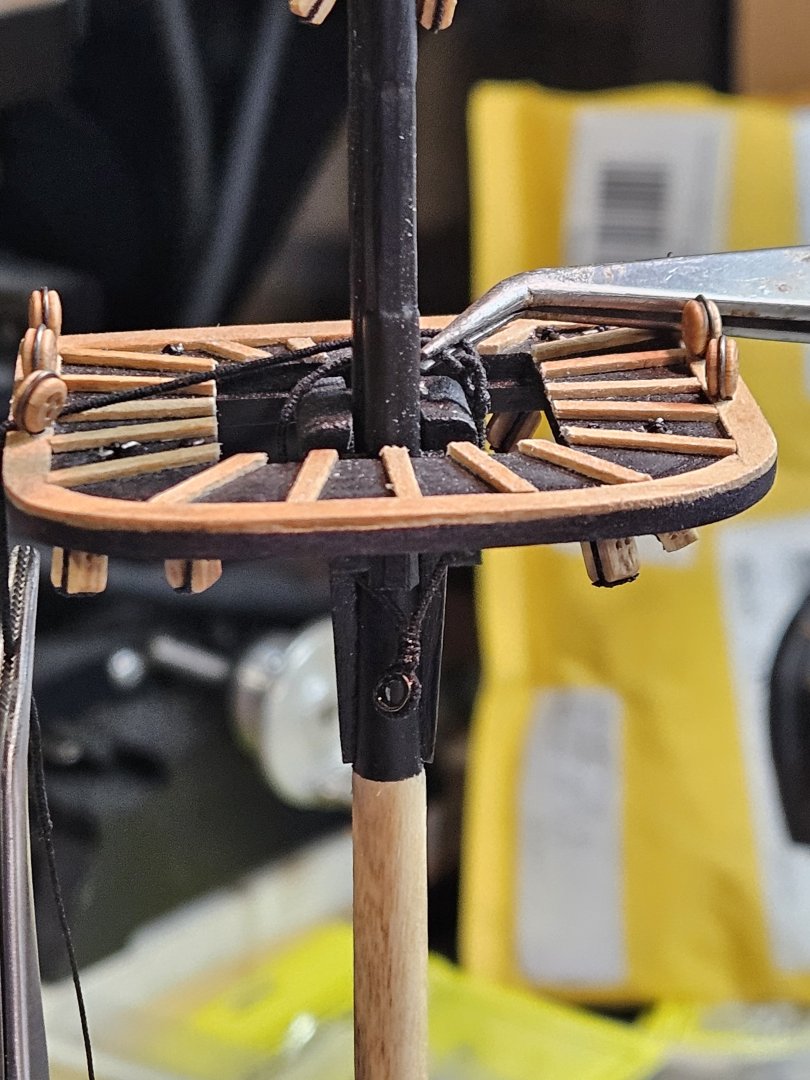
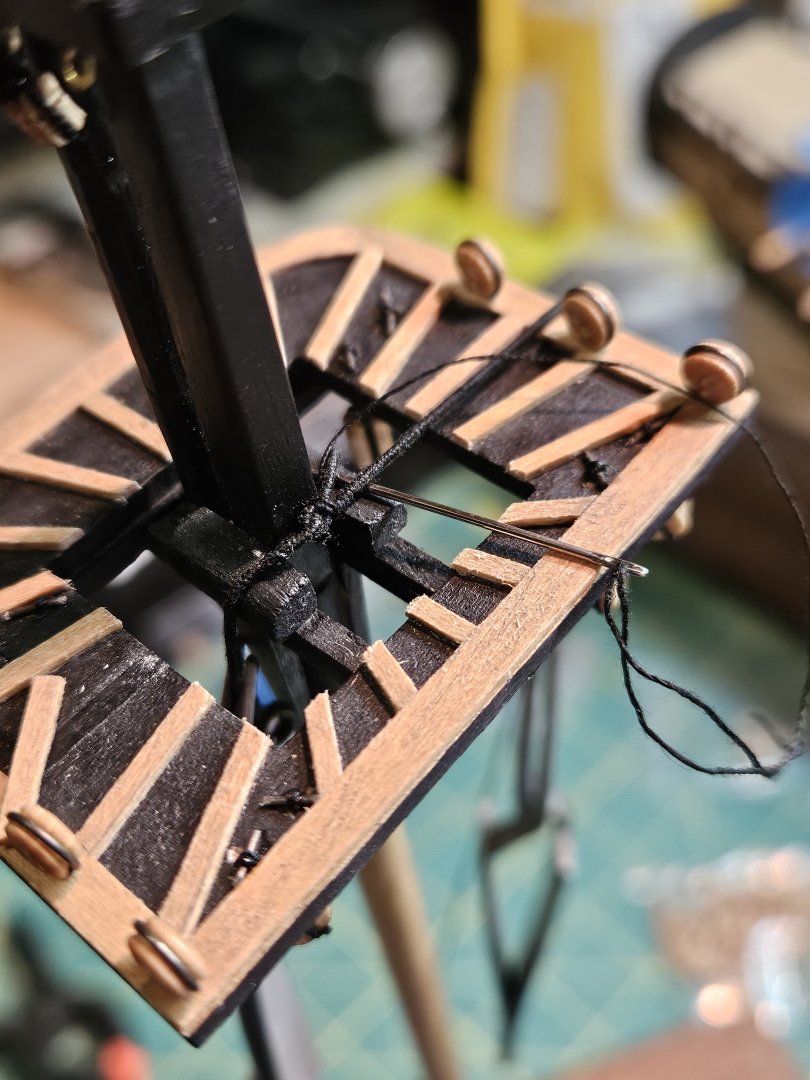
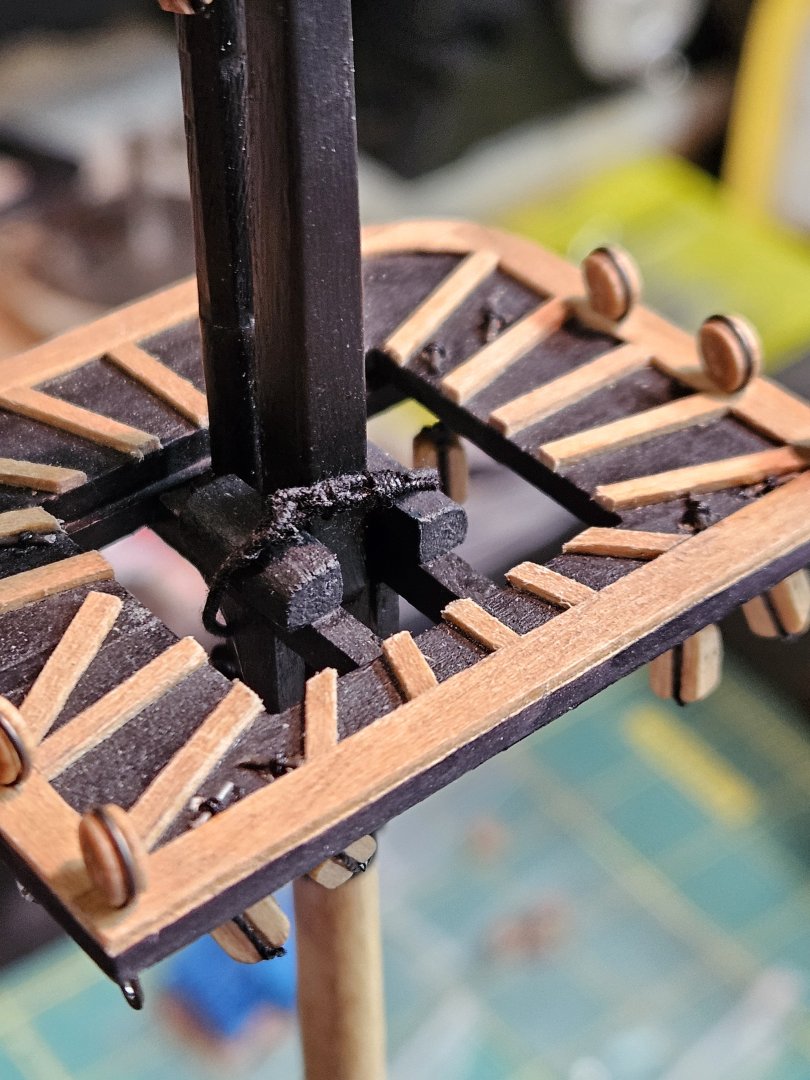
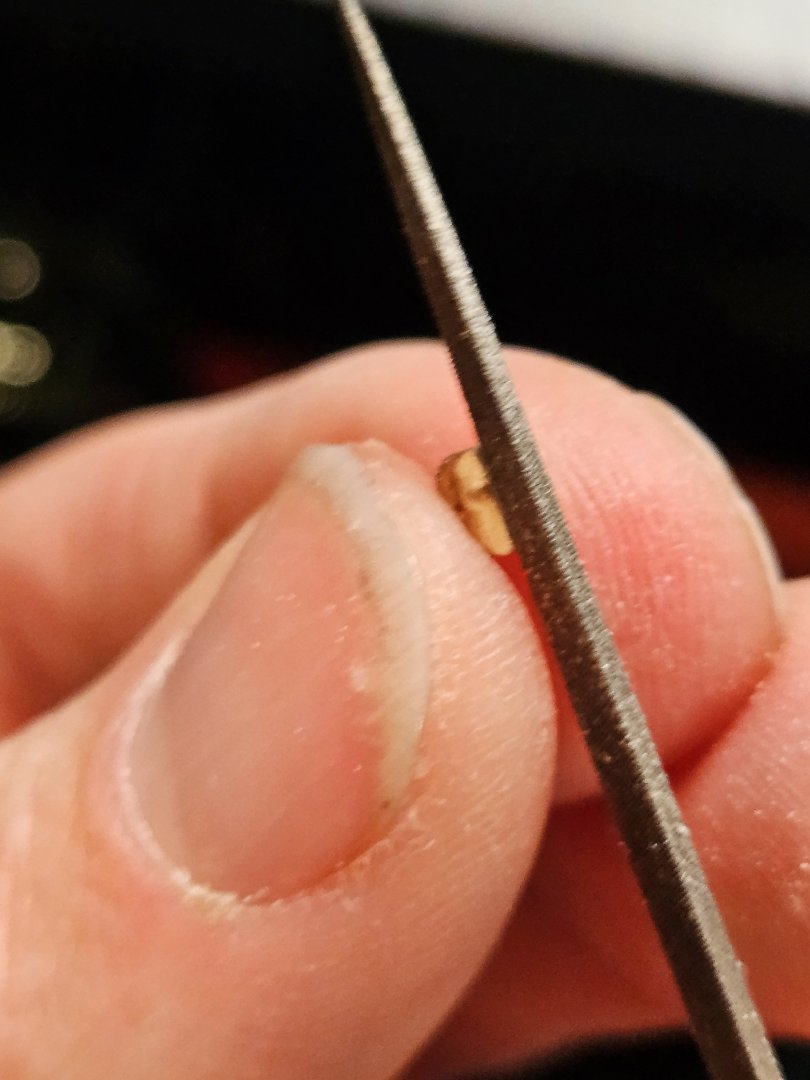
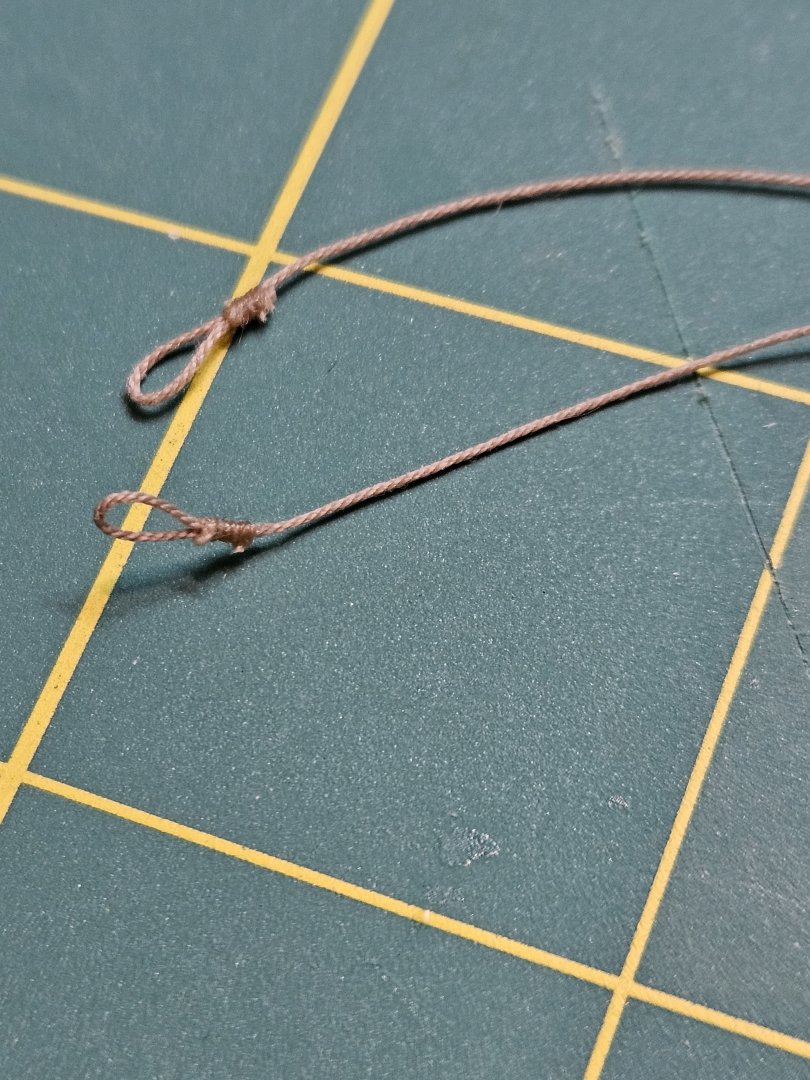
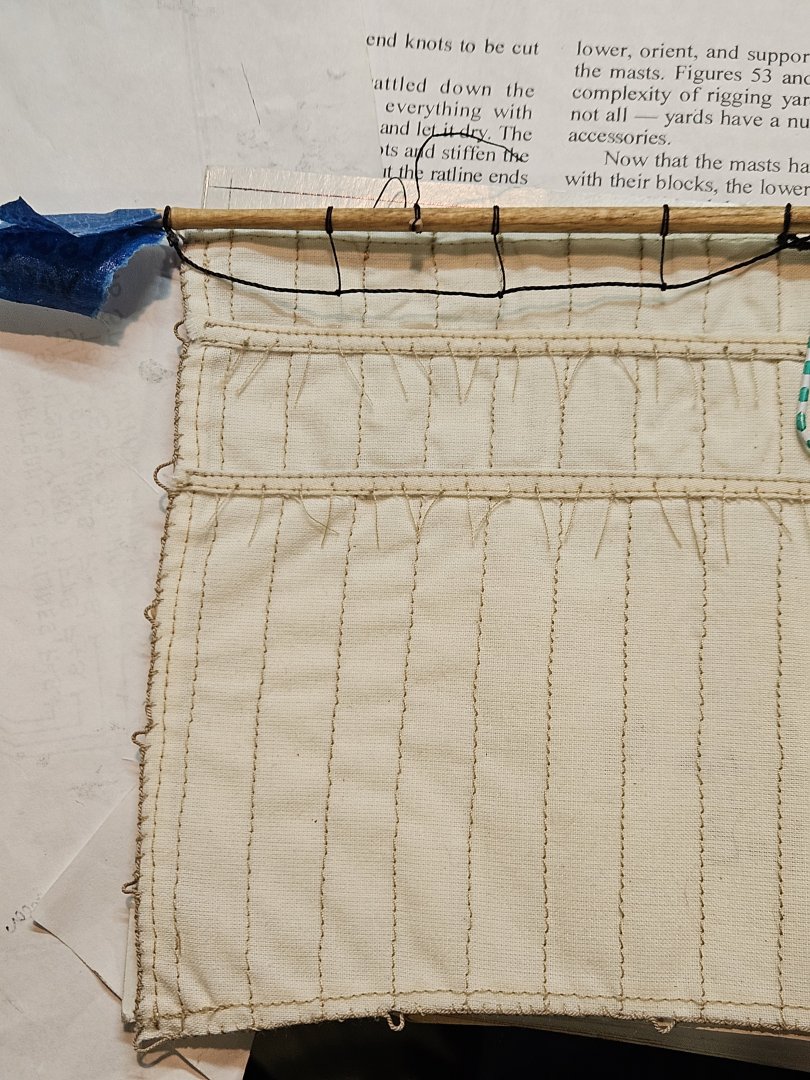
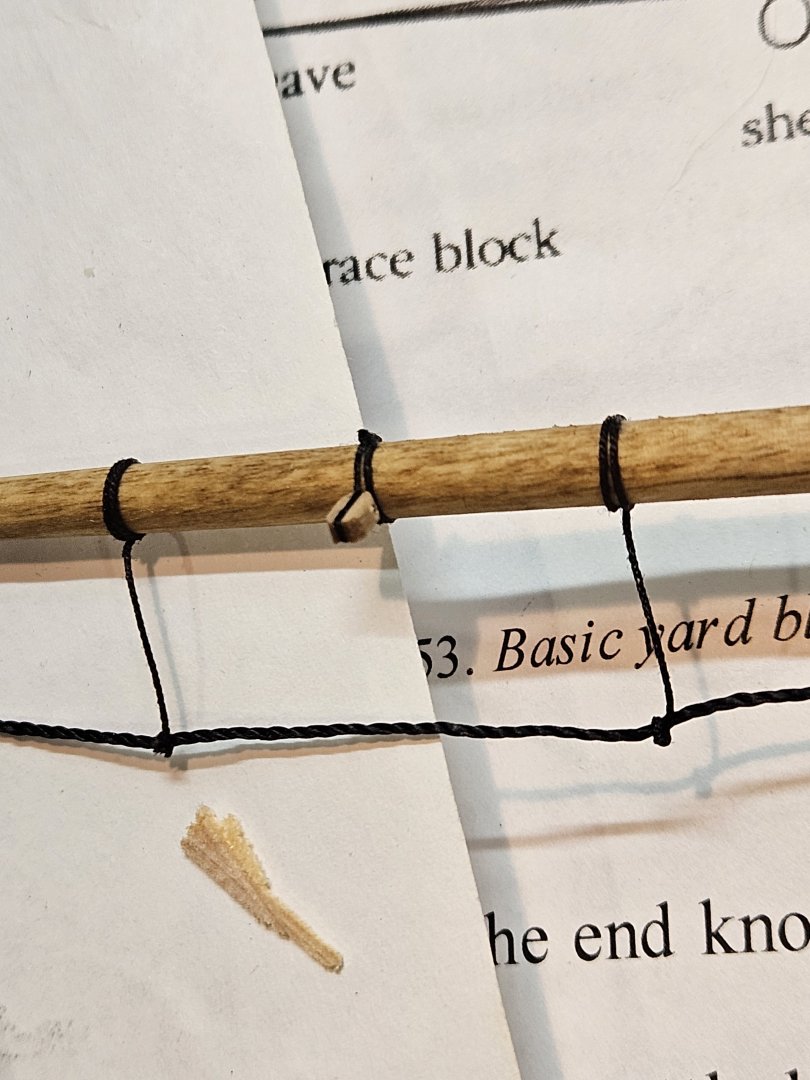
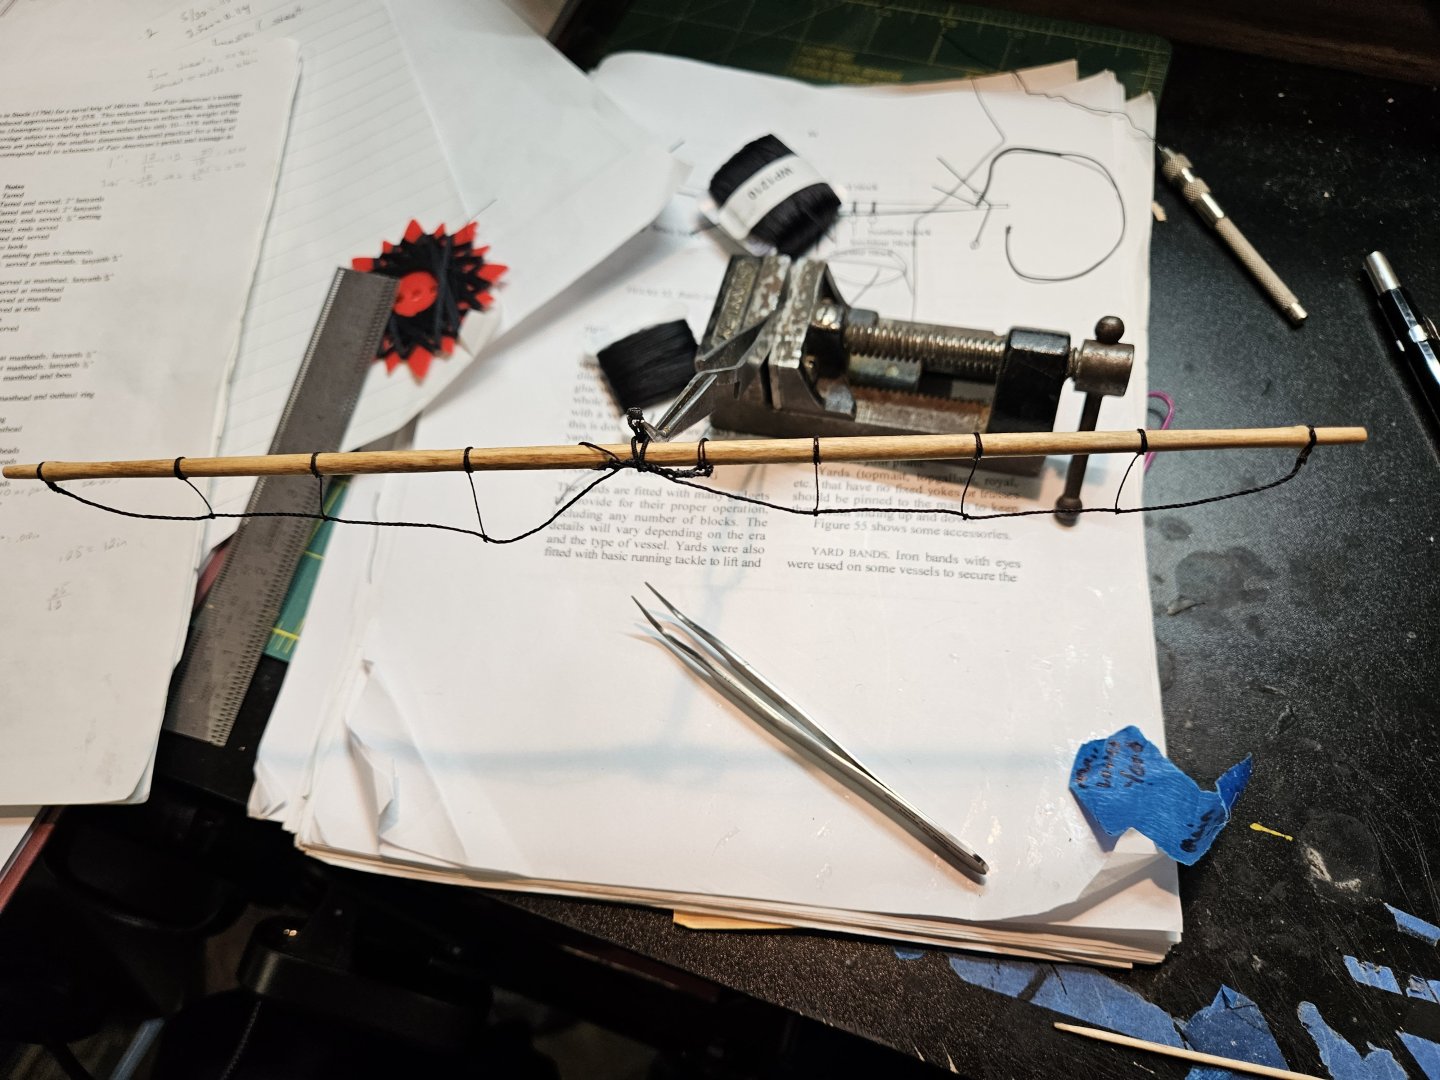
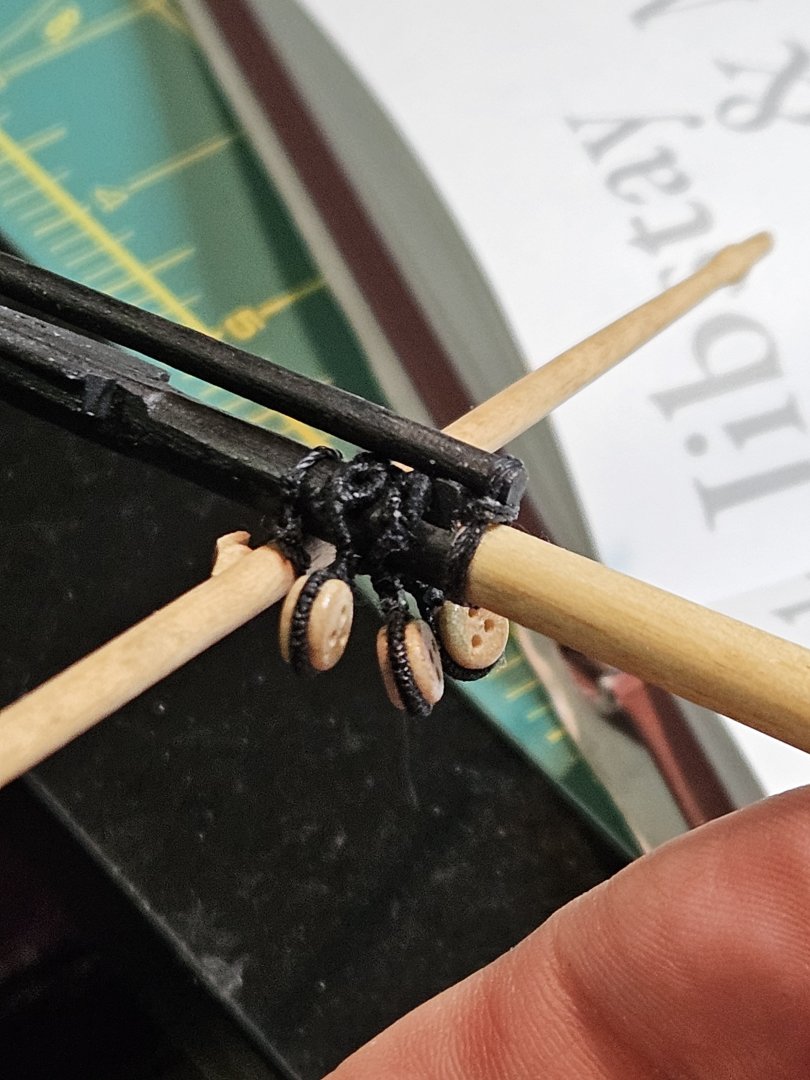
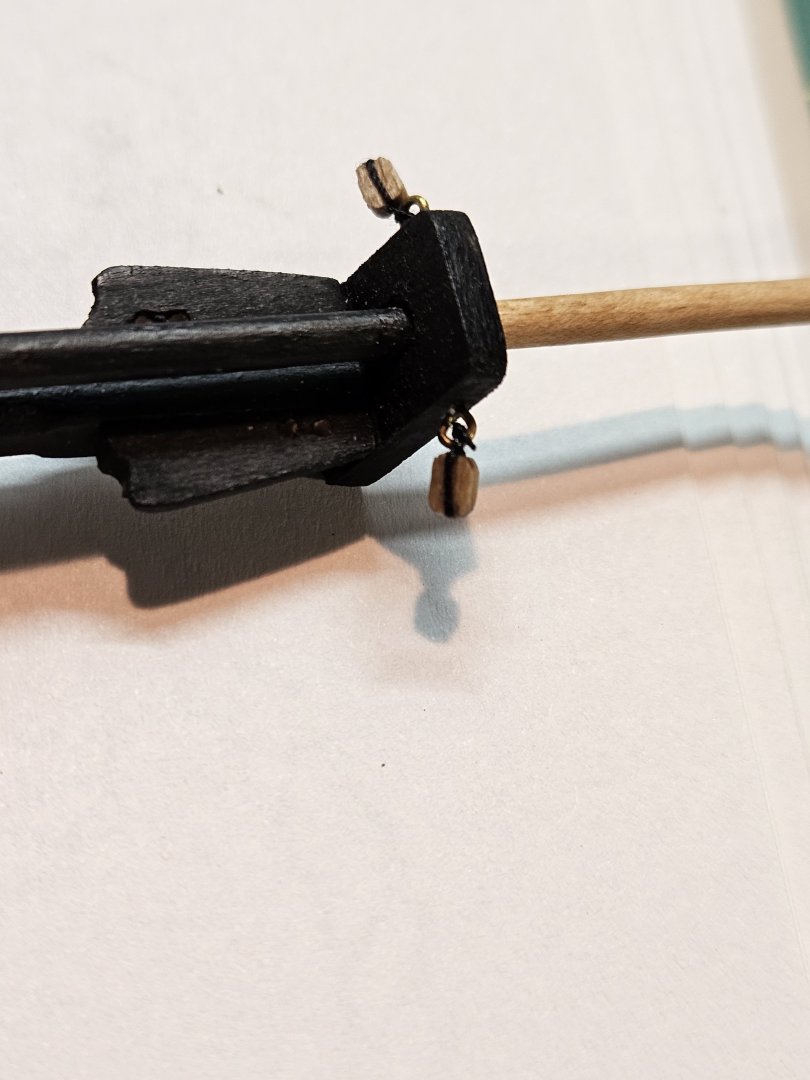
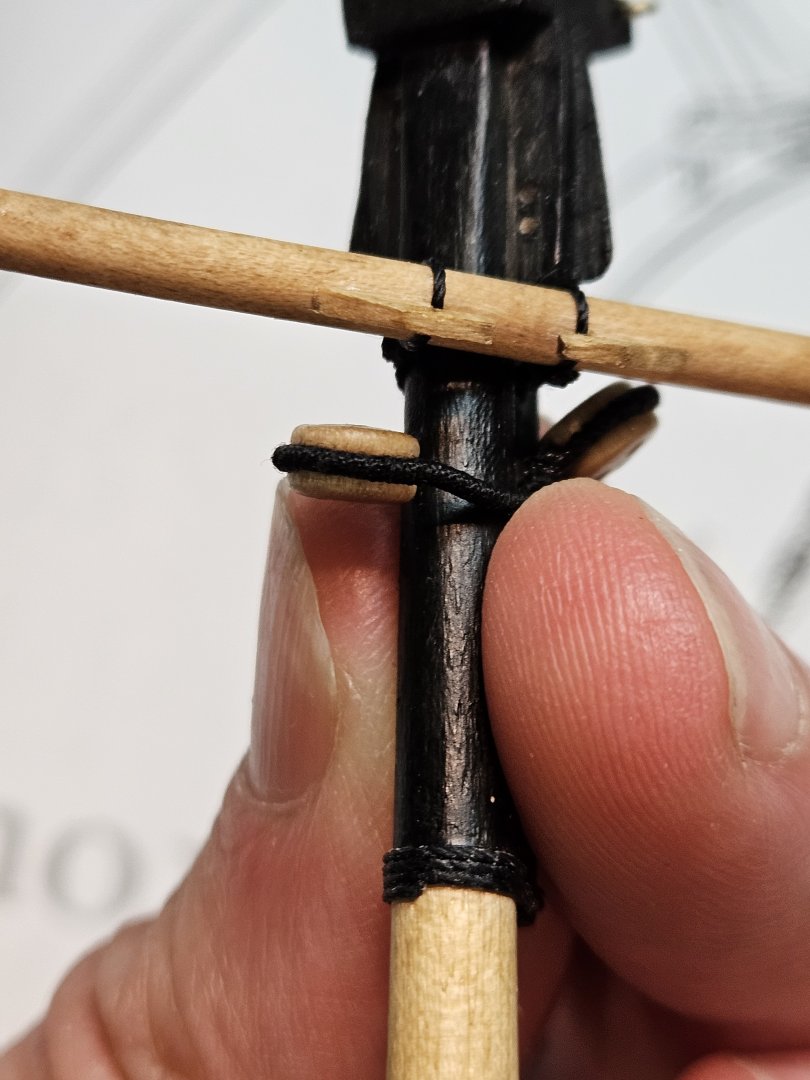
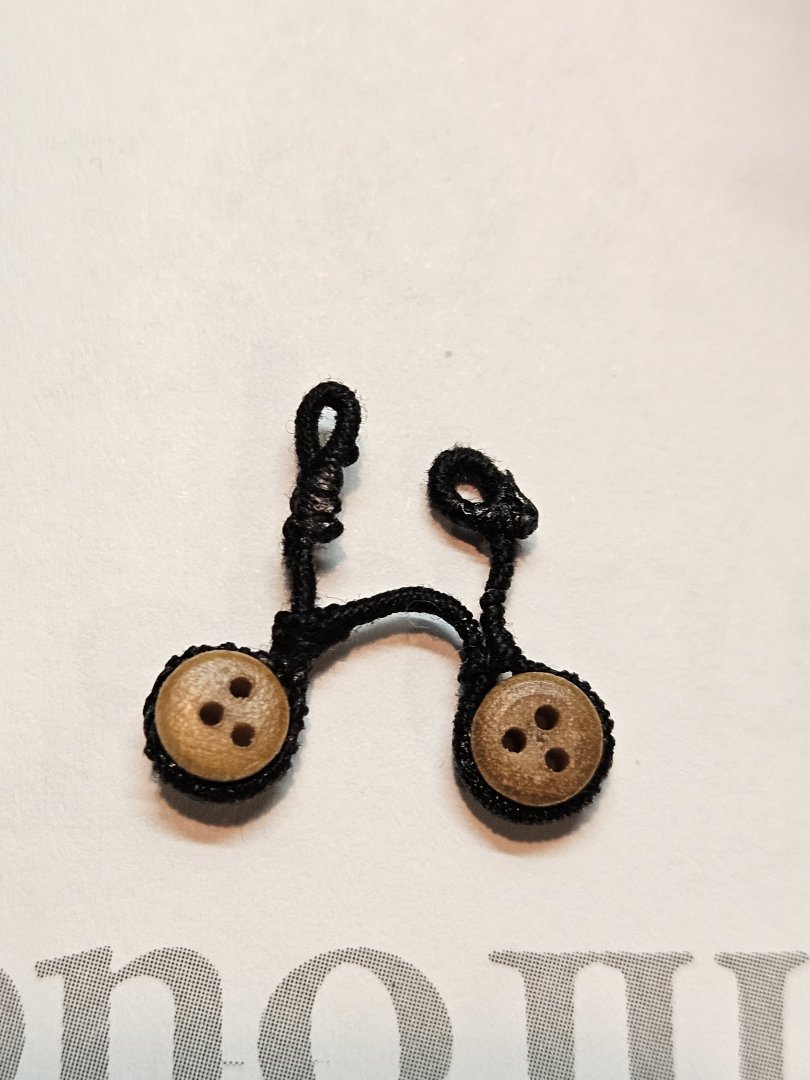
Continued Rigging on the Fair American Model ship I went to work on the lower yard trusses next. These were kind of tricky to do, and I'm only going to start them, and not fully rig them to the mast until the sail is attached first. So I made two ropes with small eyes. I haven't found a ''neat'' way of making eyes that's not bulky at this scale I started them with single overhand outside the cleats, then moved them inside. There's a lot of other foot ropes, blocks, etc that are attached to, so space to work is already tight. once both sides are 'in place', I secured them with fin black thread and a dab of CA glue, as close to the yard as i could manage, and as tidy as possible. Then, trim the ends close with scissors. But they're both secured as close to the eyes and yard as I could make. I left the running ends dangling, until I'm ready to attach the yard later. The Yard sling was next. I want to add this to the mast now so that I won't have to work around a ton of other rigging later. It may not be best practice or order of operations, but it will make my life easier. The thimbles are shown, but no description on how to make them or what they're made from. I made some small wooden ones that were a bear to make, and I need something better. I saw a fellow modeler had made thimbles from small cuts of brass tube, which he used a center punch to flare, so that it catches the rope. I managed to mimic that approach for mine. I bought some 1/16" ID tube, and cut a short 1/8" section. Then filed it flat as I could I took a nail and filed the end down to fit inside the tube and used that to ''hopefully'' flare both ends of the thimble. I'd hammer it on a hard steel block from both ends. It took a little bit of effort but I was able to make it look ''decent''. Next, I went ahead and served some 0.012in rope with fine black thread of about 0.008in. So after serving it's about 0.027in, and the instructions call for 0.025in - close enough. I used tweezers to pinch the rope close to the length I needed, and it stays pretty well. Then, seize it as close as possible so the thimble doesn't fall out. With an eye on the opposite end, it looks pretty good. Getting the length right was really challenging to estimate, since it needs to loop over its own eye and hang and the right length. I finished it by painting the thimble black. It will be somewhat covered with lashing later, but still want it to look right. Now it gets tricky, and tight - the main reason I'm doing it now. I wrapped it around the mast, so that it hung in the front properly (centered), and held in place with tweezers. The yard will be lashed right there, so I held it in place for an eyeball location reference. I used reverse action tweezers on the long end to hold the rope taut and in place. I used a fine needle to start the thread to secure it. I did two seizings in black. It kind of blends in, but its the same as the plans show. ta Over all I'm happy with the yard sling, especially the thimble - now I know how to make it. Next up is the tackle pendants and Main course sail attached, but that's next time. Take Care, - Jason -


-
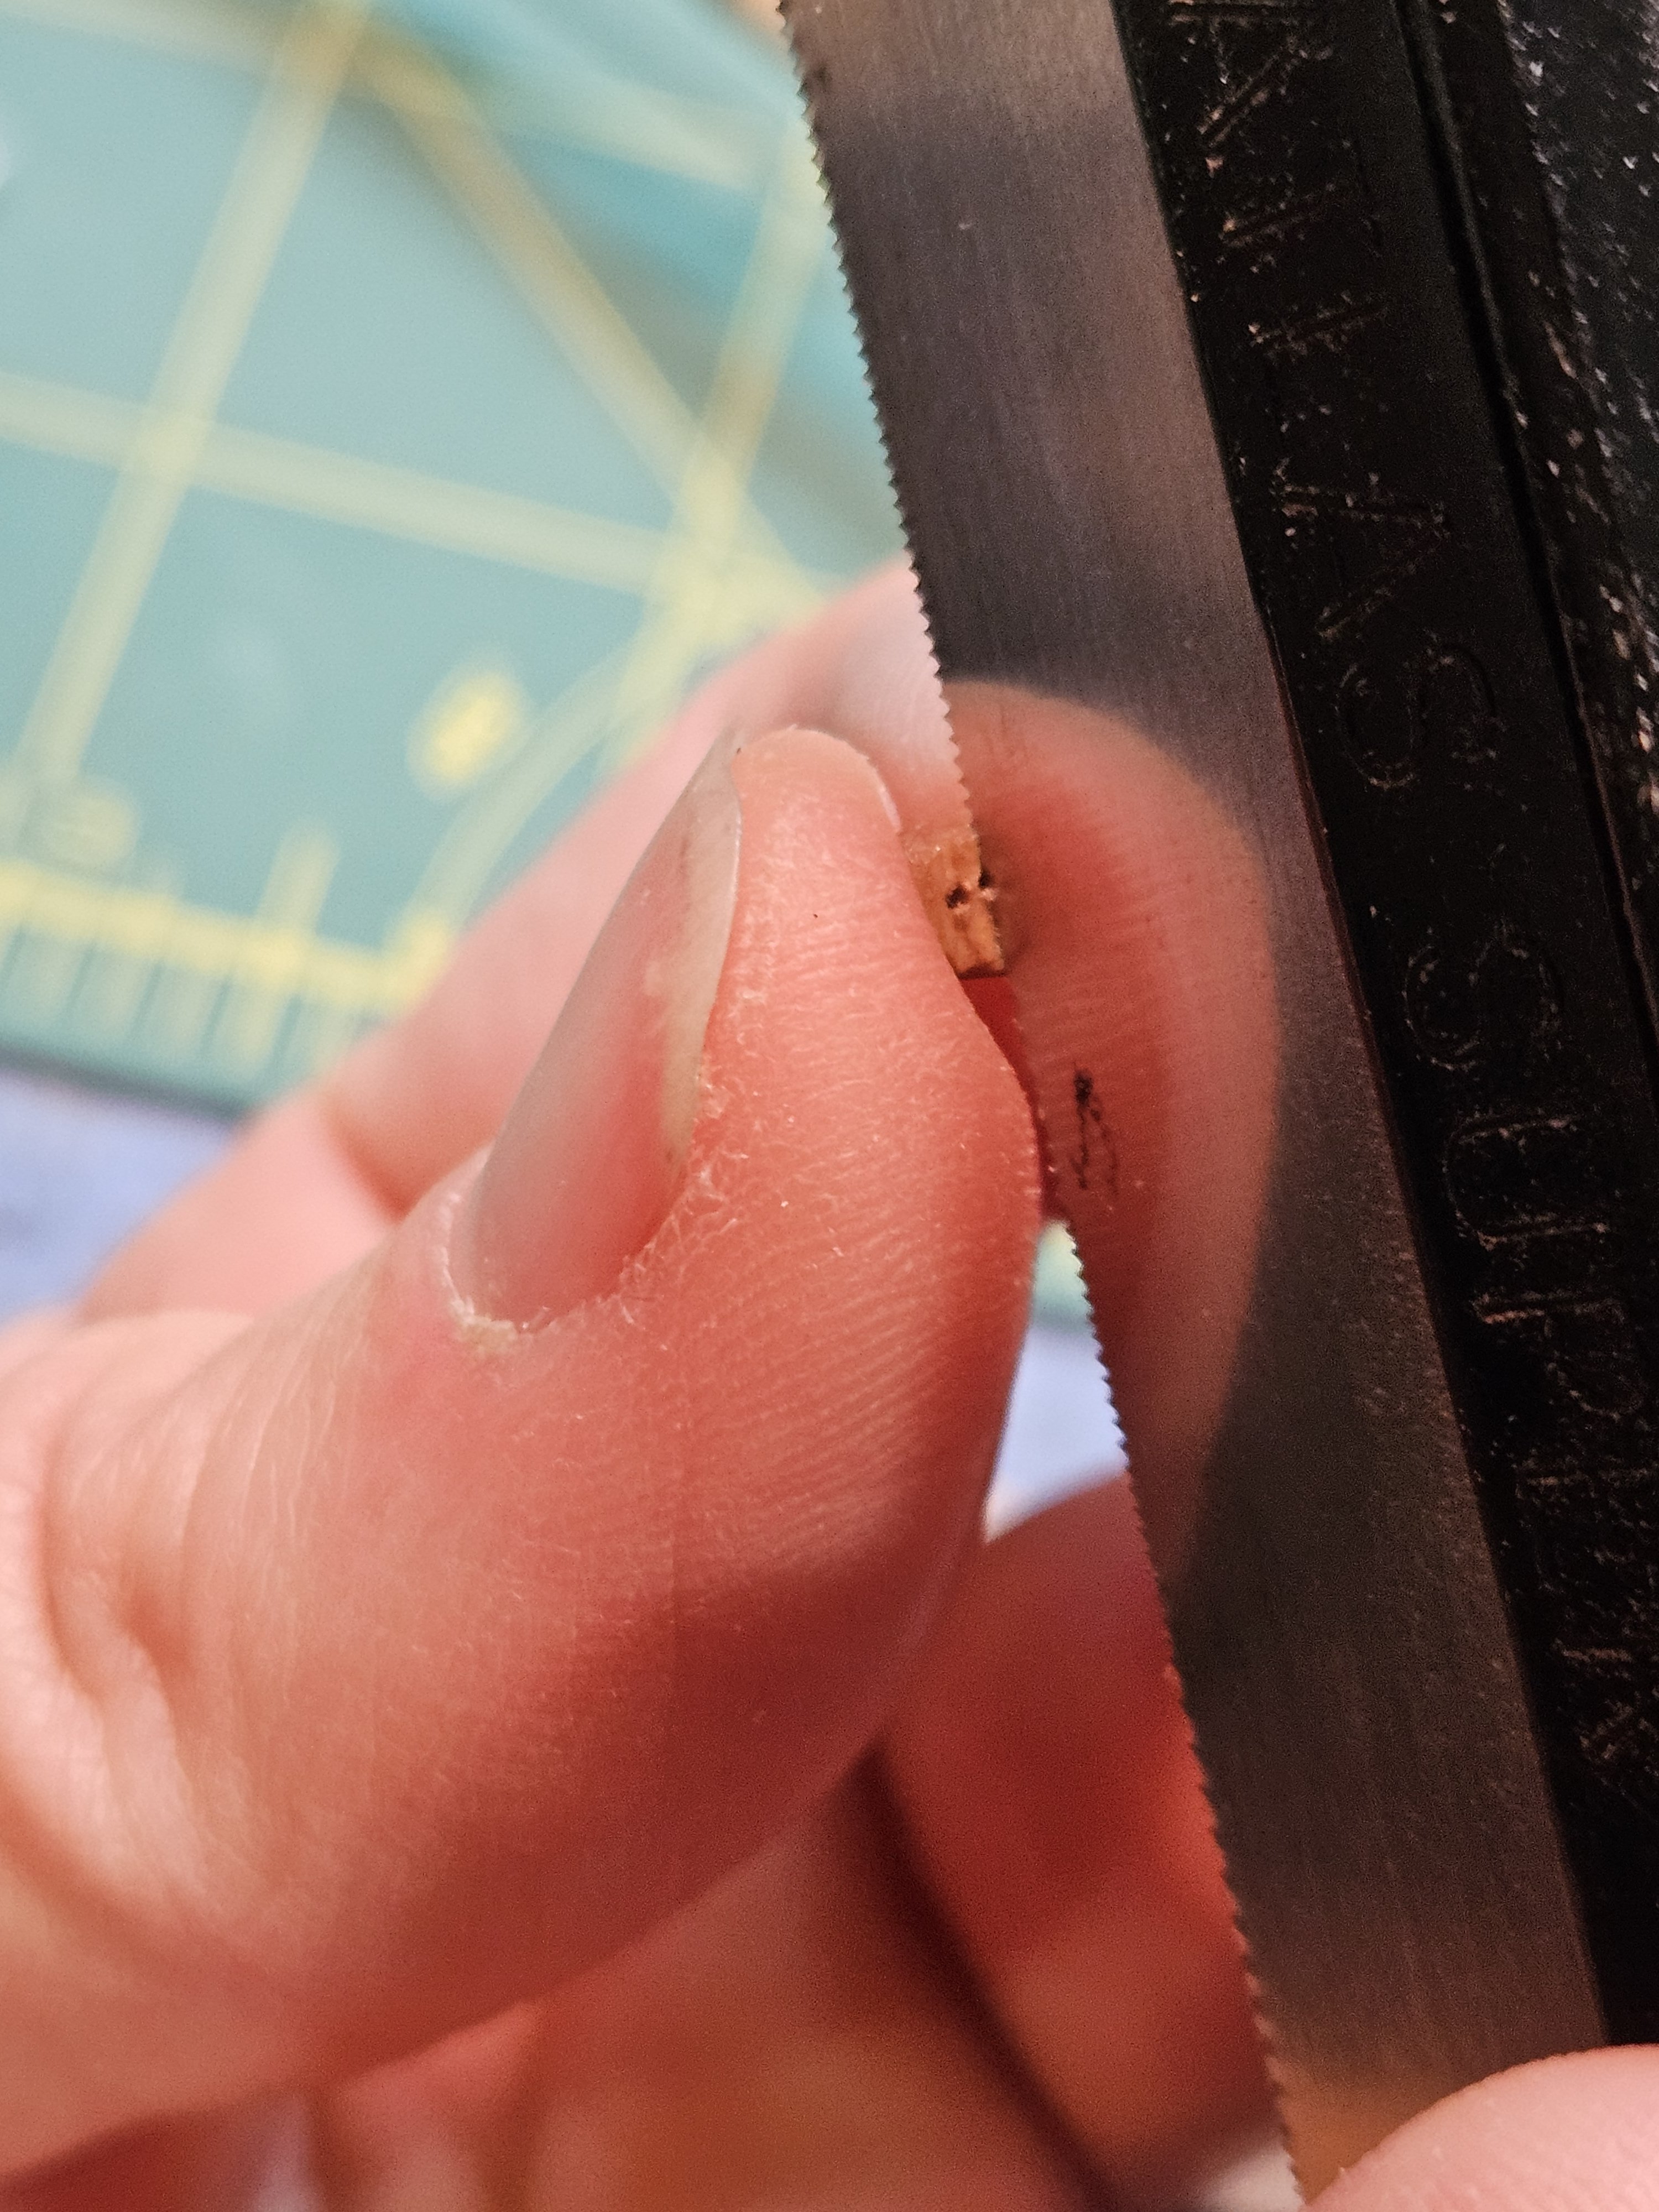
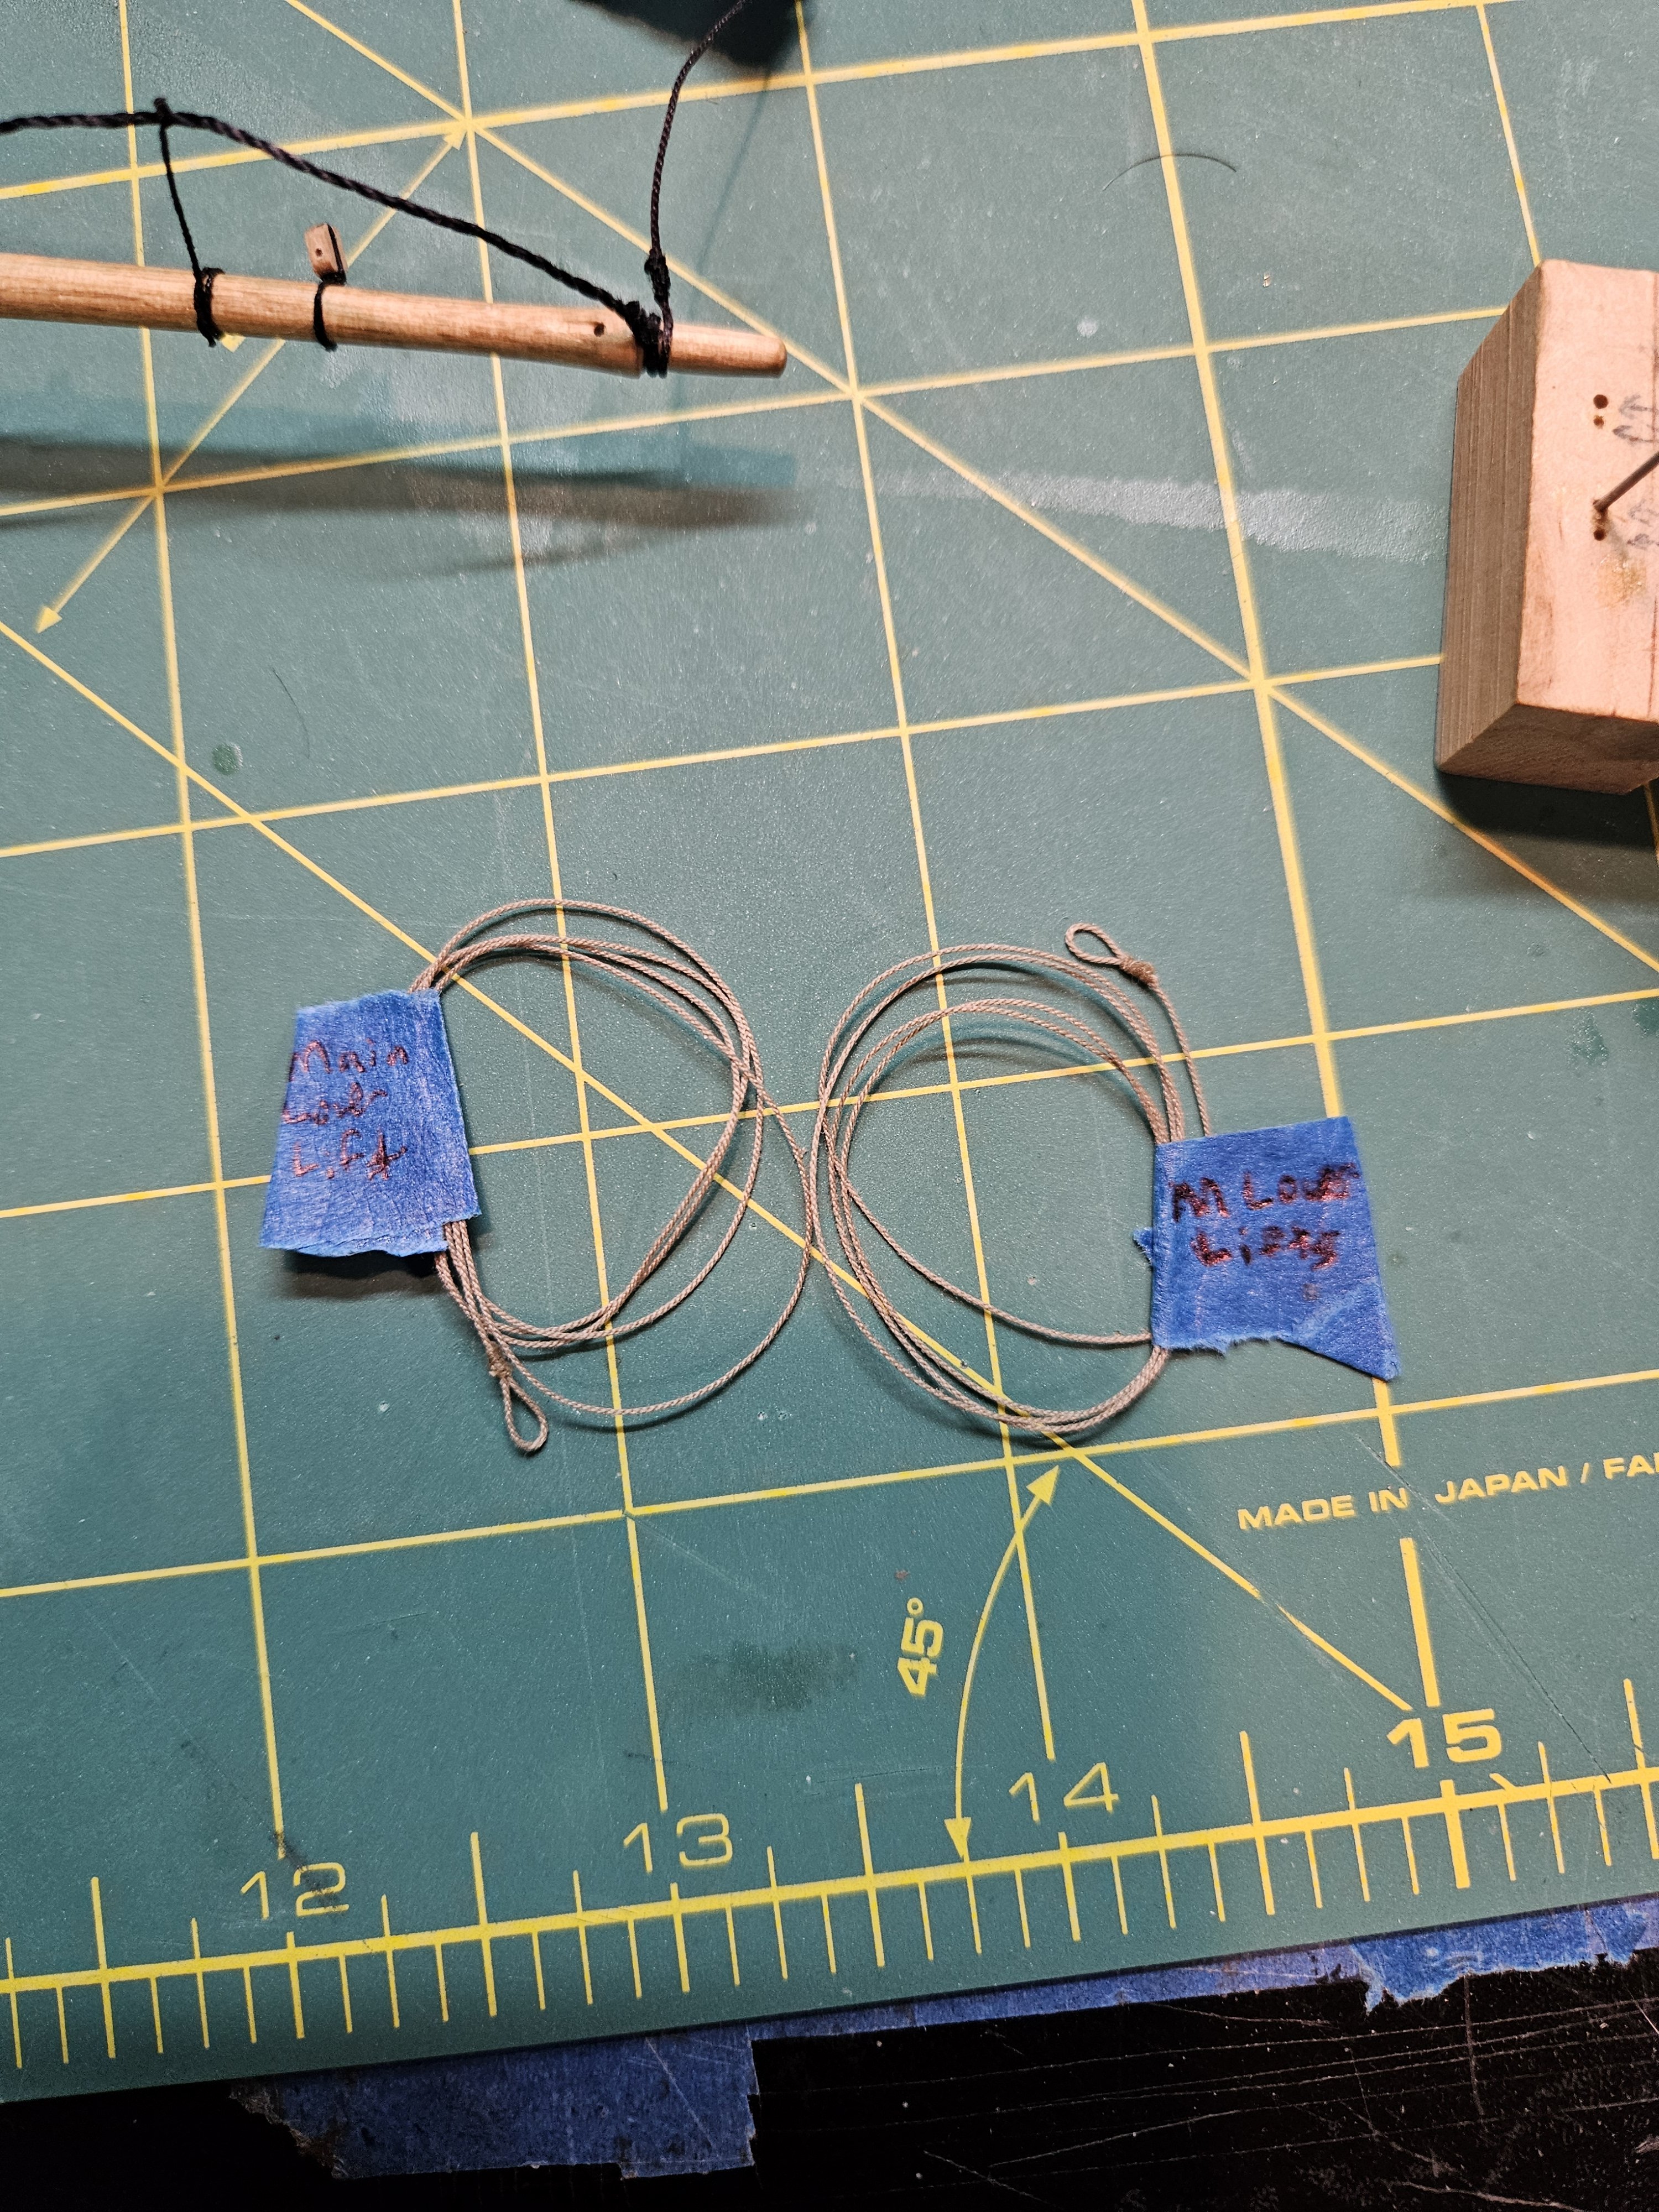
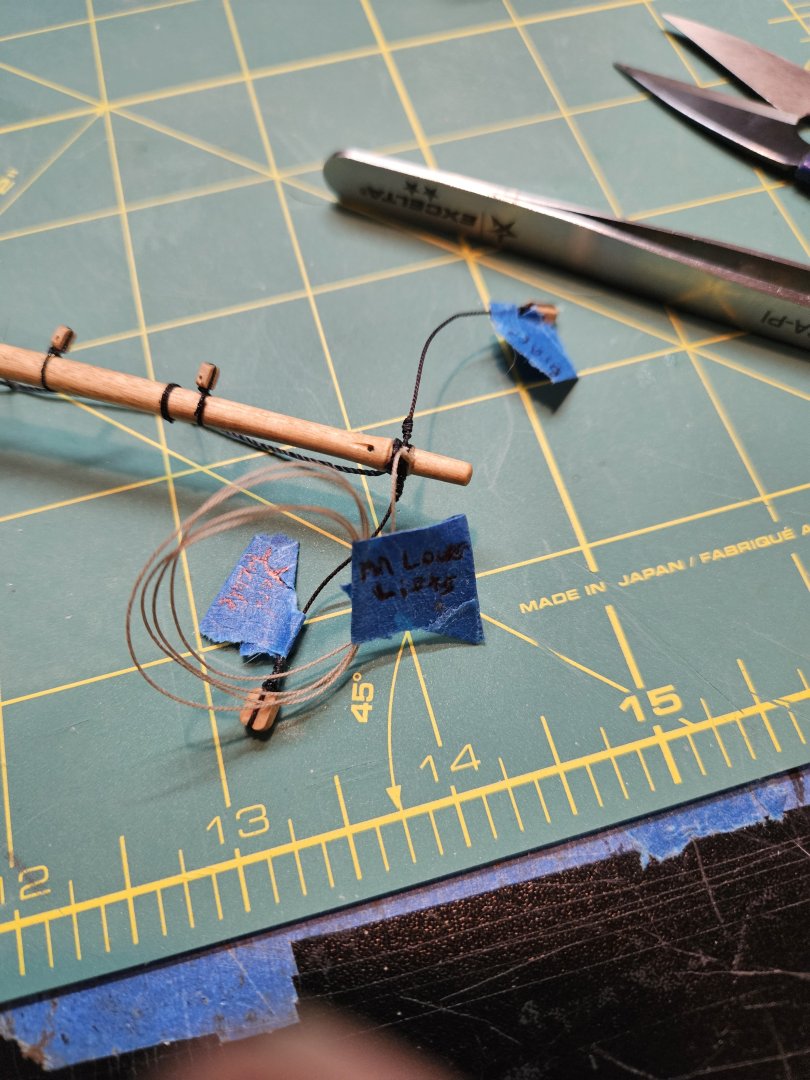
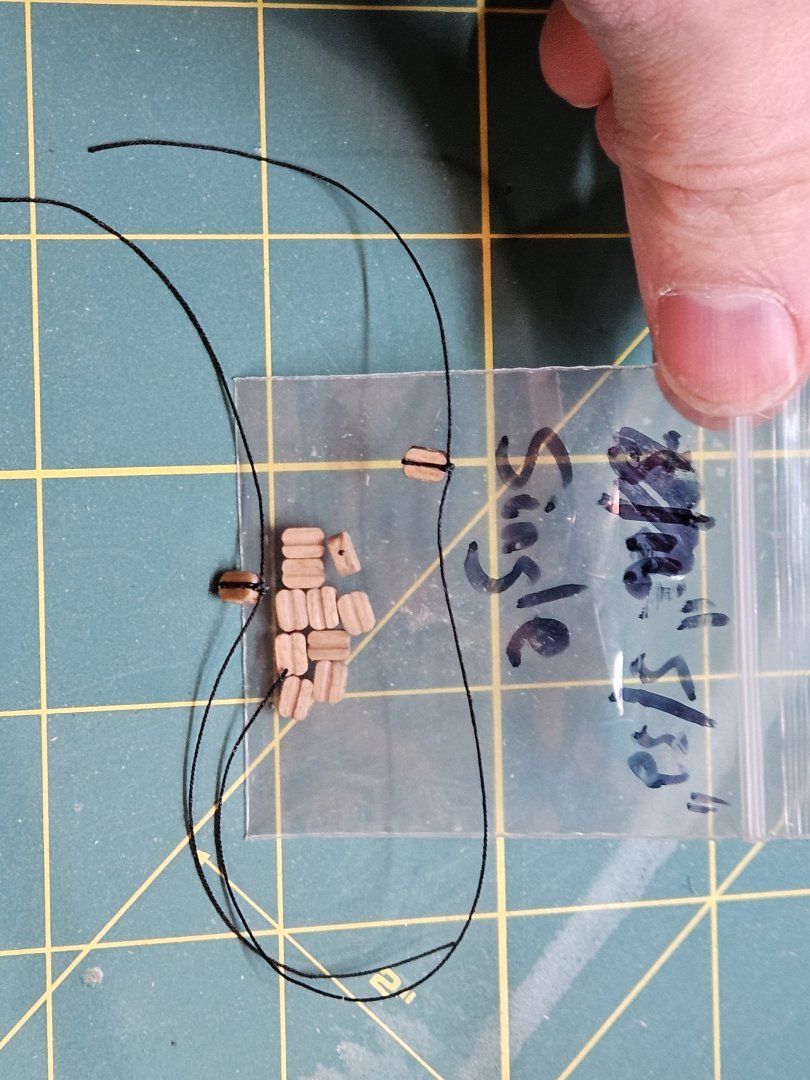
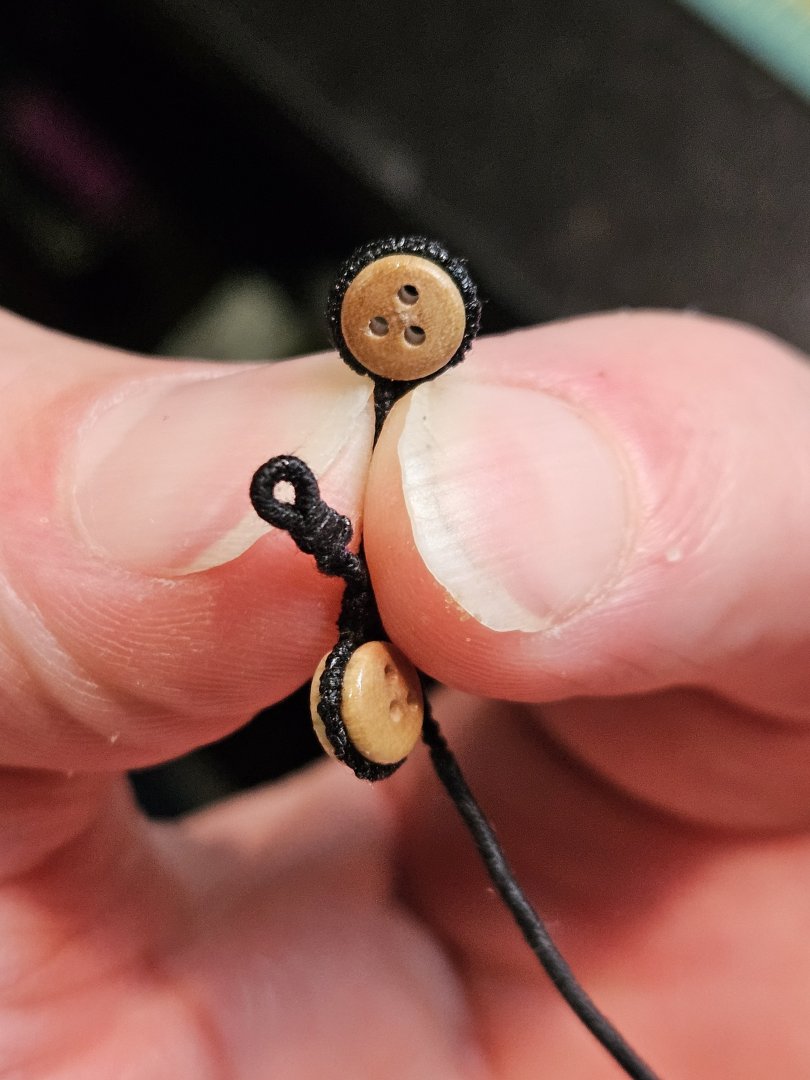
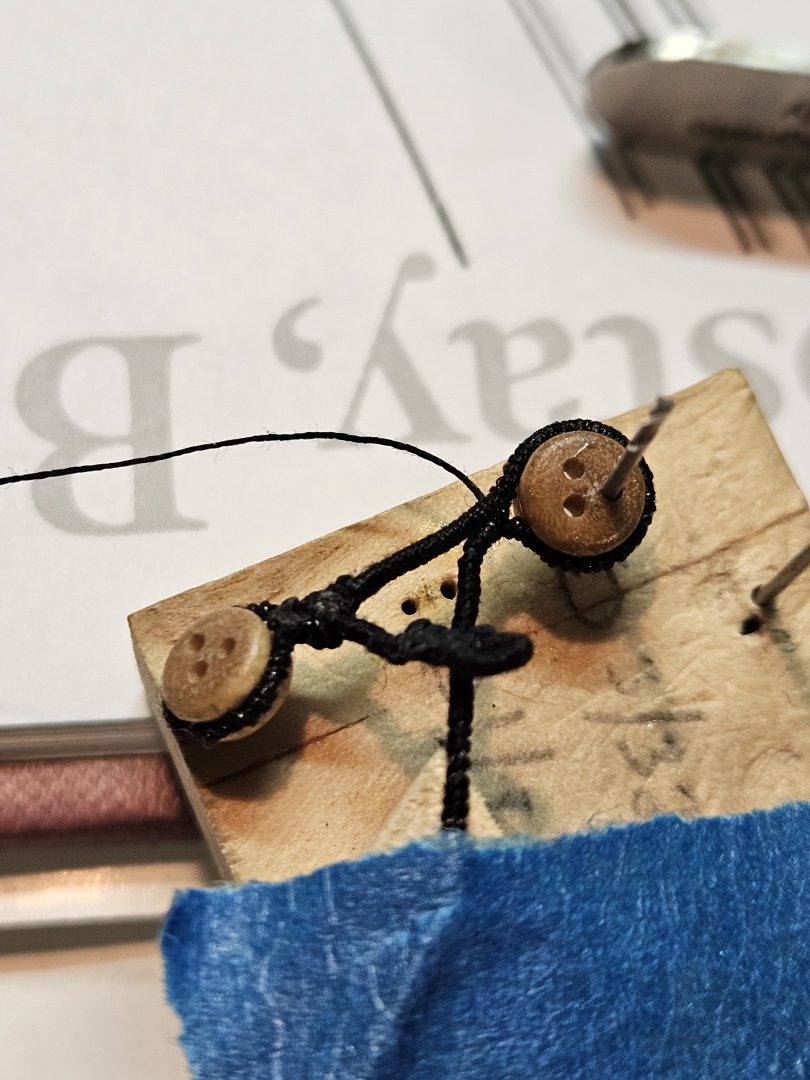
Slow, steady headway on the Fair American Model ship: One thing I've noticed is that I don't have enough blocks, primarily singles for all the sails, sheets, bunts, leeches, etc. I had a bag of 100 of 1/8" and 3/32", but they were doubles. I could order more from Model-Expo, but they've taken a while to deliver in the past, so I'm opting to make my own. My approach was to cut down the sheave hole of a double, with a saw: Pretty crude: Then on one side, I use a small file to create a groove to help grab the rope, when stropping I made a bunch. I'd stick them to the back of some painters tape, and stain them with Golden Oak. From the plans for all the yards and masts, the mast cap showed 4x eye hooks, 2 on each side. On the rigging plans, they aren't used for anything that I can see. From other models I've seen, the lifts are rove through single blocks attached to these eyes. The instructions show them going over the mast cap in a saddle and cross sides, but they'd likely chafe horribly in actual use. I'm going to use single blocks as shown. Again, I'm not sure how they're supposed to be tied to various parts, so for ease and time, I'm just doing square knots. Have to remember to do both sides.... On the starboard side of the main lower yard, is the yard tackle. I needed a nice rope eye to go over the yard end, and be partially served. So I'm using fine black thread to create some laddered loops to make the effect. Each loop is actually another overhand knot to keep it from unraveling. I makes for a relatively neat look. I did the same mini-serving for the double block. I made the length close to that on the plans. I would loop it over the end of the yard, and shoulder it next to the brace line. Just a dab of CA glue to tack it in place. I make sure to add a little label, so I know that the black one is the brace, and the other black one is the tackle. Next up is the lift....which is ......black? Using some fine tan thread, I start making the loop for the Main lower yard lifts. Making subsequent overhand knots as each loop of the mini-serving. The ends look good enough, after the ends are trimmed. I made a pair of them, P&S, since I'd like to be able to lift both sides. Making coils will help when attaching the yard later, instead of letting them dangle. I'm trying to do as much yard work, no pun intended, as I can so I'm not limited on space later. This is tough enough OFF THE MODEL! This is the last thing for the yard ends...more CA glue to tack in place on both sides. I have to remember to have them point UP. And yes, I later realized that the lifts were supposed to be black rope. The rule of thumb I was following was any rope that goes through a pulley, is running rigging, hence tan. But Lifts are standing rigging, and according to the instructions, its 'tarred' so black. I later removed the tan lifts and remade them in black rope, shown later. I know this doesn't seem like much progress, but when you spend 15min tying one rope end, and stropping blocks, and trimming, and measuring lengths, and doing the other side - its tedious. Time slips away so quickly at the end of the day. But I'm making progress. Until next time, Have a nice weekend, all. - Jason-


-
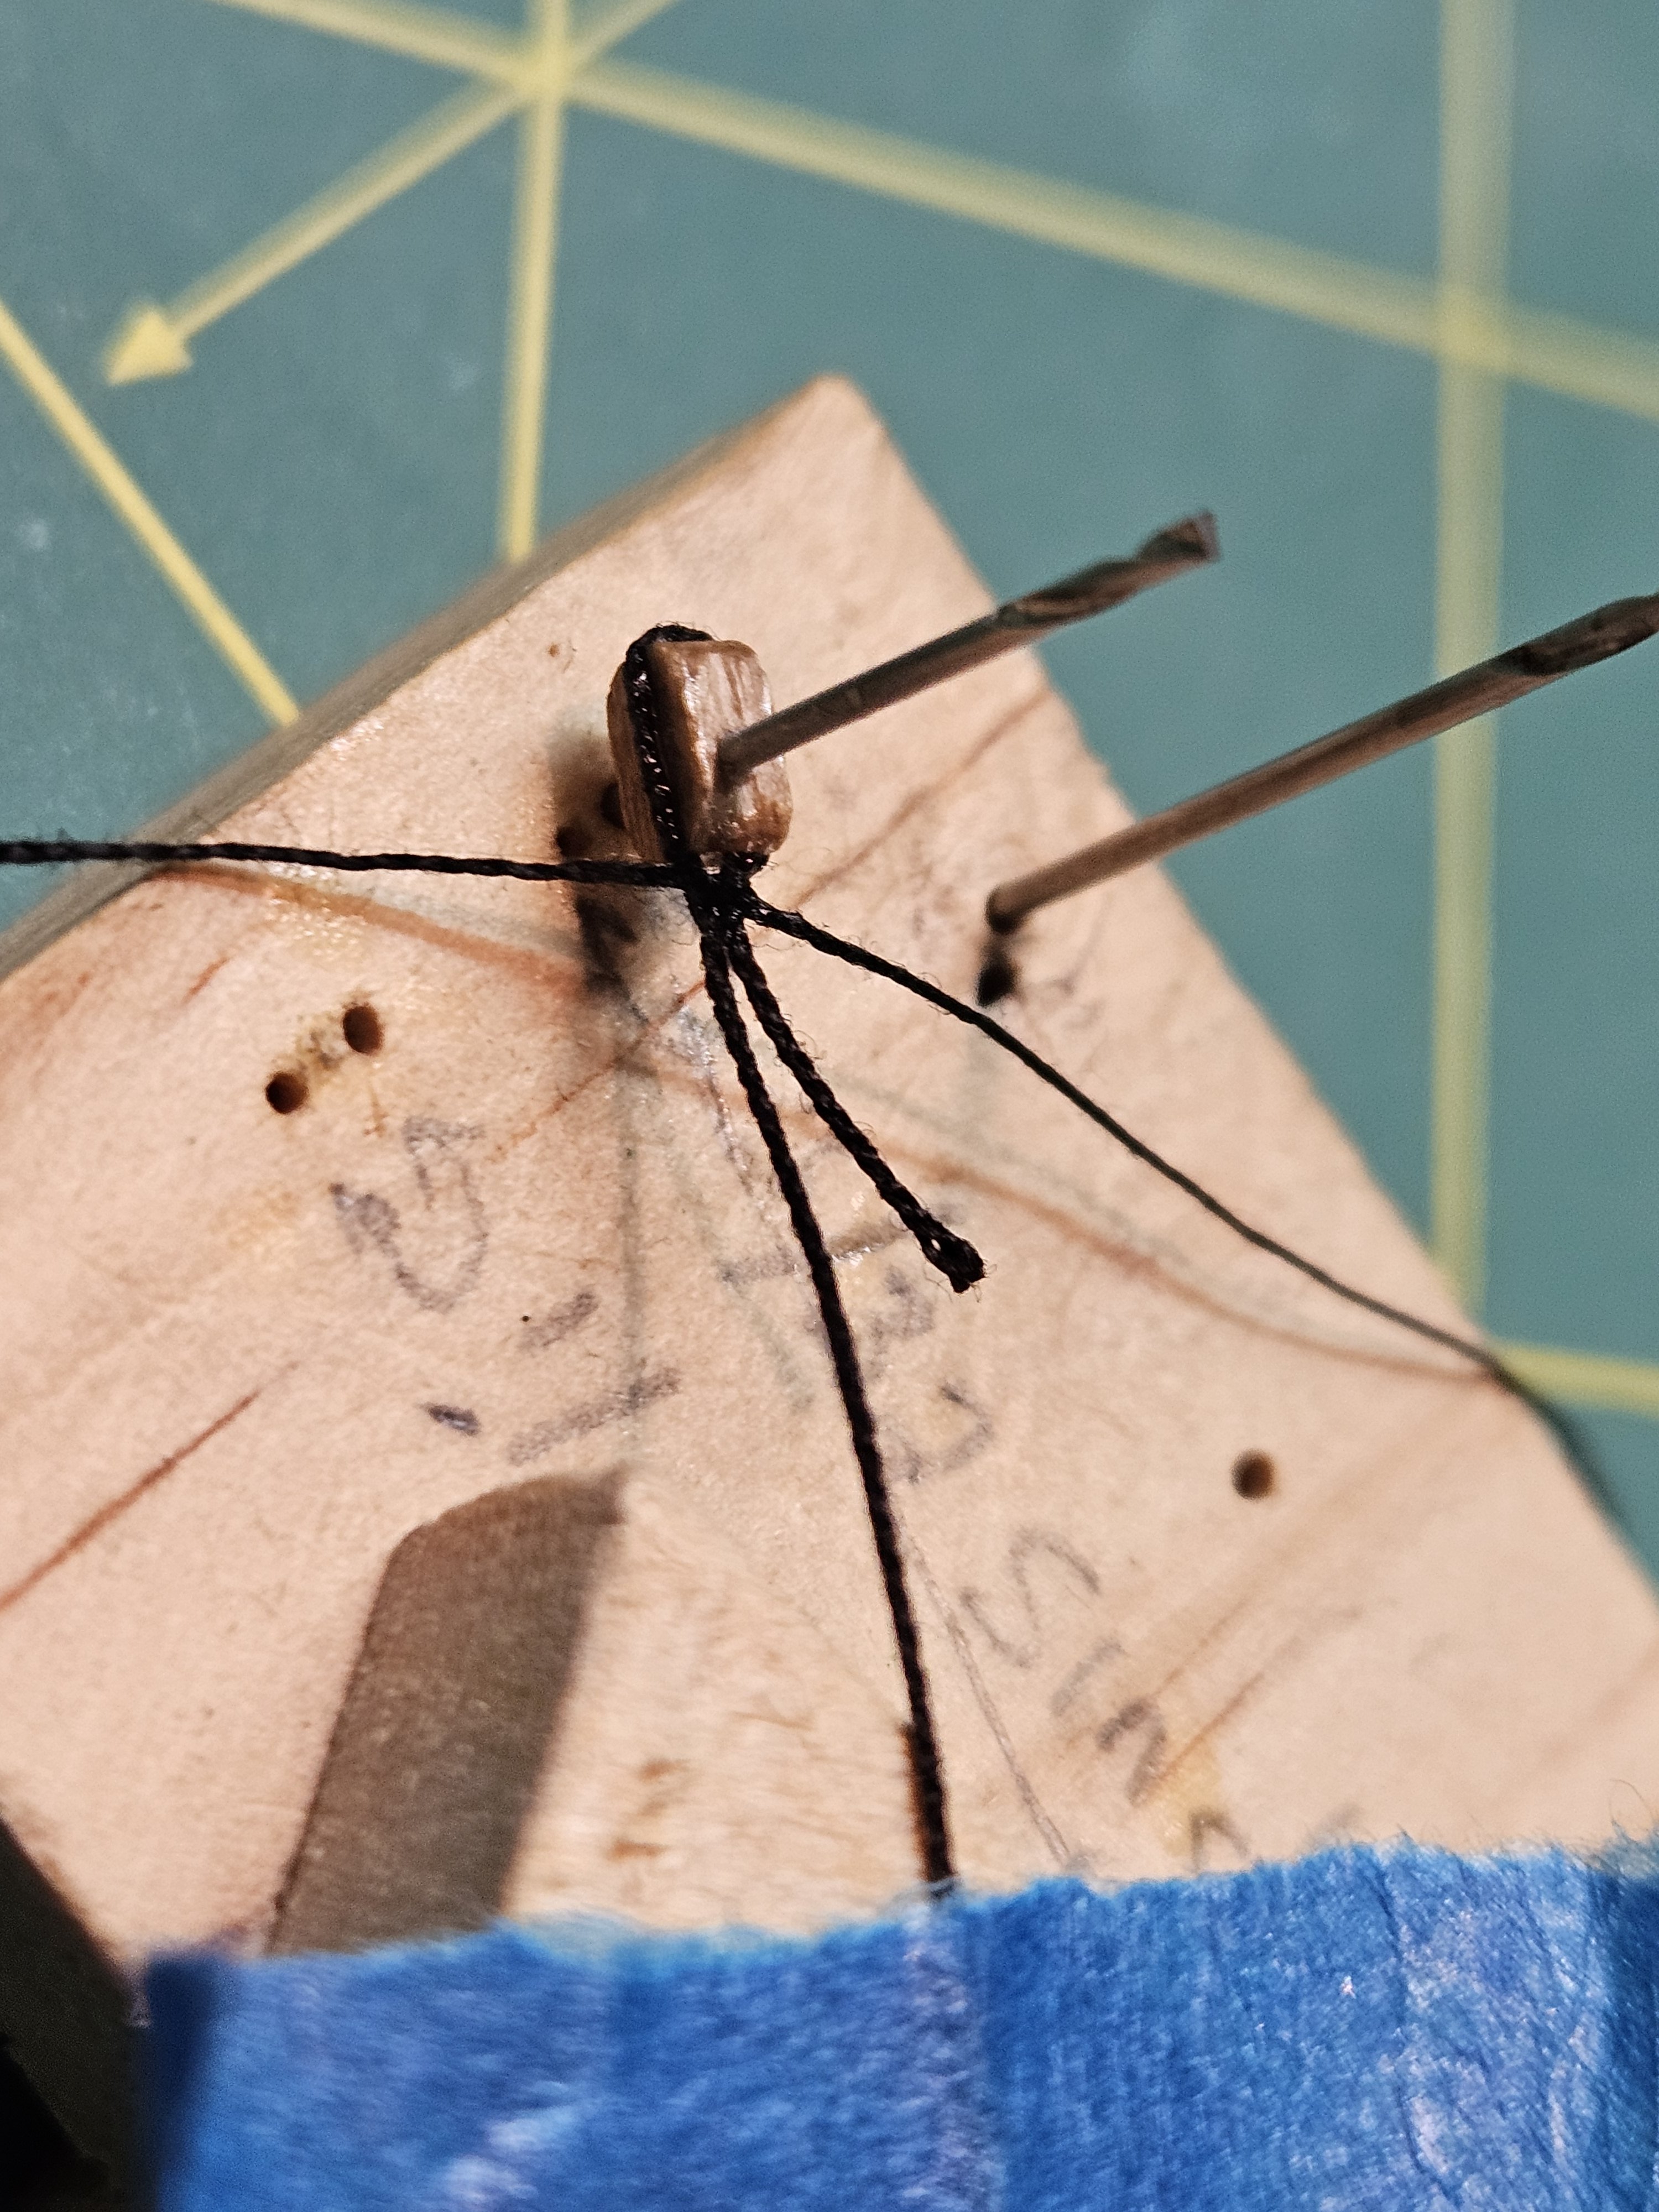
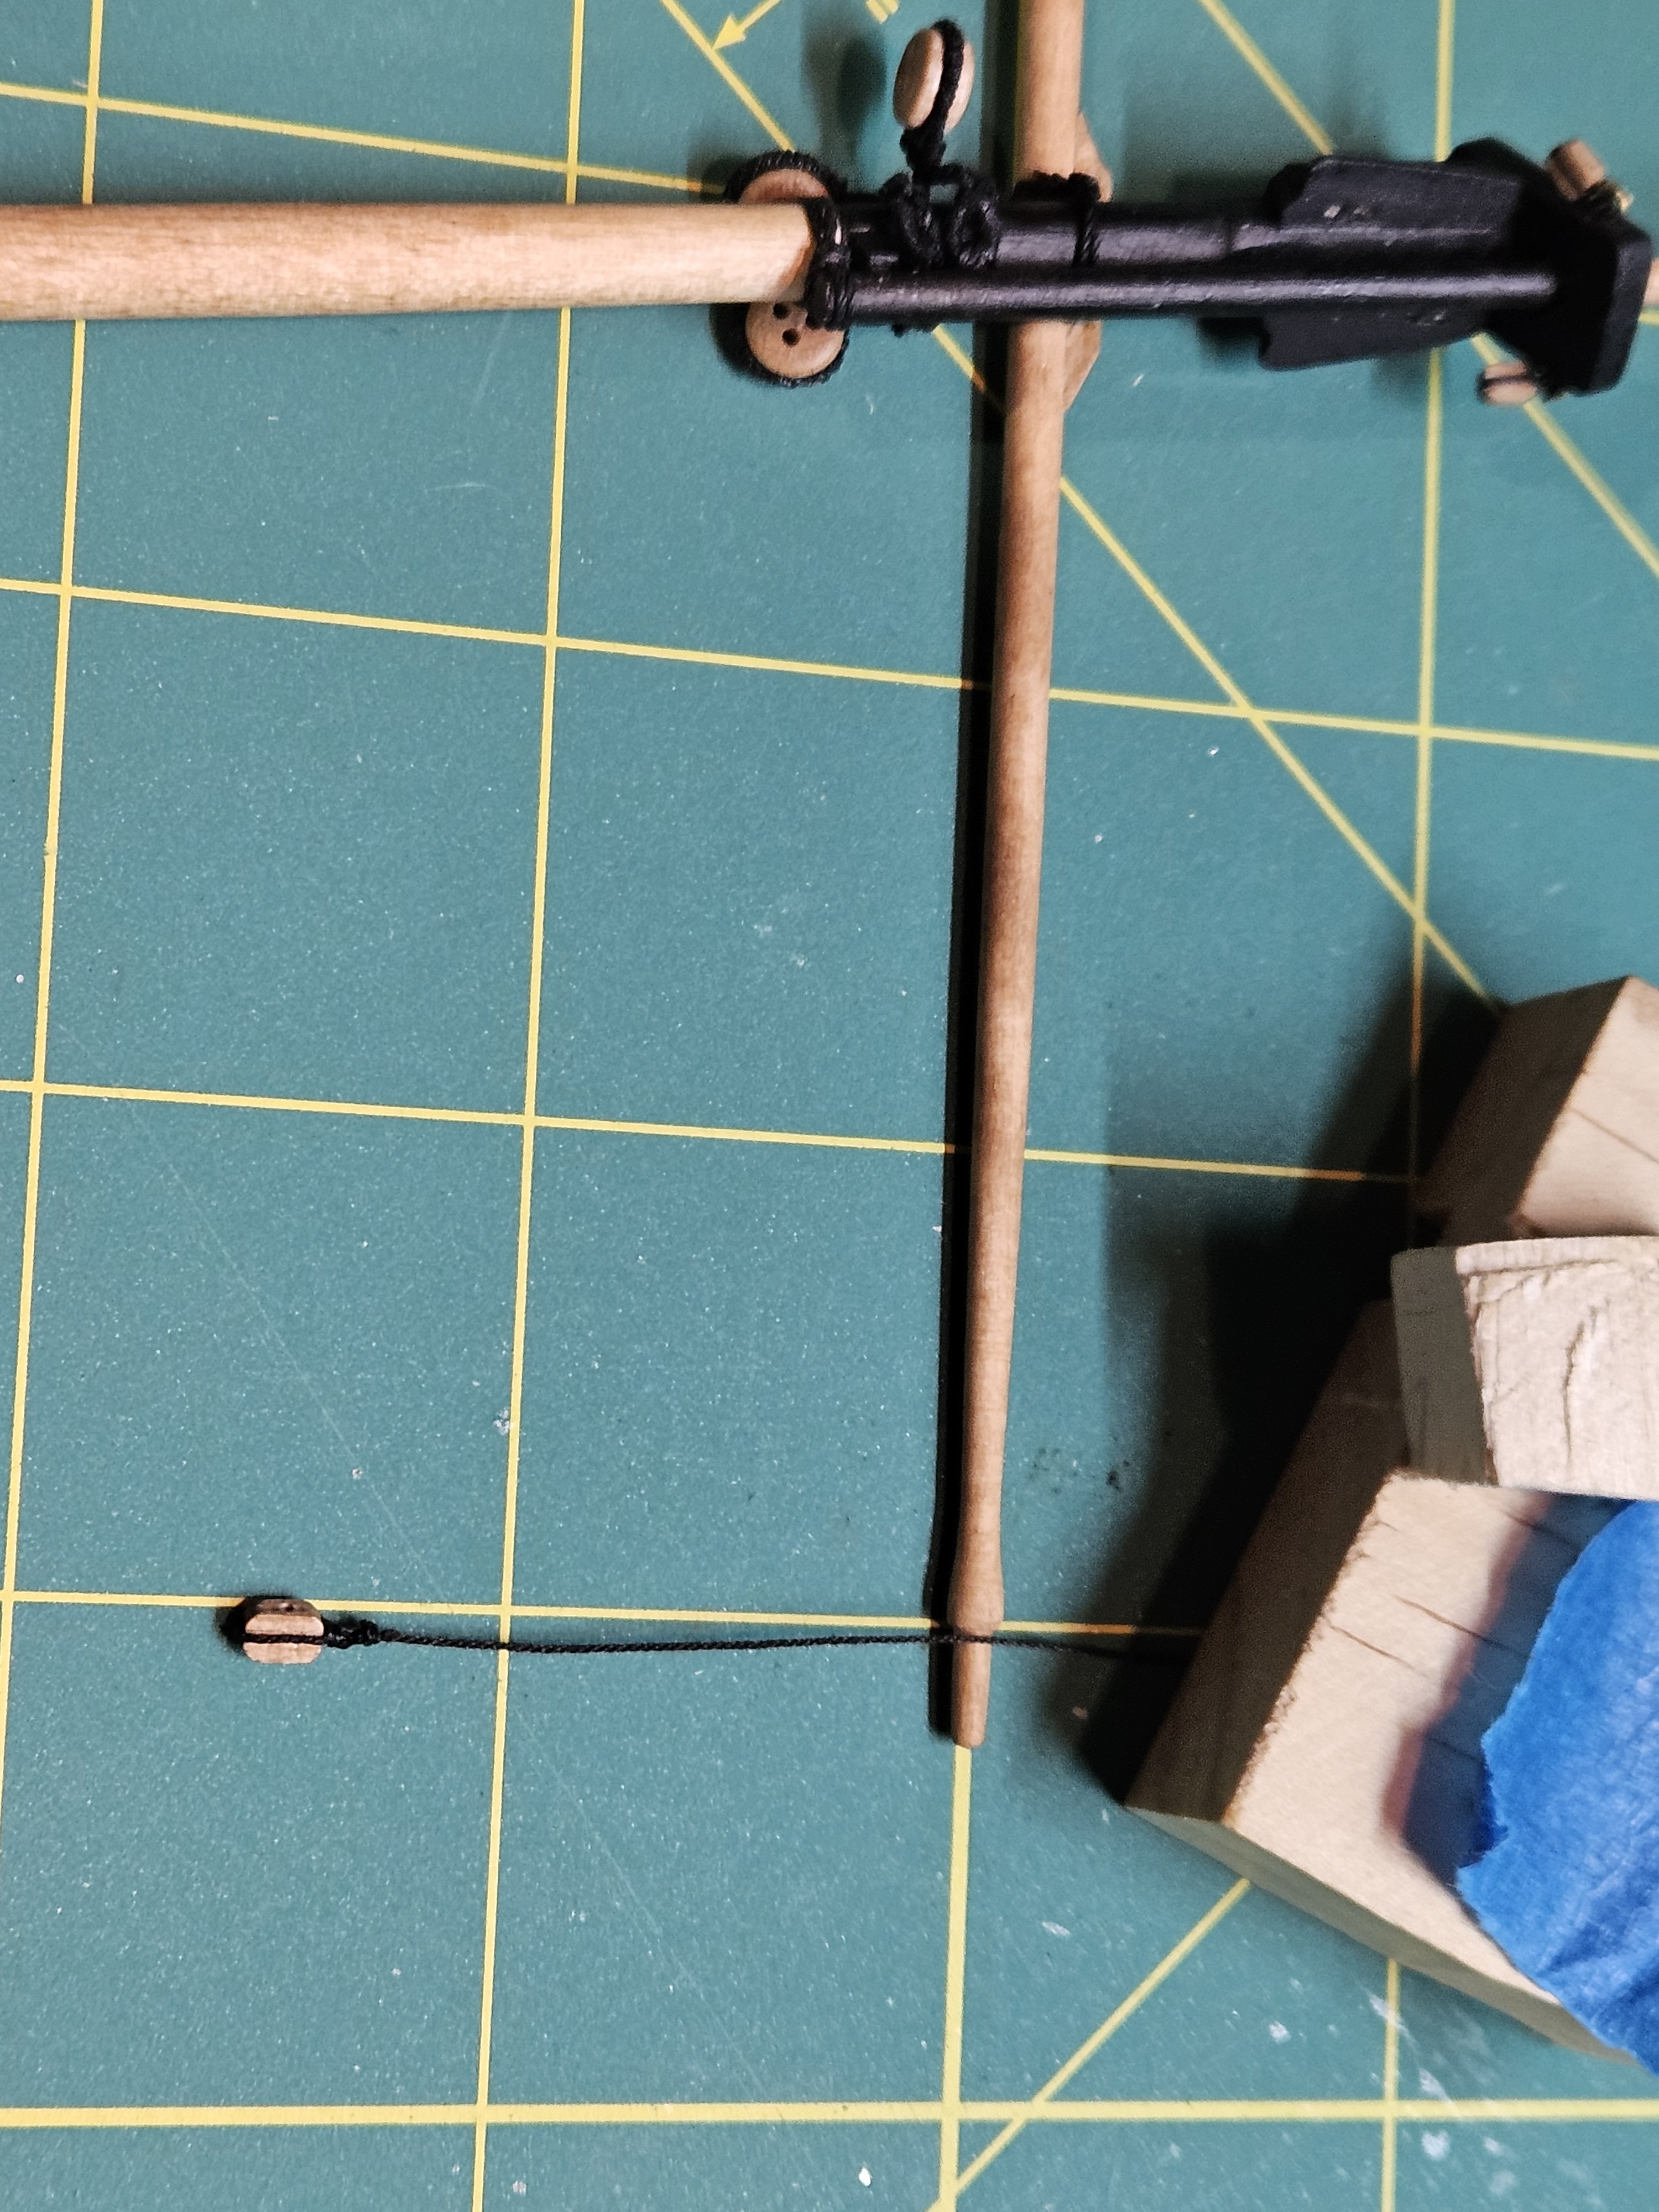
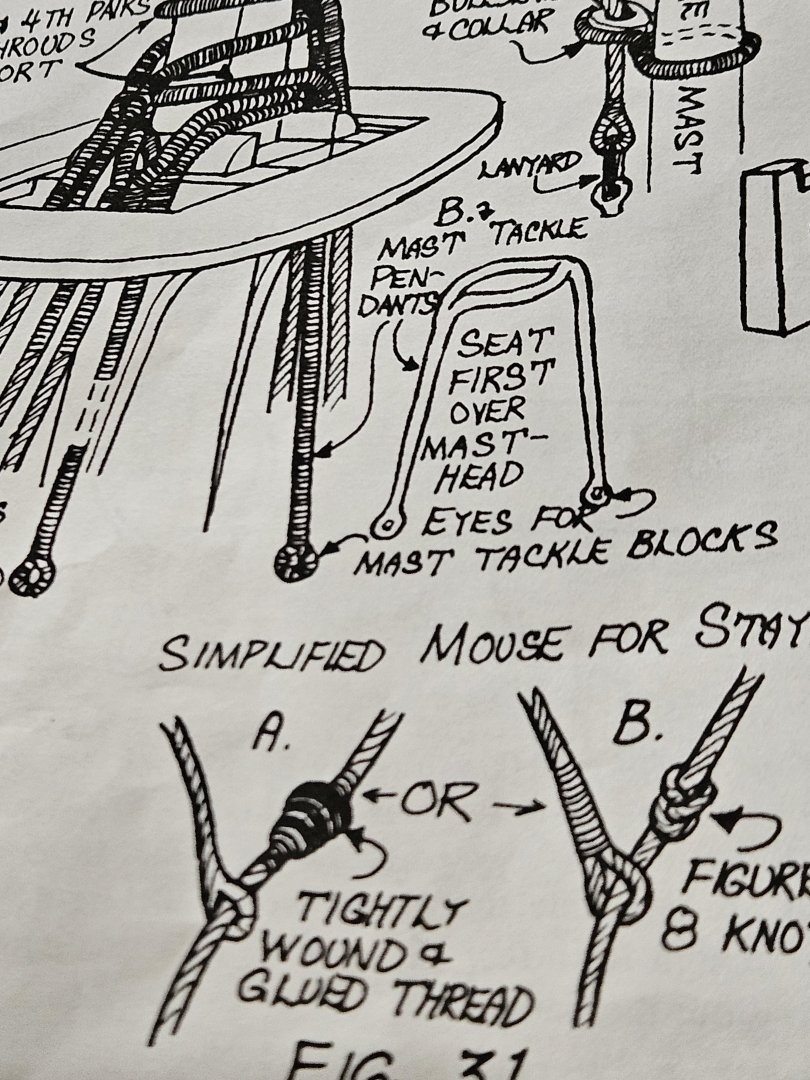
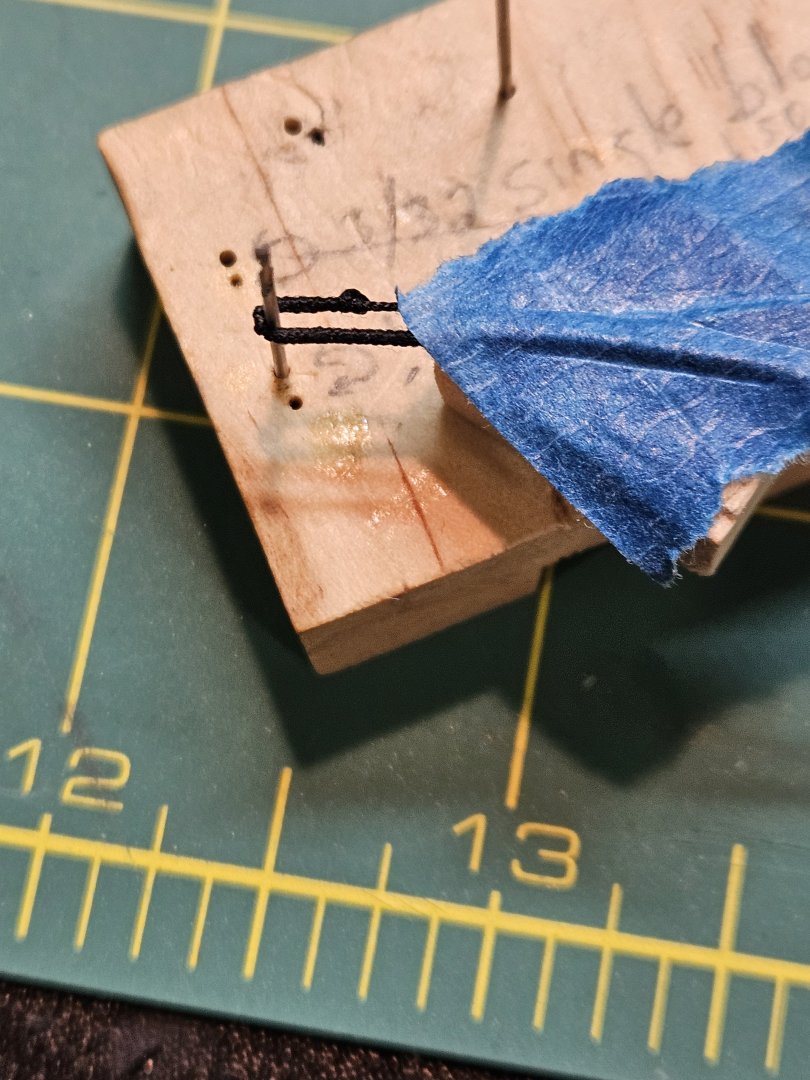
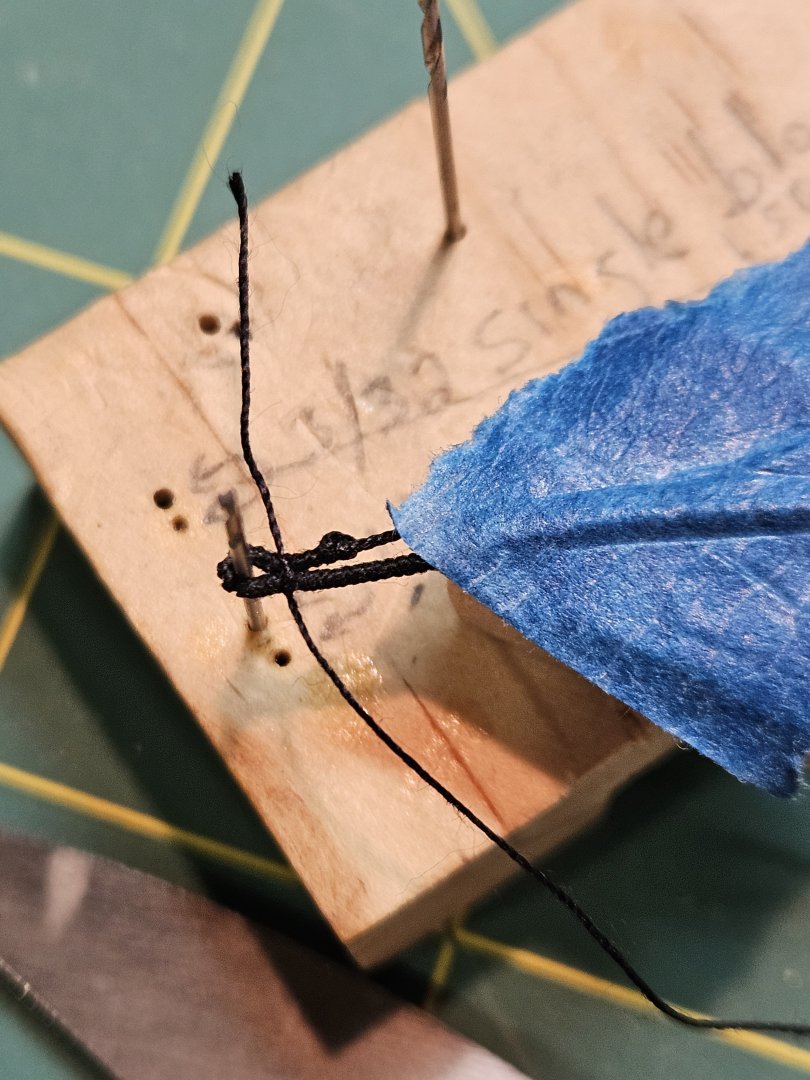
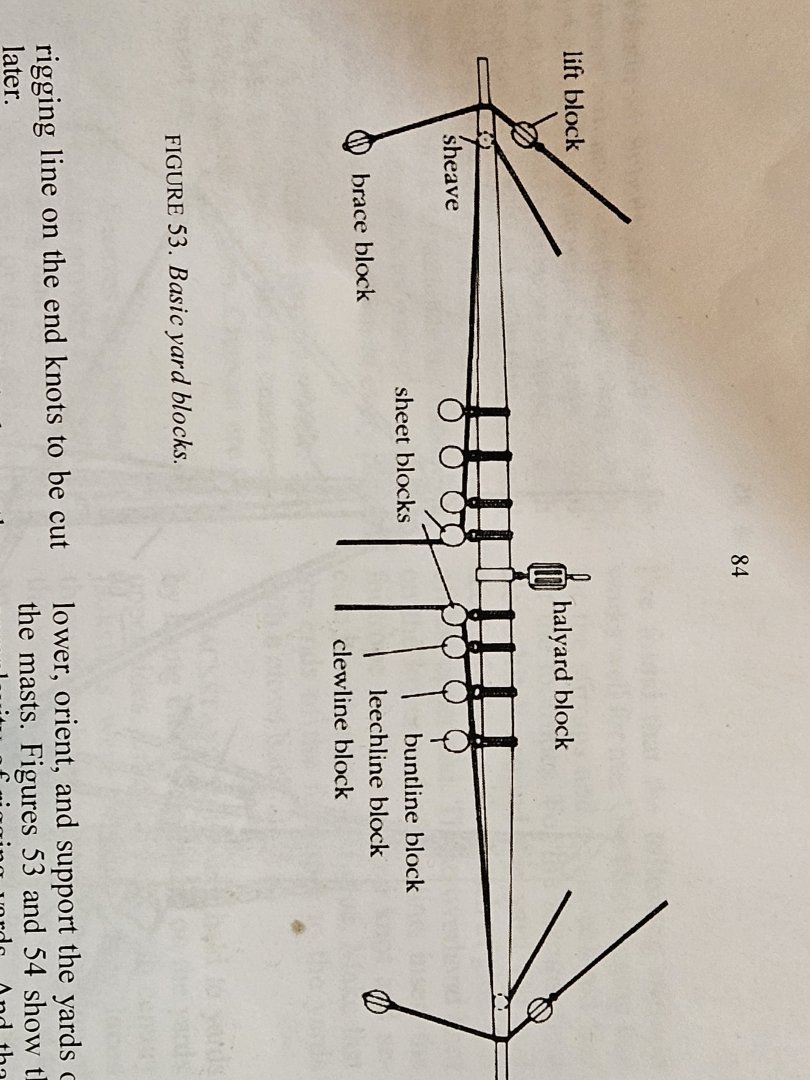
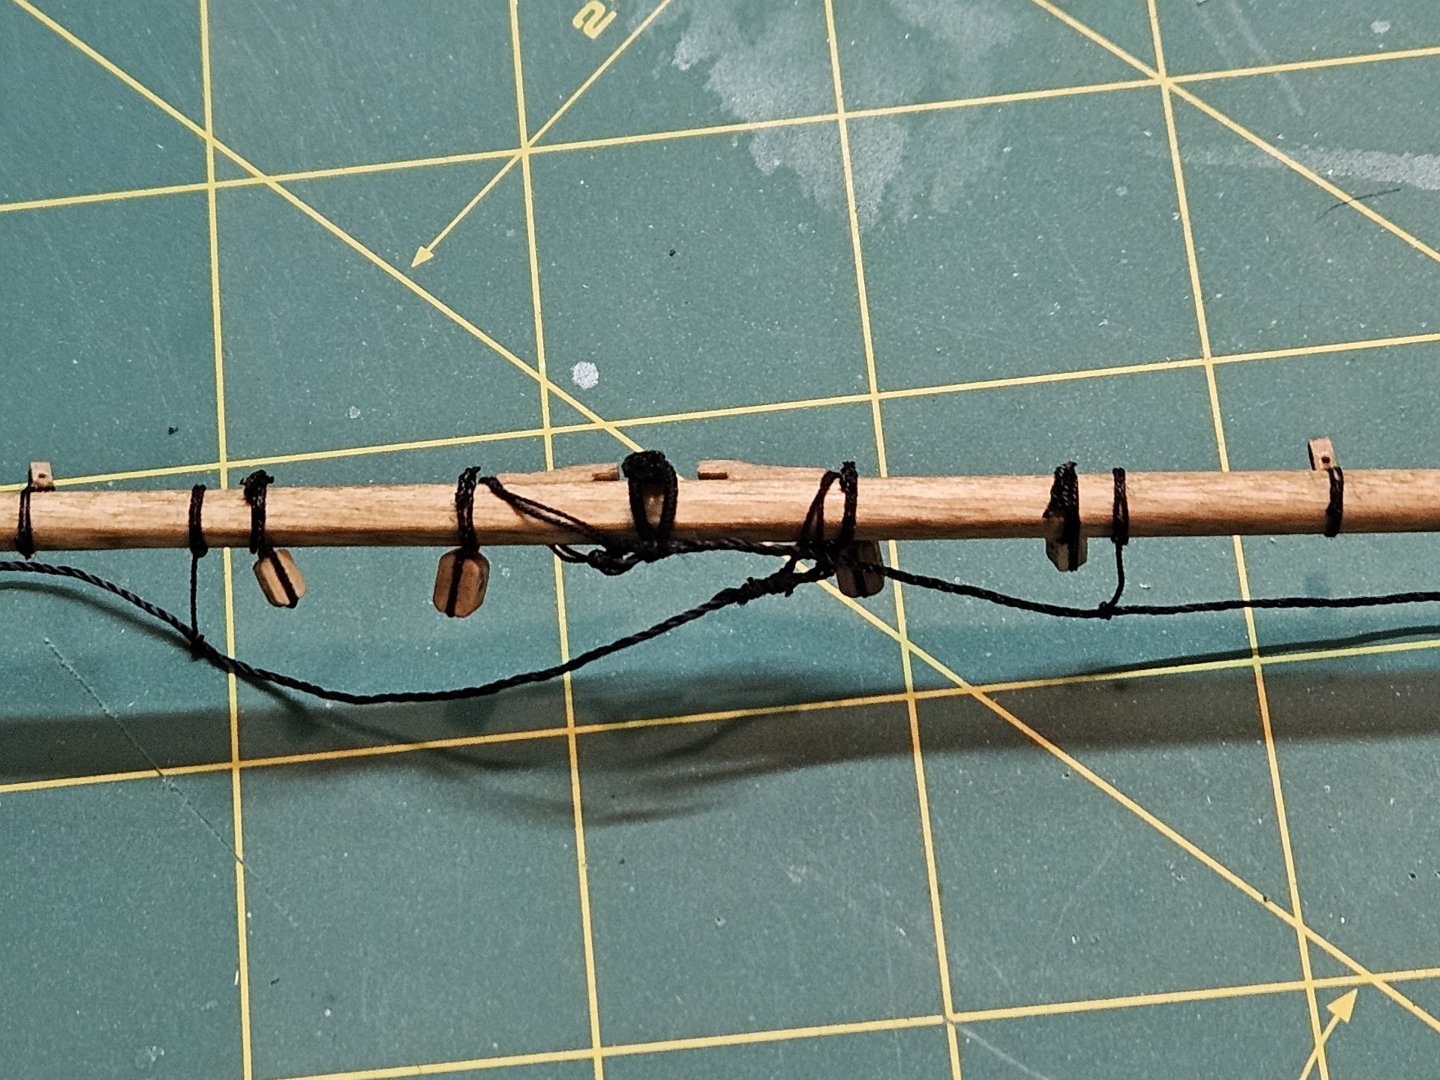
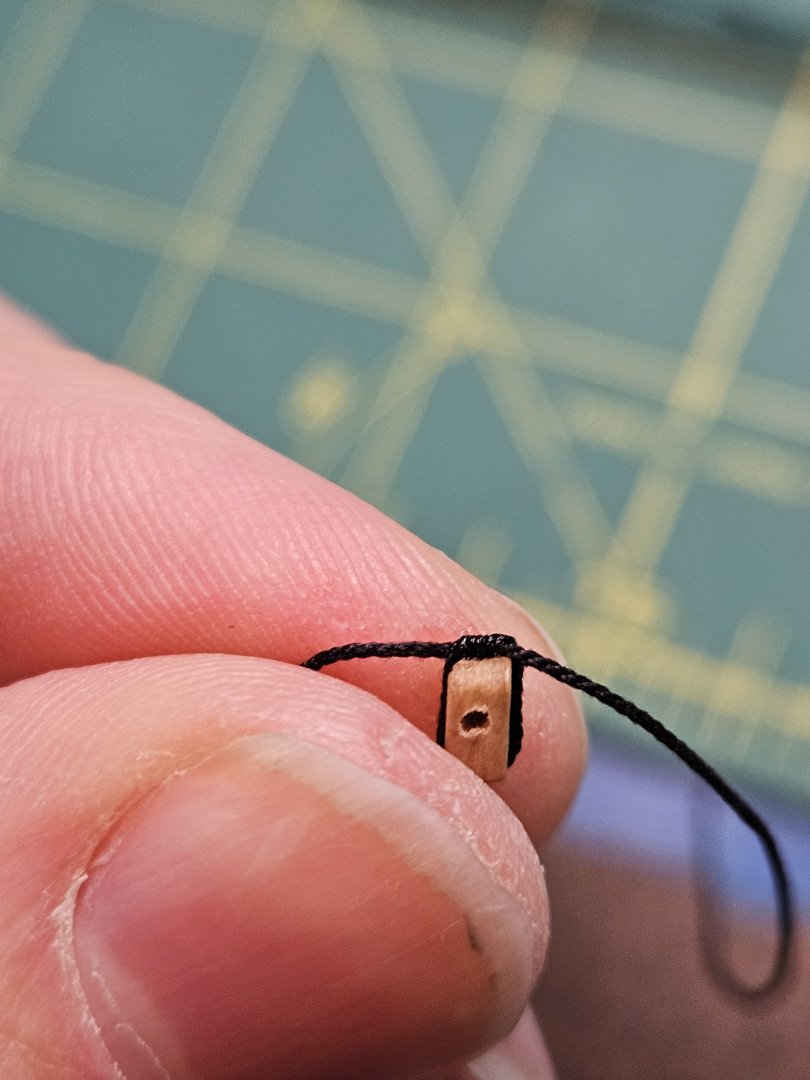
Happy New year all! This is the first progress update of 2025 for the Fair American Model ship. Which makes this the start of year 6 of the build - Seriously hoping to finish by the summer! Anyway, I'm starting on rigging the yards, with the Main Lower Yard. There are 2 buntline cringles on the sail, so I need two blocks each side. these are 3/32" Singles. Looking at the Niagara plans I purchased, these blocks are nearly vertical above the cringles, or at a slight angle, so thats how I arranged them on the mast Of course once I attached them, they're facing the wrong way. They need to have the block holes going vertically, to allow the rope to pass straight up to the top. This was because I only used a single knot at the top of the block when stropping. I didn't think about that. So I removed that block and added another knot, making sure the ropes go parallel to the block holes. Now when I added them to the mast, they're facing the right way. I also had to tie them so they stick forward just a little so the rope can reeve through nicely, while also being aware of the orientation of the foot ropes and cleat side, so it's not backwards. Here is the finished yard with buntline blocks and then a single leechline block on the outermost end of the yard. The sheet blocks were next. I used 5/32"blocks for these. The rigging plan doesn't specify sizes of blocks, but I later found an excel sheet that ''someone'' created that I used for a guide of rope size and blocks, shown later.... Additionally, during my research and learning about model ships, I saved this snippet about general rigging. It shows some basic blocks and locations on the yard. On the Niagara plans, the Clueline block is on the Inside of the yard, and the sheet is outside of that. In other ships, I've seen it the other way, where the sheet block (the bigger block, is the one closest to the center of the block. For mine, I tied it off outside the cleat, where the foot rope ties in. The sheet was 5/32" and the clueline block was 1/8" single block. Tied and glued in place. The braces were next. How I strop the blocks is, again, fairly simple. I'll take the rope starting at the bottom, over hand knot it on the top... Then add some CA glue to secure it. I'd put the trimmed/stropped block into a little jig with .031" drill bit, and hold the two ends with tape. Then pinch and CA glue them close to the block and let it dry. Then I can take small black sewing thread and make a neat little seizing. I have to knot the first loop and glue, make a couple more loops, then knot the last one and glue. After which, I'll trim all the loose ends up. I'm pretty happy with the look. That's one!!! I'll look at the plans for the lengths of the braces and try to make a loop to that size. This is trickier. I had to sort of guess the diameter of the loop before I knotted it, so that it will fit over the end of the yard and not be too tight or loose. But I made it work on my little jig. The reverse action tweezers were handy with adding some small amount of tension before I glued things. 2 braces done.... The first time I added them and glued them to the yard, they were facing the wrong way!!! Luckily I noticed/remembered the orientation of the main yard - according to the rigging plans these ropes are braced on the Foremast, so they need to go forward. Thats it for today....I have more progress with this one yard, but that'll wait for another post in the future. Thank you for reading and following along - Jason -


-
Thanks for the kind words, Steve. I've really enjoyed the whole build, especially the rigging. When I'm taking photos and describing what I've done, I like to convey what I would want to see on someone else's work. ''Oh, that's how you did that. Okay, now I know'' I'm also mad, so here's the method to my madness. Cheers!
-
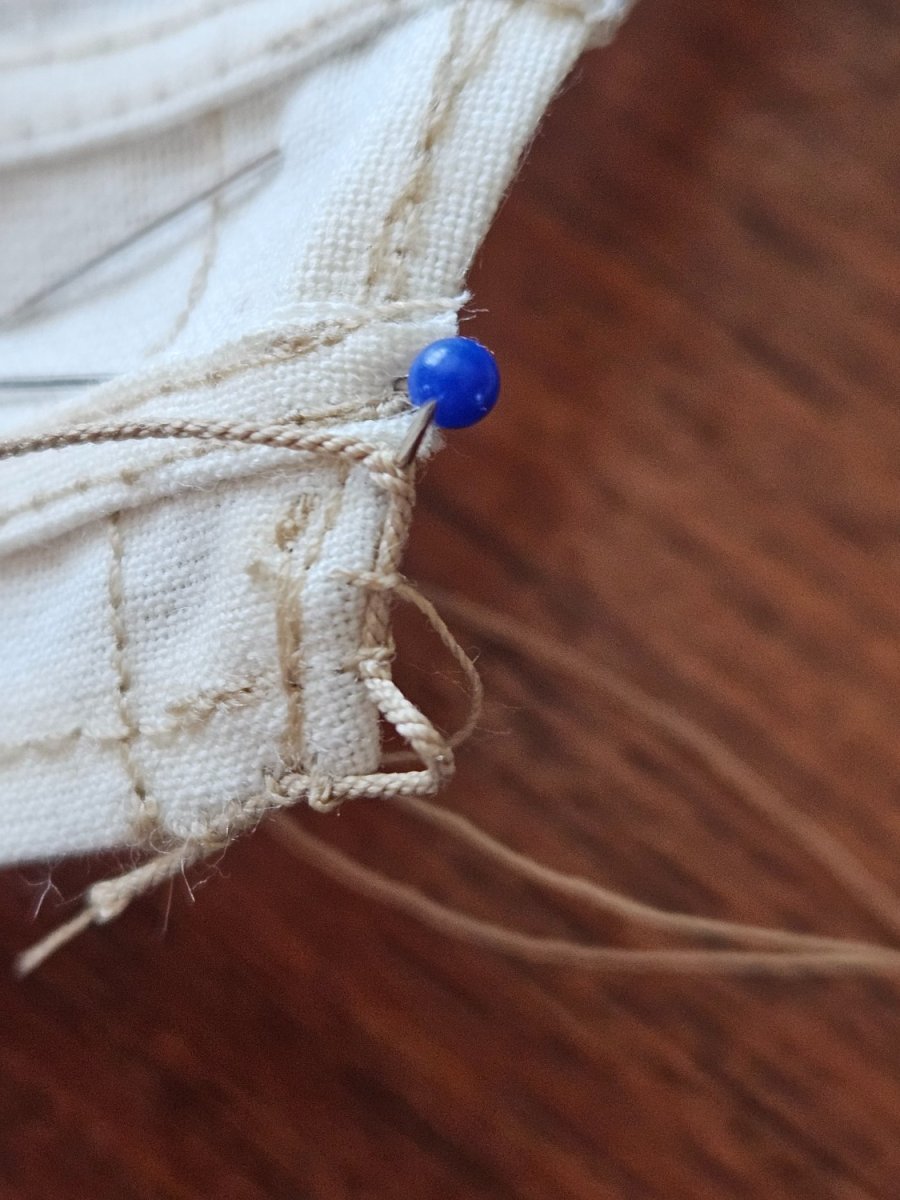
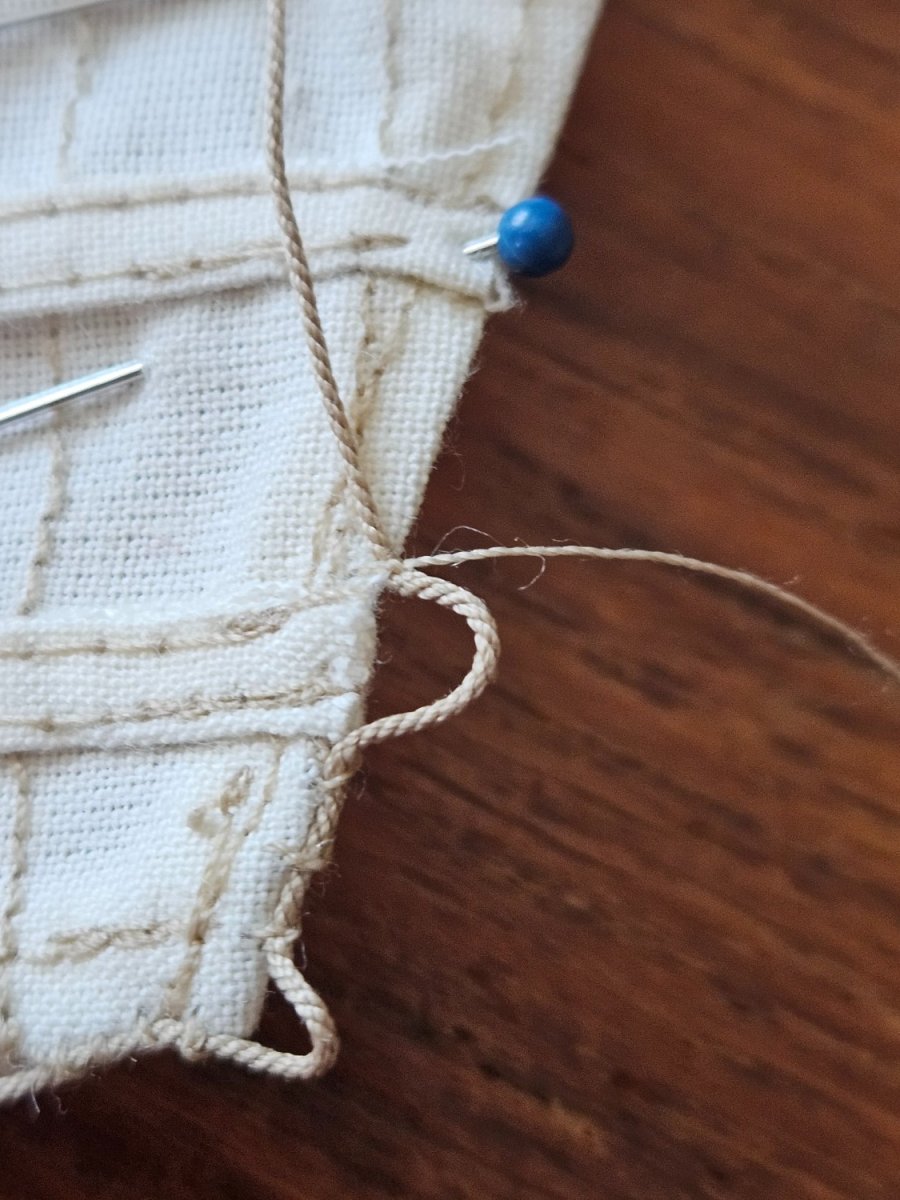
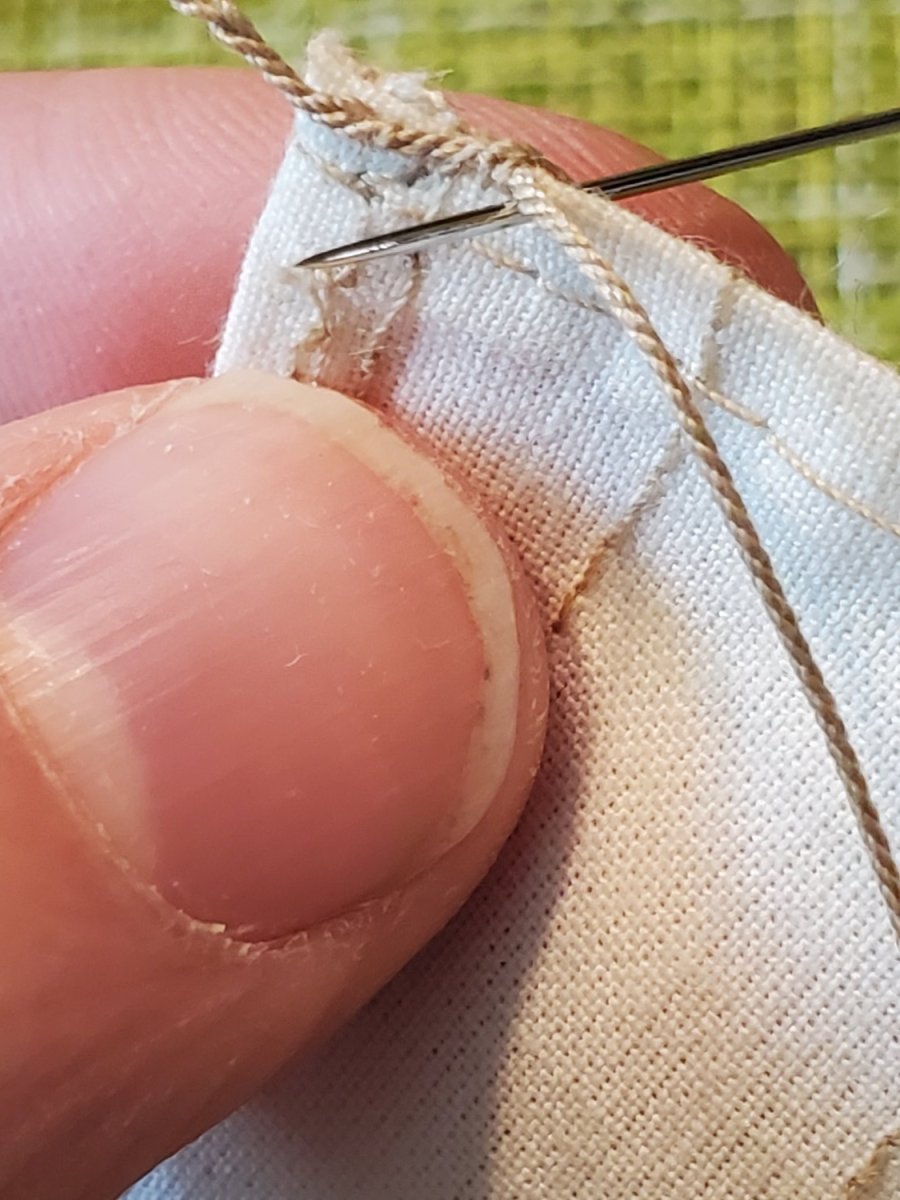
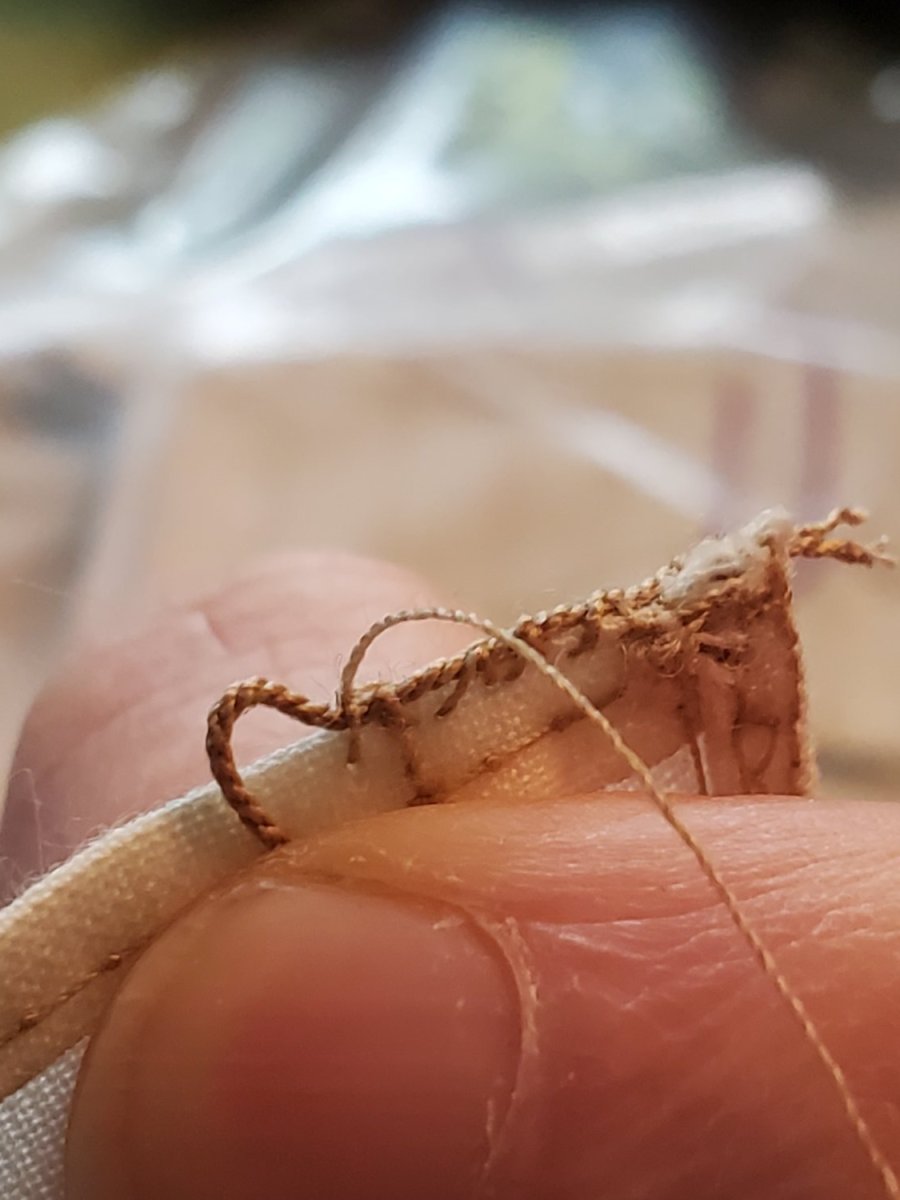
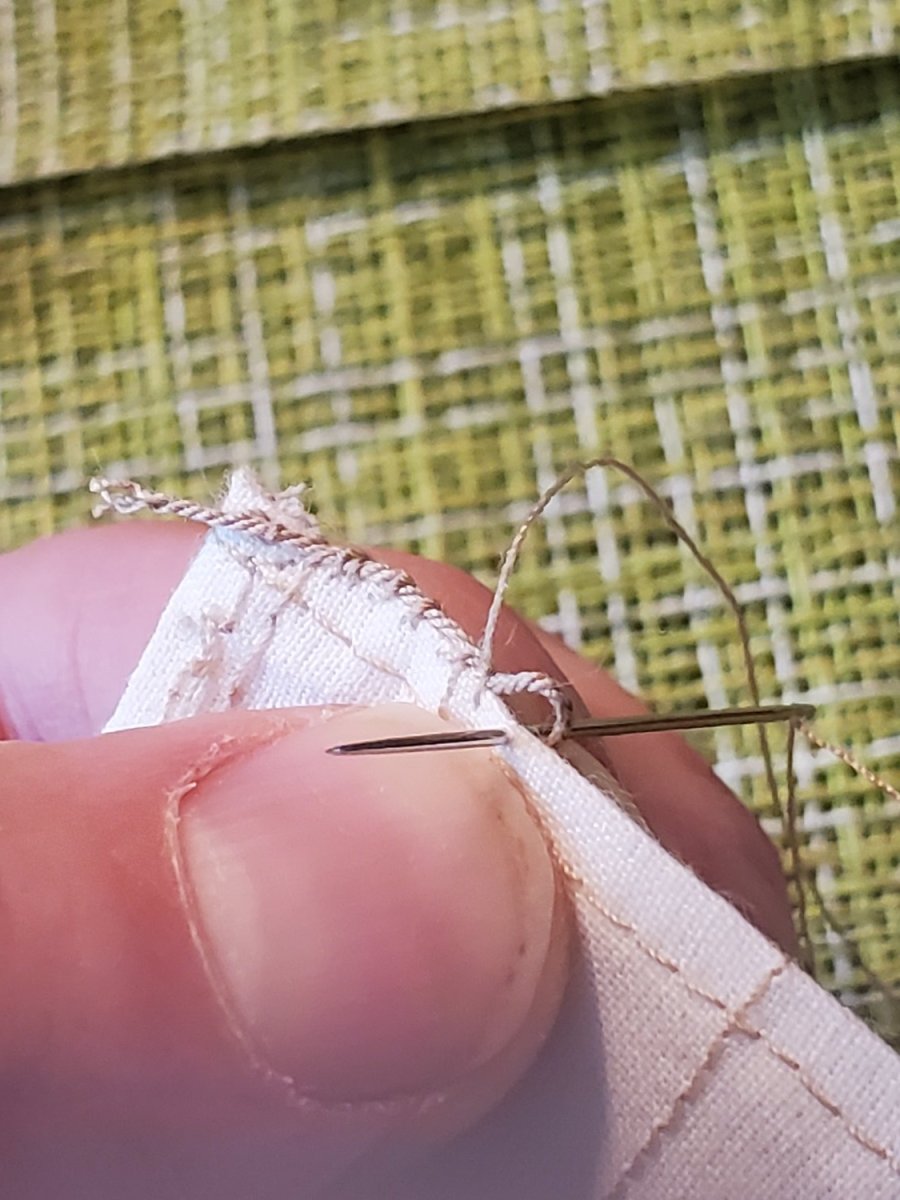
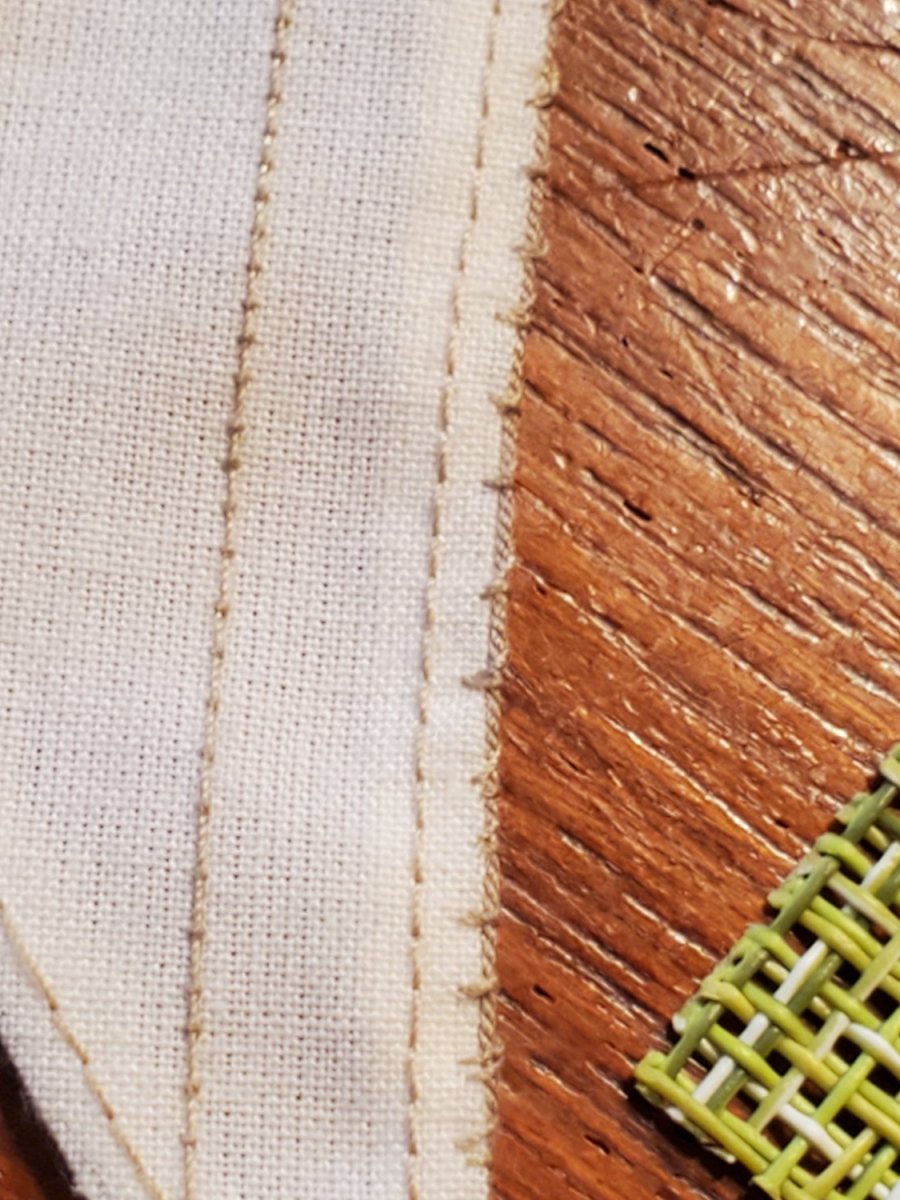
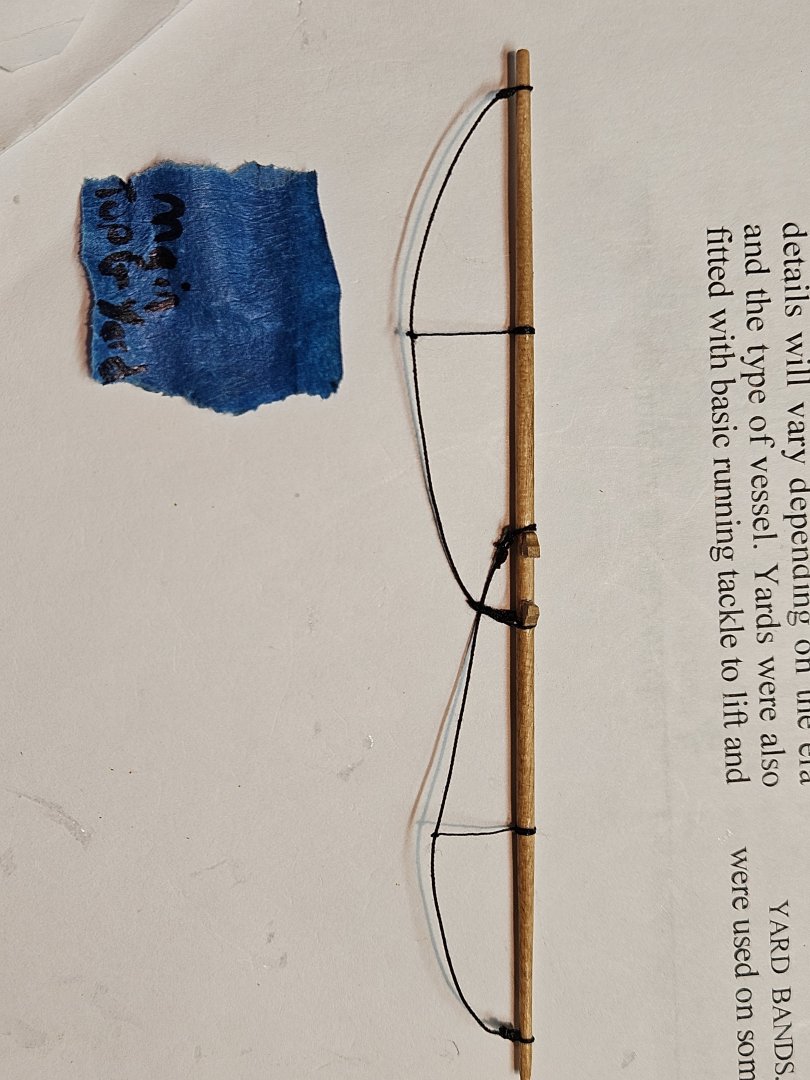
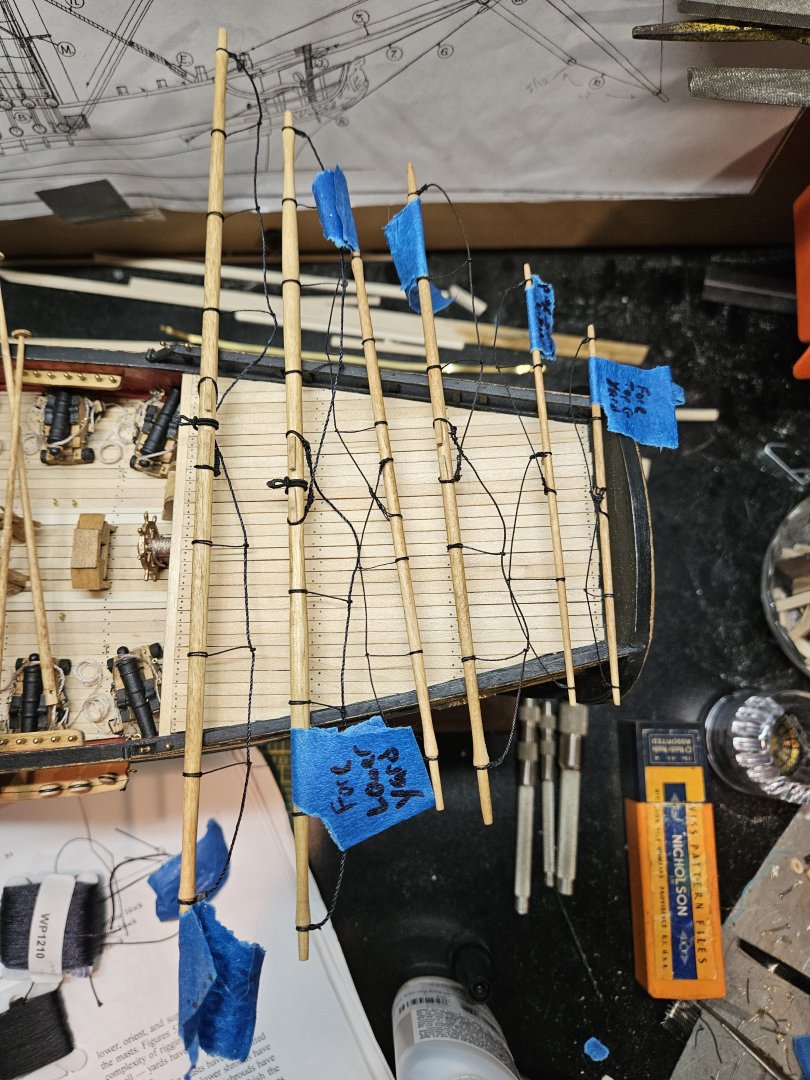
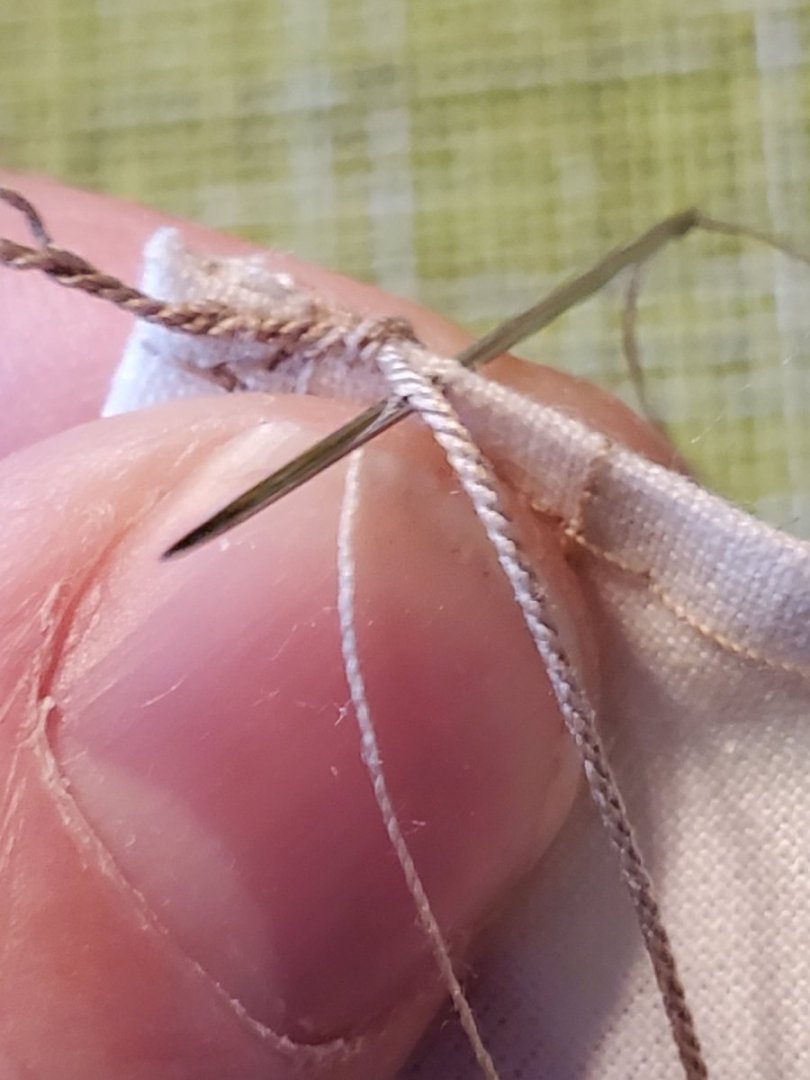
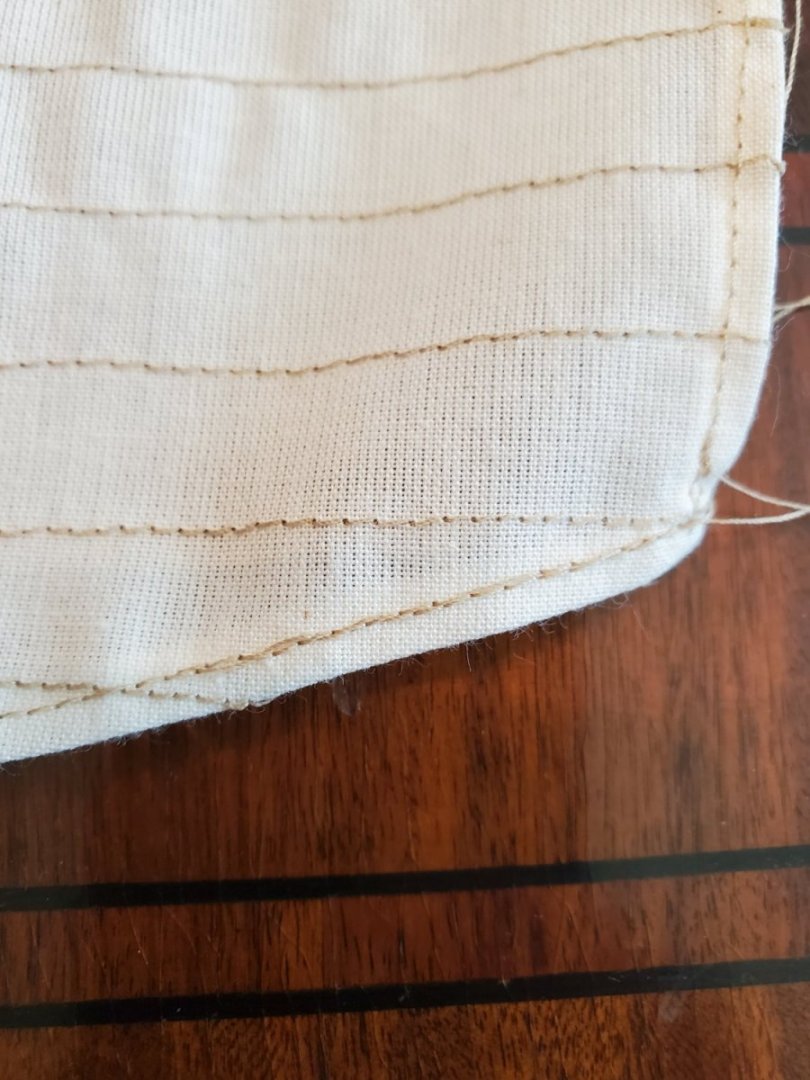
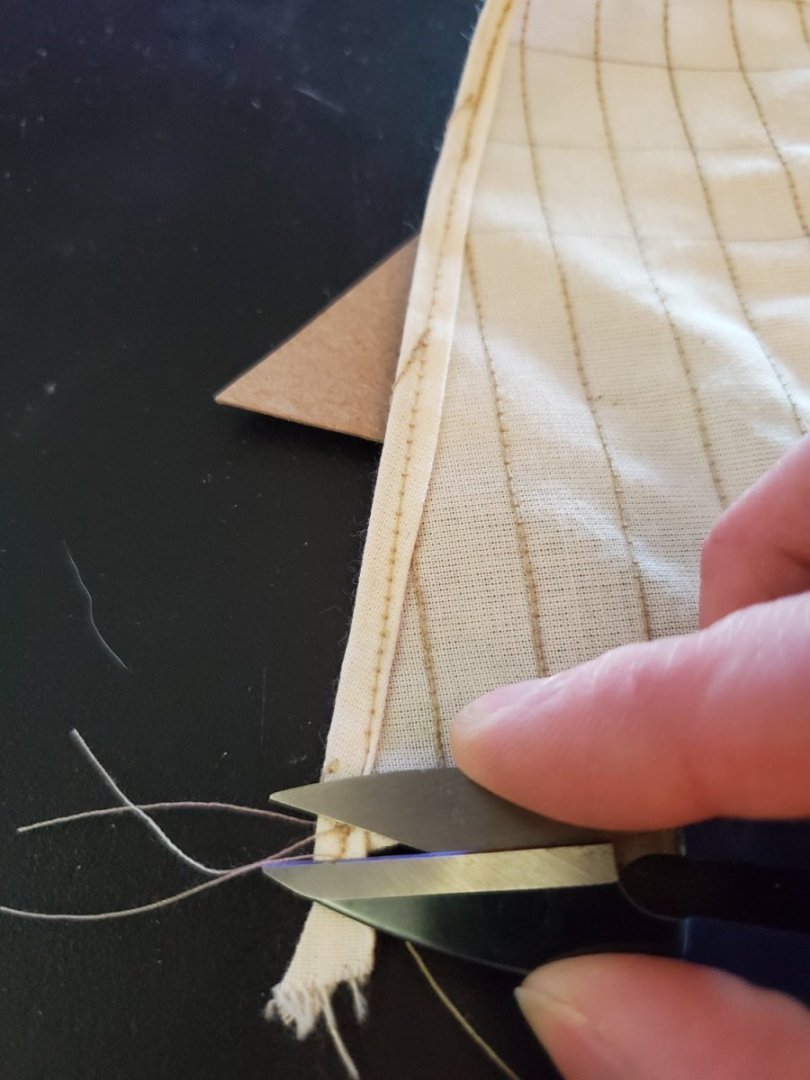
Overdue progress on the Fair American Model ship; Yet again, way too long a time between posts. Been rather busy the last few months, but still made SLOW progress on the footropes for all the yards. Firstly, for the Main and Fore Lower Yards, the yard sling needed to be made. I did serve some more rope, using .012in to serve with, to end up with .025in final diameter, which is what is needed. I looped between the cleats, and tacked in place with some glue. In order to create the eye, I started by folding the free ends down... Dabbing with glue, then pinching tightly with needle nose pliers to get the top to ''fuse''. Then tying the top with some fine sewing thread for a secure hold. Glue isn't enough to really hold it alone. After it set, I trimmed the ends as close as possible, without it unraveling. Its a bit ugly, but once lashed to the top mast, it'll be pretty hidden. I moved on to making the foot ropes, starting with seizing/serving eyes for the ends of the yards. Its pretty tiny, so having a long wrap of serving was kind of tough for me. The fine thread kept wanting to unravel as I wound it, so I only got a couple wraps in. I'd overhand knot the last one to secure it, then glue. After I secured the one end to the yard, I'd measure out the length of the next eye. They're supposed to criss cross I tried adding the stirrups now before securing the footrope ends. Really made it difficult on myself. I later did the stirrups AFTER tying both ends of the footrope - made things so much easier. Still learning. I got the spacing for the stirrups from the plans, using clove hitches on the yard. The stirrups got overhand knotted to the footrope, glued and trimmed. I held the yard sling in tweezers, so I could work underneath. Using .018in rope to rig the footrope to the yard. Twice around, then knotted, glued and trimmed as close as possible. Again, not really sure what knots and methods to use for everything, so just using what makes sense and is easy at this point. The one footrope was clearly too long, but I'm not undoing it now. I repeated the same process with the Topsail yard footropes. These only get 2 stirrups, whereas the lower yard have 3. One thing I'm doing to help the stirrups look right, is straighten them. I'll smear glue on the rope and knots, then pull away from the yard to create a taught stirrup, and let it dry into that shape. The effect is a more rigid stirrup which holds nicely. The stiffened stirrups aren't perfect, but since these aren't real ropes to scale with real weight that hangs from the yard, I want them to look right. This is just my approach. After a month of doing footropes, I'm at the TopGallant yard. It only has one stirrup. It holds the shape really nicely. Again, these take a lot of time to do, just to do one footrope and 3 stirrups on one side of one yard. Very tedious. Finally got them all done. Everything is to scale, or close to it, as per the instructions. Phew! Now that these are done, the next step will be adding all the blocks to the yard in preparation for the sail, braces, sheets, clue, bunt, leech, etc. My plan is to attach the sails, and half rig, then coil all the rigging before attaching the yard to the mast as one unit - thats the plan anyway. We'll see how it actually goes. Have a nice week, -Jason-


-
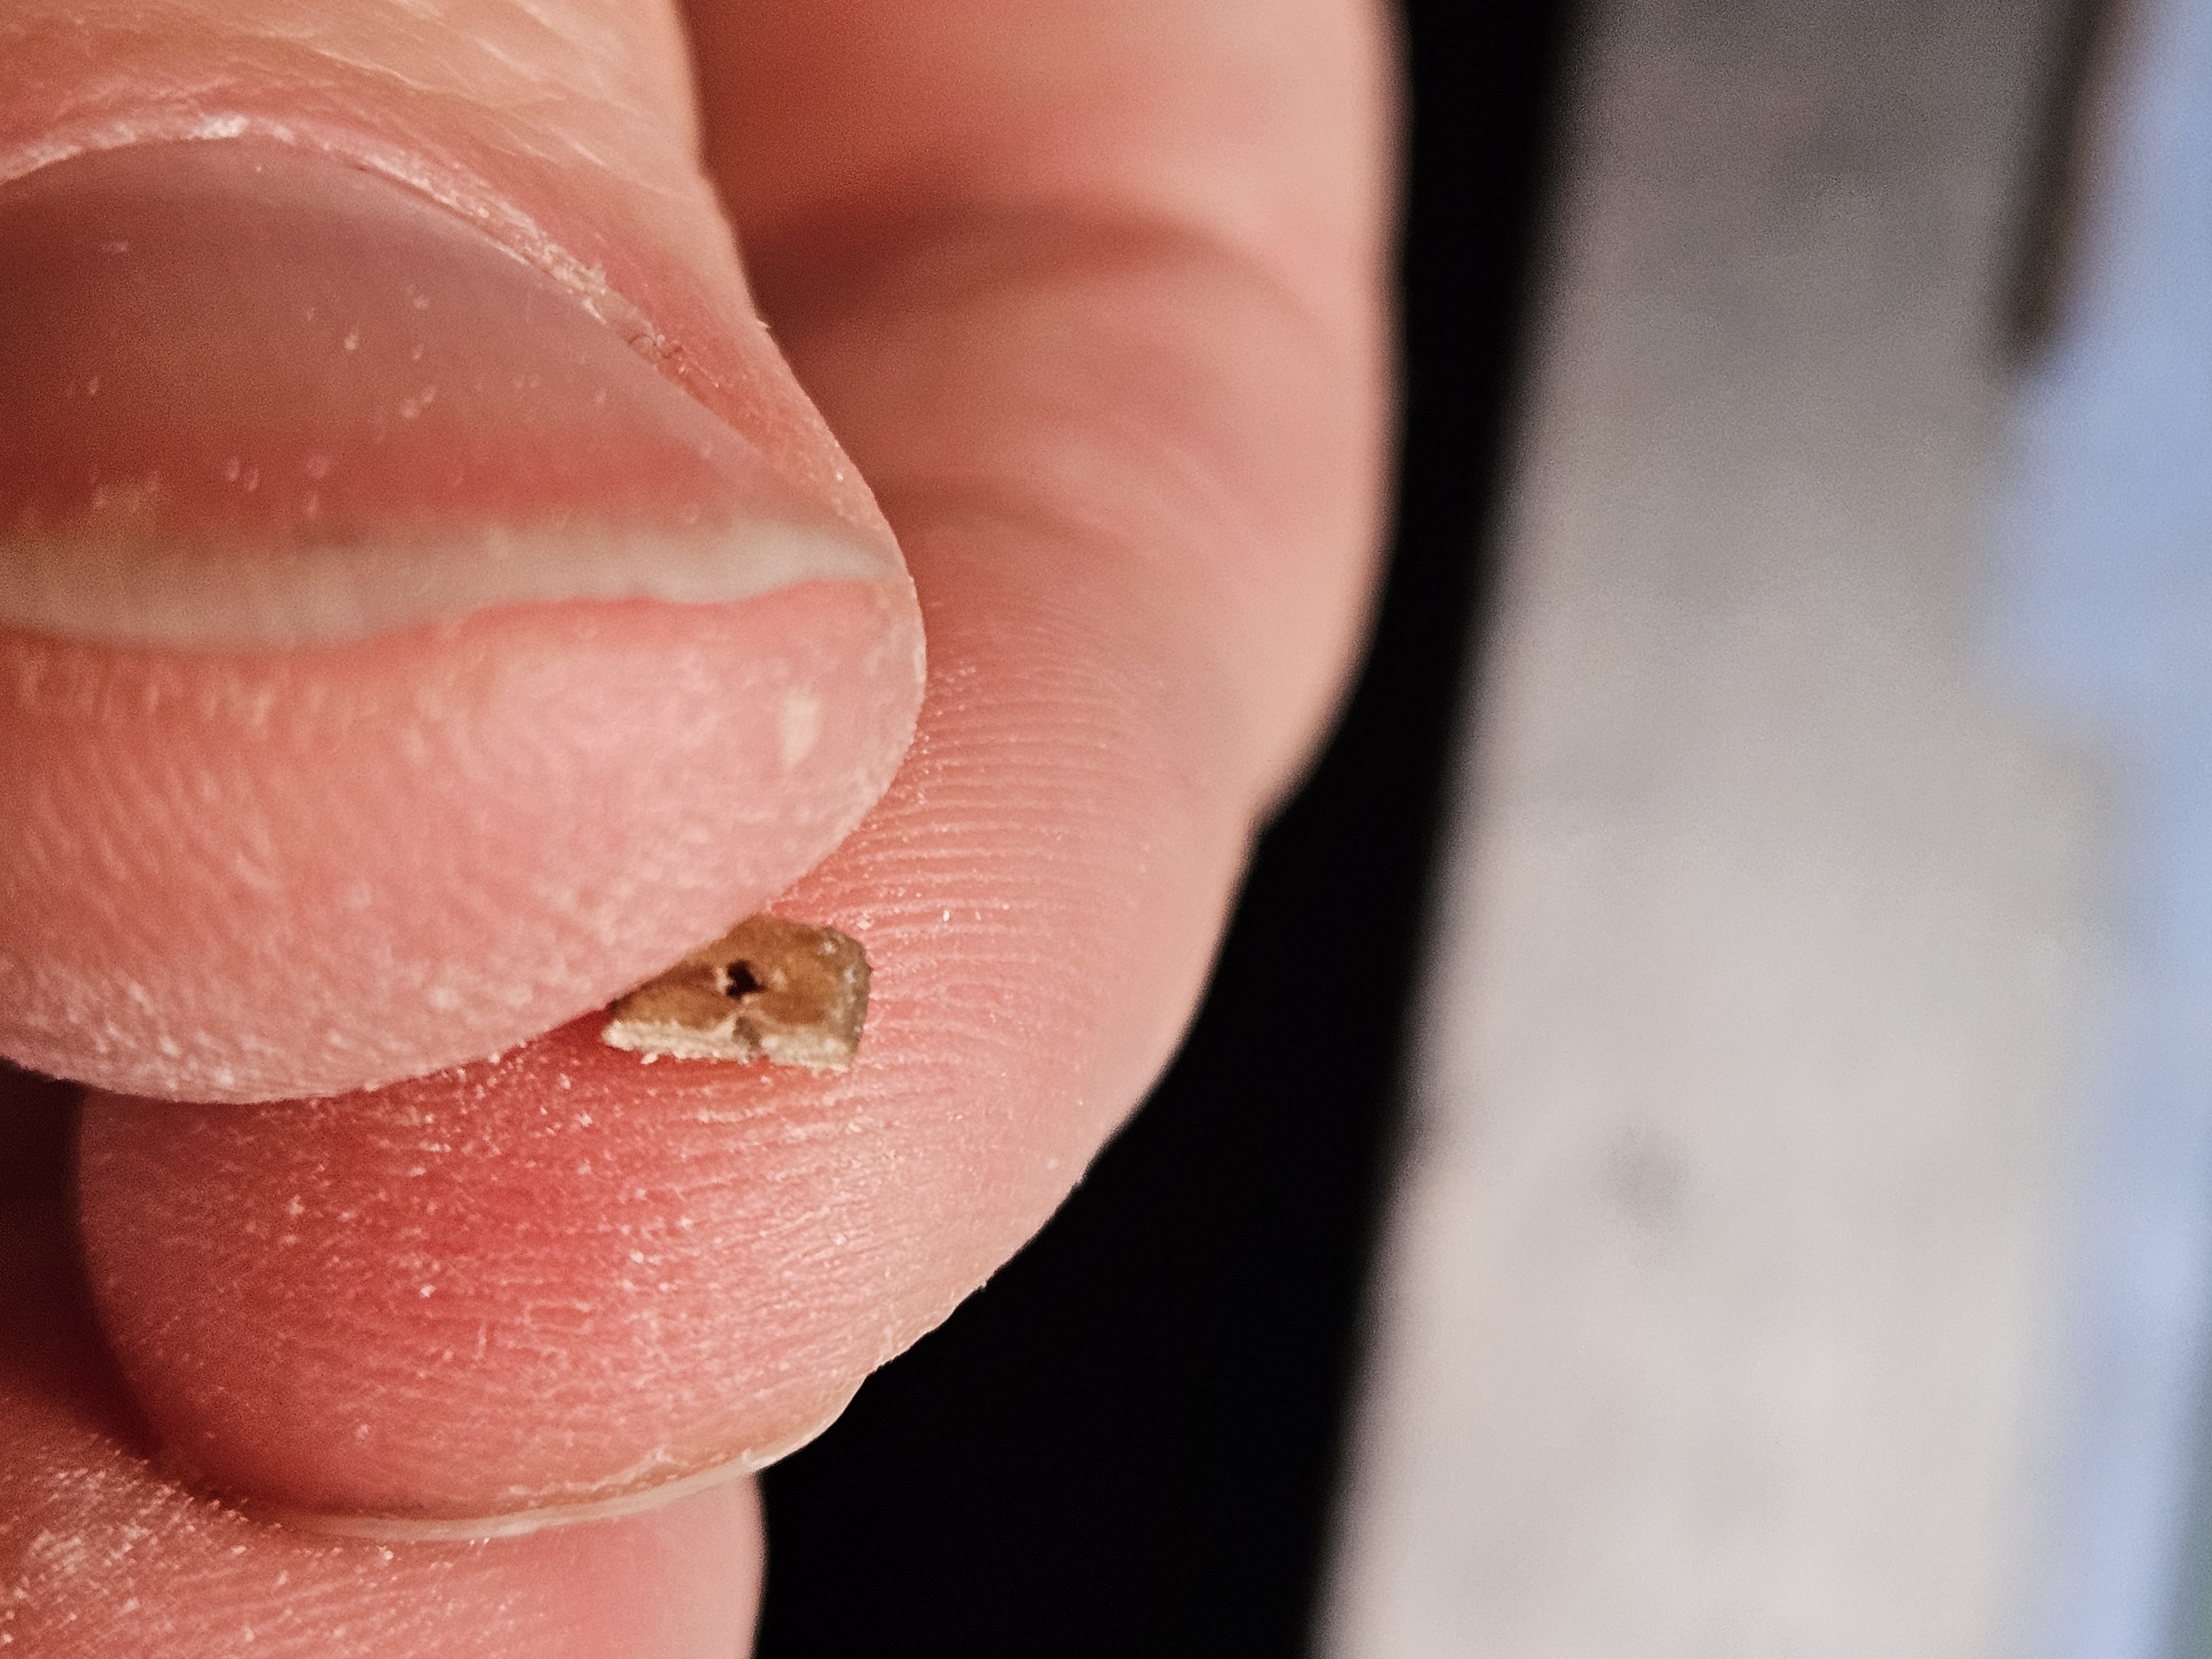
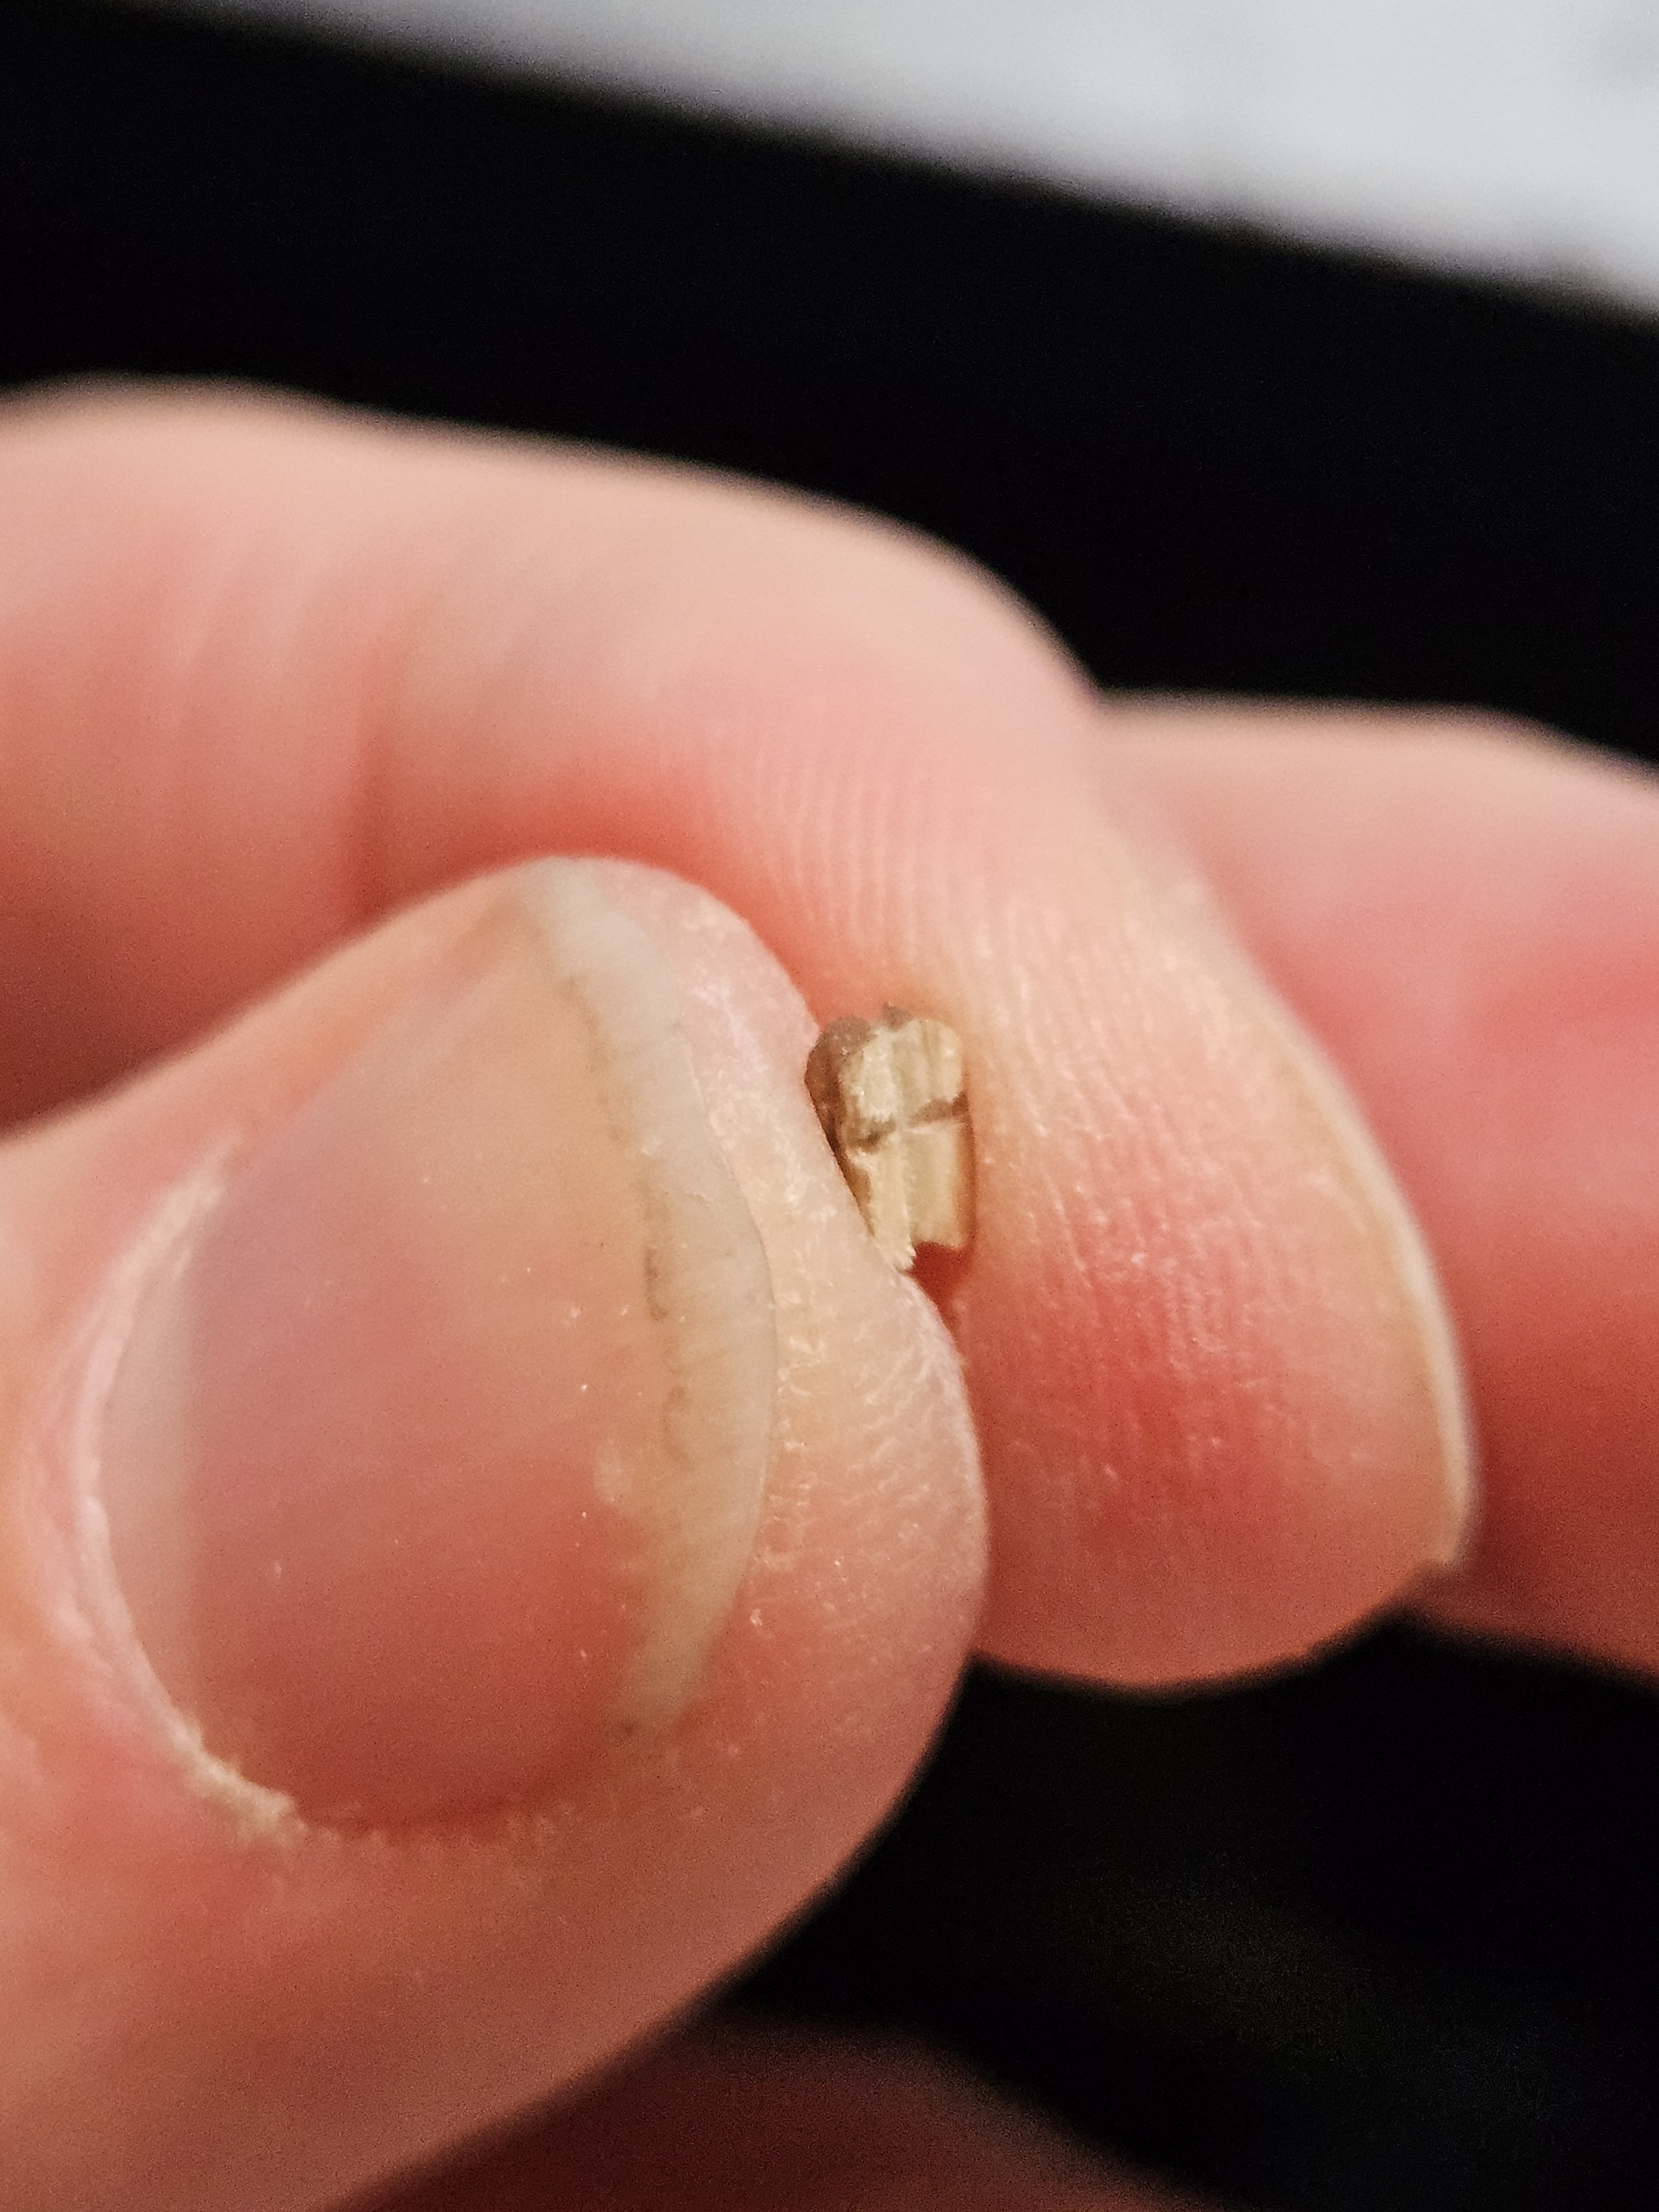
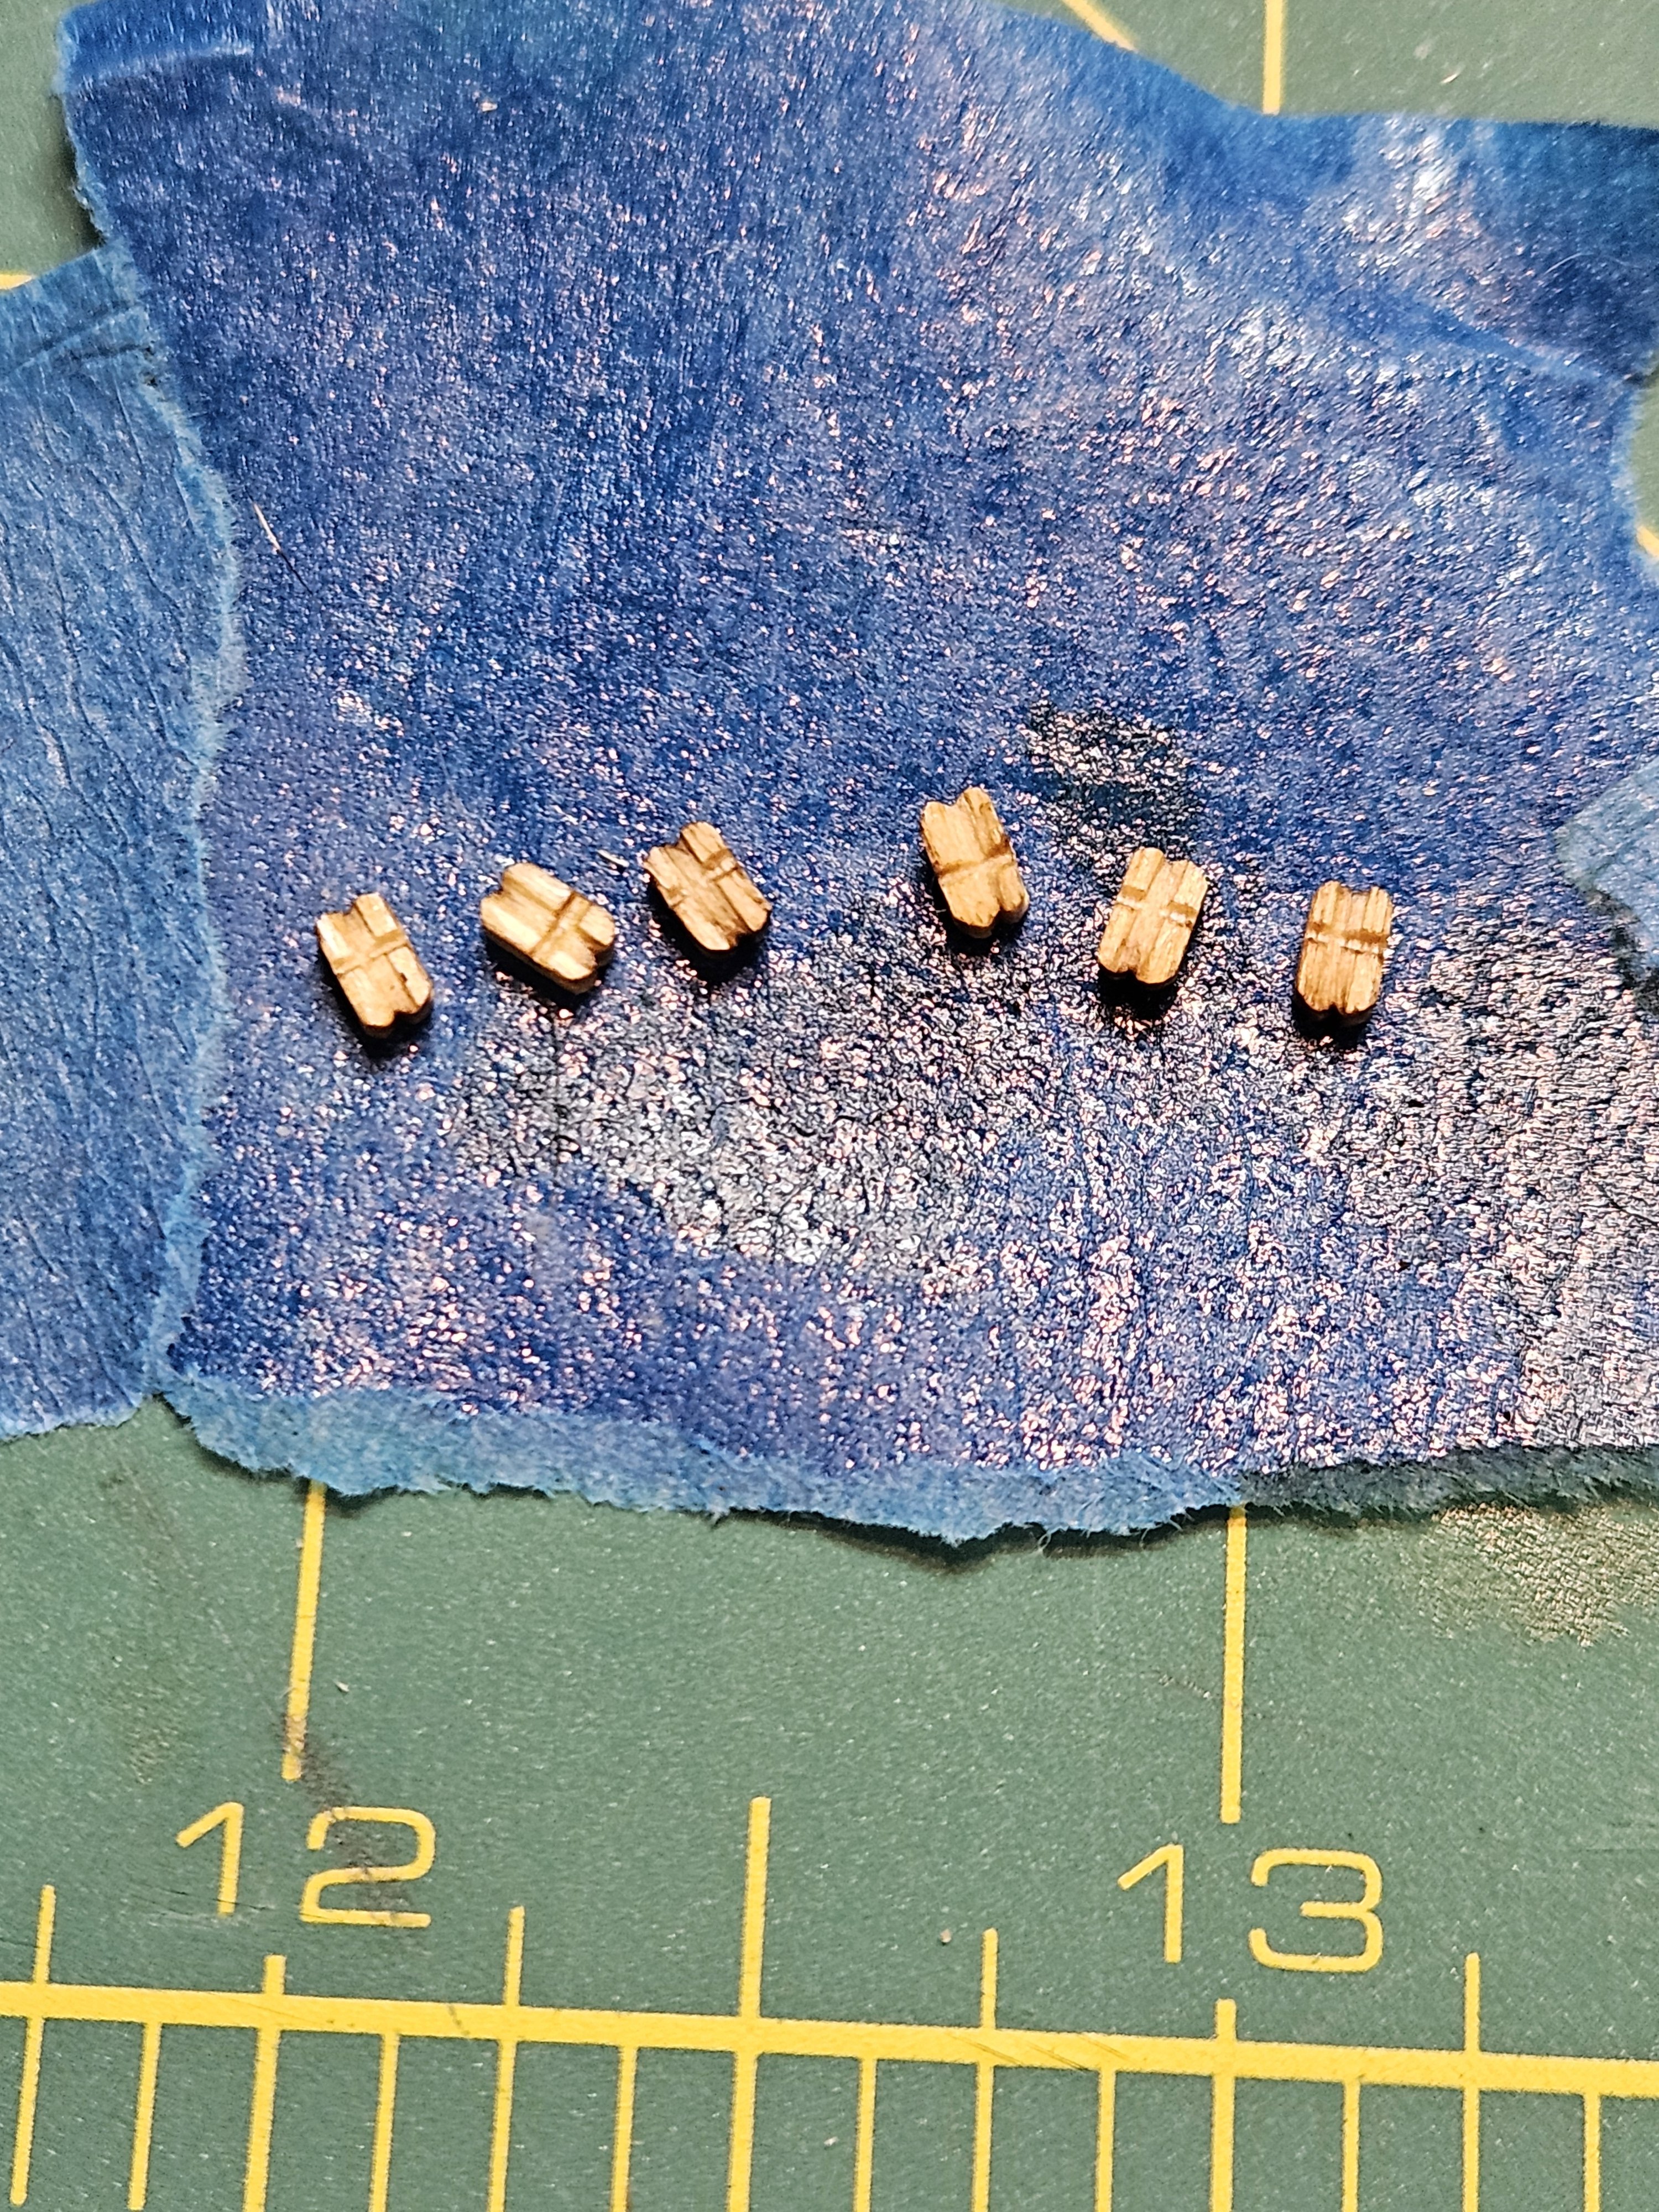
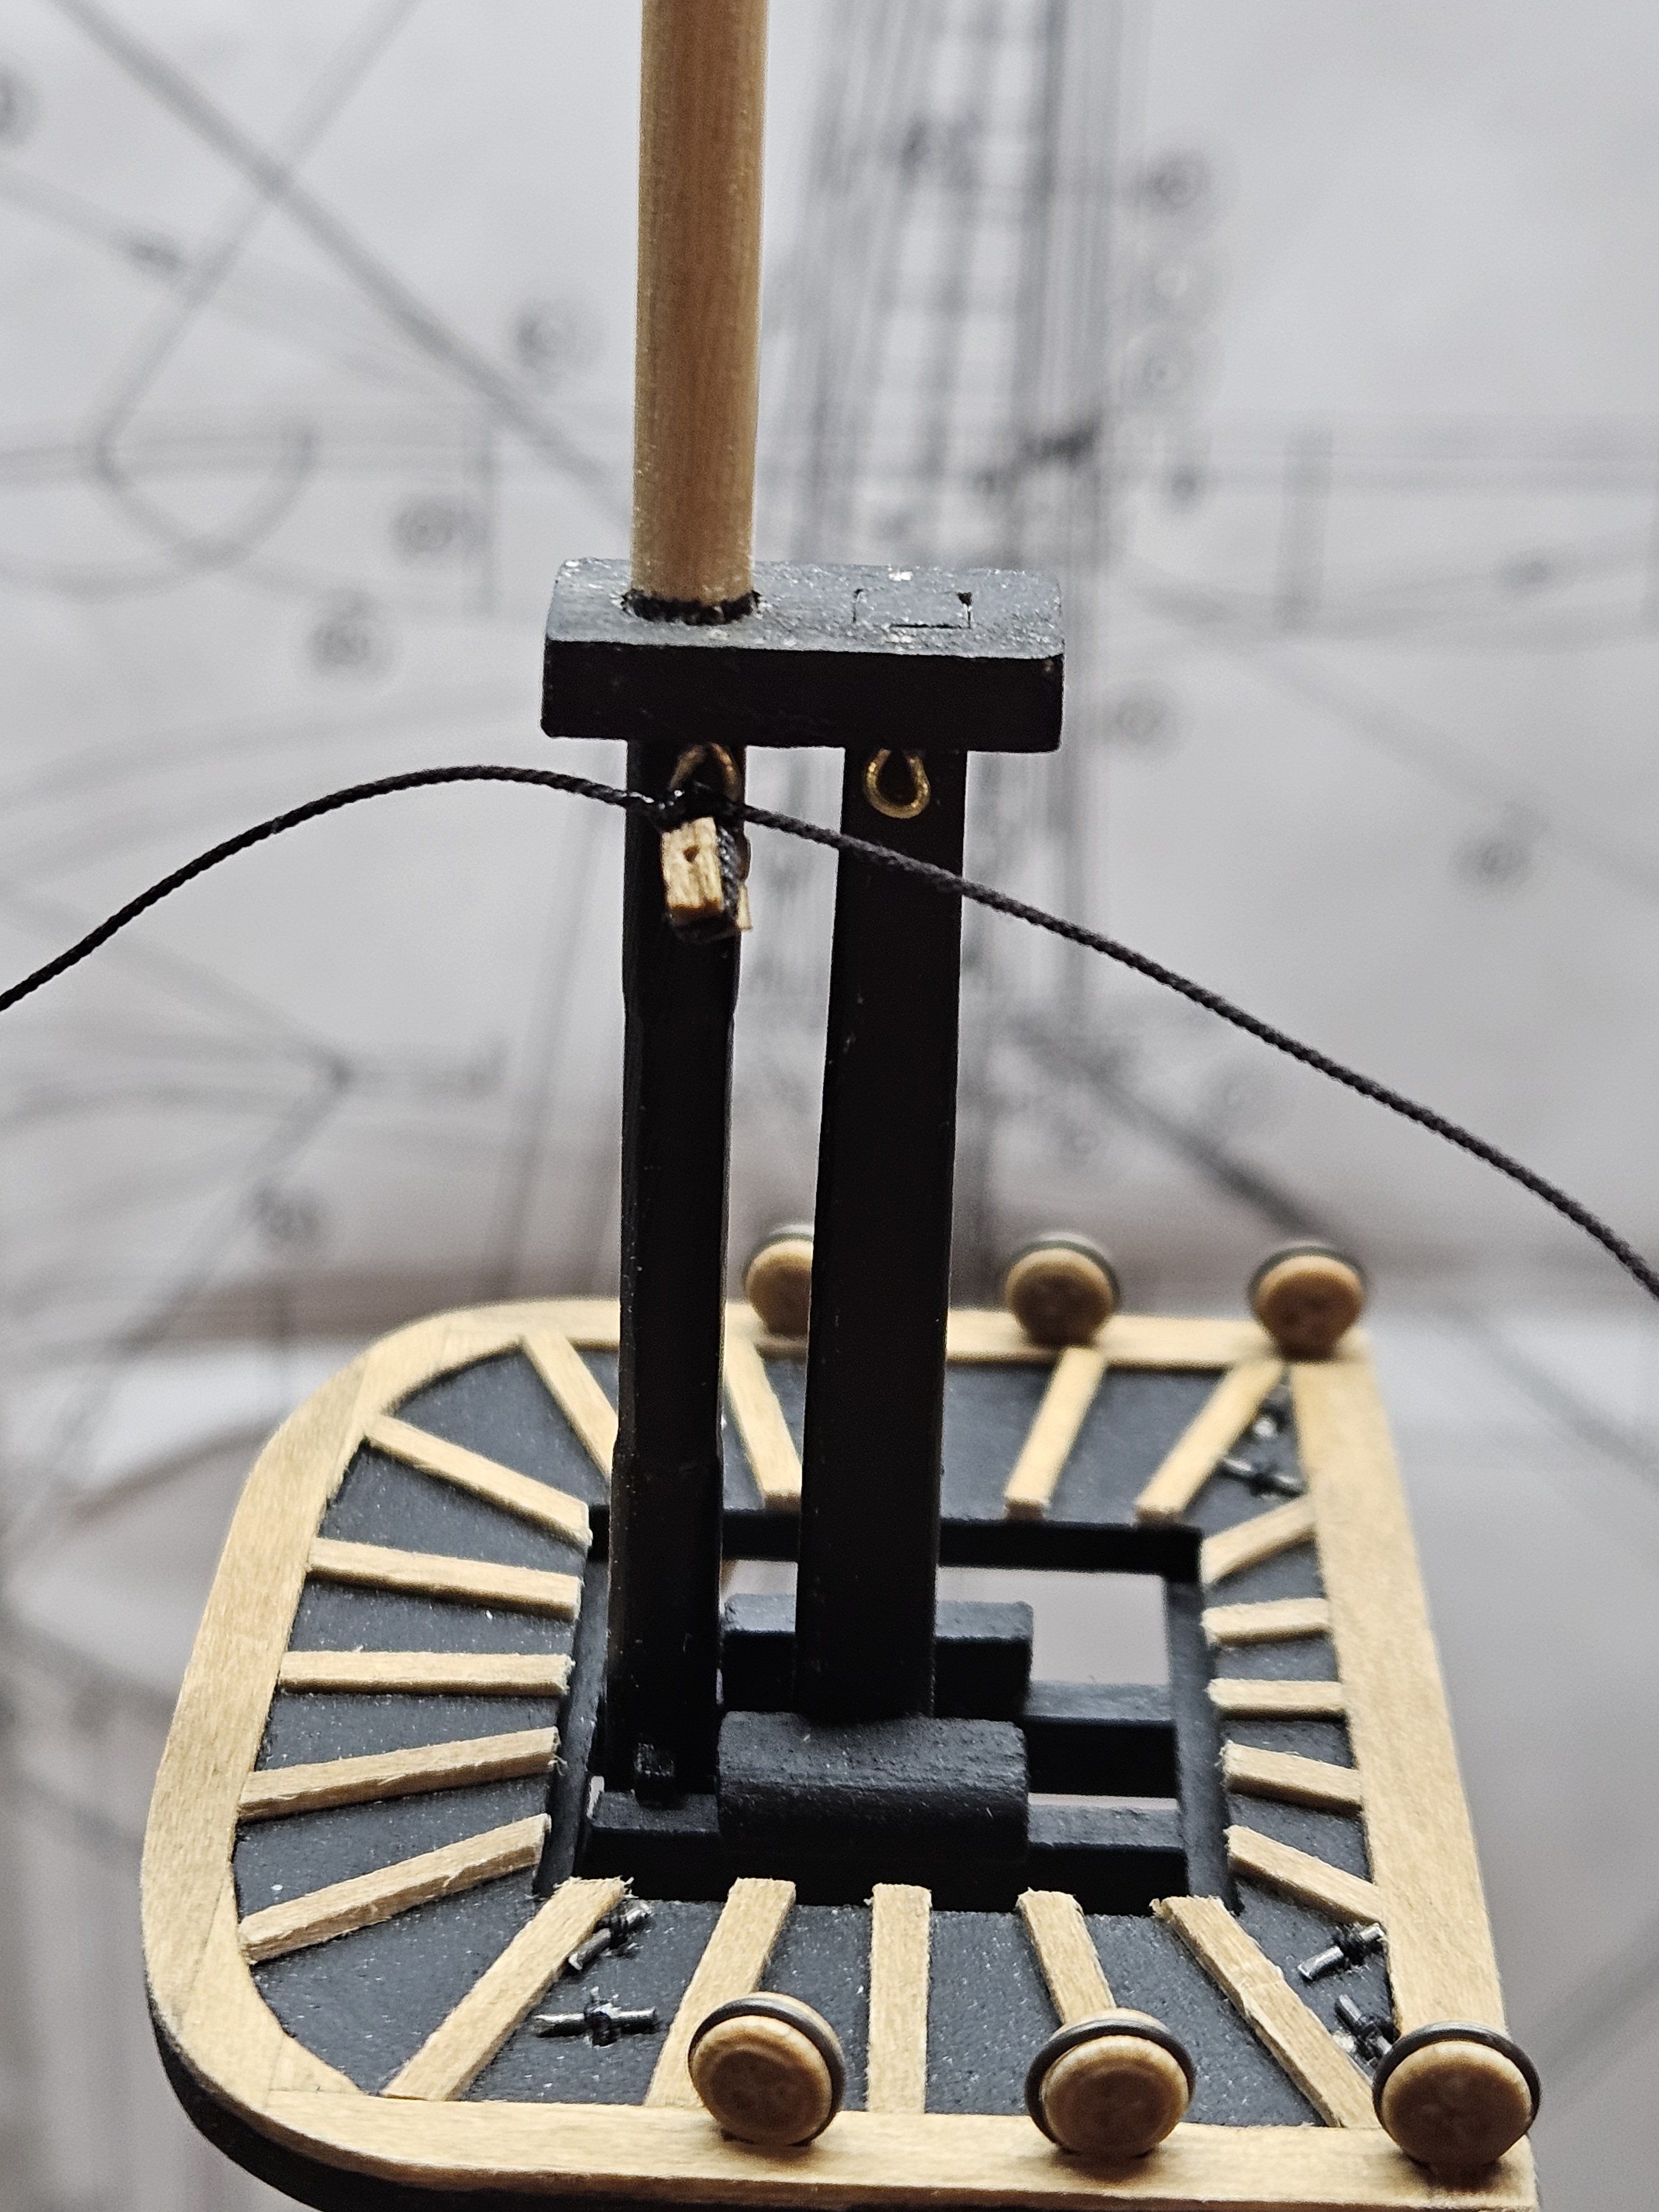
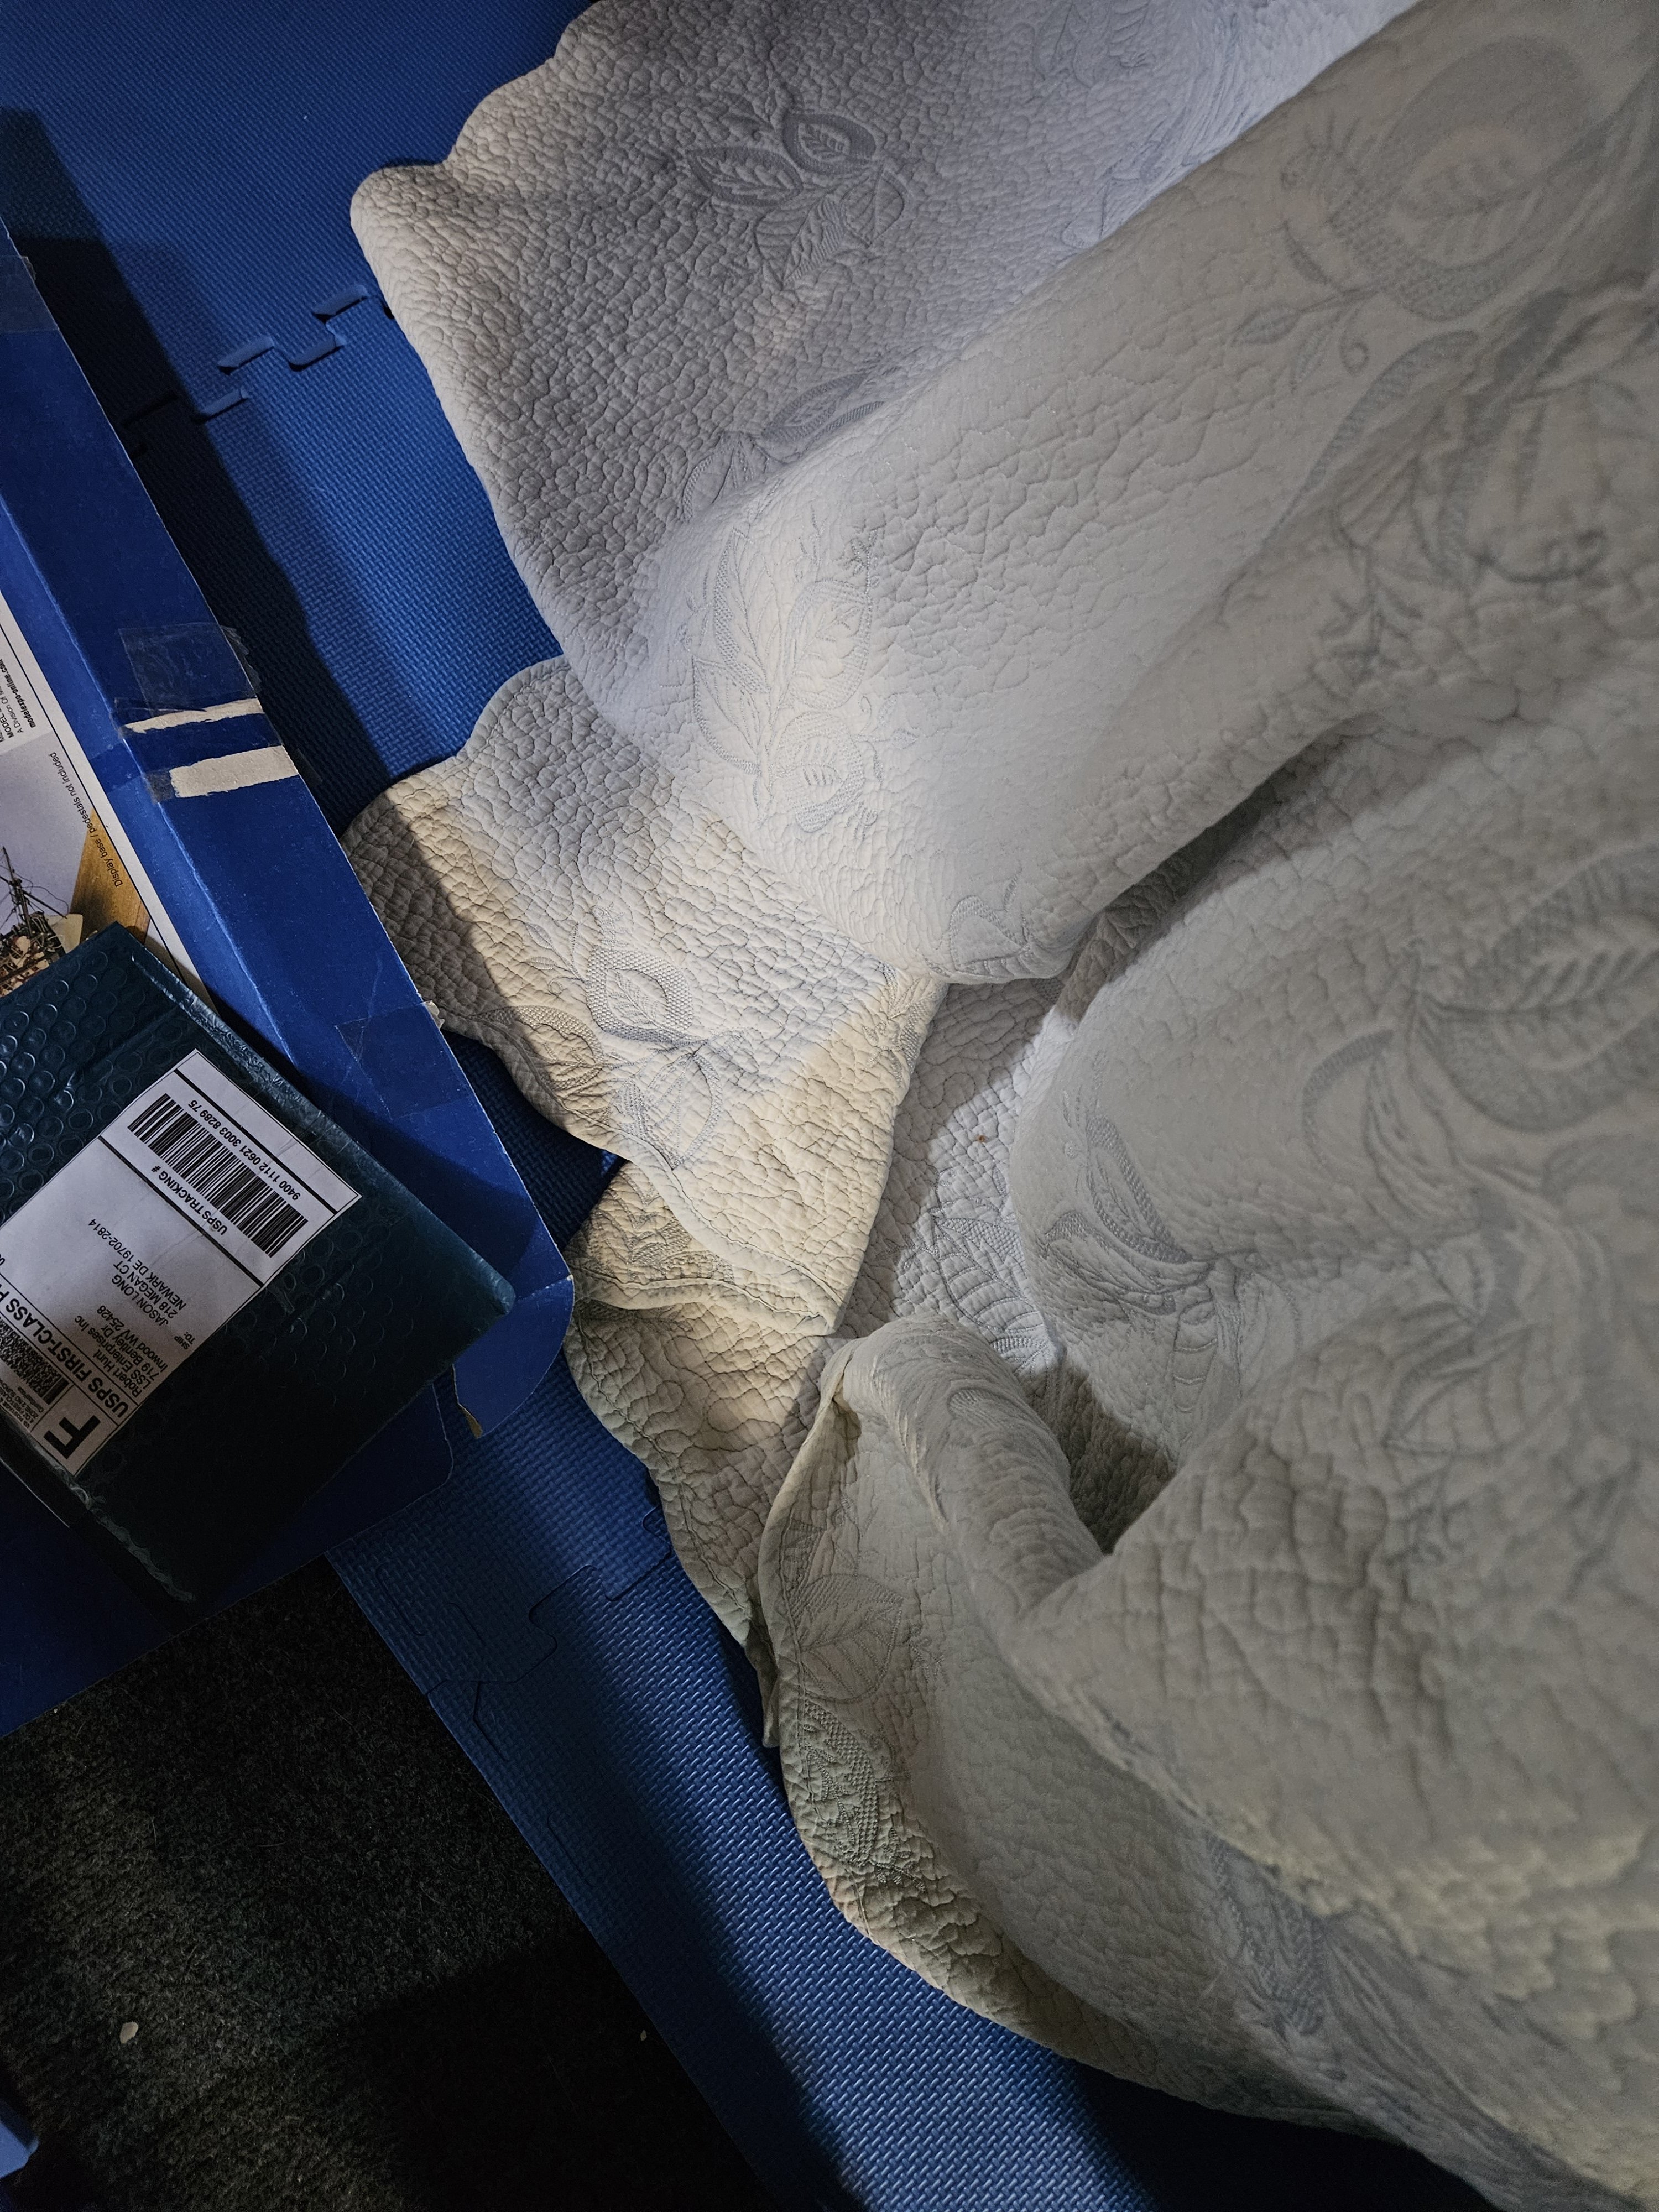
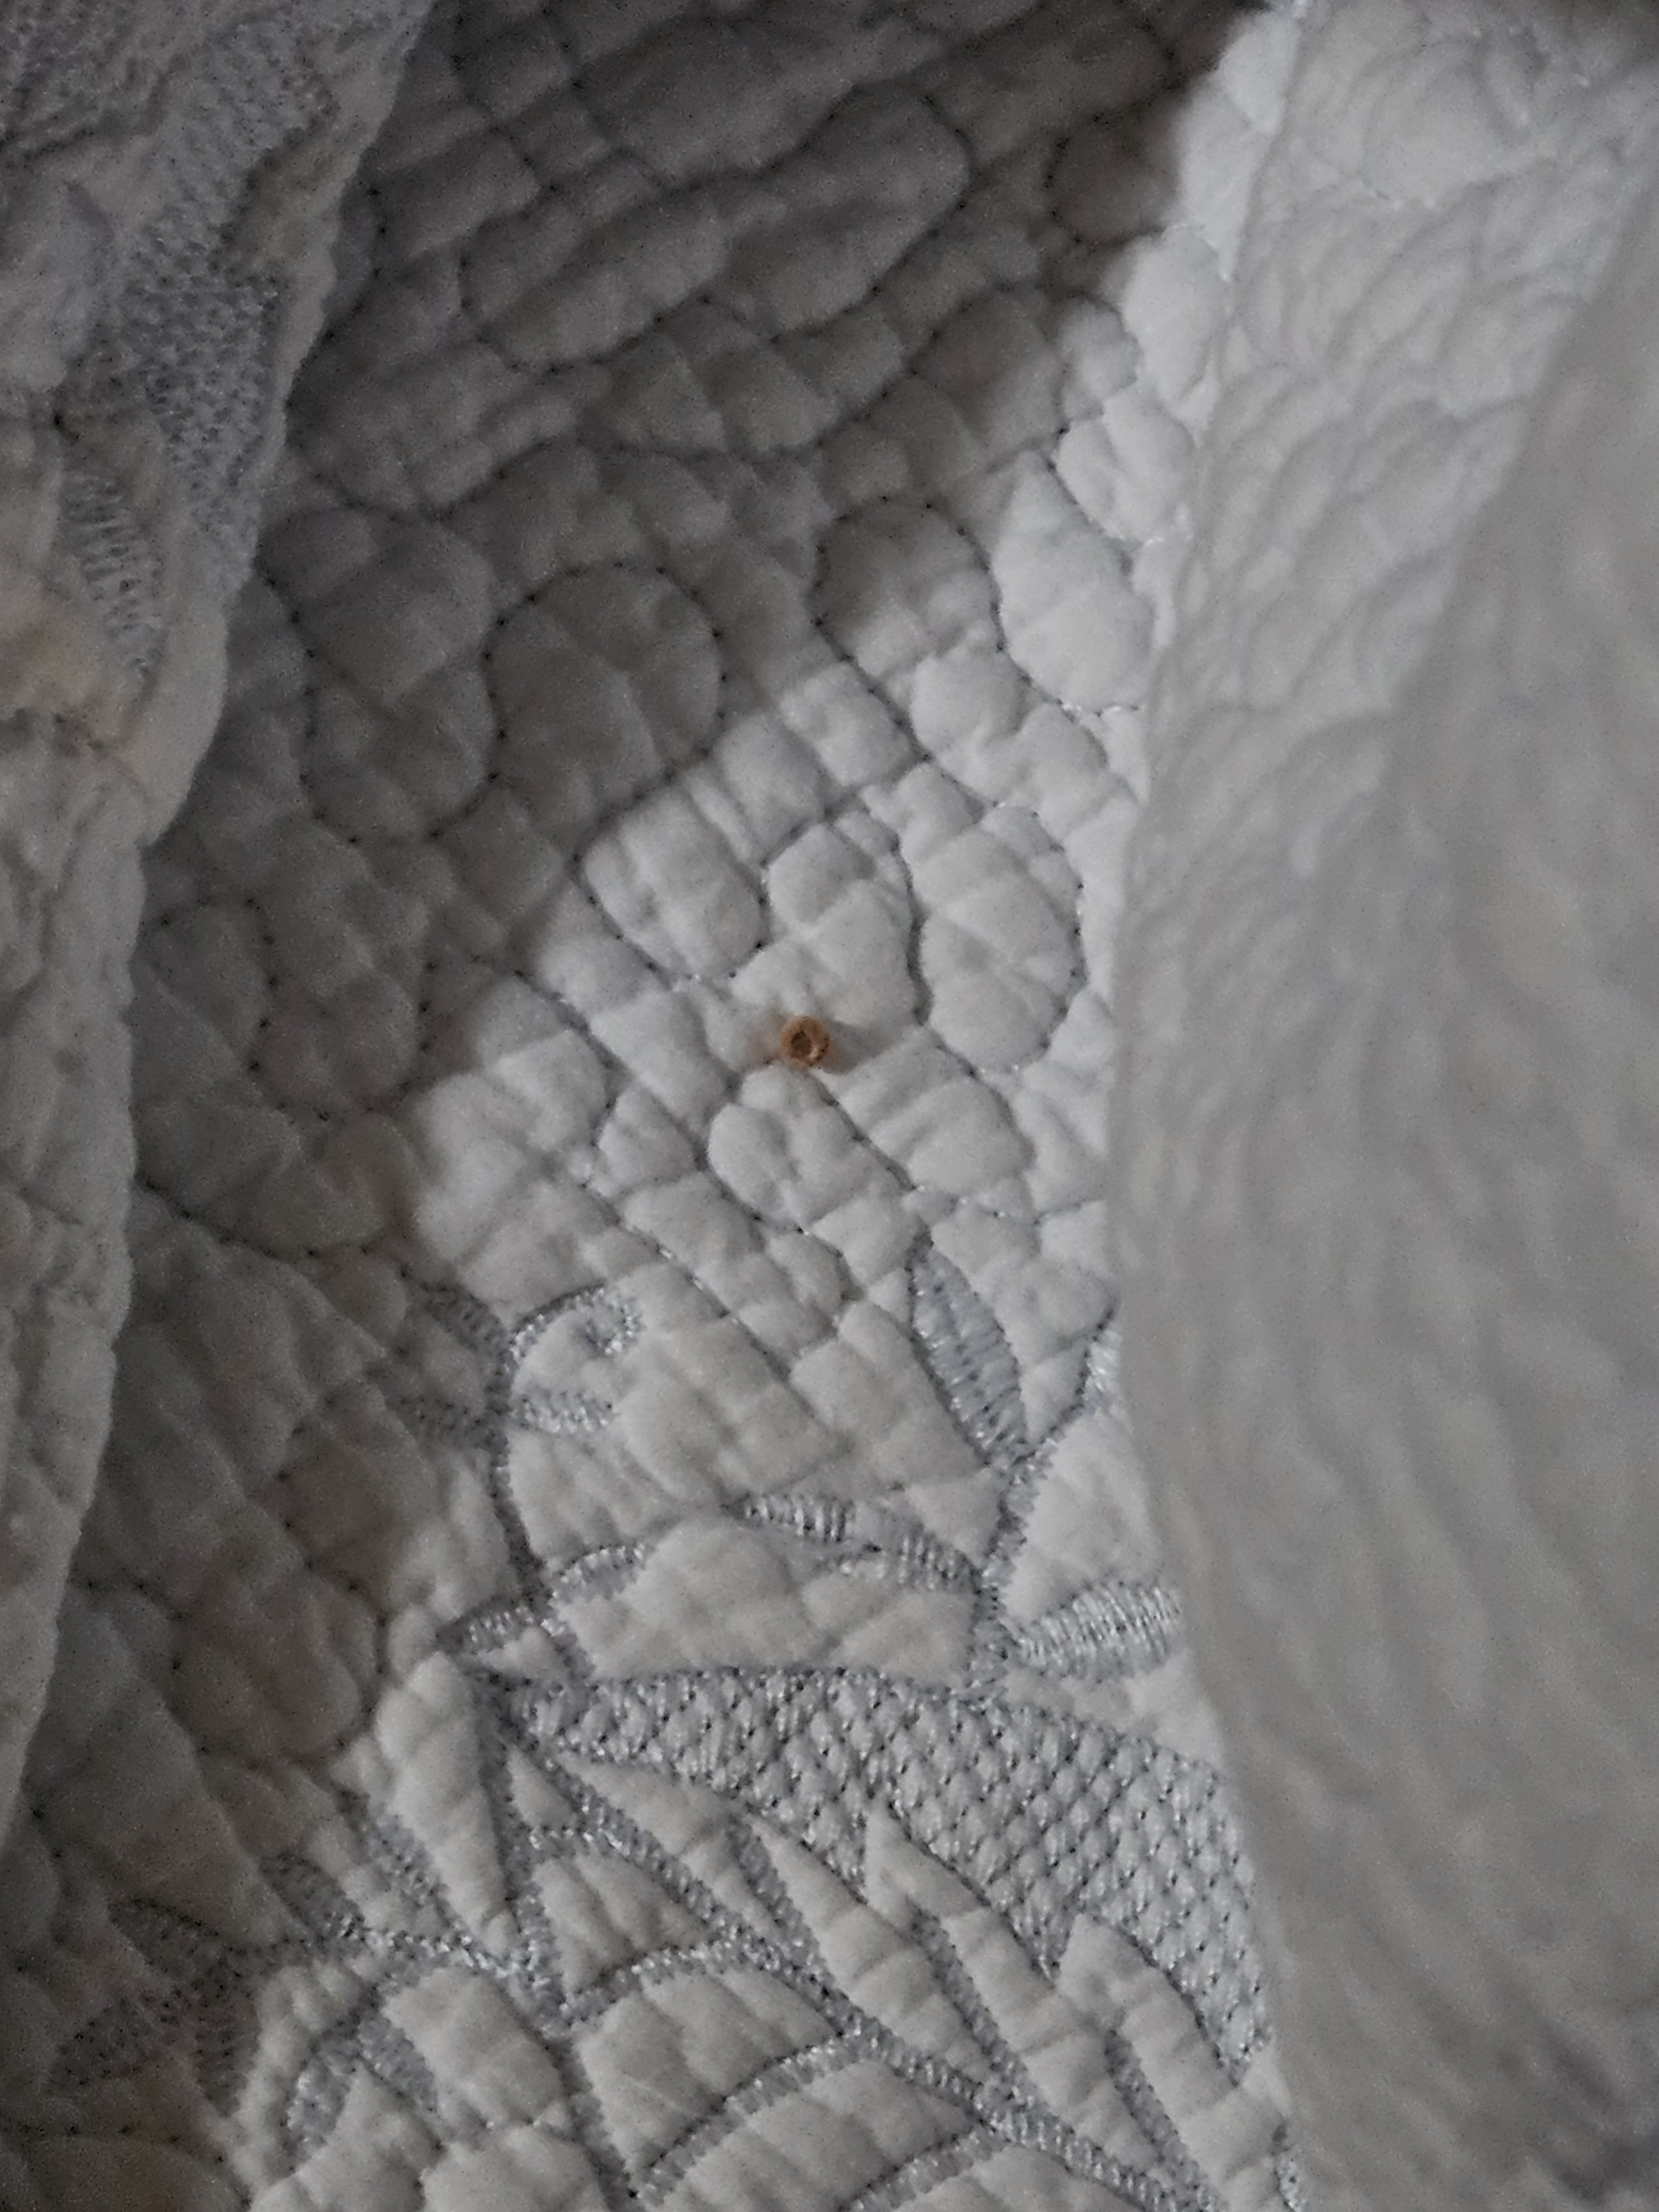
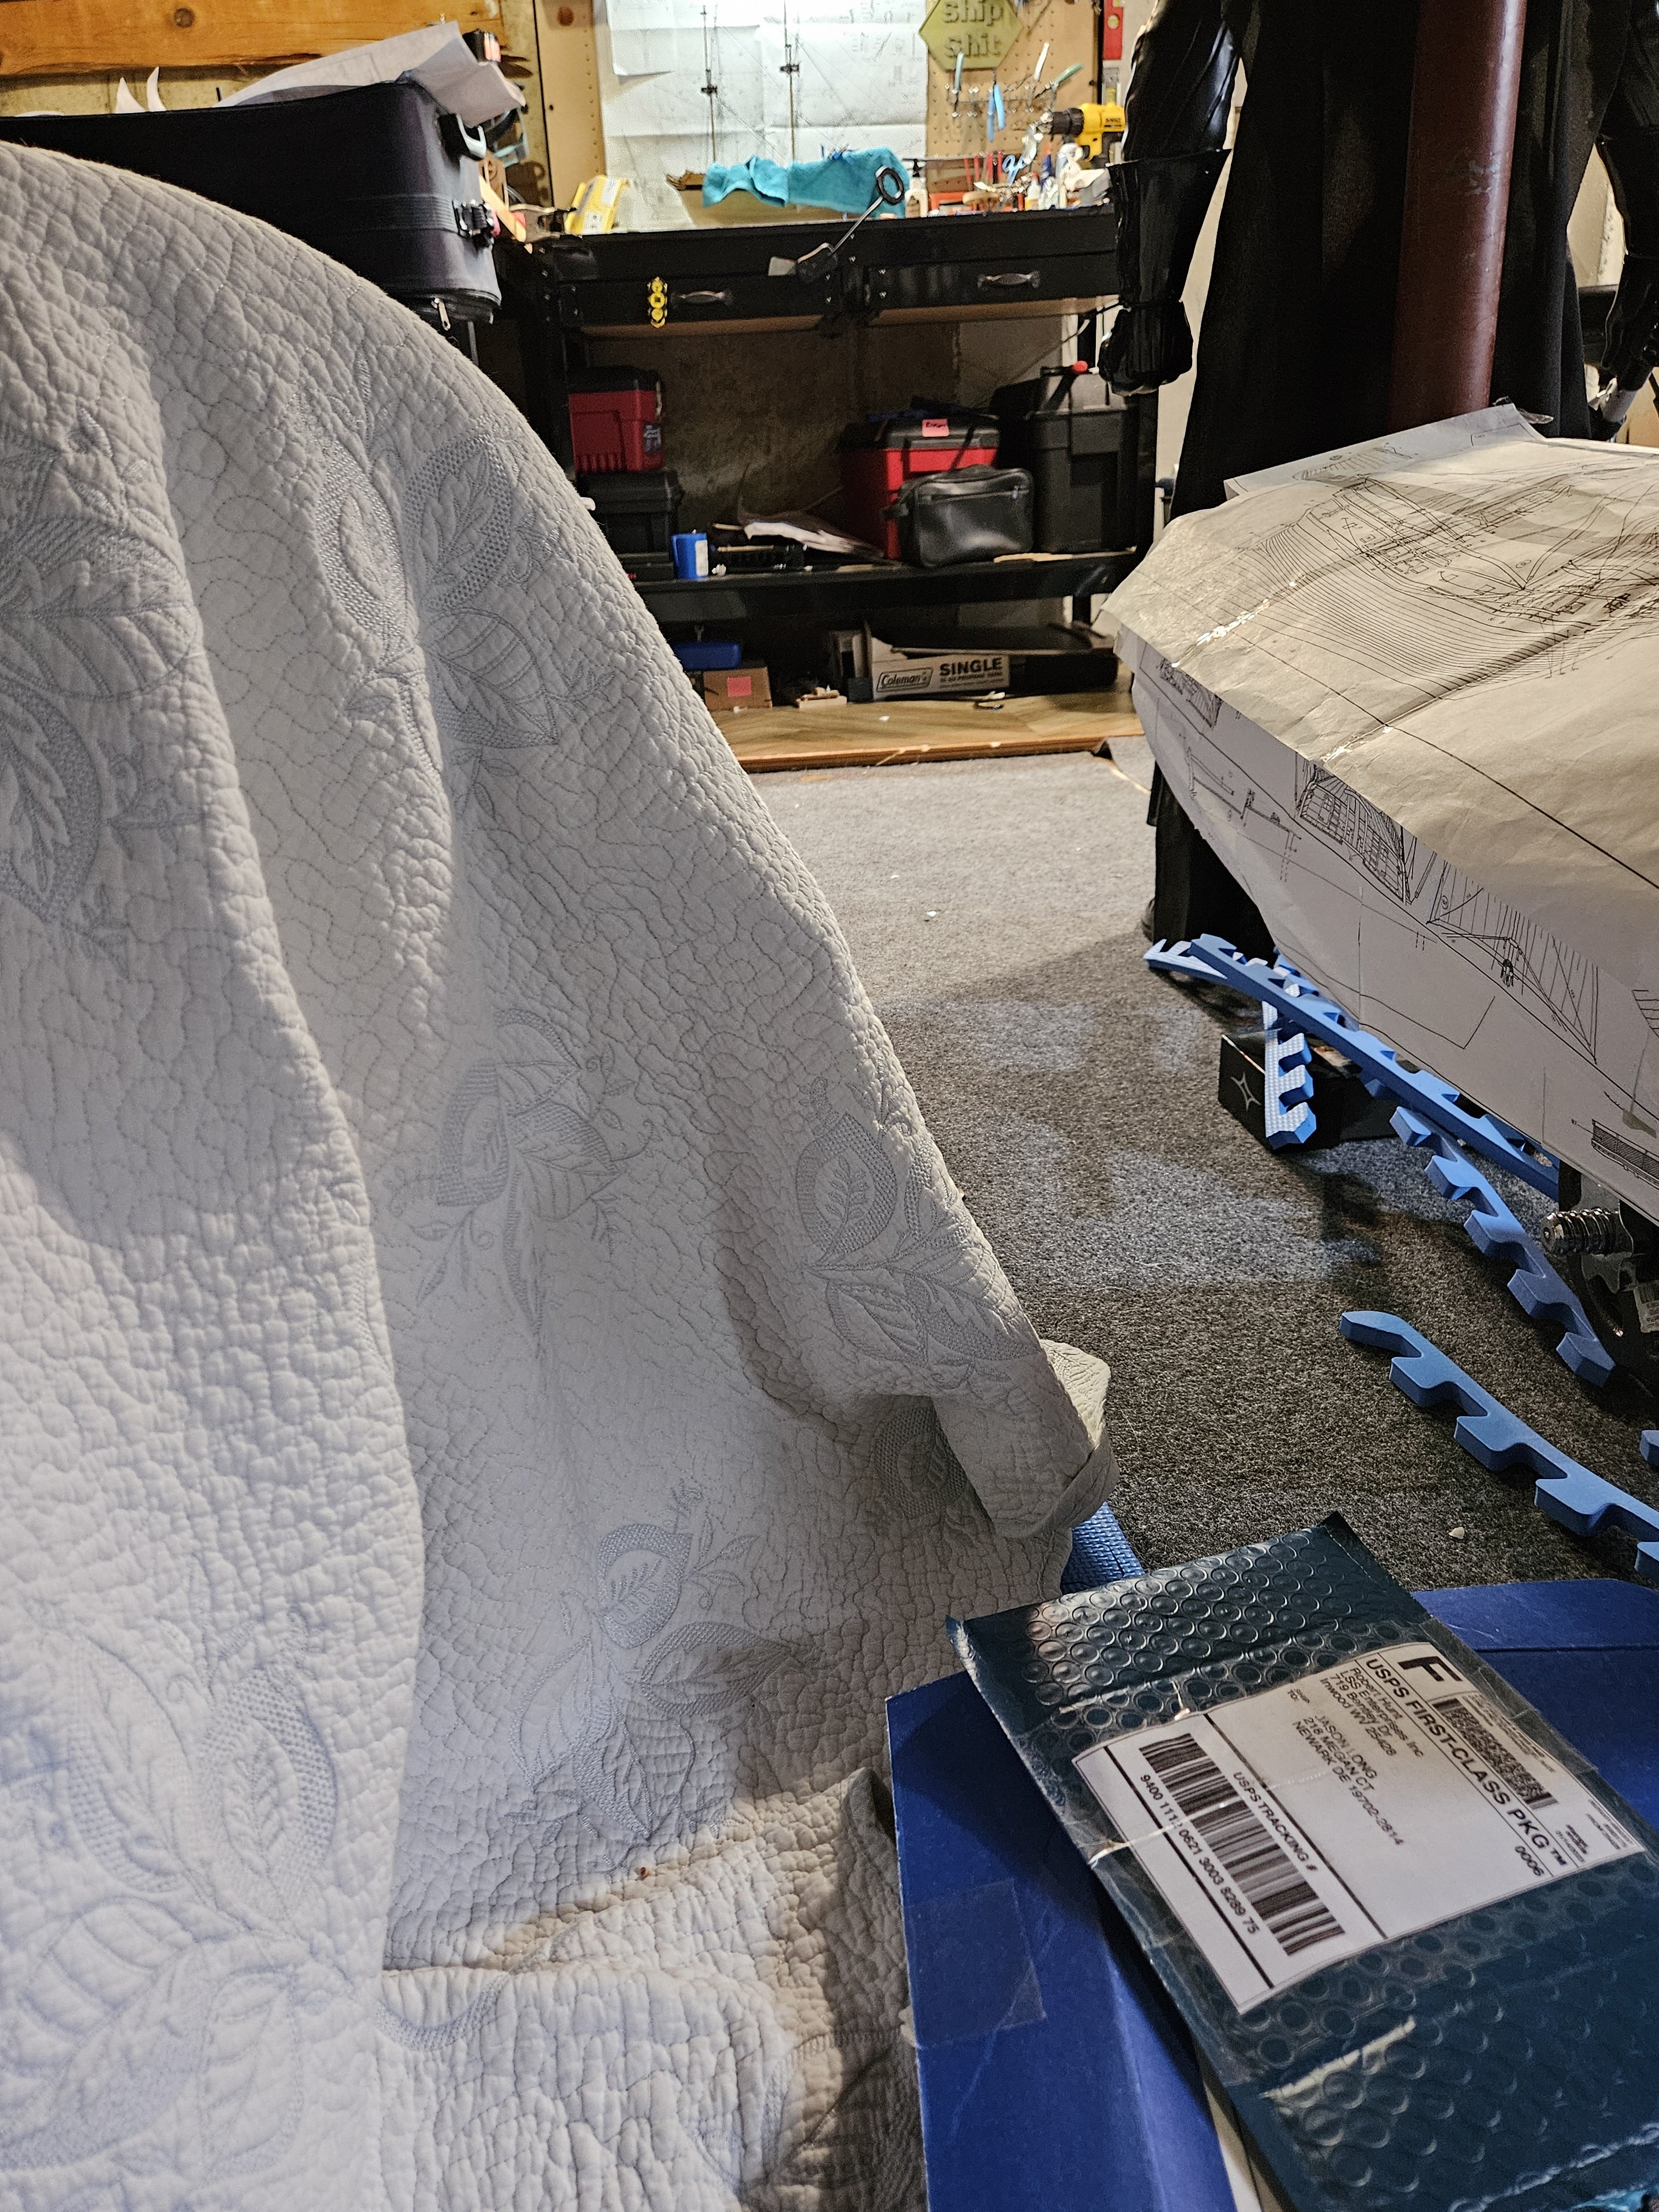
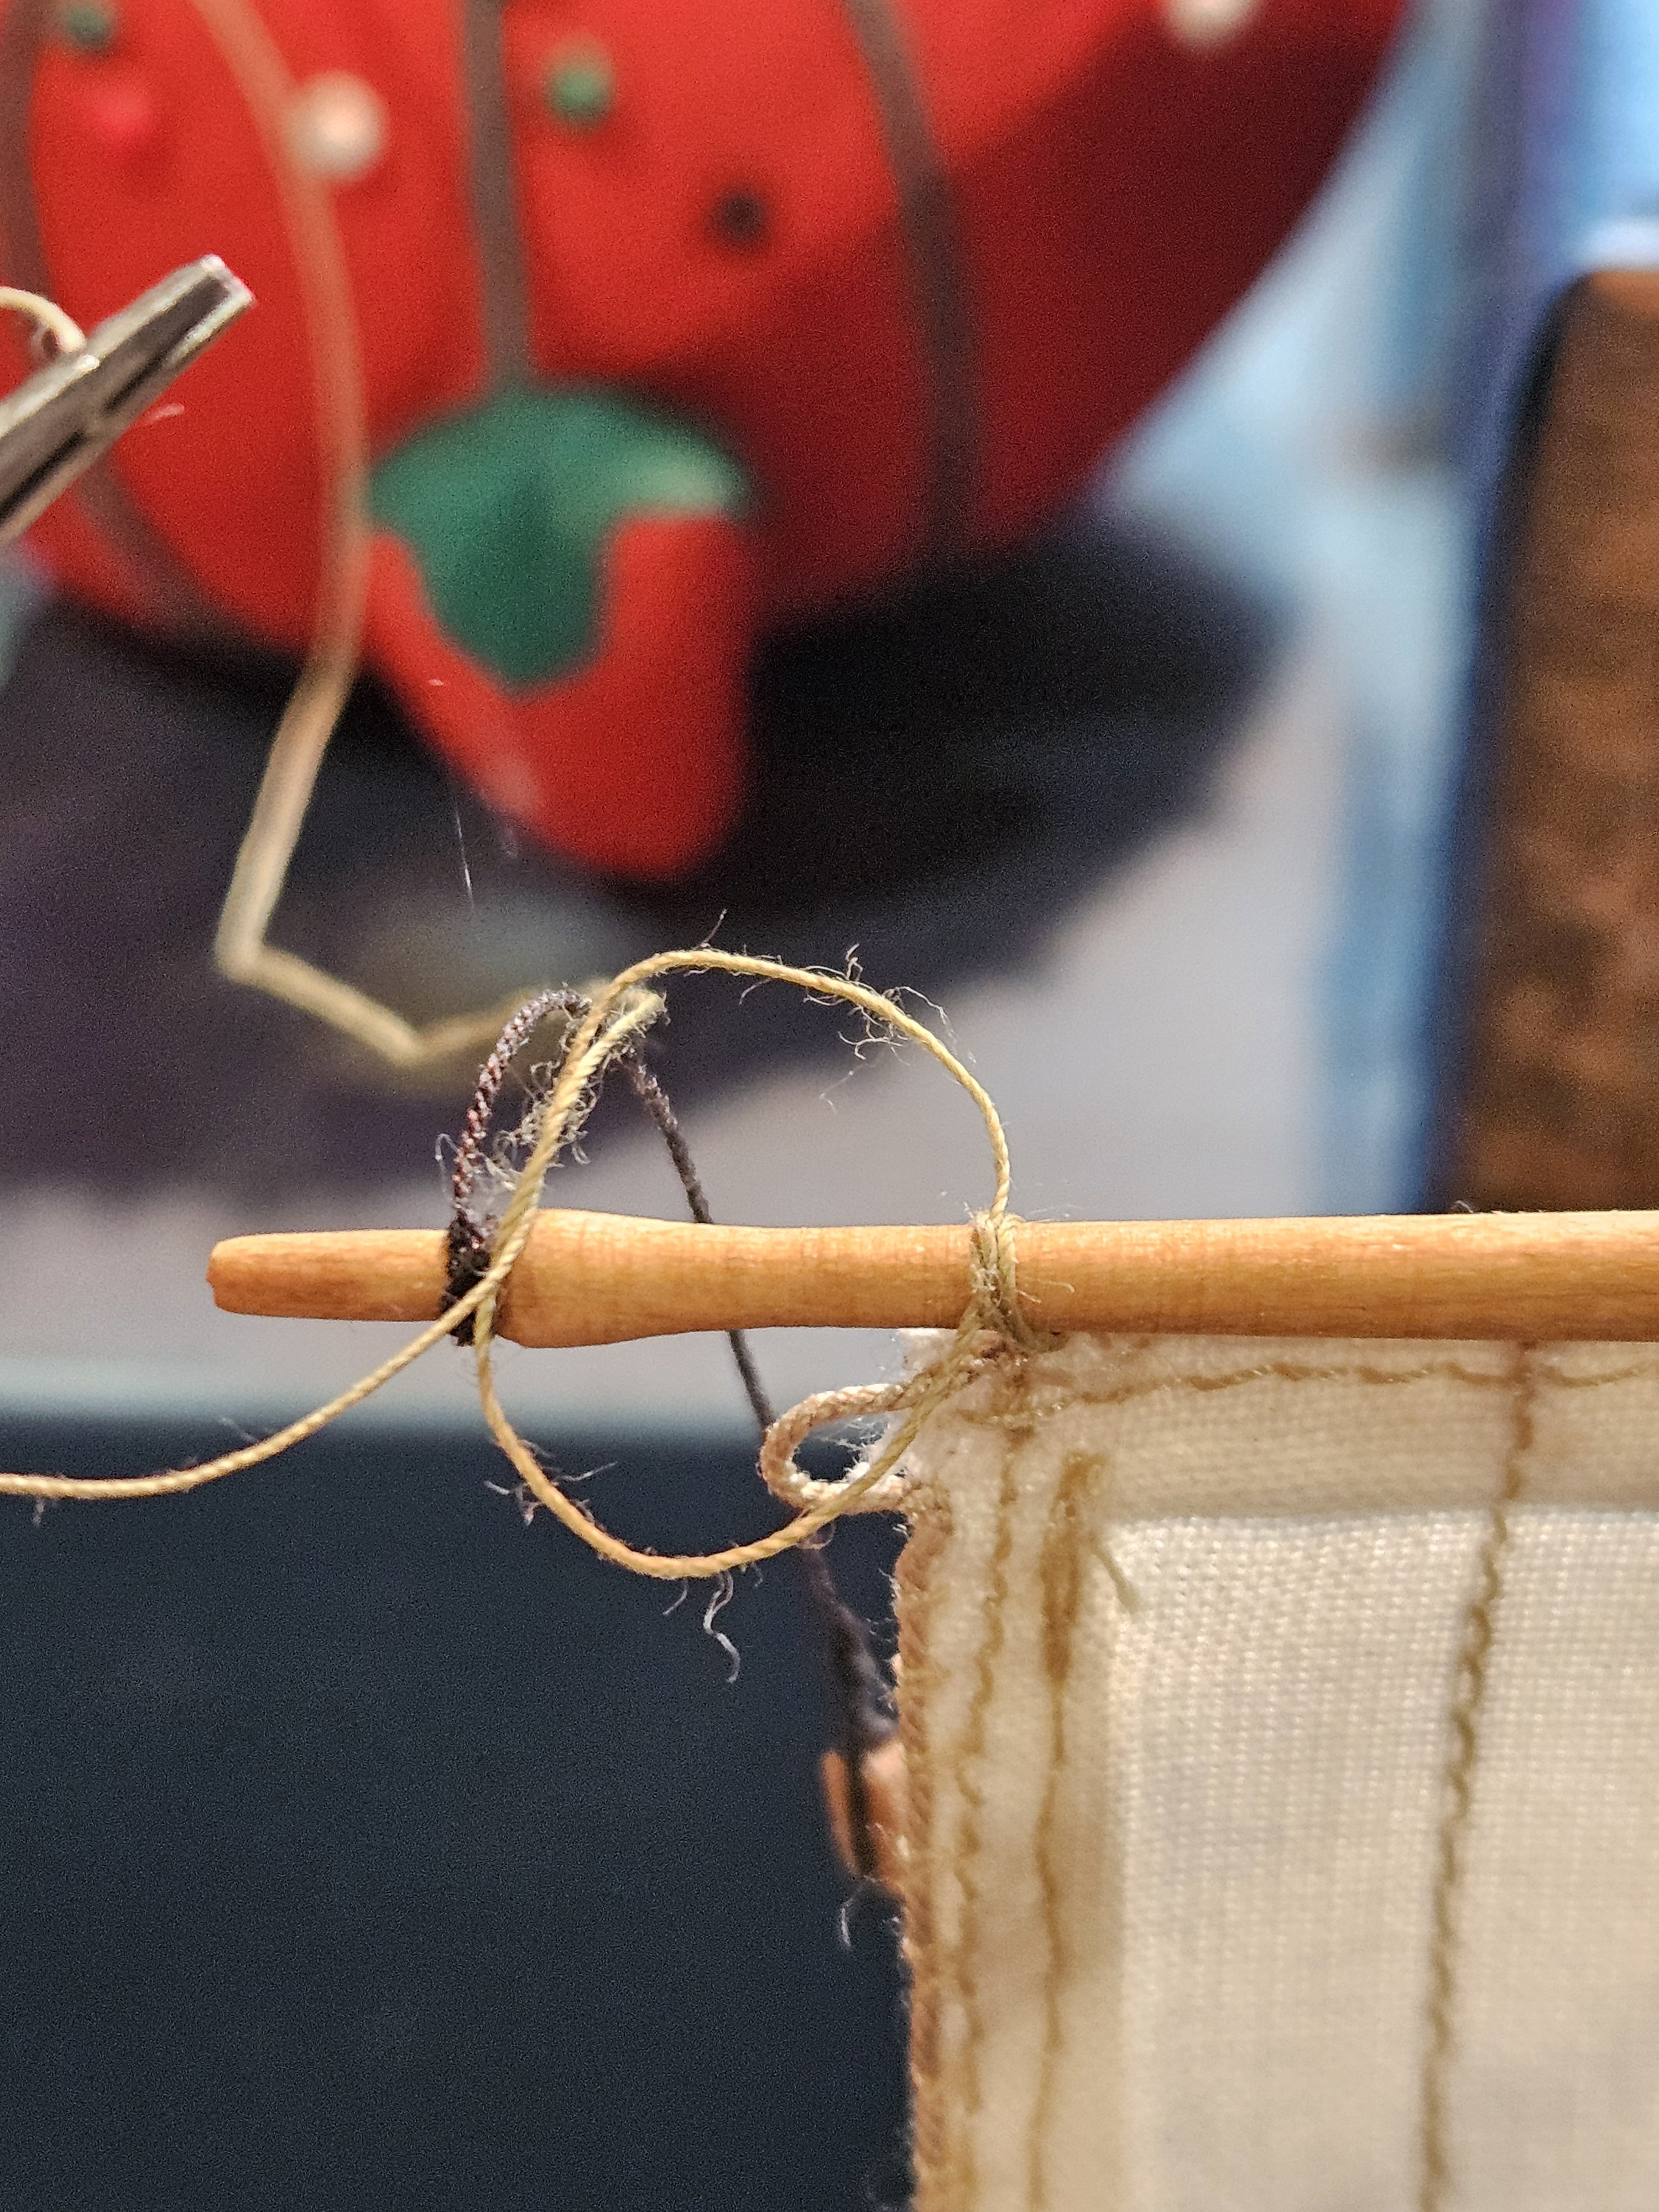
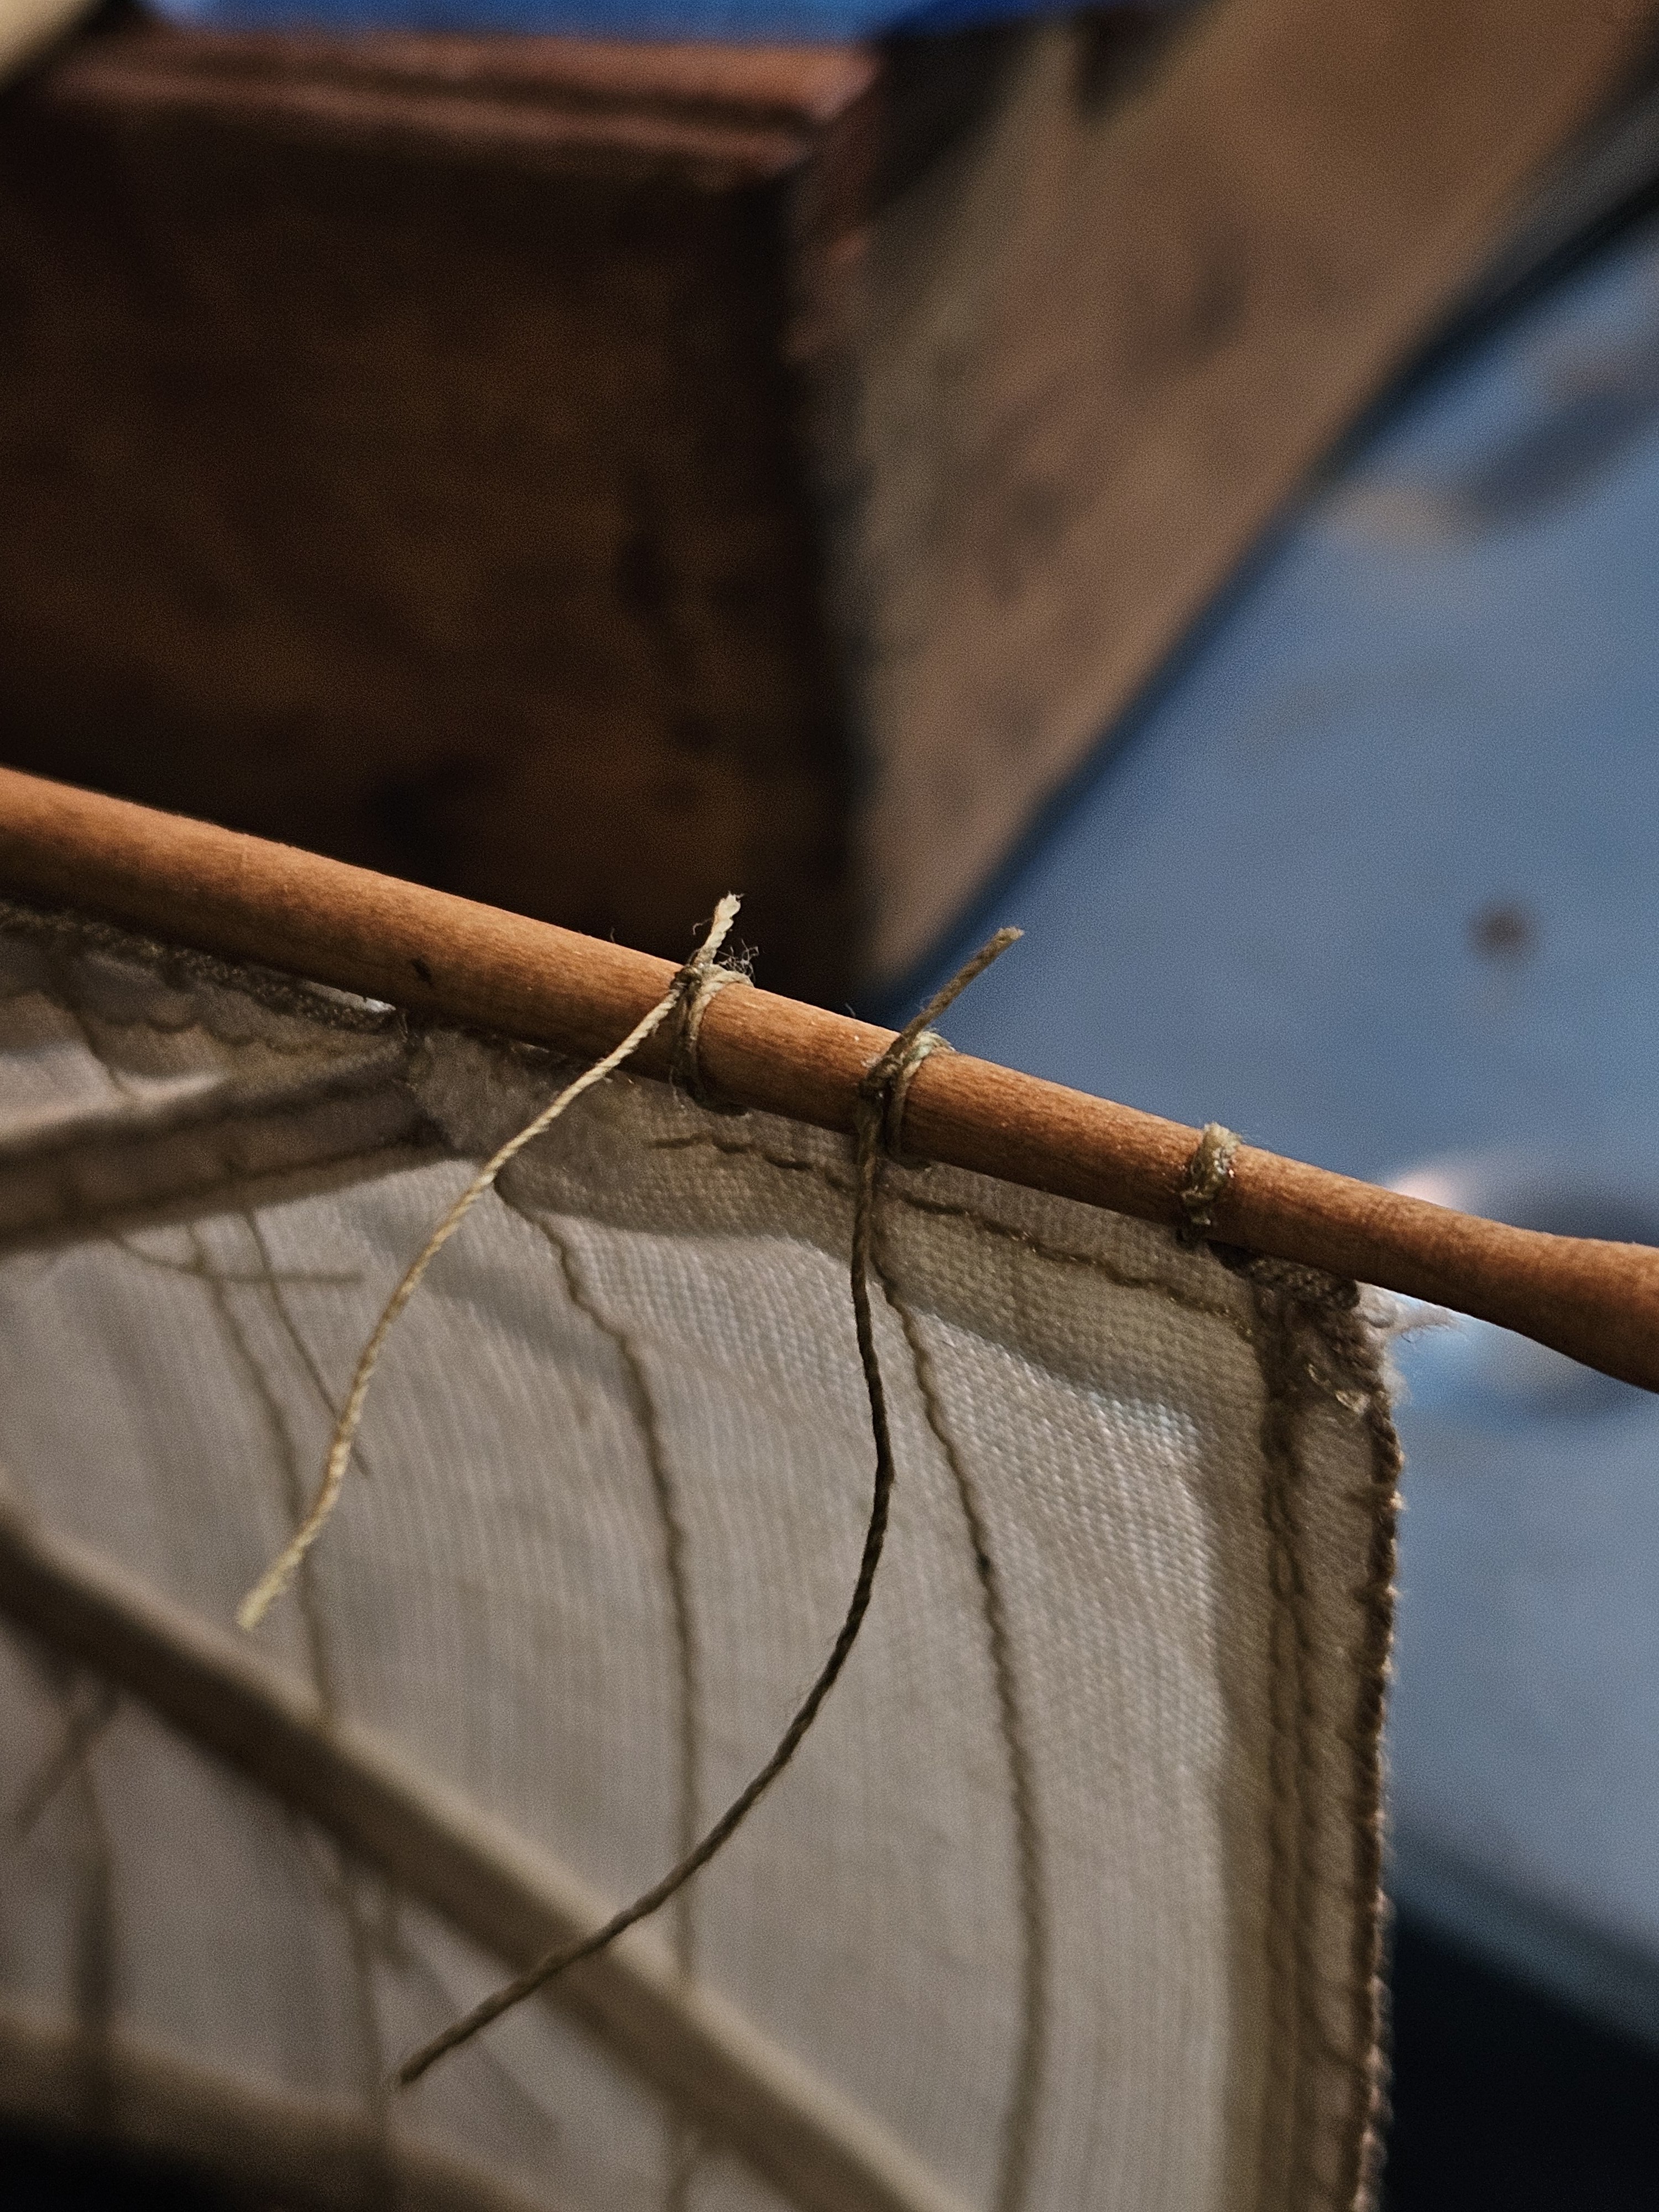
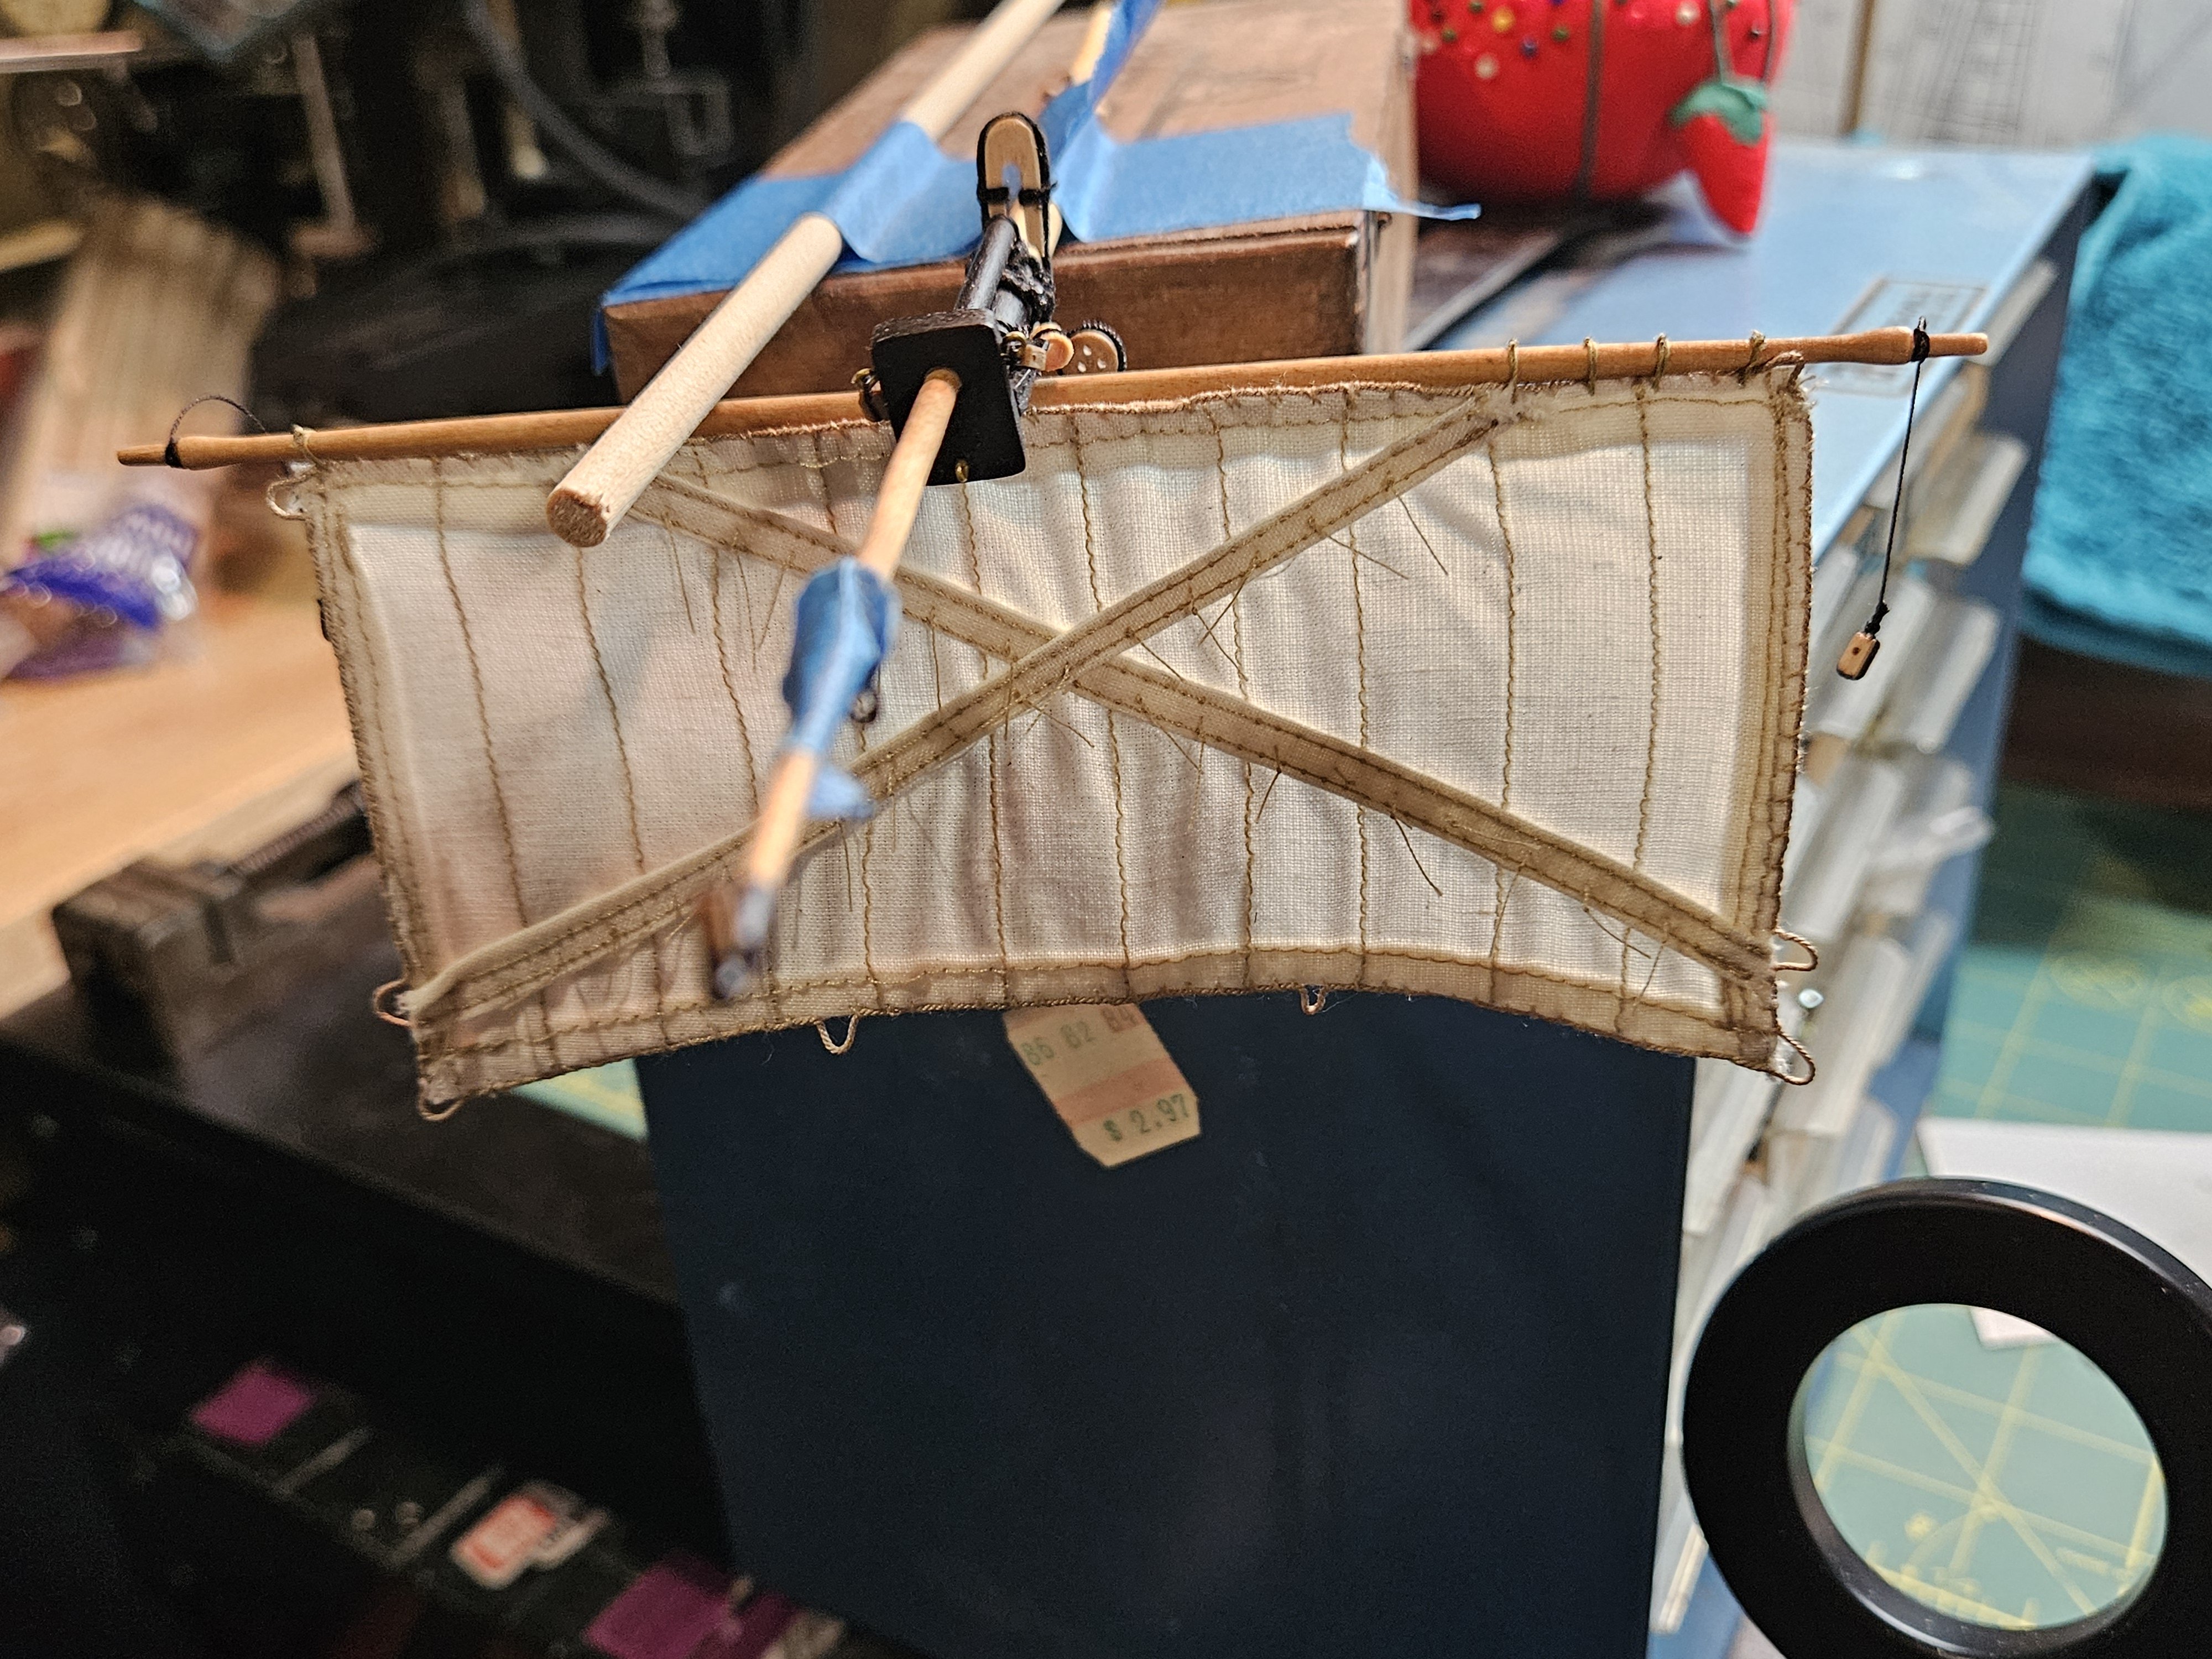
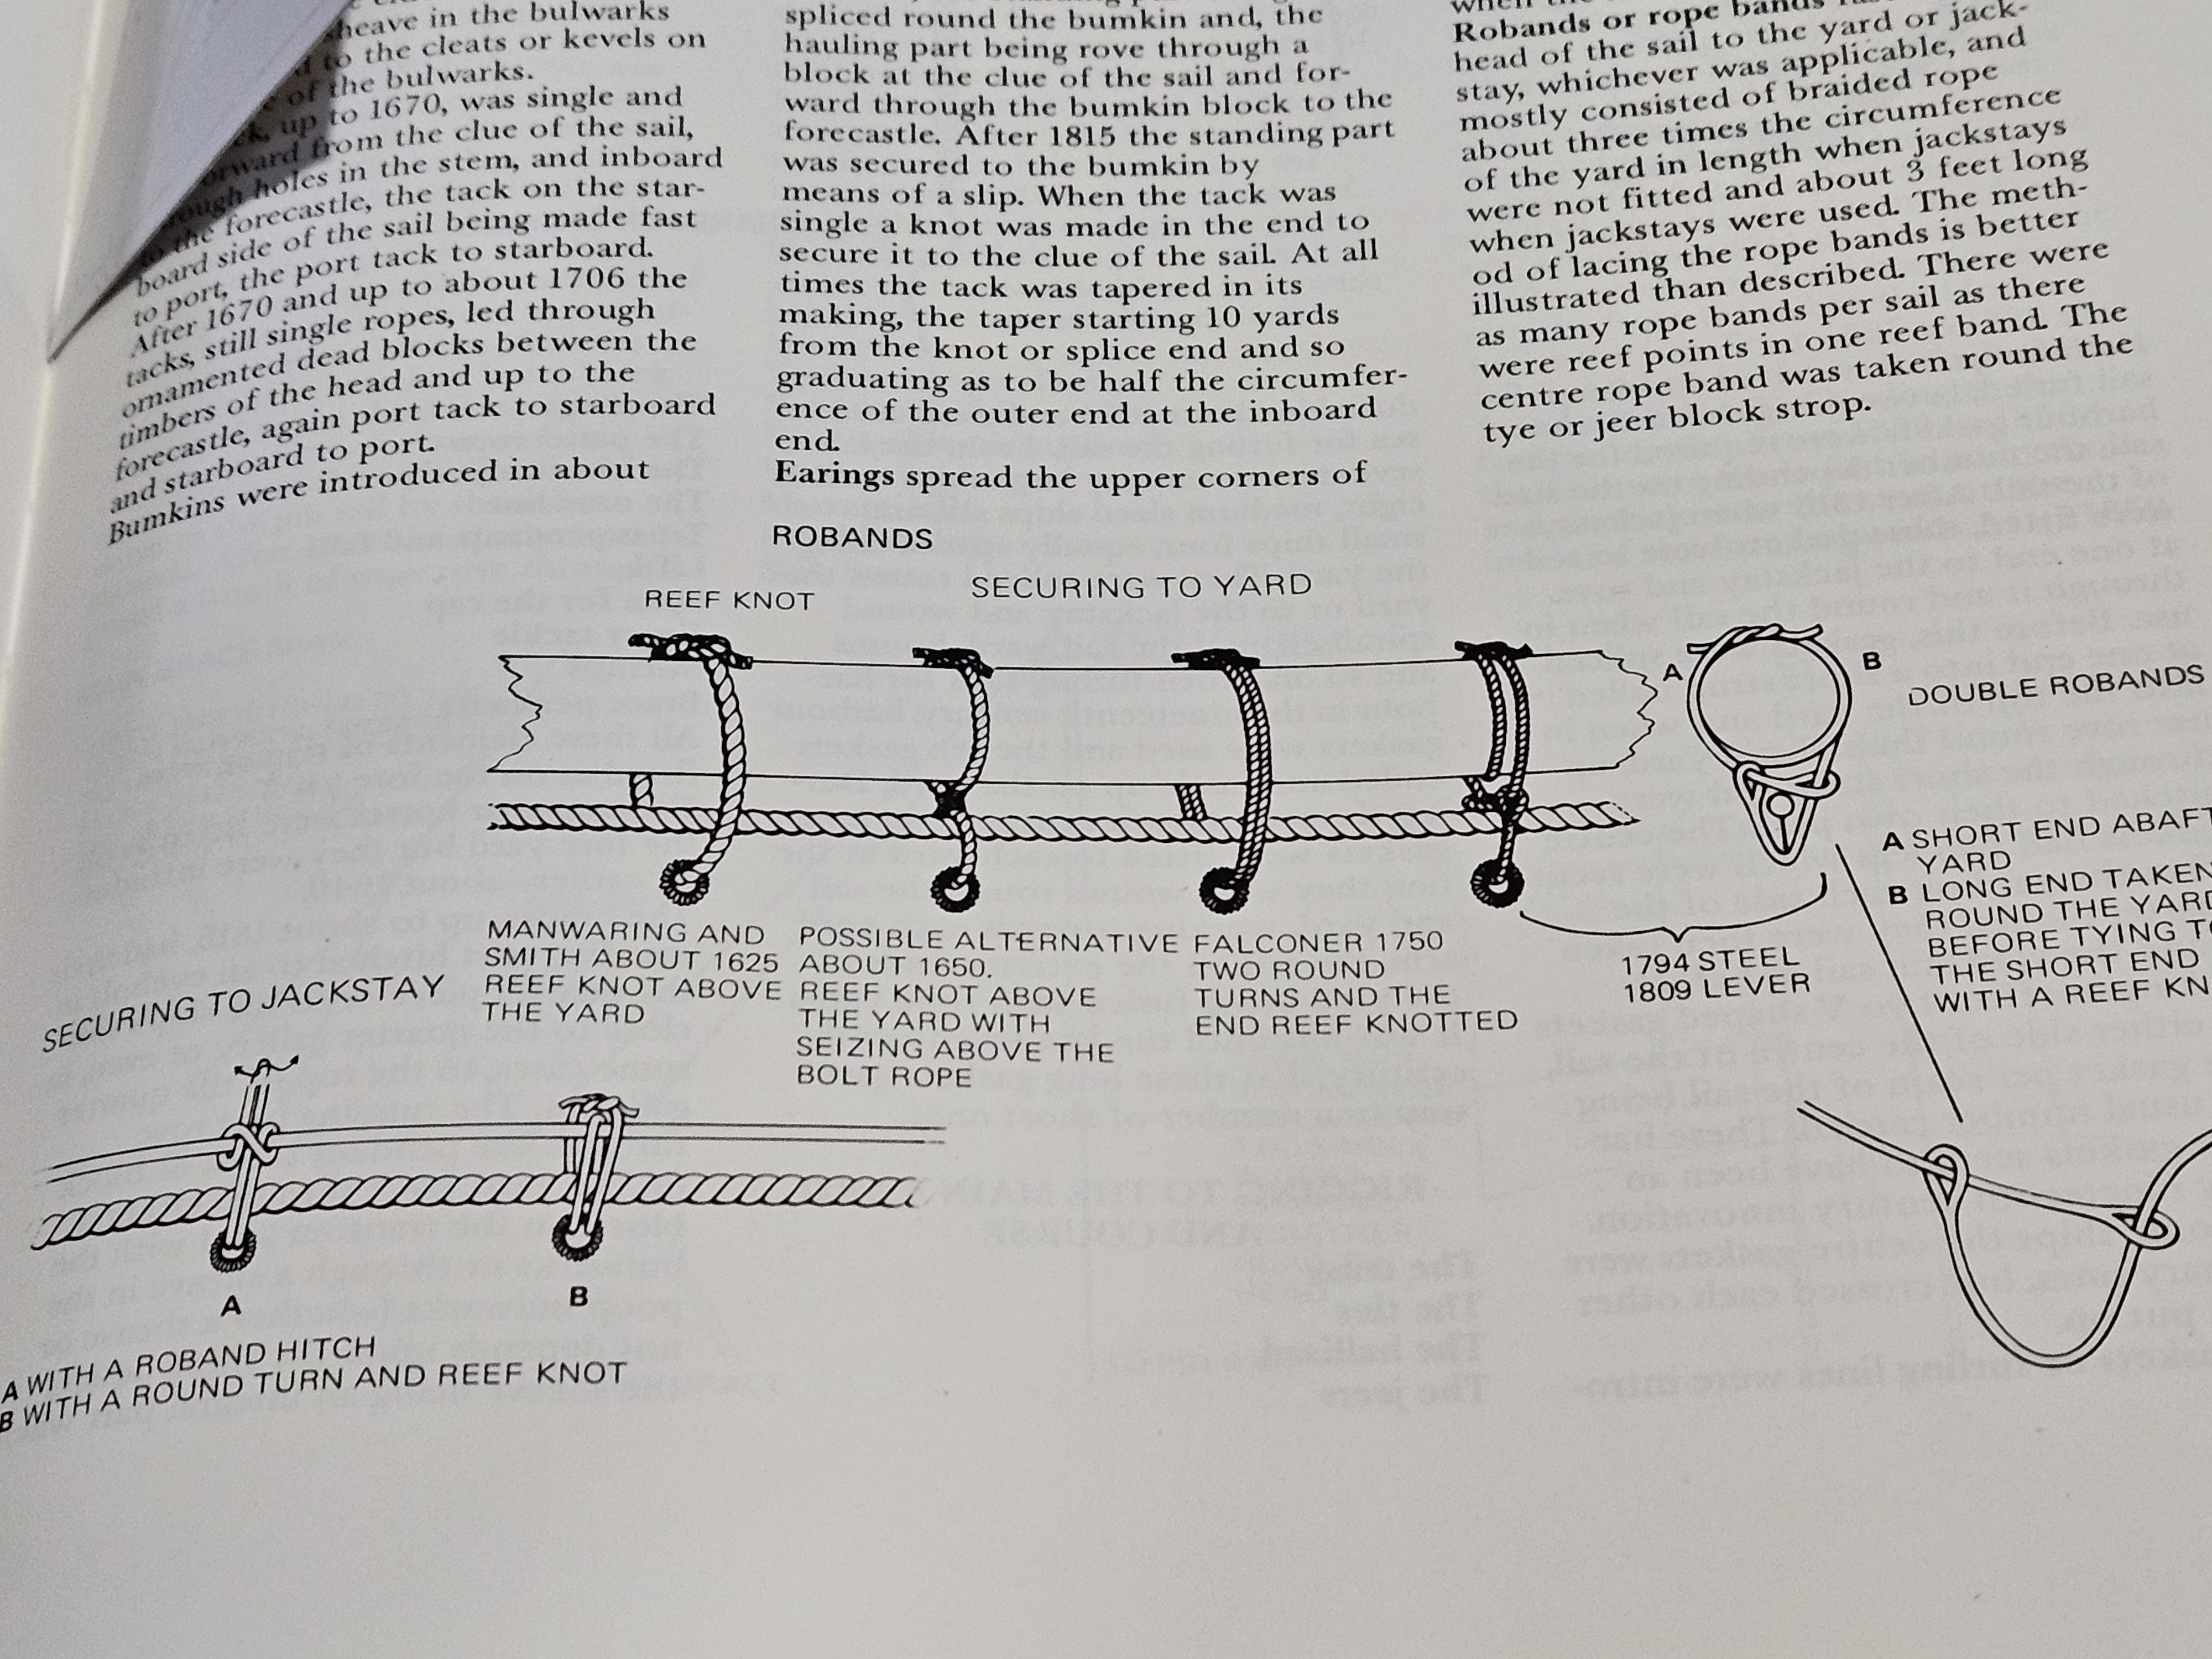
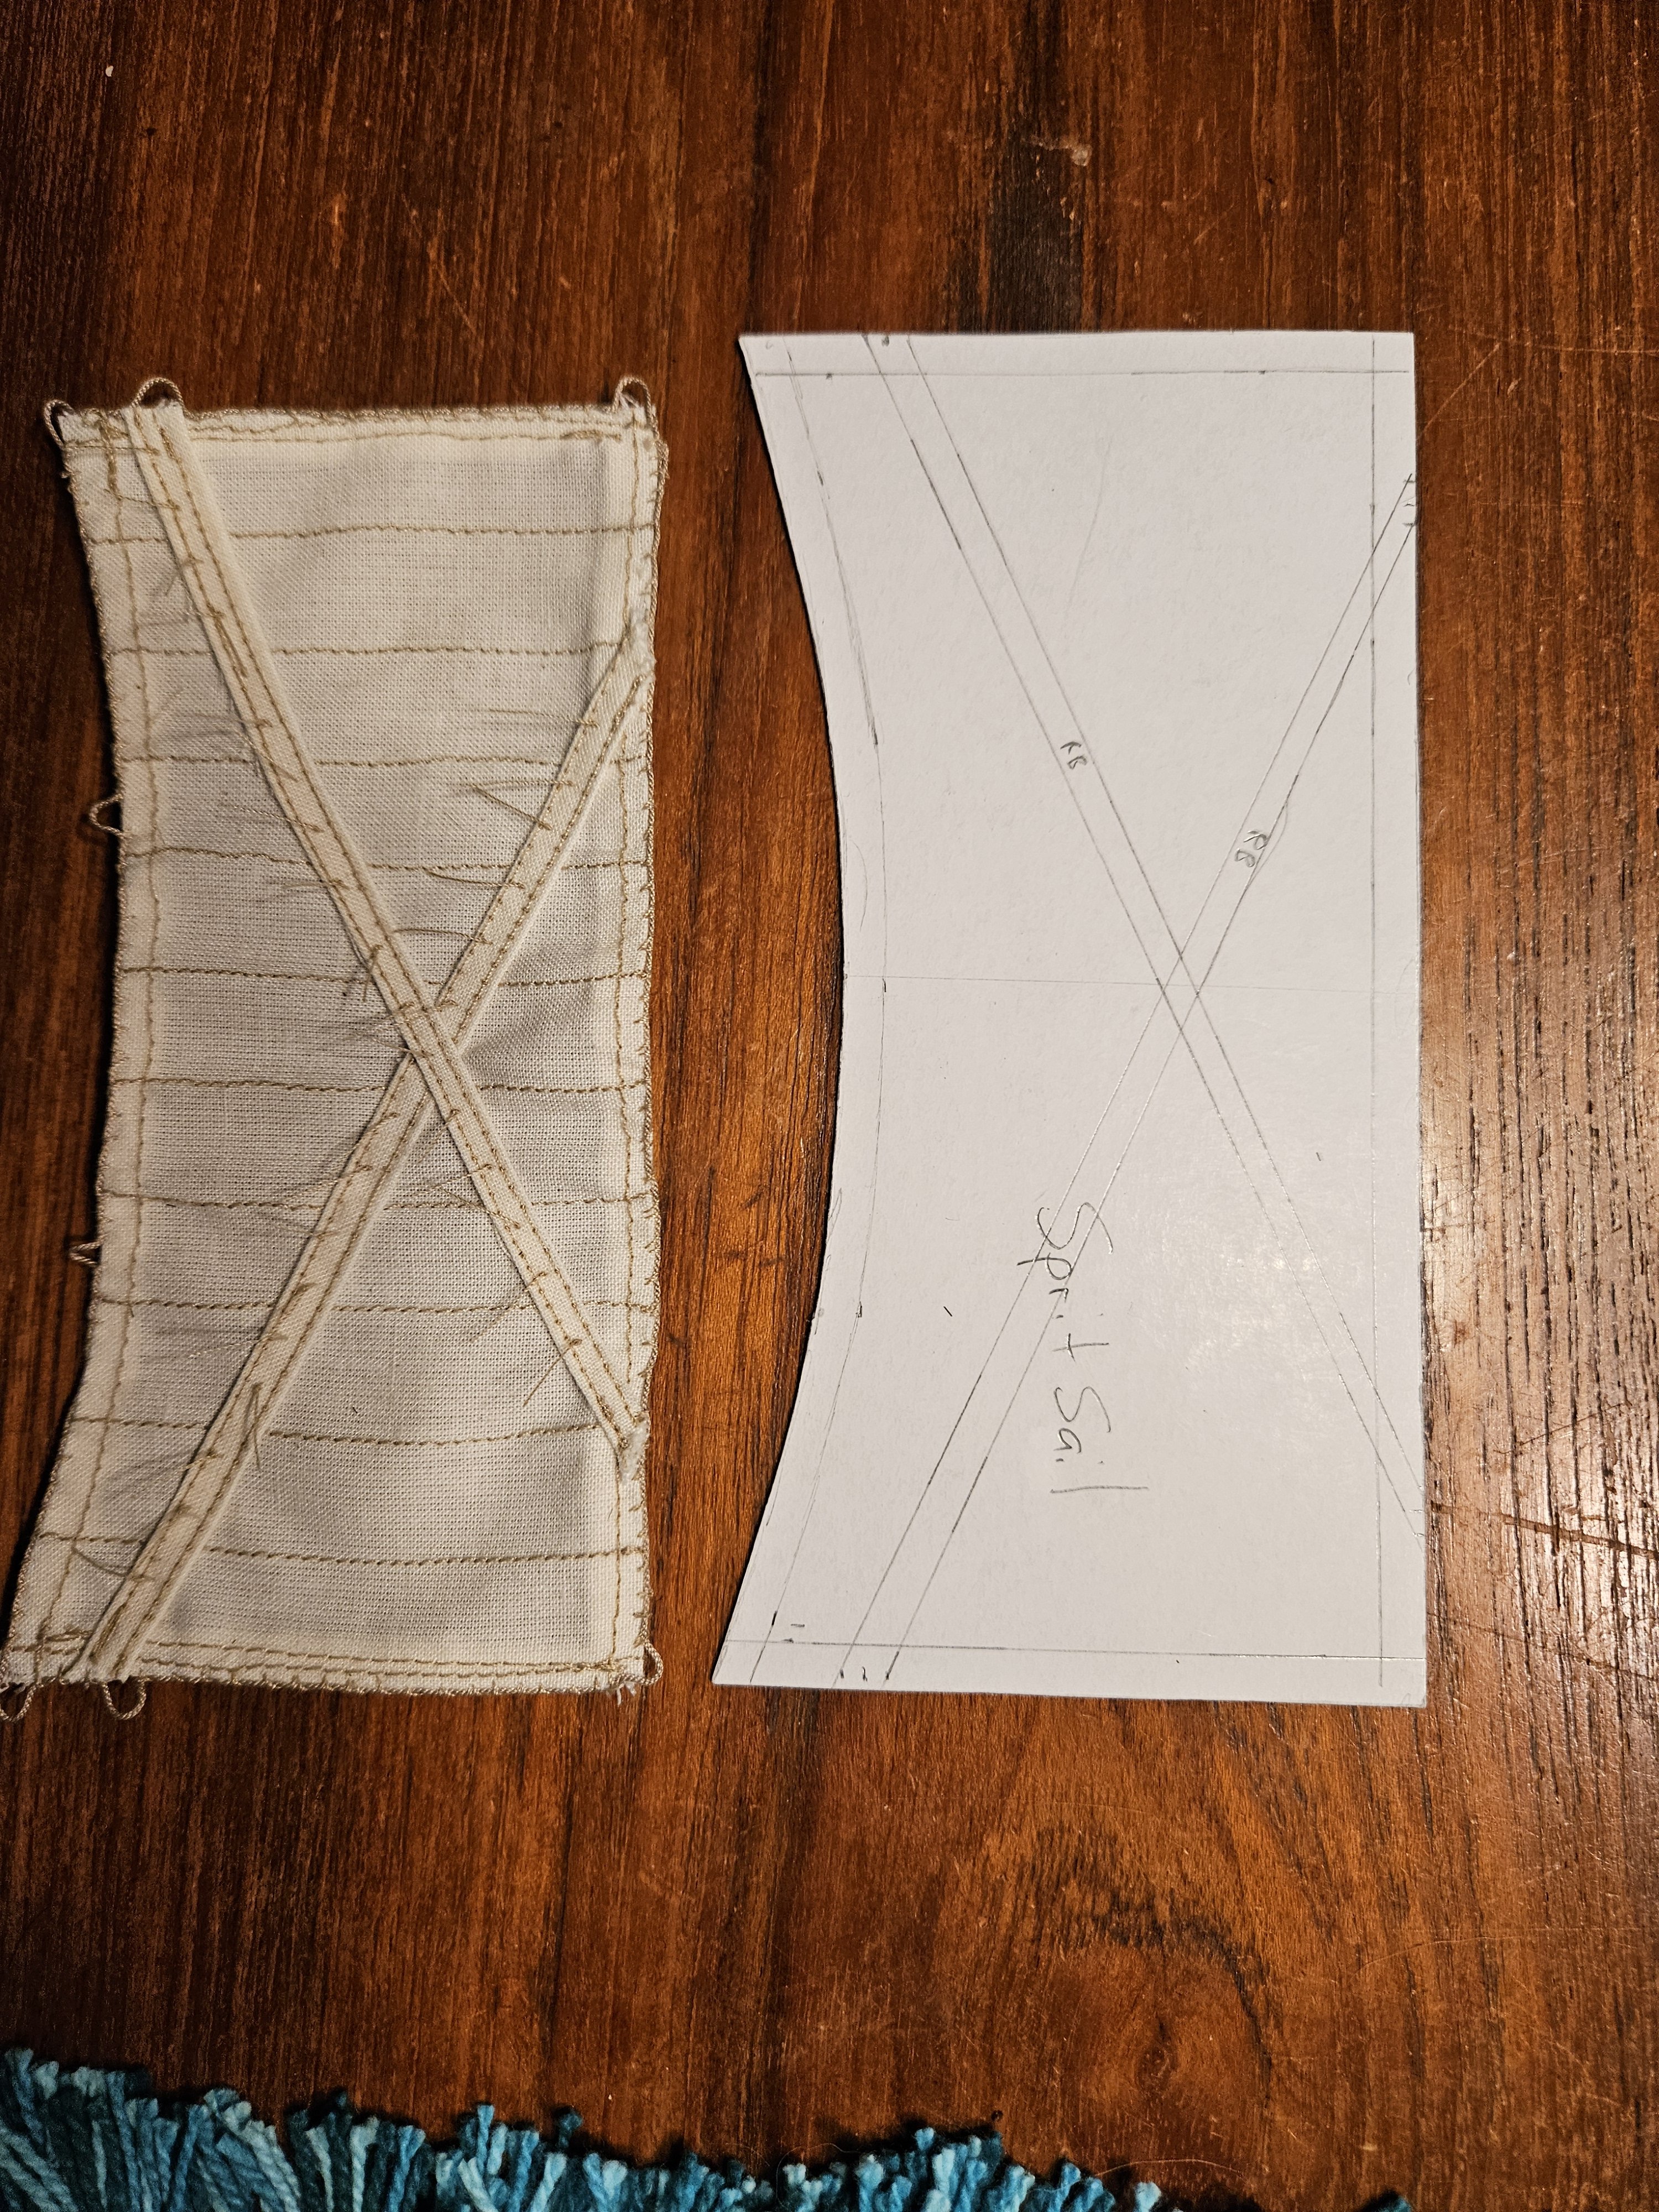
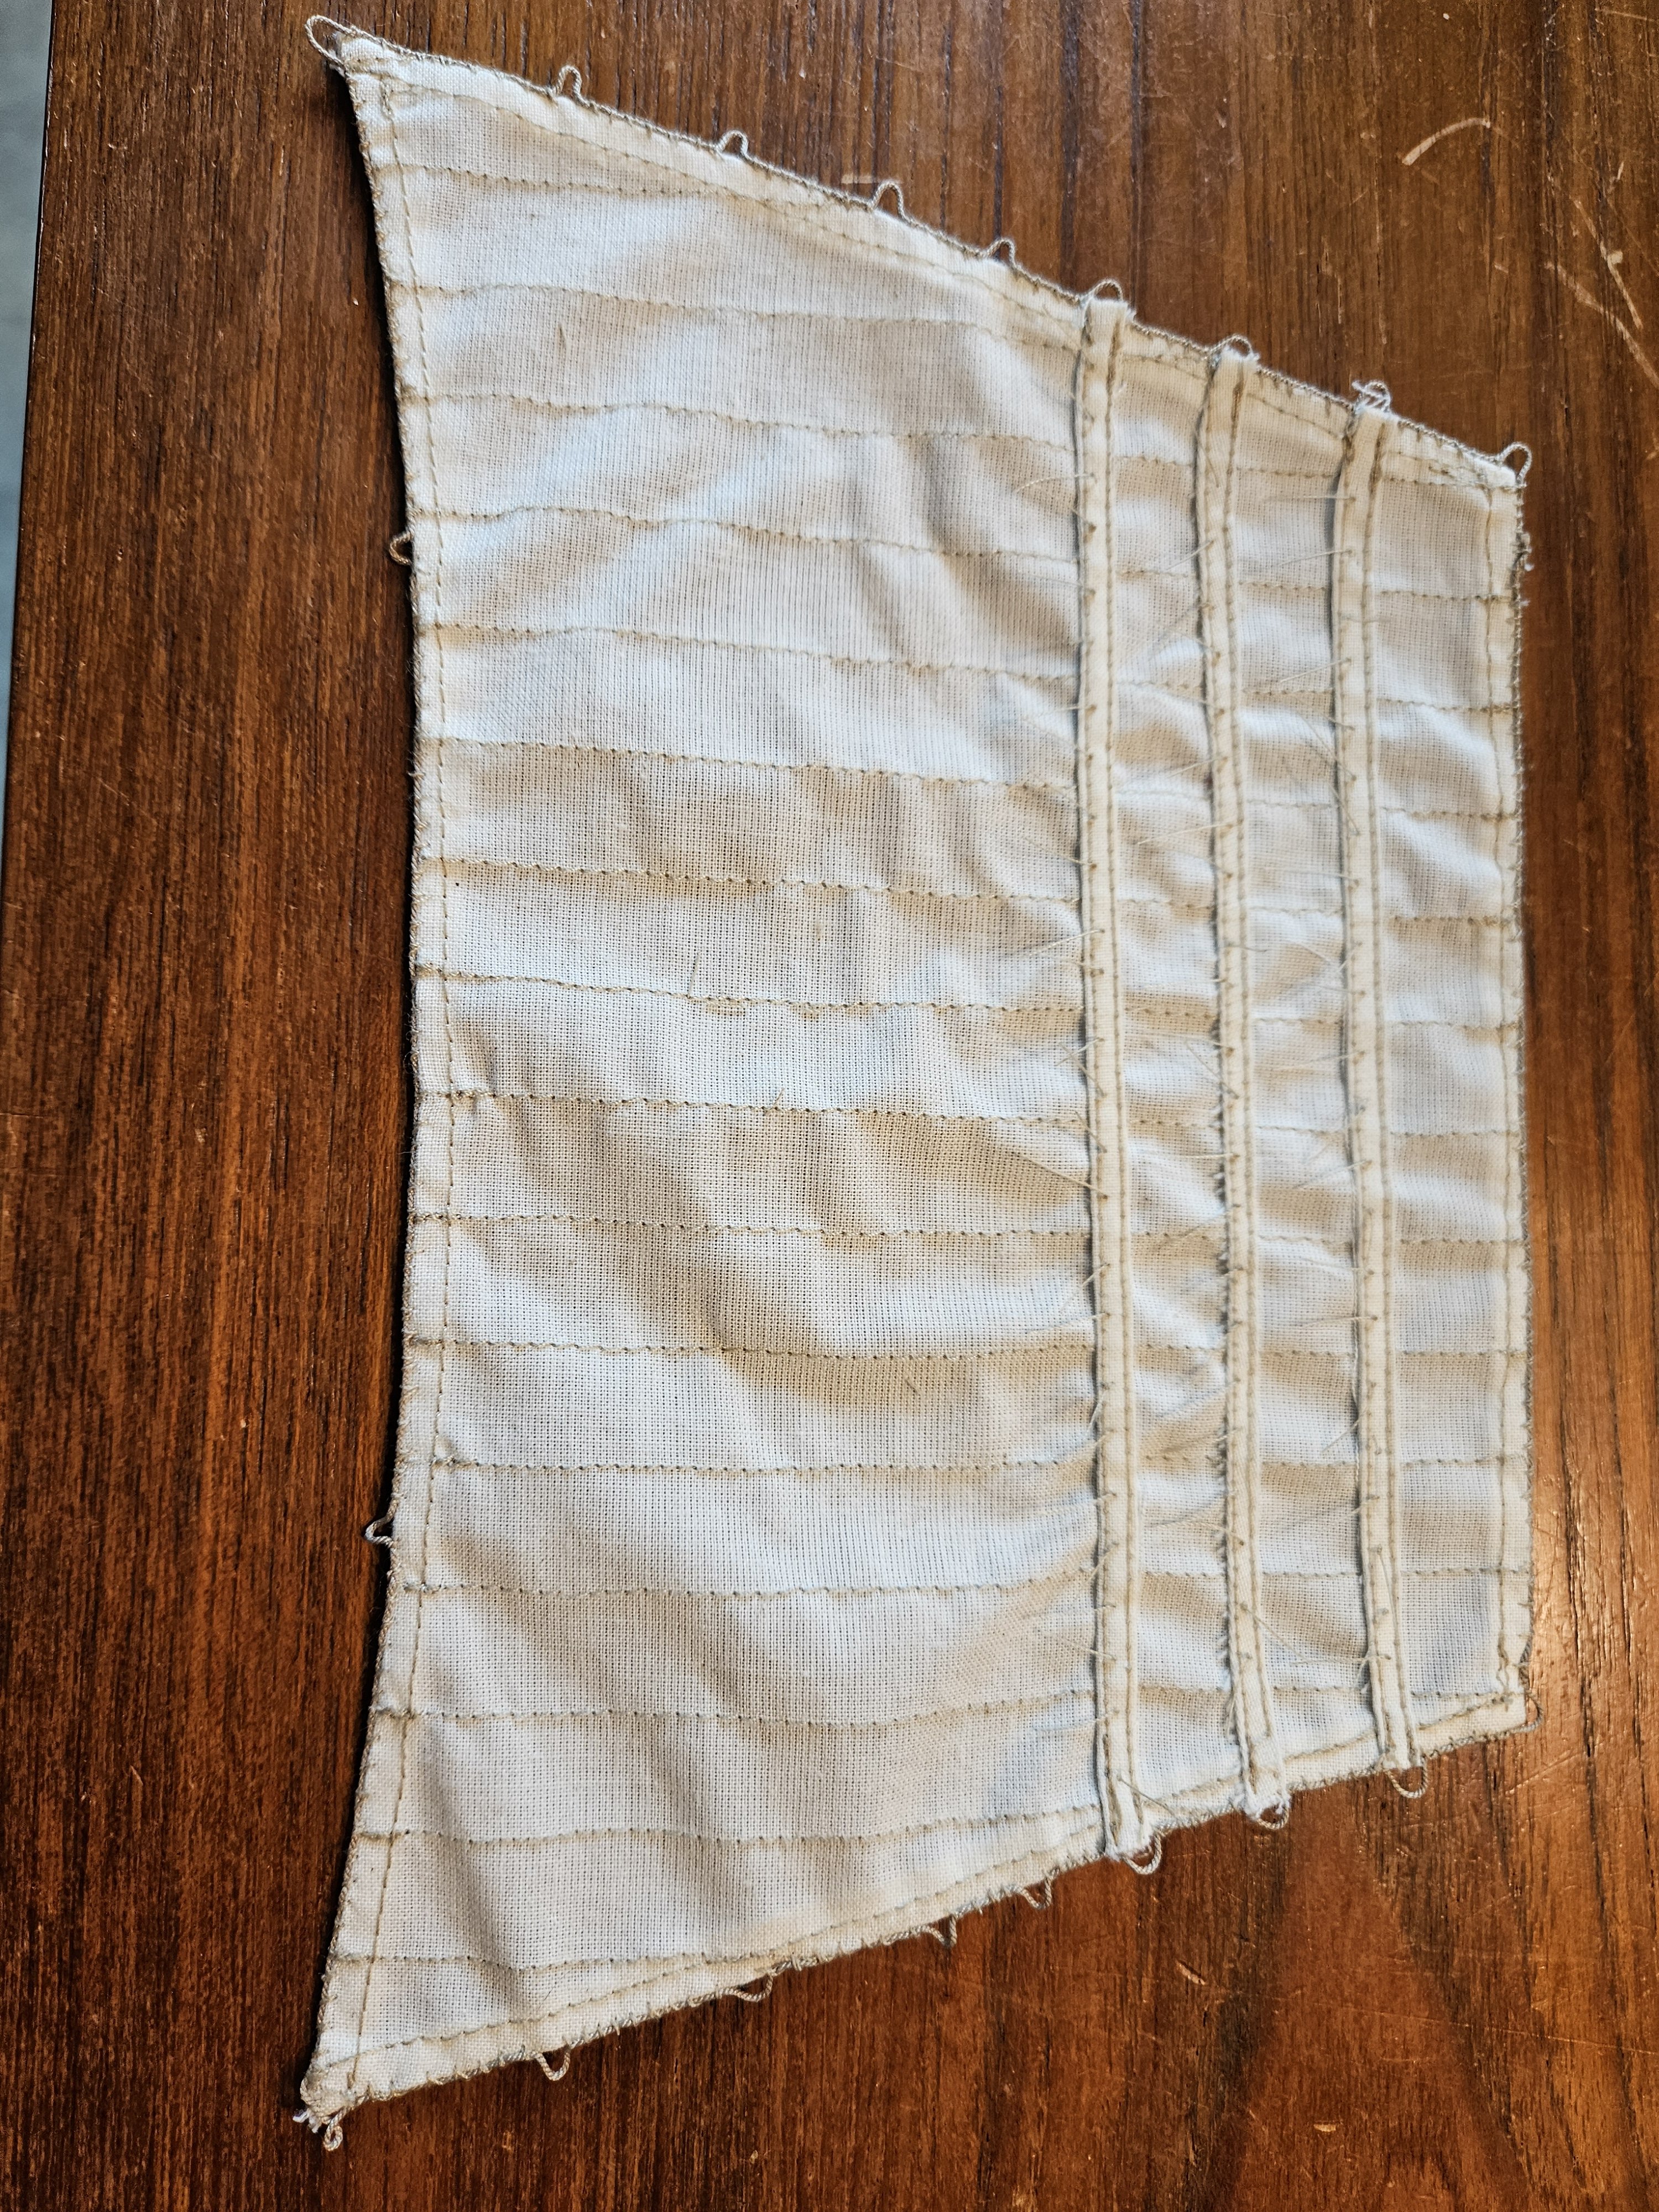
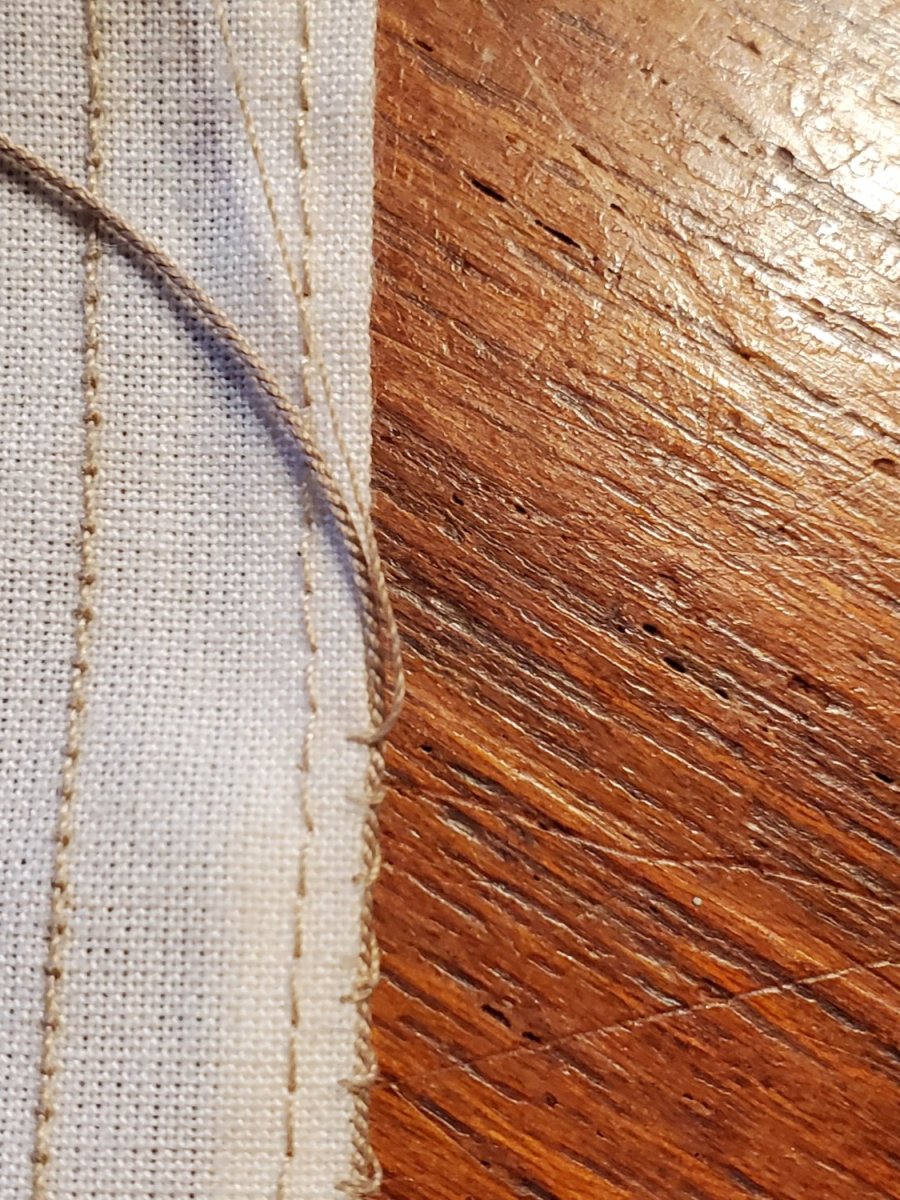
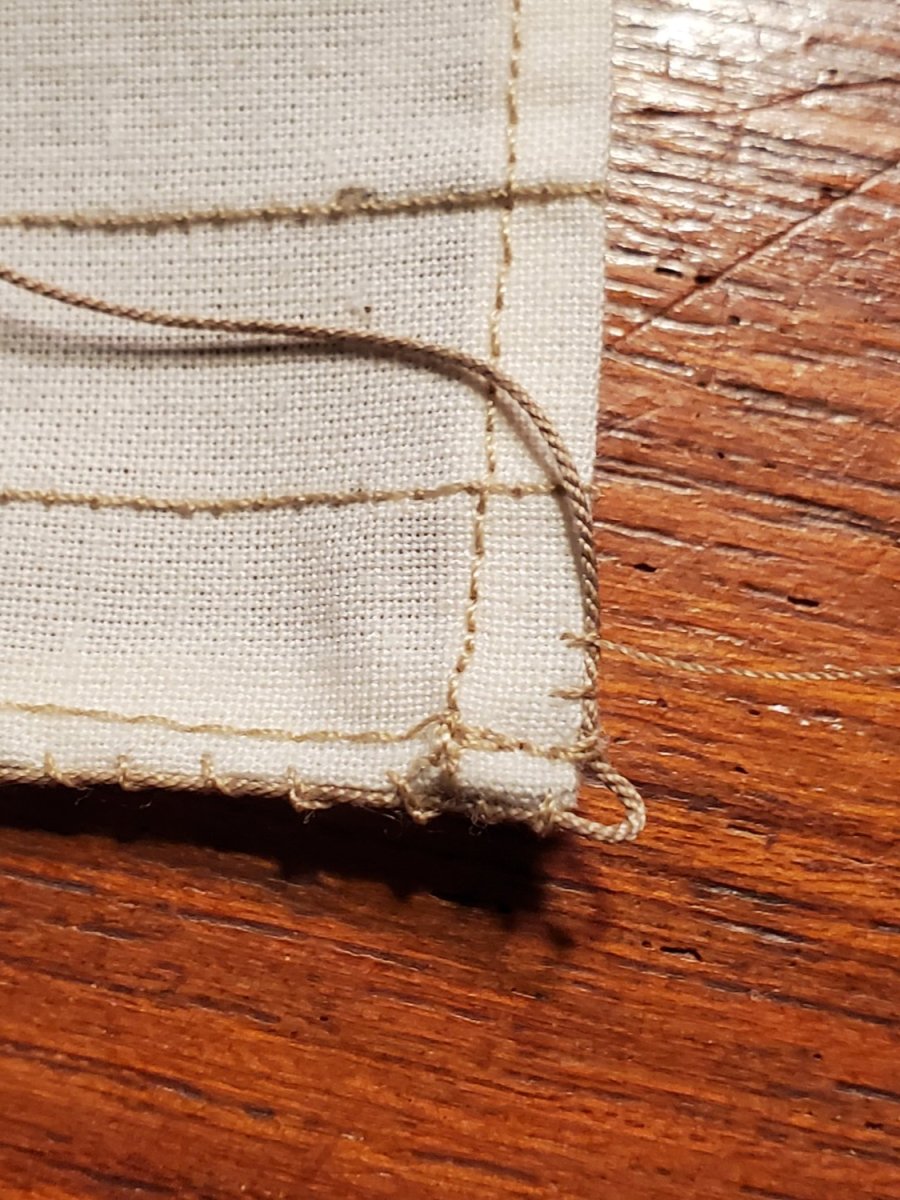
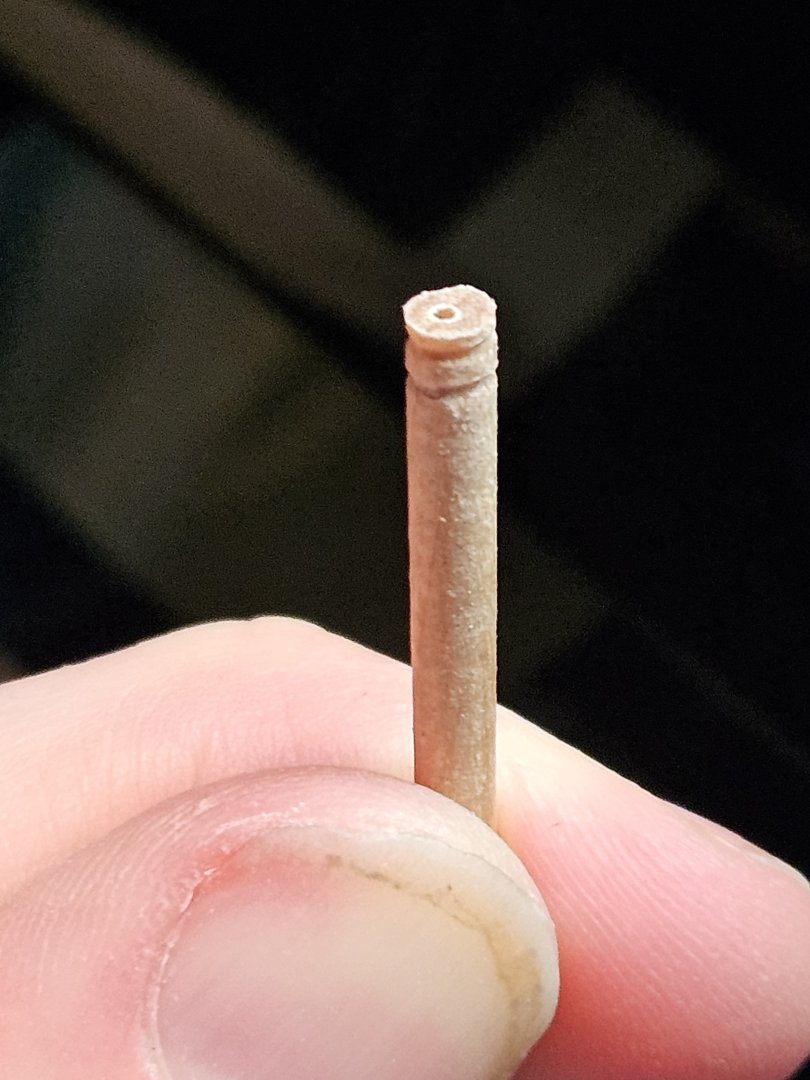
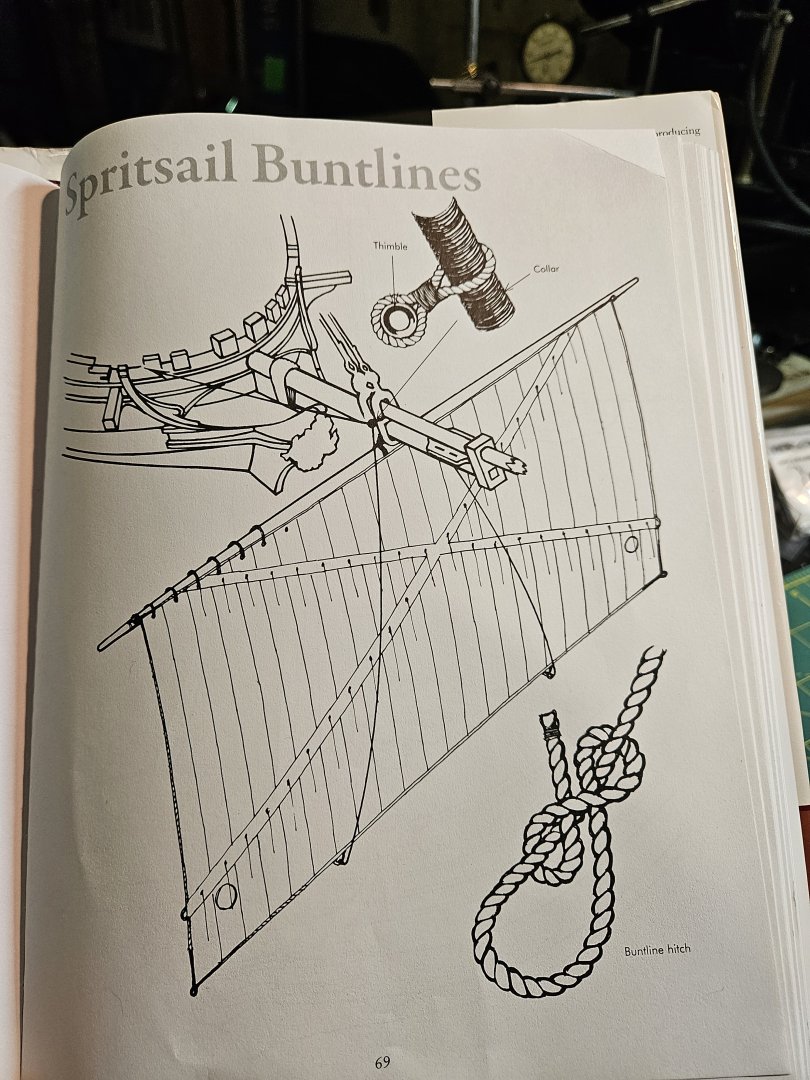
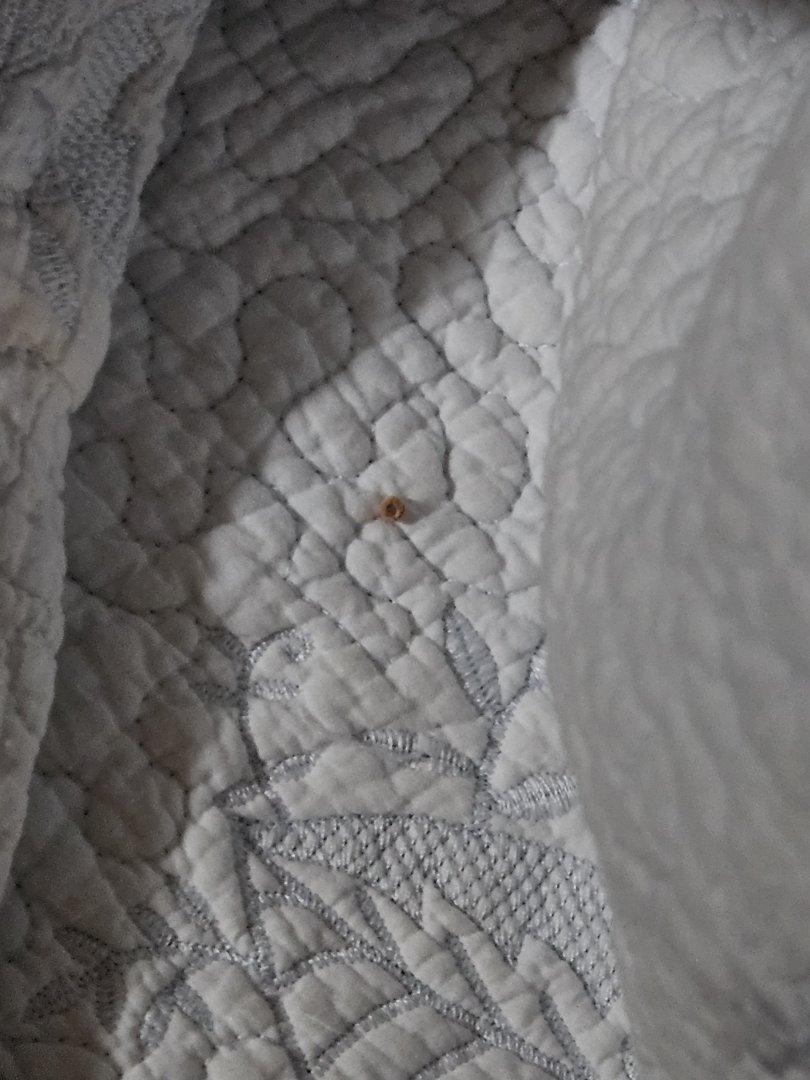
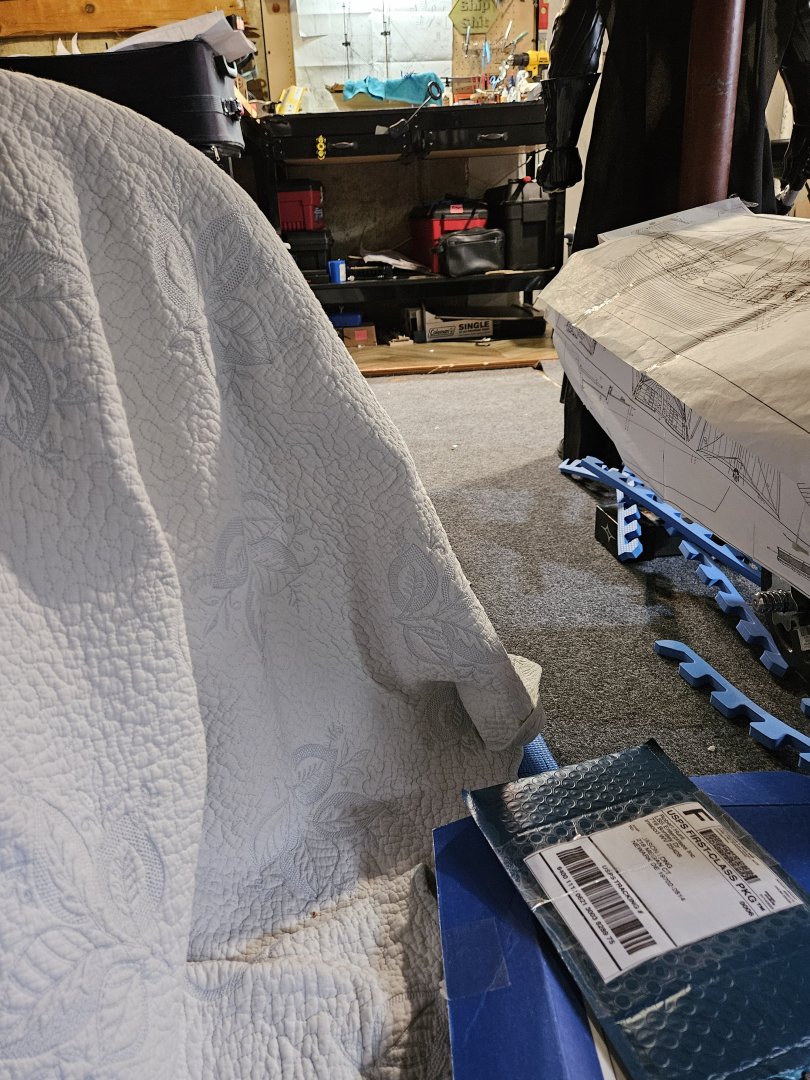
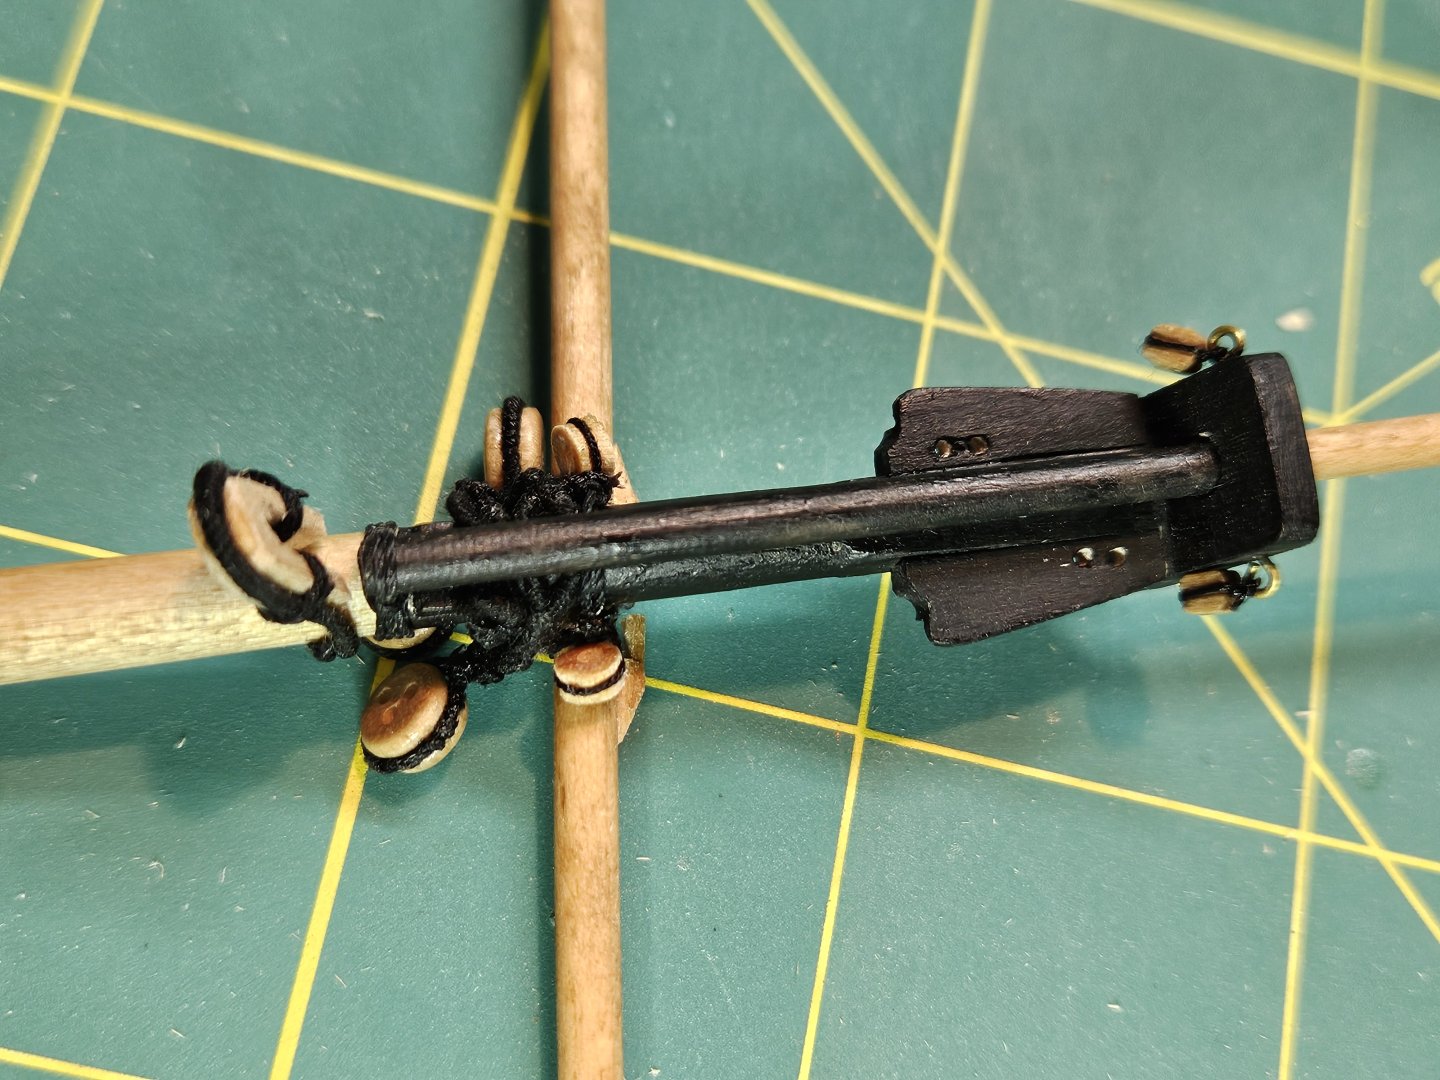
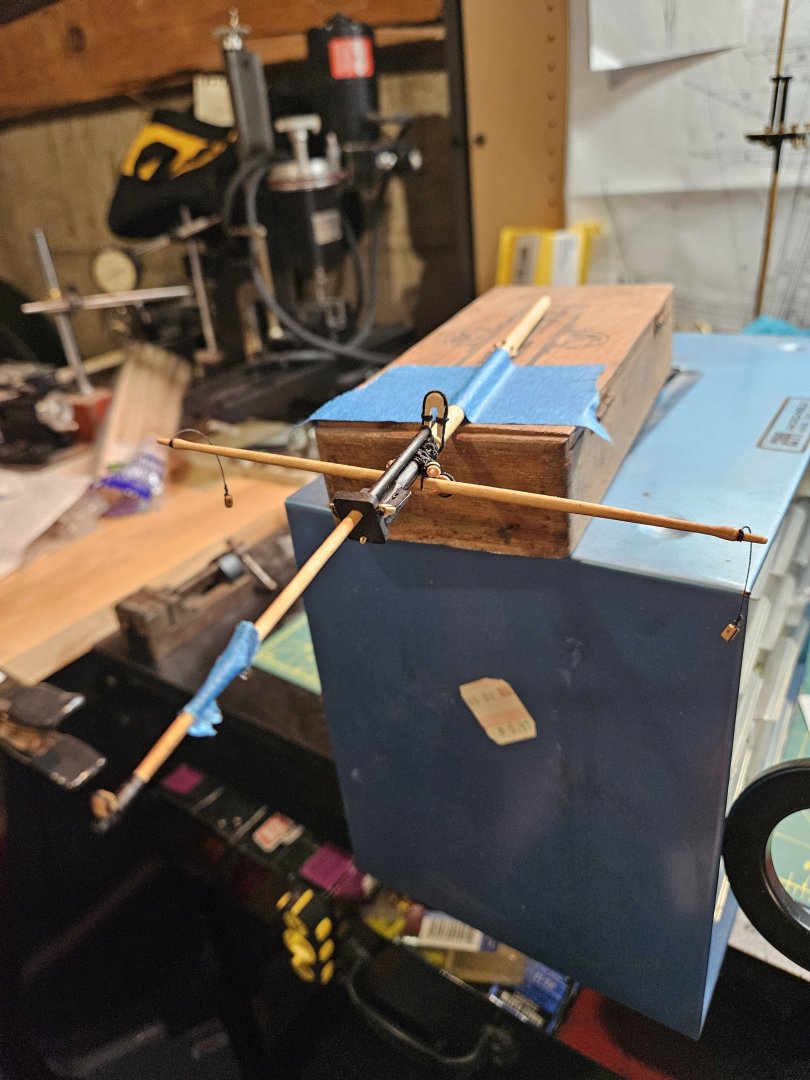
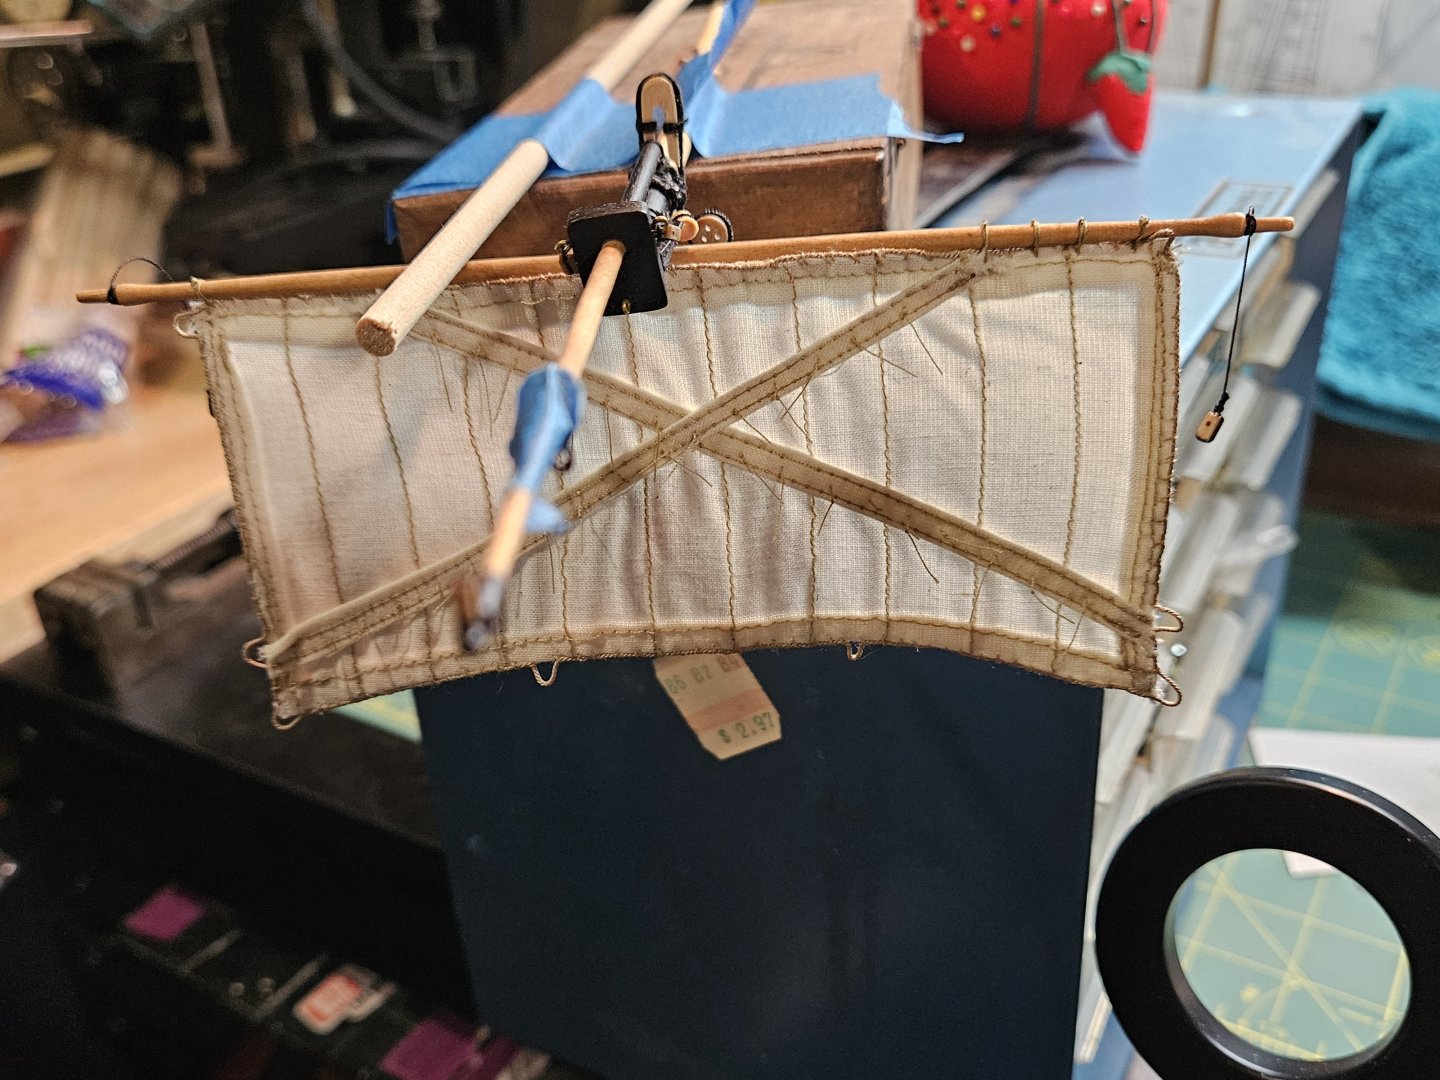
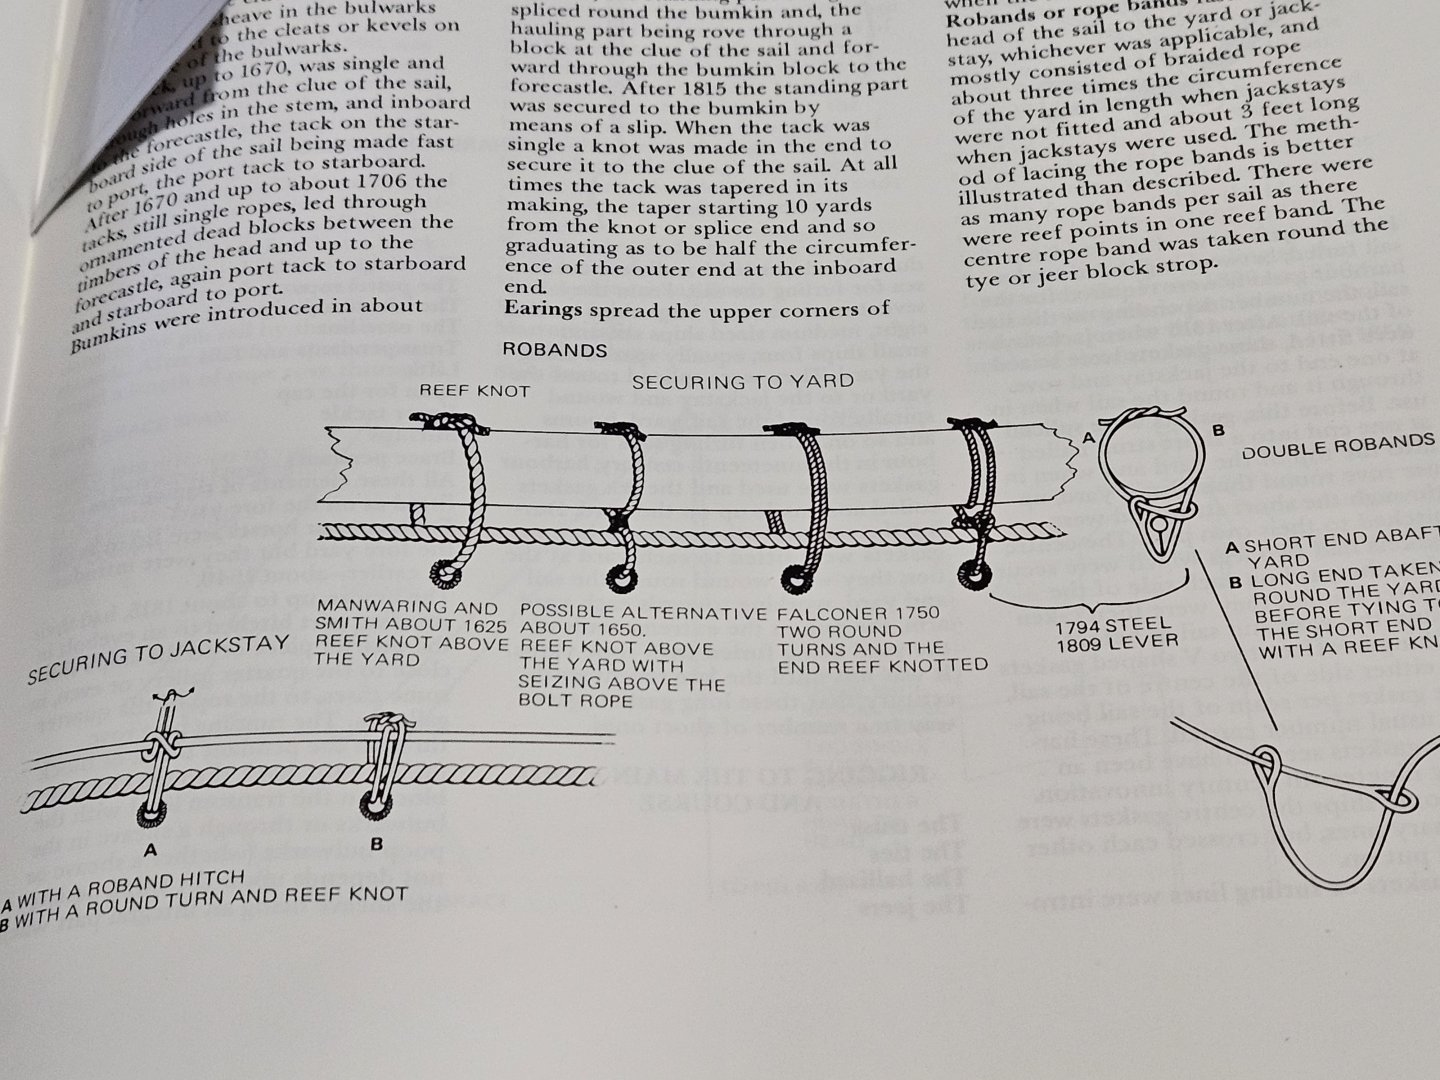
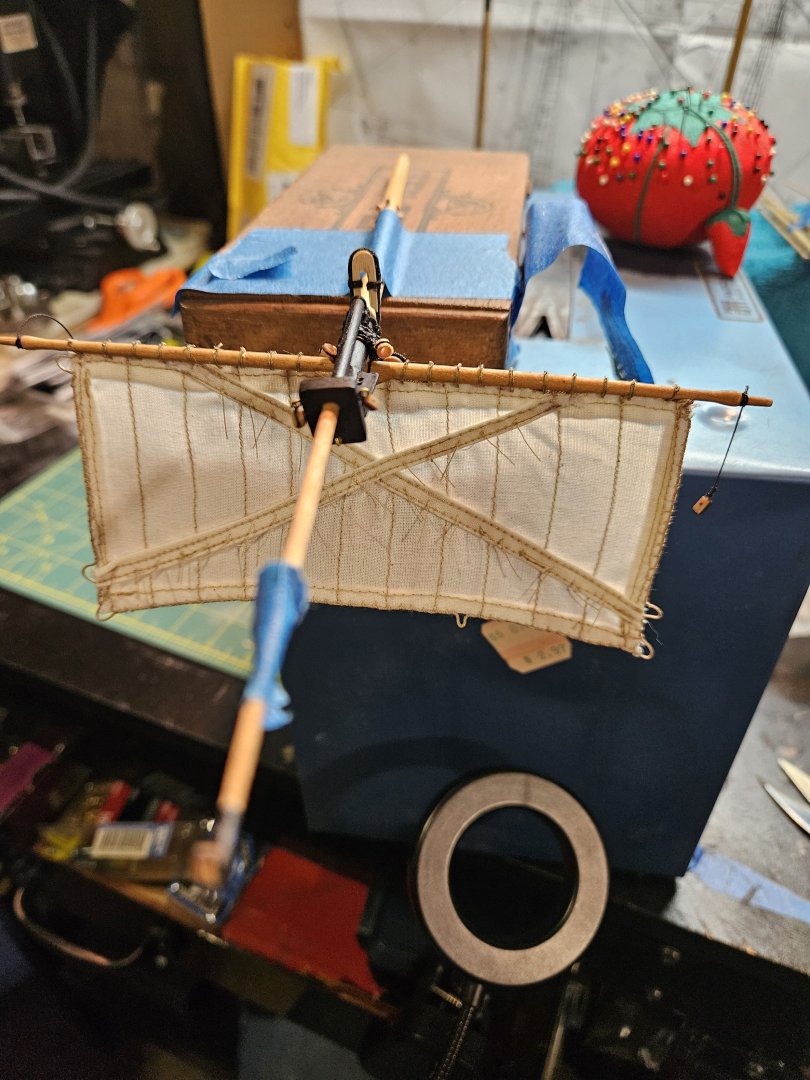
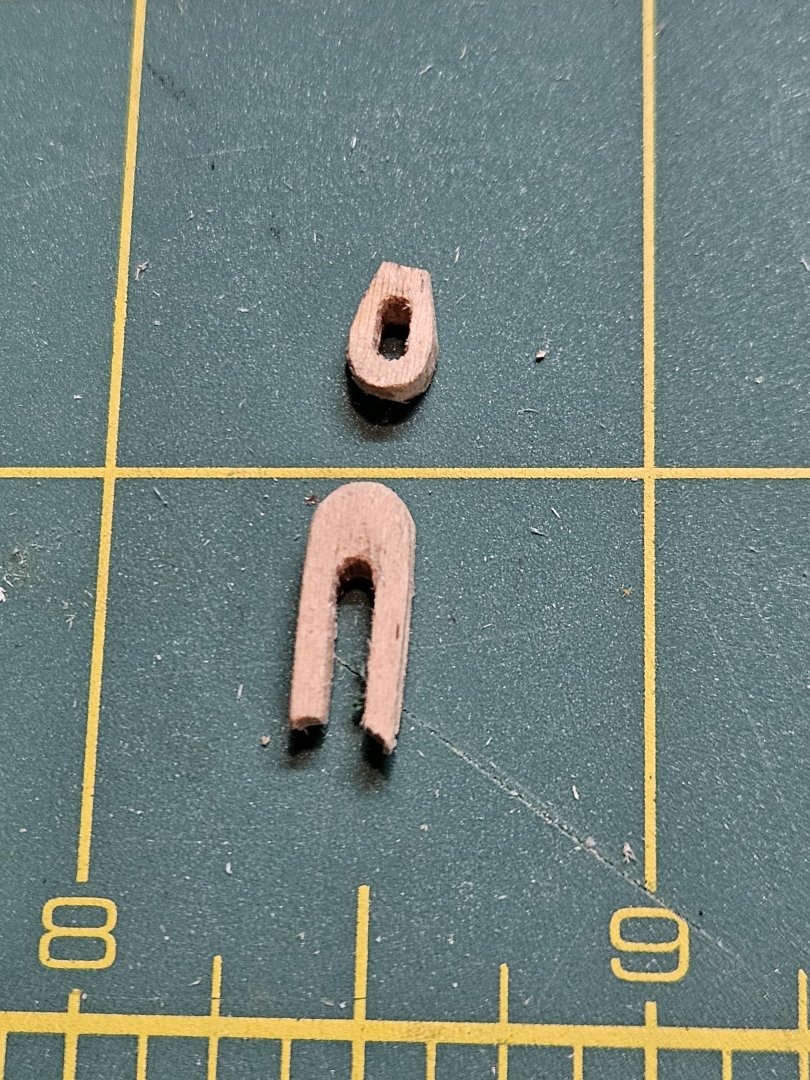
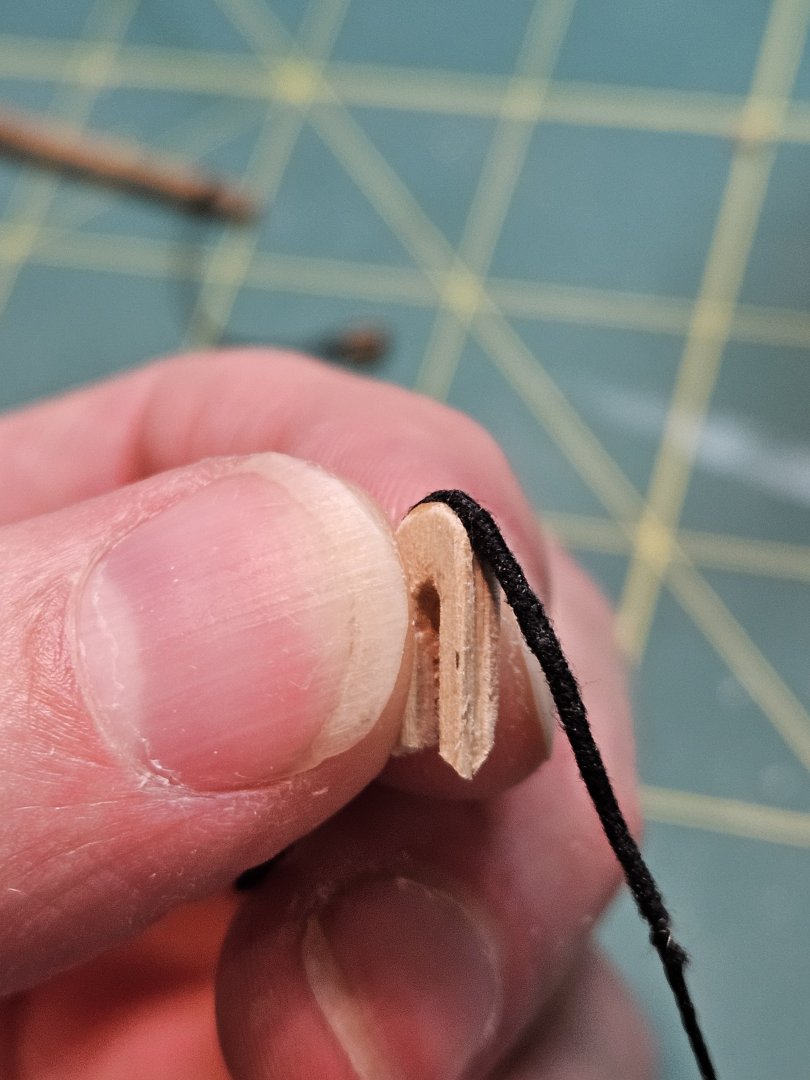
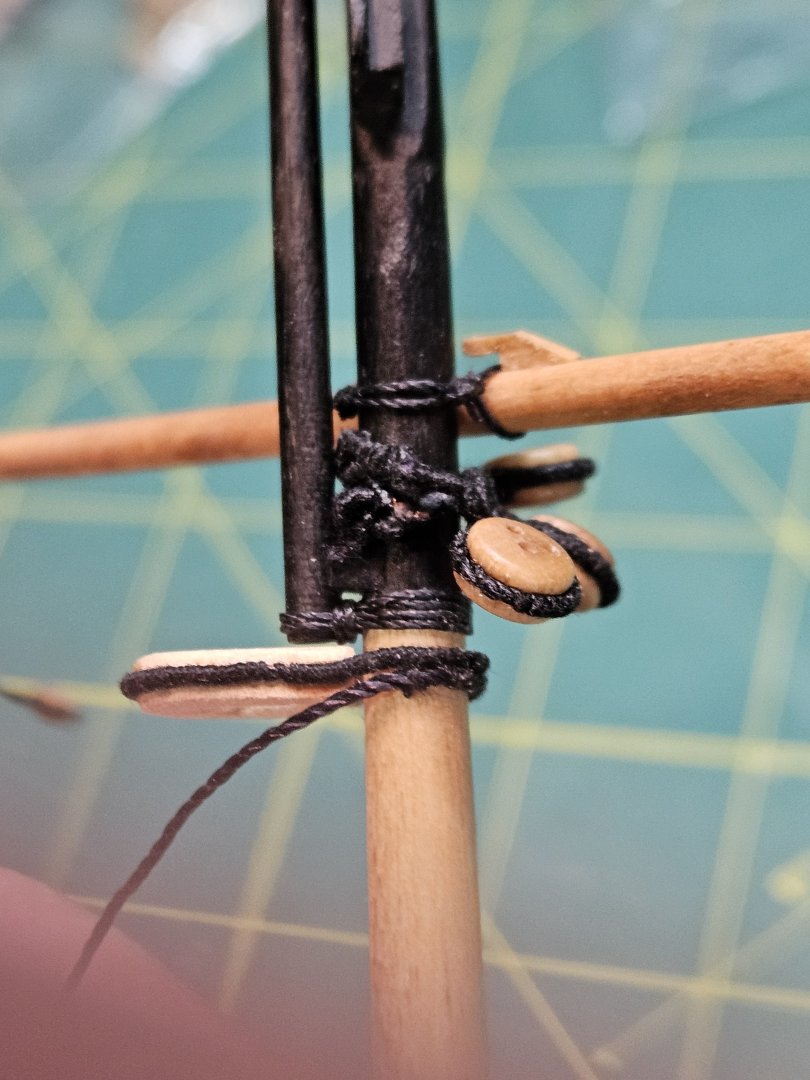
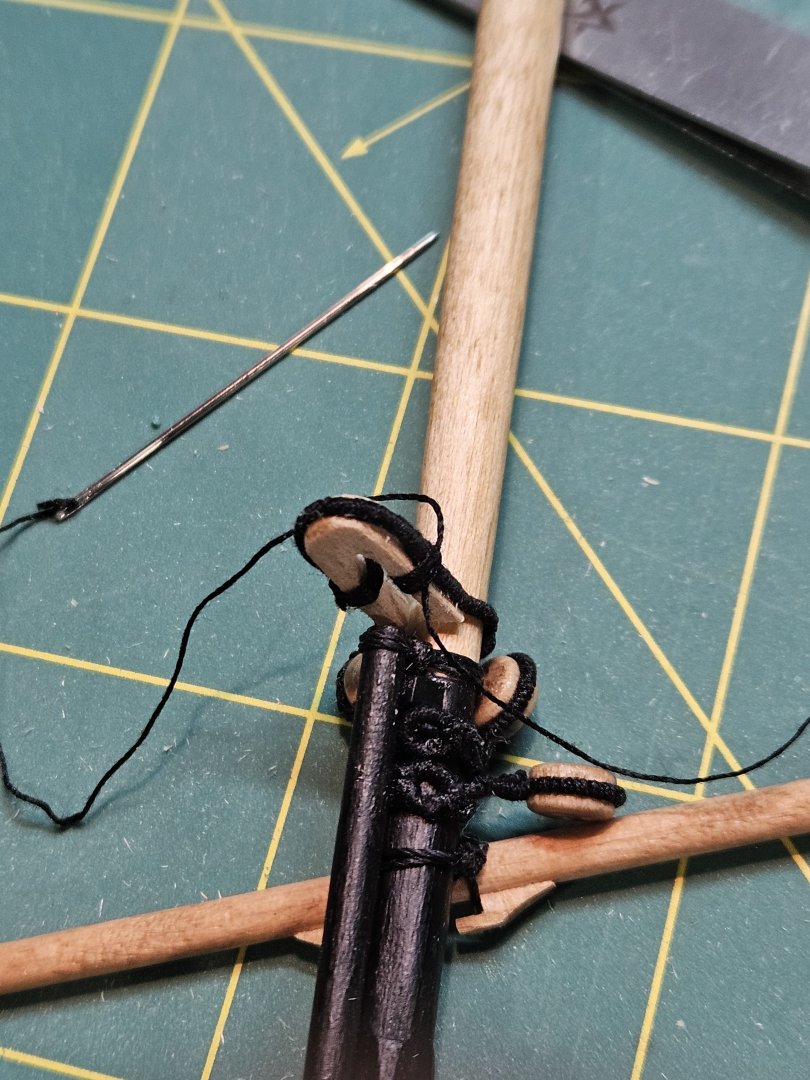
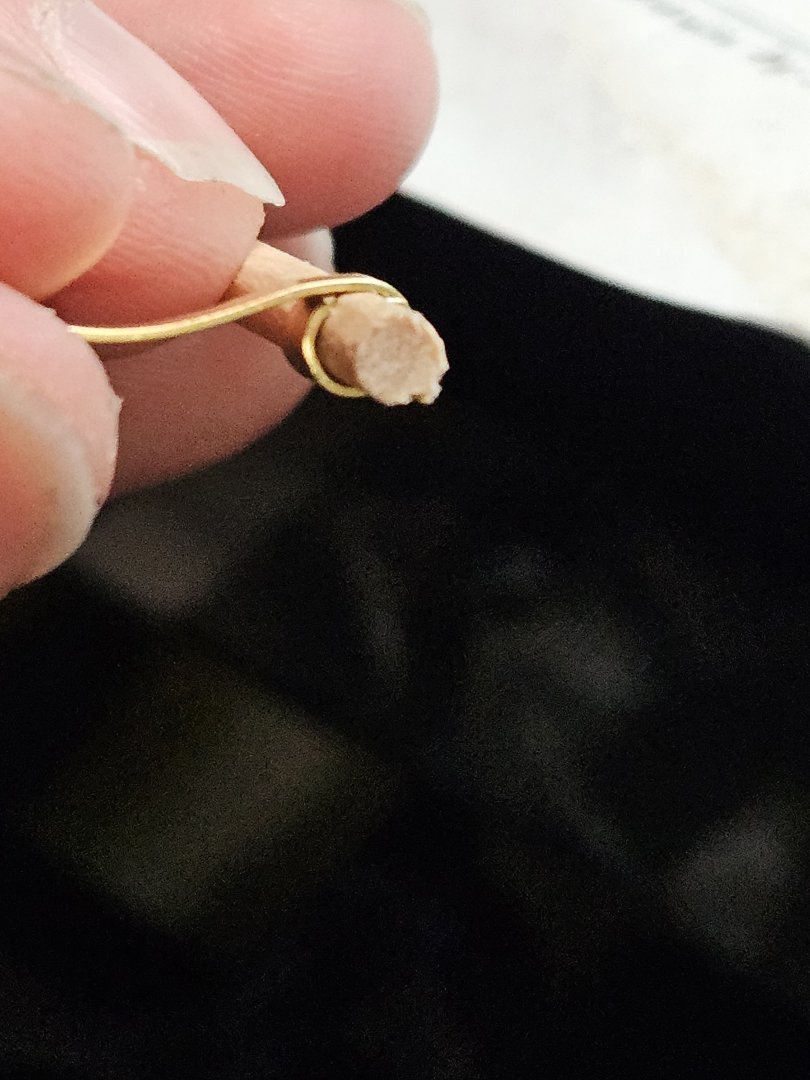
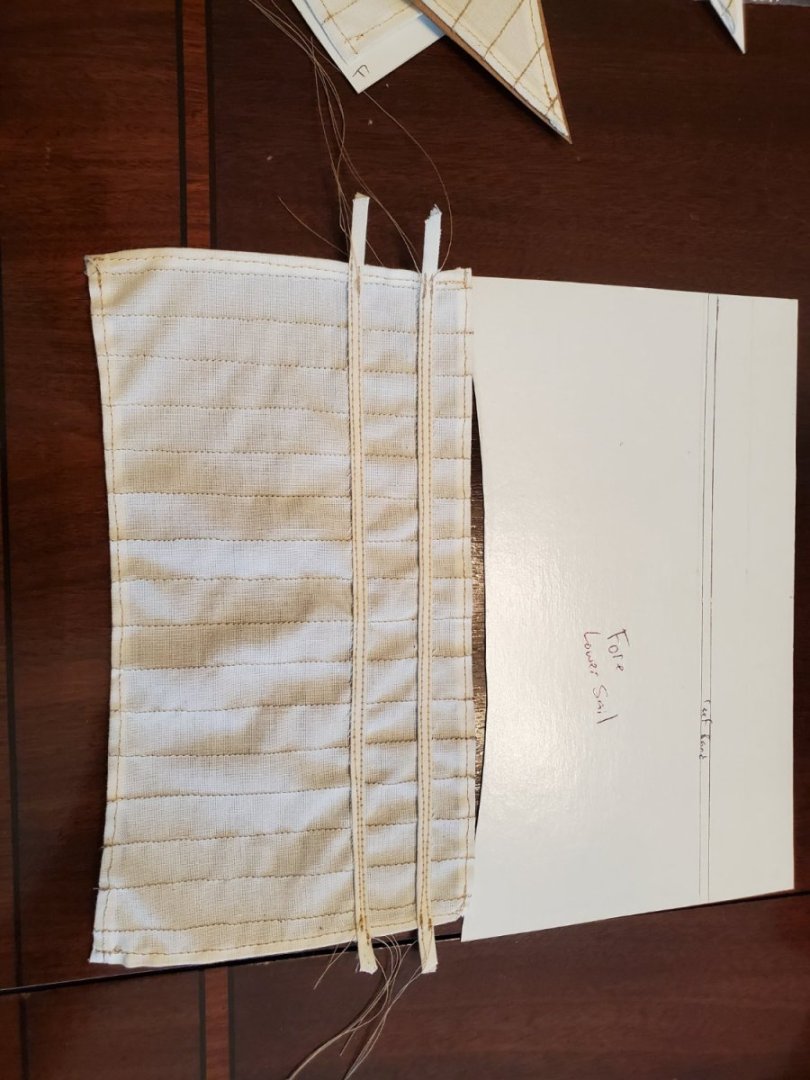
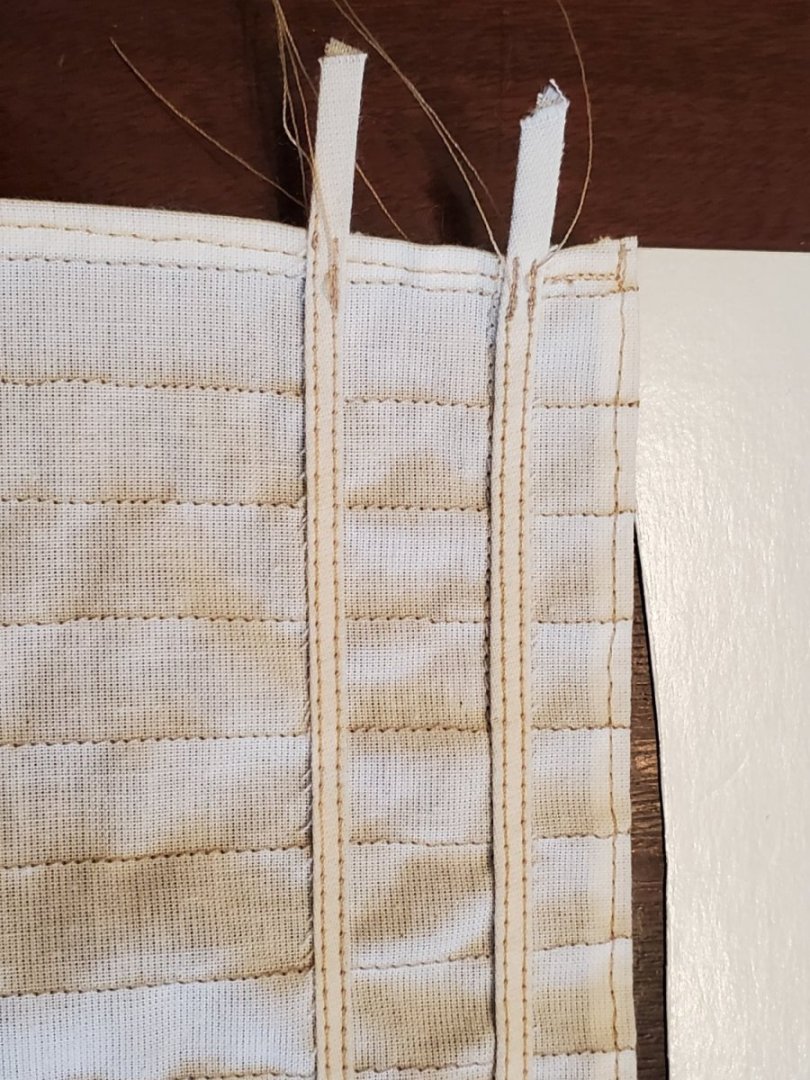
Continued progress on the Fair American Rigging: From Petersson's Rigging Period Model Ships, the Spritsail buntlines are reeved through thimbles, and not blocks. This makes rigging more straightforward, since blocks on the yard would hang and the falling end would rub against the yard, or I'd need another block. This way, with a Thimble near the Jibboom, it's a straight shot back to the bow (somewhere). I'm going with this approach. I decided to make the thimbles from wood dowel, and groove them so the rope will stay. Problem is, they're tiny. like really tiny. Like if you drill a hole in them, they'll split tiny. But I made them anyway. Took a while too. Slow drilling and carving. I really didn't want to lose them..... But I did!!! I went to move something, and i must have flicked one and it was gone!!! The thing is, I'm the most determined person on the planet. I had to find it...on principal. you can see how big it is above. It took 48min of crawling on the floor to find it: You can clearly see it here.....all the way from my workbench.... See? Right there! On the floor near the box, 10ft away.... I don't give up... It must have stuck to my clothes, then carried to the box, when I went to look at the plans near the box, and it fell on the quilt. Petersson shows the thimble being attached to the collar, but that's a different ship. Where makes the most sense, is to the yard sling.... so both ends of .012in rope are looped through. You can see that the thimble, is still pretty big, in scale, but it works. Here it is in place on the sling. Yes, everything looks kind of dusty up close, but its not bad. I'll move the sling back near the other bobstay once everything is rigged here. These thimbles will work nicely for the buntlines, once rigged. I moved on to attaching the Spritsail to the yard. I needed some working room, so I taped the bowsprit to a tool box, so the yard was accessible. When working on one side, I taped a wooden dowel to the opposing side above the yard to keep it balanced. (later picture) In another one of the books I borrow from fellow ship builder buddy Cisco, the sails are attached with robands and reef knots. The reef knots look like double overhand knots, so that's what I'll do. Mine is a 1780 ship, so the two round turns and reef knot is the approach. Starting one side was the hardest, since the sail wants to hang. But I got it done. Then to the other side. Two round turns, and two over hand knots worked fine for me. There are to be as many robands as reef points, so that's 22 total for this sail. I'd simply poke through the head of the sail, below the bolt rope, then around the yard 2x. Then I'd tie them off, a dab of glue to keep them unraveling, and also on the yard to tack the rounds in place. You can see here the other dowel, keeping the yard balanced and prevented from tilting while I'm working on one side. Just a close-up of the robands after gluing and trimming close. After the Port side, I finished on the Starboard. And there we have it, one Sprit Sail! It may be a little messy, and the reef bands are a big thick, but I'm pleased with all the work that went into making this sail and rigging it this far. Progress is slow, but its progress, and very rewarding work. This was a huge milestone. Anyways, next up is flemmish horses and stirrups for the Fore Lower yard. Might even get some of the blocks attached too. Until next update, enjoy your weekend. - Jason -


-
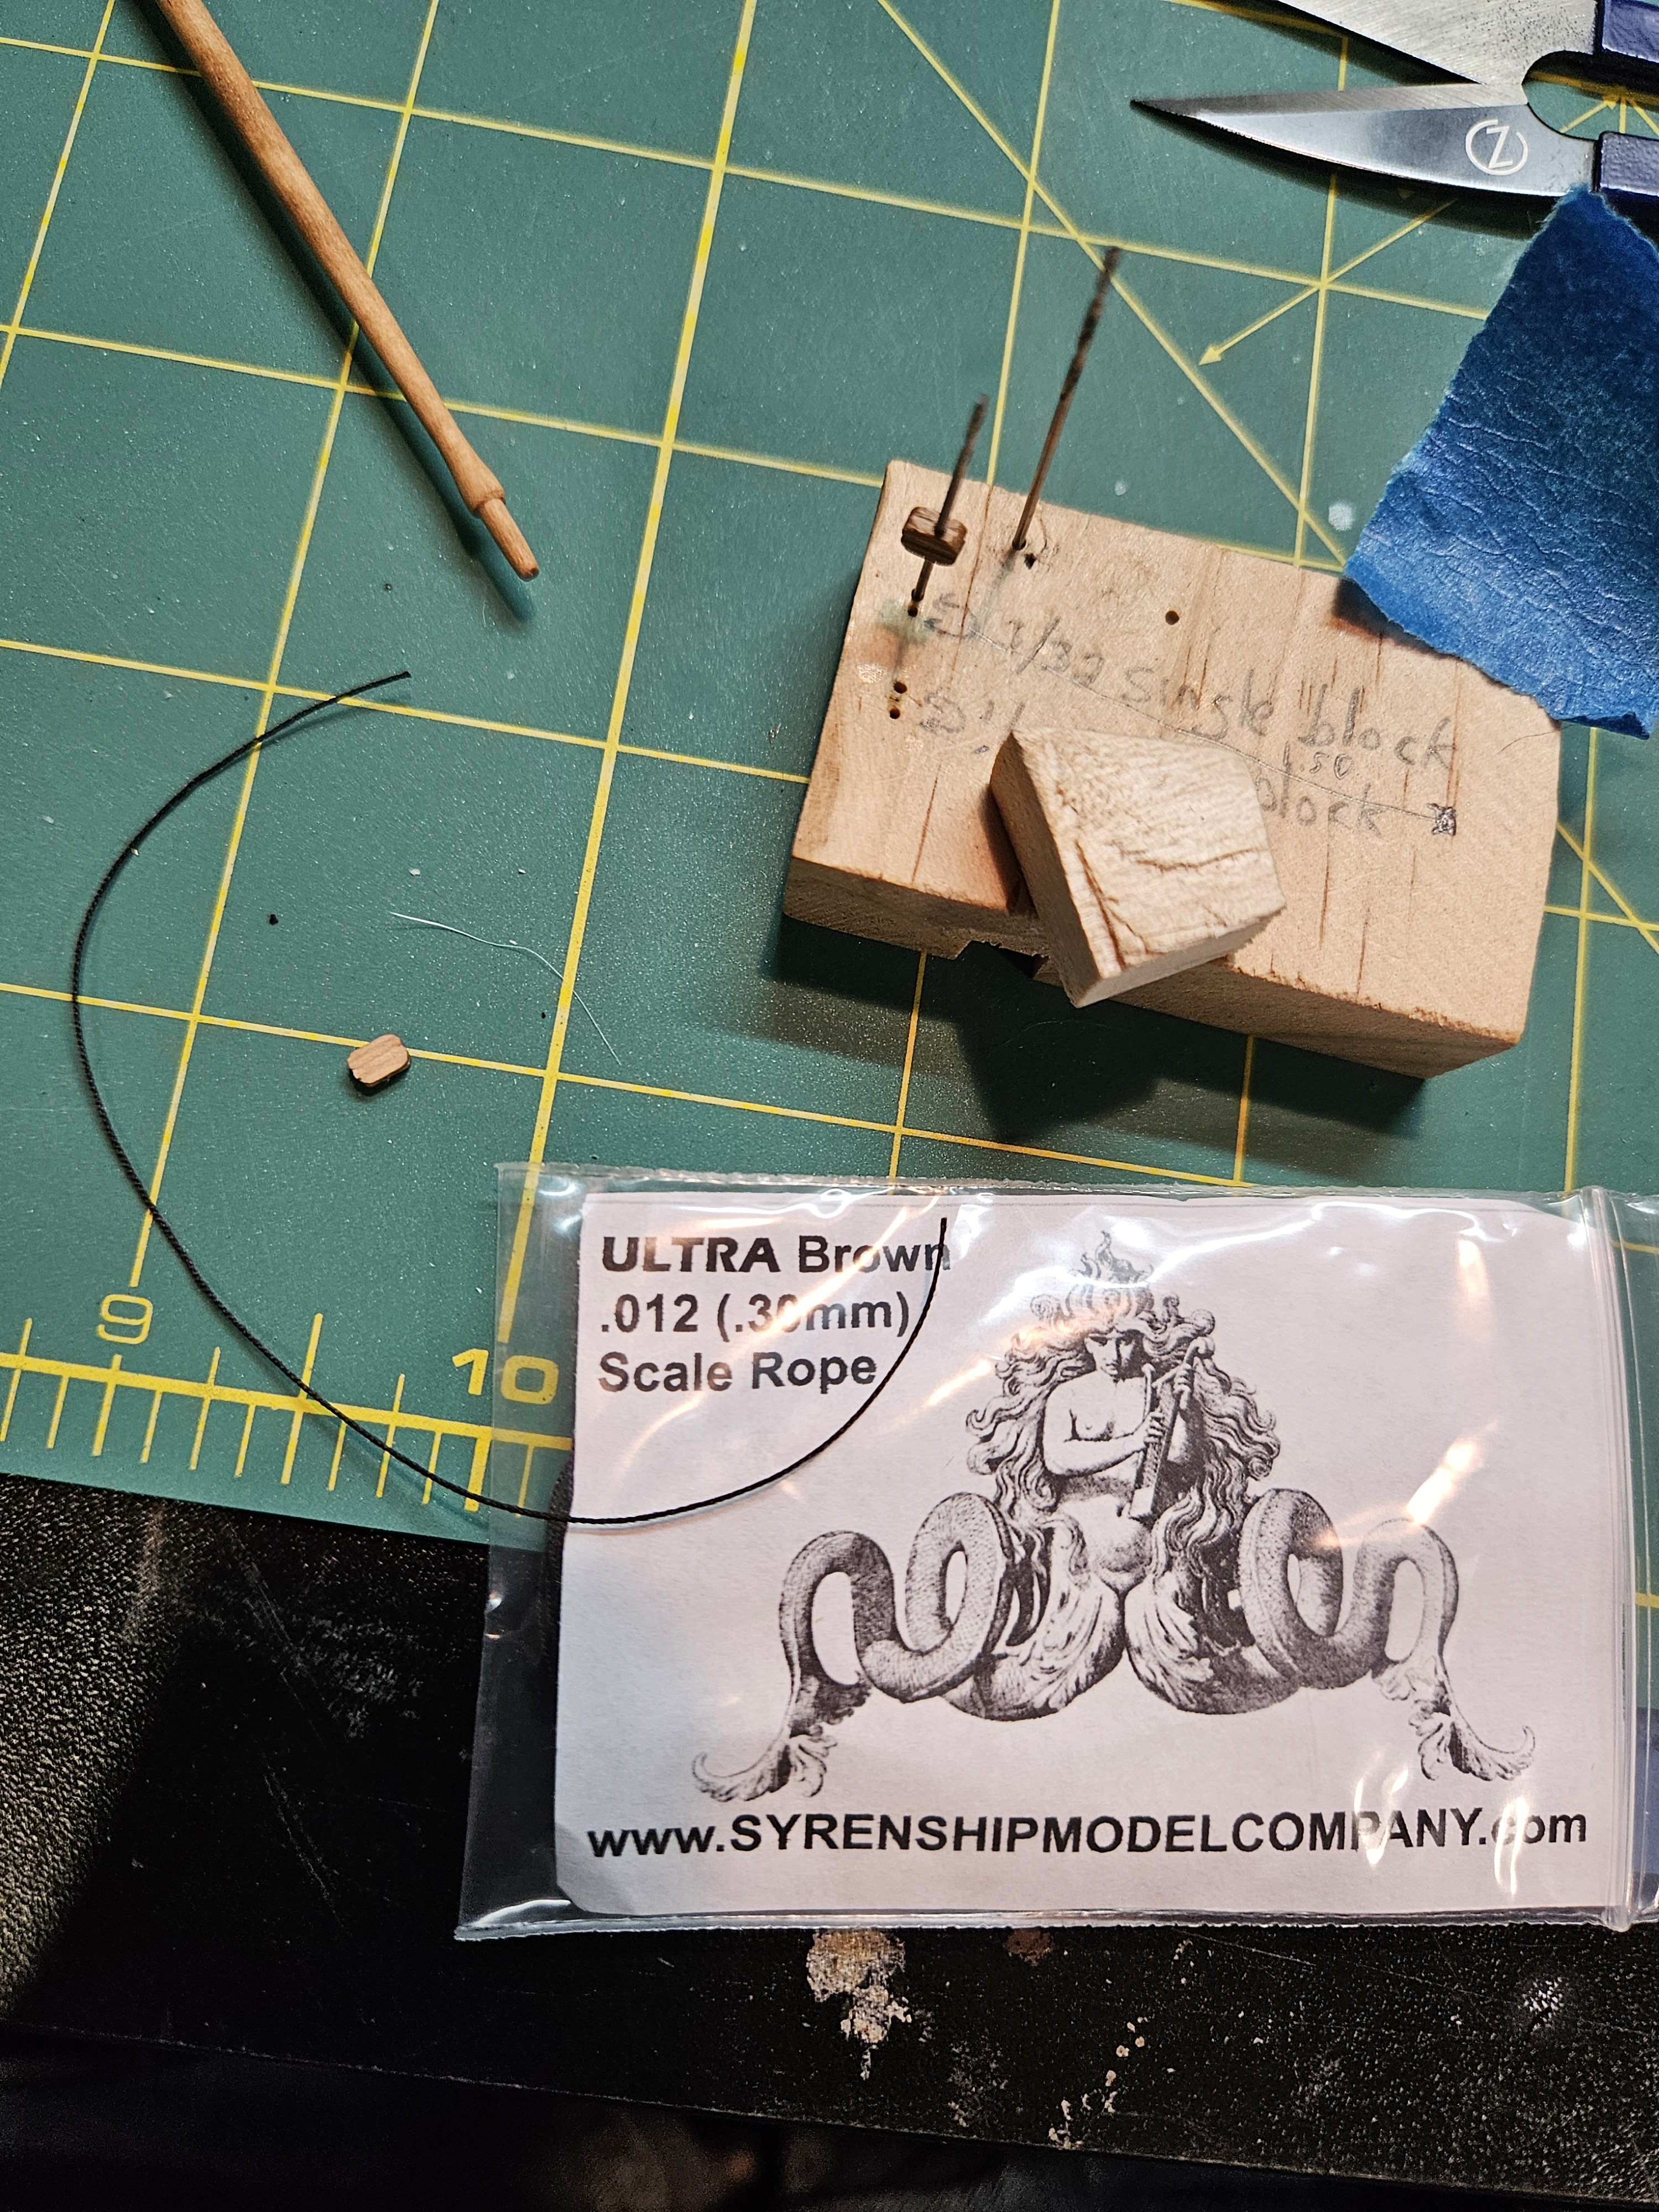
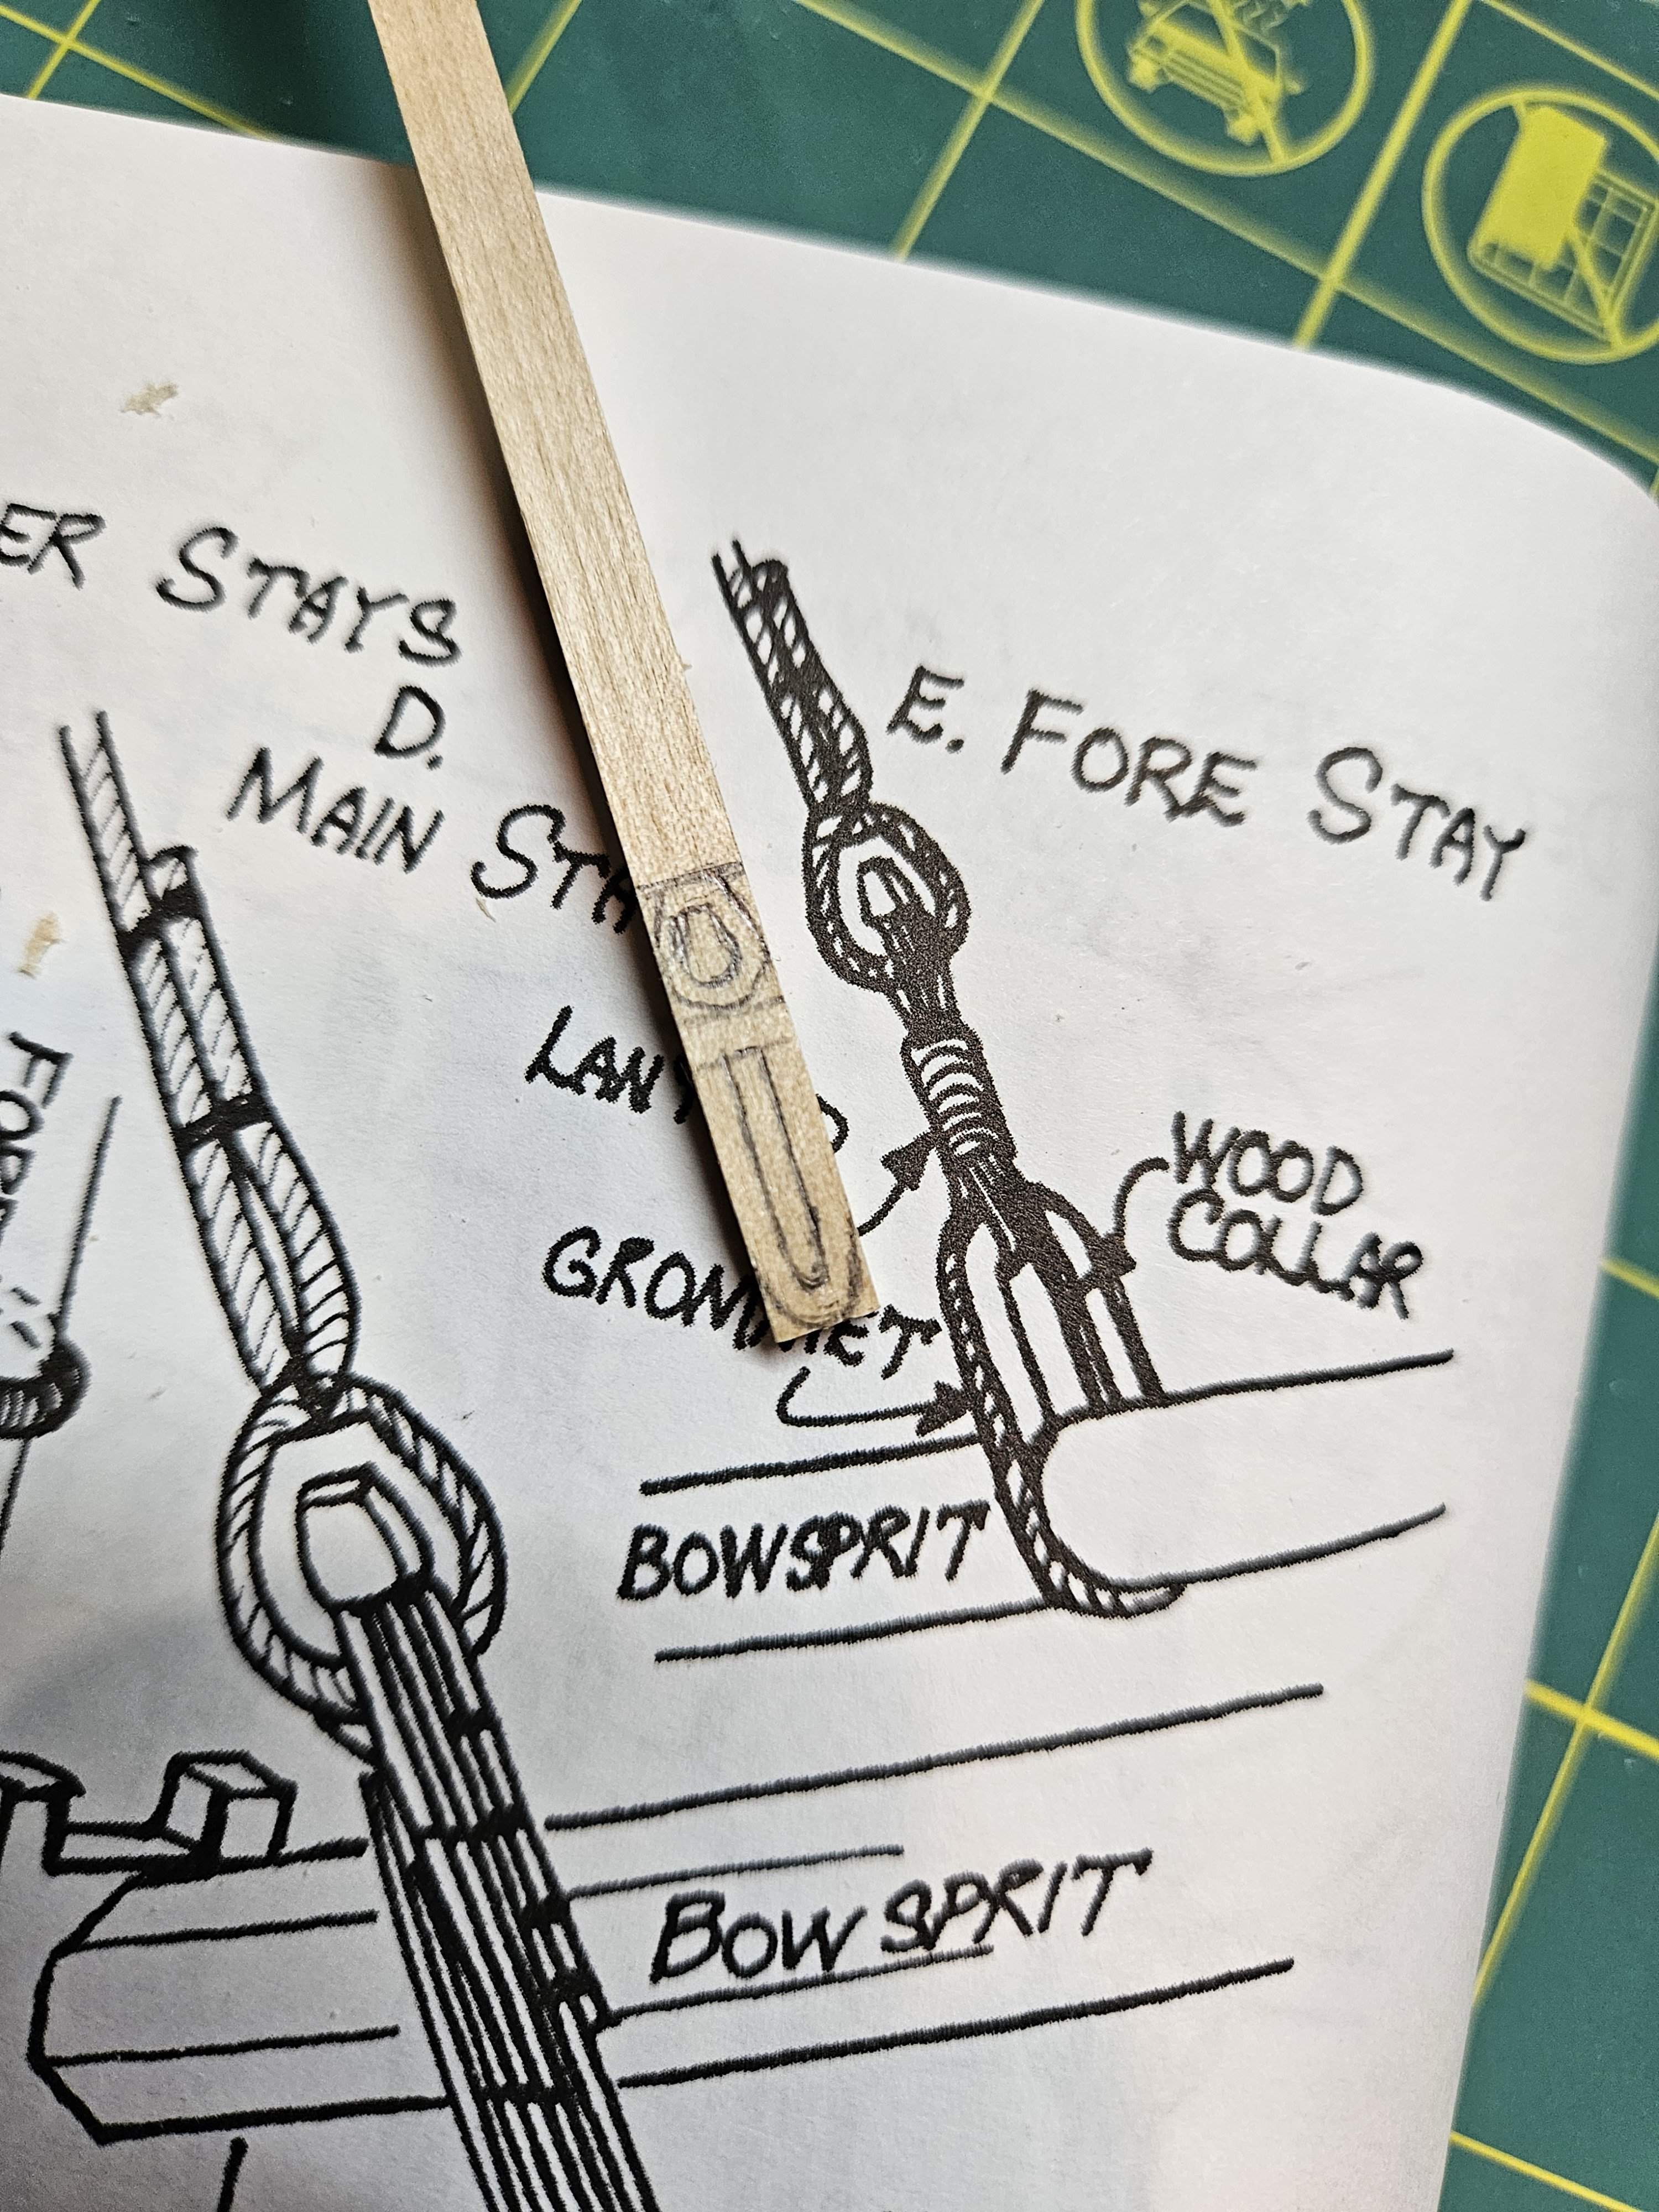
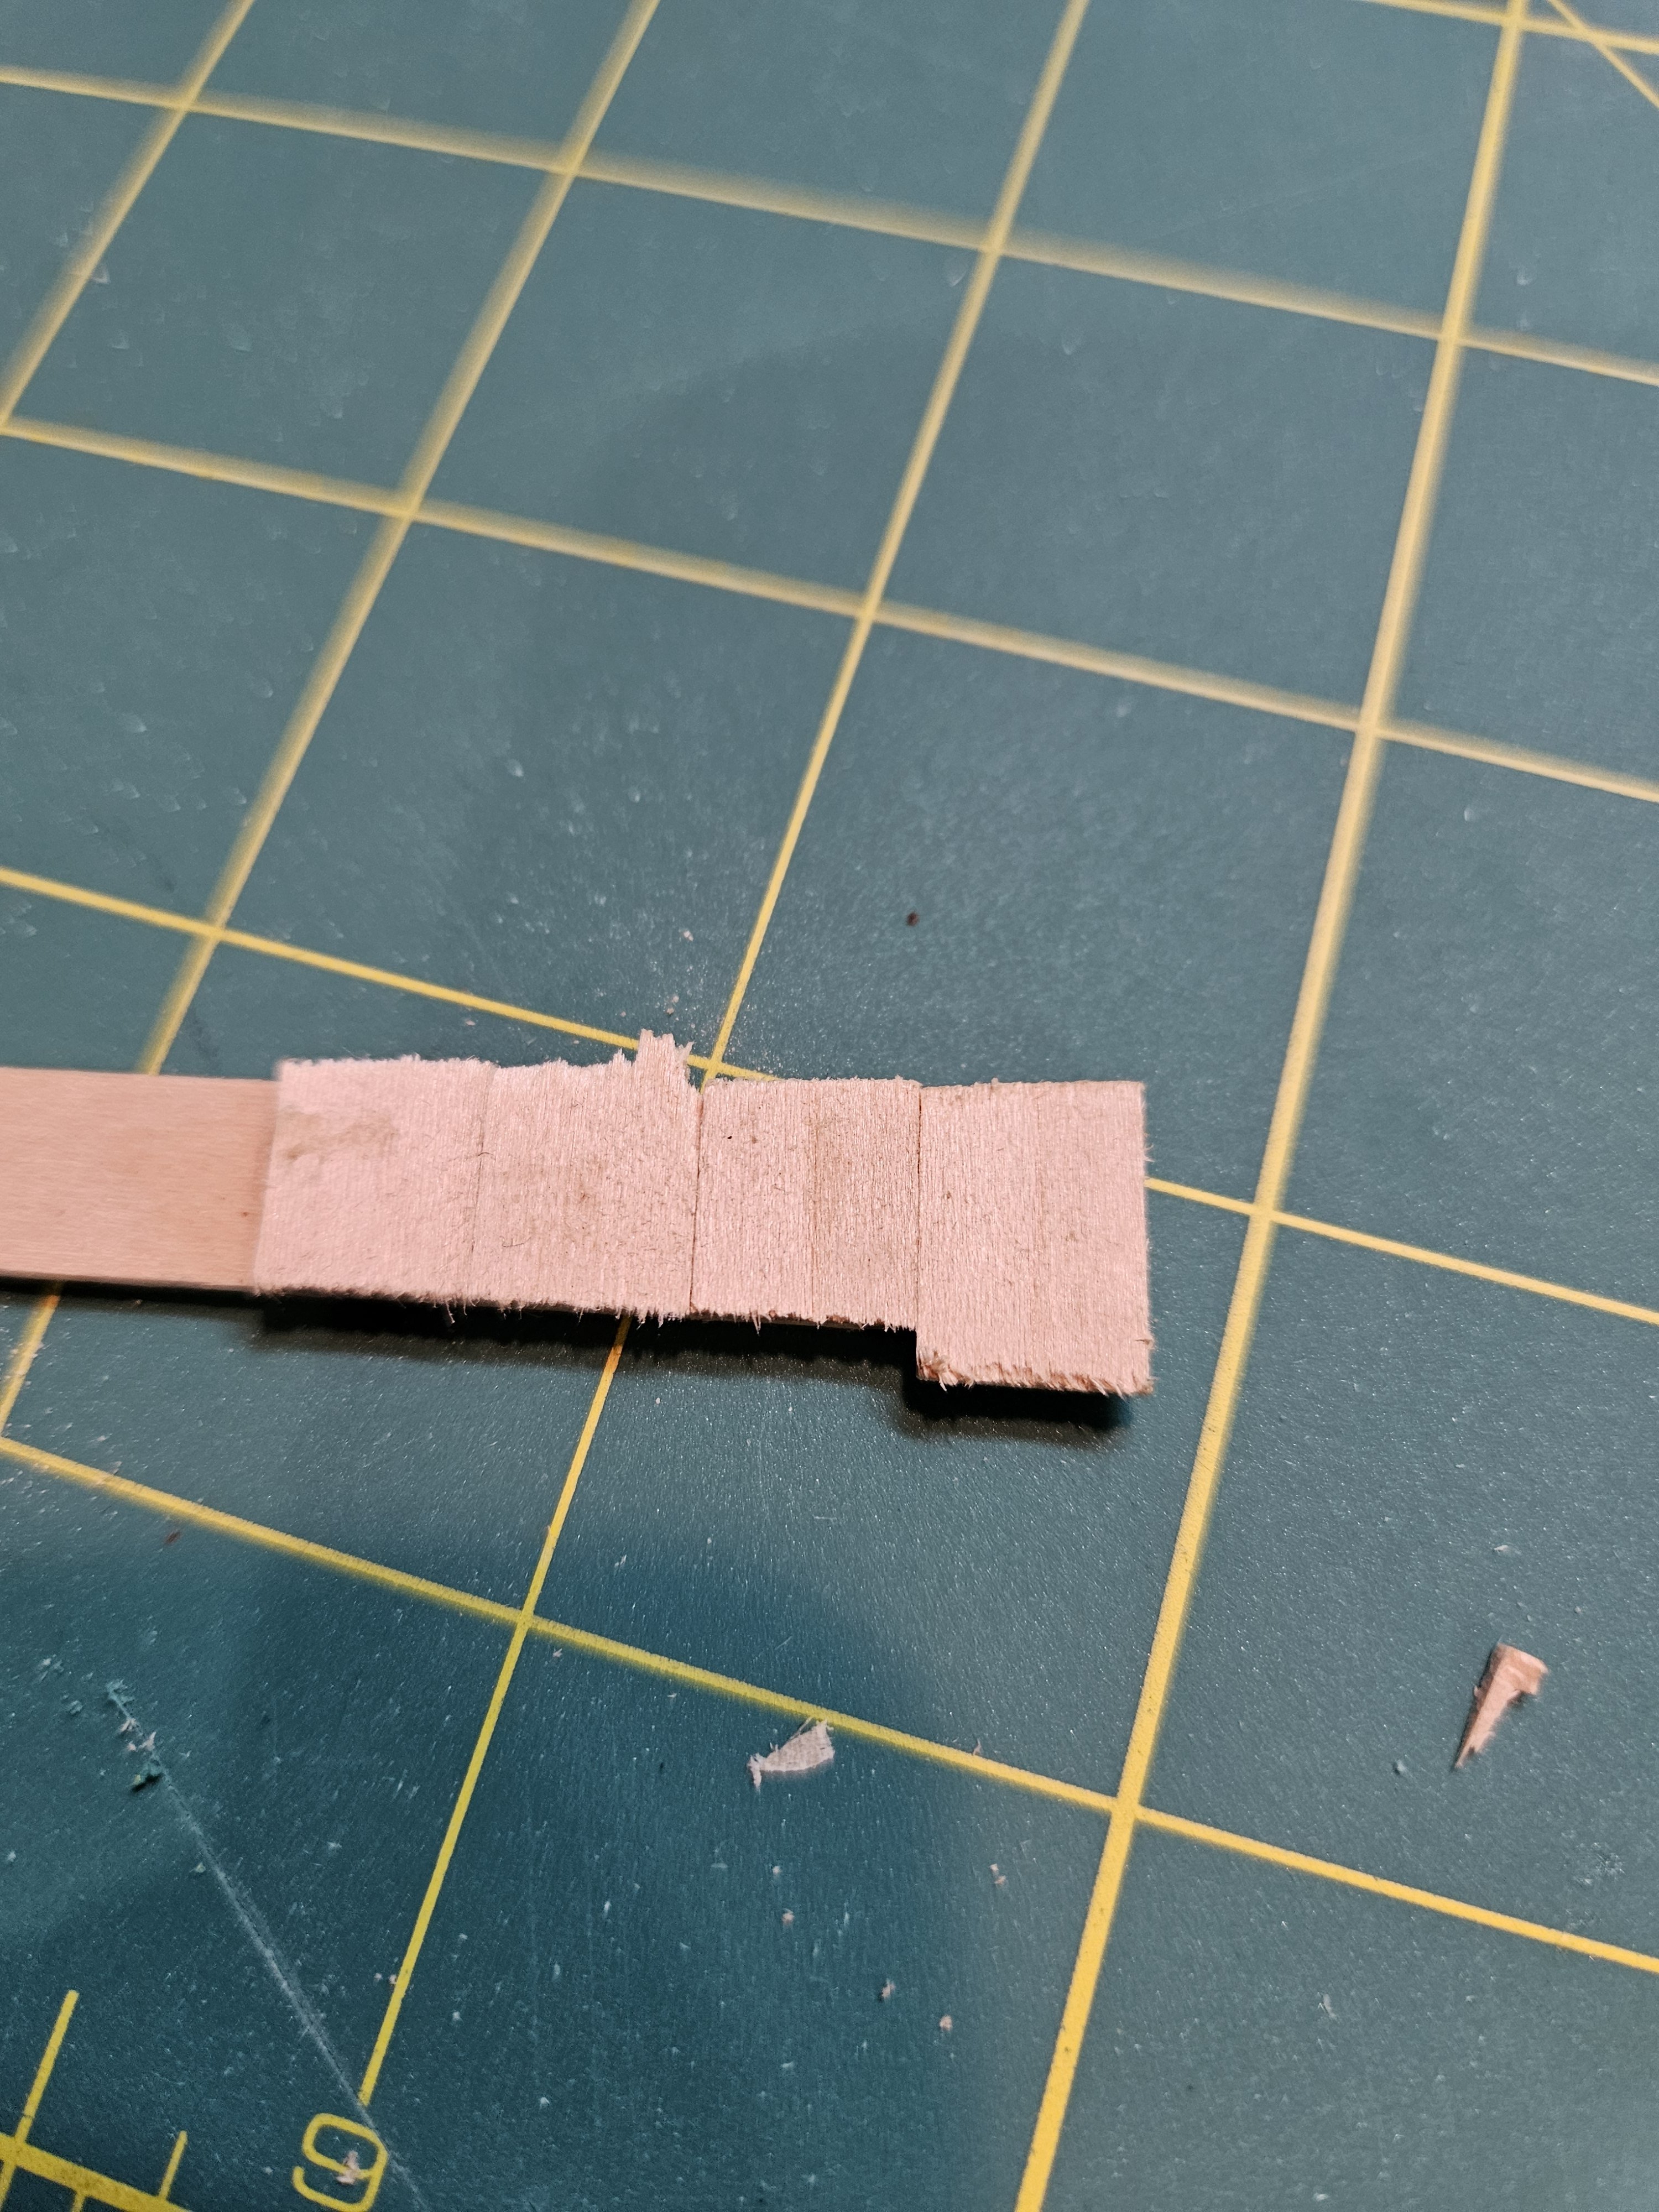
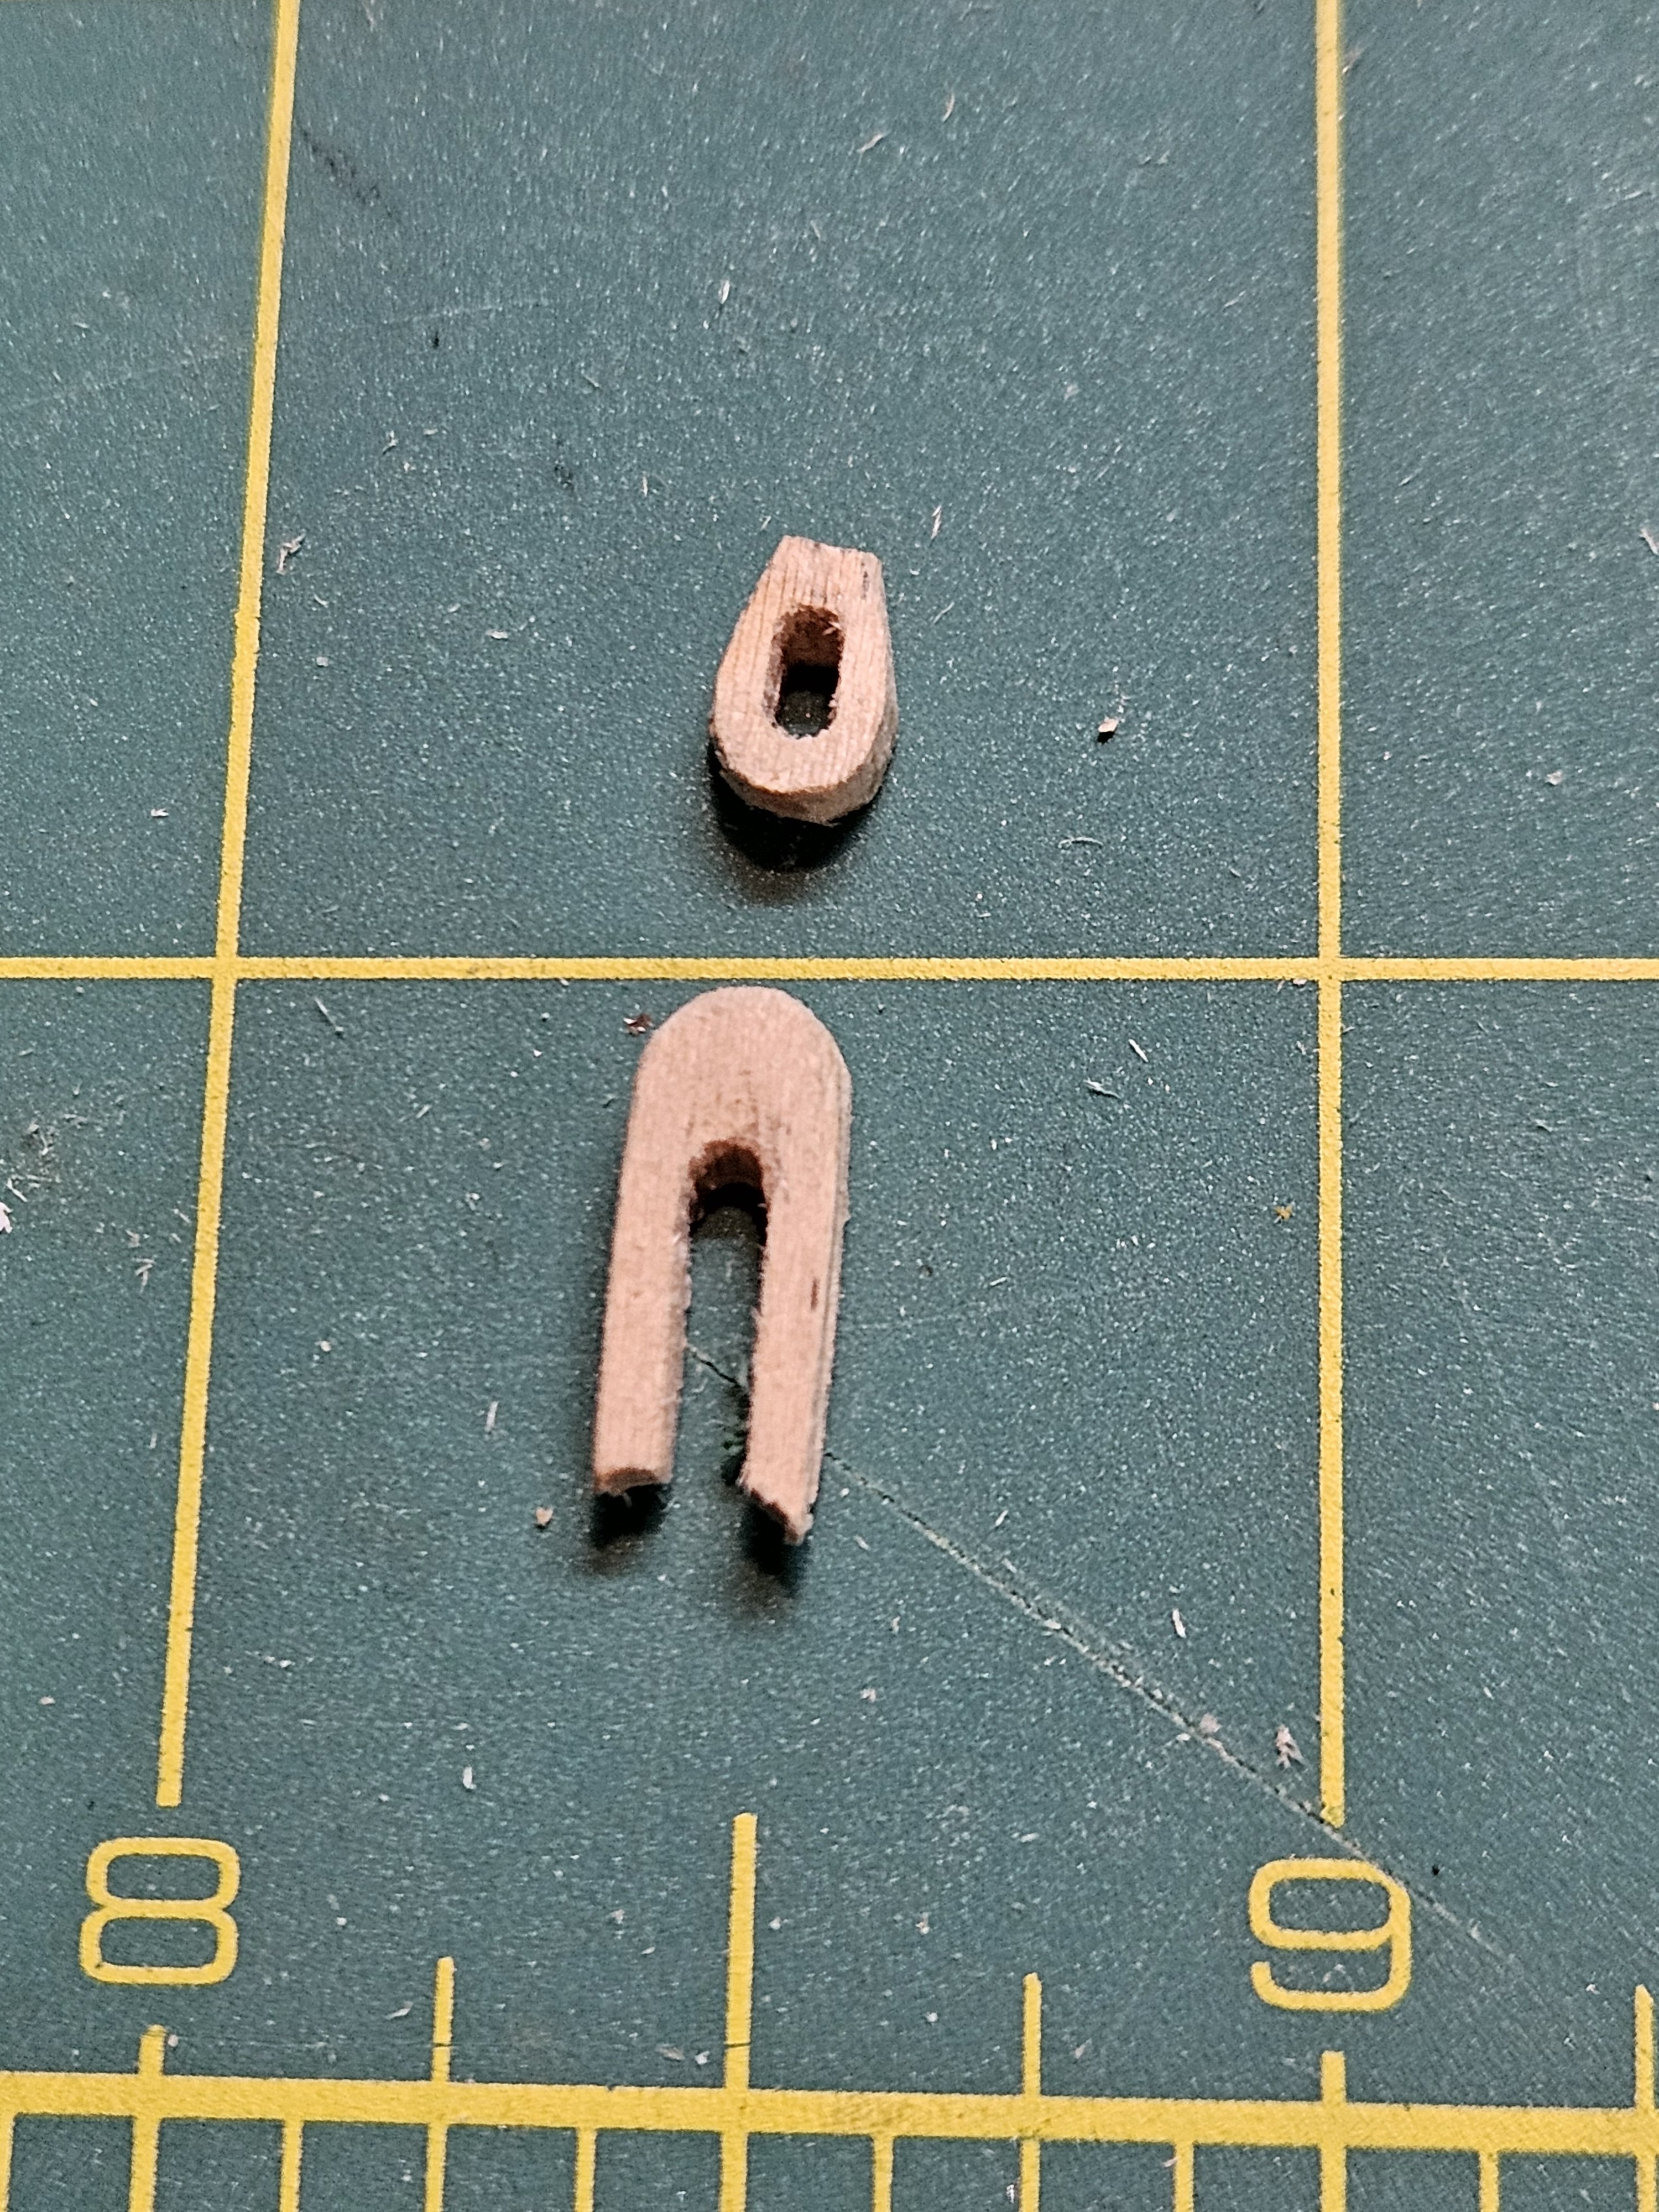
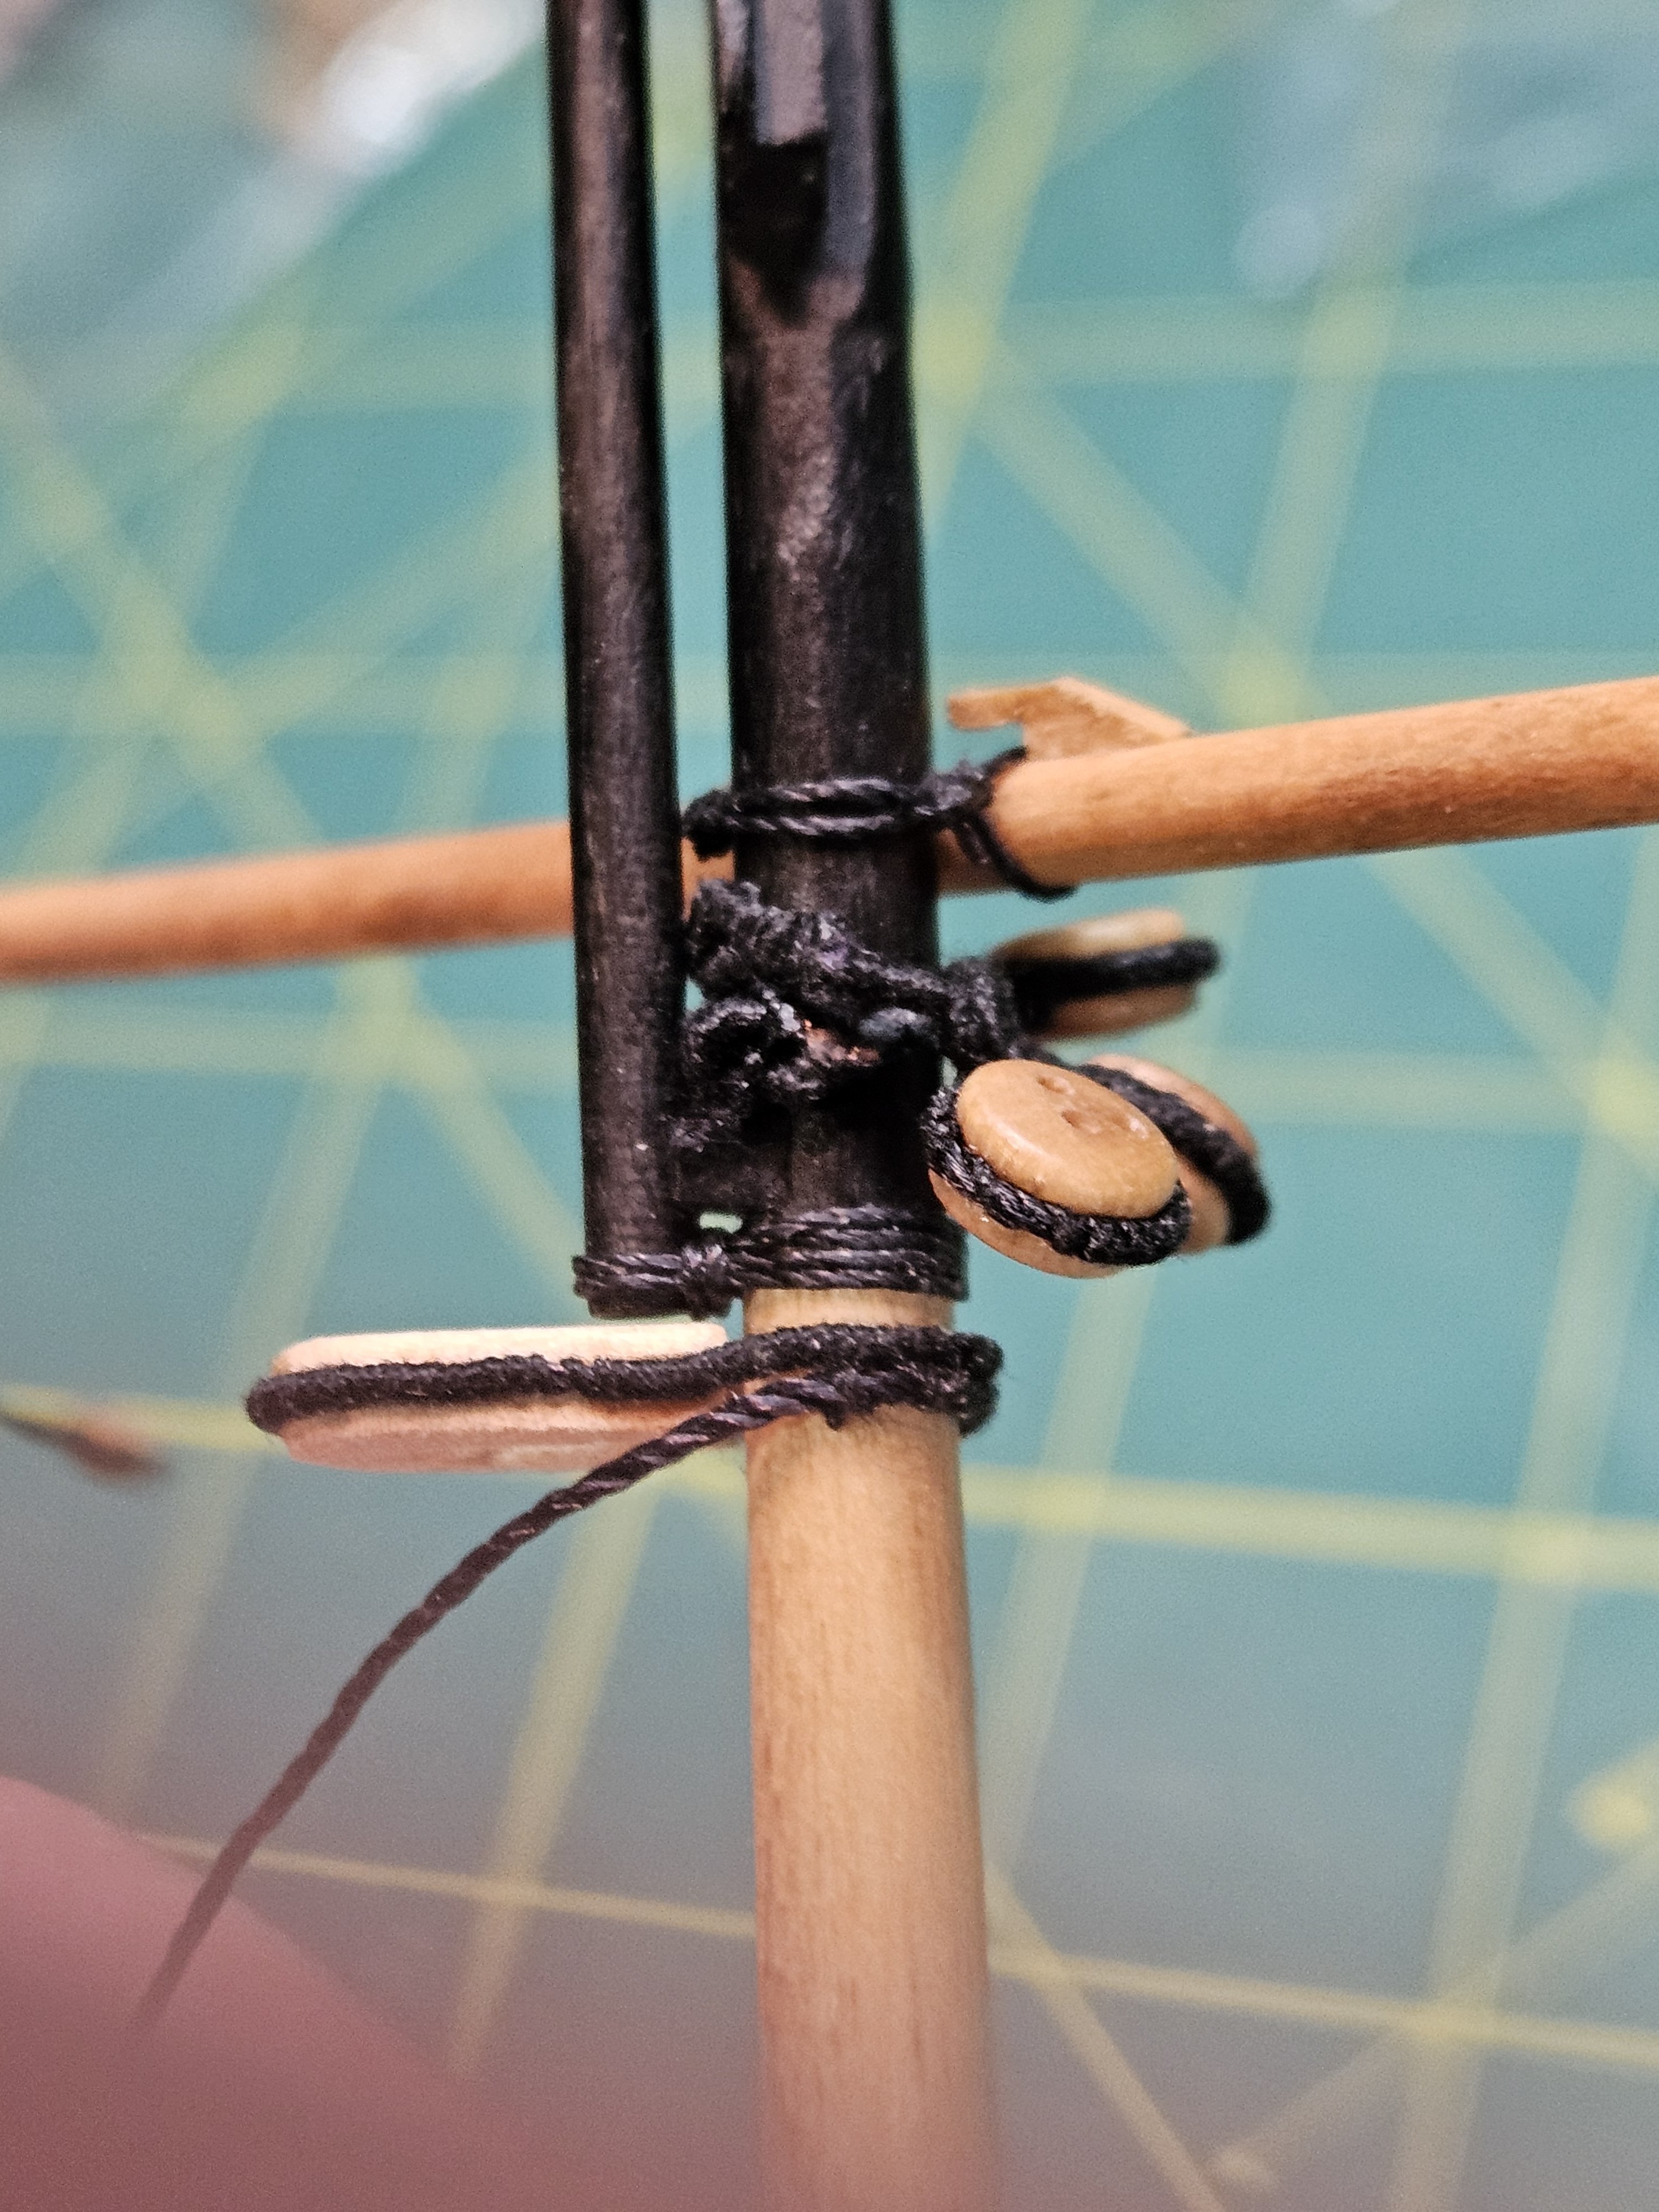
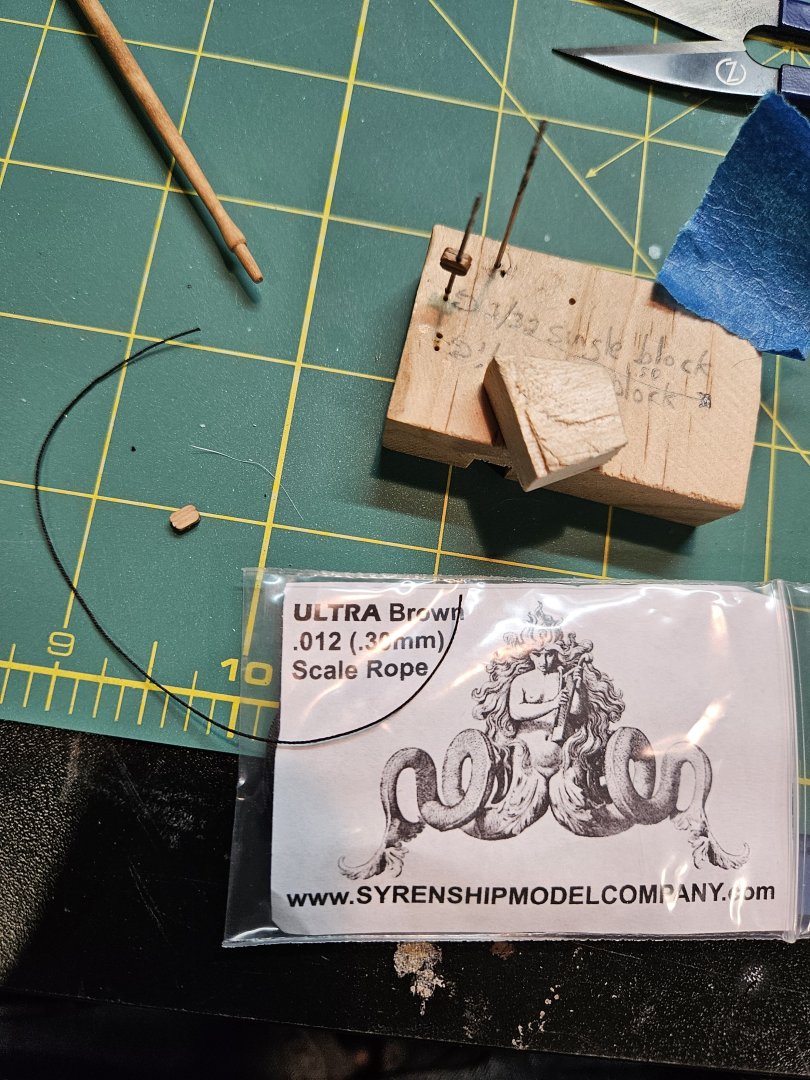
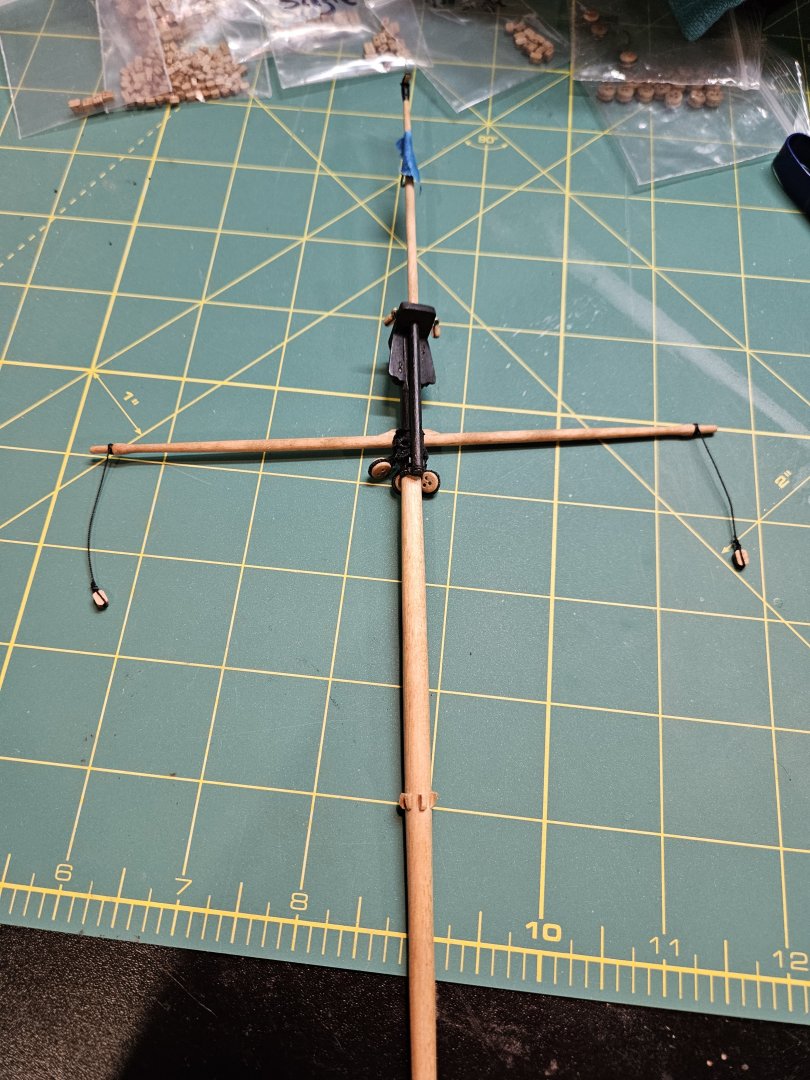
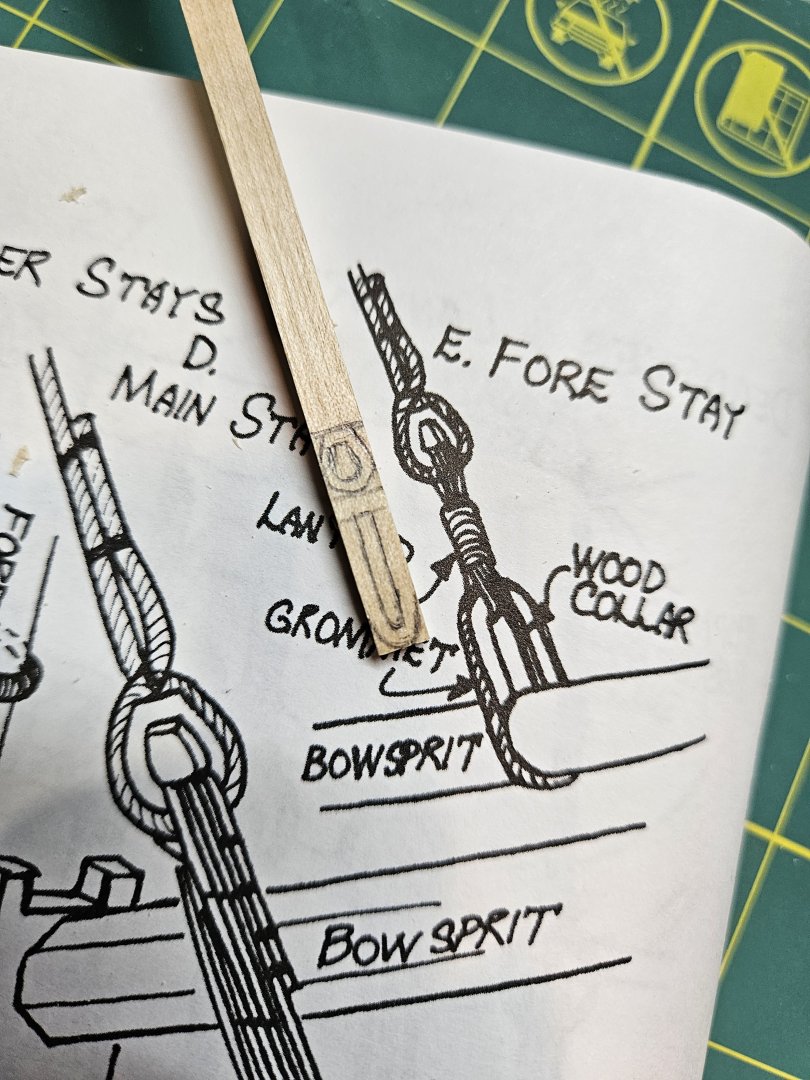
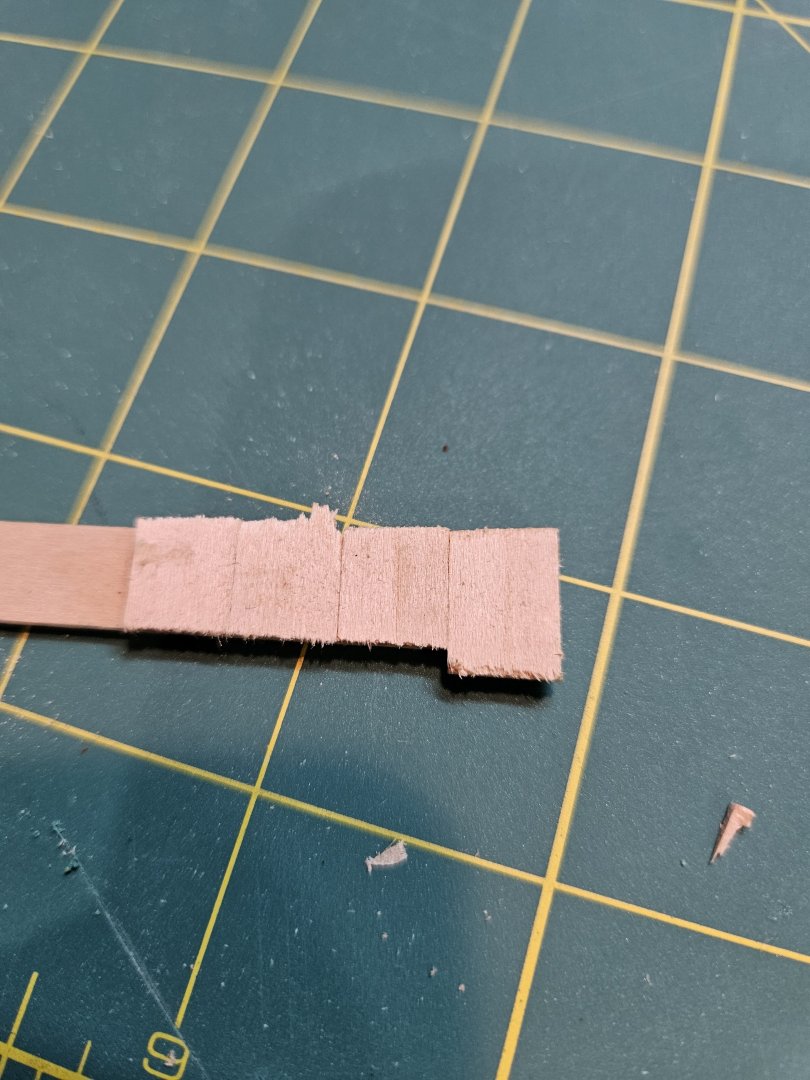
Continued Rigging Progress on Fair American model ship: I moved on to the spritsail yard brace pendants next. I used Syren Shipmodel Co. 0.012in rope to create these. I used my previously used block jig to help. Feeding the sheave hole over a small drill bit, and alligator gripping the ends to pull the stropping tight. Then seizing with fine black sewing thread. I got the lengths of the brace pendants' standing rigging from the plans, and attached to the yard with a simple clove hitch. Again, 'knot' really sure which knot is best. Both starboard and port done. you can also see the outhaul collar blue-taped to the jibboom, and a tiny 3/32 block at the end. Obviously I have a lot of blocks i bought in addition to the ones from the kit, so I can add all the sails and rigging. As mentioned previously, I am not painting the yards black, so all the detail and shapes are visible. Next was the collar and heart for the Fore Stay. These just happen to be near the same size as the illustration in the instructions, even though they're not to scale. I made them out of the kit's basswood And the collar split.... I knew it would, but I tried to go slow anyway. So I used 2x scrap 1/32 pieces and glued them together at 90deg to give stiffness. I saw fellow ship friend Cisco do something similar to this on his build, and I took that approach.... They turned out good. I rounded the bottom feet of the collar so they'll contour to the bowsprit nicely. All the jewelers needle files from my grandfather were critical in carving these. Continued to use the remaining served rope from previous use for the collar... I cut a little groove in the collar to accommodate the rope and keep it in place. I would just add little tacks of CA Wood Glue along the way. Now the plans and instructions don't describe HOW to attach the collar, so I'm just wrapping the ends underneath the bowsprit. Wrapped and glued underneath as best I could. I later read in some model ship books from Cisco (thanks for letting me borrow!), that the collar is supposed to be lashed underneath. If you look at the FA plans snippet above, it doesn't look lashed or mentioned anywhere. I finally added the whippings? Seizings? Side lashings? to the sides to secure the rope to the collar. Trimmed everything neat and close - it looks okay to me. It does appear to 'float' over the bowsprit, but in actuality, it will be bent toward the foremast, so the curved edges I talked about will rest on the bowsprit as intended at an angle. Just can't see it now. That's all for now. Next up is the buntline thimbles and robbands for the first mounted sail! The Spritsail! I'll share that next week, once I get all the pictures. Thank you for reading and following along - Jason-


-
Now THAT is an awesome idea. I'm definitely going to try that. I also have a bees wax stick, but wasn't going to use it on served rope, because i felt it would smear. I like your approach. Thanks for the tip
-
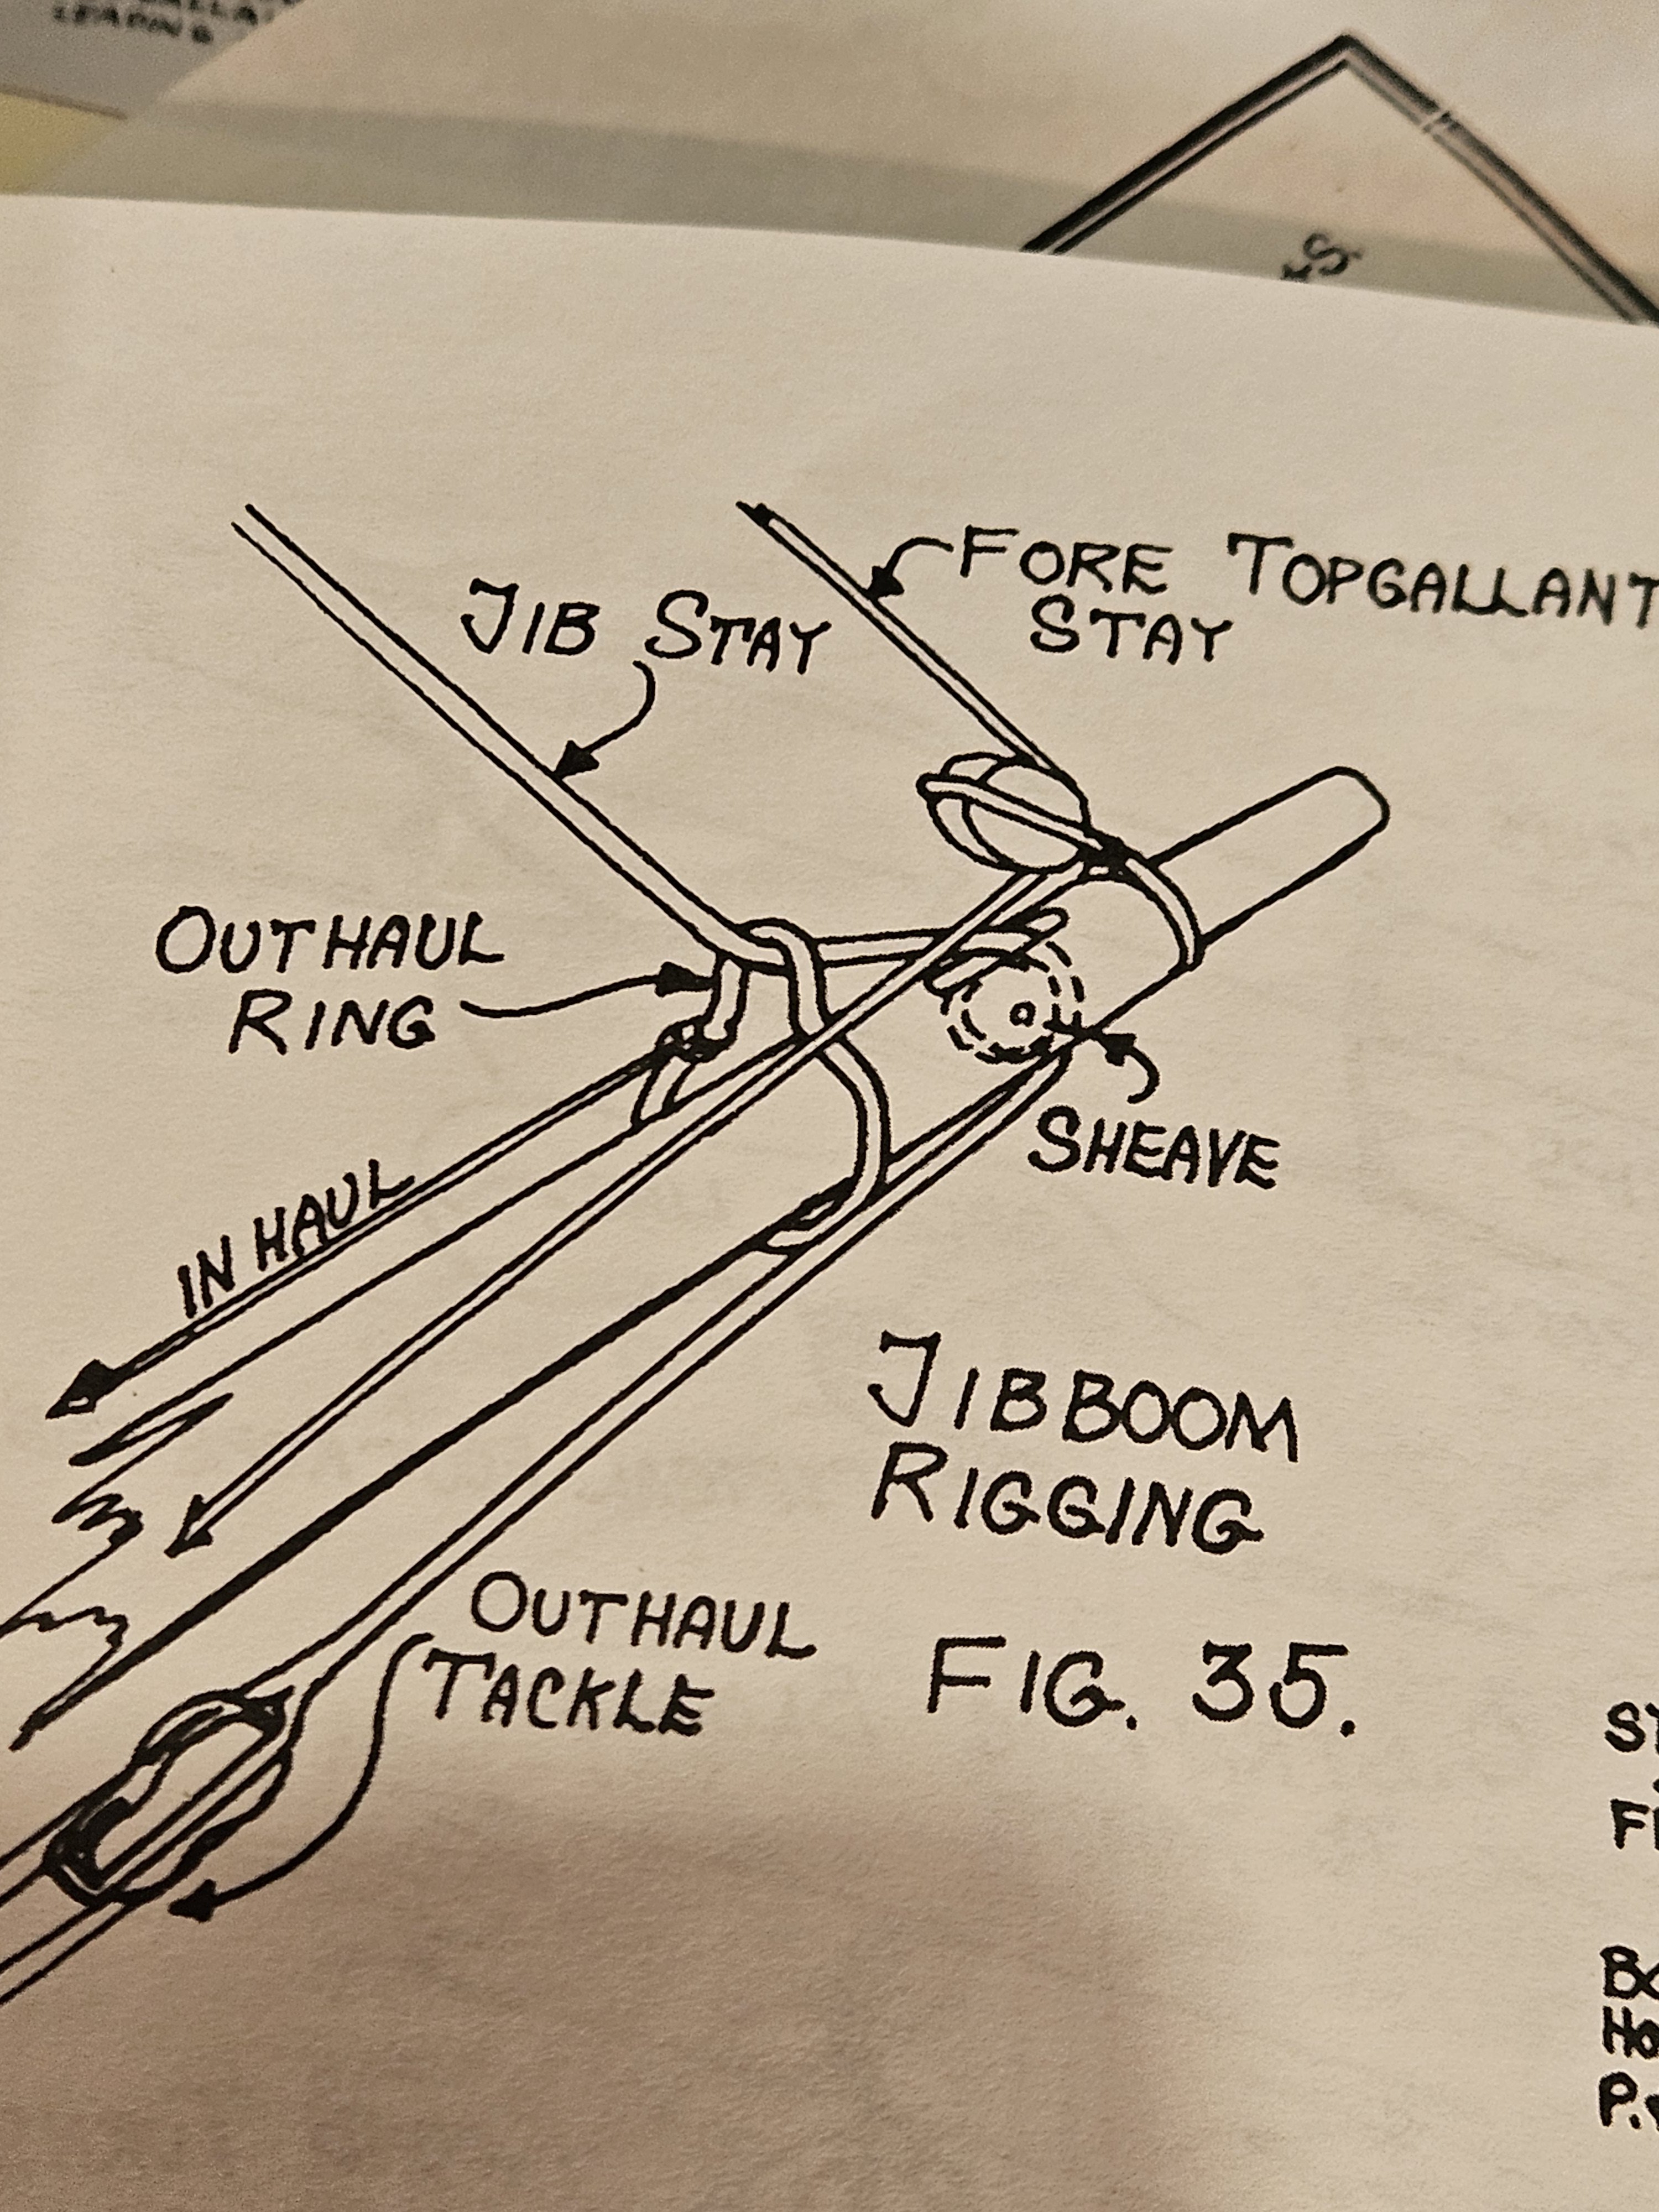
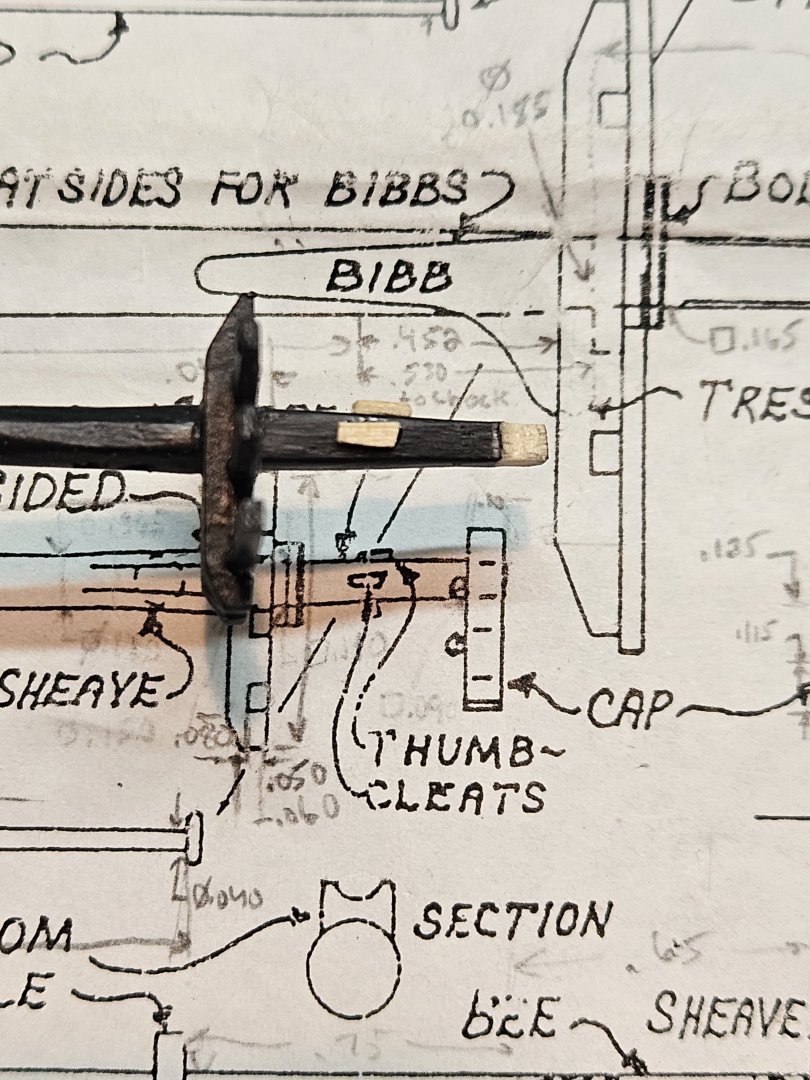
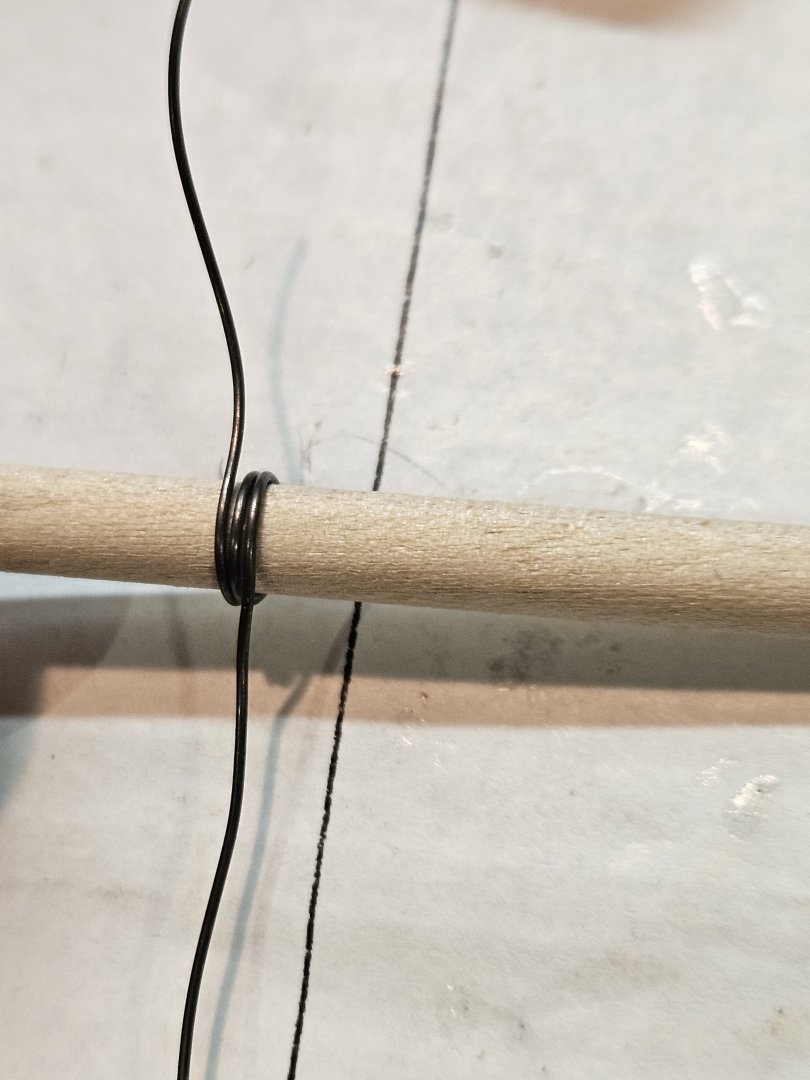
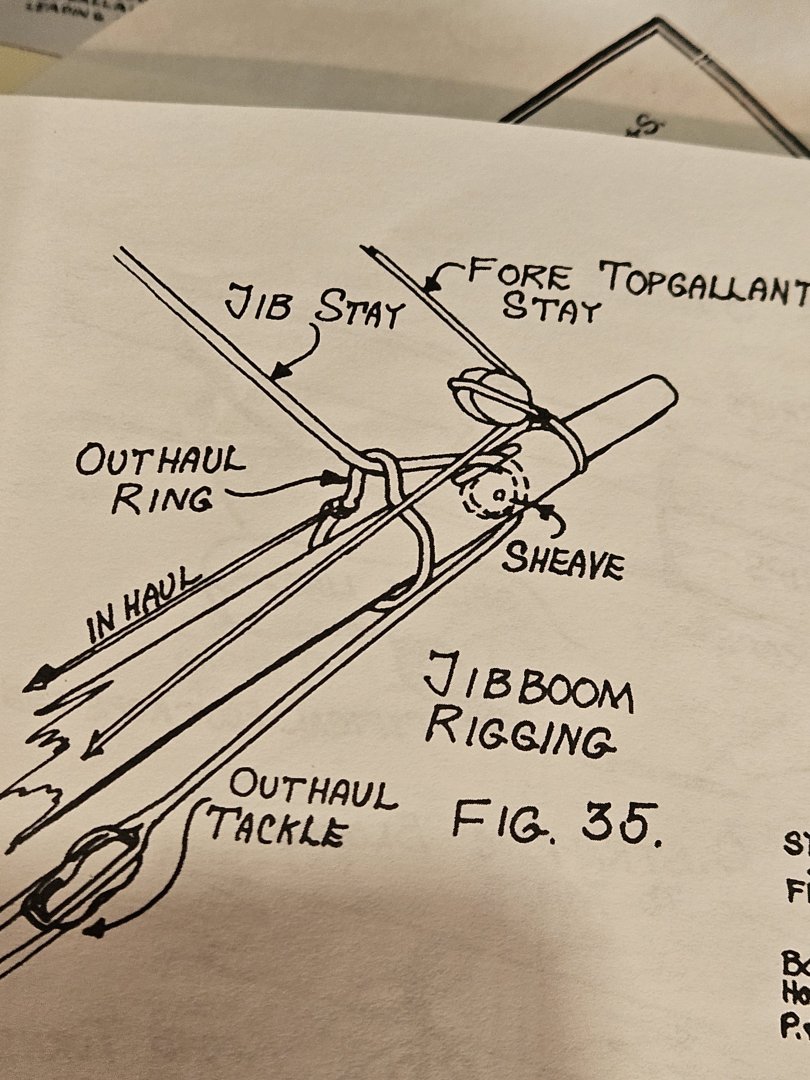
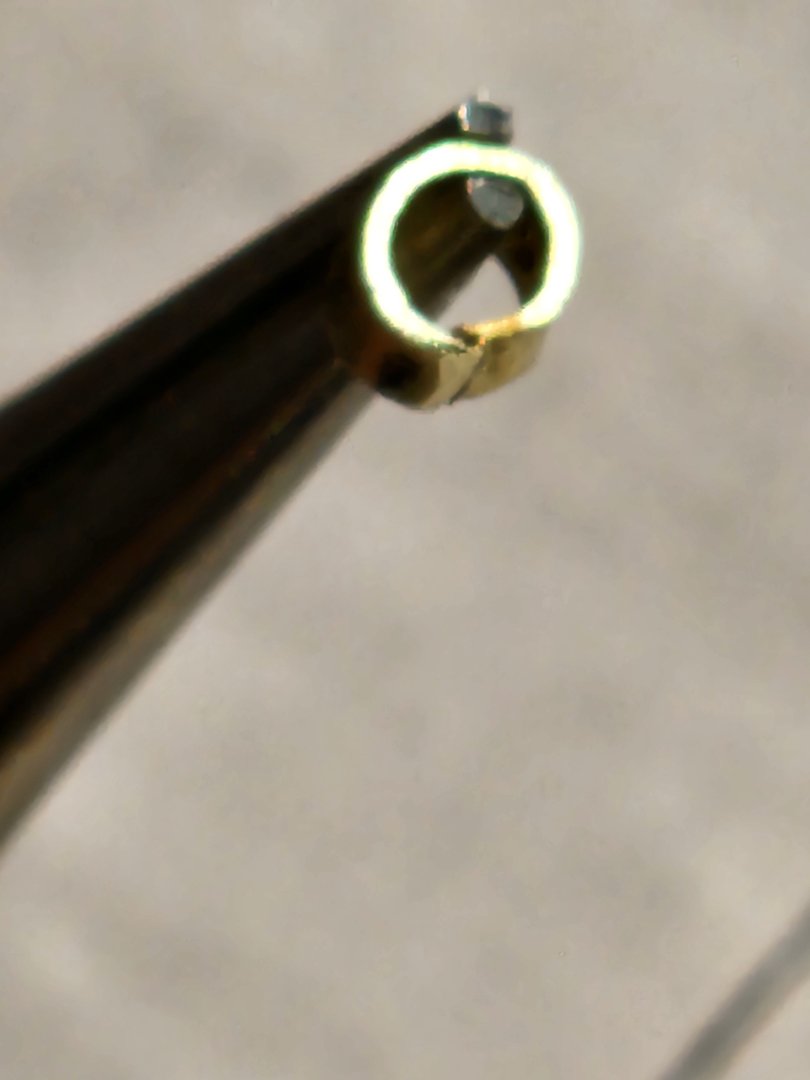
Continued rigging on the Fair American: I've been busy in September, so now that it's officially October, it's time for an update: Worked on the Bobstay collar next. As with the shrouds, I used left over served rope to make eyes: gluing and pinching with needle nose pliers. Then seizing it with fine thread and gluing. Later trimming neatly as I can. w With the deadeye, gluing and pinching again with the needle nose as close as possible. And seizing with fine thread and glue. The left eye was tough to trim close without it unraveling, so I left it with a glue tumor on the side. It's going to be lashed and hidden under the Jib Boom anyway, so I'm okay with it not being perfect. Here it is lashed to the bowsprit. Its a little crammed with the shrouds and yard truss, but this is where everything goes, according to the plans. I moved on from there to attach a single 1/8" block for the yard lift. I didn't really know what knot to use to attach it to the eye, so I looped both ends through once, and single knotted. They'll do. I debated whether to add the running rigging at this time, and just coil the rope near the block for later, but I decided to wait. I also didn't want to have too much tackle hanging everywhere while I'm still rigging other things. I need all the room I can get. I've been spending a lot of time looking ahead at rigging coming up, and I noticed I forgot something. For the top gallant stay, I needed thumb cleats on the top mast. These were tiny little guys, and at an angle so it leads to the bowsprit correctly. I know they're bigger than the plans show, but this was as small as I could handle. They turned out good. Before I rig any stays or blocks to the jib boom, I need to make the Outhaul Ring first. The best way I knew how to create this, was to wrap some annealed steel wire around a wood shaft similar diameter to the gib boom... Then use needle nose pliers to pinch the top portion to create the 'loop'. Afterwards, I could trim the ends close, and voila! Outhaul ring! It turned out better than I thought, but still a little large for the Jib Boom. I know I'll have other lines and knots that will take up SOME space, so I'm not too worried at this point. I slipped it over the Jib Boom and painter's taped it midway, so I don't lose it. There much more rigging i've done this month, but this is enough for one post. I'll post some more progress tomorrow Have a good night! - Jason -


-
Rings look pretty good to me. Those are not easy to close, even with the jewelry needle nose pliers. You could always hide the 'seam' under the staple if you want, but to me, seeing the handiwork, is kind of a testament to your skill. Nice work!
-
I'm using kit (core) rope, then sewing thread for serving. I want to save as much Syren rope as I can for other more prominent/visible rigging. I know its heavily magnified, but I do want to do as neat work as I can I'll say it's semi-pro at this point - thanks for the kind words
-
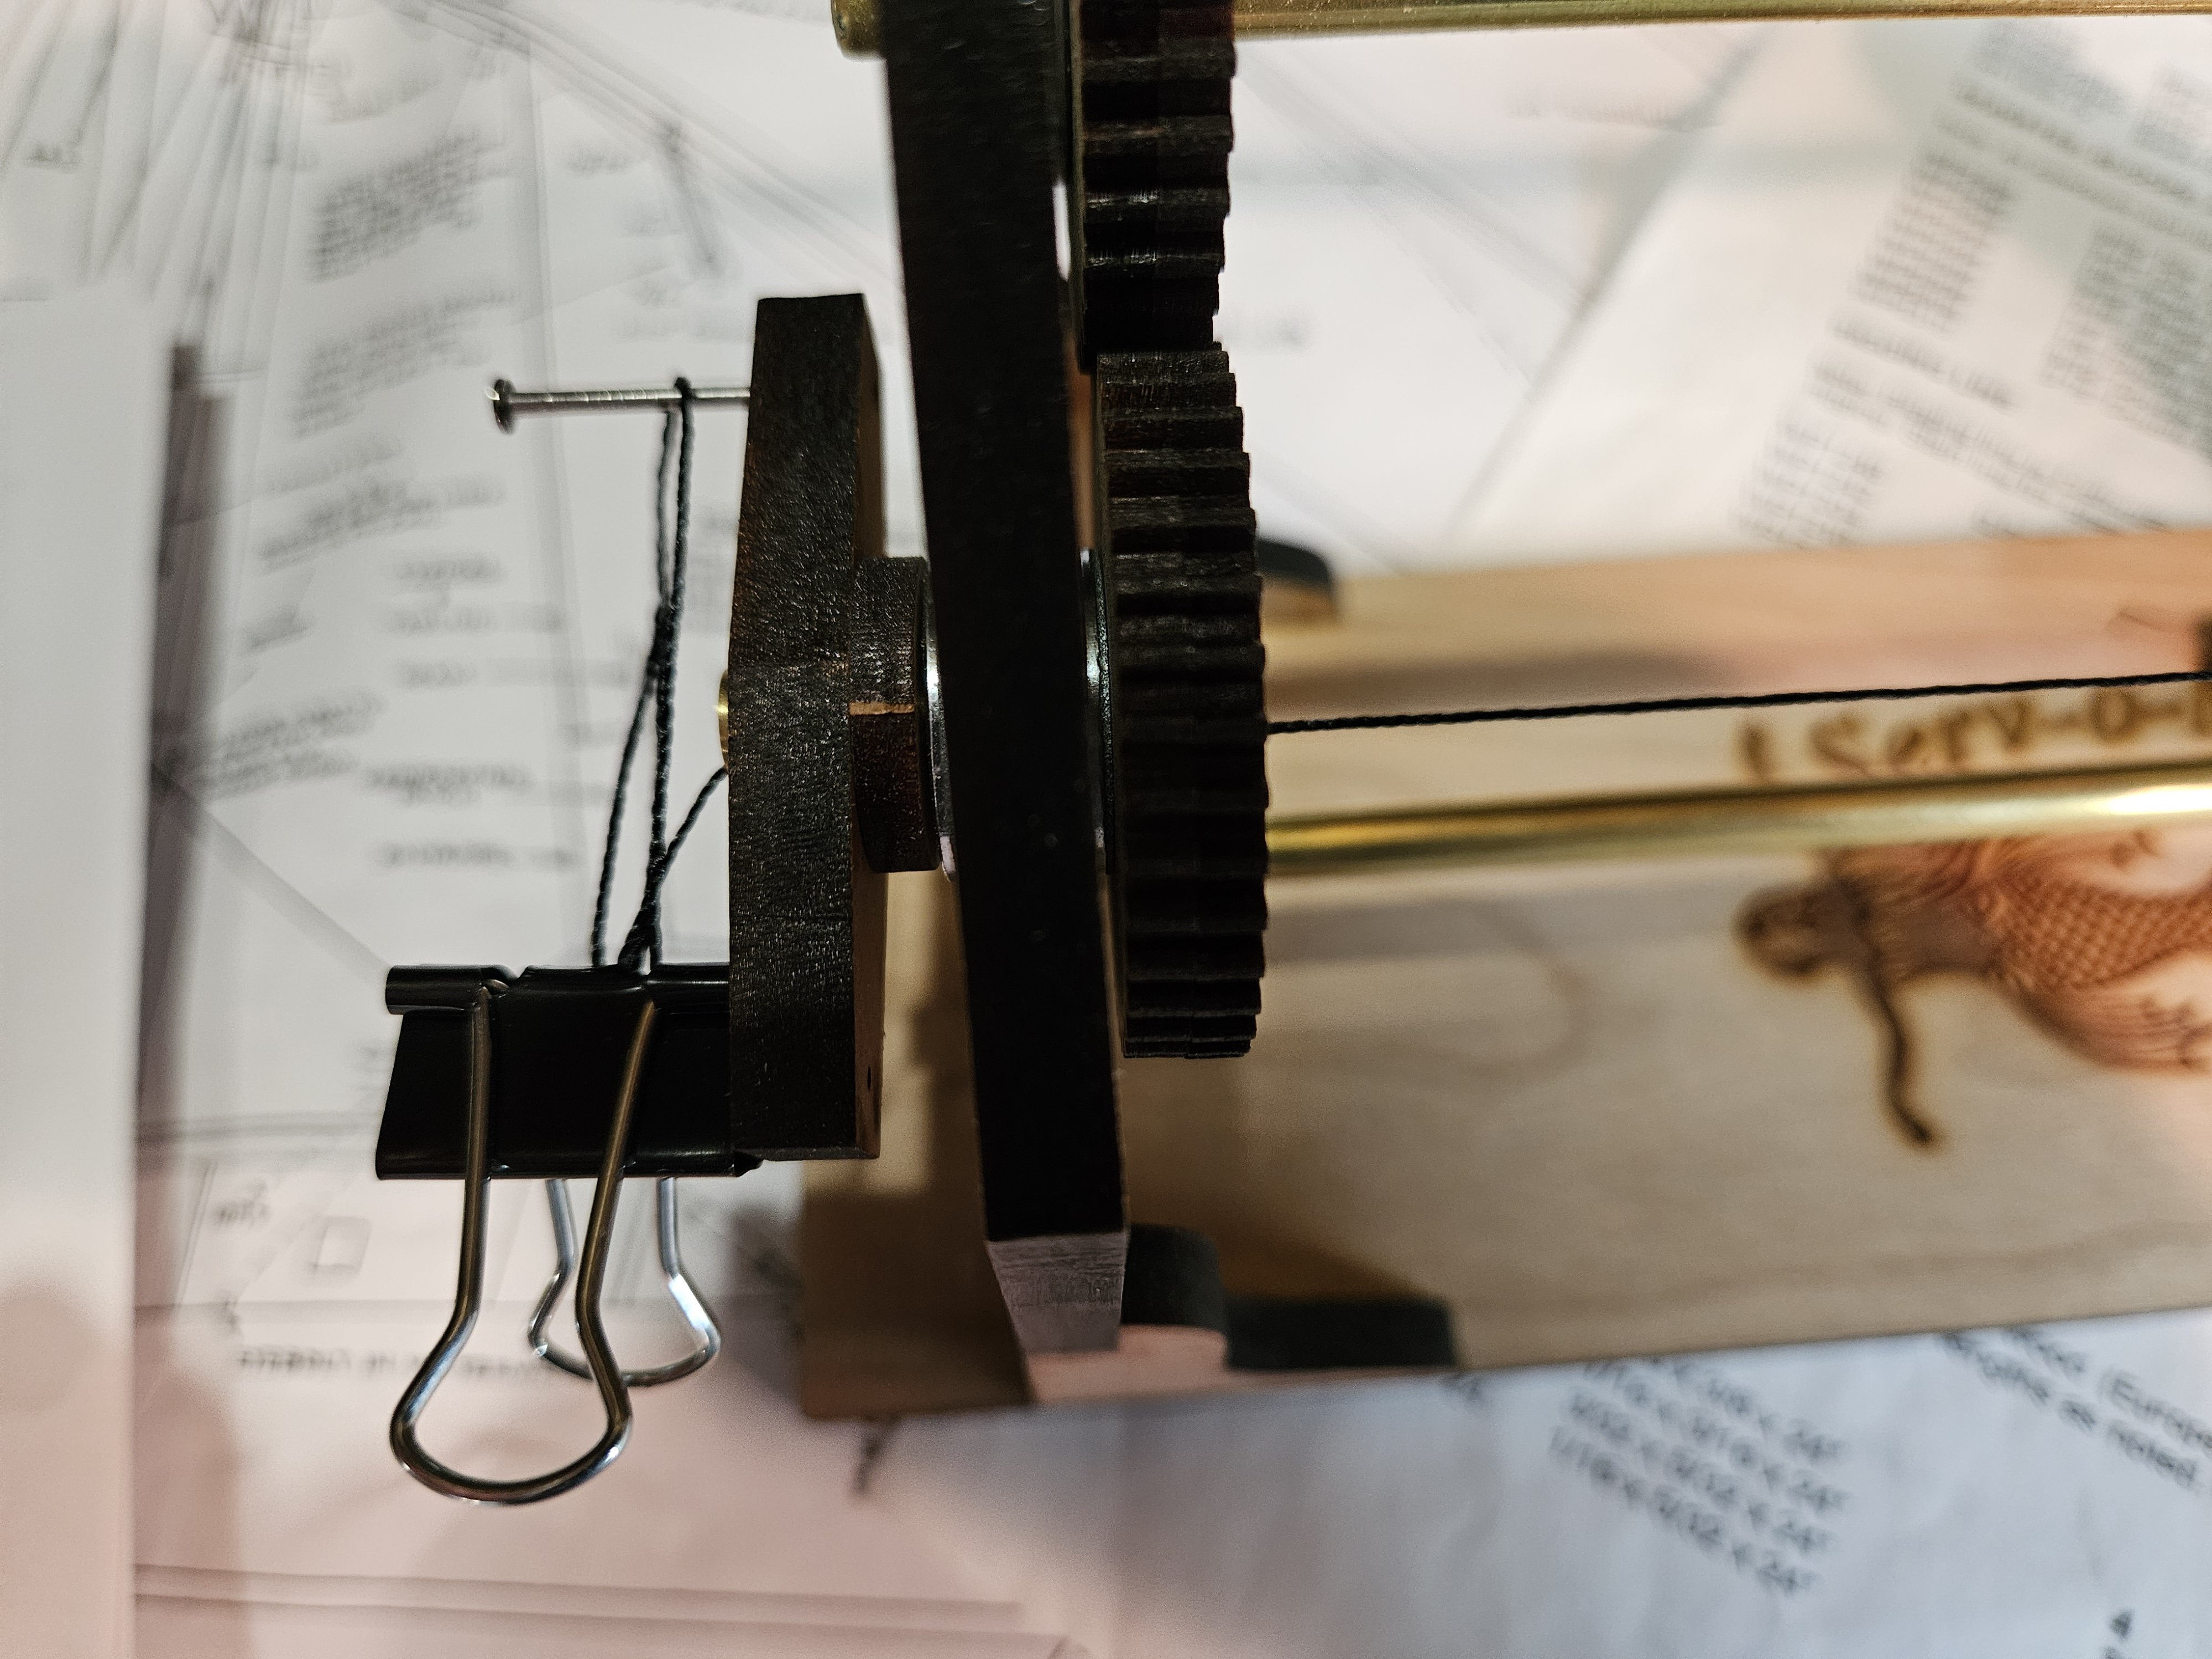
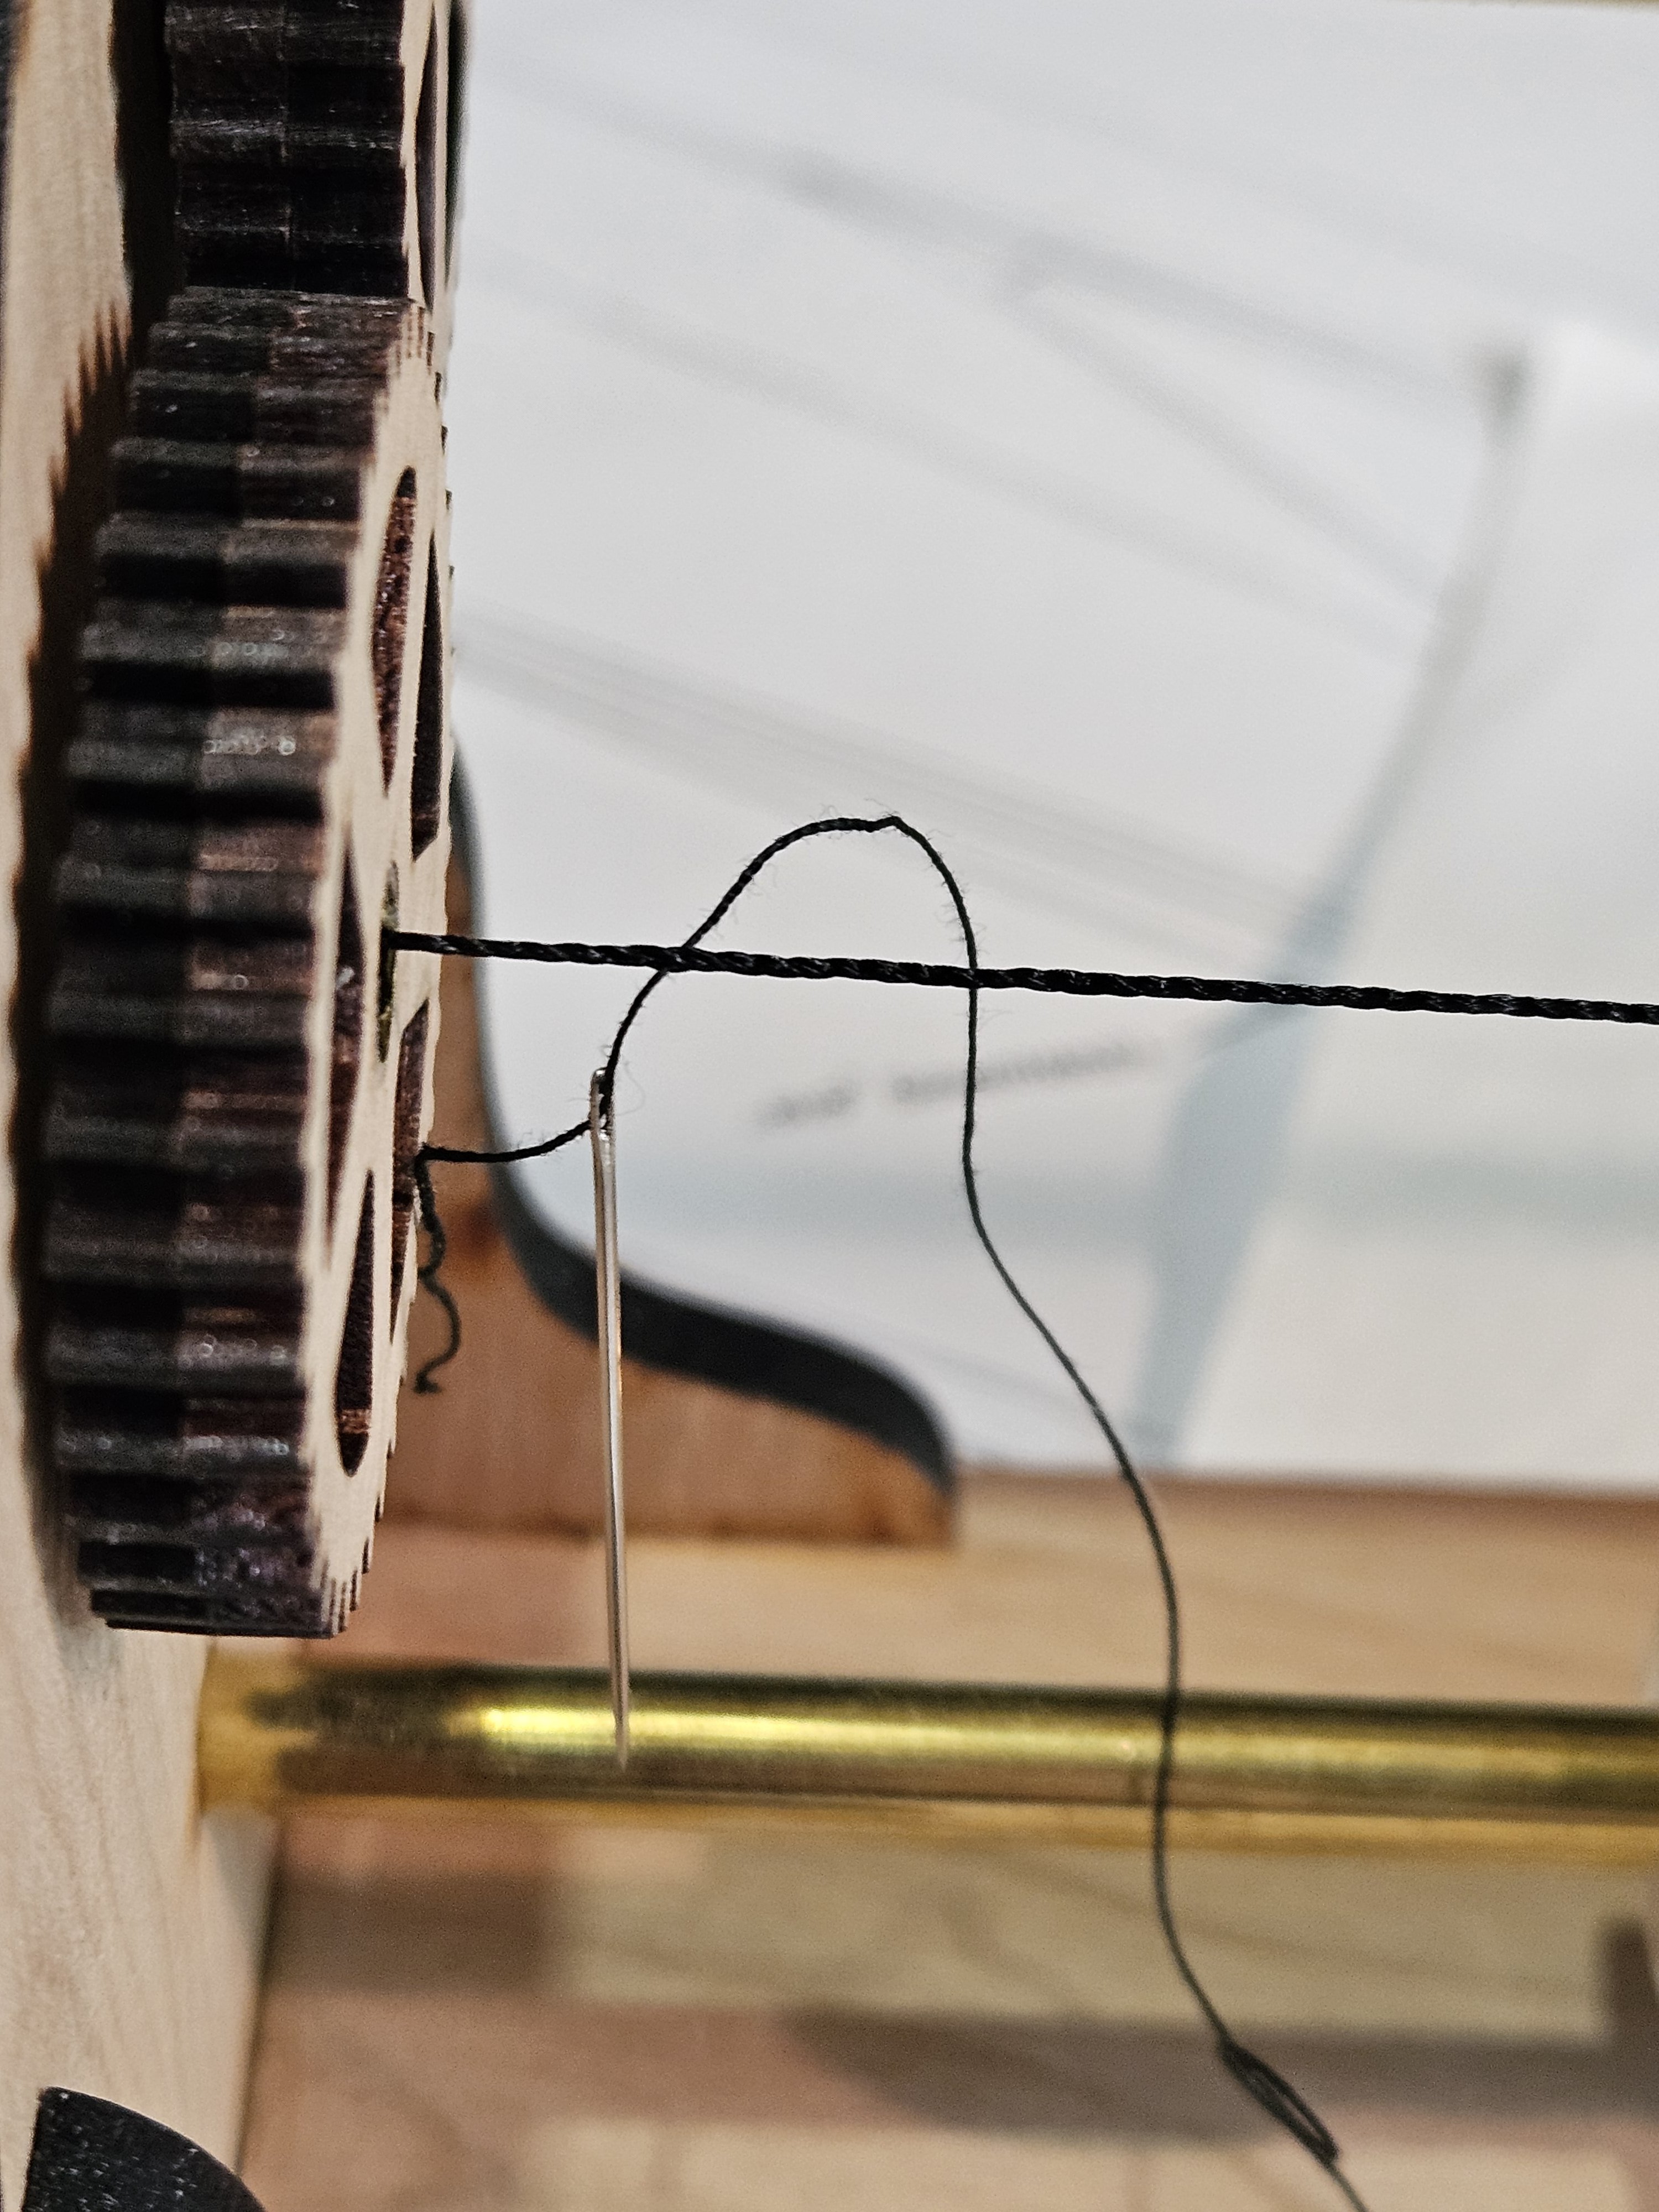
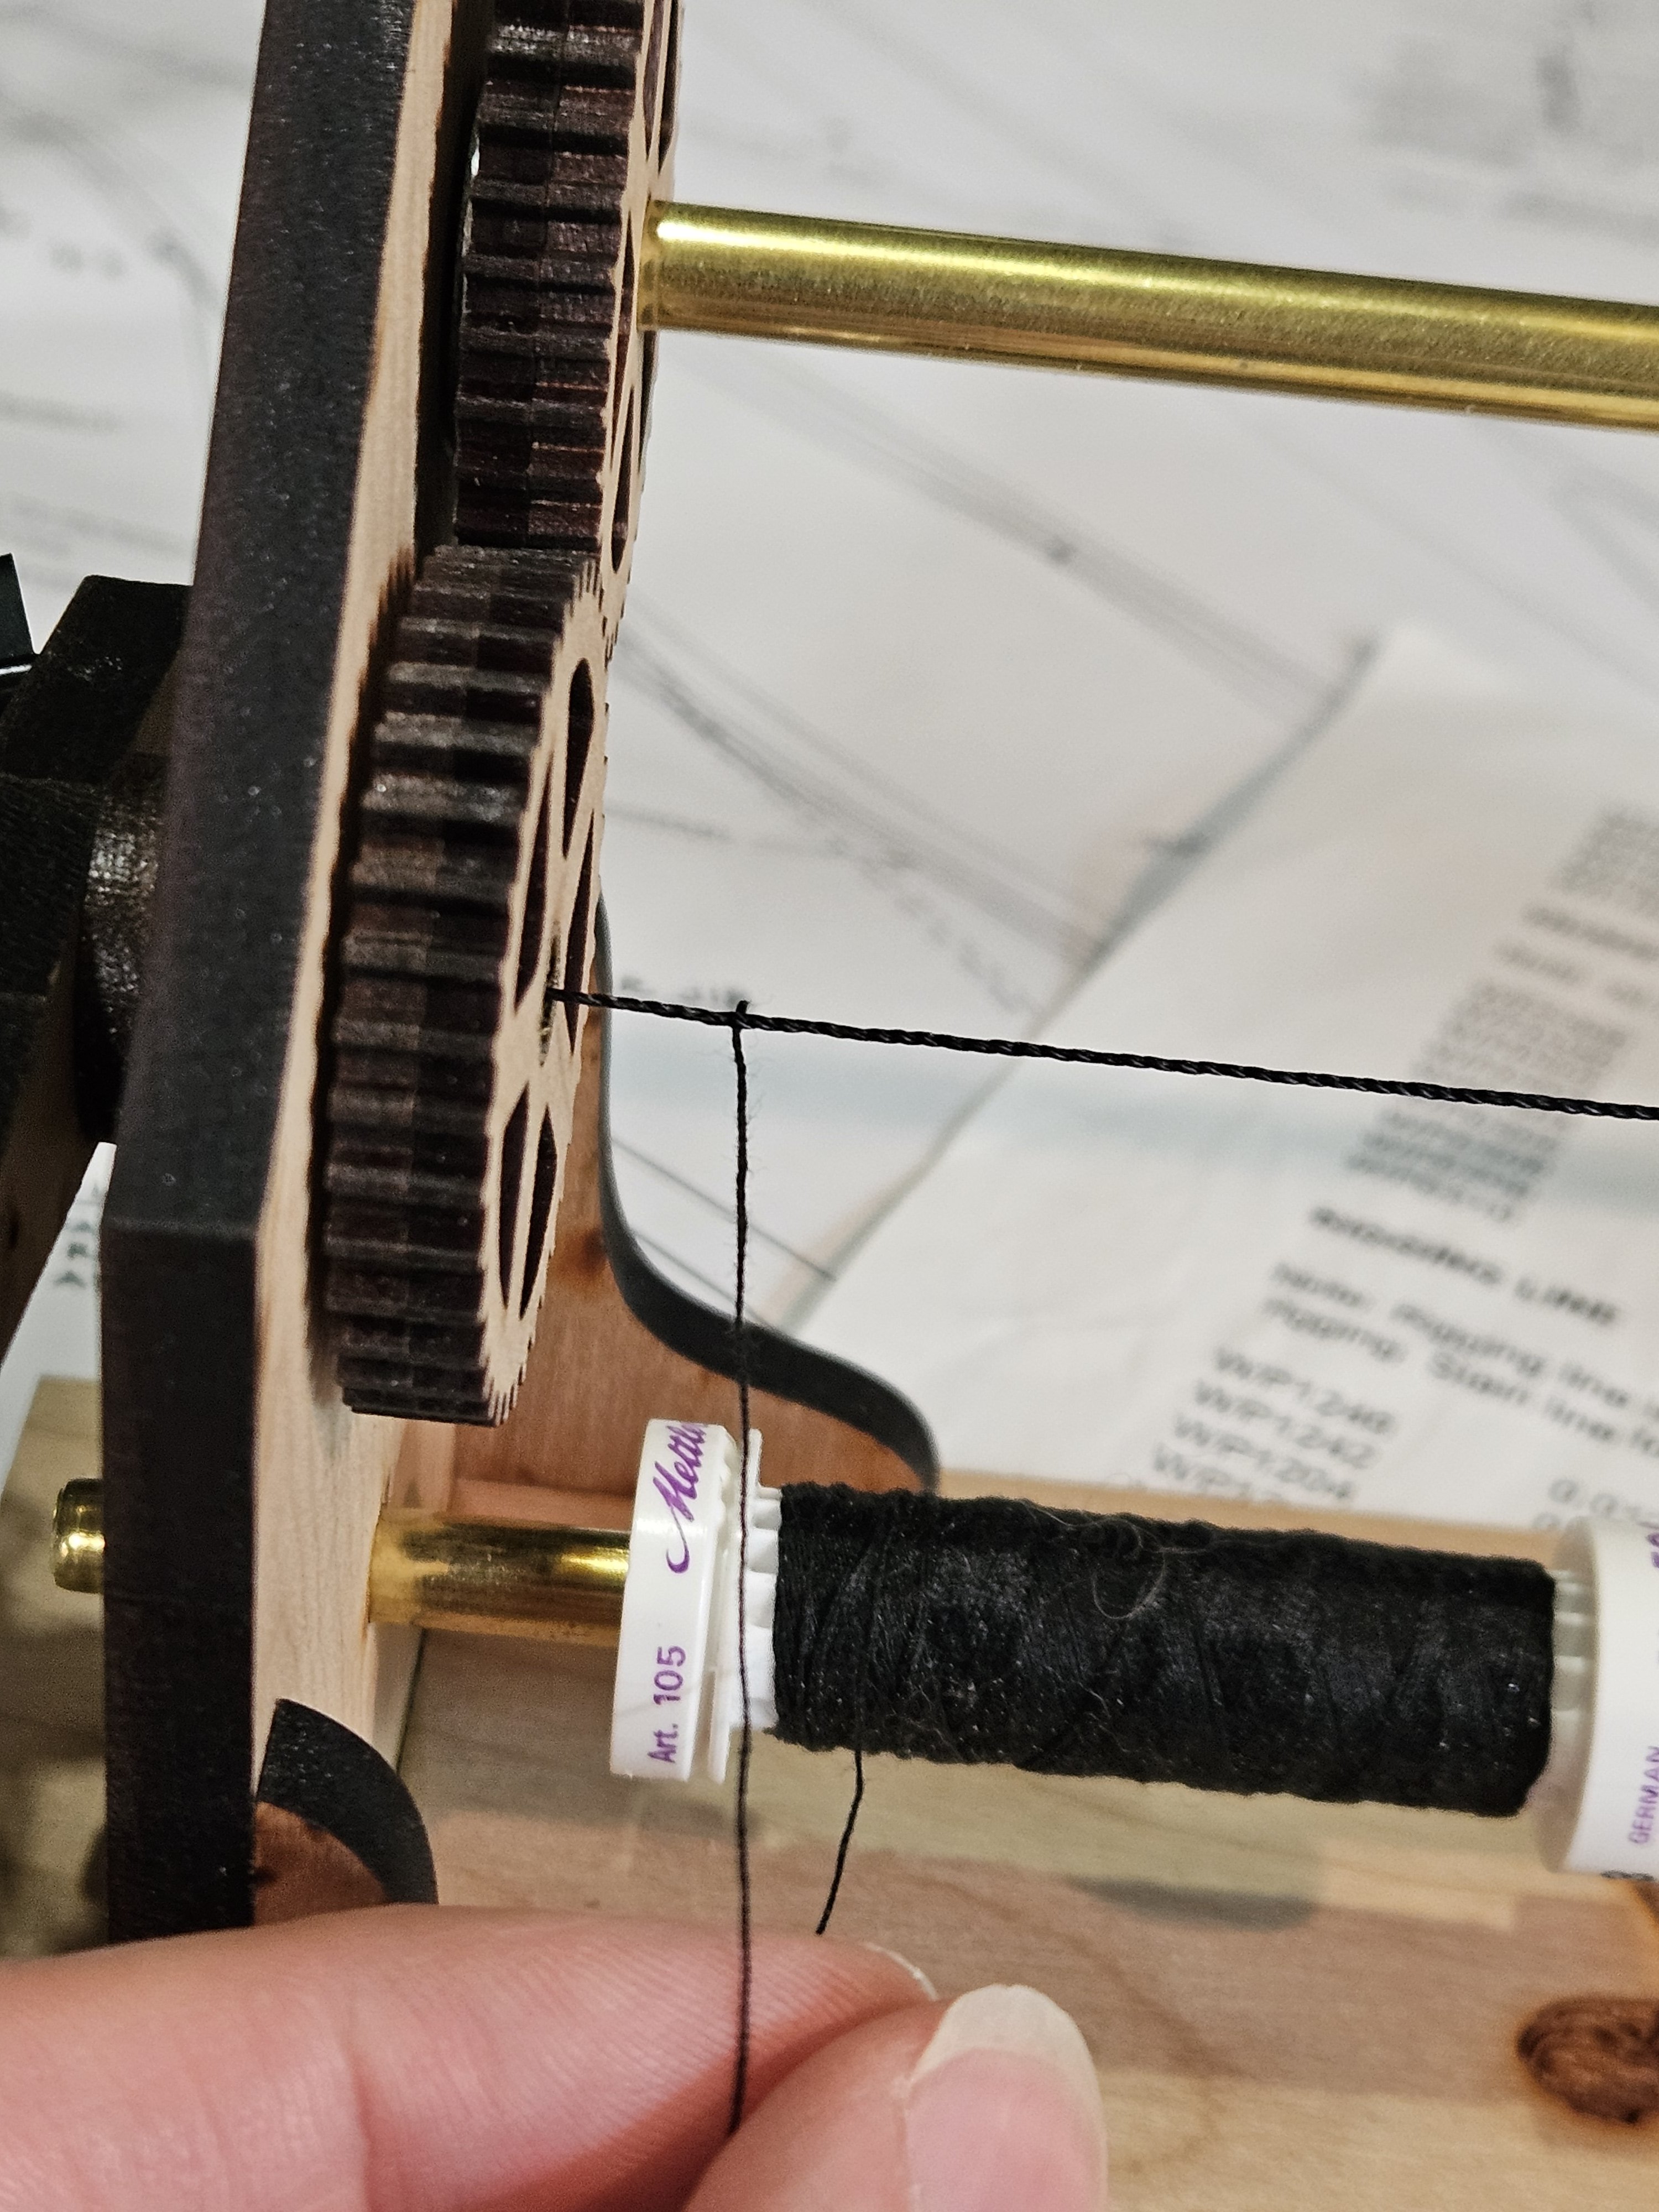
Update on the Fair American Model ship (rigging) I'm finally starting on the rigging for the model. I'm focusing on the bowsprit first, and moving backwards. My approach is to add all the blocks, deadeyes etc to the yards and masts first, then add the sails, then rig the yards to the masts, then step the masts, and so on. We'll see how it works I started to work on the Bowsprit shrouds and bobstays. I also purchased the serving machine from the Syren Model Ship Company months back. Time to put it to good use. The shrouds and bobstays need to be served, so I took some .018in rope to use. I mounted it in the machine, securing it to both the wind and static sides. Then following the instructions, threading some thin sewing thread through one end, with a knot... And tacked it with glue and trimmed short..... The first few inches of serving were very uneven. The rope likes to naturally bend towards the serving thread I'm pulling taught, so getting the pressure down right was tricky at first. You can see how it bunched up, then thins out, then tight wrapped, then semi-spaced. Towards the end, I got much better. Much more even. So I knotted, glued and trimmed short the end, and smeared a diluted bit of white glue onto the entire length to 'set' it, as per instructions. I hindsight, I should have used more glue, less water, and smeared more - it sort of unraveled part way, but I have a usable length. Its pretty easy to use, just have to do a lot of it eventually. I'm not exactly sure if the size of the rope to be served is to be scaled to size, or the final served rope is to be the scaled size. In the future I'll use a slightly smaller core rope than called for, and assume the served rope is the size I need. The shrouds were difficult to make eyes into. I could open up the weave and feed the rope through itself to create an eye, but that is more work than I'm willing to do at this point. I opted for a "fold an tiny eye of served rope, dab of glue, pinch hard with pliers and trim close as possible. At this scale size model 1:48, this is good enough for me I have to sort of guess how much length of rope I need to wrap the deadeye. I try to measure lengths, but its challenging. I'll wrap it around, tack a few spots with glue so it doesn't fall out, then finish the serving/knotting on the bottom as close as possible. Again, estimating where the other side will go, once finished to get the length right. I hold it with my fingers best I can. Make the second eye And tack and seize the other deadeye in place... This is as neat as I can produce a siezing here. It'll work. With the running end, I loop it over itself, tack with glue and pinch with pliers to form an eye Sieze/knot it.... And we have an ugly pair of shrouds! But I have to remember everyone who sees this on display will be wearing 500x magnifiers, so perfect details are key ;-). Lashing it to the bowsprit had to be done from the side, then rotated back into place, so the eyes are hidden under the jib boom. I made the eyes WAY too long. They wrap around the bowsprit, but are buckled because they aren't tightly wrapped, after lashing. But they're in place now. The bob stay is next, and that should be easier because there's only one deadeye. Most of this I'm coming up with on the fly. There isn't any real instructions for how to do this. ''Make an eye first, then wrap the deadeyes with 0.25in gap, then add 5/32" to the running end, then.." Something like this would have helped. Anyway, I'll keep chugging along. Thanks for reading. - Jason -


-
This is really nice work. I'm currently starting the rigging for the Fair American, and I bought the plans for the Niagra so I could see the rigging plan in better detail. I really appreciate all the detail you've included in your update, its helping to guide me in how to approach my build. Really enjoying seeing your progress. -Jason-
-
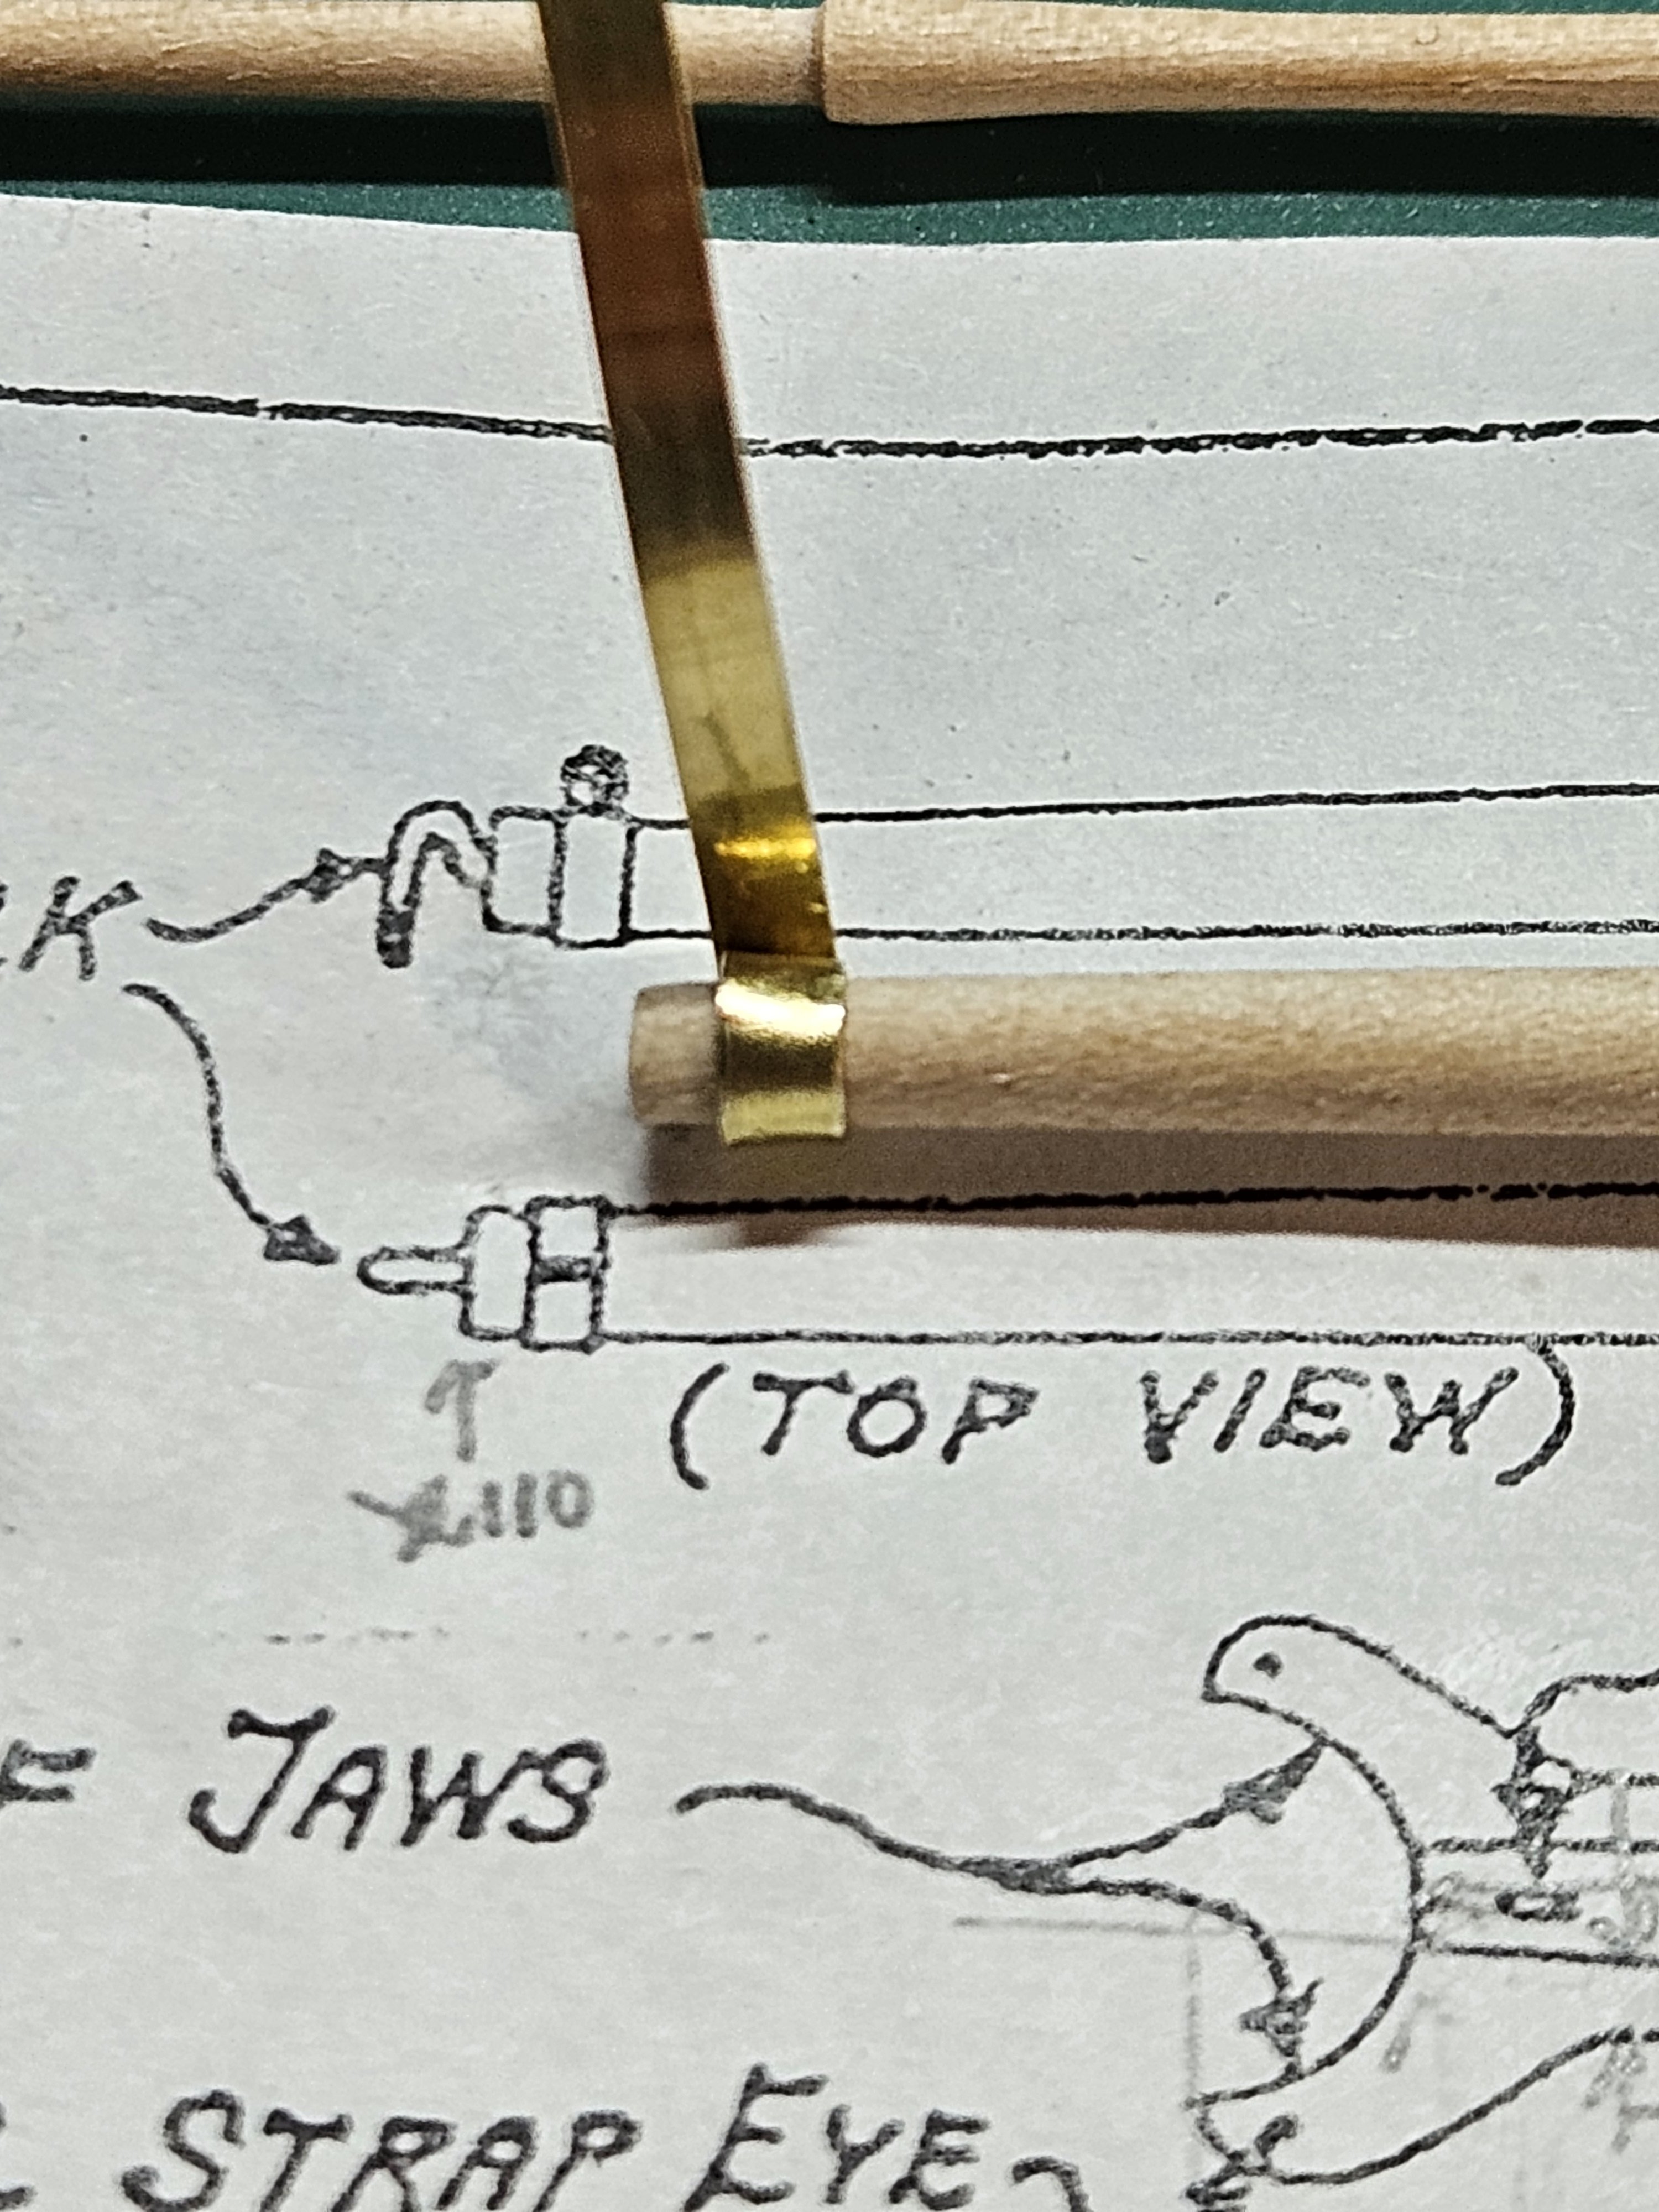
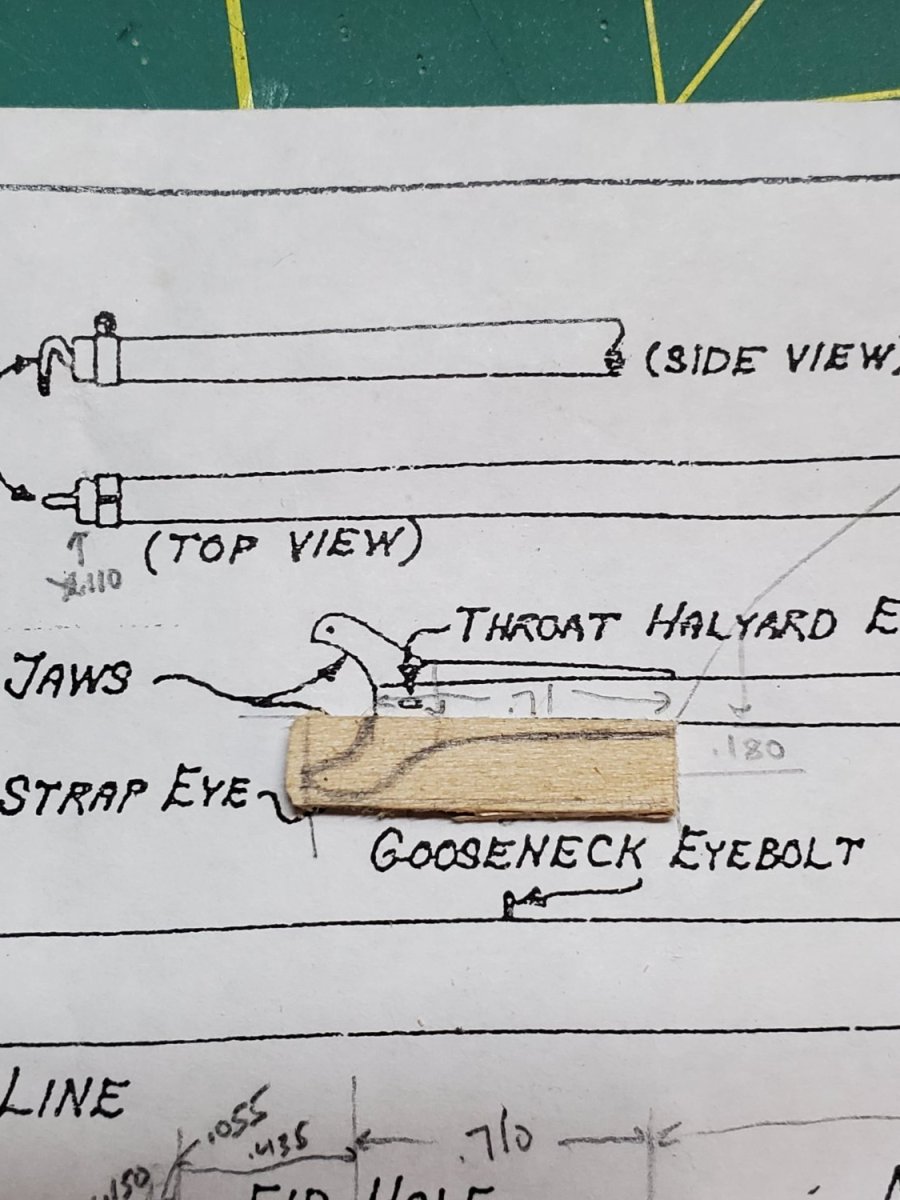
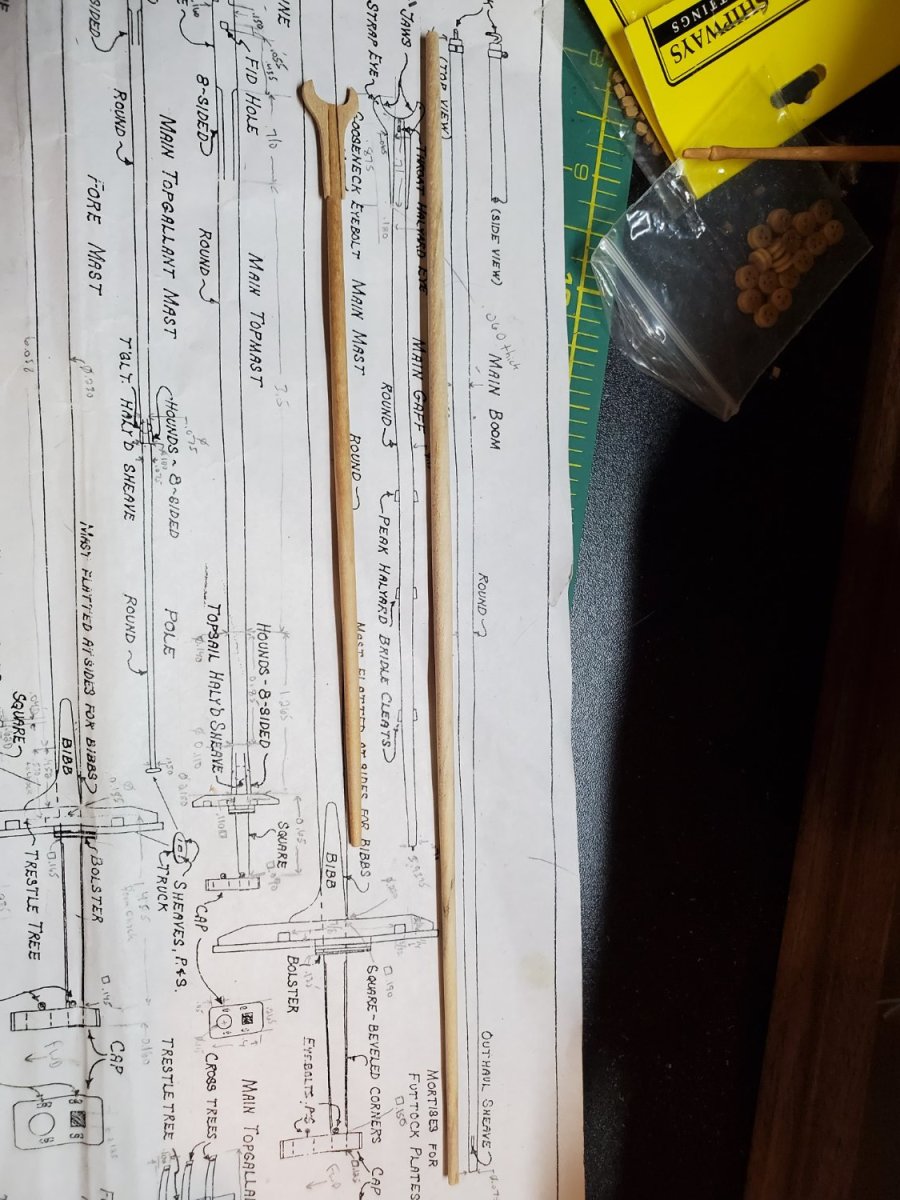
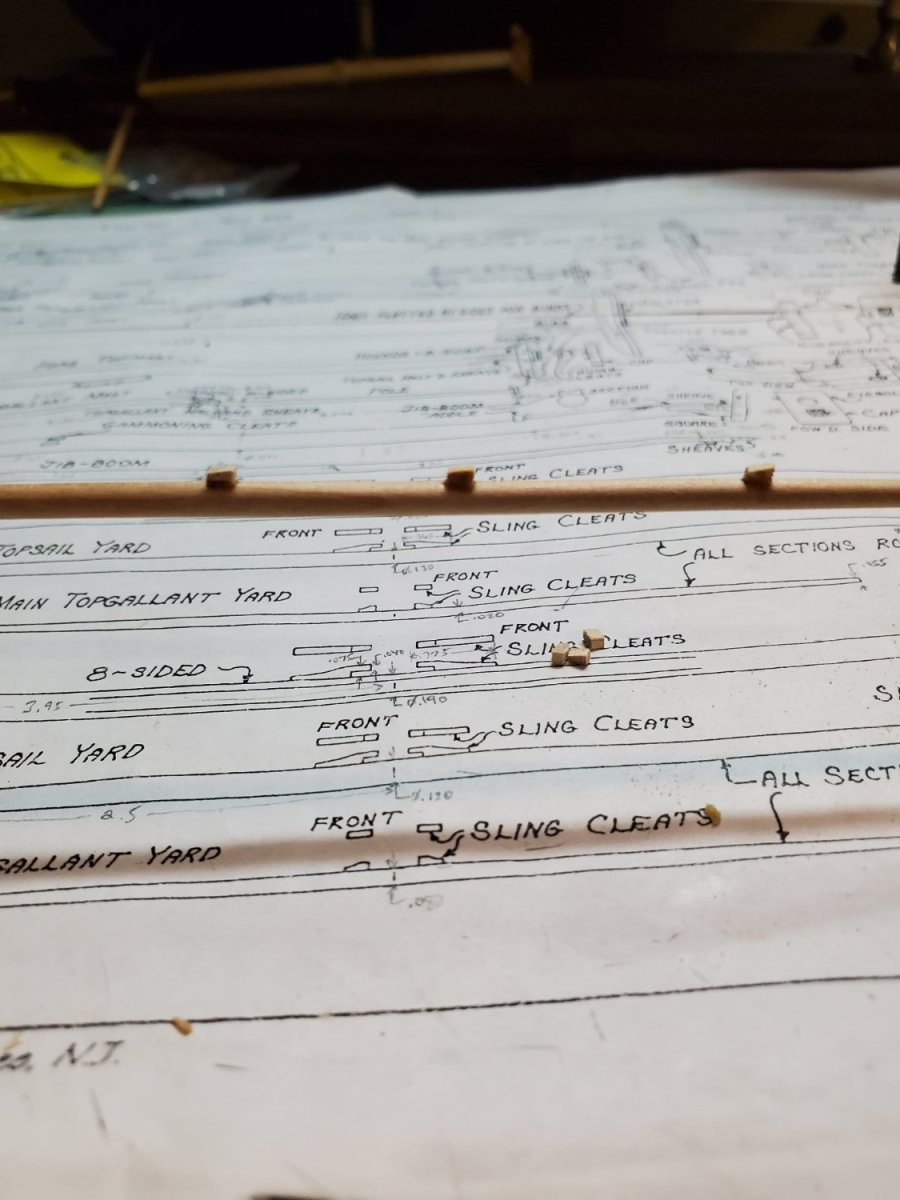
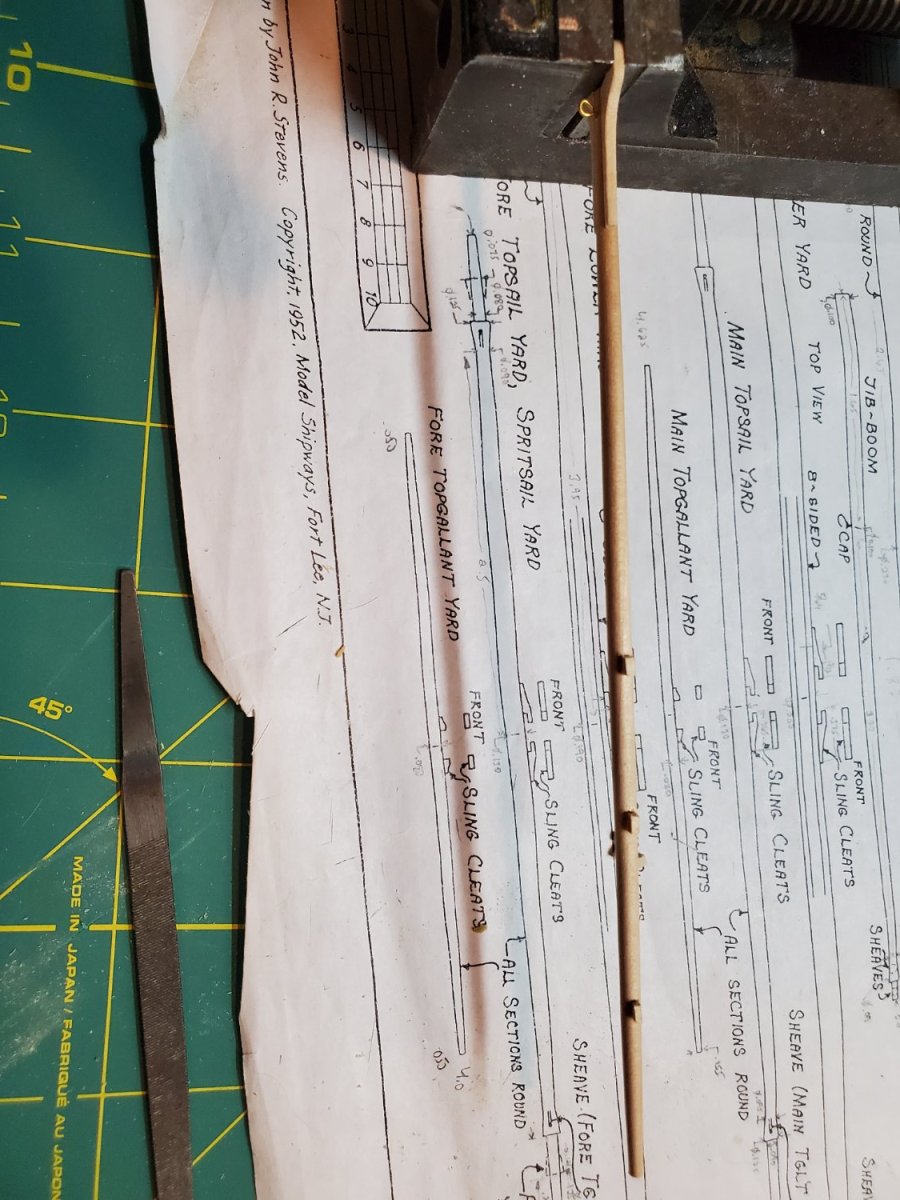
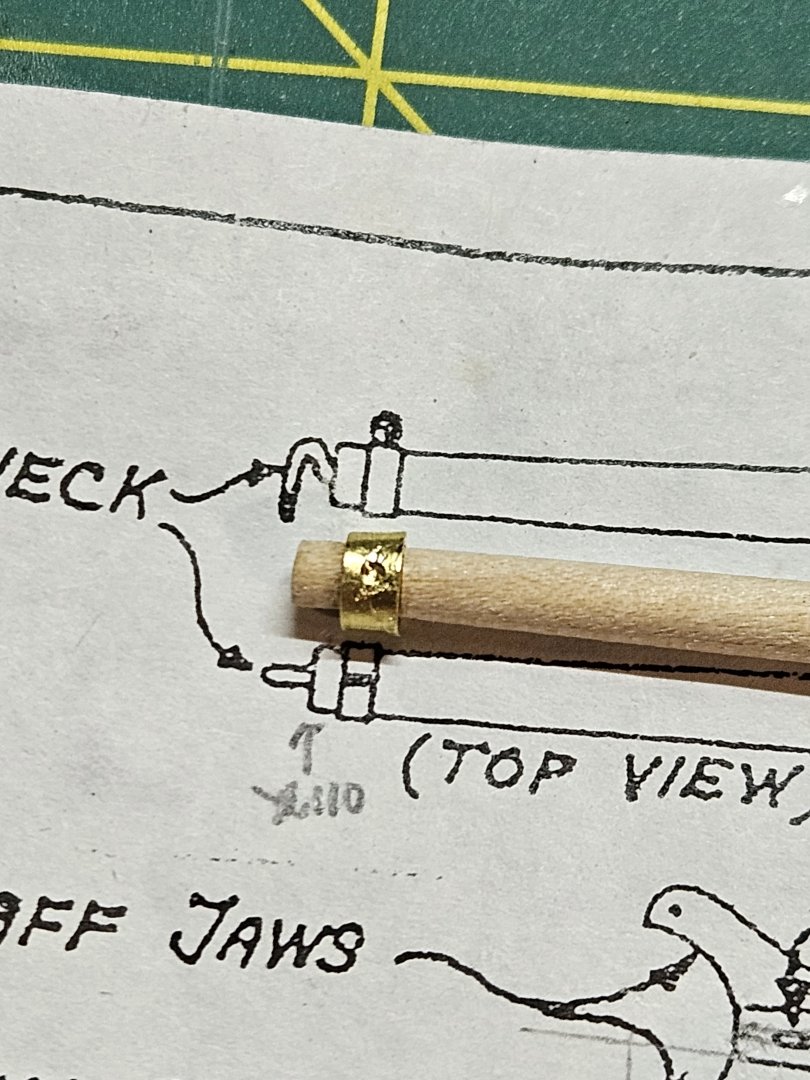
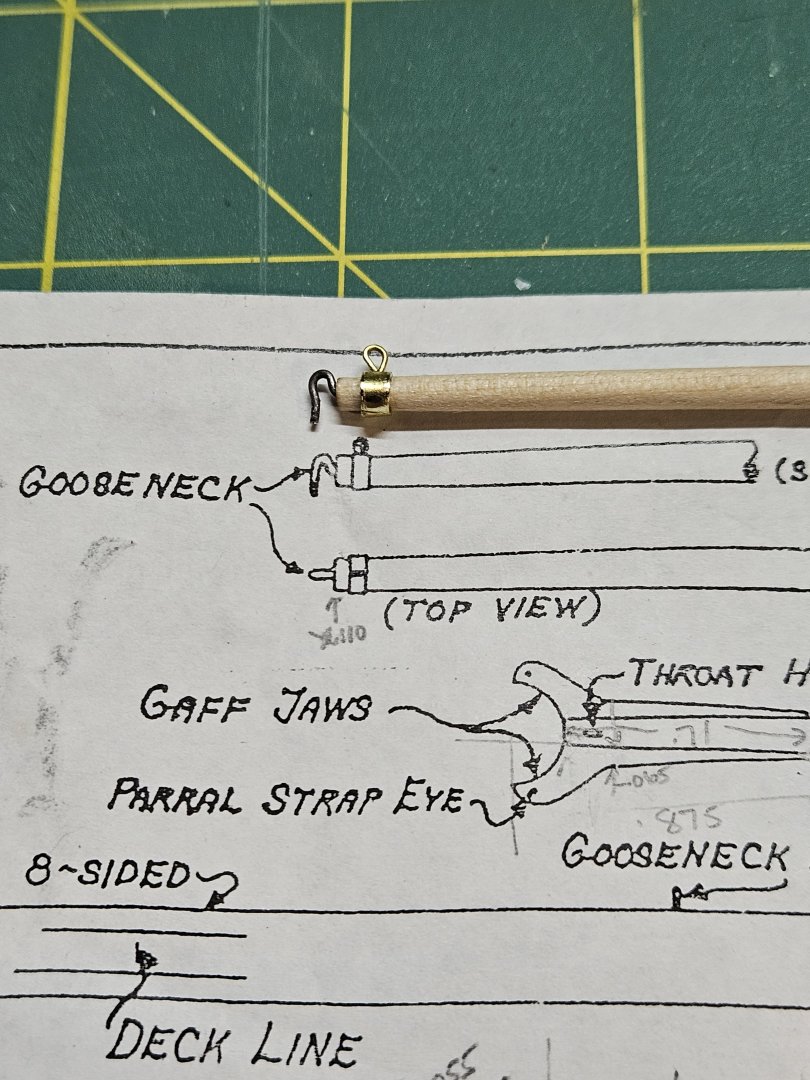
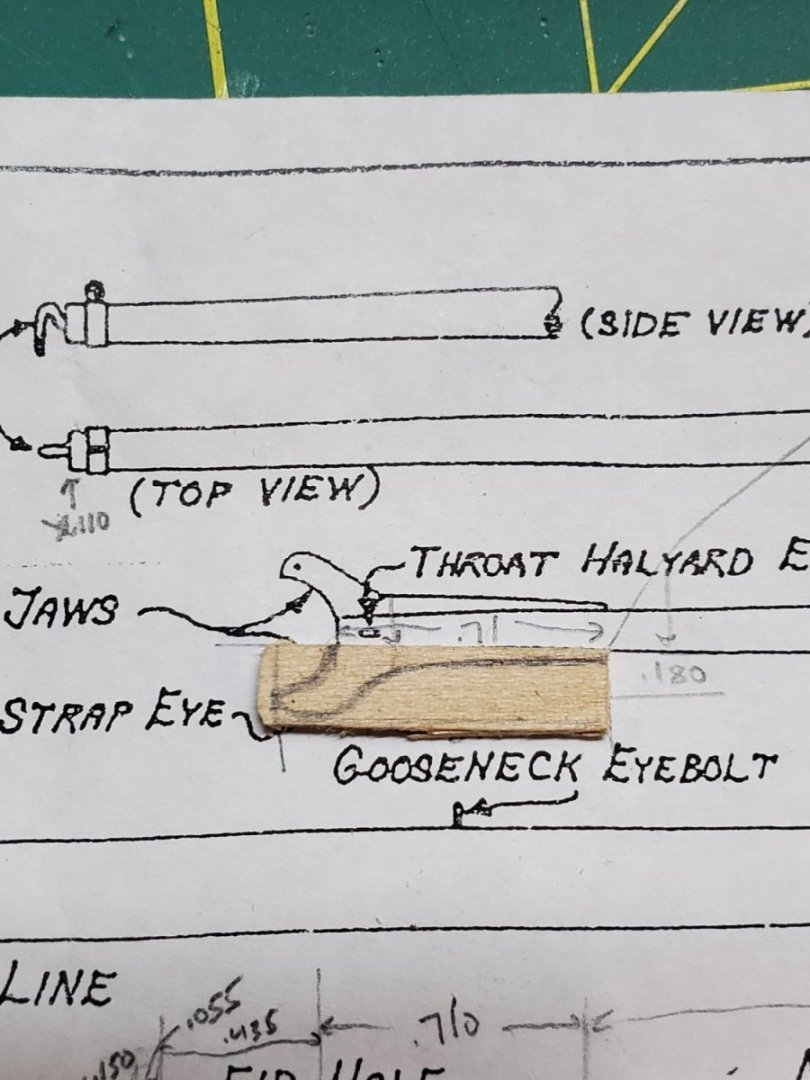
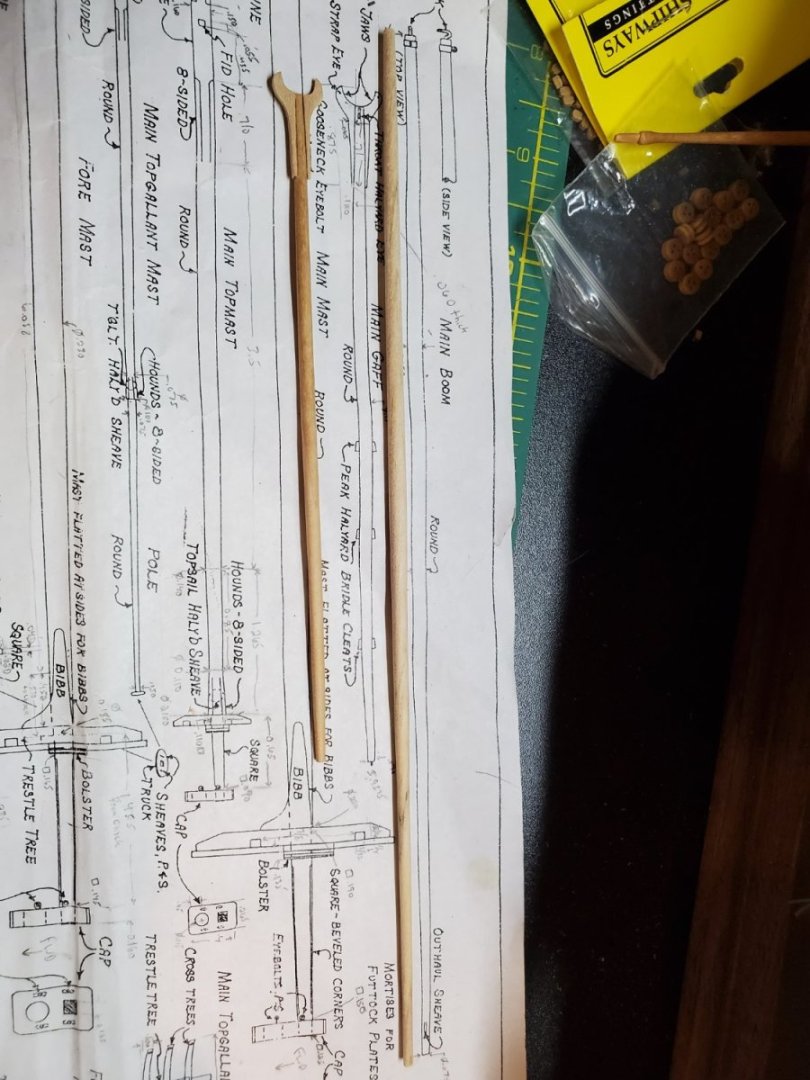
Update on the Fair American Model Ship Since the sails have been completed, I decided to focus on the Topgallant masts and Main Boom. The masts were finished, but I hadn't added the trucks yet. They sit on the very top of the Topgallant masts, and are pretty thin. These trucks are small. The plans show them in one view in a perspective view, which is unhelpful. I guestimated their shape and size. Once they were carved, they got glued to the topgallant masts with Wood Cement. I wanted to create small square pegs to fit inside, but making them so small, and having room for the sheave holes, wasn't going to happen. You can see on the fore topgallant mast, that I tried making a square peg a while ago, but couldn't carve a hole small enough in the truck without splitting it. I also continued staining the masts. I'm not painting them black, since I want the detail to show up. I spent a lot of time on the yards and masts, I didn't want to cover up all the shape with black paint. My choice. I also started working on the strap ring, and eye bolt behind the gooseneck of the Main Boom. I had some thin brass in the kit, which was close to size, so that just got tightly wrapped... I'd get it as close to size as possible, then I'd snip the brass a little long, and file it back until it fit. The long needle nose pliers I got a while ago helped tremendously. It was pinched and filed smooth as I could get it. I also didn't want it to be too large a diameter that it slide half way up the boom. It needs to wedge just behind the gooseneck about 1/16", so there was a lot of test fit, adjust and refit. Once the ring was wedged and glued in place, I worked on drilling out a hole for the eyelet. This was a little challenging, but I got it done. In hindsight I could have notched the boom to allow the ring to inset a little deeper, but at this scale, it's tough to do. I used some annealed steel wire to create the gooseneck. It turned out well. The eyelet was also a little big, but again, tough to bend eyes that small. Remember, museum curators are lined up outside my door, waiting to look at this feature with a scrutinous eye ;-). More progress with rope serving and bowsprit deadeye shrouds next time. Thanks for reading. - Jason-


-
Hi Ed, Nice work on the scratch built Capstan!. I literally made mine almost exactly as you did, same stain and everything, on the Fair American.
-
Hi Ken, Nice job so far with the framing. I like that you've made your own window frames - it's a nice touch. I had a lot of trouble with the transom cap myself. Even with soaking it for 2hrs, it was hard to clamp/glue it to the right shape without it splitting.
-
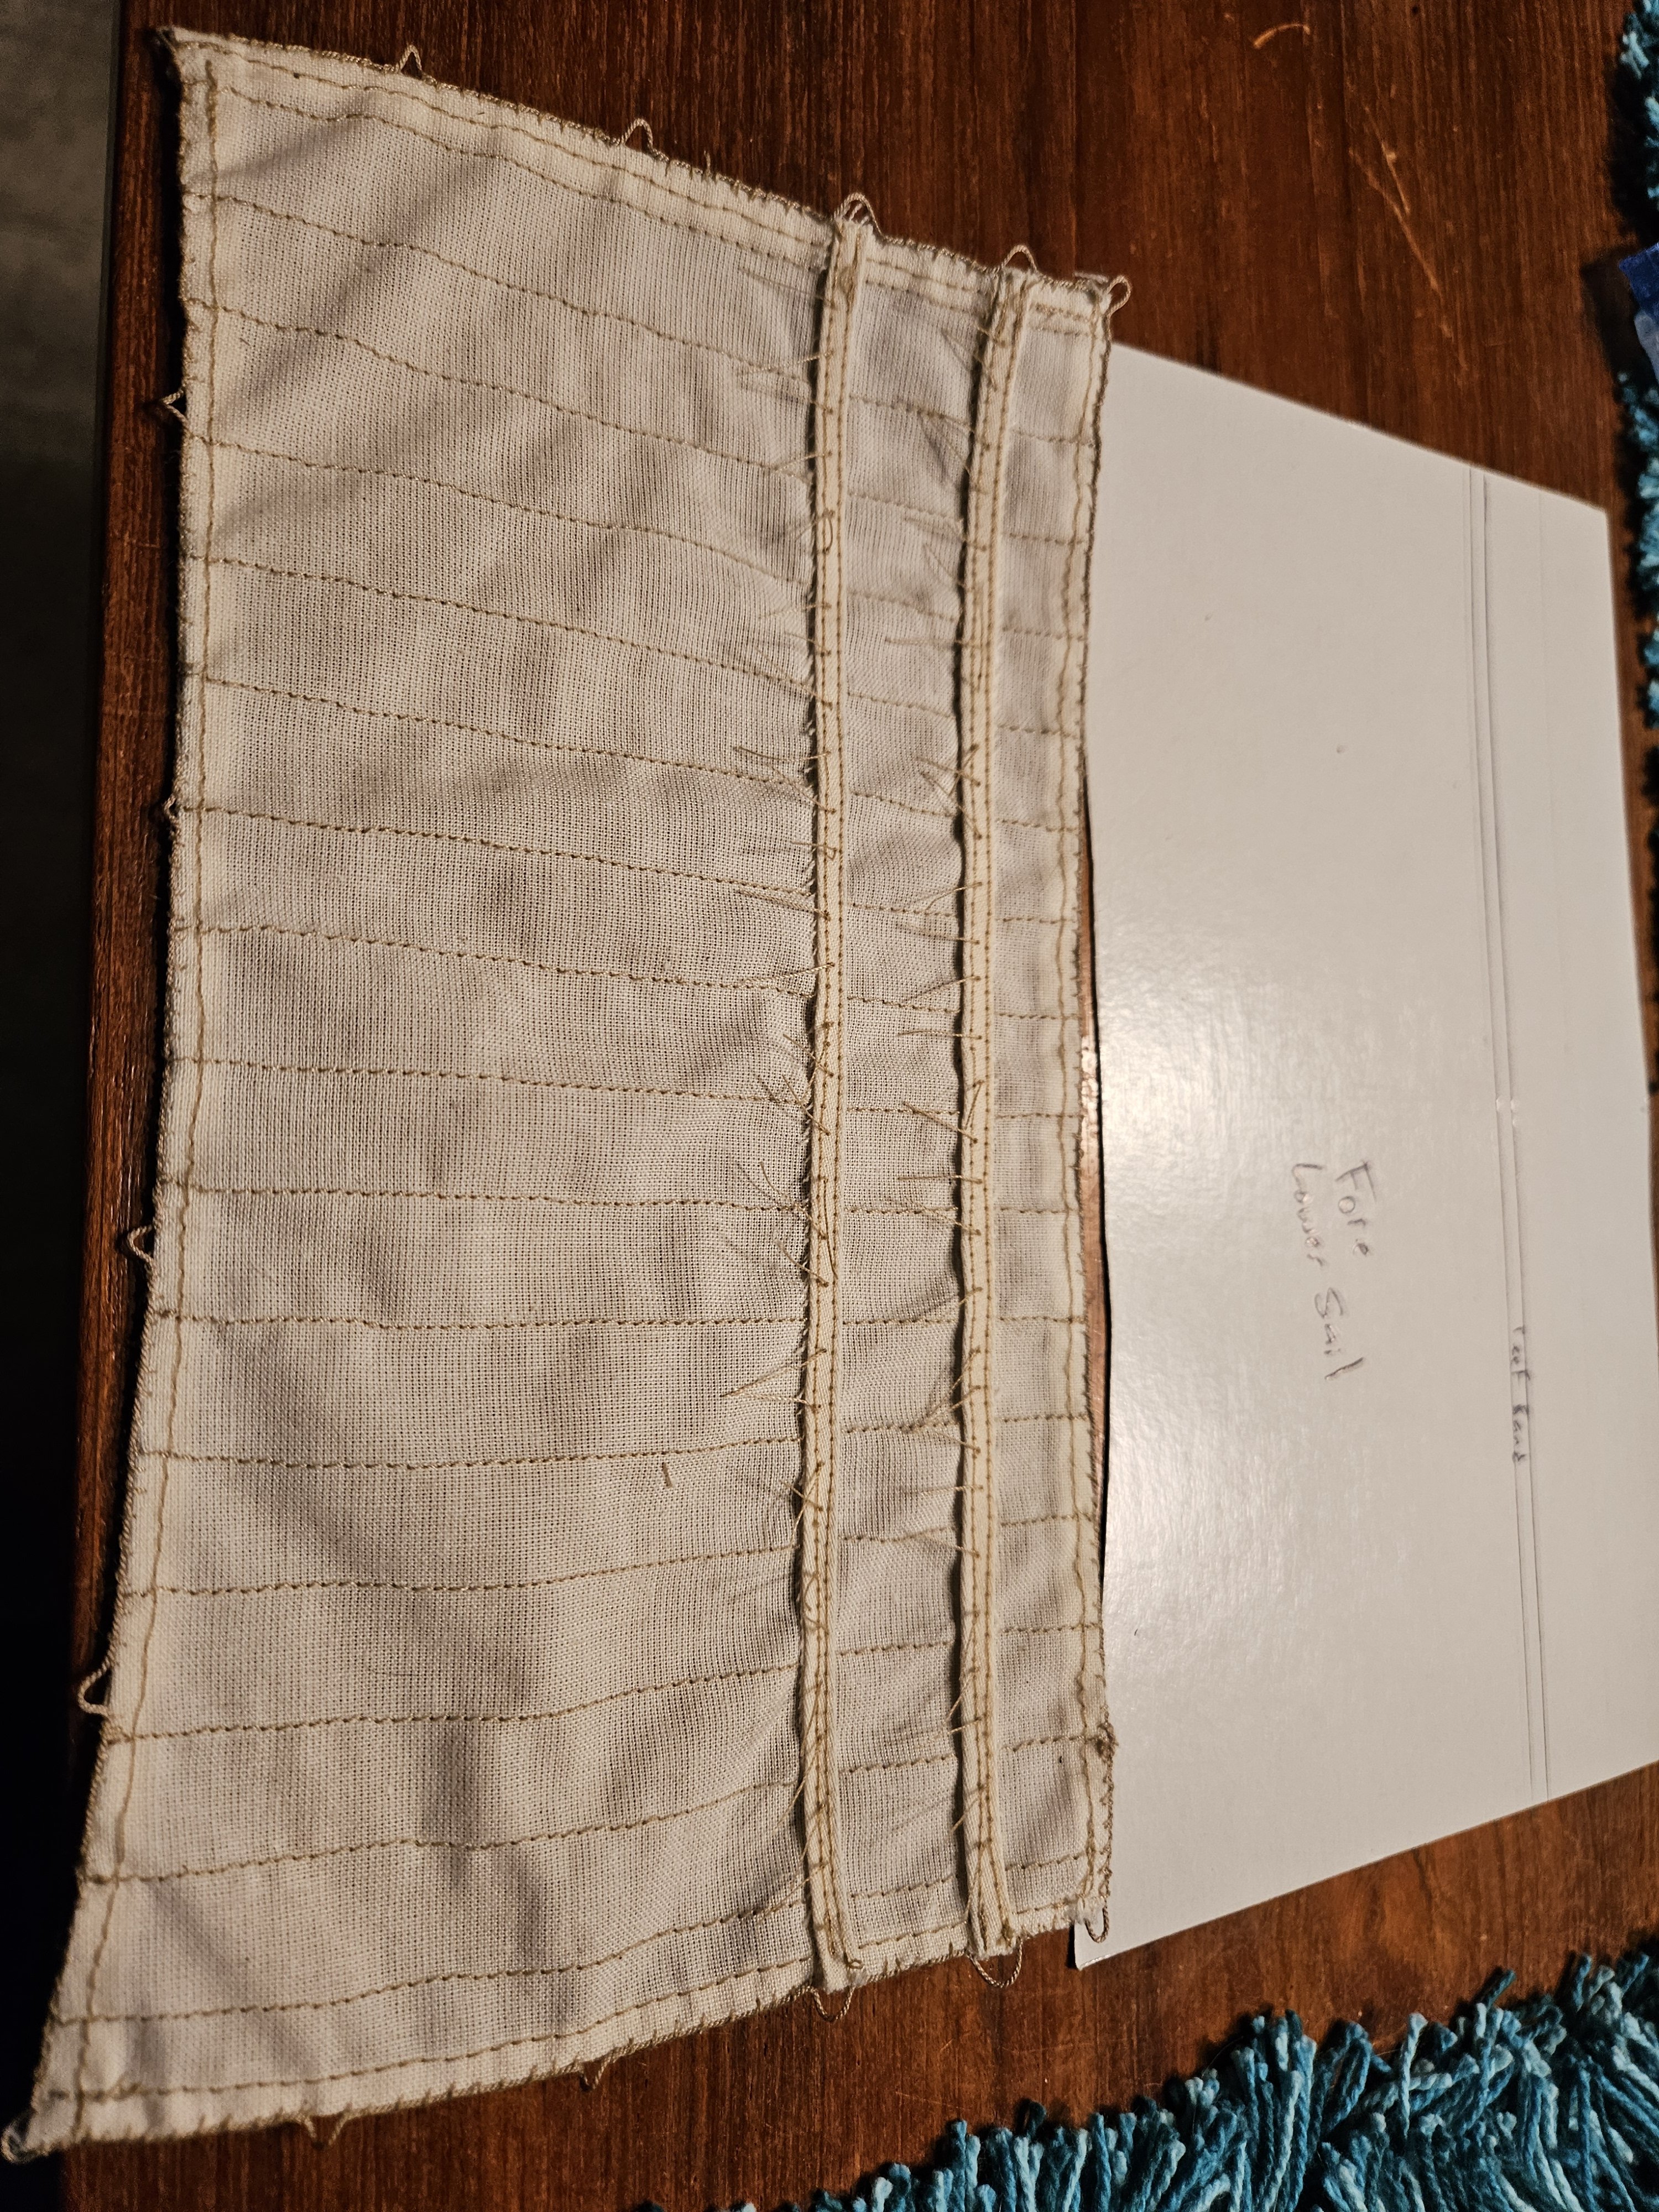
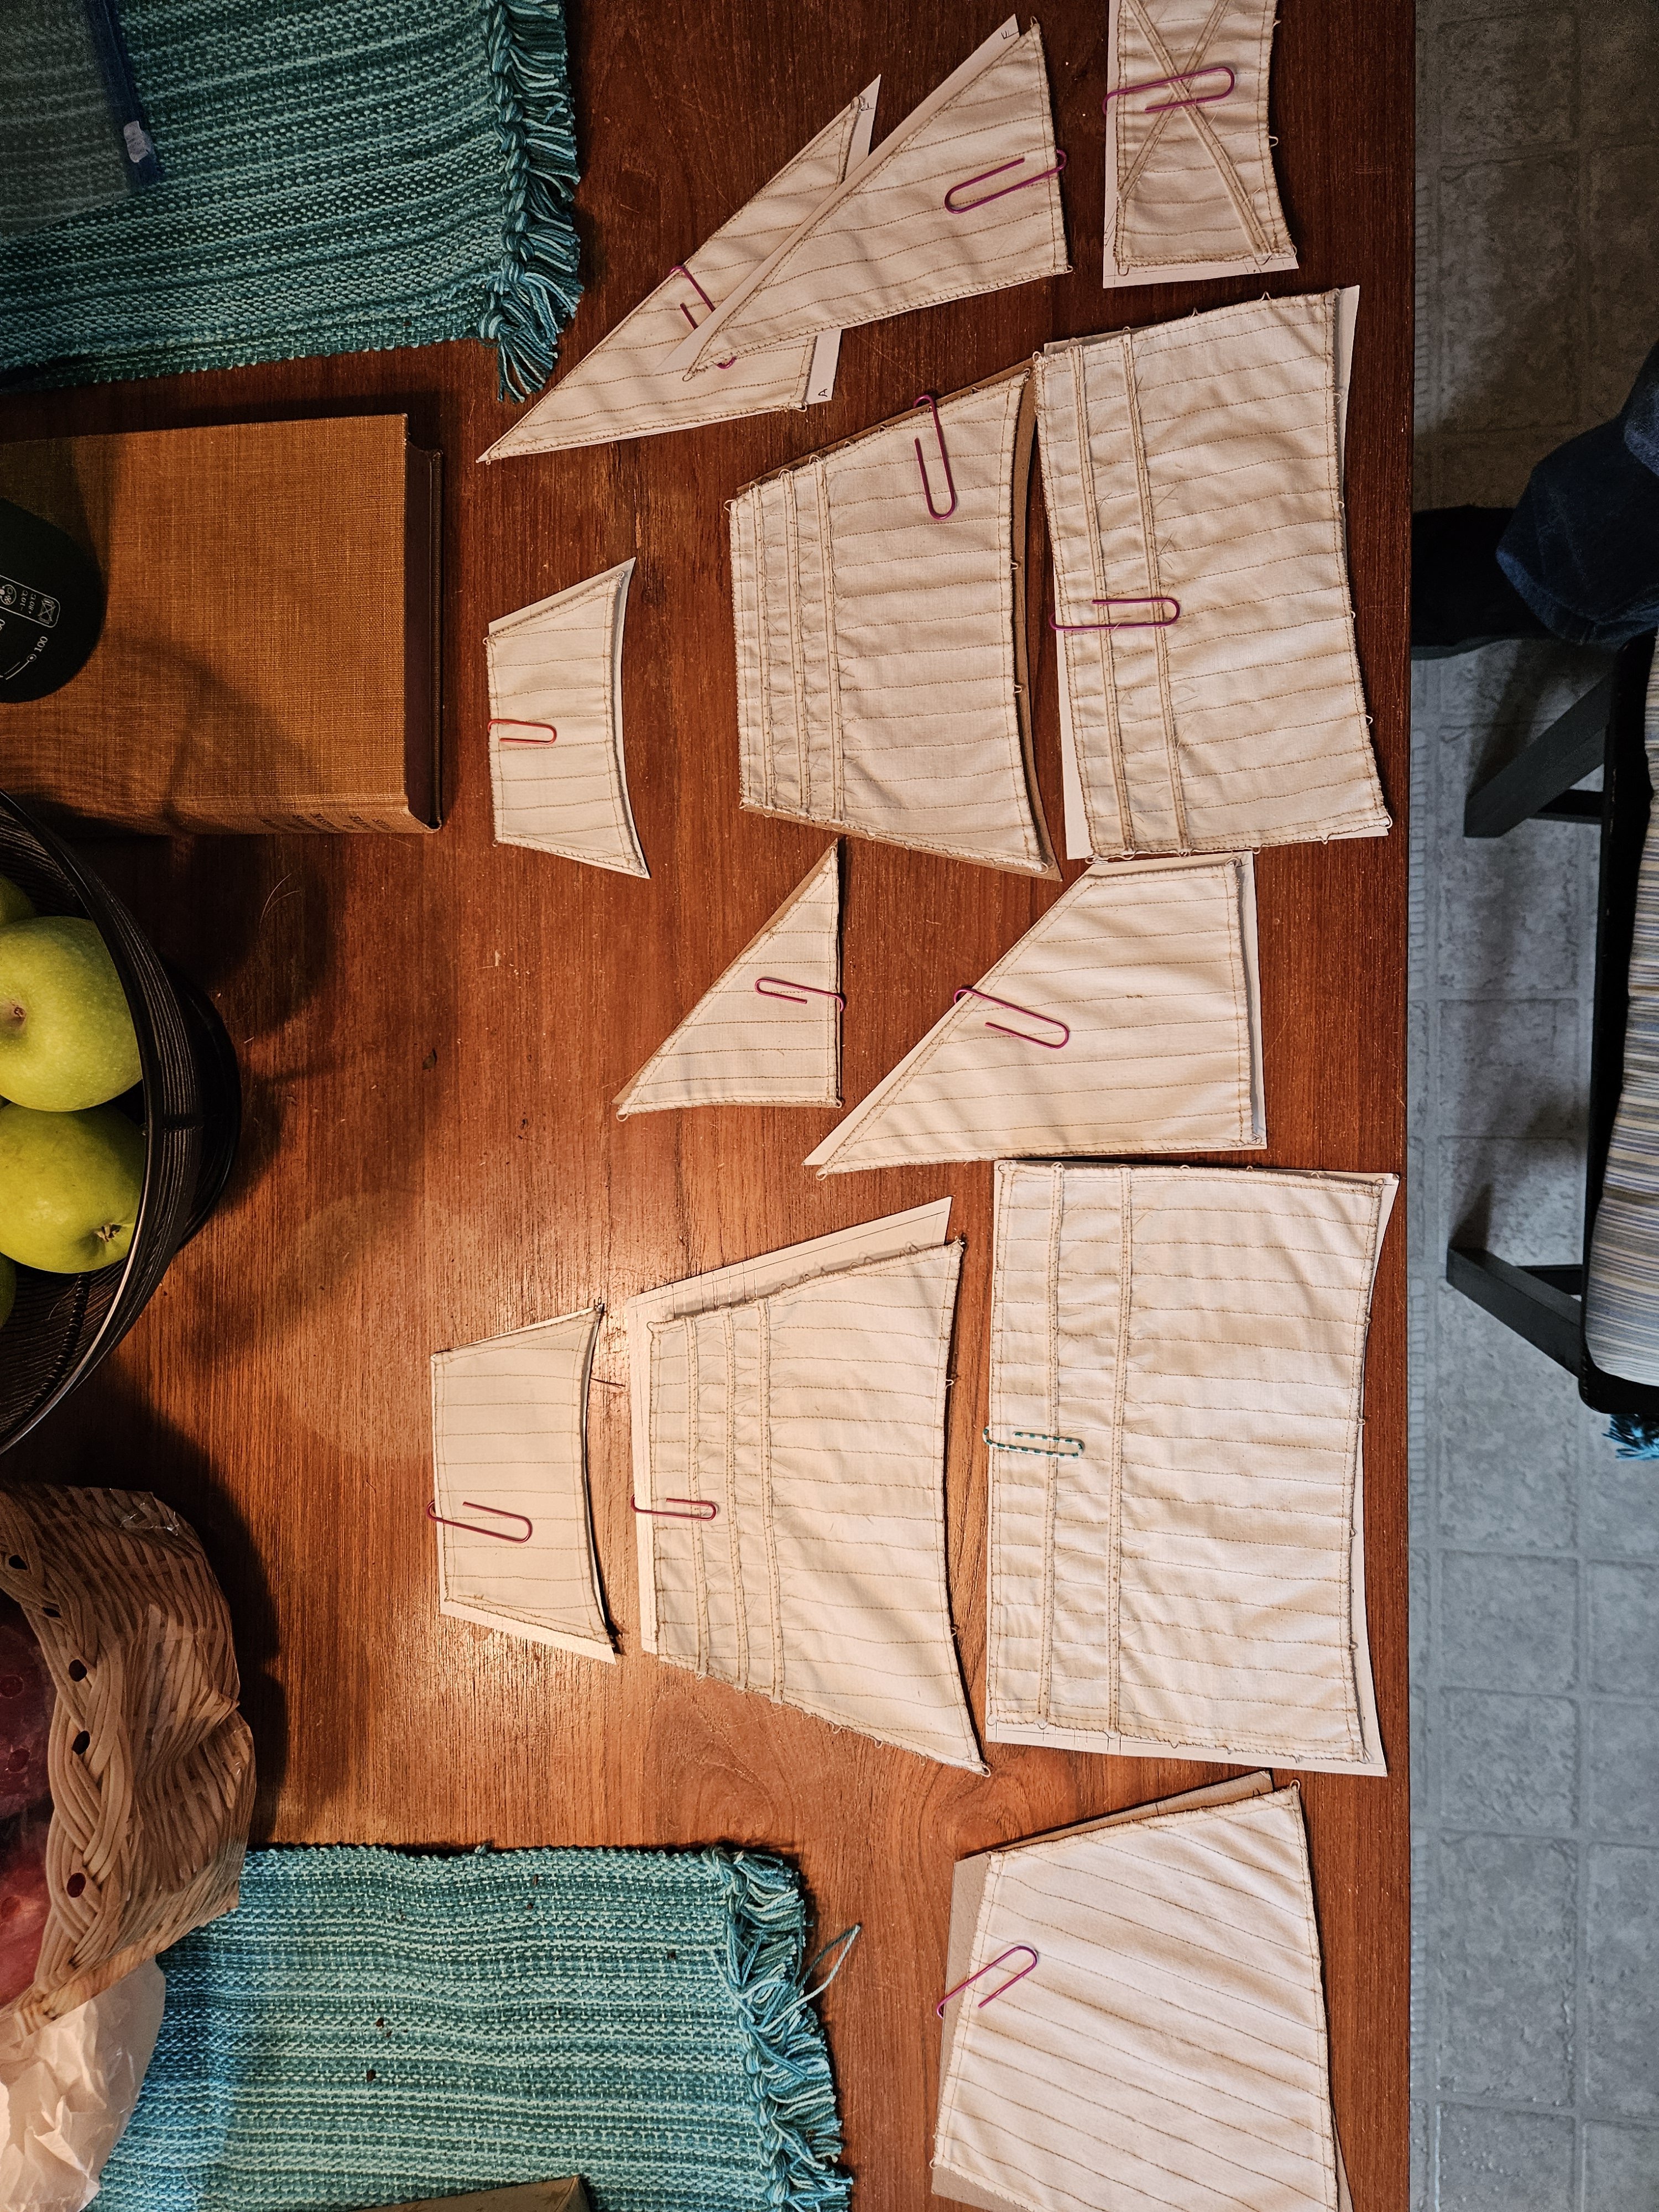
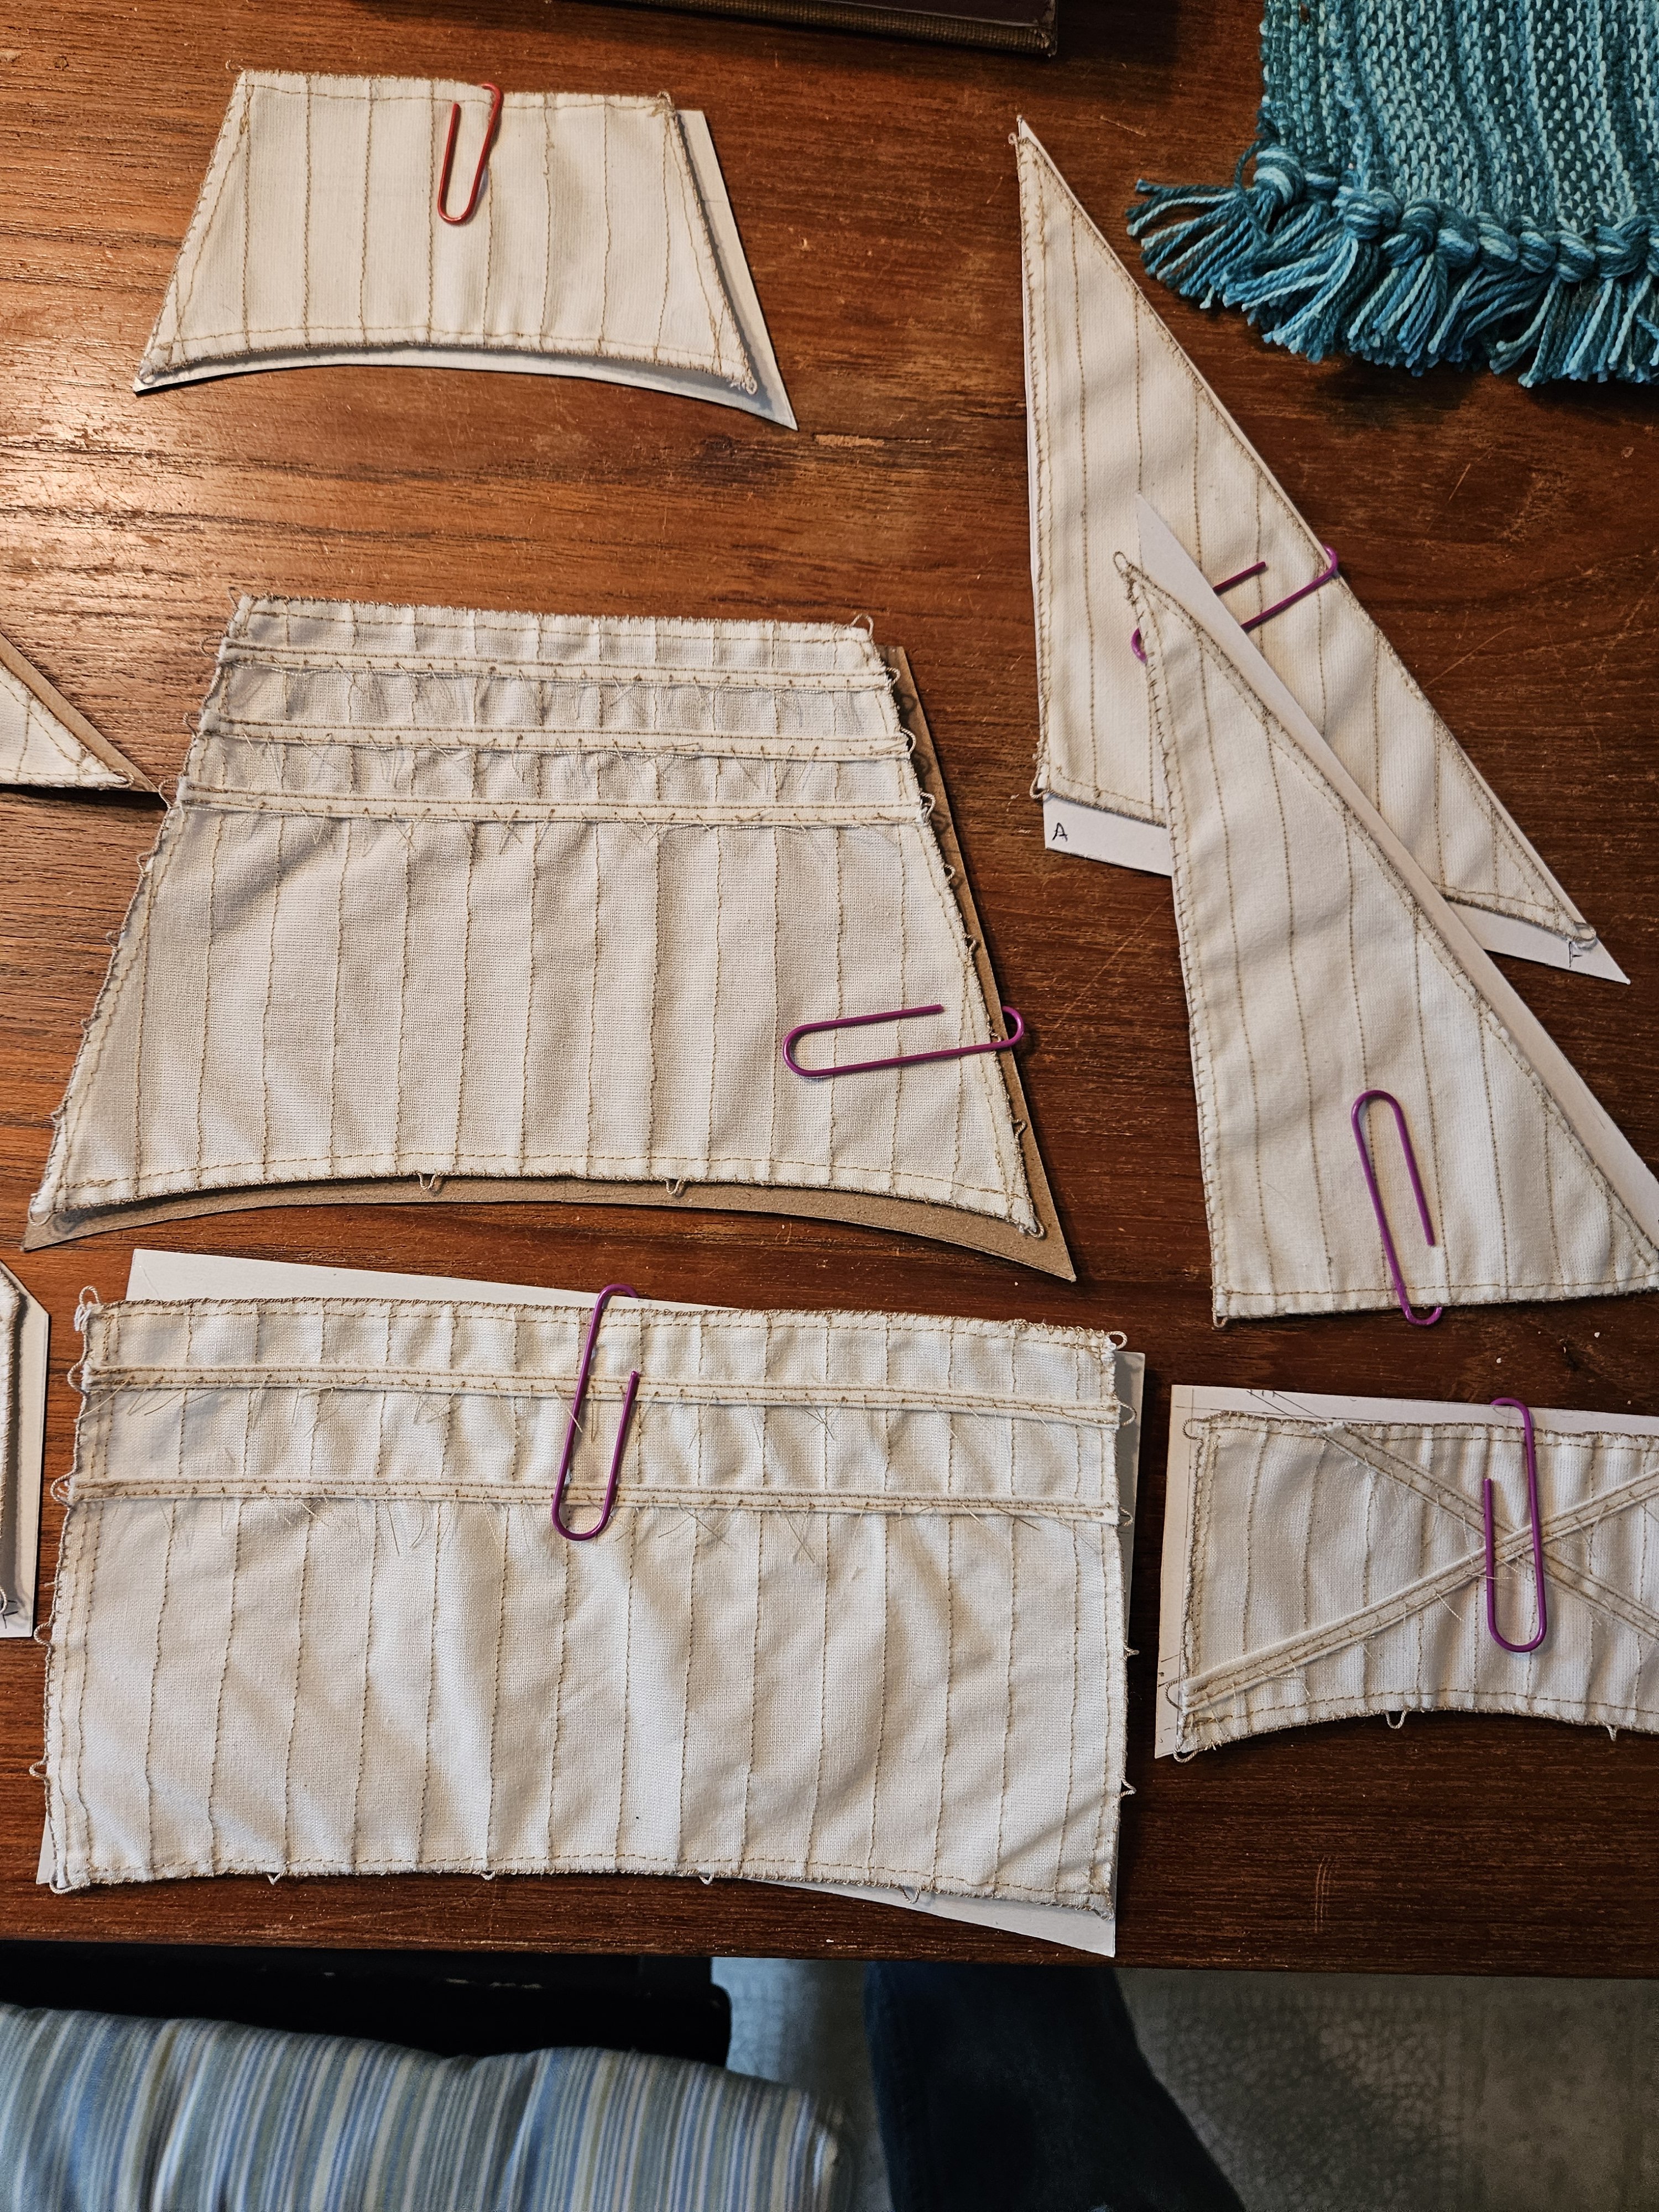
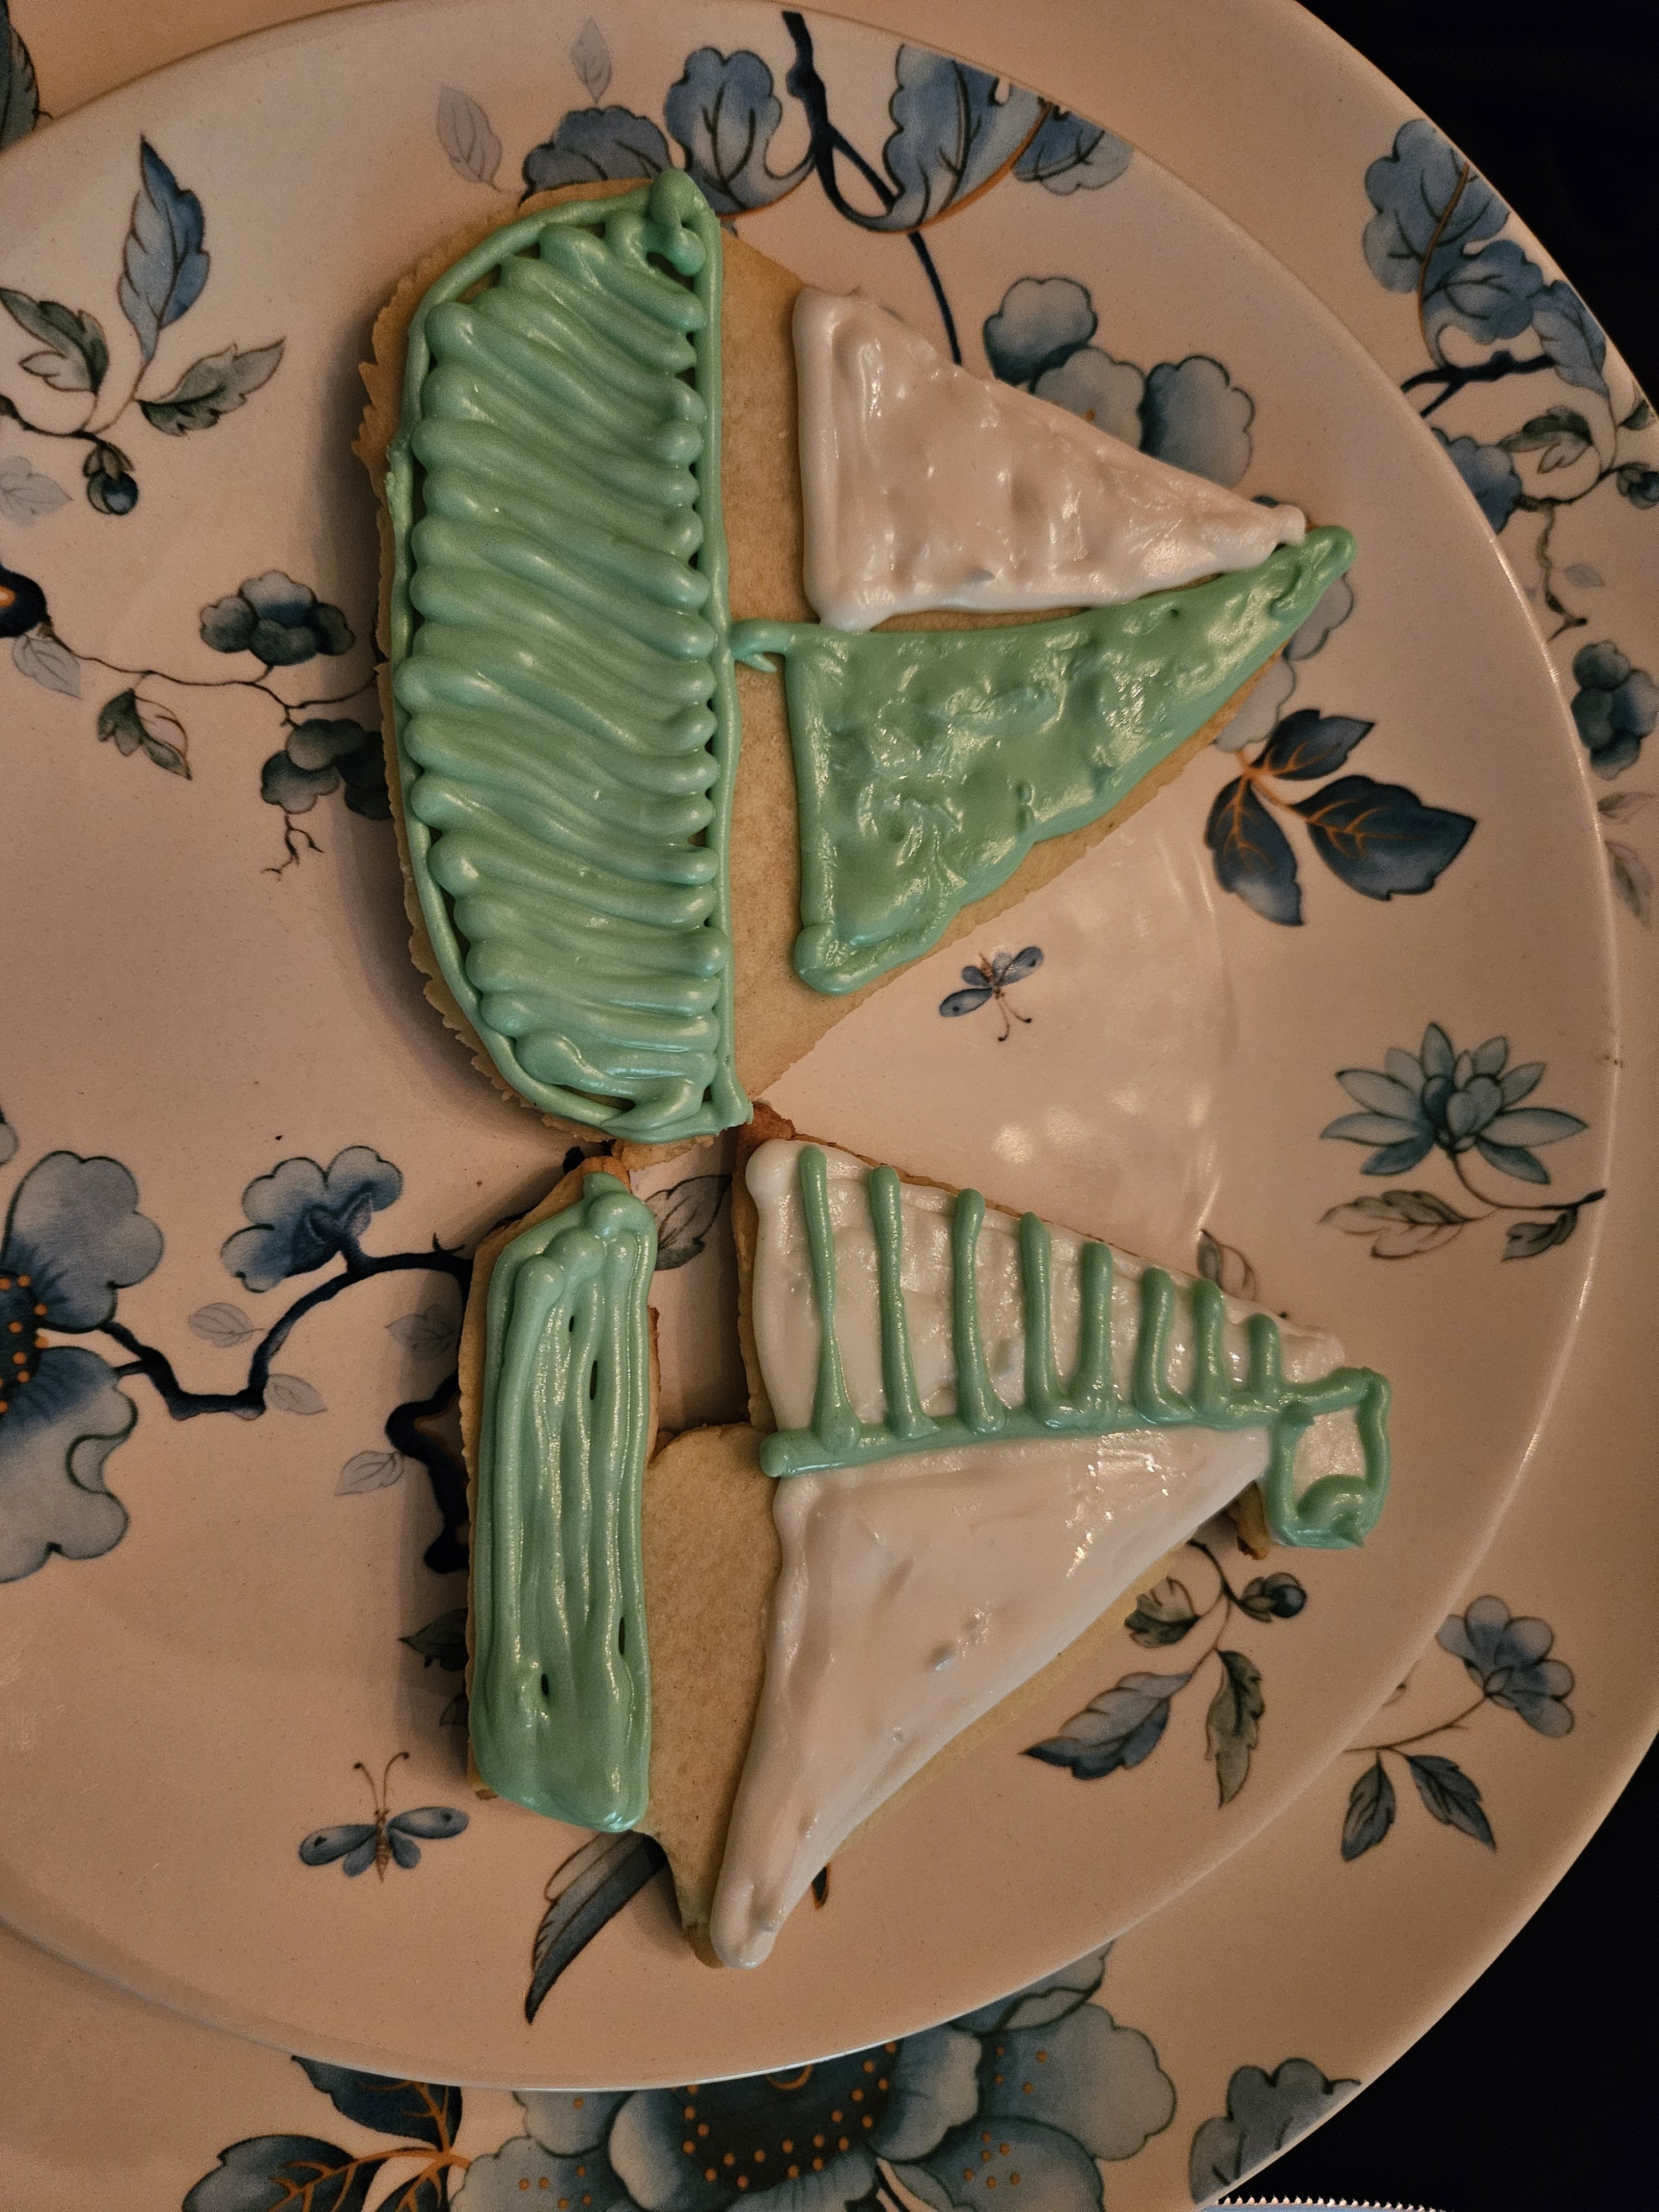
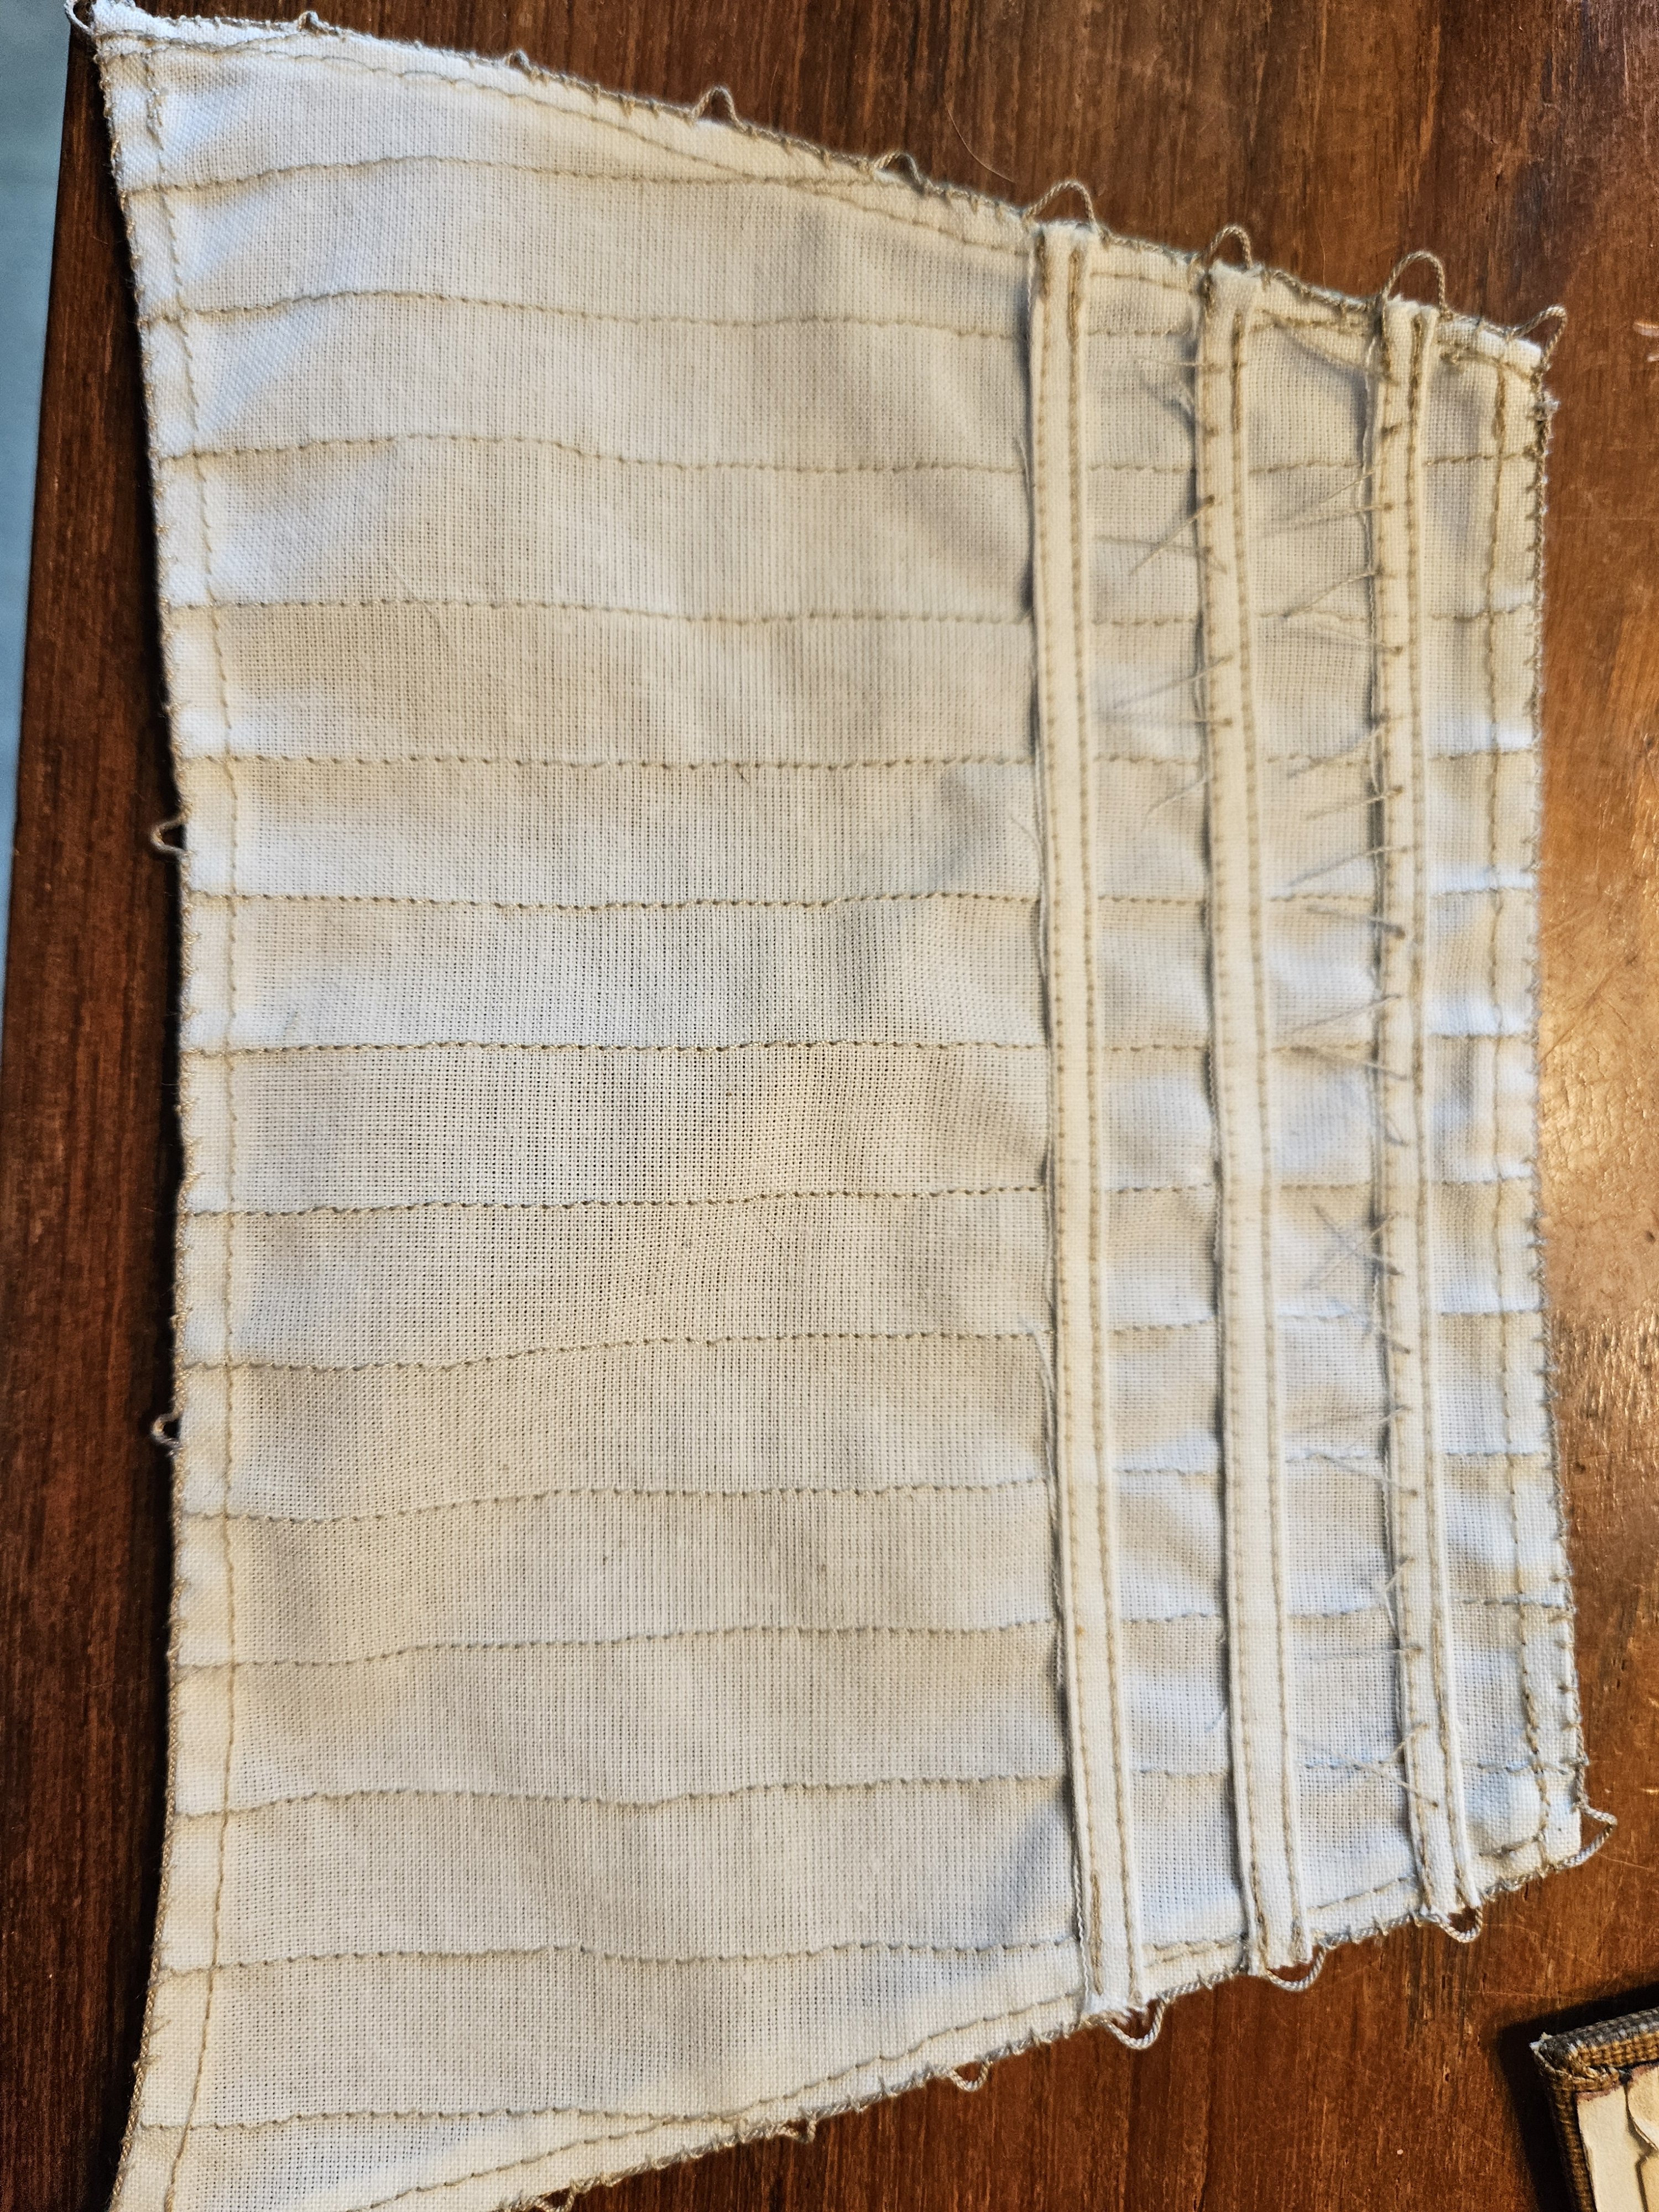
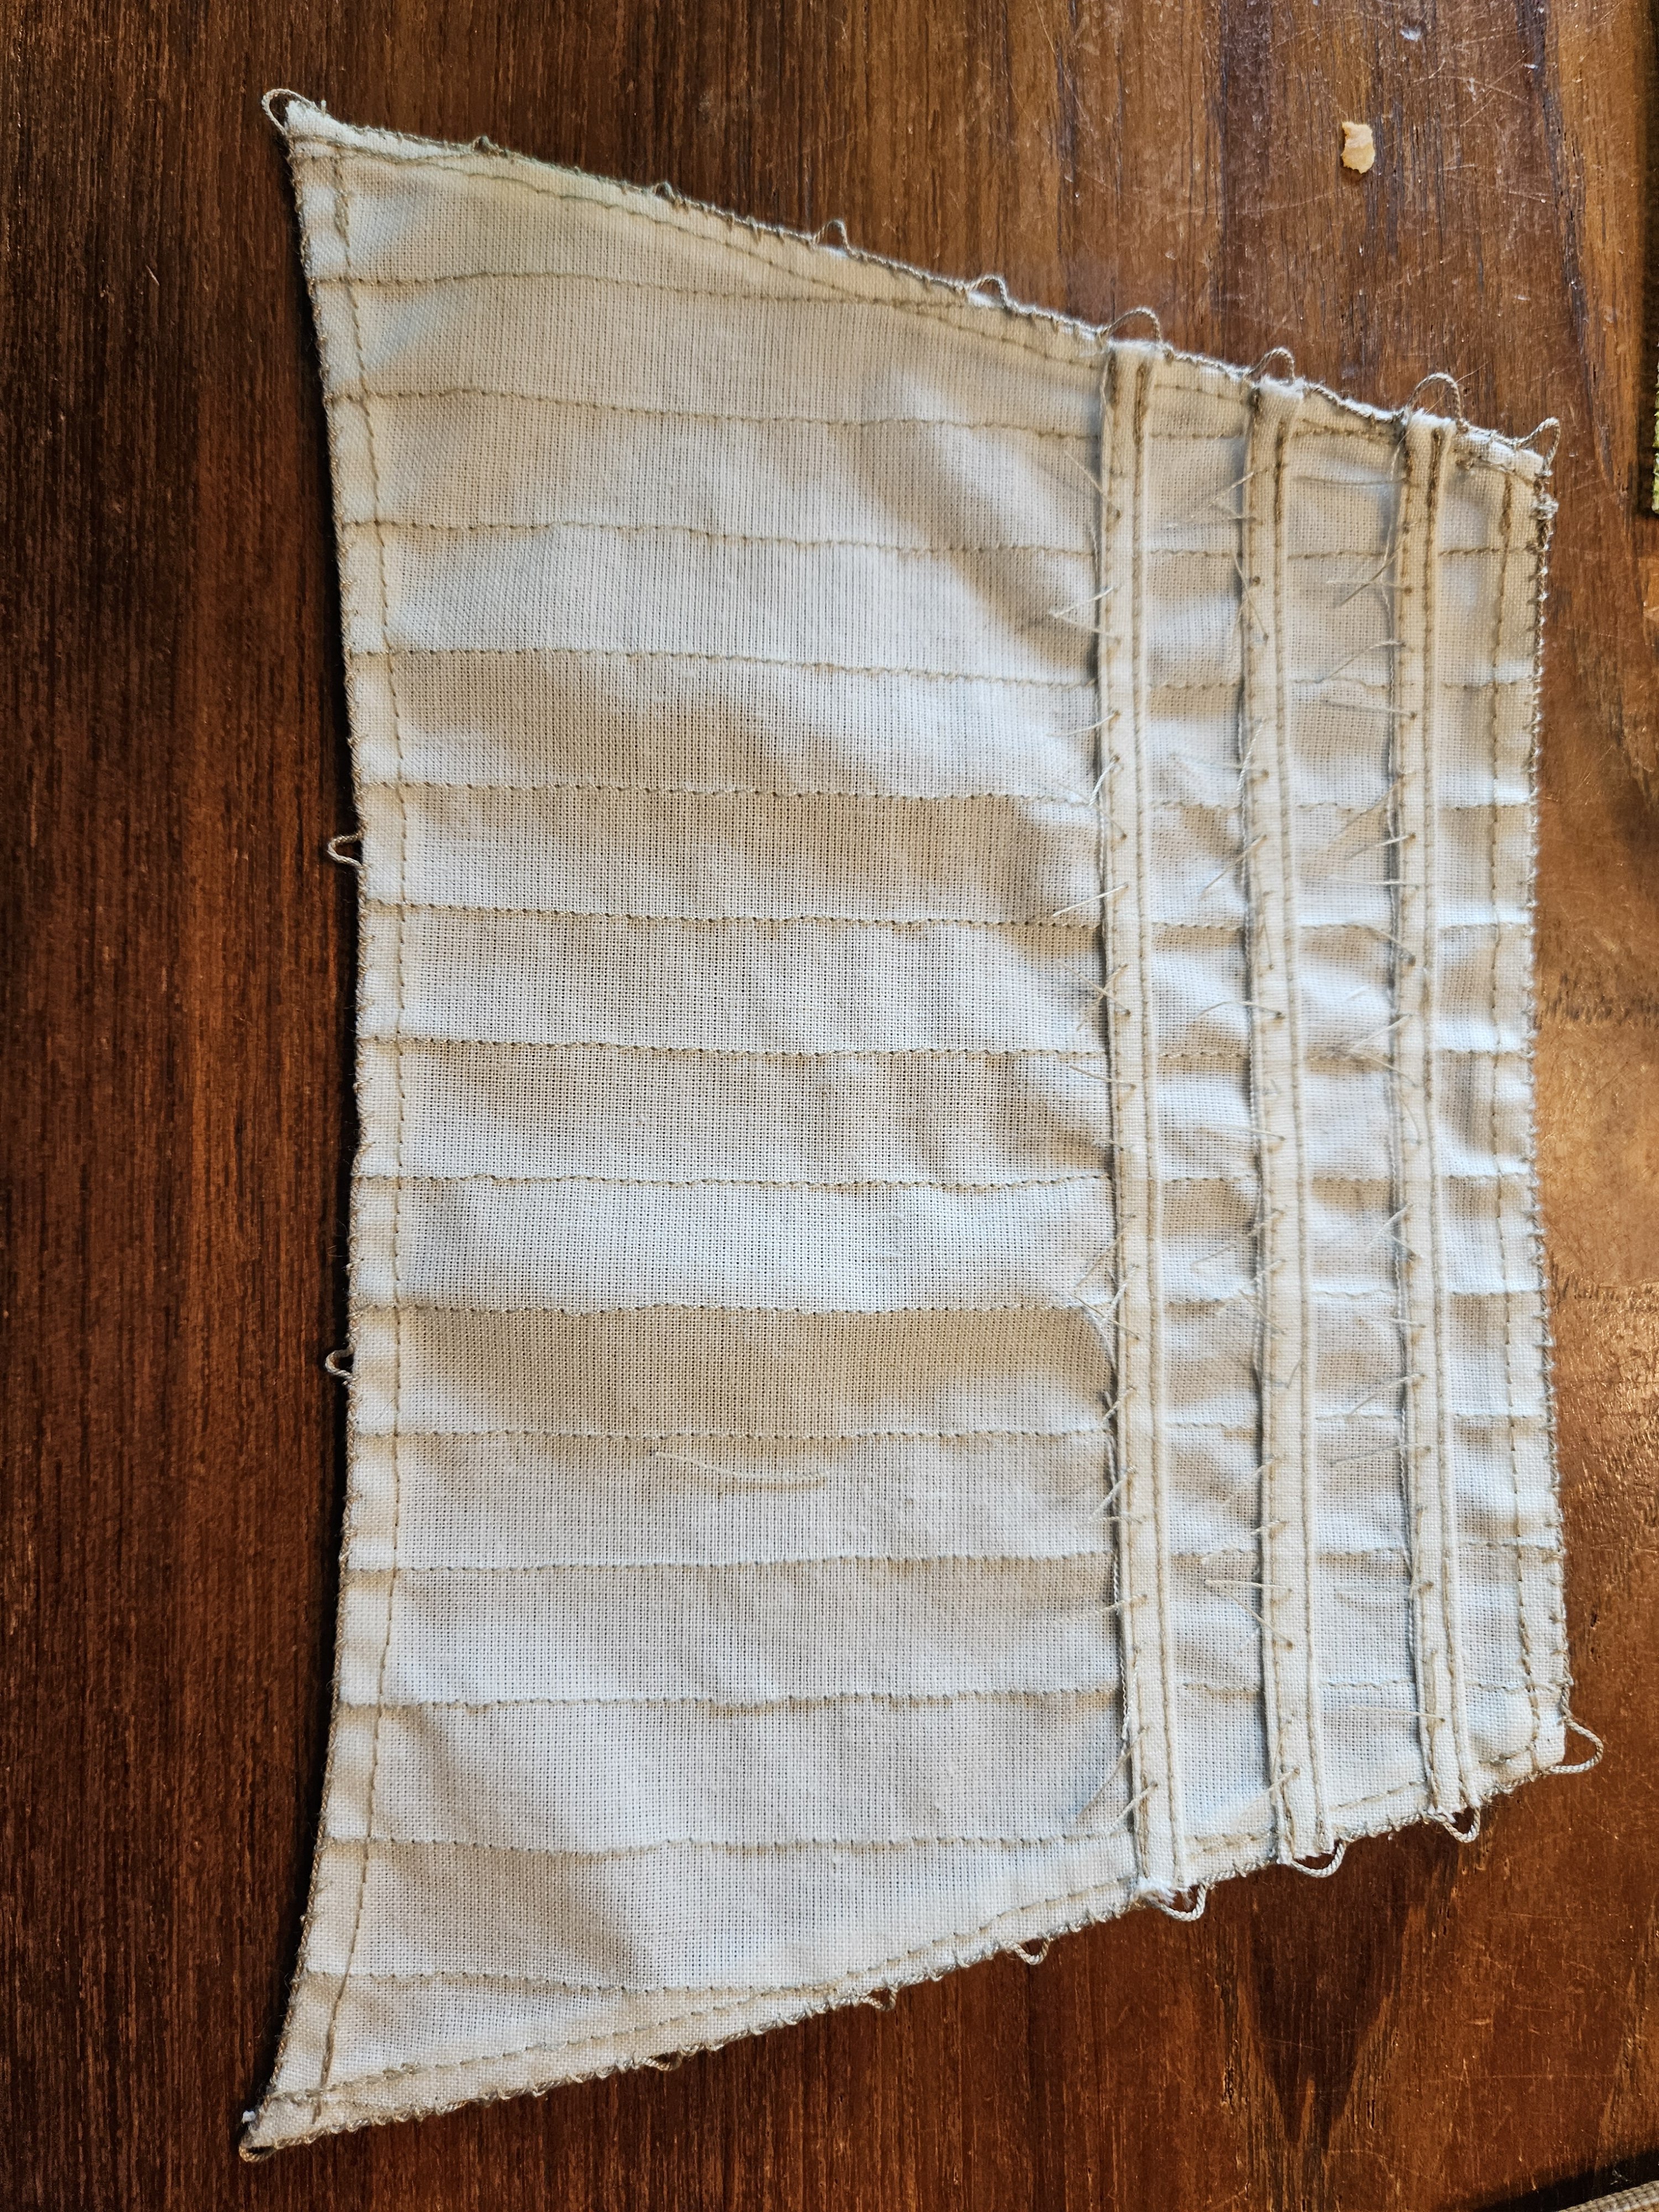
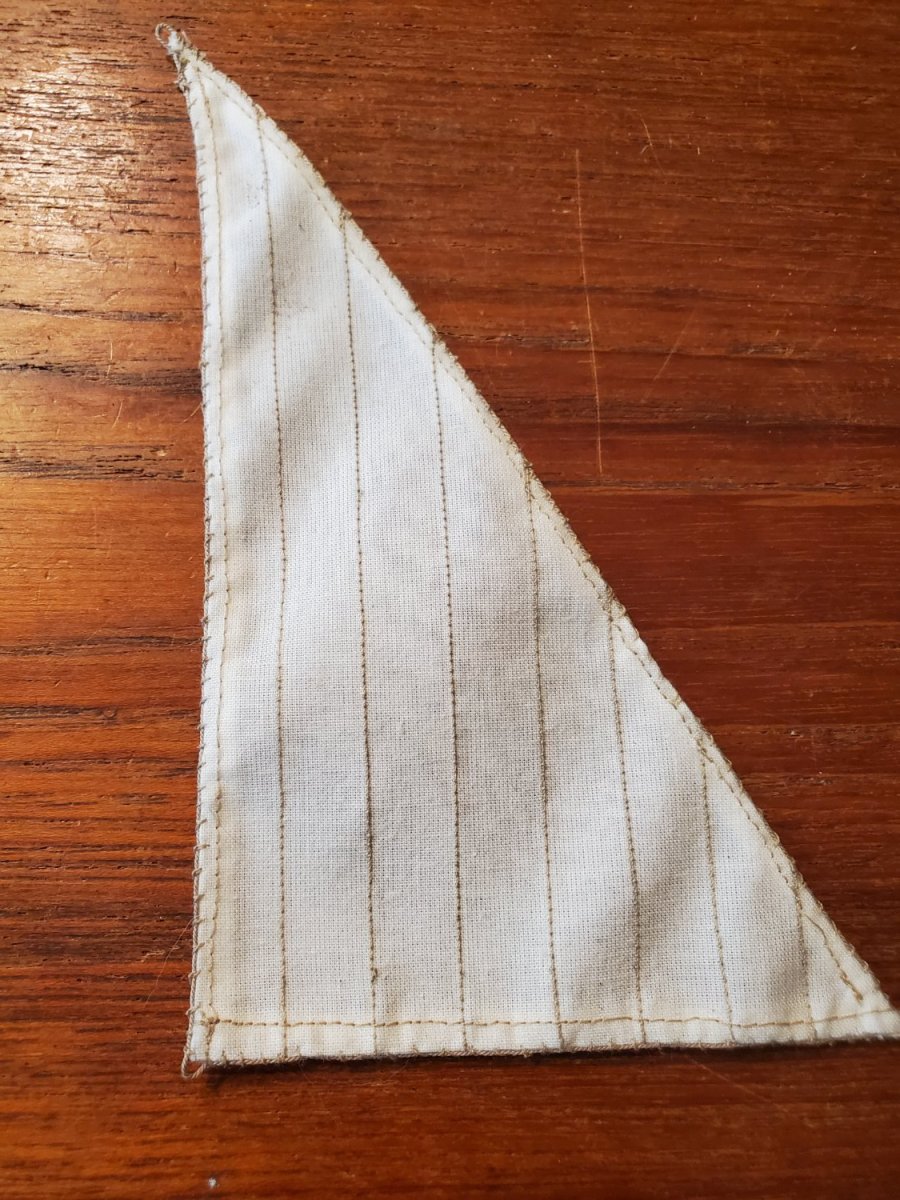
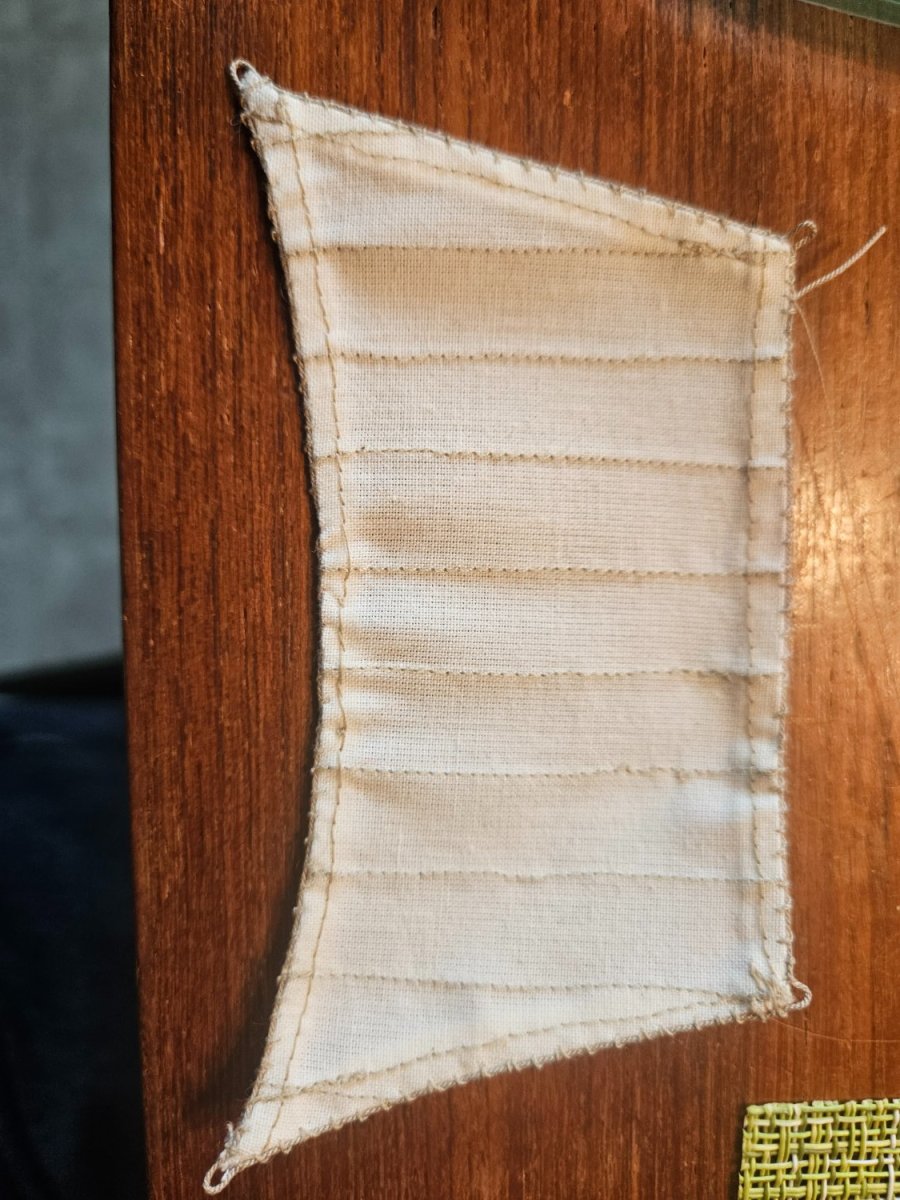
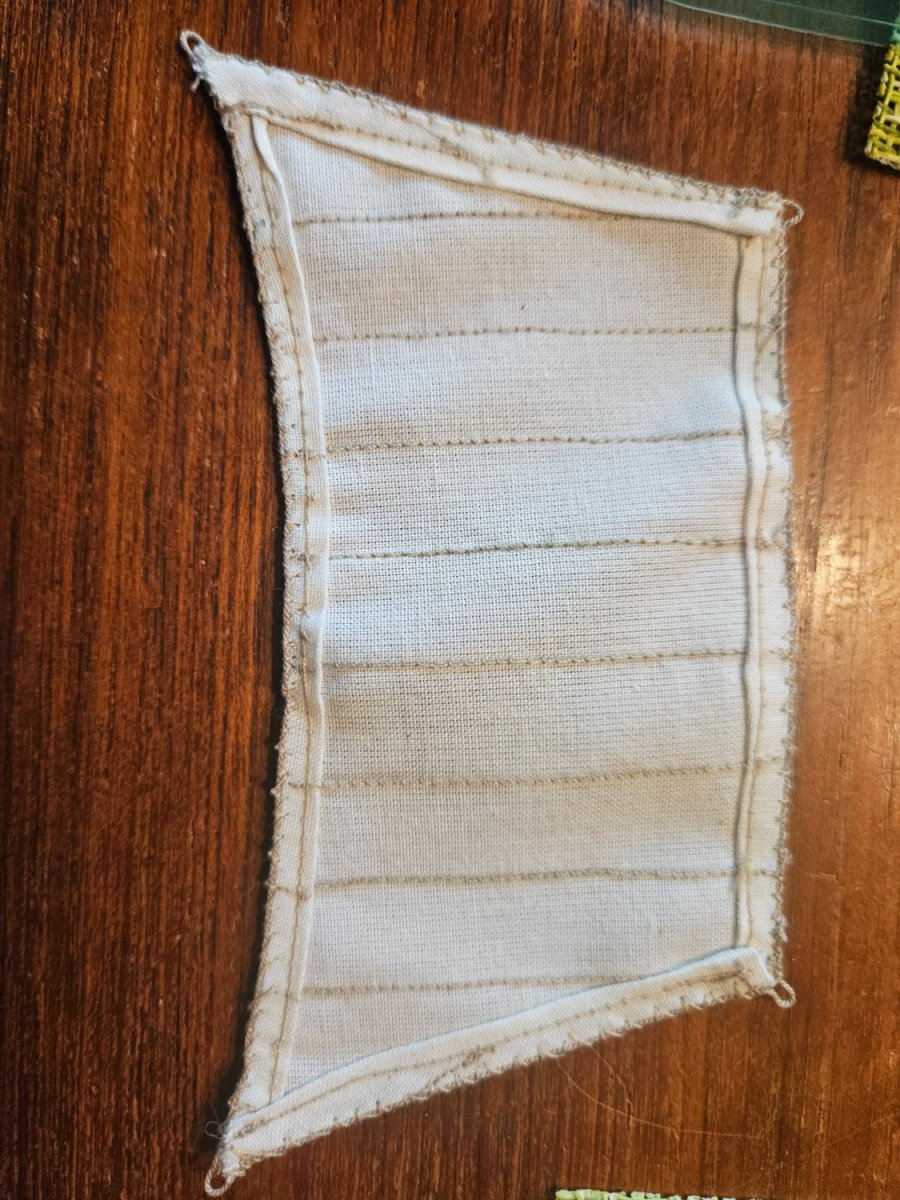
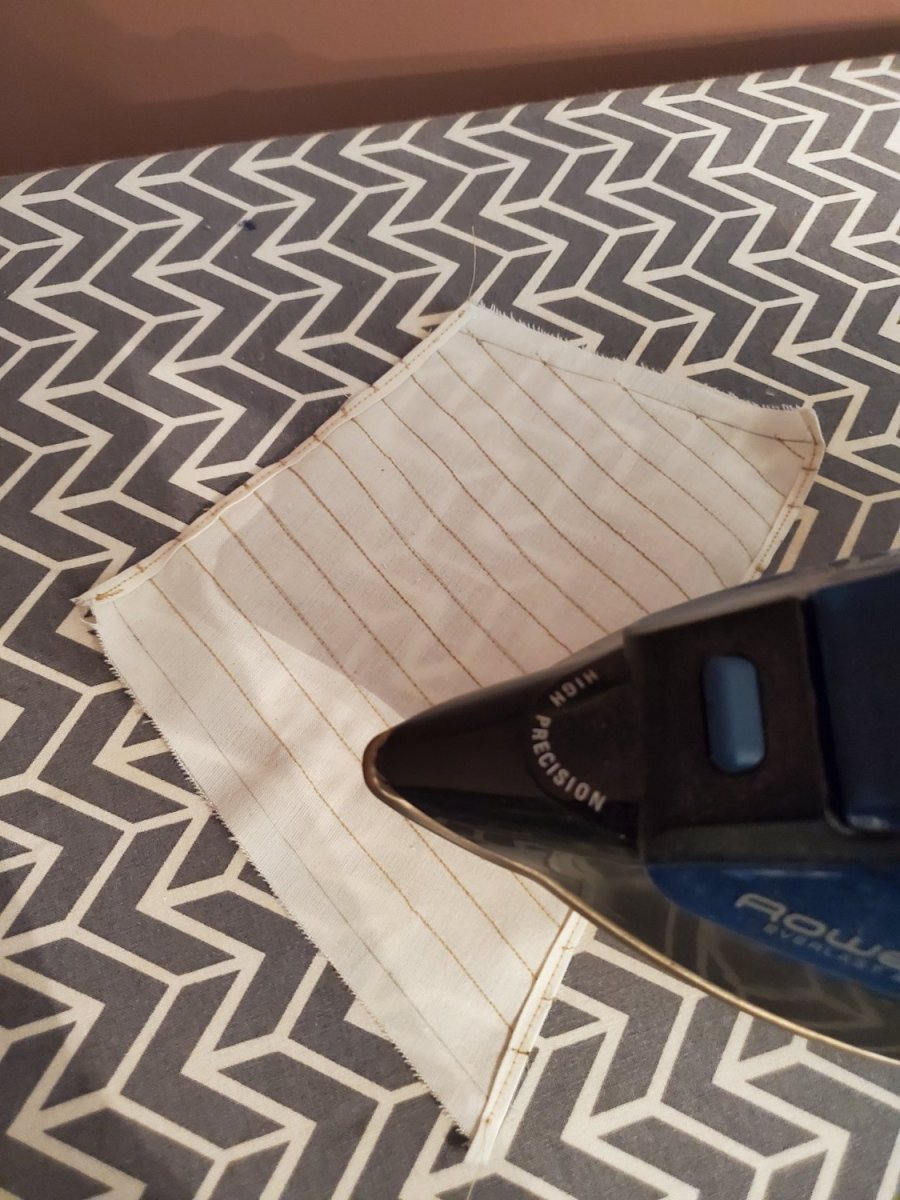
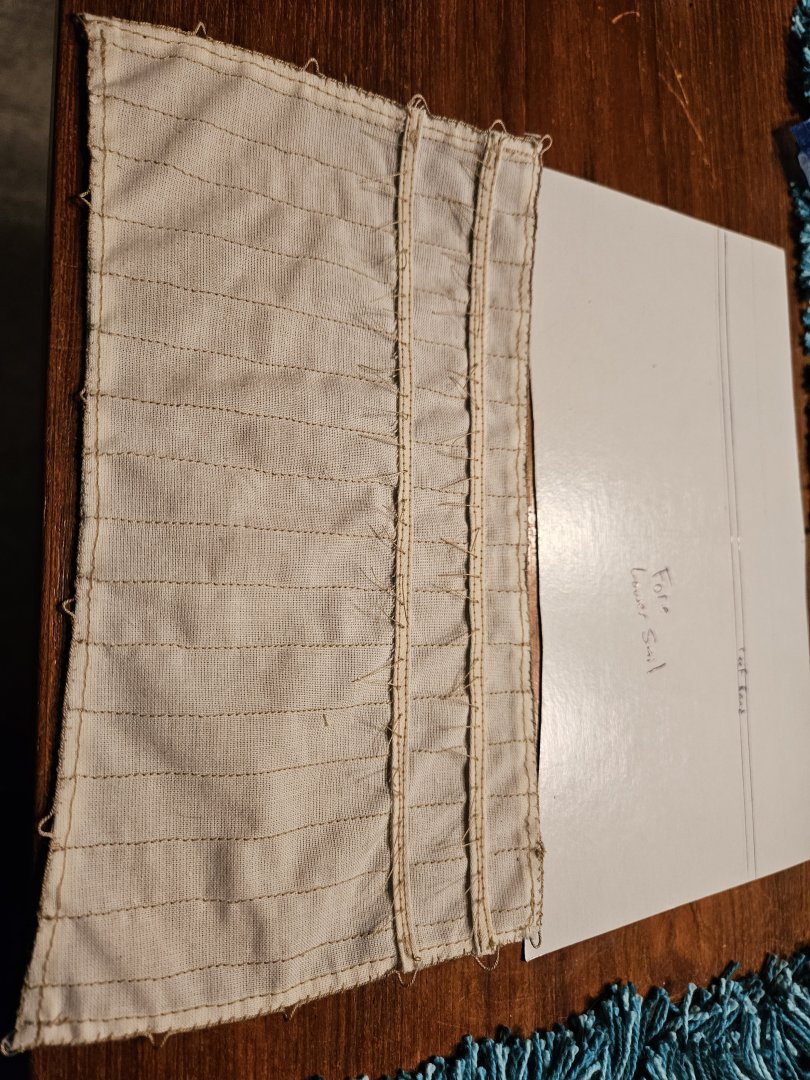
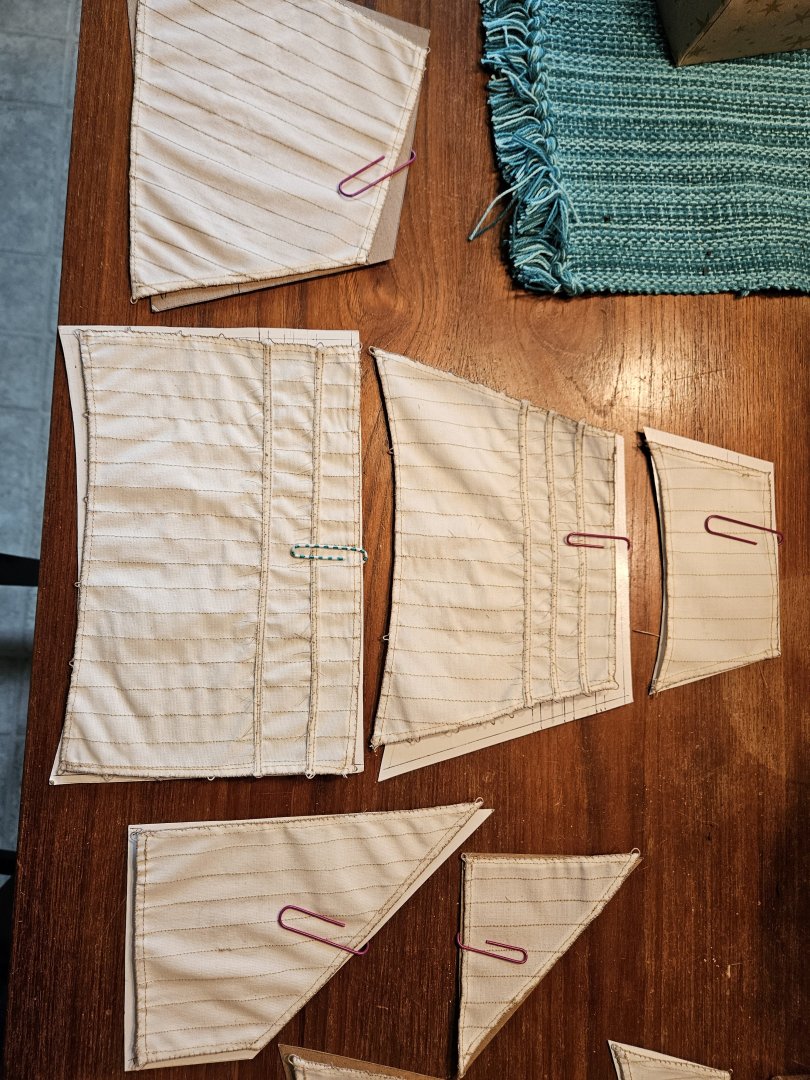
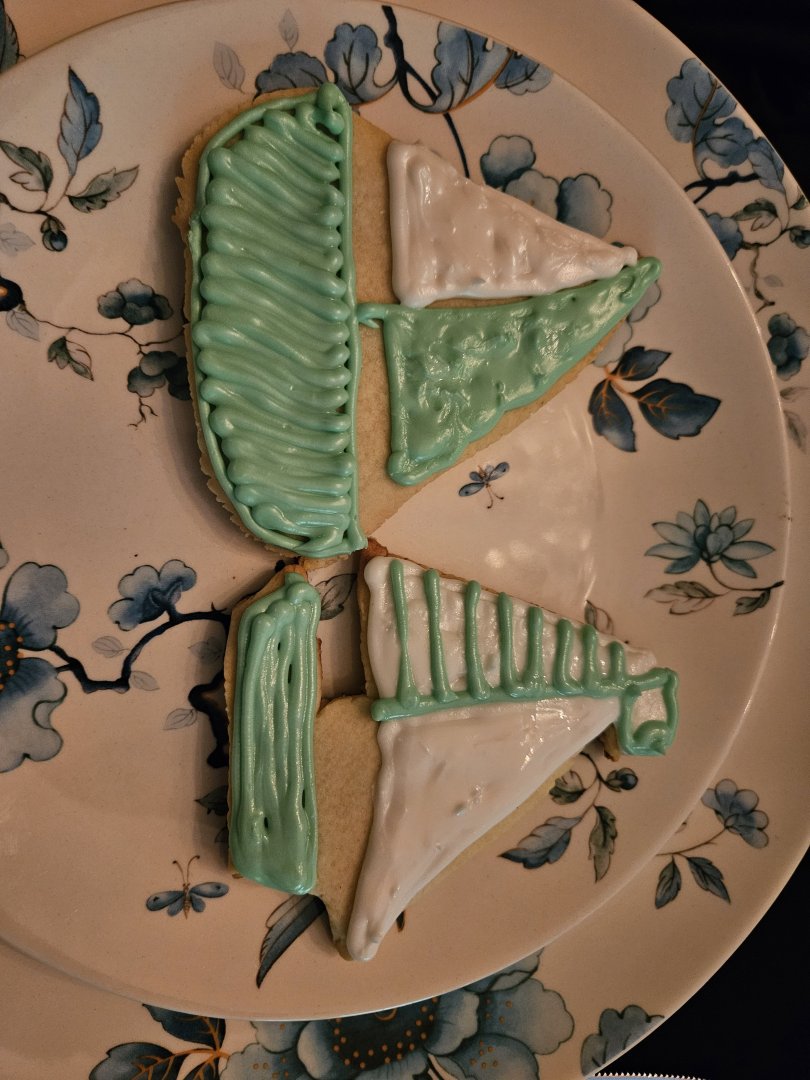
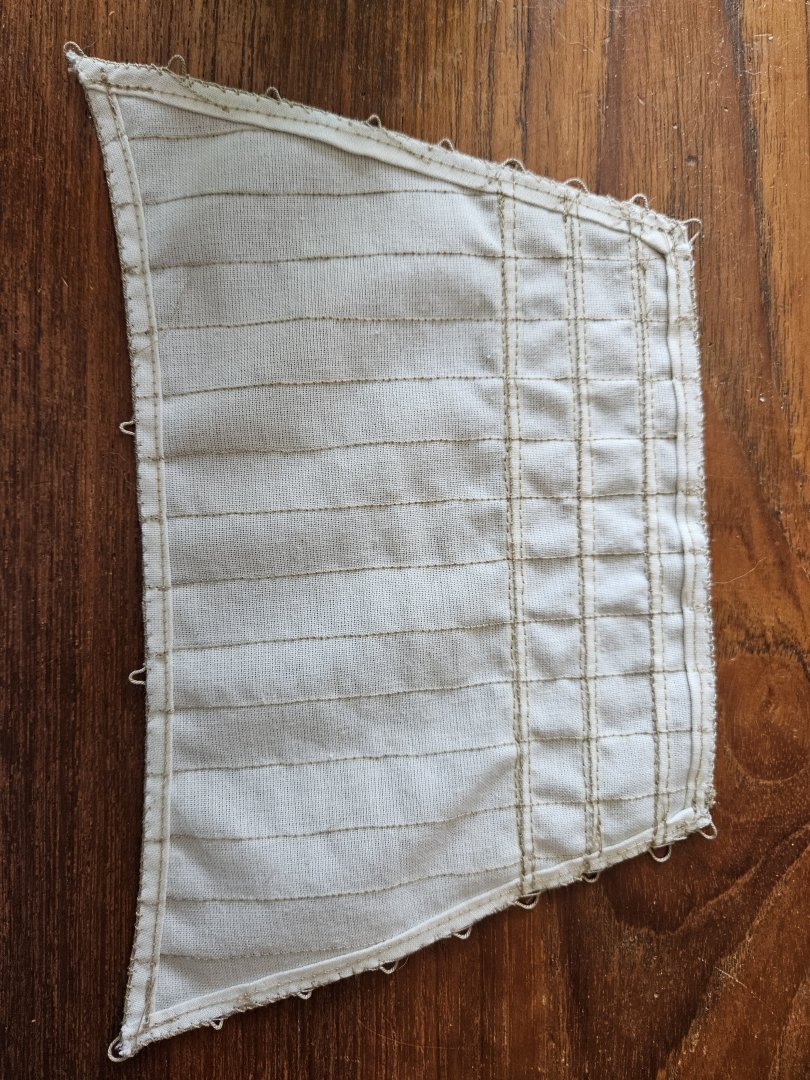
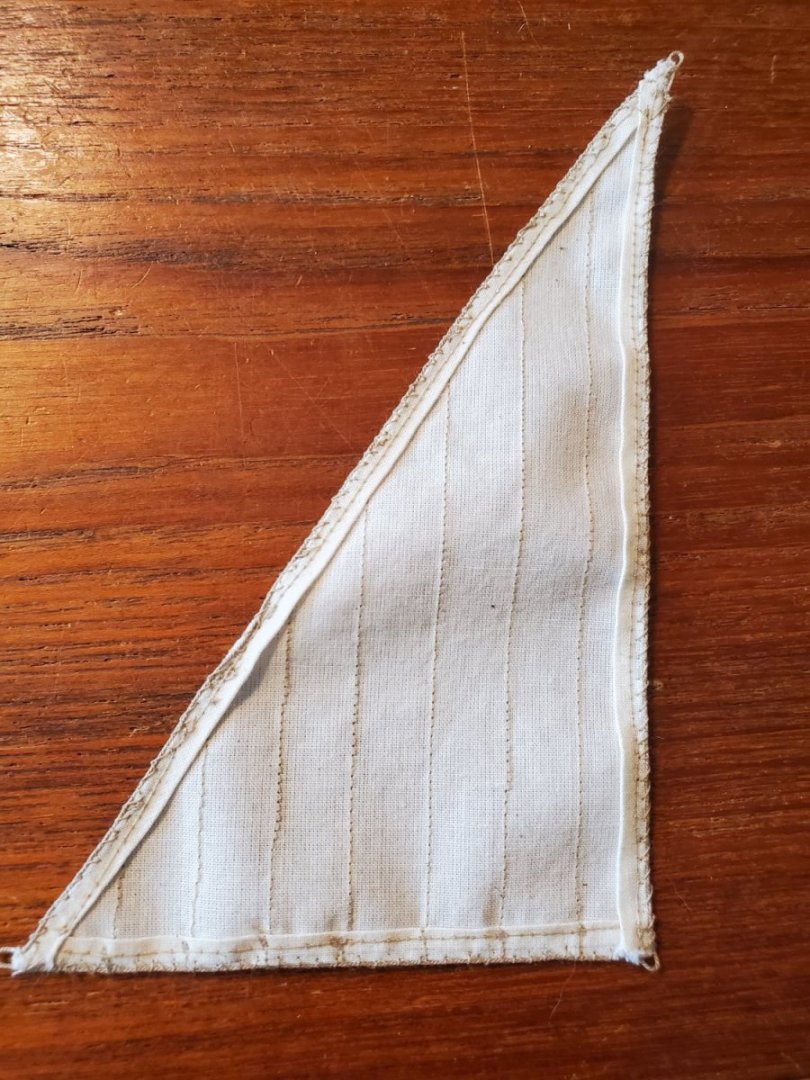
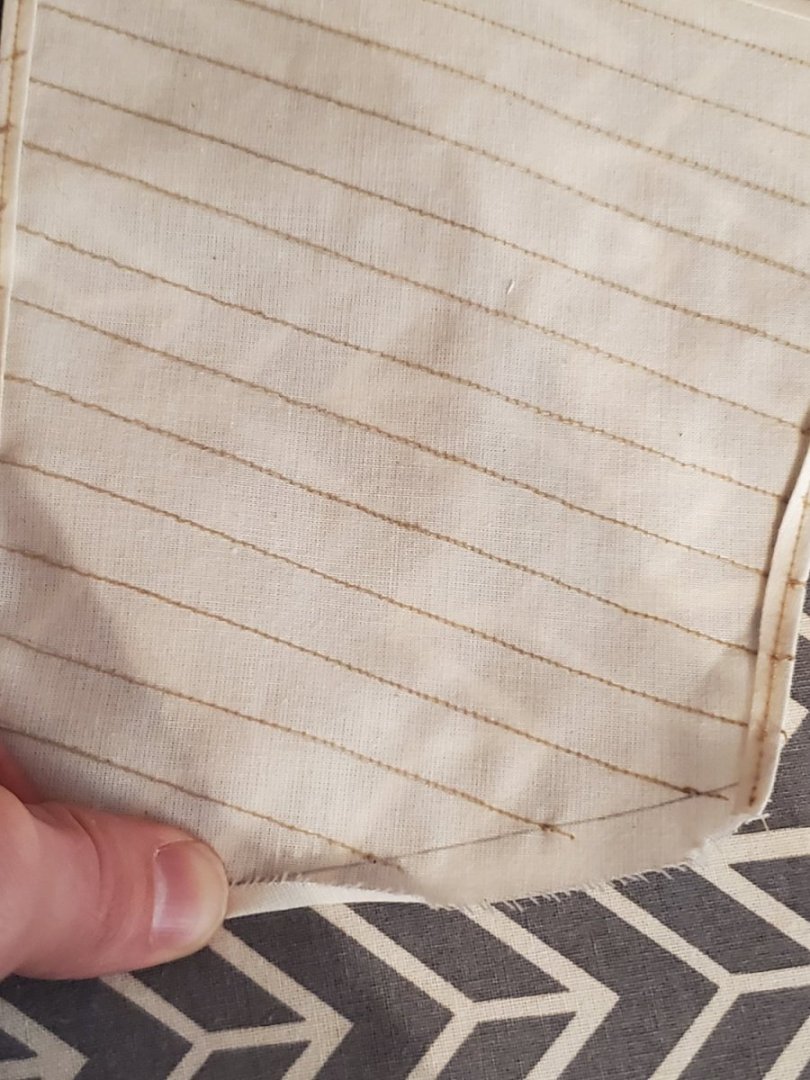
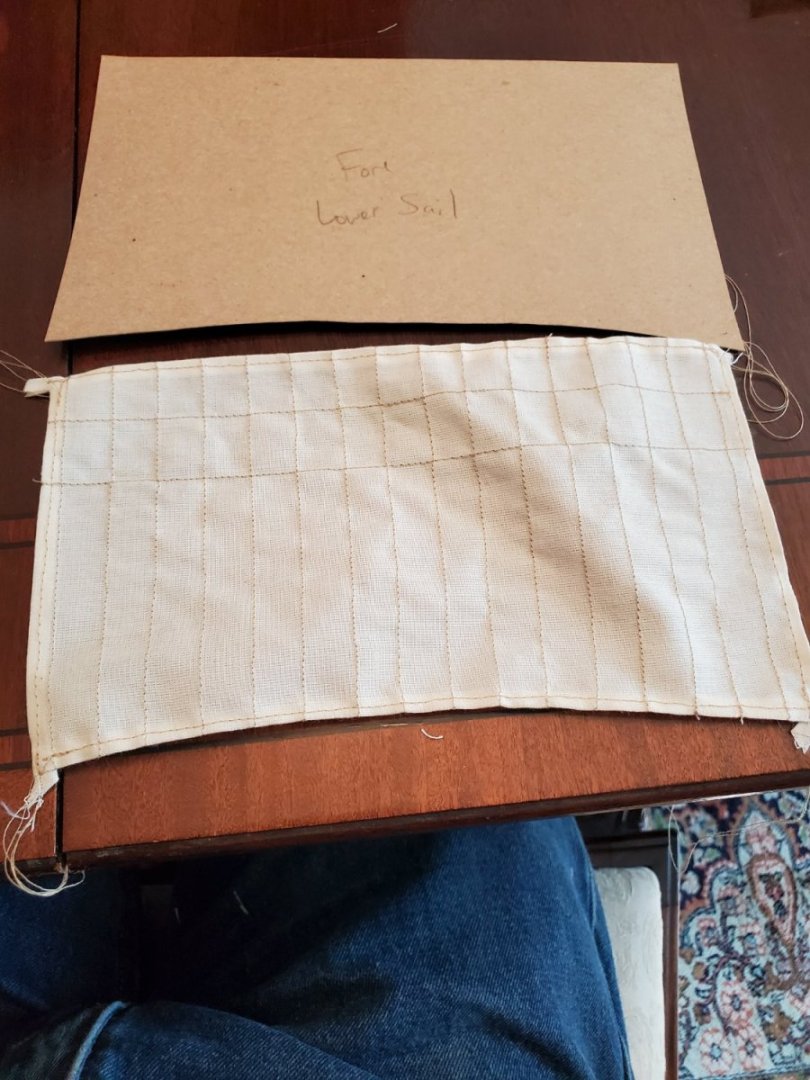
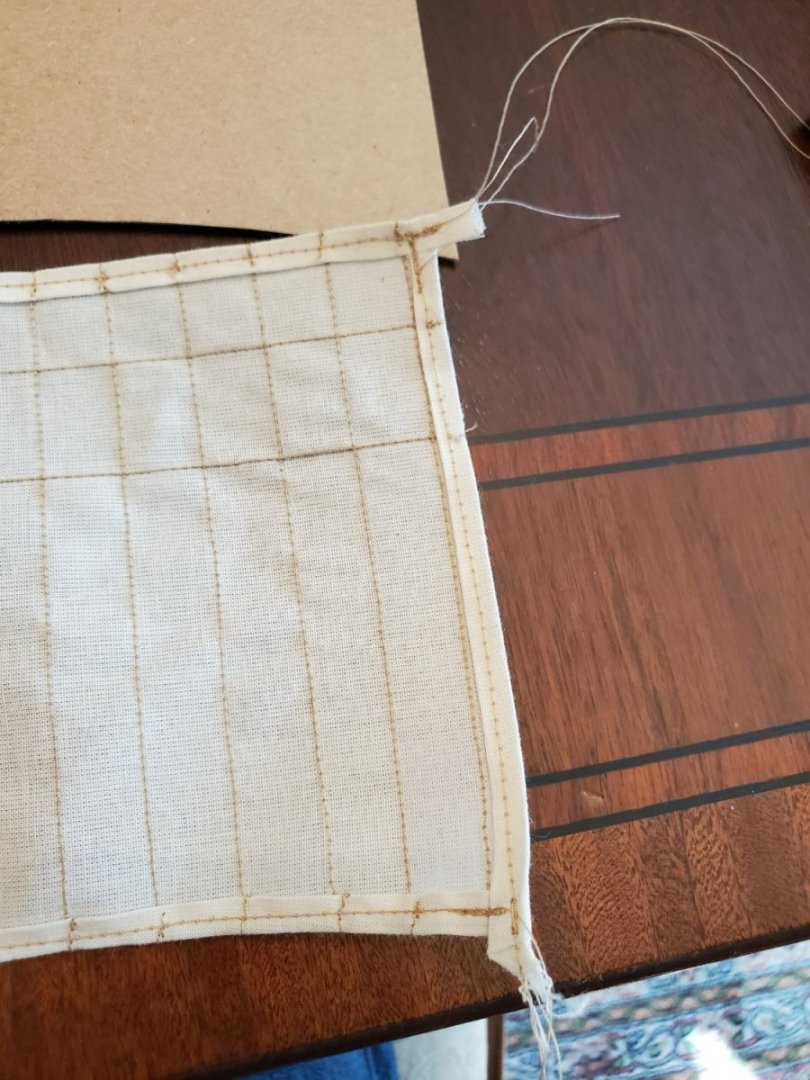
VERY Overdue progress on the Fair American Sails... After vacations in April, and Alaska in May, and other life stuff, I hadn't made any progress in over a month. Now since June, and now July I picked back up. All Sails are completely finished!!!!! The Top Stay Sail was pretty simple sewing the cringles on, there are only 3. It did get a little challenging to keep the cringles all the same size. Often the sail material would fray at the corners, so I'd have to move the anchor stitch around to make it work - you can see they start/stop at random points, which was kind-of unavoidable. The Main Course took the longest. So many cringles, largest sail, and 68 Reef points is a lot. The Fore Course Sail wasn't much faster, only a few less cringles, and reef points. But I'm very pleased with the overall look of the sail. I like all the nice details. The Sprit Sail was fairly quick. I know the reef bands are really thick on this one, but folding and sewing them on this small sail, was very very challenging, so it does look out of scale. I will likely go back and iron all the reef points to see if I can straighten them out a little bit, since they kind of point, haha, in all different directions, rather than have a hang-straight-down appearance that I'm after. The Fore Topsail had 3 reef bands, so that takes a while to get all the points sewn in, and the cringles for bowlines and reef pendants and leech lines and bunt lines. But they are all finished.... I am finally able to move on to rigging and all the rest of the ship building When I finally finished sewing all the sails, a friend helped me celebrate by making some ''ship cookies''. A great little treat. Even some icing-planking was a nice touch. All 12 sails done!!!! I need 10 more cookies.... So this is where I am after months of work. I enjoyed sewing these, but I'm happy to be moving on to the the next stage of construction. Sorry for such a long span between posts.... I'll post more progress in weeks, not months next. Thanks for following along! -Jason-


-
More Sail progress on the Fair American: I was able to sew several more sails in the last few weeks. The Main Topsail had a lot of cringles to do with the bolt rope, but I got it done. Cringles have turned out well, just very tedious. Another one was the Main Course, the biggest sail. This took some time. Again, I didn't add Buntline bands or Middle bands: I'm happy with the detail I've done on the sails thus far. Repeating the cringle technique again: Sew through the rope itself.... Then loop around and through near the same spot.... Through that loop for a knot.... ...and pull tight. Again, not sure of the best technique, but I feel this is a nice secure way of making the cringle. Another detail I'm adding is the Reef Points - the little dangling ropes from each reef band. There's two per piece of canvas, so I'll follow that from Steel's. I'm using the same sewing thread I've been using. Anything else is too out-of-scale looking to me, and I've got lots of it. Now how to attach it so they don't fall out? I decided to make a two-knot design, at the end of the thread. Making the knots as close together as I could. That way, they'll hold each other from falling out fore or aft from the sail - I hope. I'd push the needle through the reef band, until I got to the first knot. Then gently popped just one through, until the fore knot was against the reef band. Then I trimmed the thread just above the lower band, to look like how Steel's drawing shows. On the aft side, I just trimmed the thread above the knot. There's a lot of these! As I went along, obviously they didn't hang very satisfactorily. They tend to cris-cross each other, looking messy. Straightening them by hand really didn't help. But for this Main Topsail, I just got them all done and trimmed. Phew! Now to help them look dangled, I blotted a small amount of diluted white glue over the thread with a small brush, then pressed it down to help it 'tack'. It sort of worked, but not completely (forgot to take picture of the tacked reef points). I'm almost half done all the sails. The reef points will take time on all the bands too, but I'm making progress. We'll see how many I complete by next update, but I'm on vacation next week in Cancun so I doubt I'll do much until I'm back and more sunburned. Have a great week! - Jason -


-
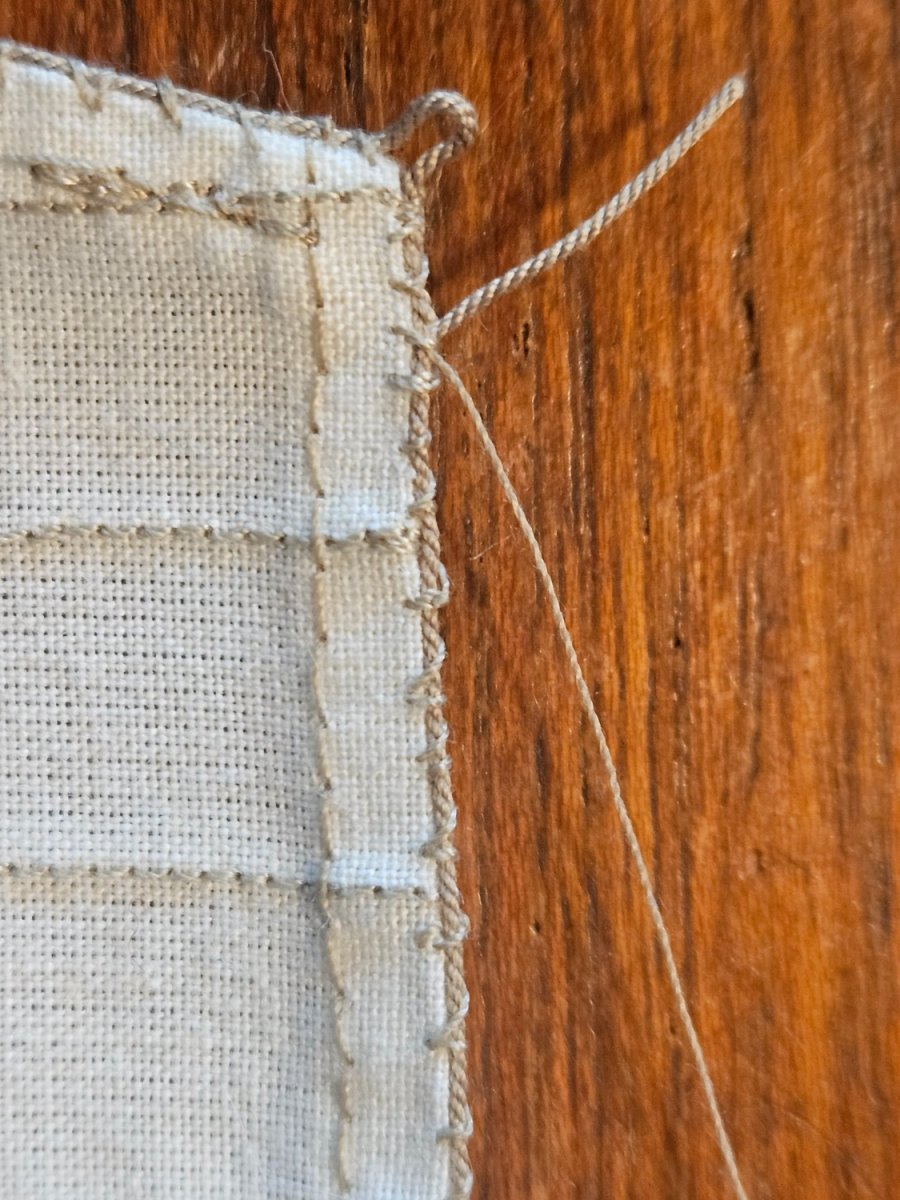
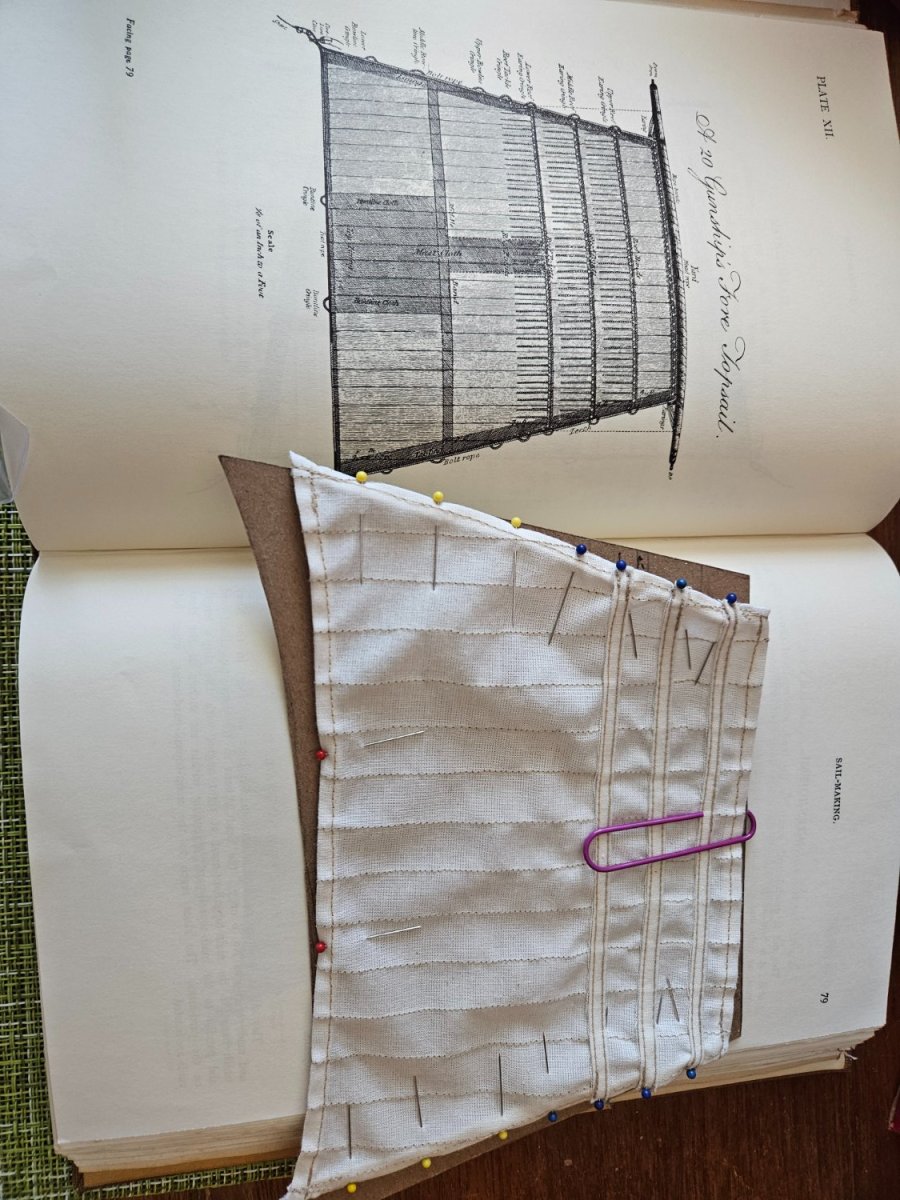
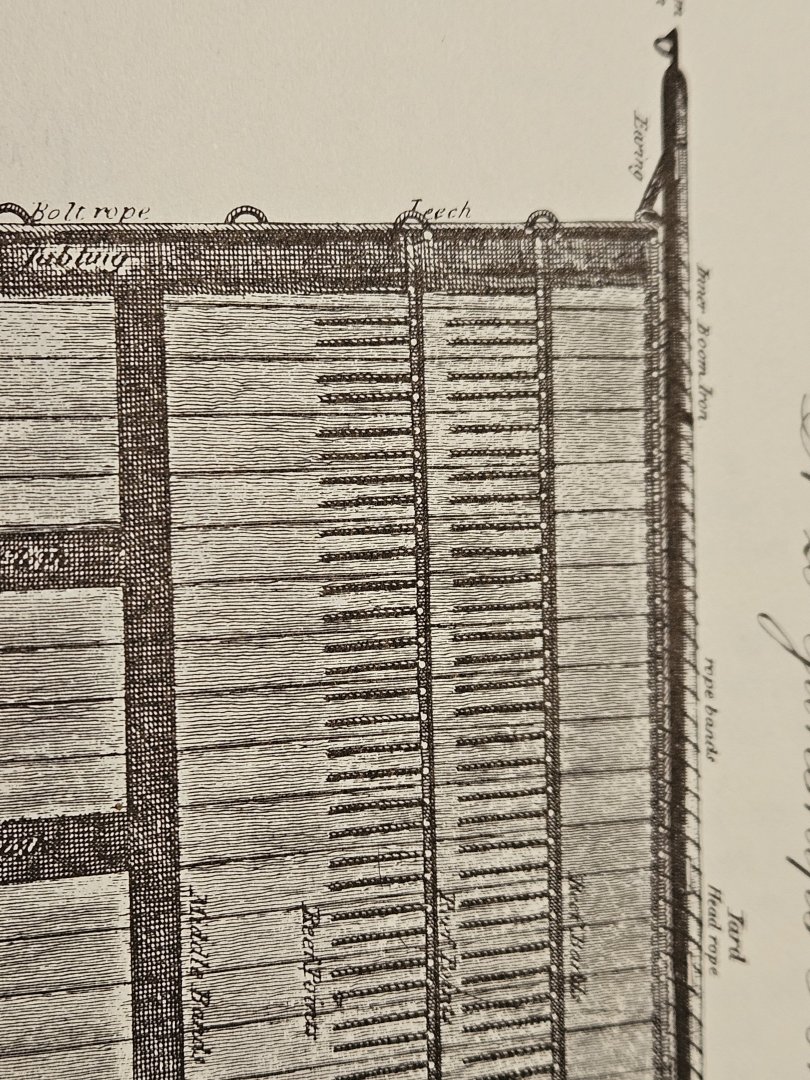
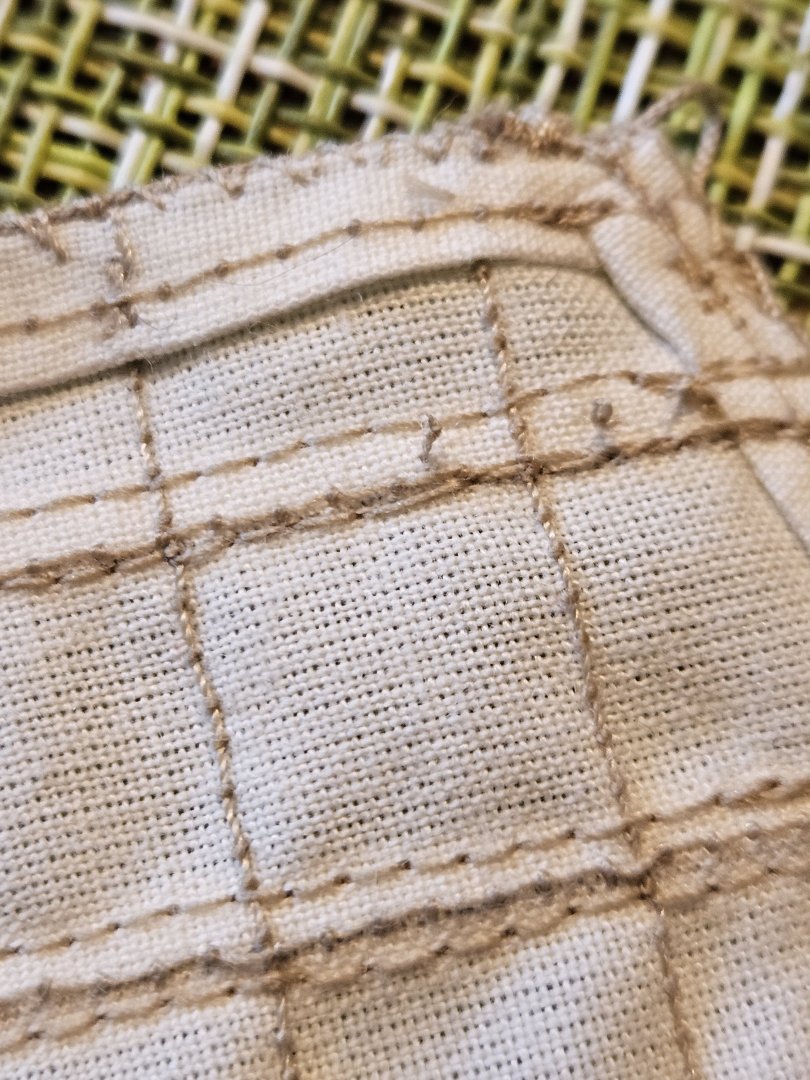
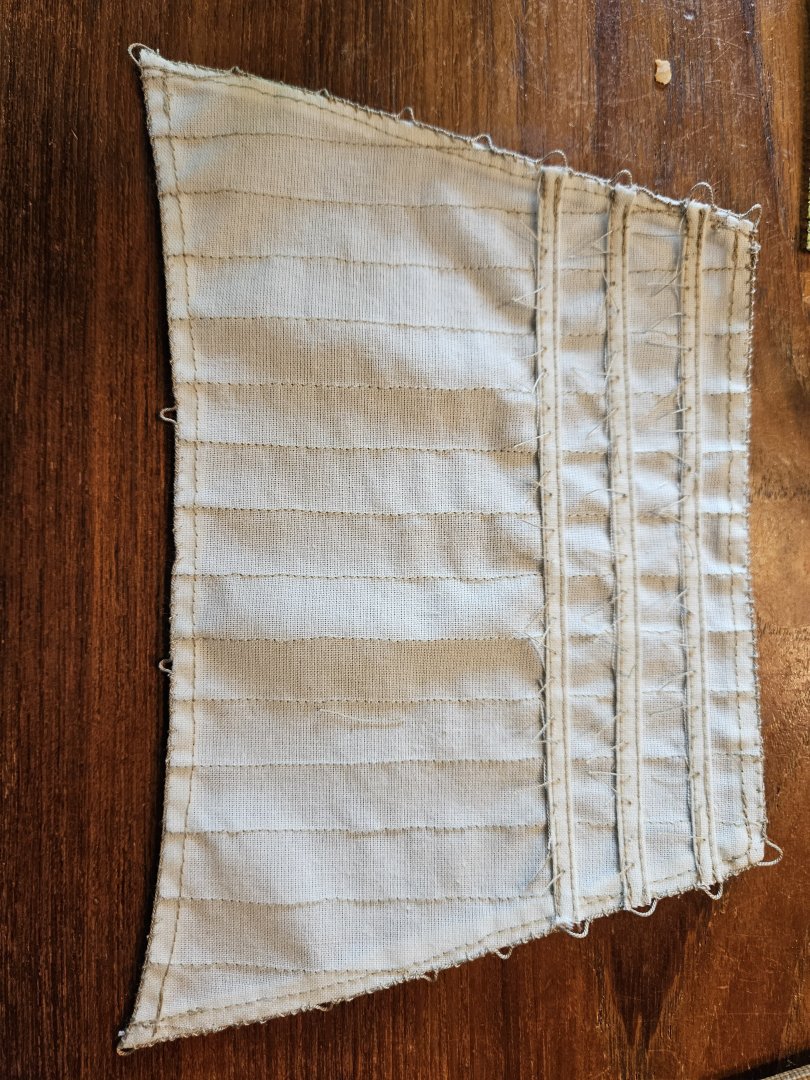
Continued Sail Progress... I finished my first ''real'' sail! One of the stay sails, complete with cringles. The port/aft end of the sail is a little messy. The tabling looks big, but it was as small as we could manage in this scale. Since I'm planning on ultimately displaying this looking at the starboard side, the port side will be facing away. The starboard side is my ''good side''. I had to make sure I had enough .025in rope to go all the way around, plus cringles. Here at the end, the rope overlaps a little bit, with some extra left over. I just trimmed it close once I finished. So this is the Fore Topgallant sail, finished. So much sewing!!! Again, the aft side isn't quite as pretty, but its progress. I'm happy with progress. The Fore Topsail was next. This one had the most cringles. To make my life easier, I used colored pins to mark where the corner cringles, bowline cringles, reef band cringles, buntline cringles, and reef pendant cringles are located, according to Steel's. I didn't include a middle band, buntline cloth, middle cloth or top lining on my sail. Its meant for when the sail is half worn in Merchant Service, and extra sewing I didn't want to spend time on for this build. As with before, at the cringle, I'd sew through the bolt rope, then loop and through for a secure stitch. You can see the needle poking through the rope before it got looped. I'd go around the reef band, and sew through the rope on the other side. Then just continue on.....and on.....and on... This is as far as I've gotten so far. I am halfway done the Fore Topsail. There's a lot of cringles to do. As the weeks progress, and time allows, I will continue to sew the bolt ropes on each sail. As soon as they're done, I'm ready to start rigging them to the masts and yards! I'll be setting 'sail' soon! Thanks for reading. - Jason -


-
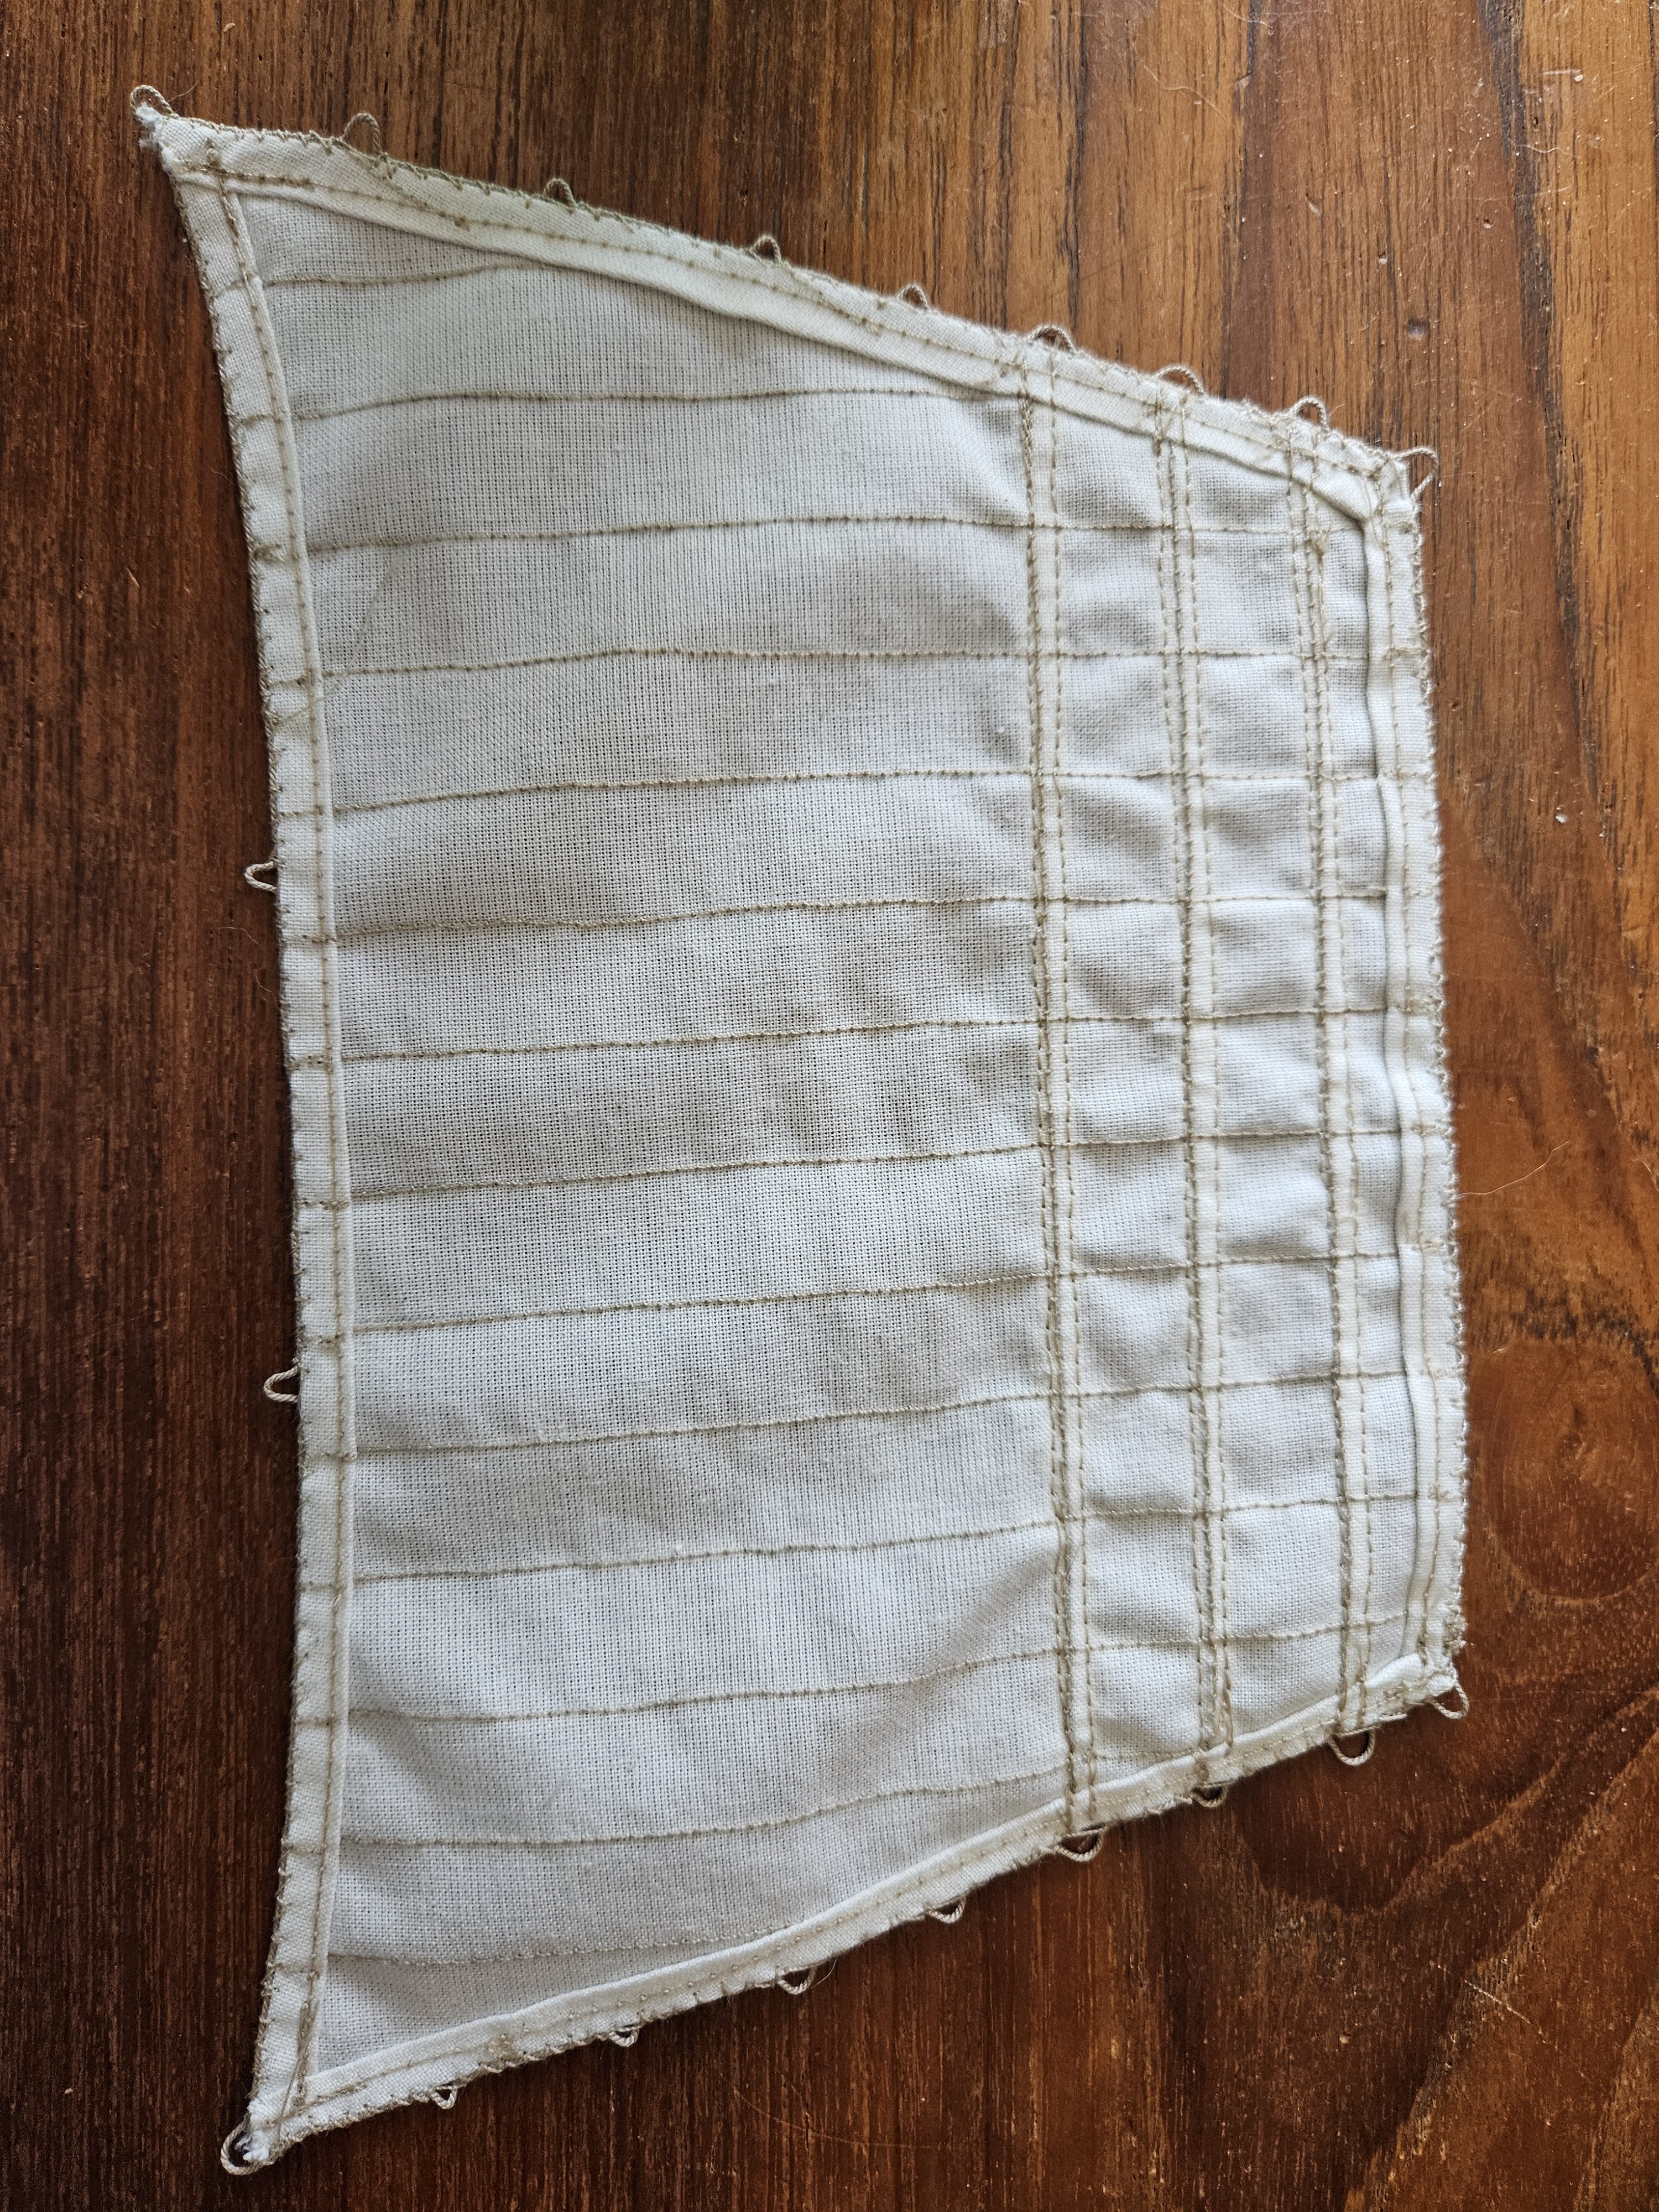
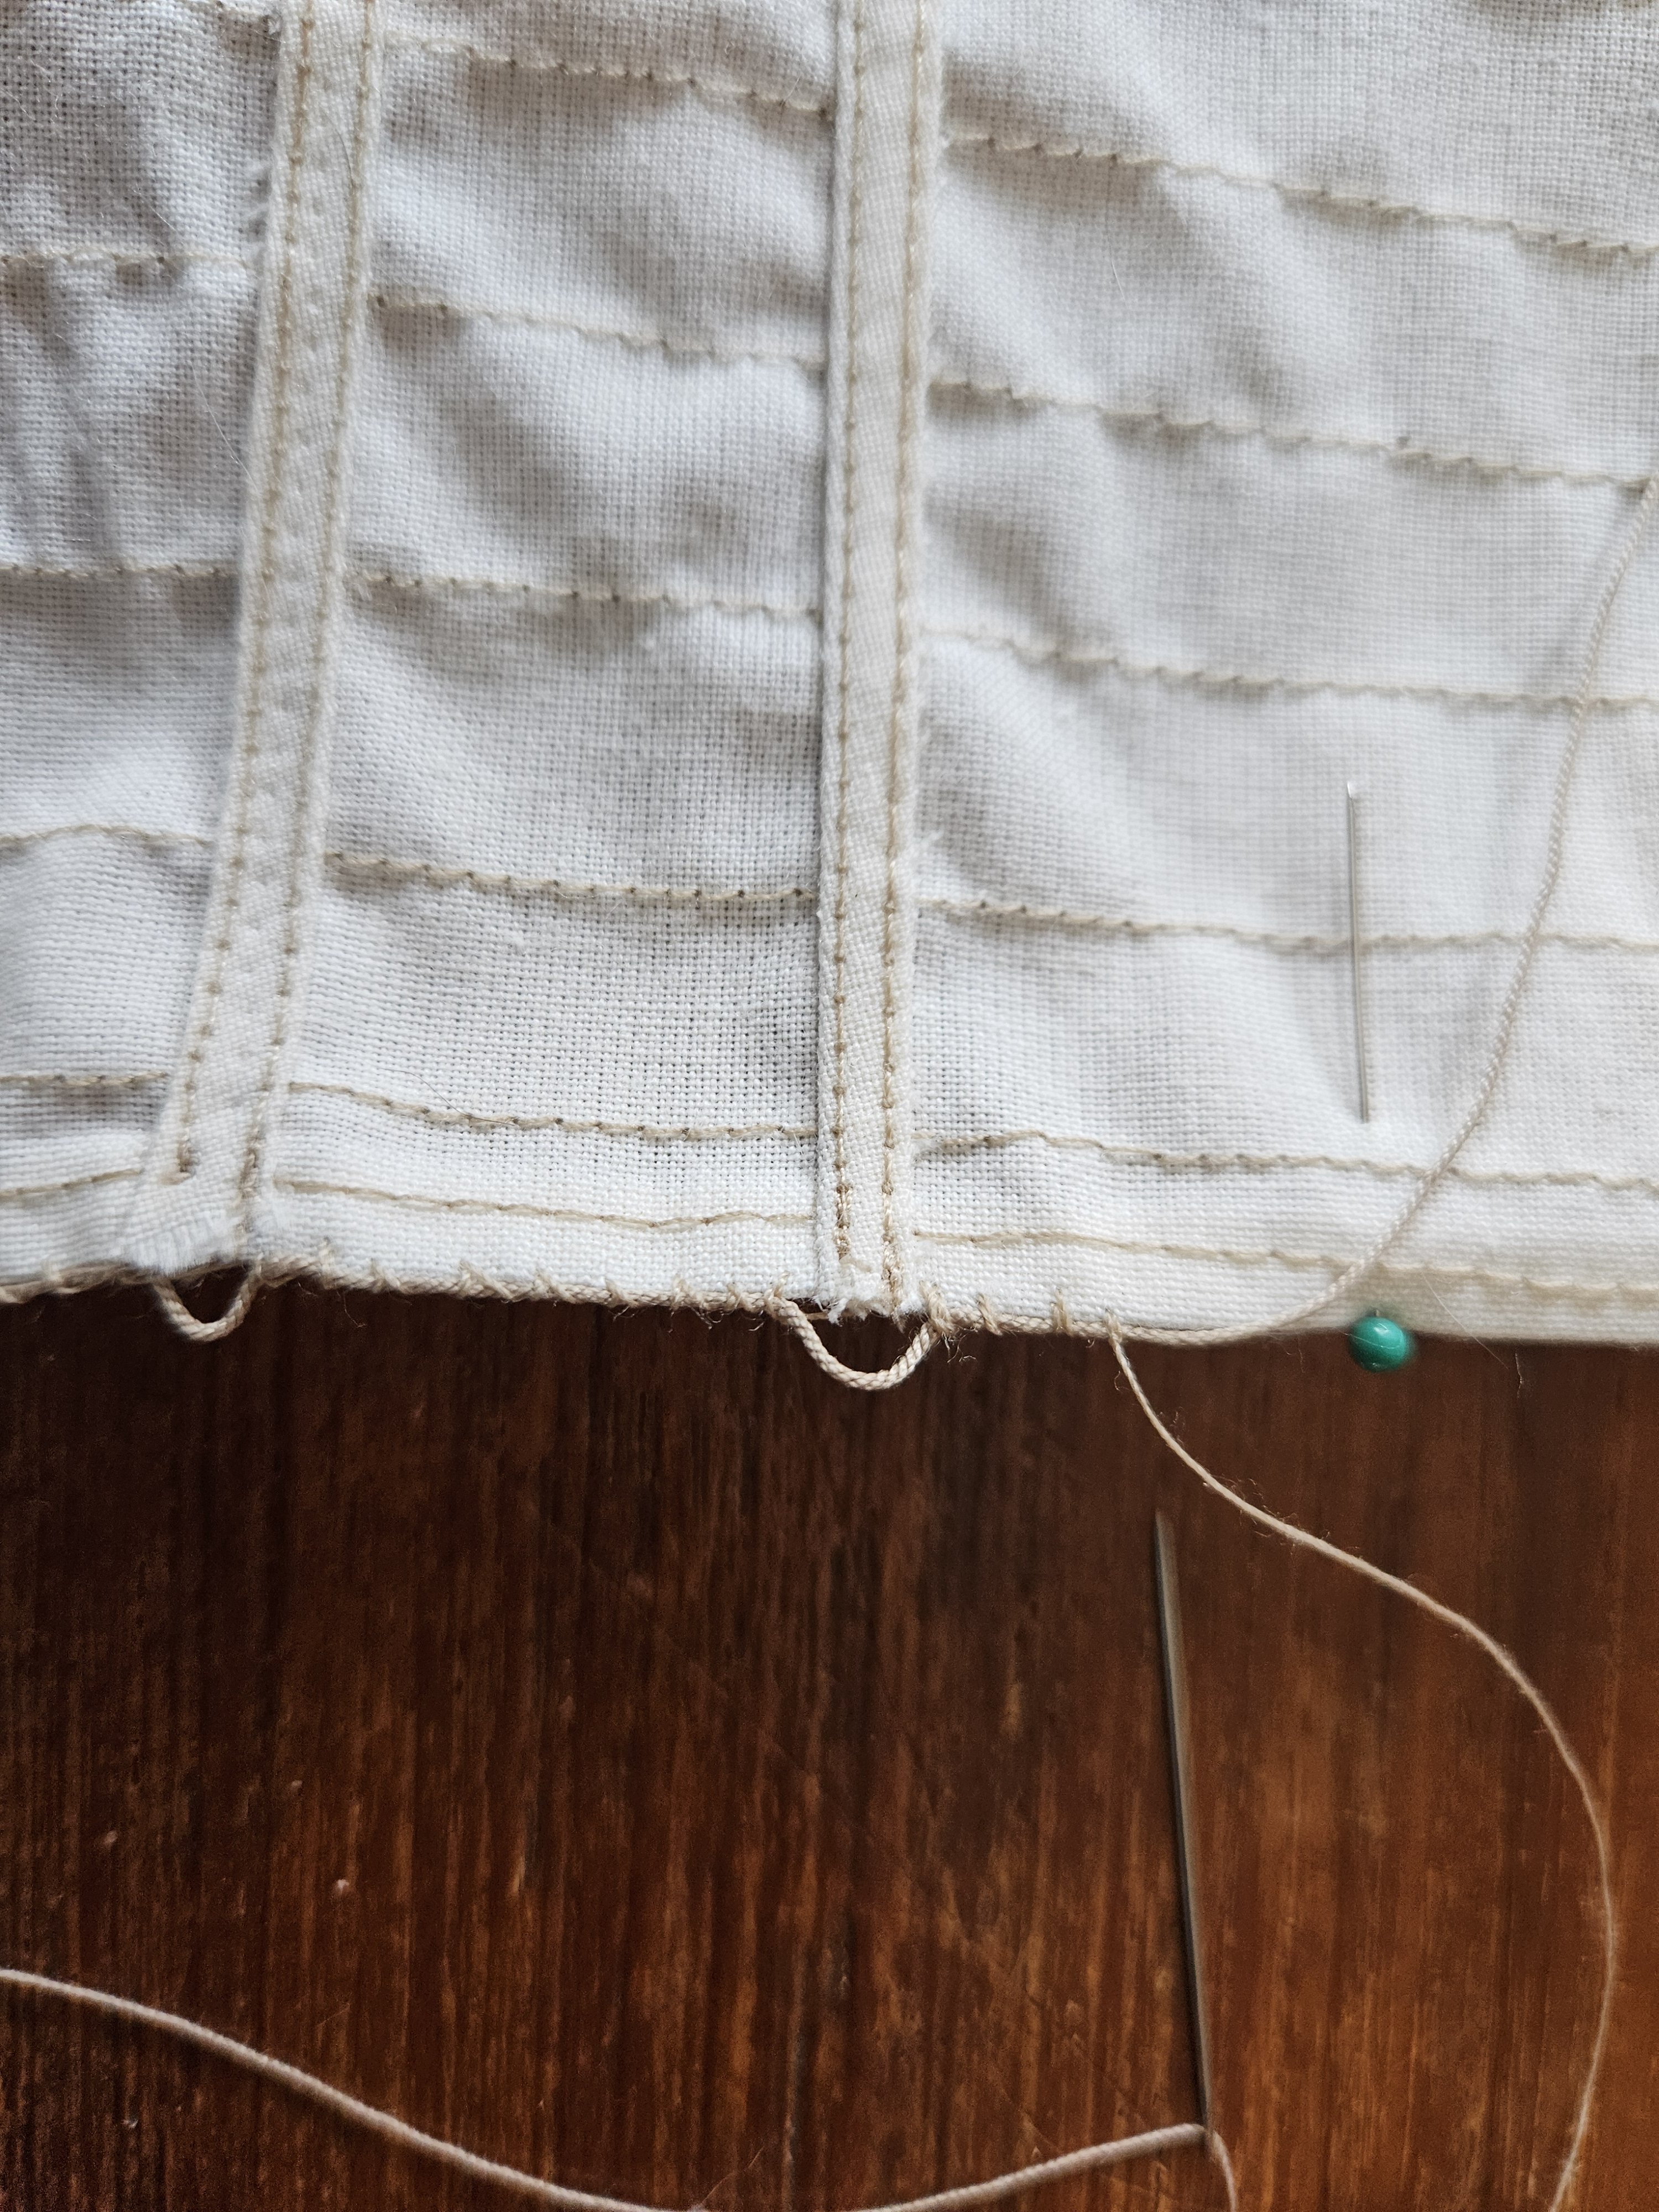
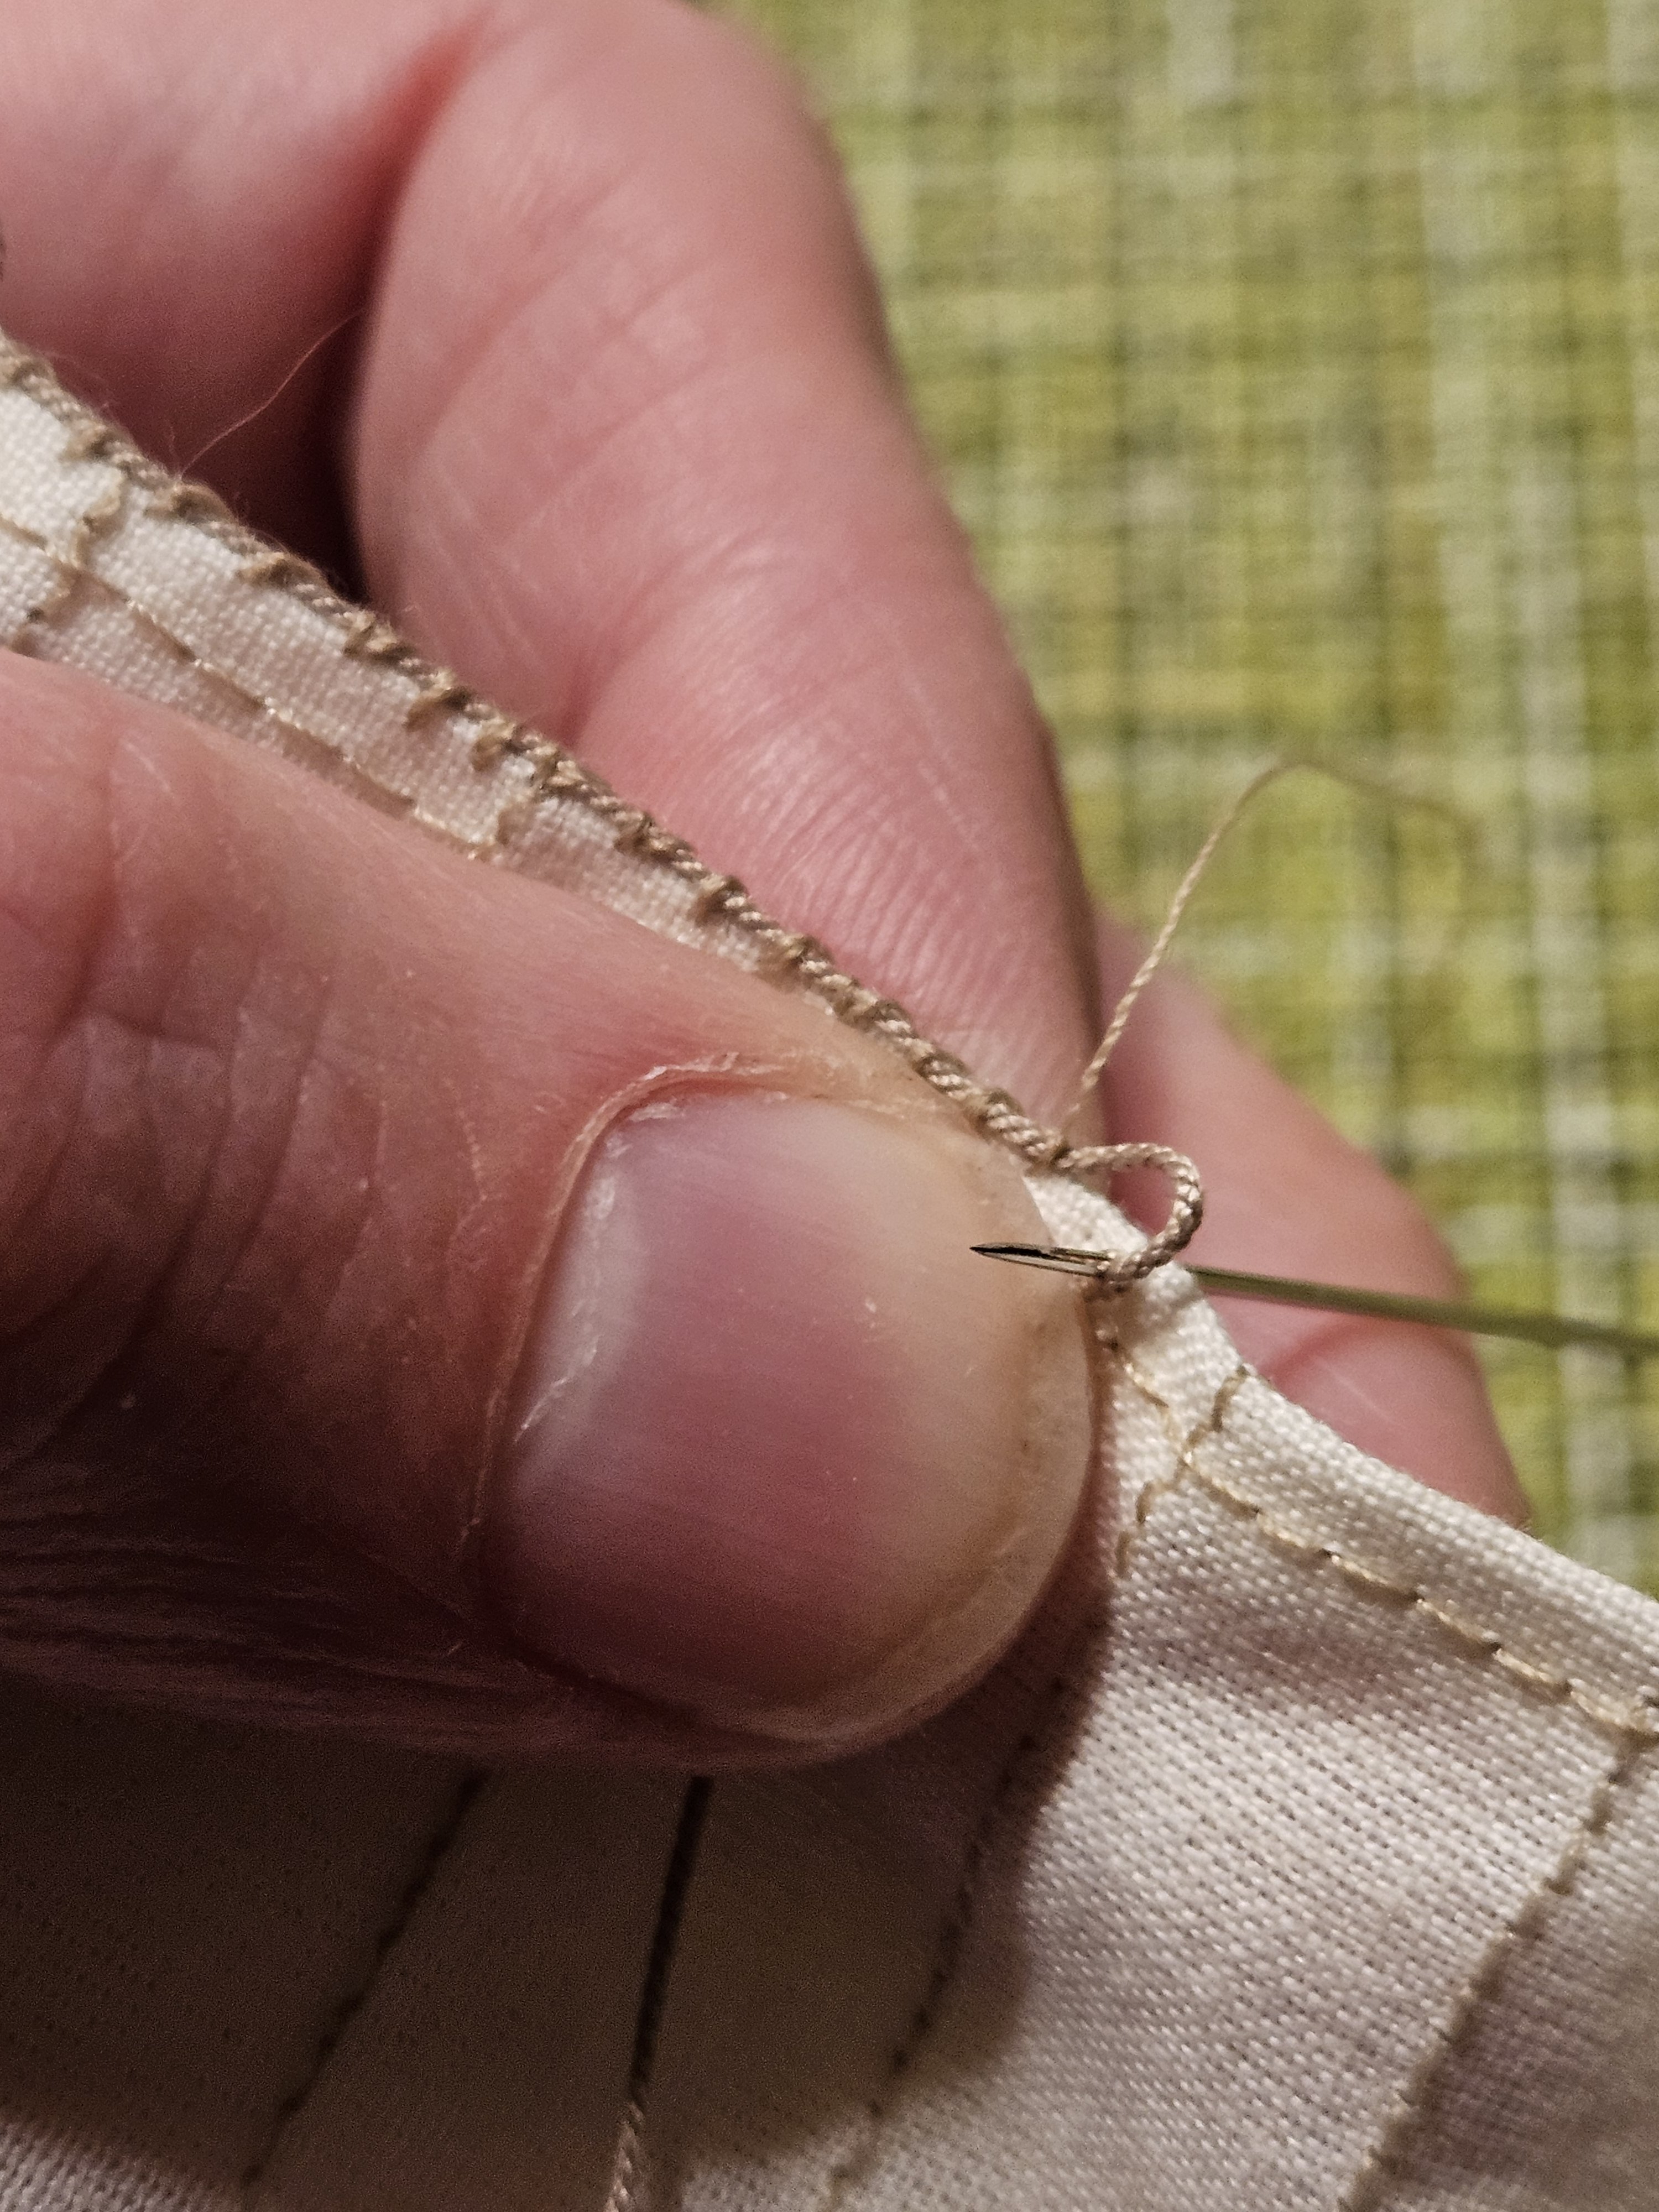
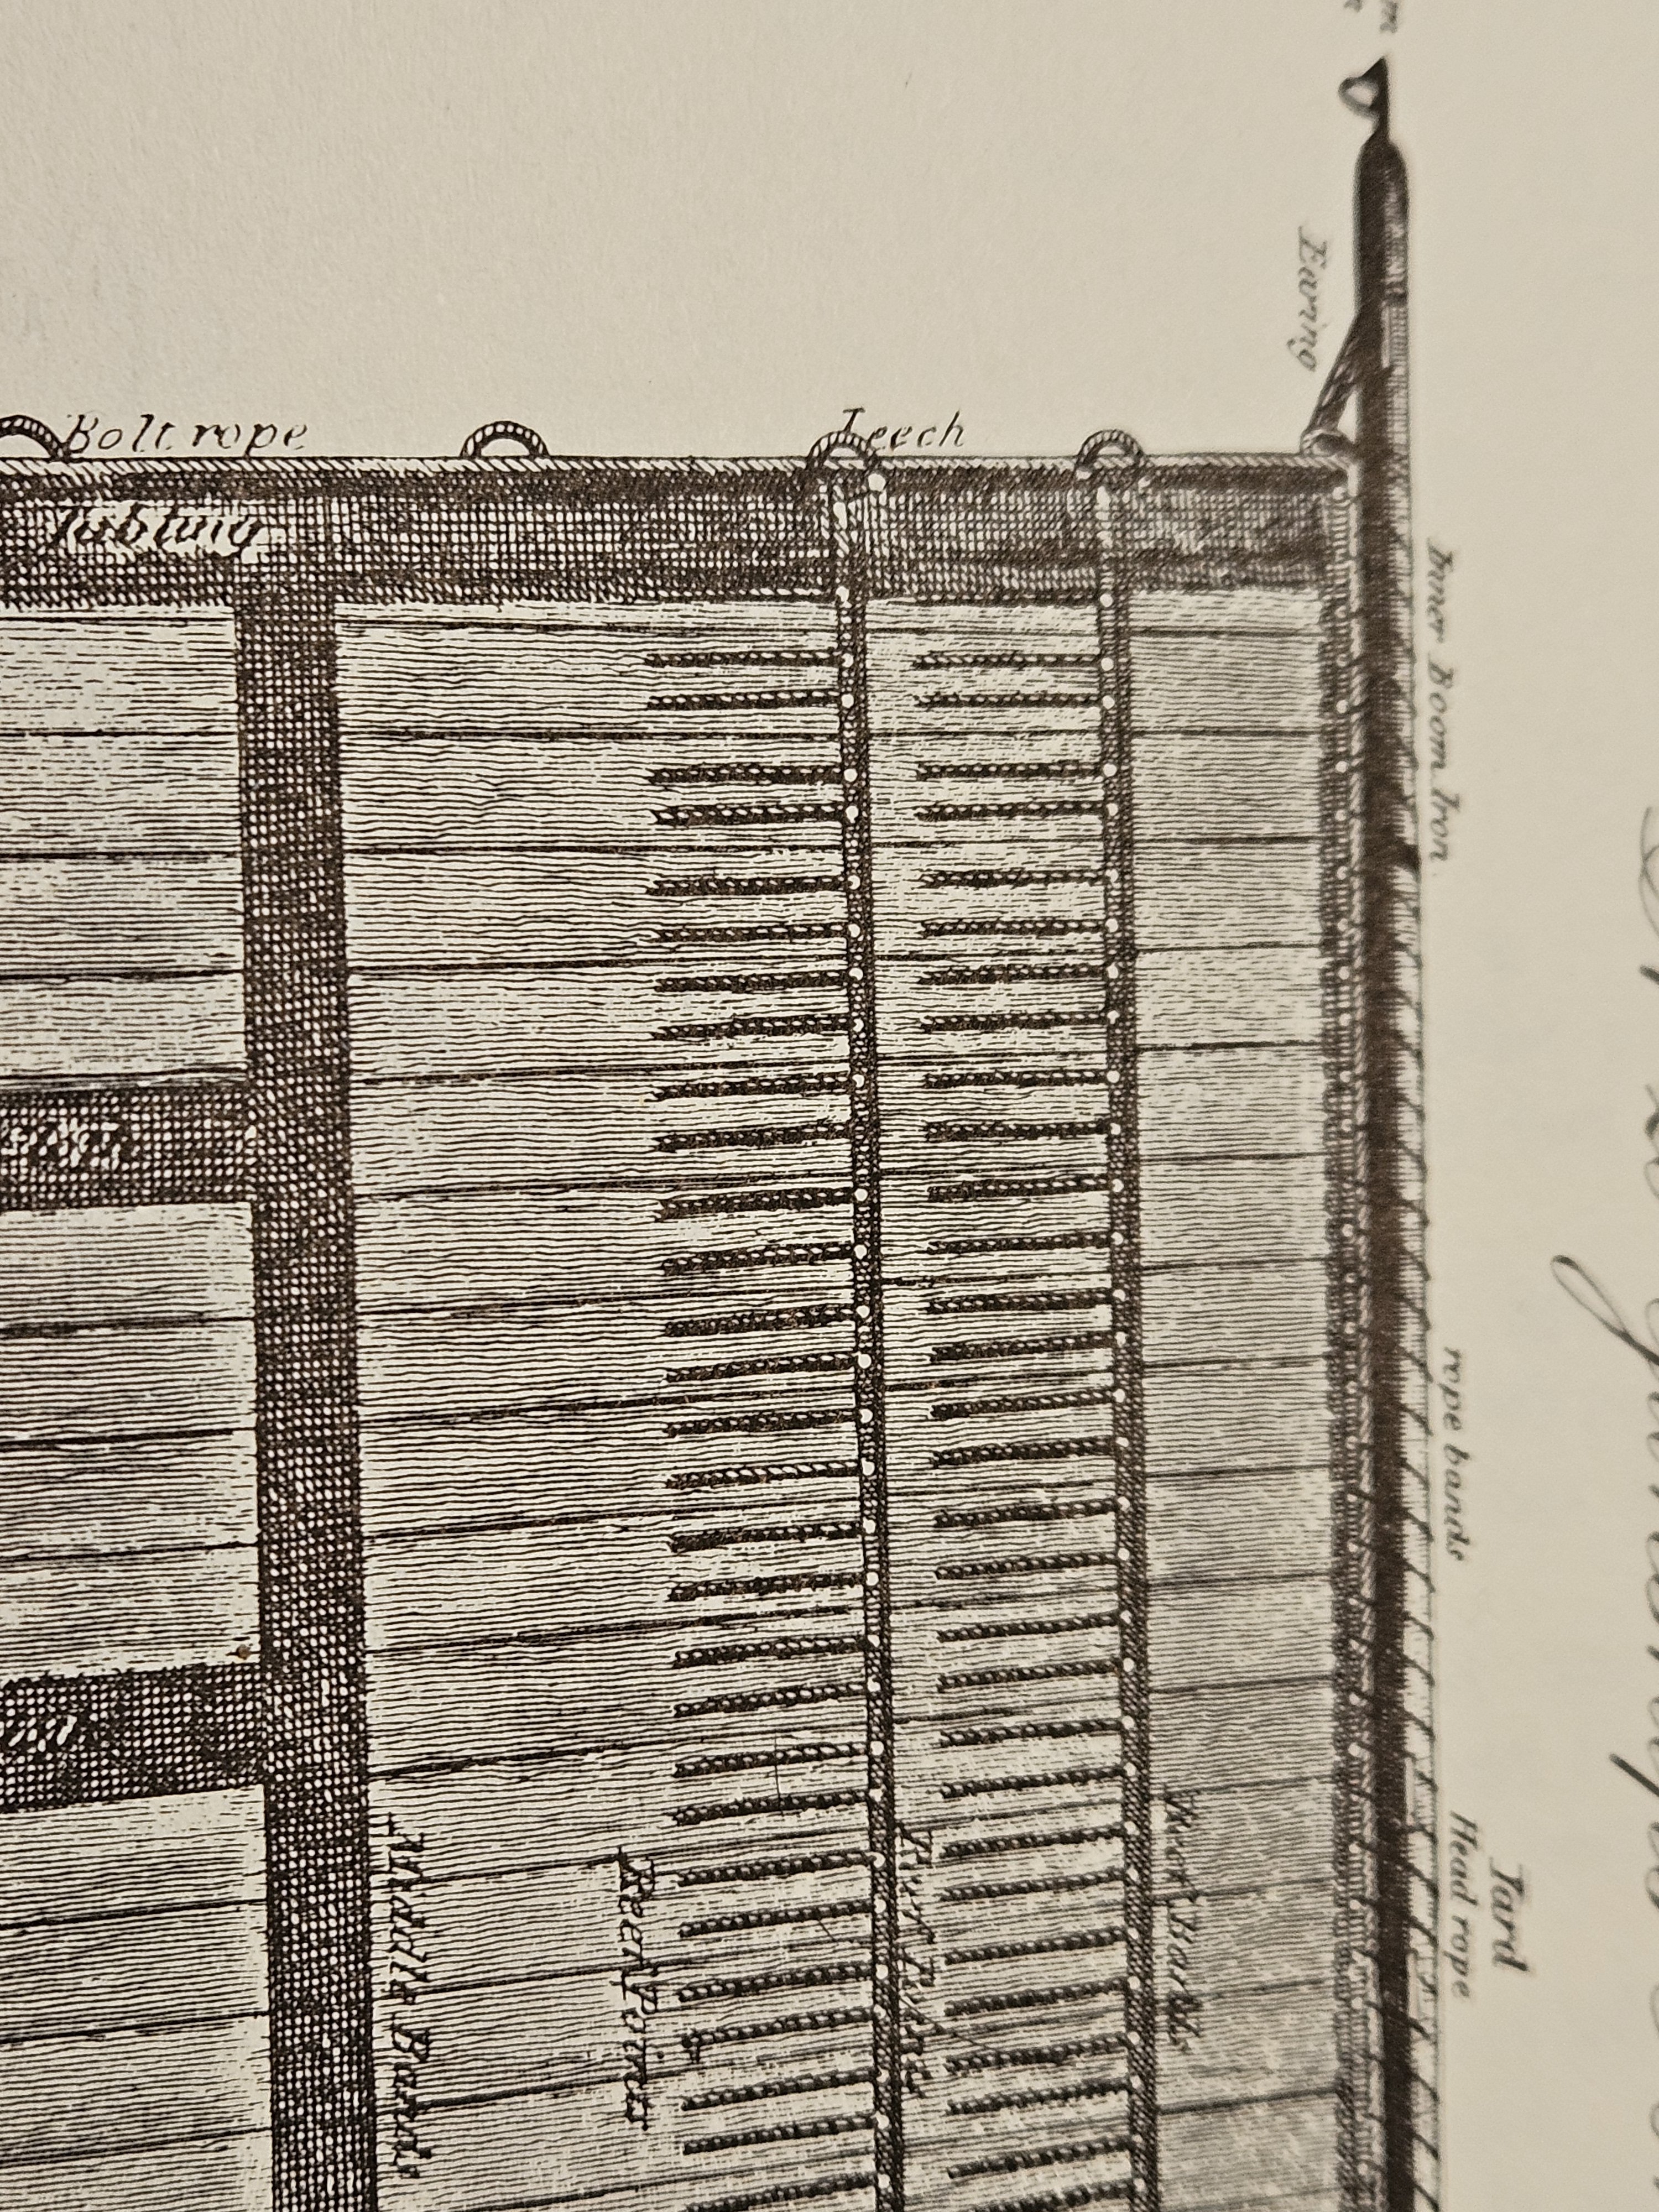
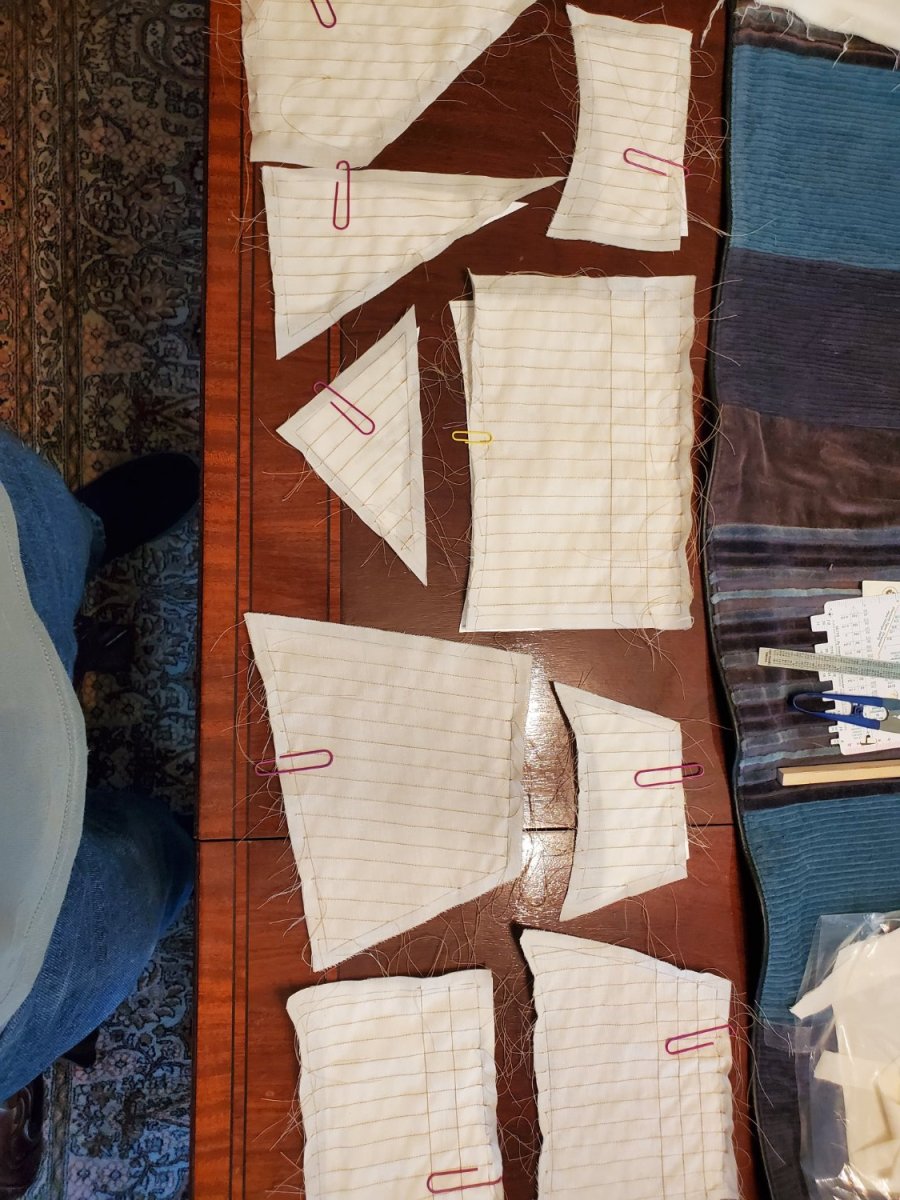
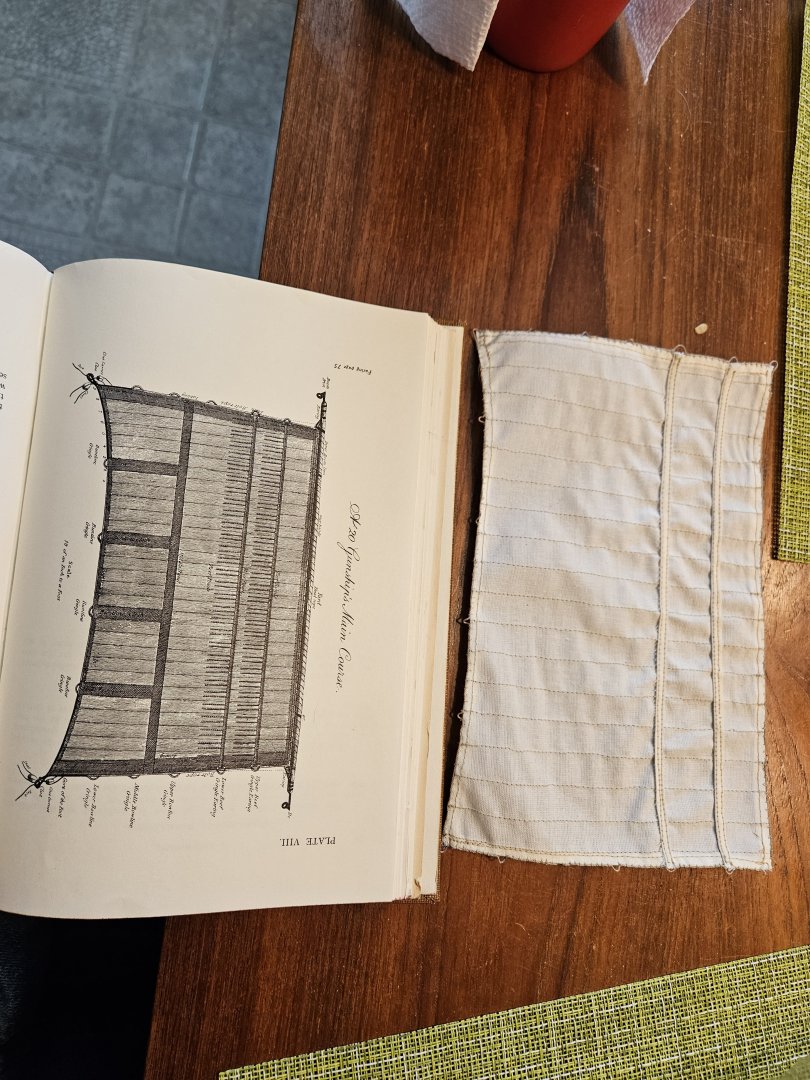
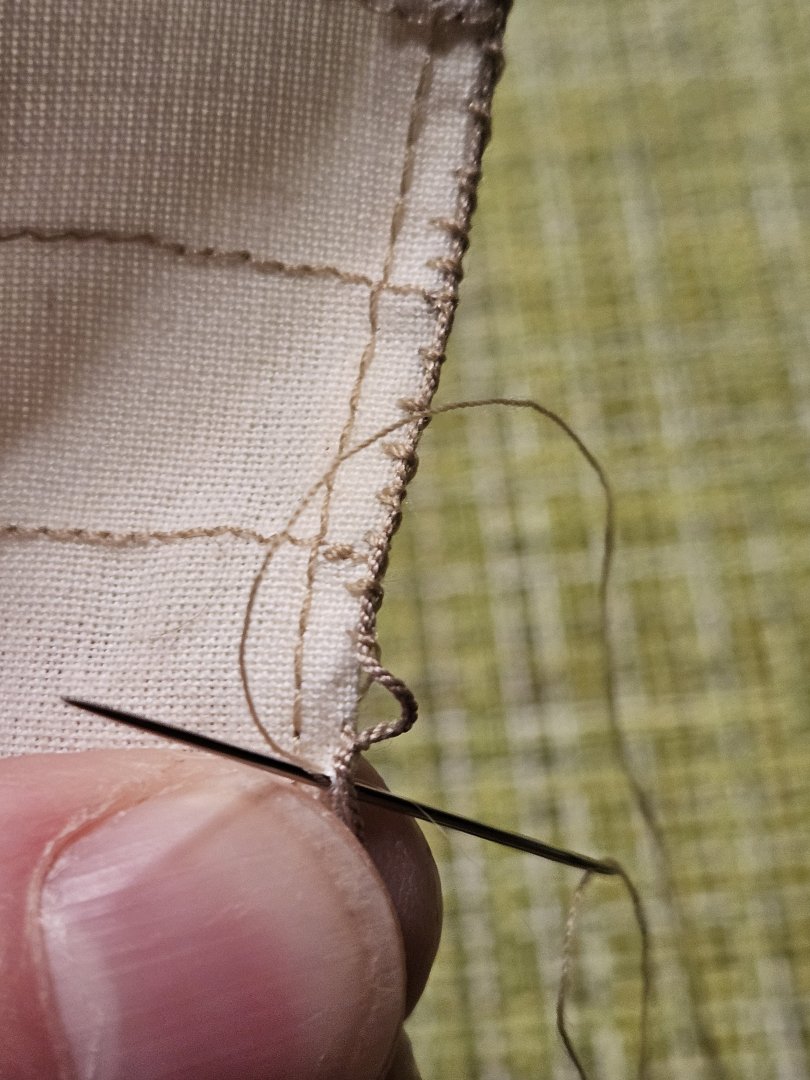
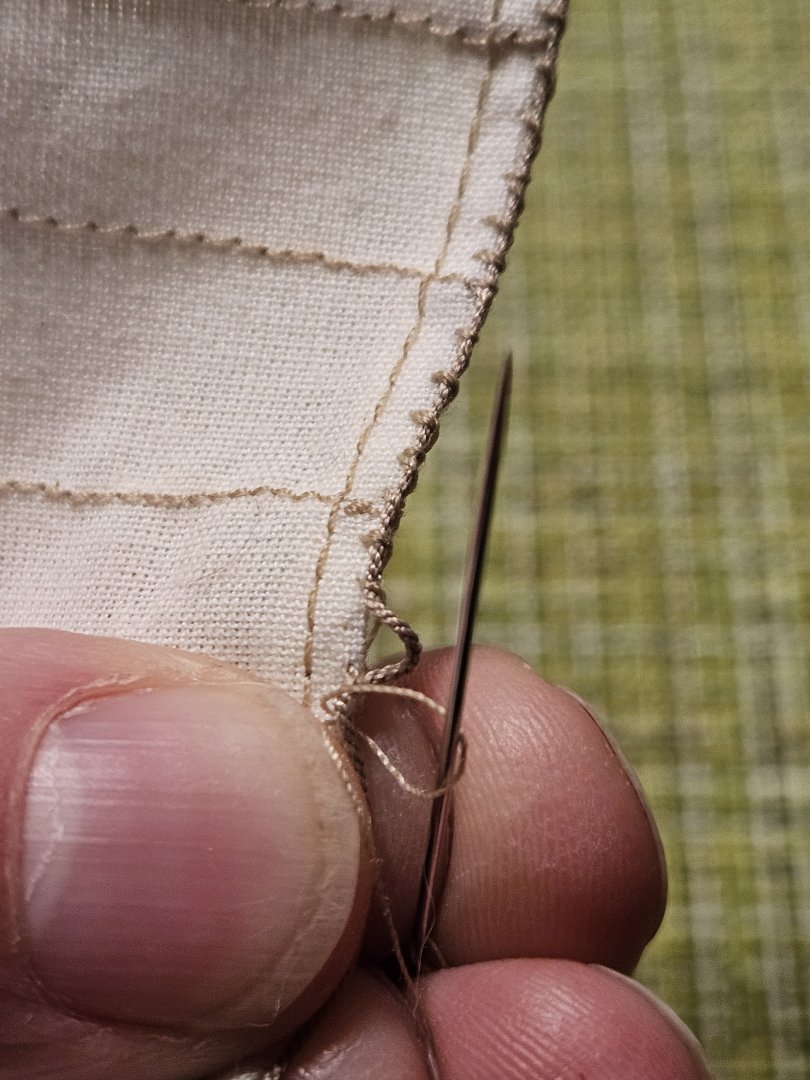
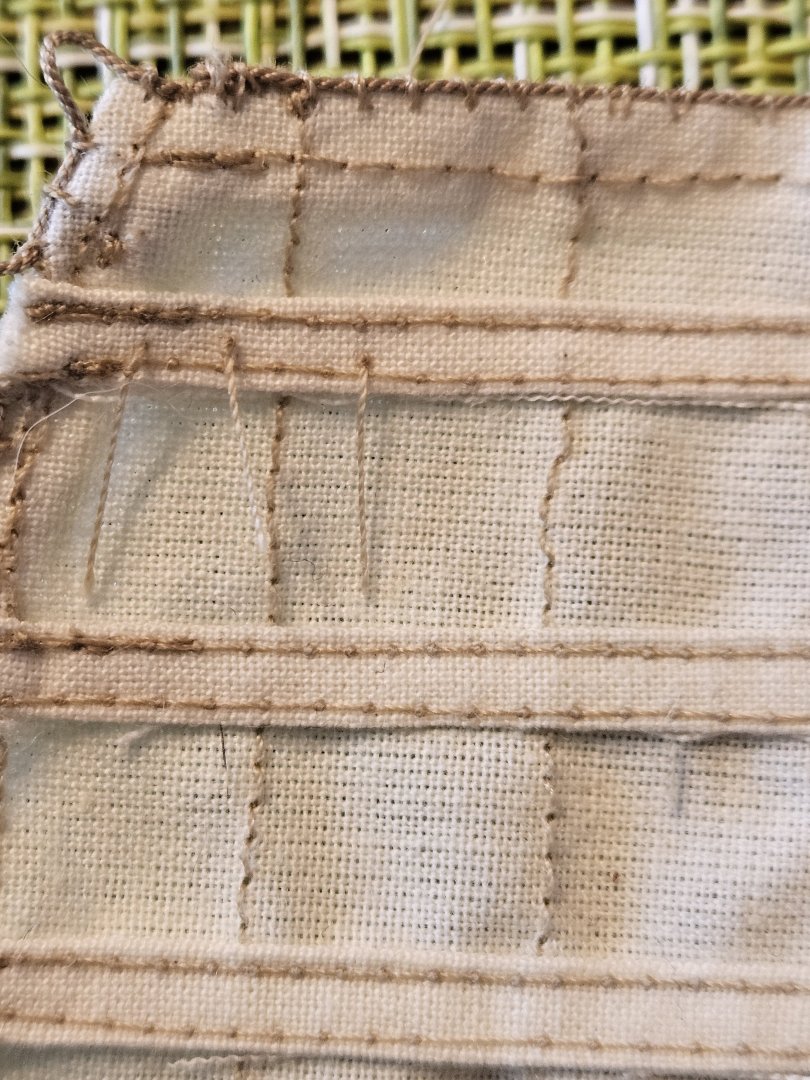
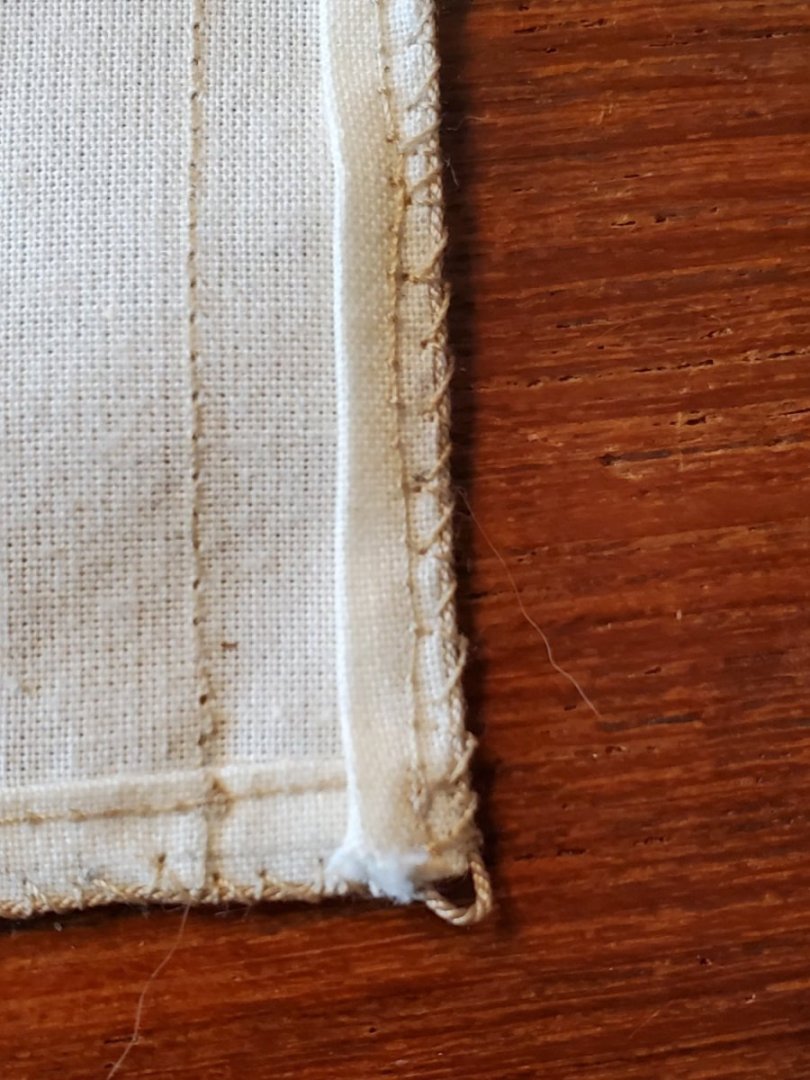
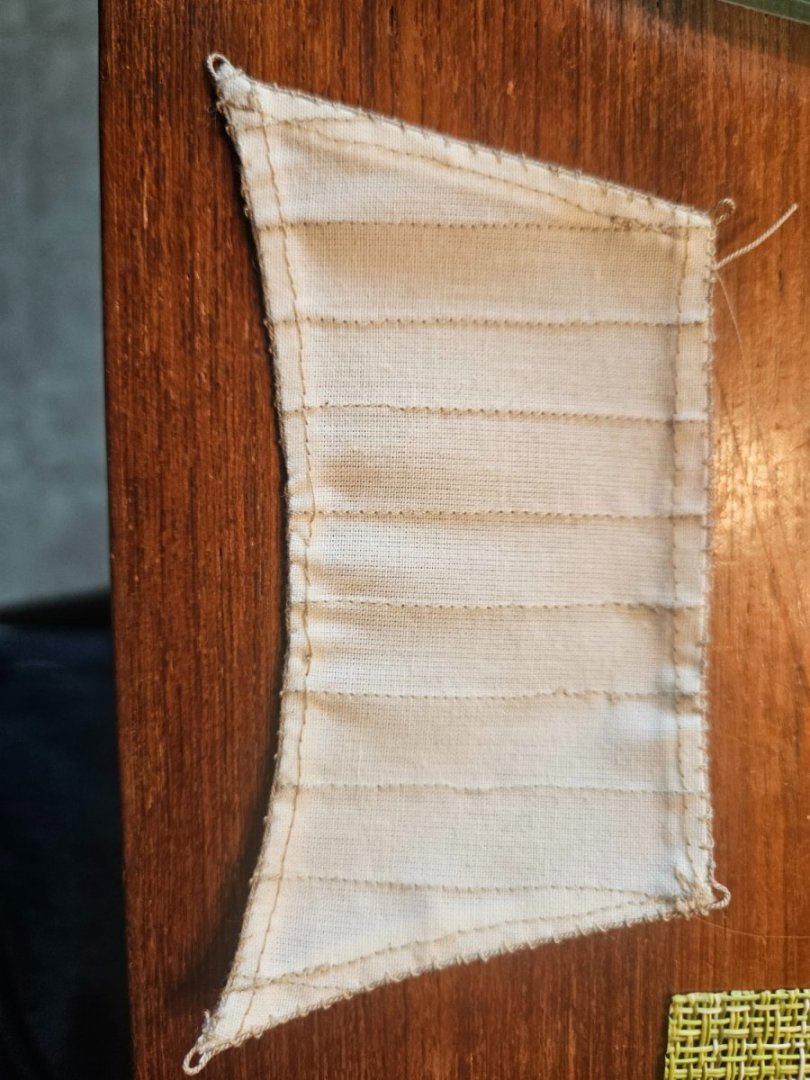
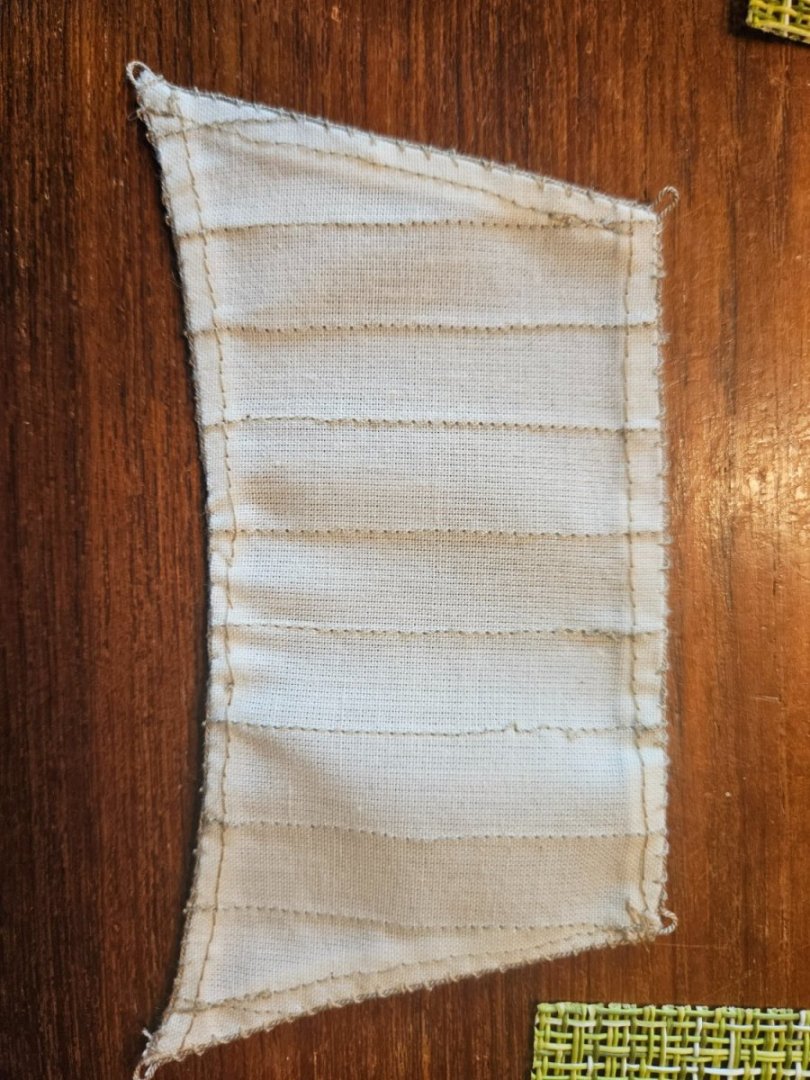
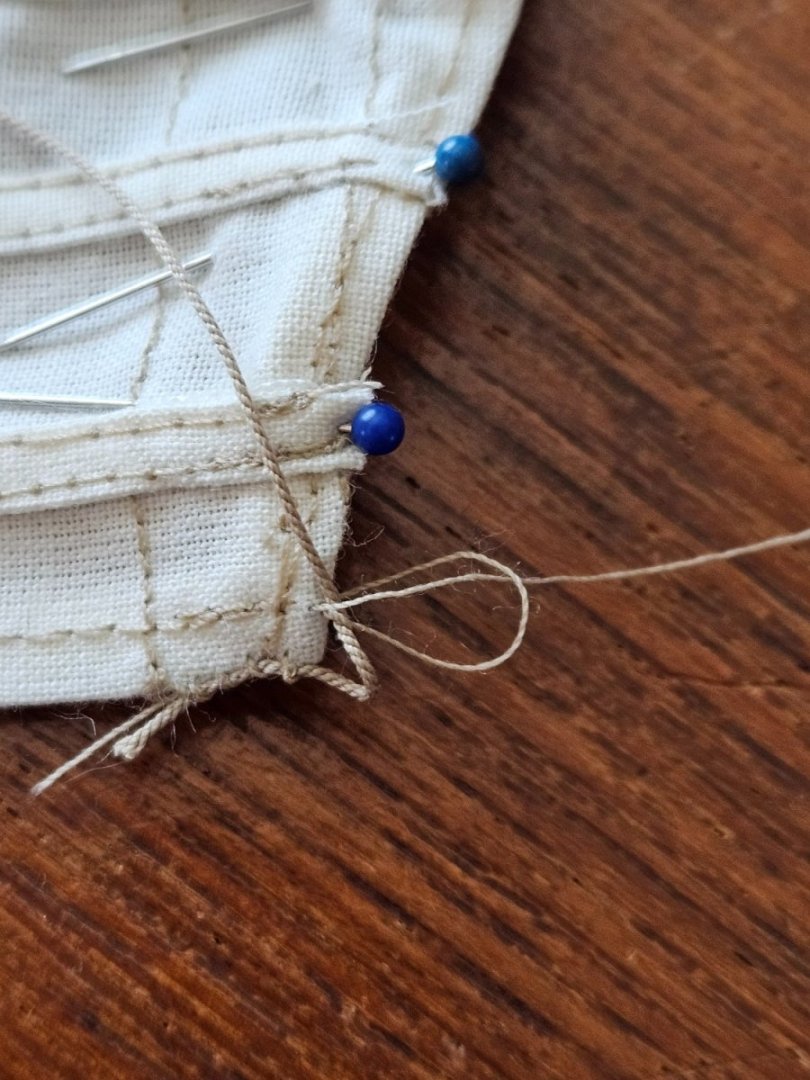
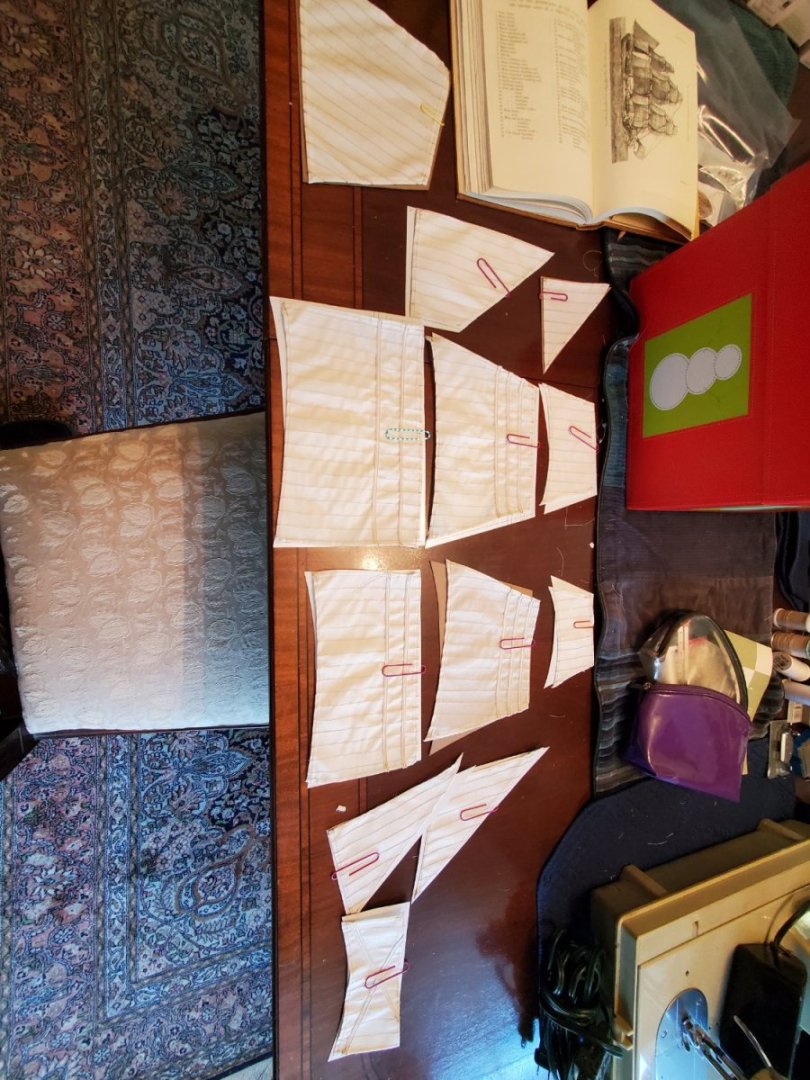
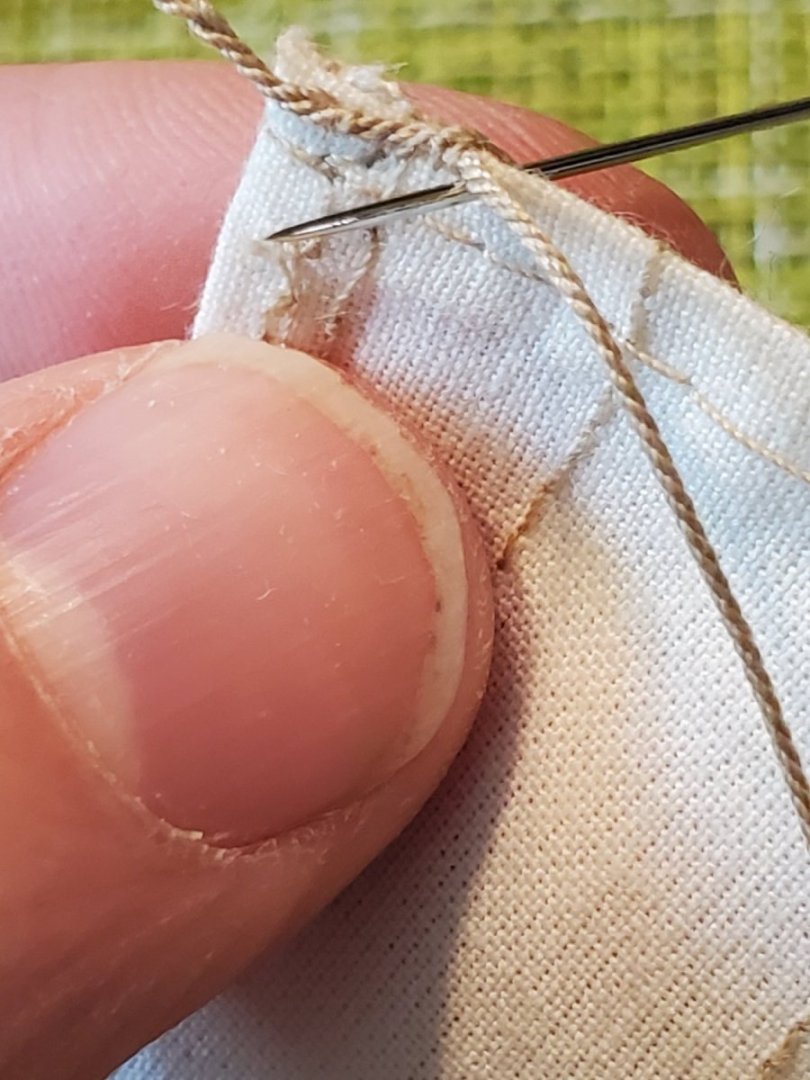
Sail progress on Fair American Model Ship. Its been a month, and I'm happy to say all the sails have been sewn up! Machine sewn that is. The reef bands were a little tricky, since they were so narrow. Keeping them straight, while sewing proved difficult, since the band liked to walk as it was sewn, but we got it done. Keeping them pressed in my music book worked well, they held shape nicely. One row of stitches down the middle didn't look right, and on the Rogers Model, the reef bands had two rows of stitches each. Obviously its a bigger scale model, so there's more room, but I liked the look, and they turned out nice. I followed Steel's for guidance of reef band number and placement per sail. This Fore Course needed two bands, not one as per the TallShips printout I had. After they were all 'banded', I laid them all out - you can kind of see the shape of the ship in there. The next thing needing done, was (hand) sewing on the bolt rope. This is also used to create the cringles. Obviously I have years of experience sewing bolt ropes, so I knew just what to do. So I started with a tiny test sail we used for practice. Basically I'd whip stitch under the rope, near the very edge of the sail.... Go over and under again, then under the loop to create a knot. Then continued along the length in equal spaces I also practiced creating a cringle. I'd hold the rope with my thumb... Then sew through the rope and sail, and make another stitch Its not bad for a practice, and I got more proficient as I went along Originally, the rope would 'lean' fore or aft of the edge. I wanted it on the very edge. So I found that keeping the unsewn rope on the fore side, while starting the stitch from the aft side, resulted in the rope staying right on the edge. So I kept going. It looked pretty neat, in the end, so I was happy with it. I found it ironic that the dinning room table, which had ample light, had green loose woven placemats nearby. I managed to do pretty well with the corner cringle too. At the head of the sail, this cringle is called an earing. Hand sewing takes a LONG TIME. Once I started with the real sails, I didn't change my stitch spacing, but BOY is it tedious now. Now to get started.... - Jason -


-
Really nice work. Don't discount all the valuable learnings you've made along the way. These are really challenging to get right - I admire the fact that you've made it able to swivel - really impressive.
-
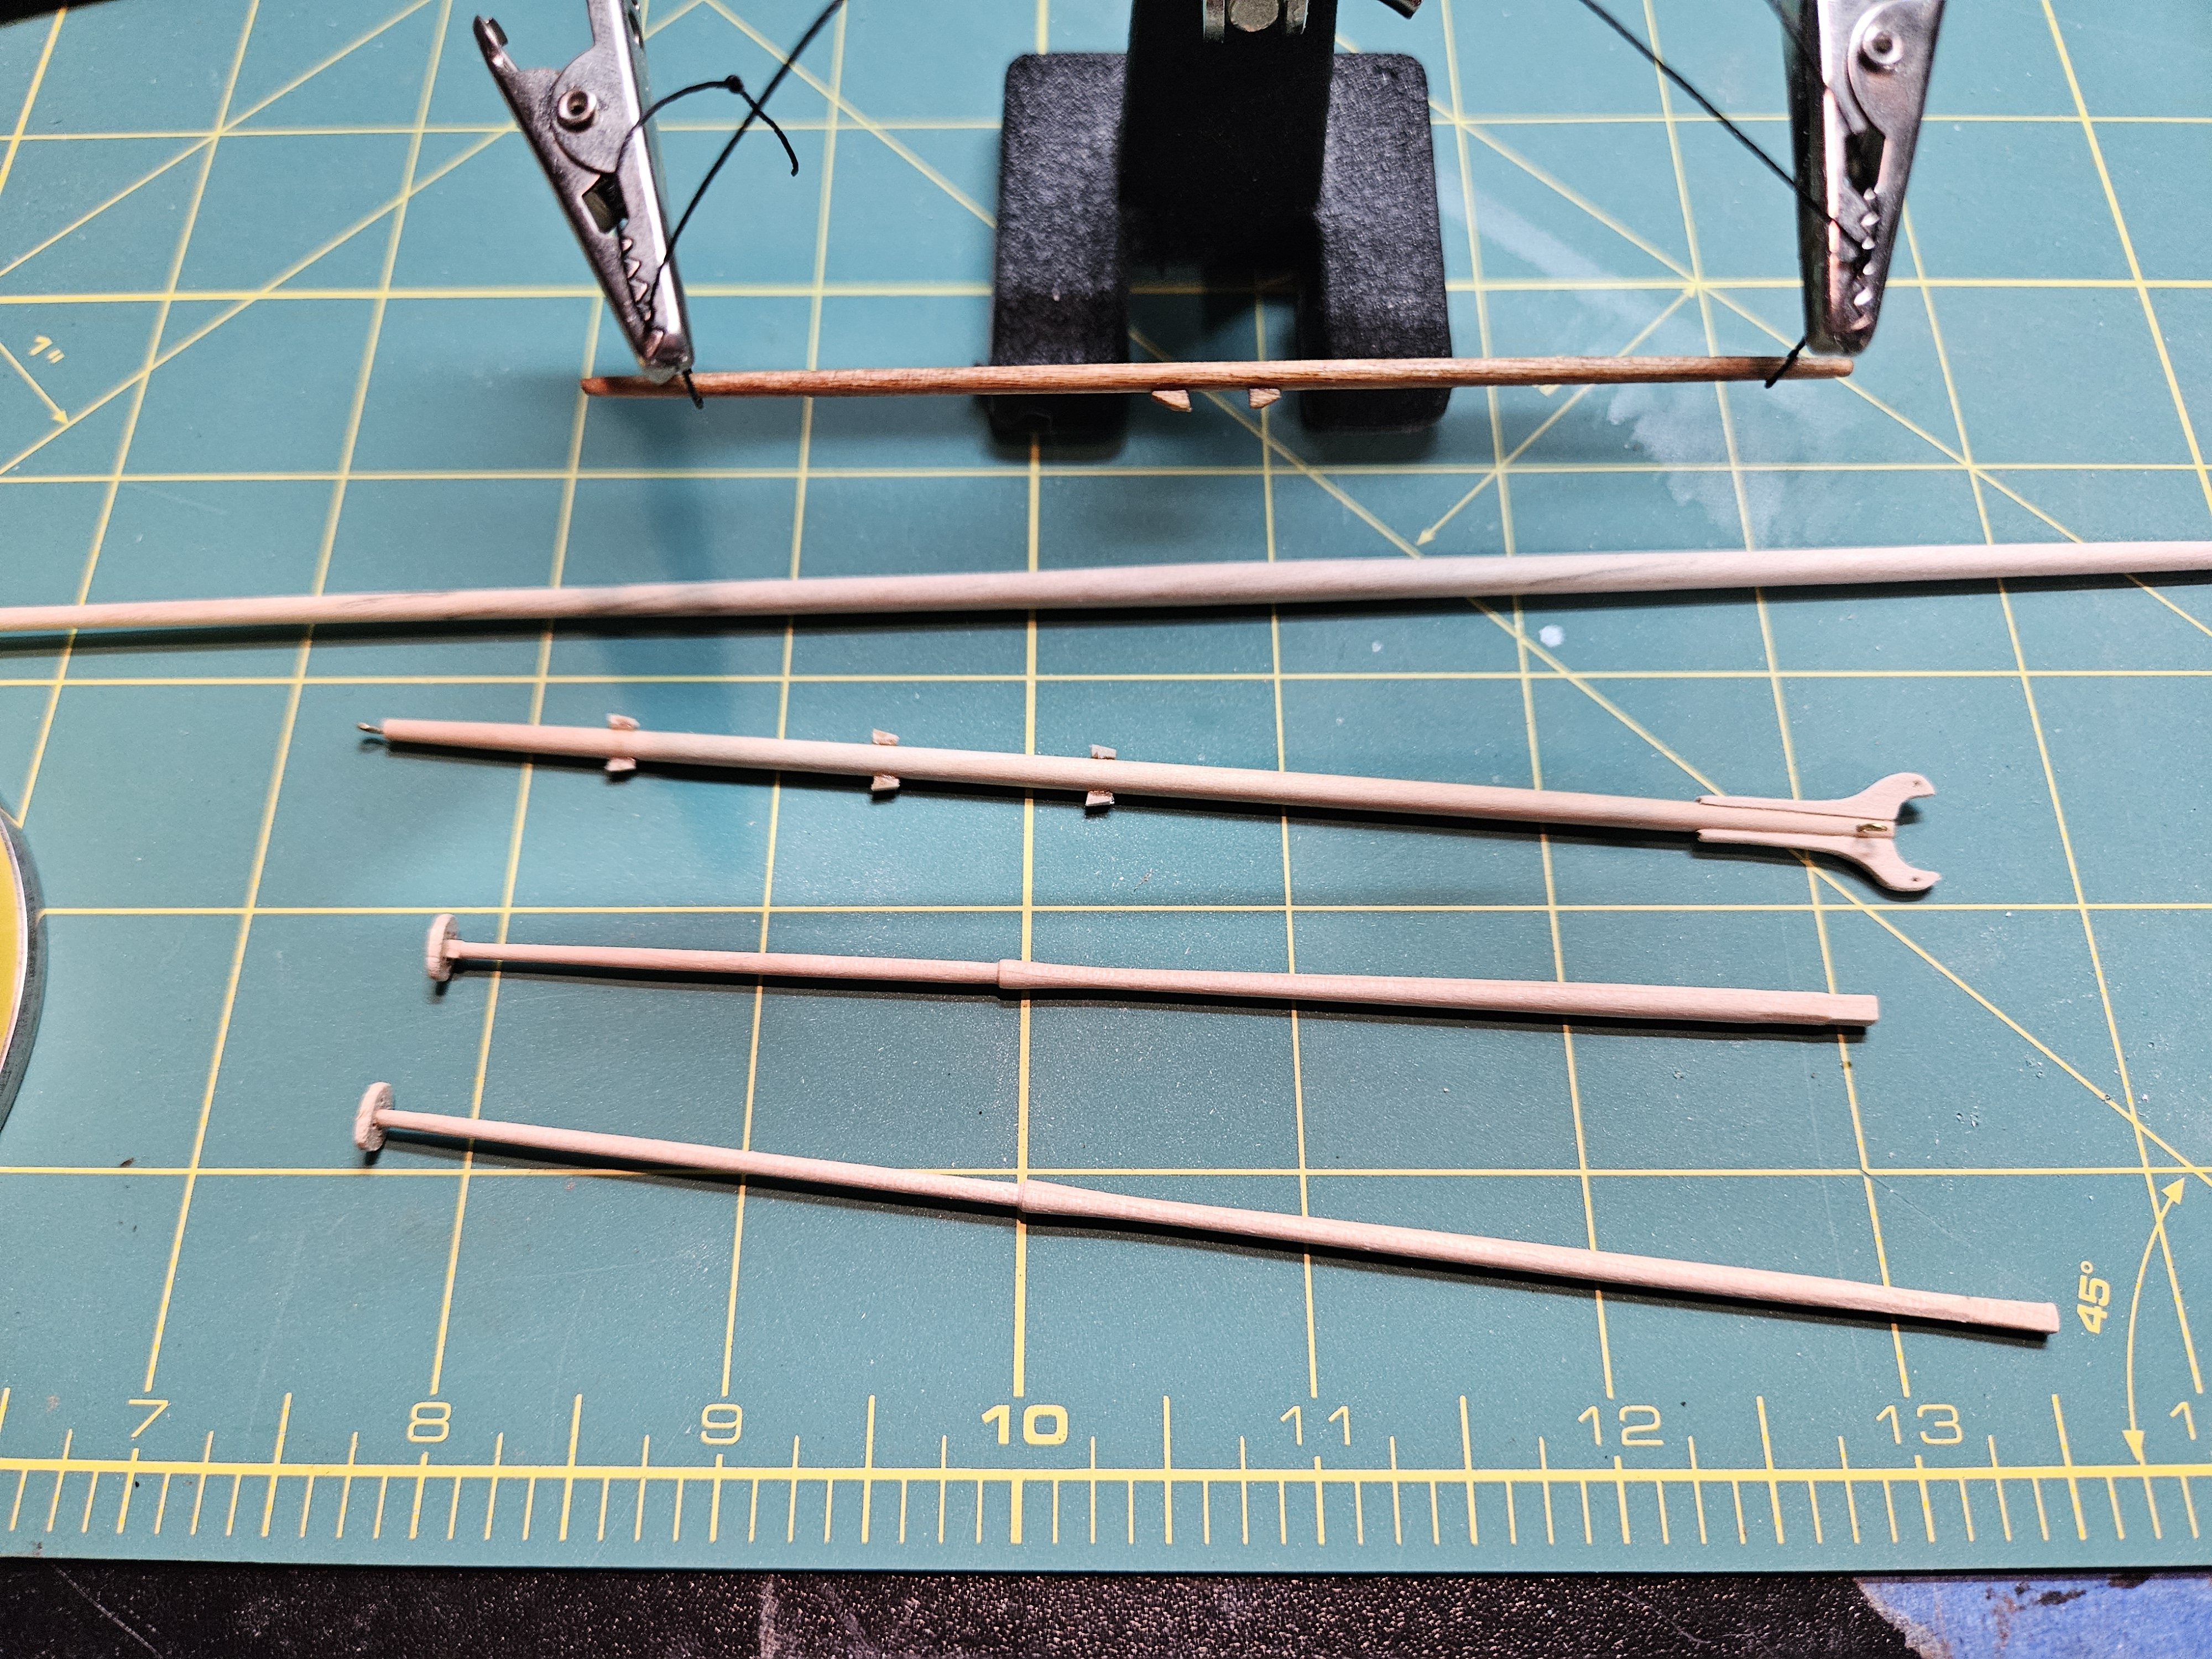
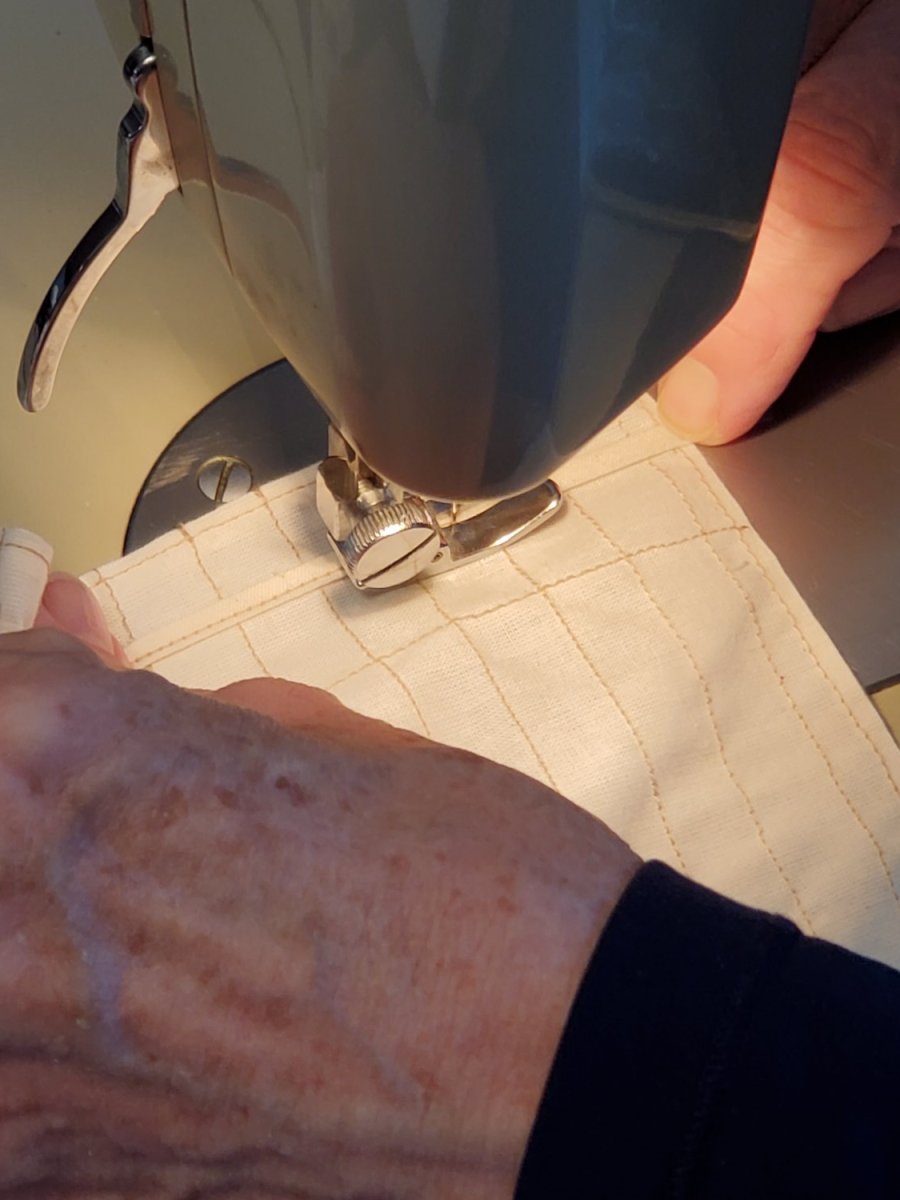
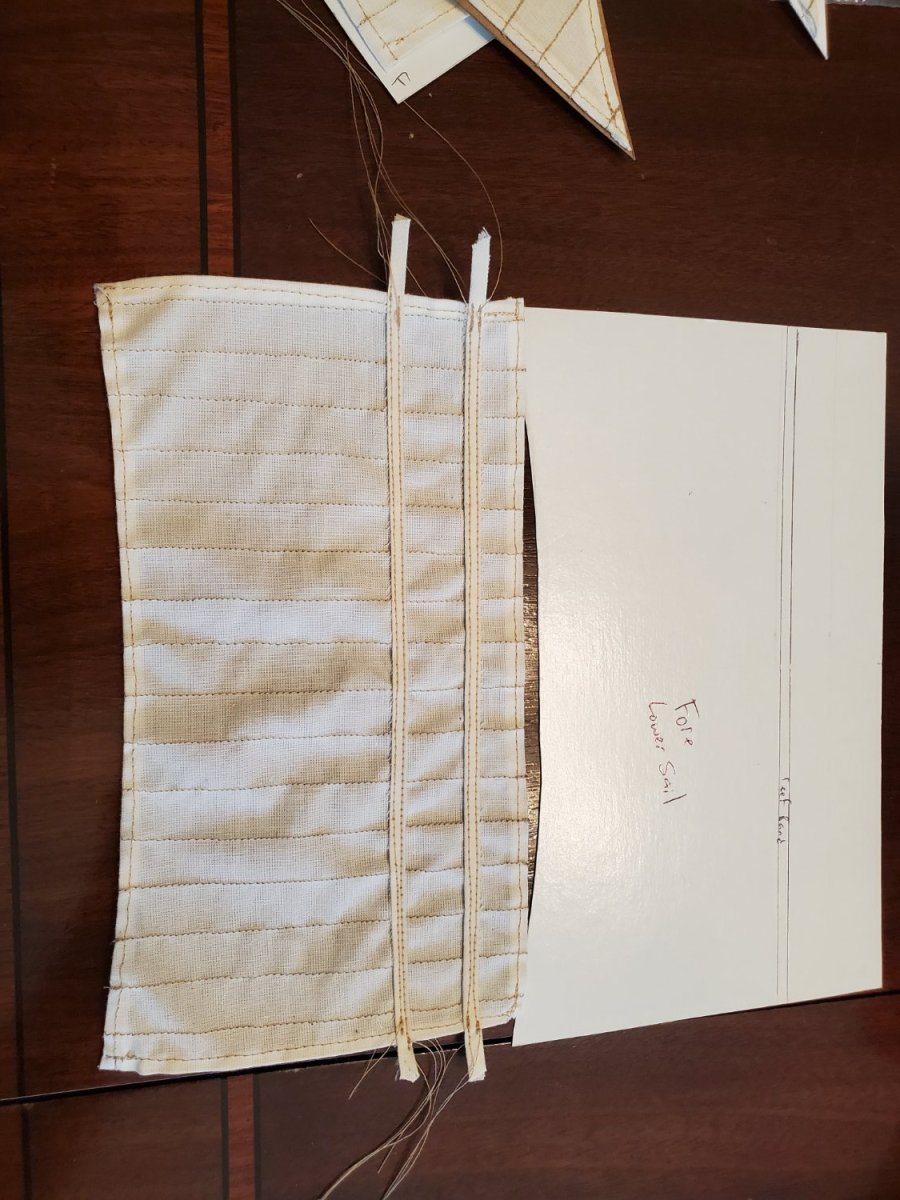
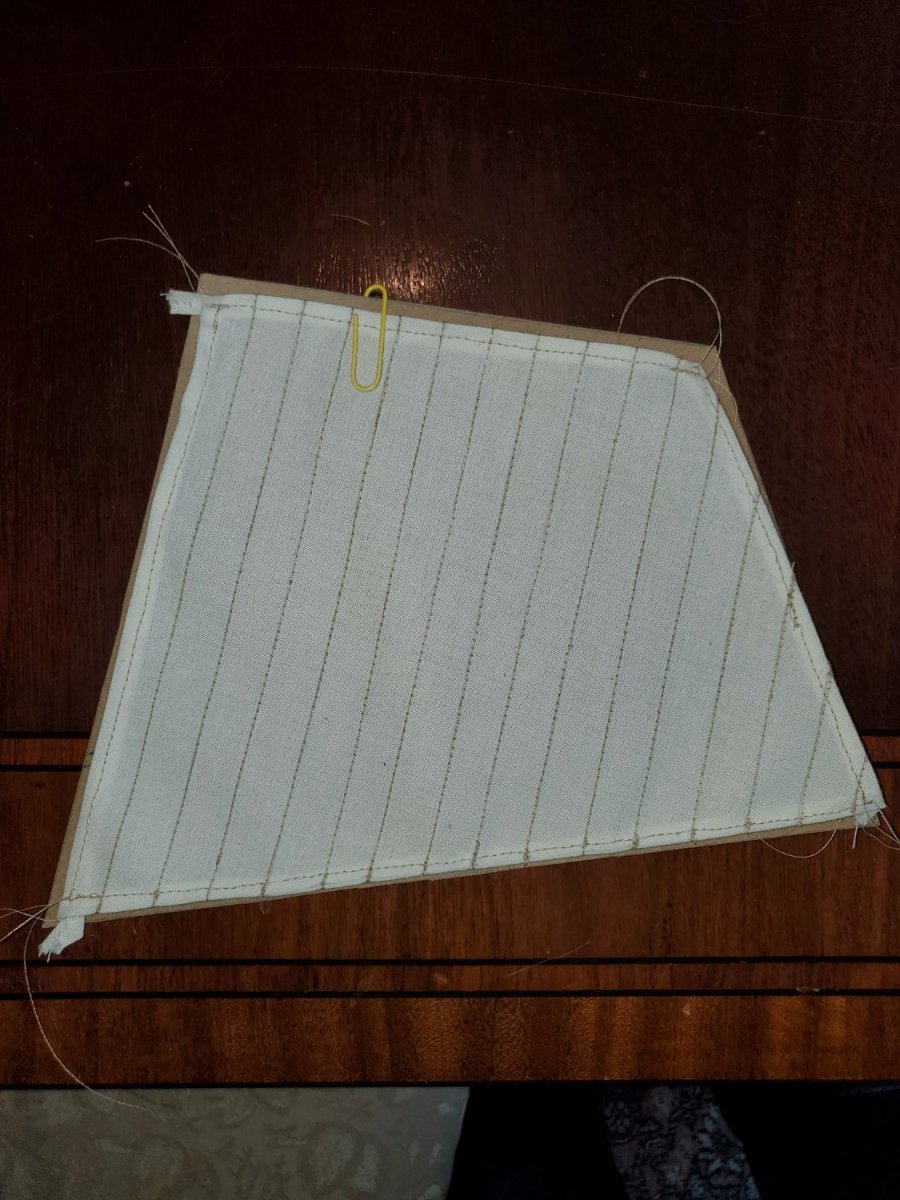
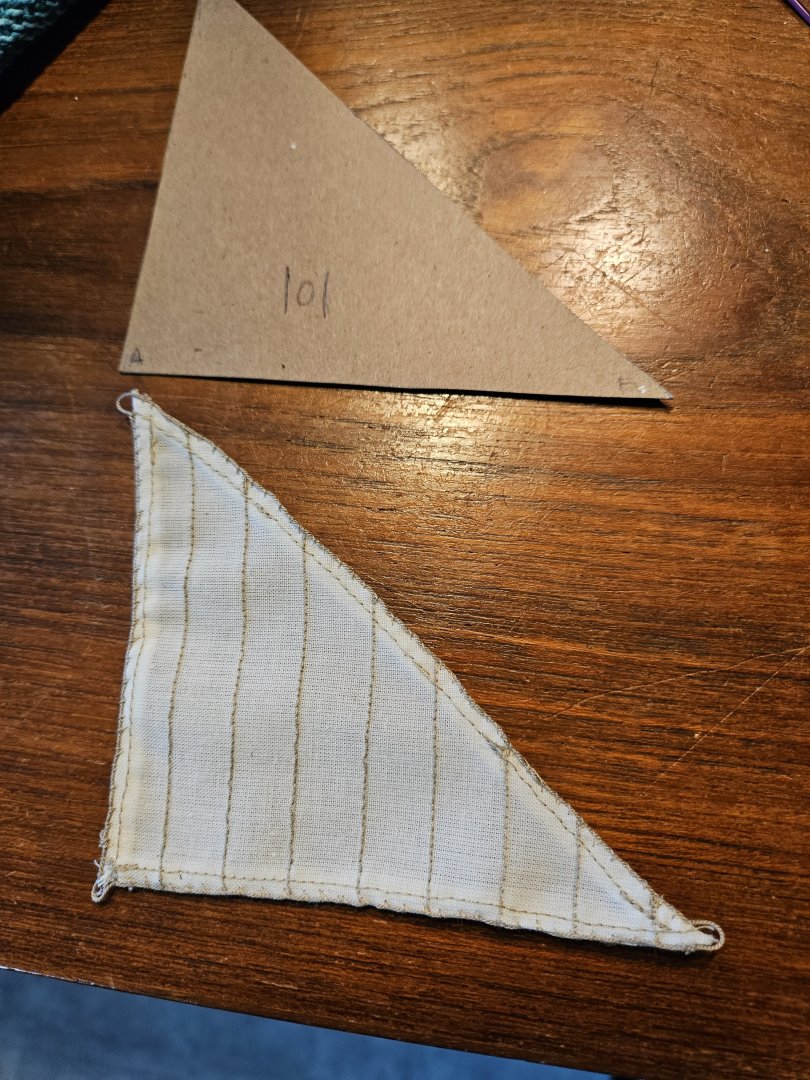
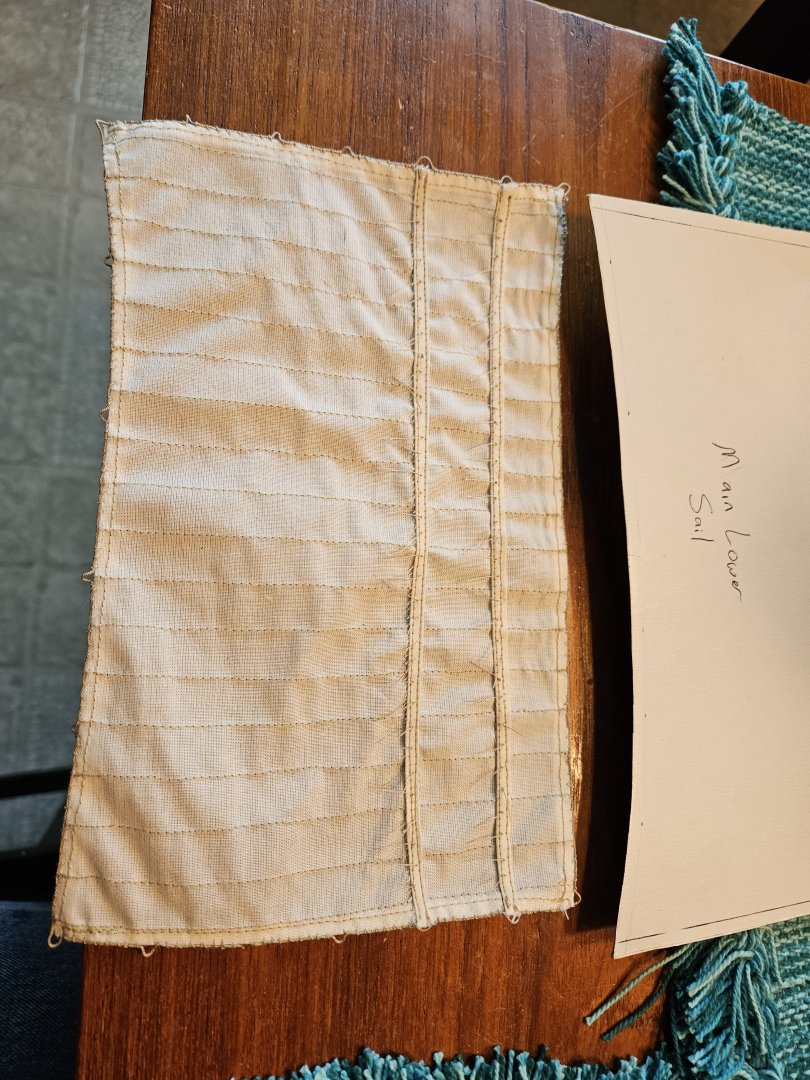
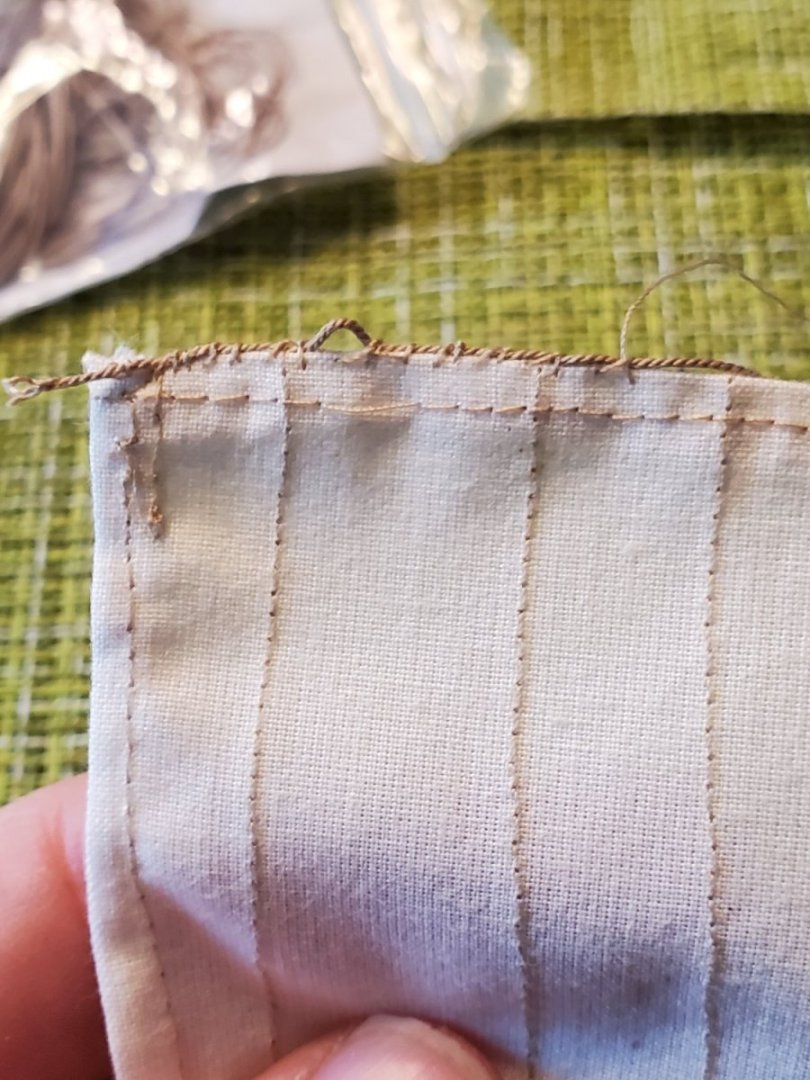
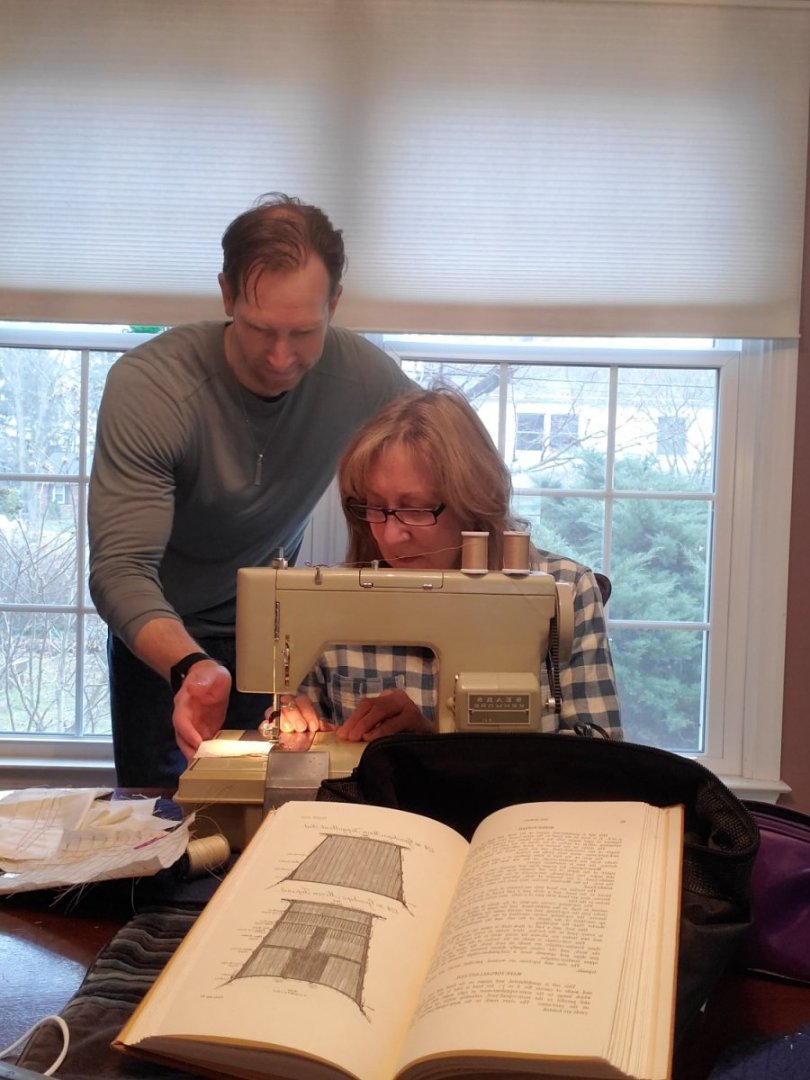
Somewhat smooth sailing with sail making on the Fair American Model ship... As time has allowed, Jane and I have , well mostly Jane has made significant progress with sewing all the sails with me. I've kept referring to Steel's along the way, trying to be somewhat representative of sizing and shapes. She spent the last week sewing all the seam lines on all the sails - tedious work, but she did beautifully. We kept each sail with the cardboard stencil so we knew which was which. After the seams were sewn, I'd hand fold the tabling(s), which was really difficult at times with trying to keep them neat and small. Afterwards, I'd iron the folded tabling, then hand it over to be sewn - literally hot-off-the-iron. Folding over previous tabling proved challenging, especially on the old sewing machine. I wasn't really sure how to terminate them, exactly, so they turned out a little mashed, but acceptable. You definitely have to watch out for the 'flying nernies' as she said. The end result is quite attractive. For some of the leech side tablings, I tried to cut and fold the ends flush with the head/foot tabling. With angled sails, this doesn't always work. But with some, like this top sail's top corner, it was very 'neat'. Another issue that kept coming up, was missing stitches. If you look closely, between the first and second reef band lines, on the right table, there's one missing stitch. We don't know why this happens, but some had to be cut and resewn. It was very frustrating, and unavoidable, in some cases. But we kept trucking along, and got them all done. In fixing missed stitches, Jane was so skilled that she was able to sew over existing stitches, to where they blend in. You can barely see it! After each sail was sewn, I'd trim all the ends with rigging scissors as close as possible. Some of them had to be hand stitched to close the ends, but not many. I even had some time to work on the Main Boom and Gaff. I kind of had to eyeball the jaws for the Gaff. I left the tapered end thick, then once it was glued, I sanded it down to a smooth taper They turned out okay, for the most part. The cleats were a little tricky, as small as they were, but I got it done. After they were glued on, I also filed them down a little bit so they weren't so bulky. I still need to stain them, eventually, but that'll be another day. The only thing that remains on the sails is the reef bands, and sewing the bolt ropes on, and creating cringles. Then I'll be able to start rigging them to the yards. Seeing the final product, or close to it, with the sails has been very rewarding. It took some time to plan, but was worth it. Not sure if any of this is best/good practice for sail making, but hope this gives other modelers an idea of an approach anyway. More progress hopefully soon! - Jason -


-
Hi Chuck. Thanks for all the kind words. I wanted to challenge myself with this build, and LITERALLY learn the ropes, so I'm doing as much as I can, and test my skills. Regarding the stropping, you can see from Dec 12, 2023 post, I use black rope (either .012 or .018). With hooks, I'll typically overhand knot the hook, CA Glue it to the top of the block so it's tacked. Then wrap the rope around the bottom and overhand knot again, pulling in opposite directions so it's neat (Dec 12 post). CA Glue, let it dry, then snip super close with rigging scissors. Hope that makes sense. I do wish the block quality was better yes. Syren blocks are really nice, but I won't change type mid-build at this point. I did buy all Syren ropes though - they are really high quality. Next build I'll get better blocks, or a better kit. I appreciate you following along so far! -Jason-