Lecrenb
-
Posts
275 -
Joined
-
Last visited
About Lecrenb

-
 JacquesCousteau reacted to a post in a topic:
St Roch by Lecrenb - 1:48 scale - RCMP Schooner rigged as schooner c. 1930/35
JacquesCousteau reacted to a post in a topic:
St Roch by Lecrenb - 1:48 scale - RCMP Schooner rigged as schooner c. 1930/35
-
yvesvidal reacted to a post in a topic:
St Roch by Lecrenb - 1:48 scale - RCMP Schooner rigged as schooner c. 1930/35
-
Scott Crouse reacted to a post in a topic:
St Roch by Lecrenb - 1:48 scale - RCMP Schooner rigged as schooner c. 1930/35
-
AON reacted to a post in a topic:
St Roch by Lecrenb - 1:48 scale - RCMP Schooner rigged as schooner c. 1930/35
-
wefalck reacted to a post in a topic:
St Roch by Lecrenb - 1:48 scale - RCMP Schooner rigged as schooner c. 1930/35
-
Keith Black reacted to a post in a topic:
St Roch by Lecrenb - 1:48 scale - RCMP Schooner rigged as schooner c. 1930/35
-
Keith Black reacted to a post in a topic:
St Roch by Lecrenb - 1:48 scale - RCMP Schooner rigged as schooner c. 1930/35
-
Gabek reacted to a post in a topic:
St Roch by Lecrenb - 1:48 scale - RCMP Schooner rigged as schooner c. 1930/35
-
Dr PR reacted to a post in a topic:
St Roch by Lecrenb - 1:48 scale - RCMP Schooner rigged as schooner c. 1930/35
-
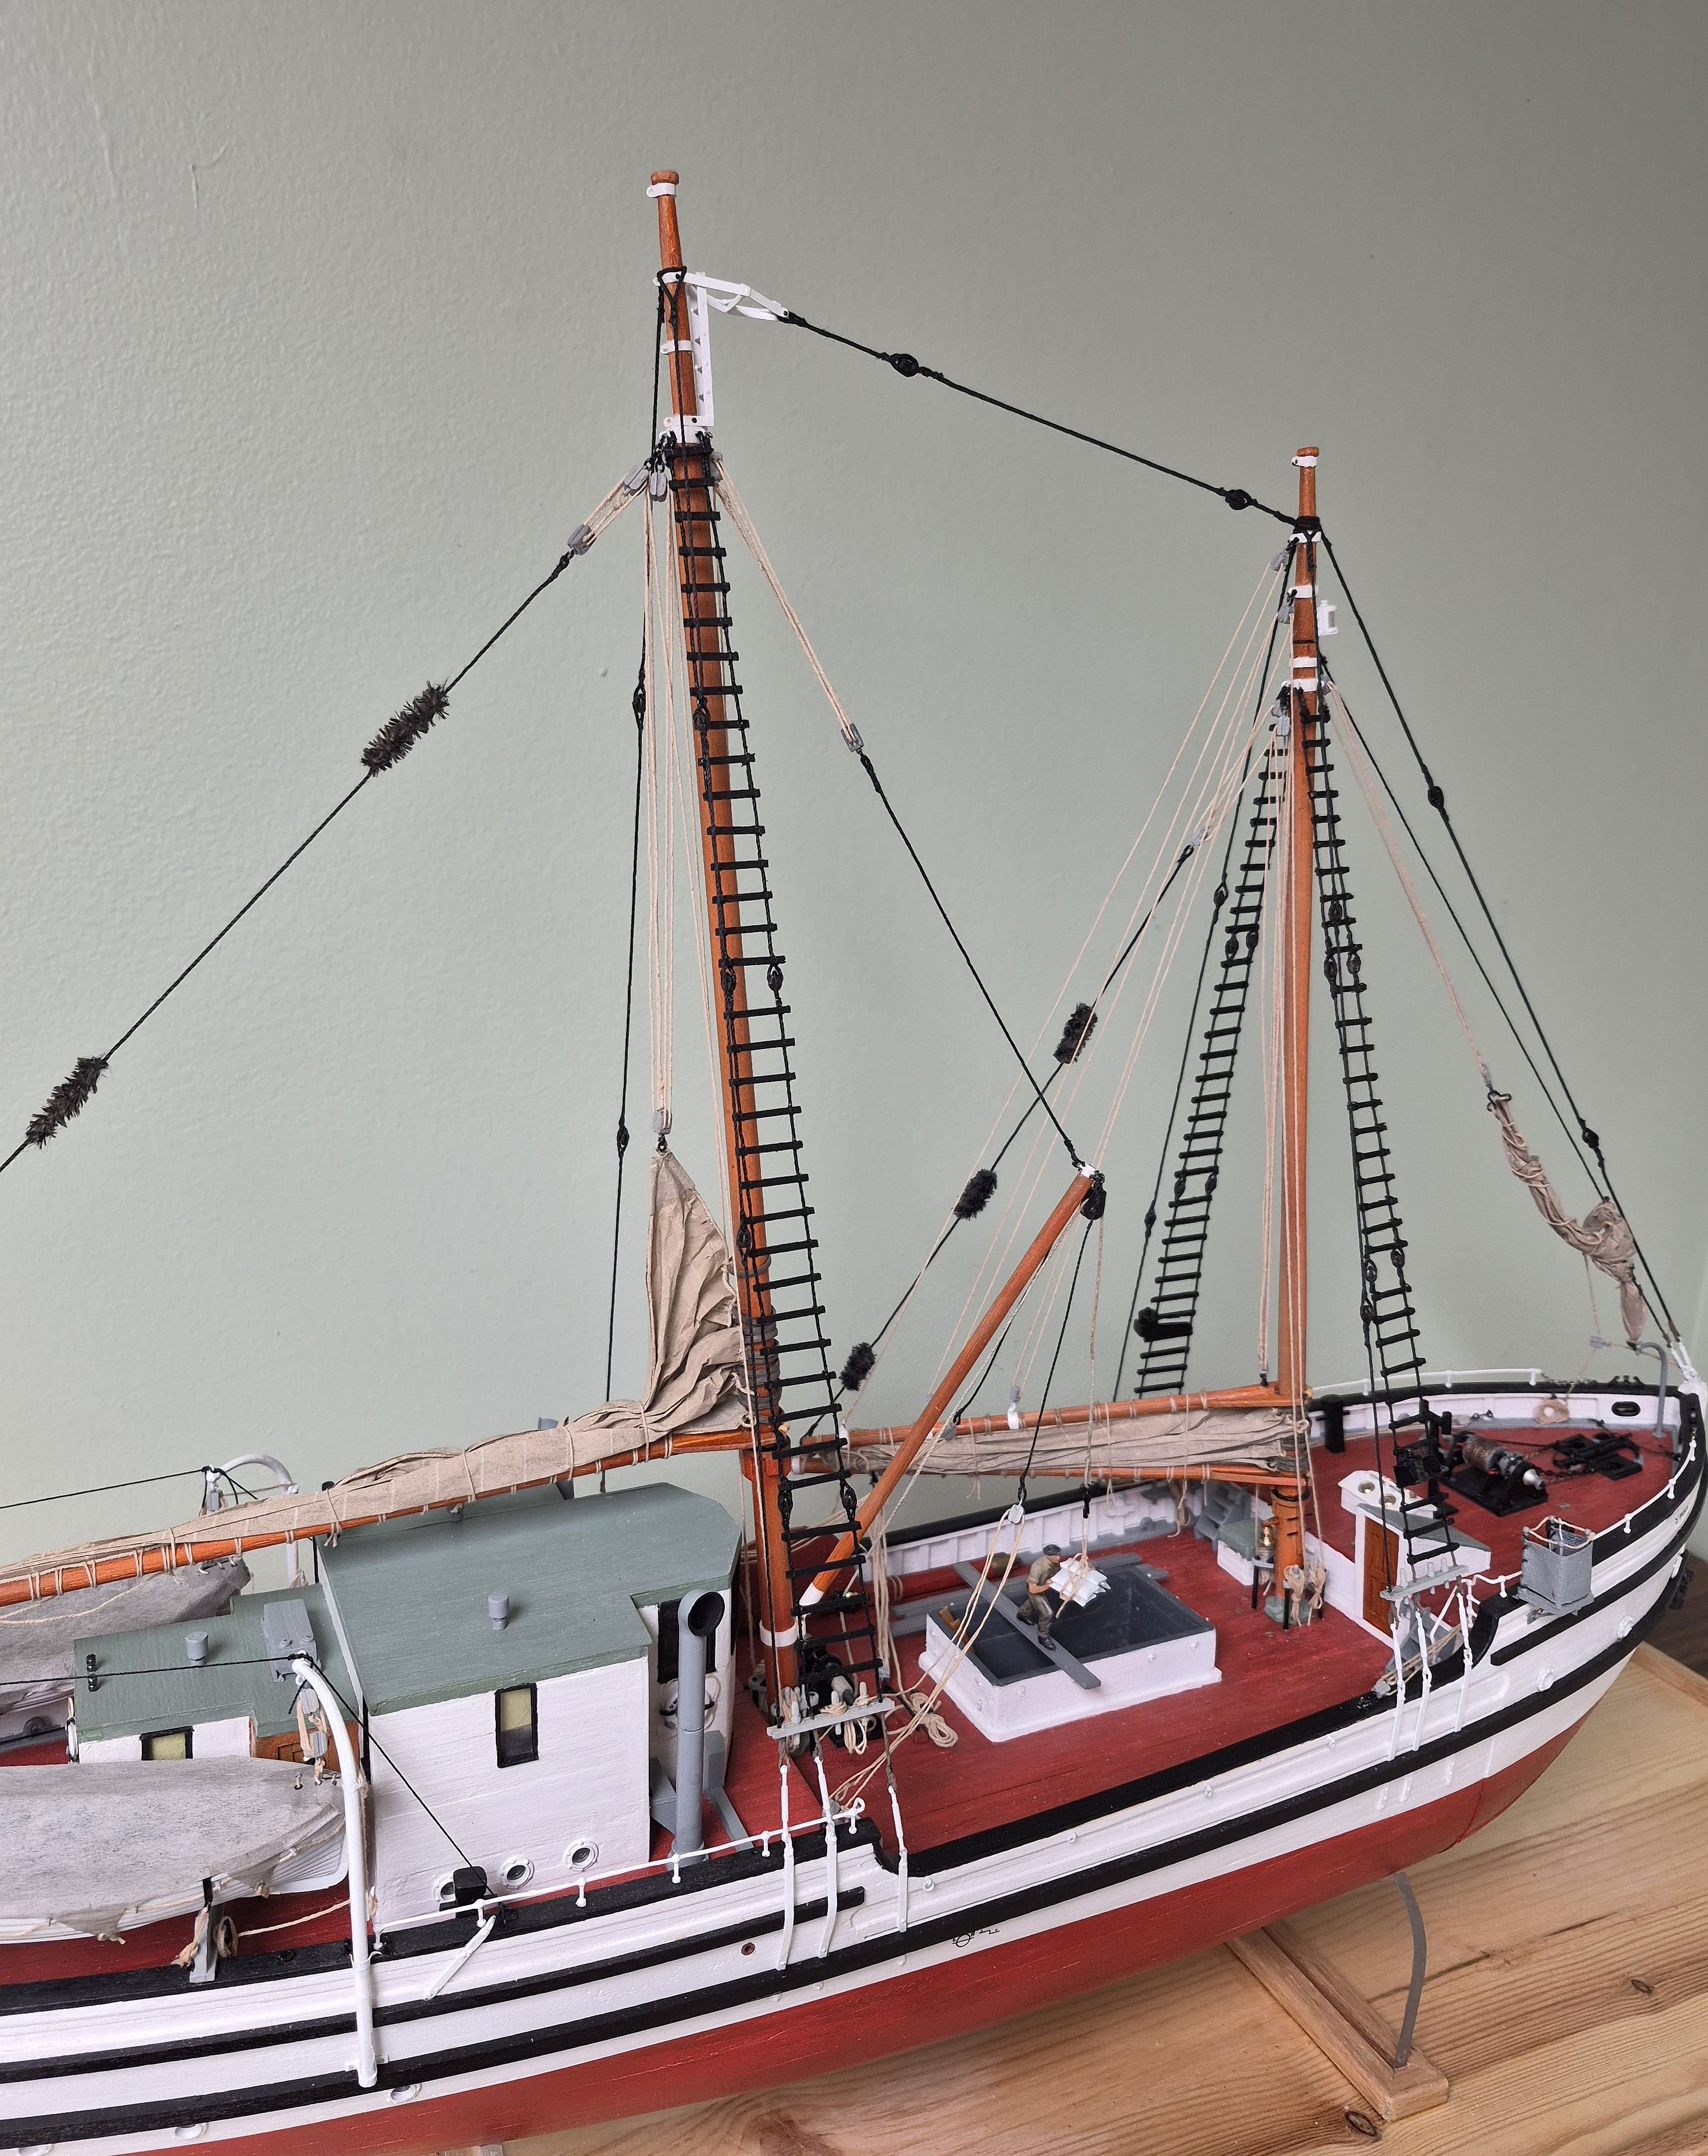
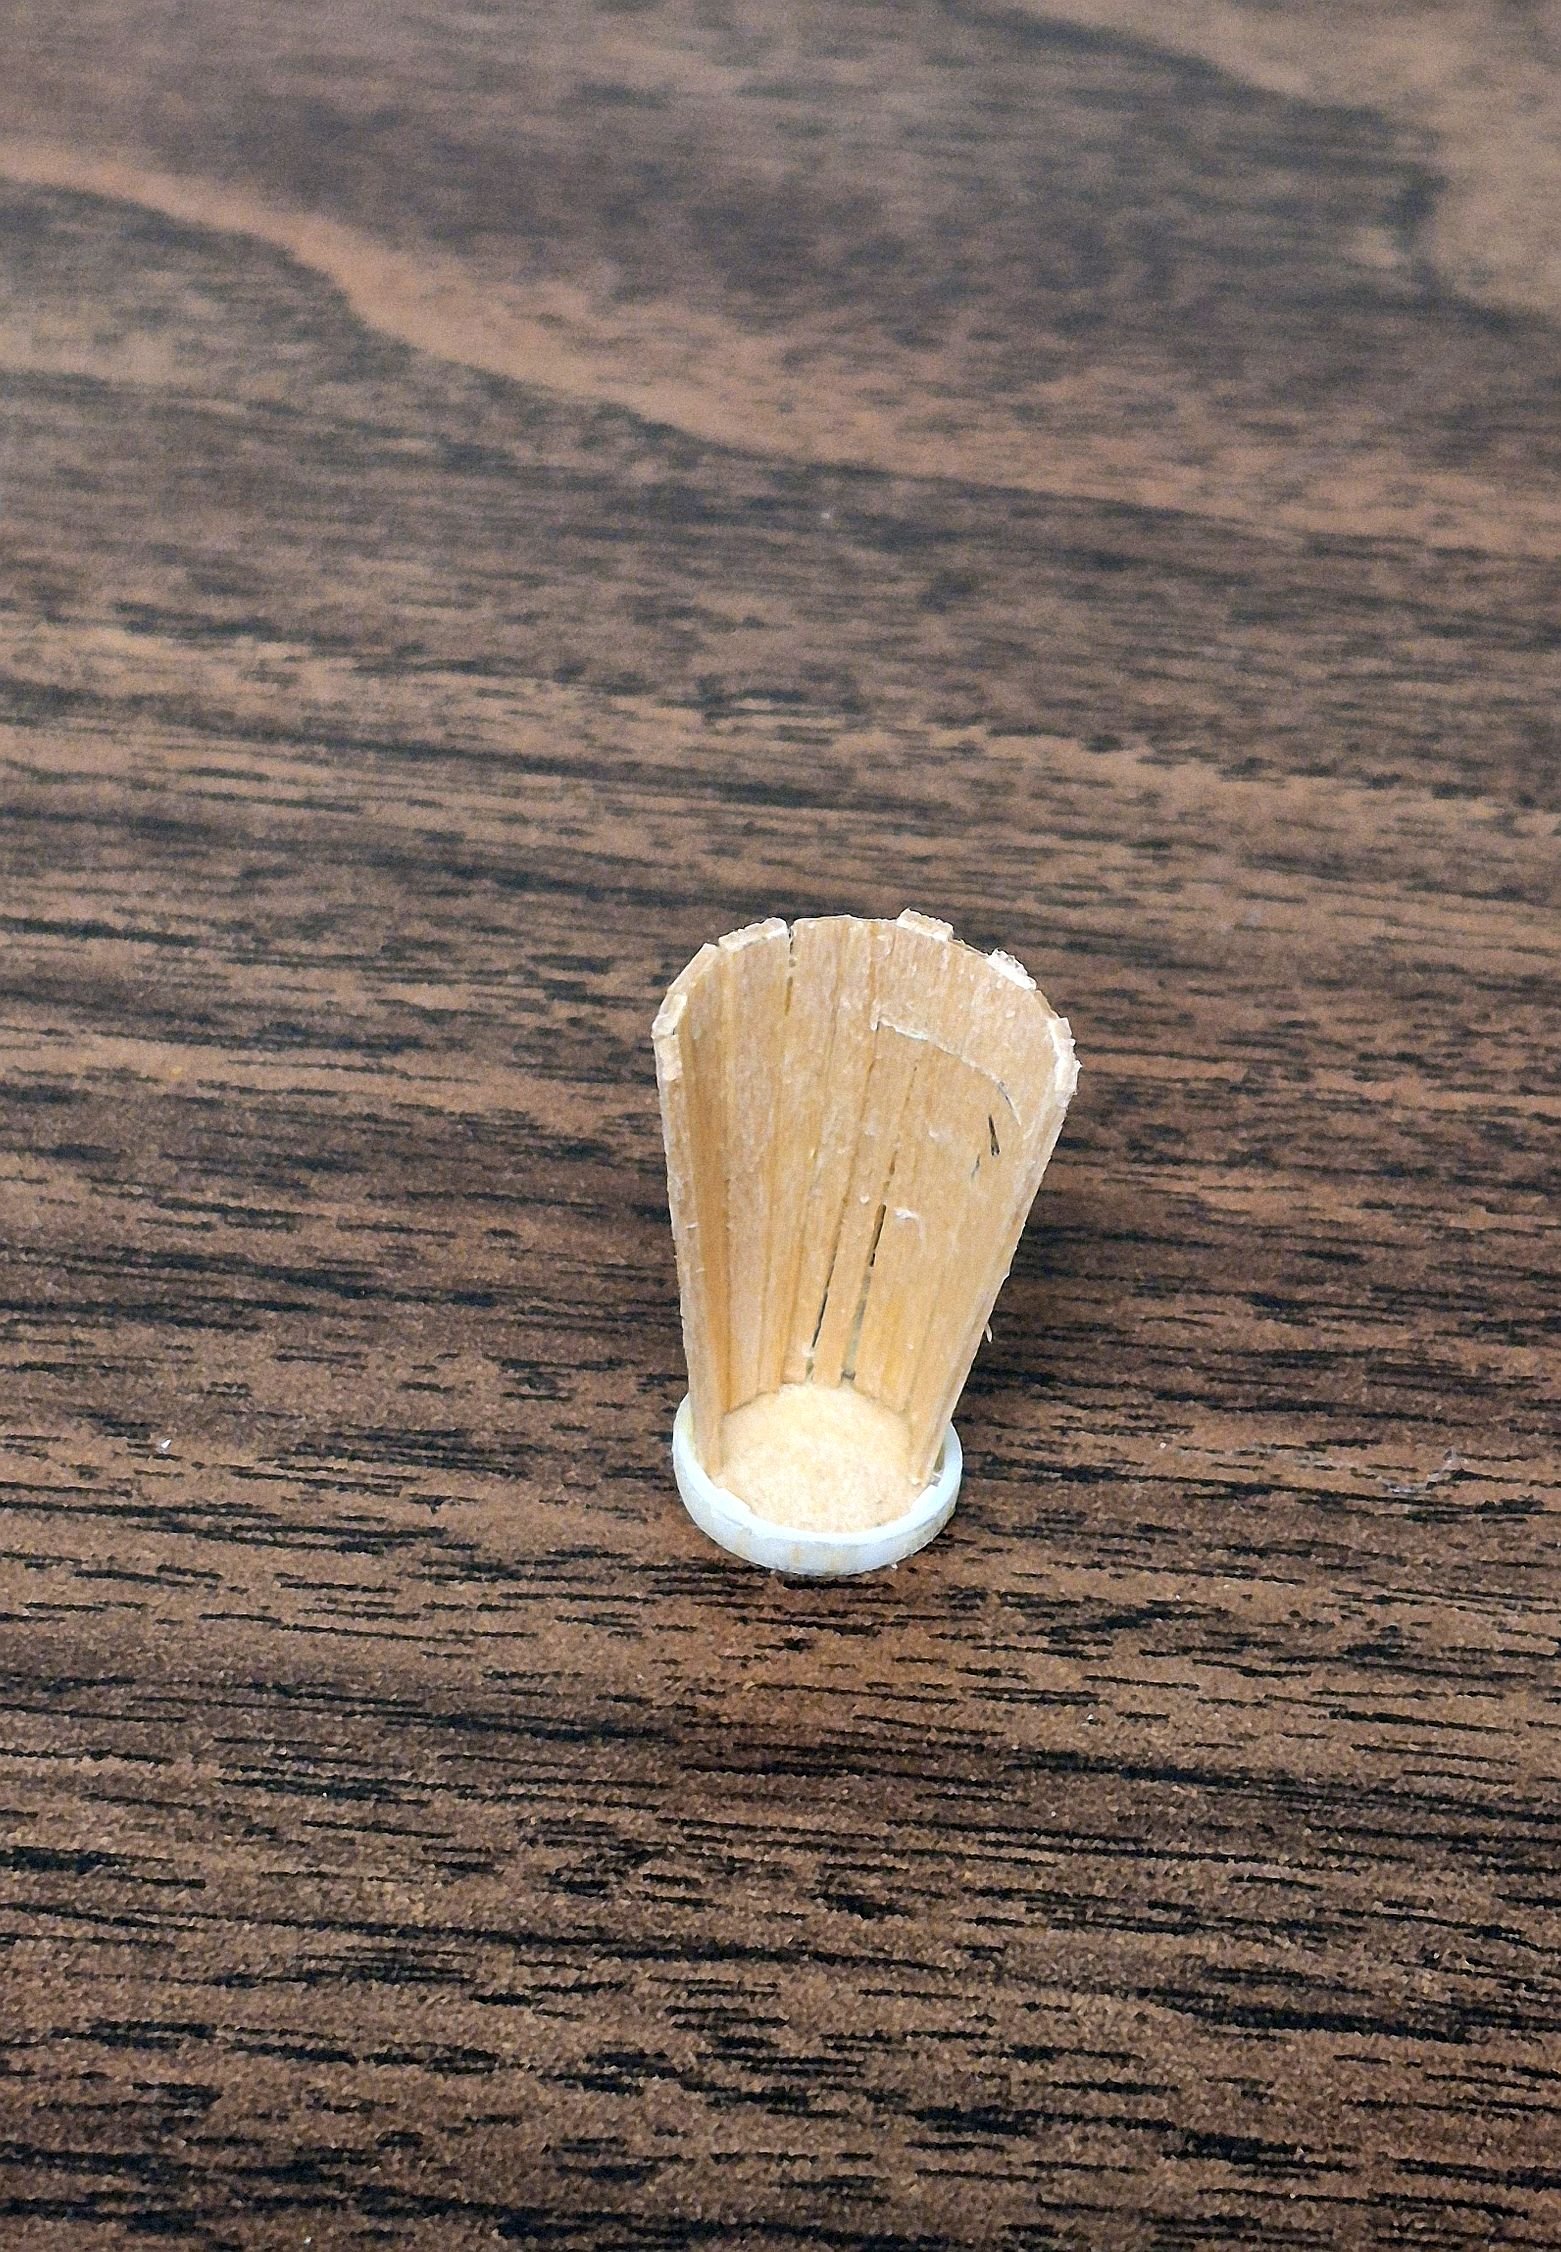
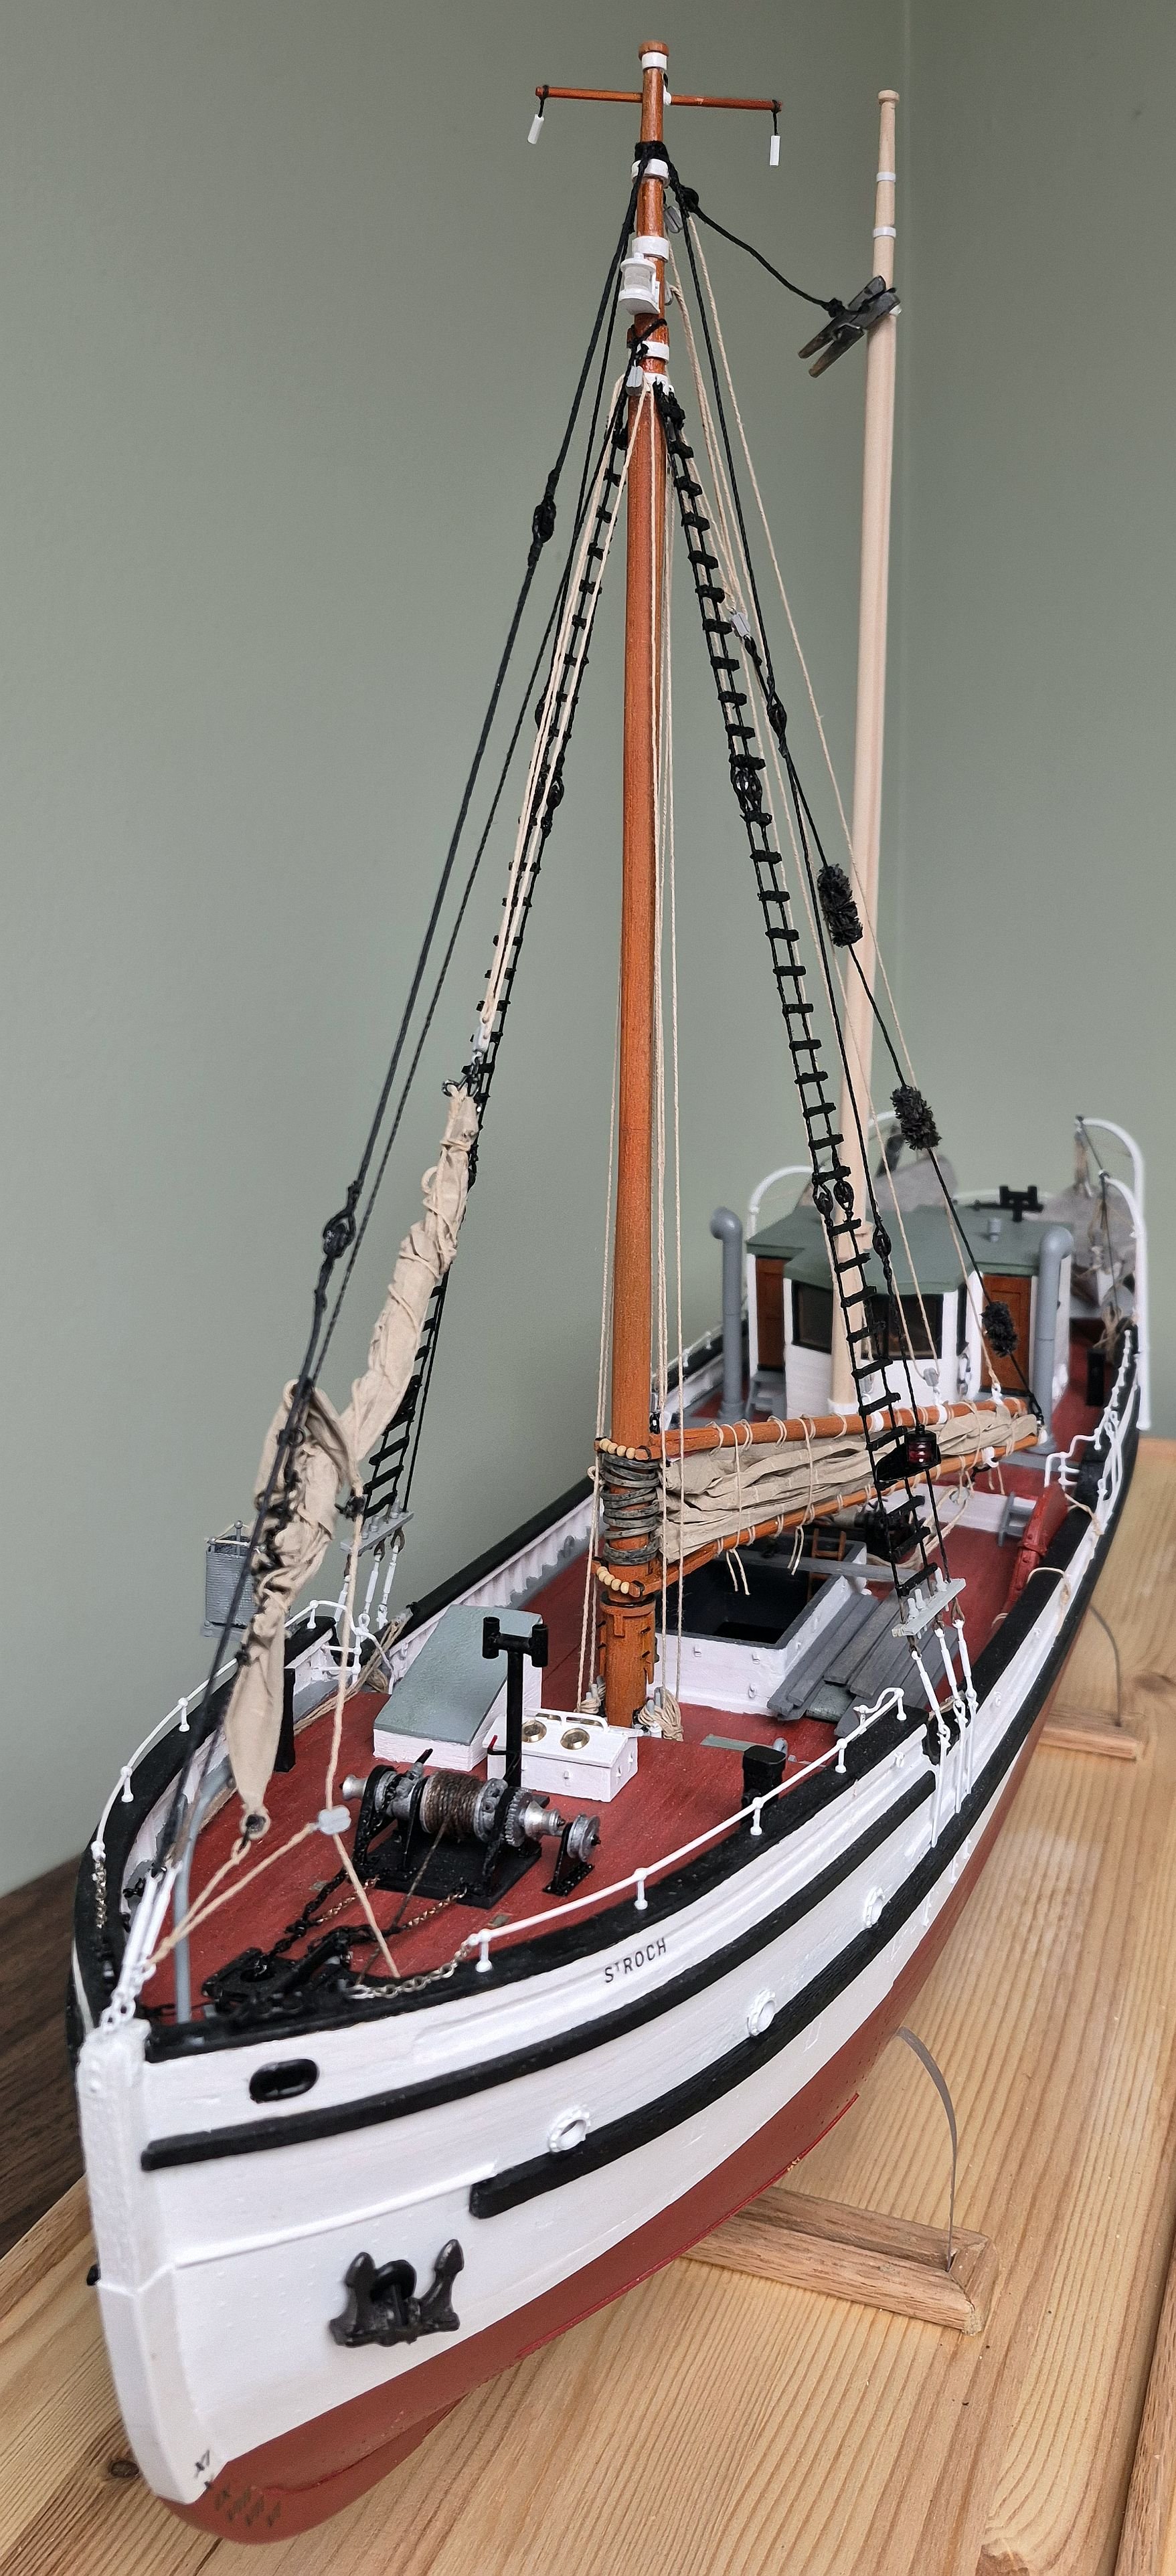
 Thought I would share my weekend's progress... too cold to be doing anything other than modelling! The starboard main shrouds are installed, with the derrick rigging belayed on that side as well... The port side shrouds are being rattled down... in between batches of ratlines I made the first of two cage aerials for the low frequency radios... This is my third attempt, the first two were crap! I took the fore yard off the mast to make things easier. I have also been fussing with the crow's nest, trying to follow the prototype photo. Not perfect but once finished I am hoping for a decent representation! So to finish these goodies off, then on to the preventer stays and the fo'c's'le deck cable reel... Thanks for following along the home stretch! Bruce


-
Thanks Gabe! Thinking good thoughts about the case, probably going with 1/8" glass because of the smaller size and the high cost of acrylic sheets in the hardware stores... Temps are climbing should be around 0 by the weekend! Thanks for all your help! Bruce
-
Gabek reacted to a post in a topic:
St Roch by Lecrenb - 1:48 scale - RCMP Schooner rigged as schooner c. 1930/35
-
Wrapping up some final details... the ensign and staff are mounted, and the main sheets fitted... The main shrouds are about half "rattled", and I'm thinking good thoughts about the crow's nest... Getting there! Bruce
- 388 replies
-
- 11
-
-
Thank you Phil!
-
Thanks Alan! The help given me by yourself and others really helped the build come together! I am looking forward to presenting my first installment of Lilla Dan's rebuilding in April, also by then St. Roch should be in her case.
-
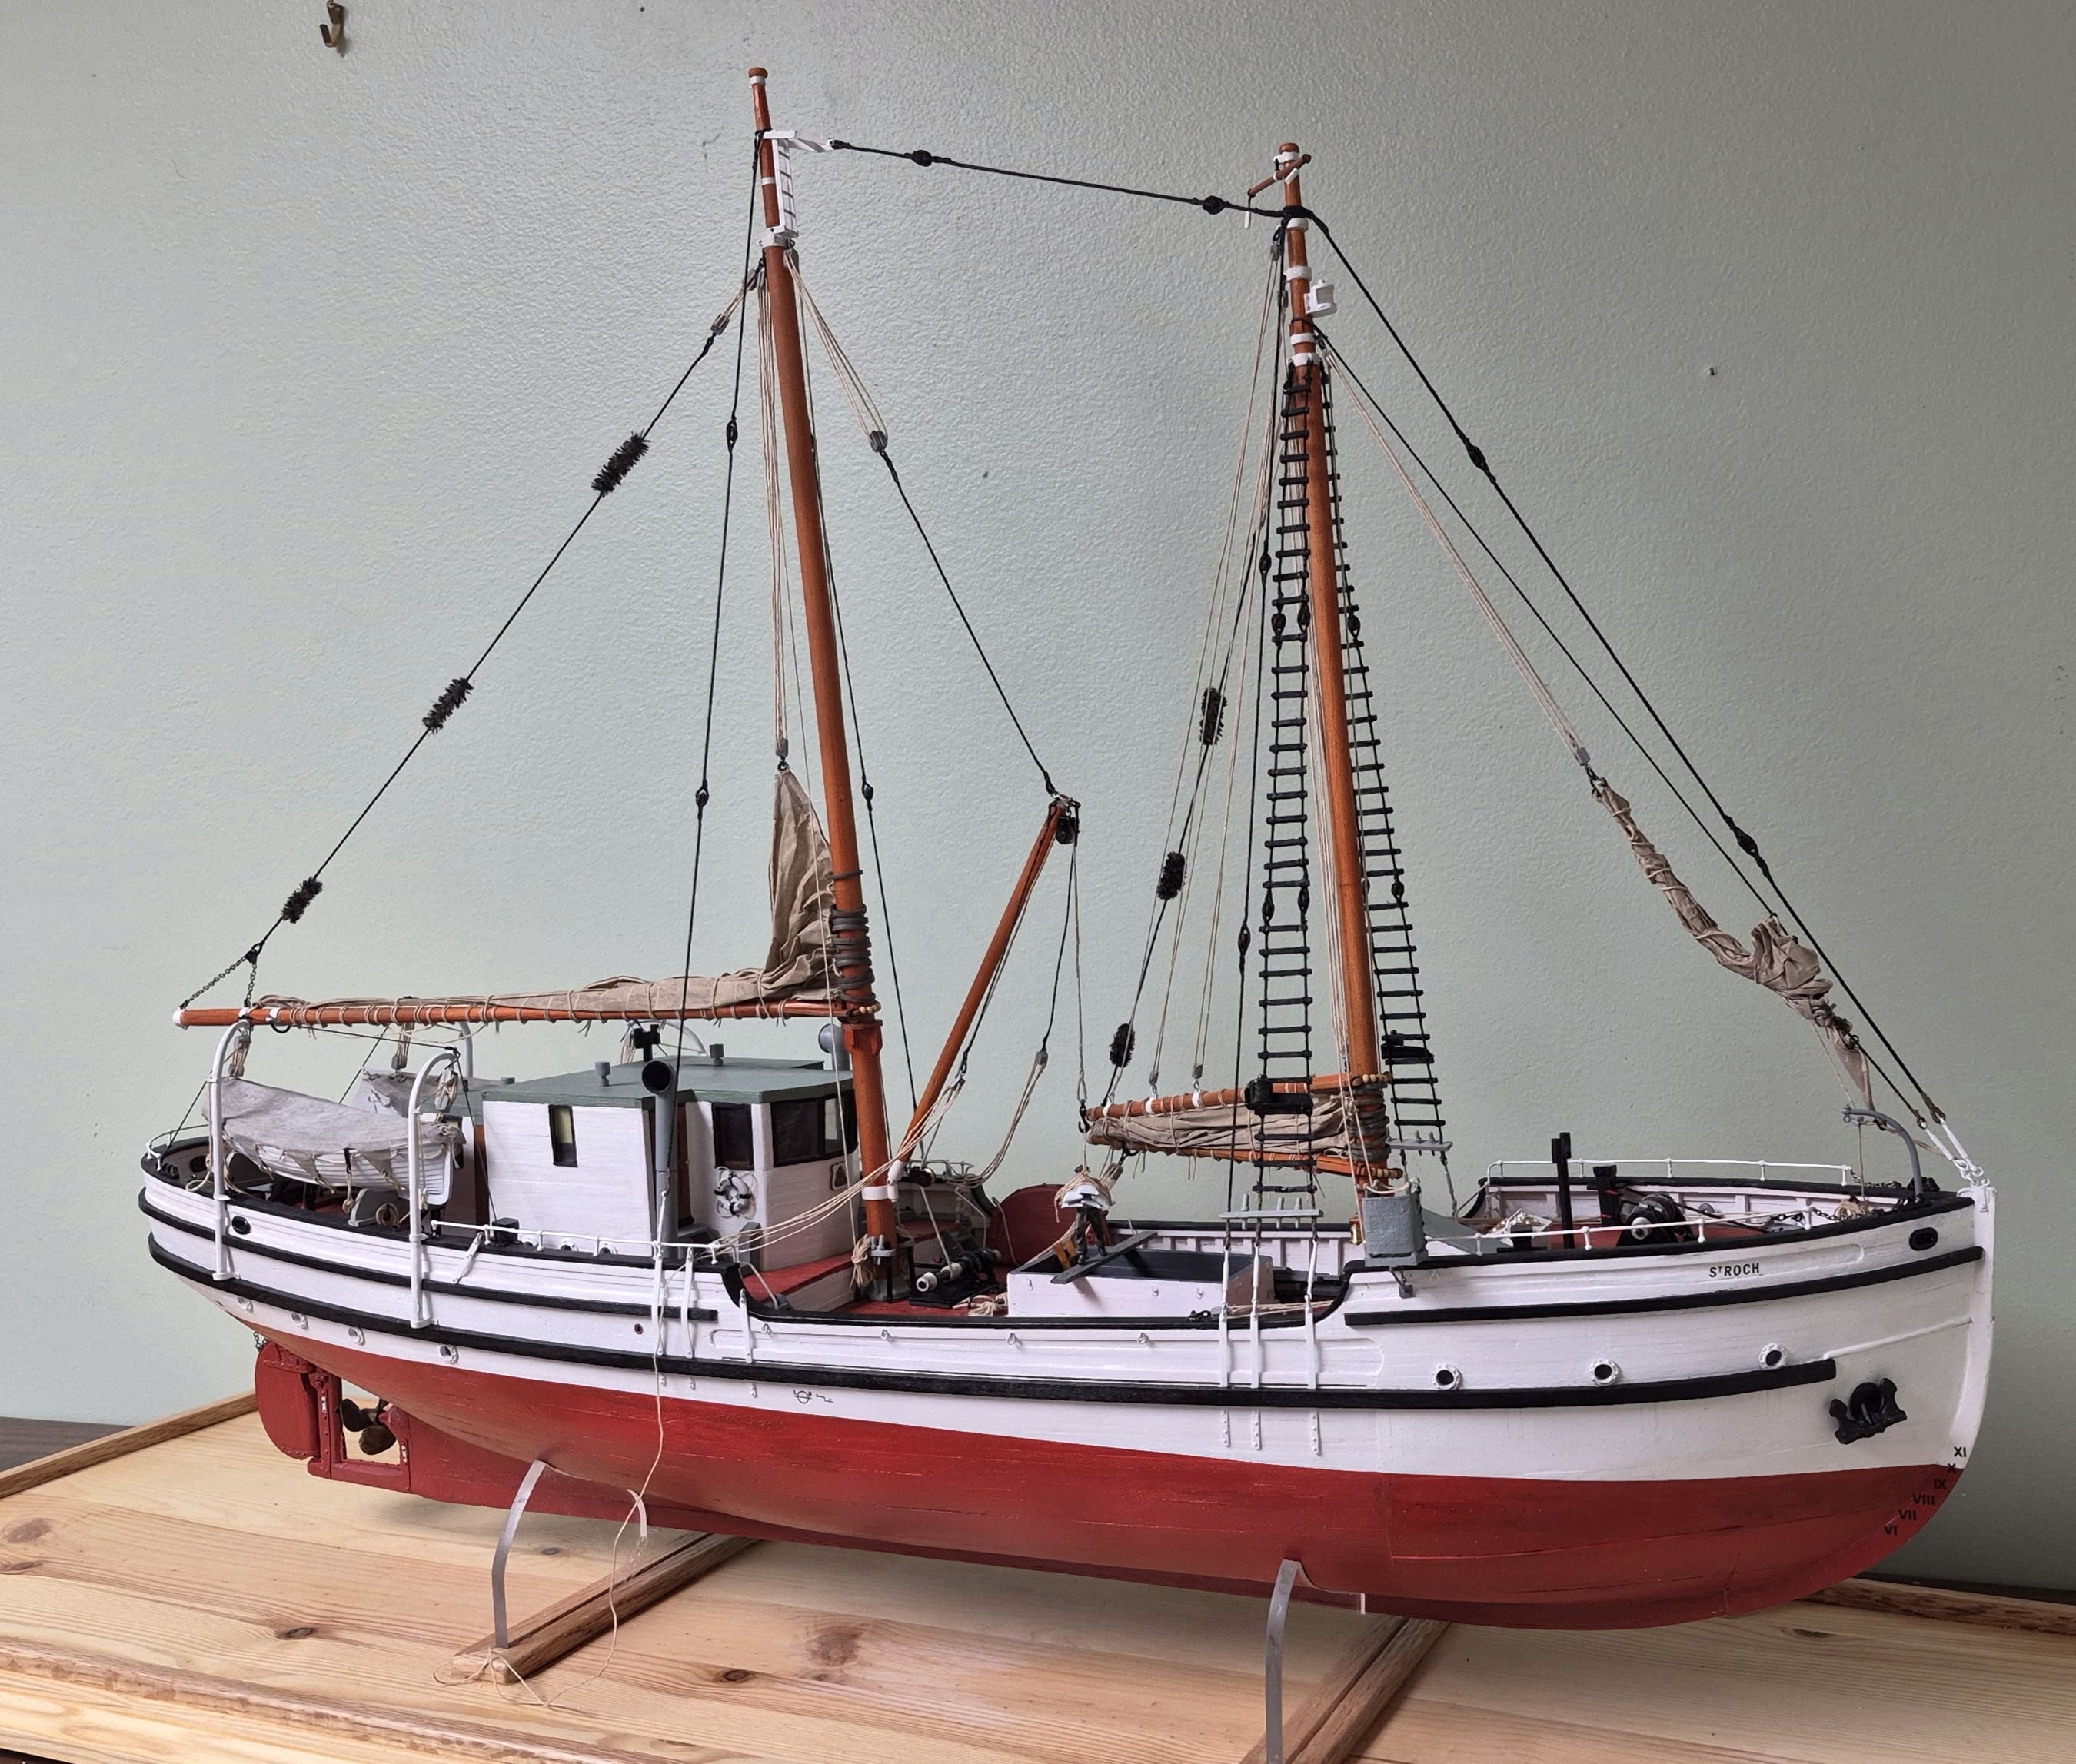
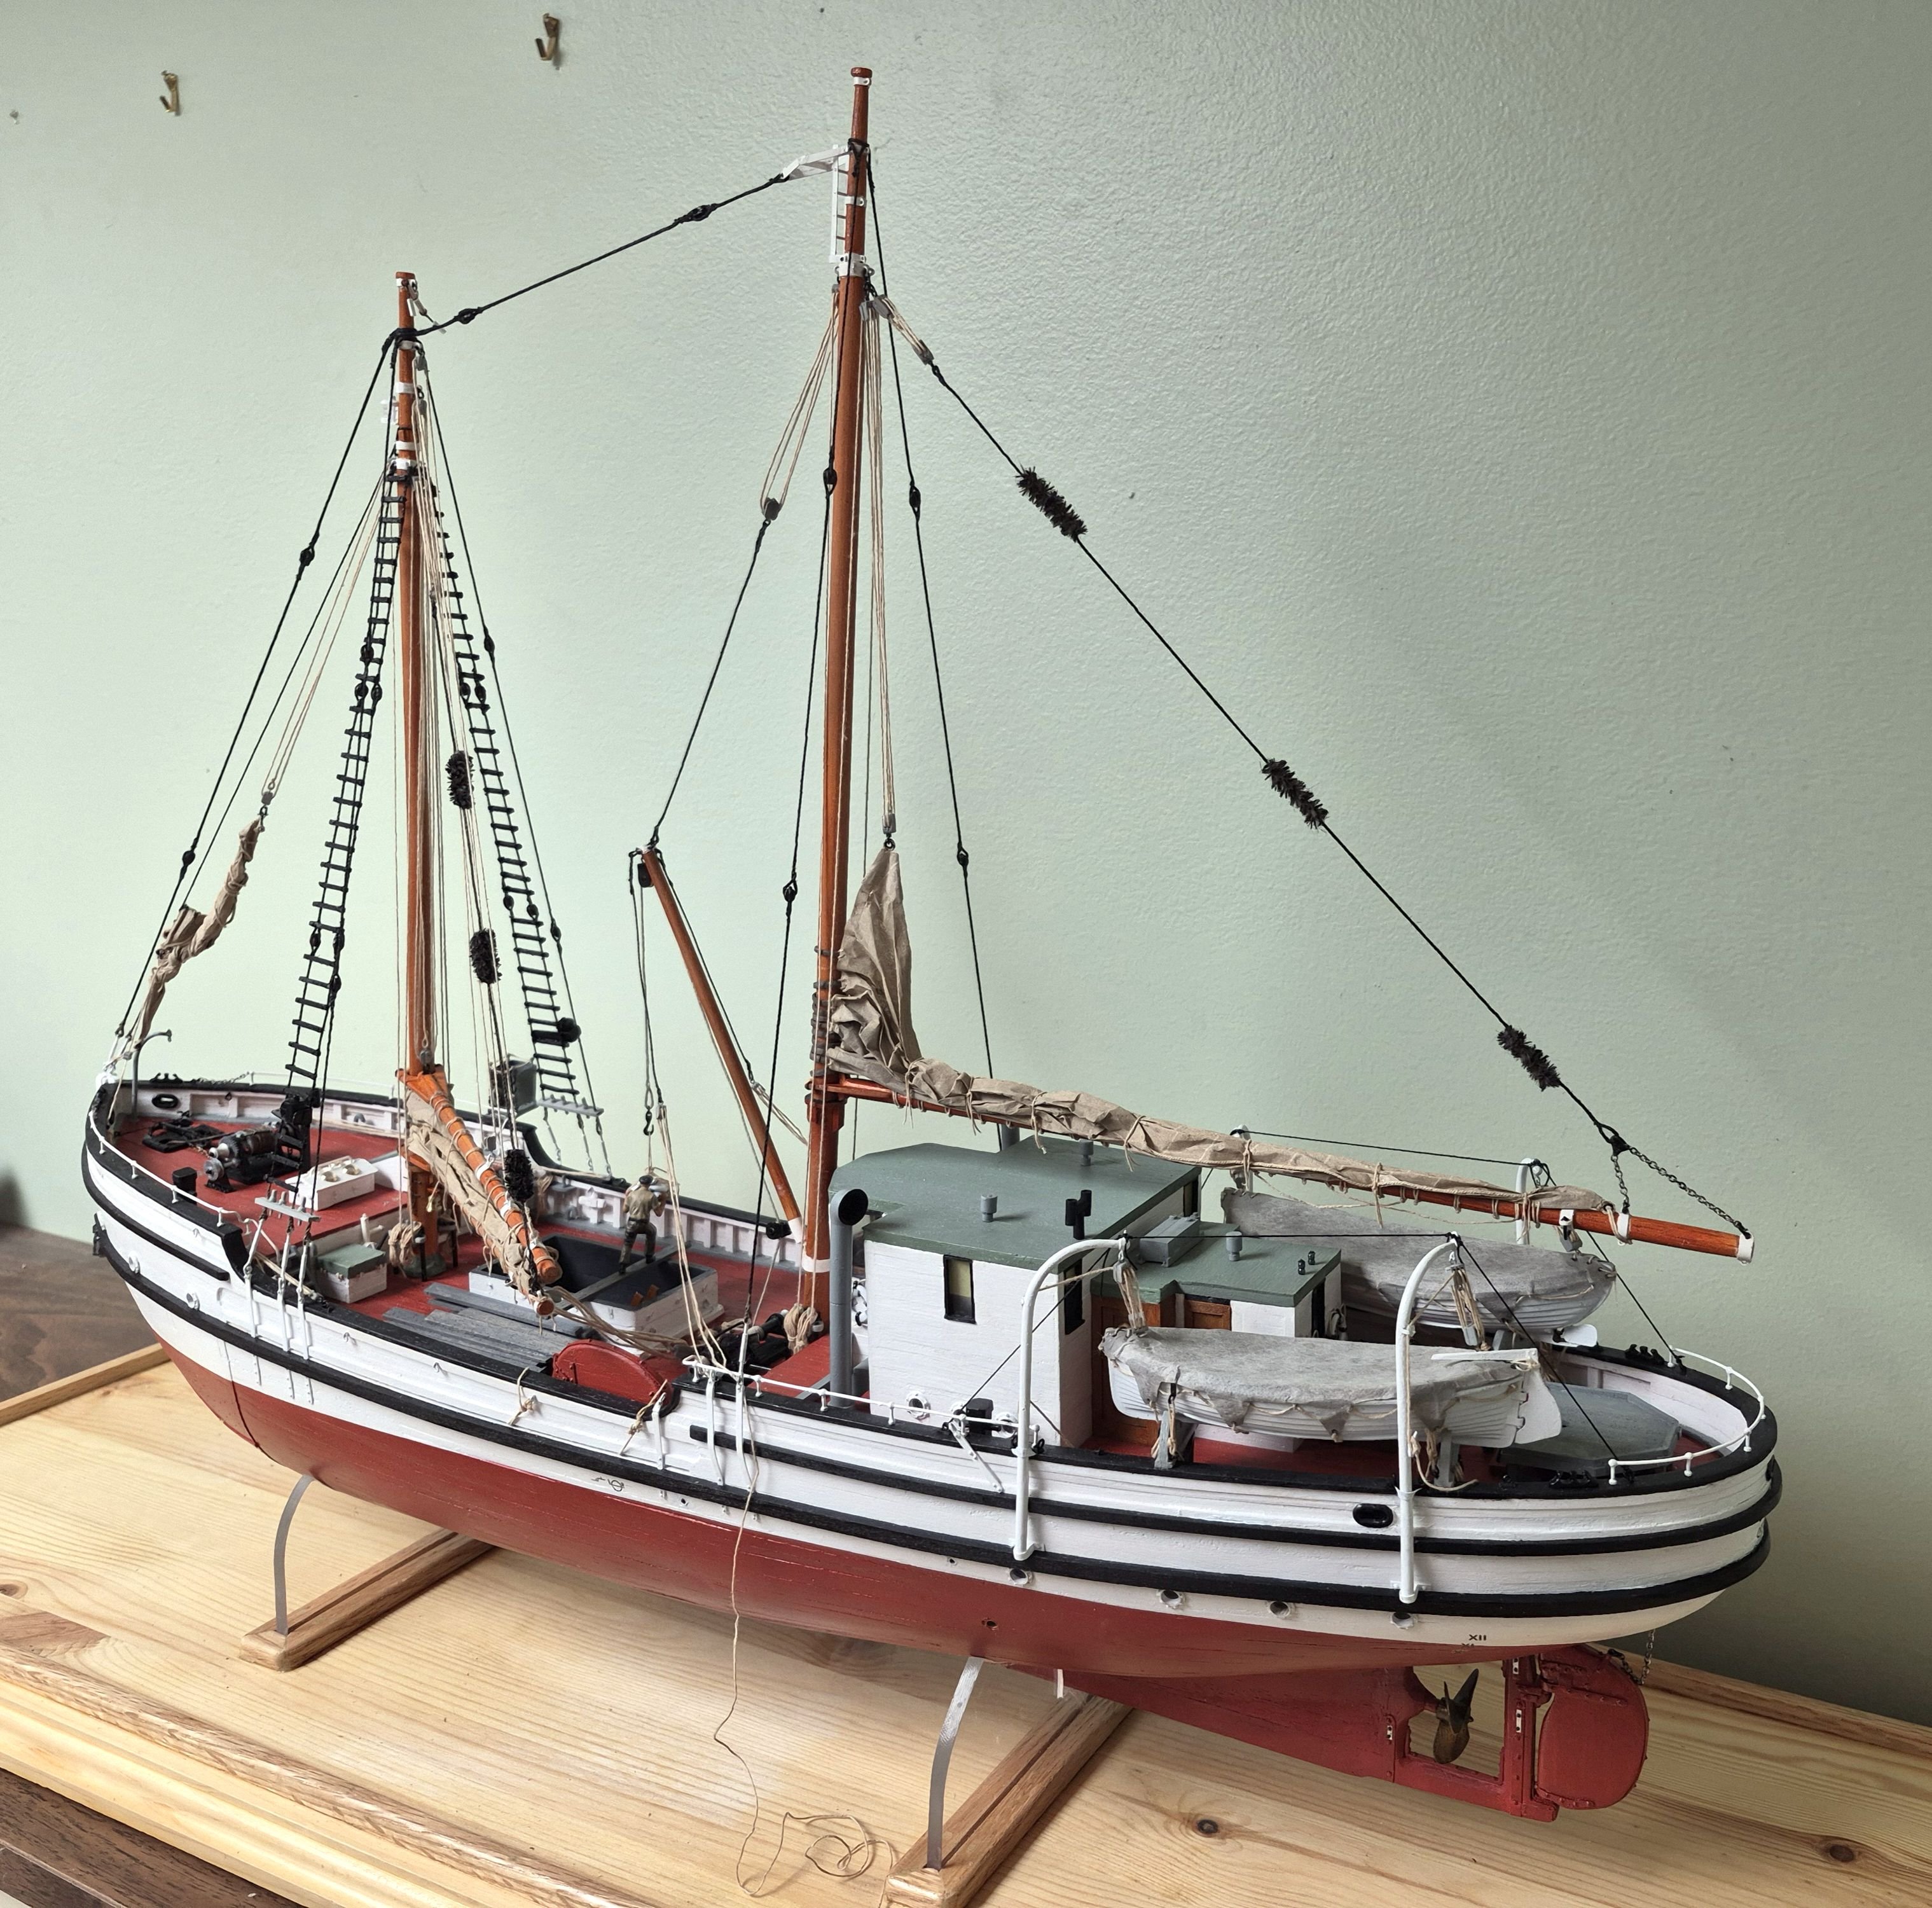
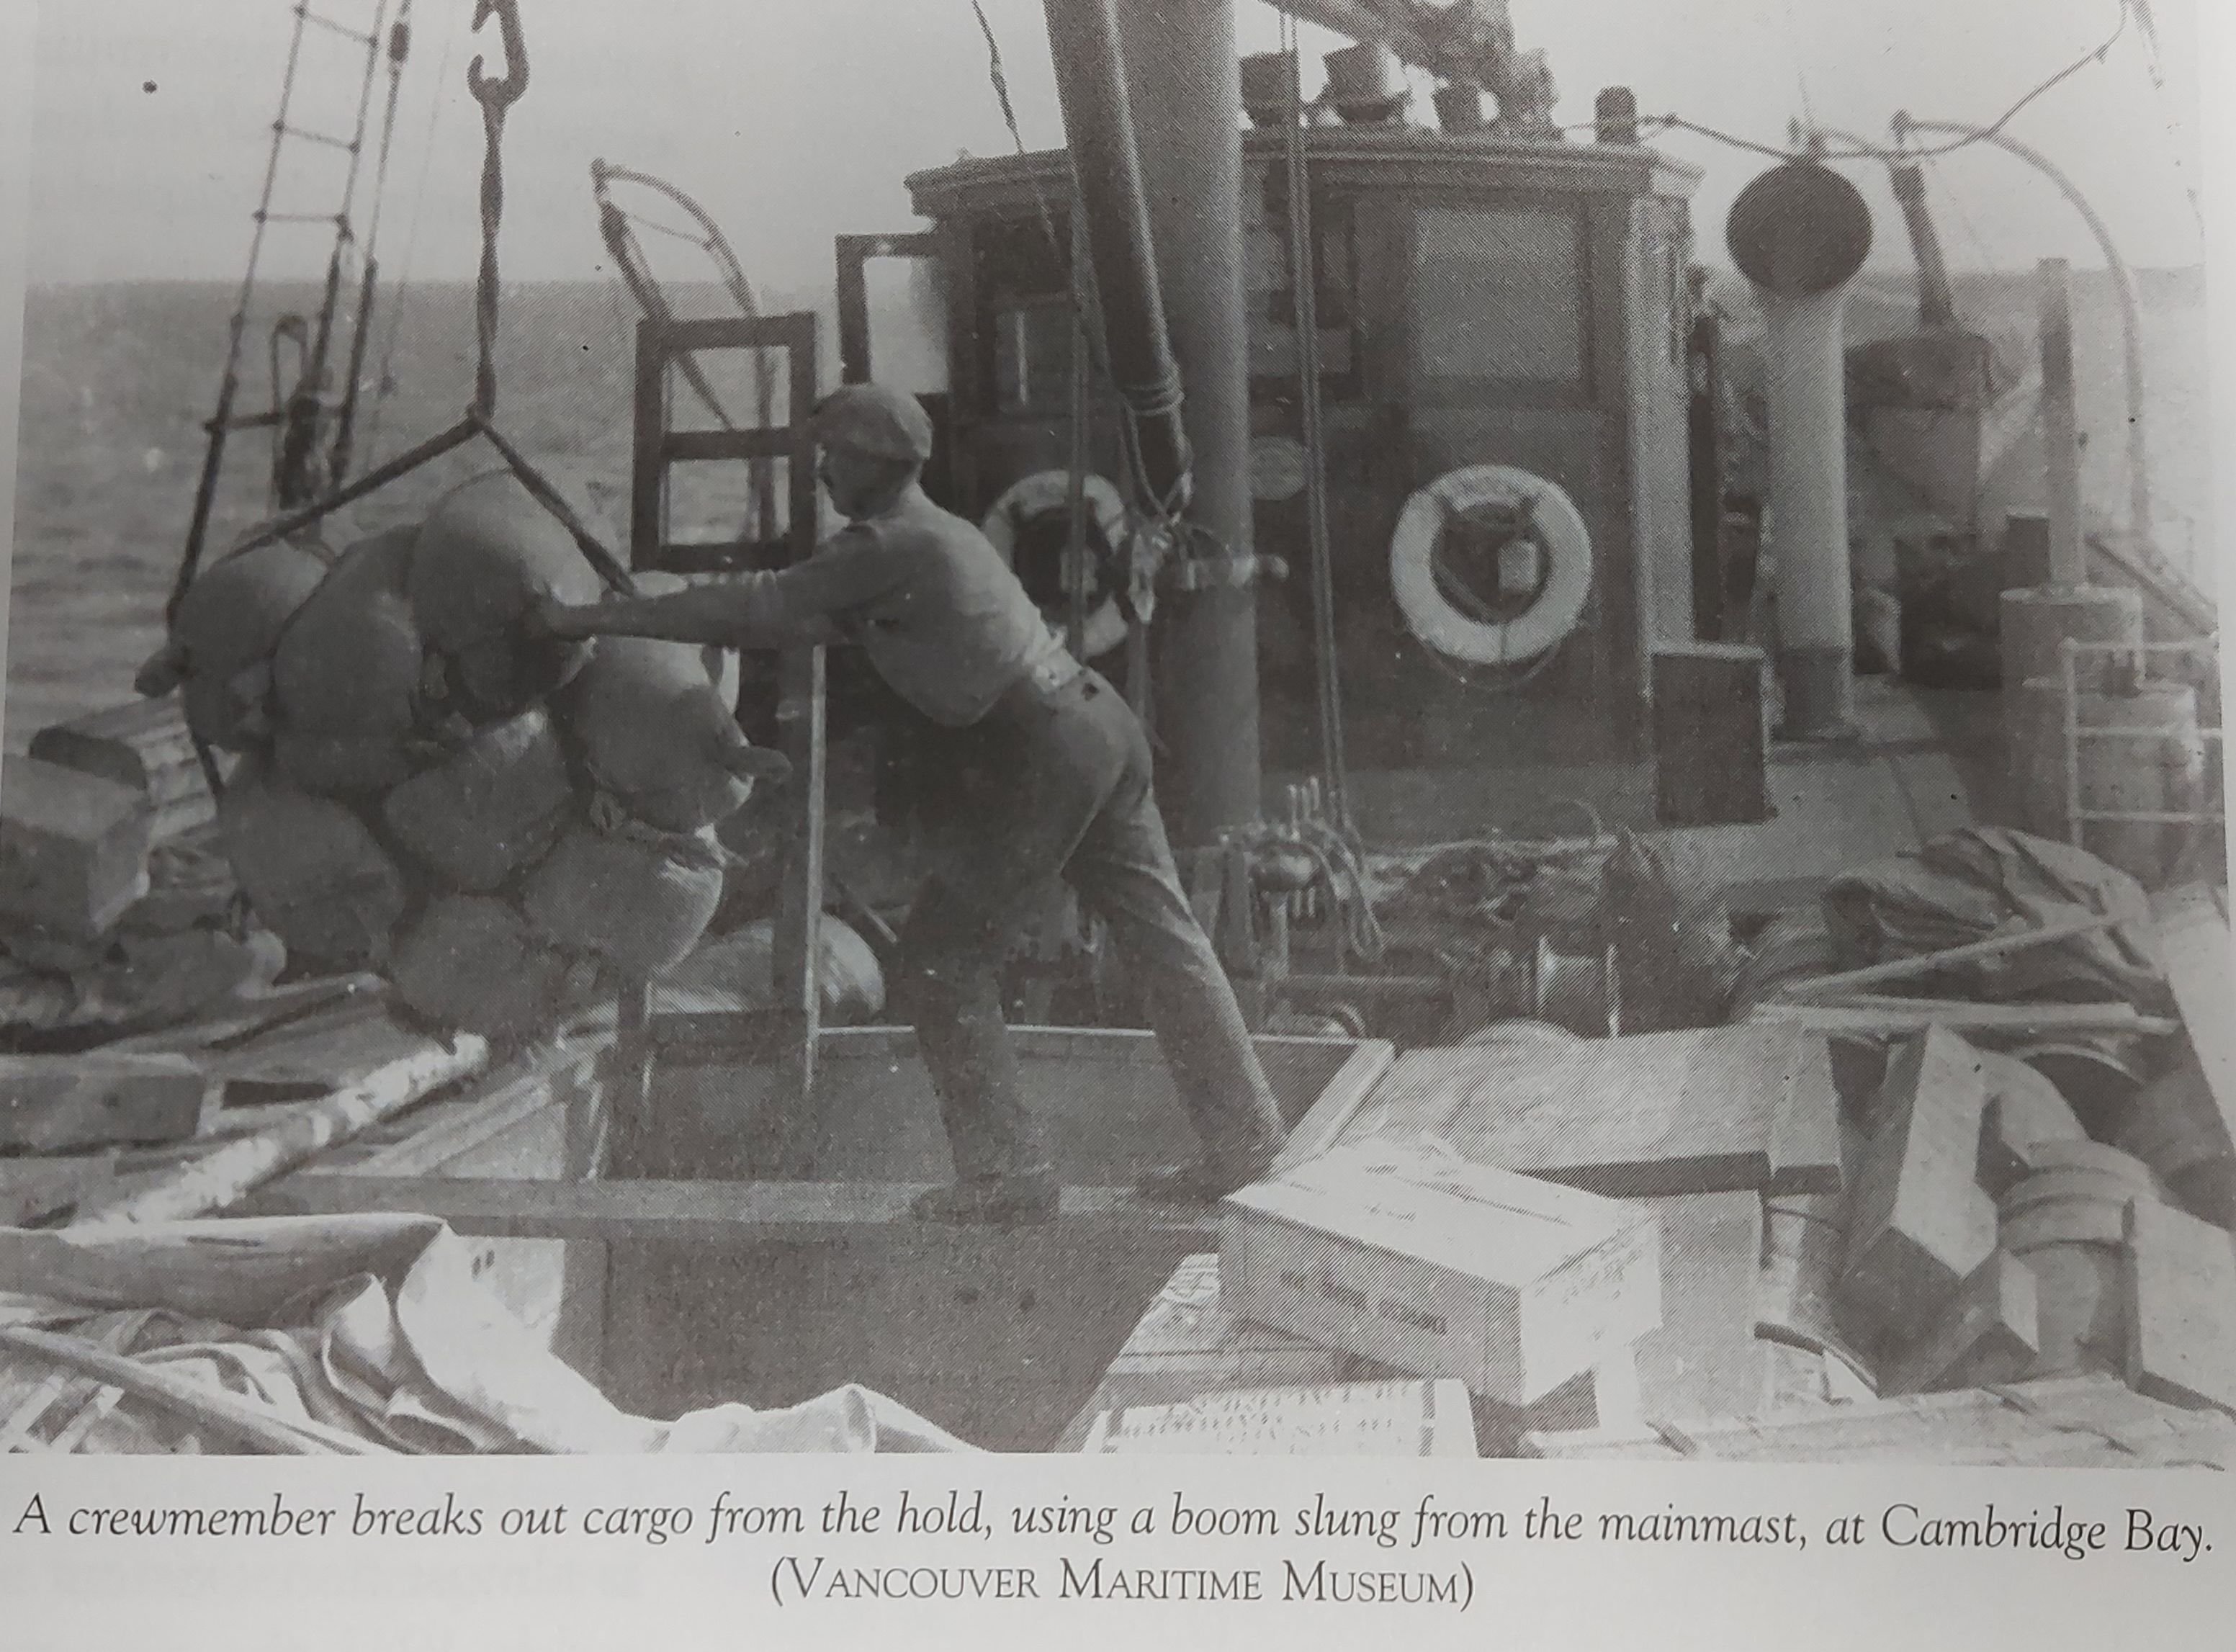
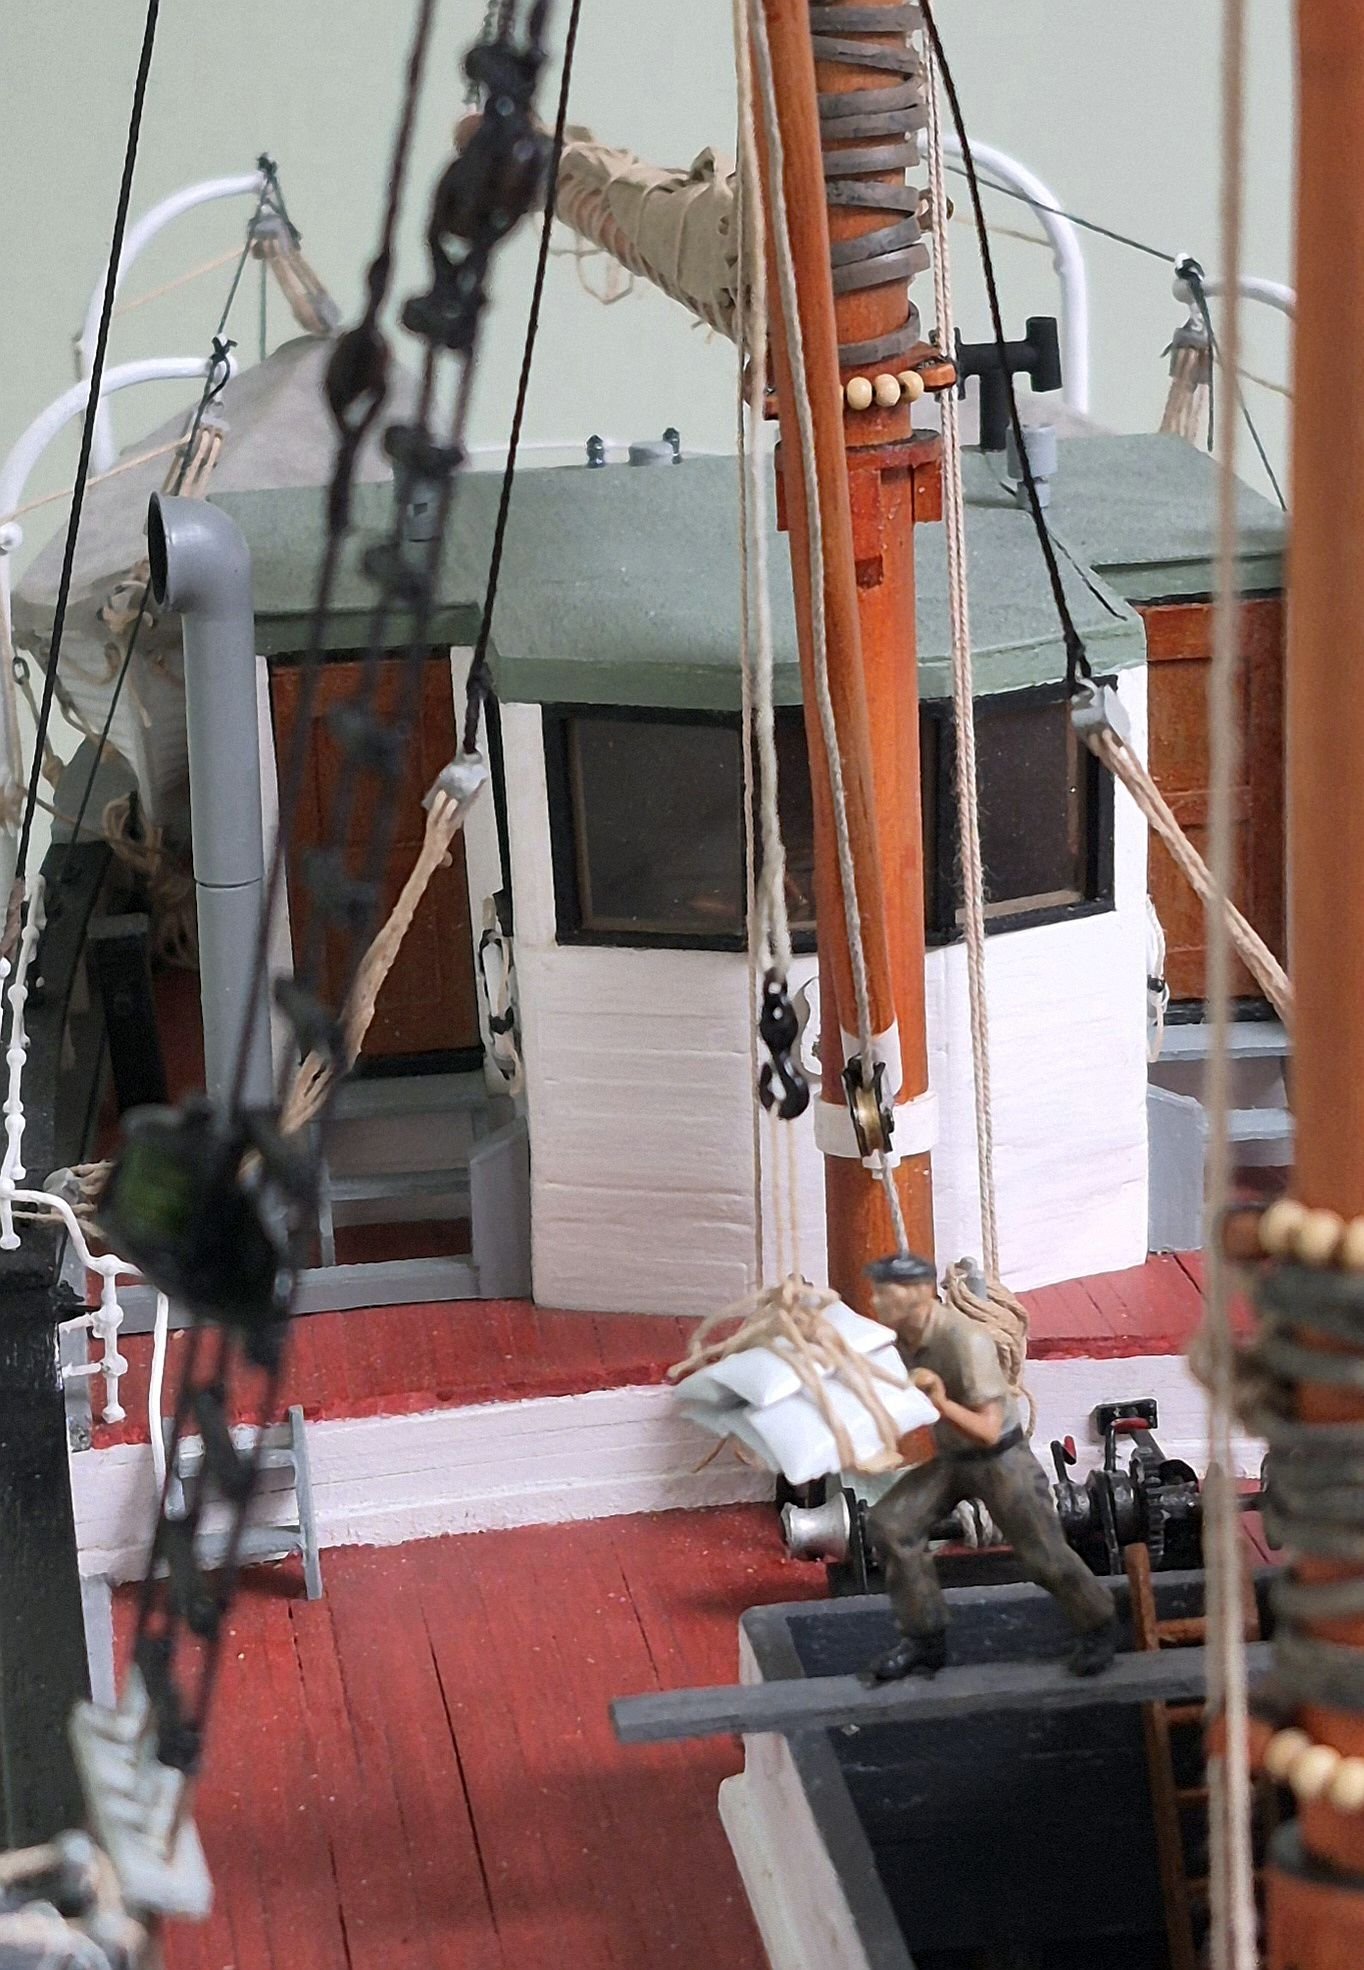
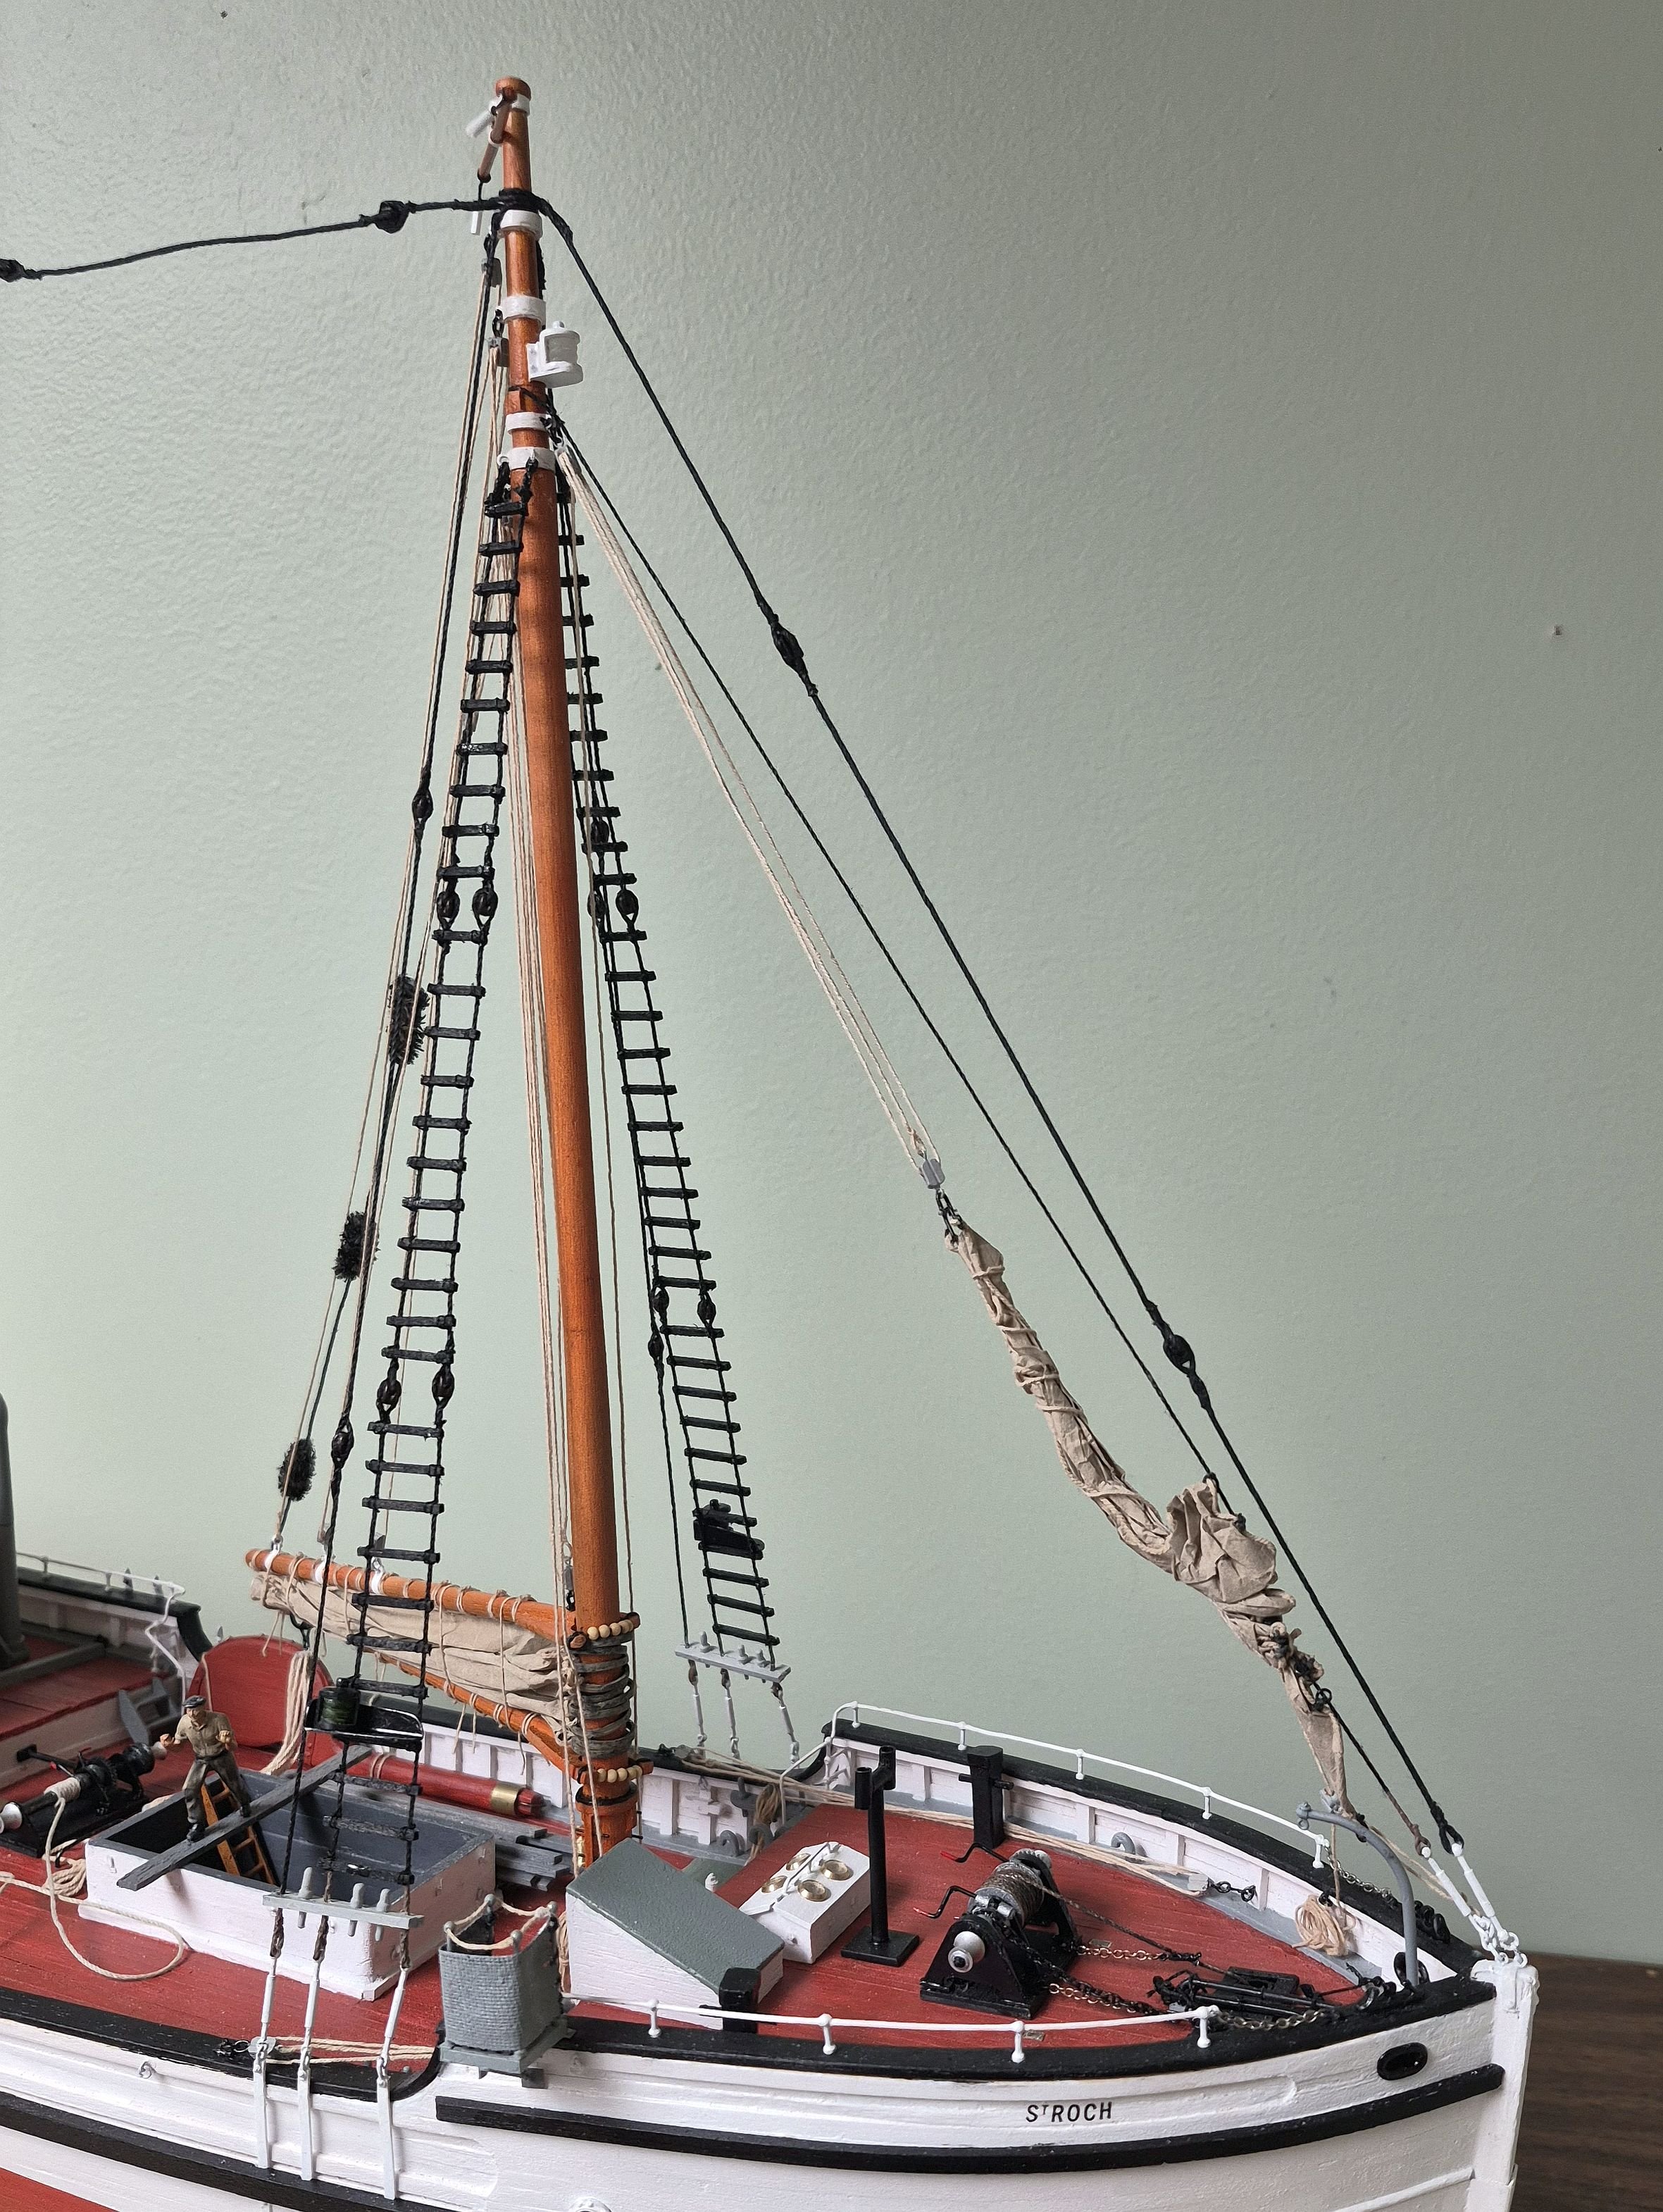
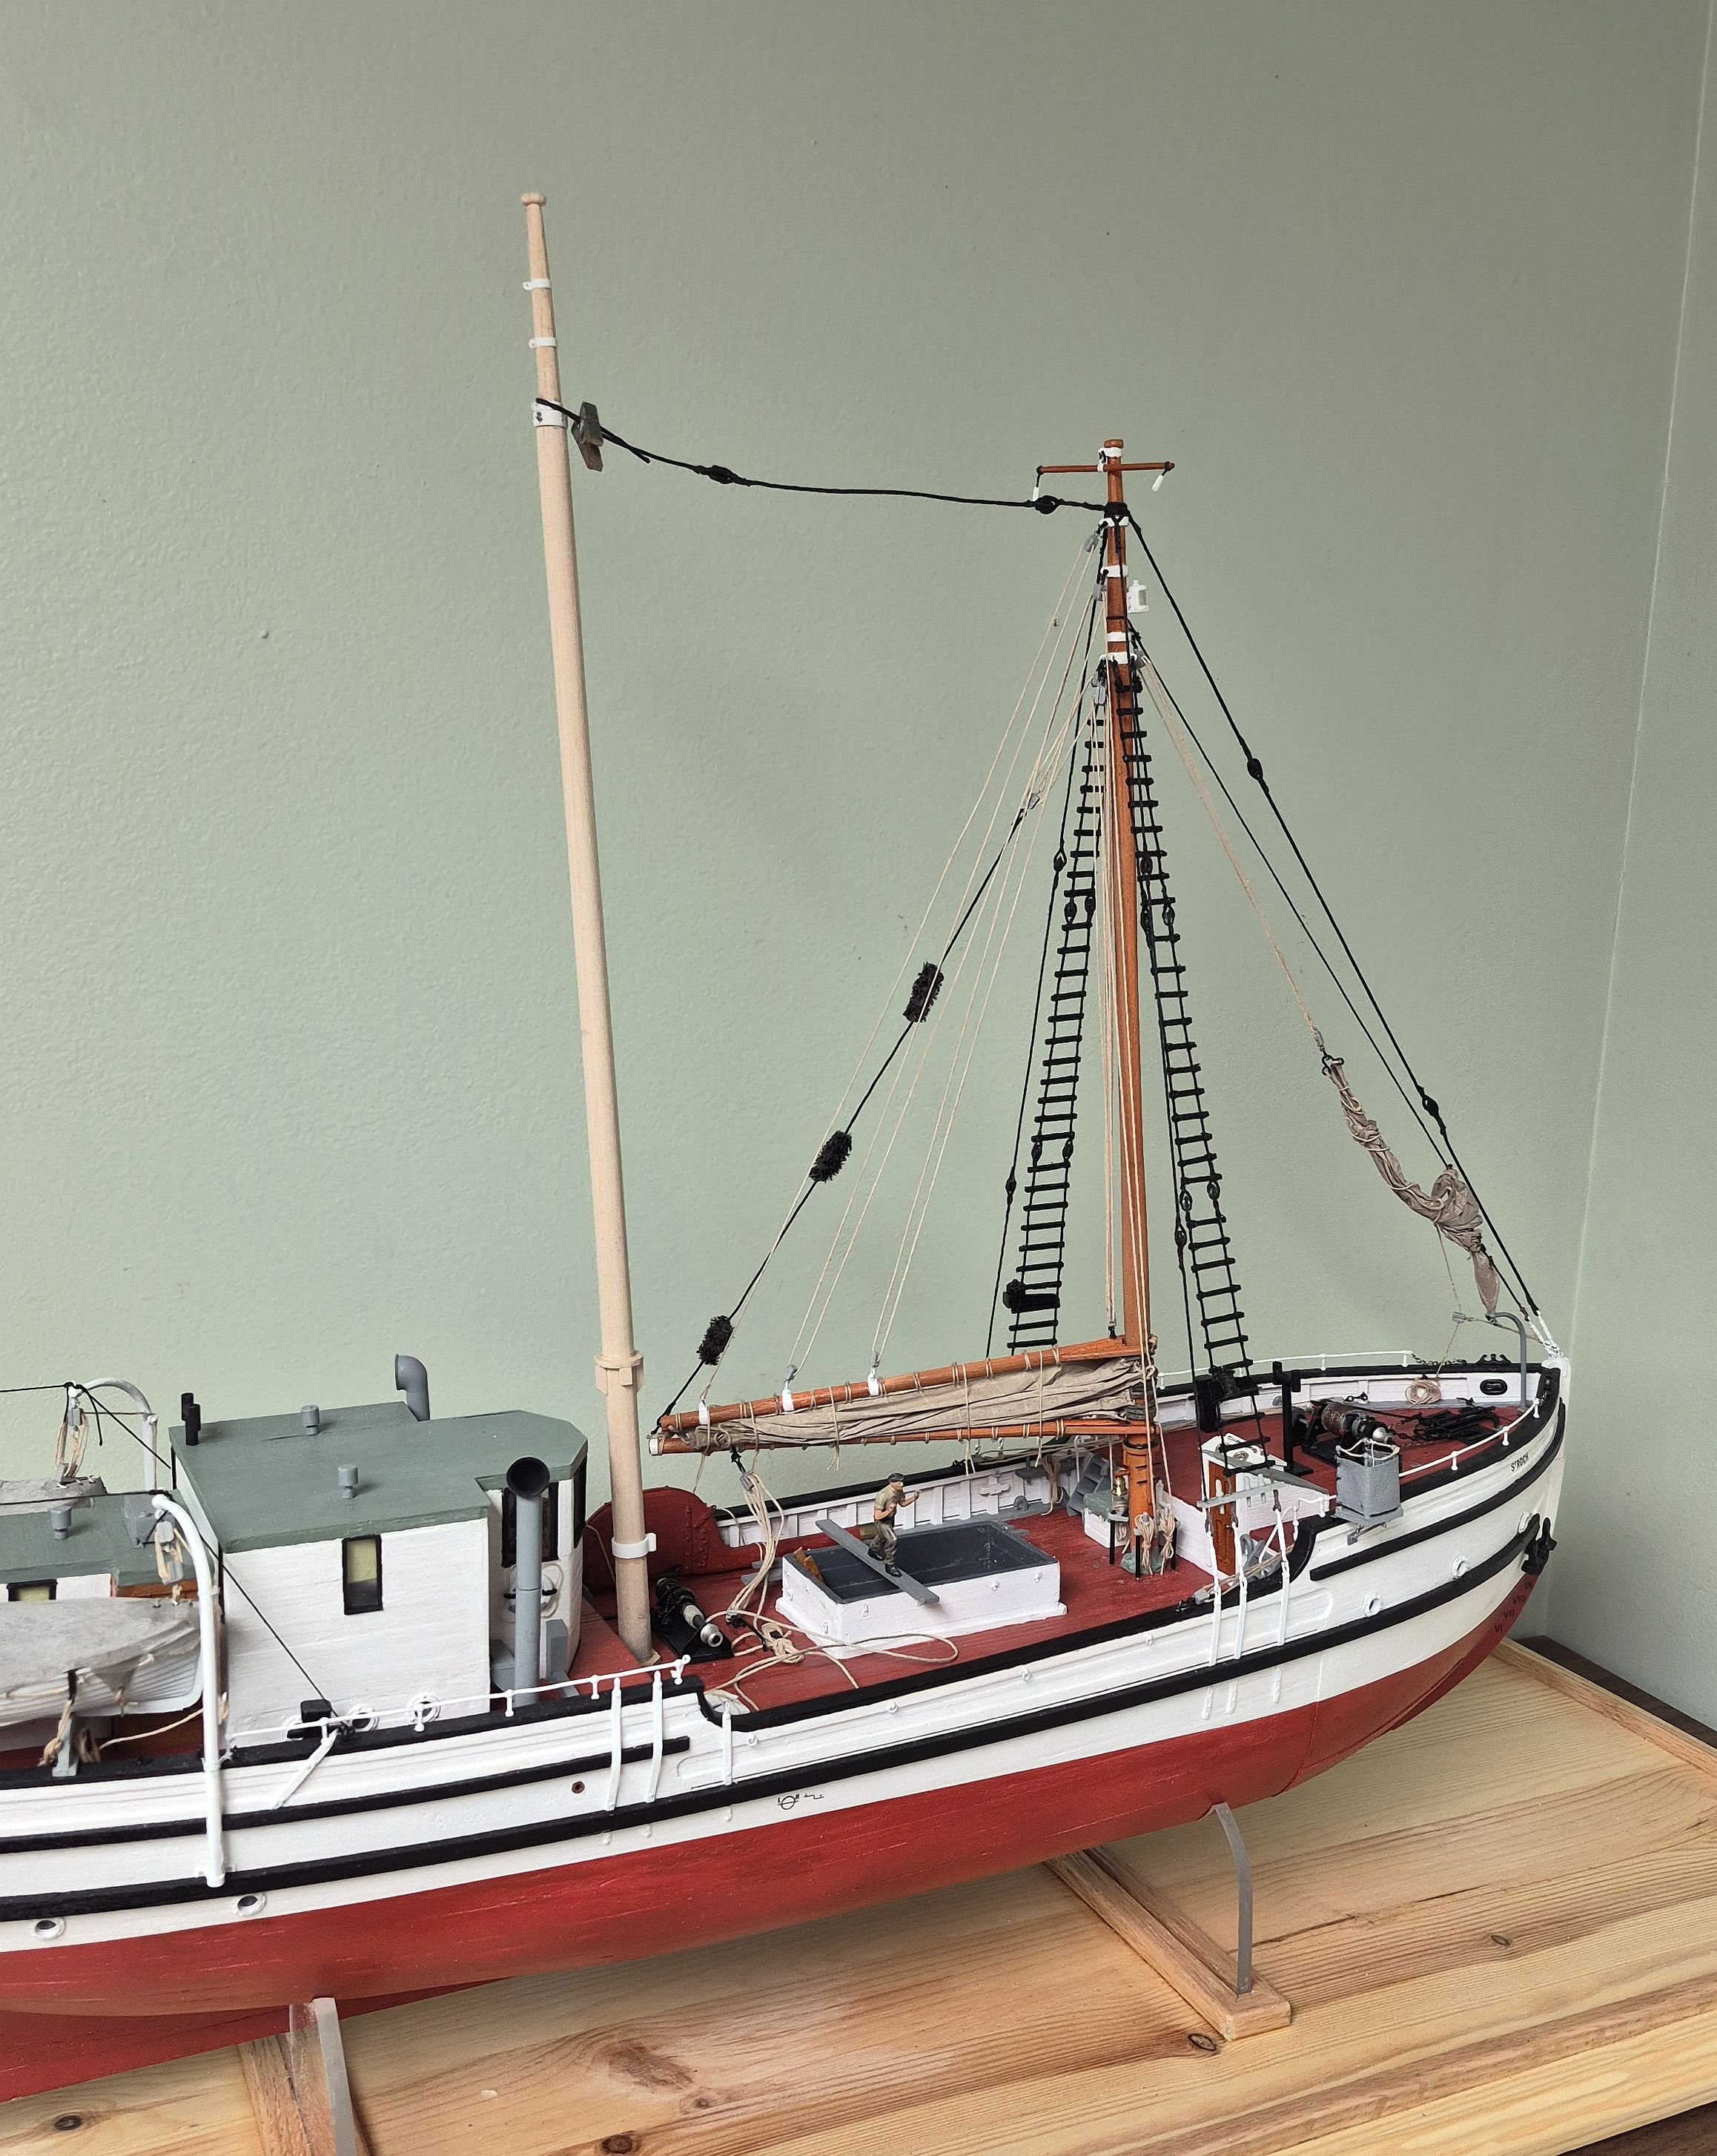
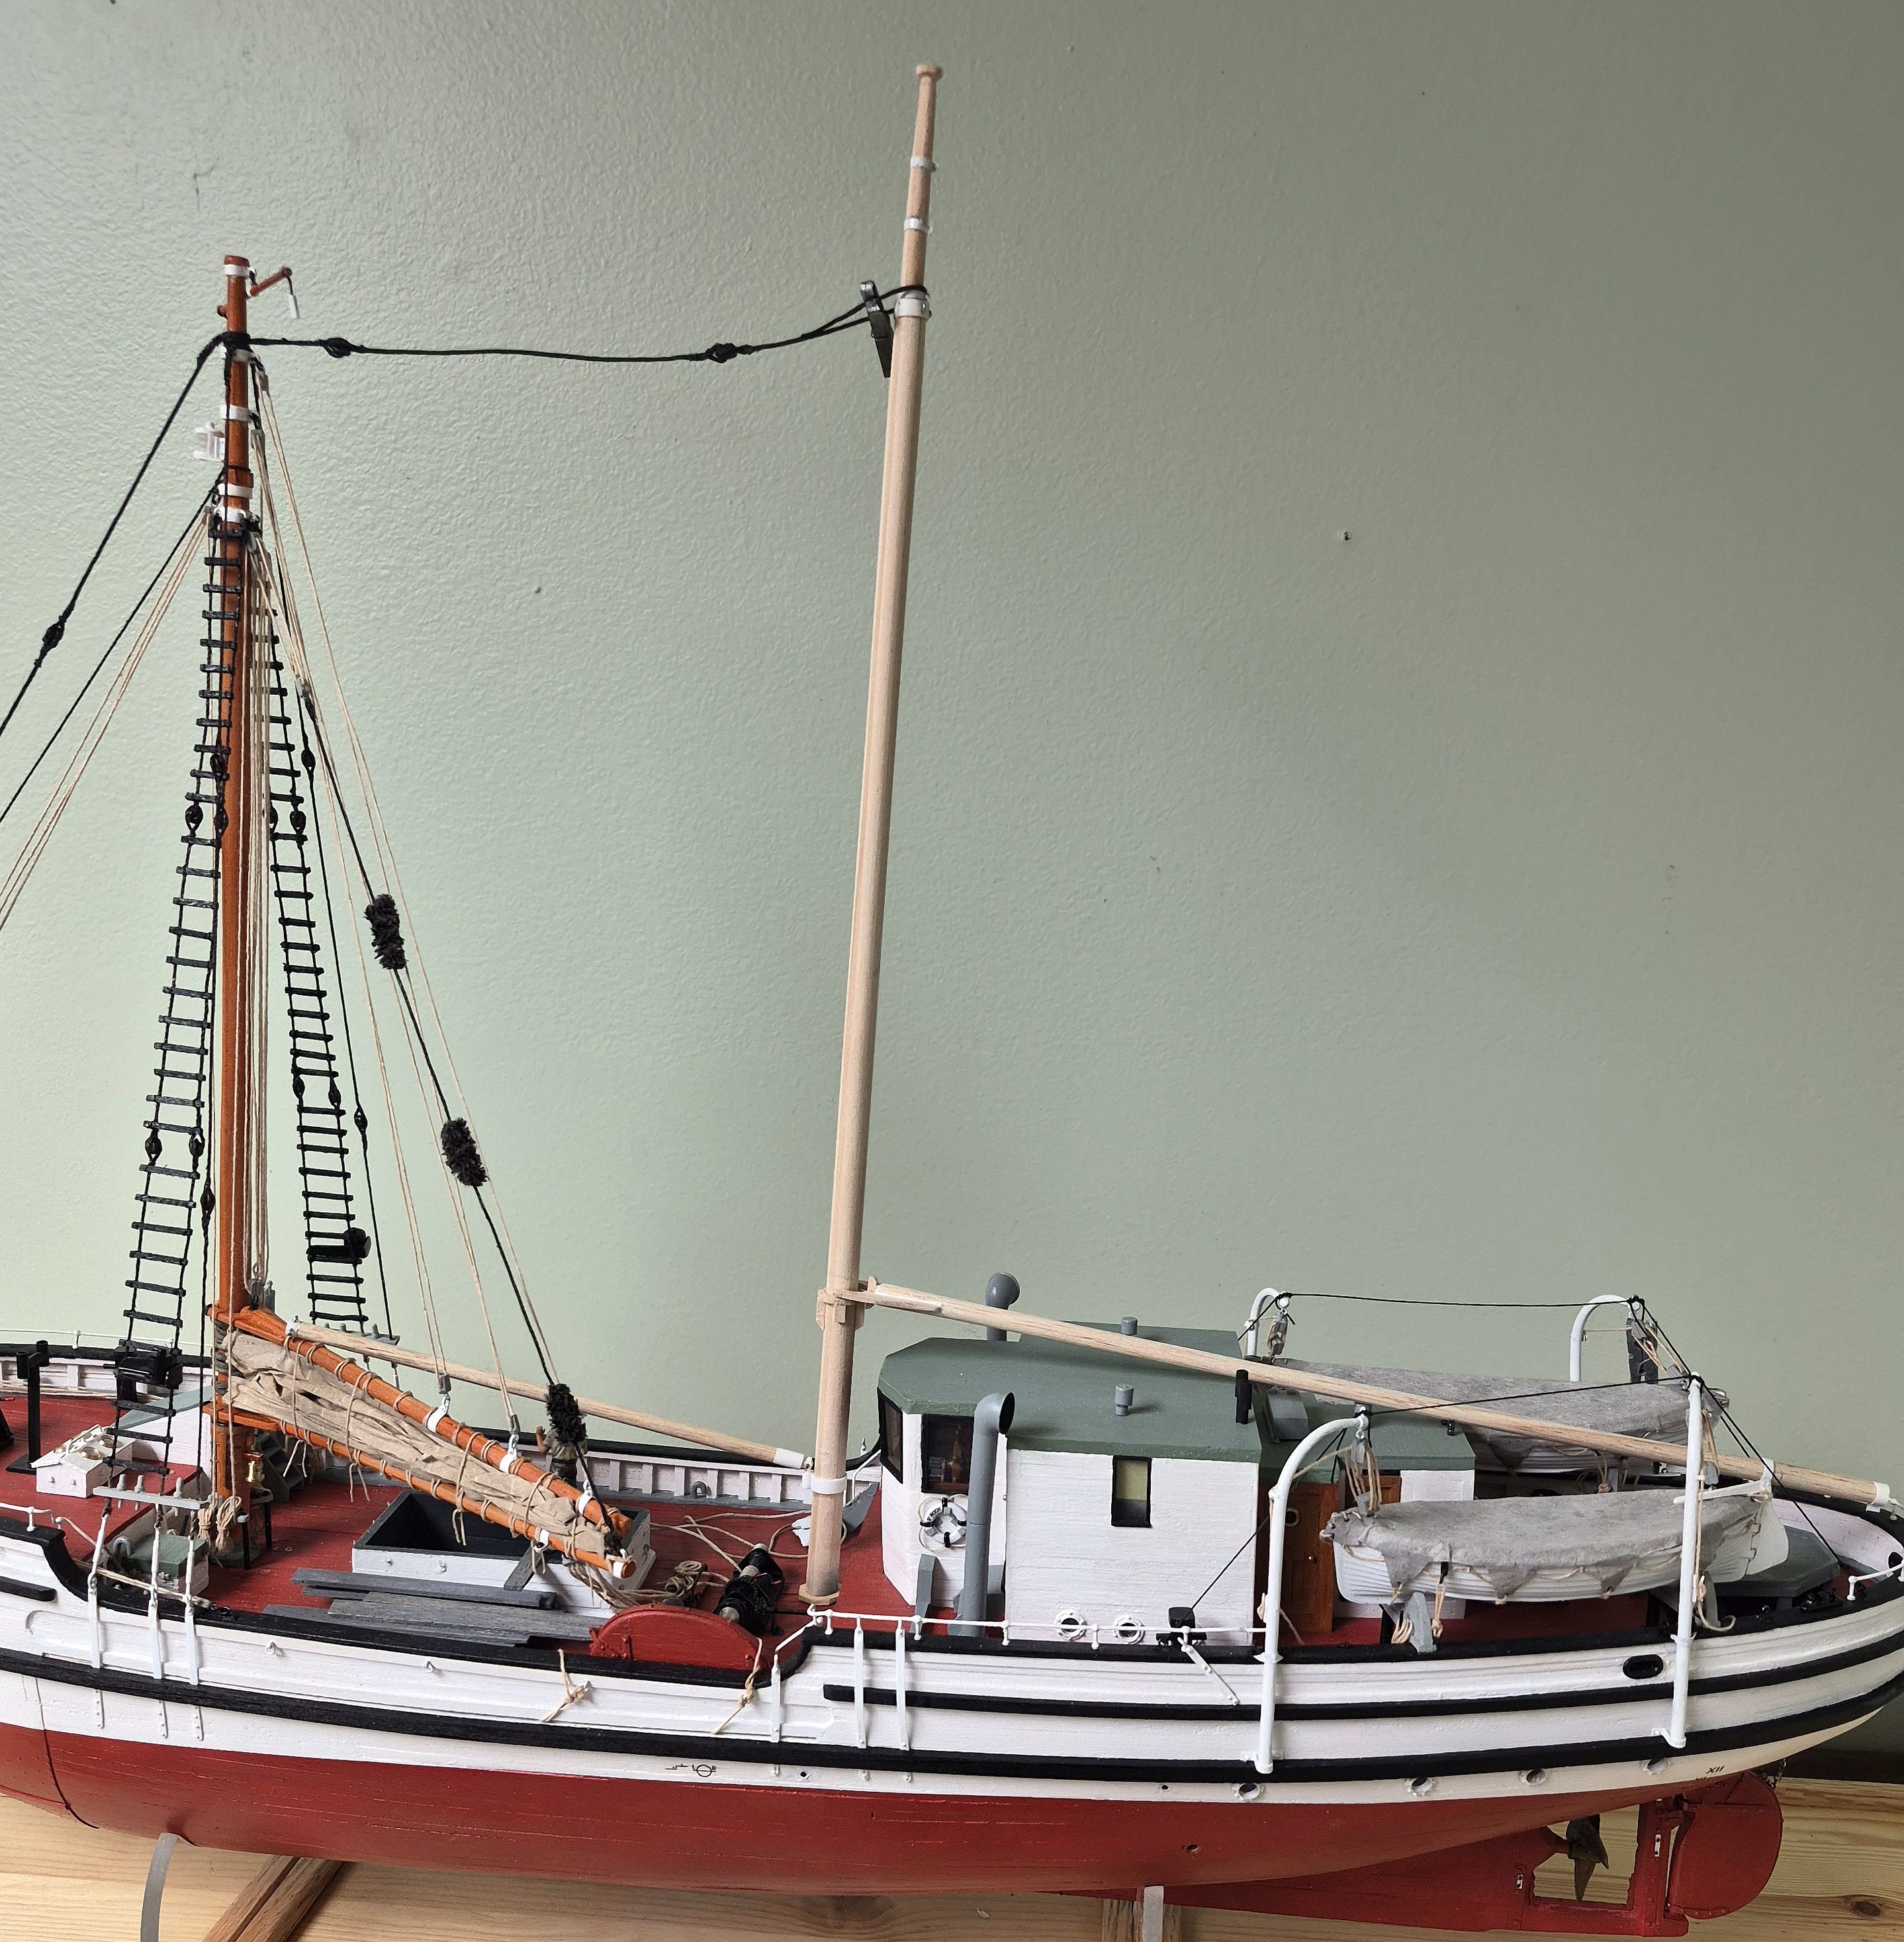
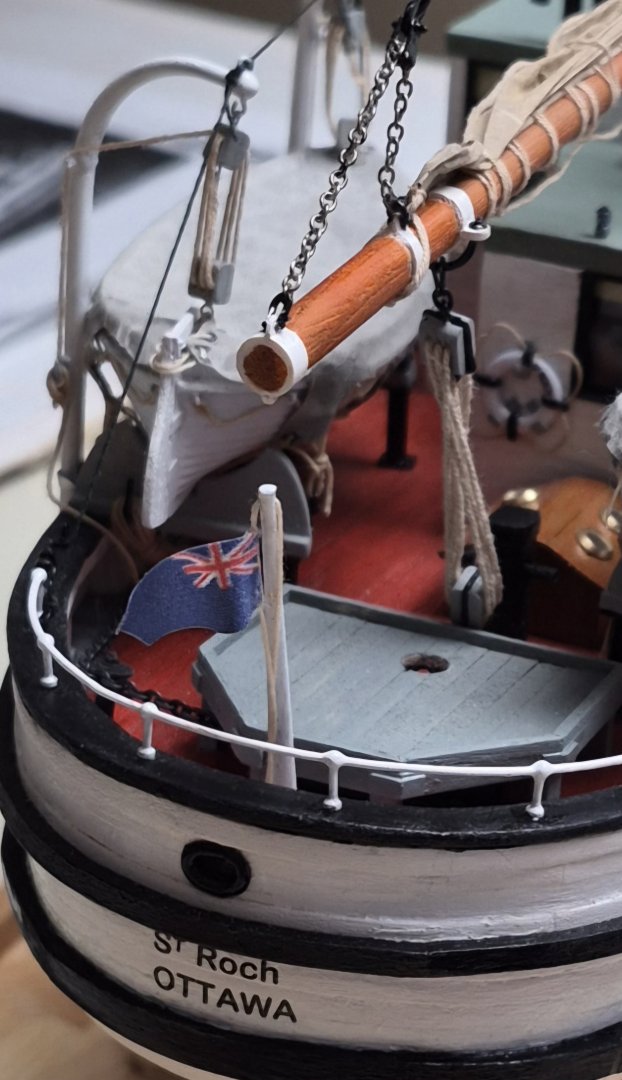
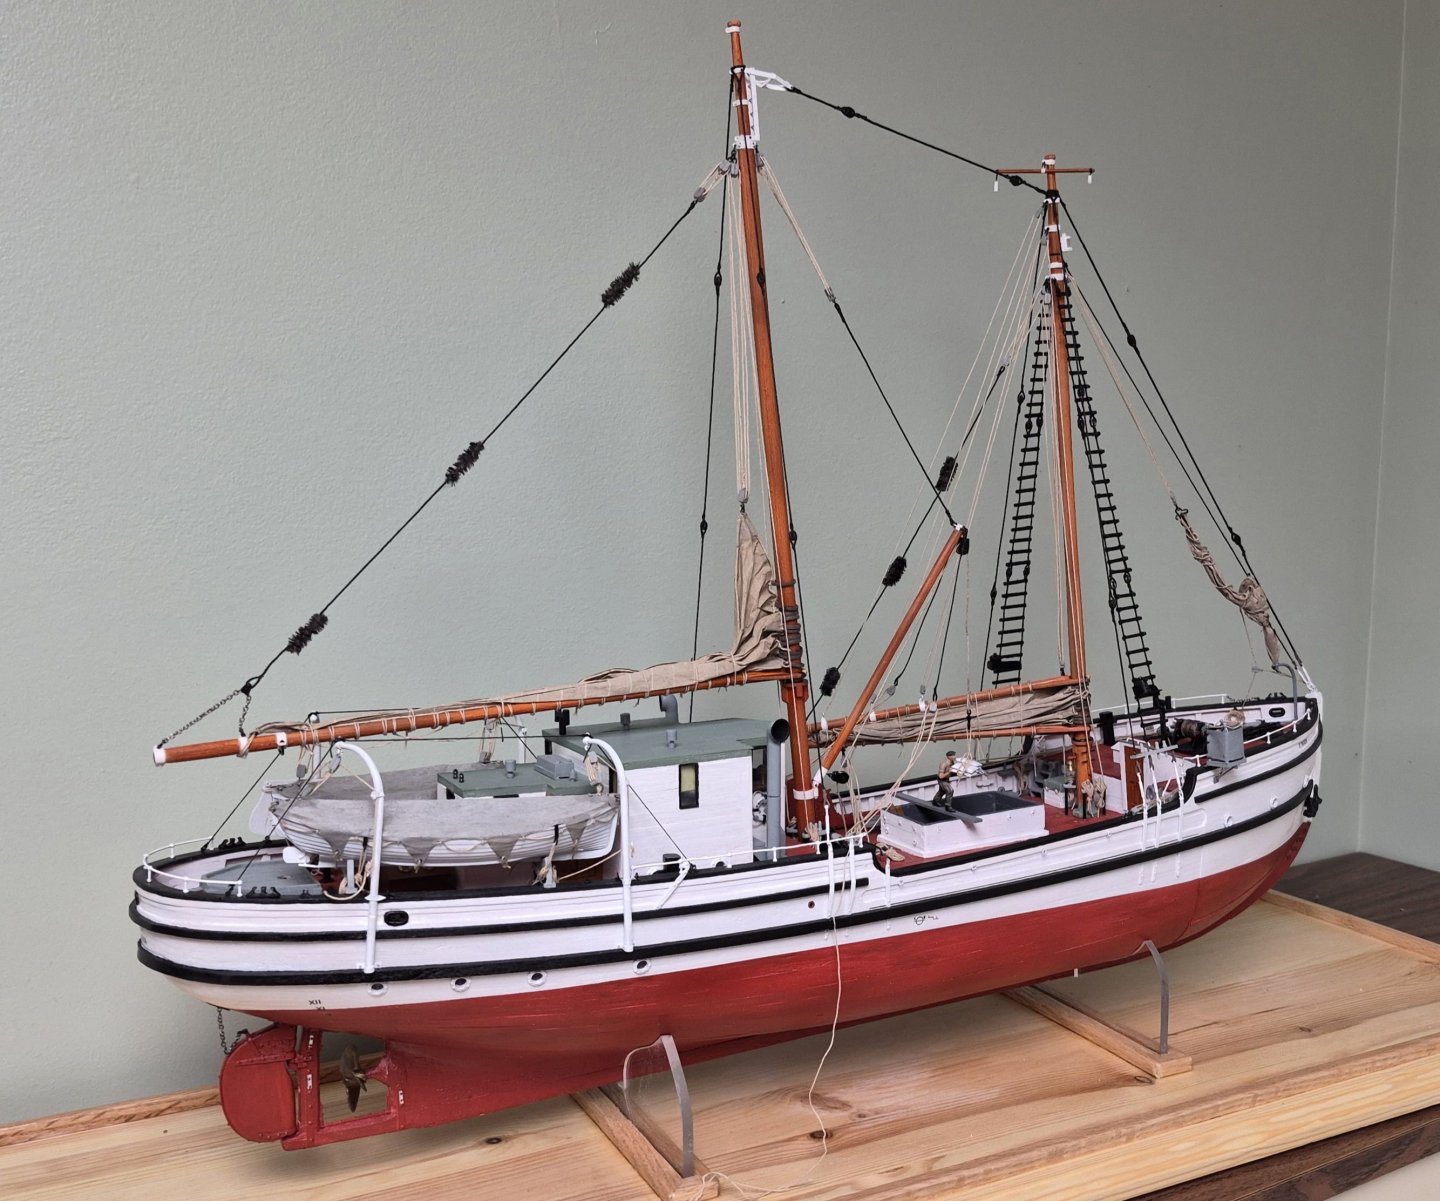
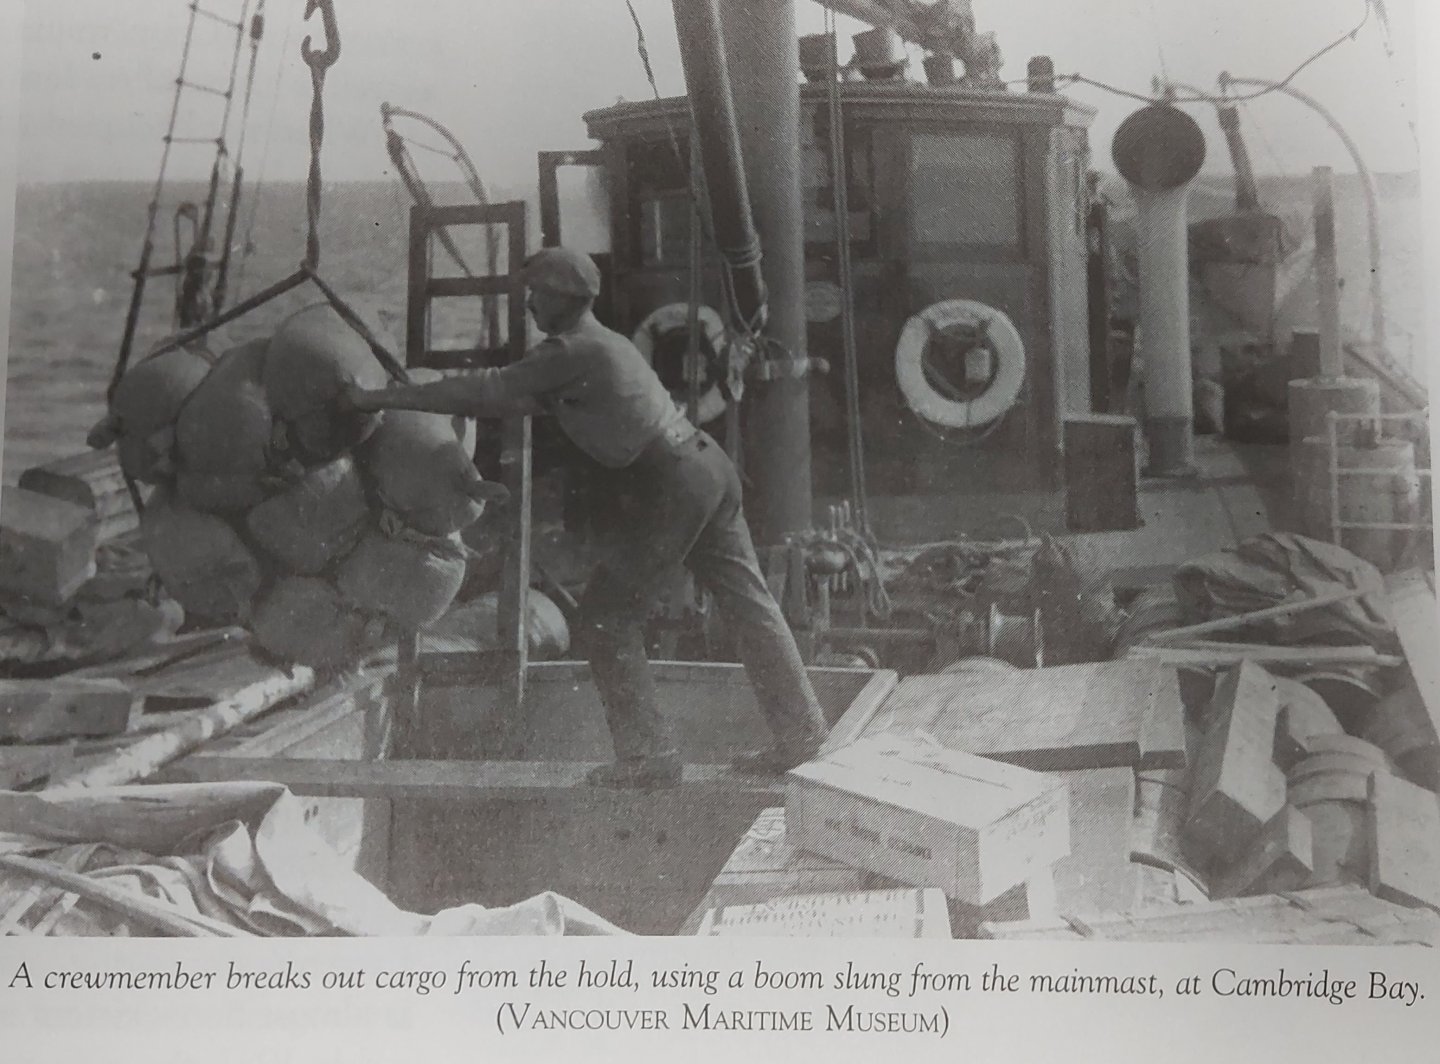
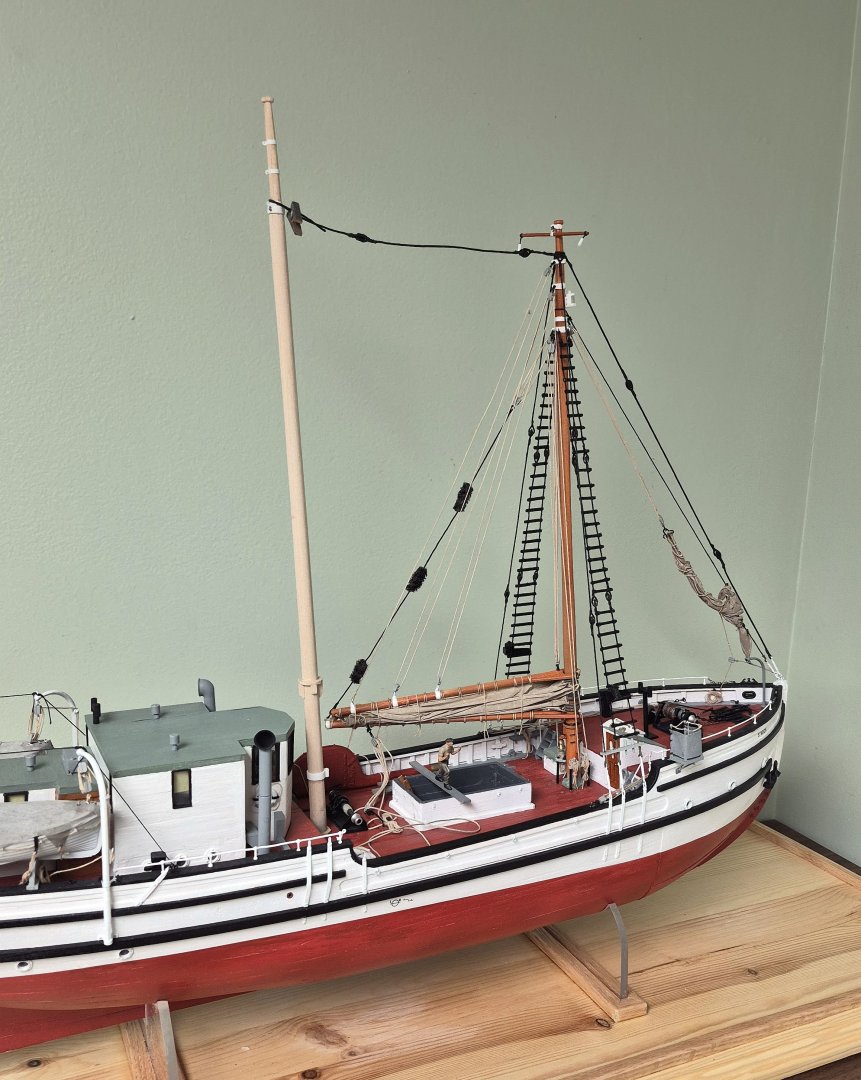
Happy New Year everyone! Now that the relative riots are over, the turkey coma has passed, and the decorations are being put away for another year, it is time to get back to modelling! St. Roch now has her mainmast installed! The steps to finish the spars and main sail, and to assemble the mast, are the same as I carried out for the foremast, so I won't be repeating them here. The first picture is the mast assembled, held in my drill press vise that I brought to my model bench. Note the running rigging is pre-installed, and the cargo derrick is in place with my scratch built gooseneck. Note also the chain and footropes on the main boom... St. Roch originally had a gaff mainsail, but this was cut down and the gaff removed by captain Larsen after her maiden voyage. Presumably the smaller sail area helped her sailing characteristics, which were not very good. And here is the mast installed onto the ship... The running rigging has been belayed to the pins at the mast foot. The back stays are installed. The main stay is installed to the spreader on the mast. The crow's nest will be installed above the spreader, which keeps the stay out of the way of the nest. I made the Jacob's ladder and installed it between the top of the shrouds and the bottom of the nest. As will be seen, crew climbed into the crow's nest through the bottom, not over the top. The shrouds have yet to be made and installed. In these next two pictures you can see the cargo derrick set up, with the crewman pushing his load of sacks to the side of the ship. The tackles used to swing the derrick are left slack on purpose, and the ends will be belayed to pins at the lower end of the main shrouds. I normally do not include crewmen, since I am not very good at making them. However a friend on another forum and his 3d printer came to the rescue. I thought the open hold looked too sterile and the crewman would give scale to the model, so I used the following picture as inspiration to create this mini-diorama. The photo was taken in 1928 during St. Roch's maiden voyage, as evidenced by her original small deckhouse and the note that she is unloading at Cambridge Bay. It is interesting to note that there is no sailor manning the winch, the crewman appears to be working alone to get the cargo over the side and into, presumable, a shore boat... This last picture shows my take on the scene... Now all that remains are the main shrouds and some final details before St. Roch goes into her display case! Thanks everyone for looking in and following along, and for your comments and support during my build! Regards, Bruce


- 388 replies
-
- 19
-

-
-
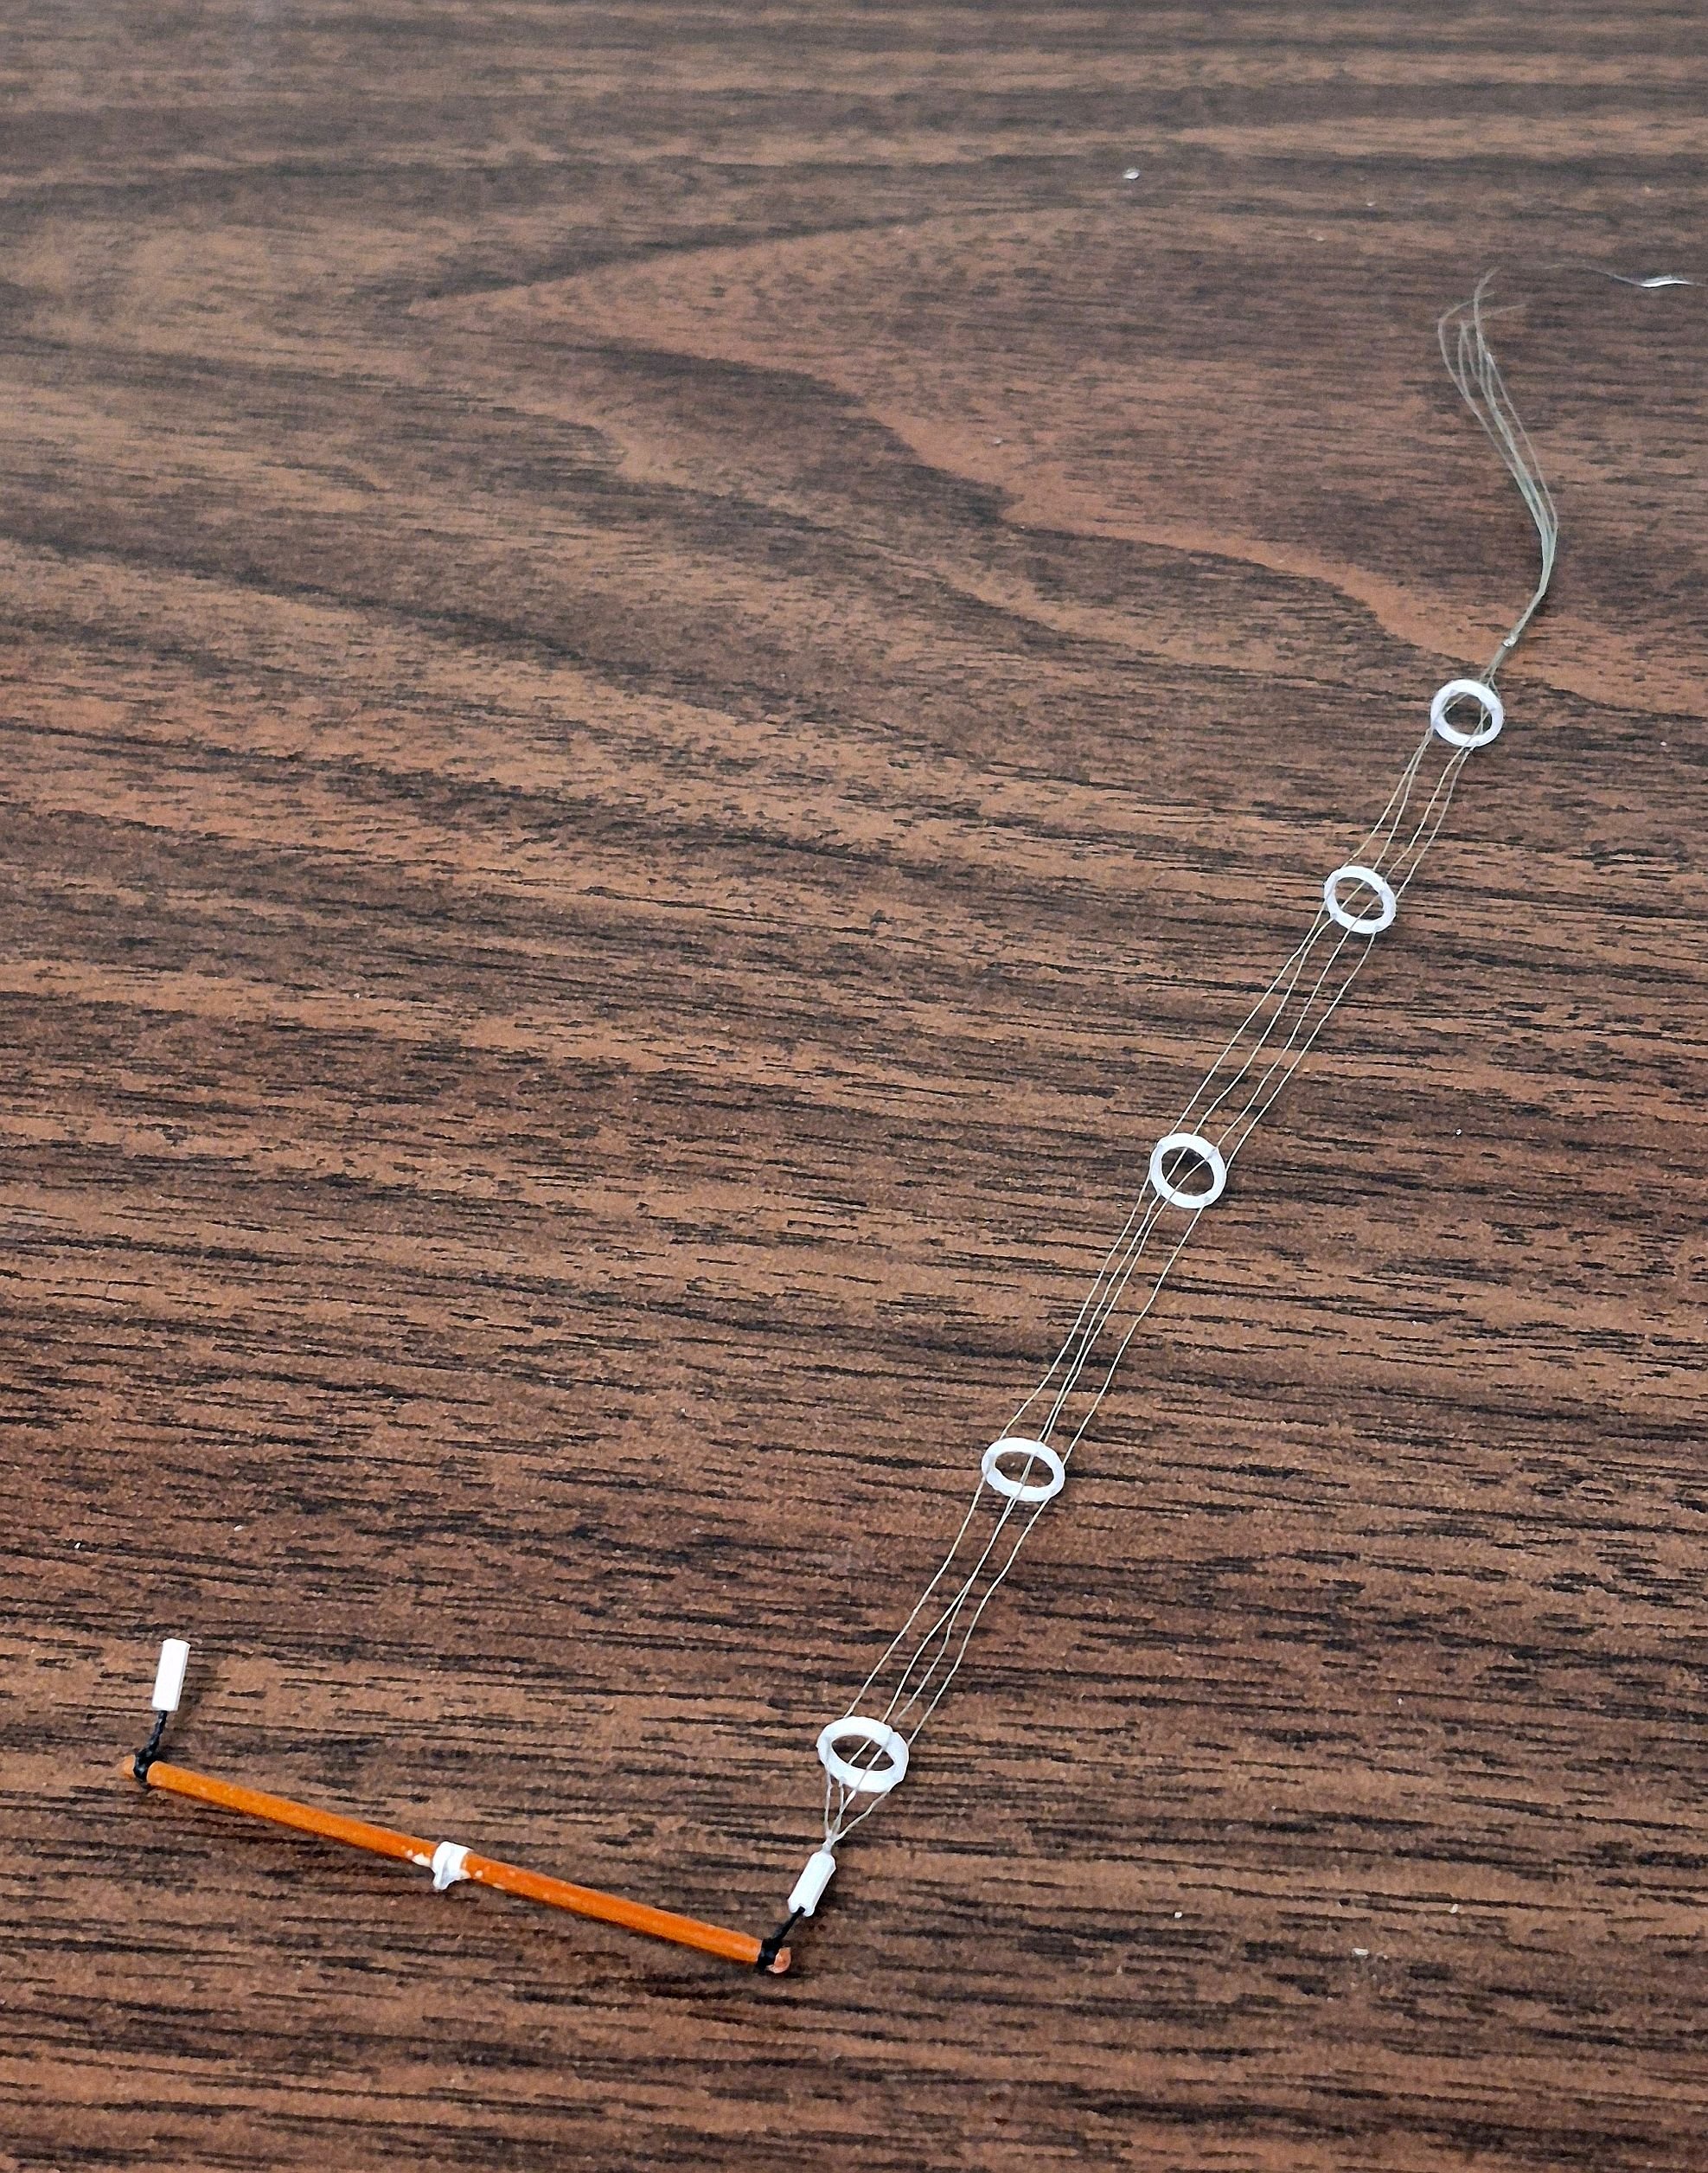
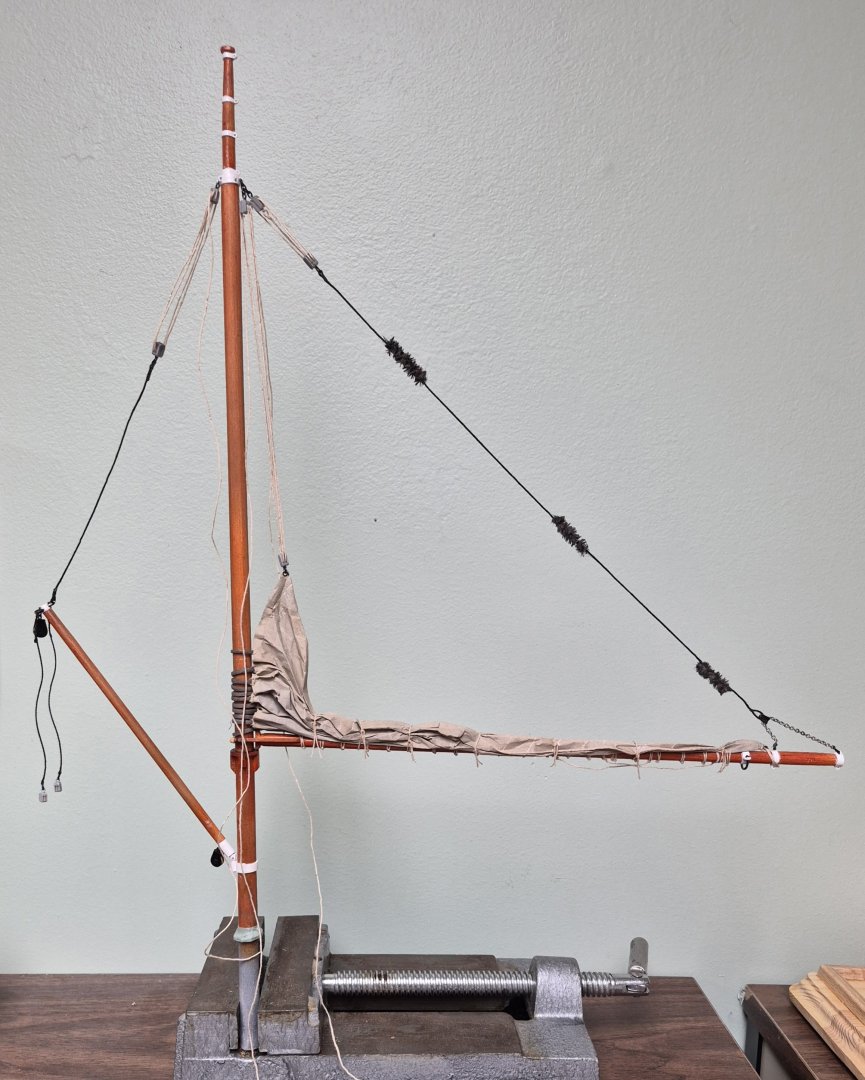
Well, it has been three weeks since my last update, and I was hoping to have had the foremast completed before now... but the empty calendar filled up with commitments that took a higher priority, and here we are! The running rigging on the foremast had already been completed. As you can see in the first picture below, I have been making stays and shrouds... The ratlines are iron bars, I used balsa wood, because when it is tied to the shroud the thread takes a small bite into the balsa and holds the ratline where I want it. The next three pictures are different views from around the ship... The main stay and main mast are posed... the stay had to go on now since the forestay is over top of it. It does not belay to the main mast, but to a spreader that will be under the crow's nest. The sailor has gotten over his hangover and fall into the hold, and is back on his plank awaiting the cargo derrick. The running lights were modified the same way as the masthead light. I have been able to make some progress on the main mast and spars, which consist of the main sail boom and the cargo derrick. I also have made the main sail... This last picture shows the derrick and boom posed on the main mast. I made the derrick's goose neck from styrene bits and bobs. Most of the bands are installed and then will be ready for the spray booth! If I don't get back to the forum before Wednesday I hope Santa is good to all of you, and my wishes go out to everyone for a Merry Christmas! Regards, Bruce


- 388 replies
-
- 15
-
-
-
Lecrenb reacted to a post in a topic:
St Roch by Lecrenb - 1:48 scale - RCMP Schooner rigged as schooner c. 1930/35
-
Lecrenb reacted to a post in a topic:
St Roch by Lecrenb - 1:48 scale - RCMP Schooner rigged as schooner c. 1930/35
-
 Lecrenb reacted to a post in a topic:
St Roch by Lecrenb - 1:48 scale - RCMP Schooner rigged as schooner c. 1930/35
Lecrenb reacted to a post in a topic:
St Roch by Lecrenb - 1:48 scale - RCMP Schooner rigged as schooner c. 1930/35
-
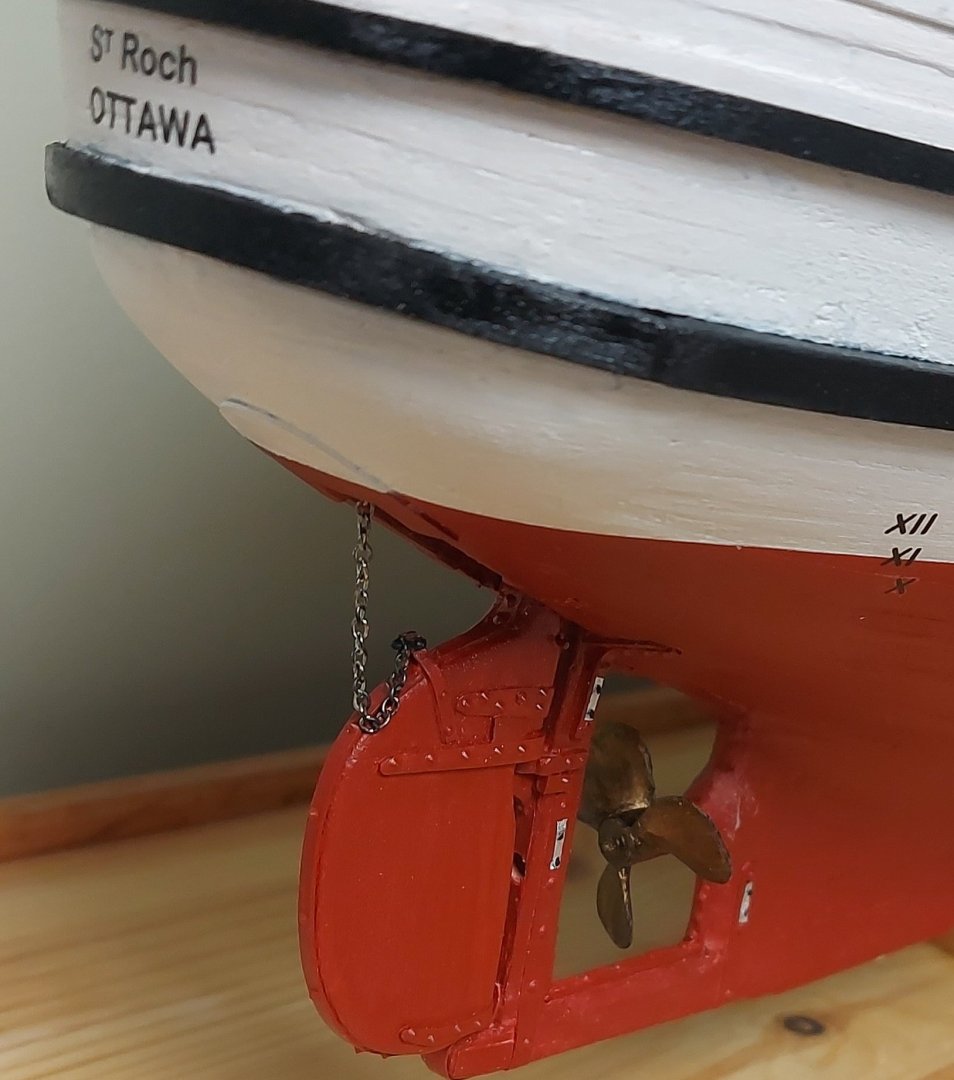
Taking a break from tying shrouds... can't imagine the fun y'all are having rattling down a square rigger like a tea clipper or Victory!! I'm satisfied with the prop colour, so St. Roch now has motive power! And so does her motorboat! This prop just fit... but I didn't want to shave down the blades because they are so delicate, so I hope it is posed convincingly! Regards, Bruce
- 388 replies
-
- 14
-