LaurenS
-
Posts
9 -
Joined
-
Last visited
-
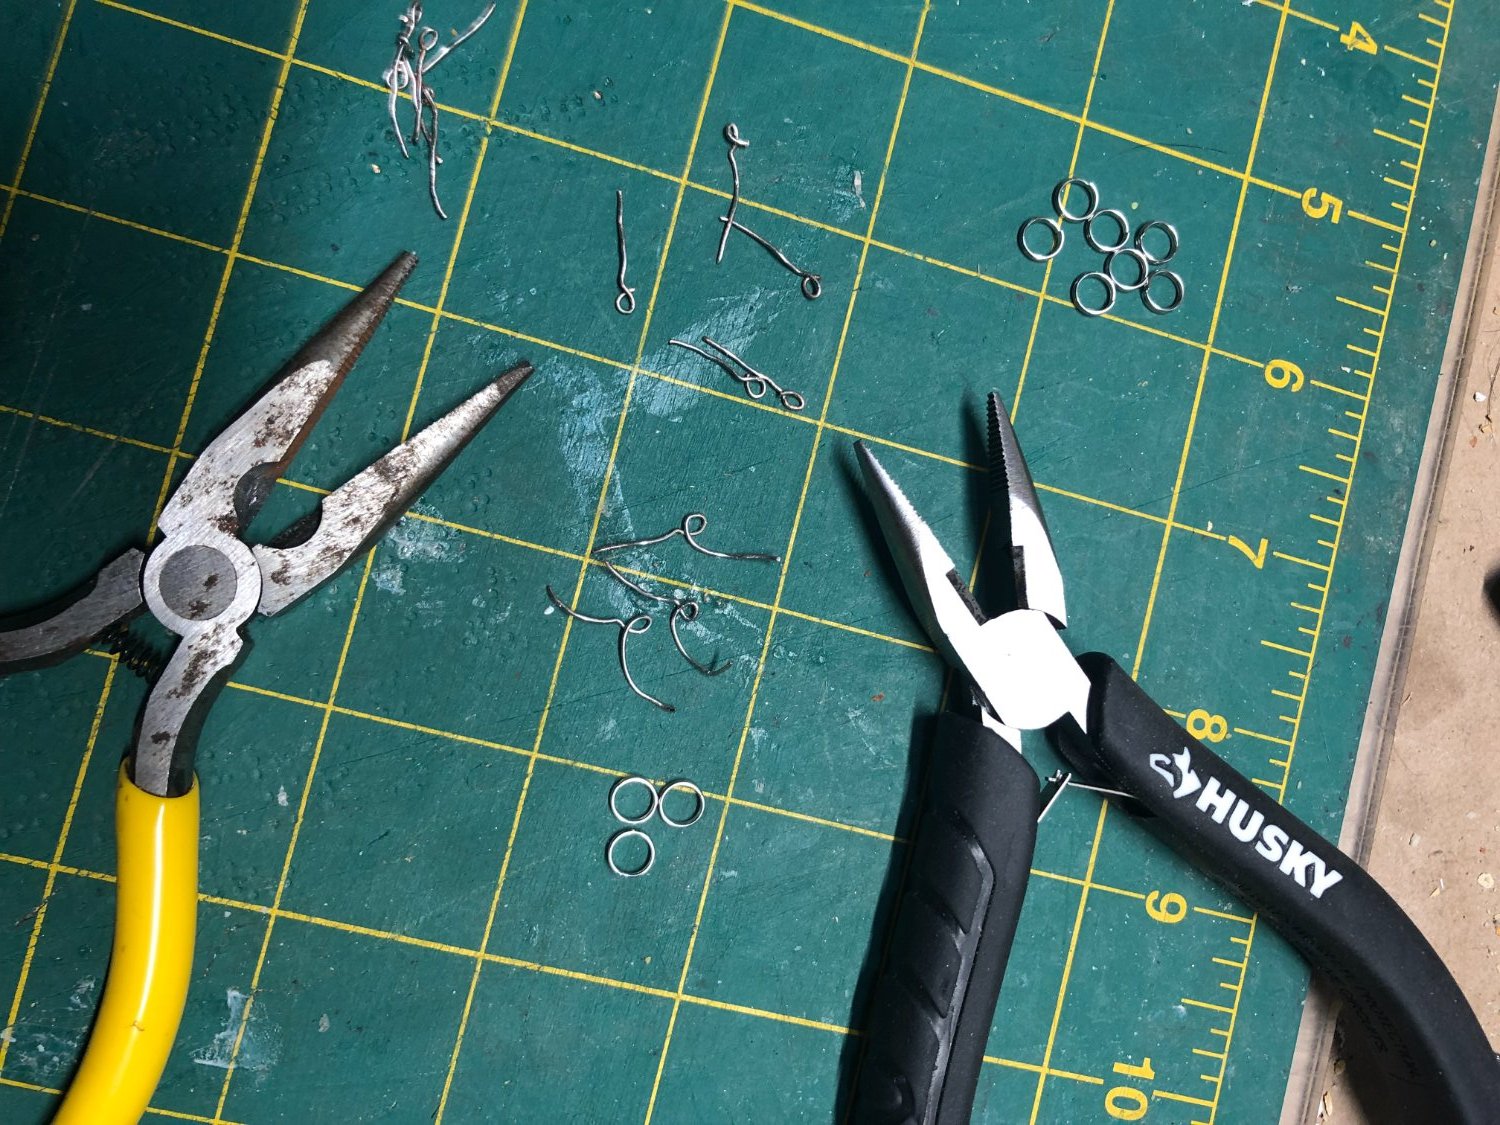
Sorry its been a bit long to add another update due to all the scratchbuilding. I have a system for making my own eyelets.

I bought a pack of ringlets from a hobby store (Hobby Lobby), using just a small pair of needlenose plyers I separate the rings into a single ring. Then making a loop around a nail used for hanging pictures and pull tight. I would clip off one long piece of wire before I would bend the other wire to make the leg. Later when going to use it I will cut the leg to the length needed to attach the eyelet into a hole. Using black paint to cover the marks and stuff, this will give me a very strong eyelet to rig with.
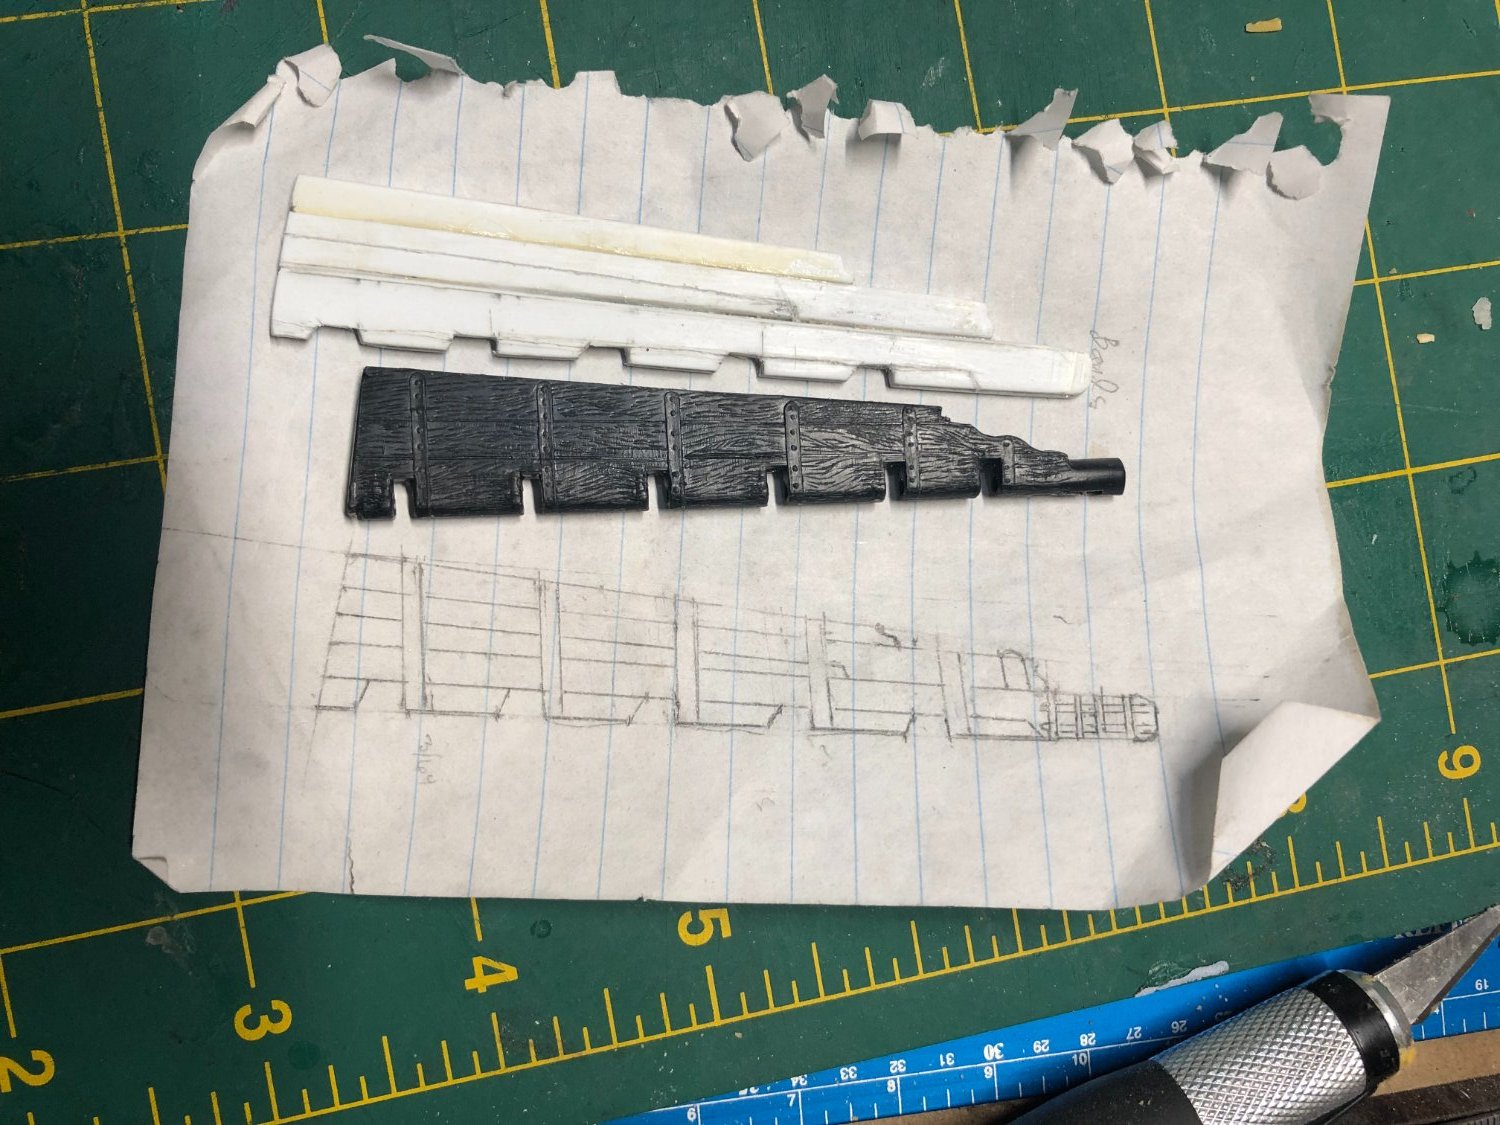
The rudder that came with the model was not the correct one for it so I built one myself using a drawing to scale.

The black one is from the model company while the white one is the one I hand made to the drawing I used. I will add the bands after I place the copper on the rudder and paint it.
-
 GrandpaPhil reacted to a post in a topic:
USF Constitution 1798 by LaurenS - Revell - 1/96 - PLASTIC
GrandpaPhil reacted to a post in a topic:
USF Constitution 1798 by LaurenS - Revell - 1/96 - PLASTIC
-
GrandpaPhil reacted to a post in a topic:
USF Constitution 1798 by LaurenS - Revell - 1/96 - PLASTIC
-
GrandpaPhil reacted to a post in a topic:
USF Constitution 1798 by LaurenS - Revell - 1/96 - PLASTIC
-
GrandpaPhil reacted to a post in a topic:
USF Constitution 1798 by LaurenS - Revell - 1/96 - PLASTIC
-
GrandpaPhil reacted to a post in a topic:
USF Constitution 1798 by LaurenS - Revell - 1/96 - PLASTIC
-
Cathead reacted to a post in a topic:
USF Constitution 1798 by LaurenS - Revell - 1/96 - PLASTIC
-
Cirdan reacted to a post in a topic:
USF Constitution 1798 by LaurenS - Revell - 1/96 - PLASTIC
-
Cirdan reacted to a post in a topic:
USF Constitution 1798 by LaurenS - Revell - 1/96 - PLASTIC
-
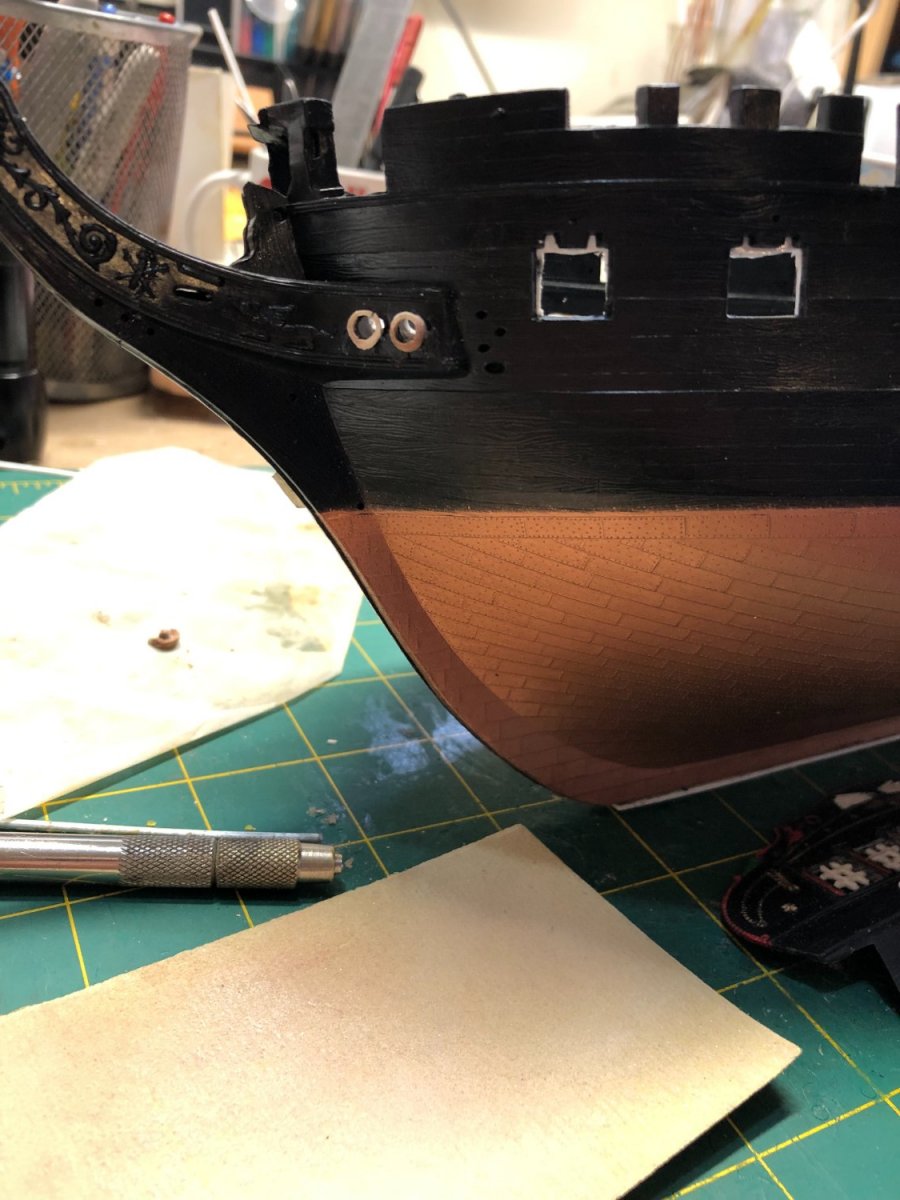
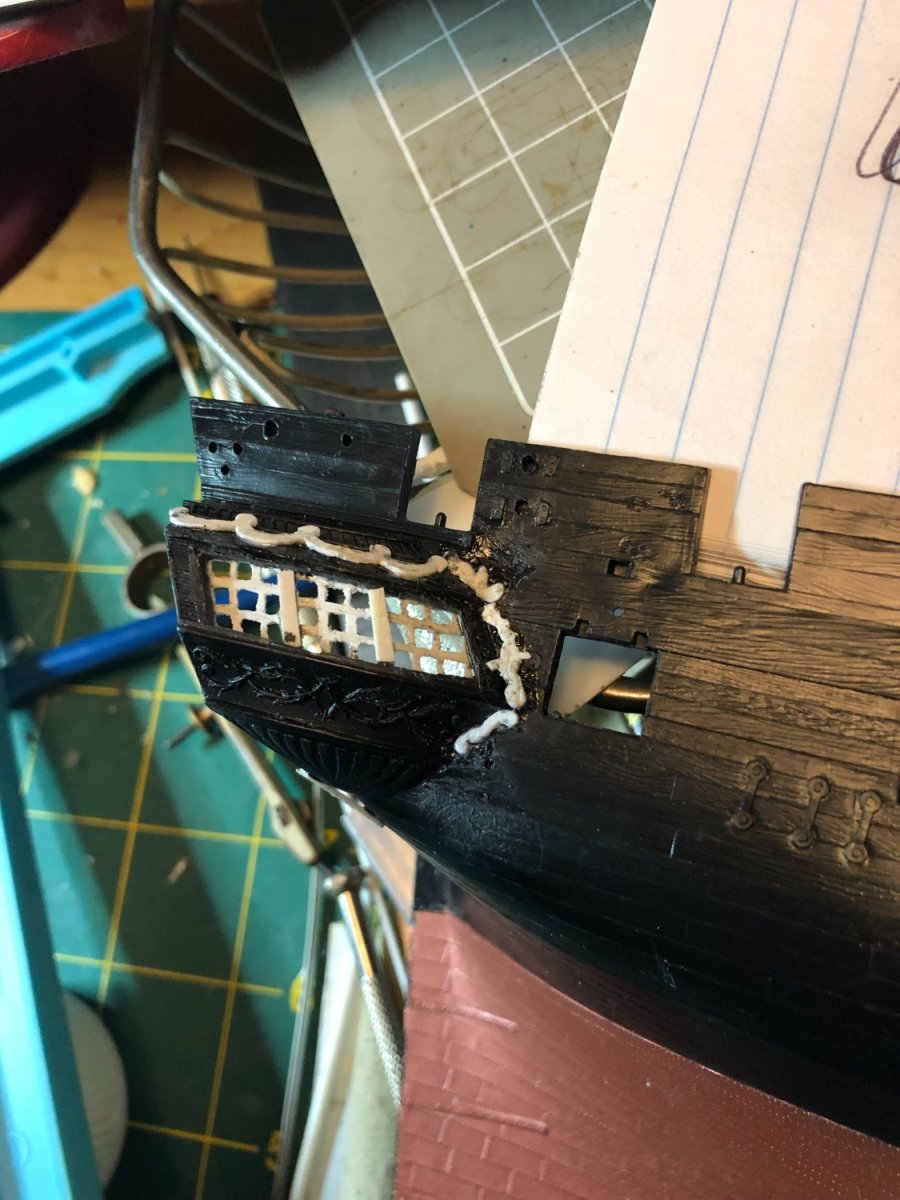
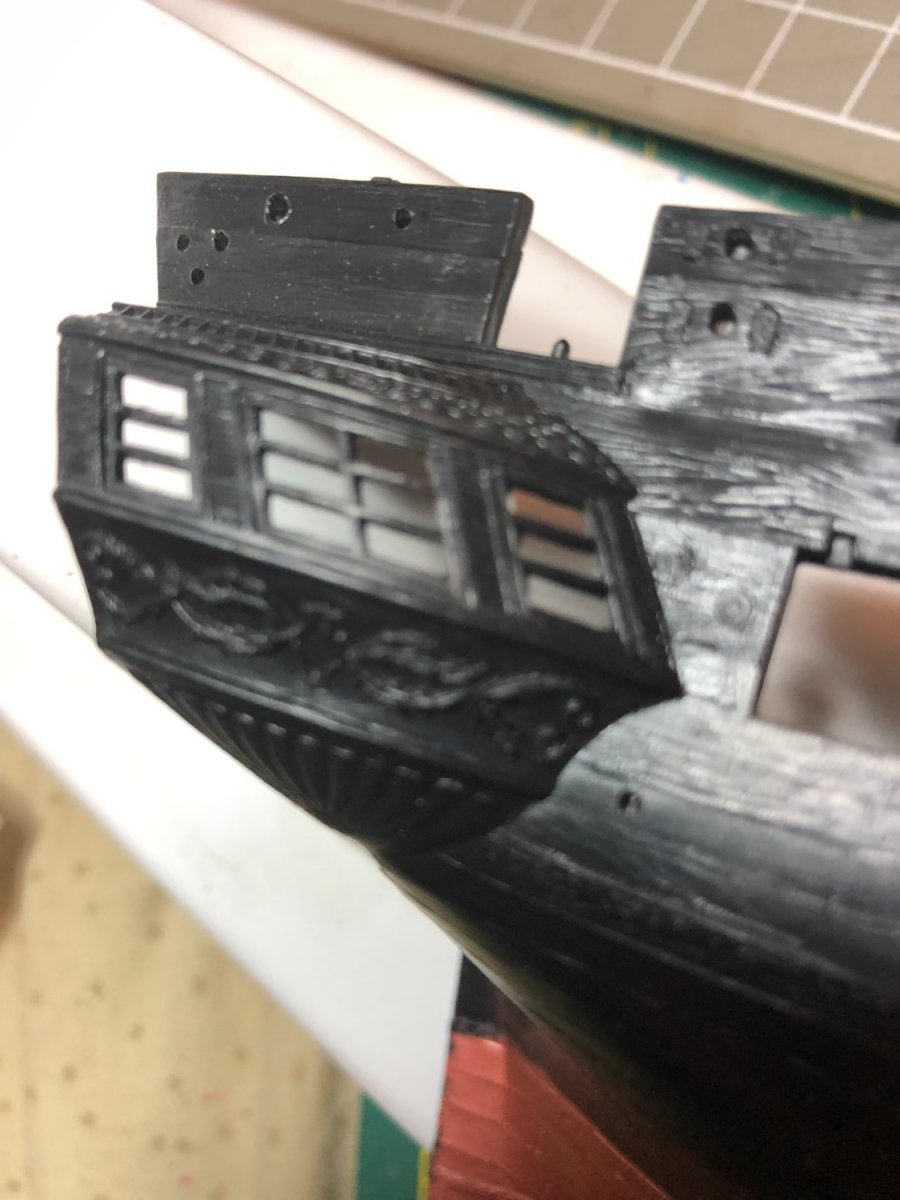
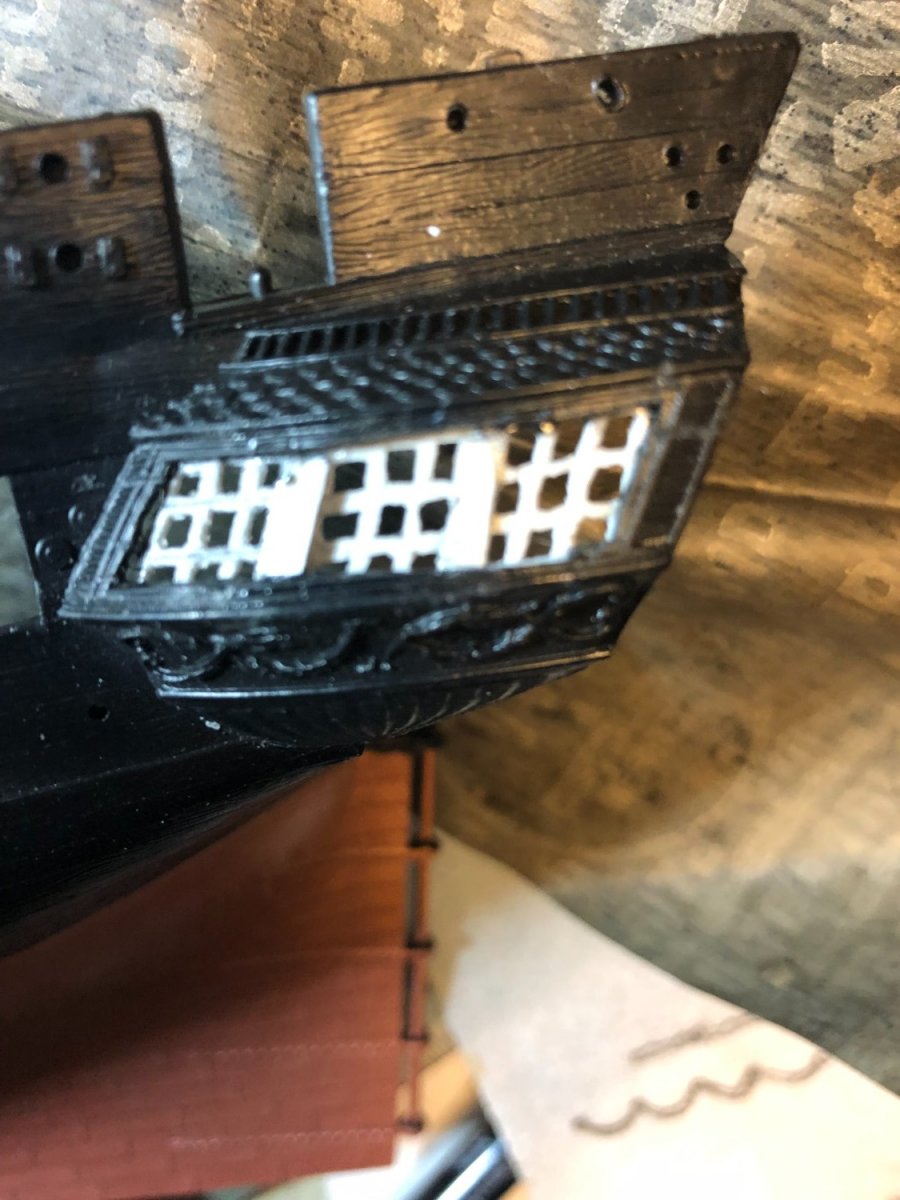
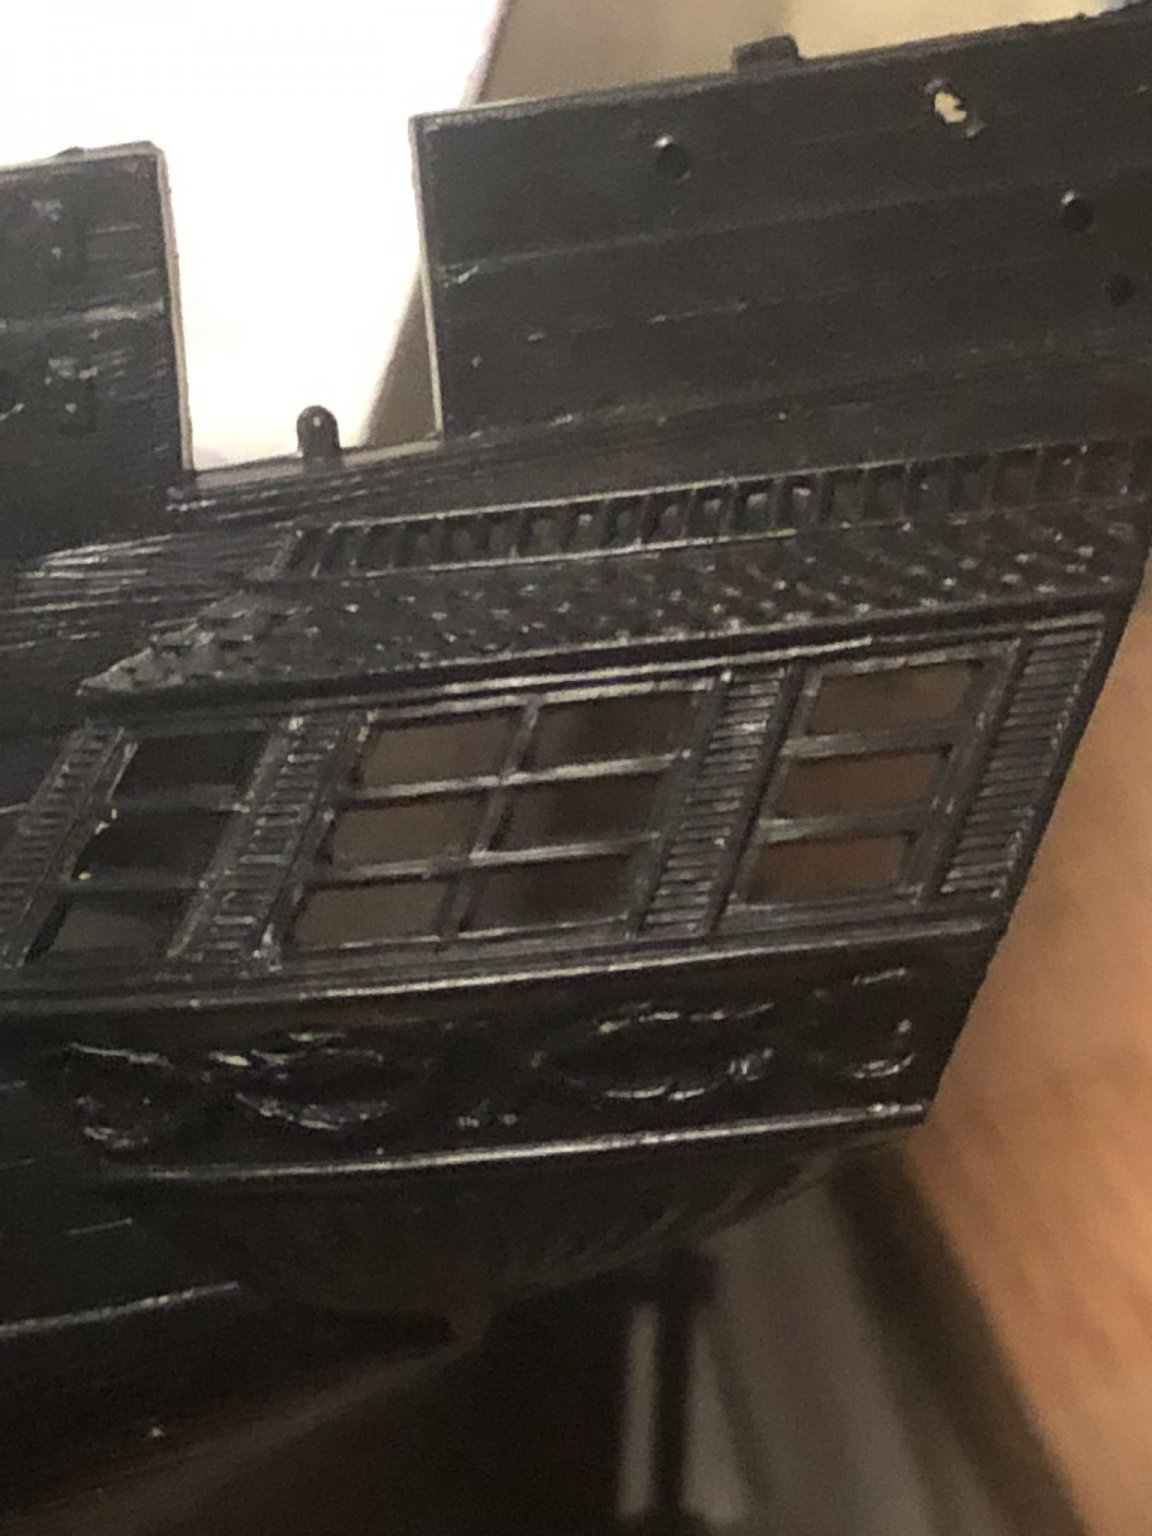
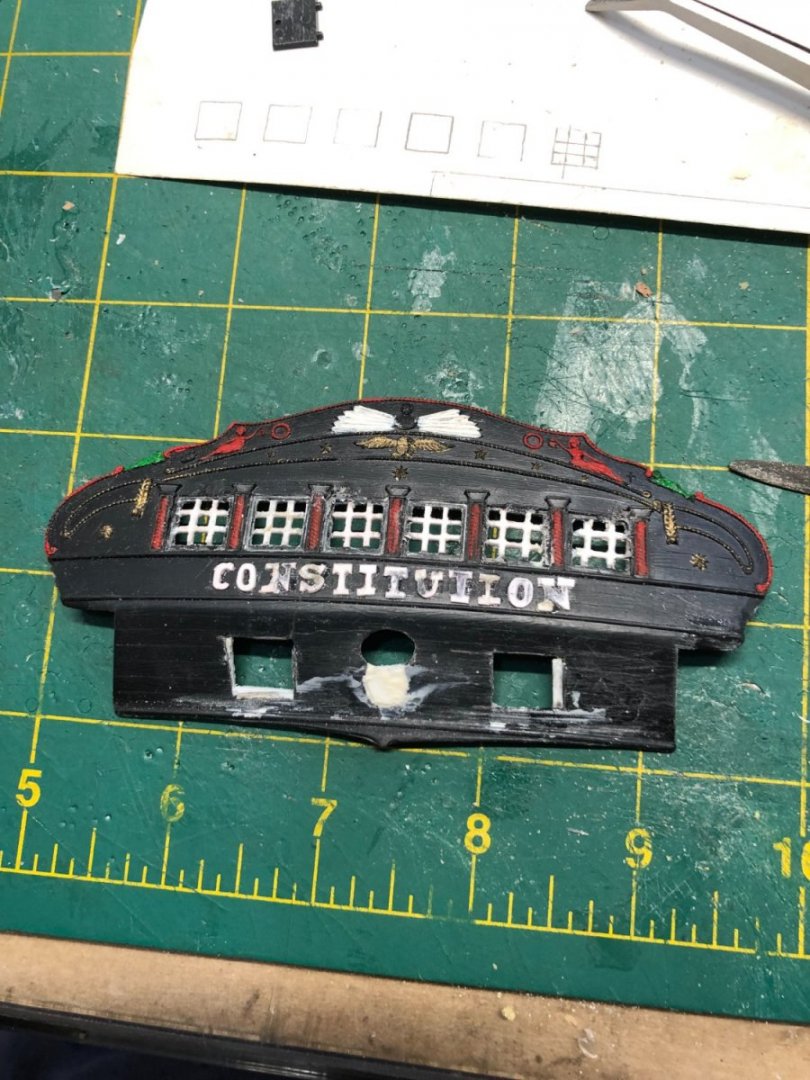
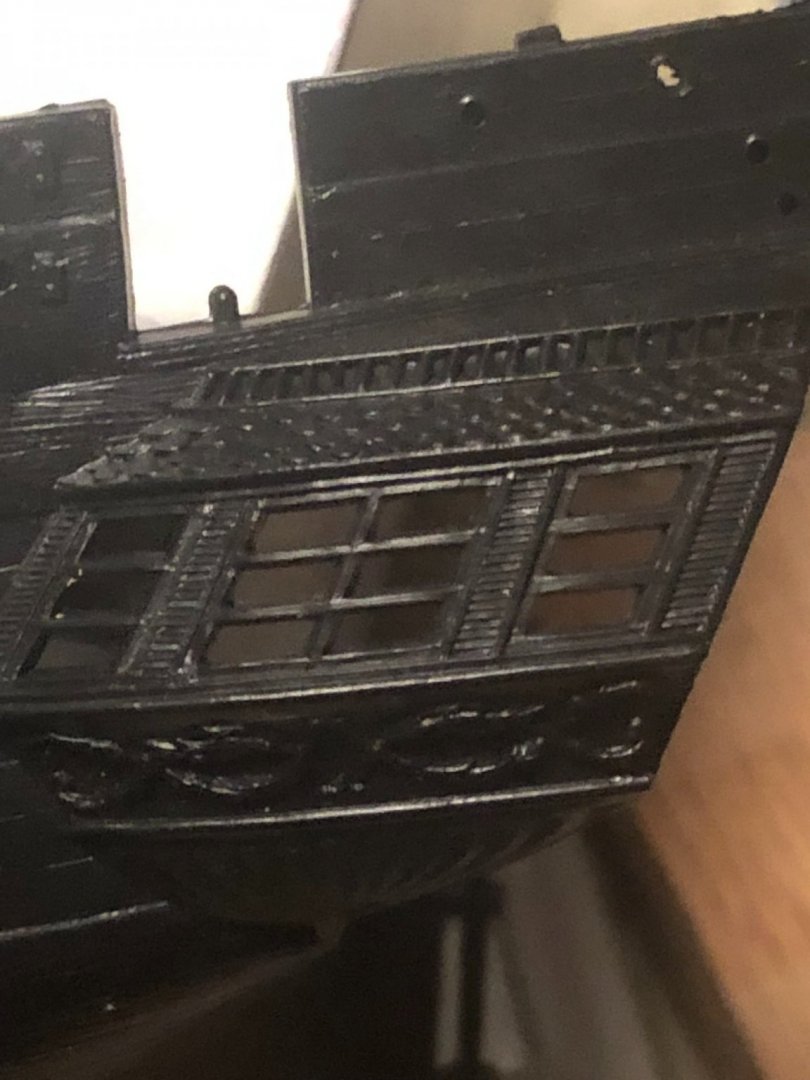
Here is the new stern reworked. I used the model made for Capt Hull by his crew. I researched and found two paintings to back up this stern design. I plan to closely model my Constitution to the time frame which when Capt. Hull commanded the ship. Revell's model had most of the details correct but was off on the window's, name on the back, the opening for the rudder and the two gun ports. There was never an oval opening running up and down on the Constitution at any time. There was an oval opening running sideways that stayed that way till after the war. Then the rudder opening became a circle for the rudder. The gun ports were originally windows till the Quasi war which they were turned into gun ports. The name on the ship had numerous styles during it's early years. The Revell model originally had oval openings going out sideways which was never used. I drilled out the holes to reflect the opening in a circular pattern going up at a 45 degree angle which allows the anchor to freely drop when used.

- 8 replies
-
- 2
-
-
- Plastic
- Constitution
- (and 2 more)
-
Cathead reacted to a post in a topic:
USF Constitution 1798 by LaurenS - Revell - 1/96 - PLASTIC
-
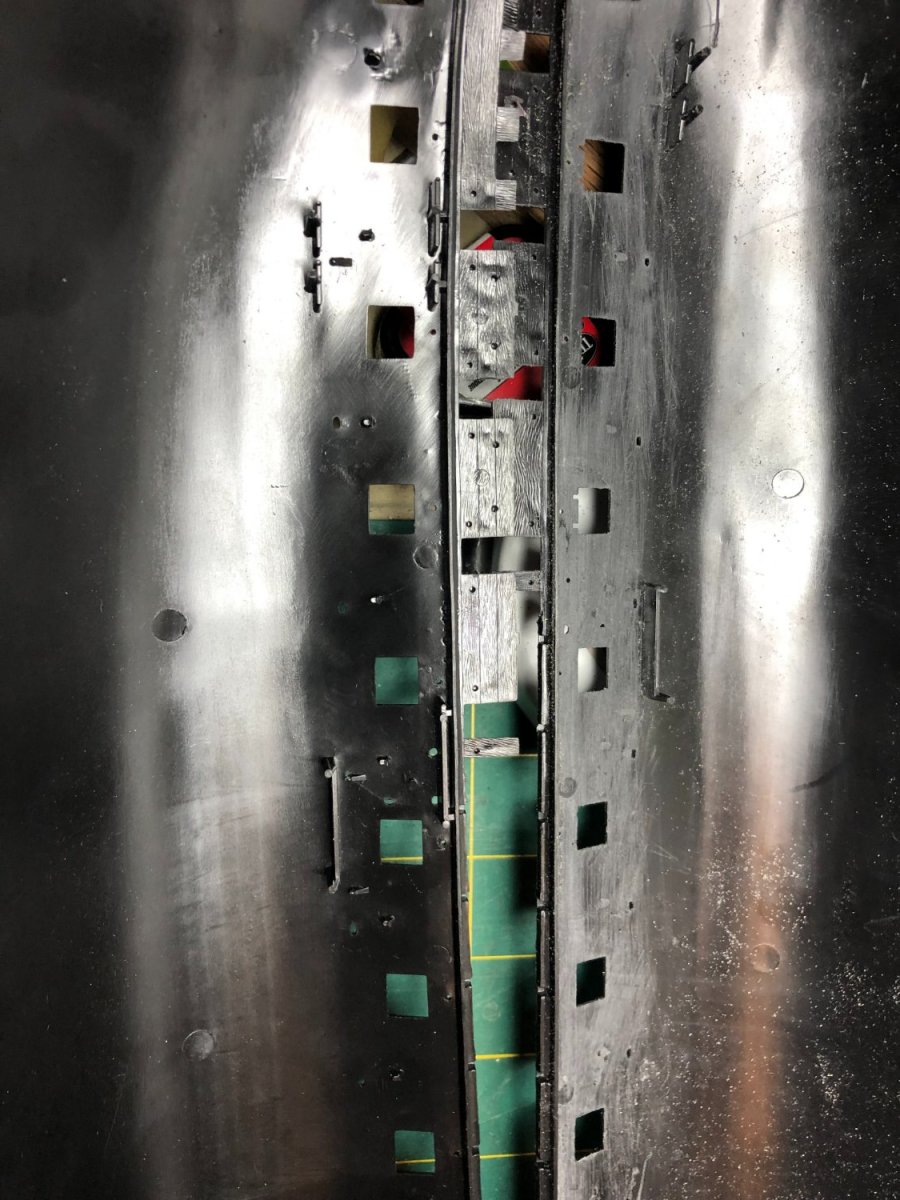
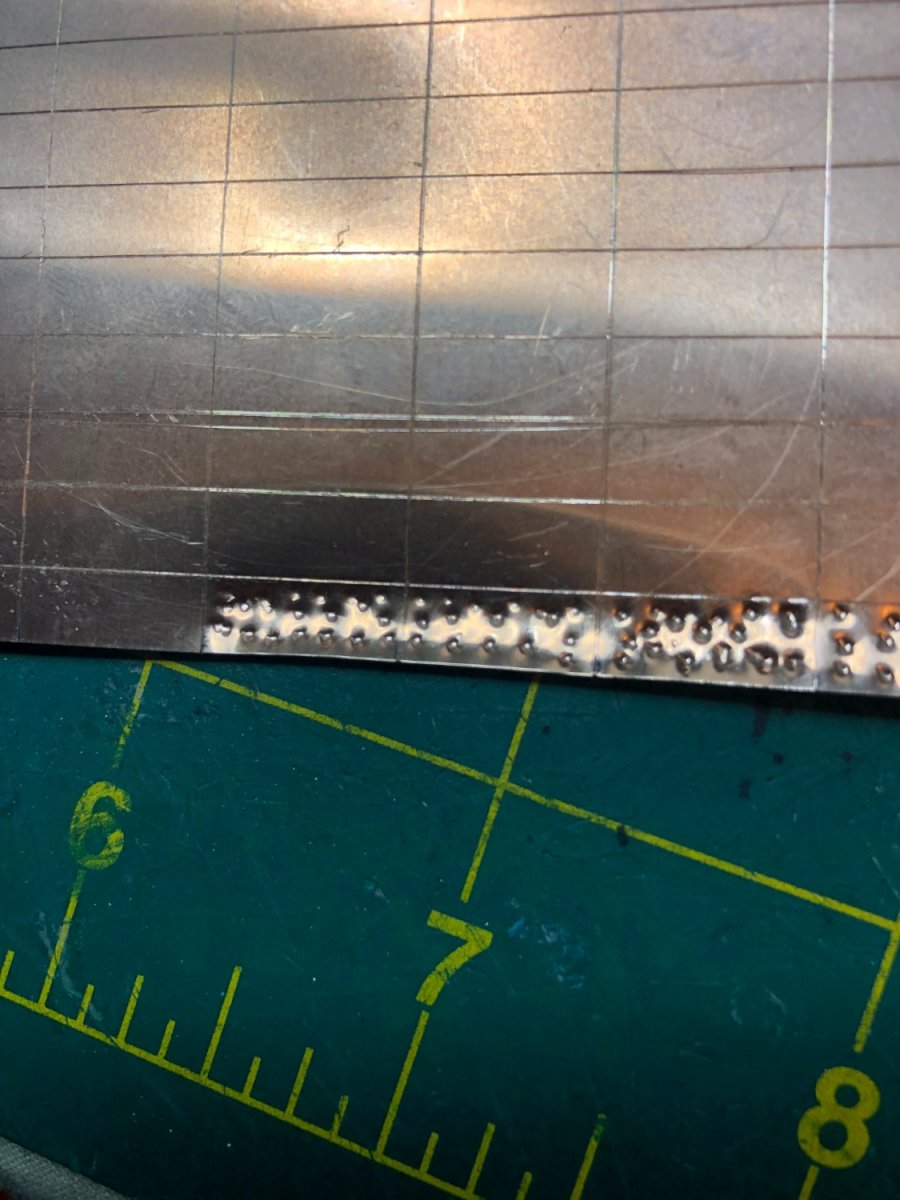
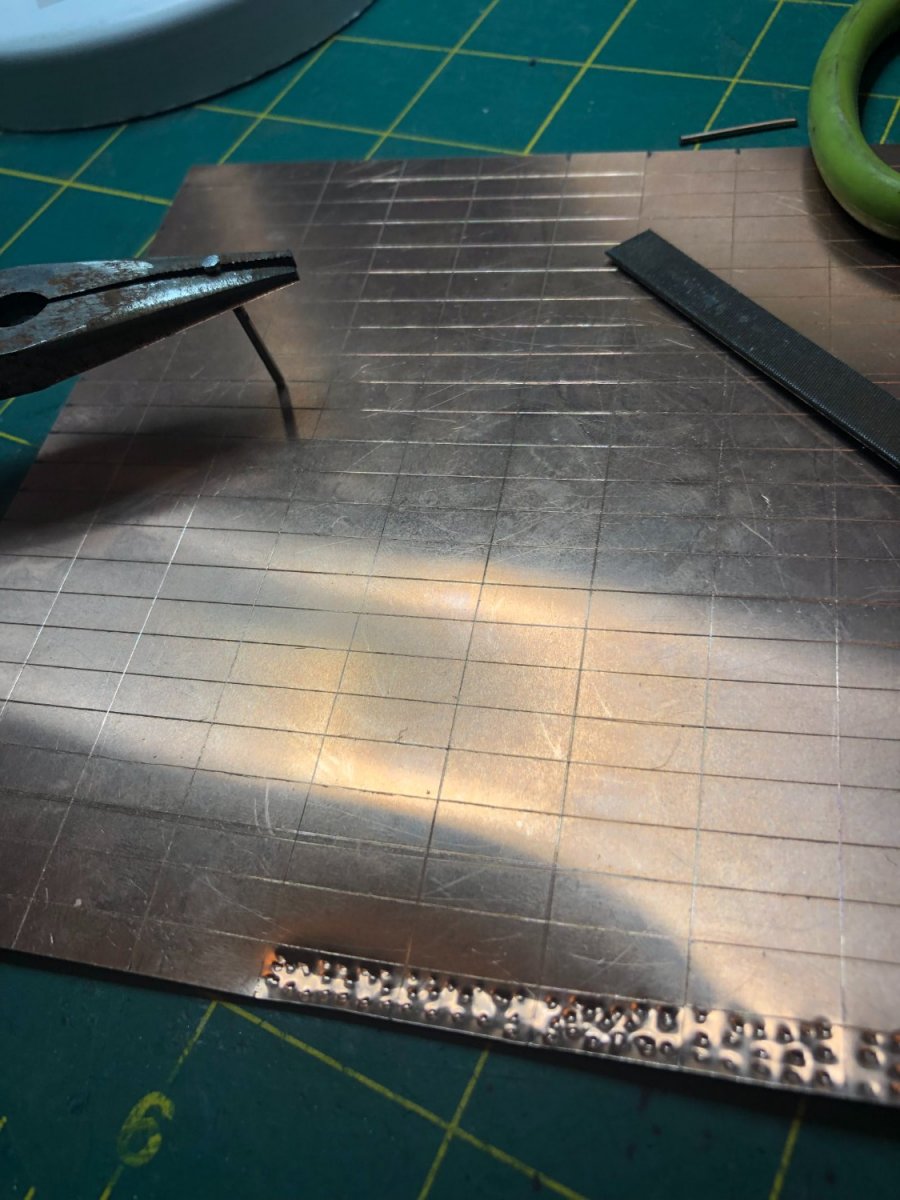
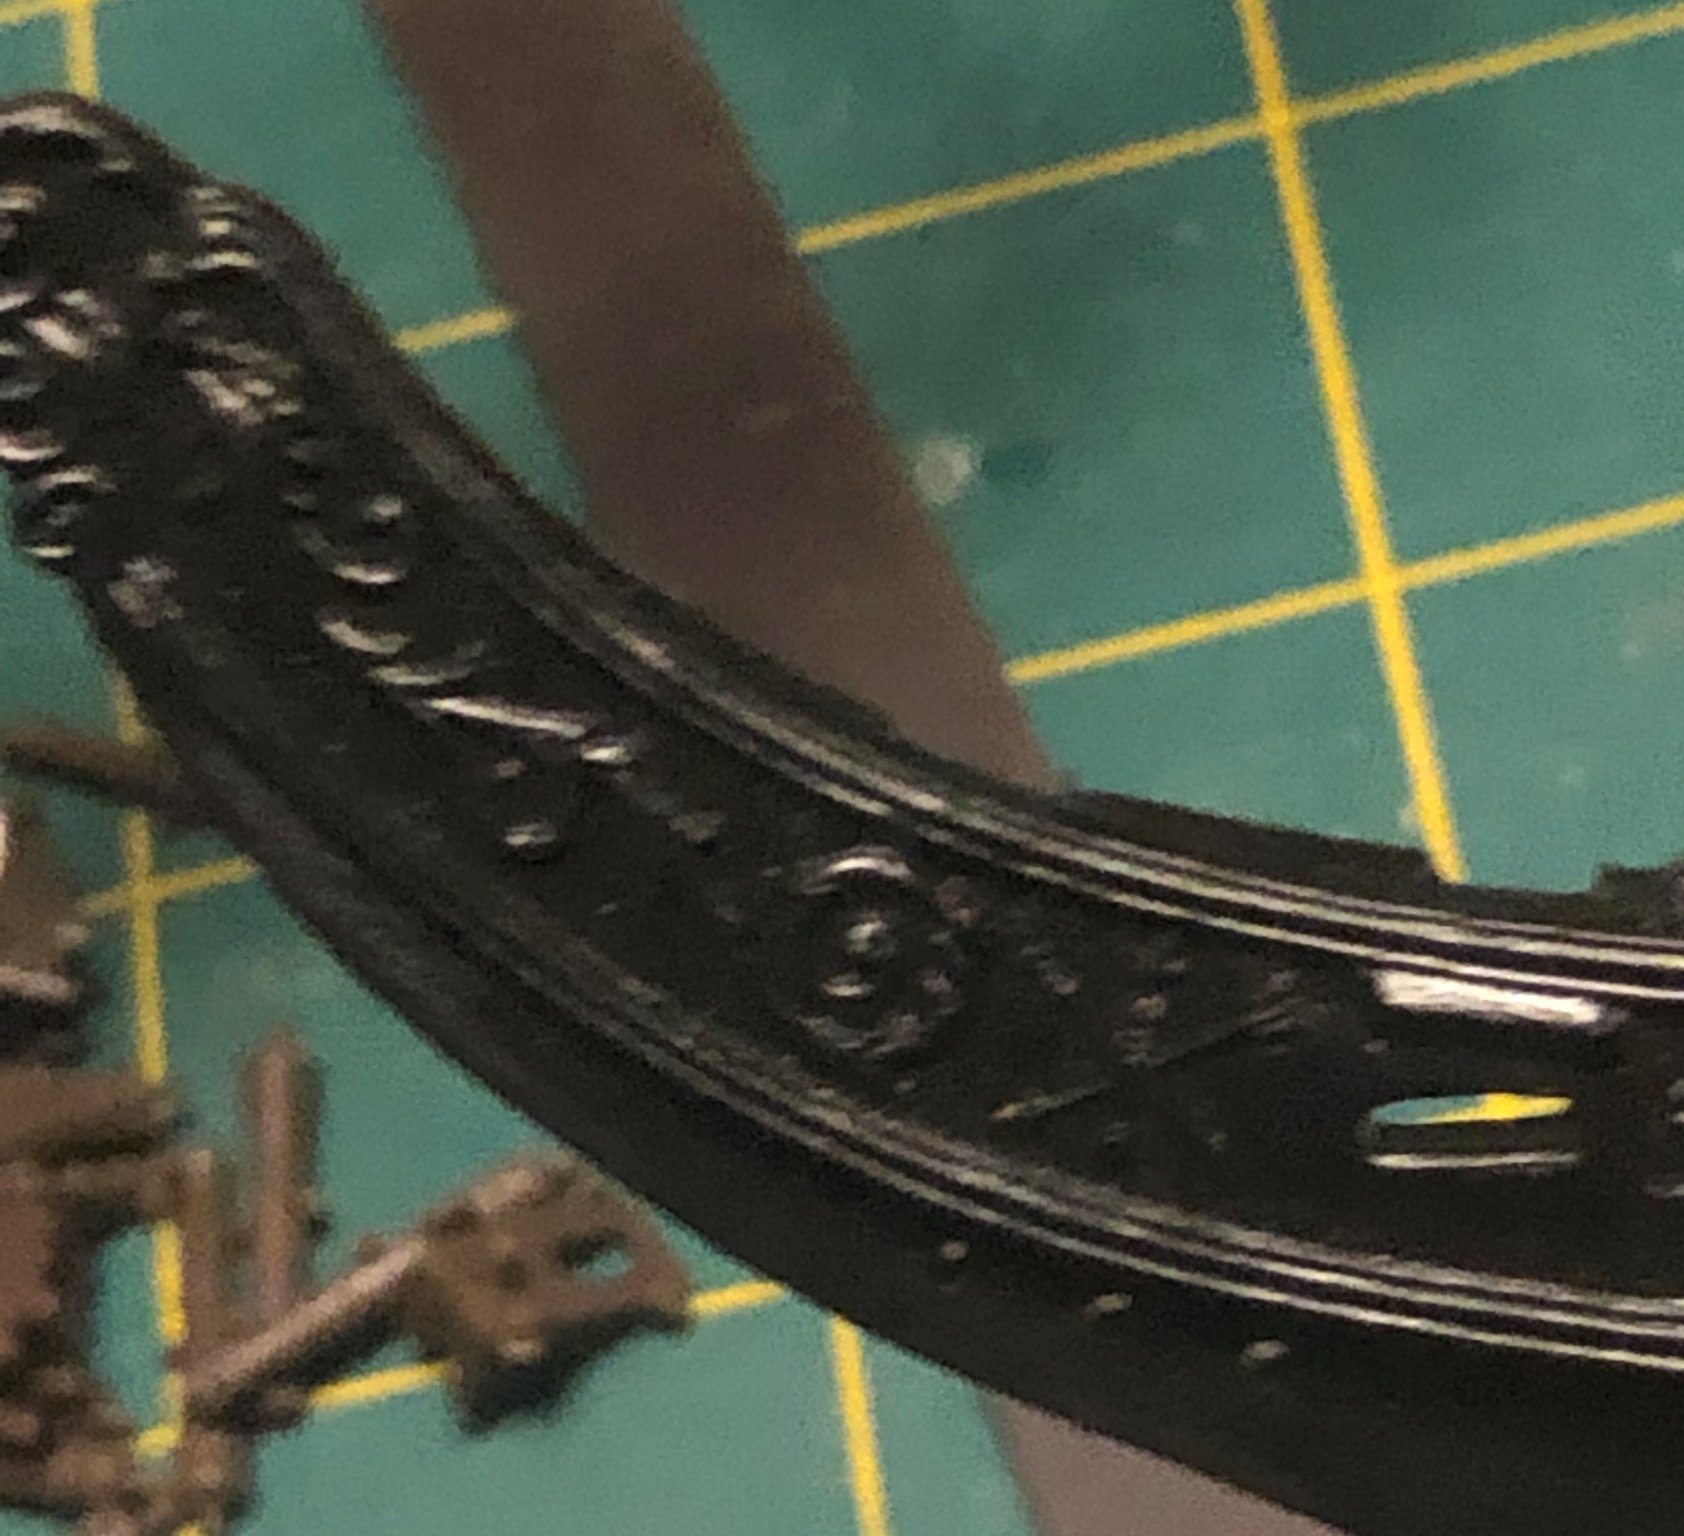
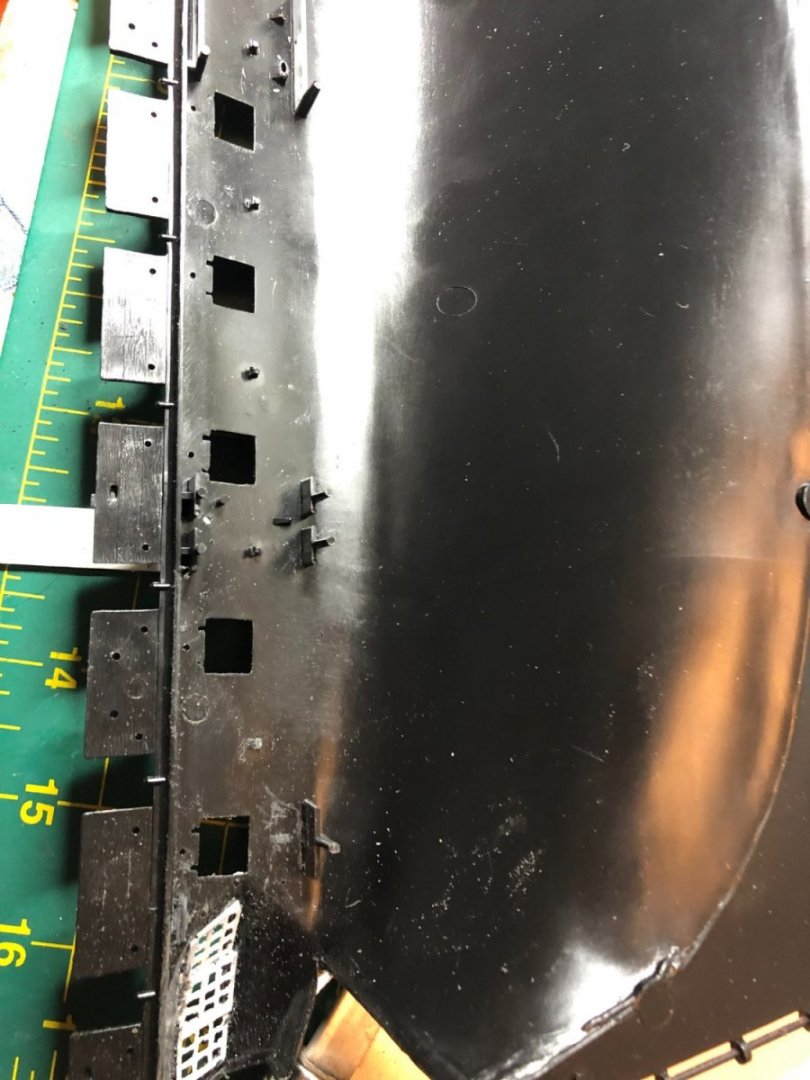
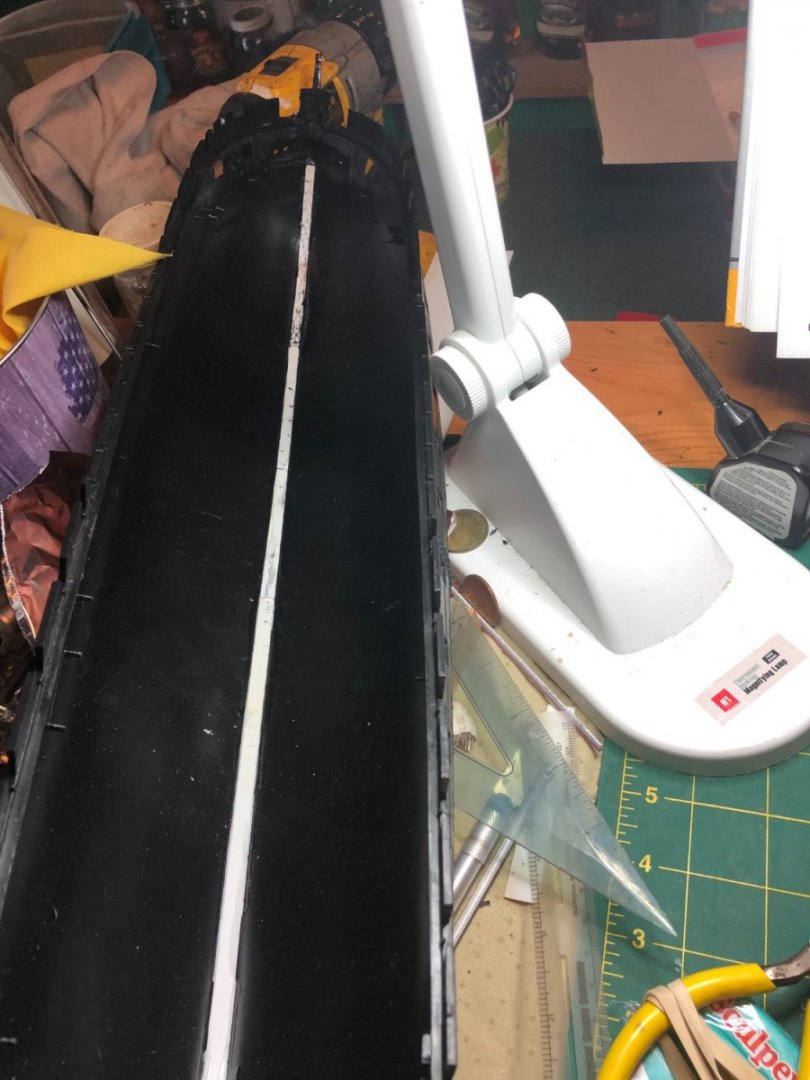
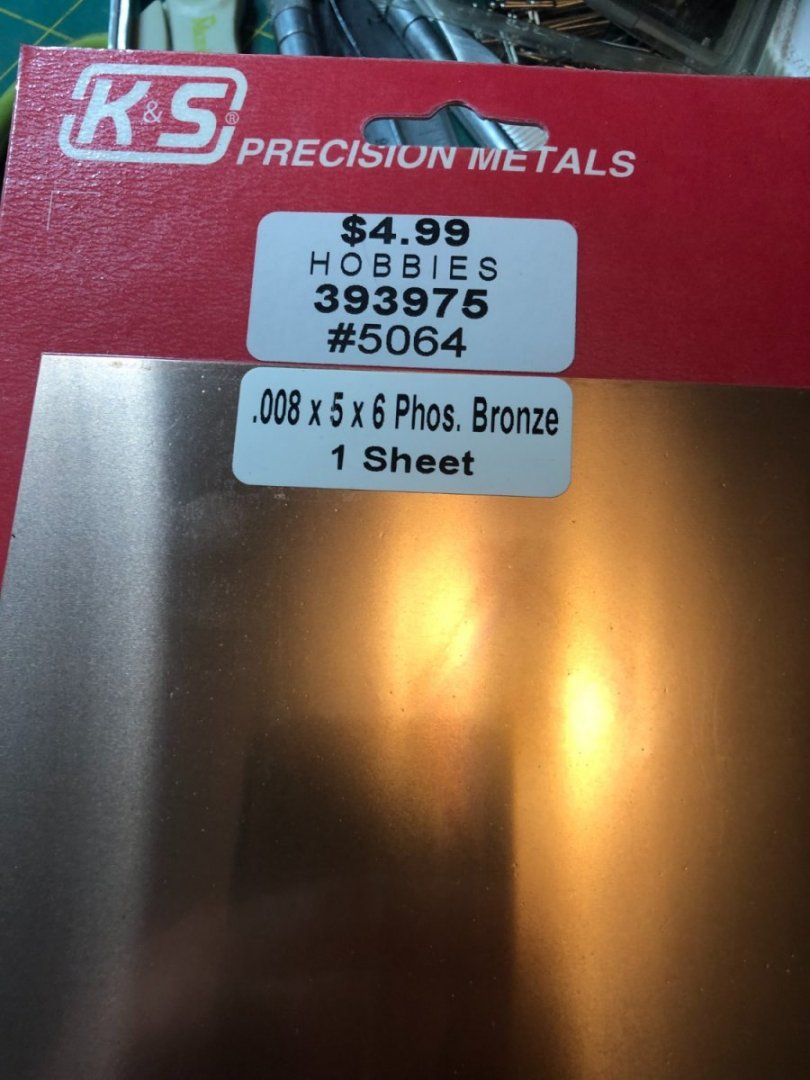
Here I knew that it had to be cleaned up if I wanted to properly rig the guns, as well as to do the deck that I would have to remove all the nobs. I had cleaned off everything off of one side and placed it beside each other to show the rework of the inside. In the past when assembling large ship models it would buckle due to a weak seam down the middle. So now I add a strip of plastic to basically weld the two halves together to prevent separation and buckling. I have read on how everyone did their way of applying copper sheathing to their ship bottoms I had came up with my own way. When compared by size and color to coppering a ship I found this to be close. Here I marked out the size then scribed out my line using me x-acto knife. Taking a nail used for hanging small pictures I cut the tip off. After removing the tip I rounded the edge keeping the bottom flat. Holding it with a small needlenose plyers I tapped the top of the nail with a hammer. It does make the small dents that would look like it was nailed with human hands. The only problem is that the sheet would curl while being worked which made it hard to make my marks. I finally ended up tapping the metal flat as I work it to keep the shape and be able to work it. I would turn it over and tap it flat on a hard surface pushing the reverse dents back up and this is the finish product. Now this is time consuming plus as thin this metal is it can be cut with a simple pair of scissors.


- 8 replies
-
- 2
-
-
- Plastic
- Constitution
- (and 2 more)
-
Thank you very much
-
mort stoll reacted to a post in a topic:
USF Constitution 1798 by LaurenS - Revell - 1/96 - PLASTIC
-
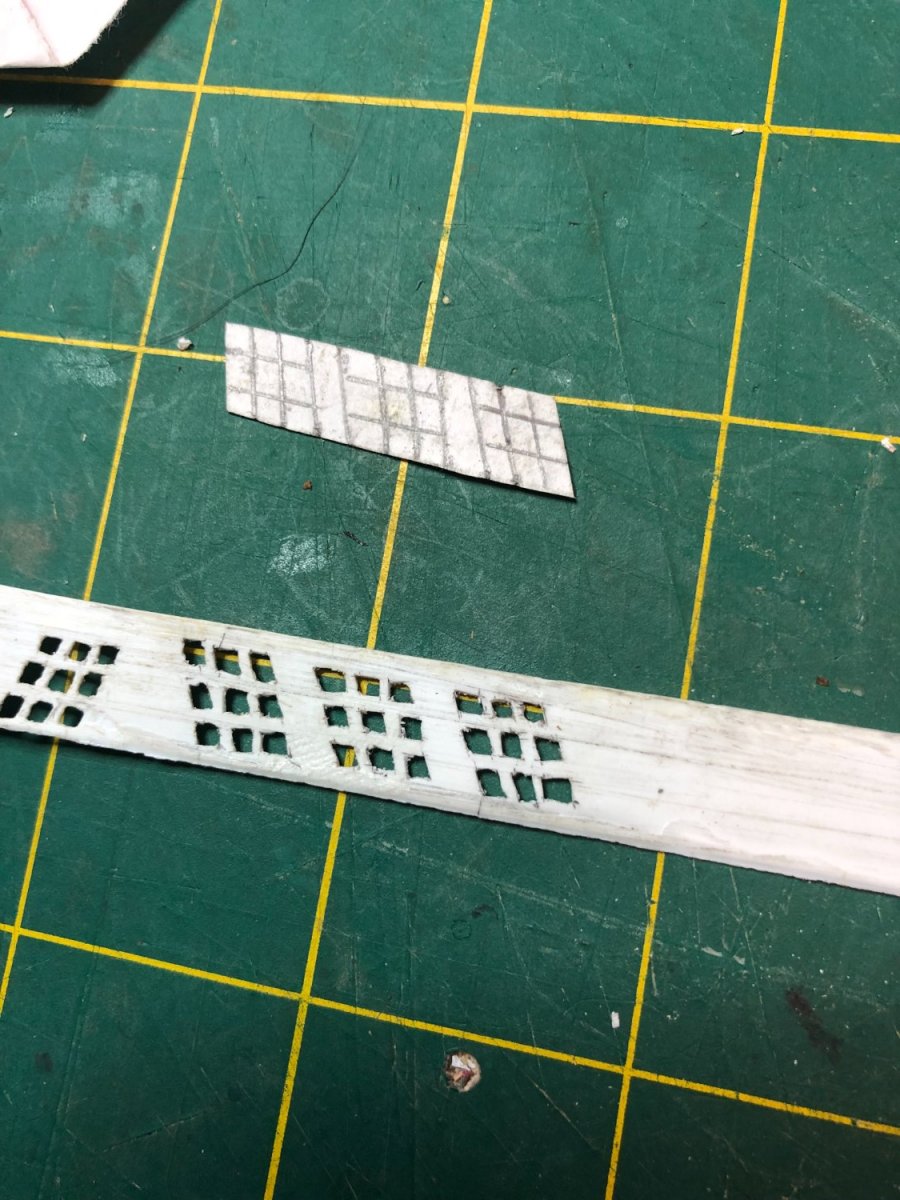
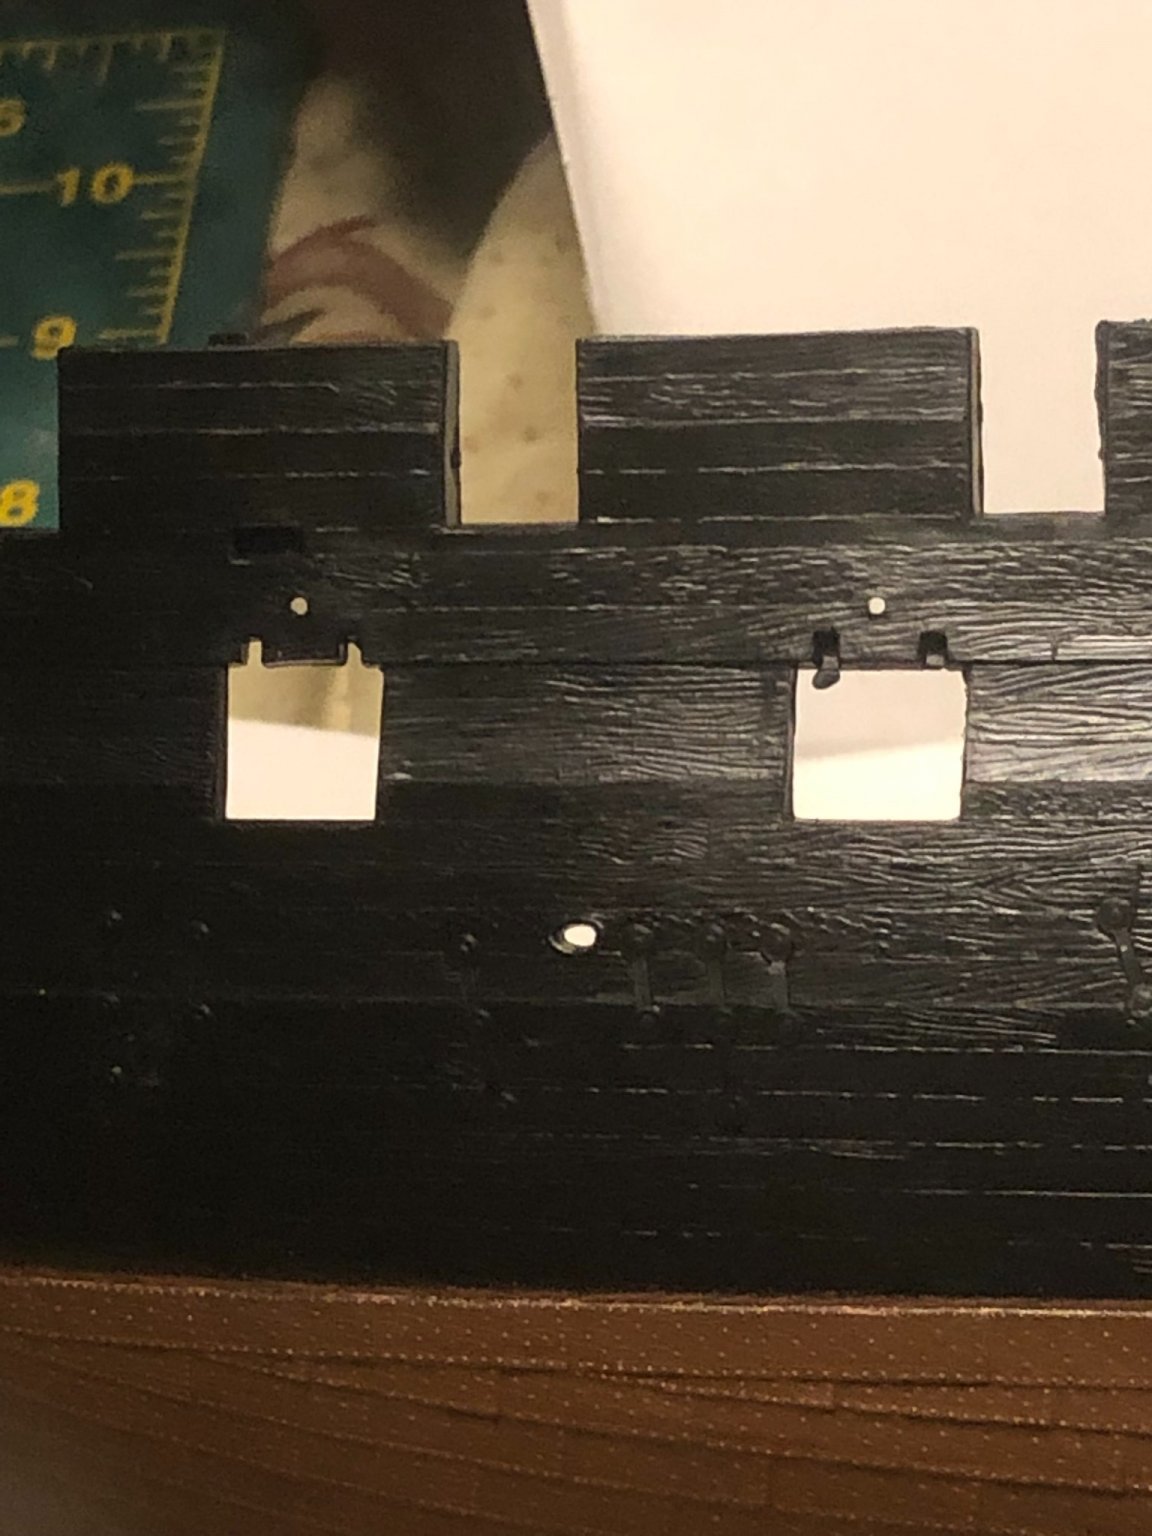
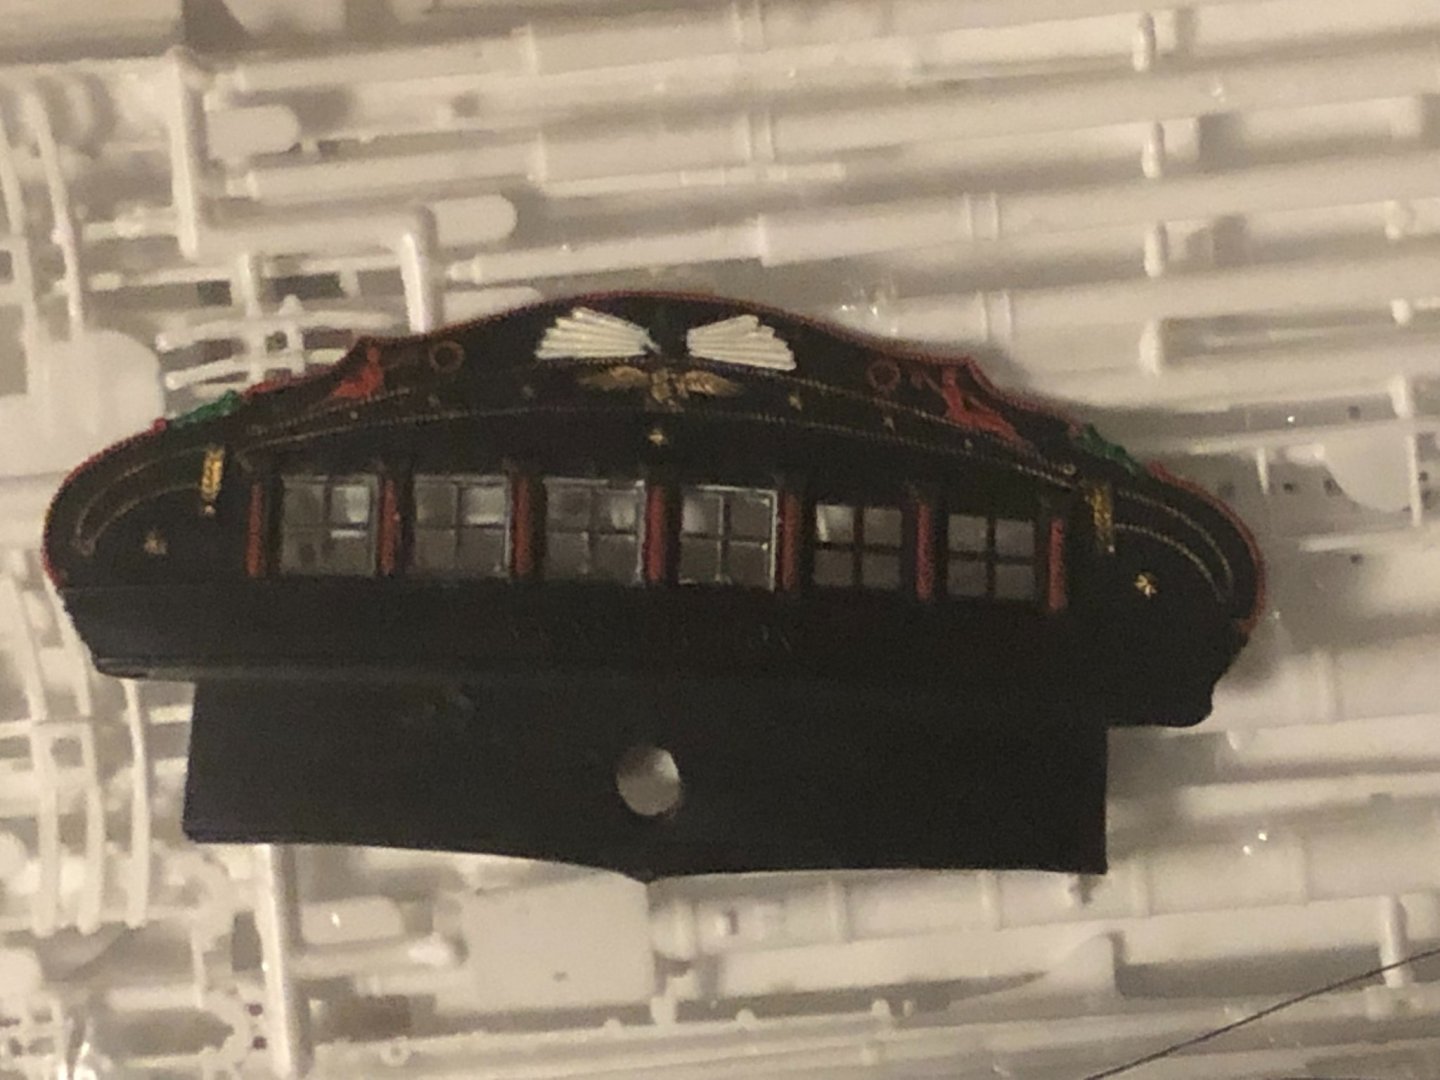
Hey please excuse me for large pics. Well all you have seen me doing is by x-acto knife, pencil, and guess work. I would transfer my pattern from paper to plastic. Then I would drill out the holes before I would carefully cut the holes into squares. Using needle files I would shape my cuttings down. The picture I am posting is a prime example of my process. I have been trying to add the window trim around the window from what I saw that the ship had on it during the War of 1812. I am far from done for I need to finish cleaning everything up before moving on to the next modification. Yes I have seen others who do this work cleaner and better but they are using a lot of the state of the art tools. I am just using a knife, needle files, steel ruler, a good light, and my own two hands. Once I am finished with this I will be moving onto making the Main Brace spreader and the Main Course sheet fairlead.

- 8 replies
-
- 4
-
-
- Plastic
- Constitution
- (and 2 more)
-
I finally started to get building. I wanted the windows to reflect the correct windows which I found both in the paintings and the book of the Anatomy of the USS Constitution. I drew up the pattern of the windows to fit in the place of the space. I carefully drilled out the center then trimmed away the rest. It meant that I had to cut the old window out. I had to place each window in place to fit, as well as making the center post. Yes there is more clean up needed but wanted to show how I am trying to make this plastic model to reflect it's time period of the War of 1812. Next I will try to work on the correct decorations that surround the windows. Hey take it easy on me for its been over 30 years since I got back into modeling once more.


- 8 replies
-
- 4
-
-
- Plastic
- Constitution
- (and 2 more)
-
New Member Rock Harris: An Introduction
LaurenS replied to rock harris's topic in New member Introductions
From one newbe to another welcome aboard matey! -
LaurenS reacted to a post in a topic:
New Member Rock Harris: An Introduction
-
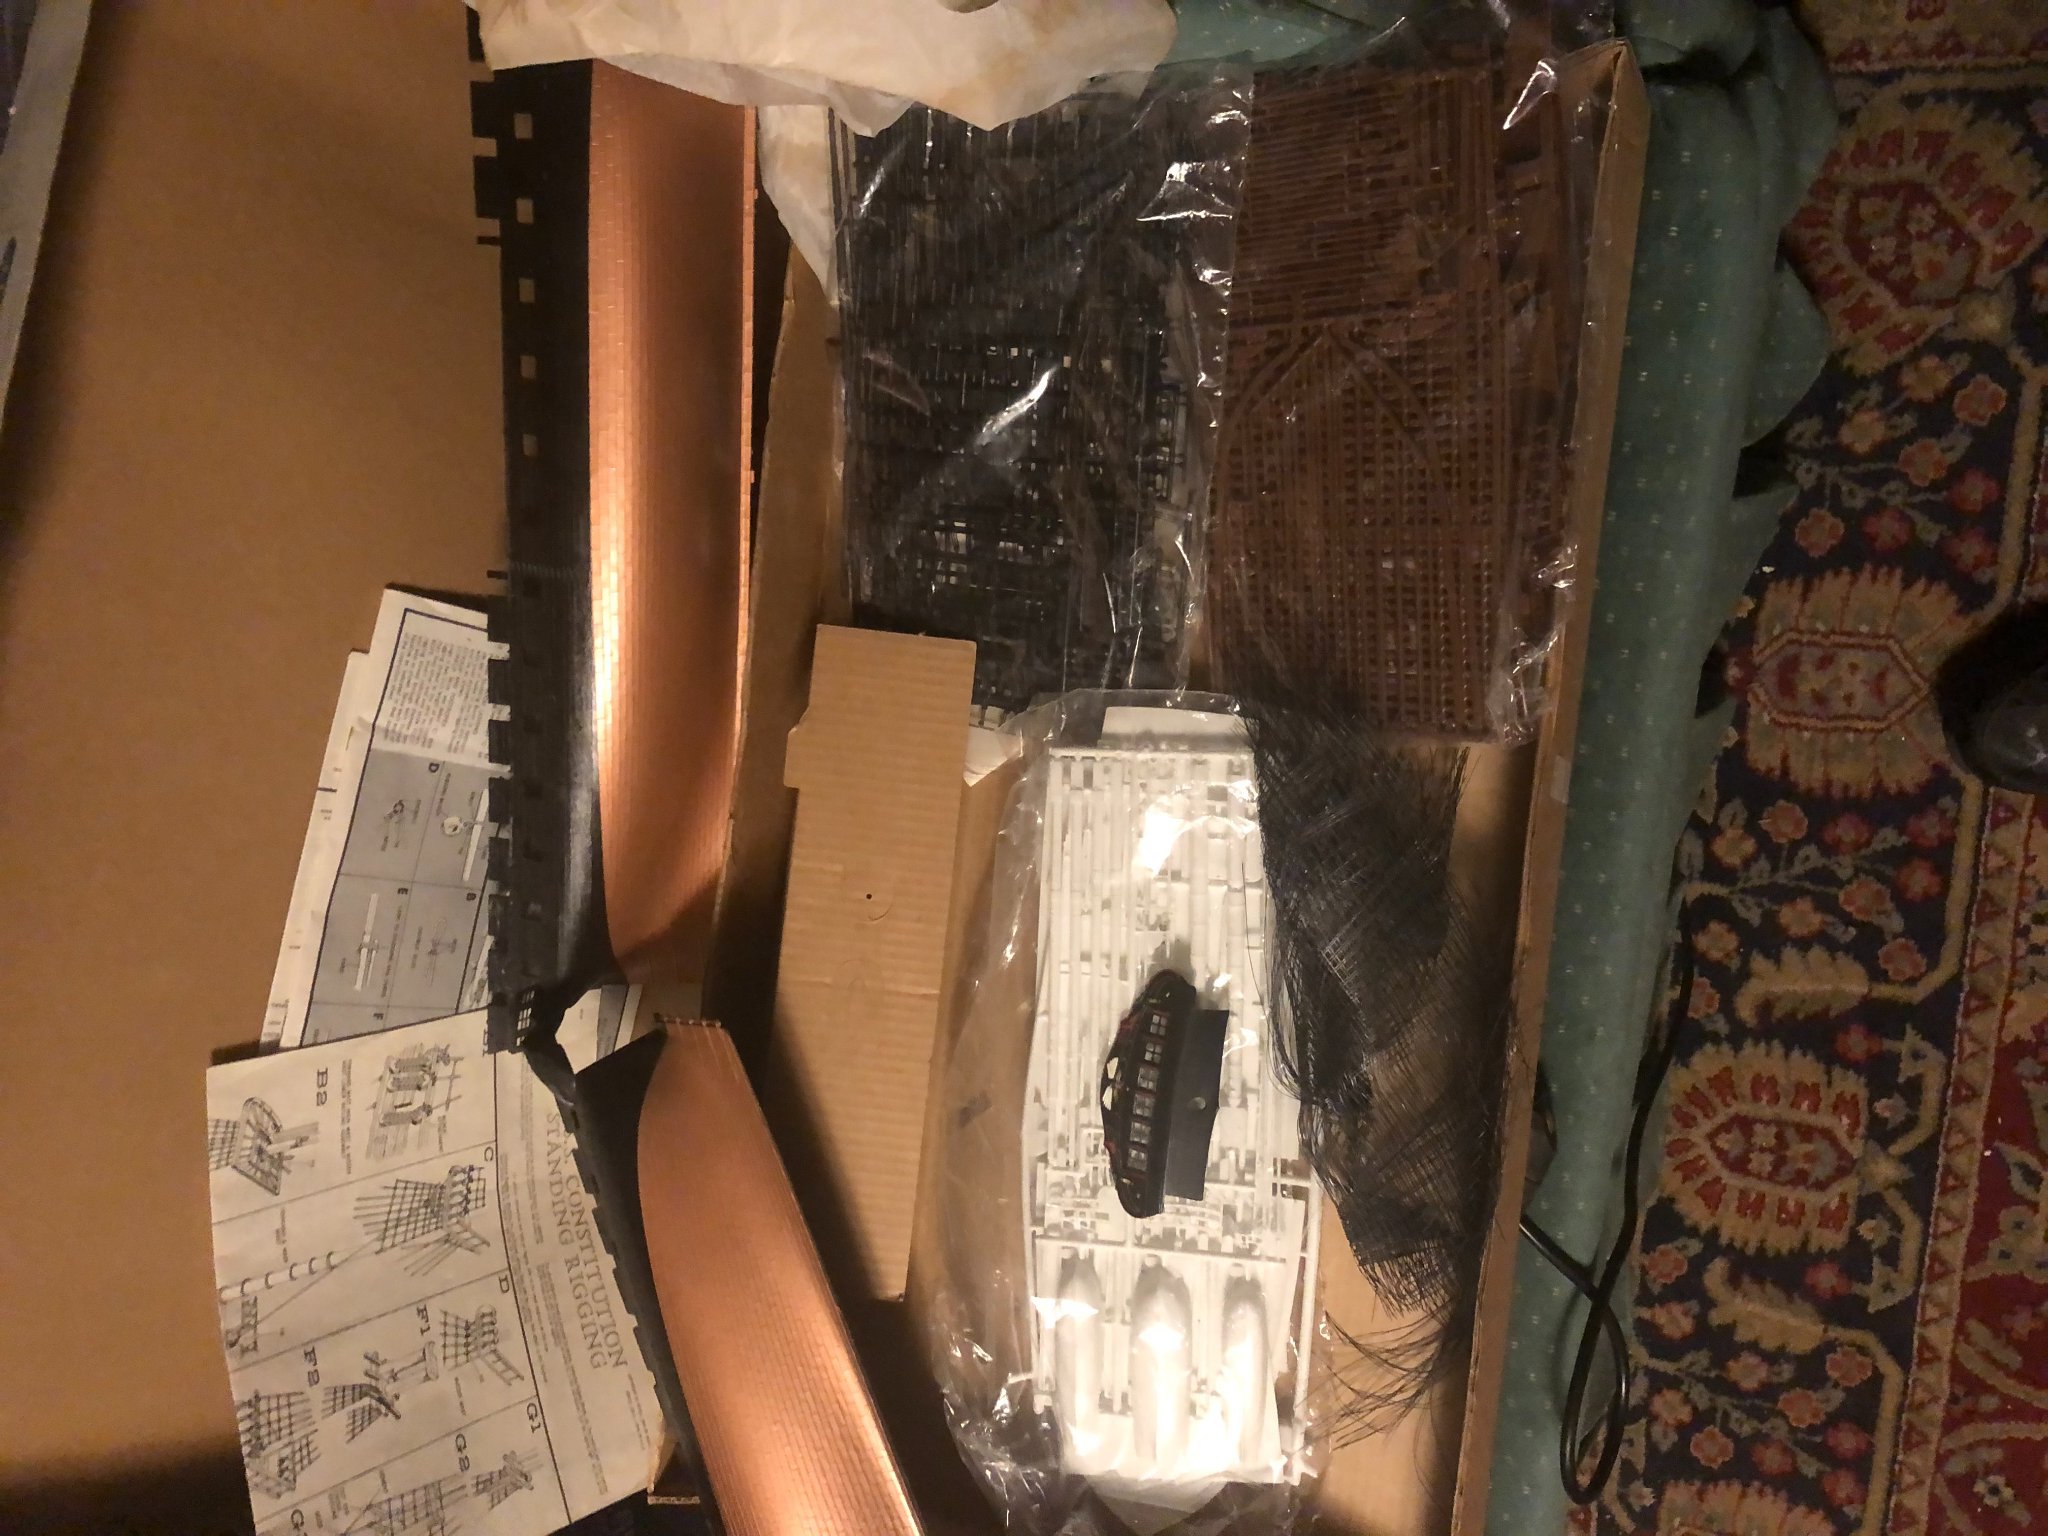
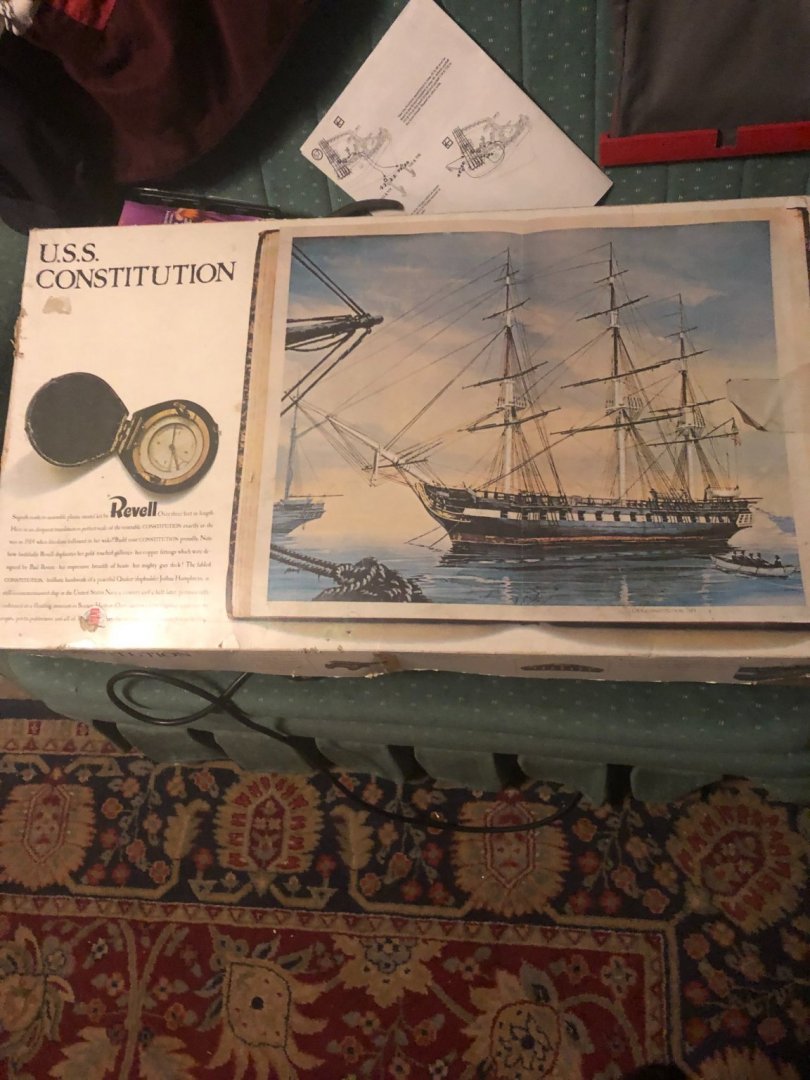
This is my first time logging a build. I bought an model of the Constitution on-line at an auction for $60.00 minus shipping. My whole thought was to build the Constitution at a point of one of her famous battles during the war of 1812. When I got the box and opened it much to my horror that once more Revell took some liberties' with it mold process. There is some major differences of their idea of what the Constitution looked like during the war and what the Anatomy of the ship USS Constitution puts out. I will not give up the ship to a few errors but will push through them and show you what I have done to correct them as well as from time to time ask for advice.


- 8 replies
-
- 3
-
-
- Plastic
- Constitution
- (and 2 more)
-
I want to thank all for such a warm welcome. I should post my first work since getting back into the hobby. I am right now working on a Linberg 1:130 scale Jolly Roger just to shake the dust off my tools. I have been bouncing in and out looking at all the reference material that is offered by so many talented model builders in here.
-
I have been in love with model ship building sense the 60's with plastic models. I still love the feeling of opening up a box of a new ship and seeing what I am getting into. Each one has been like getting a surprise present under the Christmas tree. I went into the Navy and now I am a disabled Vet who finally broke out my antique modeling tools, blow off some dust, and trying to get back into ship modeling. Back into my time the big plastic ships like the scale of 1/96 in sailing ships to 1/350 in modern Naval ships were the big ticket. I hope no-one minds that I still enjoy working with plastic ship but challenging my skills once more each one more realistic than the last one. I am now in my 60's so if I seem out of phase with everyone else on building models I just need to learn all the new advances that the modeling world has to offer now.