Mordswixed
-
Posts
6 -
Joined
-
Last visited
-
 GrandpaPhil reacted to a post in a topic:
Virginia 1819 by Mordswixed - Artesania Latina - 1:41
GrandpaPhil reacted to a post in a topic:
Virginia 1819 by Mordswixed - Artesania Latina - 1:41
-
Dave_E reacted to a post in a topic:
Virginia 1819 by Mordswixed - Artesania Latina - 1:41
-
Cathead reacted to a post in a topic:
Virginia 1819 by Mordswixed - Artesania Latina - 1:41
-
Cathead reacted to a post in a topic:
Virginia 1819 by Mordswixed - Artesania Latina - 1:41
-
Cathead reacted to a post in a topic:
Virginia 1819 by Mordswixed - Artesania Latina - 1:41
-
Cathead reacted to a post in a topic:
Virginia 1819 by Mordswixed - Artesania Latina - 1:41
-
Cathead reacted to a post in a topic:
Virginia 1819 by Mordswixed - Artesania Latina - 1:41
-
December 19, 2021 Setting the keel and getting ready for mahogany finish...


-
CiscoH reacted to a post in a topic:
Virginia 1819 by Mordswixed - Artesania Latina - 1:41
-
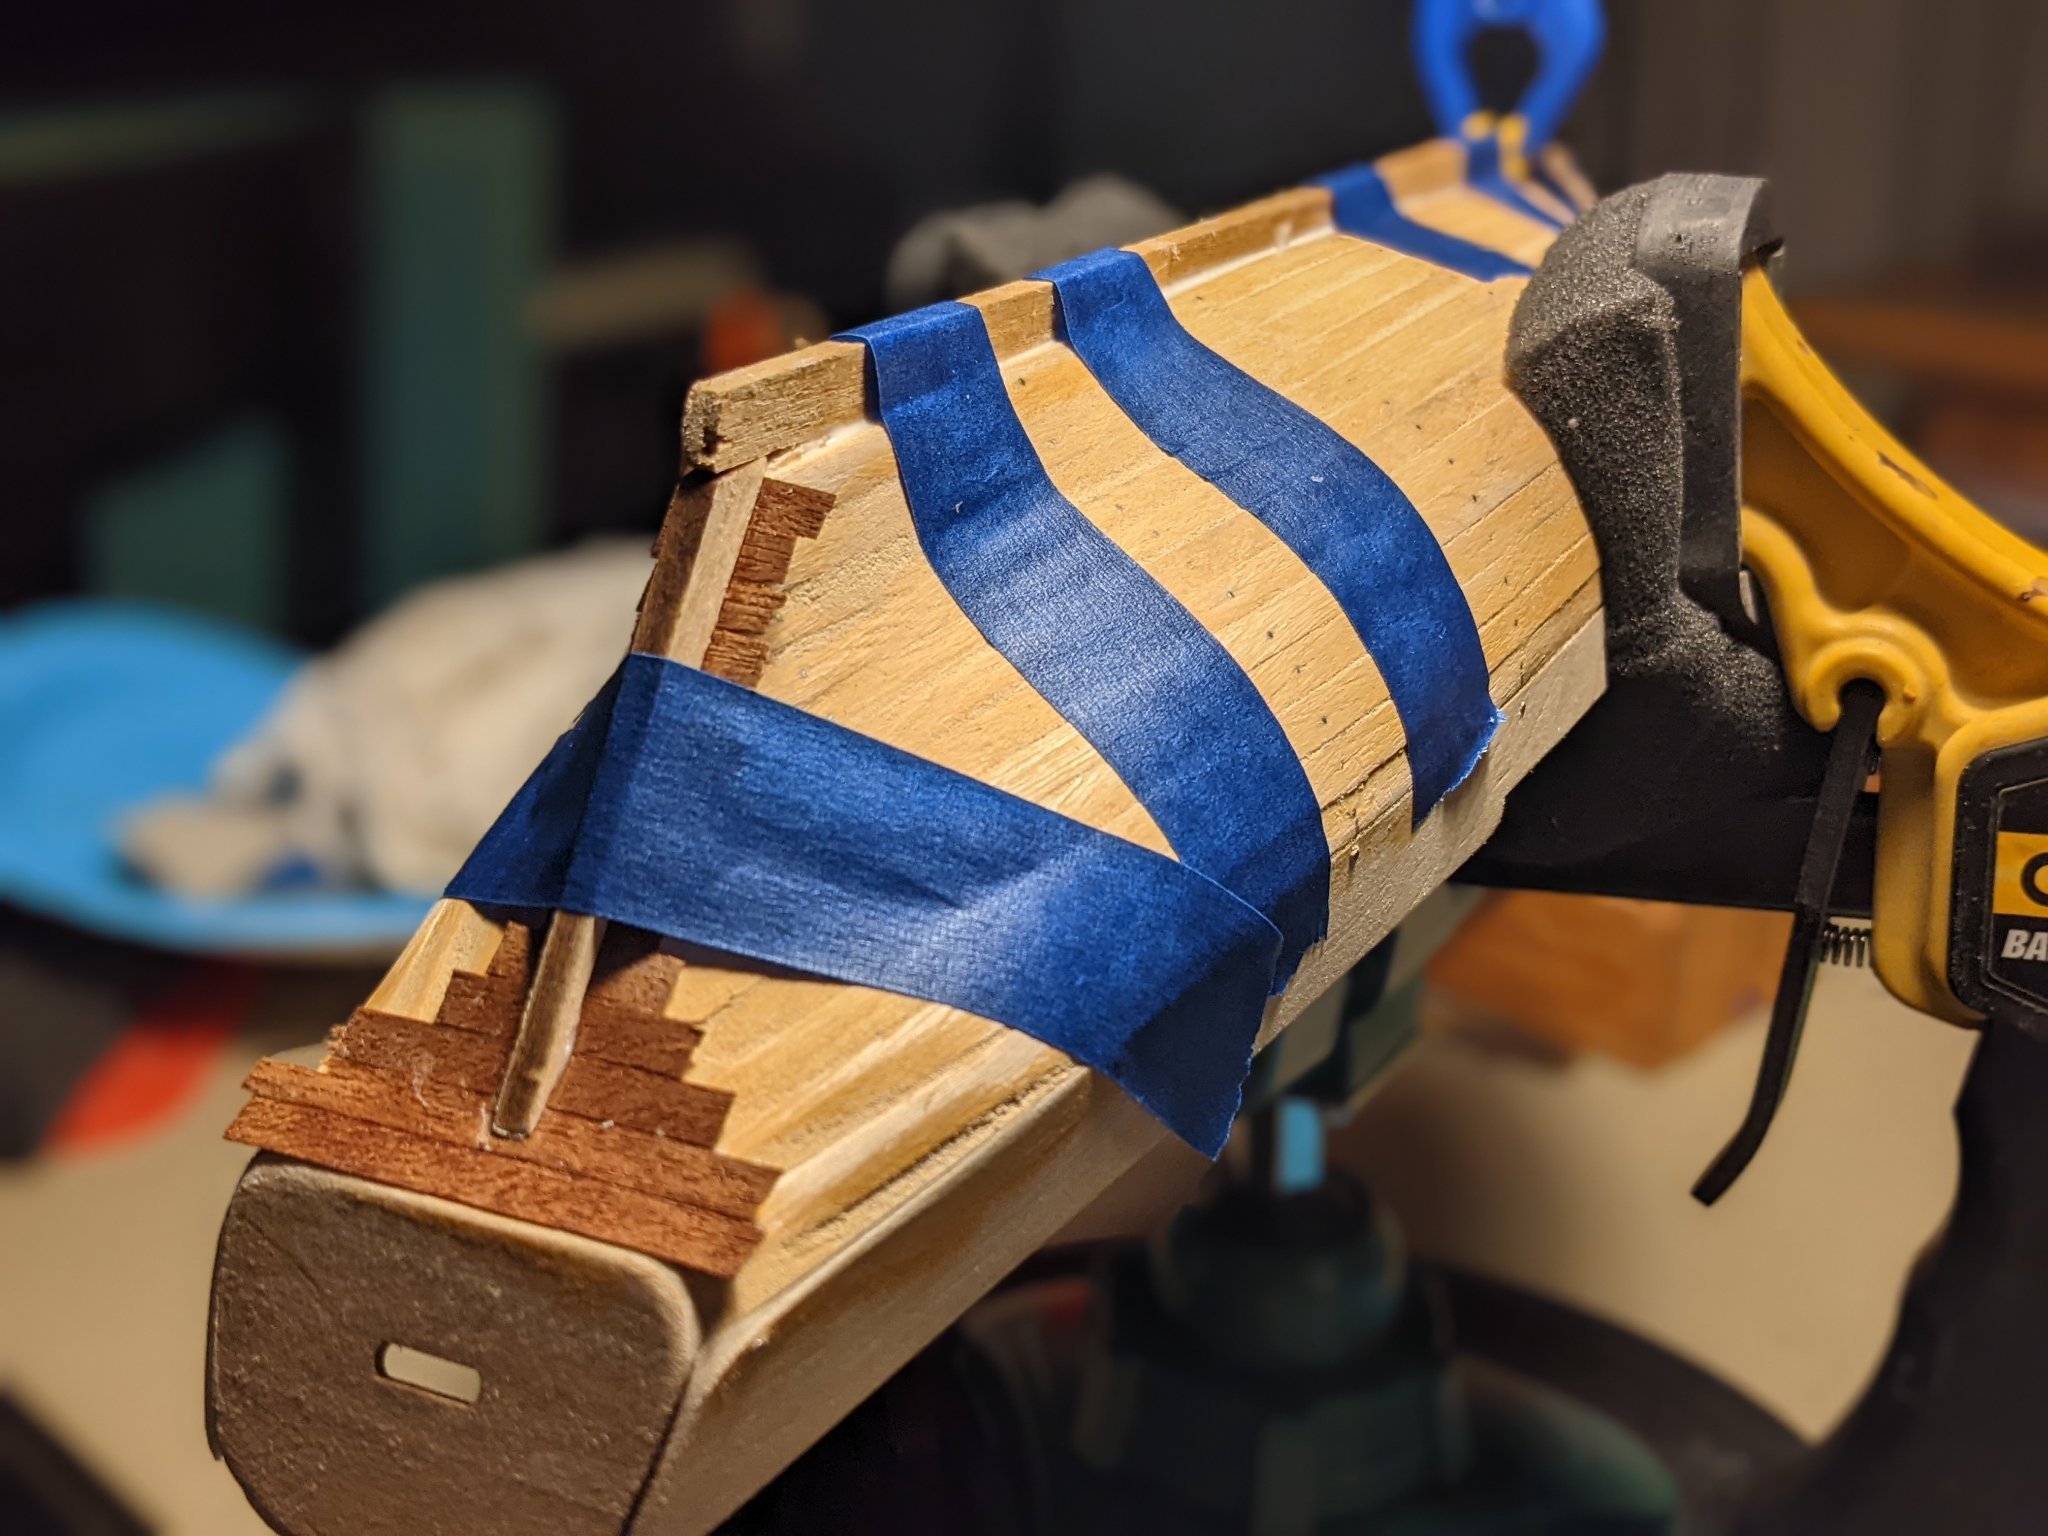
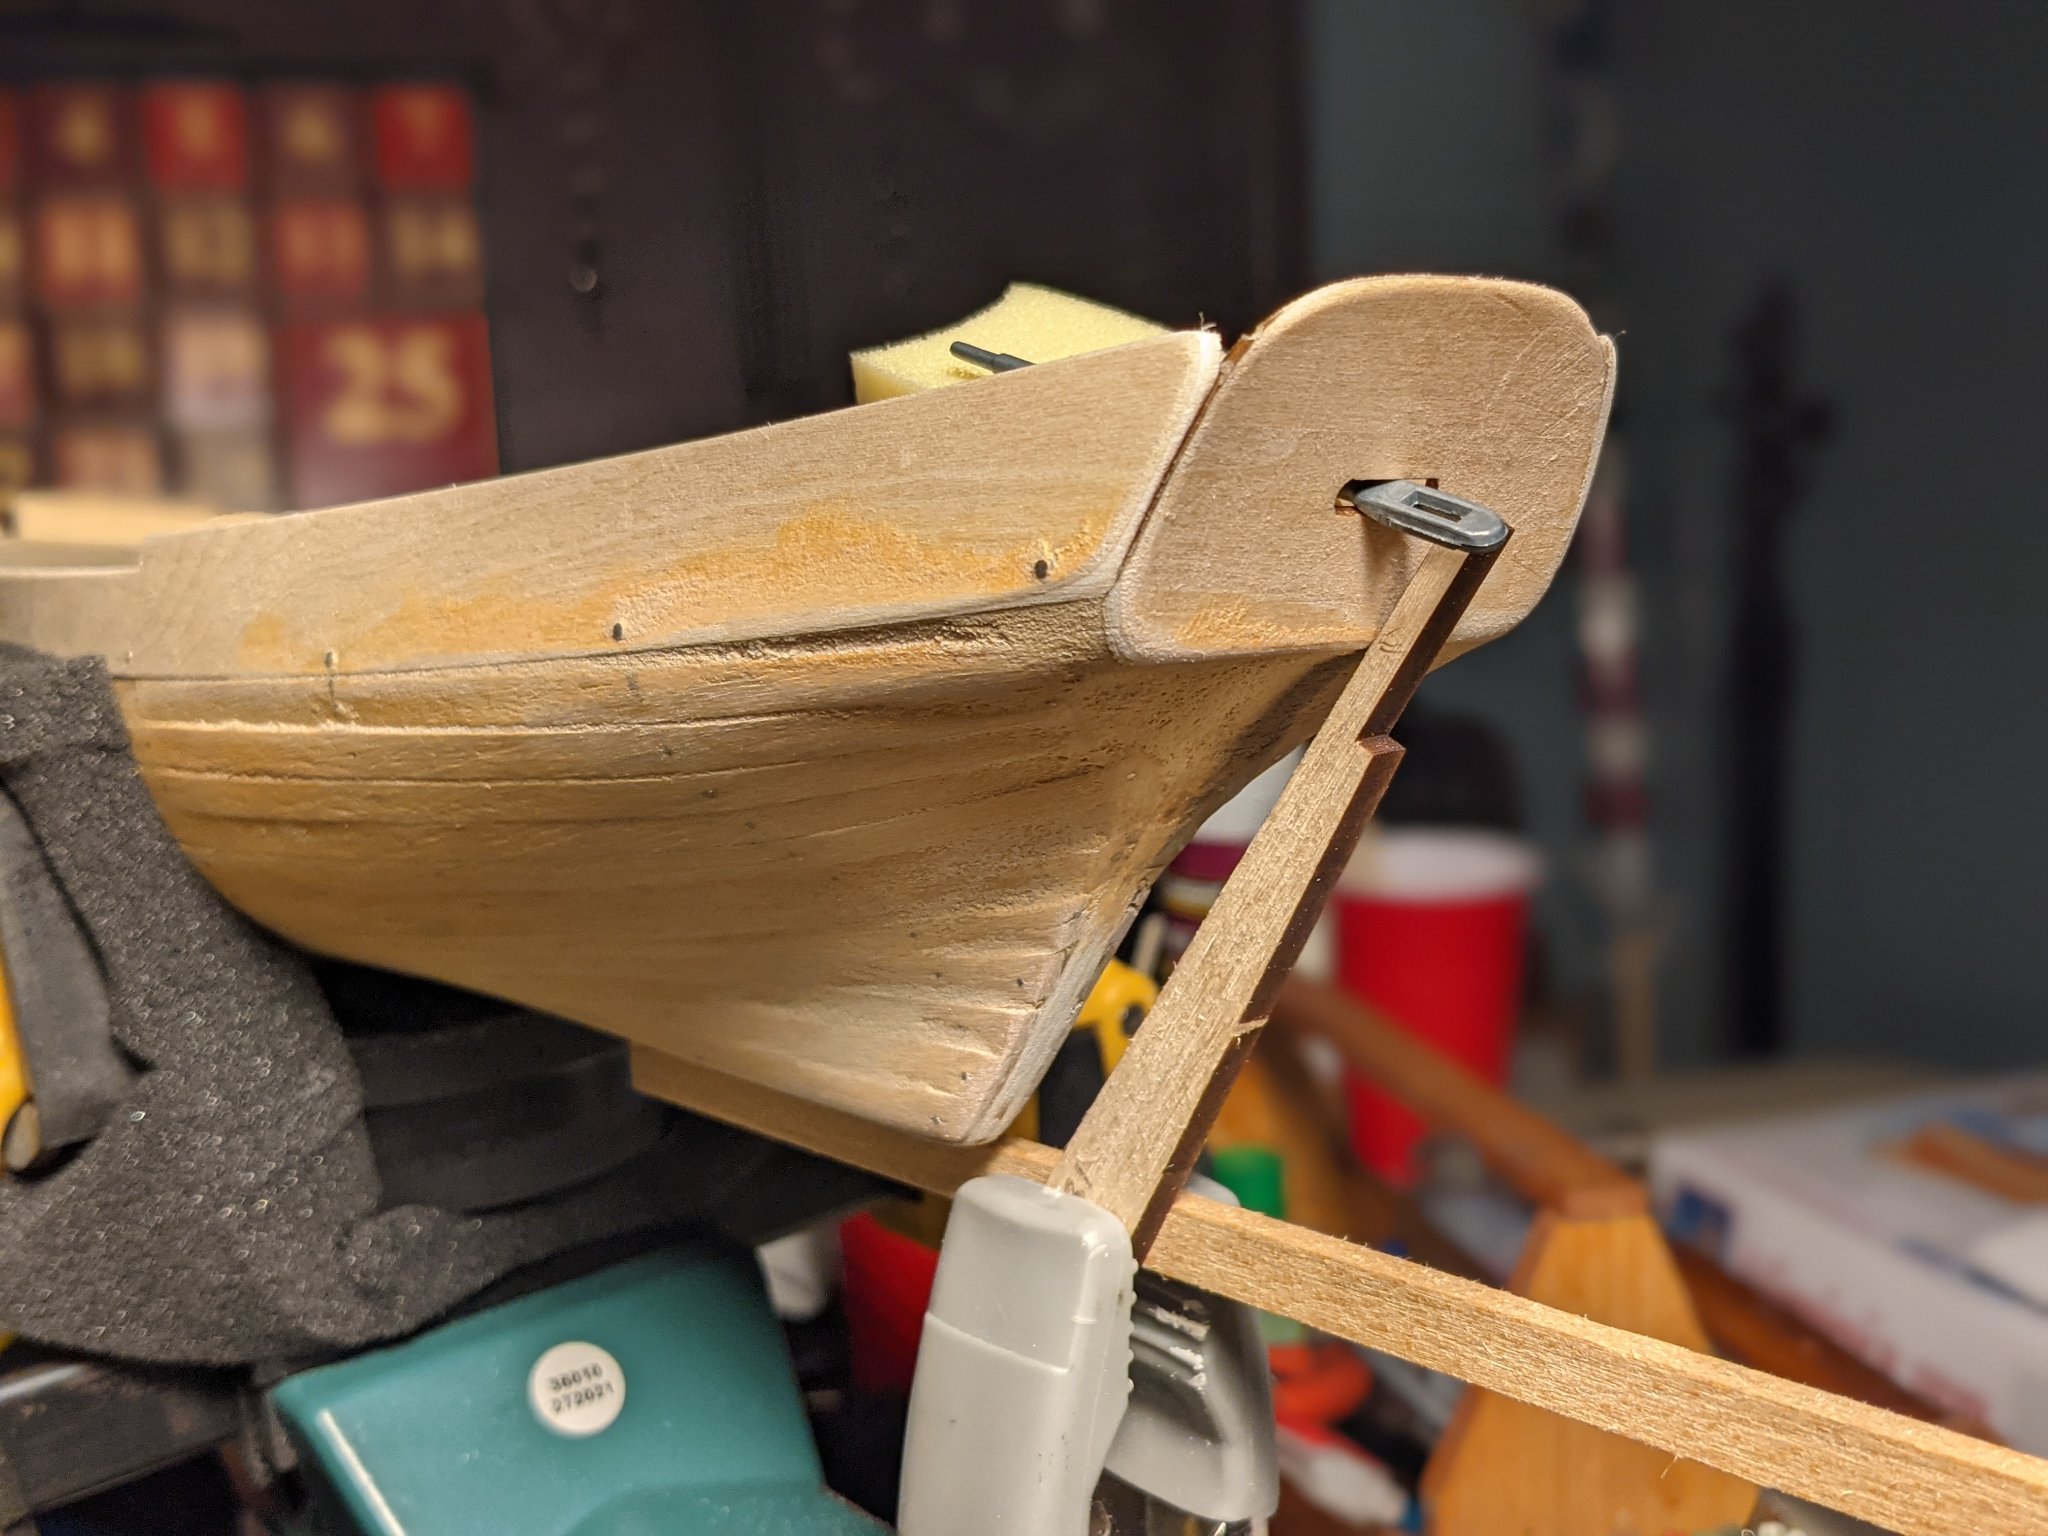
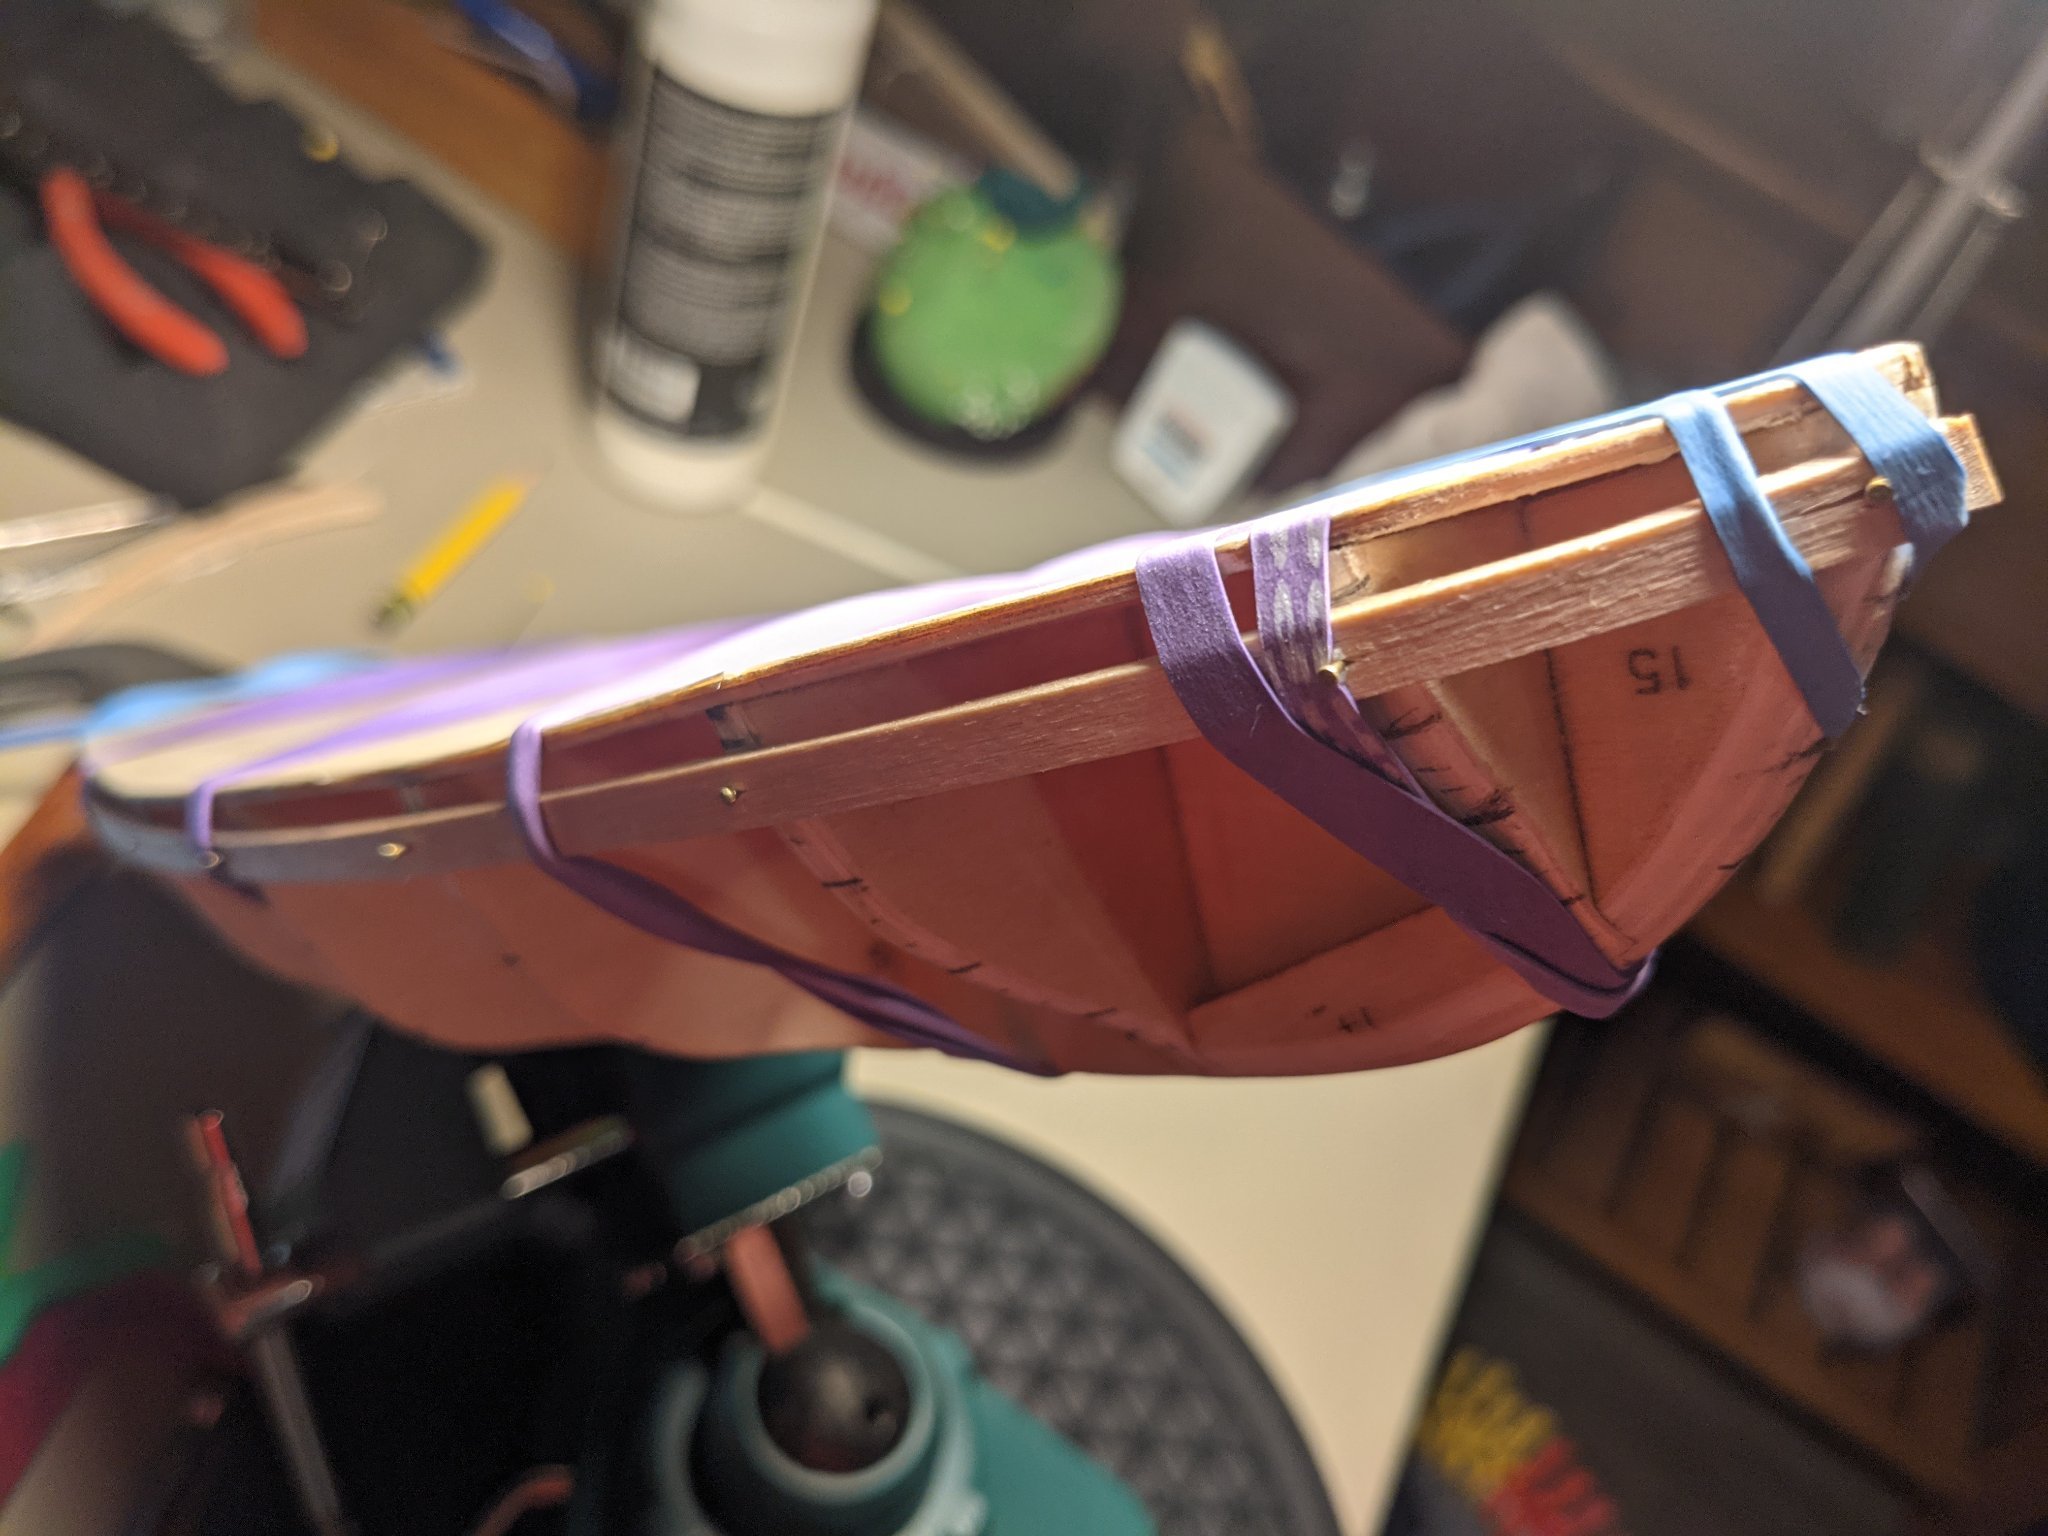
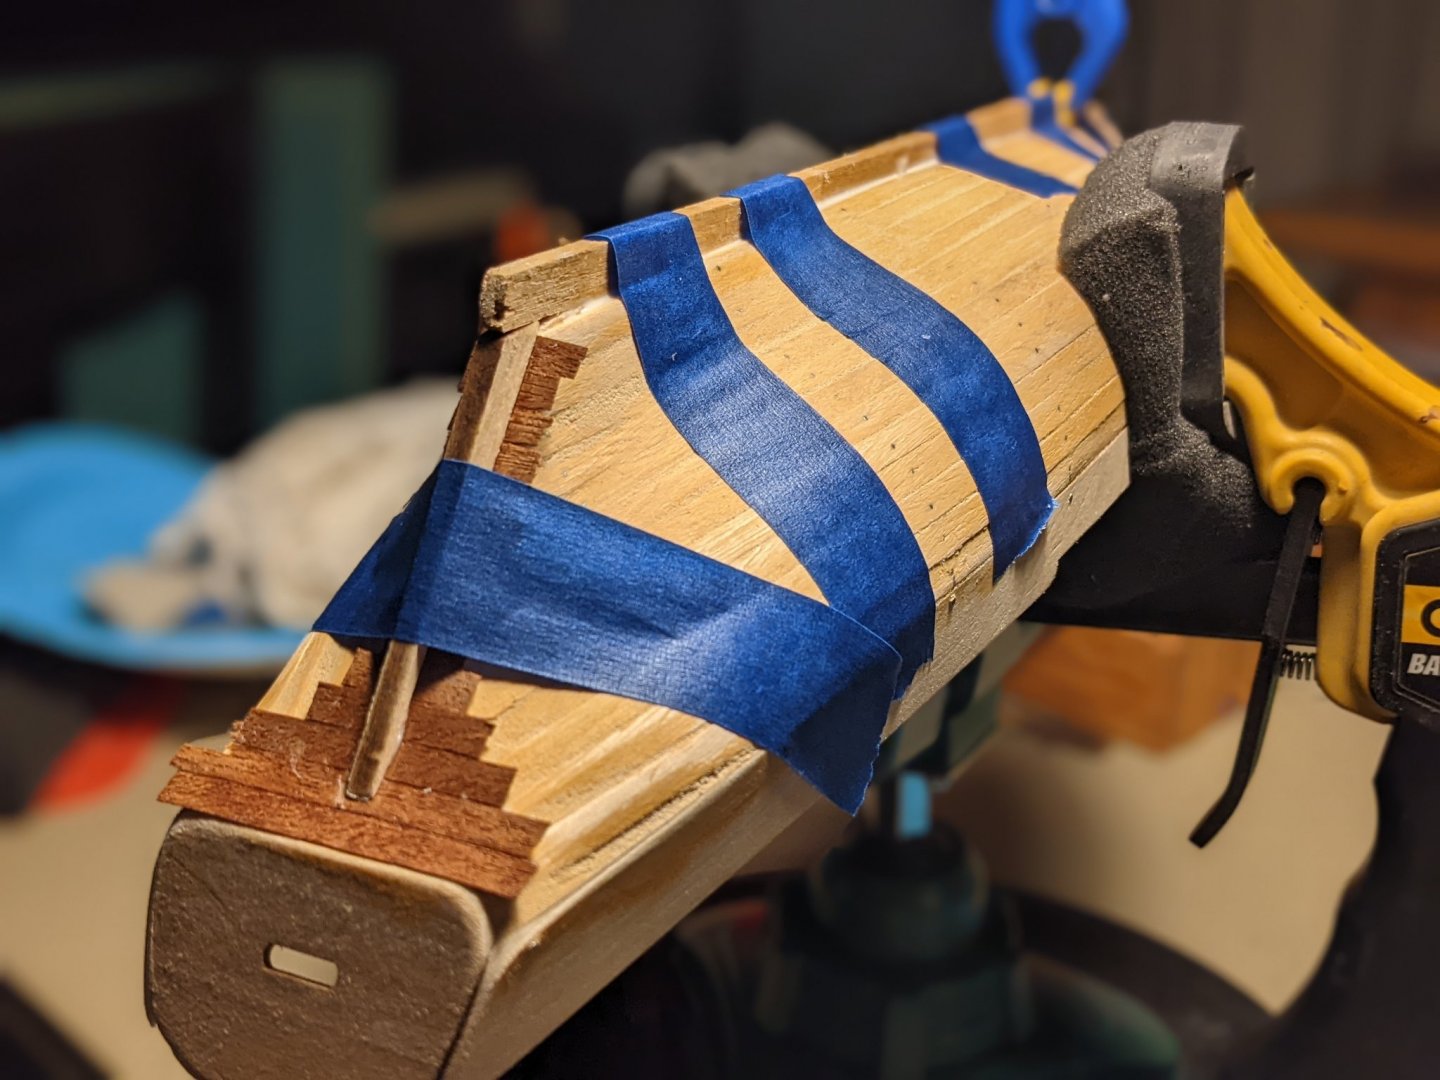
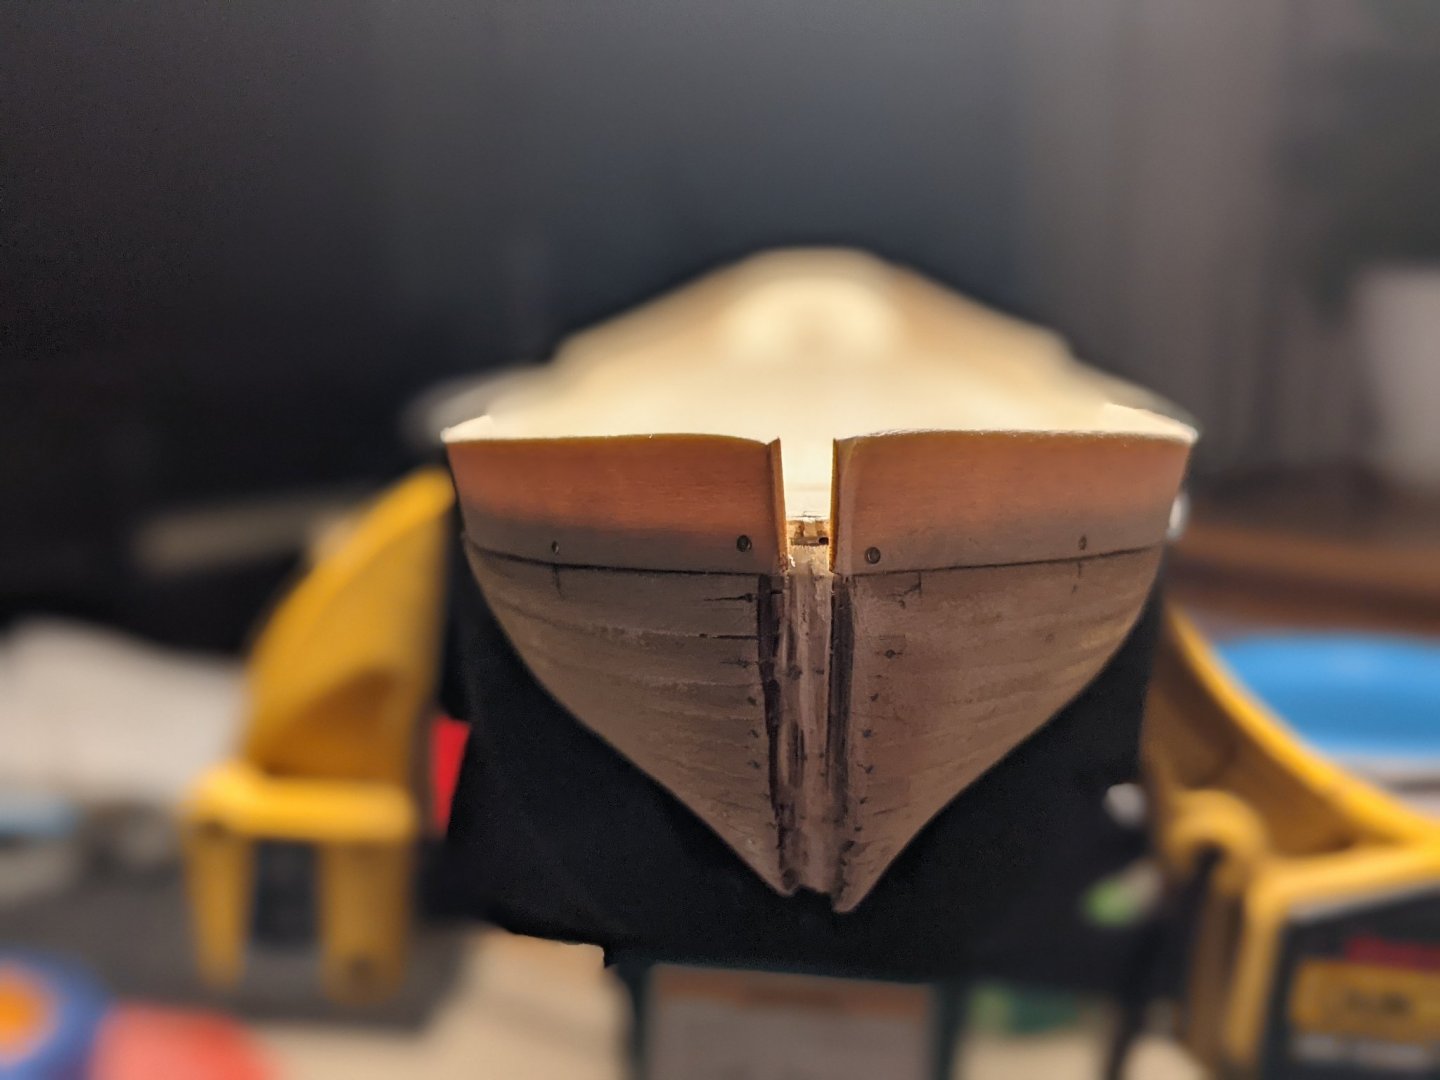
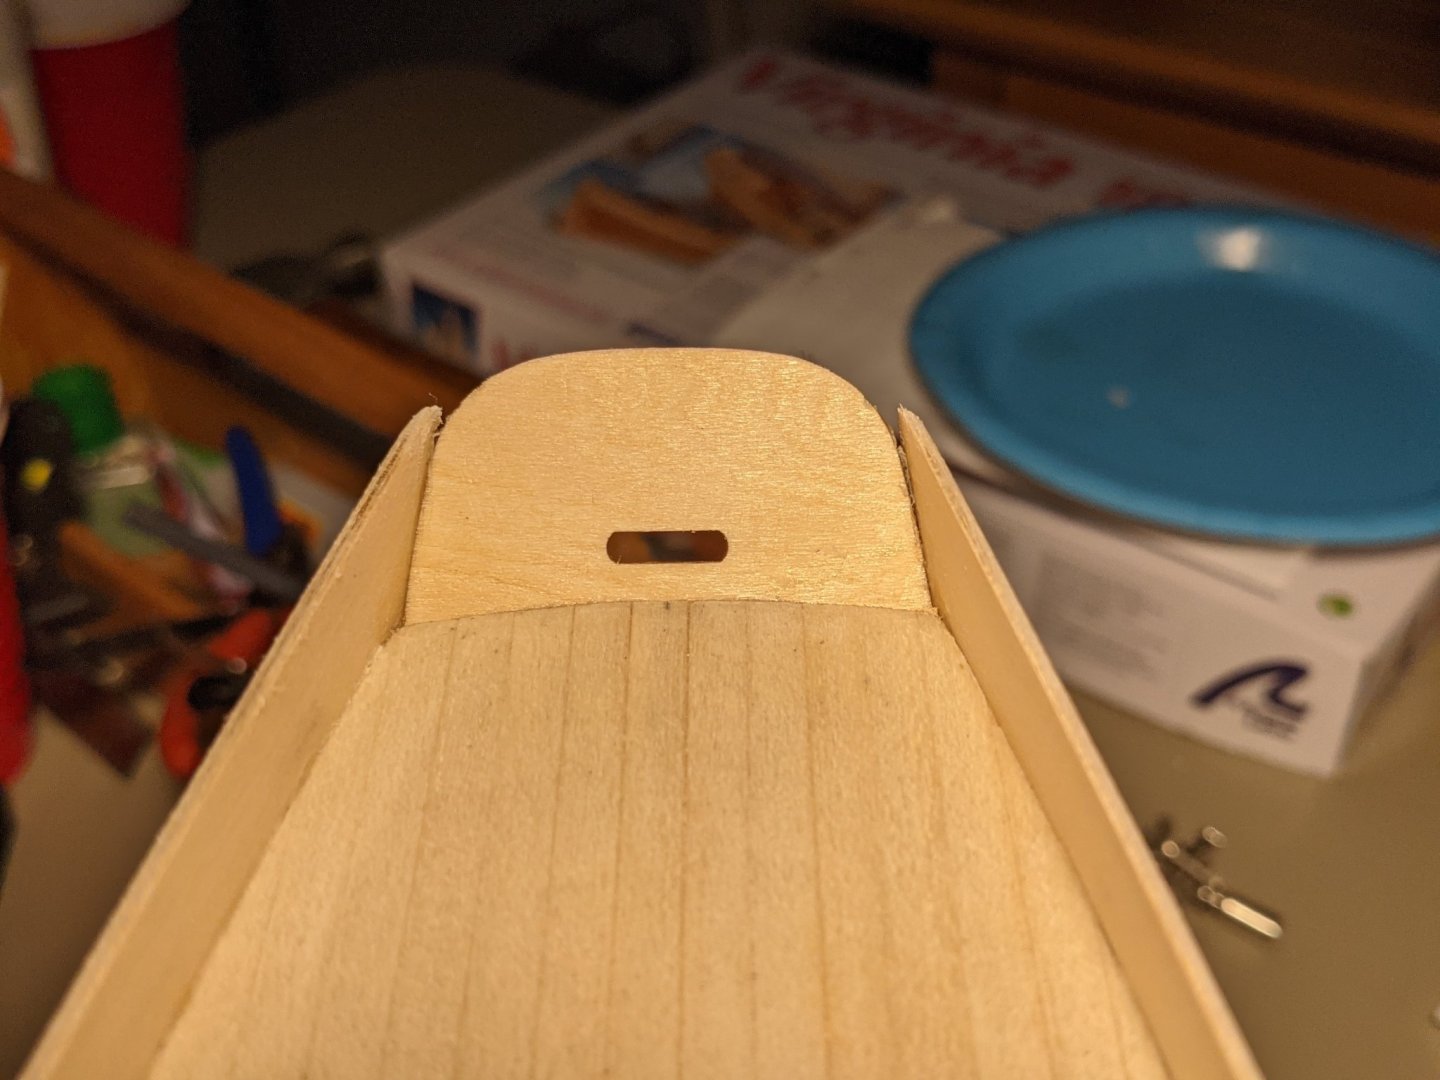
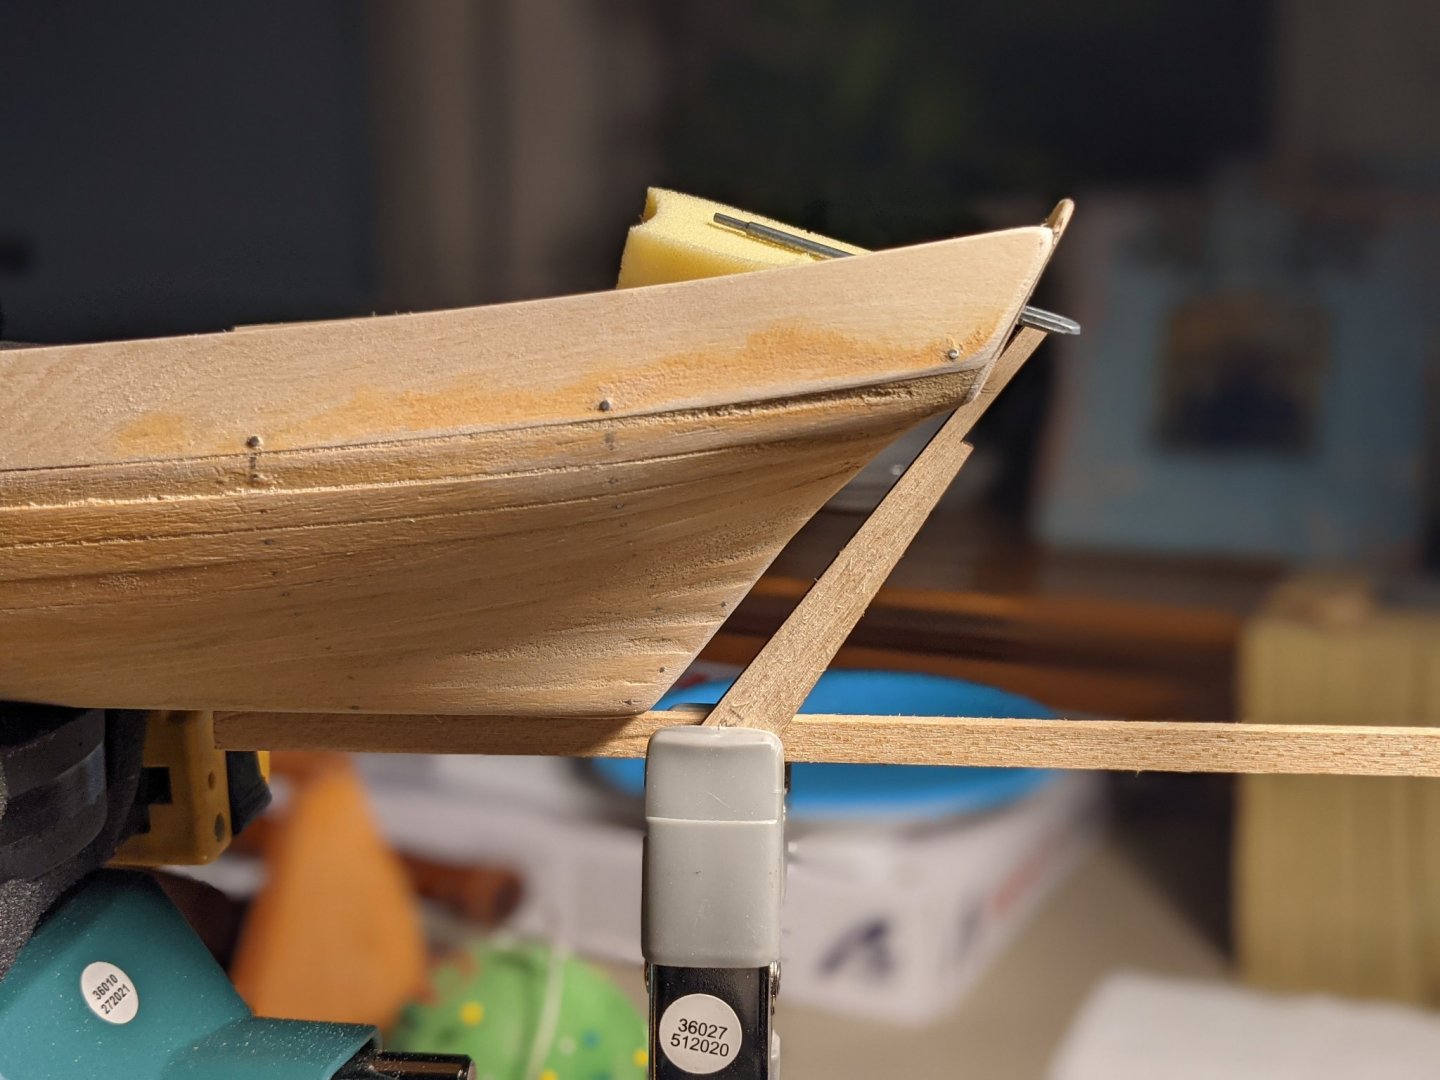
Next is attaching the bulwarks and stern piece. I'm aware of the issues with the rudder, so I'm keen to locate this stern piece accurately. After reading several logs and looking at a lot of images, I decided to take the following steps: Clamp the bulwarks in place and use the aft edges to establish the pitch angle at which the stern piece will be installed. File the aft edge of the deck and underlayment at this angle, creating about a 3 or 4 mm surface to glue the stern piece to. Glue and pin both bulwarks in place from forward to aft, leaving the aft portion for last. Fit and glue the stern piece and the bulwarks all at once, ensuring the tiller hole is about 4 mm from the deck surface. A dry fit of the keel & rudder seems to confirm that this may be a viable solution, although the stern post may still need to be filed down considerably to fit. I think this allows me to avoid making a new rudder, which is what many others have had to do. Time will tell of course, but I welcome any comments on this topic... Thanks for reading...


-
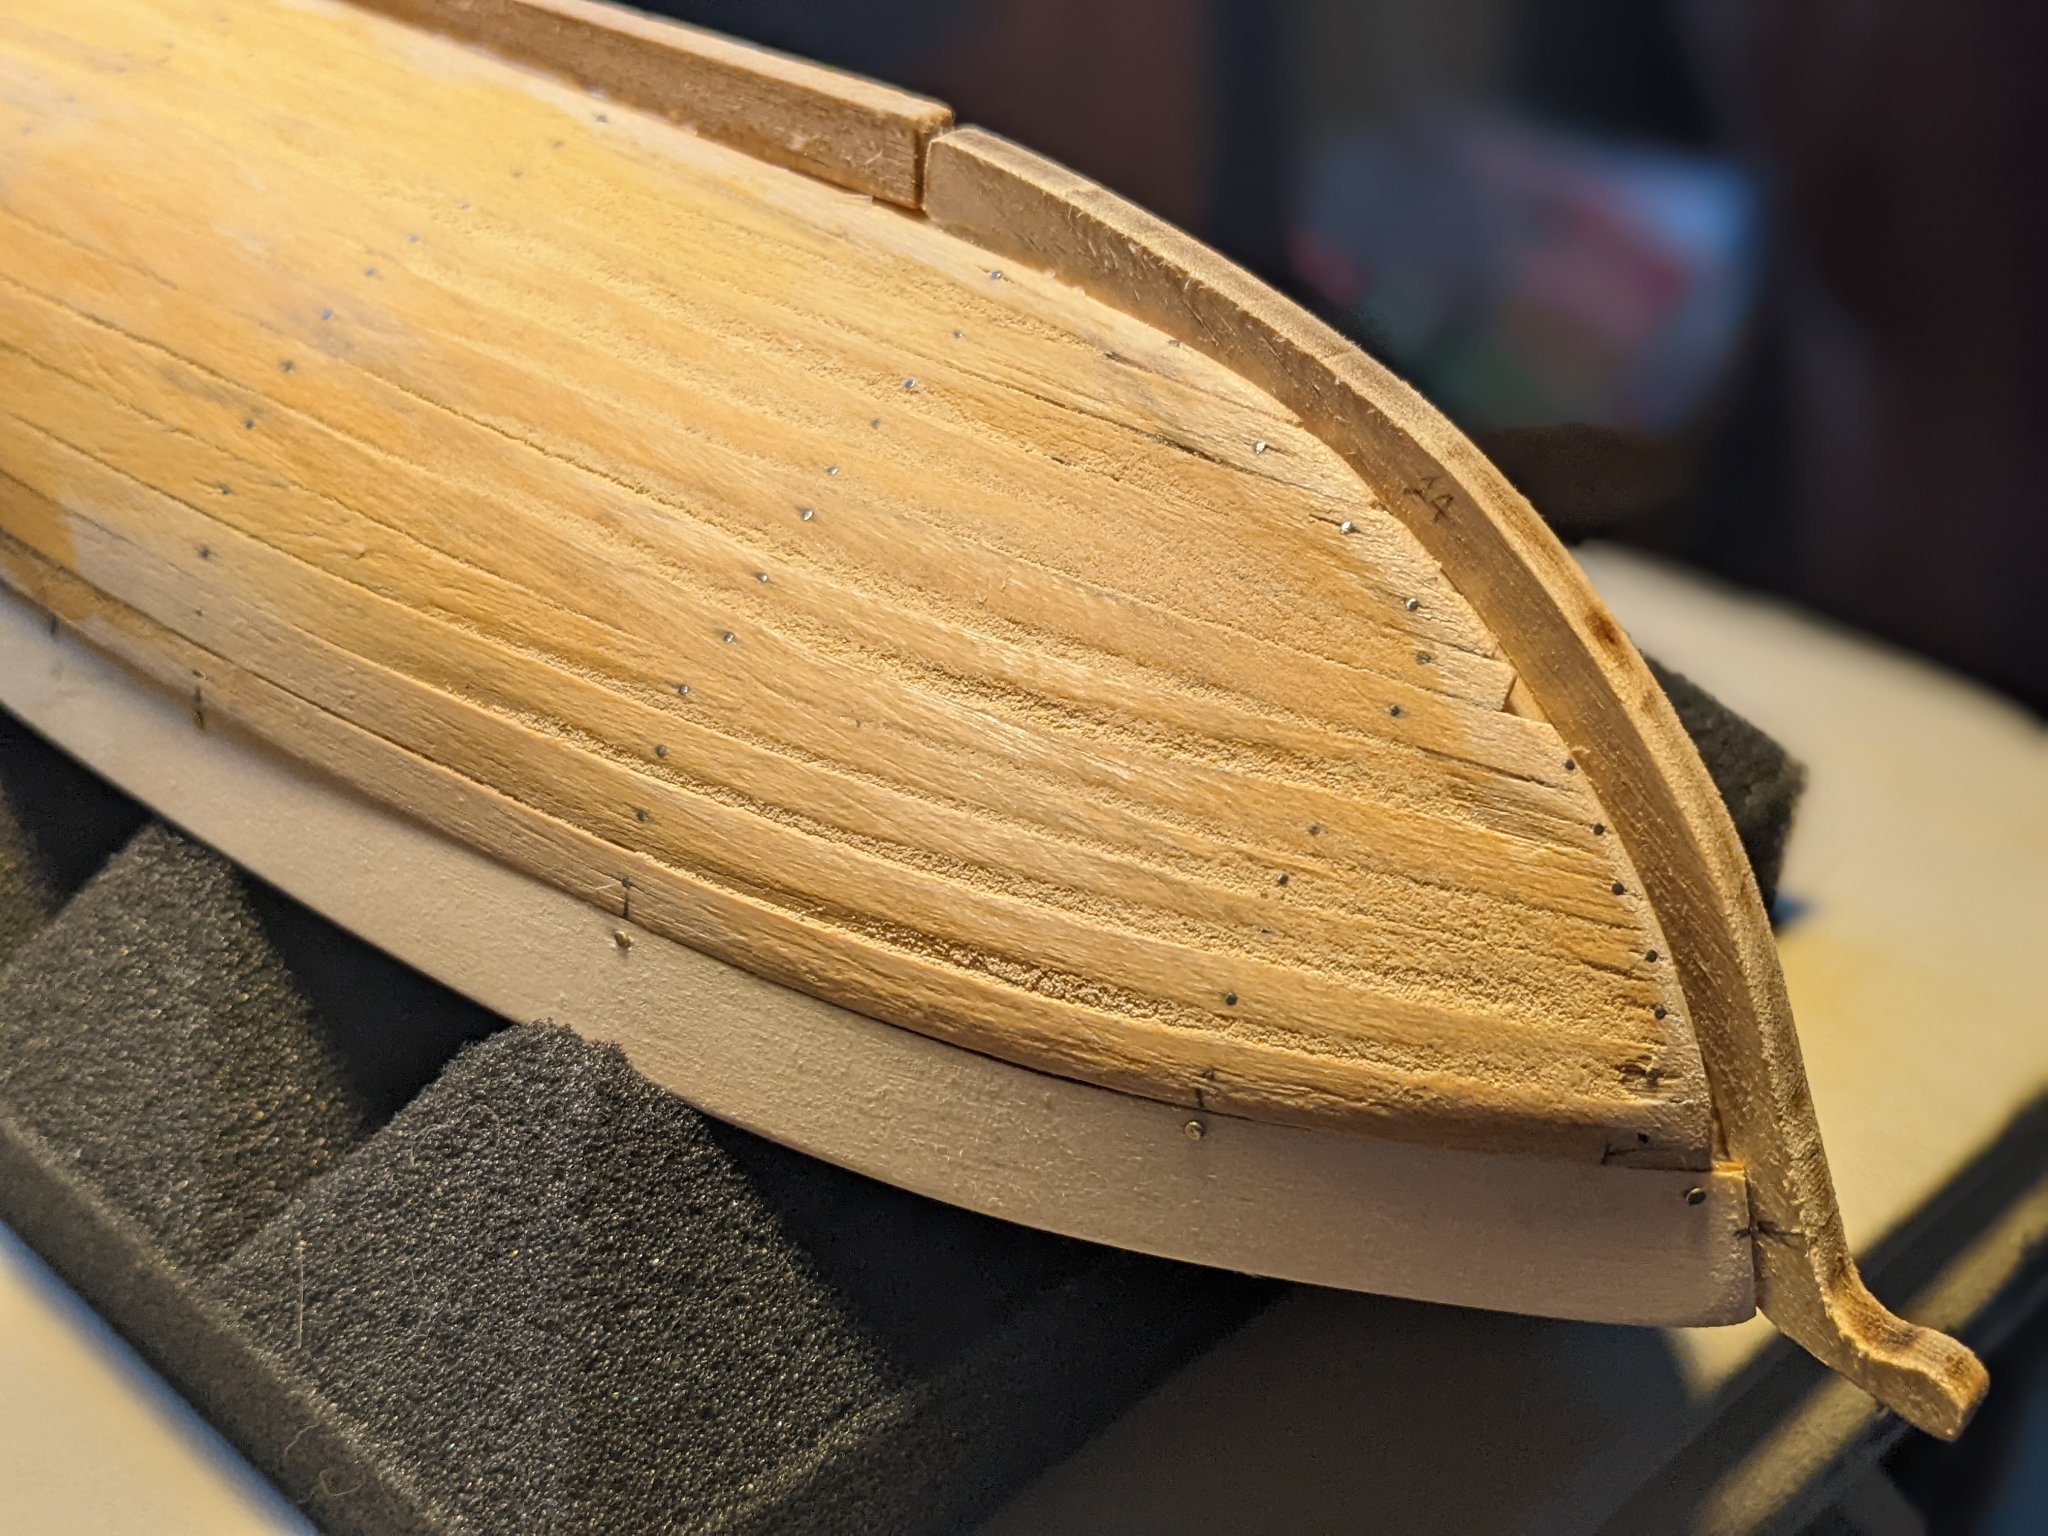
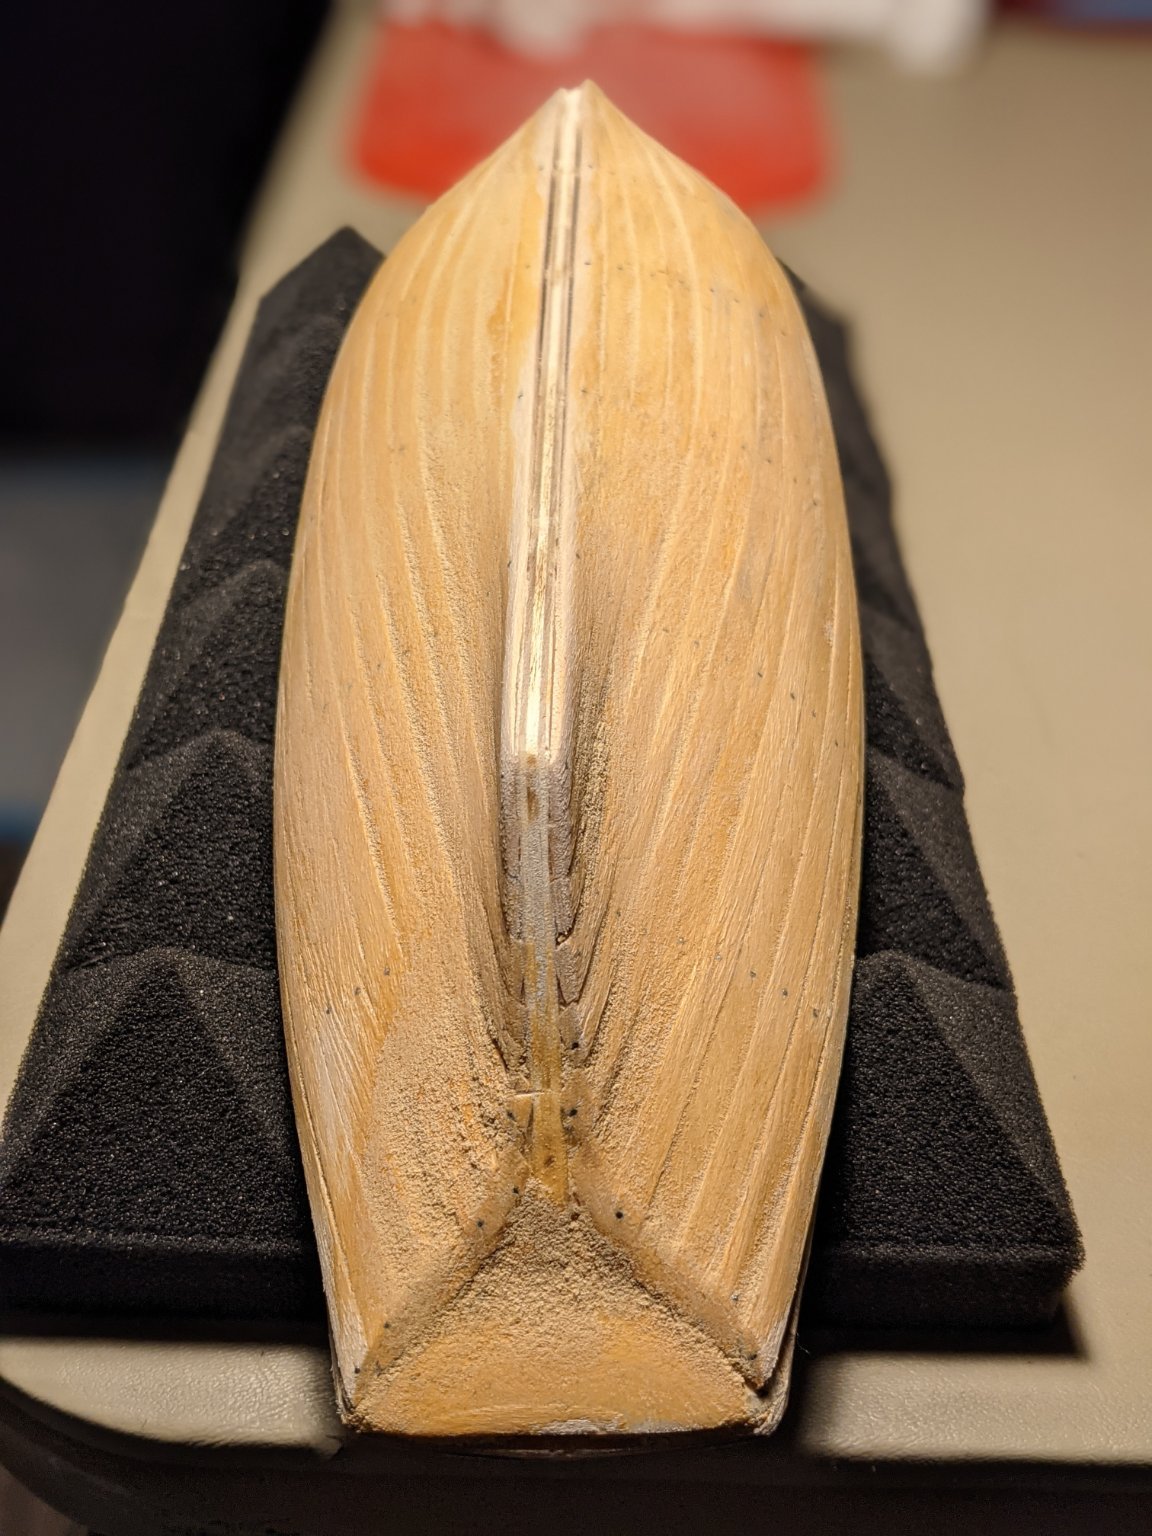
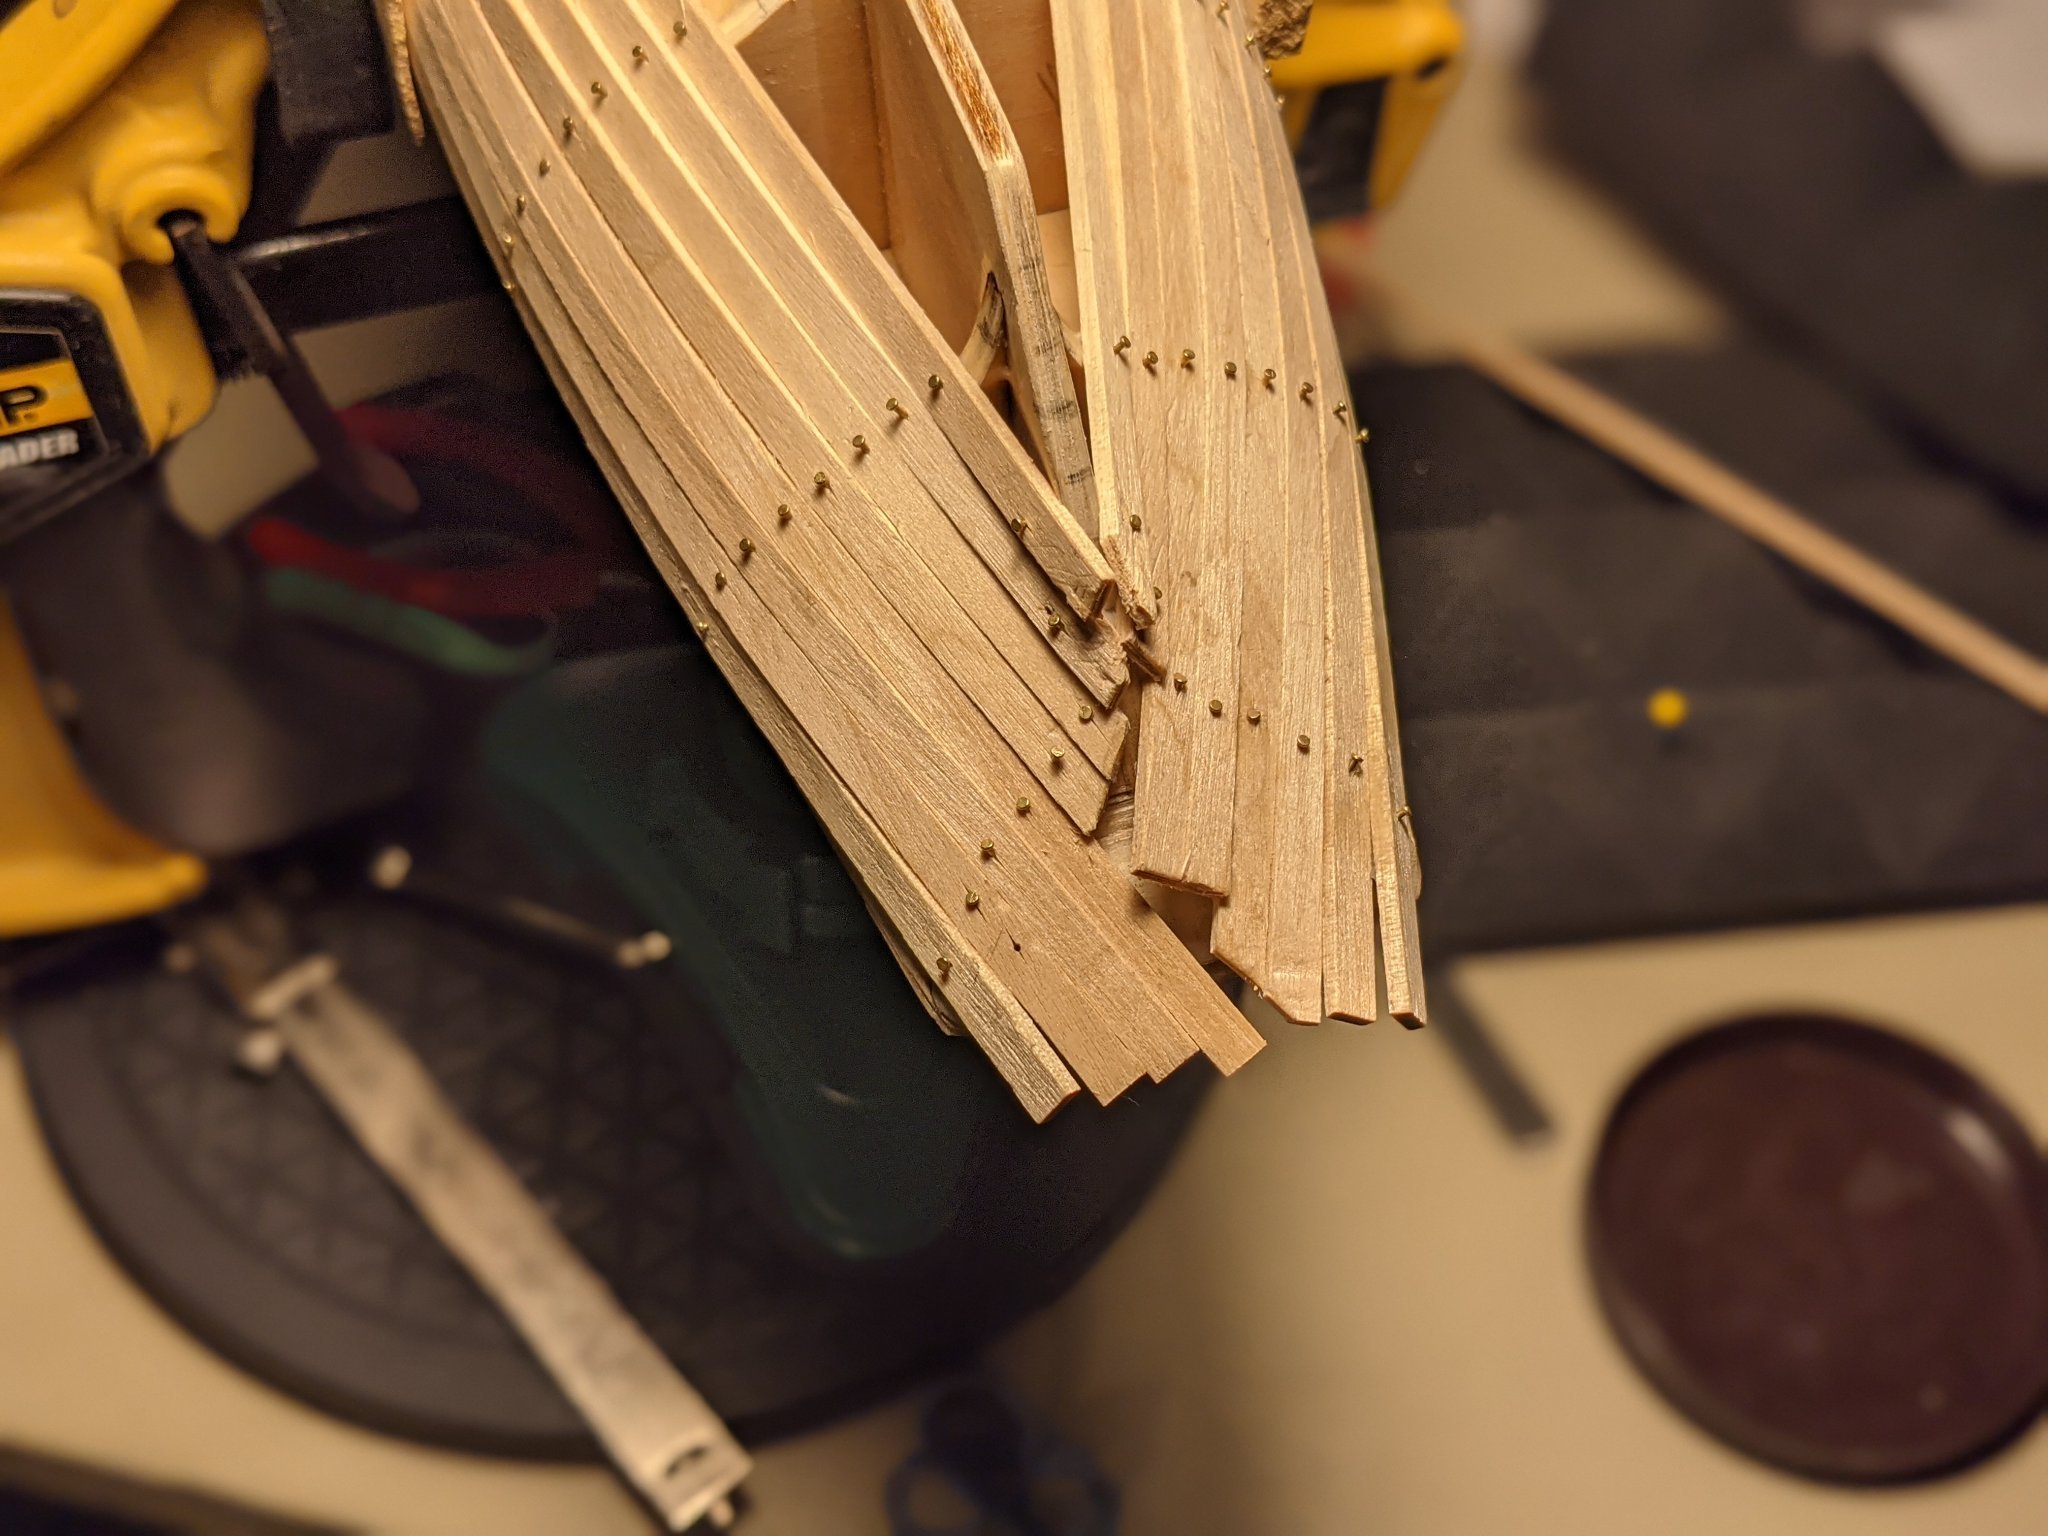
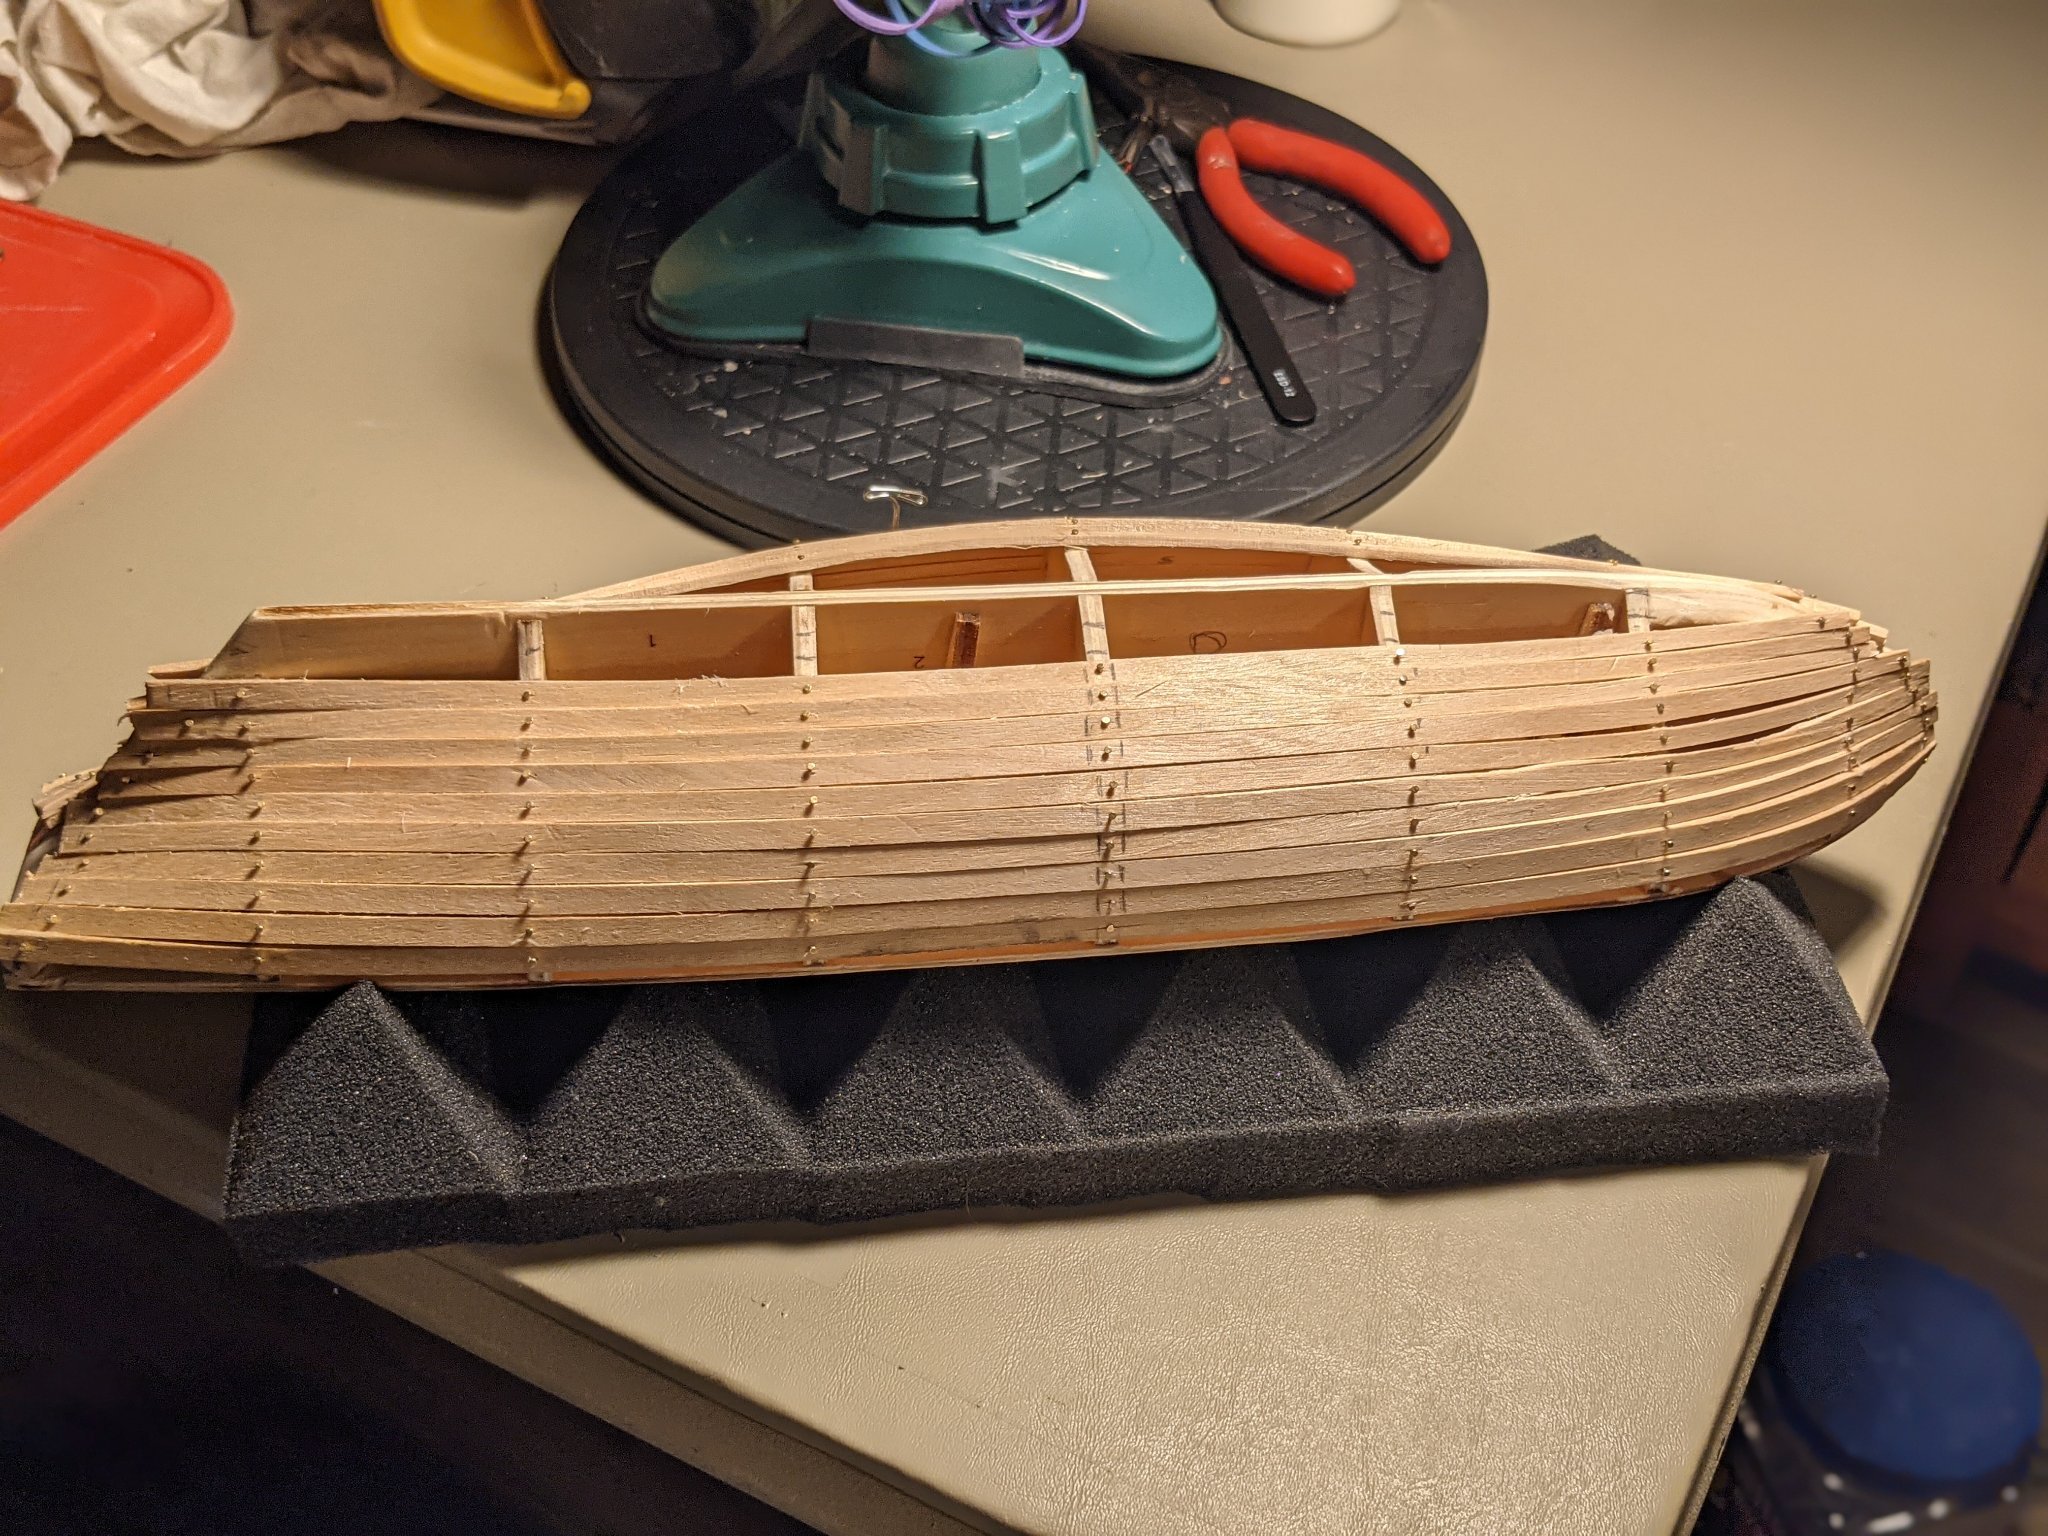
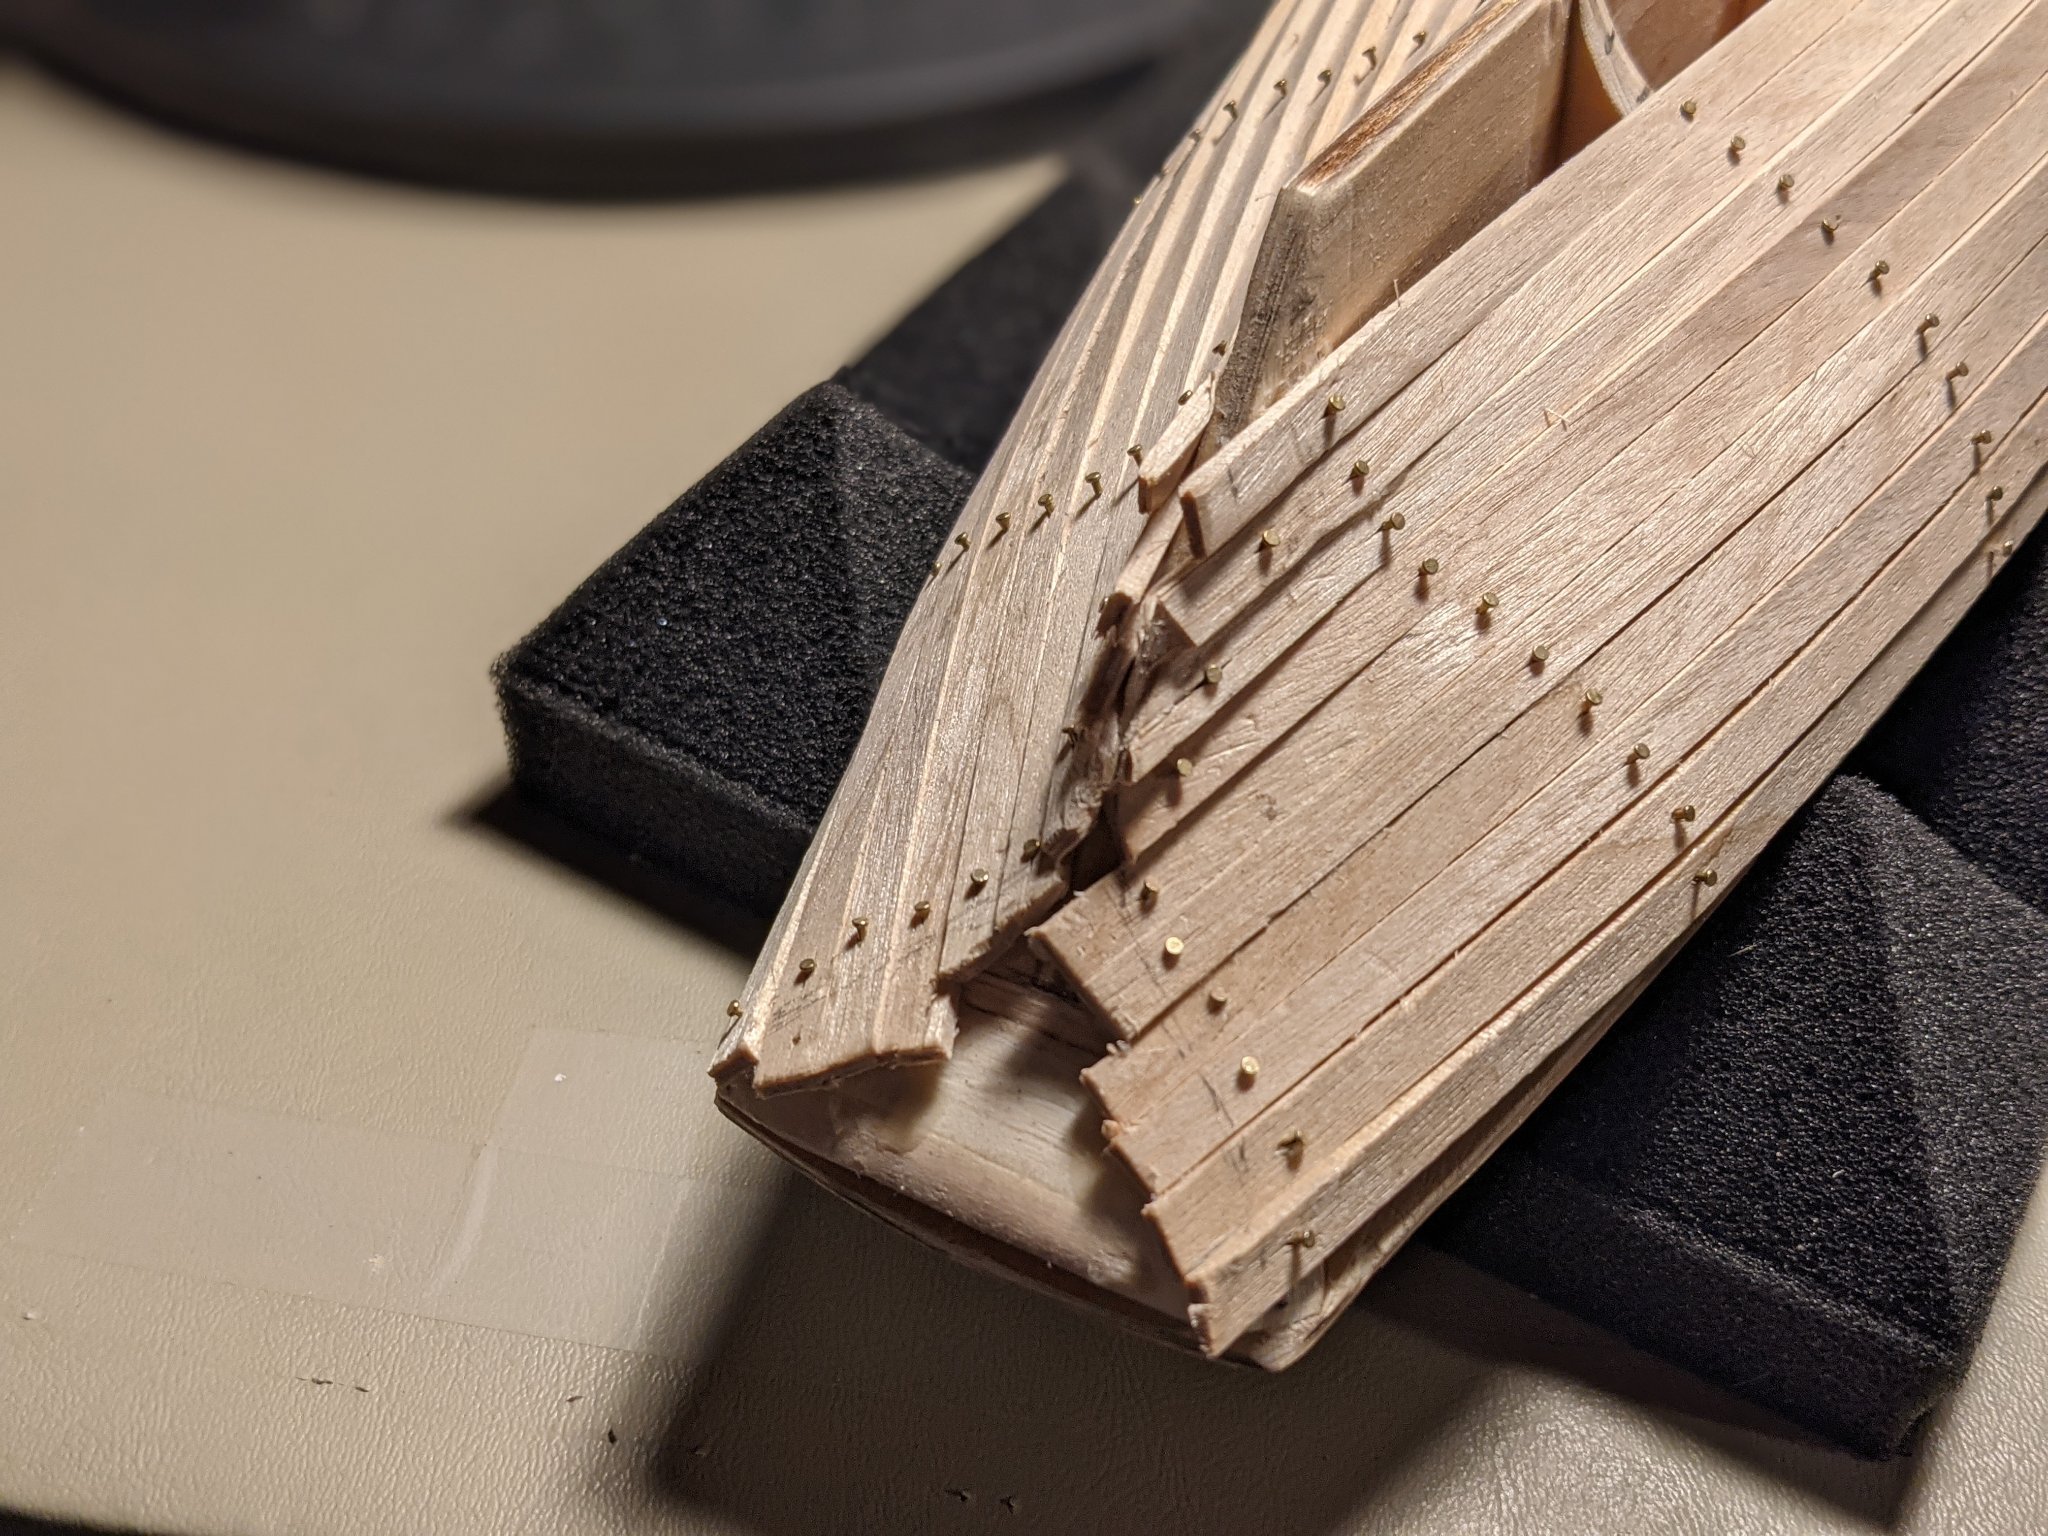
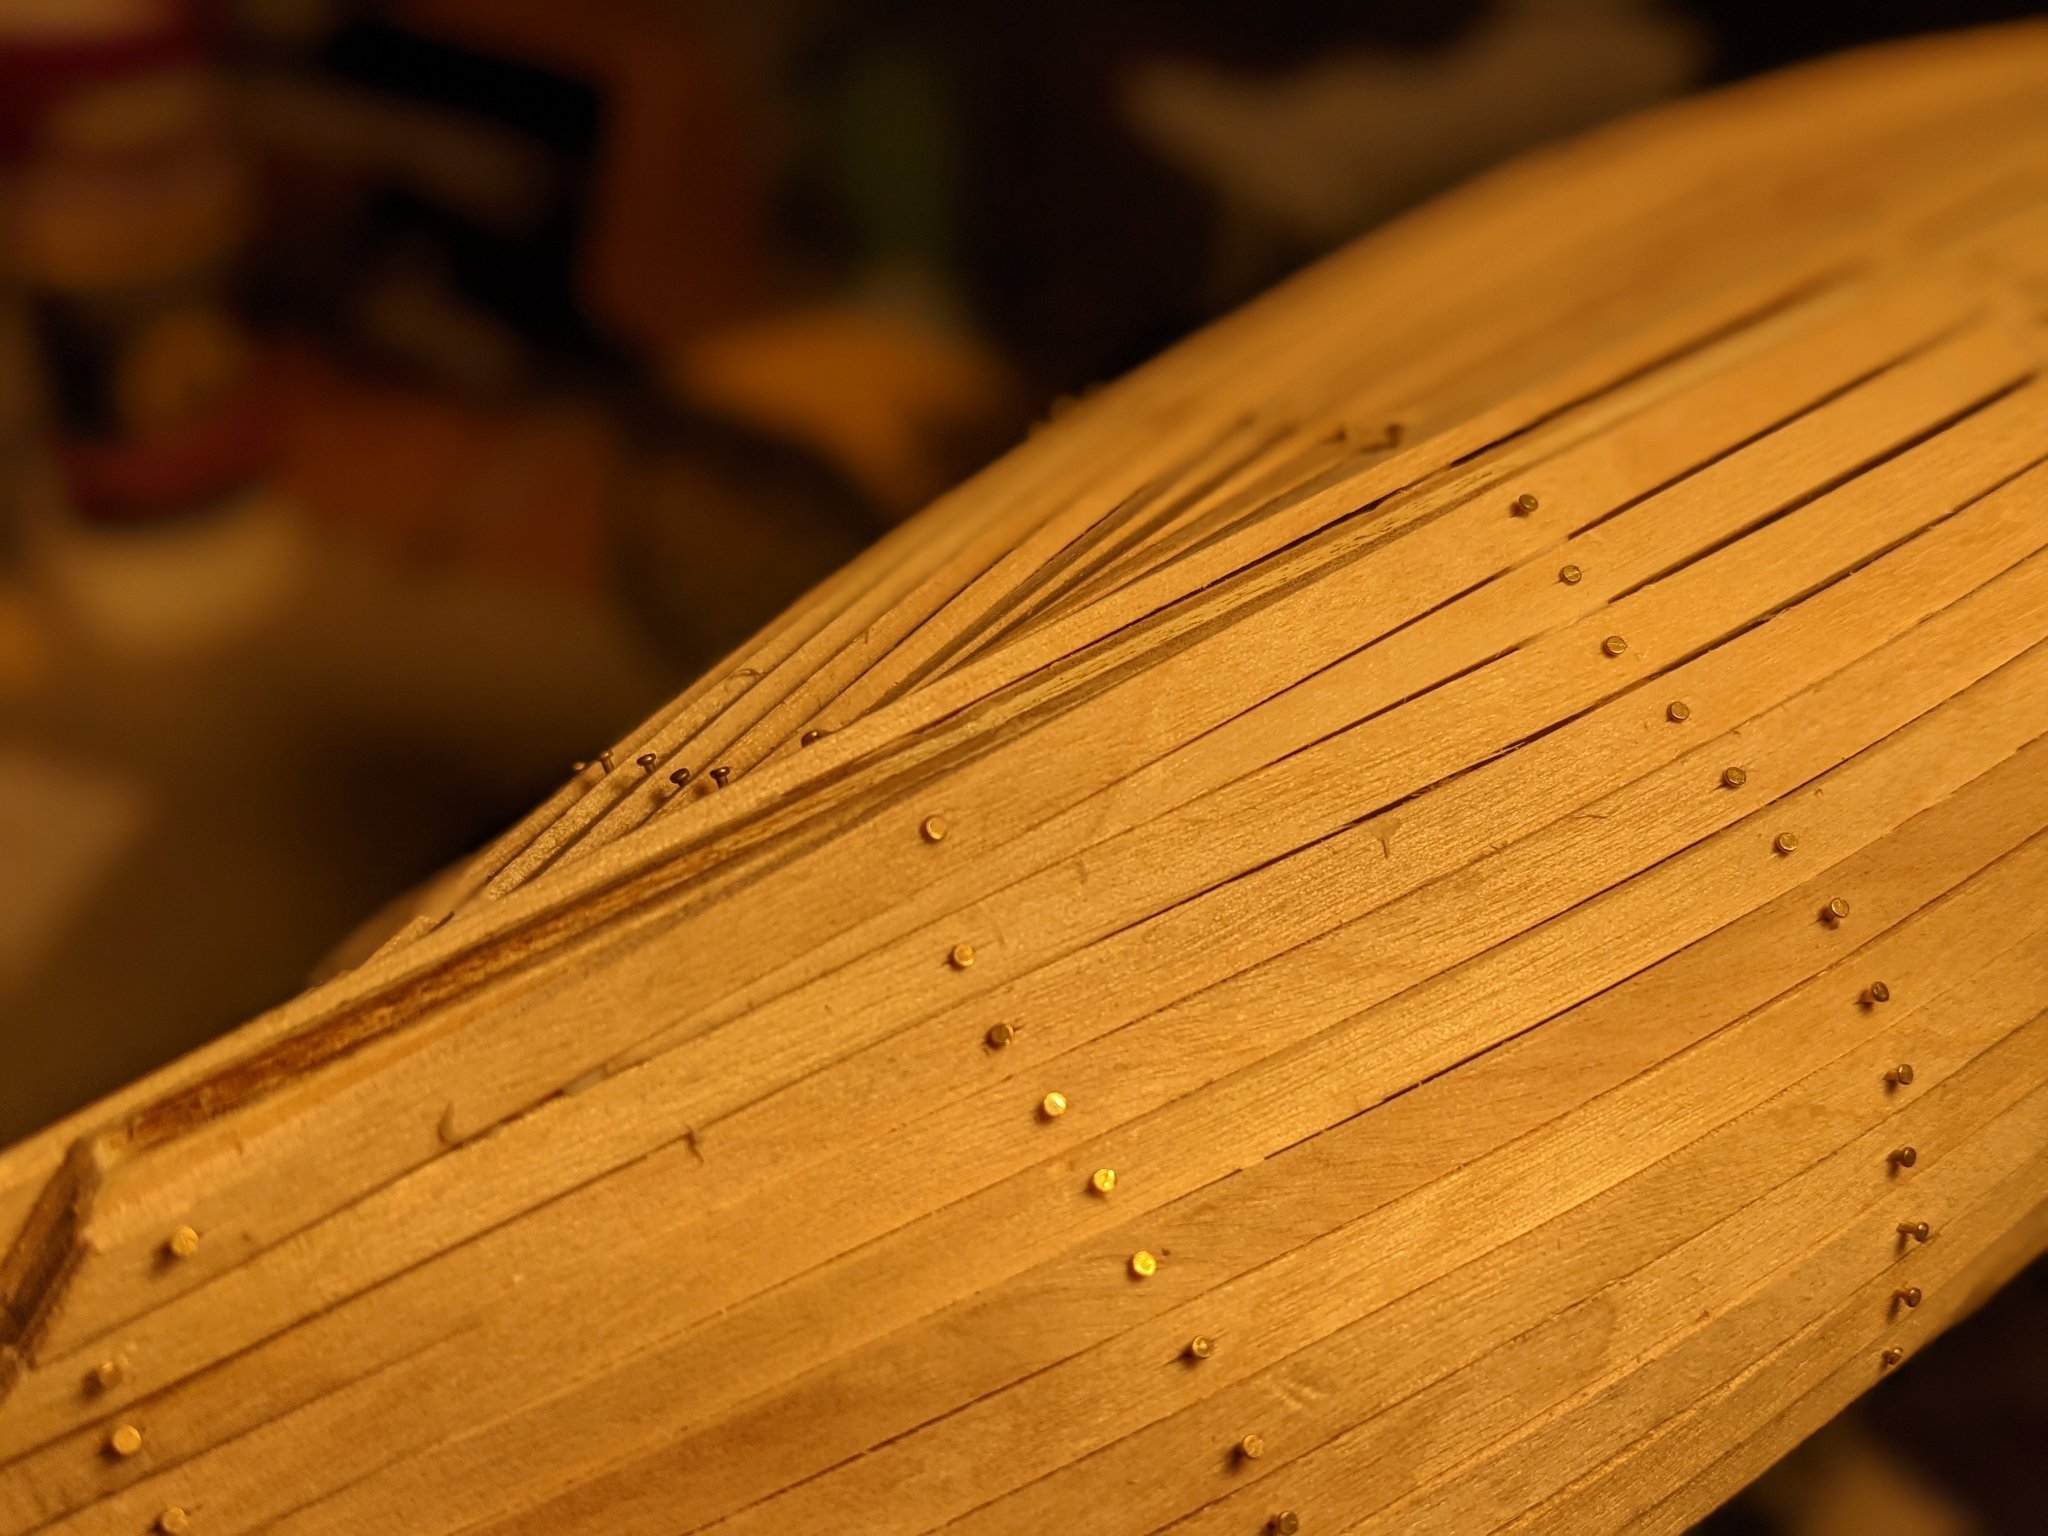
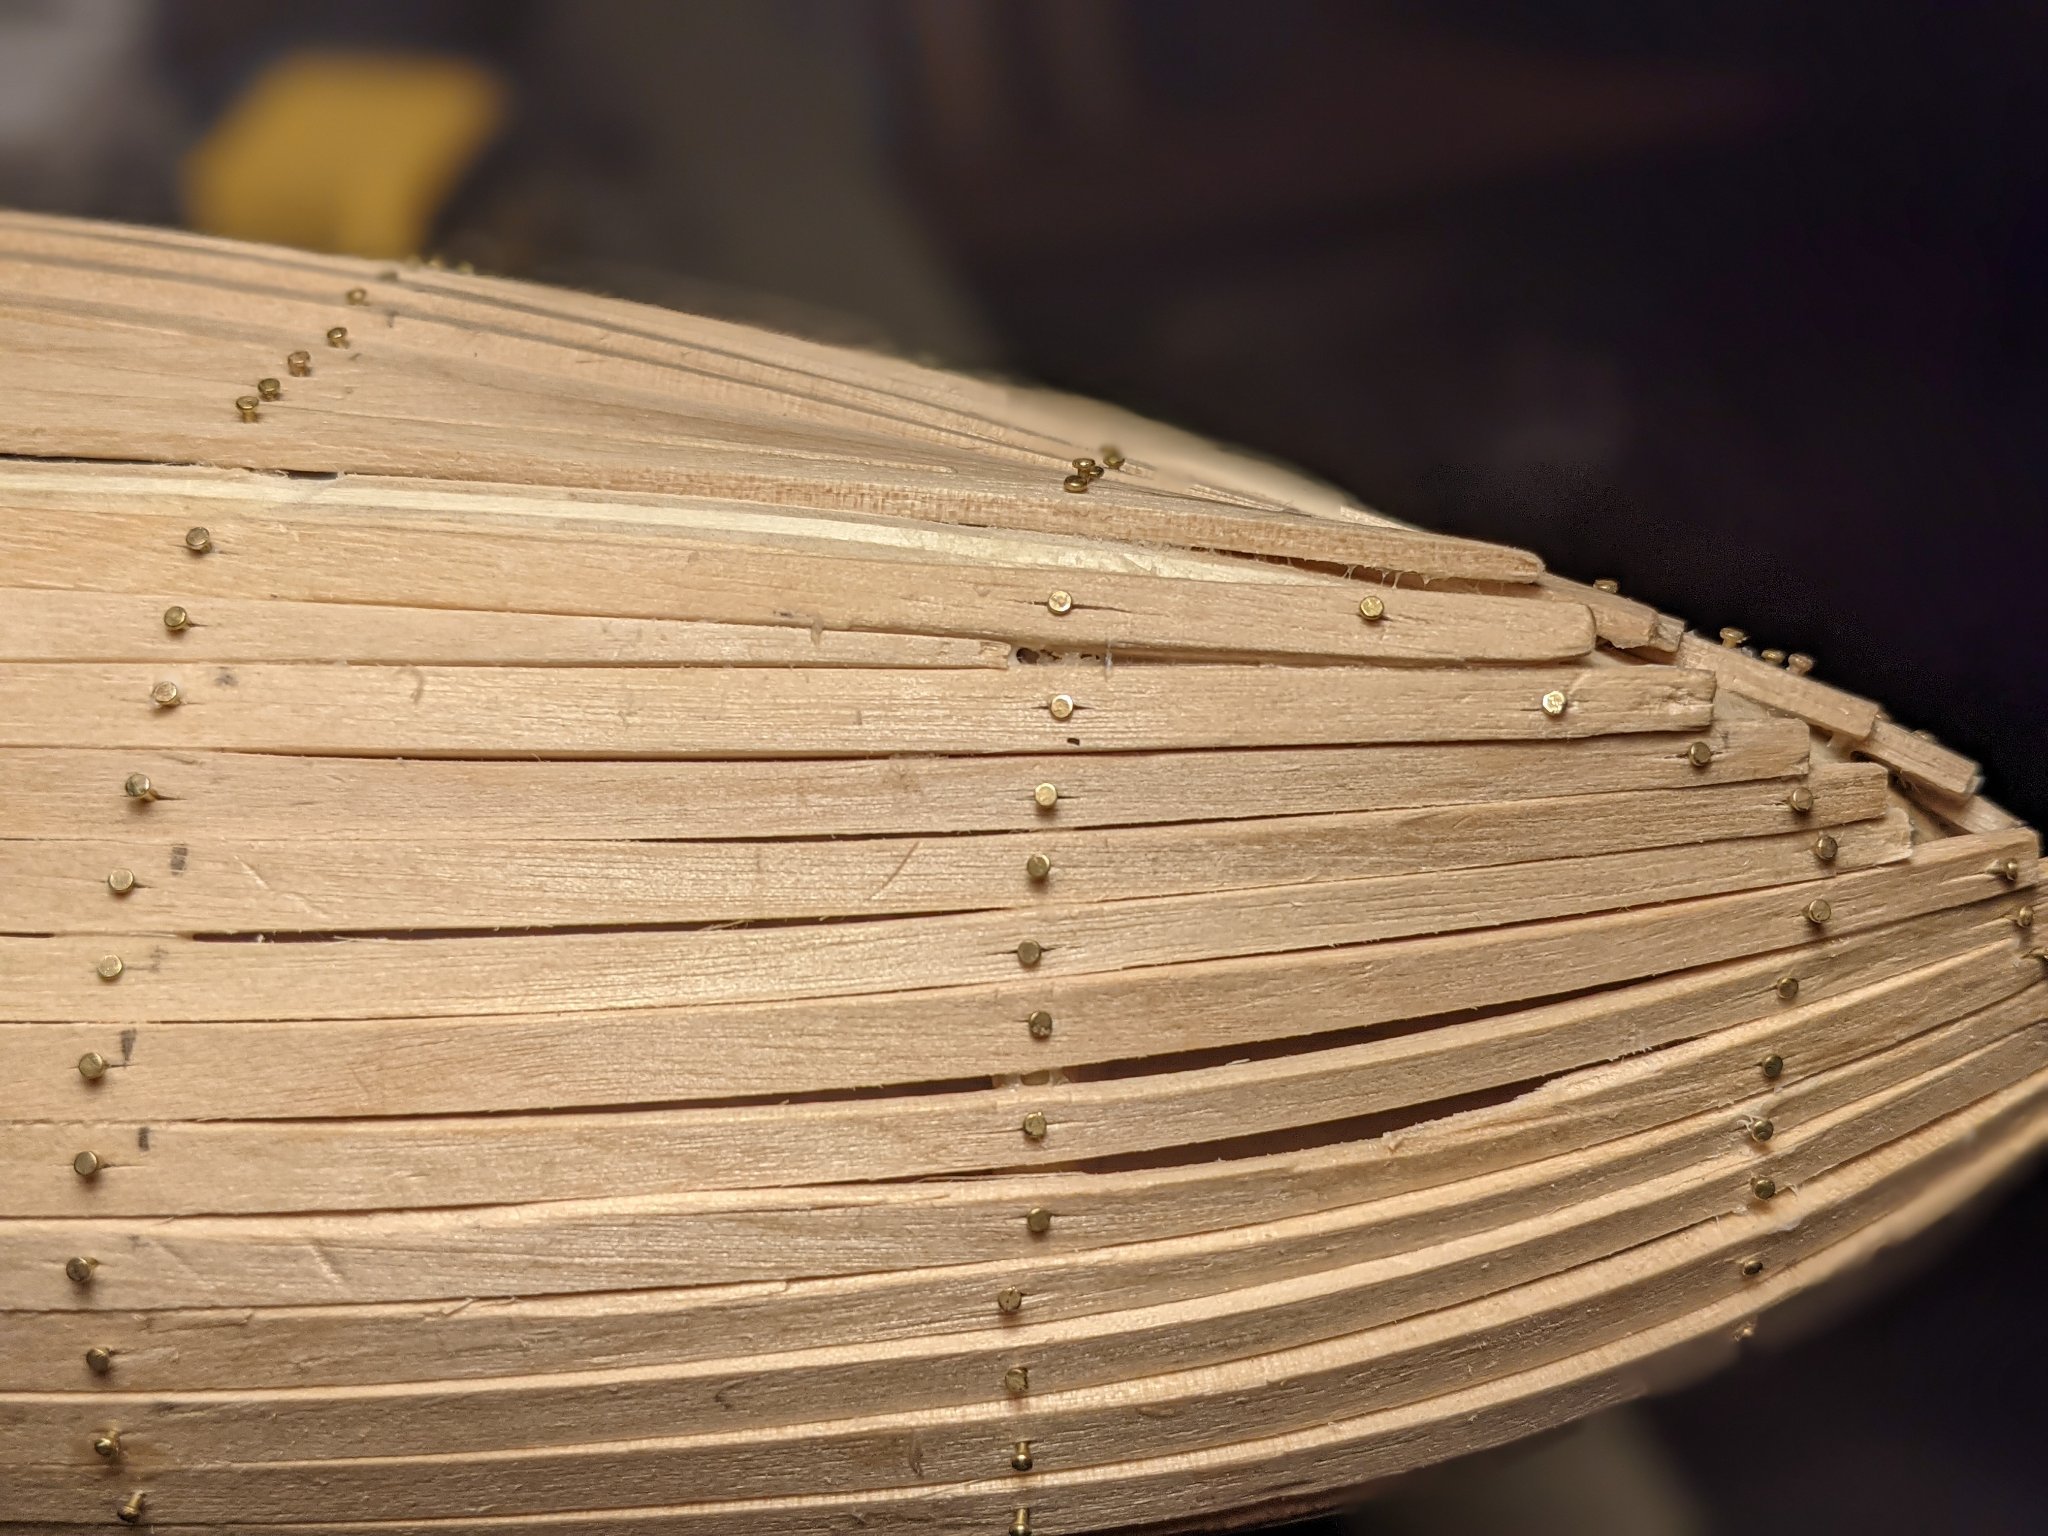
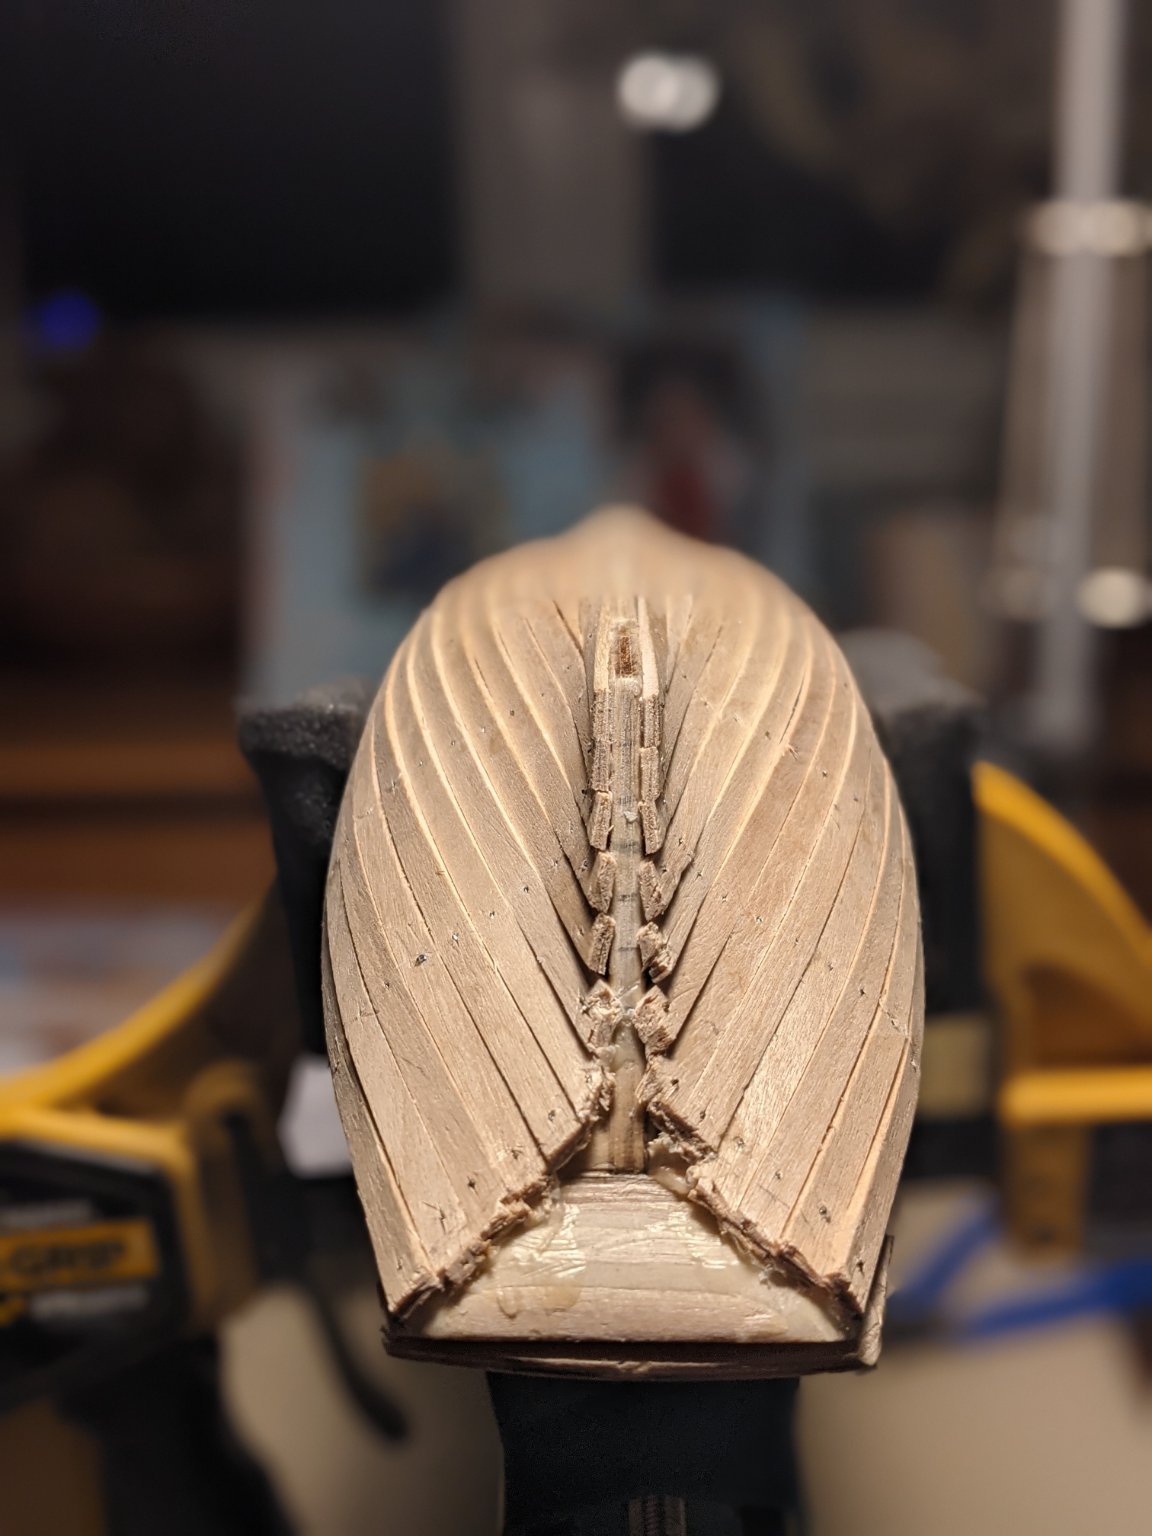
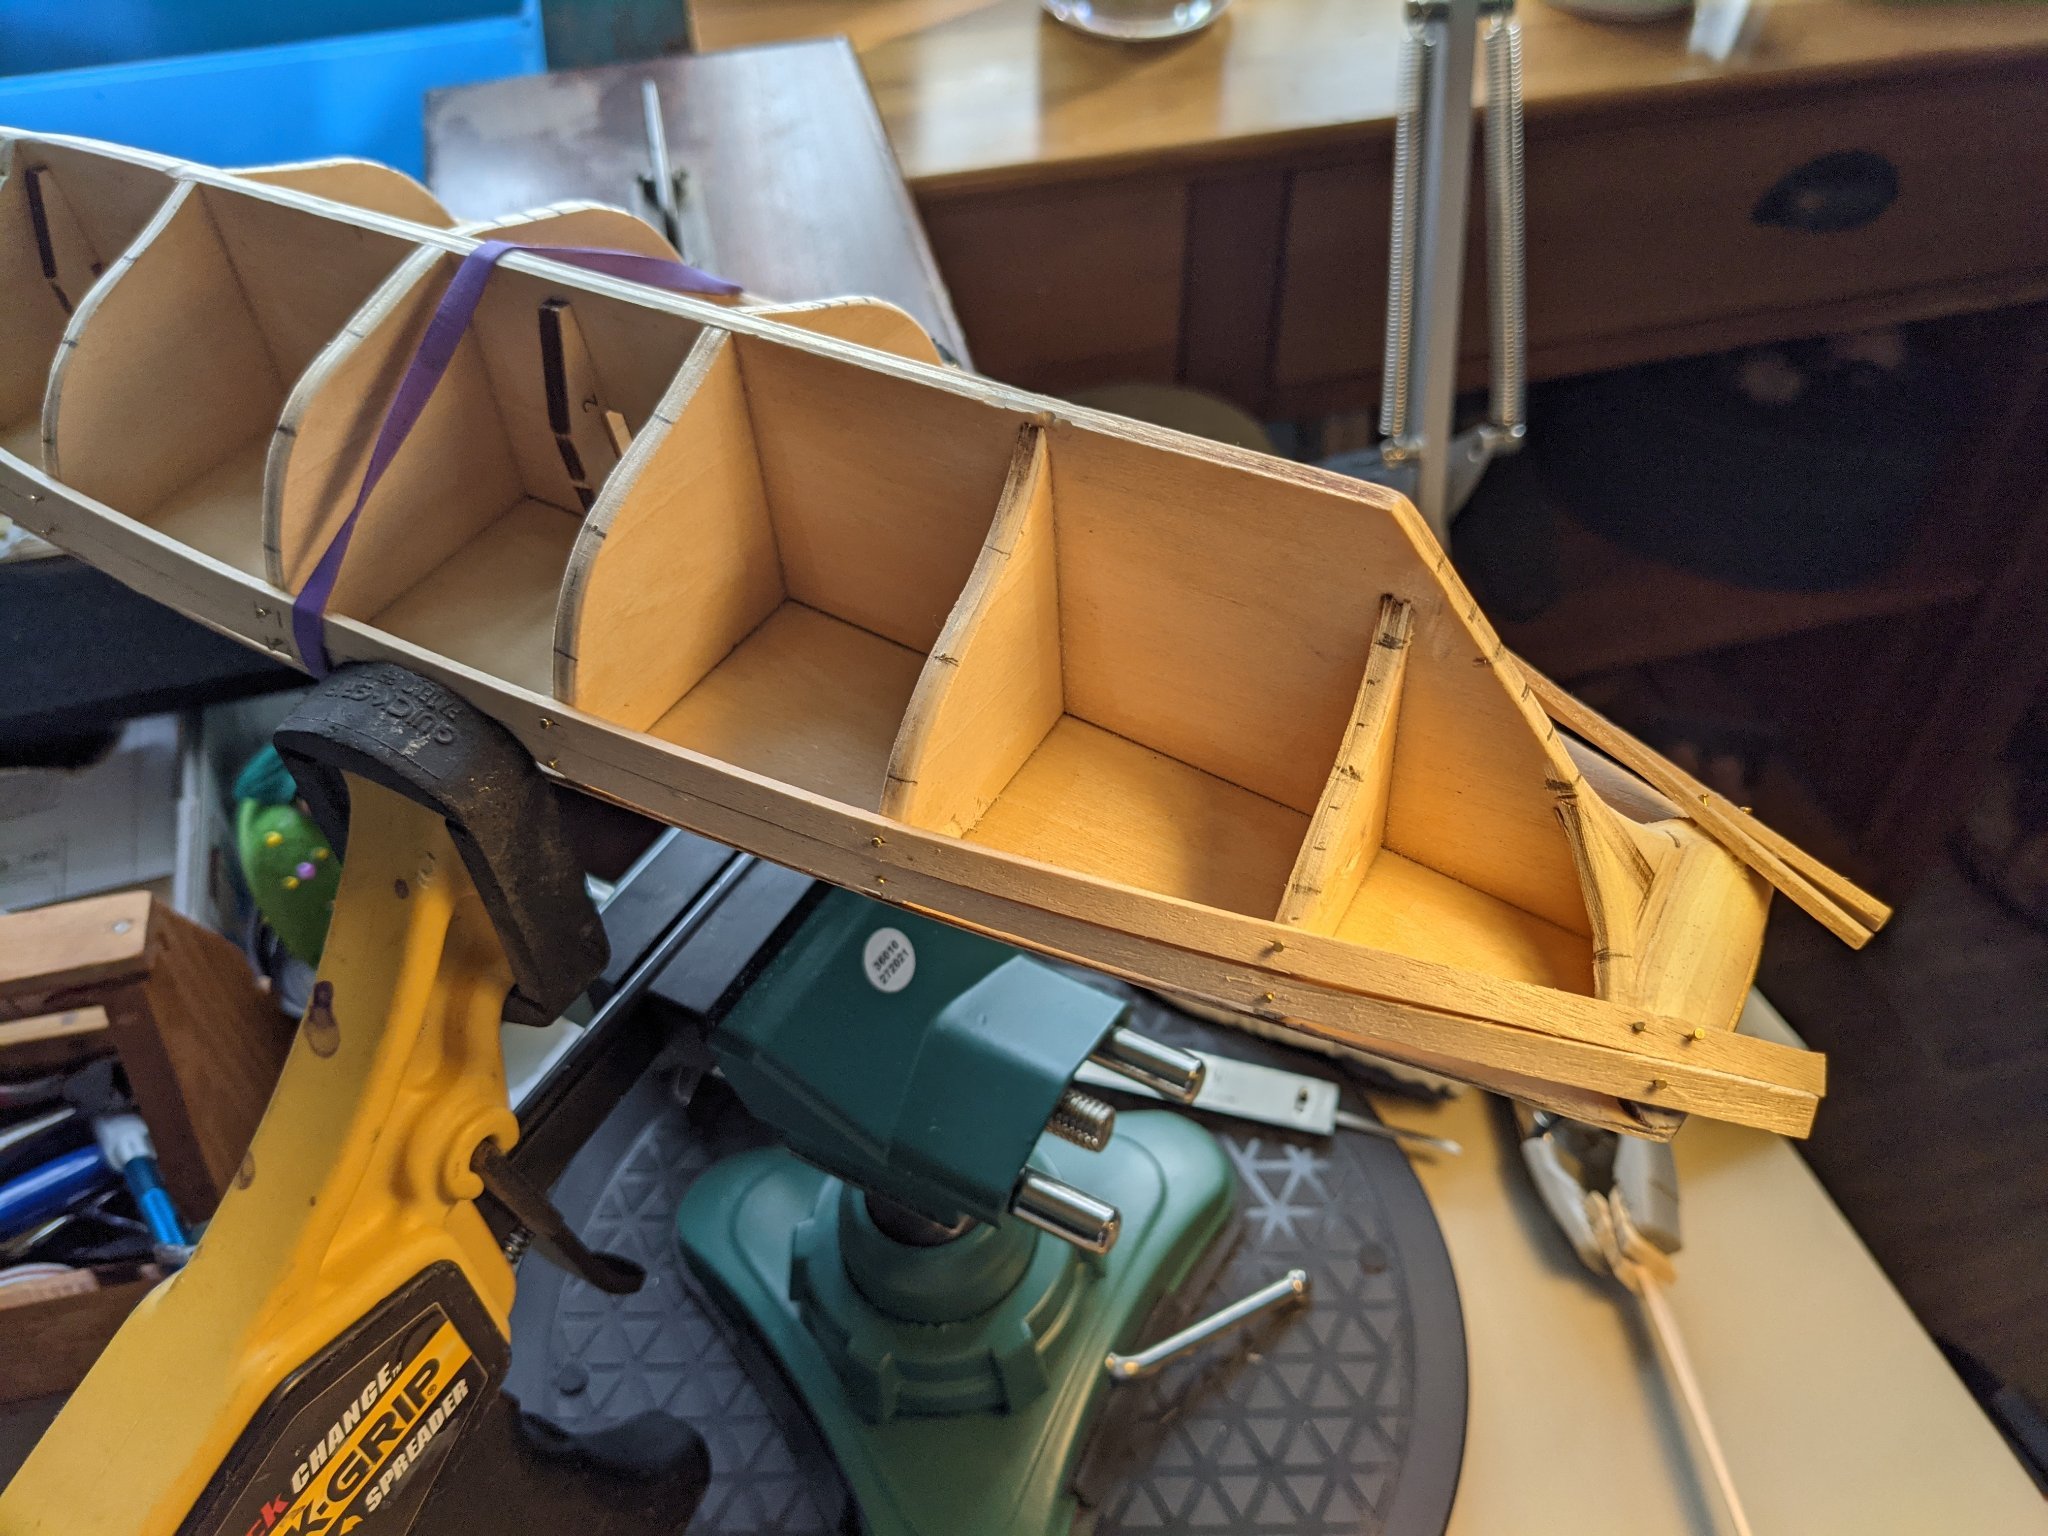
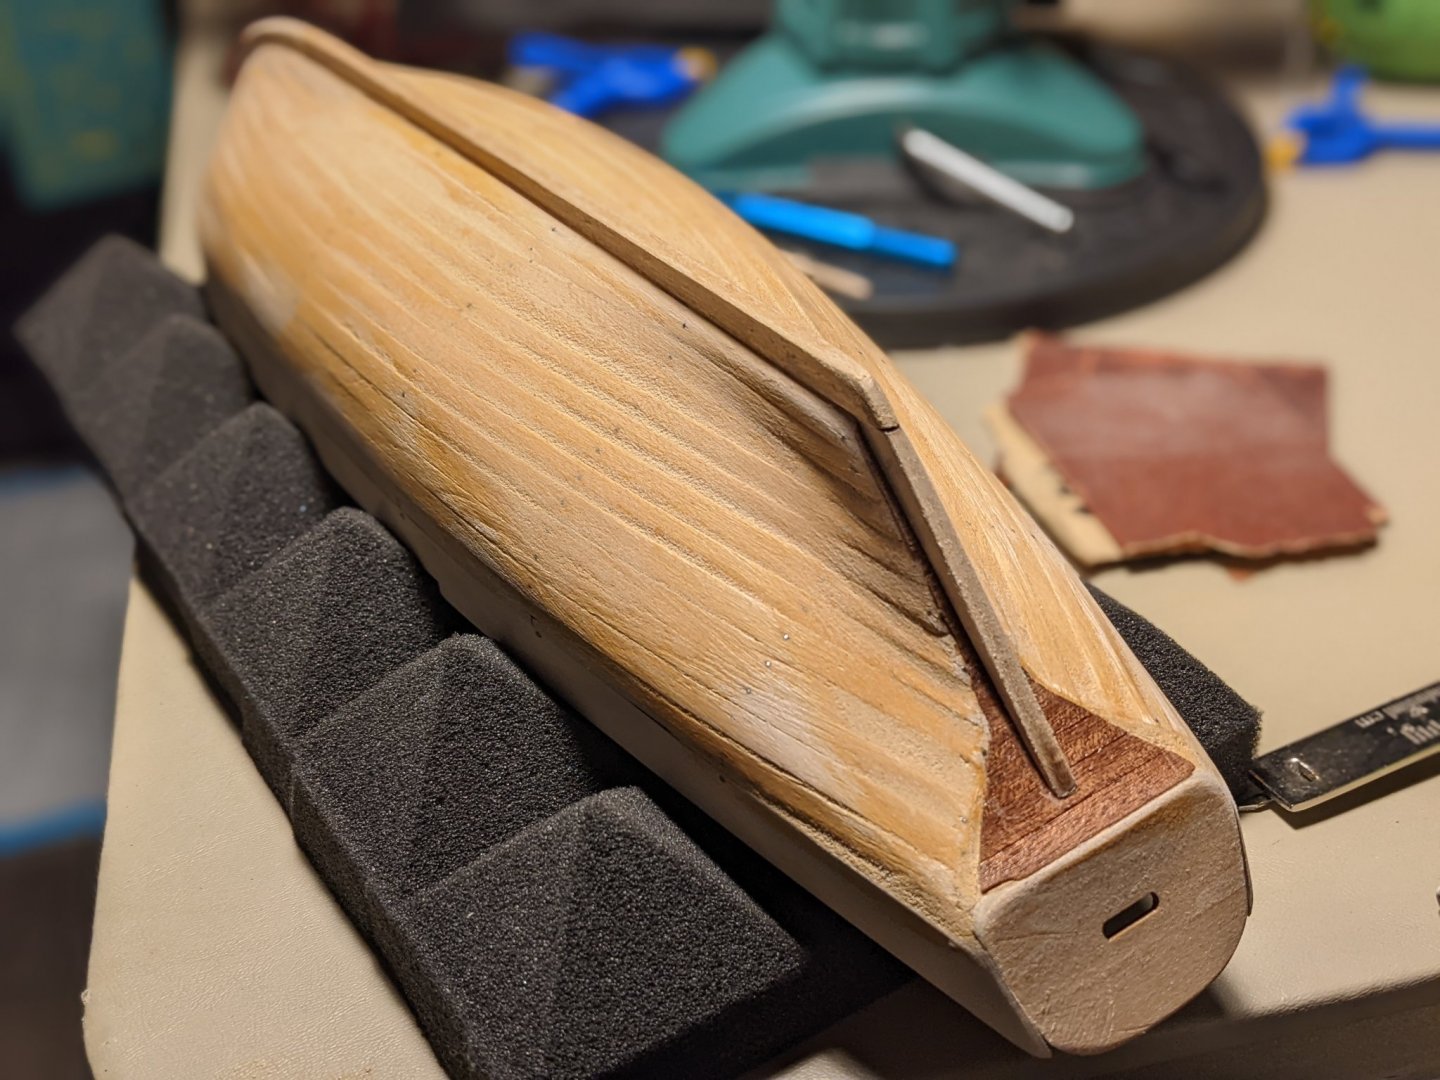
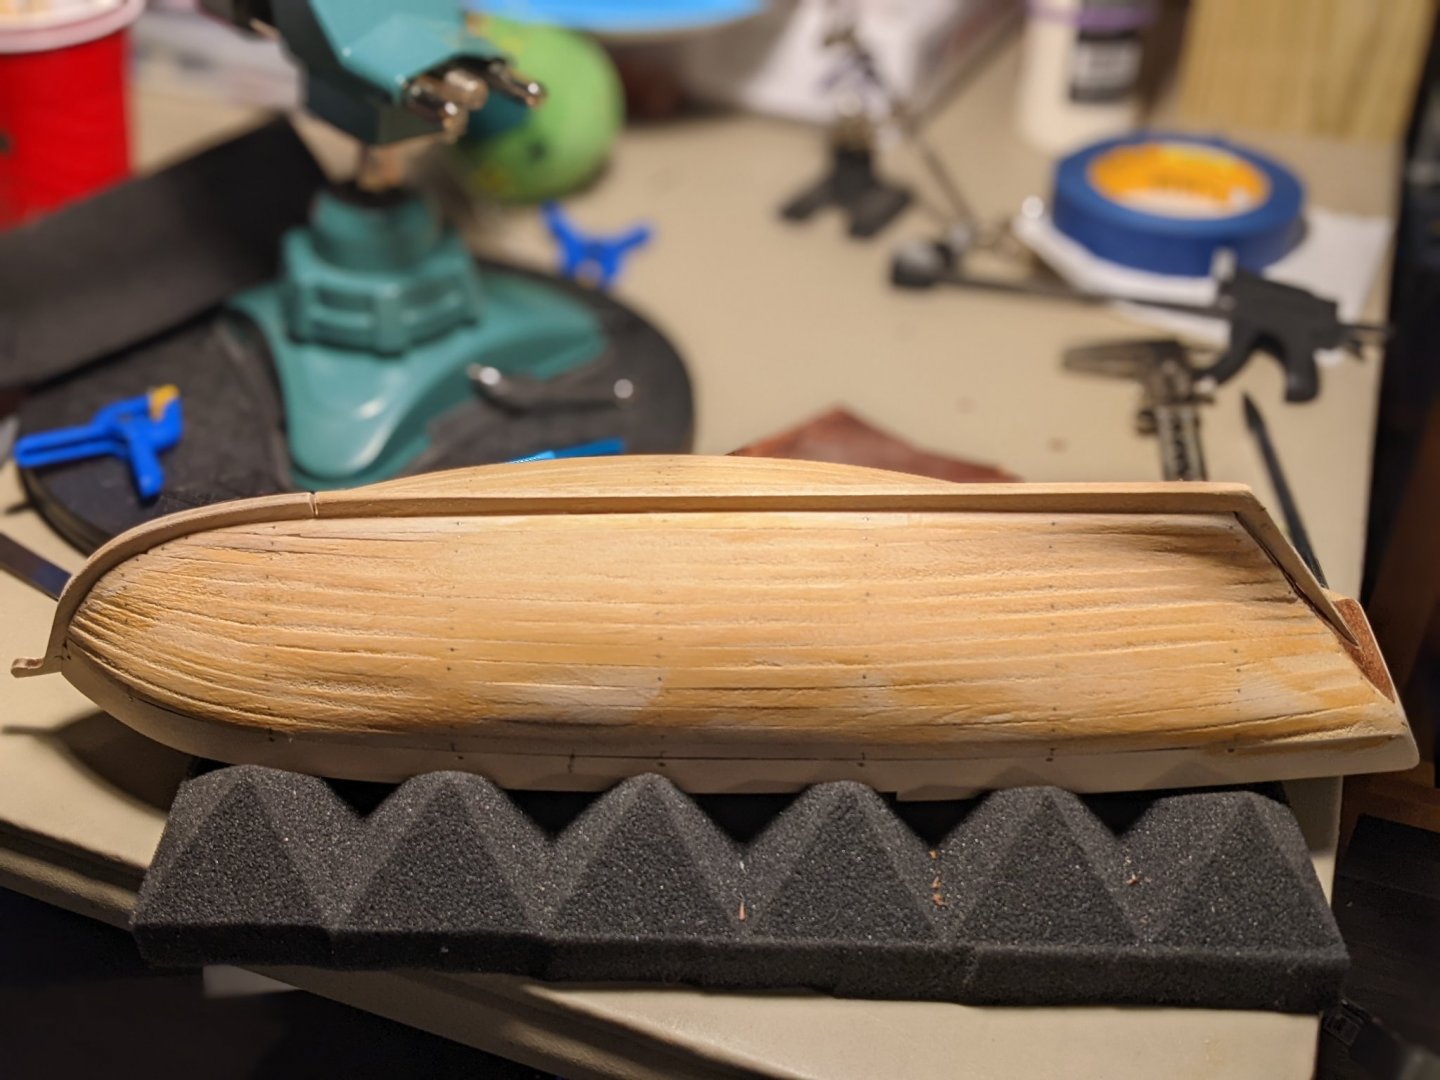
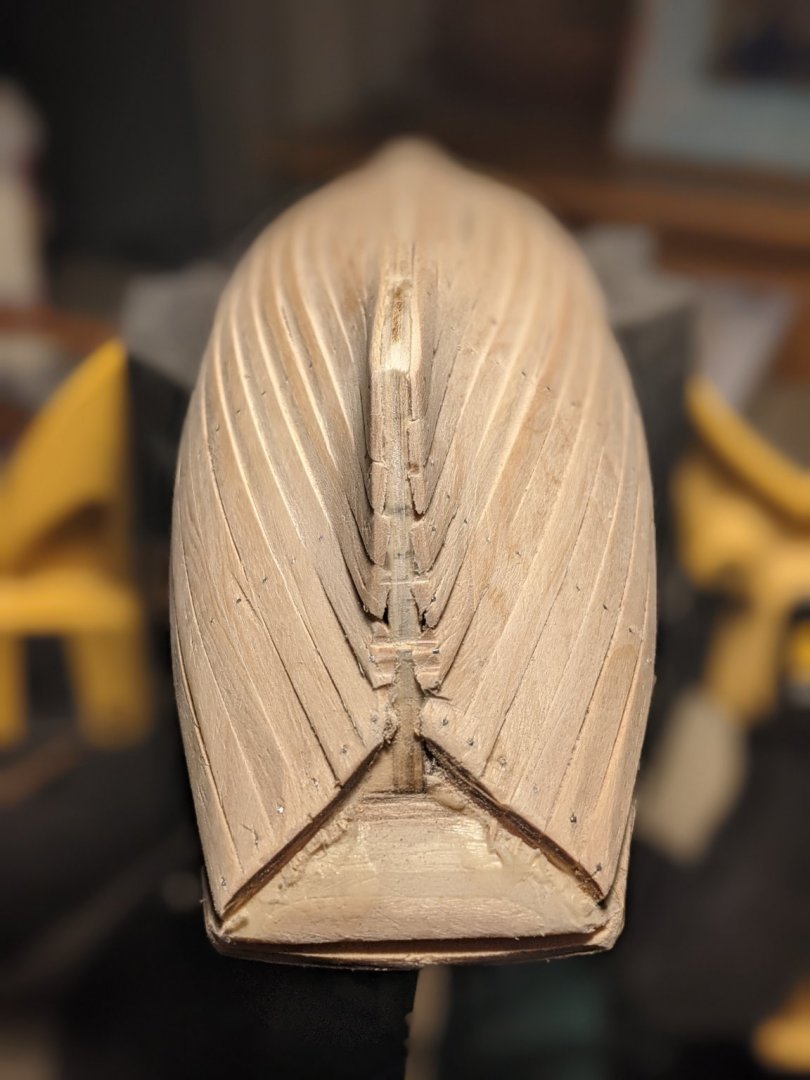
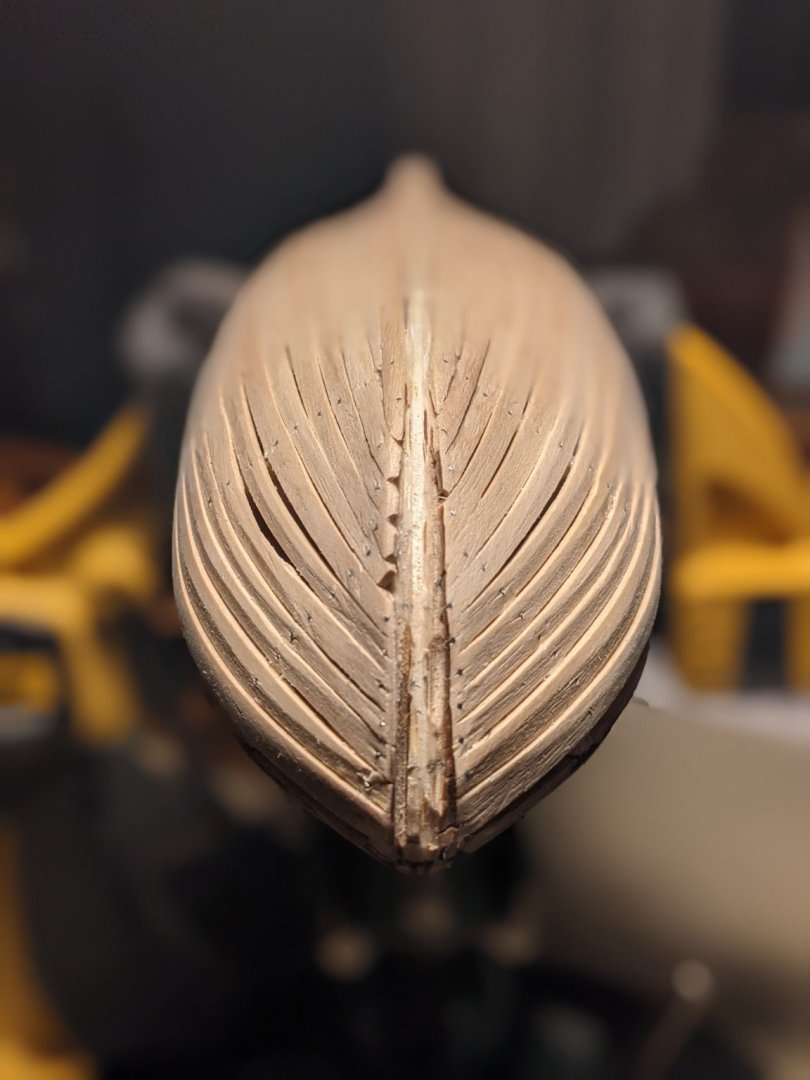
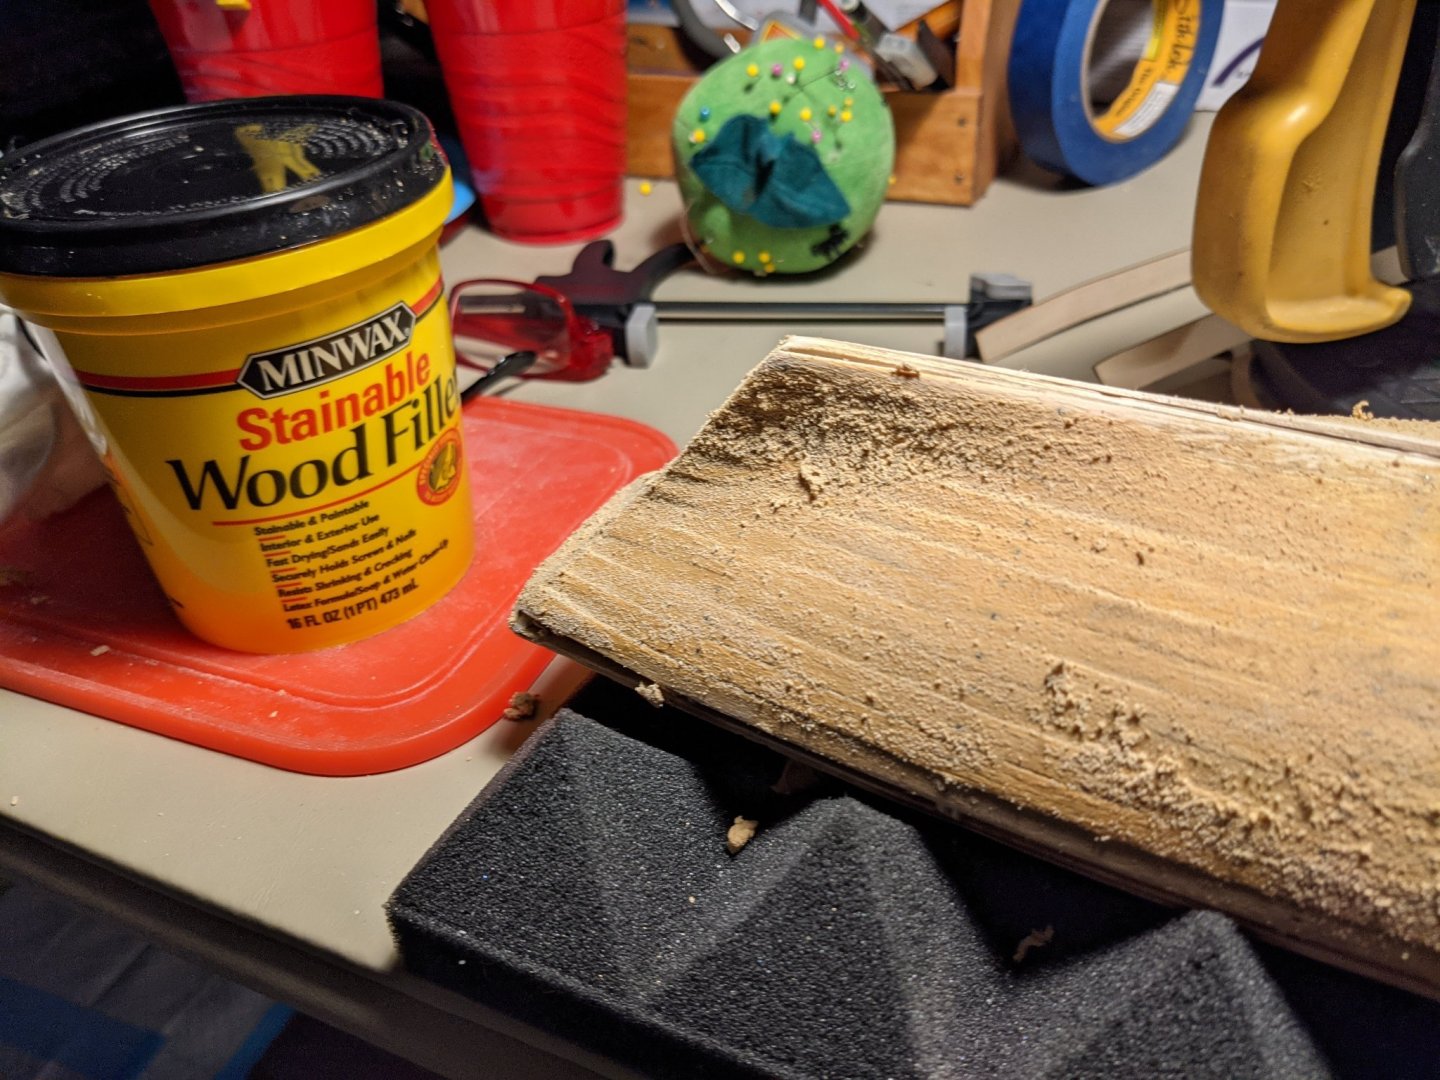
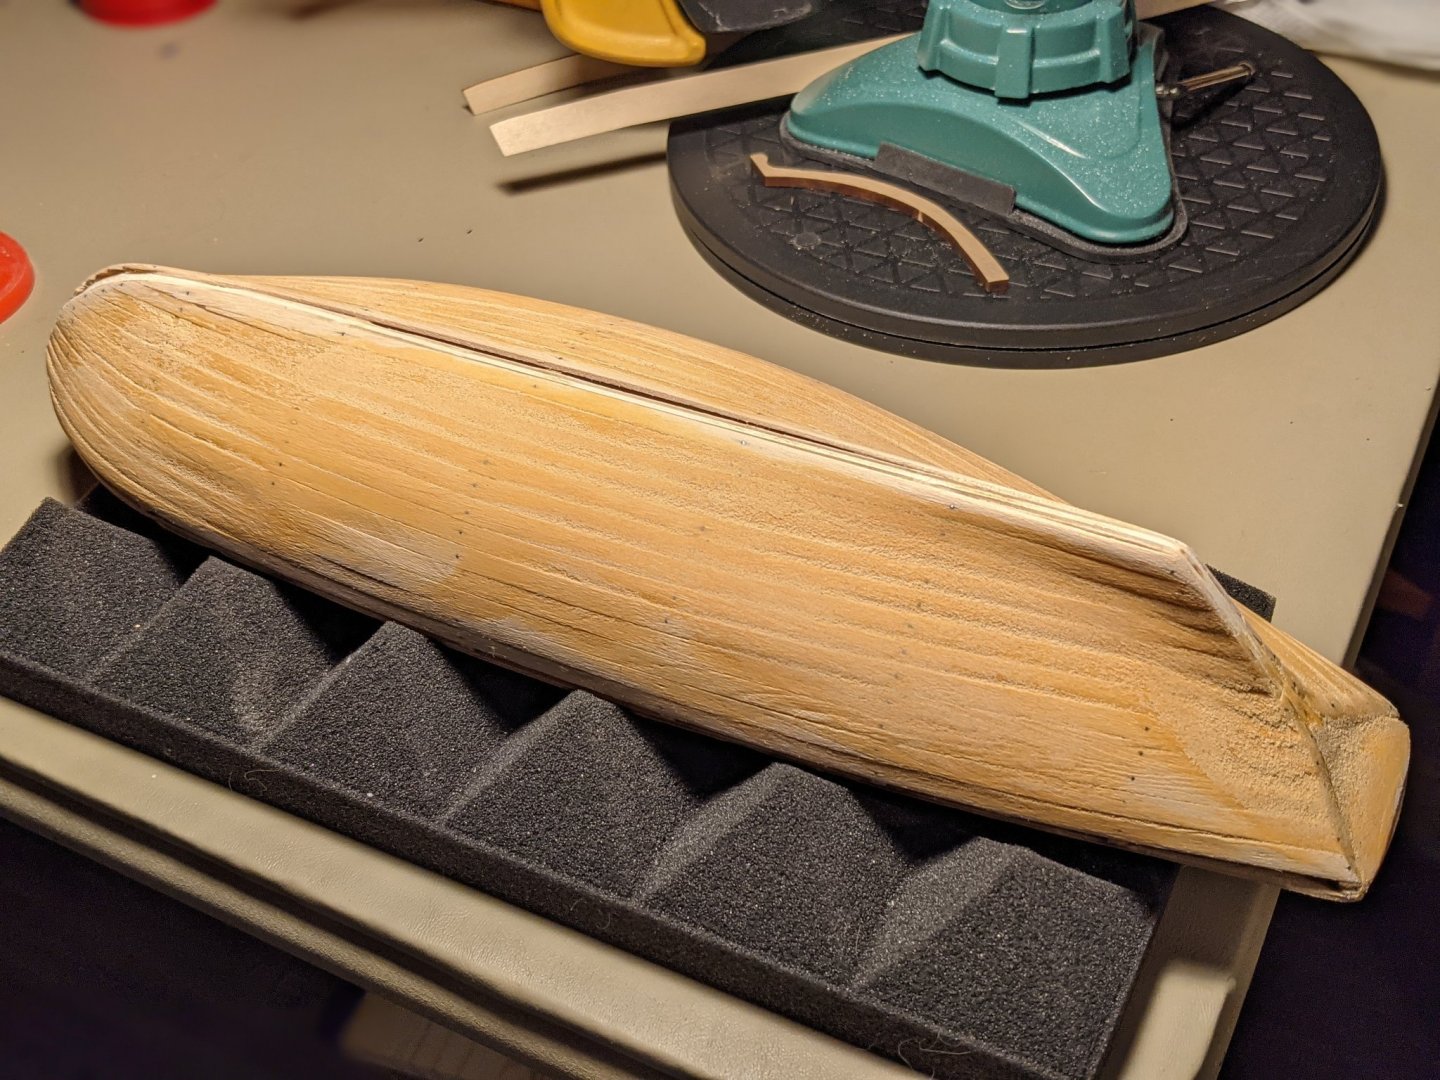
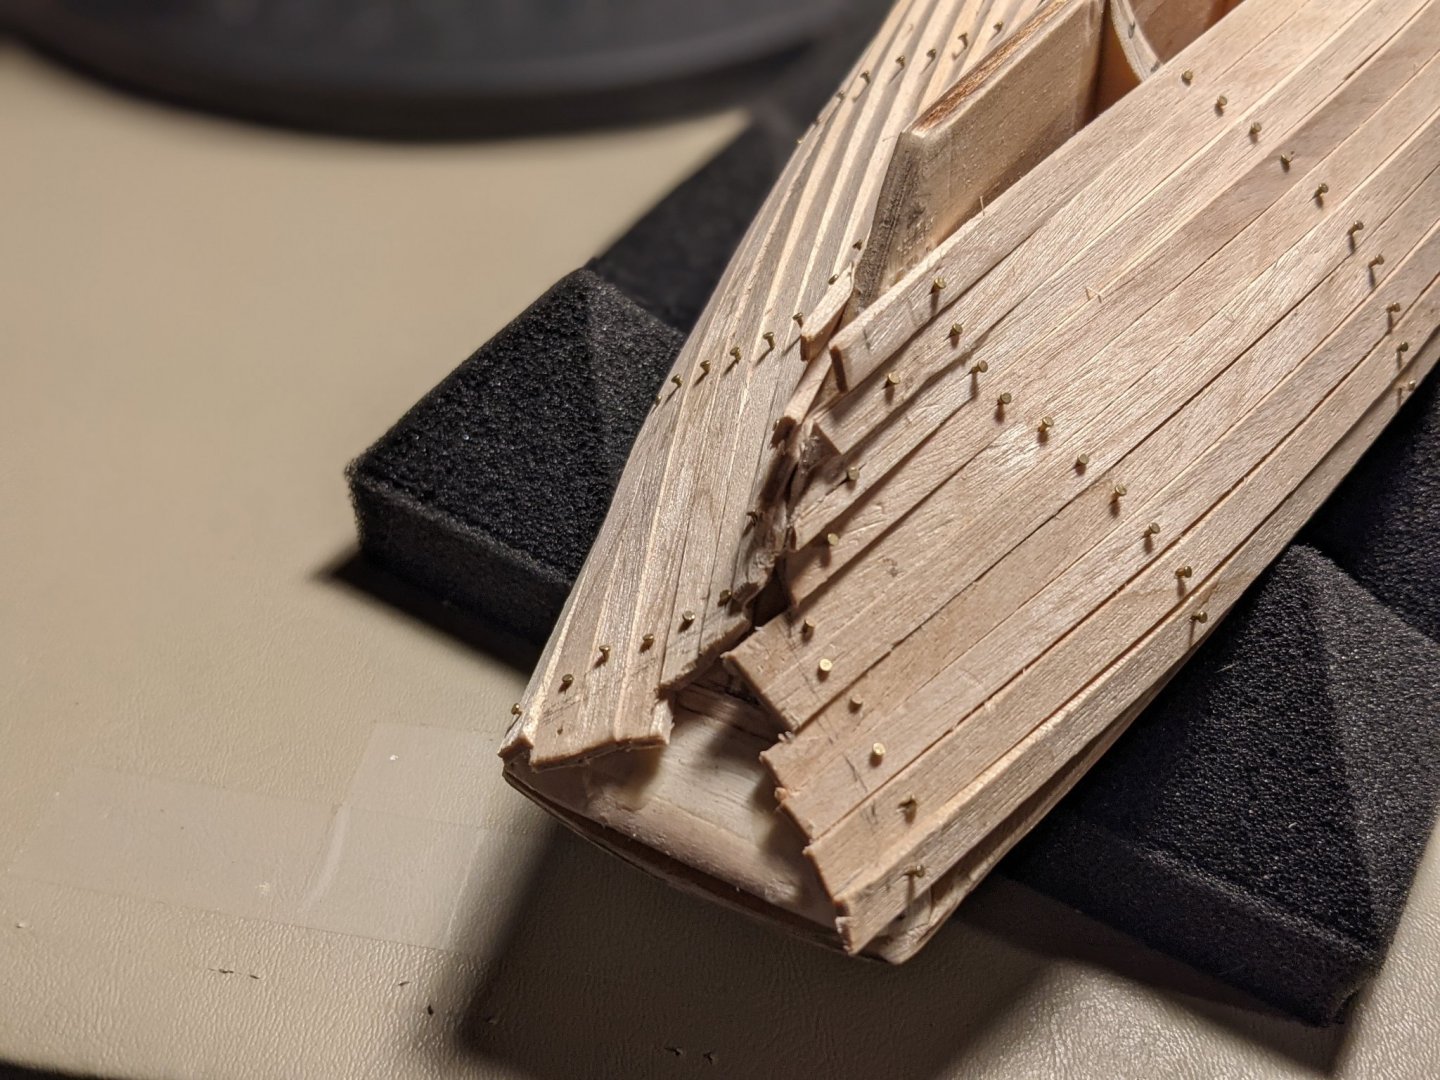
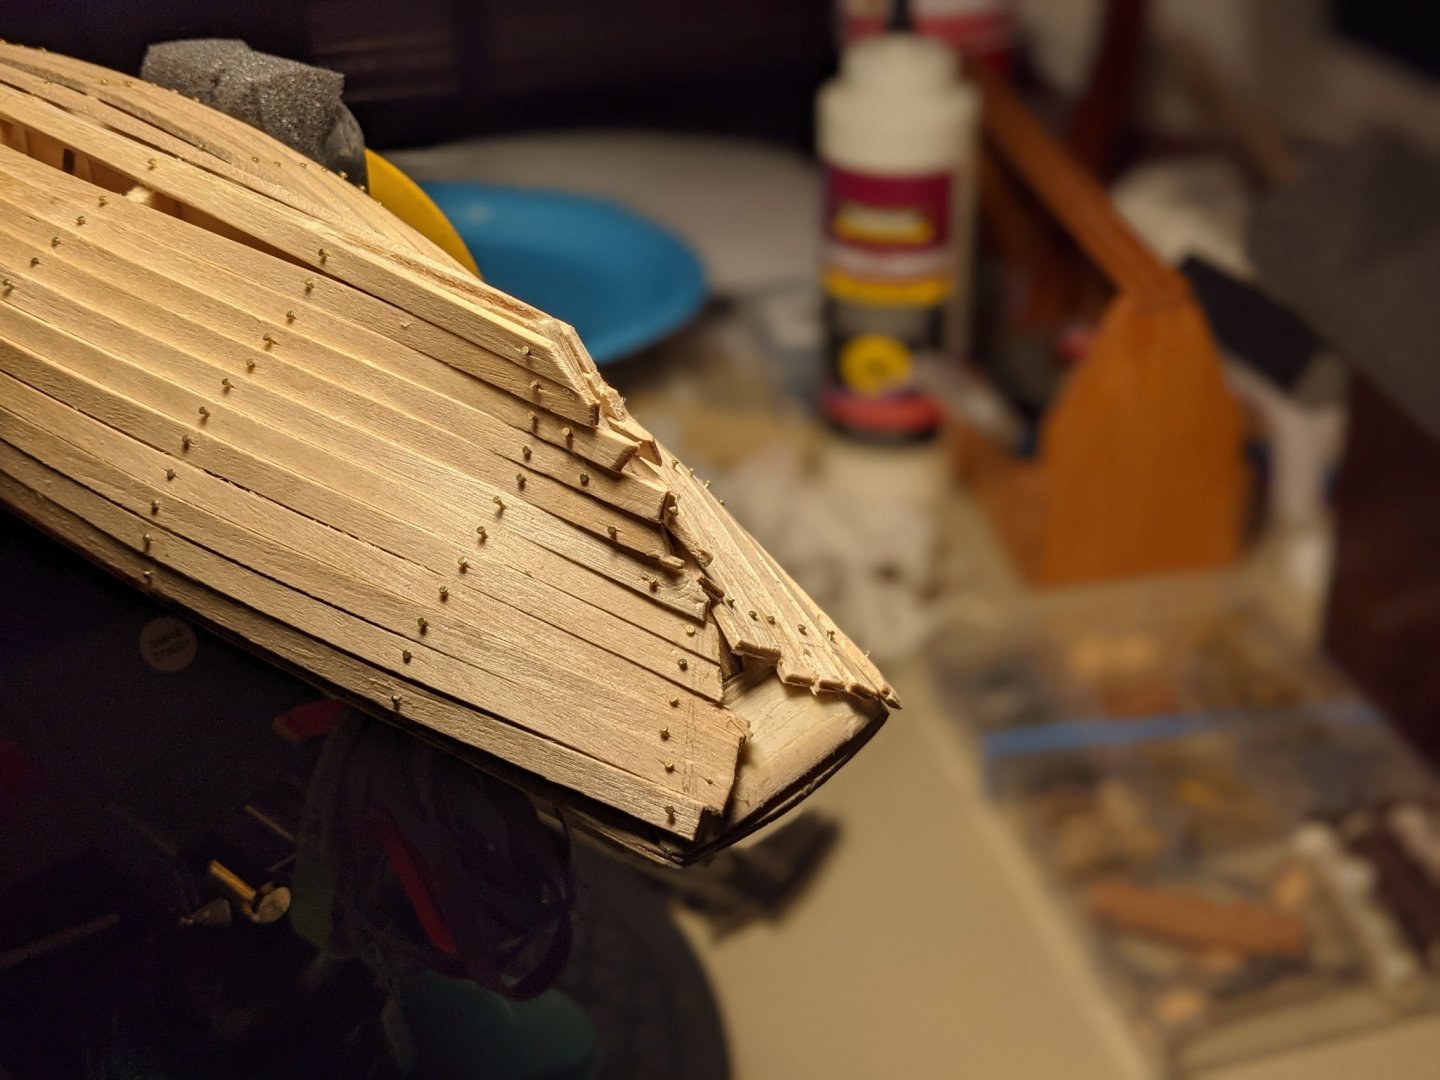
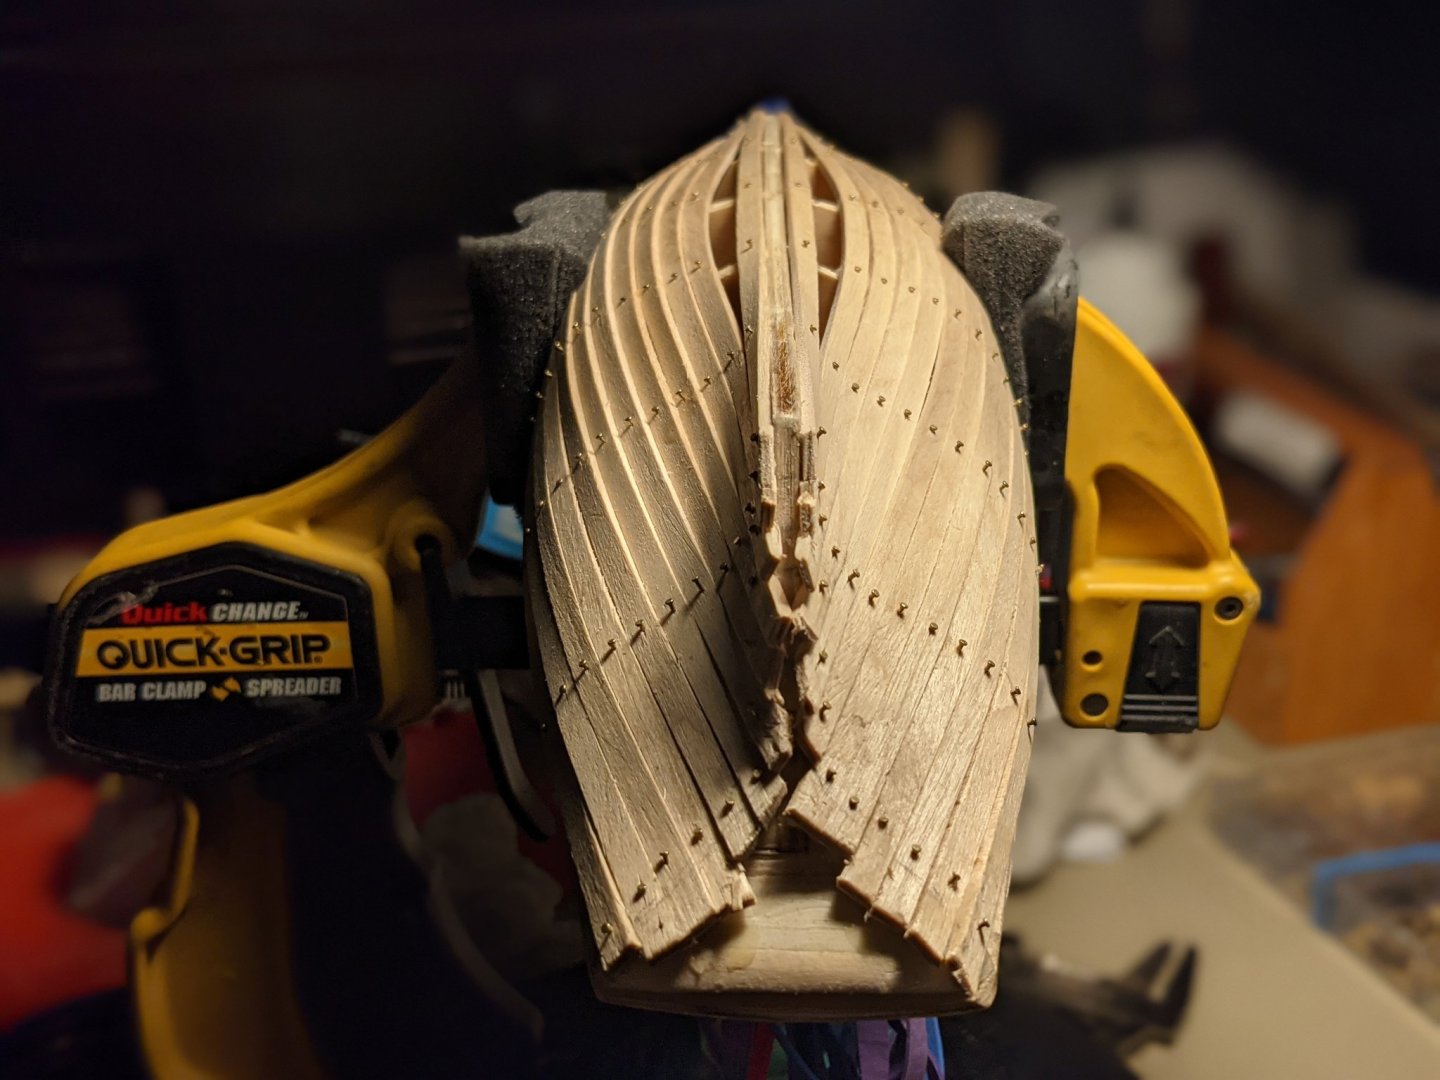
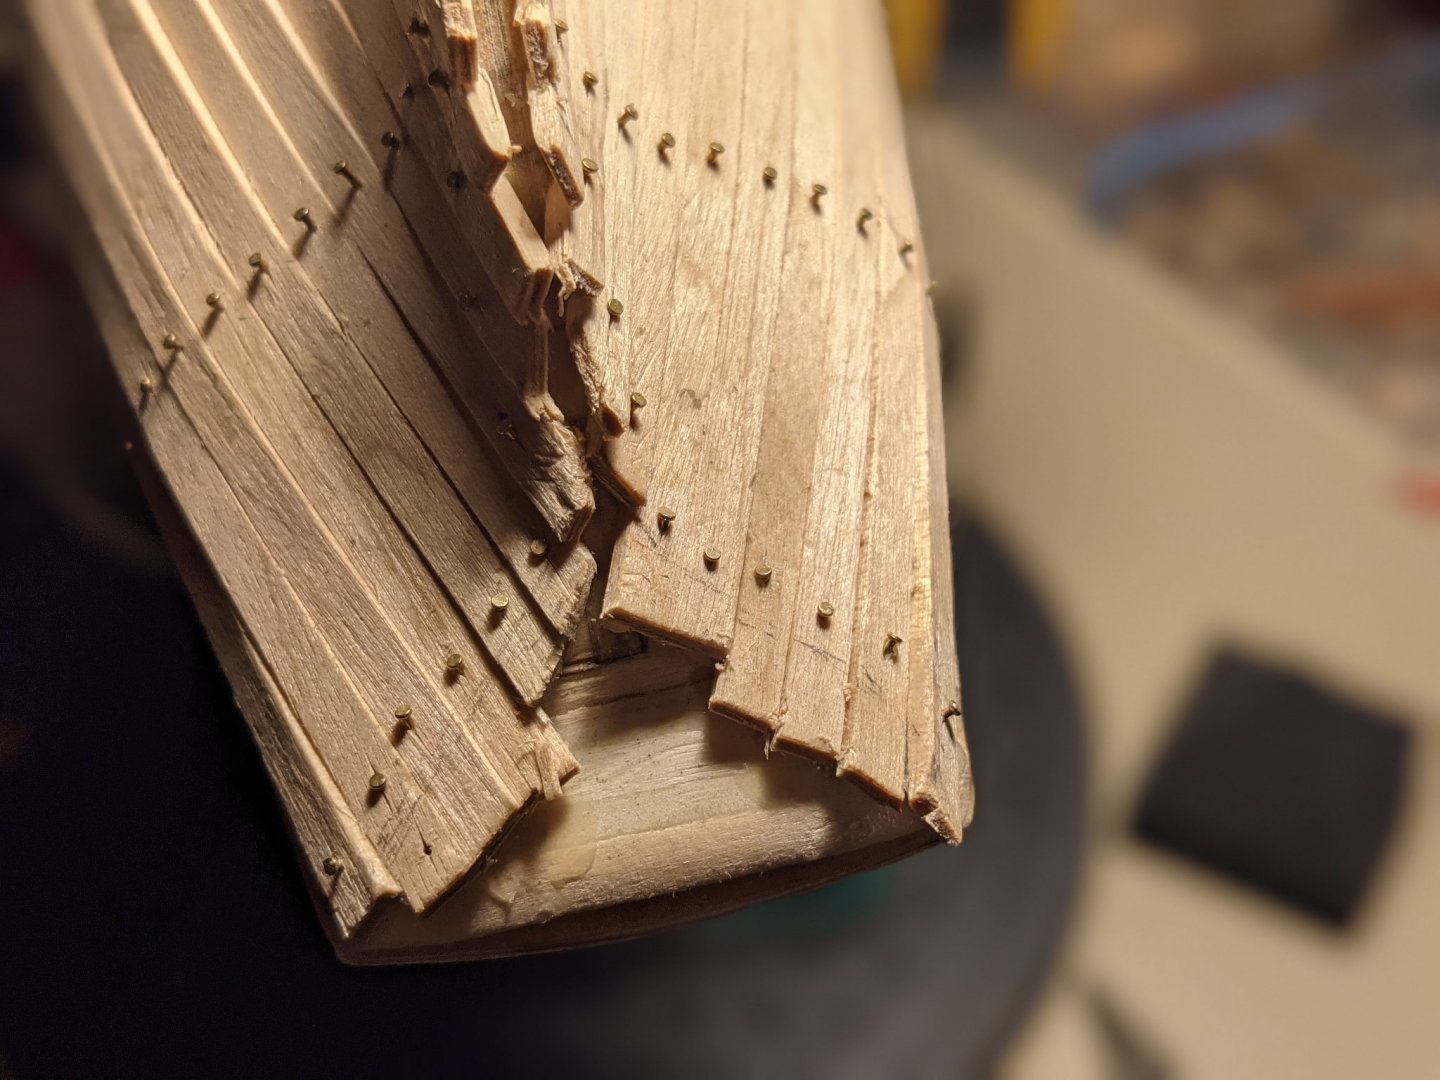
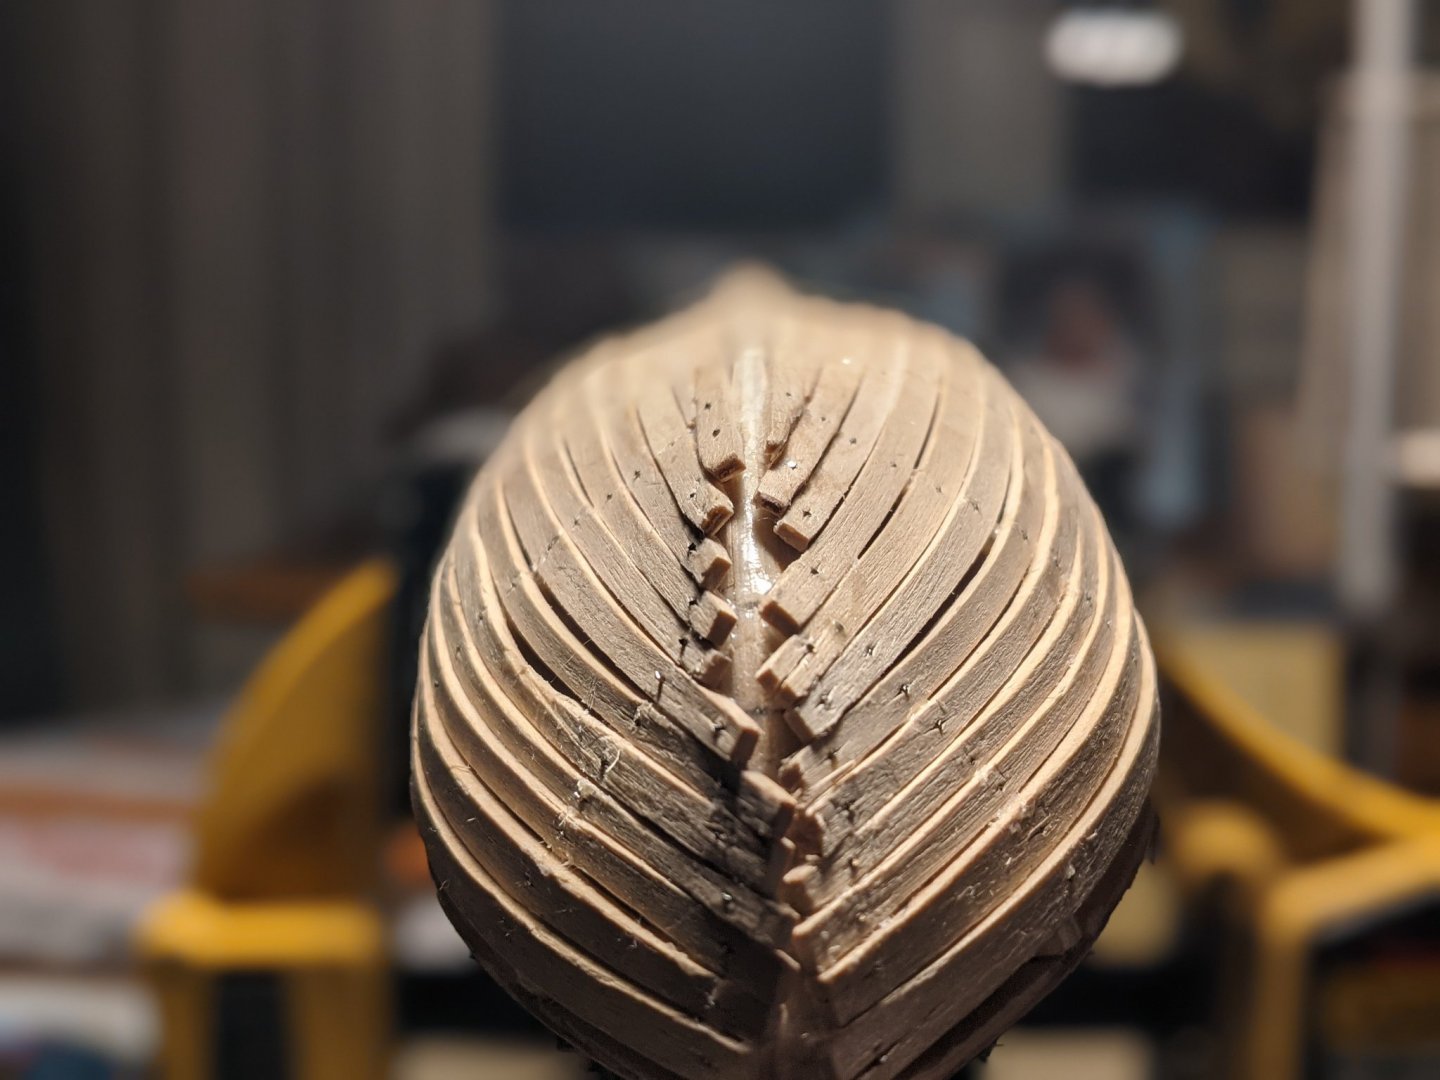
December 9, 2021: A few more images of my progress. A rotary tool with a cutting wheel was used to trim the hull strakes along the stern keel where the keel post will be fitted, and along the forward keel where the stem will be fitted at the bow. Heavy filing was required to smooth out the stepped hull strakes, followed by a heavy sanding using 60 grit paper. A fairly liberal application of wood filler, followed by 100 grit sandpaper should about finish out the rough hull. I'm feeling pretty good about how smooth it's getting, the finish mahogany strips should sit nicely. After the bulwarks are on, the instructions say to finish the hull in mahogany, before the keel pieces are fitted. I would rather switch that up. However, after reading a few logs, I think I will go ahead and line the stern piece first. This will allow me to fit all the keel pieces at one time, then I can finish the hull. I want to ensure all the finish pieces are trimmed nice and tight to the keel for a nice clean look. Comments welcome on this topic... Thanks for reading, more pics soon...

-
Hartron reacted to a post in a topic:
Virginia 1819 by Mordswixed - Artesania Latina - 1:41
-
CiscoH reacted to a post in a topic:
Virginia 1819 by Mordswixed - Artesania Latina - 1:41
-
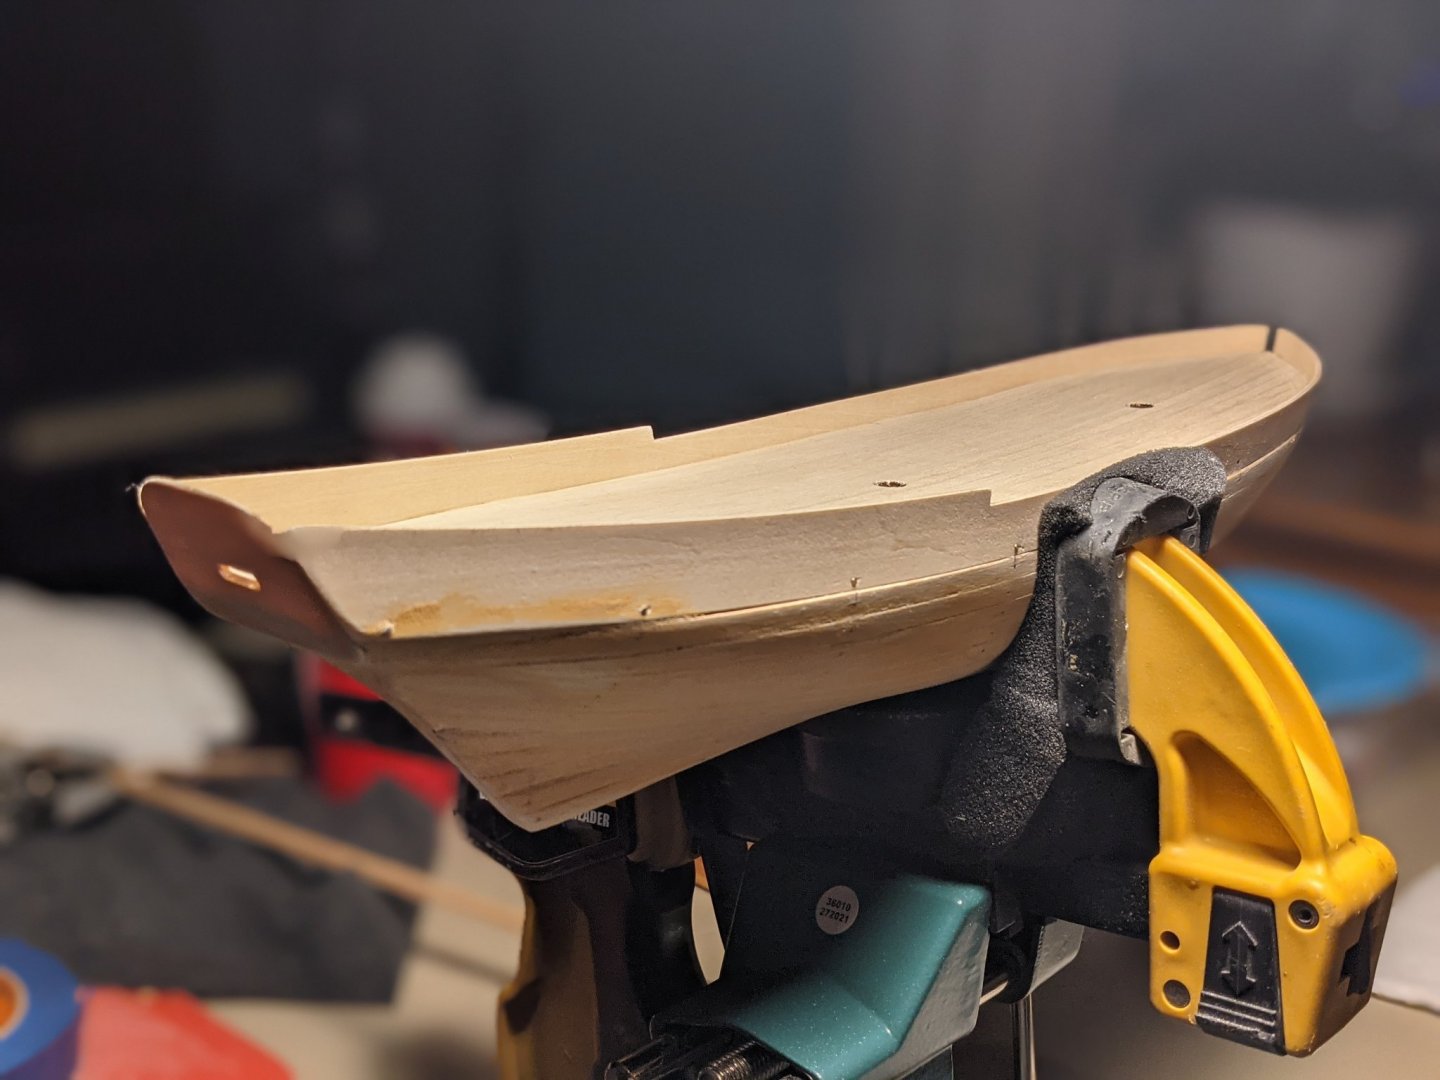
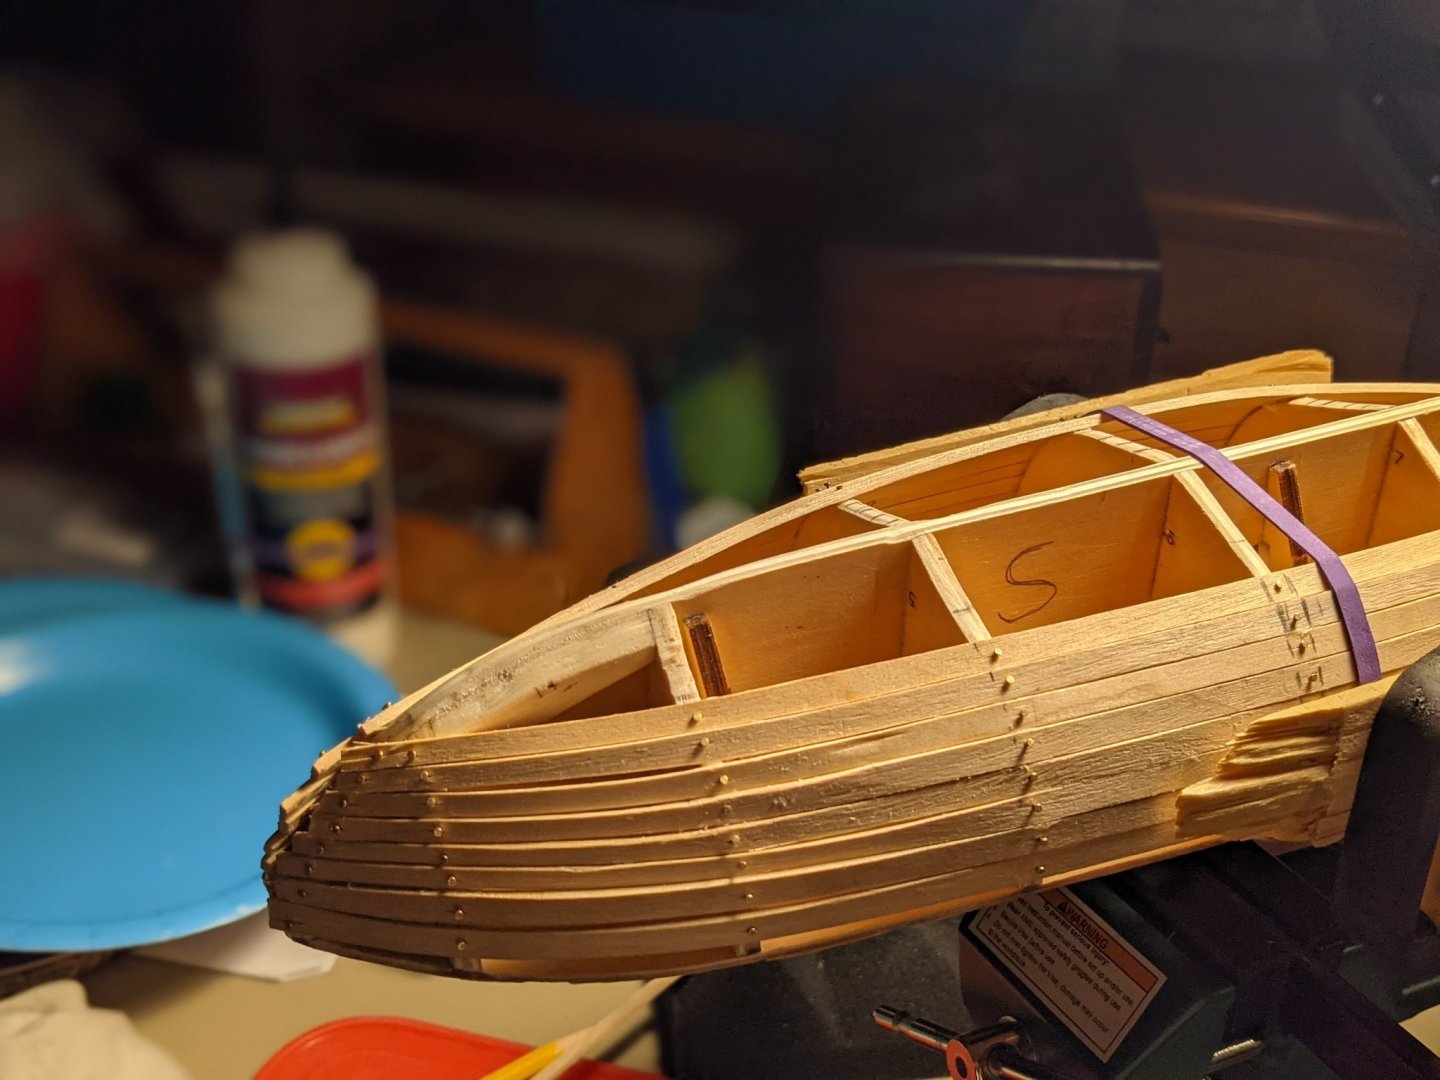
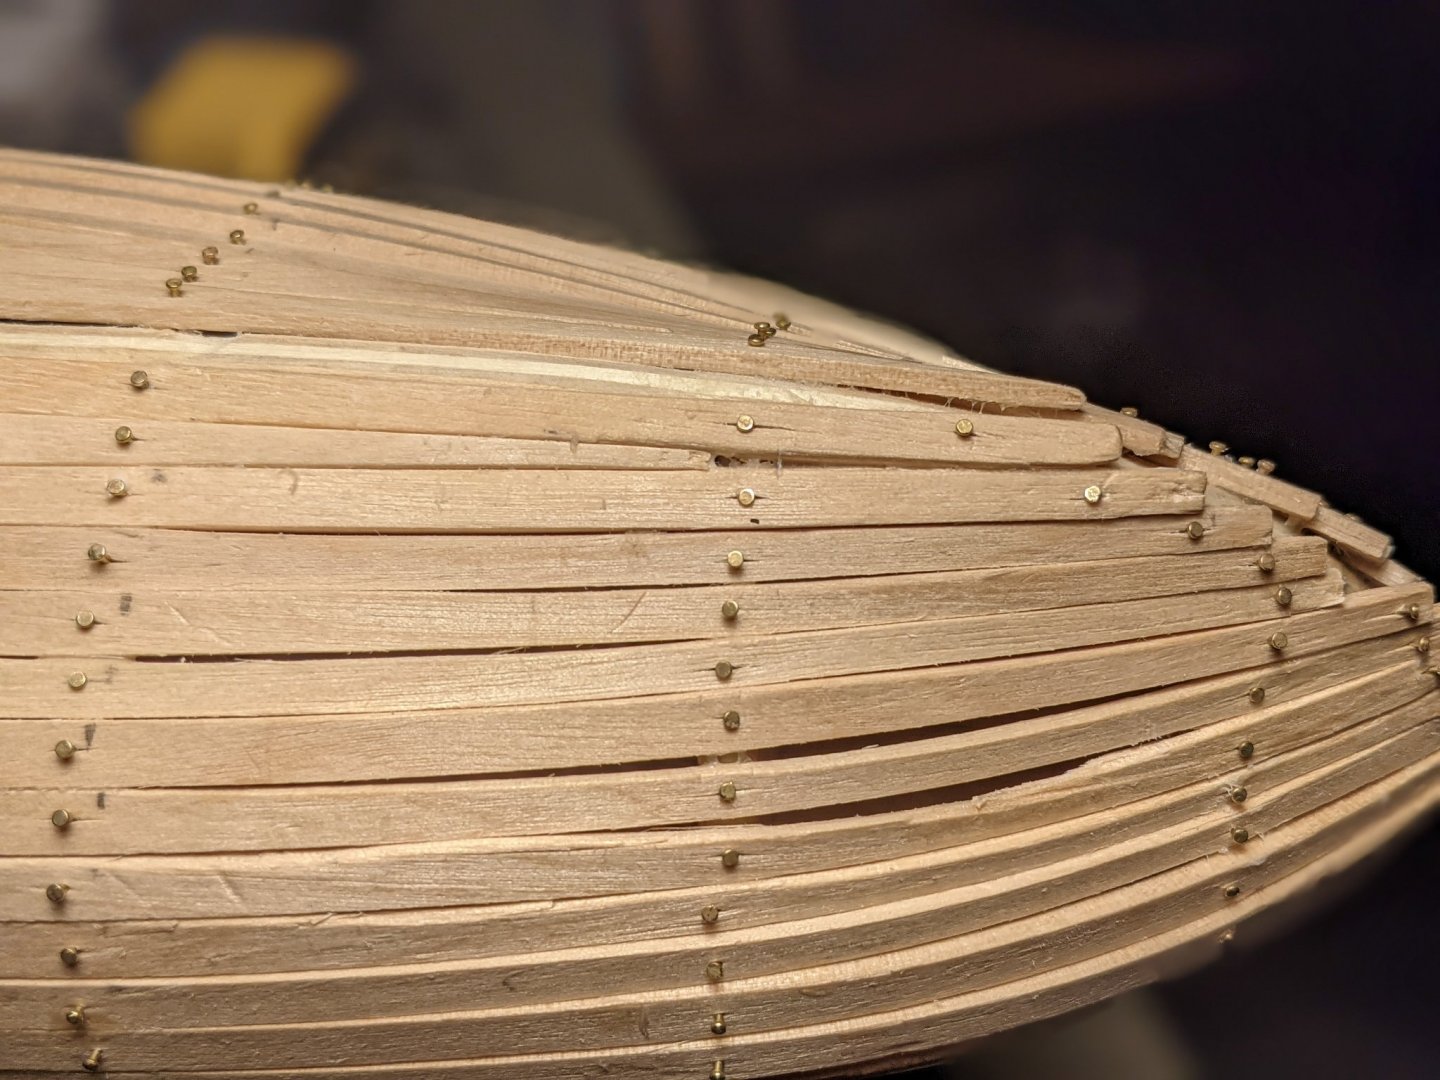
Some additional images of the hull planking. I am soaking and bending the strakes four at a time, so the entire hull took roughly a week to complete. In places, the strakes aren't sitting totally flat against the bulkhead, so things are looking a little rough, kinda stepped. But I think sanding and filling will smooth things out nicely. Other places look pretty nice and smooth already. Overall, pretty pleased with the progress. Thanks for looking! More soon....


-
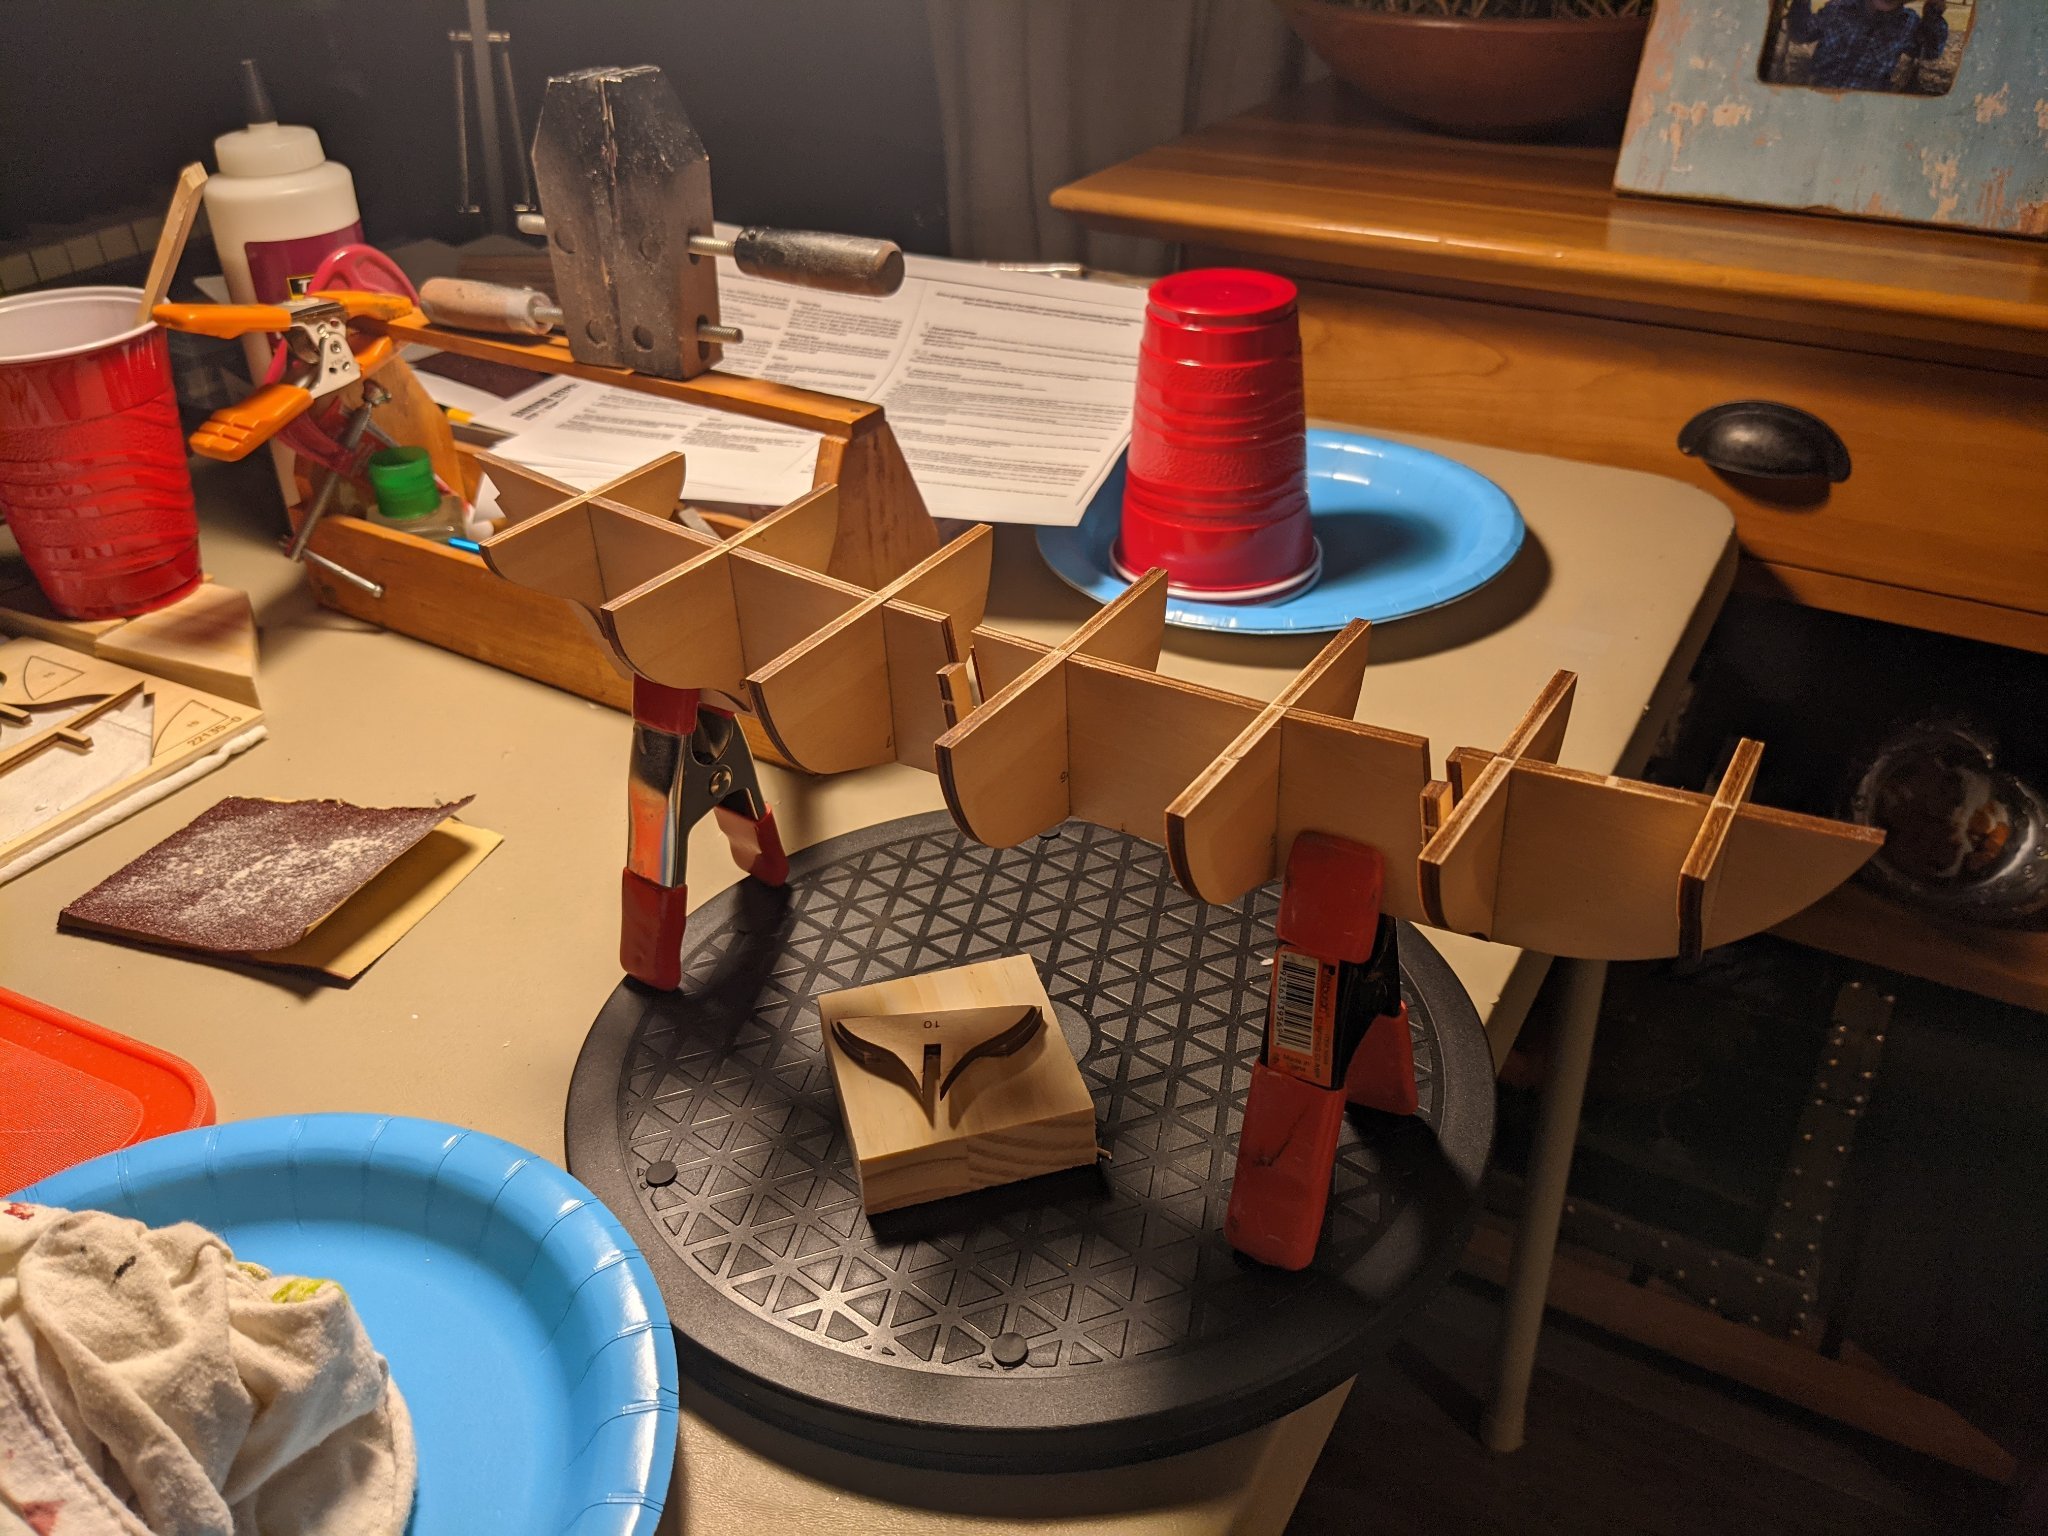
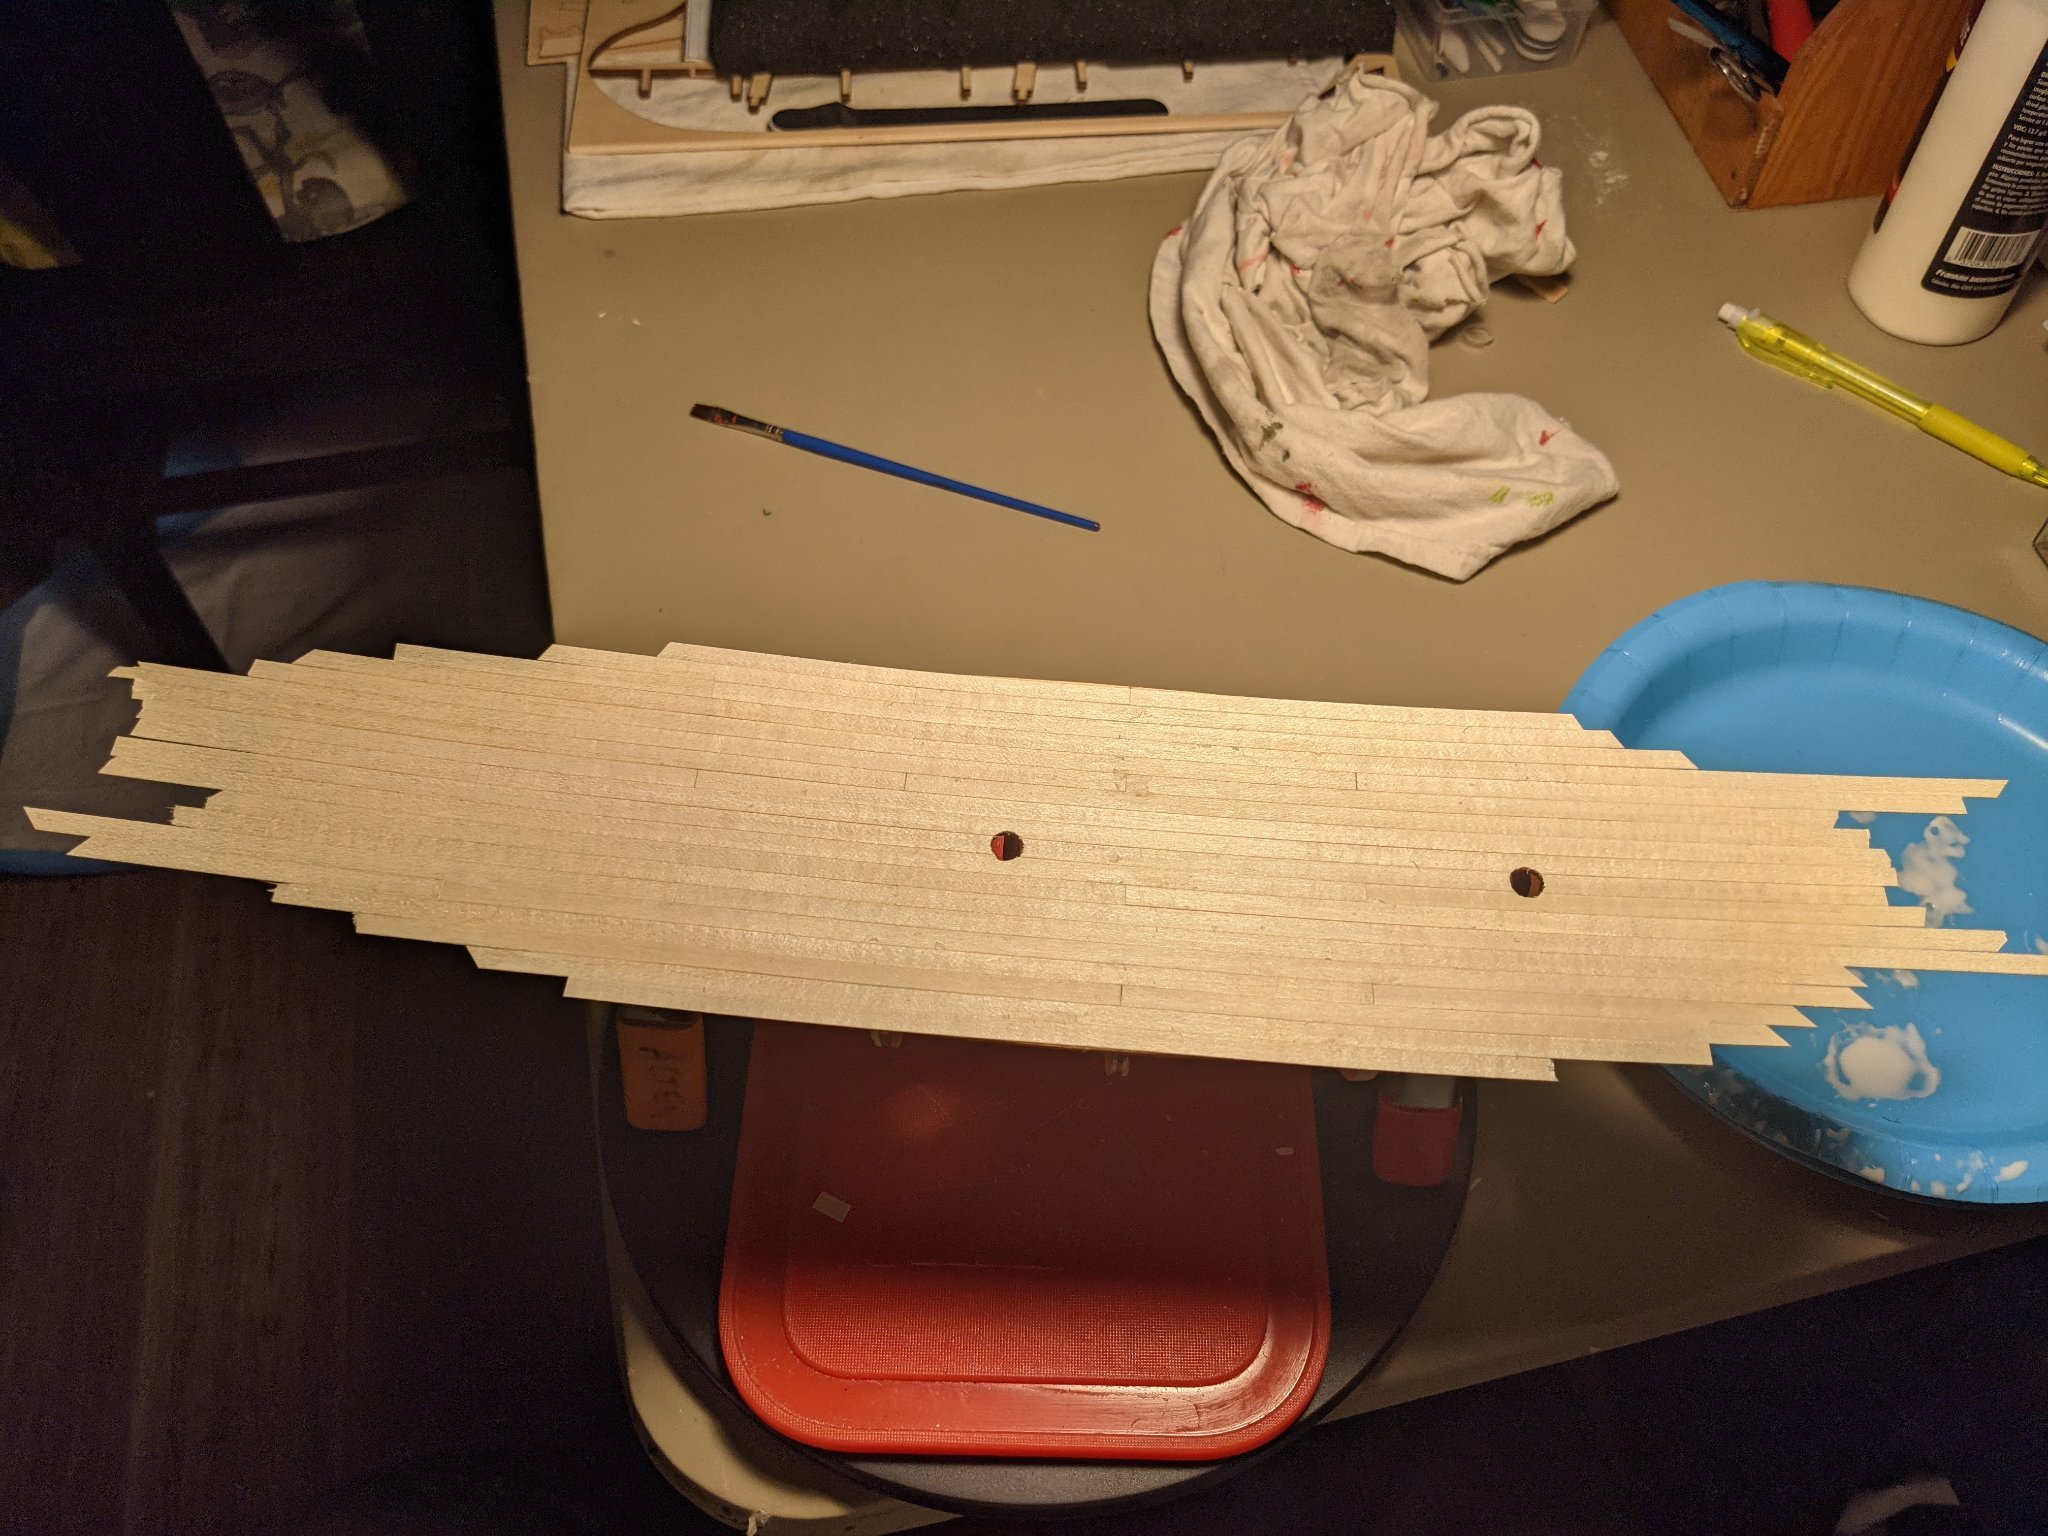
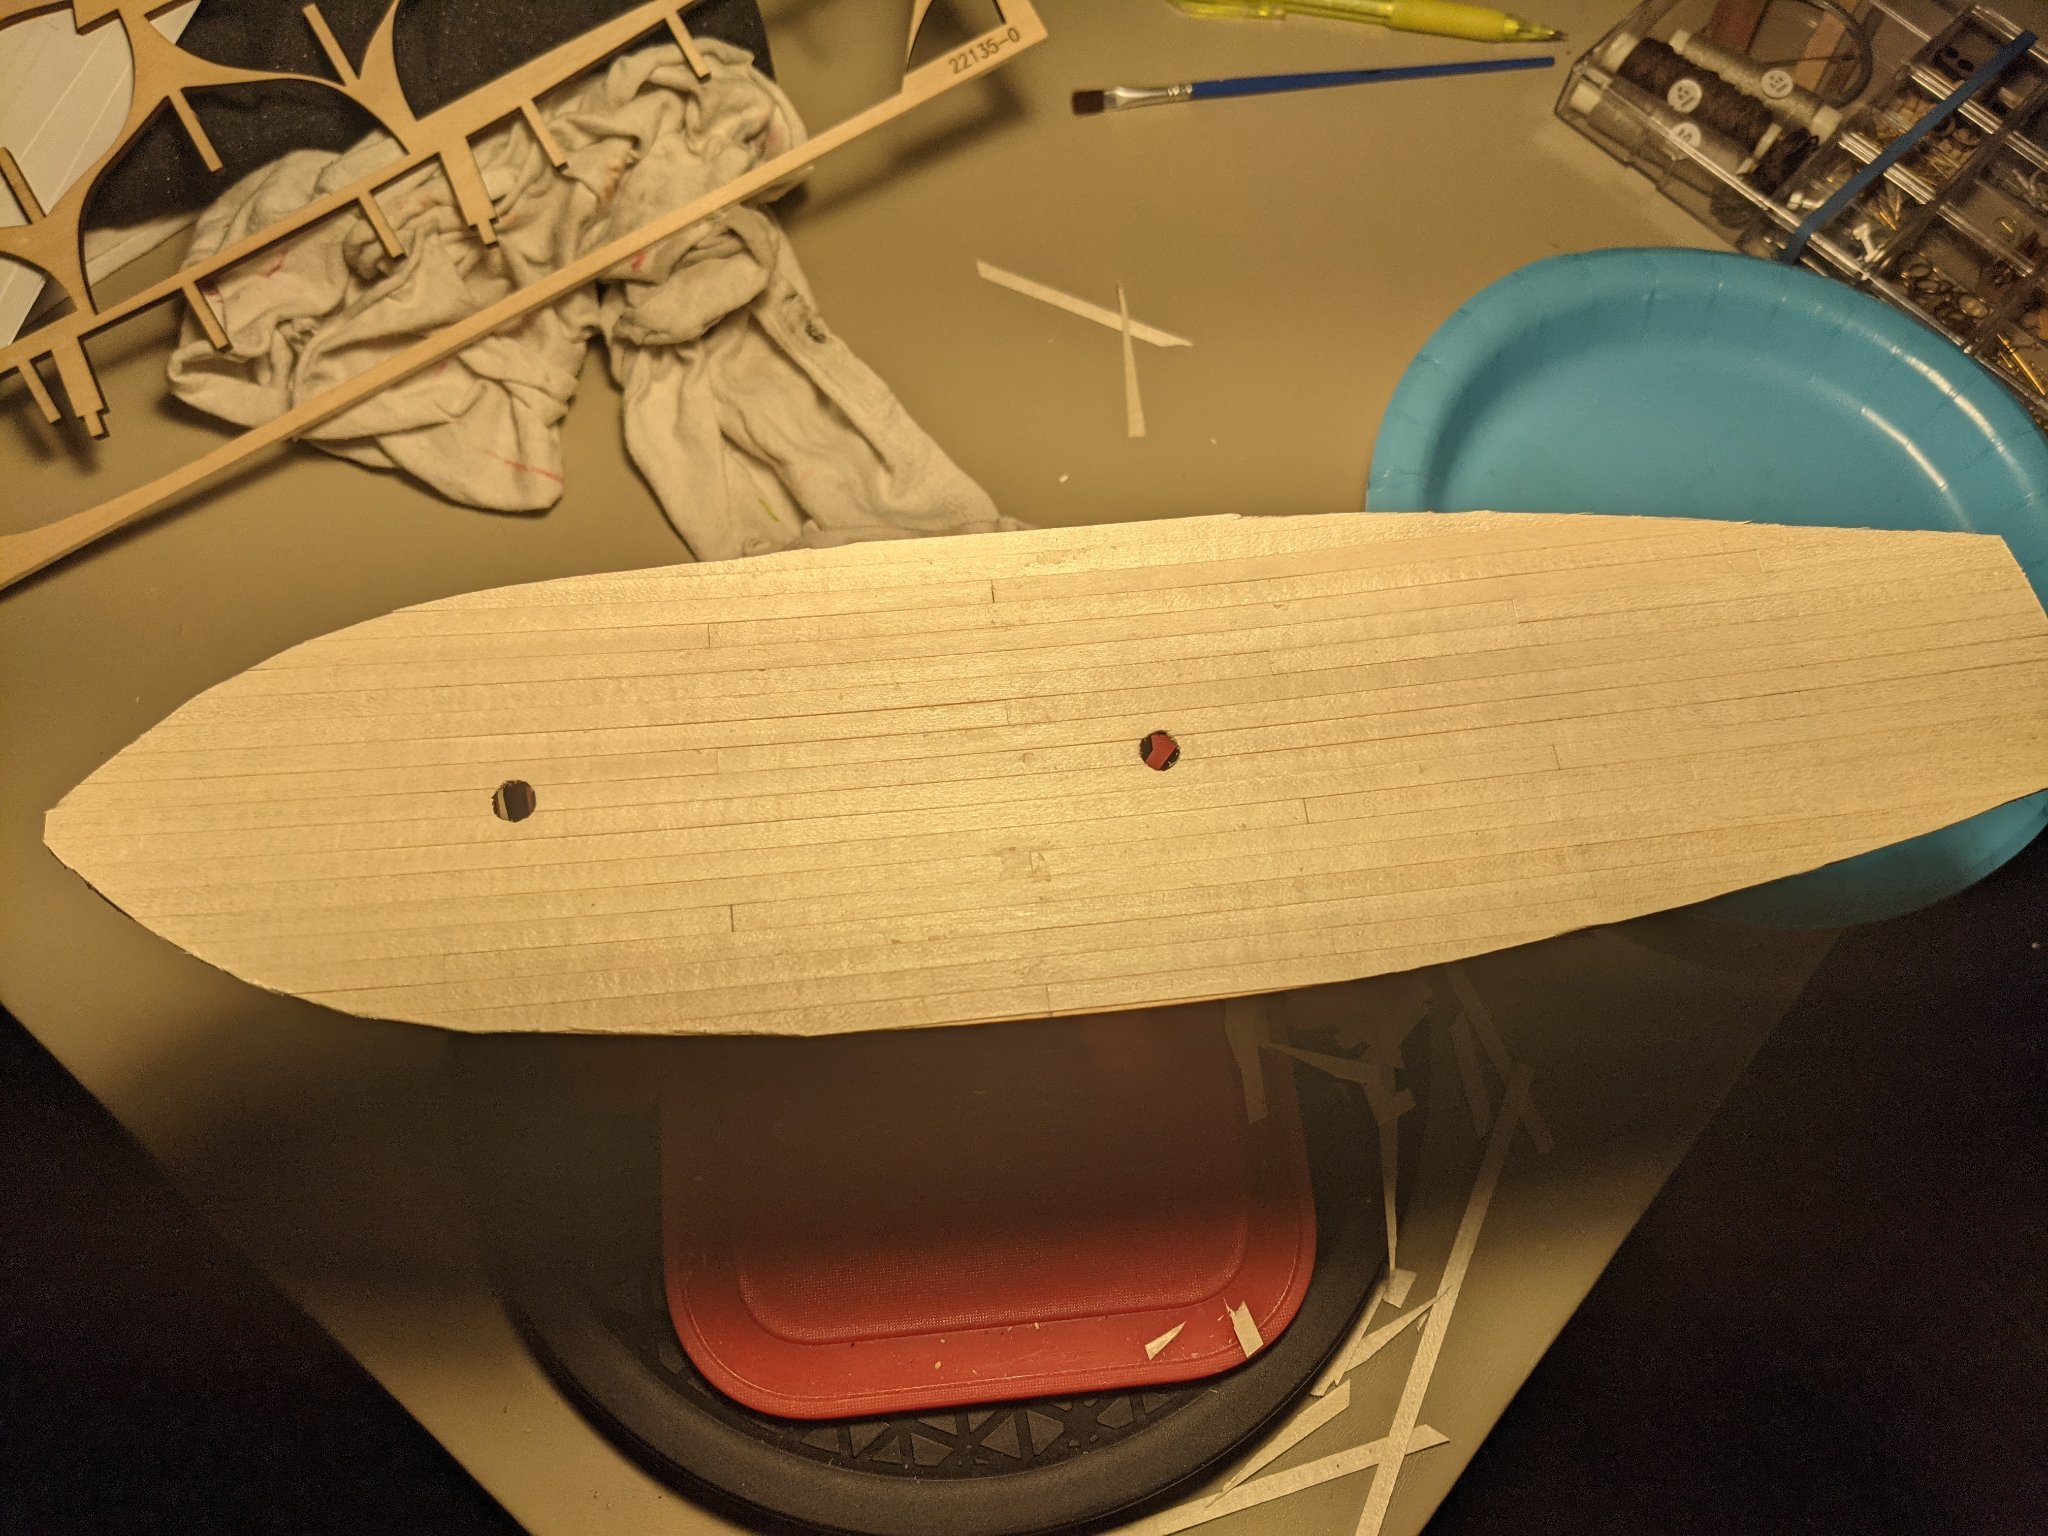
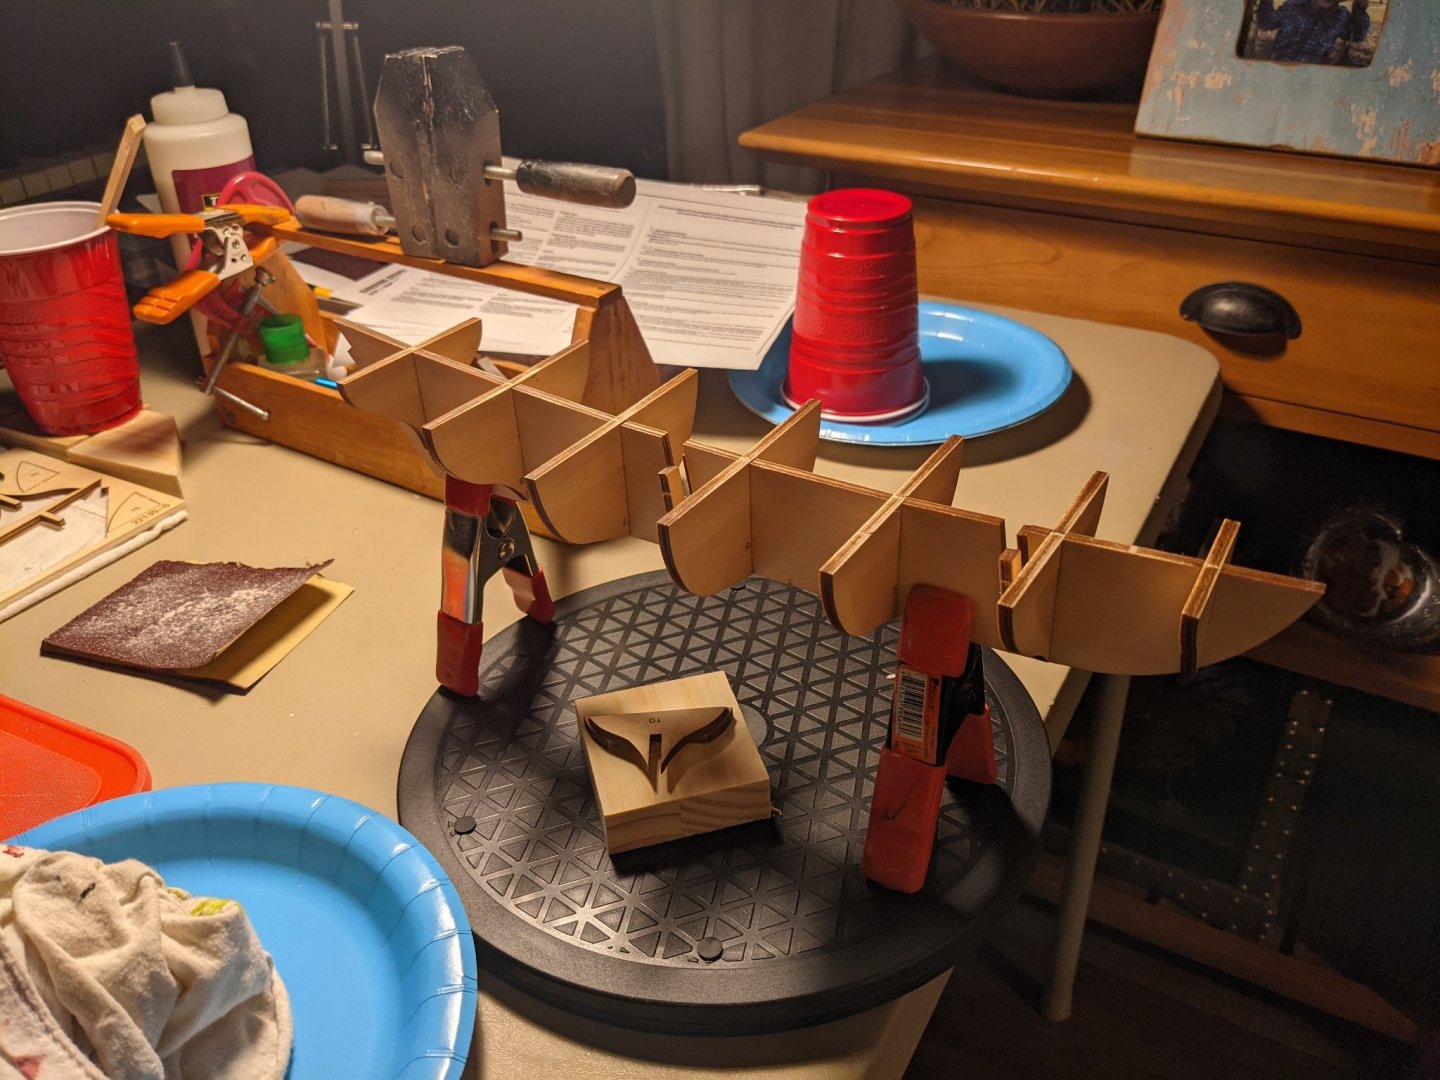
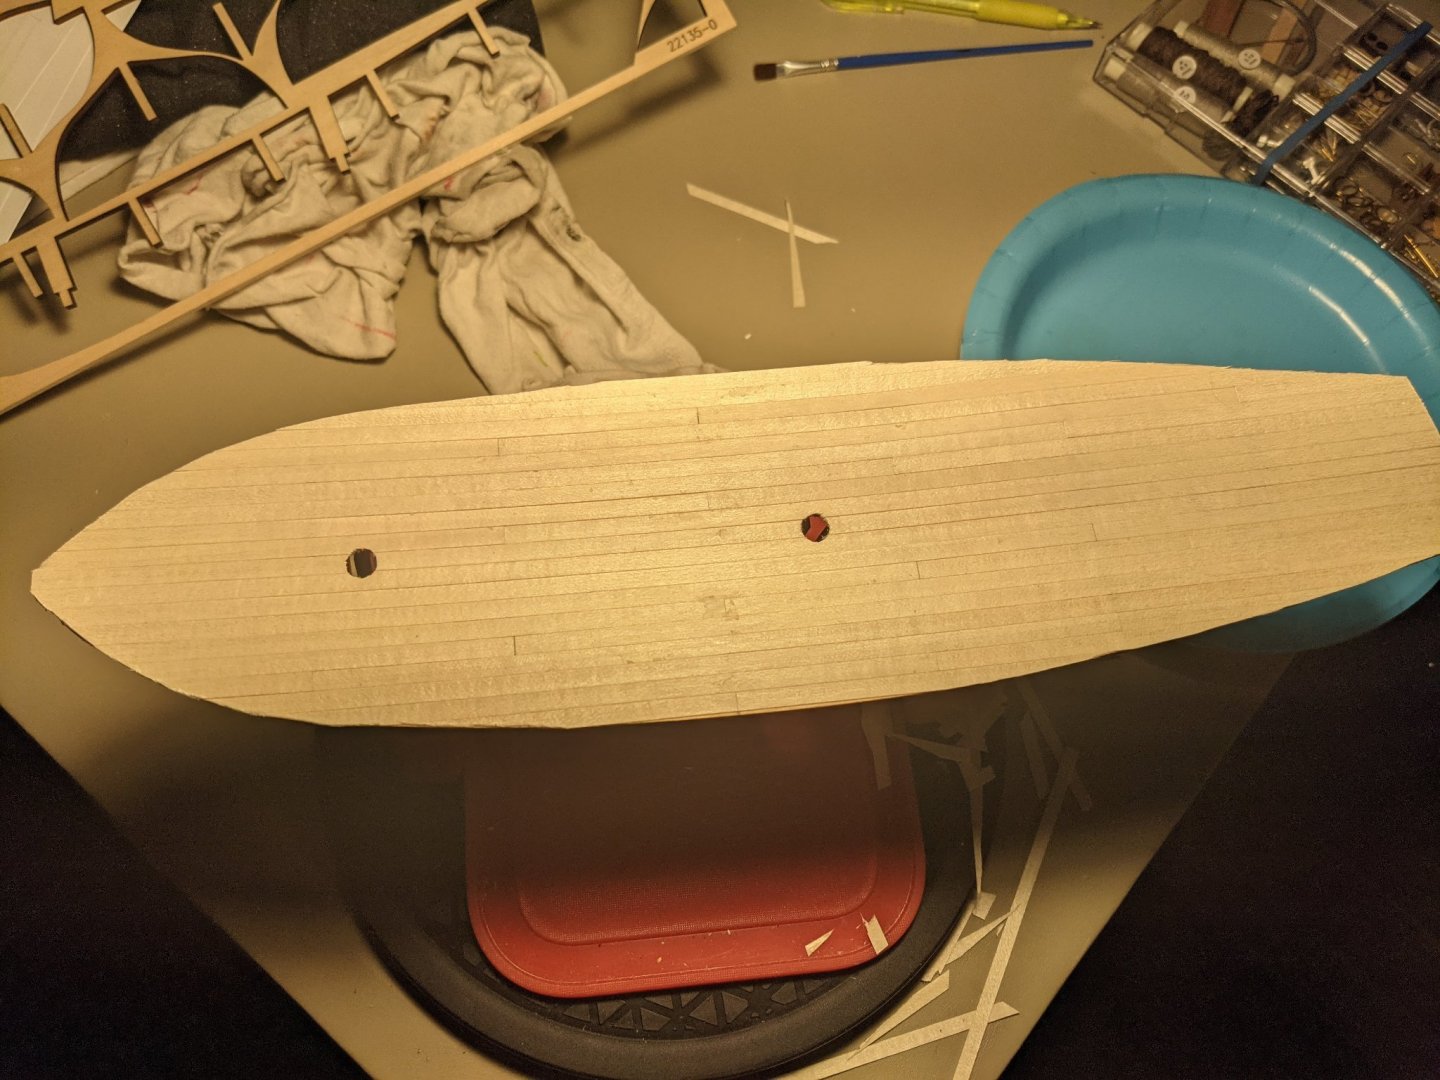
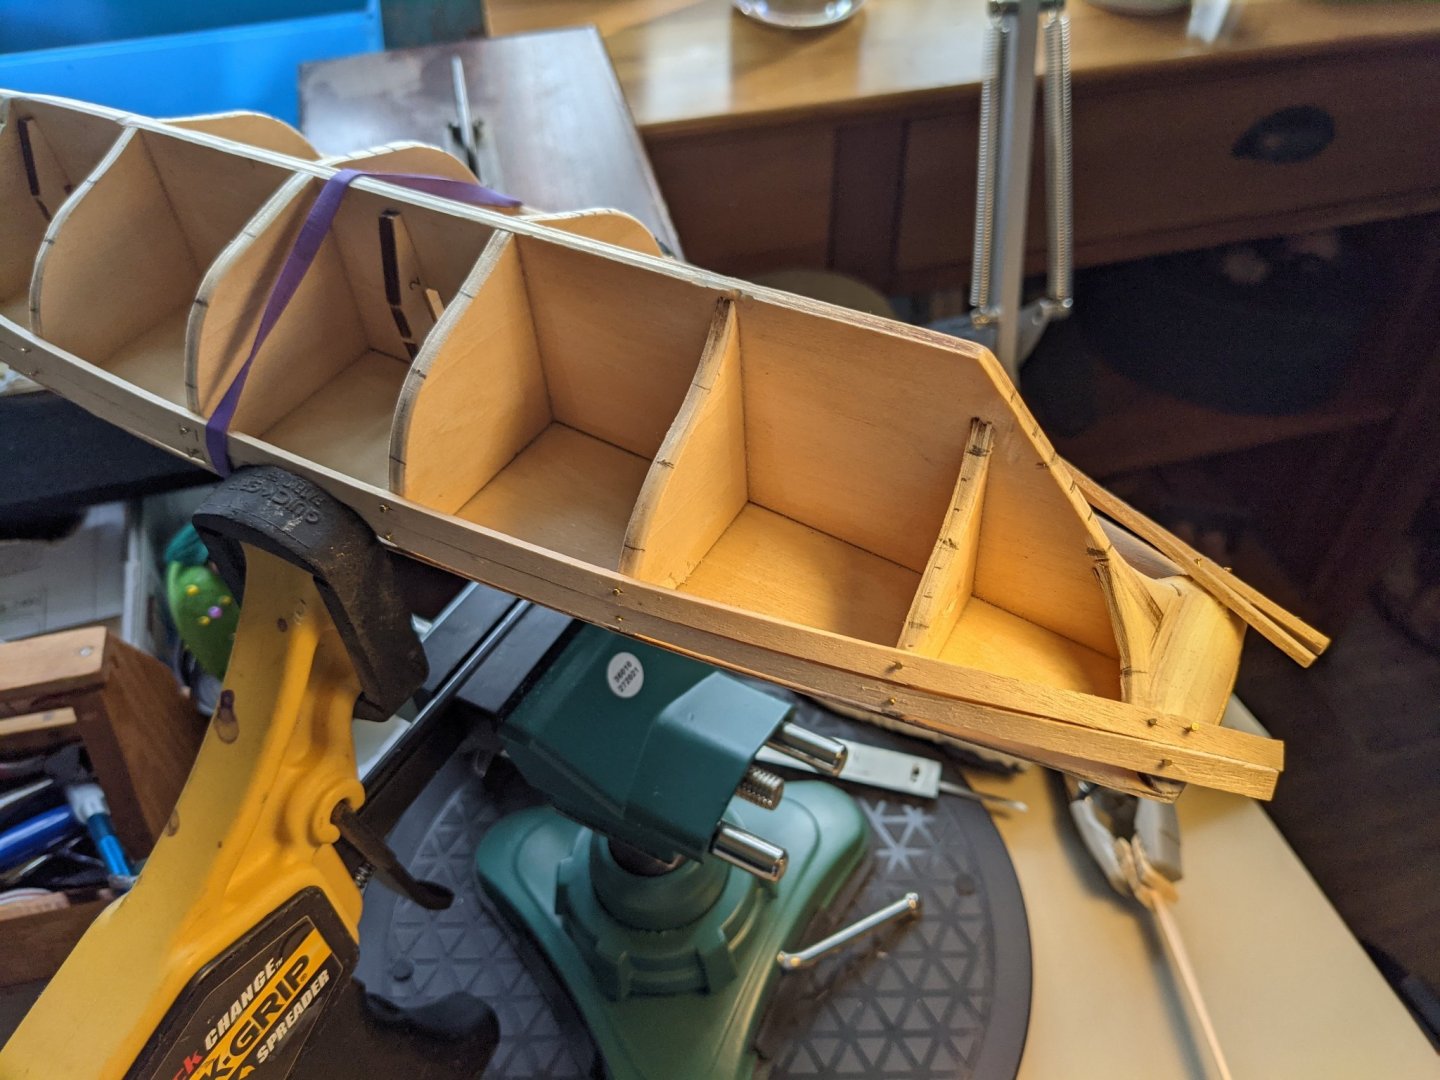
As others have noted many times, the instructions left something to be desired in terms of specificity and detail, so I have relied heavily on others' logs for information and images, which is the main reason I'm publishing my own build. Here are a few images from the first week: False keel with bulkheads Deck installed and marked with bulkhead lines Deck lined with planks - I laid out a few full length planks, others I used multiple pieces to get the look of butt joints. Those joints were staggered for what I hope is a realistic look. I skipped the pencil marks. Mandrel rig for bending hull planking - soak strakes in hot water 1 hr, then clamp to cookie tin lid. This provided a good curvature for the forward end. At the same time (for the planks further down) I clamped the wood into a twist about its long axis. This made gluing and pinning these pretty easy going. Hull planking progress Thanks, more coming...


-
This is my first wooden model ship build. This was gifted to me last year and I am just now starting it. I have spent hours looking through some of the other build logs on this site, they are incredibly helpful, especially the pictures. I thought I'd document my progress in order to help others and maybe get additional help as well. This is a new hobby for me, so I'm looking forward to growing my skills. Thanks in advance for reading, enjoy!