HOLIDAY DONATION DRIVE - SUPPORT MSW - DO YOUR PART TO KEEP THIS GREAT FORUM GOING! (Only 13 donations so far - C'mon guys!)
×


ibozev
-
Posts
79 -
Joined
-
Last visited
Content Type
Profiles
Forums
Gallery
Events
Everything posted by ibozev
-
 Hello Brumby and thanks for your comment! Currently I'm still working on the standing rigging. It took me more time than I expected not only because I'm trying to do it properly, but also because I have to do other more important things at home and don't have enough time for my Polaris right now. Hopefully will post an update in the upcomming weekends. Thanks for your advice about the gaffs and booms, I already decided NOT to glue them to the masts and use only the halyards on purpose to haul them. And about your question. I believe you are talking about the "boom braces", which have the purpose to swing the boom and control spanker's position into or off the wind. My understanding is that all braces must be rigged taut. Maybe you could swing the boom at a certain angle if you want, but after that the braces should be rigged tight. Most probably I will position mine athwartship and eventually will try to bend only the sails to make an illusion they are curved from the wind. Again, this is my opinion and understanding, I'm not 100% sure about that. The question is pretty good and if somebody else knows the right answer, it will be helpful for me also!
 -
Hello Jack, I think there is no special technique here. Just use a sansing block and carefully check the edge of each bulkhead - it should contacts properly with the planks. I suggest you to take one untappered plank and move it up and down (from keel to bulwarks) and fore and aft (from bow to stern). The plank should naturally lay on the whole surface of each bulkhead on each position. Regards, Ilia
-
Hello Jack, Thanks for your question, I forgot to explain this step in my last post. For tapering I used the method from the instruction videos - manually sanding with a 120P sanding block and a digital calipper for measuring. For the fine sanding I've used 2 types of sanding lists - 220P and 320P. I agree this is not the best technique, but for know I don't have any electric tools, such a driller or lathe to speed up the process. About the stains - two layers with Occre's walnut stain, but wait after each layer to completely dry off. Then one layer with Occre's satin varnish. And at the end I've used steel wool to polish the completed spars and to make them smooth and even. Feel free to ask me anything if you have another questions, Rick. I am very happy that my log actually helps other people to build their kits. Your Polaris also looks fantastic, I really like the different stains you've used. Regards, Ilia
-
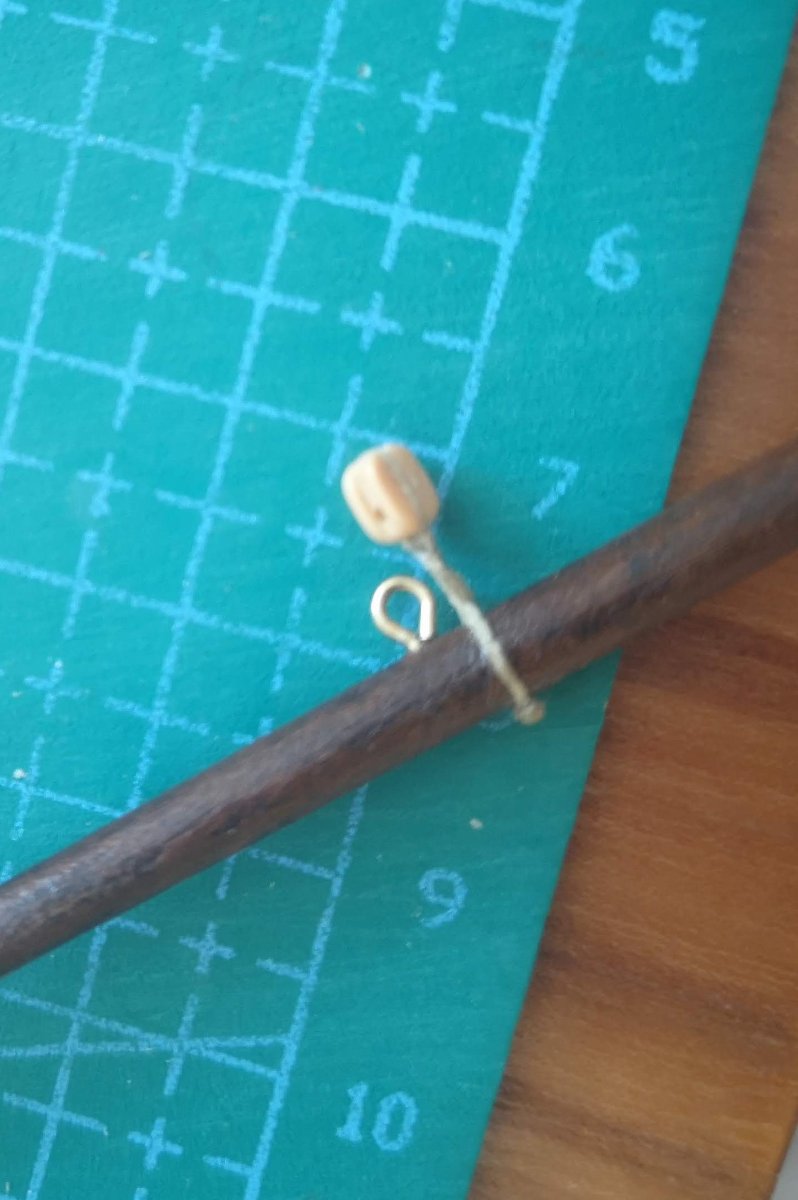
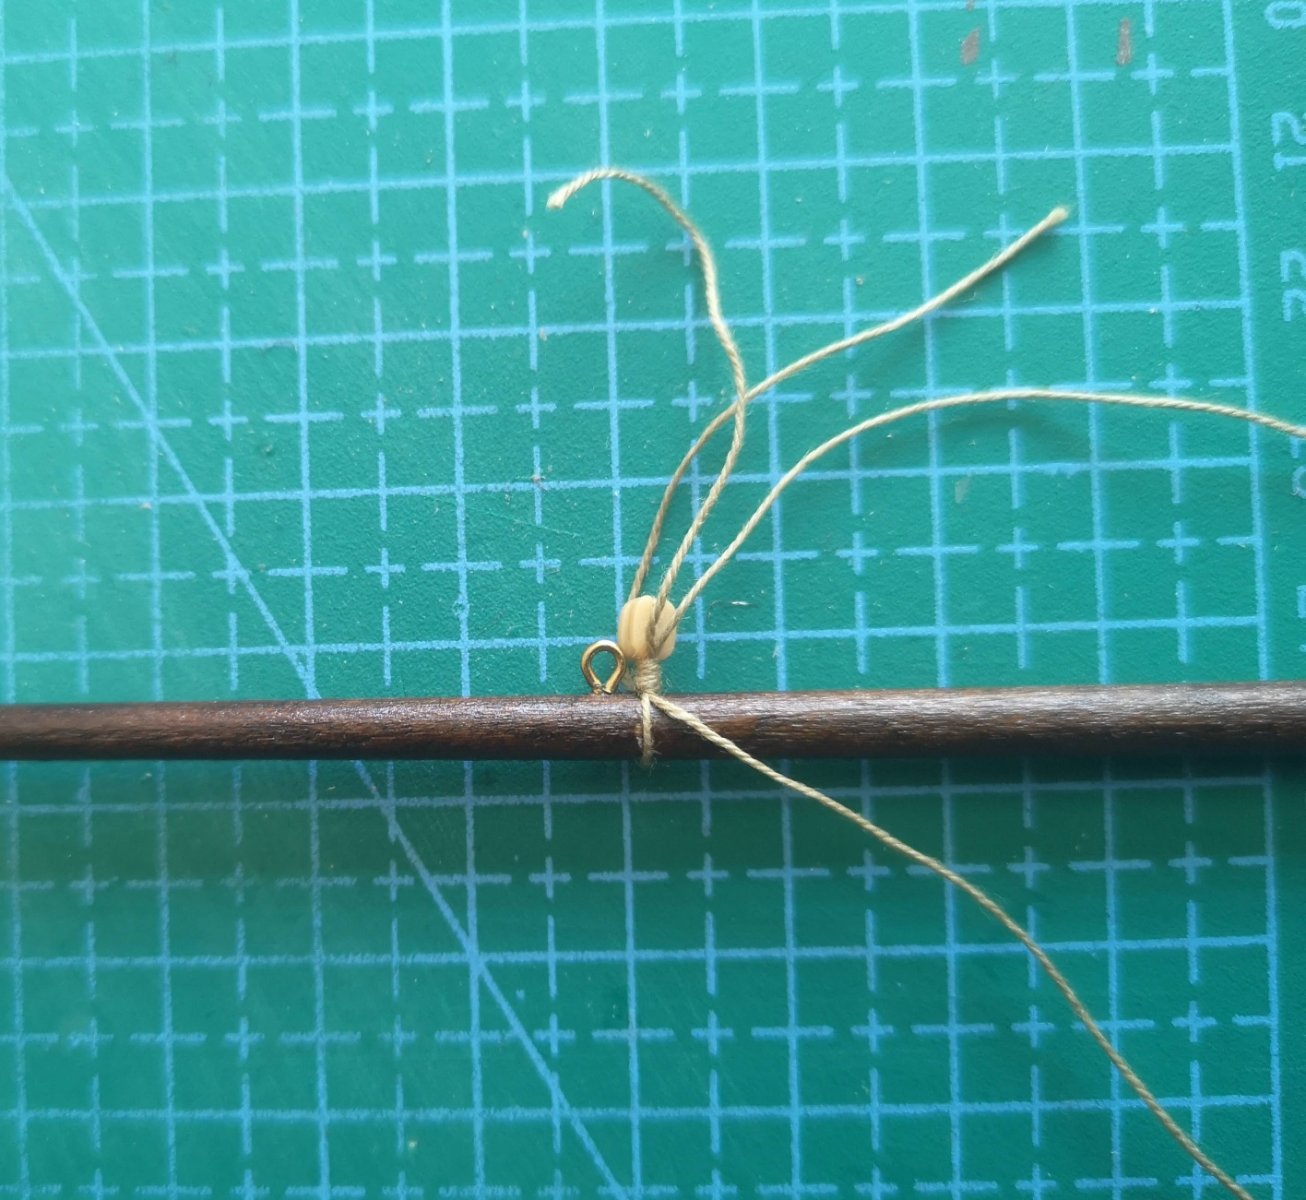
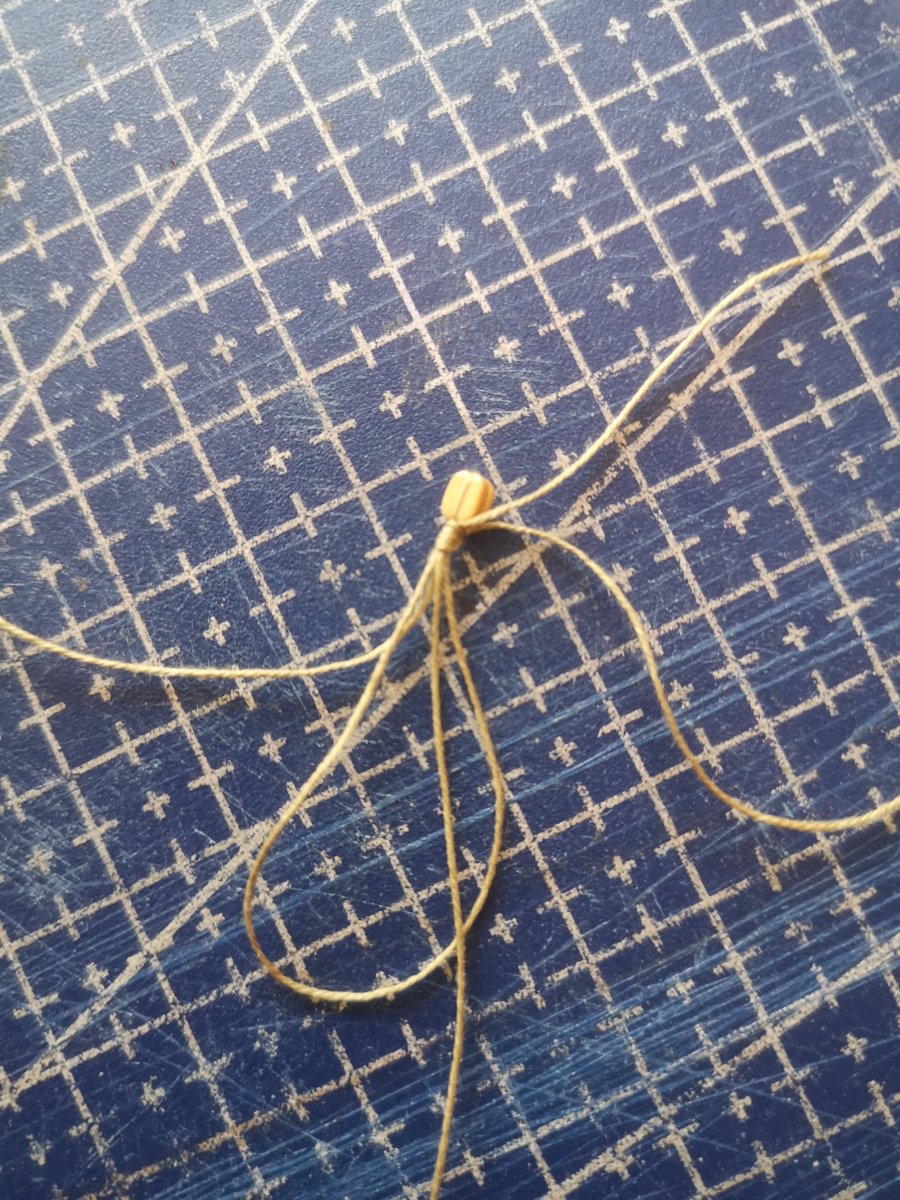
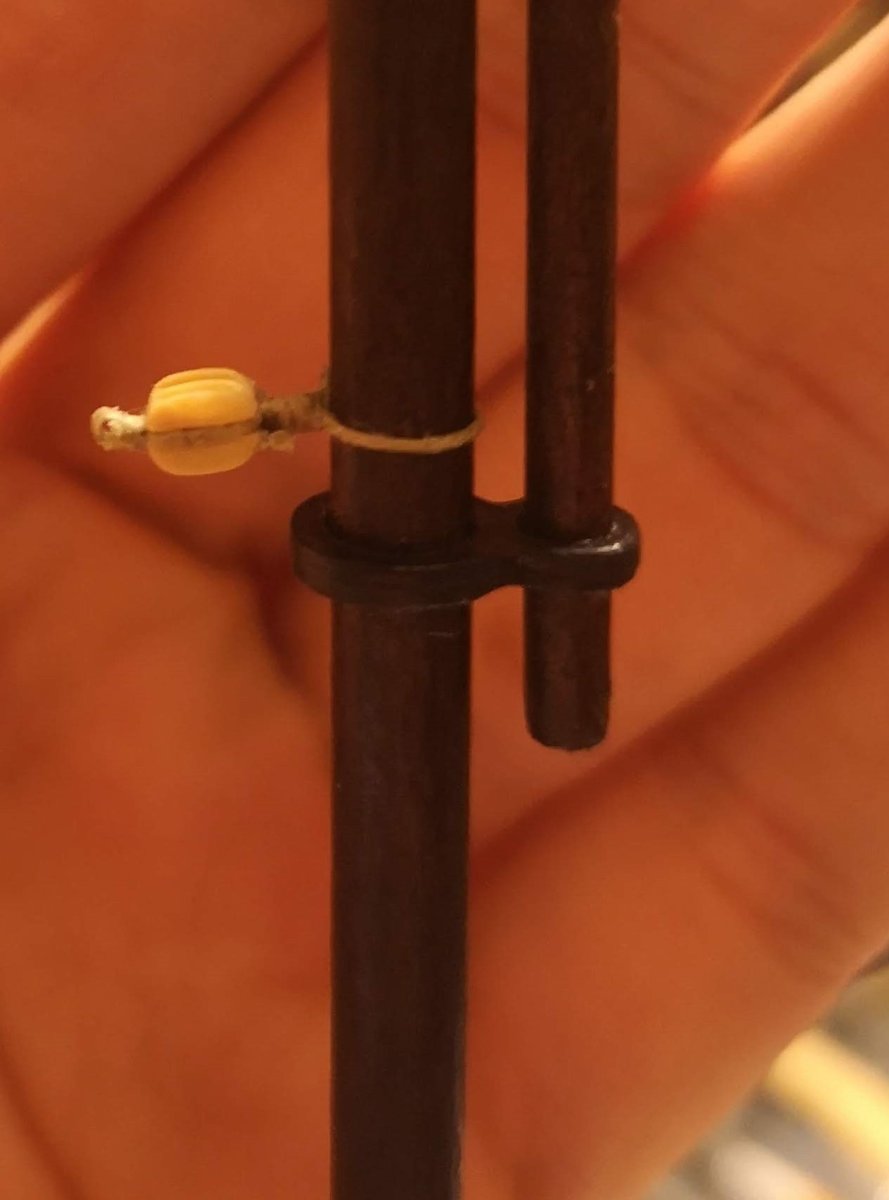
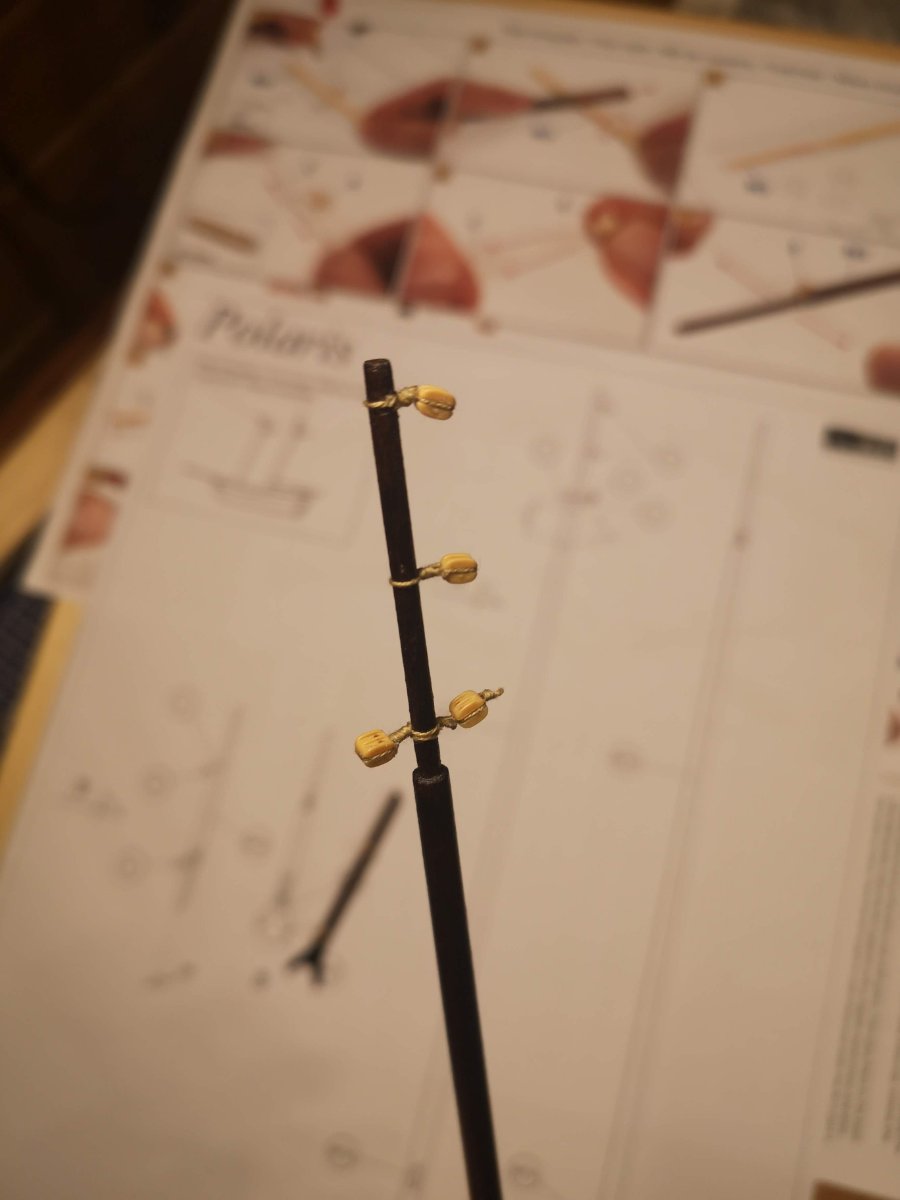
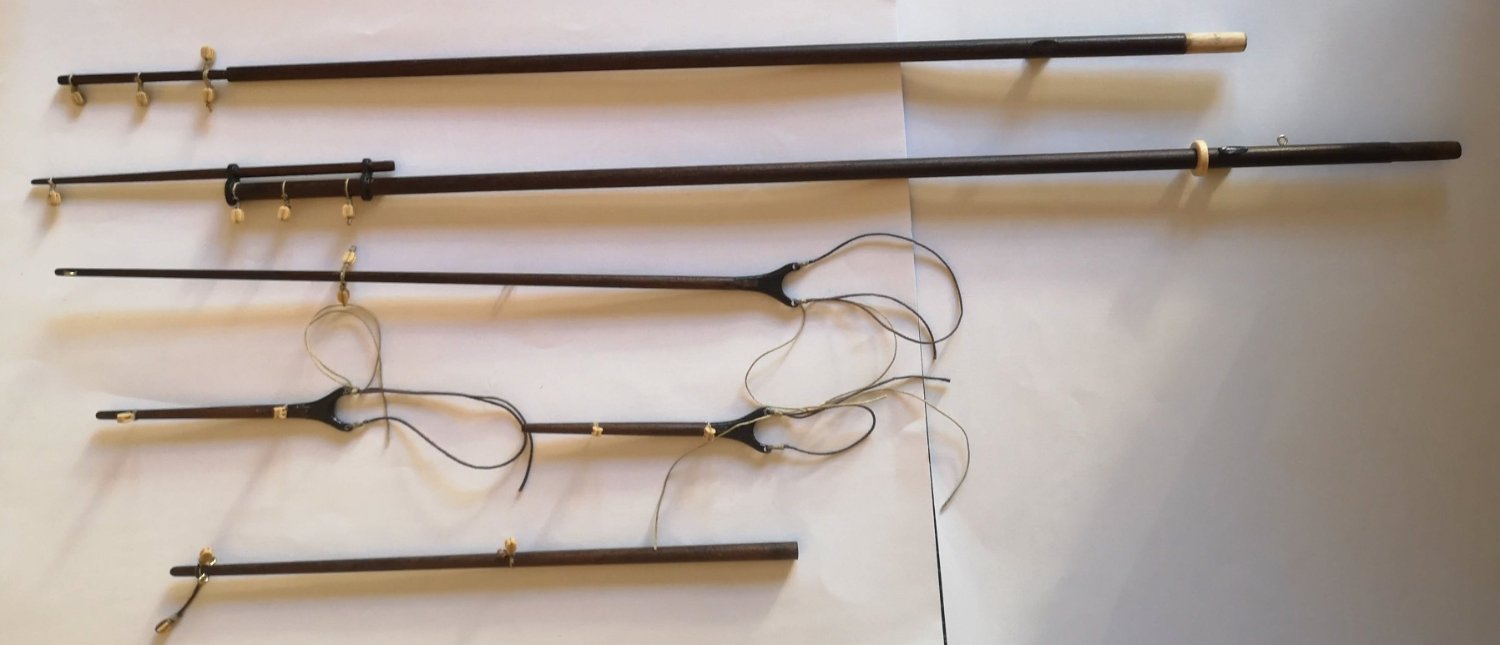
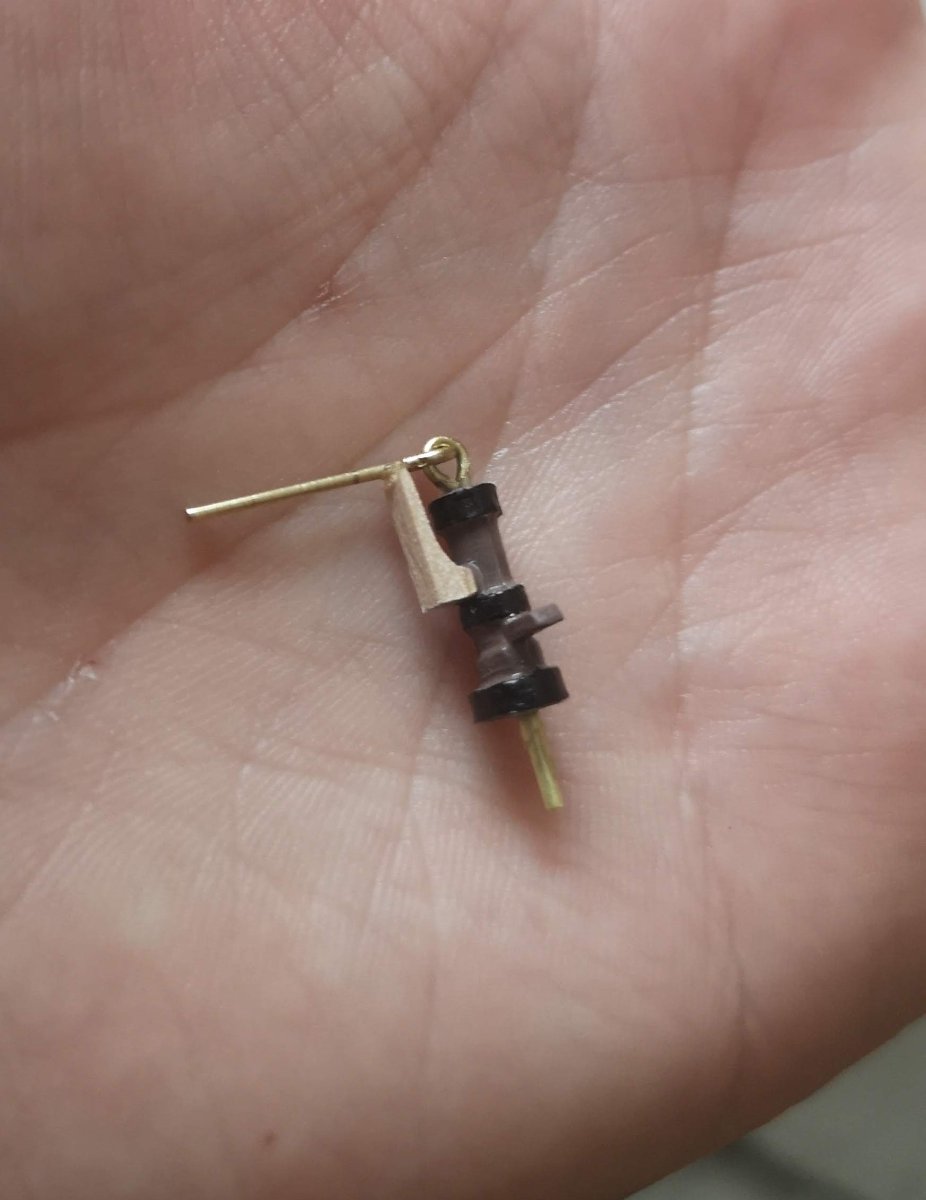
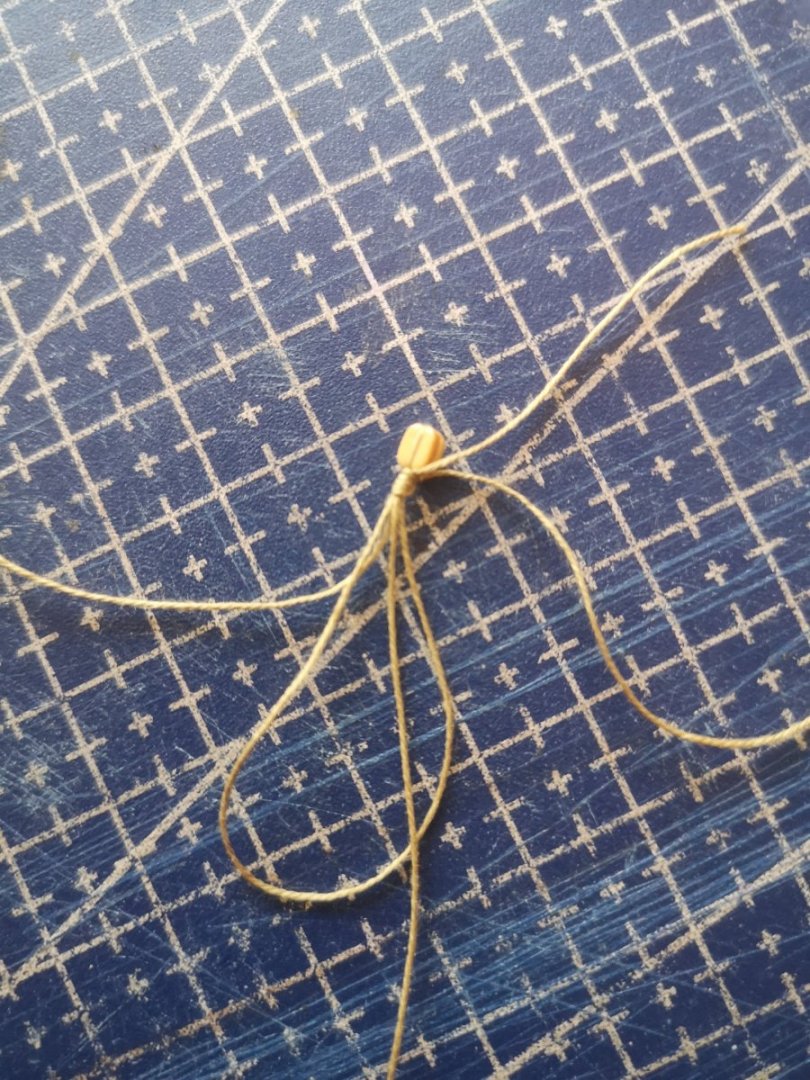
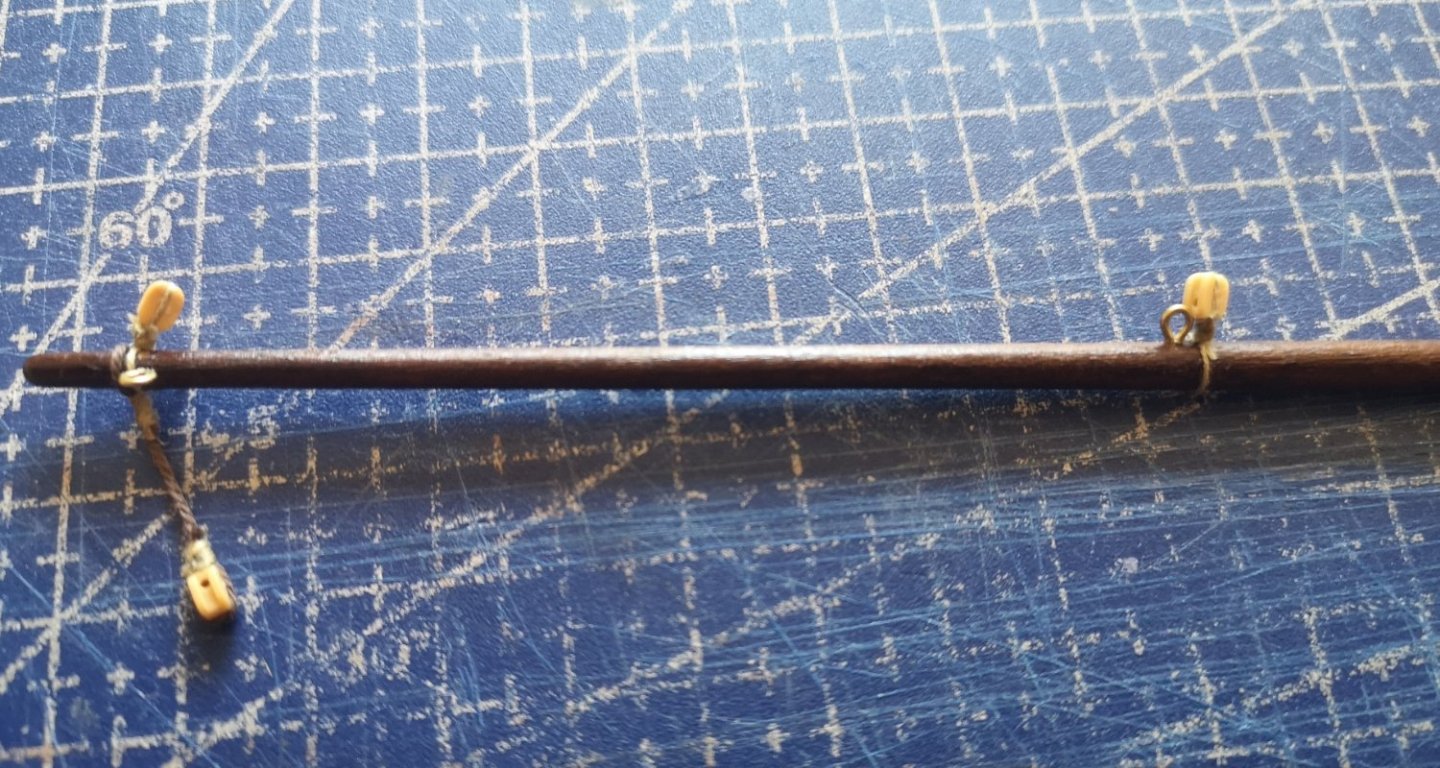
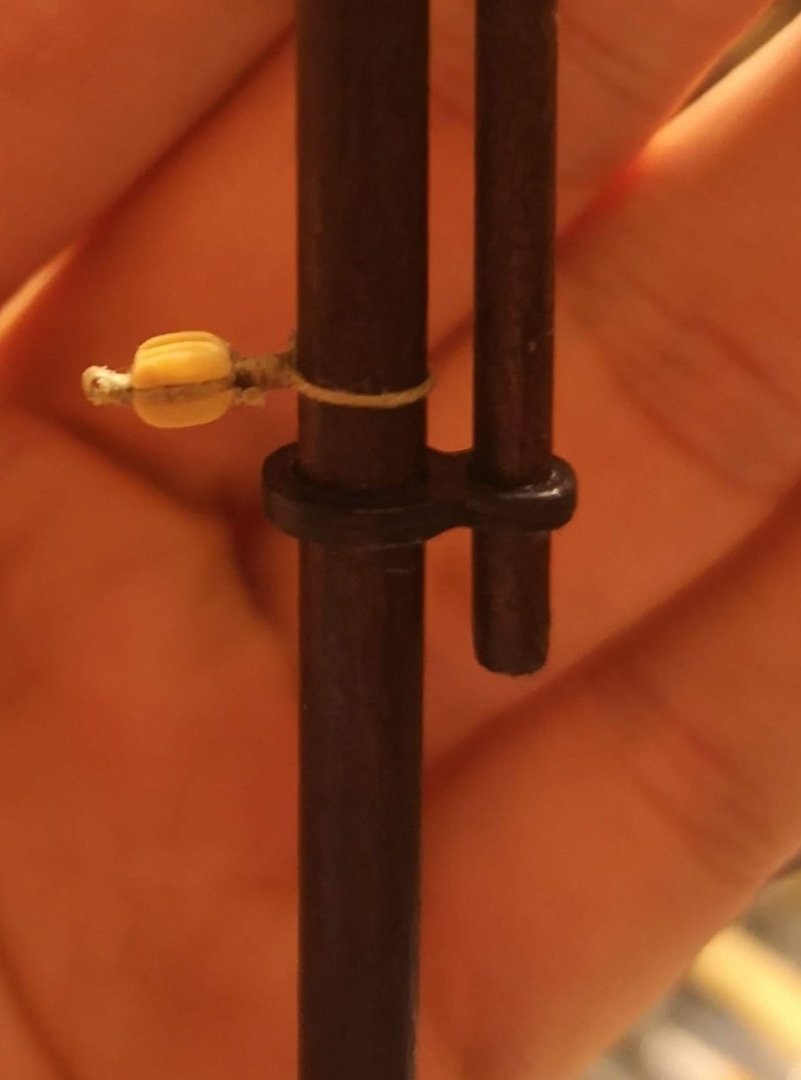
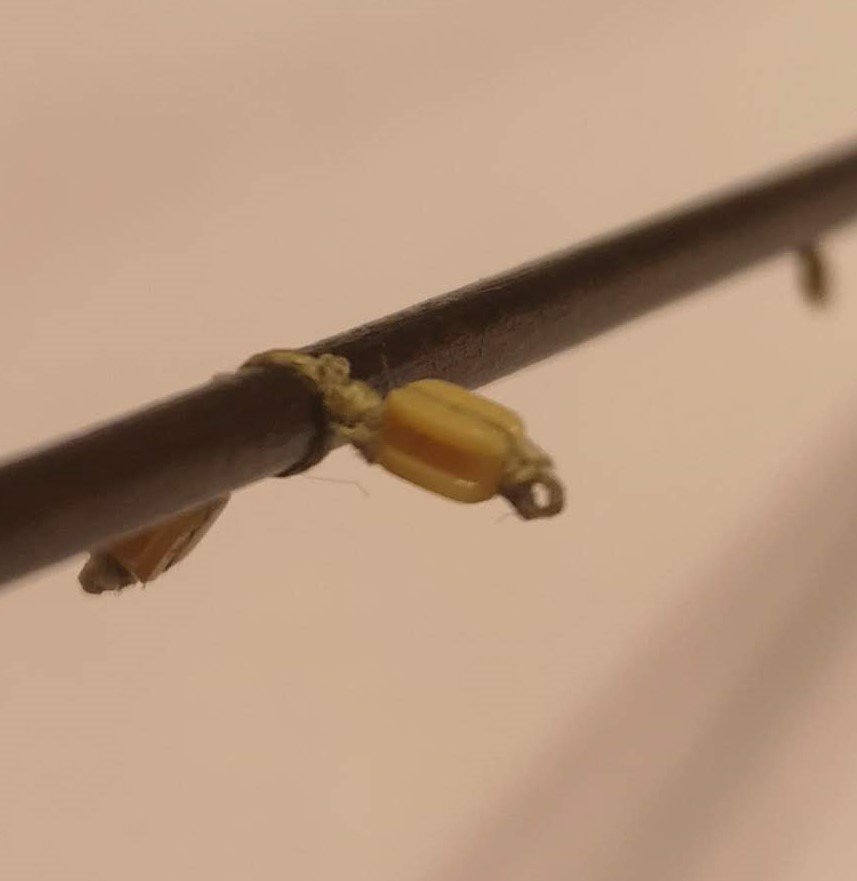
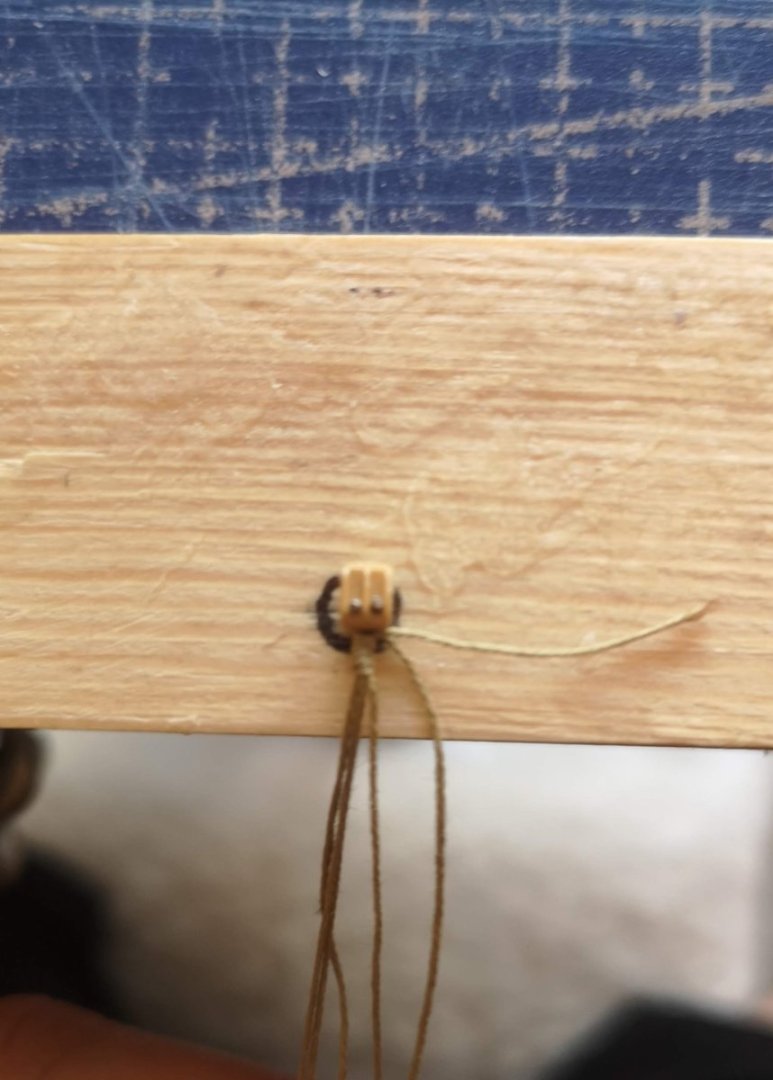
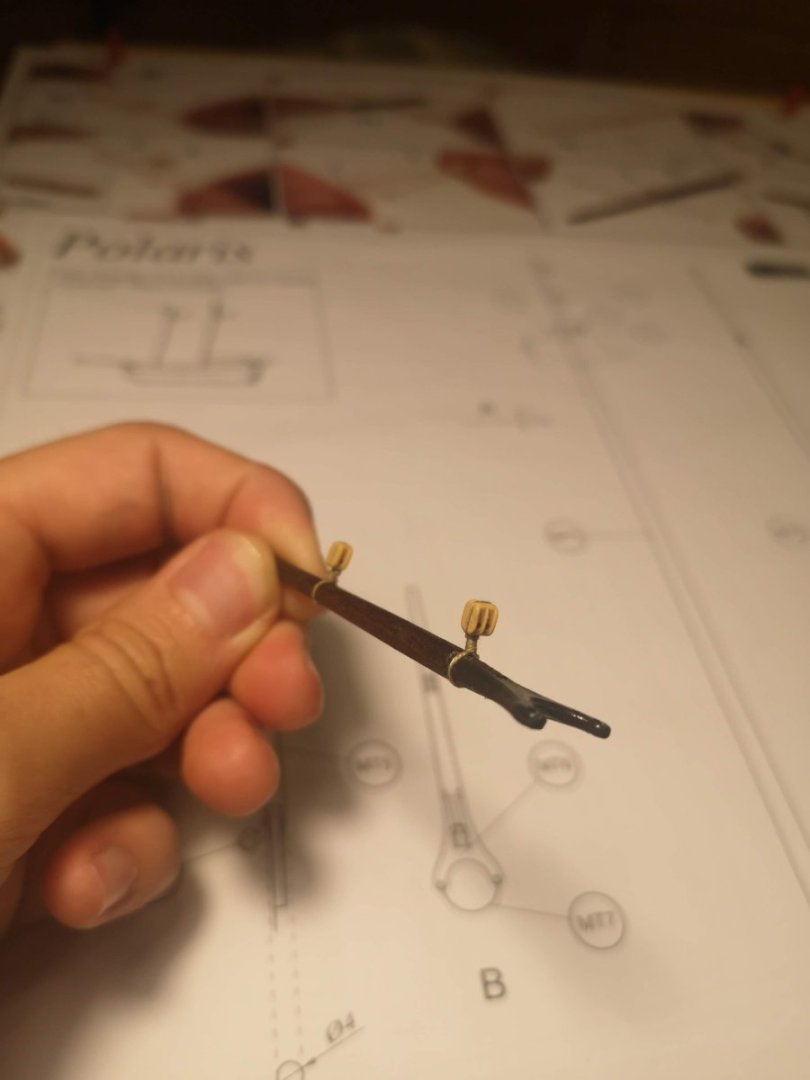
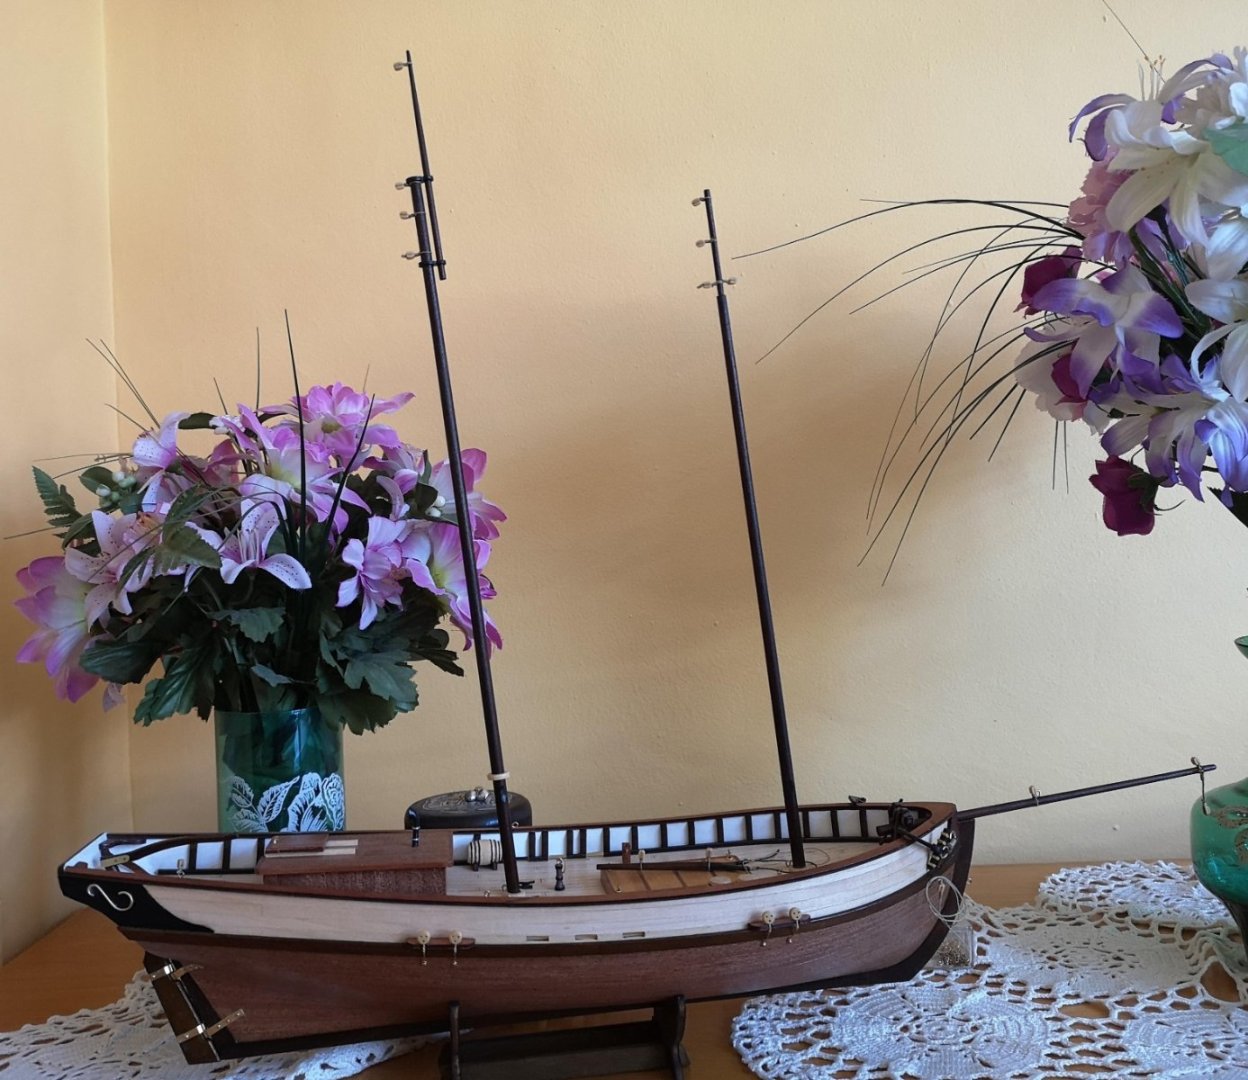
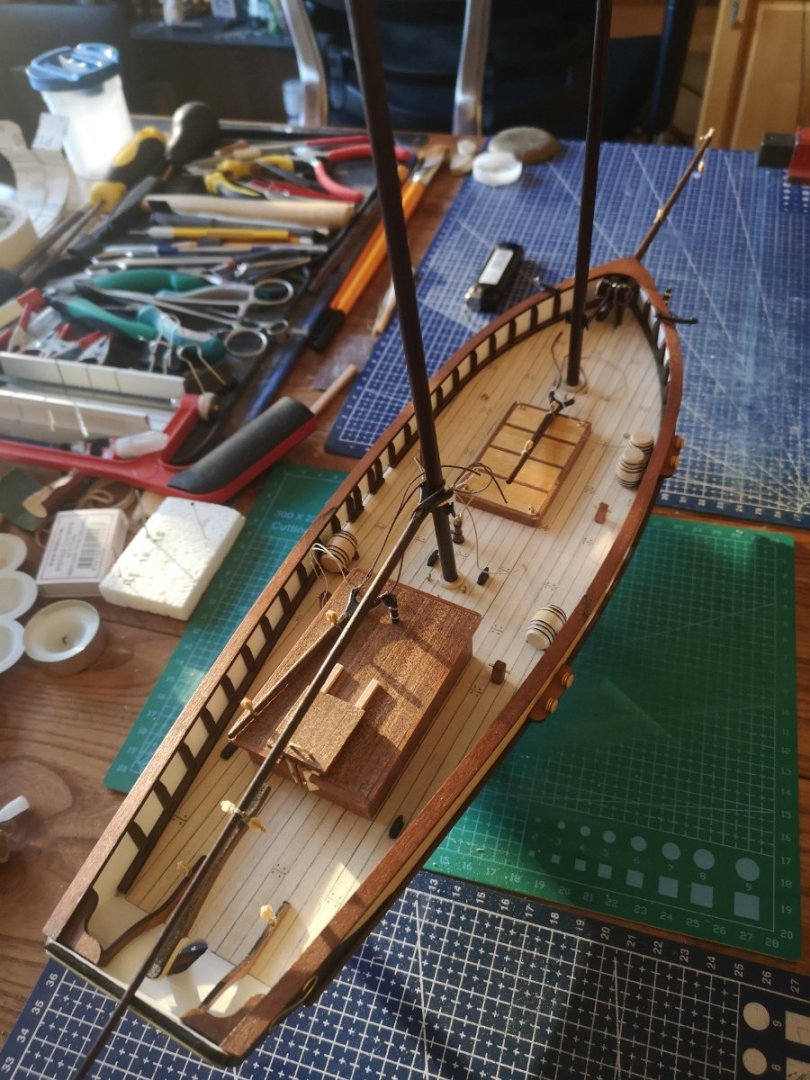
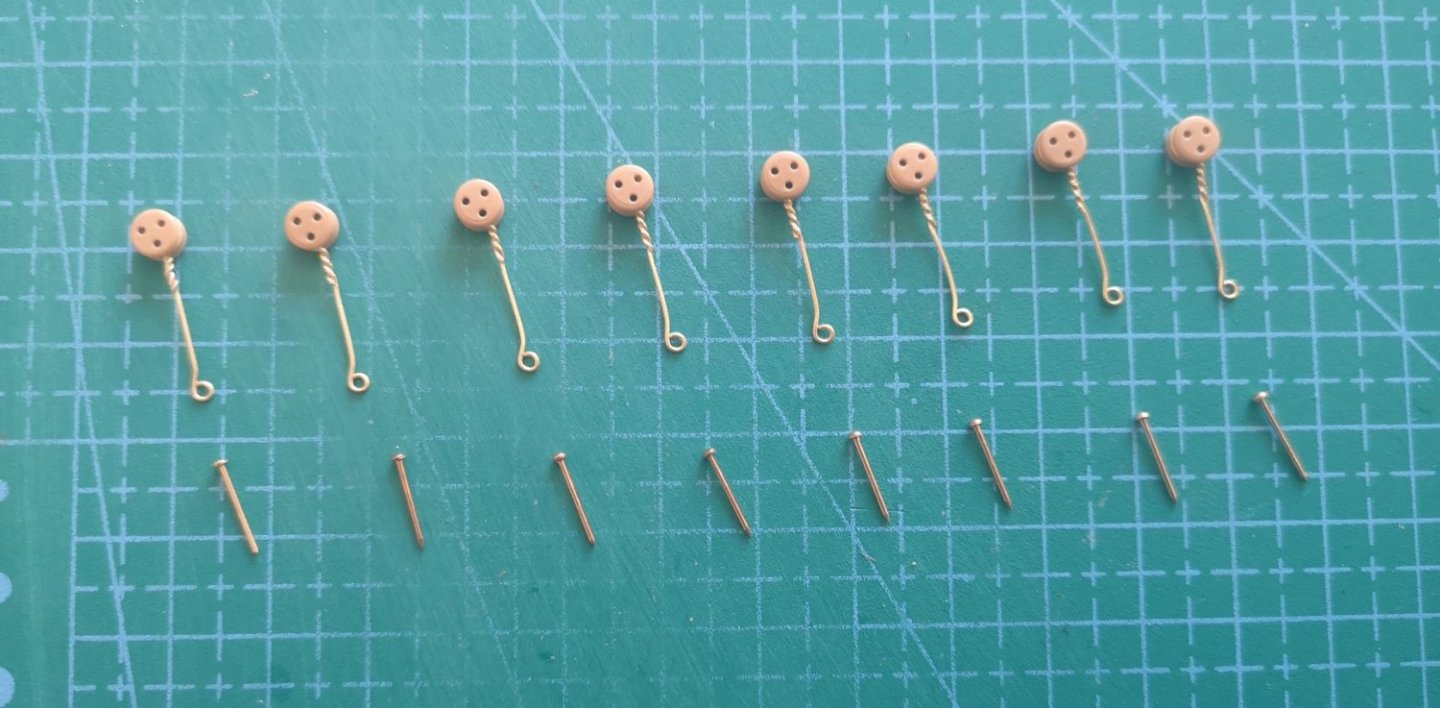
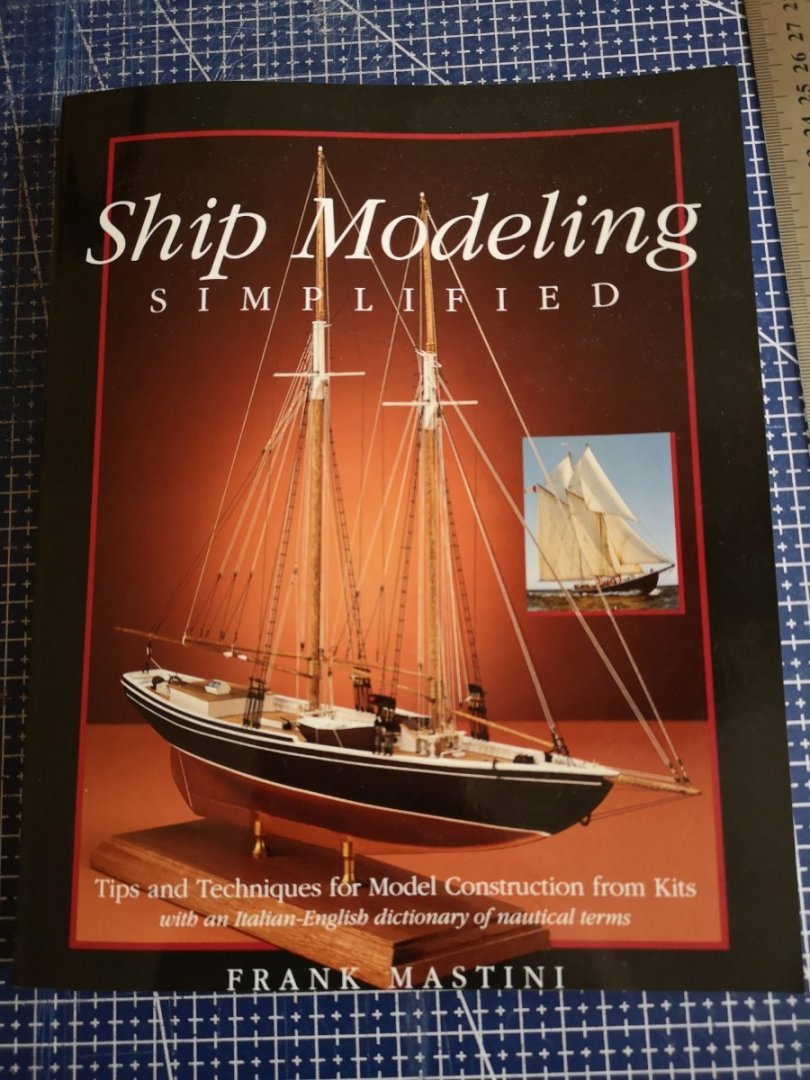
I'm finally back after more than 2 months break! Well, this was a necessary time off from my Polaris, not because I lost an interest, but because I had to do a lot of other unexpected work at my home that could not be delayed. Luckily I've managed to finish the Mastini's "Ship Modeling Simplified" (absolutely amazing book, one of the best for beginners I think) and finally understood why "Masting and Rigging" is the hardest, most frustrating and time consuming part of ship modeling. Yes, the book explains the nautical terms, parts and there mechanics in a full-rigged ship and I agree - that is a lot of unnecessary information to complete the Polaris. But my opinion is that even if you don't build a full-rigged ship as a first build, it's really important to understand the basics, to know what are you doing and to do it properly. Yeah, I won't have to do yards and footropes, futtock shrouds or ratlines in my Polaris, but the (basic) knowledge of how to do these parts and what are their purpose in the real ships is really important and very interesting. As I said in my first post - I want to build my ship properly and learn a lot of nautical things, rather than just do something that I don't know anything about it . But enough talking about the things I learnt, let me show you the things I've made during the last 2 months. First I decided to redo the front blocks which will be used for the bowsprit shrouds: This was my first try practicing the new seizing technique and I think it looks a lot better than the simple overhand knots from the official instructions. Maybe the seizing here could be a little bit tighter, but I'm happy with the result. Then I started crafting the spars. First in the row was the bowsprit. Here I learnt another awesome seizing technique (special thanks to J Brent), which I used for all blocks, rigged around spars. This is the comparison between a rigged block, made according to the instructions and a block, rigged with the J Brent's technique: Better, right? And this is the second block, before mounting it on the spar: Yeah, this one seems a bit confusing and it is much more time consuming, but believe me the final result is much more better and authentic than the technique showed in the instructions. This is the final look of the bowsprit: Then I continued with the fore and main mast. Here I've noticed something strange - there were no blocks with beckets. This type of blocks were not mentioned anywhere, neither in the plans nor in the instructions, according to which the running line should be tied just beneath the block and for me this is not correct. So I decided to learn how to make blocks with beckets, then checked the plans and marked where they are needed. Here are two of my blocks with beckets which I'm proud of : To make my job easier, I've made a little tool to keep the block in place while tightening the line around it. Just grab a part of scrap wood and pin a nail (or two for double blocks): This is the result of the fore mast and it's gaff: And these are all spars completed: Another thing I've been thinking about a lot is: to glue or not to glue the gaffs and the boom to the masts? As per instructions they should be glued, but for me this isn't correct. My understanding is that all of this spars (gaffs and booms) should be hauled using the running rigging. After all, that's the point of all halyards and the topping lift, right? And this is how everything looks on the ship (dry fitted):


-
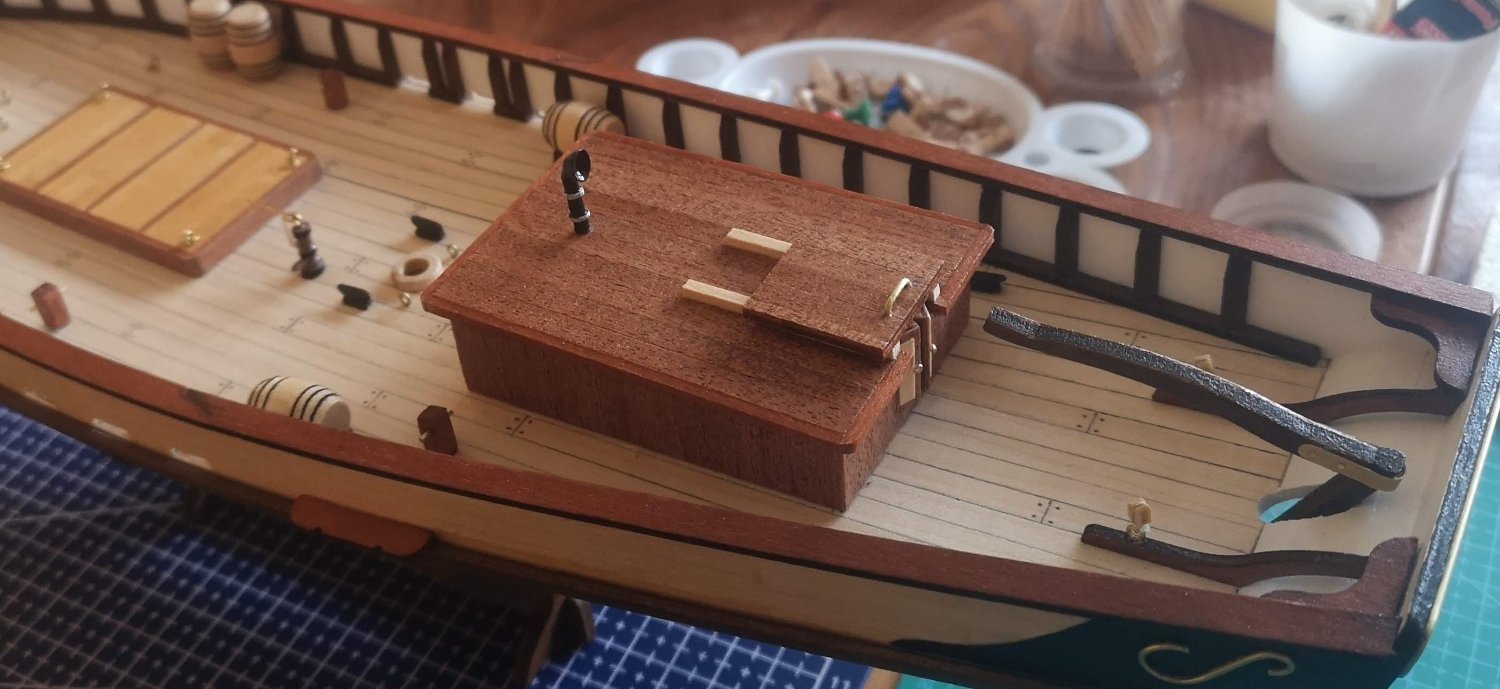
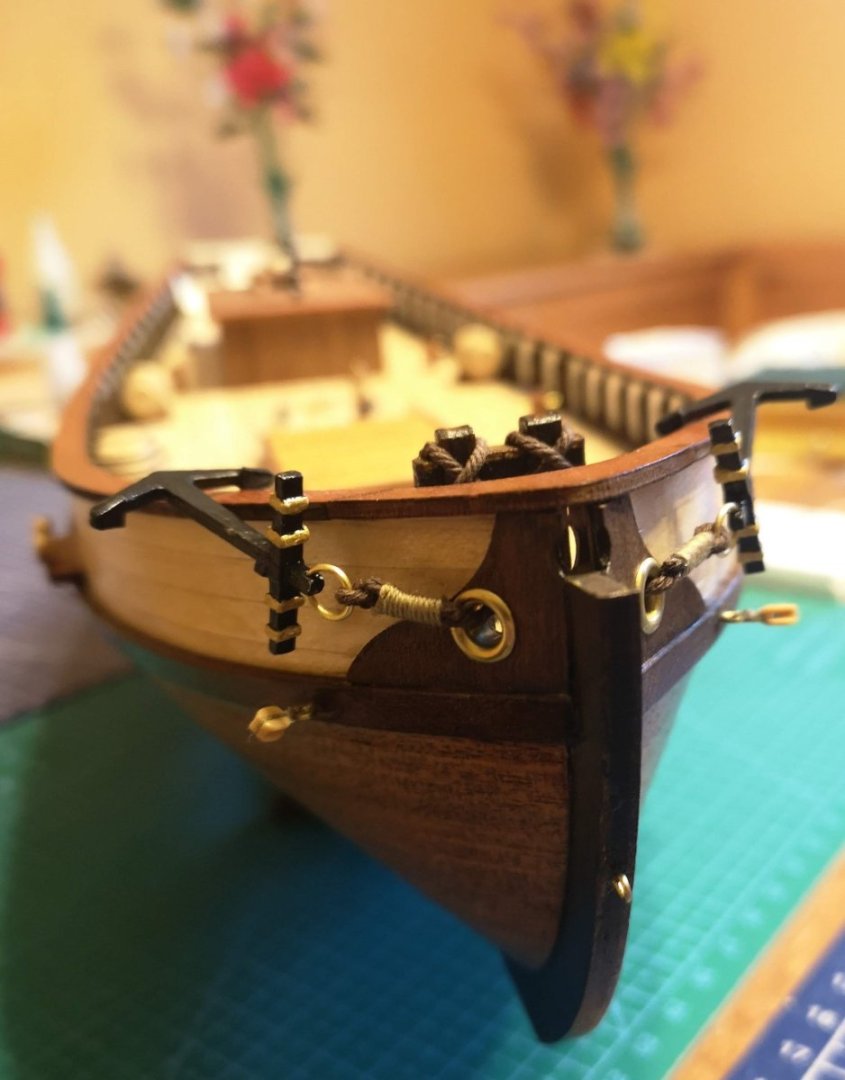
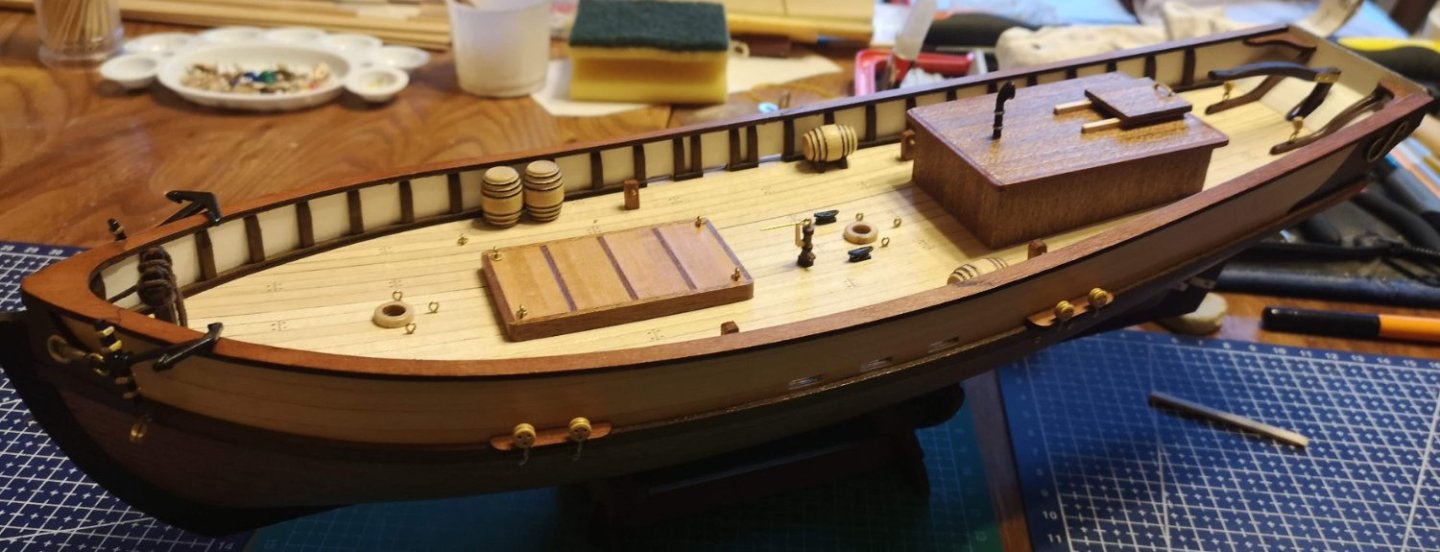
Half of the story is done - the hull is completed! I continued the work of the deck items with the bilge pump. Nothing confusing here, I just followed the instruction videos: Next was the deckhouse - one of the most interesting items to build. Here the instructions are also fine (except the use of contact cement), the only difference I made was that I left chimney's rings unpainted (gray). I think it looks better this way: The chainplates - not so tedious as I expected. Just try to separate the work into small steps and do each step at the same time for all chainplates. This way all 8 parts should look almost identical. The other very important note here is to make sure each deadeye points down to the chainplate with its single hole: And last, but not least the anchors. First I sanded the metal parts just to remove all unnecessary edges, then painted everything acrylic black and decorated with gold. Here I want to say something about the paints (for this particular ship). As I mentioned in my very first post, I bought the Polaris kit together with the paints pack, which consists of 4 acrylic paints (white, black, brown, gold), 3 wood dyes and 1 varnisher. I could say, that I'm very impressed by the paints quality and they have a really good coverage, but when I finish this ship I will still have a lot of acrylic paint and dyes (all most full tubes with brown and gold paint and pine dye). My advise for future beginners who decide to start this ship is to check if they already have any of the paints, because you will need just a little from some of the colors and the full official paints pack is not really cheap (40$). In my case I didn't have anything and decided to buy everything, but for sure will use the rest of the paints in my future builds. Along this line of thinking I have two questions to the more experienced guys here: "Are there special conditions to store acrylic paints, wood dyes and satin varnish (any tips and tricks)? And how long after opening the tube I can still use it?". I will be grateful if someone provide me explanation. Back to the anchors. Before I tie the thread, I used a candle to remove the fuzz. I read in this forum that beeswax could also be used, but I didn't have it in home and decided to try with a flame. Well, it isn't the best solution (probably will try to make my own ropes for the next ship, but for this one will stick with the kit materials) but it's better than it was before: And here is a photo of the whole hull, finally fully completed! Now it's time for Masting and Rigging. First I will spend some time for research and reading the rest of my modeling book (check post #28) and then will continue with the second part of the story, so stay tuned!


-
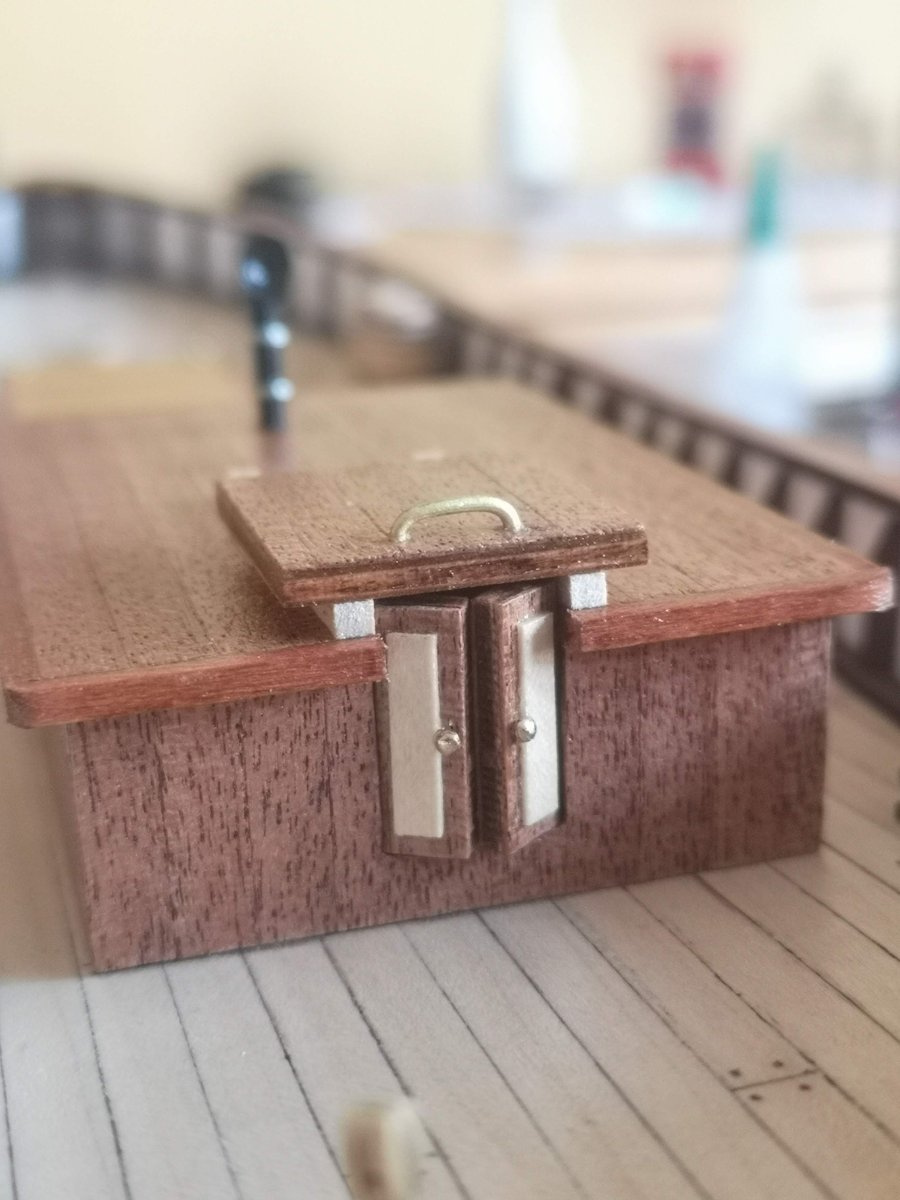
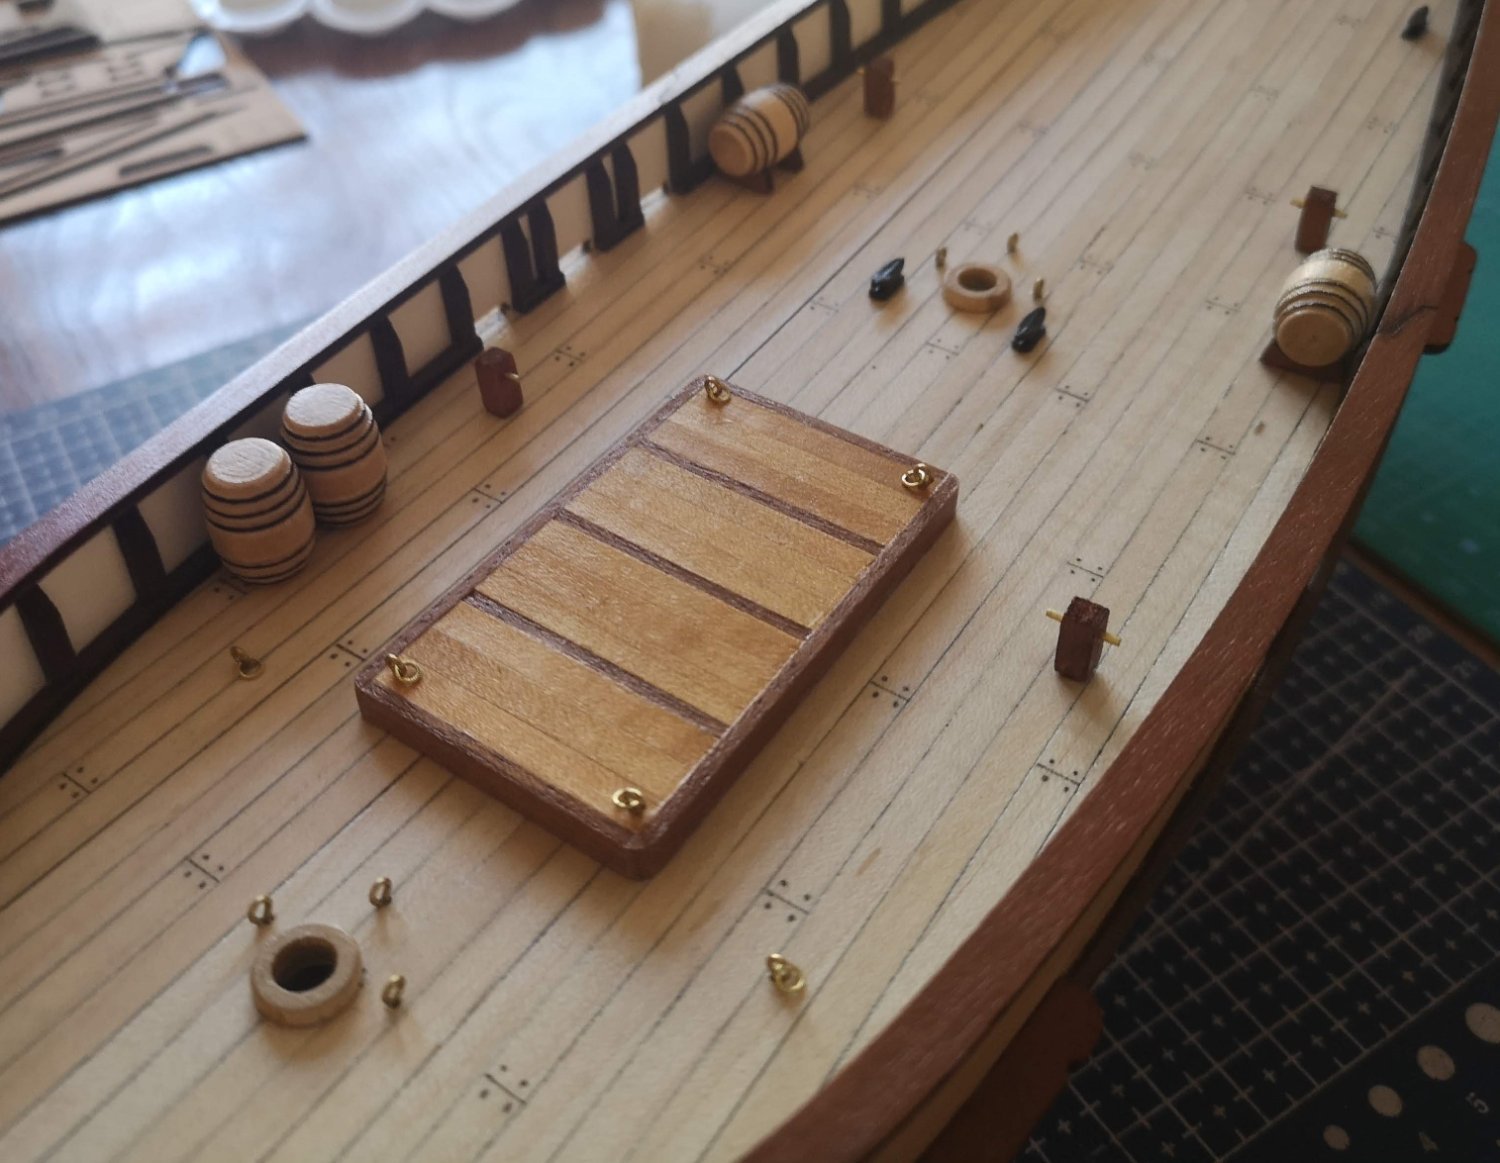
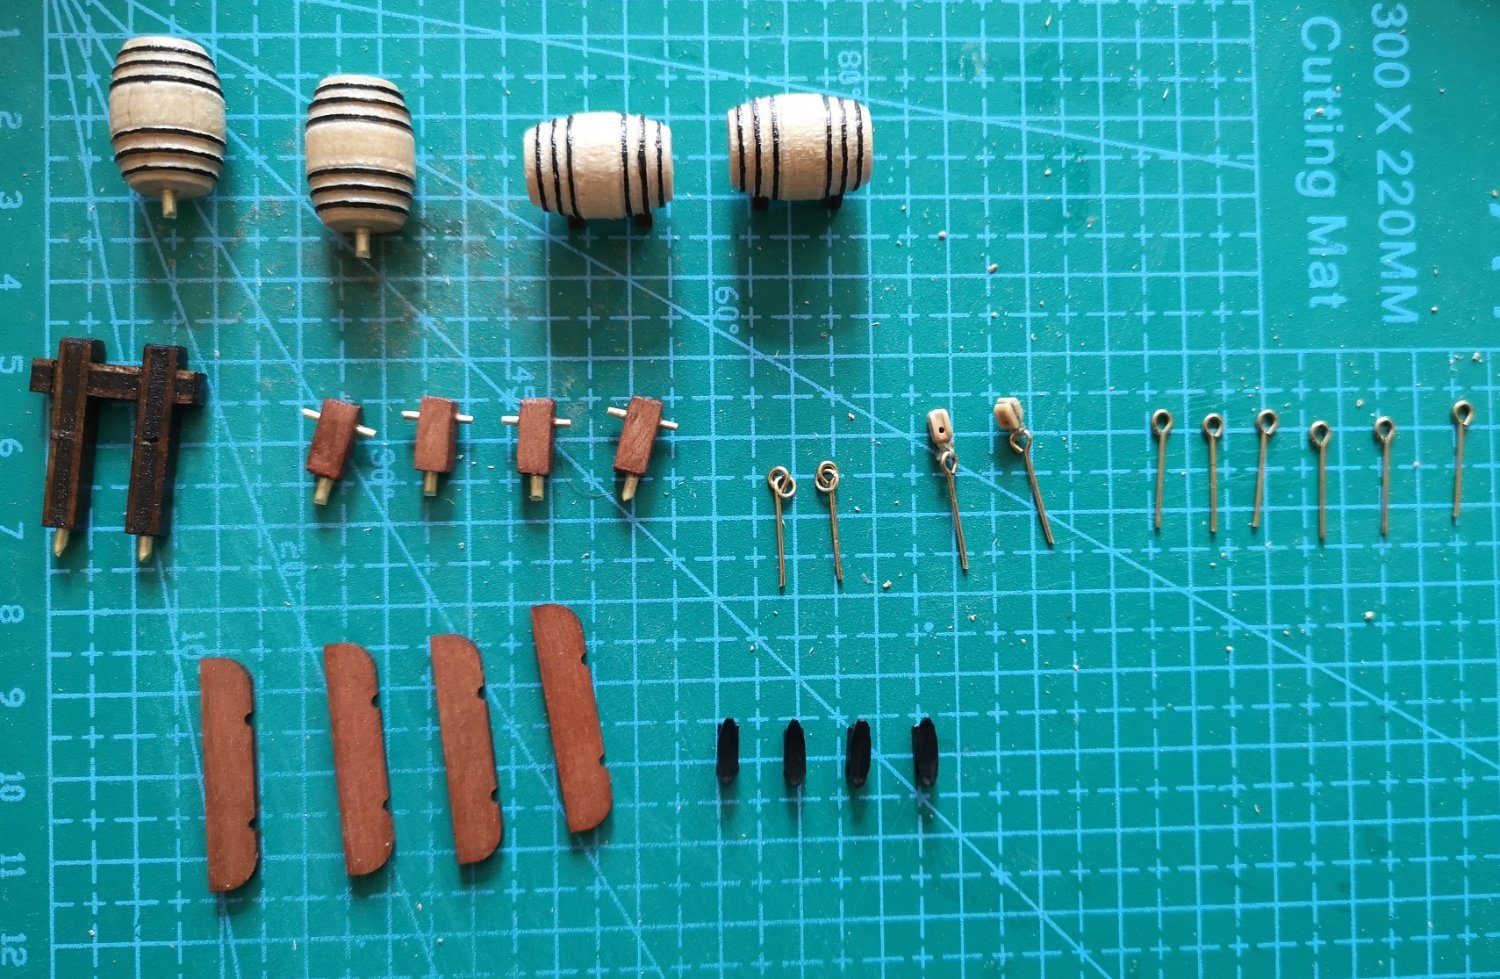
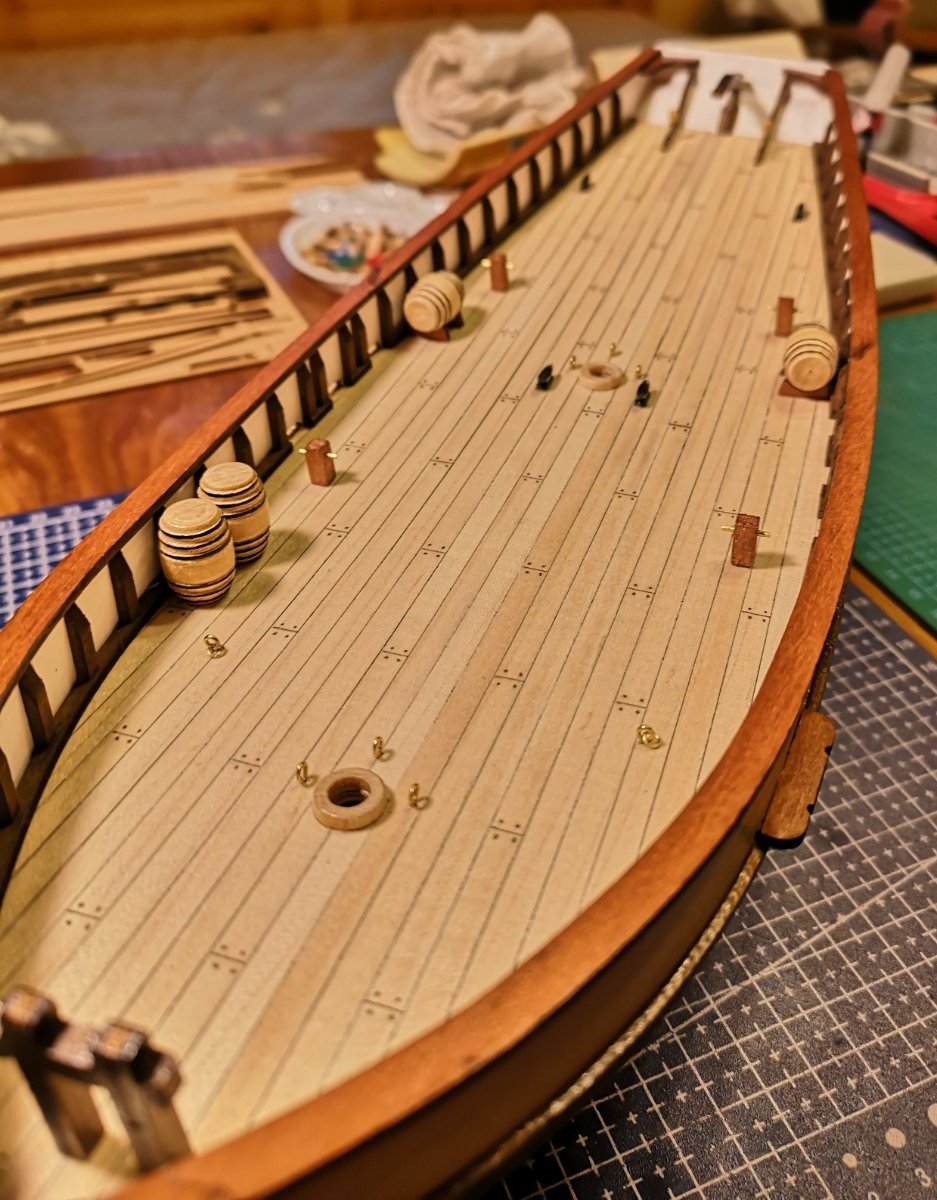
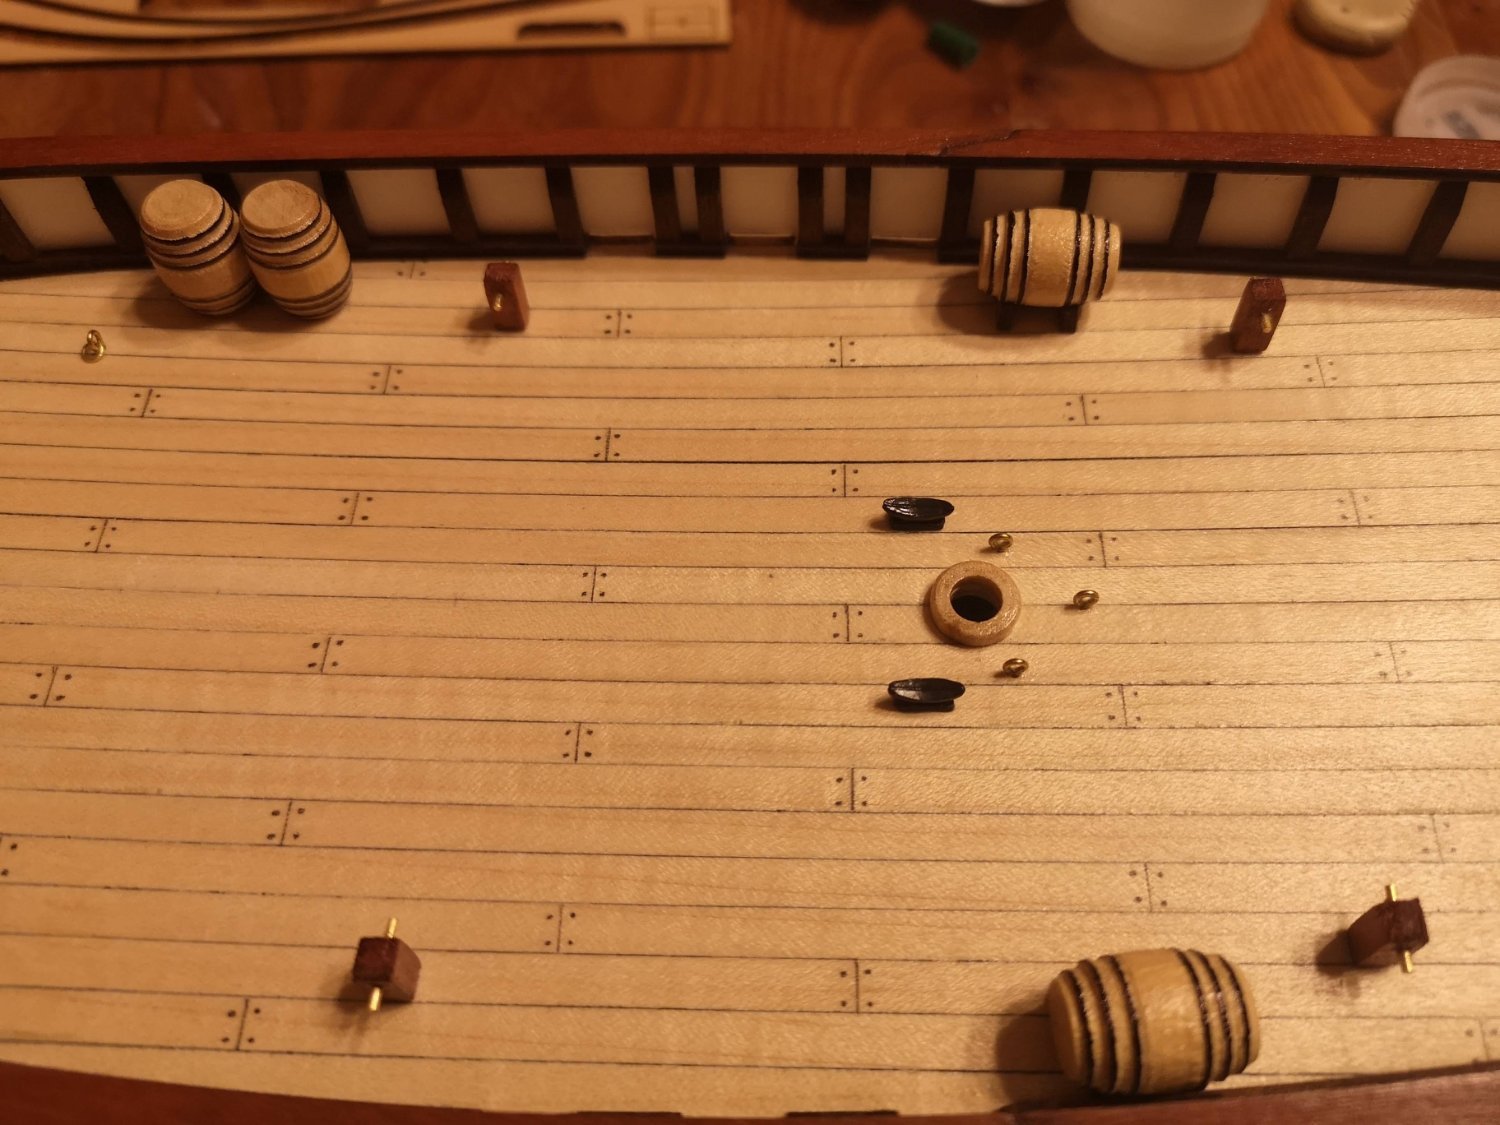
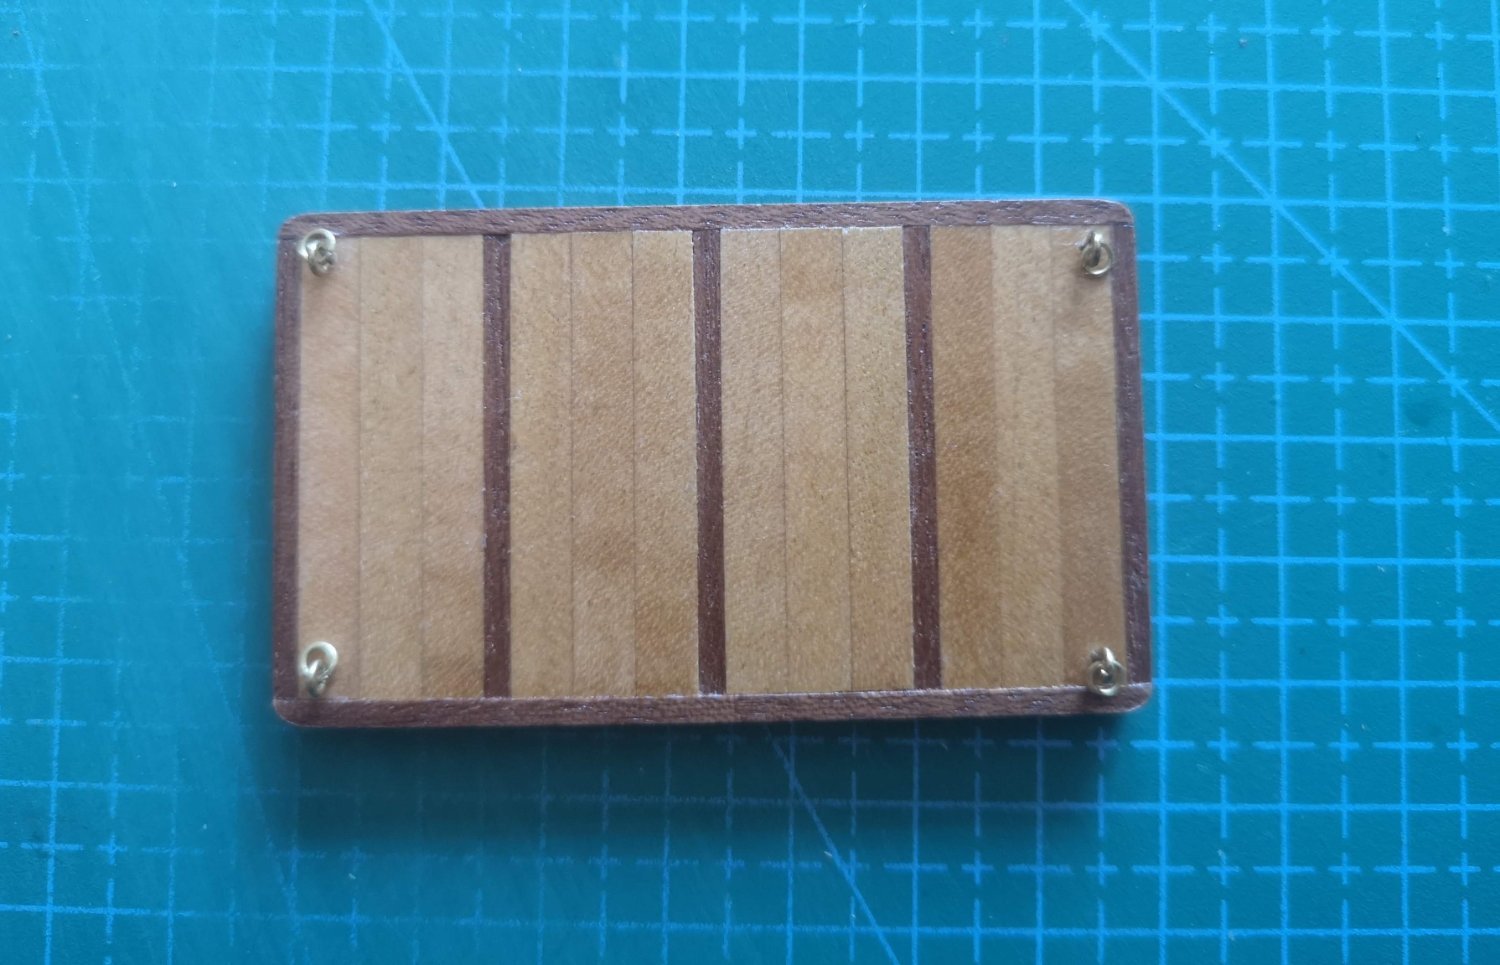
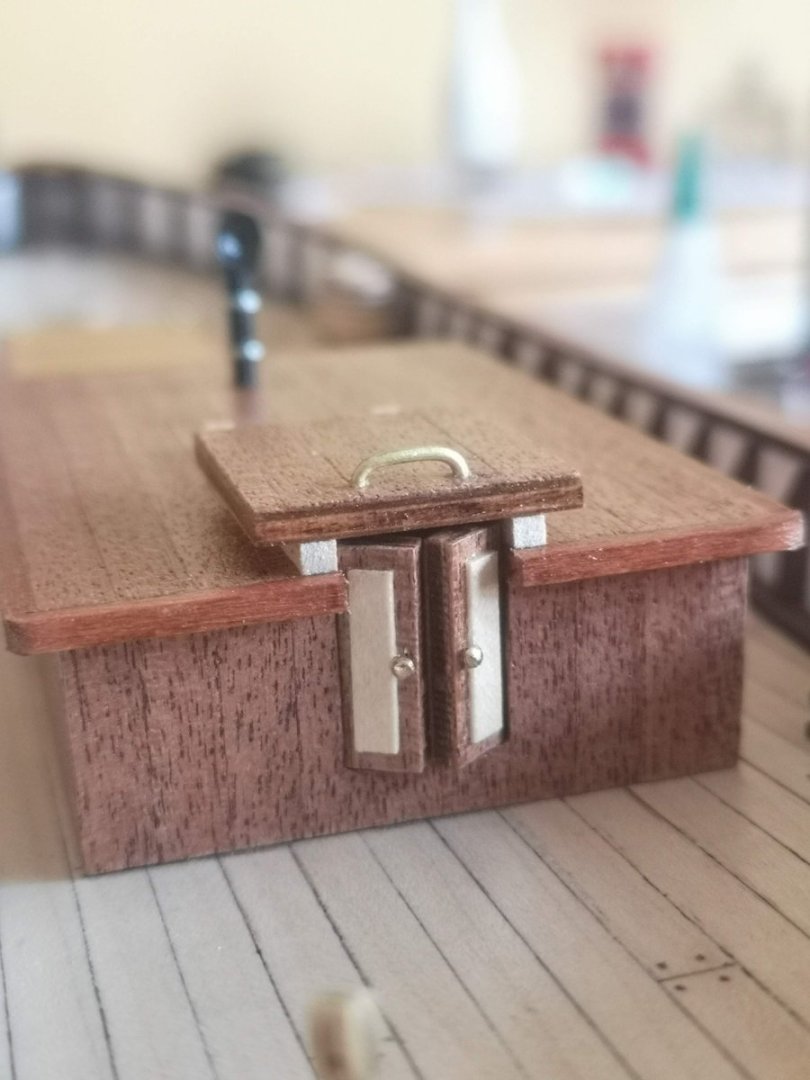
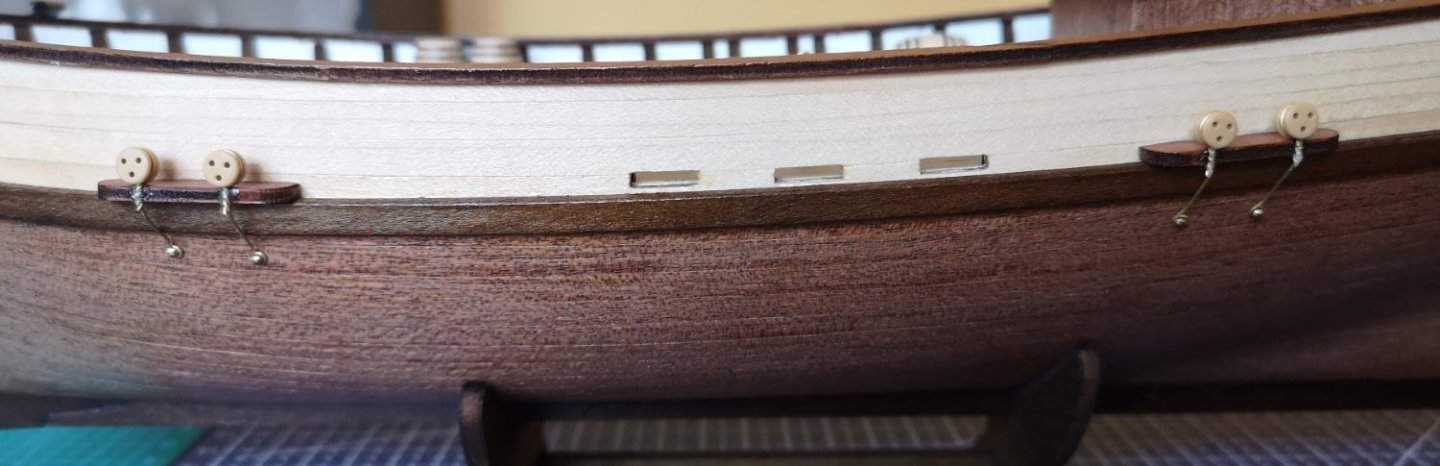
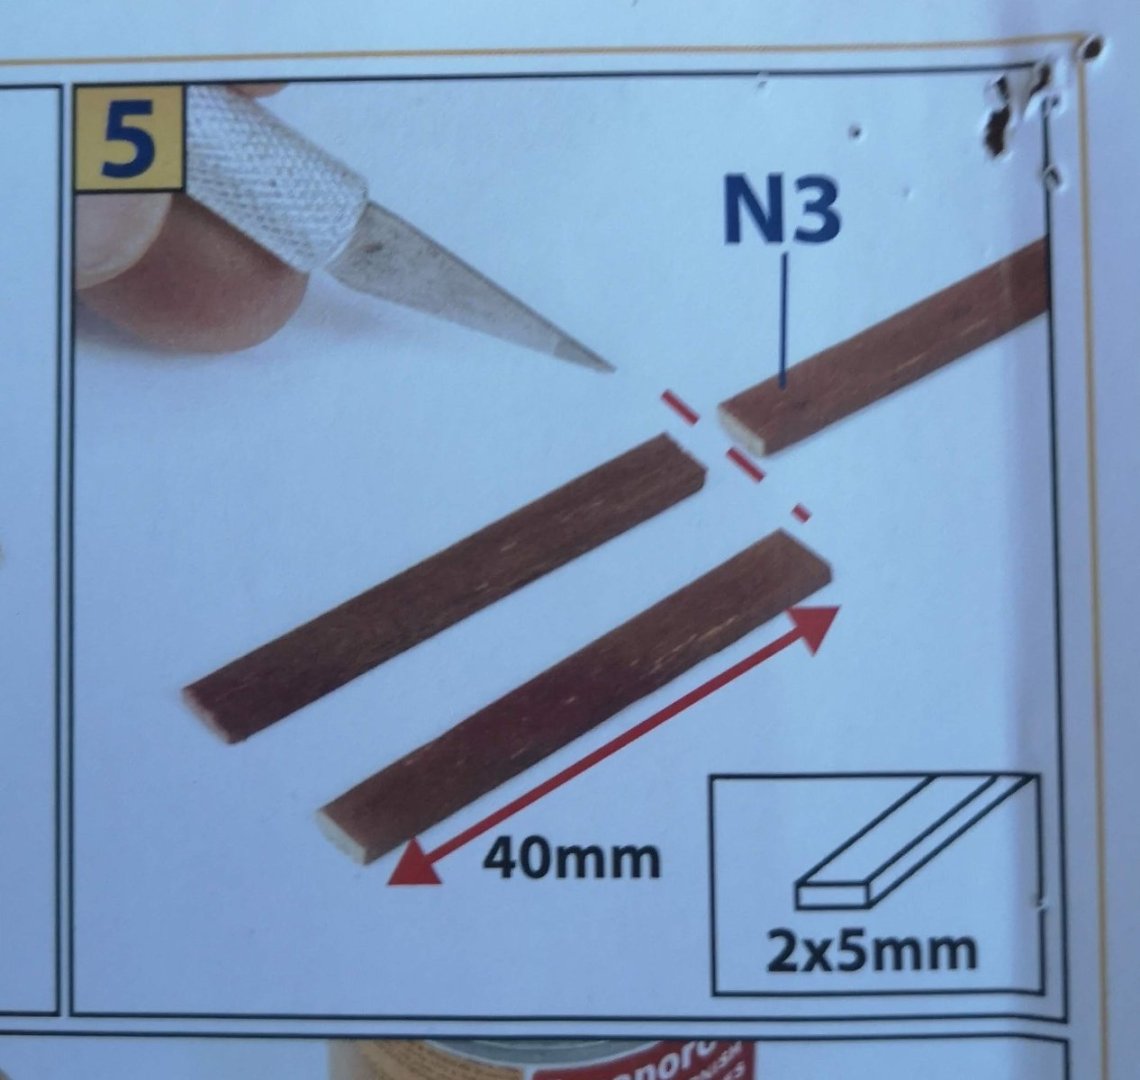
I haven't posted in a while, due to other urgent tasks in my home, but however I've made some progress on my Polaris. I've started making the items on the deck. It was really interesting and fun job, especially with the barrels. Here is an image of almost all small items - barrels, anchors stand, blocks, eyelets, channels and cleats: I used thick CA for mounting and two drills - 1 and 1,5mm for making holes in the deck. I strongly recommend to drill holes and glue such a small items with extra brass wire on the bottom. This way they will make better contact with the deck. Okay, so far so good. The next step is the hatchway, but here I noticed a discrepancy between the assembly instructions and the official OcCre tutorials in YouTube. In video tutorial (No. 47) they dyed a normal 2x5 strip with Sapele wood color and this way they made parts N3 and N4. But in the kit they provided such a Sapele strip which is not used anywhere in the future steps: And in the instructions there is no information about using any dye for this step: I checked the other build logs here, but no one had mentioned this, so I decided to write an official email to OcCre. And here I want to give а special thanks to their great service - I received a feedback on the next day with detailed explanation! So the right strip for this step is the 2x5 Sapele strip, which is already provided in the kit. This particular step is not correct in the video tutorial! They also replied to my comment below the video, so hopefully this will help to other guys in the future 🙂 Let's go back to the hatchway. Except this misunderstanding, everything with the hatchway was clear: I have left to do the deckhouse, bilge pump, chain plates and both anchors then the hull will be finally completed.


-
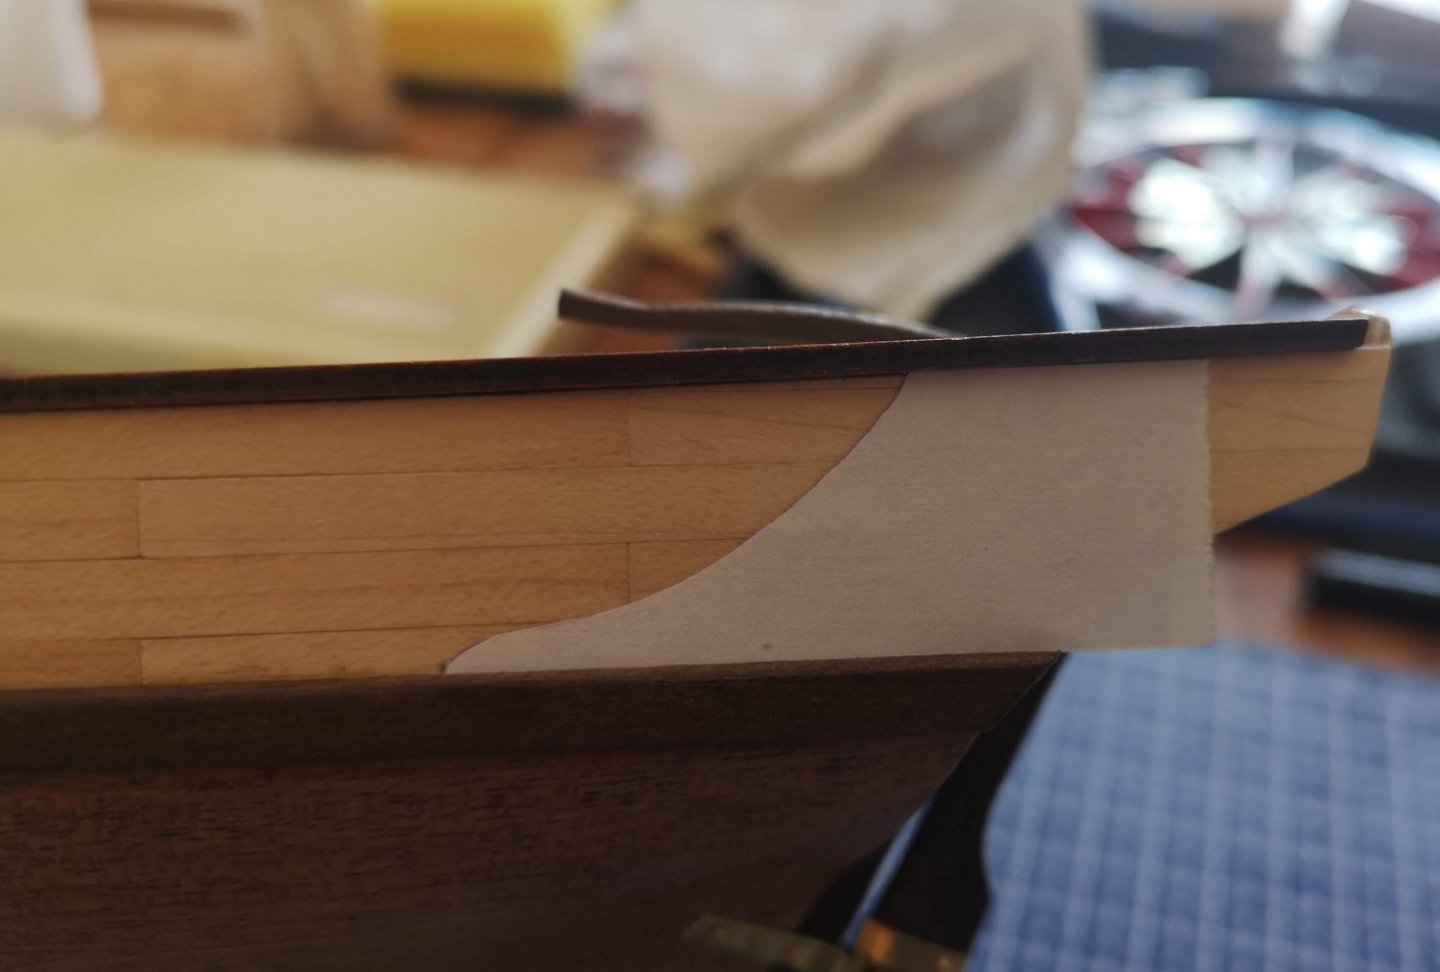
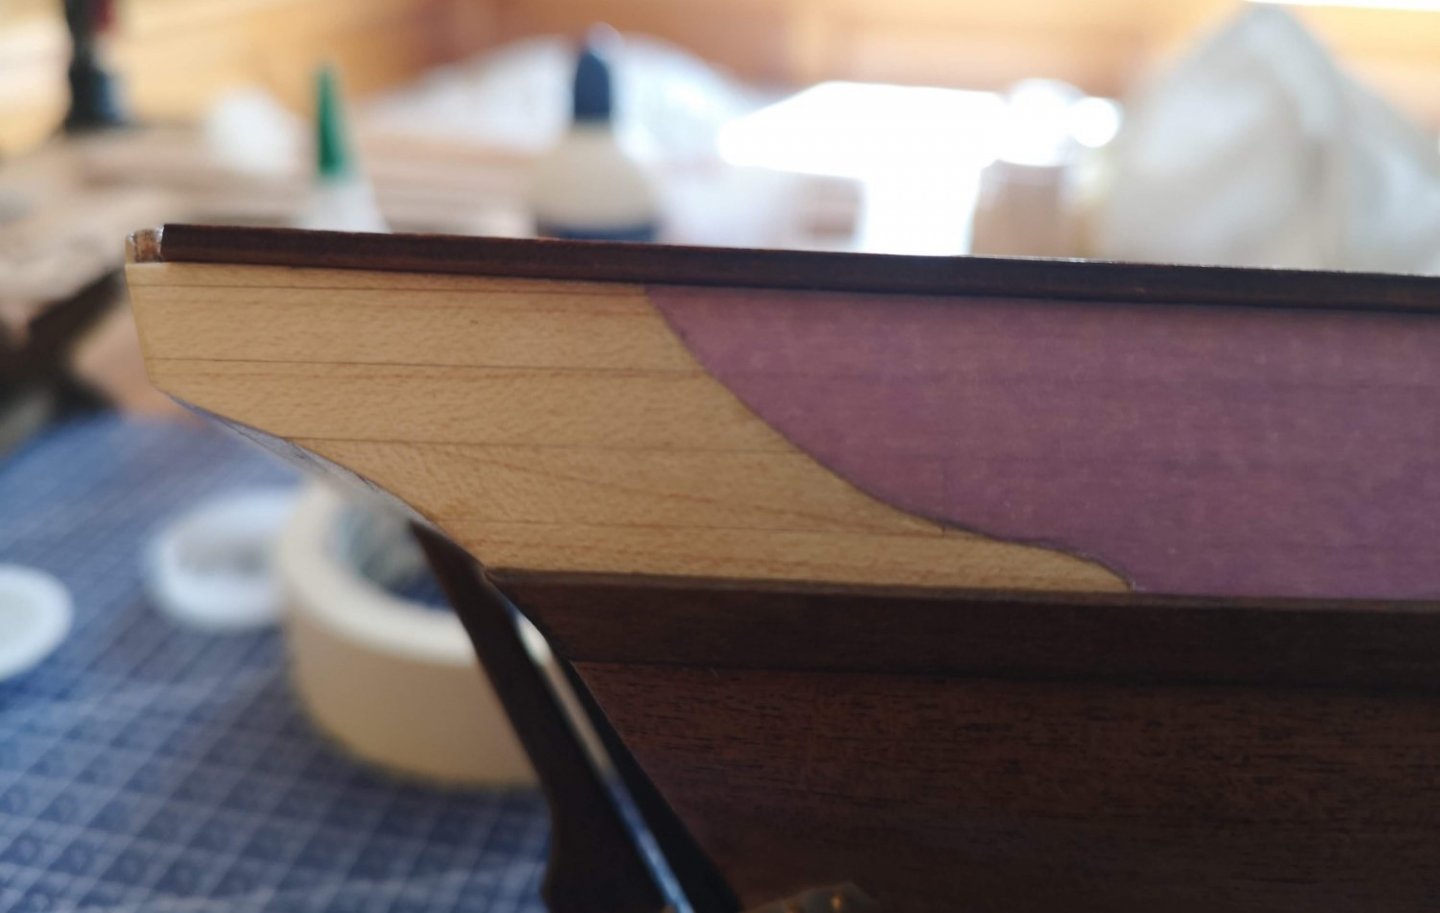
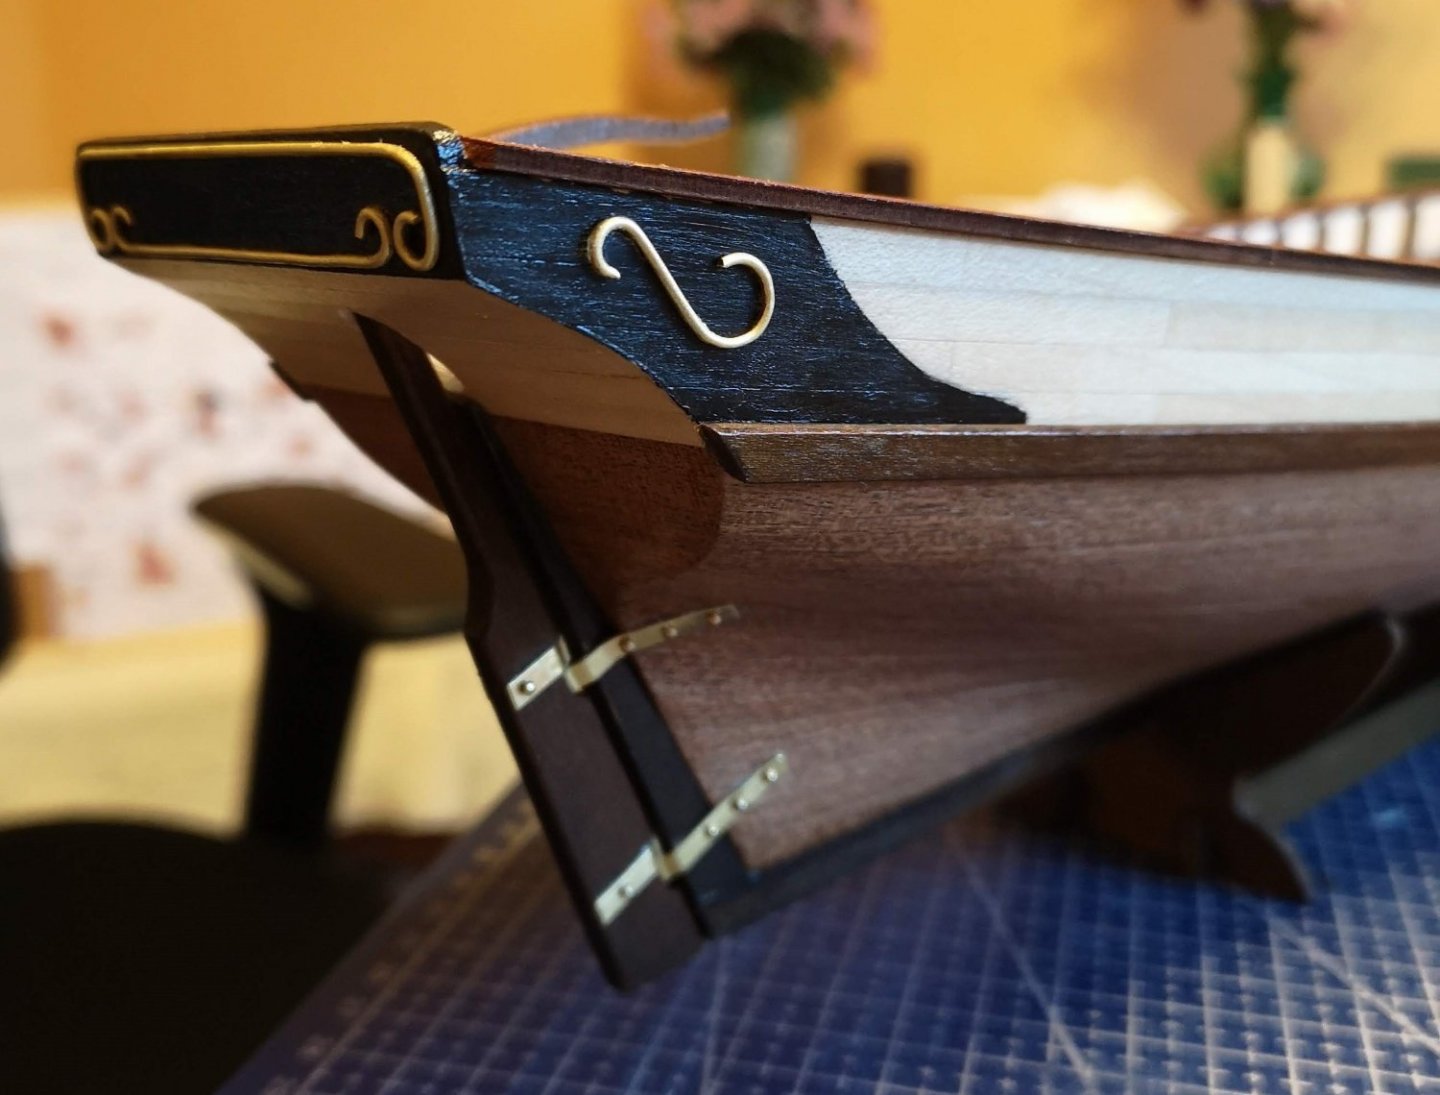
Quick update from the last weekend - I've managed to finish the stern! First I've started drawing the black curve (don't know the nautical term if there is such), well I would be lying if I said that I drew it on the first try 😁. Happily after a several attempts with a pencil and an eraser, it turned out pretty well: Then I cut off the masking tape, stick it back on a rise paper, cut off the paper and then flip it on the other side of the stern. Then I just redraw the template on the opposite side.This way the curve will be for sure symmetrical on both sides: I masked the rest of the stern and paint it with acrylic black. The next step was to bend the brass decorations. I've used only a round pliers for this step and the final shapes went almost perfect, I think. My advice here is to buy one of these pliers, because it's actually a really useful tool for bending and my opinion is that the end result won't be the same if you use normal pliers. Then I just tried to glue all of the brass parts as symmetrical as possible. And finally I bought a CA gel type (yes, I've used the liquid type until now) and it's hundred times better and easier for use than the normal CA glue, which is like a water. This is the final look of the stern:

-
Thank you for your kind words, Allan!
-
Thanks, BikerMart and yes this is my first ship. I am just trying to give my best and take my time on each step. 🙂
-
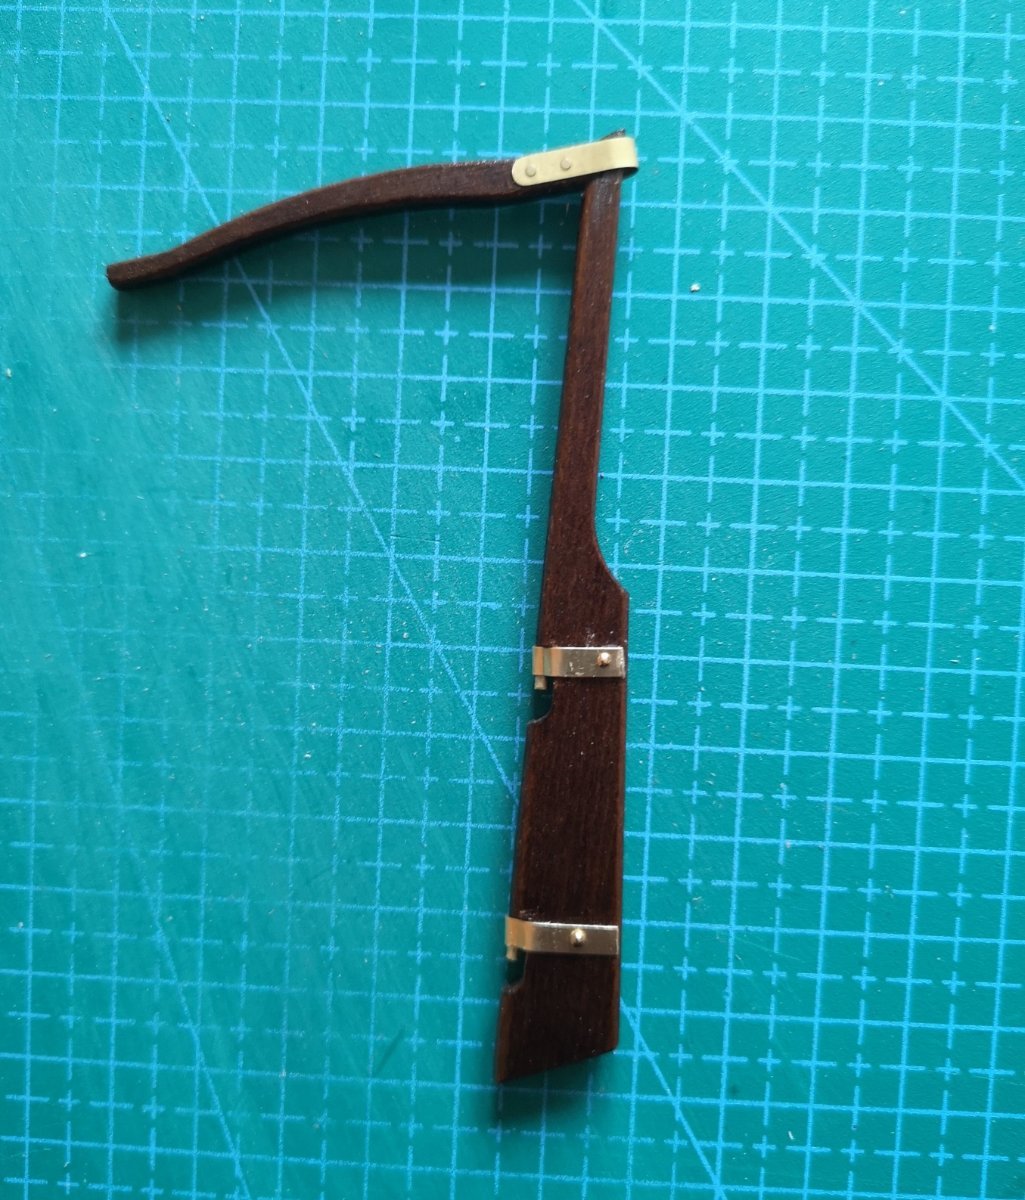
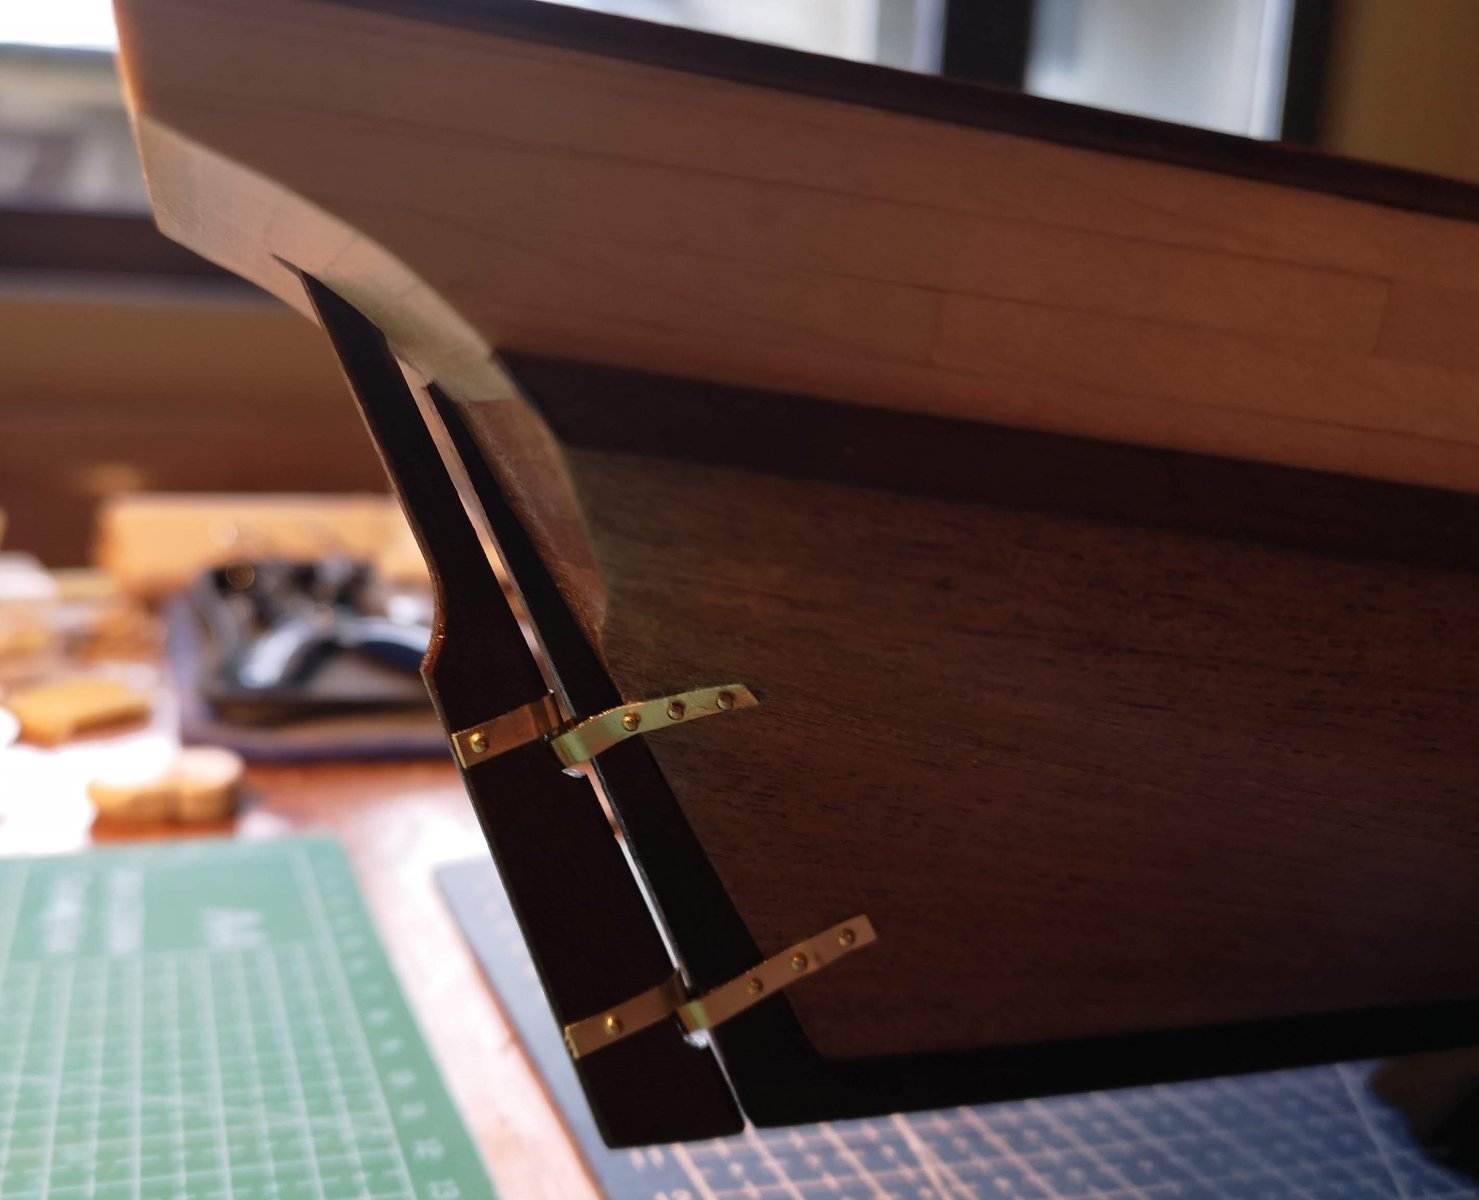
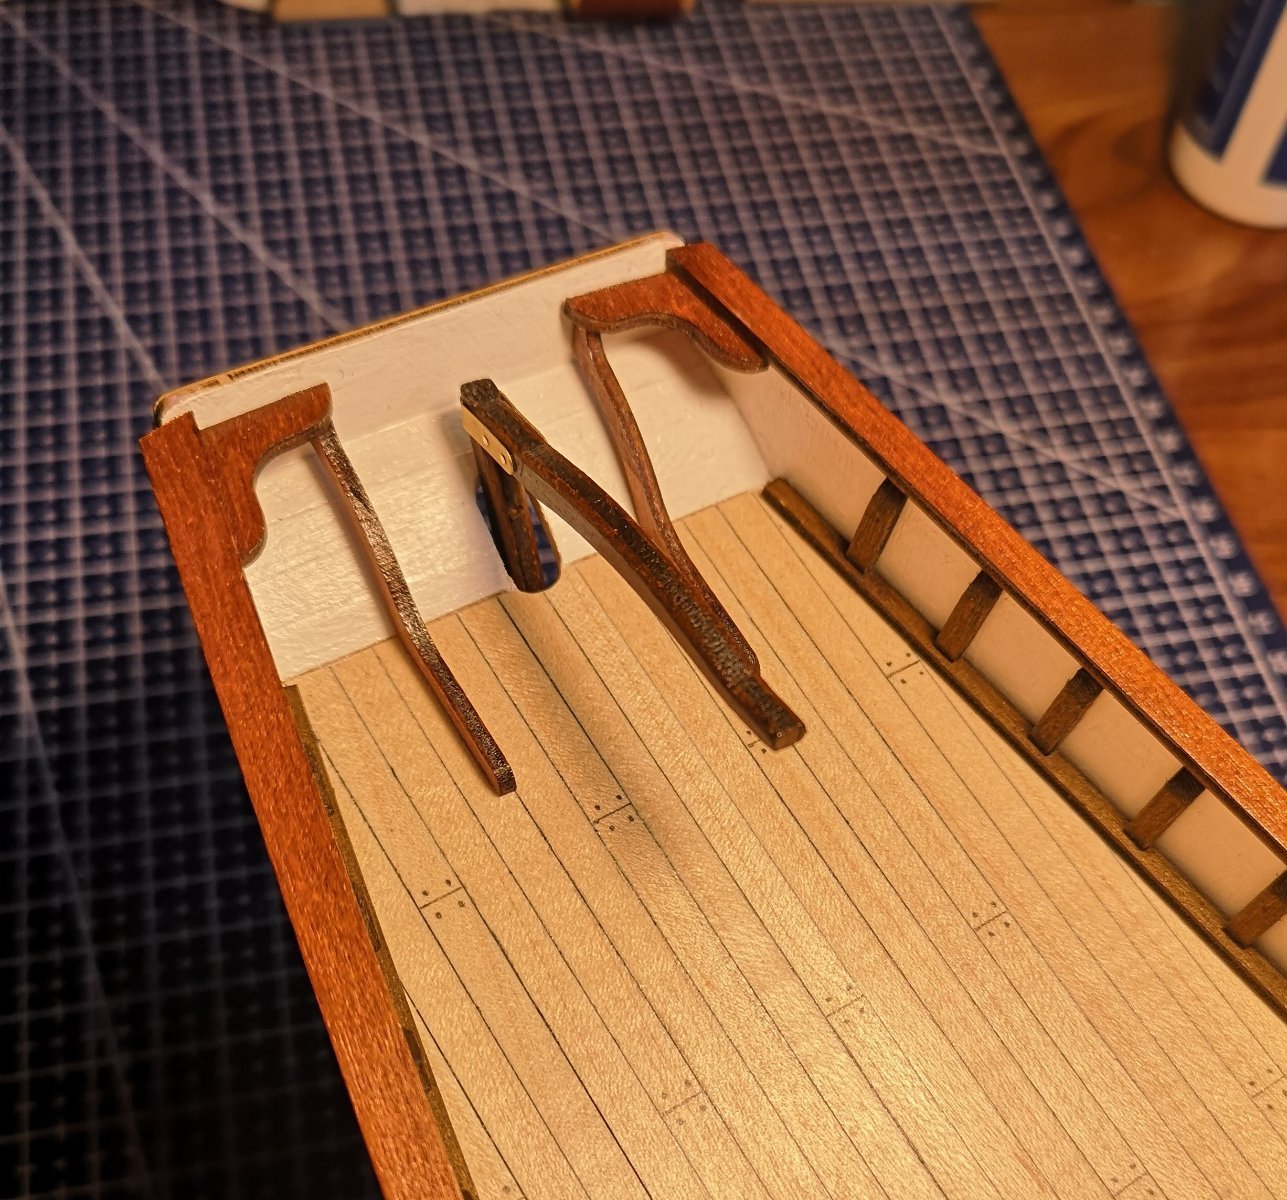
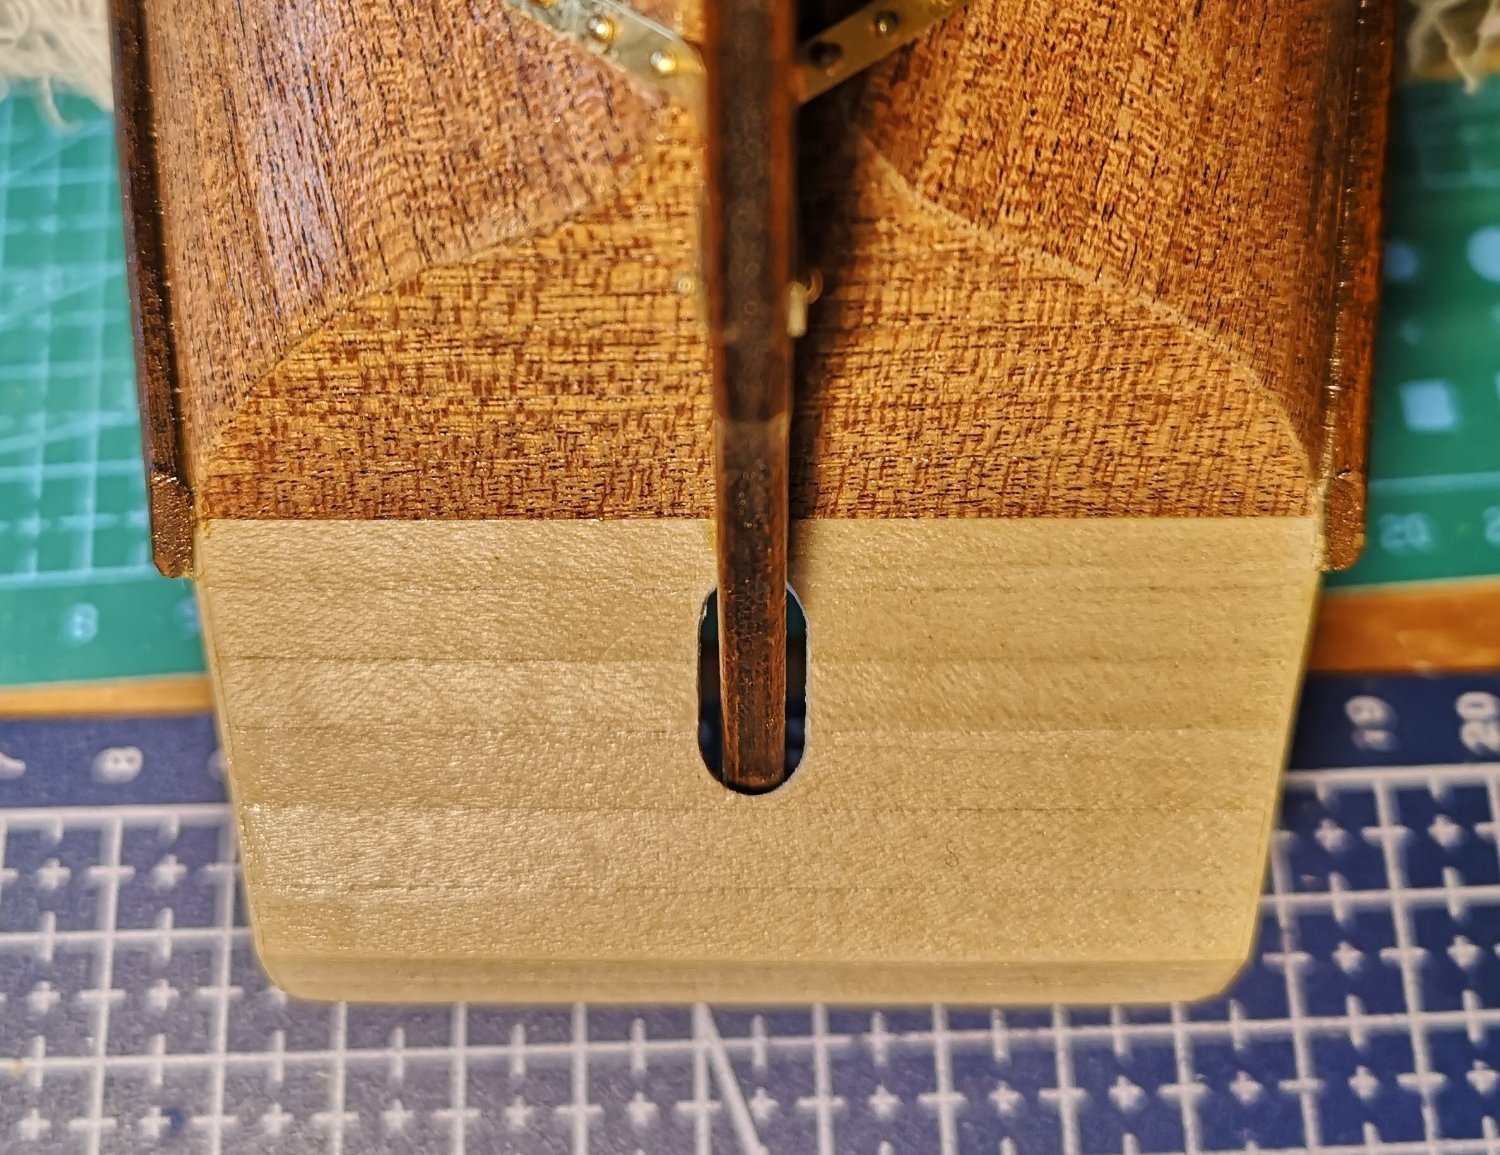
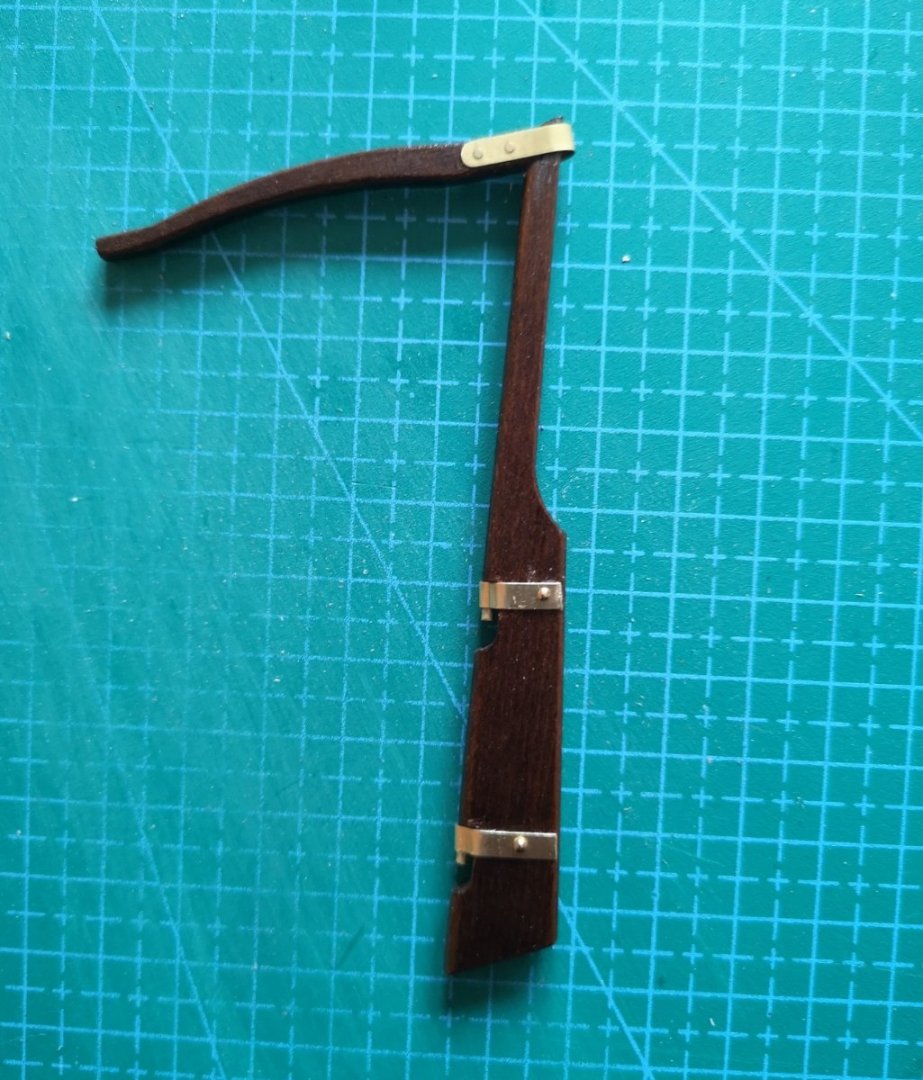
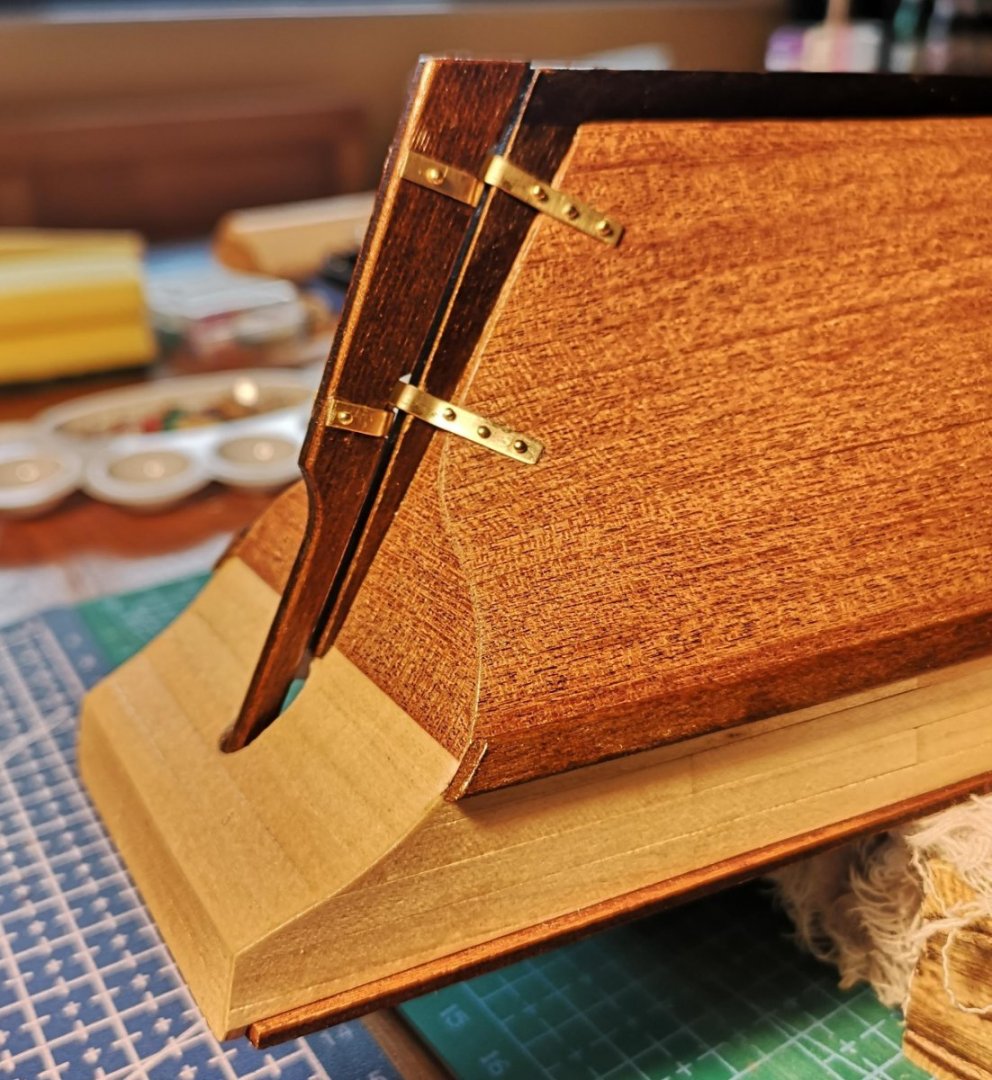
And the handrails were mounted. I stained them with Pine dye and used CA for gluing. It was a bit tricky to align all the parts, especially these on the stern. Then I began the work for the rudder. Well, I could say this was one of the most difficult and trickiest steps so far. Maybe because of the CA or because of the hole in the stern which should be made with an electric drill. Anyway, I've managed to drill the stern with 3mm drill and then used a 7mm file to expand the hole. I gave my best to make the hole symmetrical, but however I've cut a little bit from the deck planks. Bending the brass parts for the rudder was a real nightmare. I made a little mess at this step with the CA, but I'm still happy with the result. It's not perfect, but the rudder is functional and it can be easily rotated, so that's enough for me. 😄


-
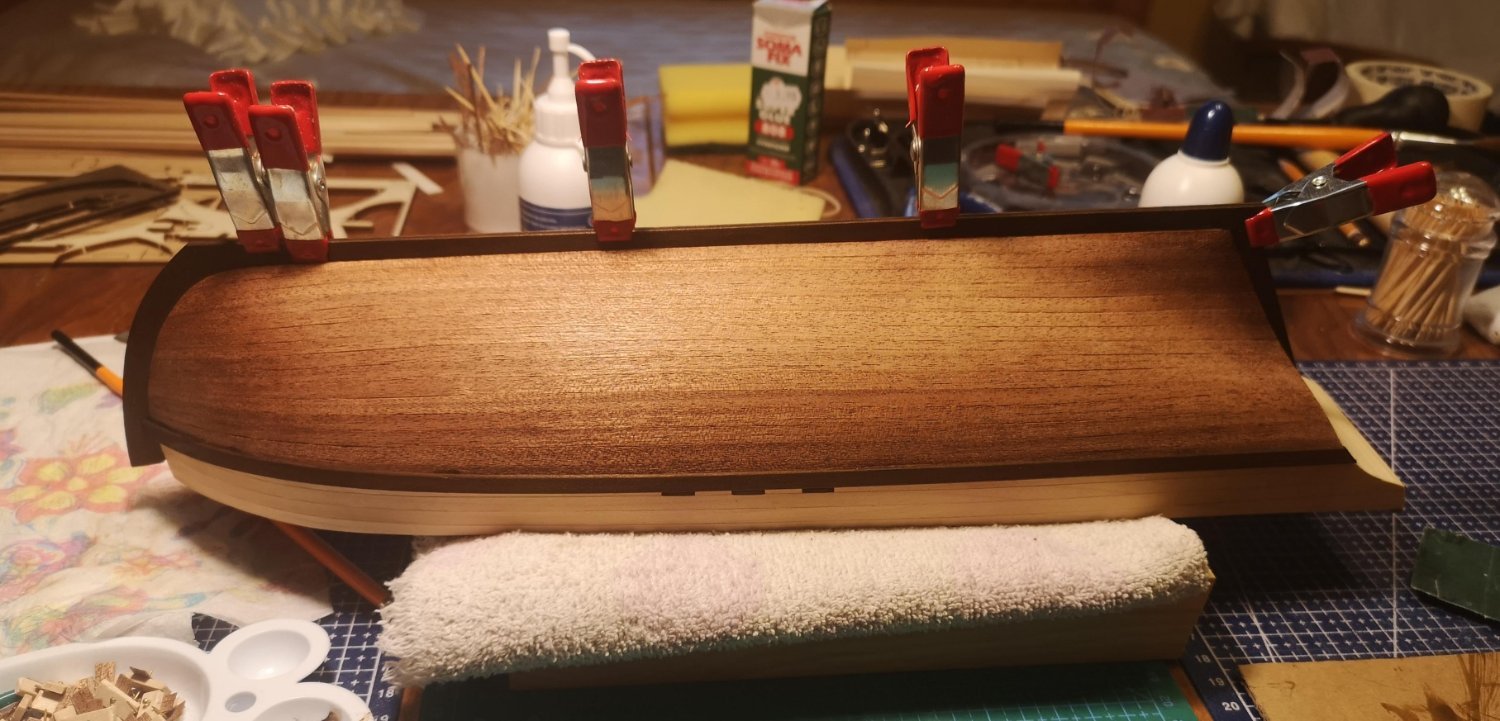
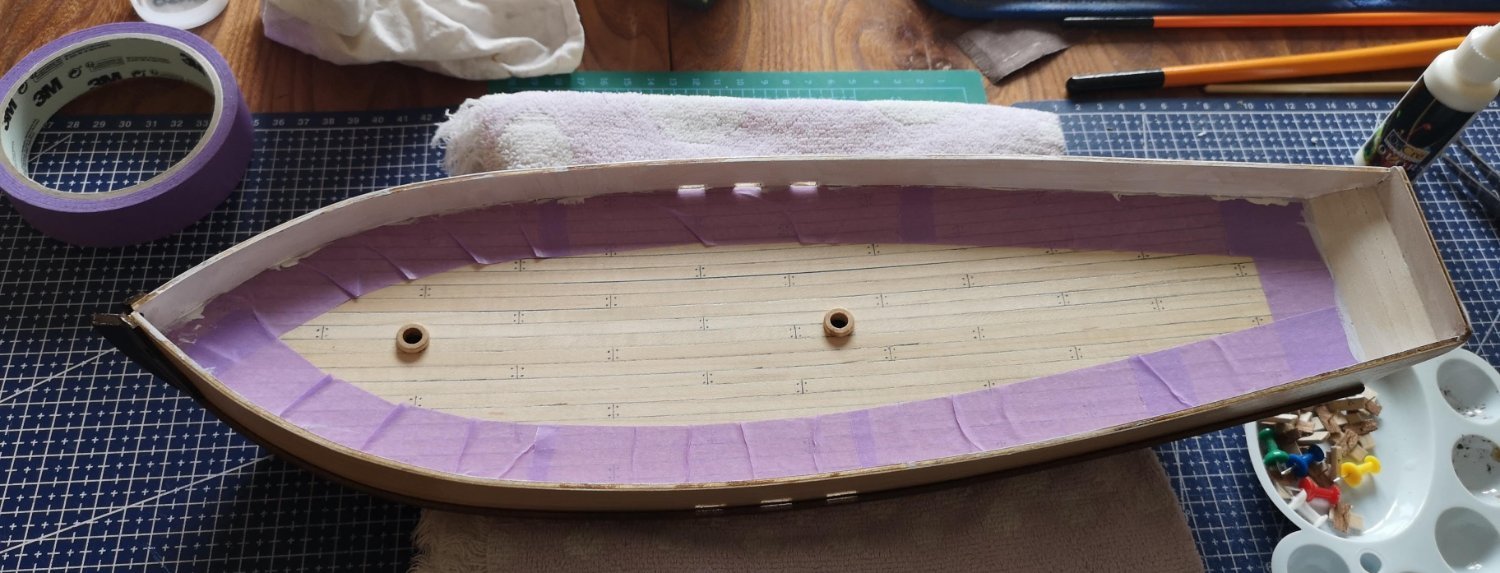
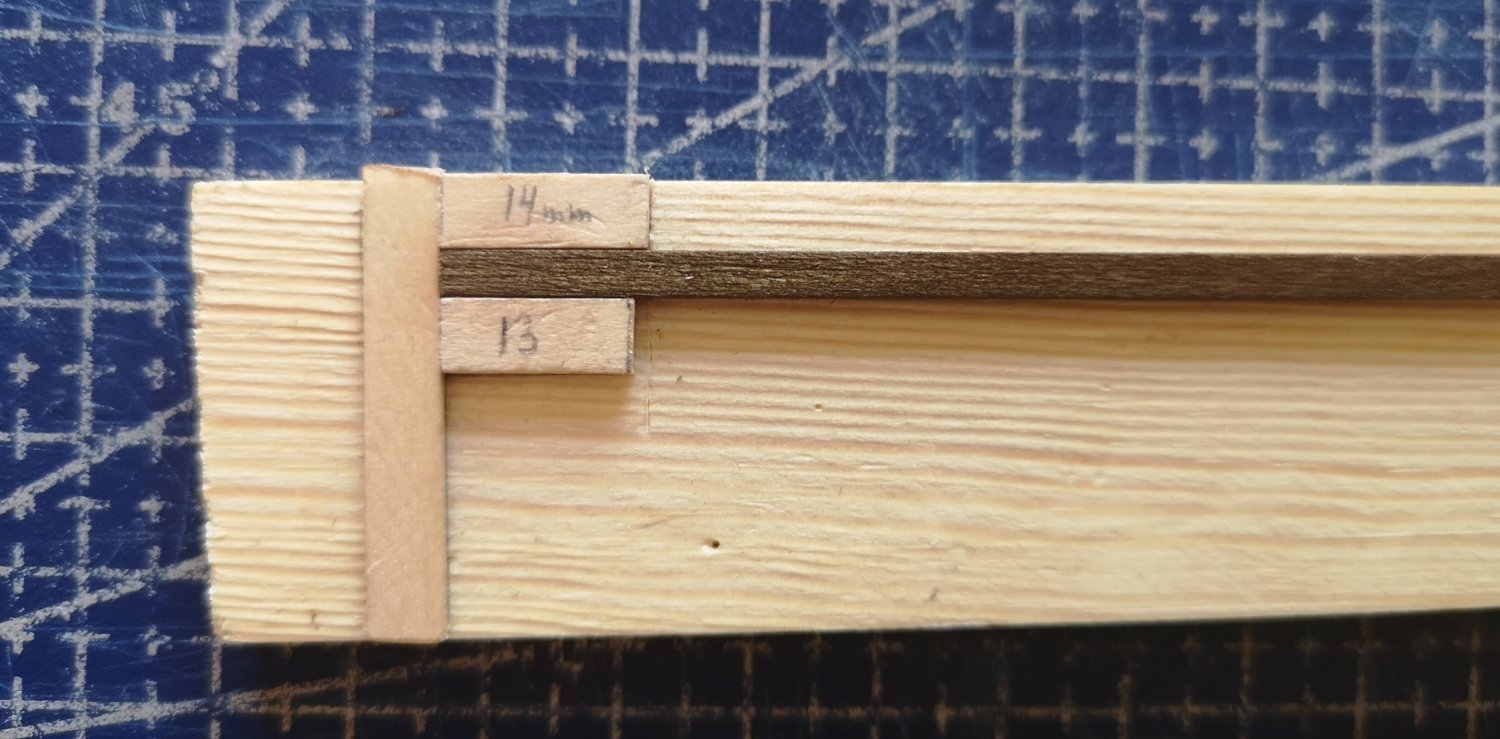
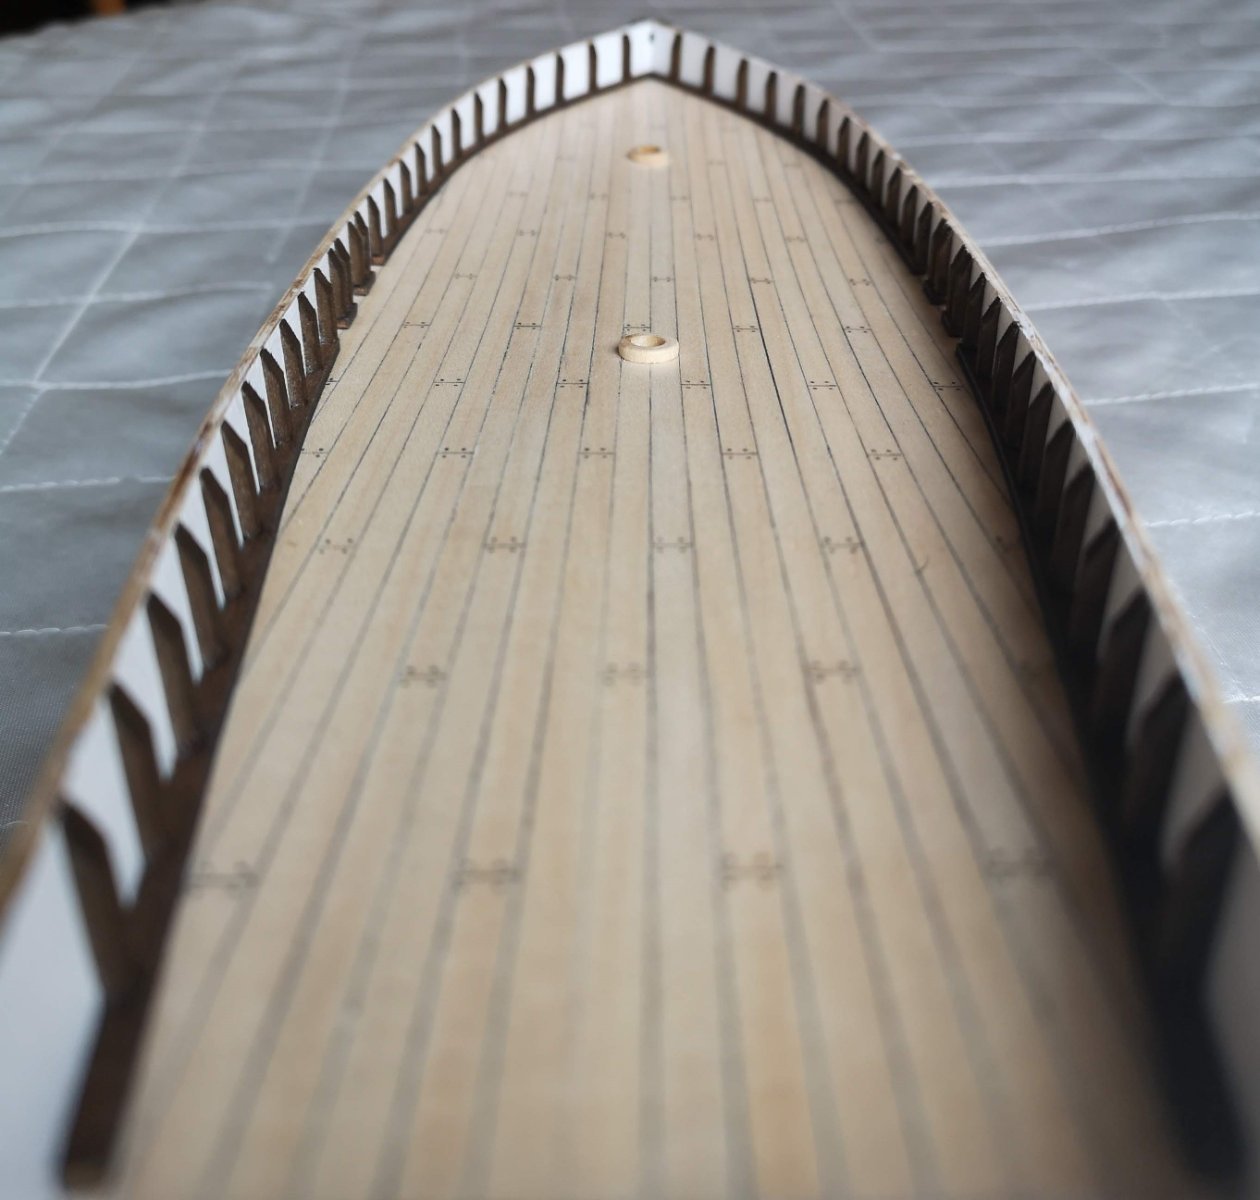
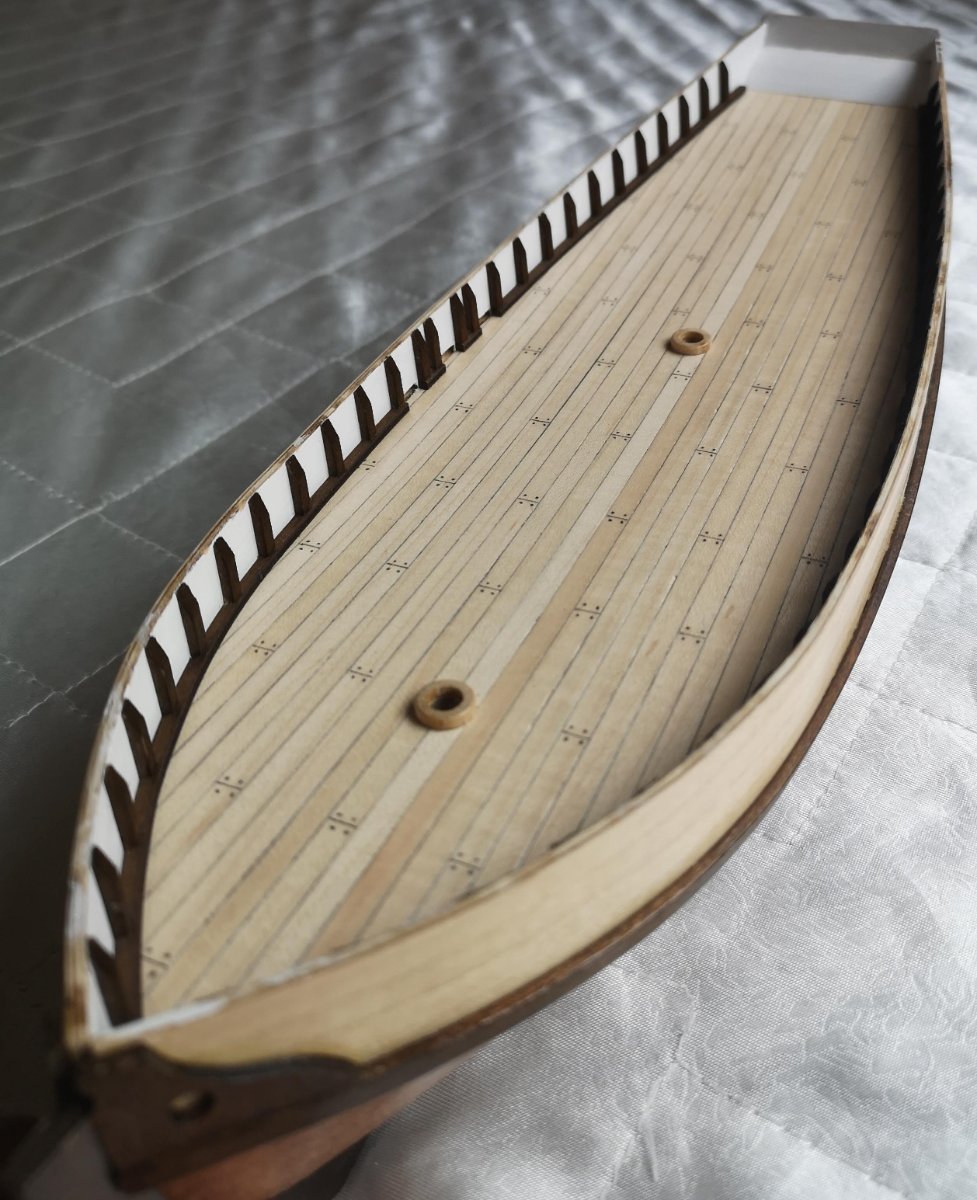
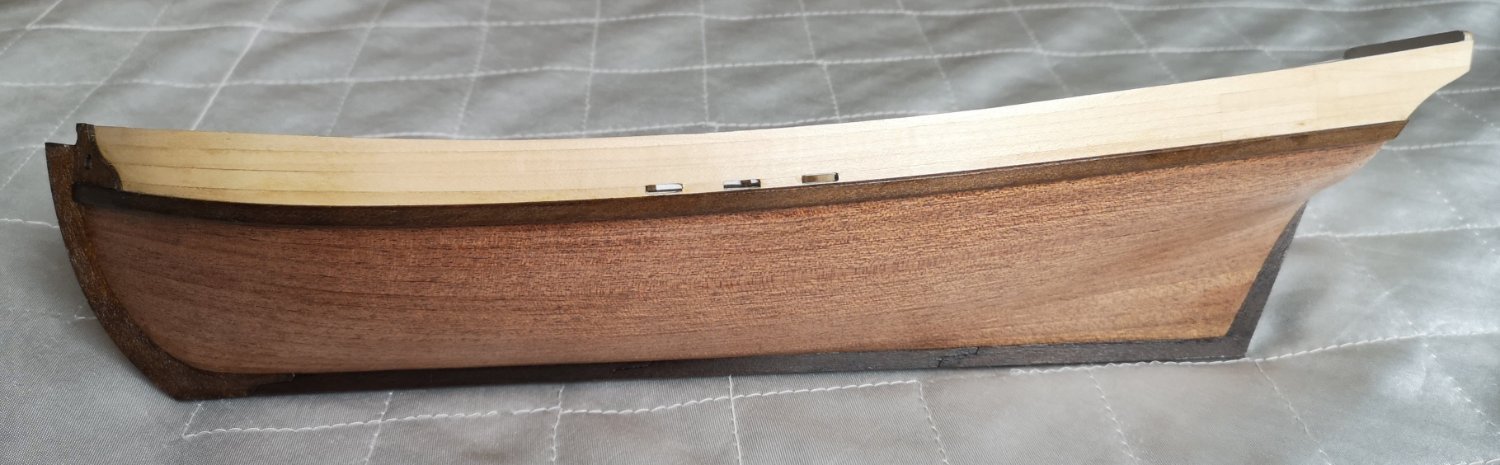
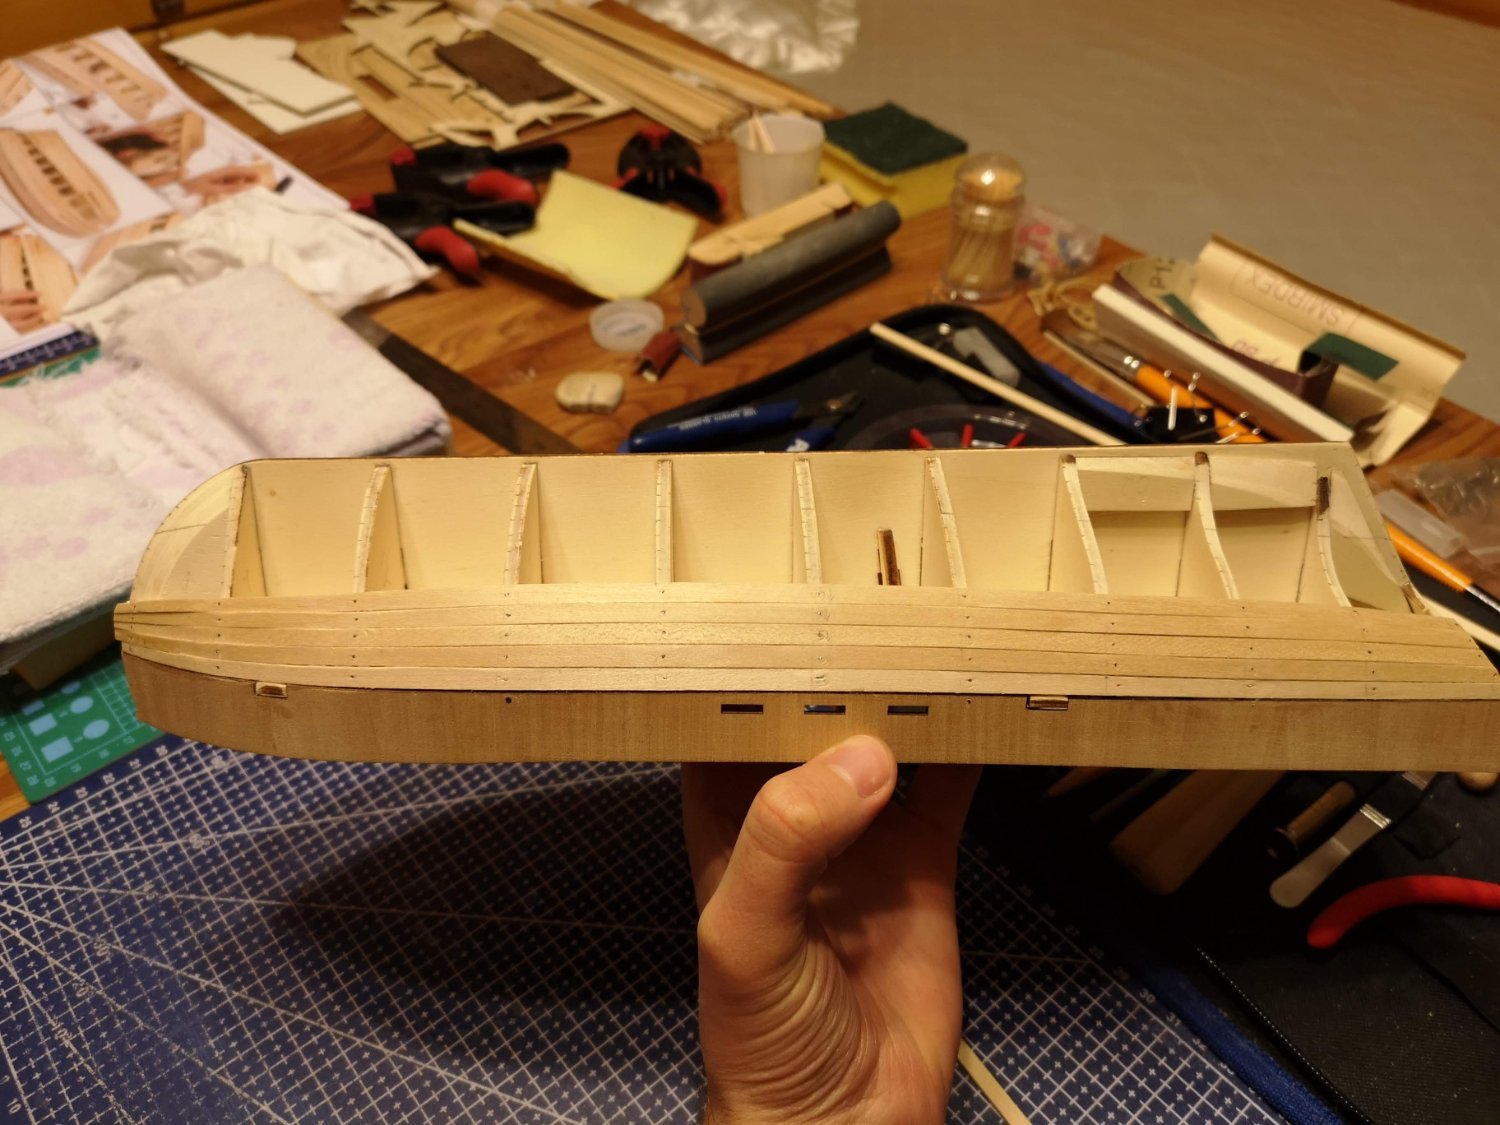
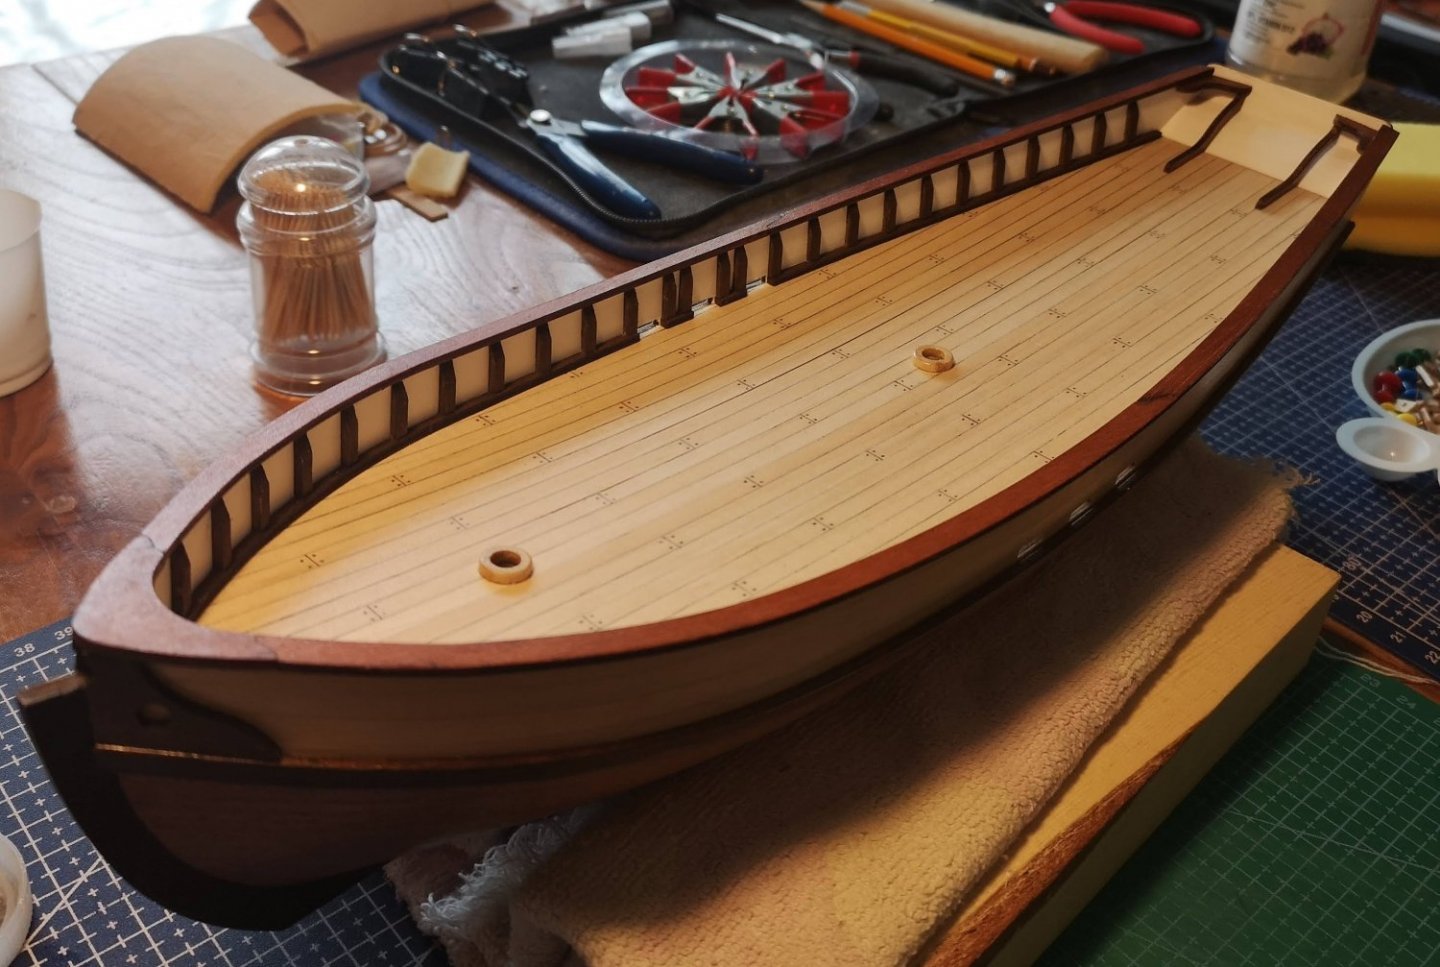
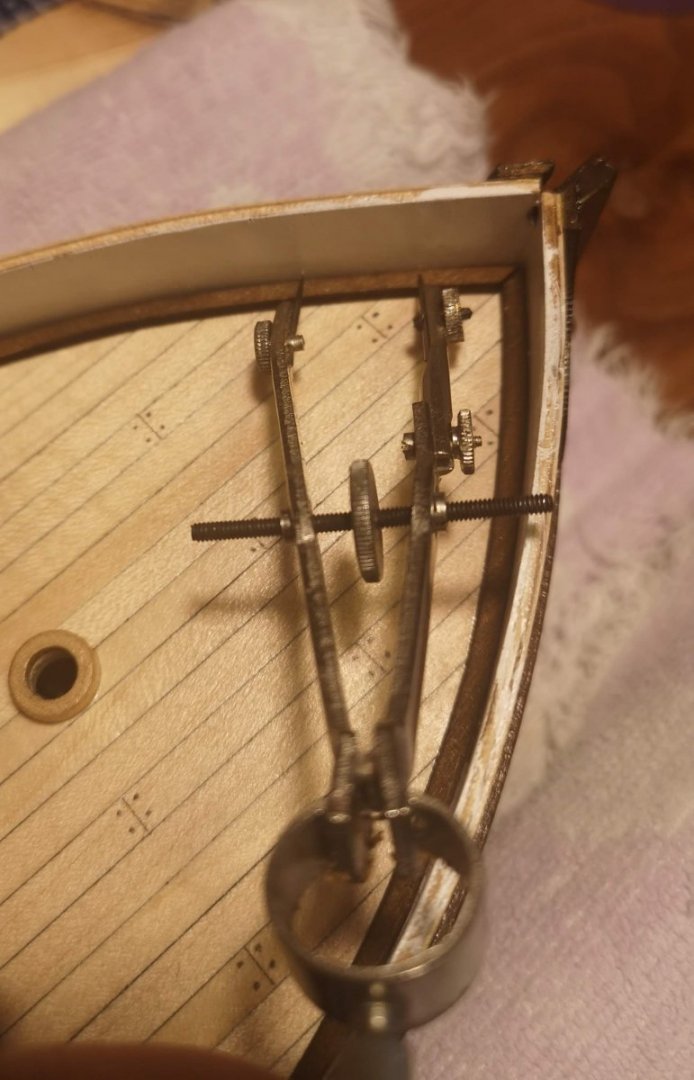
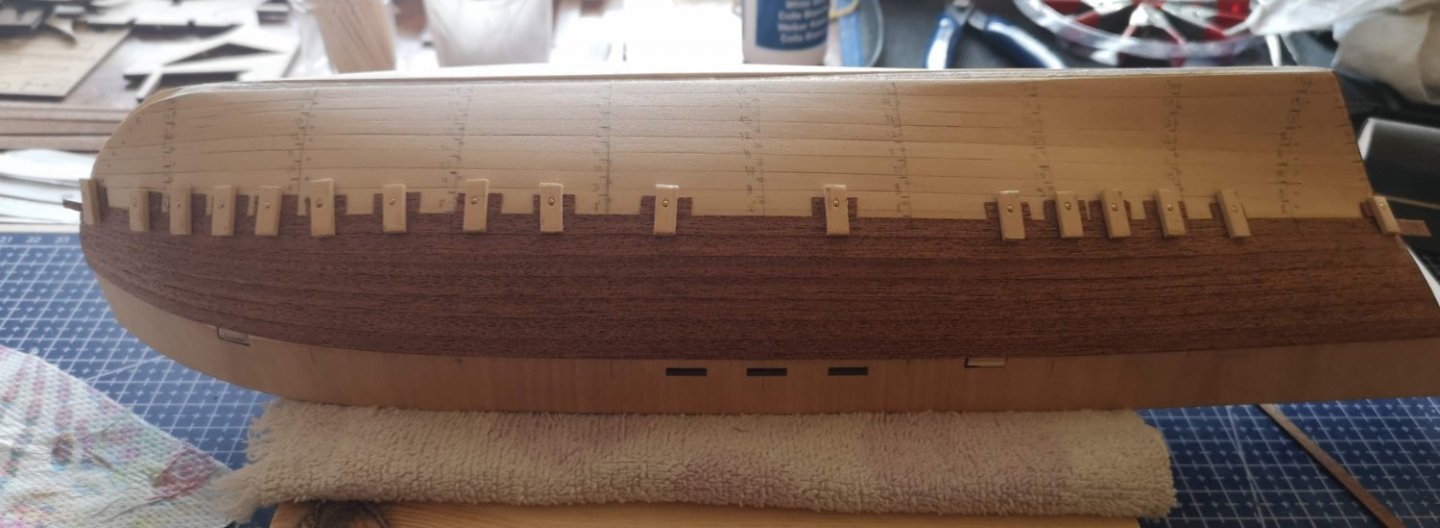
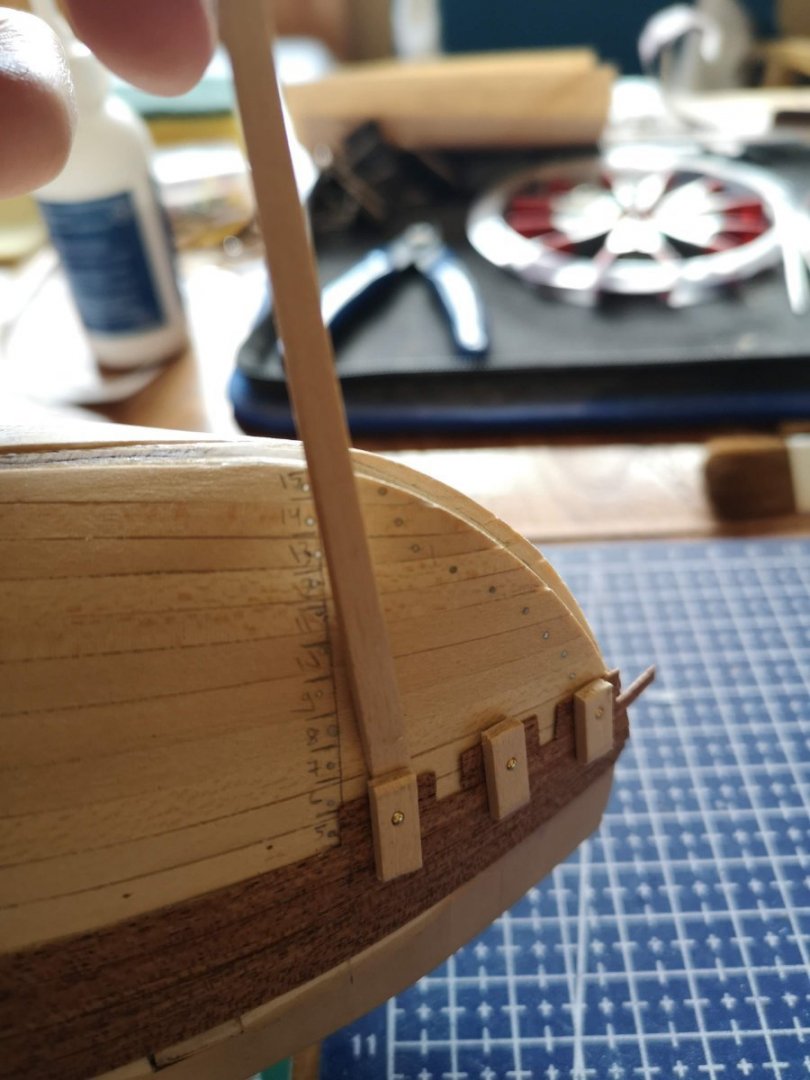
She starts looking like a boat! Long time no posting, but I still did some work on my Polaris. First I stained all the wooden parts needed for the keel and the railings in walnut dye. Mounting the stem, keel and stern post wasn't so difficult as I expected, but the wales were quite challenging. For the wales I recommend to not follow the instructions (as I did at first), but use a PVA and bend the planks before staining. Fortunately all of the gaps, which I was worried about in post #25 from this log, disappeared as I expected. I didn't pay special attention to the gaps between the keel parts, PVA filled them pretty well. One mistake I noticed was that I didn't sand the first layer evenly on both sides of the stern and now there is a little edge on the left side of the stern post: Anyway, I can live with that 😁. Then I varnished the whole hull and started working on the deck - the most interesting part of the build I think. I also wanted to plank the bulwarks inside, despite the instructions, but the thin planks won't be enough for the future steps if I use them now. So, not 100% realistic bulwarks for this build, maybe for the next one . I painted the bulwarks inside with acrylic white, 3 or 4 layers were needed for good coverage: For the next steps I used only CA for mounting the footrails and the bulwark stands (not sure about the nautical terms). My advice is to put double layer of CA, because the first one soaks in the wood and doesn't make a good contact. Maybe this detail is obvious for most of the people here, but it was a surprise for me, when the parts didn't make a good contact after the first try: The instruction video says to use a ruler for marking the distance between each bulwark stand (12mm), but I used a divider caliper and it was easier I think: And one more tip for this step is the template that I made. I just measured the bulwarks at their widest point and cut all stands with this size. Using this template, each stand will have a square end and exact same size. The only cons is that the stands in the middle of the bulwarks (the shortest point) will take more time for sanding: And here are some images of the final look for now:


- 85 replies
-
- 10
-

-
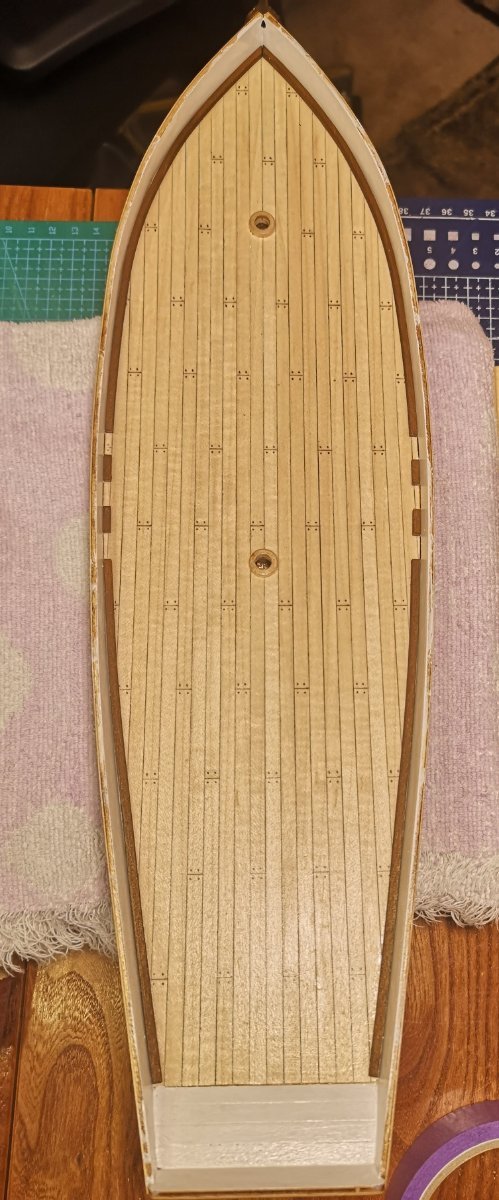
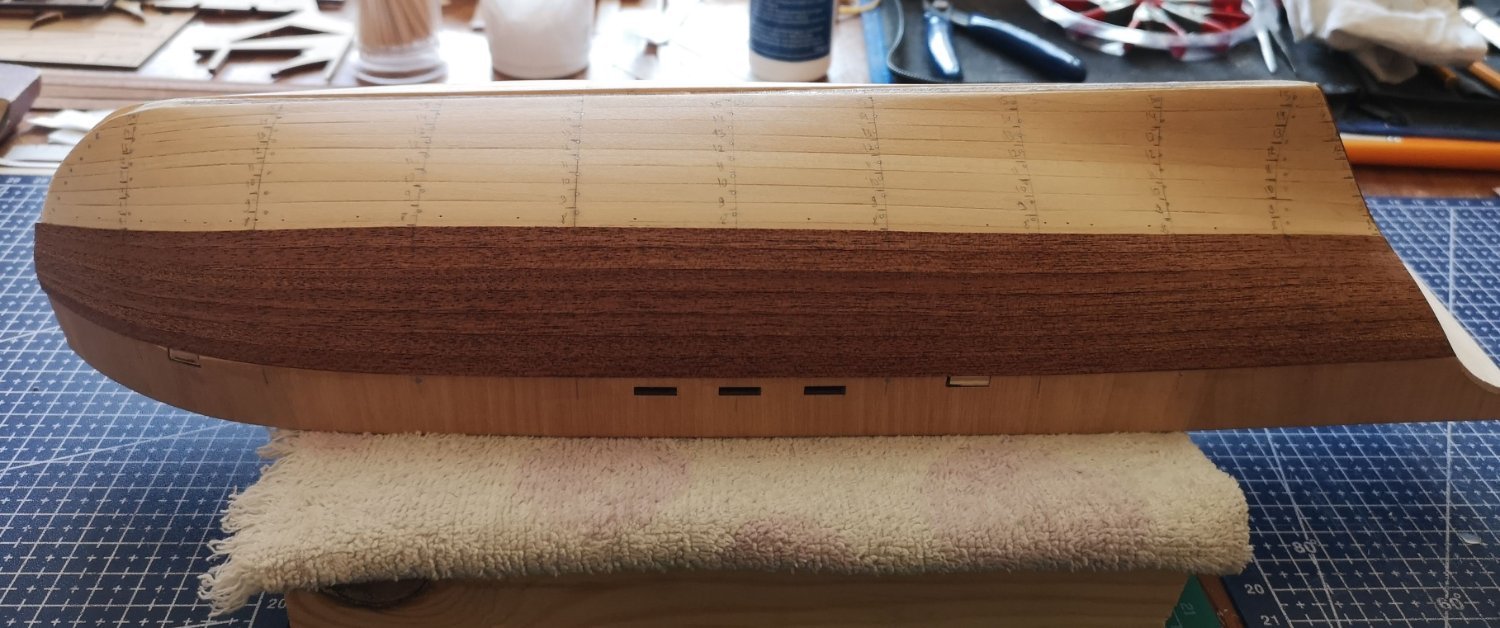
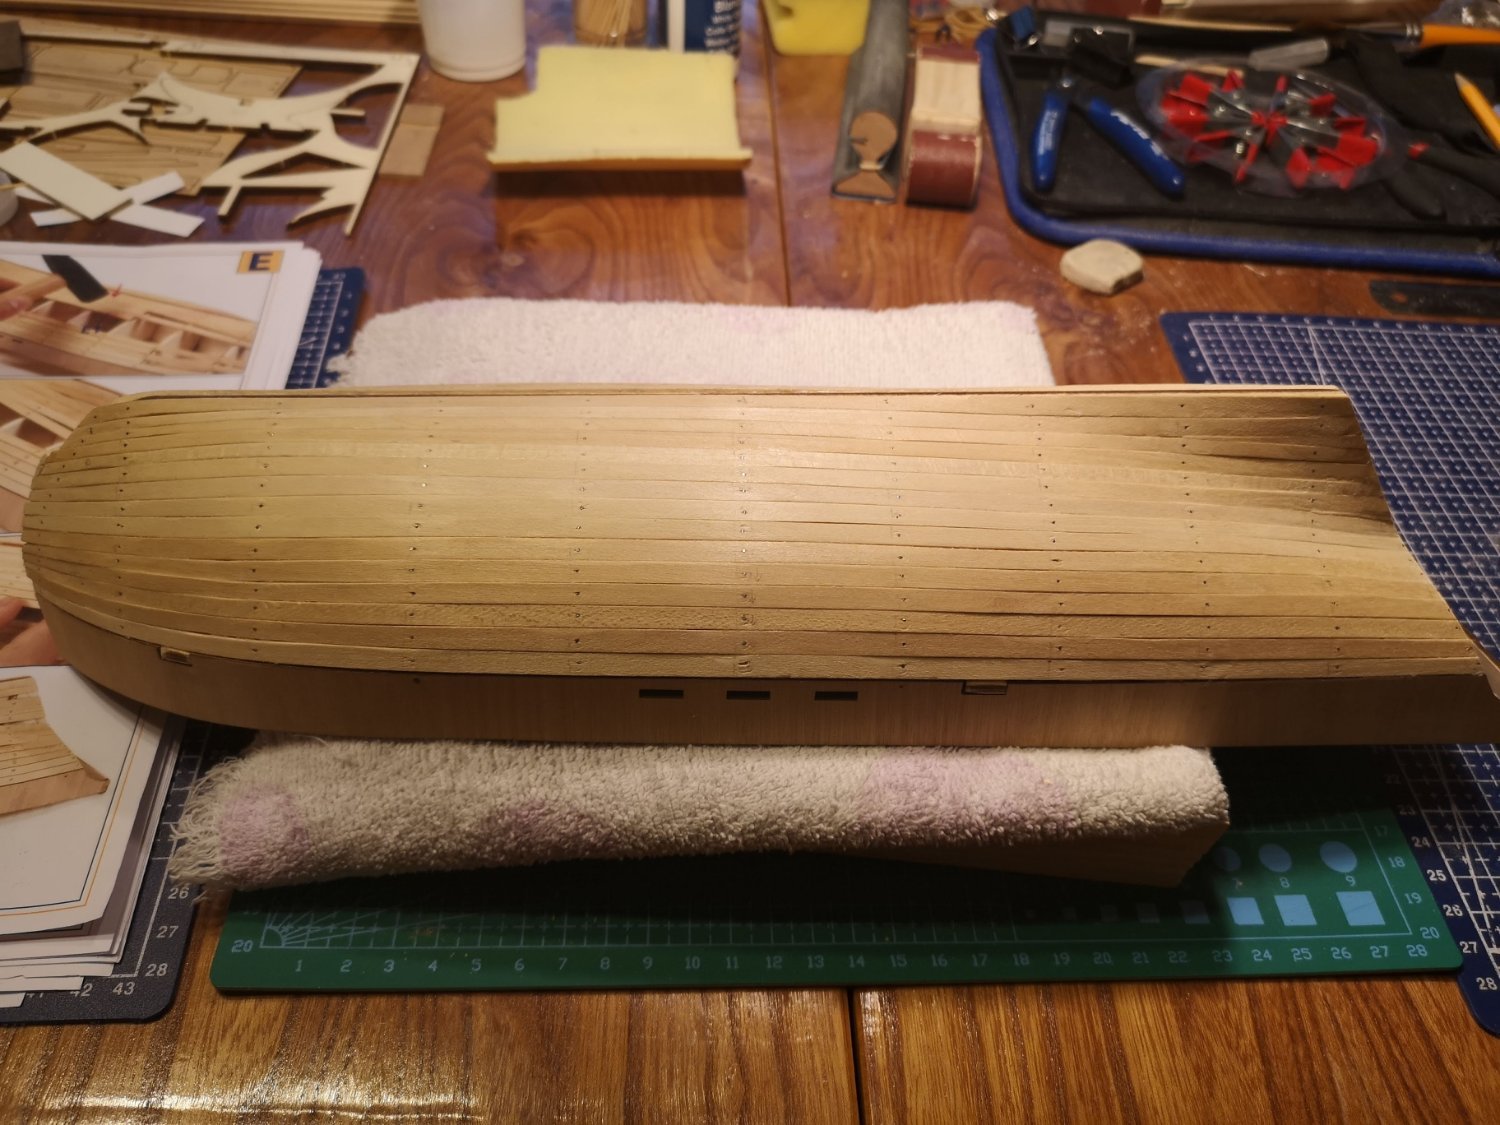
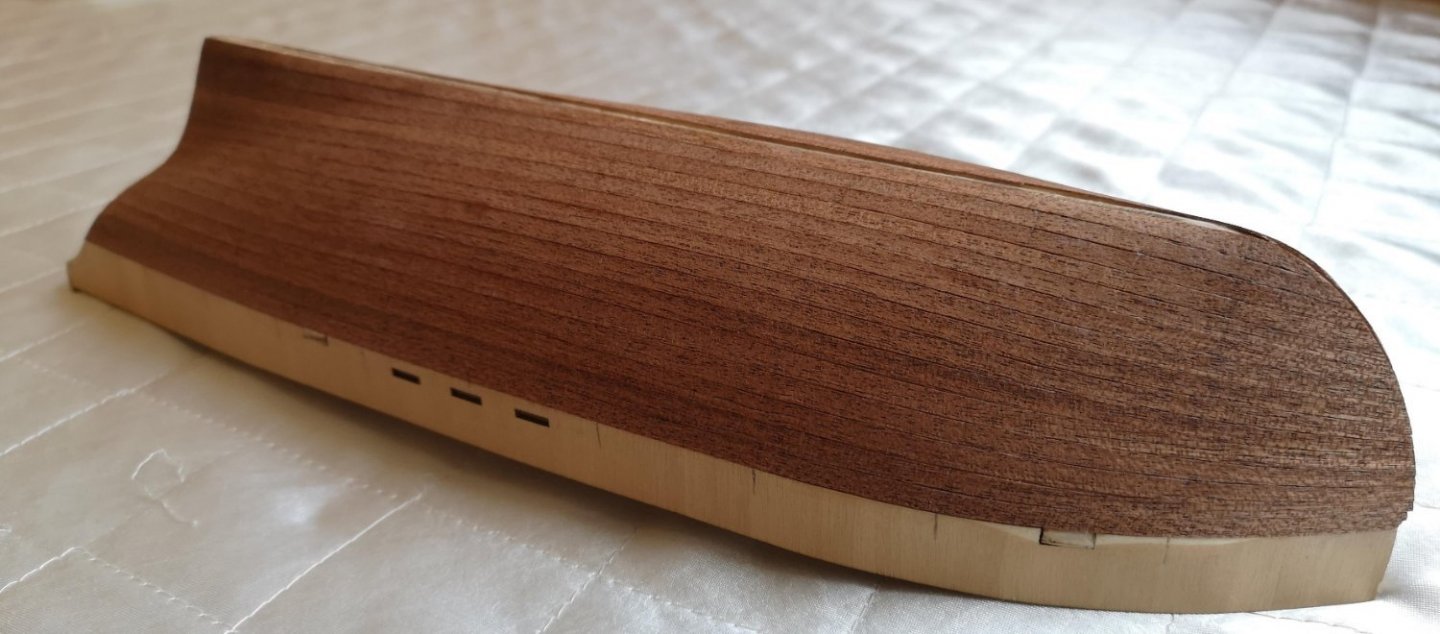
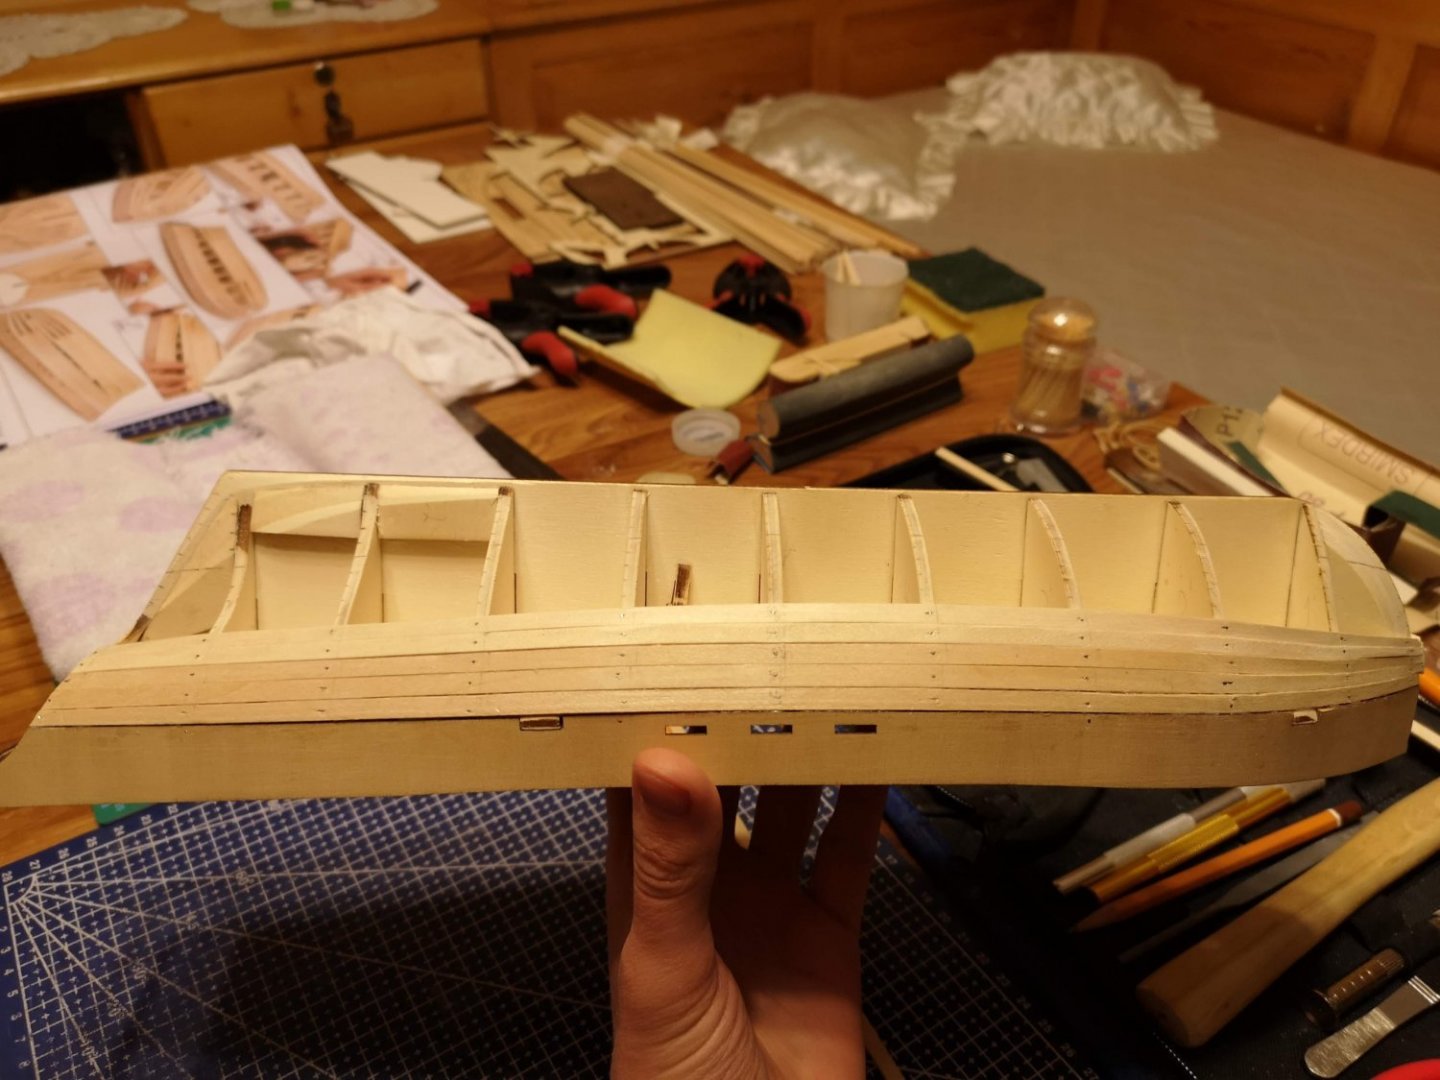
Yesterday I've managed to finish the bulwarks. And couple of months later I'm done with the planking (at least for this ship 😄). I just followed the instructions for this step and there was nothing special and frustrating. The only difference was that I used PVA instead of contact cement and cloth pins for convenience. After that I sanded the whole hull with 3 different sanding blocks (320, 600 and 2000). Really happy with the end result:

-
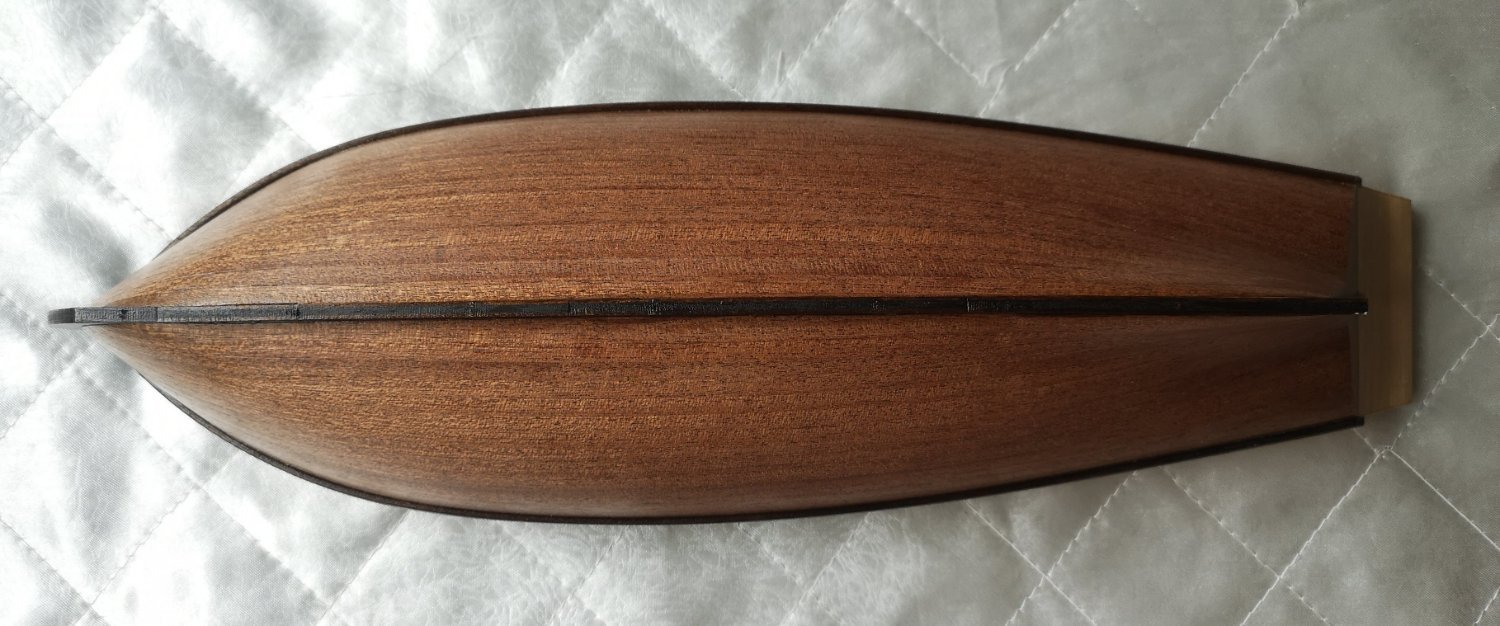
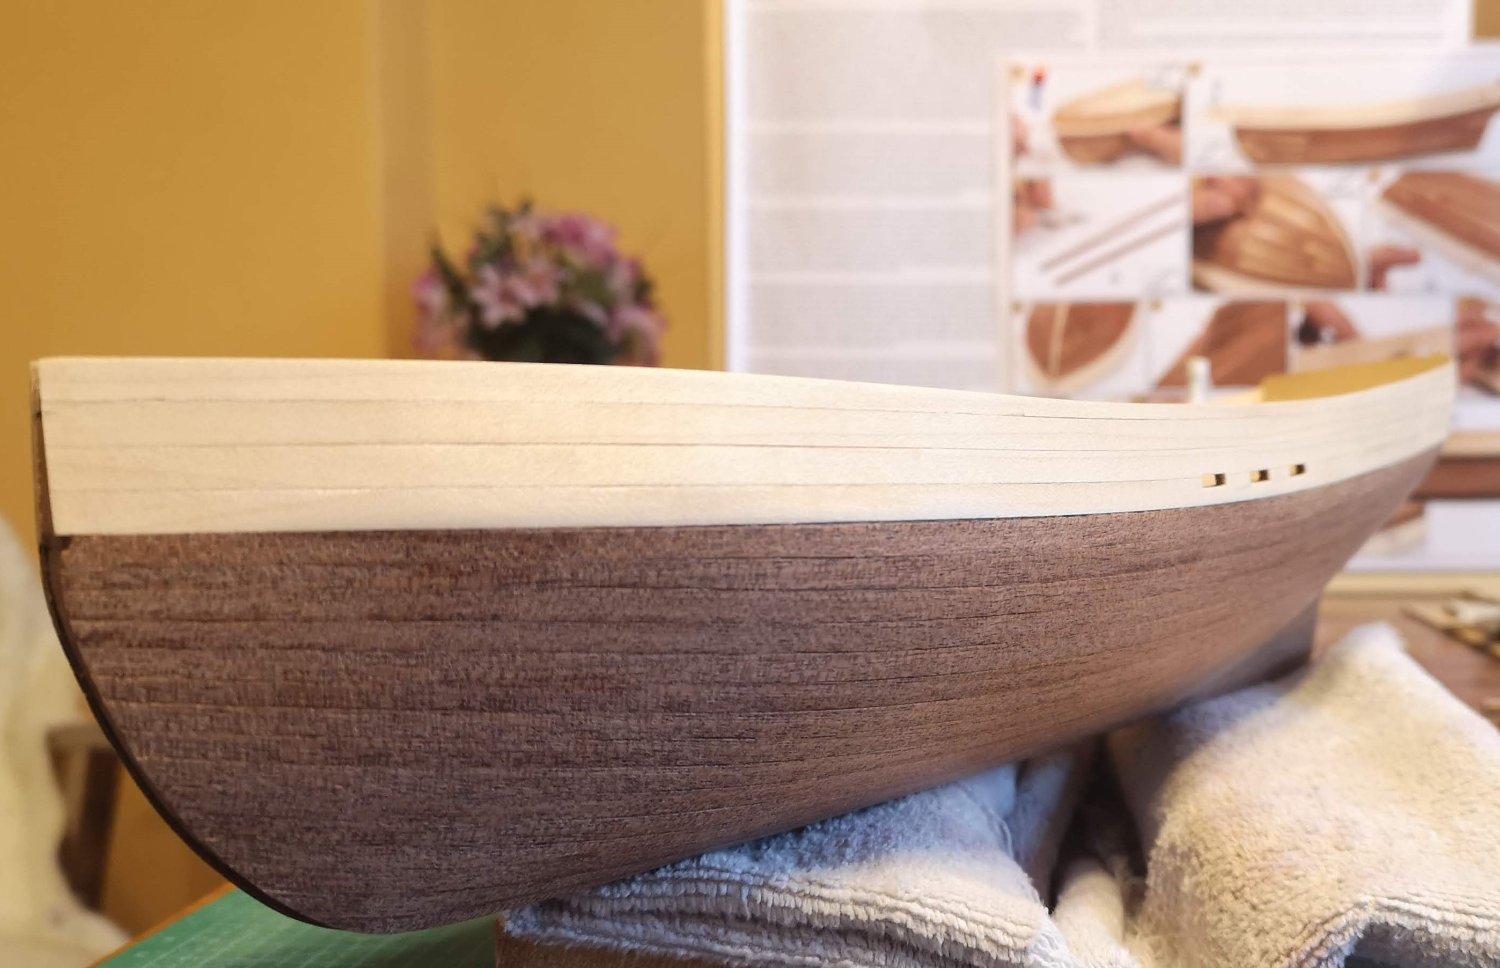
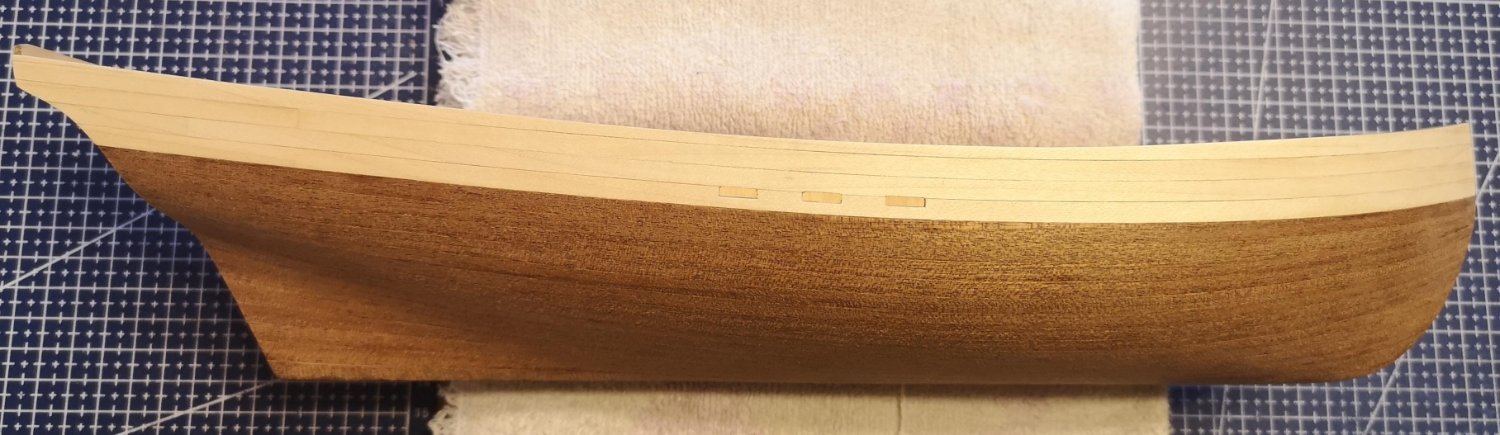
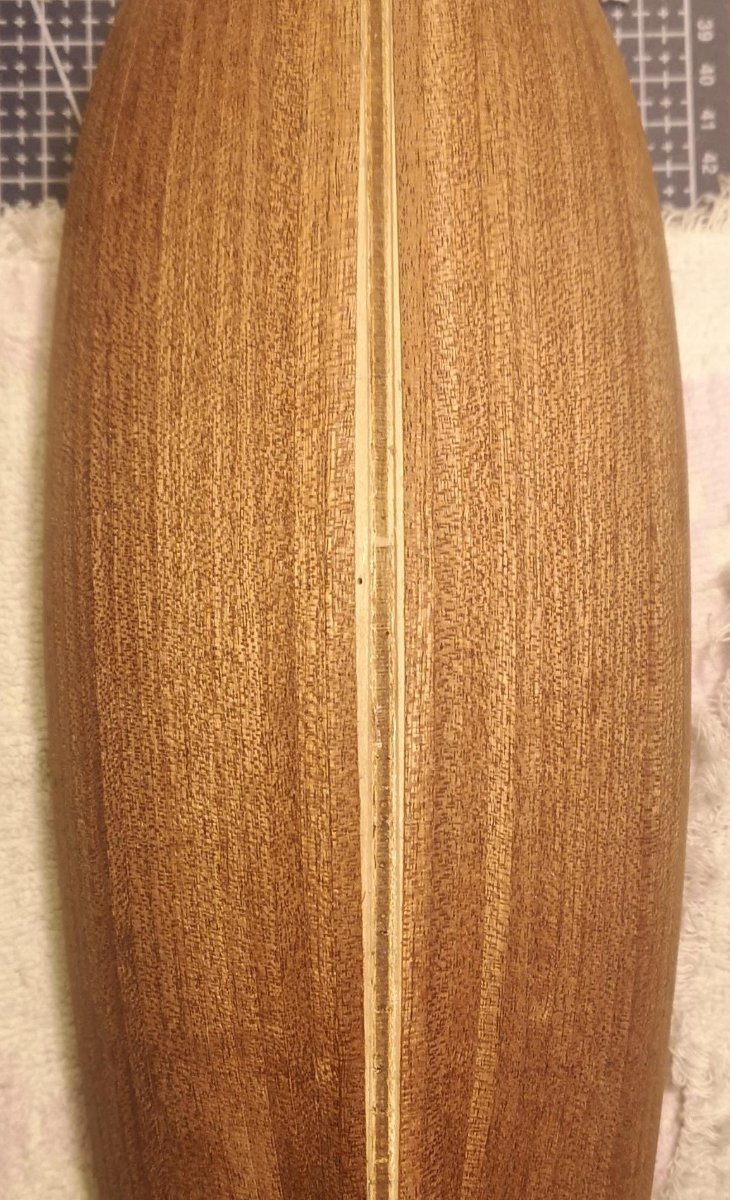
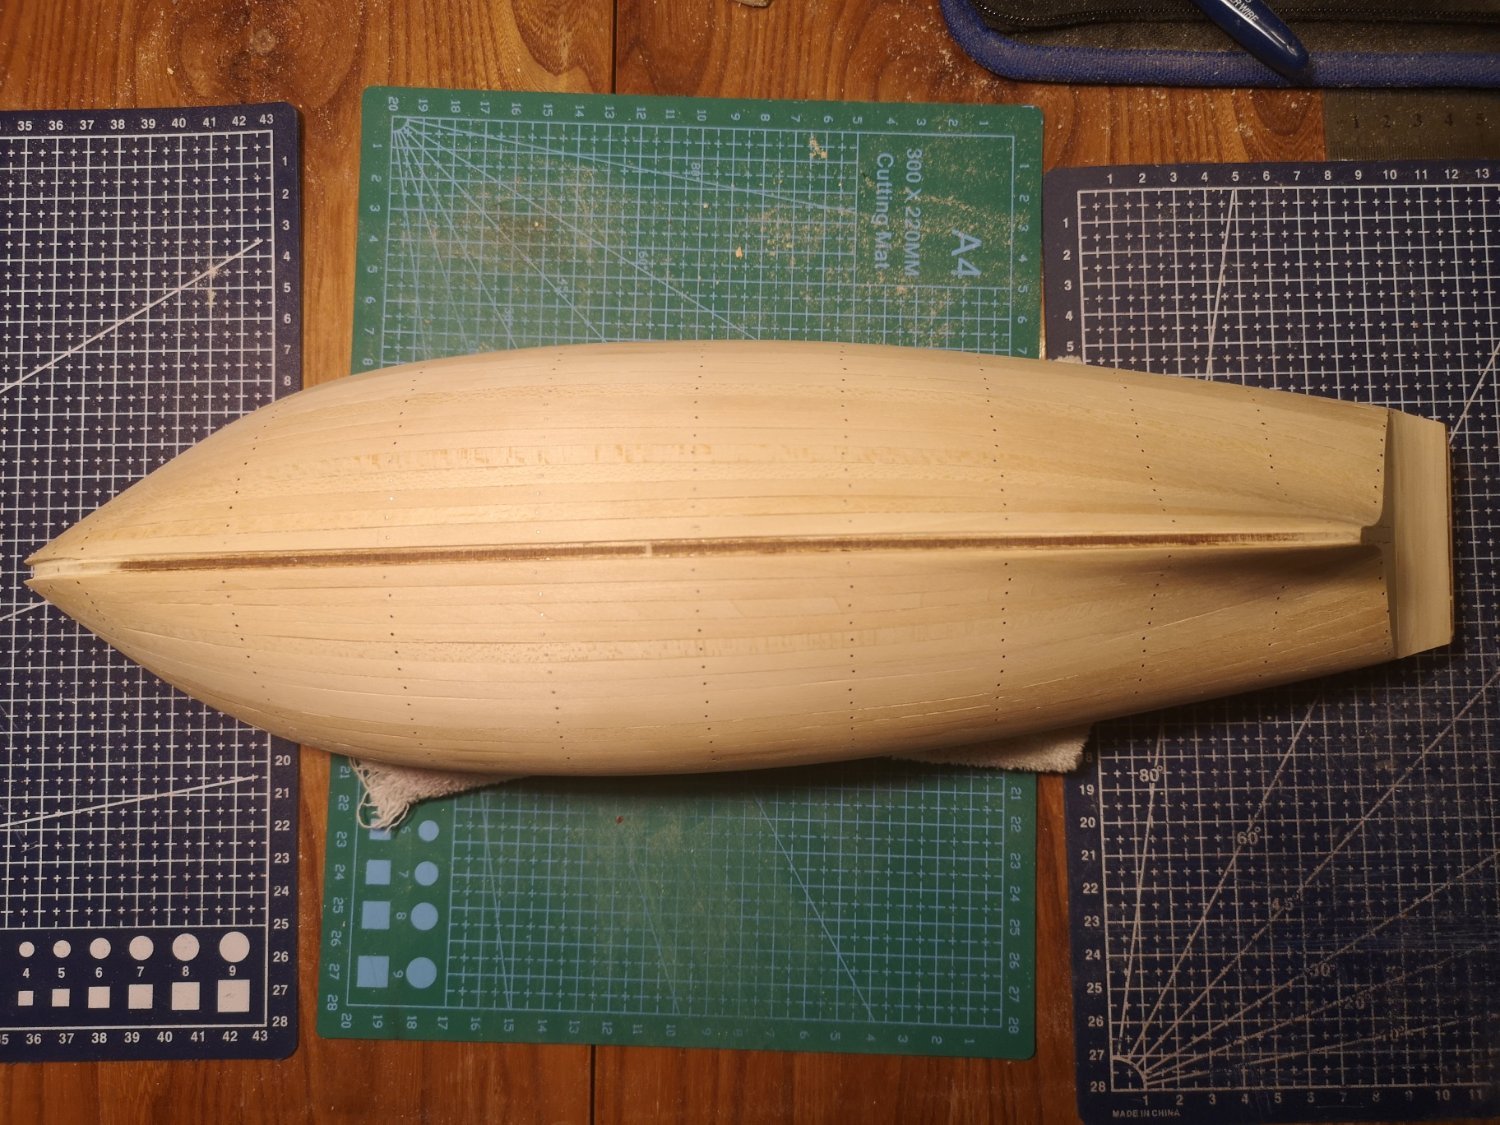
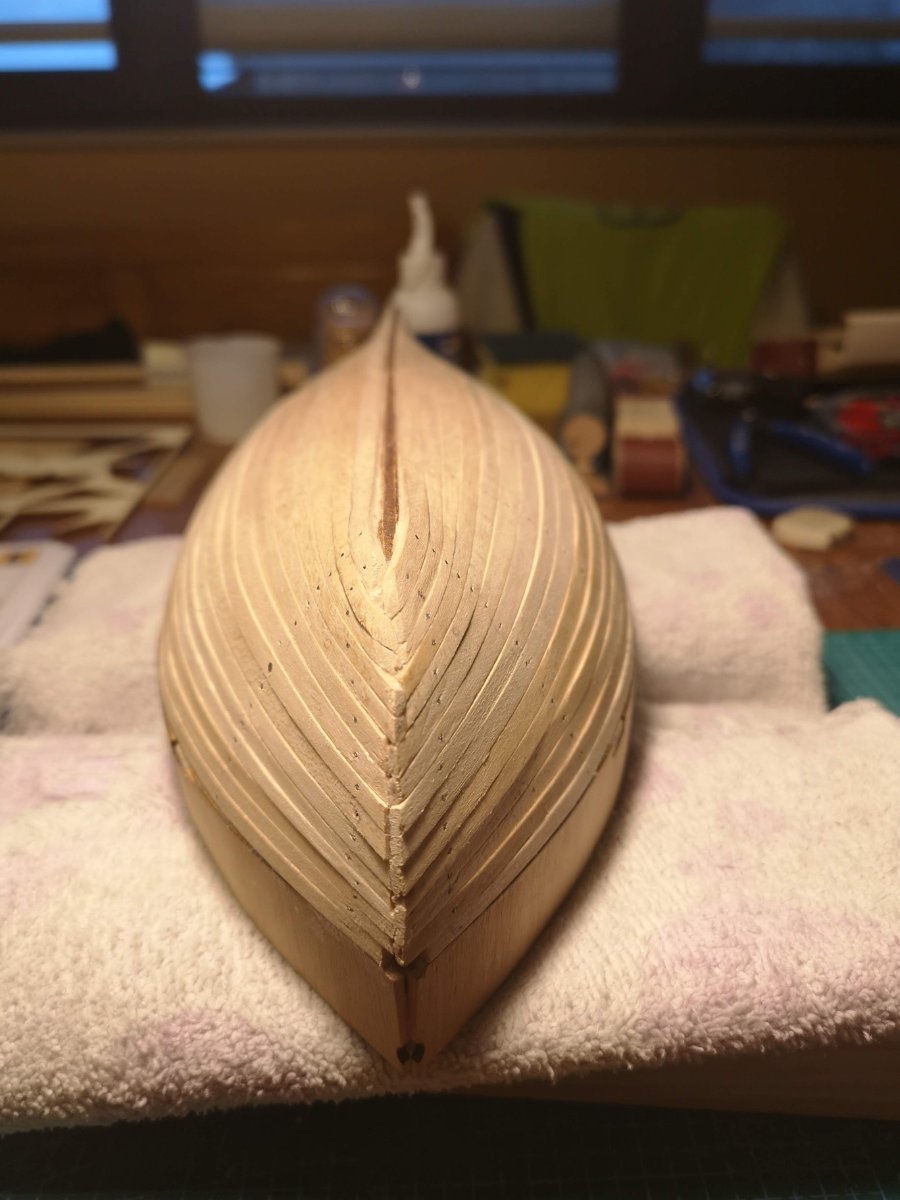
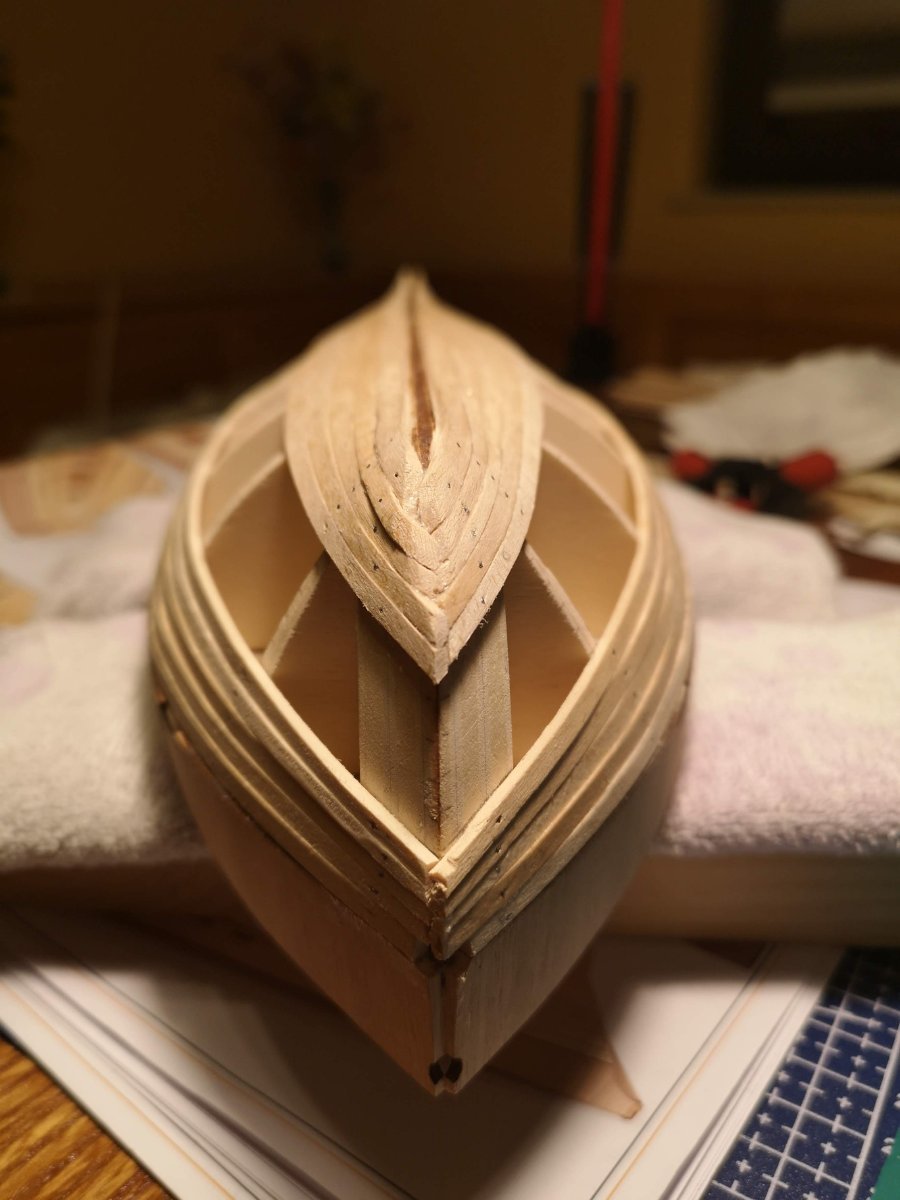
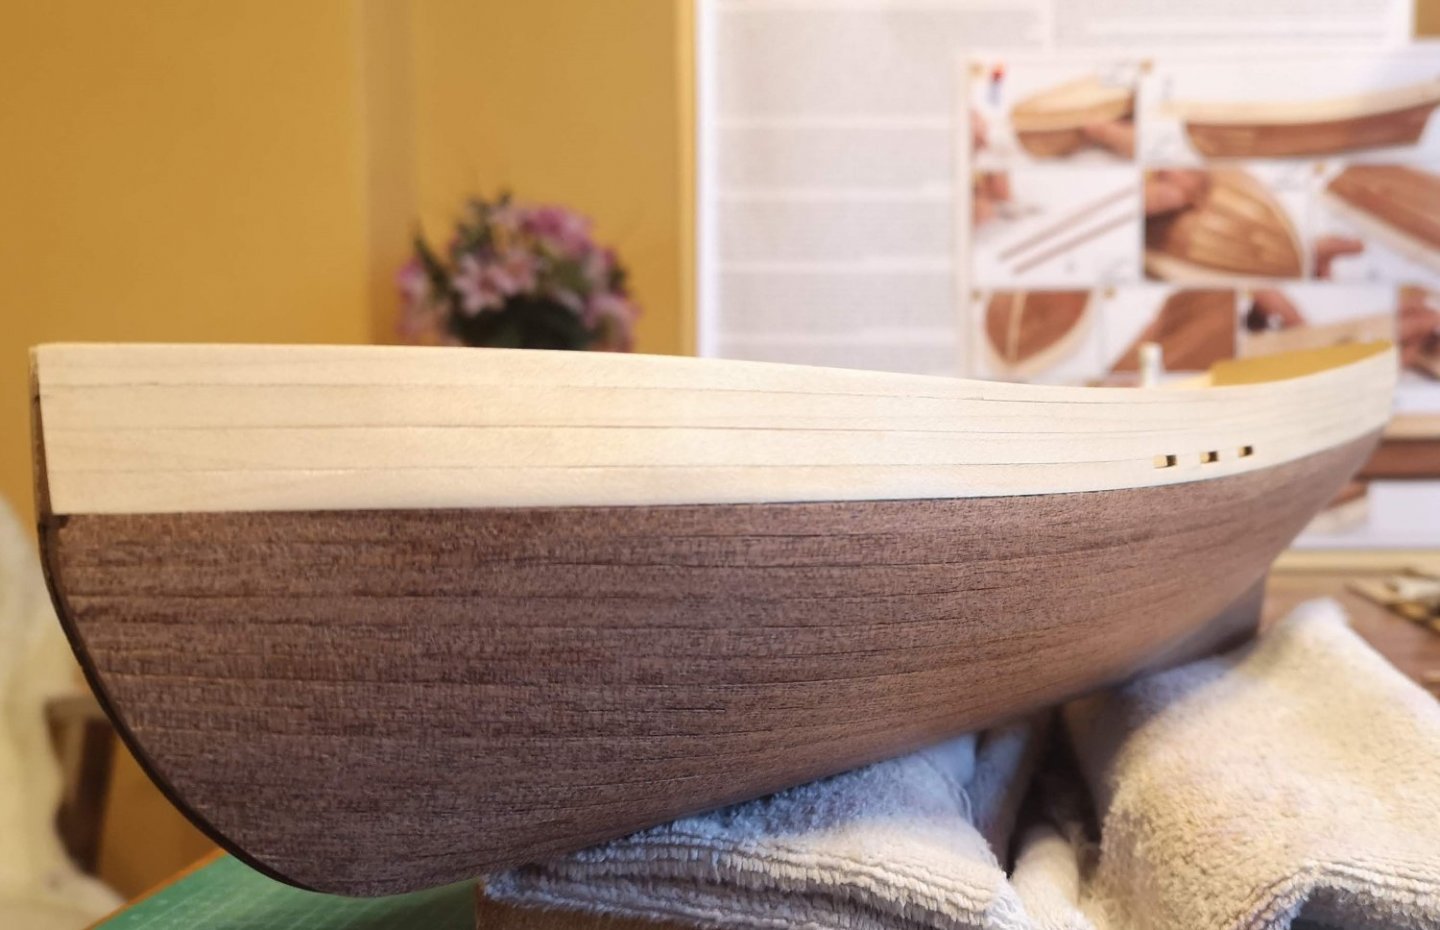
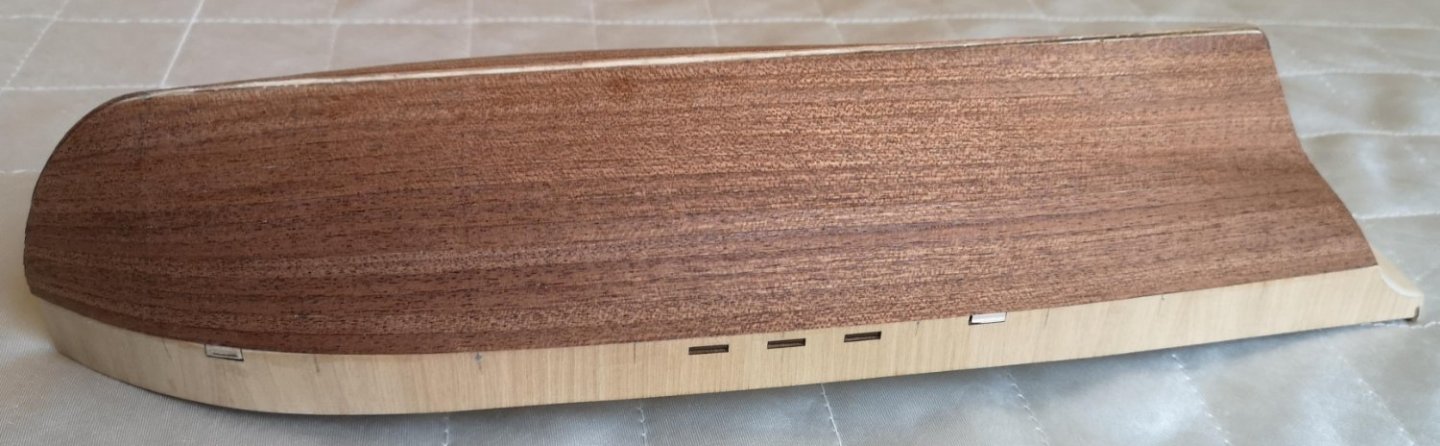
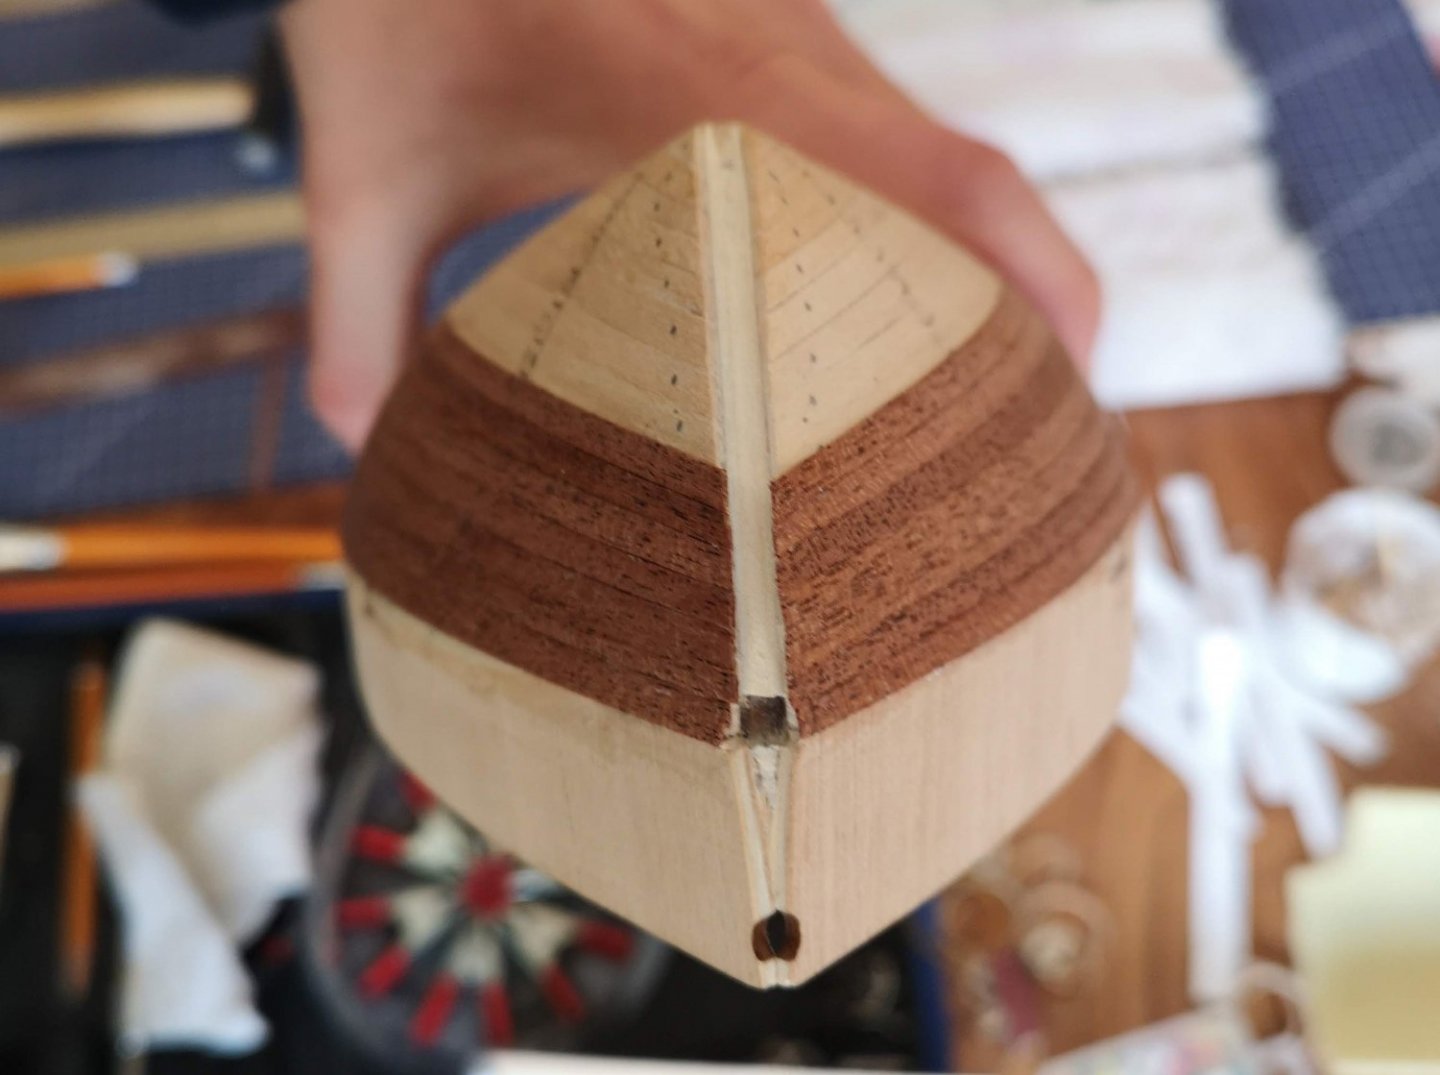
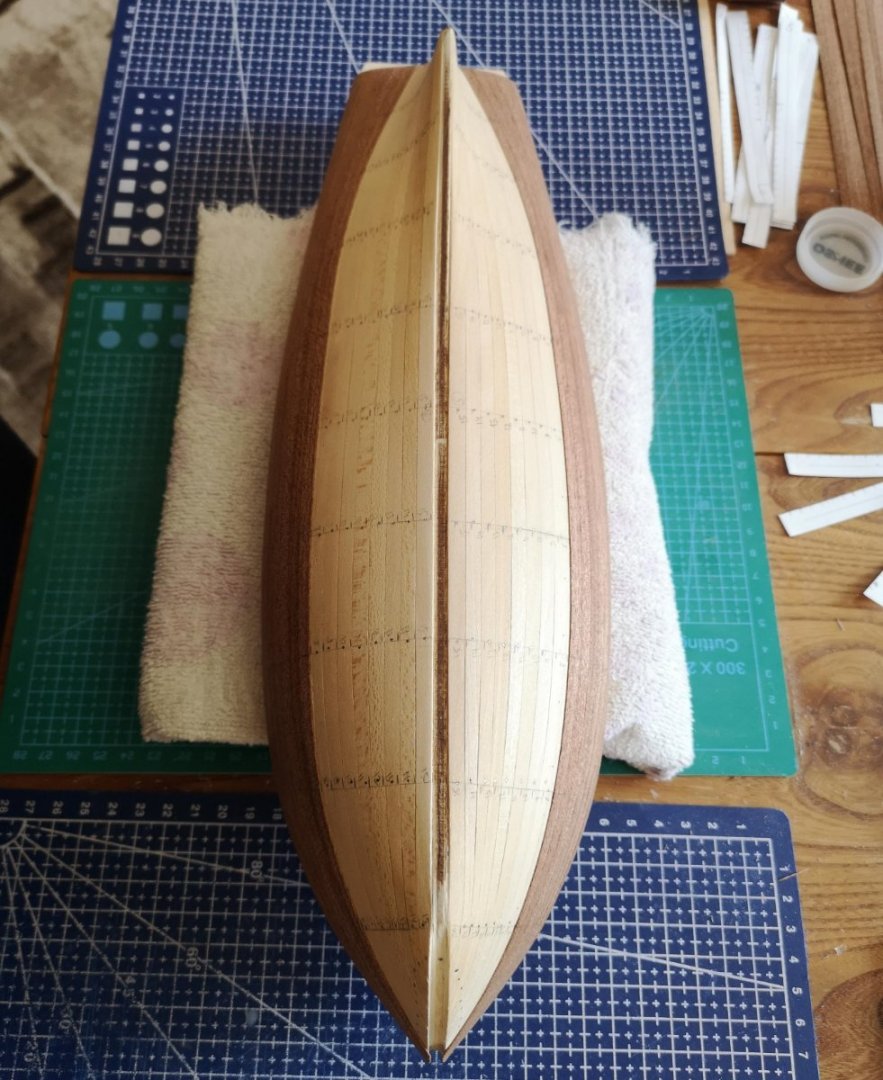
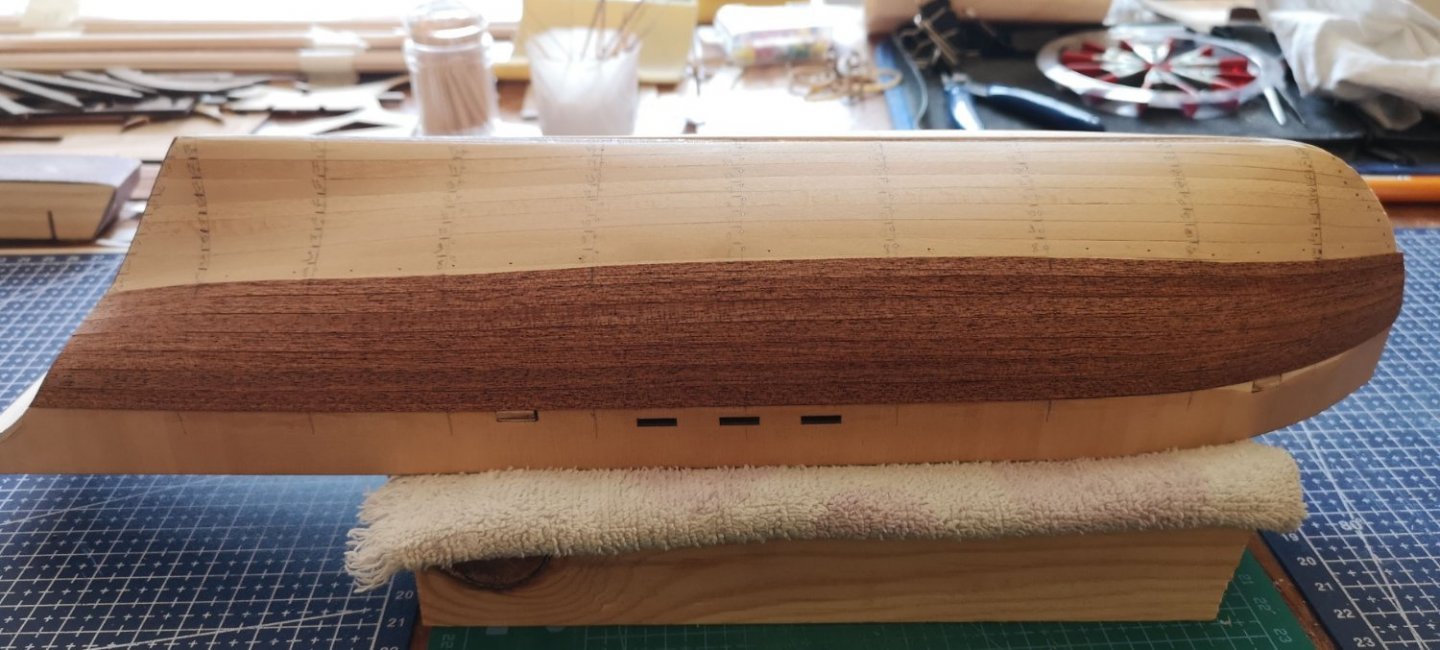
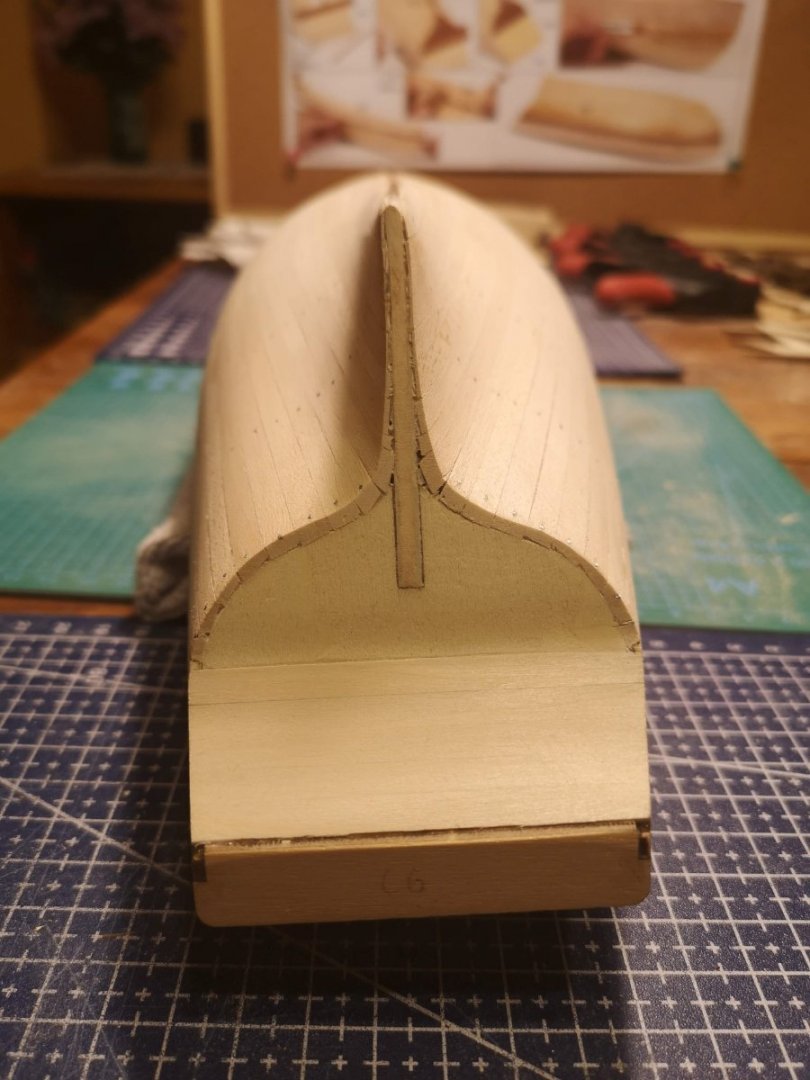
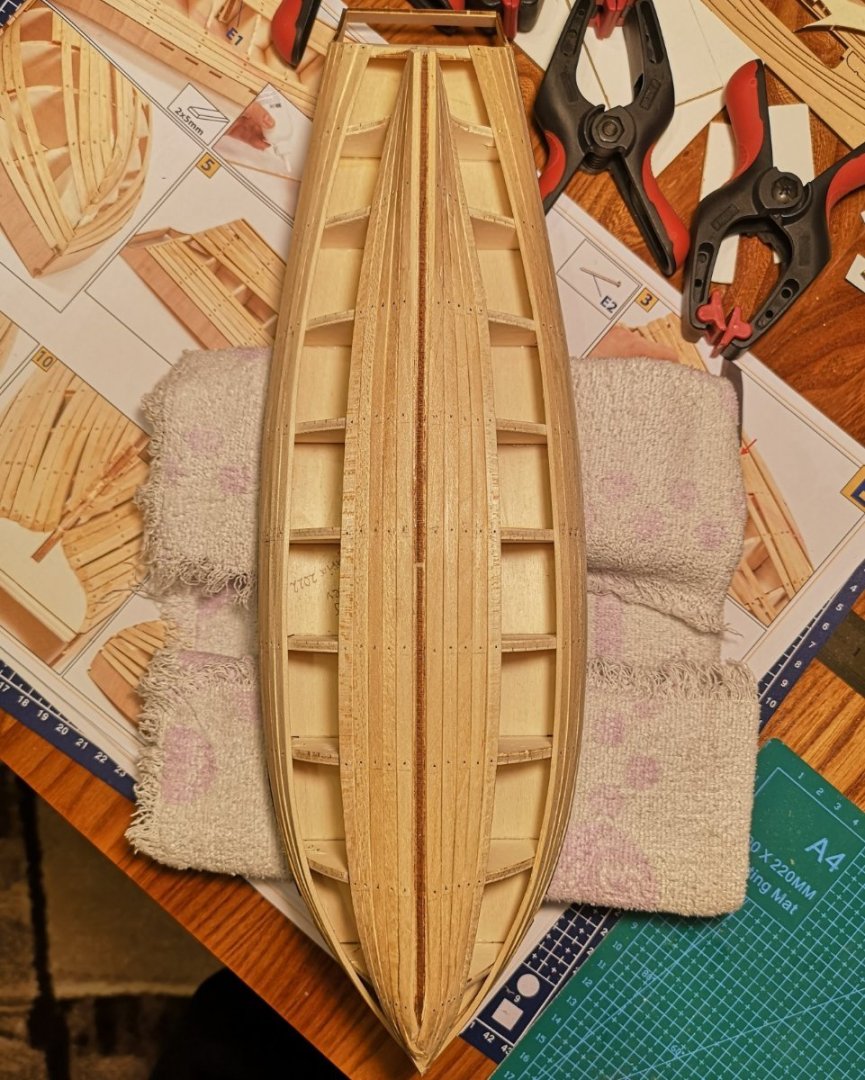
Second layer done! All of the measurement during the lining phase were correct and I am very happy that I managed to finish the job without any stealers or drop planks, which was my initial idea. This is the hull before sanding and varnishing: One mistake that I made, but will take a note for the next build, is that I didn't put the wales before starting the second layer. I followed the instructions for this step and will install the wales after the whole hull is planked (second layer + bulwarks). And because of this, there were 2mm gaps on the keel as I expected and it was quite a tricky to fill these gaps. This is the only place where I used wedges, but they wouldn't be noticeable at the end (see the third image from this post). Here you can see the gaps before filling them:


-
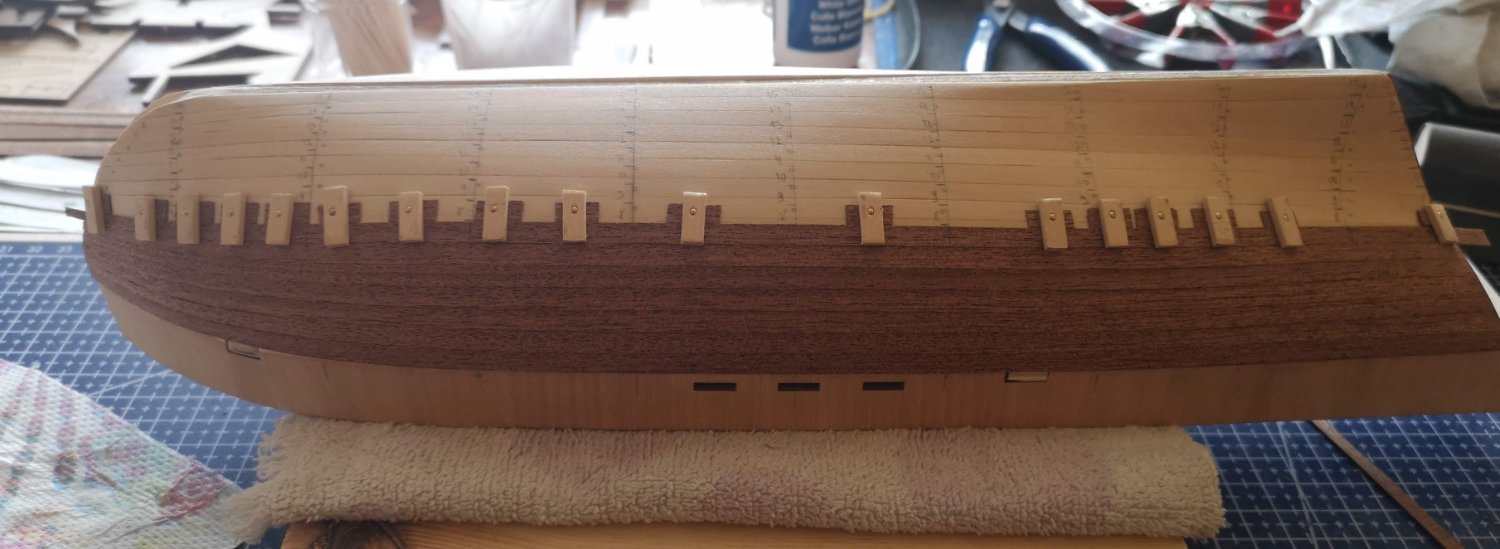
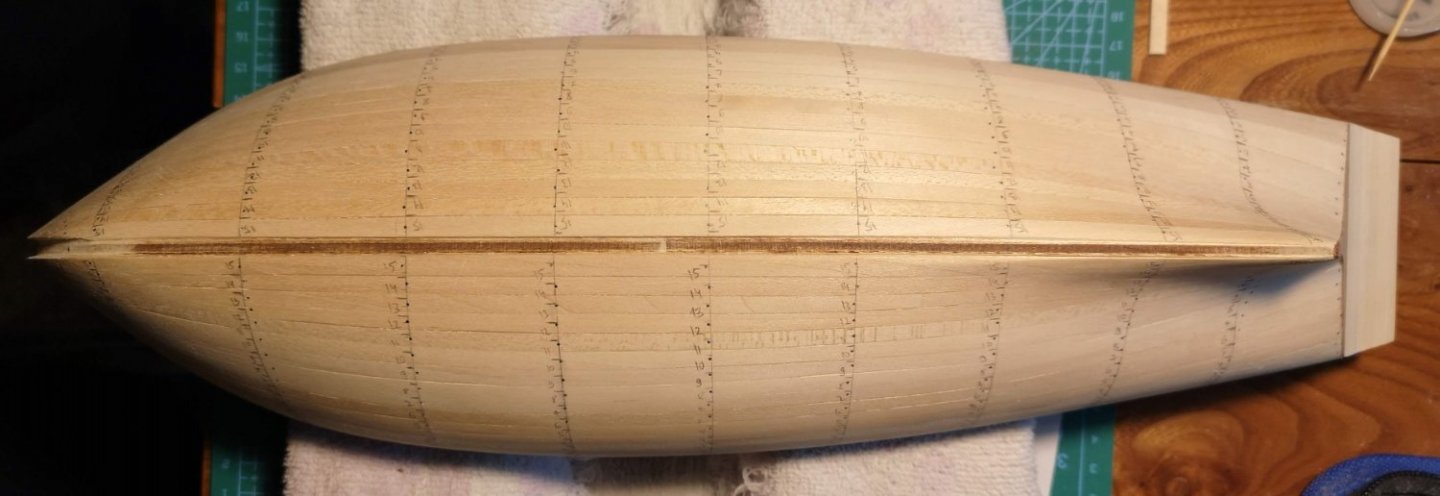
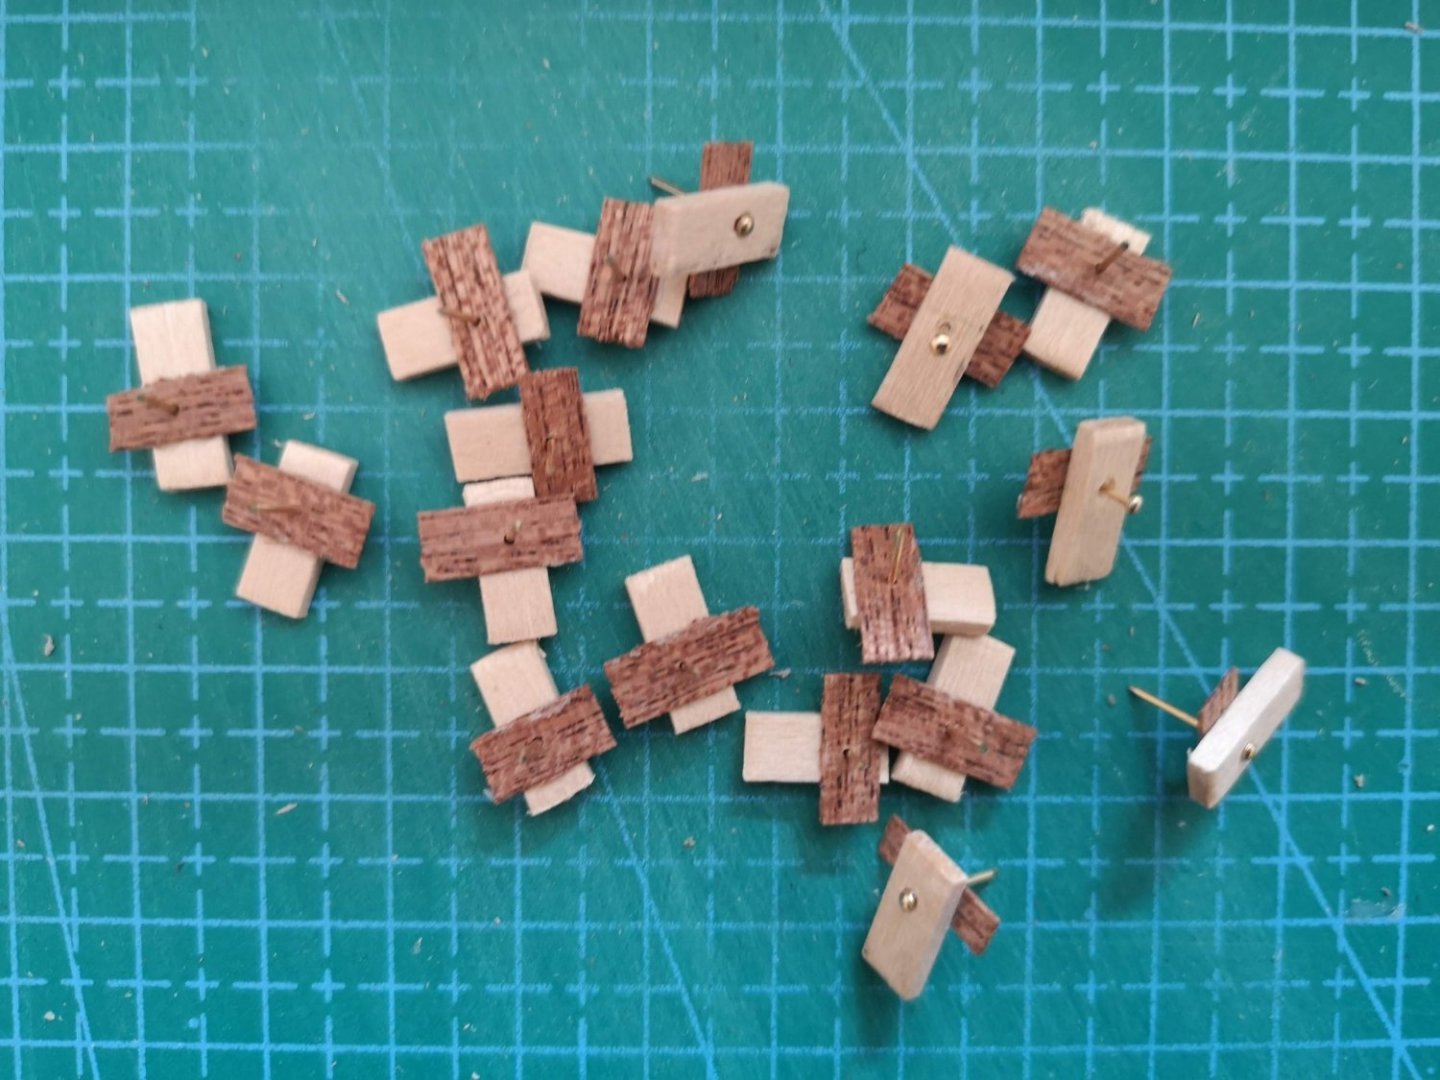
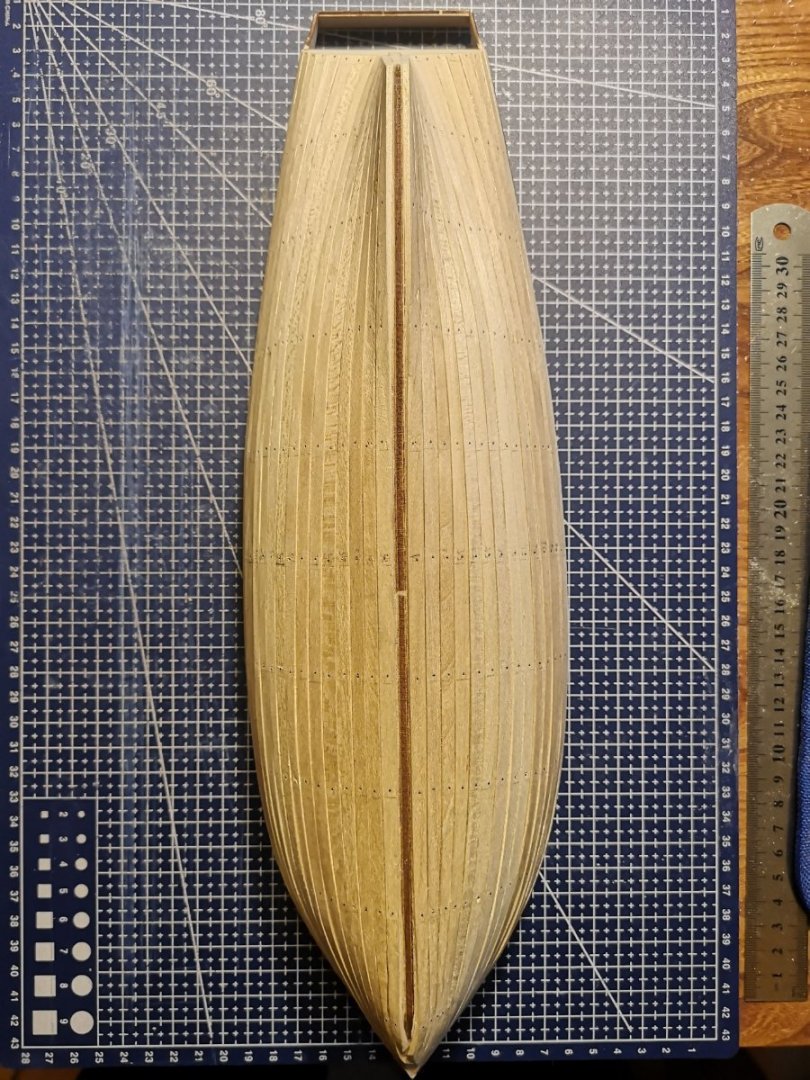
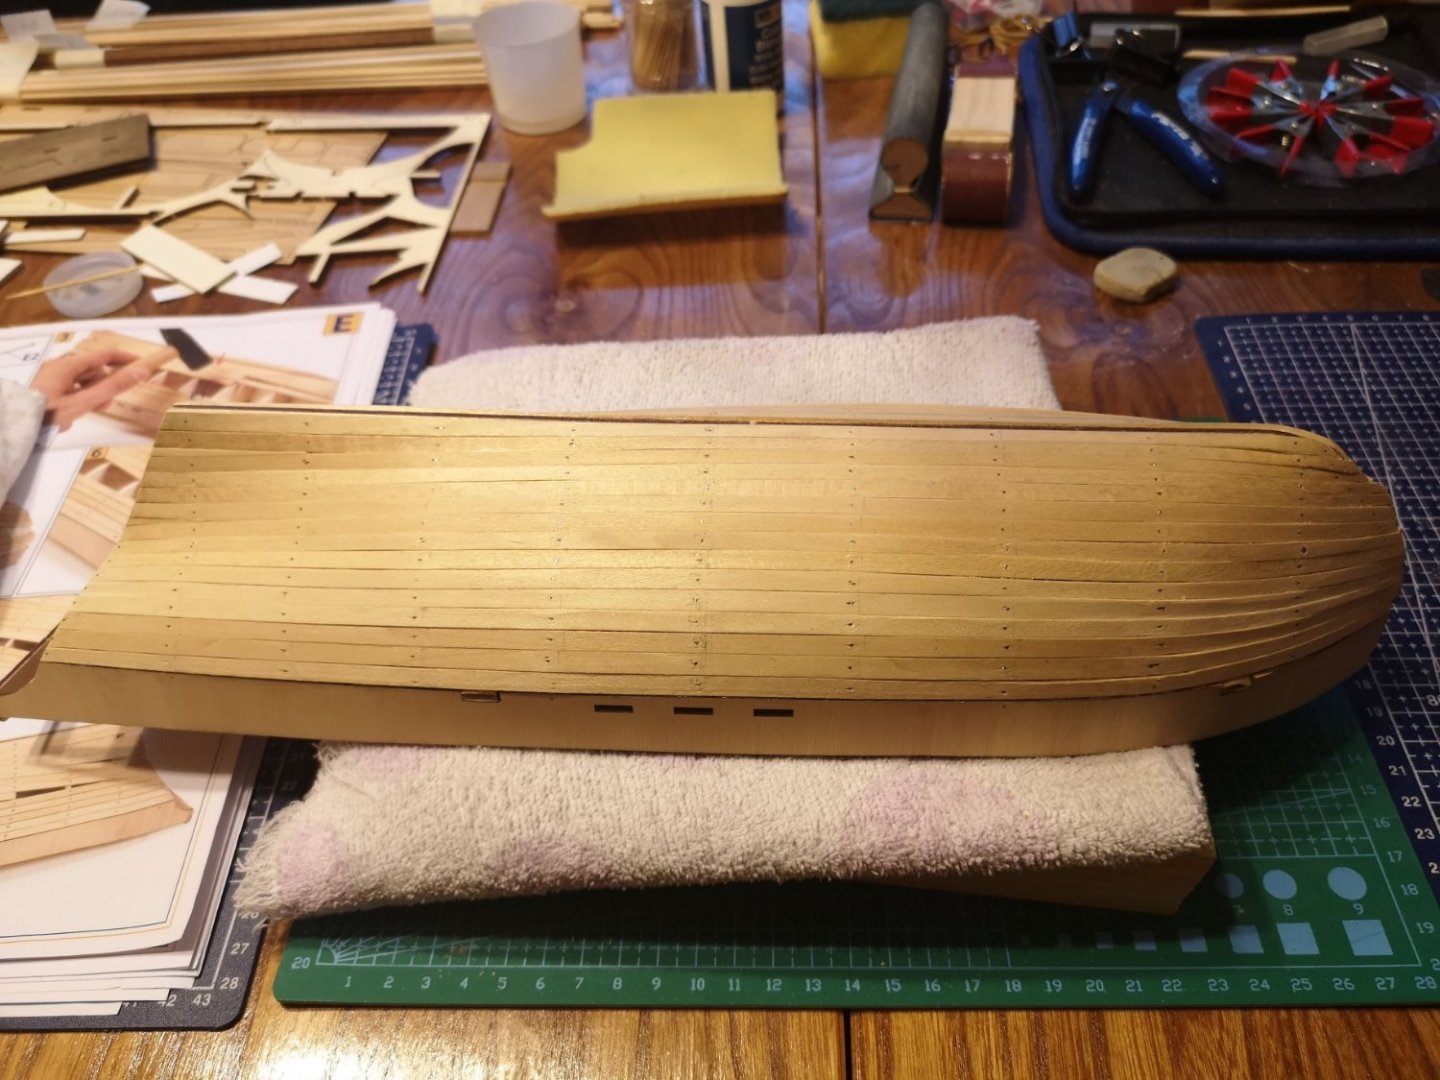
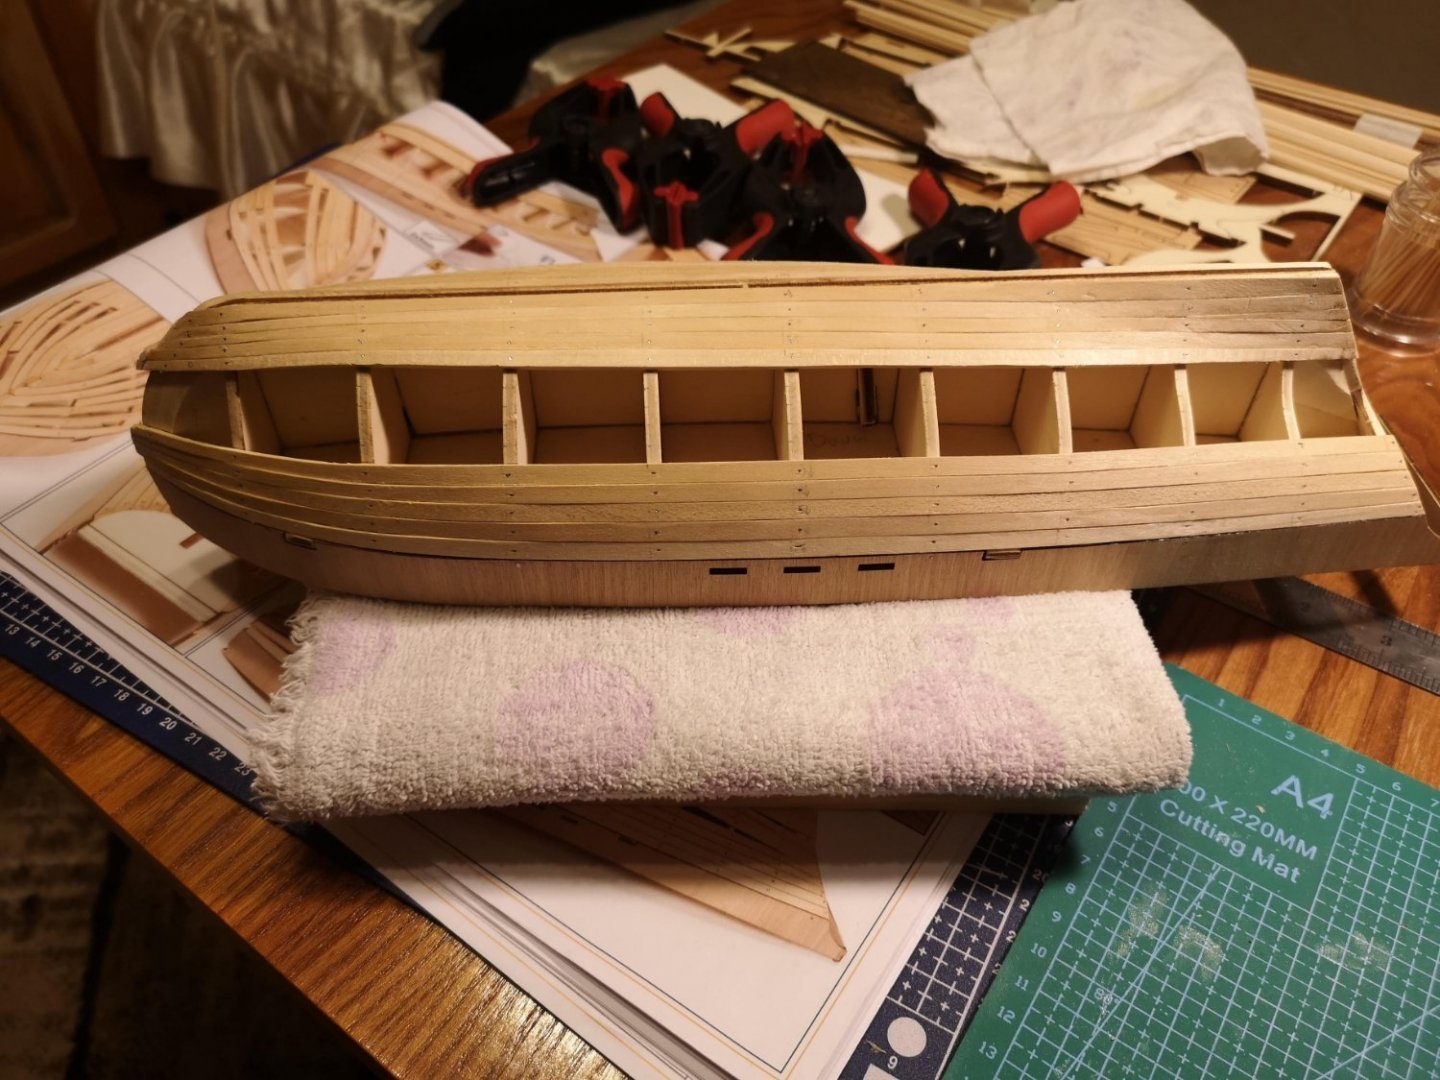
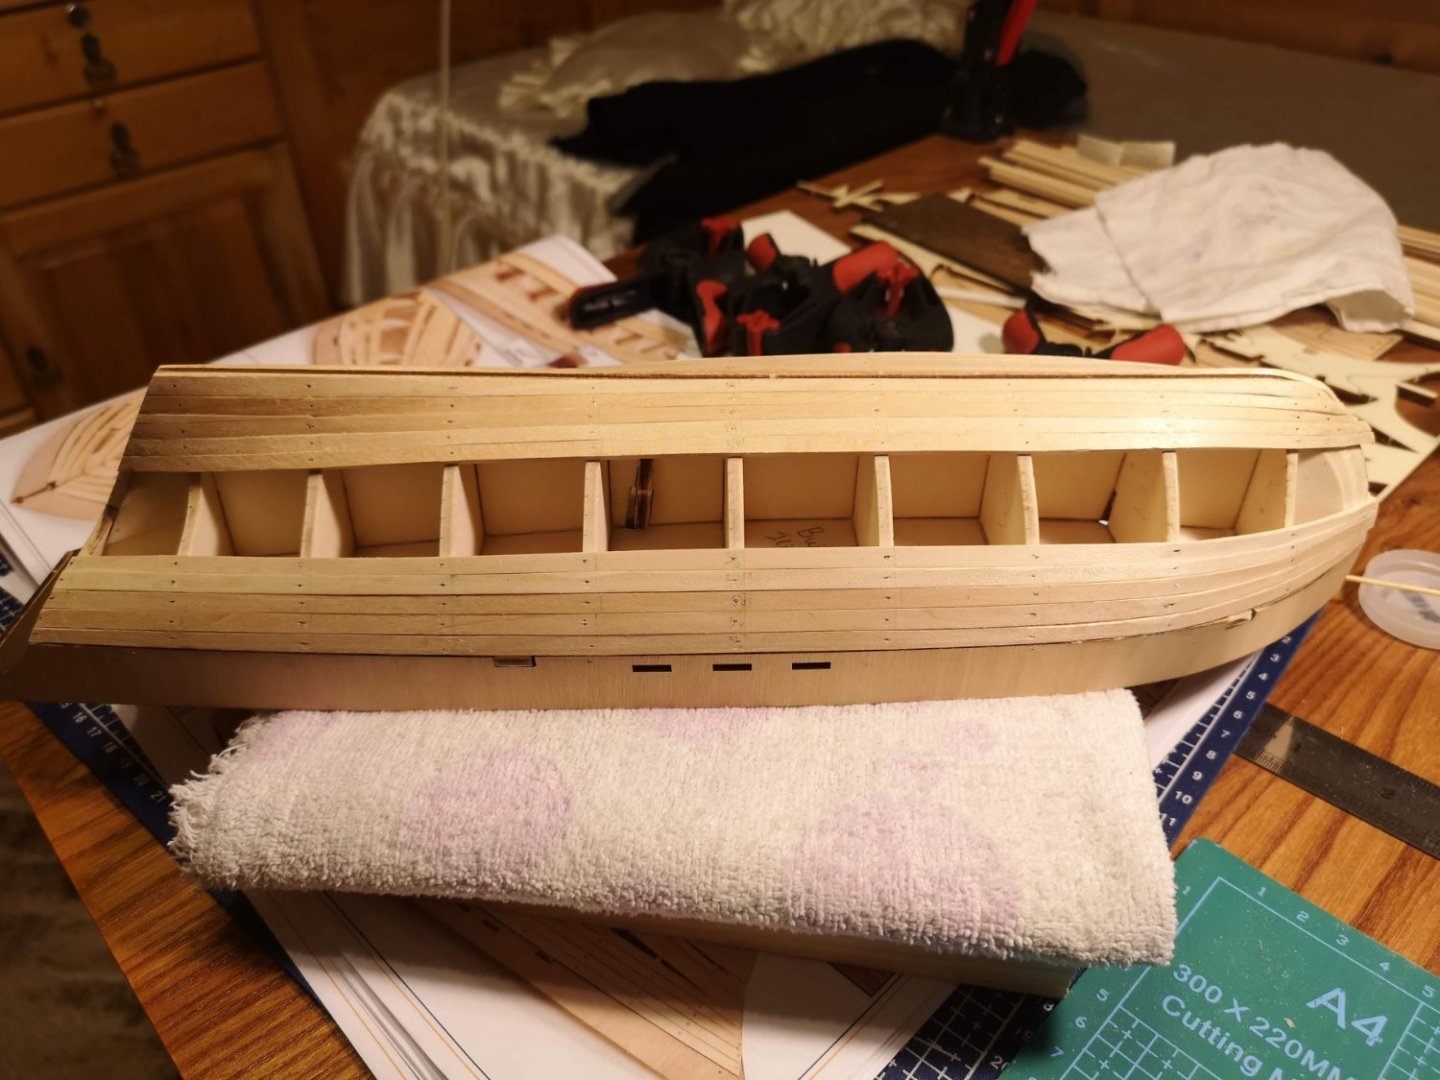
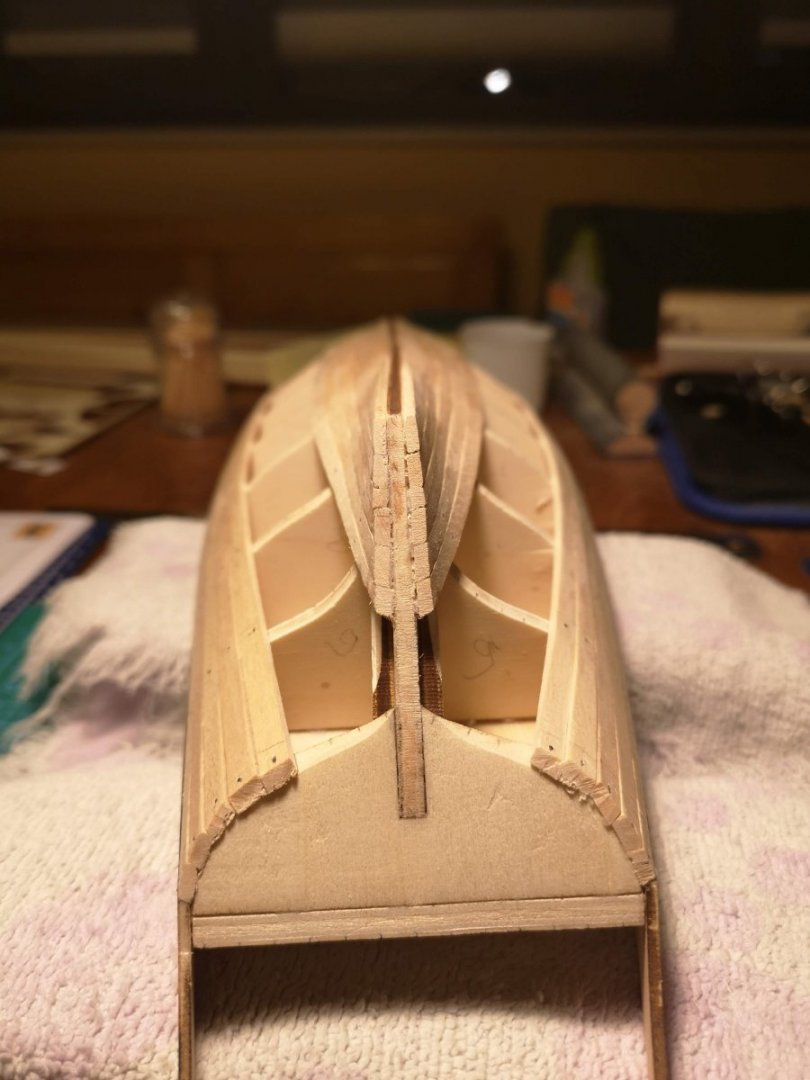
I finally started the second layer. After reading all of available materials in MSW (just kidding) I decided to use the same planking technique as for the first layer, without the bending part. And fortunately I gave up the contact cement just before starting with the first plank. I think this was my best decision so far. As many people wrote here: "just don't use contact cement, it is for shoes not for ship models". First I lined the hull, but this time I didn't separate it in 3 bands, instead I just measured the whole distance from bulwarks to keel at each bulkhead: Then I made mini clamps to handle the planks until the glue dries off. And this was my second best decision... These clamps are absolutely perfect! No forcing is needed, just tapper properly, use a brush to lay some PVA under the plank, pin the clamps where it is needed and go to take a coffee. This is the idea: When the glue is fully dried, use a sharp plank and pin them out. If there are any bumps somewhere, just put some PVA with a toothpick and pin a clamp again: Just one important thing if somebody decided to use this technique - remove any excess glue immediately after you pin the clamp. Special thanks to Olha Batchvarov, from which I learned about this wonderful method. You can check her YouTube channel here. I hope this information will be very useful for other beginners who will start building Polaris (or any other ship). And here are some photos of the progress till now (half way done): And one more thing - in the last images you can see that continued to plank towards the keel after 1/3 of the hull. For the second layer I decided to put all of the planks in one direction - from bulwarks towards the keel. One of the reasons is that maybe at the end there will be 2mm gap in the midships section, which I will fill with a wedge. And I want this gap to be as close as possible to the keel, not in the center of the hull. I think other guys have the same issue with this kit. Other reason why I didn't plank the hull from both sides (as I did with the first layer) is because it will be impossible to use my mini clamps for the last planks in the middle. I hope this won't be a bad decision and the end result will be worth it.


-
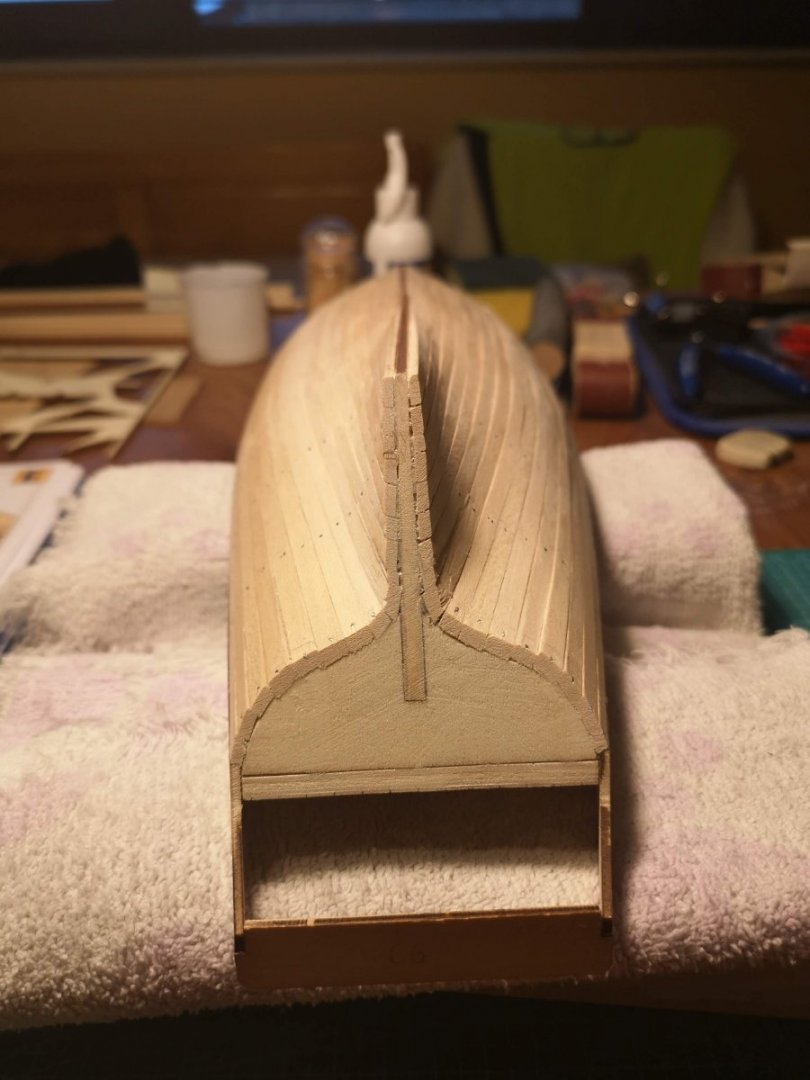
I was quite a lot busy with my garden in the last two weekends and unfortunately didn't build much on my Polaris. Happily today I've managed to plank at least the stern. I decided to use contact cement for this area, but I'm still hesitant if this is the best solution for the rest of the hull or PVA will be much better. My personal opinion is that for this particular kit contact cement is preferable for the second layer, because the planks are too thin (0.5mm) and the water from the PVA maybe will warp them somehow. But on the other hand you have only one try with the contact cement, it's much difficult to make any adjustments. For that reason I'm still thinking, if I decide to use contact cement for the whole hull, how I will taper the planks? In the meantime I spent some time reading about the second layer and came to the conclusion that the main principles here will be the same as in the first layer. Again I will use Chuck Passaro's lining and planking approach. The differences will be that this time I won't use an iron for bending and maybe I will use contact cement instead of PVA. I just want to check in one more place before moving on. This is my secret weapon (my birthday present) 😁: Very well written book I think, with a really good pictures and very useful nautical terms glossary. I started reading the book before couple of days and hopefully soon will get to the chapter about the second layer.

-
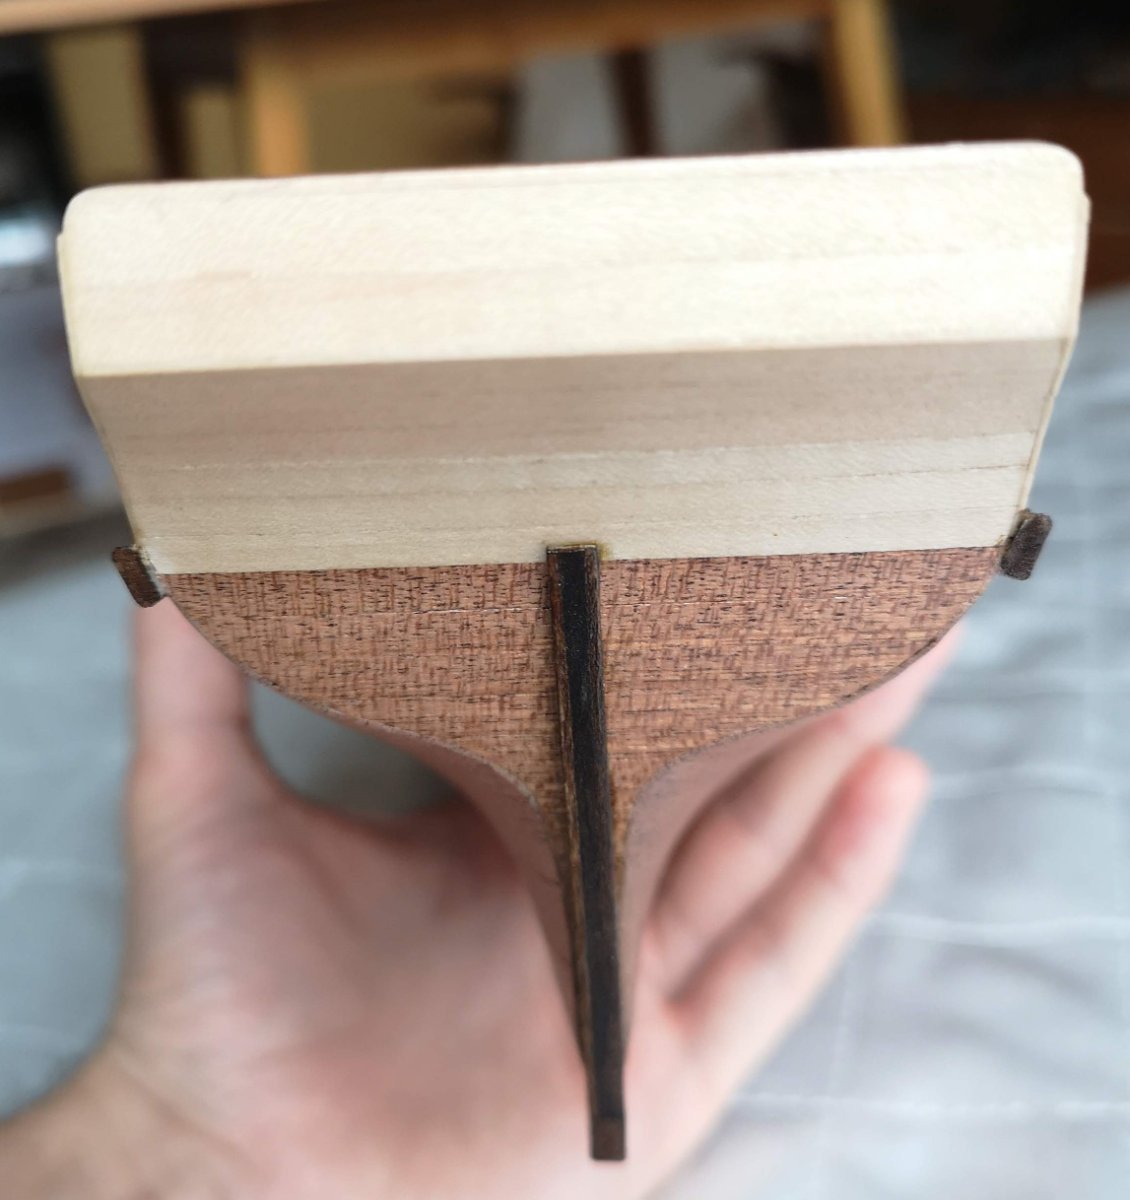
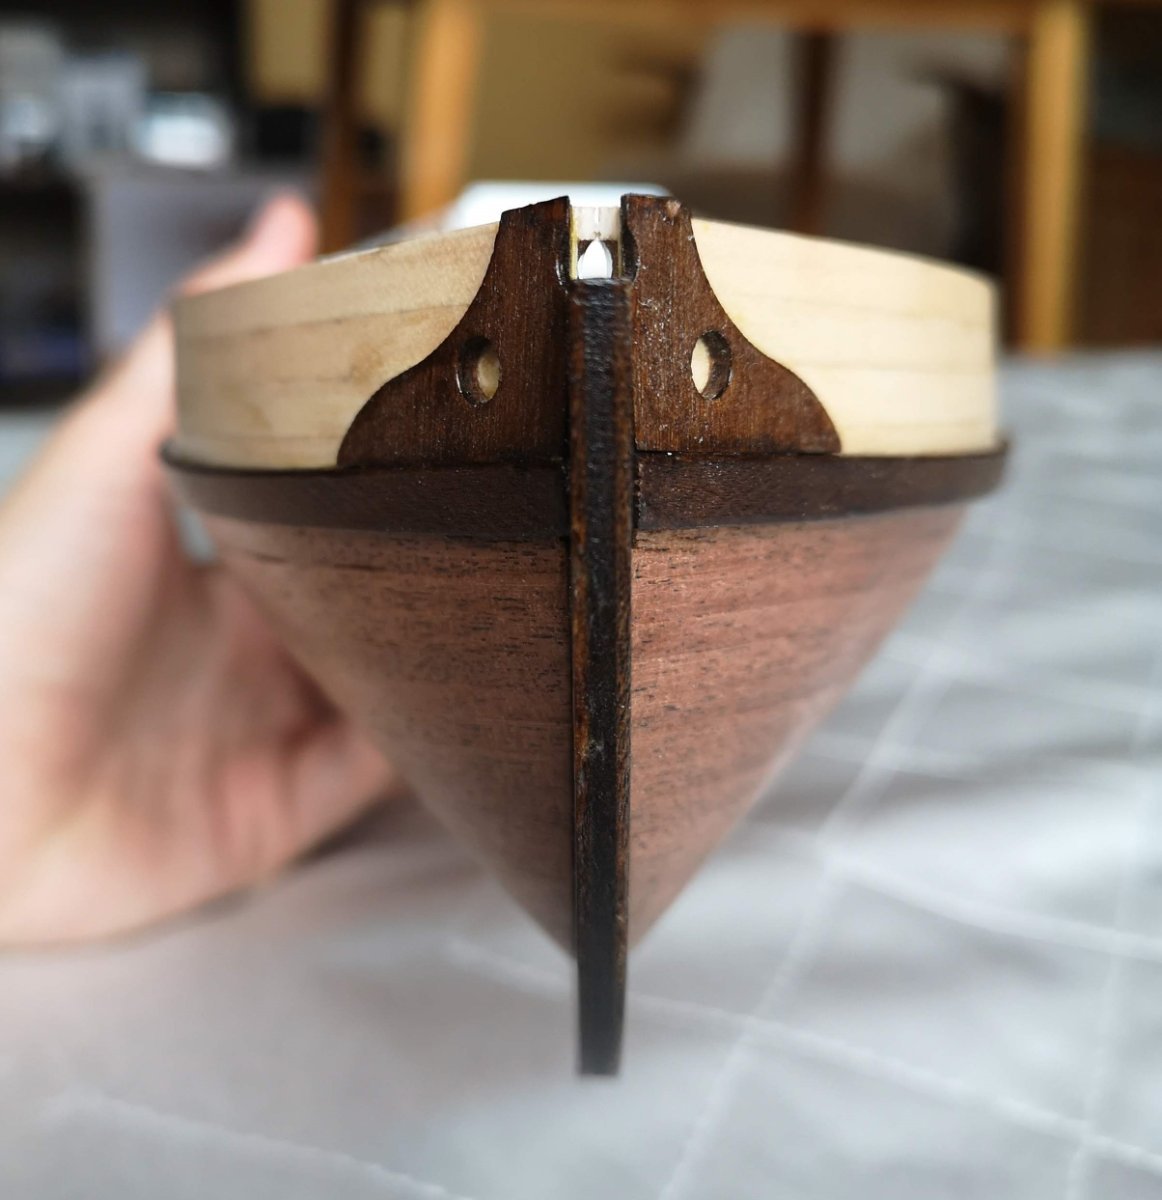
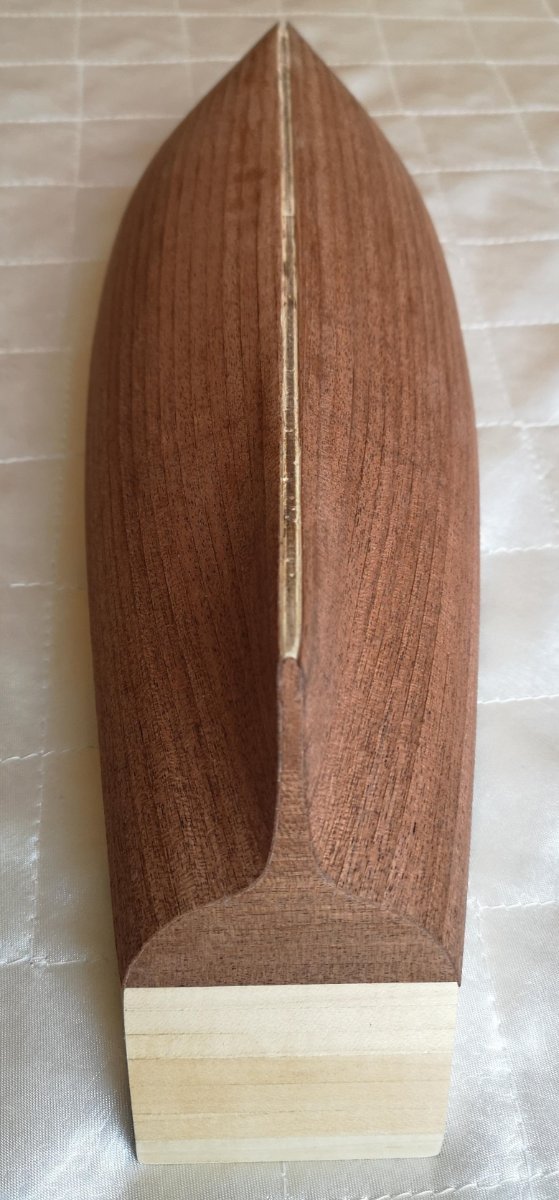
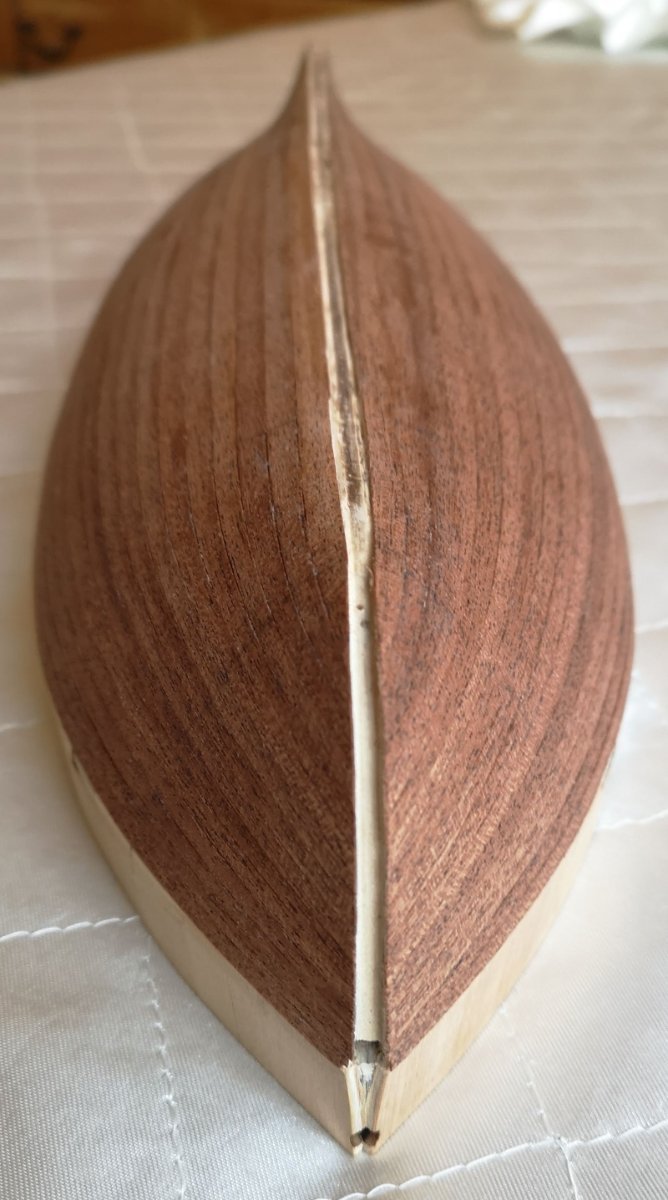
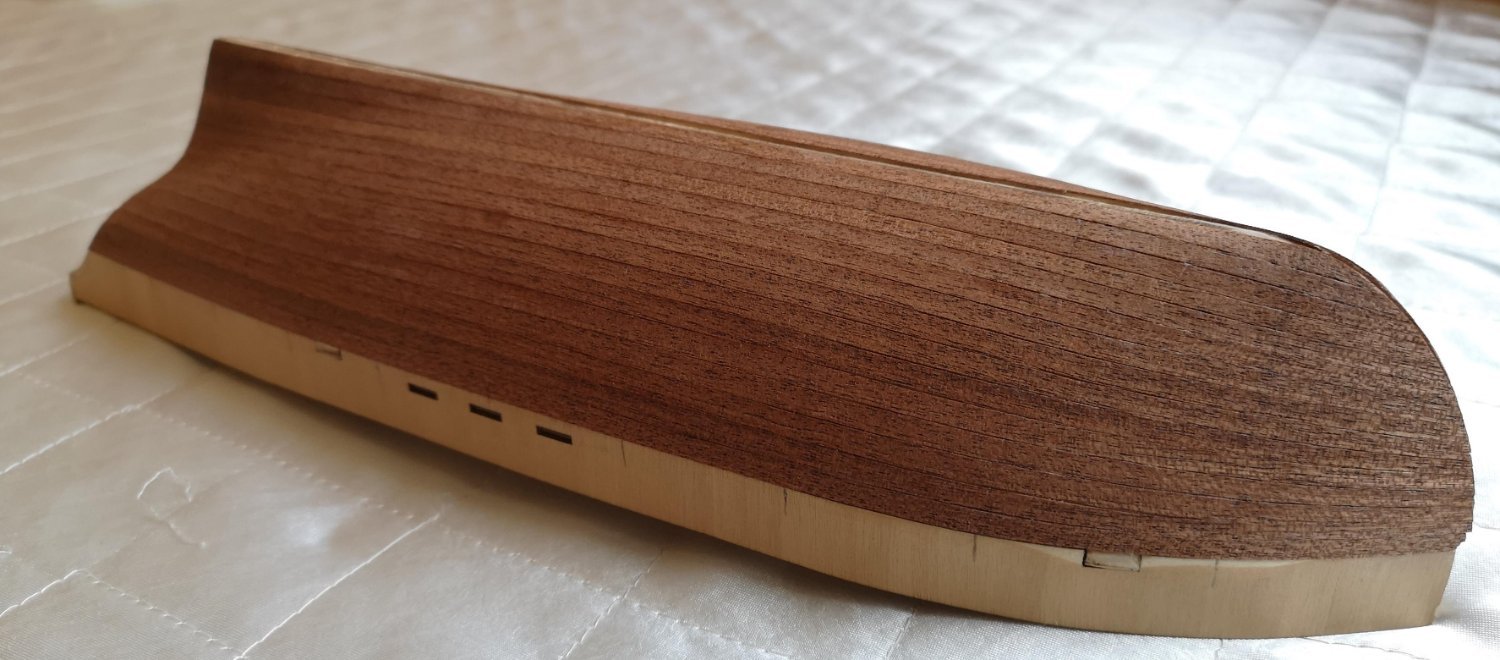
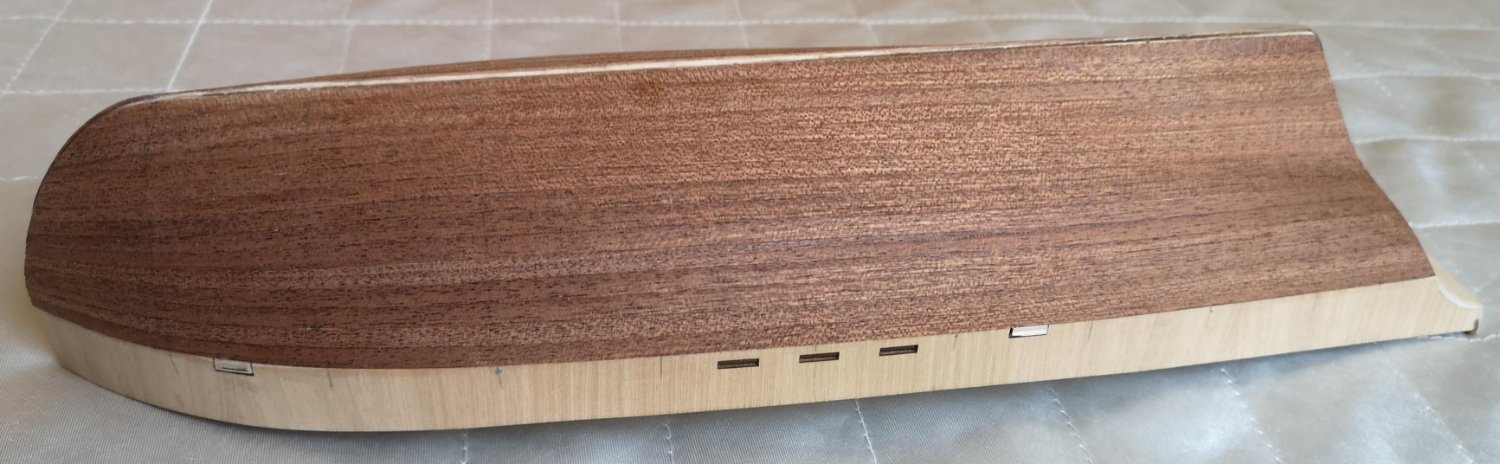
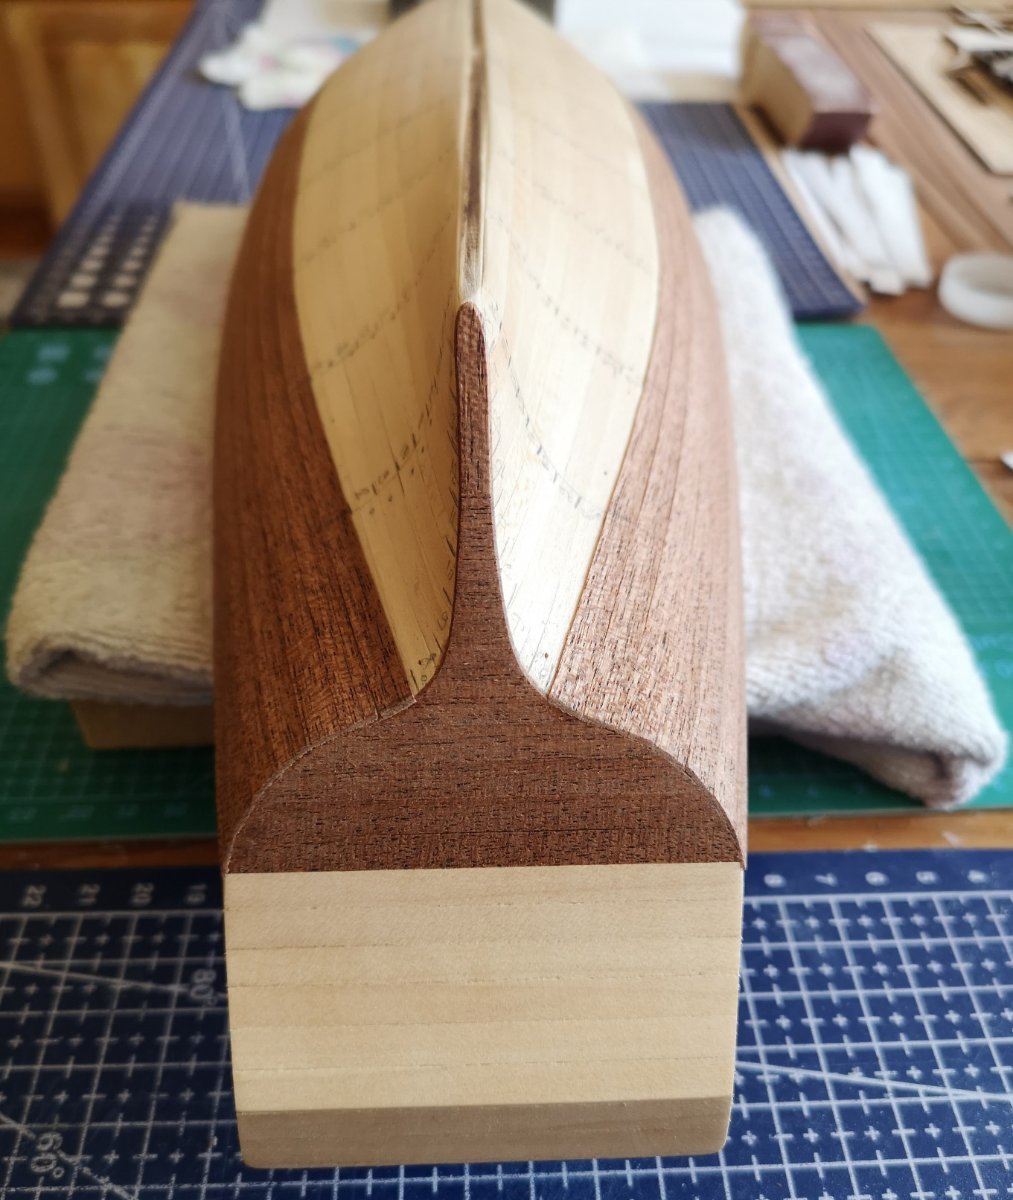
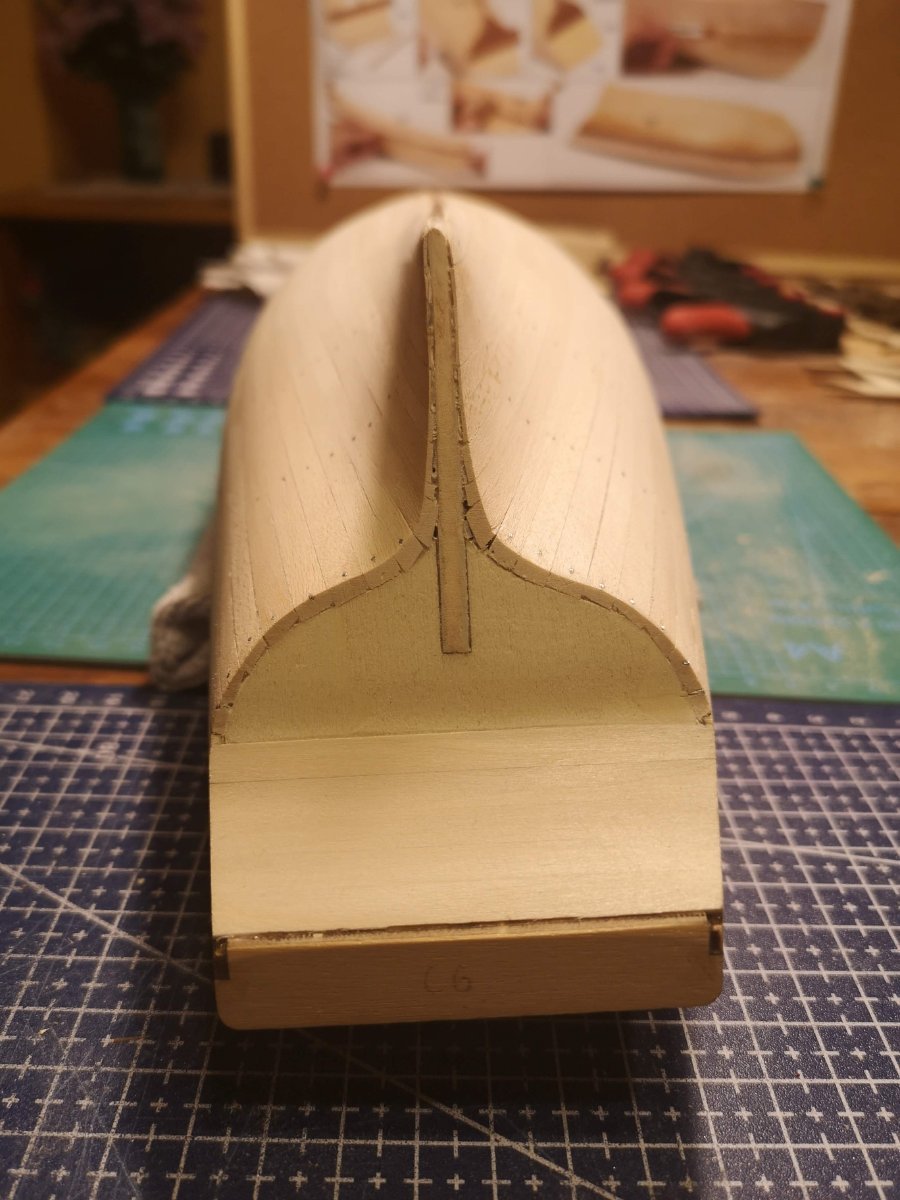
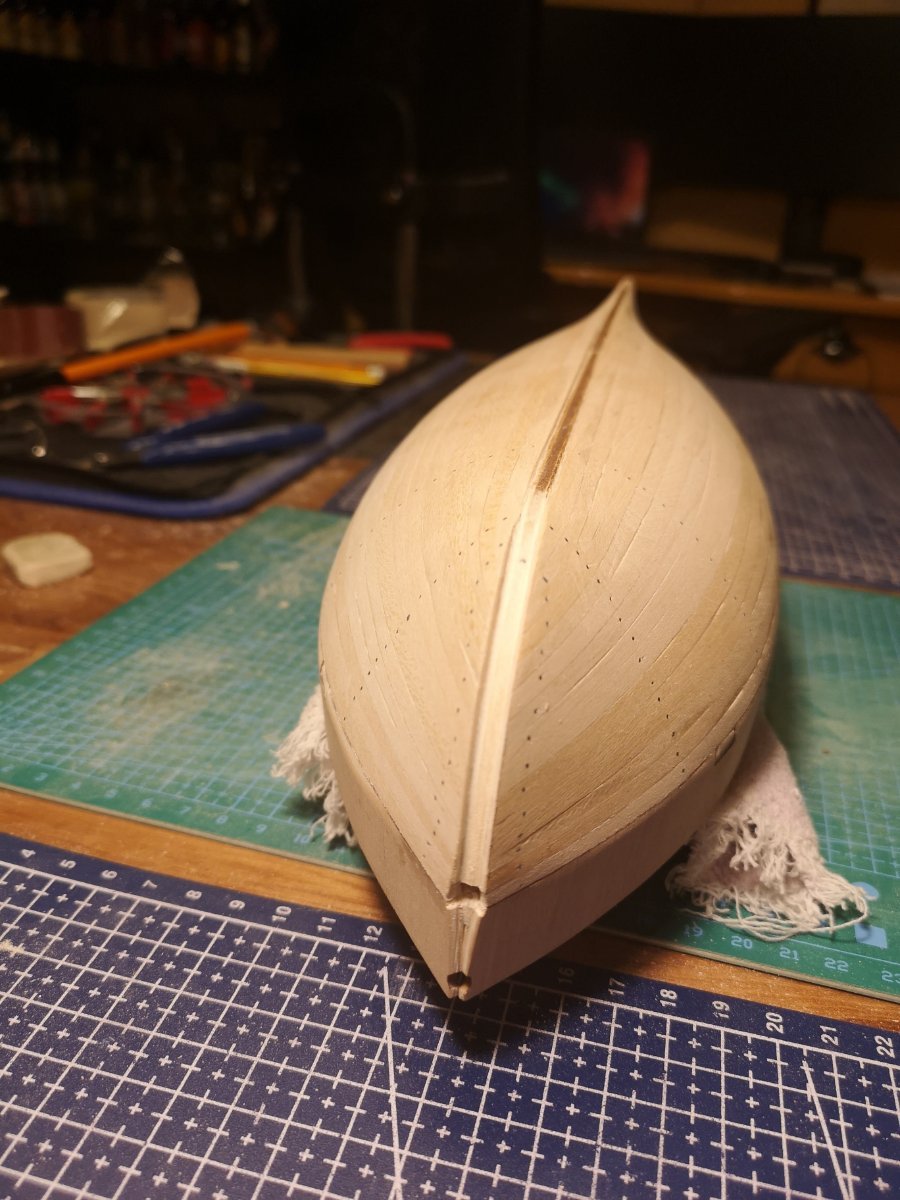
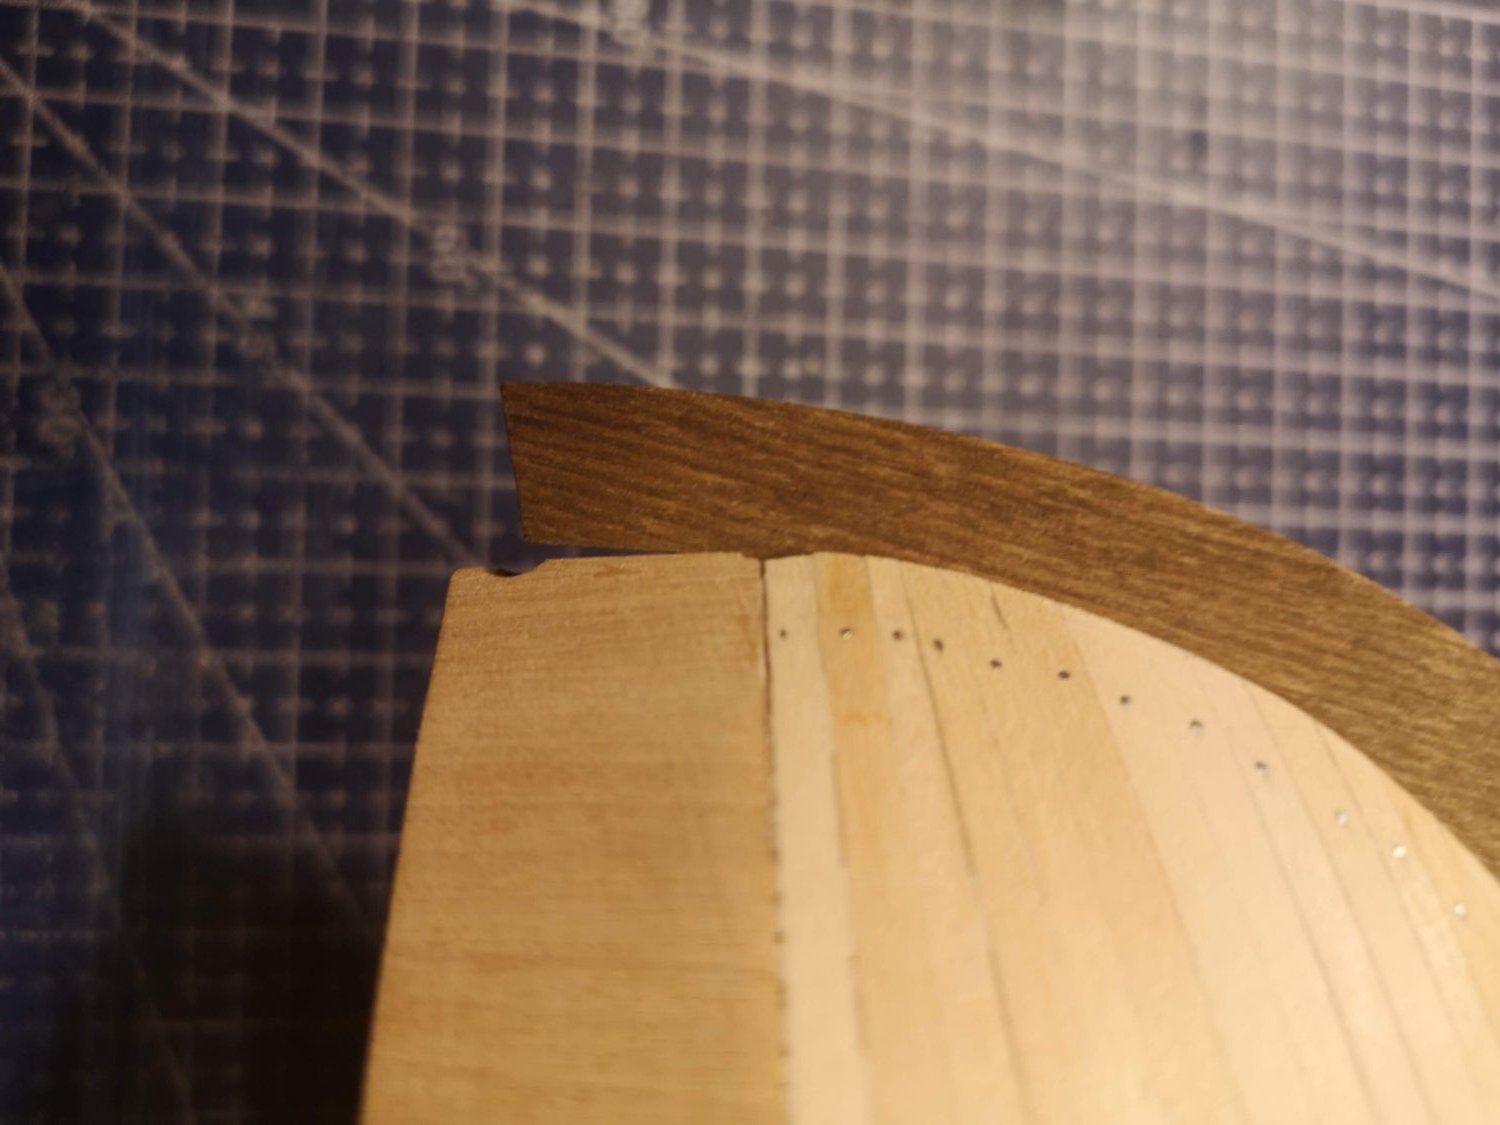
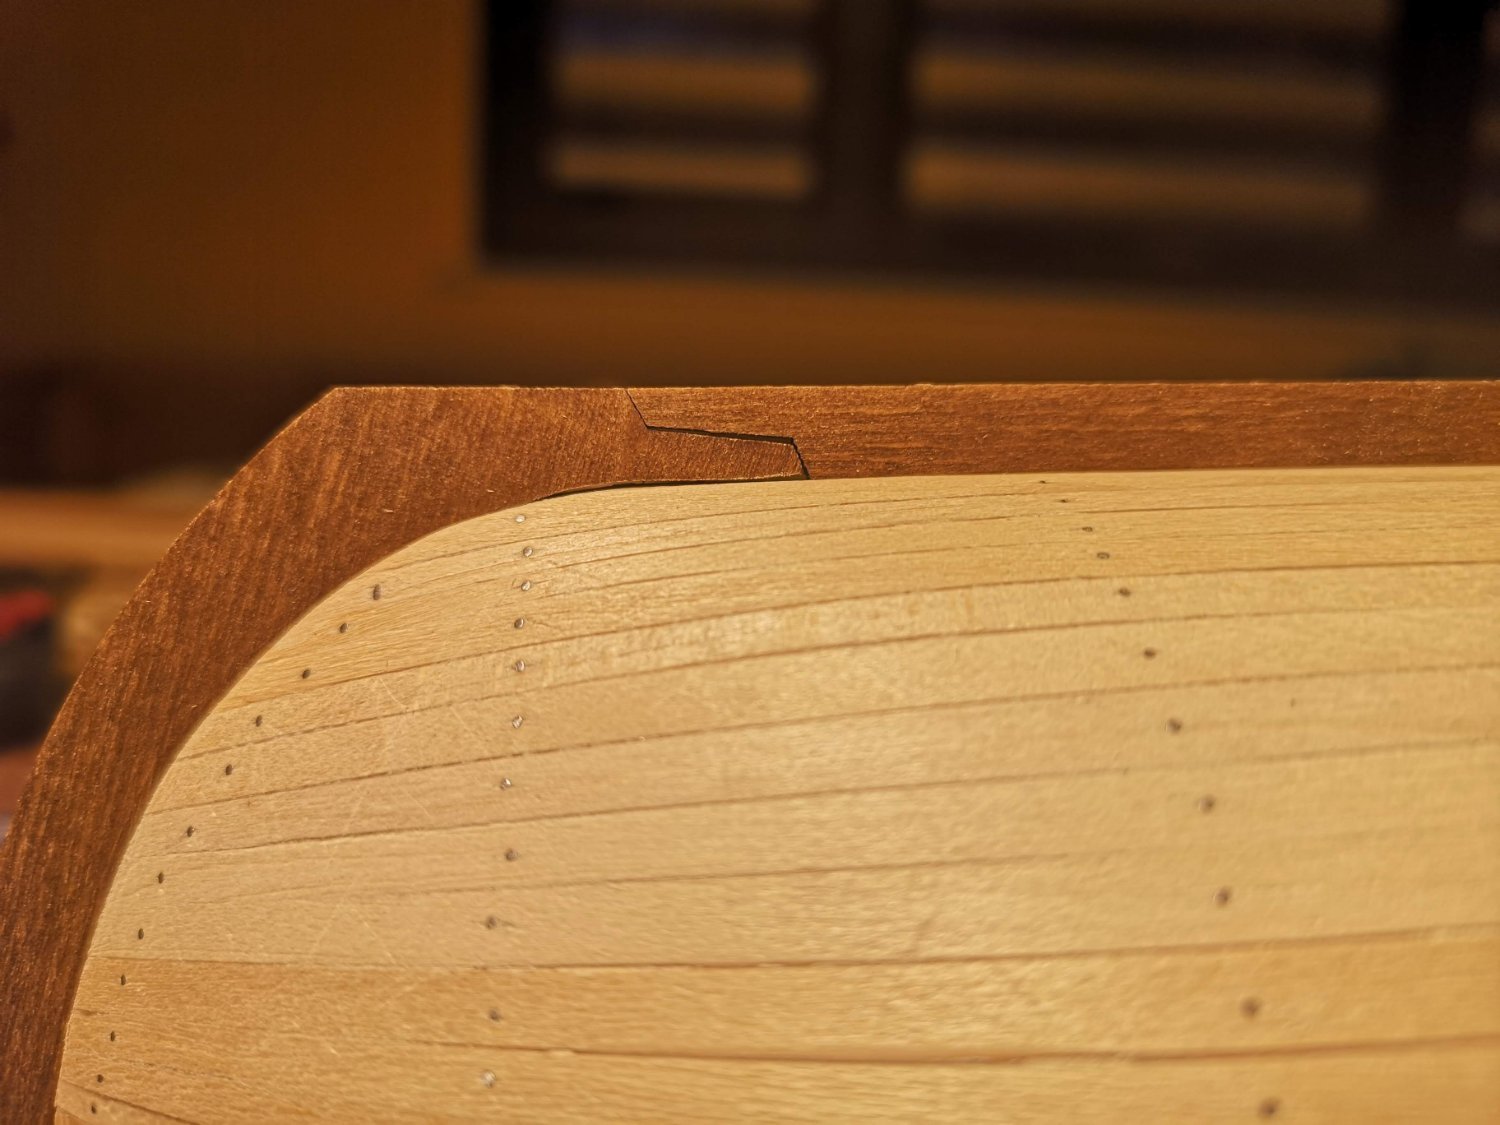
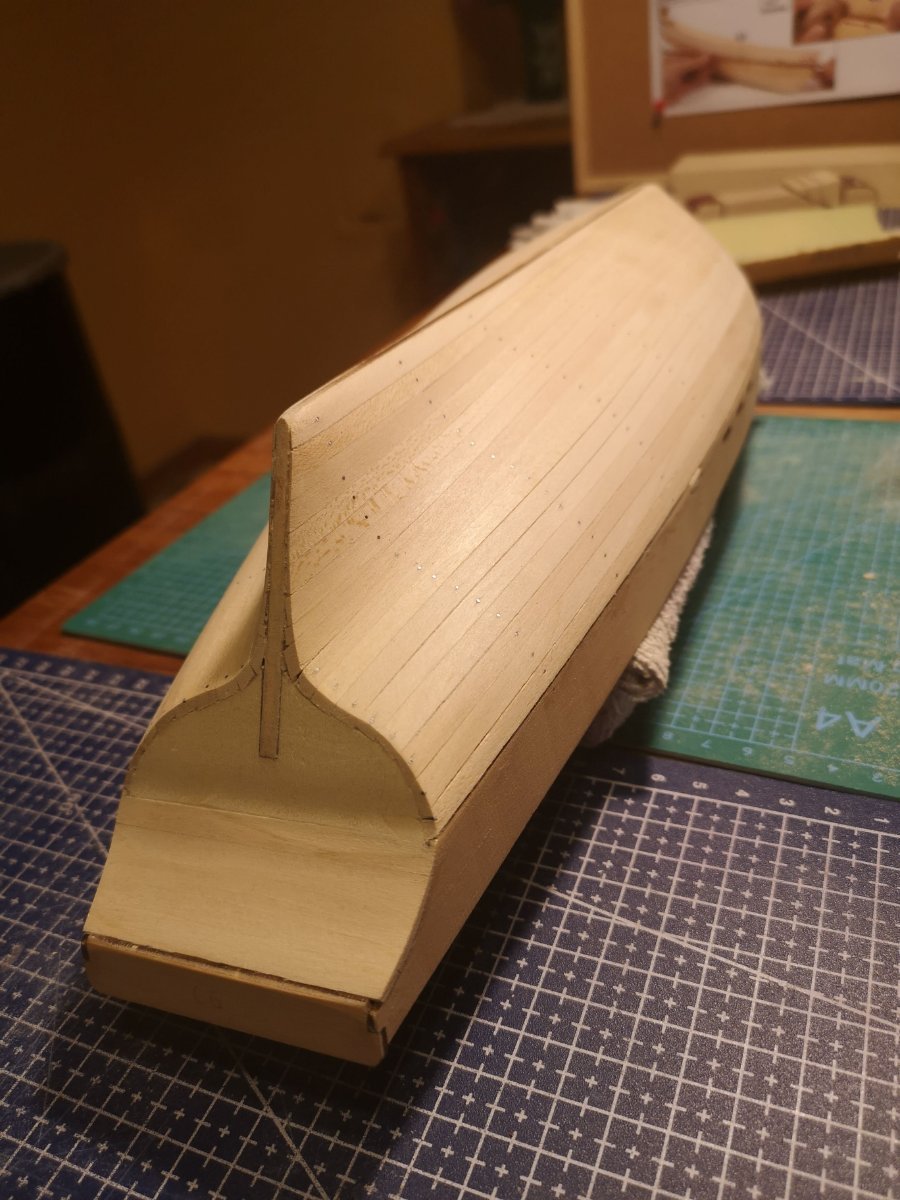
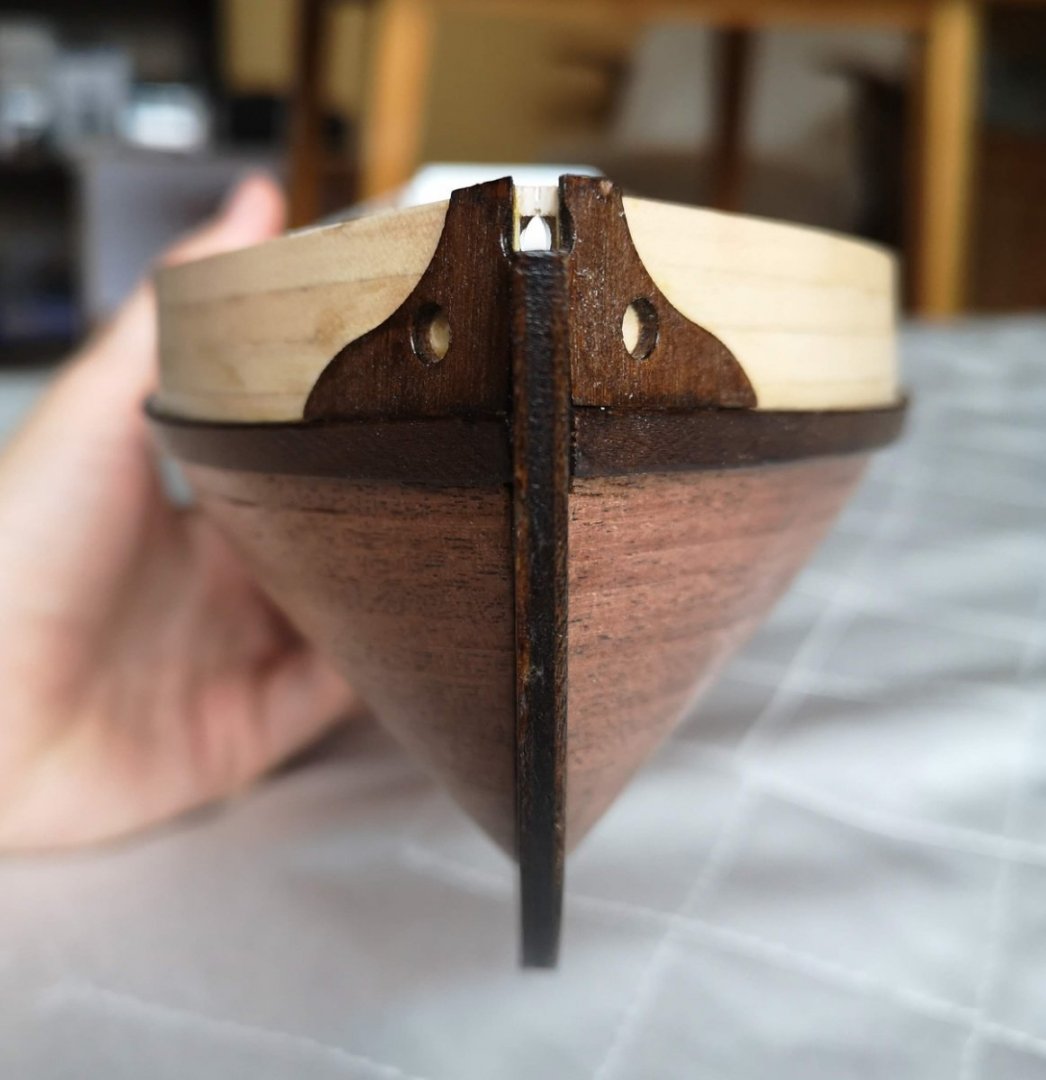
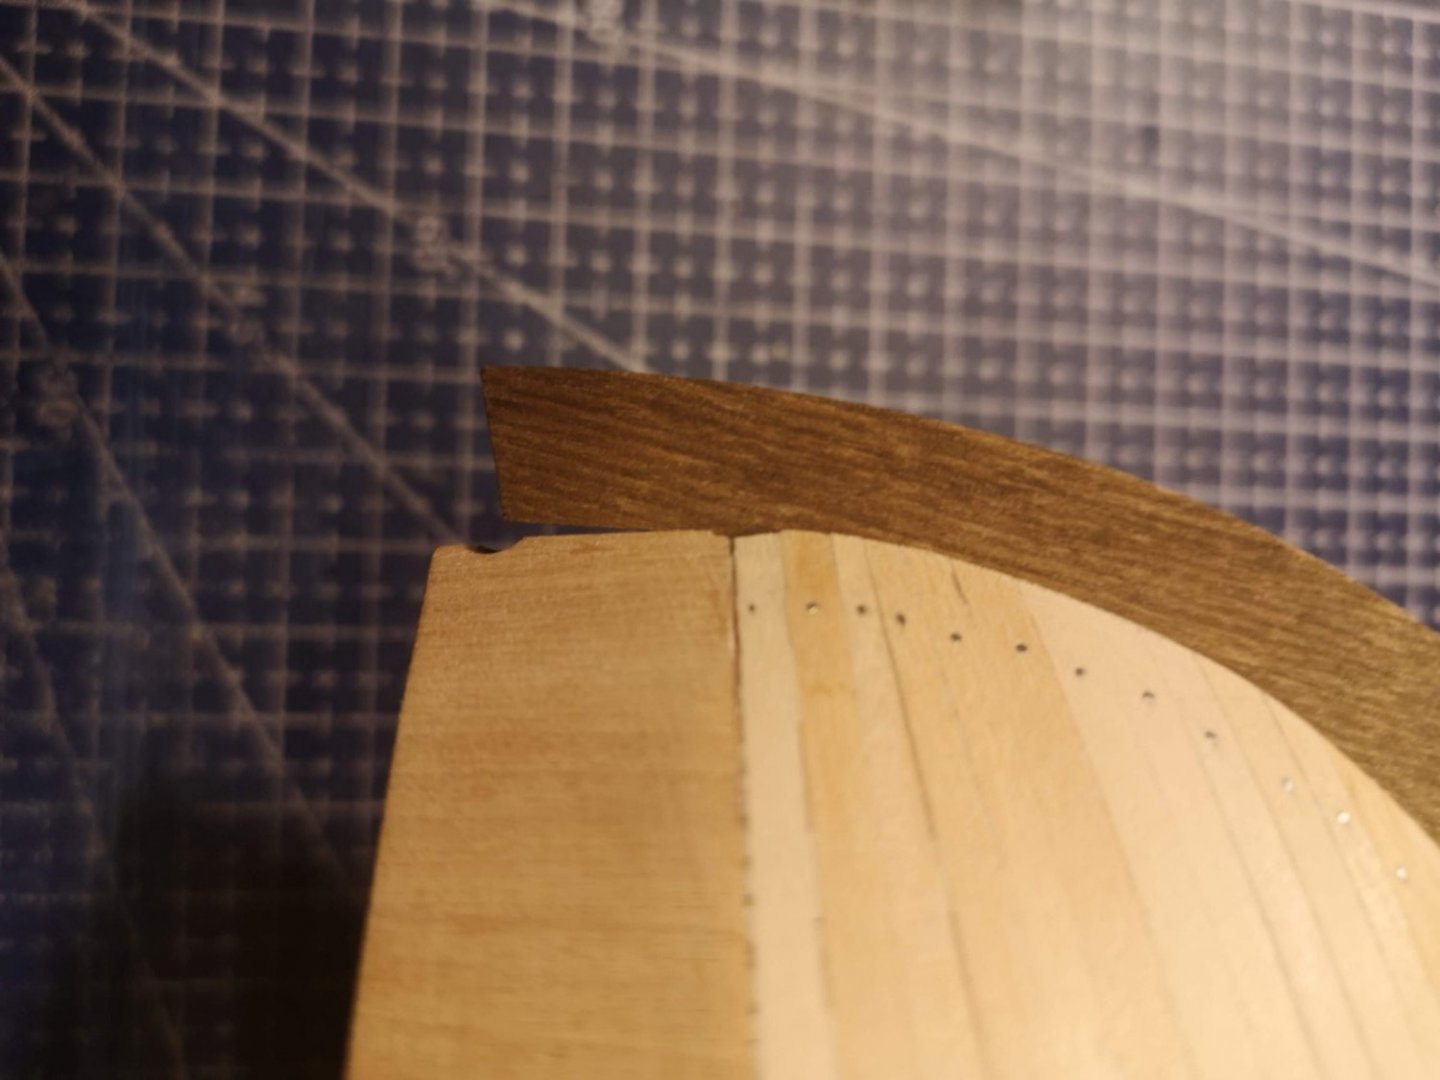
Didn't have time to post during the last weeks, but however I've made some progress. First I planked the stern and then began the sanding of the whole hull. Well... it took a lot of time and I'm not even sure yet if it's enough. This is the result after many hours of sanding 😁: It was quite a challenge to sand the bow properly to fit the stem. Maybe I've made a mistake to leave to much material on the front during the first layer of planks. At this phase I encountered another problem or maybe a mistake from my side. As you can see on the following images, the stem doesn't fit perfectly on the bow. There are three small gaps - between the stem and the bulwark, between stem and false keel and one between stem and keel. I saw that other guys have similar problems, so maybe it's a common issue with this kit or I've just made mistakes somewhere. But anyway, I will keep that in mind for my next ship. After all, that's the purpose of this ship - to take notes for the next one . However, I think two of these gaps wouldn't be visible when the second layer is planked and the whales and the bowsprit are mounted. The gap between the stem and the next part of the keel I will try to fix with BranPie's approach from his Polaris log.


-
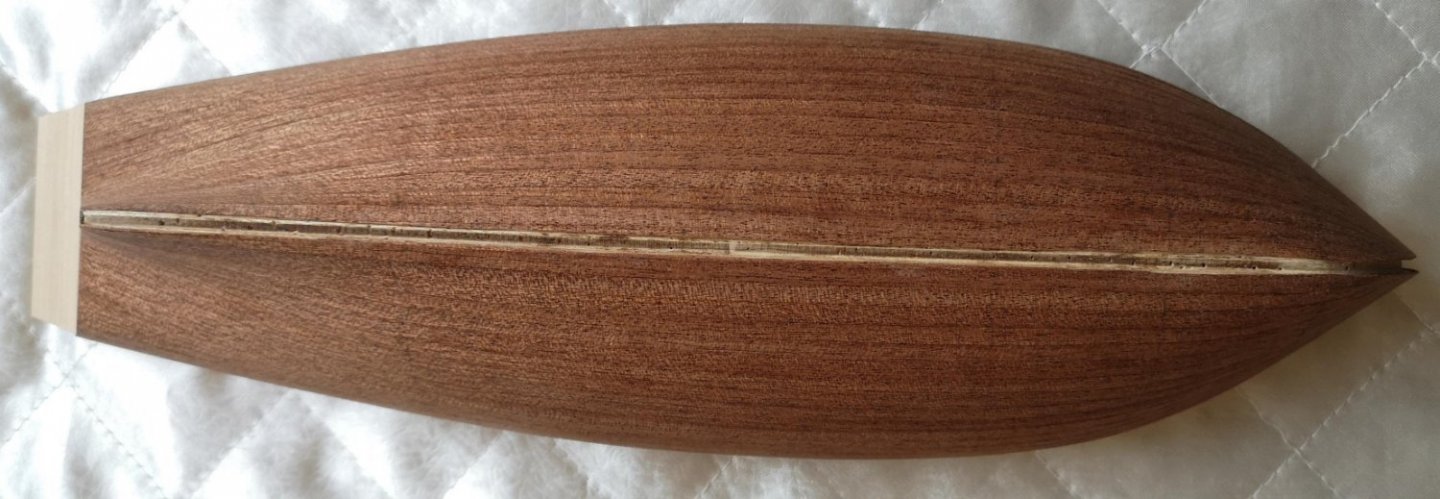
Finally the first layer is planked! It took me only 2 months... 😁 And this is the result, before sanding:


-
Hello, Pieter, I think you're doing great with your Polaris. I really like the diagonal strips on the transom, well done! I have to put 6 more planks on my own Polaris and the first layer soon will be done. Still I haven't read anything about the second layer of planks and I want to ask you some questions about that: Do you taper second layer of planks in the same shape as the first layer or it's easy to bend and mount them without any tapering? Do you use the same bending method (with iron and hot water) for the second planks? What type of glue are you using for the second layer - PVA or contact cement? Maybe I will know the answers when I start reading about this step, but I want to know your opinion before that.
-
Both keel belts are done! One more to go! This thing is taking much longer than I expected, but I hope the end result will worth it. I was one week outside of the country and didn't have time to build, so this is the progress till now. And as you see on the first two photos I used one stealer on the keel and maybe will use one more in the middle belt. Unfortunately I didn't succeed to plank the hull without any stealers, but I thinks it's not a big deal. I can live with that 😄

-
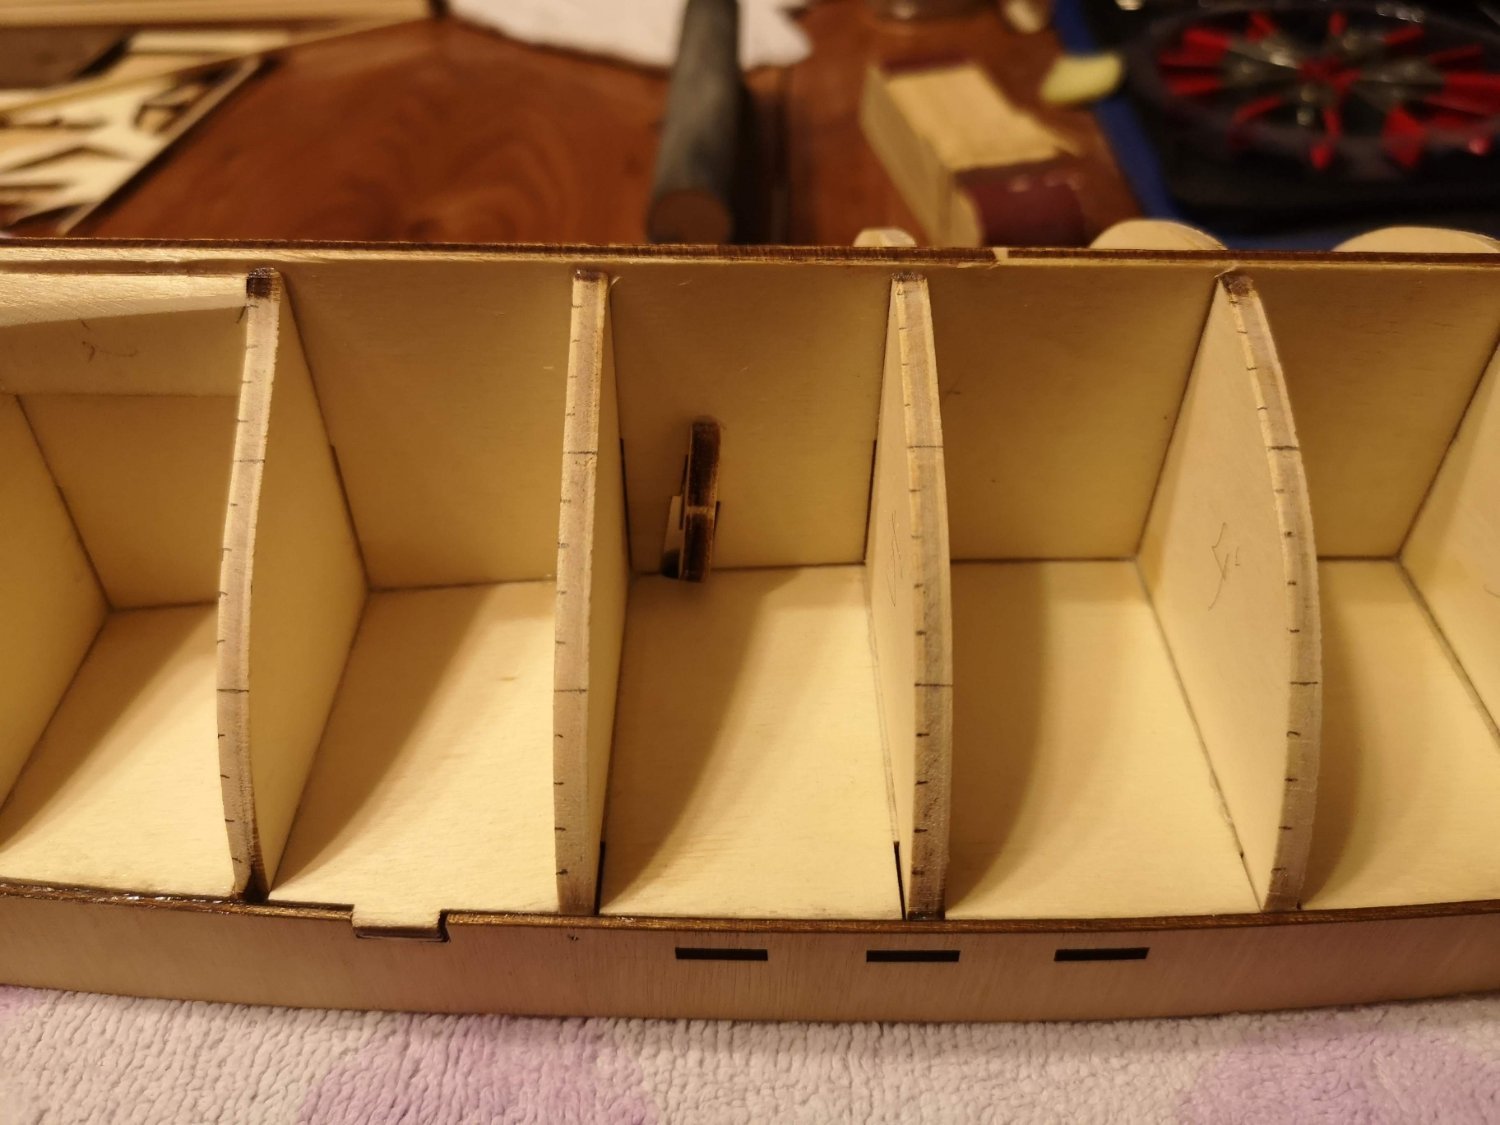
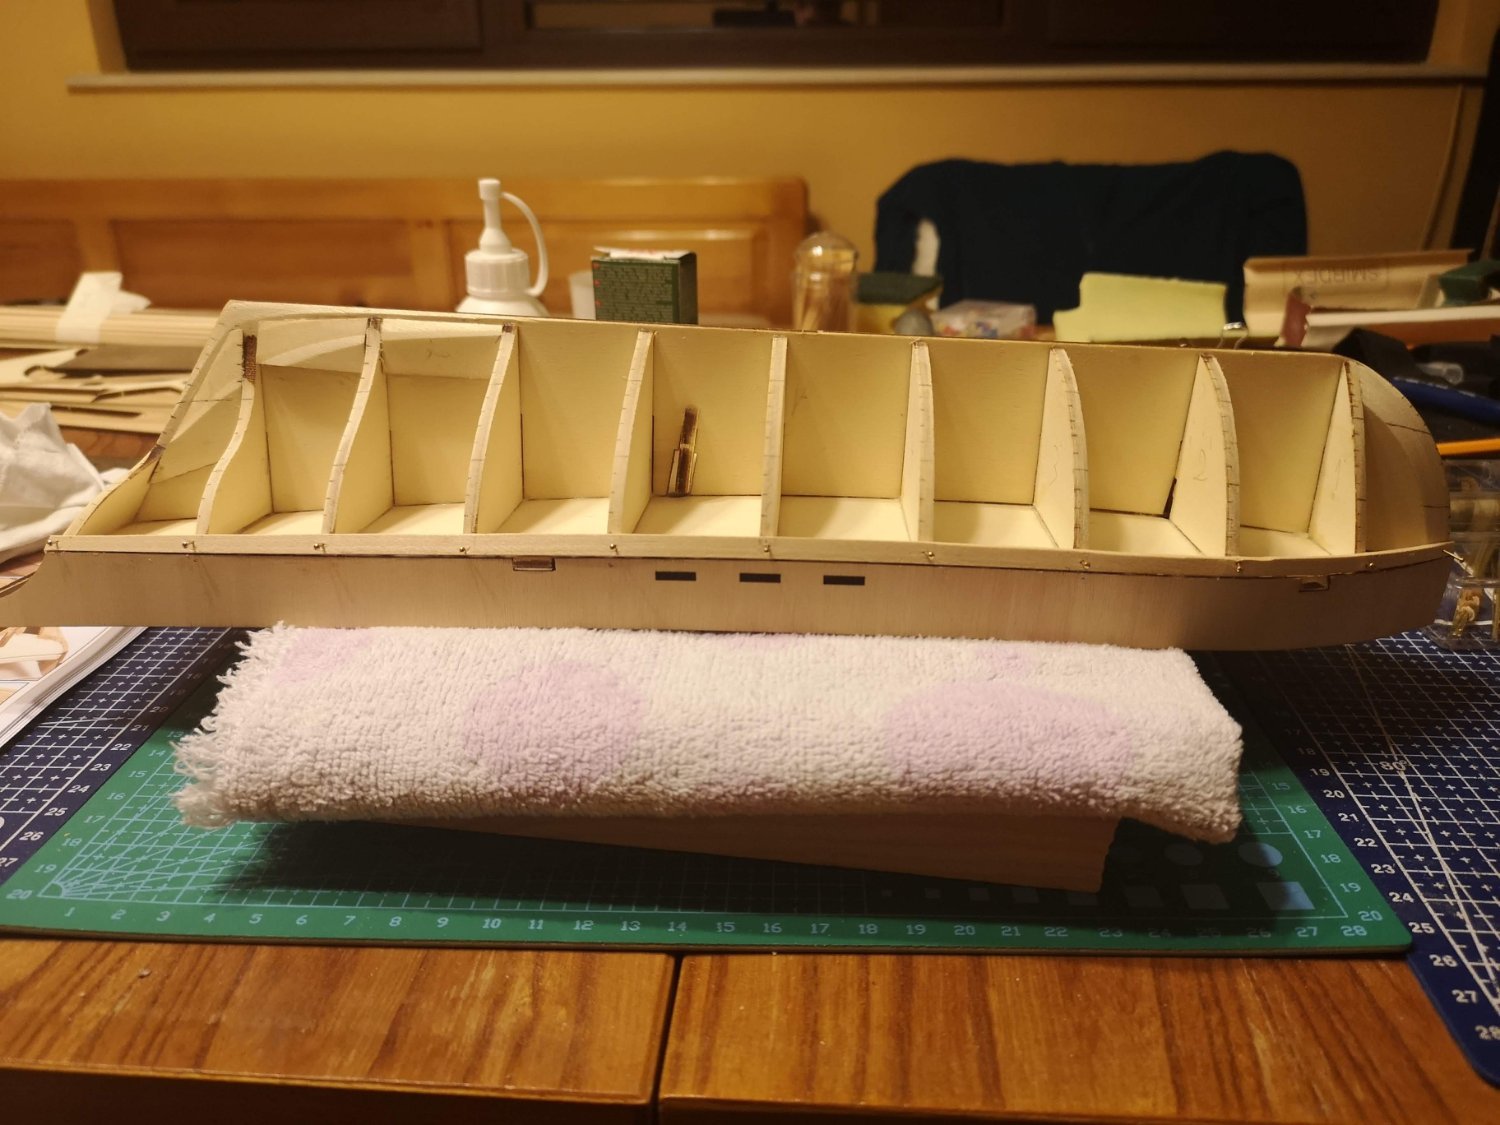
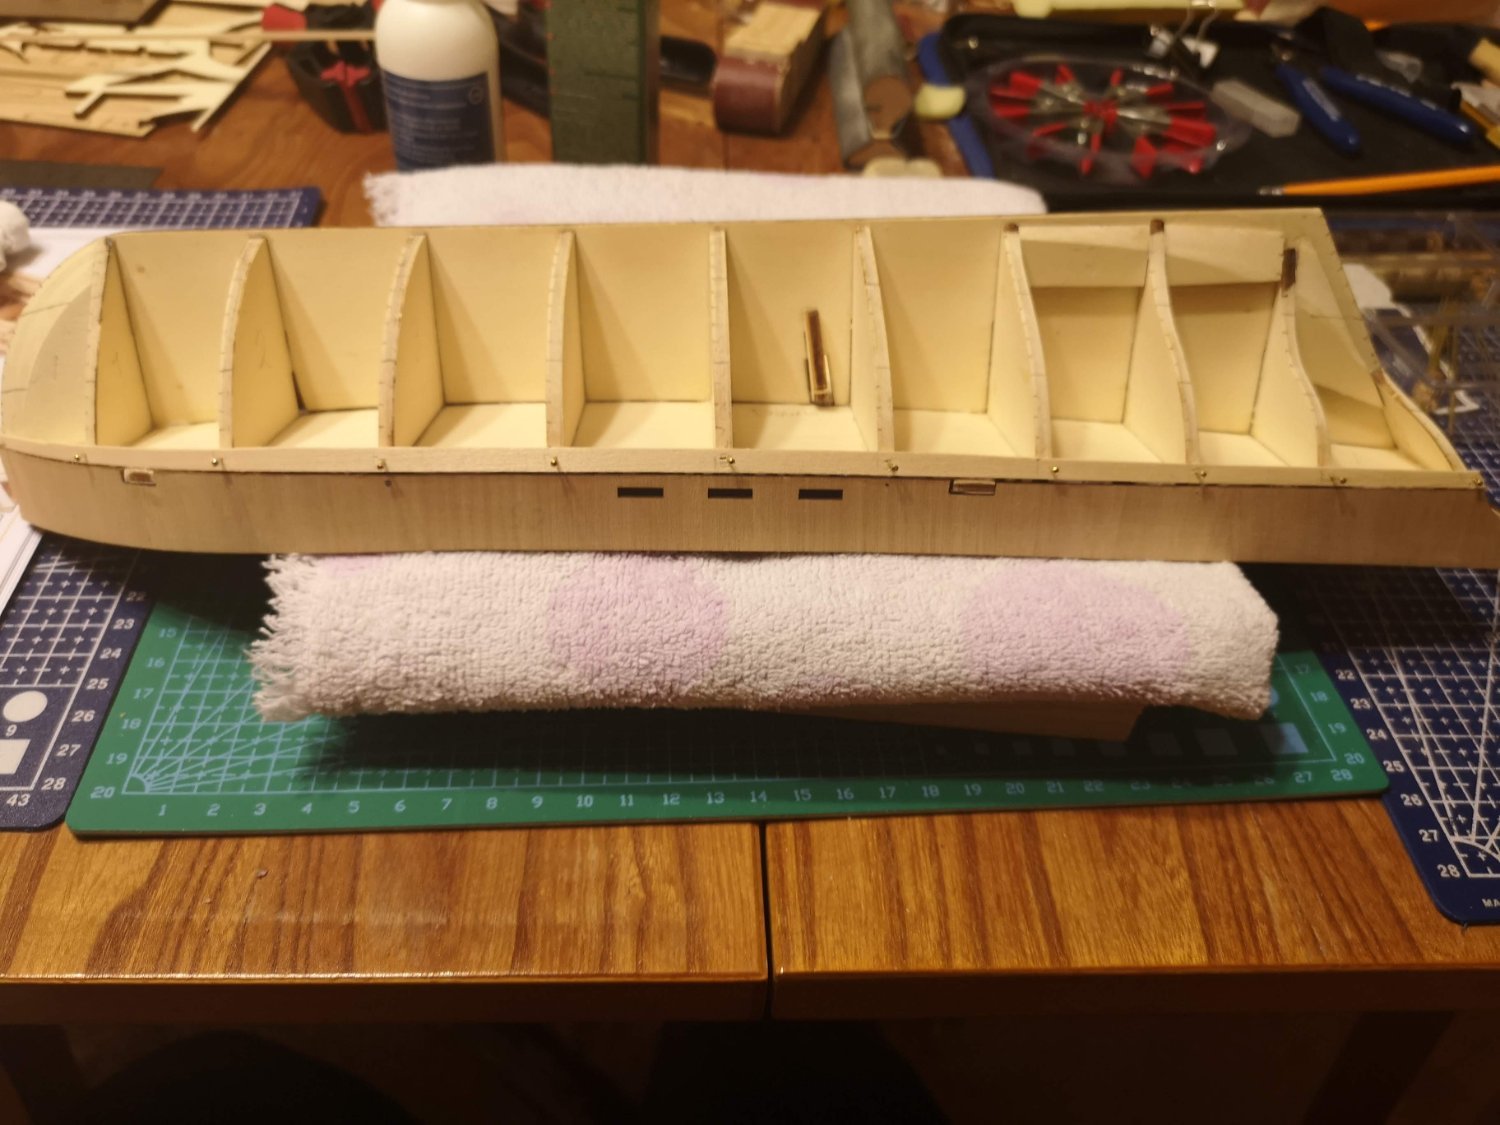
Hello Marcus, and welcome to MSW! Currently I'm building the same kit but I'm a little bit further than you. I just finished reading your log and noticed one mistake on the very last photo. You didn't have to cut the extra deck planks, which are above the holes for the ribs. The idea is to hide the ribs with the deck. Actually I can't suggest you approach for fix, maybe someone with more practice will know. Next time just read the instructions more carefully. 🙂
-
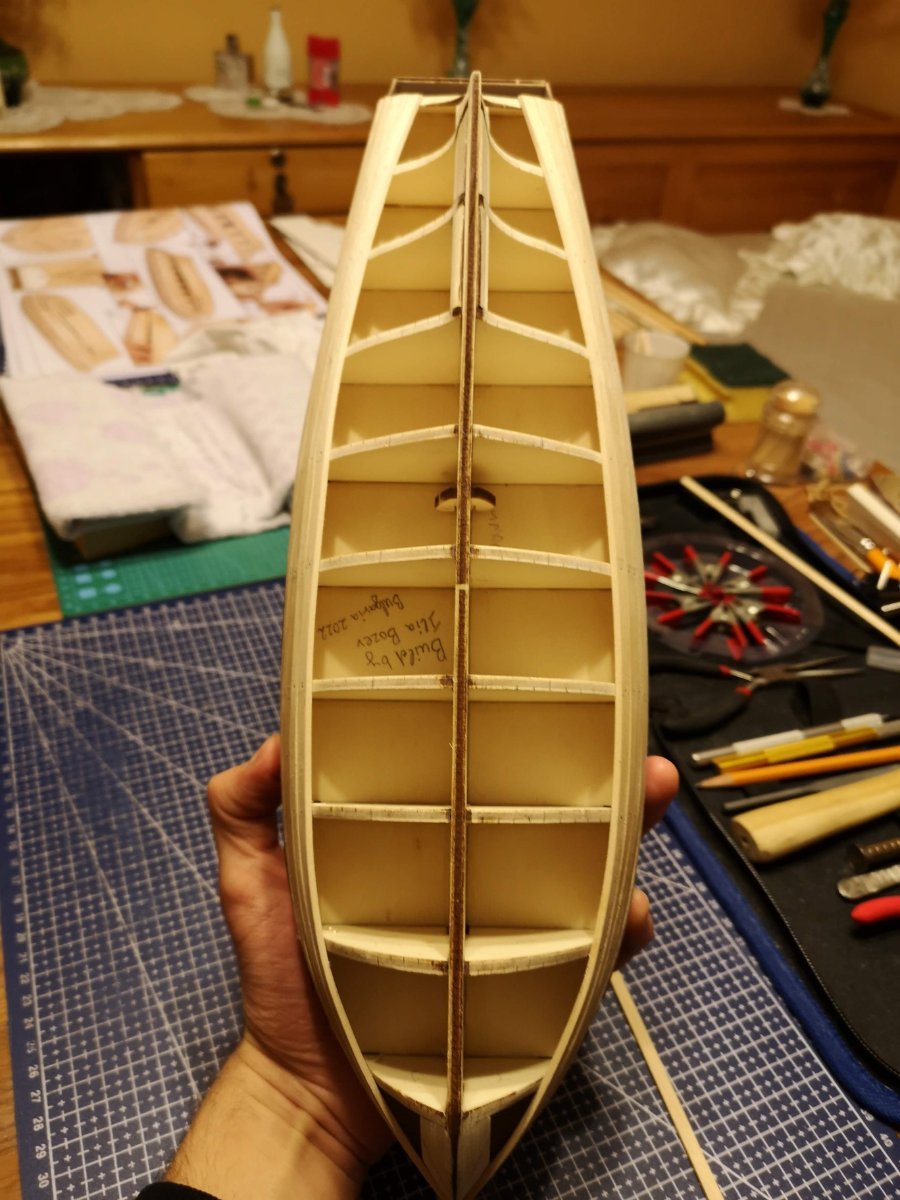
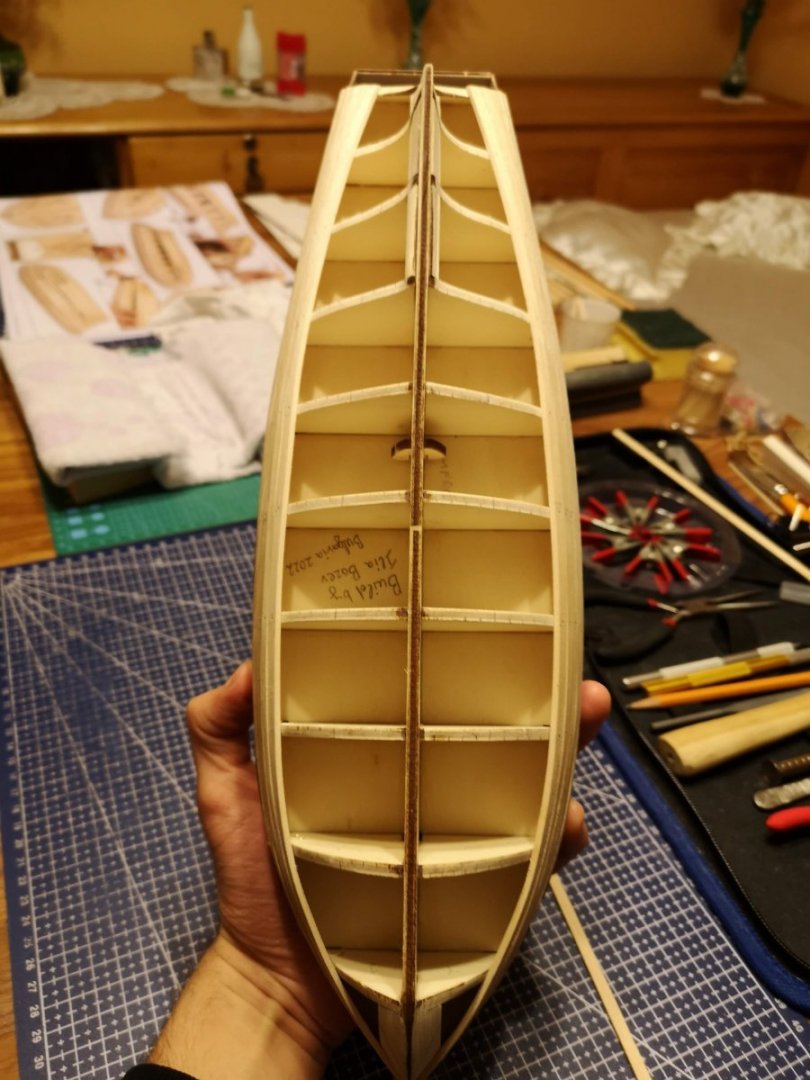
So far so good! The first belt is done, two more left (on each side). P.S. Stole the "Build by..." idea from Havelock's log 😆


-
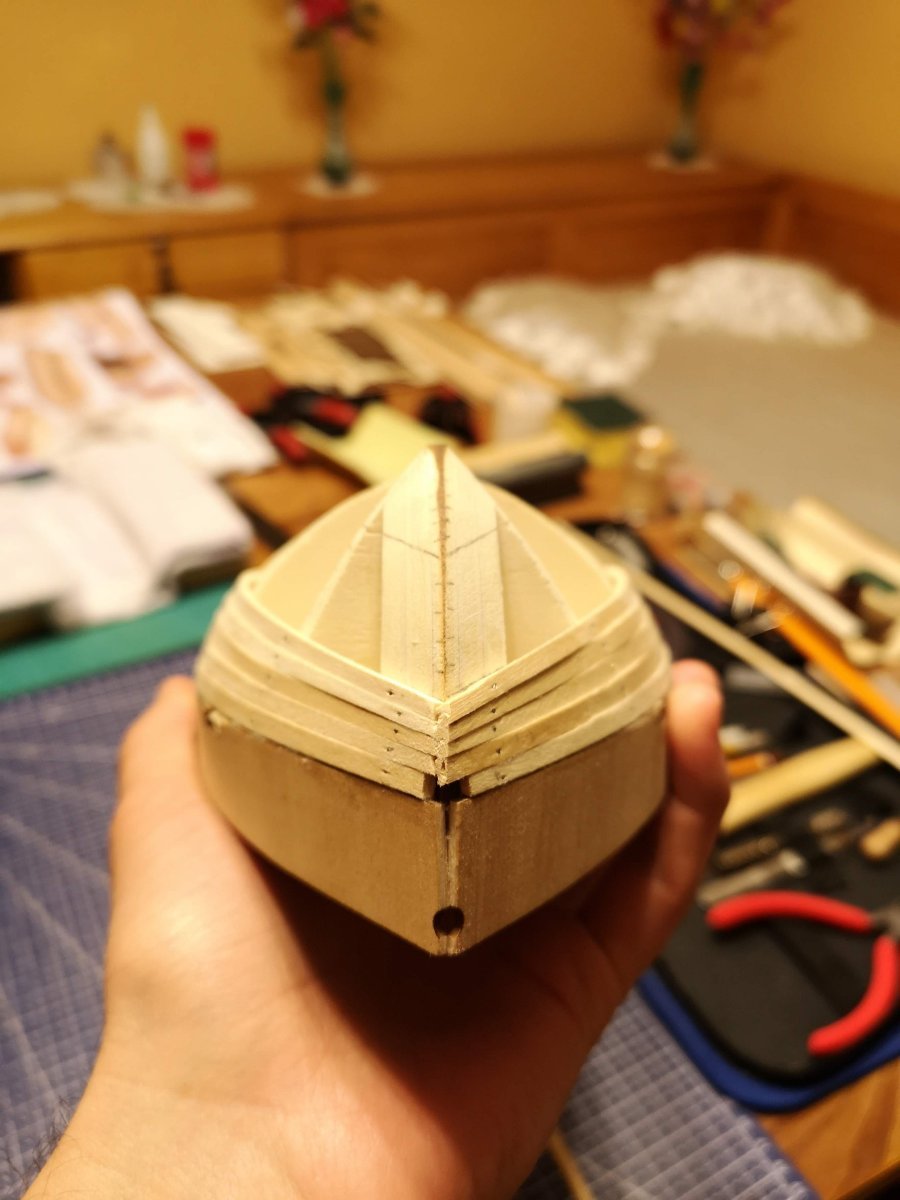
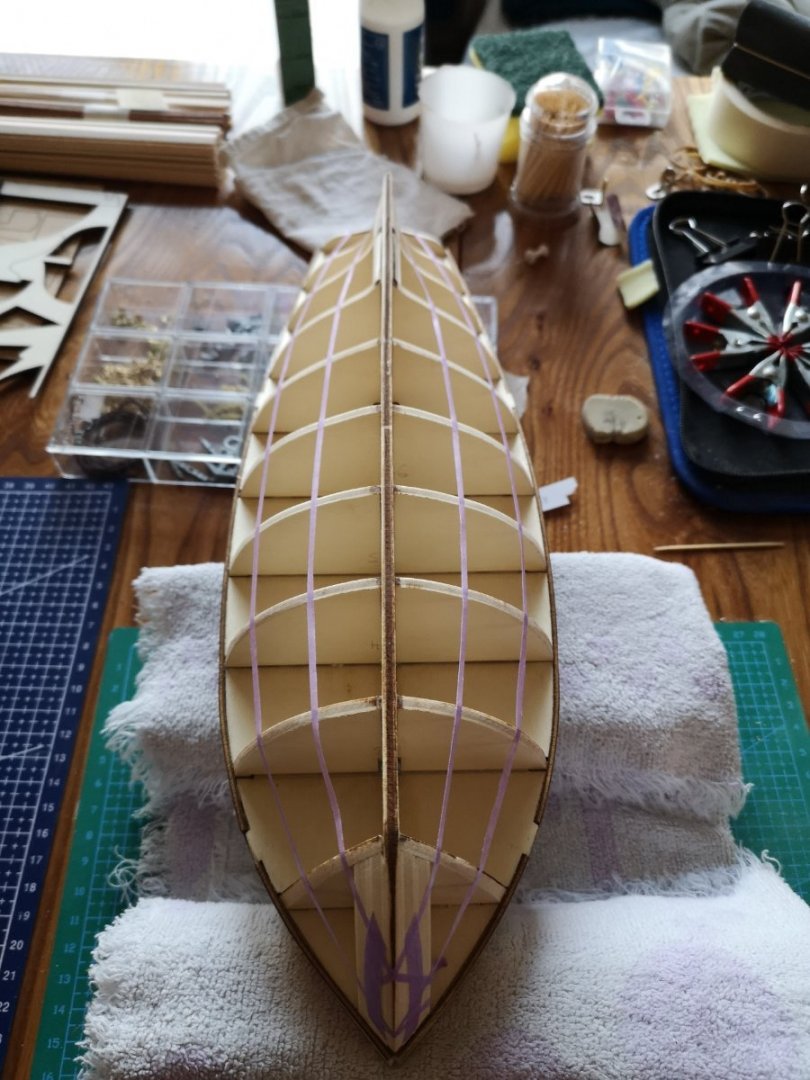
Slowly moving forward. The Christmas break is over and I came back to the old schedule - build mostly during weekends... First I made the hull lining. It took me much longer than I expected, but I hope the final result is worth it. I followed Chuck's instructions from "Lining Off your hull for planking". I've managed to put the first planks on each side and I think they fit quite well. First of all I made the tapering, then bent the planks with hot water and an iron and glued them with PVA. Also I used nails as per the instructions just to fix the planks in place. I am happy that I cut off the heads of the nails before pushed them in. Here is the dry fit for one of the planks, after tapering and bending, I think it looks good: And this is the final result for both sides:


-
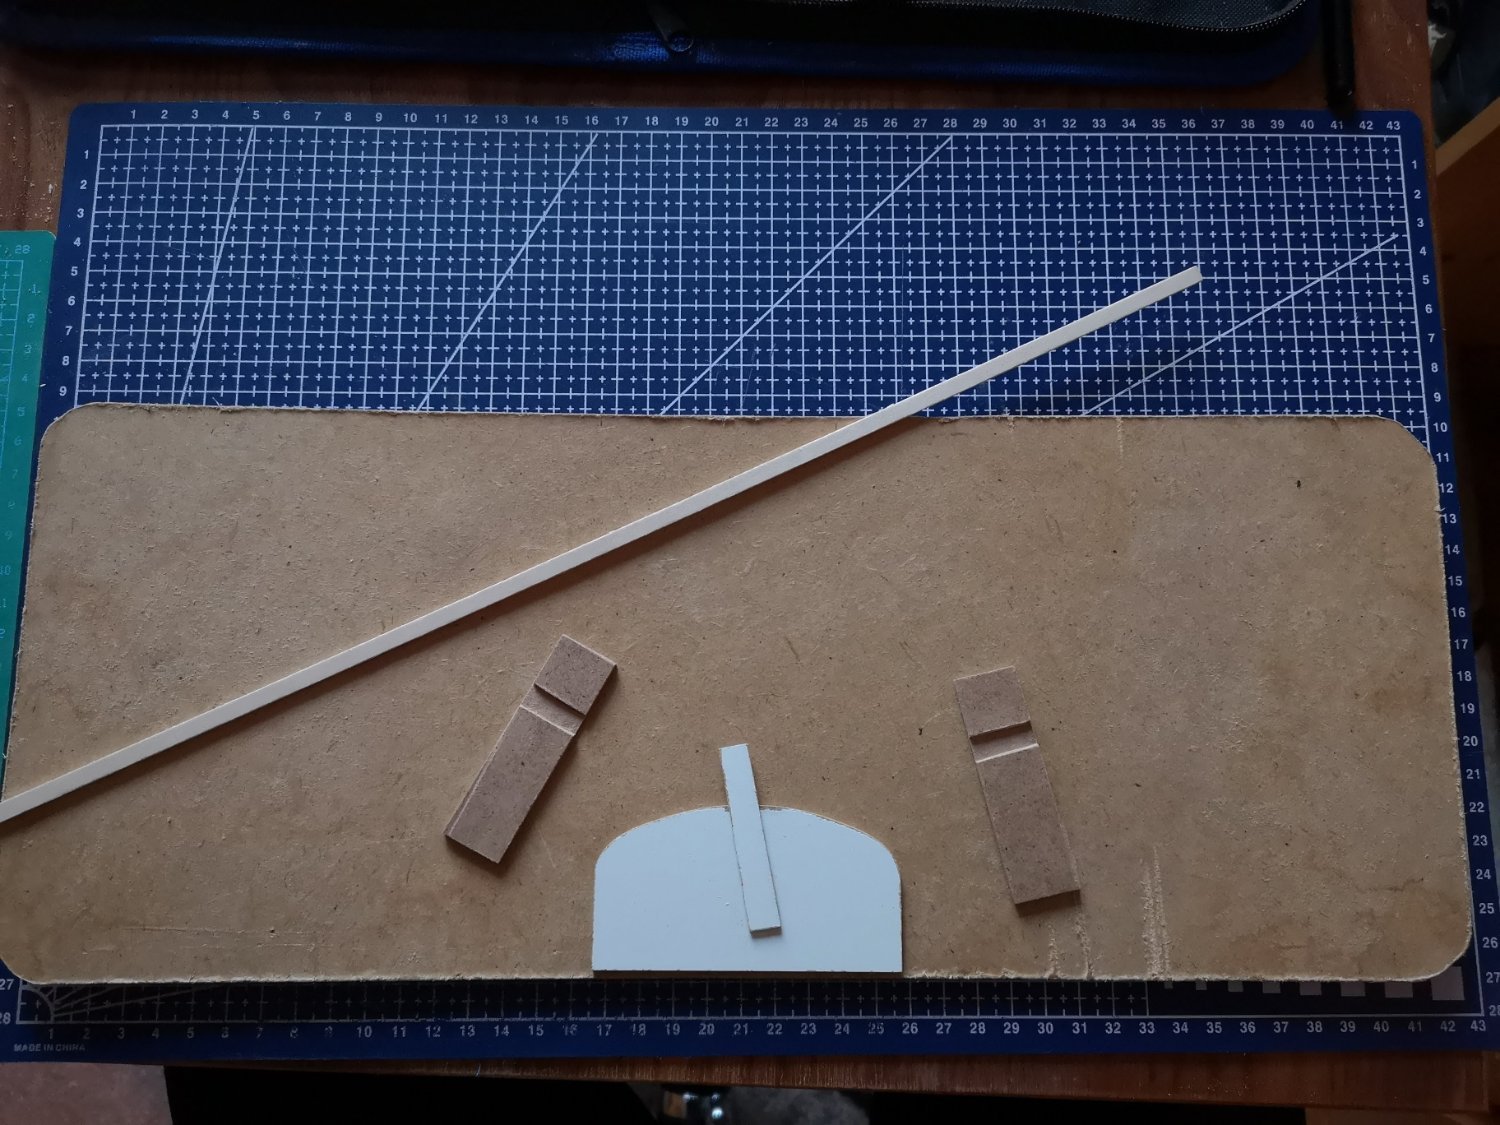
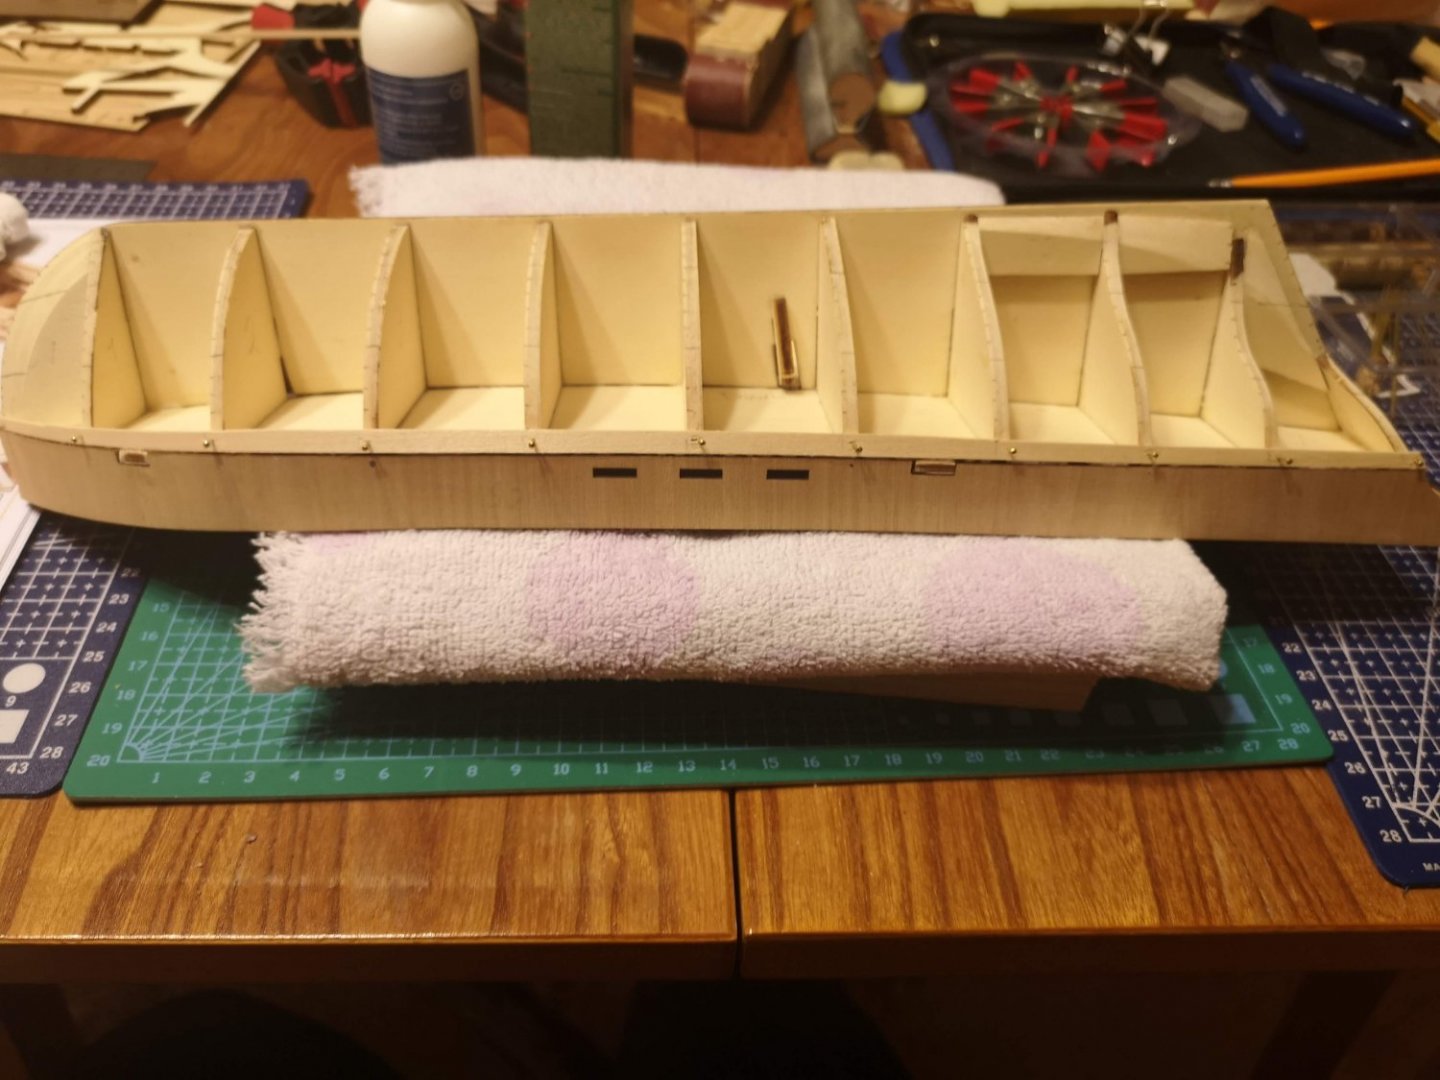
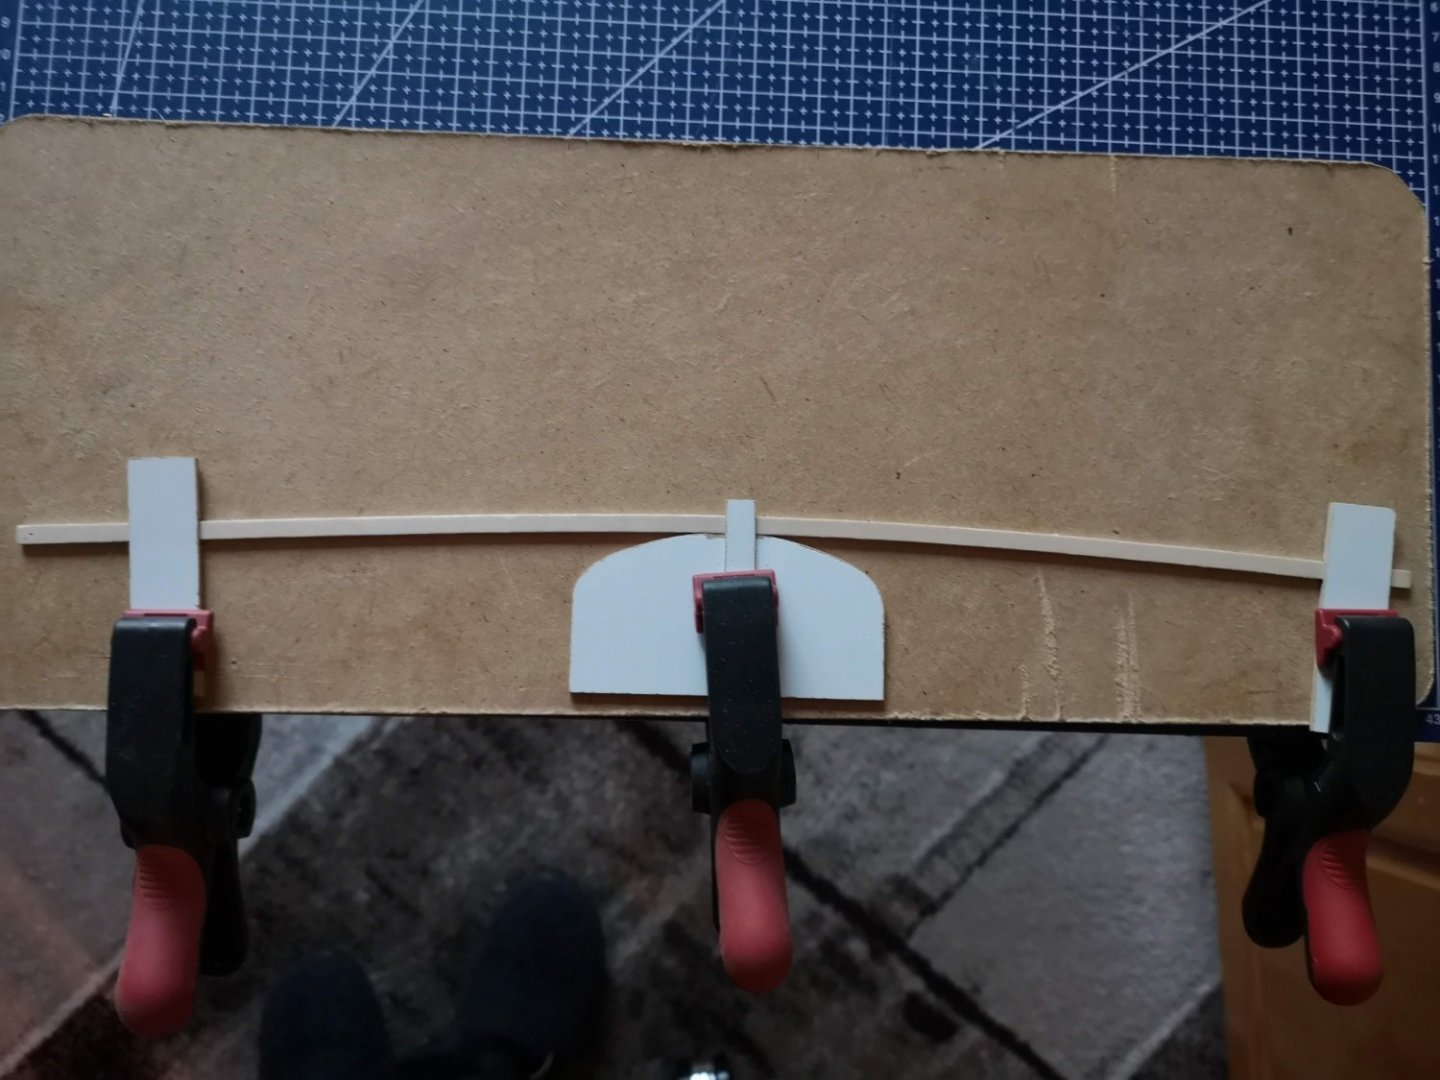
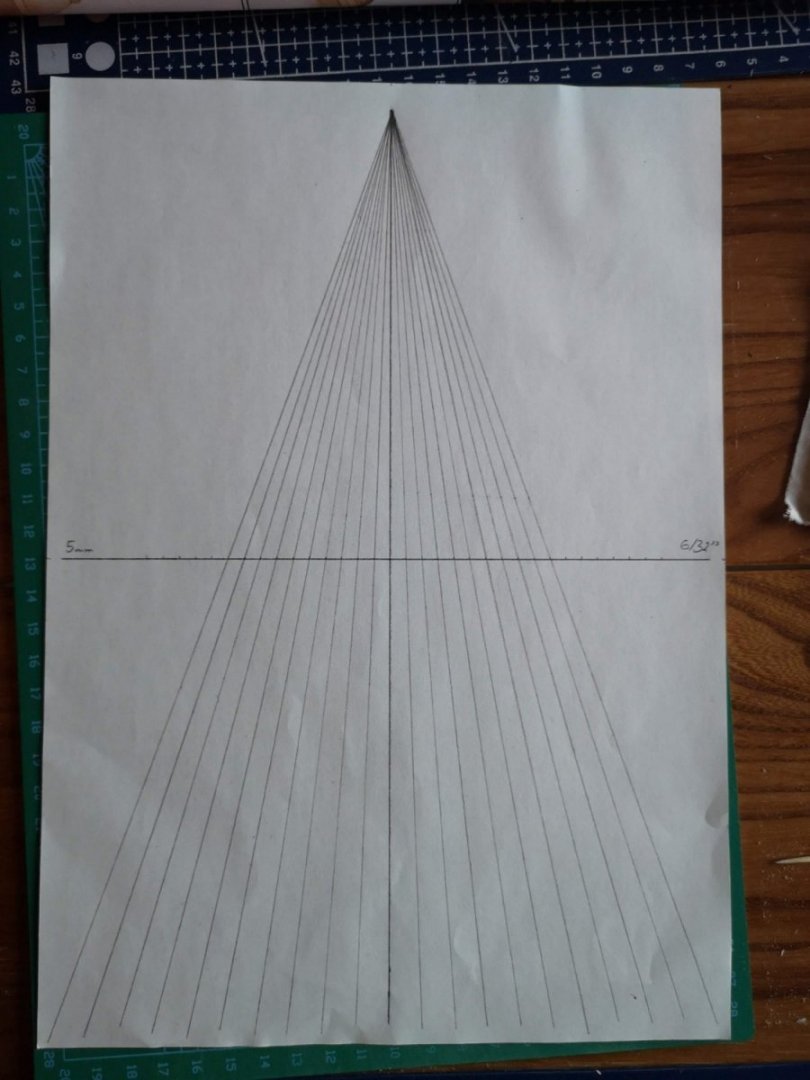
Hi all and Happy New Year 2022! Quick update from today. In the last few days I read about hull planking and bending techniques. For me "Planking primer" from David Antscherl and "Lining Off your hull for planking" from Chuck Passaro were the most useful and understandable materials. You can find this and another planking documents here. And of course Chuck's videos about bending and tapering are a great addition to his pdf. I decided to use Chuck's lining technique from the document, but the bending and tapering techniques from the videos, because I think this is the better and easier solution for my ship. Also I think there aren't enough extra planks in this kit to apply the spiling methods from Chuck and Antscherl's documents. The bending station and the planking fan template are done. I cut the template wood parts from fiberboard. Tomorrow I will start the actual work on the first layer of planks, hope everything will be okay 😄.

-
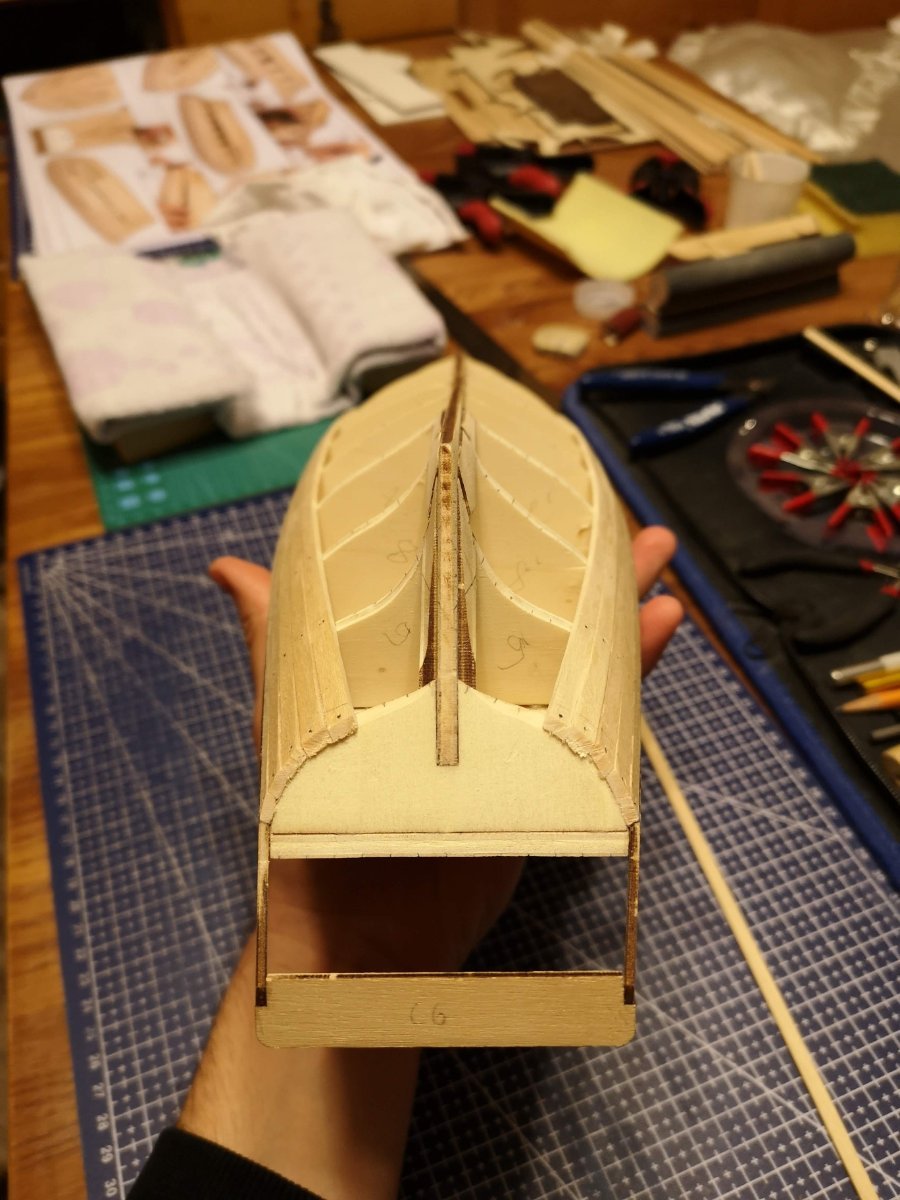
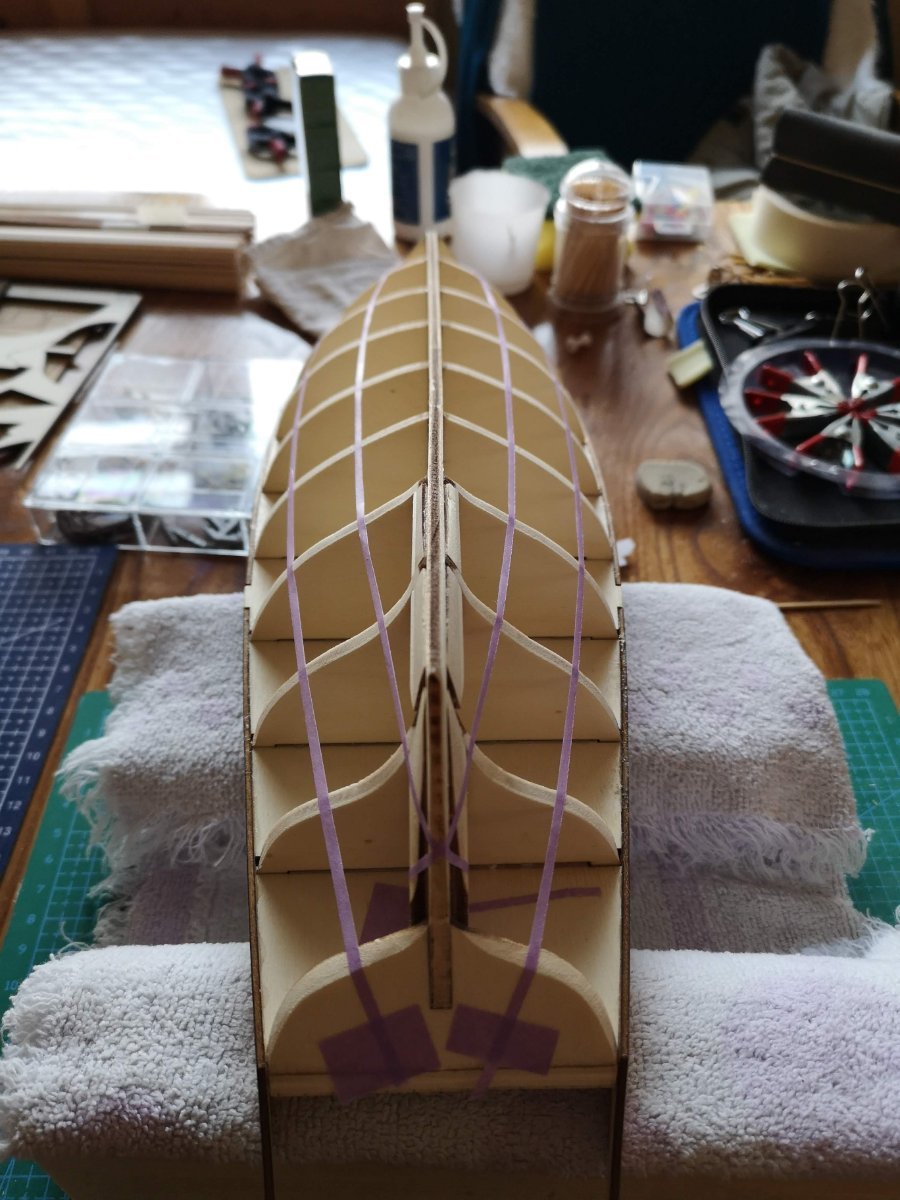
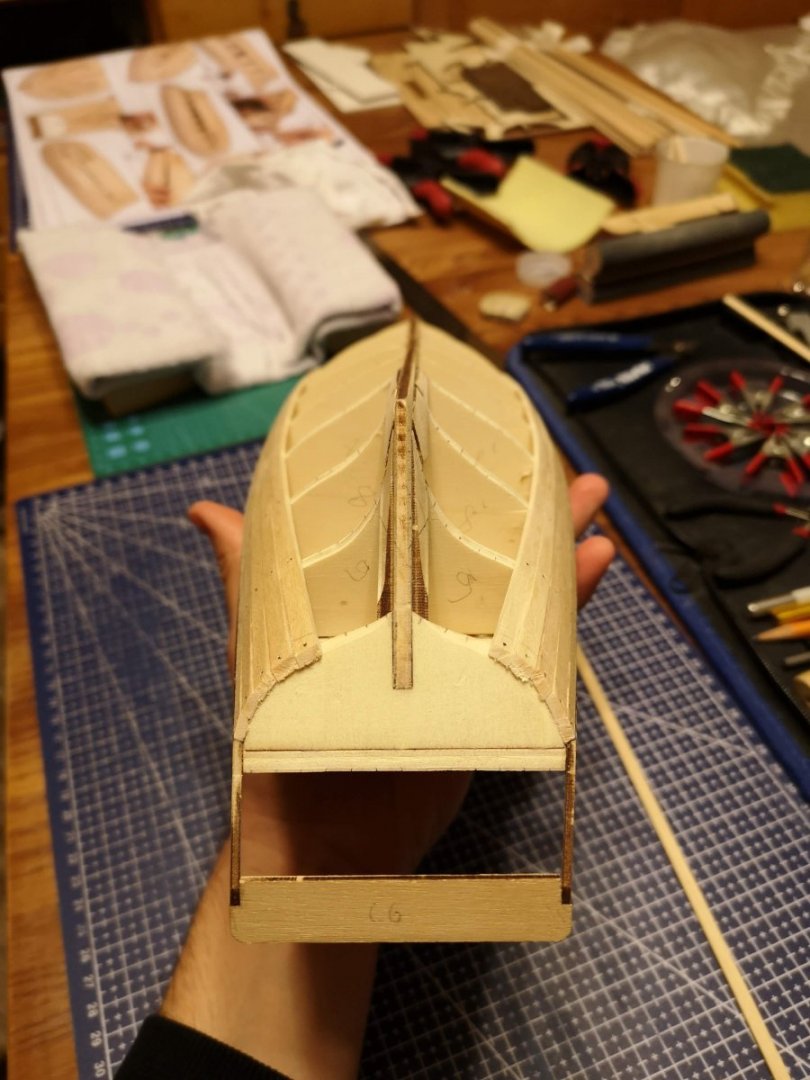
Hi Rambo and welcome to MSW! As Joachim mentioned above, you can check in the forum, there are useful suggestions in this topic: Personally I think if your curve is similar to mine you can fix it when you mount the deck to the false keel. Actually in the beginning I tried to straighten the spine with drops of hot water and two clamps, but unfortunately without any success. Perhaps I didn't do it right 😞. Maybe you can try to use the bending method I used to bend my bulwark - soak the wood in hot water for about 30 sec and then use an iron. I am not sure if this method works for thicker plywood parts like the false keel, or it is recommended only for planks and other parts that are supposed to be bent.