BranPie
-
Posts
42 -
Joined
-
Last visited
Recent Profile Visitors
975 profile views


-
 BranPie reacted to a post in a topic:
Lady Nelson by vossiewulf - Amati/Victory Models - 1:64
BranPie reacted to a post in a topic:
Lady Nelson by vossiewulf - Amati/Victory Models - 1:64
-
BranPie reacted to a post in a topic:
Chris Watton and Vanguard Models news and updates Volume 2
-
 BranPie reacted to a post in a topic:
Chris Watton and Vanguard Models news and updates Volume 2
BranPie reacted to a post in a topic:
Chris Watton and Vanguard Models news and updates Volume 2
-
 BranPie reacted to a post in a topic:
Chris Watton and Vanguard Models news and updates Volume 2
BranPie reacted to a post in a topic:
Chris Watton and Vanguard Models news and updates Volume 2
-
 BranPie reacted to a post in a topic:
HM Cutter Trial 1790 by AJohnson - FINISHED - Vanguard Models - 1:64th
BranPie reacted to a post in a topic:
HM Cutter Trial 1790 by AJohnson - FINISHED - Vanguard Models - 1:64th
-
BranPie reacted to a post in a topic:
Chris Watton and Vanguard Models news and updates Volume 2
-
 BranPie reacted to a post in a topic:
Chris Watton and Vanguard Models news and updates Volume 2
BranPie reacted to a post in a topic:
Chris Watton and Vanguard Models news and updates Volume 2
-
BranPie reacted to a post in a topic:
Chris Watton and Vanguard Models news and updates Volume 2
-
BranPie reacted to a post in a topic:
Chris Watton and Vanguard Models news and updates Volume 2
-
BranPie reacted to a post in a topic:
Chris Watton and Vanguard Models news and updates Volume 2
-
markjay reacted to a post in a topic:
Chris Watton and Vanguard Models news and updates Volume 2
-
Canute reacted to a post in a topic:
Chris Watton and Vanguard Models news and updates Volume 2
-
mtaylor reacted to a post in a topic:
Chris Watton and Vanguard Models news and updates Volume 2
-
hollowneck reacted to a post in a topic:
Chris Watton and Vanguard Models news and updates Volume 2
-
thibaultron reacted to a post in a topic:
Chris Watton and Vanguard Models news and updates Volume 2
-
chris watton reacted to a post in a topic:
Chris Watton and Vanguard Models news and updates Volume 2
-
Can't wait till James starts building that 😊
-
flutlo6180 reacted to a post in a topic:
Polaris by BranPie - OcCre - 1:50 - First ever wooden ship build
-
GrandpaPhil reacted to a post in a topic:
Polaris by BranPie - OcCre - 1:50 - First ever wooden ship build
-
Dave_E reacted to a post in a topic:
New & beginner 'dirkske'
-
ibozev reacted to a post in a topic:
Polaris by ibozev - FINISHED - OcCre - 1:50
-
Well done. That's looking really nice. I'm still not finished with mine. Work has come to a complete standstill again. Upside is that now I'll have an excellent build log to follow up on for my build
-
I have the same gaps. I'm also assuming they'll be hidden by second planking 🤞 All your prep looks fine, a bit better than mine at every step 😊
-
The OcCre supplied thread is terrible. Your first attempt is already a marked improvement. May I ask which ropewalk you used?
-
Nice! Looks better than mine did. Take your time to sand it. Especially at the sternpost you’ll need to taken quite a lot of material off.
-
I just like the name "the necessary". 😊 Looks great already, toning it down will probably be even better.
-
Hi, Ilia. Thank you for the compliment. I'm just doing the best I can, with the kit and, more importantly, with my skillset. Now, before I answer your questions I would like to repeat that I am no longer following the instructions, so be careful following my advice, I don't know what kind of trouble I might have got myself into 😁 And now, some answers: I'm tapering the planks, but only to the bow (use a very sharp blade and do multiple passes with very little pressure, if not the wood will just split following the grain) . At the stern you can keep the planks (strips) full width. At this point I'd advise you to measure really well before you start planking. The instructions tell you to start planking with the sapelli strips just beneath the bulwark pattern. I did this without thinking too much about it. The result is that, at the widest point I now have 15 strips and 3 mm I need to cover with sapelli strips. Those last 3 mm will not be easy... If you measure well, I think it should be possible to go with 15 strips and stop there. Those remaining few mm would be covered by the wales anyway. I don't use any bending method. Lengthwise the 0.6 mm strips bend very easily. I tried edge bending them with a few techniques but the strips just warp. So this is the technique I use; I start from the bow with about 5 mm of CA gel and 20 mm of PVA. I position the strip at the stem, and hold for about 20 seconds for the CA to grab. Then I hold down on the PVA, being careful to apply pressure on the whole strip (it warps from the moisture in the glue) and to push (or pull) it against the adjoining strip. After that I work myself all the way to the stern in 50 - 100 mm segments. I always work with PVA (just personal preference). The planks will tend to warp when you follow the curve of the hull, since I didn't succeed in edge bending the strips I overcome this with glue and pressure. I answered your last question above 🙂 If you use CA, be sure to use the gel type. The runnier types will soak through the strips, your fingers will get stuck and it's going to look like **** (don't ask me how I know). If you like I can add some pictures later to make things more clear. I'm stuck on my smartphone now so it's a little fiddly to do that now.
-
I can say that for the 0.6 mm strips you get in this kit for second planking, you don't need a tool. Edge bending proved impossible (the strips just twist) and in the other direction the strips bend very easily. That said, I'll be buying some kind of tool to aid in bending for my next build. Haven't been able to make my mind up on what to get though. I've thought about getting one of those adapted soldering irons and then buying some soldering tips to go along with it...2 tools in 1...
-
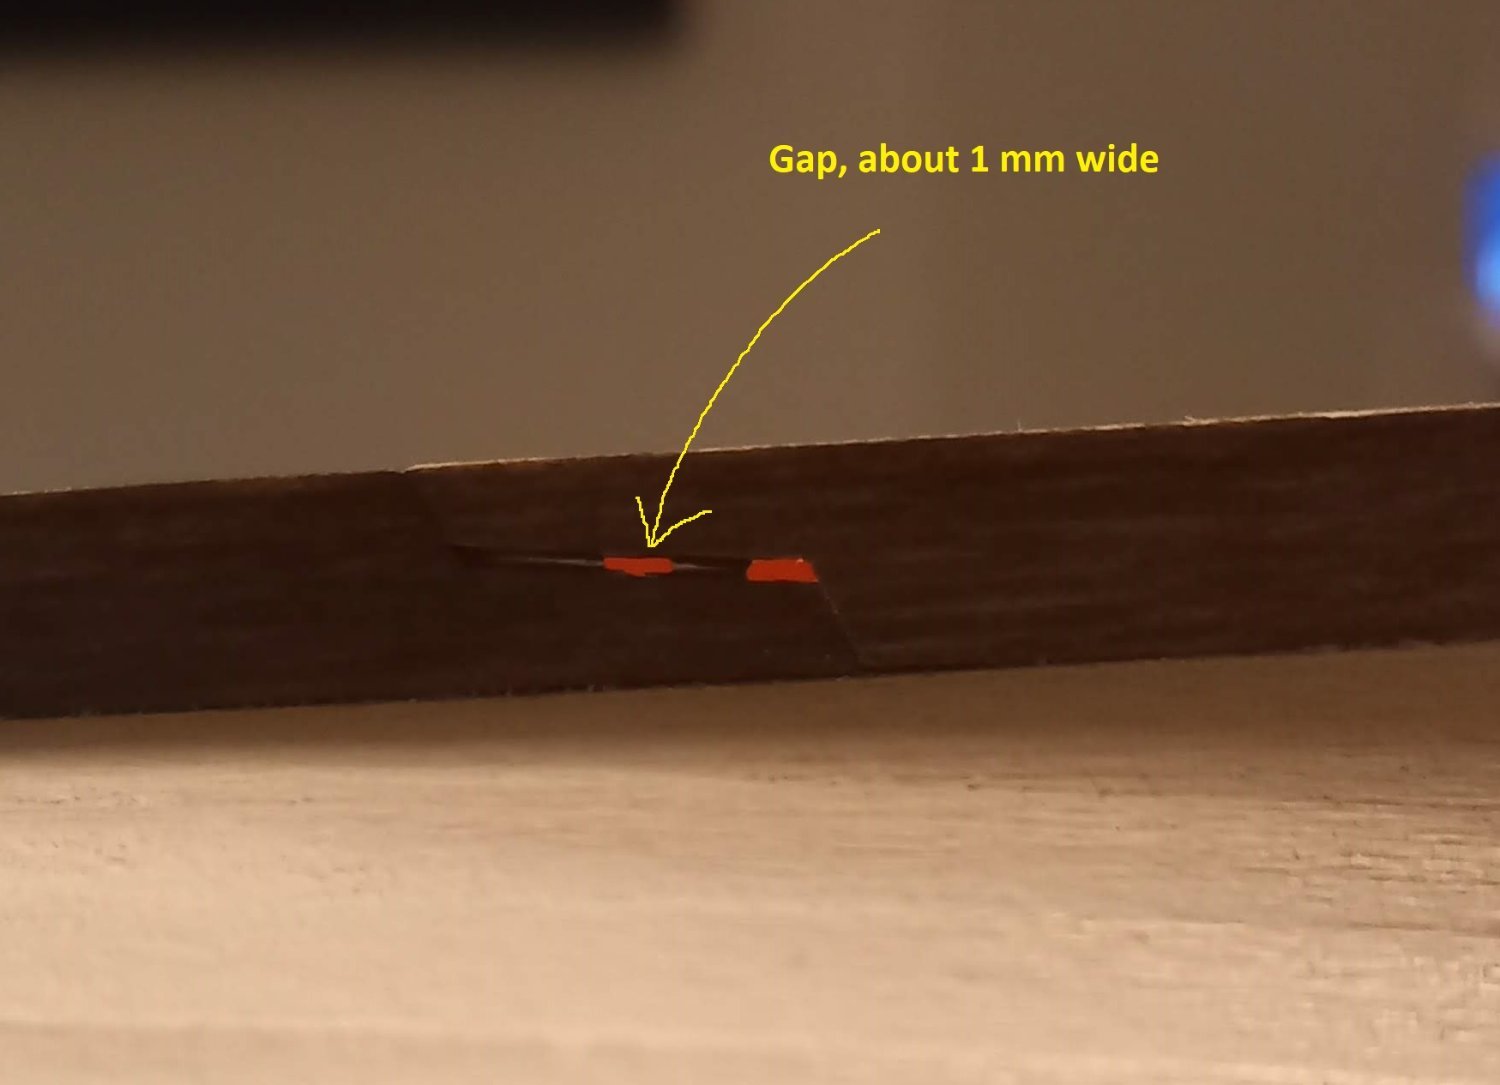
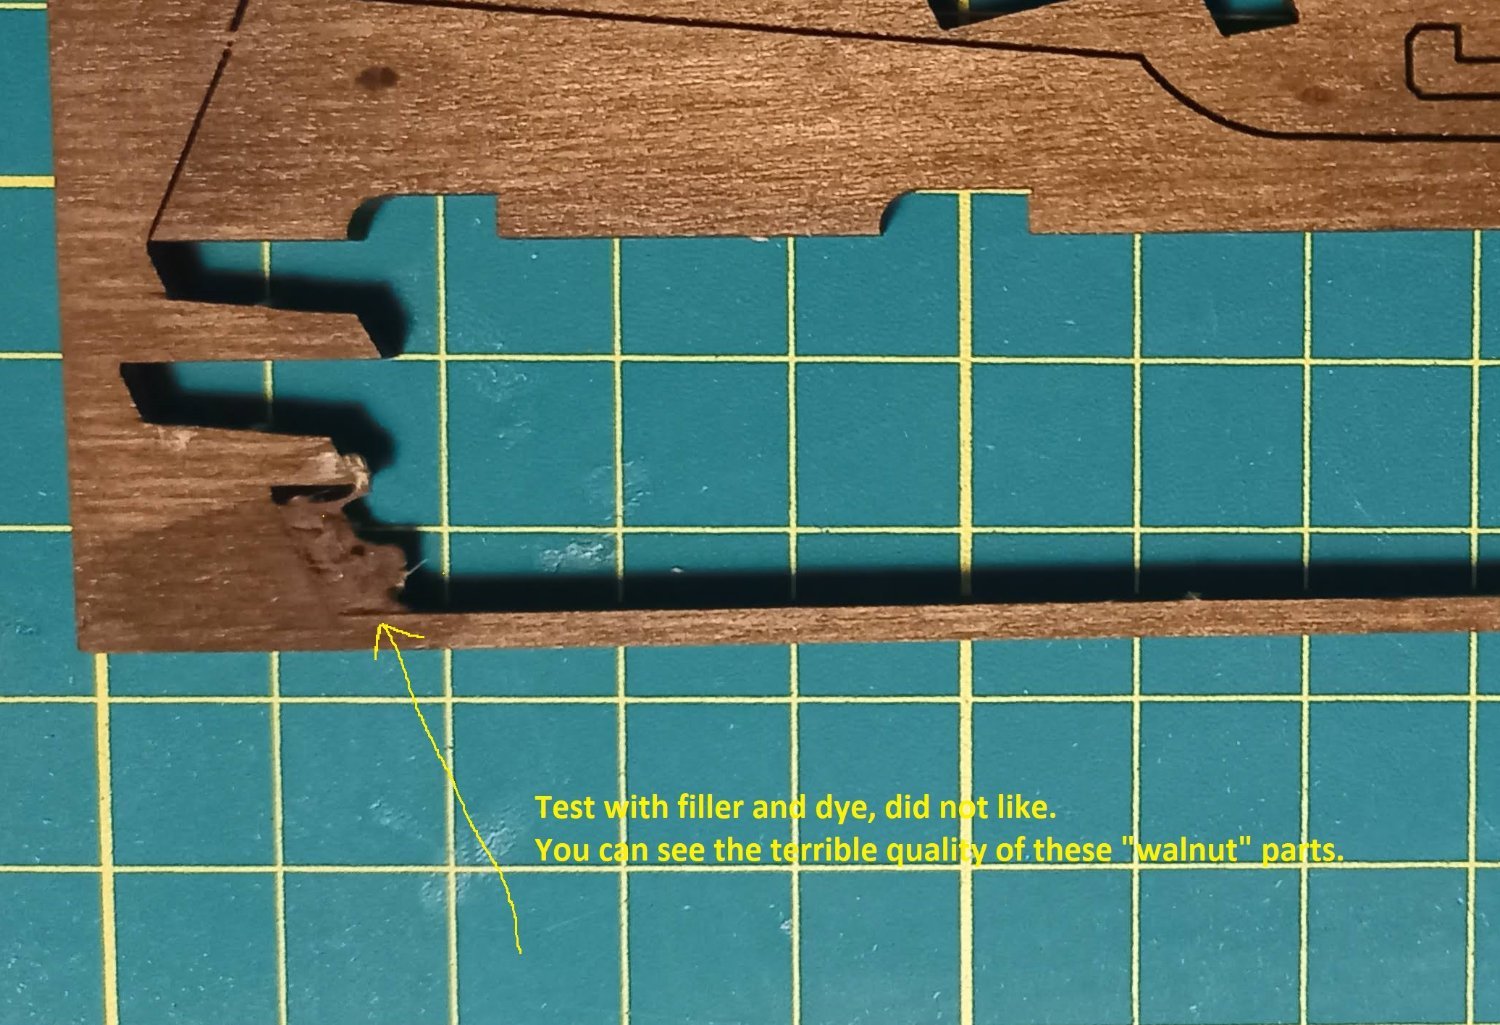
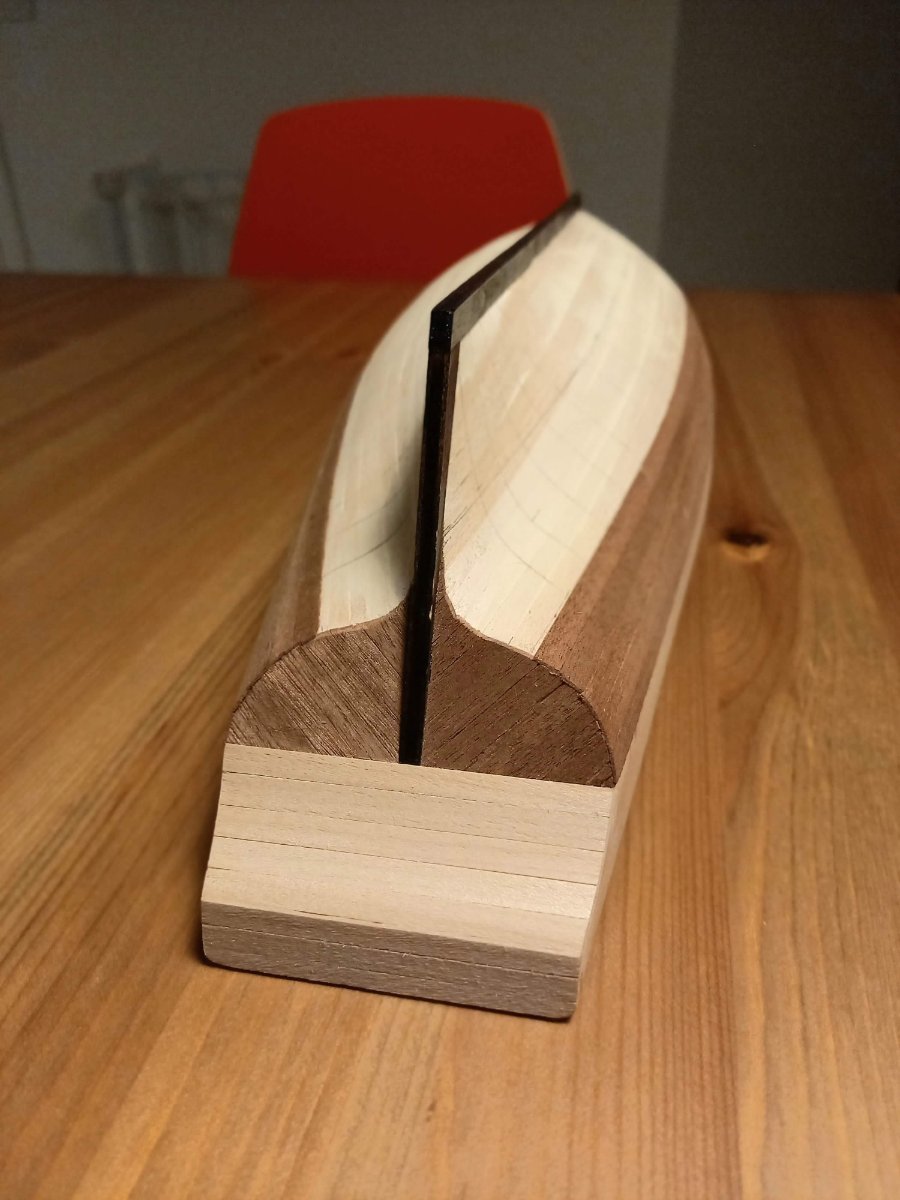
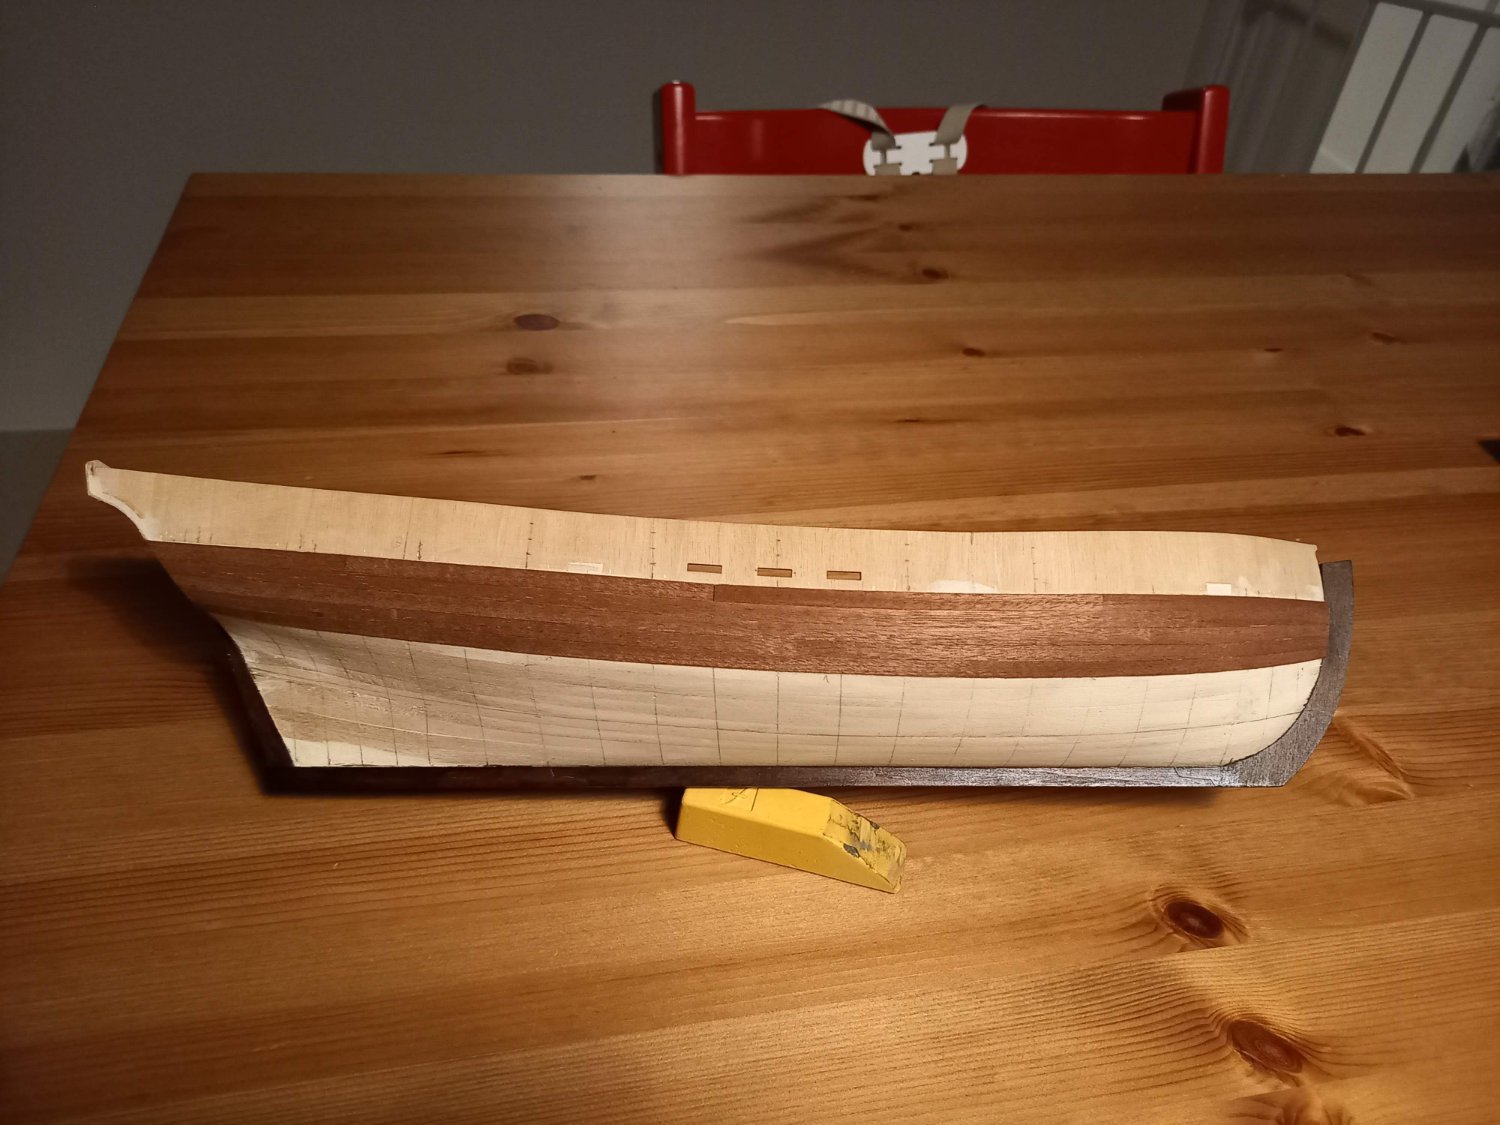
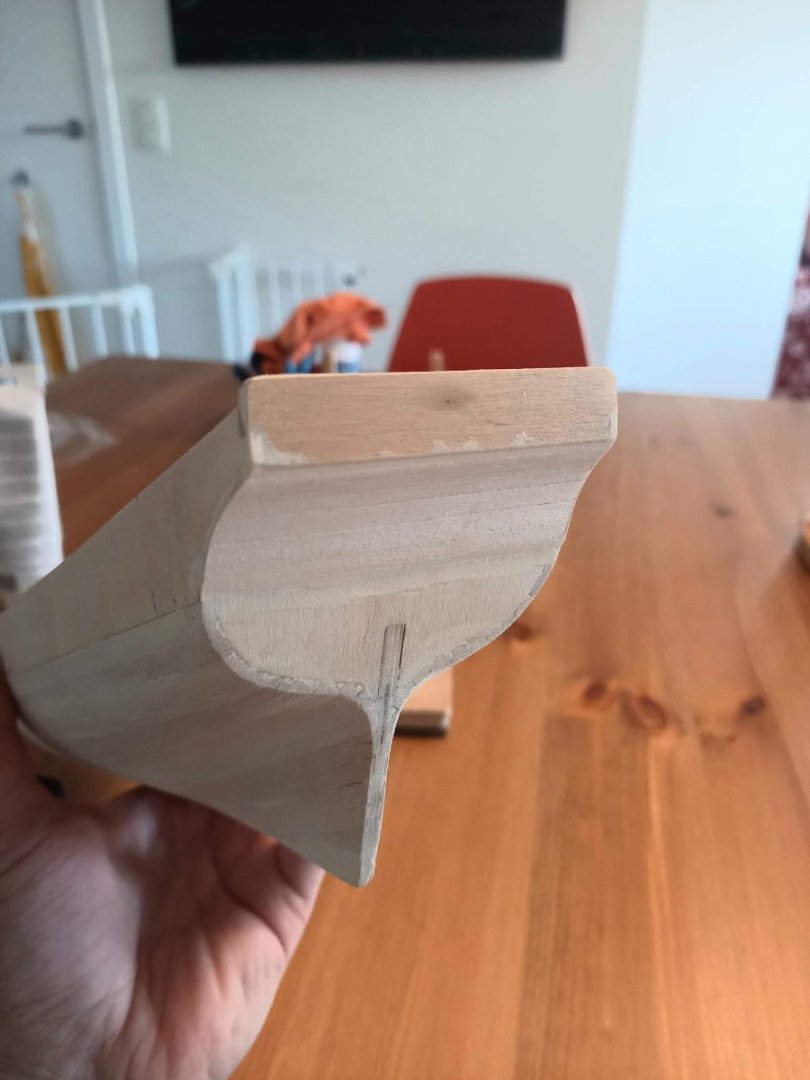
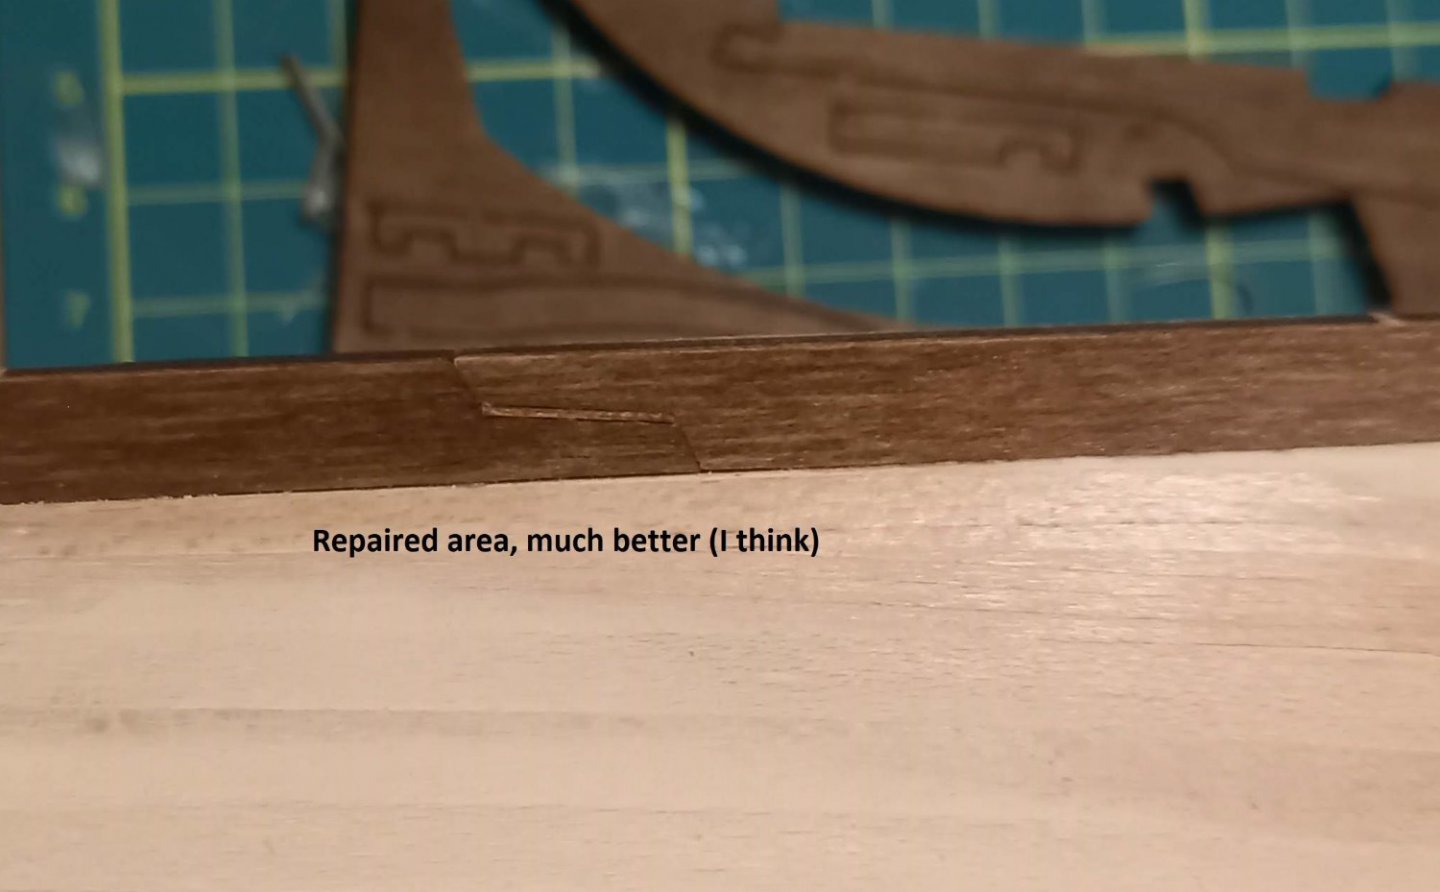
Well, I've been out of the game for a while, but here I am with a - long overdue, and rather long - update. At first I just didn't have much time for modelling due to work in the house/garden. Then I didn't feel like working on my model because I wanted to be able to spend more time with it to properly get my head around how I wanted to tackle second planking (pretty hard with a 2-year old running around the house). After that my perfectionism got the better of me; I wanted to do a whole lot of things, most (or all) of which I lack the skill or knowledge for... And so I just did nothing. By this time it was September and I had to go back to work after the holidays and ... I just couldn't. I'd worked myself into burnout, which in retrospect seems very logical, but at that time it came as quite a shock. Anyway, I'm feeling much better now, ready to go back to work in a few weeks time. And I've restarted work on my Polaris about a month ago. It's slow going but it's going, and I feel good doing it (most of the time). So here comes the actual progress report. First I needed to prepare my hull for second planking. This required some filling (not all that much) and quite a bit of sanding. After that I planked the transom (?) and did some touching up at the corners of the stern fascia, which I snapped of twice 🥴 during first planking. At this point the instructions tell you plank the transom, stick the second layer of planks anywhere they'll go and then fill the gaps with pointy pieces you cut to shape, then trim back where necessary and install stem, keel and sternpost. I decided not to follow instructions... I'm not quite a that point where I'm able to tell if that was a good idea or not ... 🤞 So, at this point I installed stem, keel and sternpost. These were a bad fit and left significant gaps between stem en keel and the different pieces that make up the keel. I decided to fill these. A test with filler and dye (the "walnut" keel needs to be dyed, which is a good thing because the wood quality is ghastly. It's basically a very course ply with an even courser veneer or possibly even just dyed ply, I'm not sure) revealed that I didn't like the look of that. So I cut tiny pieces of the "walnut" board and inserted them into the gaps. Not perfect, but you'll never see it if you don't know it's there, so good enough. Sorry for the terrible pictures btw, they're taken with a simple smartphone camera, often in bad light... Then on to second planking. First transom and stern fascia. I added my own touch with the diagonal strips, just thought it looked good. Then I lined of the hull, divided into 3 times 5 strakes and proceeded with planking. Managed to set my first strake about 1 mm high (both sides 🤪), so I'll have to solve that problem somewhere along the line... Also wanted to try planking with scale length planks instead of full length strakes (perfectionism, so tiring) and shortly after that I REALLY wanted to bin the whole thing. There are no 2 strips alike in this kit. They vary in width, but worse than that, nearly every single one tapers from 4.5-5 mm at one end to 5.5-6 mm at the other end. They are also very dry, hard and very brittle so there isn't much you can do with them because almost anything you try, they split, or a piece just breaks off, or ... Luckily (?) I was able to restrain myself, and just put the model away for a week to regain my sanity. I adjusted my expectations, discarded to idea to rip of what I had and buy new stock, decided to plank in full strakes and here we are: 5 strakes done (both sides), 10 (and a half) to go. And I'm actually pretty happy with the result AND enjoying myself again. Hopefully next update will follow "soon".


-
I think I've already read just about every Vanguard kit log there is, including your prototype builds I like the kits, I like the fact that they're all the same scale and I like the fact that they seem to be easy (relatively, of course) to build but offer enough options to personalise and expand on. The only thing holding me back, really (apart from finishing my current kit), is that I'm afraid my skill is insufficient. But then again, I'm learning now that you can't acquire much skill with the kit I have now (apart from dealing with frustration 😁) anyway so should probably just stop worrying... 🙄
-
Thank you, Allan. That's a kit I'm also considering. I'm just a little concerned about the import taxes on a Syren kit, but when the time comes I will be looking further into it.
-
I couldn't agree more. I'm on my first kit, Polaris from Occre, and whilst it is indeed a good beginner kit in that it's simple, it is also uninspiring and often frustrating to work on. The cheap materials (especially the "walnut" ply which has the tendency to crumble as soon as you touch it and the 0.6mm "walnut" strips which are so hard and brittle that it's nearly impossible to do anything with them) are really no fun at all to work with. The instructions are simplified so much that if you follow them you don't learn to plank properly (and if you try the wood quality drives you insane (this is where I'm struggling now, I almost binned my model last week) and you don't learn to do rigging properly (I've decided I'm not going to try on this model, I just don't have enough knowledge to make something of it). So in the end, at best, you end up with an OK model... I'll be putting much more thought into what my second build wil be. The Vanguard kits are at the top of my list, because they seem to have excellent instructions and are designed so even a beginner can achieve a good result.
-
Welcome to MSW from another Belgian, Dirk. Hope you enjoy your first build and many more will follow.
-
I'm building a polaris myself and had the same issue with the bent spine. Attaching the deck won't cure the curve (I assumed that too ☺️) . That said, it isn't that bad that you can't just continue your build. Polaris is a good starter kit in the sense that it's relatively easy to build, but issues with material quality do sometimes make it frustrating. If you like I can post some pictures of how mine looks now; I'm almost ready to start second planking and (since I'm not following instructions anymore) have the keel already attached which makes the curve very visible.