


Koerant
-
Posts
9 -
Joined
-
Last visited
Content Type
Profiles
Forums
Gallery
Events
Everything posted by Koerant
-
There has not been any progress since my last post - unless you count the new toolbox I bought last week to store all my modeling tools in. February has been a busy month and March is not looking any better. The way things are going I will only be able to build again in April. But I have not forgotten about it, I did not store the ship away in a closet, it is out in the open as constant reminder when I walk past it to get back to work as soon as possible.
-
Your model is looking incredible so far.
-
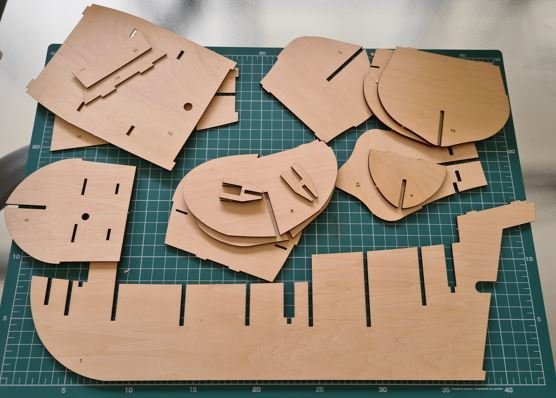
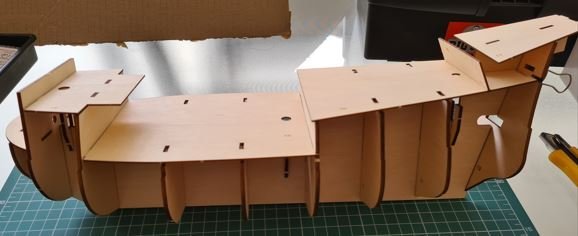
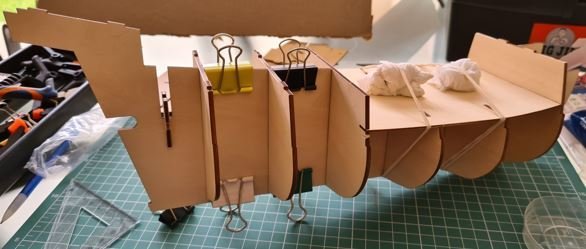
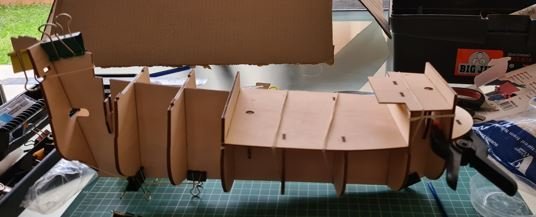
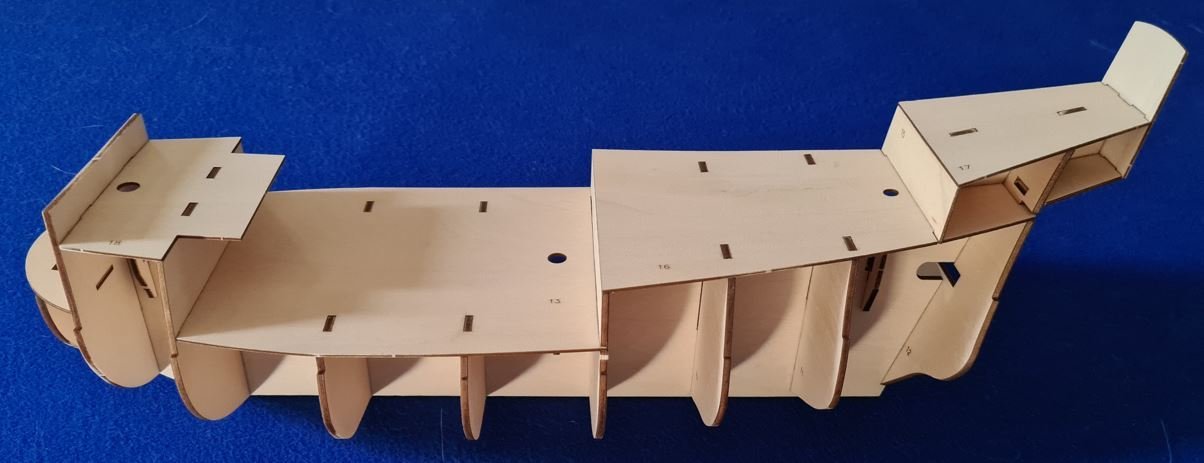
Hello everyone. The time has finally come to start work on my second model. The San Francisco II. I chose this one because I wanted a nice-looking, decent sized ship with canons. I went online and this was the cheapest one I could find with those requirements. I don't know much about the ship other than the name. If it turns out like the picture on the box, I’d be happy. I really hope that I learned from the many mistakes on my first build. So, without further ado, here goes. Step one, open the box. It does not look like a lot of components. How on earth will this turn into that ship… It comes without a printed manual. I loaded the instructional PDF on my phone, and I must admit it is quite nice using it like that instead of the printed manual. I started out by cutting out the parts required for the first few steps and then dry fitting them together. First thing to notice is that the parts fit quite easily, almost too easy. There is a small gap when fitting the cut pieces together. Looks like about 0.5mm. Seems like either the plywood used is too thin or the laser cutting was too generous. Should not be a major issue as I guess I can just make sure one side is glued very well. I saw some build videos and most of the people used rubber bands in the assembly, I tried it and I have to say, it is a game changer for me. Wish I knew about this earlier. And here we go, the stopping point for the weekend. Finished the structure and transom assembly. Up next is the planking of the decks.

-
Thanks for the great feedback everyone. Next I am going to try my hand at something bigger. The San Francisco II from Artesania Latina. If everything goes according to plan, I can start a new build log this coming weekend.
- 10 replies
-
- 2
-

-
- Viking Longboat
- Artesania Latina
- (and 1 more)
-
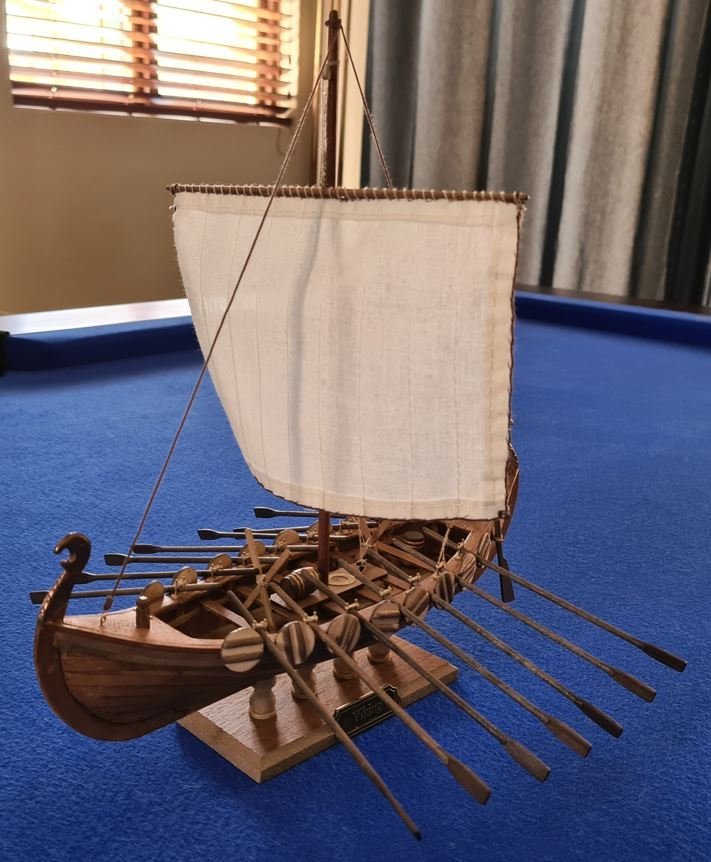
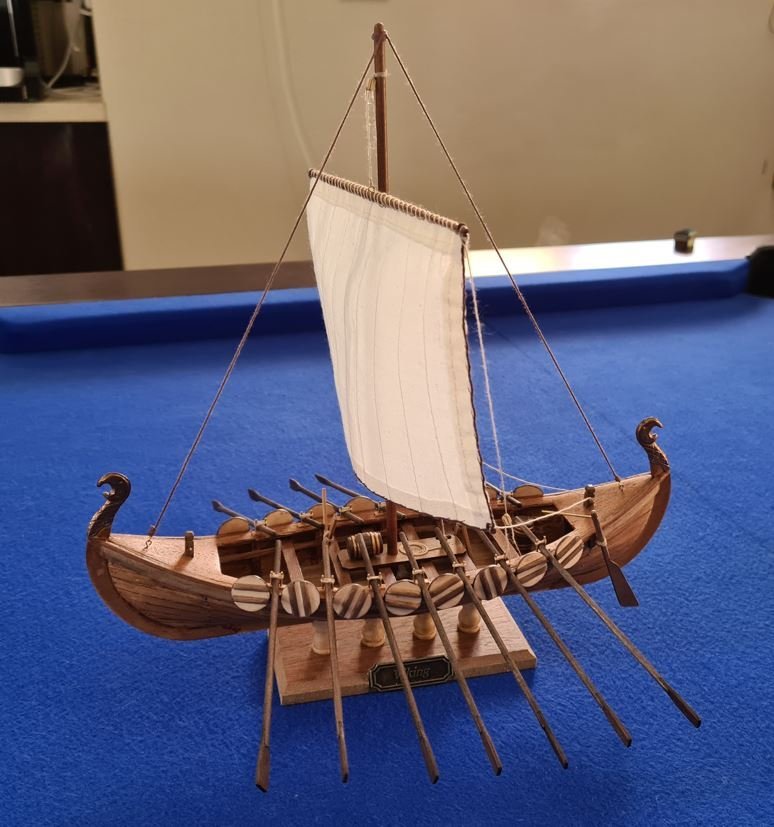
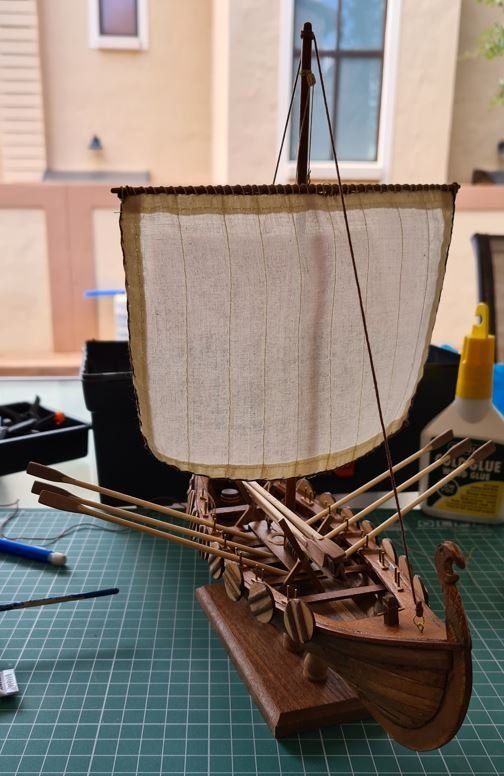
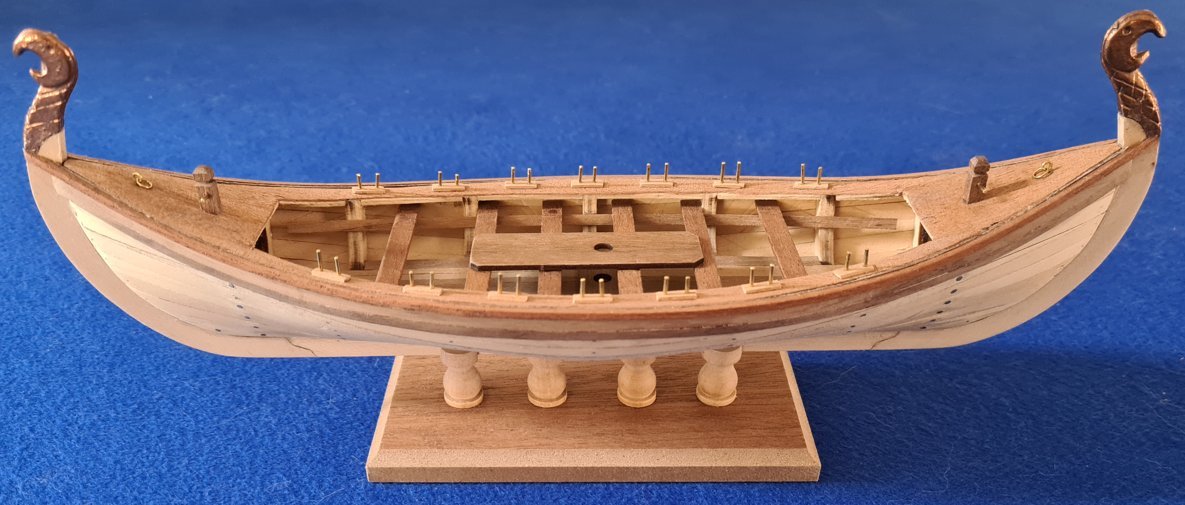
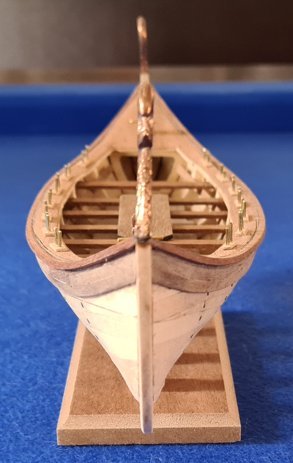
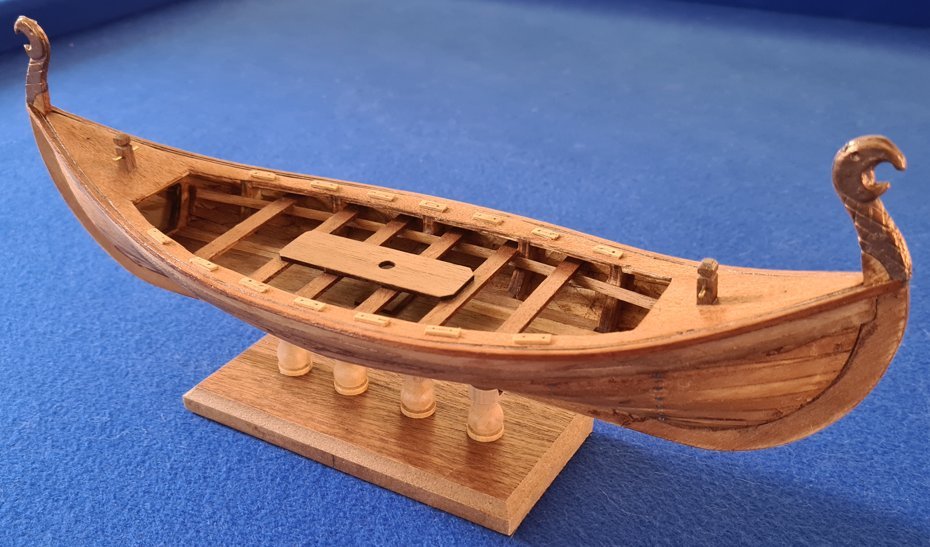
I finally made some time to finish the boat. Now all I need is to find a spot where I can admire it.
- 10 replies
-
- 15
-
-
- Viking Longboat
- Artesania Latina
- (and 1 more)
-
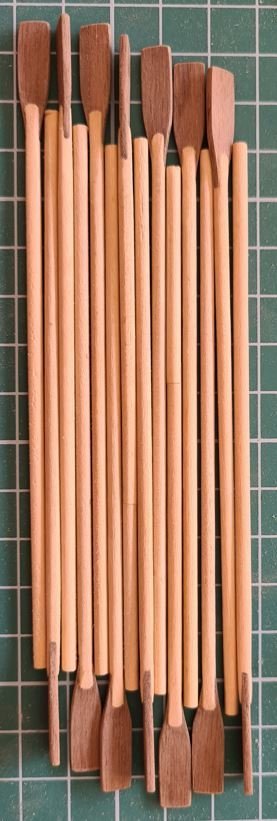
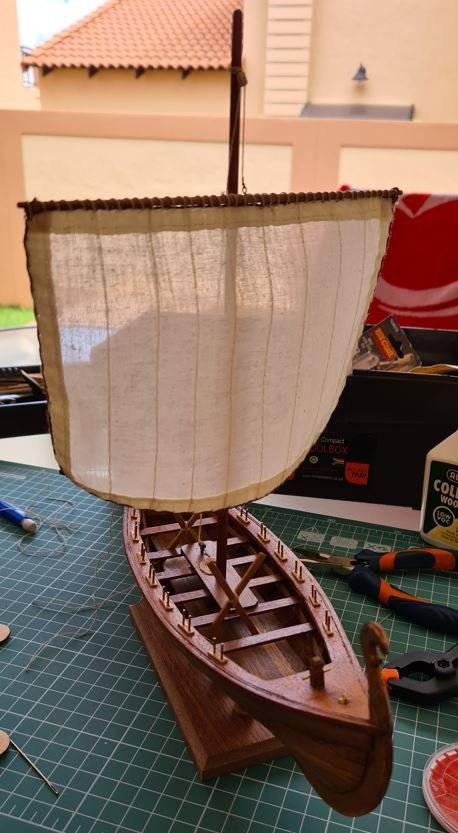
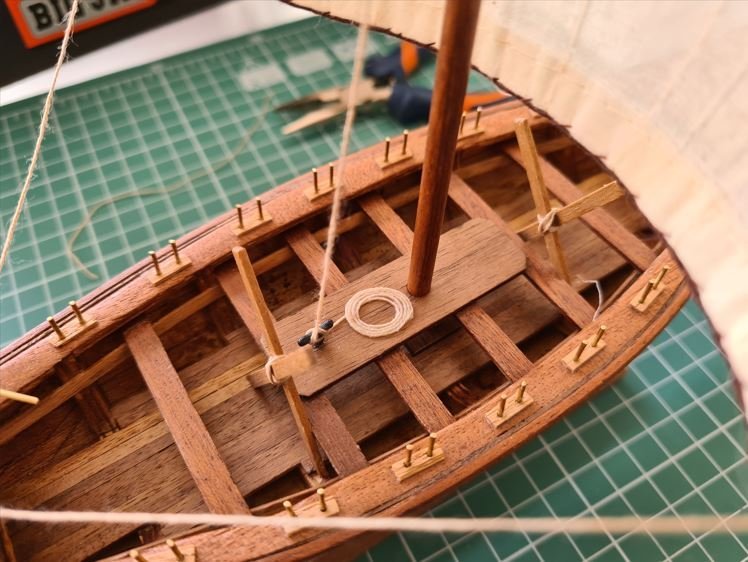
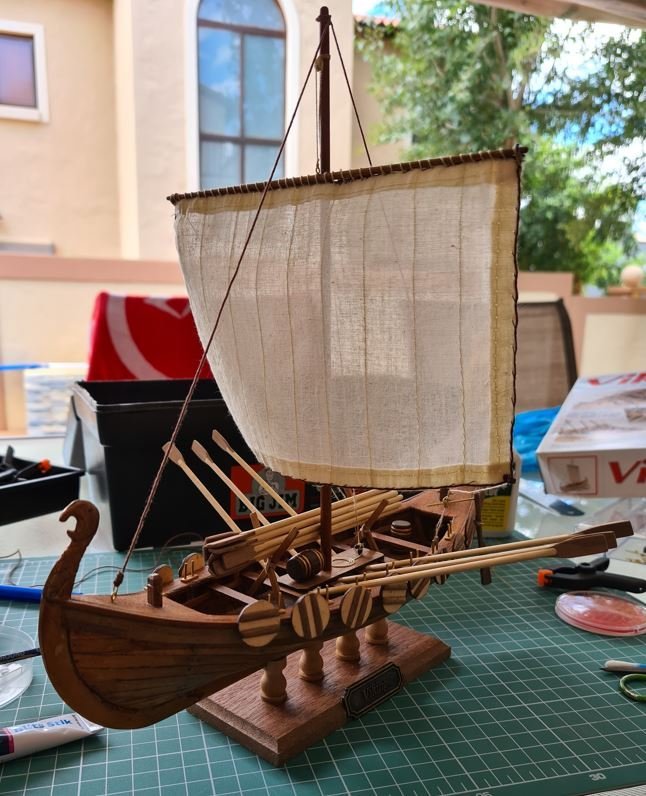
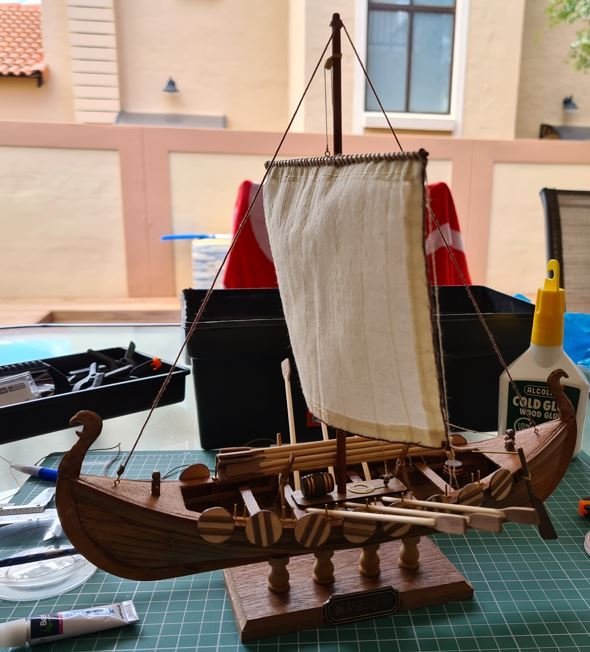
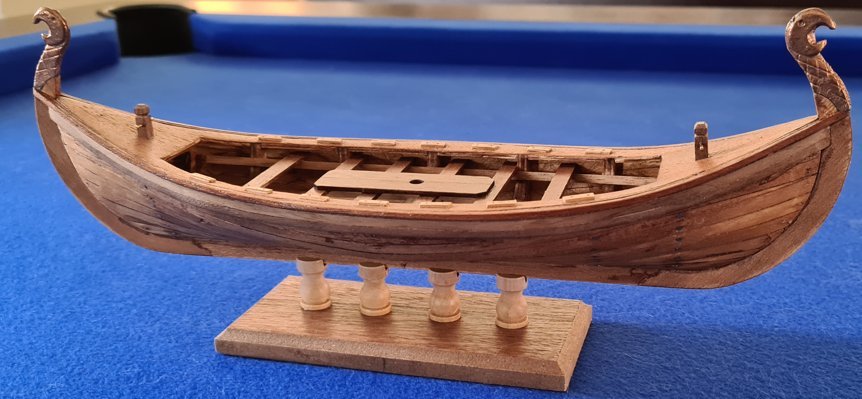
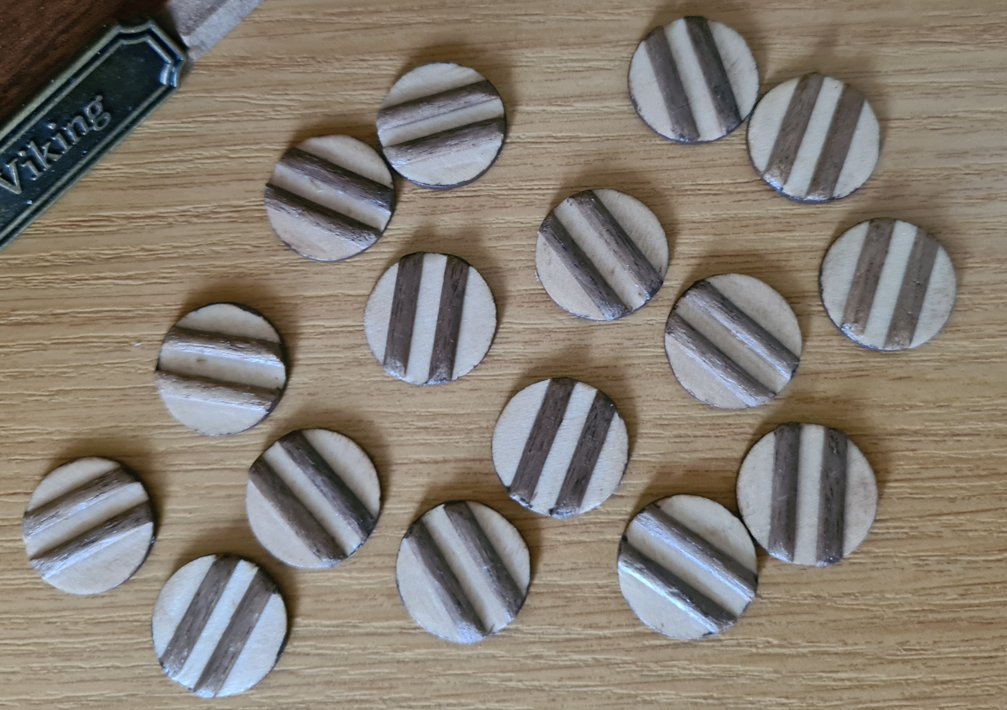
Oars are assembled now. I also started work on getting the sail up: I had two missing dowel sticks in my kit so had to get some at the local hardware store. A little disappointed about that. Added the shields and barrels. I am basically done. All that is needed is to figure out how I am going to match the paddle color to the shaft. Easiest might be to just paint it all the same. Either way I do not have the correct colors to do that now so will hopefully get that next week and finish this one off.
- 10 replies
-
- 5
-
-
- Viking Longboat
- Artesania Latina
- (and 1 more)
-
This was the last place I though anyone would understand some Afrikaans. It is quite a beautiful country. Thanks everyone for the warm welcome. For those who are interested, here is my first model in progress:
-
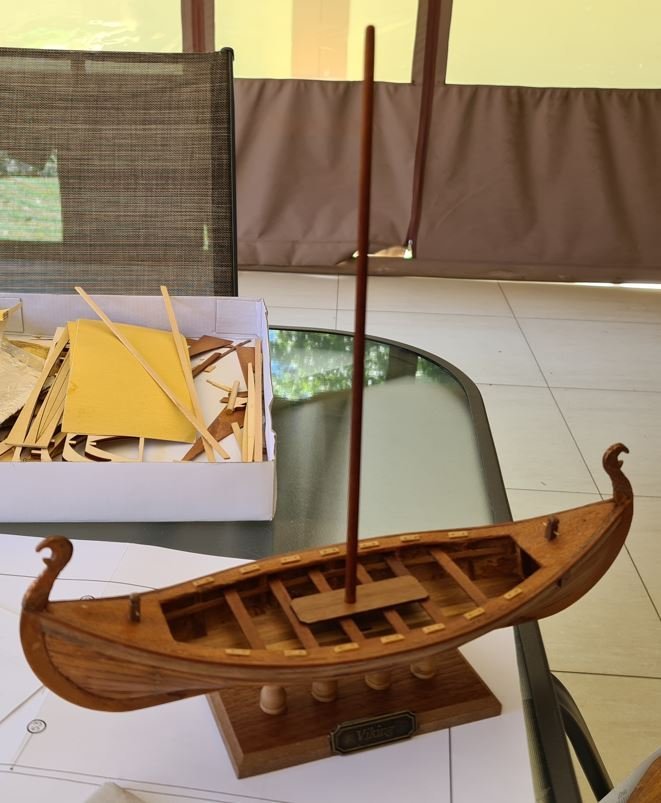
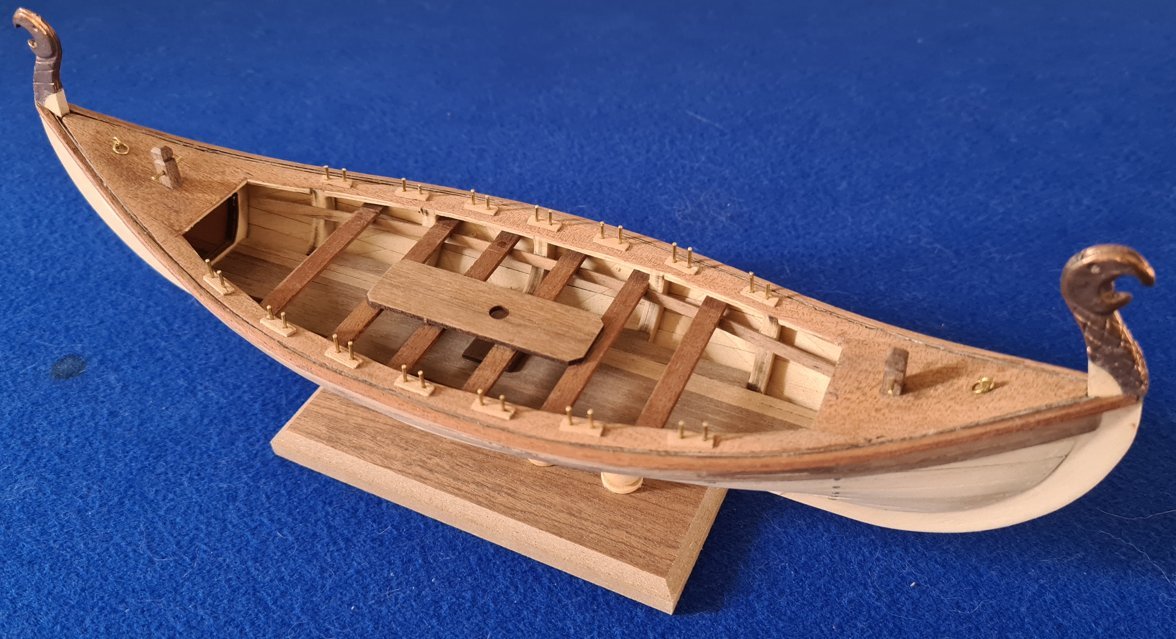
Ok, so I am a complete beginner. I have little to no woodworking or modeling skills. This is my first build. I purchased this model a few years ago and was eager to start. I completed it up to the first half of the planking and then stopped for some reason. I have since moved 4 times and every time moved this unfinished model with me. About two weeks ago I decided to finally put in some time to get this model done. I only recently found out about this forum so did not keep a log from the start. I am starting this log with an almost finished longboat. This is my starting point fort this log. Longboat is ready for staining and varnish. I learned that I should not be trusted with wood stain. I stained quite a bit more than just the wood. My hands are still a shade of medium oak. I should probably have used a lighter color for the wood wood stain but it does not look too bad. I could not get a clean finish but I kinda like the uneven coat. It gives it more character. When staining the outside, the color started to bleed through the planking so I had to stain the inside as well. Boy was that a mission... My next task was to glue and finish the shields that will be added to the sides. I did not like the way the shields looked after following the instructions, so I worked on them a little bit. I sanded down the blocky look of the planks glued on them. I wanted to stain them as well, but the only color I had was the medium oak that I stained the hull with. I did not think it would look great and I was too lazy to go to the store to get another color so I left them the way they were. I want to add a bit of contrast. Next up, I need to assemble the oars. Will do that in the next couple of days.

- 10 replies
-
- 5
-
-
- Viking Longboat
- Artesania Latina
- (and 1 more)
-
Hi everyone. I've always been fascinated by historical sailing ships. They just look so awesome. I am very new to modeling. A few years ago I bought an AL viking kit to see if I would be interested in the hobby. I started the build but never finished it. A few weeks ago I decided to finish it and then found this forum. Once I am done with my viking kit, my next project is going to be the San Francisco II.