


DanPage
-
Posts
46 -
Joined
-
Last visited
Content Type
Profiles
Forums
Gallery
Events
Posts posted by DanPage
-
-
Hi David
Thanks for your comment. Sorry about the double reply I pressed the wrong key. (Warning... Pressing Tab produces an immediate post!)
I don't know if you could answer a query of mine regarding the situation of the cable tier on the Bounty. It is not mentioned in The Anatomy book although it does mention that the Bounty had 3 X 600 ft anchor cables. In the Caldercraft plans the anchor cable is shown coiled up on the deck aft of the windlass but I think putting 600 ft of cable there would be most unlikely. I think the cable probably lead through some sort of opening into the hold. Was this the case with your Billings version?
Danny
-
-
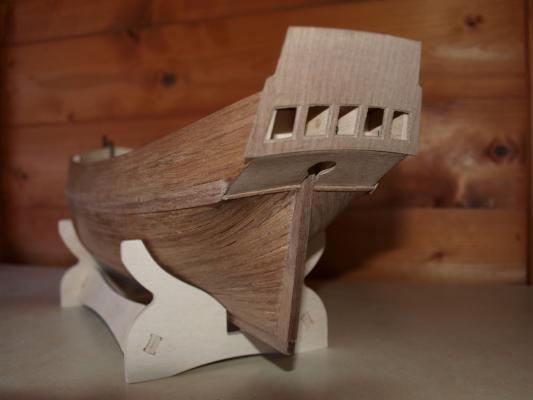
The wales having been completed, the upper hull was sealed with sanding sealer and varnished.
The wales were then masked and painted and the yellow ochre strip added immediately above the wales. These strips were painted first to avoid awkward painting problems.
A similar process was carried out for the blue band, the yellow upper rail and the lower capping rails which were painted black with a yellow edge. These features can be seen in Photo 18.
Before the capping rails were fitted, the tops of the first 3 bulkheads were removed and the inner bulwarks planked and painted red so as to avoid getting paint on the deck later.
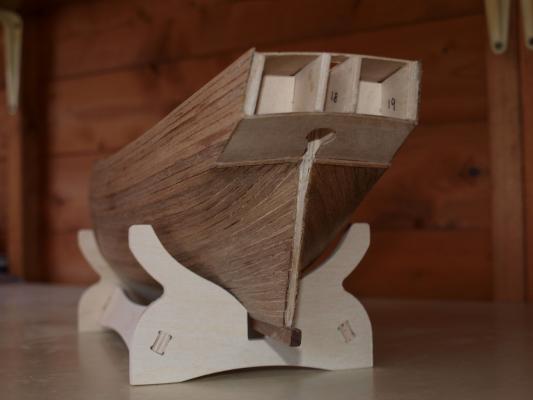
The aft bulwark patterns were the fitted and planked inside and out as can be seen in Photo 19.
It was also felt convenient to fit the lower stern finishing pieces at this stage.
Next up will be the deck planking.
Danny


-
Hi
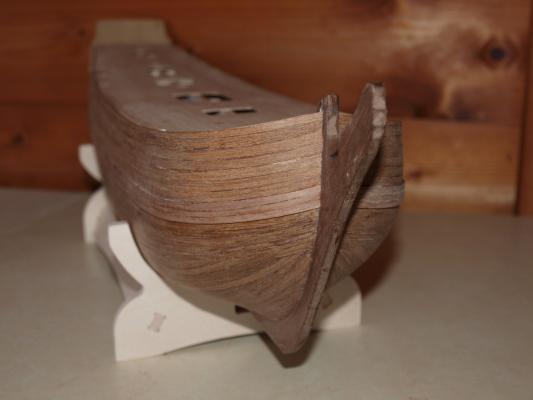
Latest progress : The general rubbing down of the 2nd planking completed and the stern post and stern fascia added.
At this stage I deviated slightly from the instruction sheet and added the wale planks. This was done so that the waterline (which is just below the wale) could be marked. This then enabled sanding sealer to be applied to those parts of the upper hull and the hull between the wale and the waterline which were to be left with a natural finish. This has now been done and I will be reverting to the standard instruction sequence.
Danny
- AJohnson and Captain Slog
-
 2
2
-
Hi
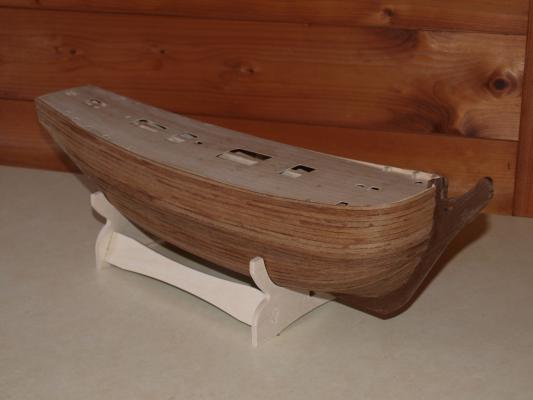
Finally finished 2nd Planking. Photographs attached - prior to sanding down which is the next job which has already been started.
I have also been working on fitting the stern post but can not finally fit this until sanding is finished. The stern fascia is also all ready to attach.
You may have noticed that the planks appear to be different shades. In fact all the planks are darker on one side and lighter on the other. I initially didn't think this mattered as I thought the darker side would lighten on sanding. This however does not happen but I didn't worry about this for the hull below the water line as this will covered by the copper plating but selected the lighter side for the upper part of the hull as this will remain unpainted.
Danny
-
Hi everyone.
Thanks for your comments.
Peter : Nice to hear from you again.
The Sailor : I have just been looking at your Pickle build, nice job! I agree with you about the walnut planks. My 2nd planking seems to be taking an age. I have almost finished from the wale down. Will publish a photo when that phase is finished.
ZyXuz : I wouldn't describe the 2nd planking as a breeze as is mentioned above, the planks are rather brittle and are not that easy to shape. It's not too bad a job though and I have nearly reached the sanding stage.
Danny
-
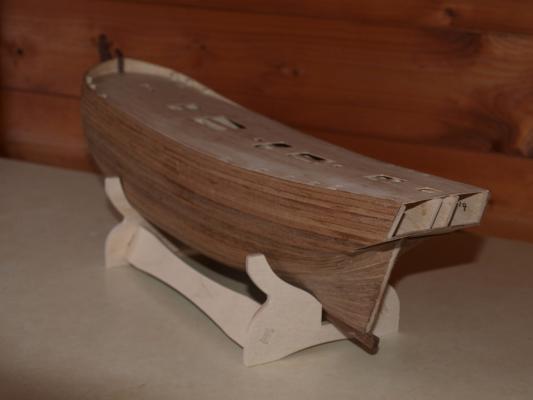
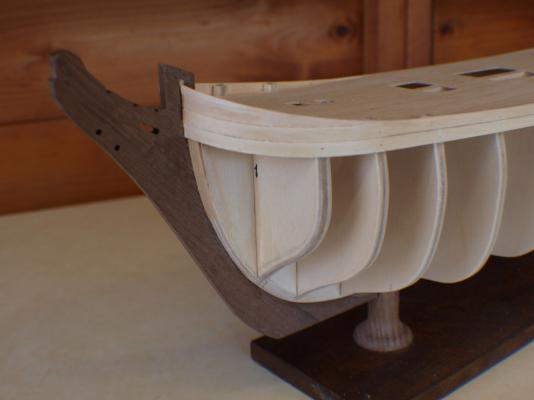
Build update : At last the 1st planking is complete. Not the most beautiful job as can be seen from Photos 6-8 but ok to support 2nd planking.
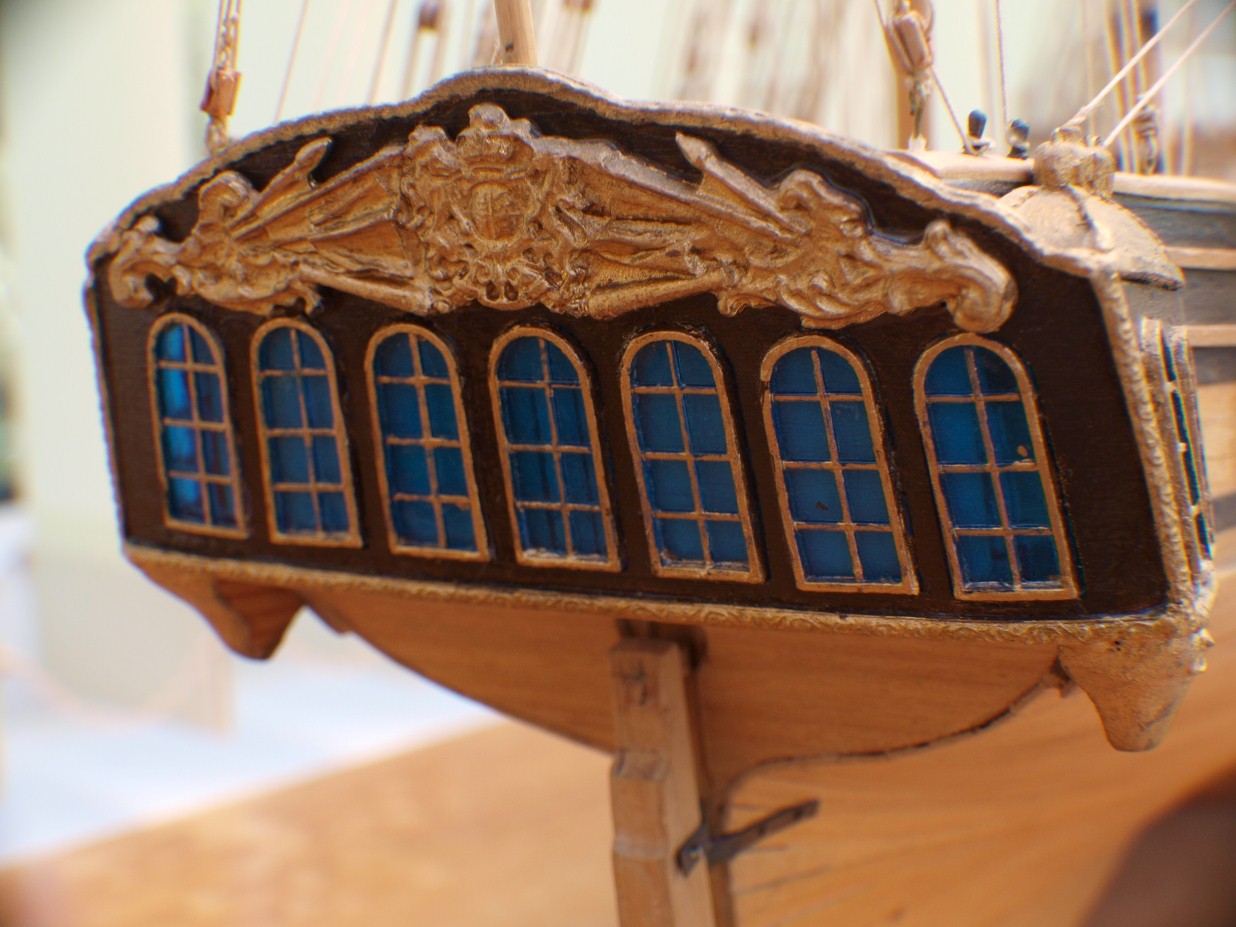
Since before starting the 2nd planking, the stern facia and counter had to be fitted. I thought it might be easier to fit the stern windows on the bench rather than after the facia was mounted on the model. This was only a temporary fitting but gave me the opportunity to try a suggestion that the plastic disc from an old 5 1/4 in floppy disc provides a dark reflective glazing. My efforts are shown in photos 9 & 10.
Photo 11 shows the counter fitted and Photo 12 the 1st plank of the 2nd planking.
Danny


-
Thanks Mathewp and Klimi for your encouragements.
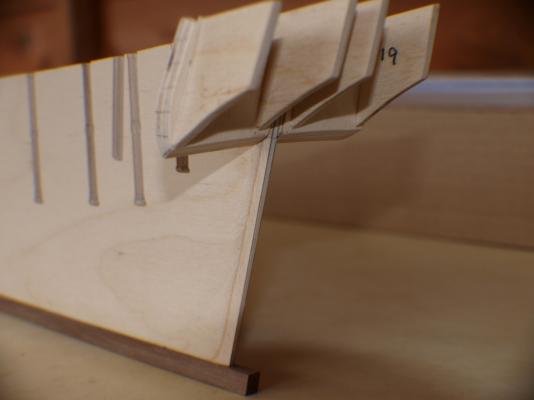
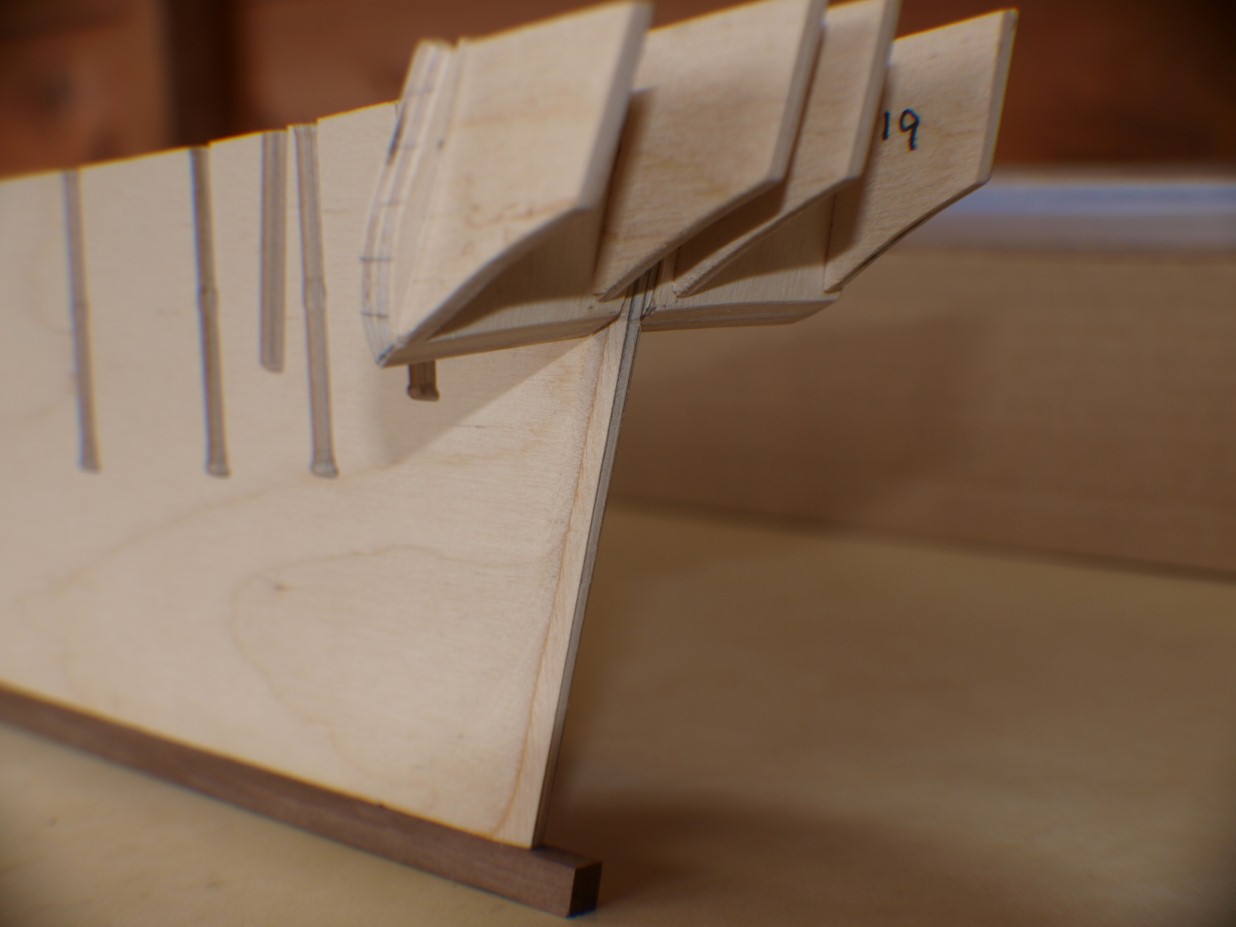
Progress report : The stem termination patterns chamfered and fitted and 1st planking started as shown in photo Bounty4.
The chamfered termination patterns can be seen in detail in photo 5.
I will now be continuing with the planking and will keep you updated as I progress.

-
Hi
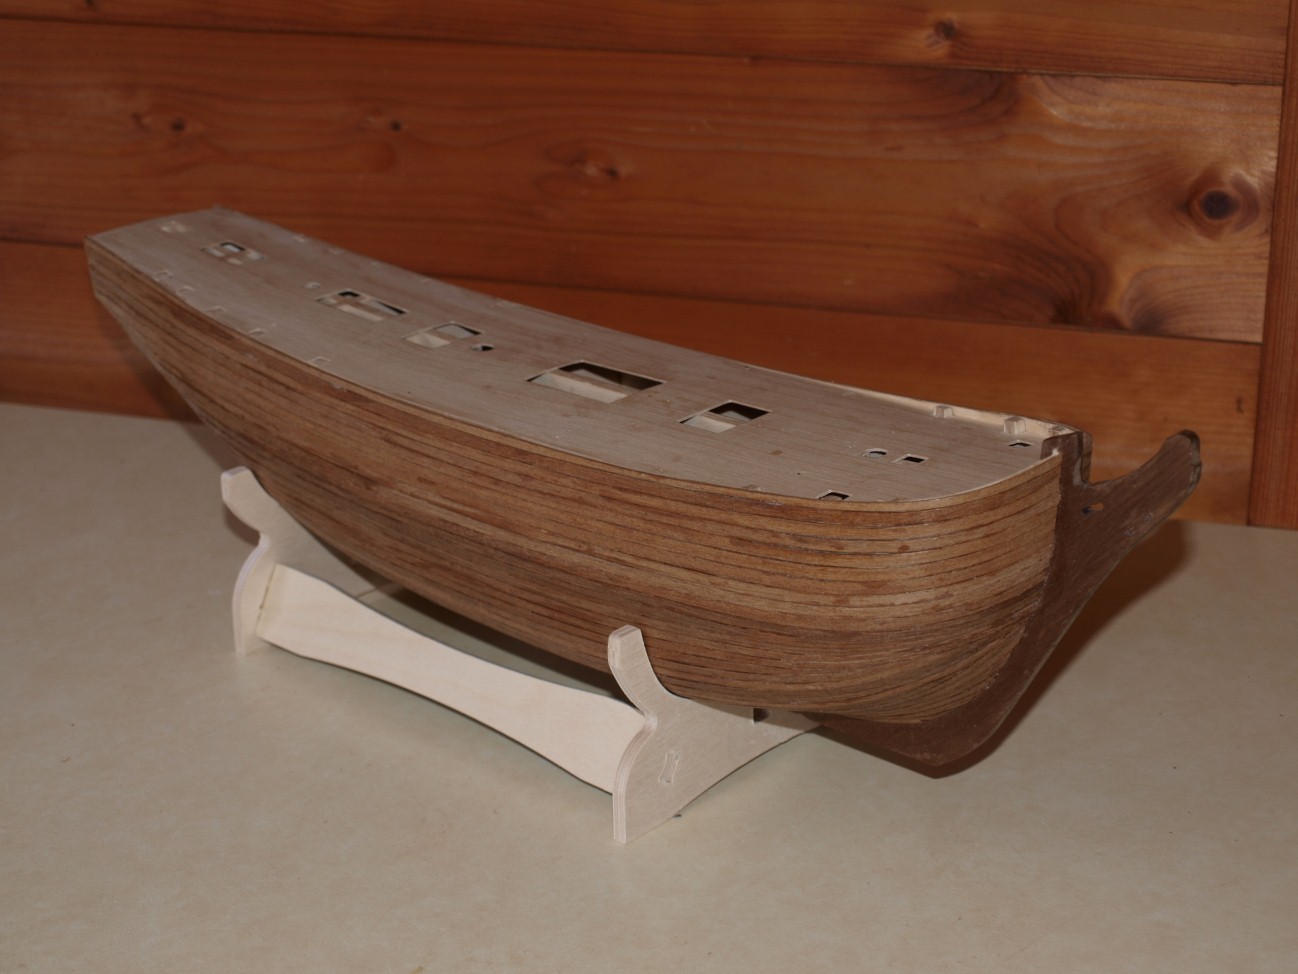
This is my second Bounty kit made to replace the original which was sold to a friend.
The kit follows the usual plank on bulkhead format but before fitting the the keel and stem to the false keel, the back edge of the false keel was chamfered from 5mm down to 2mm. This was so that after planking the the back edges of the planking could be sanded down to 5mm (the width of the stern post) without reducing the plank thickness to zero.
The stern post was not to be fitted until planking was completed and sanded to the correct thickness.
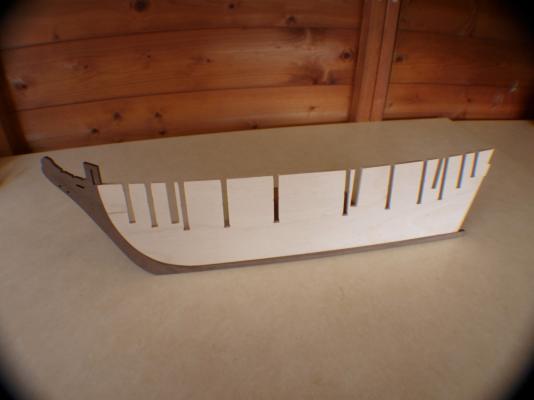
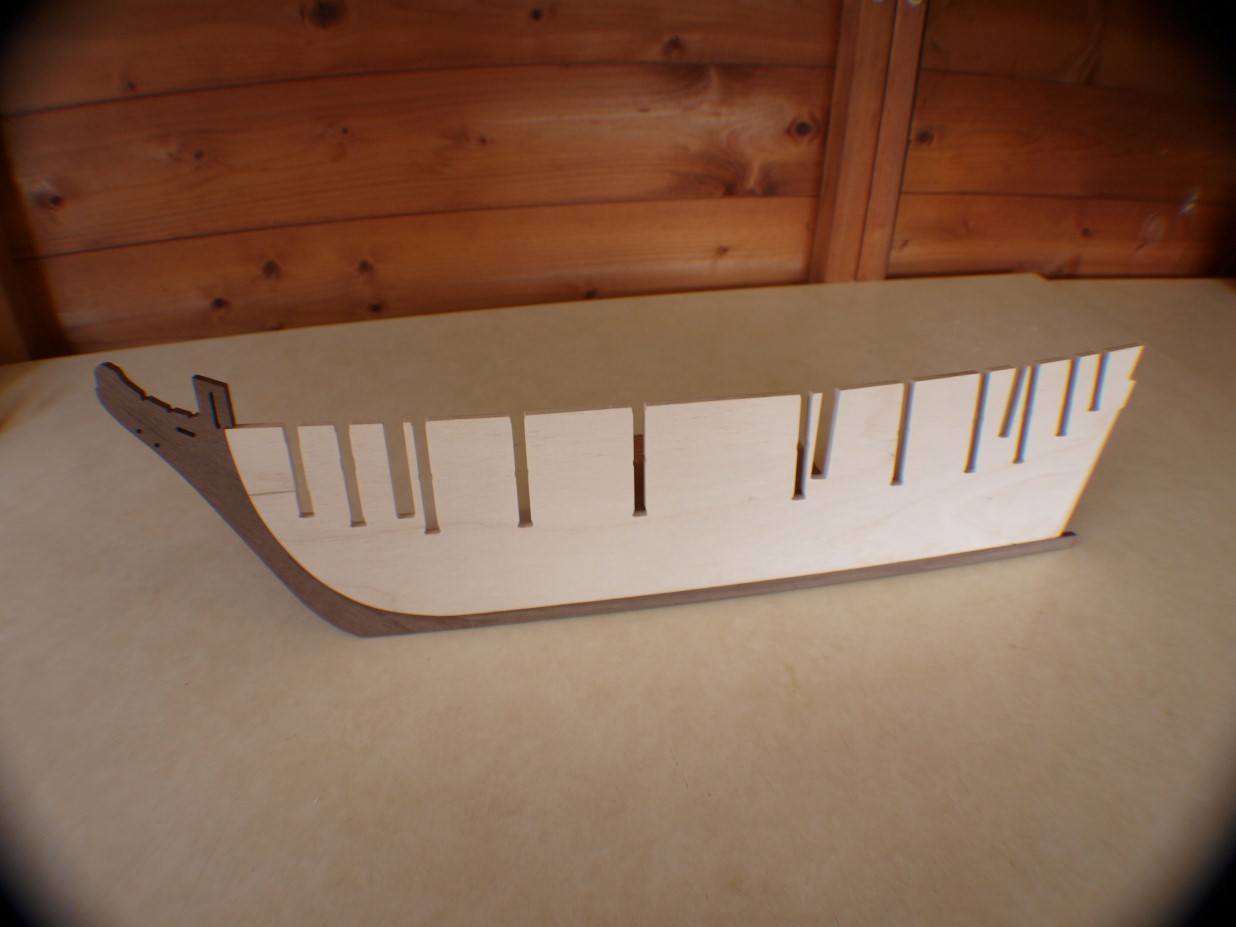
Photo1 shows the false keel, keel and stem piece. The chamfer mentioned is not noticeable in this photo but can be seen more clearly in Photo 4.
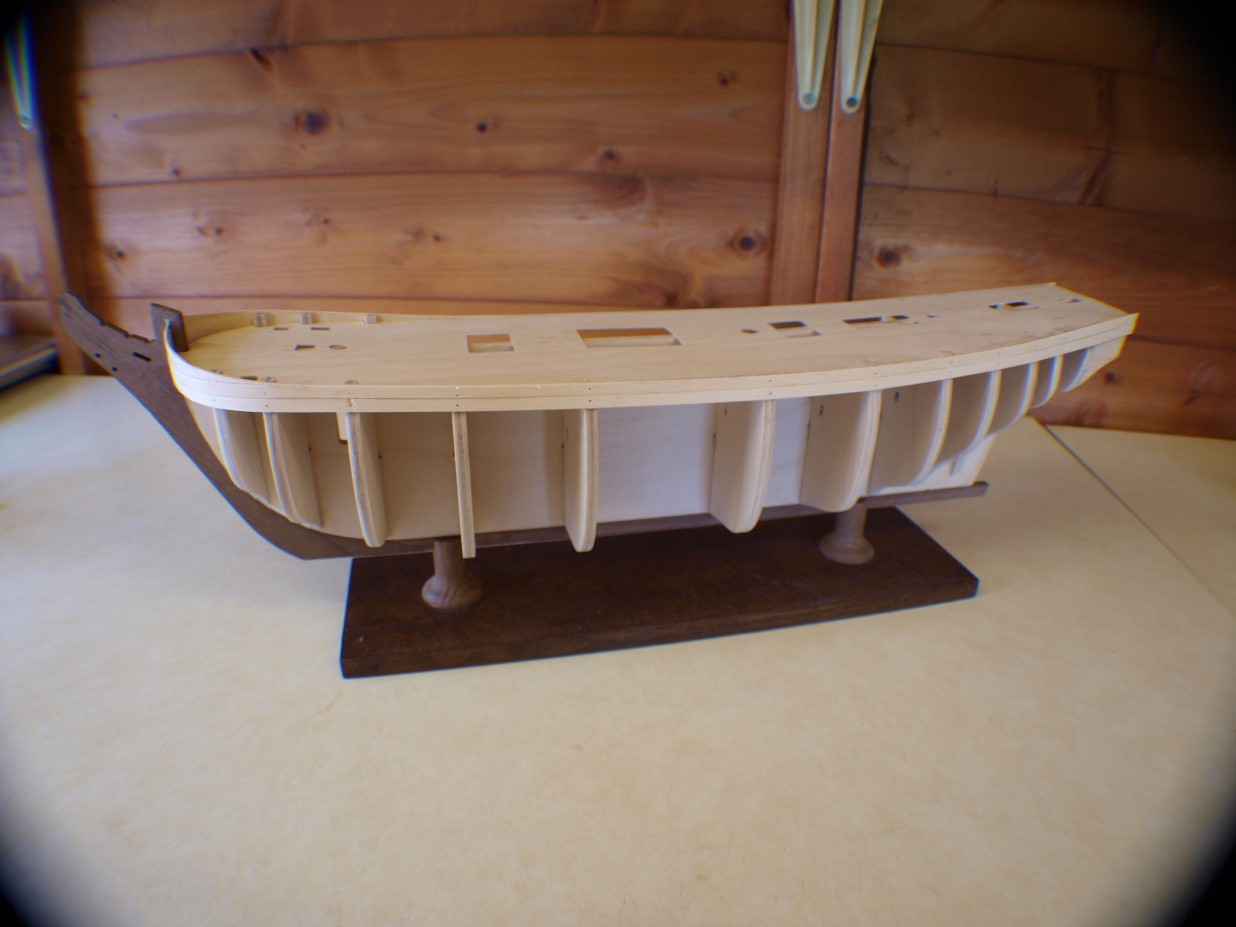
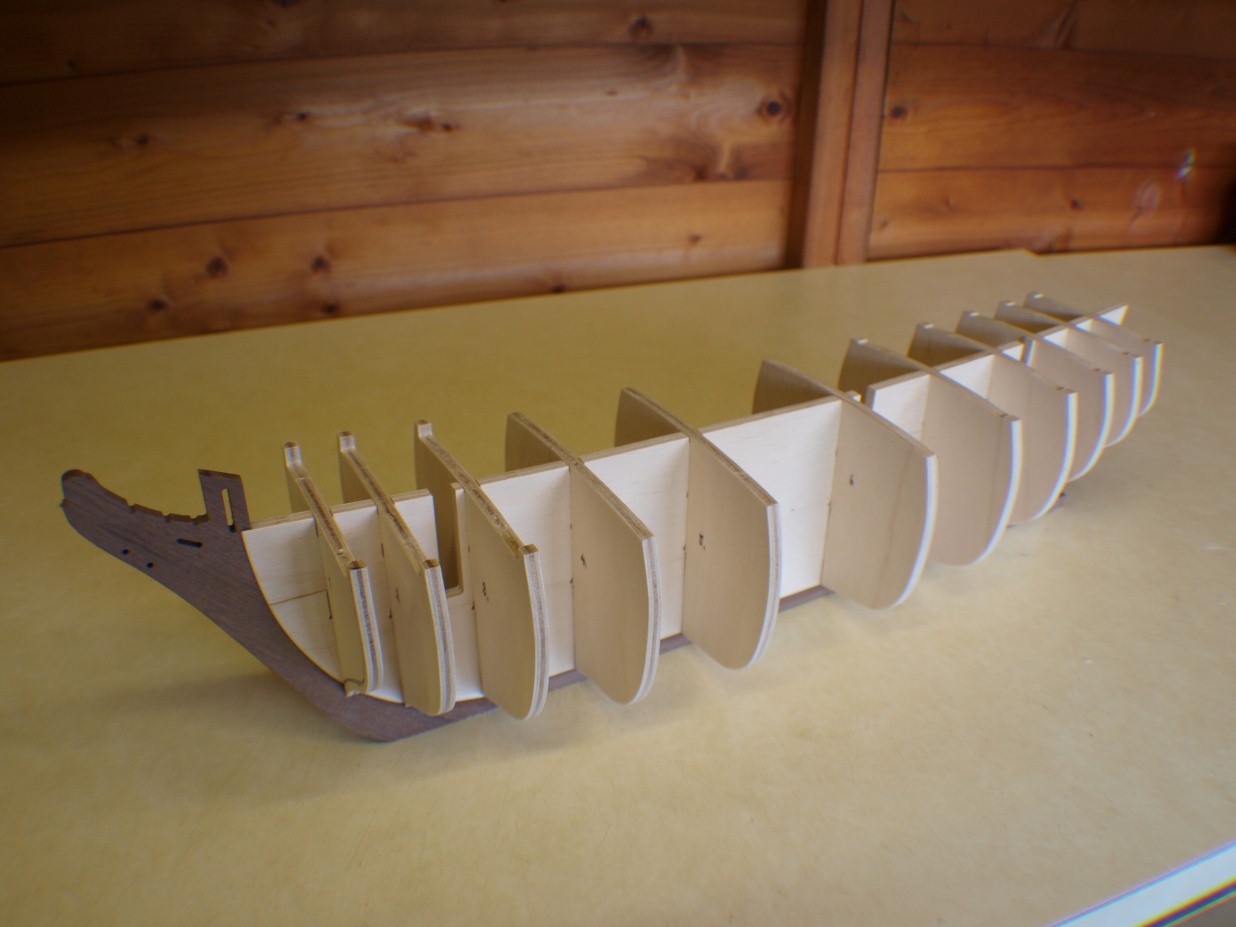
Photo 2 shows the bulkheads dry fitted before the edges of frames 1-4 and 8-11 were roughly chamfered to allow the proper seating for the planks.
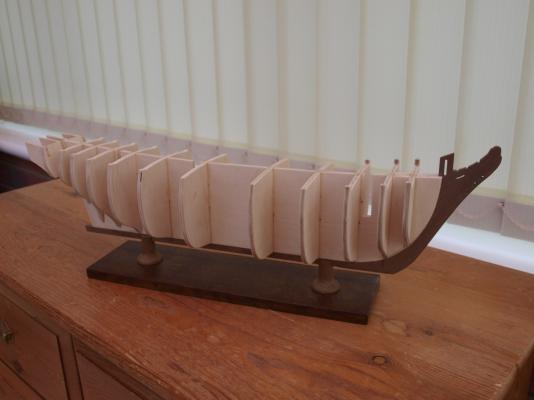
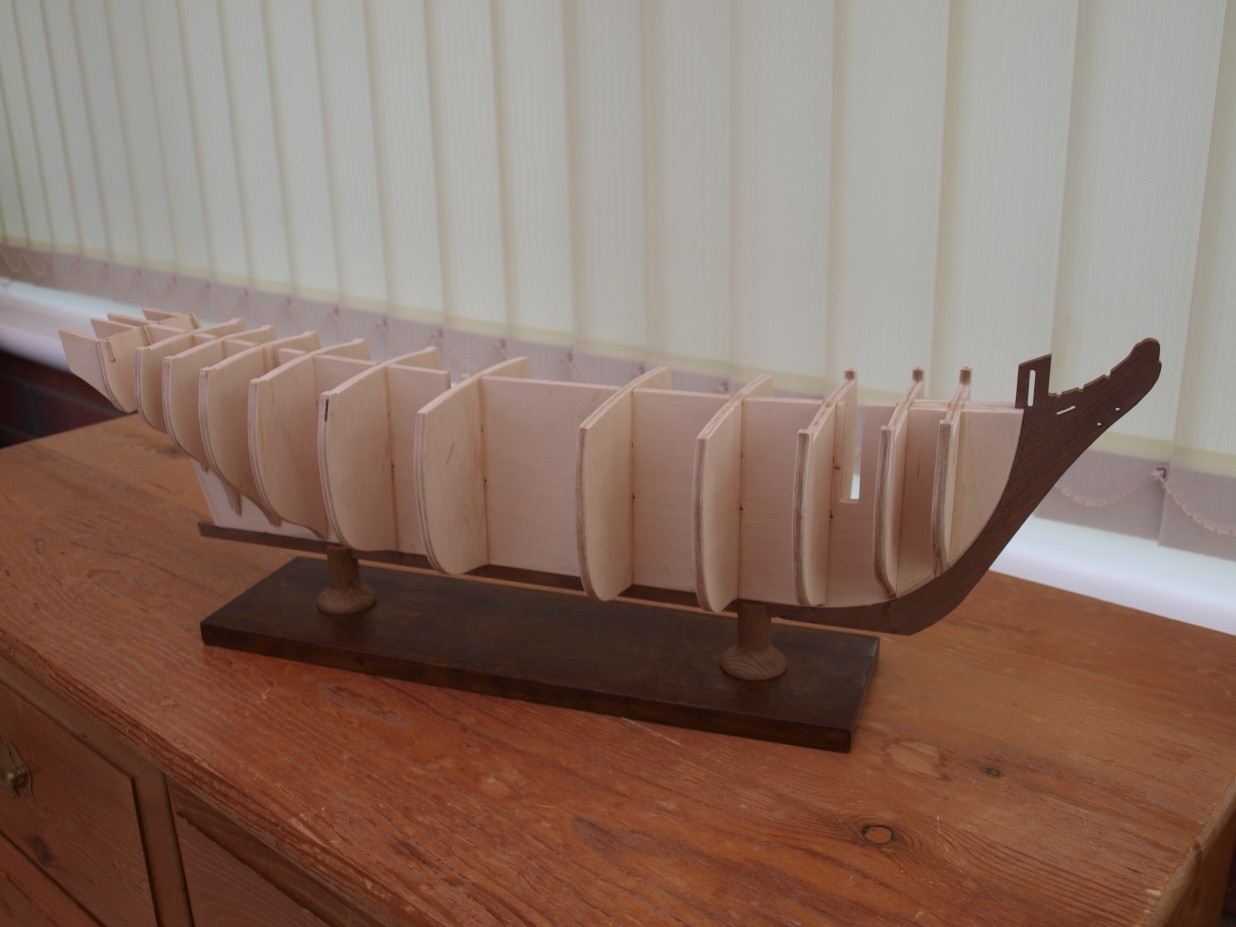
At this stage I also decided to set up my final mounting system using two pedestals as this would be easier to deal with at this stage. Photo 3 shows this with the bulkheads chamfered and glued and Photo 4 shows the stern in more detail.
I now have to shape and fit the termination patterns at the stem, fit the false deck and then can begin planking.

-
Hi Ian
As requested I am attaching a couple of photographs of the stern area of my Unicorn. Unfortunately I built it so long ago I can't remember exactly what I did (or had in the kit) but I hope these photos will be of some assistance.
Danny


- ianmajor, hamilton and Mike French
-
3
-
Hi Ian
I also had problems with the galleries on my Unicorn. I seem to remember that the skins did not fit very well so I made some new ones.
Unfortunately I couldn't match the colour to the rest of the timber so if you look at the port gallery in my photograph you will see it has been painted a darker brown (there were fewer shades of paint available when I built it).
I also seem to remember the decorations on the top and bottom of the galleries did not fit very well either.
Anyway I will take some more close up photographs for you.
I have just today received my 2nd Bounty kit and intend to start a build log. I do have a fair number of photographs of my previous build some of which are in the gallery but they are not detailed enough to form a proper build log.
I have taken a first look at the Bounty web site you mentioned and it looks both interesting and useful. Thanks for the tip.
Danny
-
Hi Ian
Thanks for your greeting.
Thought you might like to see a picture of my version of HMS Unicorn. It was built in the 90's I canot remember exactly when and was my 2nd POB model. At the time there was no internet (for me that is) so I was not aware of the general interest in model ships and was also unaware of the amount of research data available. So unlike you and others I did no research and just built the kit as it came.
Danny Page
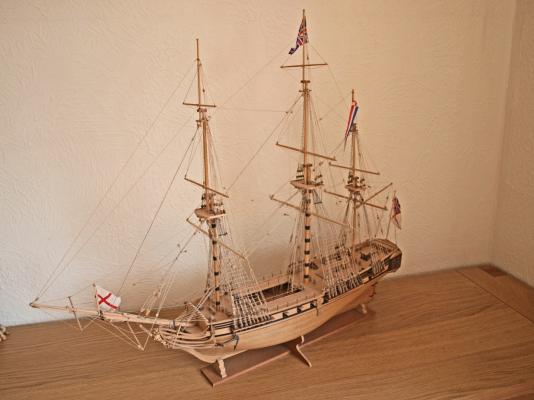


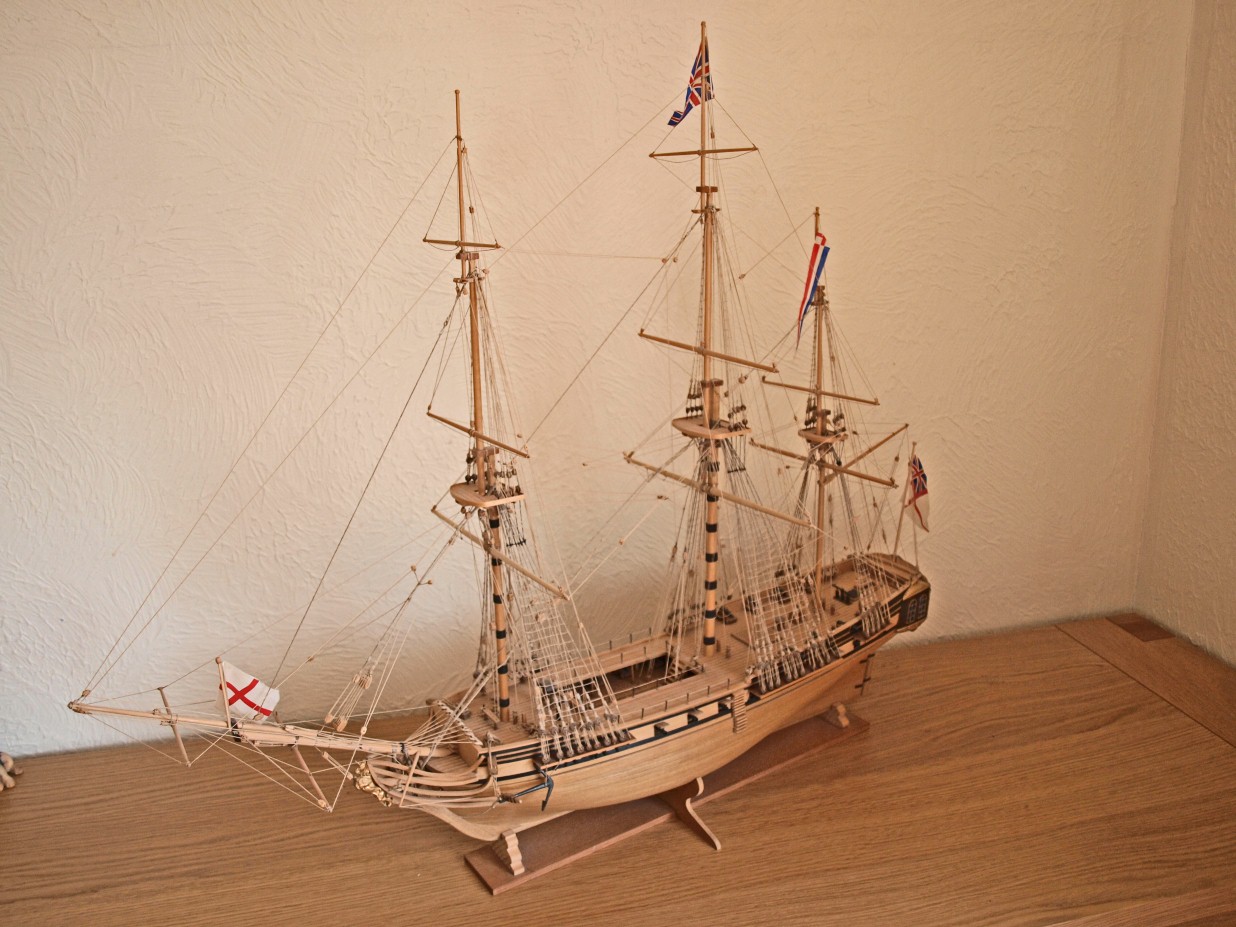
HMAV Bounty by DanPage - FINISHED - Caldercraft - Scale 1:64
in - Kit build logs for subjects built from 1751 - 1800
Posted
Hi David
Thanks for your response to my query regarding Bounty's cable storage.
I have had a look at flipperphil's build log and he shows a photograph with the cable also coiled close to the windlass.
I couldn't find the Mark willemain reference but found 2 in the gallery (by ARG and johannesludo5) which show as you say the cables
passing through the deck aft of the windlass.
I also found another photograph (attached) on another site which showed a similar arrangement but the holes are sited just aft of the companionway next to the windlass the cables passing through small wooden grommets. I have no information on which kit this was or if it was a scratch build.
Thanks again for your suggestions
Danny