HOLIDAY DONATION DRIVE - SUPPORT MSW - DO YOUR PART TO KEEP THIS GREAT FORUM GOING! (Only 20 donations so far - C'mon guys!)
×

richardhd
-
Posts
56 -
Joined
-
Last visited
Content Type
Profiles
Forums
Gallery
Events
Everything posted by richardhd
-
 Keith, Much appreciated, that’s precisely the information I was looking for. I don’t want to dirty her up too much, but she spent quite a long time bumping and scraping around in the ice and salt water, so I don’t want the finished product to be pristine either. As someone who started off in plastic, this is turning into a very familiar and exciting phase of the build. Thanks for sharing your expertise, more updates soon, likely after the upcoming thanksgiving holiday. RHD
 -
Keith, Appreciate the information, out of curiosity what was manufacturing wrought iron like in the Victorian era? Was it difficult to produce pure iron? Would other trace metals routinely end up in iron for purposes like this? I partly ask because I’m considering adding some light weathering to the bands and plating and am curious how it would corrode aside from just the usual rust stains.
-
Allan, follow up response to your previous comment: do we know what kind of iron was used in the bow plating and stern reinforcements? Do we know how pure the iron used in the UK in the early 19th century was?
-
Allan, thank you and I’d like to know as well! You make a good point, and now I’m thinking there’s a decent chance these are not historically accurate, but I do like the look of the rivets still.
-
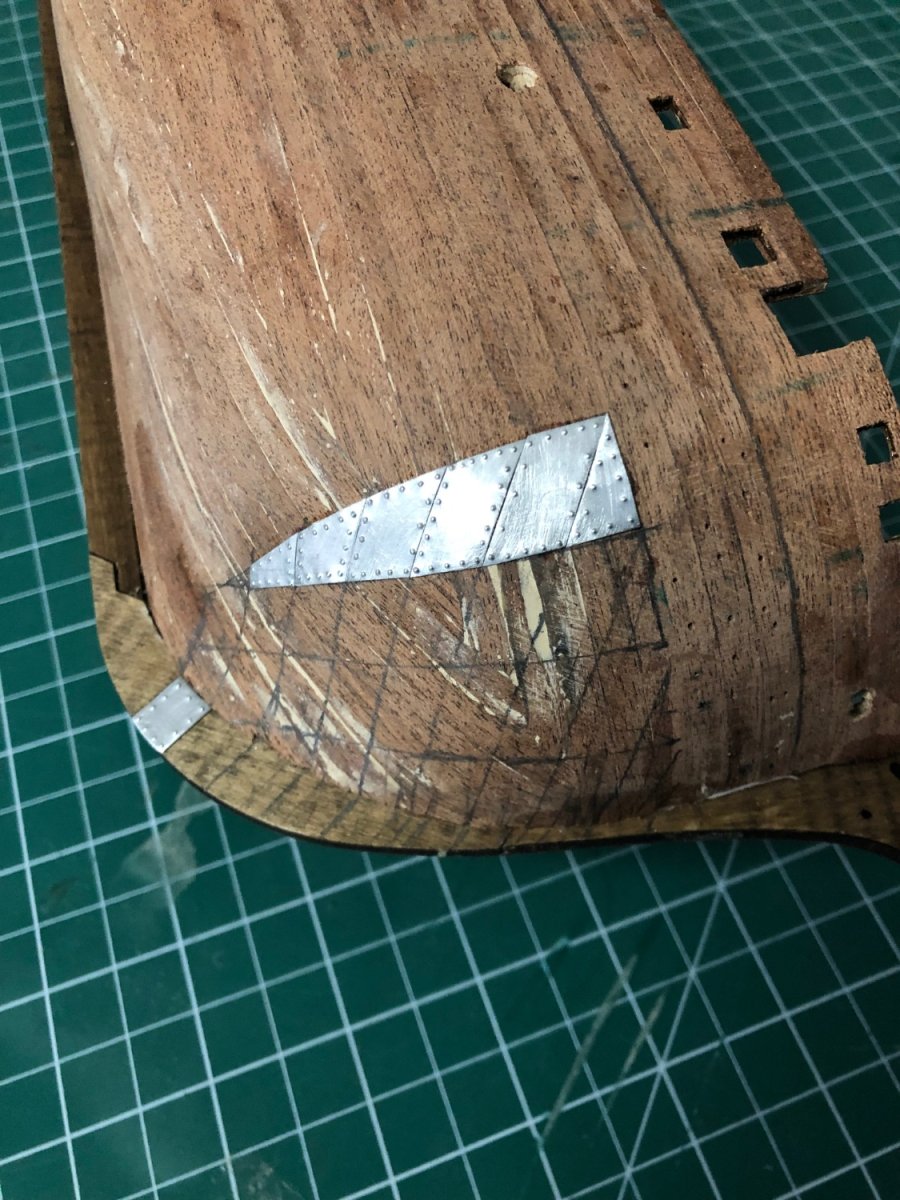
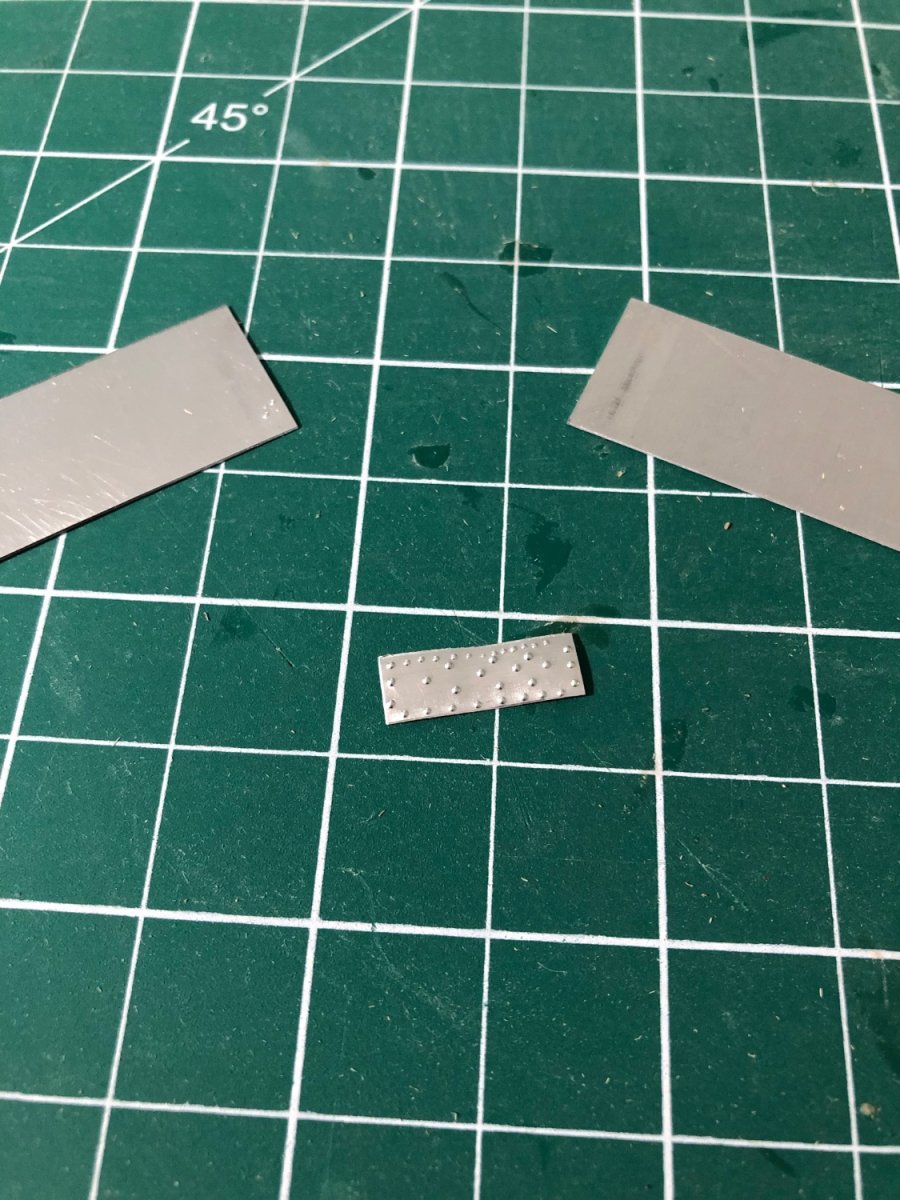
Rking, thank you! It wasn’t without its headaches since punching the rivet shapes into each plate cause the metal to warp and I needed to flatten each back out without also flattening the rivets! But I figured if I was spending so much time dry fitting, trimming, and dry fitting again for every plate then the extra investment in the rivets would not be much more tedious by comparison. Just looked over your build, it’s looking great!
-
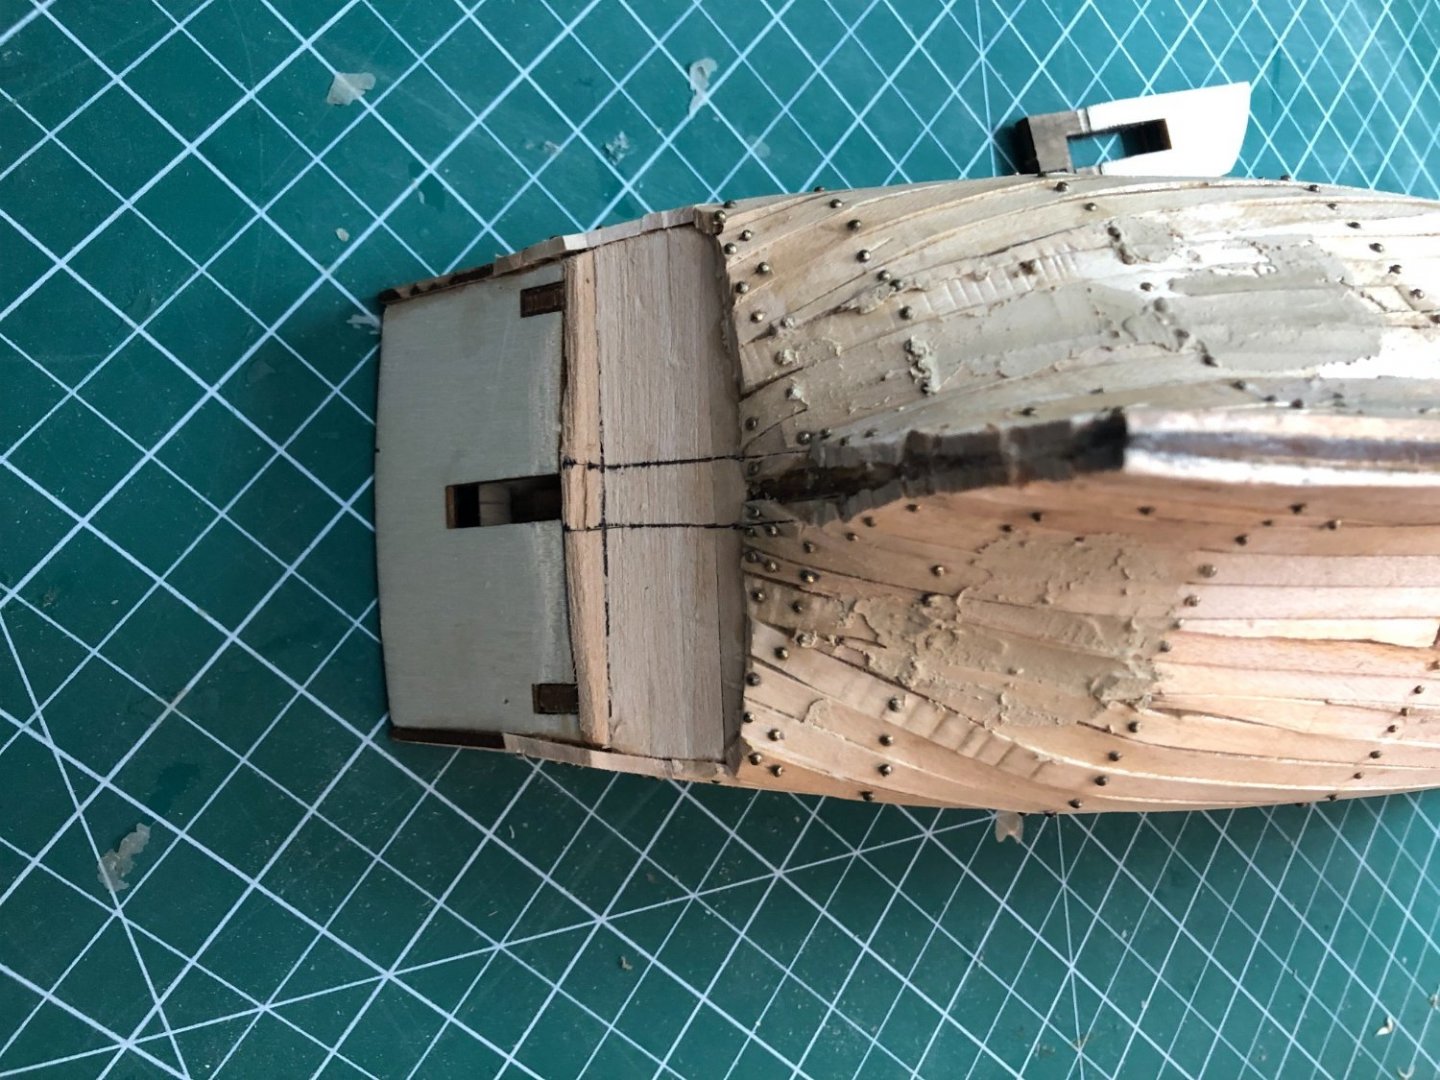
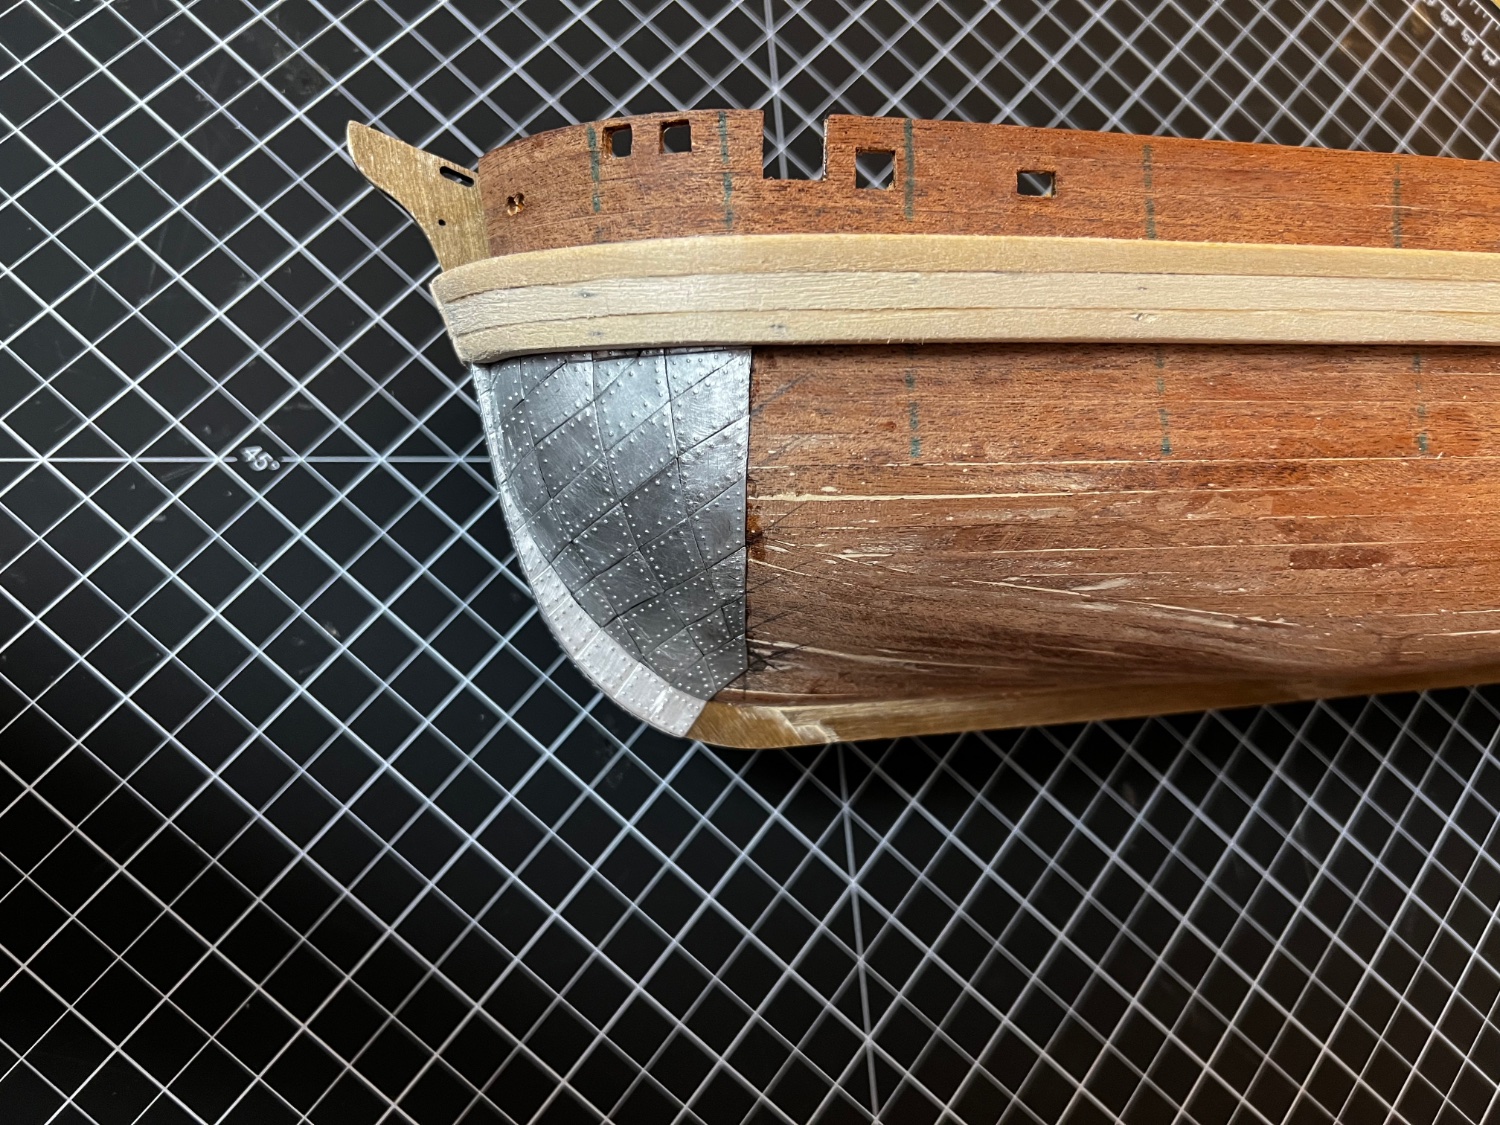
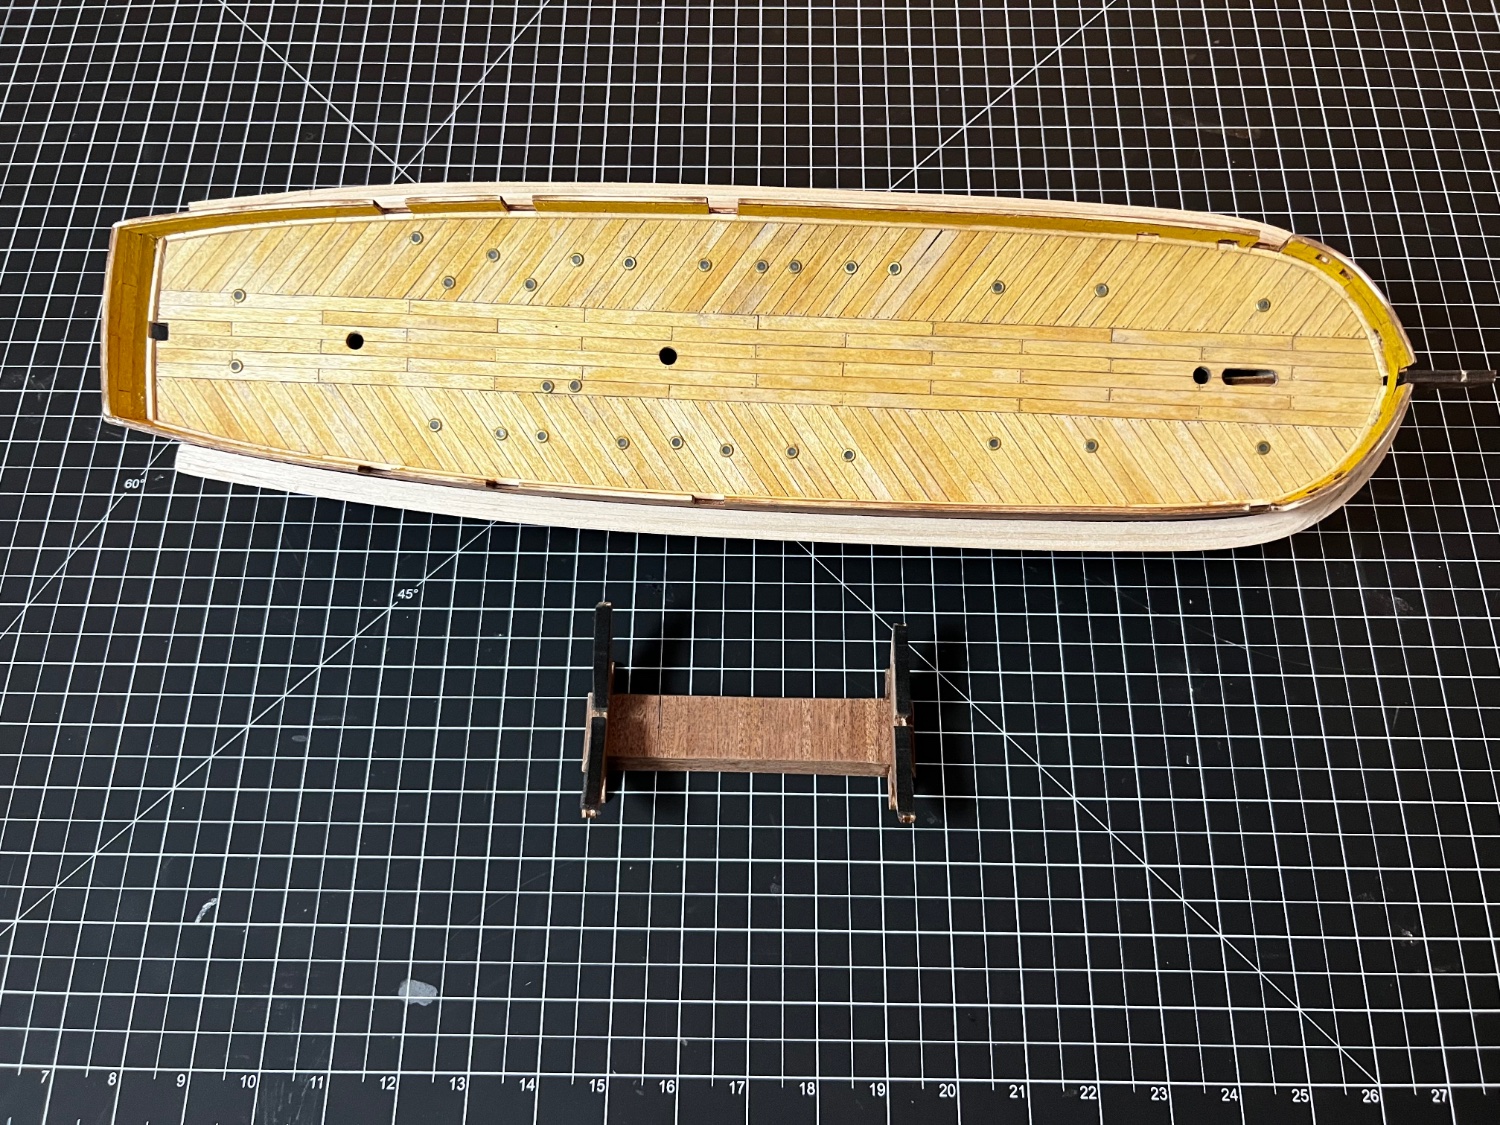
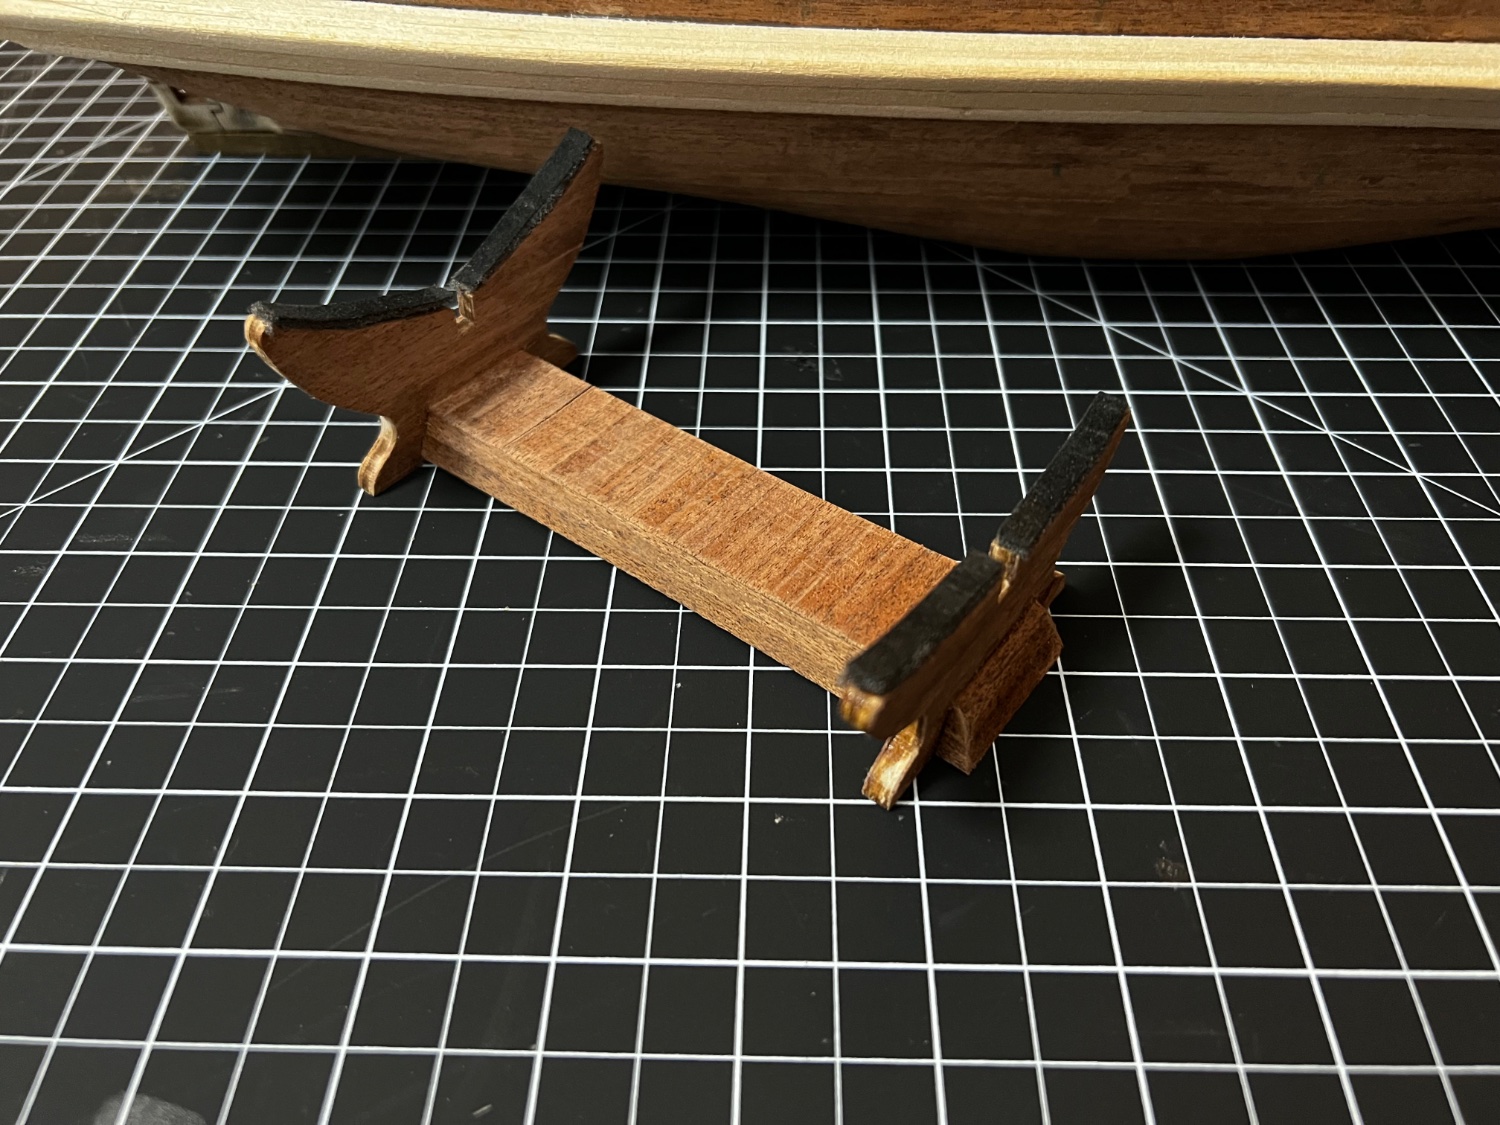
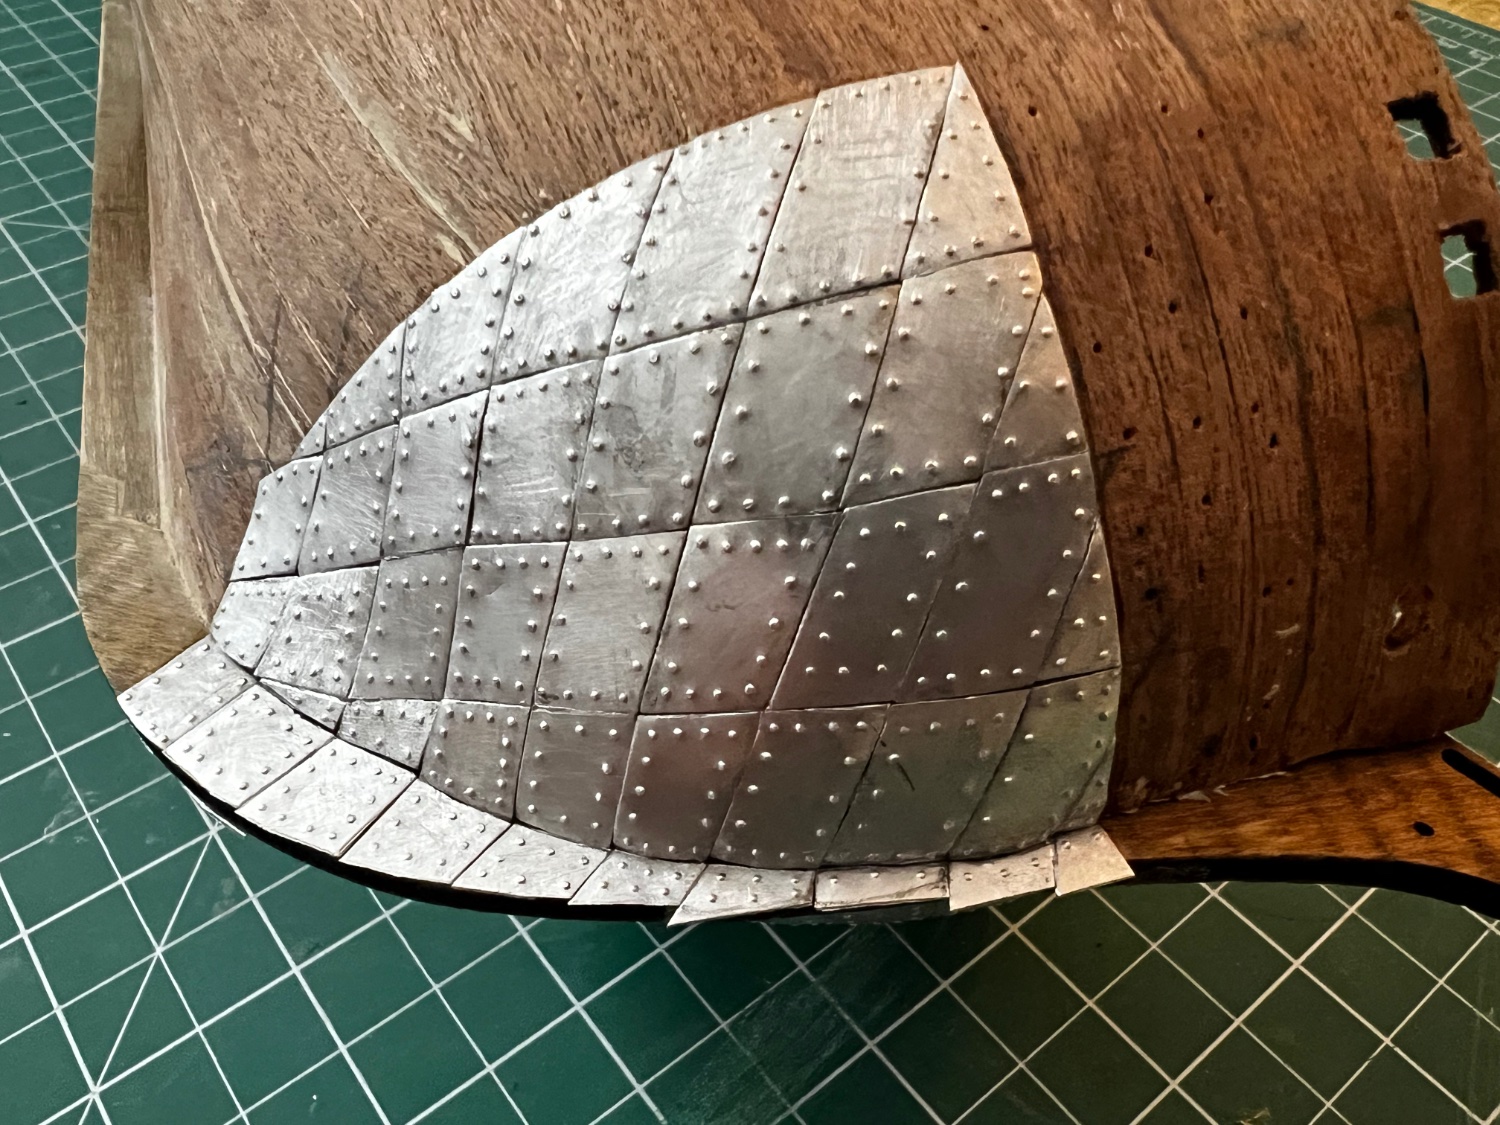
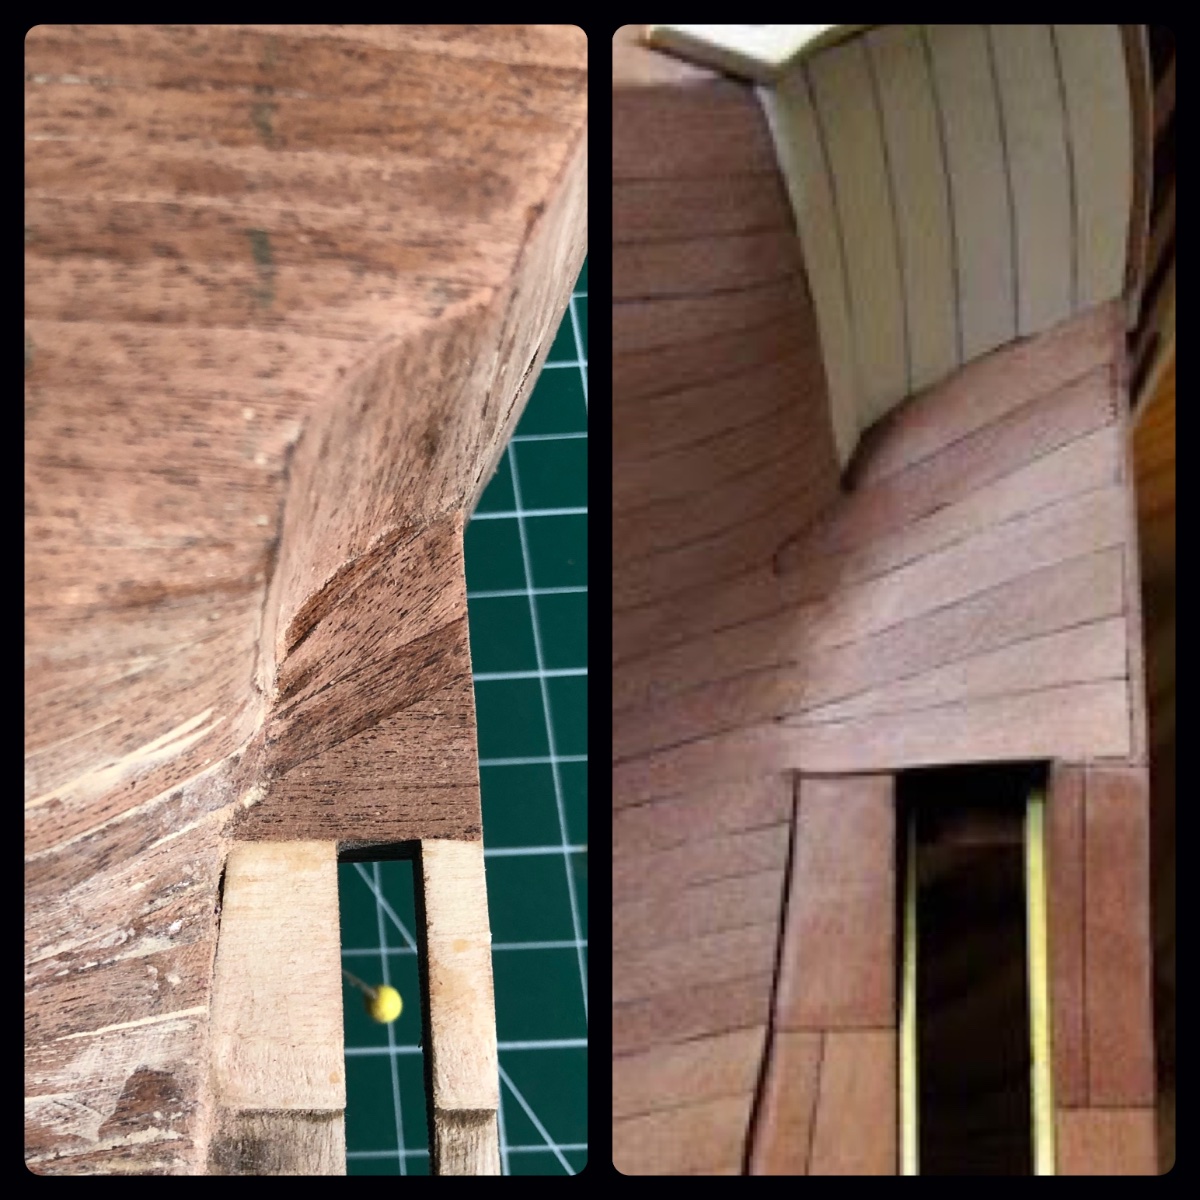
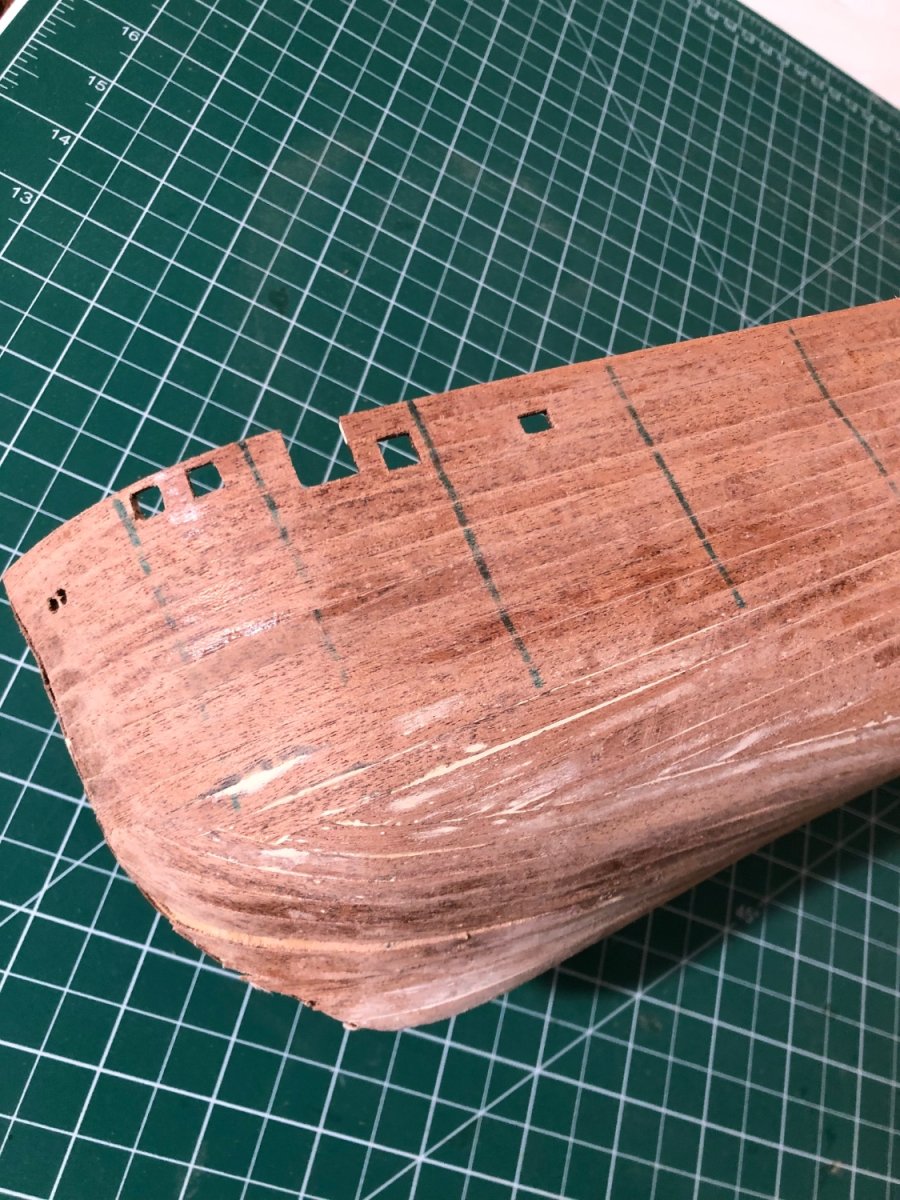
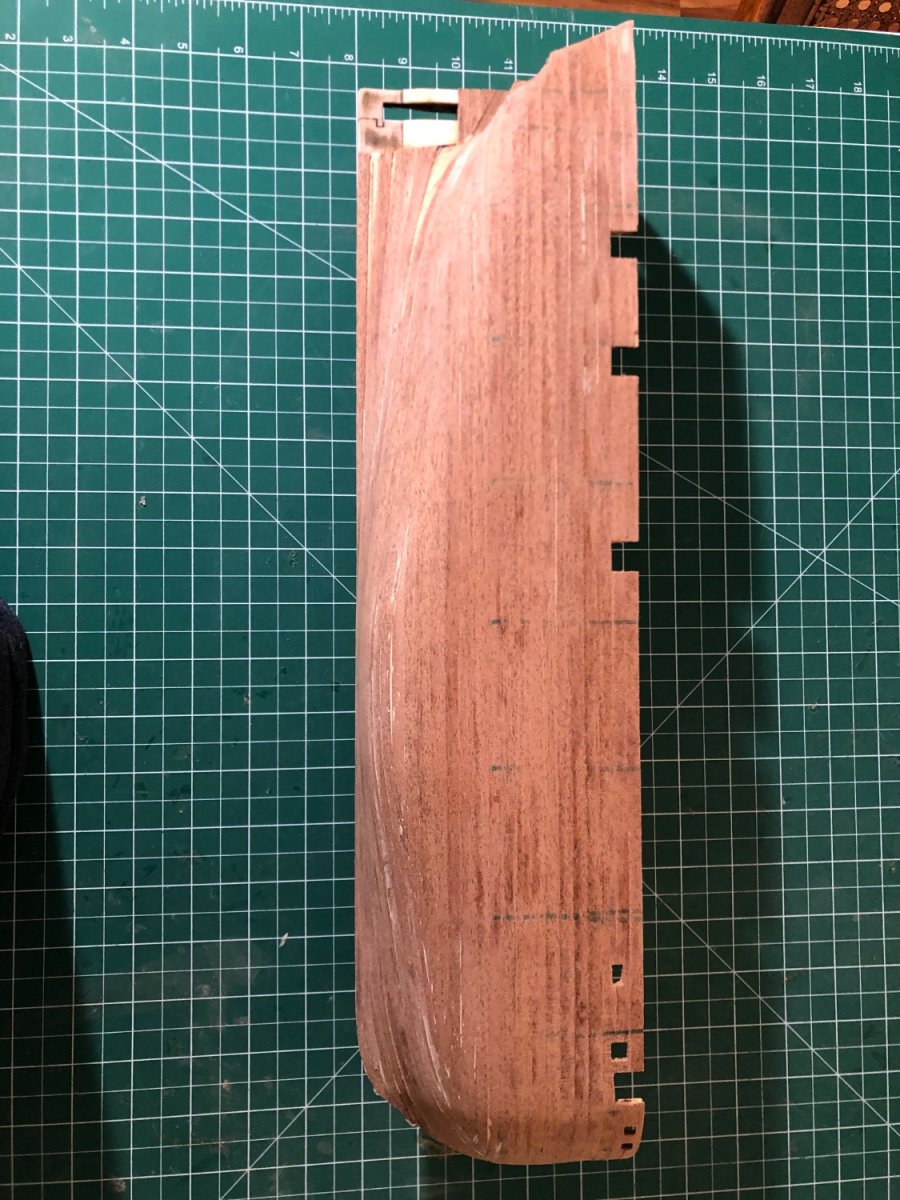
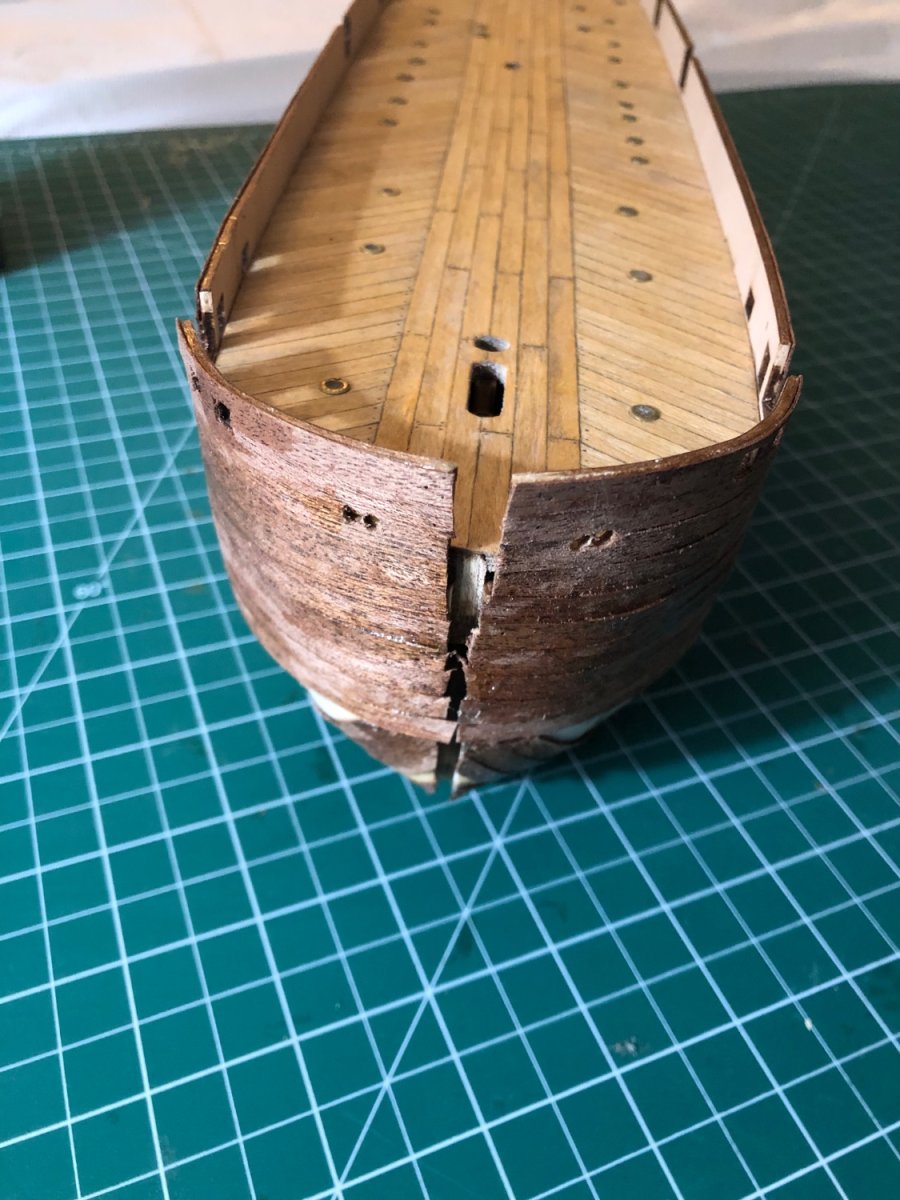
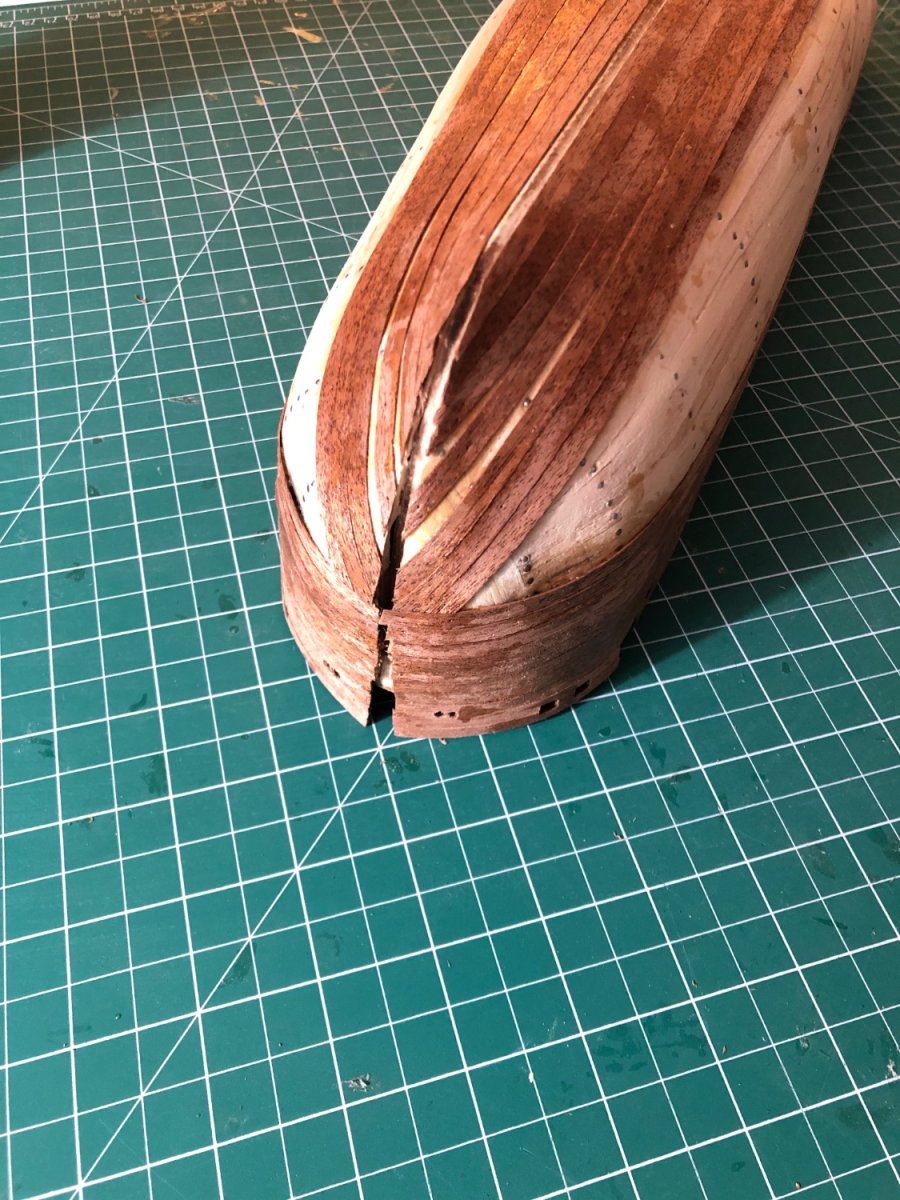
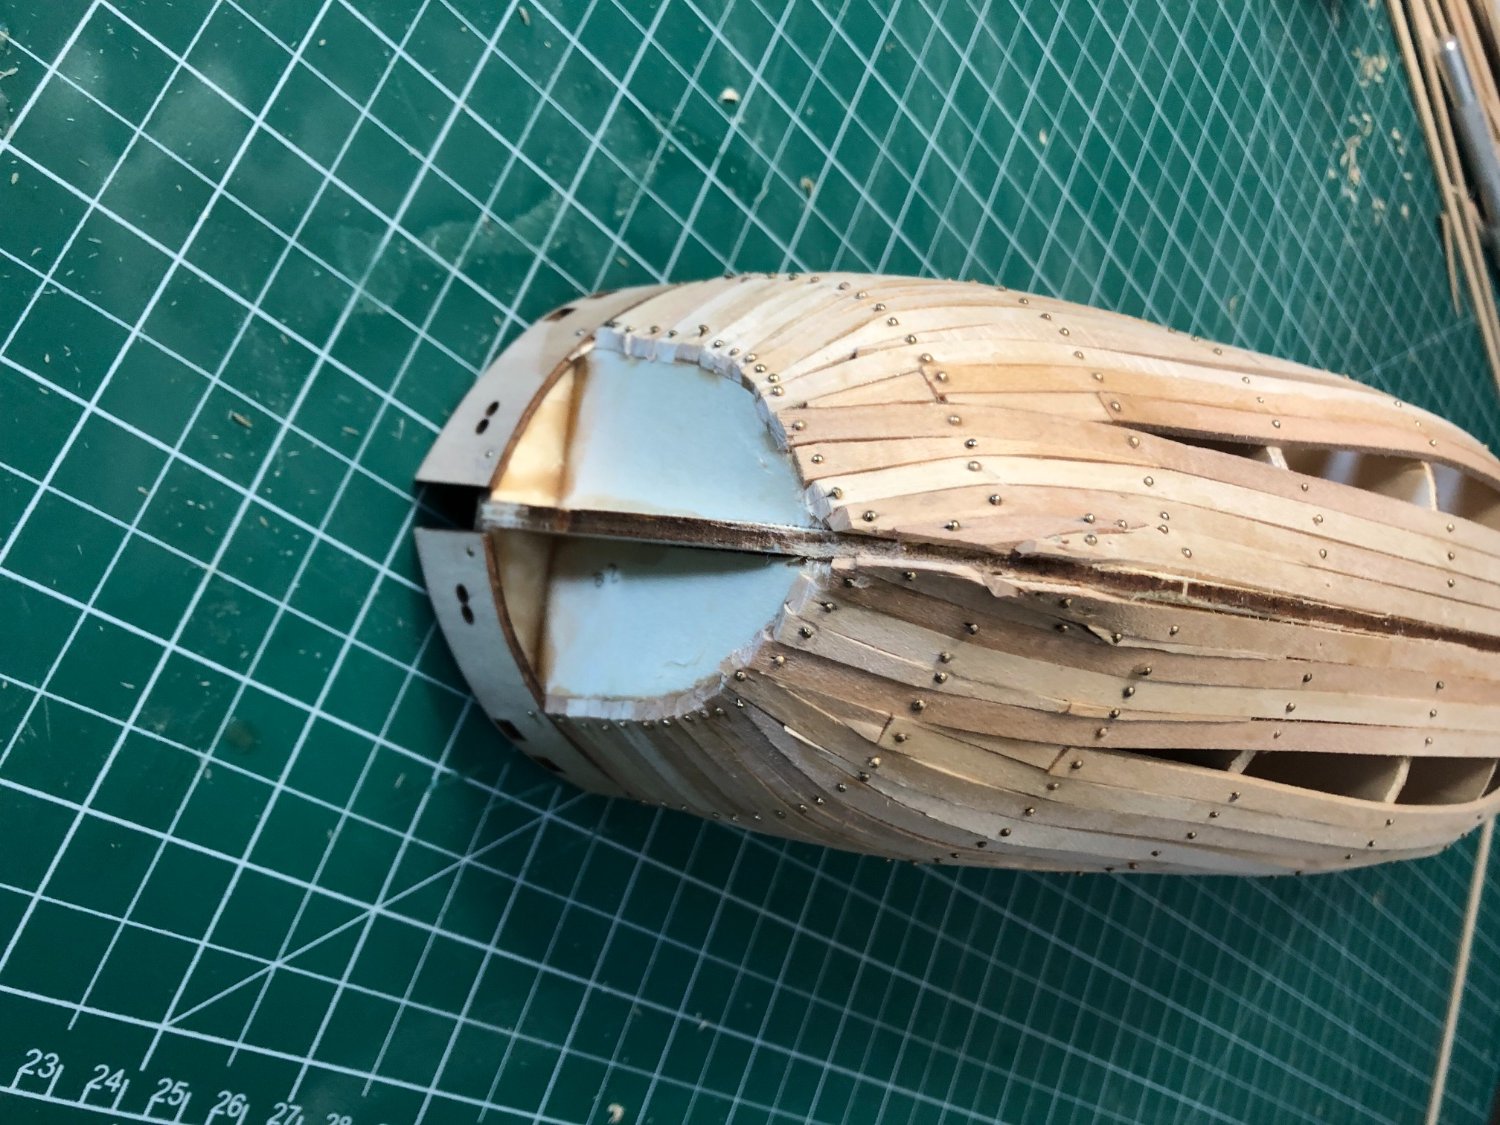
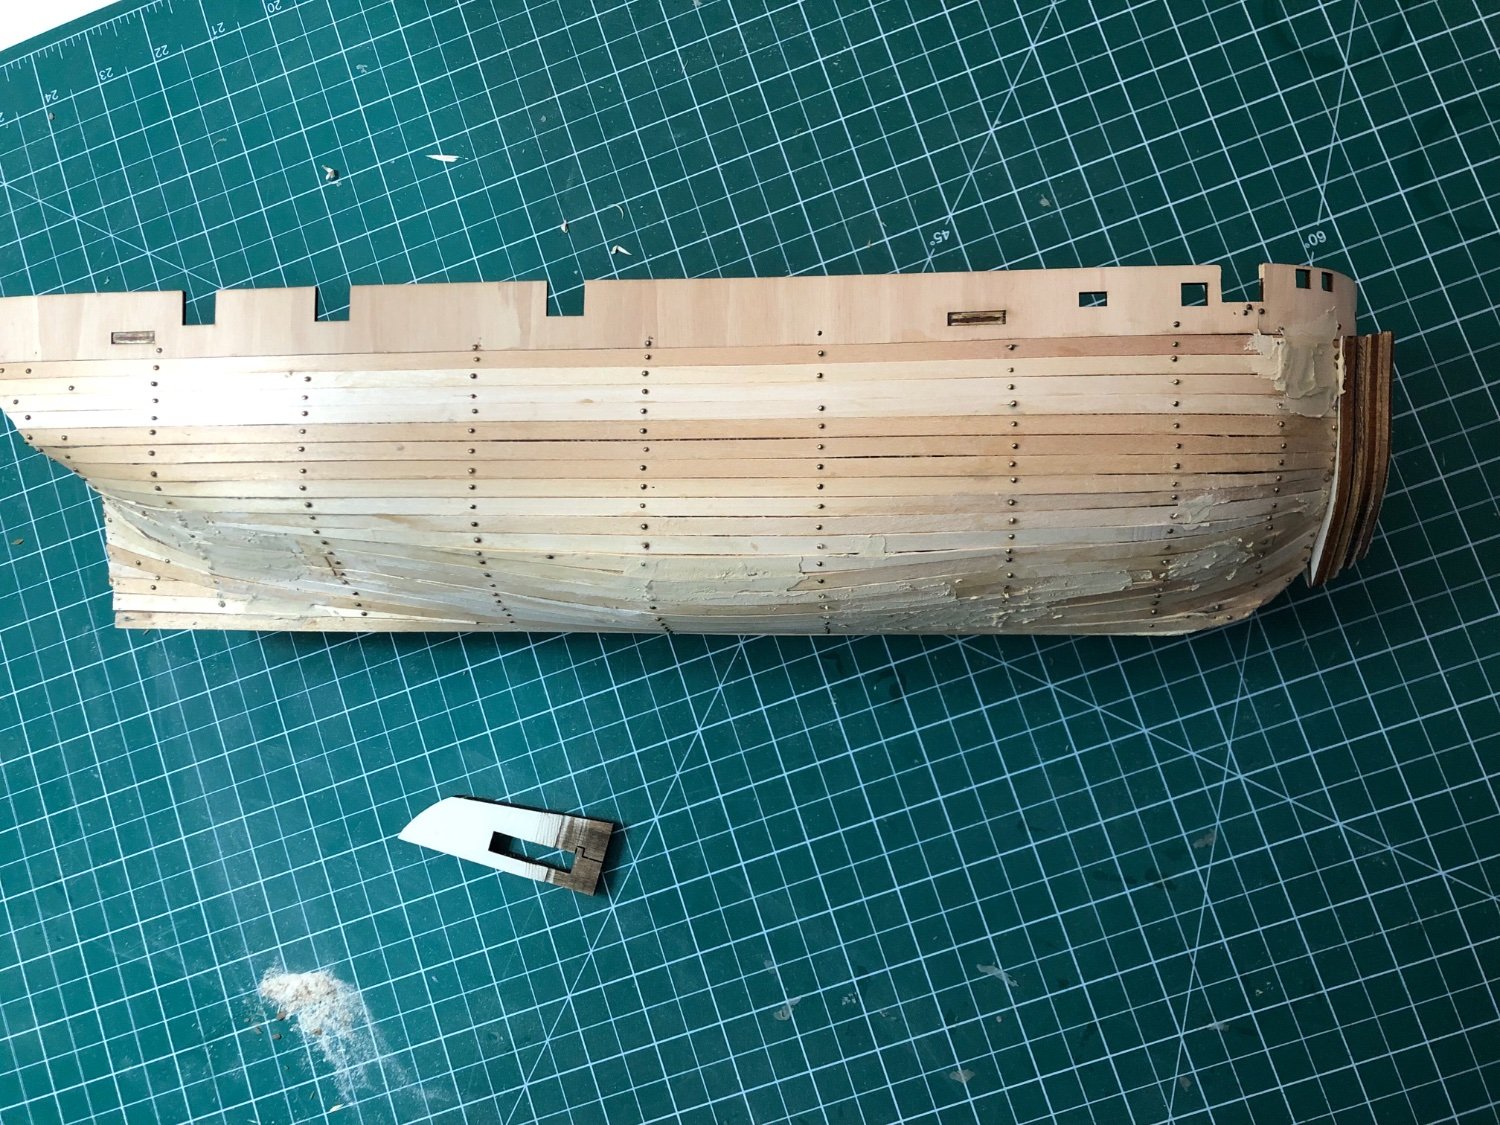
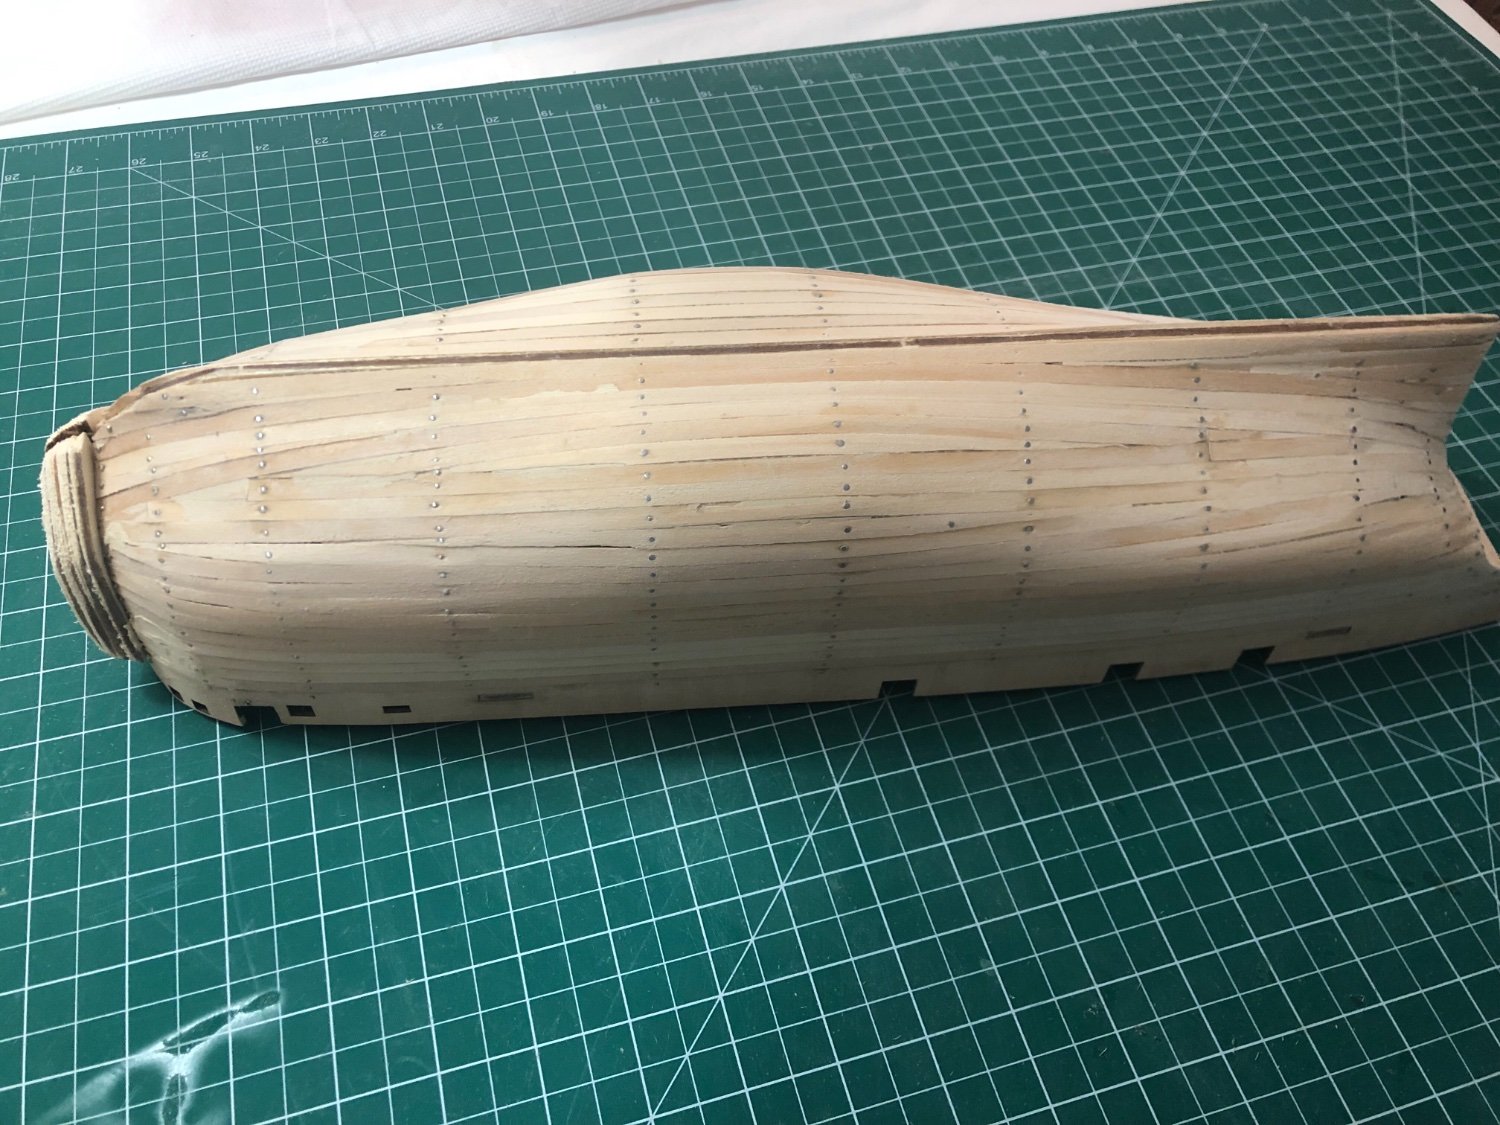
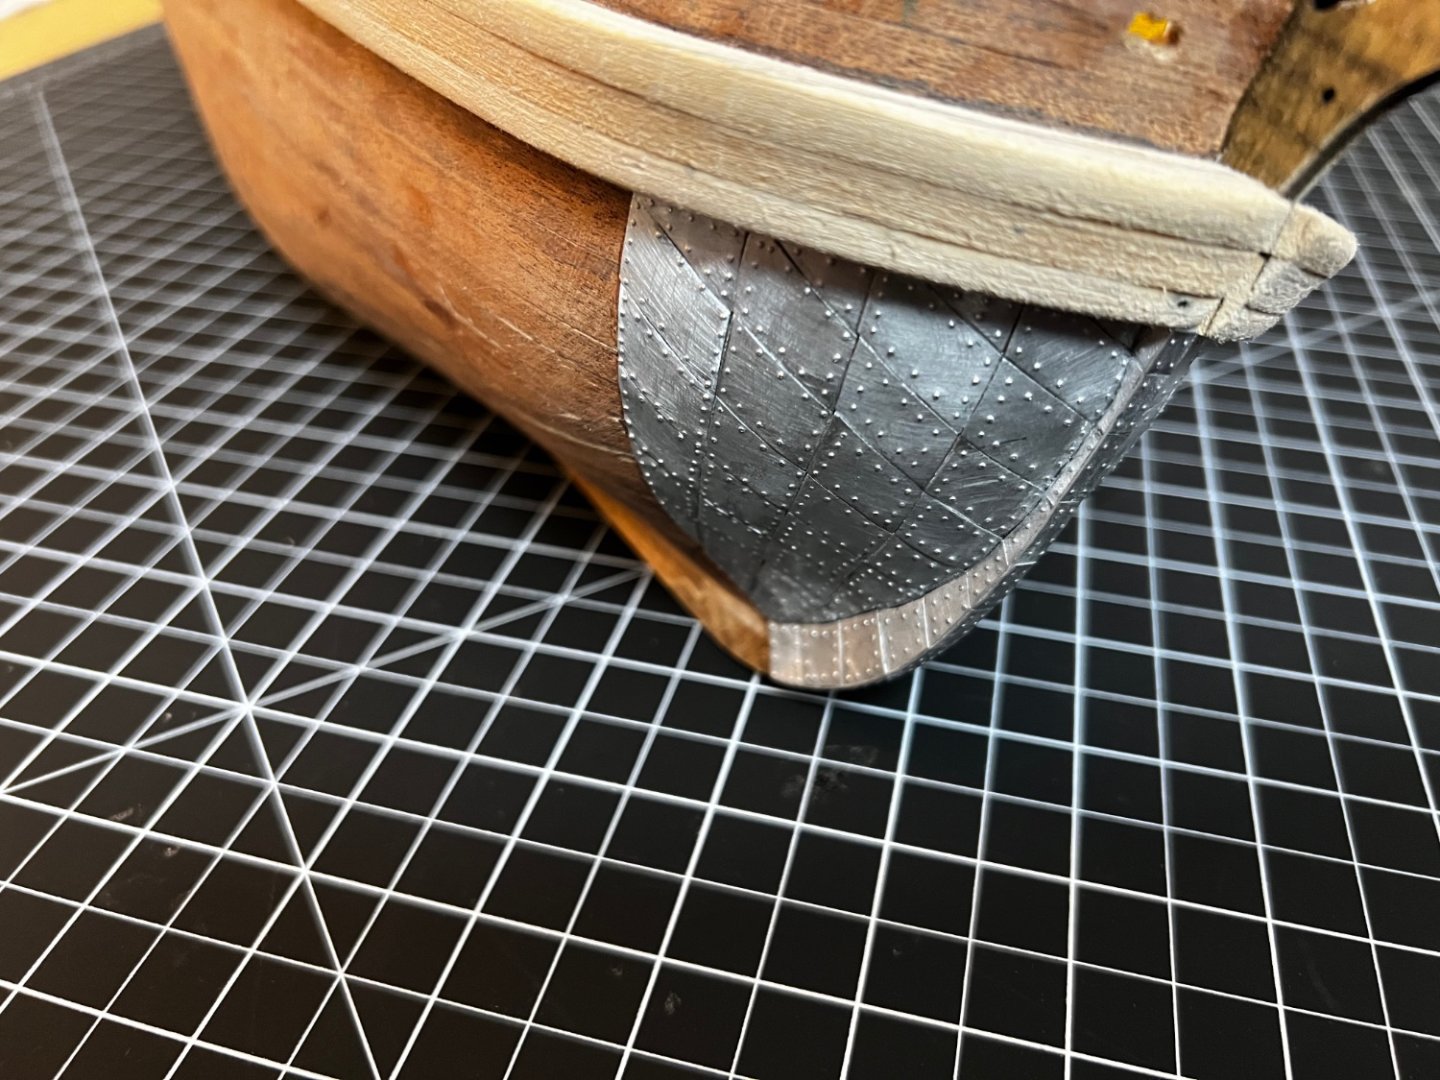
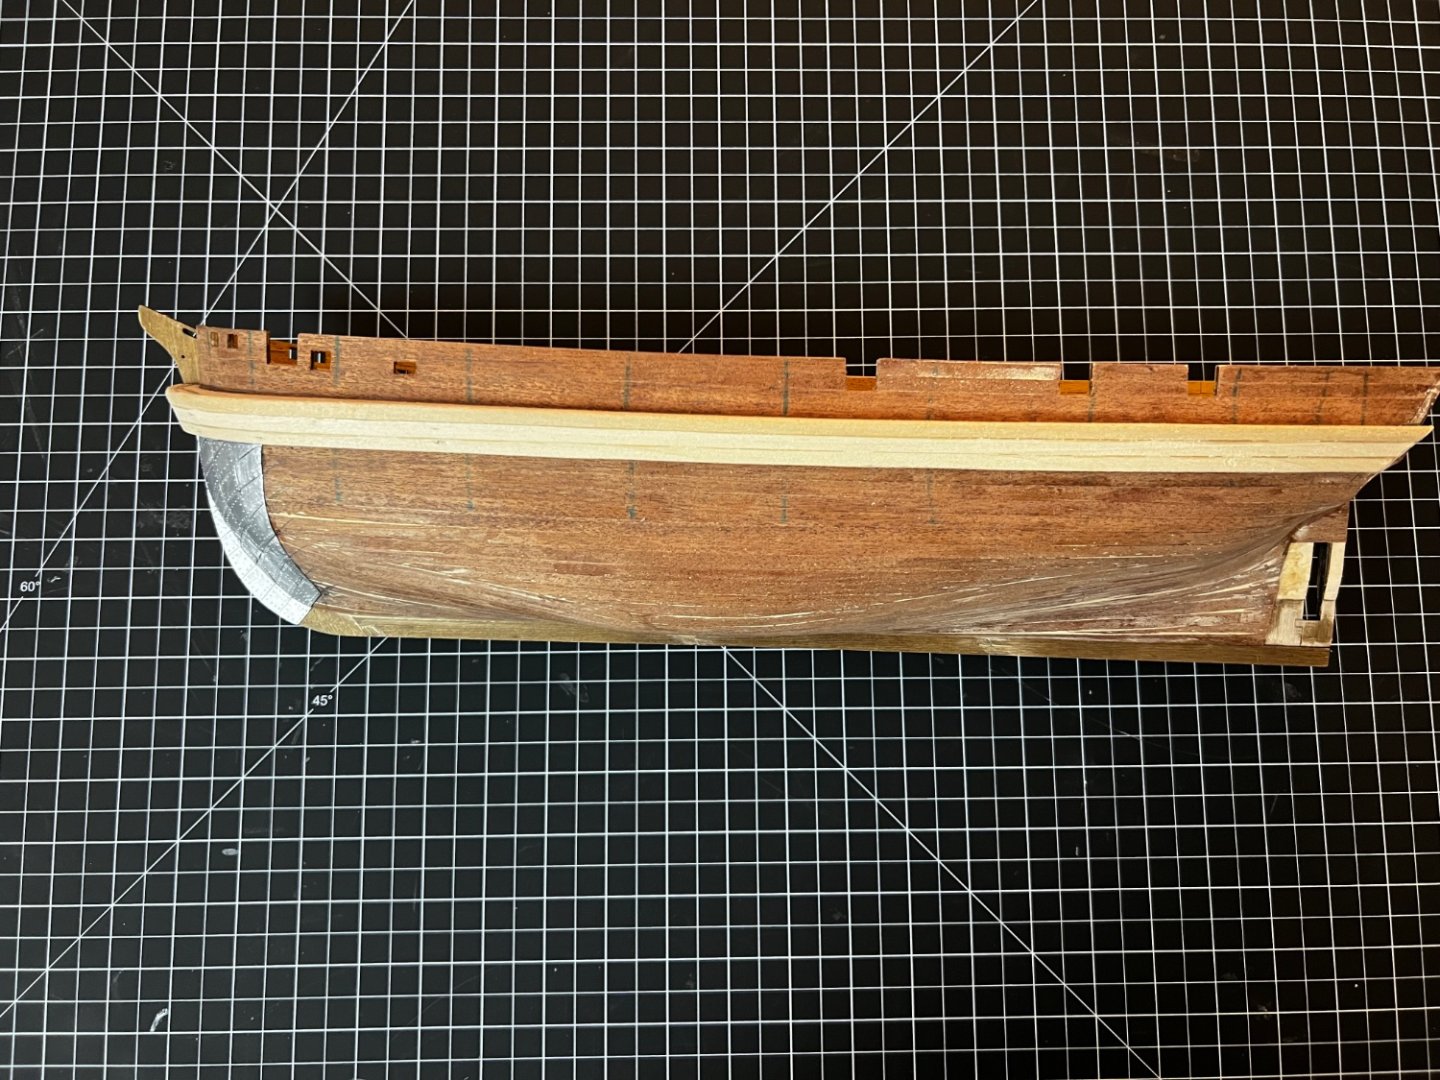
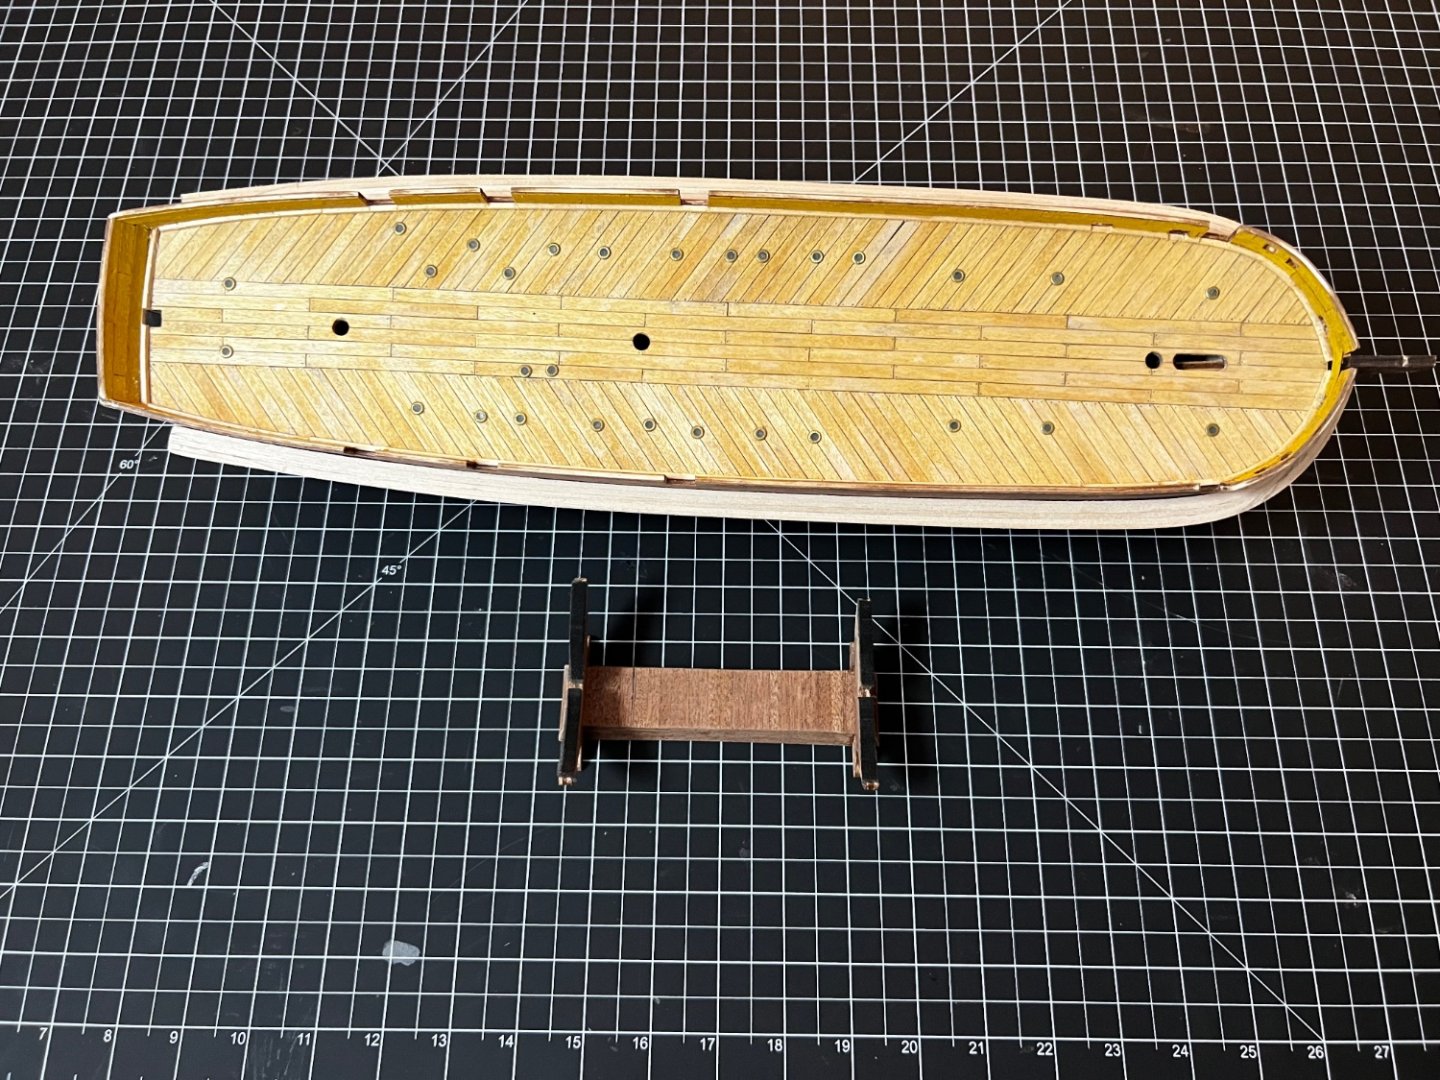
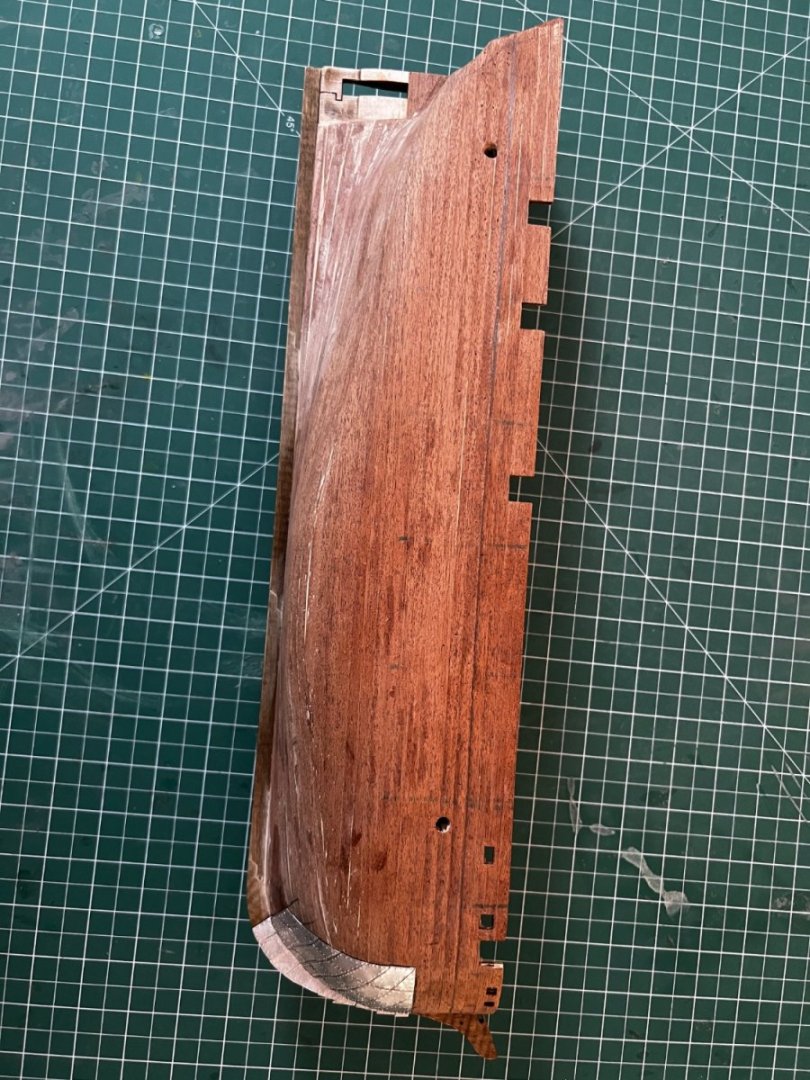
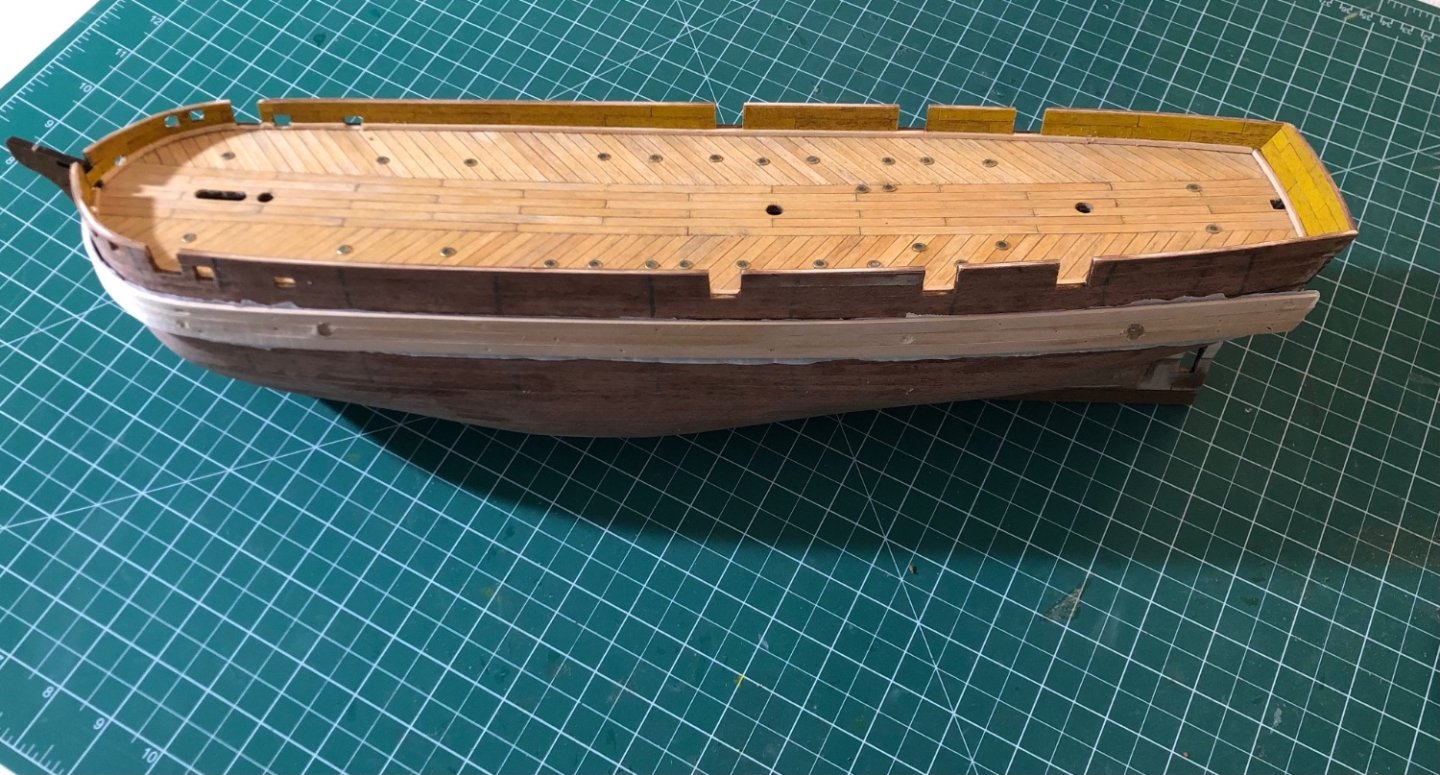
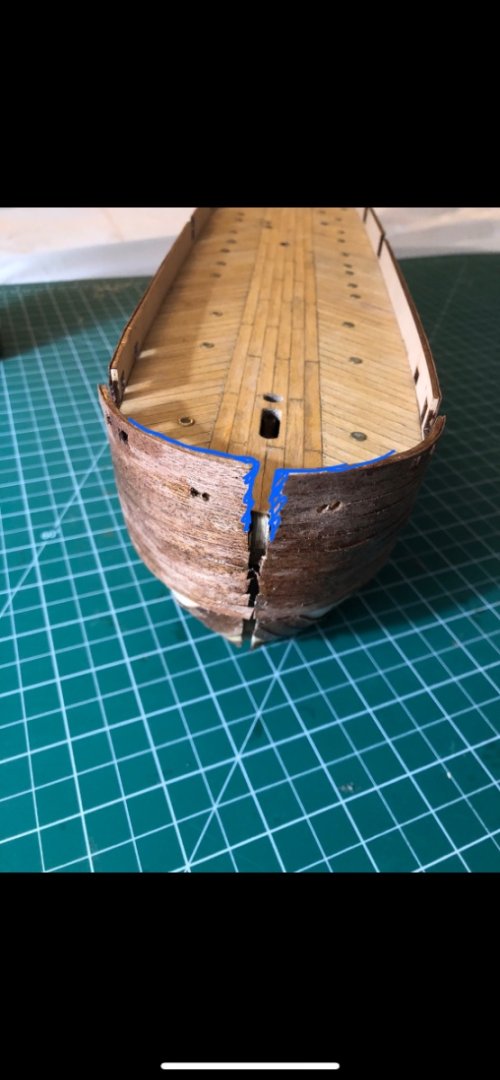
Hi all! Bow plating is finally done! I know my updates were few and far between but I was doing at least a little plating most nights over the last 2 months, it was just such a tedious job. Anyway I tonight I popped the ice chocks back on just for a few glamor shots. Also in the time I spent doing the plating I needed a side project to help keep my sanity, so I planked the kit-provided stand and added some felt to it. Saw a fellow Terrorite do the same and thought it was a great idea.


-
Hi all, It’s been just shy of two months and I finally got around to making more progress on the bow plating. Nearly done, just have some of the keel to finish. Not dissatisfied with the appearance. Have some finishing touches left on the hull, then hoping to get her all painted up before the holidays!

-
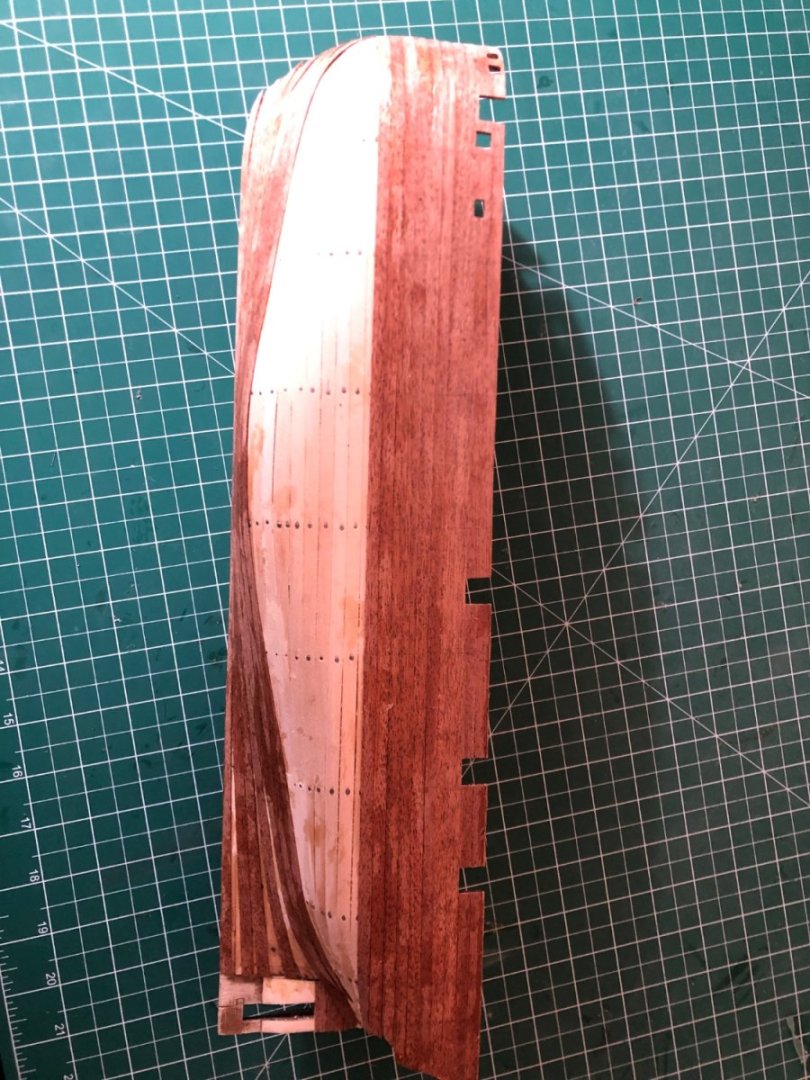
Hi All, Ice chocks strategy seems to be working, they have been successfully built up and removed. Additionally I’ve started on the bow plating. It certainly is tedious work, but I believe it will be well worth it. Rivets are slightly out of scale, but I’m satisfied with the look so far.

-
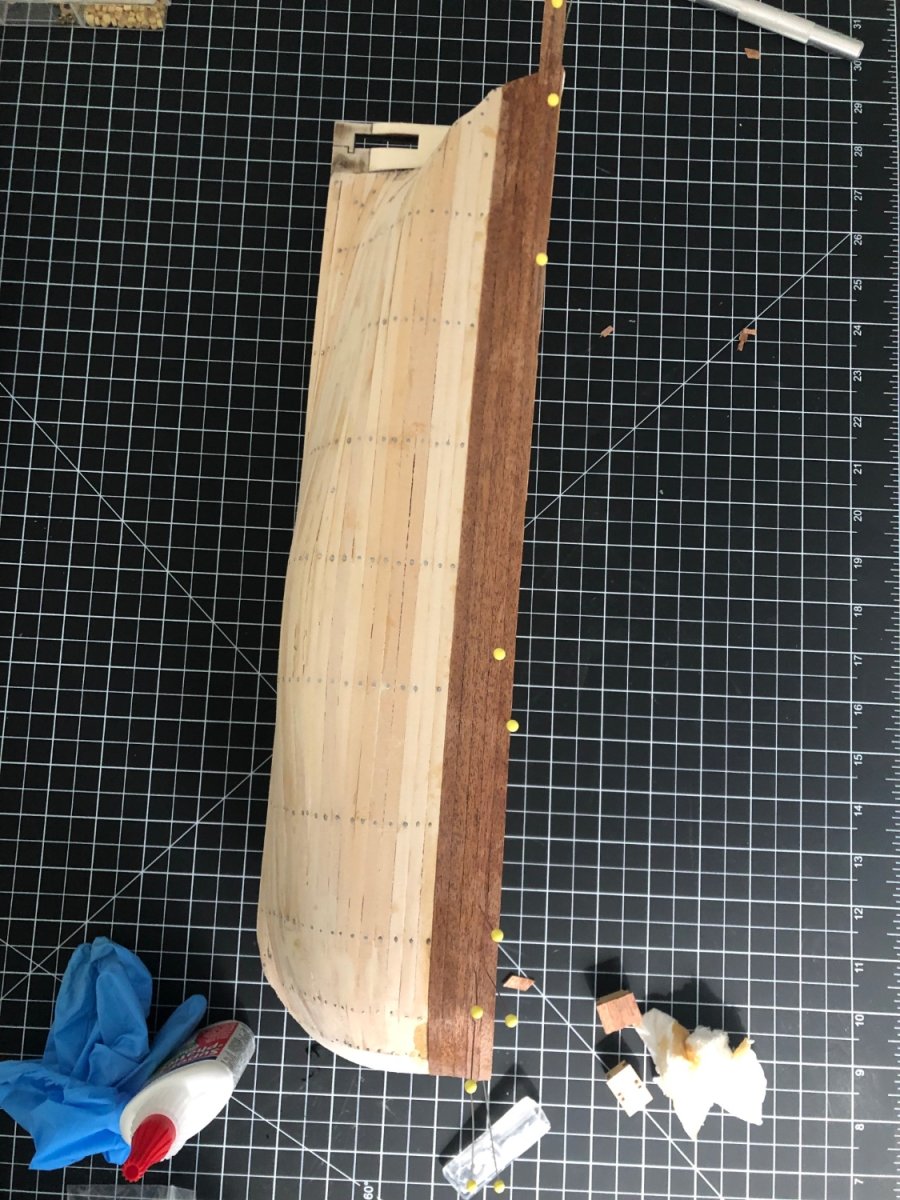
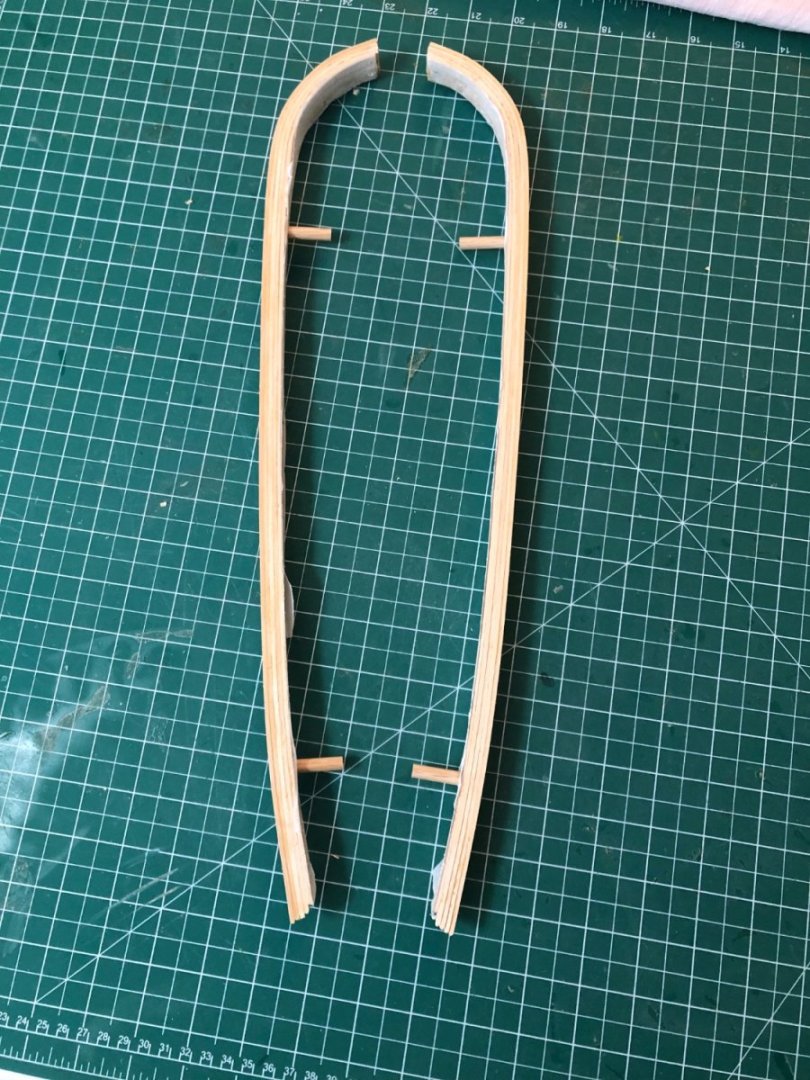
Hi Keith! Have not quite yet started on the plating, realized it would make more sense to complete the ice chocks (channels? Working on my maritime vocabulary as a second goal here) first as the top edge of the plating bumps up against it. Any suggestions for the most effective way to trace the outline of the plating onto the hull? Seems challenging to freehand straight lines on a curved surface. In the meantime I’ve planked and painted the inside of the bulwarks and I’ve installed the keel, she’s starting to look like the Terror 😁. Huge thanks to all the Keiths and Daniel for the ongoing discussions on your respective logs. I’ve been following closely, and my build would be straight from the kit if it weren’t for you all. The depth of research on the azimuth compass alone is impressive. If I can glean this much just from the logs, I feel my finger hovering over the “purchase” button for Dr. Betts’ book. Regarding color, I have both ebony stain and black paint. It’s not really a planking job worth highlighting, so I would not consider it a loss to paint over it. I’m thinking I will try the stain first, then if I’m unhappy with the appearance I can just cover it with paint. Appreciate you checking in, the build continues!

-
Keith, Noted, thanks! I feel brain aches are on the way once I start moving into the little details!
-
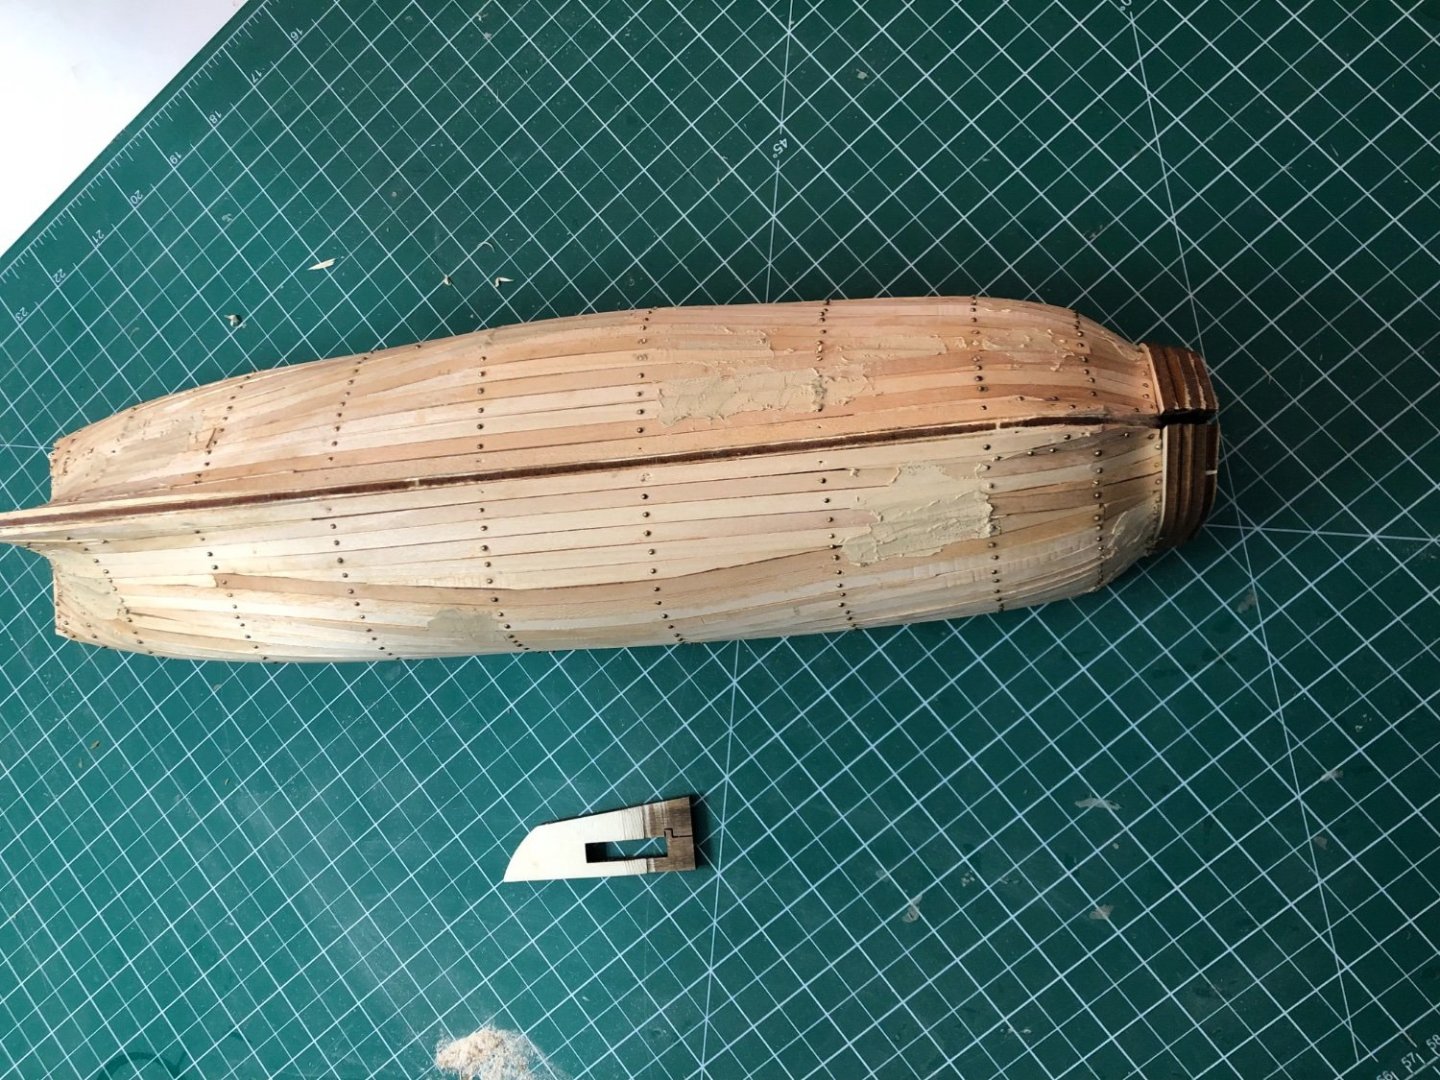
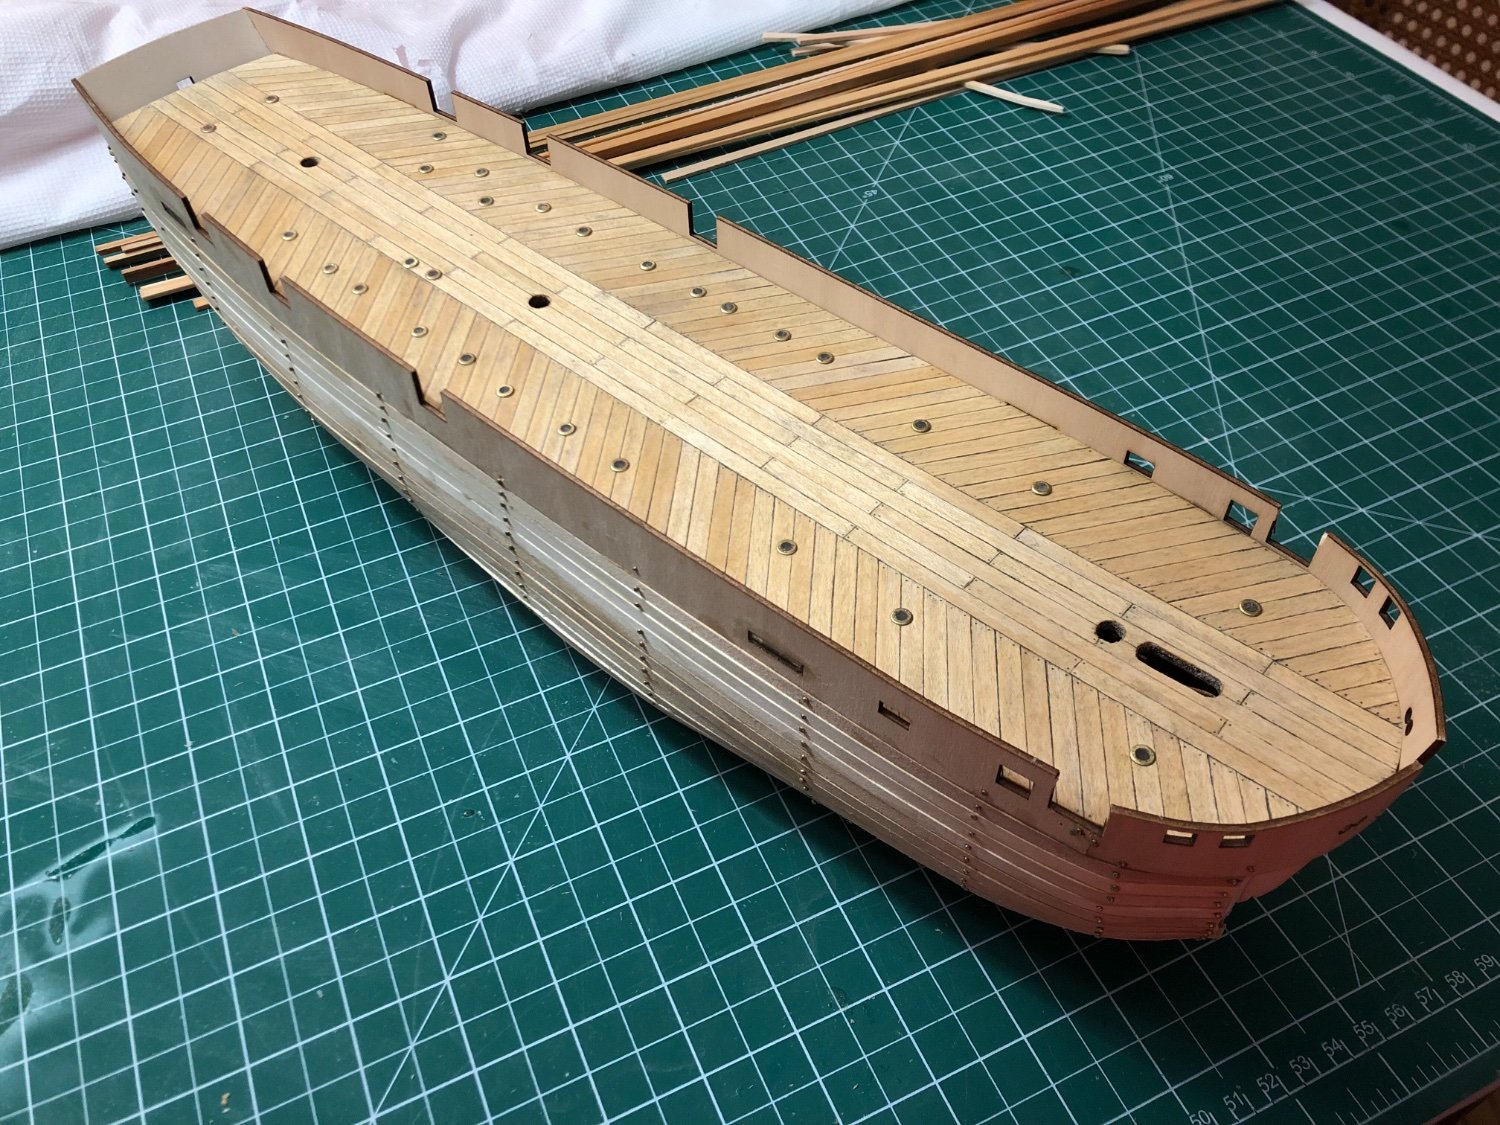
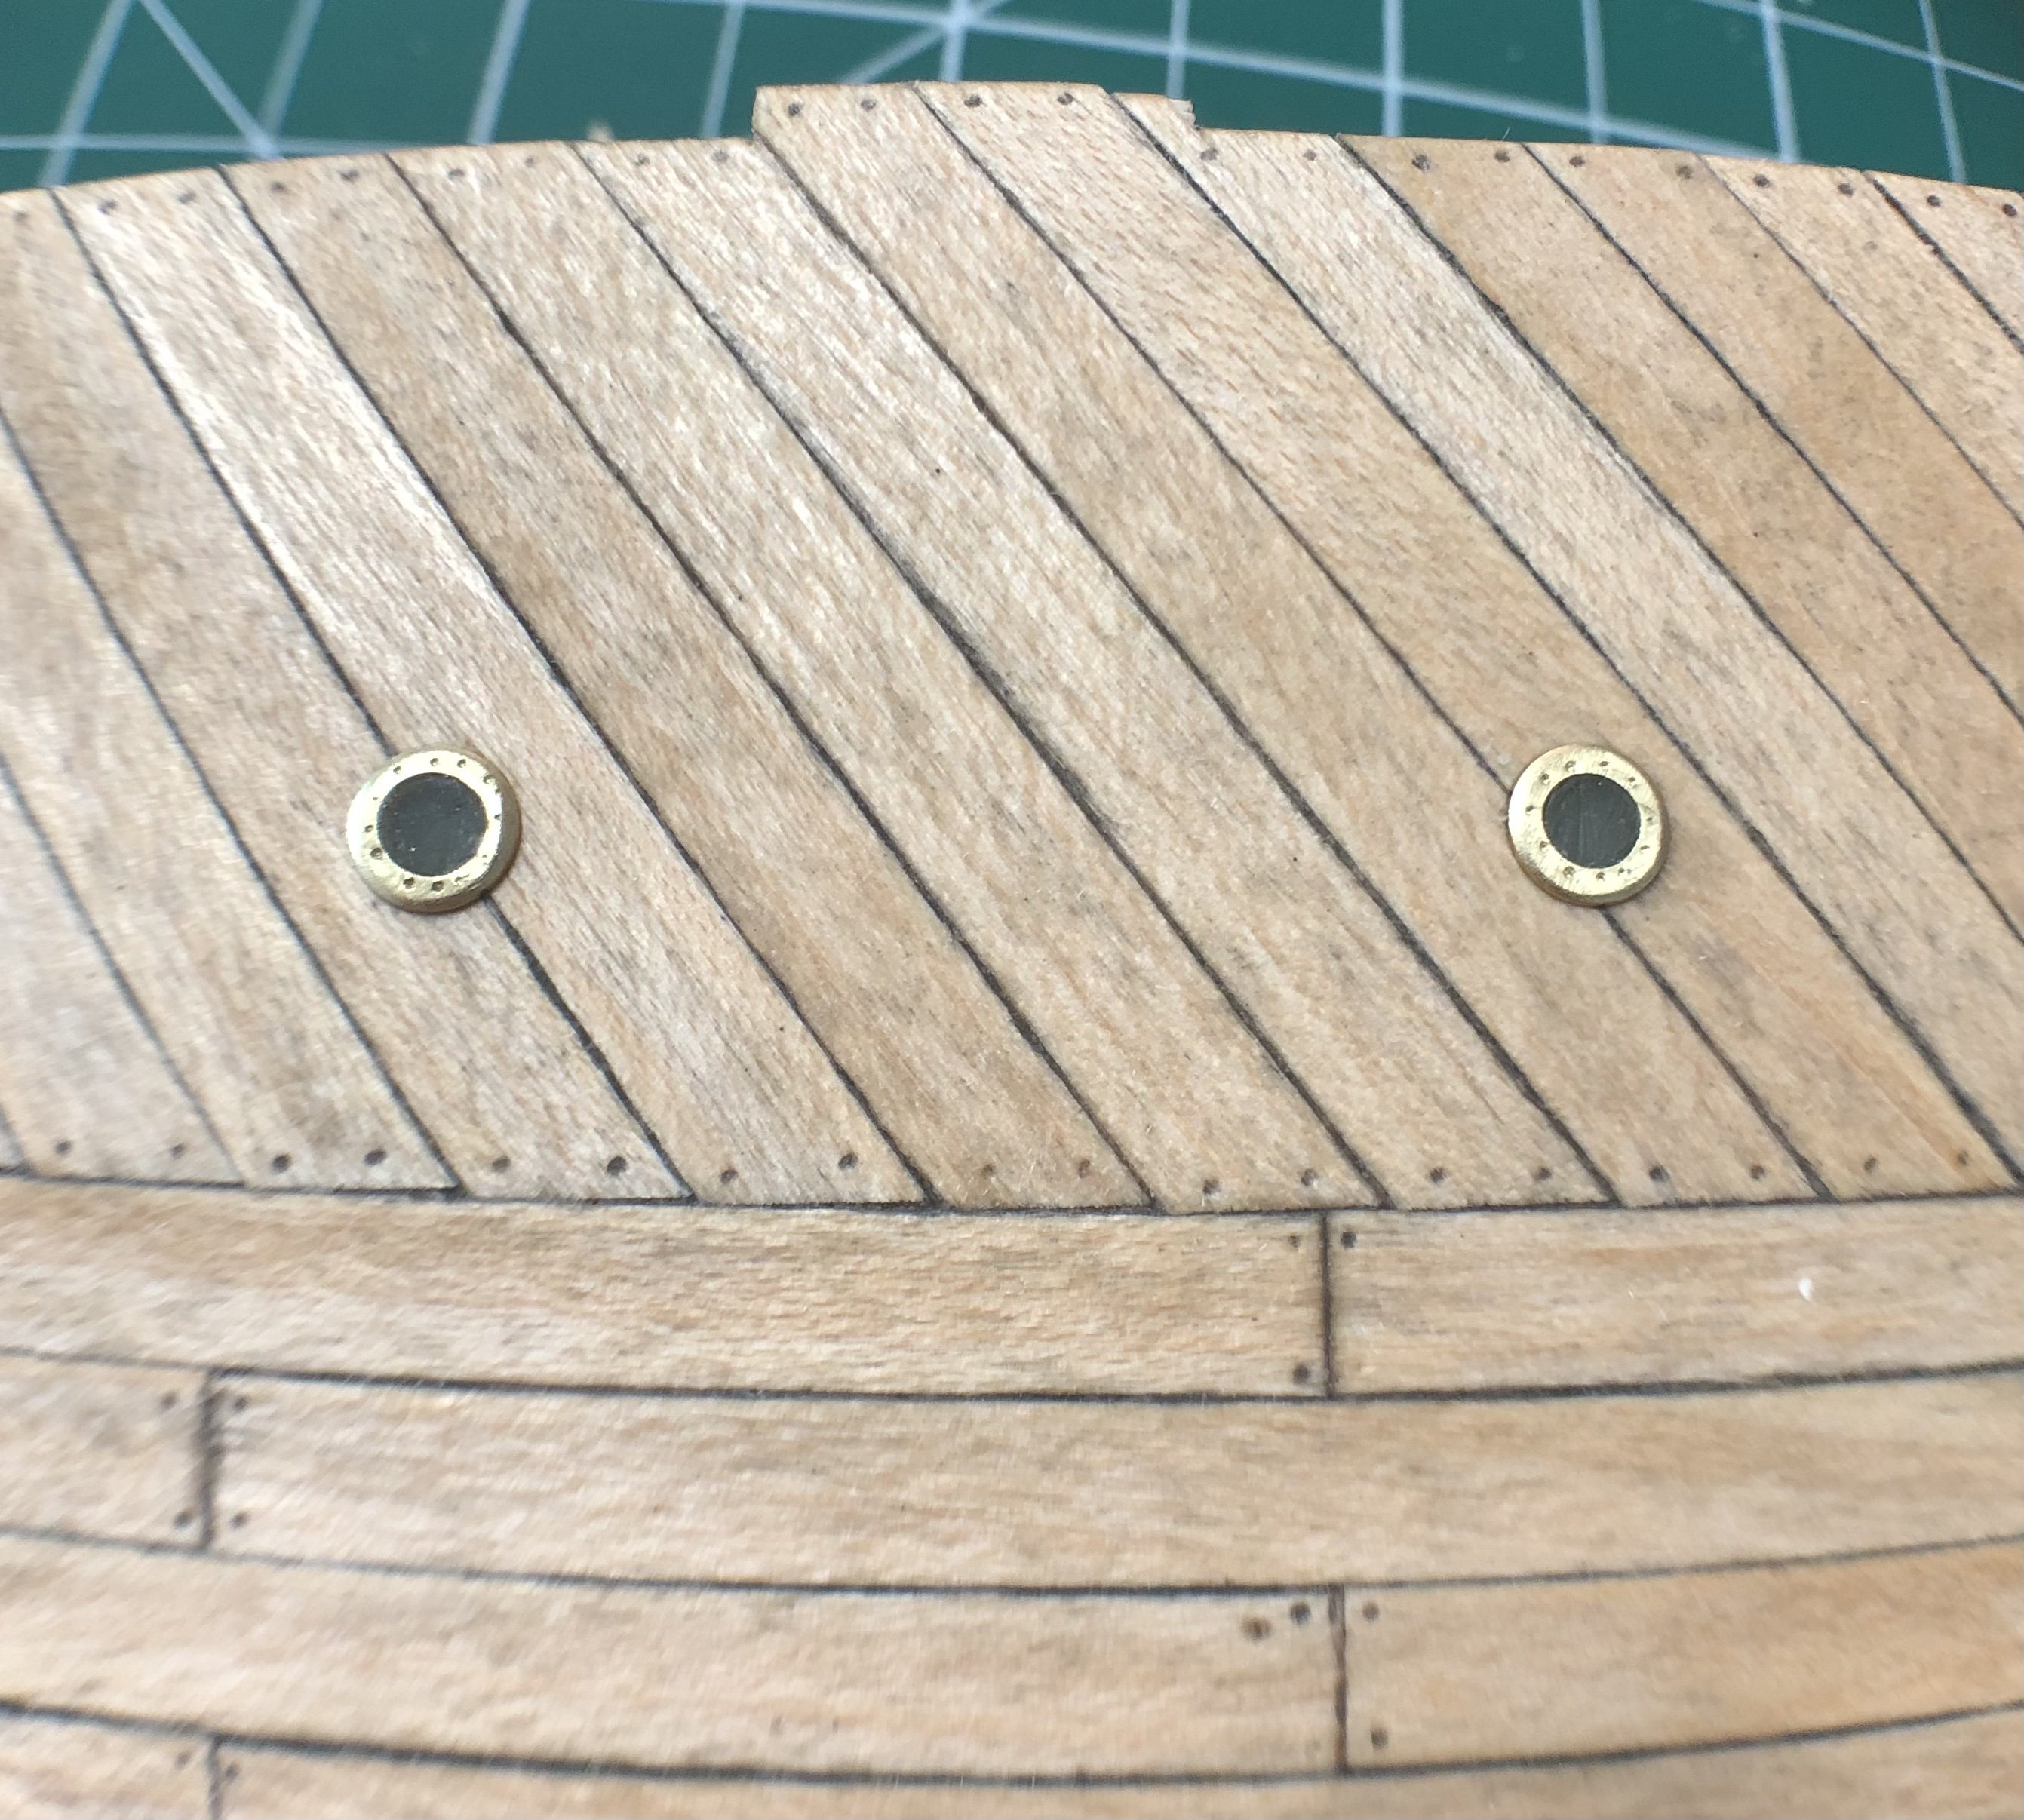
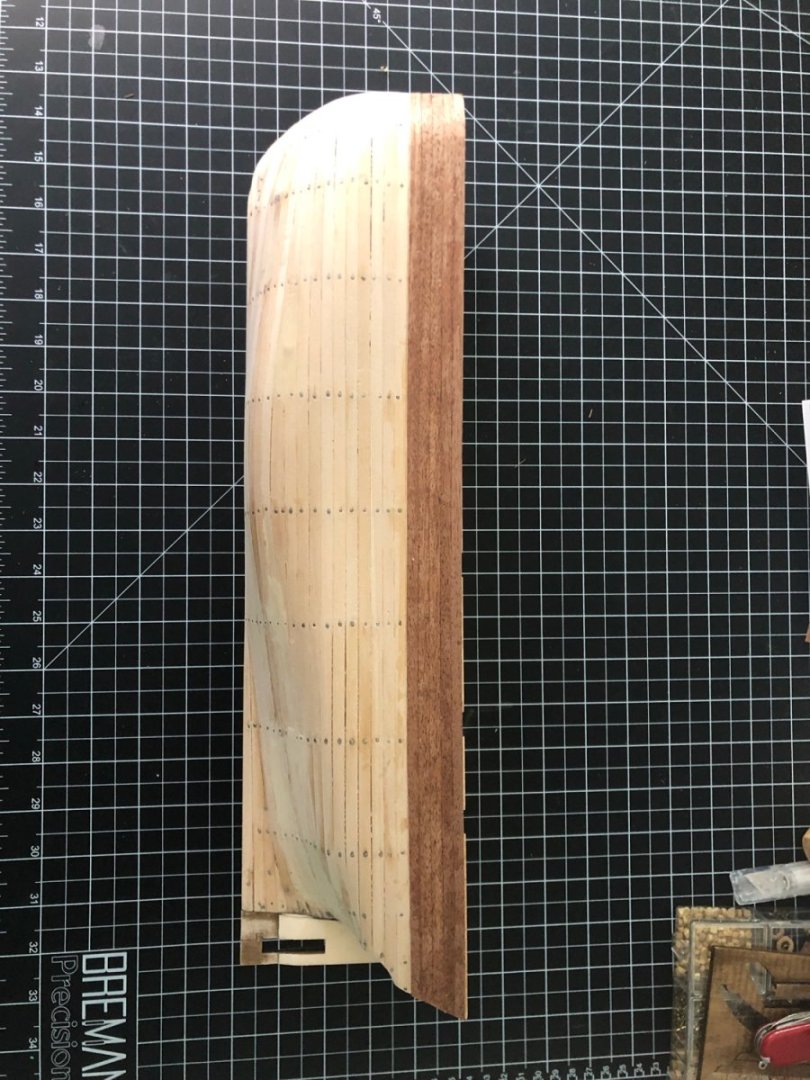
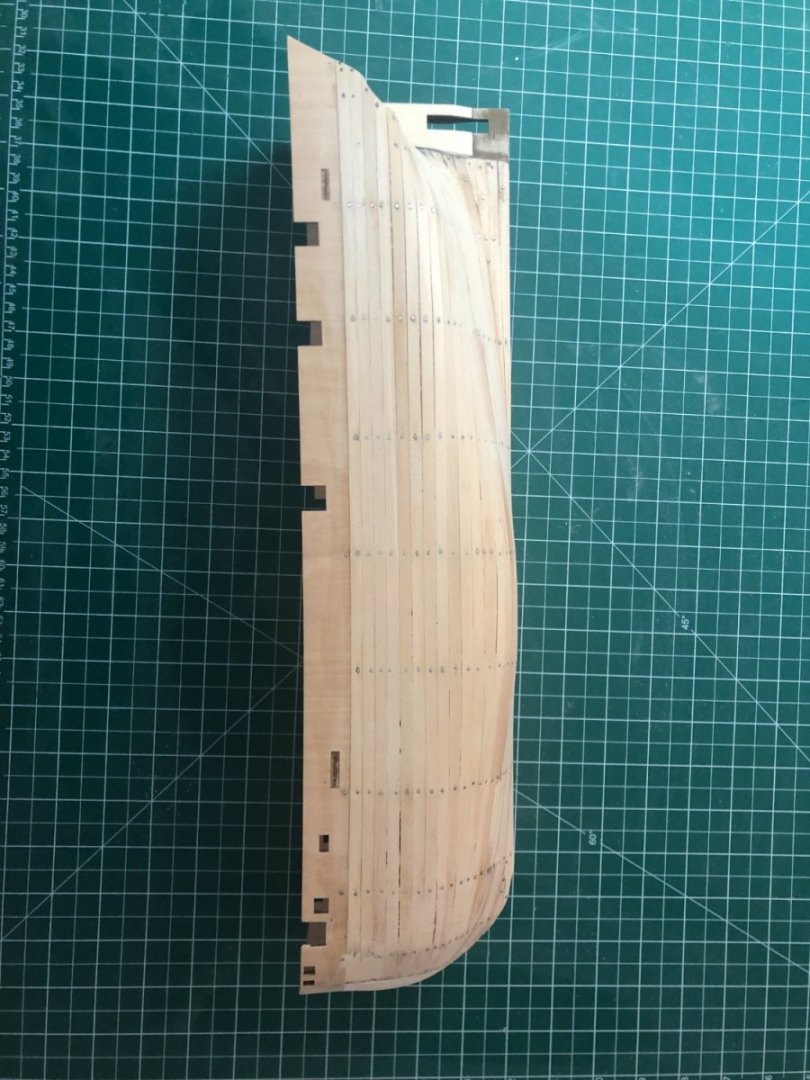
Hi all, All of the discussion surrounding planking and plating is much appreciated. Happy to report second layer of planking is now finished! She’s sanded and ready for ice chocks and painting. I know I did a rough job of it but I think my attempt to get the base kit closer to Matthew Betts’ model was modestly successful and I managed to avoid destroying her in the process (so far!). Close up shot below for comparison. Also tested out adding rivets by hand to the kit supplied plating. This looks a little out of scale but I’m thinking if I can do it in straight lines and I’m patient this may be a viable option.


-
I wouldn’t know anyone who made that mistake 👀
-
Keith & Keith, Thanks for the feedback and offers of help on dimensions. As this build moves into more detailed construction and scratch building I will certainly be asking. While waiting for the kit to be delivered I spent quite a bit of time checking out your build logs and the extensive detail/research is just awesome and nice to have for reference. Thinking that this next stage of the build can become incredibly long depending on how much historical accuracy I want to go for (and I’m aiming high to start!). Of course, as always, I have more questions. I’ve seen a lot of builders find the kit provided bow plating pretty frustrating, as an alternative I was checking out this self adhesive 1:75 copper plating which already has rivets included in the molding. Any caveats on using this that I should be aware of? (Let me know if linking to sellers is not allowed and I’ll edit the link out) https://www.ebay.com/itm/314076499581?chn=ps&var=612739481491&_trkparms=ispr%3D1&amdata=enc%3A1eUJzI0pwRYiLRf6hkW0Gsg26&norover=1&mkevt=1&mkrid=711-117182-37290-0&mkcid=2&itemid=612739481491_314076499581&targetid=&device=m&mktype=pla&googleloc=9012147&poi=&campaignid=17597089569&mkgroupid=&rlsatarget=&abcId=9300988&merchantid=507190959&gbraid=0AAAAAD_QDh_AX-EBfBgUXRIBunVspTKyG&gclid=CjwKCAjwo_KXBhAaEiwA2RZ8hJiAIyKY4msEhs6bT1snGk6s2Nuoju8NYAVokrriaX5bcVXR5fMAhRoCRzMQAvD_BwE
-
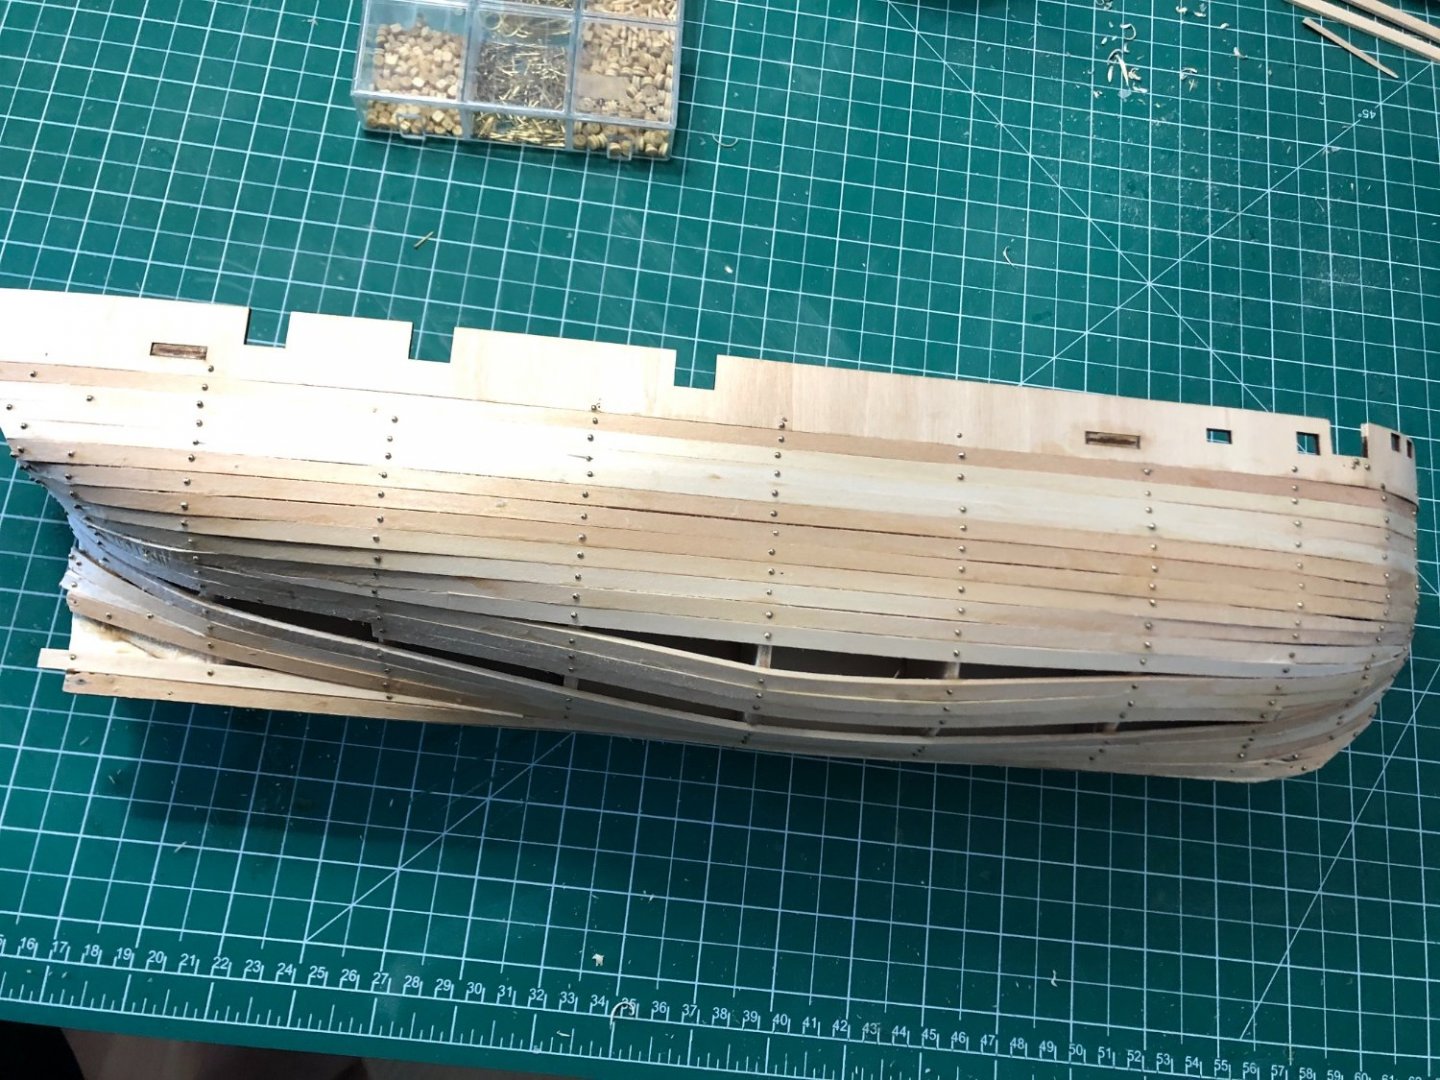
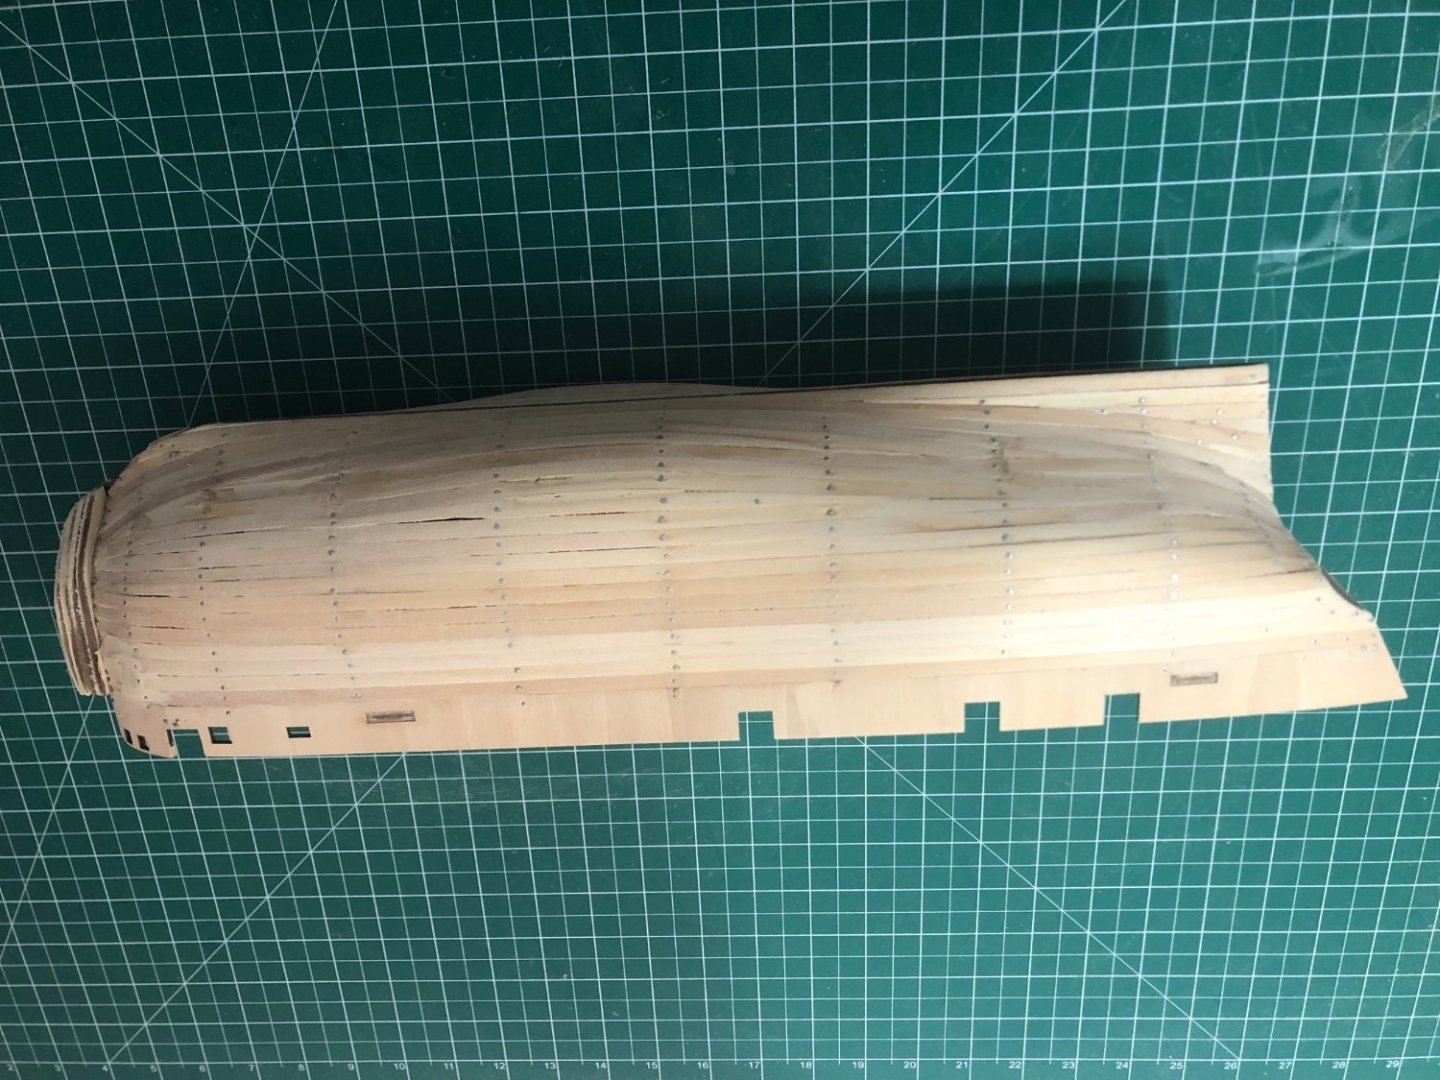
Hi all, Some extra time in the shipyard this weekend. Nothing significant to detail, but got most of the second layer planking done. There are some spots that require additional attention, but she’s starting to look like the Terror and that’s exciting! Big thanks to Allanyed and Cathead on their advice about planking as well as wood and kit selection. Will be referencing these comments in the future. In the meantime here are the latest pictures. Hoping to get the keel on and paint this ship in the coming weeks. Note: You’ll notice green marks along the hull. This is to identify where the bulkheads (and nails) are along the hull. I will of course prime and paint over these, but I wanted to add them for reference as I’m considering implementing DanielD’s strategy of building removable ice chocks that can be painted separately and aligned with dowels. Also: Some areas of filler are visible. While the sanded hull is smooth and featureless to the touch, my planking skill set is not. Ideally this will not be very noticeable after painting, but needless to say I’ve learned many lessons about planking on this build


-
I hope not. Beginners like myself won’t be able to make informed decisions about kit purchasing unless someone is speaking this plainly. I’ve learned a lot just from these last few posts.
-
Allan, thanks so much for breaking that down. I’d be lying if I said it doesn’t have my head spinning a little, but I’m glad to be more informed. I’ll be referencing this on my next build. Also Keith, thanks for the advice! I’ve referenced your build multiple times and never even noticed that you had the same bulwark issue nor how you solved it. Much appreciated, I will see what I can do on mine.
-
Hi Allan, Did you mean both layers of planking or just the thin second layer? I have some concerns about ultimately destroying the model. In either case my next build will most certainly be focused on a smaller subject and proper planking. Appreciate you pointing me to the planking primer and Chuck’s videos. Also, I’m ignorant as to the quality of this wood. Suggestions on better options? Should I avoid OcCre in the future?
-
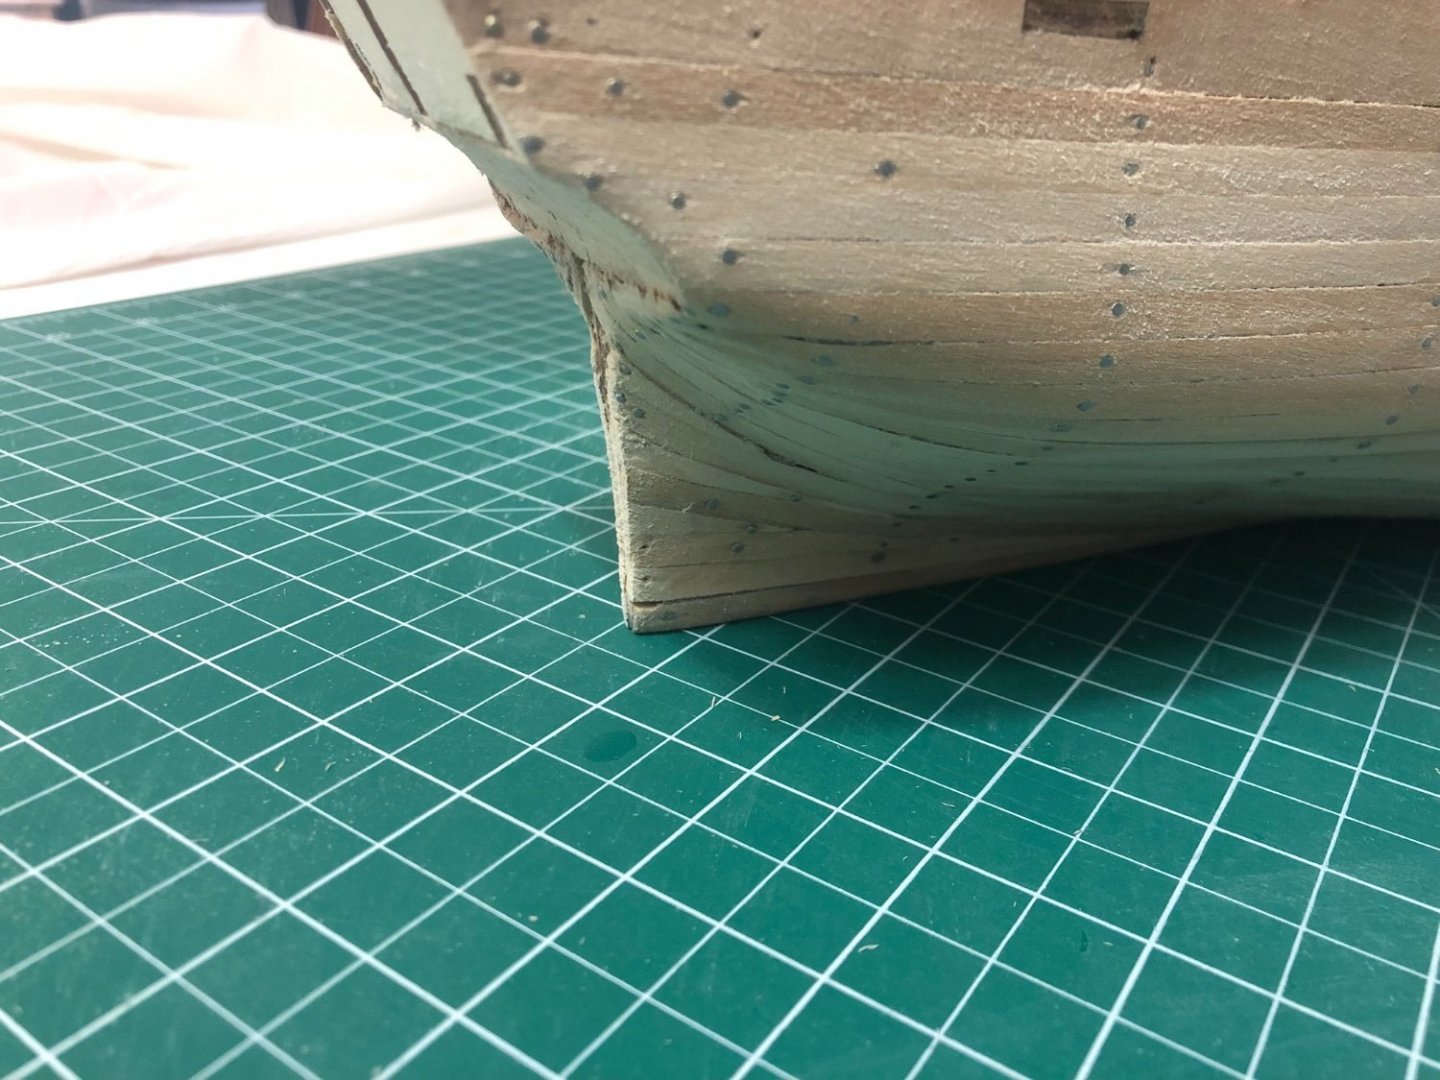
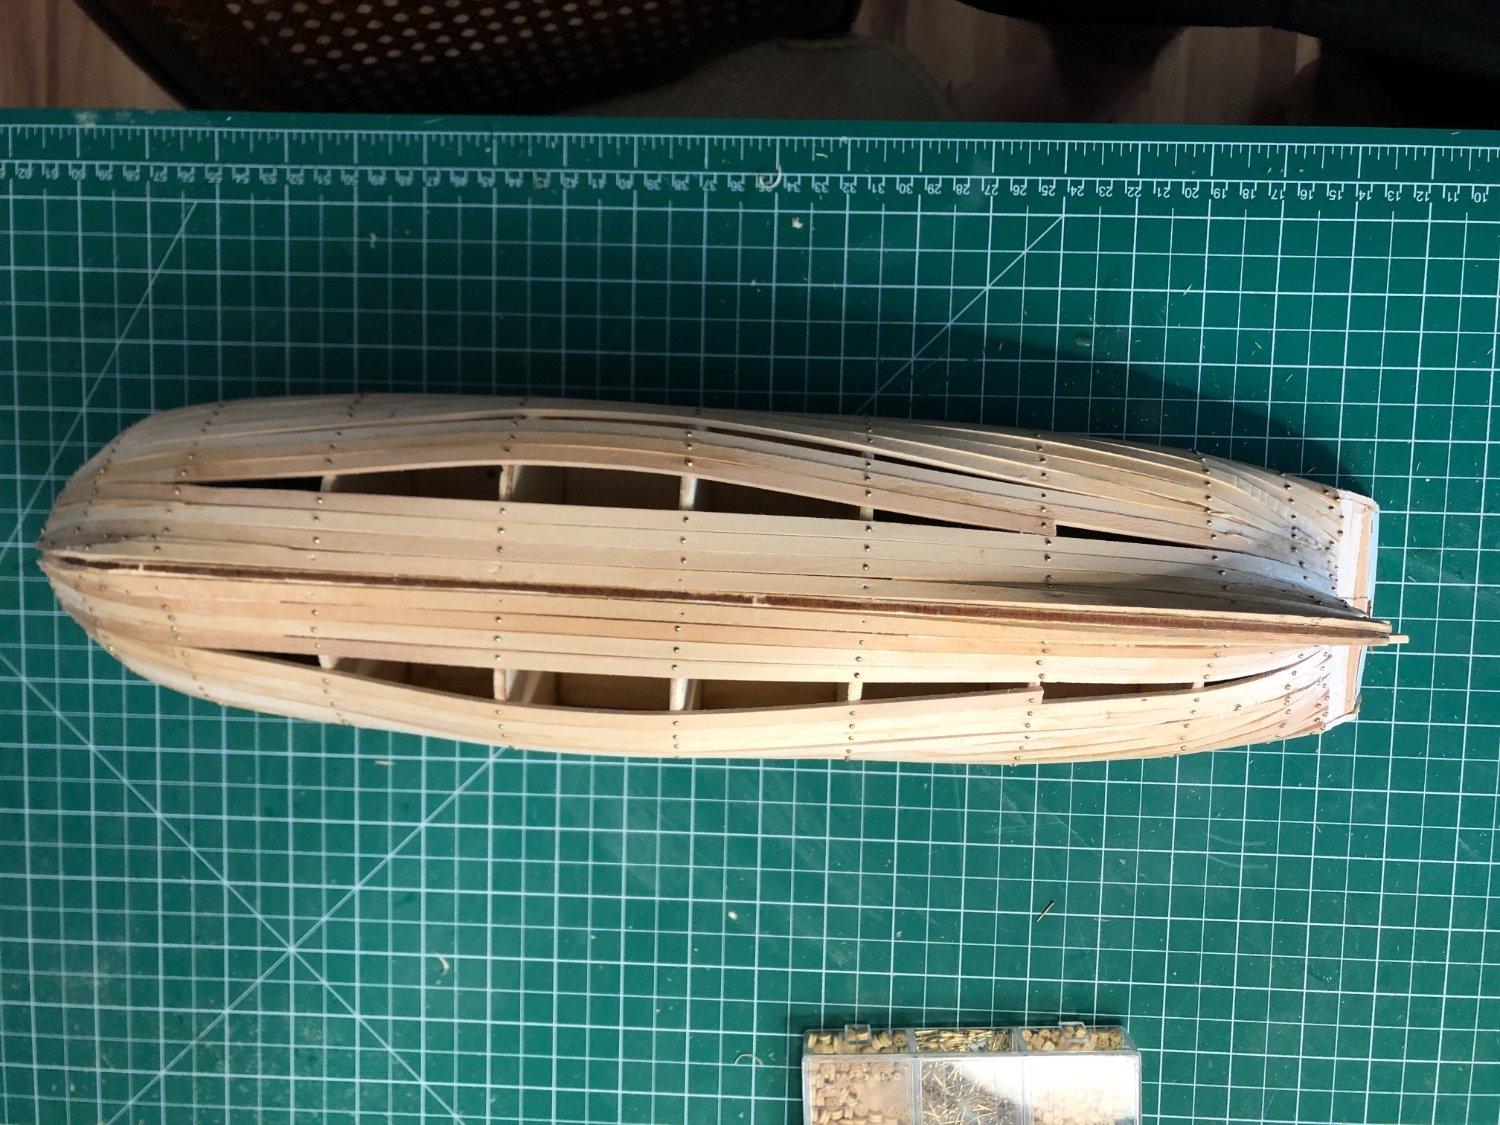
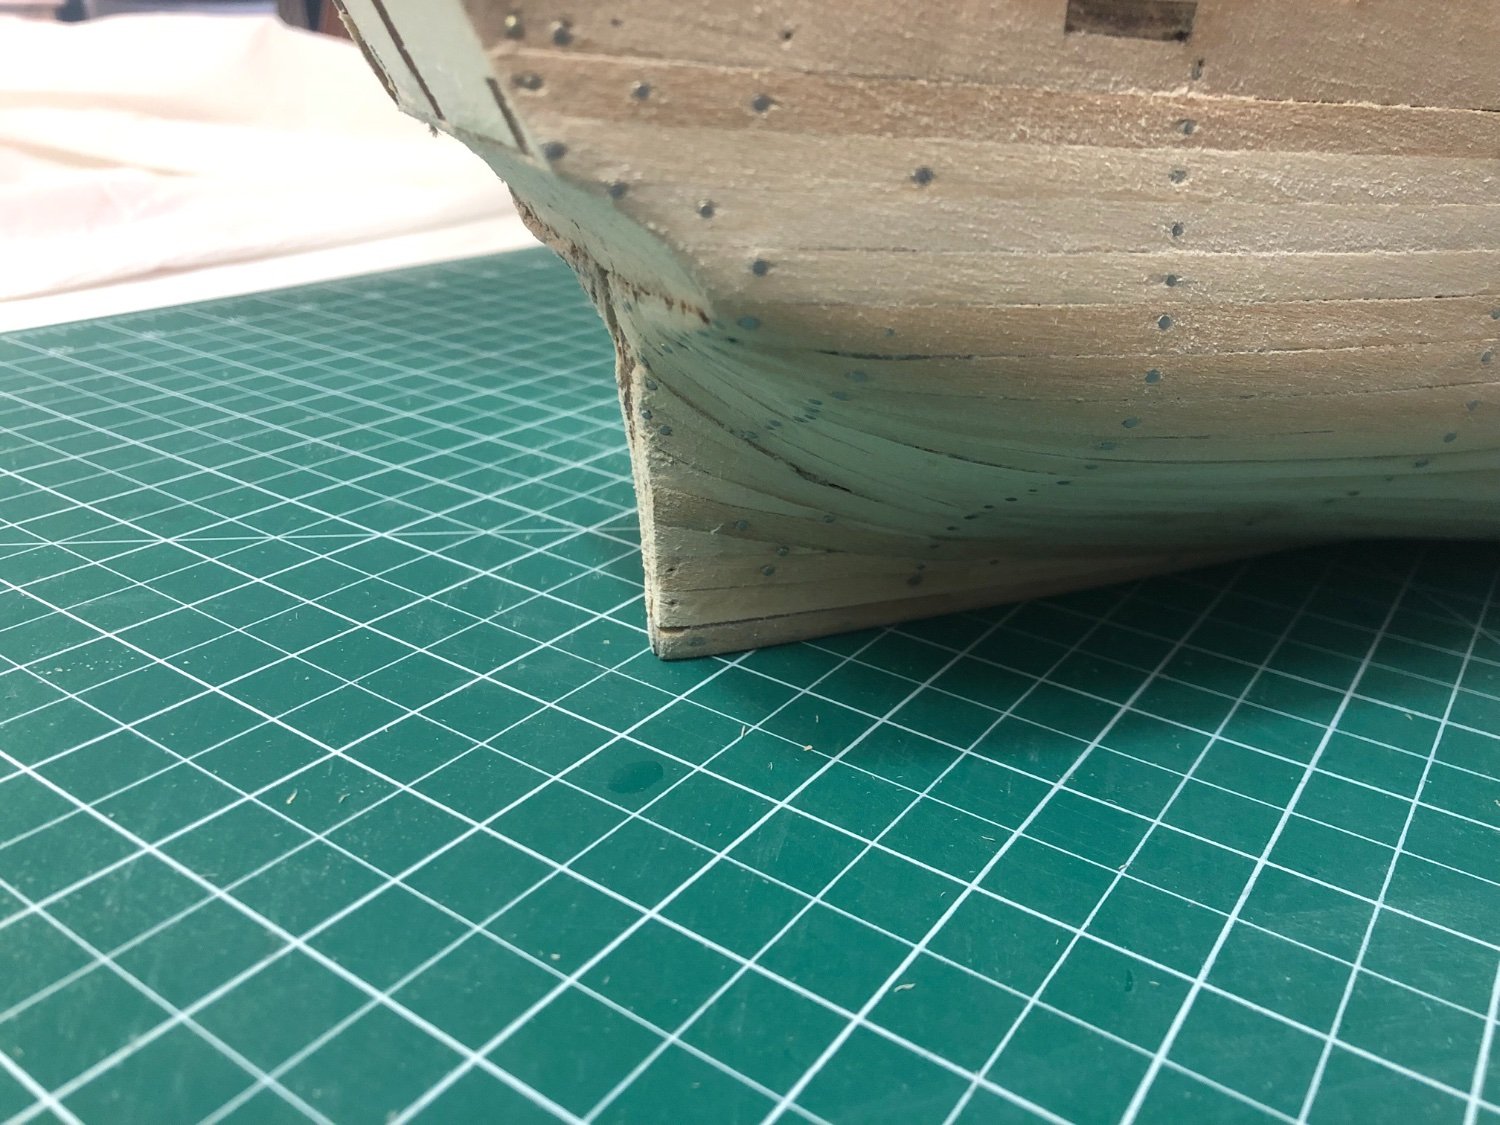
Hi all! Second planking coming along and I’m running into my first real bungle that I’m somewhat lost on how to handle. In gluing on the bulwarks it appears that I somehow misaligned them with the gap for the keel, leaving them slightly farther apart than they should be. This will result in a gap between the keel and the hull right at the bow. I’m unsure how this happened as the bulwarks have multiple little notches that ensure they are correctly aligned, but alas, I’ve managed to screw it up anyway! I’m sure someone else has made this same mistake as a beginner. Any thoughts/experience on handling this? I have some ideas, but they both involve modifying the appearance of my Terror, which I’m not too fond of. First was to extend some of the iron playing above the ice chocks to top of the hull, which runs the risk of looking *terrible*. Second was to extend the railing down between the hull planking and the keel for a small section. See crude illustration below. Anyway, insights and experience appreciated. Hope everyone has a great weekend!


-
Hi Paul! Awesome work so far, especially on handling the incorrect bulkheads. I believe the Amati Titanic kit is either based on or is a repurposing of a subscription titanic kit that I recall poring over as a child in the early 2000’s. I was absolutely taken with it and a museum quality Titanic kit is one of my dream builds so I’m excited to follow this log.
-
Allan, ”Fairy tale planking”, ha! Very good. Yeah I’m learning that the OcCre Terror certainly has some ridiculous planking, but in all honesty it’s part of the reason I chose it as my first kit. Aside from my personal interest in the Franklin Expedition, the OcCre Terror having 2 layers of planking (in effect offering a “practice” run), plating covering the bow planking, and the option to obscure the whole planking job in black paint makes it a very appealing first timer build. I think once I finish the Terror I’d like to build a much smaller kit where I can practice more of the fundamentals of planking. Thanks for the recommended resources!
-
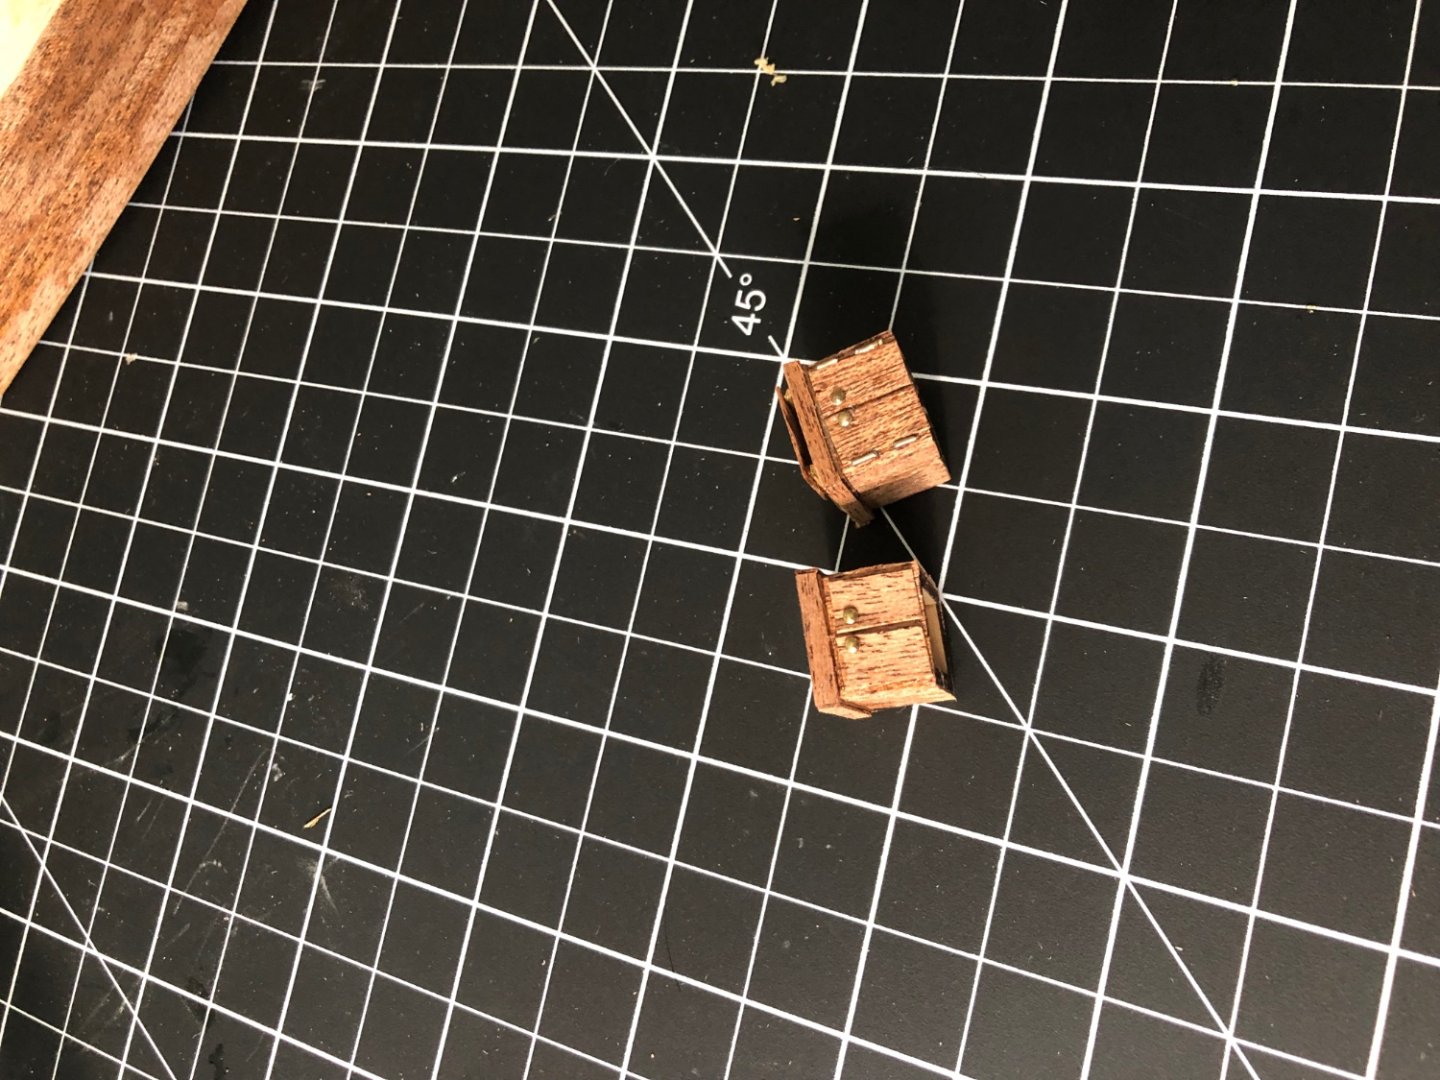
Hi all! It’s been a really busy 3 months but this week I finally got some time to pull the kit out and start some second layer planking. Didn’t get a TON done, but it’s nice to see the second layer started and I’m hoping to have more time to dedicate to the build in the coming weeks. Also while I was waiting for glue to dry I tried my hand at some of the little deck structures. So tiny! Looking forward to putting all this planking behind me and to get into a different phase of the build. Very nice to be building again.


-
Hi all! No pictures today, just a quick update. First of all thanks for all the advice and feedback, it’s very encouraging and I appreciate that this site is such a well of experience and expertise. Secondly, I tested some glues and did find one that I think will work for second planking, so I’m going ahead with it. I haven’t been able to even touch the ship in the past month as things have been very busy, but I’m eager to get building again!
-
EZ & Keith, Thanks for the replies. I’ll look into Bostik as an option. I am leaving the pins in as I wanted the extra security and sanding them turned out to be fairly simple. EZ, I am painting the hull so I’m less concerned about rust. I am interested in your statement about CA being unreliable, does it fail after a while?
-
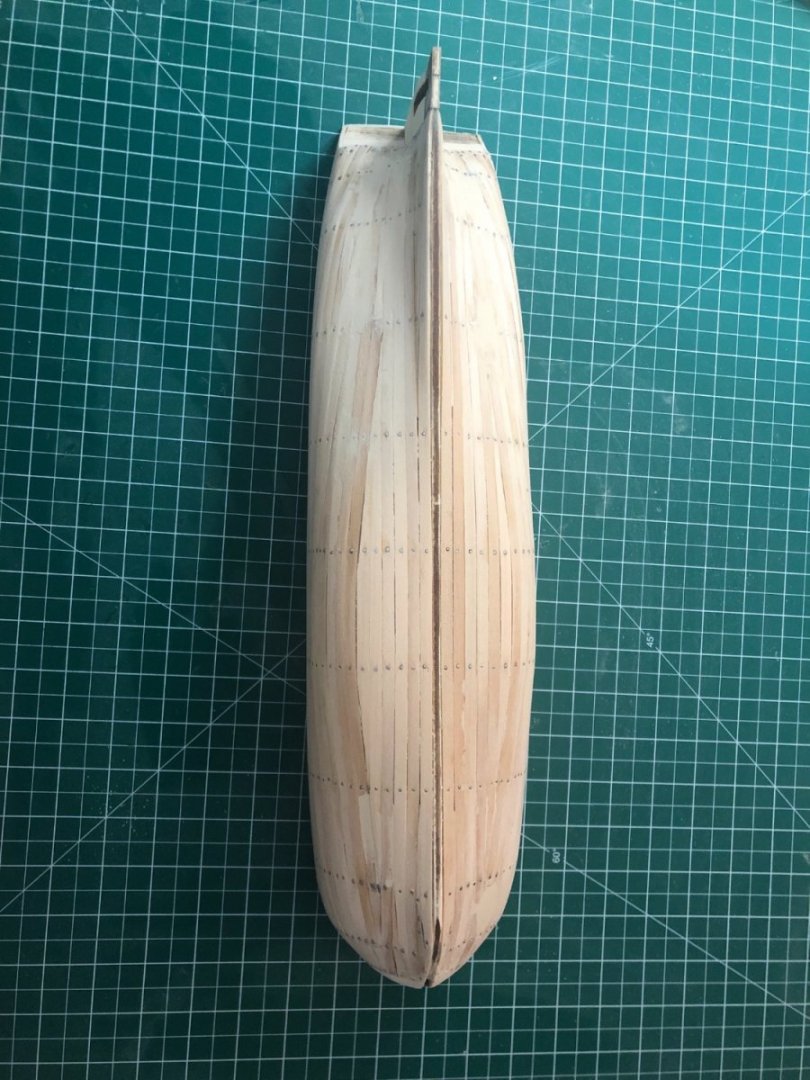
So the ship is all sanded and shaped. Looking at starting the second layer of planking this week and I’m finding myself unsure of whether contact glue or CA is the way to go. Any thoughts?
-
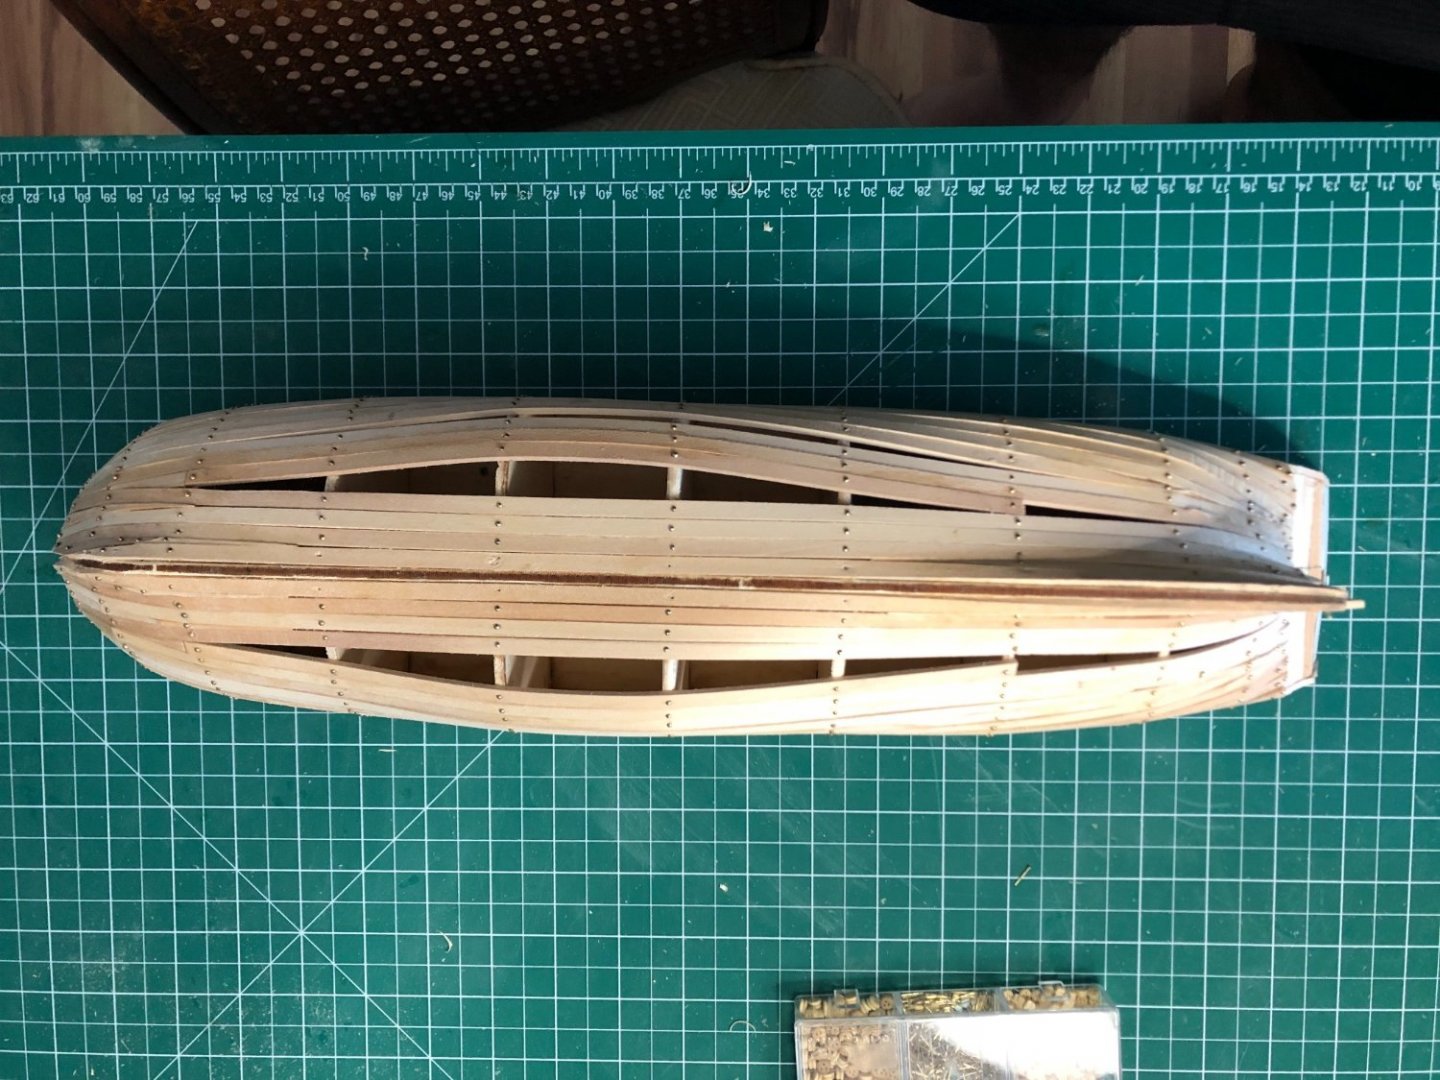
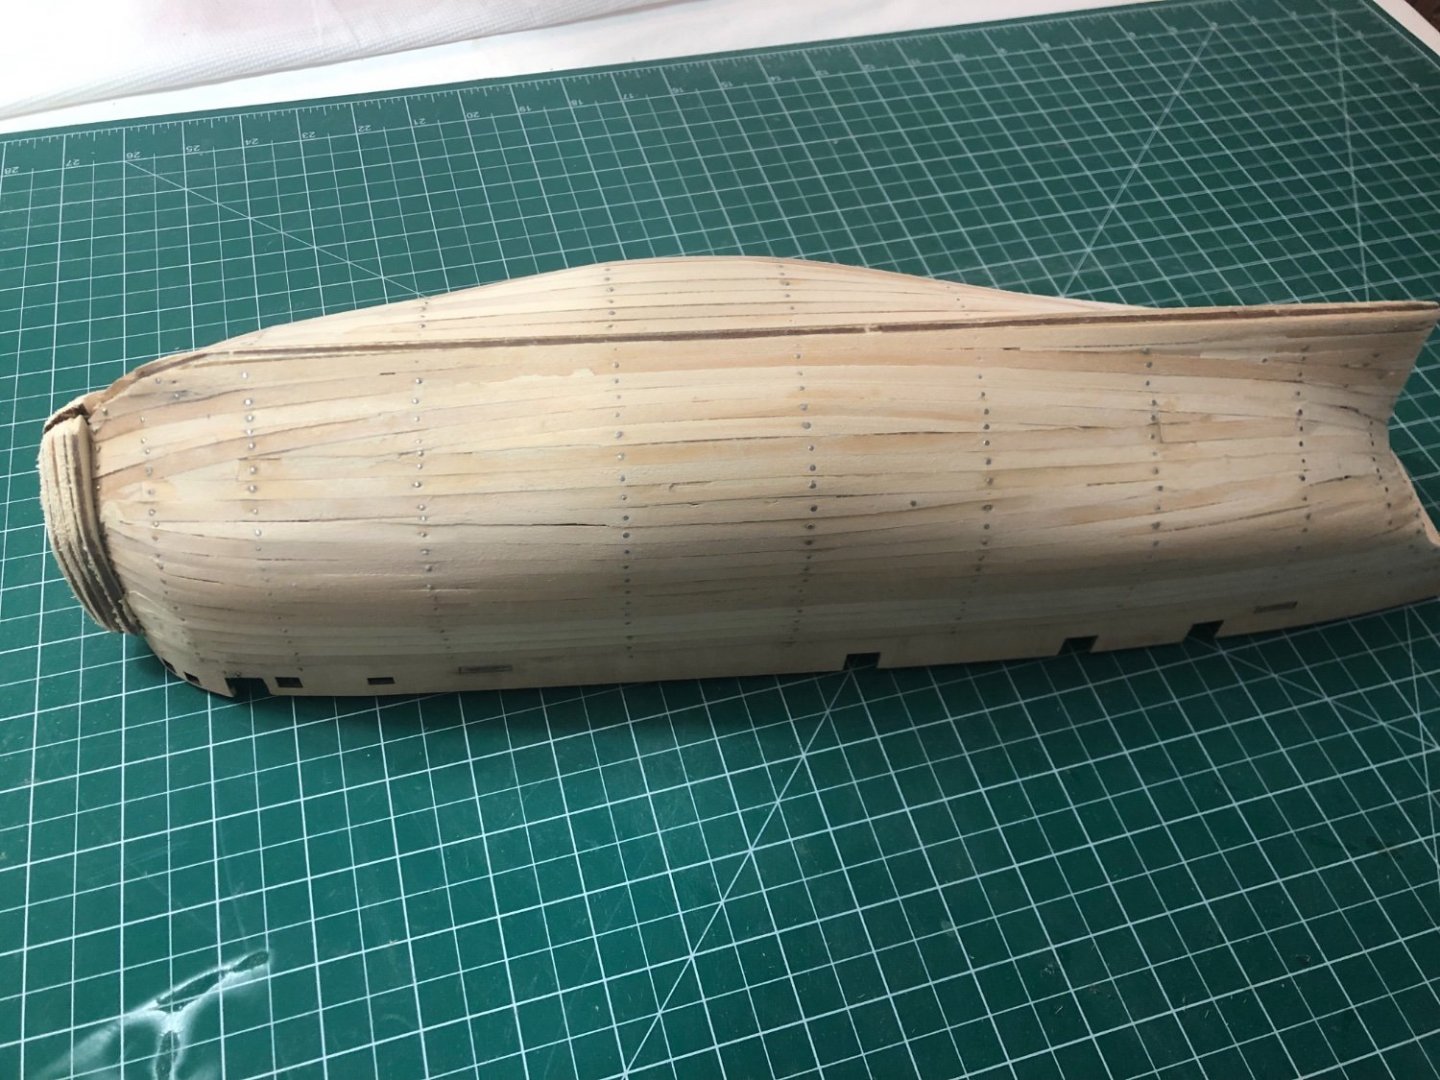
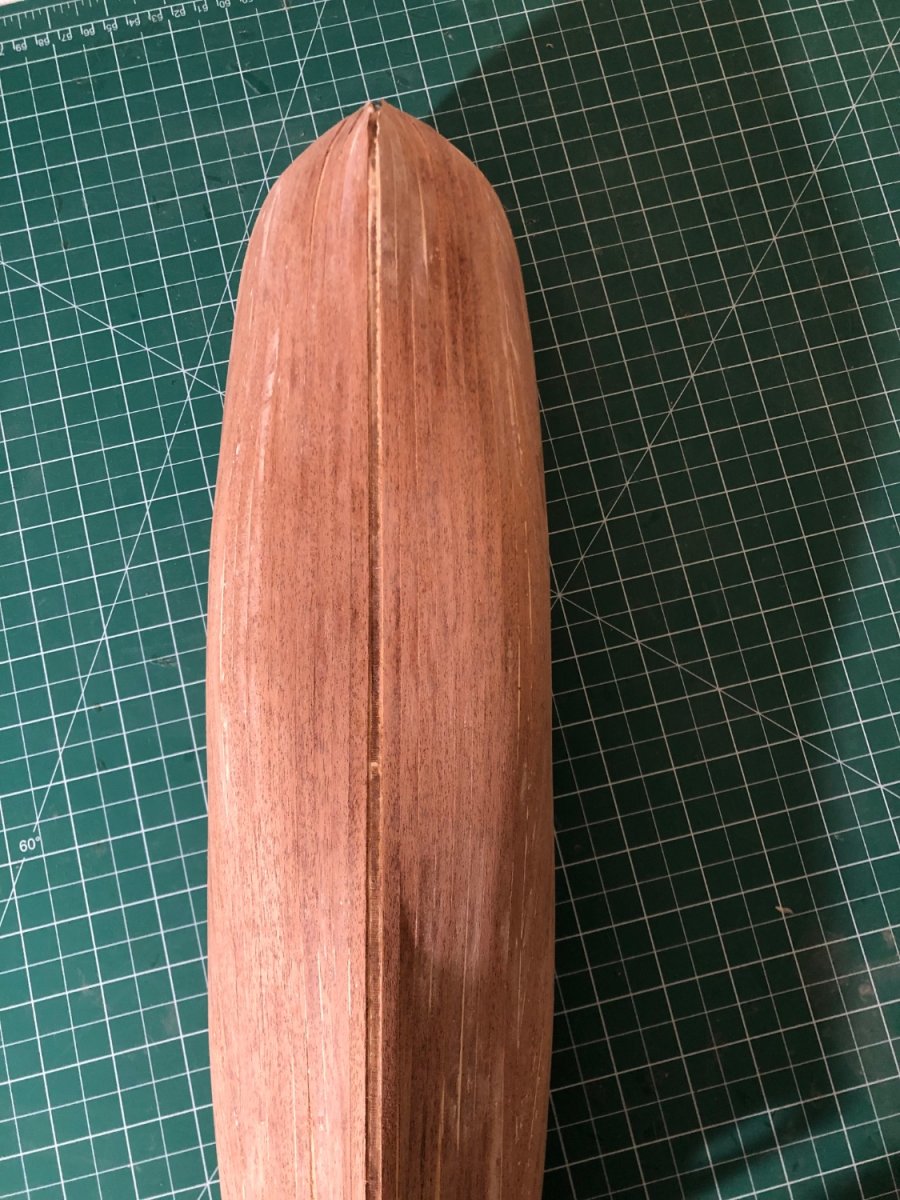
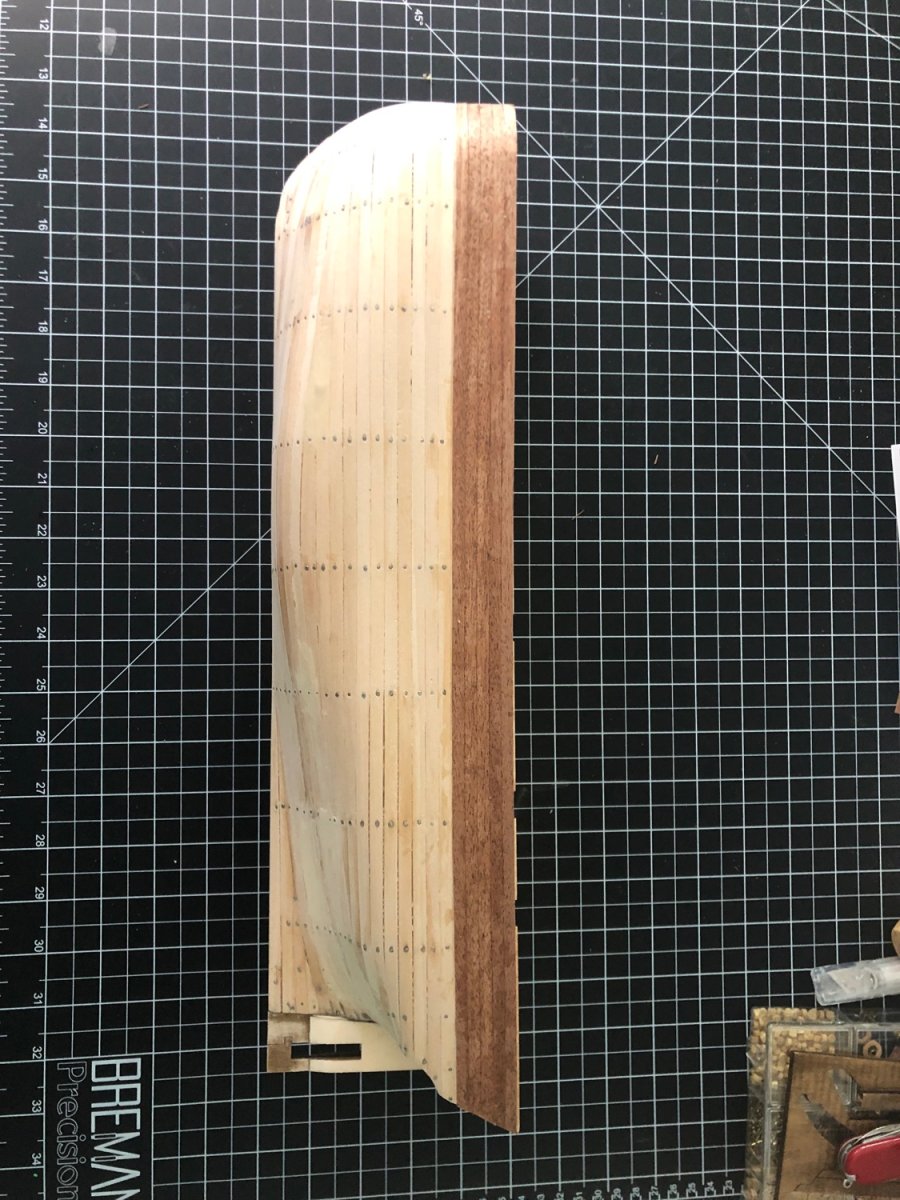
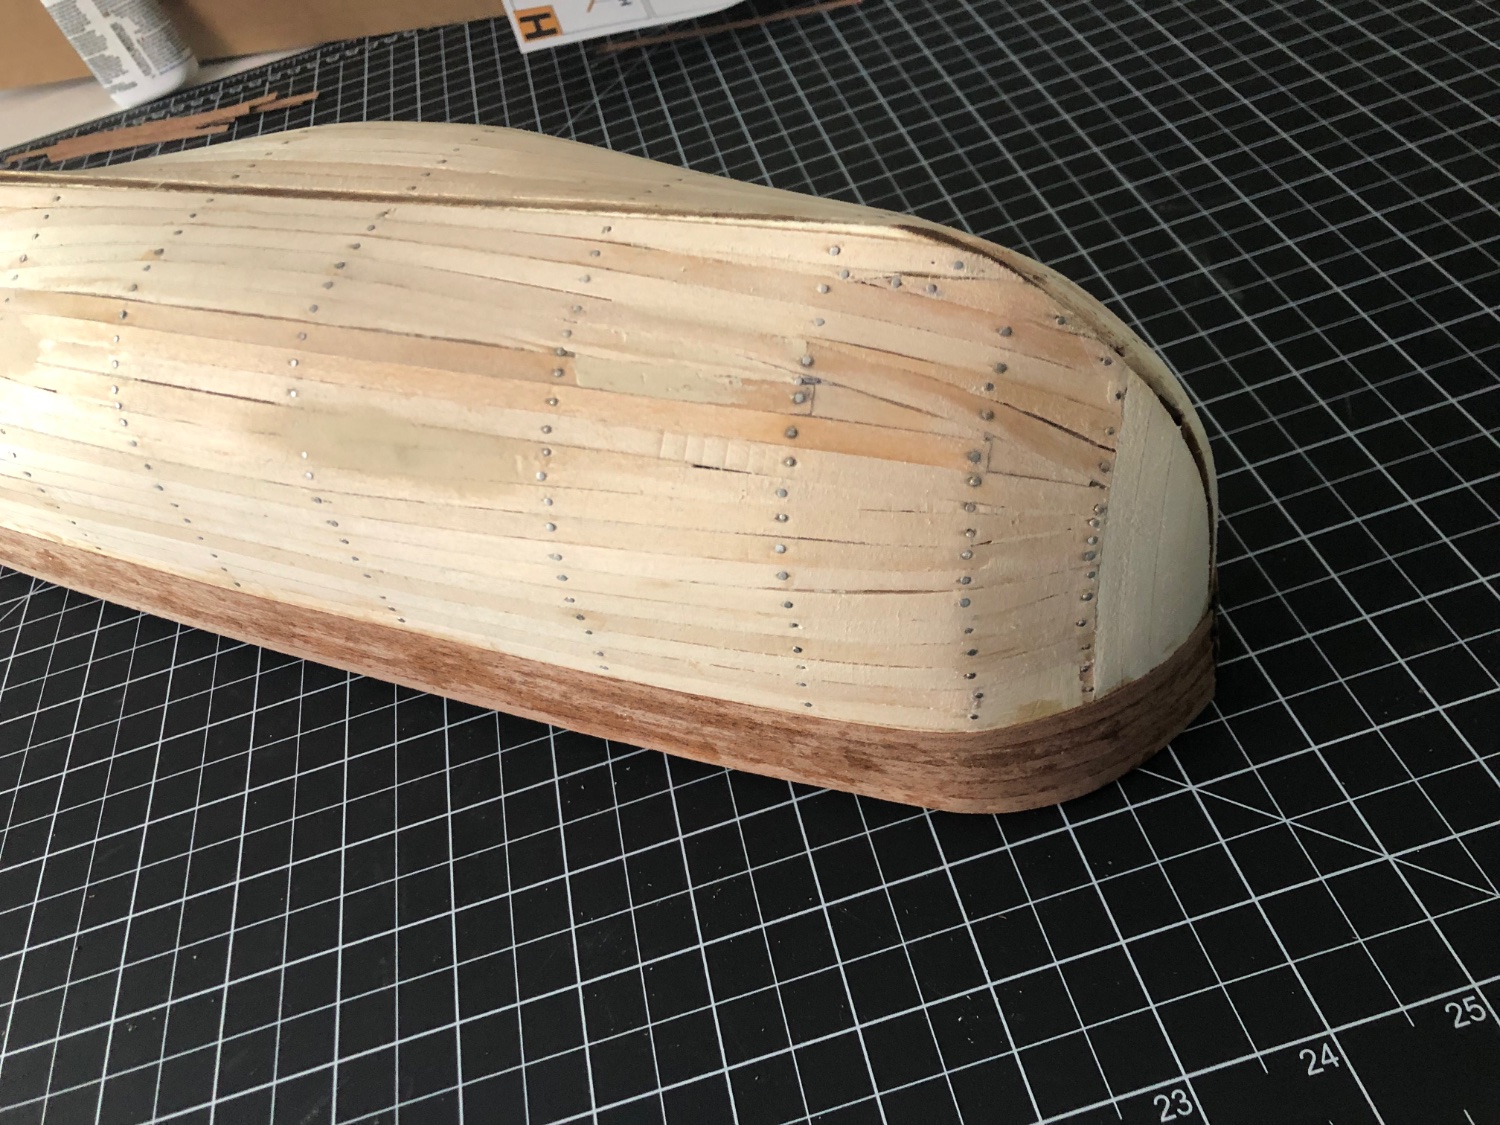
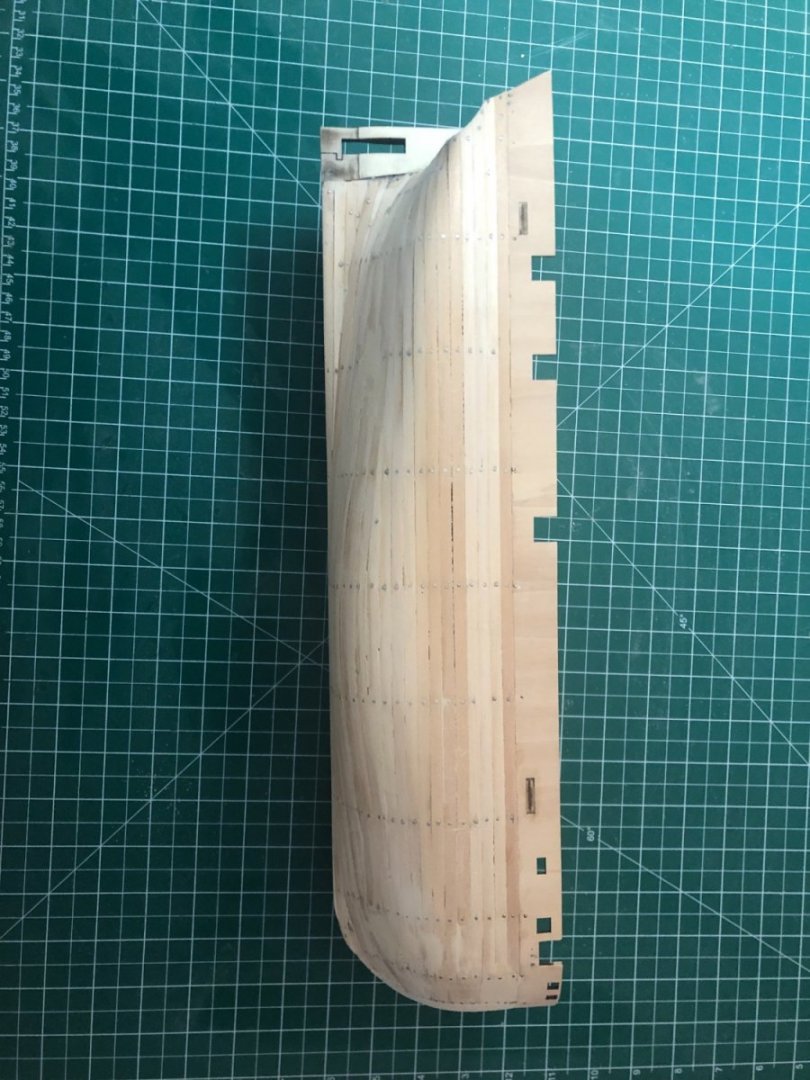
Hi everyone! I wanted to hold off on posting until I’d fully finished the first layer of planking, but MAN this takes a lot of sanding and I’m excited with the progress so here’s a quick update. She’s got her first layer of planking mostly done (barring some sanding)! First layer of planking is glued/nailed down and I have to say it truly is a science with how precise all the fitting and tapering has to be. I’m satisfied with my decision to take on a double planked model because I did a pretty rough job of it and I’m going to be happy to cover it up because it’s not pretty. However, the shape is established and I was able to successfully sand over the nails and it’s very satisfying to feel a (semi) smooth hull forming. I also glued in the bow blocks and those are taking a while to shave down, but I’m in no rush. Also I’m fairly satisfied with how the modifications to the stern turned out. Earlier in the build, when I had to commit to leaving it as is or reshaping the bulkheads I was feeling pretty anxious over the decision, but from referencing Matthew Betts’ build I think it looks alright. Anyway, now that I’ve established that I can at least take some laser-precise, pre-cut wood and make it vaguely ship-shaped, I’m looking forward to the rest of the build and have some questions. First up, did the real Terror have a studded anchor chain? Been trying to find out online and I’m having trouble. I did see that studded anchor chains were patented in 1819 so I suppose it’s possible she got a new studded chain when she was fitted for arctic voyages, but I don’t know for sure. Also any suggestions on the places to get reference information/images of the ship? I feel myself slipping down the rabbit hole…