


Heliart
-
Posts
21 -
Joined
-
Last visited
Recent Profile Visitors
429 profile views


-
 Oldsalt1950 reacted to a post in a topic:
HMS Victory by Heliart - DeAgostini - 1:84
Oldsalt1950 reacted to a post in a topic:
HMS Victory by Heliart - DeAgostini - 1:84
-
bruce d reacted to a post in a topic:
HMS Victory by Heliart - DeAgostini - 1:84
-
bruce d reacted to a post in a topic:
HMS Victory by Heliart - DeAgostini - 1:84
-
bruce d reacted to a post in a topic:
HMS Victory by Heliart - DeAgostini - 1:84
-
 Quimp Slattery reacted to a post in a topic:
HMS Victory by Heliart - DeAgostini - 1:84
Quimp Slattery reacted to a post in a topic:
HMS Victory by Heliart - DeAgostini - 1:84
-
GrandpaPhil reacted to a post in a topic:
HMS Victory by Heliart - DeAgostini - 1:72 - Cross-Section
-
GrandpaPhil reacted to a post in a topic:
HMS Victory by Heliart - DeAgostini - 1:84
-
GrandpaPhil reacted to a post in a topic:
HMS Victory by Heliart - DeAgostini - 1:84
-
GrandpaPhil reacted to a post in a topic:
HMS Victory by Heliart - DeAgostini - 1:84
-
GrandpaPhil reacted to a post in a topic:
HMS Victory by Heliart - DeAgostini - 1:84
-
Heliart reacted to a post in a topic:
Albatros by Dr PR - FINISHED - Mantua - Scale 1:48 - Revenue Cutter kitbash about 1815
-
Heliart reacted to a post in a topic:
Albatros by Dr PR - FINISHED - Mantua - Scale 1:48 - Revenue Cutter kitbash about 1815
-
This is supposed to be a building section before sanding the fuselage. On the picture you see no planks on the frames. 😉 An idea I found on the internet. Support of the cross "beams" to get more stability for the lower deck. And all the beams now got a slight bow. According to the construction plan, some caulking lines should be drawn with a marker in the area of the entrance gate. I didn't like that, so I replicated the planks with thin (0.4 mm) linden veneer. I know the planks are too wide. They should be 2.7 mm wide. I did not know that at the time. The planks were solid teak, over 6 inches thick, 9 inches wide and 6 metres in length. Here the two deck halves before gluing them together and cementing them to the beams. The central caulking line I inserted before the deck halves were pressed down.
-
Heliart reacted to a post in a topic:
Albatros by Dr PR - FINISHED - Mantua - Scale 1:48 - Revenue Cutter kitbash about 1815
-
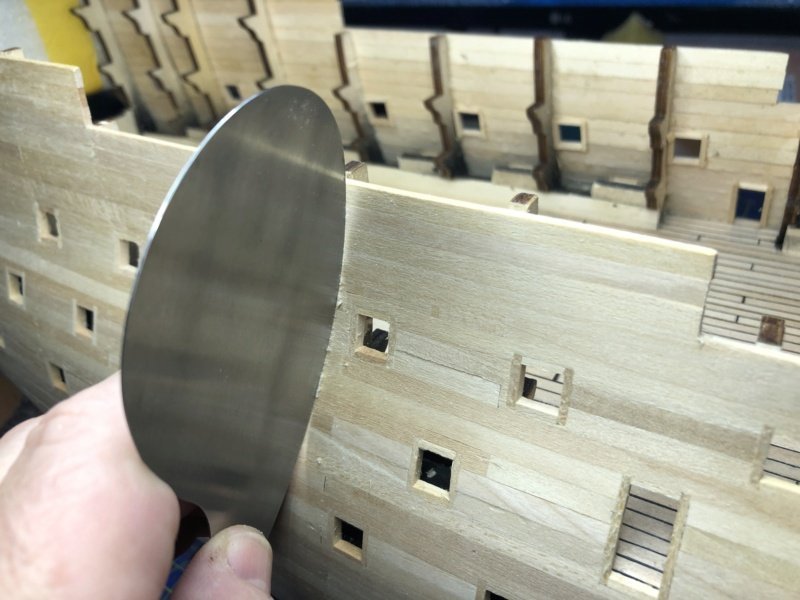
After the complete planking, according to the building instructions, the entire hull should be sanded over until everything is nice and smooth. Within a very short time, I literally got fed up with this very fine wood dust that settles on everything that is not covered. I then started stripping the hull with snap-off blades of a box cutter. For the roughest irregularities I used a small model plane. Then it was much better with the dust, now only the fine wood shavings flew around. After these blades got always very quickly blunt, I had to think of something else. On the Internet I found some awesome woodworking tools. I took a high quality a french scraper. This scraper is mainly used by instrument makers. I also had to learn how to sharpen such drawknives. In the meantime I can do it quite well. You can see the result in the following pictures. Then I closed the holes of the push pins with a cotton swab and warm water.
-
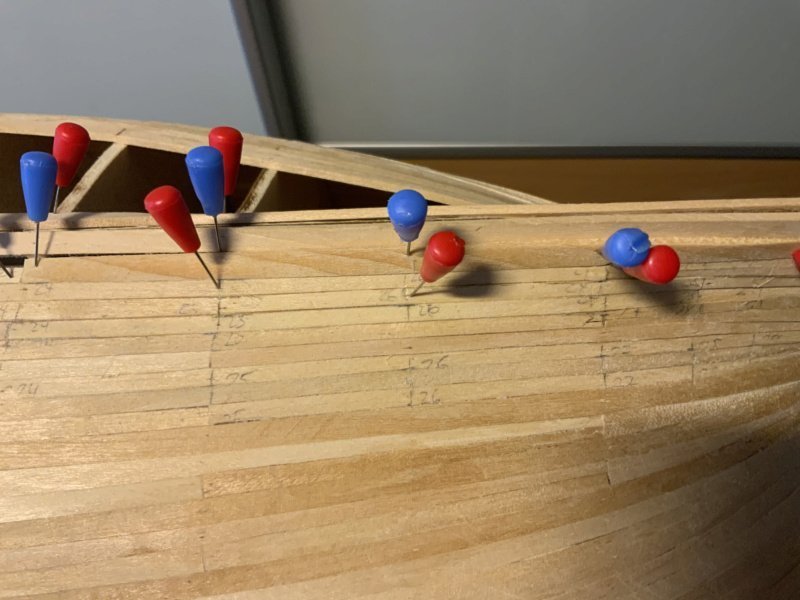
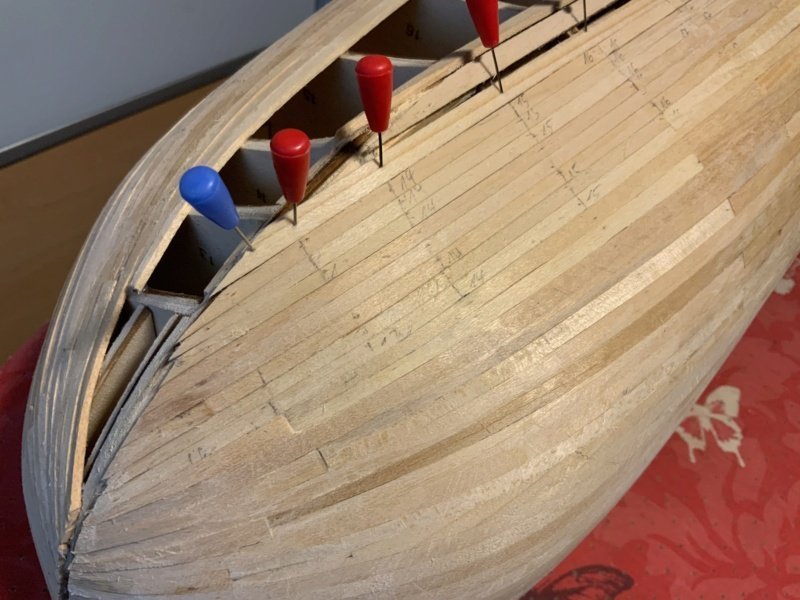
When planking, the giant holes through the nails in the planks annoyed me, so at some point I changed fixers. The push pins work great. Because they are very thin, they leave very small holes and you can drive them pretty deep into the wood. Of course you have to be careful, they are quickly bent. But better than the needles with the glass heads. Who ever had such a needle stuck in the thumb, knows what I'm talking about. 😥
-
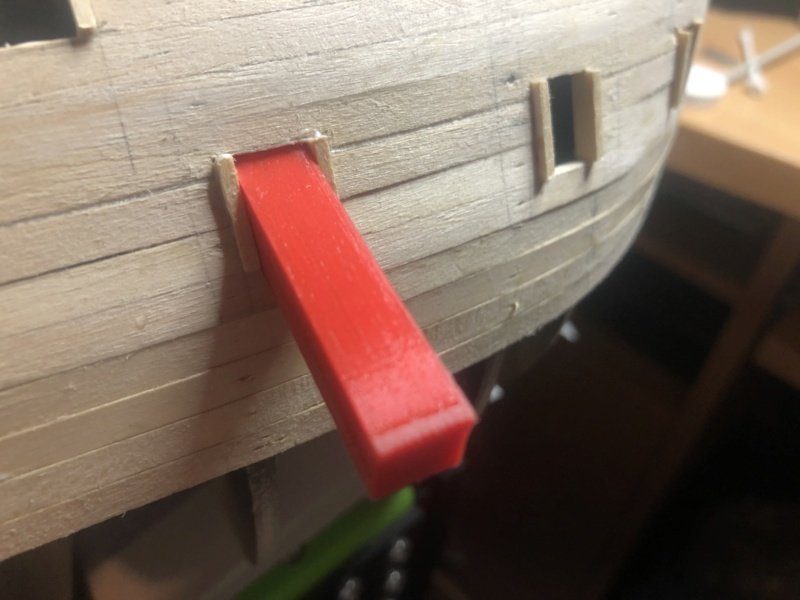
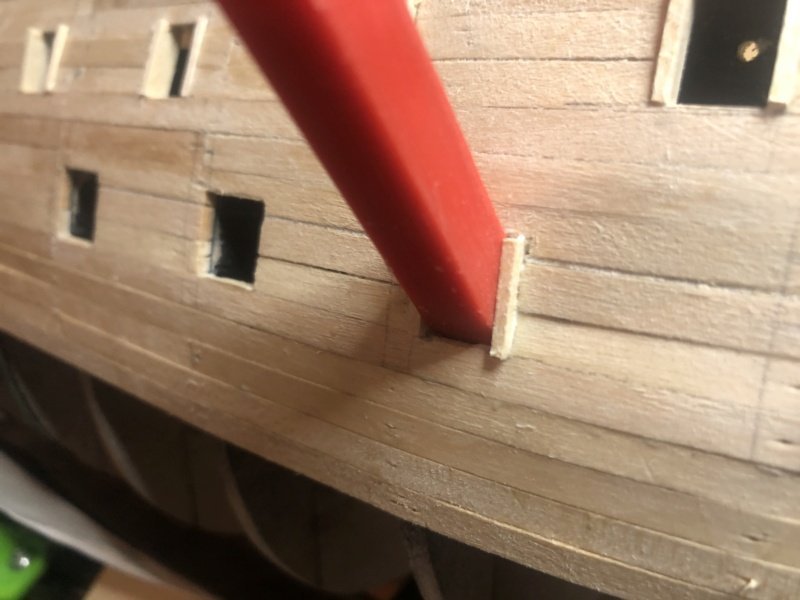
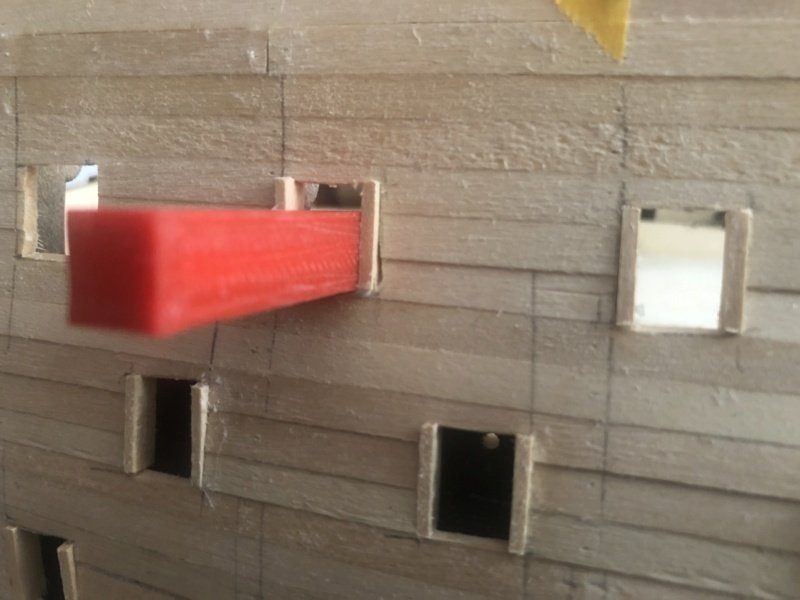
As I promised, I won't bore you with endless pictures of the hull planking. So the fuselage is half planked and according to the building description the gun ports are to be cut out now. I printed a jig for the gun ports with the 3D printer. With it, I almost got the parallelism and the same cutout.
-
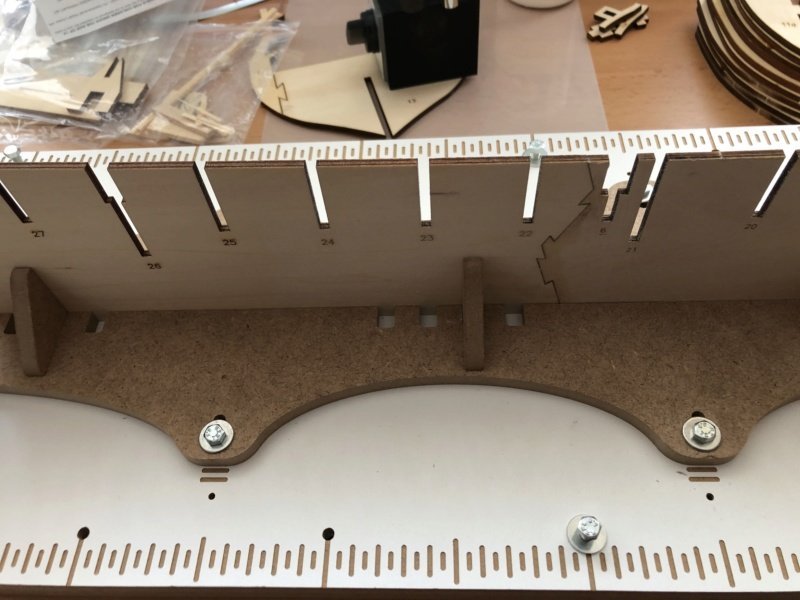
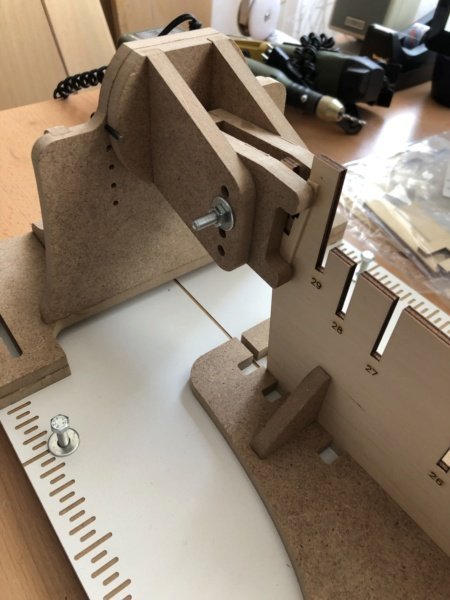
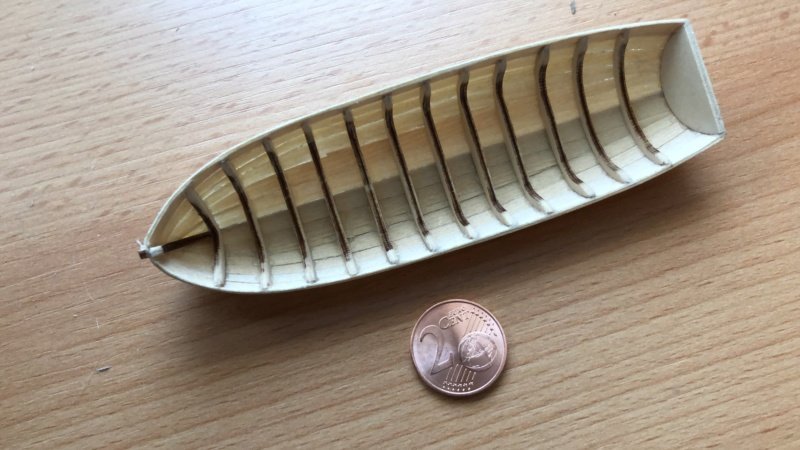
After the longboat I finally started with the hull of HMS Victory. I decided not to build up keel and frames without support. And so I bought the "shipyard" from Modelzone. I have to say, it's really good value for money.

-
Heliart reacted to a post in a topic:
HMS Victory by Heliart - DeAgostini - 1:84
-
Heliart reacted to a post in a topic:
HMS Victory by Heliart - DeAgostini - 1:84
-
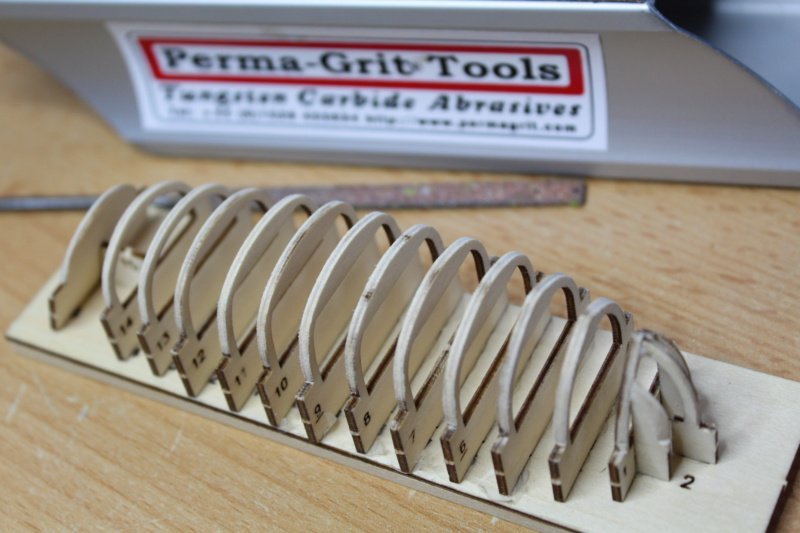
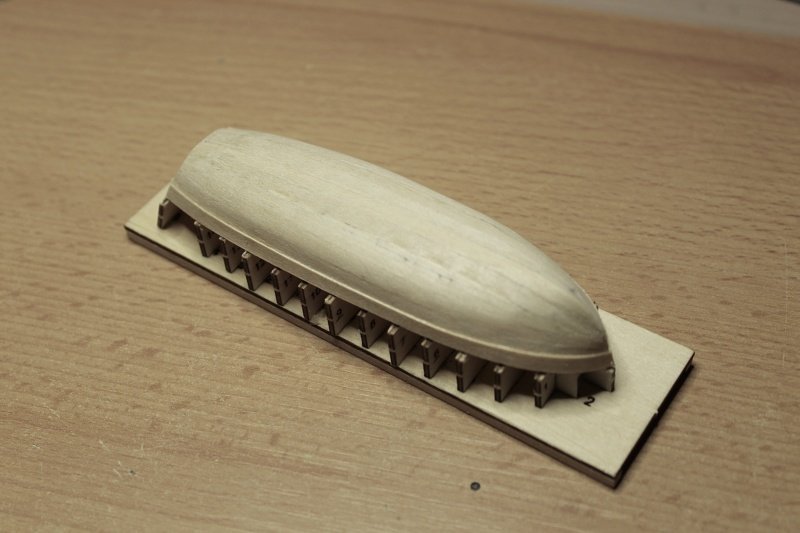
They are really very fragile. And I have already broken off one or the other bulkhead before sanding. I then sanded parallel to the bulkheads. This worked very well with the Perma-Grid tools.
-
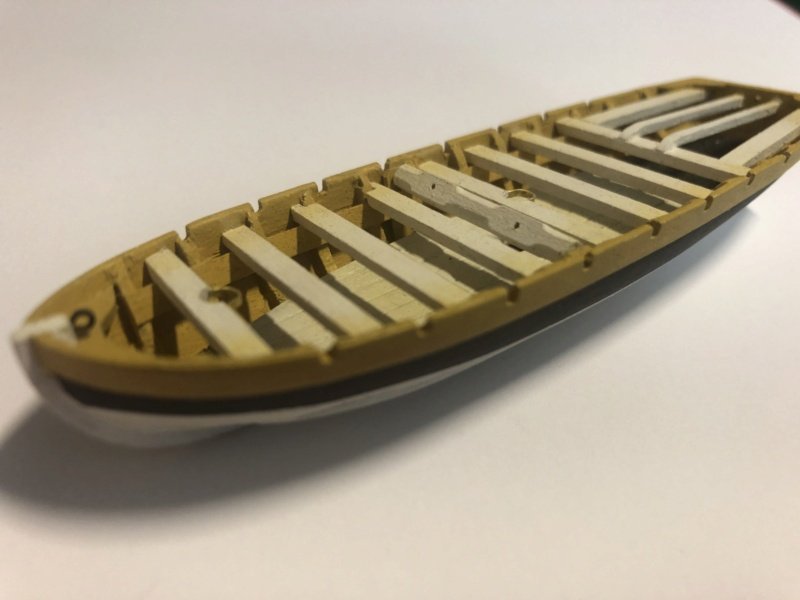
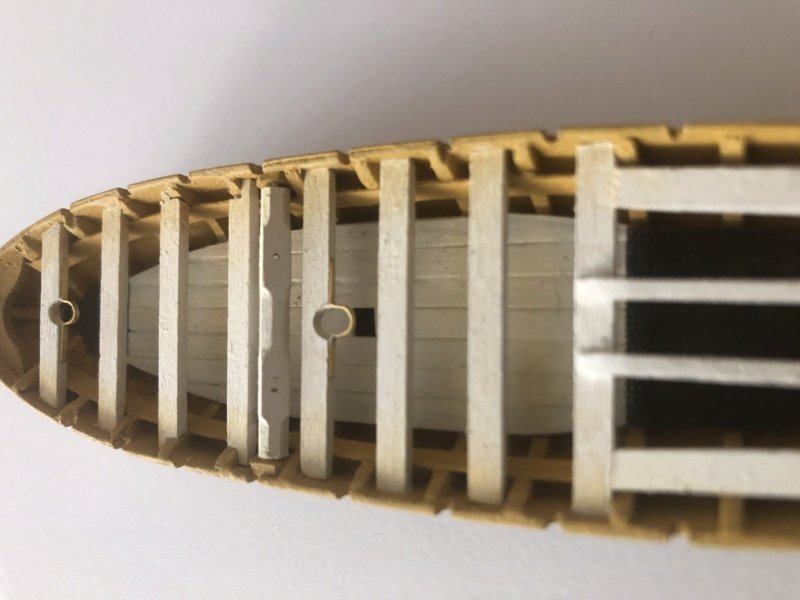
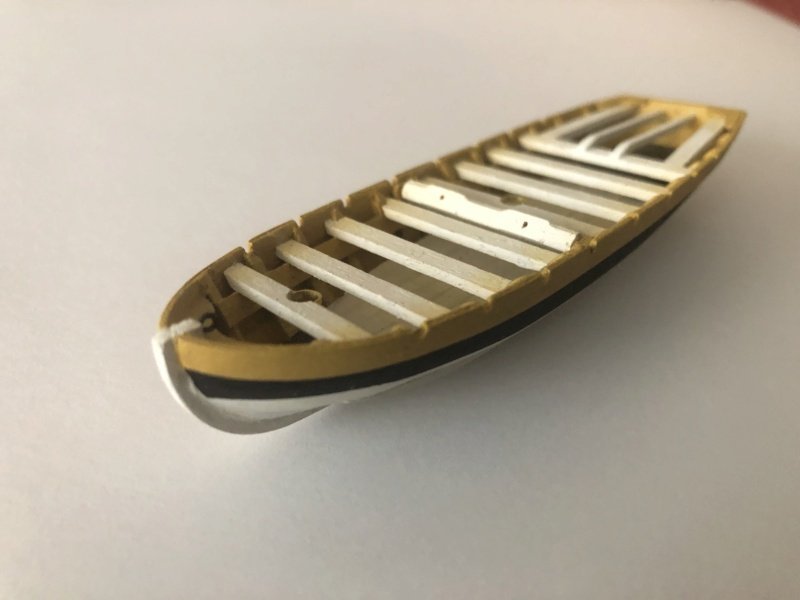
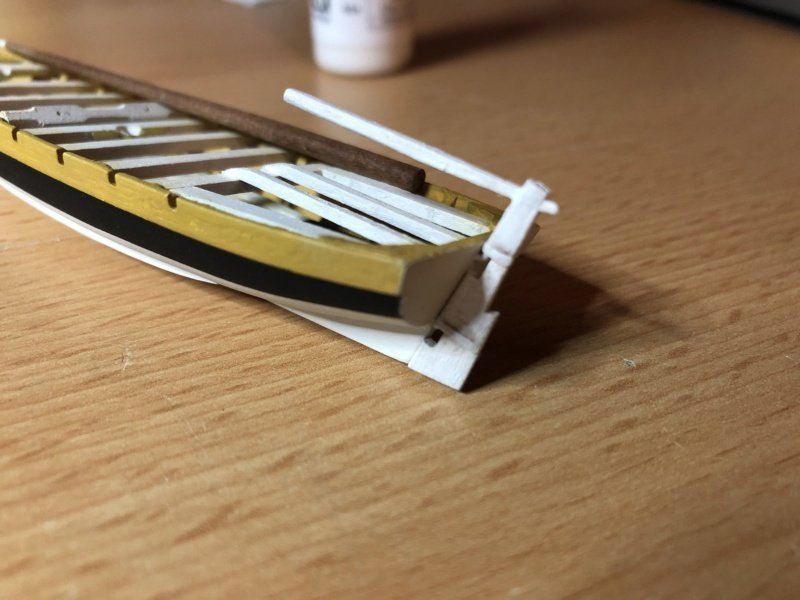
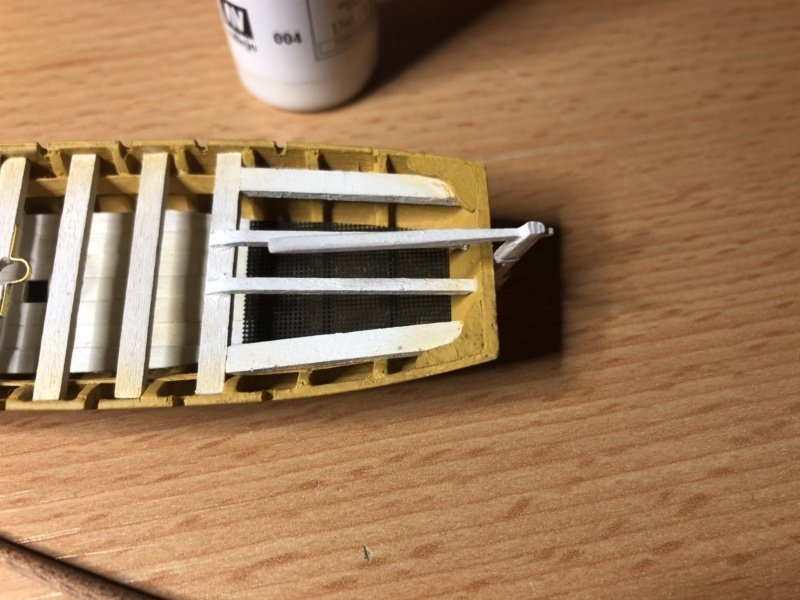
As it says in the build description, I started with the longboat. In the meantime it is done.
-
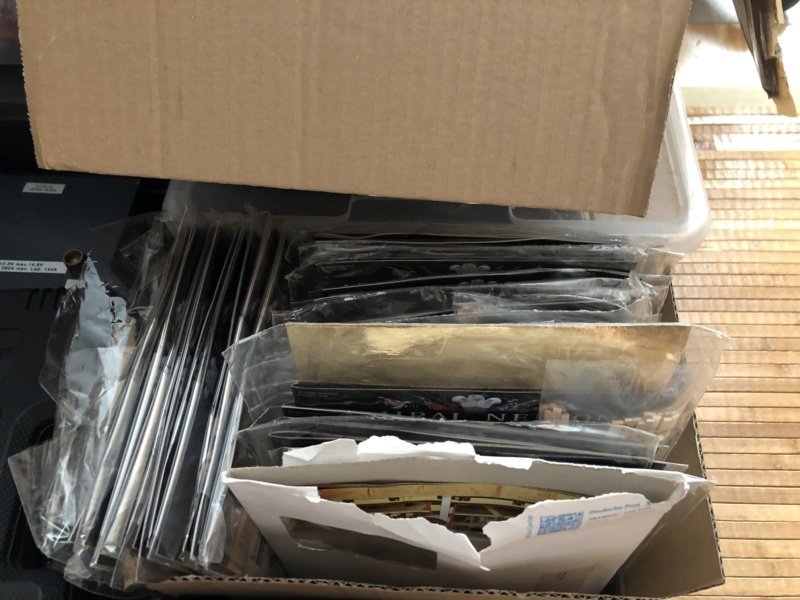
Hello friends of maritime modeling, As I already announced in build log of the HMS Victory cross-section model, I am also working on the HMS Victory from DeAgostini. I don't want to bore you with tiresome descriptions of weeks of hull planking, especially cause the work is always the same. So I will only post some construction stage pictures and if I did something different as described in the building instructions, I will explain this briefly. This was the starting material I started with (150 bags of wood and tiny stuff)
-
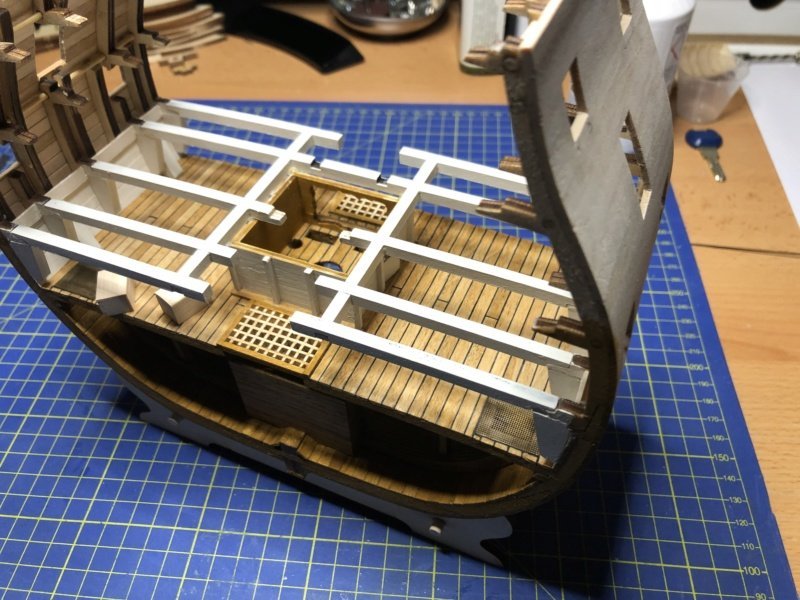
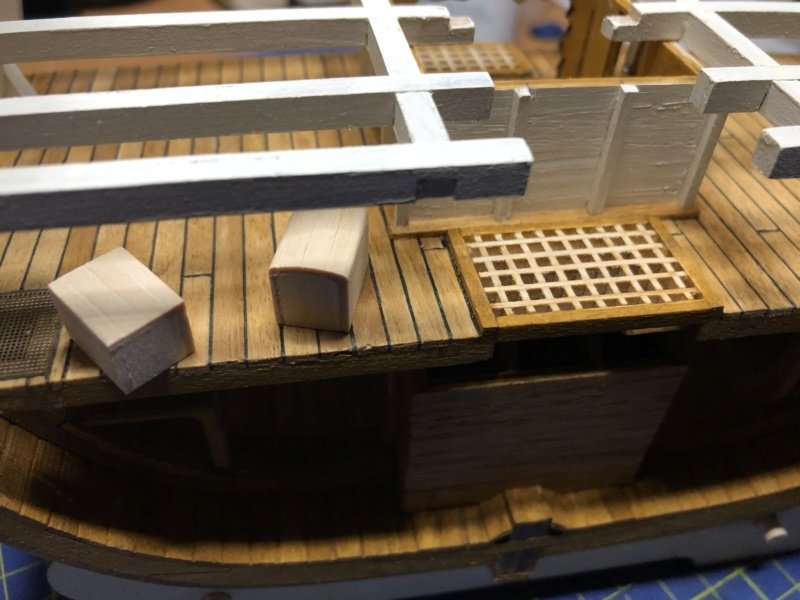
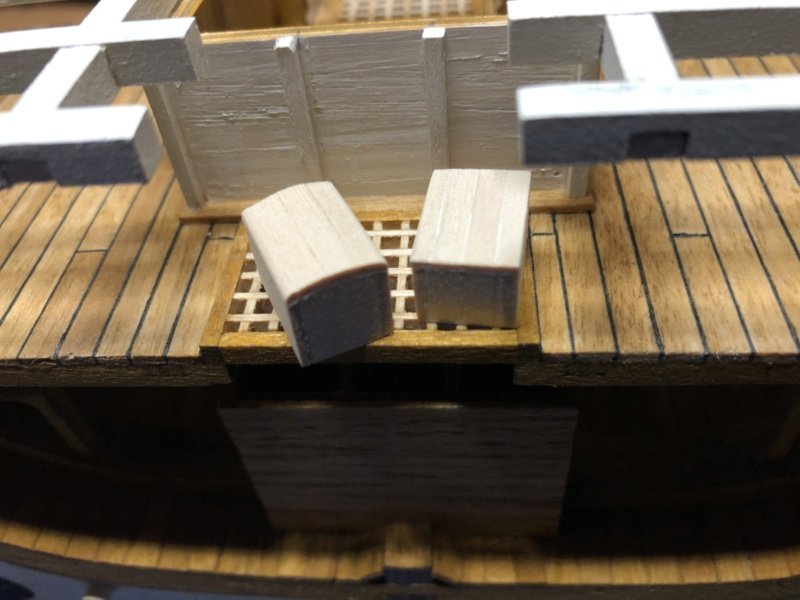
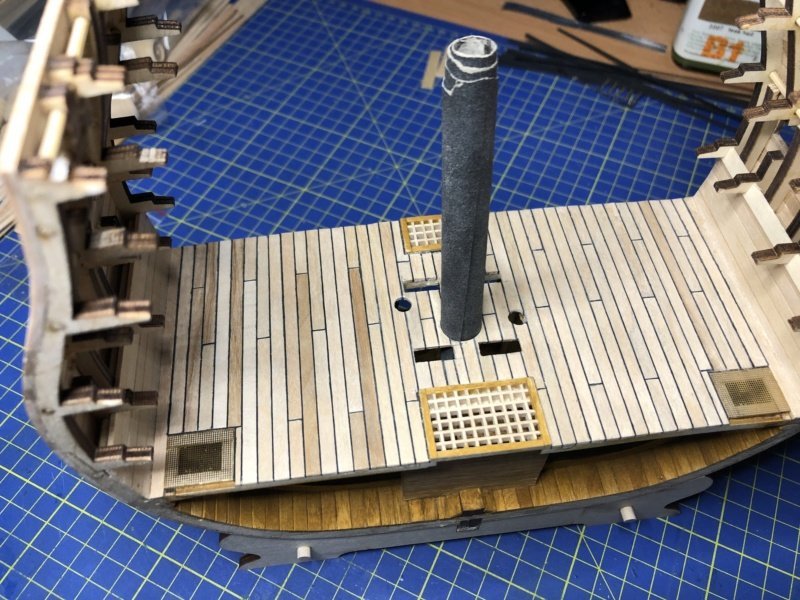
The second part of the pump house is set. The floor stringers and knee braces are painted and glued and more deck beams are painted white and fitted. And I tried my hand at the first sea chests.
- 7 replies
-
- 2
-
-
- Victory
- DeAgostini
- (and 1 more)
-
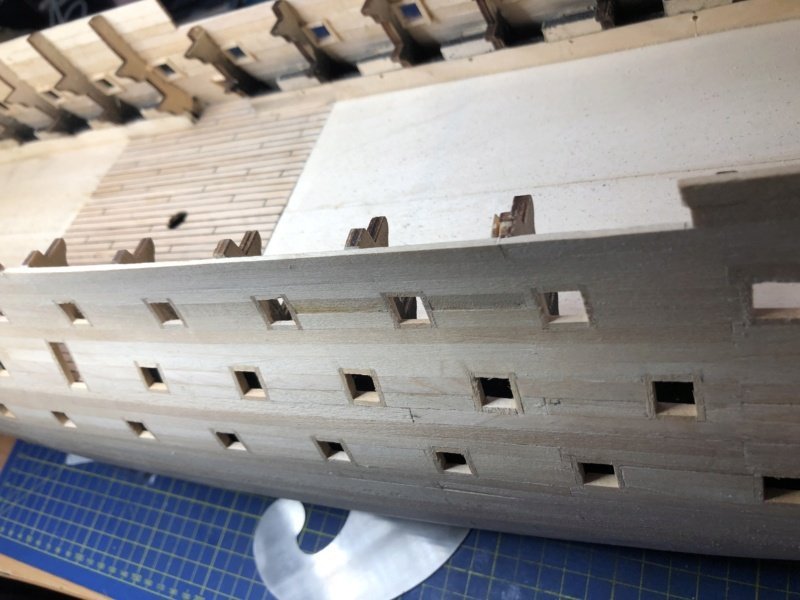
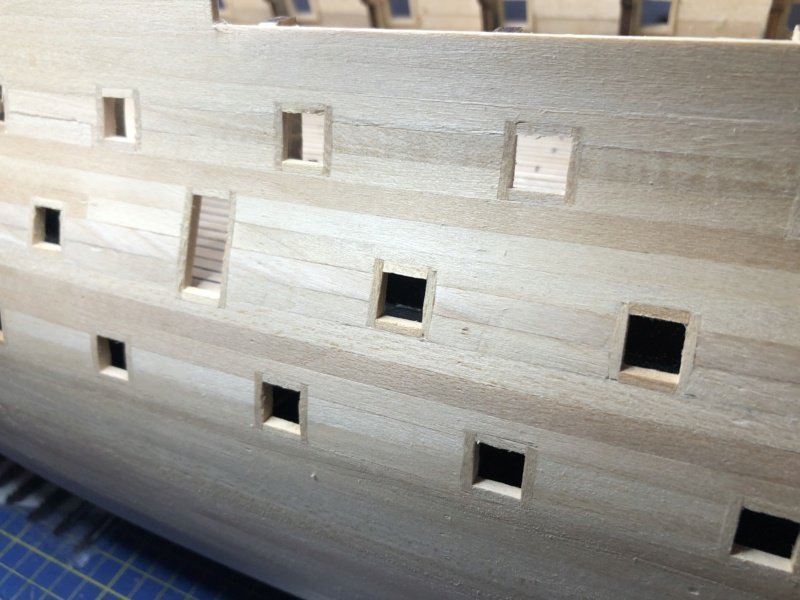
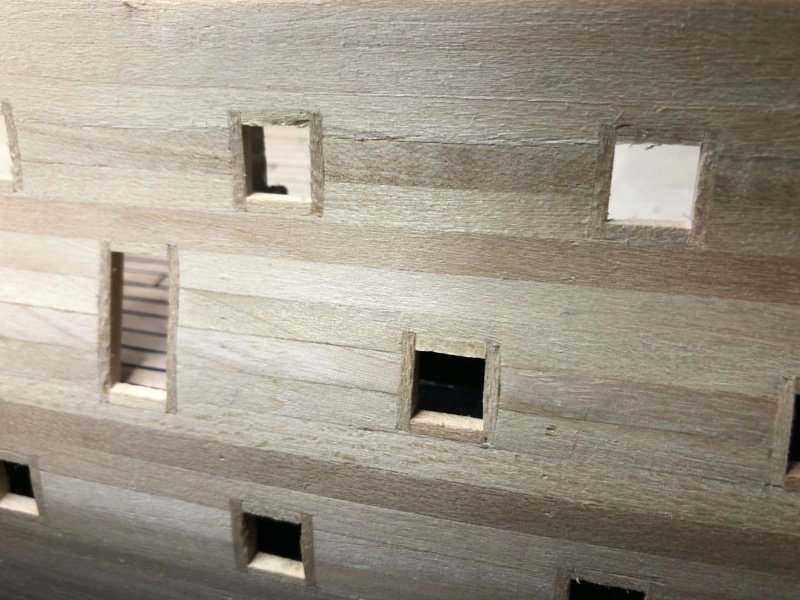
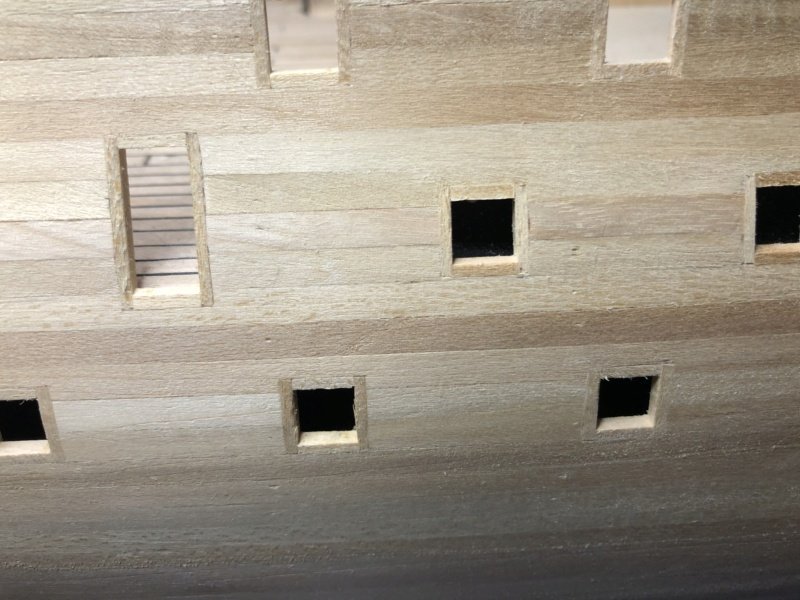
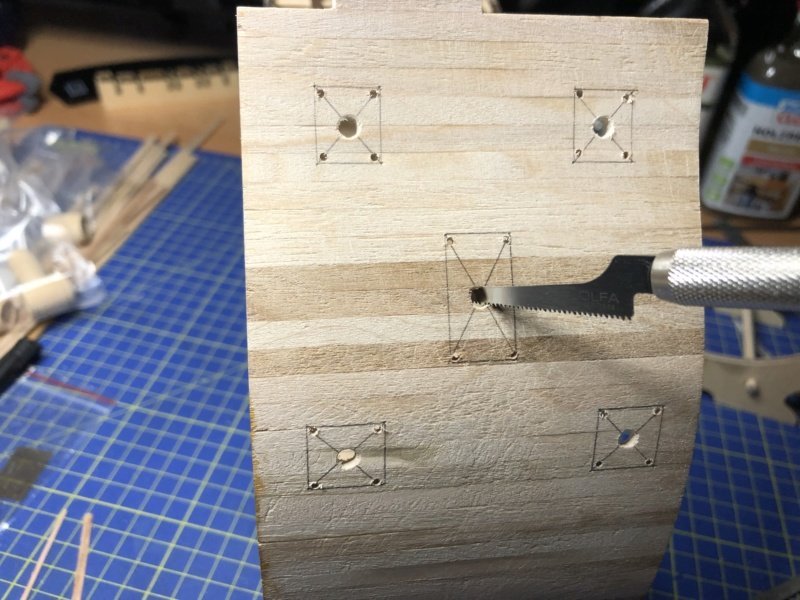
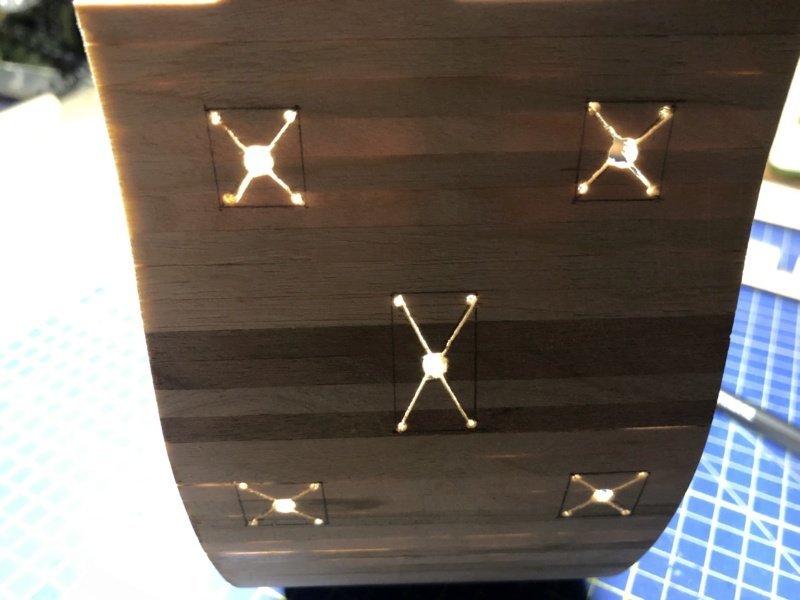
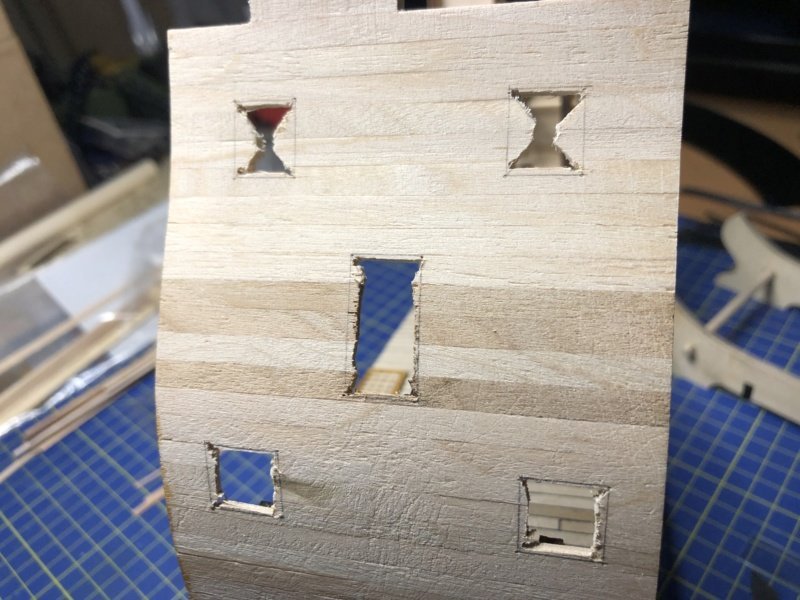
Next up were the gunports and entrance ports. Since I didn't want to drill a lot of small holes again, I used a different technique: - I put a small hole in each corner of the single gate. - in the center of the gate a fifth hole, which I widened so much that the saw blade of my model saw fit through. - Then in each case a small saw cut from the center to the holes in the corners - With the scalpel, a horizontal cut from one hole to the other. - This way, the upper and lower triangle can be easily broken out (see picture). - and then with the model saw two vertical cuts (s. picture) - final I carved down to the markings with a fresh blade.
- 7 replies
-
- 1
-
-
- Victory
- DeAgostini
- (and 1 more)
-
Heliart reacted to a post in a topic:
Greetings from Bavaria, Germany
-
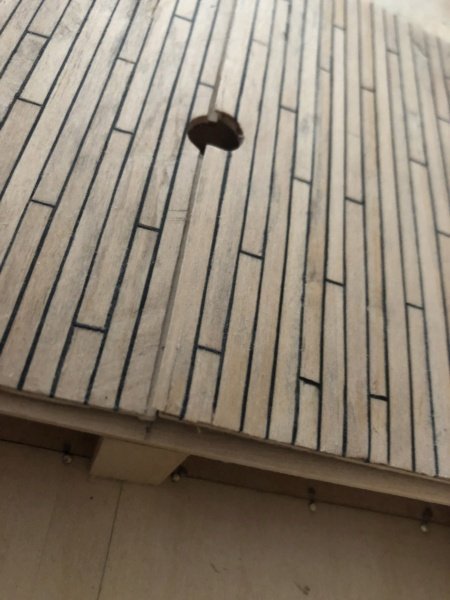
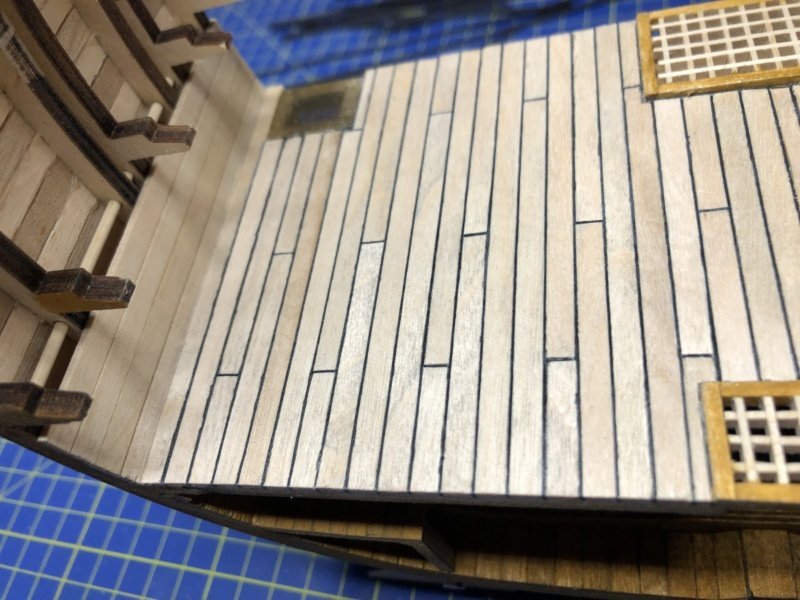
I worked out the openings for the bilge pump and the mast. The breakthroughs really made me. The instructions sayed that you should be careful because the deck breaks quickly at that point. Because I glued the clay paper between the planks, the deck broke away several times while I was working on it. Then i had to glue and wait for it to dry. I had to learn that it was best to use a small hand drill with a 1 - 1.5 mm drill bit . Then put hole after hole next to each other and the whole thing with as little pressure to the deck as possible. Then I used a fresh, very sharp blade to cut away the small ridges between the holes. After that I used the scalpel to work my way up to the pencil mark with very fine carving movements. Carving movement always parallel to the plank. I worked out the holes with a round needle file with rotary movements to the nominal dimension. For the mast, I used 240-grit sandpaper, turned into a roll.
-
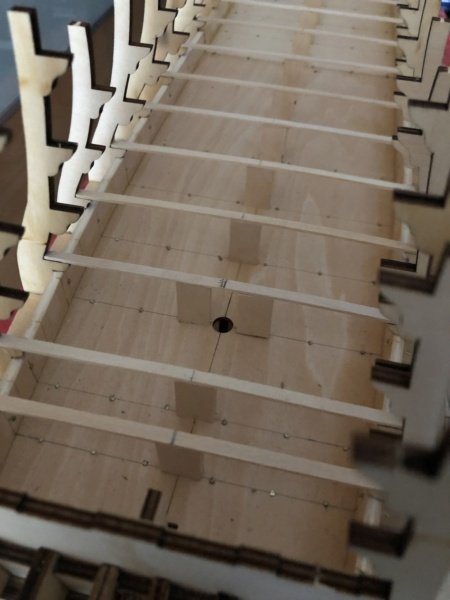
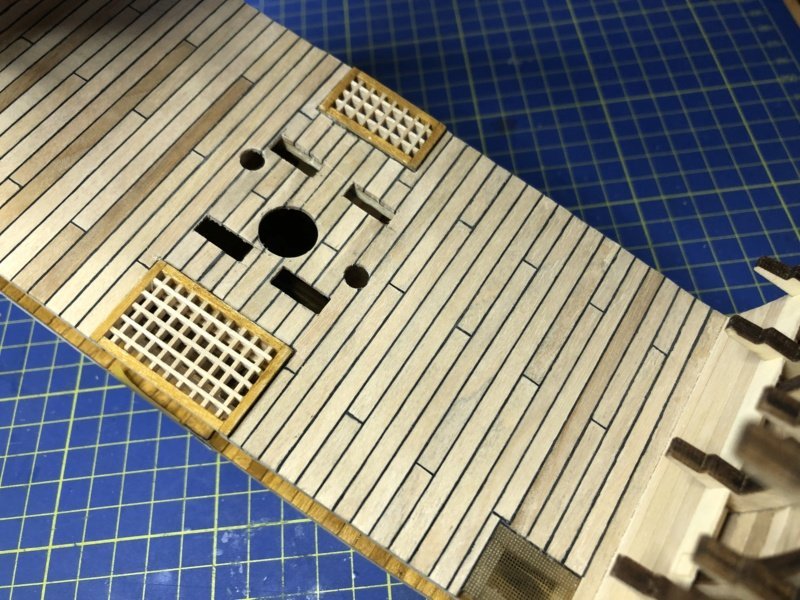
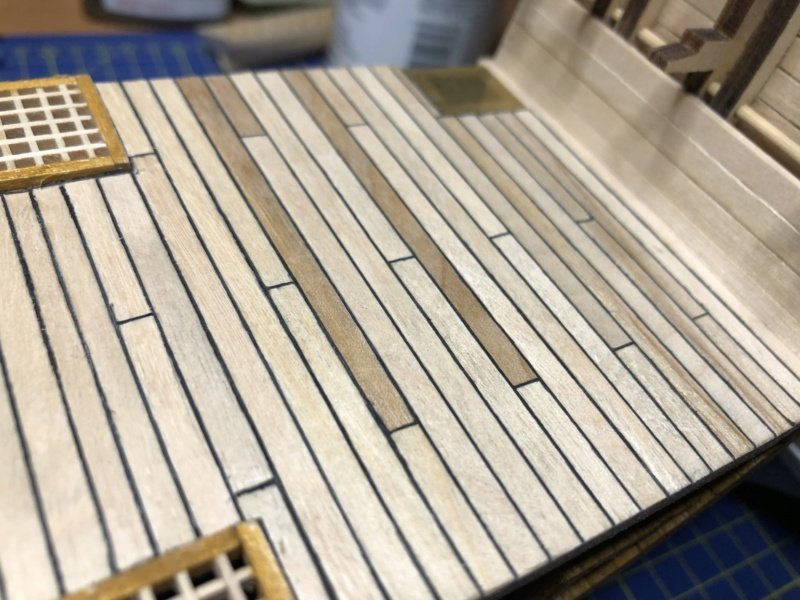
The planking of the orlop decks is finished and has already been stripped with the scraper. In the middle, the openings for the mast, the pump pipes and the second part of the pump house are still missing.
-
I'm so sorry, I forgot one Mark 😱 thx Mark and also to cathead 😁
-
Heliart reacted to a post in a topic:
Greetings from Bavaria, Germany
-
Heliart reacted to a post in a topic:
Greetings from Bavaria, Germany
-
Many thanks to all, Dave, Keith, druxey, Mark and Ian @druxey I have family in St. Catharines nearby your home location 😉 and my sister went from Rochester to Philly
