


MrBeanCar
-
Posts
7 -
Joined
-
Last visited
Content Type
Profiles
Forums
Gallery
Events
Posts posted by MrBeanCar
-
-
On 12/14/2022 at 8:33 PM, Belco said:
I have found this pdf with the assembly instructions for the Newport, in which the abbreviations you need appear with their translation into English and French.
It is a company that sells models in the Czech Republic.https://www.astramodel.cz/manualy/mamoli/KR-21750.pdf
I hope it's useful
Regards
Belko
Yes that is perfect. Thanks
Regards and Happy Holidays
-
I was building a small J Class model, and wanting a smooth finish. It was a white finish, white is notoriously difficult to get coverage without lots of coats. Not sure how many I ended up with; but it was a LOT. All of the paint was acrylic. What I ended up doing was:
- I hand brushed the model with a cheap, indoor acrylic. It was very rough. I think I put on 3 coats.
- I then sanded that until it was smooth. This left a few spots bare; but not to worry.
- I then air brushed enough coats until I had very good coverage, it all looked white
- Then I sanded it, starting fairly fine, as the finish was pretty smooth. Just not "really smooth". I started with 600
- And progressed to 12,000.
I really did not see much effect past 4,000 and since then I rarely use 12,000 anymore, I usually only go to 2,000 or maybe 4,000.
Interestingly, for some reason I thought I should shoot another thin coat after the final 12,000. The surface repelled the paint like it was coated with oil. I suspect that, even after it dried, there would have been little to no adhesion.
Since then, I've adopted the following for smooth finishes over wood
1) Sand surface to at least 2000 grit
2) Two coats of wood sealer
3) Sand with 1000 to 2000
4) Paint; airbrush; at least 3 coats
5) Sand with 1000
6) Clear coat. Either gloss or matte, whatever the final effect is that I'm looking for
7) Sand with 1000, to 4000
I'm still fine tuning this. I don't think I need to go to 2000 in steps 1 and 3, but that is yet to be proven
Regards
-
I'm building a Mamoli America 1851, and I'm not familiar with their material codes. For some of the items, it would help me to know what it is made of in order to find it. Some I can figure out: MET is metal; LN is wood of a particular color/type (think it's legno in Italian).
But what are
OTN
CO
NO
Regards
-
On 4/9/2016 at 8:39 PM, mojofilter said:
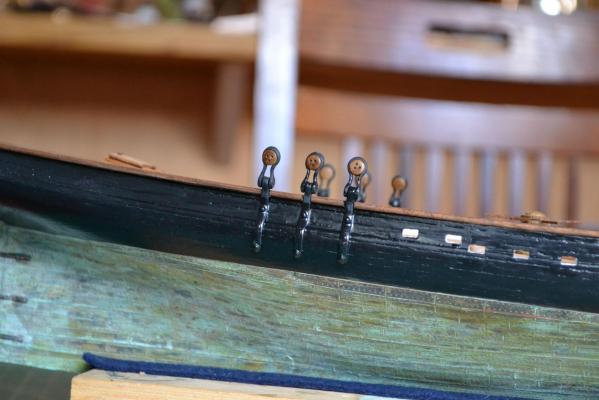
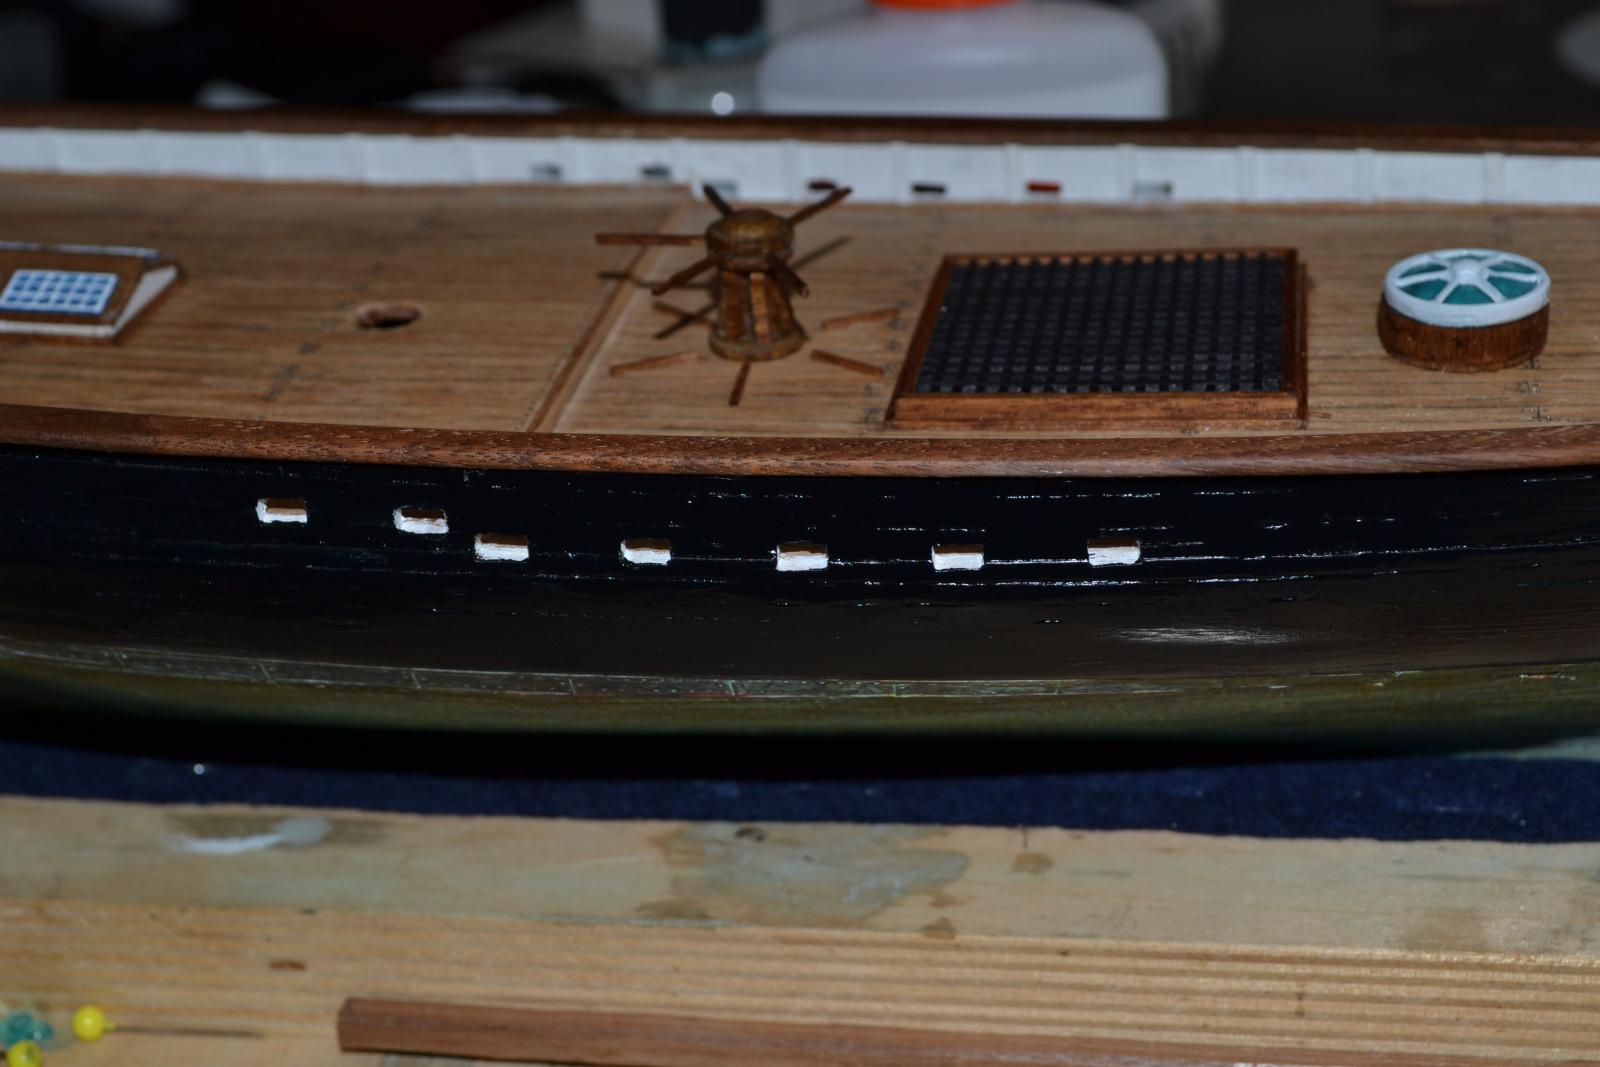
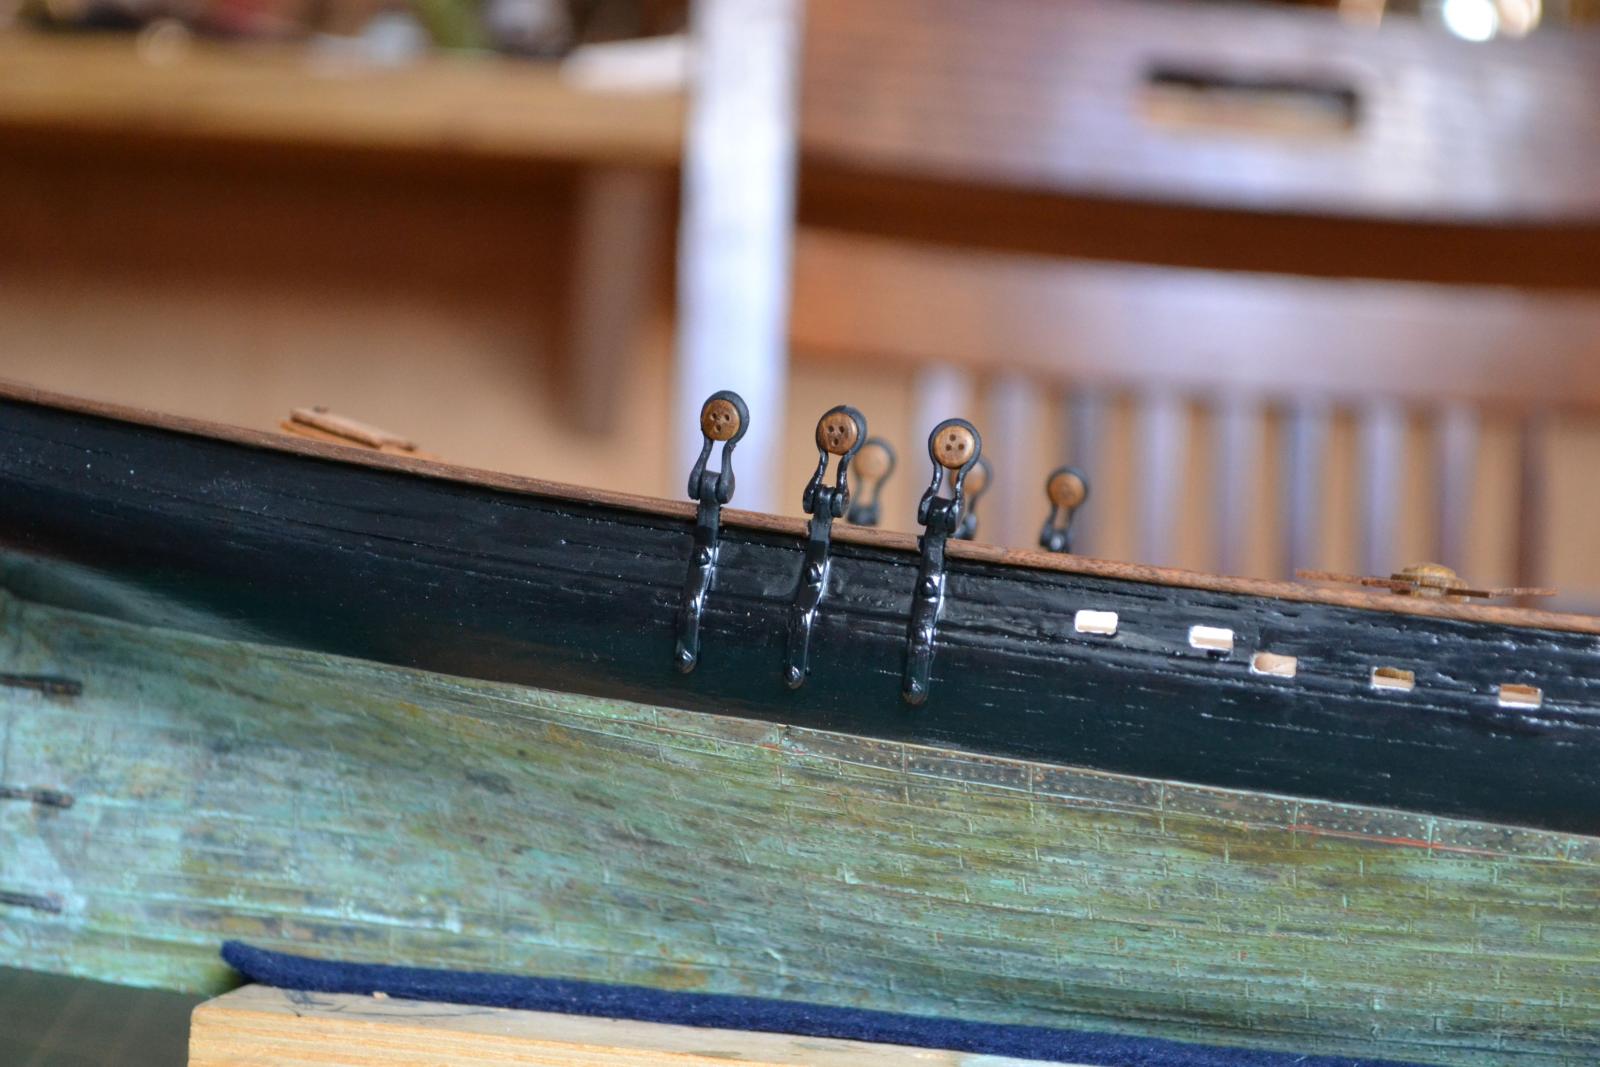
A little more progress - Got the drain holes (? insert nautical term here) in the bulwarks, and the lower deadeyes mounted. Note broken off capstan bar.
The supplied pot metal tiller bar did not survive cleanup of the flashing - snapped in two. I fashioned another out of walnut.
A lot of the spars, booms, gaffs, etc. need to be turned down to tapers, including the bowsprit.
I threw down and bought a little mini lathe from Harbor Freight - the larger of the two Central Machinery lathes. Works pretty good, although it's been a long time since I've turned anything.
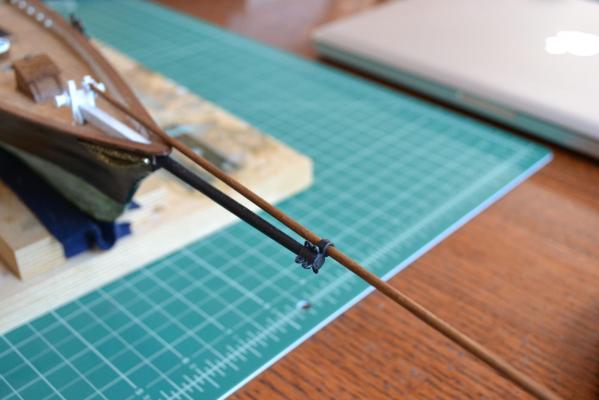
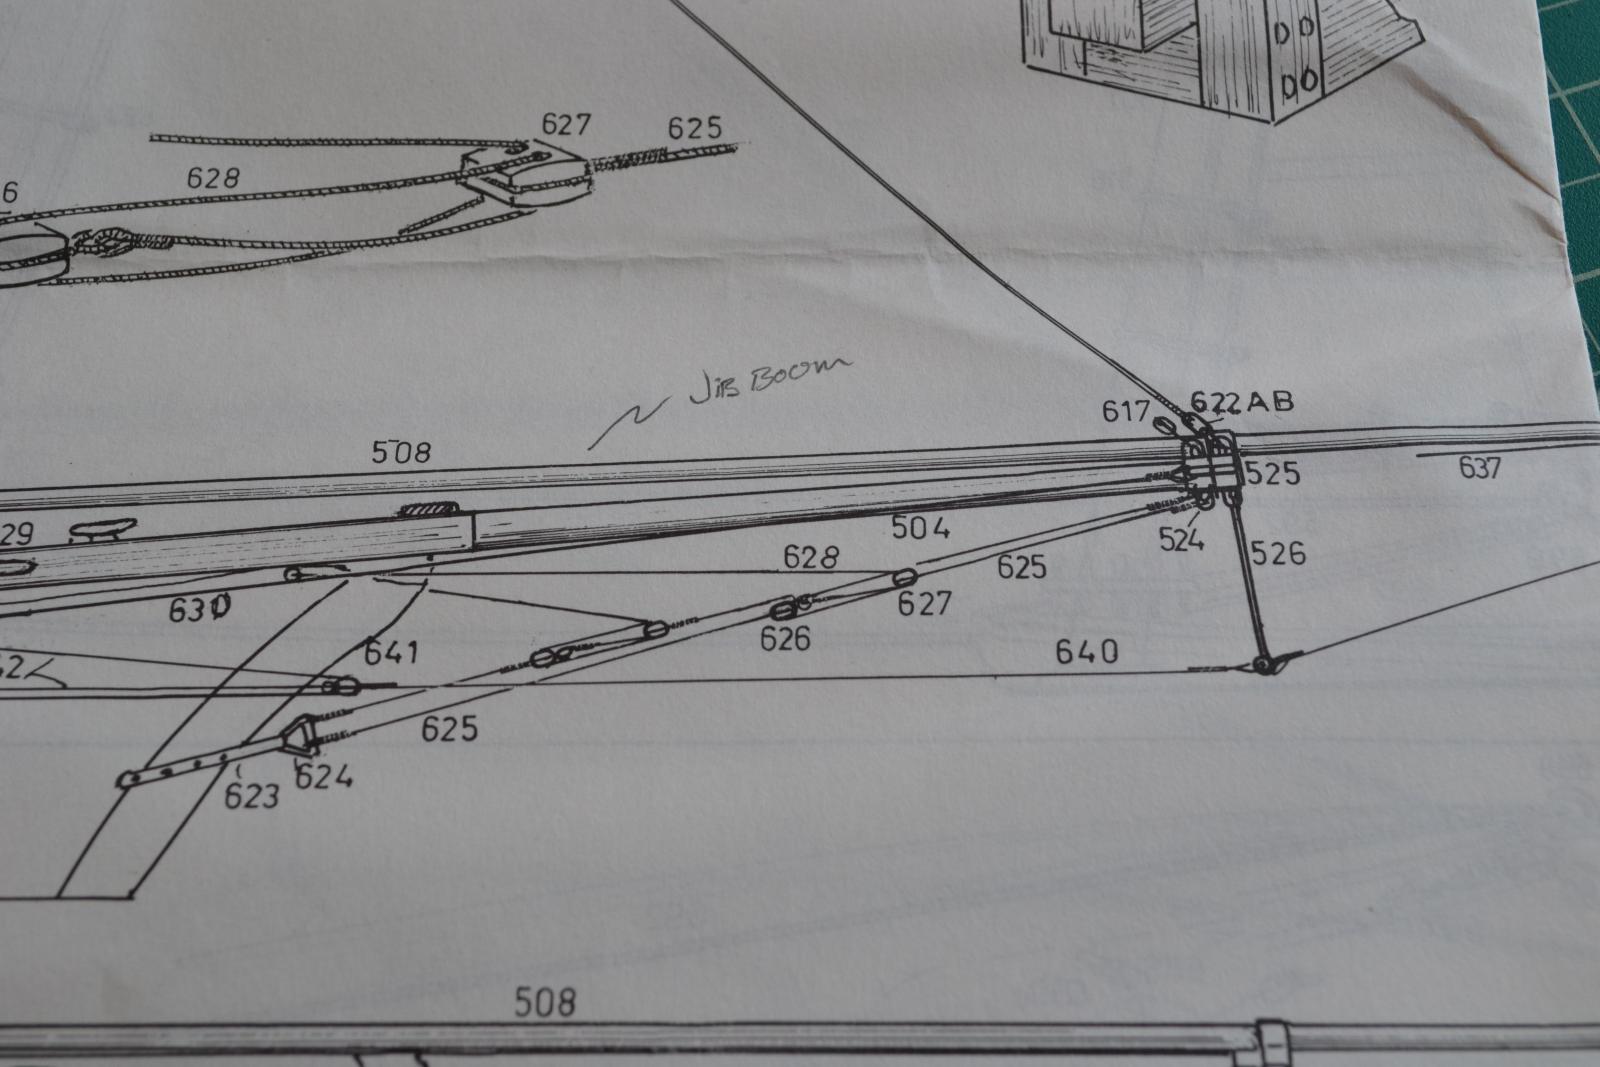
Turned down the bowsprit per the drawing:
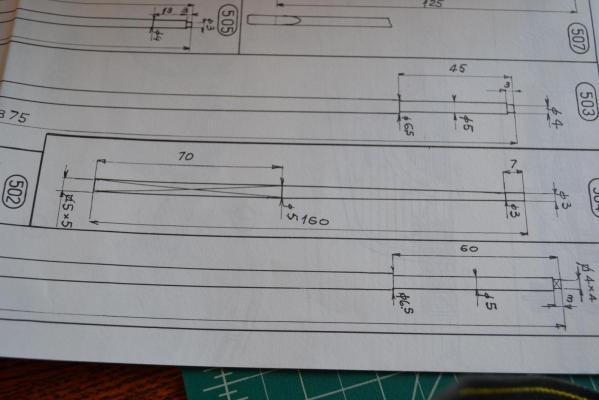
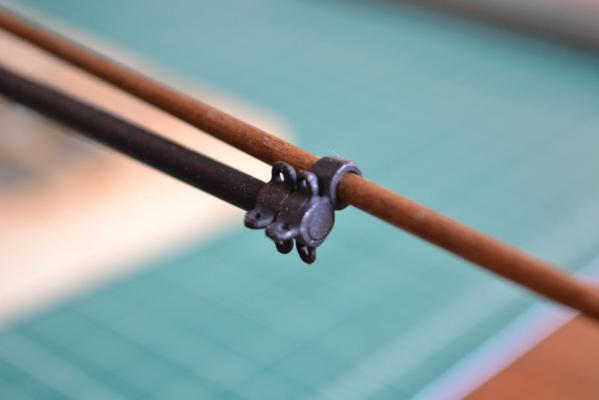
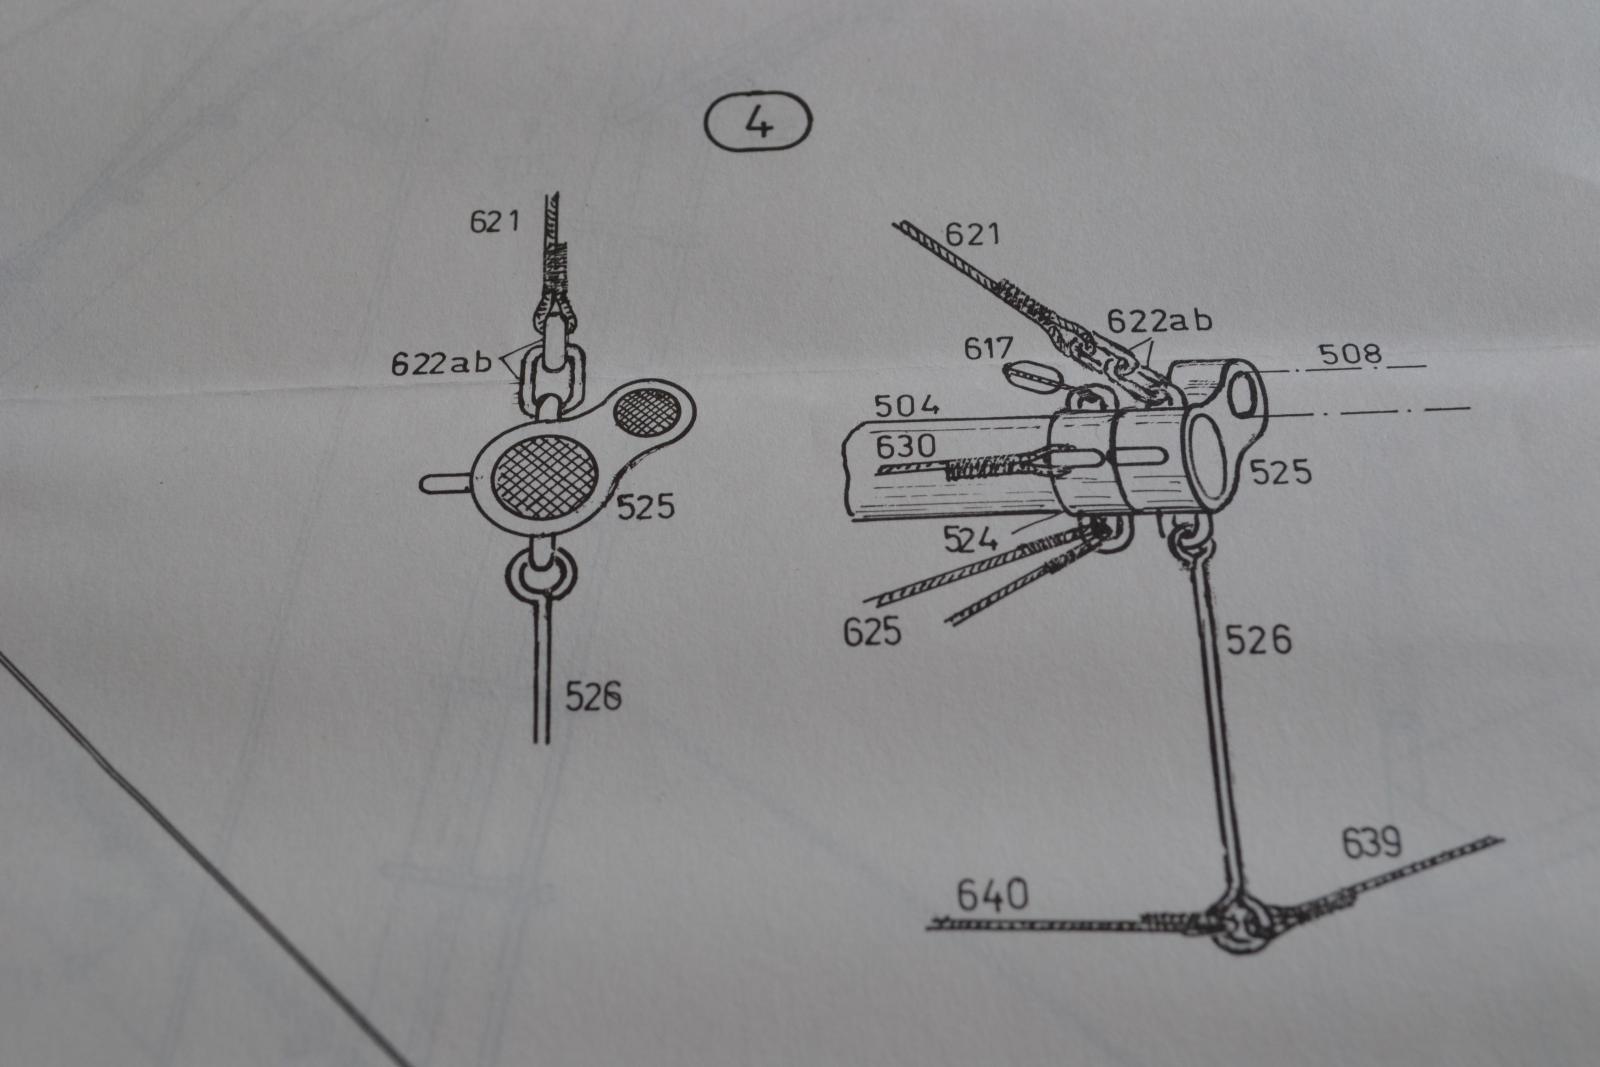
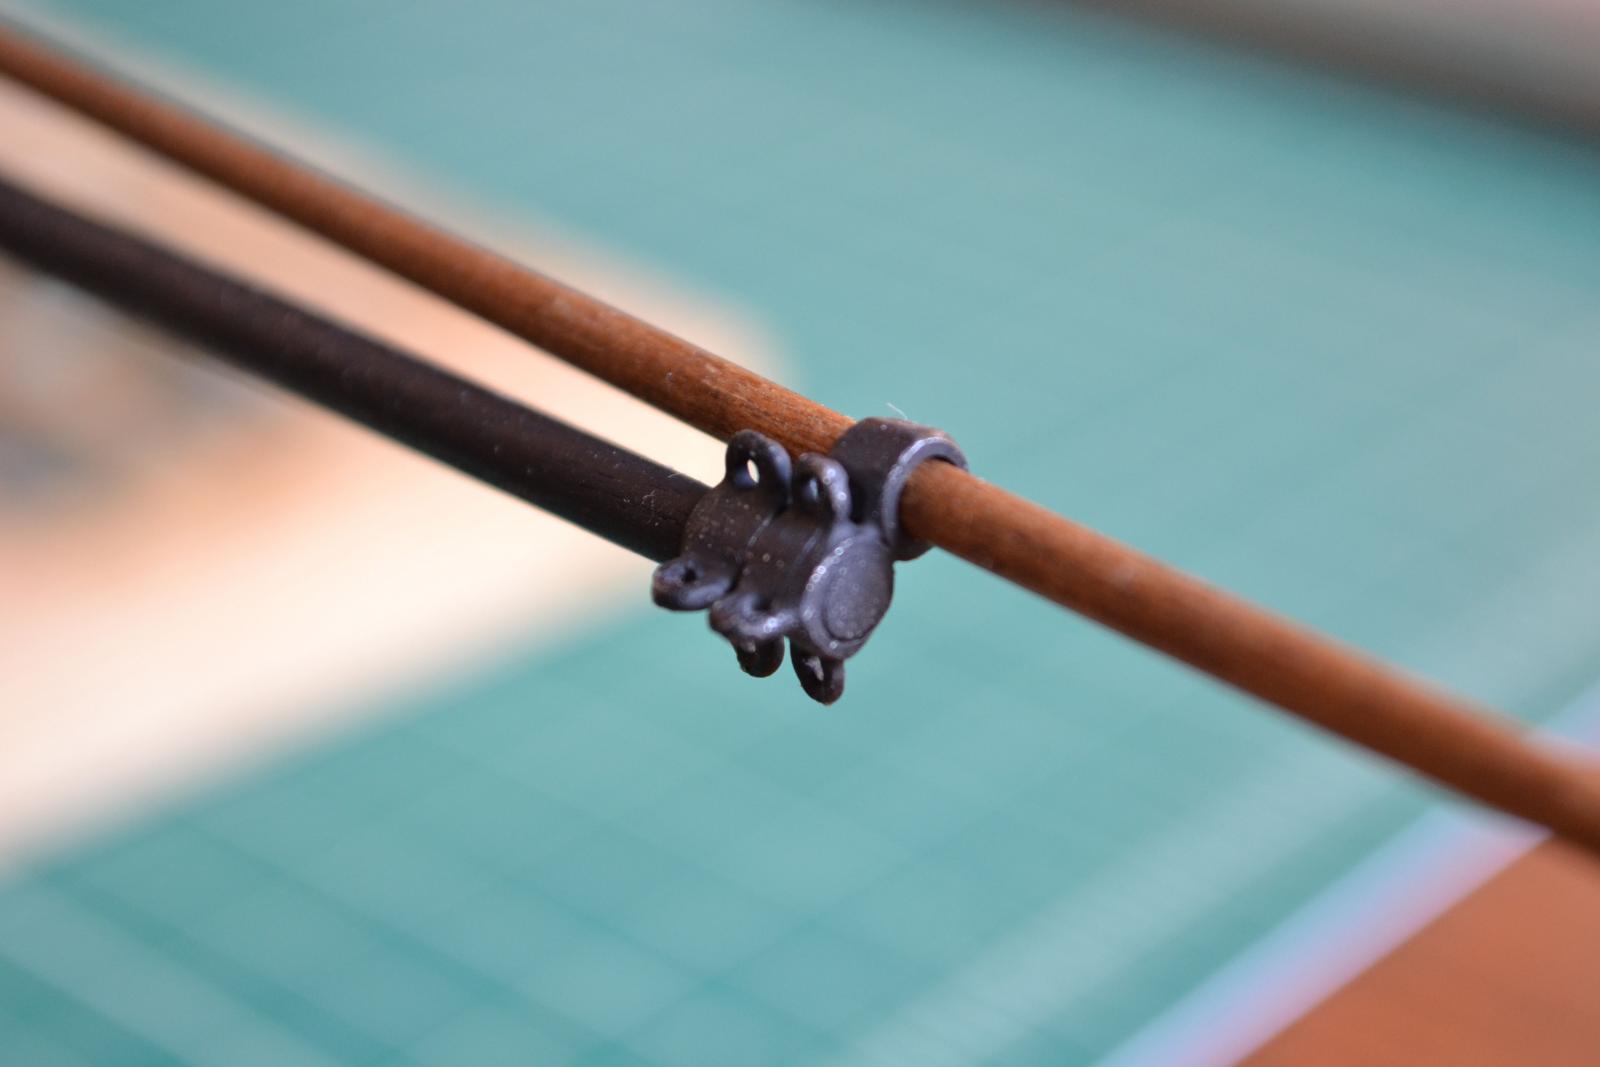
Note that the drawing (second from bottom) calls for the the tip to be turned down to 3mm. This contradicts other places in the drawing. The coupling between the end of the bowsprit and the jib boom, which is a straight 3mm along its entire length , shows two different sizes:


The coupler is part (525). The bowsprit is (504), and the jib boom is (508). Clearly the bowsprit and jib boom are different diameters.
This is OK because the part (525) was missing from the kit. I made my own.
If I had known this I would have turned down the end of the bowsprit to 4mm.
Anyone building America should beware of this - although I understand Mamoli has gone out of business...
Next will be all the rest of the cleats, blocks, and everything else on the hull or deck, then a light coat of satin lacquer.

More later.
- Tim
I am also missing part 525 from my kit. How did you make your replacement part? I looks like you used an extra/spare 504 and added a tubular attachment for the jib boom
Regards
-
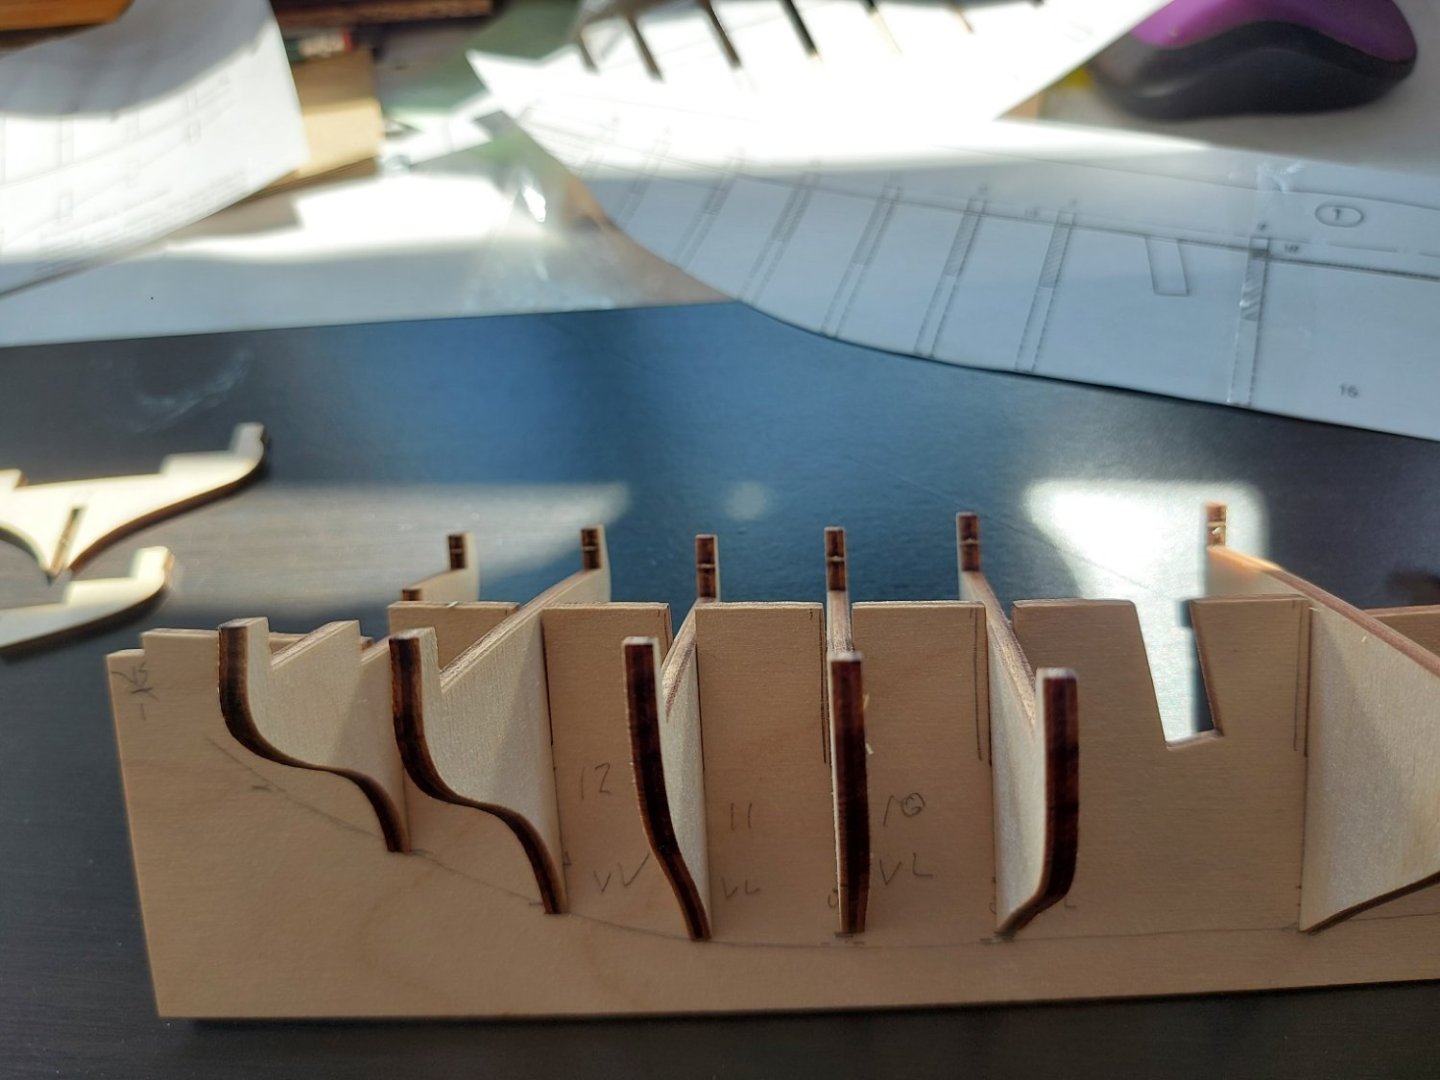
Well just by accident I was looking along the length of the frames and noticed the profiles did not look right.
I thought the frames were in order, on the sheet that they are cut from. They aren't. So I had mixed up frames in the wrong slots. I matched them to the profiles on one of the plans, and this solved the problem I had.
Regards
-
I’m starting the 1/66 Mamoli America; and I’ve read what build logs I could find. My primary source at this time is Hamilton’s from 2015.
Glad I looked at that as the openings in the keel for the bulkheads are quite off, similar to his experience. I’ll be adjusting for that.
I’ve found something else that seems a bit out of kilter (described below).
Input requested. My thoughts are that I should make the bottoms align as well as possible and not worry about what happens up top.
Exposition
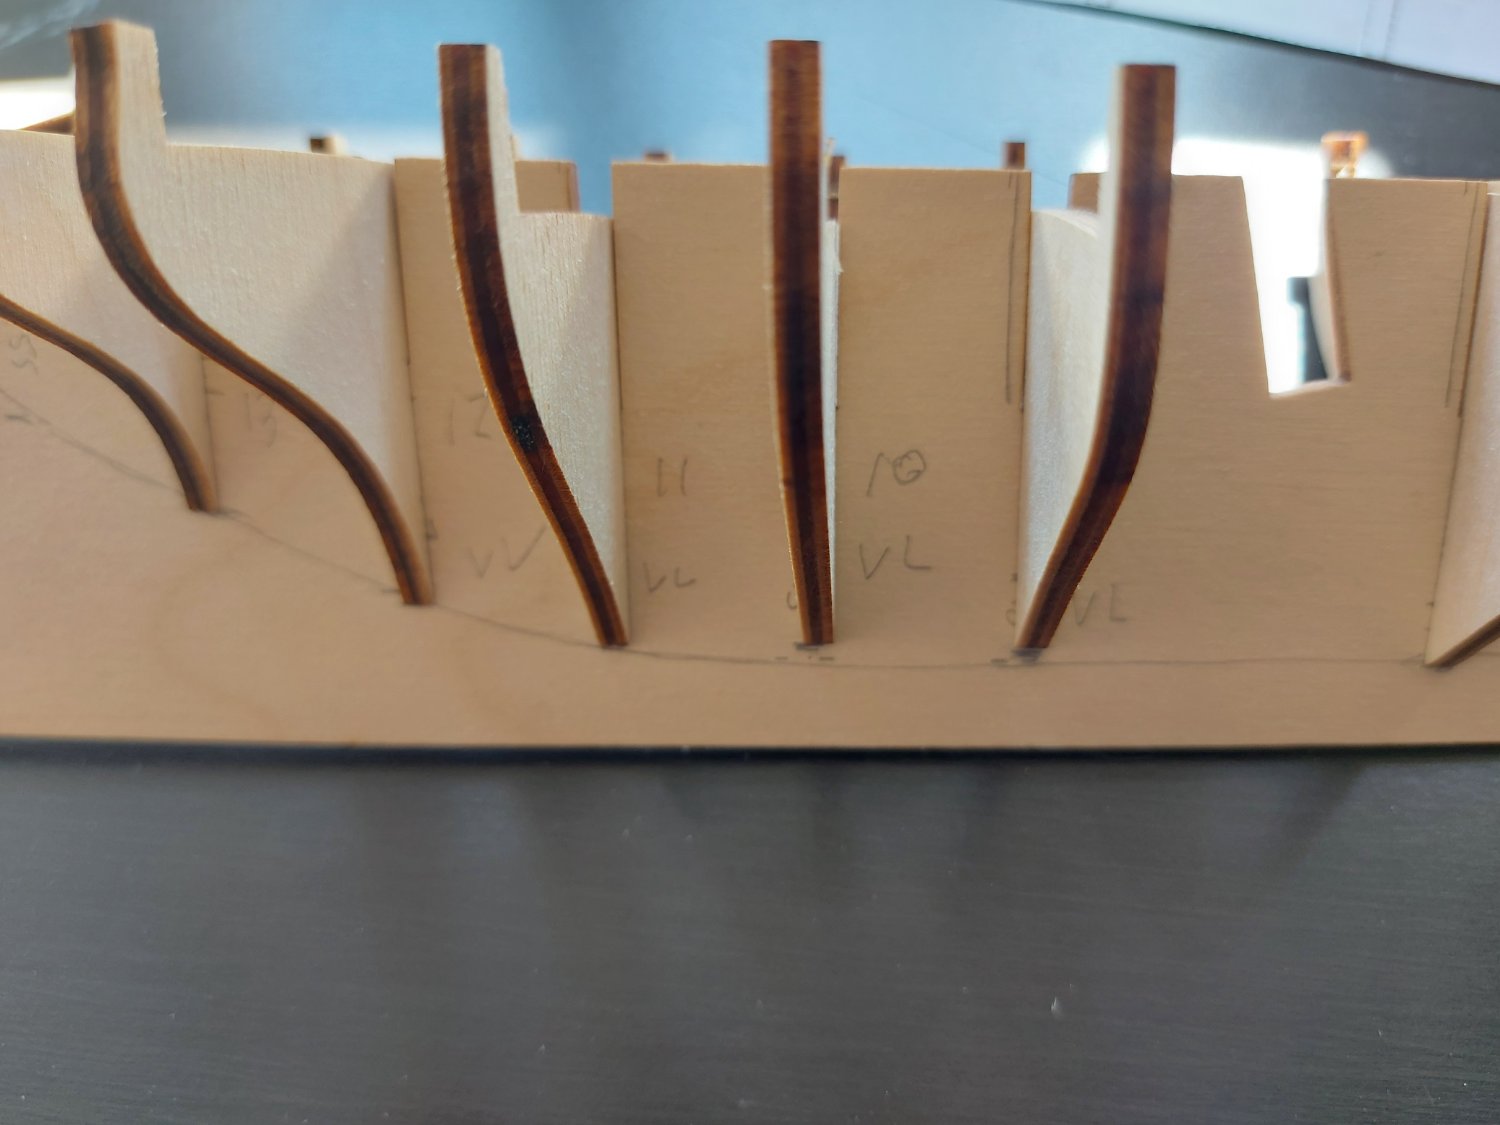
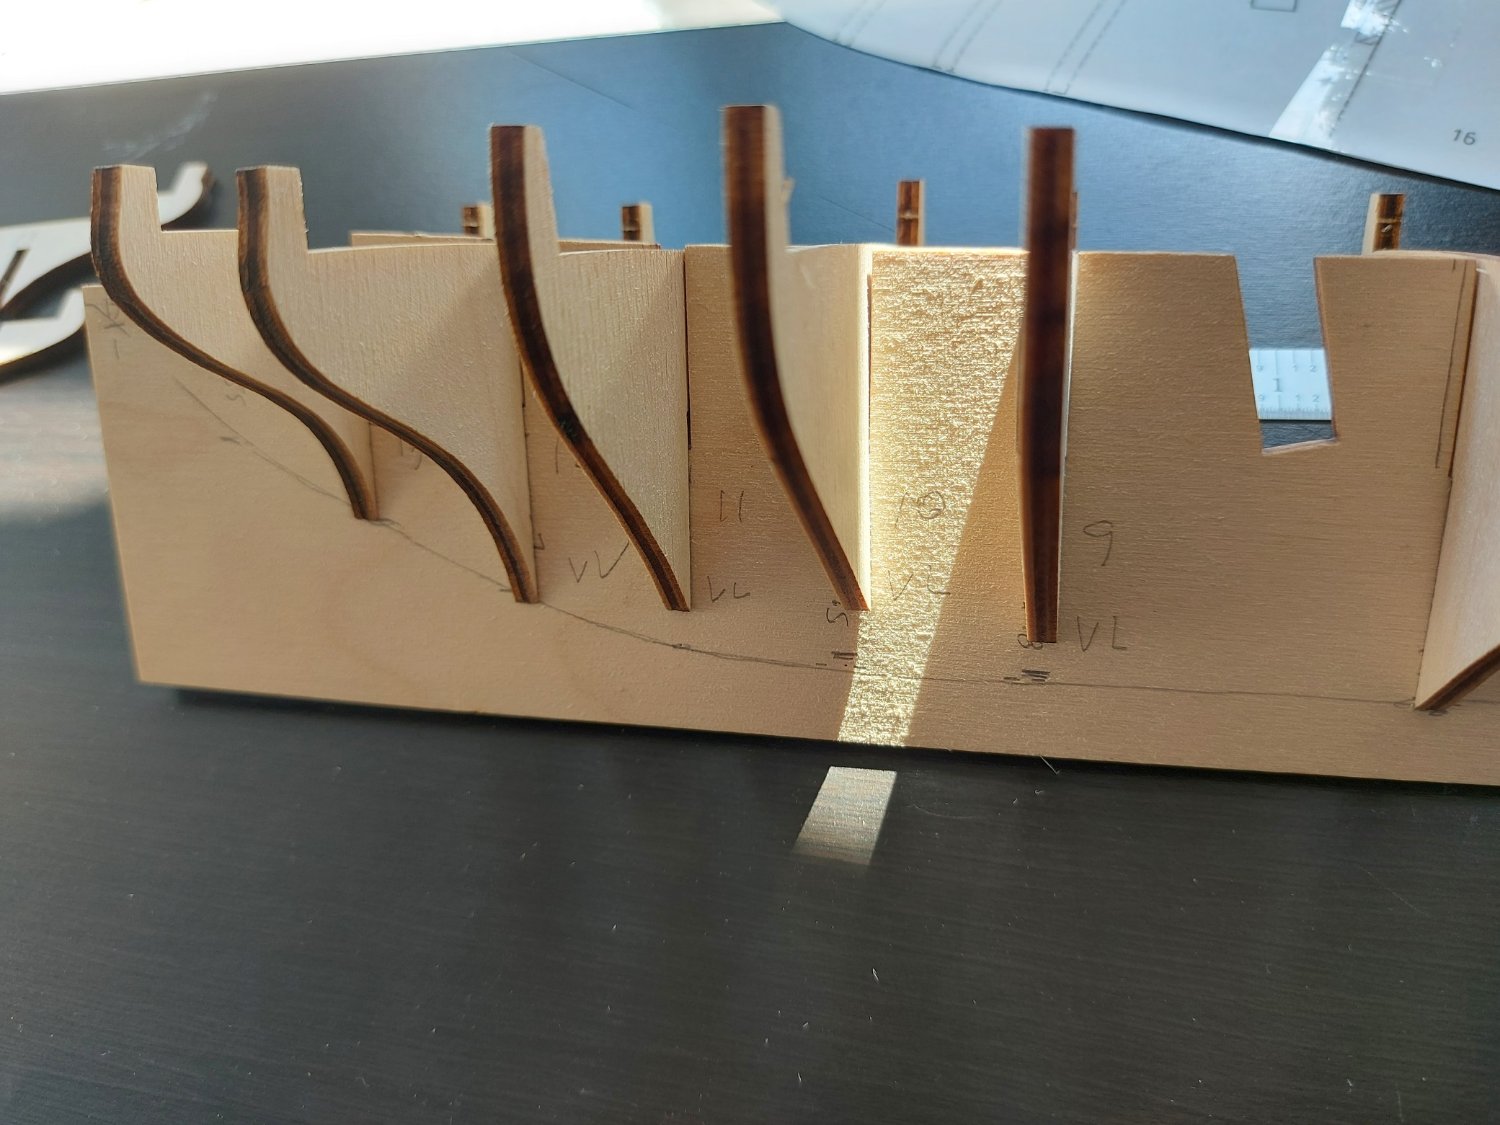
The top surfaces of bulkheads 9-10-11 end up well below the top of the keel (Part 16) ; ¼” for 10 and 11, and 5/32” at 11. I’m not concerned so much about where the bulkhead ends up at the top, however, I’m concerned more about where the bottom edge of the bulkhead ends up at.
Using a copy of the plan, I drew a smooth line connecting the bottoms of the bulkheads and matched that to where the bottom of the bulkhead meets the keel.
1) If I raise up 9-10-11 so that the top of these bulkheads meet the top of the keel, the bottoms of the bulkhead don’t come close to matching a continuous line
2) It actually looks like I need to lower bulkheads 9 and 10 further down, to create a smooth line
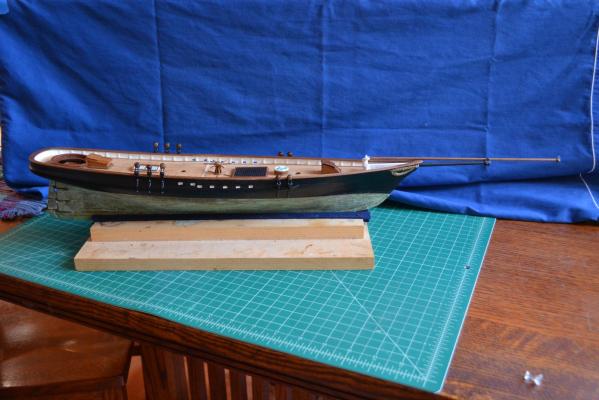
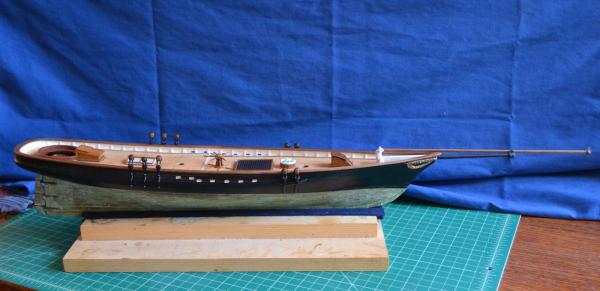
I attach 3 fotos.
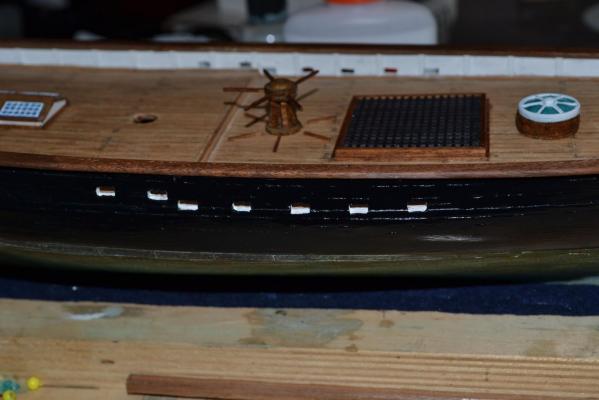
Foto 1 shows how low the bulkheads are compared to the top of the keel;
Foto 2 shows how the bulkheads meet the keel, and the need to lower 9 and 10 a bit (matching comment 2 above)
Foto 3 shows what happens should I move the bulkheads up to match the top of the keels; this doesn’t look right at all


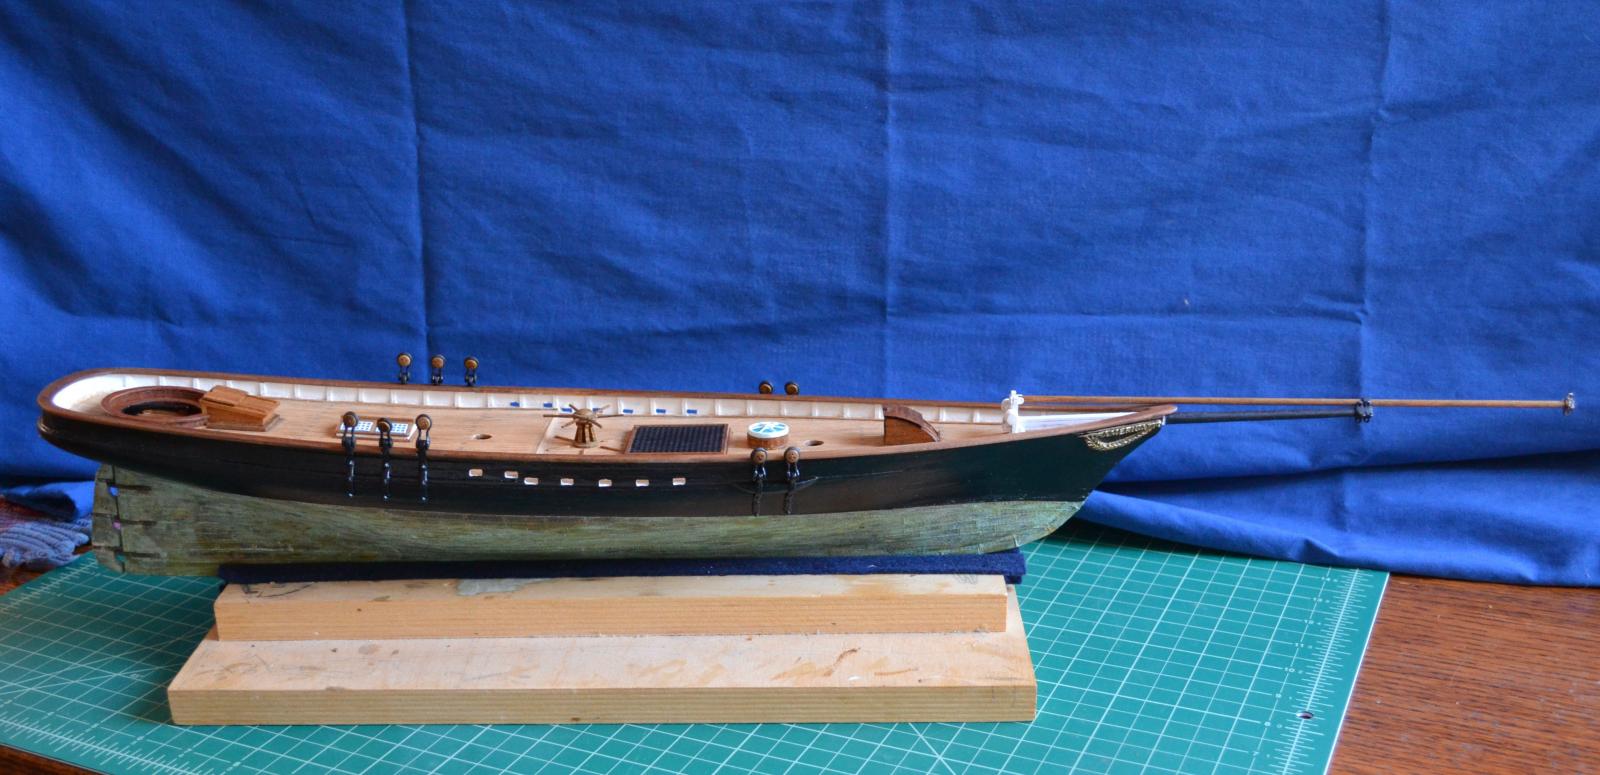

America 1851 by mojofilter - FINISHED - Mamoli - Scale 1:66 - First wooden ship build
in - Kit build logs for subjects built from 1851 - 1900
Posted
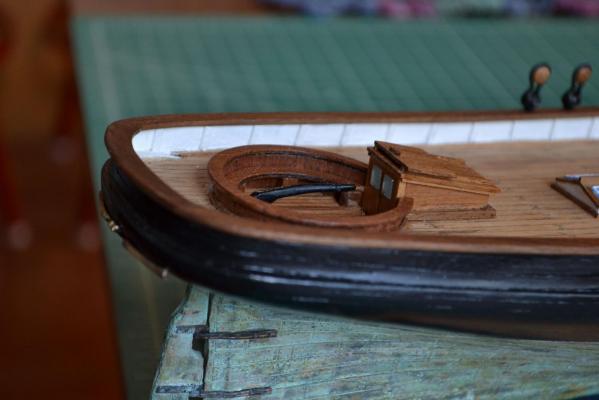
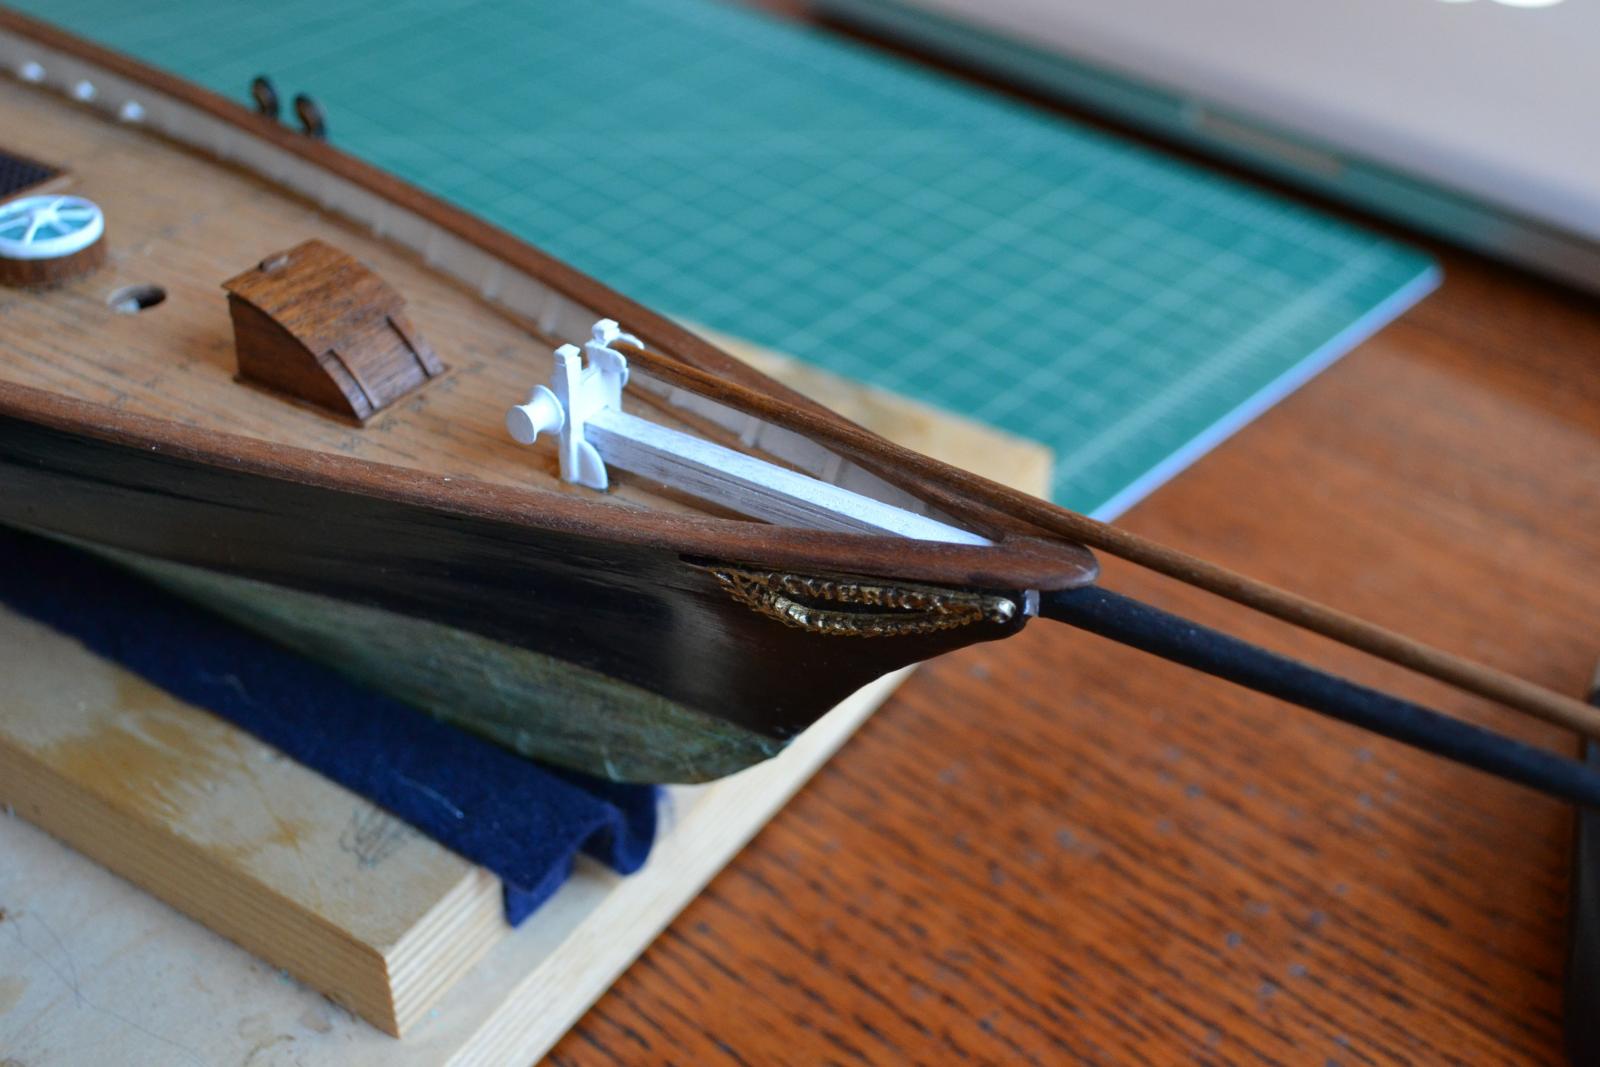
I am getting close with my 1851. I am working on the lines on the front, and there are a couple of pieces which I can't figure out.
They are part number 631 (4 of them), they are called "redancia", which would be "thimble" in English.
It looks like that setup should allow for adjustment of tension to the jib boom, and so should be blocks with the tensioning end routed through a hole in the hull. But that is not shown.
Regards