WizardOfOs
-
Posts
75 -
Joined
-
Last visited
Content Type
Profiles
Forums
Gallery
Events
Everything posted by WizardOfOs
-
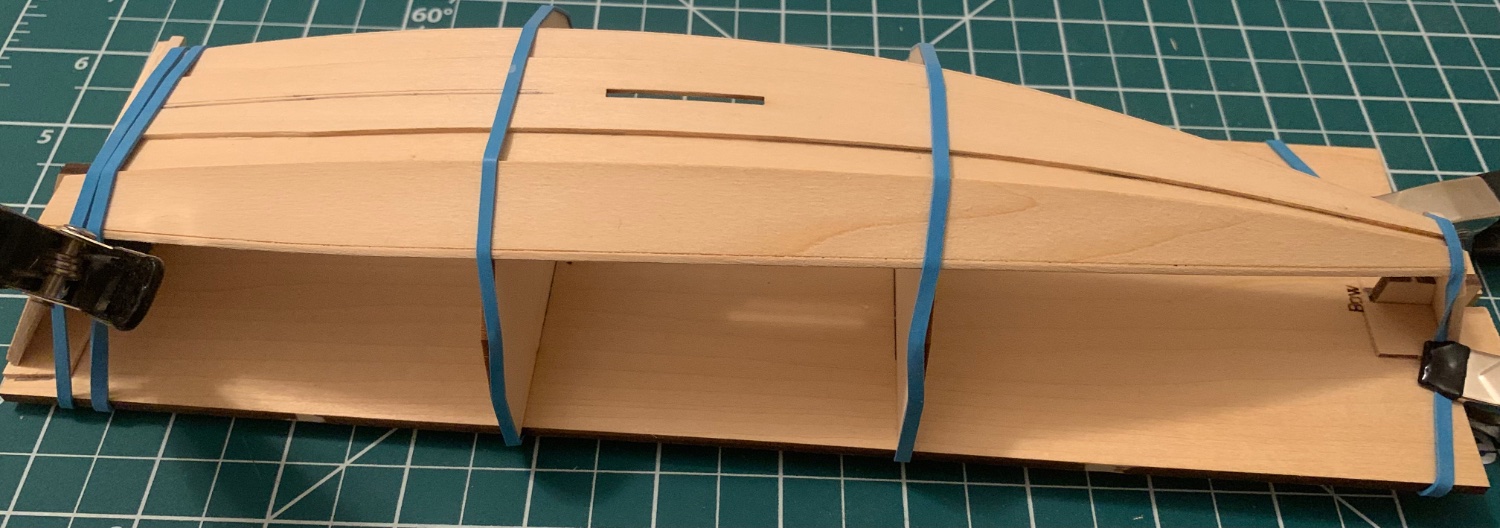
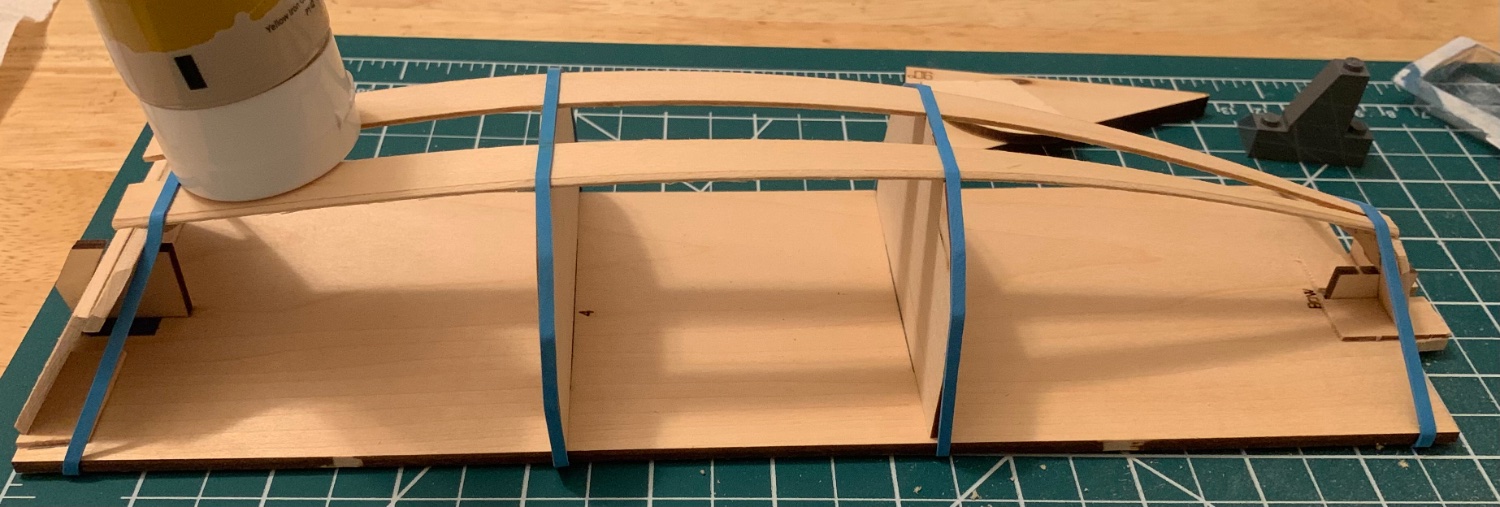
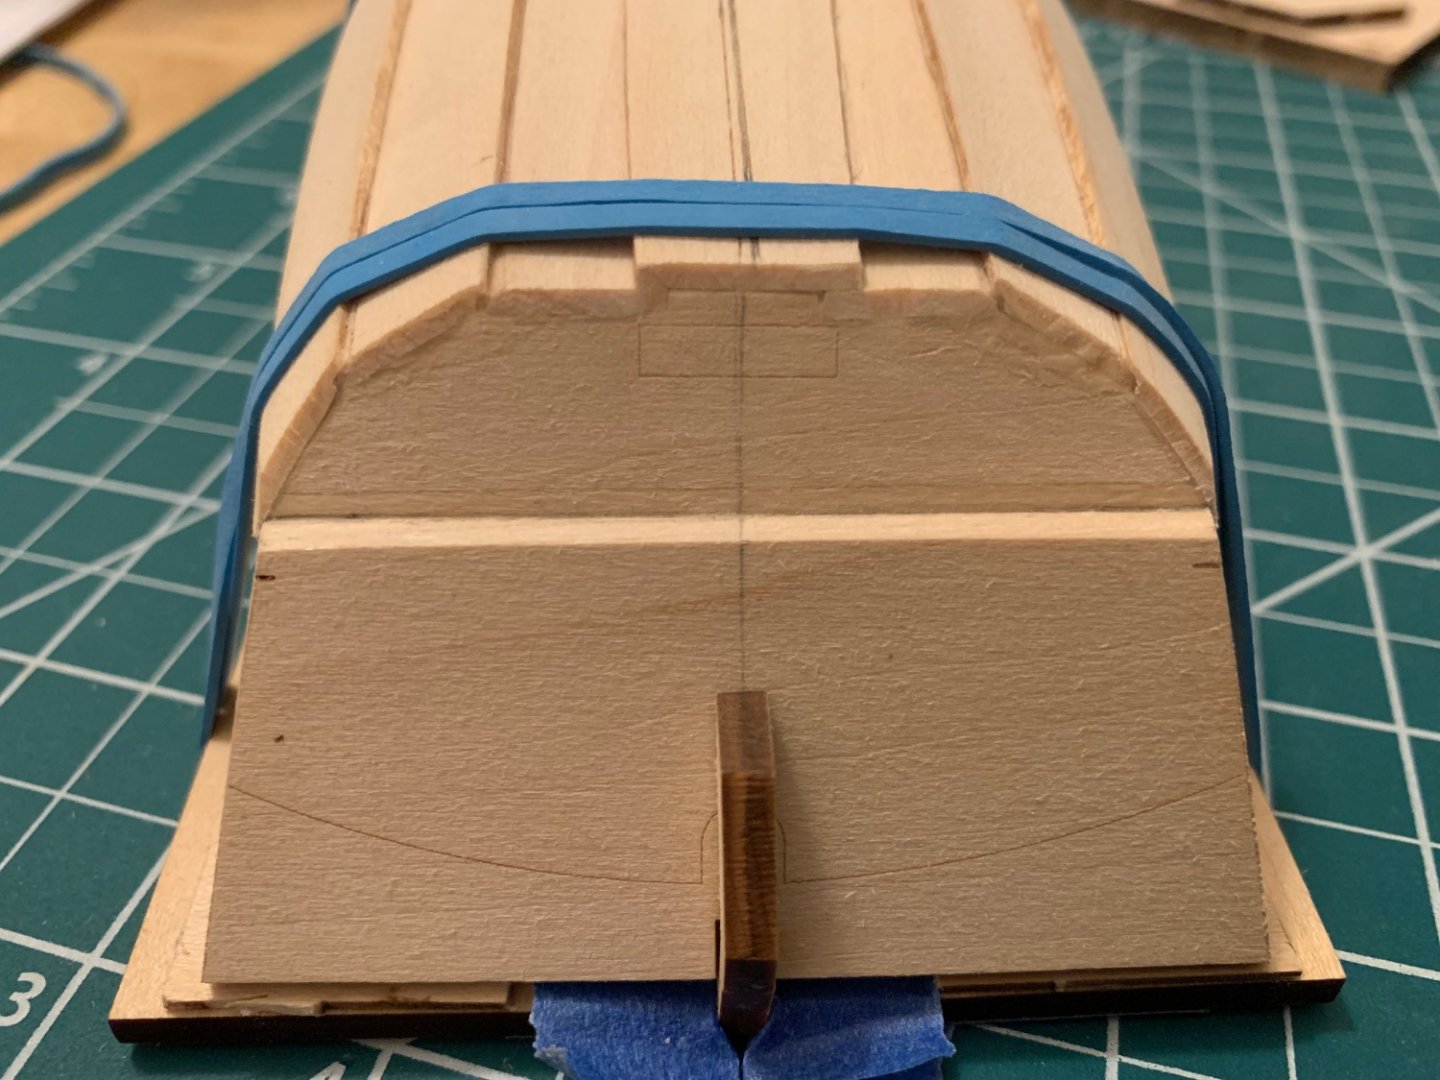
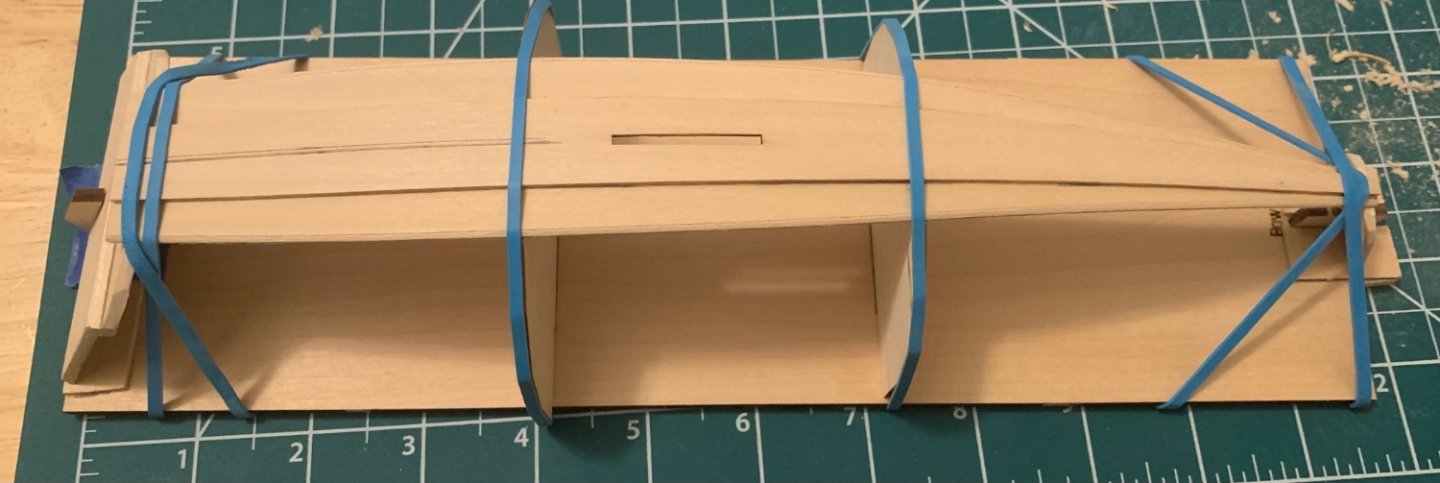
The weekend gave me a chance to steadily plank away. Here are a few shots of sequential progress: This gave me the chance to practice carving rabbets, which I feel much more comfortable with and think I’m improving on. I decided to stick with the 1 mm width which worked very well for overlapping. I was happy with it right up until I uncovered a possible mistake. My second strake planks fell awkwardly on the connection between my upper and lower stern transom. There wasn’t enough material over hanging to justify carving a step, but there was too much overhand to let the final Sheer plank meet the stern transom without a gap. My solution was to just sand down the second strake plank and simply not carve a rabbet into the sheer plank. I think it’s going to work out okay. We’ll see when I bend the sheer planks in the next day or two.


- 38 replies
-
- 7
-

-
- Norwegian Sailing Pram
- Model Shipways
- (and 2 more)
-
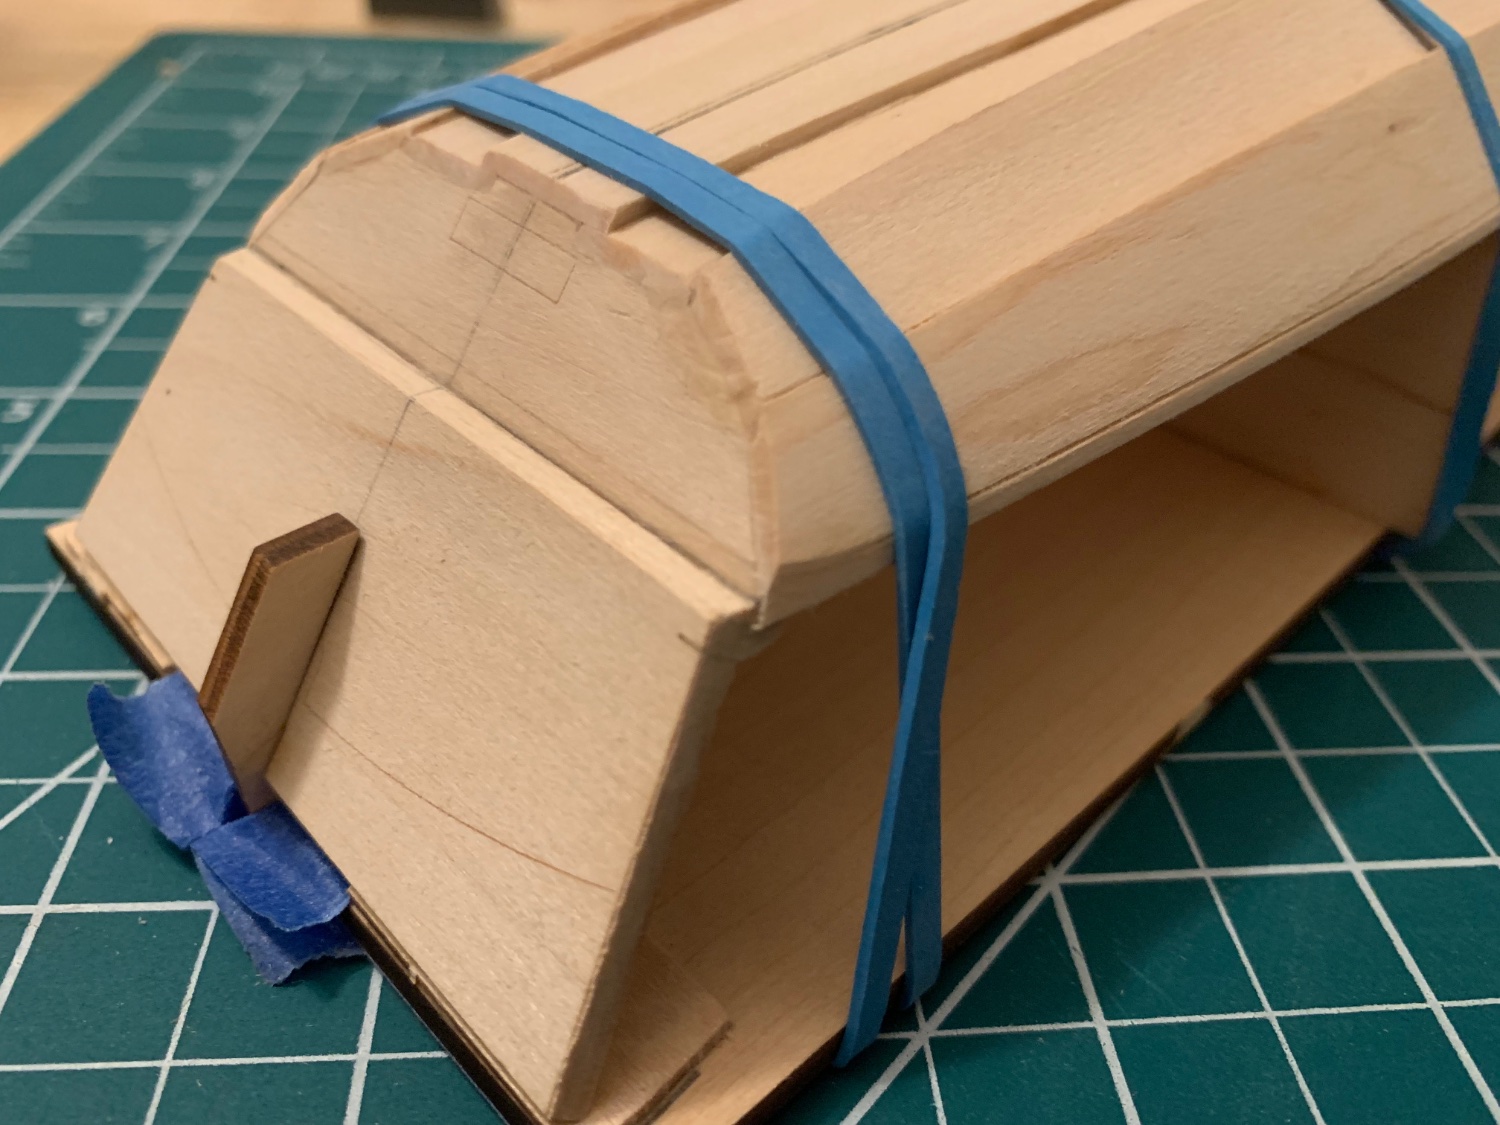
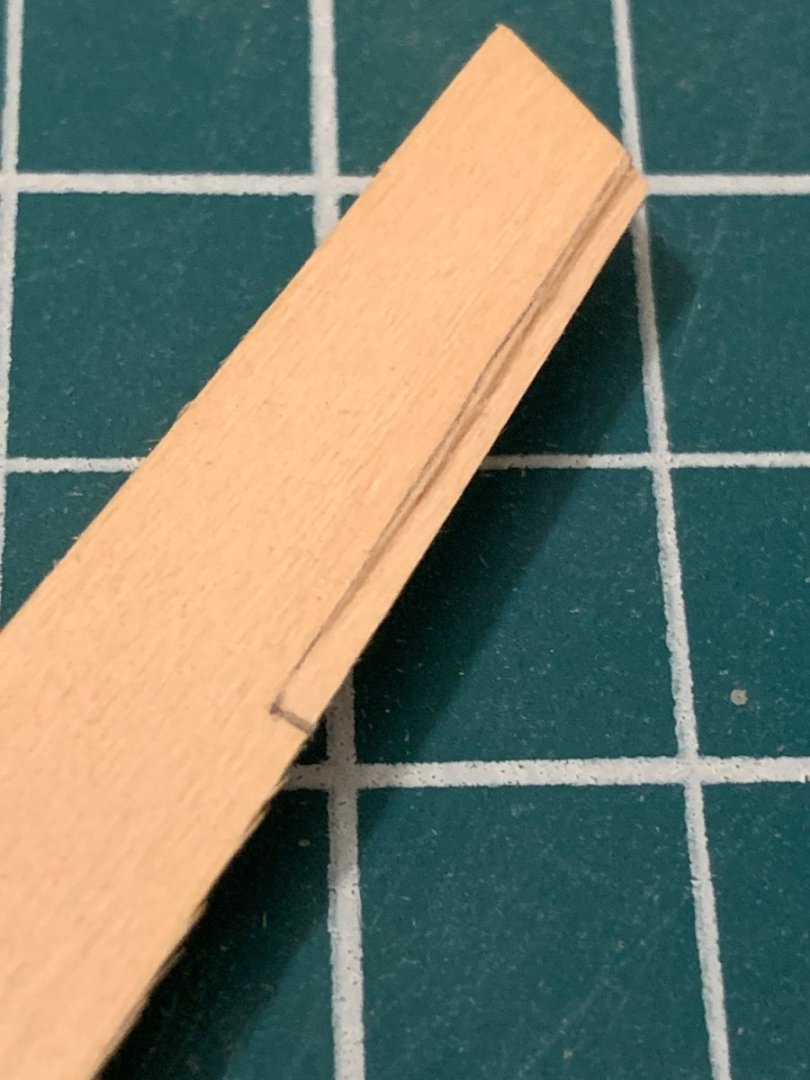
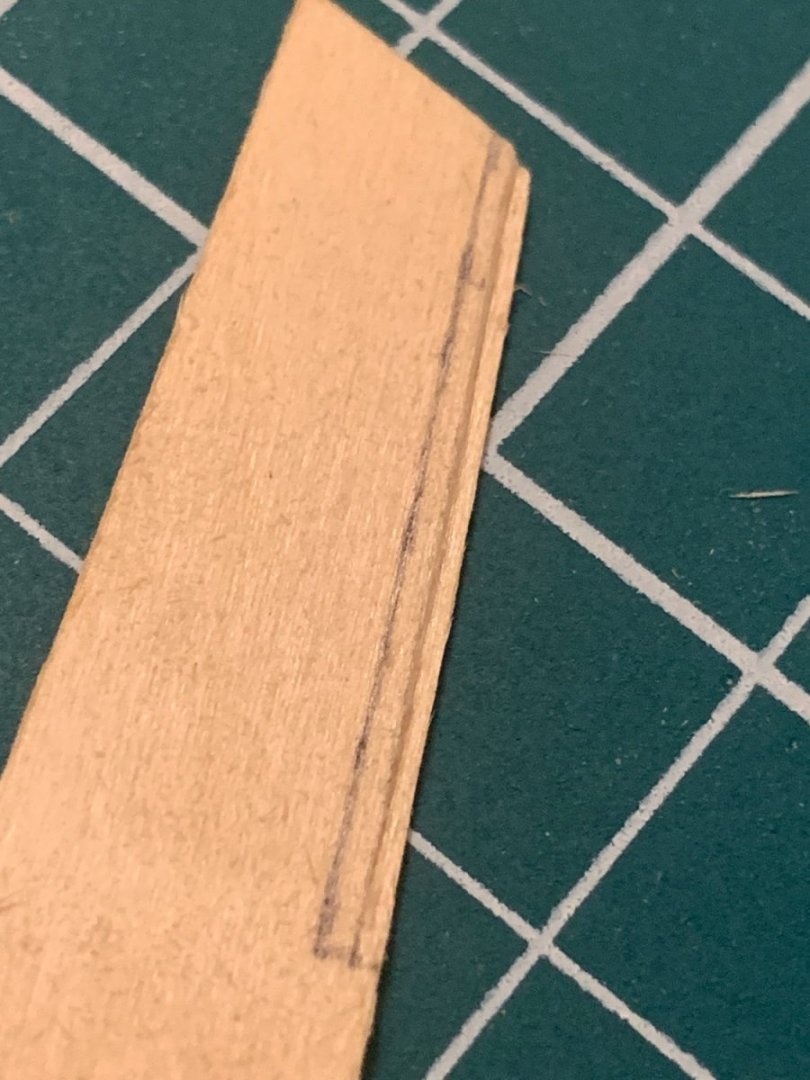
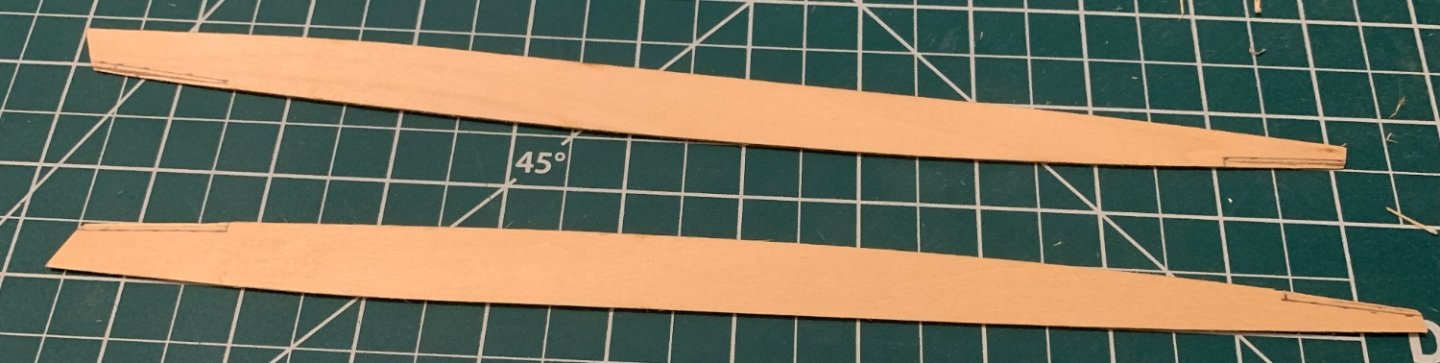
Finding time through the work week is always a challenge. As such, I’ve only managed to get a few things done. I started by getting the bow nice and square and gluing that down. The technique I found worked best for me was to glue the very tips of the two bottom boards together first, then glue the combined piece to the bow transom and let that set. Doing it this way meant I didn’t have to worry about them splaying unevenly as I fiddled with gluing them down. This left me free to square up the two bottom boards against the appropriate stops on the molds and then glue them (one at a time) to the stern transom. The stern doesn’t look square in the above because it is not, that got fixed when I glued as described. Next came bending and then gluing the keel board. The process was exactly the same as what I had done for the dory so it was a comfortable process. The only helpful thing I added was tracing along its edges with a pencil when I dry fit it to make sure it was as exactly centered as possible. Finally, I sanded the bevels into the garboard planks and tried my hand at cutting the rabbets. The instructions say to cut the rabbet a scale foot long and a scale inch wide. At 1:12 a scale inch is ~2mm so that’s the pencil line you see drawn. I went back and forth with myself, wondering it that was too wide and would impact the final height of the sides of the boat because of too much overlap. Ultimately I ended up only cutting them ~1mm wide but may come back and widen them before I soak/bend them after a chance to dry fit in the daylight.

- 38 replies
-
- 4
-
-
- Norwegian Sailing Pram
- Model Shipways
- (and 2 more)
-
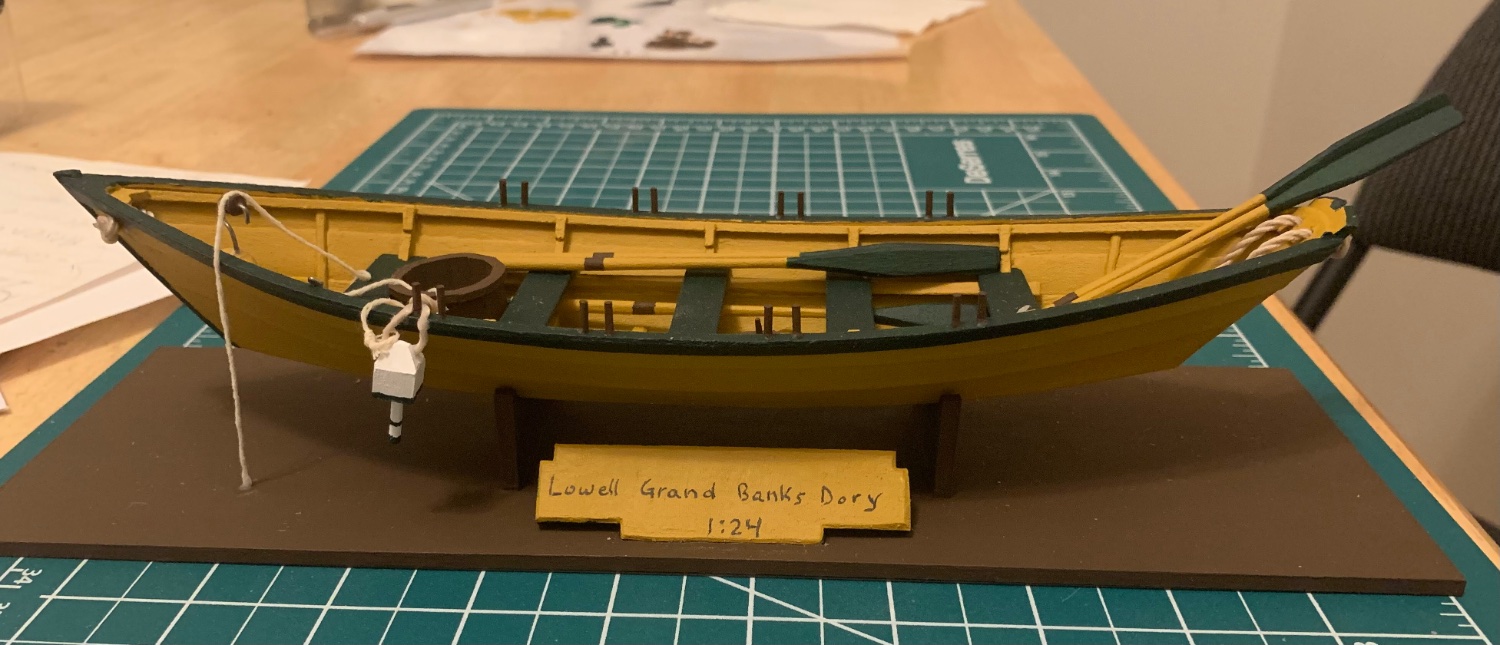
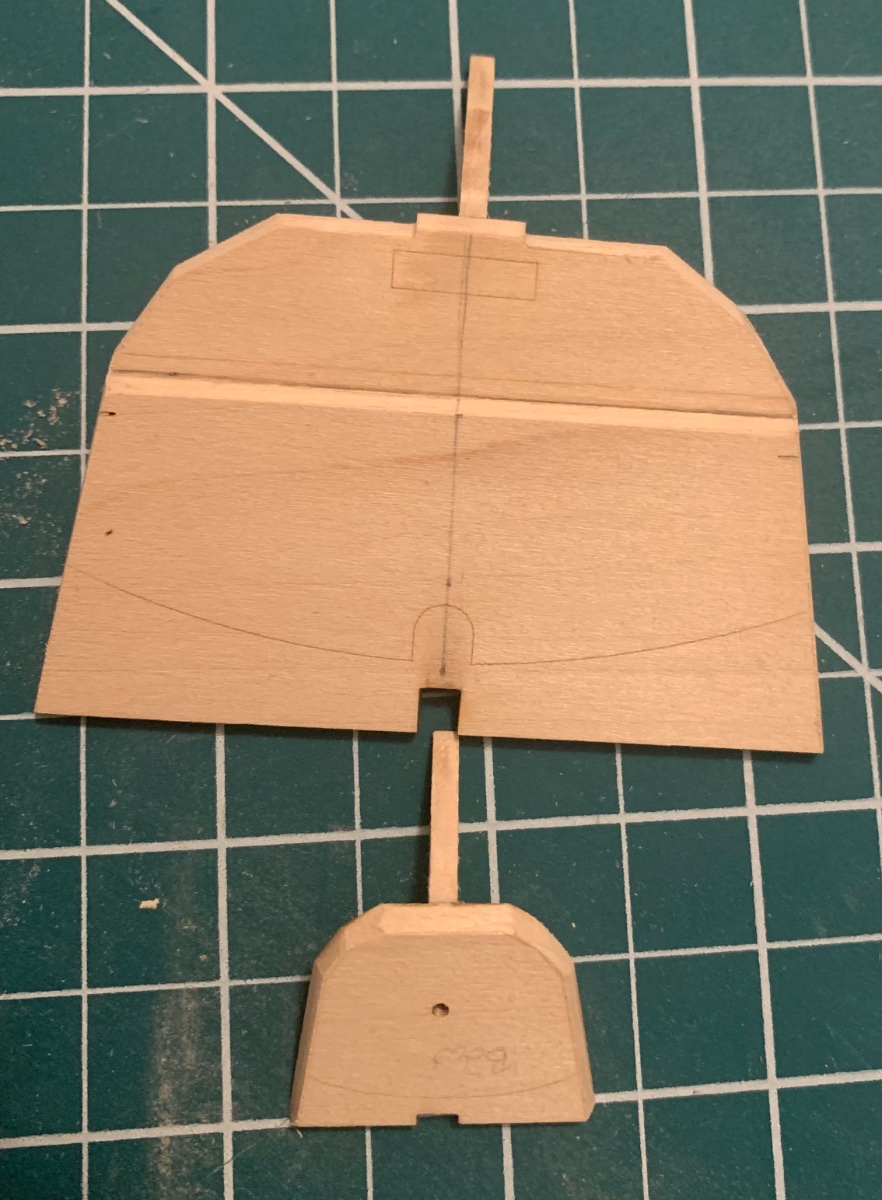
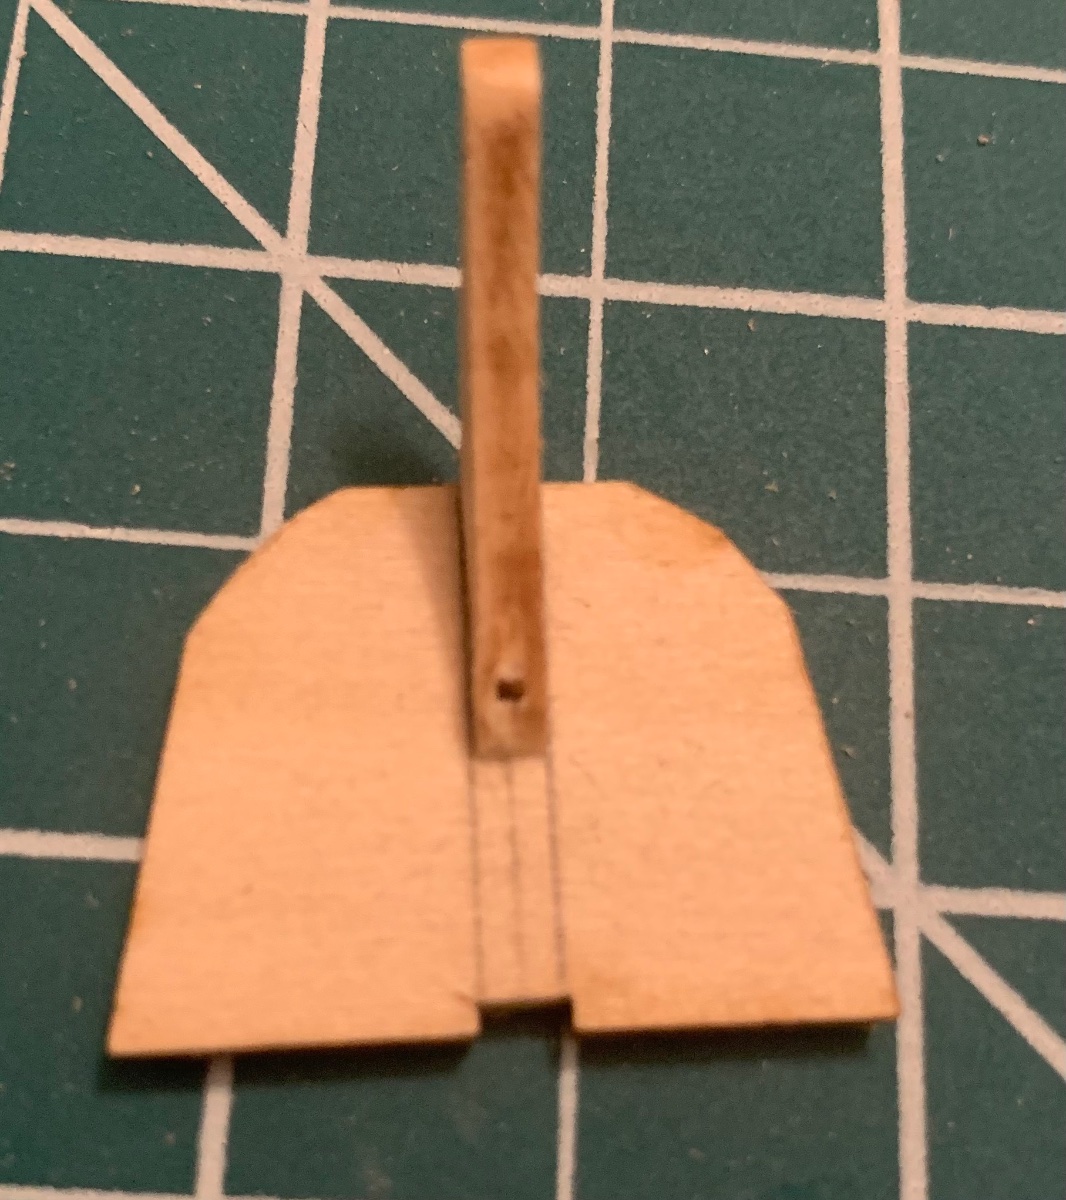
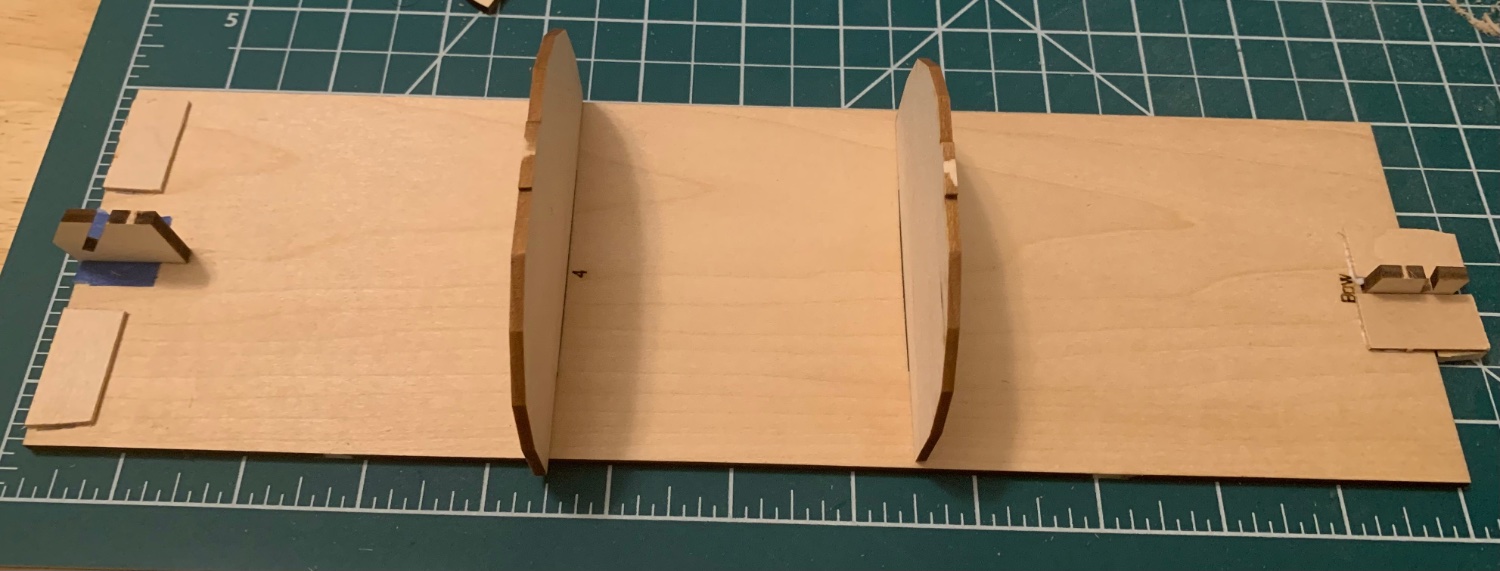
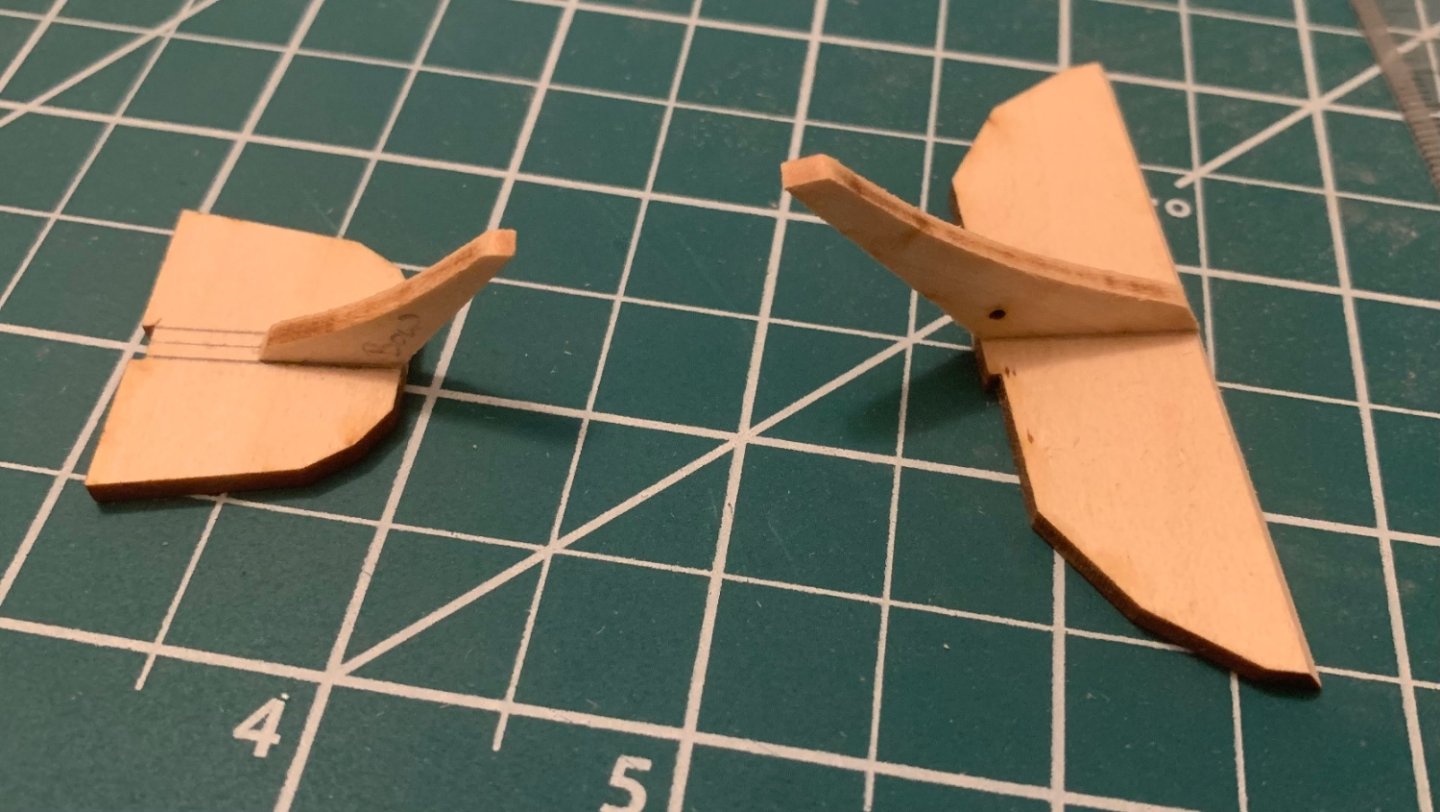
Following some encouragement in the new member introduction post Decided it was time to start a build log here. I already completed the Lowell Grand Banks Dory which I’m quite proud of. The Pram will be my second model, and in fact only the second model I’ve ever attempted of any kind. Let’s get into it. Day 1 was a simple matter of beveling the bow and stern transoms as described in the instructions. Just like the dory, I’m impressed with the detail provided and find it very useful. I also attached the knees and drilled a hole as directed through the bow transom knee. There was a little bit of tearing out, but I pieced the splinters back in place and glued them back down. Day 2 involved assembling the build board. I took the helpful advice of Ryland Craze given in the build log by Zack Soderquist and added some scrap to the board so that the transoms would sit flush. All added pieces are 3/64 thick. You can see that I also had to add some tape to make the stern transom support fit snugly, without the need for glue. Disaster struck after this picture was taken and I broke the thinnest part of the stern transom support, something I saw commonly happen in other logs and which I was trying to avoid. A little gluing back together and it works fine. Day 3 saw sanding and bending of the bottom boards. I treated them exactly like the Dory, soaking and bending over the frames with elastics. Those are now set to dry overnight. That brings me pretty much up to present. I decided to bend the keel board after the bottom boards because it’s going to lay on top of them anyway, counter to what the instructions say. I also can already tell I’m going to have a gap between the stern transom and the keel board so I’ll try to sand the notches a little deeper before gluing the bottom boards in place. I may also consider adding a little spacer between the bow transom knee and the keep board to fill up the gap that’s going to be present there.


- 38 replies
-
- 9
-
-
- Norwegian Sailing Pram
- Model Shipways
- (and 2 more)
-
Thank you all for the warm welcome!
-
I’m just about to begin this model myself and am looking forward to following along with your progress.
-
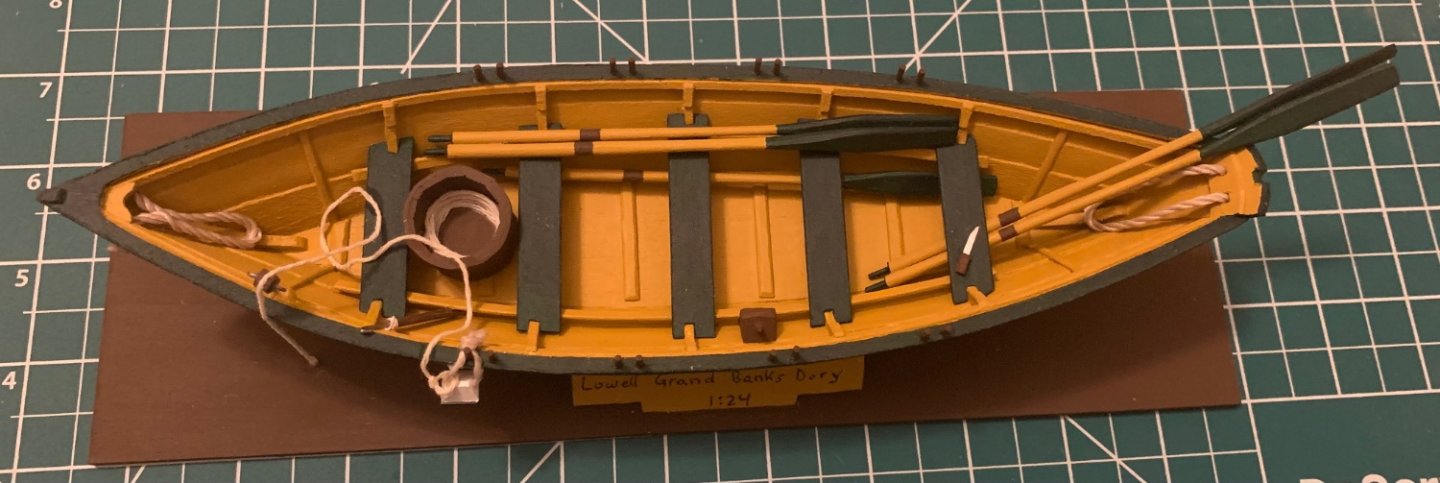
Hello everyone, I have wanted to get into model ship building for a while now but could never really figure out the best way to start. I have fond memories of my grandfather’s ships on the shelves in his home and saw building one as a means to connect with him in that way. While I have absolutely no prior experience with model building nor wood working, this hobby does fit my skill set to some degree by involving fine motor control. That said, what some of you produce is beyond comprehension. A few months ago I joined this forum after purchasing the Model Shipways 3 kit combo, and had great intentions to start a build log of the first model. That didn’t end up happening, but I did finish the first build over the holidays. I offer a huge thanks to both Prairie Sailor and Tigersteve who I took many ideas and much inspiration from (I hope my blatant plagiarism is acceptable) and whose build logs I found invaluable. I’m more than open to any critique or ideas for improvement. Next up is the Norwegian Sailing Pram which I am only just getting started on. SkiBee’s build log has already become a valuable reference point. That’s really what I wanted to say, I’m excited and happy to be here and pushing myself to actually become involved here because I’ve used the site as a resource and wanted to say (both broadly and specifically) thank you. A Wonderful Wizard, Os


- 17 replies
-
- 15
-