HOLIDAY DONATION DRIVE - SUPPORT MSW - DO YOUR PART TO KEEP THIS GREAT FORUM GOING! (Only 36 donations so far out of 49,000 members - C'mon guys!)
×


DonBMichigan
-
Posts
60 -
Joined
-
Last visited
Content Type
Profiles
Forums
Gallery
Events
Everything posted by DonBMichigan
-
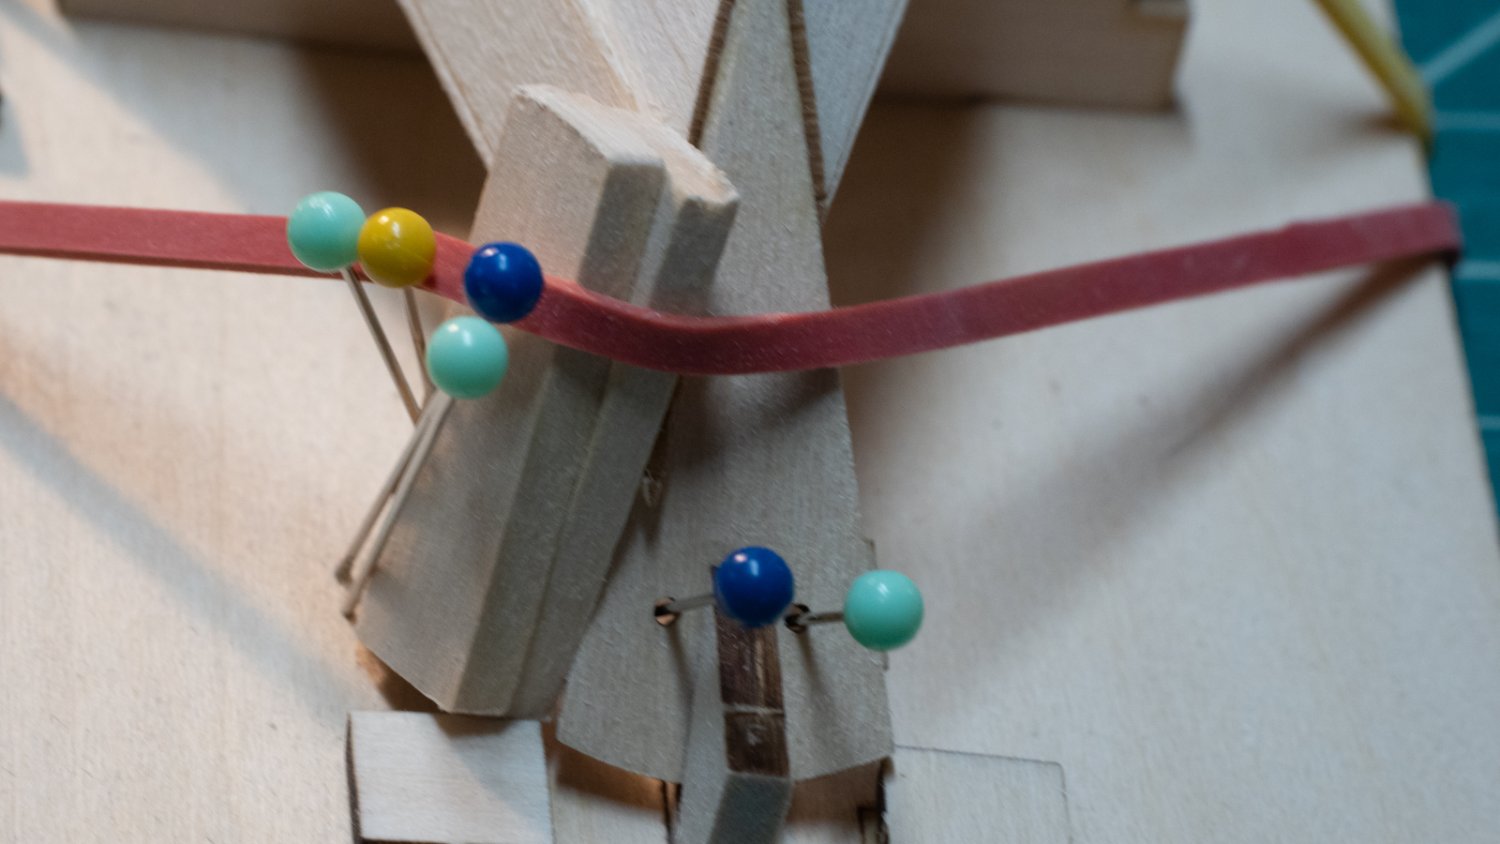
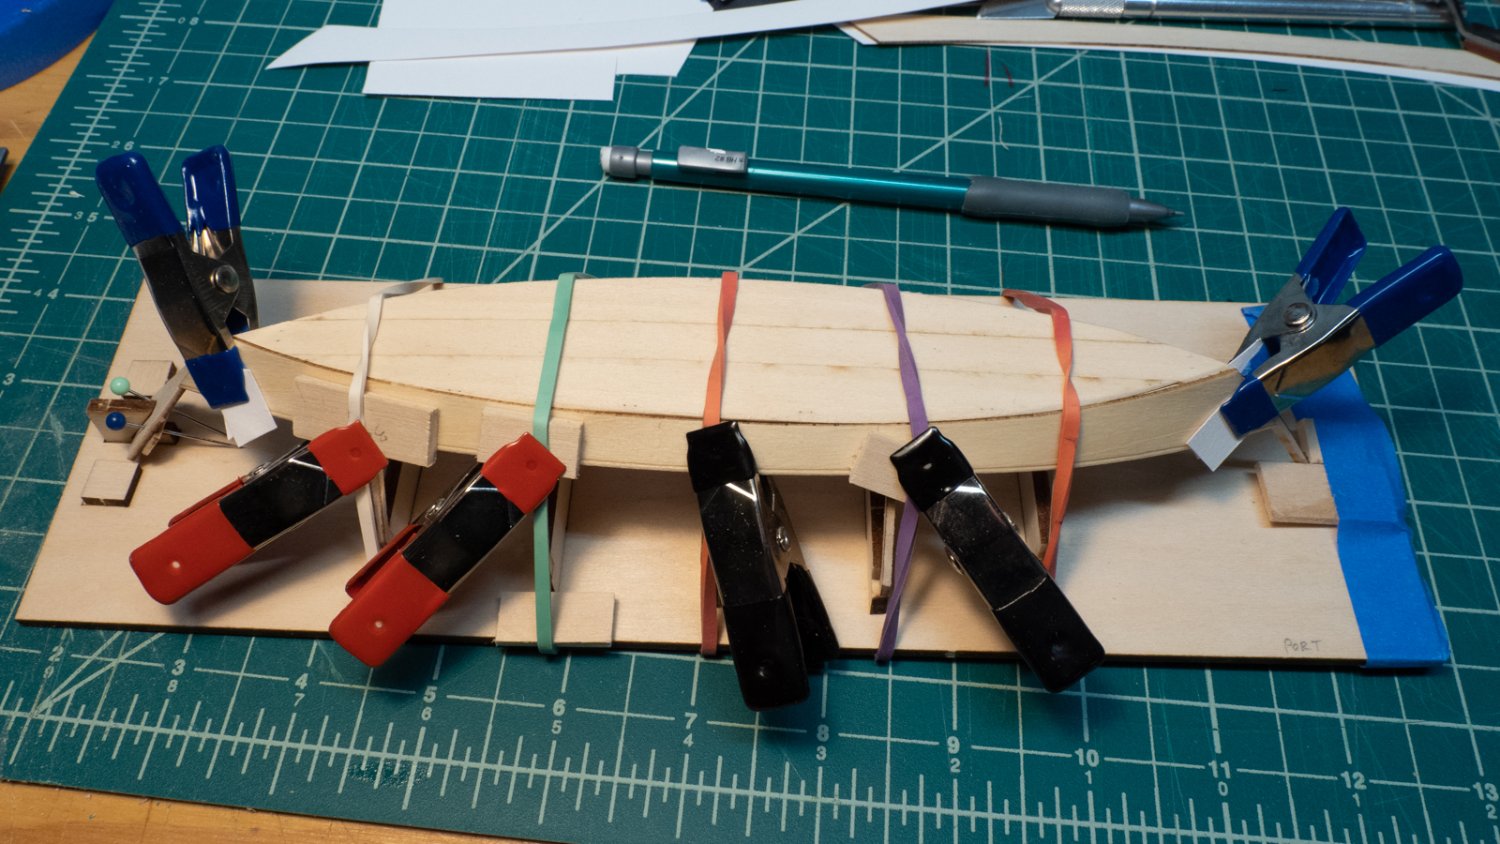
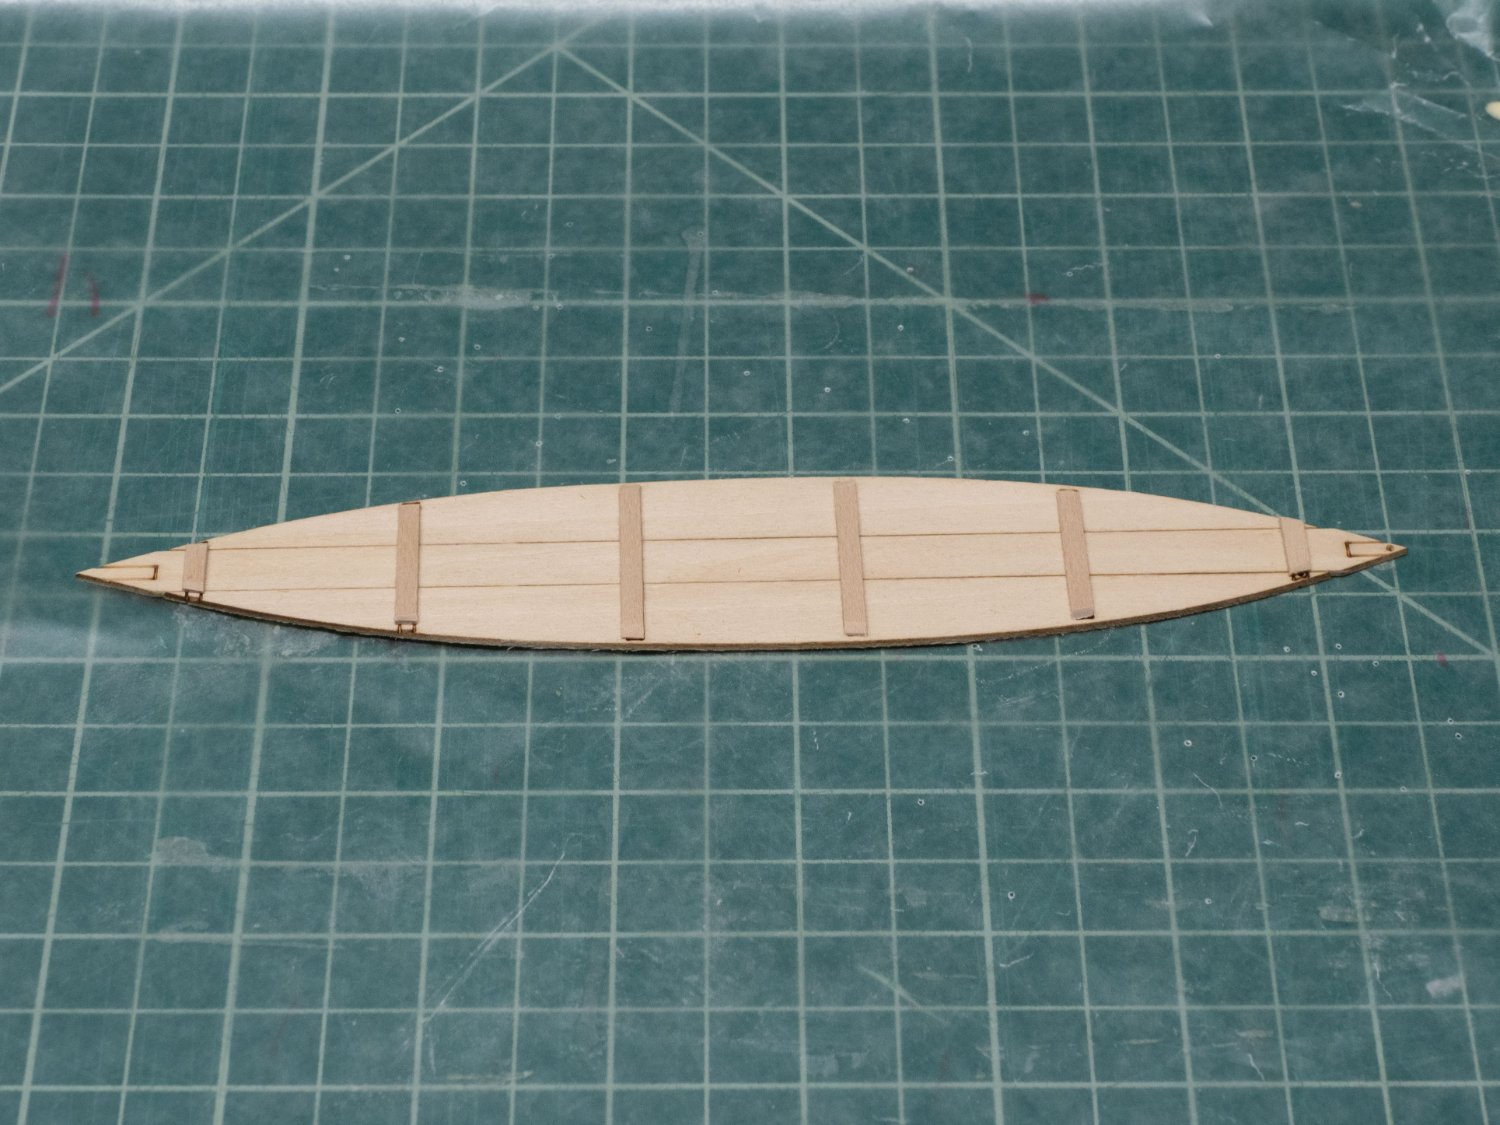
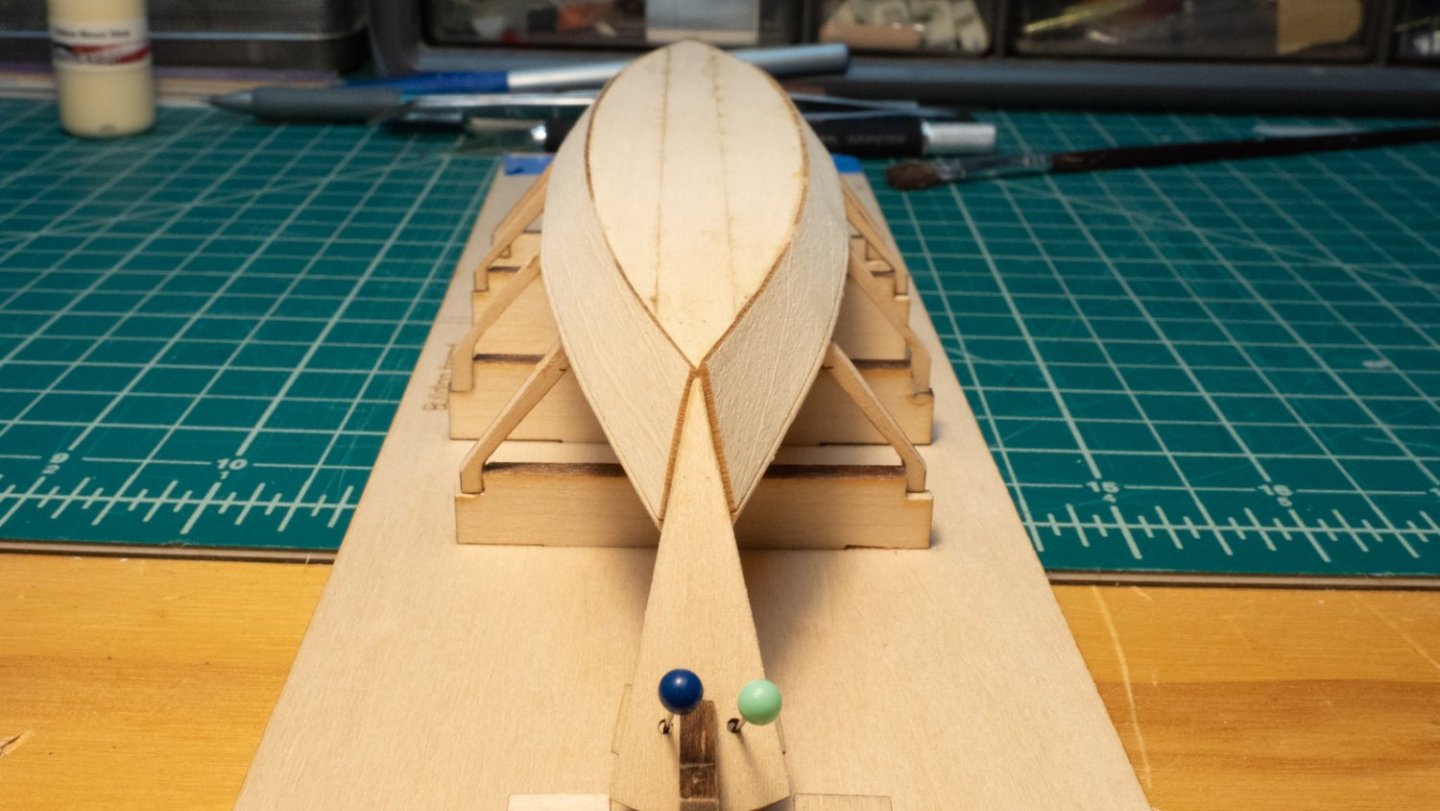
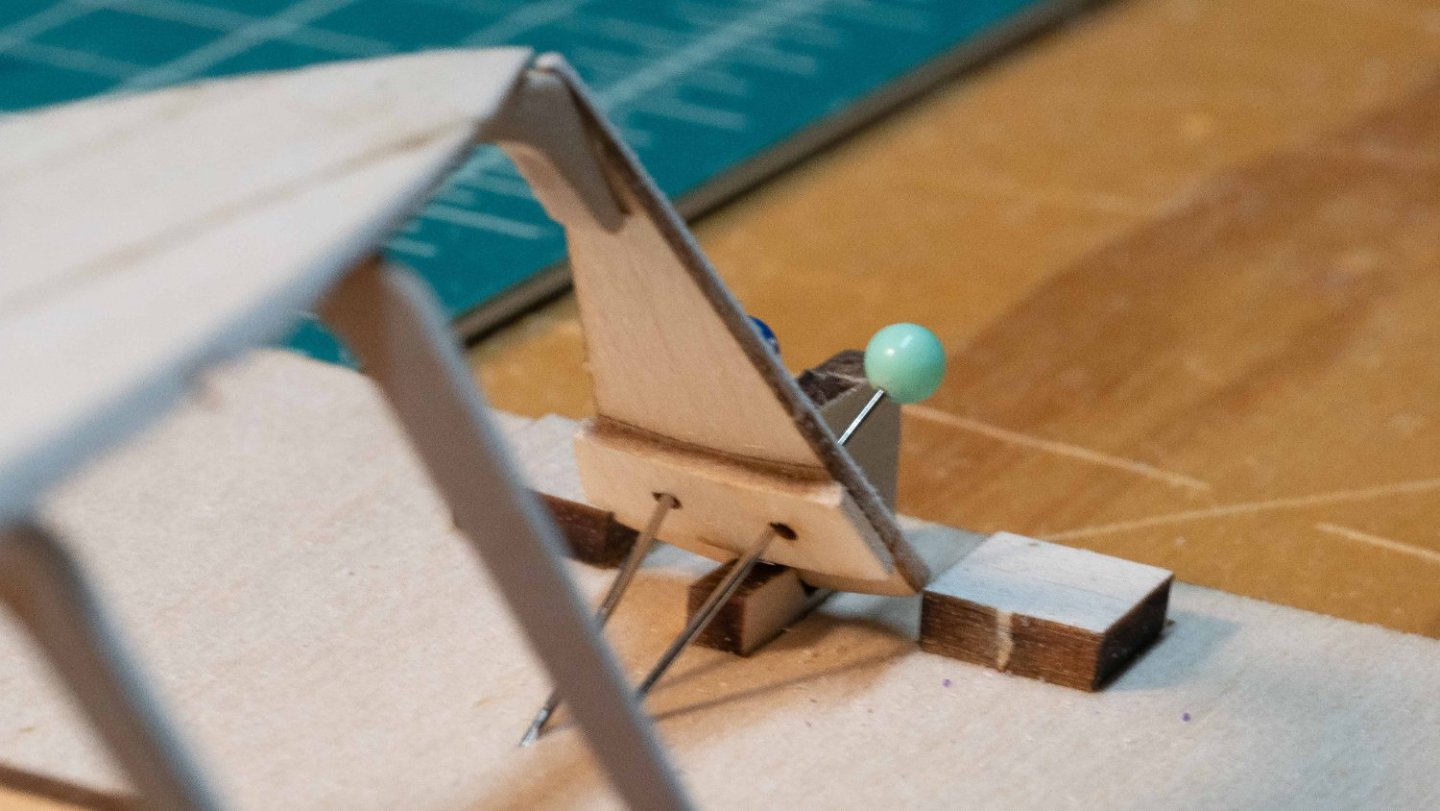
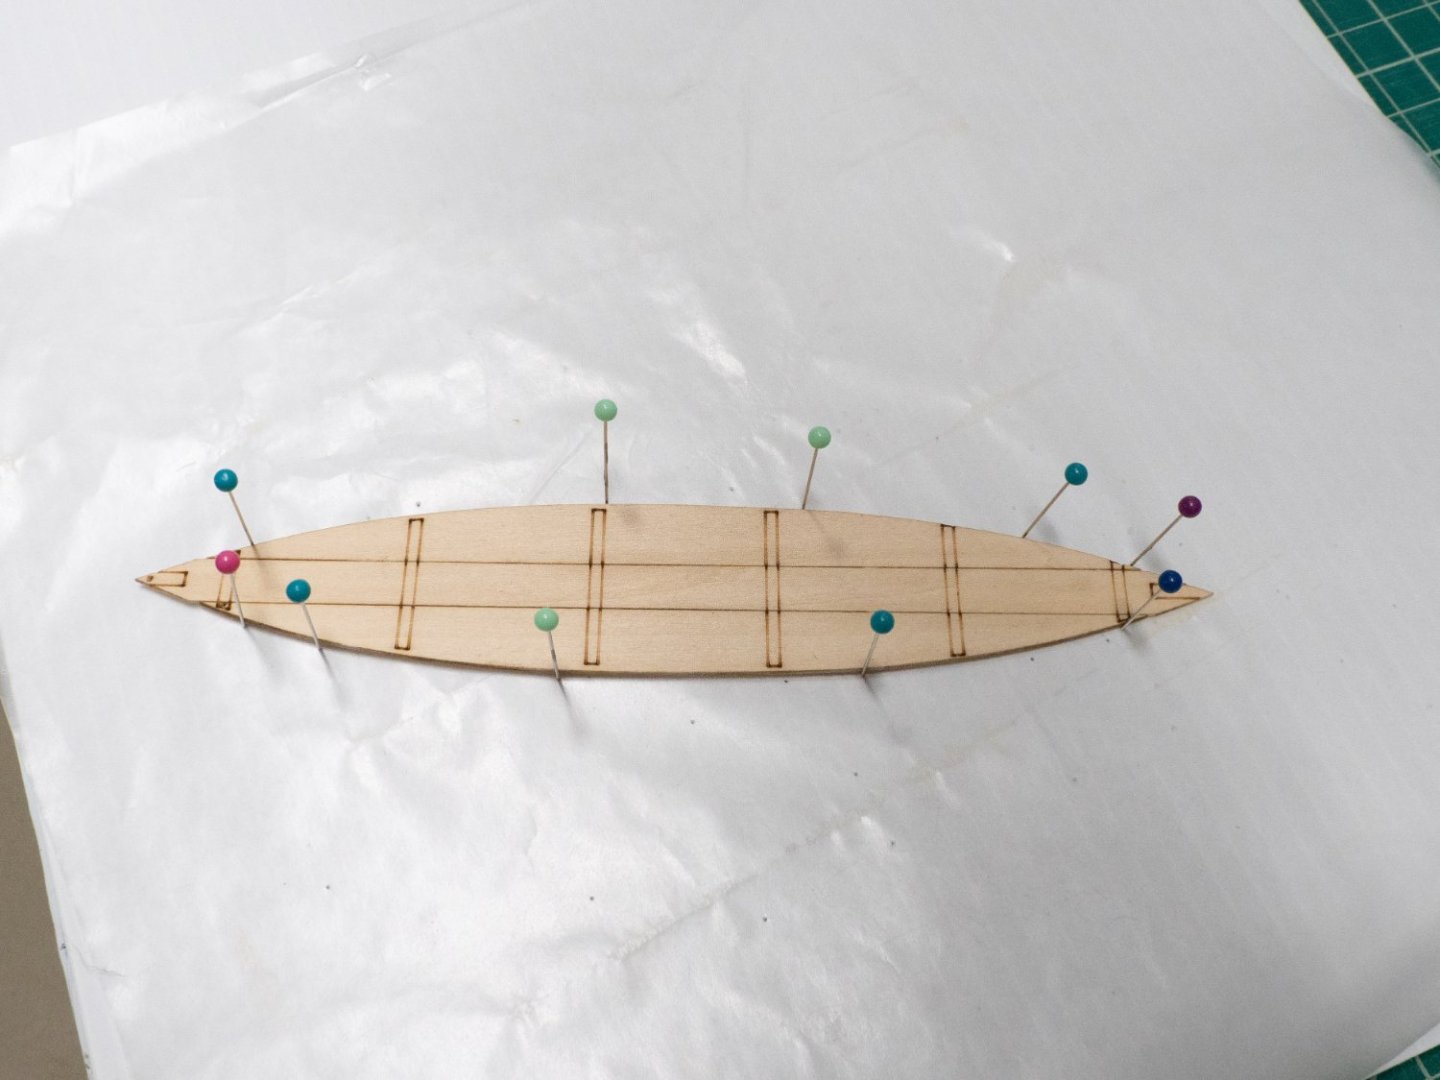
 Bending the broad planks: Bending and clamping was similar to the garboards, but I was having trouble picturing what the bevels were supposed to look like or how they necessarily fit with the garboards, so I cut copies of the supplied planks out of basswood I picked up at a nearby hobby shop. I sanded and beveled away until I was able to see what it looked like at the ends of the planks where they meet. When I was comfortable I knew what to do, I sanded the bevels on the supplied planks, soaked them, and attached them with rubber bands and clamps. The instructions for gluing the broad planks in the following step indicates that, during gluing, it may be necessary to adjust the plank by adding water to it and shaping it. I wanted to avoid this as much as possible, so I spent quite a bit of time trying to get it to line up with the garboard as I clamped and adjusted it across its length. Hopefully, that will minimize any adjustments needed at glue-up time, although I'm prepared to do so if needed. I used pins and some small scraps of wood to hold the aft end of the broad plank in place at the transom, as pictured. The stem end of one of the planks was clamped too far in, and the plank took on an unfortunate curve. I flattened this by putting a small piece of wood on top it, and putting a heavy object on top. I'll plan to return to this log after I've glued both broad planks, or even after the final planks are bent and glued.


- 40 replies
-
- 4
-

-
- Lowell Grand Banks Dory
- Model Shipways
- (and 1 more)
-
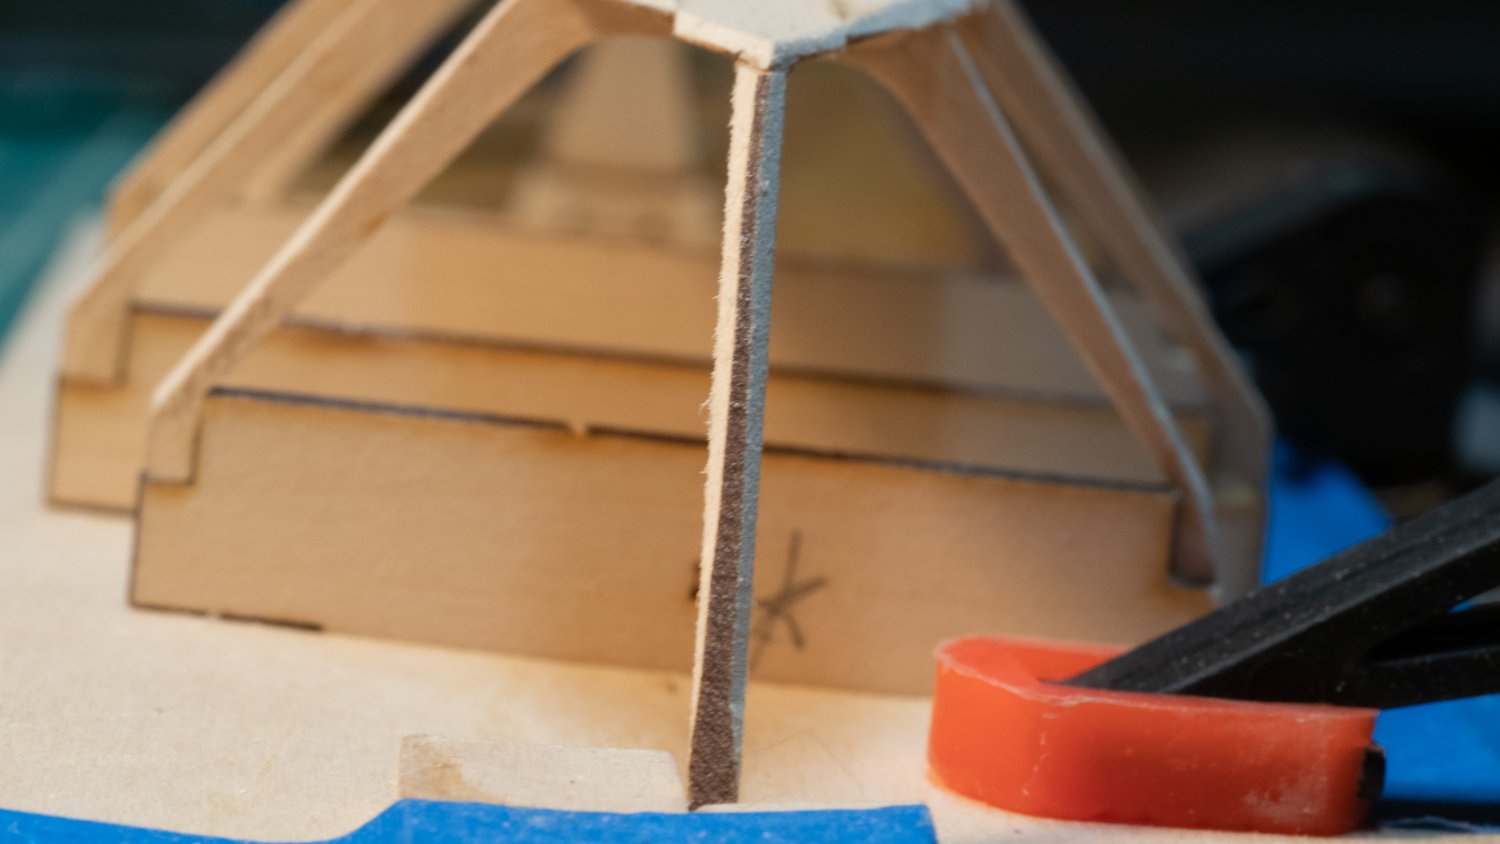
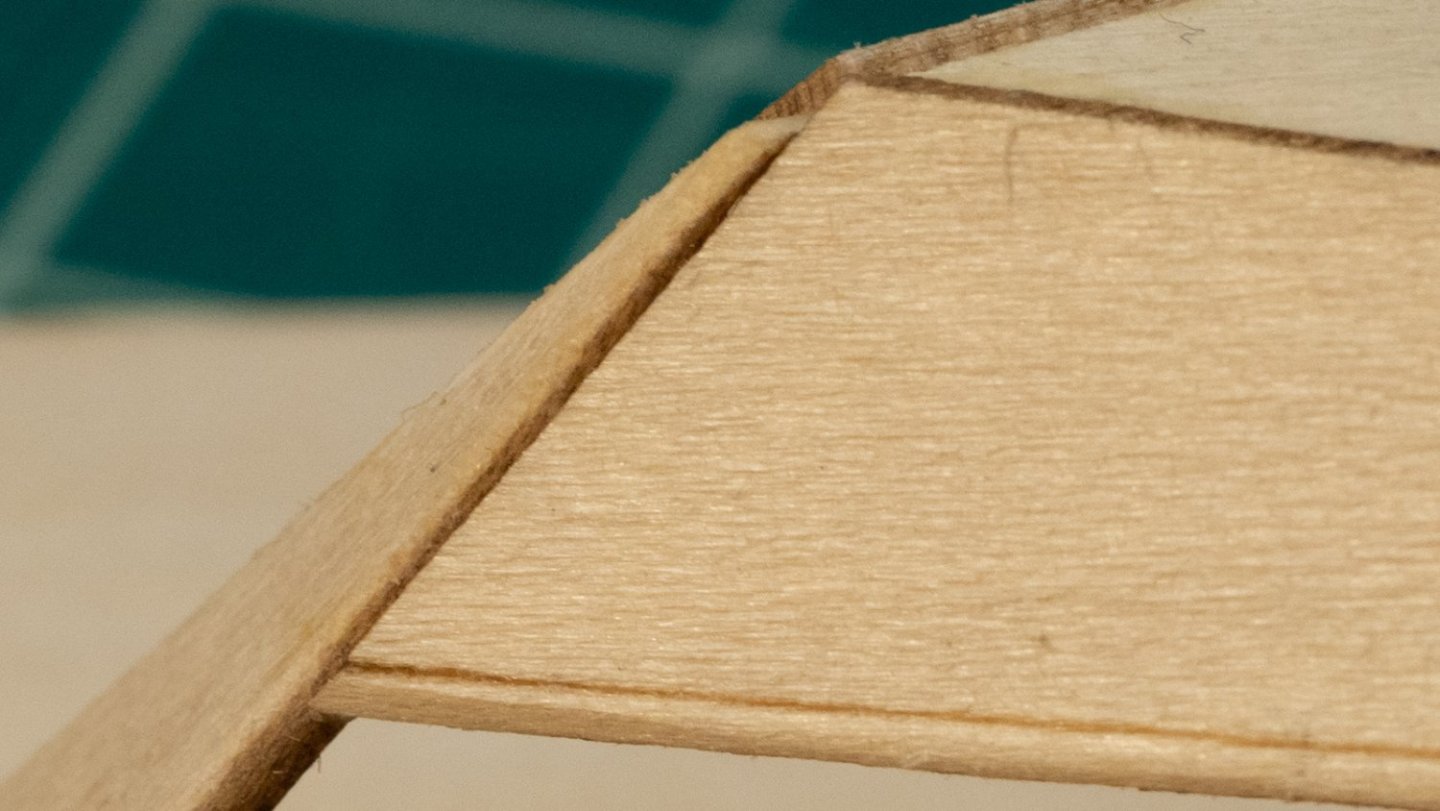
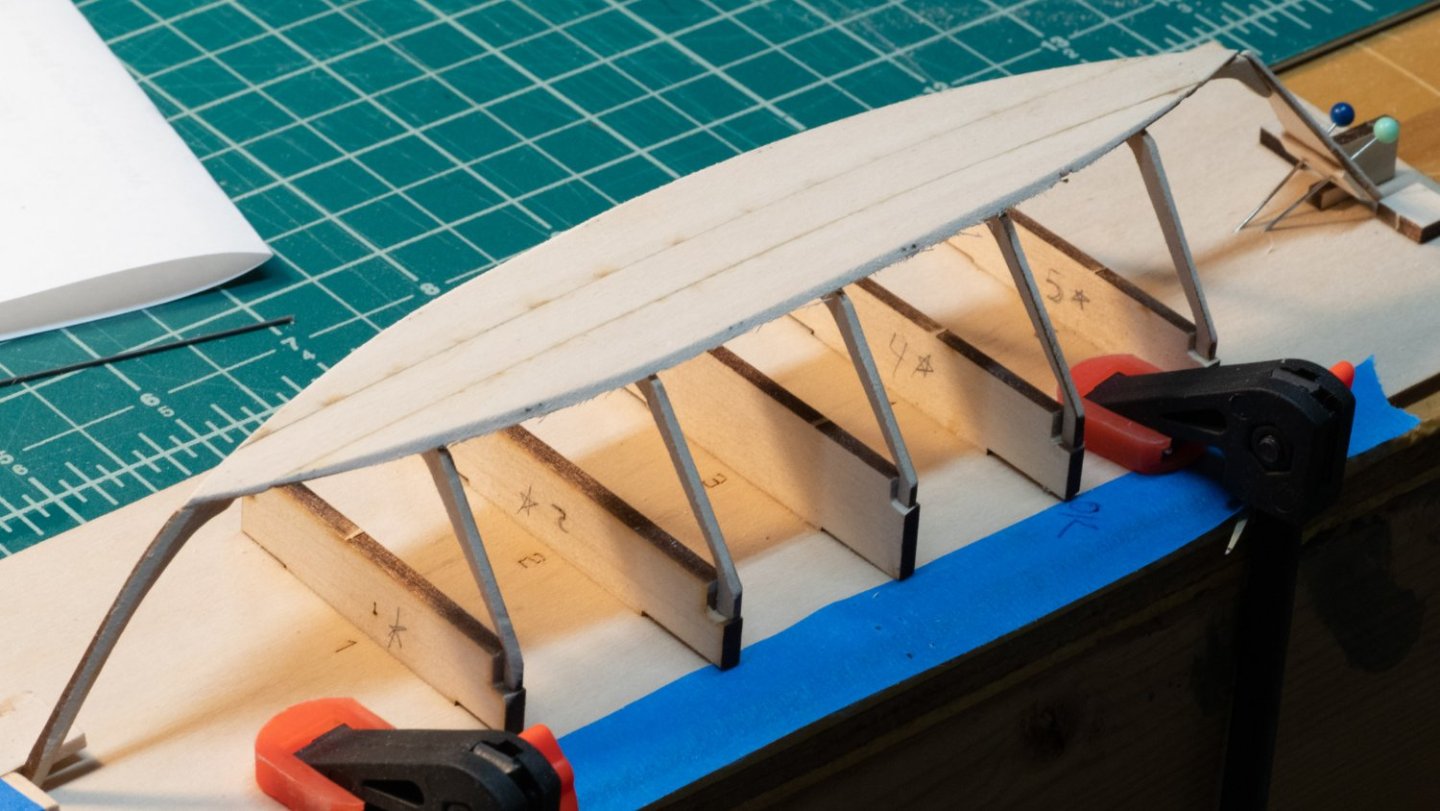
That's a good picture, thanks! It does help to visualize the rolling bevels.
- 40 replies
-
- 1
-
-
- Lowell Grand Banks Dory
- Model Shipways
- (and 1 more)
-
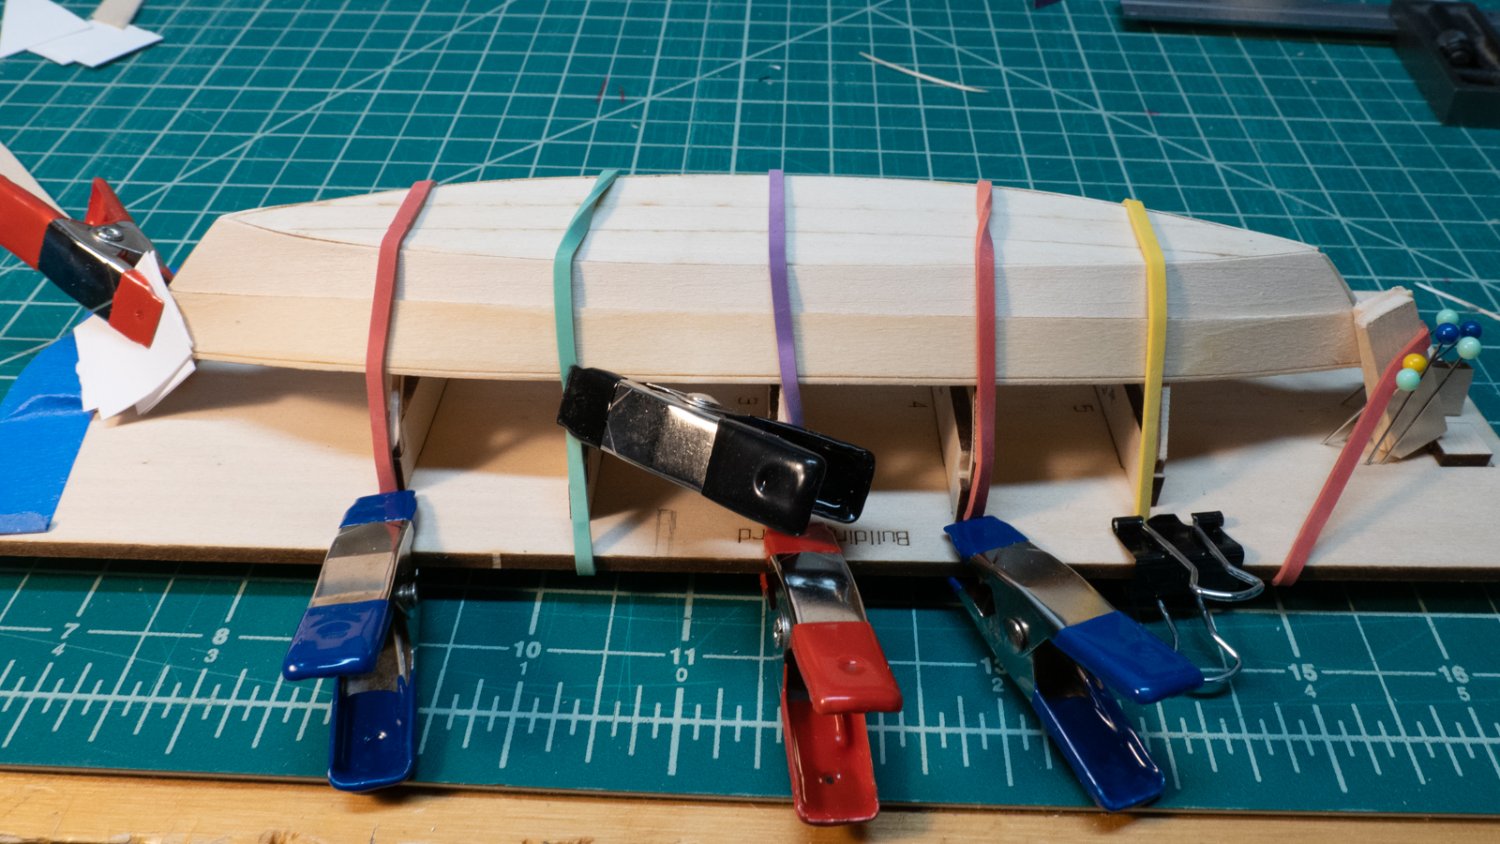
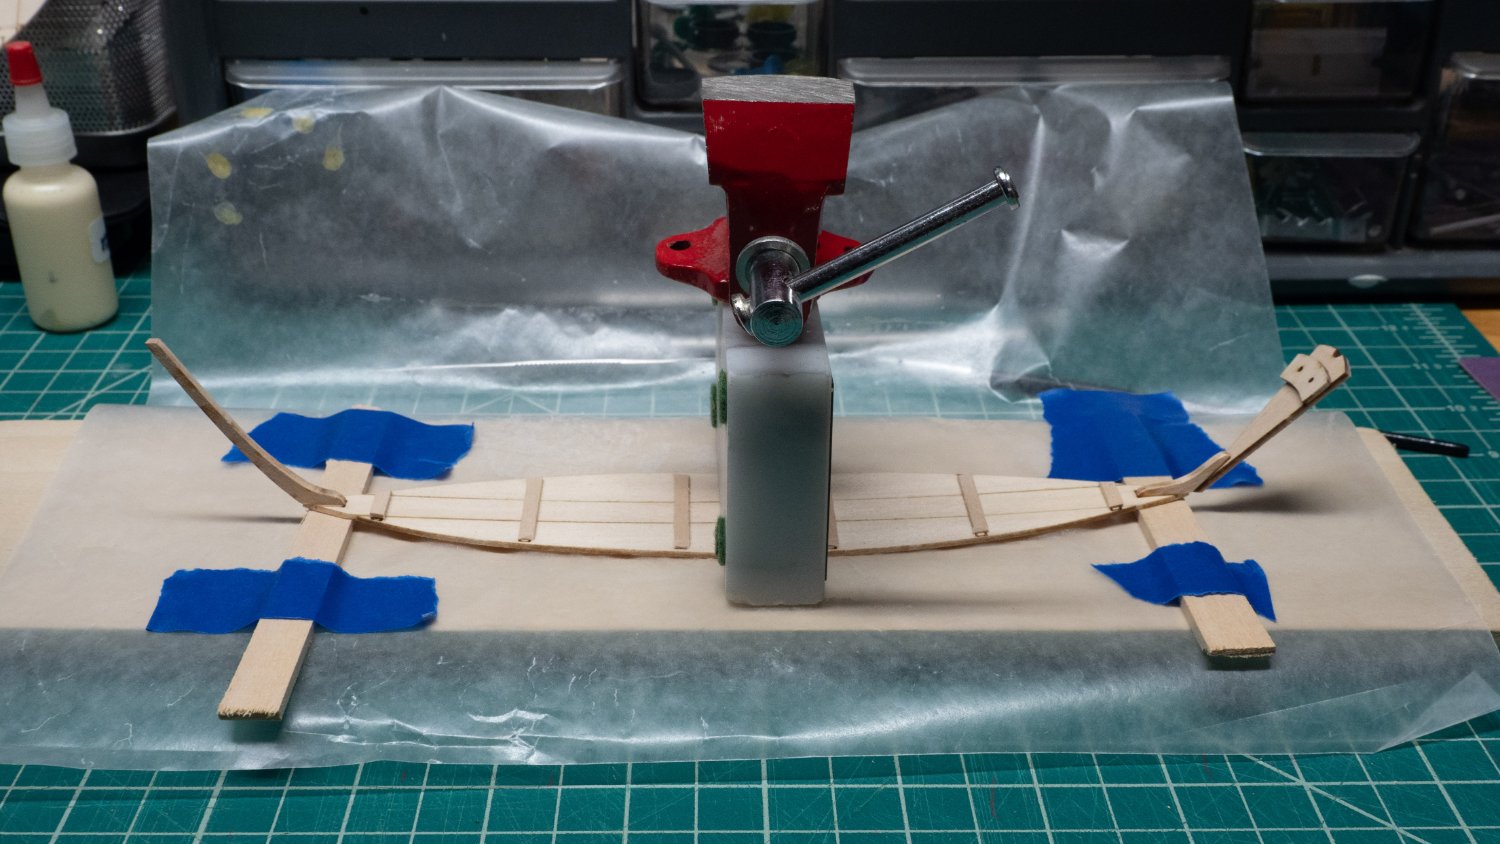
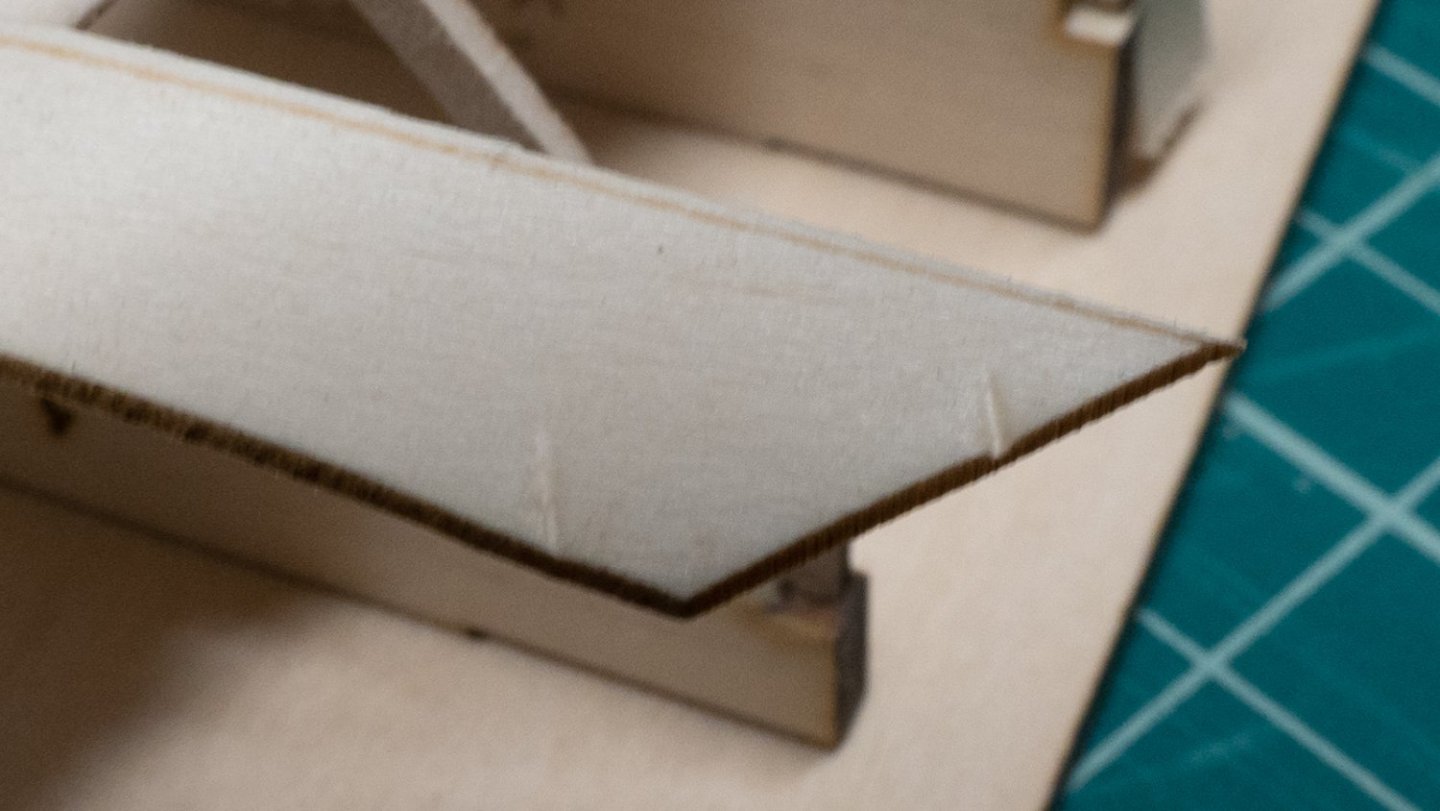
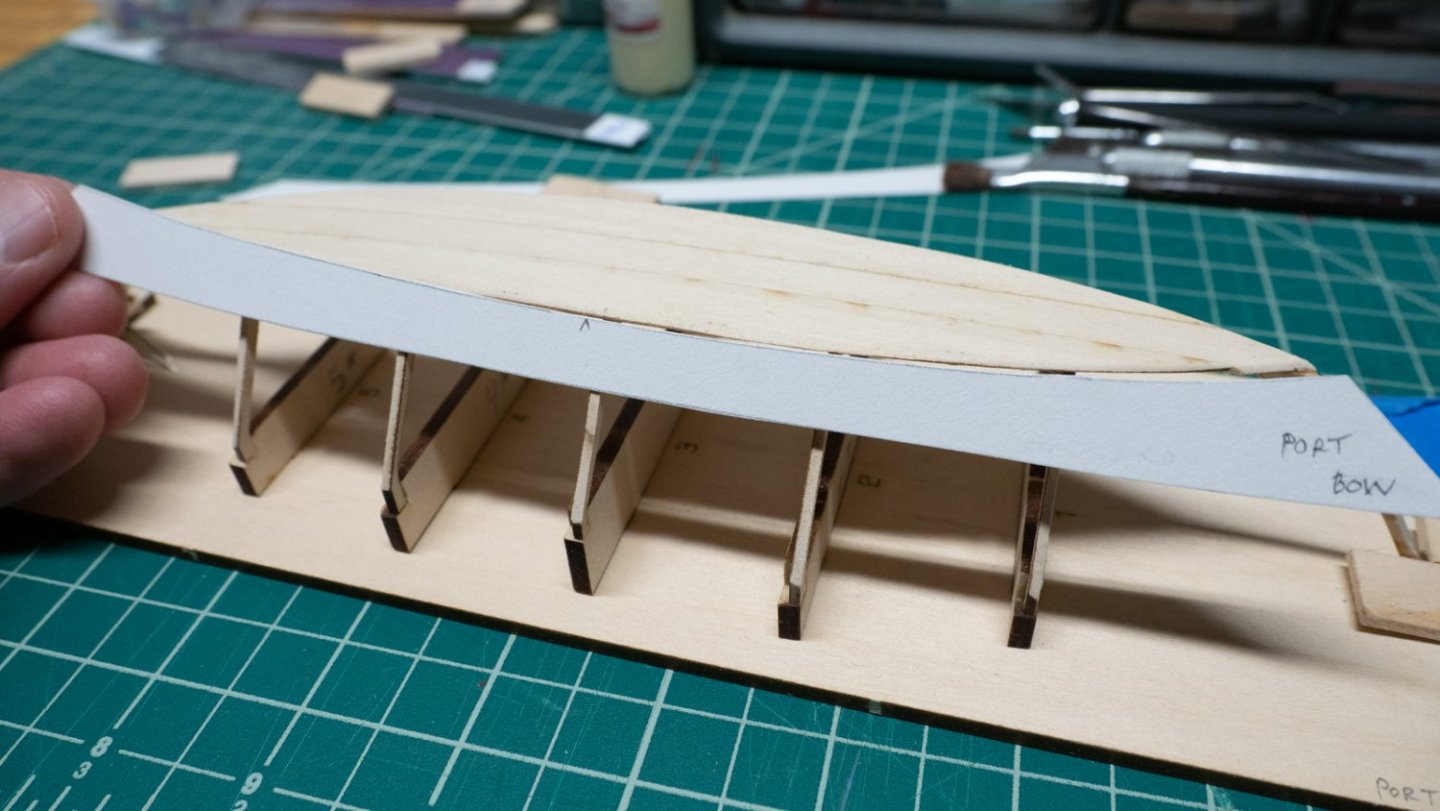
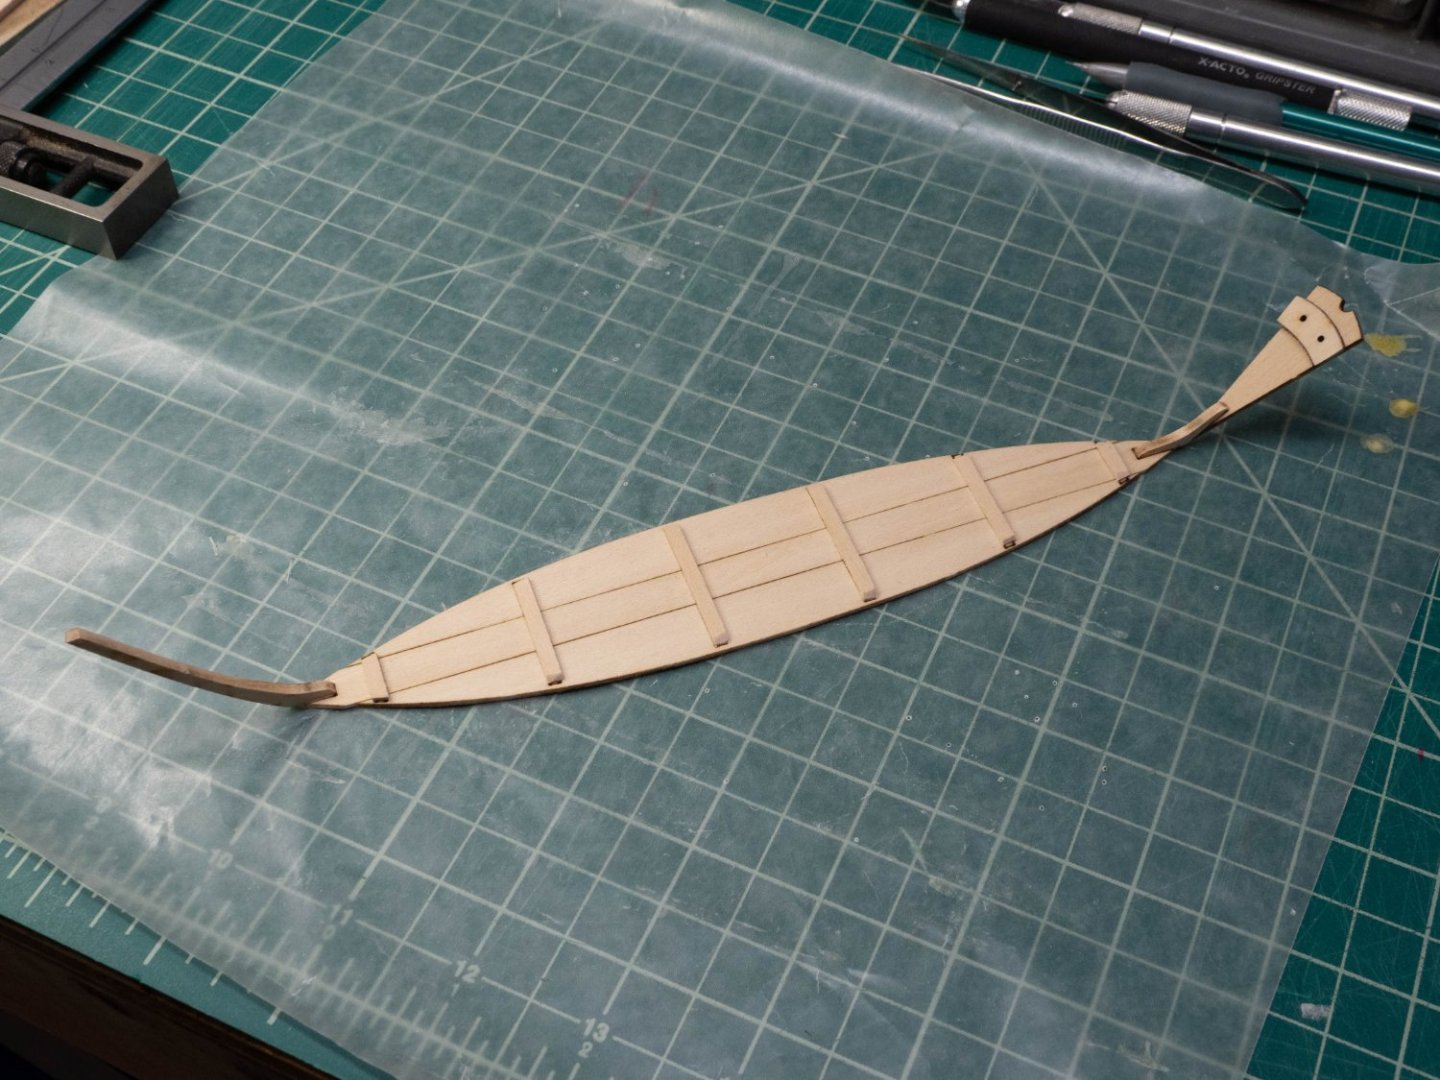
[Update from last post: Putting some water on the dents swelled them out quickly.] I glued both garboards, and have a few questions below if anyone has some ideas to pass along. First, though, I bent the second garboard, I did basically the same as the first, but this time used the clamps to "pinch" the rubber bands to the frames, which did a better job of holding the garboard tight while it dried. See the first garboard glue-up shot below for what this looked like, Now, gluing: With the garboards bent into the right shape, it was easier to set up and prepare for this step. I got all my clamps and card and spacers in place. I brushed glue on the frames, bottom edge, stem, and transom, and clipped the stem end on first. I removed the spacers one by one. I used the clips the same as during the bending process. One of the frames was not making solid contact with the garboard, so I moved the clamp up and put a small spacer in there to provide some extra pressure. It worked well and everything stayed put. I put the second garboard on, and did my best to hold the stem in place on the glue while moving the board around into position under the rubber bands and clamps on the frame. When things were in place, I held the transom and stem ends of the board with my fingers for a while. Neither the stem nor transom ends held fully after I released them - I probably didn't put enough glue on them. I used a pin to insert a little glue onto the stem, held it for a while till it stuck, then did the same for the transom end. Two concerns I have at this point, if anyone has some advice: Concern 1. When it was all dry, I noticed that the starboard garboard is very slightly (a few mm) higher up the stem and transom then the port side. Should I sand these down a tiny bit to line them up, and recreate the tapers? Concern 2: Neither garboard end extended past the surface of the transom. See picture below. I was hoping to have a little extra there. I'm wondering if the transom angle isn't right, and the next two courses of the sides won't be long enough to reach the transom. A (very) dry fitting of one of the broad planks appears to show that it will have enough length to reach the transom, I hope that pans out. I don't yet understand the instructions about tapering the edges of the broad plank, I am going to have to study them more, and maybe find some info in someone else's build log.

- 40 replies
-
- 7
-
-
- Lowell Grand Banks Dory
- Model Shipways
- (and 1 more)
-
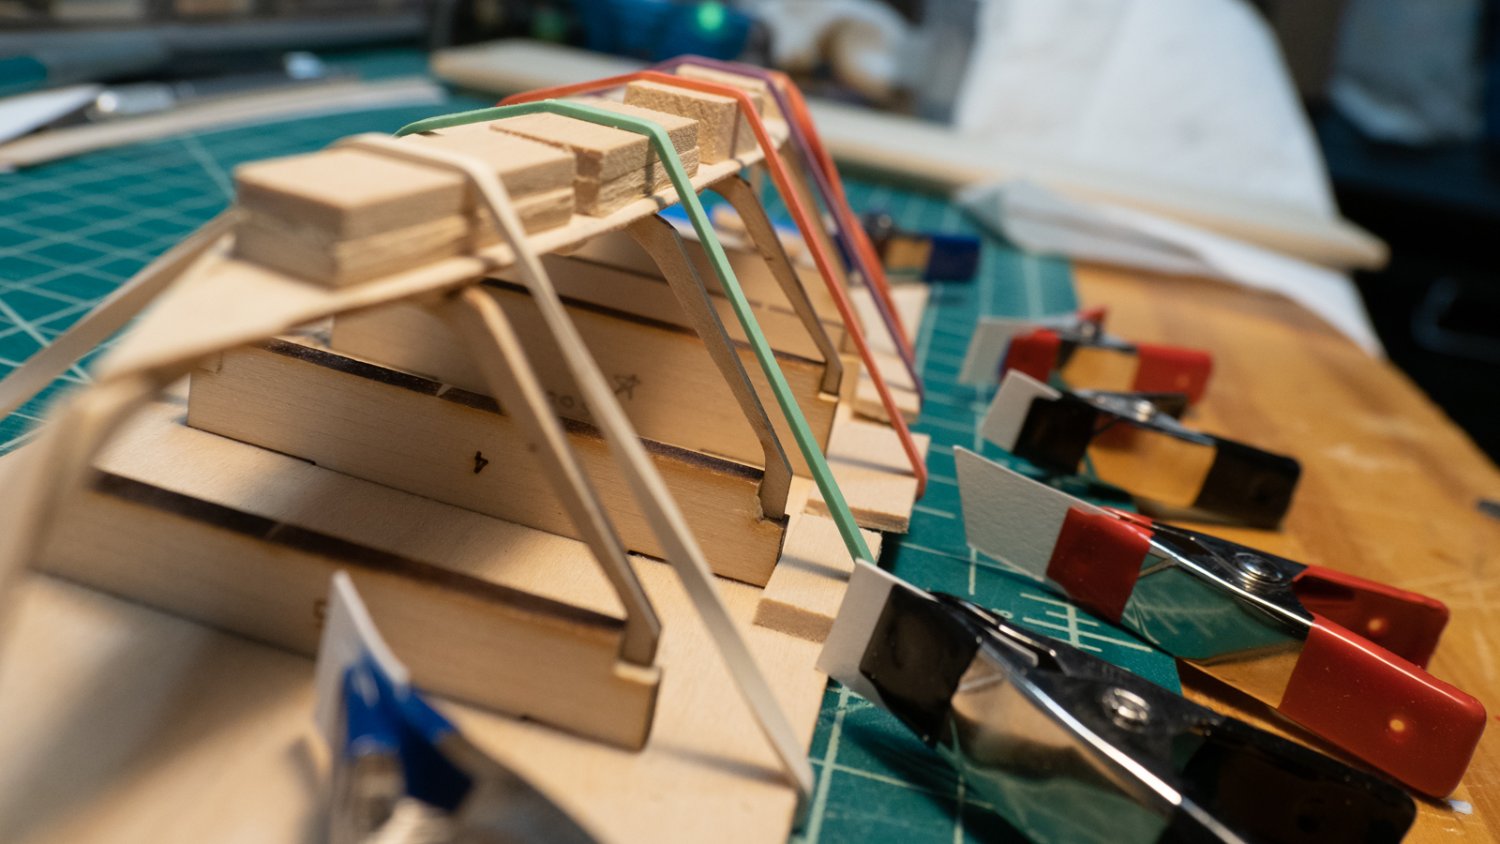
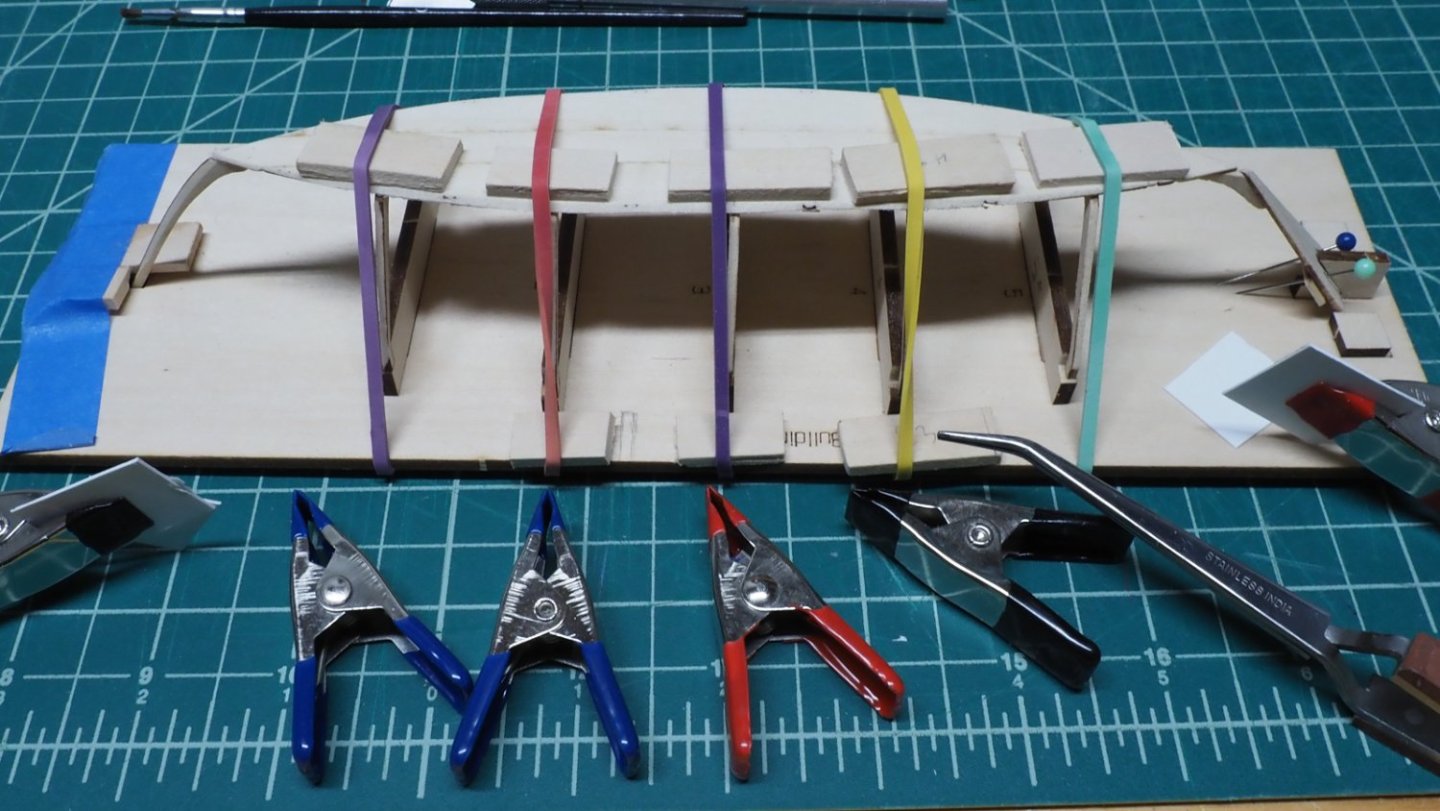
I spent several days fiddling with ideas for how to clamp the garboard to shape it to the bottom and frames. I was paranoid about breaking one of the pieces (after sanding the edges as shown in the instructions), so I made a copy out of double-thick card stock and used it for practice. I settled on the following strategy: by putting some spacer blocks on the bottom, and some on top of the building board, I could slide the garboard into place, clamp at the stem, then remove the spacers to snug the rubber bands against the garboard one by one. I soaked the board in hot water for 5 minutes, patted the extra water off, then slid it into its place. I lined up the bow end with the stem and clipped it there. I put some double-thick card stock on the jaws of the clip as suggested in the instructions. You can tell by looking at the next picture that I didn't cover enough with the card stock. The spacers were removed, and I moved some of the spacers down between the rubber bands and the garboard to provide a little pressure. When I was done with that, I turned the assembly over and looked underneath to see if the garboard was sufficiently in contact with the frames. Several weren't - the rubber bands were perhaps a bit stretched out by the previous steps, and not providing much pressure. The clamps went on at that point - now things looked better from the underside. The instructions appear to show the clamps holding the rubber band to the exposed frame, and that may have worked well here to provide tension. Maybe I'll try that on the other side. The bend turned out OK, except for the indentations where I didn't cover the clamp jaws sufficiently. The instructions say to put some water on this; if that doesn't work, a little heat might help the water.


- 40 replies
-
- 3
-
-
- Lowell Grand Banks Dory
- Model Shipways
- (and 1 more)
-
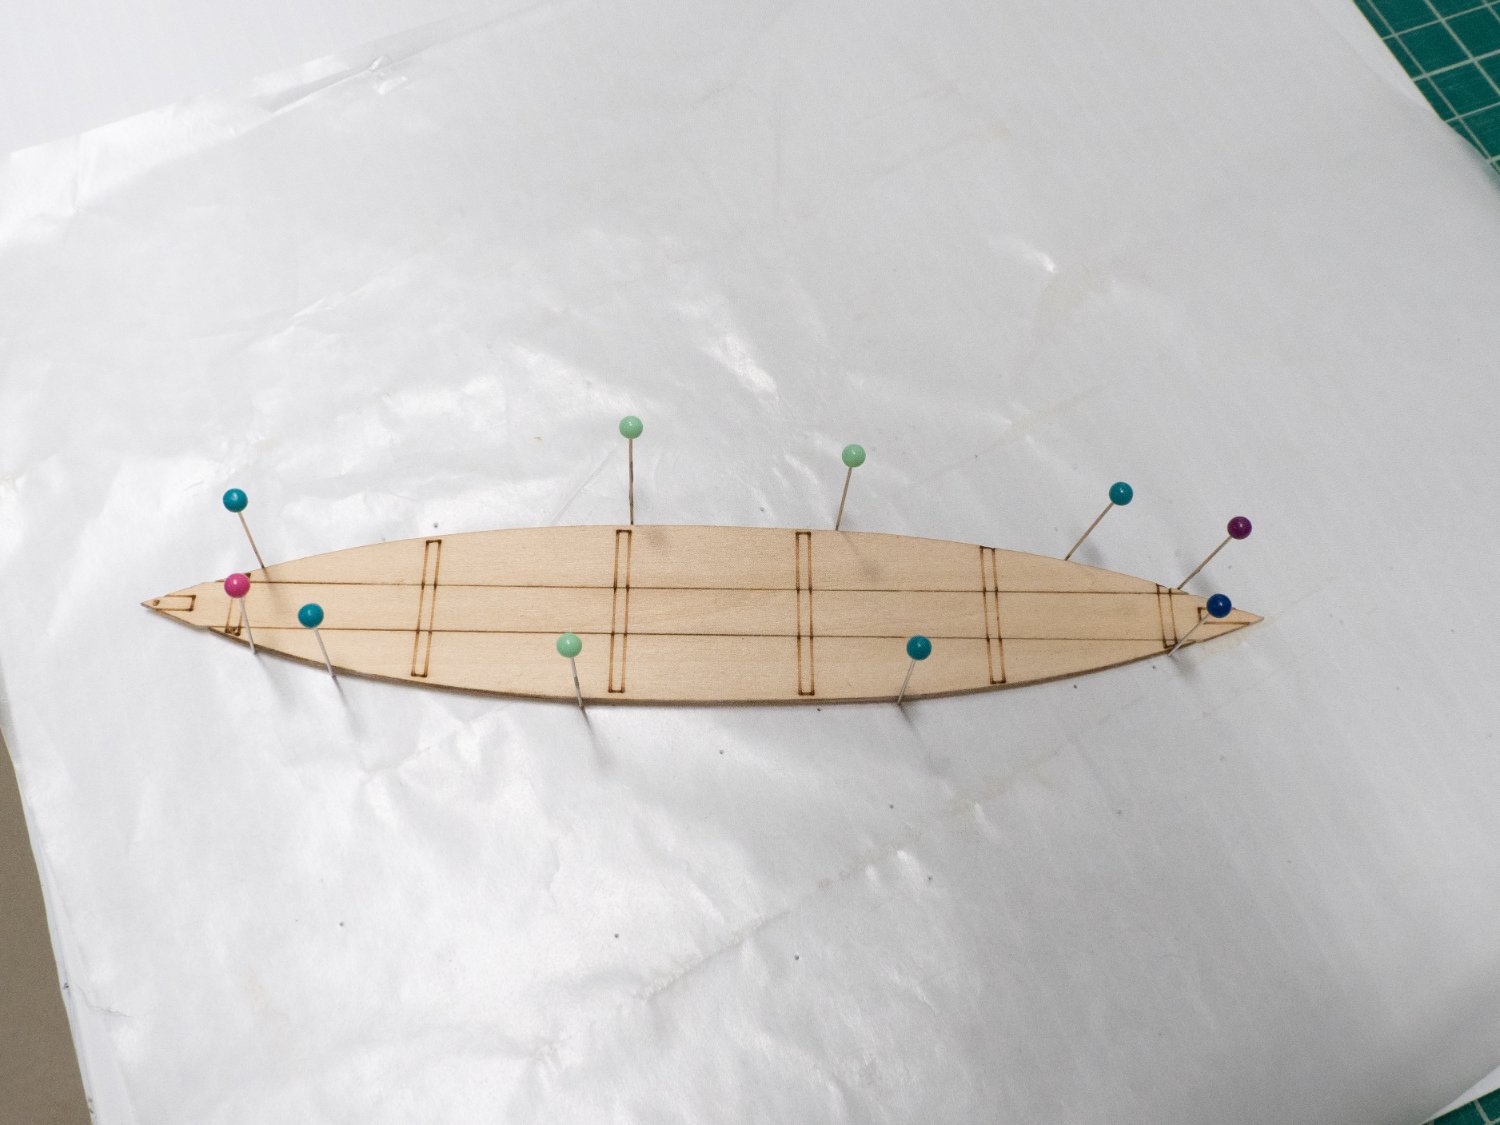
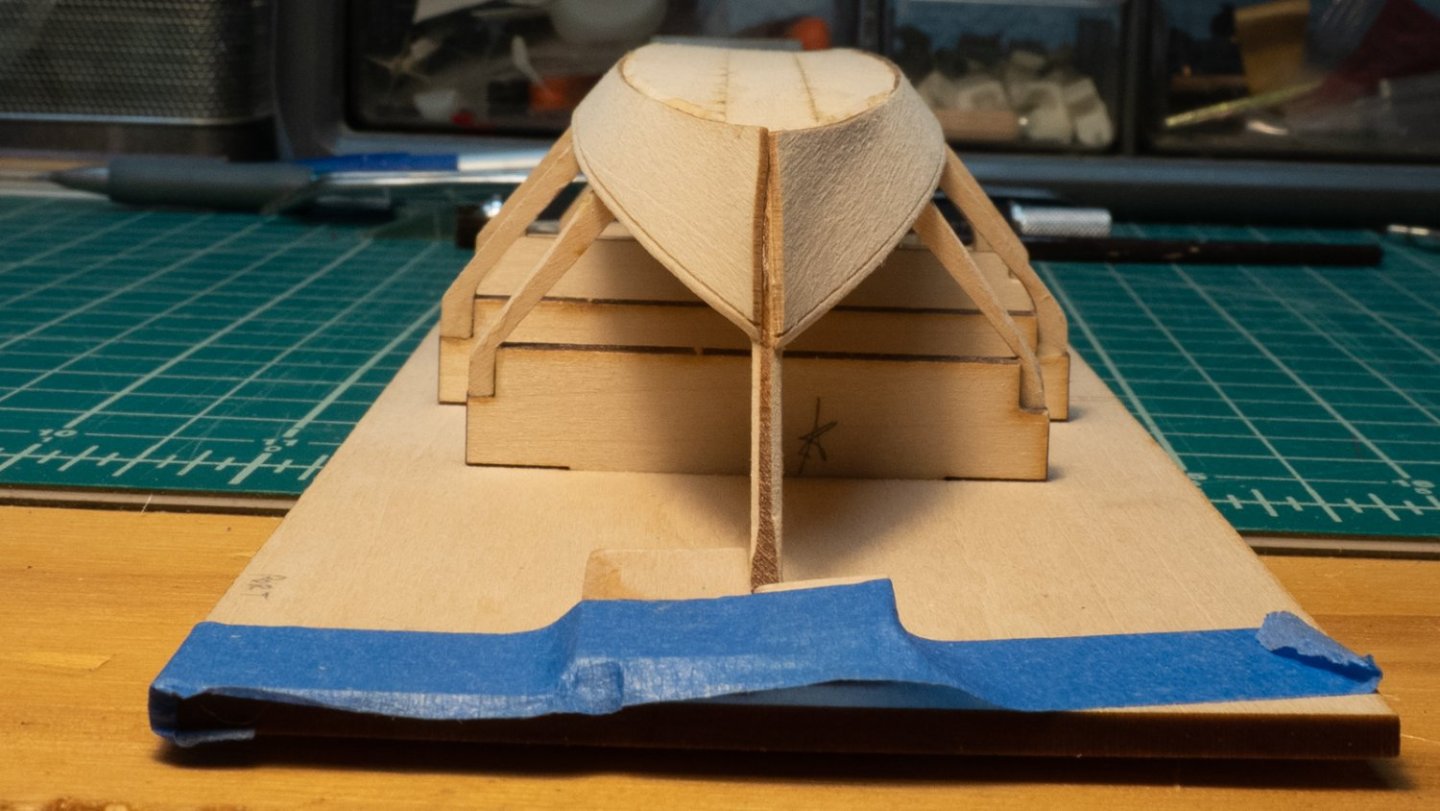
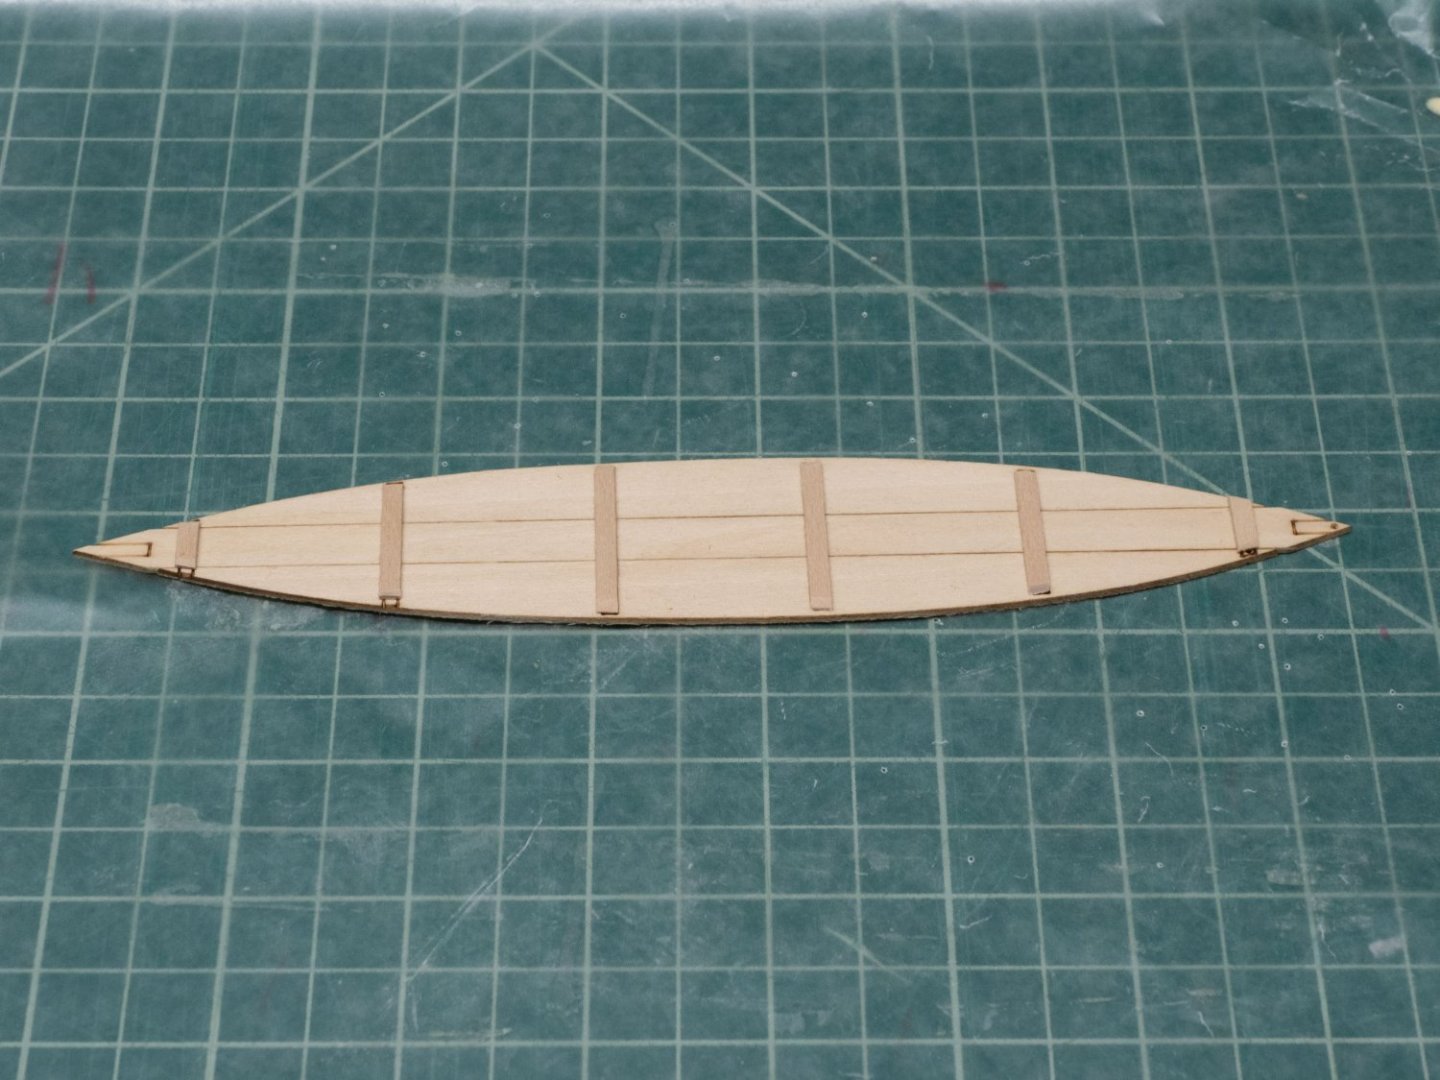
I started sanding the bottom and frames to prepare for the sides. A short way into this, I popped the stem off the bow. It came off cleanly as one piece. My tendency early on was to use as little glue as I thought I could get away with, and I misjudged this one. A short deliberation later, I chose to reglue it with a gel CA. I didn't feel like the wood glue was going to work in the same place again, and I wanted to make sure the sanding wouldn't separate the joint. I also noticed as I was sanding that the stem was moving around in its slot, so I taped some small pieces of wood around it to hold it centered and stationary. The 150 grit sandpaper seemed too "grabby" for the job at this stage, and I am working on using a lighter touch, so I made another sanding stick with 220 grit so I could go a little slower and take lighter passes. Instead of scrap wood for the backing, I used a thin styrene strip. This is flexible lengthwise, and will keep its shape along its width. I have a lot of it around, unlike the very thin wood strips. As I mentioned in my last post, the transom ended up hovering a bit off the surface of the building board after the glue-up, which means that the prescribed blocks for either side of it were not holding it firmly in place during sanding. I put some pins through the becket holes and buried the ends in the building board, and that was sufficient to hold it steady for the sanding steps. I took very light strokes on it with 220 grit to avoid stressing it. Sanding down the rest of the frames and bottom went well. I have 2 tiny misalignments of the frame to the bottom where further sanding would have forced the bottom out of shape, and the rest of the frames line up well, so I left the two alone. After I had the shape I wanted on the frames, I noticed the stem still wasn't as tapered as pictures show it should be, but I didn't want to keep sanding the frames. I put a piece of paper over the frames and sanded with the sanding stick as normal so I could get the right curve on the stem without altering the frames. I'm almost done with that.

- 40 replies
-
- 4
-
-
- Lowell Grand Banks Dory
- Model Shipways
- (and 1 more)
-
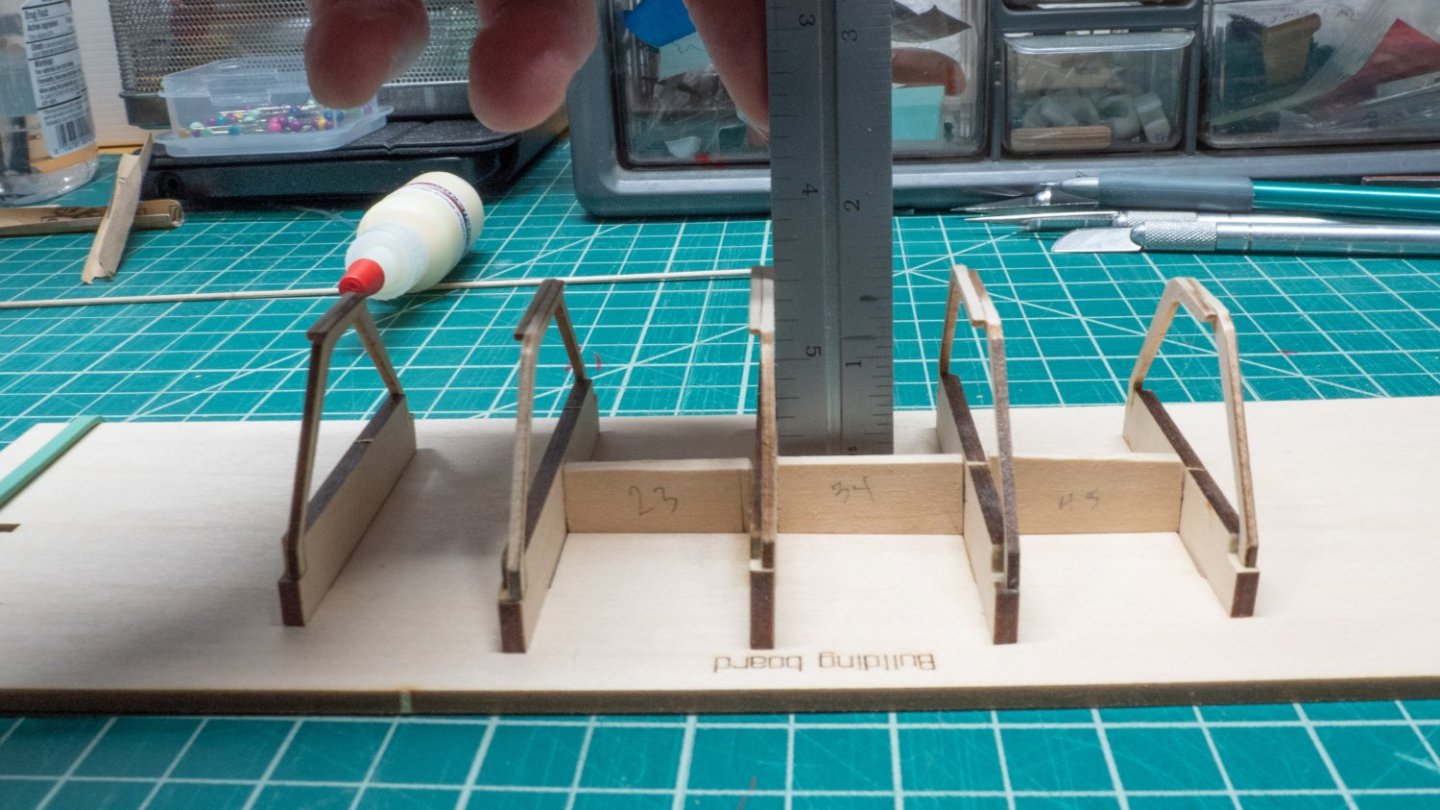
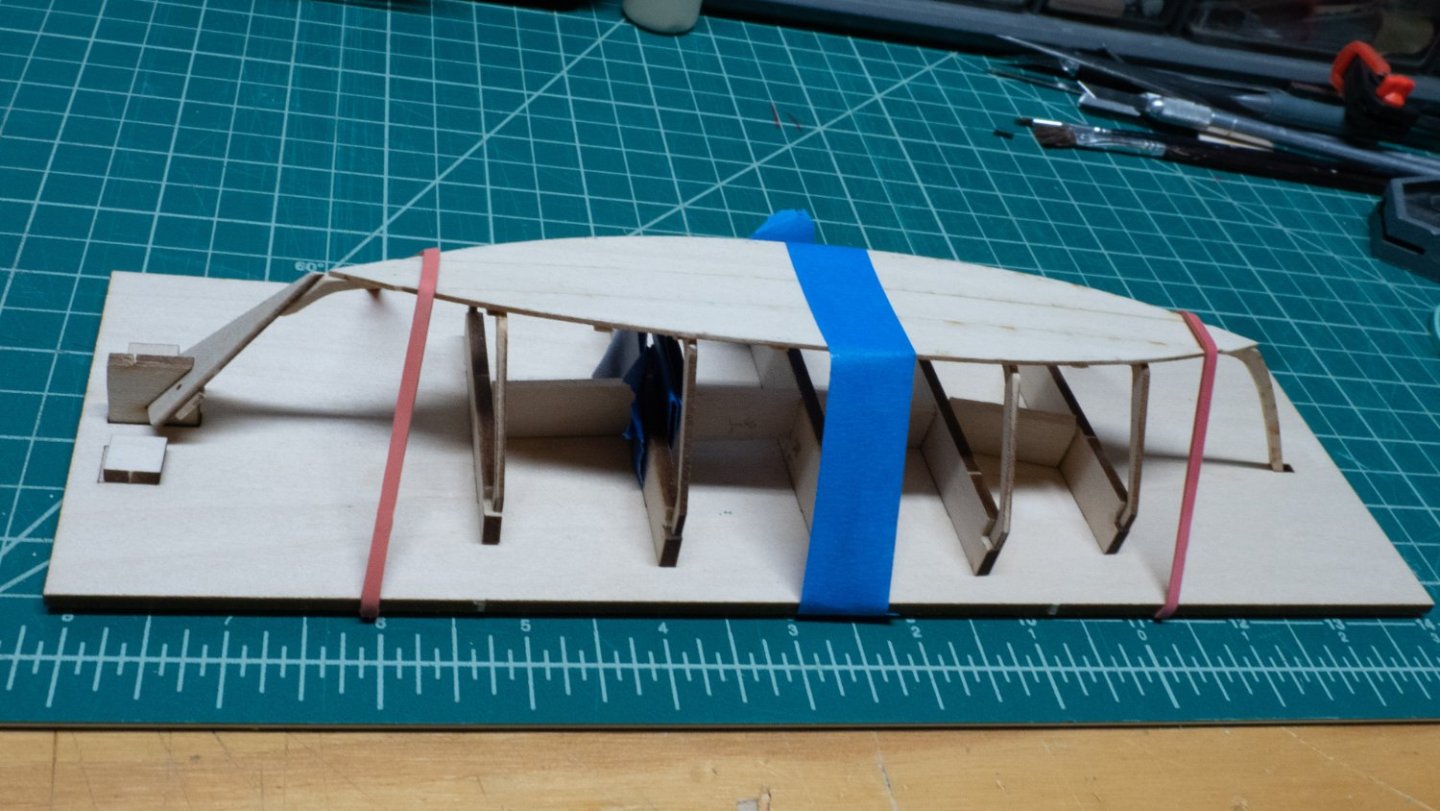
I started prepping to glue the bottom, and I was never happy with the position and orientation of the frames - they were always a little off 90 degrees from the building board. Some were a little wobbly. I made some small wooden blocks to fit between each frame to attempt to hold it as close to vertical as I could manage. I used a small square's ruler to test. I continued to fiddle with these little blocks, and folded some tape to put into some gaps to get everything in place, which you can see in the second picture below. When I was happy with that, I practiced putting the bottom onto the frames and pulling rubber bands up over the assembly. I was having trouble getting the rubber band in the middle, and I noticed that the third frame was not quite touching the bottom when I did the dry runs. I have broken a few pieces so far, and I was worried about breaking something during glue up. I decided to use some blue tape instead of a central rubber band - I cut a foot-long piece of tape, attached it to the bottom under the third frame, and had two rubber bands ready go on either end. I got three spare paint brushes and dipped them in water so I could quickly clean off glue squeeze-out. Next steps: Put glue on the bottom of the frames Put the transom into the holder, then pressed the bottom down onto the frames. When I was happy with it, I wrapped the strip of tape around to secure the middle. Pulled the transom-end rubber band up over and check the fit with frame 5. Pulled the rubber band over the stem and checked the entire position of the bottom. As I was lining up the bottom and brushing glue squeeze-out, I didn't notice that the transom had crept out of its holder, and when I was done, the end of the transom was about 1/8" off the building board. I don't know if that's going to be troublesome later. It looks worse in the picture than actual. If I did this again, I would probably not use the tape, but rather put a small weight in the middle once the bottom was lined up and the rubber bands were on. 😀
- 40 replies
-
- 2
-
-
- Lowell Grand Banks Dory
- Model Shipways
- (and 1 more)
-
The bottom got its curve, using the pictures in the instructions for where to place the 1/8" risers. I taped down the risers so they wouldn't move. I used a scrap piece of wood to ensure a flat surface. All 5 frame blocks ("cross-pieces") required some fitting before they would line up correctly with the plan outlines. The parts I sanded were the rectangular cut-outs into which the frame ends fit - see the red circles in the image. Right off the laser-cut sheet, they were all too wide to fit onto the plans. Pictured is a frame being glued, on corrugated plastic sign, wax paper, and pins to line things up and hold them in place. I broke the end off one of the frame pieces while sanding - I glued it back on after the majority of the piece was glued to the assembly. I fit the frames into the build board, using 150-grit sandpaper on a thin piece of wood as a sanding "block" in the slots, all of which needed a slight expanding.


- 40 replies
-
- 5
-
-
- Lowell Grand Banks Dory
- Model Shipways
- (and 1 more)
-
A few of the first days of working on the Dory. My first attempt at gluing the bottom pieces didn't work - I didn't use enough glue. I did it again and used a corrogated plastic board and pins to hold it together. while it dried, and this worked. The cleats went on fine. It was unclear, given the markings on the bottom pieces, how far to the edges the cleats should go. Pictures in the instructions, and on this forum, showed them short of the edges, so I followed those. I found the instructions about gluing the knee and transom a little confusing - I couldn't tell what order to glue the knee to the bottom and the transom. I glued the knee to the bottom first, then the transom to it. I wish I had glued the knee to the transom first, then glued that assembly to the bottom, because I feel like that would have been easier to adjust and line up. In the end, I think it came out fine. Looking at the result, I wonder if I should have put a little more effort into removing the char from the pieces.
- 40 replies
-
- 4
-
-
- Lowell Grand Banks Dory
- Model Shipways
- (and 1 more)
-
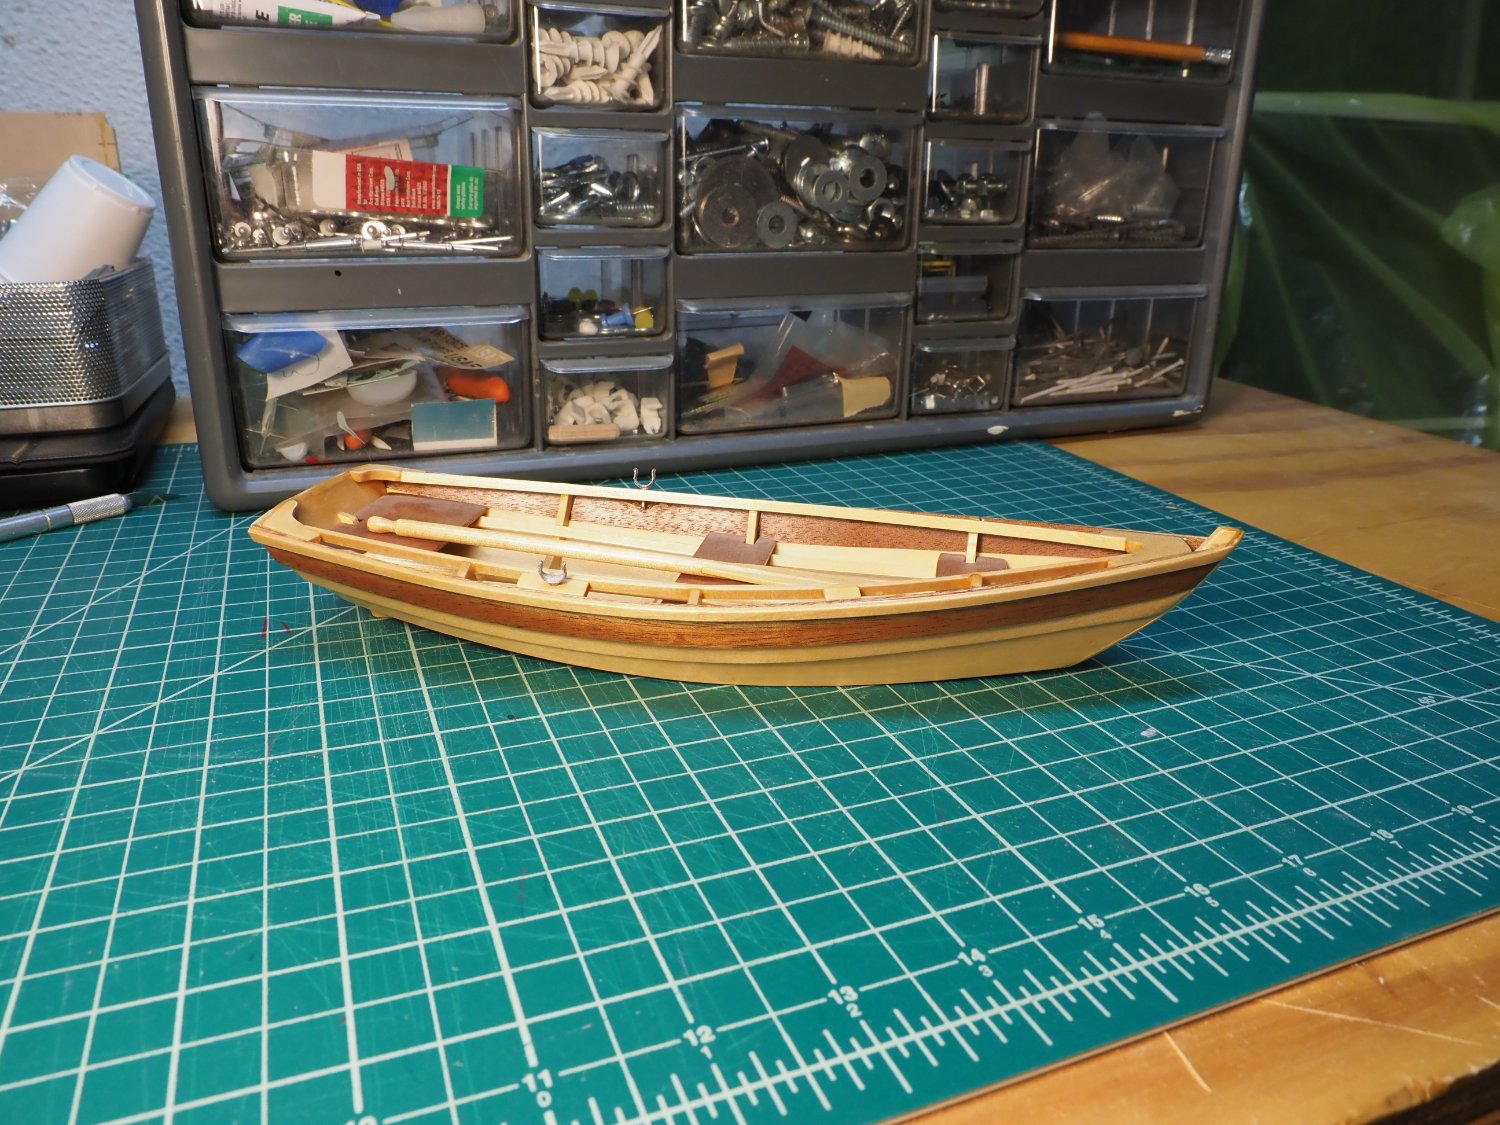
Hi All, I'm Don. I live in Ann Arbor, MI and I earn money as a software engineer for a large software and services company. I've lived in Michigan all my life, and most of my family is nearby. Some current and past hobbies include photography (Olympus shooter), Photoshop, hand-tool woodworking, electronic circuitry, volunteering for an organization that supports science education in local schools, and dreaming of retirement. I have built a dozen or so plastic models (planes and cars mostly), and one wood model (Midwest's Dinghy - see attached image). I received the beginner's "shipwright" kit combo from Model Shipways for Christmas, and plan to start a build log for the Dory soon. I'm looking forward to making all three models. Don

- 11 replies
-
- 12
-