Andy P2
-
Posts
28 -
Joined
-
Last visited
Content Type
Profiles
Forums
Gallery
Events
Everything posted by Andy P2
-
Looking good! I'm going to follow your build...hopefully avoid more mistakes...
-
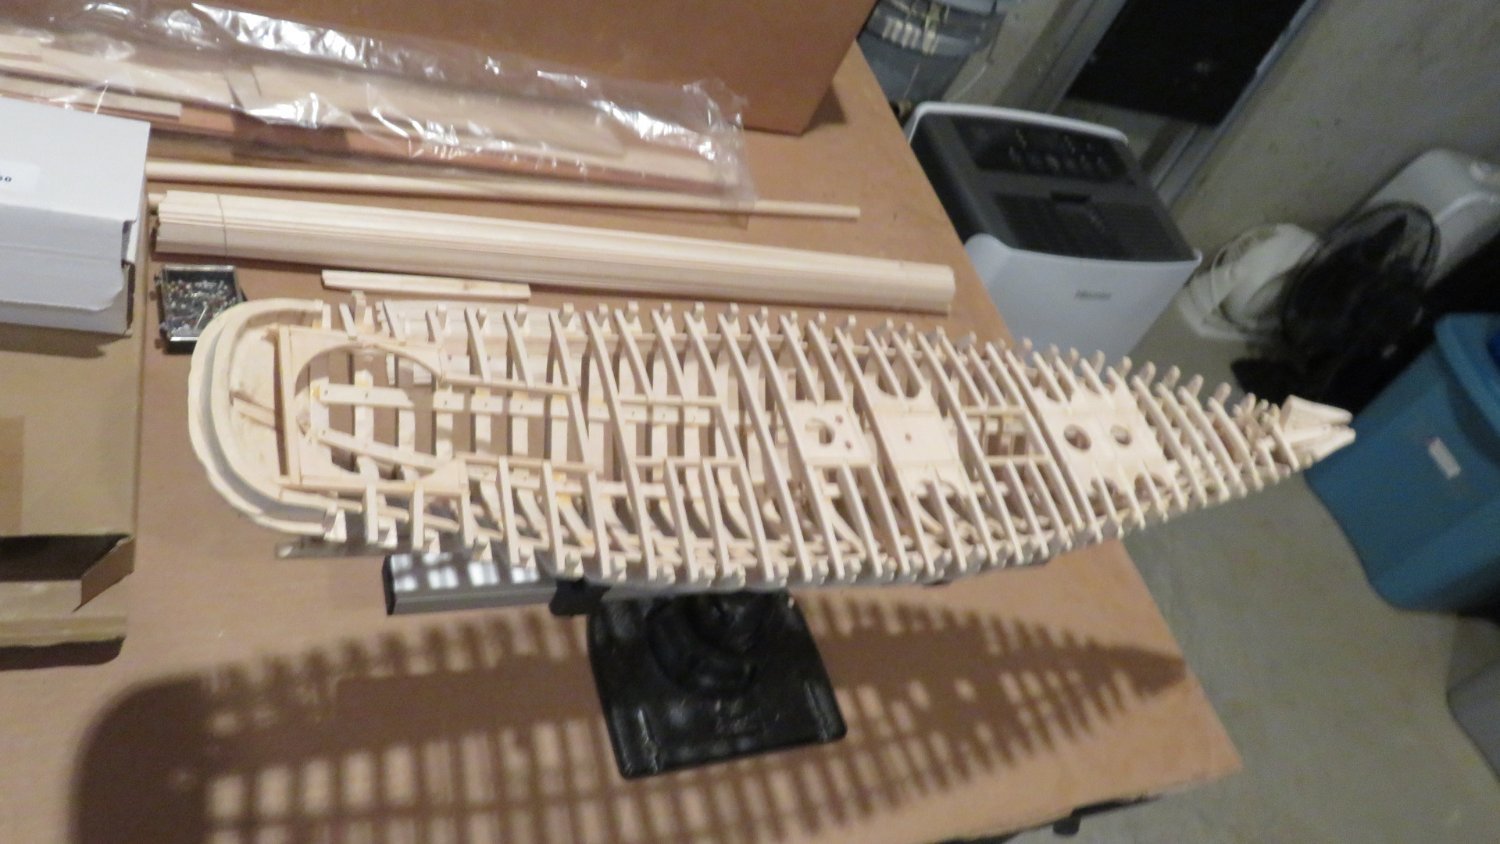
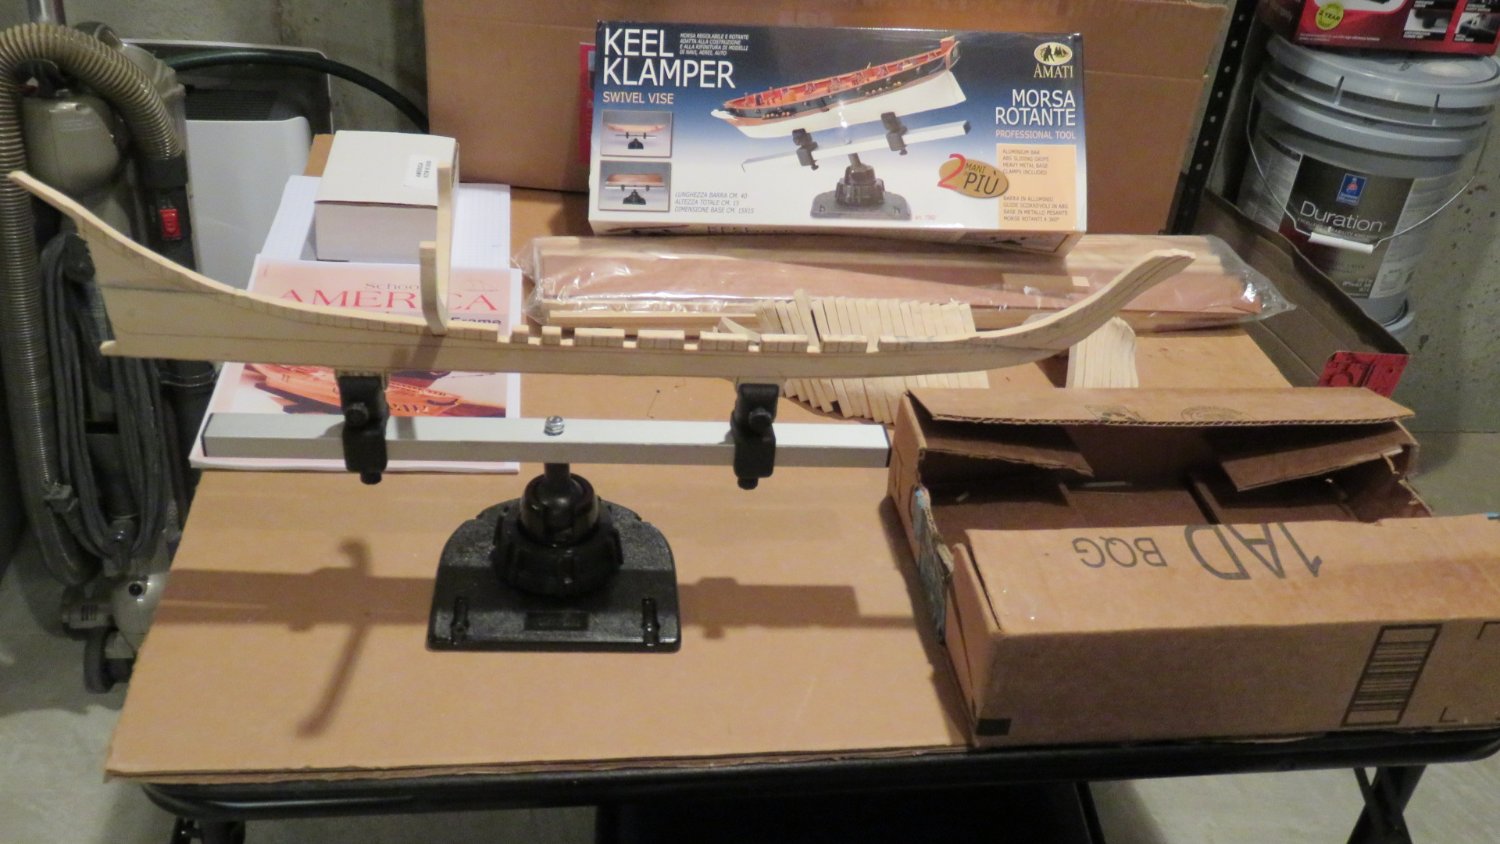
Hey All! Been a long time...almost a year. A year filled with a lot of travel, family and health issues that kept me from the America. But no trips in sight until April, and cold weather keeping me off the golf course; time to start working on the model again. As noted before, I made mistakes when setting the frames. I also found that I misread the plans on the frames at the stern, so the heights are not perfect to align with the transom. Hopefully I can fix this as we go along. Working on the deck beams. I am fortunate to have a friend who has an extensive woodworking shop. He has a very precise bandsaw that I was able to take advantage of. So I ended up with a whole bunch of extra beams. I mad a mistake in reading the plans. Most of the deck beams are shown as aligning with the back of the frames. But there are some that sdo not. So I suddenly found that my spacing was off and I had to redo a section. Also, since a couple of my frames are not perfectly perpendicular to the keel, a couple of the beams are a little crooked. Hopefully I will be able to smooth all of this out before starting the waterways and planking. I would be remiss if I didn't give a big shoutout to Gary (build 15910) for the heads up on setting the mast steps at this stage instead of later. I plan to fully plank this project and it would have been very difficult to set them later. Obviously, I still have some work to do before planking. But it's good to be back working on it again. Hoping that I haven't made any fatal errors. Now a couple of pictures...


-
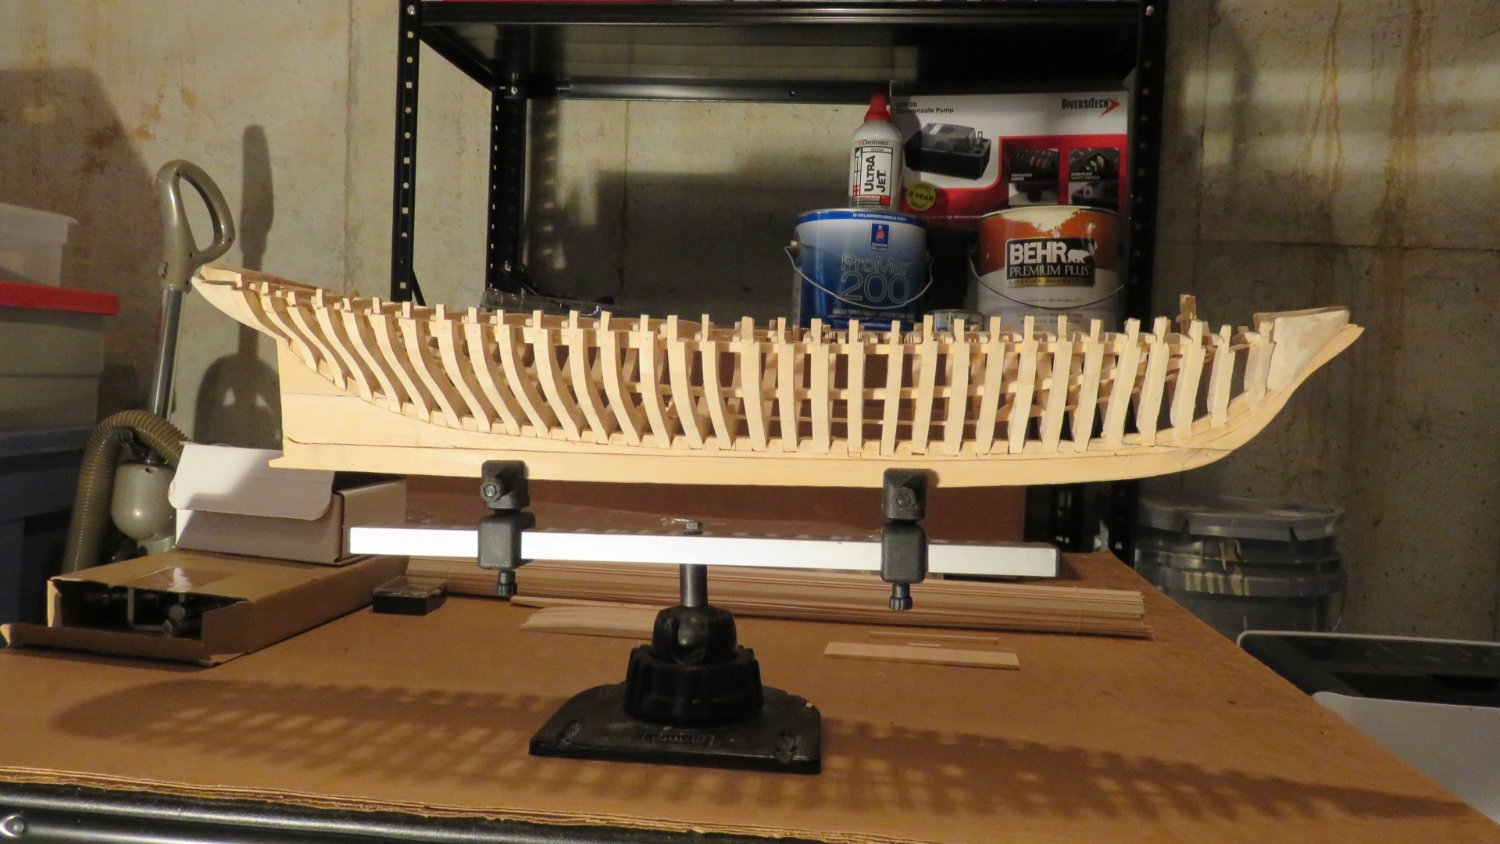
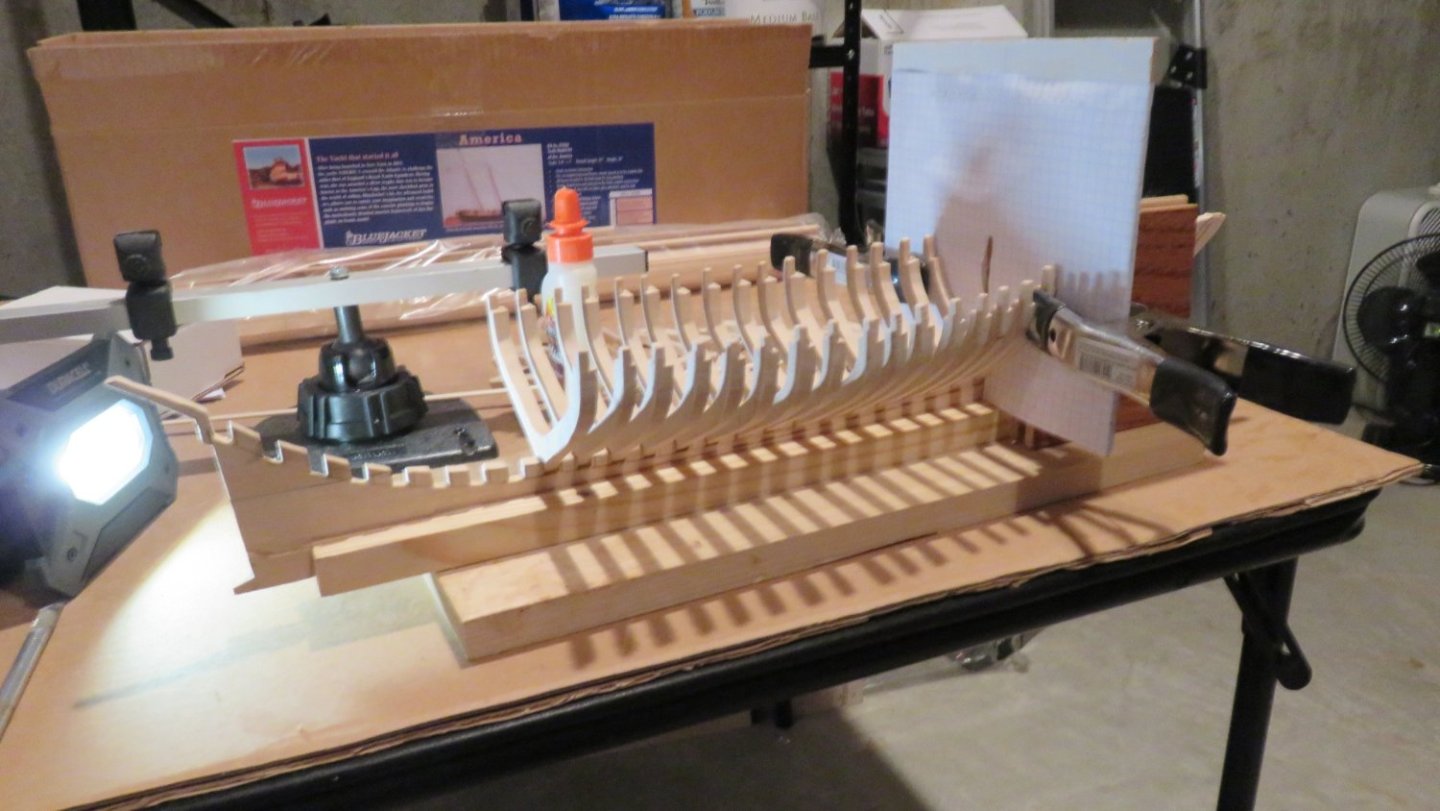
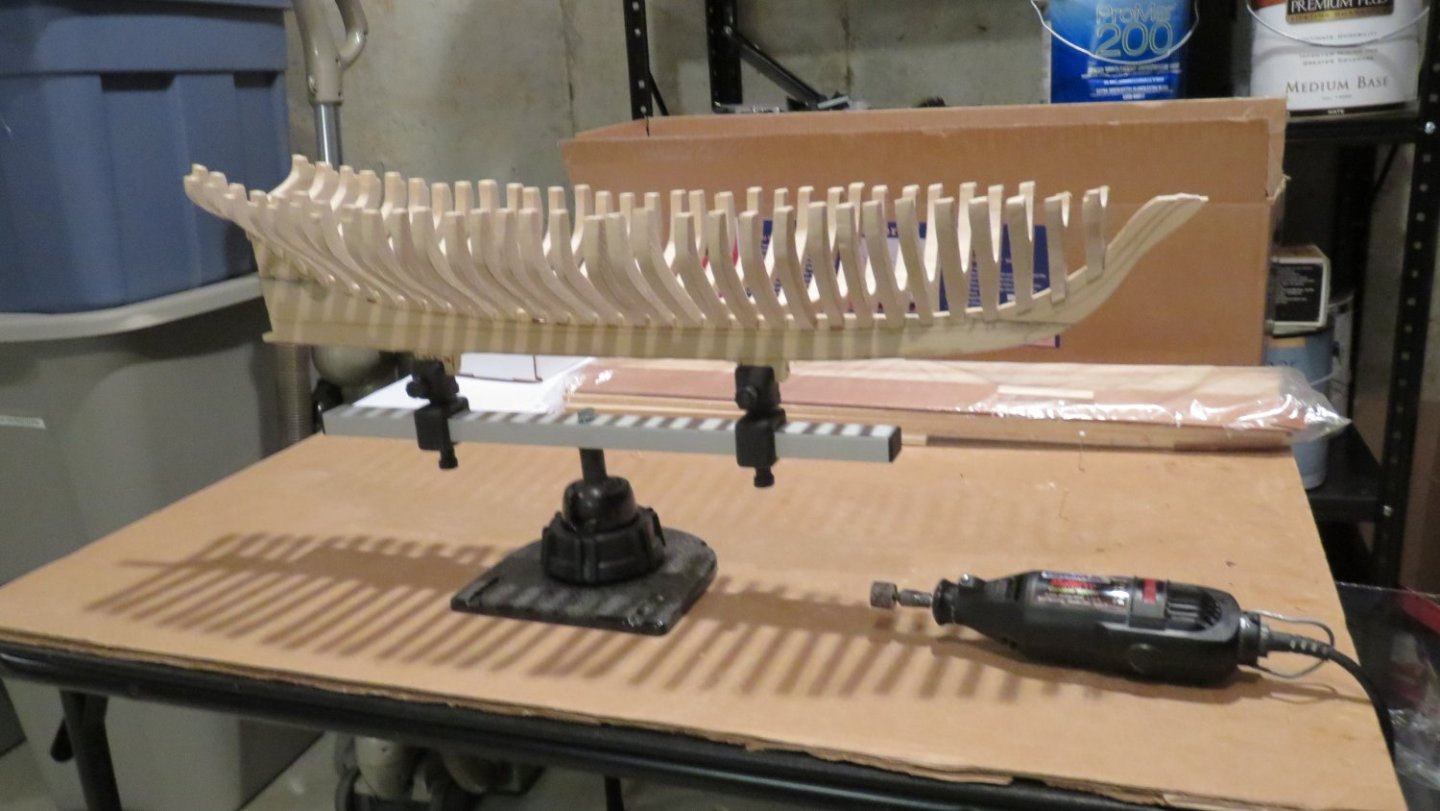
Back from vacation. Pretty major setback. After having glued all of the frames, I pulled the entire structure out and found that the aft frames were all off center from the keel. Not clear how that happened. I guess that the jig that I built wasn't quite right. So, I have currently removed frames 17-32 and am going to re-center and glue. Preliminary inspection of the forward frames looks encouraging. Hopefully those will be OK and we can move on to the keelson and bilge clamps. More later...
-
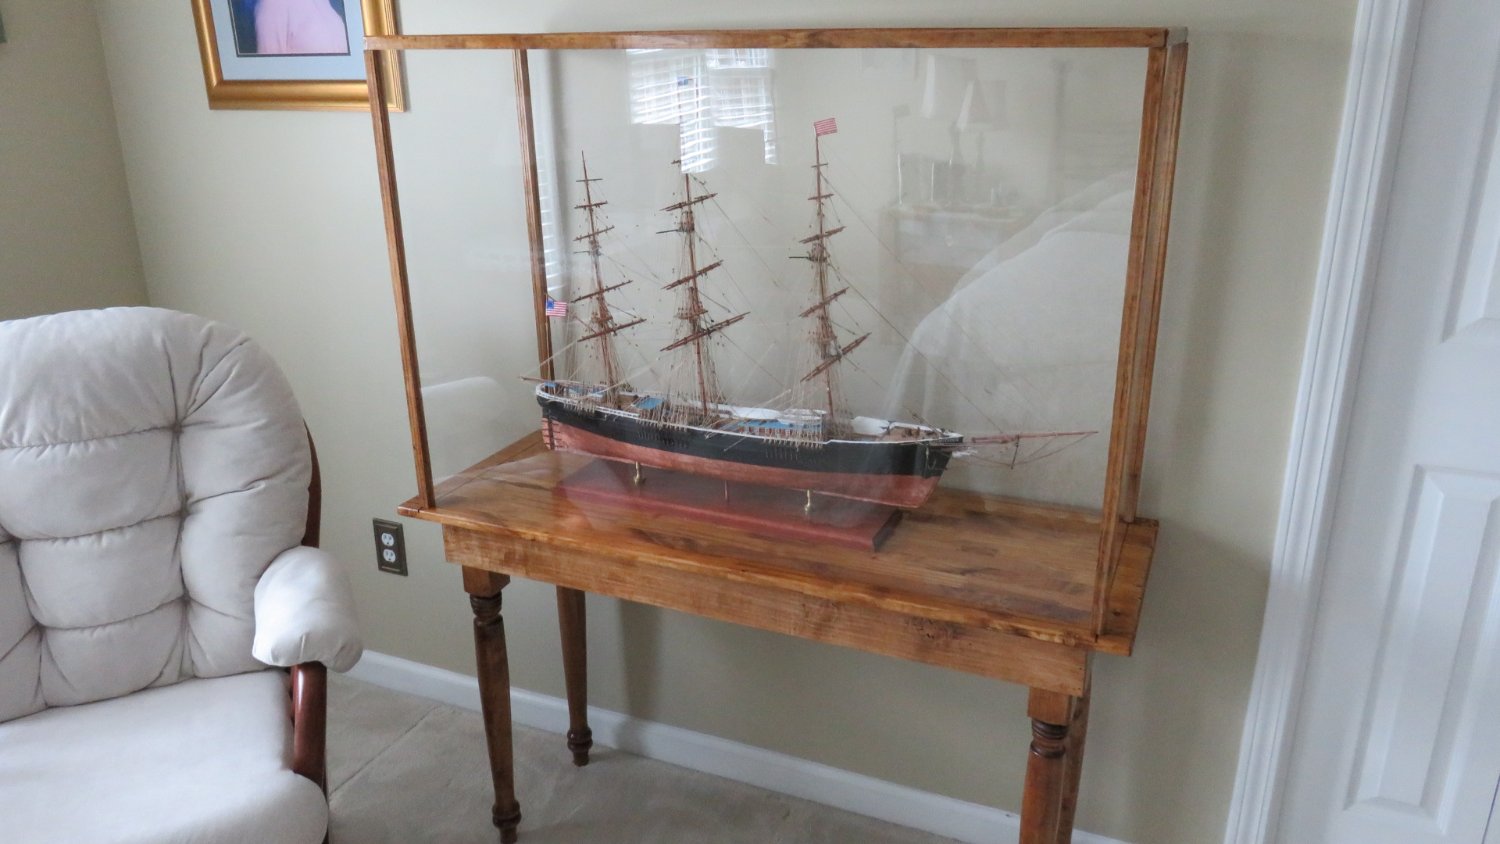
Thanks, BobG! Now my wife and I are discussing the nature of the display case for the Robert E. Lee...
-
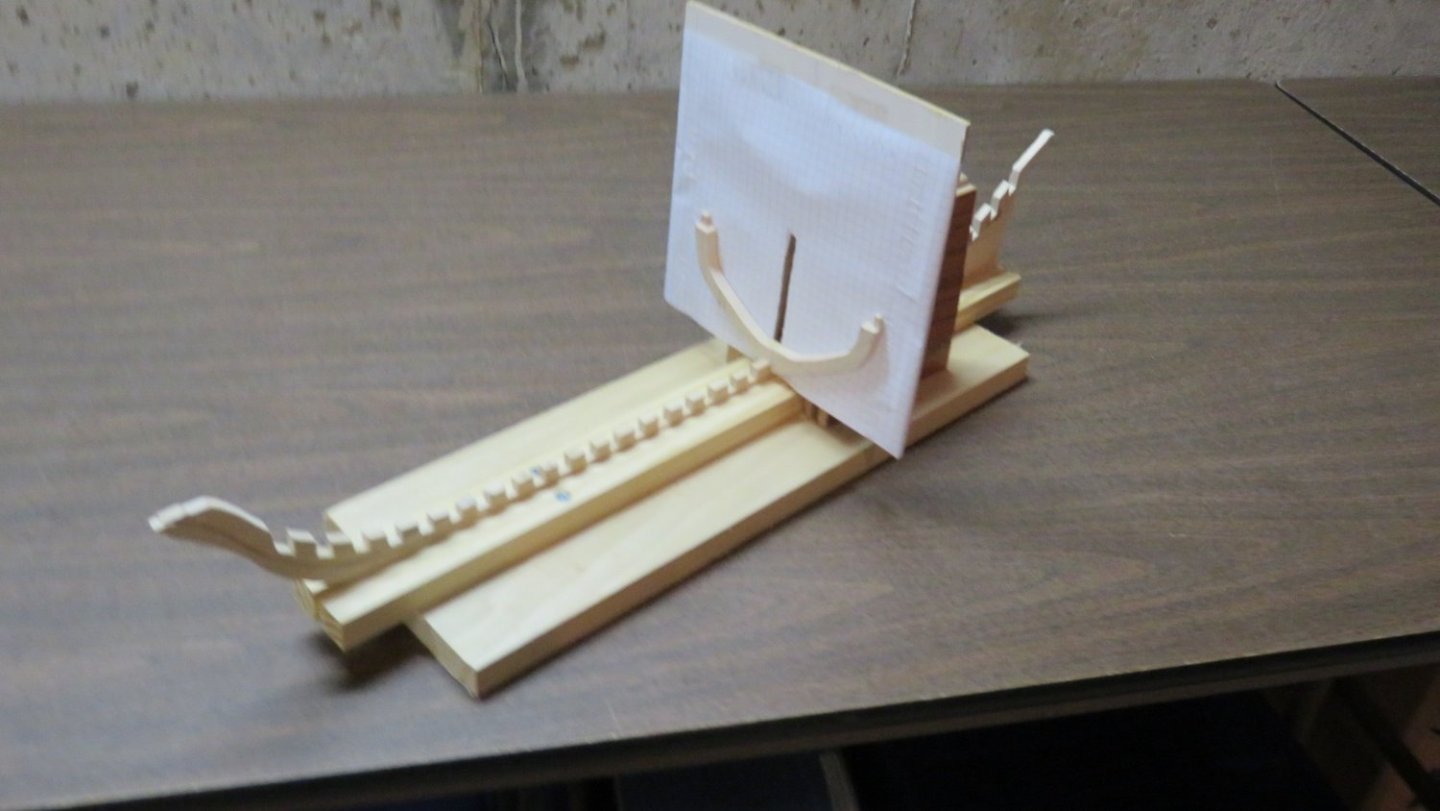
Gluing the frames now. Kind of a slow process. The keel holder is two 3/4" square wood strips on a 1X6. The jig is similar to the one Gary used, with two vertical pieces that slide on the 1X6 that hold the face perpendicular to the keel. Graph paper on the front allows for measuring the symmetry of the two sides when gluing. From the looks of things, I may need to do yet a little more fairing and trimming before planking the outside. Nothing major, but I can see some irregularities. Oh, and the completed display case for the Flying Cloud. I need to get a name plate made, as I wasn't satisfied with the one that came with the kit...too gaudy. I'd like something a bit more subtle. Going off on vacation for a bit. Back next month sometime.

-
I built this one a while back and used the 1X3. It probably would look better with the 1X5, but there is so little showing that very few people will note the difference. See closeup below. There is an overall picture of my build in my introduction several weeks ago. Message me if other questions. Andy
-
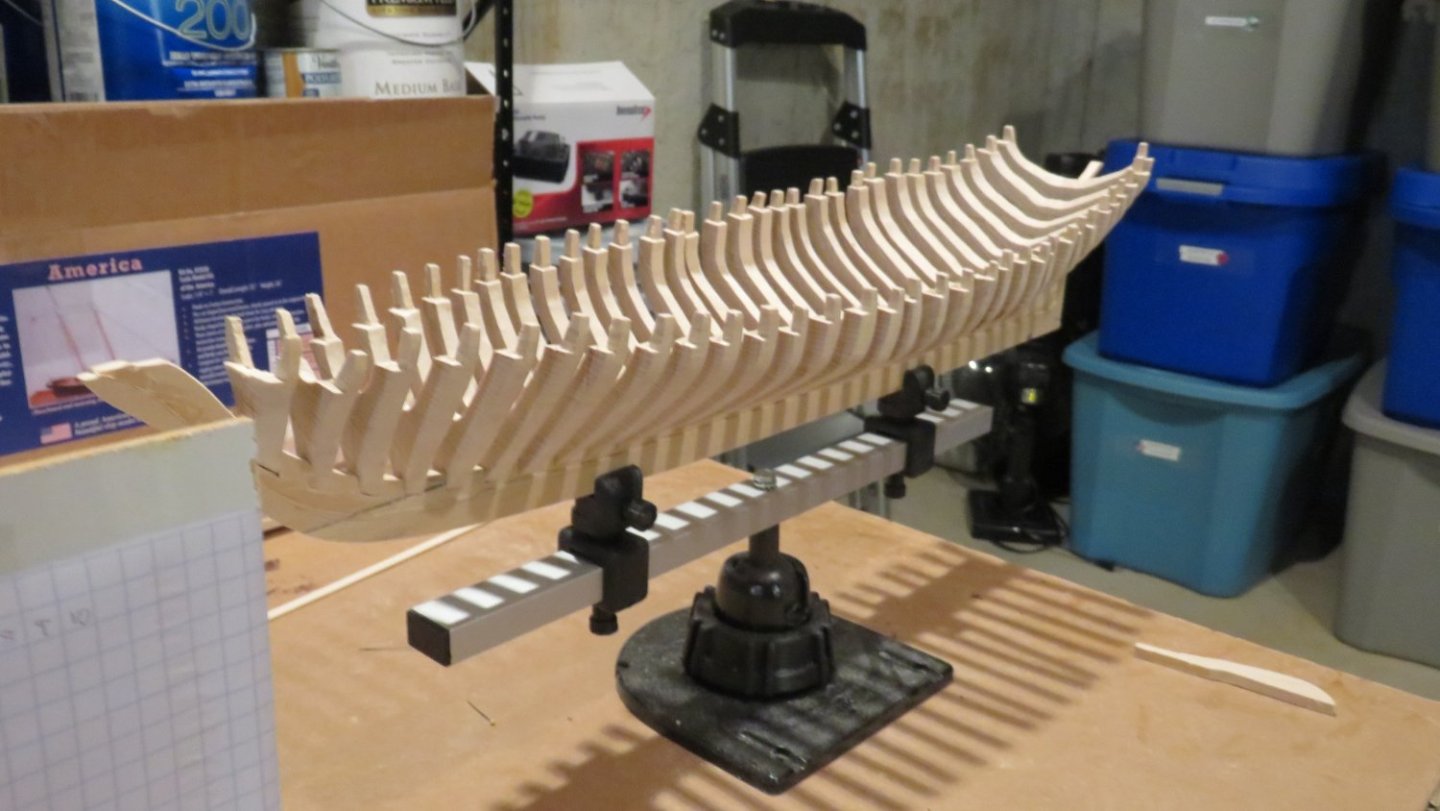
Another dry fit of the frames after rabbet and timberheads cut. Obviously not glued in place yet. Still needs a little more fairing and trimming some of the timberheads. Also build a jig for helping to mount the frames when time for final gluing. In this picture, the keel is lying flat, but I am assuming that the frames need to be perpendicular to the waterline, so will have to adjust the angle when it's time to glue.
-
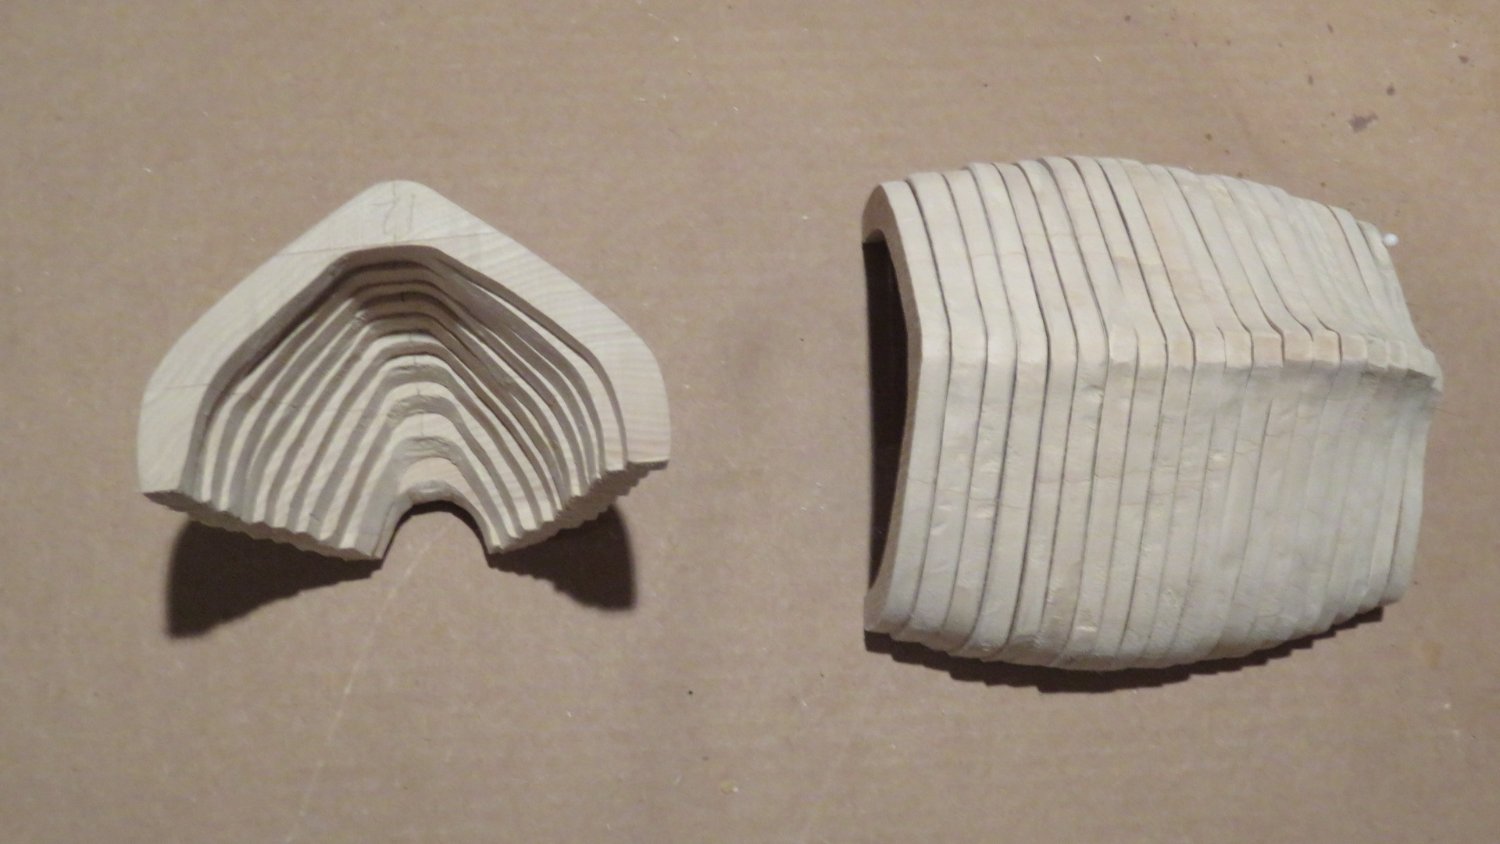
Thank you, MrBluejacket! I am cutting the timberheads accordingly. An interesting side note: I am fairing the frames again. I found that the aft frames were significantly wider than the plans show, sometimes by around 3/16" or so on both sides. Moving forward, they became about the same size as the plans. After the break, they are becoming slightly narrower than the plans show. I'm on number 12 and it's about 1/16" on each side or about 1/8" overall narrower than the plans. I'm just going to go with it to the stem and not try to build anything up. I don't think that it will be noticeable in the end. Oh, and I'm taking Gary's advice on fairing the inner surface of the frames. Making them all a consistent 10 mm width. Sorry for mixing metric and English measurements.
-
Thank you Gary! As one who has built this already, you are probably best qualified to answer this question. Your comment about the cap rail is informative and perhaps the best indication that it should be progressive and a smooth curve. So, onward to more timberheads and further fairing of the frames.... Andy PS...I see that you are building a Sopwith Camel. I did a balsa and tissue Sopwith Camel (Guillows?) back in the early 80's. It still hangs in my basement near my workbench.
-
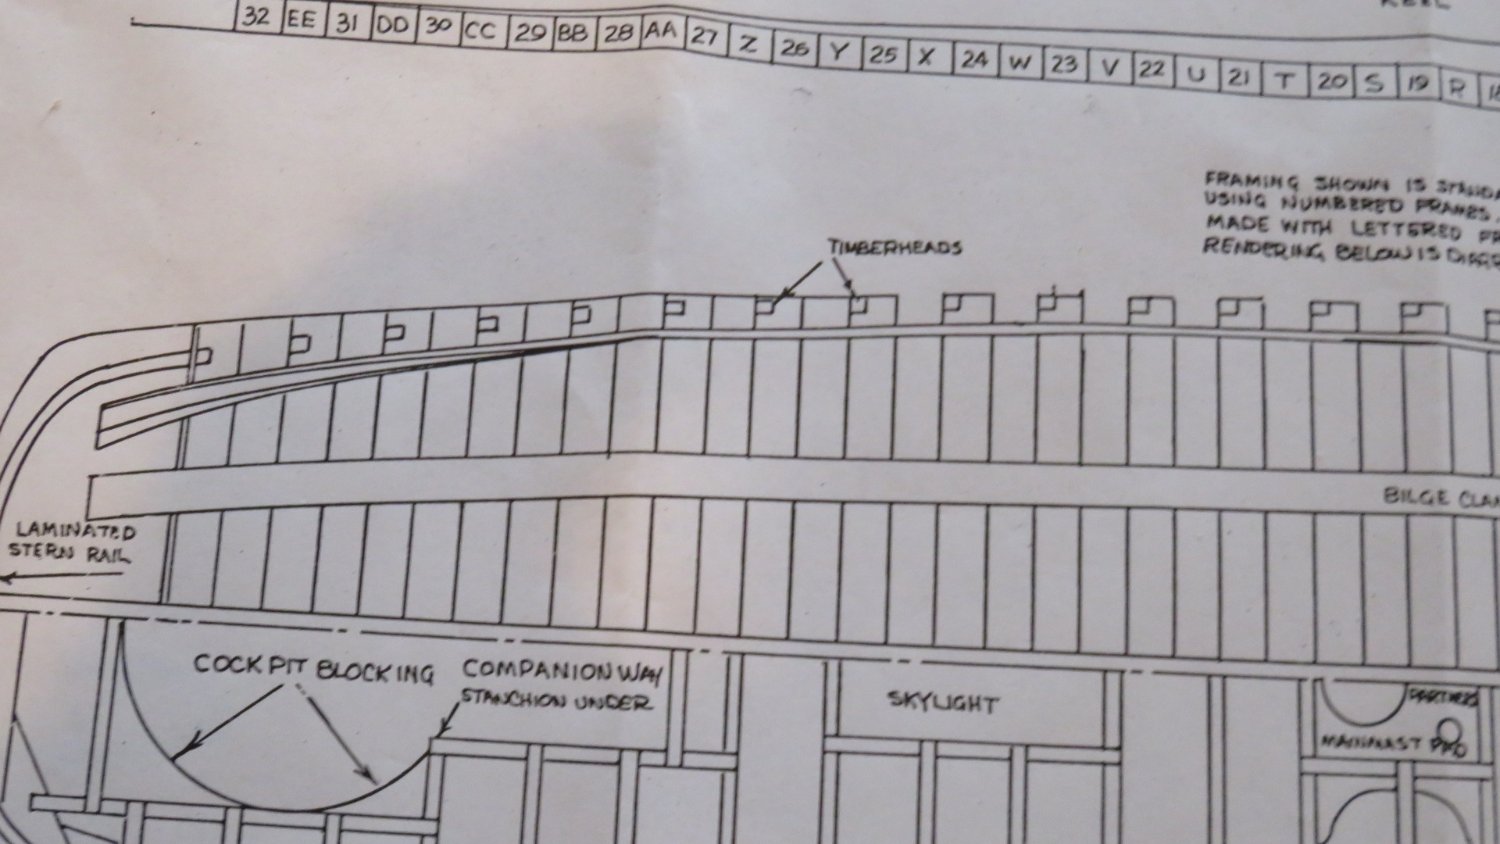
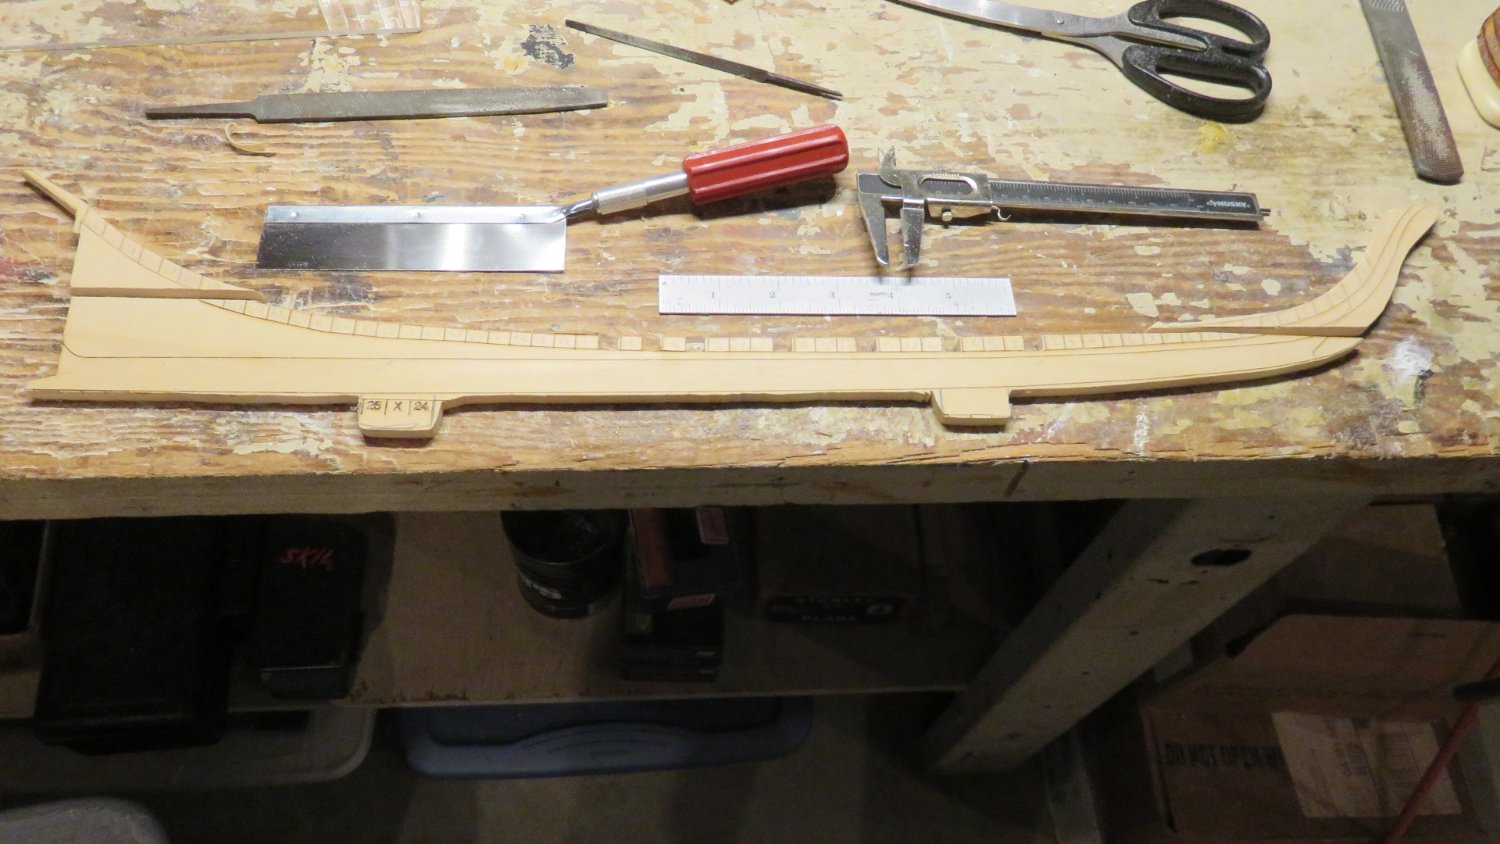
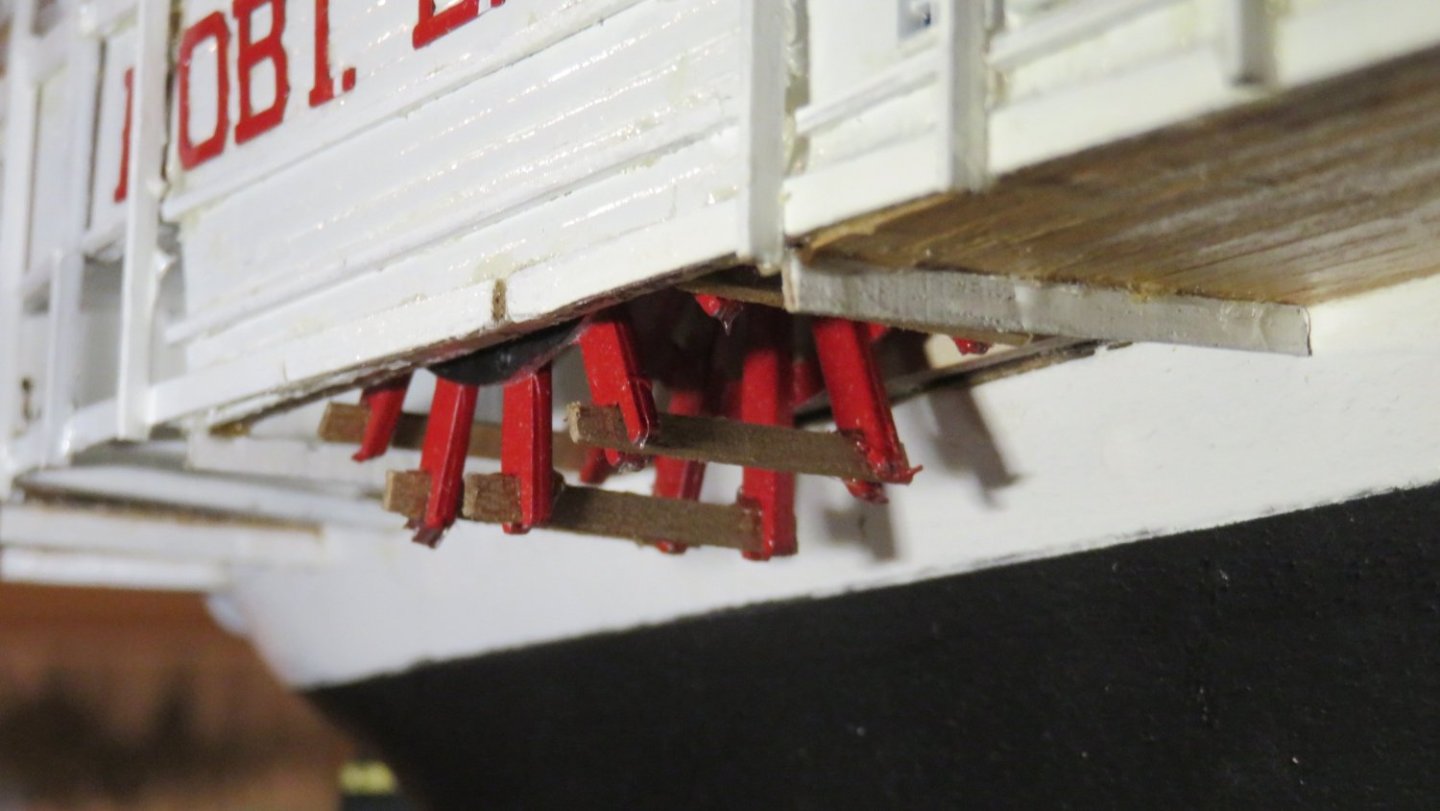
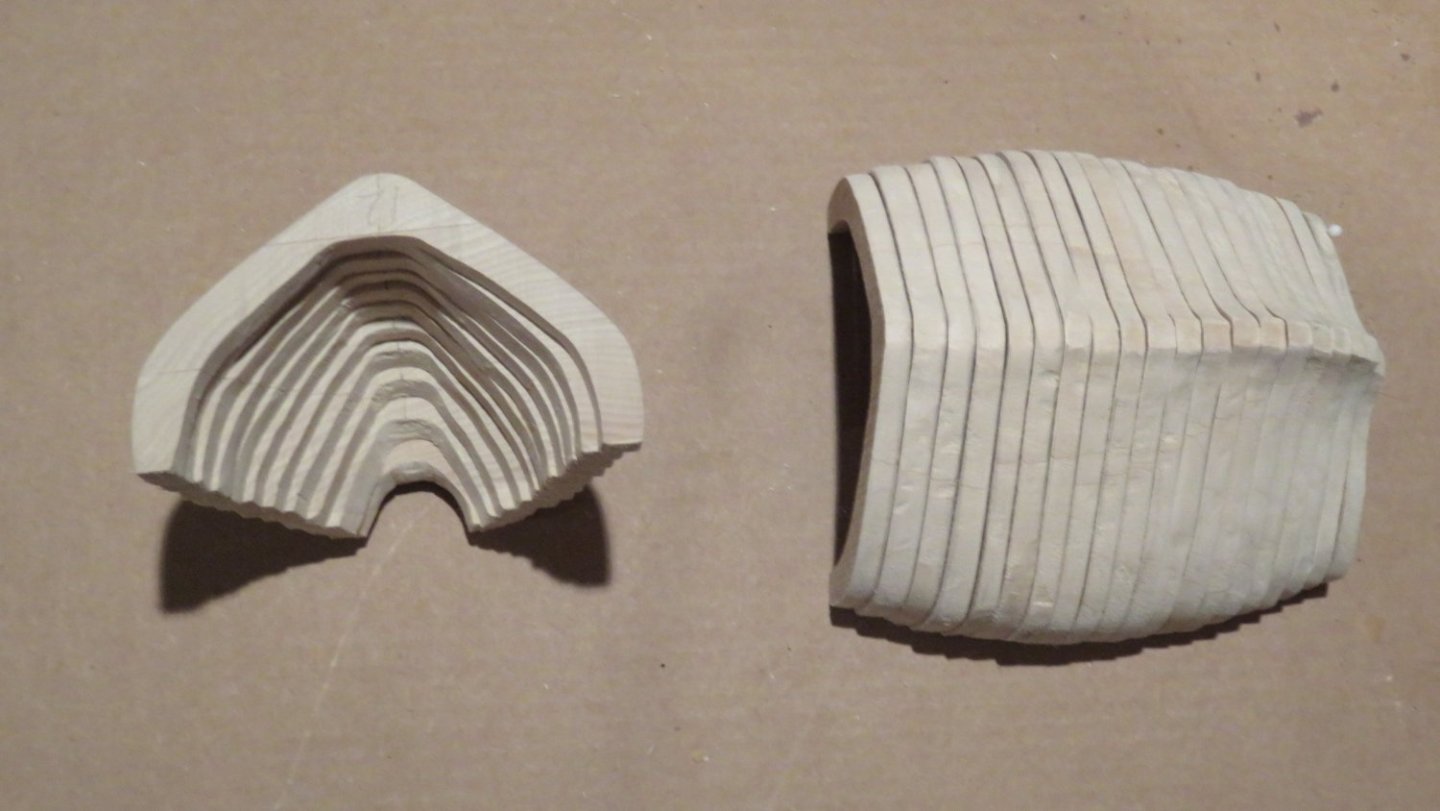
Good Afternoon All! I'm looking for advice/opinions on what may very well be a minor point. In cutting the timberheads, the plans seem to show that the aft most eight frames ( numbers 25-32 in my kit) have a progressive position from the inside of the frame to the outside. That is number 32 is on the inside surface of the frame and numbers 25 and lower are all on the outside of the frame while 31-26 are progressively more to the outside as you move forward. Am I reading that correctly? Or should 25-32 all be on the inside surface with 1-24 on the outside? Picture below. Thank you, Andy

-
First "dry" fitting of frames. Not glued in place yet, so still a little crooked. I really like Gary's jig for the final truing of the frames for gluing in place. Do you mind if I copy it, or at least do something similar? You must be an Engineer. Next up, the rabbet and timberheads...I'll be back... And I am very thankful for my Dremel tool... just sayin'
-
Back from a week at Walt Disney World in Florida. During that time, my Keel Klamper arrived. Many thanks to Gary for recommending this handy little stand. Prior to this, I would do things like cut out cardboard boxes to hold the ship in an even and workable position. This will make things so much easier! Okay, I will sign out for a while to make some real progress, then get back with something tangible. In the meantime, Happy Groundhog's Day! Andy

-
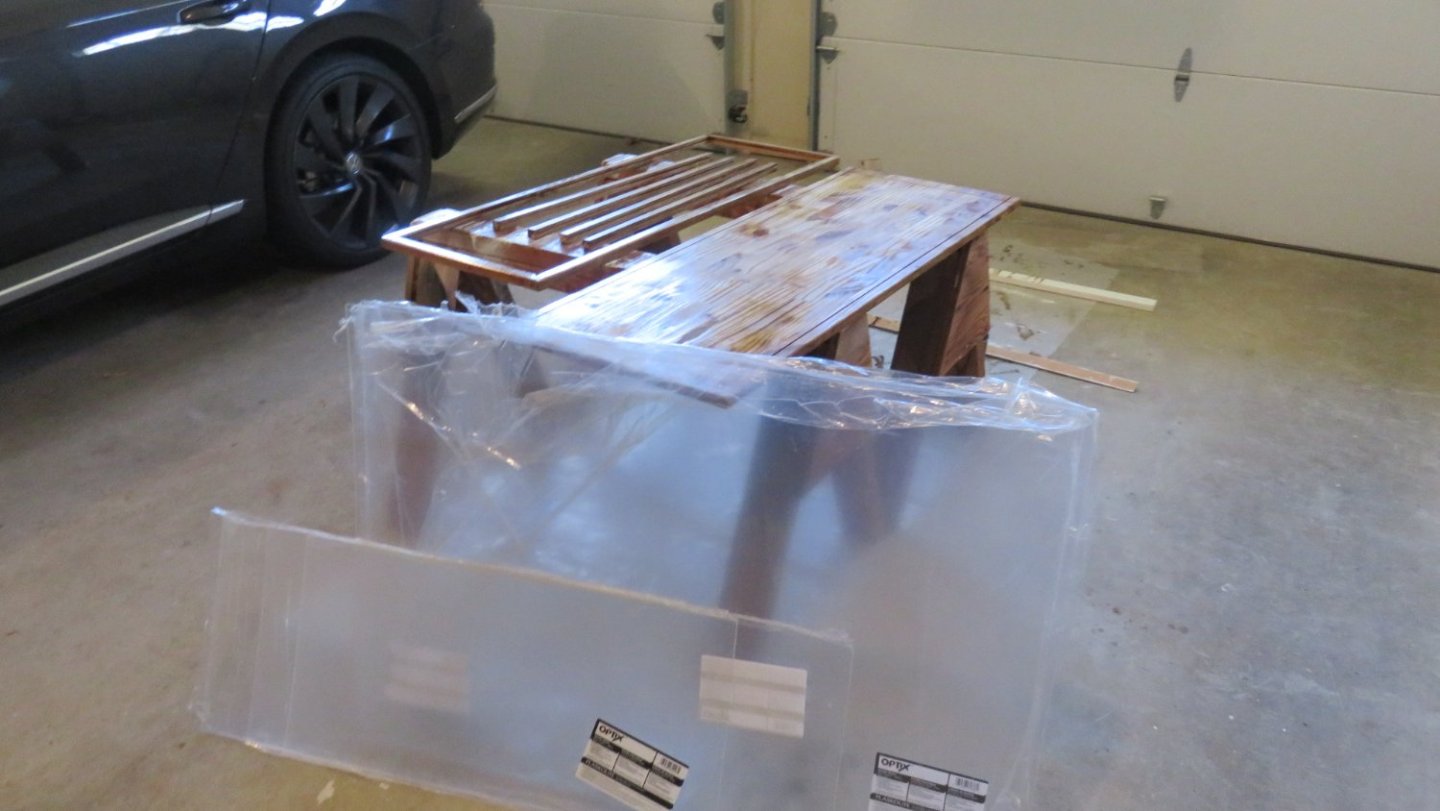
Sooooo... Rough shaping of frames completed. Took Gary's advice and did some work on the inside of each. I'm sure that there will be a good bit of tweaking later. Starting to cut the slots in the keel to accept the frames. Much to my chagrin, I discovered (the hard way) that the thickness of the frames is not consistent. So I am having to measure each with a caliper before cutting. And here I thought that this project might be done in less than a year... BTW... Display case for Flying Cloud nearly complete. A woodworking friend is making the legs and rails under the table. Have a good weekend! Andy

-
Go back to the home page and look for the link to members build logs. Choose the correct time frame. There should be a first post telling you how to name and start a build log. I did it wrong, but one of the moderators helped set me straight. I'm working on the America right now.
-
Interesting... I've not done a Billings kit (yet). Amati, AL, Mamoli and now Blue Jacket. Although I consider it to be the lesser quality, I am most proud of my Mamoli build of the Flying Cloud. It was a challenge. I hope that you set up a build log for your current projects. Your progress so far looks good! Andy
-
Welcome Tom! Just curious, which kits are you using for your two builds? Andy from (also landlocked) Kennesaw, GA
-
Taking a short break (albeit early on) in order to build a display case for the Flying Cloud. Since the base is so big (16" X 45"), I am going to put legs on it and make it freestanding. Back to the America in a couple of weeks. Happy New Year!
-
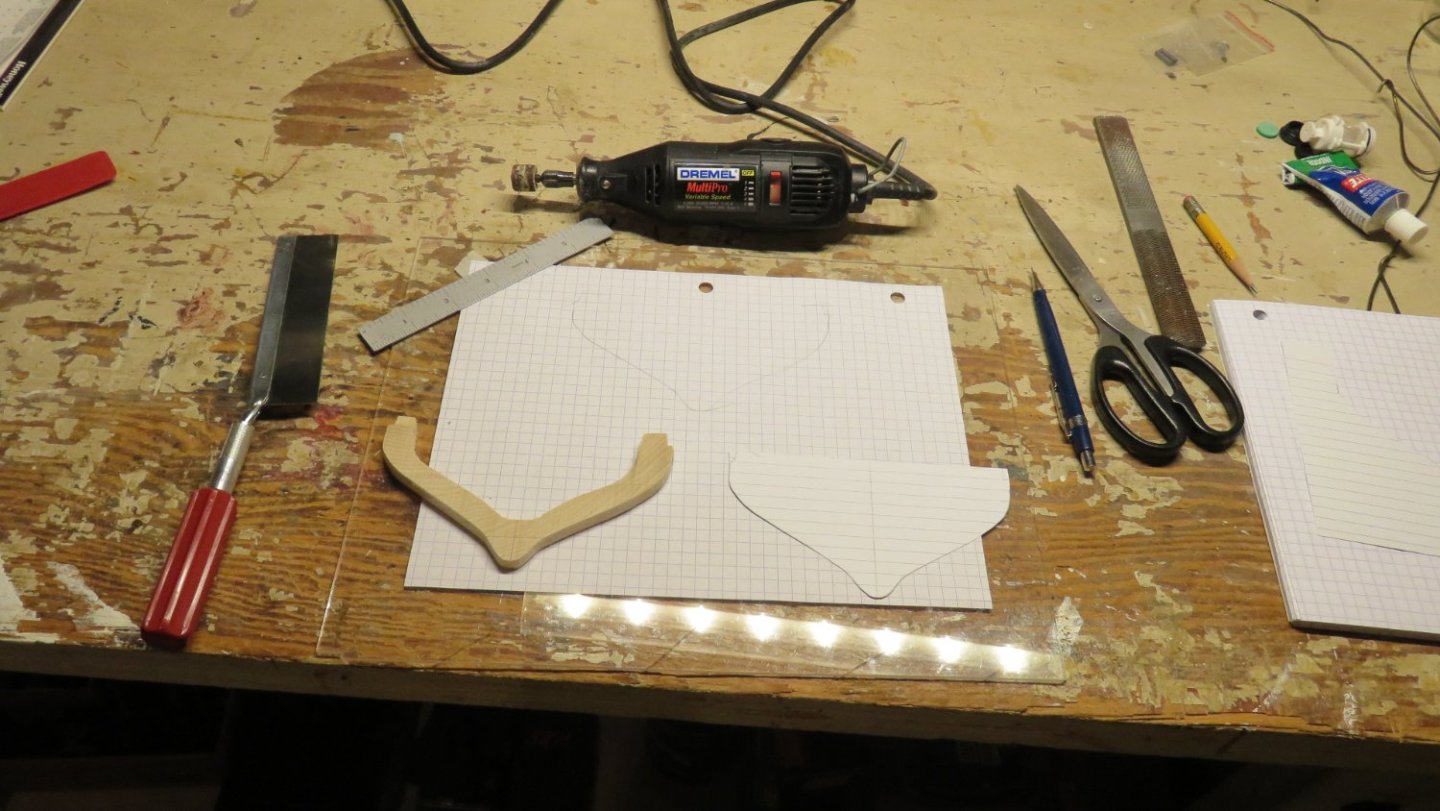
Happy New Year's Eve Eve! Truing up the frames. I've modified the Bluejacket recommendation somewhat. You old hands will probably laugh at me, but here goes... I trace an outline of the frame onto graph paper, then measuring from the center line, see if either side is significantly outside of the other. If so, I remove the offending wood until the outermost portions of both port and starboard are equidistant from the center line. I then make a template of the whole frame from card stock. Larger index cards (6X8) work well for this, as the lines help with placement. After cutting out the template, I flip it over and place against the frame. Irregularities show up with wood protruding from the template on one side and the card sticking out on the opposite side. Remove the offending wood, narrow the bottom a little to meet the keel and we have a preliminary shaping of the frame. I don't think that I will do the inner surface of each frame, as I have decided not to leave any of the interior exposed. Glad that I have a Dremel tool! Andy
-
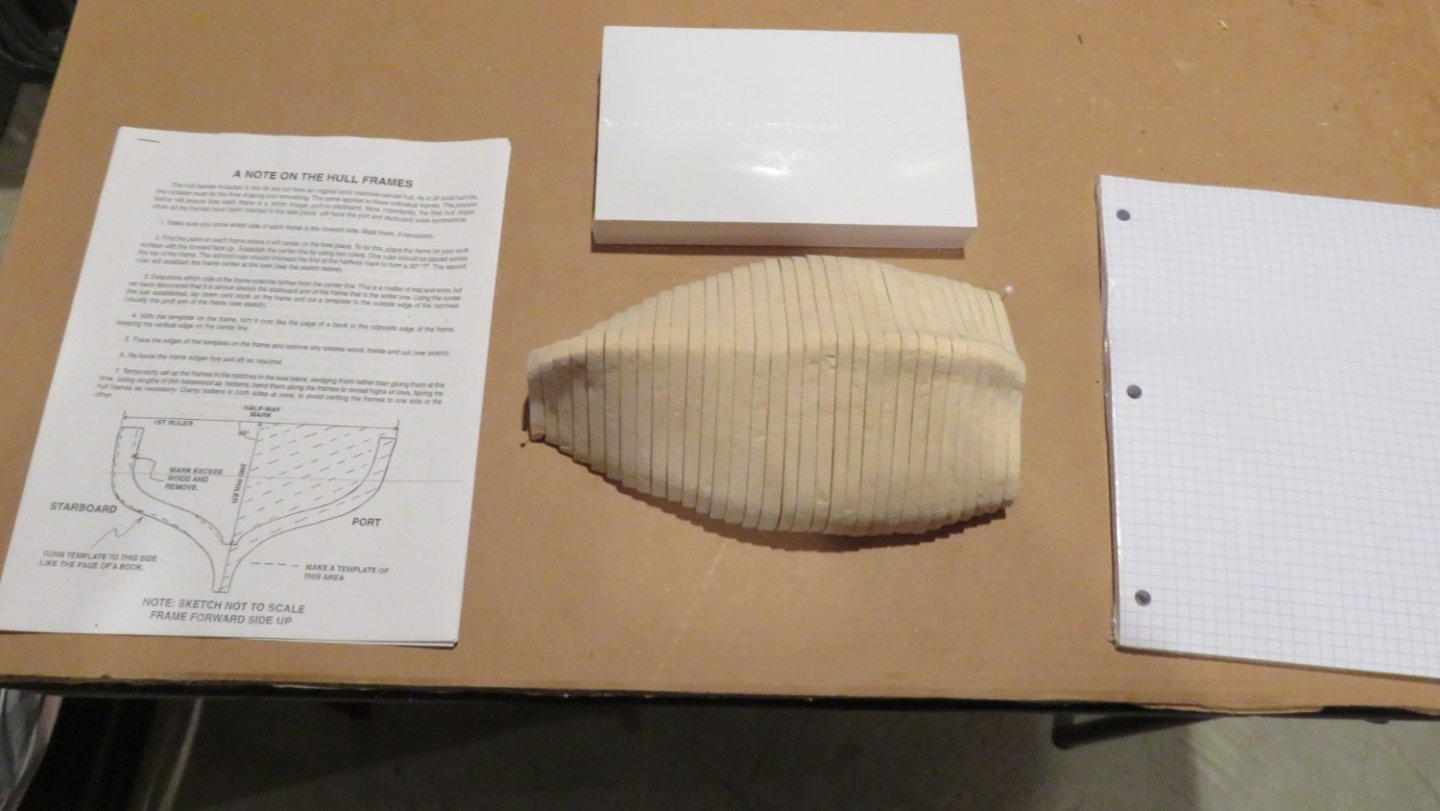
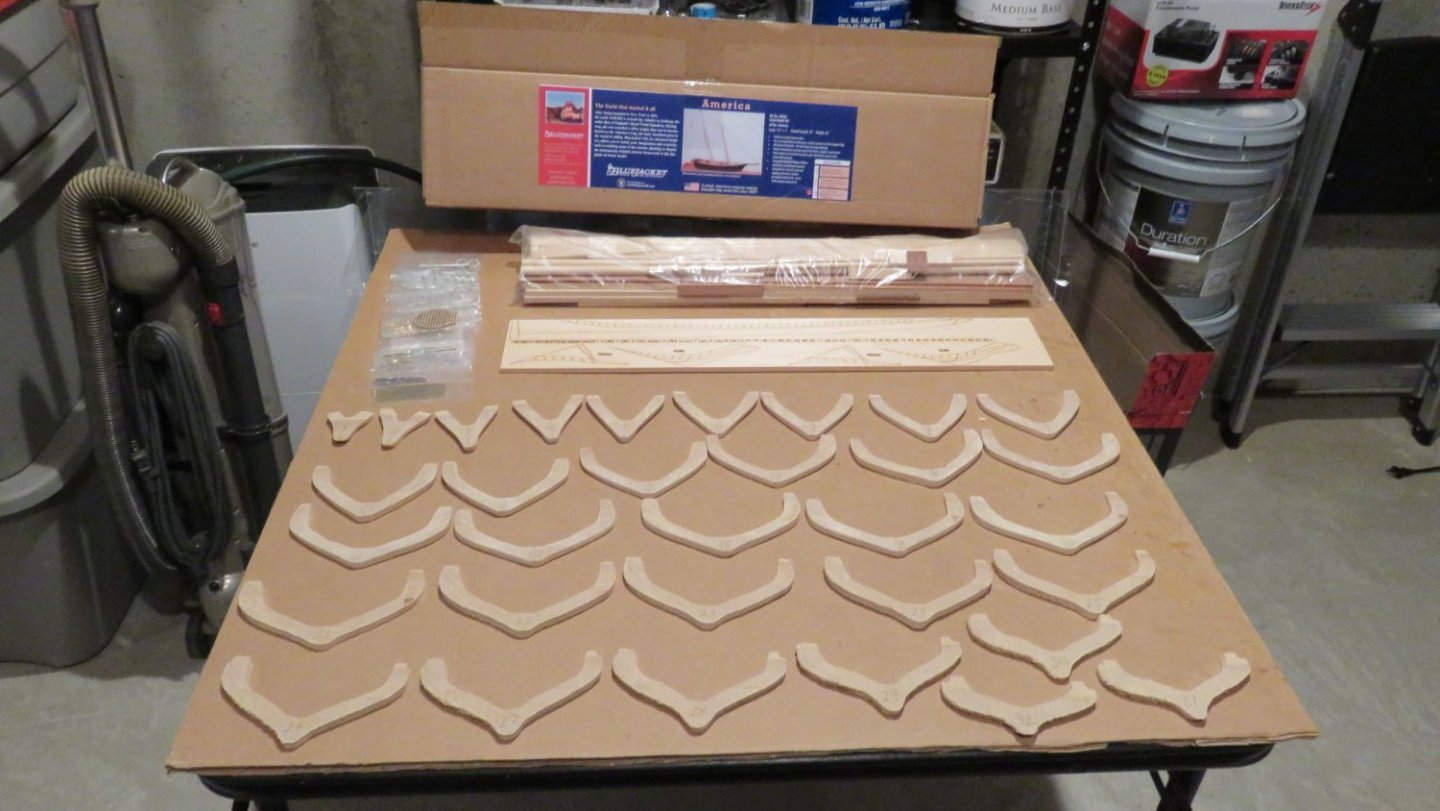
Good Afternoon all! Just getting started now. I cleaned up the rough edges (feathers?) from the saw marks on the frames, measured and marked the center lines on each and am now going to start shaping each one. Unless someone has a better method, I thought that I would use the recommendations from Bluejacket that came with the kit: "A NOTE ON THE HULL FRAMES". (I don't see any copyright symbols on this, so I assume that it's OK to post.) They recommend determining which side of the frame is the narrowest, or farthest from the center line. Using cardstock, make a template of that side and transfer to the wider side, then remove the excess. There are likely some other irregularities than will have to be trimmed as well. I welcome any and all suggestions. Thank you, Andy
-
Thank you, Knocklouder! I had to look up the Speedwell that you mention. Seems pretty ambitious with very limited information. I'm guessing that you have been doing a bit of research. Good luck with that endeavor and all of the other projects that you have listed! Andy
-
Thank you all for the warm welcome and the compliments. I've been making mistakes, and hopefully learning from them along the way. I expect that I will make a few with this new project as well, but with your help, perhaps avoid some of the worst ones. I am starting a build log to document the trials and tribulations. Thanks again! Andy
-
Oops...That should be 1851 in the title, not 1951...Perhaps the moderators could make that change...Sorry 'bout that...
-
Well, here we go... It appears that the first order of business is going to be shaping all of the frames so as to be symmetrical and form the smooth lines needed for the overall build. That could take a while, so you may not be hearing from me for a bit. I don't think that I will leave any exposed after planking, as there is no subdeck or other internals included in the kit, and I like the look of the finished craft. Other decisions that will come (much) later include: Sails or not? Coppering the hull or not? Lifeboat or not? Whatever the answers, this looks like a fun journey. Happy New Year! Andy
-
So, how does one go about starting a build log? I just opened the box from Bluejacket yesterday (Christmas present from my wife.) Thank you, Andy