Zvr
-
Posts
24 -
Joined
-
Last visited
-
 Zvr reacted to a post in a topic:
HMS Sophie by TBlack - kit-bashing Jack Aubrey's first command from the Vanguard Models HMS Speedy
Zvr reacted to a post in a topic:
HMS Sophie by TBlack - kit-bashing Jack Aubrey's first command from the Vanguard Models HMS Speedy
-
Zvr reacted to a post in a topic:
Rattlesnake by Ed Ku20 - Model Shipways - 1:64
-
Zvr reacted to a post in a topic:
HM Gun Brig Adder by albie-forgotten - Vanguard Models - 1/64
-
Zvr reacted to a post in a topic:
HM Armed Cutter Sherbourne 1763 by Nick 843 - Vanguard Models - 1:64
-
Zvr reacted to a post in a topic:
HM Gun Brig Adder by albie-forgotten - Vanguard Models - 1/64
-
Zvr reacted to a post in a topic:
Chris Watton and Vanguard Models news and updates Volume 2
-
 Zvr reacted to a post in a topic:
HM Armed Cutter Sherbourne by Zvr - Vanguard Models - 1:64
Zvr reacted to a post in a topic:
HM Armed Cutter Sherbourne by Zvr - Vanguard Models - 1:64
-
Thukydides reacted to a post in a topic:
HM Armed Cutter Sherbourne by Zvr - Vanguard Models - 1:64
-
François de Saint Nazaire reacted to a post in a topic:
HM Armed Cutter Sherbourne by Zvr - Vanguard Models - 1:64
-
chris watton reacted to a post in a topic:
HM Armed Cutter Sherbourne by Zvr - Vanguard Models - 1:64
-
DB789 reacted to a post in a topic:
HM Armed Cutter Sherbourne by Zvr - Vanguard Models - 1:64
-
cotrecerf reacted to a post in a topic:
HM Armed Cutter Sherbourne by Zvr - Vanguard Models - 1:64
-
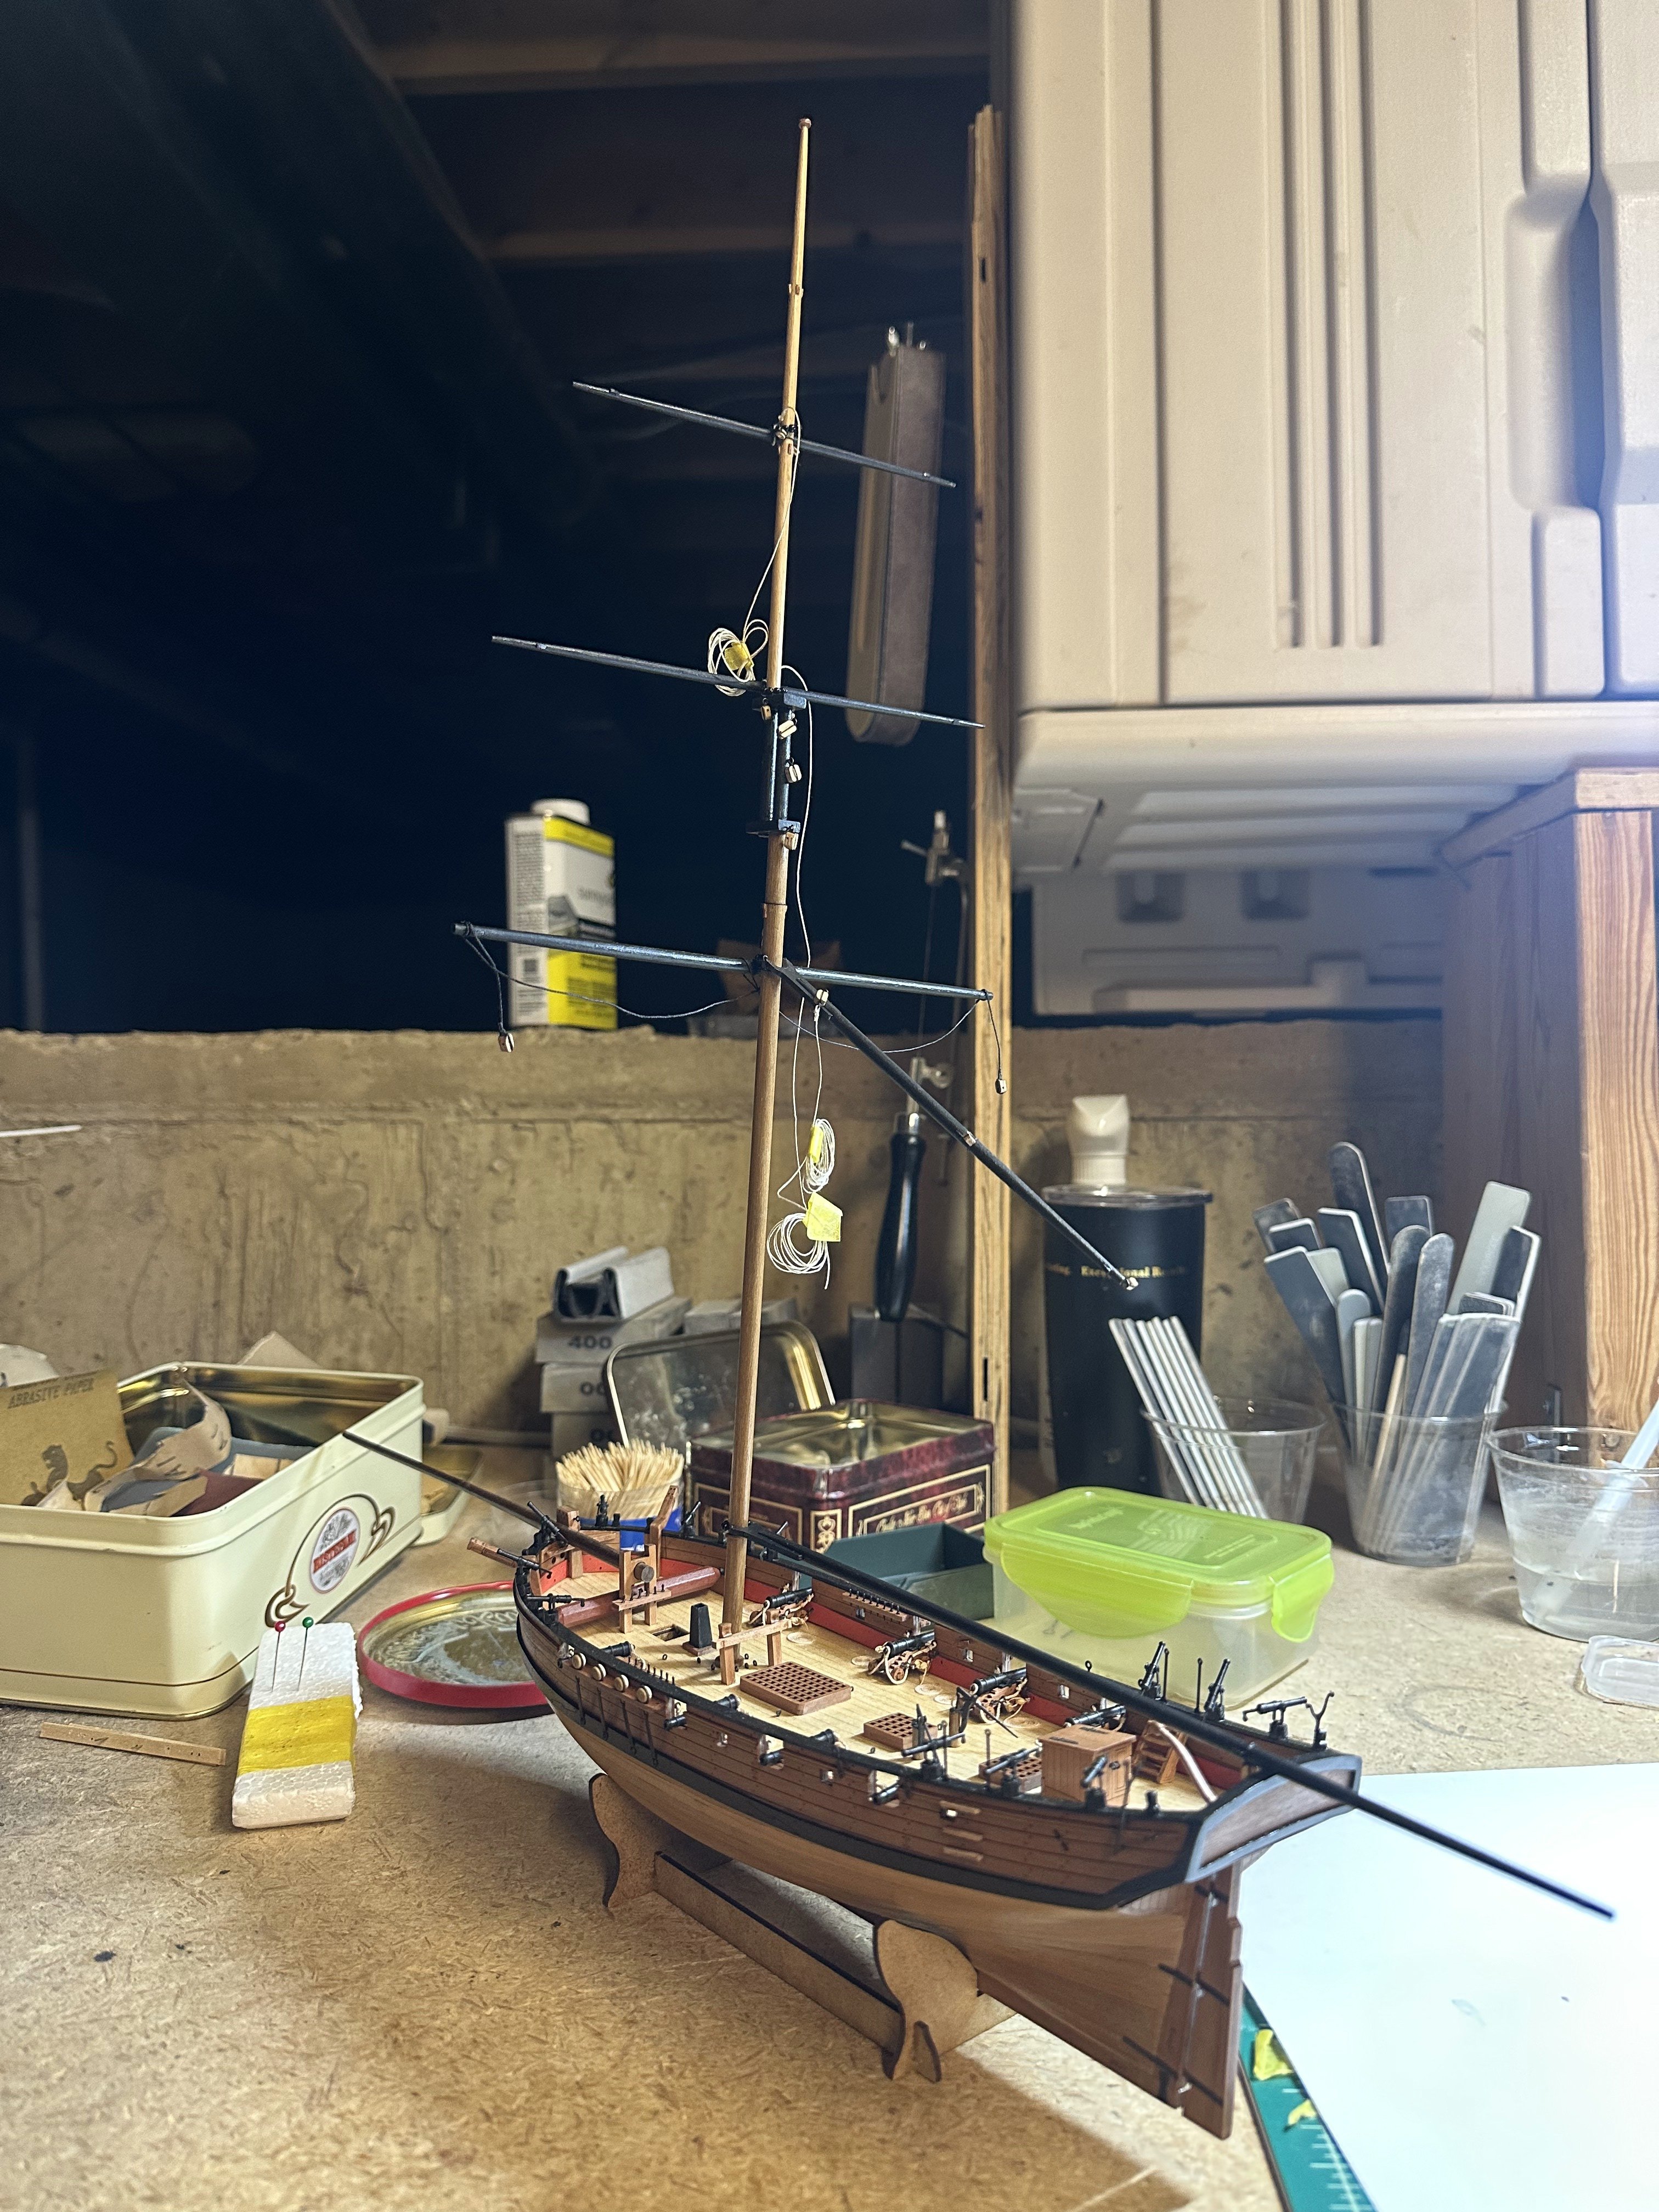
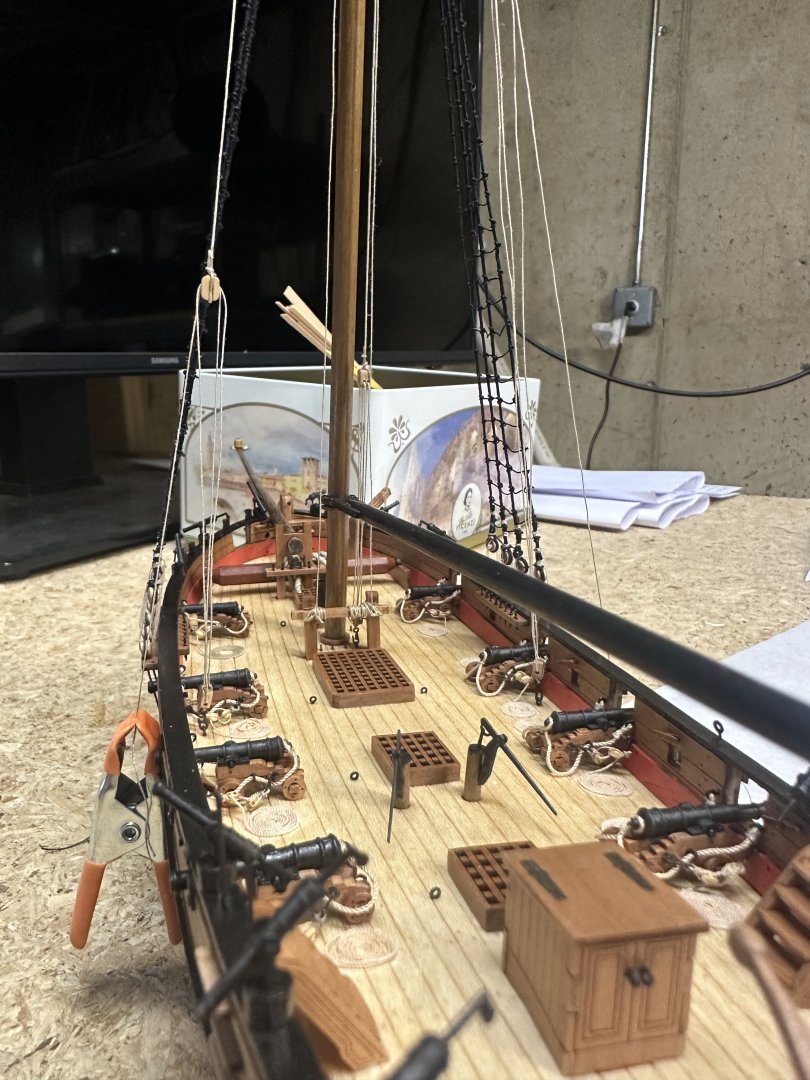
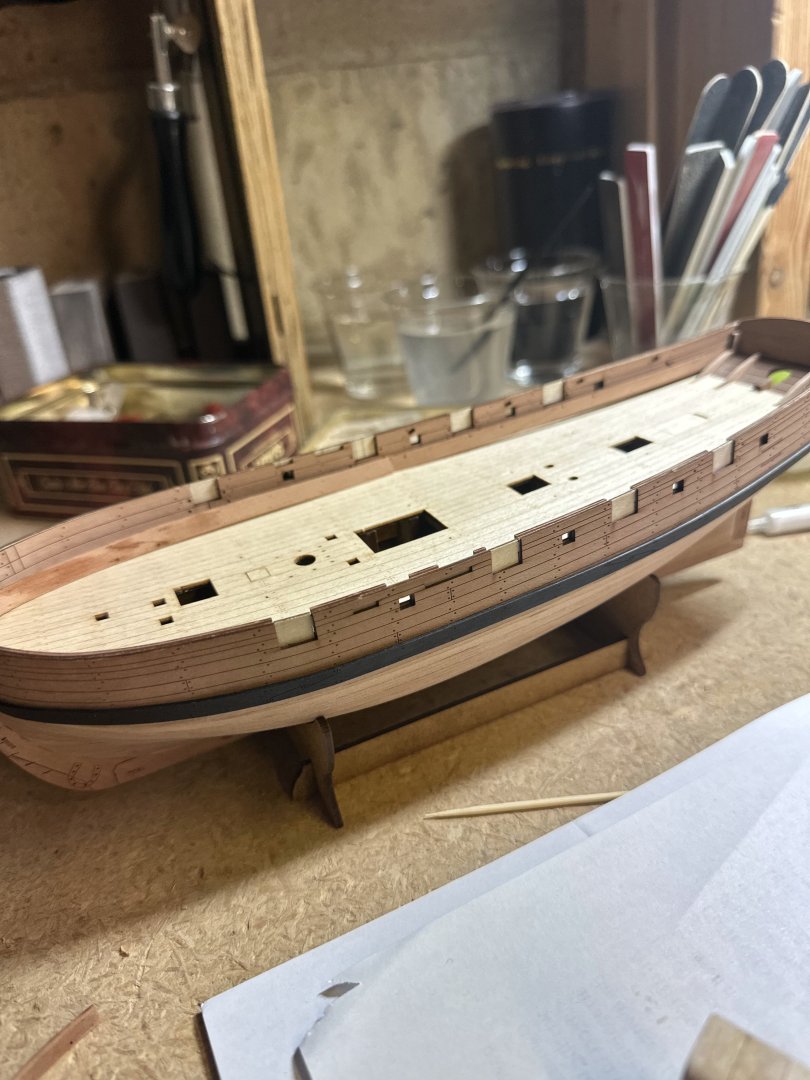
finished shrouds and ratlines... took forever! now continuing rigging... it looks like there are few hooks that come with the kit and, using Lennarth Petersson rigging book, it seems few are needed when attaching to the deck - they came in handy!
-
Nick 843 reacted to a post in a topic:
HM Armed Cutter Sherbourne by Zvr - Vanguard Models - 1:64
-
Zvr reacted to a post in a topic:
HMS Macedonian 1812 by JerryTodd - 1:36 scale - RADIO
-
Zvr reacted to a post in a topic:
HMS GREYHOUND by Jackson7 - Corel - Collaboration With My Past Self
-
Geordie Tyne reacted to a post in a topic:
HM Armed Cutter Sherbourne by Zvr - Vanguard Models - 1:64
-
ccoyle reacted to a post in a topic:
HM Armed Cutter Sherbourne by Zvr - Vanguard Models - 1:64
-
Russ2025 reacted to a post in a topic:
HM Armed Cutter Sherbourne by Zvr - Vanguard Models - 1:64
-
Thukydides reacted to a post in a topic:
HM Armed Cutter Sherbourne by Zvr - Vanguard Models - 1:64
-
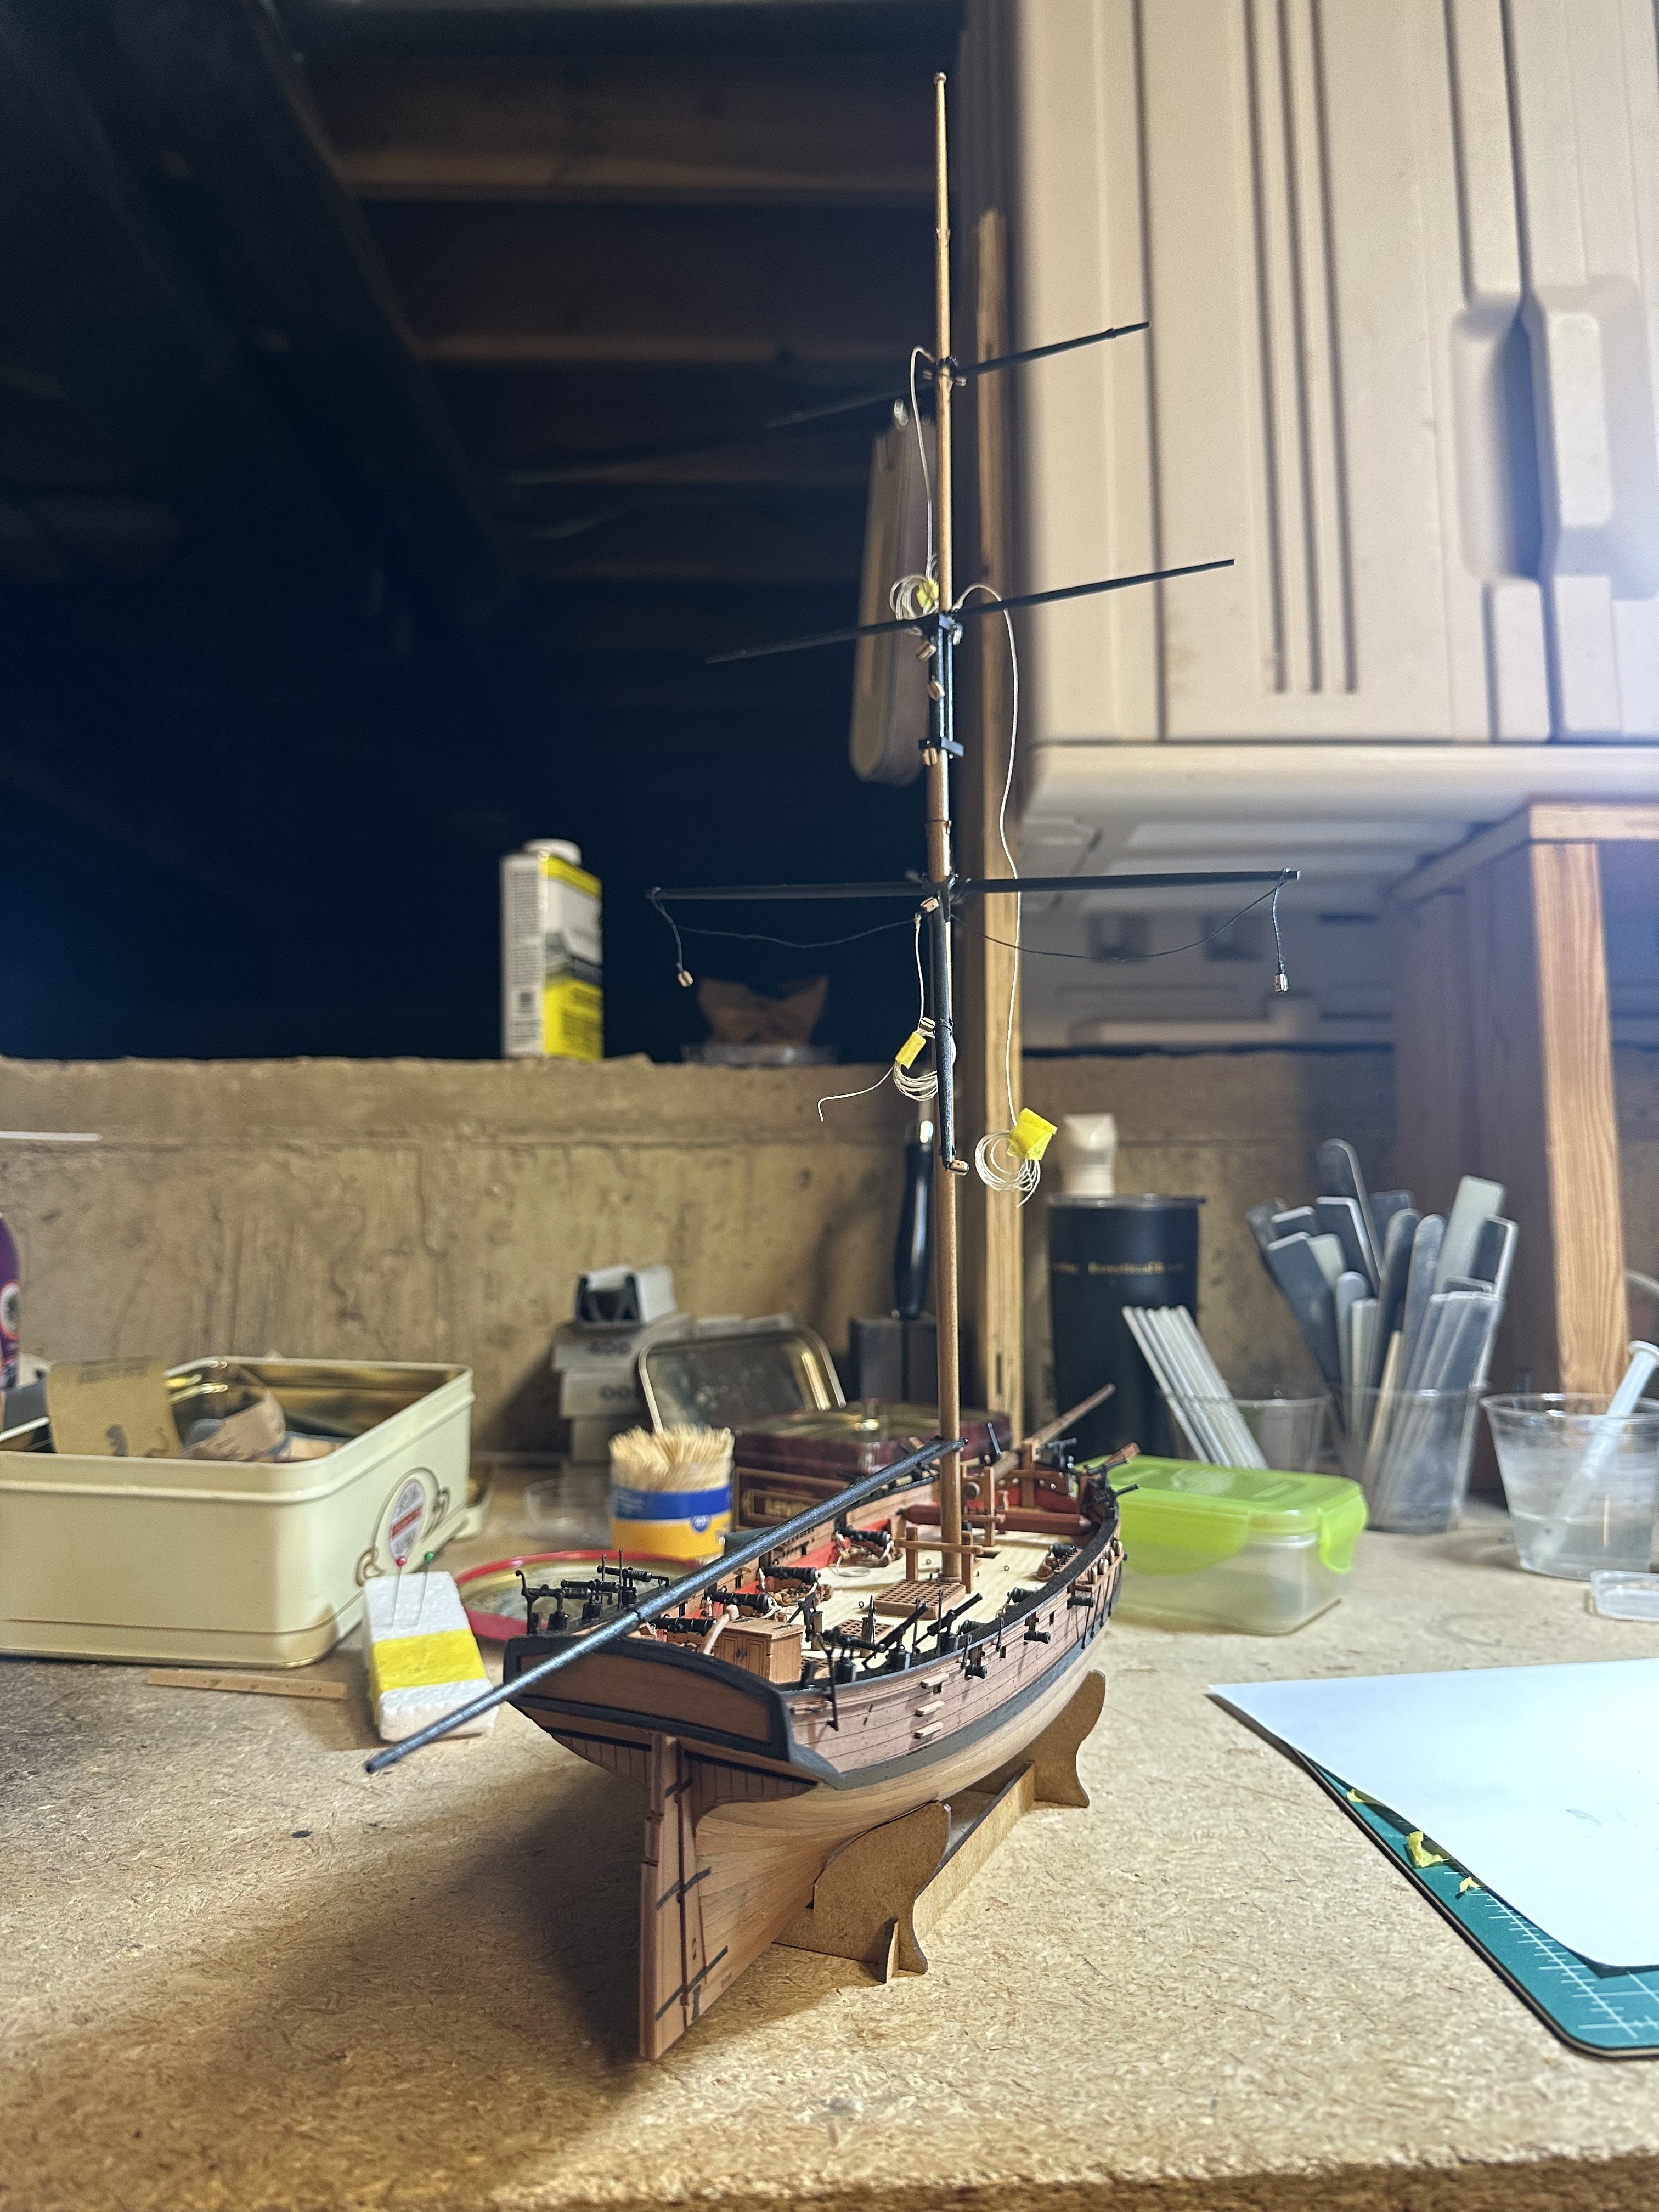
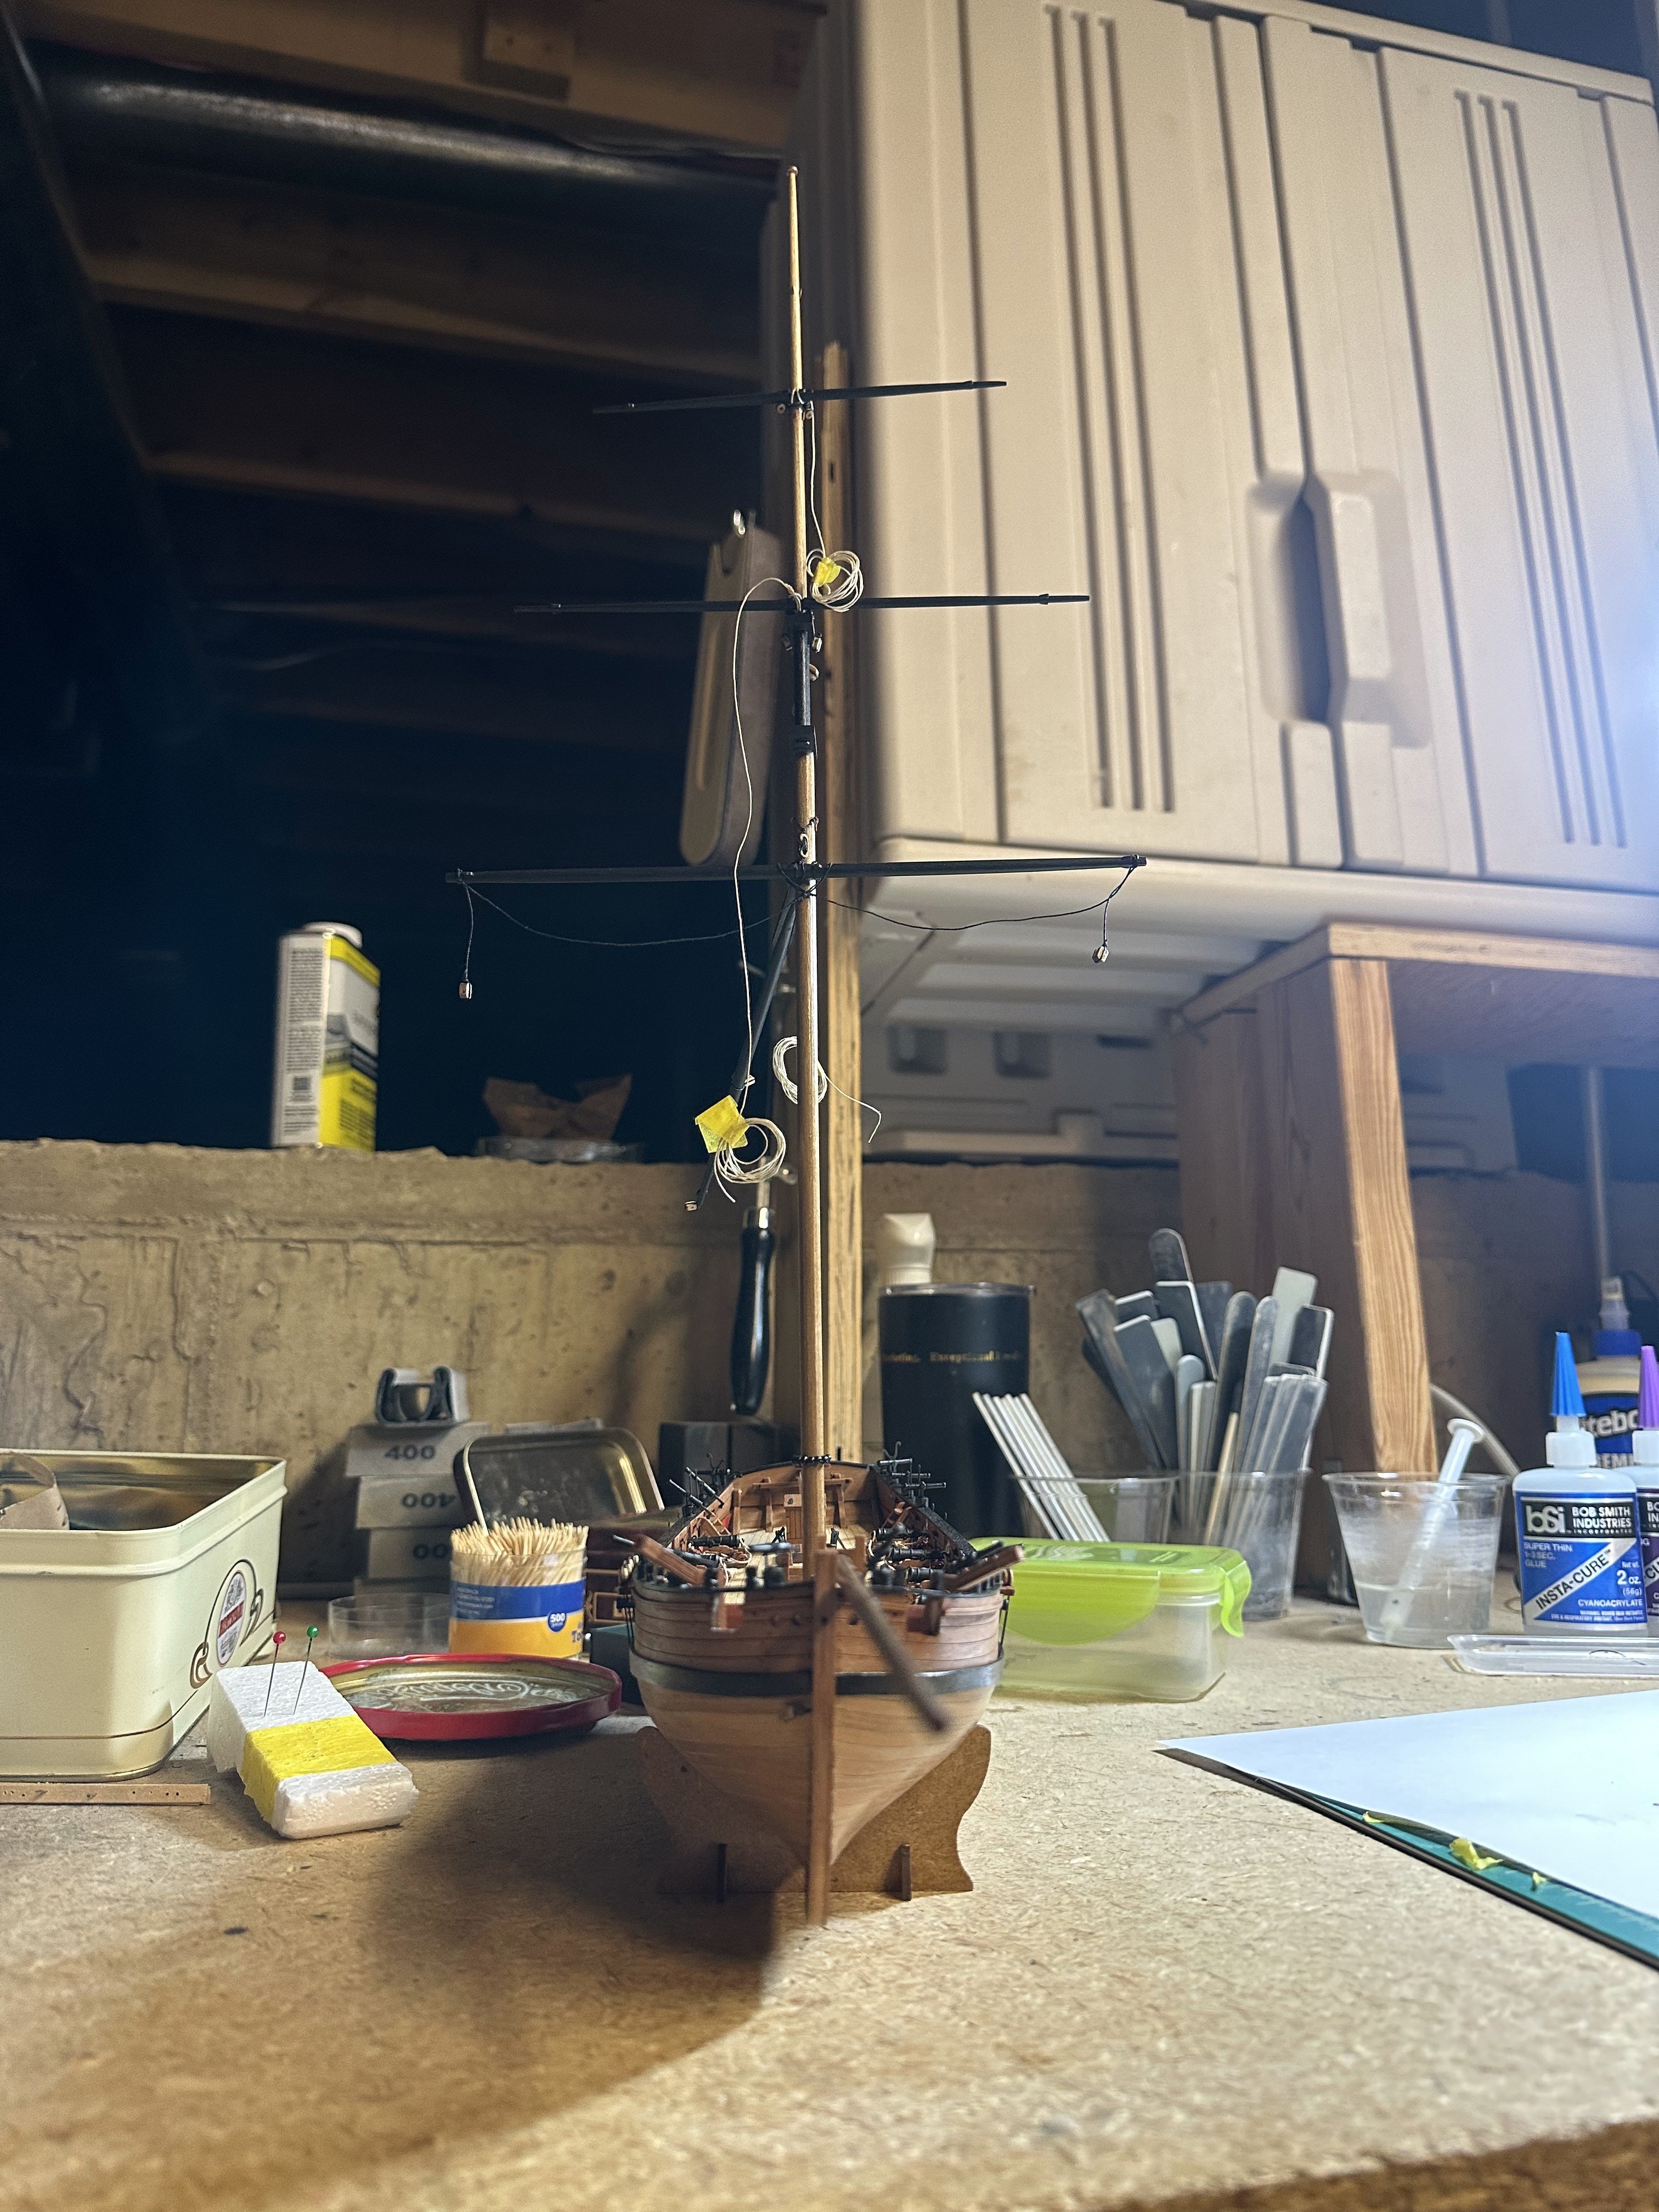
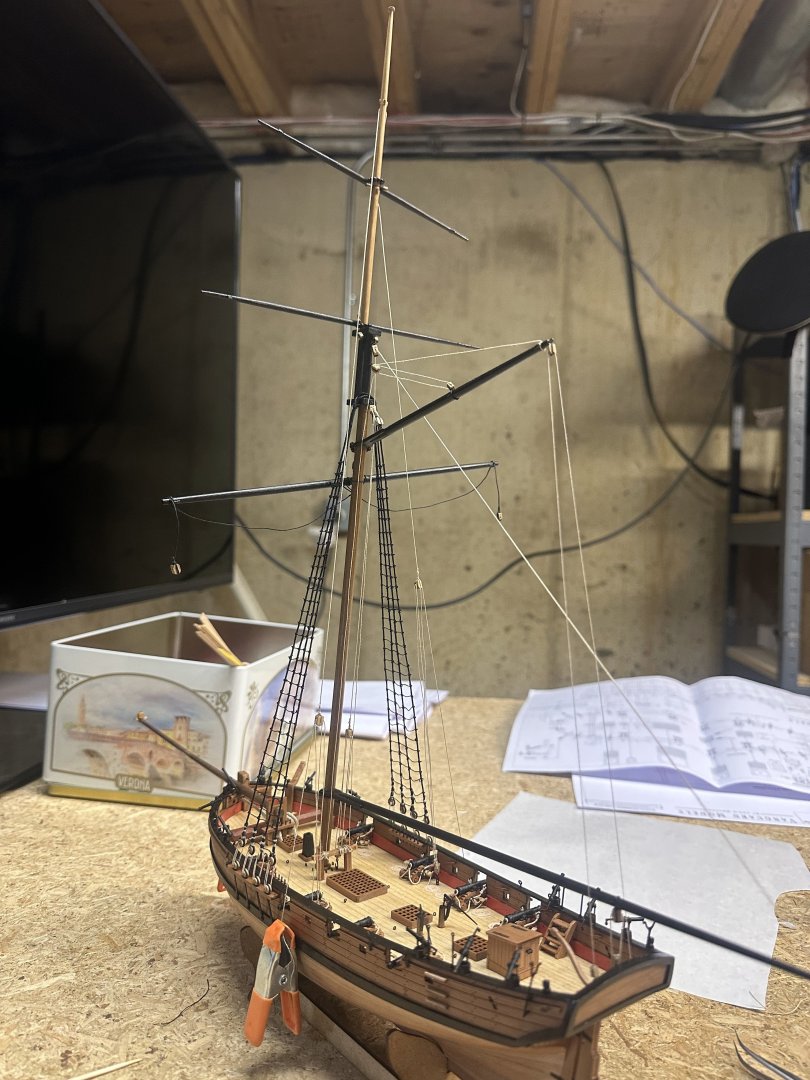
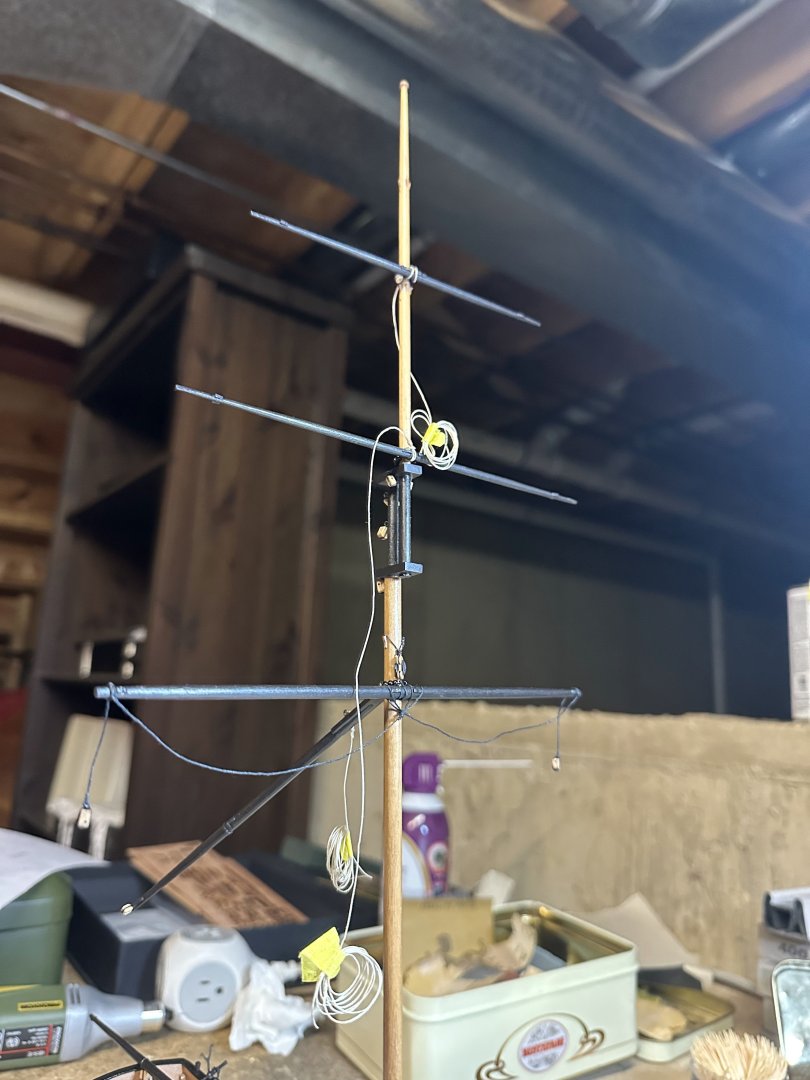
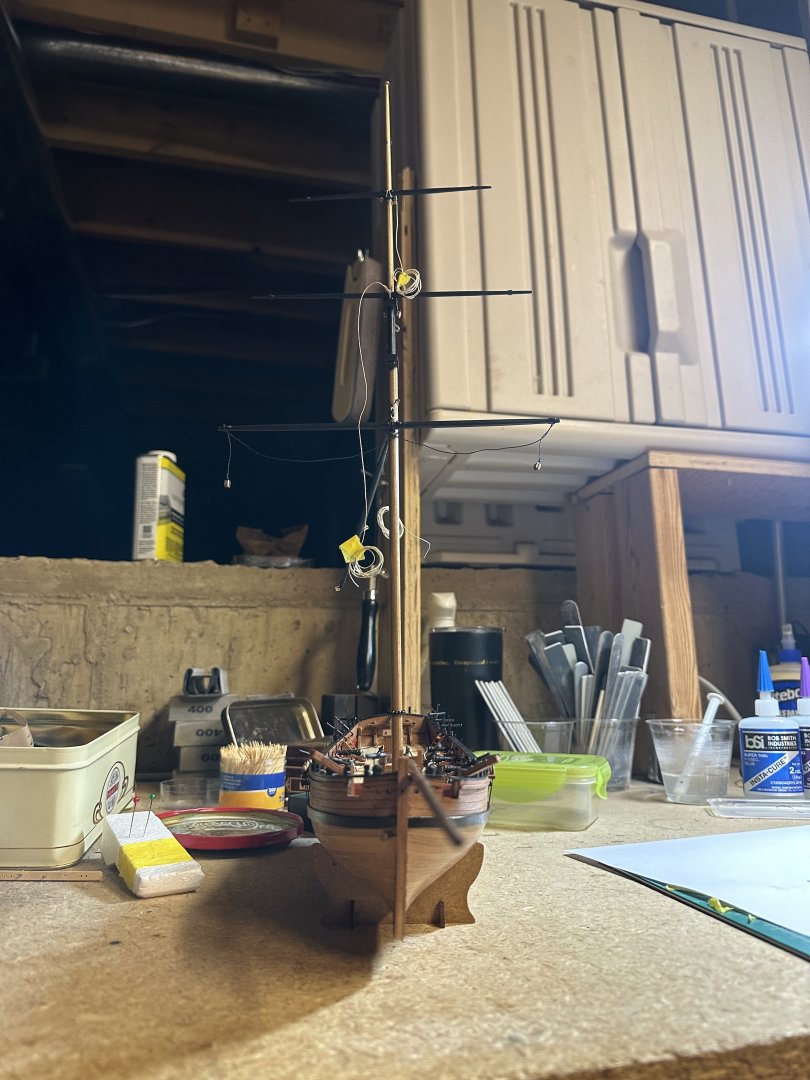
Mast is up and rigging is almost ready to be next! btw, i do have to say.. i saw in one of the posts recommendations for black acrylic paint pens.. got them off Amazon - they are really great! Cannot not recommend them enough. I had so much trouble with the finer touch ups with the paintbrush but that paint pen.. so straightforward to use!

-
Zvr reacted to a post in a topic:
Rattlesnake by Ed Ku20 - Model Shipways - 1:64
-
I am thinking of trying getting Vanguard Gun Brig Adder model - what would be the ship's boat type and size that will go with this ship? (launch, yawl, 14 ft/24ft... etc.) Hope anyone knows/ran into the same question... I looked everywhere but for the life of me cannot find this information on what would be historically appropriate.
-
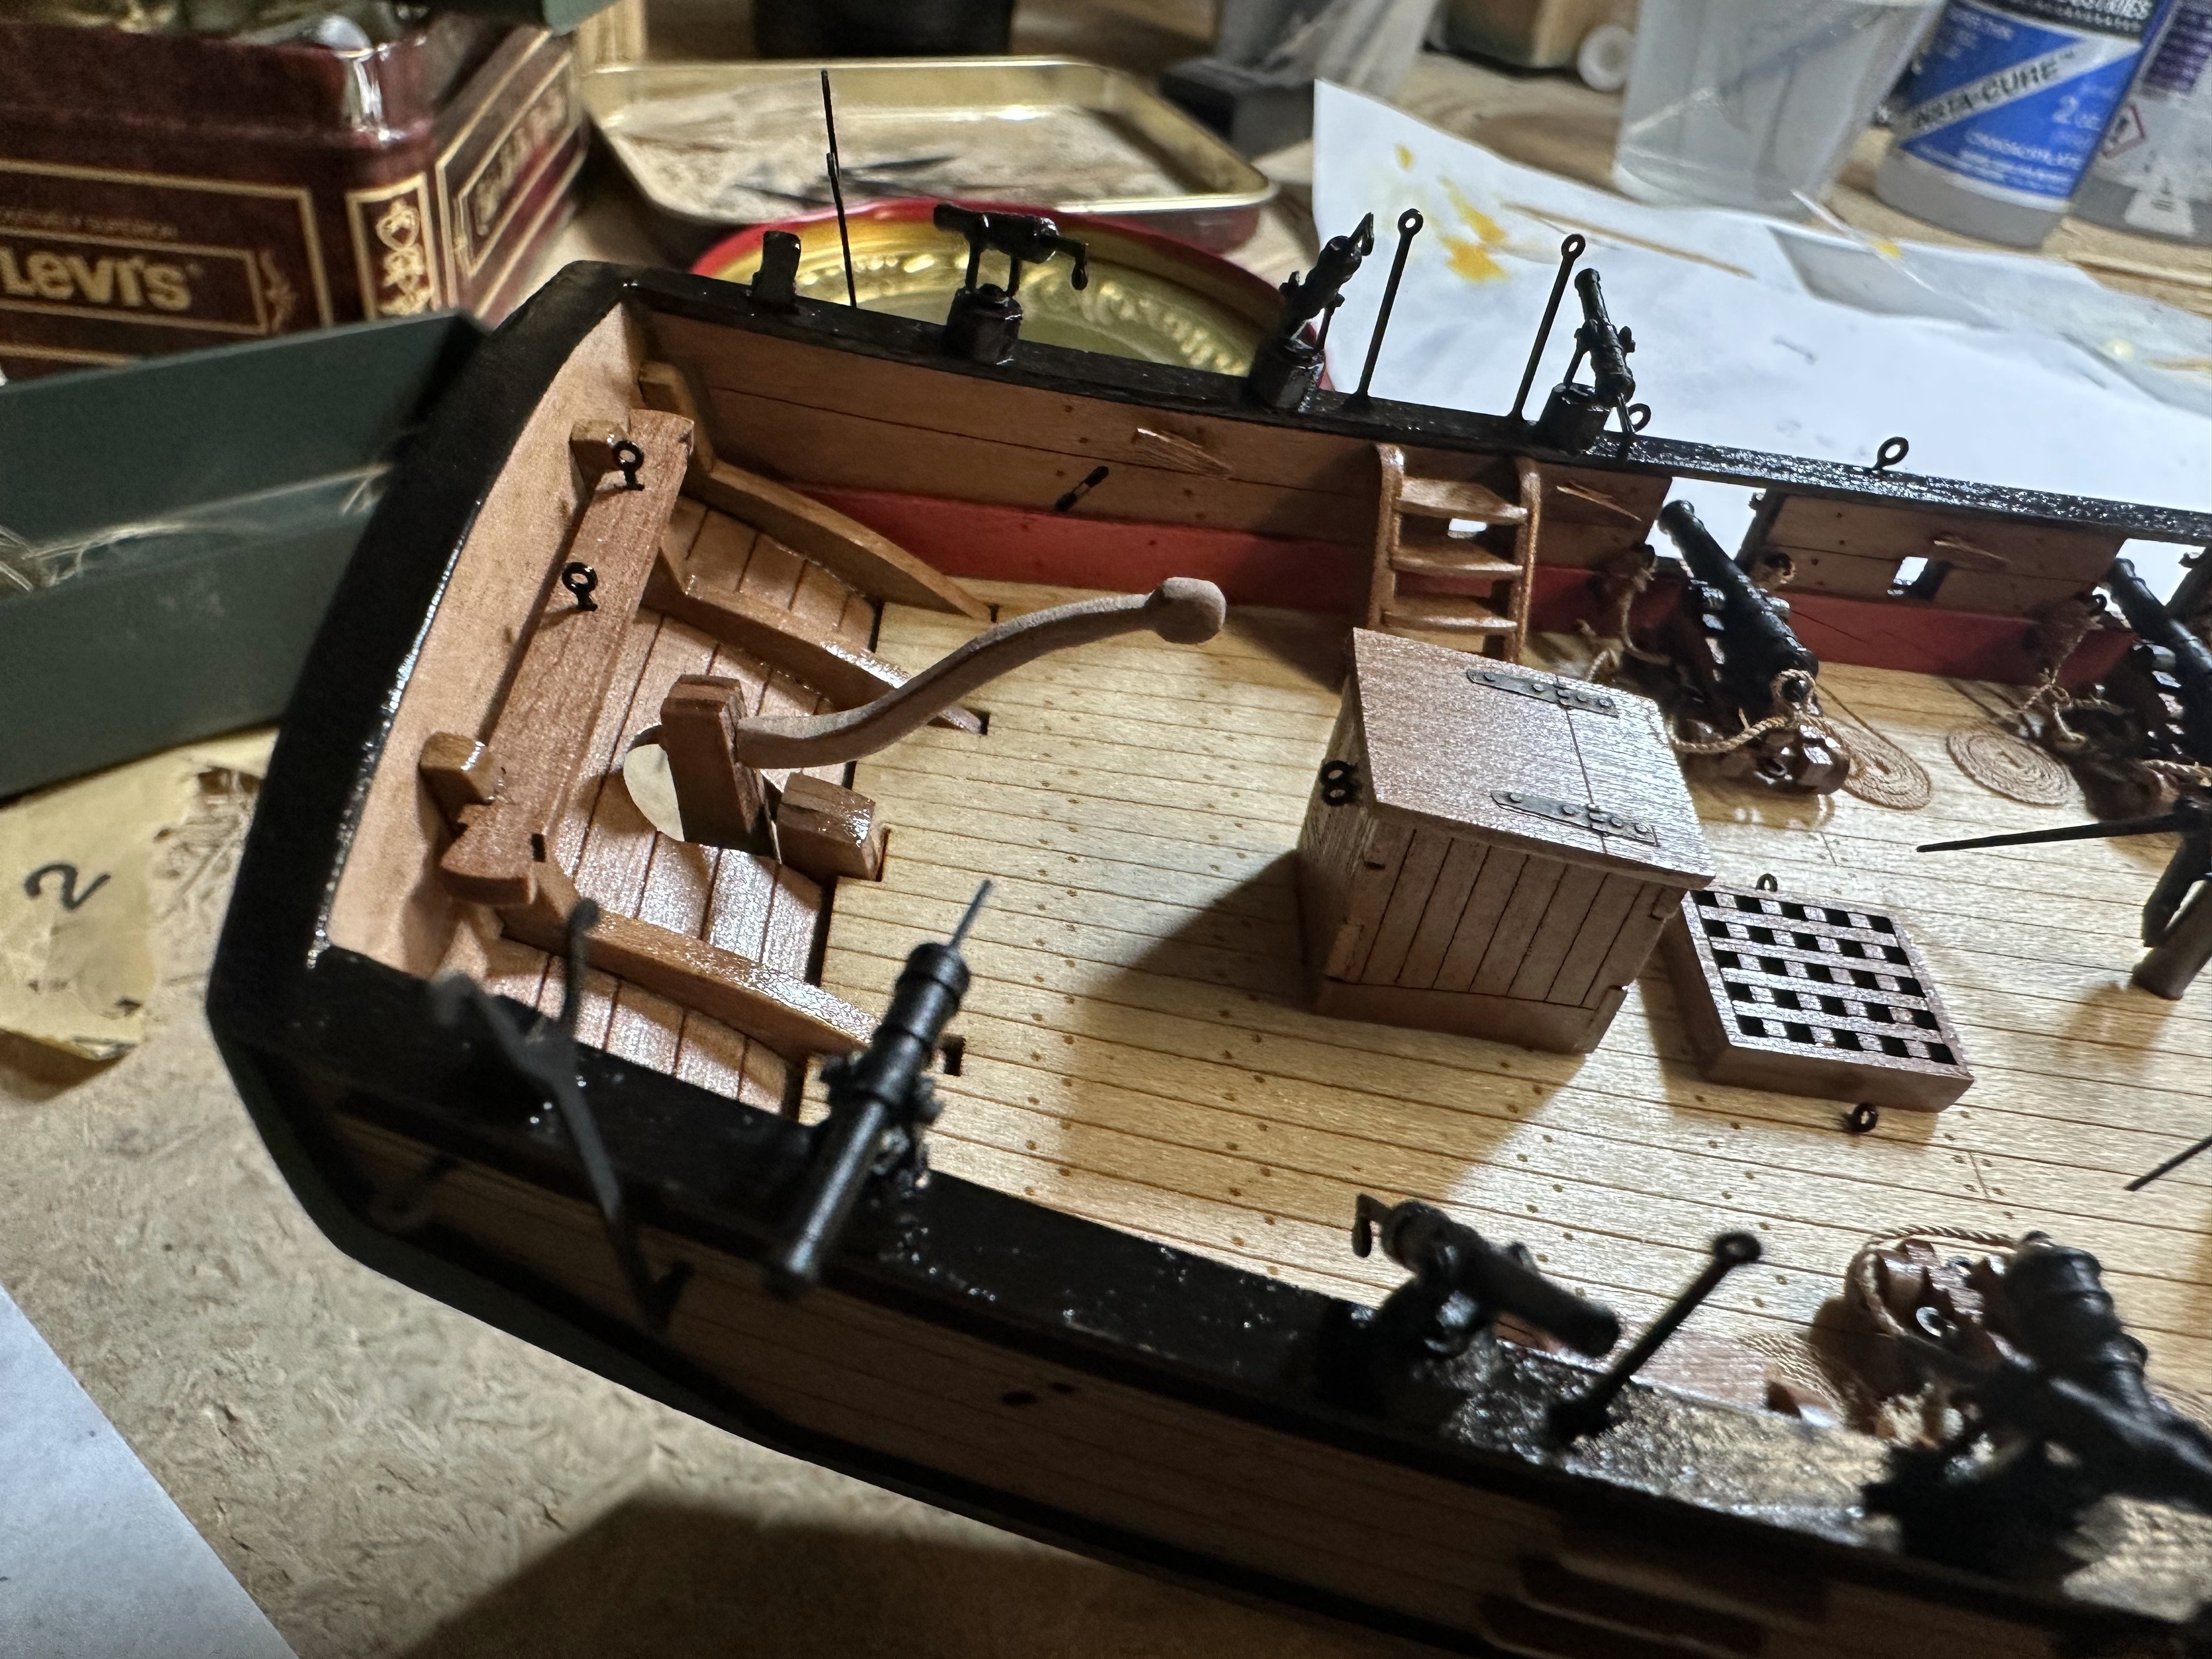
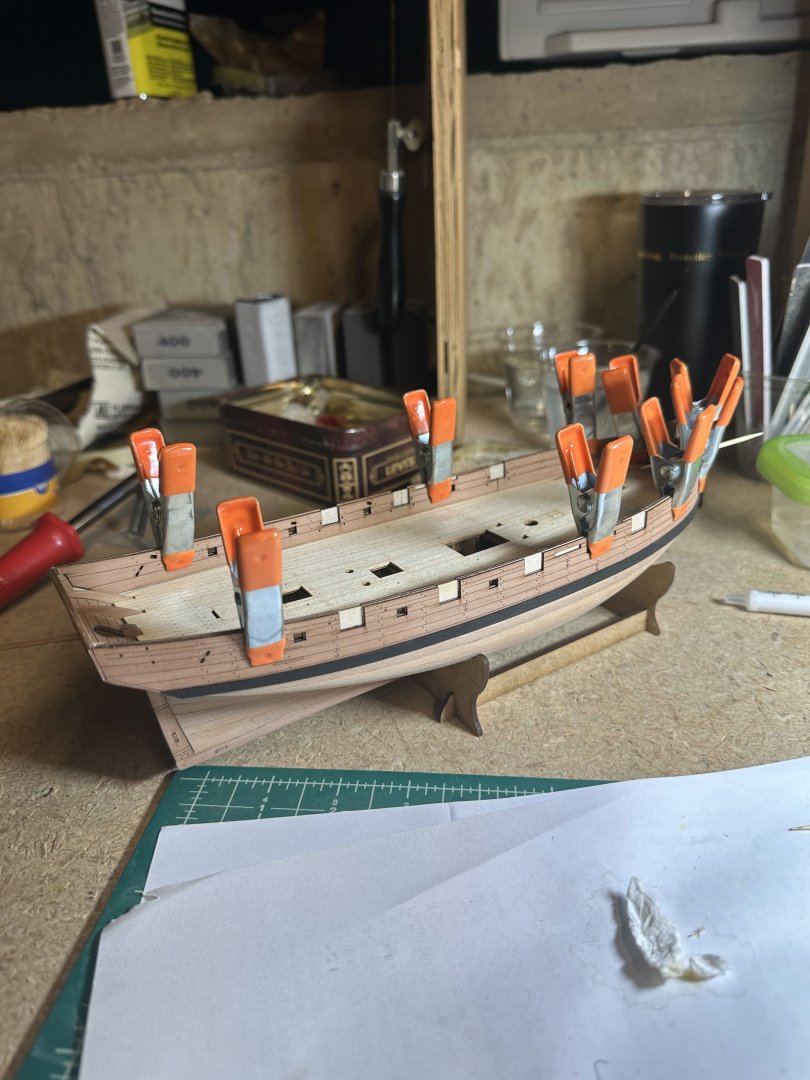
Ready for building masts and rigging... (almost). I made the rudder from scratch. I could say that I decided to be historically accurate and did this only because I studied rudders on contemporary models in the great post below and decided to emulate those ... but one could also say that the original rudder has fallen victim to the overzealous sanding - of course i will go with the historical accuracy and the the latter explanation 😀 I now understand why some hate rigging the cannons - not sure if i would go through way more of them... Good thing is I am now not that scared of rigging - I can still screw it up but i won't be scared while doing the screwing up 🙂


-
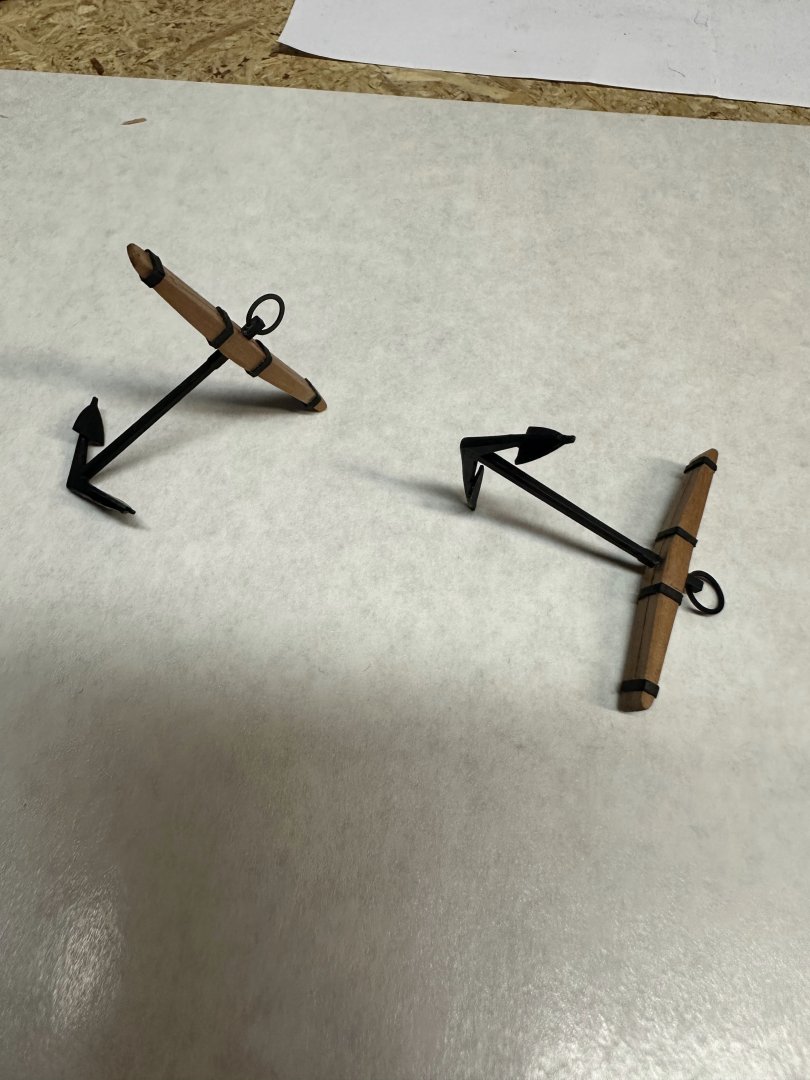
thank you! i am in US. I chickened out to do the brass rings 🙂 I figured at this scale I can close the eyes and pretend they are there. (just will do the eye bolts) So far I had been using the eye bolts from the kit but since i will run out I was thinking to experiment more to see if i can make some. Since the biggest goal is the experience figured i should at least try to learn how to do it from the brass wire... it's been tricky!
-
Today it was snowing all day so used the day to work on this... Going VERY slow looks like 🙂 only prepared the riggings for two cannons. I got the loose rope coiled on the masking tape and put diluted wood glue to hold it together, will see tomorrow how it ends up. I was hoping if anyone had any suggestions on the best (and easiest most importantly) way to make small eyebolts (1.5 mm). Since I am rigging the cannons I will end up using 2 extra small eyebolts per gun. I tried using few methods I found online using the copper wire i purchased but failed miserably.


-
thank you so much Thukydides and Palmerit!!! i will start on the jig...
-
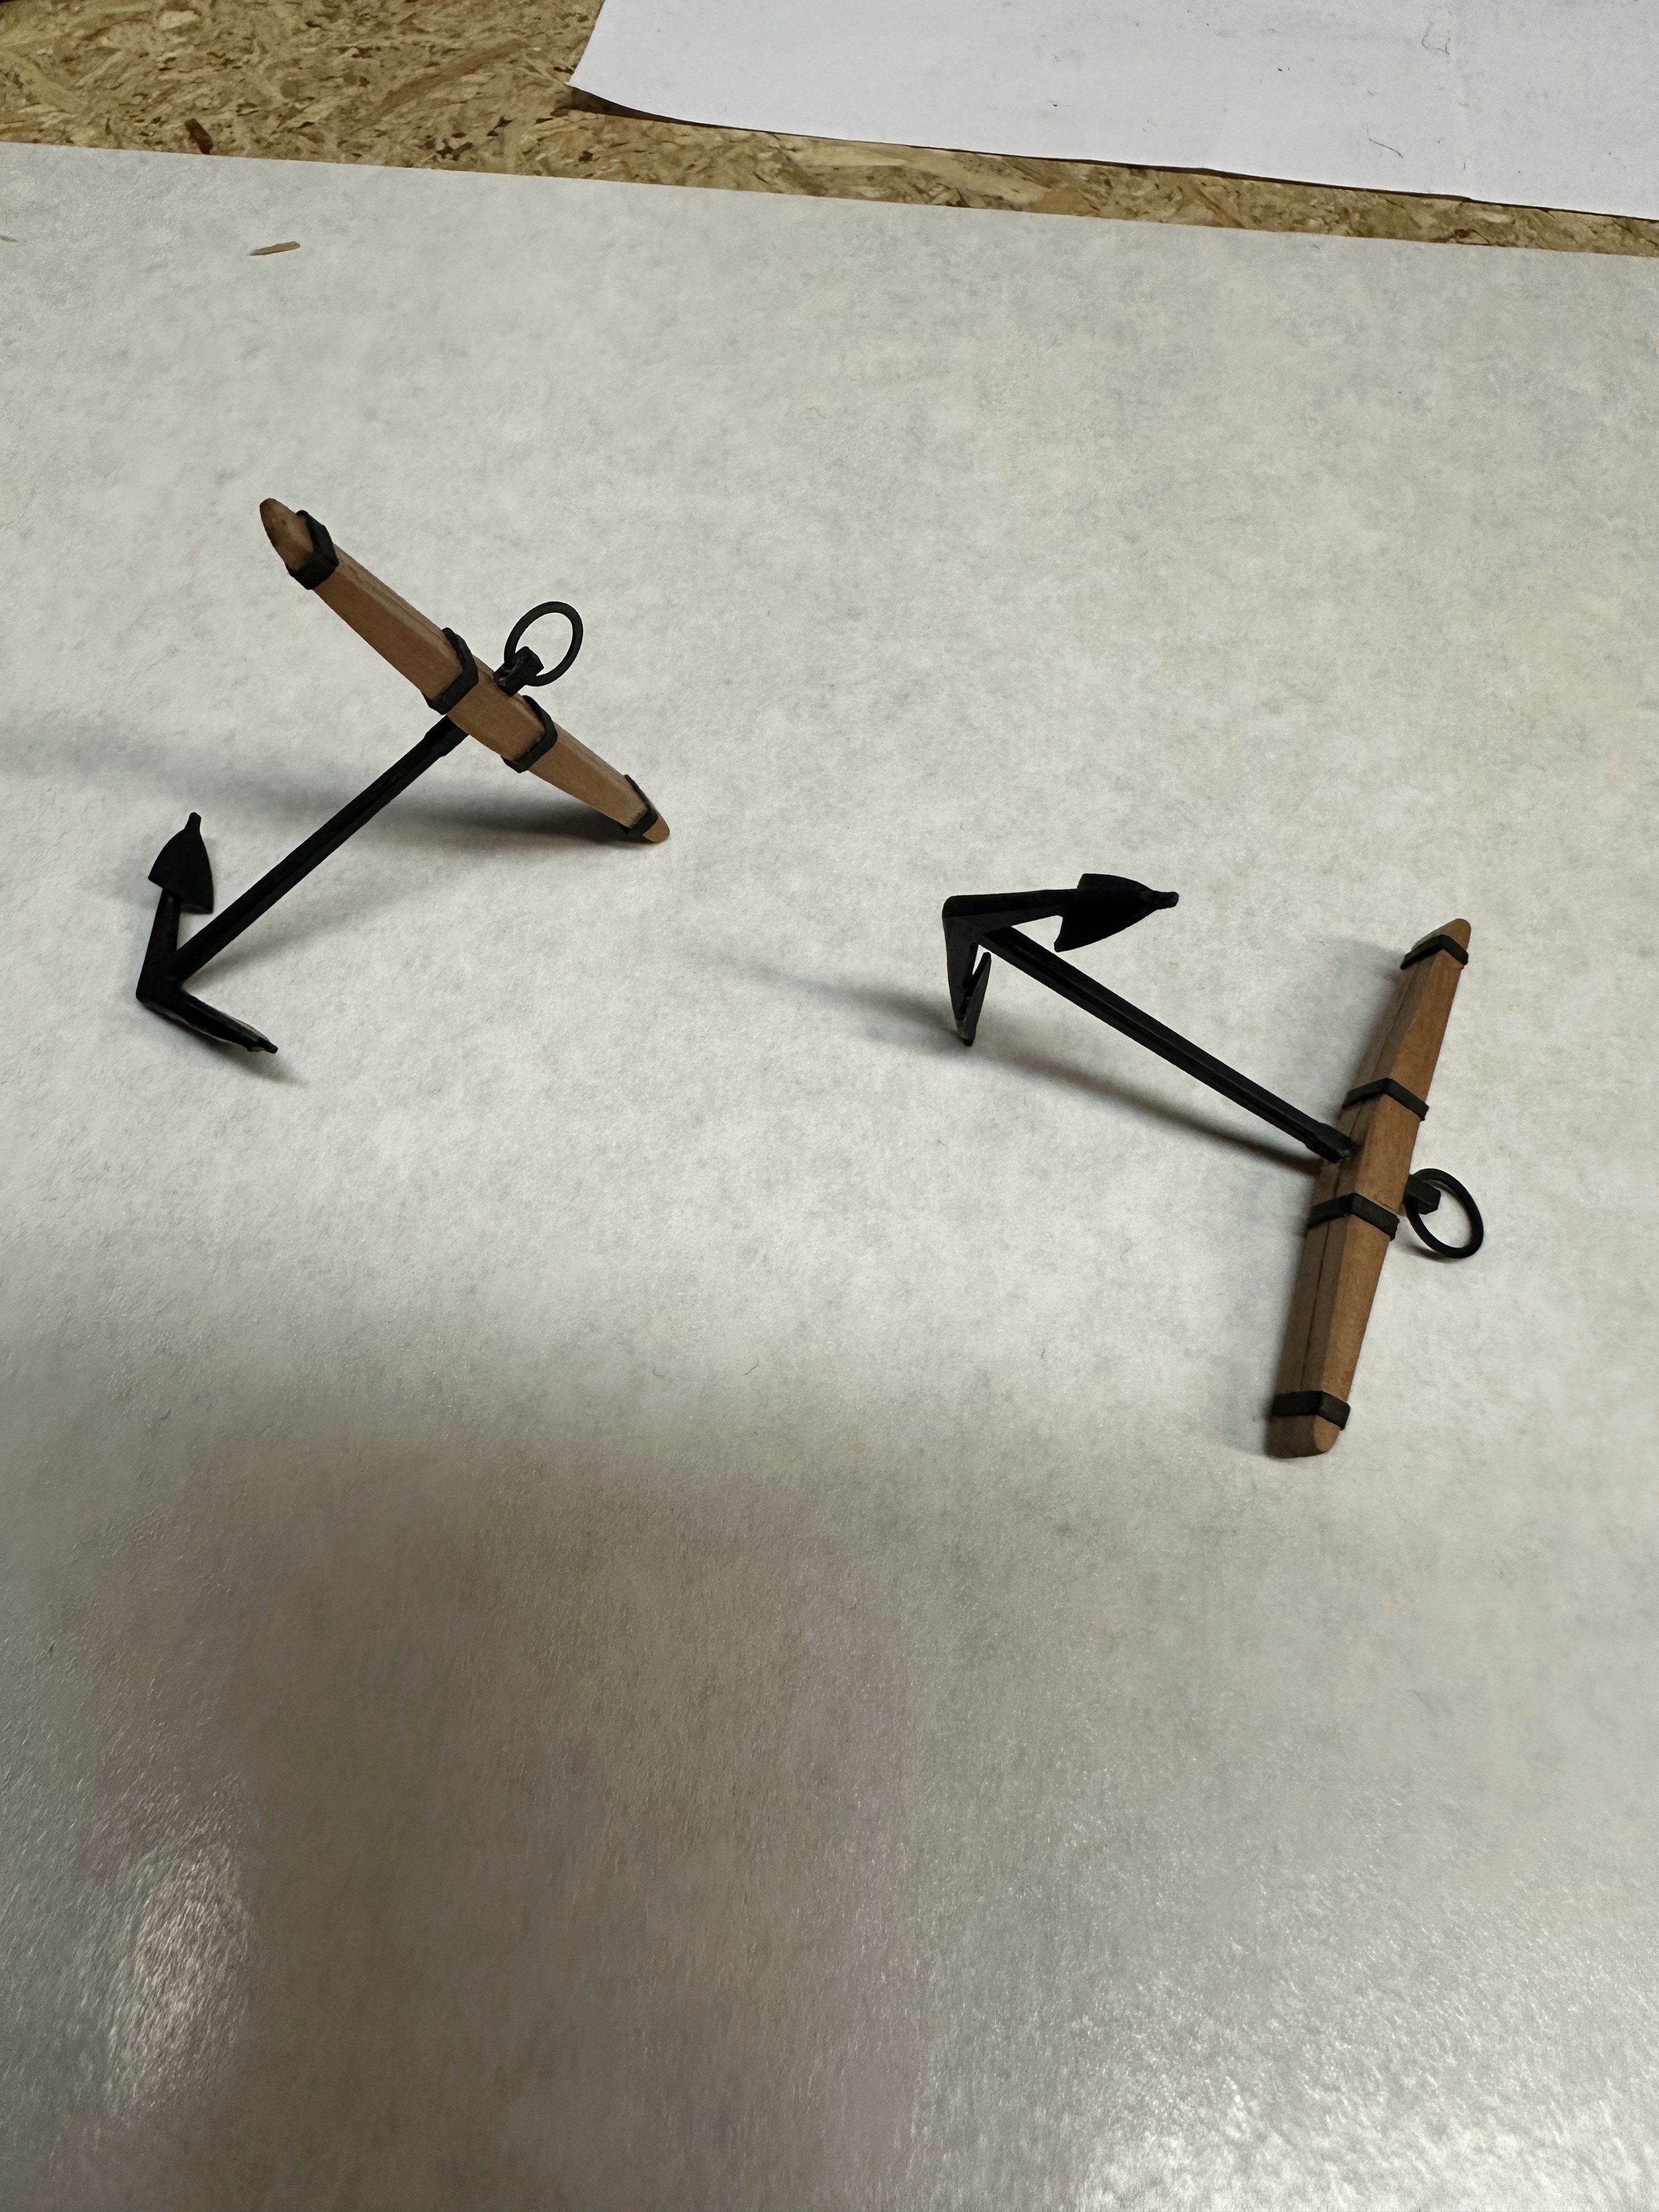
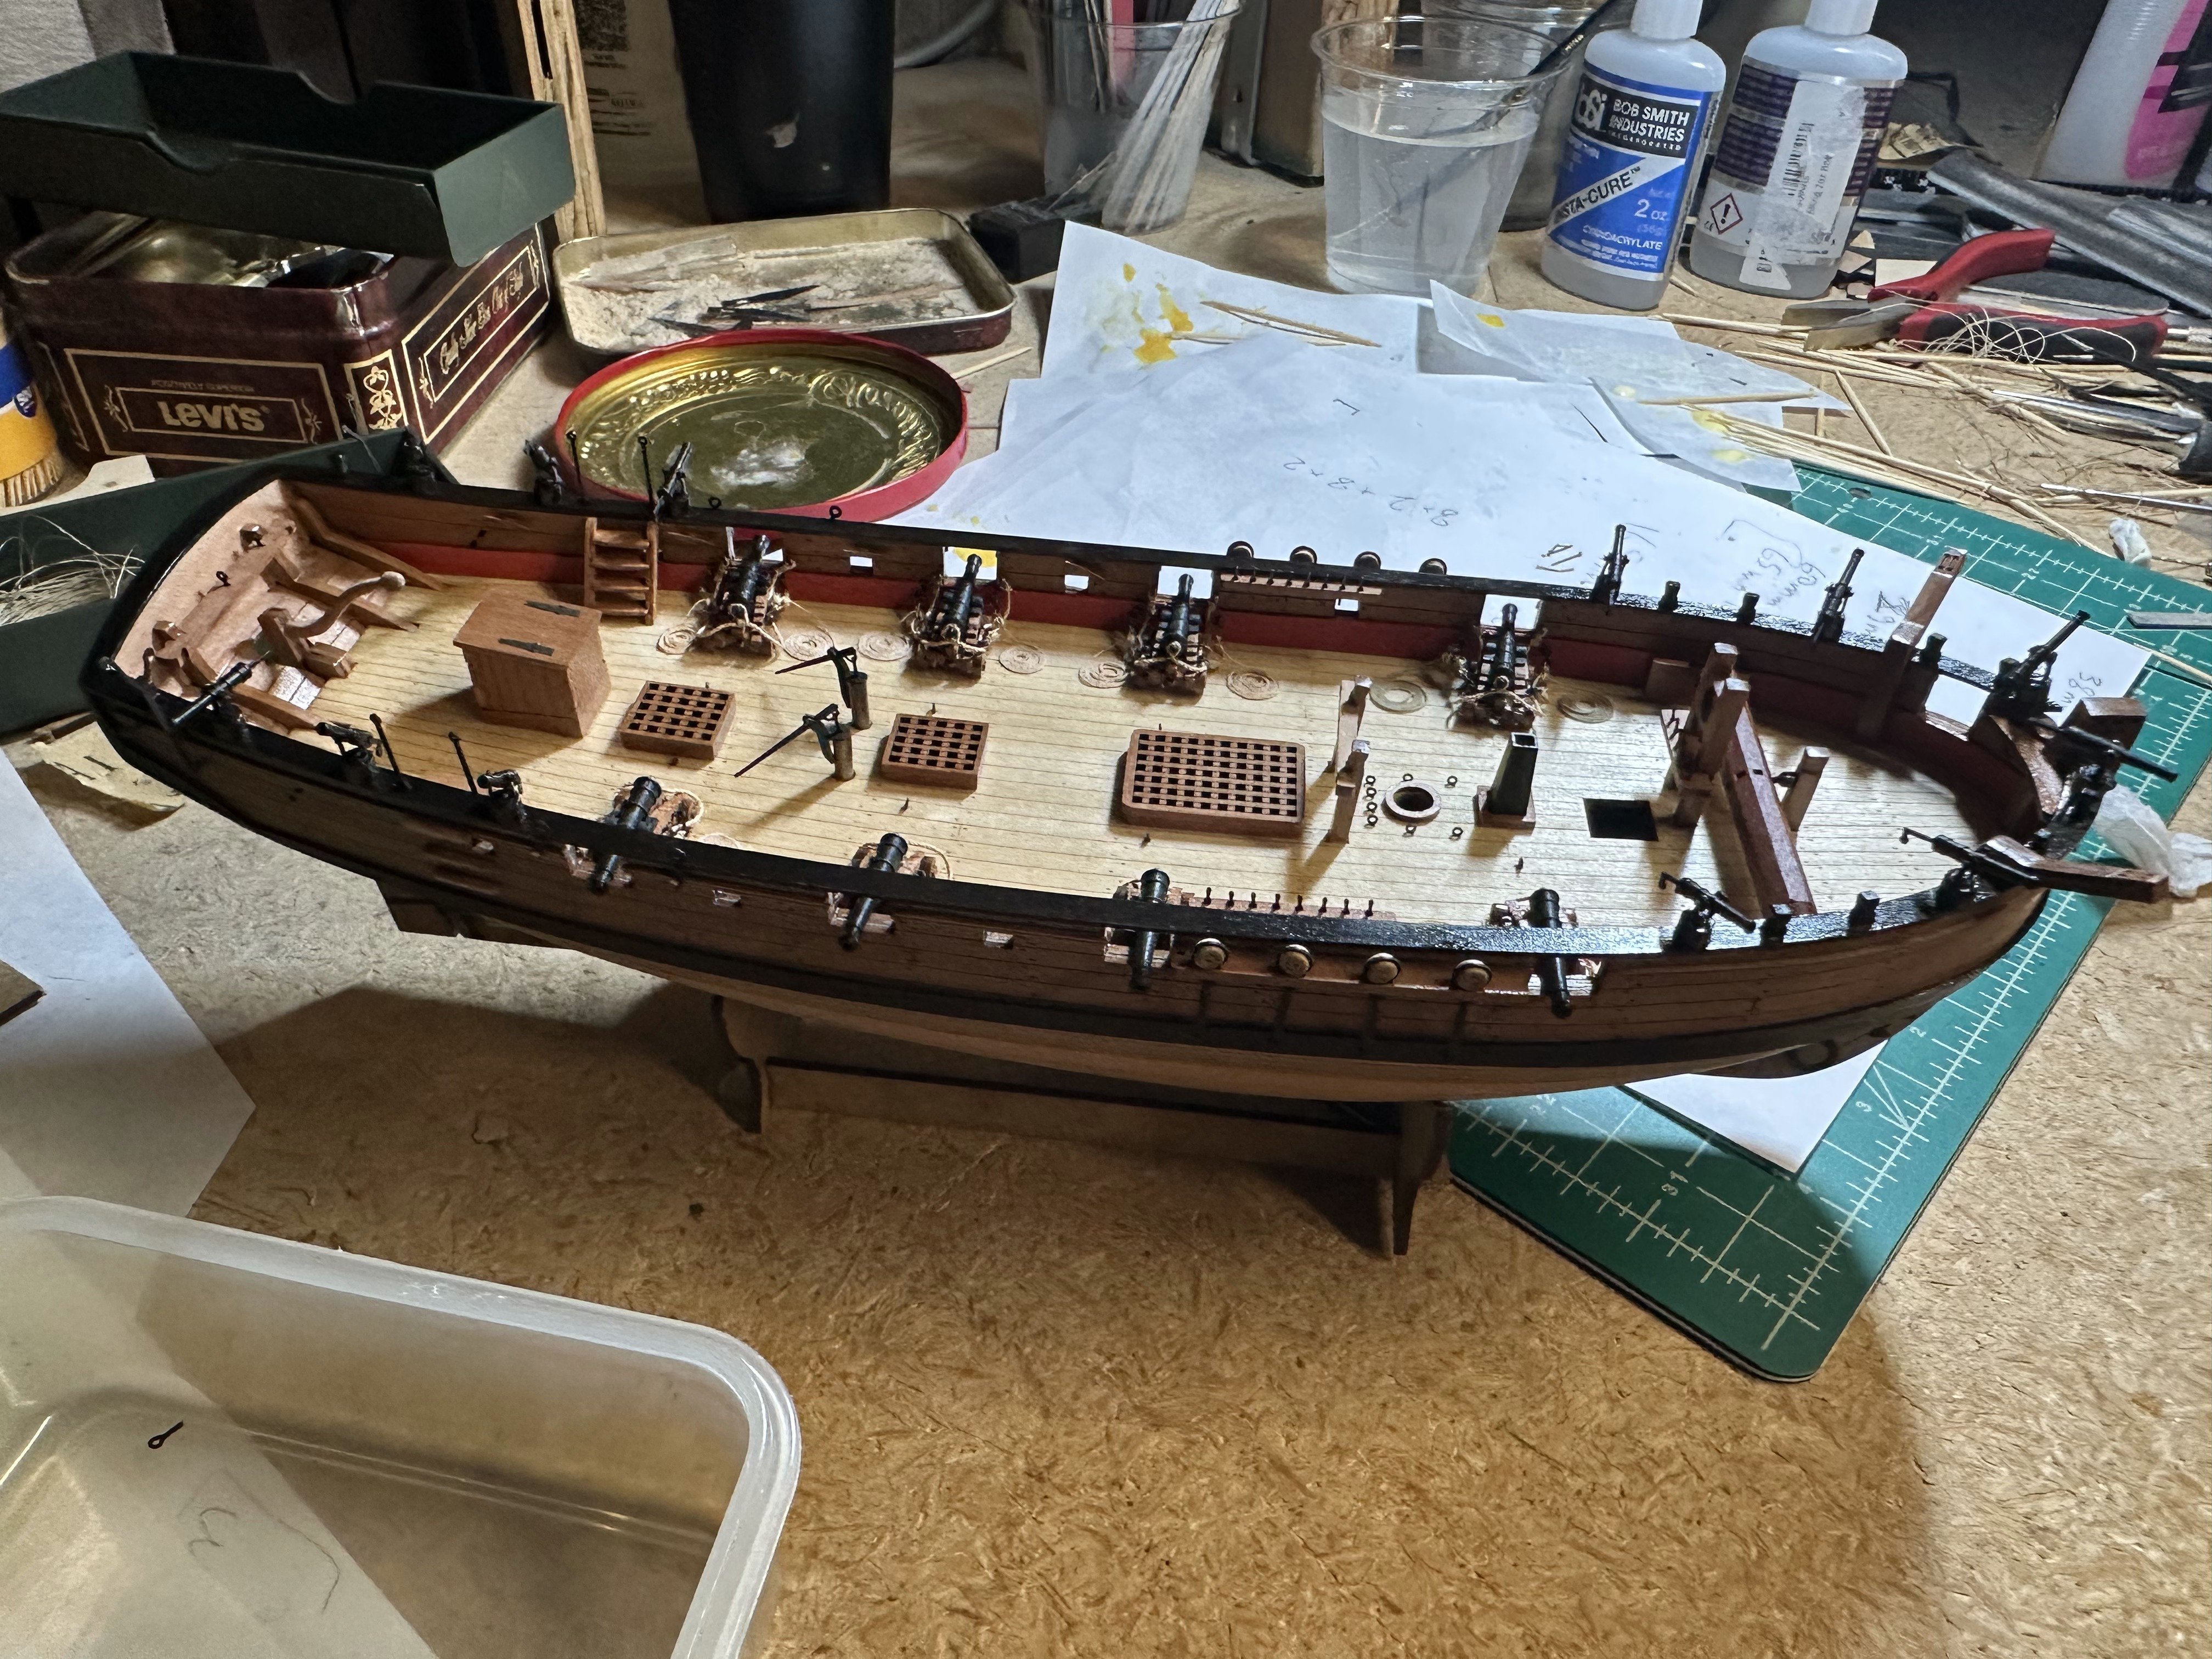
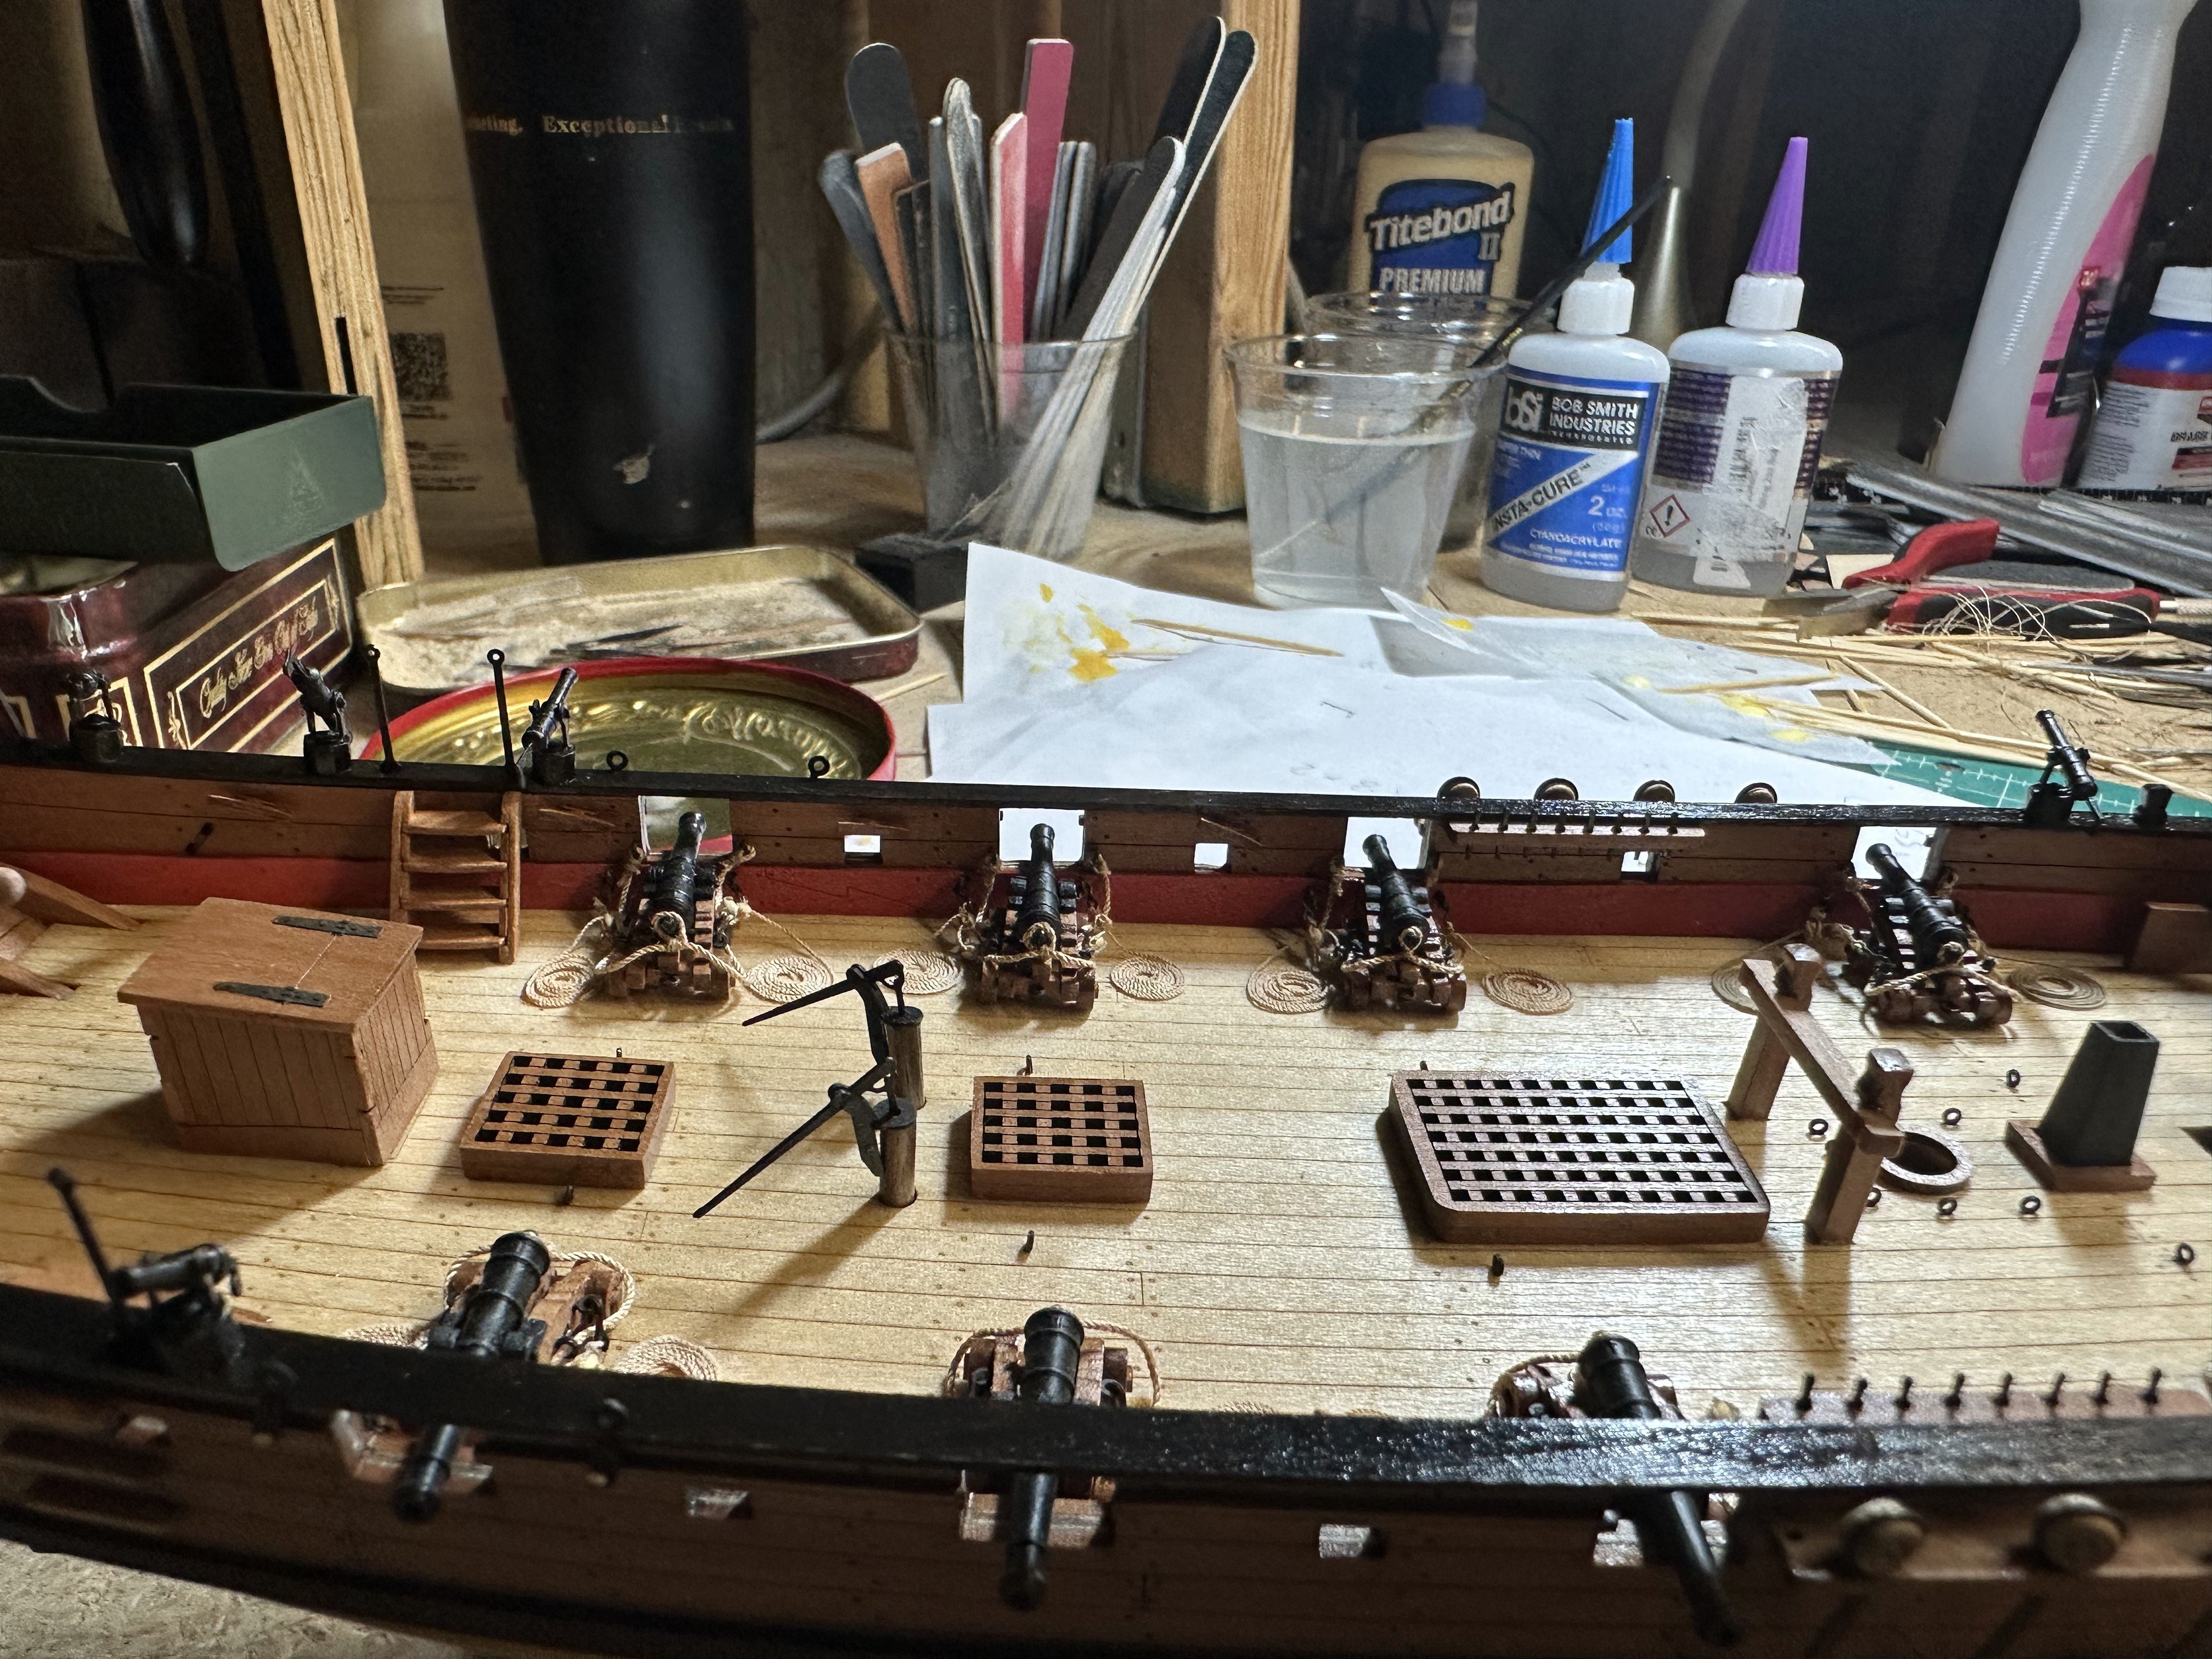
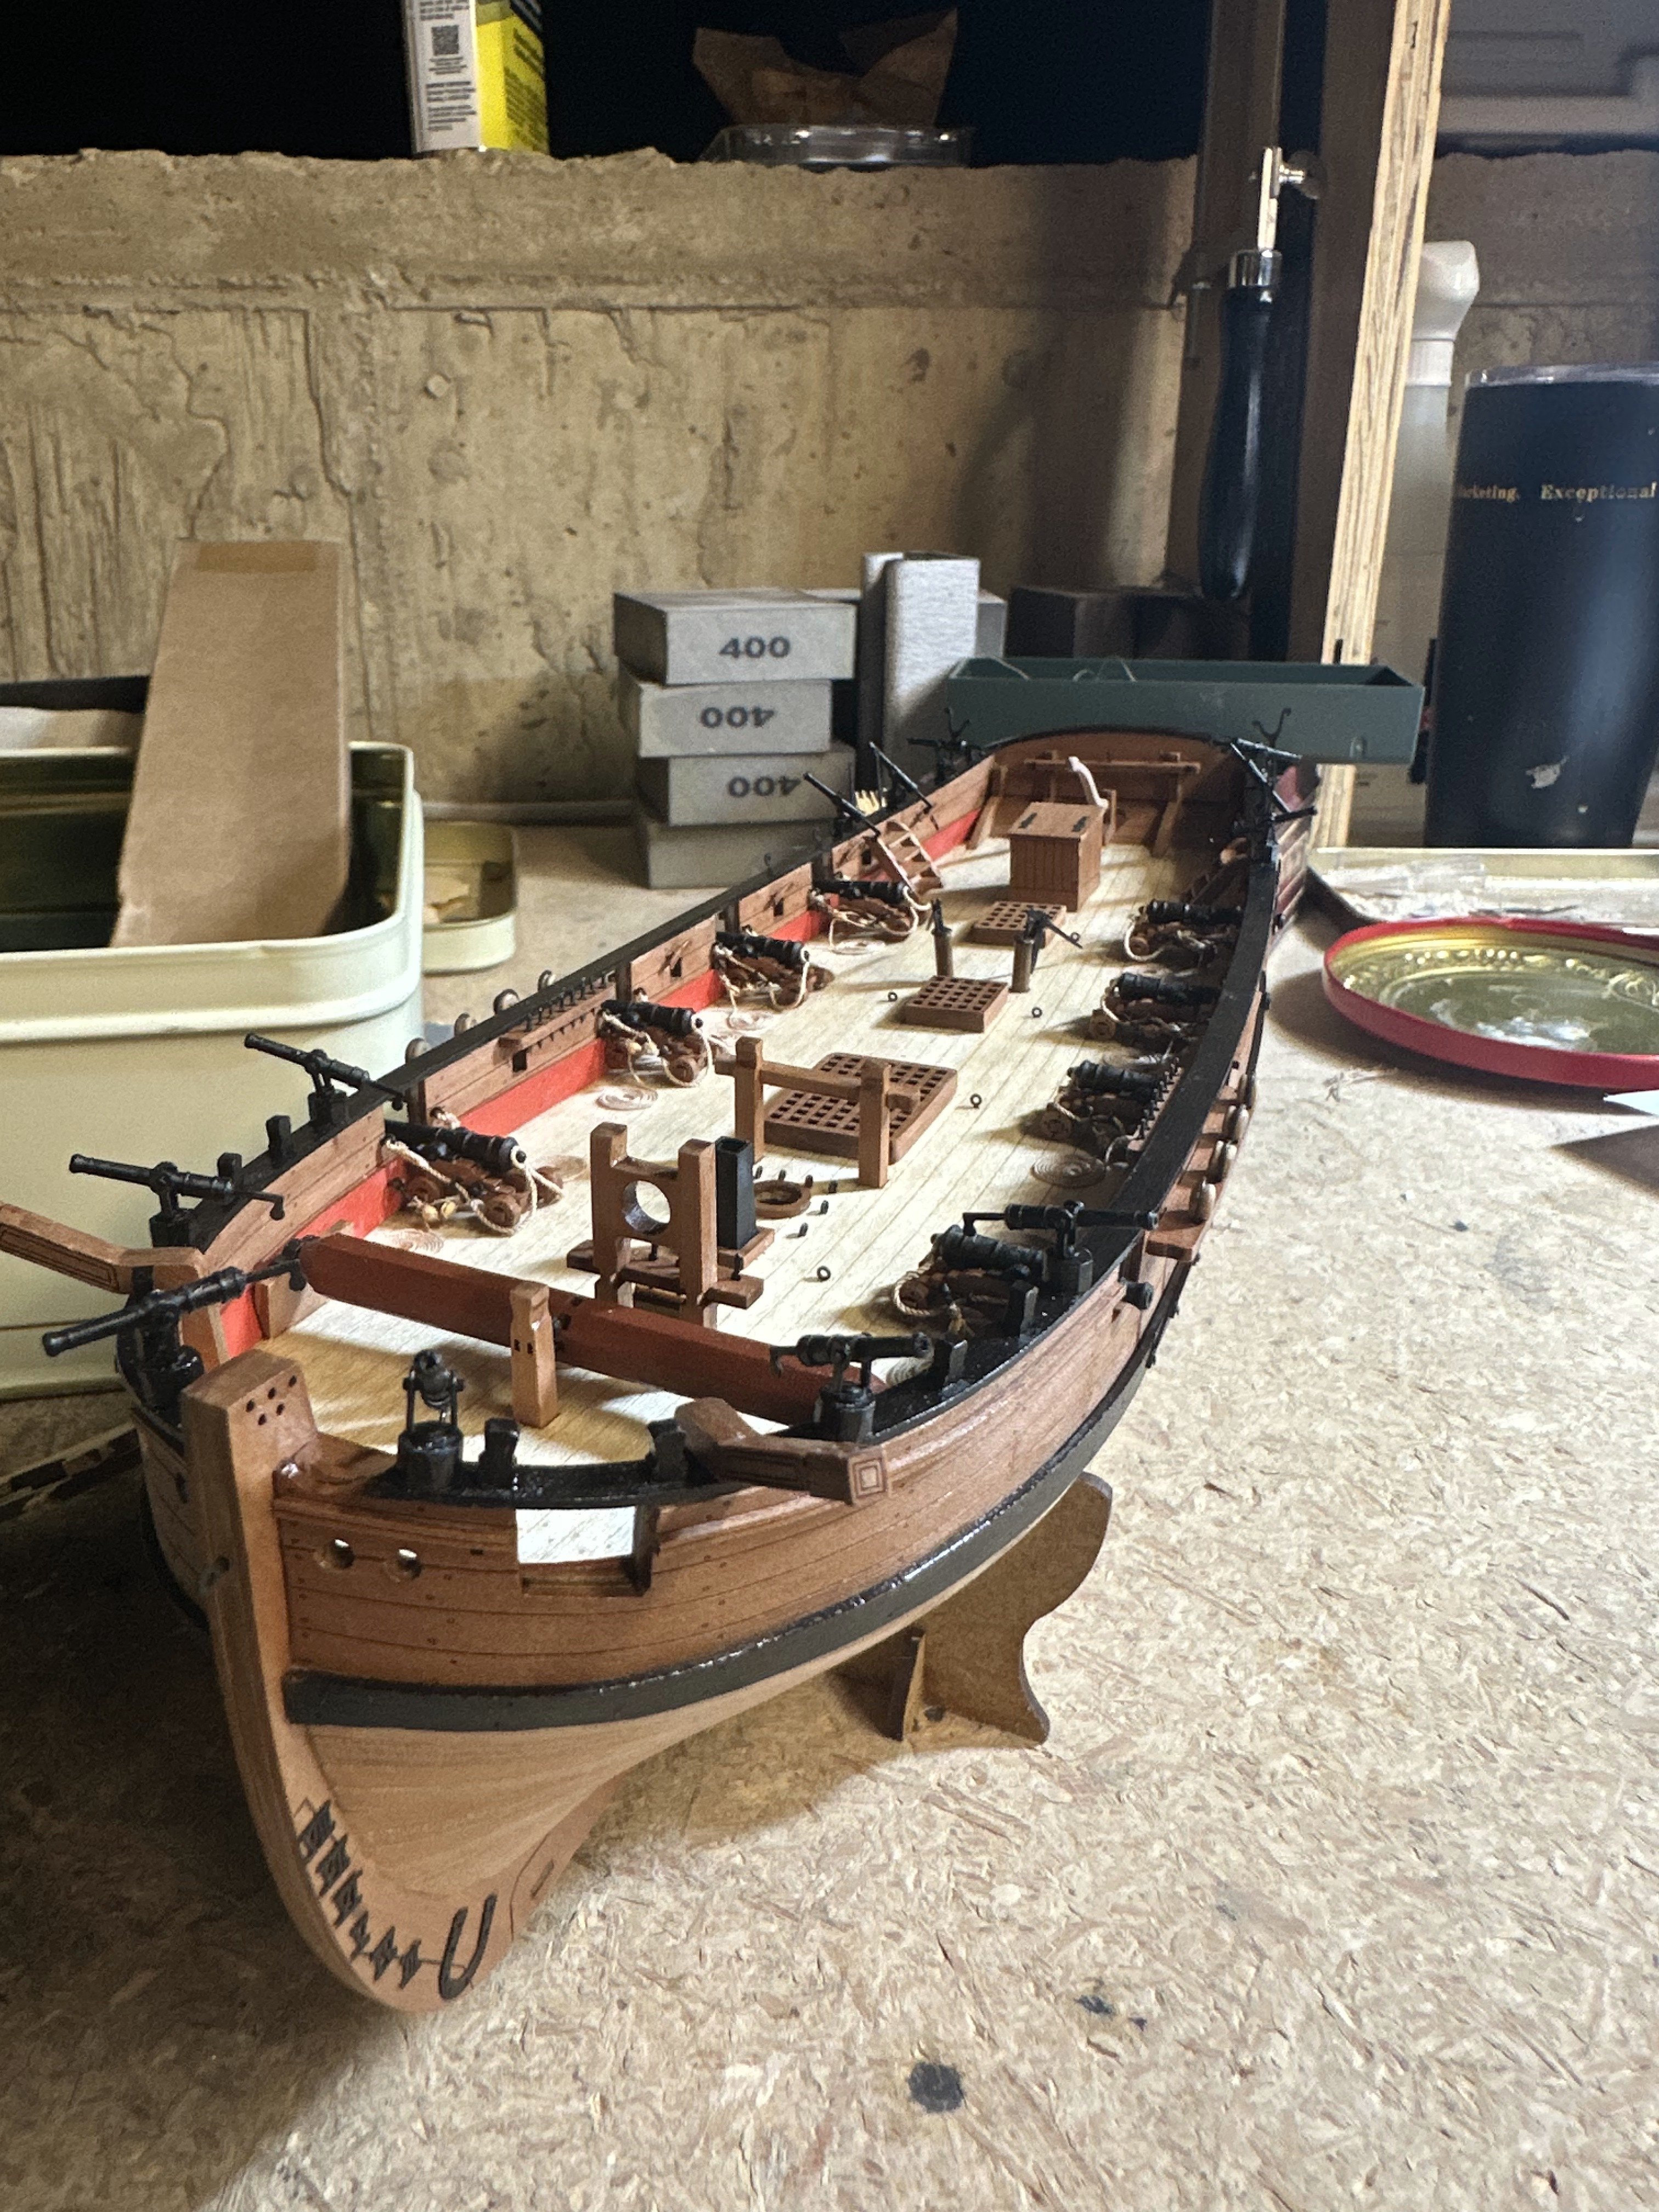
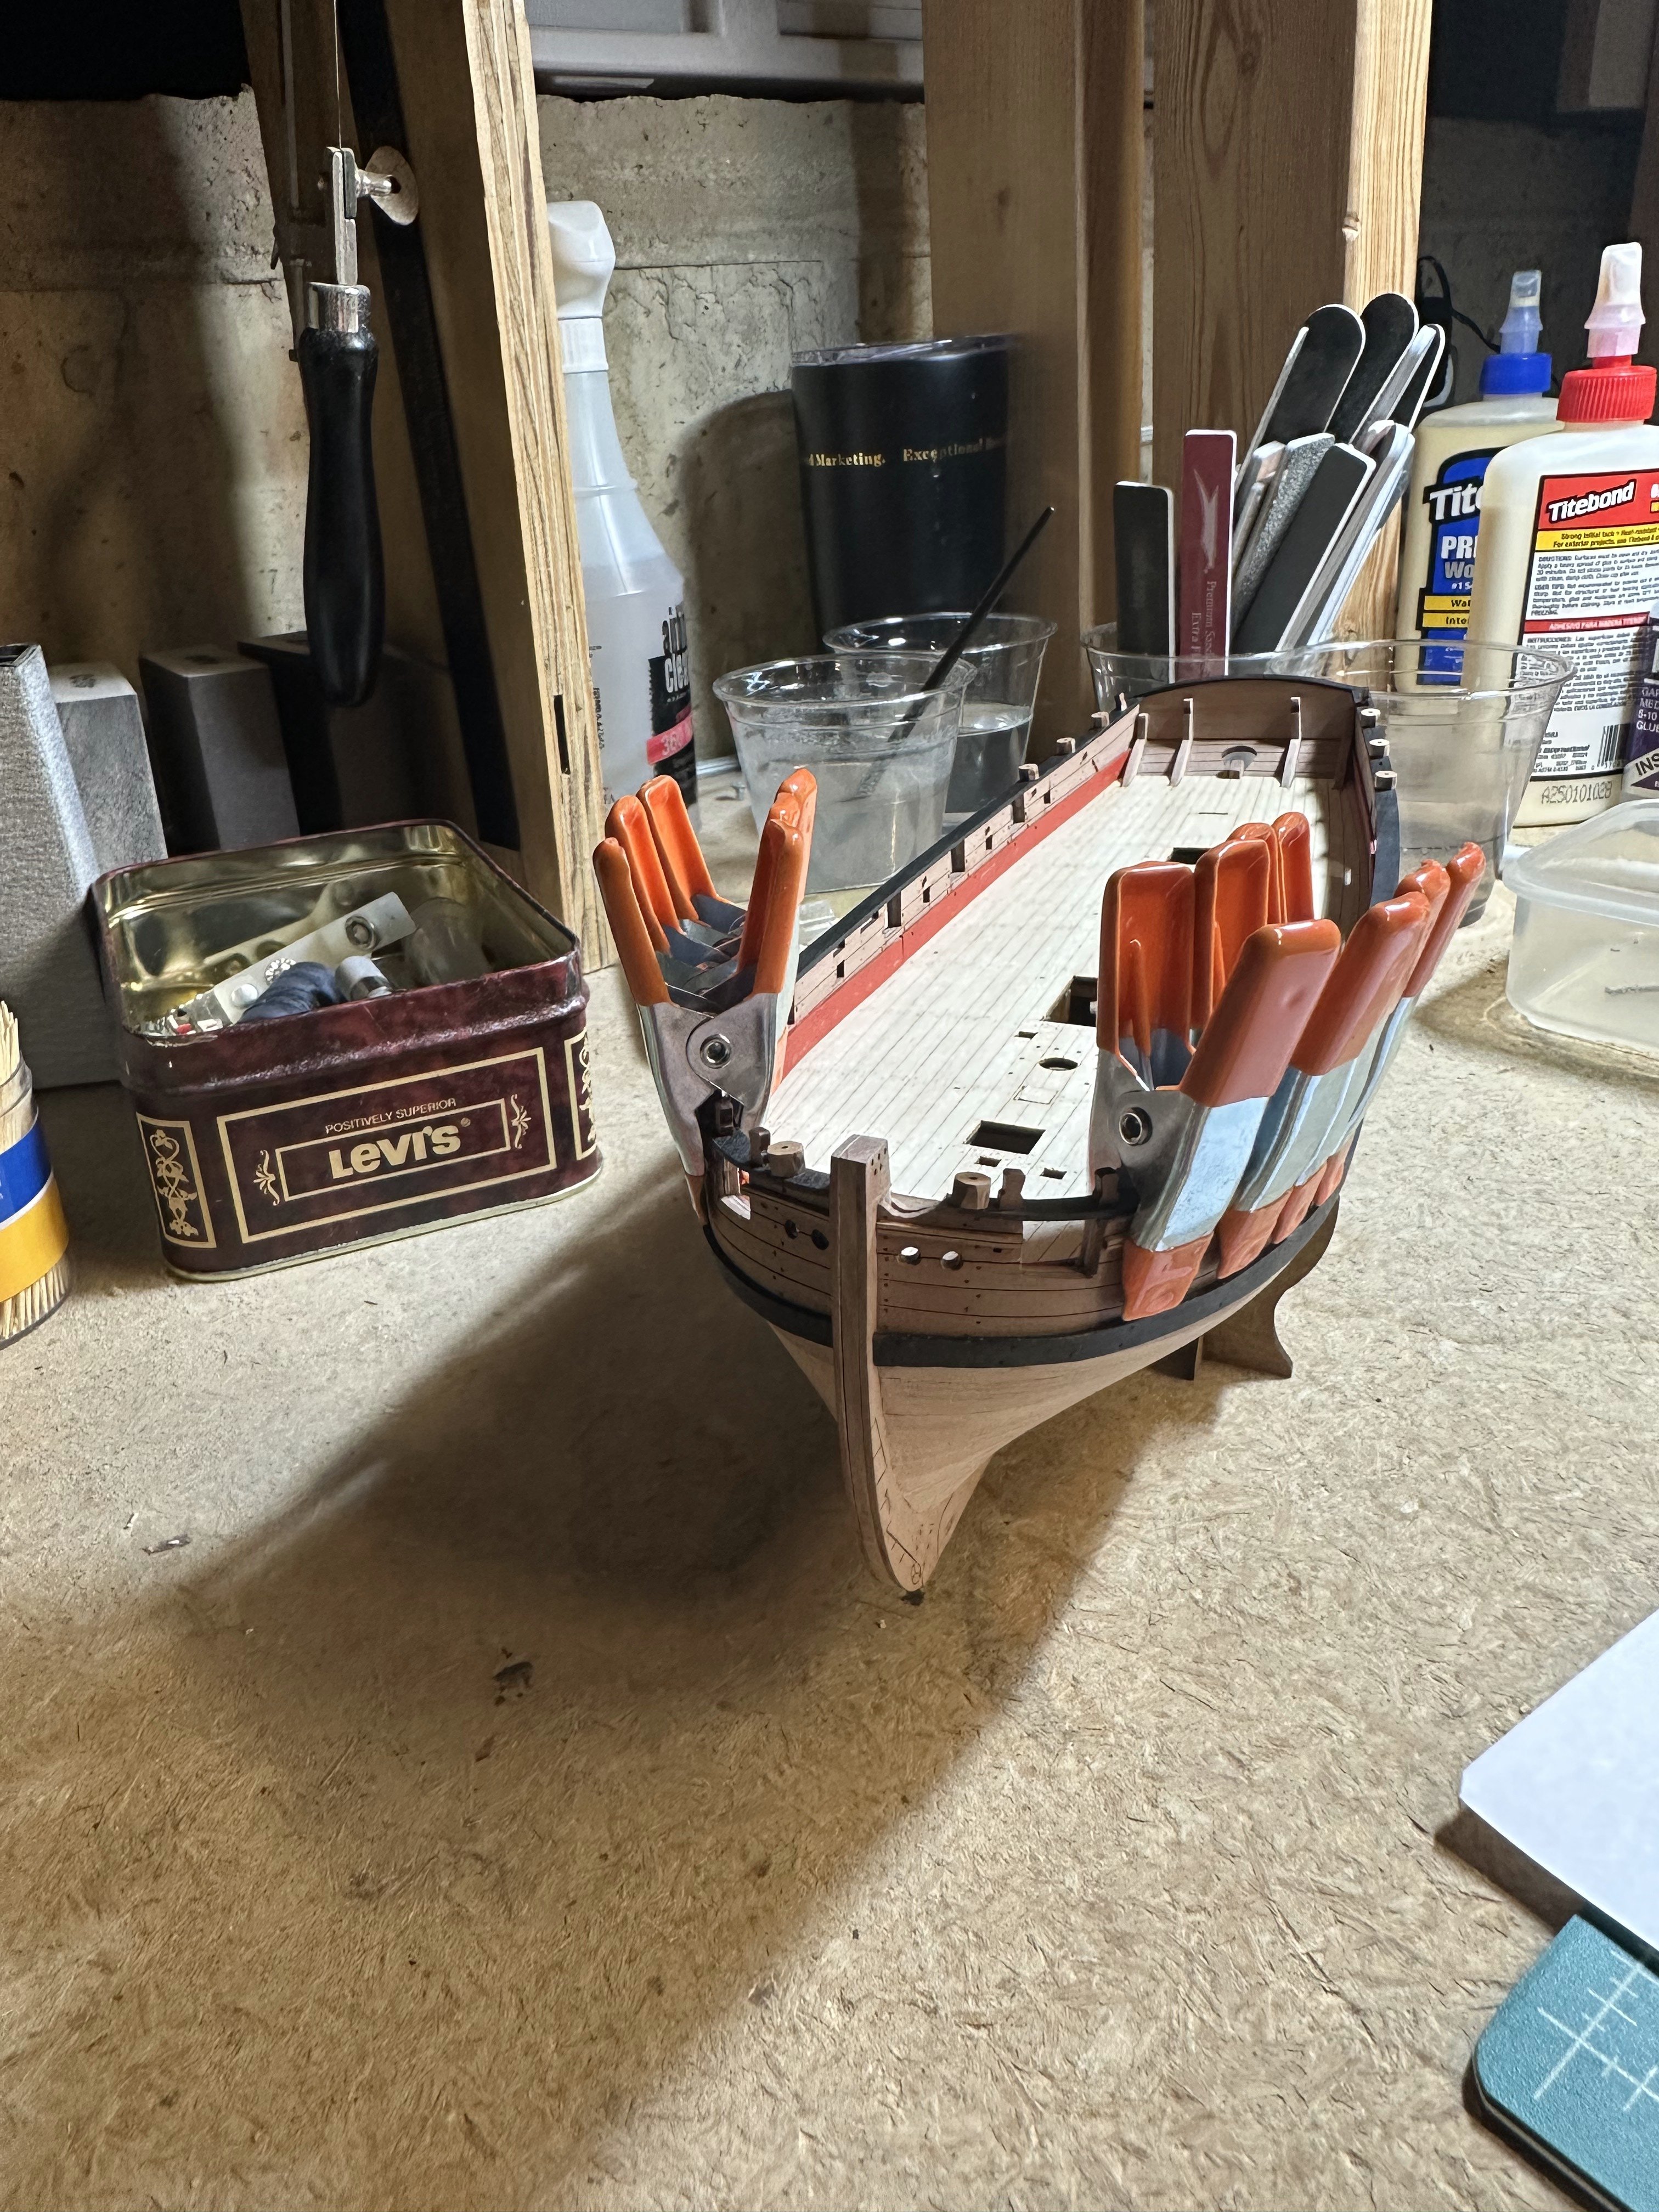
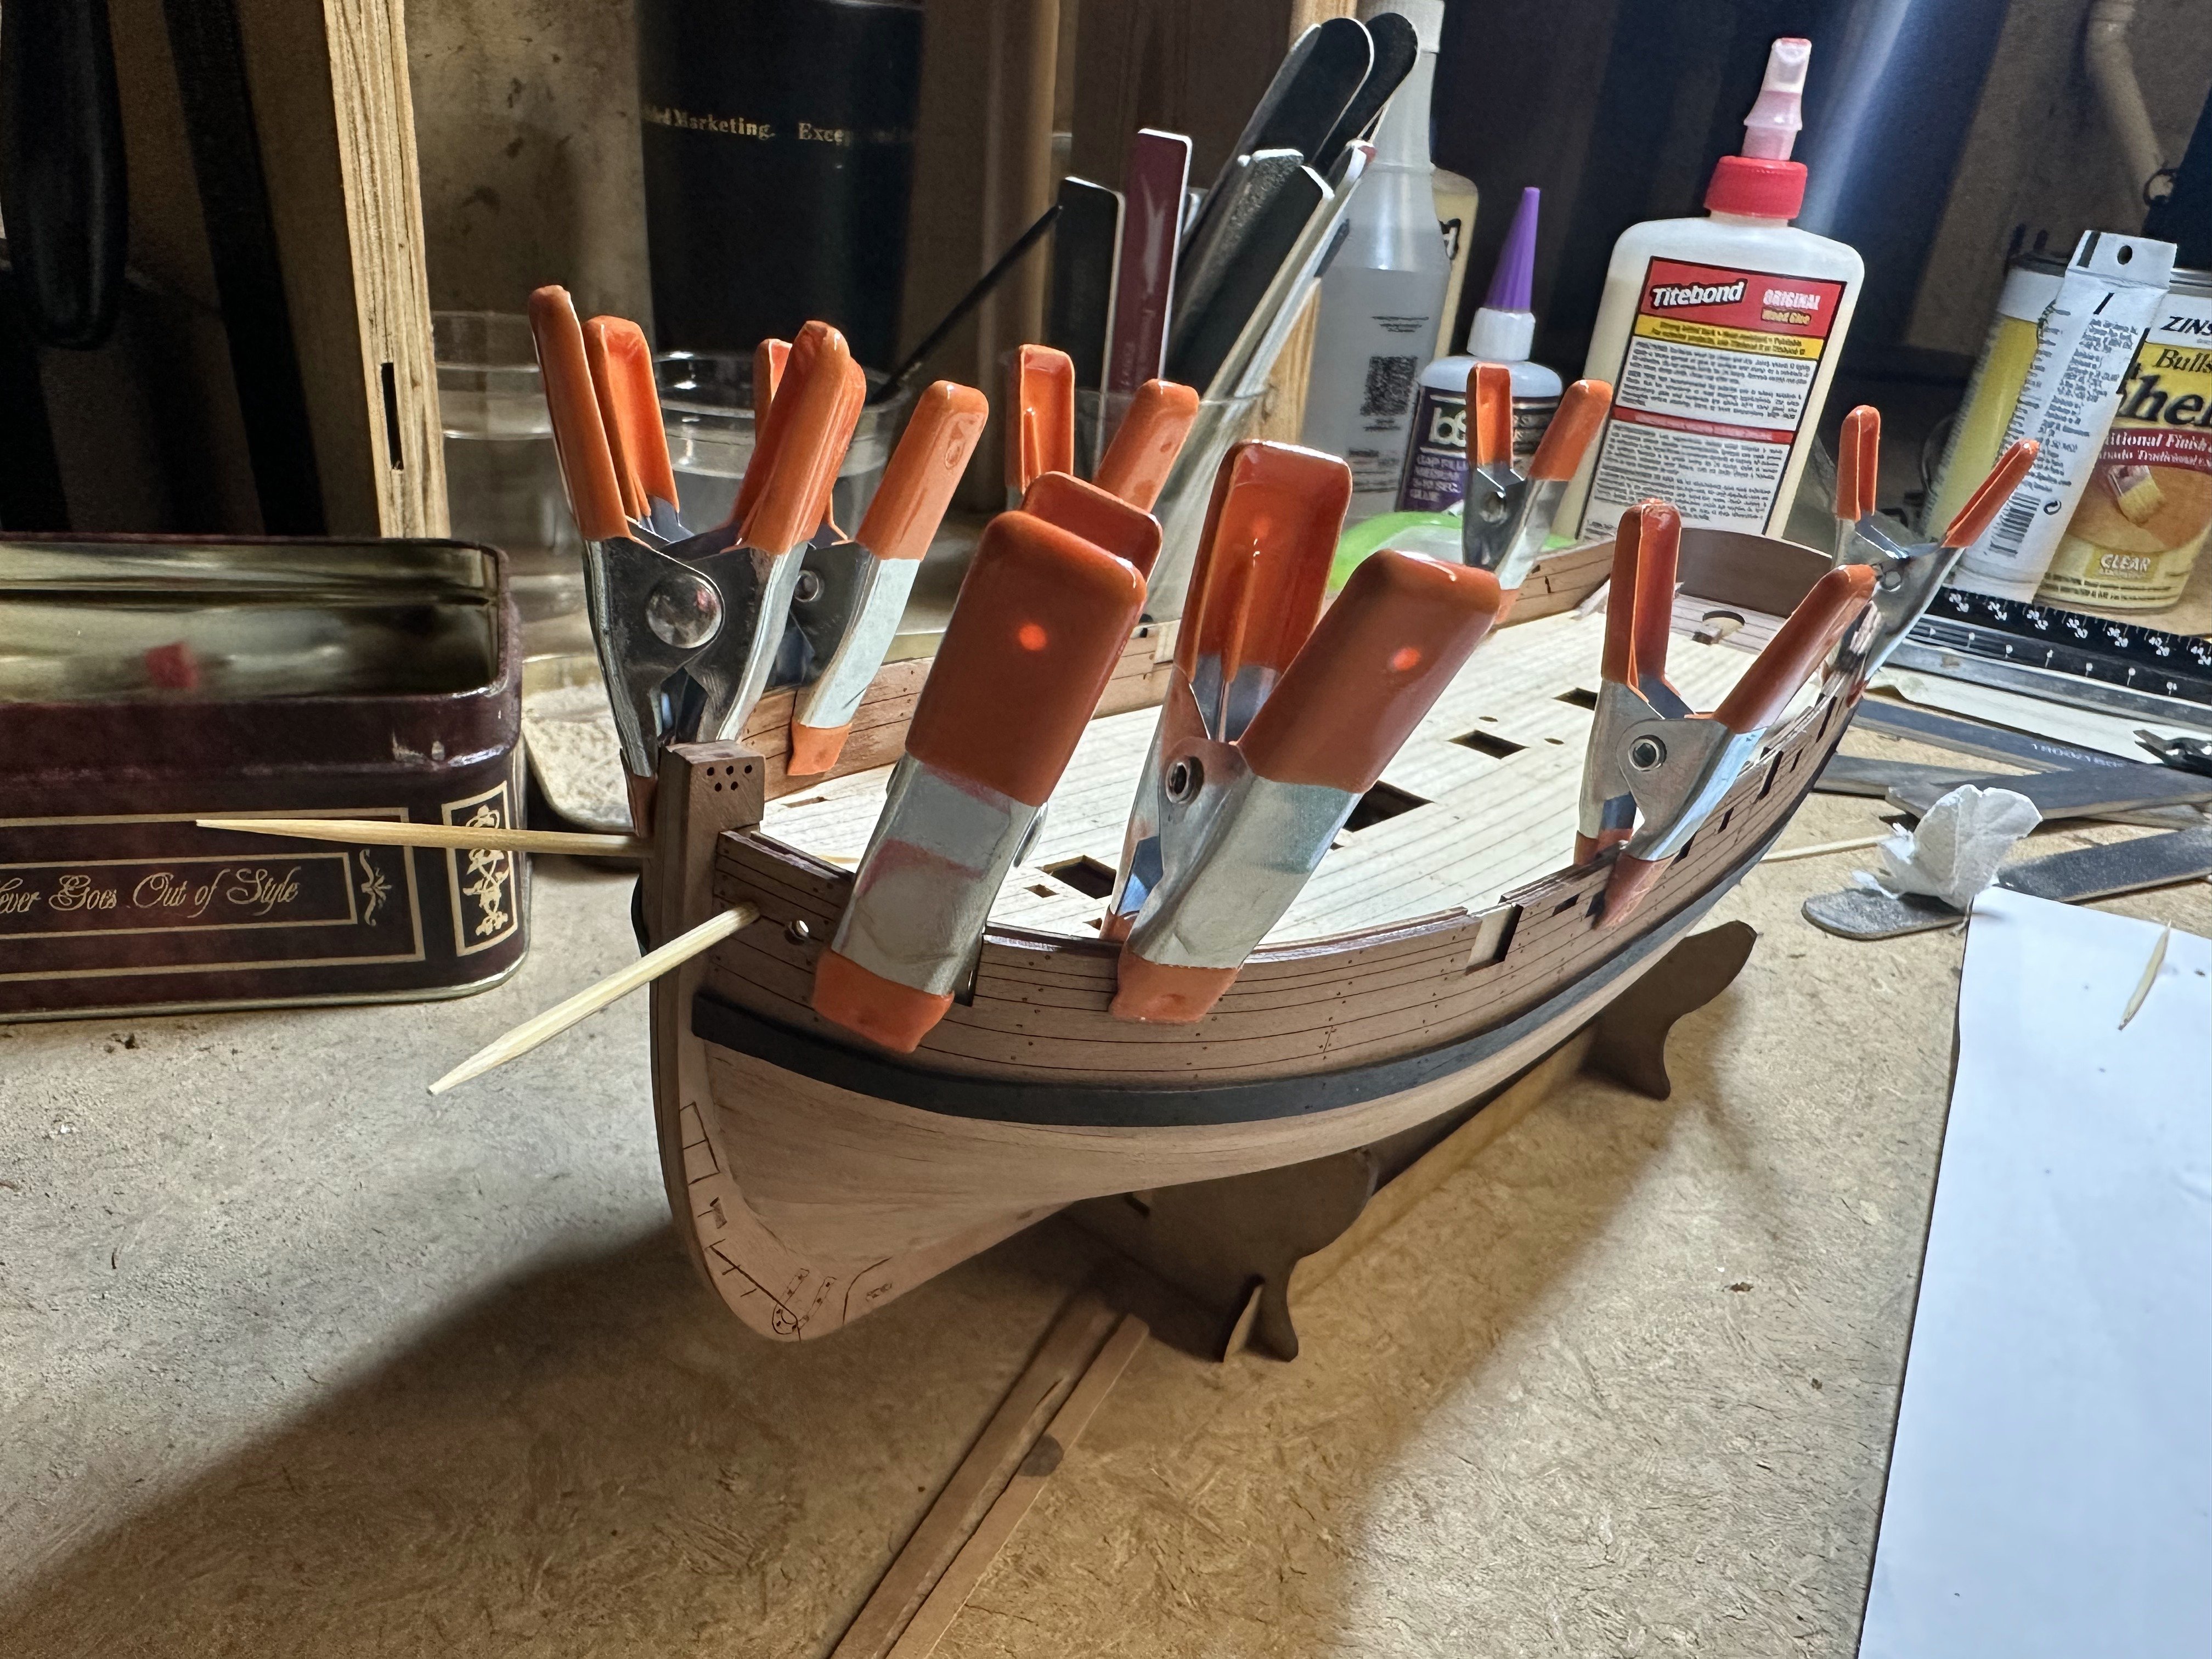
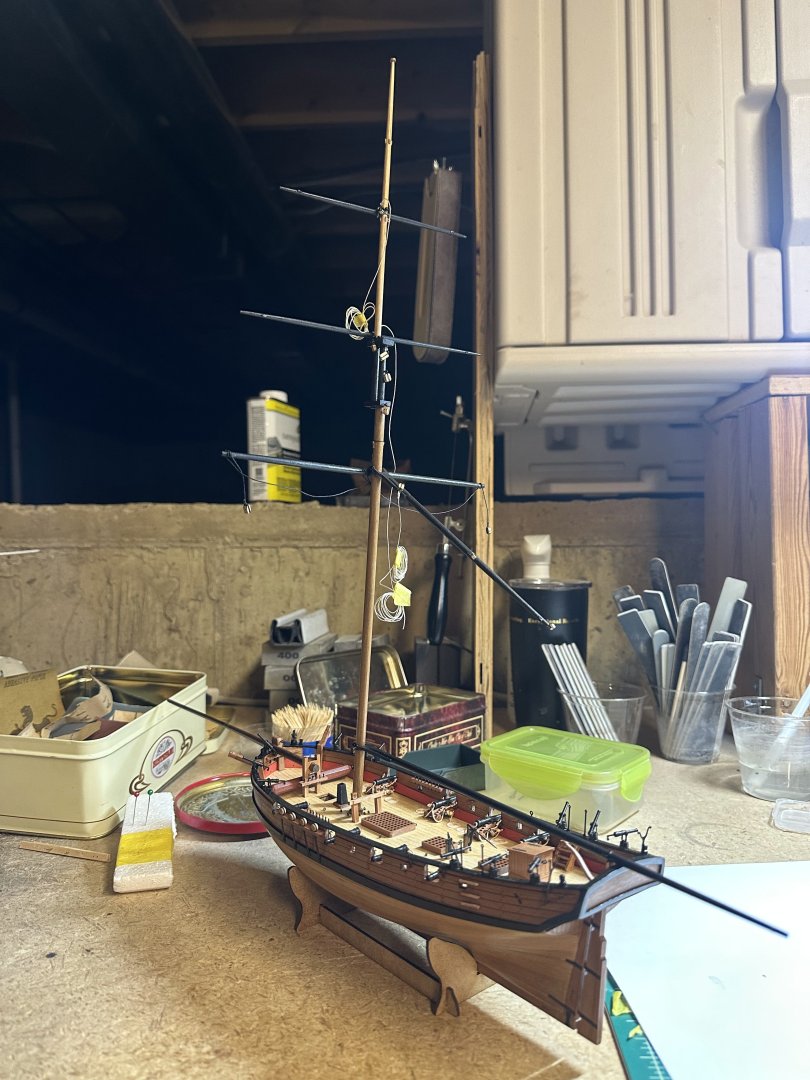
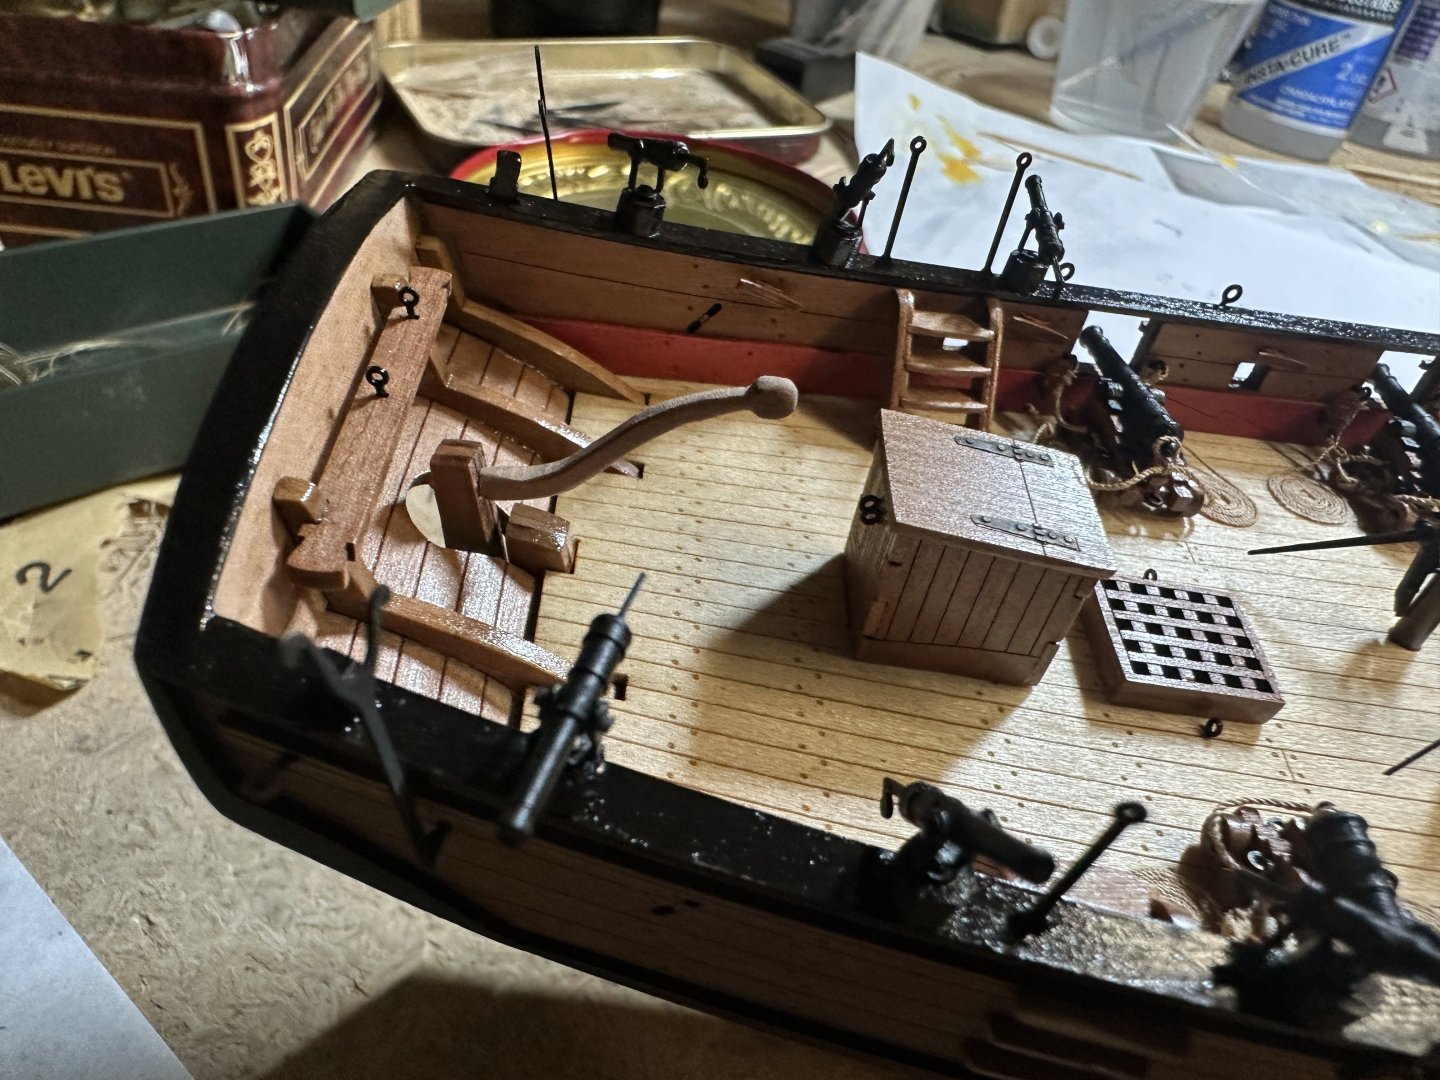
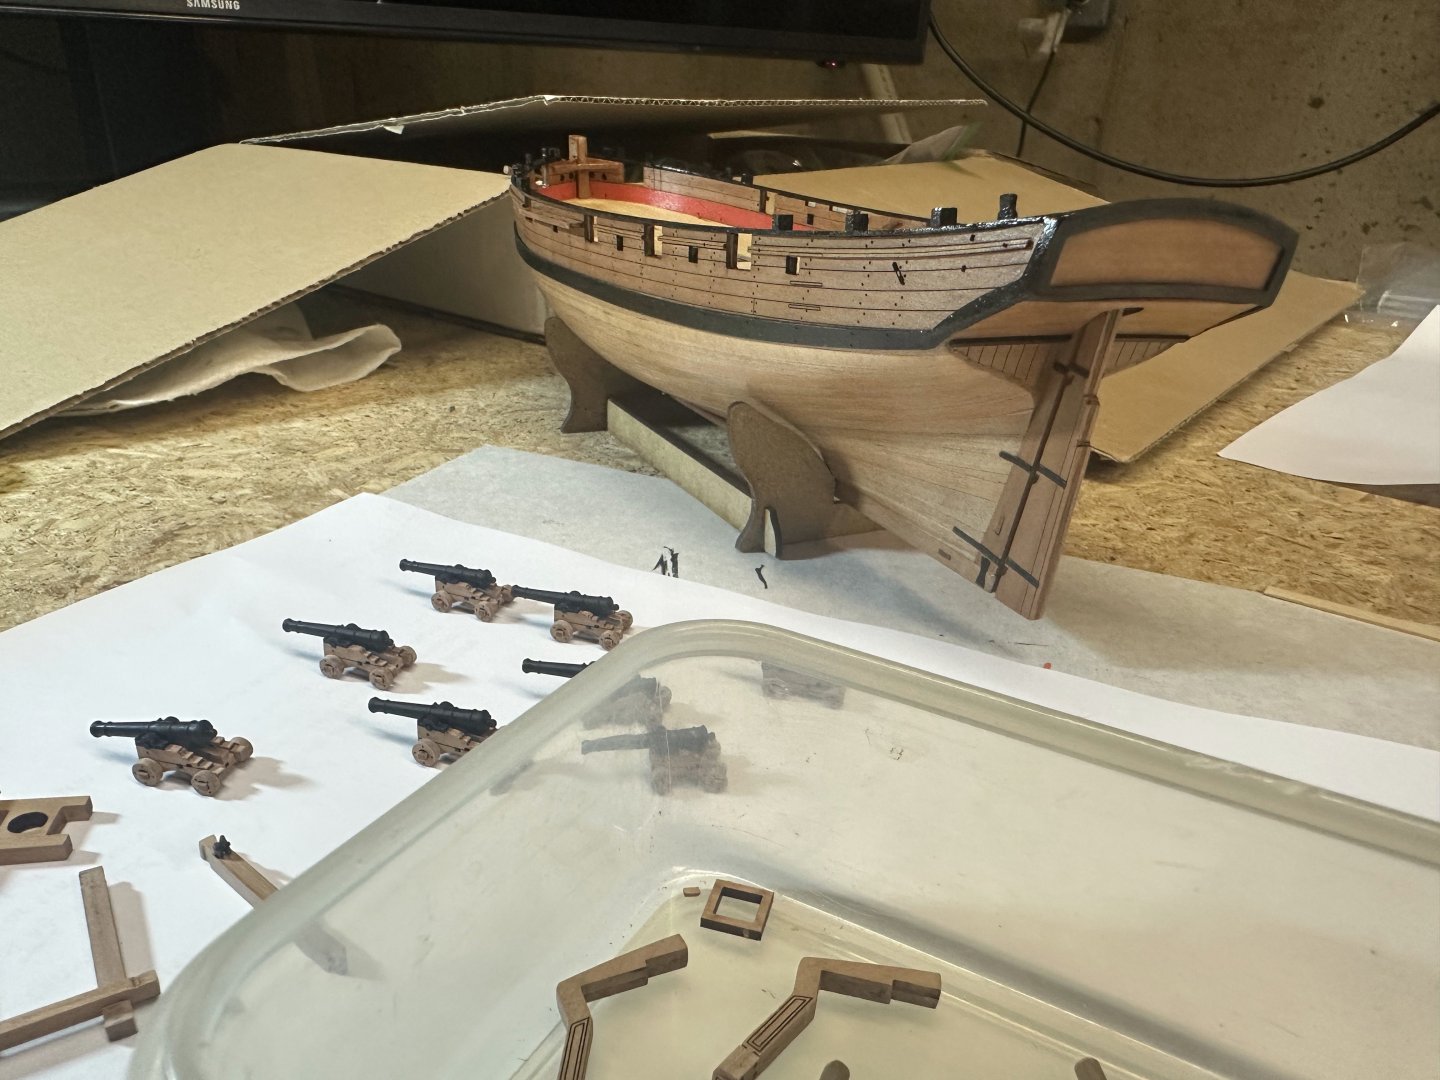
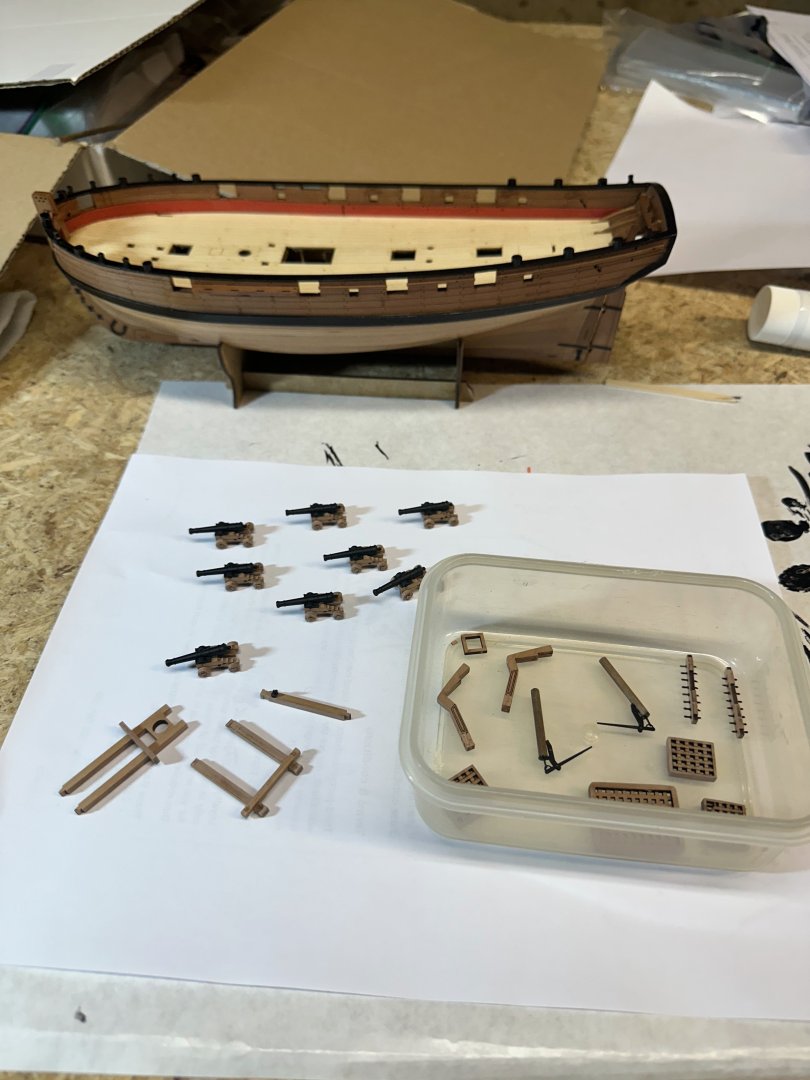
Working on the fittings and deck furniture.. The big question is what to do with the cannon rigging... really want to do it to learn but this is the first time so a bit daunting. I bought some hooks, .6 mm and .3 mm rope, and 2 mm boxwood single sheave blocks from Syren (based on recommendations here). (6 blocks per gun, 6 hooks..) also bought Tiny Photo Etch Eye Pin 1:48 - 24/set to have breeching lines pass through those but now contemplating if I will use them or not.. trying to figure out now what would be the easiest way to rig the cannons doable for a beginner... easiest configuration while still semi-historic.. do i hook the end one to the eye pin on the deck and if not do i leave it out altogether or put to the side... Would anyone have suggestions on the overall approach? would really appreciate if others had any advice...


-
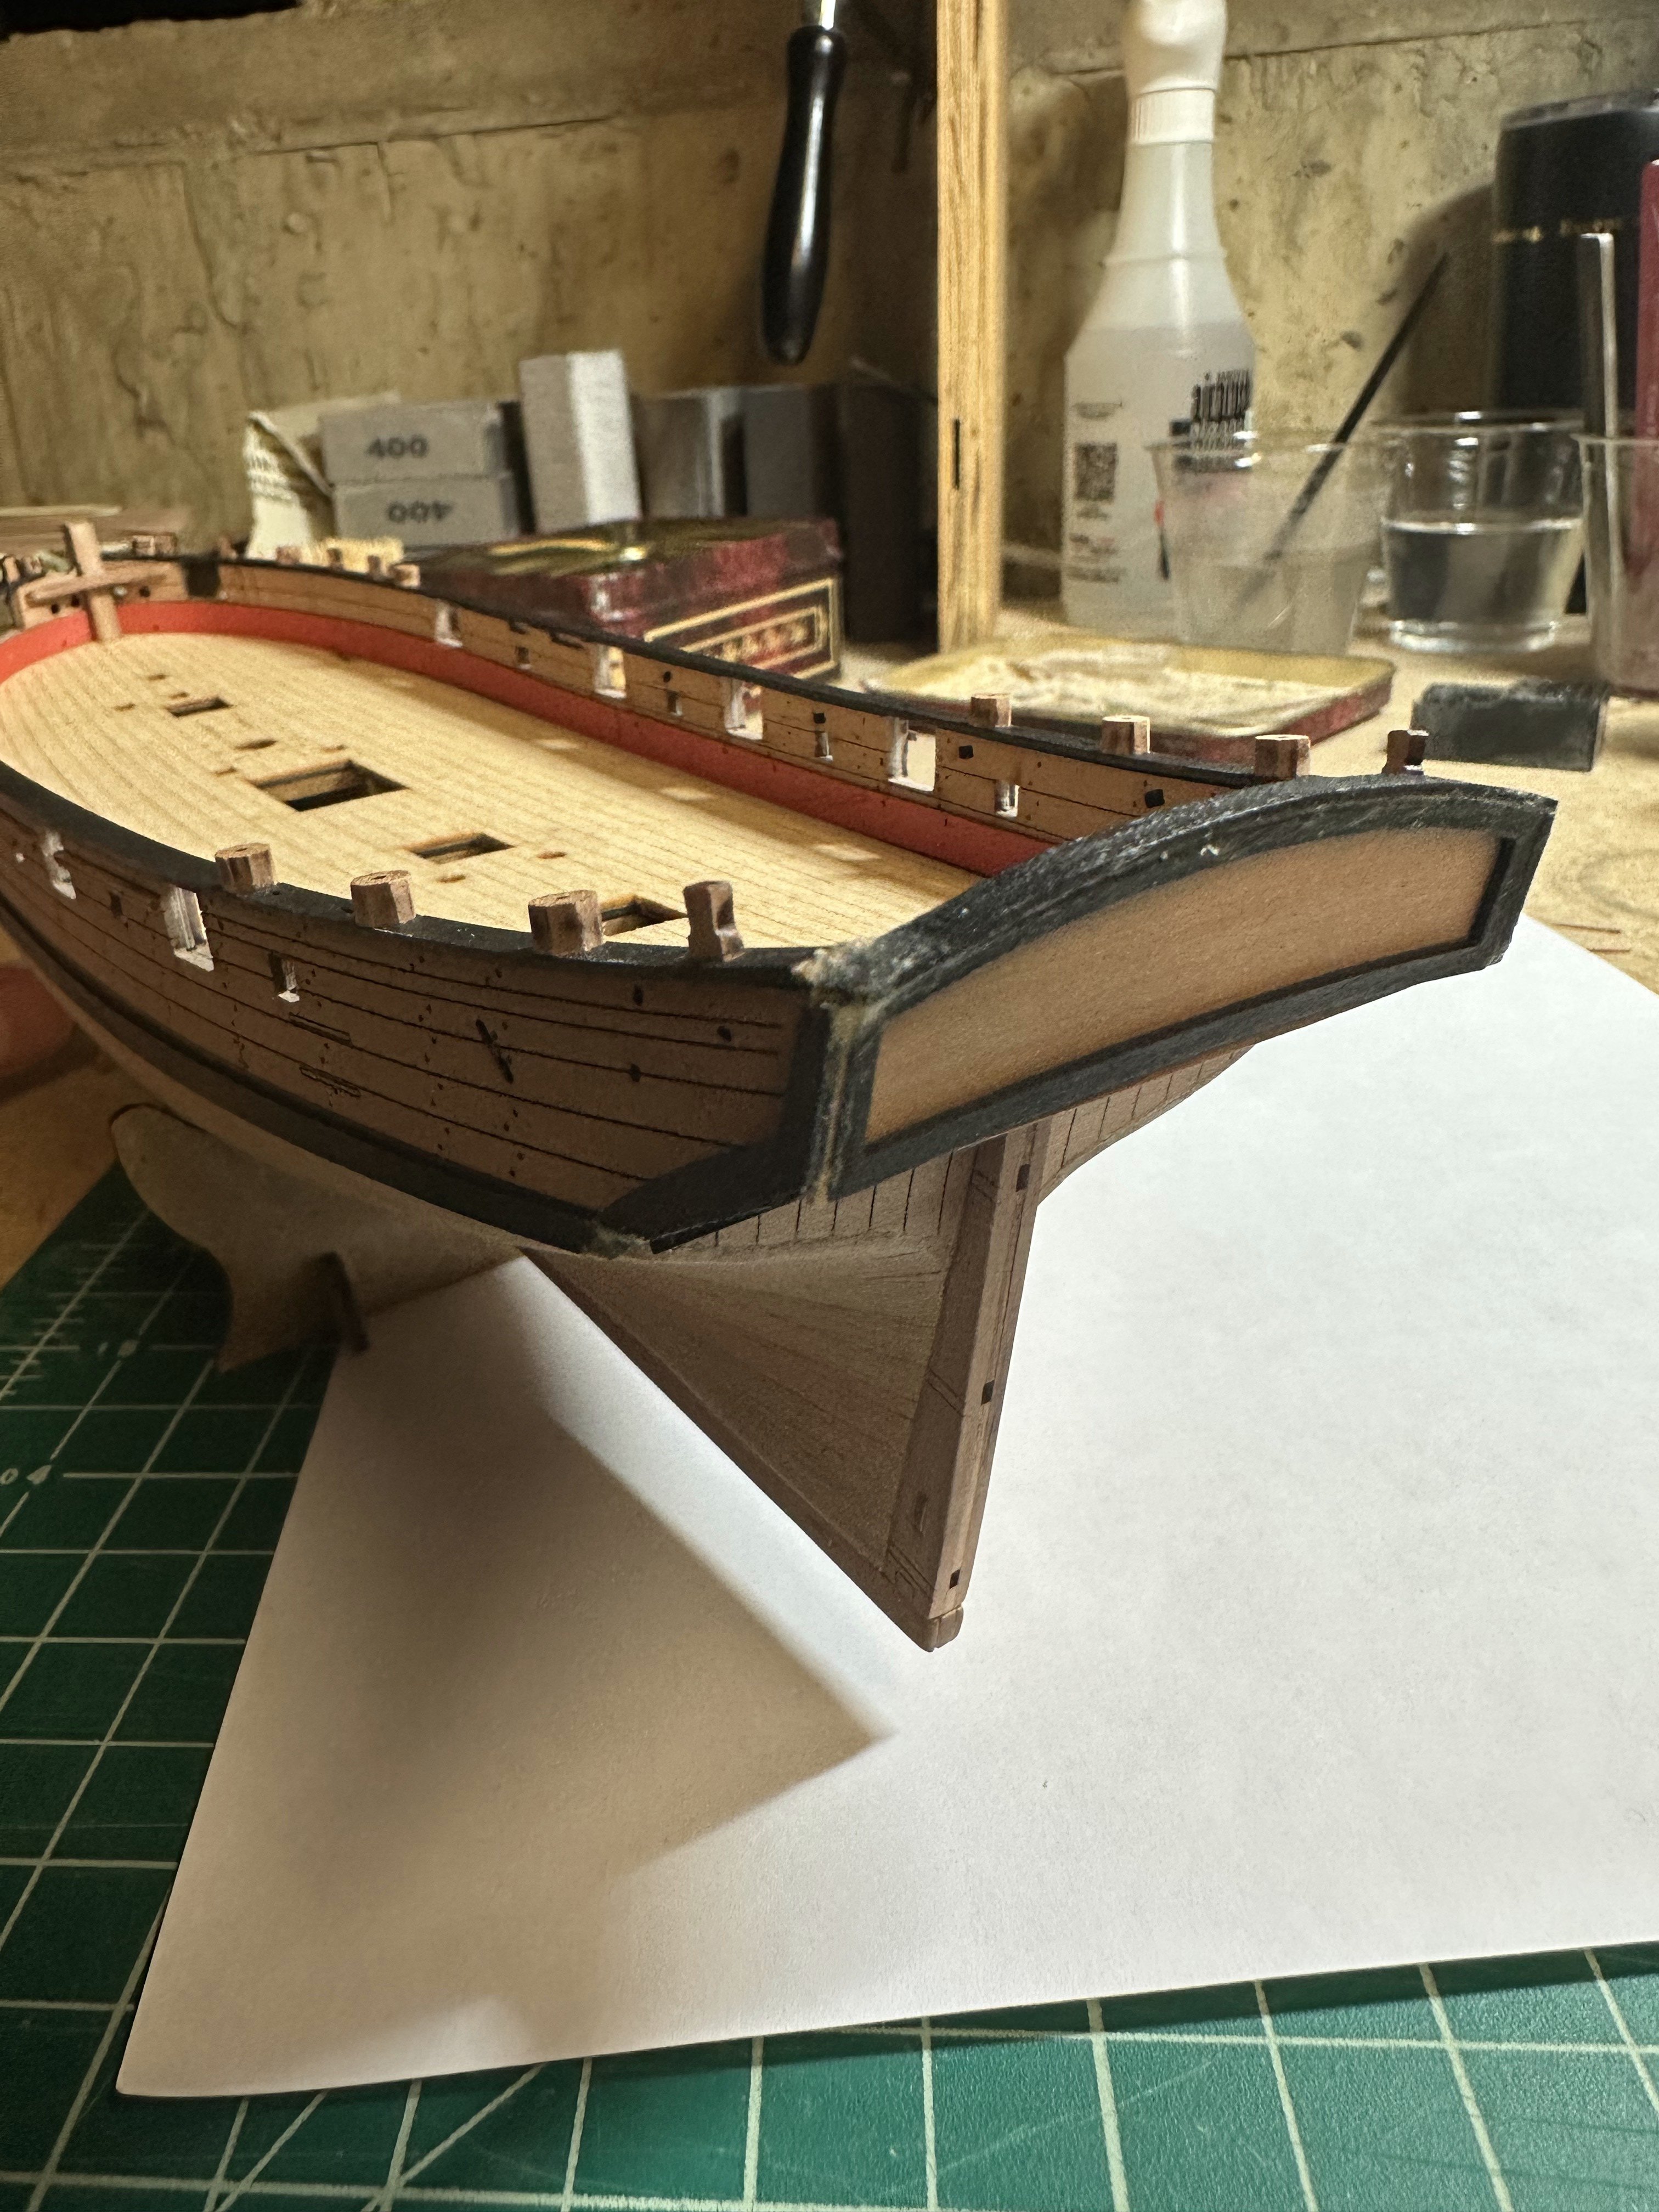
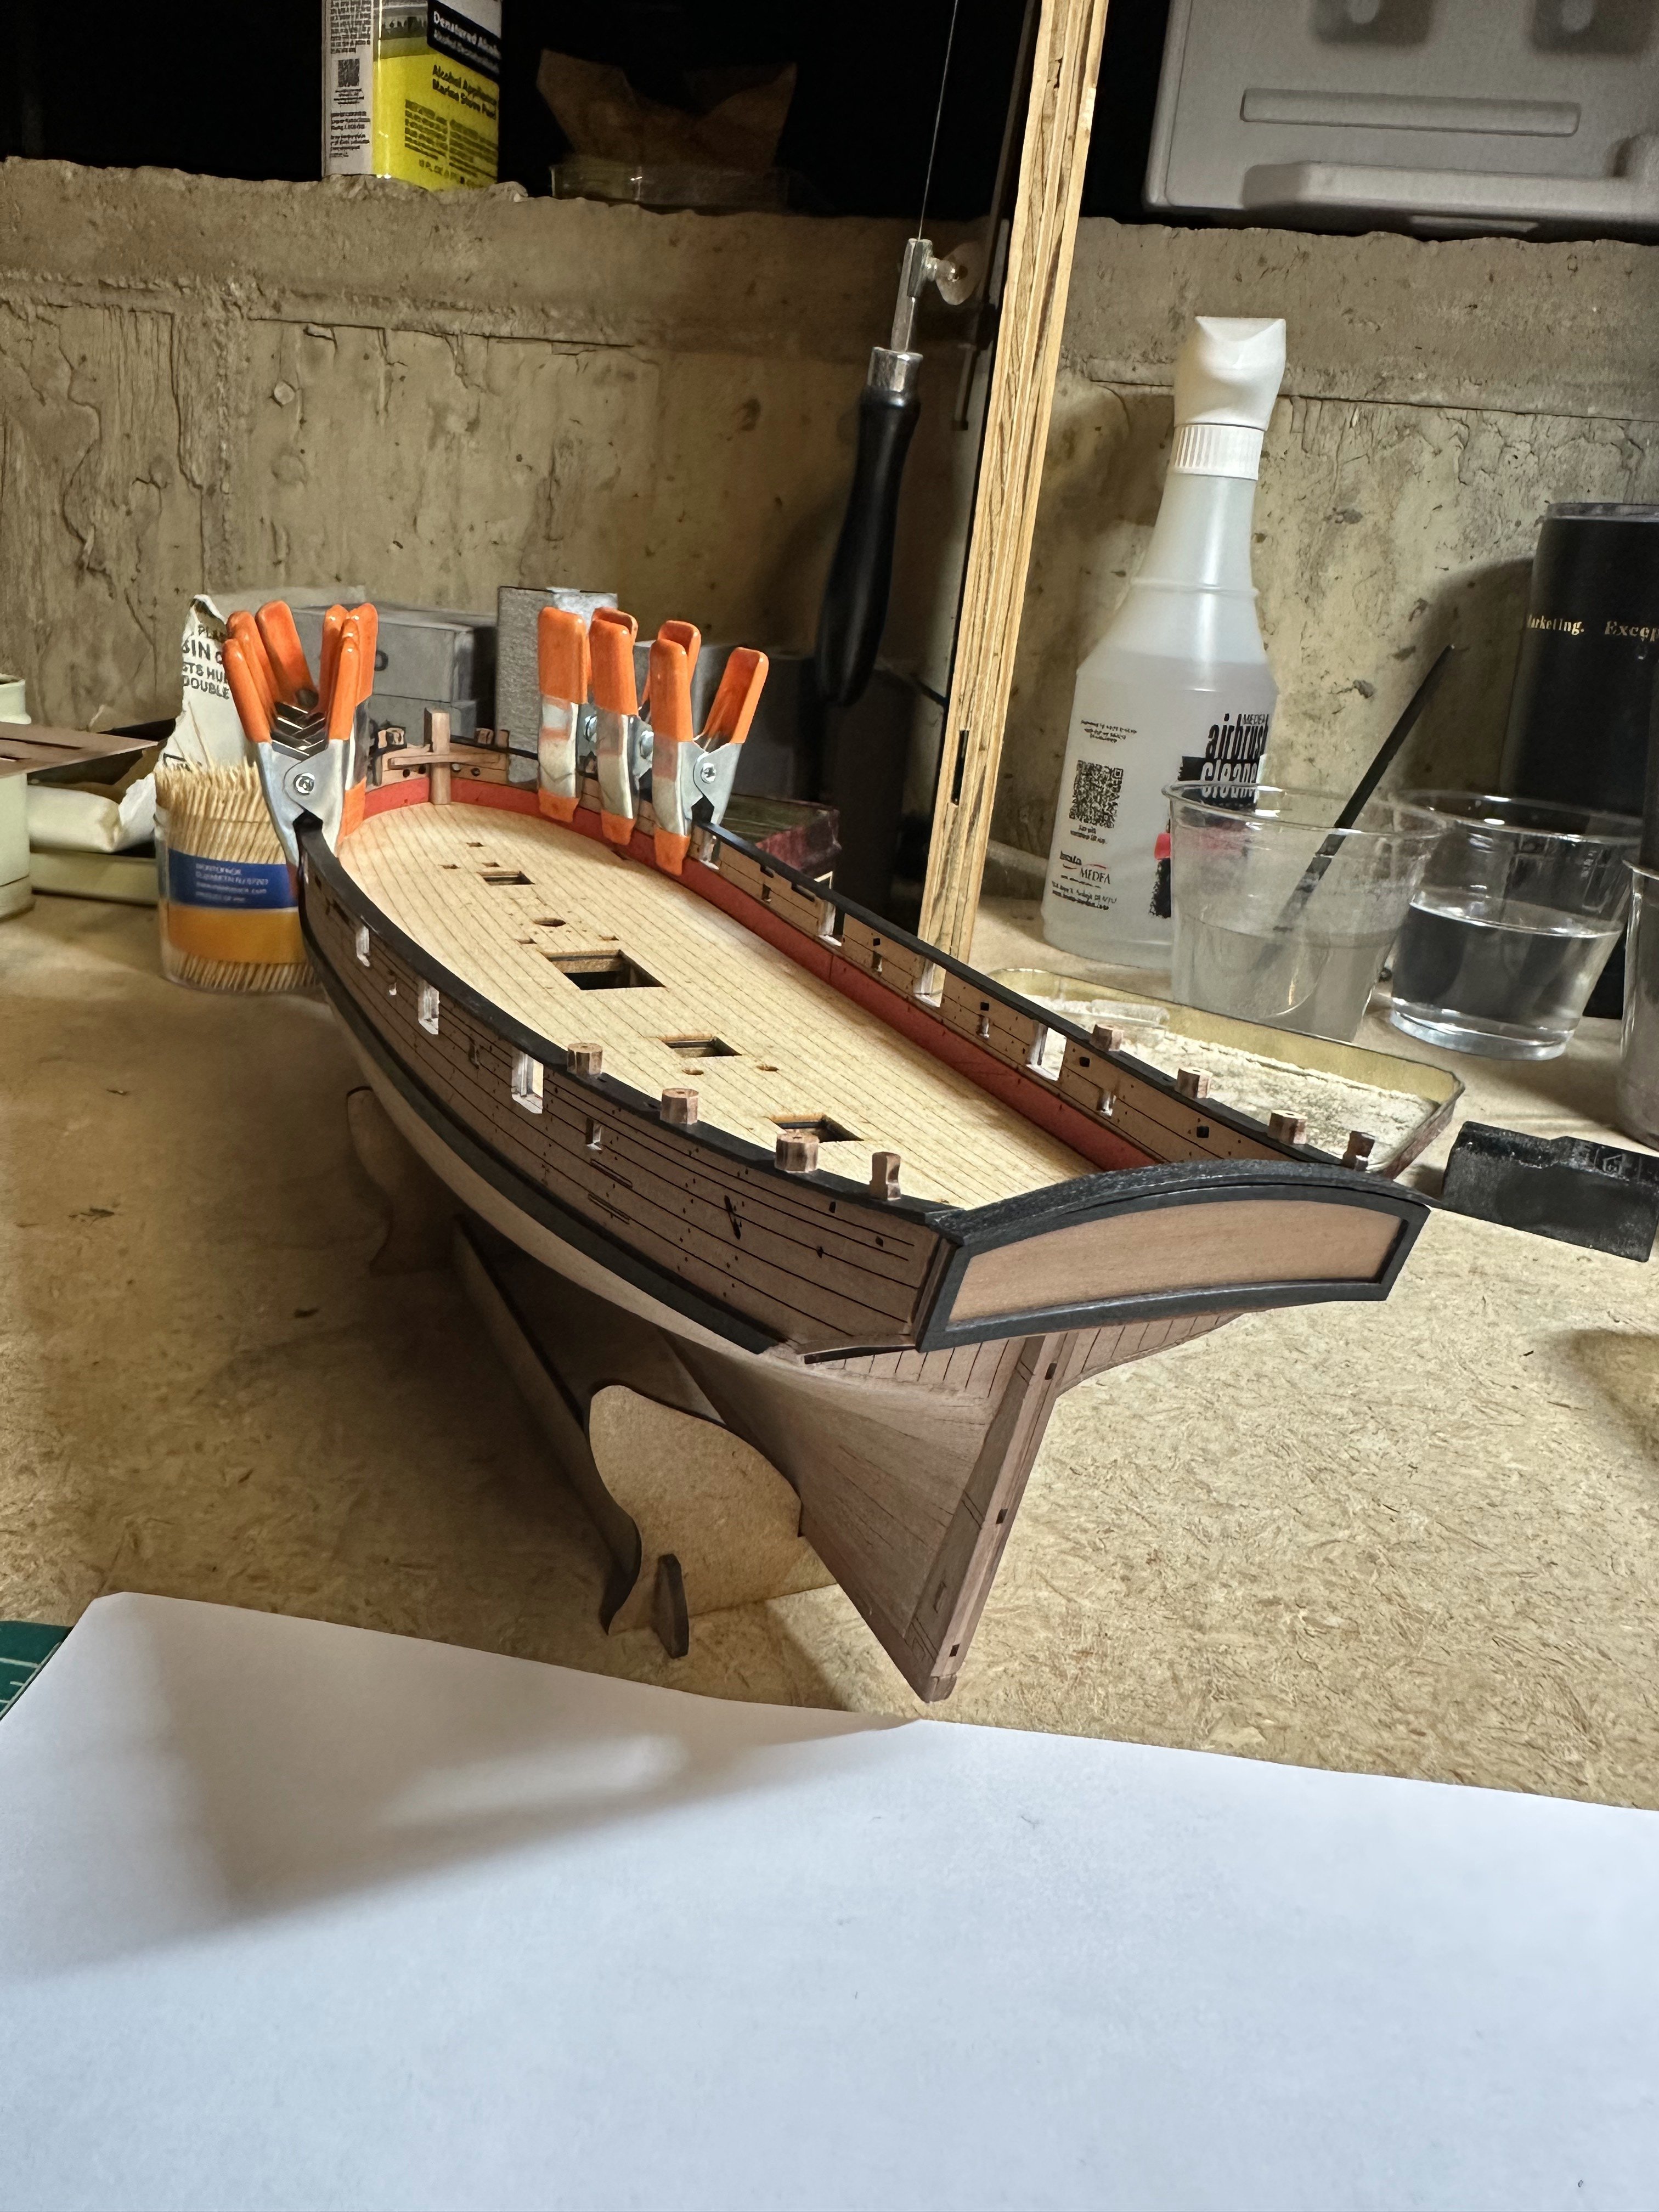
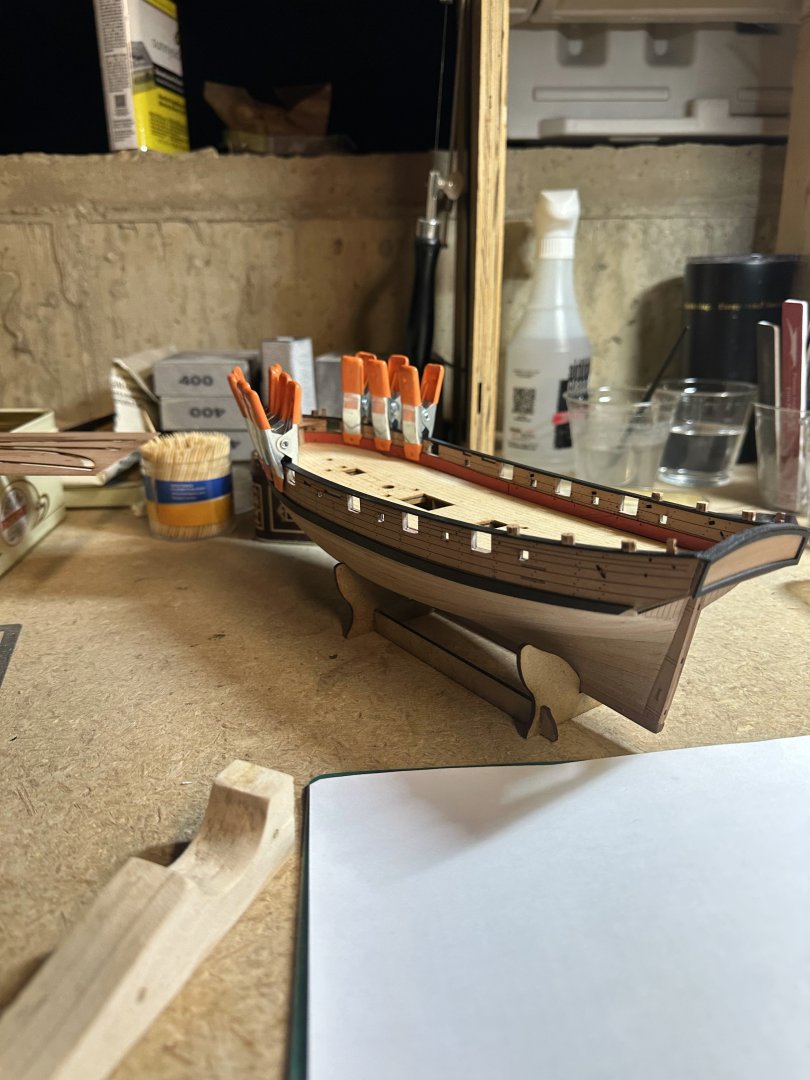
chugging along.. added and color few parts.. The transom black borders (not sure what they are called) were a bit out of shape so had to carve and add few extra pieces to make it look even - and added a lot of putty. After it dries will paint it black. One of the things I am thinking of is learning how to rig the guns. I found this helpful article here: also purchased Birchwood Casey Brass black metal finish for PE parts - saw the recommendations on this forum...


-
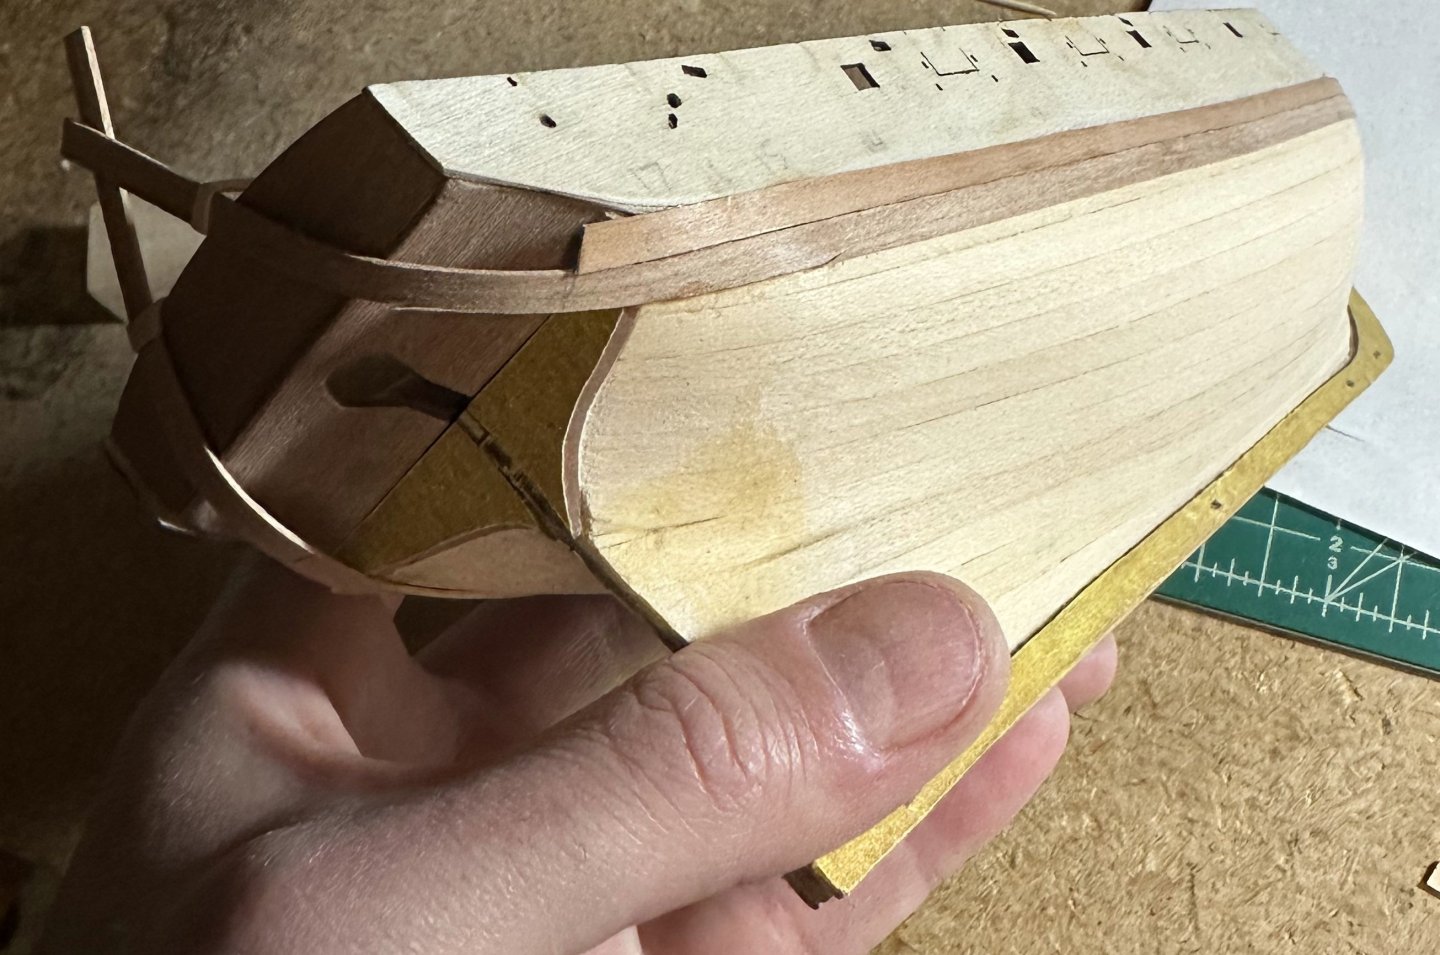
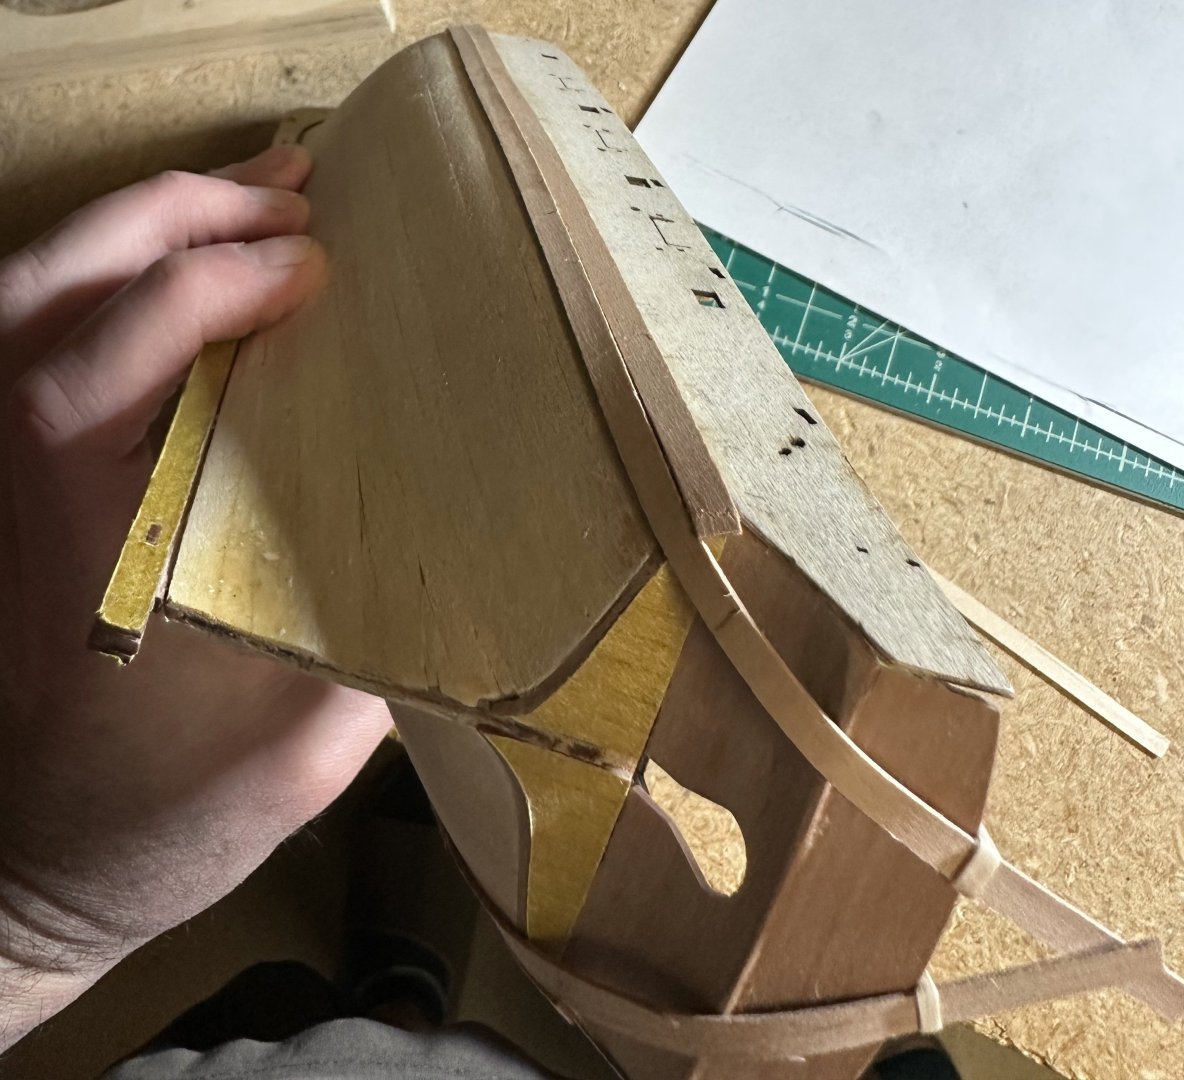
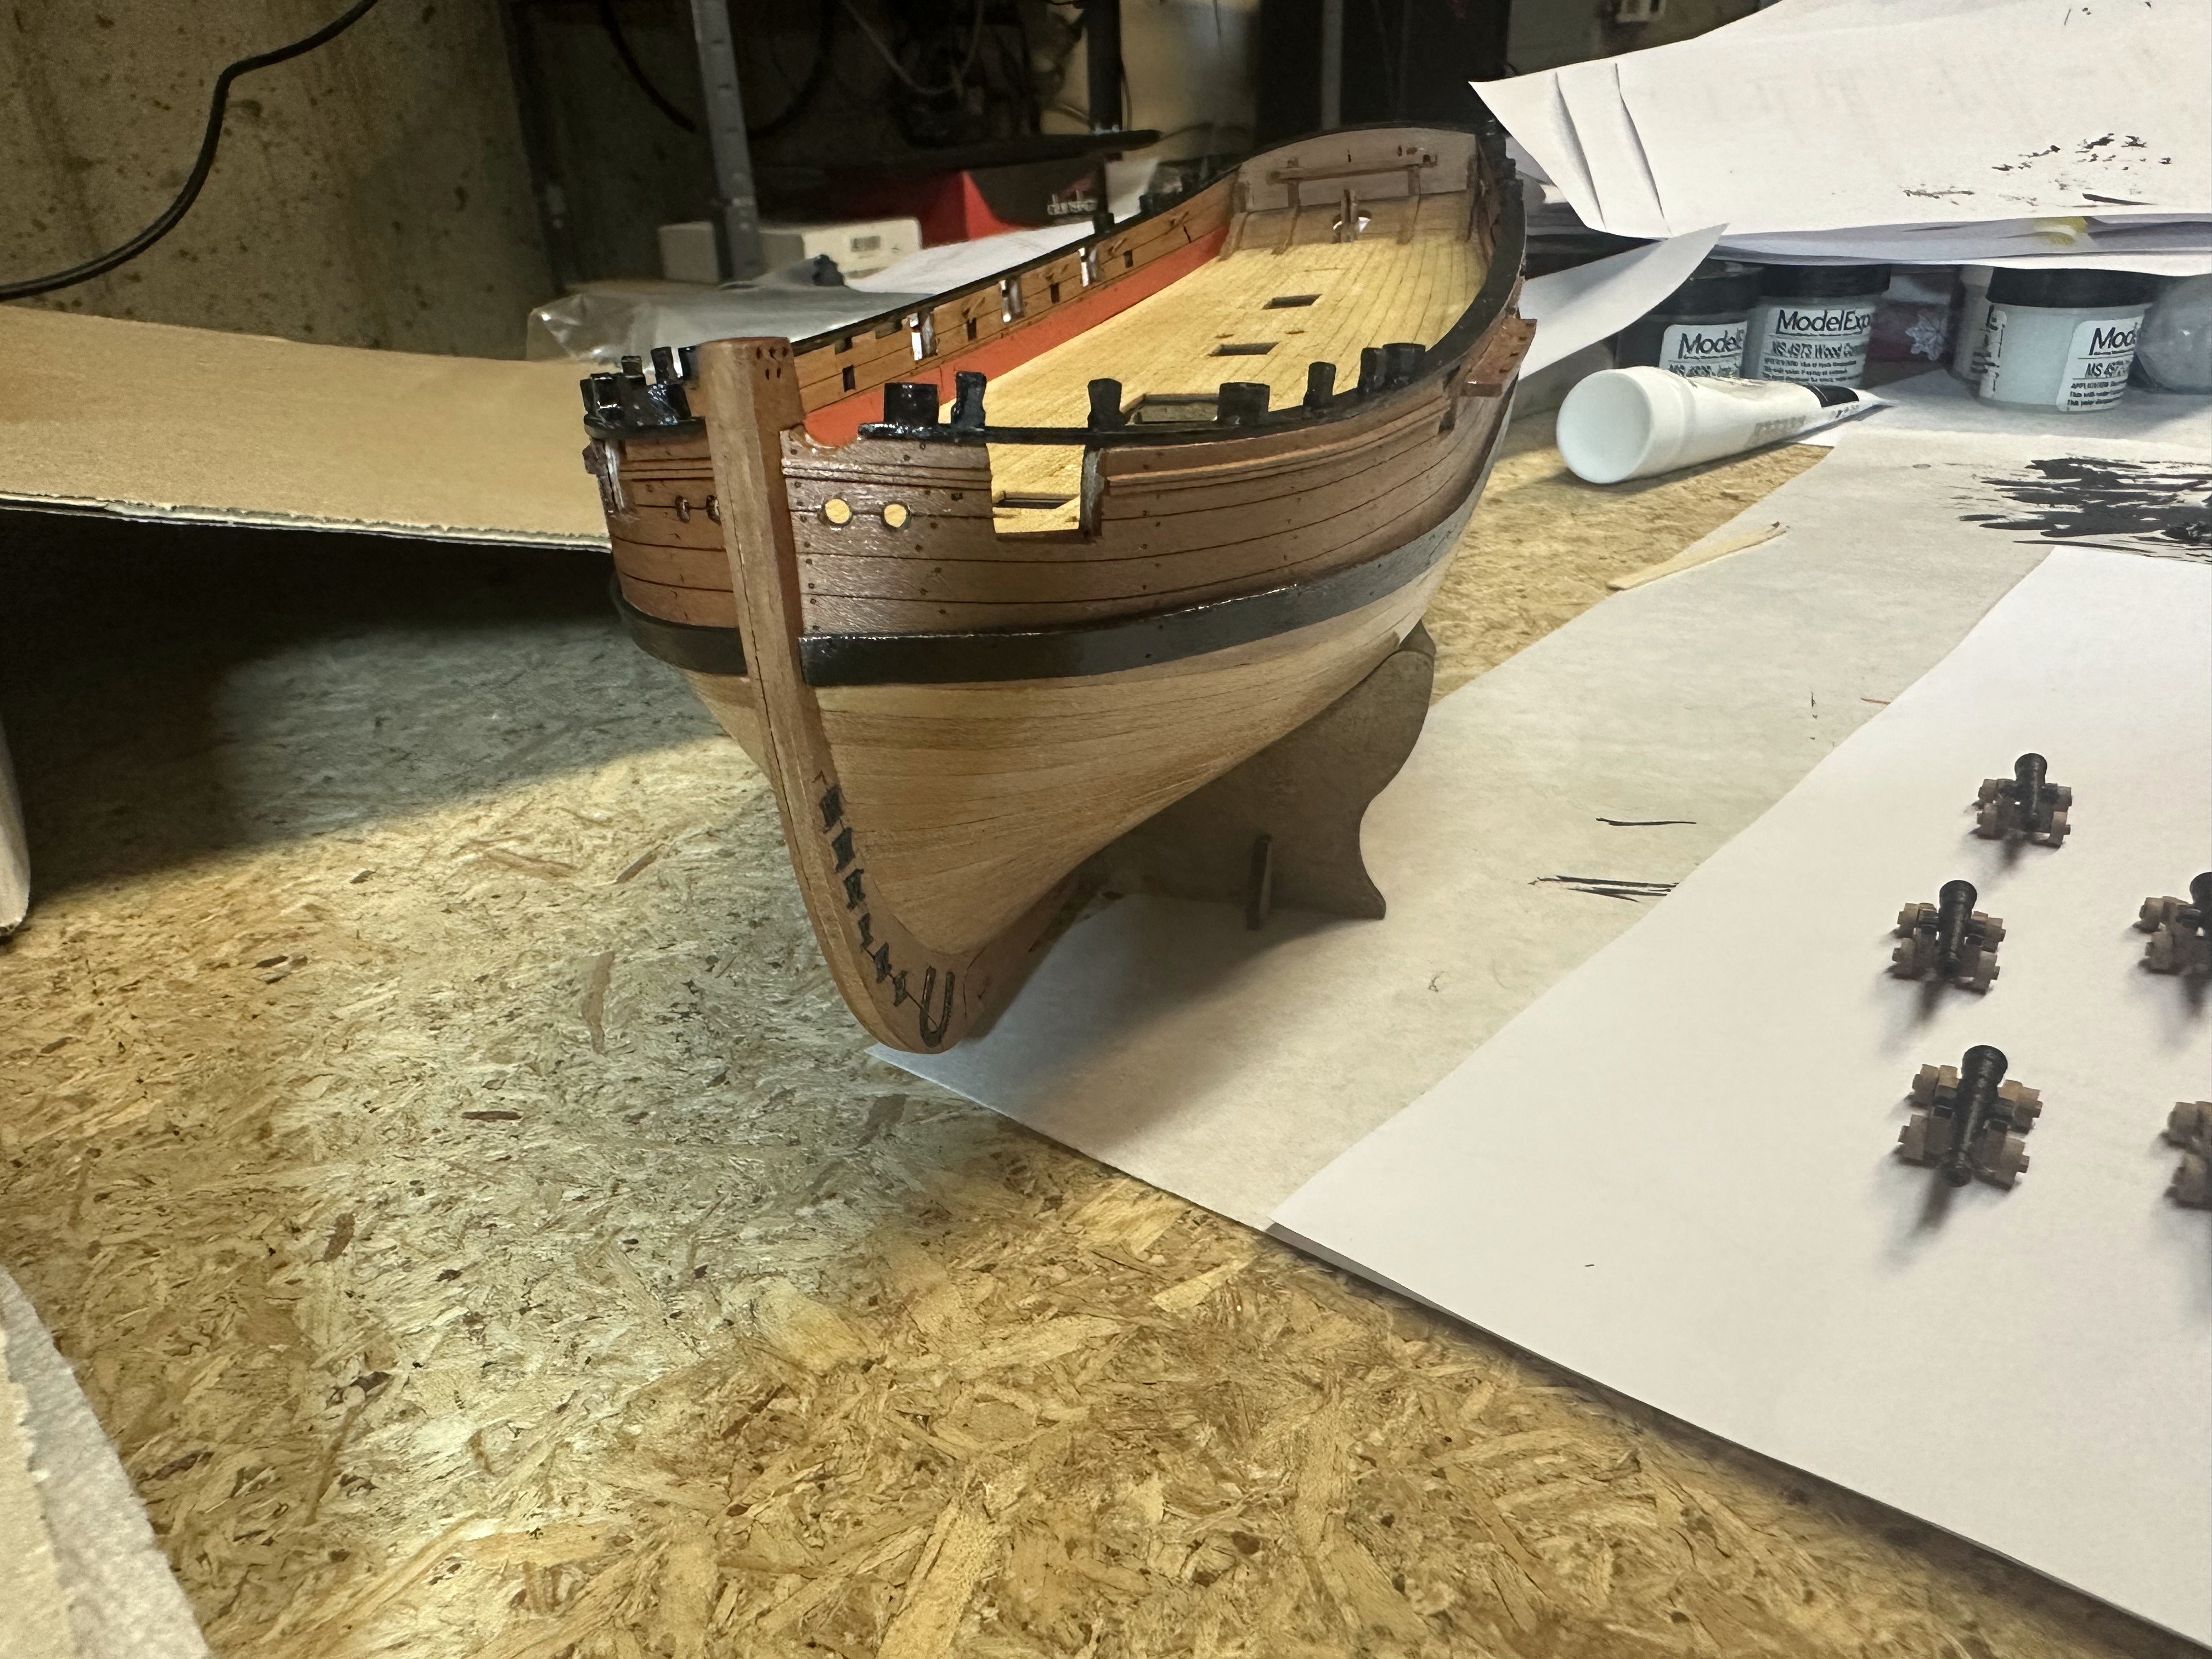
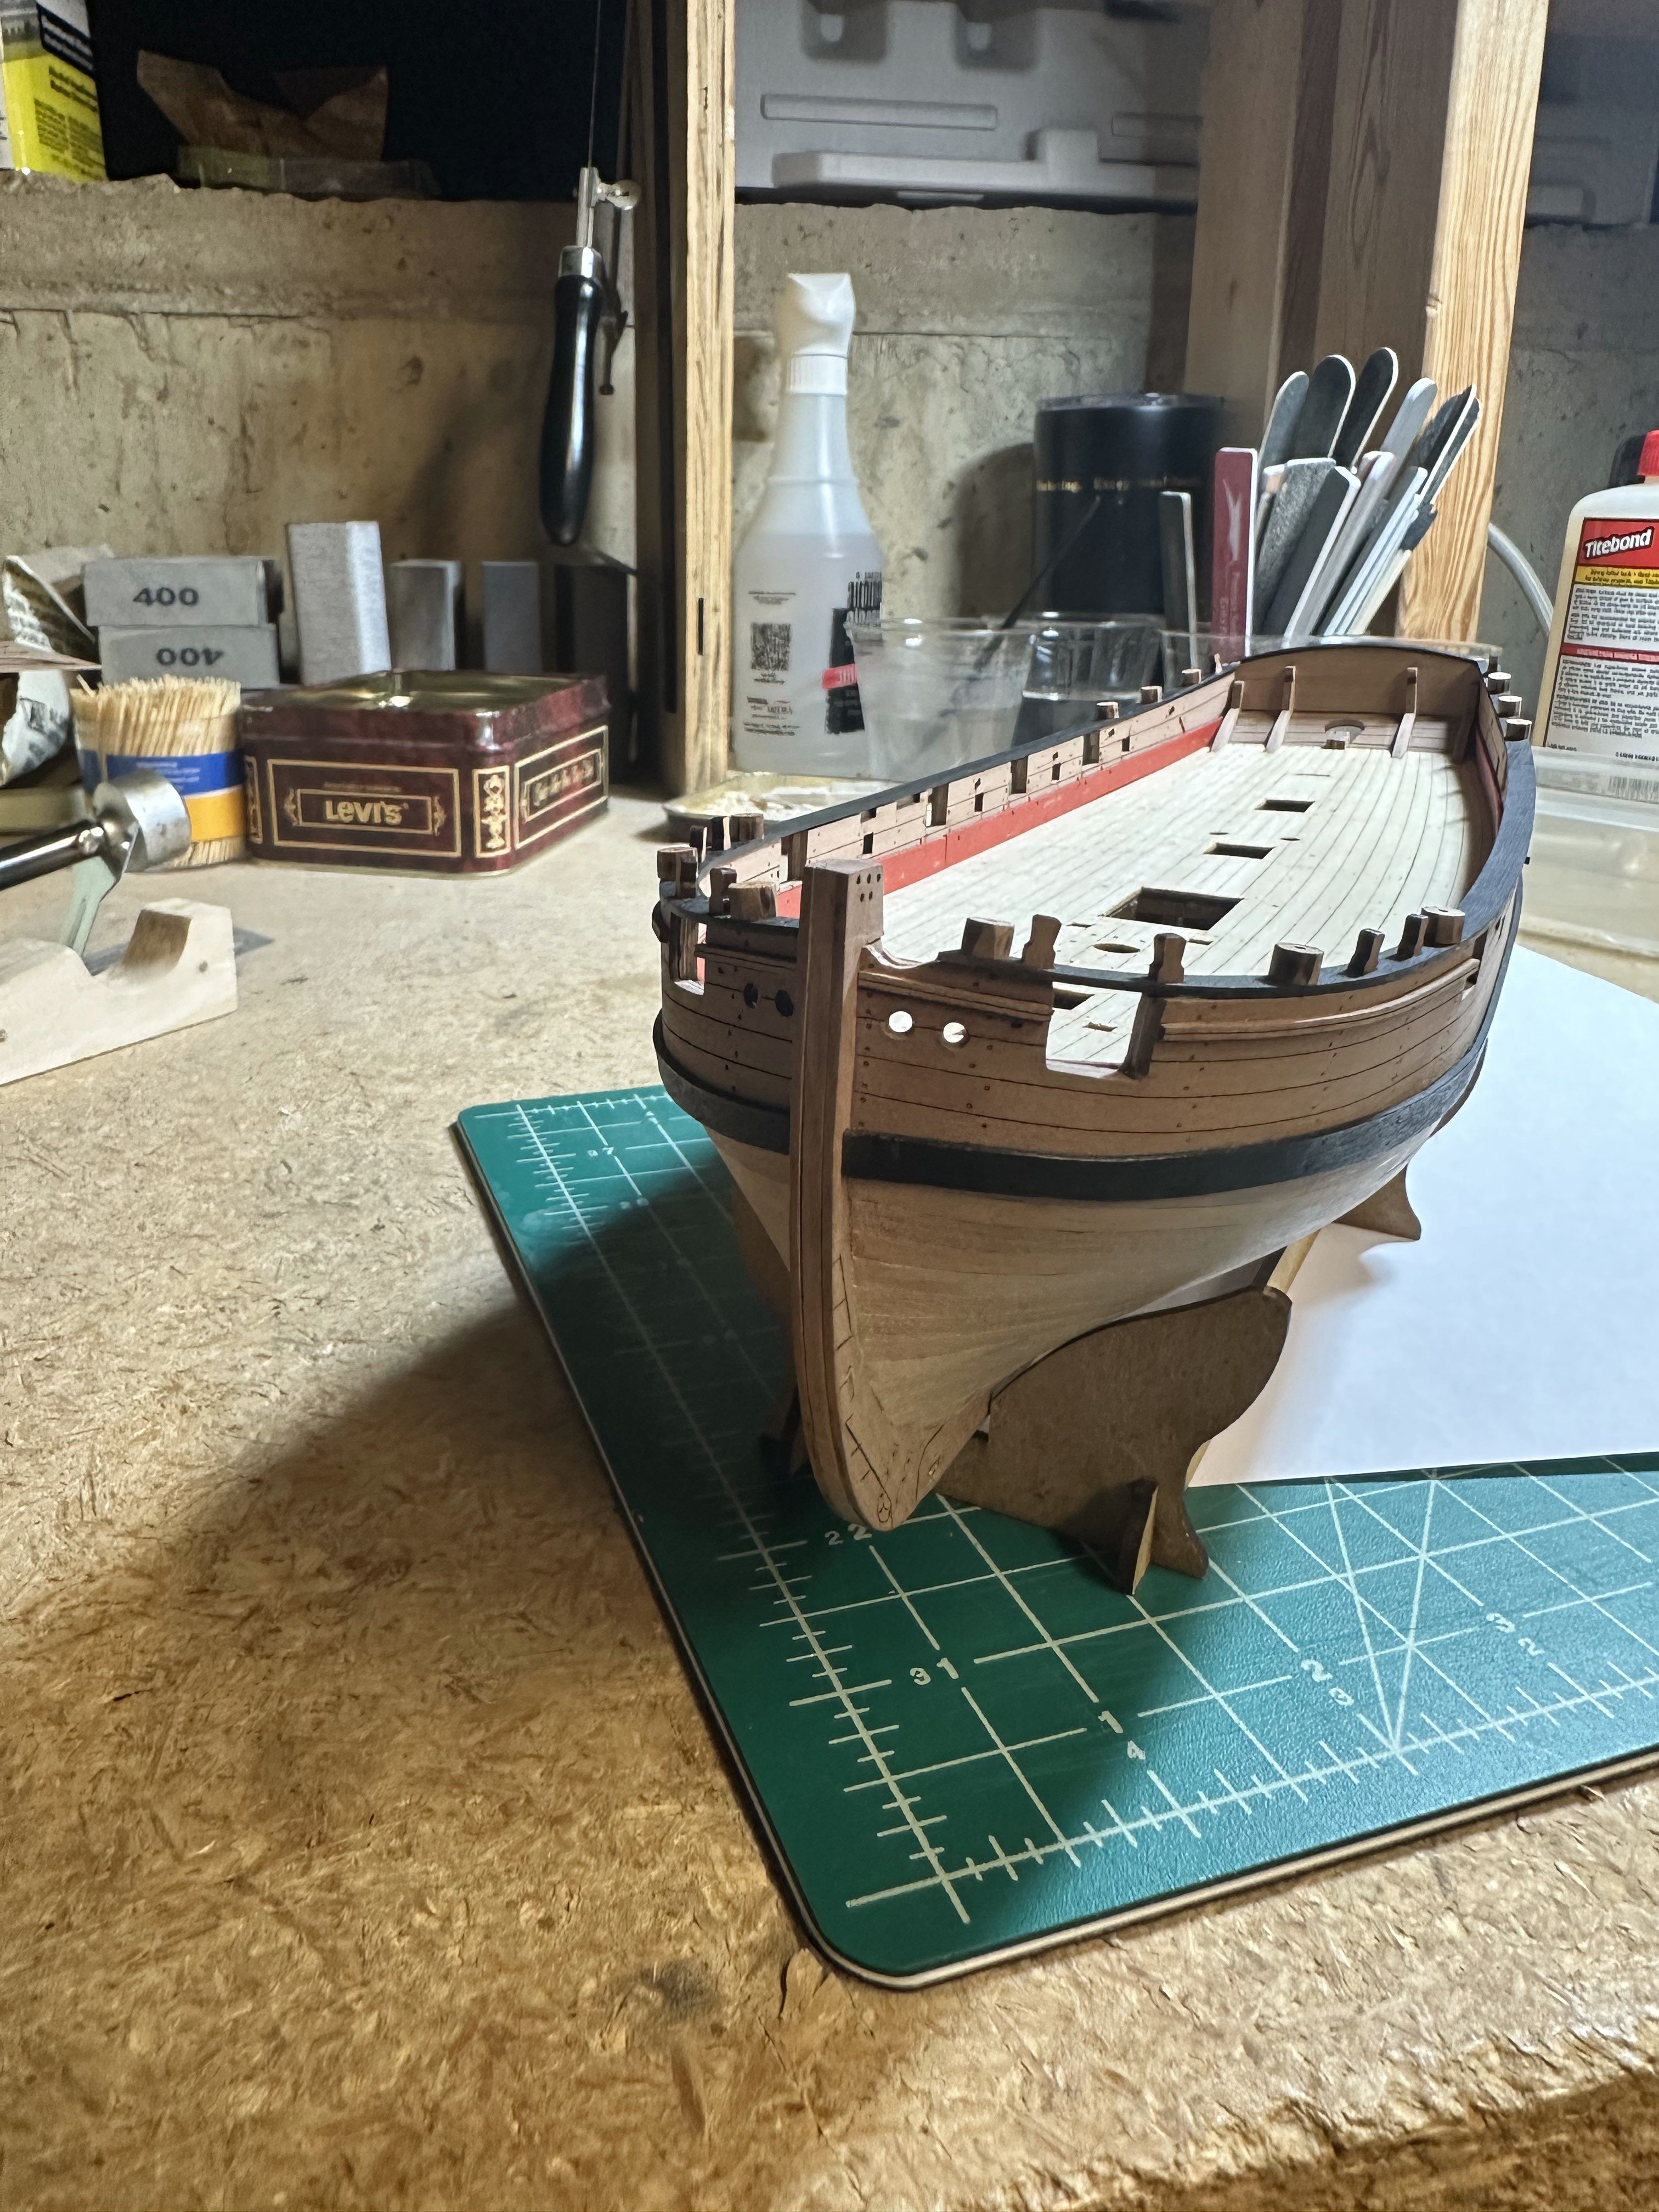
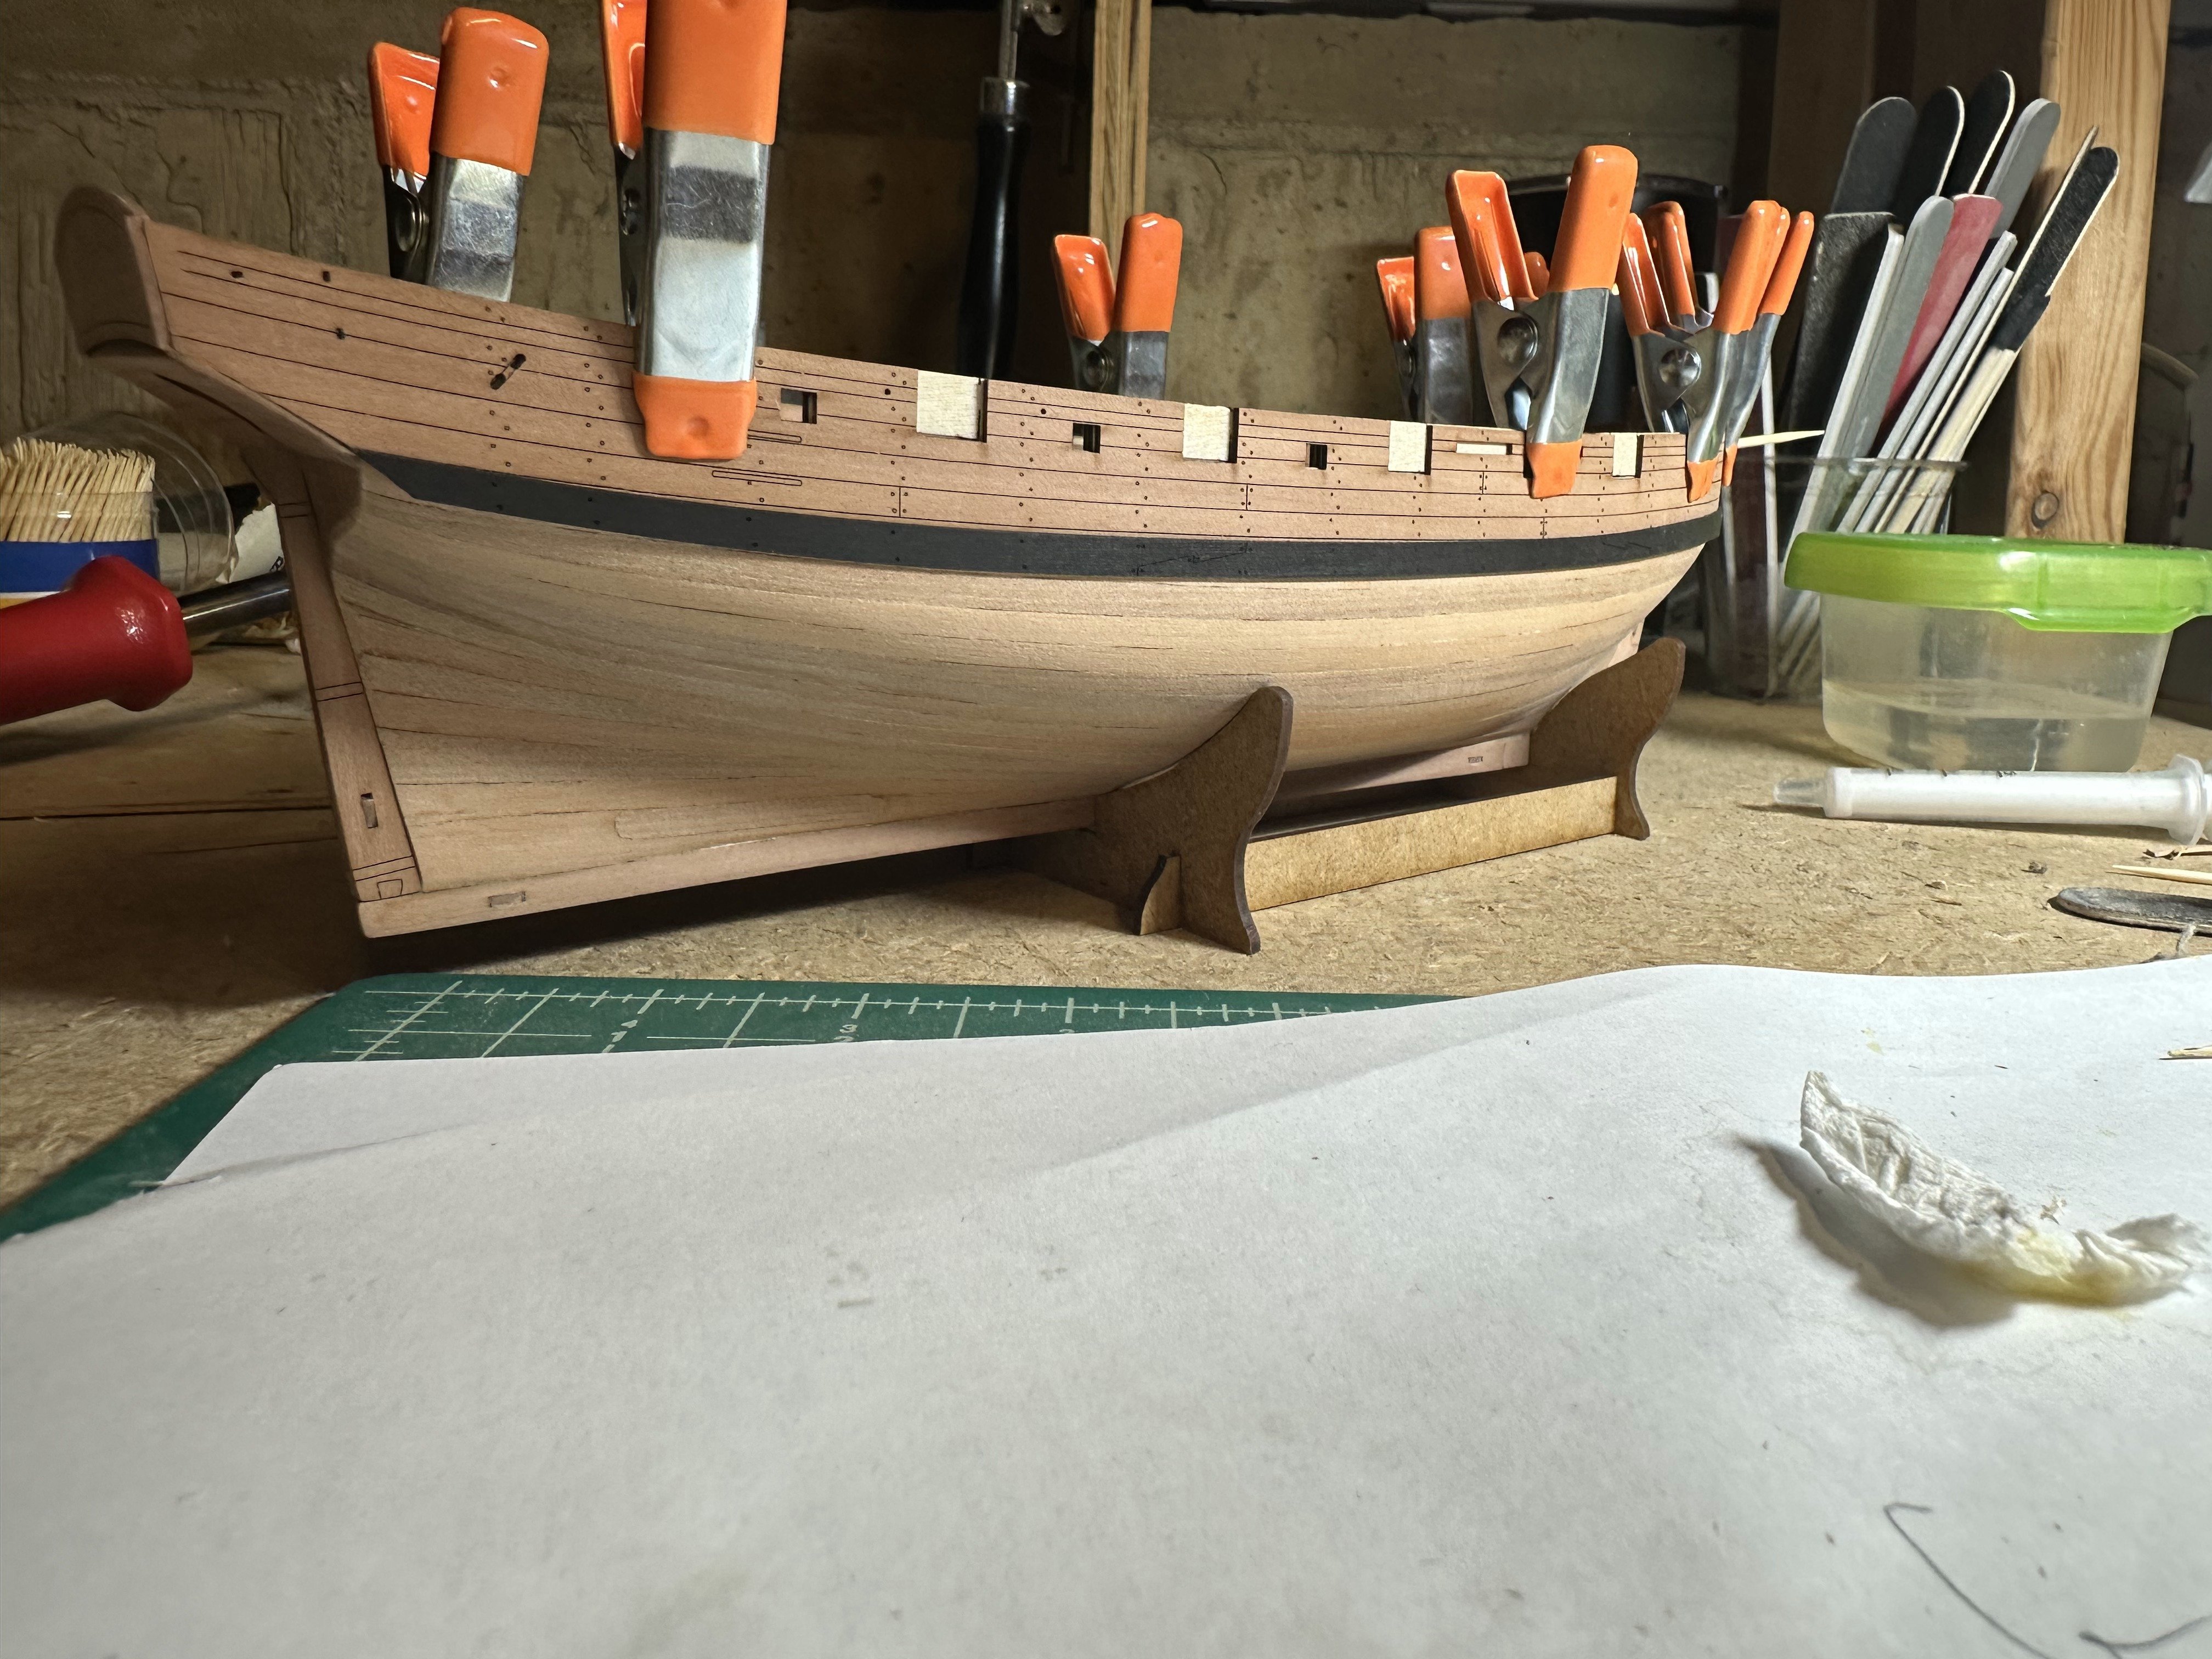
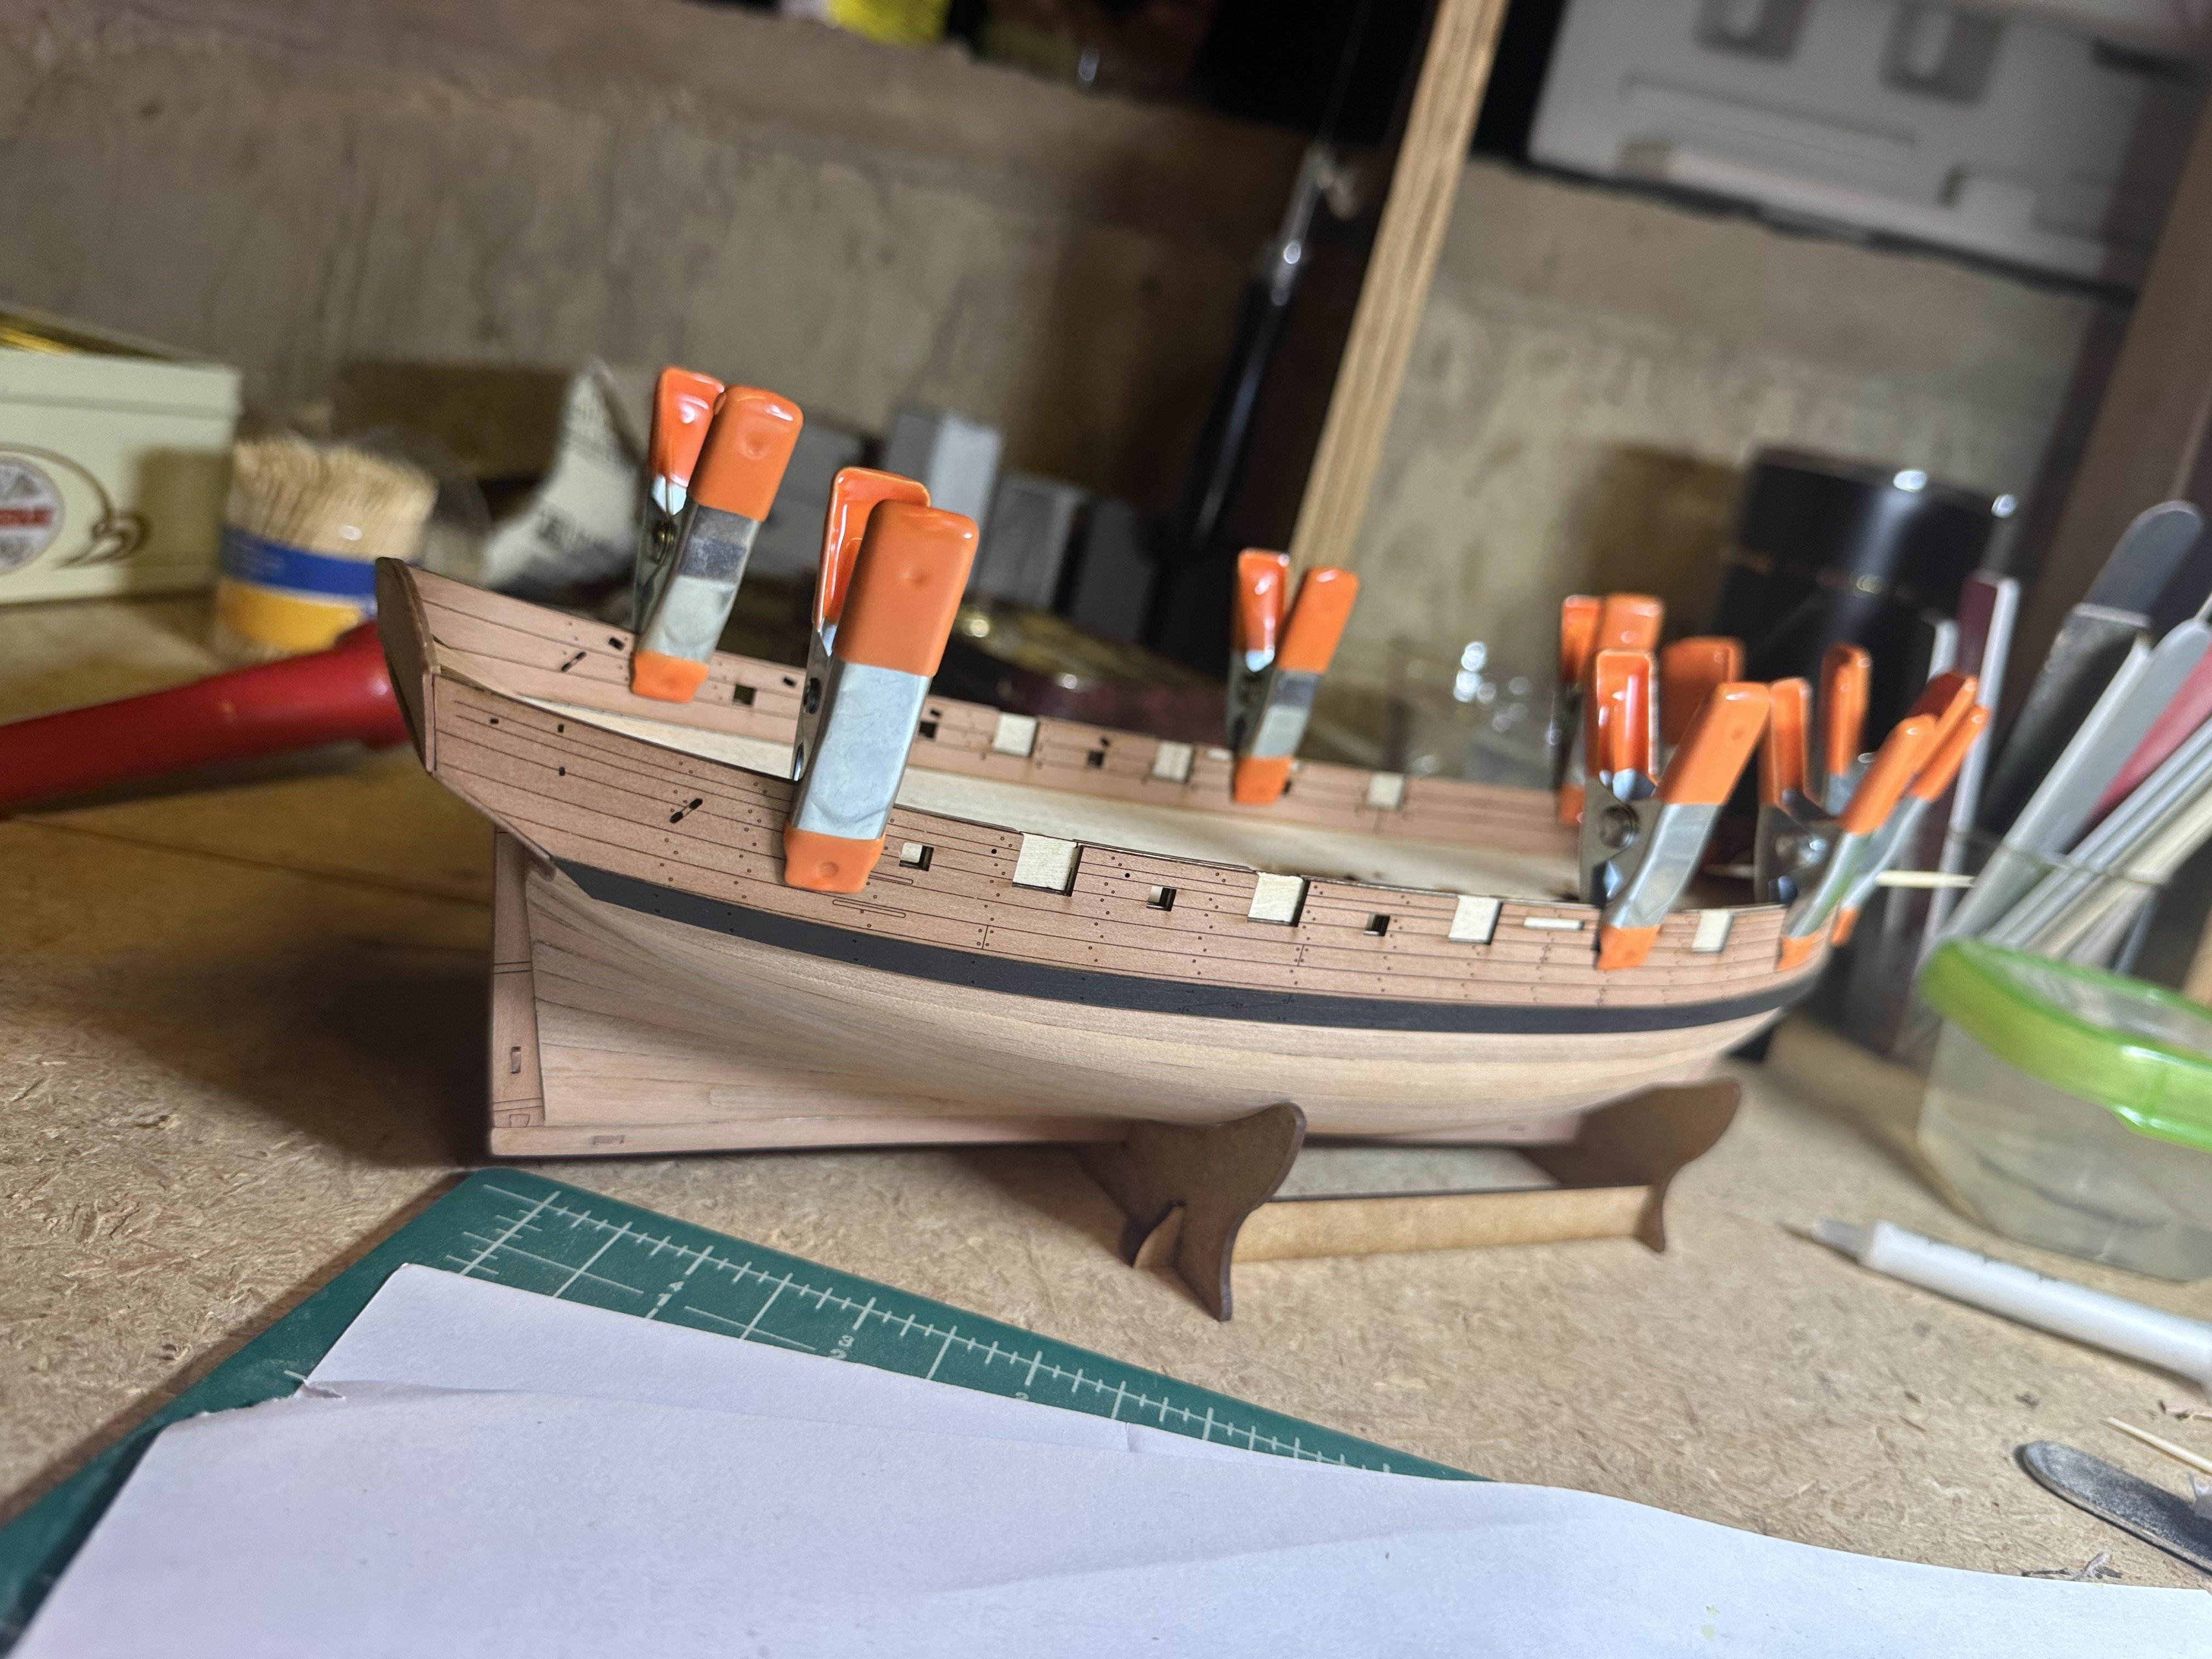
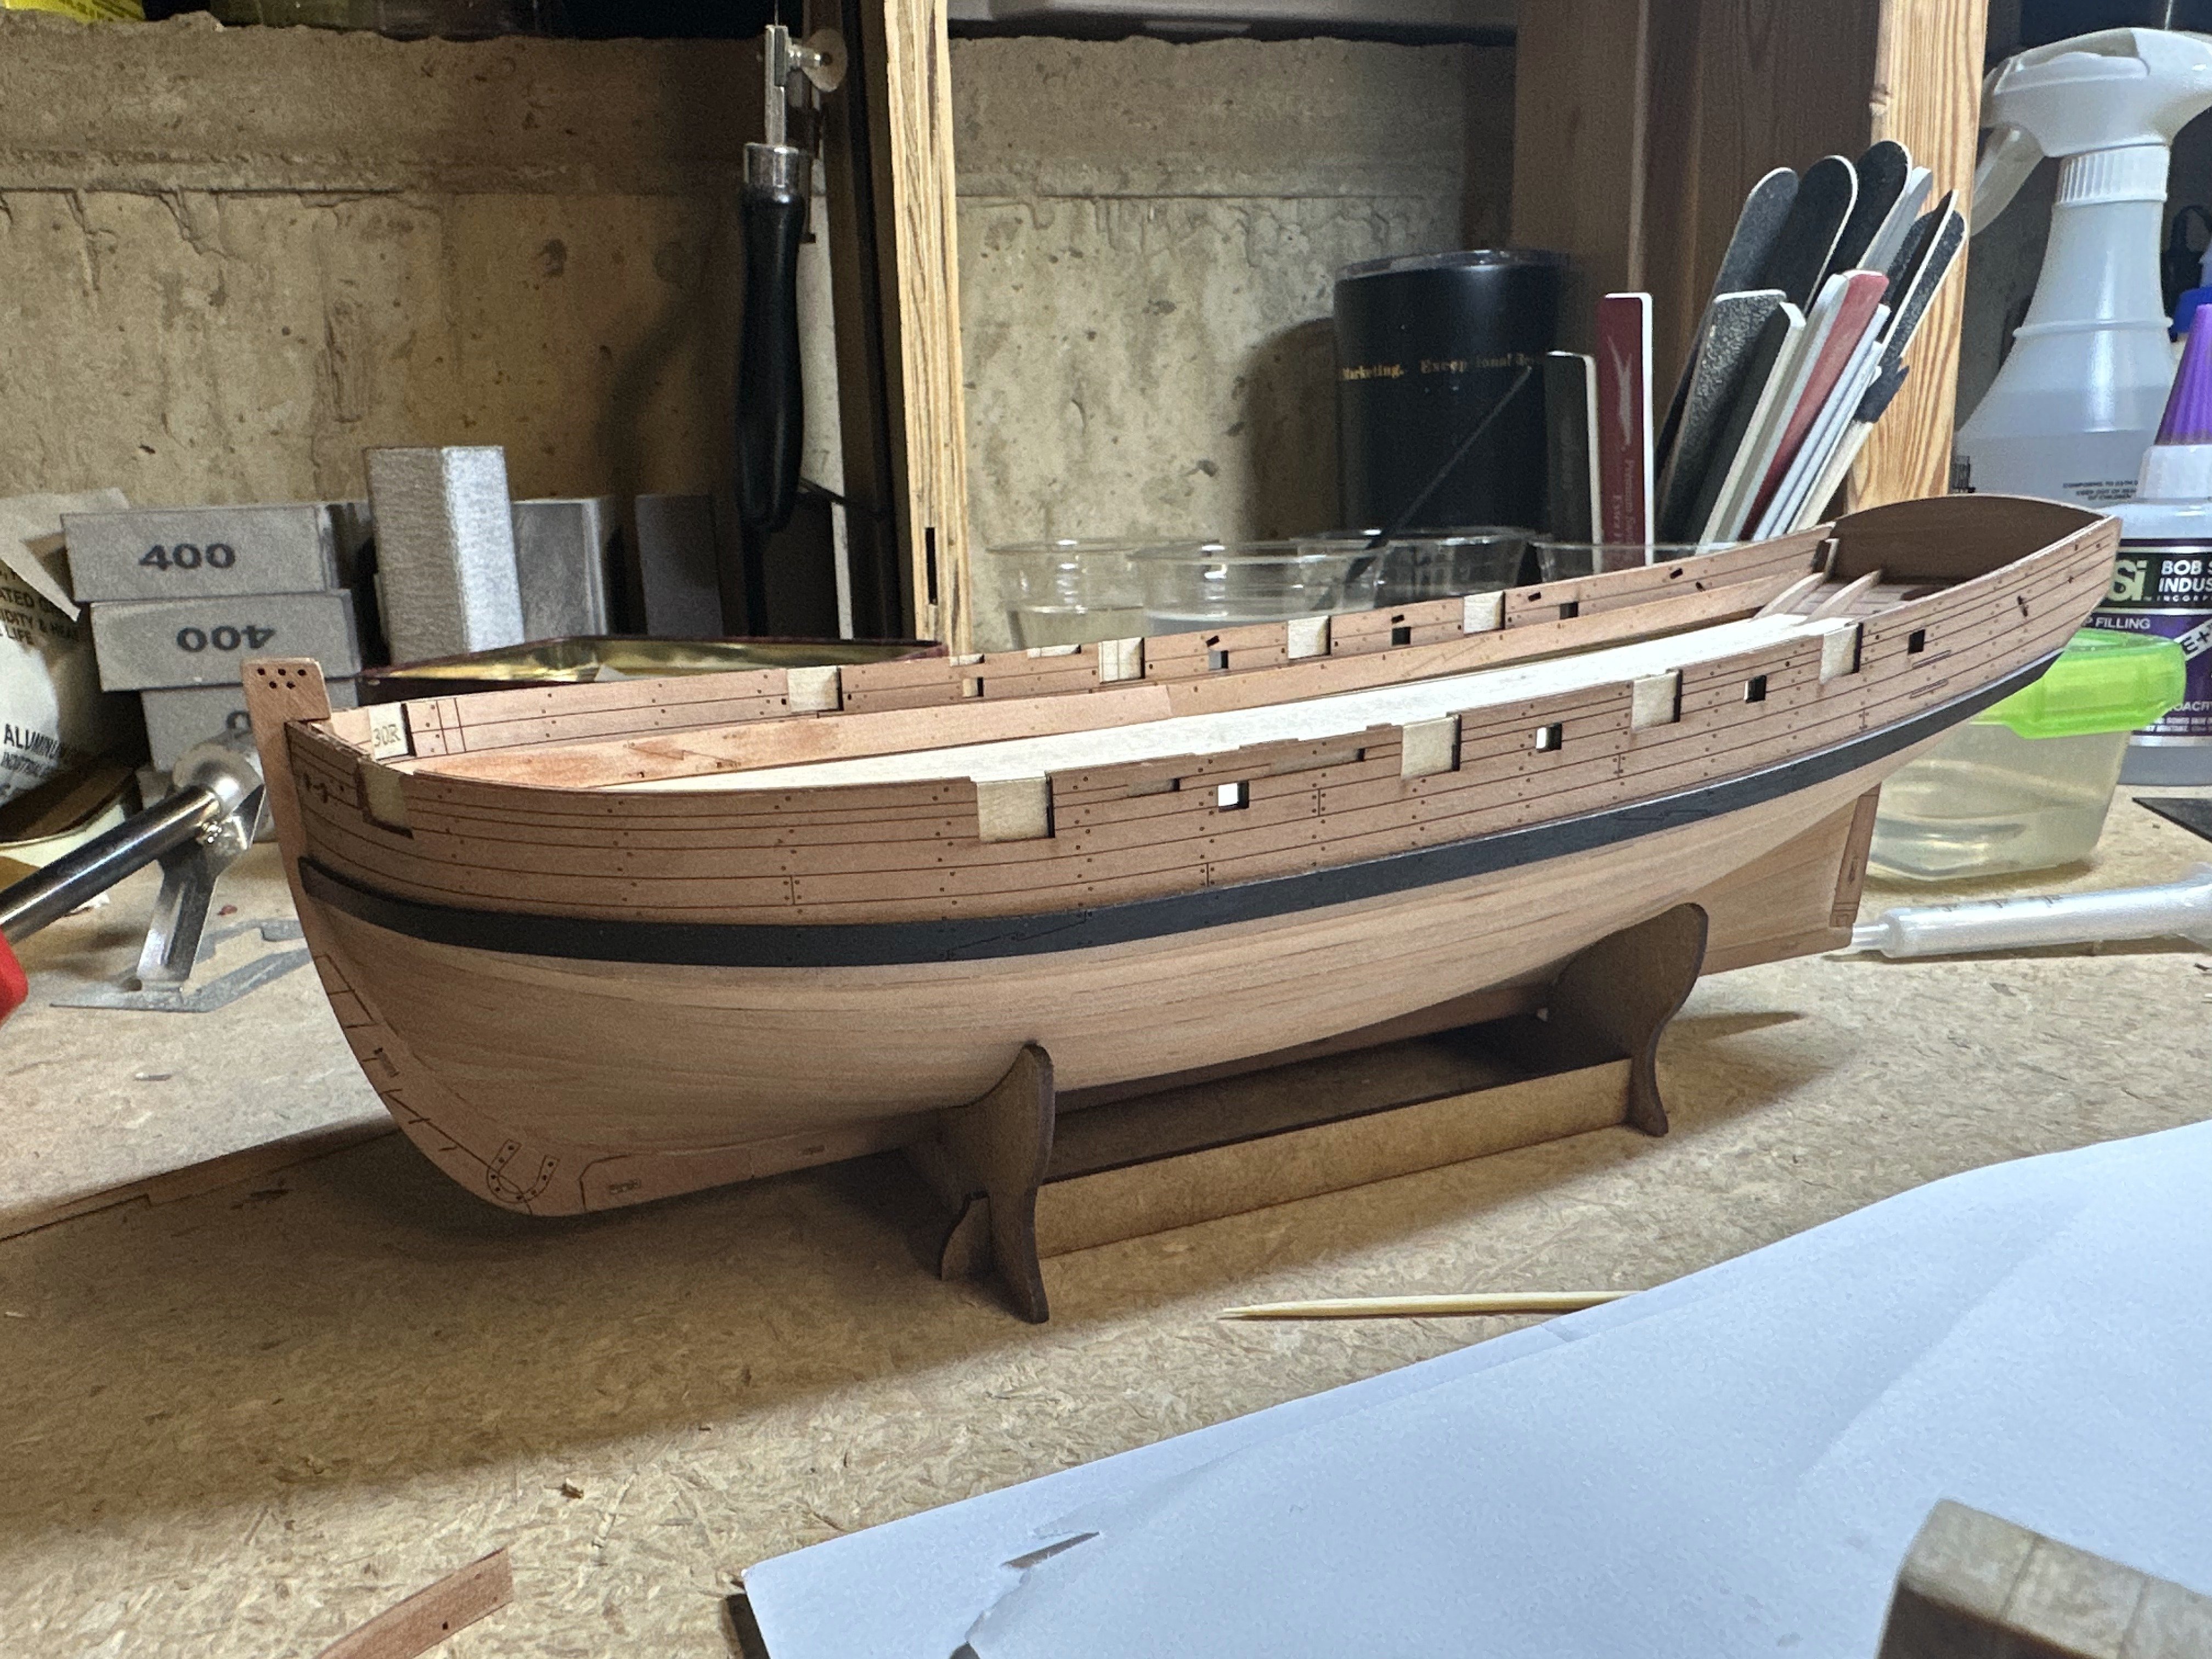
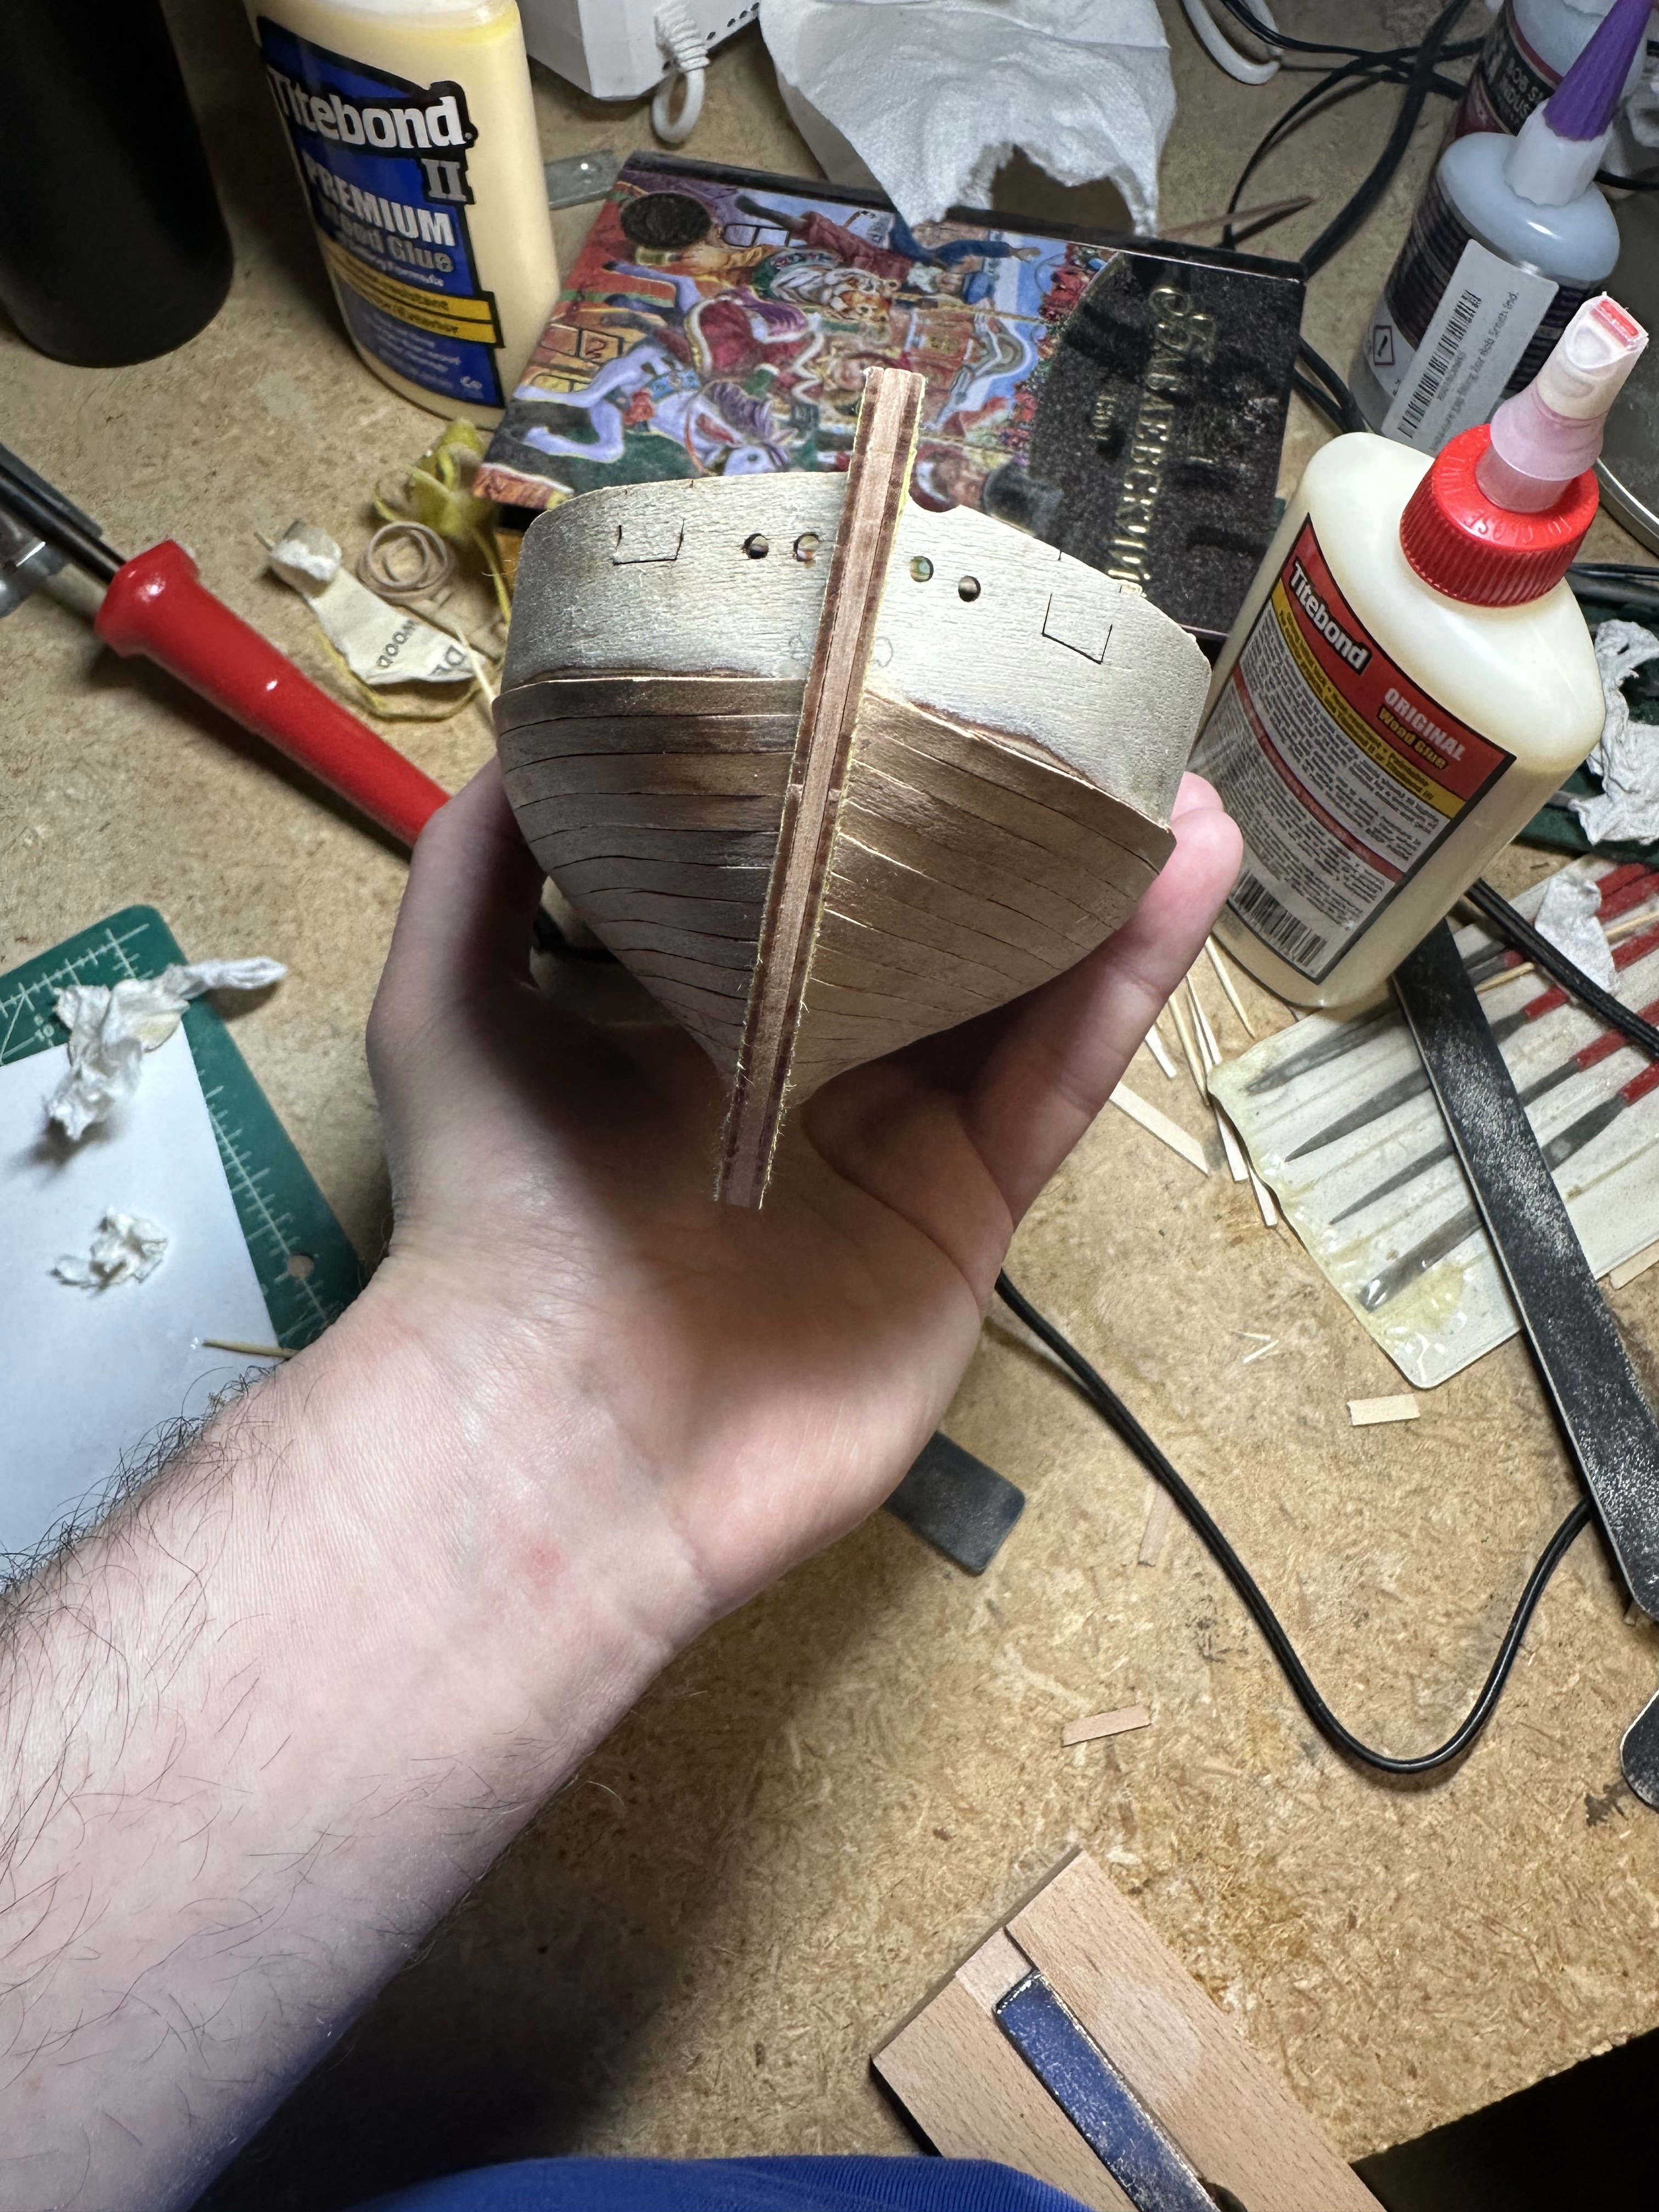
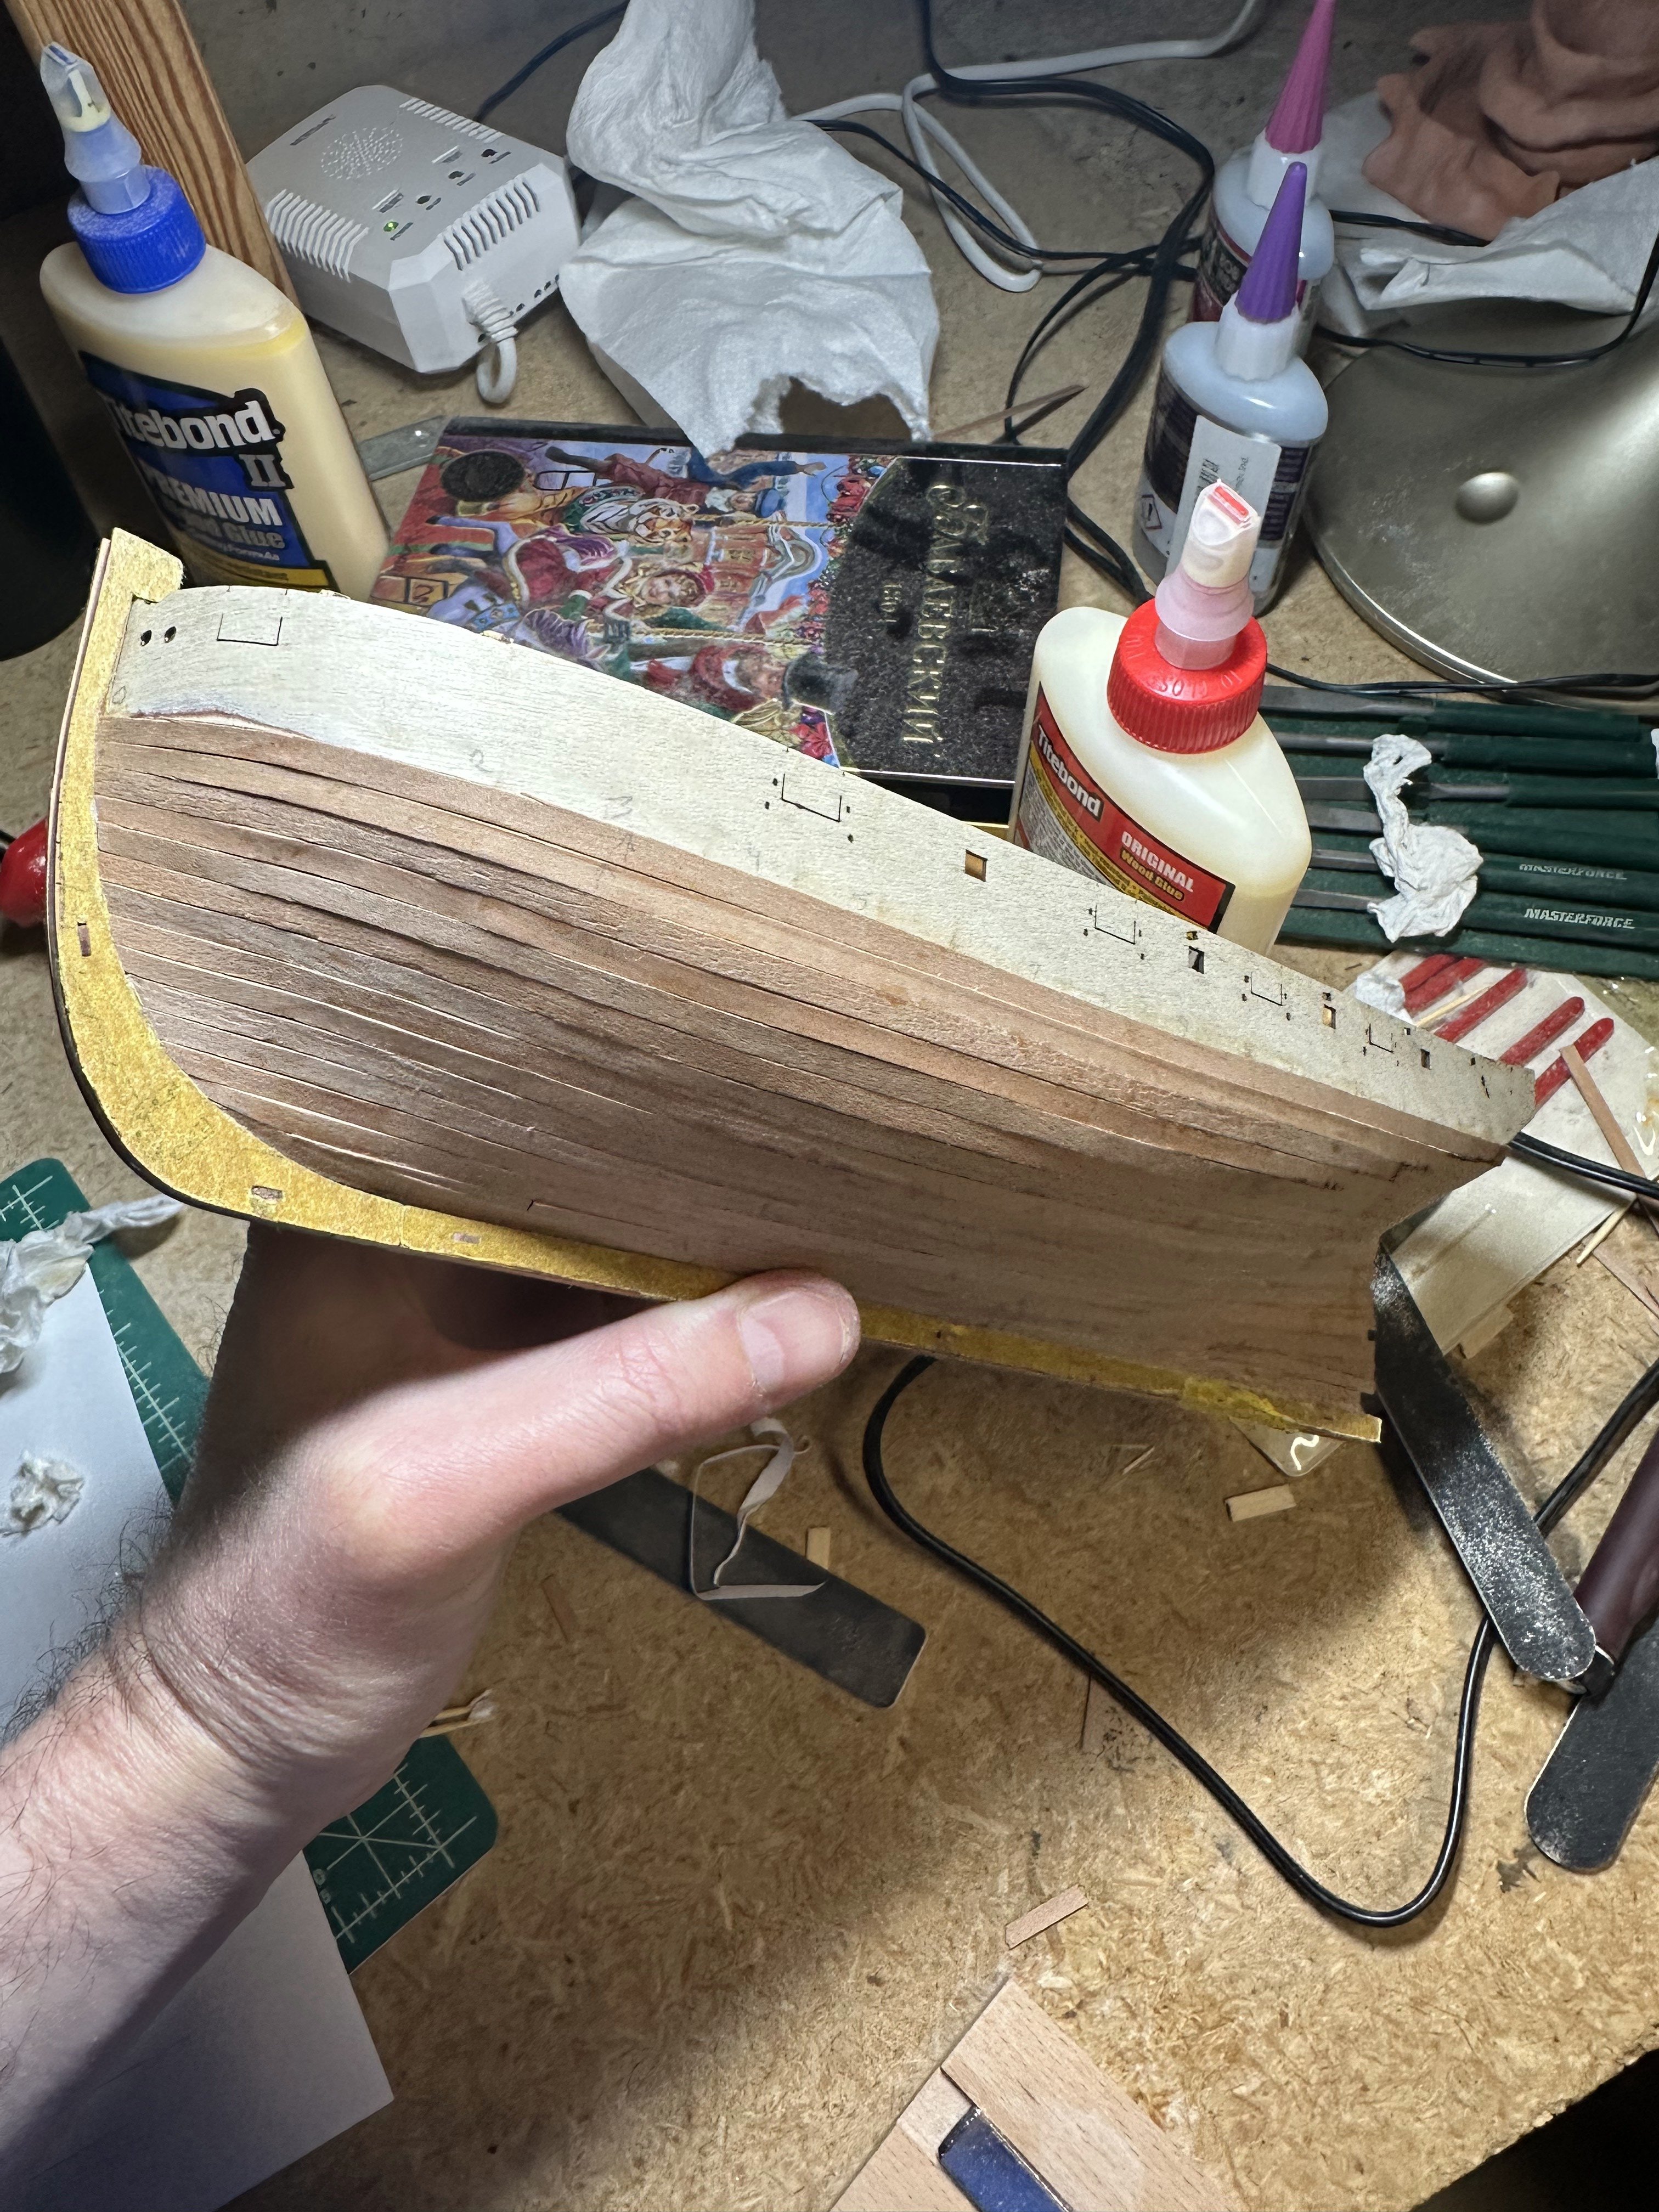
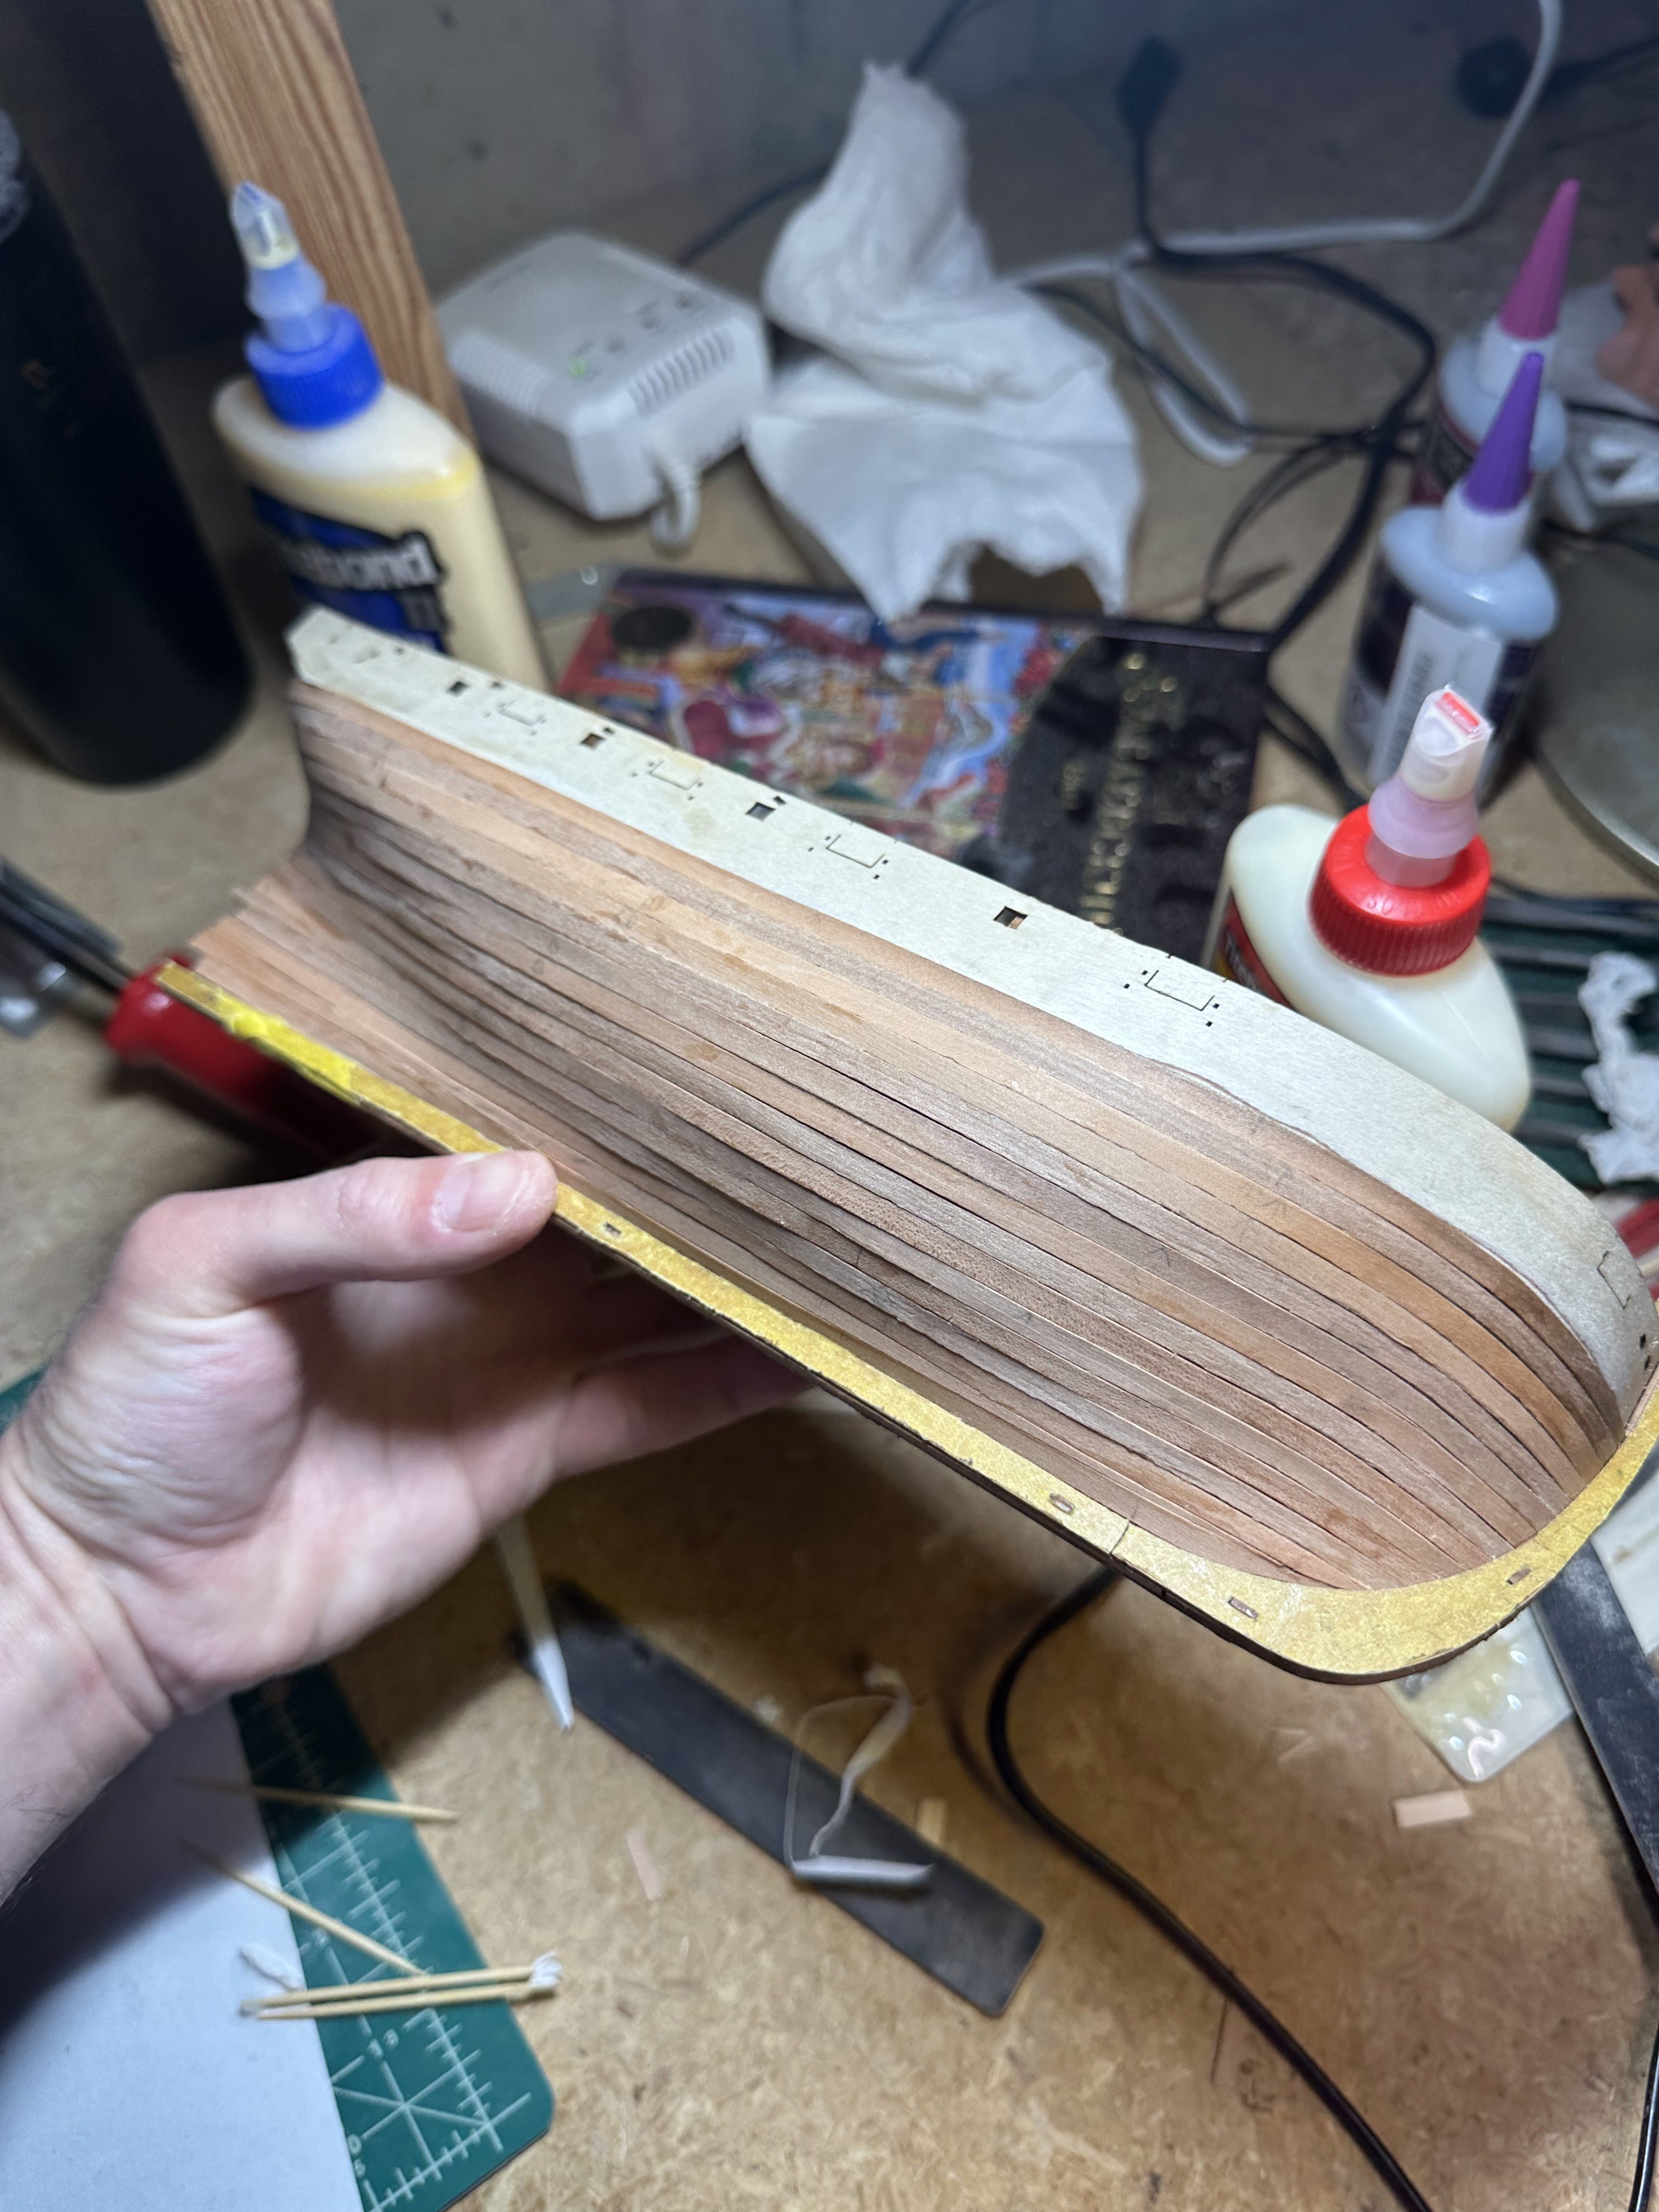
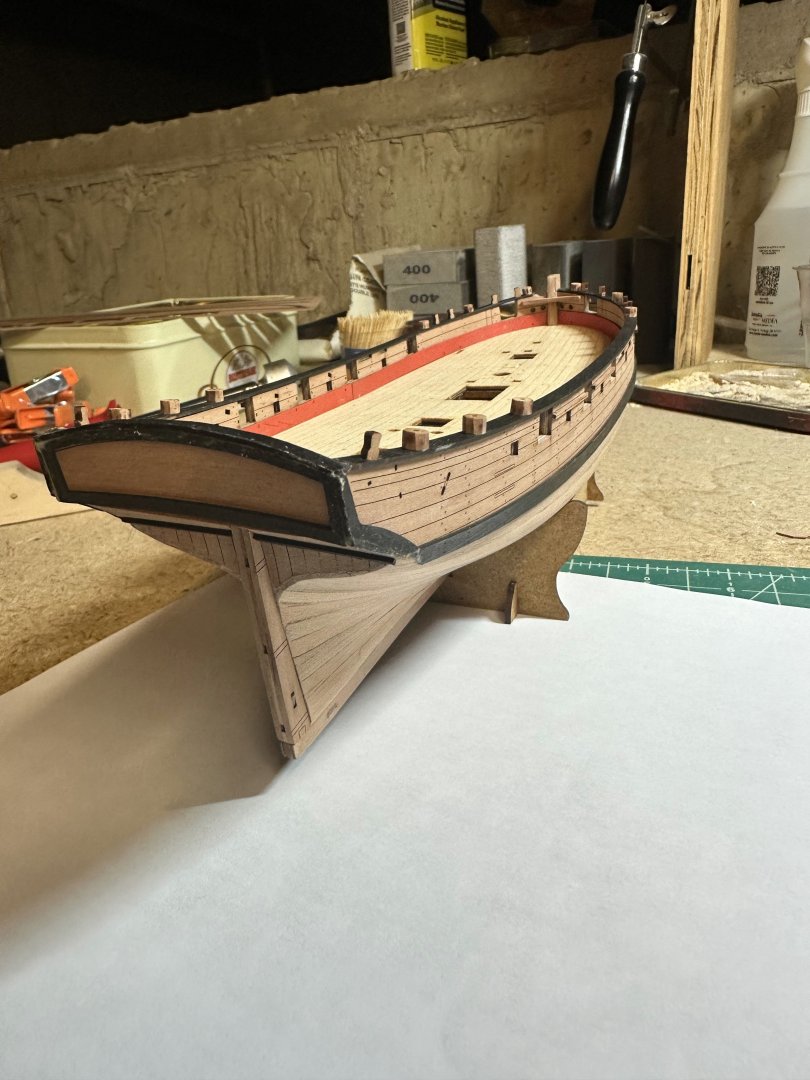
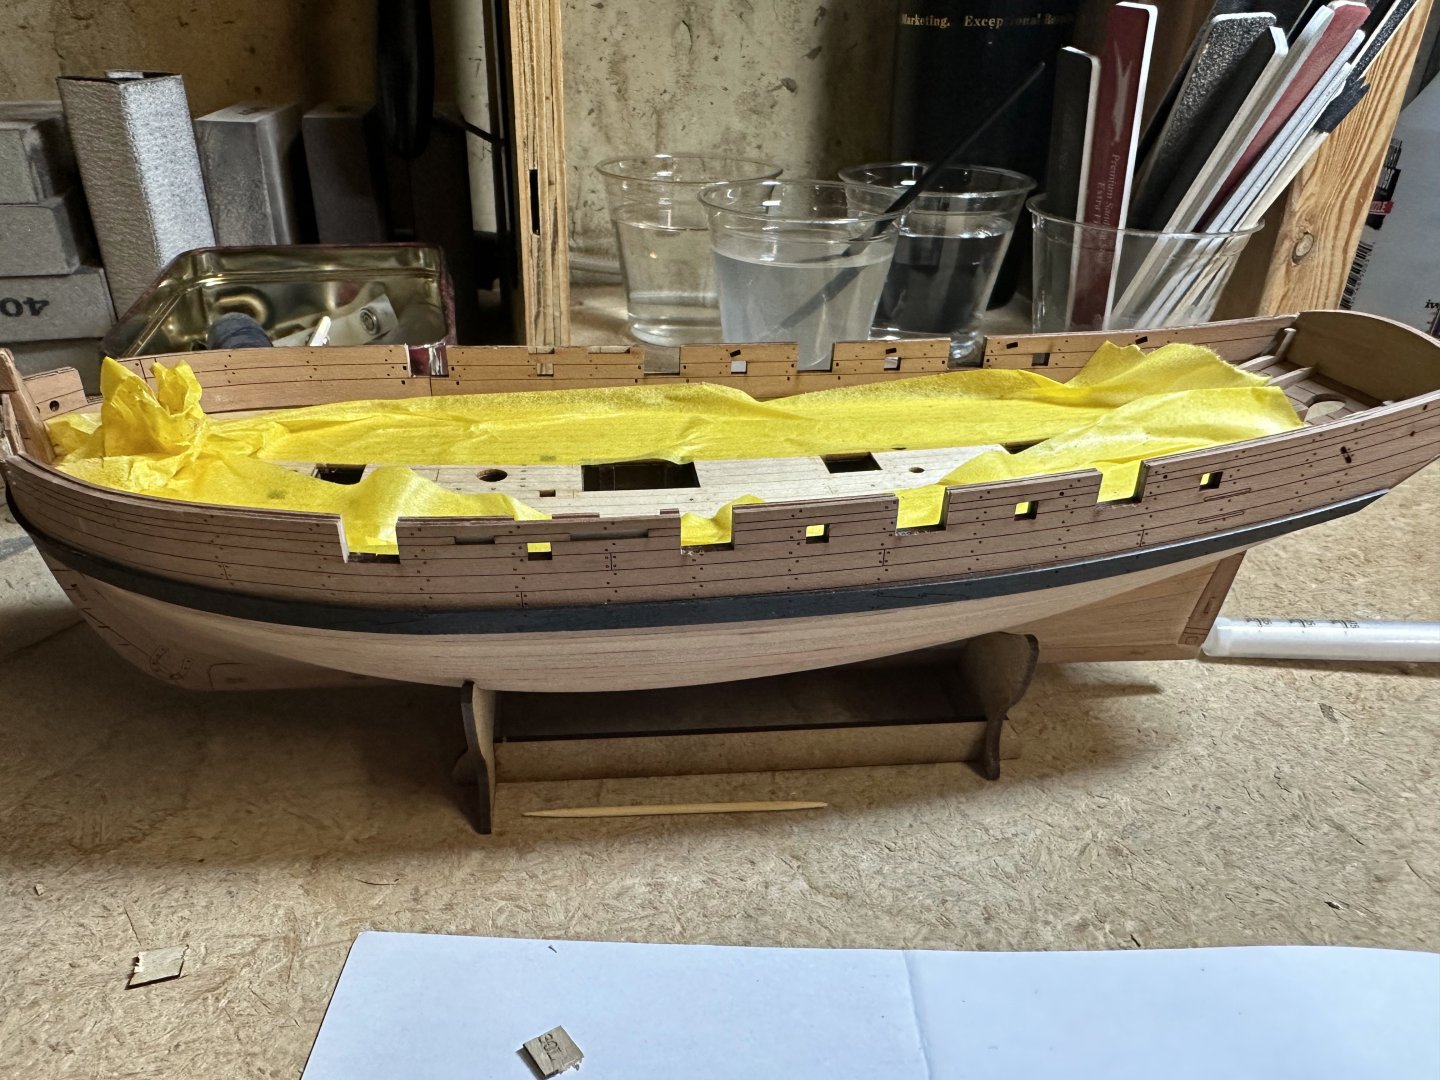
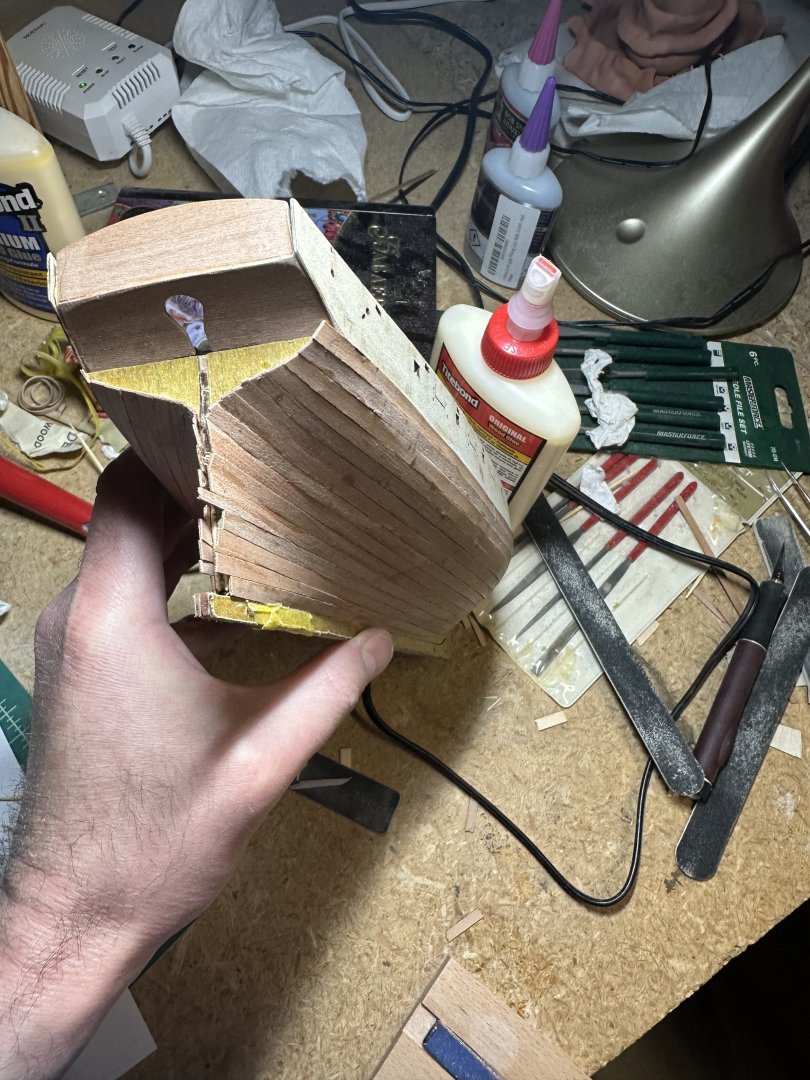
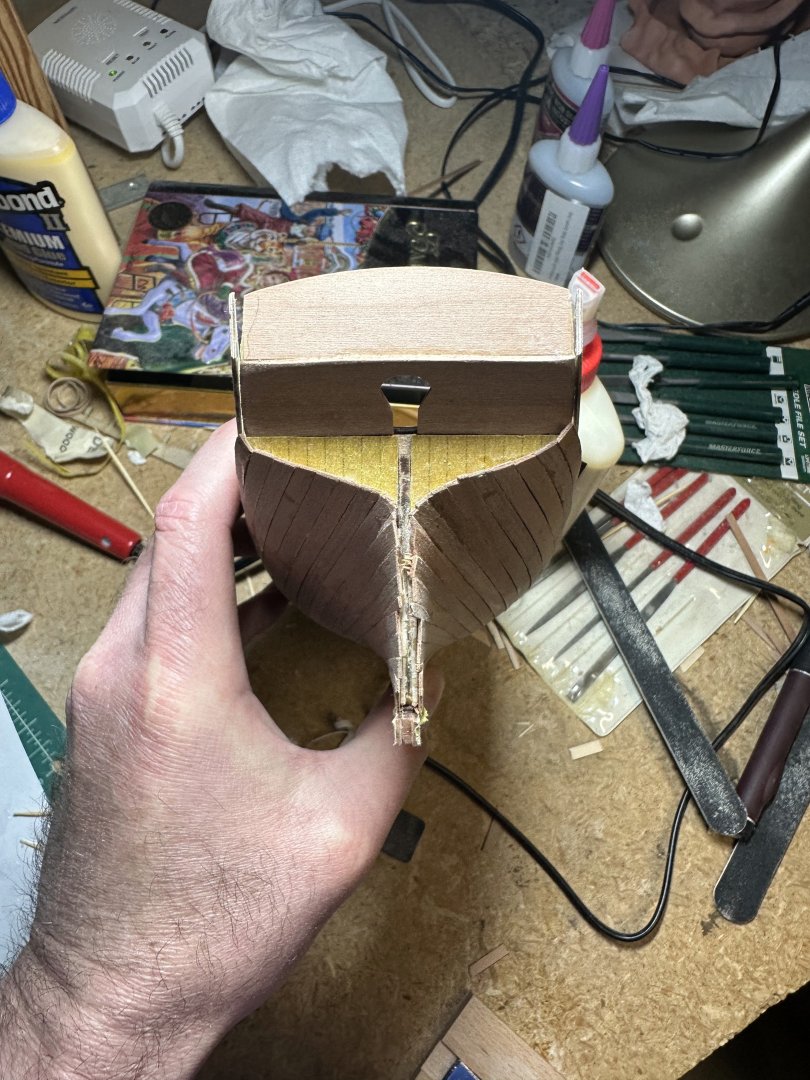
finally got to work more on Sherbourne... at least after few comments from my family that real ship probably took less time to build unfortunately i was not able to (or more properly was really scared to damage more things) to rip out the plank so ended up putting one on top of it. I should have put the one that goes the full length and after sanding it would have been less visible but overall i am ok with how it turned out... Had an accident and broke the stern, had to repair it... Tied too many rubber bands holding the black board while drying the glue.


-
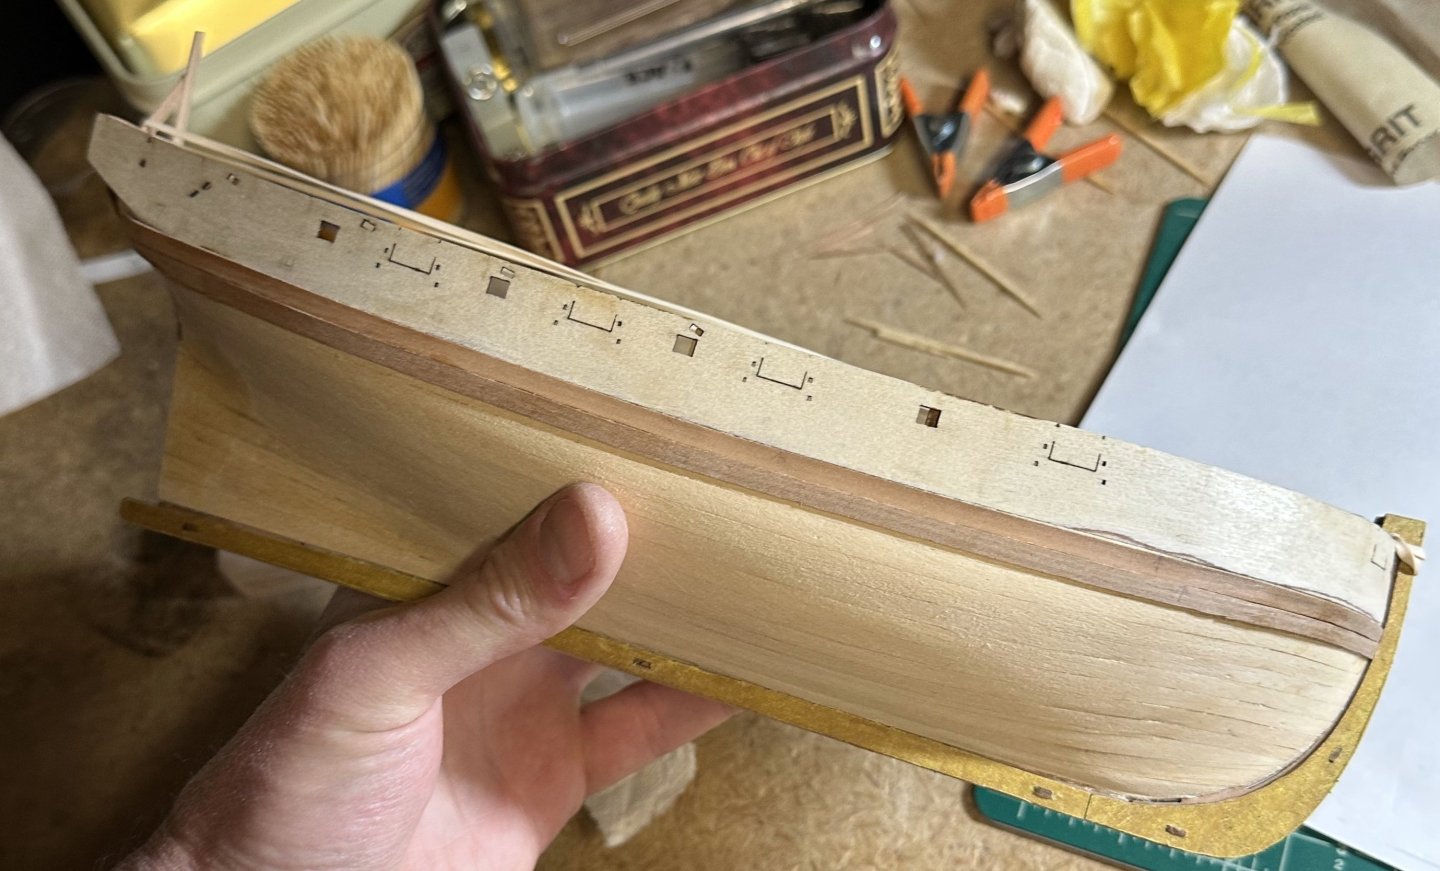
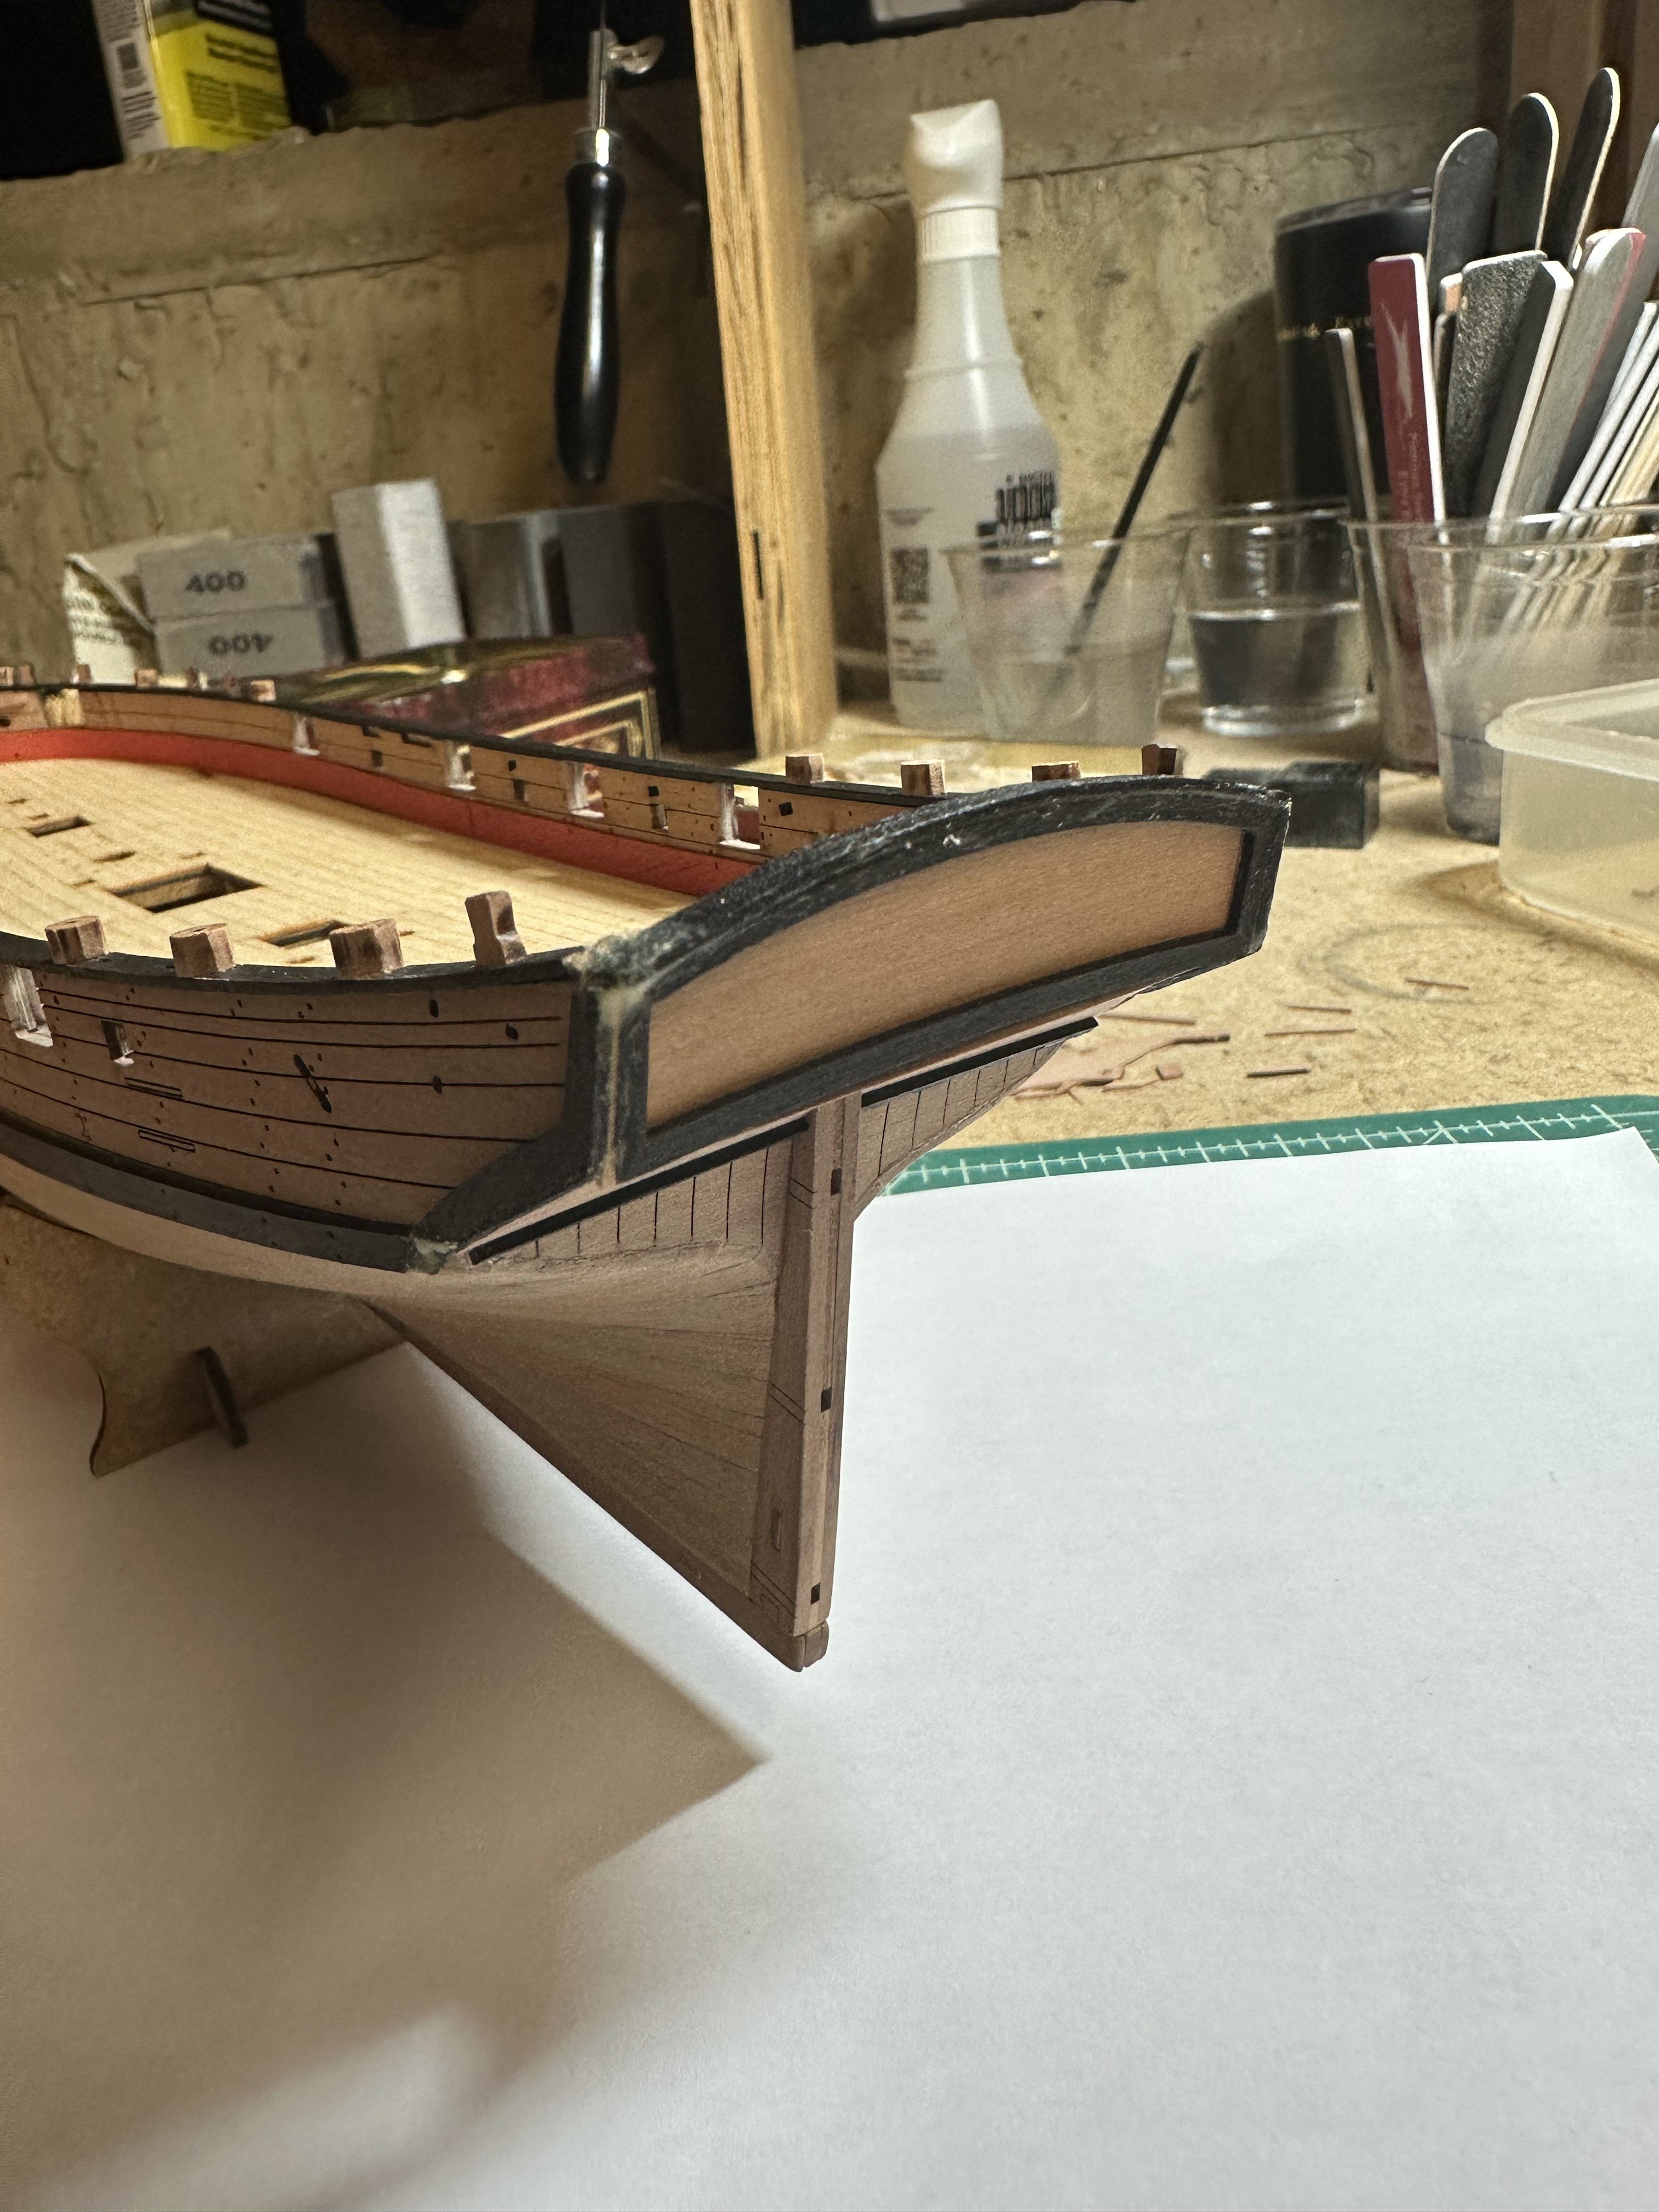
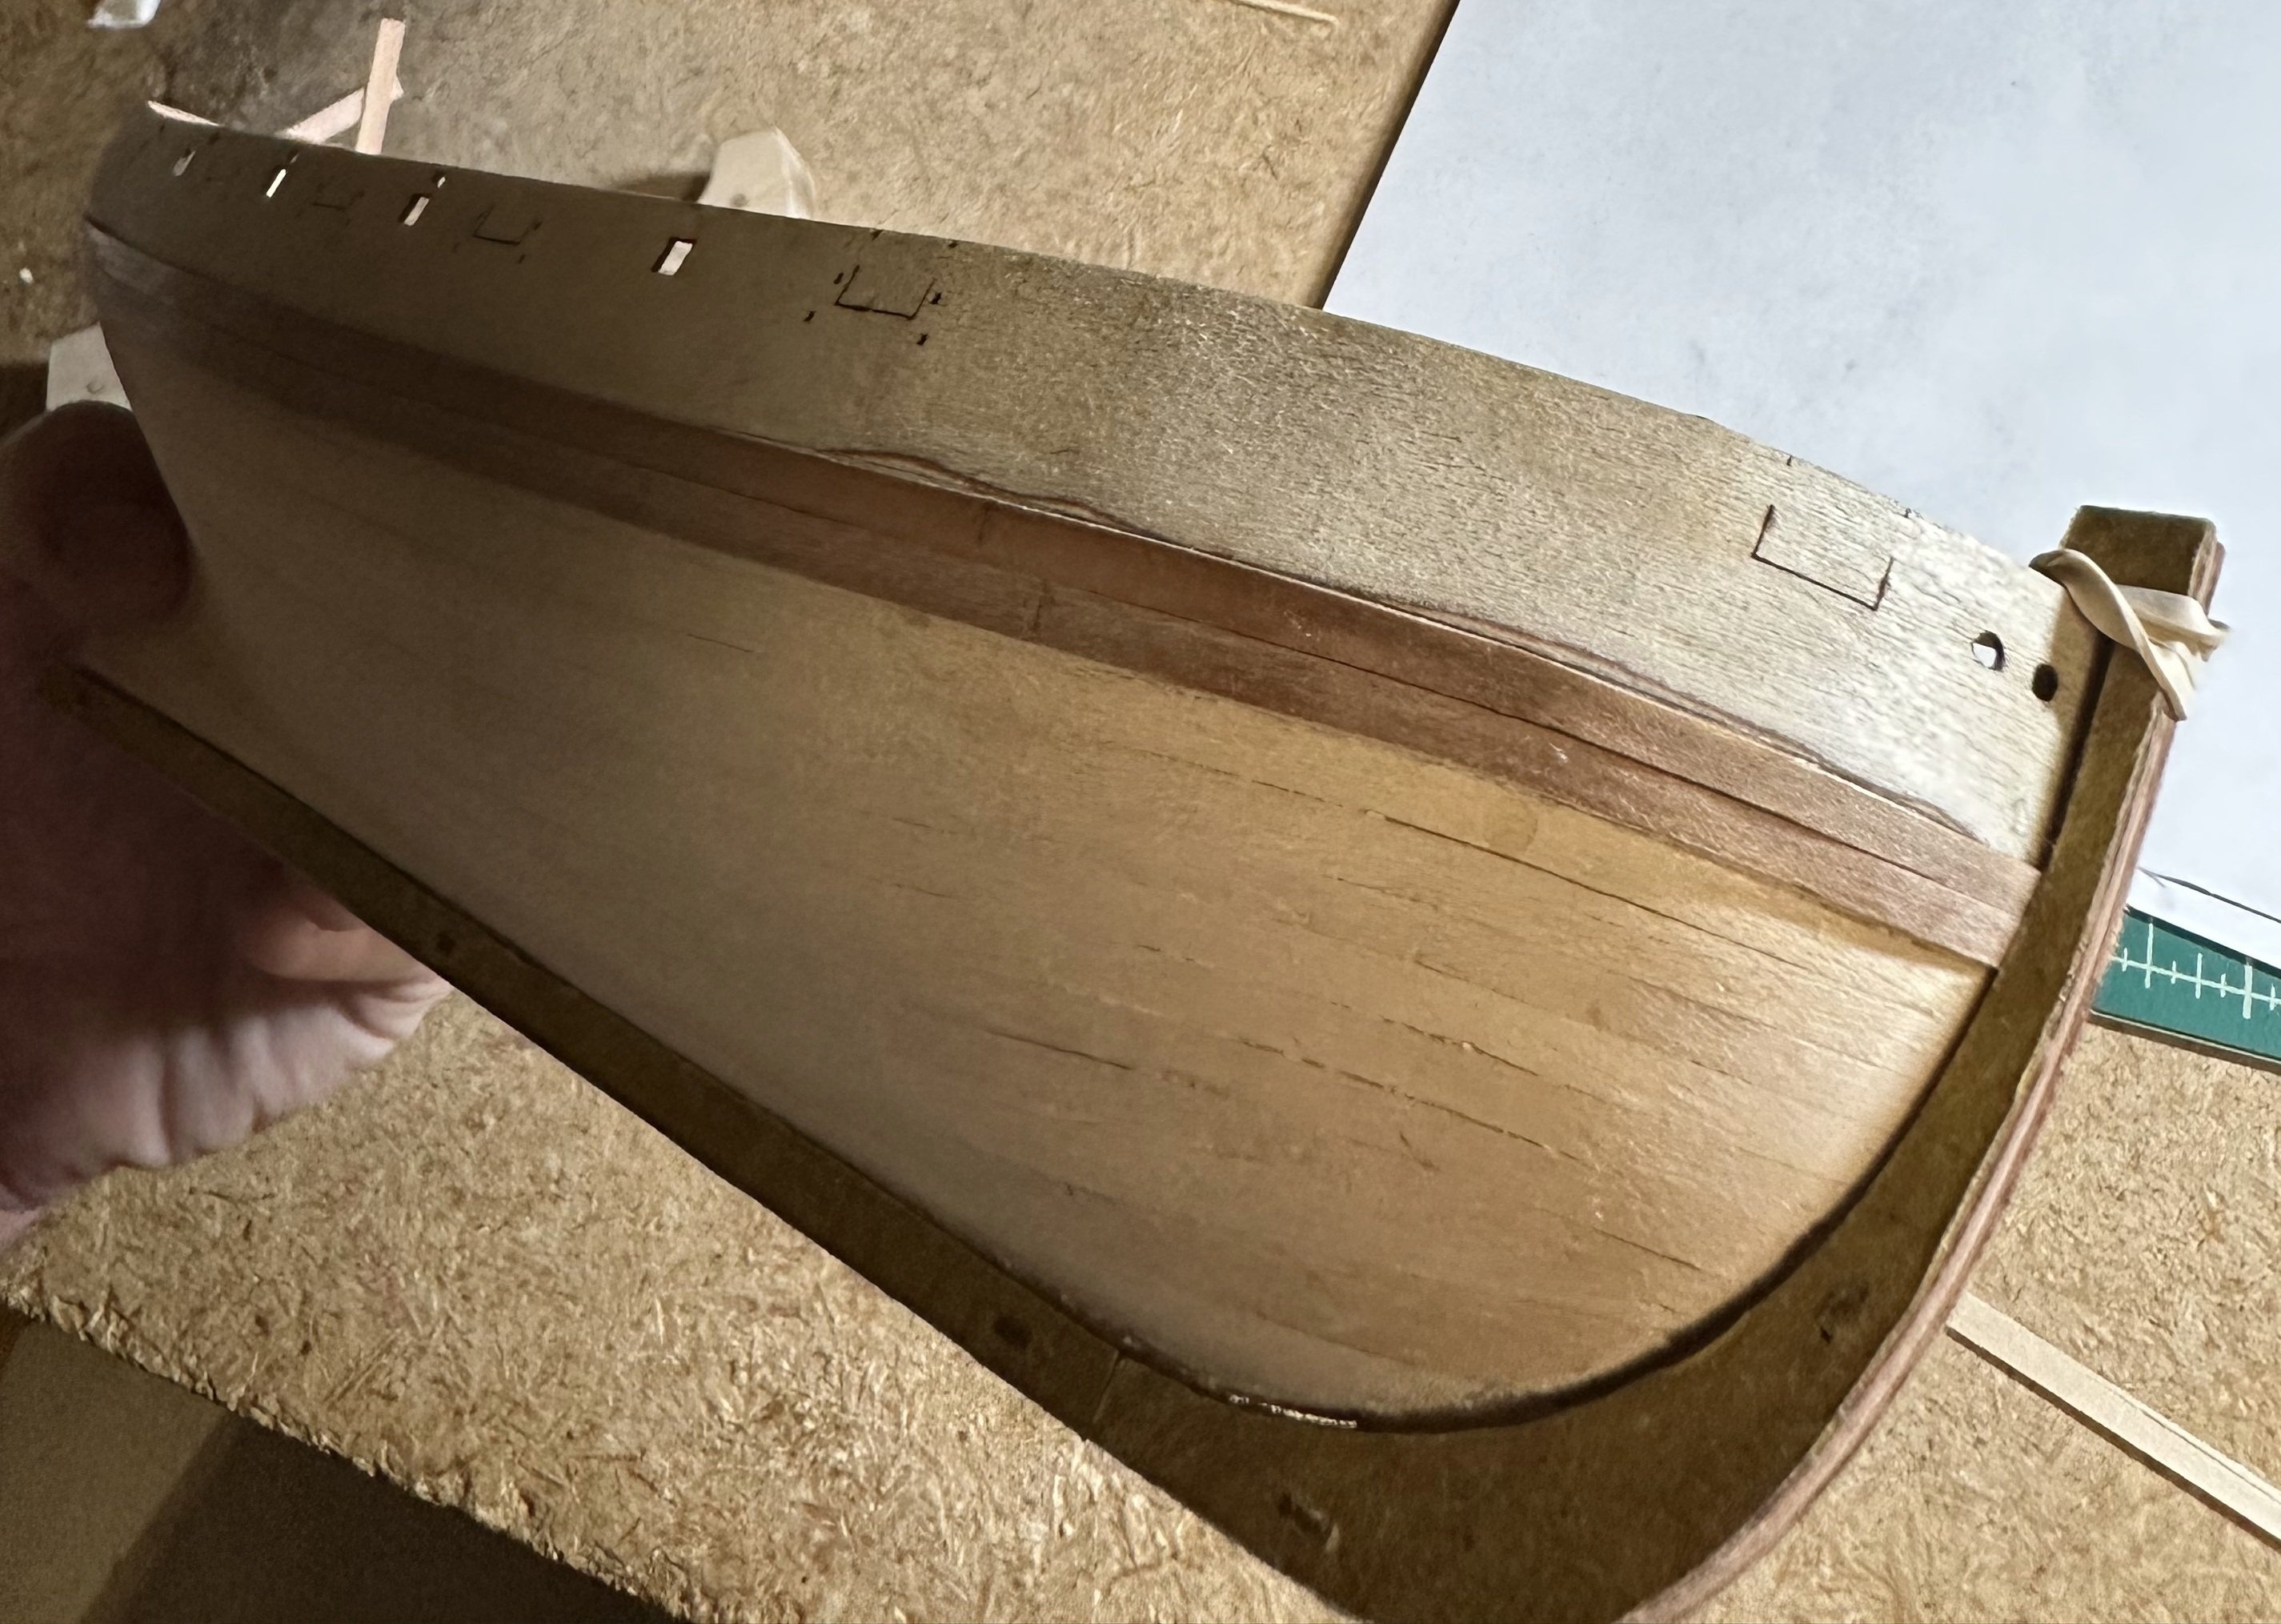
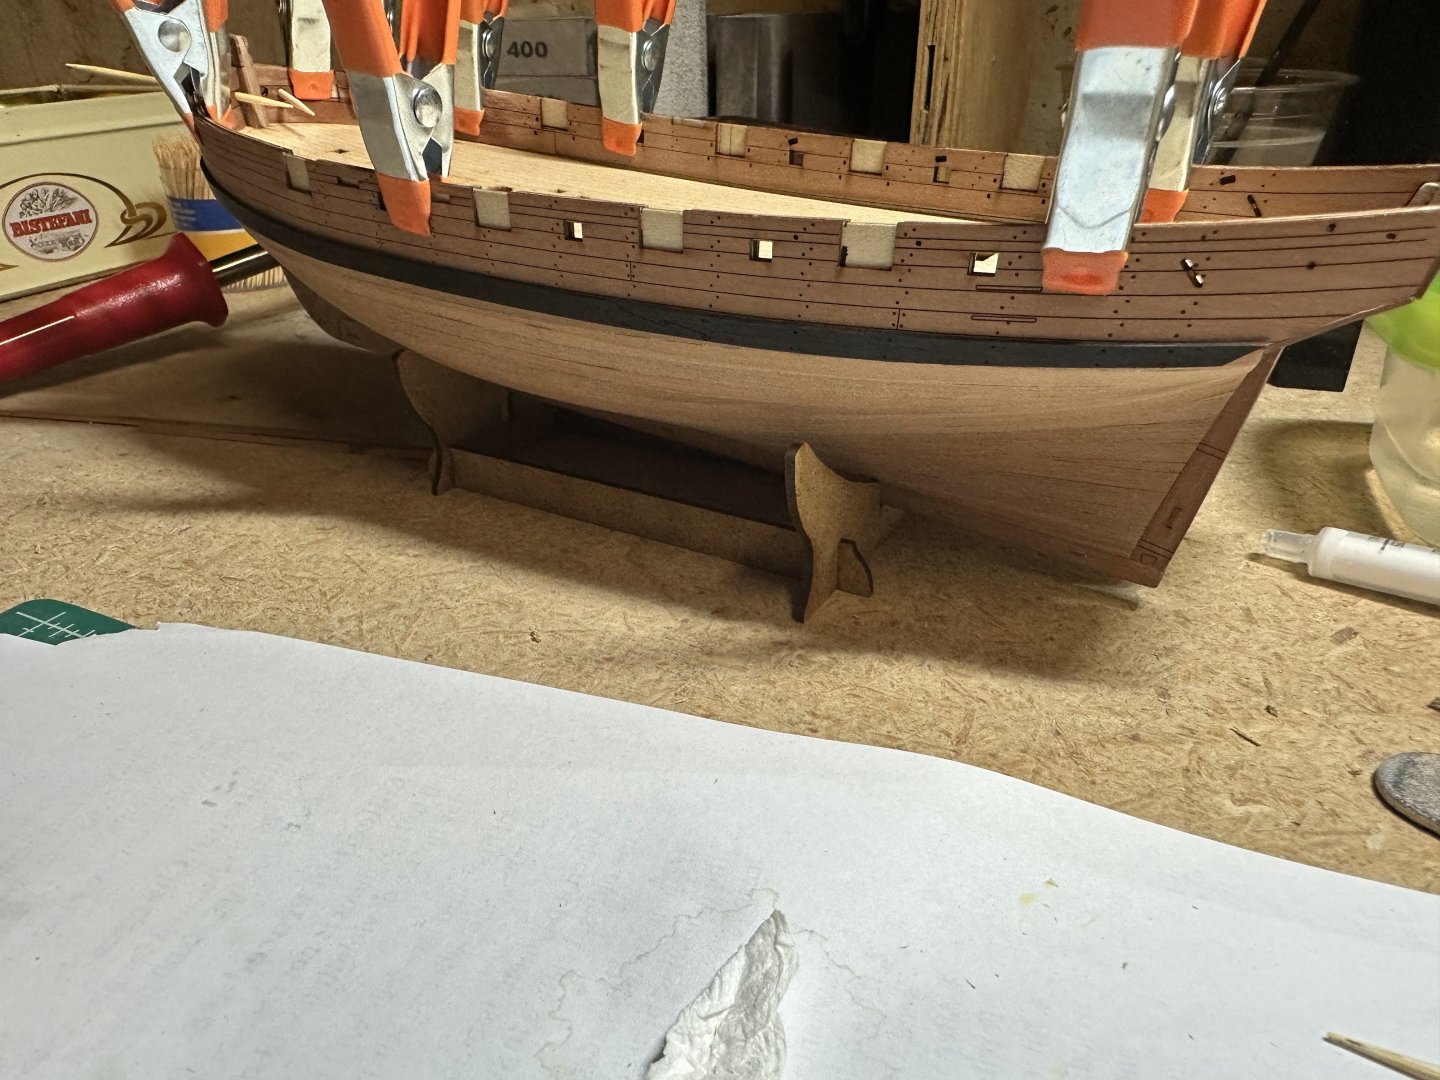
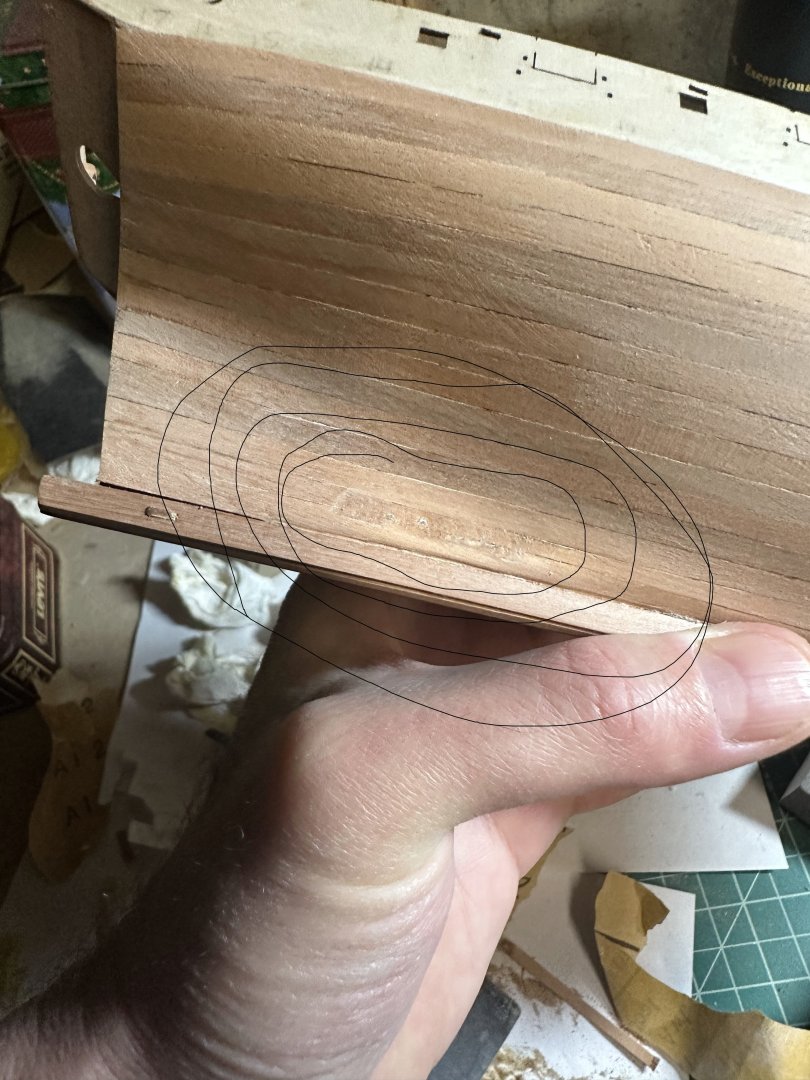
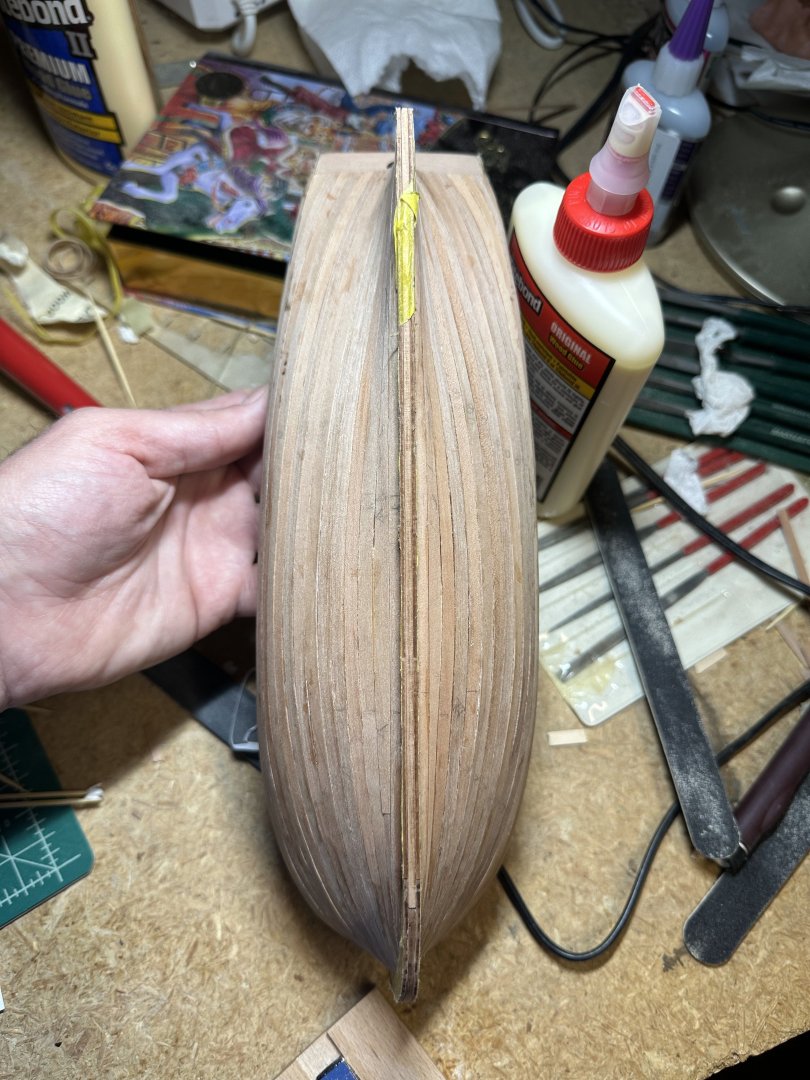
Run into a problem looks like... (few but one is more than the other...) was a bit overzealous with sanding and had the first planking layer showing. Attempted to mix together a mixture of dust and yellow glue, masked sides with masking tape, and added created filler - but when sanded looks like it did not go away that much.. Are there any methods to solve this that anyone is aware of is it just better to leave as is and put it as a learning experience?
-
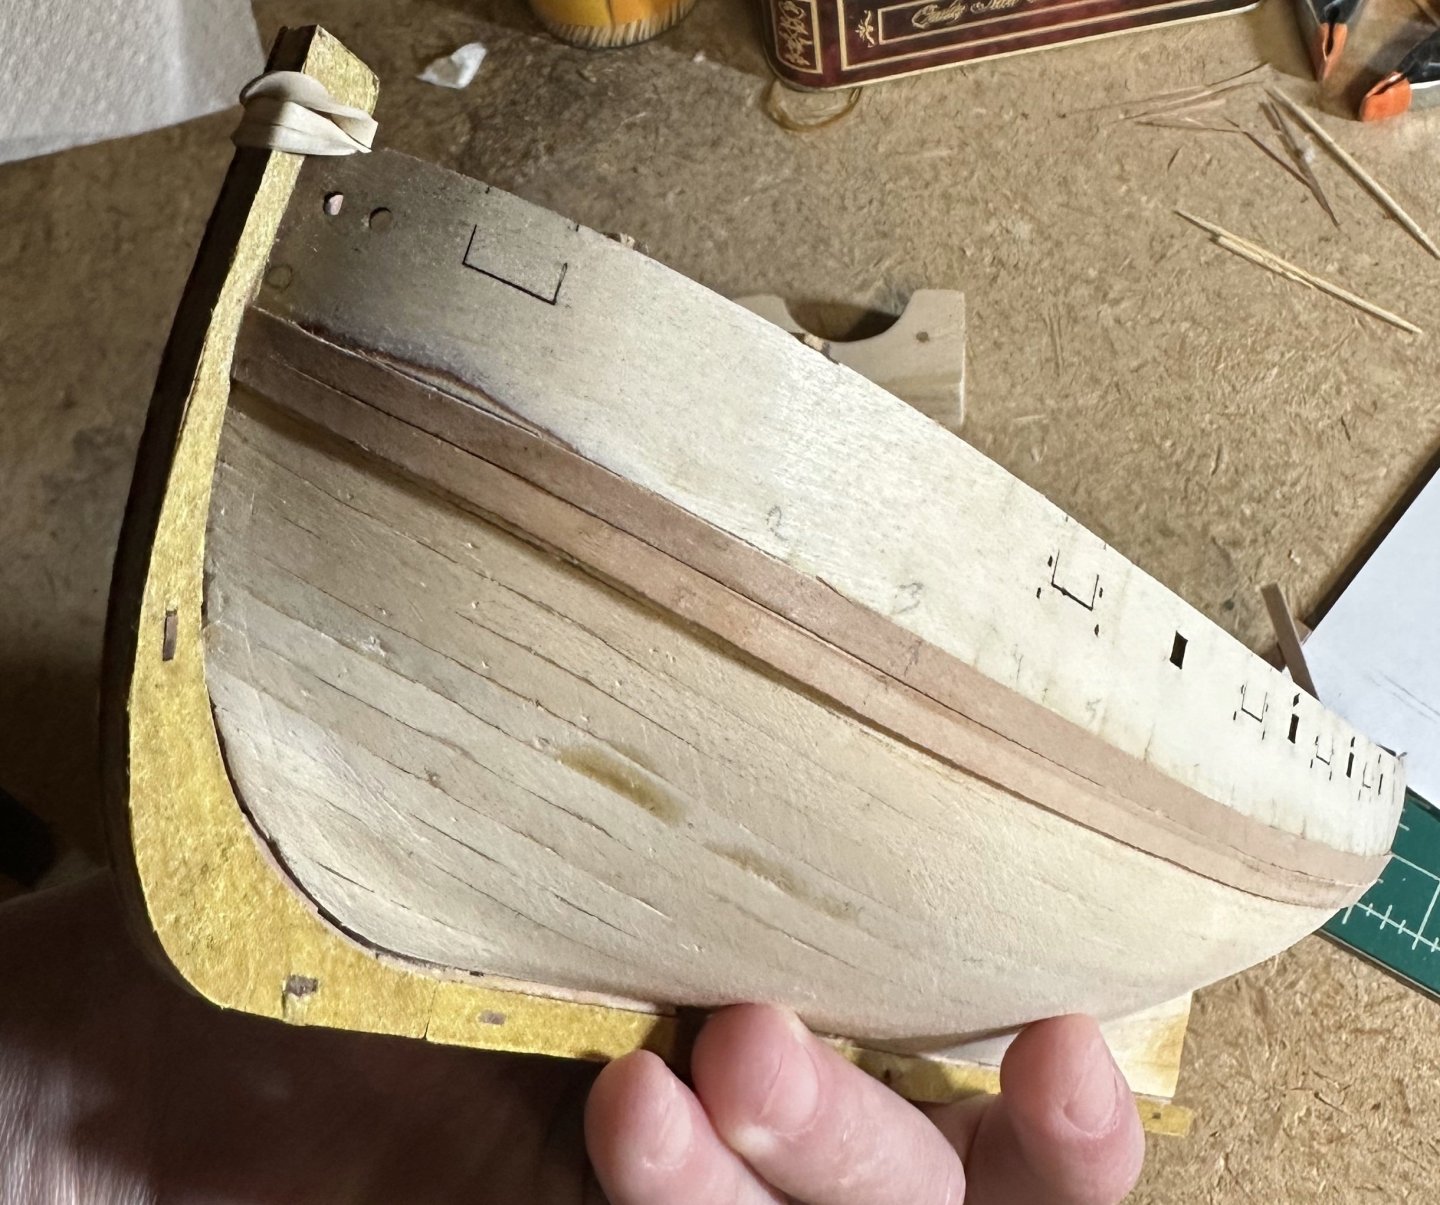
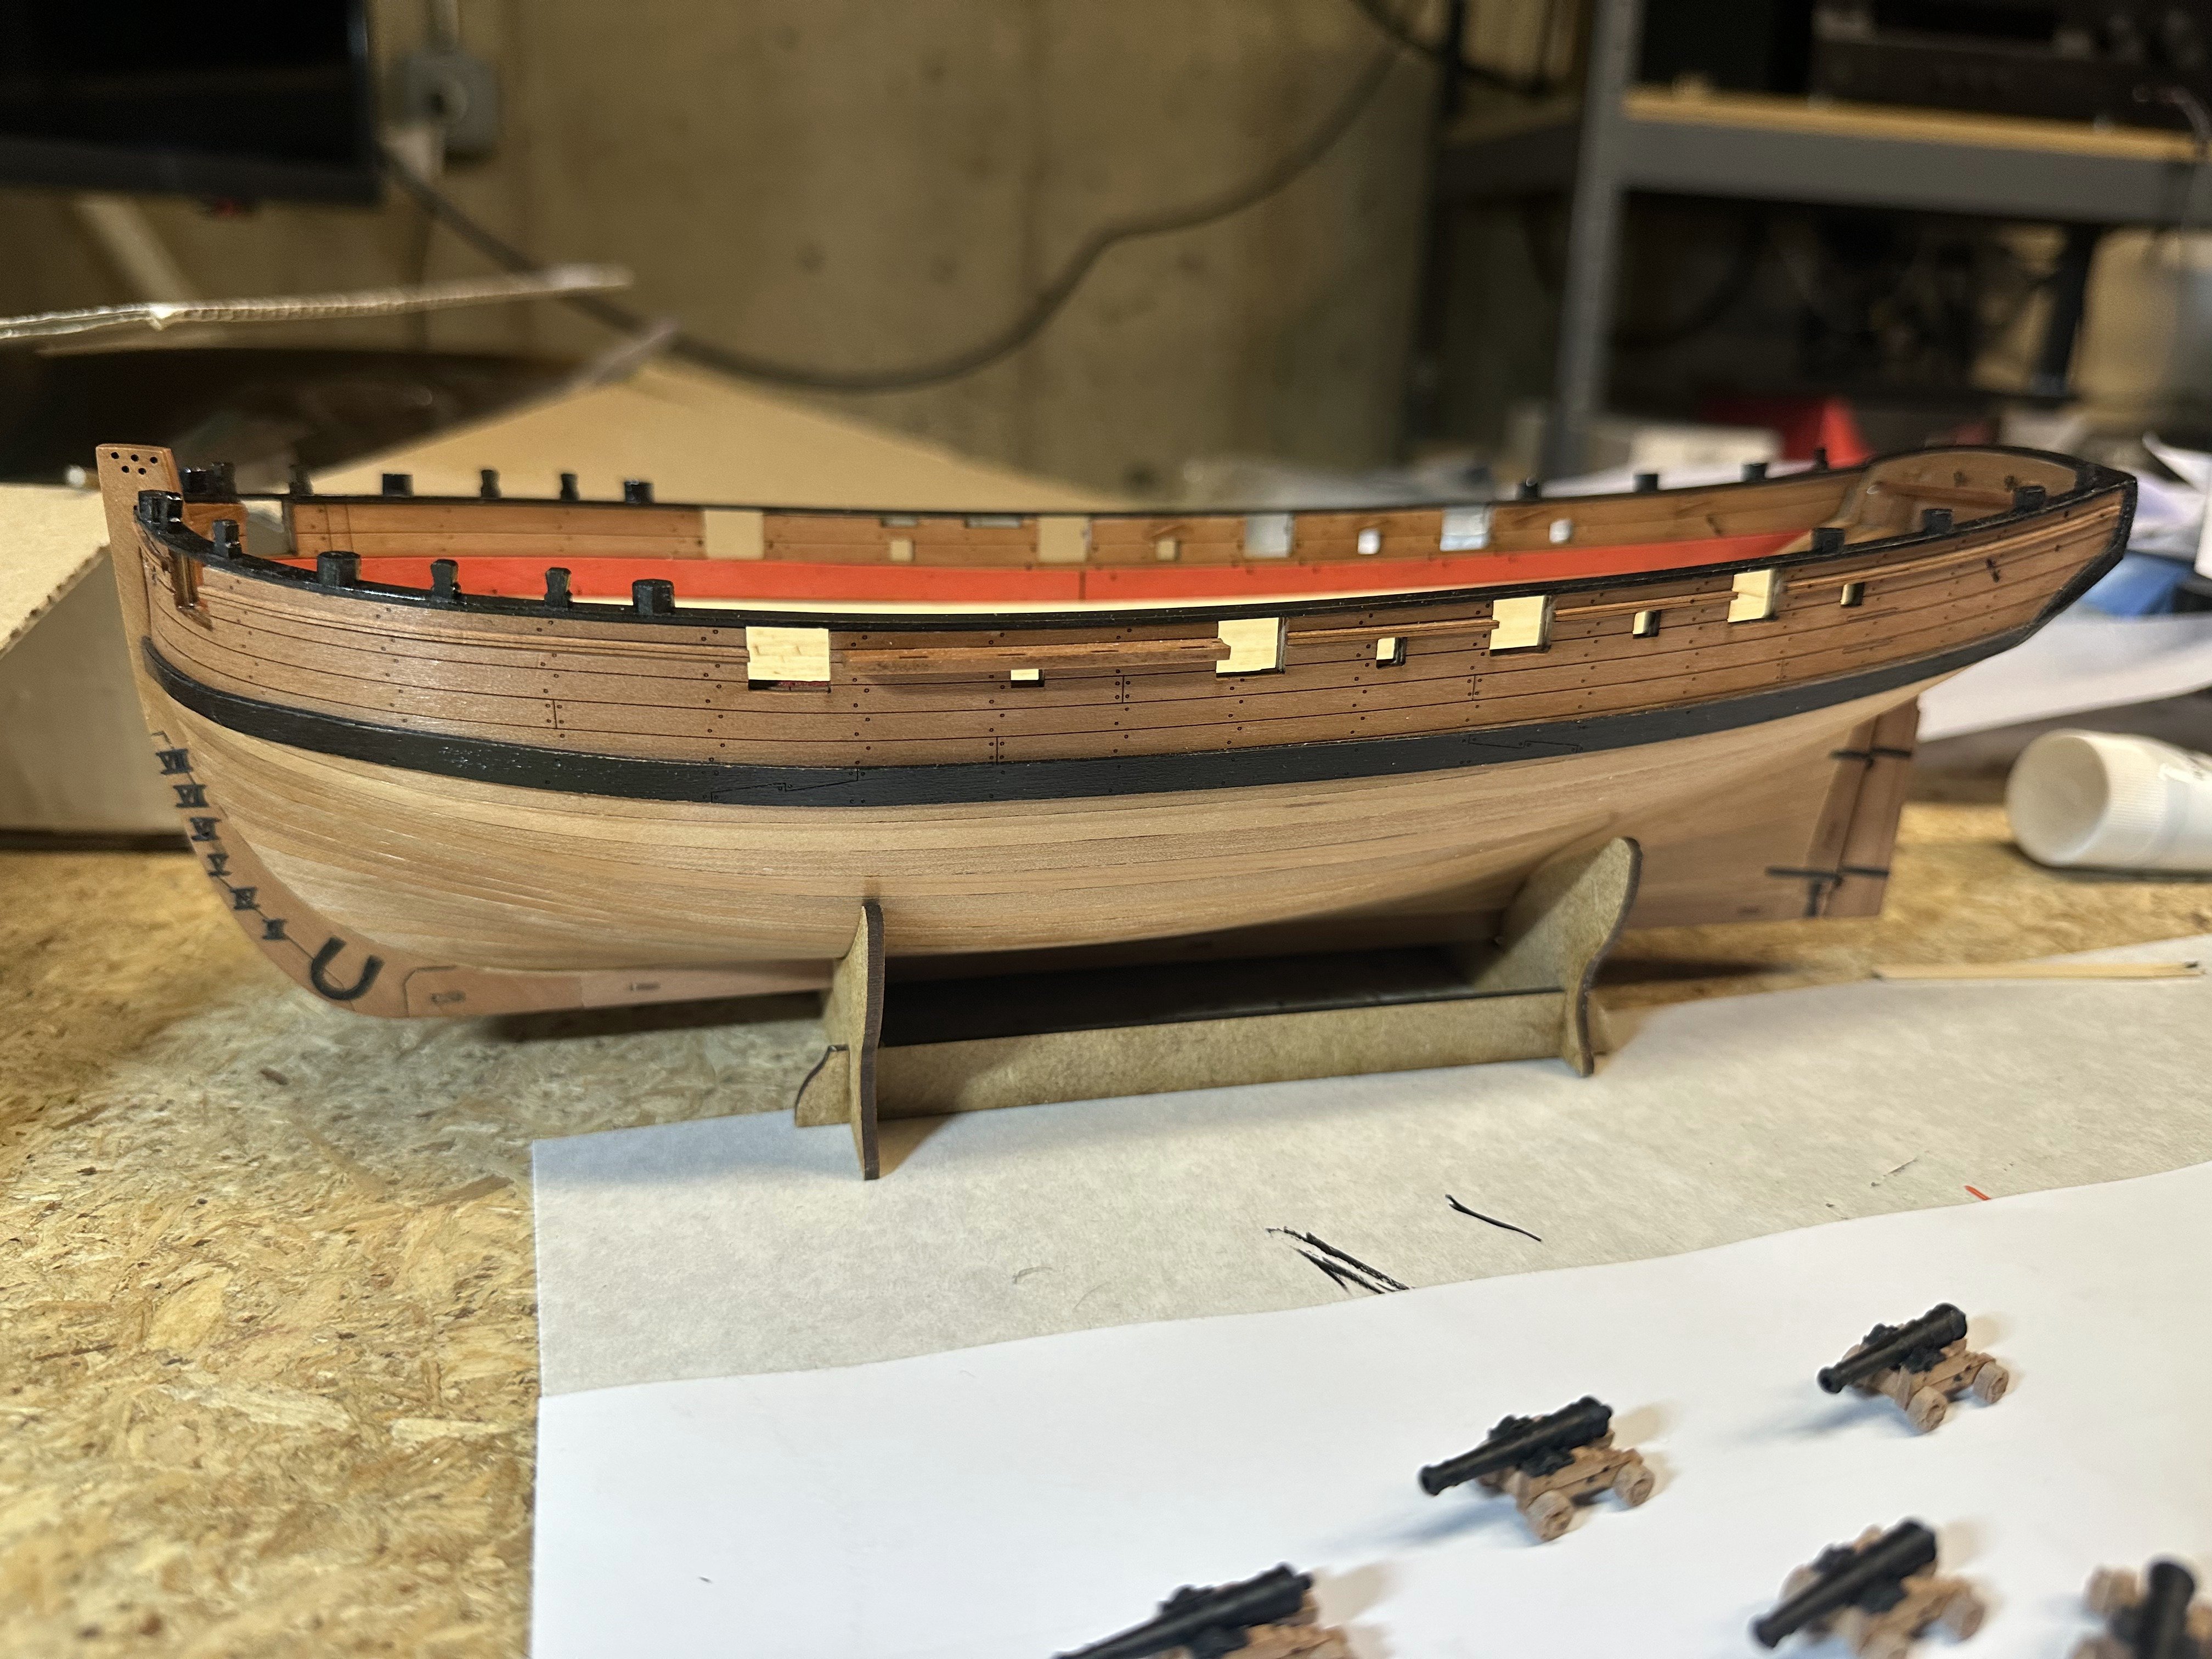
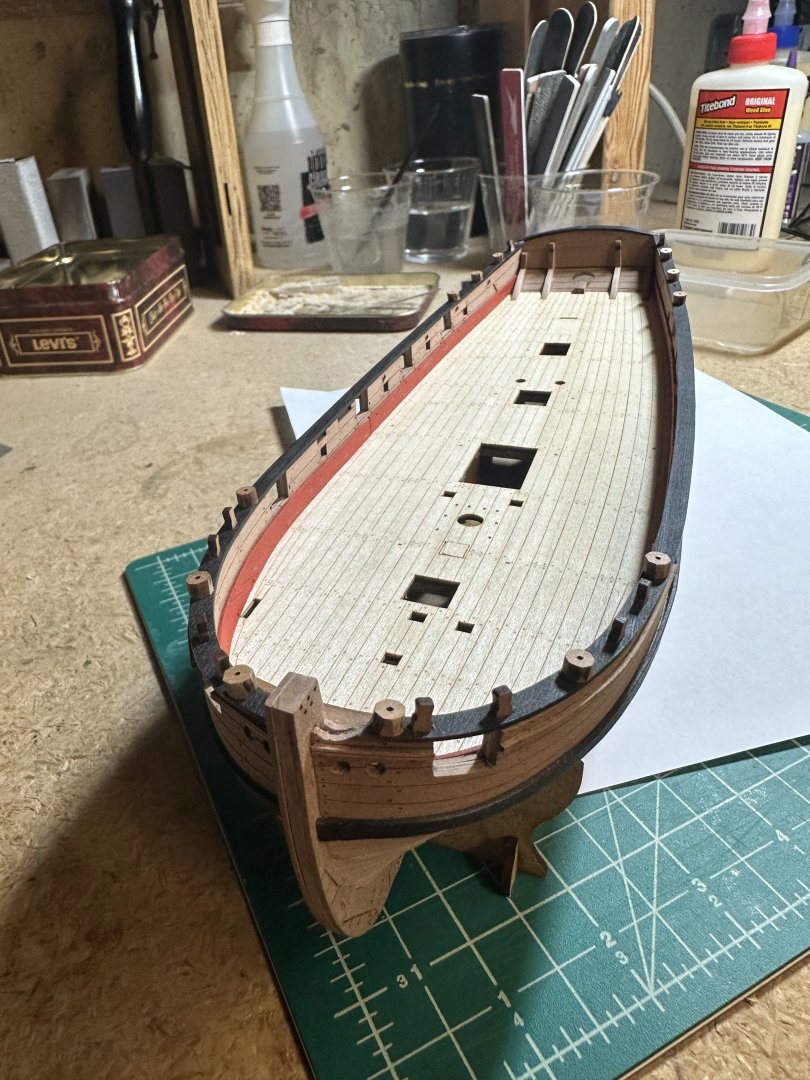
I was thinking about the colors of the hull since coming up to that step... White somehow does not sit as good with me... Started doing a bit of digging and from this forum the article below came up: "Pitch, Paint, Varnish and the Changing Colour Schemes of Royal Navy Warships, 1775–1815: A summary of existing knowledge" by Brian Vale. It had a text in there: "In terms of preservation and decoration, the Navy Board divided the sides of a ship into two parts: that from the wales, that is the strengthening timbers which stretched from the stem to the stern, down to the waterline; and the area which extended above this to the rails. The first was ‘payed’ with waterproof applications of pitch and tar, while the second was covered with various types of varnish and/or oil paint." So i take it the color was dark/gray tones of the wood which most directly translates to he unfinished wood look, outside of weathering it. So leaning towards just leaving the hull as is (only varnish with shellac) and just having black wales.
-
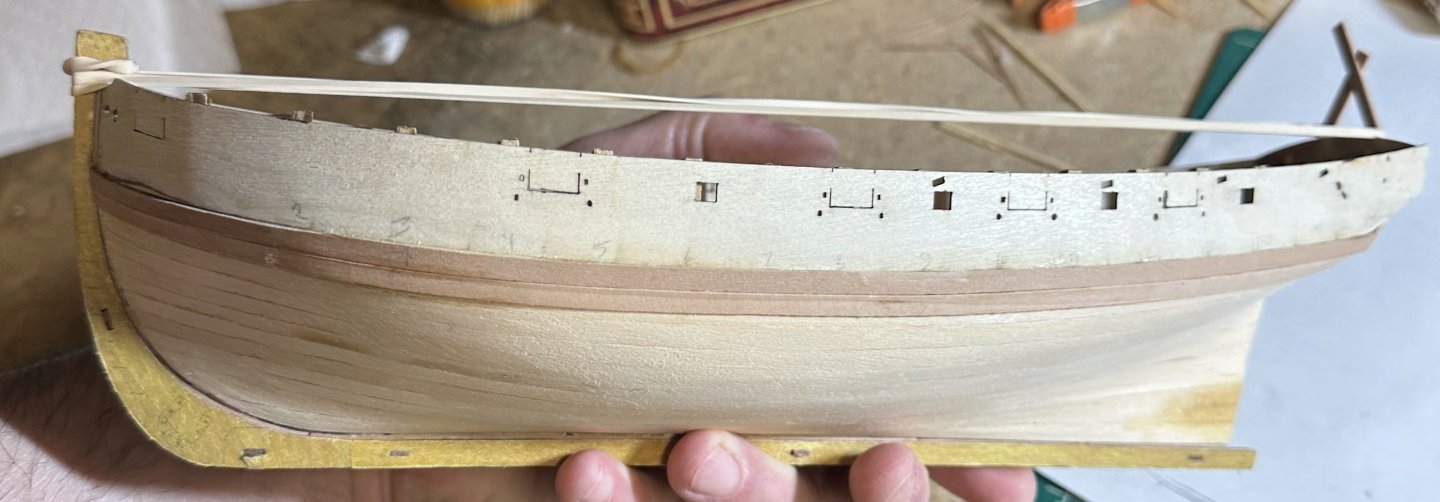
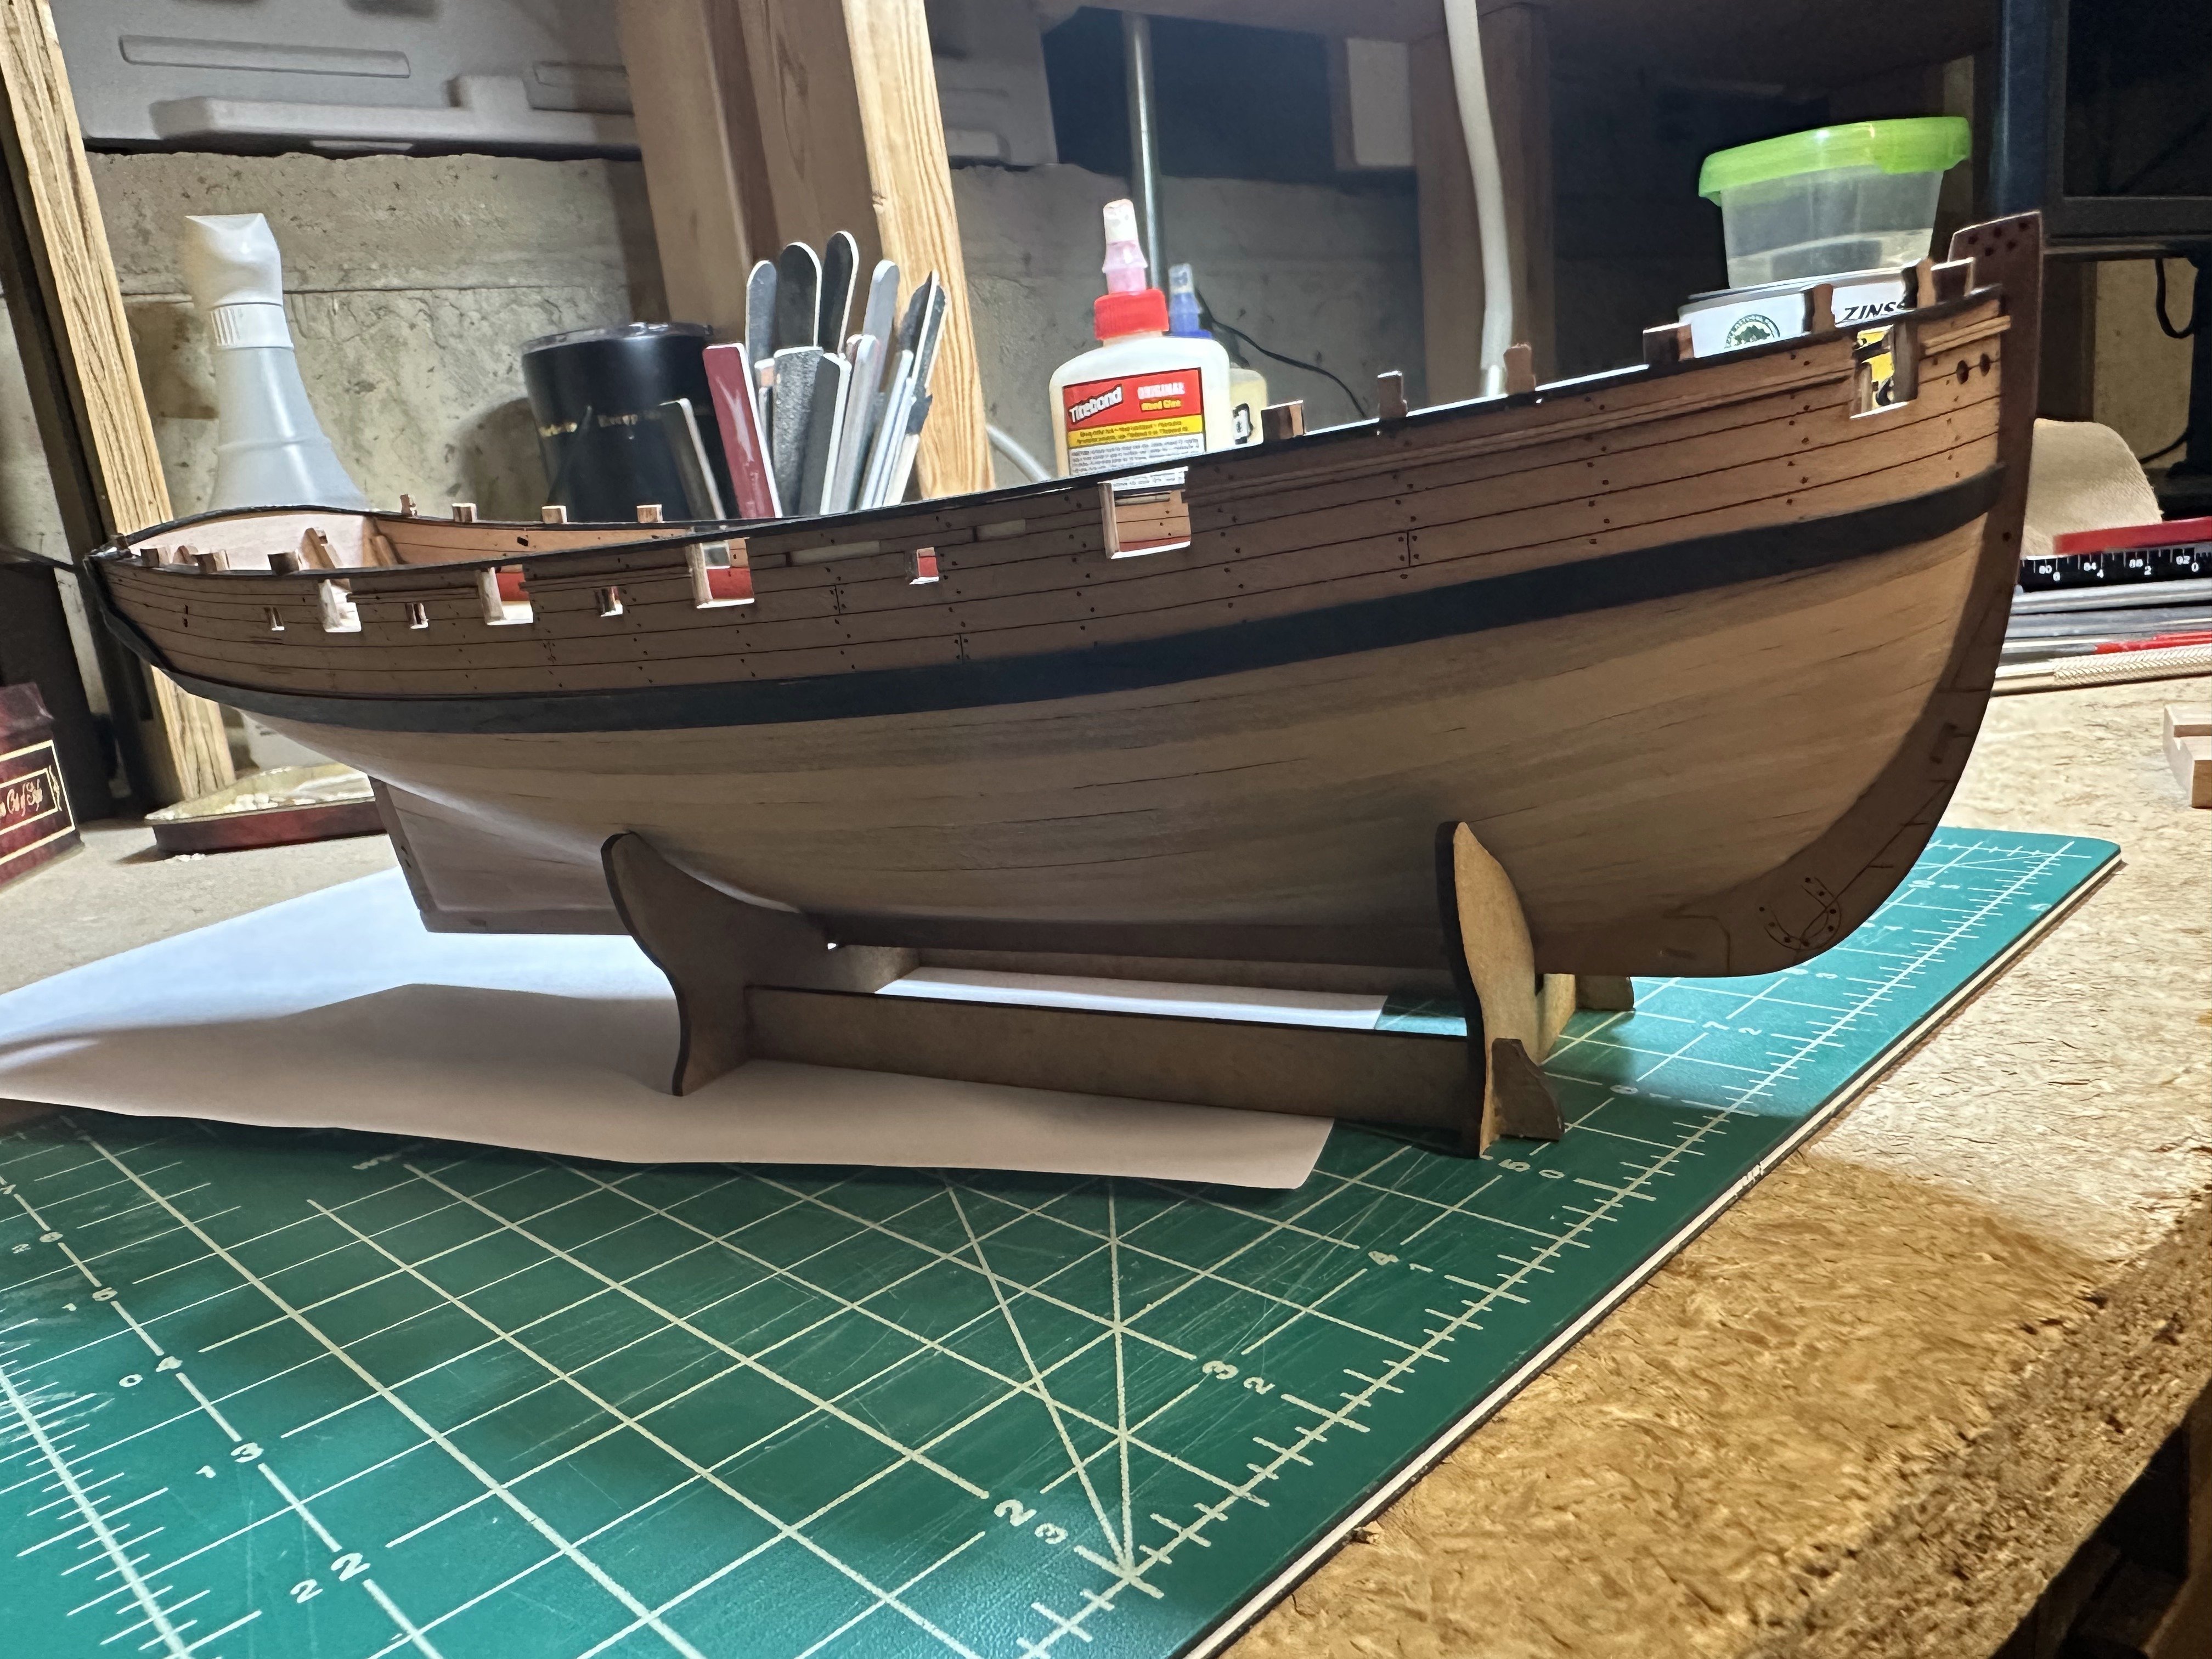
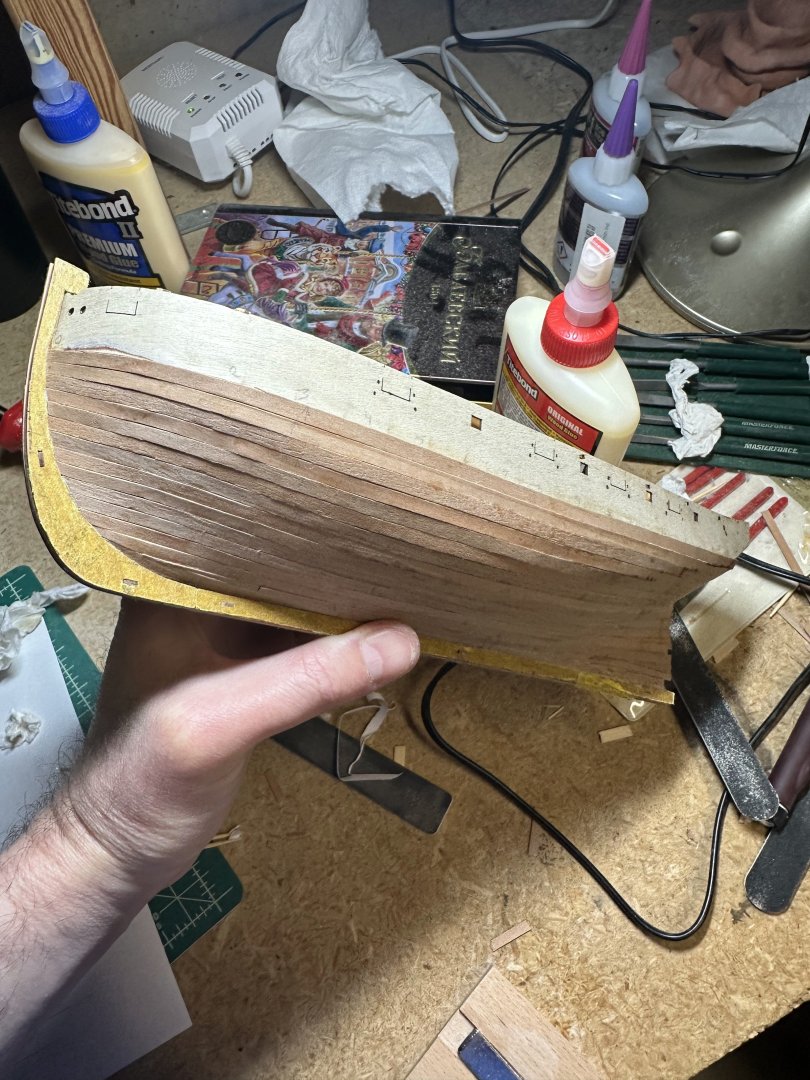
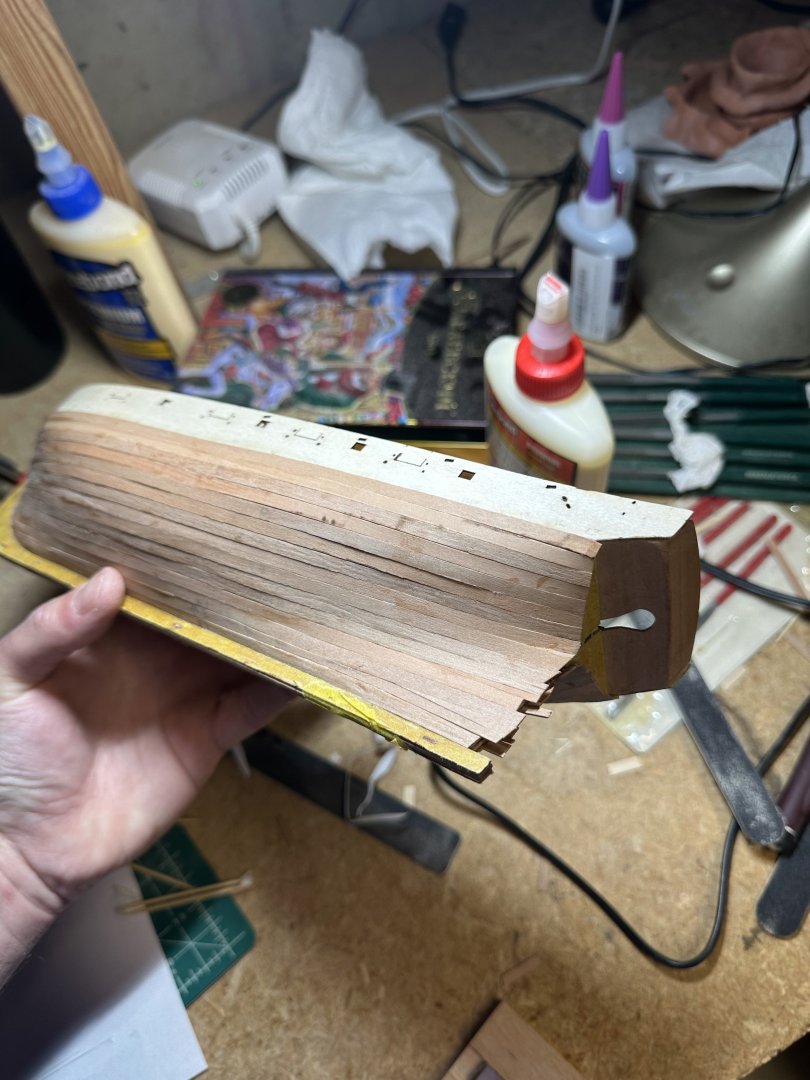
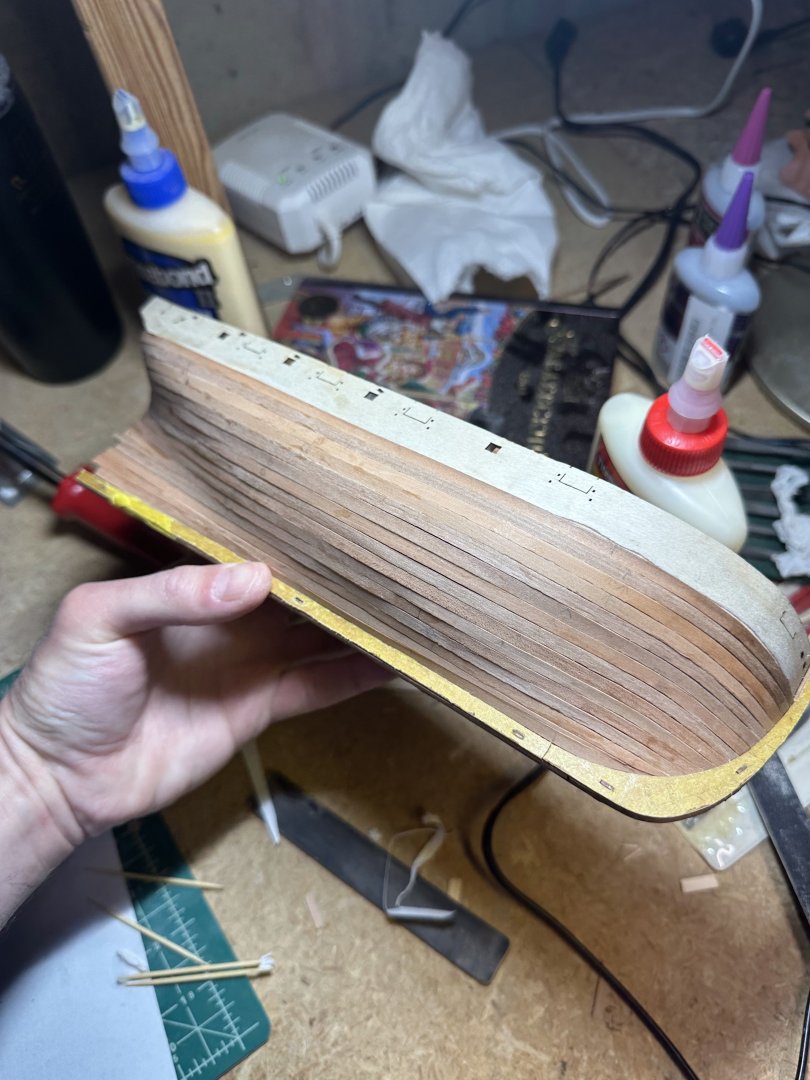
Second planking is done... Last plank turned out to be very tricky on both sides, spent a lot of time sanding and cutting it to fit the opening... Now need to figure if it is better to paint the hull white or leave be in natural color...


-
thank you!!! that's a relief!
-
Slowing getting second planking on using the advice - thank you! It might not apply to this one since it will be painted but will accidental drops of super glue be visible if the model is left unfinished/i.e. is there a specific way to get them off? I wonder if others have run into this problem...