HOLIDAY DONATION DRIVE - SUPPORT MSW - DO YOUR PART TO KEEP THIS GREAT FORUM GOING! (89 donations so far out of 49,000 members - C'mon guys!)
×


rlwhitt
-
Posts
161 -
Joined
-
Last visited
Content Type
Profiles
Forums
Gallery
Events
Everything posted by rlwhitt
-

Use of “other power tools”
rlwhitt replied to kgstakes's topic in Modeling tools and Workshop Equipment
Thanks for that video - that's quite interesting. What model # is this machine? -
Baker and mugje, thanks for the nice comments!
-
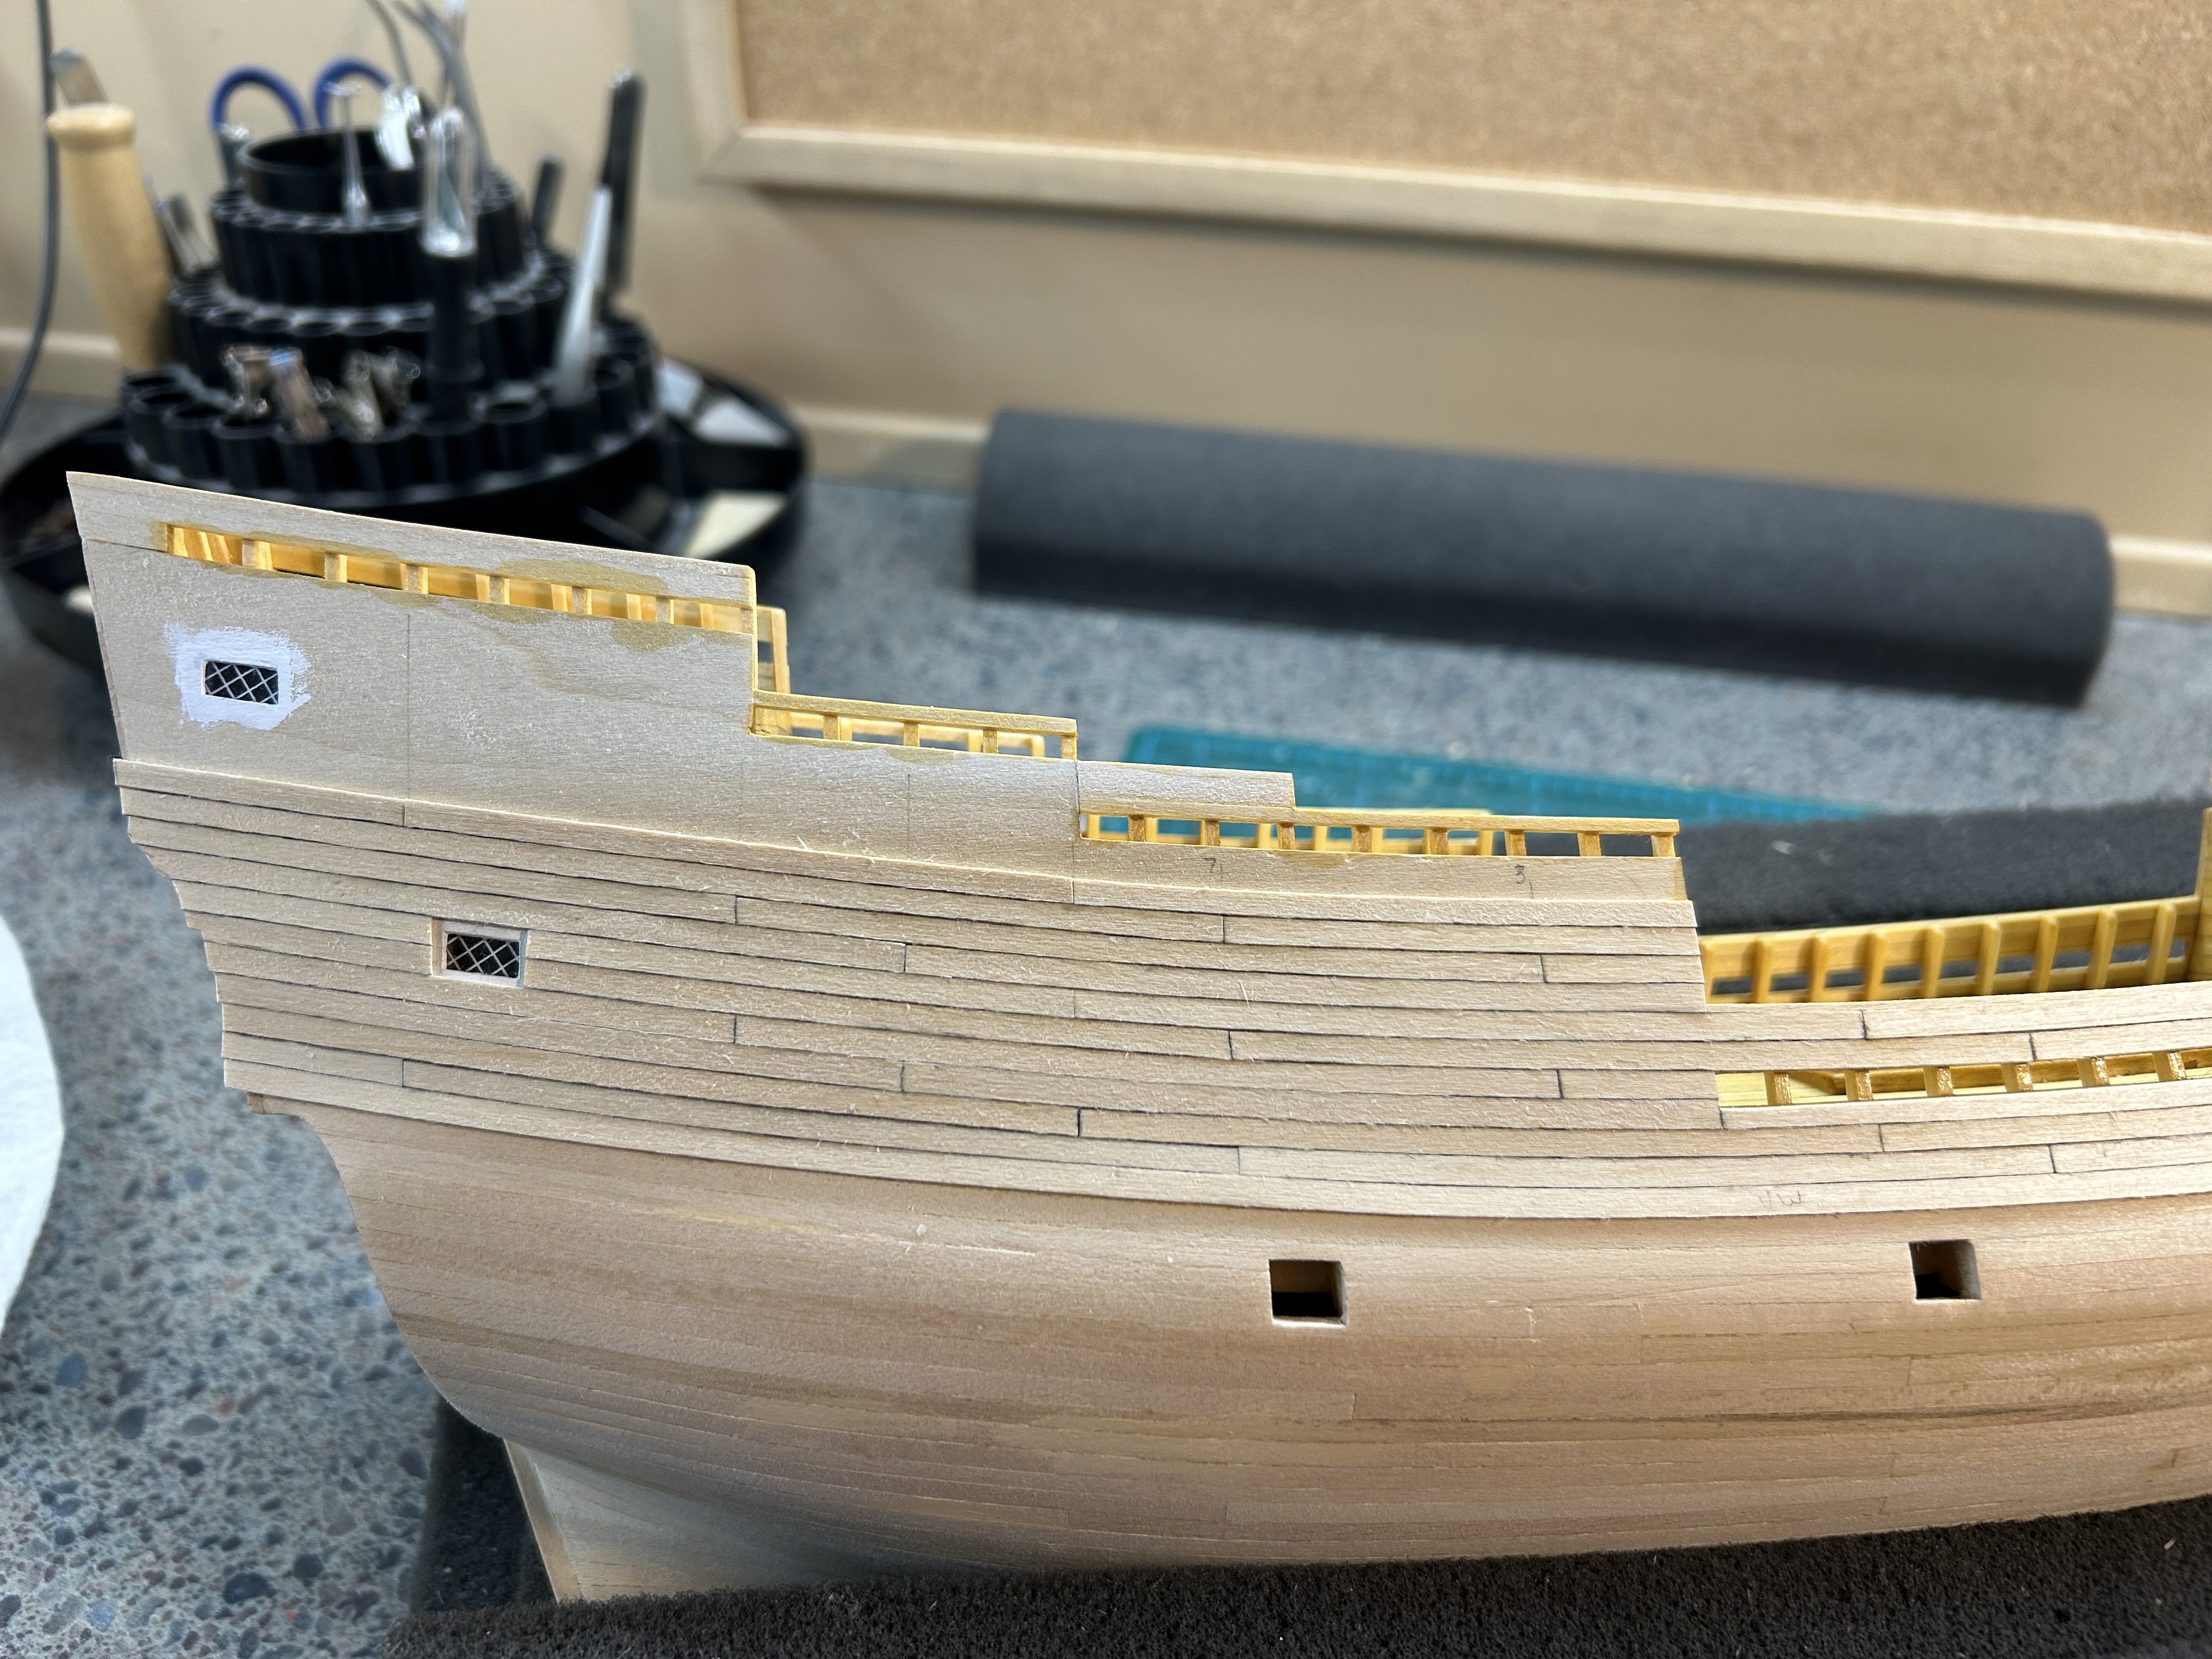
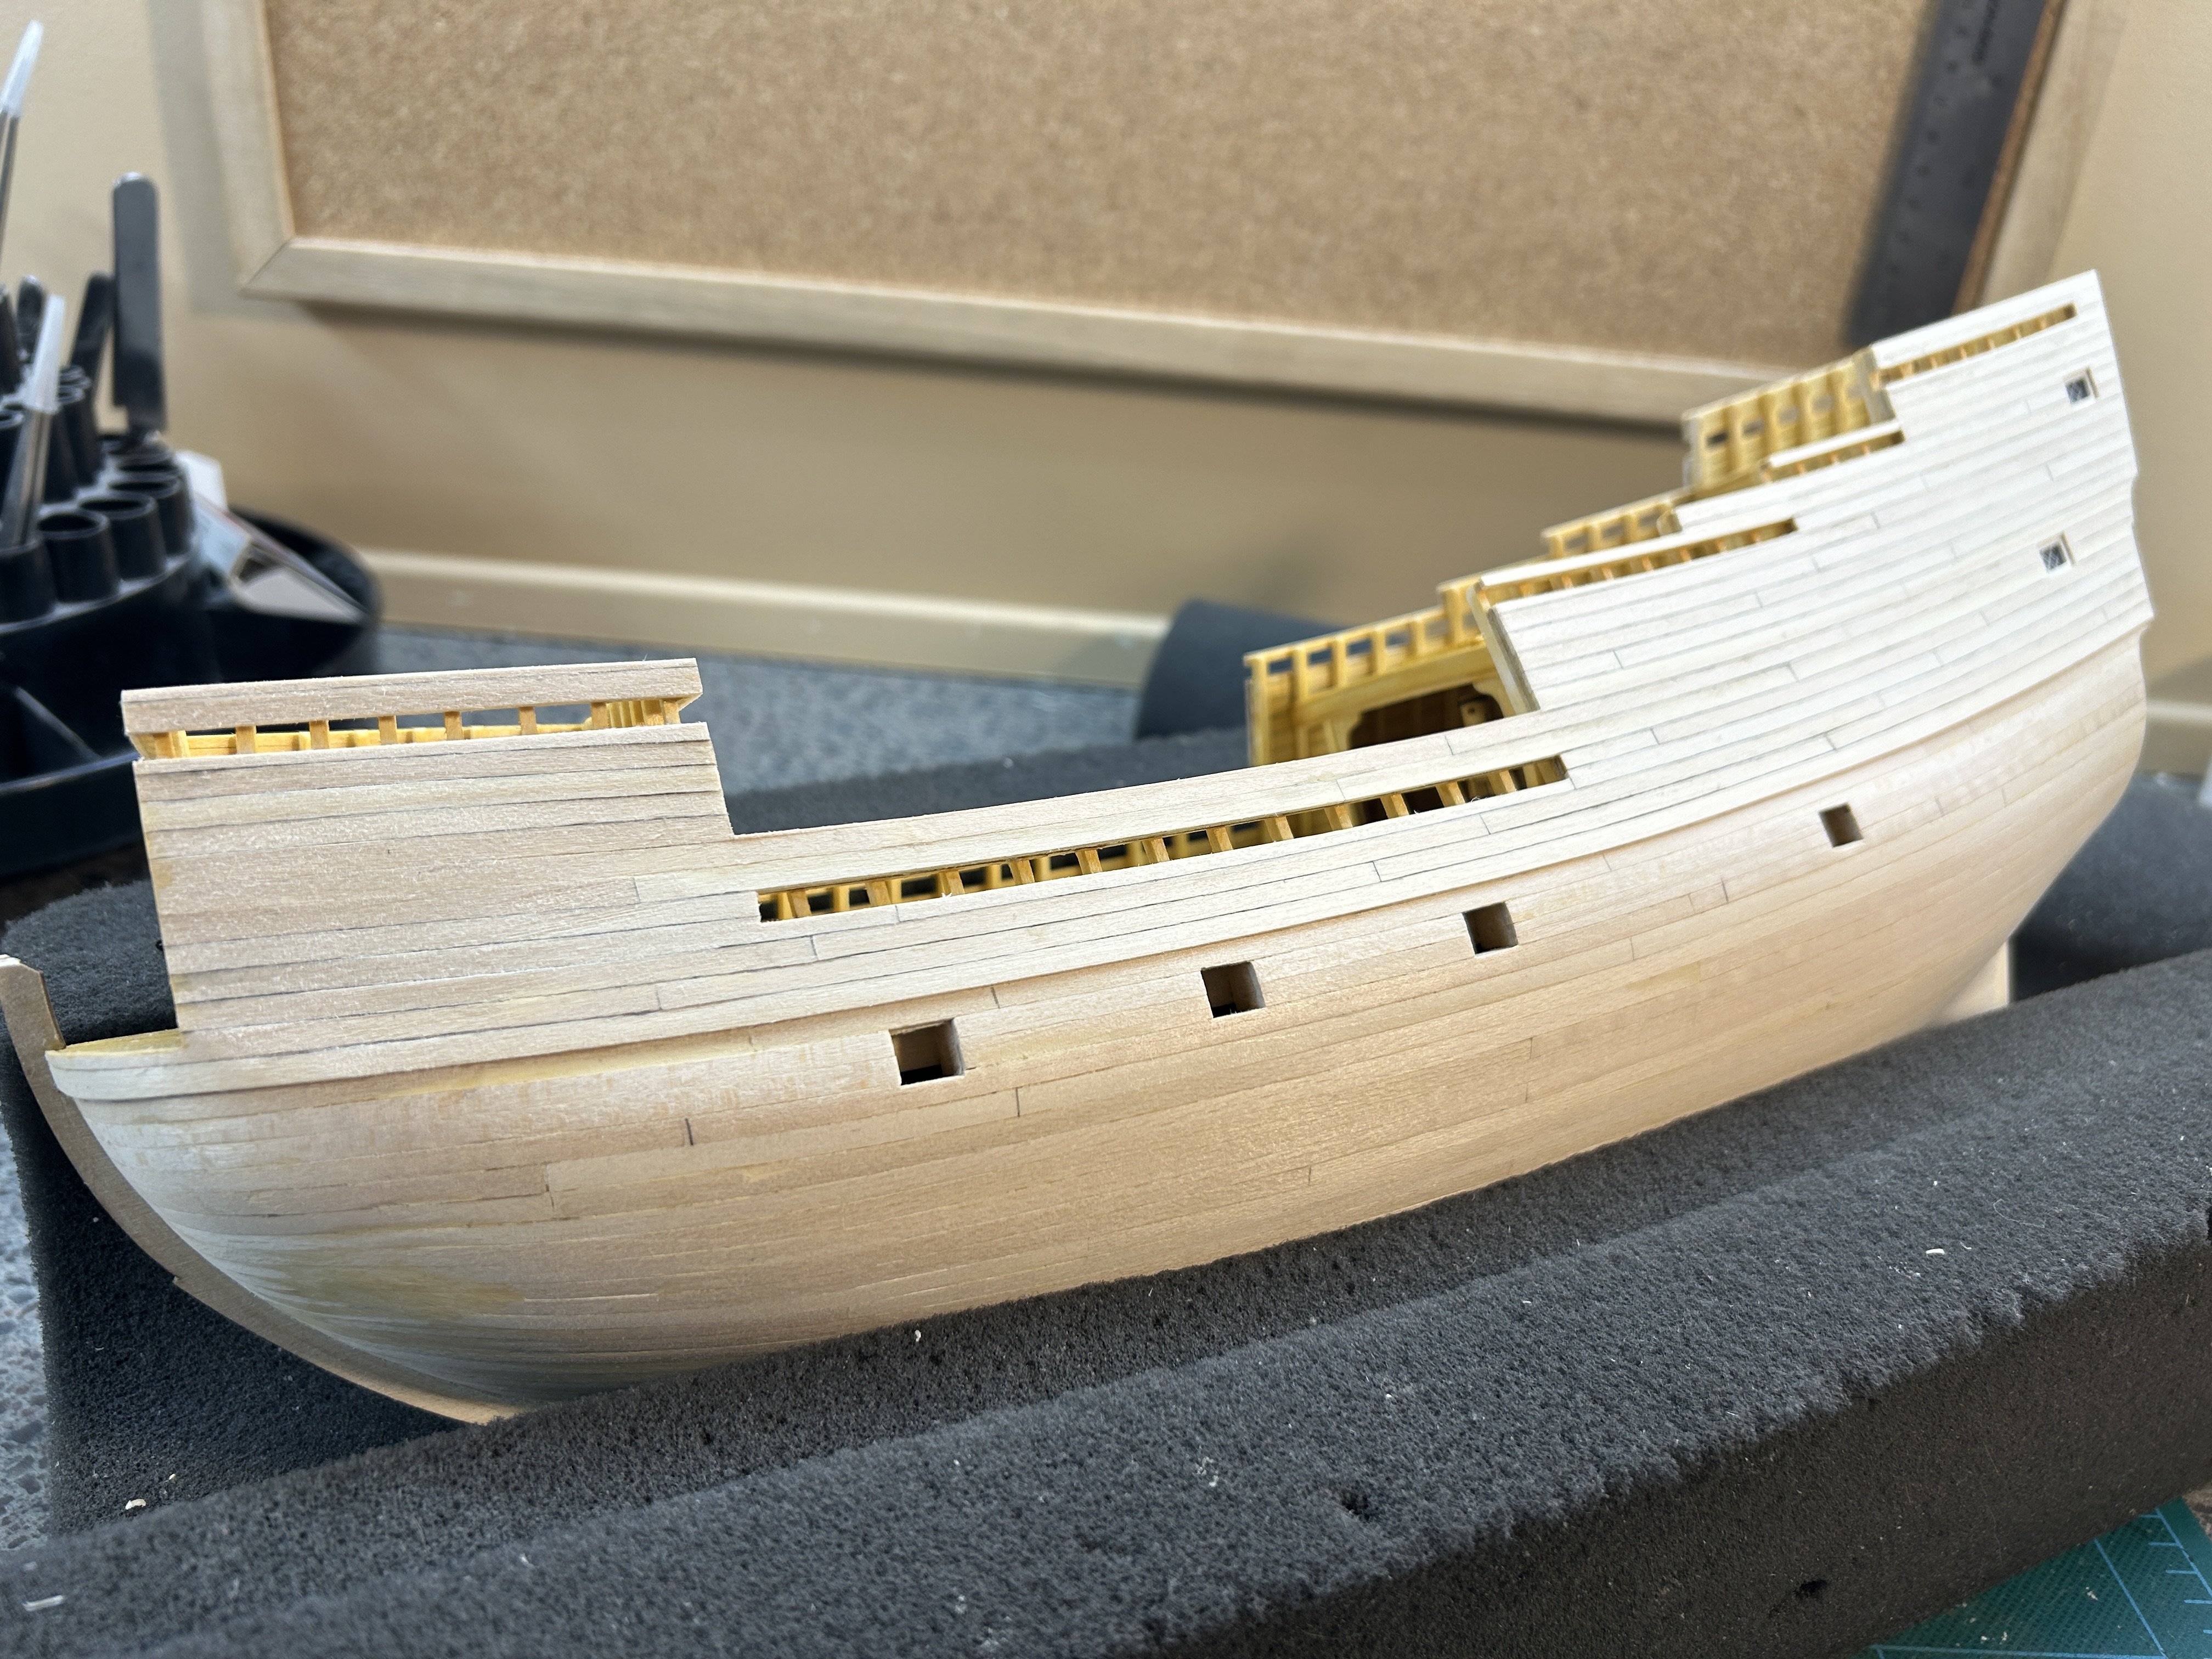
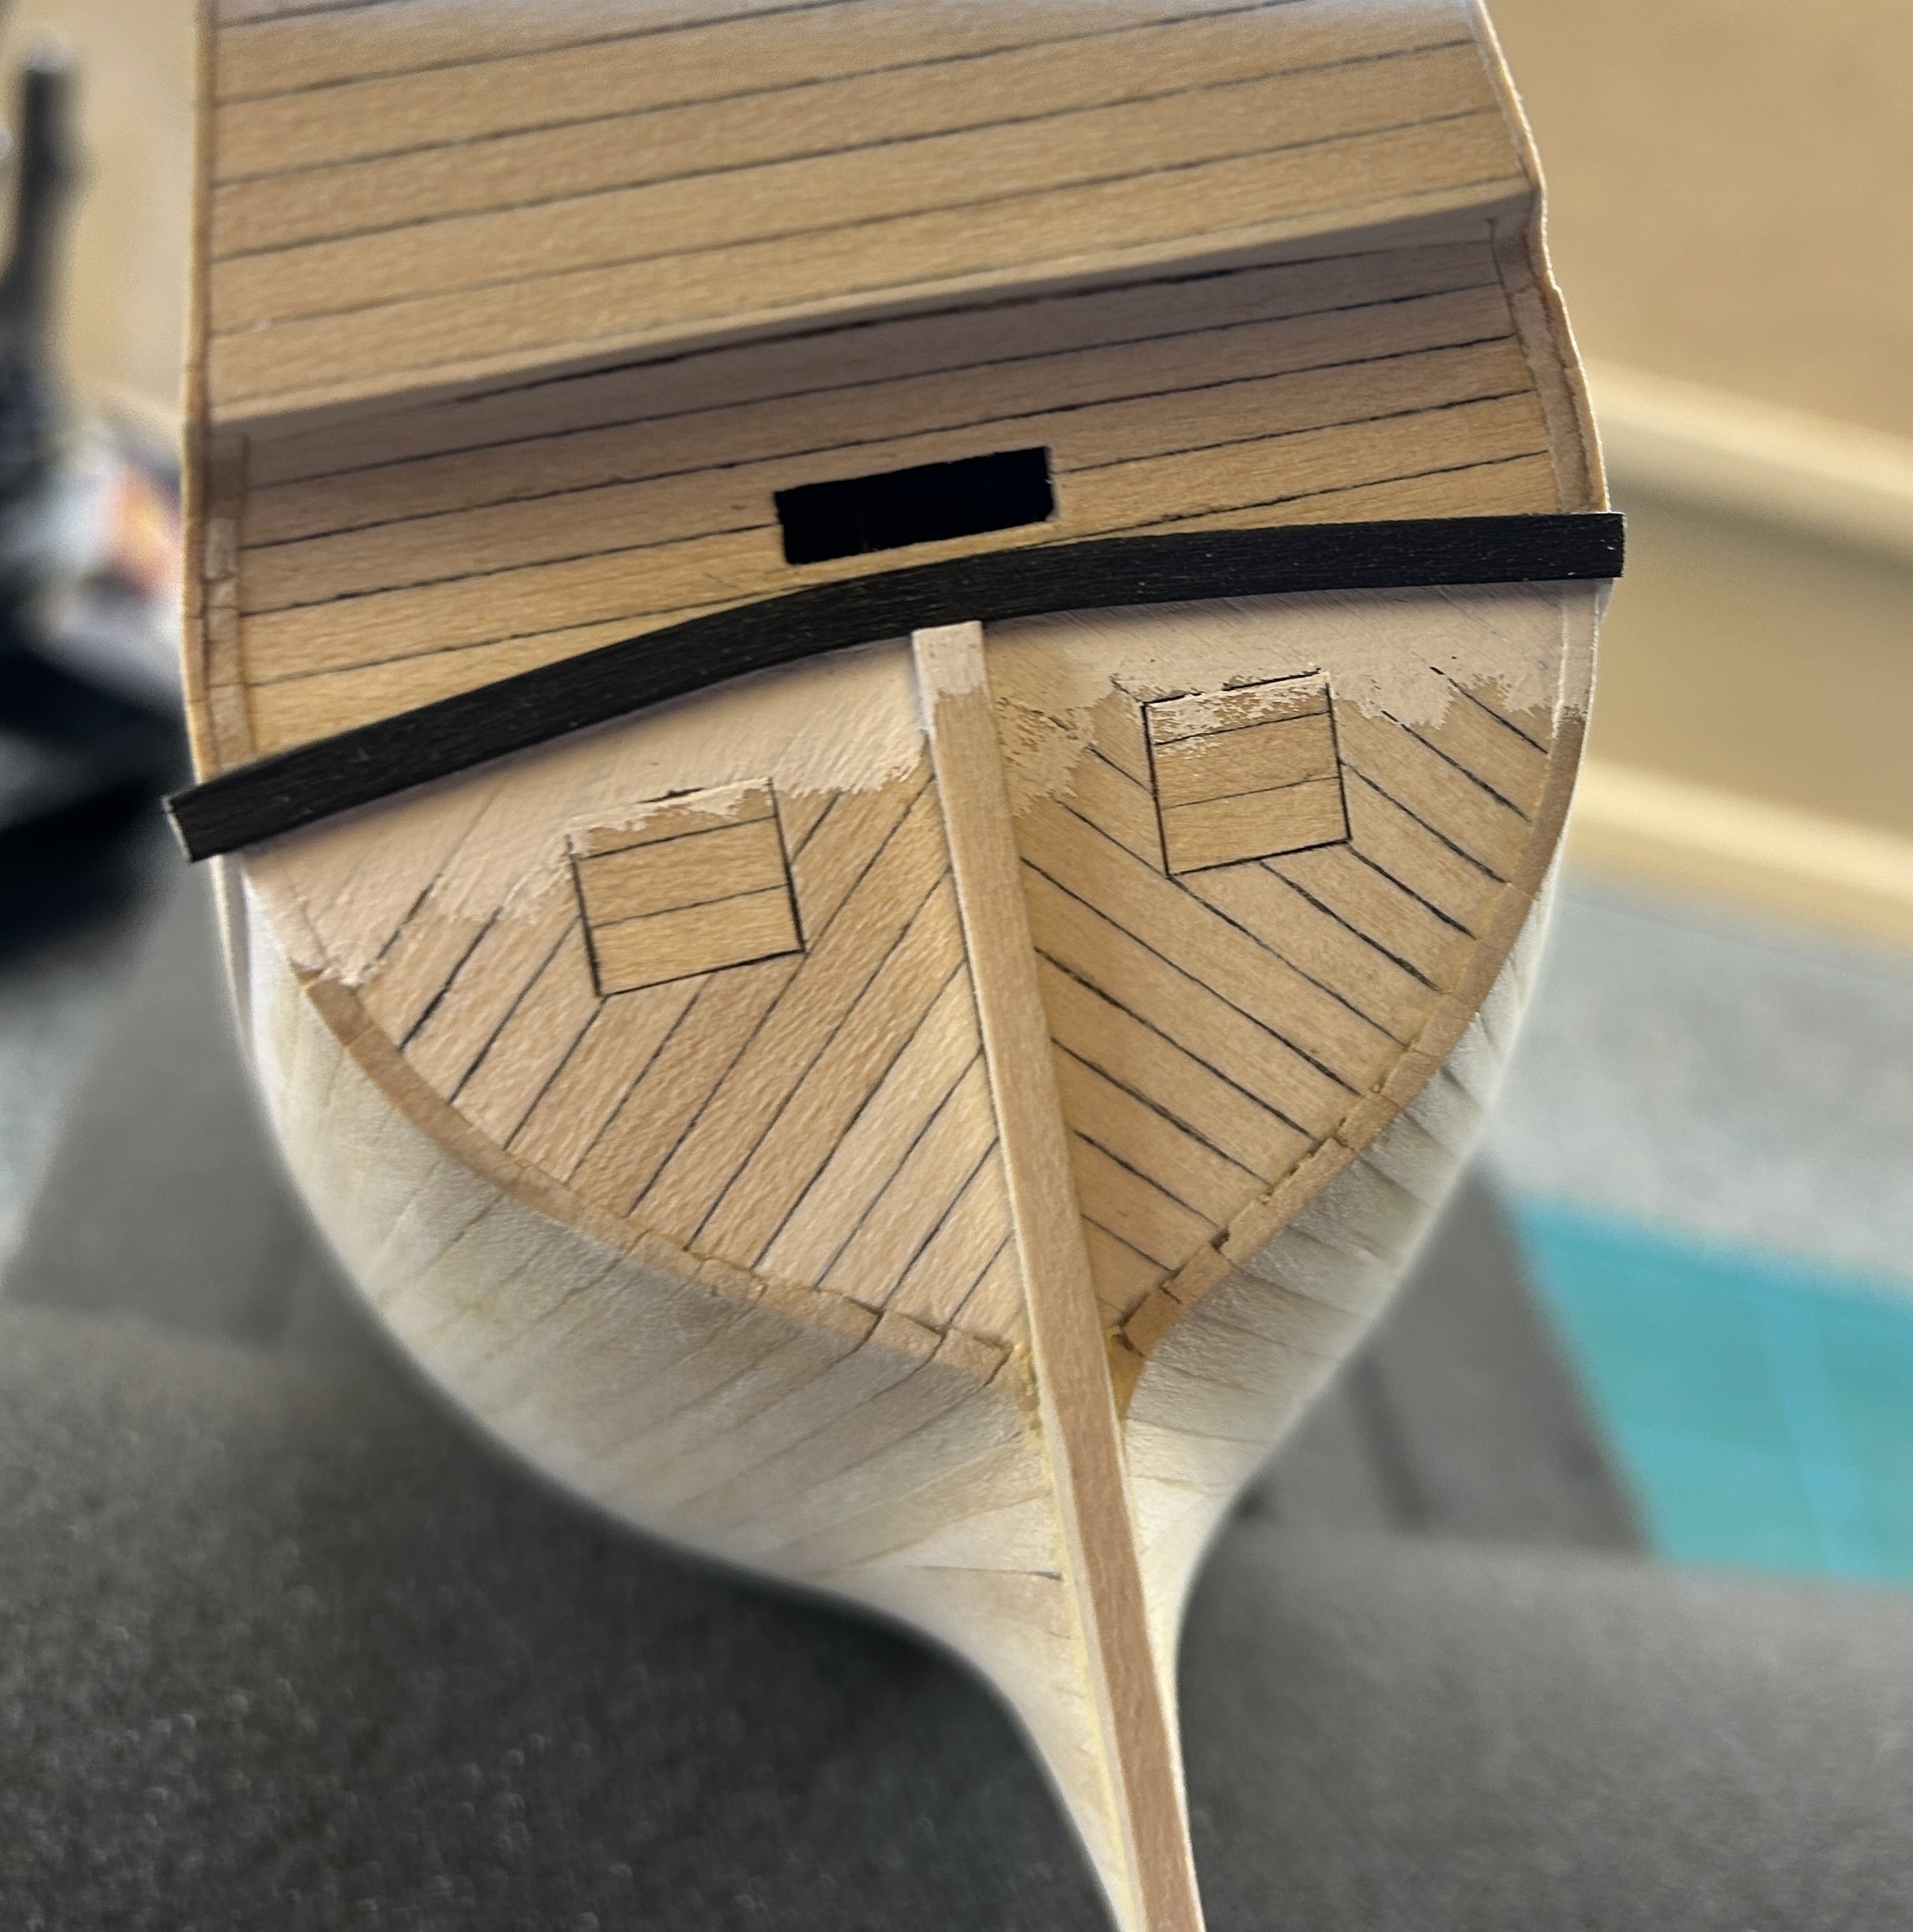
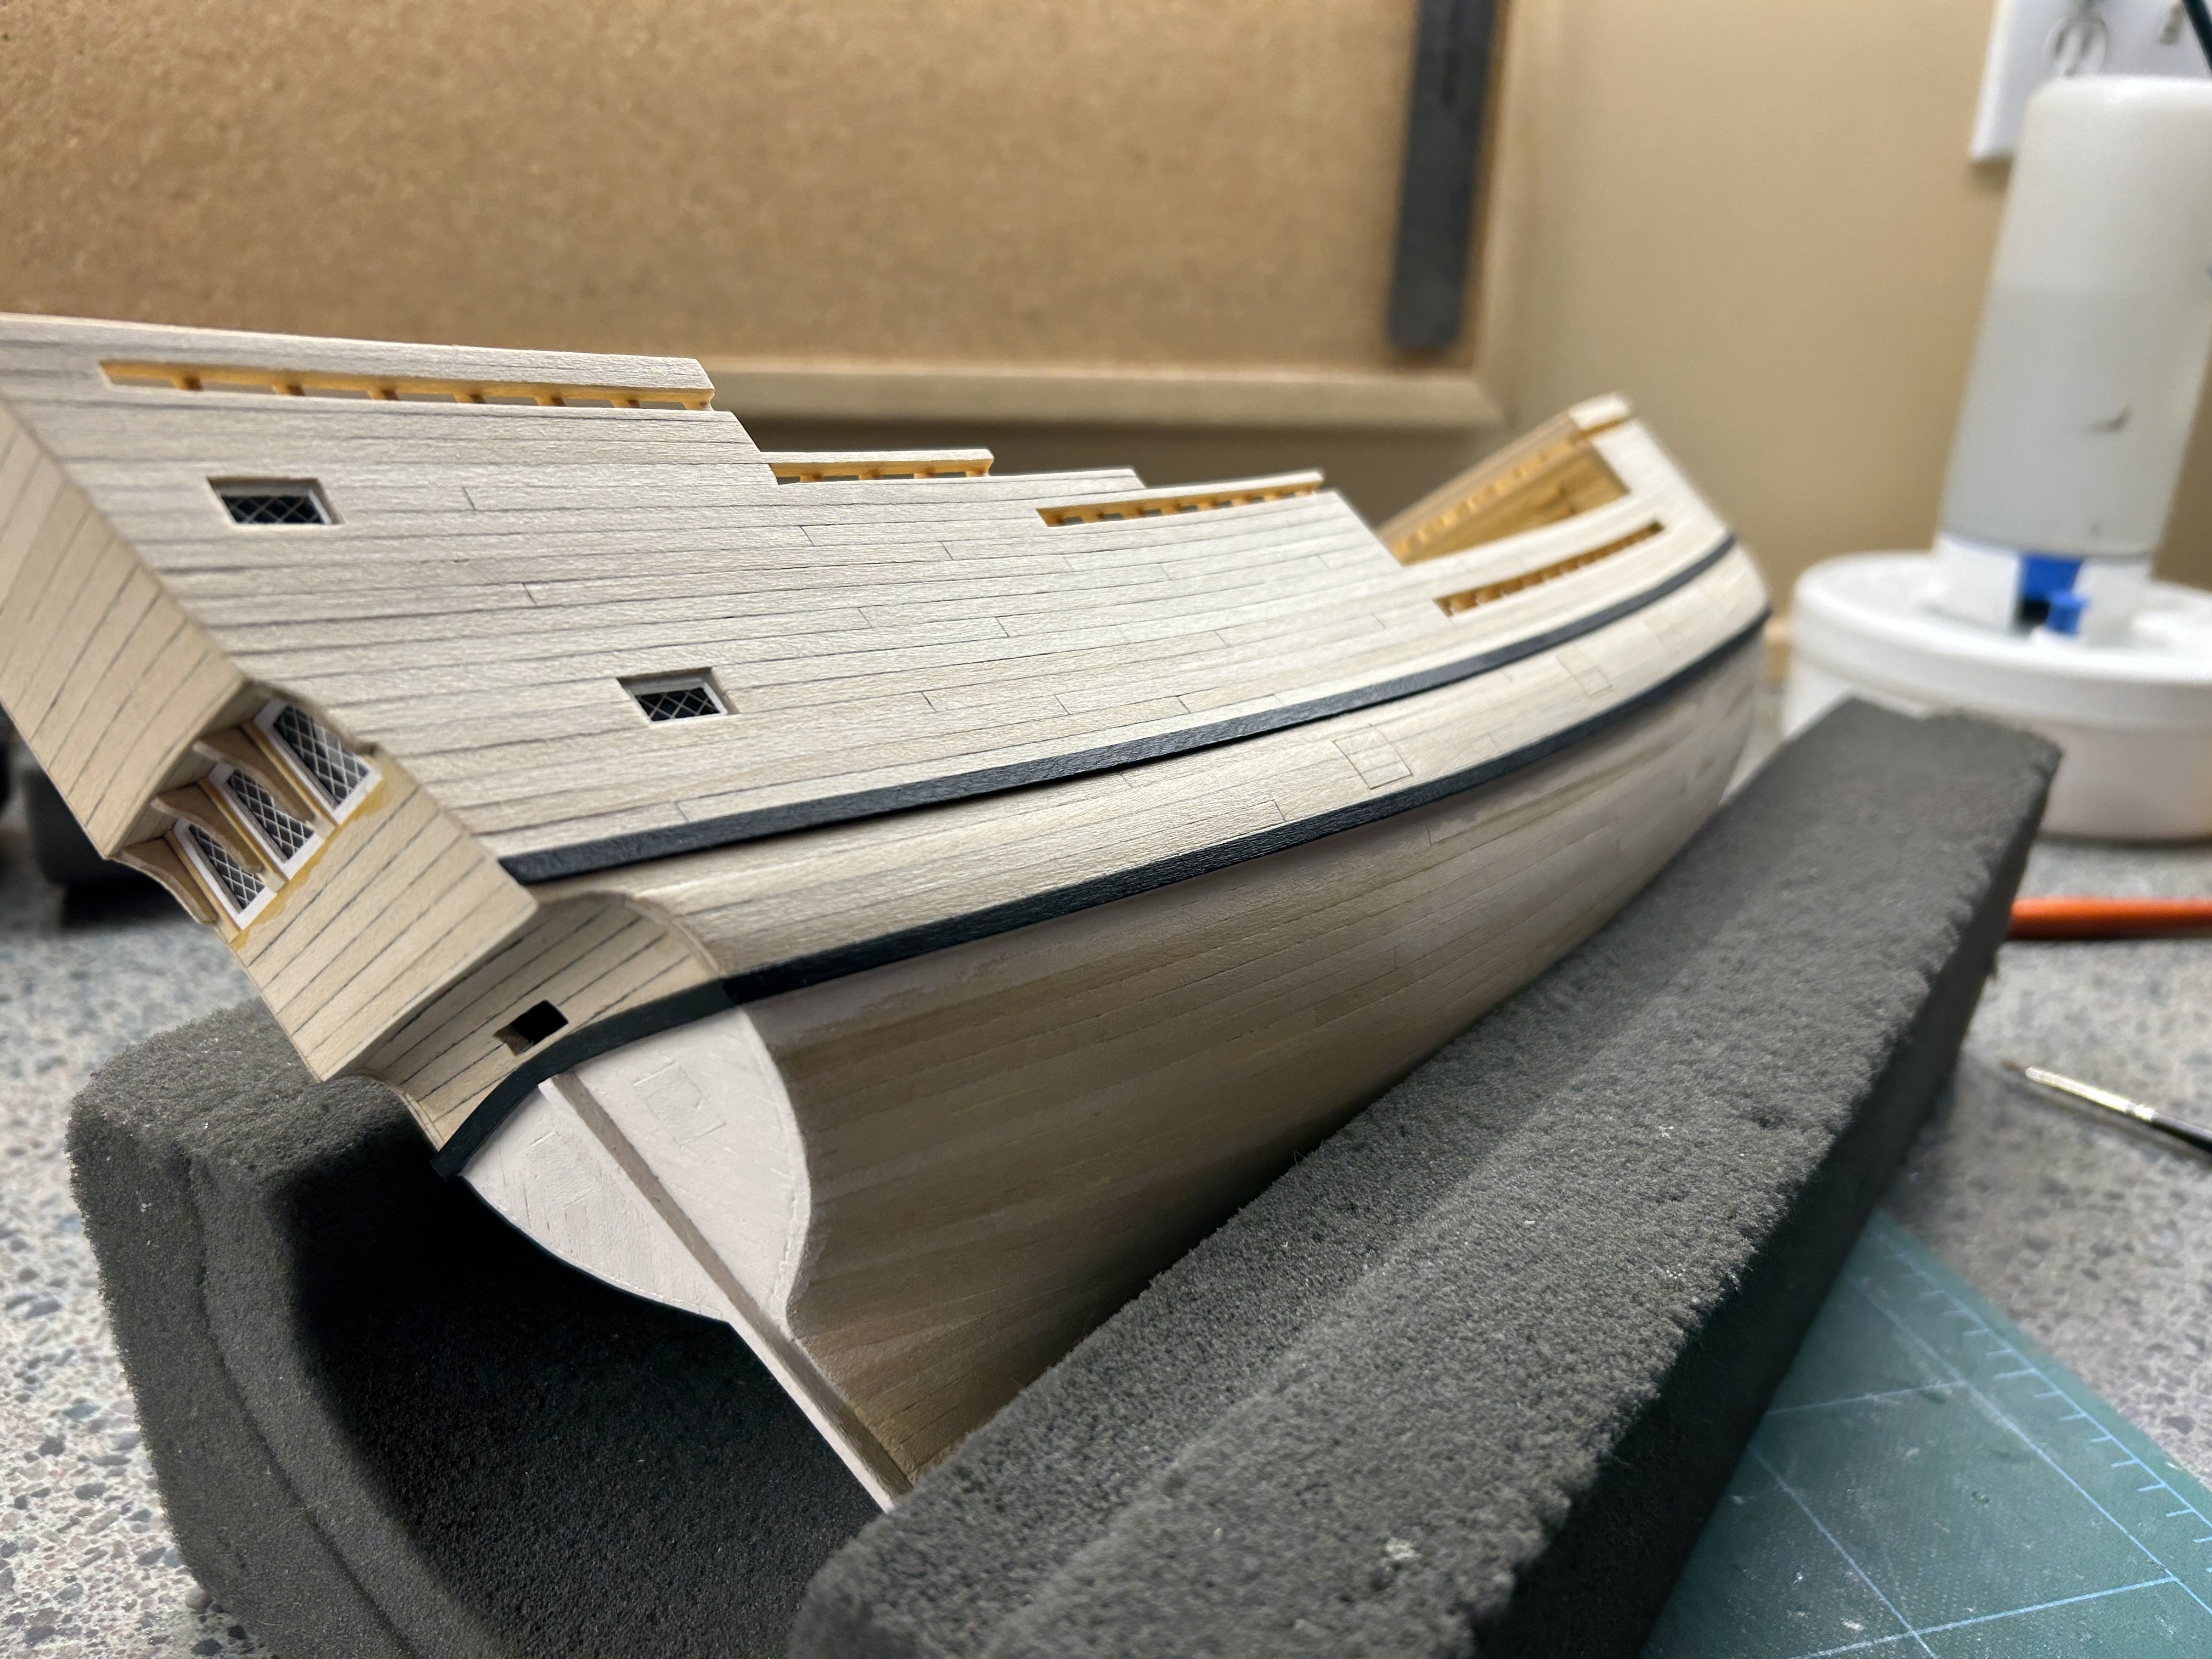
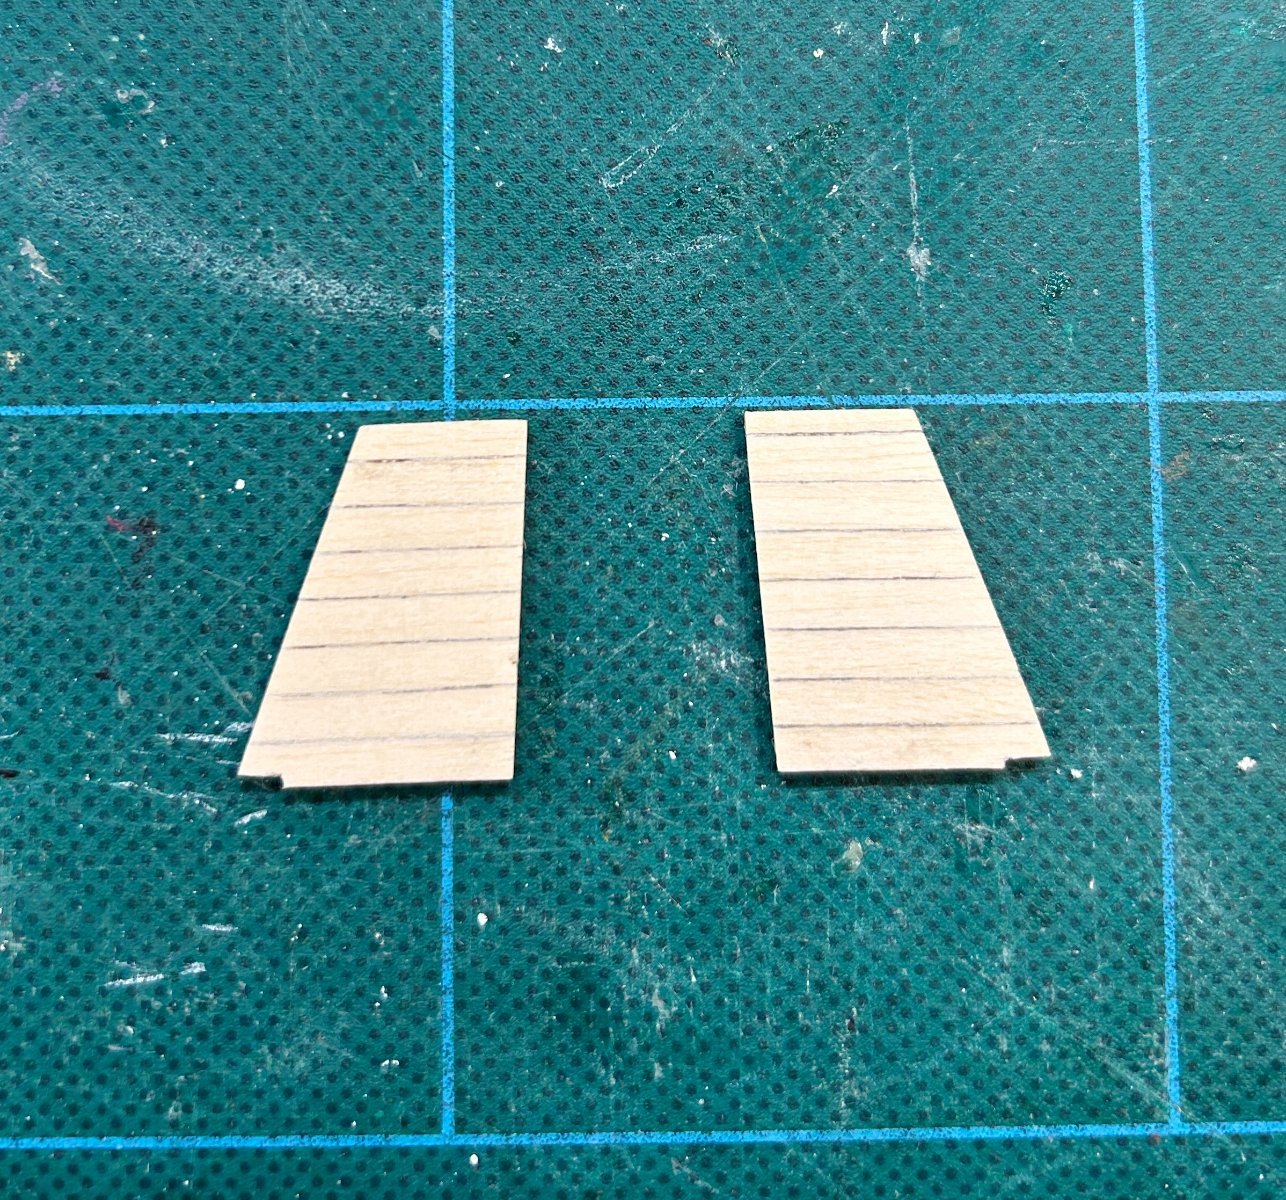
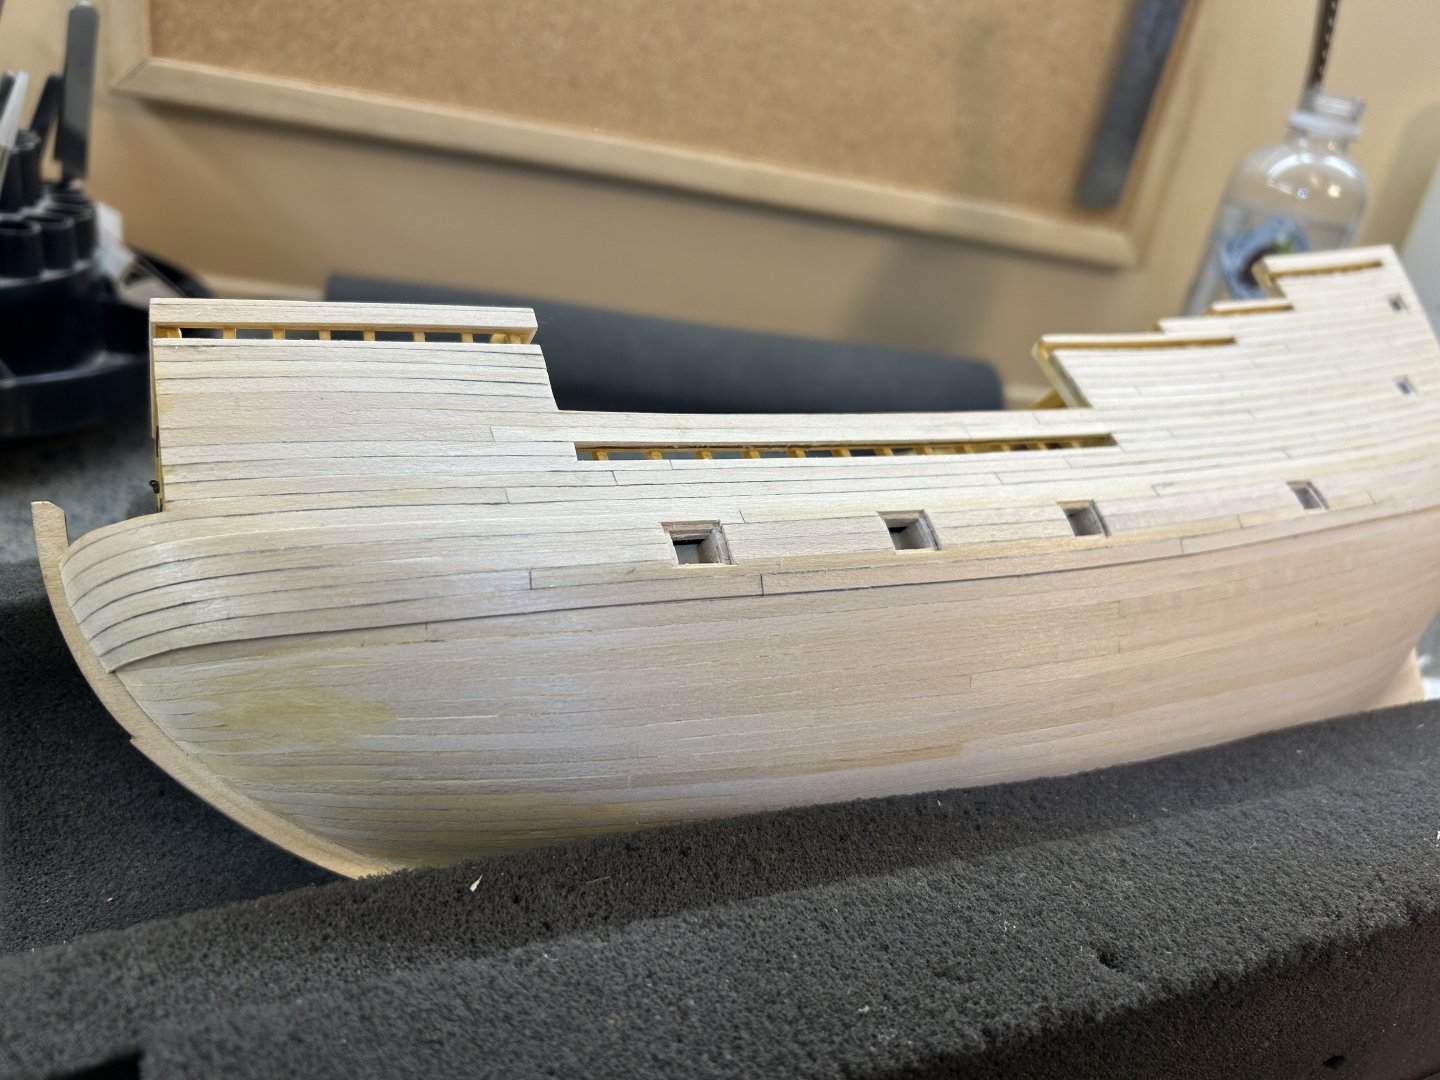
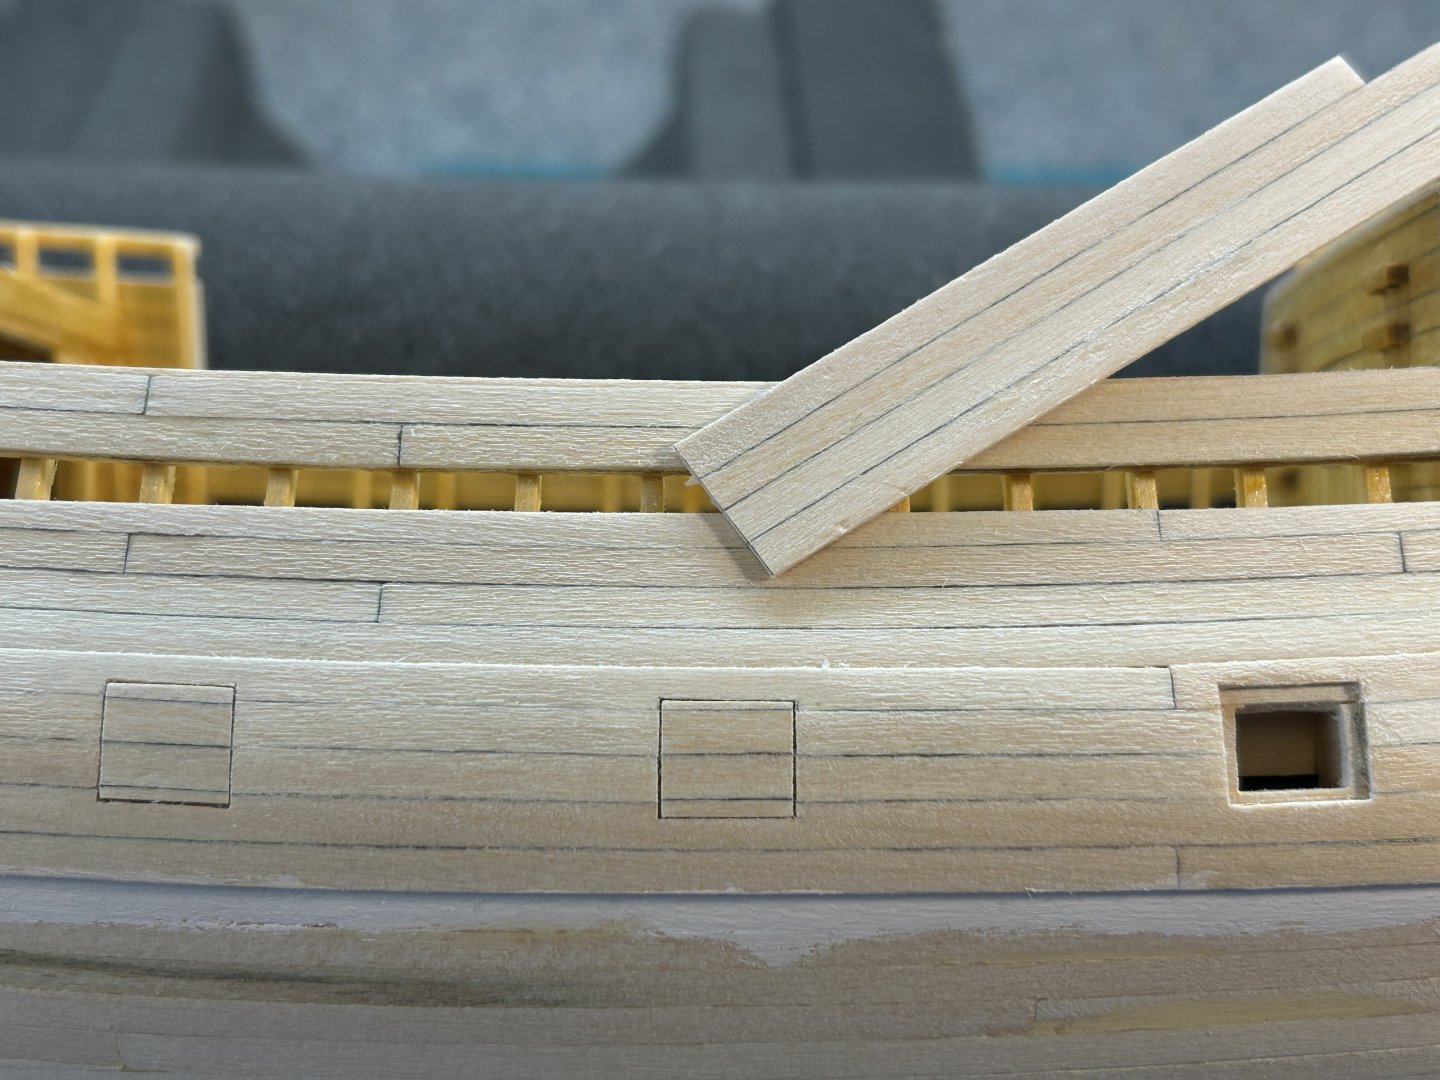
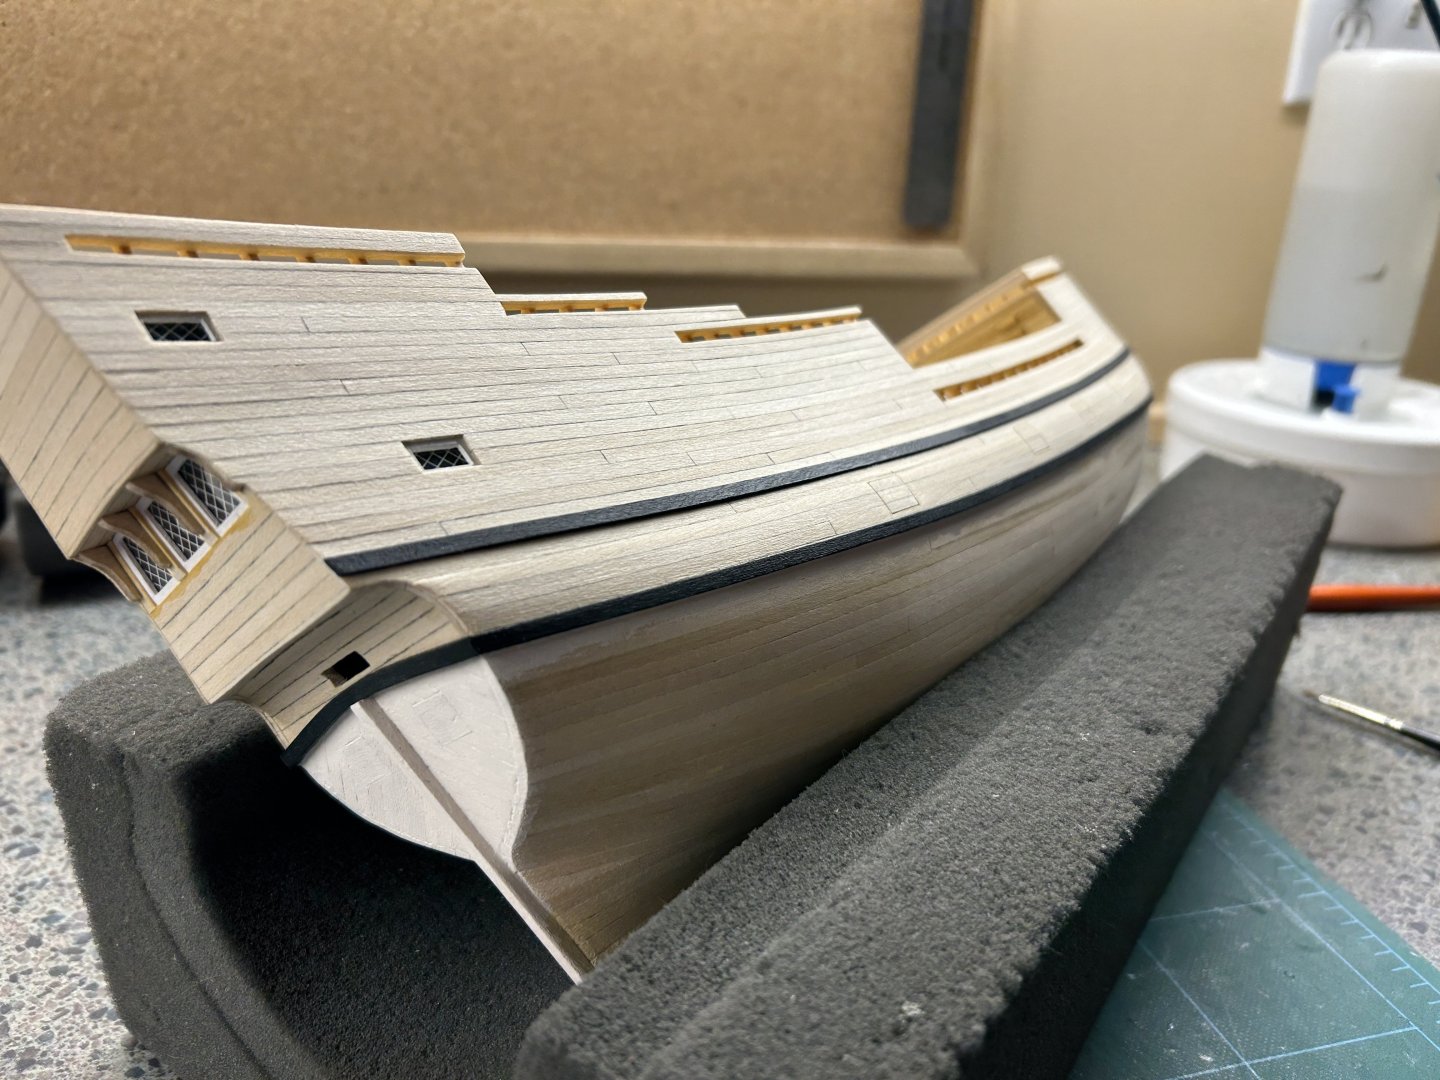
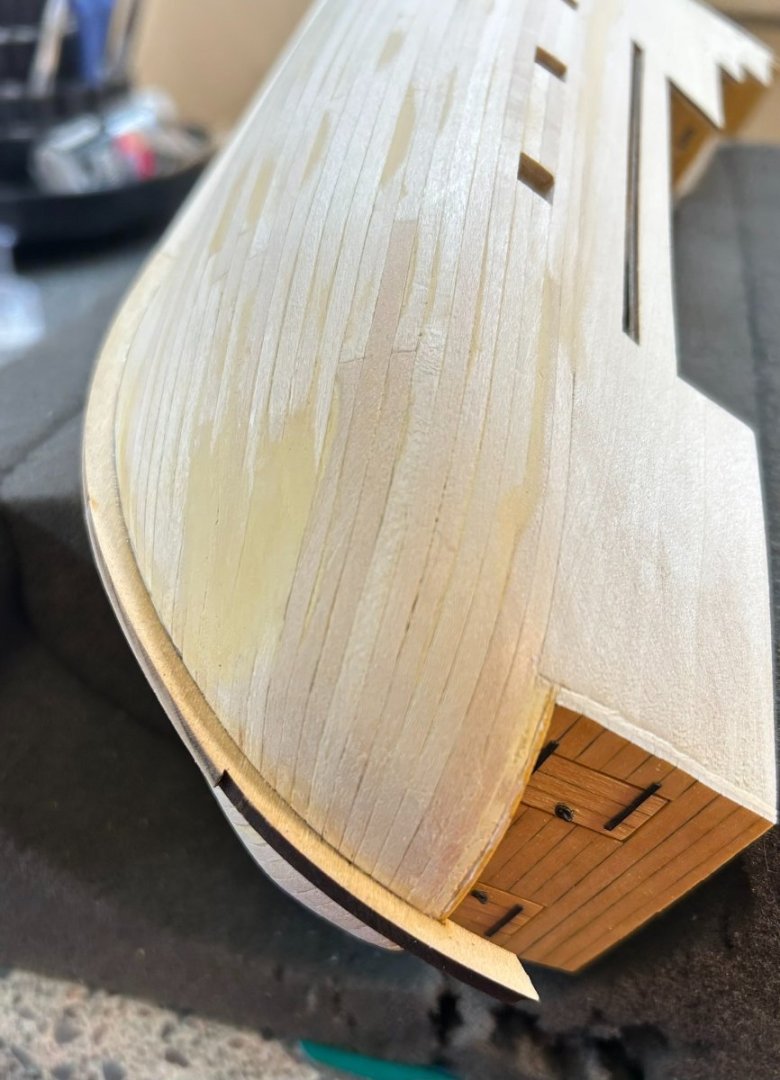
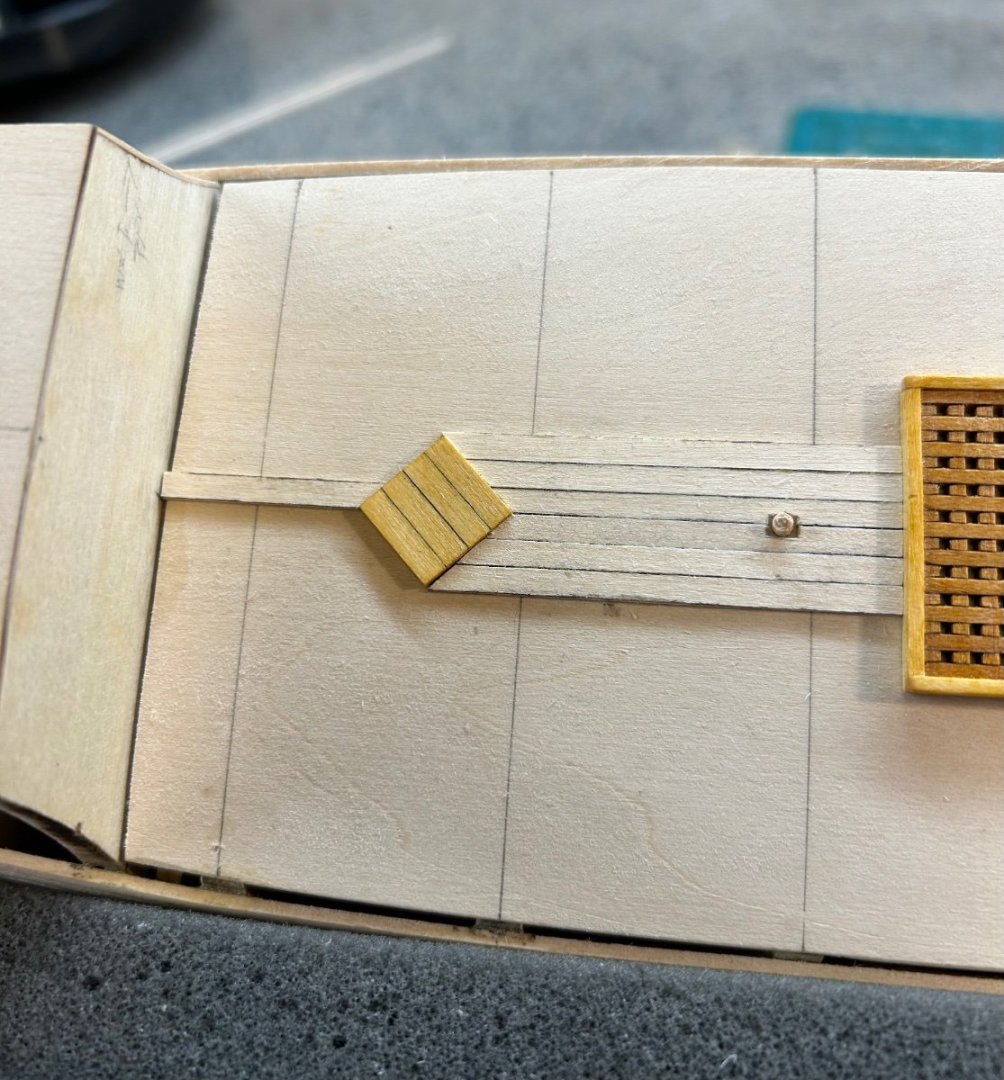
Outer planking, Gun port lids, Wales Now it's time to move outboard and get all the hull planking done. The first thing to do is to make a starter plank with the top edge aligned exactly with the bottom of the bulwark template. This is a very important step as all the rest of the planking's correct positioning depends on it. From there we start planking up the sides. Here you can barely see some pencil marks I made on the bulwark templates to indicate where to put the planking joins: One side upper planking complete, before final sanding: The bottom strake of the upper planking (the first plank you put on), will become the upper wale. The wales in this case are nothing more than another 1/32" x 1/8" strip just like the rest of the planking, so the wales are just doubled planks. Next we add 5 strakes below the upper wale. The bottom strake of that set will be doubled to become the lower wale. Here we have that done, with margins left around the gun ports: OK, now comes a key choice in the build. The 2nd layer of planking below the main wale is not technically required, so you are given a choice. Supposedly there is enough of the 1/32" planking to do the rest of the hull down to the keel, but not in my case - there's not enough even if I wanted to do it. Maybe I was a bit wasteful in its use so far but I really don't think so. Everything below the wale will be painted so small imperfections can be filled/sanded. So if you are content with the shape of things down here, no real need for the 2nd layer. Mine's not perfect, but I don't think I'd improve things much or at all with a second layer, so mine's going to the paint shop as-is. How you treat the gun ports is another choice. You can put in the dummy cannon barrel tips and show the lids open, or you can show them closed. My choice is closed, since I don't think in real life you would have typically seen a common merchant ship like this with guns run out. I believe the real Mayflower would have actually carry them stowed, "just in case" (Pirates!). Someone who's seen it in person correct me if I'm wrong but I don't think Mayflower II ever had them, except for maybe 1 sample one at the stern, just going by the pictures online. Anyway, mine are going to be done closed. I started by making some blanks out of 4 planks penciled and glued up like the example below. Then I cut port lids out of it trying to align the plank joints as best as the inconstant width planking supplied would allow. Moving for a moment to the back, I went ahead and did the stern part of the main (lower) wale. Not much is said about this in the manual, the pictures there show it pretty much straight across and intersecting the stern post somewhat. Looking at pics of the real thing, it's got quite a pronounced curve, like I've done here. I used the thicker 1/16" planking stock instead of the thin stuff and used the edge bending jig to get the curve: Finally, here we have both wales on this side complete. Next up will be the decorative trim strips and bunch of painting.


-
OUTSTANDING Mini Drill
rlwhitt replied to Bill Jackson's topic in Modeling tools and Workshop Equipment
Hi Bill, I have this too and really like it. I bought the one that included the little drill press widget, but I find that to be nearly useless. I would not recommend the extra $$ on that one. I find that the speed is relatively low and useful, though of course I'm comparing to the only other hand drill I've had which is a Dremel, that's way too fast. Do you find that you have a tiny little wobble at the bit end? I have to assume it's in the collet and wonder if I might need to replace that. -
Thanks Dave!
-
$500 gift cert? And here I was thinking you were just rolling in the royalties in perpetuity! Yeah, I kid, but seriously that's almost insulting.
-
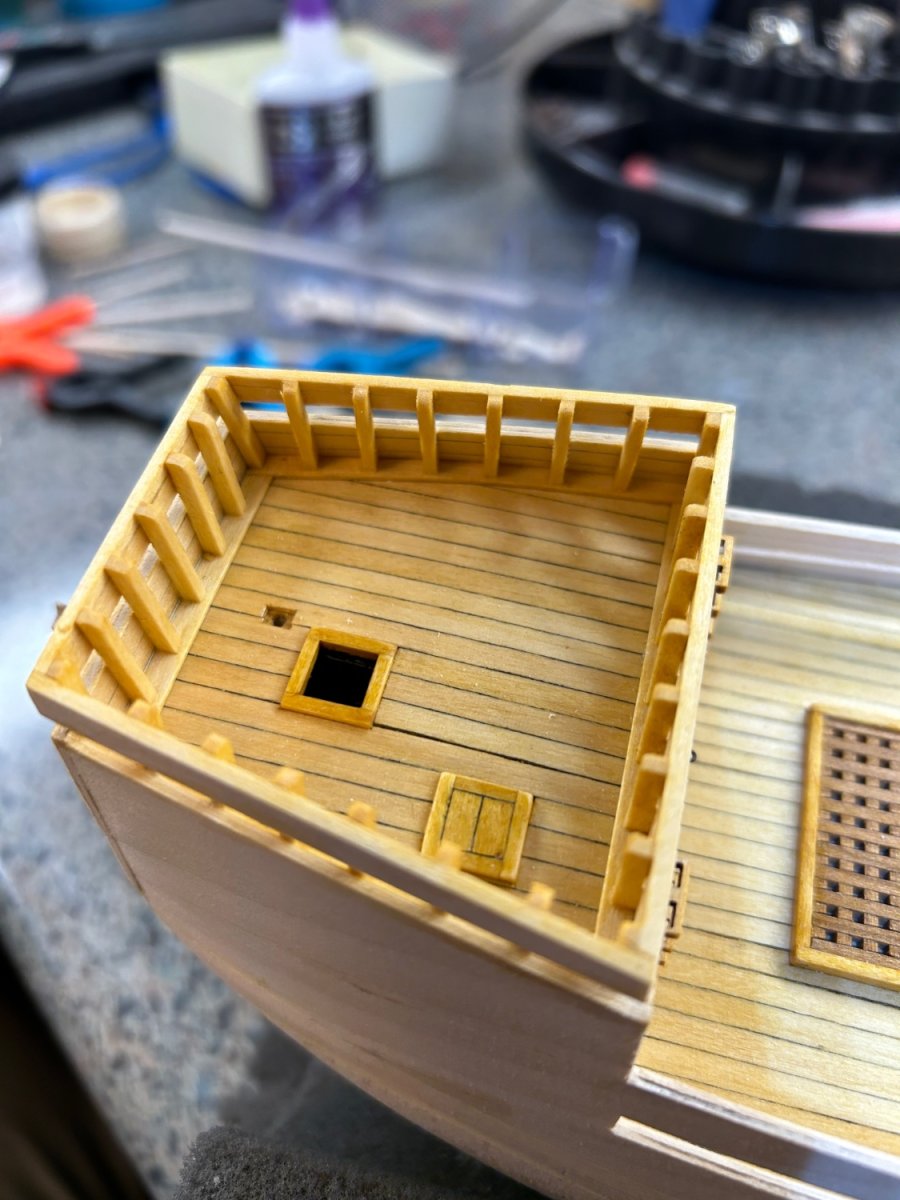
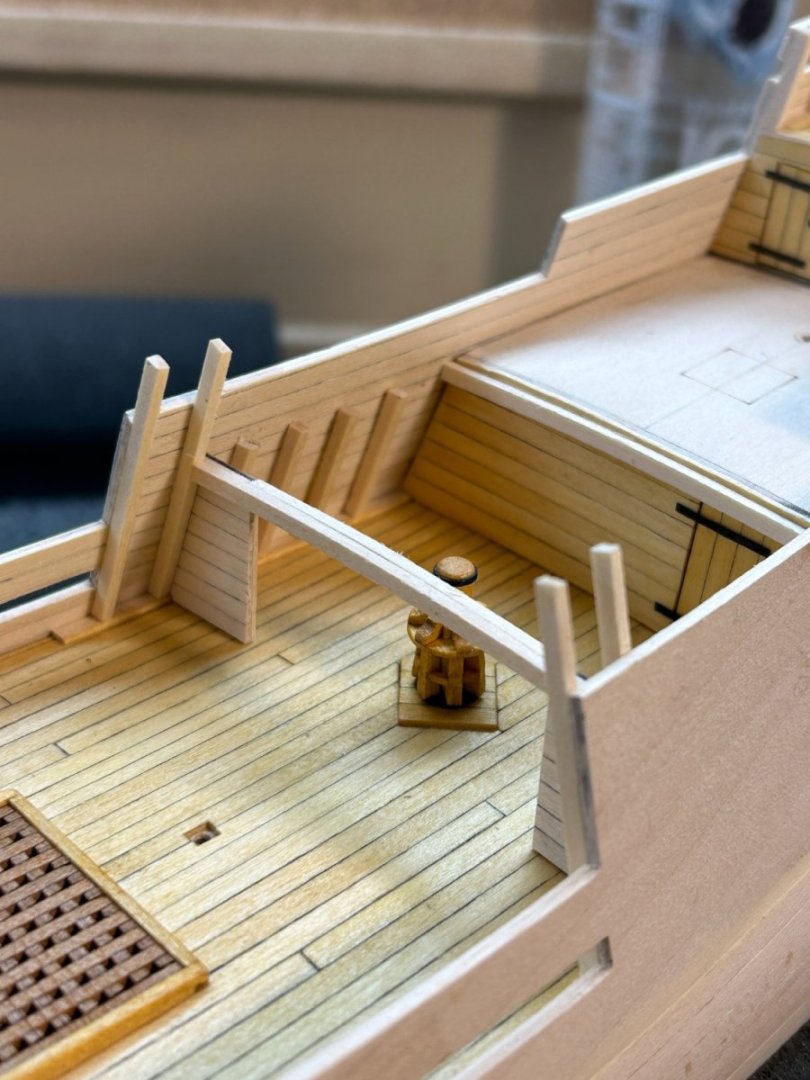
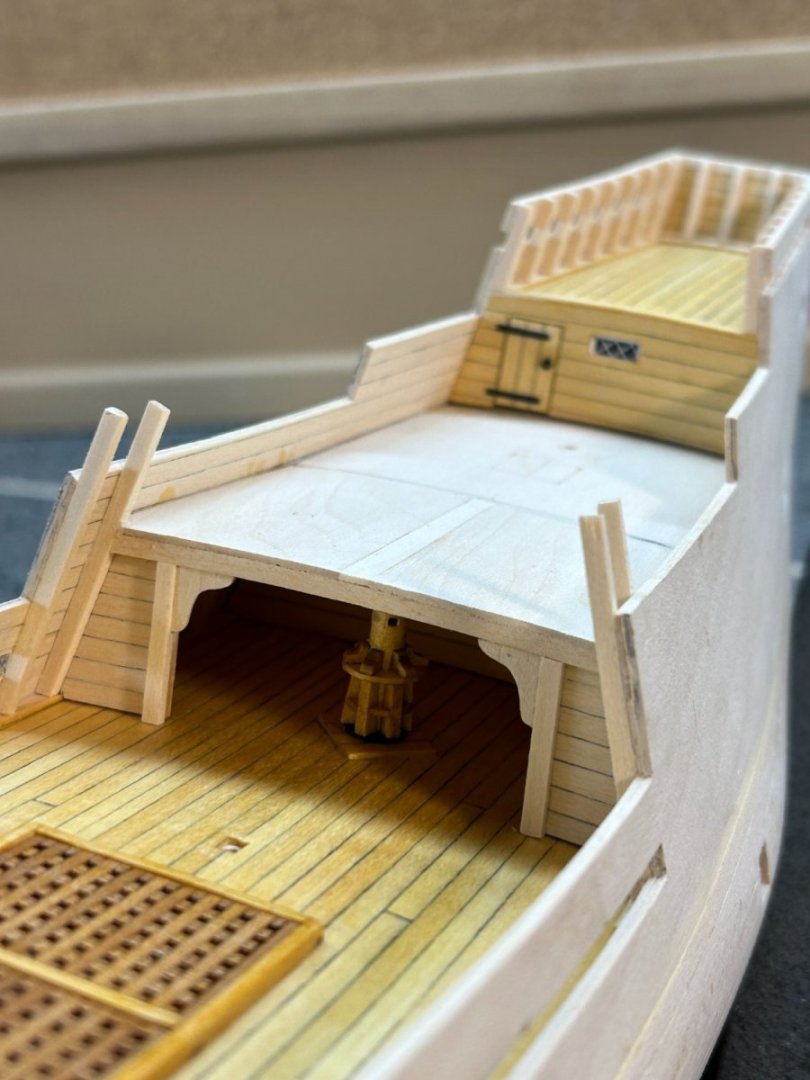
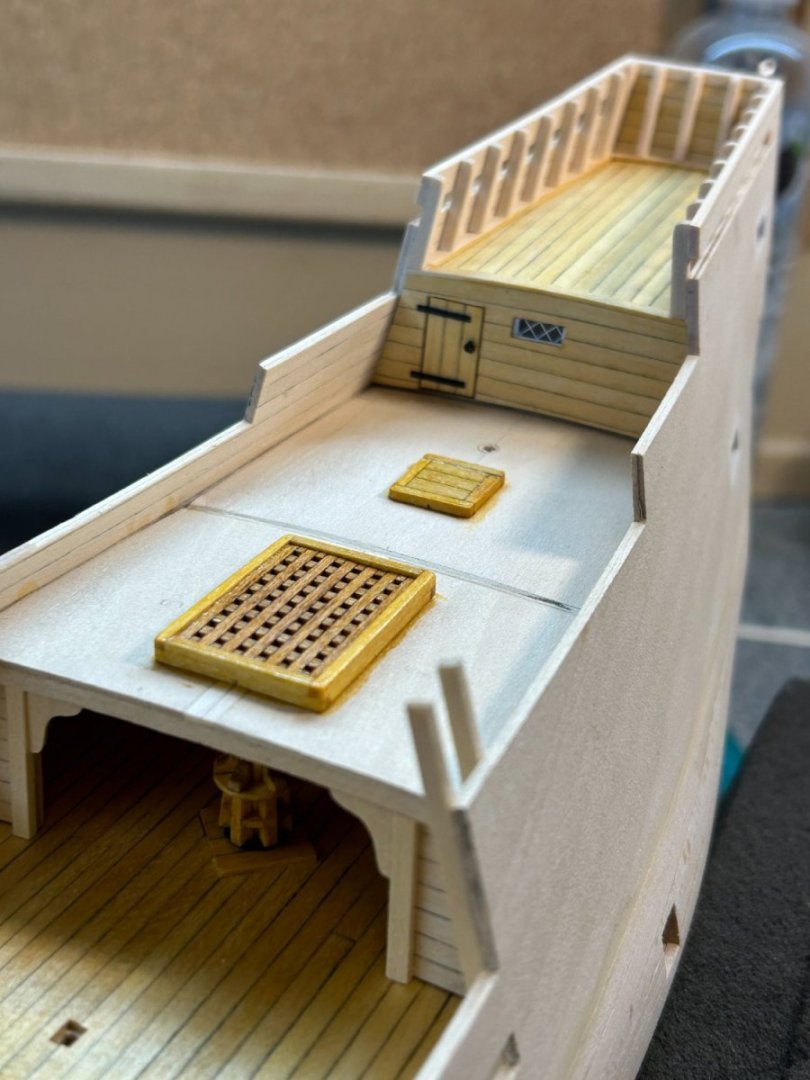
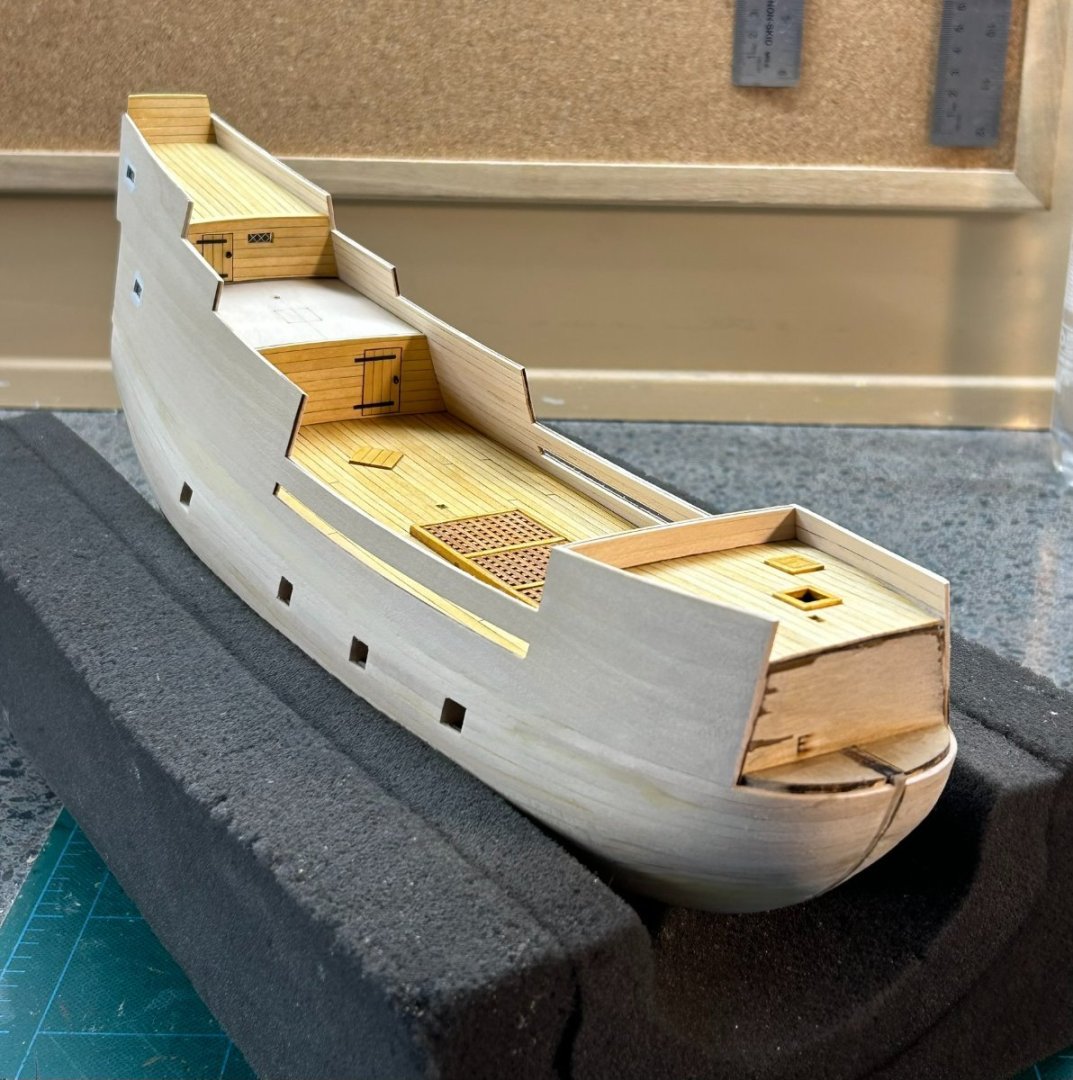
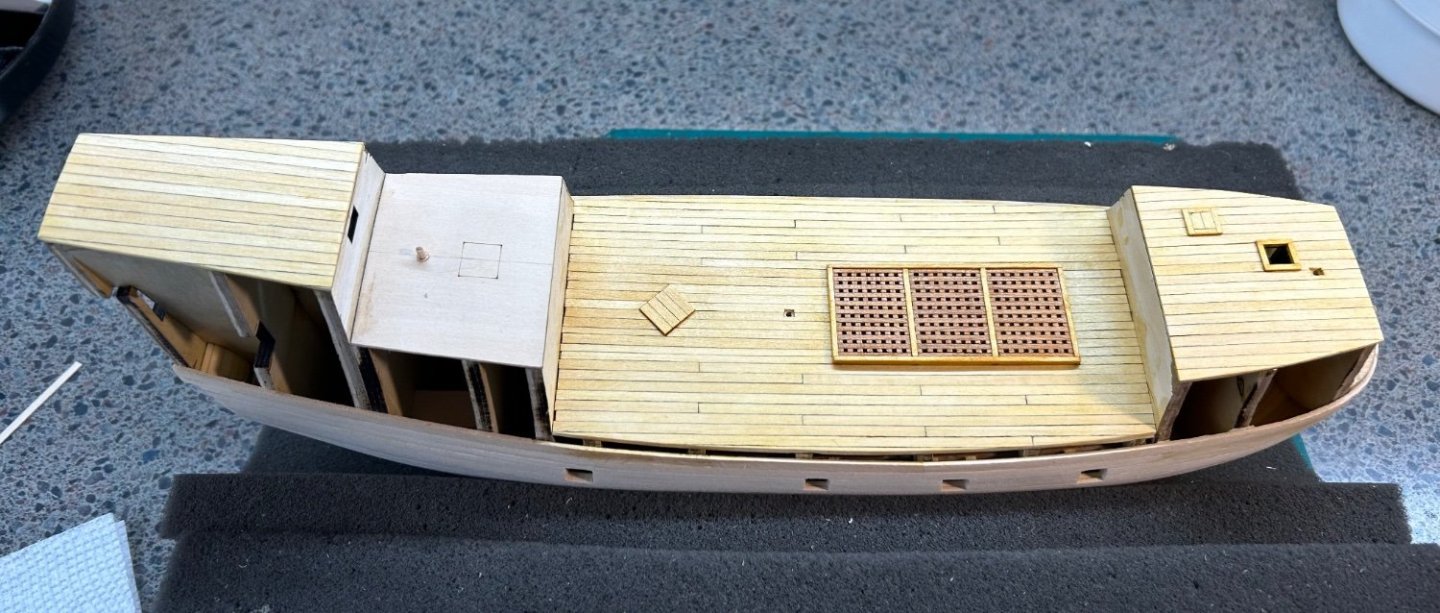
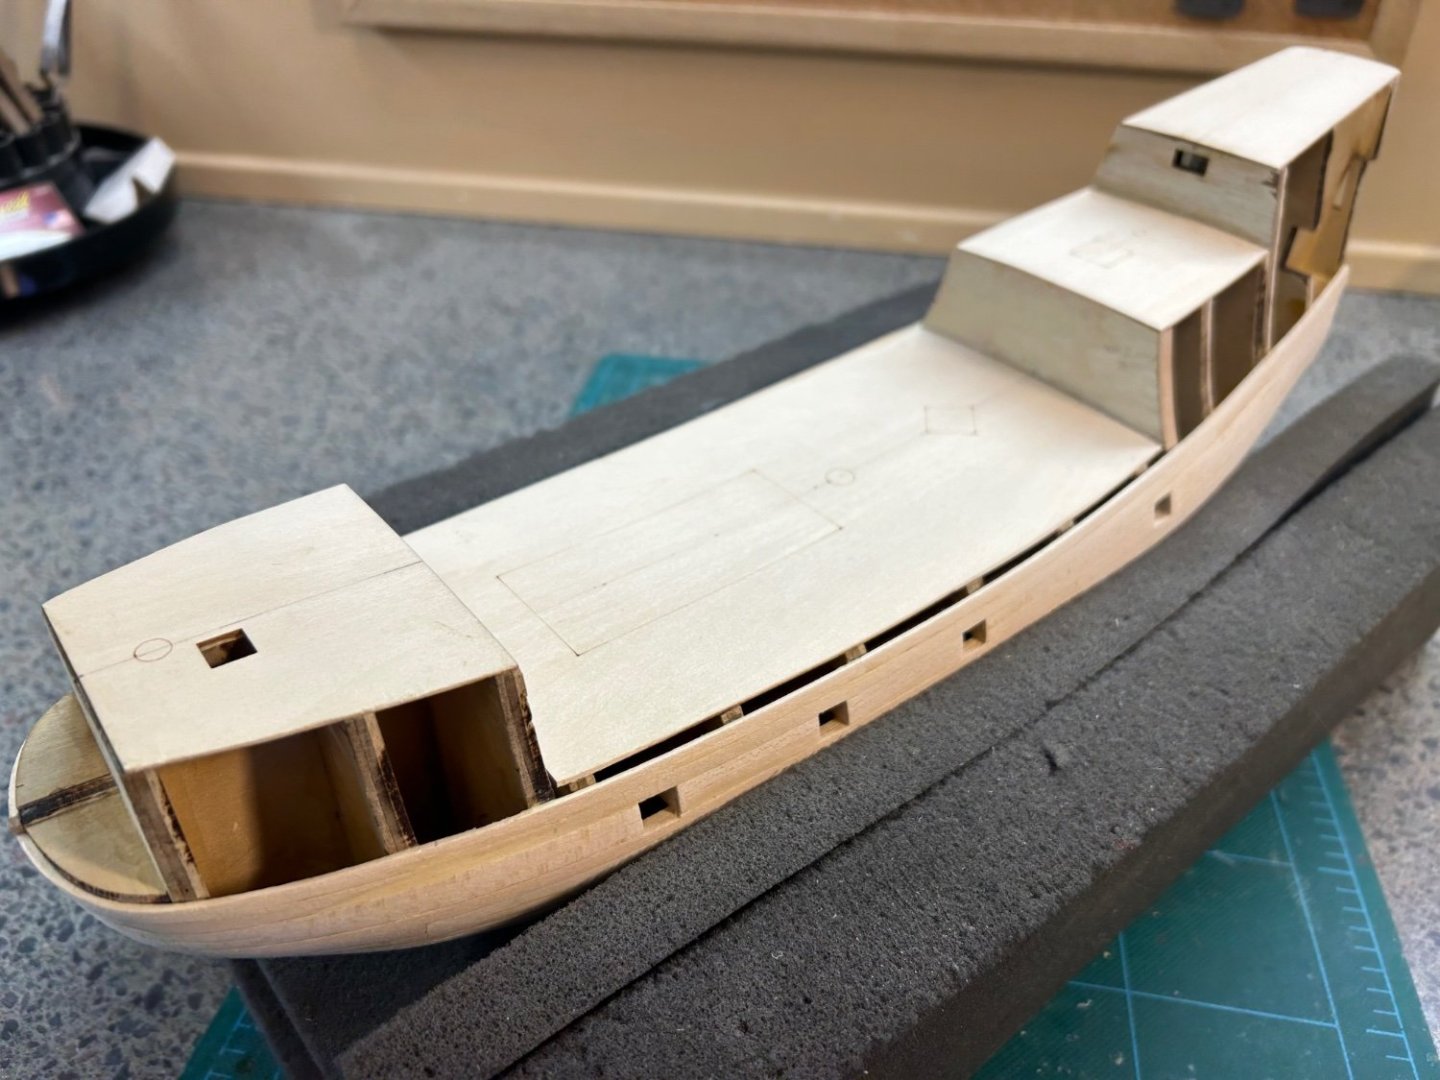
Half Deck and Finishing the Bulwarks/Stanchions Before I continued with the stanchions I decided to change up the order of things. Instructions sequence has you doing all the stanchions, and after the 2nd layer of planking coming back and finishing out the half-deck. Didn't make a lot of sense to me as I wanted to be done with all the major inboard stuff before moving to finish the outside. Plus, if you put the long stanchions in the half deck section on first and then put the deck in, you have to notch the false deck and the planking around them. Sure, this is how the real ship is built, but I figured I can make a lot neater looking job if I split them, thus putting the upper part of the stanchions on the waterway like is done throughout the rest of the model. Hopefully the following pictures will illustrate what I mean. First we need a partial bulkhead, made of 2 sides, planked. Those go behind the 2nd of a pair of full height stanchions. In this picture you can see them installed, and behind them are stanchions that will come up to just under the false deck, installed next. Added to both bulkheads here are some deck beams, appropriately arched to match the part of the half deck that was originally installed during framing . You can also see the capstan peeking out there a bit. I scratched that from some leftover bits from my Essex build, instead of using the Britannia metal one provided. Here the false decking is placed on the beams and a few pieces added to dress up the open bulkhead. Put on the deck hatches first, before planking around them Finally, a couple of pictures of all the decking, bulwarks and stanchions complete. Next we will go on to finish the 2nd planking and other outside details.

-
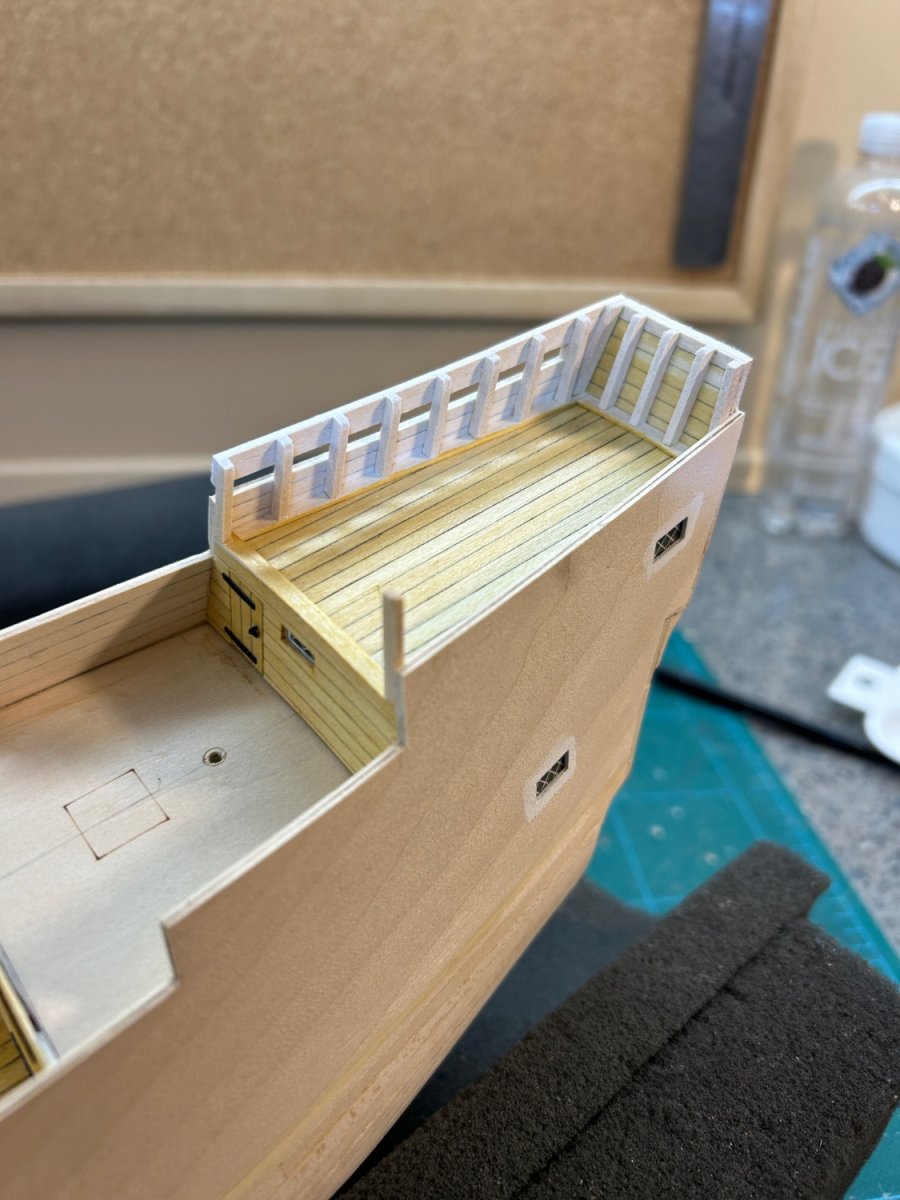
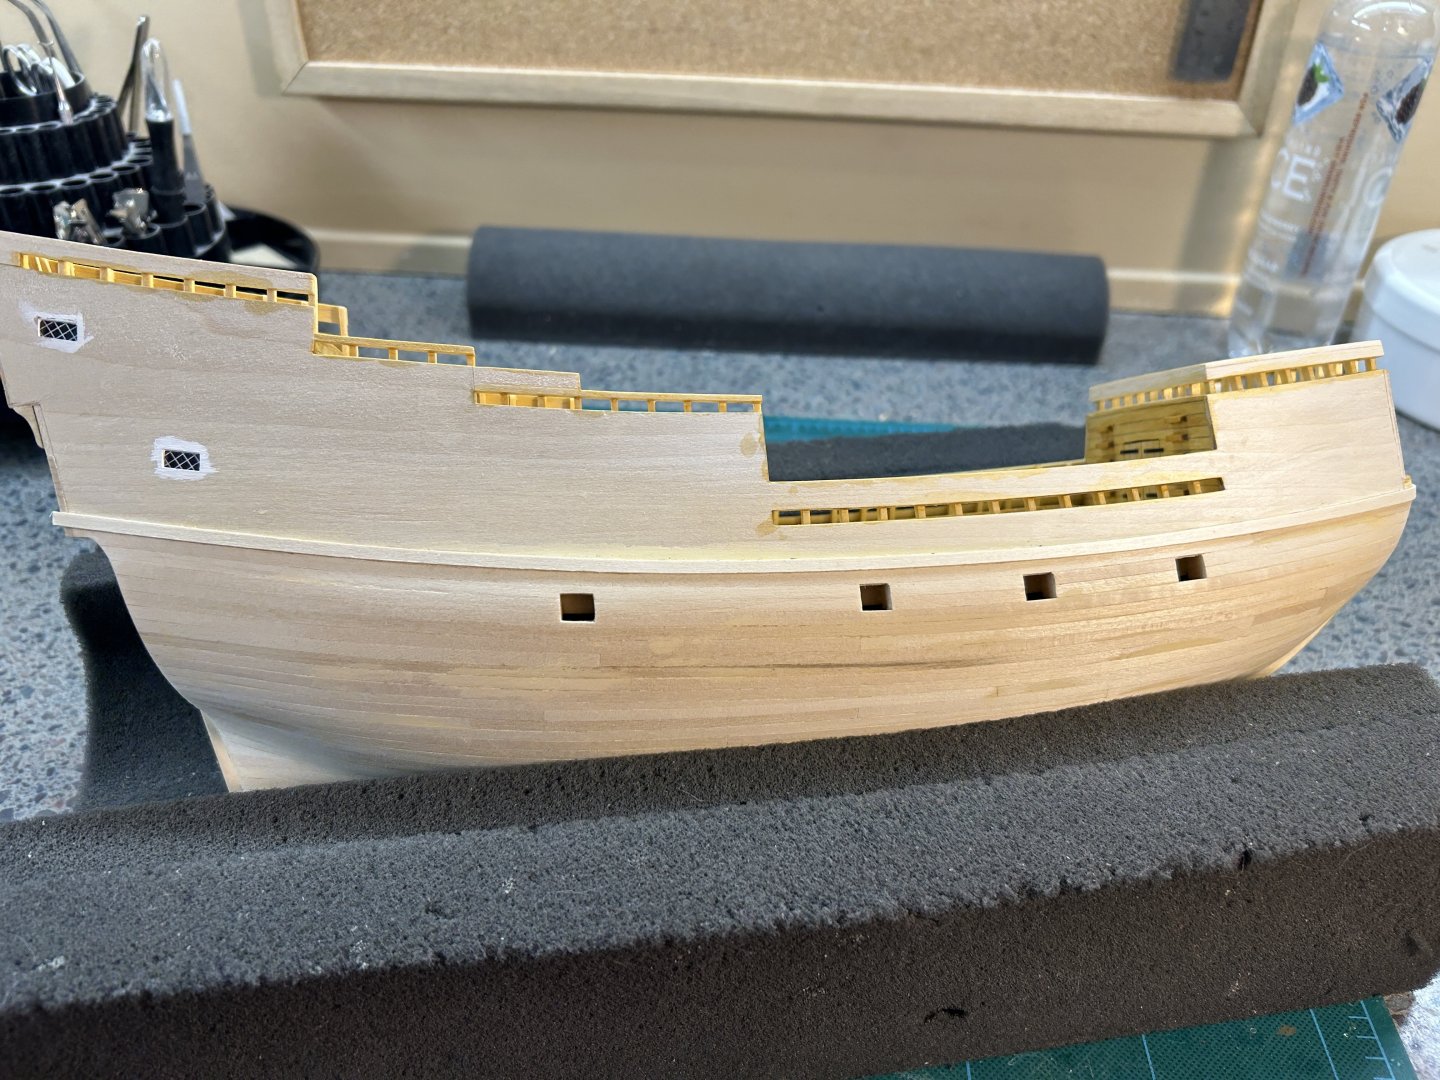
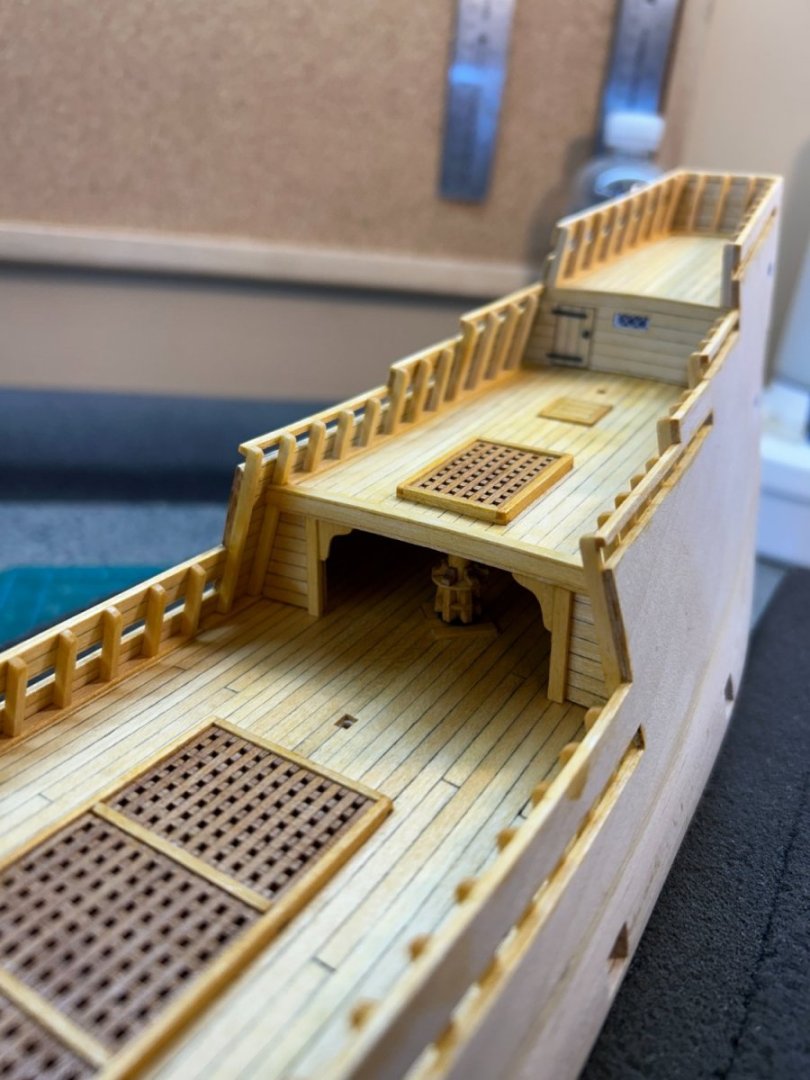
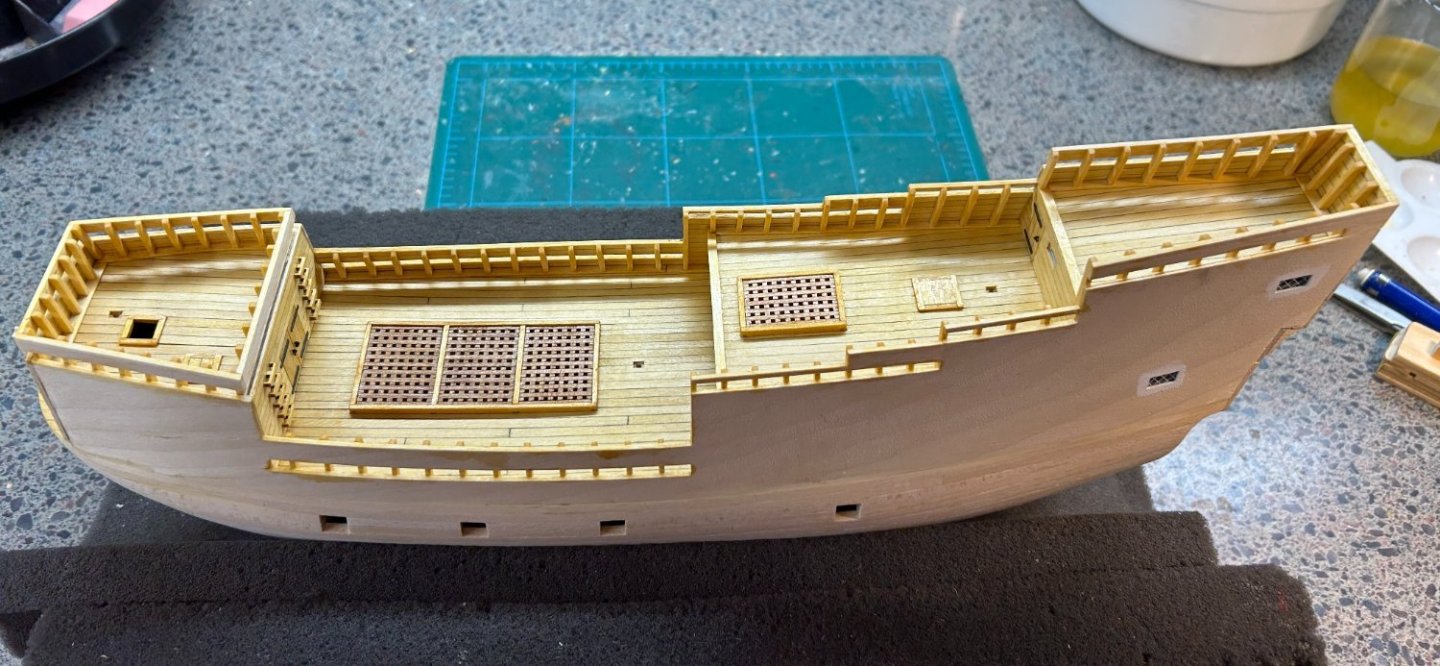
Stanchions I have started the stanchions and upper bulwark pieces, which pretty much cover the entire length of the ship. Basically, they will all proceed the same. Put down waterway/base strips, then place the uprights, cut extra long. Then a couple of strips to form a top rail, and finally trim and round the tops of the stanchions. Here’s the start and finish of the forecastle, followed by the halfway done poop deck. Some will find this tedious - but I’m enjoying this part!


-
Keel holder/clamp recomendations
rlwhitt replied to Mike Shea's topic in Modeling tools and Workshop Equipment
Another vote for the foam cradle. You can put the ship into just about any kind of position and it’s soft so doesn’t damage stuff -
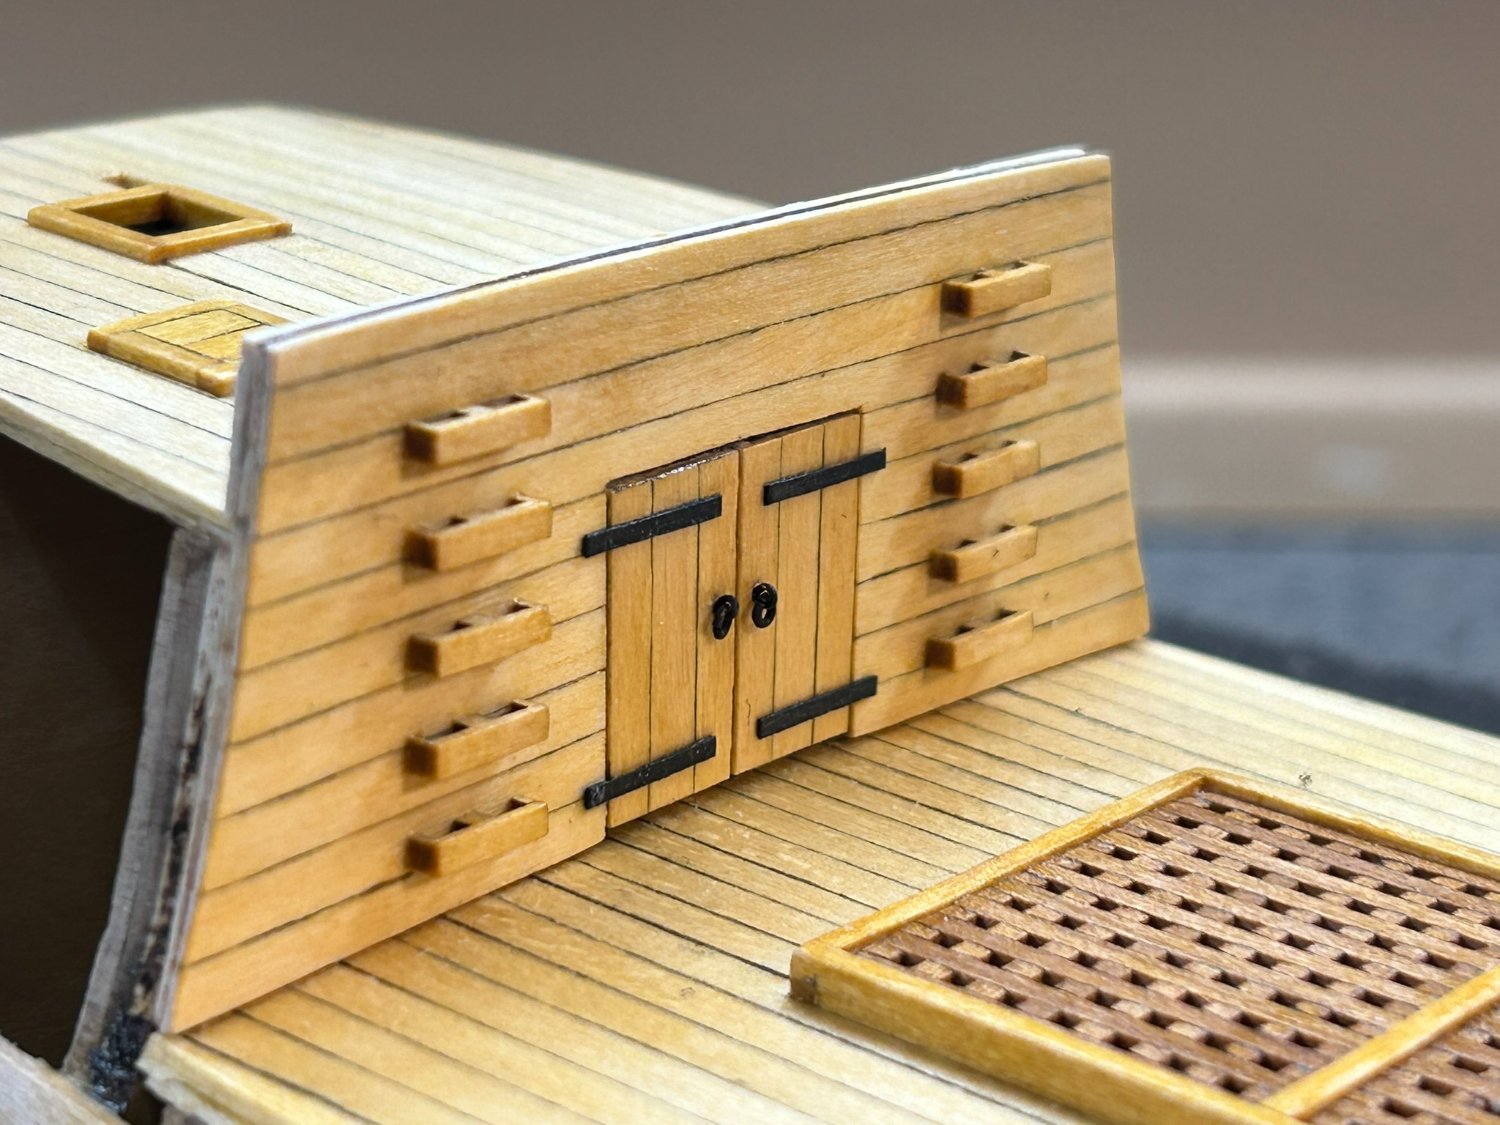
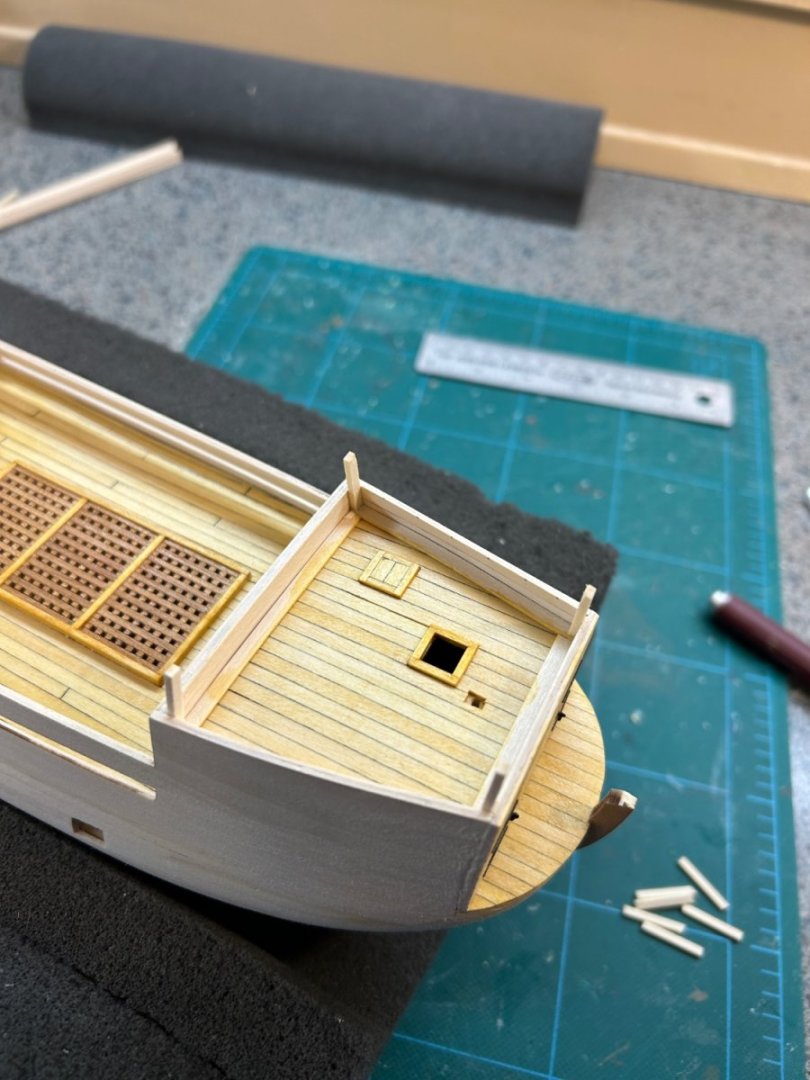
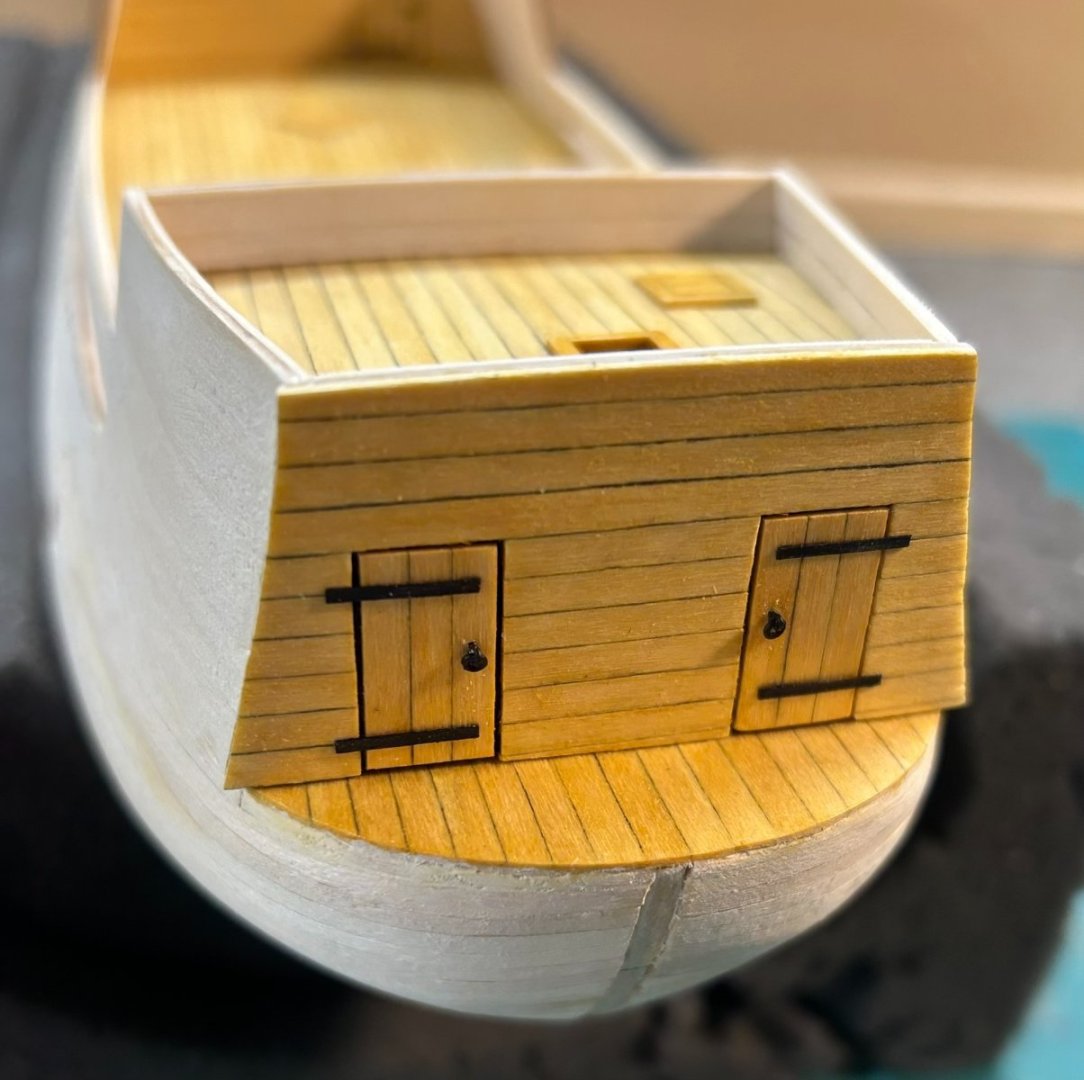
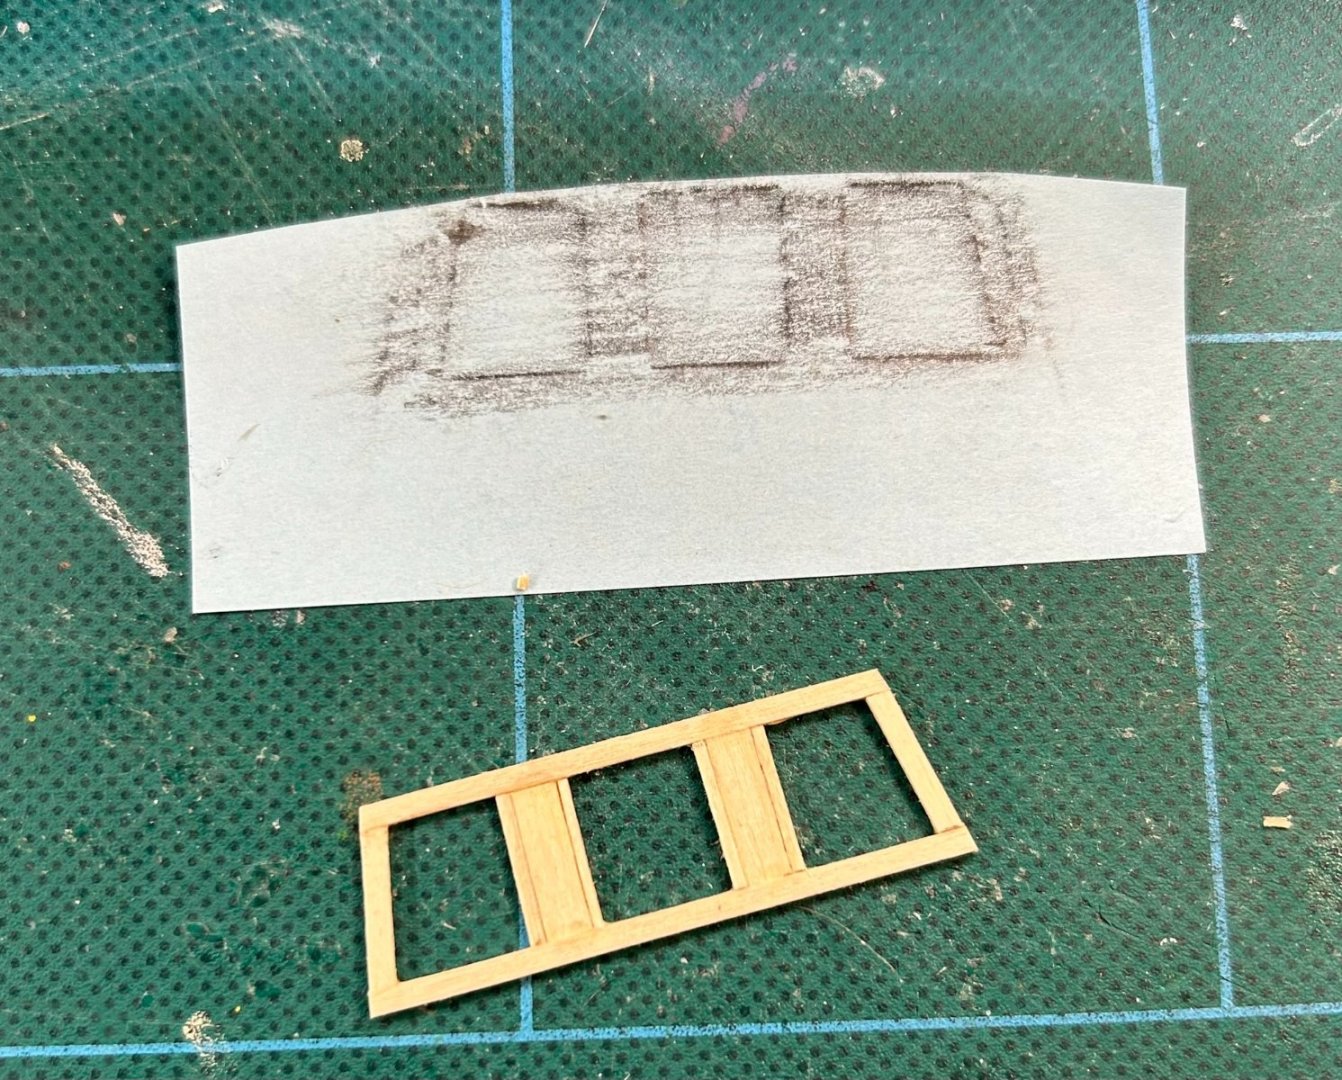
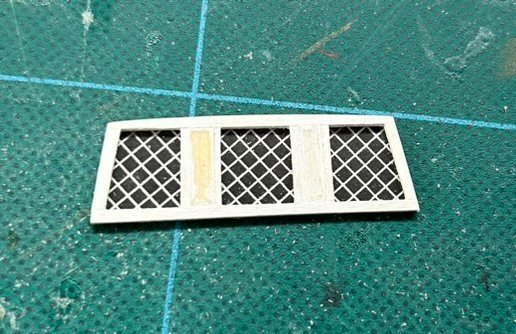
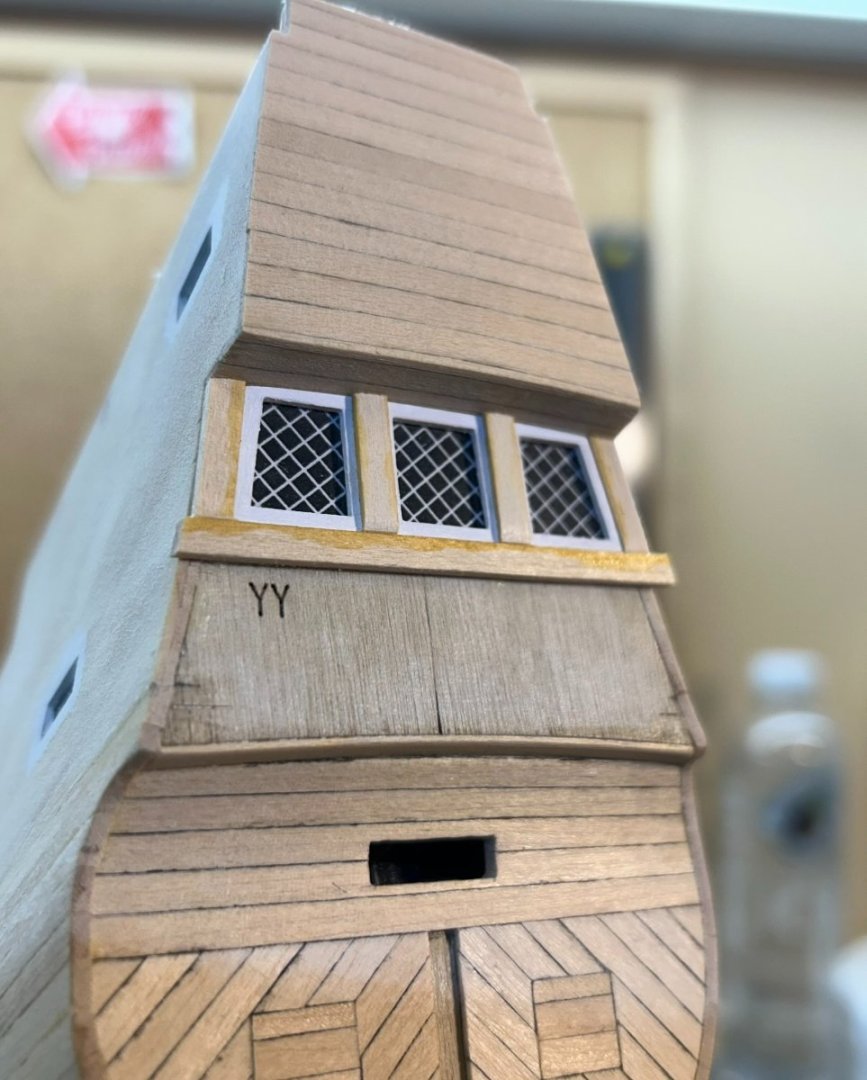
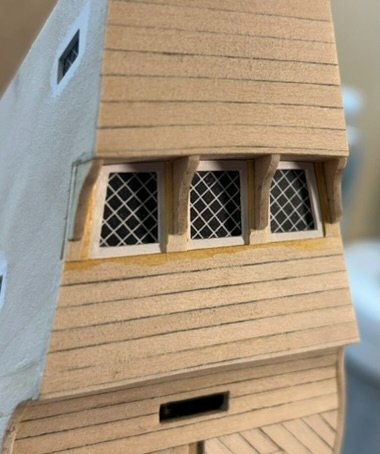
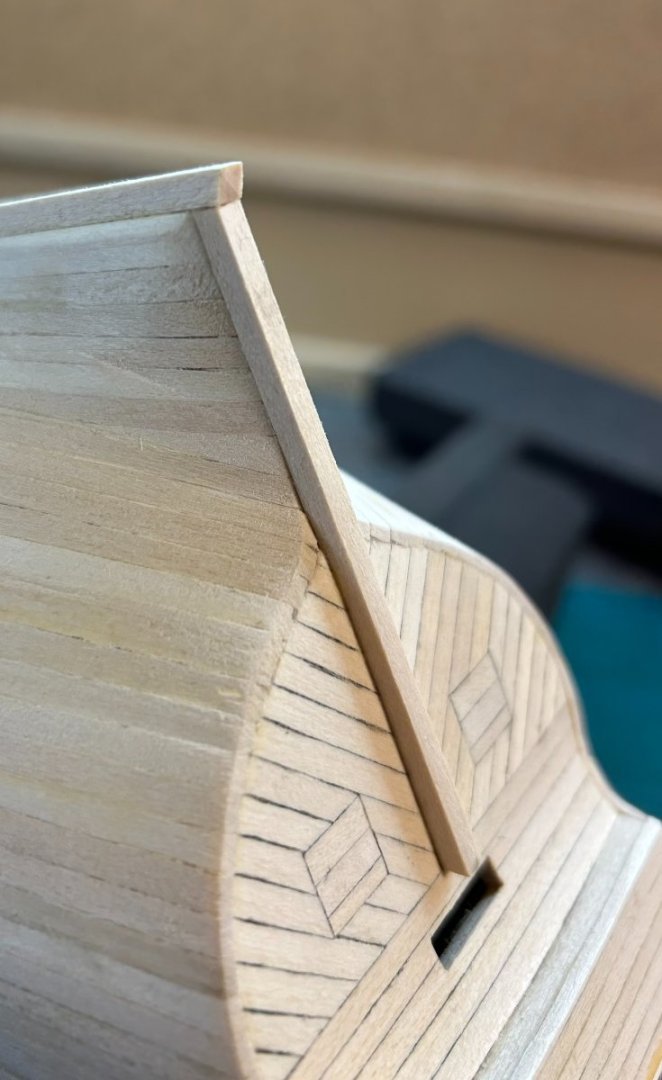
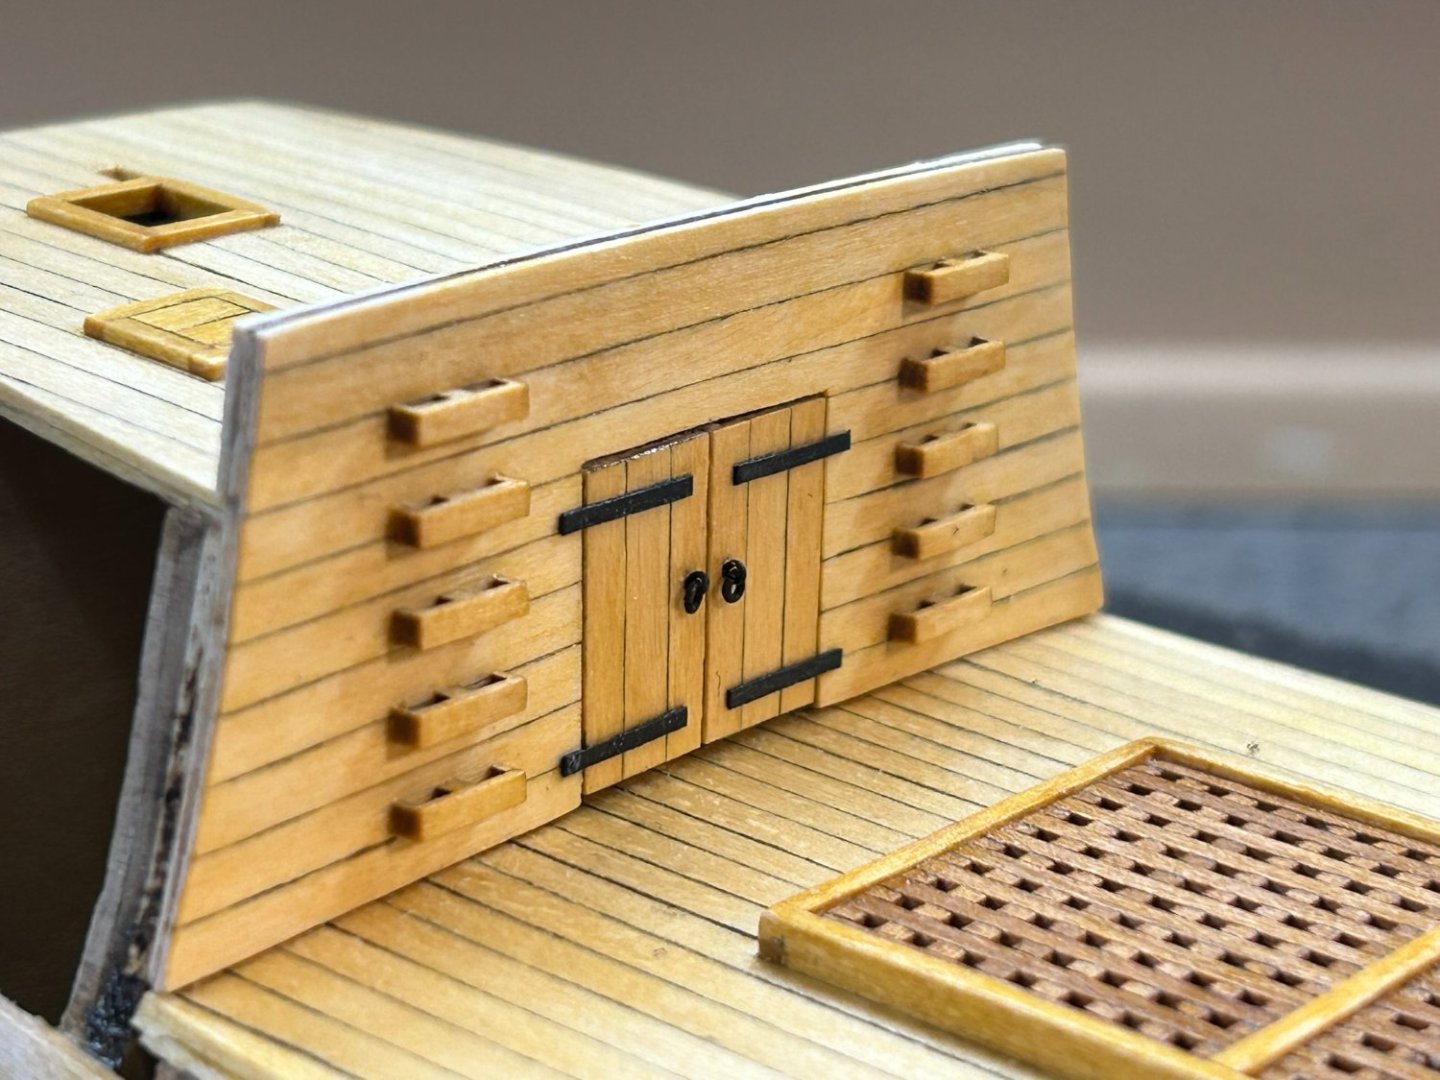
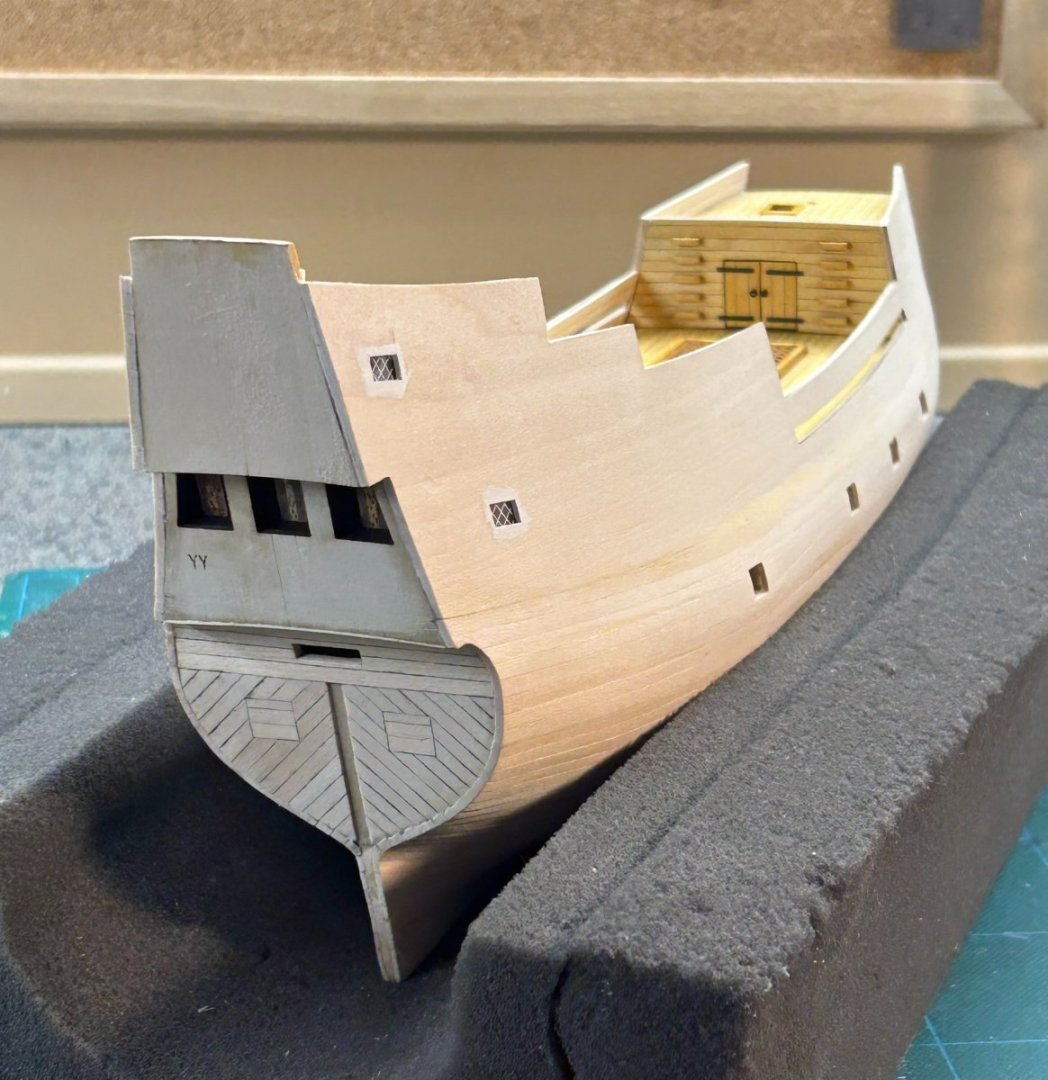
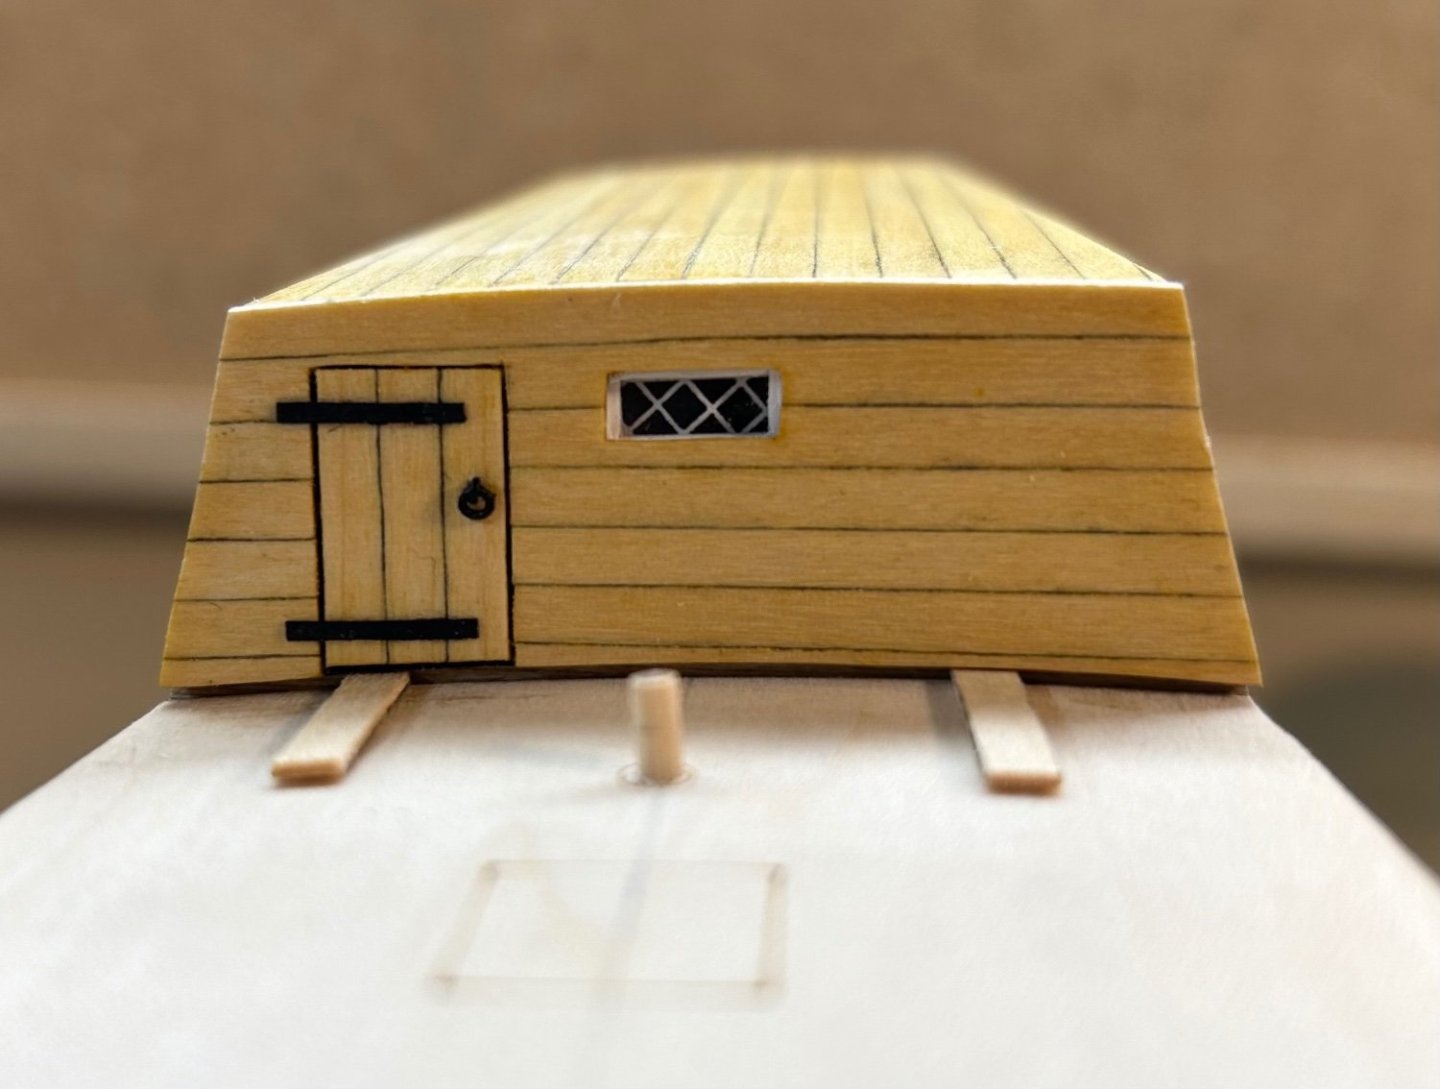
Bow, Stern and Keel We finish up the bow end of the basic hull by planking the little bit of deck at the beakhead and putting on the bulkhead here. There are two options for the beakhead bulkhead given. As drawn on the plans it has 2 doors like this, as it was designed and came over from the UK in 1957. Later, these doors were removed and replaced with steps like on the bulkhead on the other side. The kit provides enough laser cut step parts to do it that way if you want. Here the bulkhead is installed but not yet trimmed to fit the sides. Next we are going to turn our attention to finishing up the stern. First up is the main windows. I didn't do things exactly like the instructions. I decided I wanted to build a frame and glue the acetate and grid to it before attaching to the ship. Here I have done a pencil rub pattern of the windows to give me a template to build the frame shown below, made from various widths of 1/32" stock. Here I sanded the top, rounded to fit under the return, painted white, and cut/attached the acetate sheet and photocopied grid bits. Now I attached it and framed it with 1/16" stock. Here you can also see that the upper rear bulkhead was finished with 1/32" plank before putting the windows on. Finally, the rest of the lower section is planked with 1/16" stock and the laser cut knees are trimmed and fitted. There are extra ones of these and they needed to be cut back a good bit to correct size. Wrapped up this section with the stem piece (laser cut) and 1/8" stock keel and stern post.
-
Yeah, I stole that idea from David Lester's log (I think I mentioned that before), but he went even a step further. Rather than use just a crappy photocopy like I'm doing, he made a better quality version in a draw program.
-
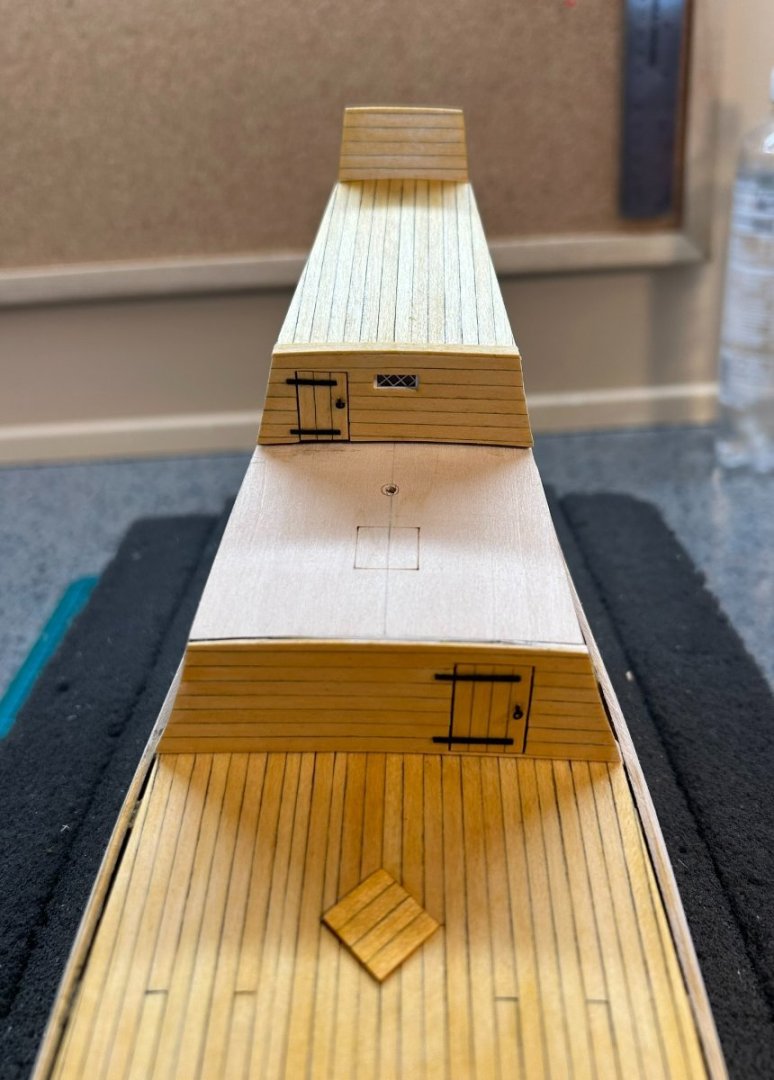
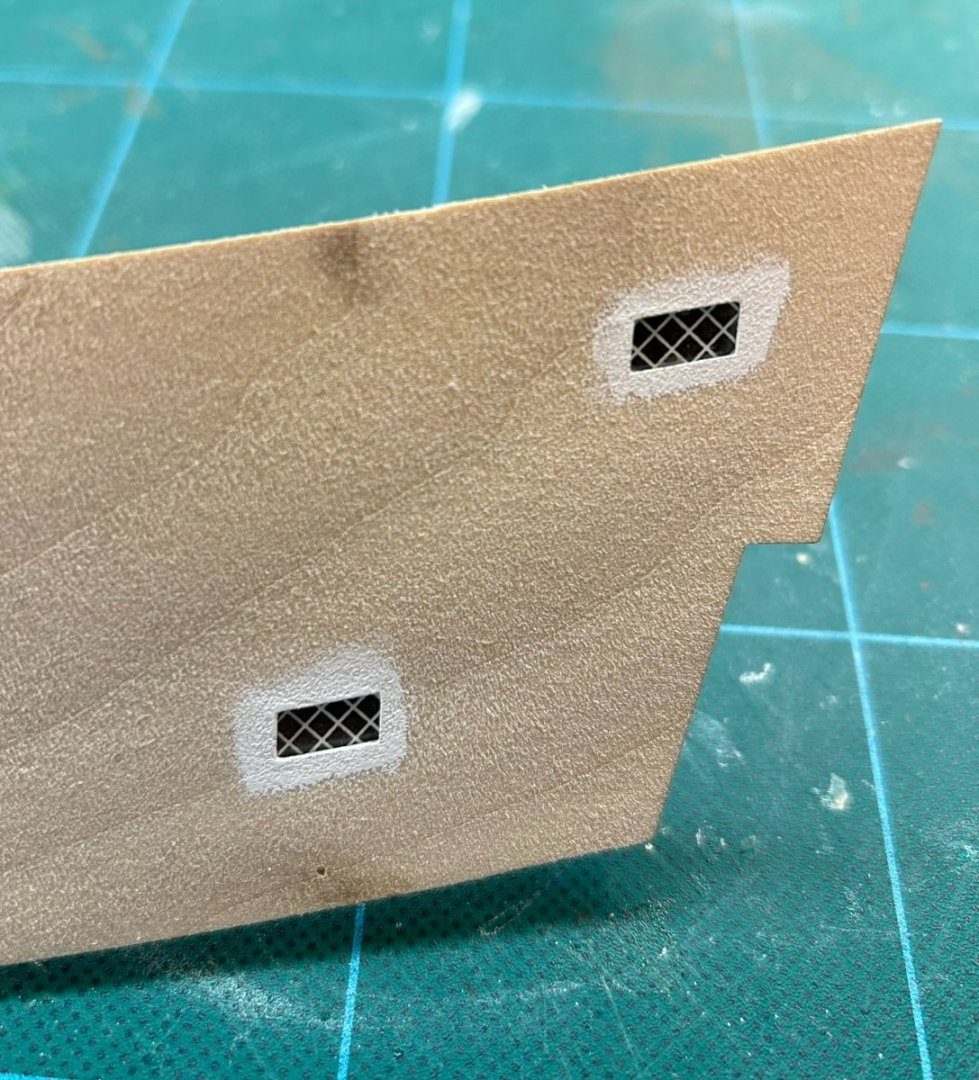
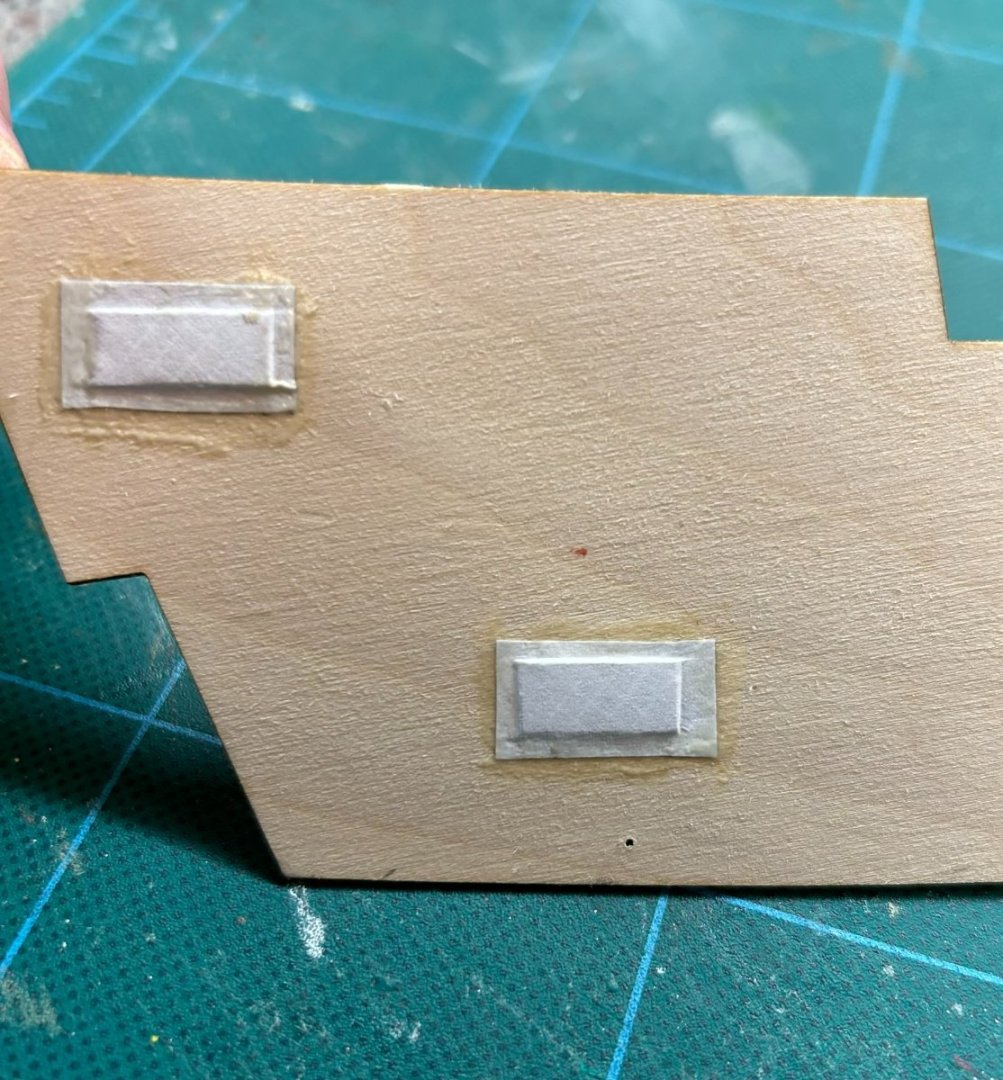
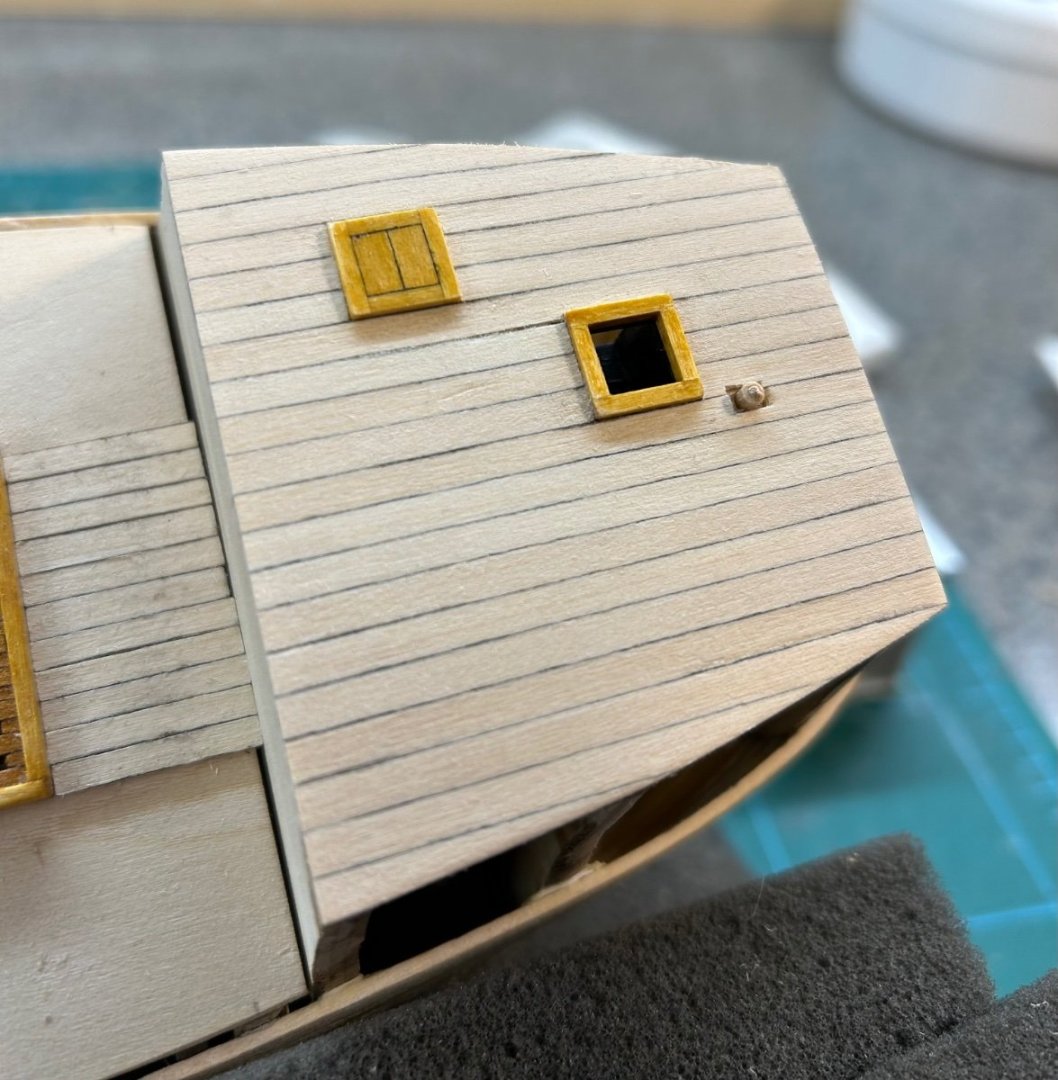
More Bulkheads, Bulwarks Cubbridge head, with steps. These steps are laser cut, with plenty of extras for the inevitable breakage and trips under the work table, plus if you take the option to put them on the beakhead bulkhead (more on that later). A view to the rear, with the great cabin bulkhead and stern piece in place. The next thing to add is a pretty big step, the bulwark templates, with windows and internal planking. These form all of the sides from just above the gun ports. First, we have to add the faux (in my case) windows. I painted the area inside the laser cut holes and just to the outside white. I'm planning to leave a little margin around the windows on the outer planking to make the window "frame". The process I used to make these faux windows is different from the instructions as I didn't care to do the window grids with tiny tape. My way does not make as realistic a window, but it's very simple. I started with a photocopy of page 12 of the instructions where there is a white on black grid printed. I cut a small piece of the provided acetate sheet just larger than the hole and tacked it from behind with some CA. Then a bit larger piece of the grid photocopy glued to the wood behind the acetate and flattened down around it. I will plank up to the window in the next step. Here's a pic from the outside and inside of this treatment: Windows in place, next we plank the entire inside of the template with 1/32" x 1/8" planking. Where the planking will show I've done the pencil blackened edges. This is the rough planked template, before sanding: Here one of the templates is glued on. It is a bit oversized so it will need some trimming in several places once in place. And this is the outside view. You will most likely have some gaps at the bottom to fill Finally, a couple of overall pics with both bulwark assemblies in place. It's starting to look like a ship!


-
Actually today I noticed that on the iPad a thread I had partially read went to page 2, when the unread line was actually on page 3. So I continue to be perplexed.
-
That could well be, makes as much sense as anything
-
Hi all, I have what might be one of the least significant 1st world problems ever. I commonly read threads on both a PC and an iPad. Pretty much always on the PC the browser positions itself correctly at the -- Unread -- line to pick up where I left off reading a thread. However on the iPad, as often as not, it lands somewhere above that, sometimes significantly, so I'm frequently scrolling down to find it. Anyone else have this issue or found a way to fix it? Thanks!
-
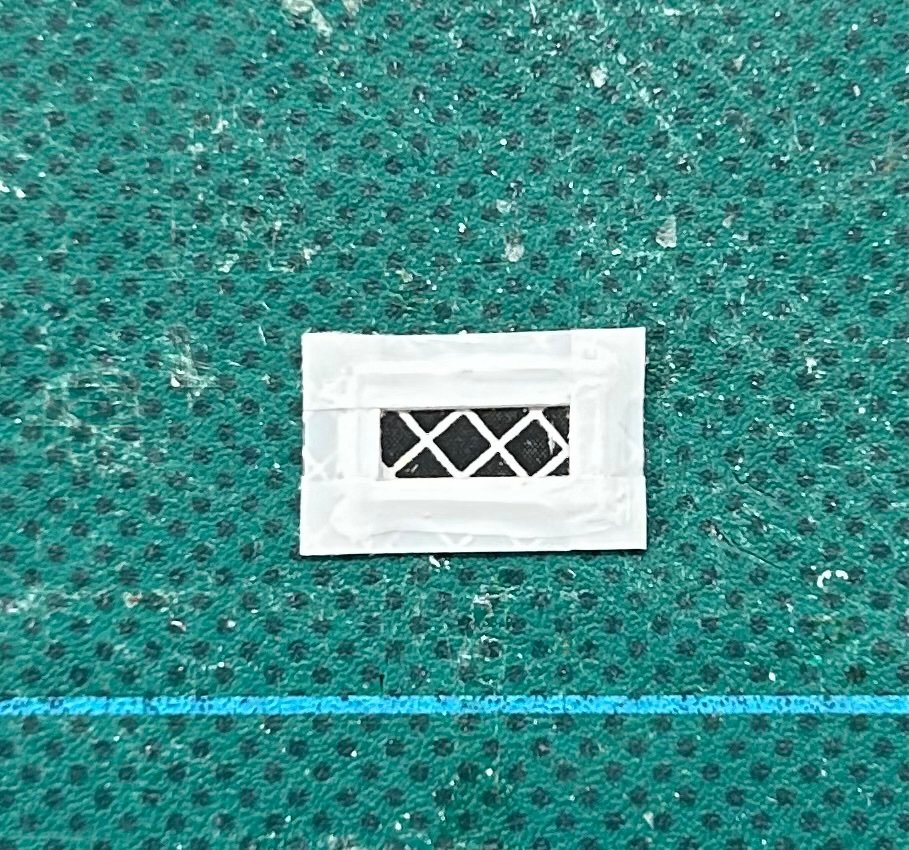
Decking and Bulkheads Next up we have planking of the decks except for the “half deck”. That one will be extended in length after the bulwark pieces are in place. A couple of in progress shots: Here’s all 3 decks done and finished. I like using shellac, this is my “light mix”, 1/3 clear, 1/3 amber, 1/3 alcohol. I had used a more concentrated amber mix for the hatch frames and such. Even though the instructions cover doing tree nails, I still haven’t caught the fever to do them yet, so I’m not planning to do them on this build. Next we start on the bulkheads, which are laser cut parts that are planked and doors added with planking material. I started with the poop deck bulkhead as it has the most complexity because of the window. There is a cross hatch pattern in the instruction pages for you to use as a template, on which you place some strips of very thin white tape on the provided acetate. The way it reads makes it sound as if it’s included, but it’s not. I swiped a simple idea from David Lester’s log in that I just printed copies of this pattern and cut a piece of it to go behind the acetate and then lined the edges with some chart tape I did have. The stuff is shiny and sort of semi transparent, so I had to paint it flat white. This will be glued to the back of the bulkhead. I’m sure the solid black of the paper does not produce as nice a look up close as a true transparent window, even though what’s behind it is dark. I feel though that the “3 foot” rule applies to this and it will be fine. This is the finished bulkhead, mounted. This one was designed a bit oversized and had to be cut down a bit. Also note the scrap bits of decking to glue it at the height to allow the decking underneath once the half deck is finished. I’d also mention that I left a little gap around and under the door and paint the part under the planking black before doing the planking.
-
Thanks Dave! I don’t really think I have any particular planking techniques of note, but this one came out better than my last build. Just the practice, I’m still pretty new to this. I gotta say that planking the bow of a ship has gotta be about the hardest part of the build to me.
-
Chopper Lesson Learned
rlwhitt replied to Todd Hart's topic in Modeling tools and Workshop Equipment
Or this one that I have works great, but it's limited on size and flexibility for angles: https://www.micromark.com/Extra-Long-Micro-Miter-Box -
As far as gaps at seams go, I've had a little experience with that. I've often wished kit makers would print a little swatch of skin color somewhere in the book that could be used for patches. I think I recall seeing one that actually did that (Orlik Wright Flyer I think). I've tried scanning and printing but could never get it close enough to suit. Oh well....
-
“papered over” hahaha. 😉
-
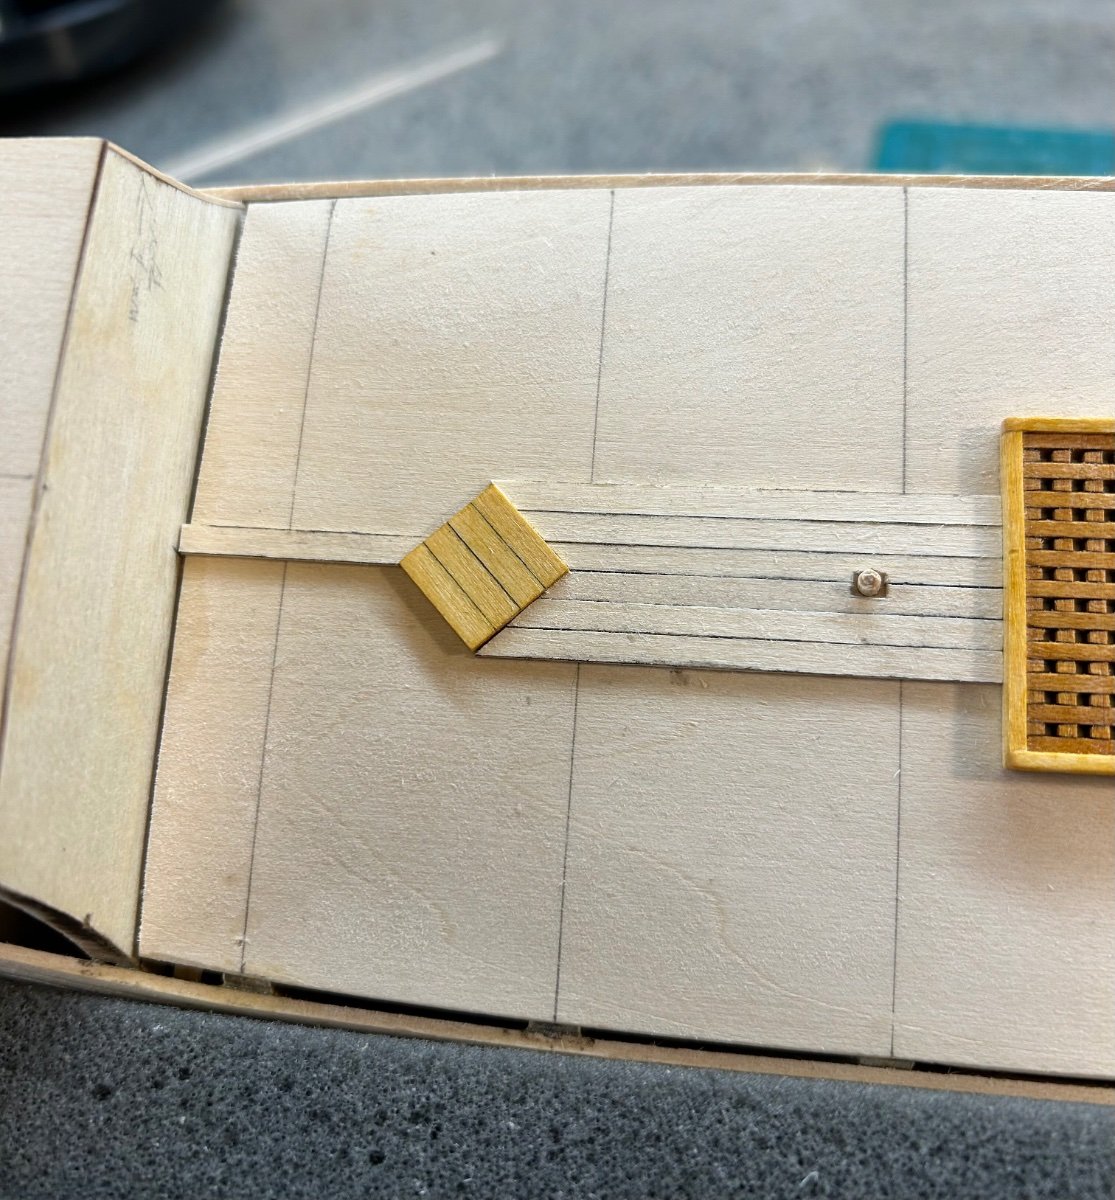
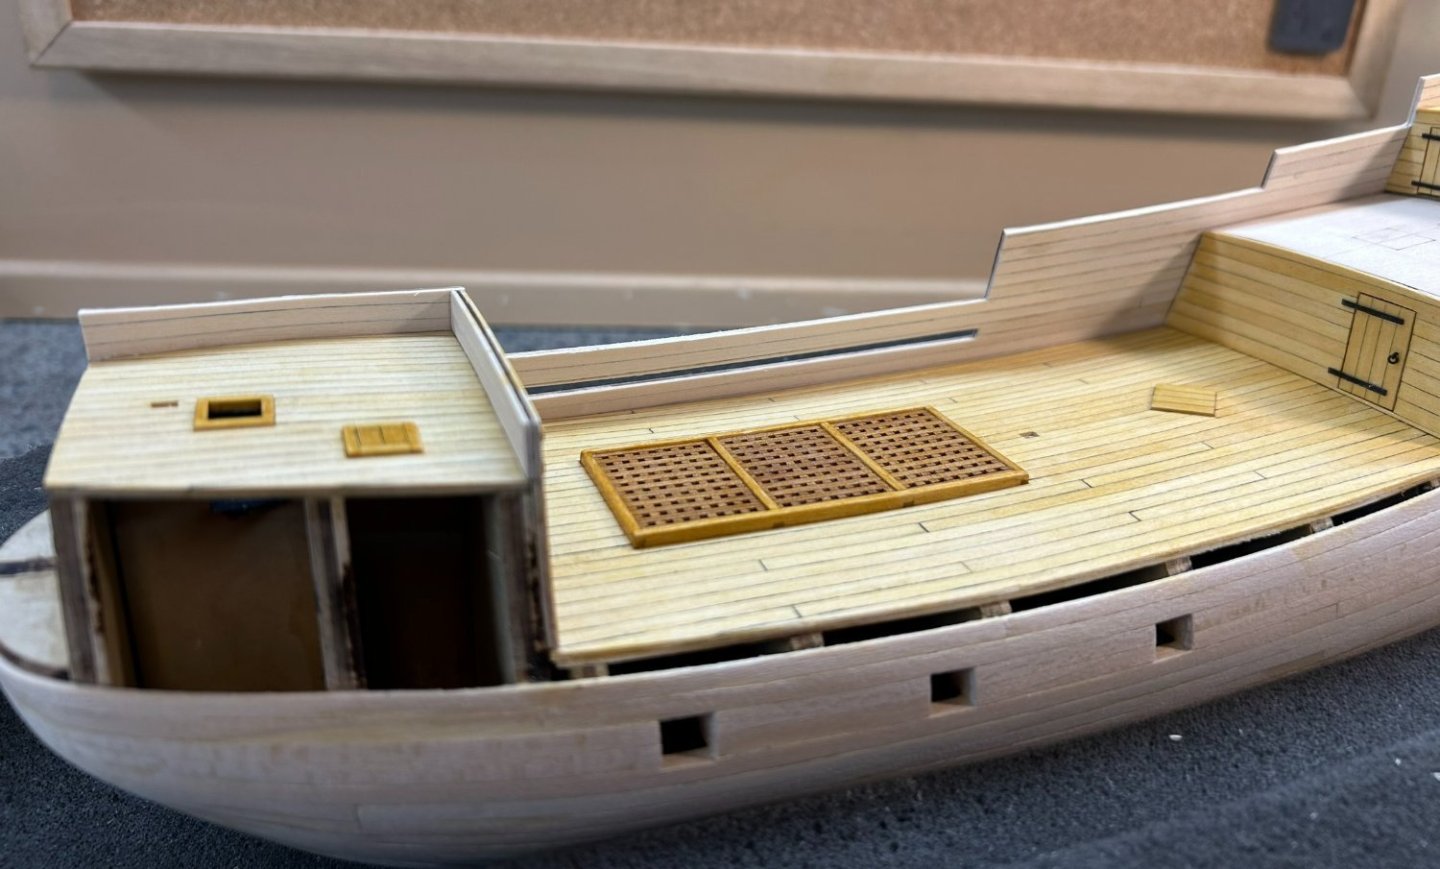
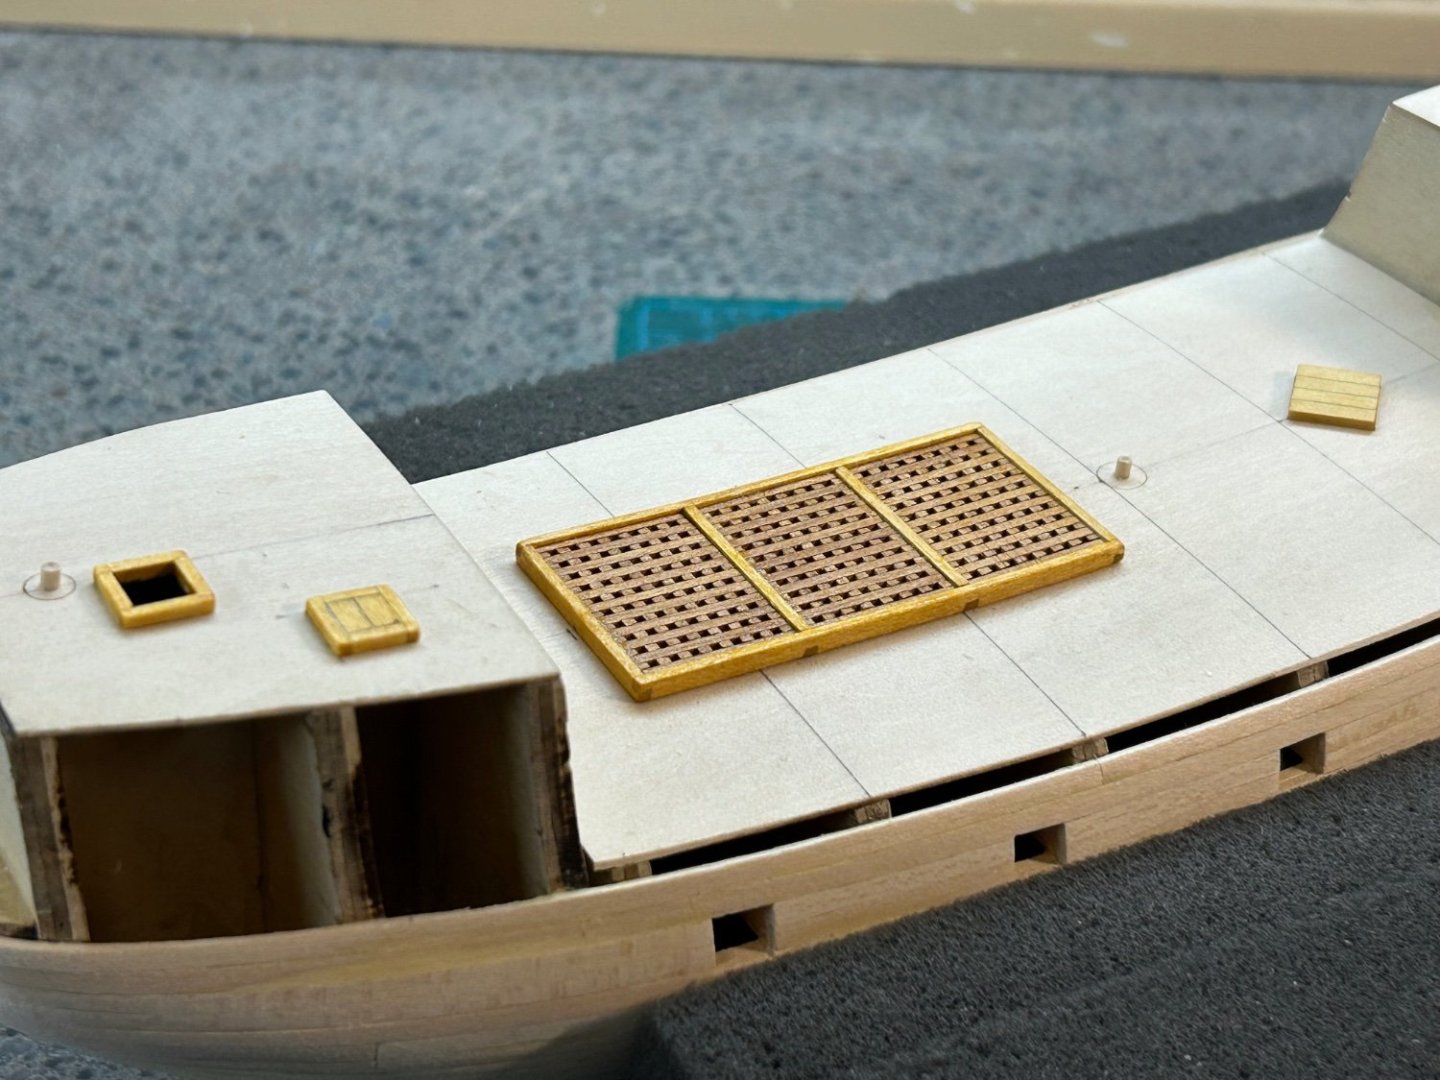
Deck Items Added some things to plank around - main gratings, forecastle hatches, capstan base. I also went ahead and drilled some pilot holes for the masts and poked some toothpick pieces in so I don’t loose them.
-
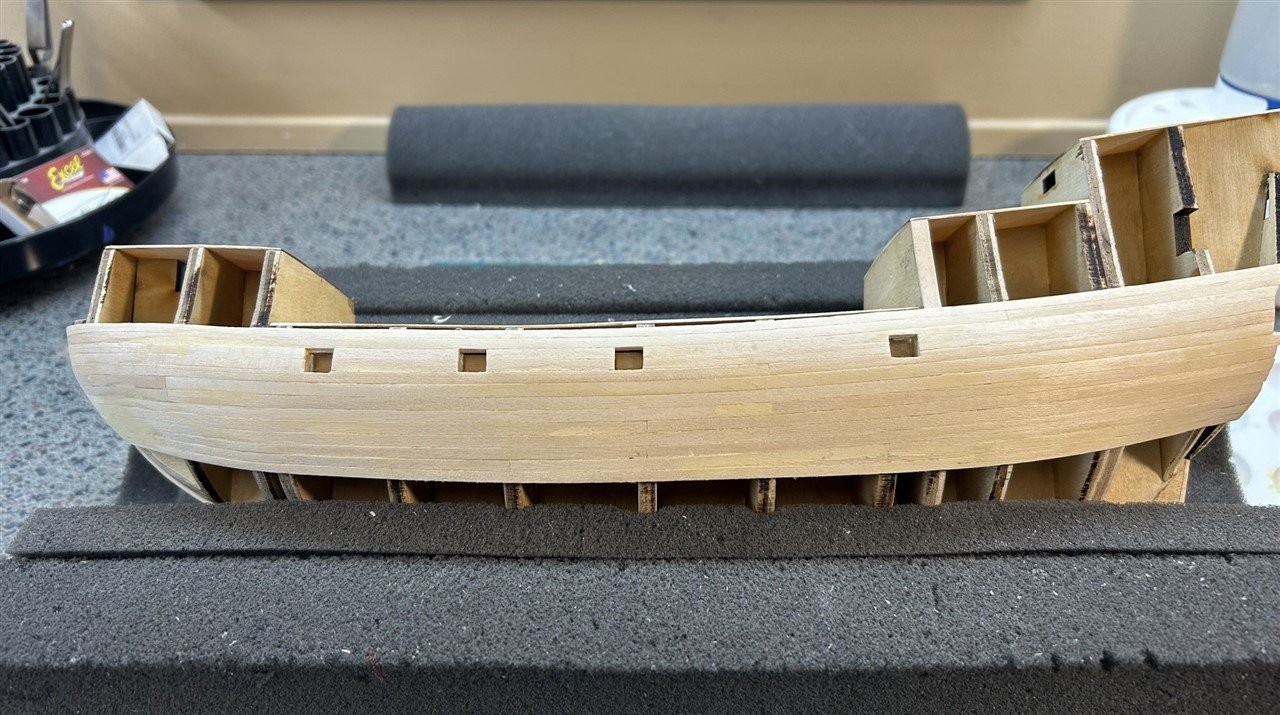
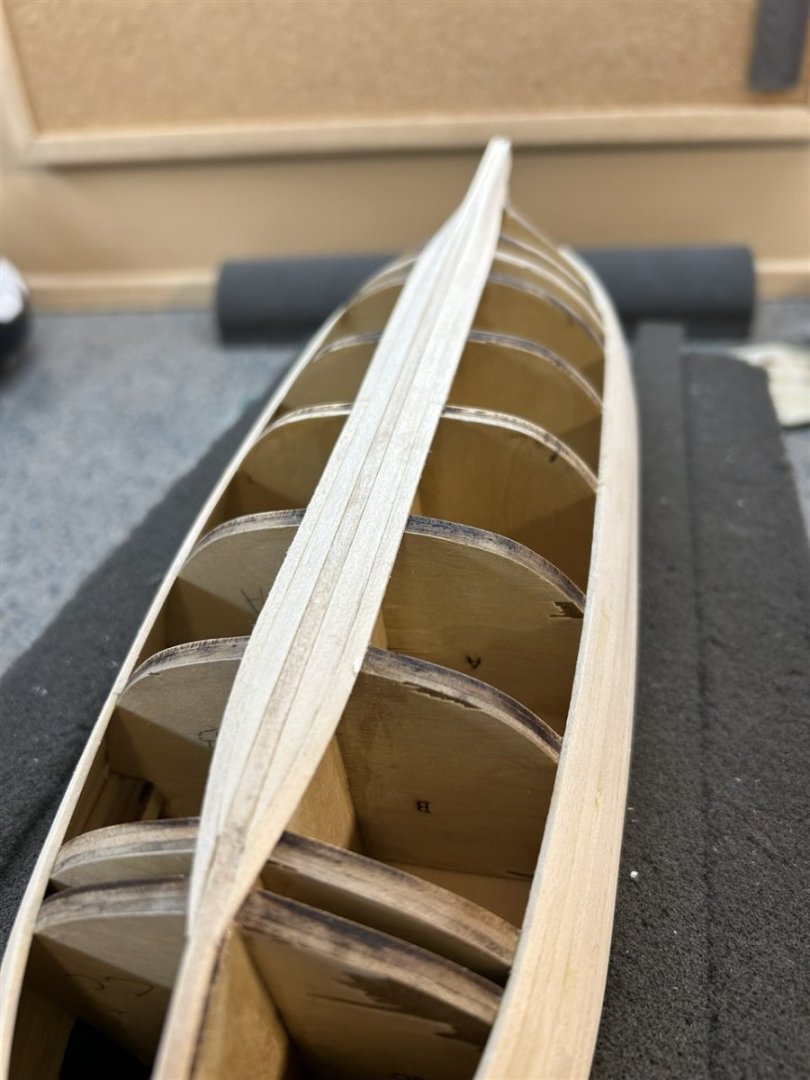
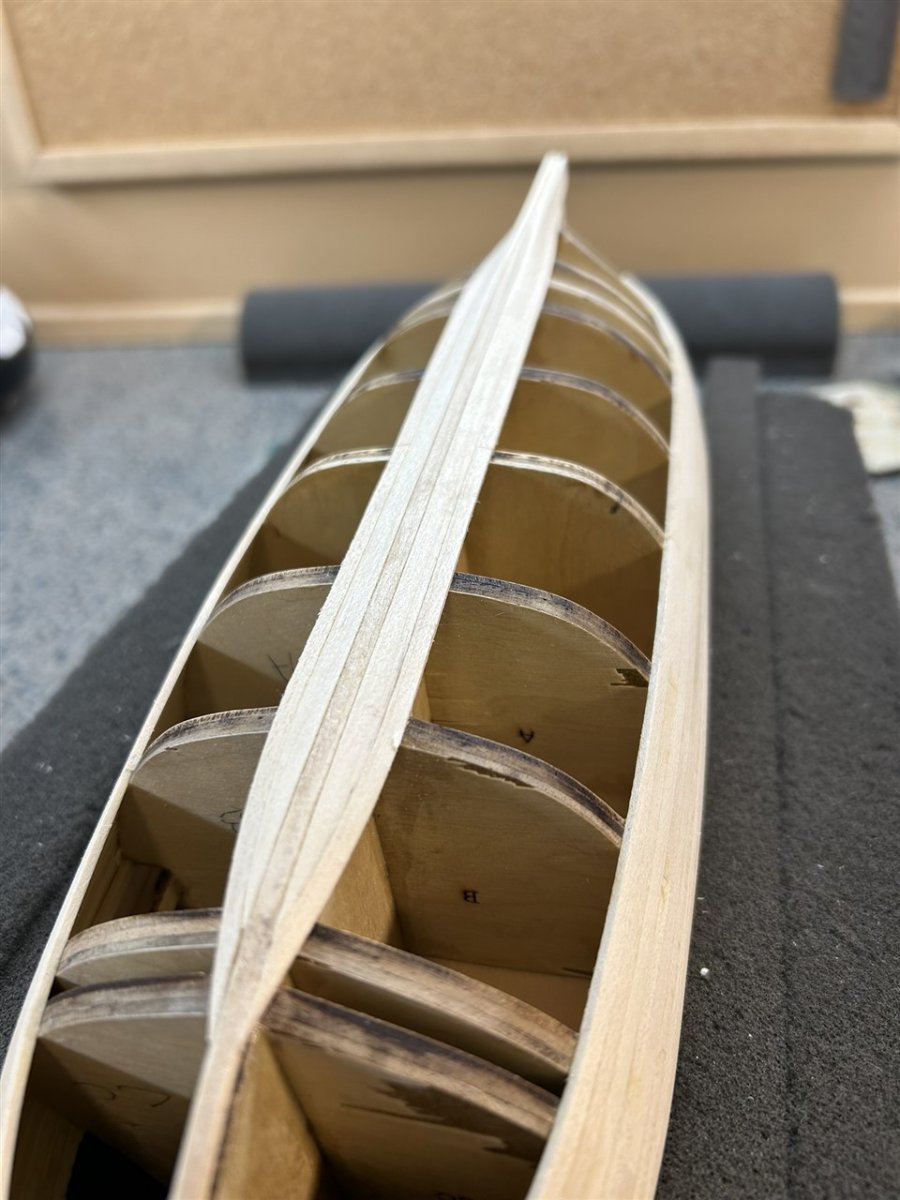
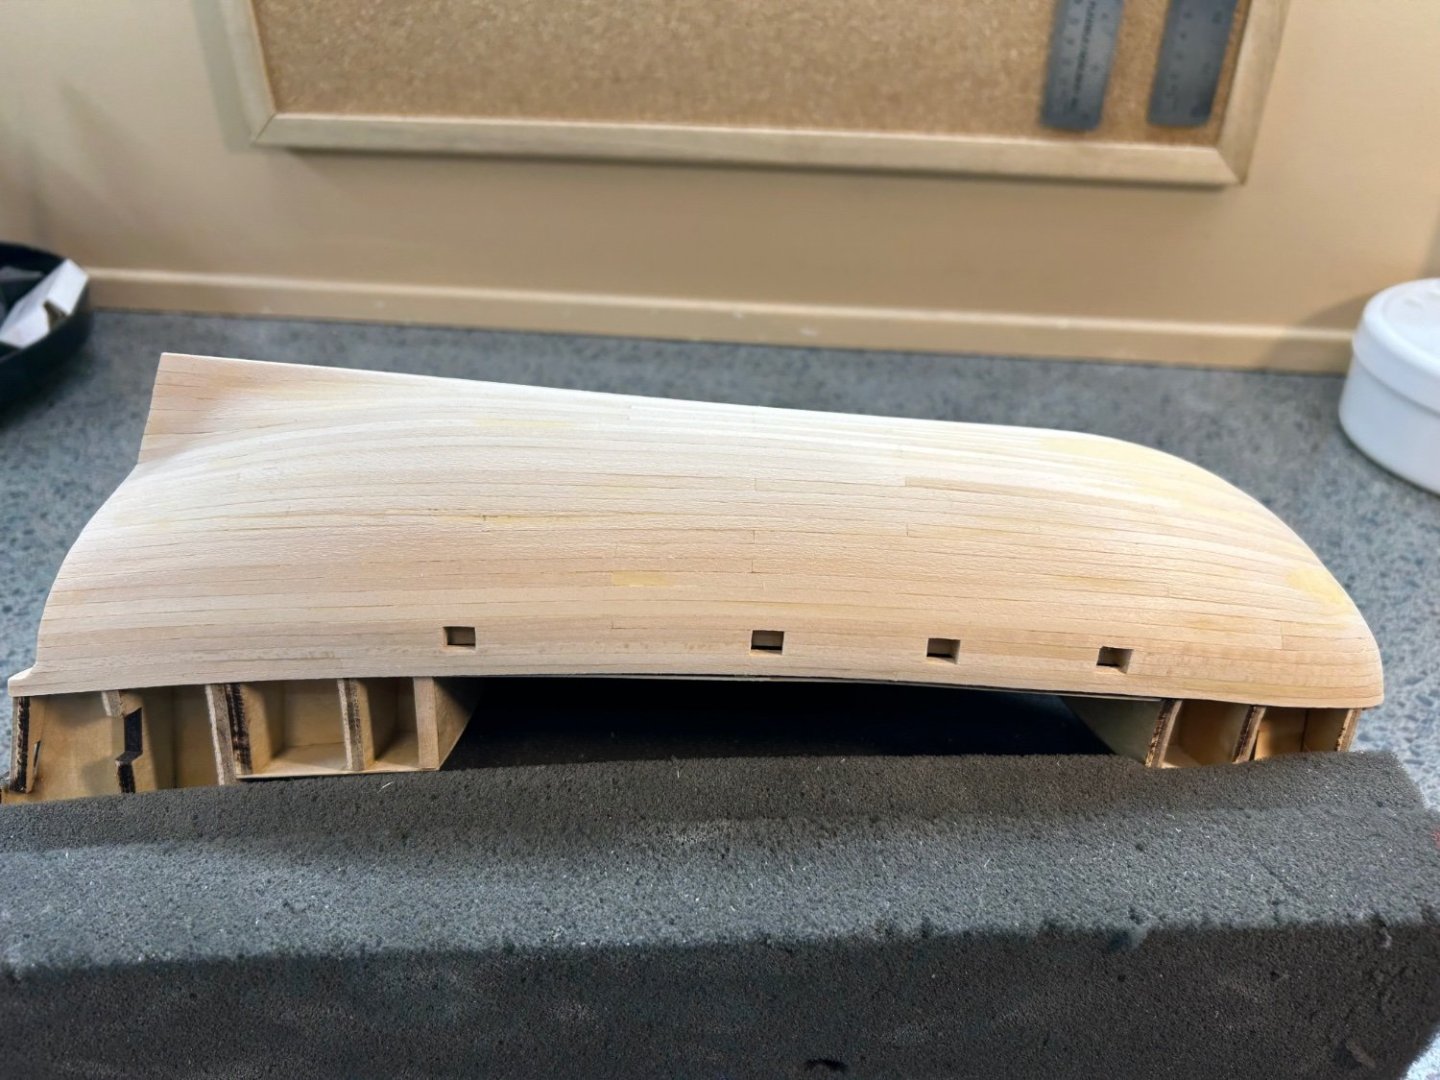
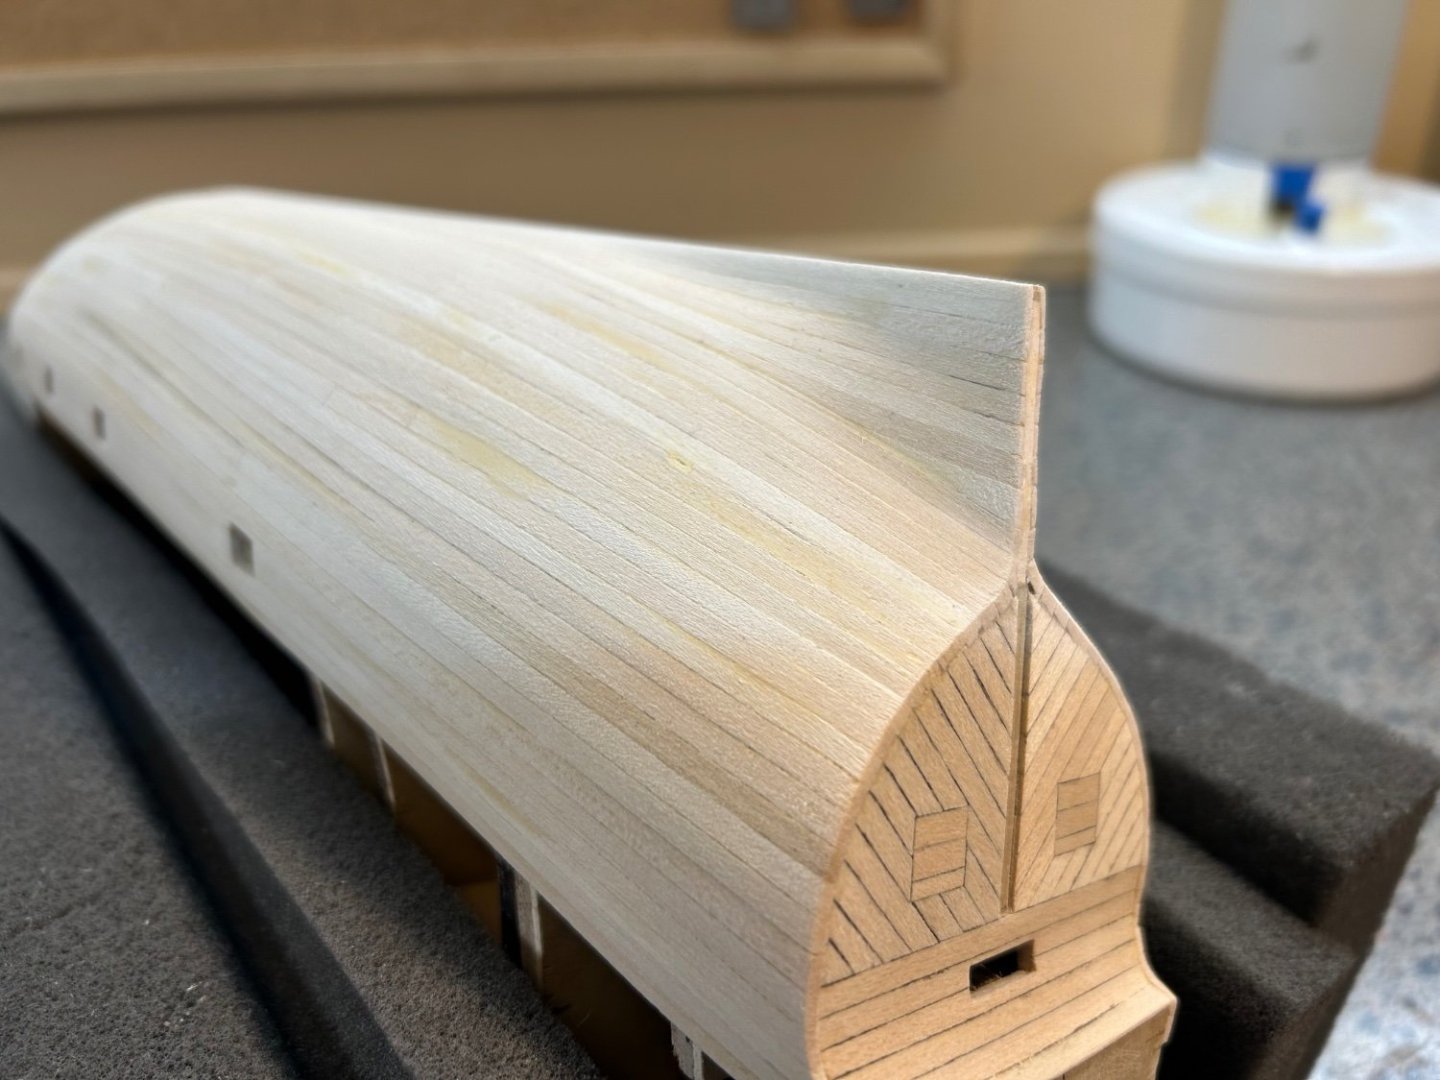
1st Layer Planking Complete Pretty much done on the sanding and filling. It will get a final touch up after bulkhead templates are on and ready for 2nd layer. back up top, next up will be hatches and deck planking
-
First I’ve seen on a kit review, to comment on the smell. I like it! I thought maybe I was the only one to notice.
-
Tim, You are correct, the kit has some pins as well, in addition to the kevels. It's accurate inasmuch as this is a model of the Mayflower II replica, which has them. My theory - without doing any research to find out - is that even though they are not accurate for 1620 the replica was fitted with them out of plain practicality since it had to be sailed across the Atlantic and they wanted it to be as easy as possible.
-
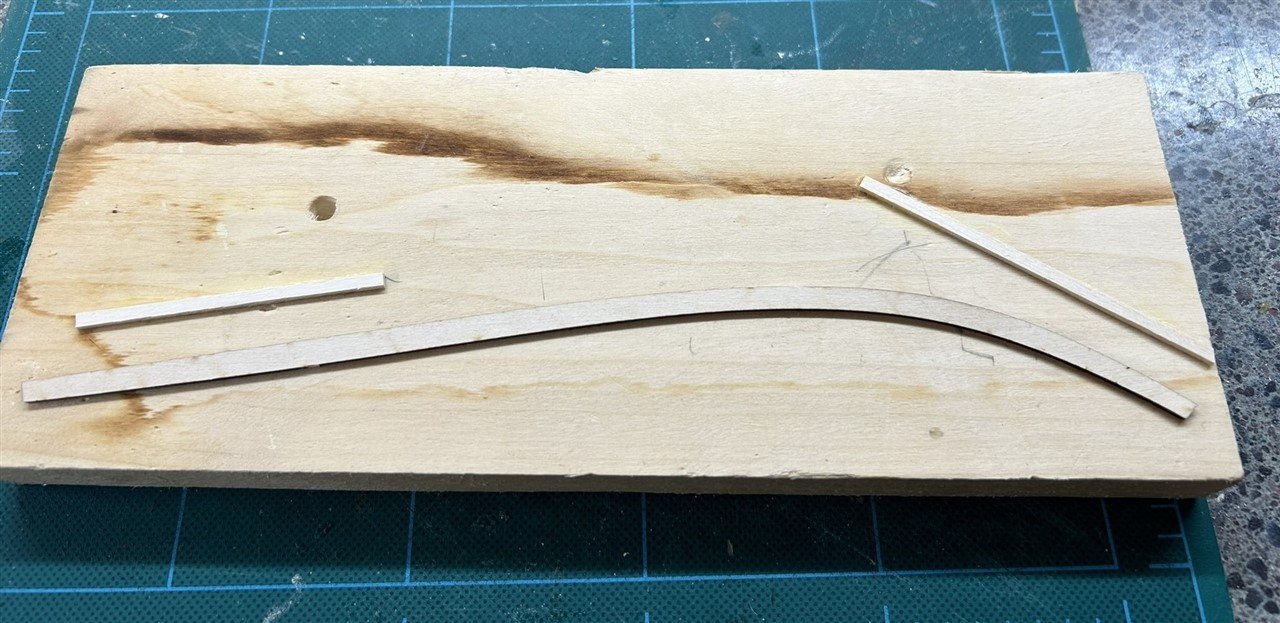
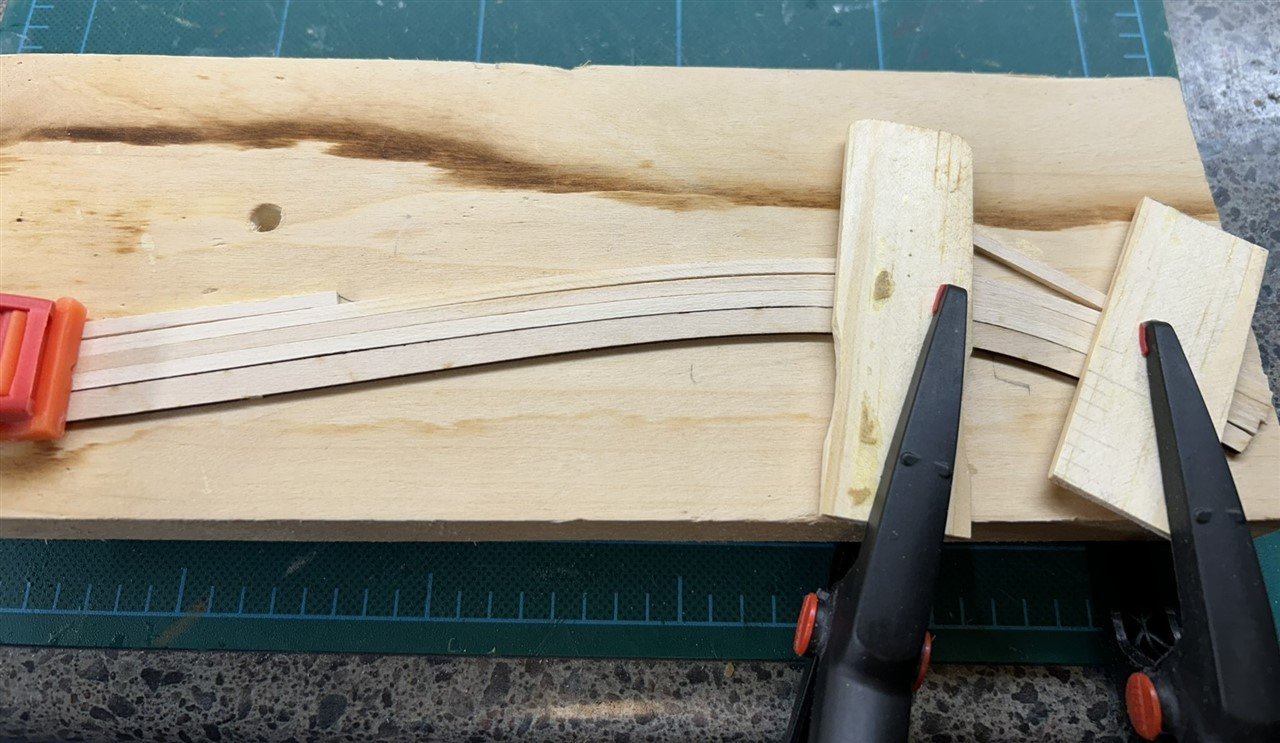
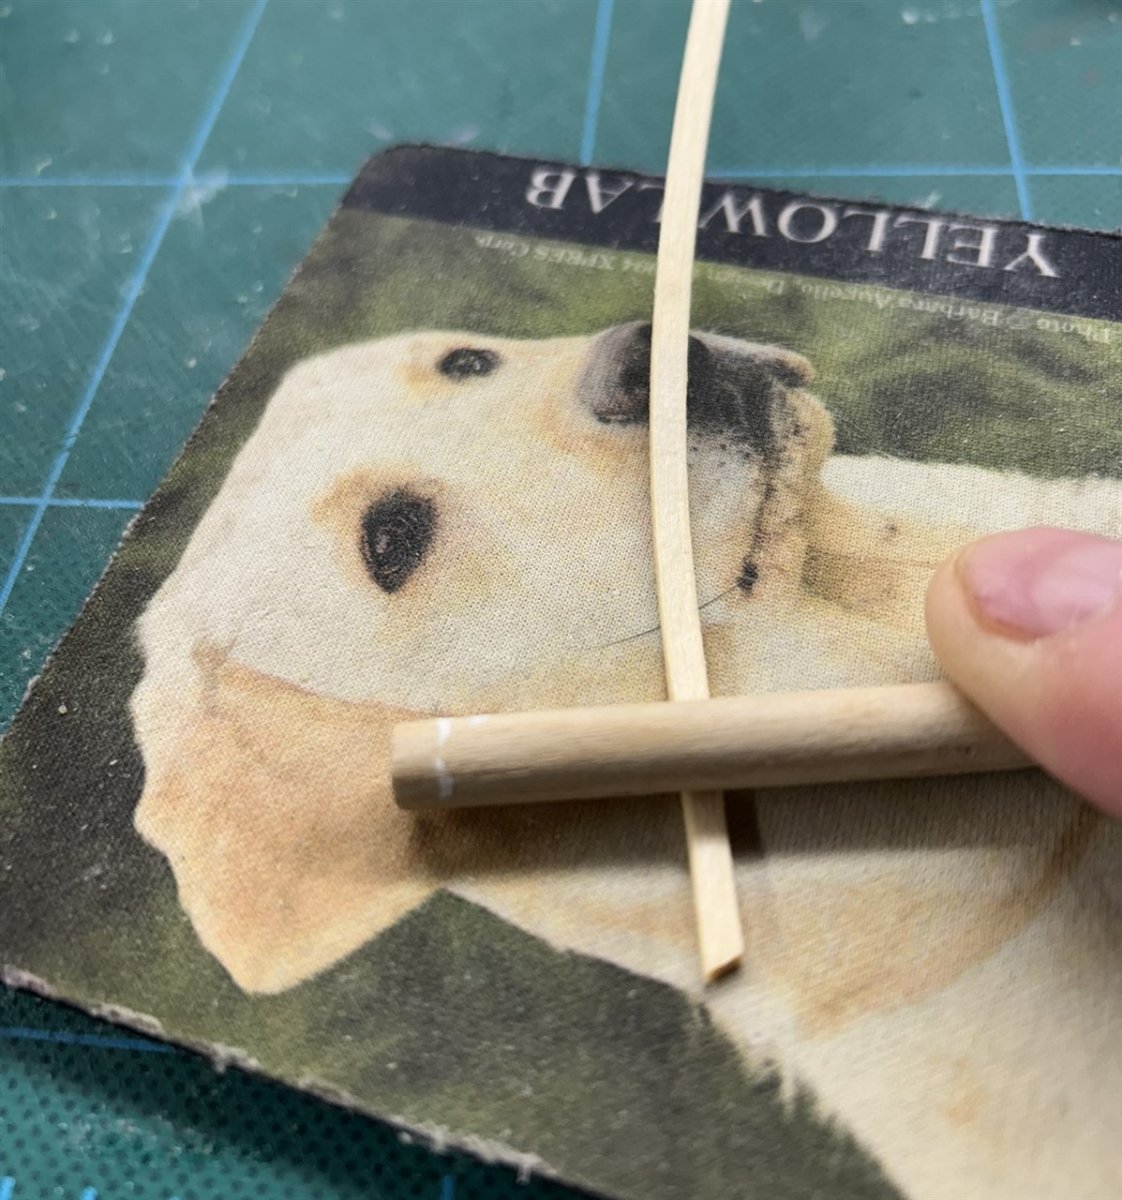
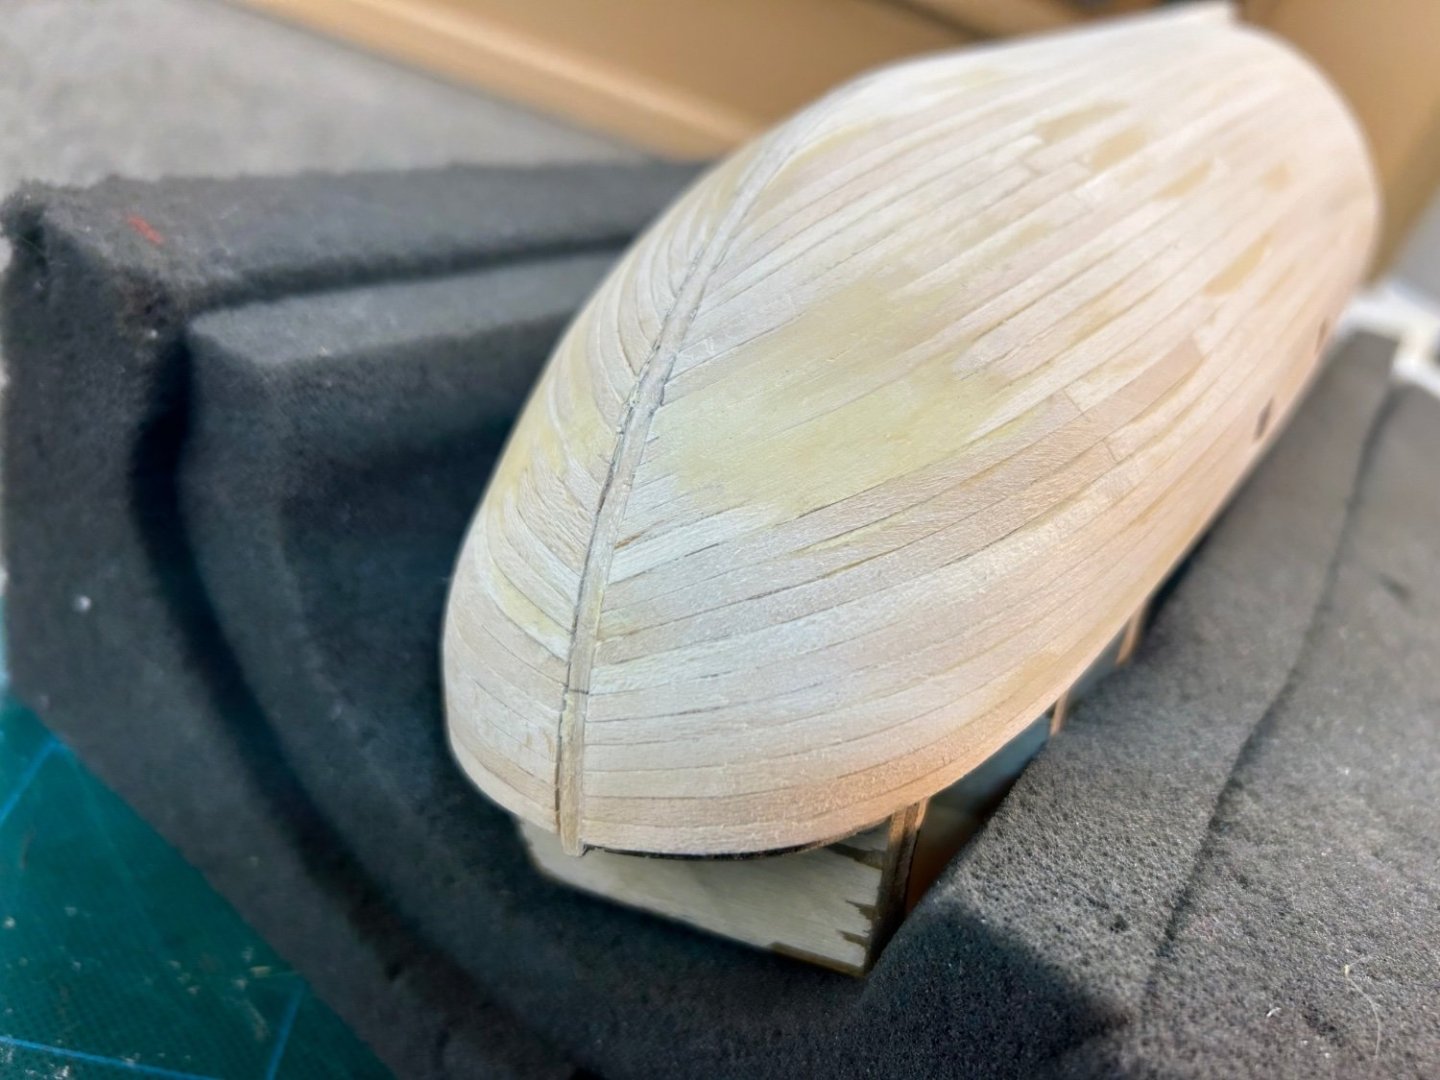
Planking, continued... Moving down the hull with the planking, and where it starts to become necessary to have a curve in the bow end of the planks so they sit flat on the forward bulkheads. The most exact method of doing this is real spiling, where you cut the plank in a curve from wider (sheet) wood. I did that here for a couple of planks, but mostly I followed Chuck's method given in the instructions to edge bend the 1/16" x 1/8" strip using a template and little heat and water. Some will prefer to use heat only, though it might take a little longer. The kit comes with a laser cut "spiling guide" piece. The photo below follows the recommendation of the instructions to glue this down and add a couple of pieces of scrap to hold the bent strips against the guide. They are glued here to allow for 3 plank widths to be bent at once. Next I have sanded the first few inches of each plank to be tapered down to 80% of full width at the tip, slightly soaked them, and bent them one at a time while applying a heat gun until I got all 3 bent and trapped in place with some scrap and clamps. Let them sit a while to fix the bend. Next is something extra I did to curve the planks in the flat direction a bit to help make the sharp curve at the bluff bow. The dog picture is actually a hard foam rubber drink coaster. Rolling the plank on it under a dowel makes a nice bend (I wet the end of the plank a bit again before doing this). Here is some of the first upper planks in place. I'm rough sanding and filling as I go. And now I have switched over to the the bottom with the garboard and first adjacent plank.