HOLIDAY DONATION DRIVE - SUPPORT MSW - DO YOUR PART TO KEEP THIS GREAT FORUM GOING! (89 donations so far out of 49,000 members - C'mon guys!)
×


rlwhitt
-
Posts
161 -
Joined
-
Last visited
Content Type
Profiles
Forums
Gallery
Events
Everything posted by rlwhitt
-
 Thanks for the reminder Allan. I did see the thread and thought I'd do that, need to remember to do so before the outside paiting starts.
- 43 replies
-
- 2
-

-
- Essex
- Model Shipways
- (and 2 more)
-
Those cambered pieces are a "grate" look! Thanks for the tip!
- 648 replies
-
- 5
-
-

-

-
- Indefatigable
- Vanguard Models
- (and 1 more)
-
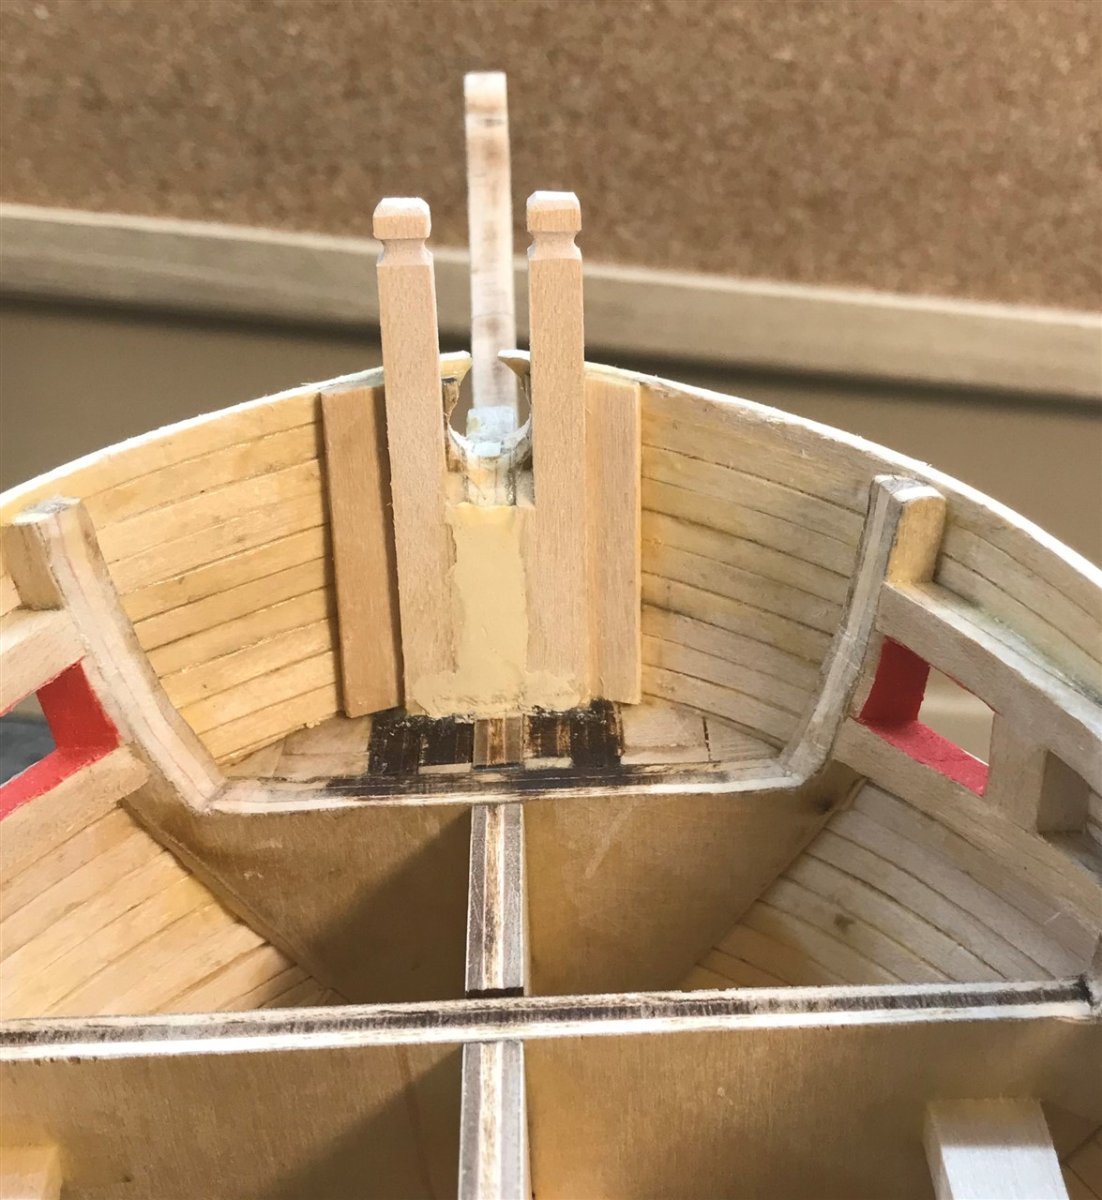
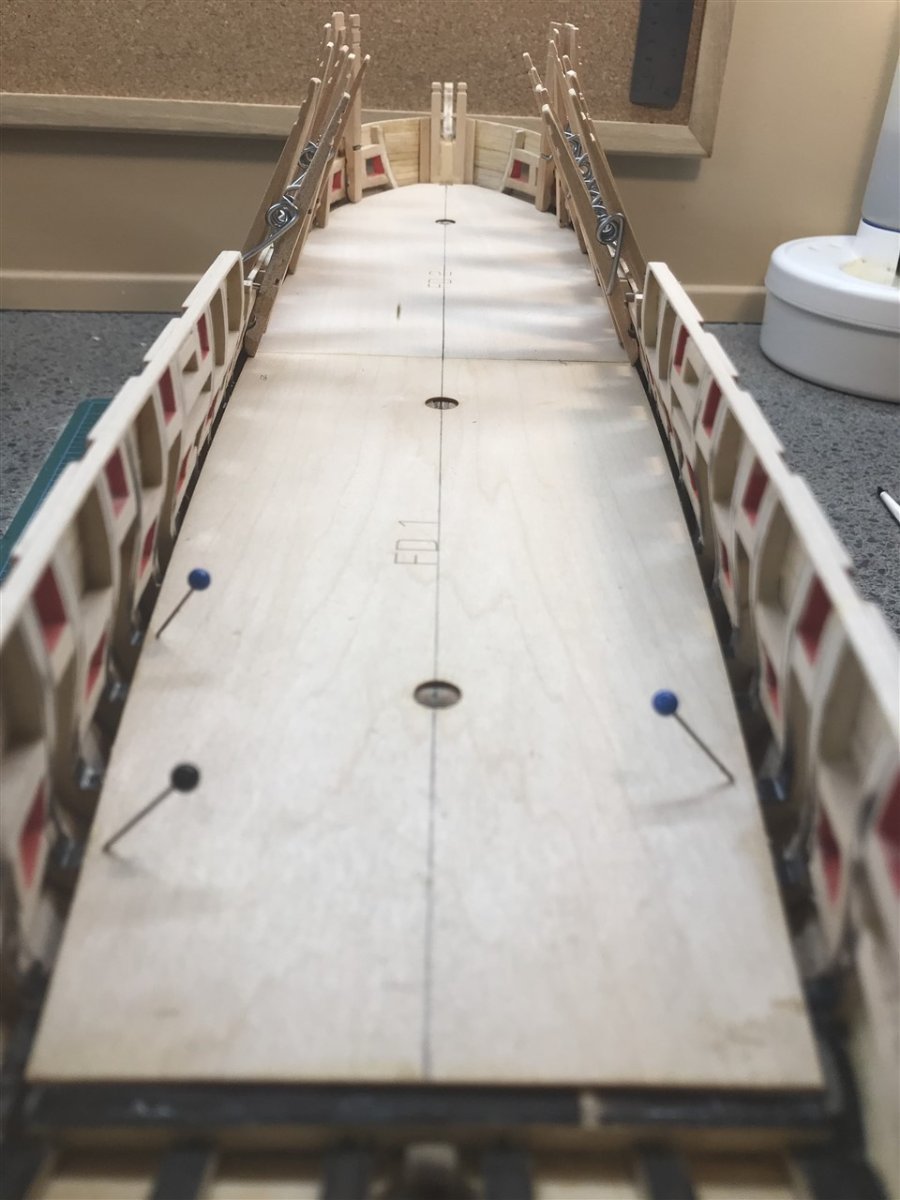
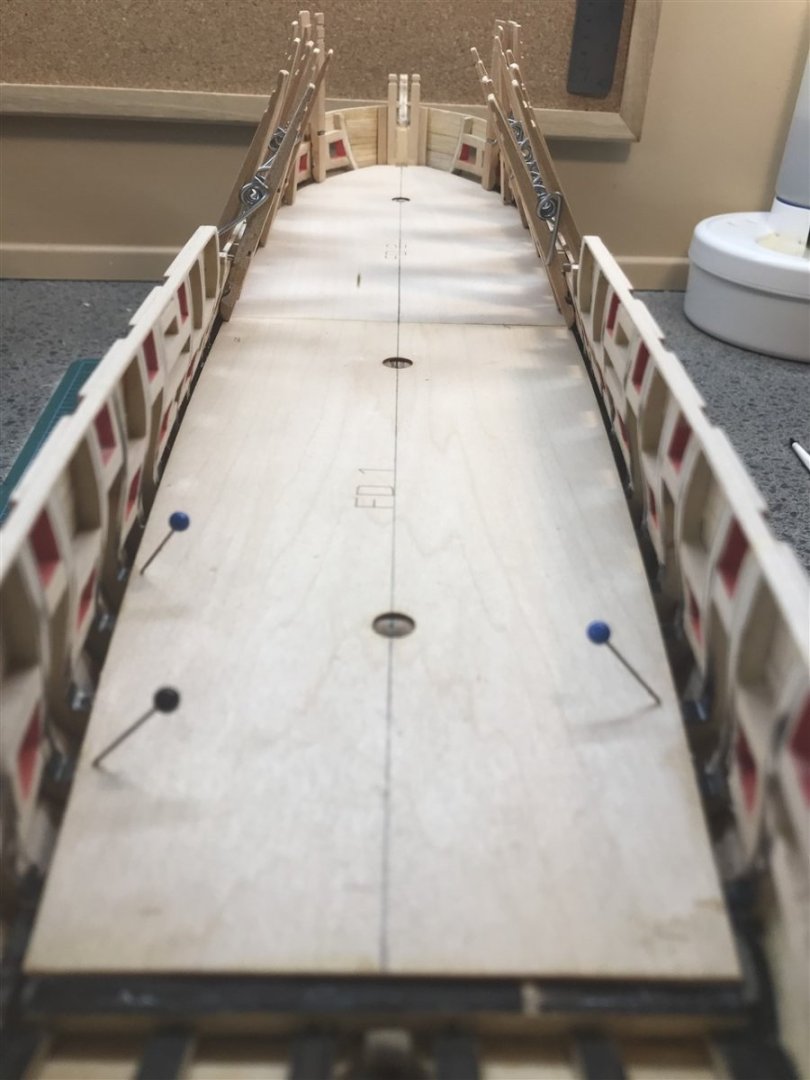
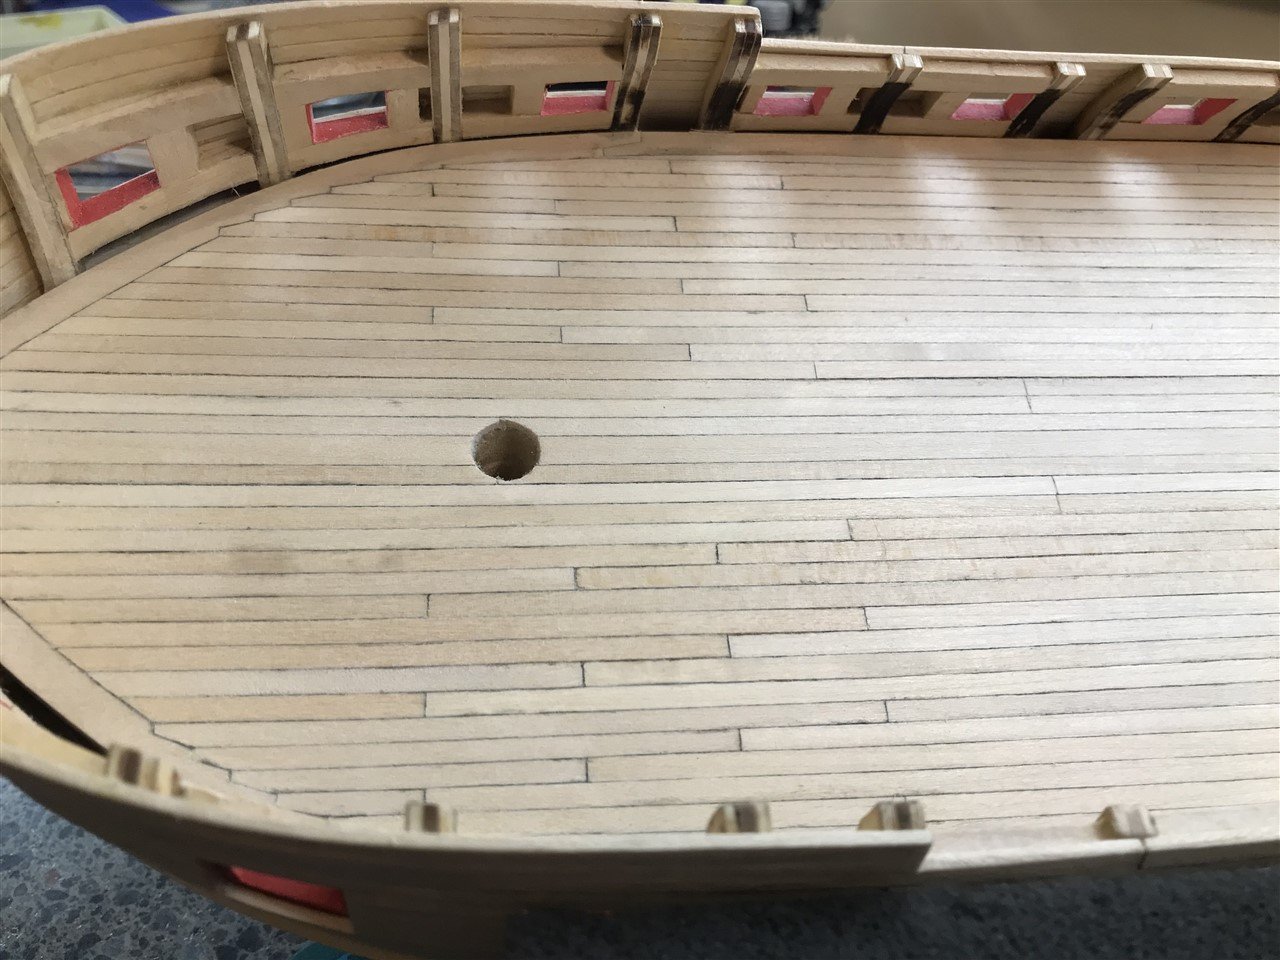
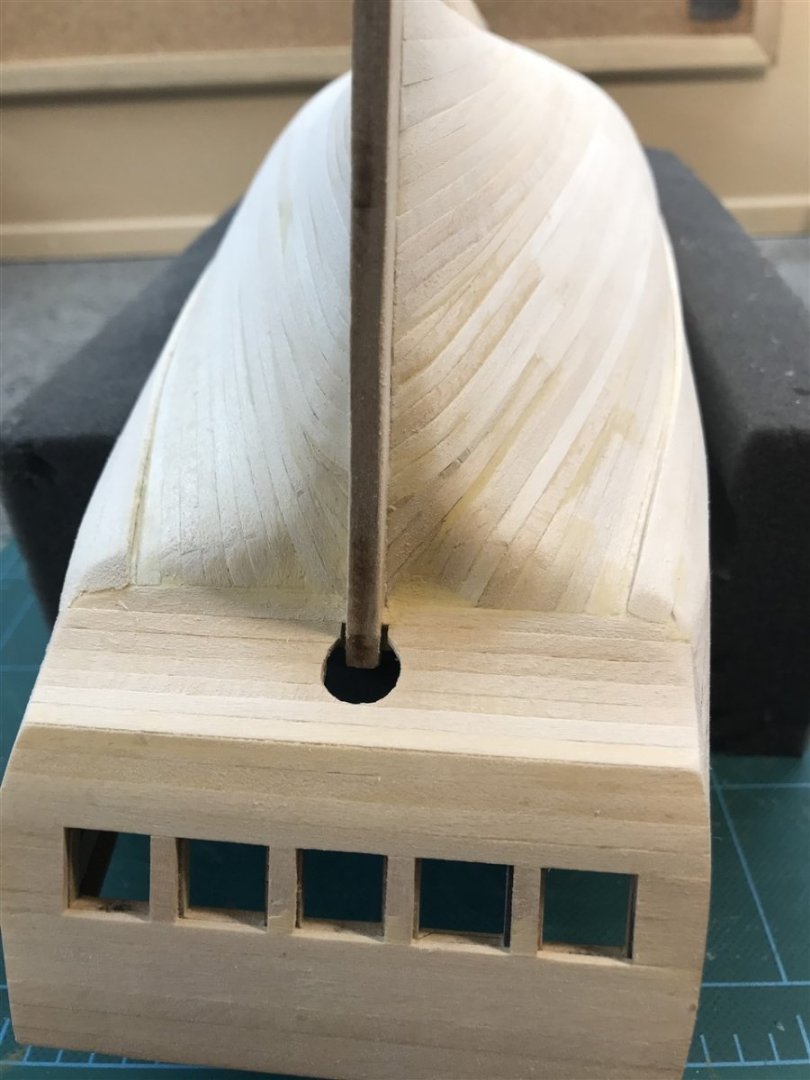
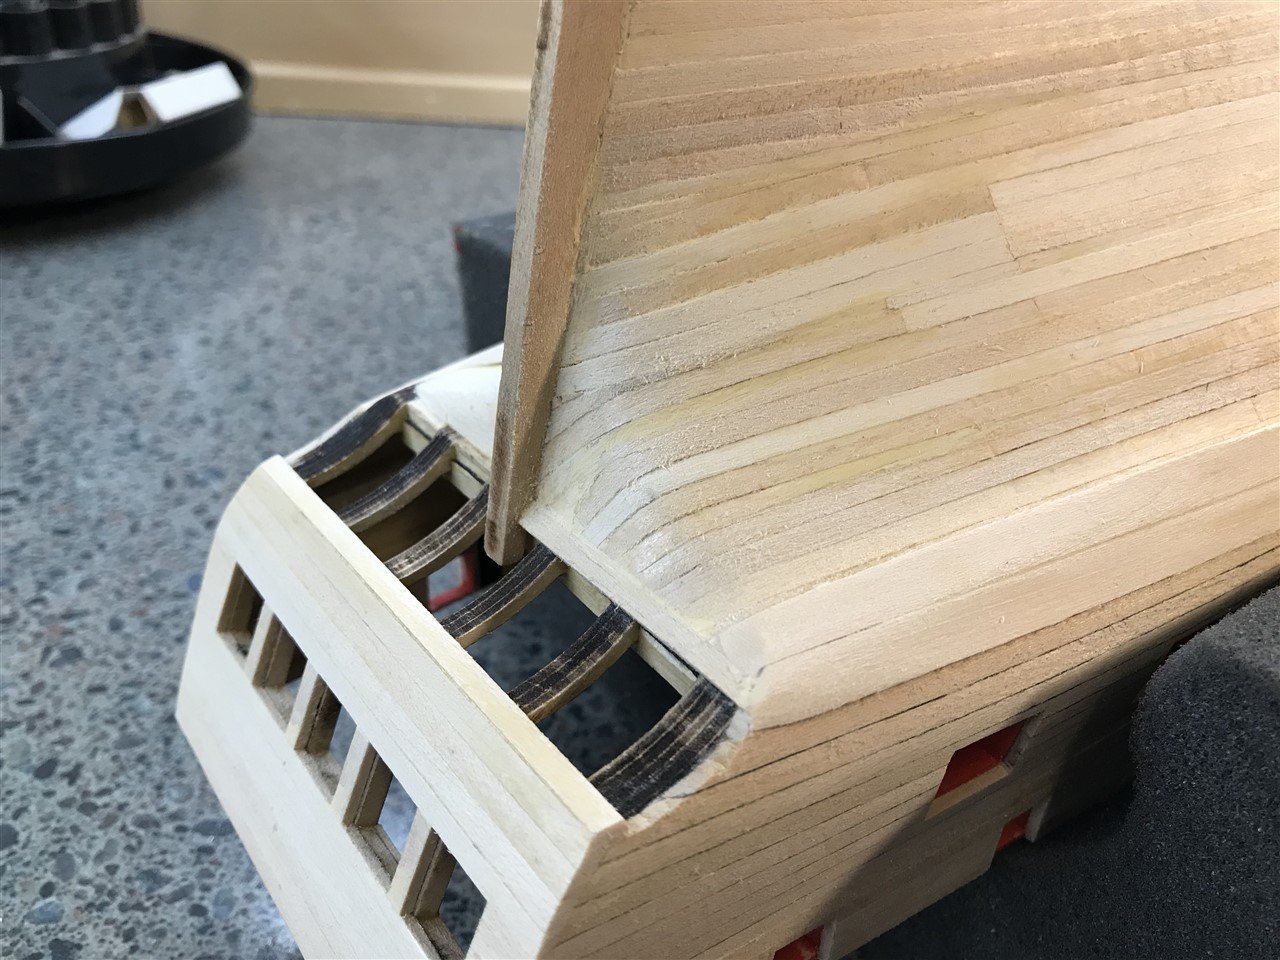
Main Decking Before I got any further along, I decided I didn't like the recommended method of adding the Knightheads. They have you waiting until all the bulwark planking is done (inside and out), and cutting a square opening wide enough for the upper part of the knightheads and the bowsprit between them, and only as low as the bottom of the bowsprit. That would make them very fragile I think. So I went ahead and made them all the way down to the frames, and drilled a hole in the outer planking. (It's rounder than it looks in this picture, oddly). This is much more secure. I also added some scrap strips to either side to receive the ends of the inner bulwark planking. Then, in goes the false deck. Like the instructions say, this is not a tight, aligned fit. There will be significant gaps on the edges. These will be covered with the margin planks (laser cut). Obviously the important thing is to get it centered correctly. Then drill the mast stub holes into the blocking we previously installed. In my opinion, the masts as depicted in the plan are longer than they need to be, and I felt funny about drilling the holes that deep. I will adjust as needed when I get there. And here all the planking is done. I've got a few rough spots and room for improvement next time, but all in all I'm happy with it. Will need a bit more finish sanding before finishing, and that part has got me having a hard time deciding which way to go. Thinking about shellac. I've got amber, which might make a nice look, perhaps cut with clear to make it less pronounced. Or some kind of stain wash. Decisions. Luckily I don't need to make that one today. I'm going to continue on to do the inside bulwark planking while I ponder finishes.


- 43 replies
-
- 6
-
-
- Essex
- Model Shipways
- (and 2 more)
-
Hi Dave, As I'm about to need to think about this in my current project, I'm intrigued by your mention of Miracle Grow and vinegar. Do you have the specifics of the receipe handy? Thanks!
-
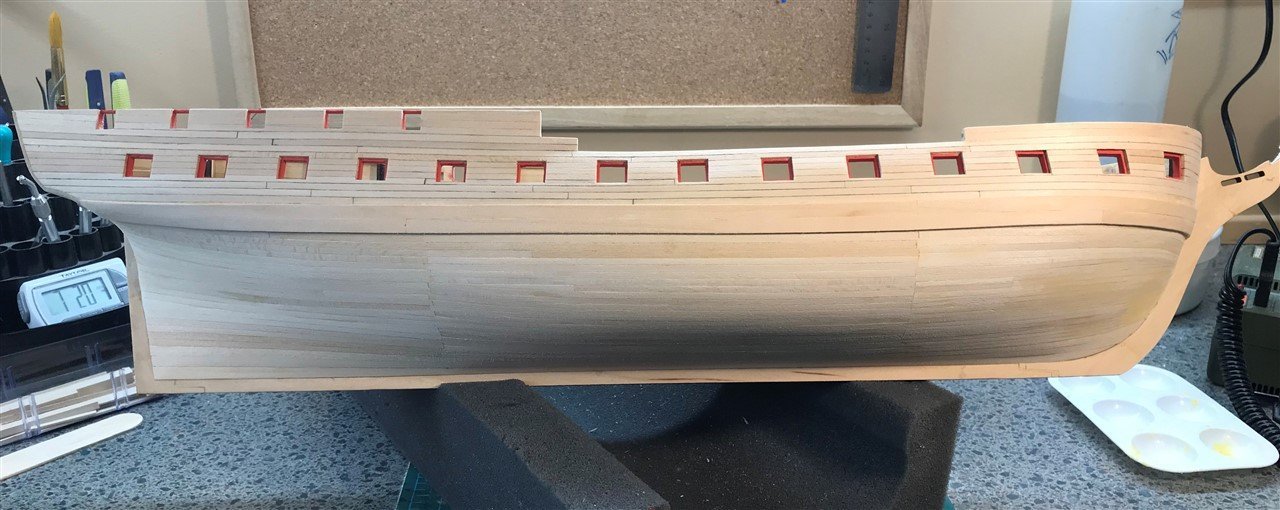
External Planking Complete A milestone! The hardest part, in my opinion, completed planking. This model only has one layer. Everything will be black paint or copper below the wales. But before that happens, I'll be moving inside for the bulwark planking and decking. Much sanding left to do!
- 43 replies
-
- 6
-
-

-
- Essex
- Model Shipways
- (and 2 more)
-
Thanks Allen! By stops you mean the little bit of red margin that is not planked? My understanding is that this was not done on the top ports as they didn’t have lids, so I did not do them here. I must confess you’re asking someone not yet very well researched, so my knowledge journey is just beginning!
- 43 replies
-
- 1
-
-
- Essex
- Model Shipways
- (and 2 more)
-
Below waterline will be copper tape. Most of the rest of the hull will be black. The line of main deck gun ports will not be black, but I’ve not yet totally decided what that line of planks will be. I might try to leave it somewhat natural, maybe finish with shellac. I did do the “tar” joints with that possibility in mind. However there is some evidence that they were actually yellow, and I could go that way.
- 43 replies
-
- 1
-
-
- Essex
- Model Shipways
- (and 2 more)
-
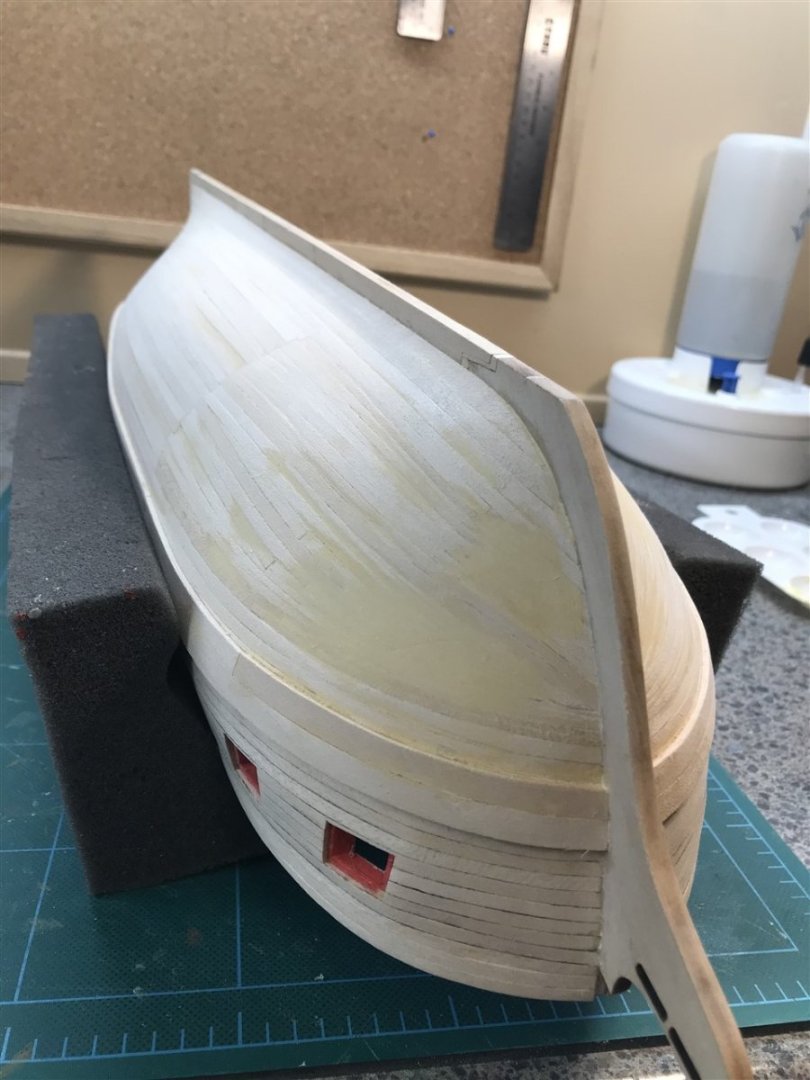
Lower Planking and Wales So I went ahead and followed the instructions for the simplified planking, first with garboard and a couple of lower planks. These are supposed to be 3/16" for all 6 but there were only 5 provided, so I did the garboard with a 1/4". Then the middle section, followed by the stern and bow sections. I ended up with quite a crazy quilt of planks! But since it'll all be under copper and paint below the wales, I'm not sweating it too much. Here it's rough filled and sanded, I will do a finer sanding once the other side is done. I did the wales with some extra 1/4" strip instead of the 1/8" planking.
- 43 replies
-
- 8
-
-
- Essex
- Model Shipways
- (and 2 more)
-
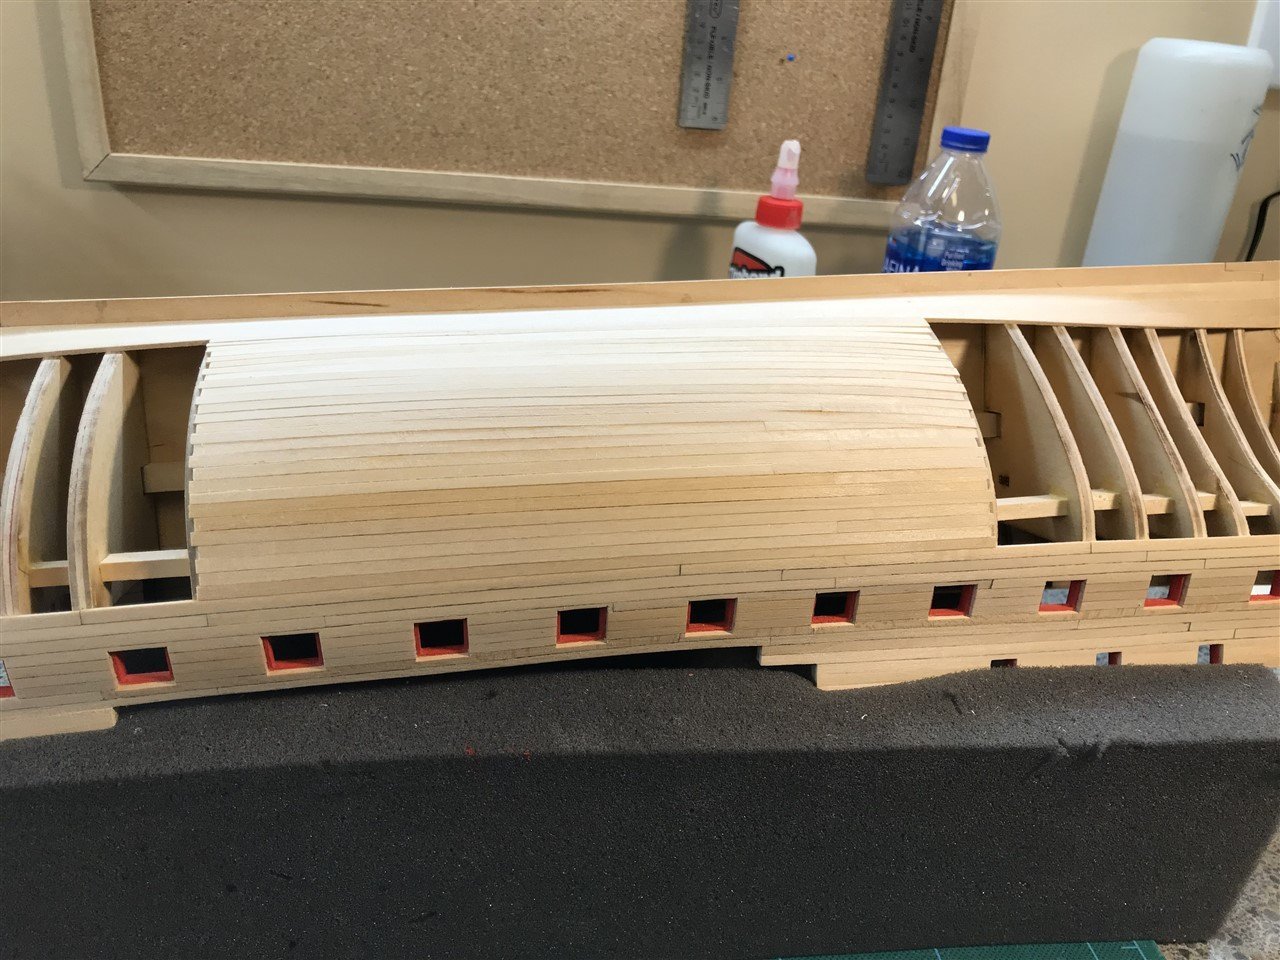
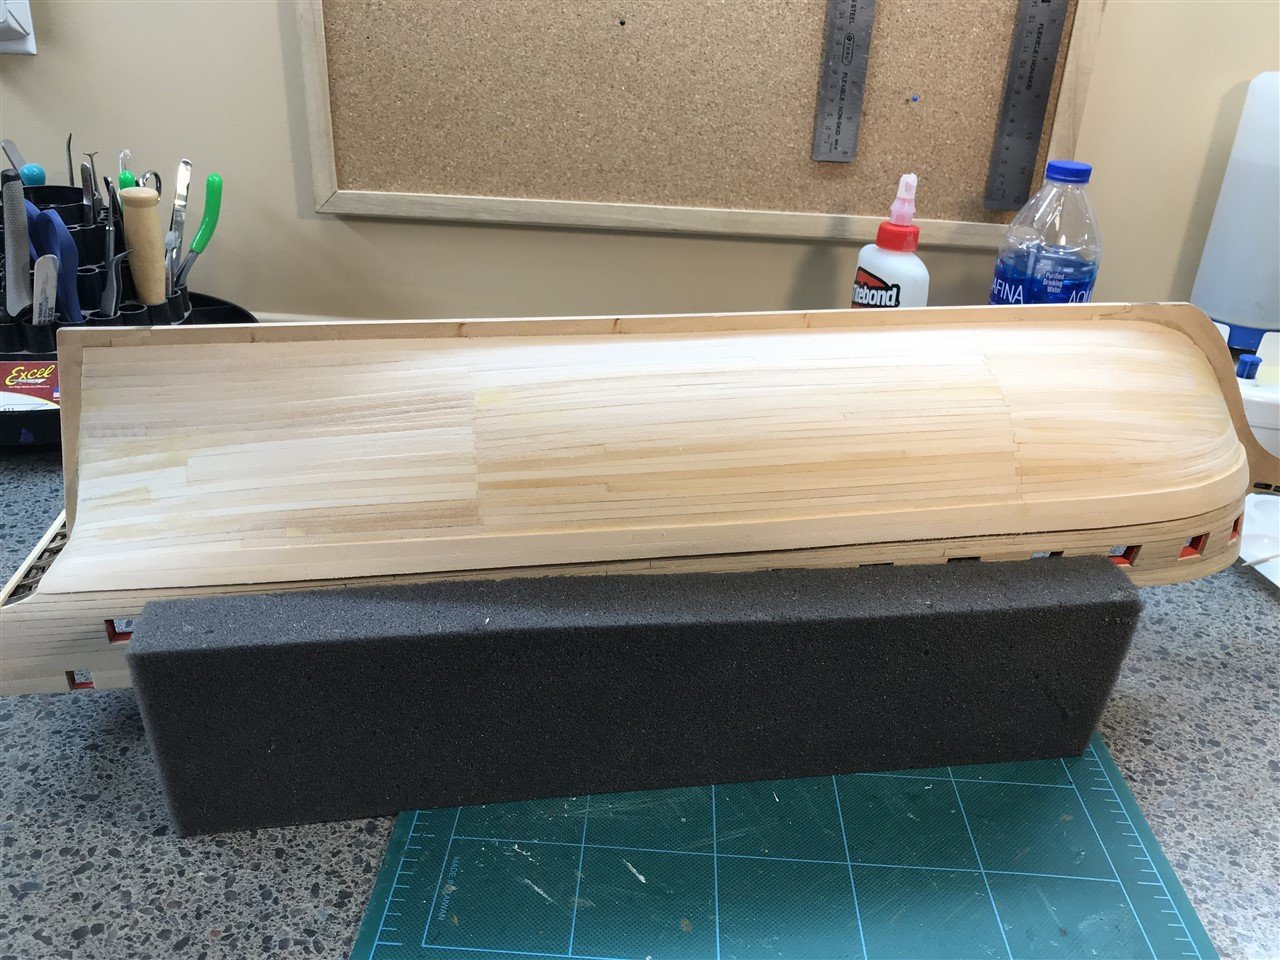
Upper Planking Hello all, it's been a little while. Turns out planking at this scale takes a while 🙂 Thanks for the likes and views so far! Outer bulwarks and stern are planked. Many places I wish were better, but as this is my first "real" full ship with gun-ports, etc, I'm satisfied. This is why we build more than one right? - so we learn to be better next time! I think at this point in the build, many will put in the wales. Oddly the written instructions in this kit never mention them. They just magically appear in the pictures a bit further on, after the lower planking is in place. I will assume from this context, and a lack of sufficient thicker stock, that the intention is to put on a second layer of the same planking for the wales. Which is what I'll do - so next task will be to start that lower planking. There is a decision of sorts to be made here, in my opinion. As designed, the plan here is a very simplified planking where the middle section is done with straight(ish) planks, with all the butt joints on 2 frames, followed by the bow and stern sections. Not sure how I feel about this, but most is under copper plating or a little bit is painted, so I understand why they went this way. We'll see.
- 43 replies
-
- 8
-
-
- Essex
- Model Shipways
- (and 2 more)
-
This is a great looking start. May I ask what laser cutter you’re using? Looks like it does a nice job.
-
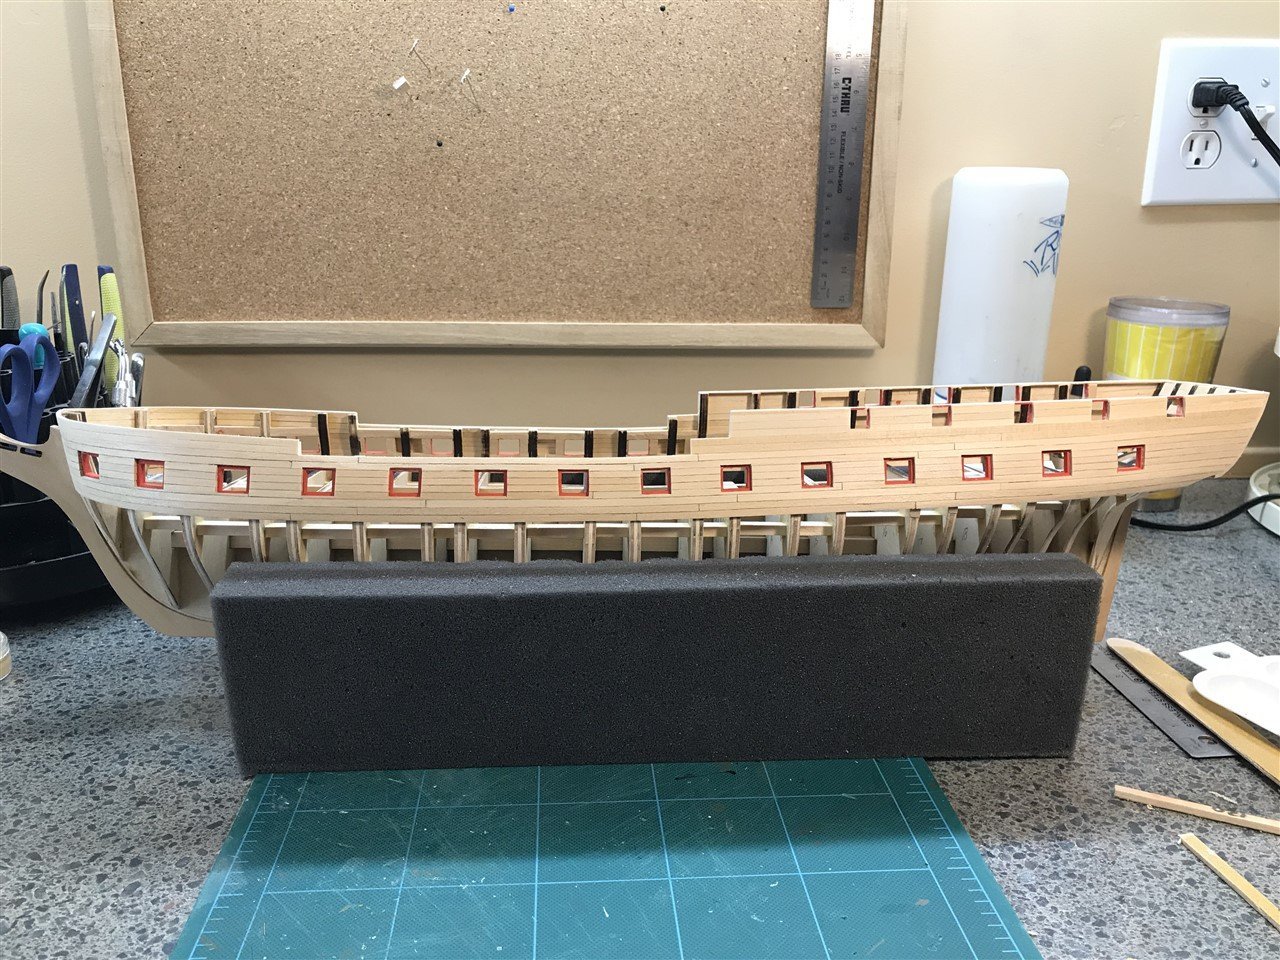
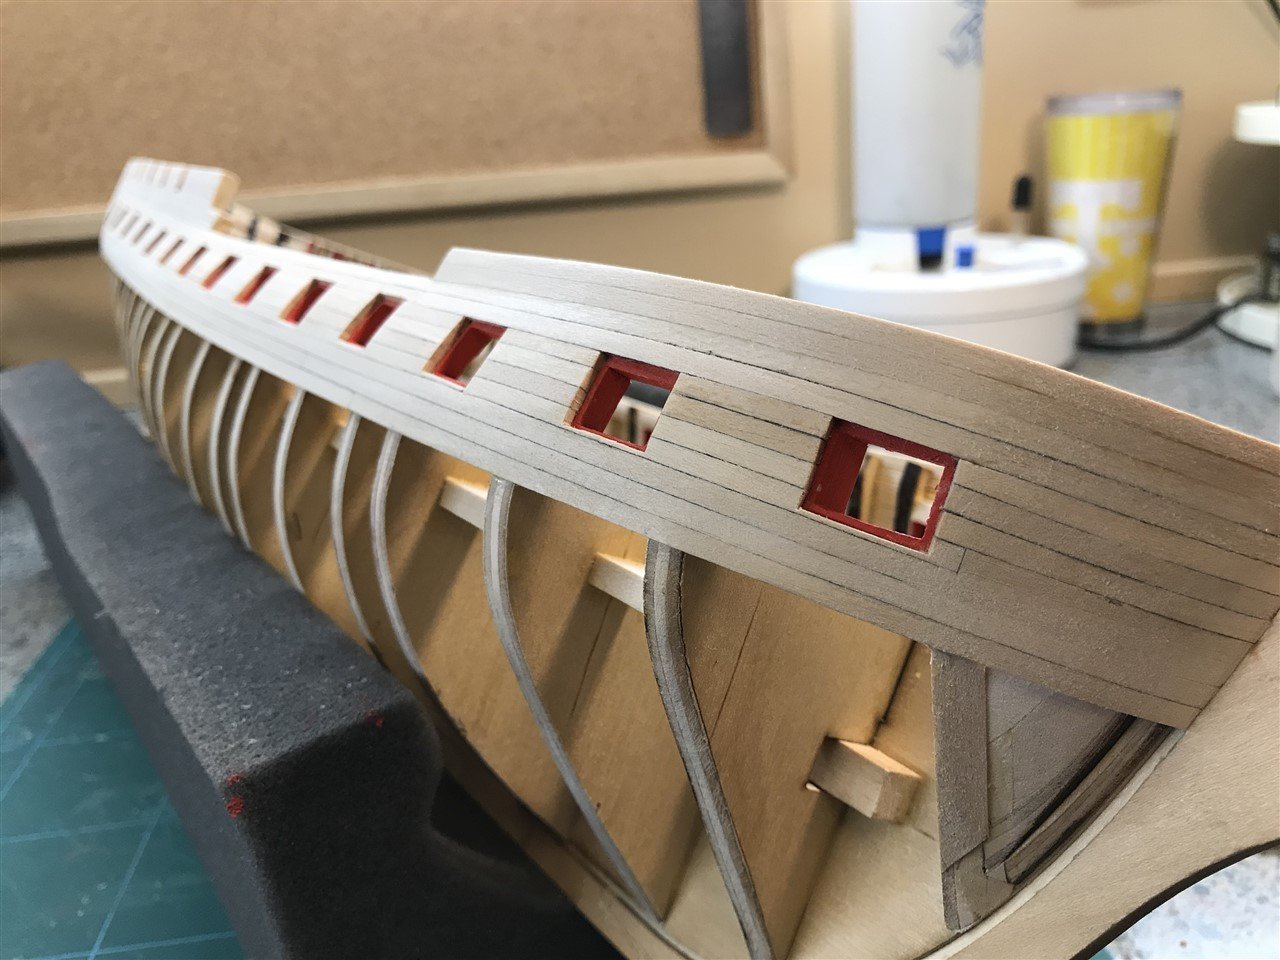
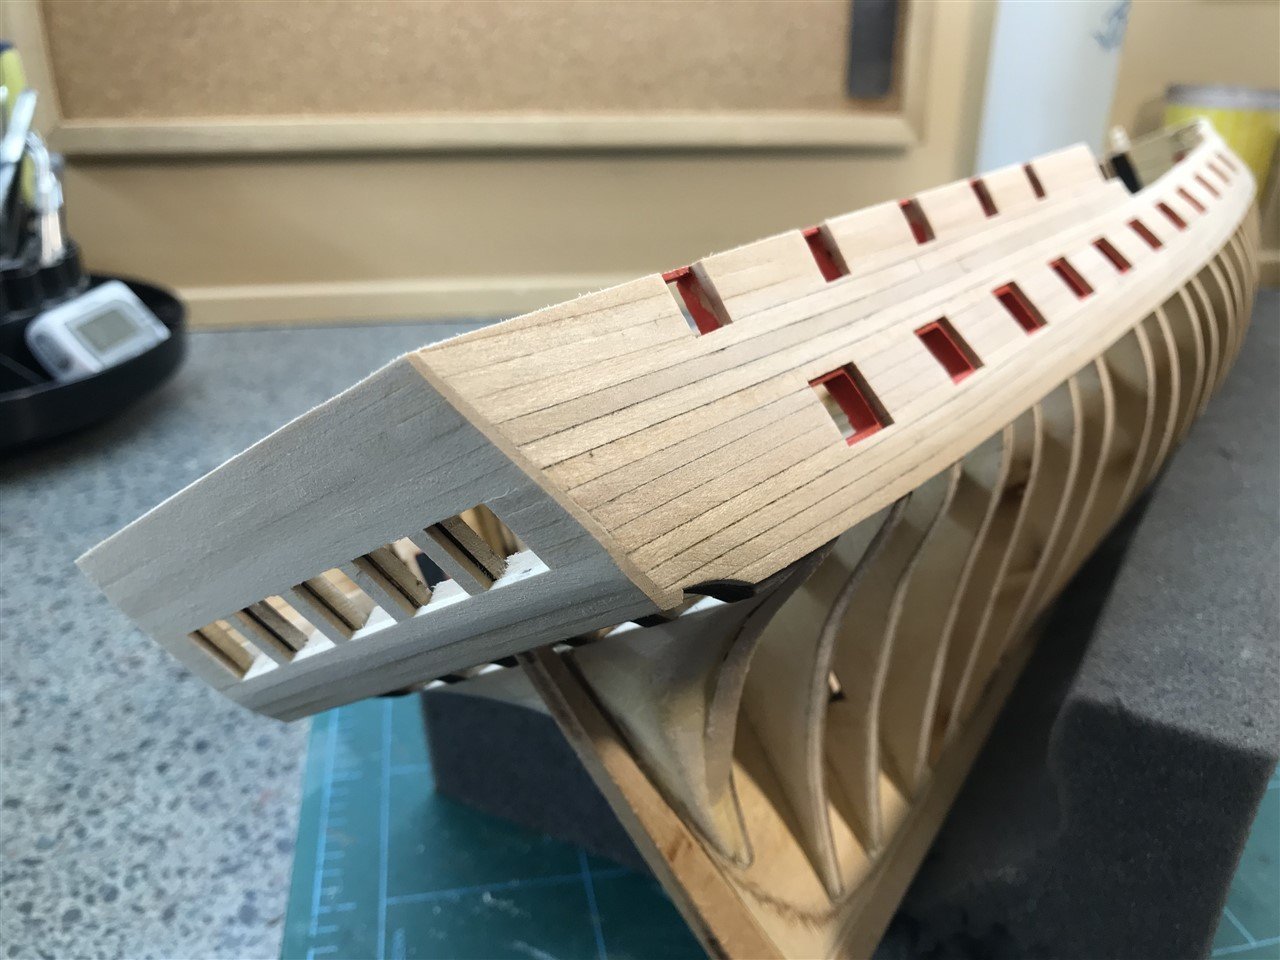
Framing Complete So I've finished the framing (stern and gun port) with very little drama. One thing that needs to be pointed out is a discrepancy between the framing plan sheet and the instructions, for the stern framing. Following the plan would put the stern windows at the wrong height. The pictures in the instructions are correct, and I've patterned mine after that, as shown in the first photo. Additionally, just to make sure, I got out the stern arch piece and dry fit that to verify that the window line is right. Next, the significant task of gun port framing, old school. No laser cut sills and lintels here! Just tons of little sticks. Actually, I enjoy this step. I know a lot of folks find it quite tedious. I guess it is, but it's one of those things where you feel like you're actually building something, and I find it satisfying when done. On the framing plan the framing parts stated to be 3/16" were actually drawn a little too small, like 1/8" or so, but the text legends are correct. And the instructions of measuring up 1/8" from top of bulkheads for the bottom of the sills seems to work out correctly for the 3/16" dimension and the measured height of one of the gun carriages. So the framing is complete and rough sanded. Next some finer sanding work and onto planking, where the real test (for me) will be.
- 43 replies
-
- 5
-
-
- Essex
- Model Shipways
- (and 2 more)
-
Hi Chuck, Will definitely be getting some of these when I get a bit further along in my current build. Just a quick question - does the stated size include the whole length, including the eye? Thanks, and kudos for your continued innovations.
-
I did the Halinski P-47 a few years back and upscaled it to 1:20. I had to put up a special shelf. 😀 Crazy
- 150 replies
-
- 10
-
-
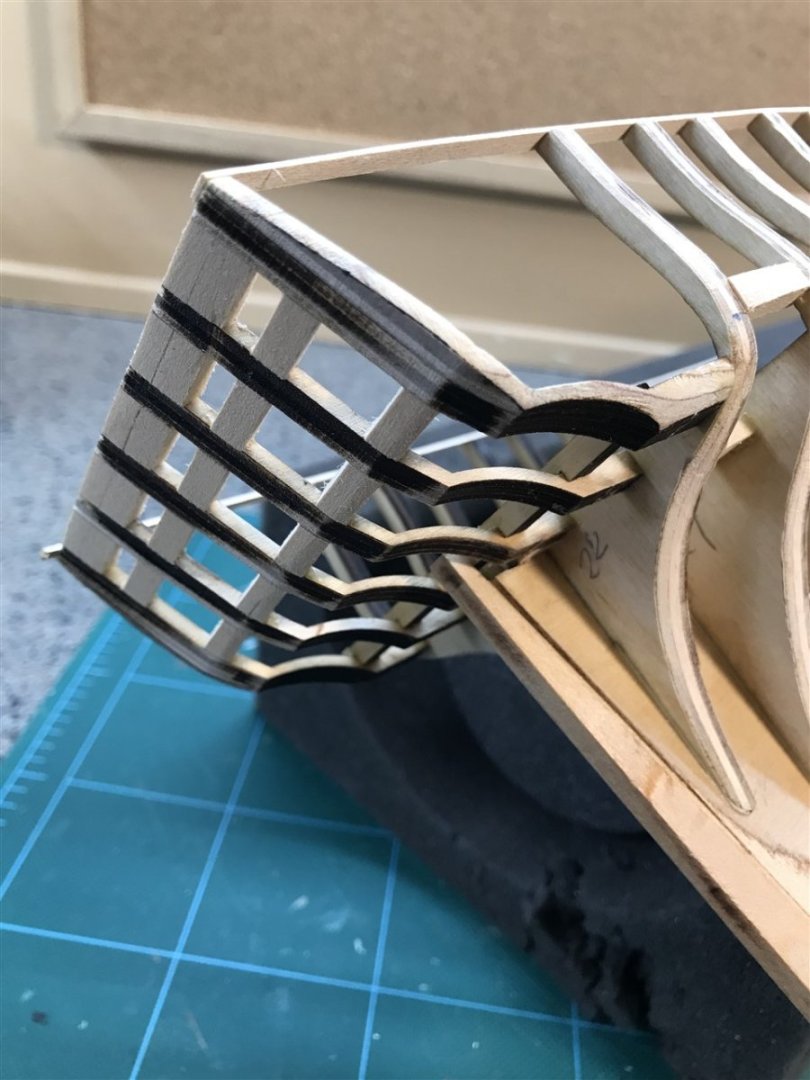
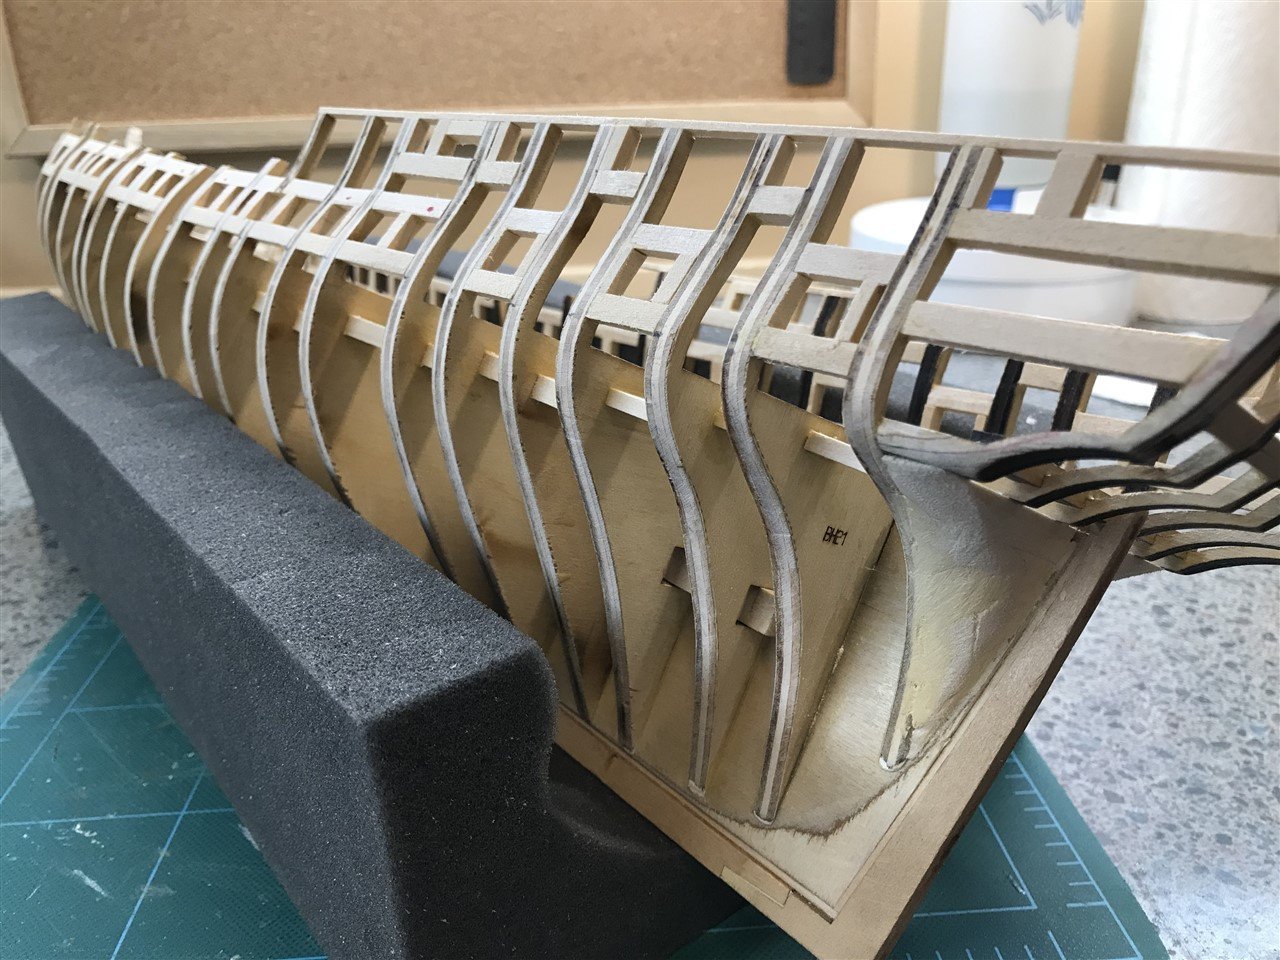
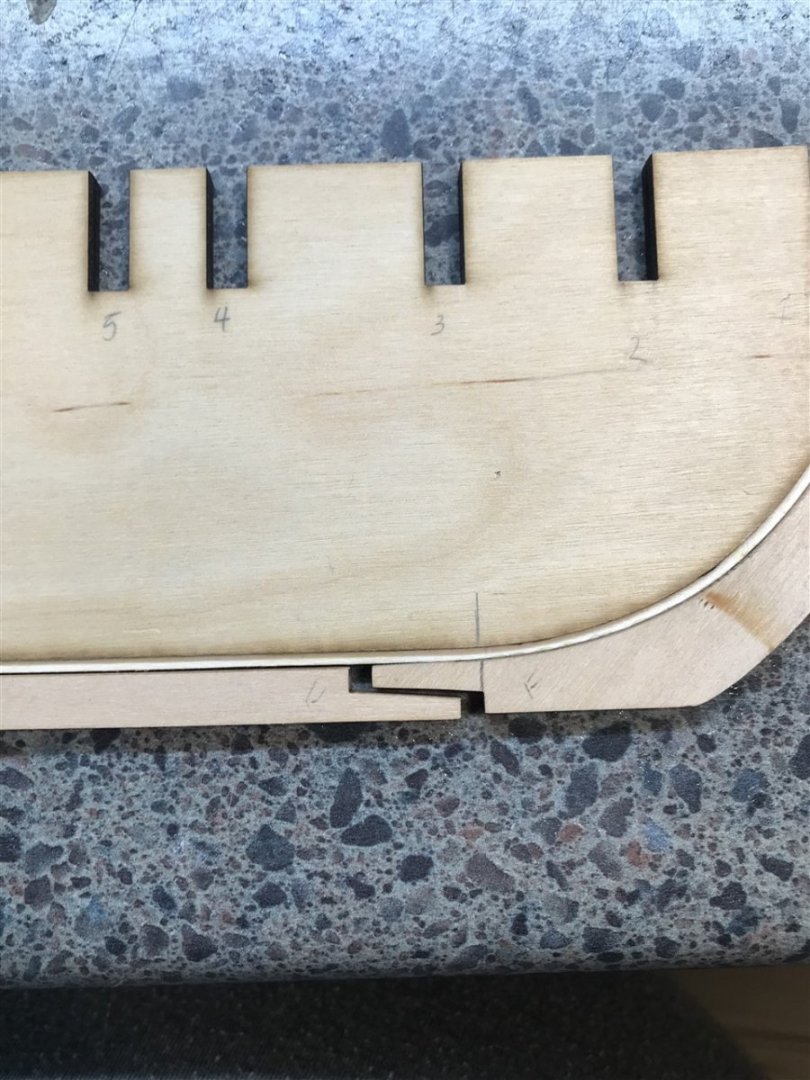
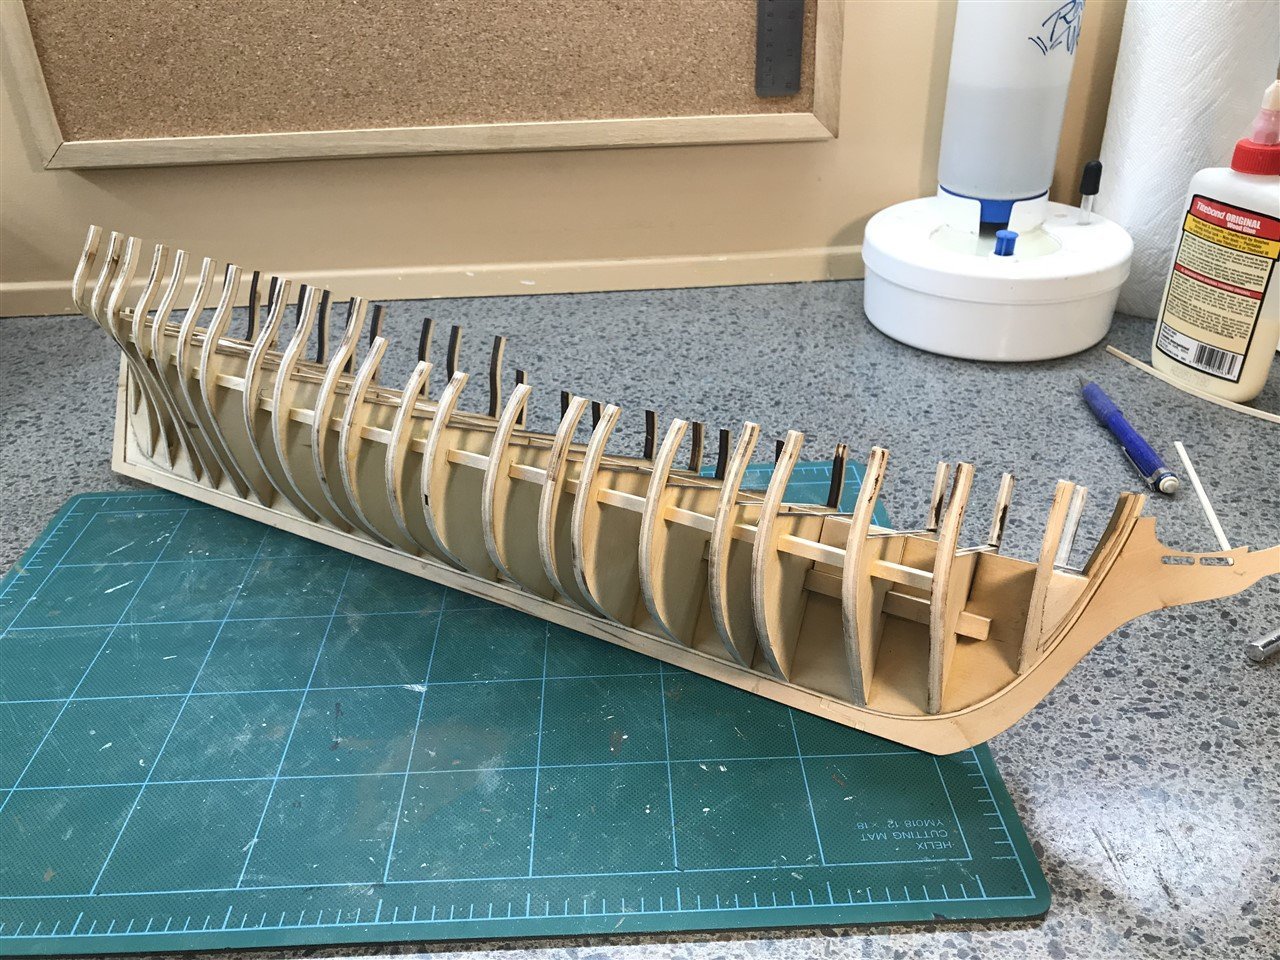
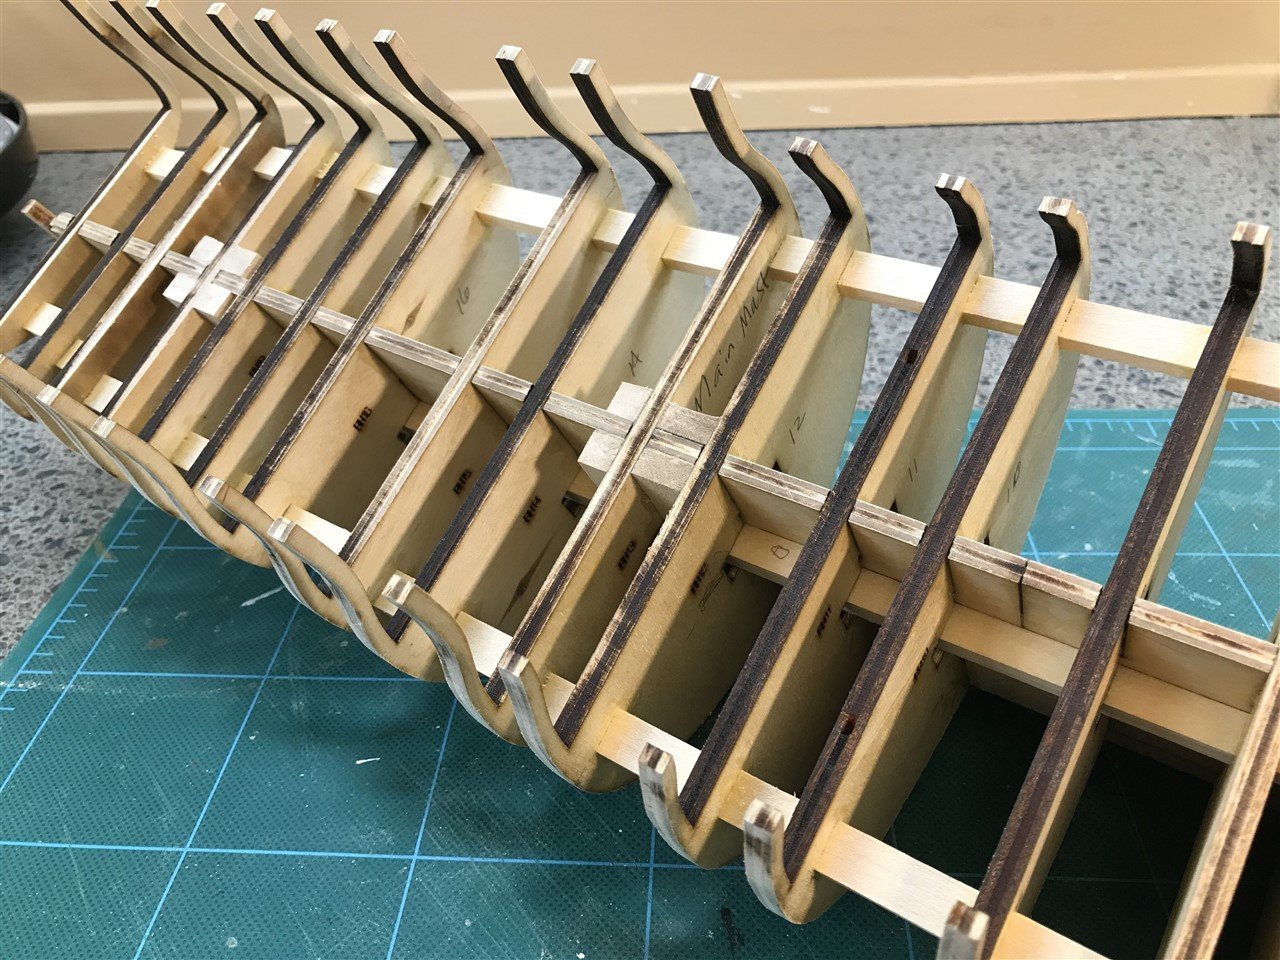
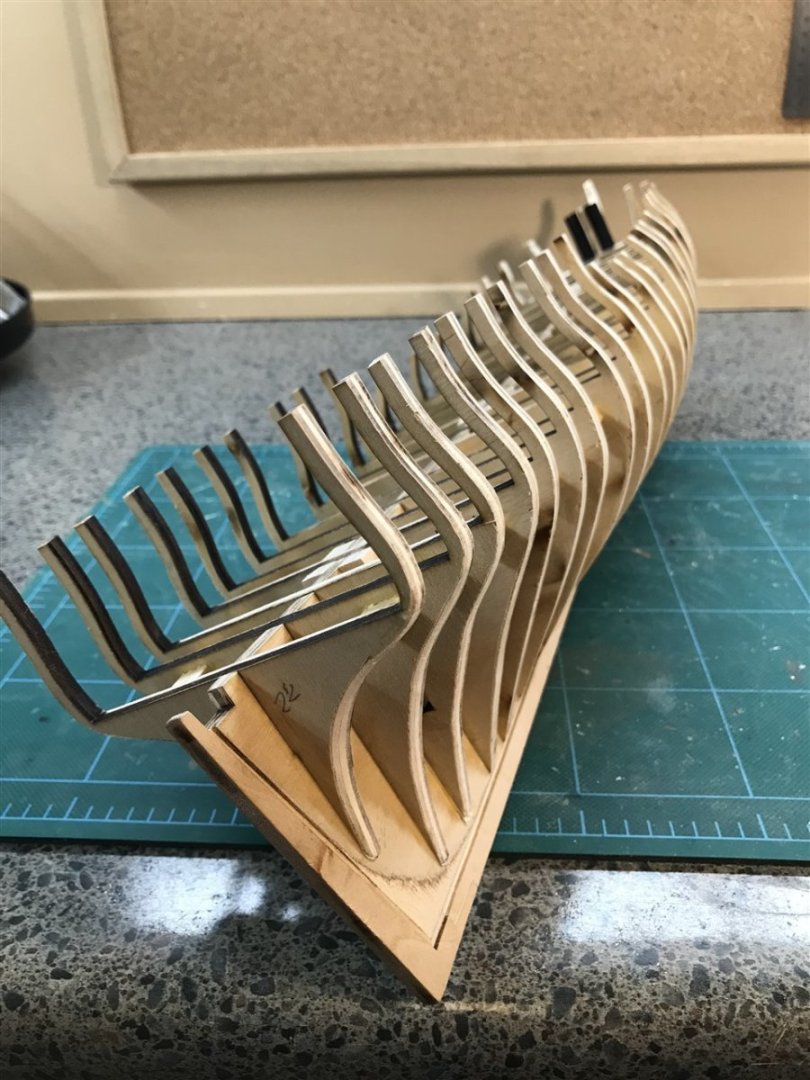
Bones So I've gotten through the basic framing, sans stern framing. A couple of observations. First is that ALL the bulkheads fit quite loose on the keelson/former, even with the char still intact. Some were "rattling loose". So, much shimming was required. As for the vertical fit I only had to adjust a couple by a very small amount to make the top even + bottom right at the rabbet, so that part was good. As you can see in the first picture, there is a rather big issue with a gap at the scarf joint. Since this hull will be coppered on the bottom, this is no big deal. Some scrap wood and filler does the repair deed. The 2015 re-release included an optional "strong back" method to use a couple of thick strip "spines" along the keelson former and through some slots cut into most of the bulkheads. Tricky alignment to get those spines in there, but mine went in pretty easy. I also added some additional stiffeners near the outboard edges of the bulkheads, for more confident fairing. This thing is strong, that's for sure! The rest is just pictures of the framing so far, including mast blocks and some bow filler, with rough fairing done.
- 43 replies
-
- 9
-
-
- Essex
- Model Shipways
- (and 2 more)
-
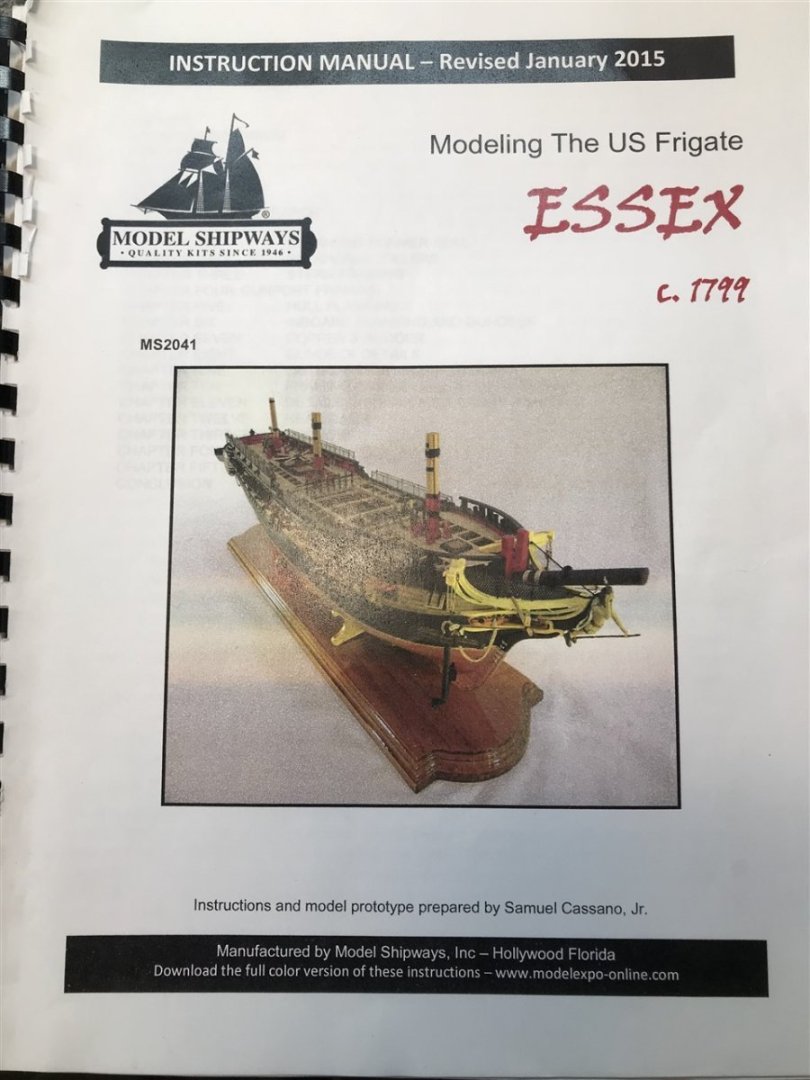
Welcome to my log for the Model Shipways MS2041 US Frigate Essex, Hull Model. I've had my eye on this kit since I started not very long ago in wood kits. I liked the looks of it, and since I'd already known I wasn't going to be big on fully rigged models, the "Admiralty Style" had a lot of appeal to me. This one and the Confederacy immediately went on my wish list. Then I started looking for build logs and realized that there were a number of bad rumblings about the kit. It seems that there was a snafu with MS getting the correct digital files used in the production of the kit in 2013, its first release. The kit was re-released in 2015, but I think by then folks were wary. The designer made a comment herein that they never did incorporate all his changes, though the kit definitely did undergo some changes in 2015, as can be seen in the manual. So not sure what the exact story is. A while back MS put all their kits on sale 47% off and I could not resist so went ahead and got it, so here we are. How bad can it be right? I'll do my best to work around anything I find. I do know that one of the main issues with the initial build being the shape of some frames not matching the contemporary drawings or AOTS exactly, but there were a number of drawings with no way to reconcile them all. If I'm getting the details a bit off I apologize. I have a feeling some of these conversations were occurring offline. My main concerns at my level of experience is that the thing is buildable for an intermediate builder and will create a pleasing model. At this point if a frame shape is a bit off 100% of the historic accuracy, I'm not sweating it. Hopefully by the end of this, if it builds OK it will encourage others, who like myself were a bit wary, to take the plunge. I don't really intend for this to be a very detailed log, mostly a milestones and exceptions kind of thing. If I have trouble that ought to be known, I'll show that and what I come up with to work around it. Thanks all for looking!
- 43 replies
-
- 5
-
-
- Essex
- Model Shipways
- (and 2 more)
-
I can see the wisdom of this method, using spiling. However I’ve seen some instruction hereabouts, from even Chuck himself, showing his edge bending method. It strikes me as odd to see him doing it both ways at different times. Is it ship dependent or something?
- 648 replies
-
- 1
-
-
- Indefatigable
- Vanguard Models
- (and 1 more)
-
I could be wrong, but I'm guessing the OP means cutting a smaller square section at the top for fitting a mast top or some such. Telling him to start with a square and round what's below will be a little difficult if the round section is bigger. I had the same issue and just made a center mark and drew the proper size square around it and whittled with an exacto. Like the OP, I don't have anything but hand tools, but I'd be interested in more accurate techniques myself.
-
Oh wow! So is that hinge material natively black? If so, man that could be used for so much stuff - painting metal is such a huge PITA. Thinking chain plates, etc.
-
Happily agree on this idea. I did the NRG training kit first to learn some planking skills and it's a great tool. Plus if planking is your interest it's perfect as that's all it is (well, some frame and rabbet practice too) and it's not terribly expensive.
-
Chuck, thanks for the quick response and it was what I assumed. And I fully expected that this will be a pricy project. There's just too much quality material and work here for it not to be - but it's well deserved! I have a couple of projects in mind first to gain skills (one being your Confederacy), and in the meantime I'll be "saving up" for this! 😀 Thanks!
-
Hi Chuck, this is all amazing work. Do you plan to offer this kit in stages or batches as it were, so if one wanted to build it navy board style, it could be done without having to get all the mast and rigging parts?
-
Worse even, the instructions are worded such that it sounds like they intend for you to put the diagonal braces ON the berthing deck side walls, and the first picture of the diagonal pieces repeats that. Though the 2nd pic showing the actual installation as correct in the orlop at the correct sequence. Just a bit of sloppy writing, but it's hard to believe they don't go back and correct these things.
-
Anyone out there working on a card model?
rlwhitt replied to gagliano1770's topic in Card and Paper Models
That is super clean work, very nice! -
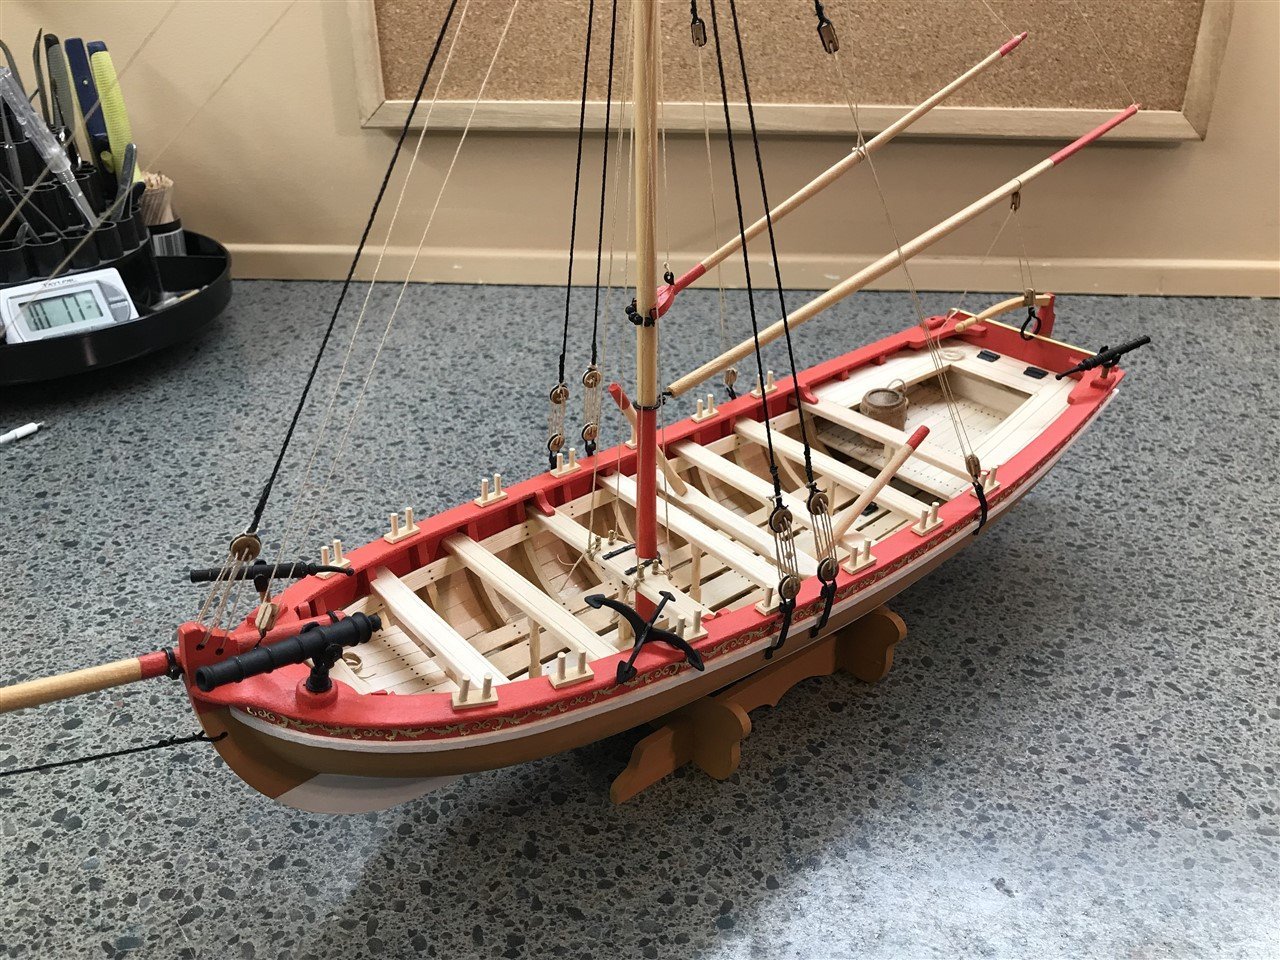
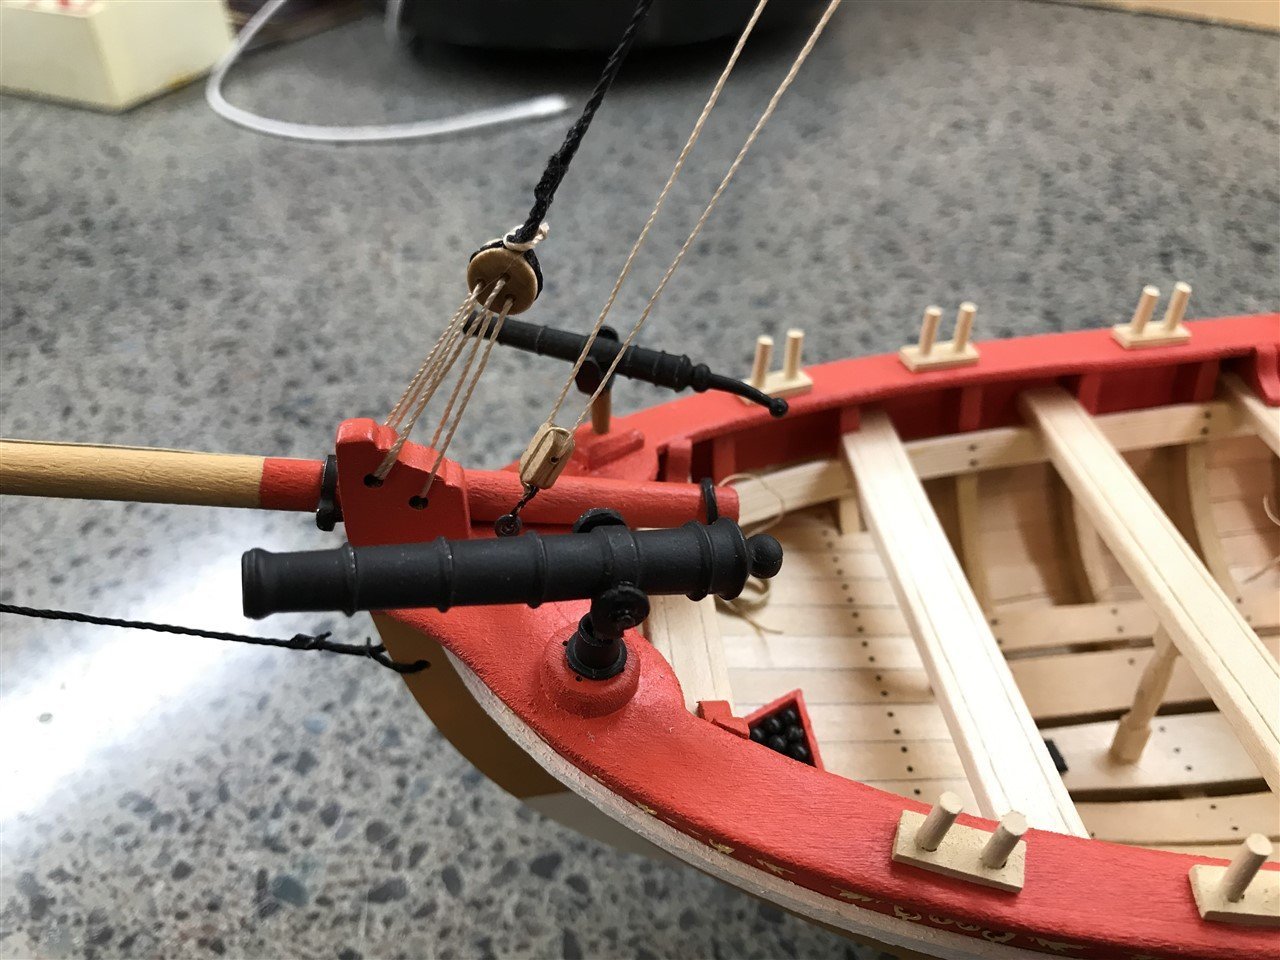
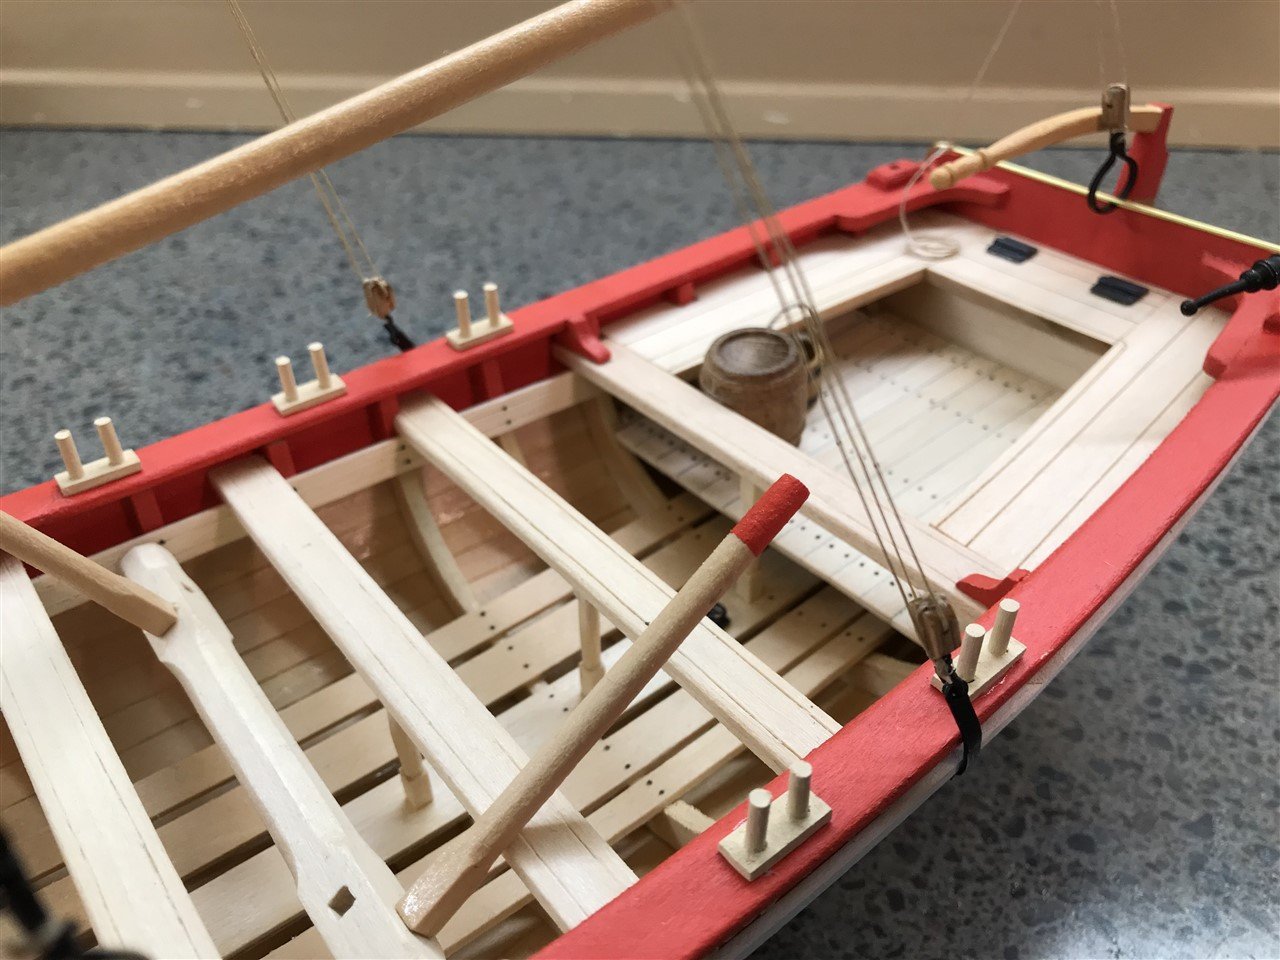
Finish! I have been a bad build logger. No interim photos. Just got caught up in the masting/rigging/finish and got lazy about taking progress pics. You might notice no oars. I made one. It turned out fine, but I didn't have a lot of pleasure in the process and really didn't want to clutter up the nice interior with a pile of them anyway. So my lazy nature won out! Anyway, it's done. Lot's of places I know are not as good as I'd like, but since this is my first wood kit I'm still quite happy with the result. I had fun, learned some stuff, and am ready for the next project and to get better. Thanks to all who've read along and hit the like button!
- 24 replies
-
- 8
-
-
- 18th Century Armed Longboat
- Model Shipways
- (and 2 more)