


East Ender
-
Posts
90 -
Joined
-
Last visited
Content Type
Profiles
Forums
Gallery
Events
Everything posted by East Ender
-

Work area pictures only
East Ender replied to Johnny Mike's topic in Modeling tools and Workshop Equipment
Dave, E, I ended my career as an F-14 Plane Captain, Grumman Aerospace, Calverton, NY 1973-1993. Were you at Oceana? I see you collect the old model kits as I do. Aurora, Revell ,Monogram ,Hawk. Must have 300 or so. Your shop is similar to mine! Plastic vs Wood. -
Work area pictures only
East Ender replied to Johnny Mike's topic in Modeling tools and Workshop Equipment
Beautiful transformation of your garage Hamilton! Nice work area. The big saw in the plastic modeling area is a 10 inch skill saw, no where else to put it. I like your tabletop, something I’m looking into as my wood work bench is a piece of &*#@. I went to move it slightly last week and it collapsed send my tools everywhere. I have clamps hold it together at the moment. One clamp visible under chair. Luckily Smuggler was not on it. Again nice job on your shop!! -
Work area pictures only
East Ender replied to Johnny Mike's topic in Modeling tools and Workshop Equipment
I have two areas in the same room, one for wood kits, and one for plastic kits. I collect the old aircraft kits from the 60’s, the ones I built as a kid. The wood model area has two drawing tables, my small tools, small Wen bandsaw, a proxon sander, dremels ect and Bluejackets Smuggler in works… No carpet or rug for the wood area, easier to vacuum up the dust and shavings.

- 52 replies
-
- 14
-

-
Welcome Glenn!
-
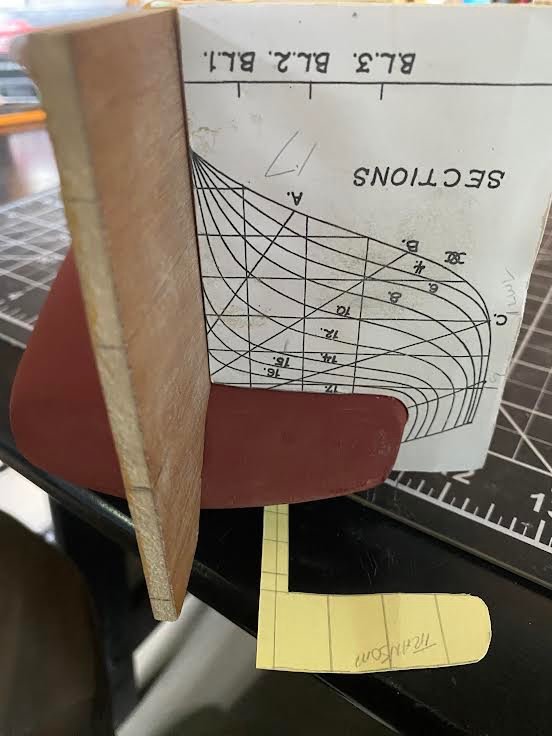
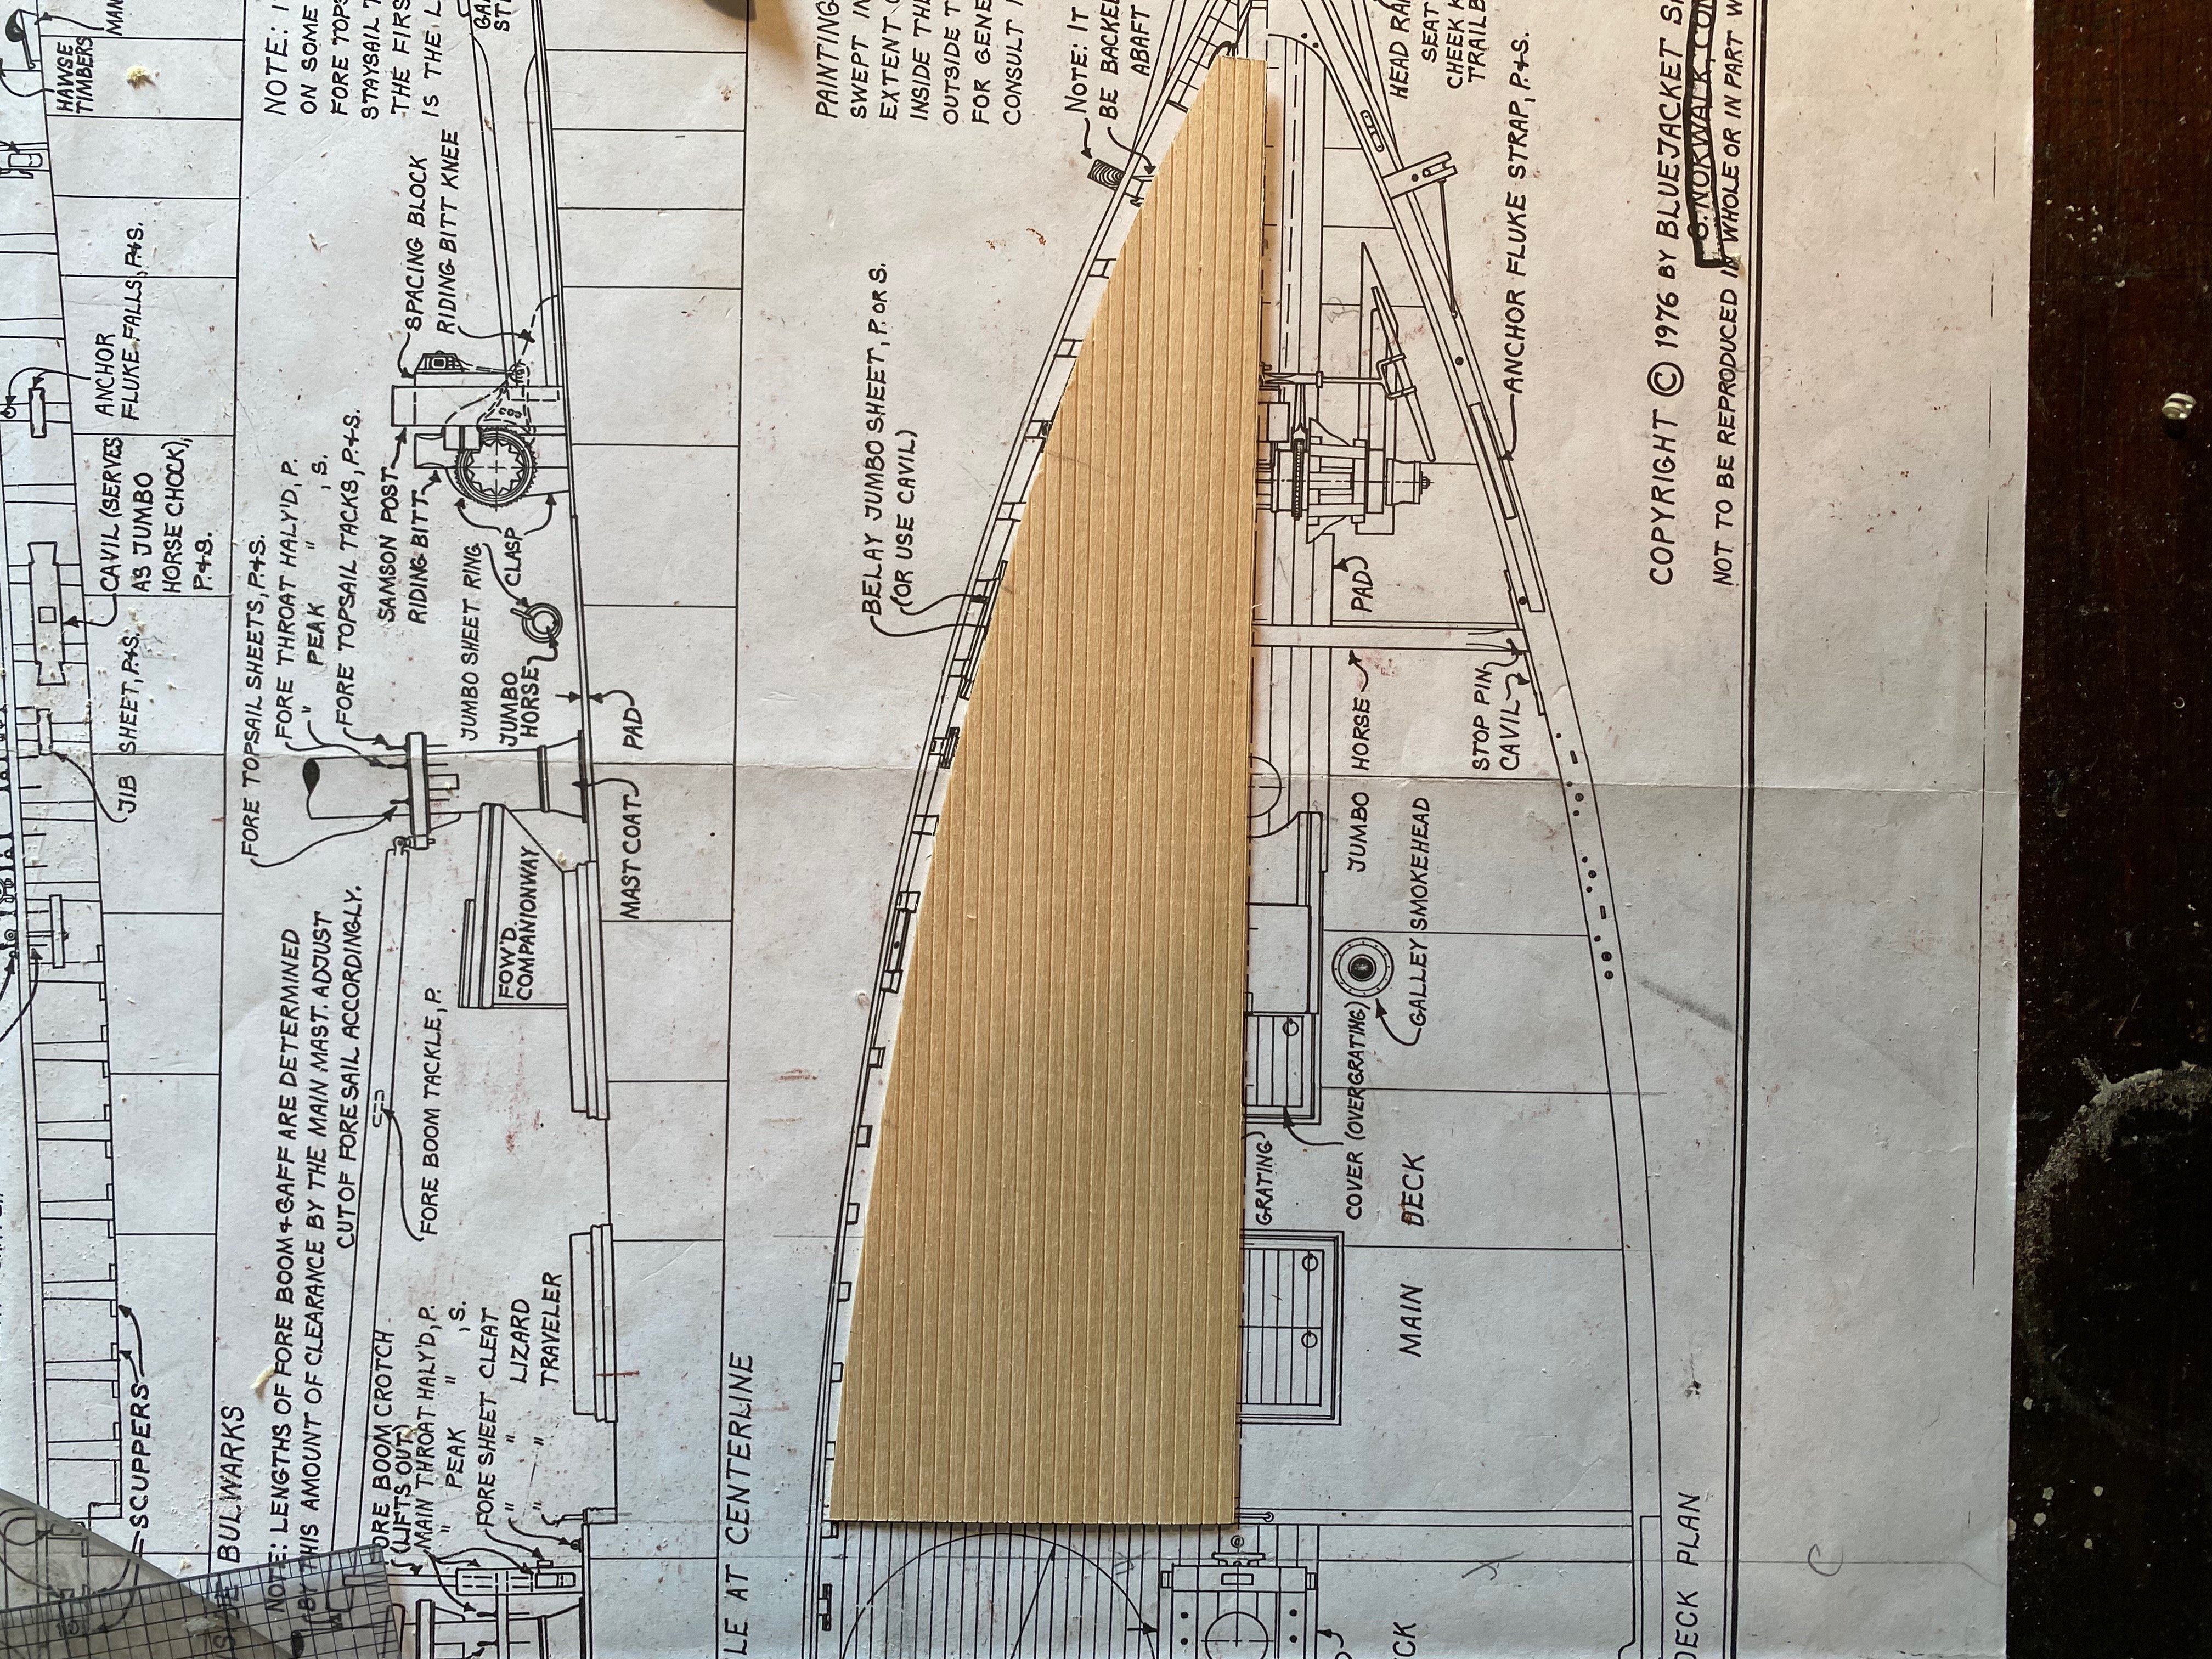
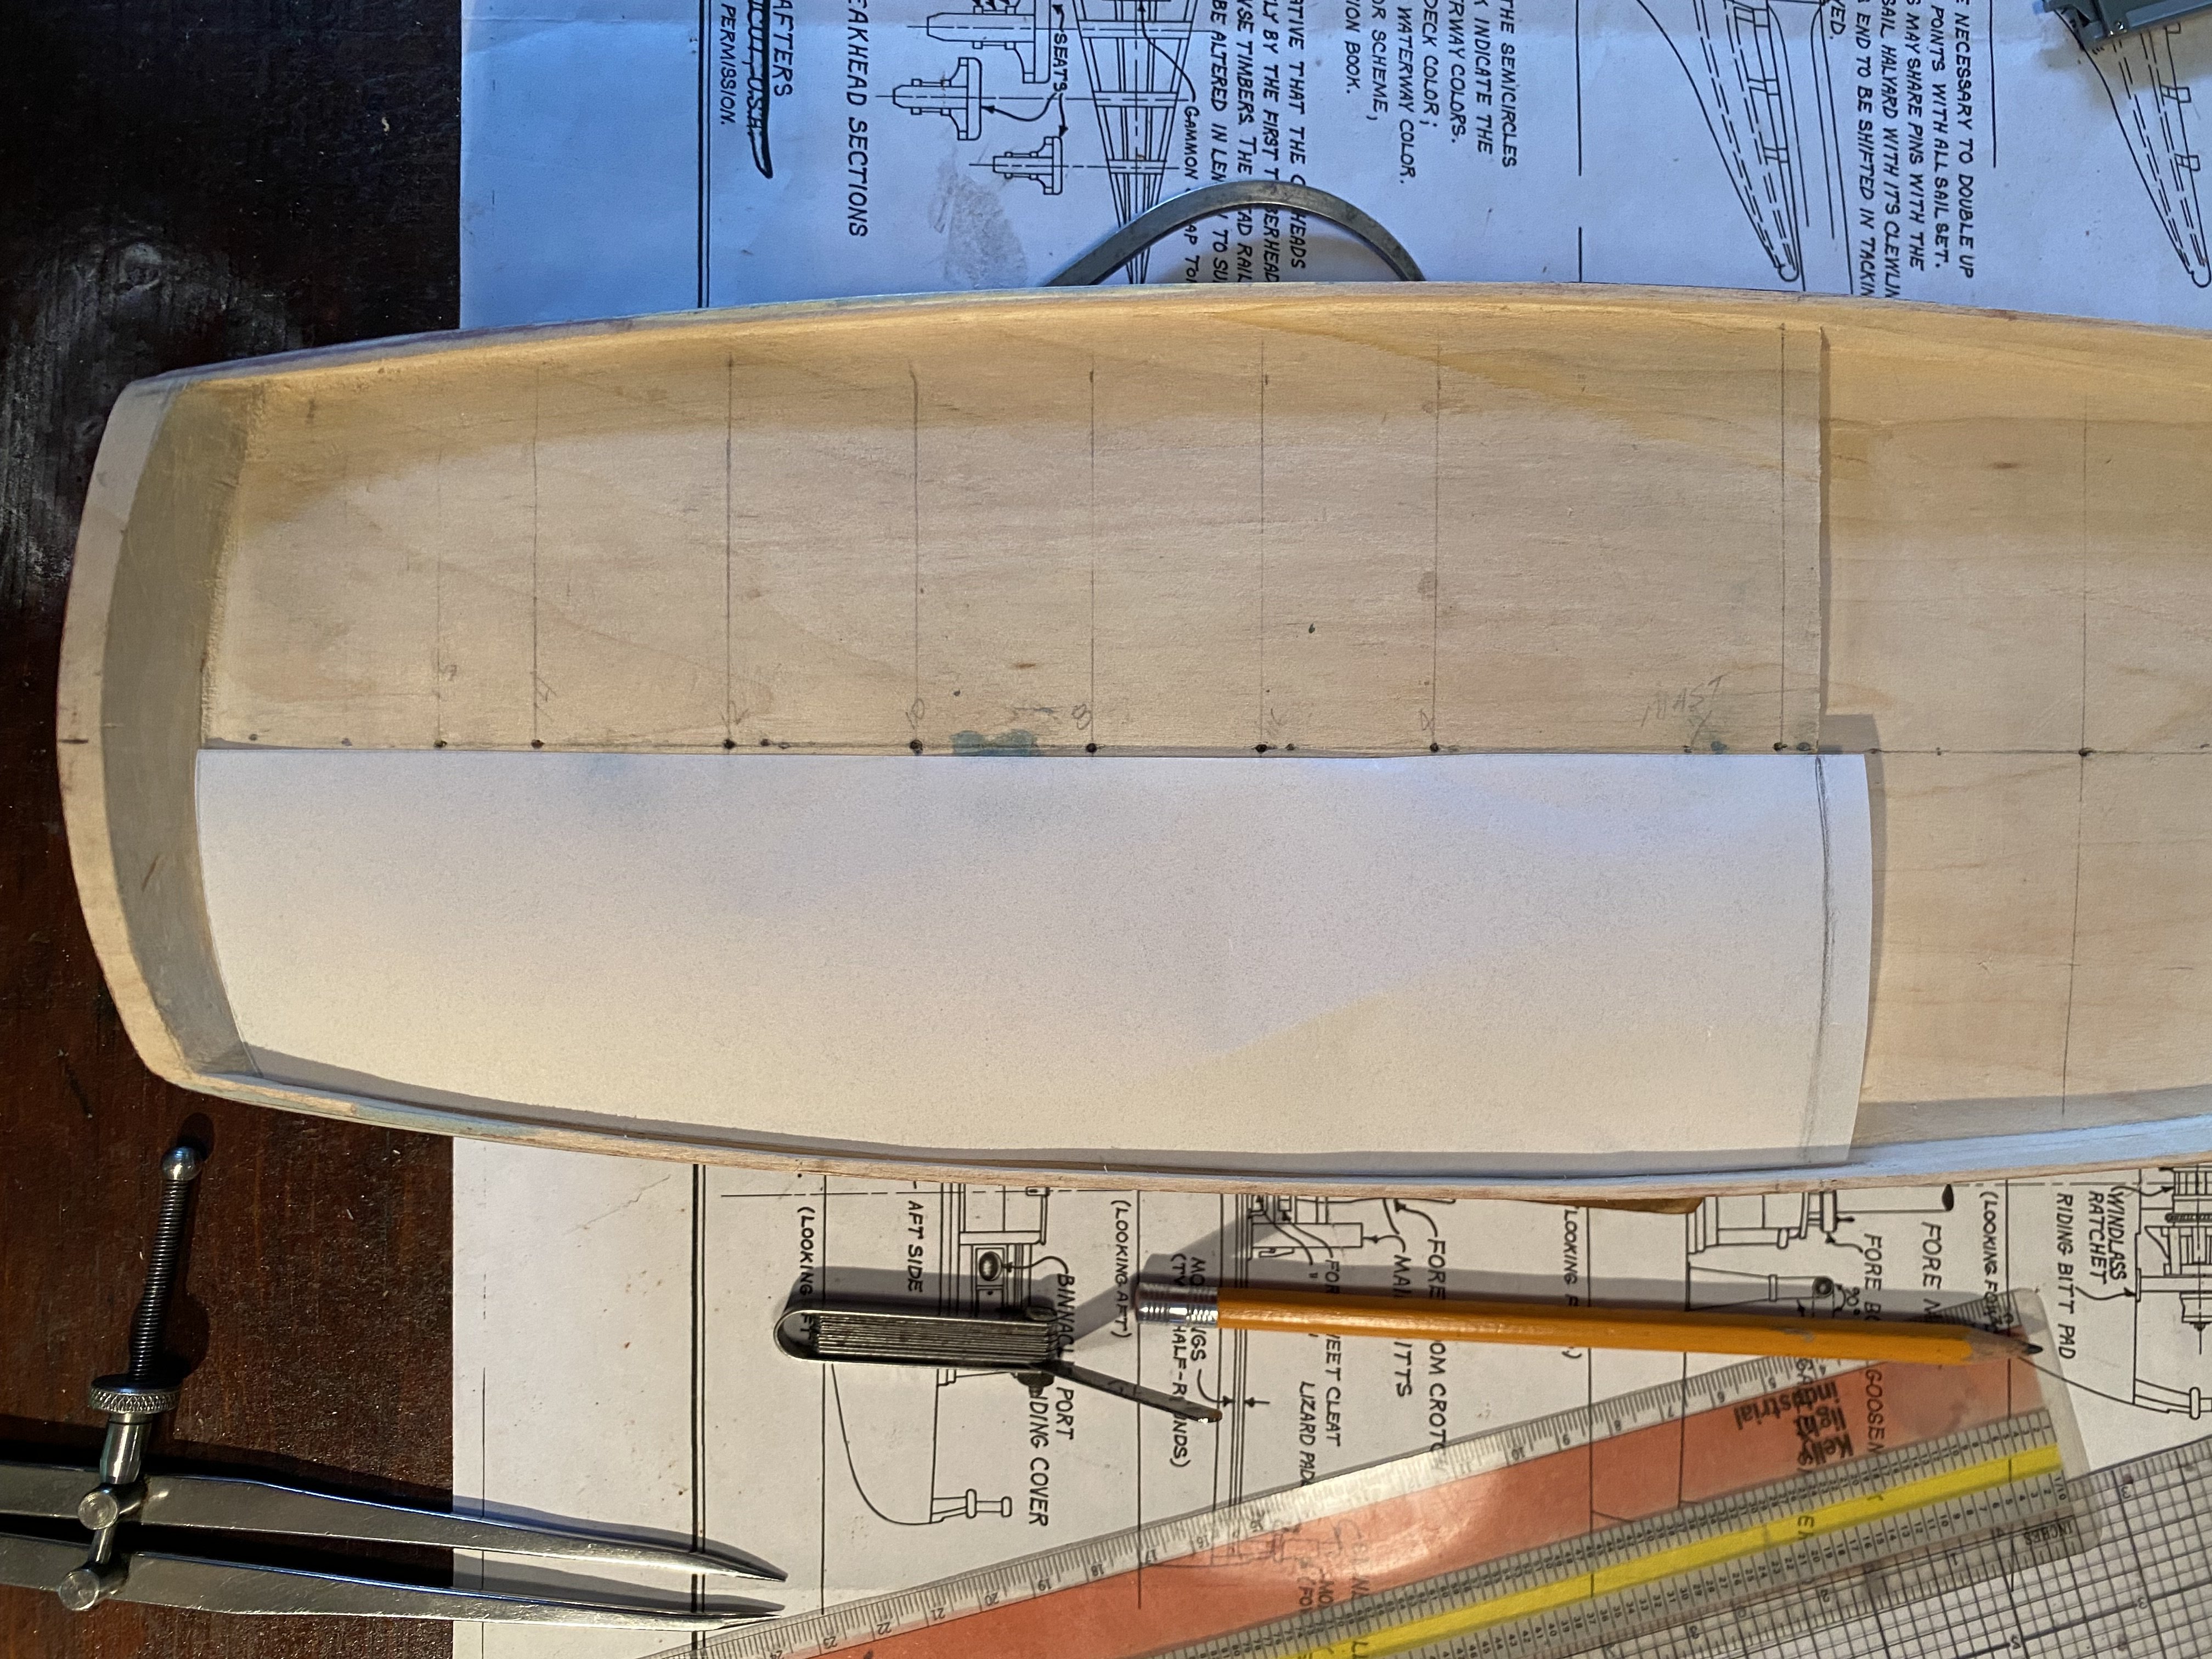
It looks as if I shaved too much off the outside of the hull on both sides from the grub beam forward to just before the jumbo horse. The hull should be fatter to the tune of about .150 on each side. I cut the both veneers to match the print, but they were much too fat on the outside edge. I needed to trim down the veneer on the outside edge(s), both sides, so they fit the narrower hull, tight up against the bulwarks. The "cut to fit” veneer lying on the print you can see the large gap, between the veneer to the outside of the hull, especially in the area of the bulwarks. Hard to describe, but I think I royally messed up. (The veneers are not glued down, still loose)
-
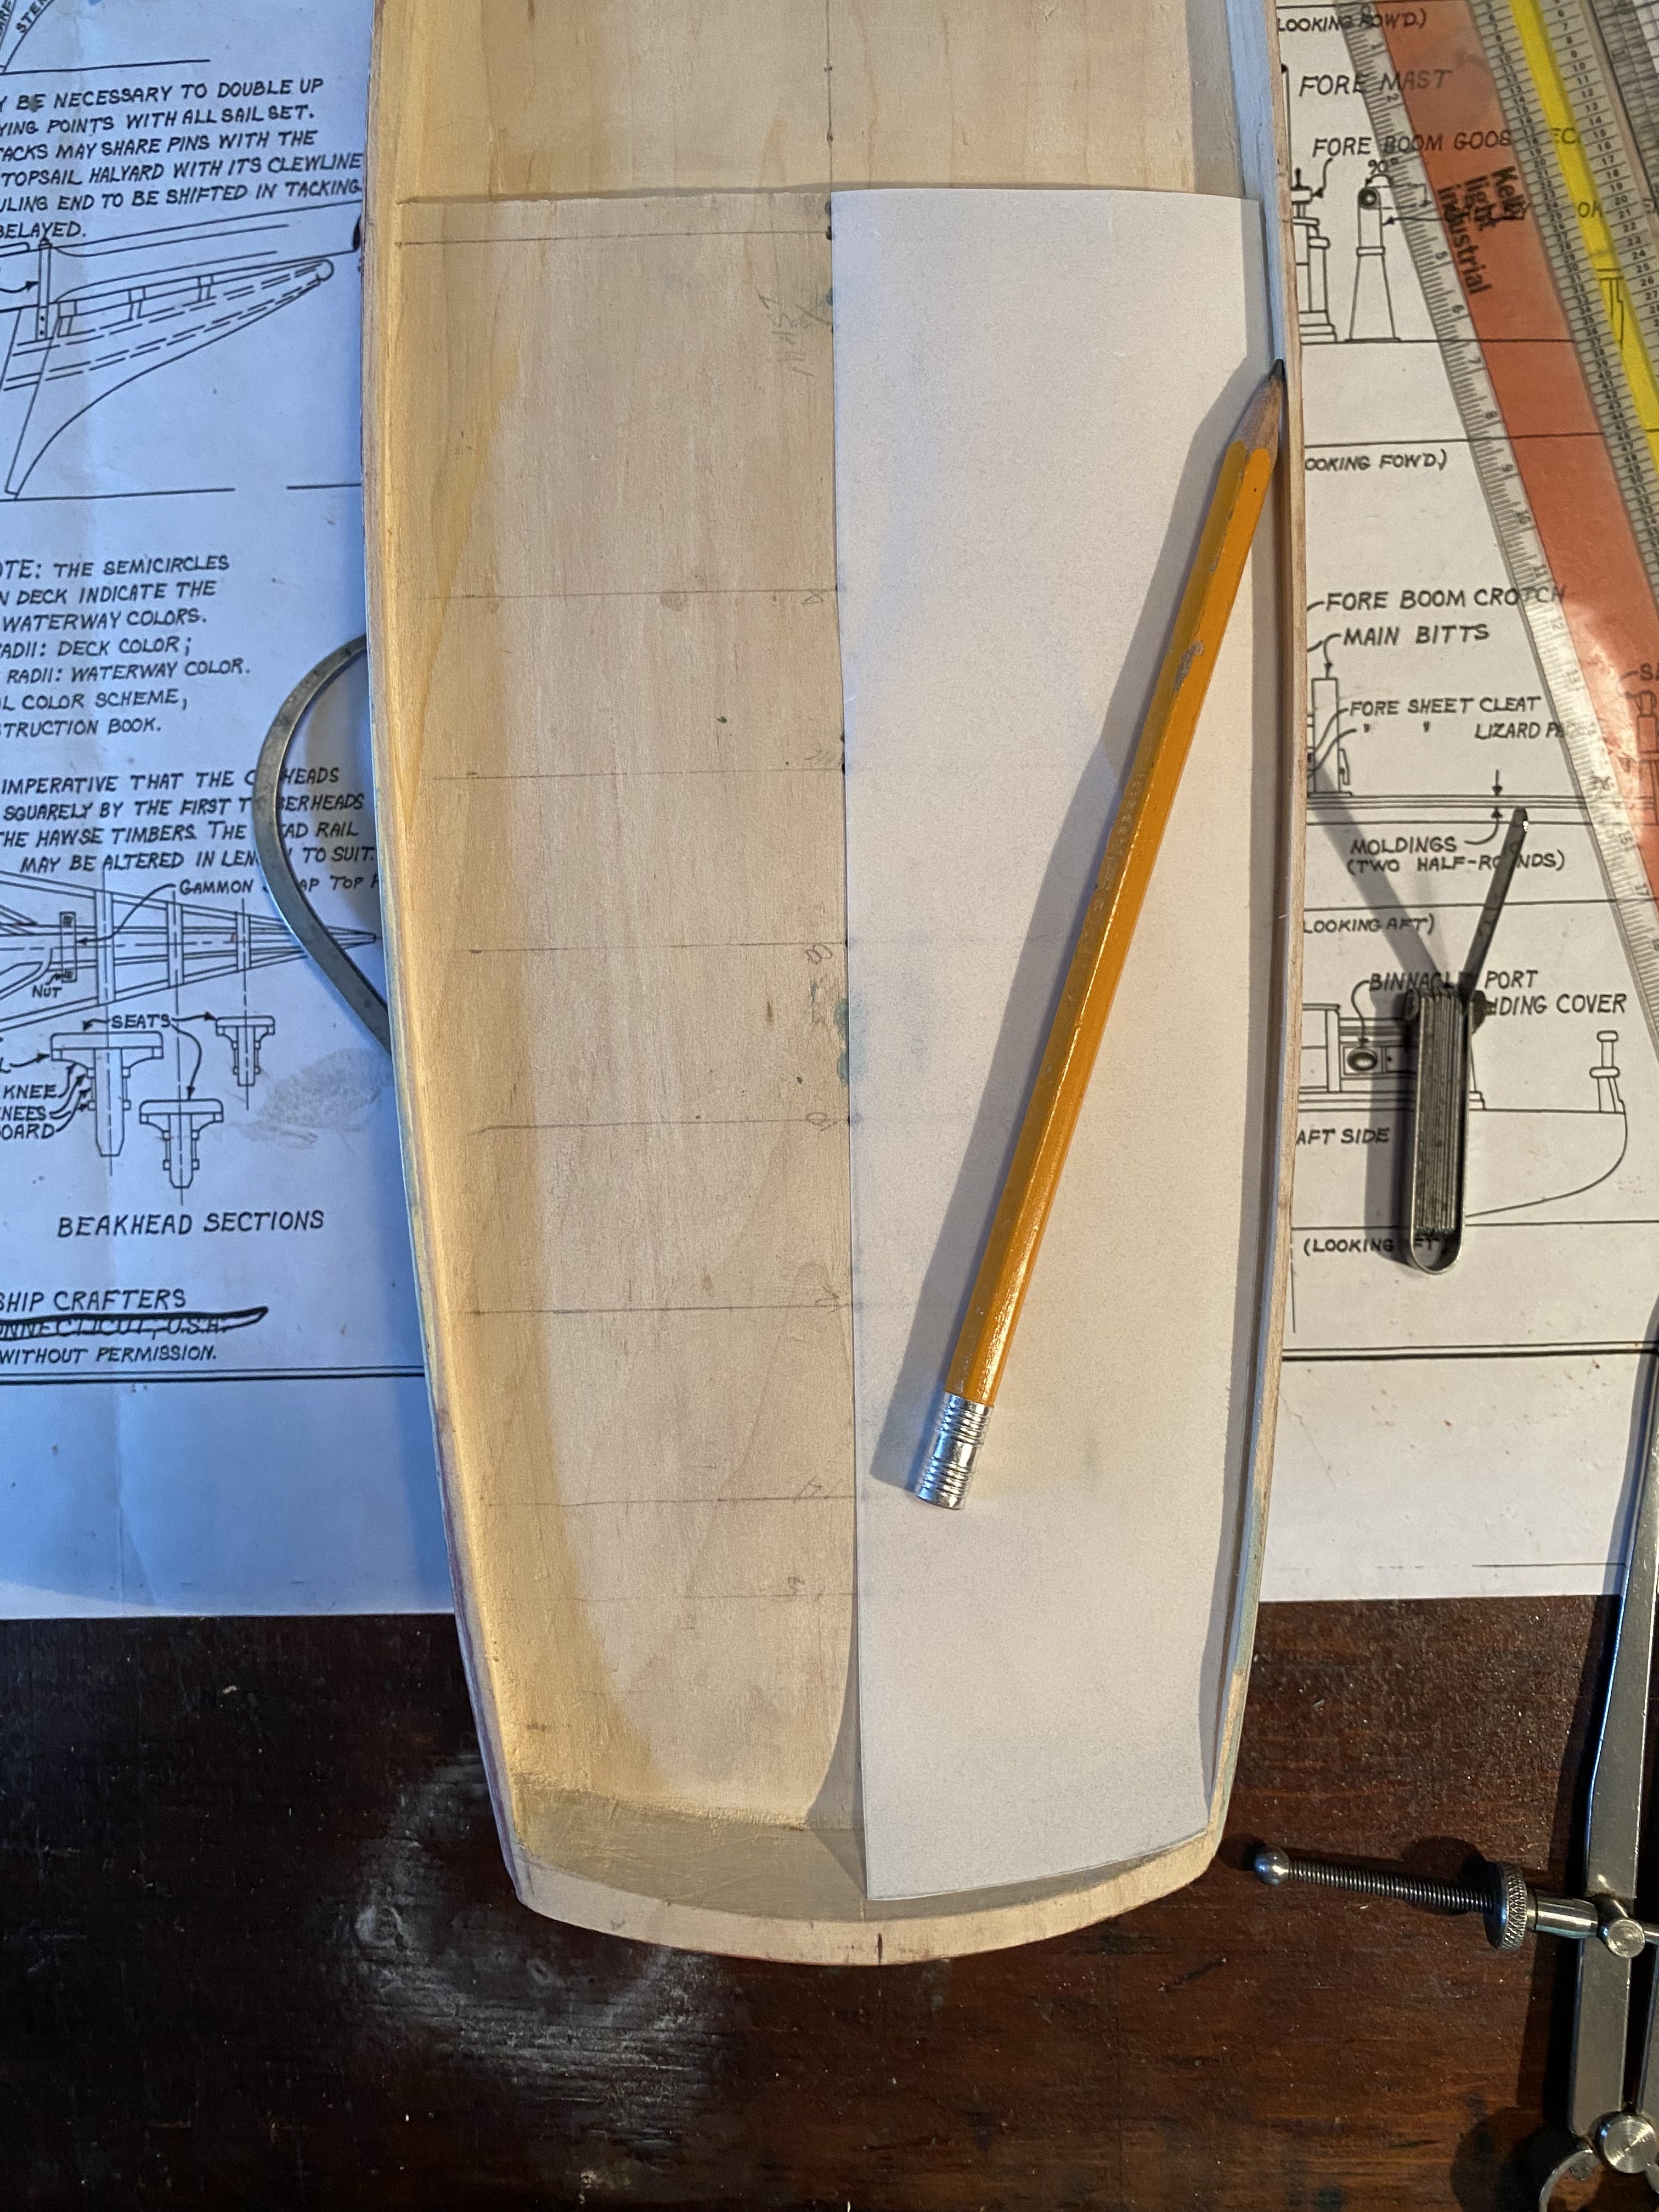
When fitting main deck veneer, my mistake templating the hull is obvious. This photo shows the veneer trimmed to fit the deck. Trimmed to fit. The hull templates are exact so I’m a bit confused. Wondering where I went wrong and if I should proceed at this point, or call it a day and buy a new hull. At least I was consistent and made the same mistake on both sides.


-
Question for those that have built Smuggler about the veneer deck. The instruction manual says to use contact cement. Is this the best practice, or is wood cement more forgiving for minor adjustments?
-
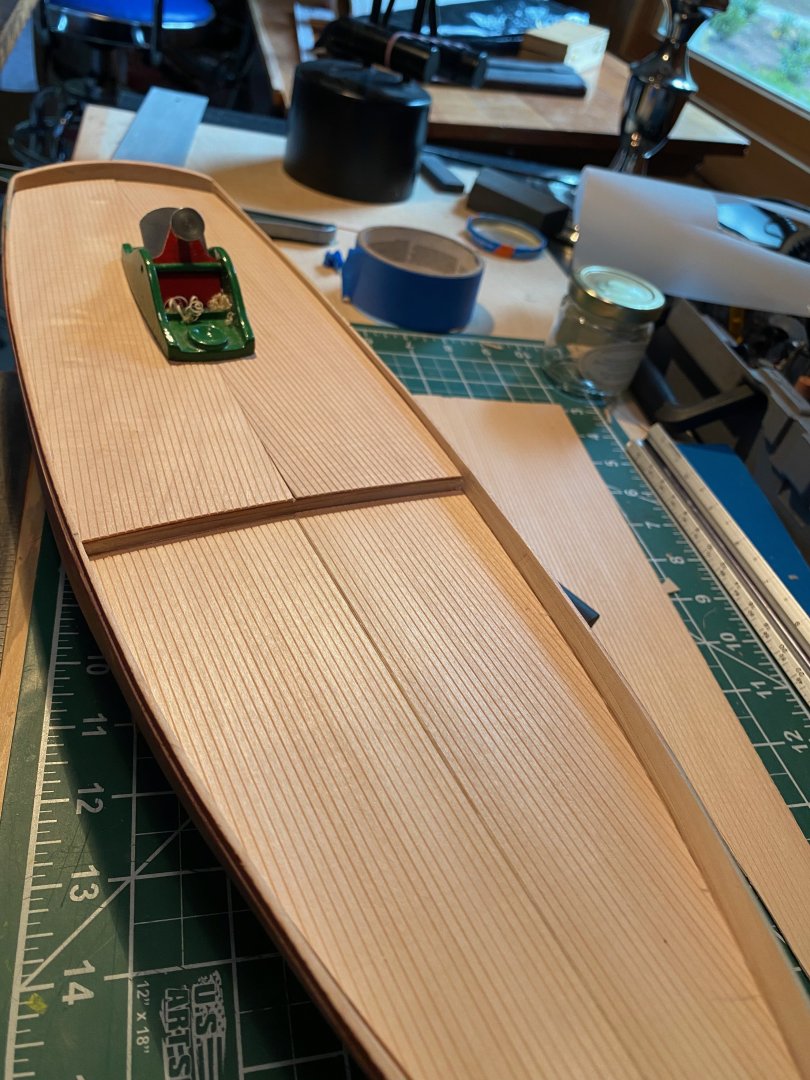
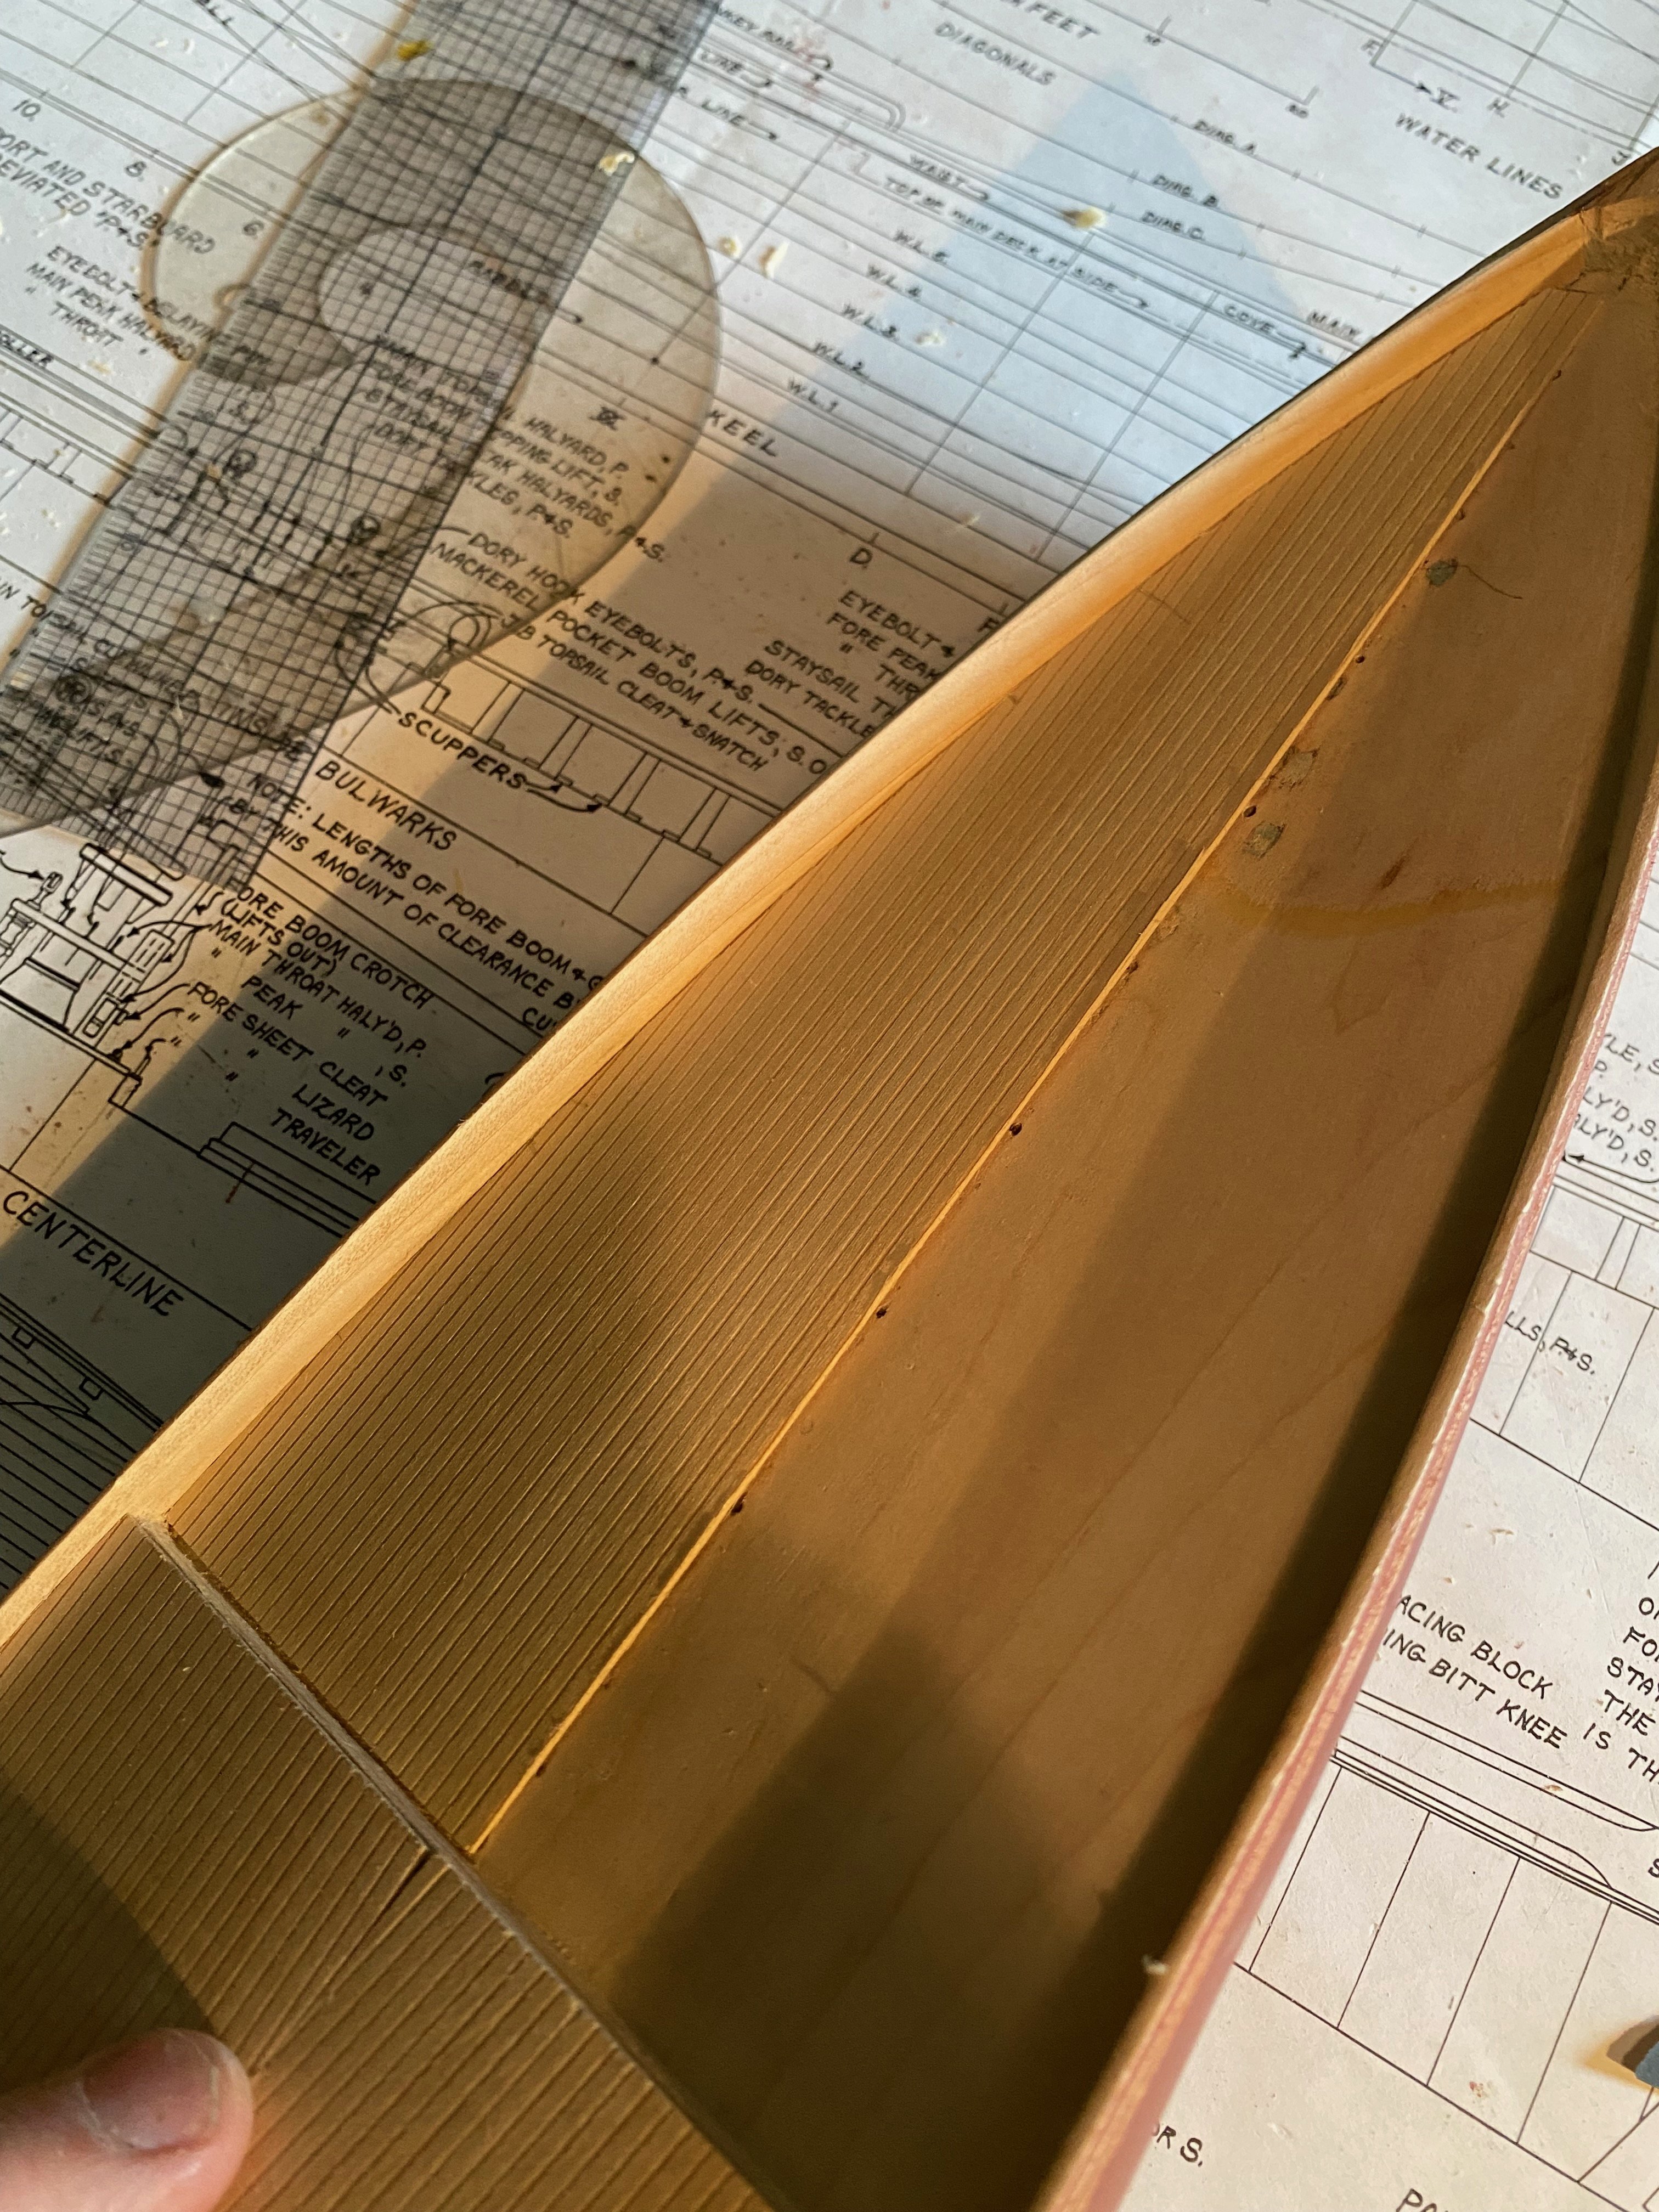
Trimmed down the bulwarks, cut and fit Quarter Deck veneer today.

-
I know this is an old thread, but did you ever finish the Morgan? I just bought one as well on Ebay. In 1969 my dad bought me the kit during a visit at Mystic seaport in Conn. I built it, but it was difficuilt for me being only 14 years old, and it looked ok at the time, but Im sure I may many mistakes. Now that I’m 70, I want to build it correctly. My kit is the 1968 issue in a 1971 hard box. Fun reminiscing with the old kits. I collect all the old kits I built as a kid. Must have 200 or more. The kit I just bought is in beautiful shape. Your kit was progressing nicely, maybe I missed a thread where it was done. Cheers, Tim
-
I’m sorry to hear about Charlie. I was unaware he had passed. You're correct about the stern, I need trim the bottom inside to match the deck. Thank you NIc.
-
Johnny, I’ve had two strokes, one in the right cerebellum and the second in my left cerebellum. Also Multiple Myloma, cancer of the blood, (in remission after a bone marrow transplant), suspected cause of that was exposure to jet fuel. The second stroke was worse than the first. Cause was atrial fibrillation. I suffered balance issues, depression and issues with handwriting . Long story short, physical therapy helped the second stroke. And two other things have helped. I have recently taken up learning the piano. Learning to read music, and using my left and right hand to play at the same time. I believe this has helped me “re-wire” my brain. And then there is model ship building. I’ve had trouble building Smuggler for the last year but have resumed. My hands are now much steadier, and was even to even carve out the Bulwarks, although it took me two weeks! . Music has helped me, maybe it could help you too. The power of music and model ship building, All the best during your recovery.
-
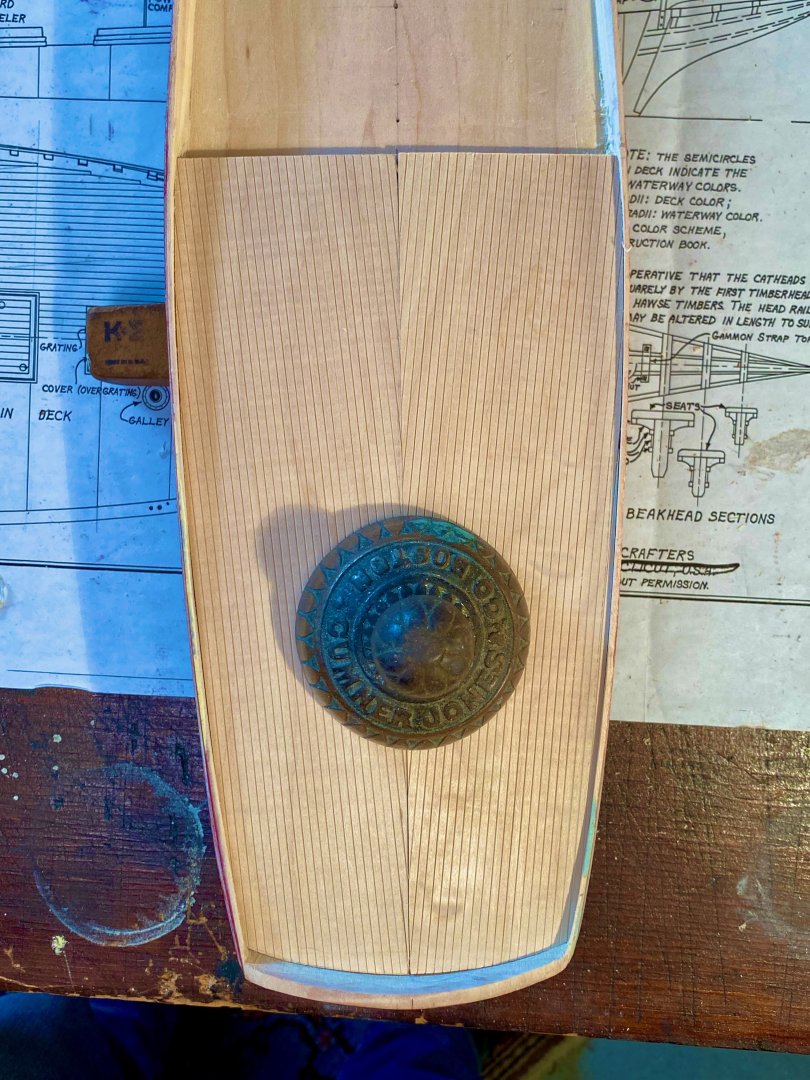
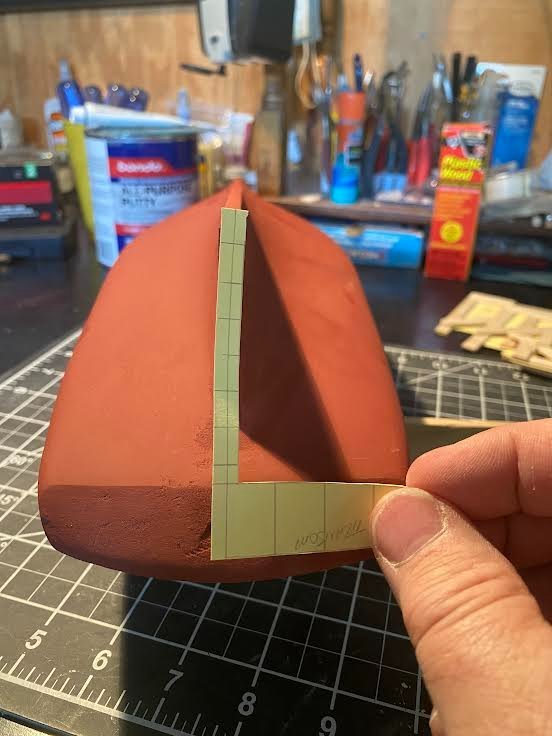
Used vellum to trace the decking, it seems I need to take more off the transom, so the tracing fits? I trimmed back for the Grub beam. What am I missing here? Maybe Charlie or Nic at Bluejacket could comment? Need some help.


-
Bulwark where it meets the transom, (I think it's correct). Bulwarks are a slightly loose 3/32, I don't think I want to take anymore off. Will sand smooth what I’ve cut so far. Nic?


-
Thank you Nic!
-
Thank you Rick!
-
Working the bulwarks to print, quite the job, down to 3/32. Taking my time and enjoying some carving. Almost time for planking. Does anyone template the deck?
.thumb.jpeg.65e63bb6a4bcb08691d57b6f89649dd3.jpeg)

-
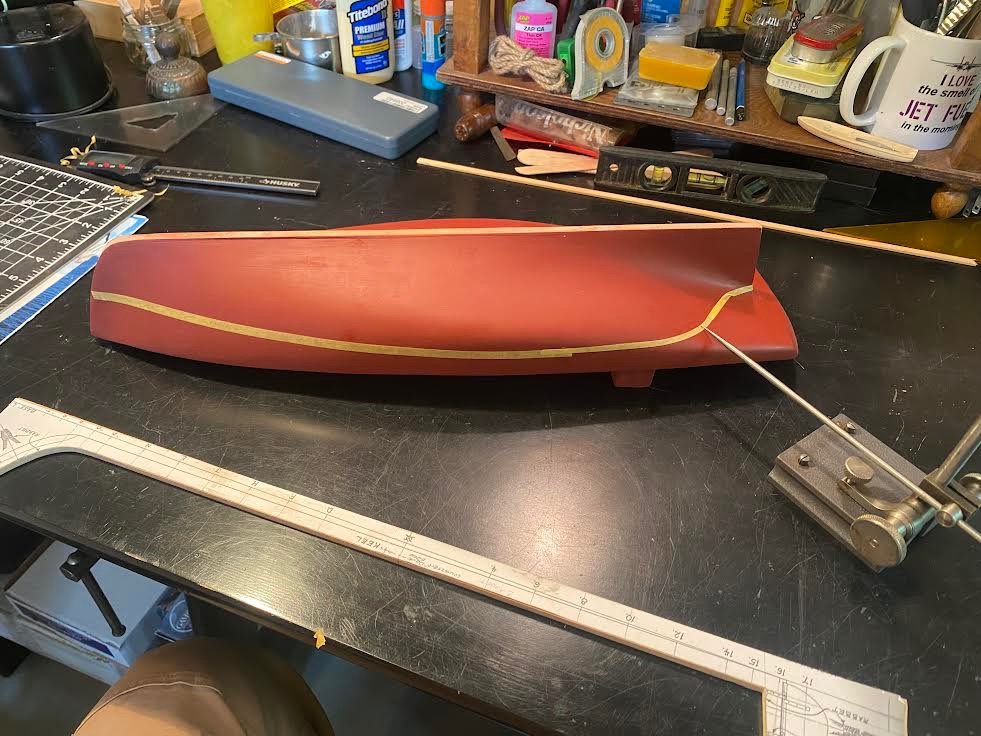
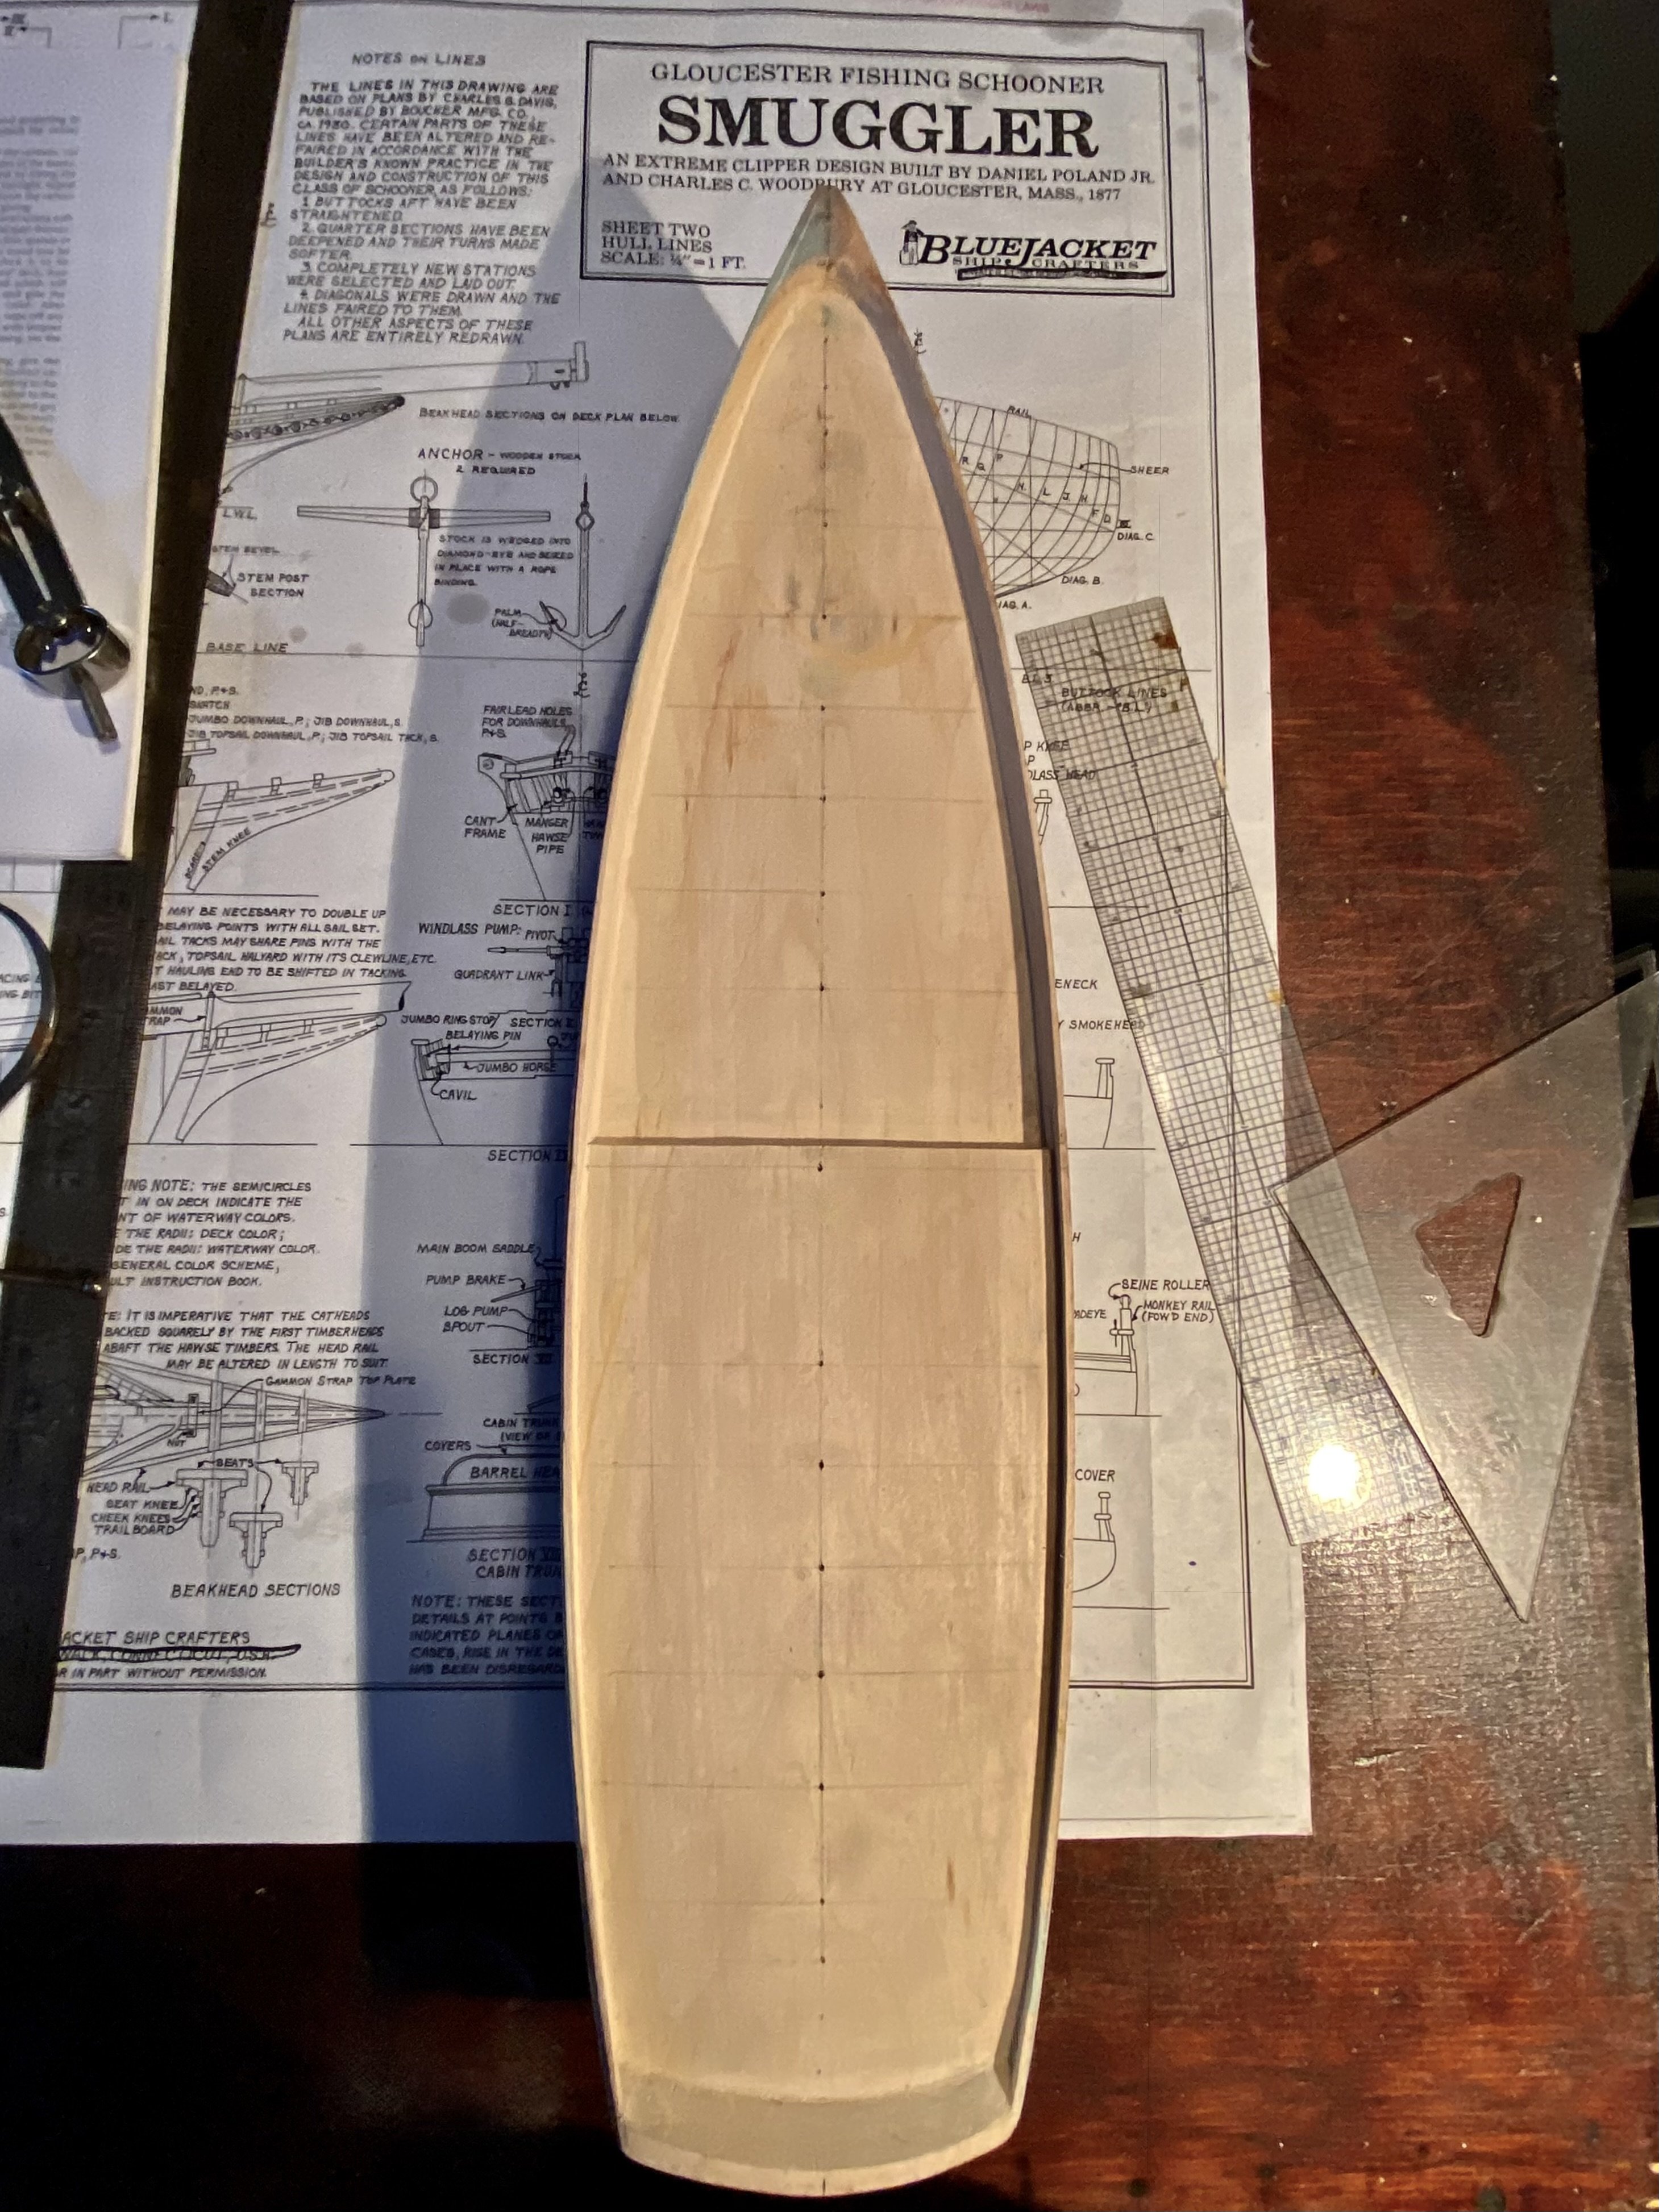
Today I revisited Smuggler and began carving the bulwarks . It seems Smuggler lost some weight amidships, as it is 1/8 narrower on each side than the print. A bit sleeker than the real ship, I think it will be difficult to notice. I have that small 1/32 deep half round detail that runs the fore and aft length length planned out using 1/32 safety wire which I will stretch fore and aft at the correct location and press it in, to create the detail... somehow. Book says folks usually just paint to simulate it. I’m still stumped as to how much to trim that mass of wood at the stern. Any help would be appreciated, as the instructions are a bit lacking in this area. I will just leave it full for now.
-
Hi everyone. Yes, it's been quite a while since I've been on the site, I was on earlier and received an email wondering if it was me. Life just got in the way Anyway, I was at the table getting reacquainted with Smuggler today, trying to get motivated. Seems I'm still a bit stumped with the transom and how much to trim back the solid hull. One step at a time. Tim
-
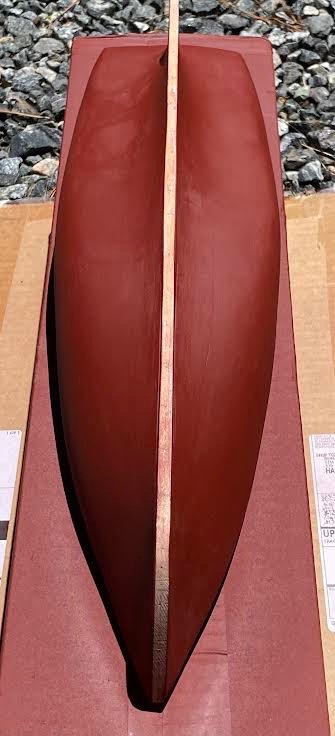
Checking the waterline against the print all the way around with a surface gauge. (Top of tape is MLW)
-
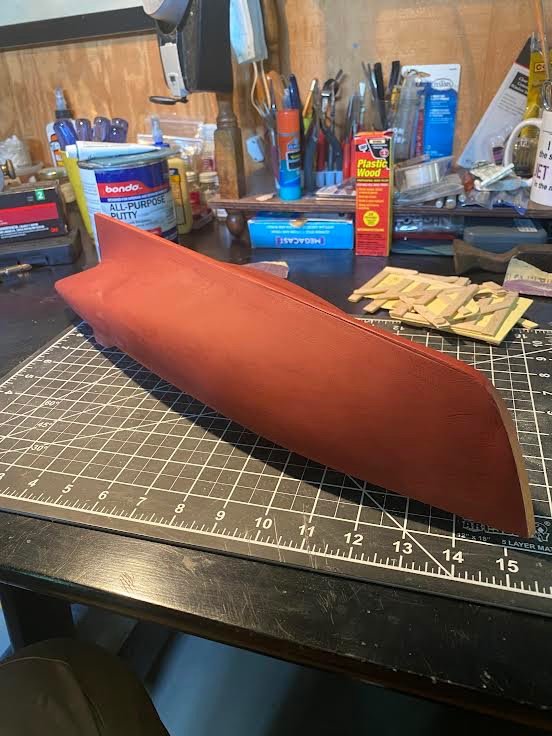
Sanded down the first few coasts of primer on the hull again, used a little red lead, made the repairs to the keel with Bondo where I accidentally overcut. Bondo is now my friend. I'll let the primer cure a day or so then I'll start on the bulwarks. I ordered a surface gauge to mark the waterline and and all of the other details on the side of the hull. I also located my old Grumman drill bushings which should help me be accurate with drilling holes for the masts, at least with the pilot holes. The rudder post/drilling looks like a critical set up.

-
Roger, just watched a video on transom expansion. Now I get it. Skewed perspective and laying out a transom, inboard and outboard. Going out to the shop to study the print and give it a go. I doubt it but I'm wondering if Bluejacket has already accounted for this on Smuggler and the transom just needs cleaning up. Perhaps Mr.Bluejacket could weigh in? Thanks.
-
Thank your compliment and information Roger. I'm going to research Transom Expansion. I've looked into the miniature spoke shaves as well as the old Stanley 75 rabbet plane and the Stanley 100/1/2 model builders plane. Yes, I'm sure these spokeshaves would have made the job easier. They will help on my next solid hull, I will not start one until I have a set. This was my first solid hull. and I've learned a lot, especially of what not to do. I do need to improve on my layout skills.
-
Not quite sure what to do here
-
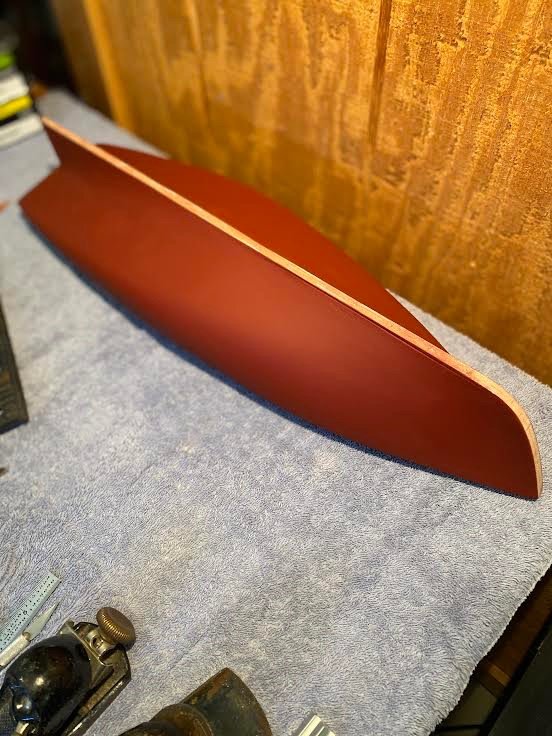
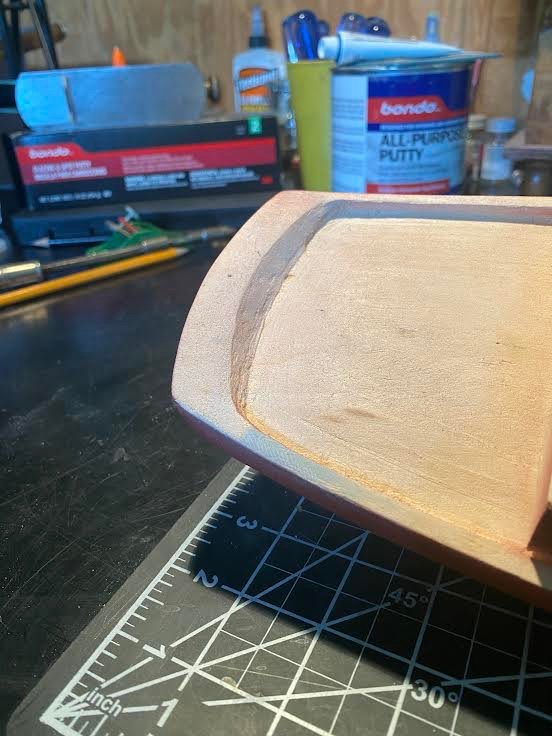
I suppose you could call this a major milestone, at least for me. With encouragement from Nic at Bluejacket about the use of Bondo, and epoxy /glue adherence to it. I triple checked the hull today to ensure all the templates which fit snuggly. My only dilemma is how to you position the very last template, the transom. The transom is on an angle and I do not want to overshave the area. Also not sure how much wood to remove on the top deck at the transom, see photo. I masked off the keel rabbet and primed the hull lightly with Dublicolor red oxide automotive primer and will lightly sand tomorrow and apply some with red lead where needed. Some of the grain was a bit narly in spots. I still need to repair some over cuts on the keel rabbit caused by my hamfisted use of the Dremel tool. I'll use a bit of bondo to reform that area. I've put the Dremel tool away for now as it cuts so fast and gets me in trouble. My second dilemma or perhaps this is normal for a solid hull model, and that is I need to shave the deck down as the bulwarks are not high enough when checked against the print. Why this is, I'm not sure. a I need to cut down at least .100. Here are a few photos of todays progress, and thanks again Nick for your support!
-
Following this build. Our entire family worked for Grumman on Long Island, my dads father on the F4F Wildcat, my moms dad on the F8F Bearcat through the A-6 Intruder, both my father and I on the F-14 Tomcat. Enjoy the build!
- 150 replies
-
- 12
-


.jpeg.093110d3e53dd5c5864a1aa4934aa94b.jpeg)
