

East Ender
-
Posts
90 -
Joined
-
Last visited
Content Type
Profiles
Forums
Gallery
Events
Everything posted by East Ender
-

Introducing myself and already seeking advice
East Ender replied to kdm's topic in New member Introductions
Welcome Keith! Enjoy the site. Good folks and a wealth of information. -
Cleaning and Priming metal
East Ender replied to Cleat's topic in Metal Work, Soldering and Metal Fittings
Like Oldsalt1950, (Jim) mentioned, MEK is probably the best degreaser out there. Just a whiff of it takes me back to working on Navy Military aircraft at Grumman. Use a simple but appropriate respirator if using for prolonged periods, and wear dishwashing gloves or anything equivalent. If anyone is making small parts using aluminum, dipping it in Alodine 1200 will give it a light brown color while etching for paint at the same time. Alodine 600, used for electrical bonding, will give it a golden or brass color. When we used to trim aluminum skins, the edges would be cleaned with MEK then brushed with Alodine 1200 followed by zinc chromate primer. I'd try it and use Alodine 600 if I had some small aluminum parts. Put them in a jar in with the alodine for about a minute or two, then remove them and dip them in water to stop the etching process. You could probably simulate brass with aluminum if the part is treated correctly. -
Welcome from coastal Virginia Joe, enjoy your first wooden model, as I am building my first also. The folks on this site have been a tremendous help.
-
Hello from Canada’s west coast
East Ender replied to Twokidsnosleep's topic in New member Introductions
Welcome to this outstanding site Scott! -
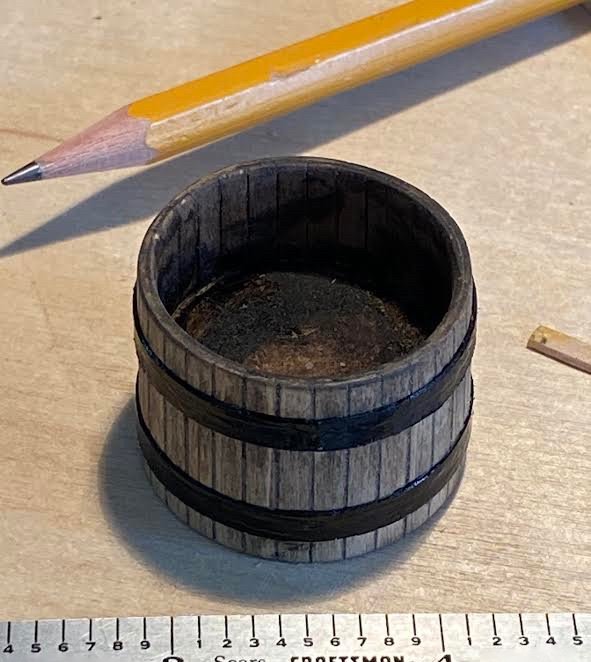
Took a break from the dory to let paint dry and stay out of trouble so I made the small barrel that the kit has you build. I also planked the inside and added some weathering to make it look old and beat up. Not sure if I'll weather the dory yet, I don't have the guts....or experience to take the chance. So the fisherman will be taking out a fresh built dory with an old bucket. I'd like to build some tools dorymen used to carry. I know a bailer is one, and a gaff is another. Any other suggestions would be appreciated! Cheers, Tim
- 31 replies
-
- 4
-

-

-
- Grand Banks Dory
- Bluejacket Shipcrafters
- (and 1 more)
-
Warm welcome from along the Chesapeake Bay in Virginia Michael. Beautiful model!.
-
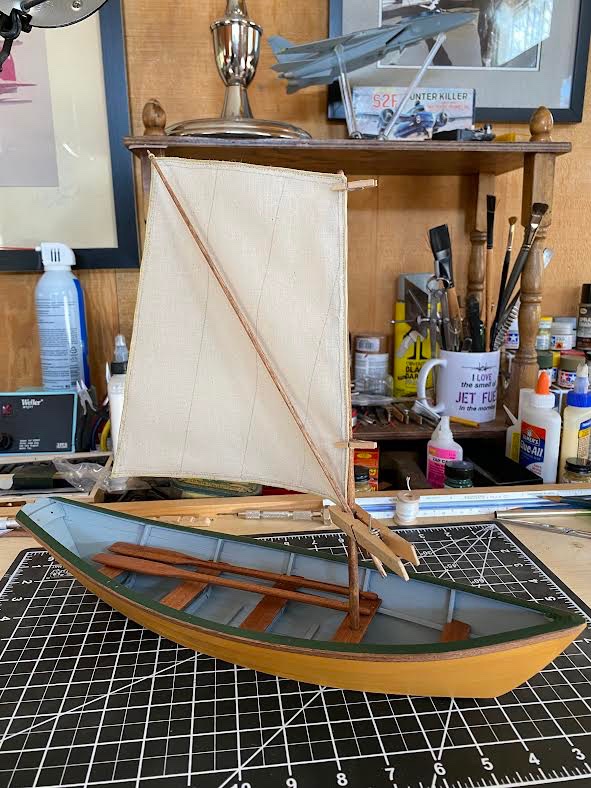
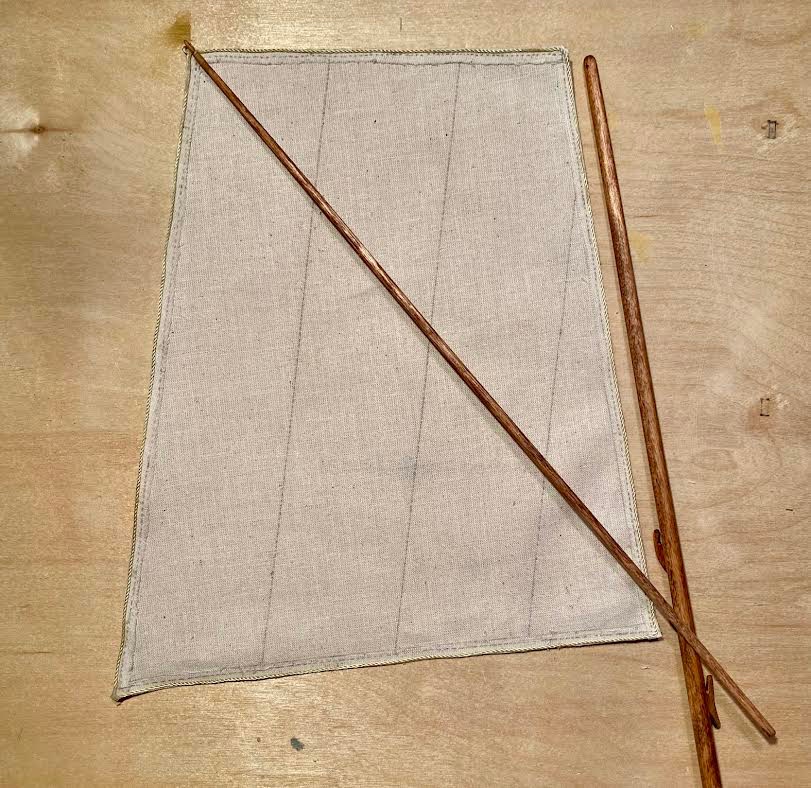
Worked on the sail and gave the boat its first coat of paint with True North Depot Buff on the hull. I have not used enamels in quite awhile and ran into trouble with even coverage. Perhaps the paint thinner I used, Testors for enamels was not appropriate for True North so rather than end up with a real mess in trying a second coat and fretting all night, I removed it with mineral spirits first this morning while it was still somewhat soft. After a nice cleaning with denatured alcohol followed by a gentle sanding and drying, I applied two coats of Model Expo Hull Yellow Ochre which layed down fantastic with a one inch artist brush I use for my artwork. For the interior and I used Model Master Dark Ghost Gray and for the gunnel, Tamyia Dark Green. Tomorrow will be final paint/touch up, make the barrel and dye the rigging with RIT tan dye, (like I did with line around the the sail). The some light weathering here and there , cut some thin leather for the oars and thole pin installion and other details. I'm thinking the mahogany band under the gunnel should also be green, not quite sure, I think it usually is. Cheers, Tim
- 31 replies
-
- 4
-
-
- Grand Banks Dory
- Bluejacket Shipcrafters
- (and 1 more)
-
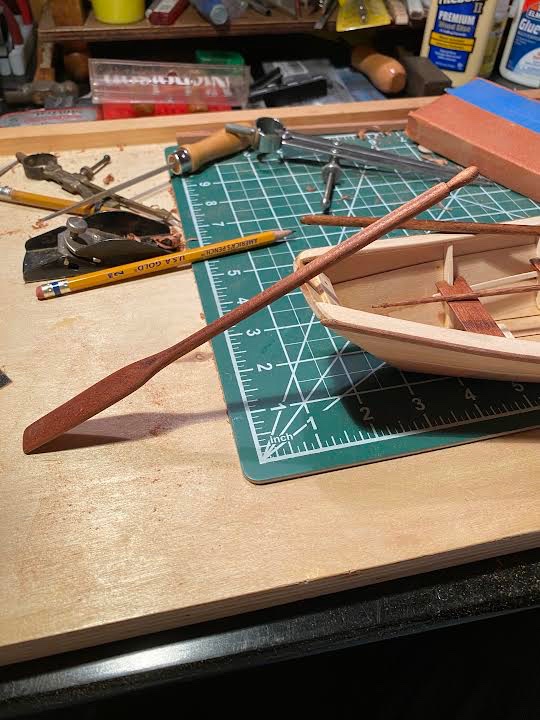
Thanks Alan and Keith, I appreciate the input! I'm going to make the 2nd oar the same as the first and also make 2 more with Holly or basswood to simulate weathered ash. Also going to wrap some thin cut leather around each as shown on photos. Getting back to work after a long weekend near the Blueridge Mts. Tim
-
Like Keith says, it's already weathered! Perhaps some additional weathering where the oars meet the boat and where hands grip the oars. Wefalk mentions grain,so another option would be to use Holly, which has very small grain. I have a log pile outside full of small Holly logs, aged for about two years, which I'm going to try and rip on the table saw, if it ever stops raining here in Virginia. If that works, I'll have a never ending supply of that species. Thanks Tim
-
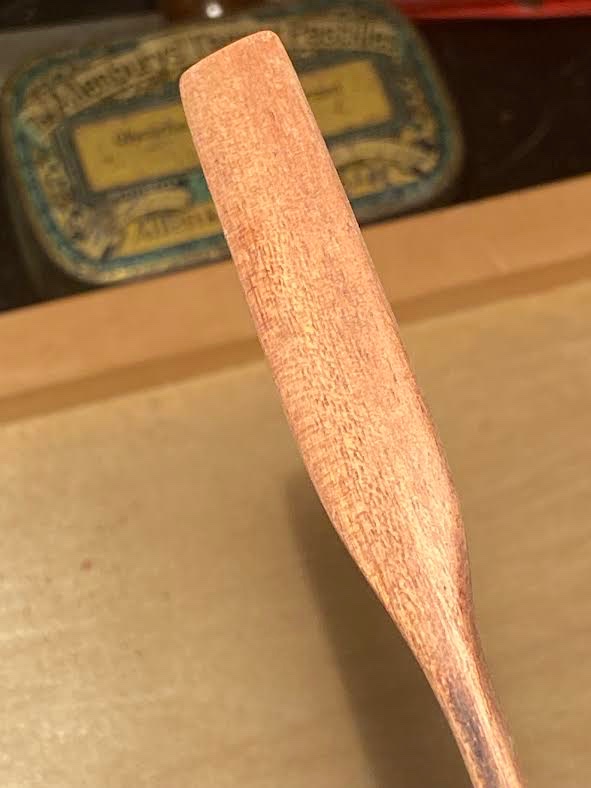
Thank you Keith. It's probably best I pick up a chunk of white ash. This photo of the Acadia wood shows it may be too dark.
-
Building Bluejacket's Grand Banks Dory, I've searched with no luck for the specifications with regard to typical oar construction. I would like to scratch build them, and have already made one from Acacia wood, which is very dark. The print lays out the size, and I have read through research they were usually made of clear pine or fir. Was oak ever used for oars? Thinking about it, oak oars would be very heavy so I don't think oak was used, but that's just my thought. The kit also calls for one set but I'm seeing photos with two in the Dory. One extra set as backup for a single occupant and two for 2 occupants? Thanks, Tim
-
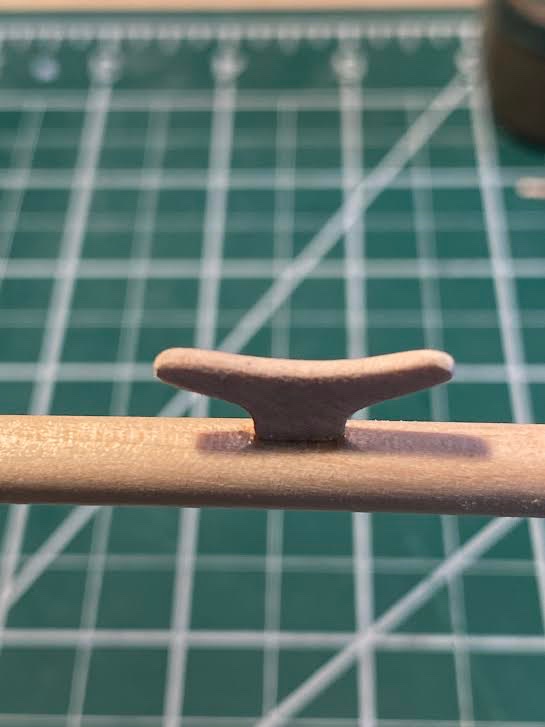
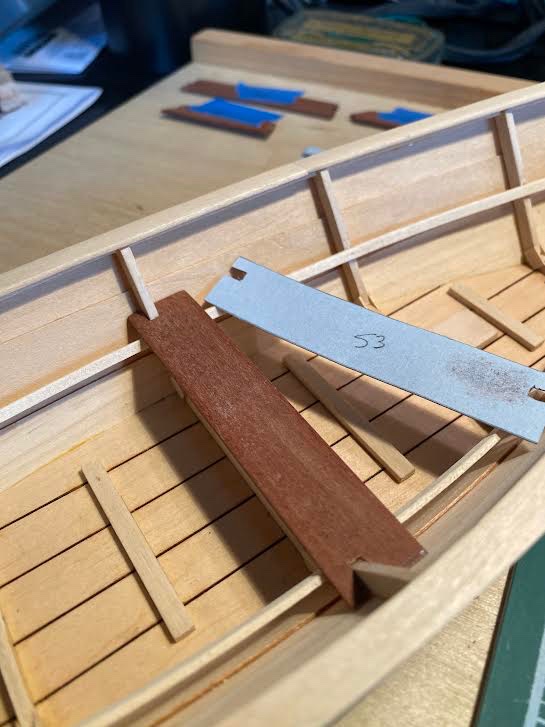
Thank you Ryland and Nic for the kind comments. Today I worked on some of the details, the mast, cleat, snotter cleat and started the oars. With regard to the oars, I started with the dowels provided in the kit but I'm thinking I'm doing to go for the more realistic looking oar(s) as suggested in the Bluejacket instruction book. I had a piece of Acadia wood that I'm going to try but I think the grain may be out of scale. (see photo) I do have a small log pile outside loads with Holly that grows in the woods on my property that has aged a year or so and I may mill a piece or two since it's a tighter grain. I'll carve out an oar and see how it looks after staining it oak, which is what I believe they we historical made of. Correct me if I'm wrong.


- 31 replies
-
- 1
-
-
- Grand Banks Dory
- Bluejacket Shipcrafters
- (and 1 more)
-
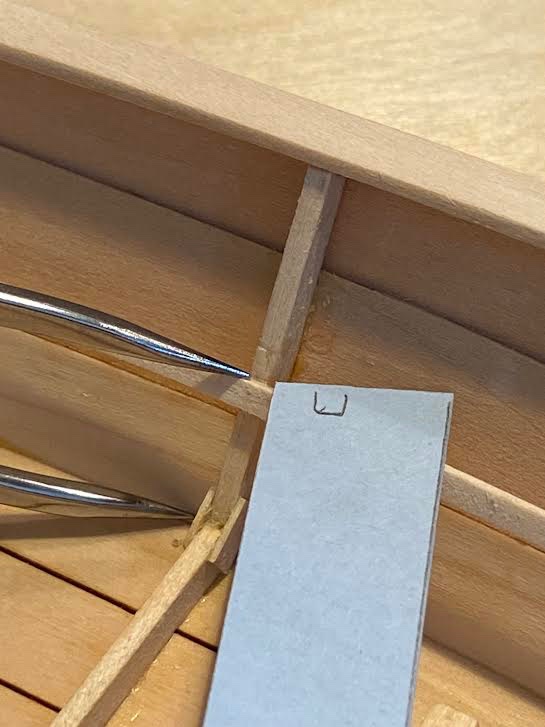
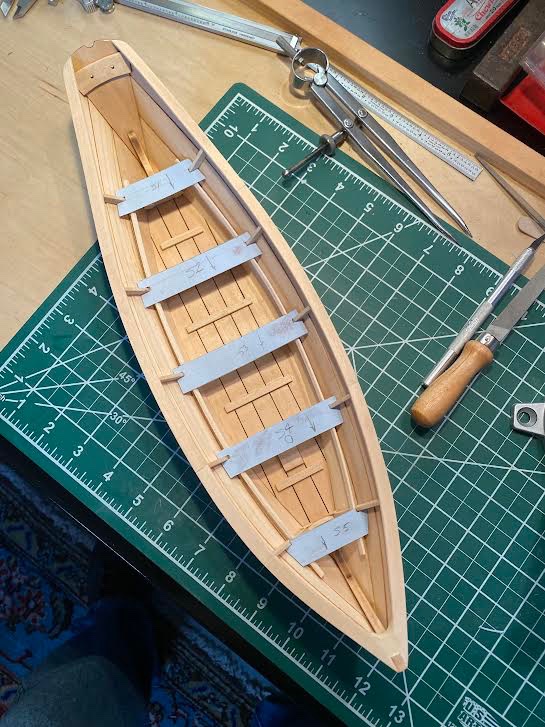
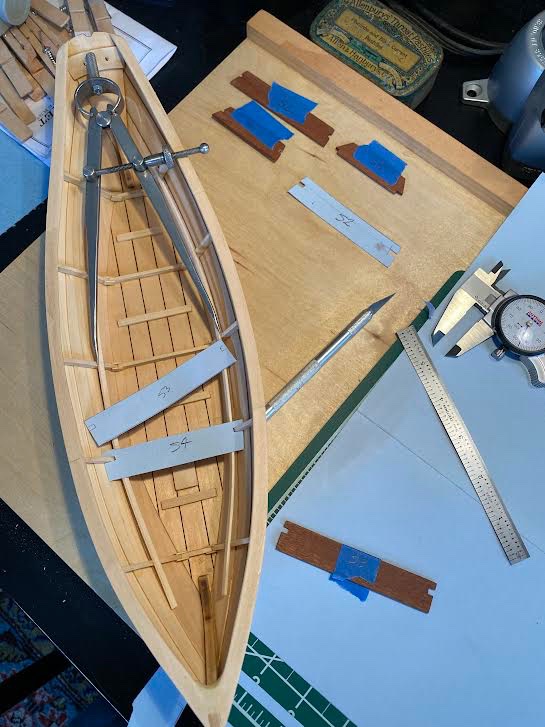
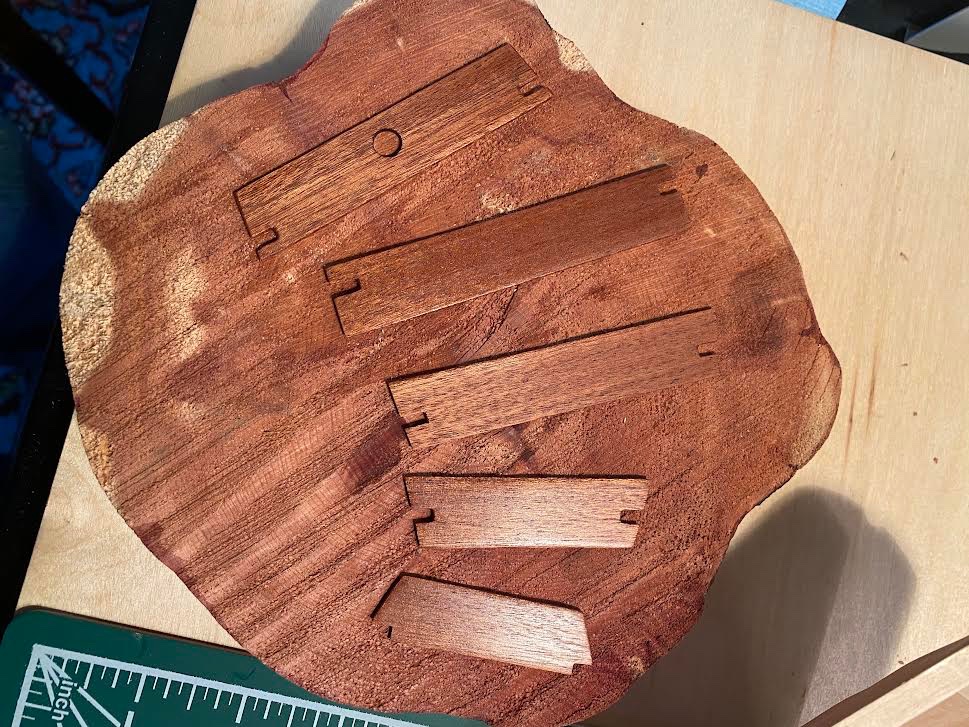
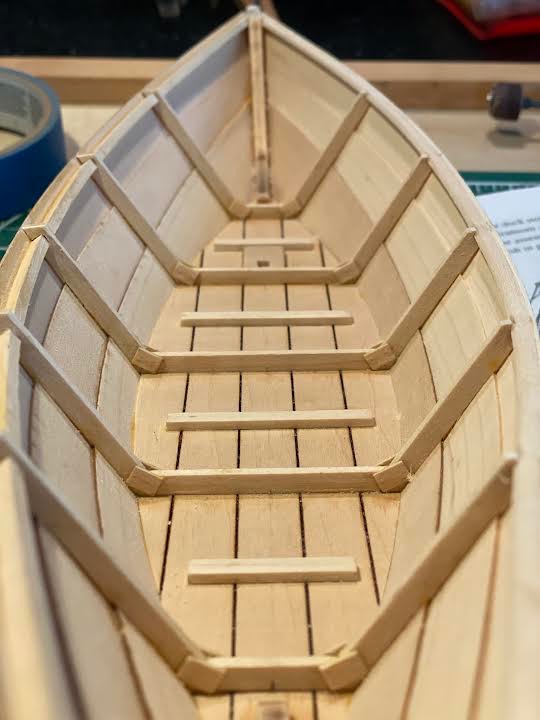
Yesterday and today I worked on the seat rails and seats. Being brand new to the hobby and this being my first build I struggled with the laser cut seats as they sat too high, were too wide to sit correctly at the height seat rail called out on the print. Why don't they fit? Then, the light bulb went on. This is a wood model! Everything needs cutting, trimming, fitting and double checking against the print and double checked again. All parts are oversize on purpose to correct for variations and build "creep". So now , obviously those hard mahogany parts need trimming. What to do. I do not want to ruin them. So thinking about it, I grabbed a file folder to use as template as the material is quite stiff. I laid each seat over the file folder and carefully outlined and cut out each seat. I then numbered each seat template as on the plan and added an arrow forward for proper direction. This is good for several reasons. First, I'm not experimenting with cuts on the actual wood seats and I can cut each template accurately and if I mess up, just make another, not big deal and no ruined part. On this kit getting two of the seats mixed up is easy, so number them. I fit one side of each seat first, then use my dividers to measure the distance across and mark the width between notches and the outside planked side on the template. Once I get a nice fit with the template, I use the template to transfer over to each wood seat to make my cuts. Again starting with on side and slowly trimming the other side until the seat sits nicely on the rails between the frames. Take your time. A small square jewelers file for the notches and a sanding block fro the outside edges. Note: The little notches play a huge part in allowing the seat to sit down nicely on the rails, so cut and chamfer ( angle of frame) carefully using the template as a guide. Fit and final sand the outside edges of the seat which also have a slight chamfer. I then coated each seat with a very thin coat of McCluskey Spar Varnish, and after waiting for about an hour lightly wiped each seat with a damp rag with mineral spirits to dry overnight. I hope this helps all the newbies out there, as I'm one myself ! Cheers, Tim
- 31 replies
-
- 7
-
-

-
- Grand Banks Dory
- Bluejacket Shipcrafters
- (and 1 more)
-
Welcome aboard Jim!
-
Thank you Ryland
-
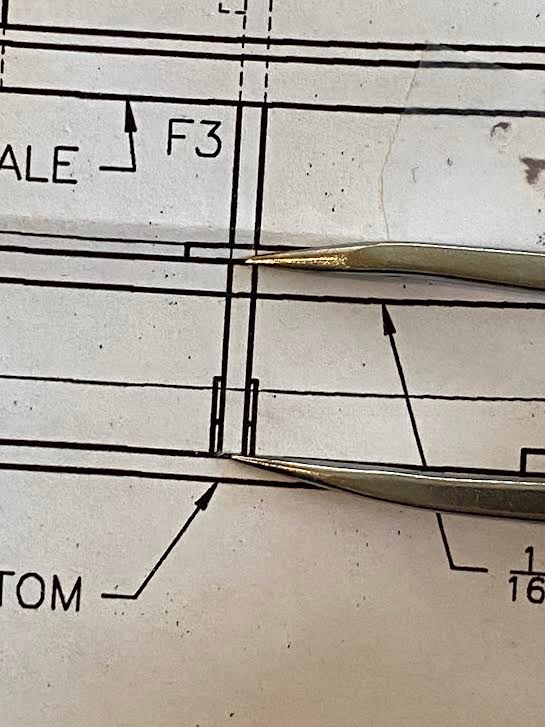
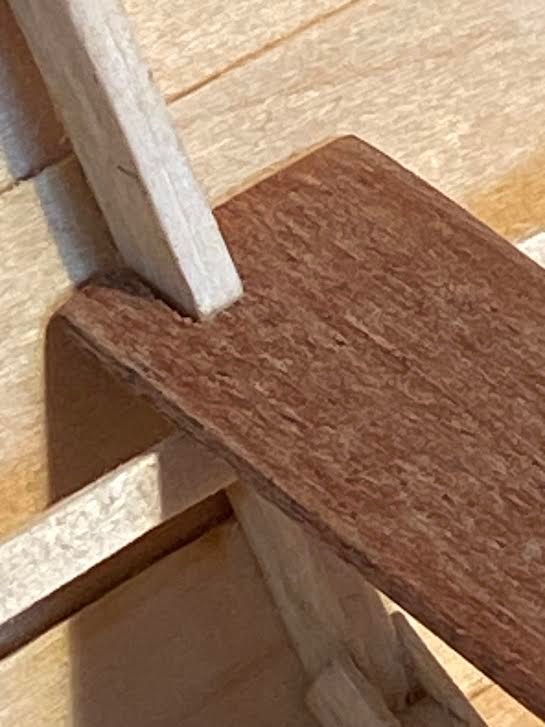
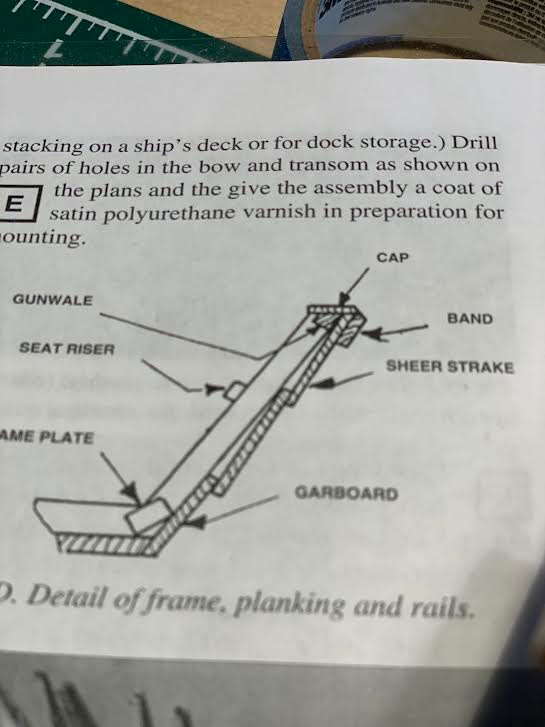
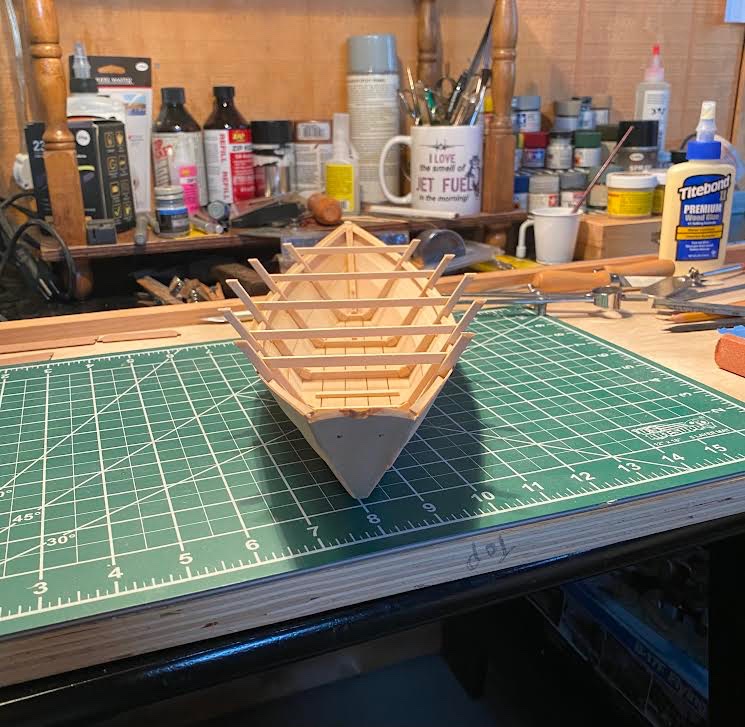
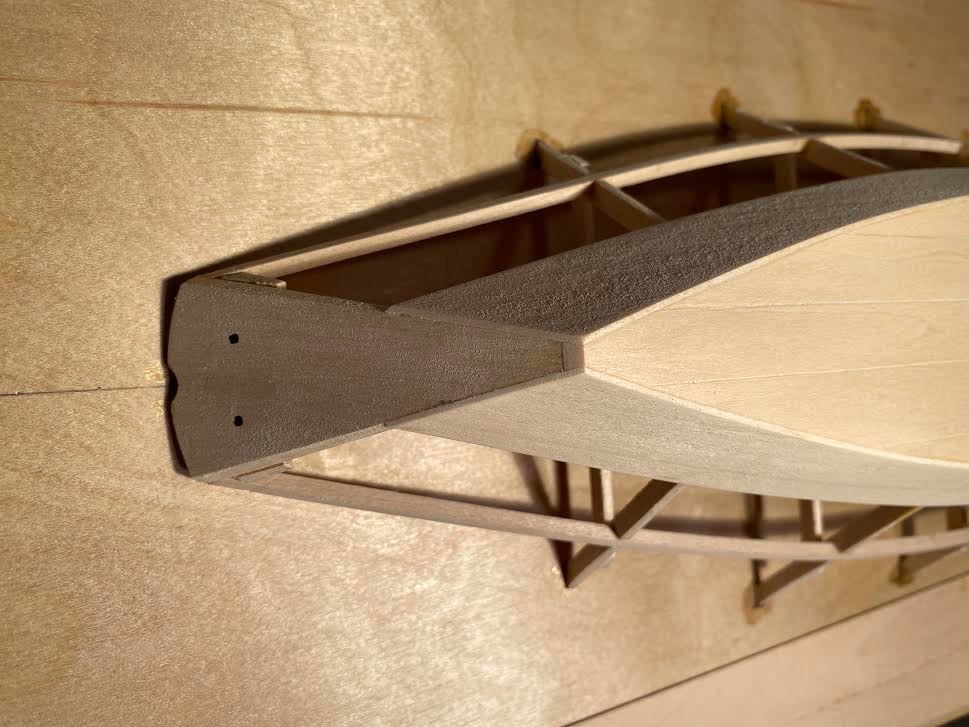
Yesterday I sealed the boat with a 50/50 mix of Zinnser clear Shellac and Denatured alcohol. I may use a 400 or 600 paper to sand smooth, perhaps even fine scotchbrite. Also worked on this gunwale strip/cap detail. I did notice some Dory's through photographic evidence have more of an angle, slanted at almost the angle of the gunwale. Without this little detail in the instructions I may have followed that angle. The one photo shows the starboard side trimmed and the port side still raw from snipping away the build frame.You can see the extreme angle there would be if you followed the angle of the gunwale strip and ignored the detail. I found a wonderful color video on YouTube called Grandbanks Doreymen of the Newfoundland South Coast and Gloucester that supports that detail and colors used during that time period. My preference would be to leave the interior natural, using a thinned spar varnish and the outside the Depot Buff as is called out in the available paint kit. The gunwale would be deep green. I would like it to be as historically accurate as possible. Any suggestions? Cheers.
- 31 replies
-
- 3
-
-
-
- Grand Banks Dory
- Bluejacket Shipcrafters
- (and 1 more)
-
Finished planking today and added gripe. On to the next step (s).
- 31 replies
-
- 3
-
-
- Grand Banks Dory
- Bluejacket Shipcrafters
- (and 1 more)
-
Thank you Mark.
-
Thank you for that, but it looks like I need to have reached 100 posts before I can utilize that option. Tim
-
My apologies Dave, I never answered your question. Yes, I would like to change it to Tim Lent
-
Welcome aboard Javelin!
-
Thanks for the help mtaylor! I tried and read the link and all of my photos are showing up in my build log, but still not on the very first page. If you look up Grand Banks Dory by East Ender - Bluejacket Shipcrafters 1-1, in 1851-1900, only my first two photos are visible. Other member build show a slew pf photos. I must have messed up somewhere after my first post. Thanks Tim
-
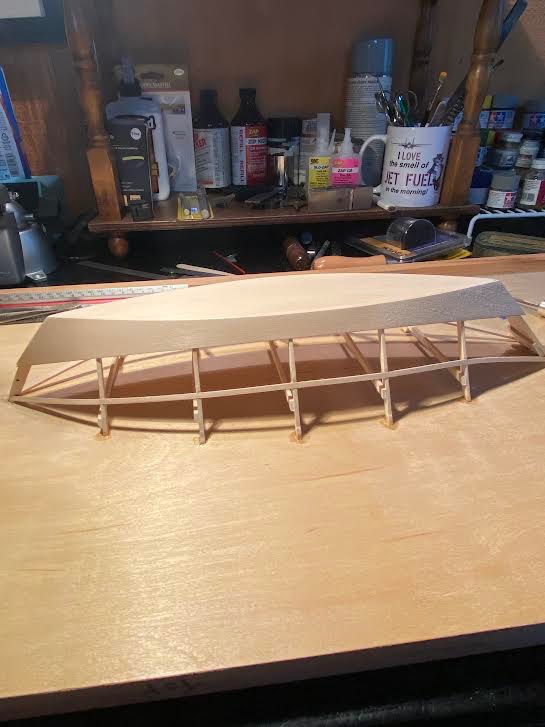
Not much today. I sanded the frame and installed the first two garboard planks, and sanded again. Soaked the gripe in ammonia and water and formed it with the heavy shaft of my soldering iron. Will let this dry overnight. I may install one more plank before removing it from the build board. Tim

- 31 replies
-
- 3
-
-
- Grand Banks Dory
- Bluejacket Shipcrafters
- (and 1 more)
-
I'm not sure if this is the correct page to discuss this for help, but I've noticed that when I click on my build of the Grand Banks Dory by Bluejacket in the build log page for ships between 1851 and 1900, only my first two photos populated on my main page, the rest have not. I did read the "Getting Started" page but I must be missing something. All other members seem to have all their photos displayed before clicking onto their log. Can anyone help? Thank you, Tim
-
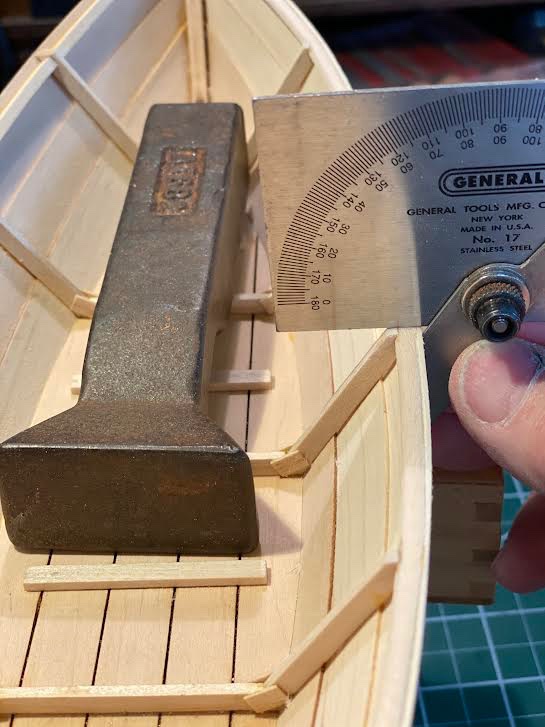
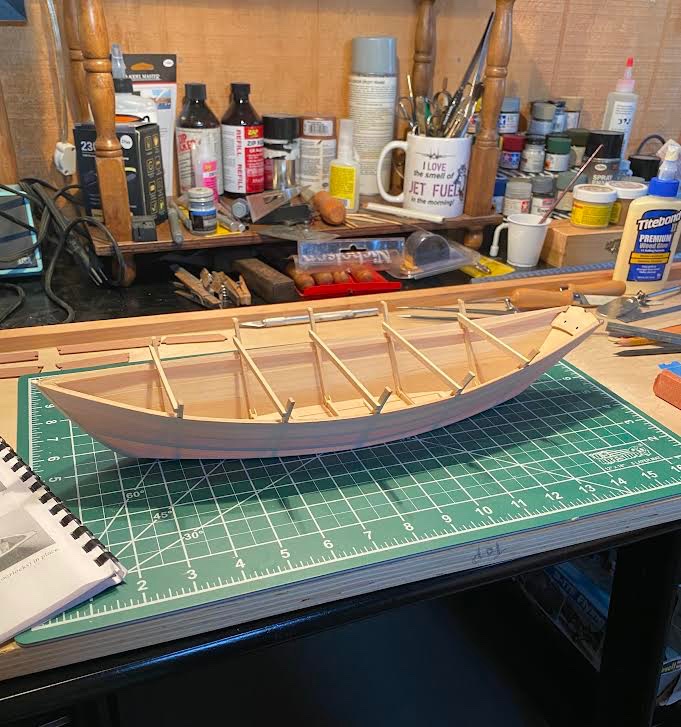
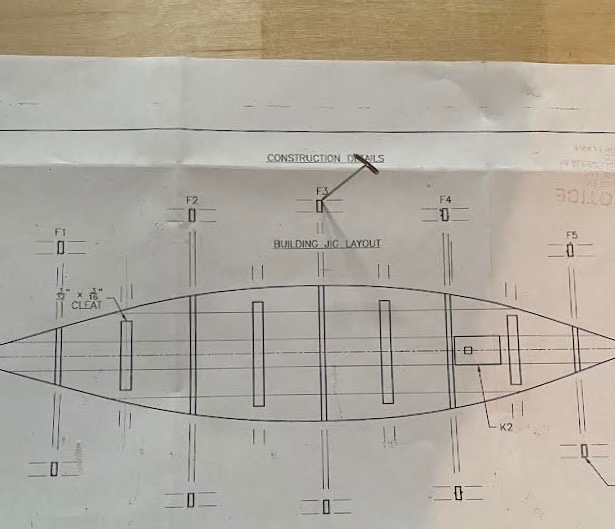
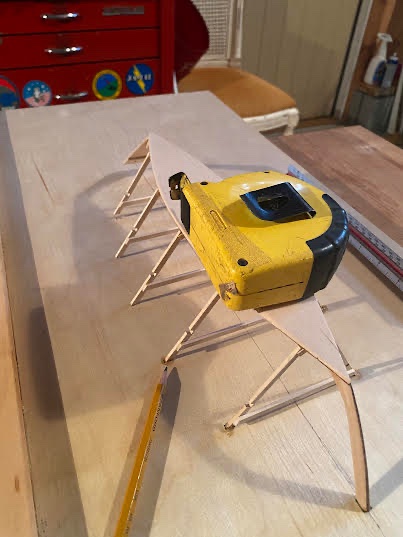
Today after all the chamfering of the stem, transom, matching the angle of the the frames along the bottom for a nice clean angle and flat surface for the side strakes, I flipped my building board over and transferred all of the important jig points off the print by way of pinpoint and then starting with the stem and working back one frame at at a time, glued the assembly to the board. Much more robust than pinning and no worries of movement. (Bluejackets video of the Dory also has the frames glued to the work surface). Tomorrow will fit the gunwale strips after soaking in water and ammonia. not sure how long to soak them. Then will trim and clamp them in place until dry before gluing.
- 31 replies
-
- 2
-
-
- Grand Banks Dory
- Bluejacket Shipcrafters
- (and 1 more)