IllicitFive
-
Posts
14 -
Joined
-
Last visited
Recent Profile Visitors
382 profile views

.thumb.jpeg.ffac2f8a24d212961a83eab4efb06a6c.jpeg)


-
 yvesvidal reacted to a post in a topic:
Aurora by IllicitFive - OcCre - Brig
yvesvidal reacted to a post in a topic:
Aurora by IllicitFive - OcCre - Brig
-
king derelict reacted to a post in a topic:
Aurora by IllicitFive - OcCre - Brig
-
king derelict reacted to a post in a topic:
Aurora by IllicitFive - OcCre - Brig
-
king derelict reacted to a post in a topic:
Aurora by IllicitFive - OcCre - Brig
-
king derelict reacted to a post in a topic:
Aurora by IllicitFive - OcCre - Brig
-
king derelict reacted to a post in a topic:
Aurora by IllicitFive - OcCre - Brig
-
king derelict reacted to a post in a topic:
Aurora by IllicitFive - OcCre - Brig
-
MajorChaos reacted to a post in a topic:
Aurora by IllicitFive - OcCre - Brig
-
DavidG reacted to a post in a topic:
Aurora by IllicitFive - OcCre - Brig
-
SiriusVoyager reacted to a post in a topic:
Aurora by IllicitFive - OcCre - Brig
-
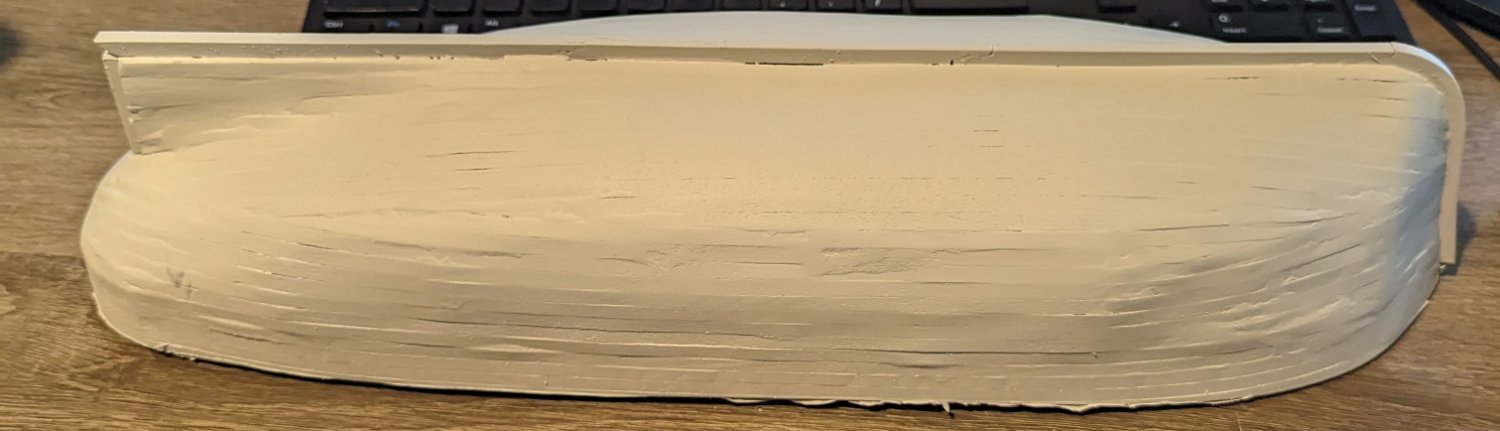
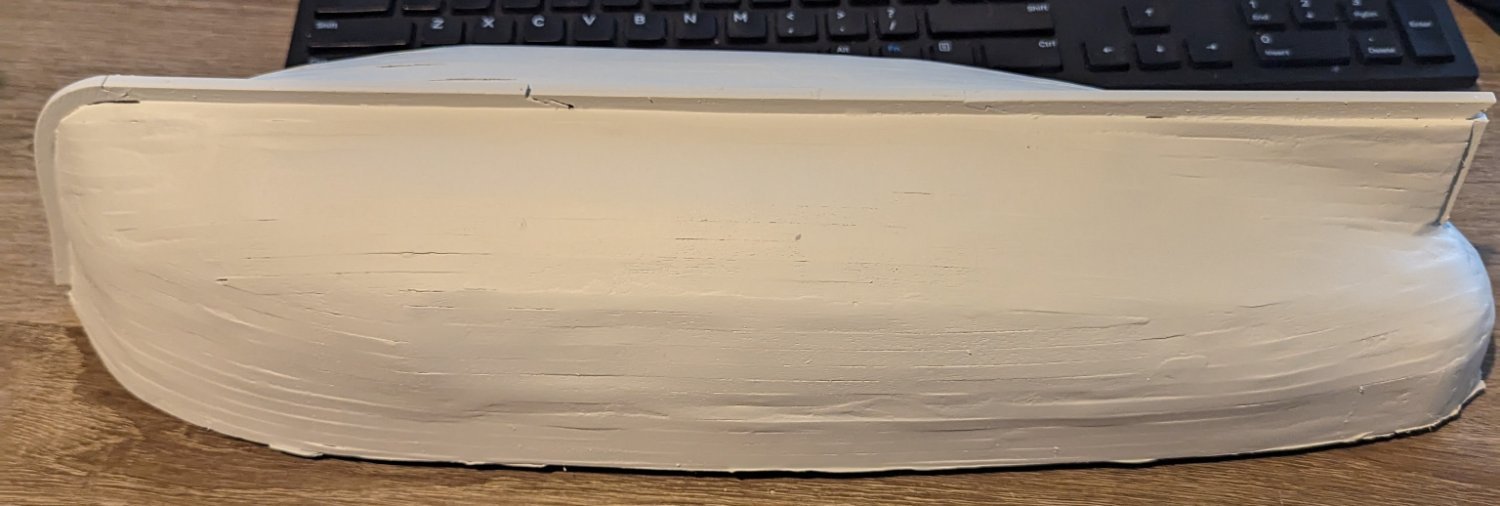
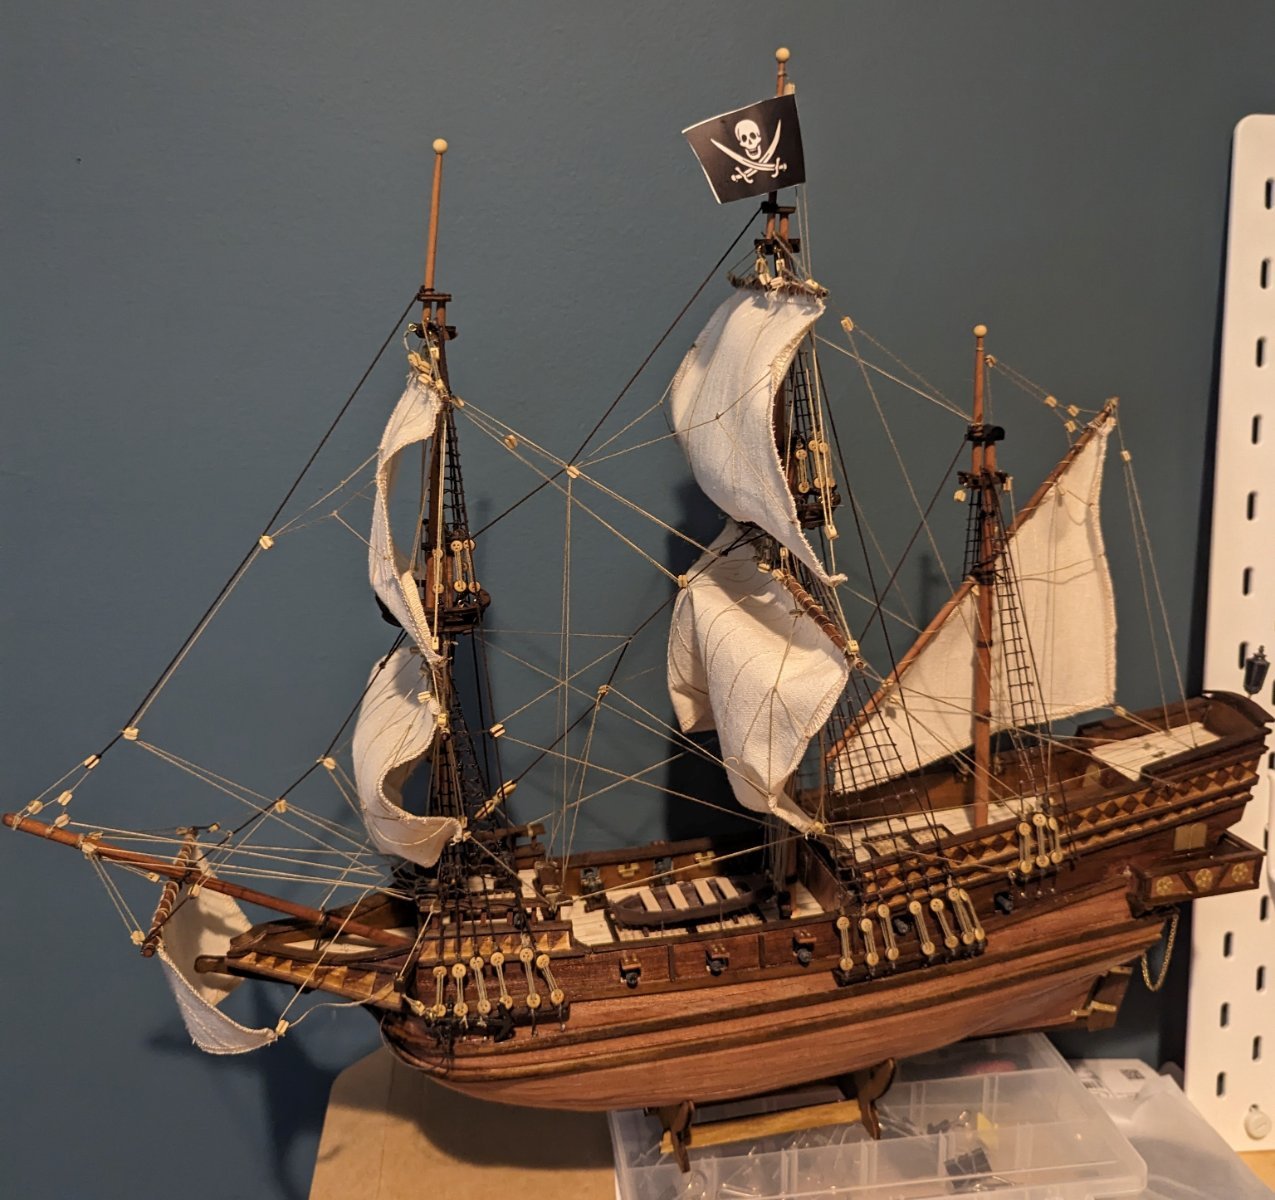
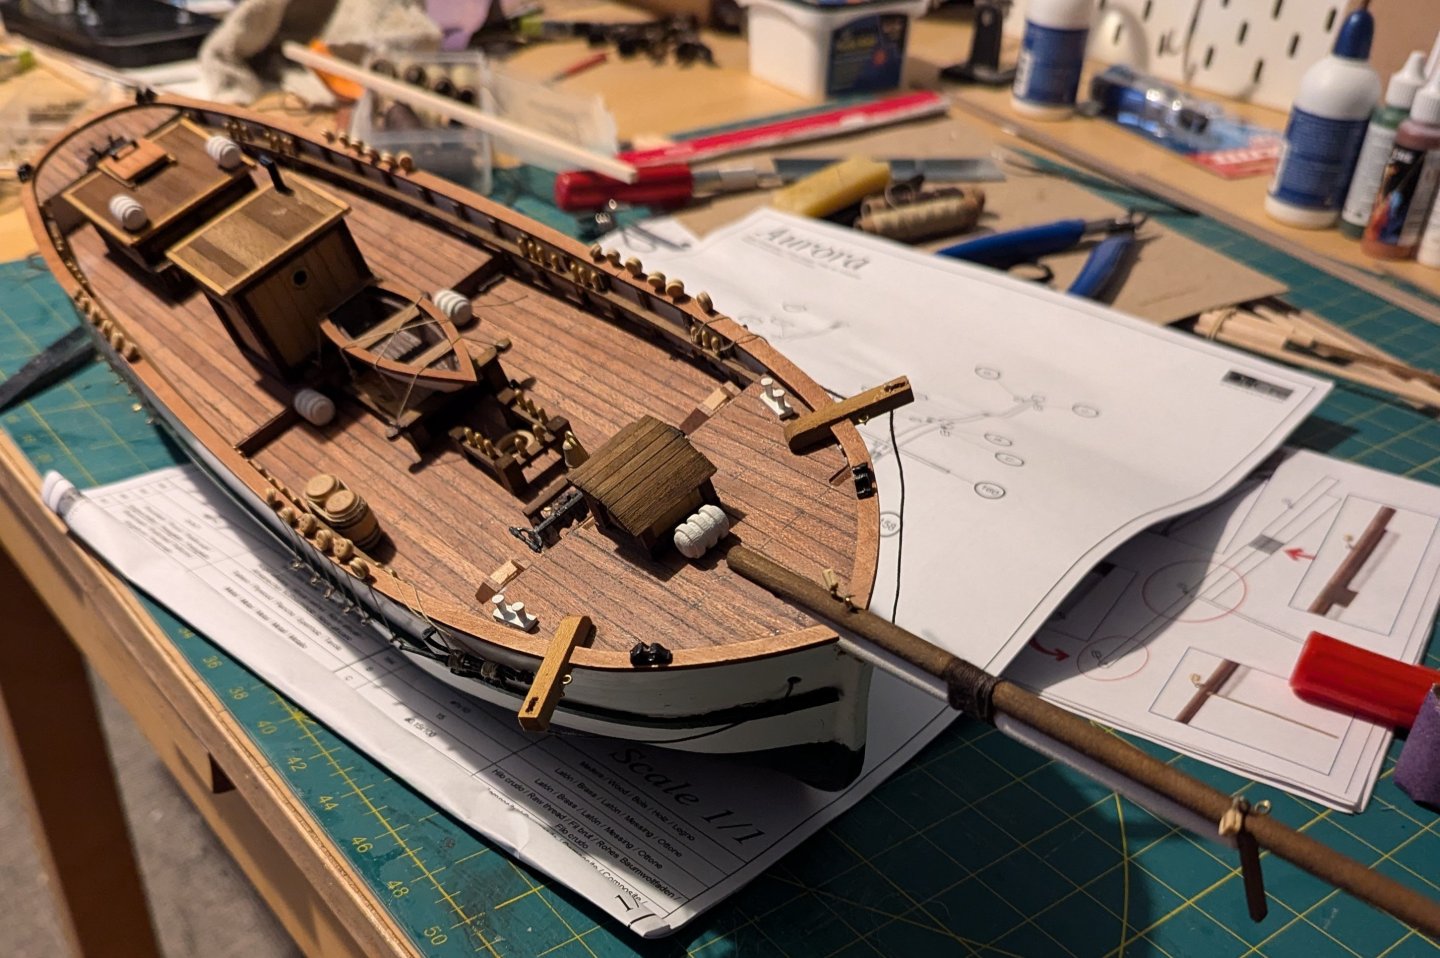
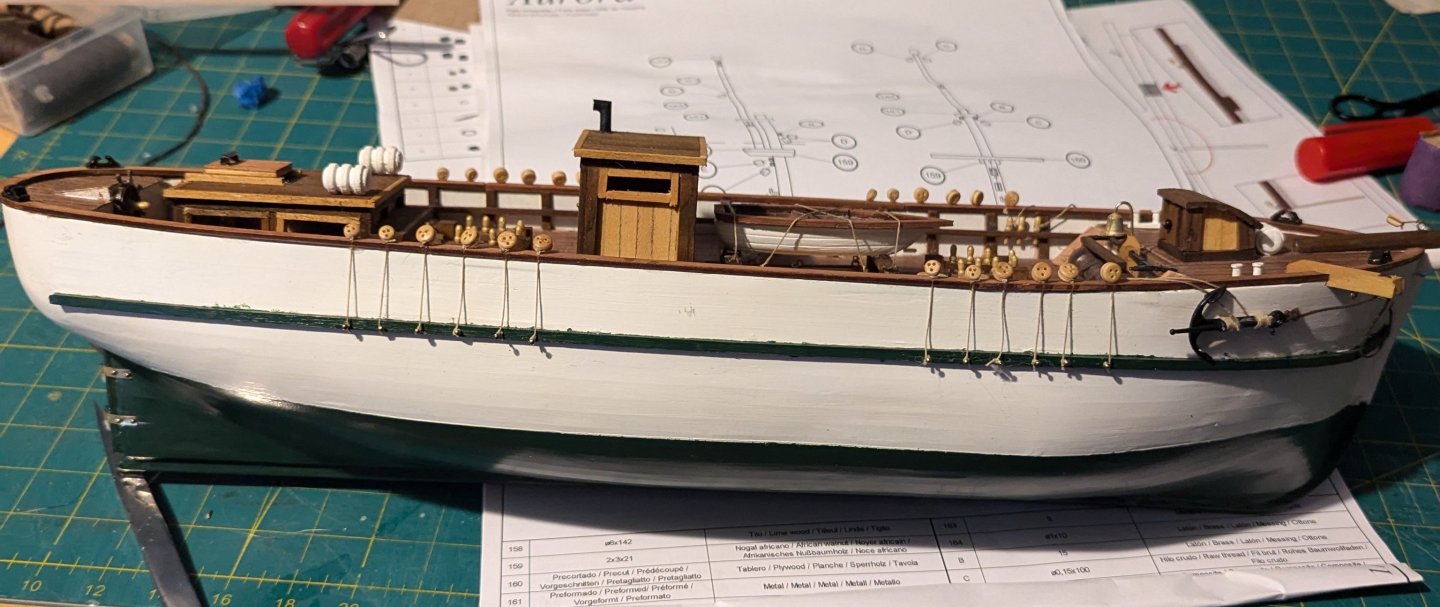
Been quite awhile since I posted about this but pleased to say process has been made. I had taken photos on my old phone which then broke, and I hadn't backed them all up so lost a lot of progress pictures. Through sanding, mudding, redoing portions of the hull I finally got it to a point of being acceptable. Not perfect but much better than where it was at. This was my first time using an airbrush as well and I am very happy with the results. Did some practice work and weirdly found the acrylic with a 1:1 with water worked best for my cheap airbrush. Learned that standard blue painters tape does not work as well as I hoped. Will be investing in modelers tape for the next time. I decided to use pine die on the lighter portions of the attached pieces to give it some more depth of color. Now to begin work on the masts and continue the journey of this build. Hopefully have a bit more time to work on it and remember to provide more updates. Thank you all for your advice above. It was greatly helpful in my times of frustration and allowed me rework this model to a point of moving forward along with learning a lot of new tricks for future builds.


-
Just an update. I have not given up on this yet just had life take over recently, 7 month old, a bit of travel and work getting crazy. Planning on returning to this project soon and attempting to save it. I appreciate all the help and advice, planning on sanding it down and seeing if I can get a cleaner finish on this.
-
 IllicitFive reacted to a post in a topic:
Aurora by IllicitFive - OcCre - Brig
IllicitFive reacted to a post in a topic:
Aurora by IllicitFive - OcCre - Brig
-
IllicitFive reacted to a post in a topic:
Aurora by IllicitFive - OcCre - Brig
-
IllicitFive reacted to a post in a topic:
Aurora by IllicitFive - OcCre - Brig
-
Thanks, I think I will give that a shot, sand, refill sand and see what I can save. Heck while it may be more work than if I did it properly the first time it still may turn out.
-
When you say stripping and rescuing it looks like I have to go way back to the beginning and almost start it over to fix the issues or what would you recommend? Honestly bit disheartened by this at this point
-
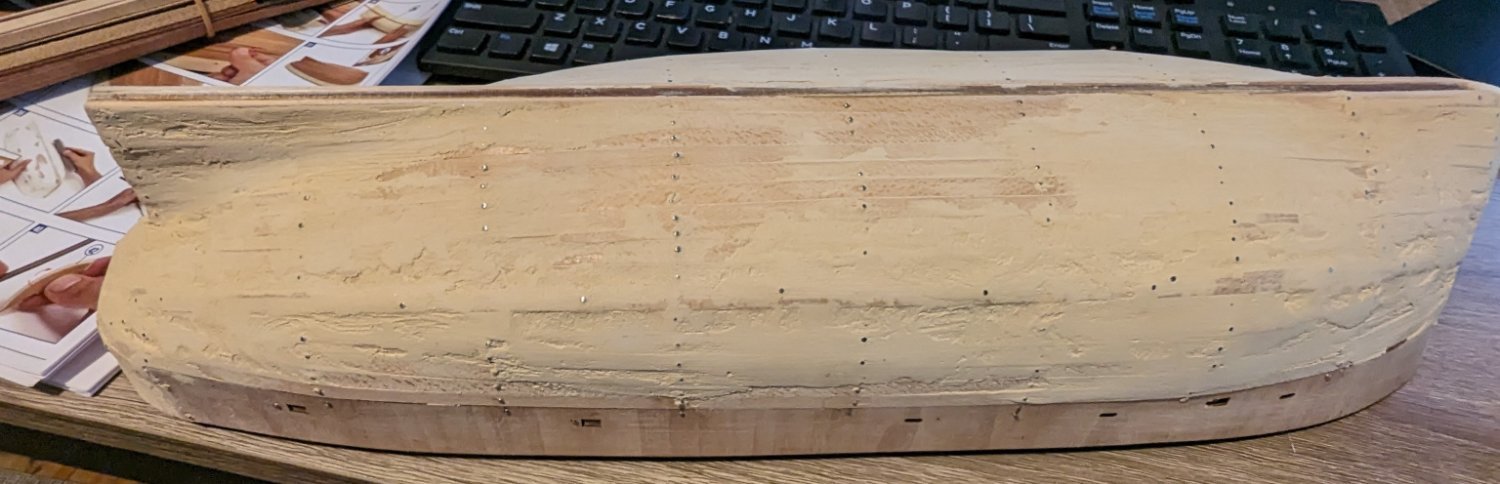
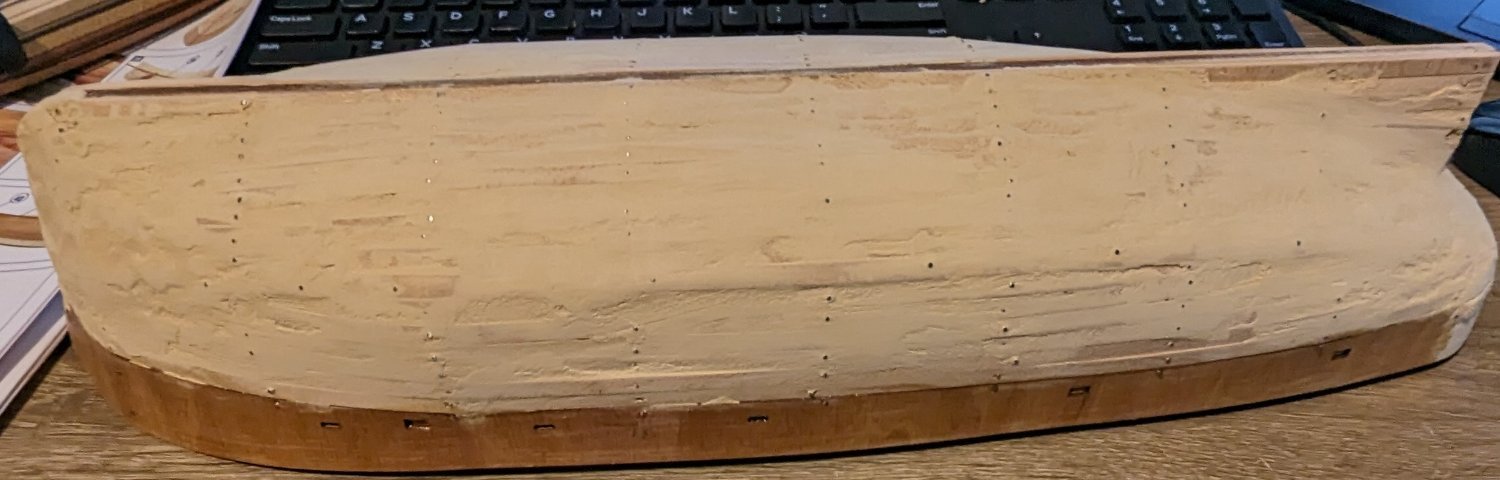
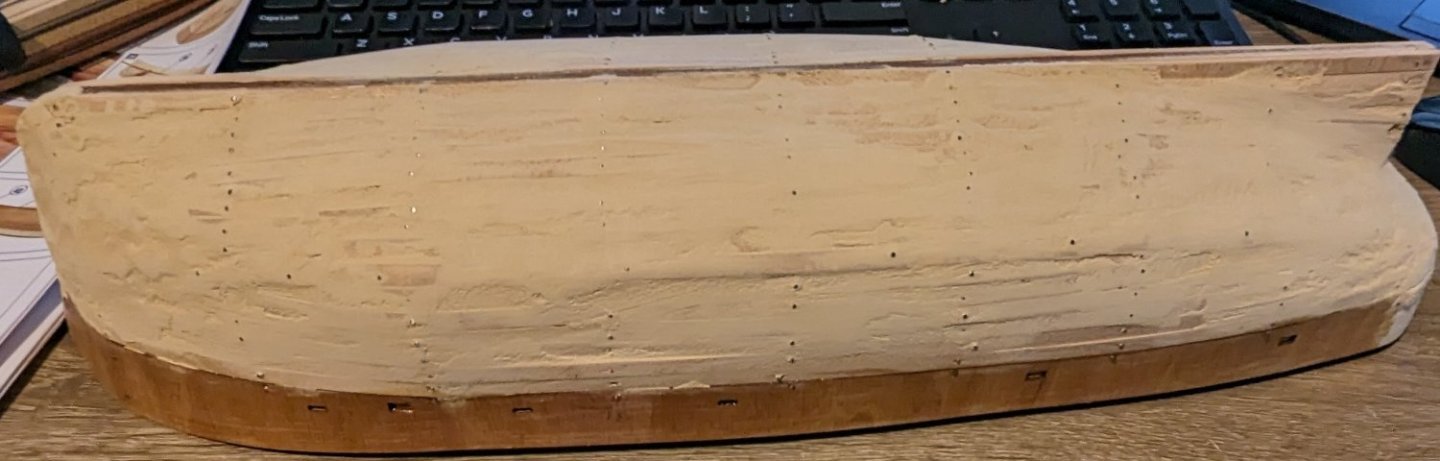
Got the layer of white paint on, definitely great at showing every little detailed flaw in the hull..... looks worse than previously thought it did prior to painting. Trying to sand paint has always made things look worse when doing other house projects so I feel like I am either needing to completely strip this down or just role with it, move forward, and embrace the mistakes hopefully looking back years from now when more experienced and watching how my skill grew. Leaning towards moving forward and embracing the imperfections of my modeling journey.


-
IllicitFive reacted to a post in a topic:
Aurora by IllicitFive - OcCre - Brig
-
IllicitFive reacted to a post in a topic:
Aurora by IllicitFive - OcCre - Brig
-
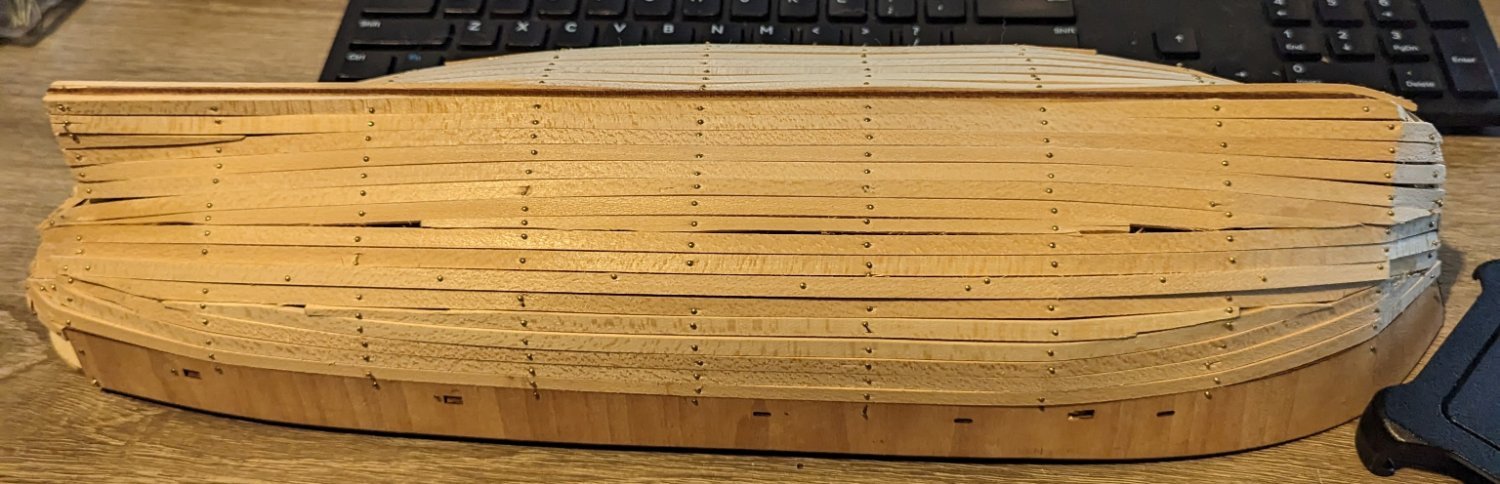
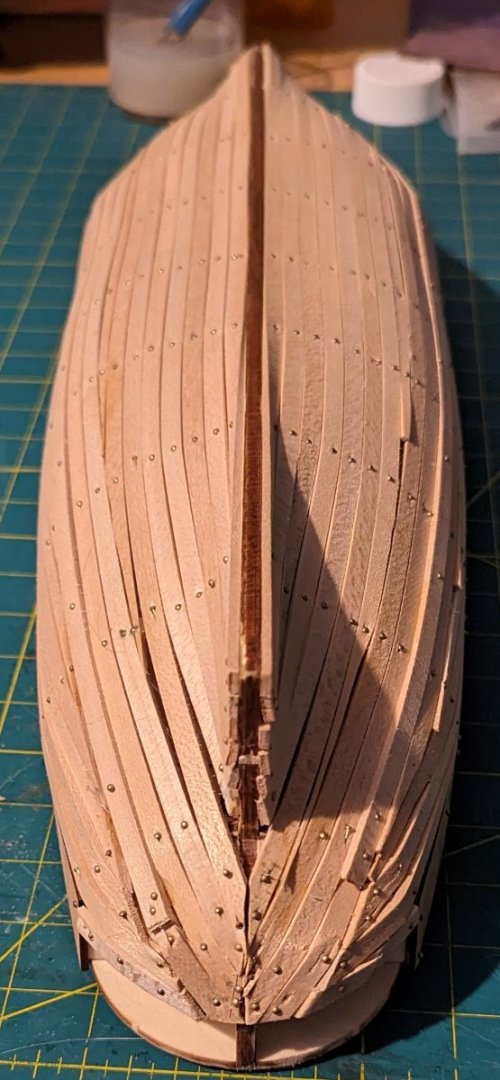
I do soak, heat bend and let cool and dry prior to placement though I did not bevel the edges around the curve. The bulkheads I was curious about as others have been sanded down much more but as I layered the sander flat across the frame there were no gaps or bulging so I took that as a sign they were sanded properly but may be mistaken. I bet my issue is lack of beveling, had not thought of that before. I am mid process of another skim coat to level out and I think its hiding the mistakes at this point but adding beveling to my notes for future builds.
-
I had tried that and it was pulling off the frame even with dried wood glue, I opted to try to file them down and for the most part the 2nd layer lied flat until I hit the curves, that's where I usually found it bubbling. Any recommendations on what I could do so the boards don't pop off when I remove the pins?
-
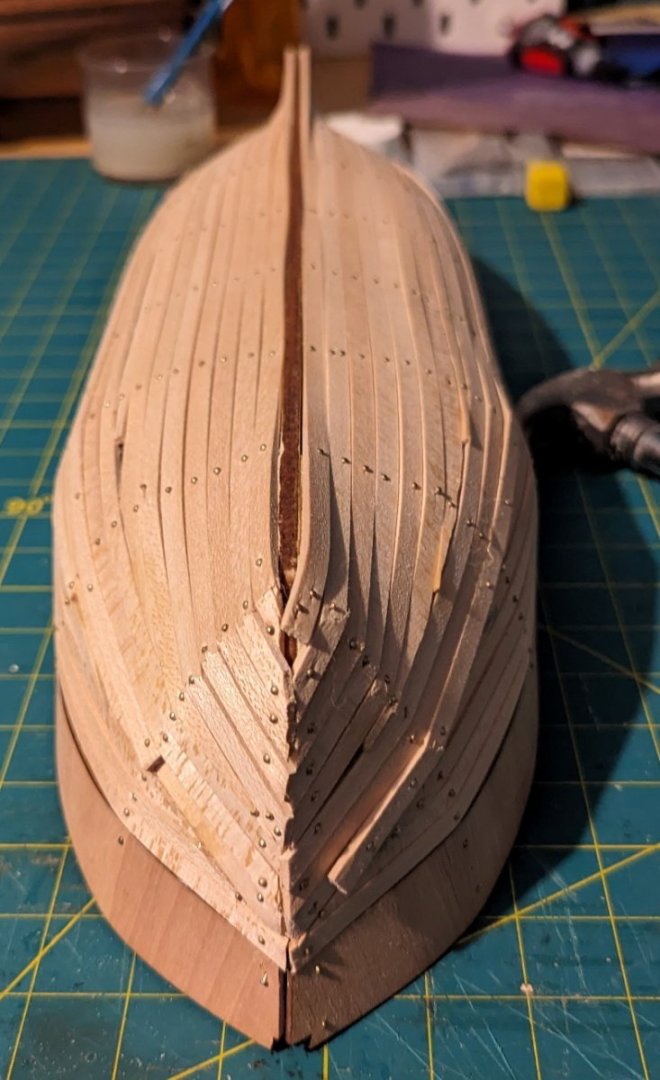
Got the 2nd layer on but already seem to run into an issue of it bubbling. Try to use super glue to hold it down if the contact glue doesn't but cant quite seem to figure out what I am doing wrong. Probably trying to hard to bend/force together instead of back filling gaps. Sanding will hopefully take the ridges down some. I am debating another thin coat of mud since this will be painted but leaning towards not doing so thinking the paint and clear coat may help to balance some of the uneven points or small gaps that showed up if not taken care of by sanding.

-
Ah yes, everyones favorite part, mudding and sanding. Really makes me think I need to learn to do the first layer better , I over mudded and will sand it down significantly/


-
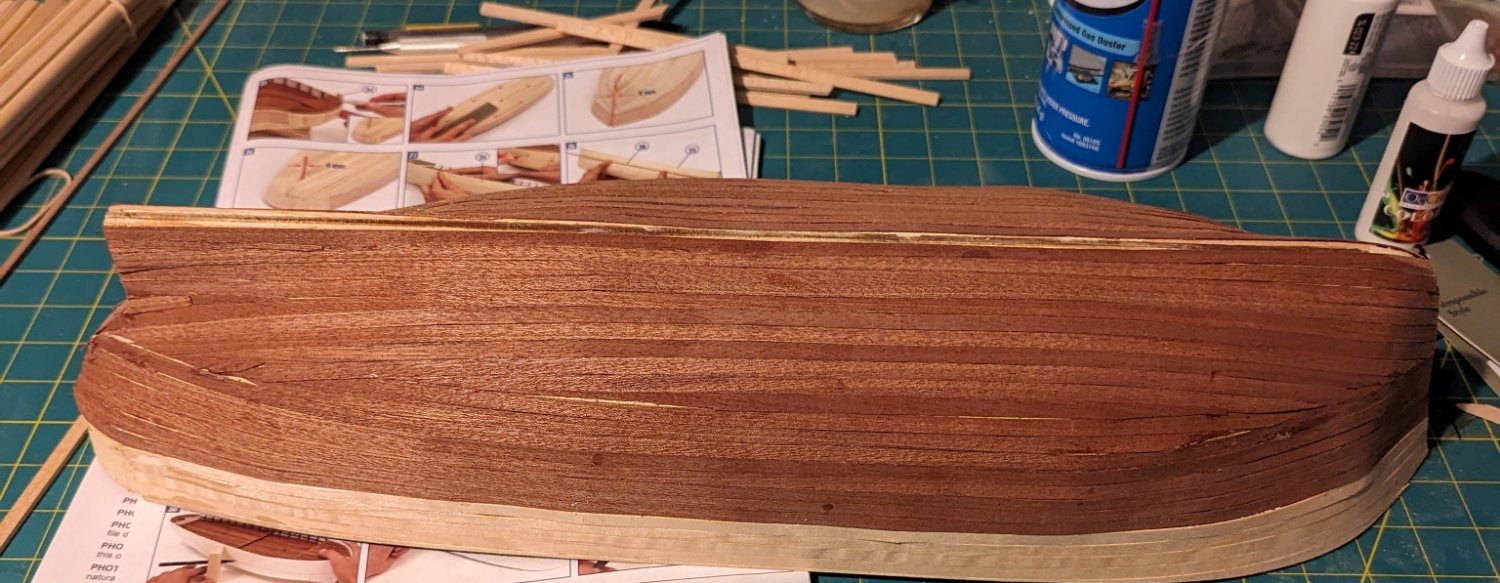
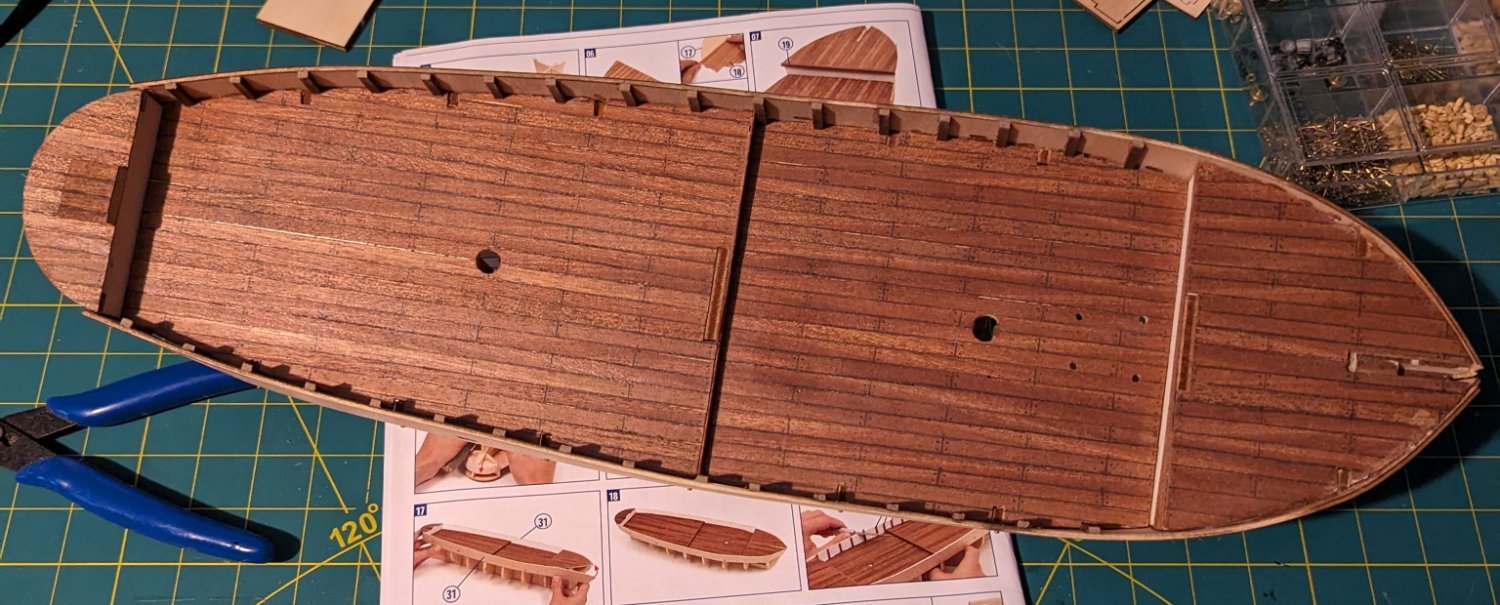
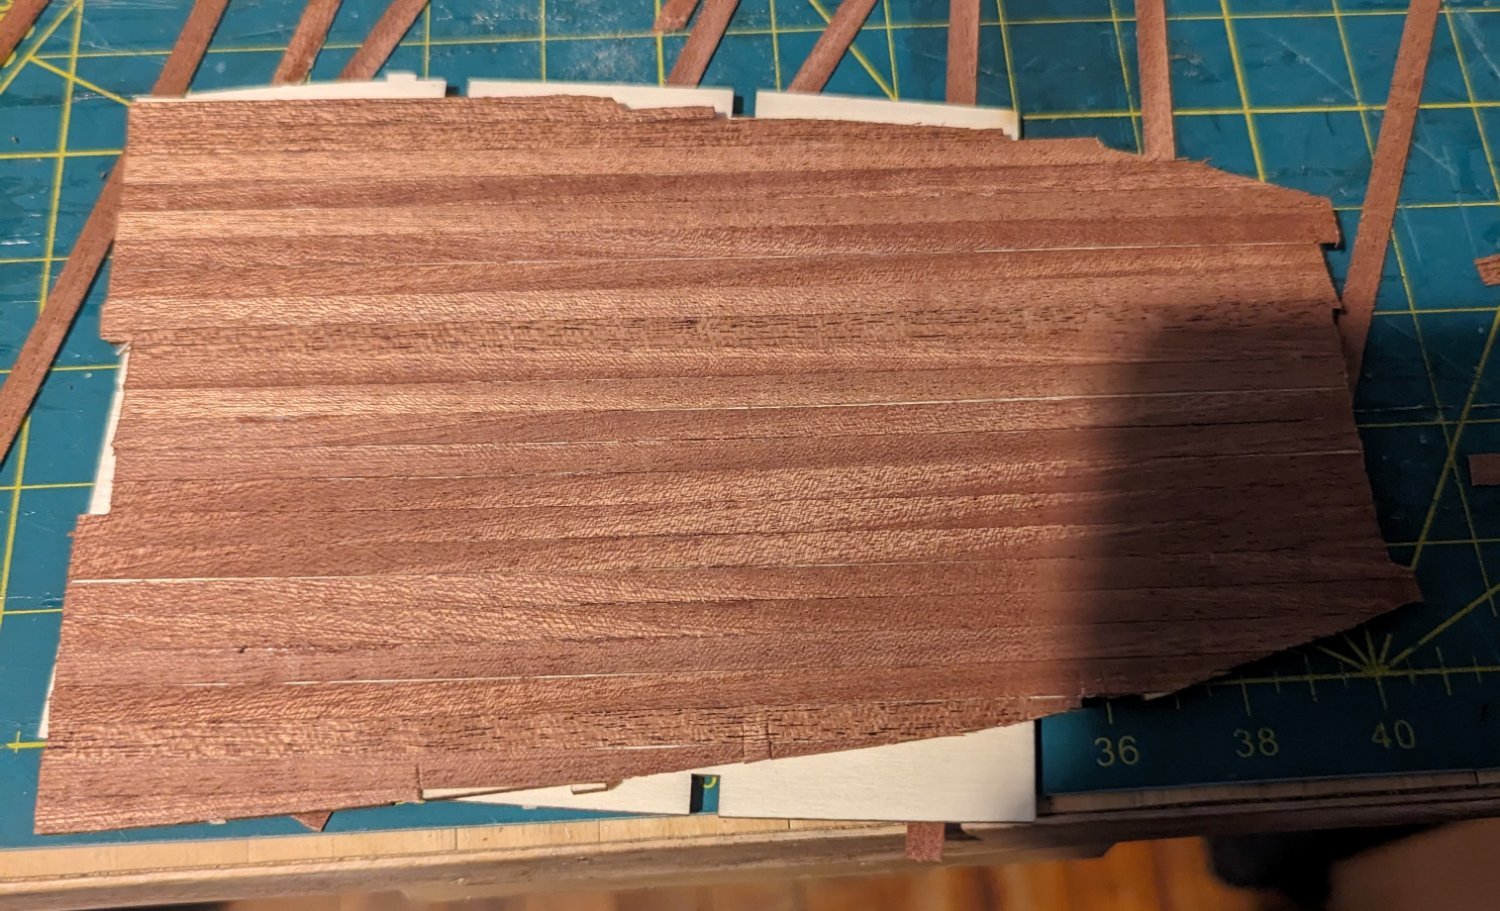
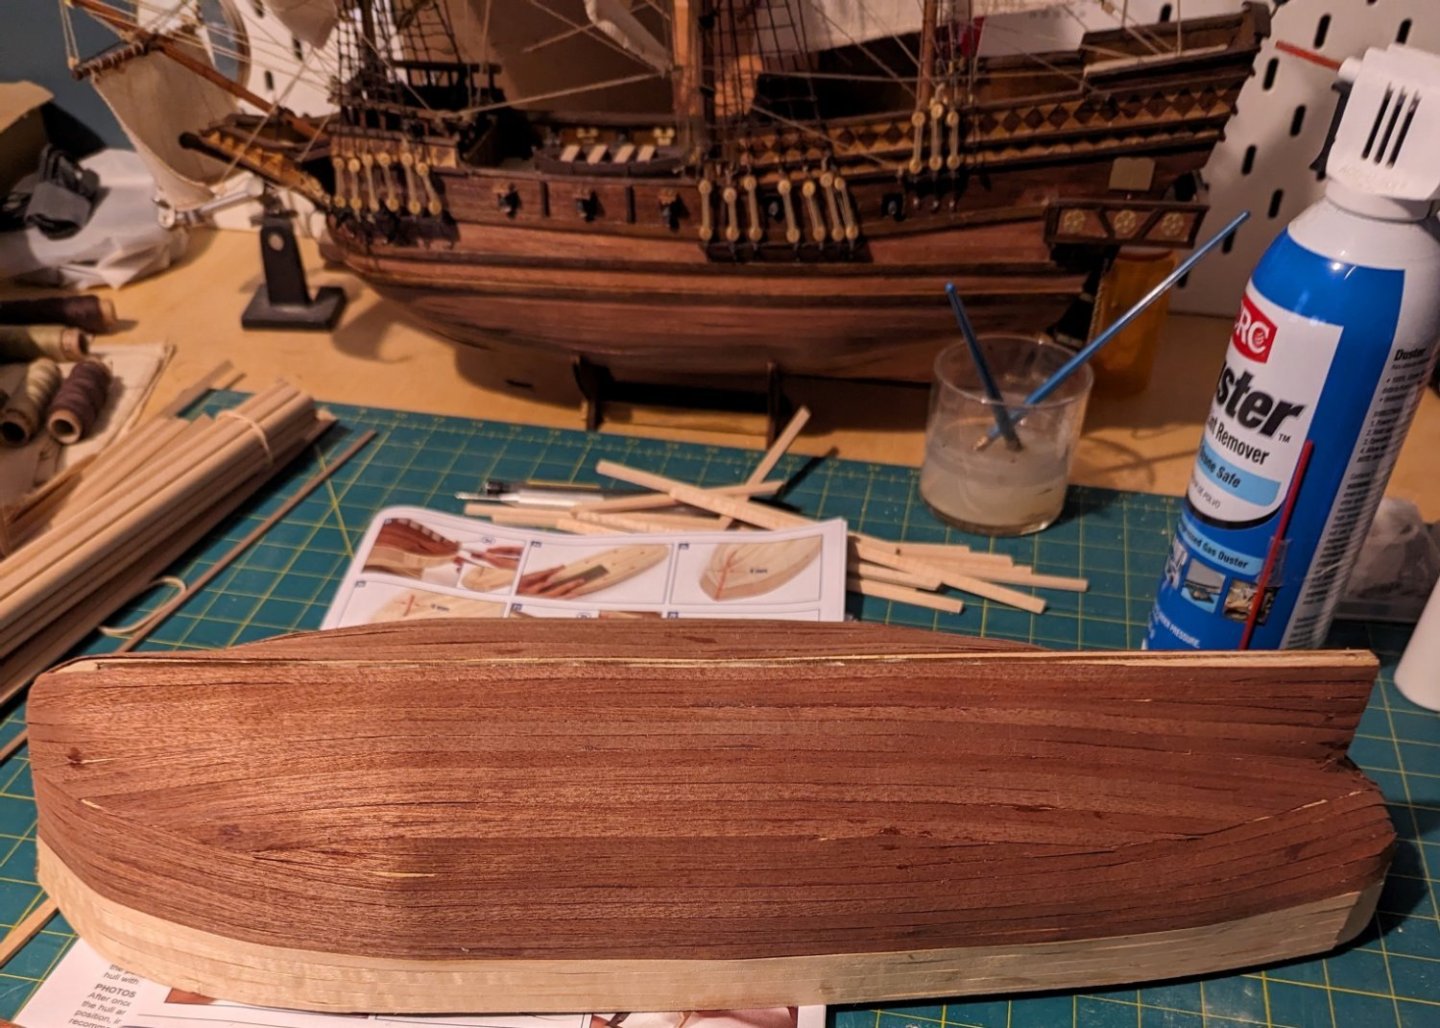
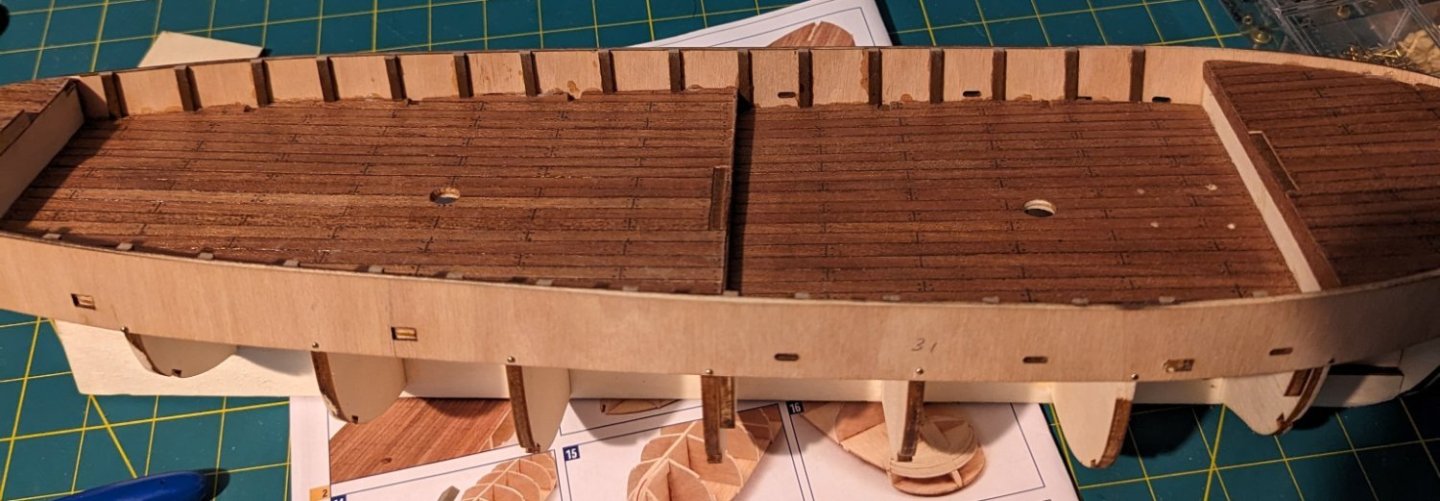
Finished up the first layer of planking, ended up layering a 2nd plank over the inset guide plank. Not perfect but by far not the worst 1st layer that I have put on. Nothing sanding and putty can't mask. Even with soaking the planks I had some snapping happen so hoping that can be smoothed out enough it will be hidden.

-
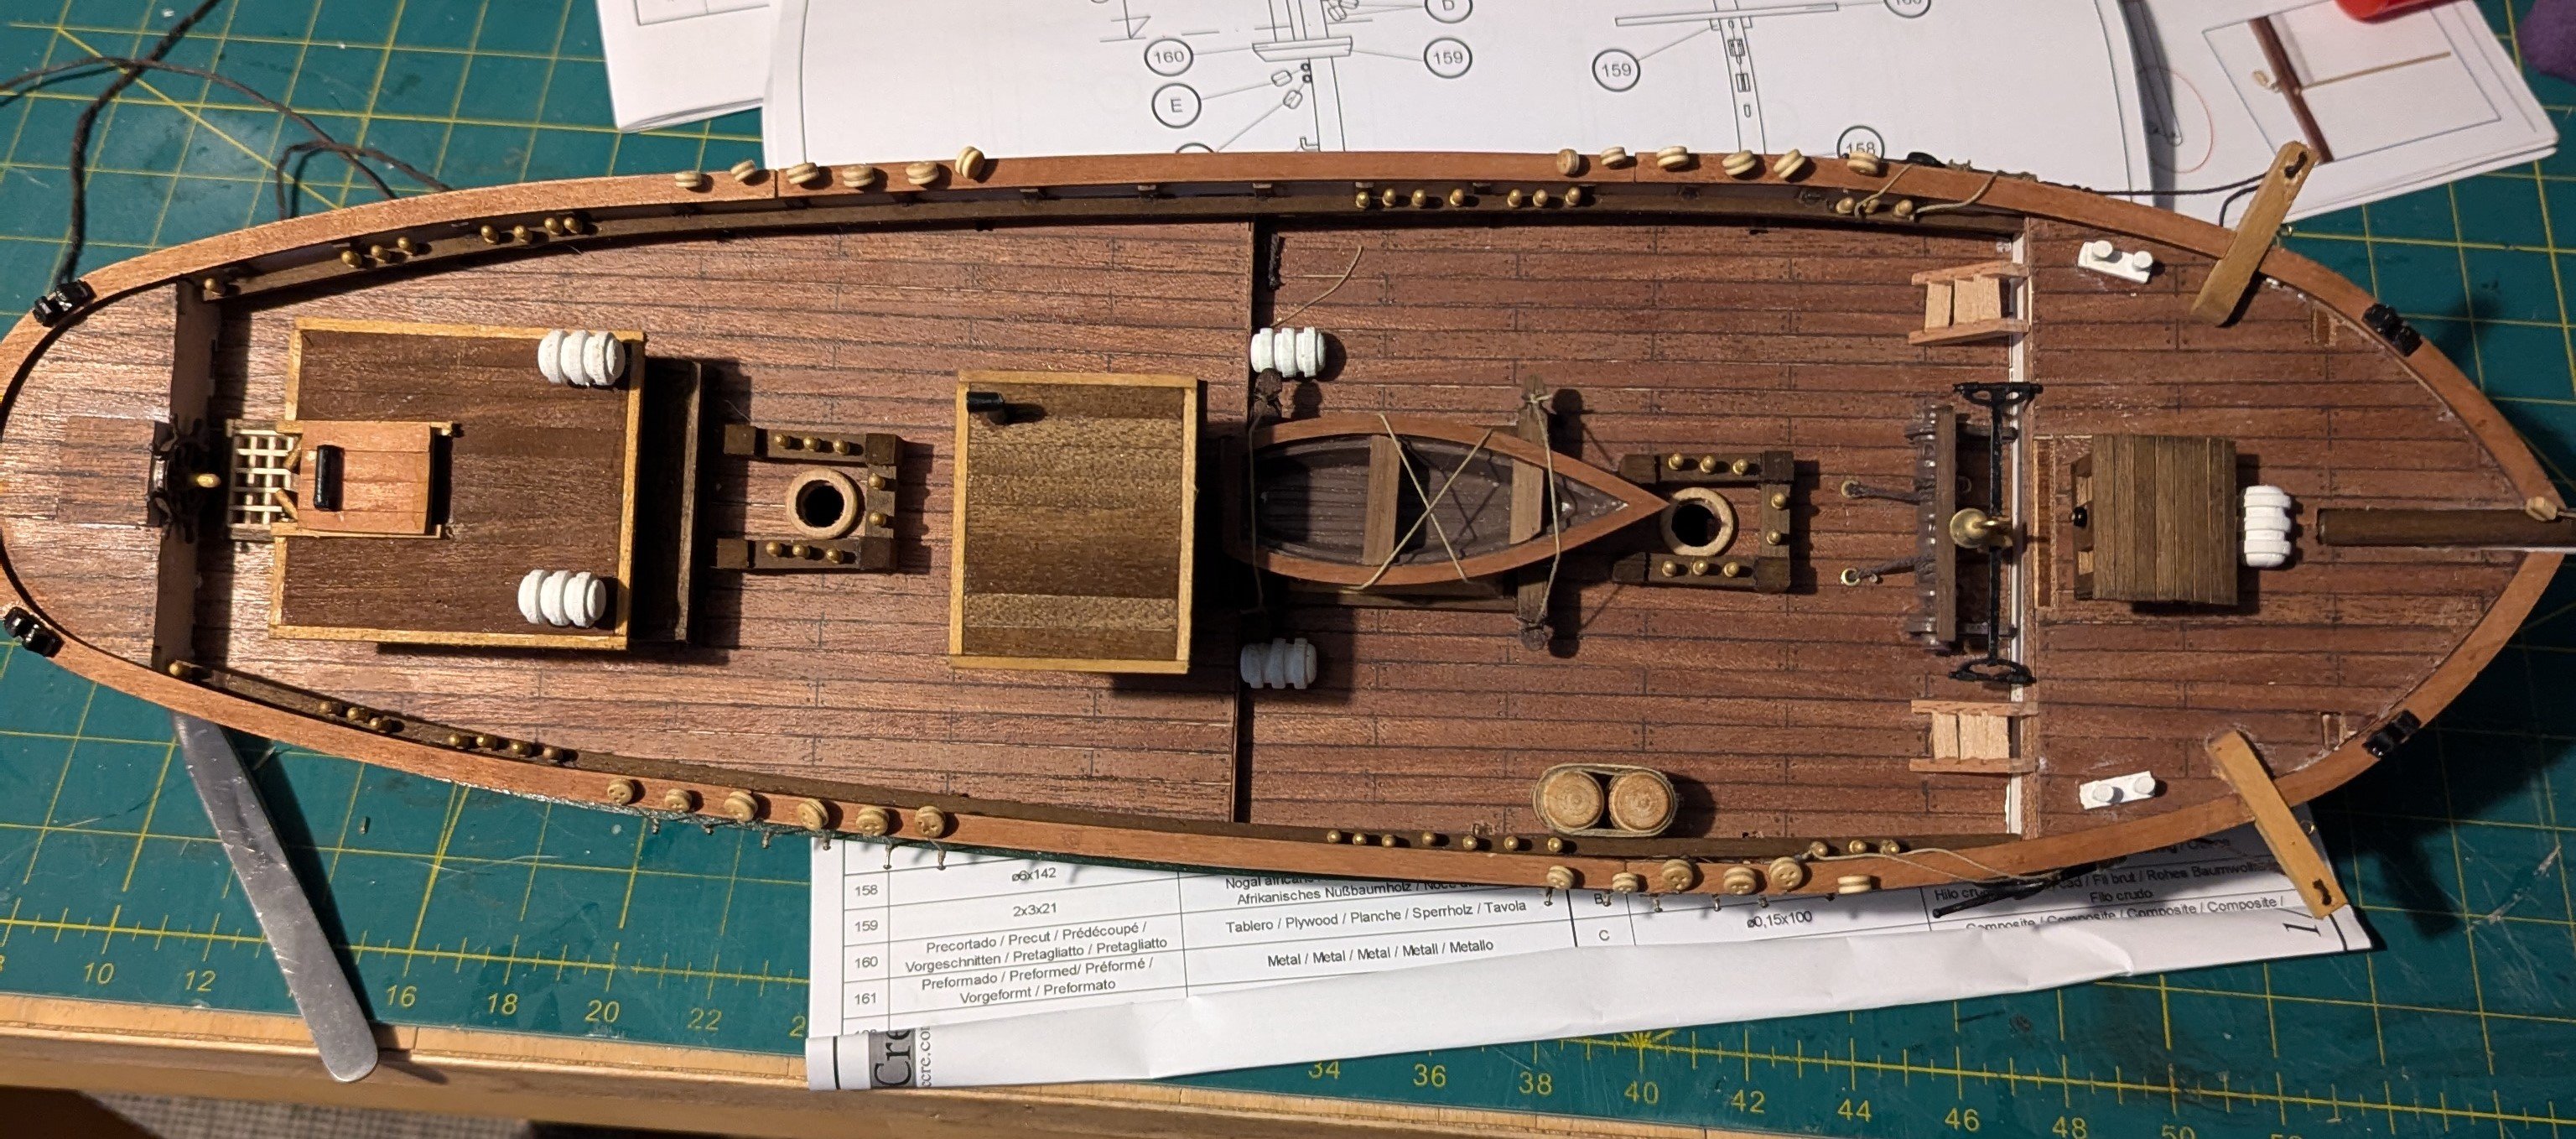
Got the painting between the stanchions on the bulwarks done, not as clean as it could have been had I done it correctly by painting first, but it will have to do. Looking for any recommendations on good brushes for acrylic paints that people have used in the past. When it comes to smaller pieces and the hull I will be attempting to use an airbrush for a good smooth finish. More on that to come when I get there haha. This model also has notches in the frame to guide the placement for lining the hull, but it is not the full depth of a board. I am trying to figure out if I should back fill down to the inset plank when smoothing it our using puddy or layer over the top and sand down to match the rest of the height then puddy the hull. Has anyone run into a model that has these?

-
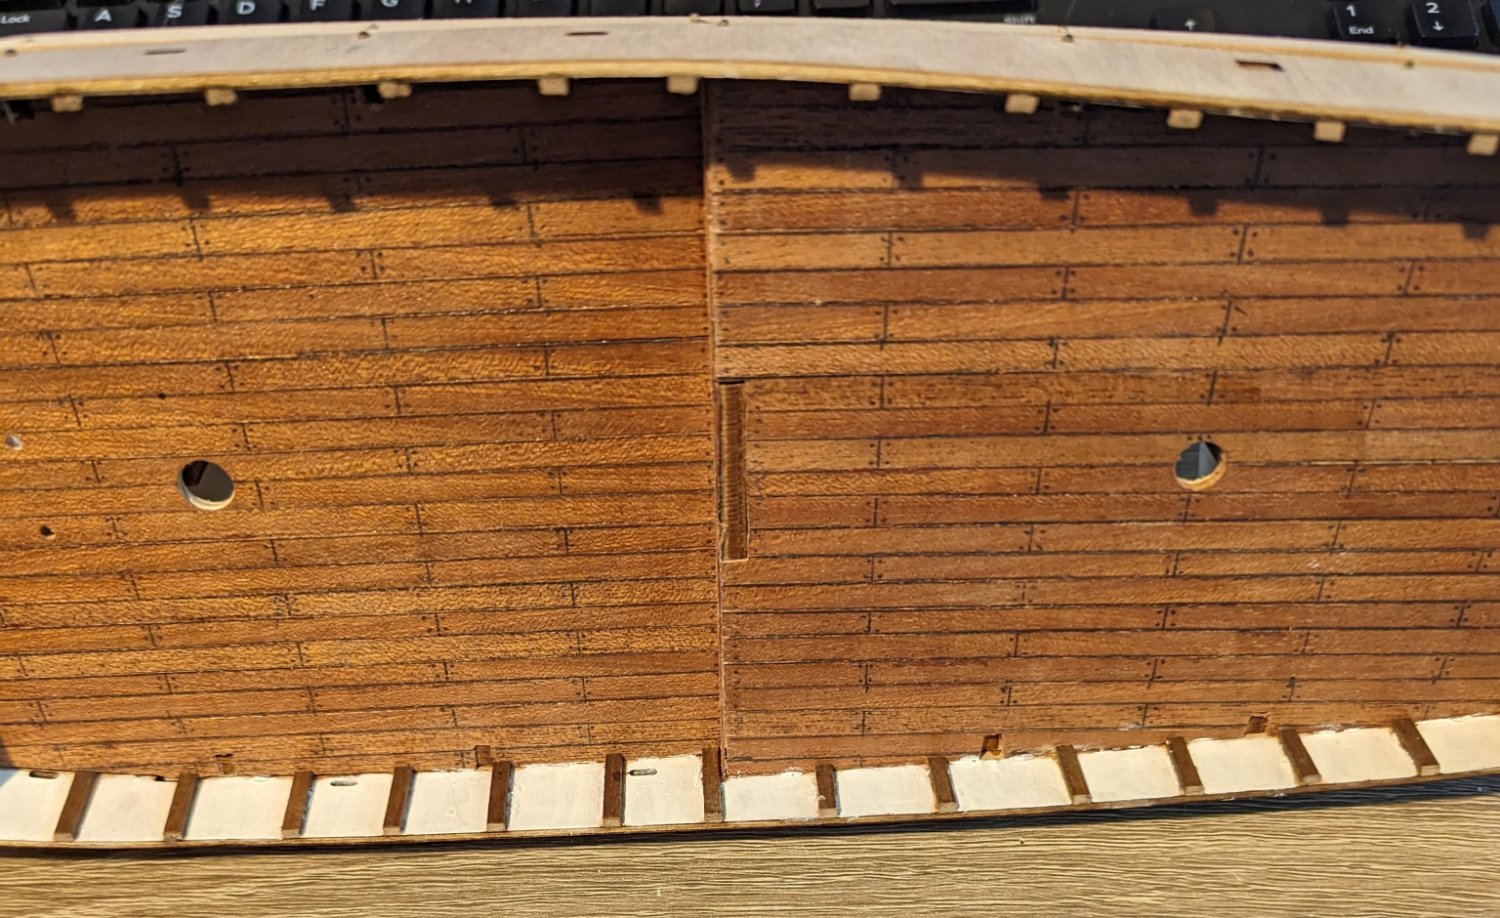
Finished up the decking and bulwarks. I couldn't get the glue to hold so ended up using nail provided to attach the bulwarks. Once I placed the stanchions I realized I had forgotten to paint the bulwarks white (Downside of doing my first painted boat). Now I get to see how steady my hand is trying to paint between the stanchions. Lessons learned. Once painted ready to start lining the hull.

-
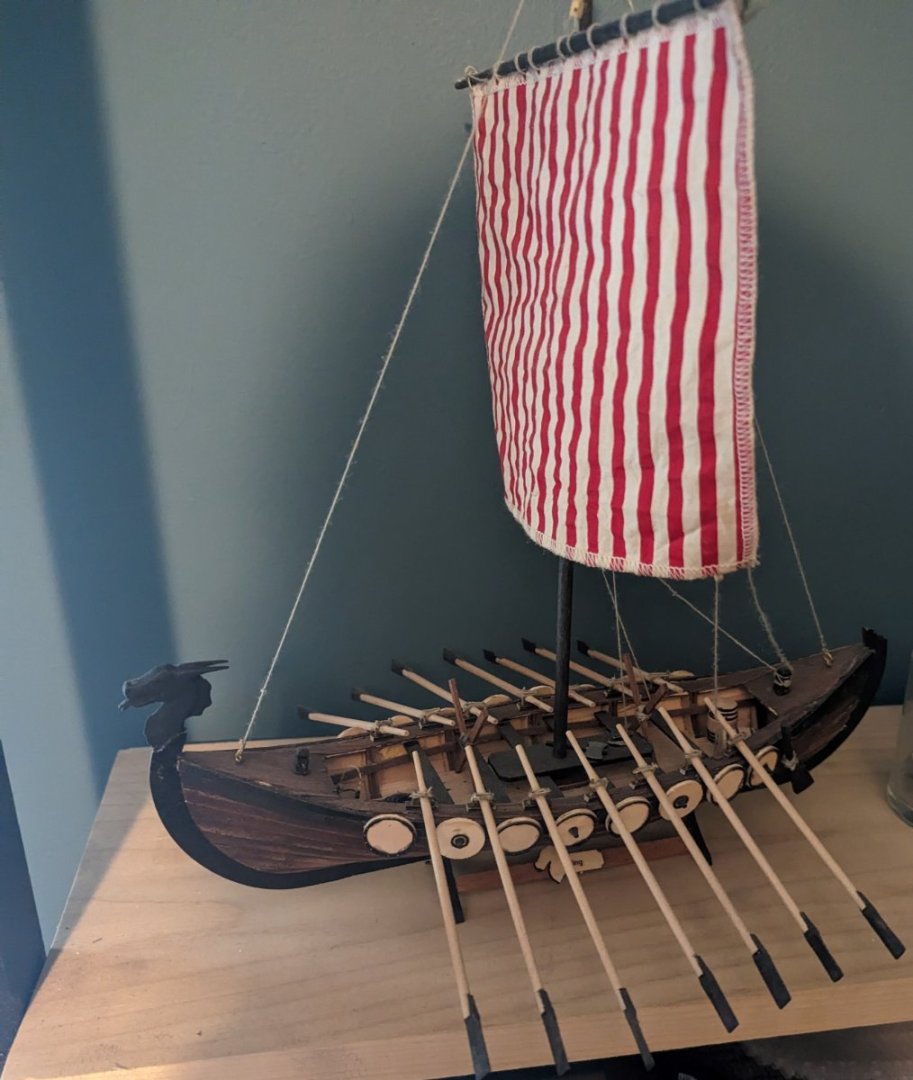
Wanting a place to track my model progress, Drakkar first completed model, 2nd Albatross, 3rd Buccaneer

-
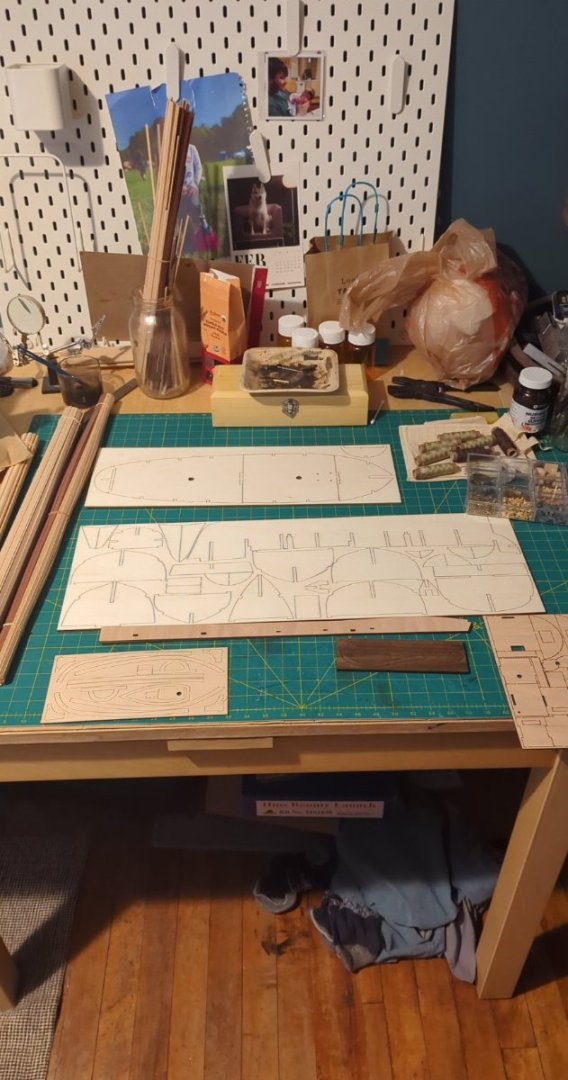
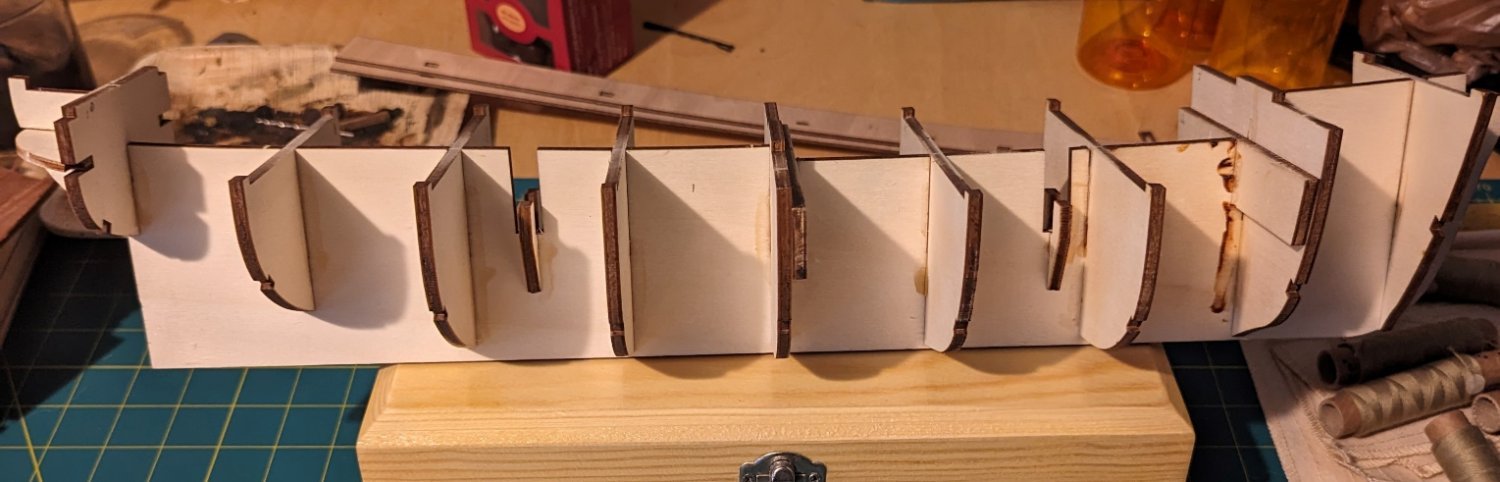
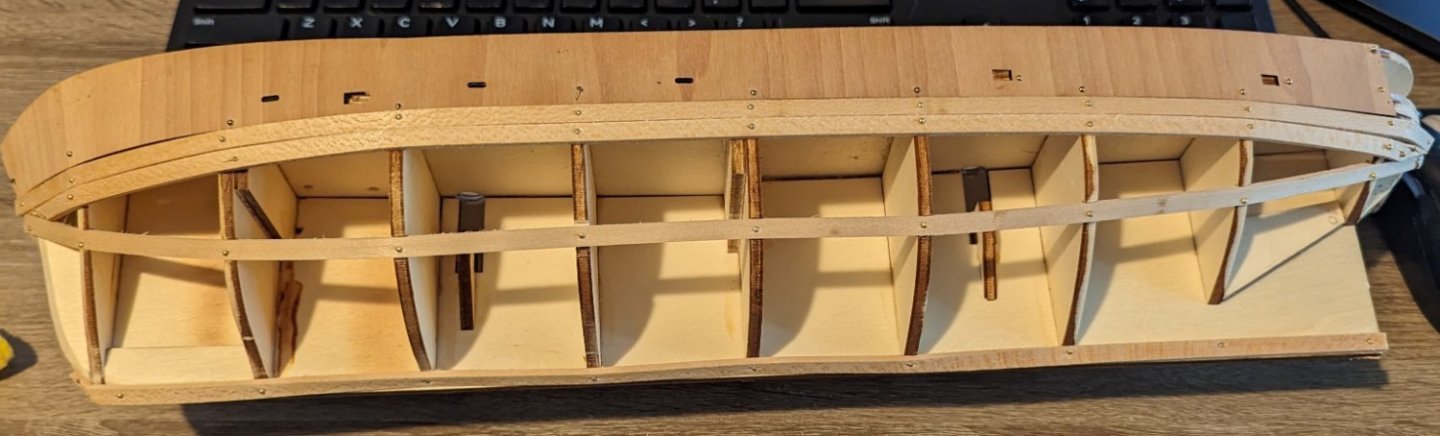
Got the hull structure built, glued 2 pieces in swapped spots but luckily a heat gun released the wood glue enough to swap them around, no hard no foul on this one. First layer of planking on the 1 of the 3 deck parts done, using rubber cement has been such a life savor on this instead of trying super or white glue, apply to planks and deck, let sit for a few minutes and it dries nice and flat in my experience. Unfortunately not super tight so will do a little sanding and glue to fill in gaps before marking them up. Updates may be slow coming at times since I have a new baby taking up most of my time. (If I am not posting updates correctly please let me know how to do it correctly haha)


-
I have been doing a bunch of "anonymous" following along on this site as I have gotten into model ship building around 2 years ago. I have built the Artesania Latina Drakkar Viking, OcCre Albatross, and OcCre Buccaneer. I thought now I'd try my hand at a build log since I don't see one for the Aurora yet. First time working on a model that is painted vs stained so this should be a fun learning experience.