HOLIDAY DONATION DRIVE - SUPPORT MSW - DO YOUR PART TO KEEP THIS GREAT FORUM GOING! (Only 72 donations so far out of 49,000 members - Can we at least get 100? C'mon guys!)
×


Old Rentner
-
Posts
138 -
Joined
-
Last visited
Content Type
Profiles
Forums
Gallery
Events
Everything posted by Old Rentner
-
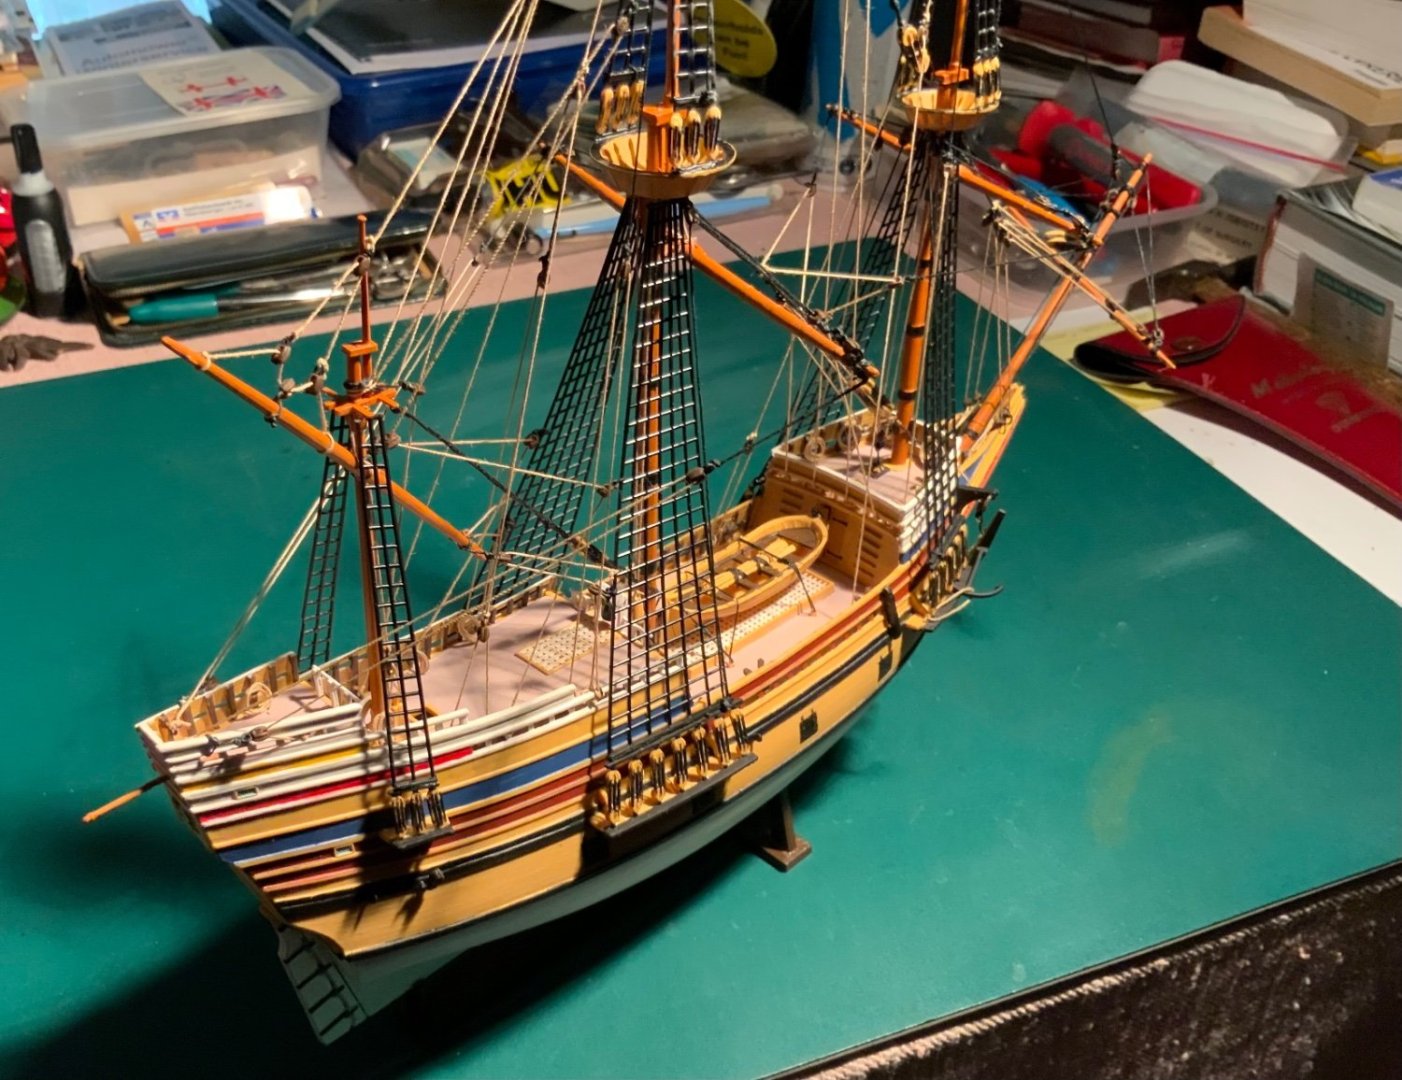
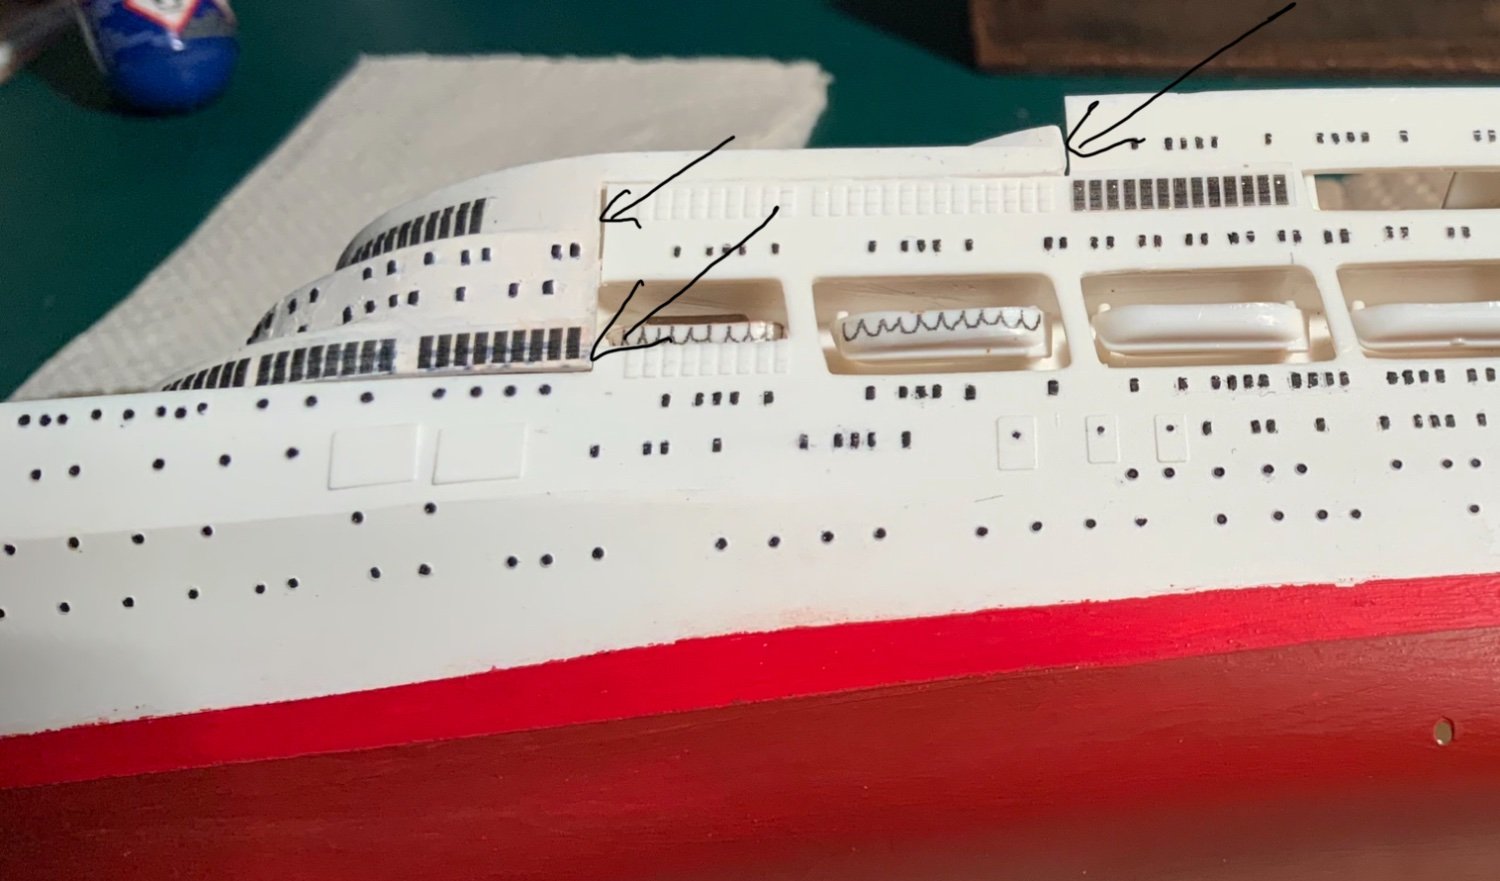
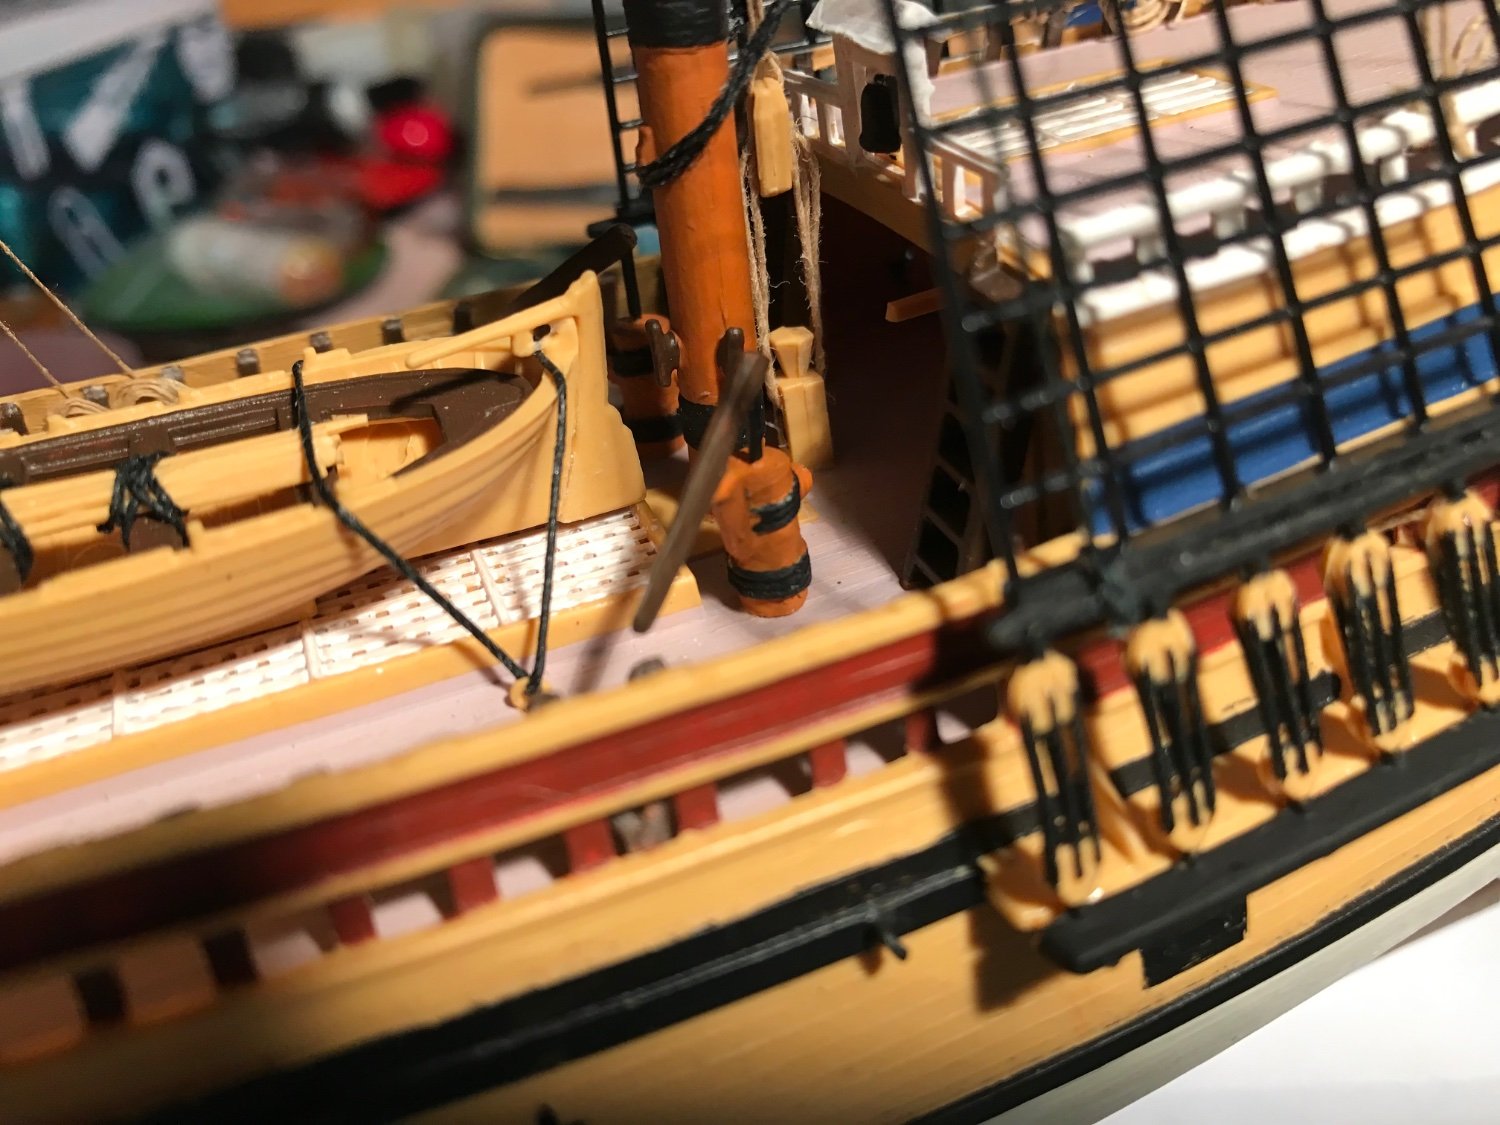
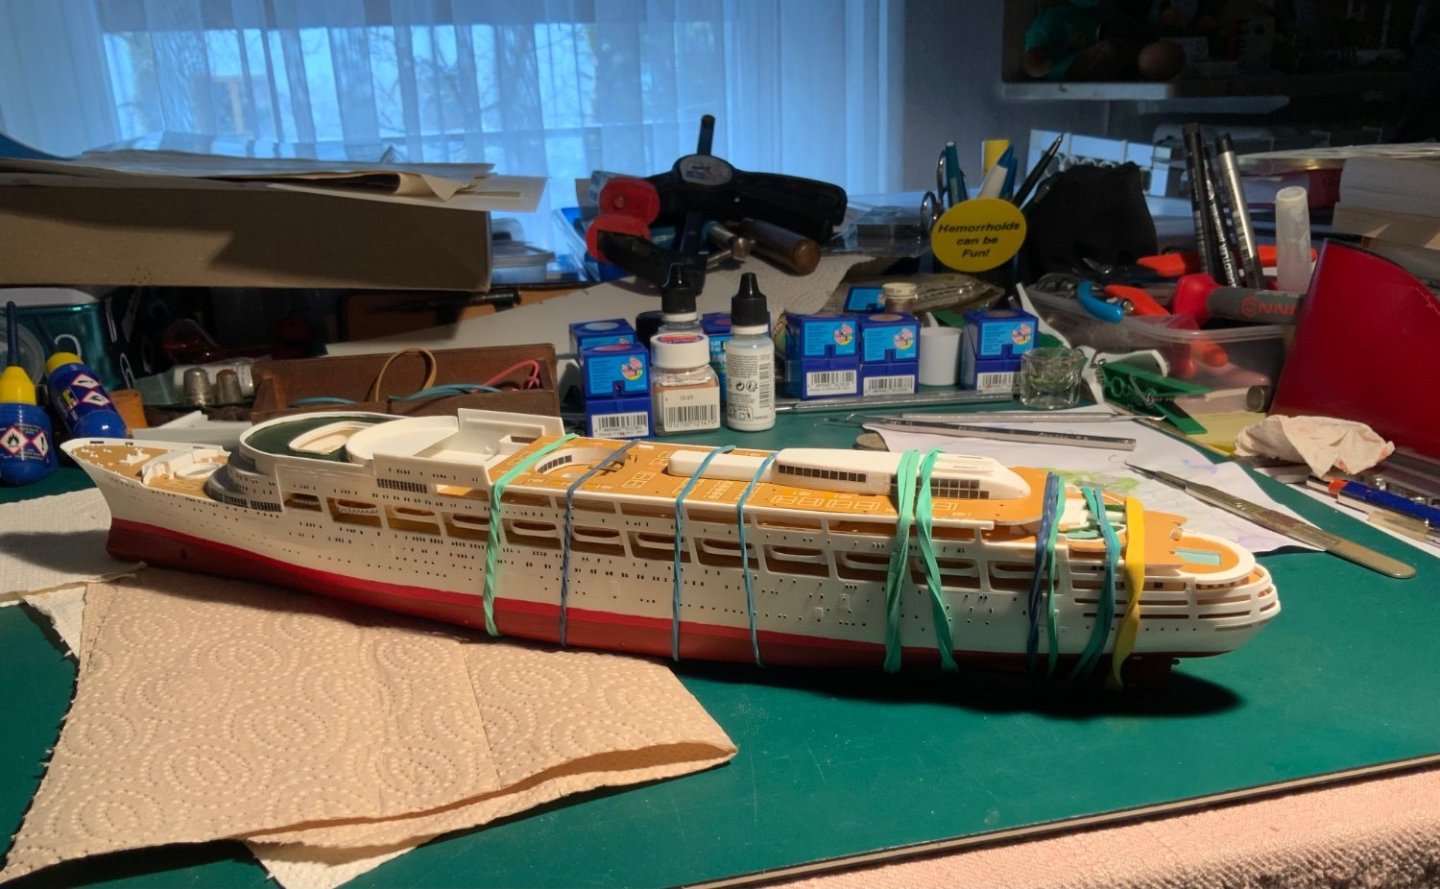
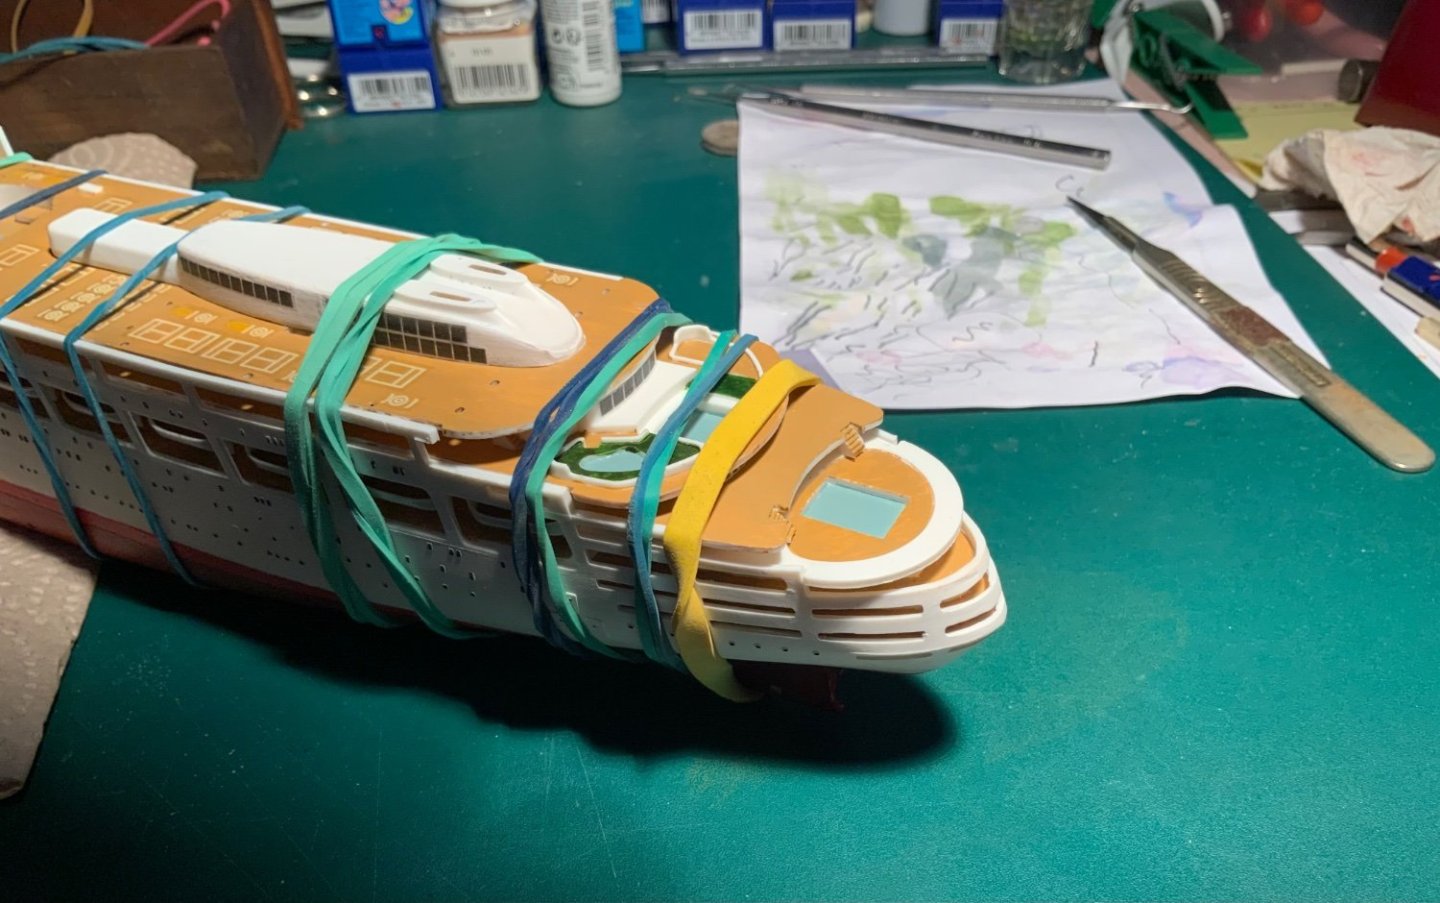
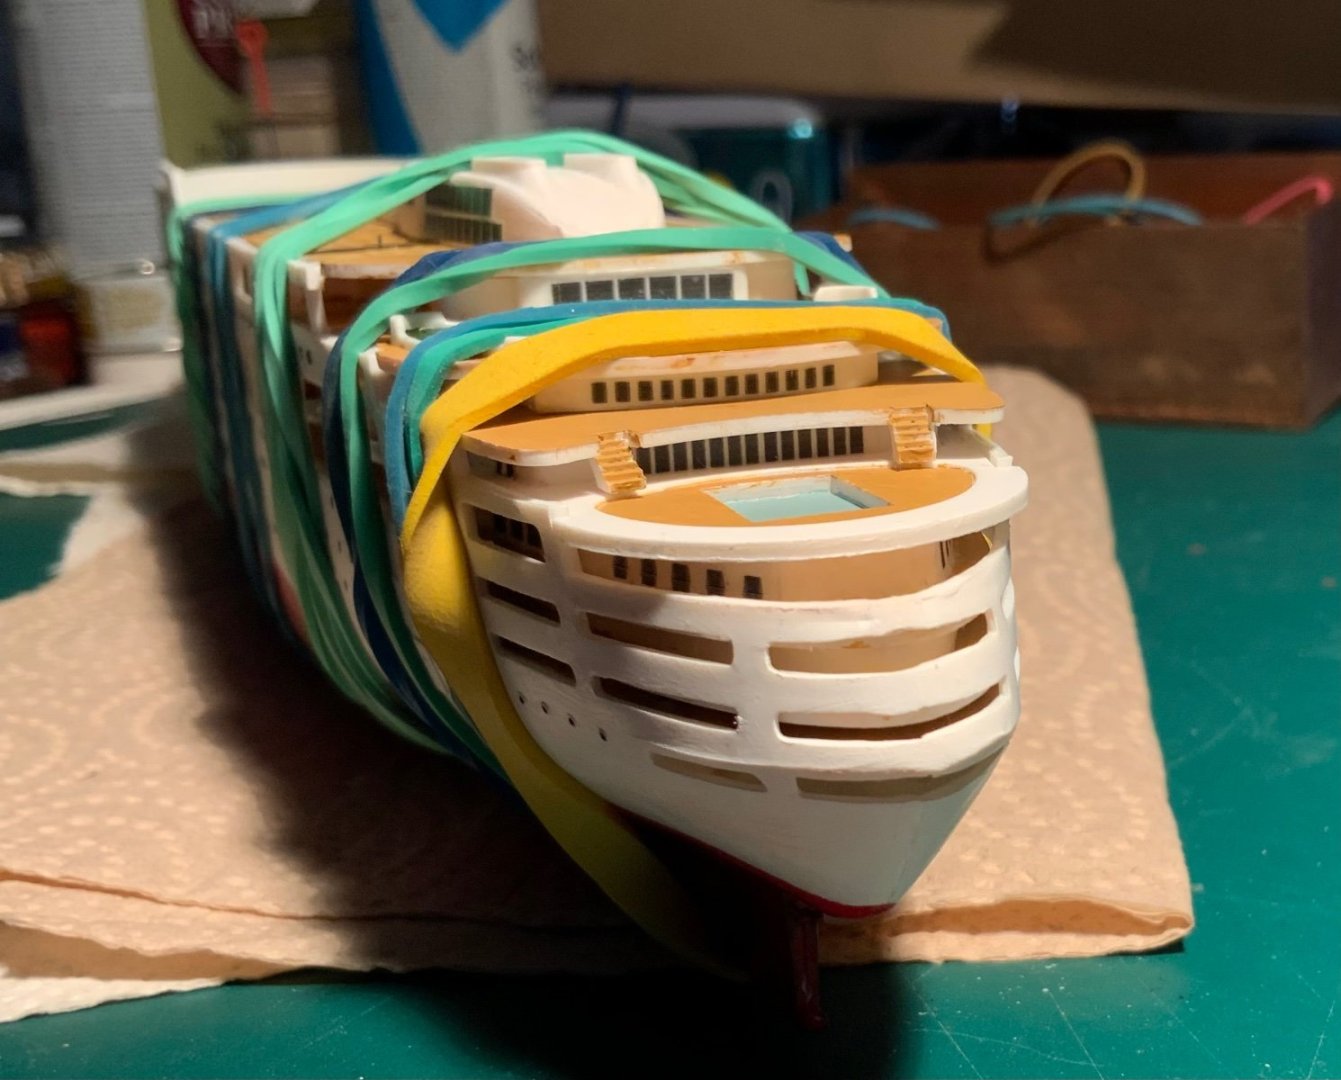
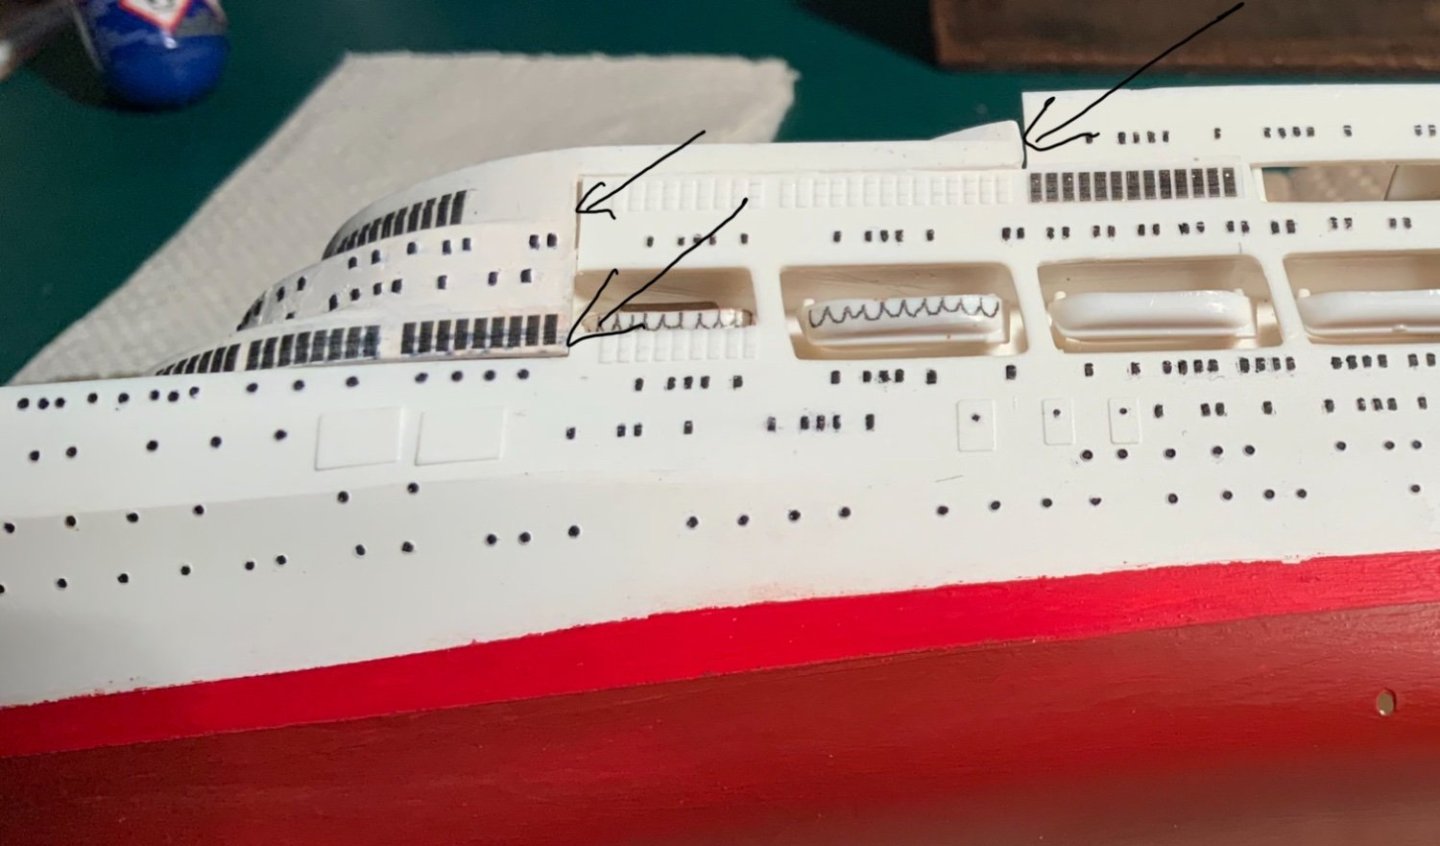
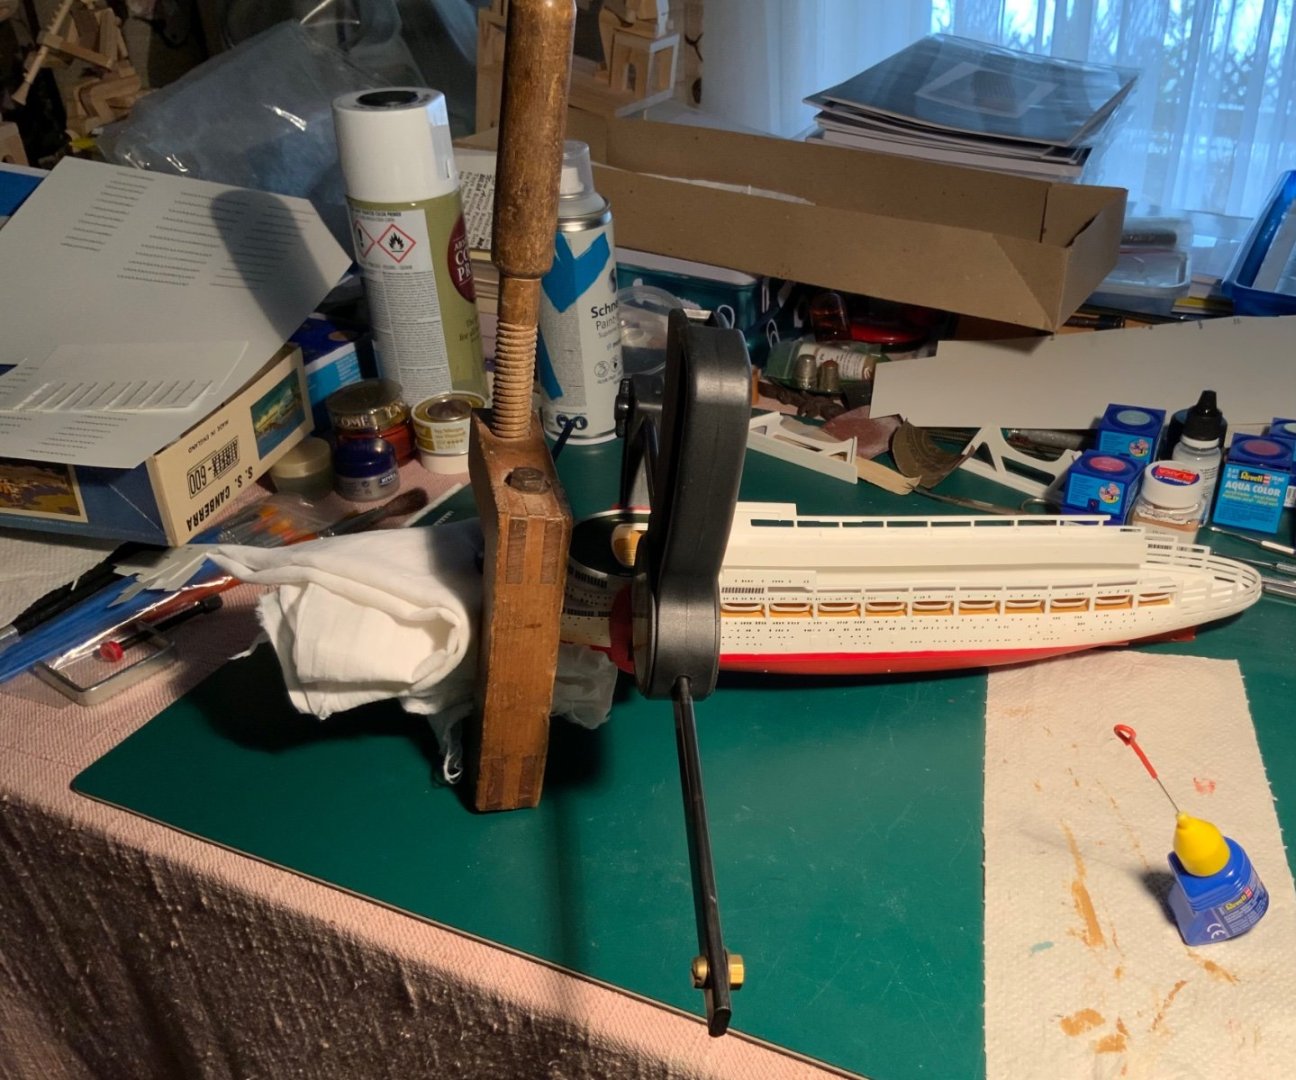
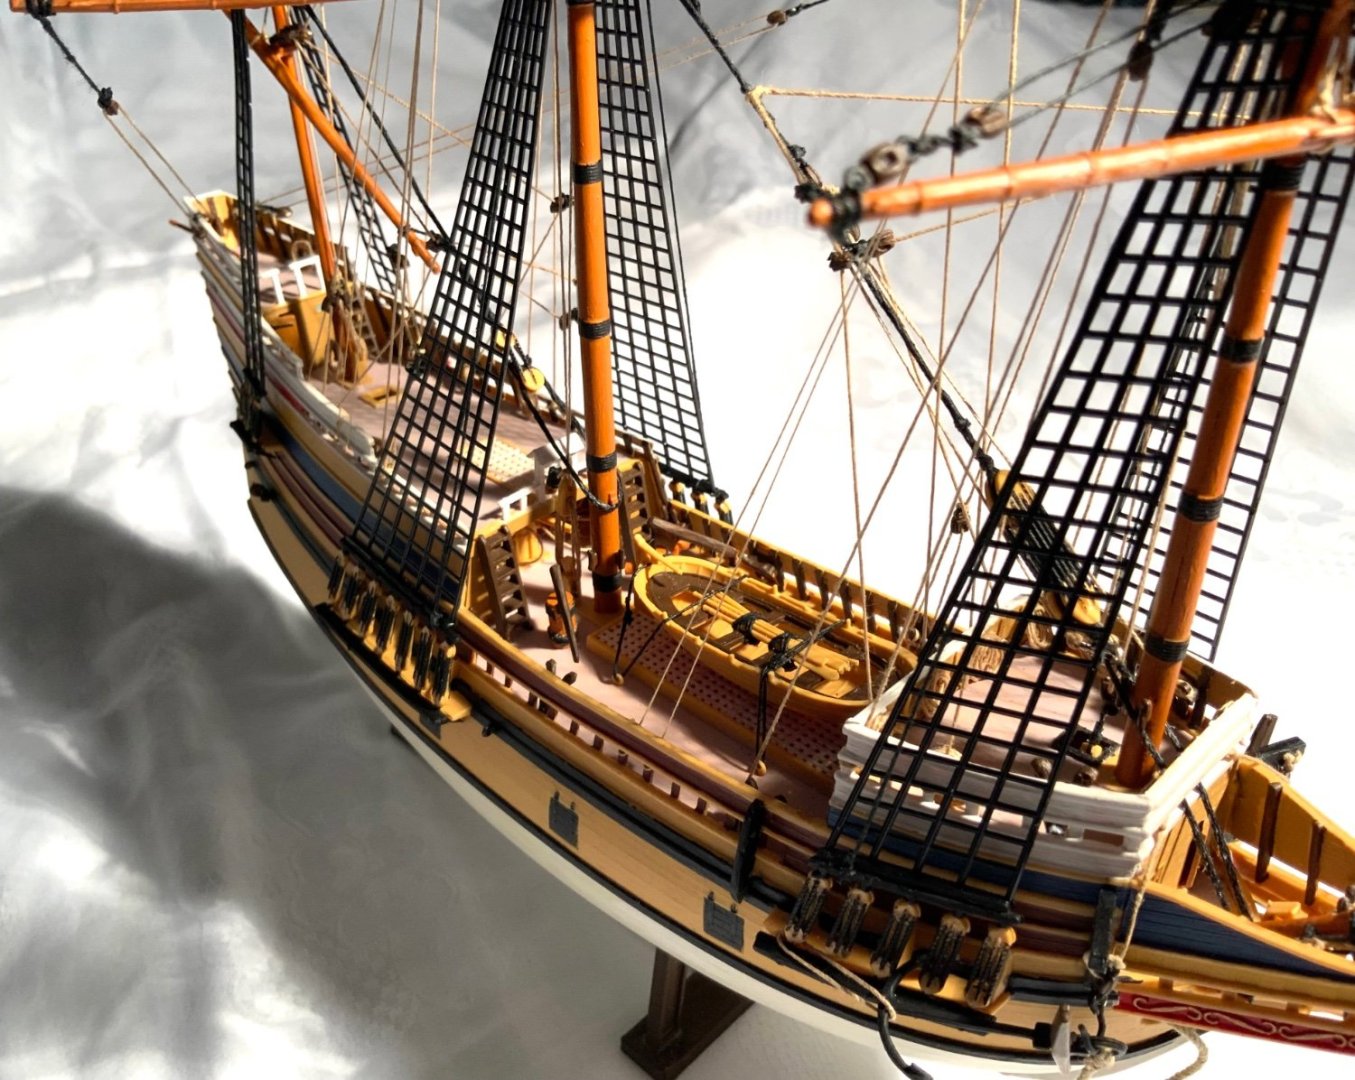
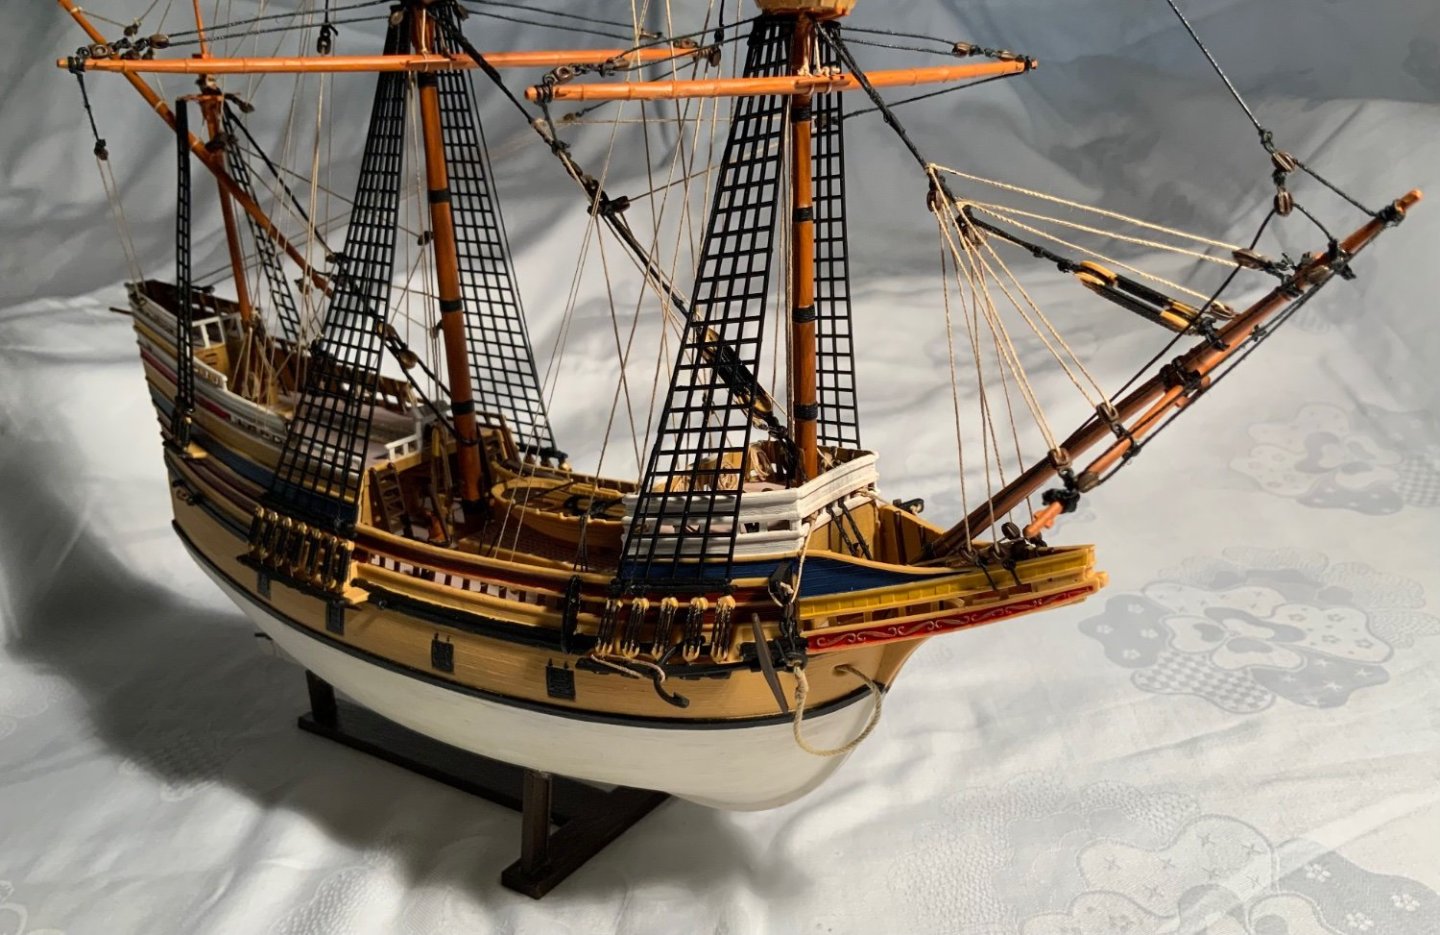
Disaster! When I came to remove the heavy clamps I found that one side of the ‘arena deck’ was glued below its supports so that the ships sides were pushed out and the next deck would not fit properly. After a big struggle I was able to undo all the gluing on the port side and re glue it in the right place. Luckily nothing broke during the process of seperation. I used more gentle ‘clamping’ methods for the games deck! The gaps will be addressed and filled later when the putty arrives!
-
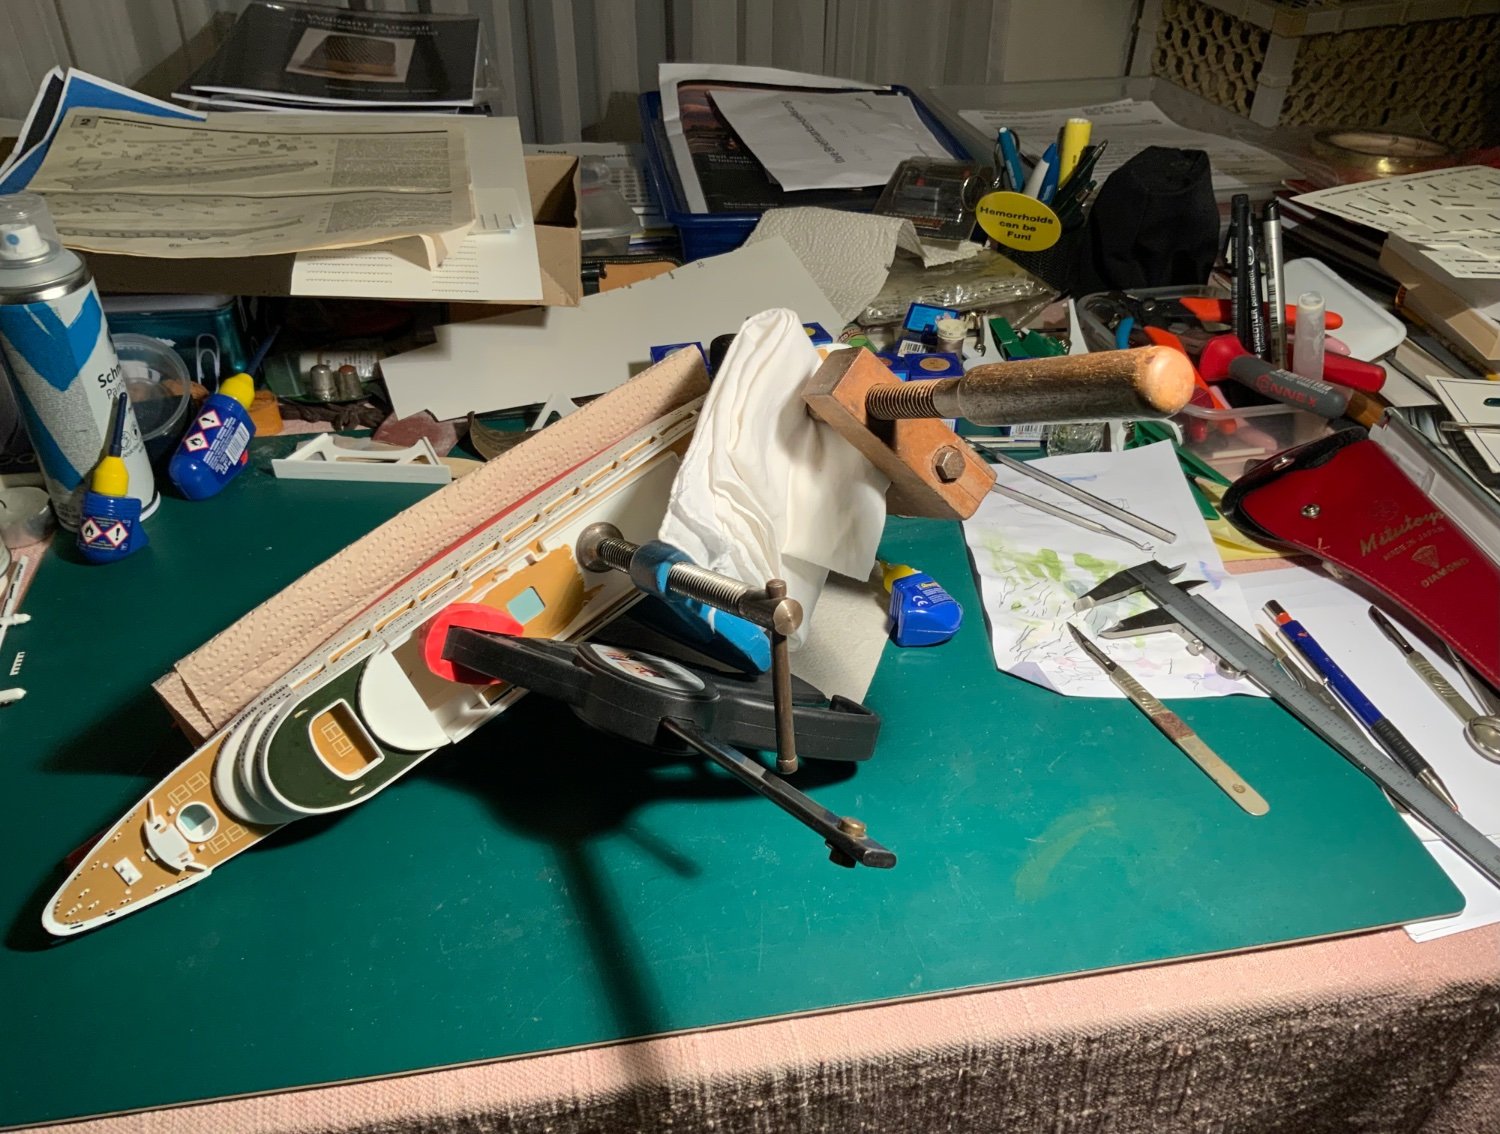
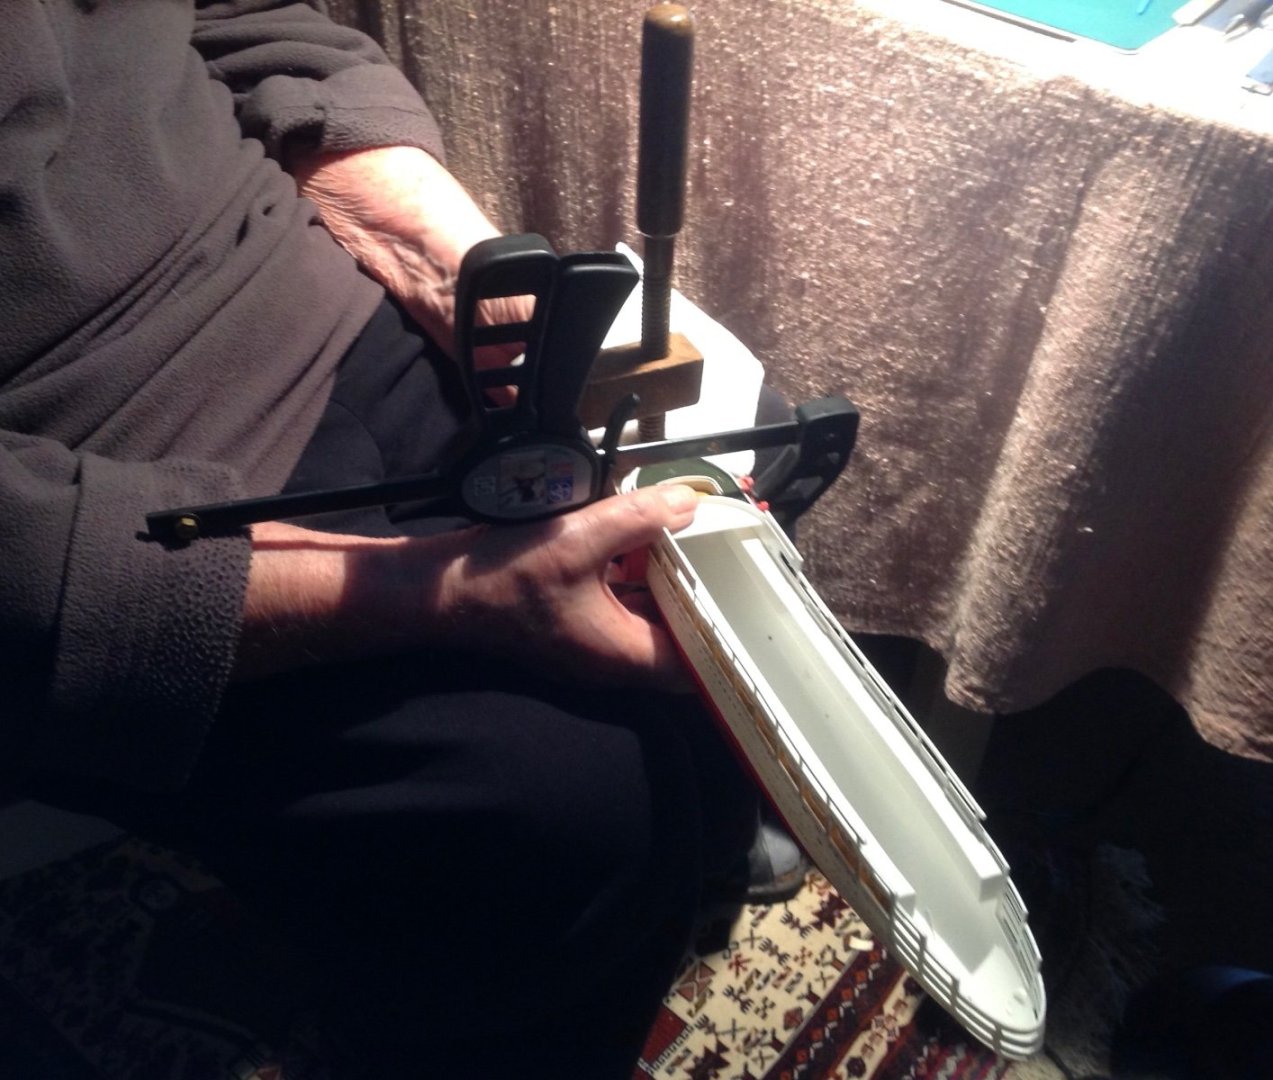
I was quite pleased with my deck clamping and gluing although I did find a couple of cracks to try to fill! Next the top decks - they did not fit too well so I used three clamps to secure the lower one.


-
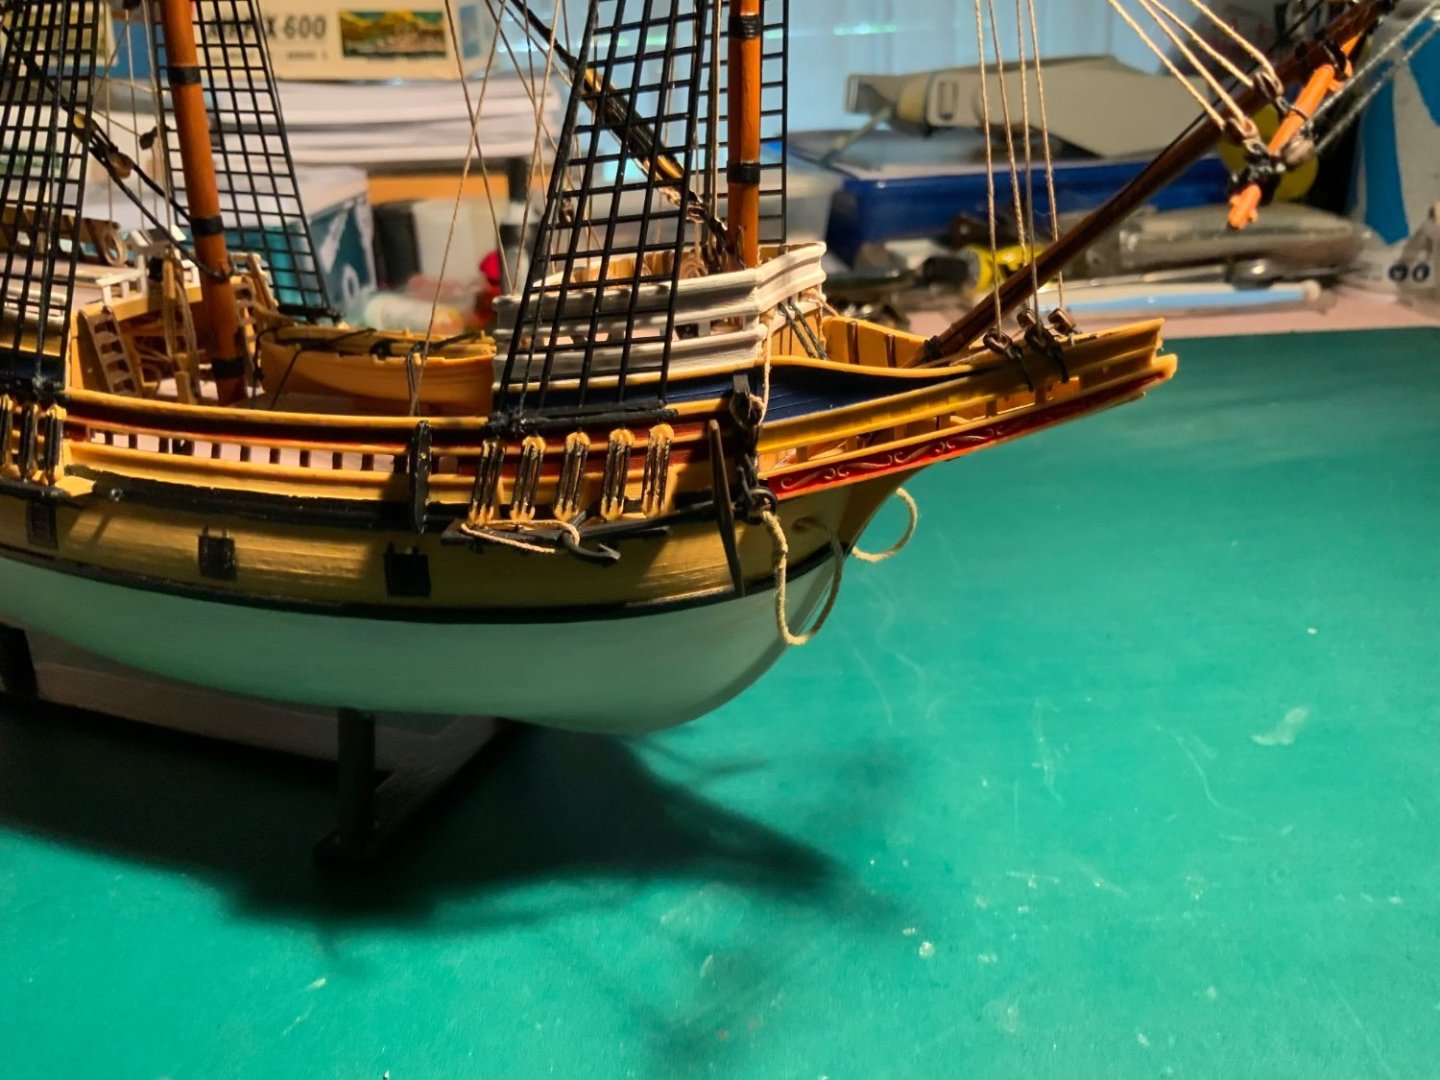
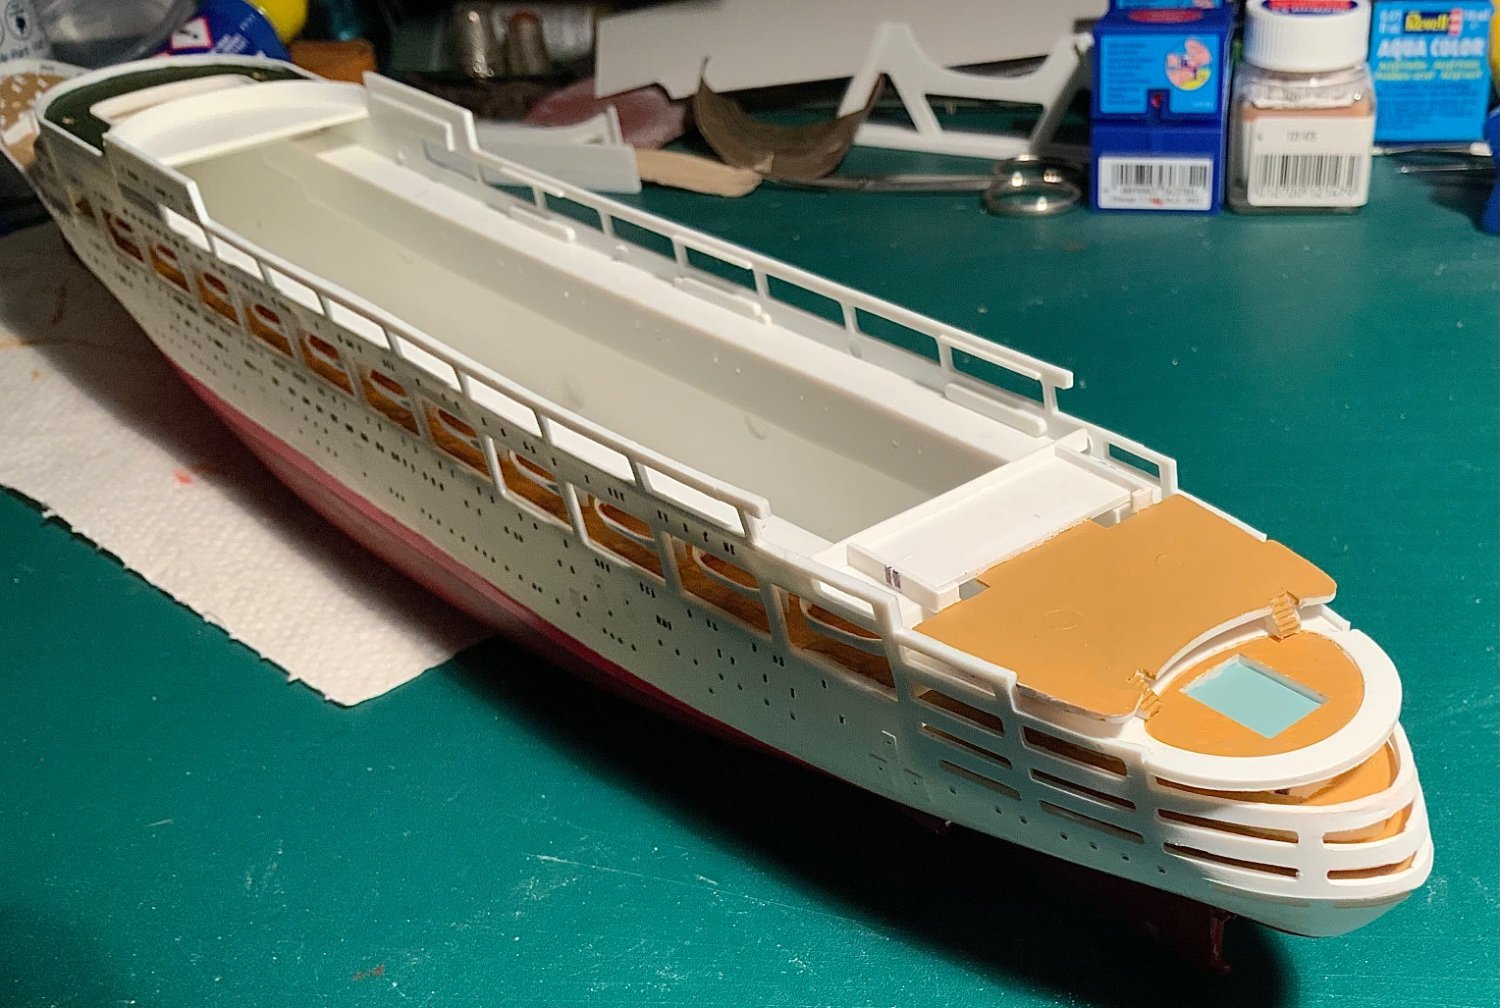
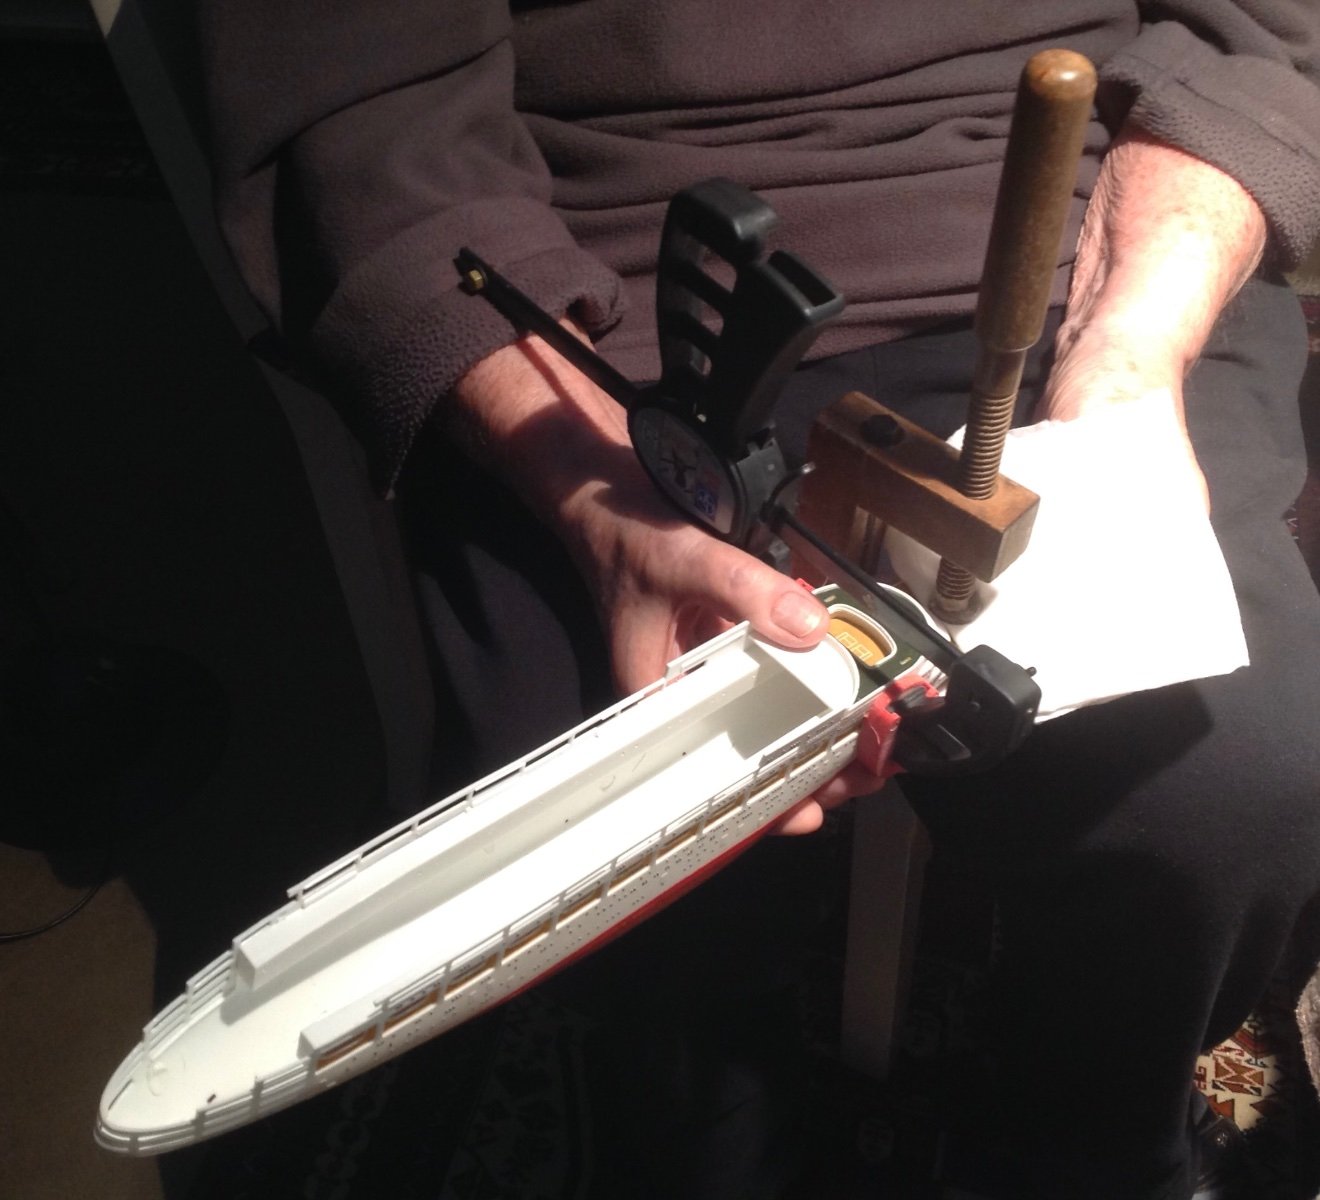
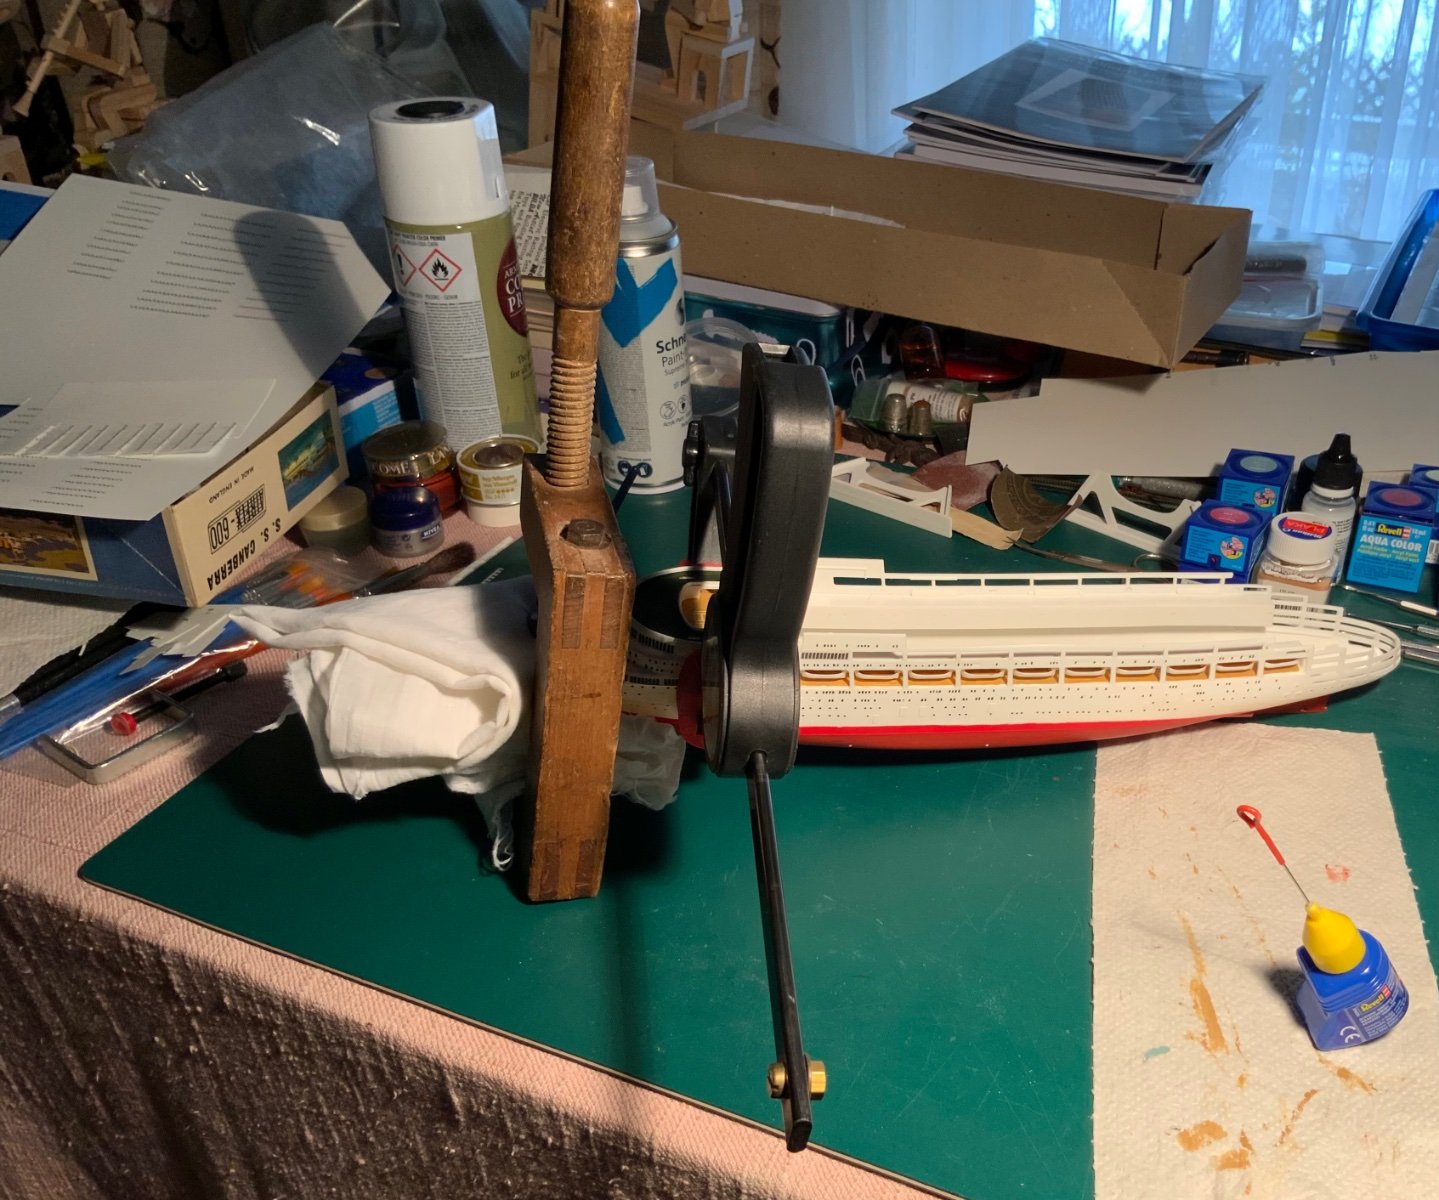
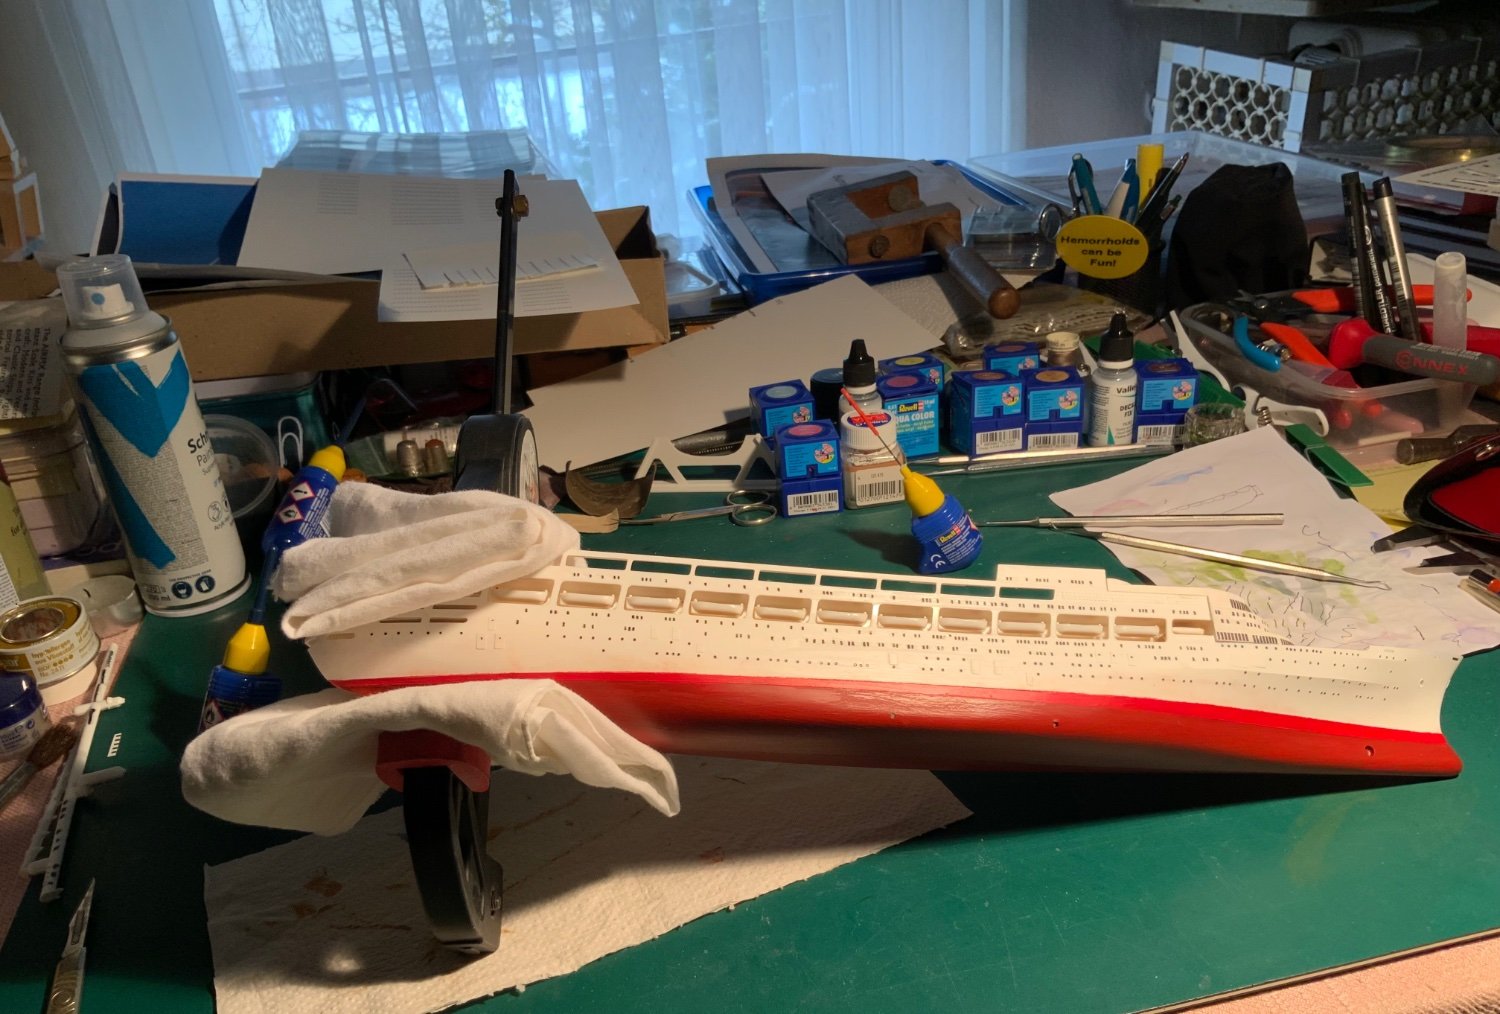
I was afraid that all the handling of the hull, boats etc. might damage the boat grab line transfers so that I decided to fix the fore and rear decks before applying any more transfers. i did not possess any small clamps so I ended up with what I had and my hands. I had to hold the bow for over 15 min. till it stayed in place! The rear decks were less problematical and I only needed one clamp! I tried to protect the paintwork with folded old handkerchiefs - they were soft and gentle!


-
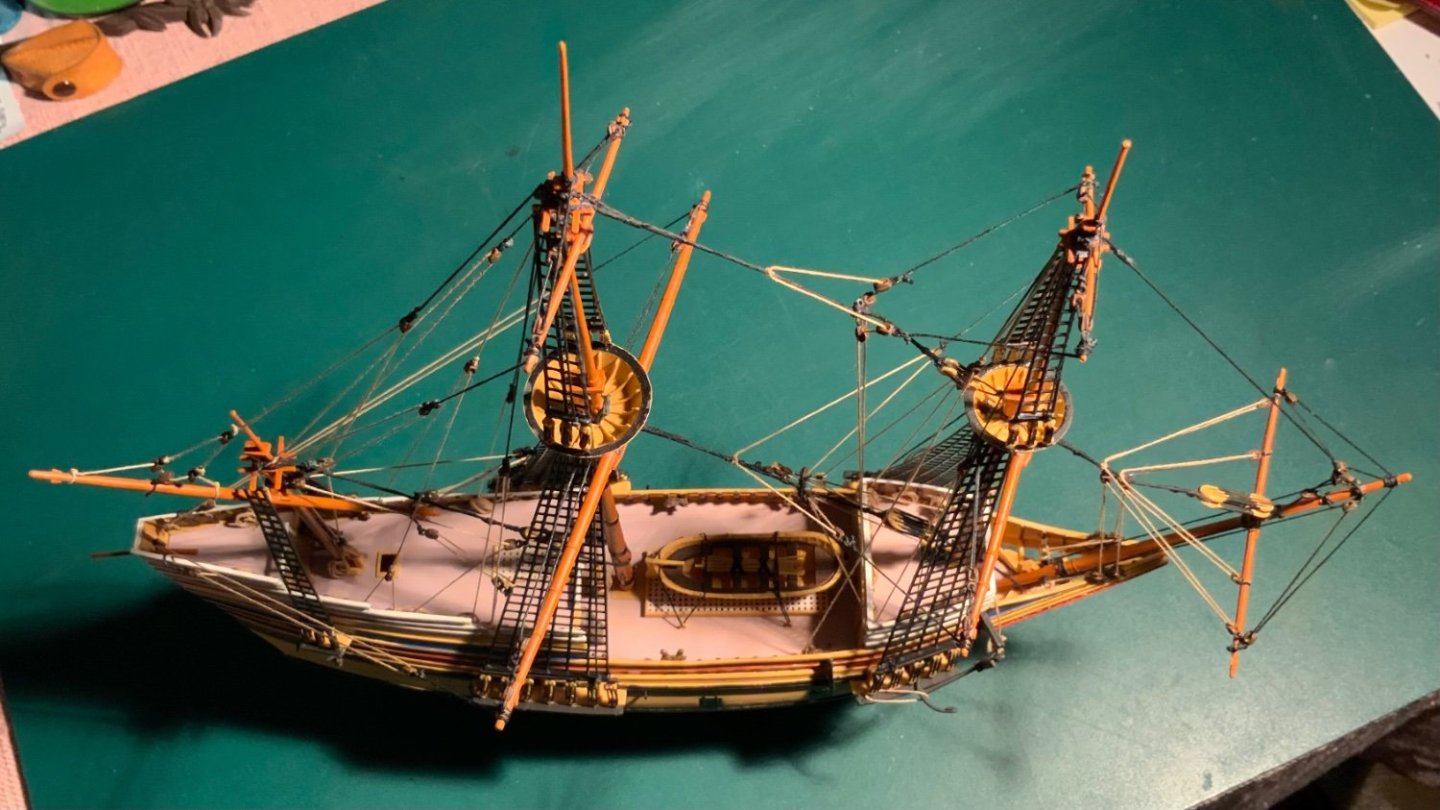
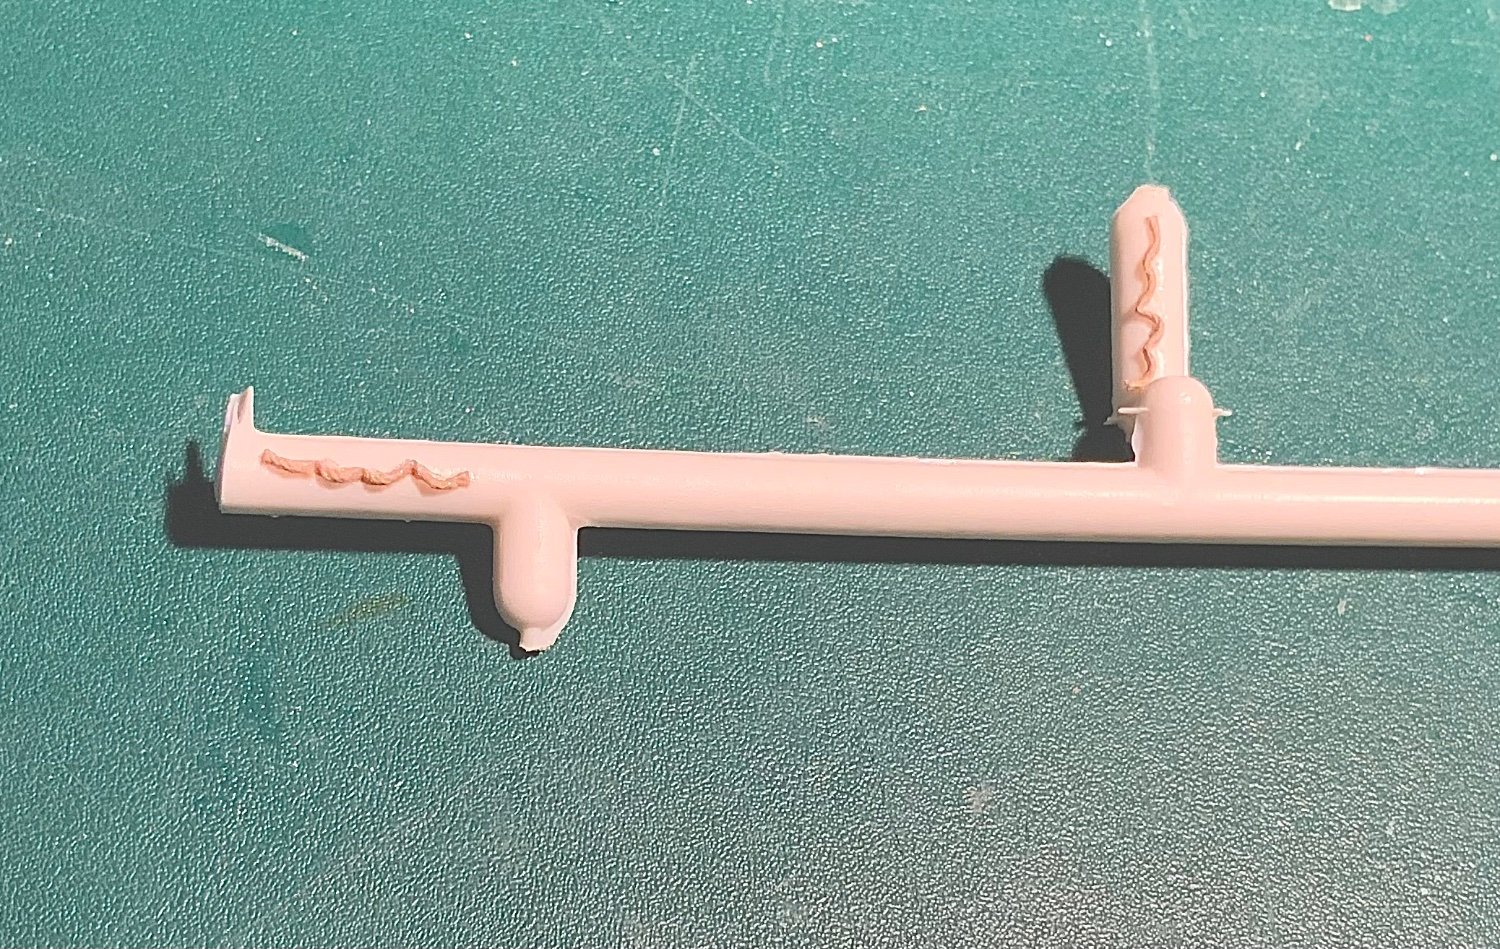
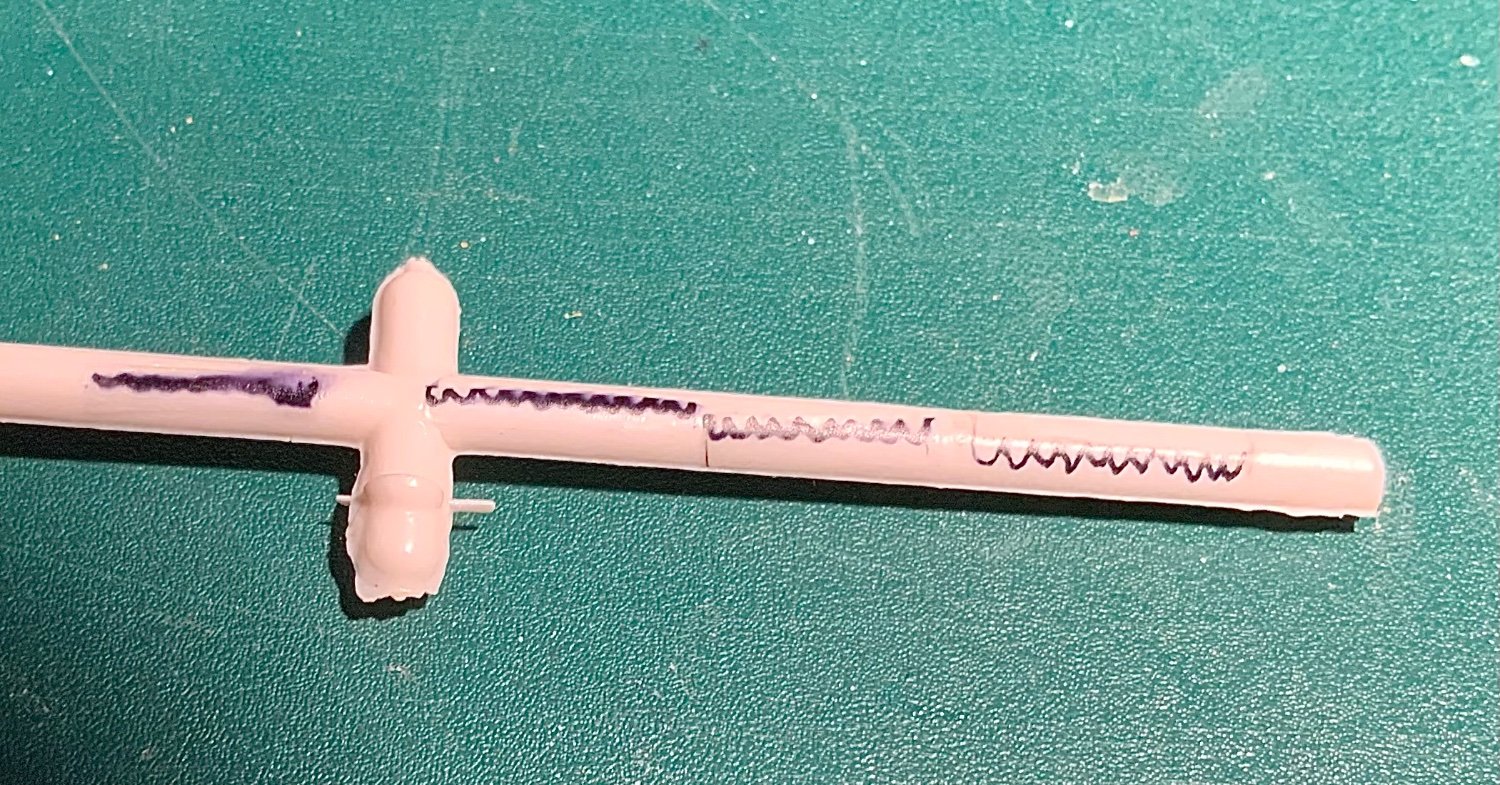
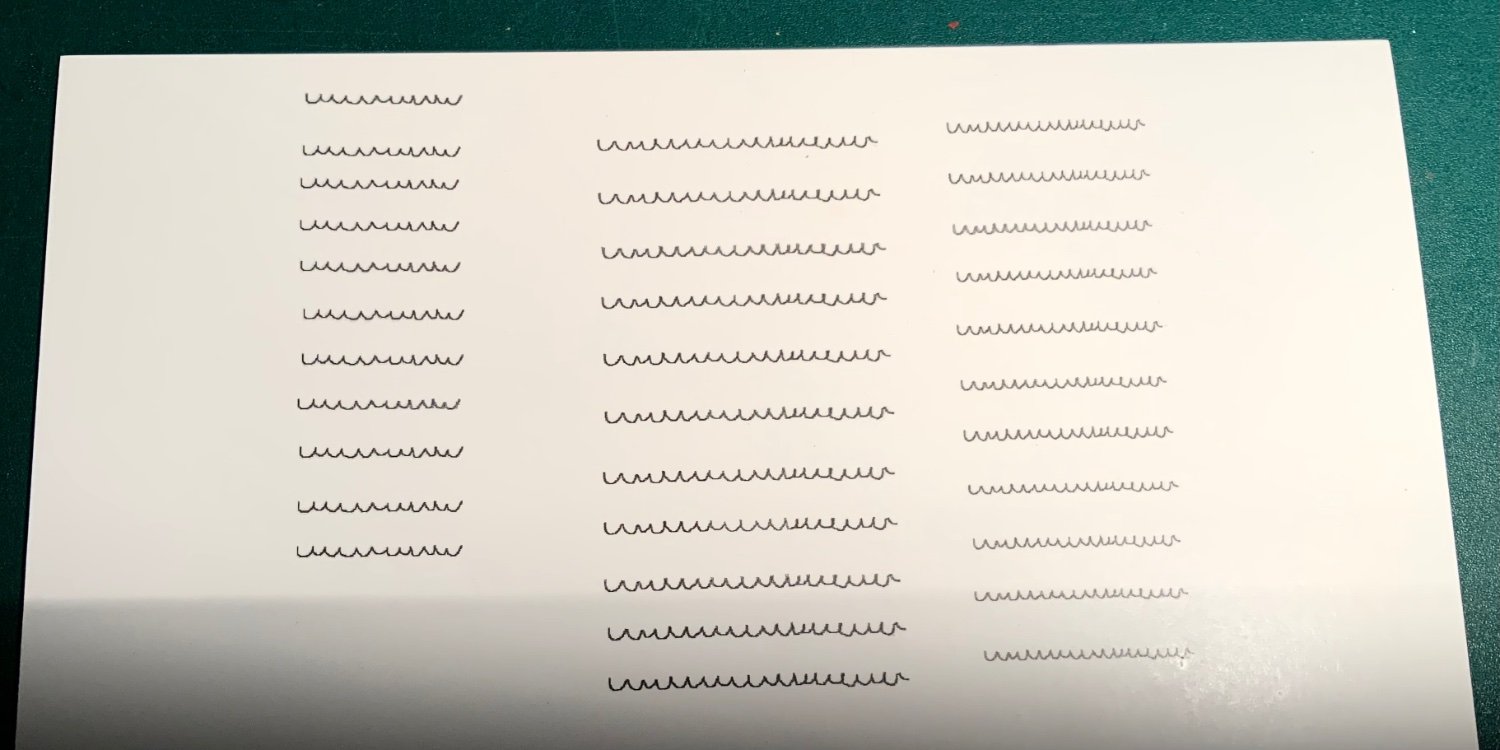
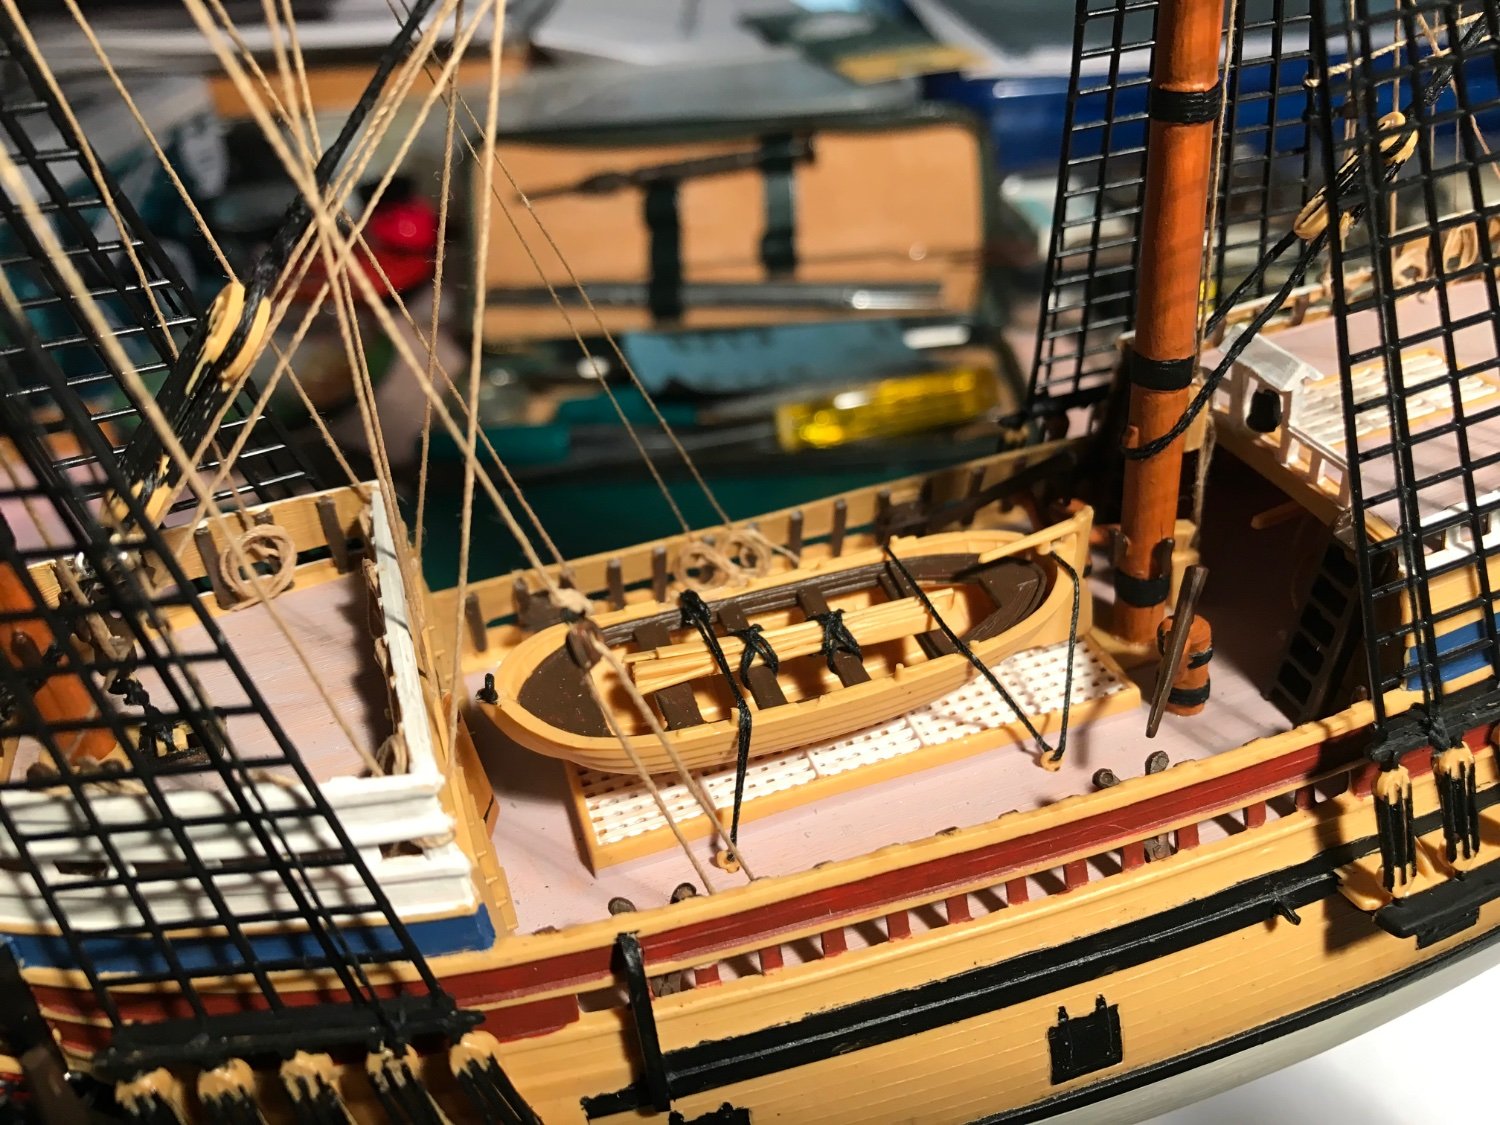
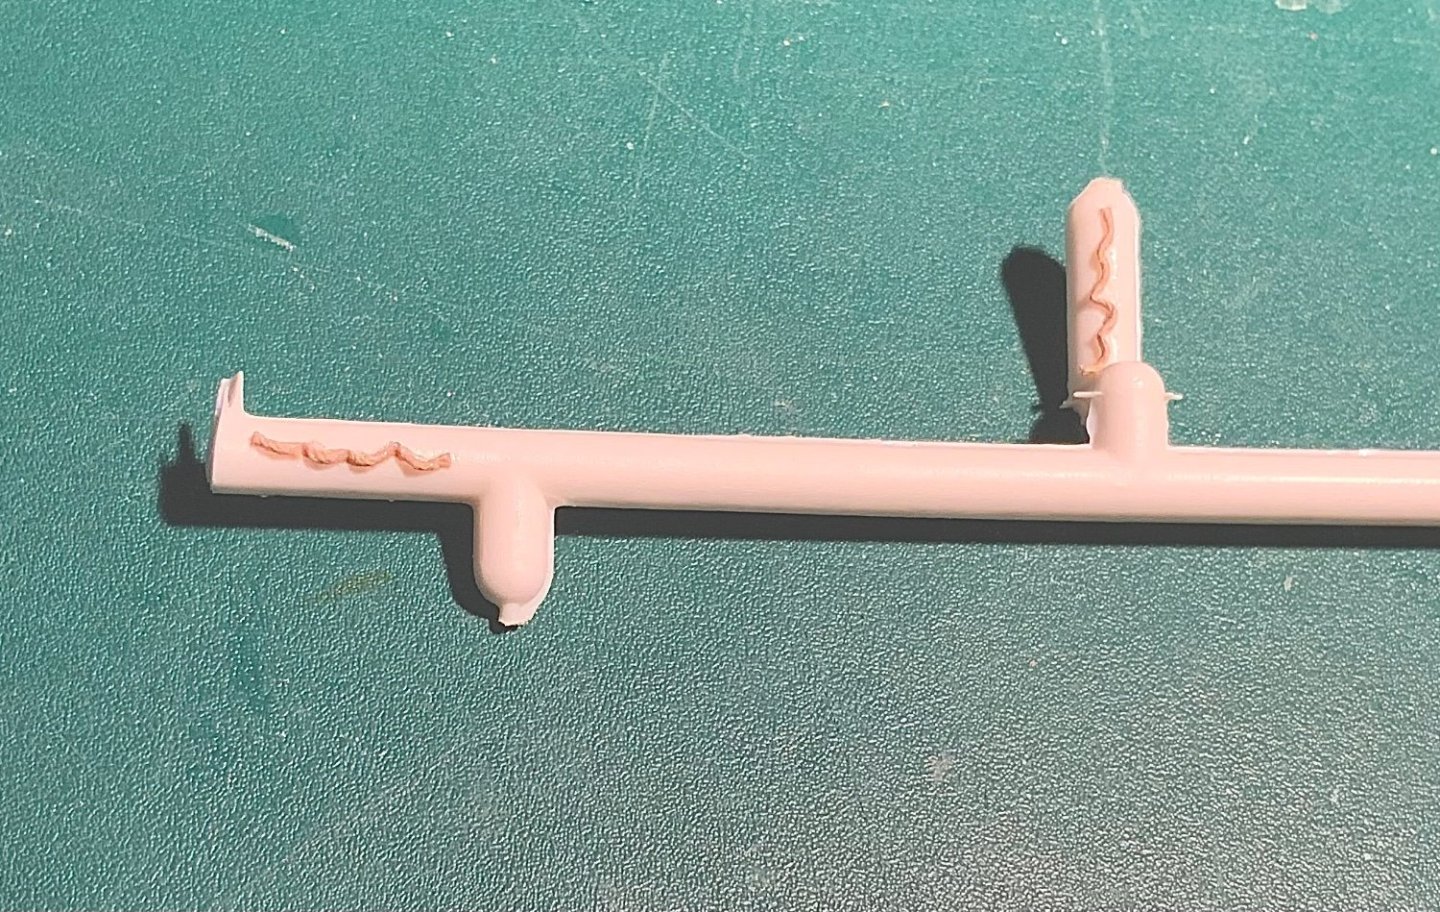
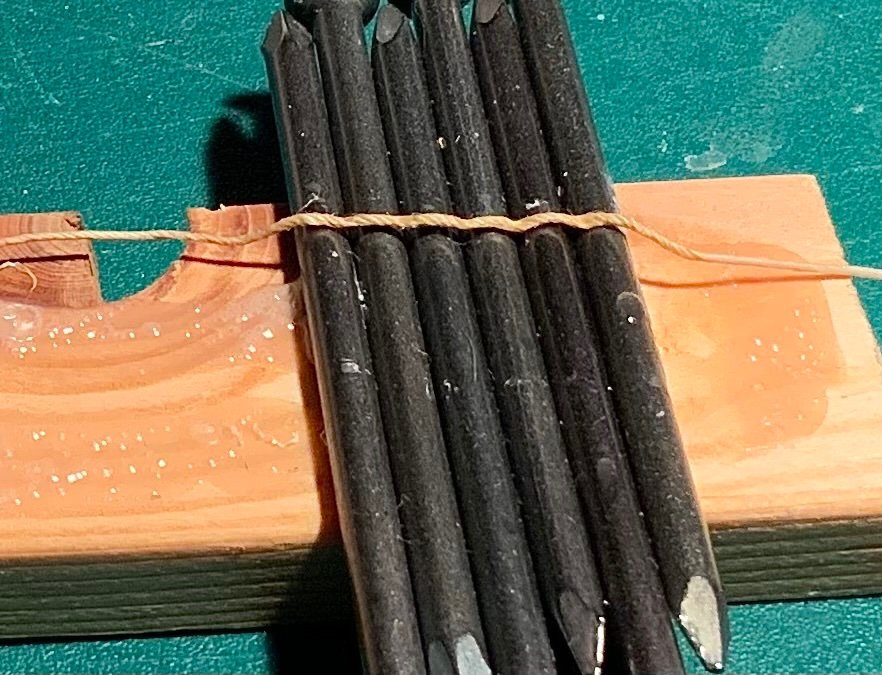
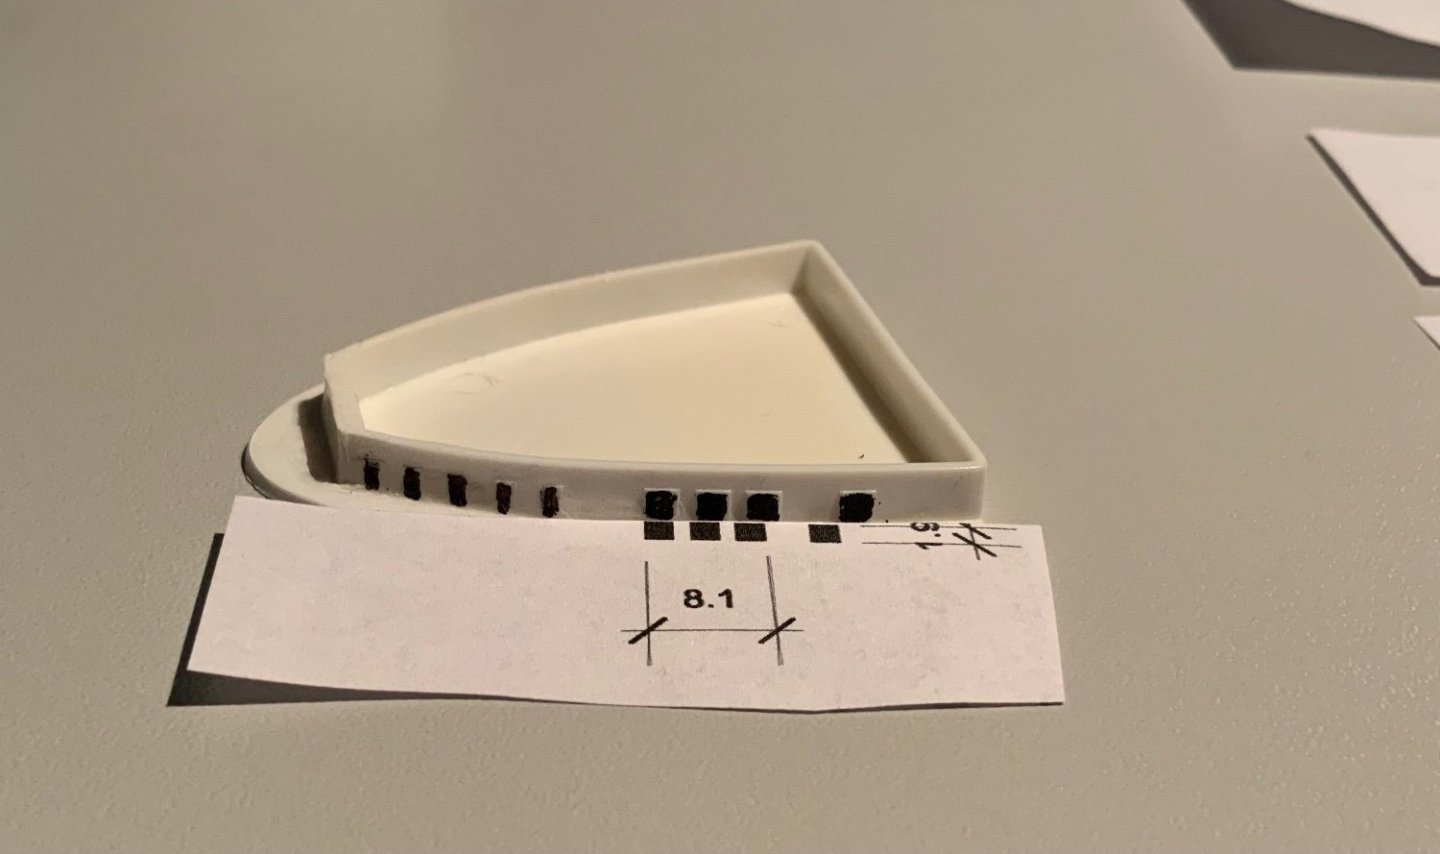
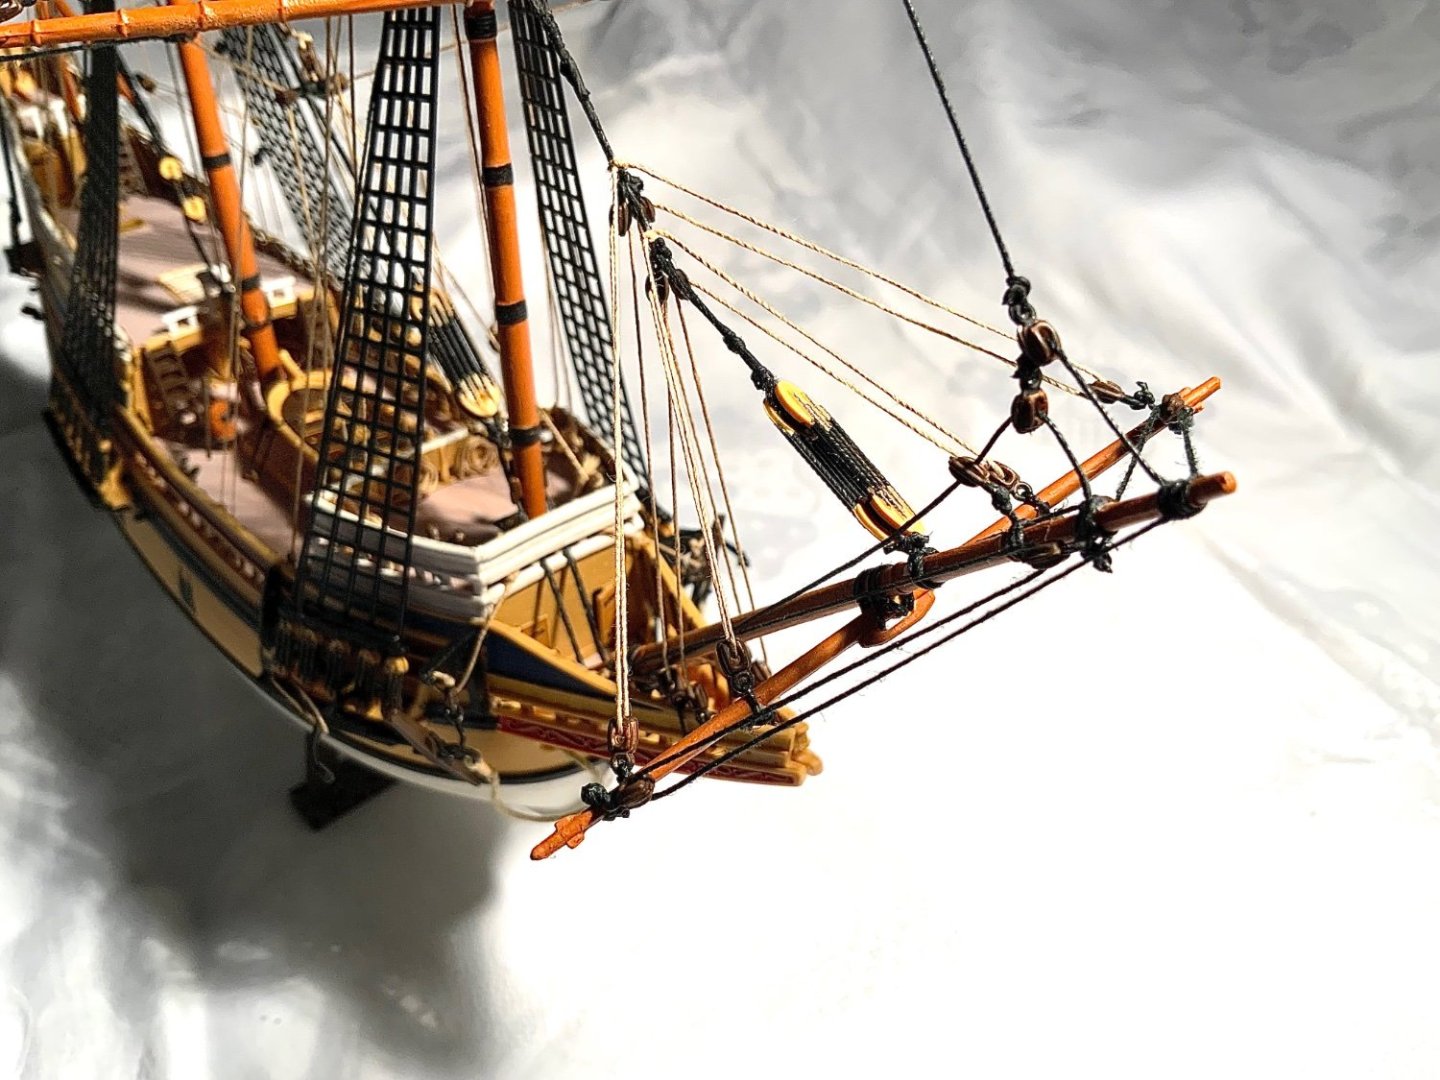
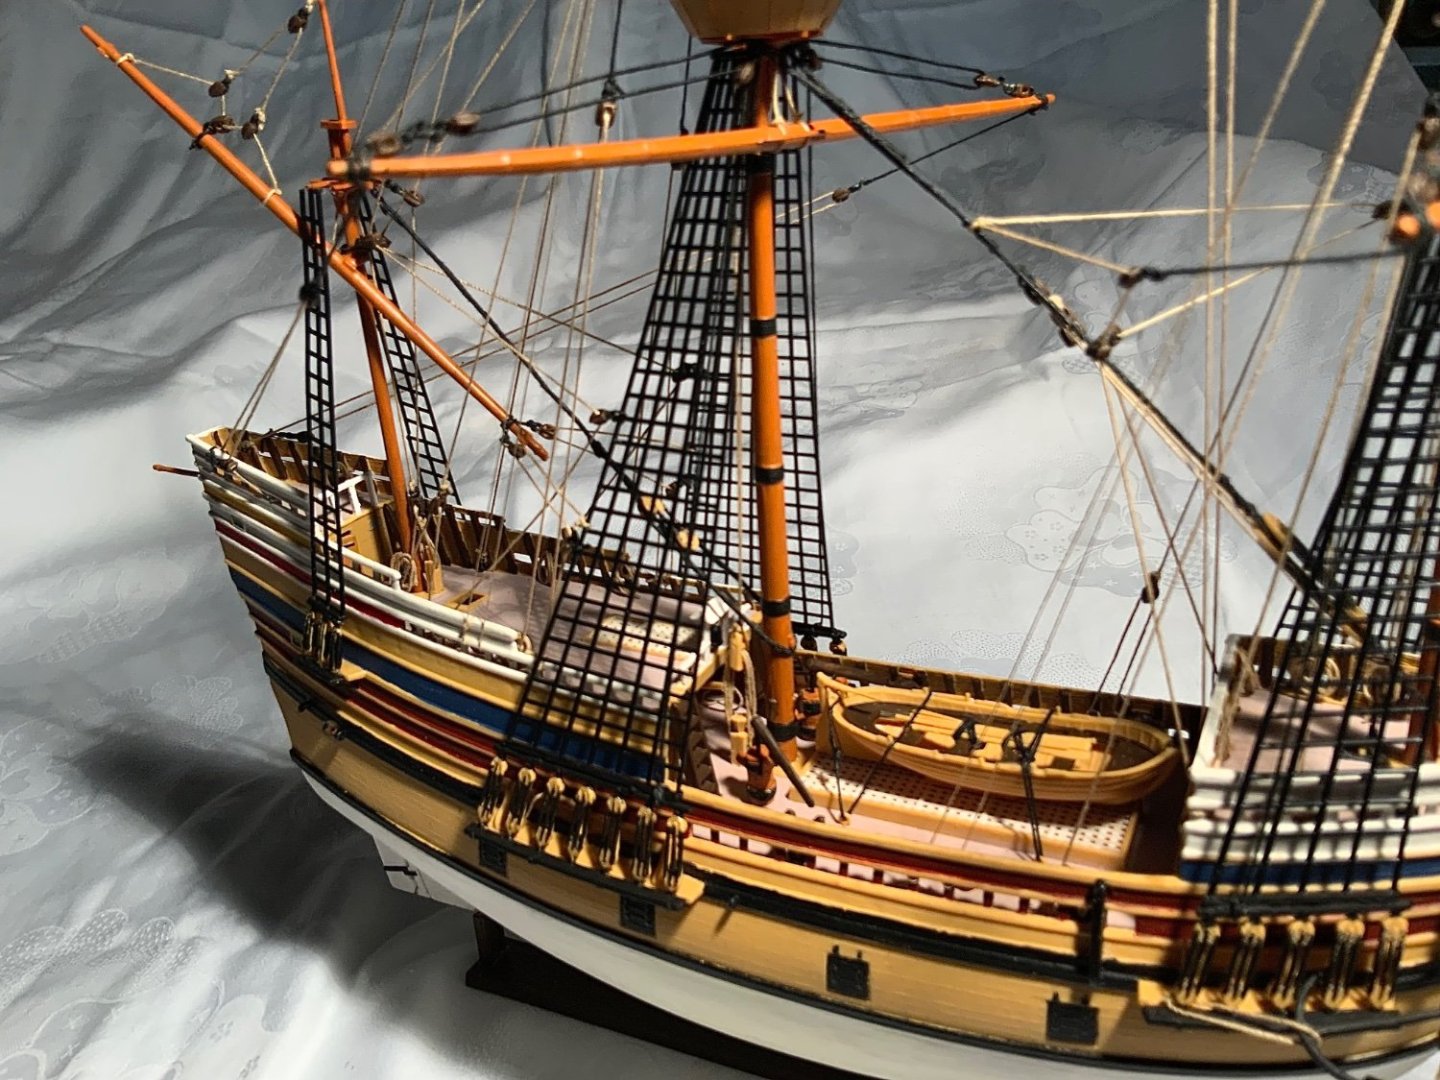
The next problem was how to make the ‘grab ropes’ for the lifeboats. They did not look very nice omitted and my hand was not steady enough or my pen fine enough to draw them freehand. I tried using nails to create an undulating base onto which I could mold pva soaked thread to create the ropes but the scale was all wrong and the undulations did not hold. I tried to draw the ropes but the lines were too thick too. Finally I resorted to creating a pdf in Photoshop with two pixel lines! I printed a transfer sheet and cut out and then applied the transfers to the boats. I used sections of the right hand column in the end.


-
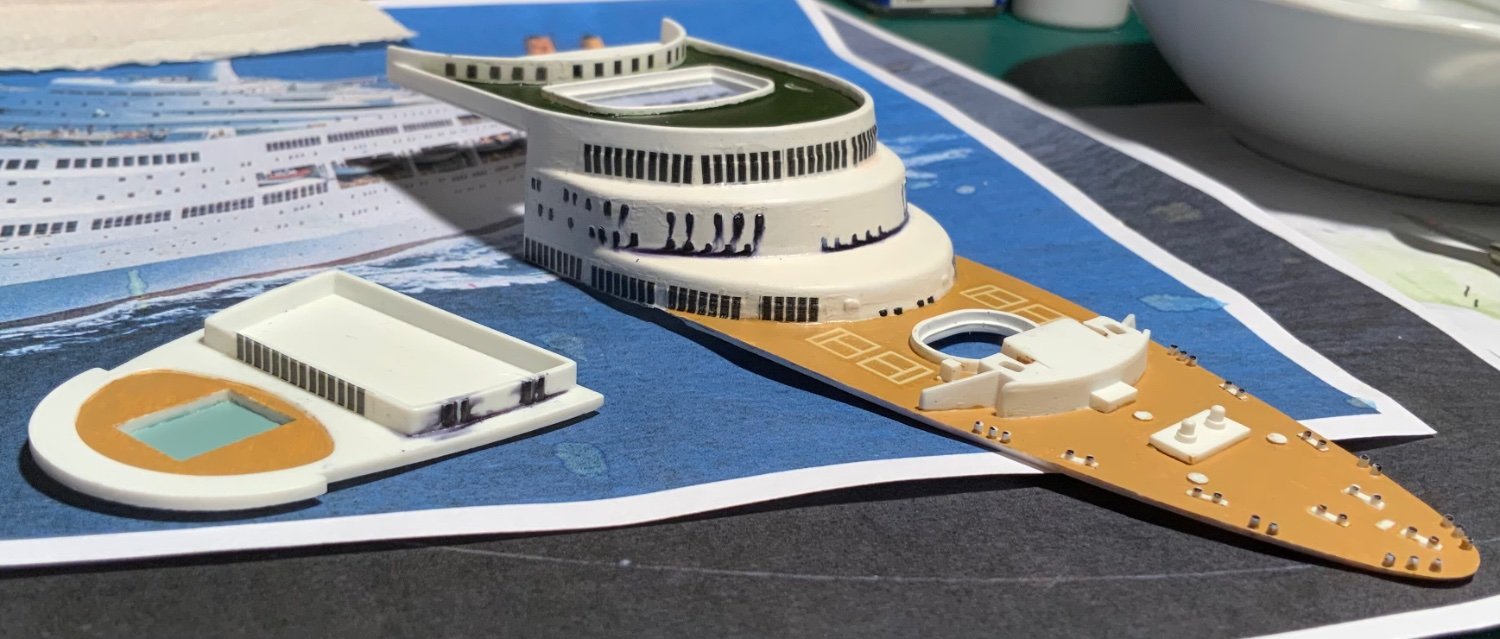
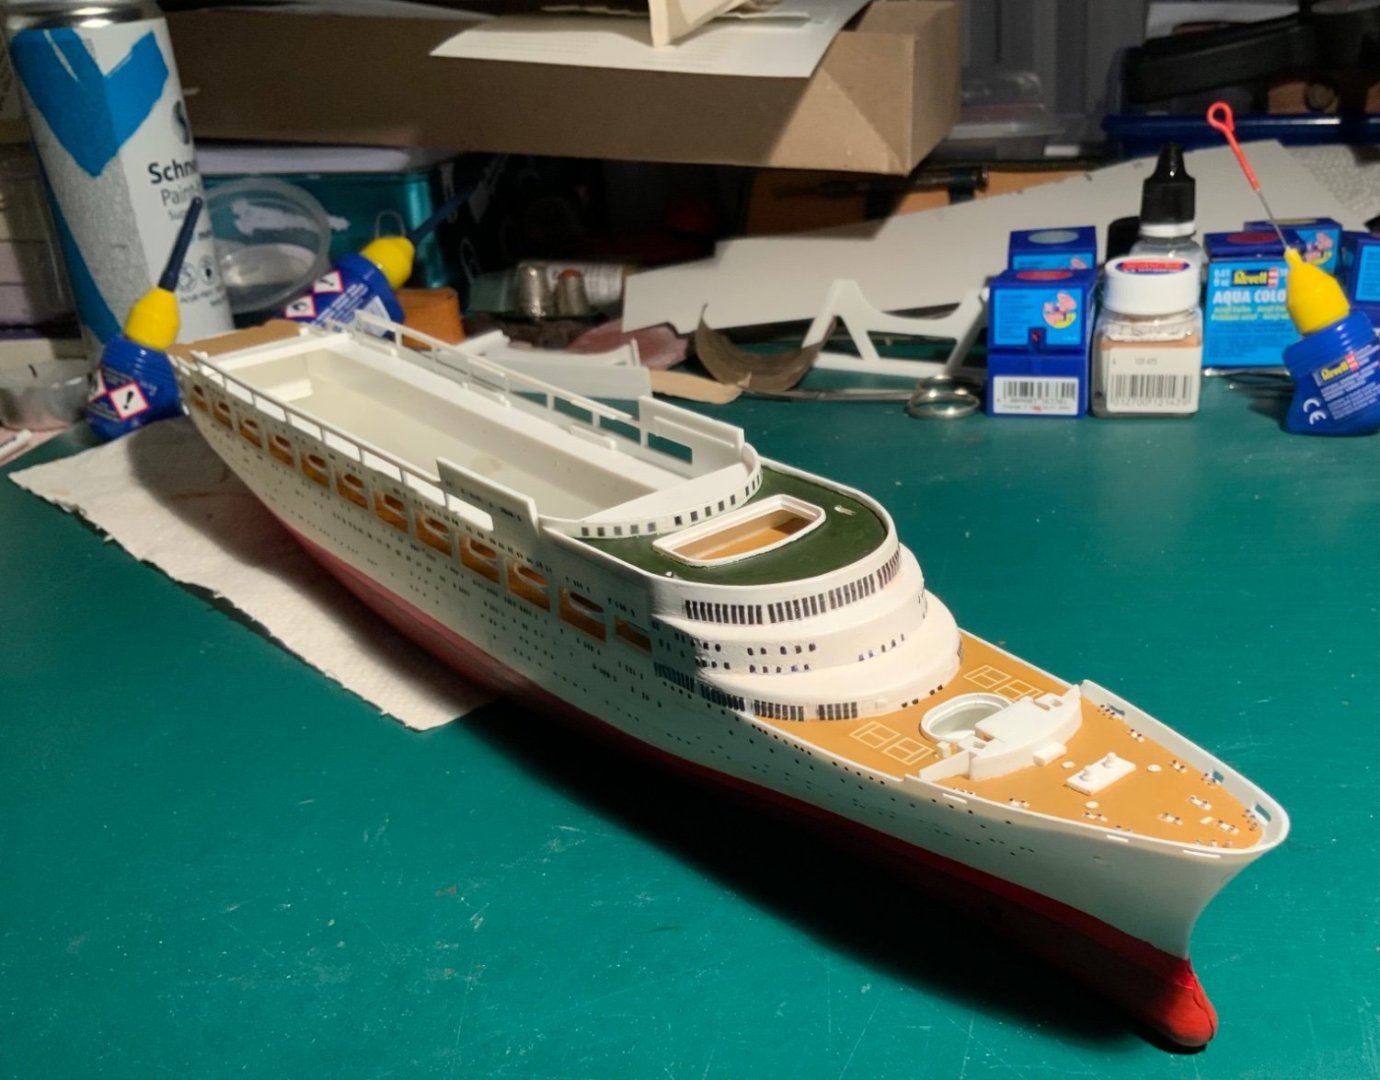
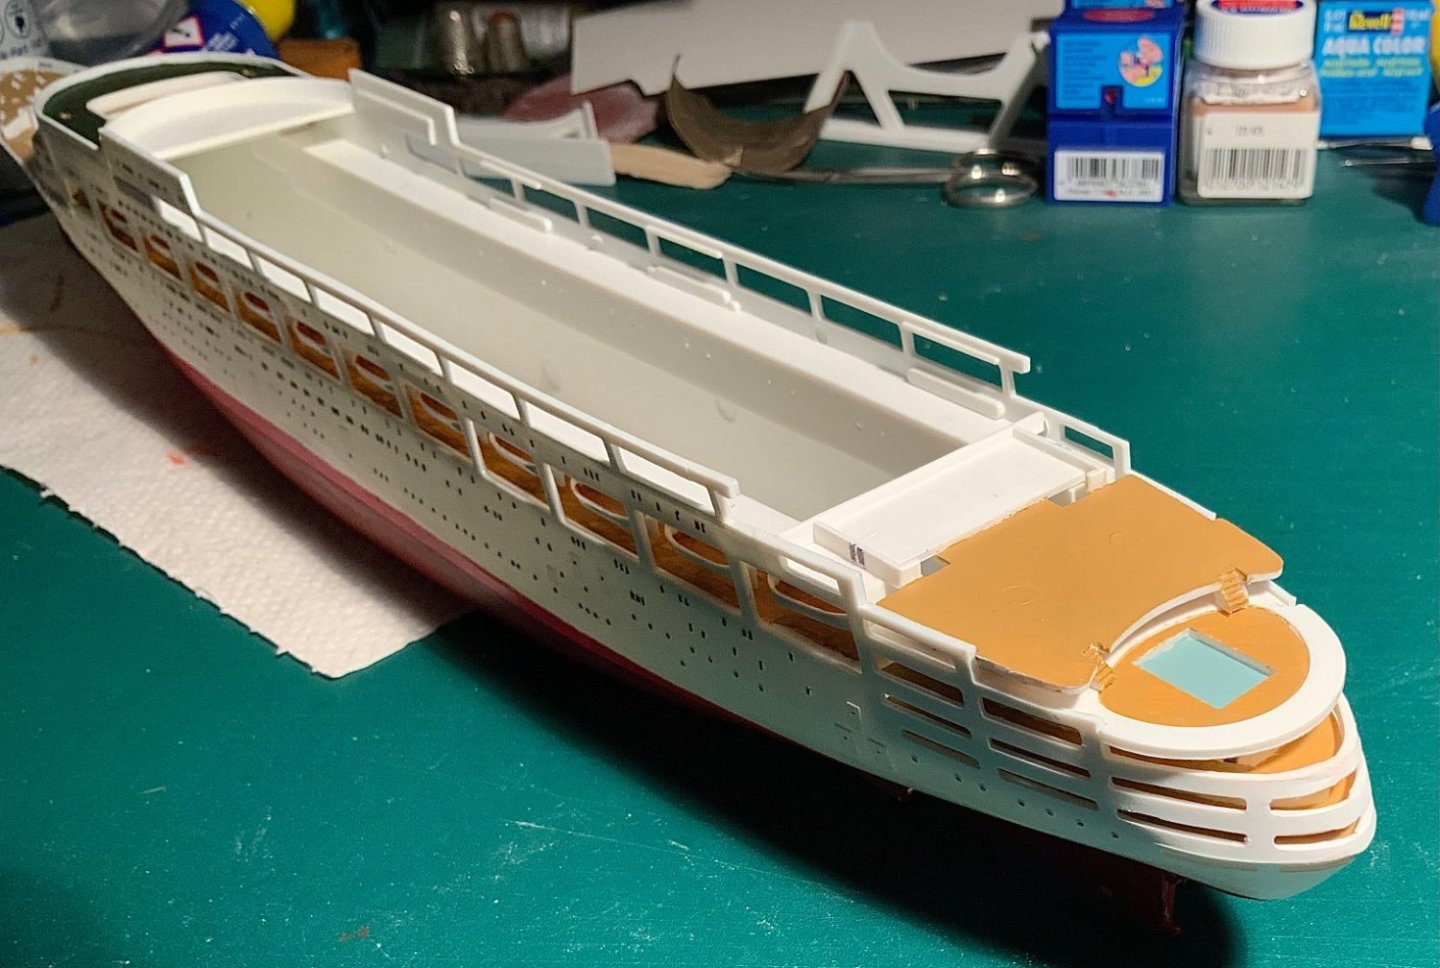
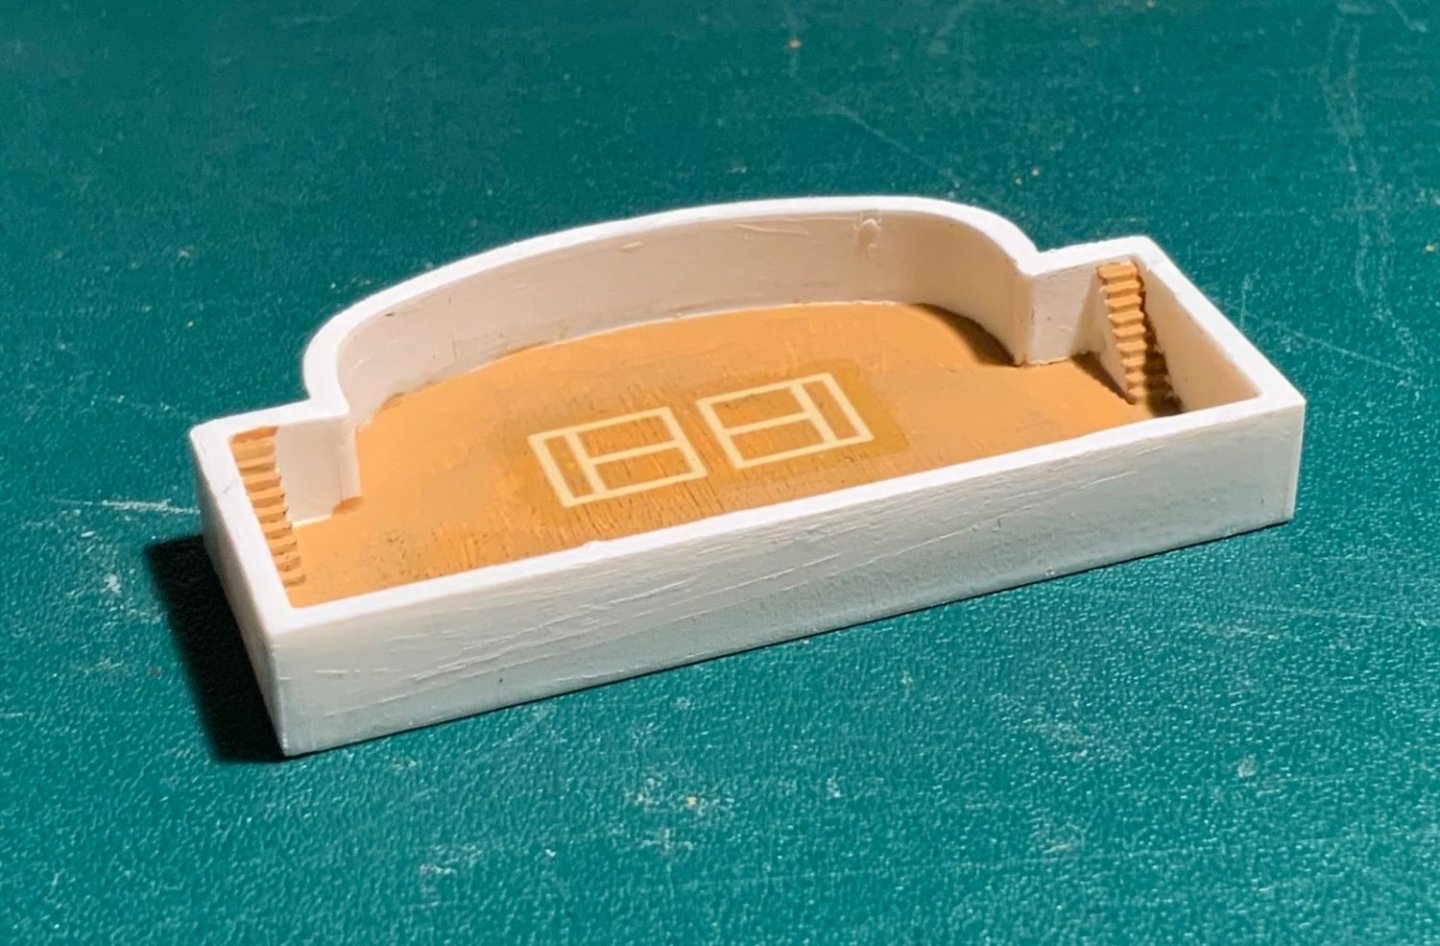
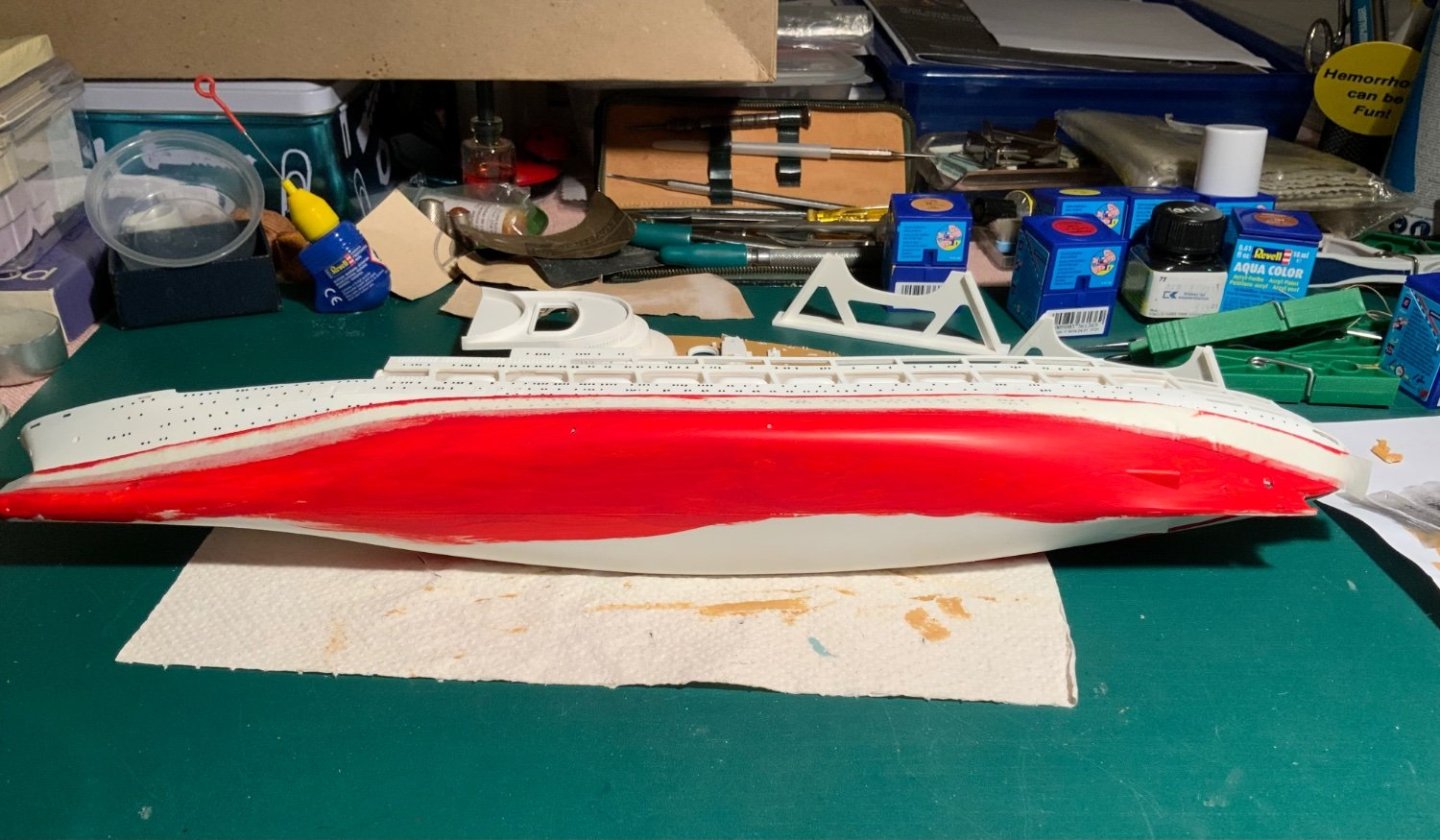
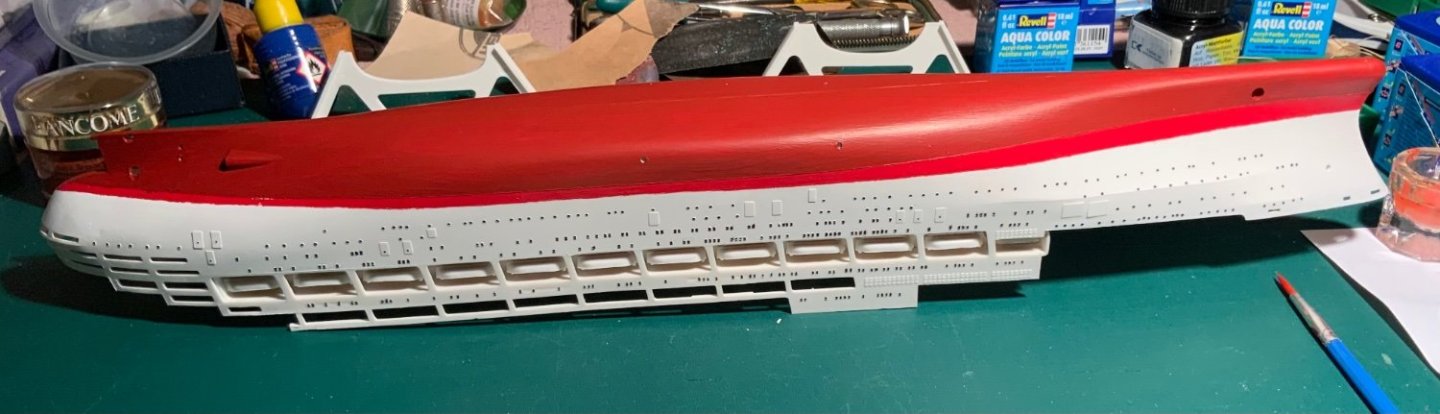
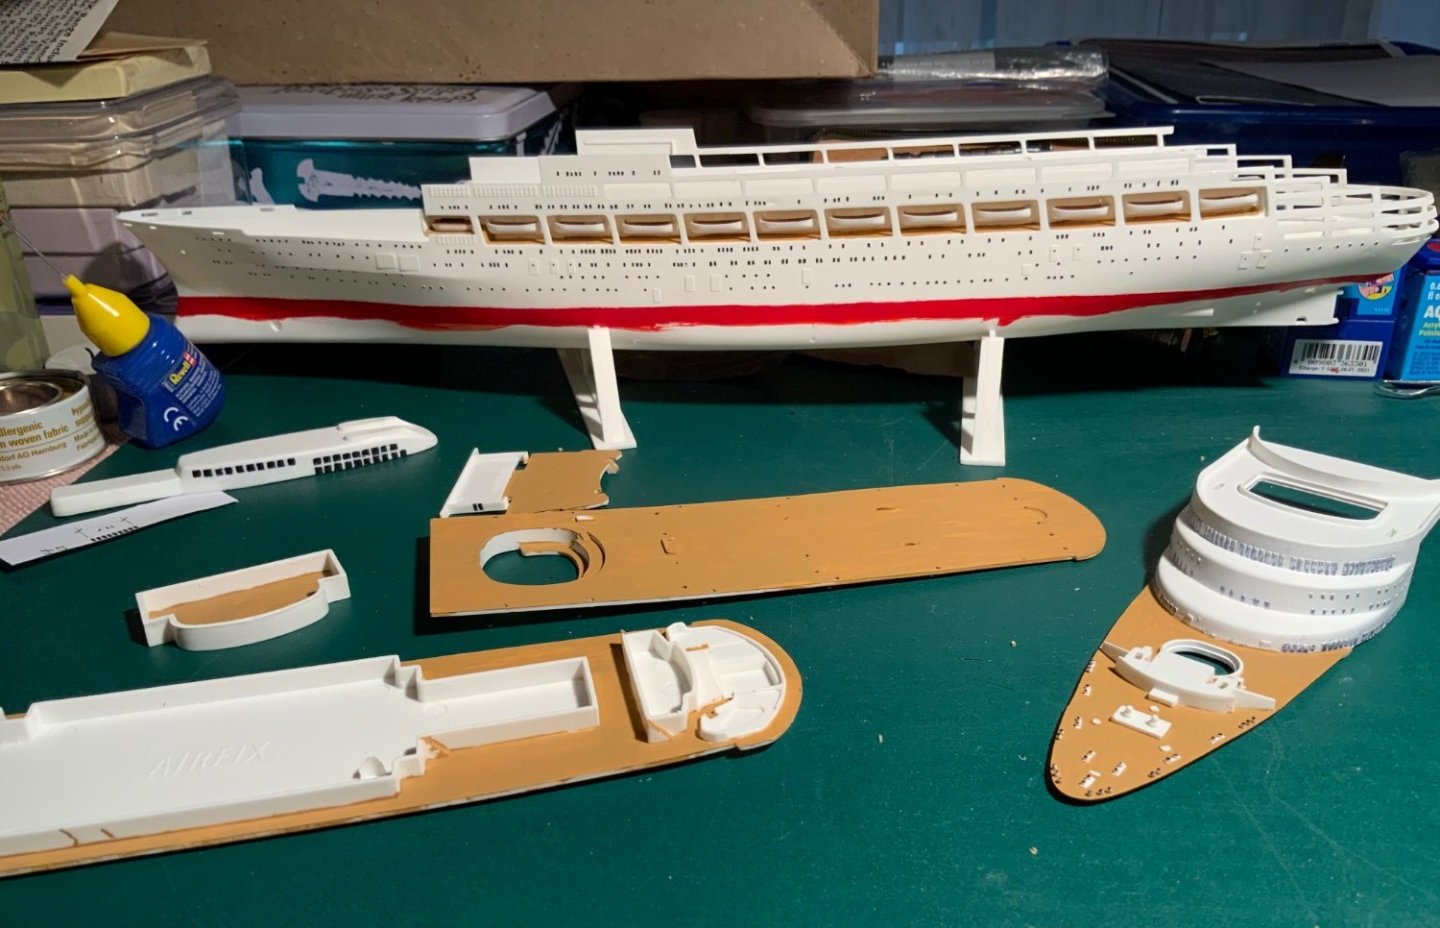
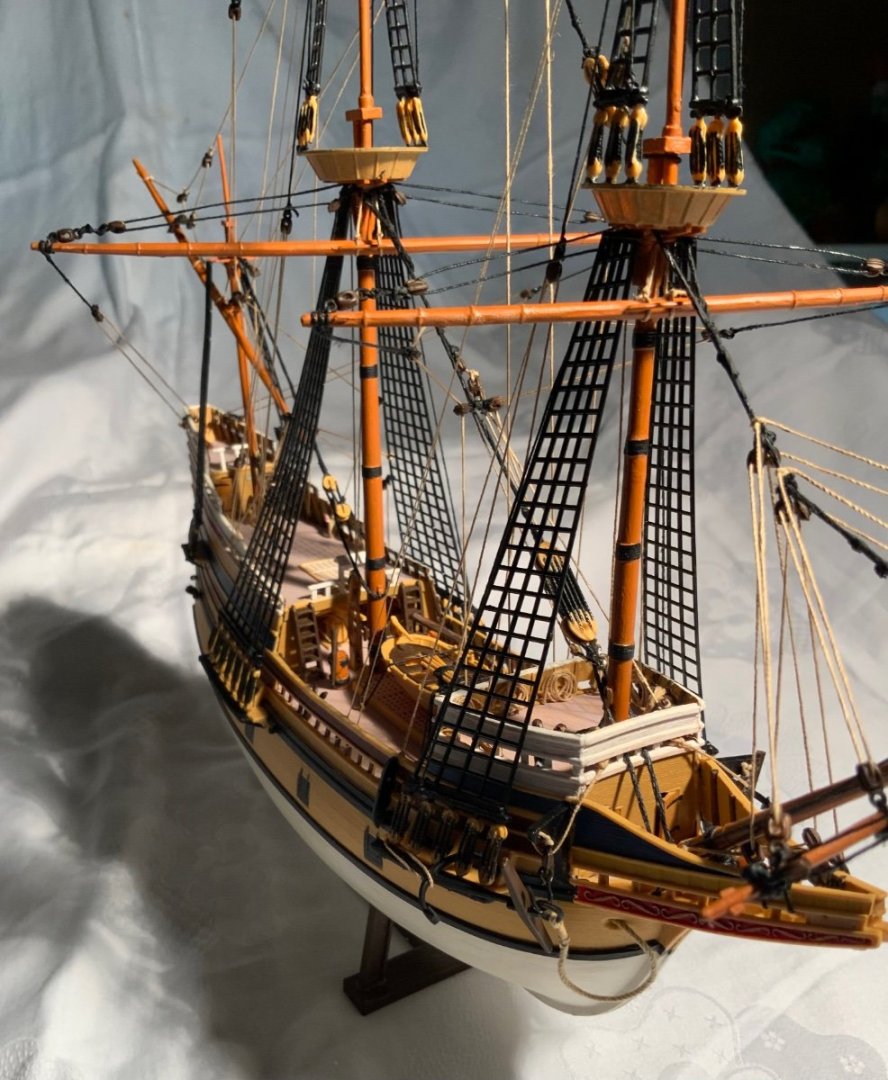
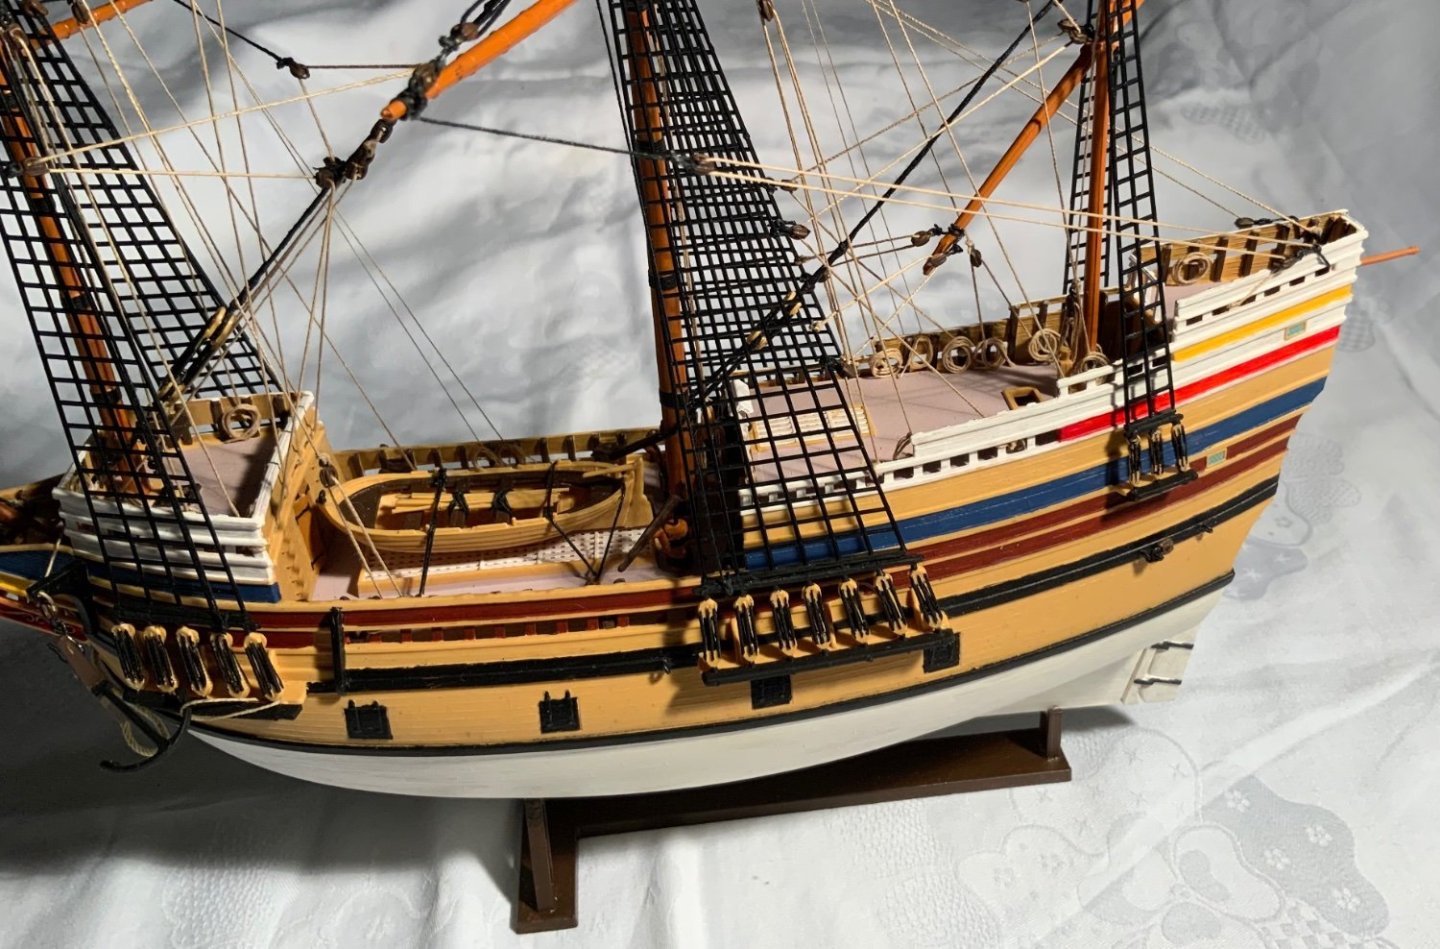
I painted the decks, swimming pools etc and then attacked the hull. It was difficult to get the red lead painting straight and the masking tape did not stick too well!


-
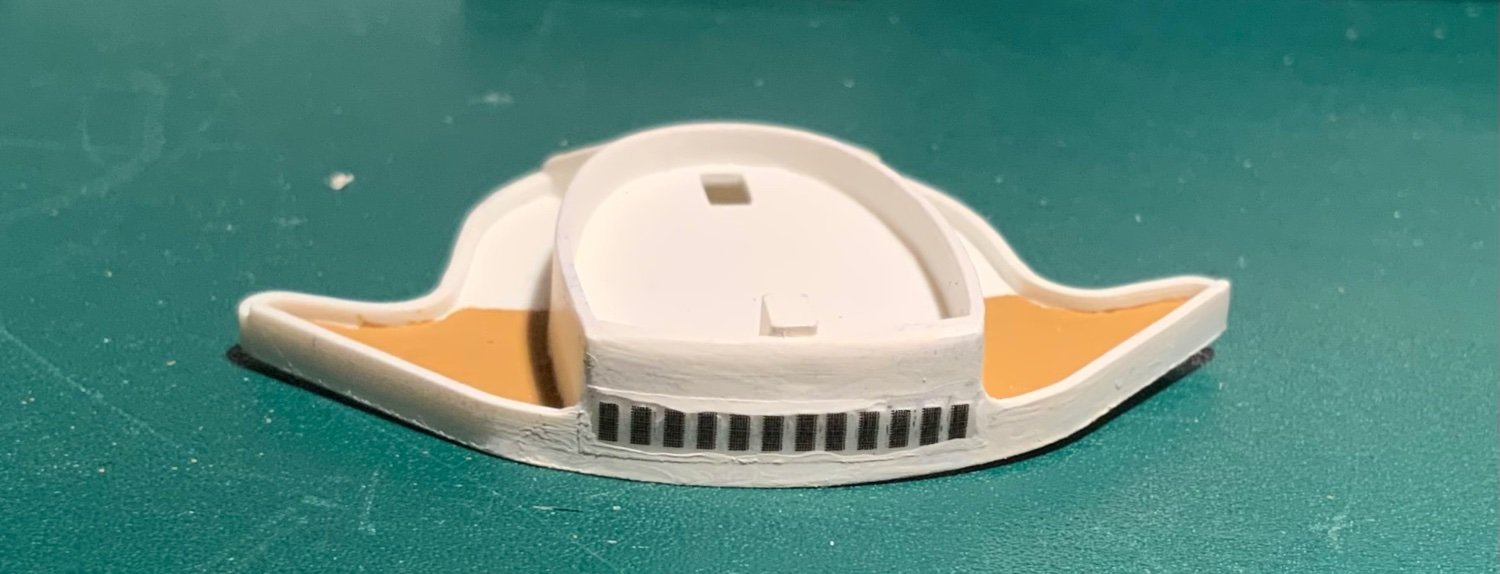
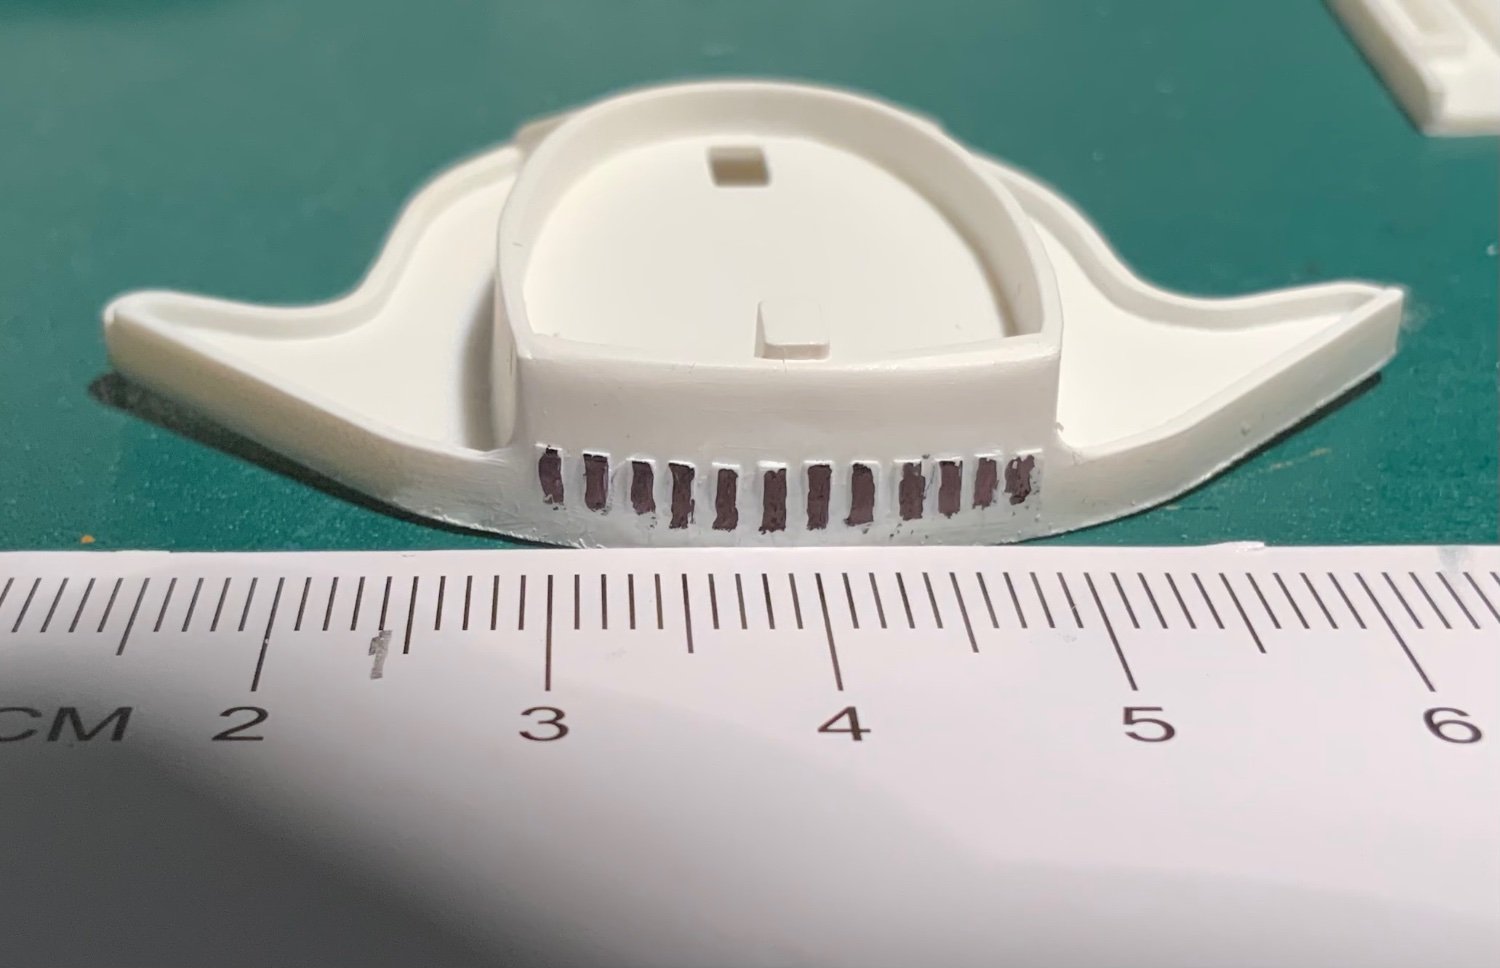
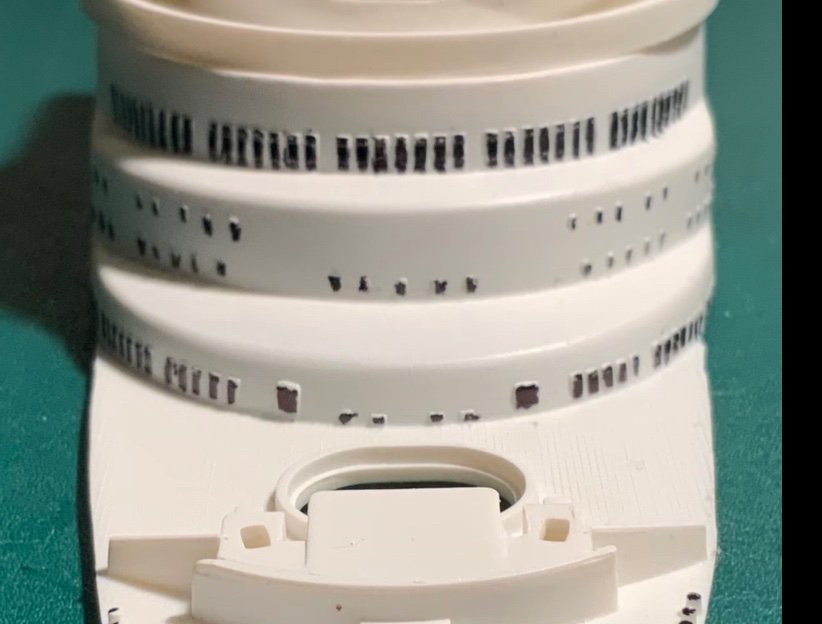
Having printed the transfers and varnished the i proceeded to cut the up and to try to apply them. They did not stick well! The internet experts told me to apply gloss varnish, then transfer glue, then the transfer, another coat of a material that shrunk the transfer to the contour and finally some Matt varnish to get it back to its original state. I neither had the solutions nor the patience to do that for the millions of windows on the boat so I resorted to using dilute pva glue and a coat of Matt varnish which, so far, seems to have worked! Subsequently I used Decalfix (Vallejo) which seemed to work pretty well too! I did encounter another problem however, the pen painted windows all ran when sprayed so they turned out to be a disaster and had to be redone with white paint and then ink and then a simple brush applied varnish. I guess the propellant in the spray dissolved the ink? It was not as good as the first time but it will have to do!


-
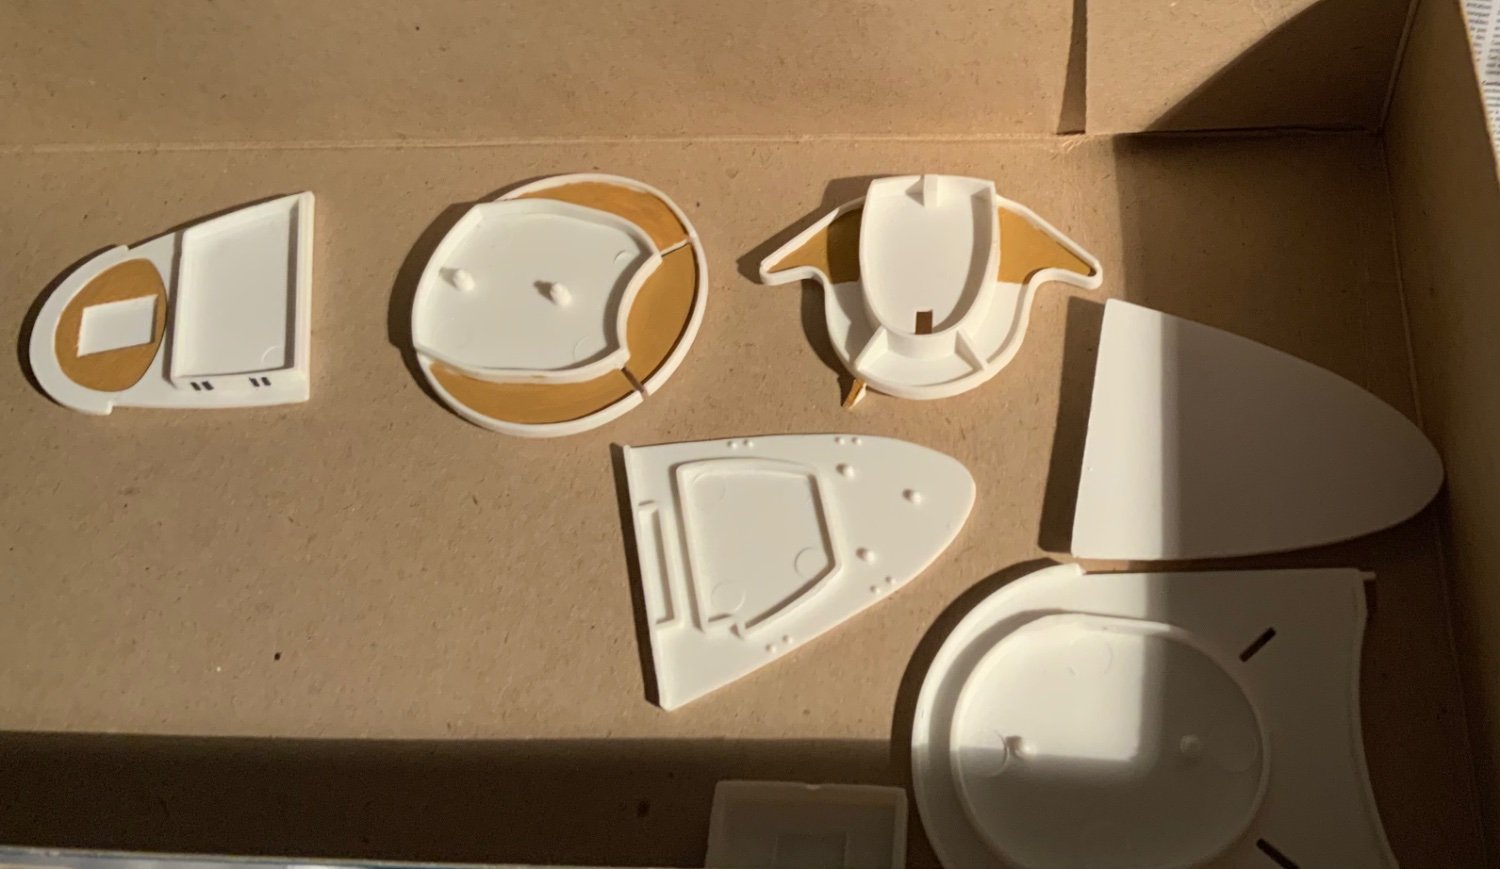
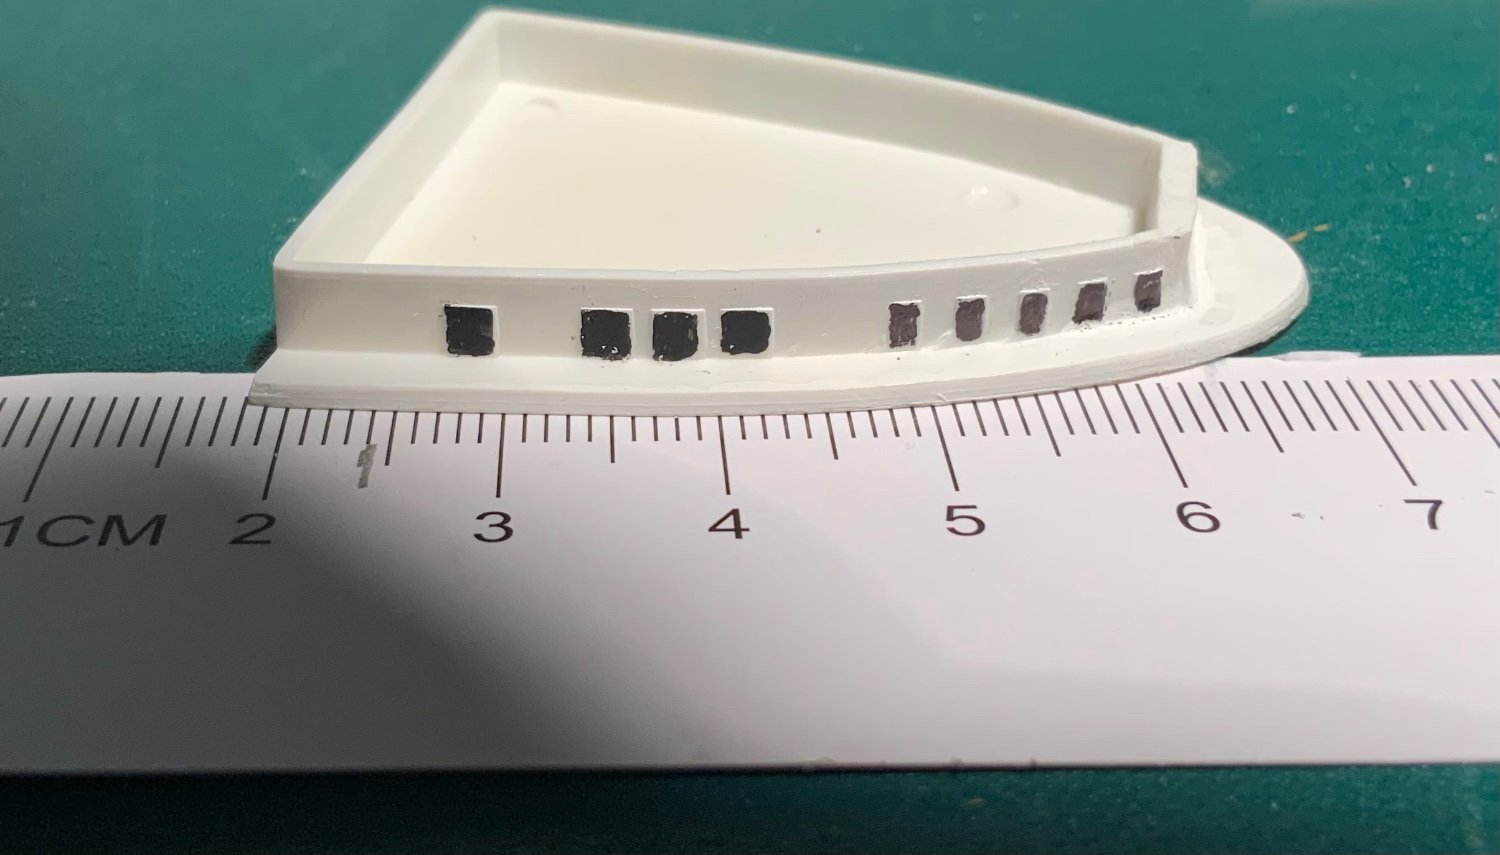
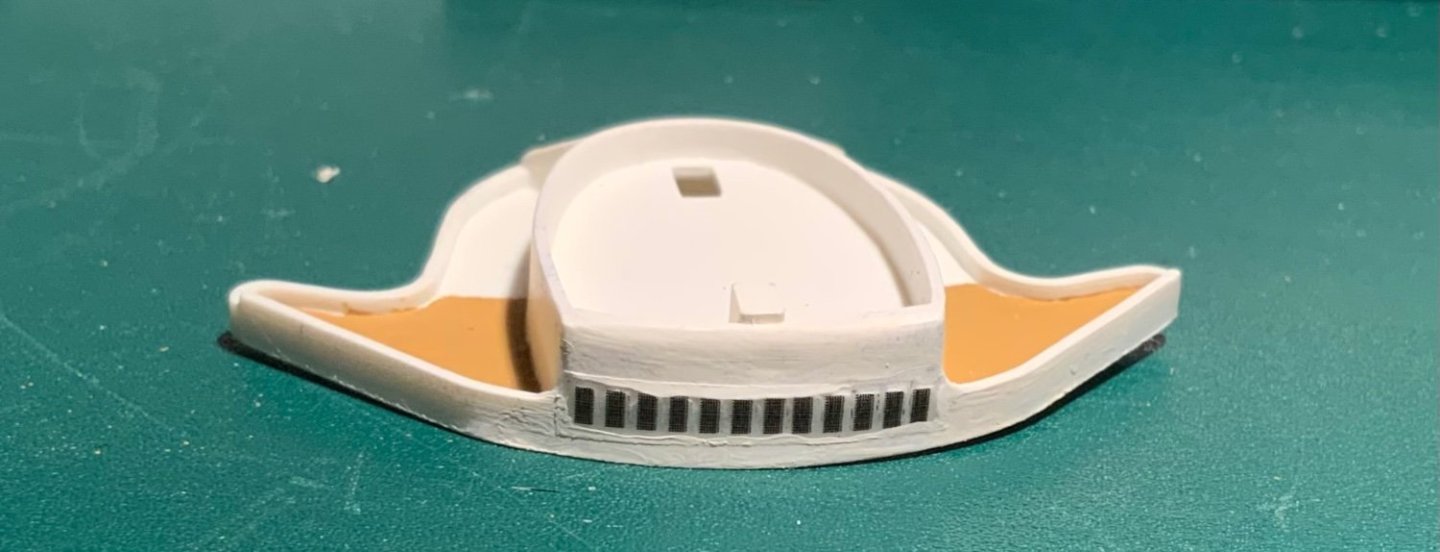
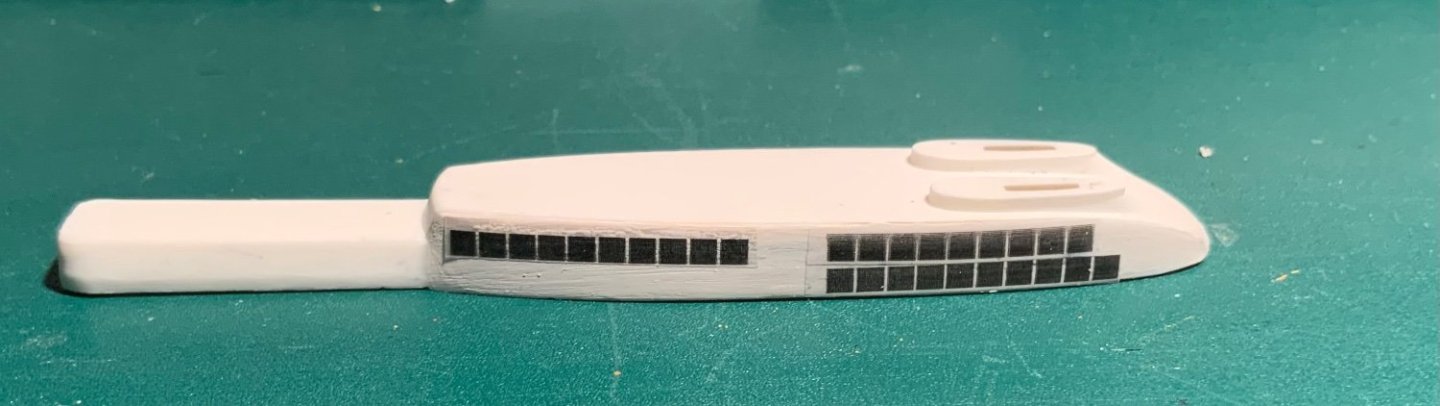
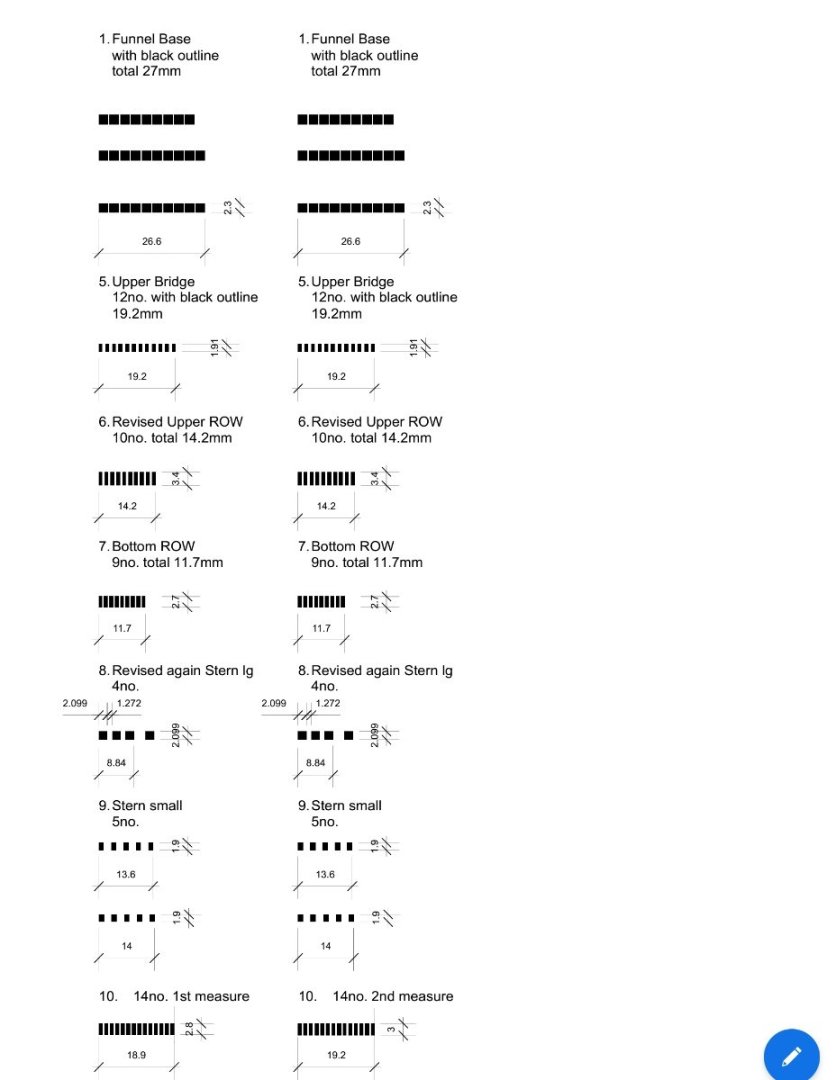
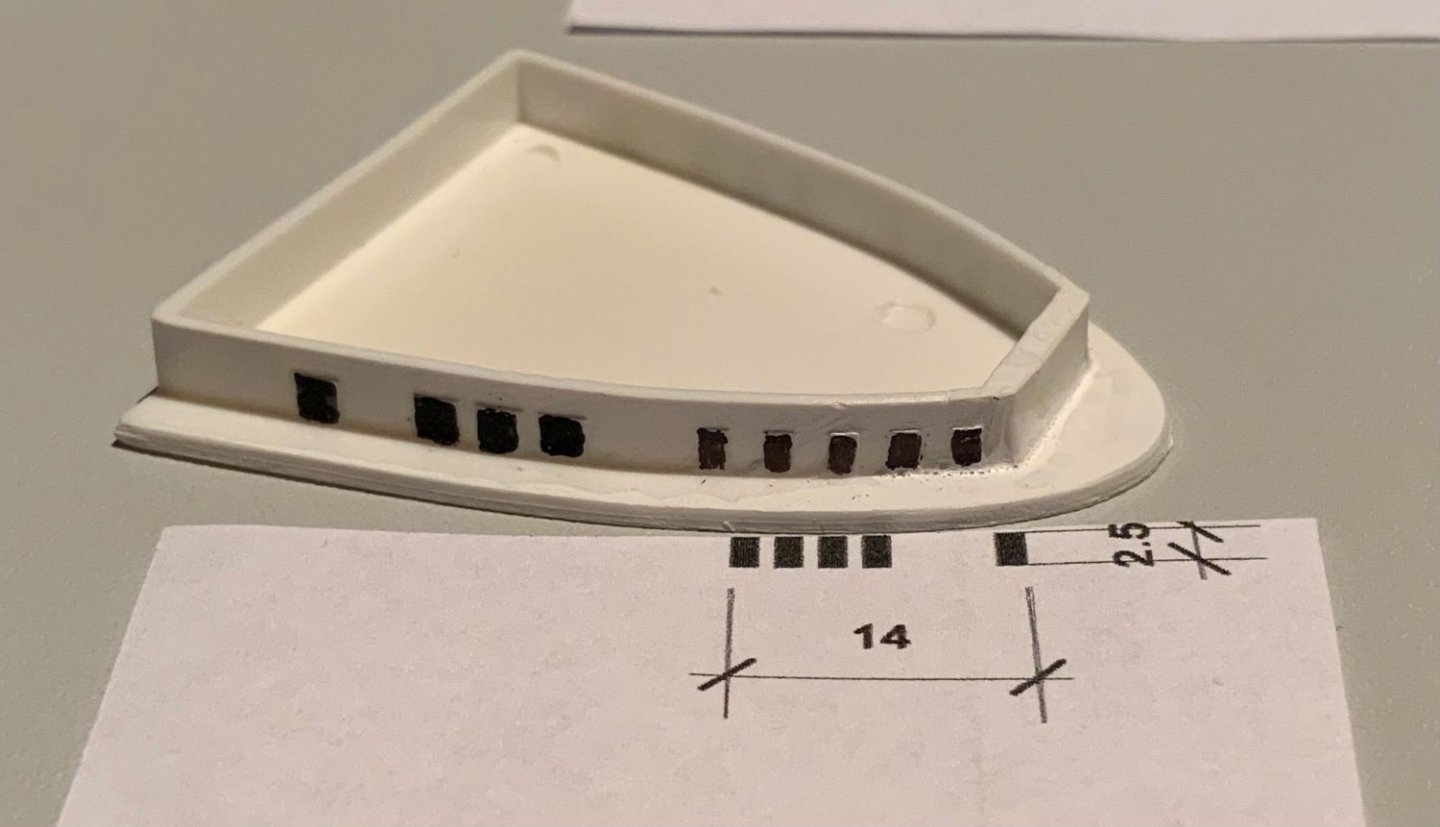
Clearly I was not doing very well even by my standards so I turned to the internet and found on other sites boat builders had used computer generated windows on transfer paper. I did not have the necessary skills to draw such small objects so my daughter very kindly made pdf files in Vectorworks and sent them to me. I measured the window and it’s spacing and by trial and error we produced a set of transfers for all but the very small windows. Test prints - spacing incorrect. Ready to print. The small portholes and very small windows were done by hand. They were so small that I did not think that I could have attached the transfers so I settled for my painting, poor as it was - I had no alternative!


-
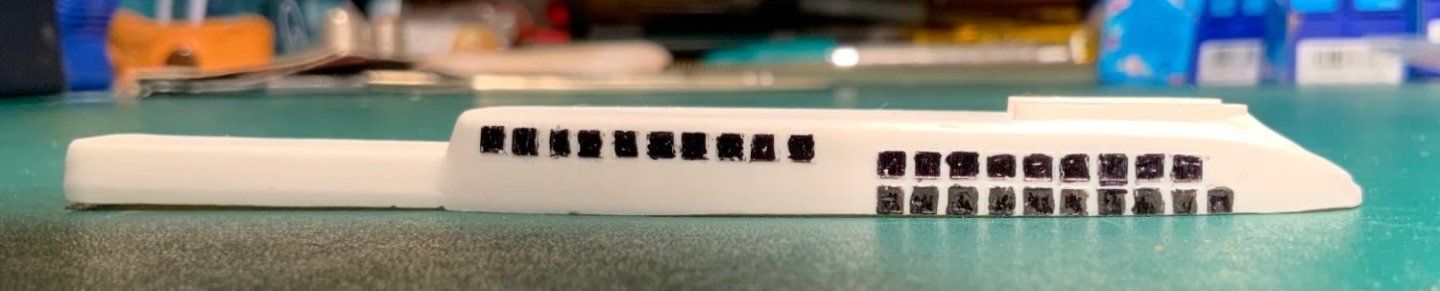
Having sprayed the undercoat I set to work on the very (too) many windows and portholes. I tried painting them wit a fine brush but was not steady enough. I then tried with a waterproof fine pen. The results were less than pleasing!


-
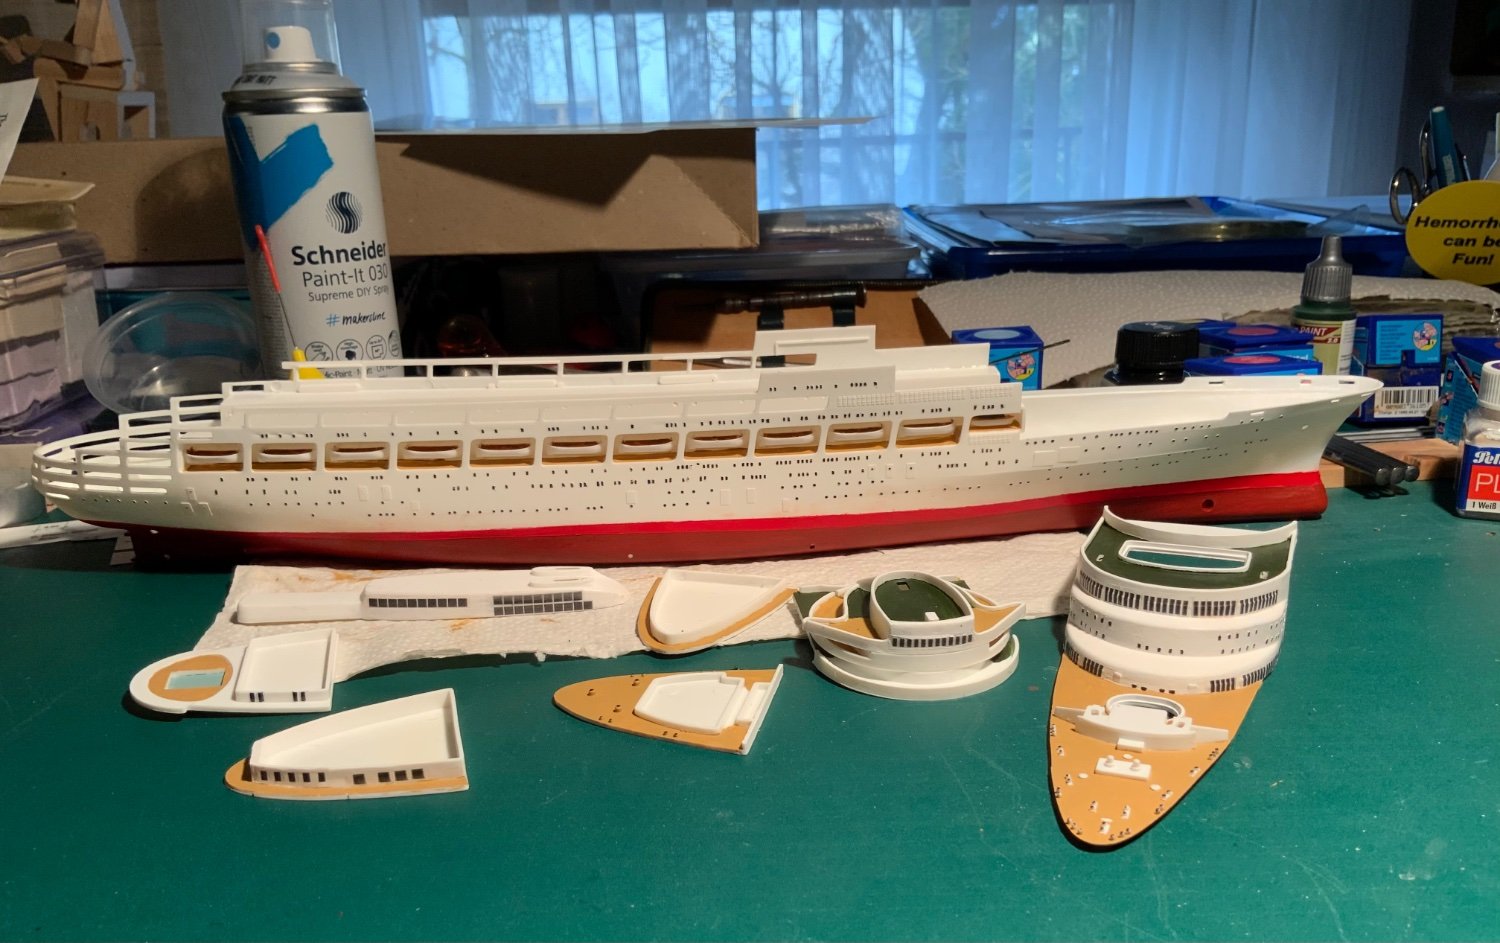
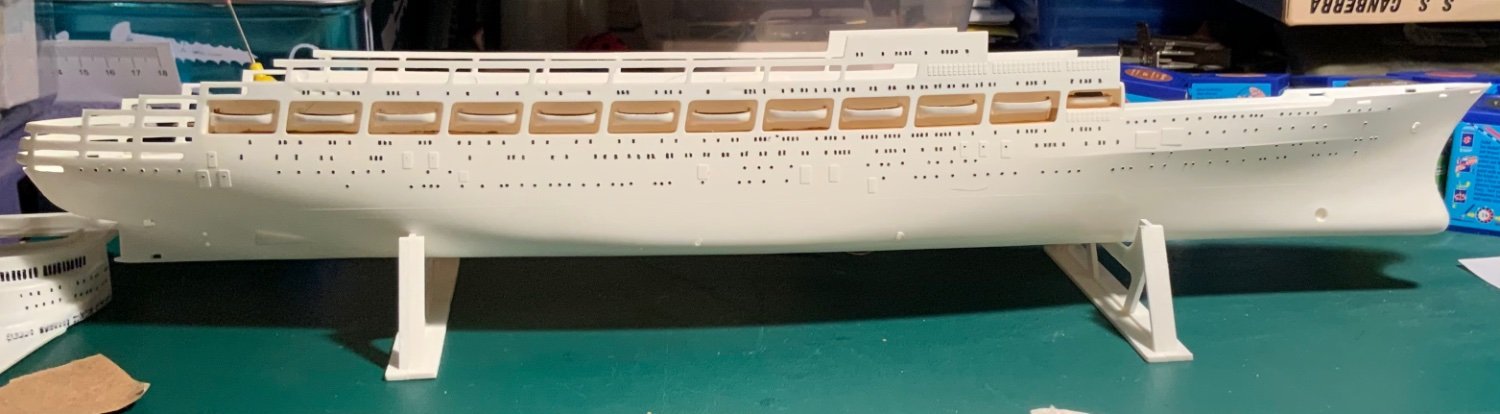
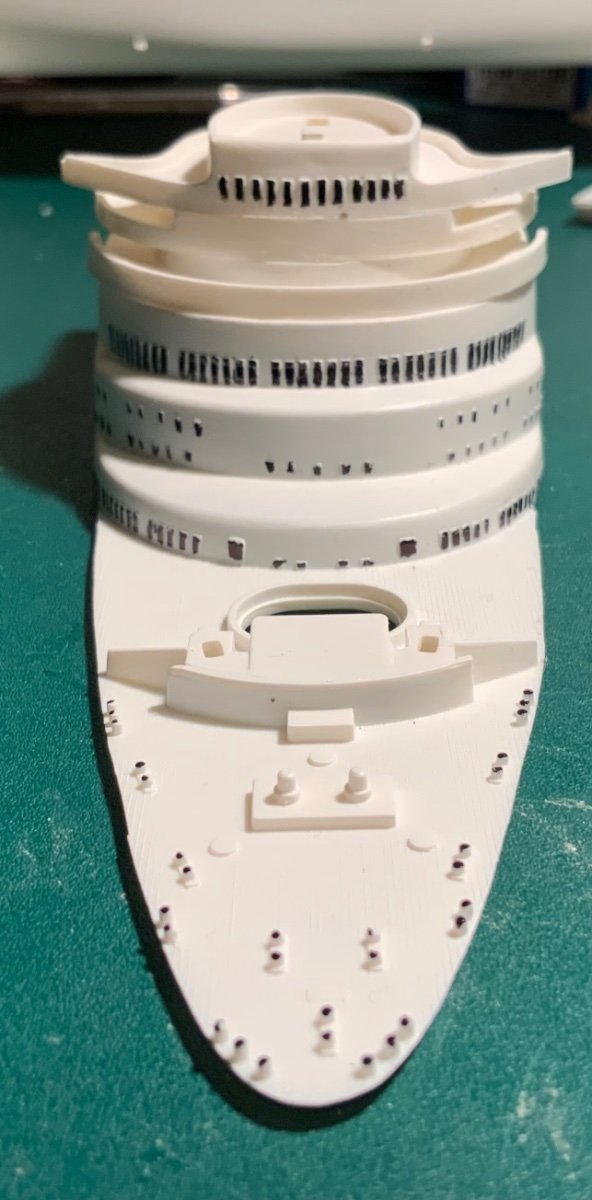
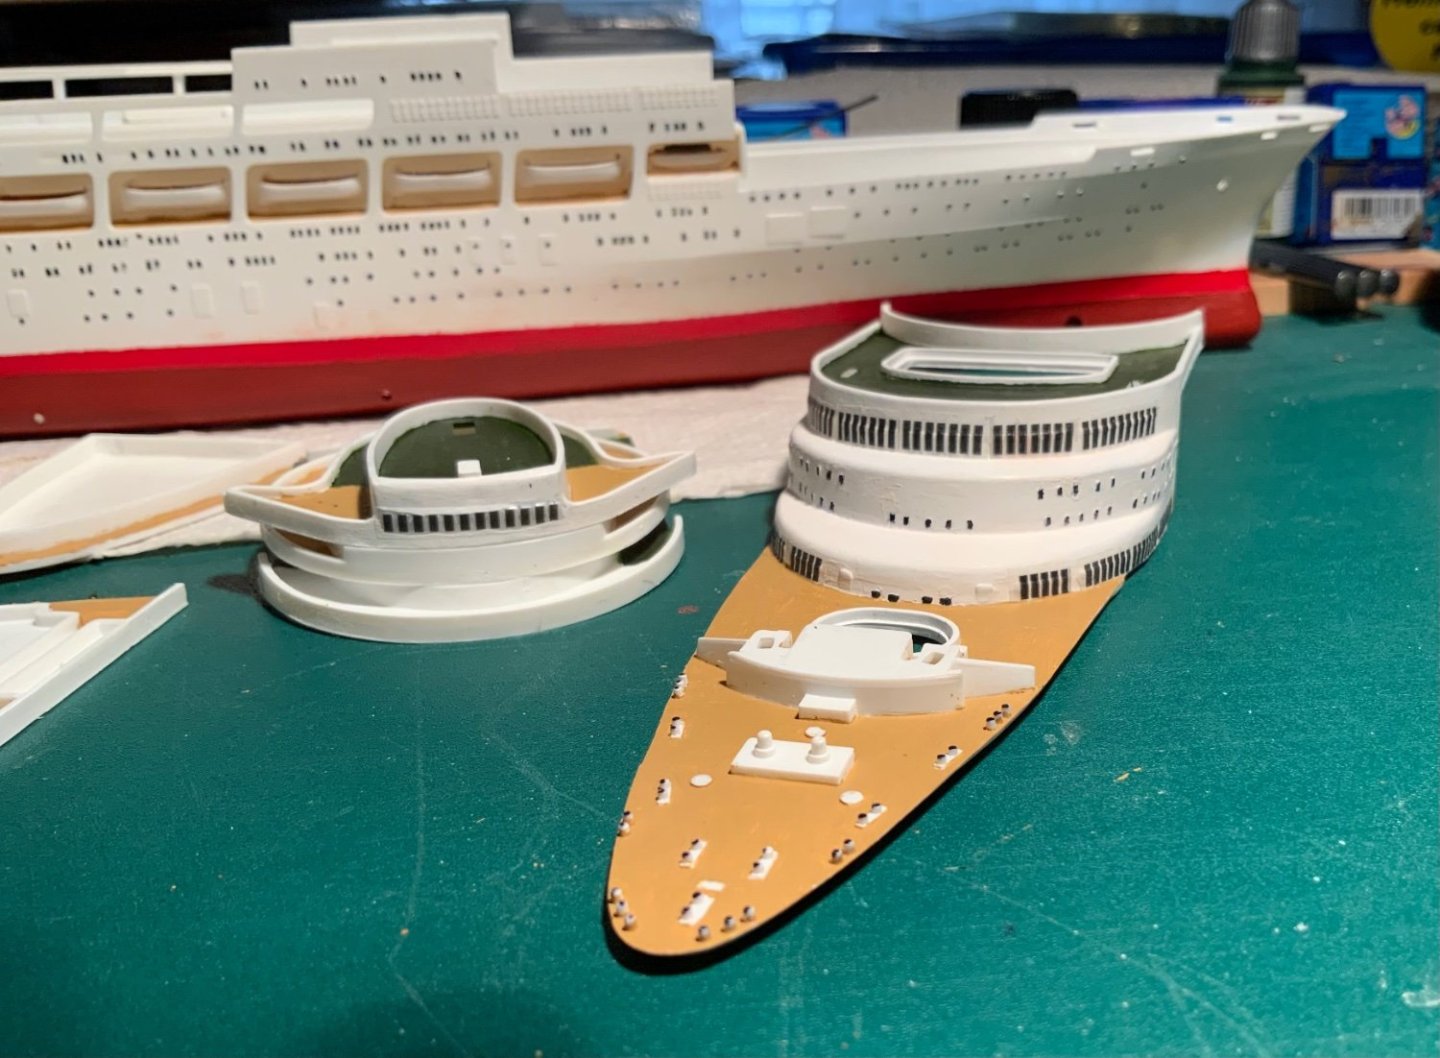
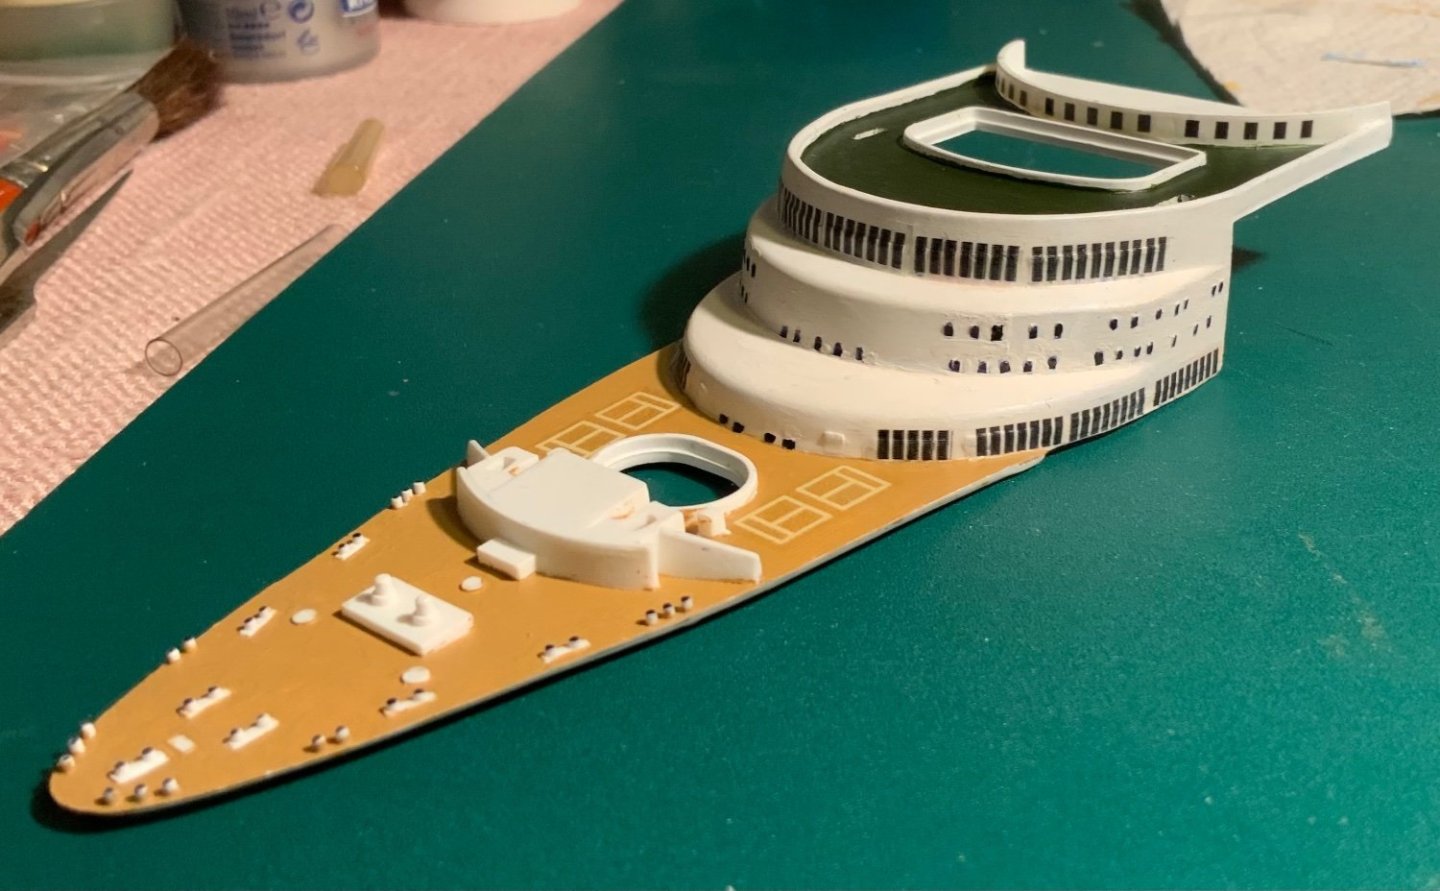
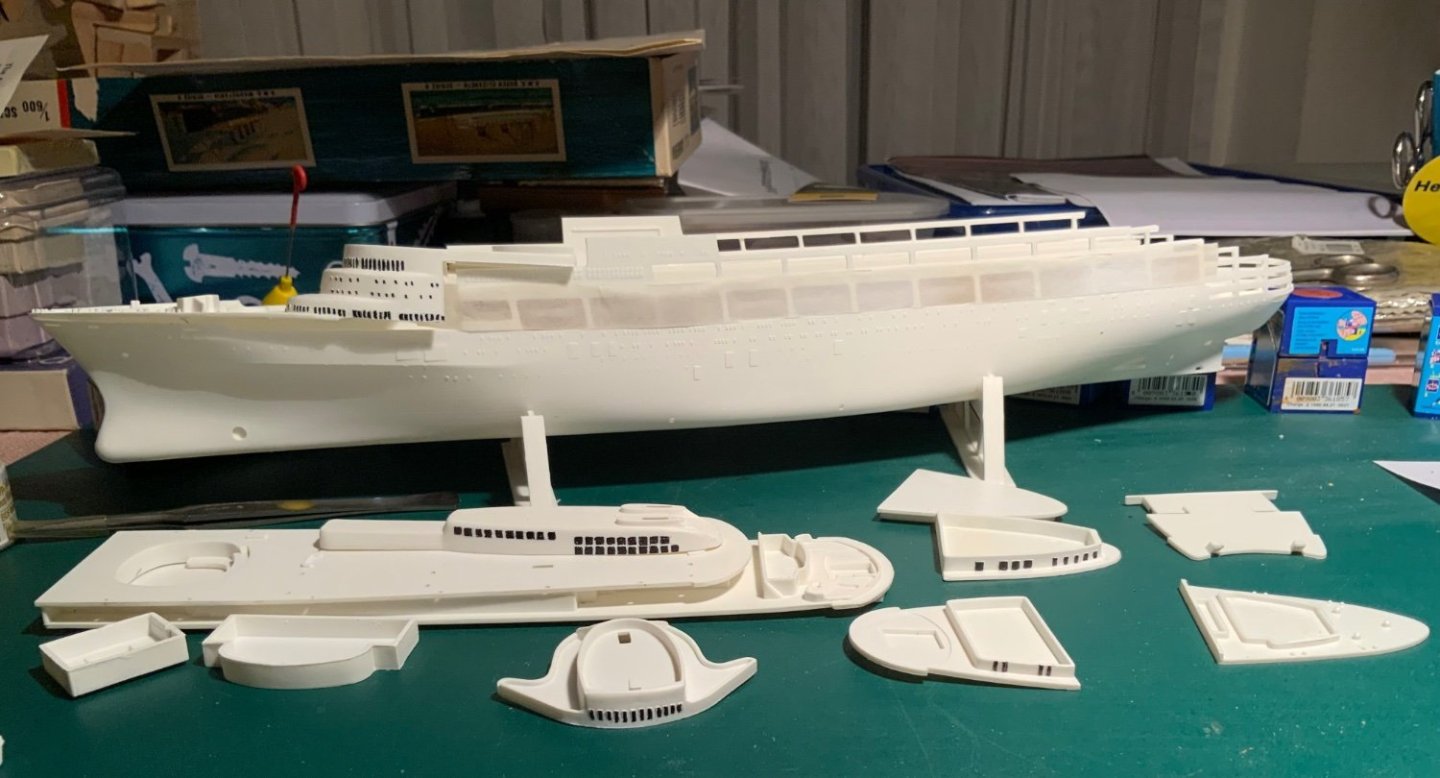
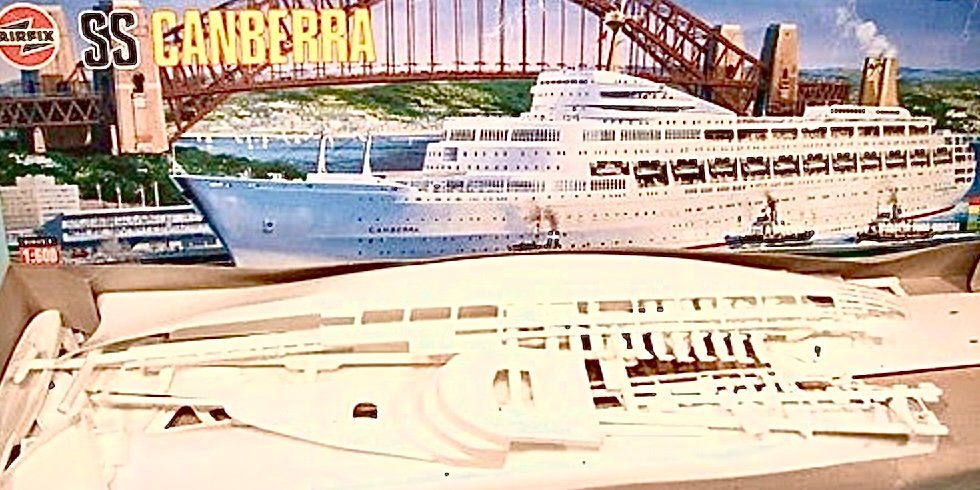
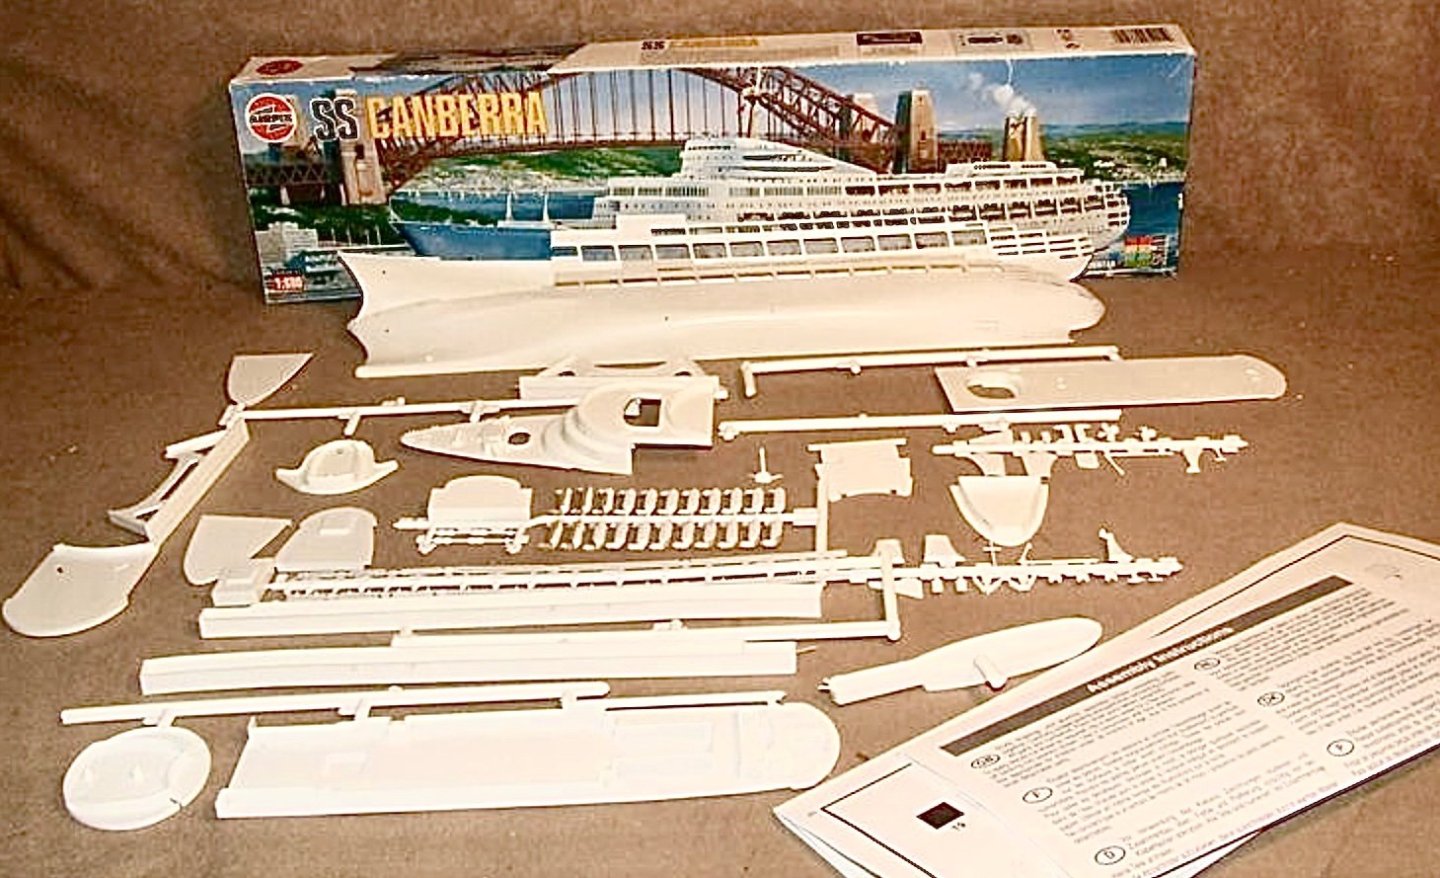
Here I go again! Having finished the ‘Mayflower’ with some difficulty I needed some more occupational therapy! In January of 1972 we found ourselves on the SS Canberra. My family and I were sailing from Southampton to Sydney. Our eldest son was eight years old at the time and to remind him of the boat we bought an Airfix model kit of the Canberra which we thought that he might build at a later date. Time went by and the Canberra kit joined the ‘Mayflower’ and went into ‘storage’ with the ‘Mayflower’ for the next 50 years. They travelled from Brisbane to Wellington to Germany with us and now, with my grown up son’s permission, I’m starting to try to build the SS Canberra! This build log will describe my problems and solutions (if any) with the build. As others have already commented, the kit was not very well made so features in the polystyrene are not often clear and pieces do not seem to fit too well sometimes. This time the first step that I took was, after washing the parts, to spray everything with a white undercoat! I soon found that the major difficulties with the build were going to be with the painting of the individual parts and applying the transfers (decals). As I found with the ‘Mayflower’ my hands were not too steady and I did have some problems masking and painting some small parts. The windows were a nightmare (see later).

-
Amazing - you can understand now why I was somewhat depressed with my efforts with Mayflower! I hope you have a happy new year and that you make many more ships. Thank you for your help to me. William
-
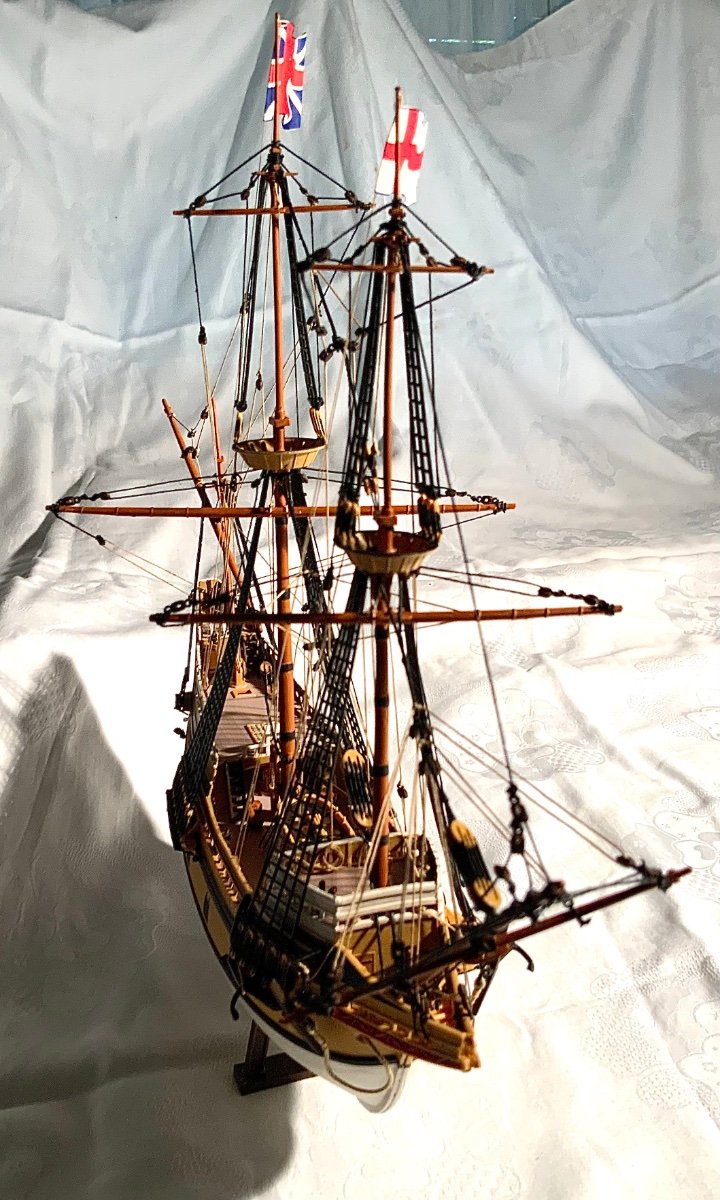
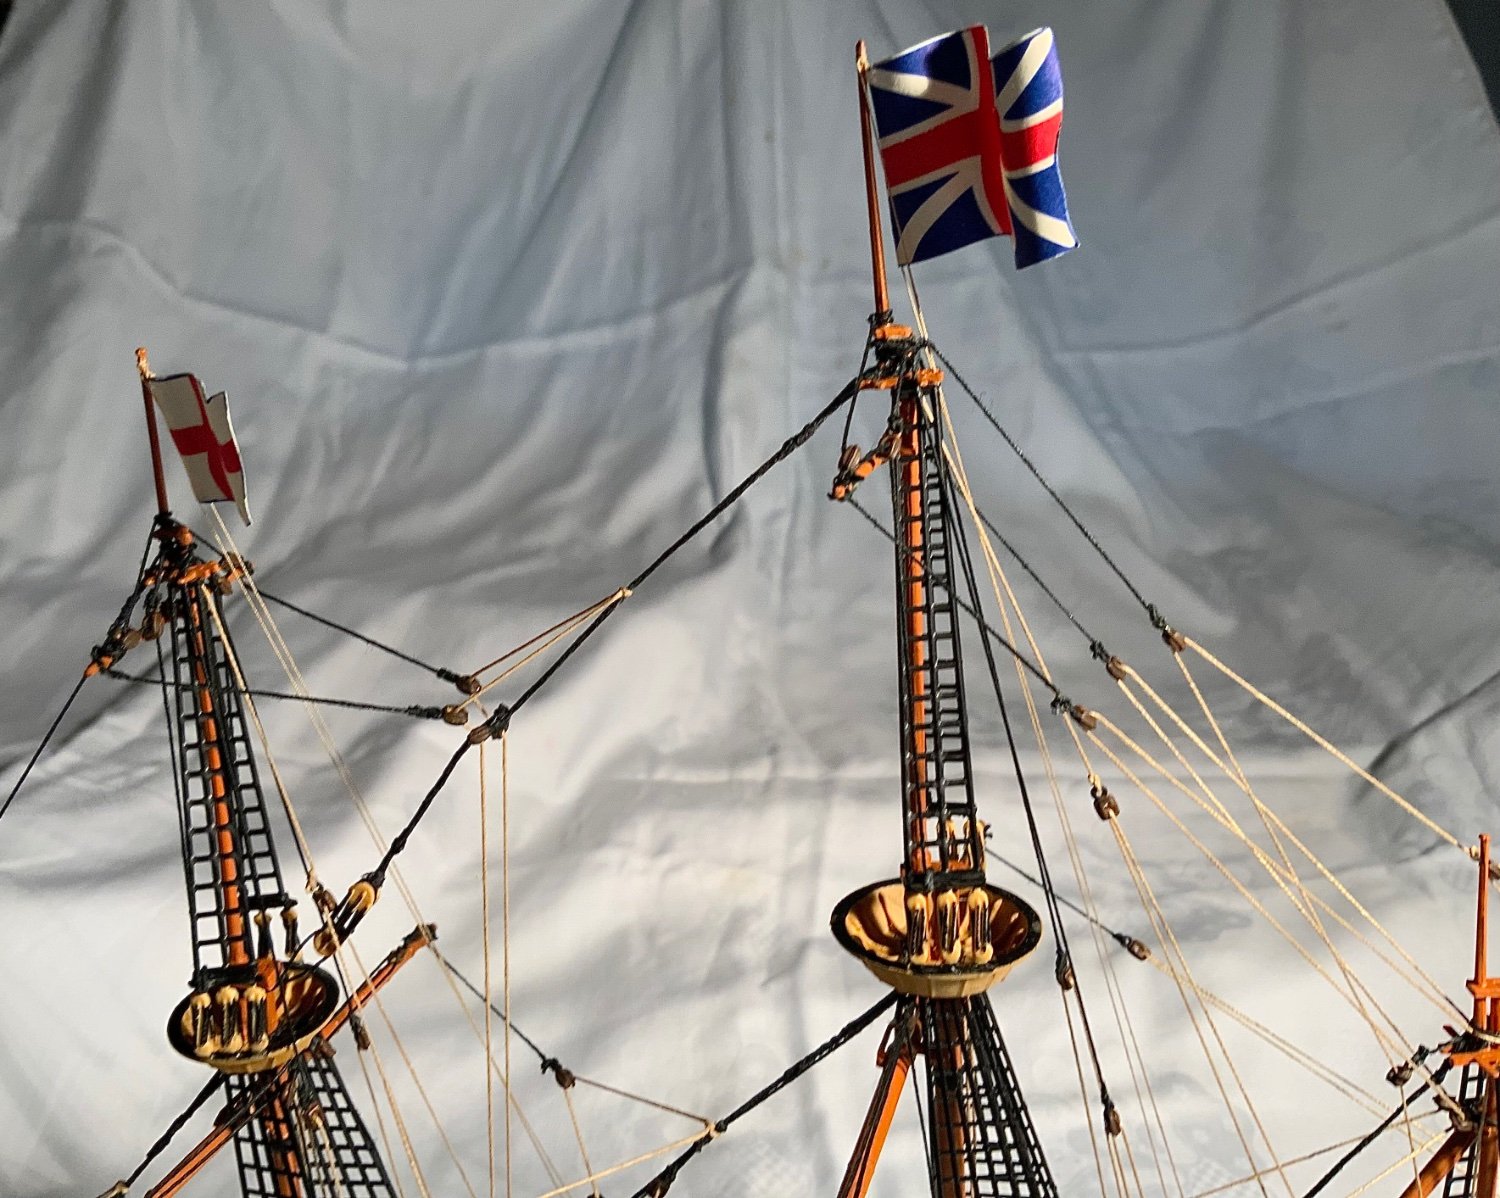
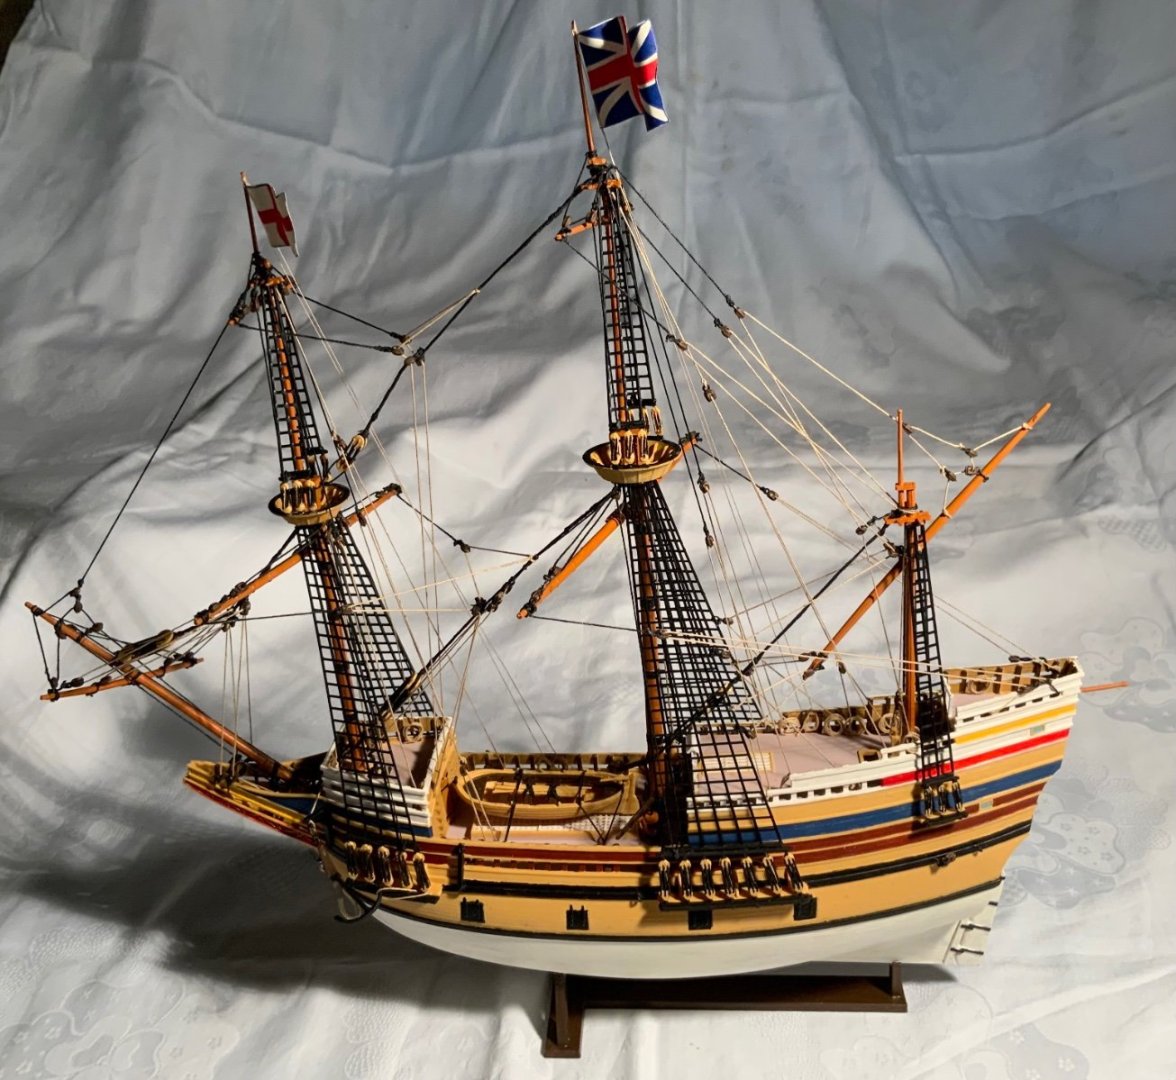
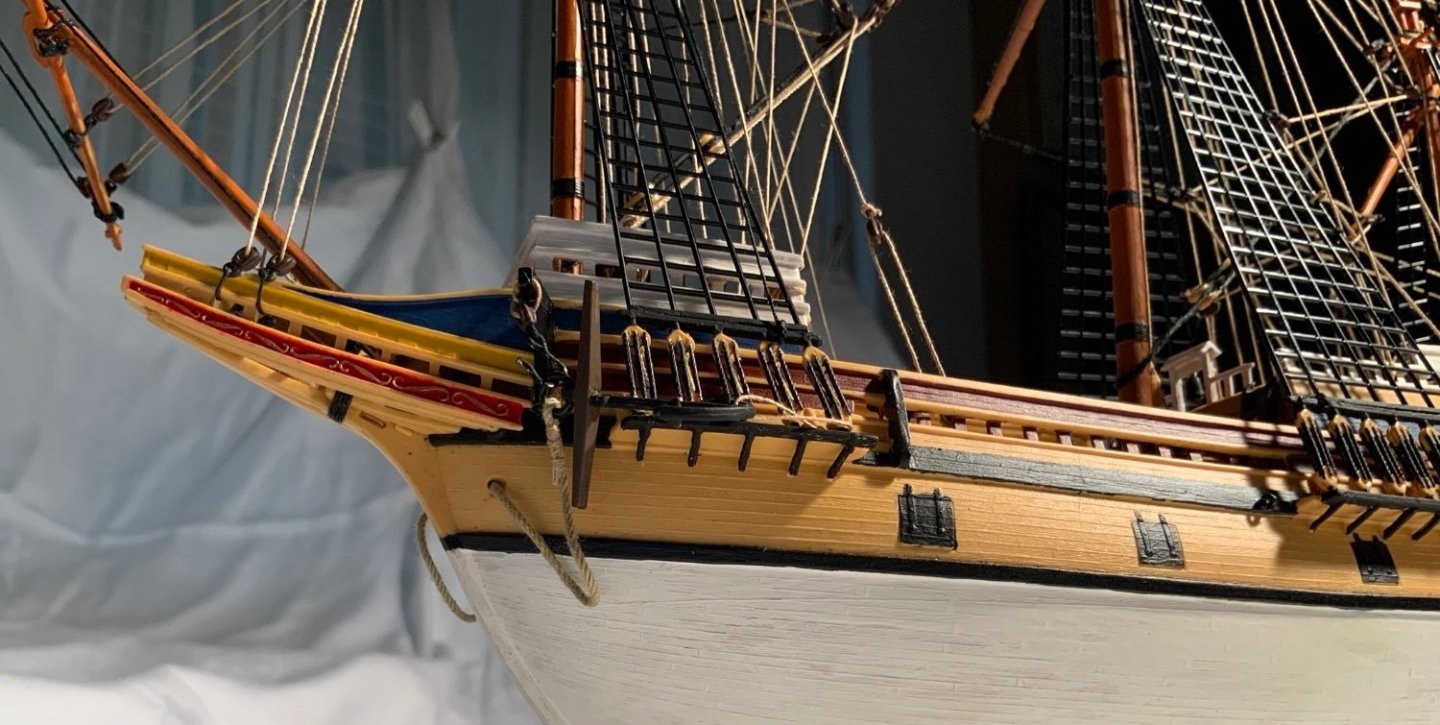
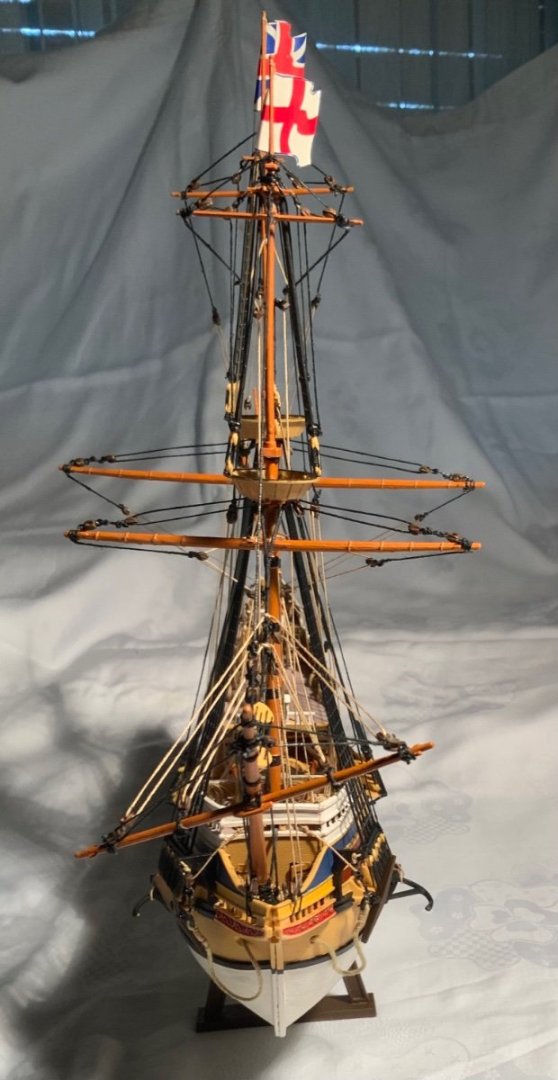
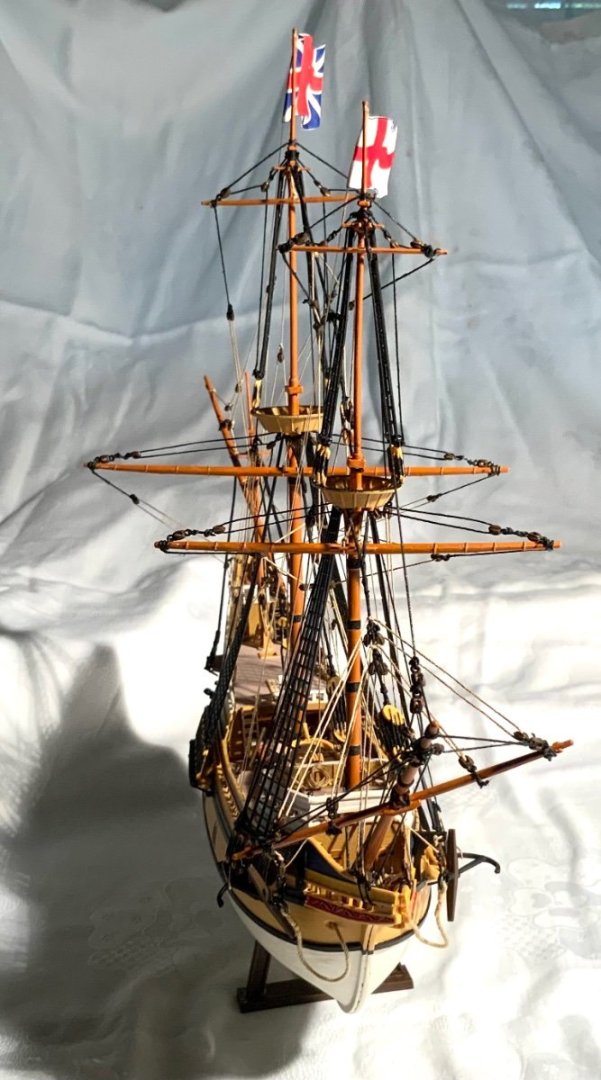
Thank you to everyone who offered help or who commented on my efforts. Even I am quite pleased with the rigging! It was quite a job for me and I am pleased that I did not have any sagging lines.
-
Do you just brush on the Antiquing Medium or do you have to brush on, wipe, wash away parts with solvent etc?
-
FM. Thank you for sending all the suggestions. It was very kind of you to take the trouble. My painting is not steady enough, unfortunately, and I’m not artistic enough to get worn/weathered finishes. I did try on spare bits but it looked horrible! Thank you again for the kit suggestions.
-
Patrick, I have been looking at your build logs. I am amazed that you go from bathrooms to Revell kits - you are a magnificent builder, both small and large, and I do wish that I had managed a much better paint job. I’m too old for a second boat however so I will just look, from time to time, at other experts builds. Thanks for your kind words, william
-
Thank you Steve, I tried my best! Having read more builds on this site I see, now, how I might have made the build better by using third party parts. Thank you again for your kind words. william
-
Thank you very much. Towards the end I did know about the third party blocks and different thread sizes but I did not think that I could manage them. I did not think that I could make my own ratlines either. I guess that if I were younger, I would try again and try with third party parts. I did make a kit set wooden drummer though. I don’t know if I’m allowed to show you? My Movie 25.mov My Movie 27.mov
-
Thank you for your kind words. What sort of rigging pieces do you mean - I doubt that I could make blocks and deadeyes and rig them - it was hard enough doing what I did!!!
-
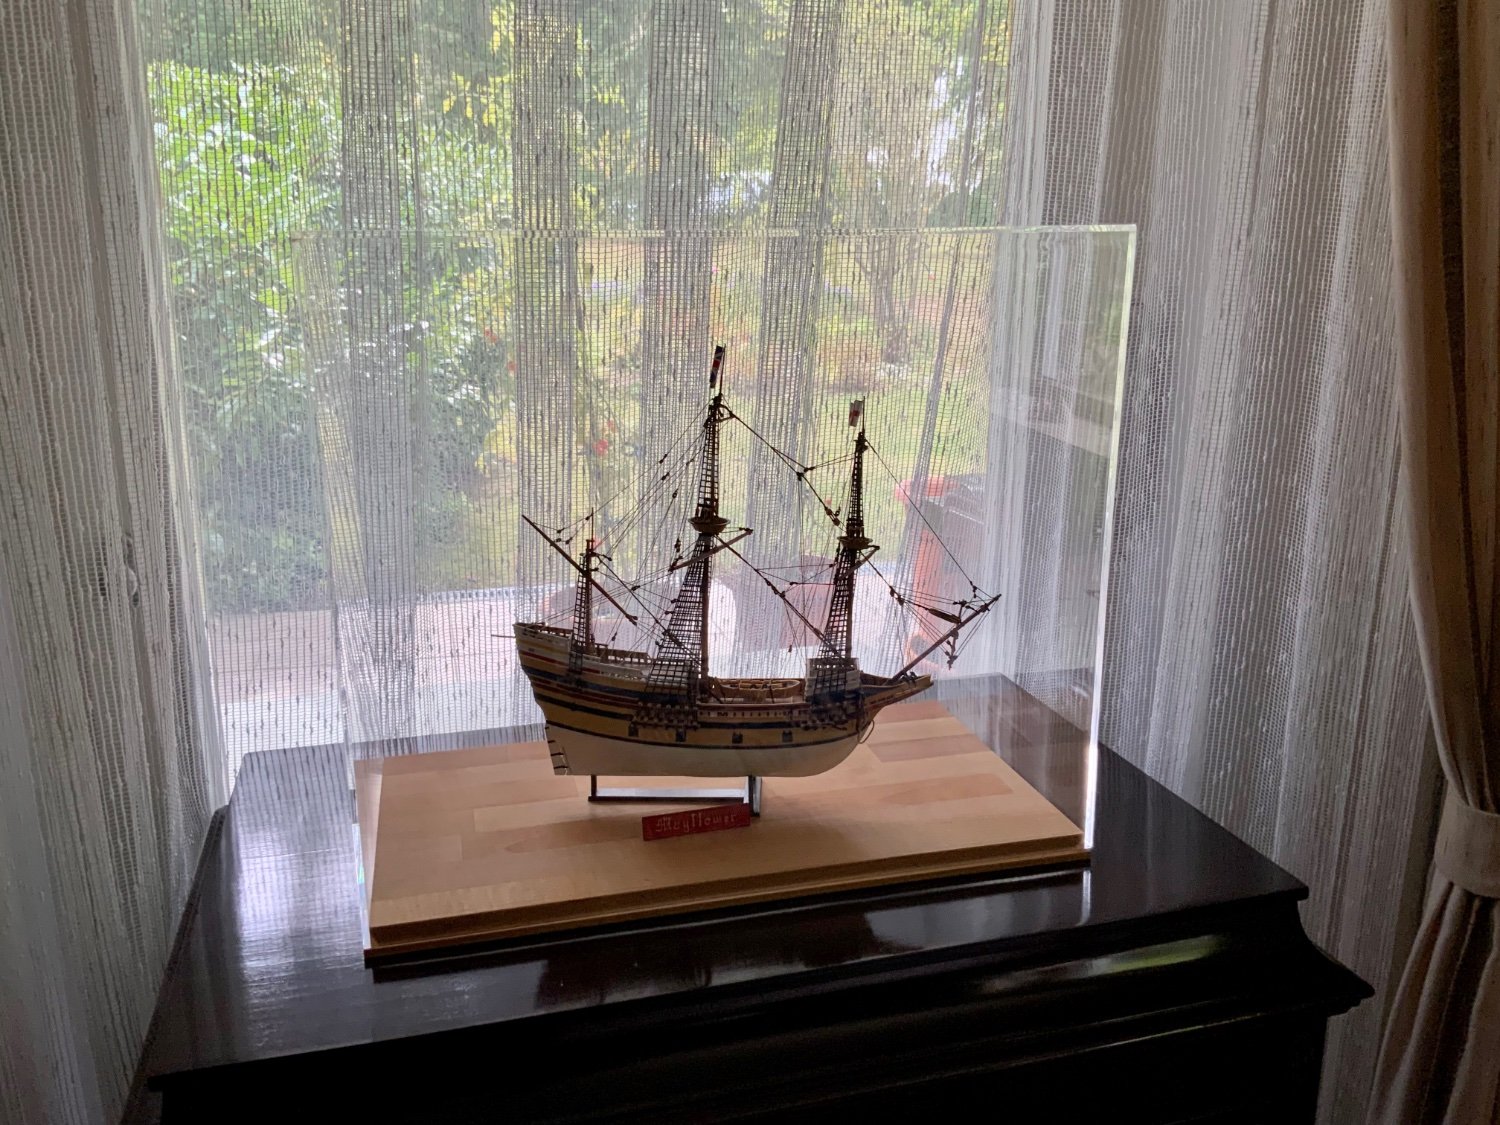
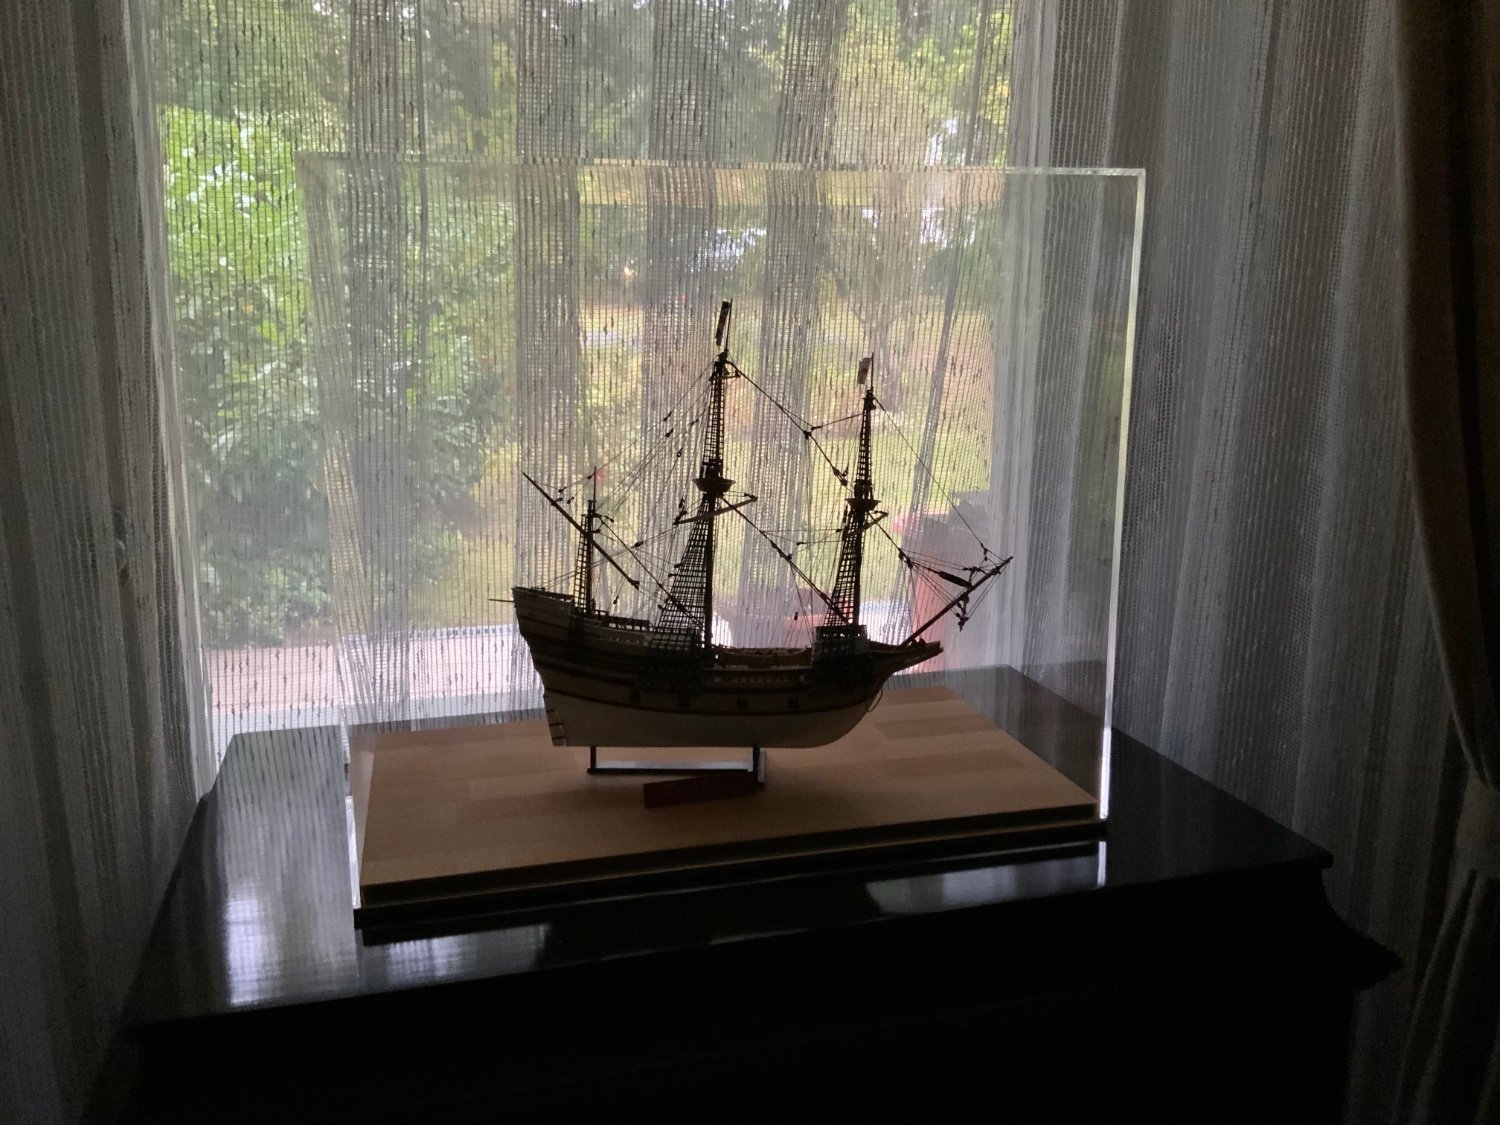
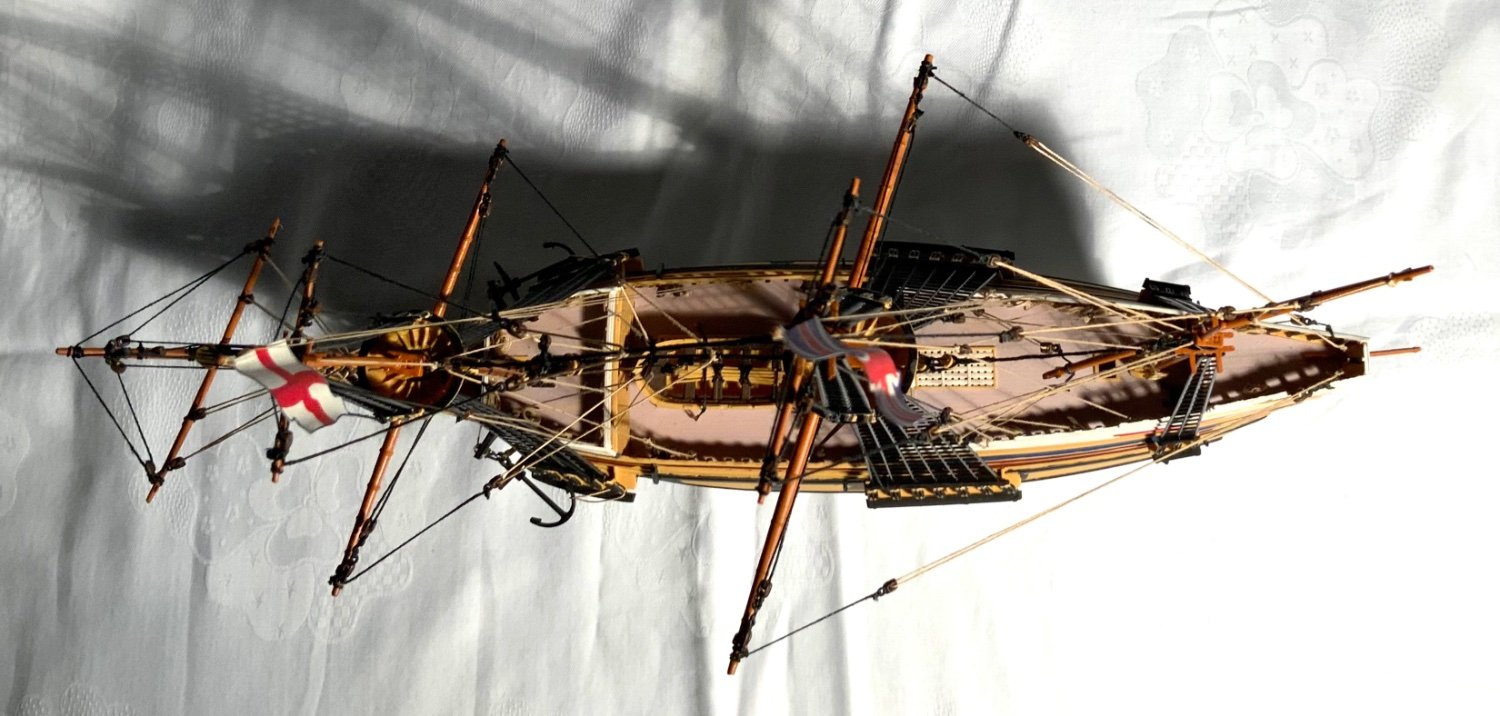
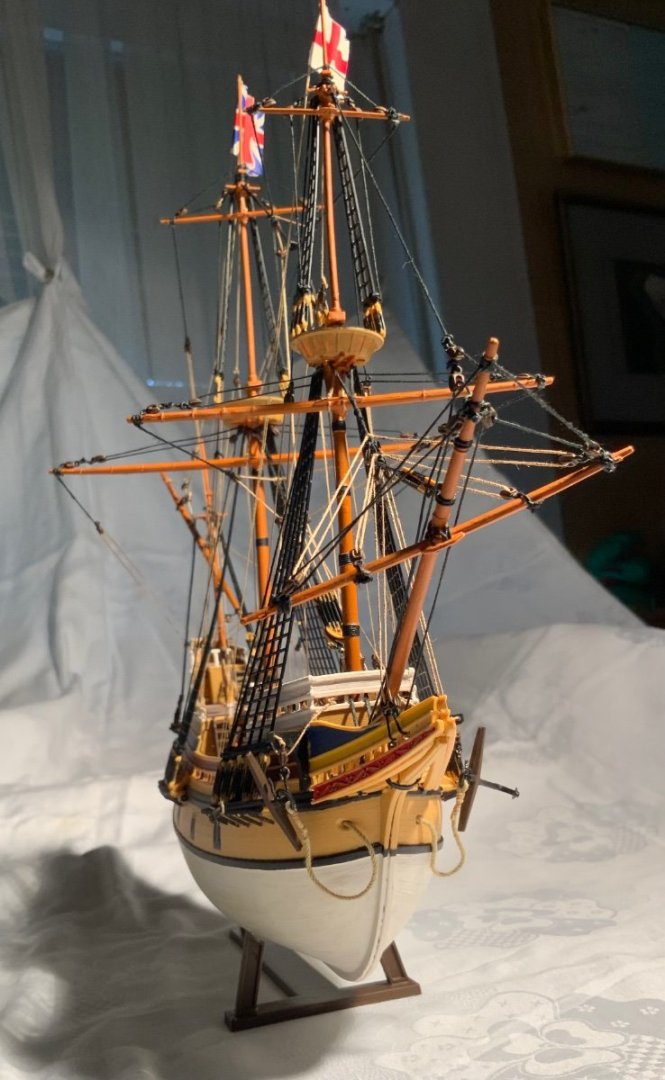
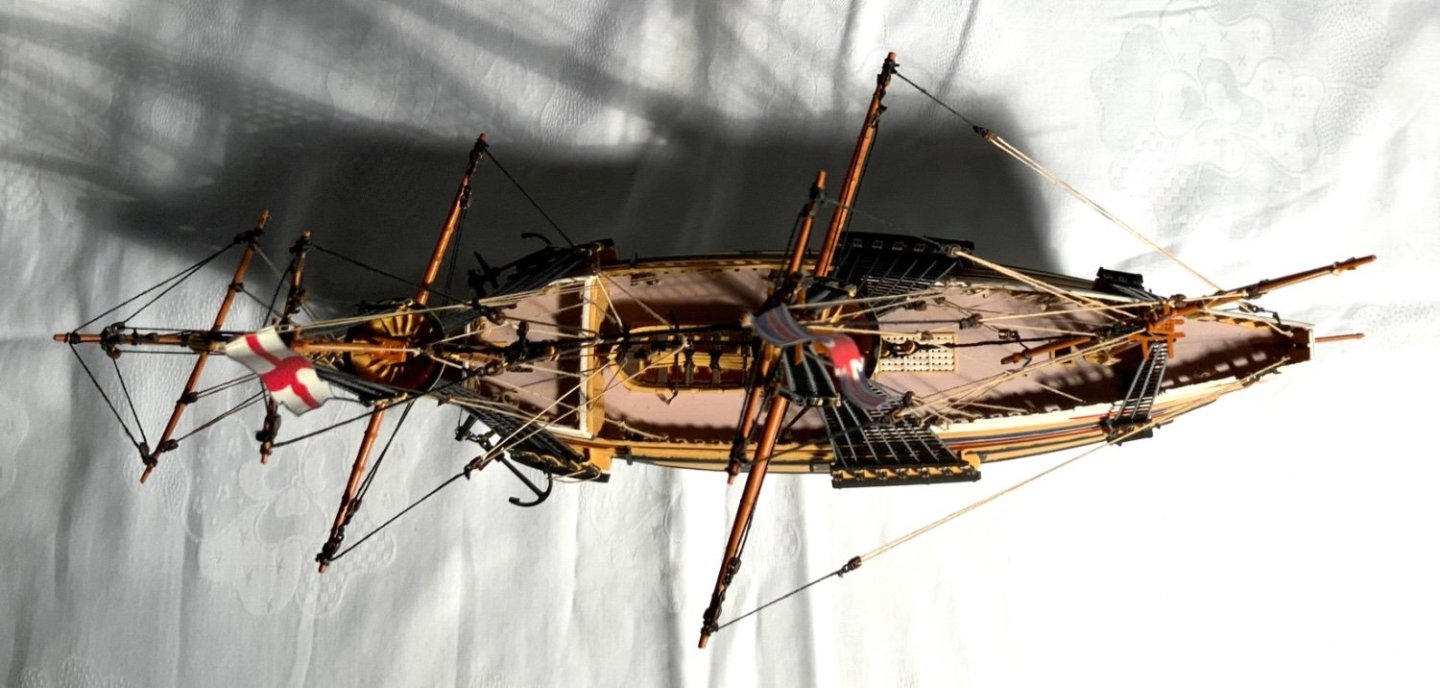
My ‘build’ is finished. I found the painting particularly difficult. In a way, I’m sad it is finished because it kept me occupied, but on the other hand I’m glad that I made it. I’m sad it’s not up to the standard of the other builds on this site, particularly the wooden ones, but at least I finished. I will never know if it would have looked better with sails? P.S. I did manage to get a peep at the newer 30+ pages instruction manual! It was all pictures, some quite unintelligible to me, with no useful written instruction at all. In retrospect, my old instructions were far superior! FINISHED!


- 48 replies
-
- 10
-

-
My ‘second childhood’ build might be similar to an 8th. grade standard???
-
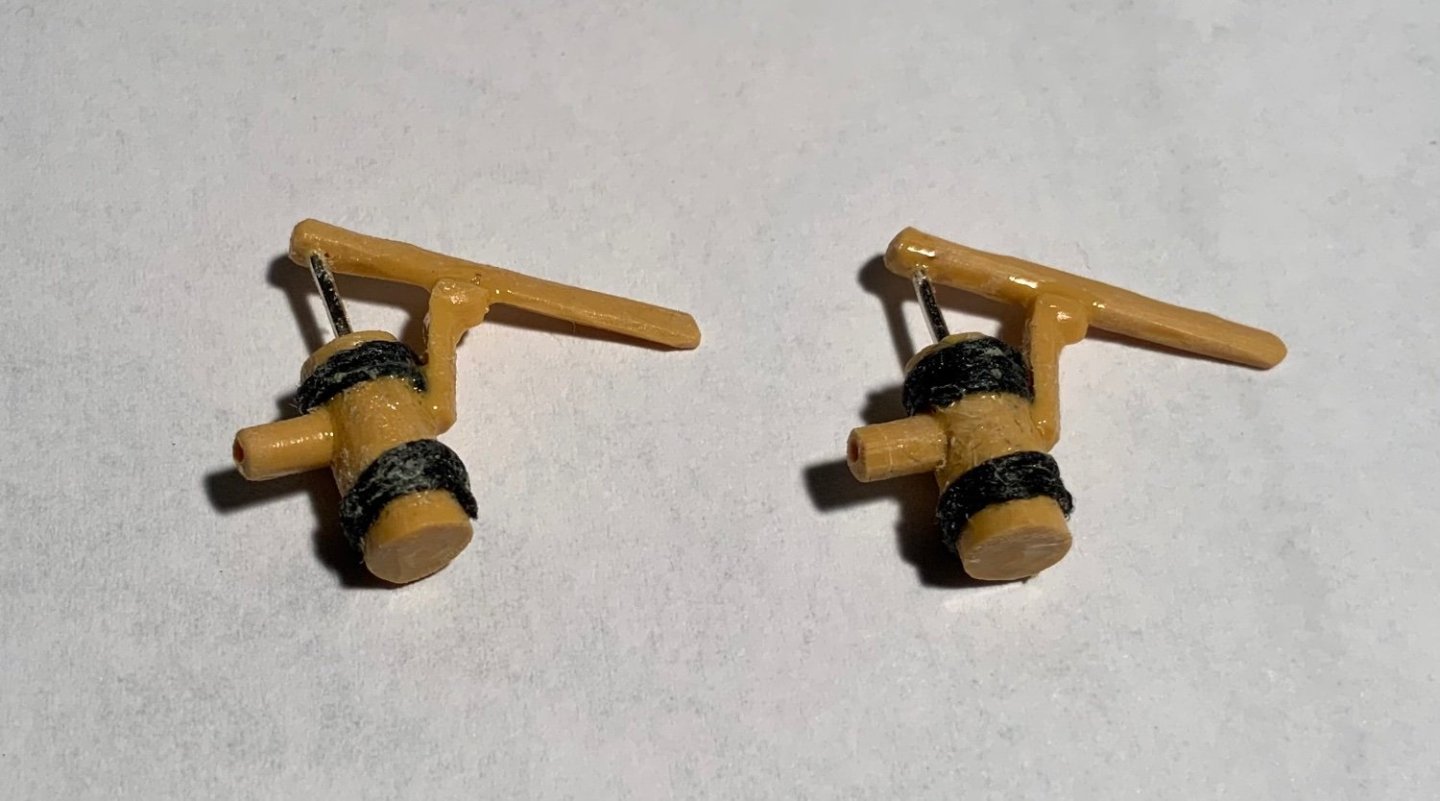
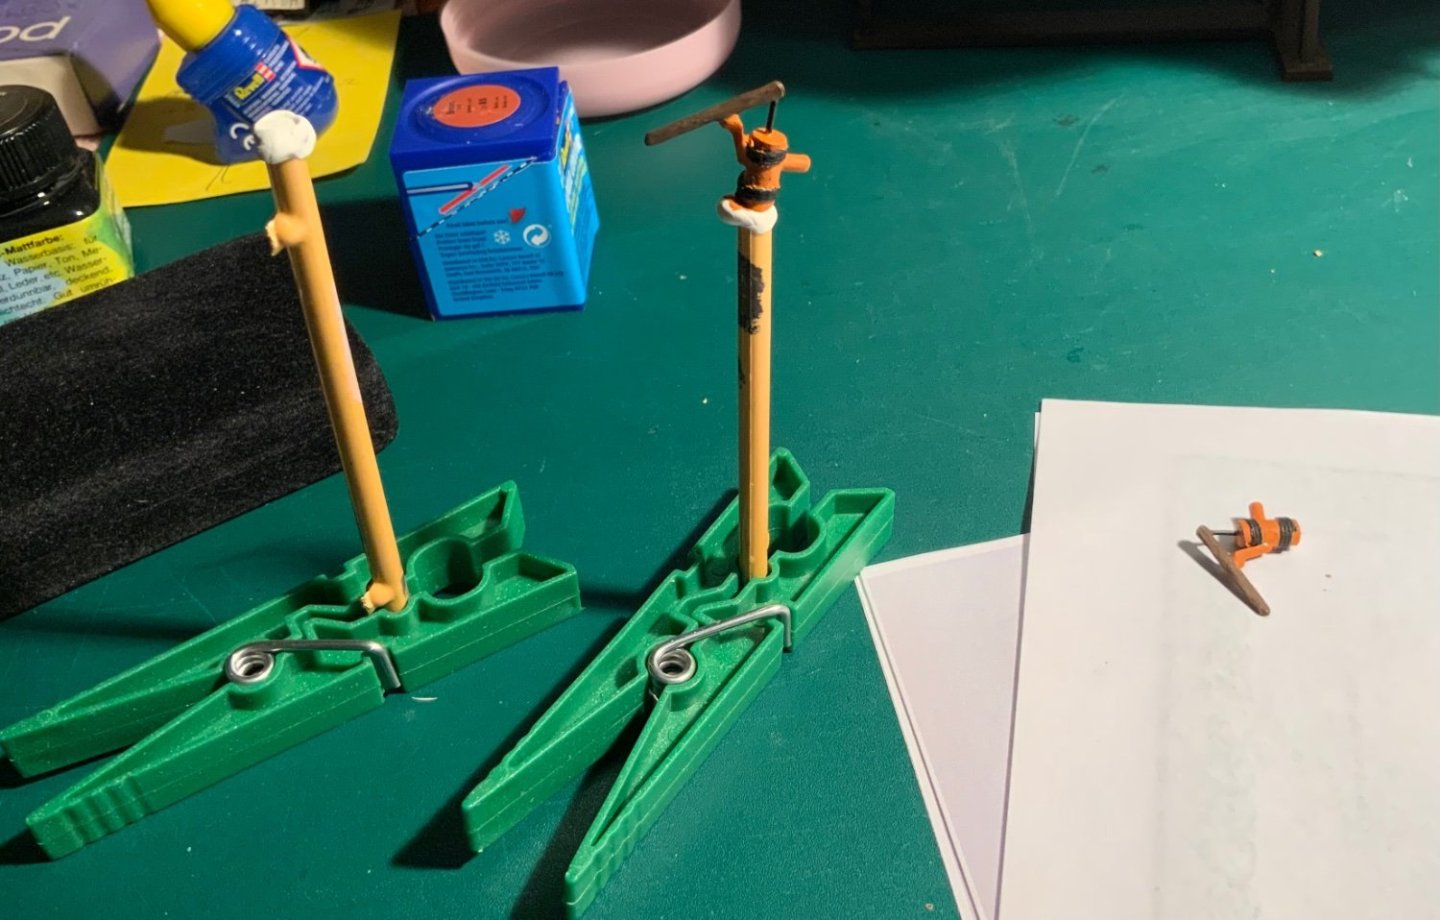
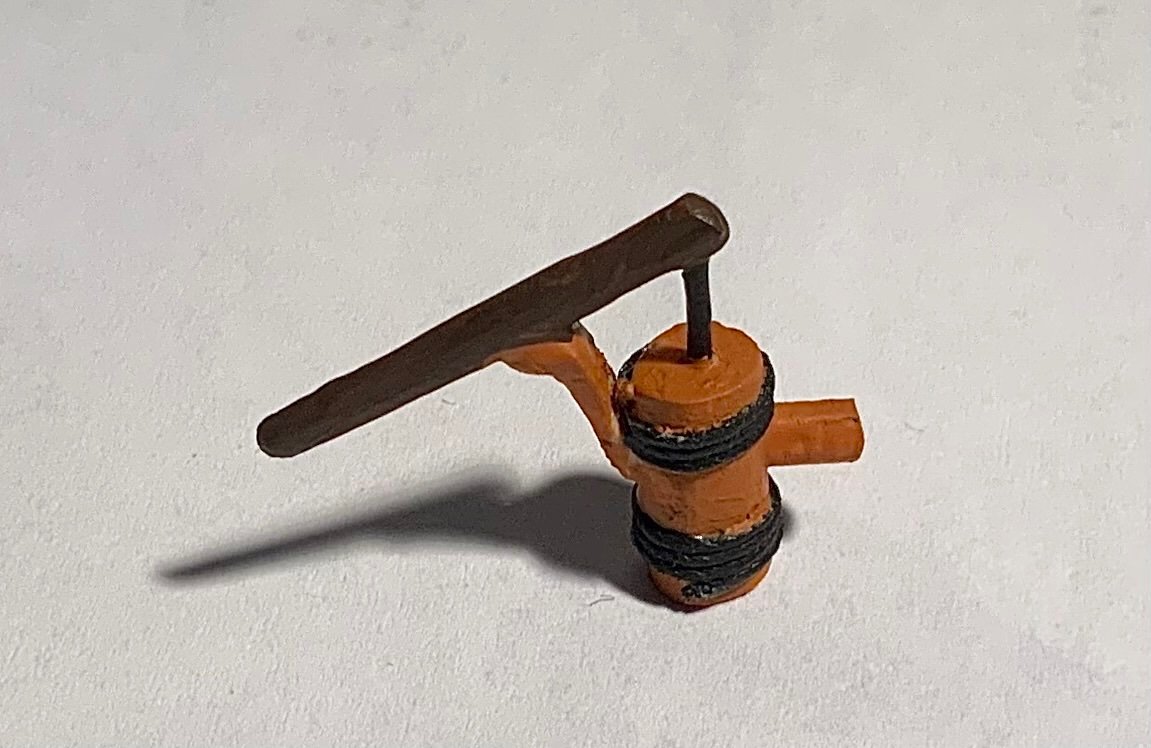
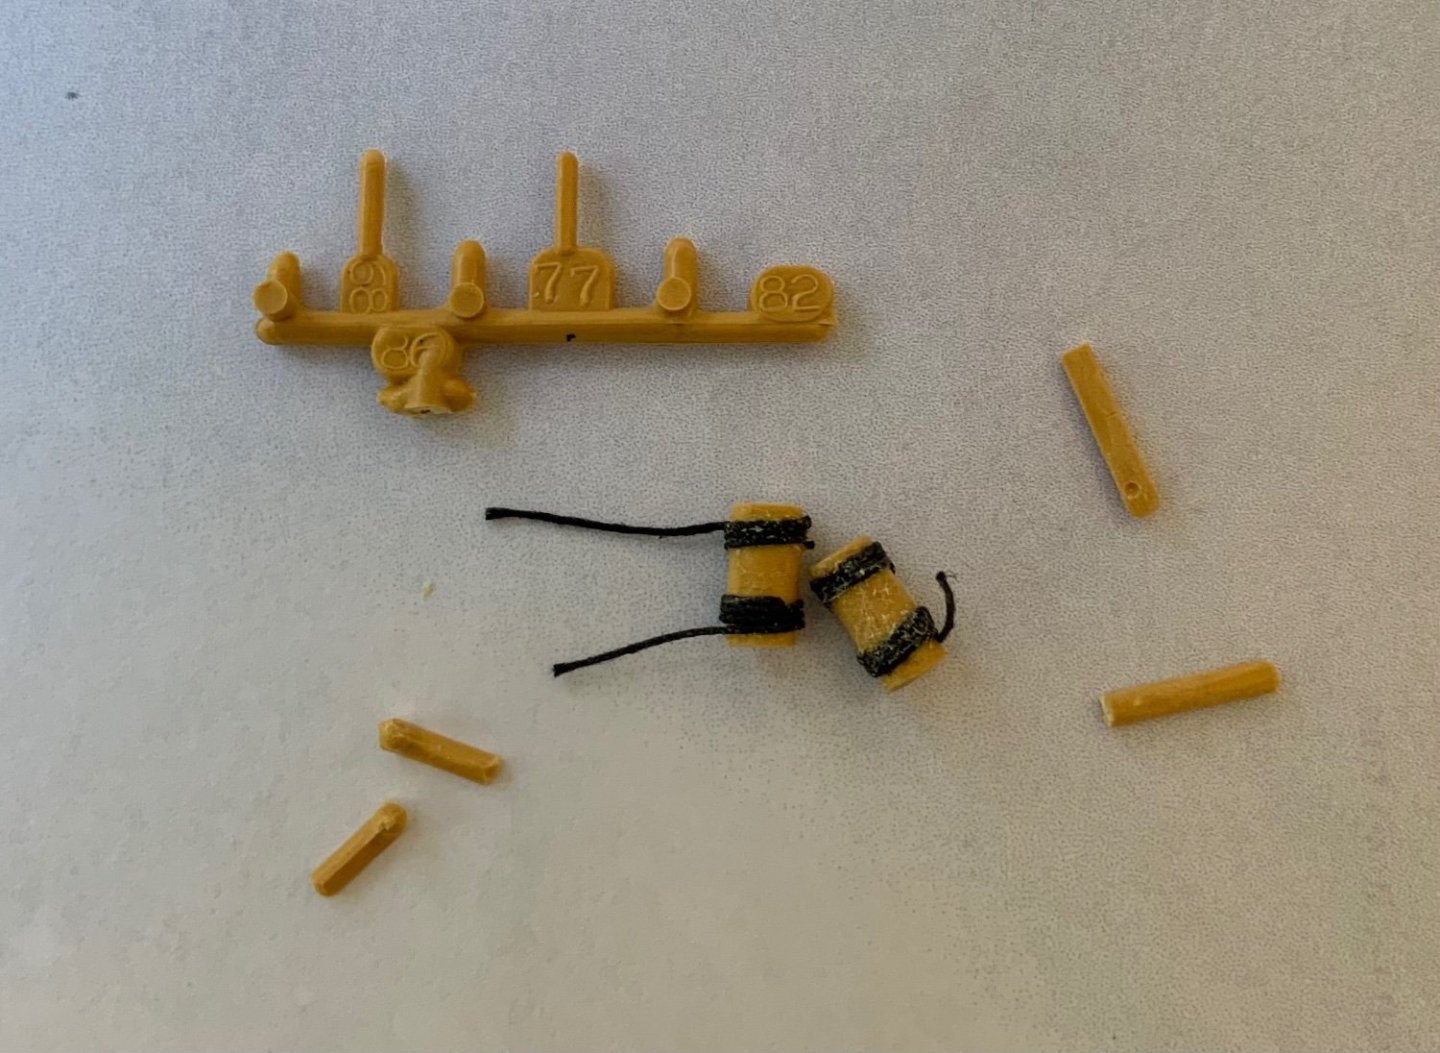
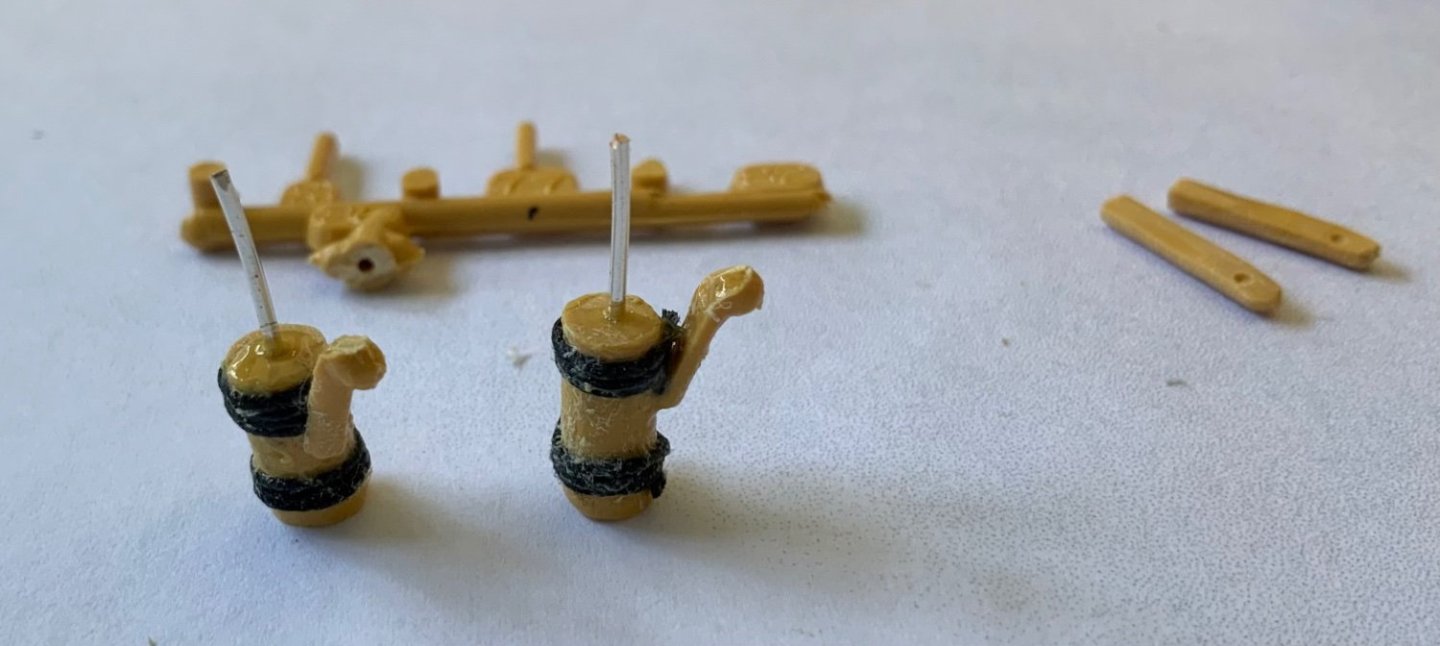
The finished water pumps were painted and are now ready to be installed! It was fiddling work and not as neat as i would have liked. The pumps were white-tacked to sprue to facilitate painting.
-
I used the Shipways manual a lot and recently discovered that in the Shipways’ Mayflower there were water pumps on the main deck. I decided to try to make a pair with some of the remaining sprue from my kit. More to follow….
-
My build was finished (at least, as far as I had determined to go) and I was wondering whether to spray the rigging, masts etc.? I had a test run with a few threads mounted on the sprue but I did not like the result. The build had taken about four months with many trials, missteps and tribulations. I had read the Model Shipways manual and Hackney’s book. The latter was not much help because I did not know many of the terms and the part numbers referred to Airfix parts and not Revell. There were too few illustrations for me as a novice! I understand that the later Revell kits had about three times the pages of my kit so if I had had more help I might have had more success and less mistakes? i managed to break the boomkin three time and it was so small that it was not easy to repair. I wished I had known how easy it was to damage and I would have added it last! The best I could do! In the end I was quite pleased to have finished and at my age I was reasonably pleased with the result. When I looked at many of the builds on this site I wondered whether to describe my build at all was appropriate because they were all so beautifully made. I guess that if I had known I might have made/bought wooden blocks and hand made the ratlines but under the circumstances I doubt that I could have managed. All I had to do was paint the sign. But…………. Model Shipways Manual. https://www.manualslib.com/manual/973192/Model-Shipways-Mayflower-1620.html Hackney NCL. Mayflower. Patric Stephens. 1970.