HOLIDAY DONATION DRIVE - SUPPORT MSW - DO YOUR PART TO KEEP THIS GREAT FORUM GOING! (Only 72 donations so far out of 49,000 members - Can we at least get 100? C'mon guys!)
×


Old Rentner
-
Posts
138 -
Joined
-
Last visited
Content Type
Profiles
Forums
Gallery
Events
Everything posted by Old Rentner
-
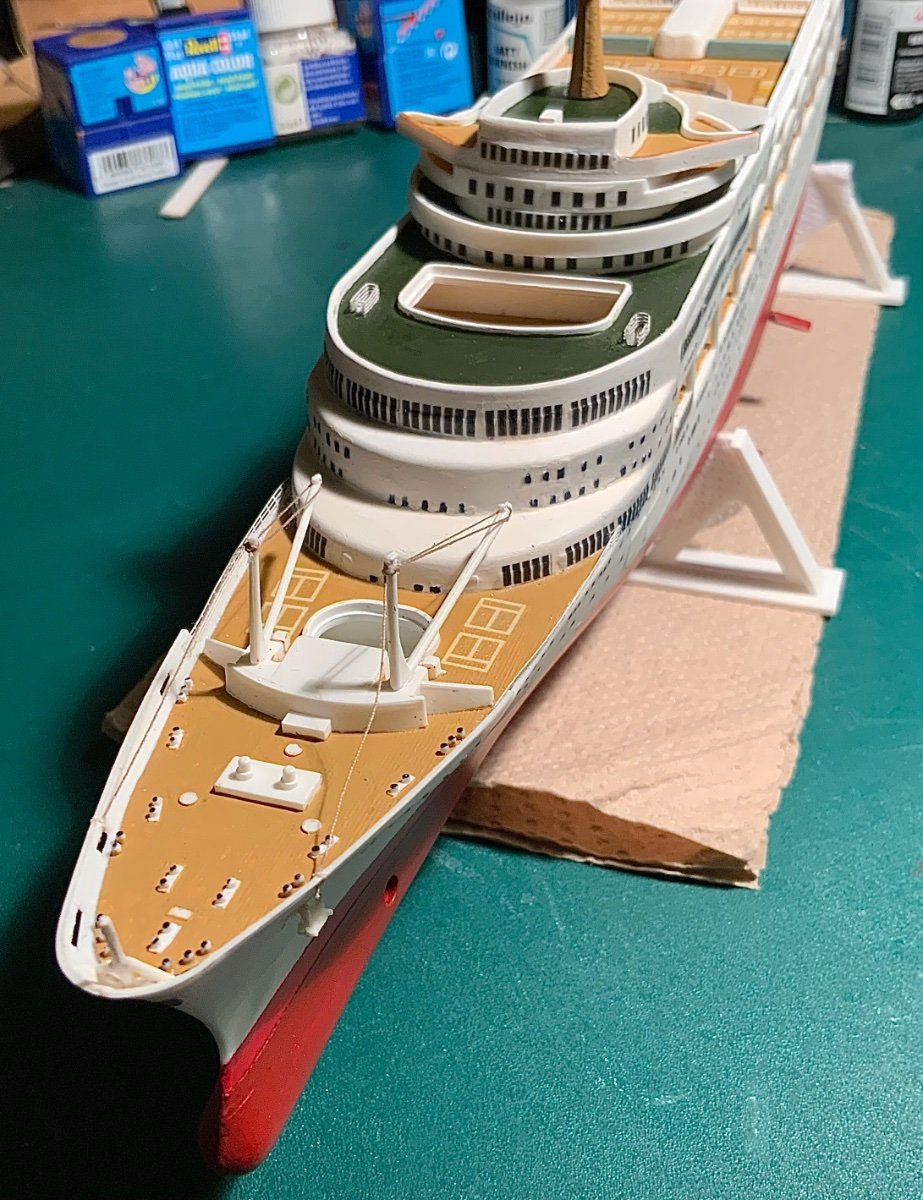
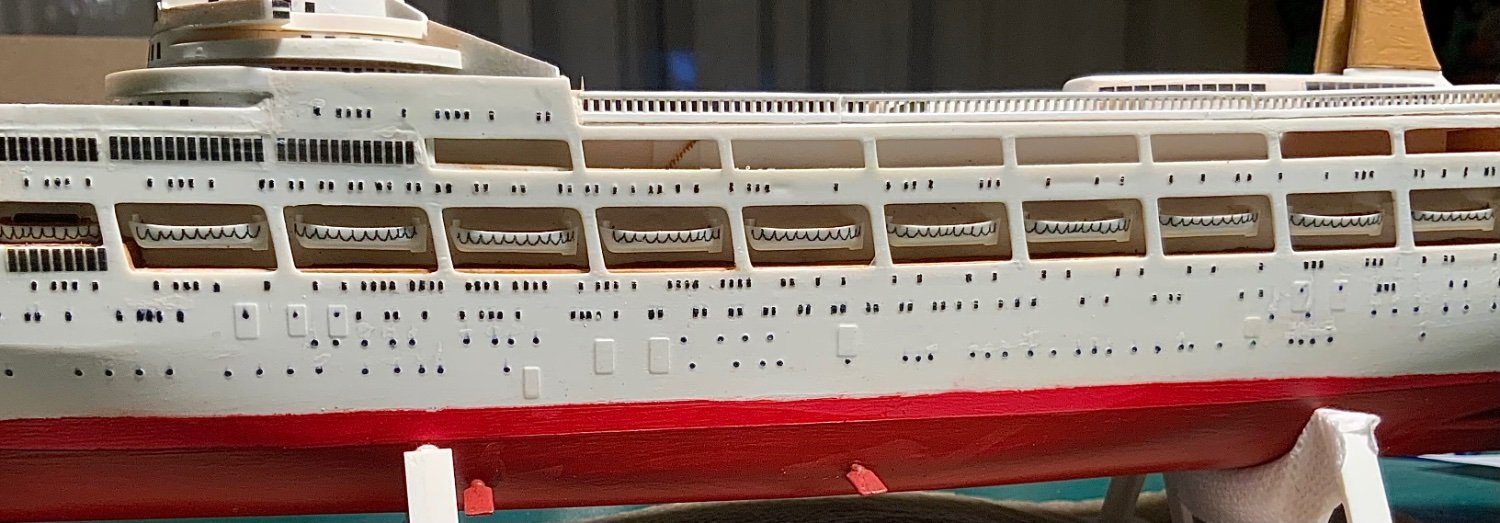
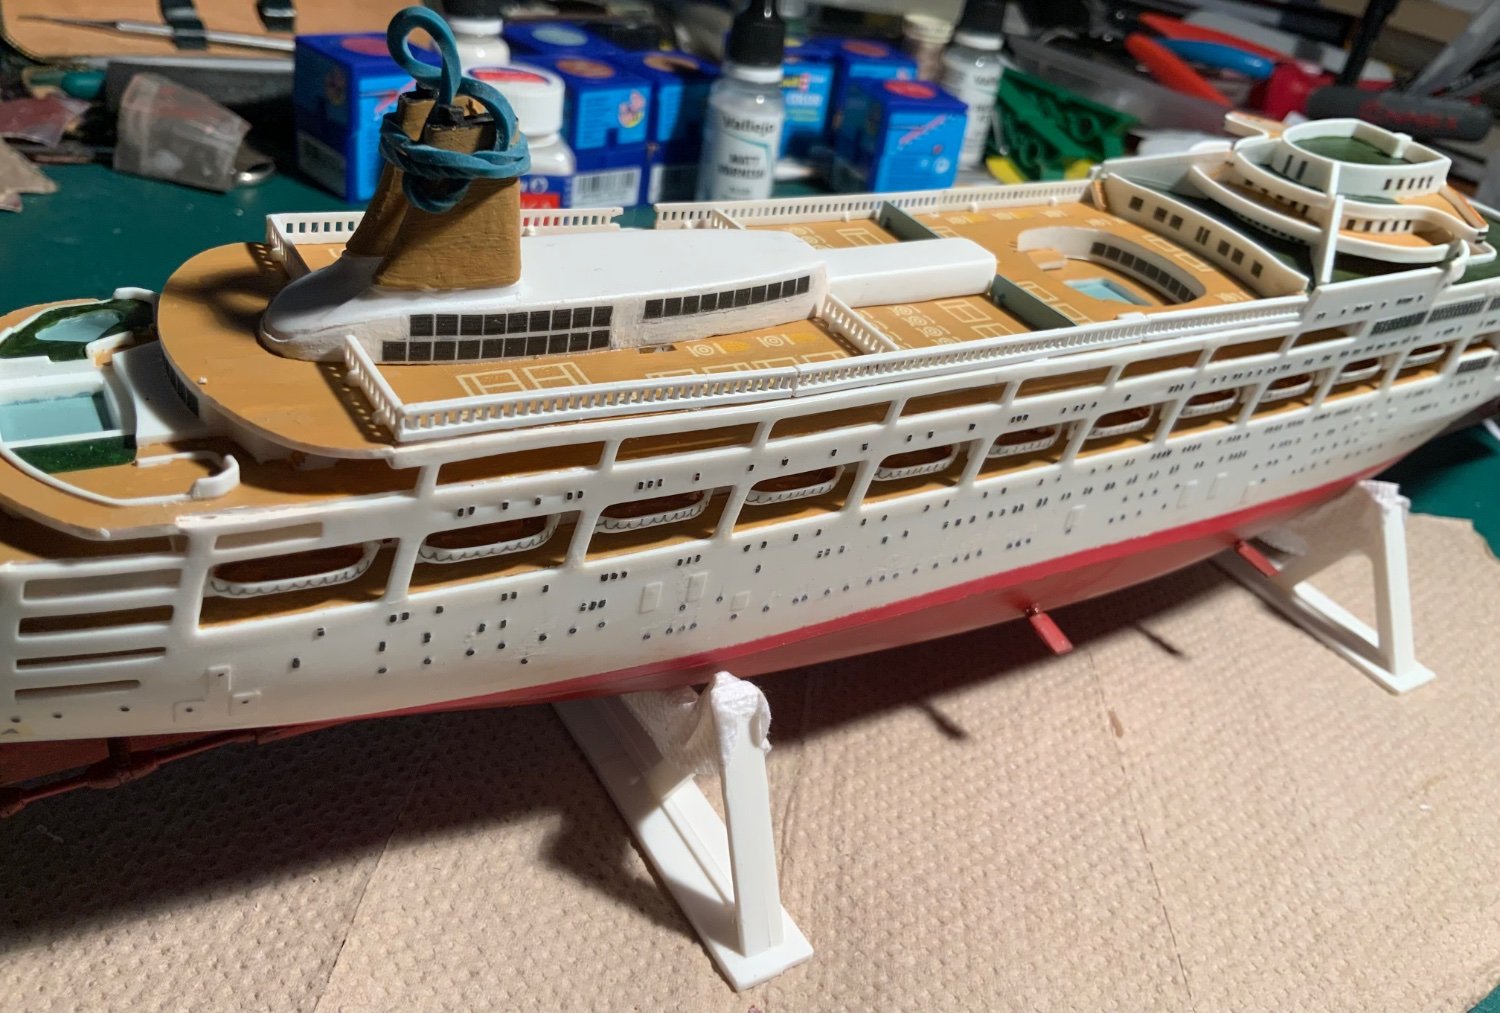
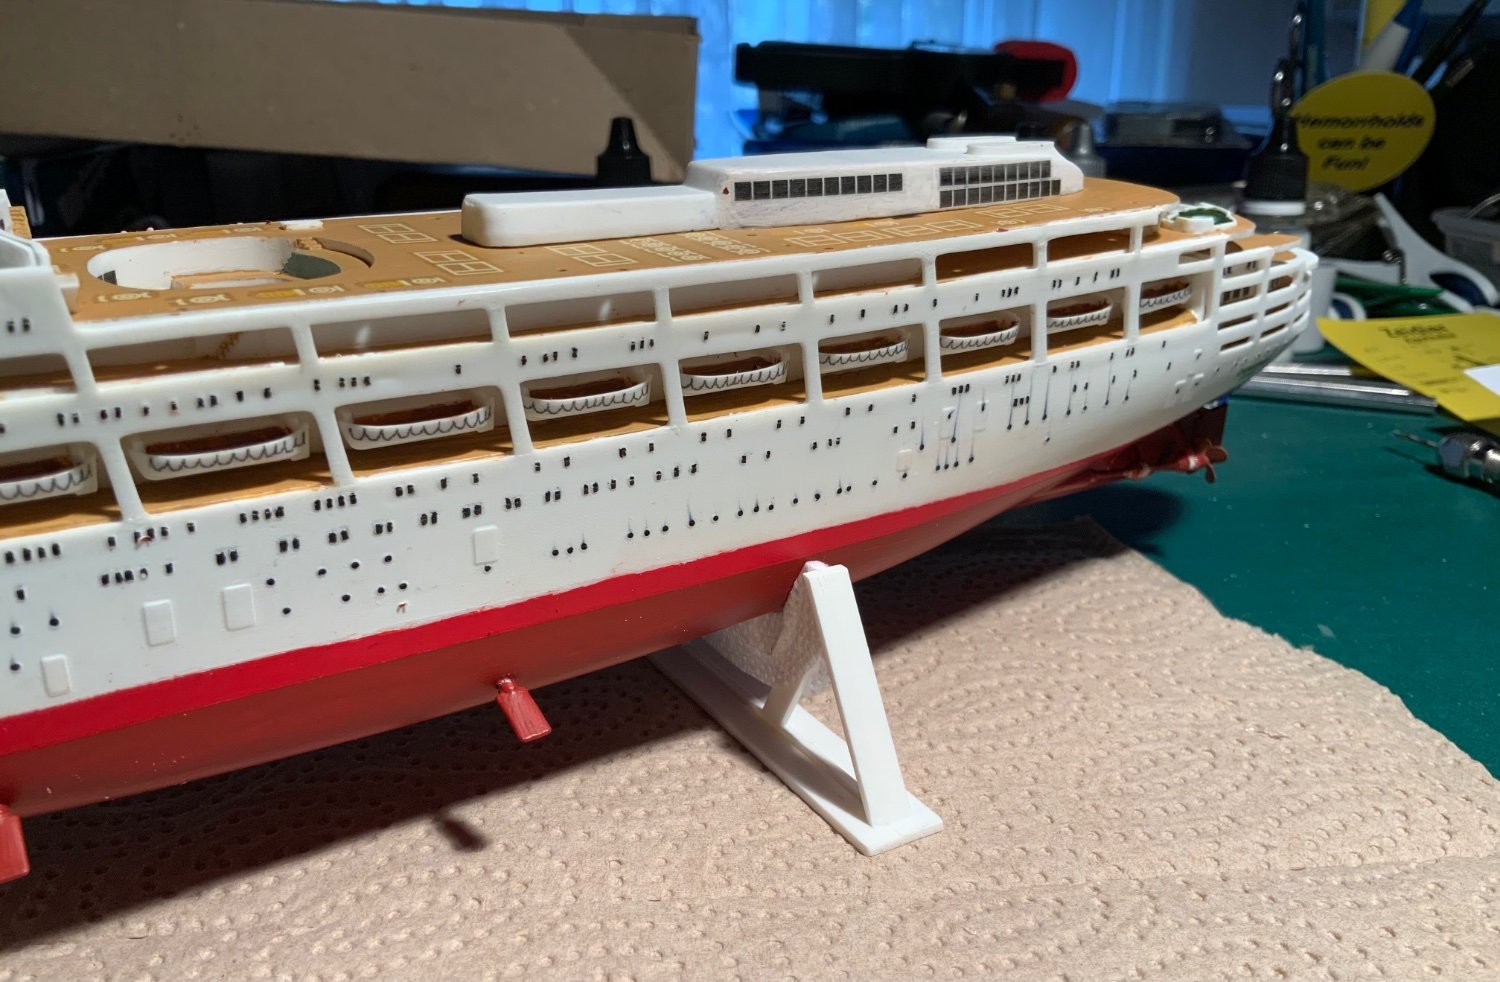
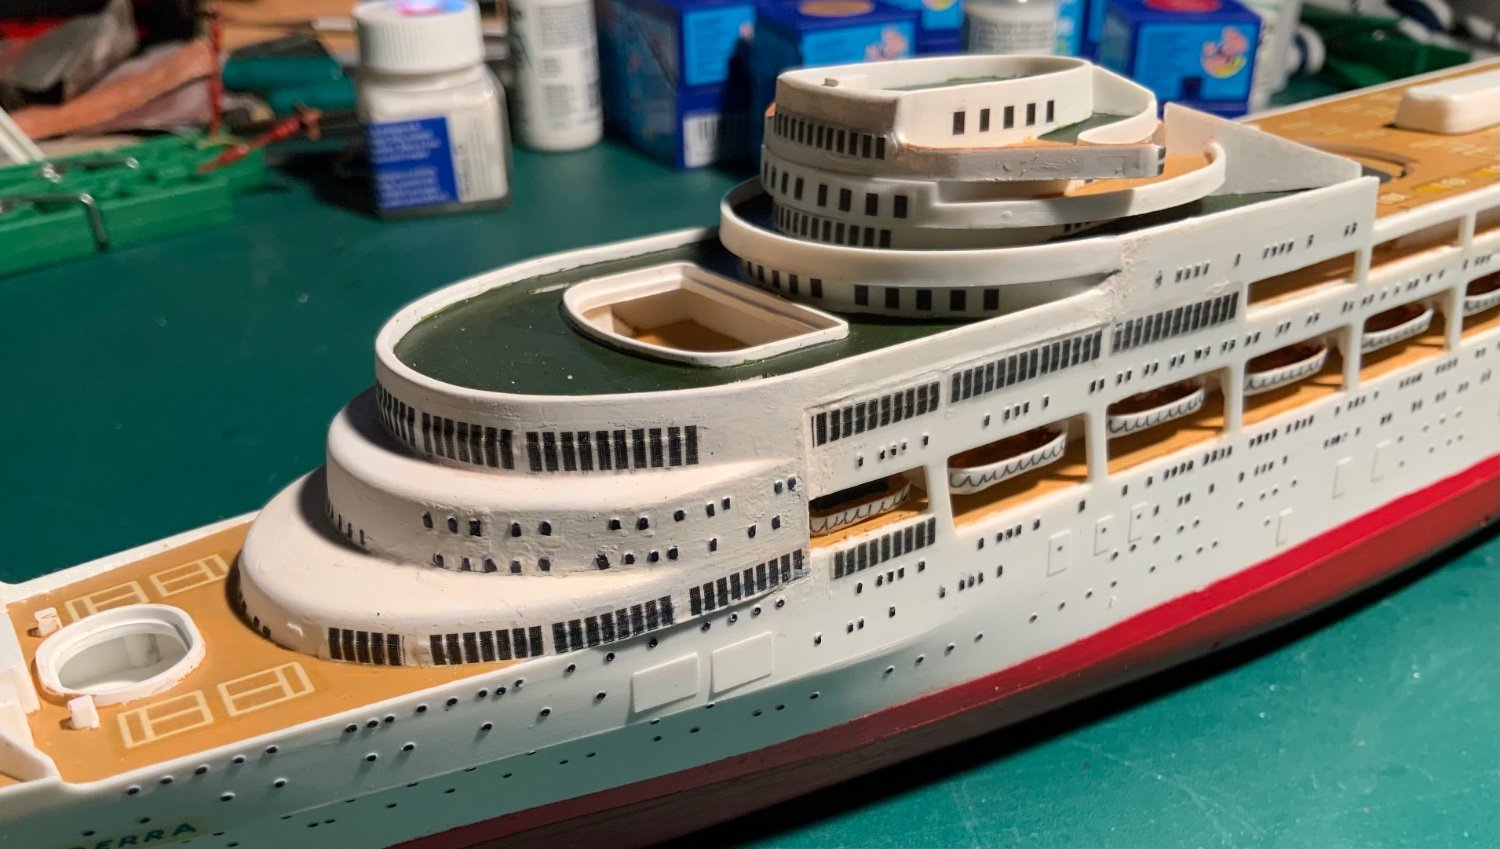
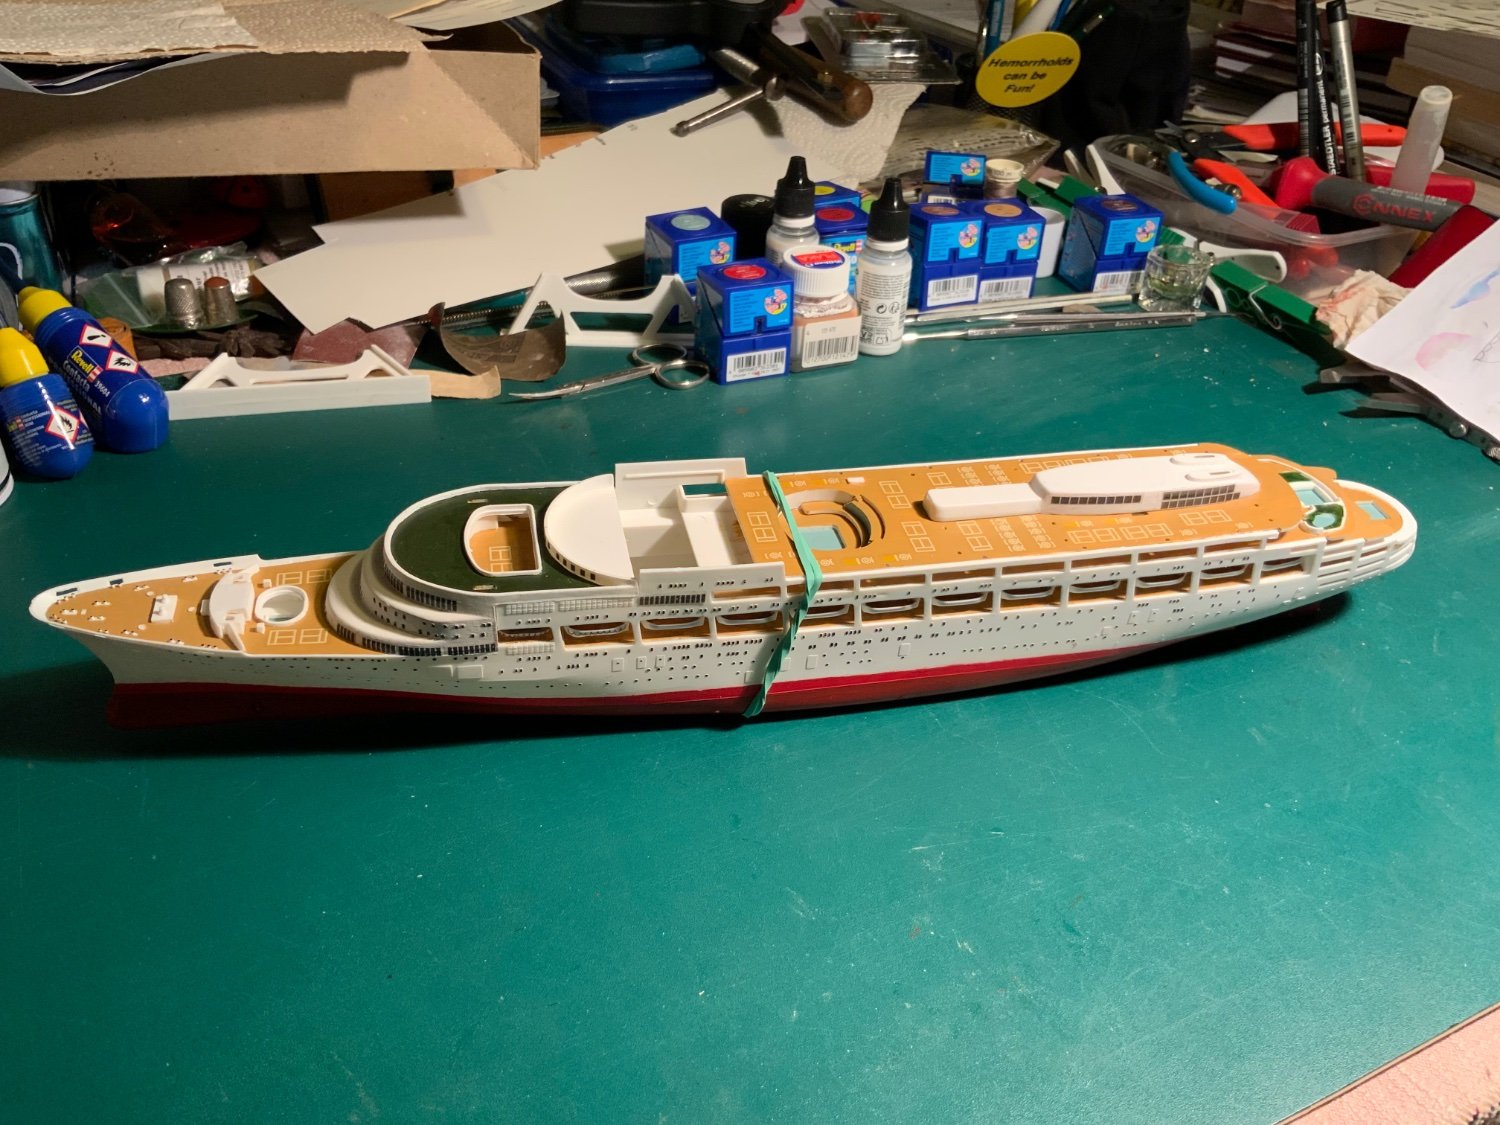
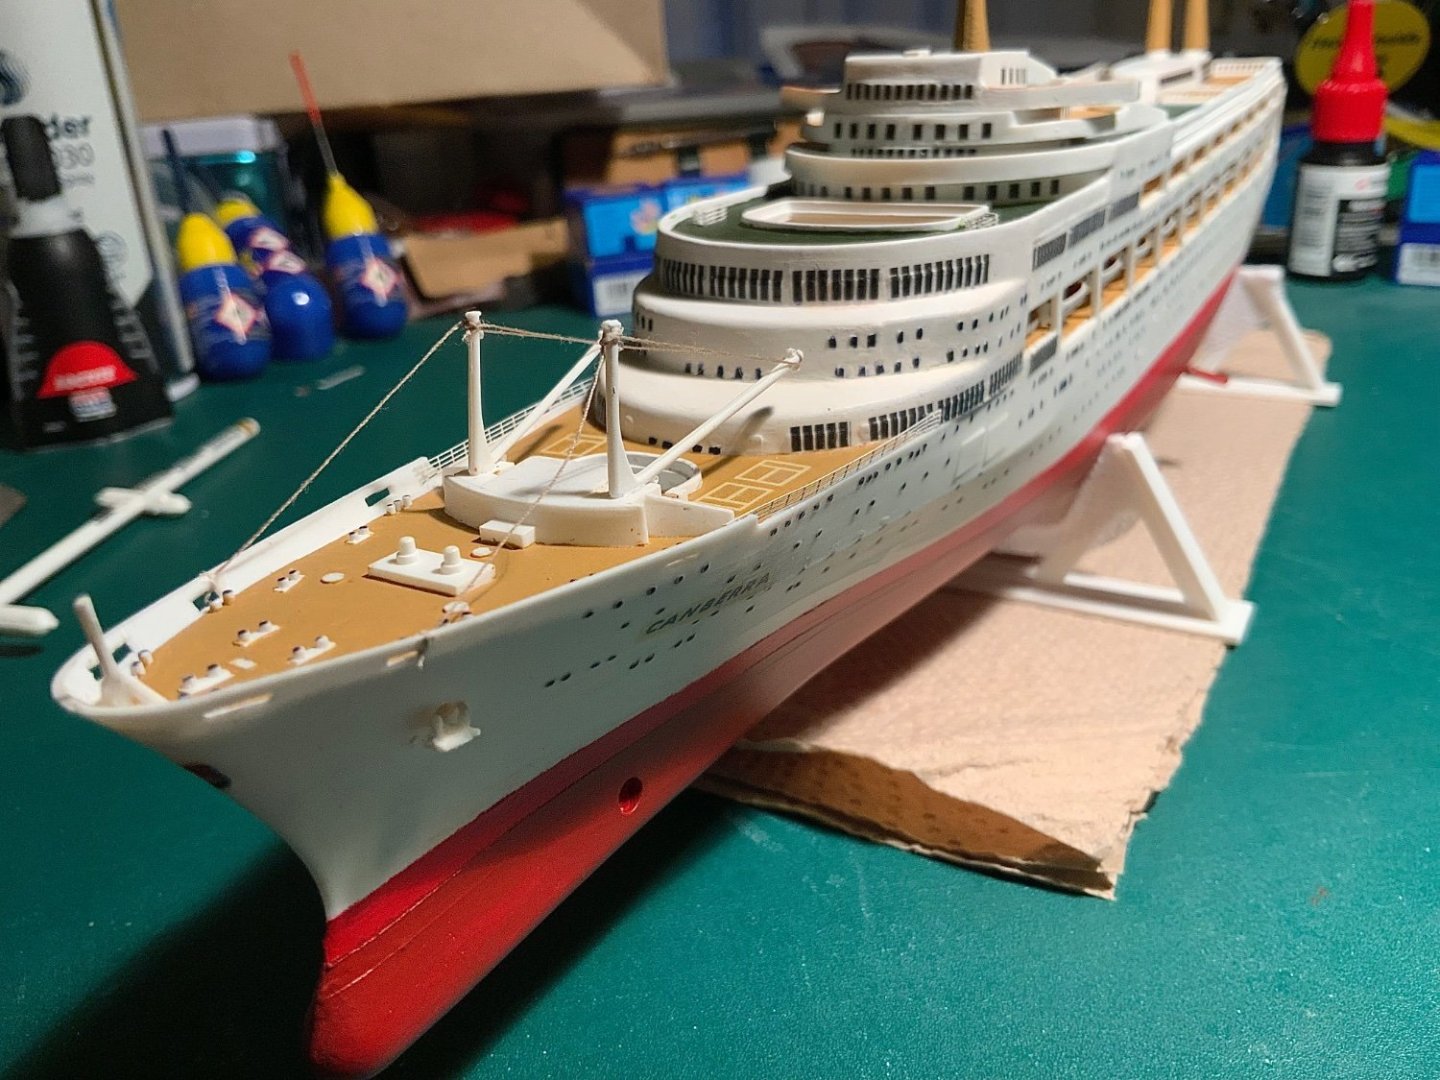
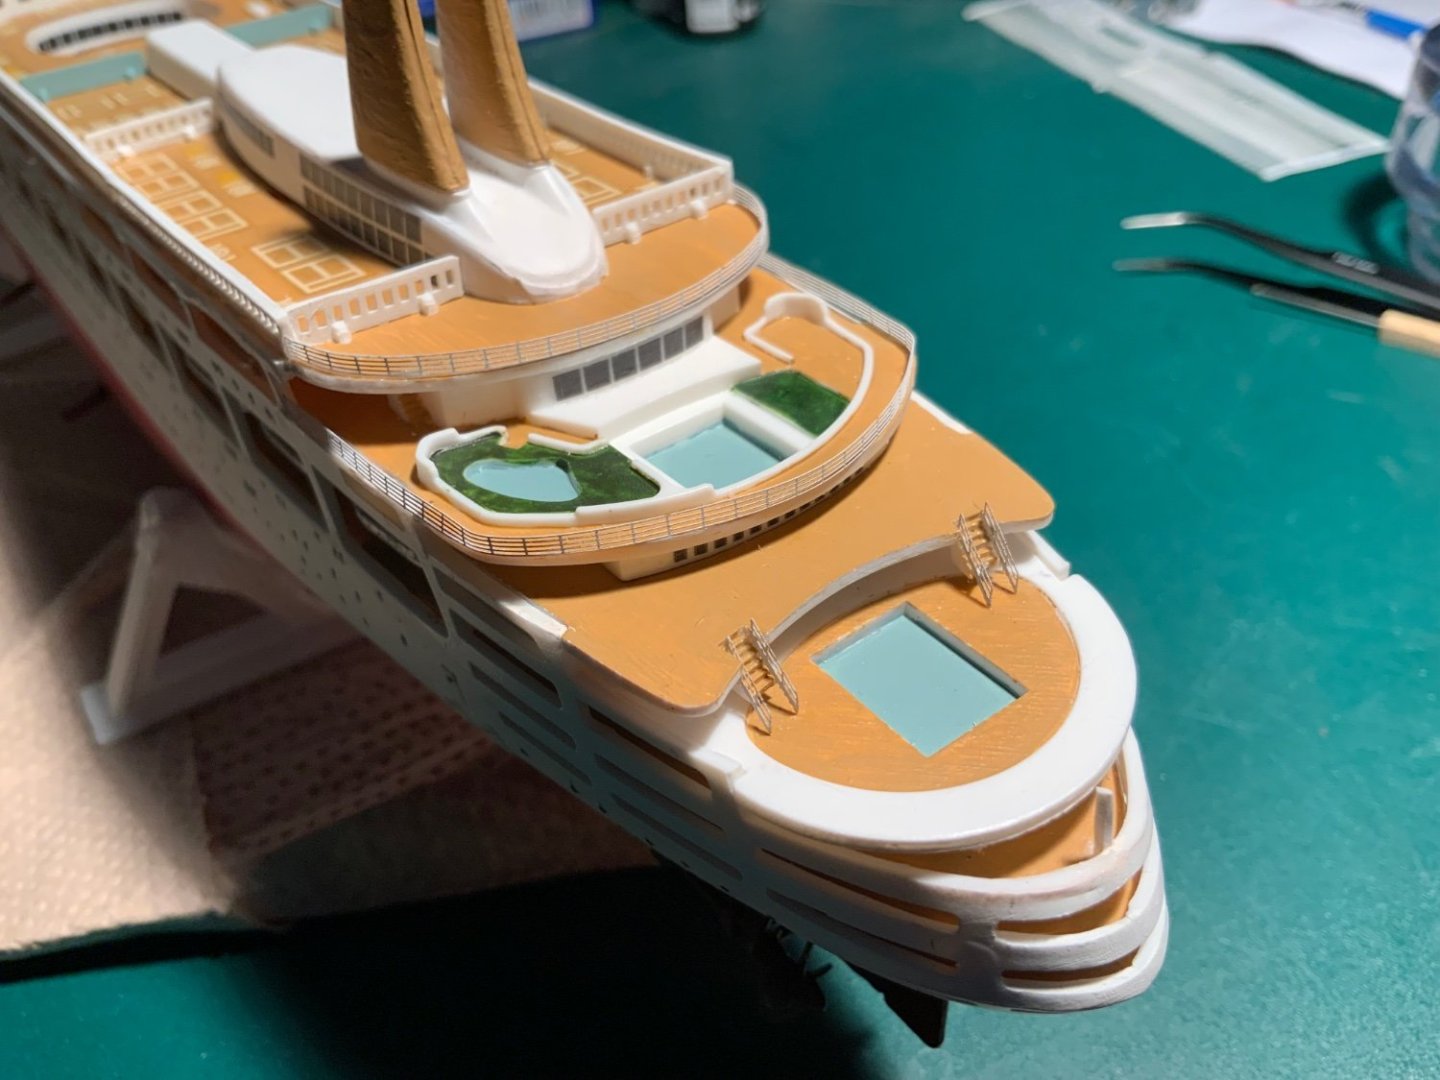
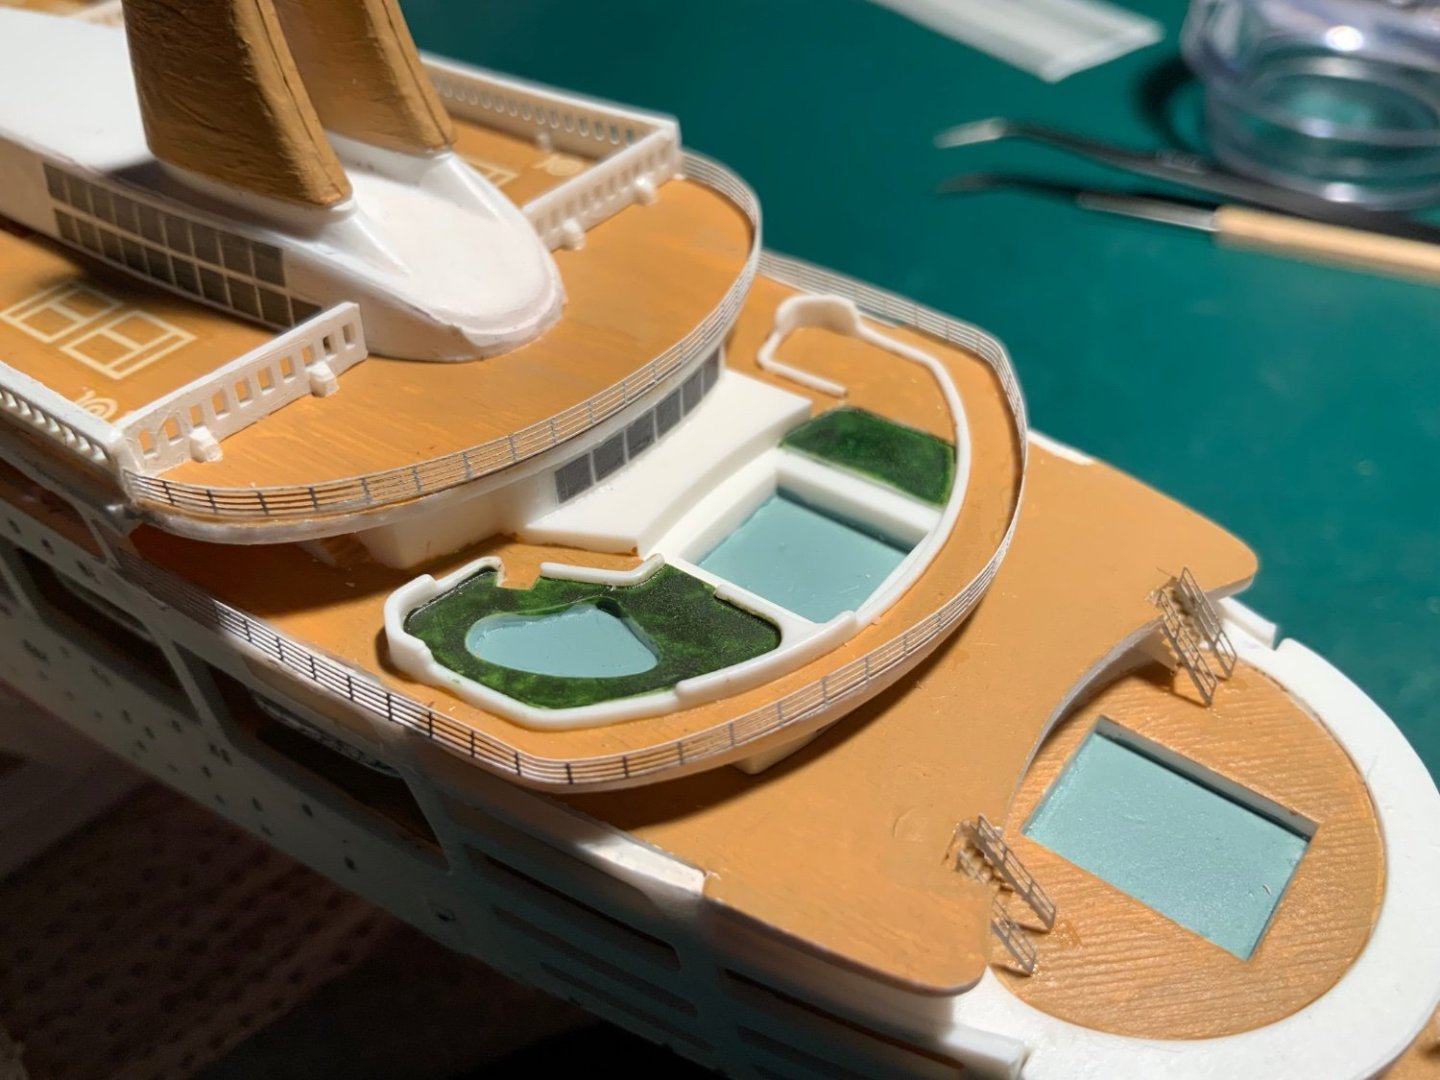
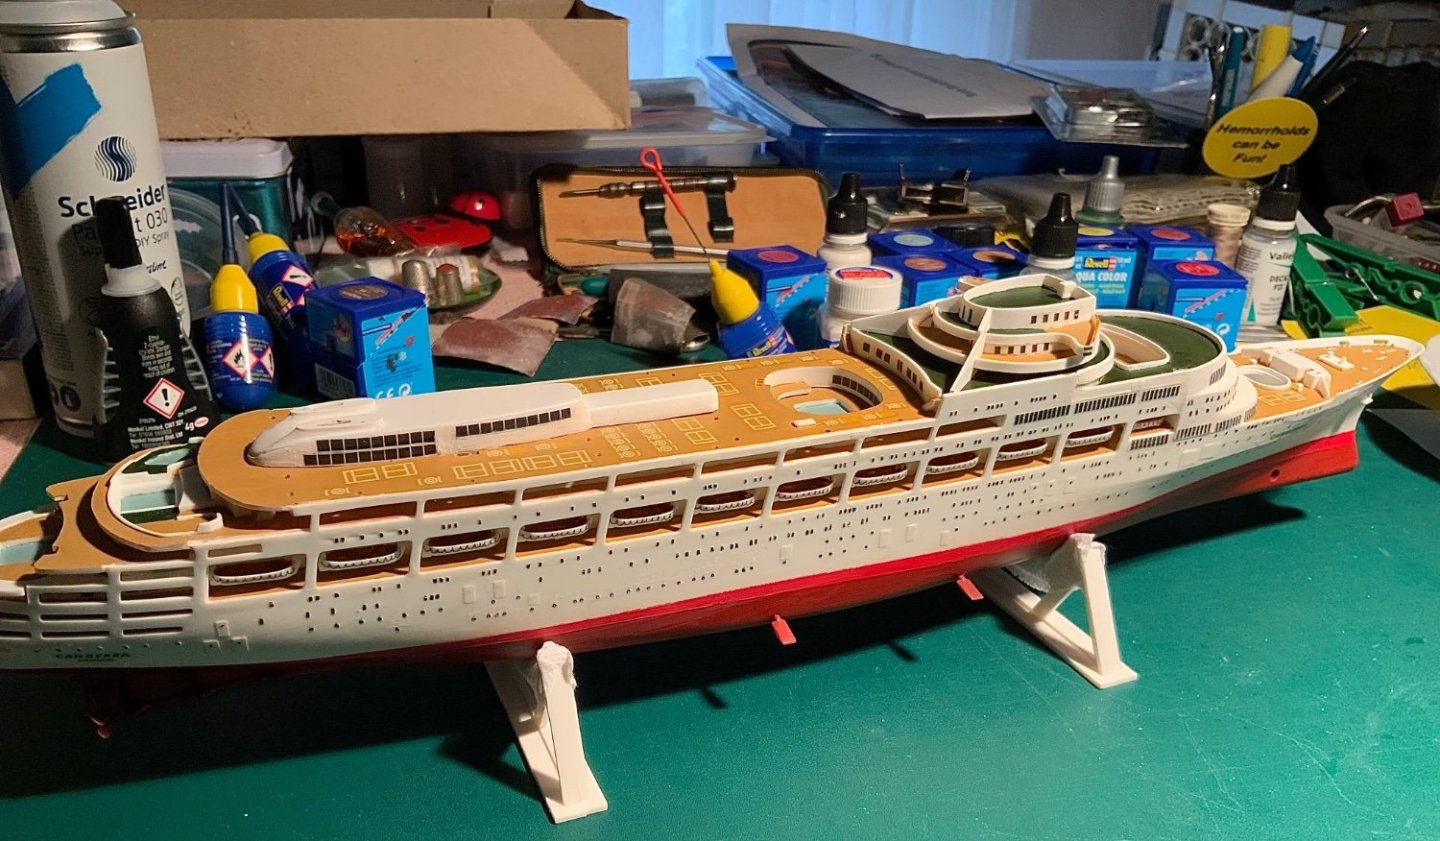
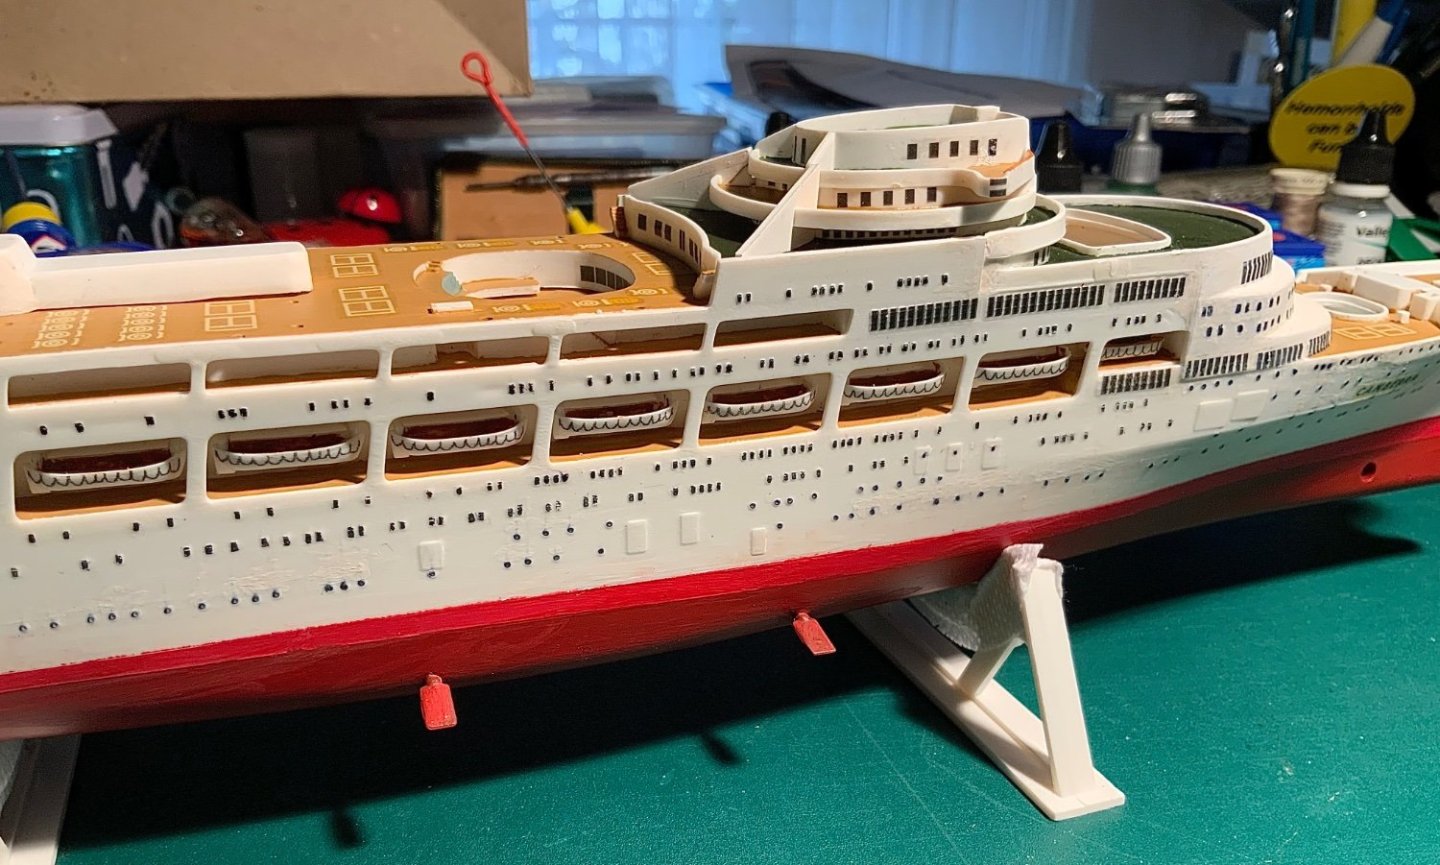
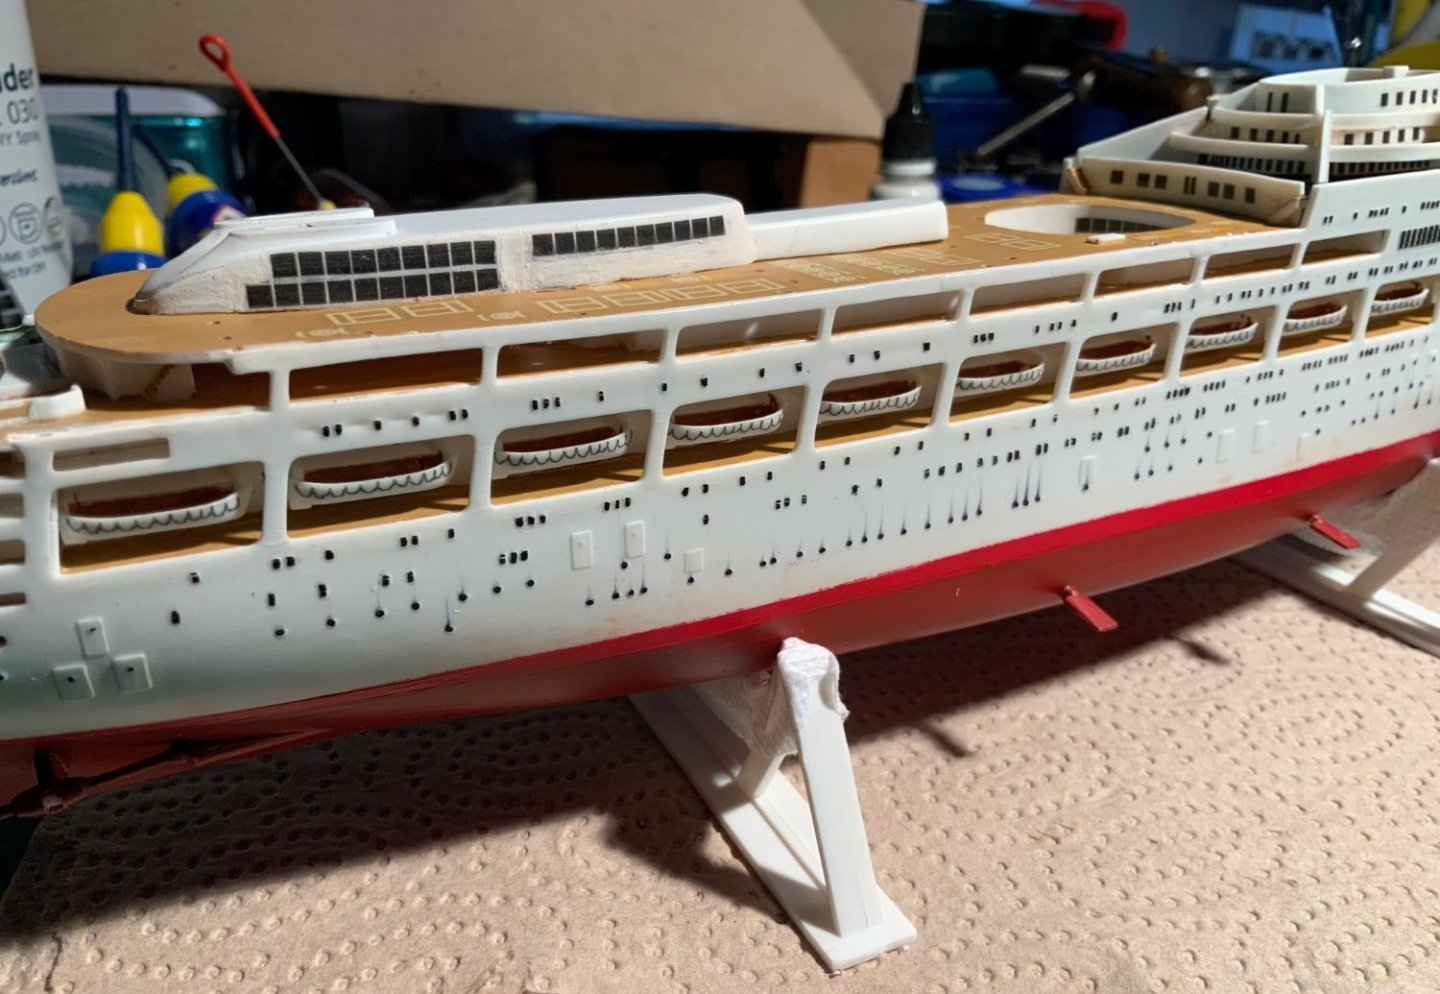
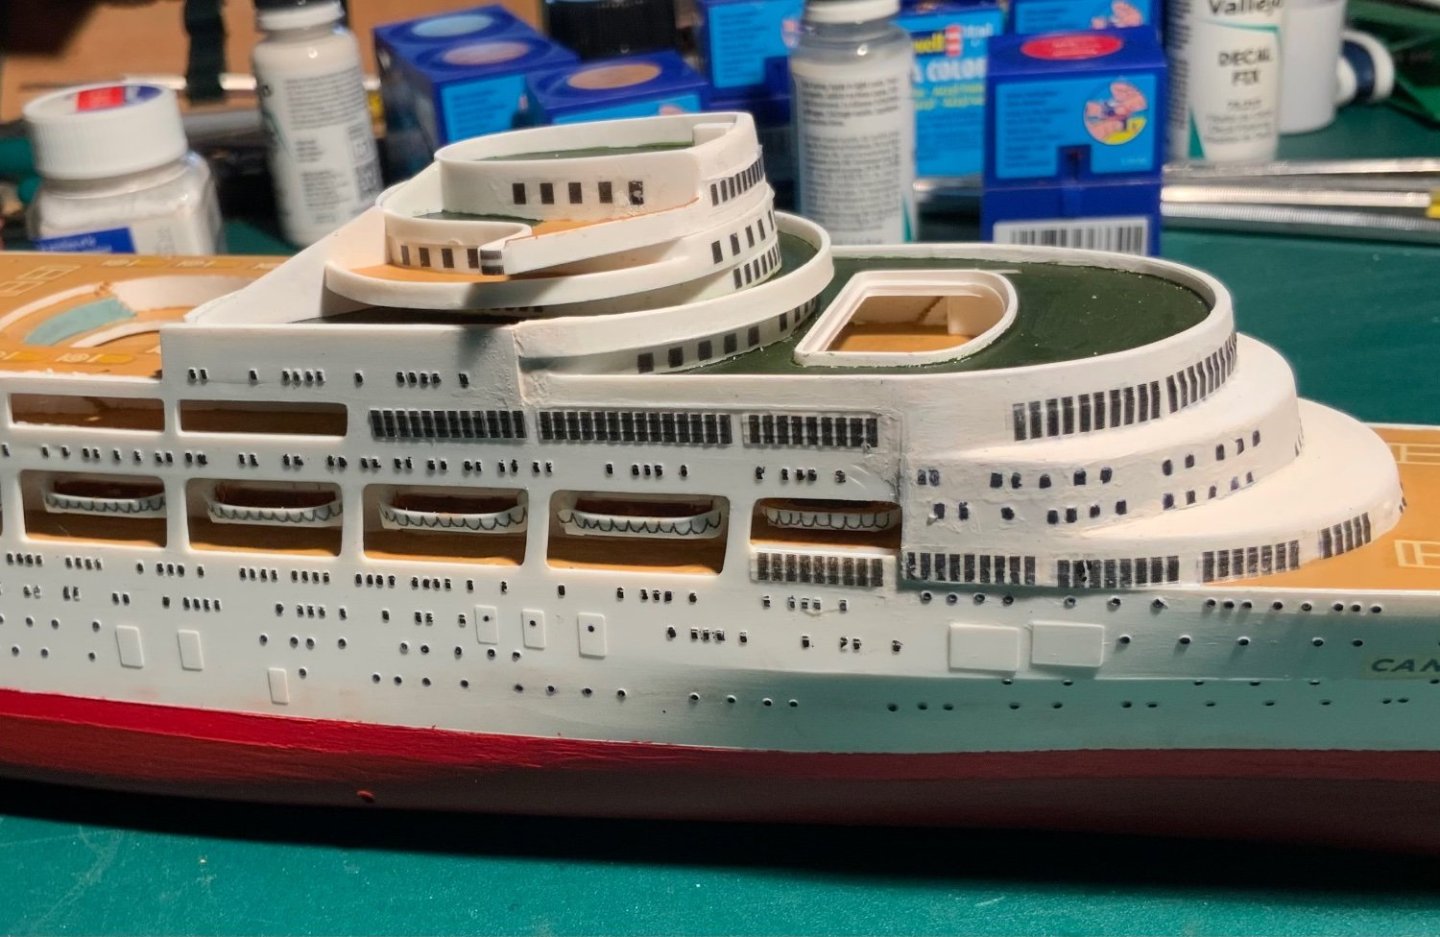
At last, the more difficult railings are in place! I redid one but the others were as good as I could make them I thought. Placing the very small ladder rails, with my wobbly hands, was not too easy!!! The final gluing will have to do for my model. Now for the boat deck rails - I’ll have to do each one separately I’m afraid - there is no quick way as far as I can think. If I just put in an entire strip of PE rail it would either be too far inboard (I could not glue it either) or it would be outside of the hull! After the boat deck rails, some filling and retouching the areas where paint came off during gluing and manipulation with my tweezers. Then, finally, I hope, the wireless/radar wires etc. How to do that, at reasonable scale, with tension, I have not worked out yet!


-
Thank you. The rails were very small and the ladder rails were even smaller and I found it very difficult getting the parts in the right place!
-
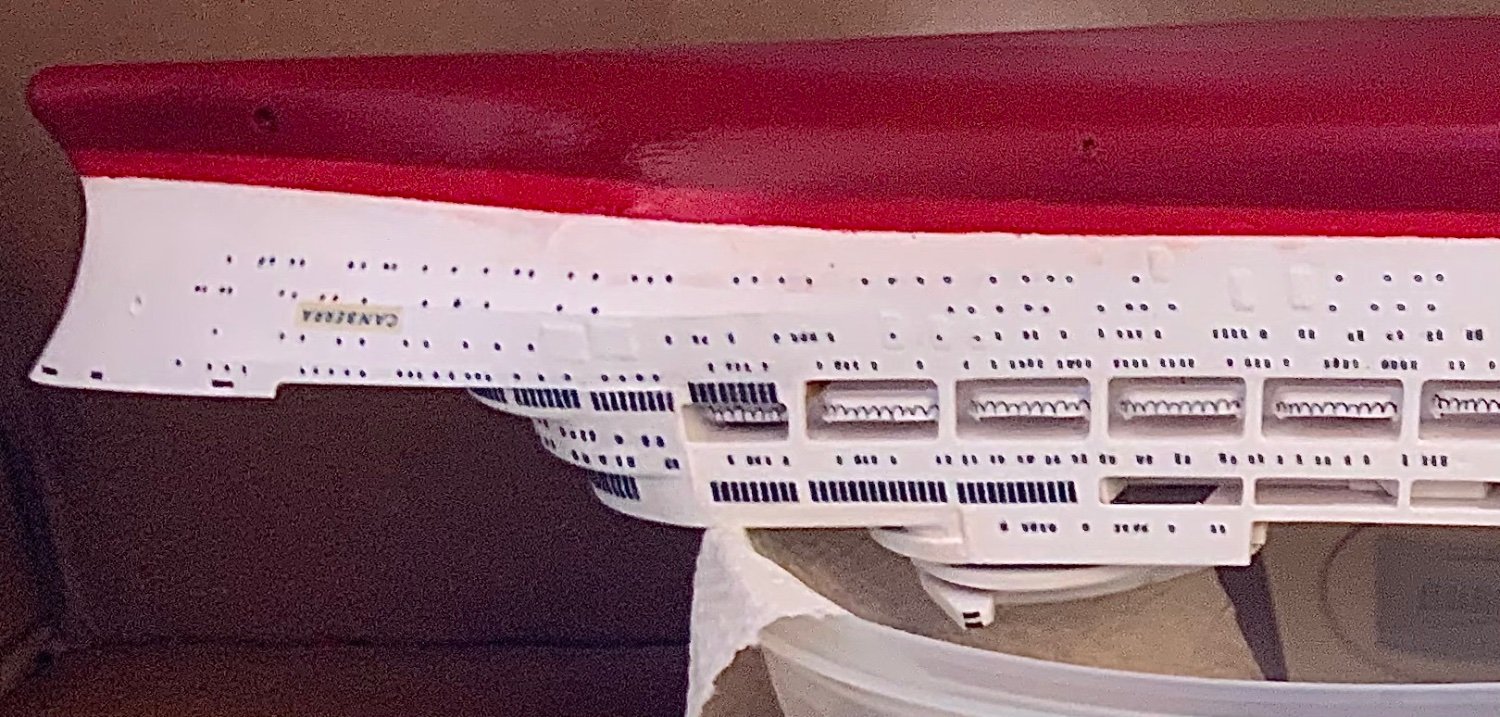
Well, at last, passengers on the upper decks won’t fall off the aft areas! I plucked up courage and set to work with the newly arrived glues. The ‘3 second’ one did not set in three seconds but it was much better than the gel. I managed to hold sections of the rail sequentially around the edge and was fairly pleased with the result. Unfortunately some areas of paint came off and the glue when dry is glossy so I will have to do a lot of touching up. Ladder rails were very difficult because the rails were so small! Touching up won’t be easy I fear?
-
I’m not sure that nail varnish sets quickly - thank you Roger for the suggestion. If my ‘new’ superglues don’t work I will try nail varnish next.
-
Thanks for the suggestions. I had read about using tape but was frightened that, with my luck, I would not get it off without major damage! I also read about accelerators but with all the problems that I seem to have had with ‘spraying’ I decided against trying one. I’ve ordered some quicker drying super glues so will have a go again tomorrow. They’ll probably dry before I get the rail in place though!!!
-
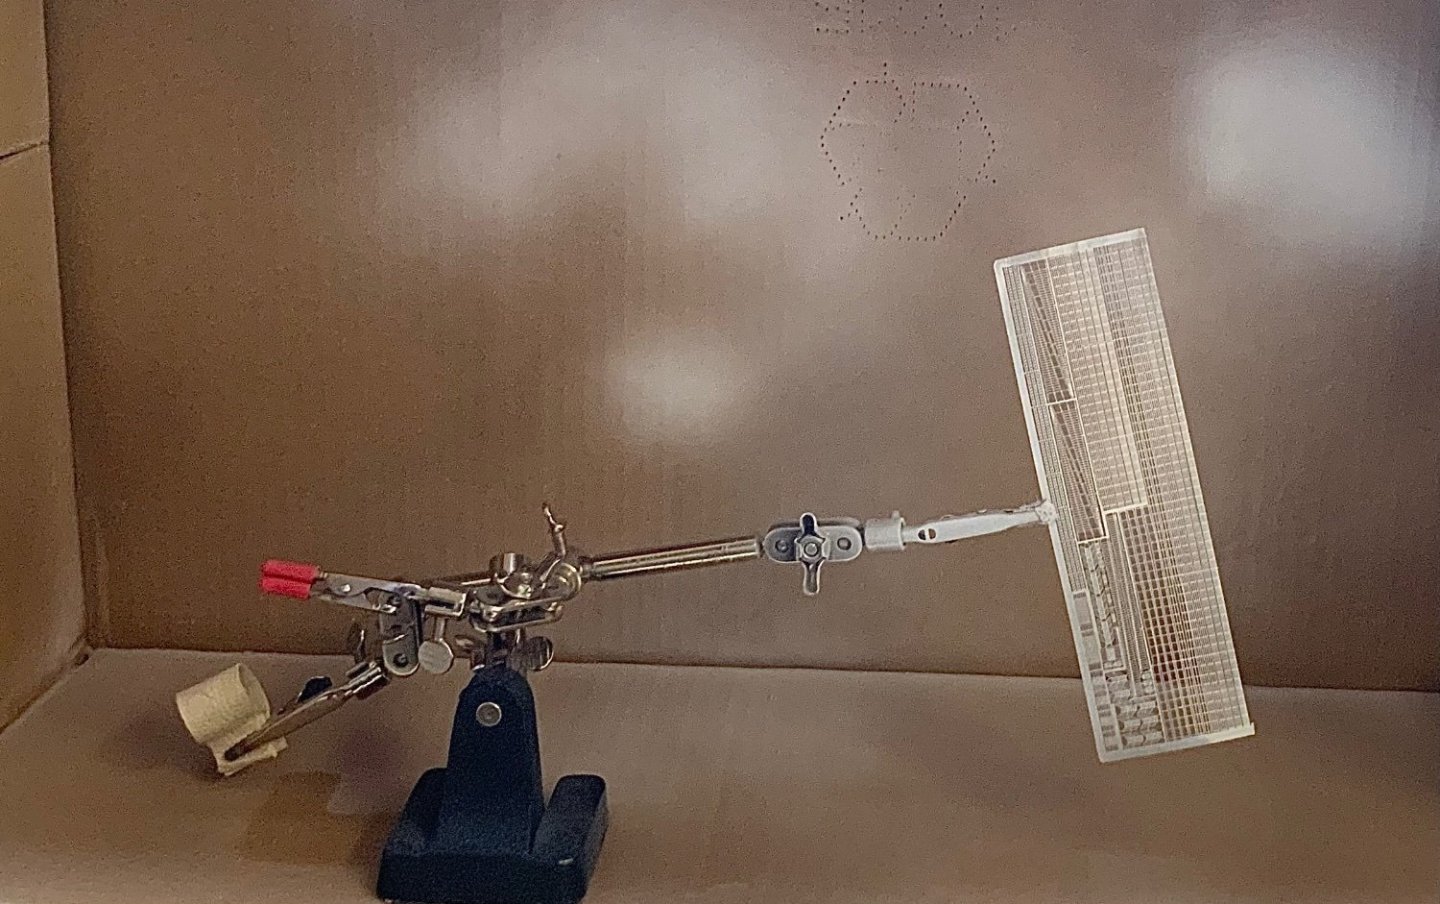
I tried soaking the PE sheet in vinegar as advised but the paint did not stick! I then lightly sanded the surfaces and sprayed them with primer. It seemed to work and there was no ‘clogging’. Dilute white acrylic (two coats) was applied with the PE sheet on a paper underlay so that the paper seemed to absorb the paint between the railings. Cutting the railing presented no problems but trying to glue the railing to the aft games deck was another disaster! The super glue took so long to dry that I could not hold the rail in position correctly so I abandoned the task. I must get some quicker drying super glue I think?

-
Thank you Jeff. One last thought, this ‘Mayflower’ probably actually traveled further than the real ship. It went, as a kit in its original box, from Nürnberg to Brisbane, to Wellington and finally back to Nürnberg, where it was finally built up over 50 years later by an 89 years old ‘rentner’ and thimble collector.
-
Thank you. The USF Confederacy looks like another beautiful model.
- 389 replies
-
- 1
-

-
- winchelsea
- Syren Ship Model Company
- (and 1 more)
-
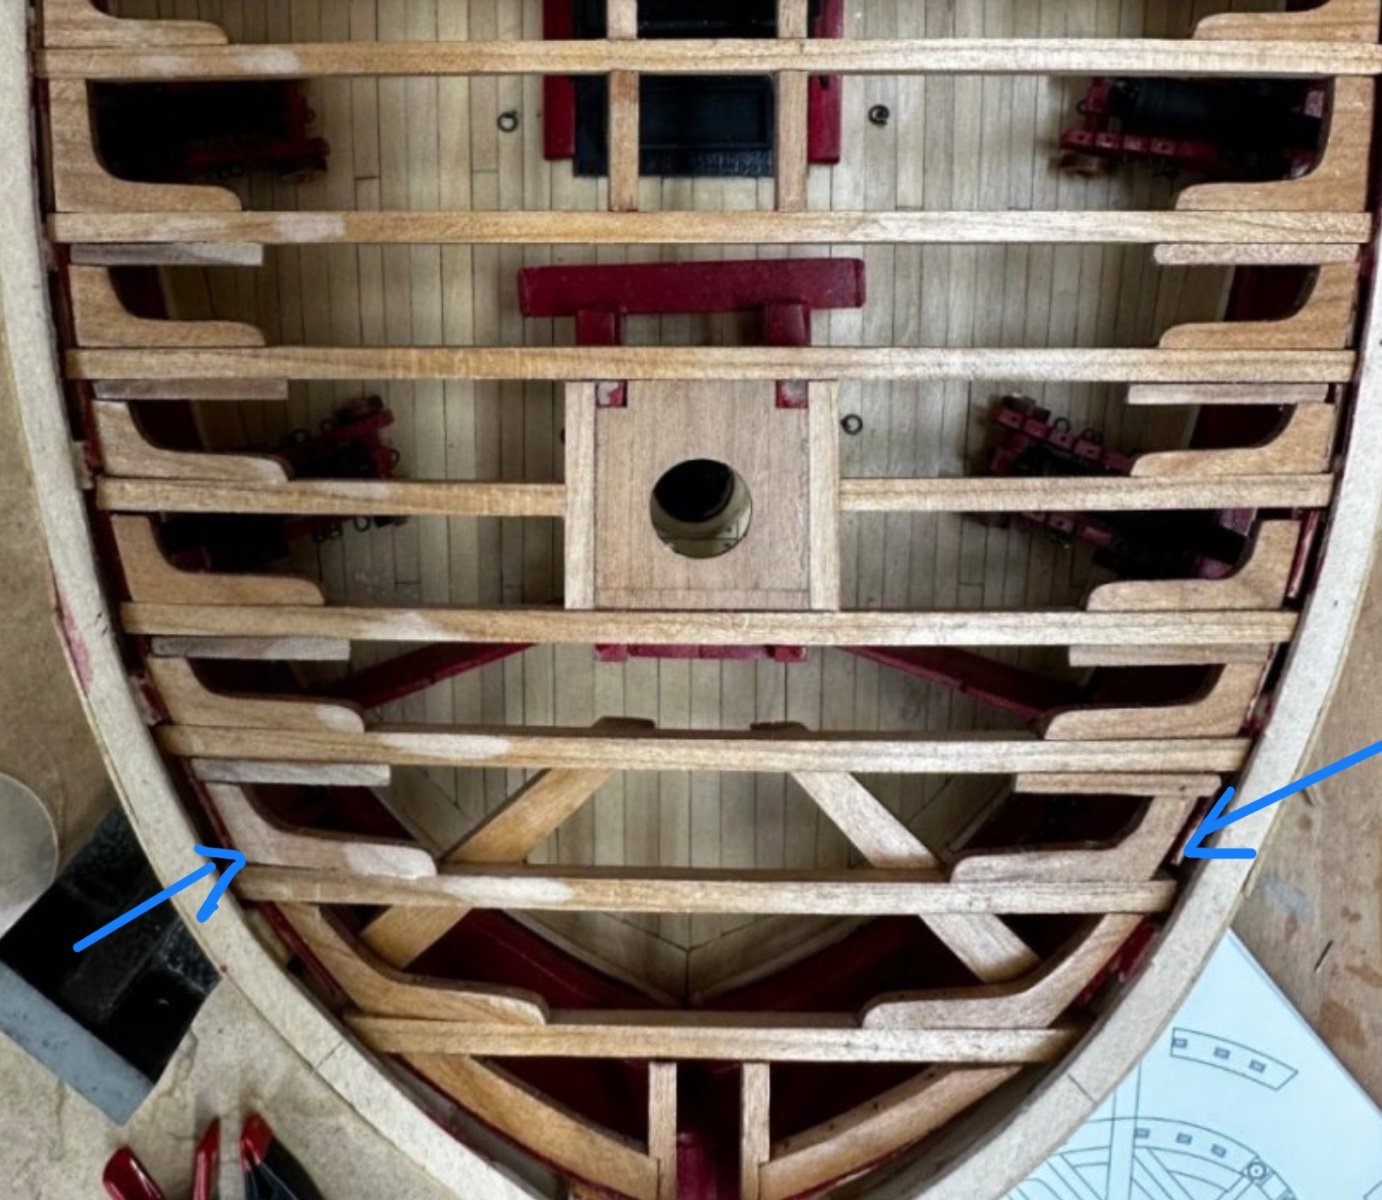
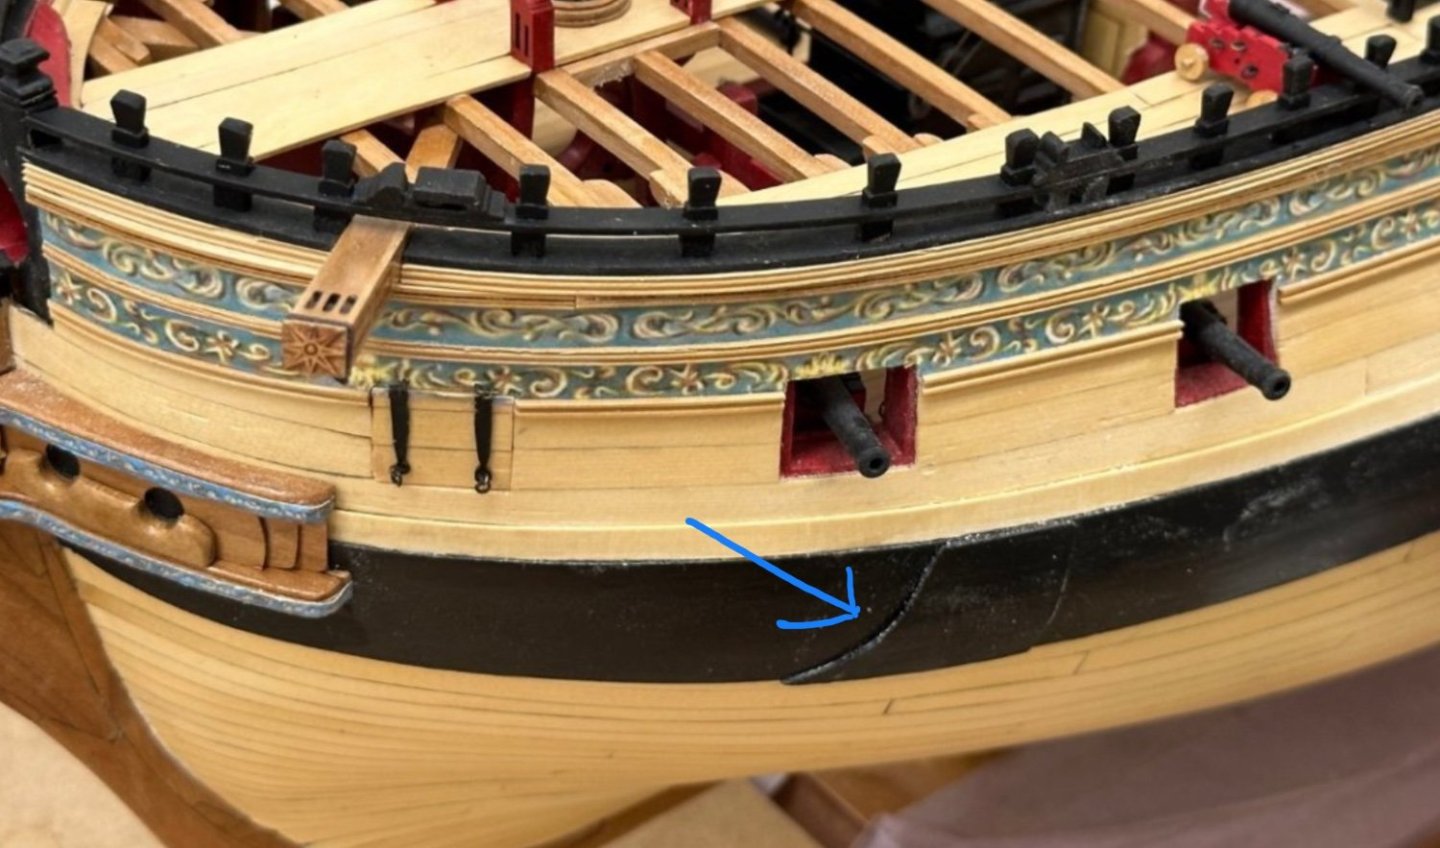
As is pretty obvious I am a complete novice! I found this log and was absolutely fascinated. Your attention to detail was unbelievable and the finished model, to me at least, is just amazing. Congratulations. I expect your room decorating is pretty wonderful too? As someone who knows very little about wood boat building I have a couple of questions, if I may? Why do you leave the space indicated with the arrow all around the bow? I know that later the space is hidden by planks but why is it left? Secondly what or why is this mark on the hull? Thank you for a fascinating, honest, most detailed build log about such a wonderful model.

- 389 replies
-
- 2
-
-
- winchelsea
- Syren Ship Model Company
- (and 1 more)
-
Thank you very much for the tips, may I ask about painting? If I use primer and a top coat how can I avoid clogging the spaces between the rails. The spaces between the rails are thinner than four coats of paint I think?
-
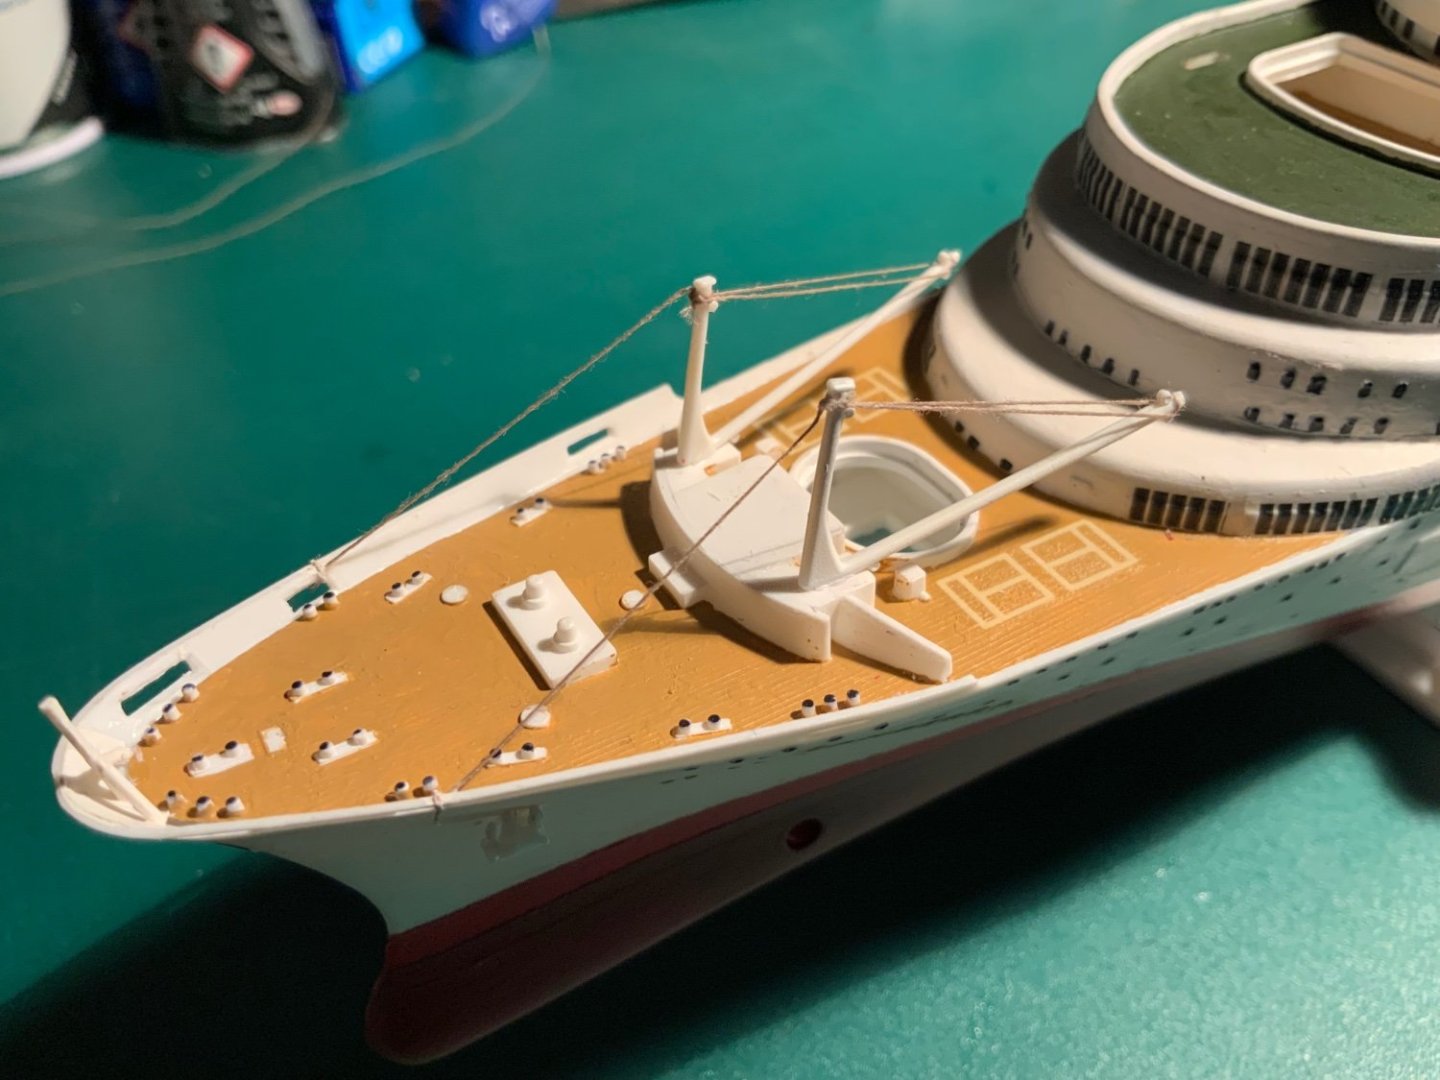
Ready for the rigging and railings but they are both so fine I wonder how I’ll manage? The superglue that I have (Locktight) seems to take a while to dry - is it too old?
-
The problem is how to make them, tension them and fix them to the bridge structures. Thank you for the pictures. The scale makes them very thin!
-
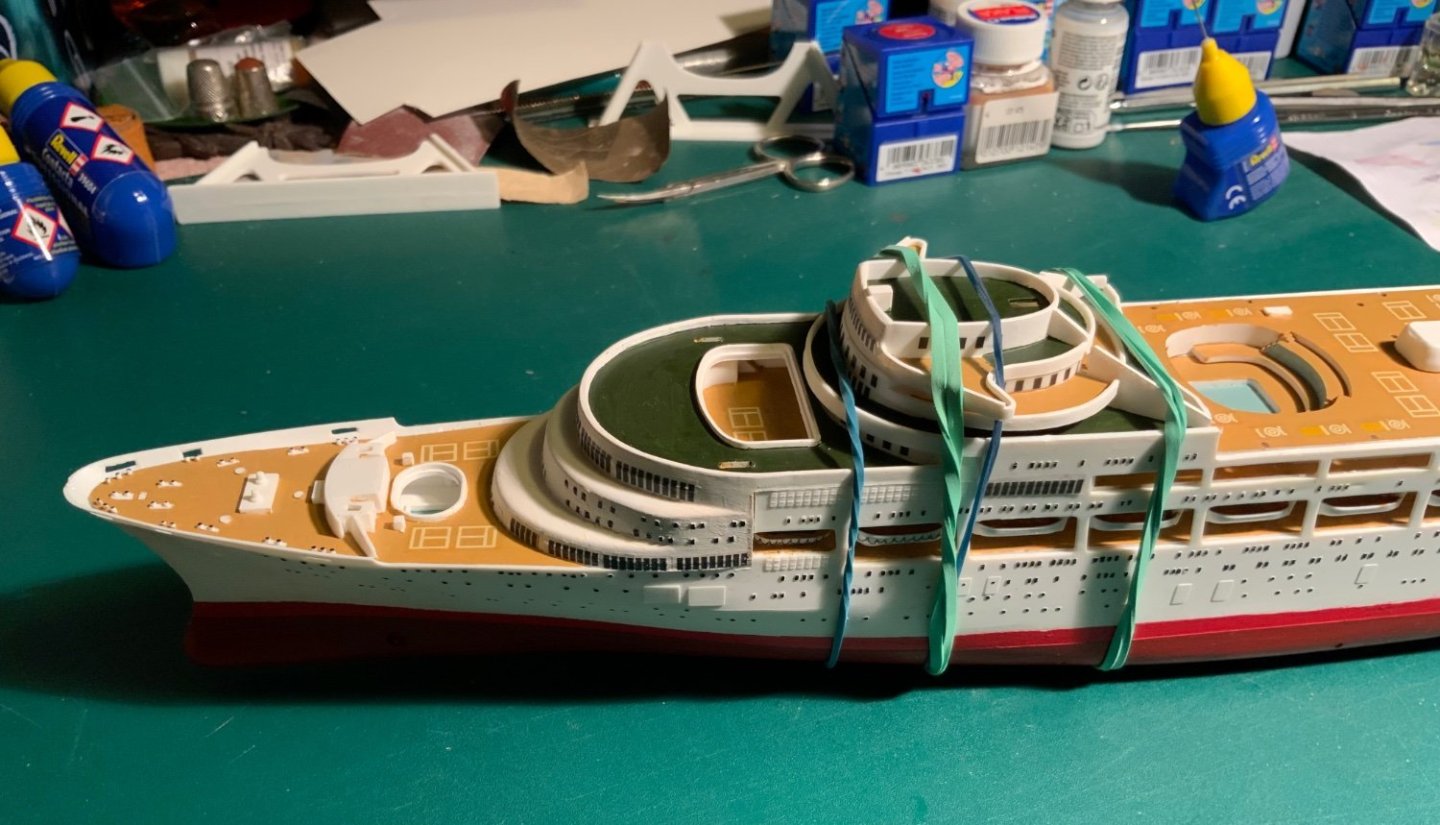
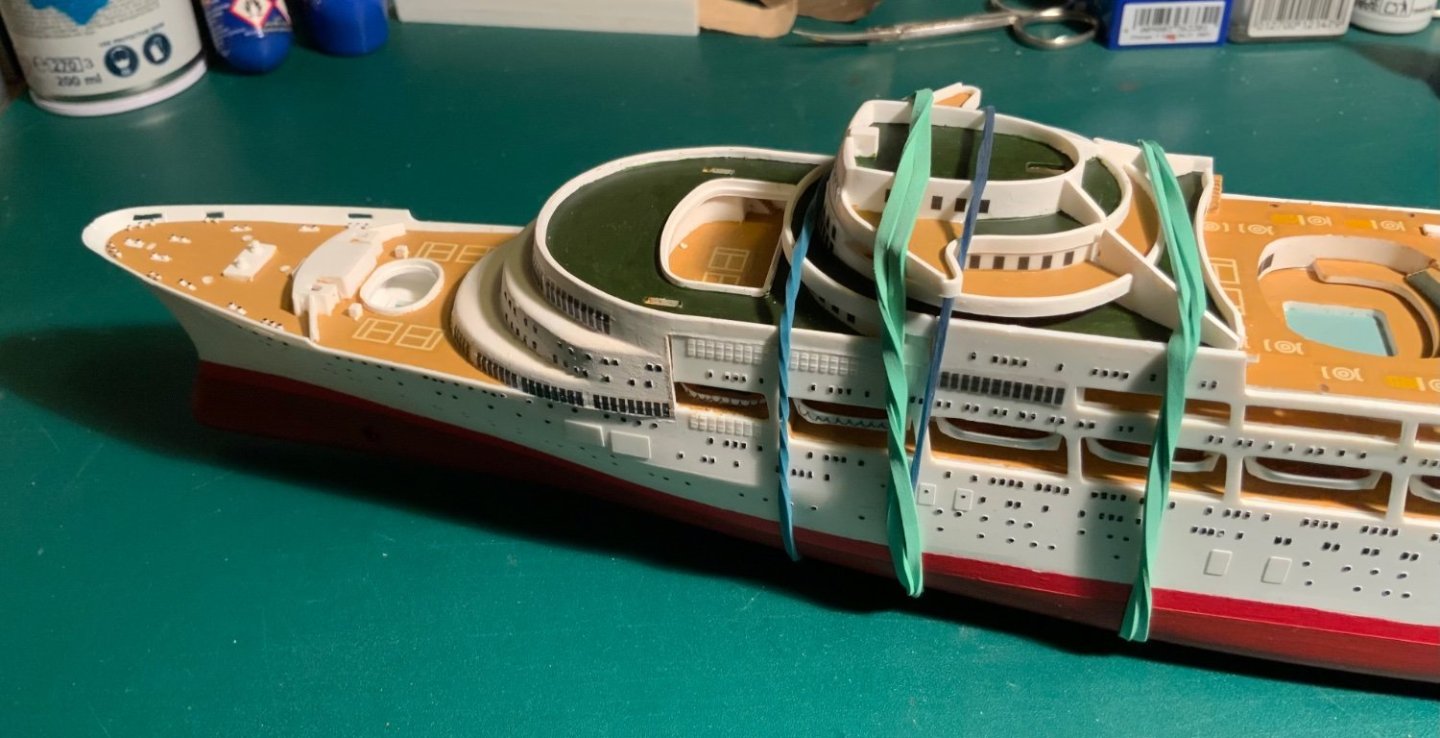
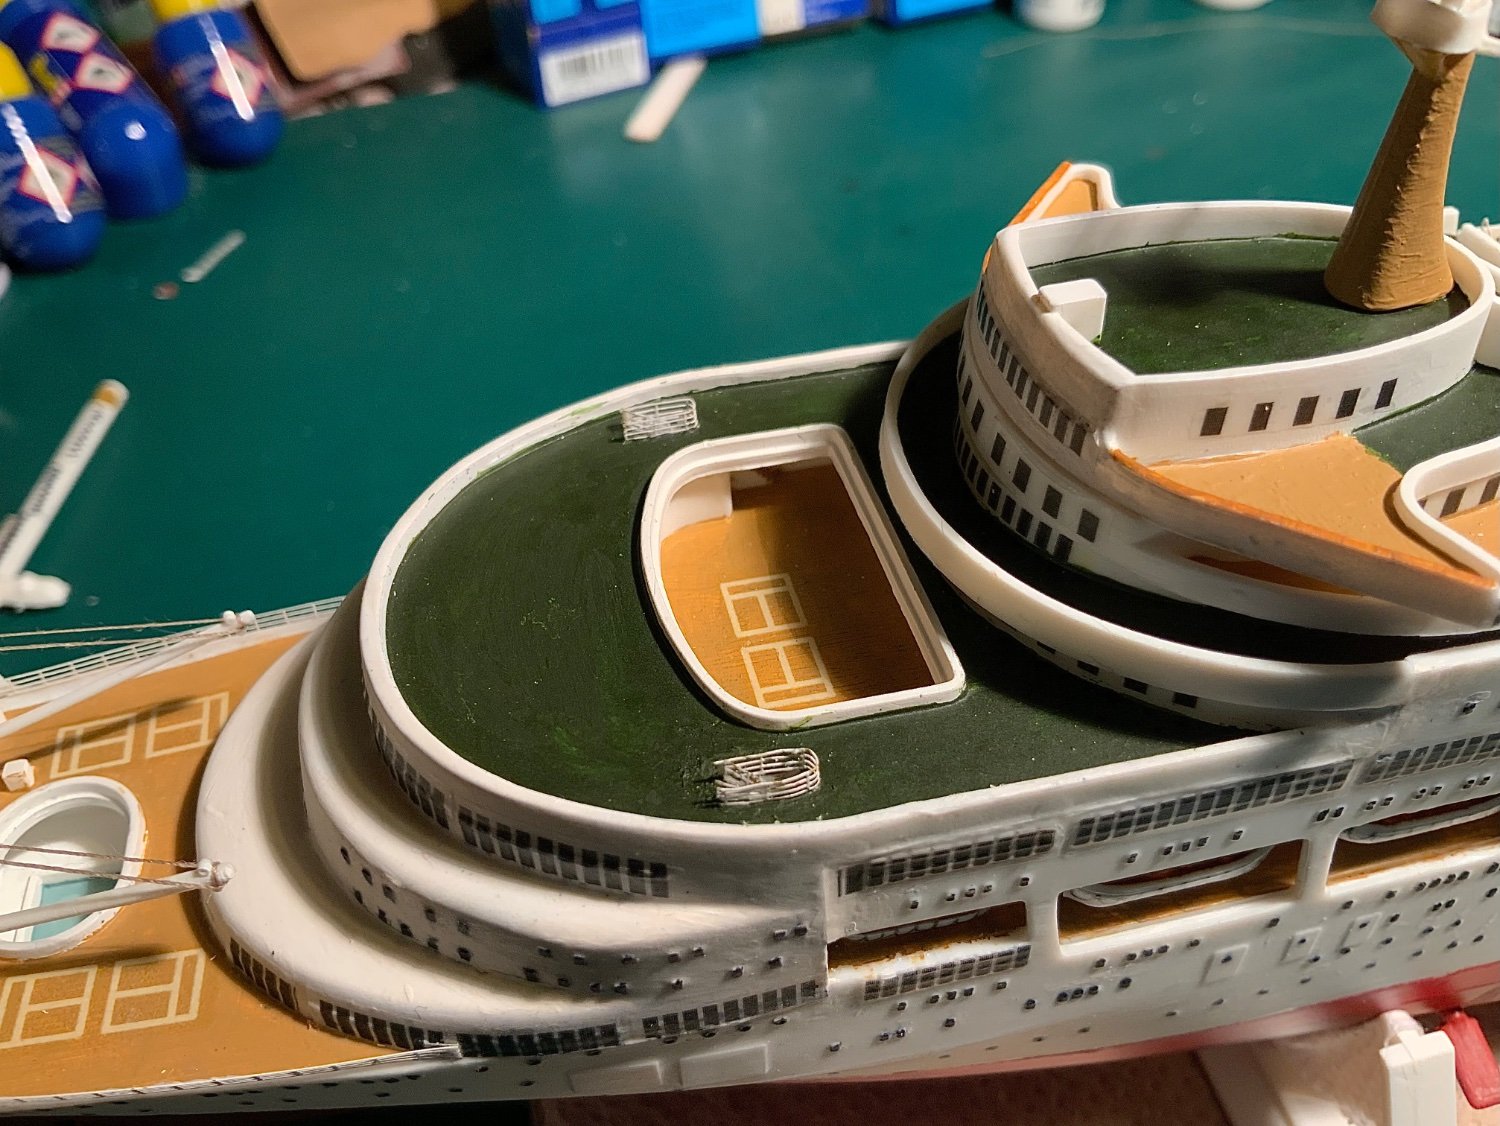
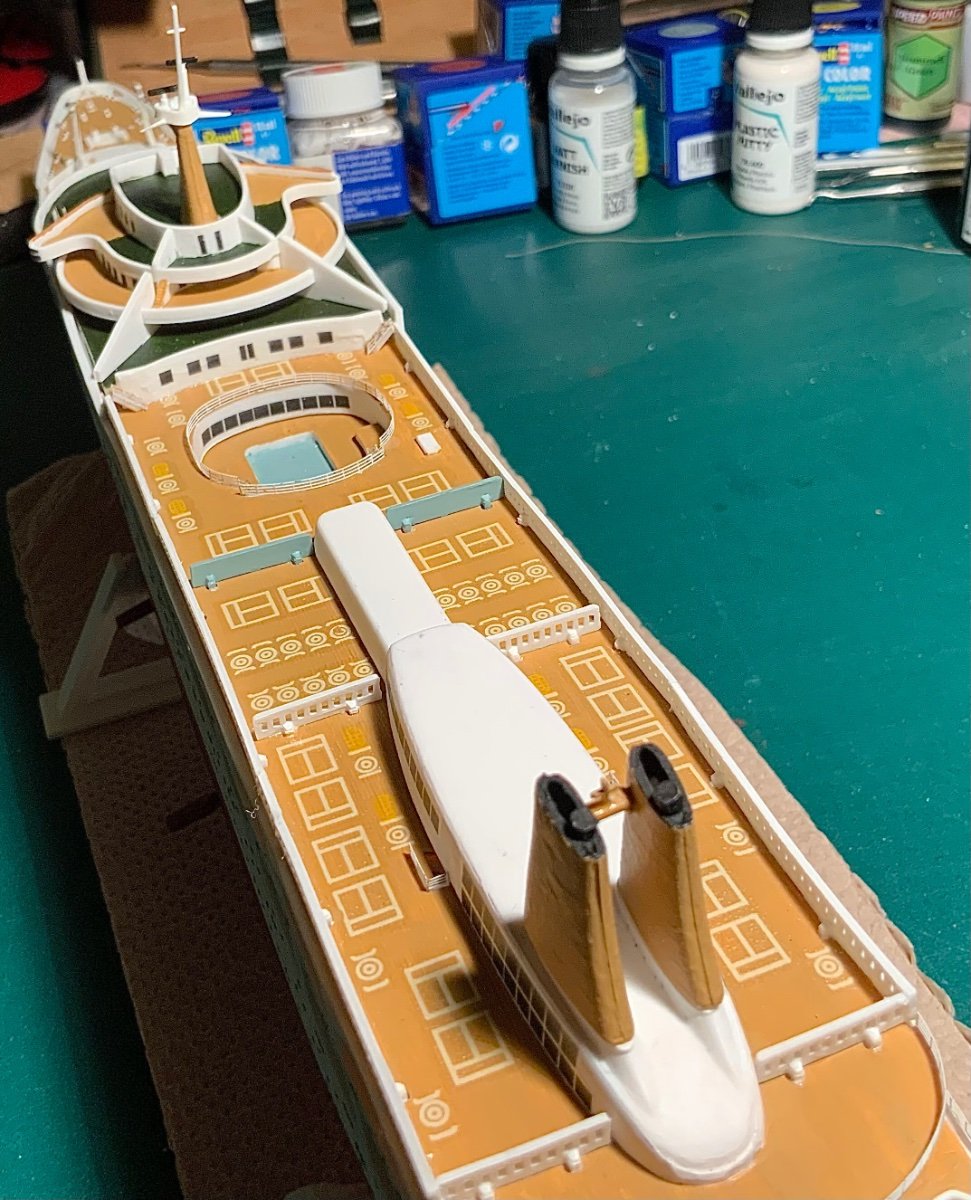
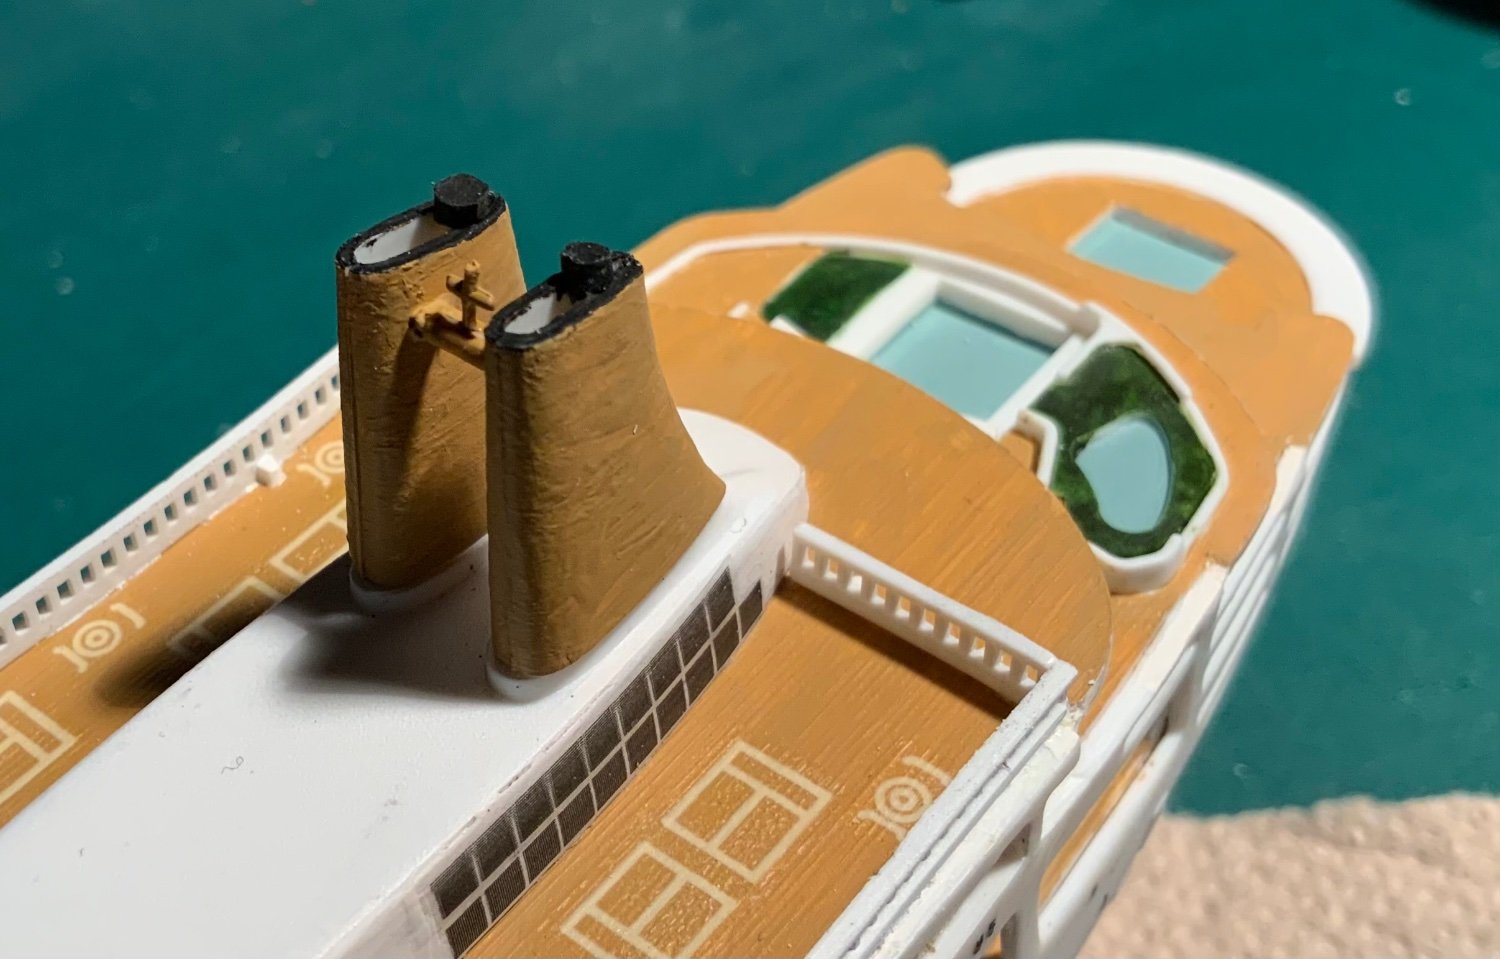
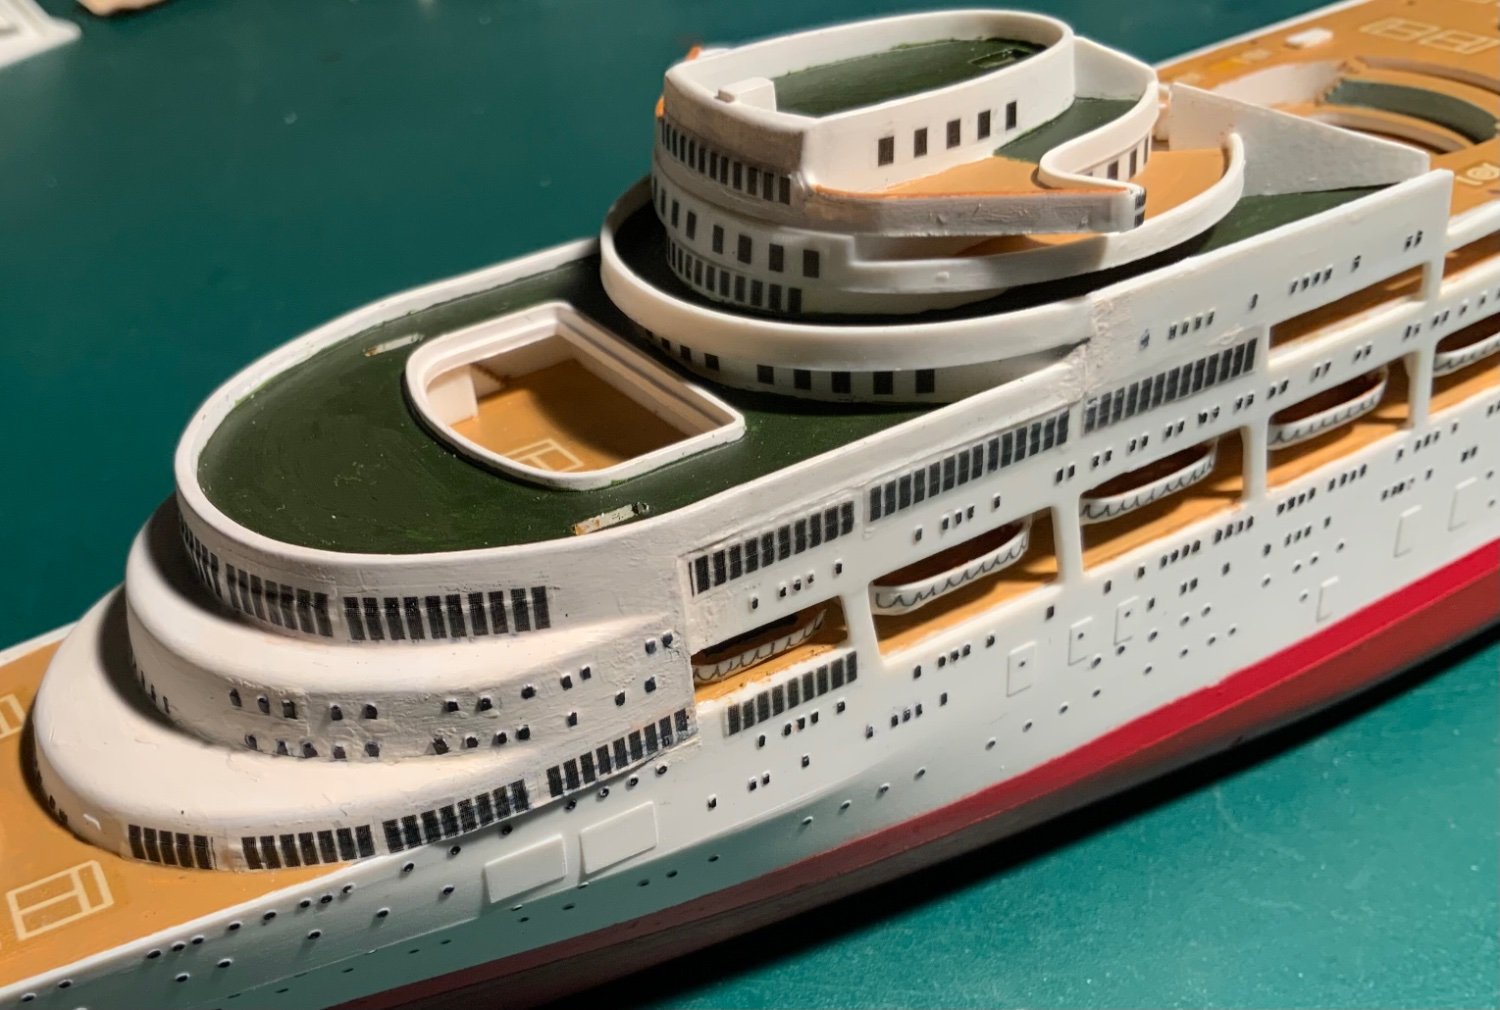
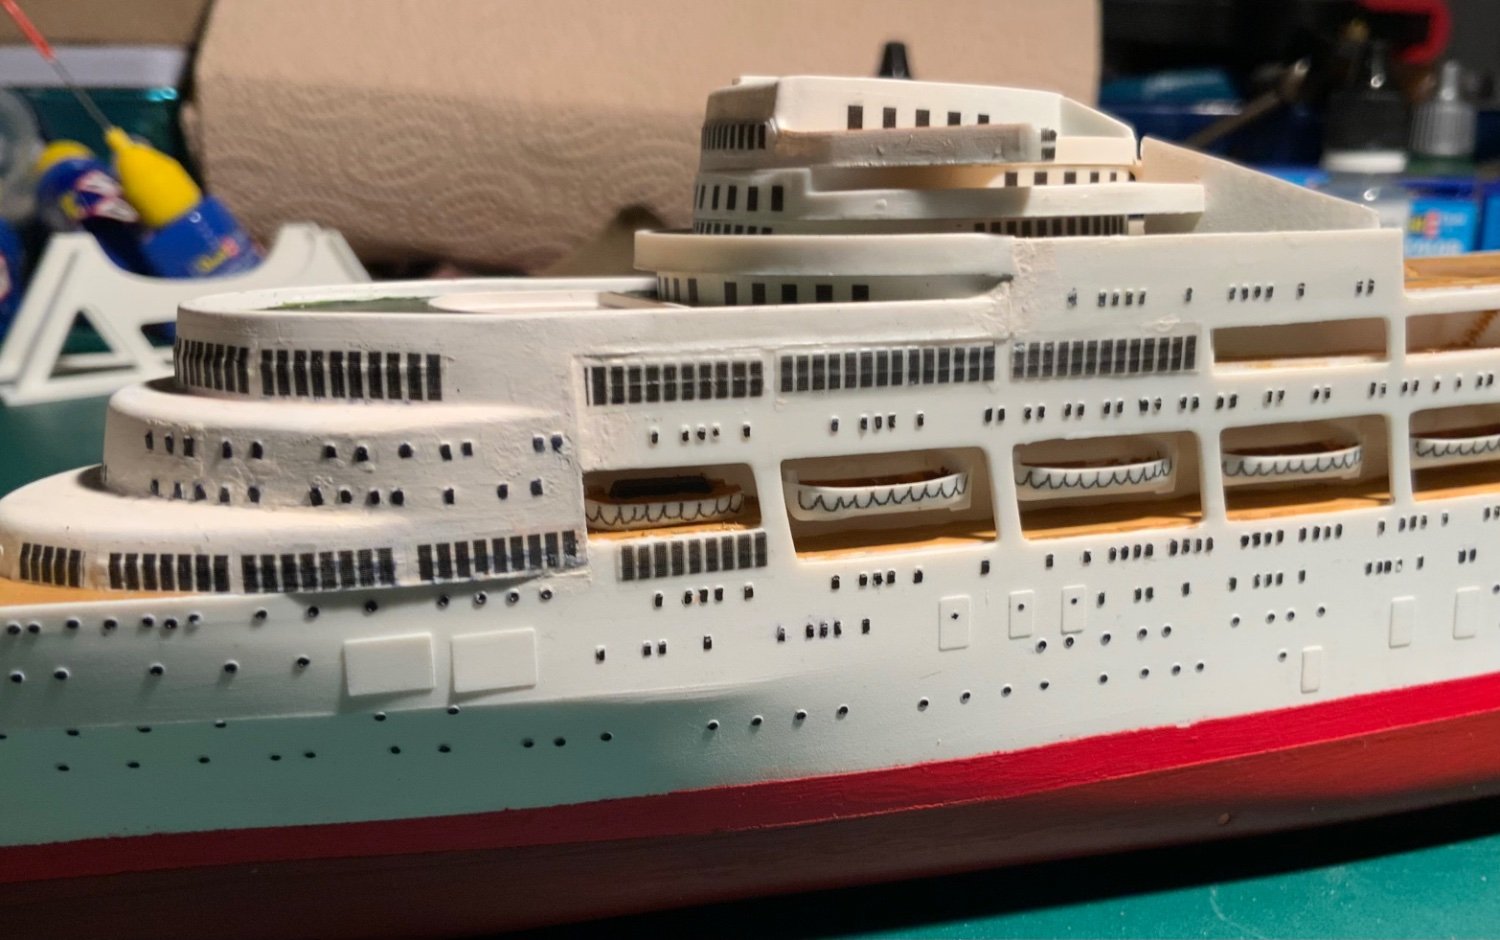
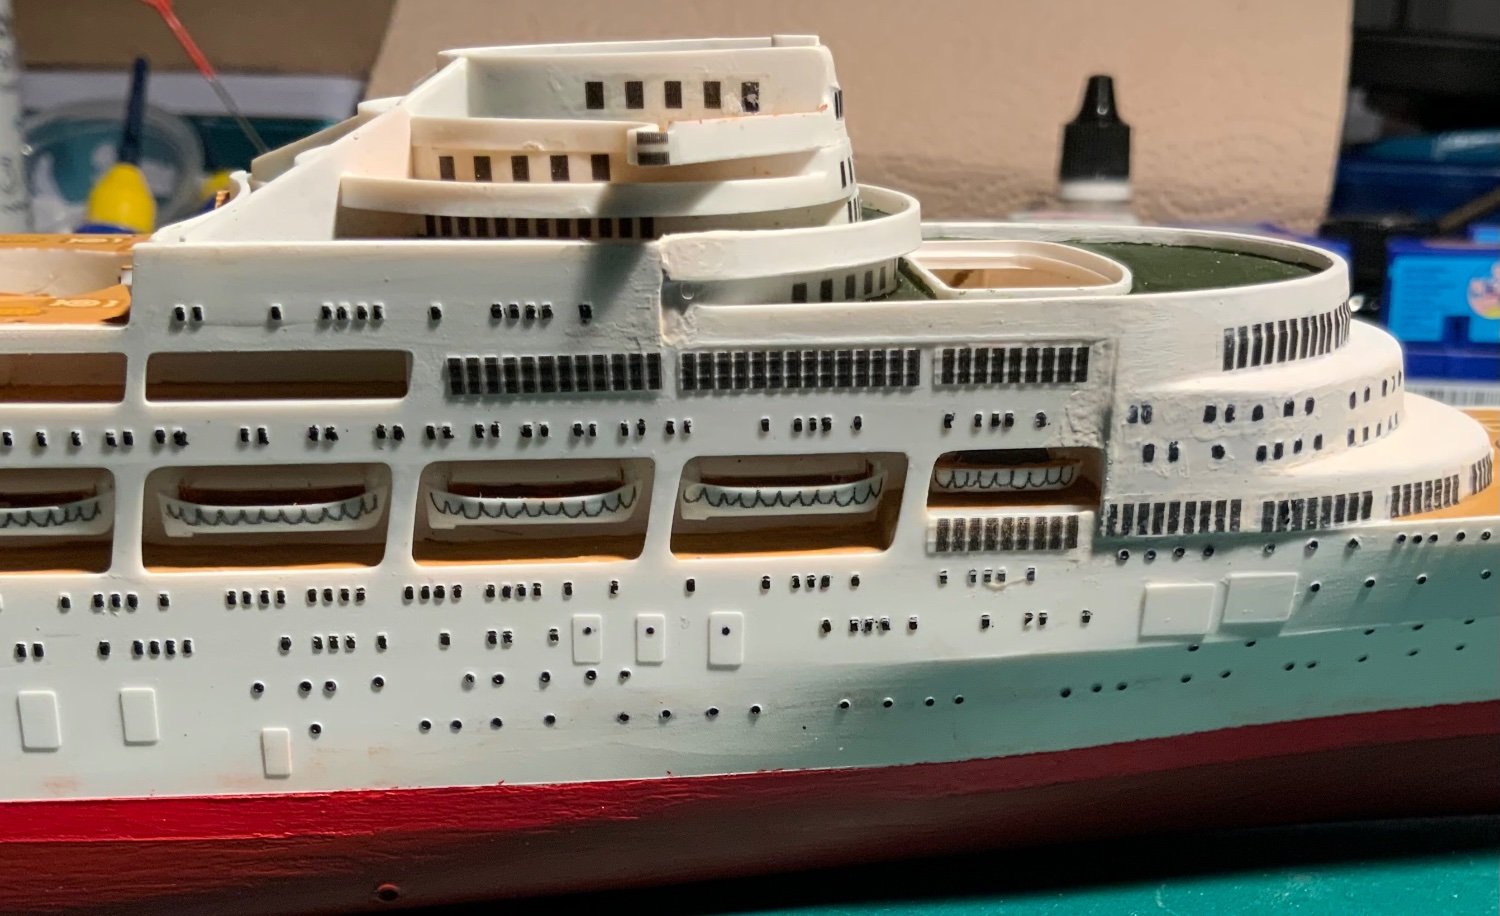
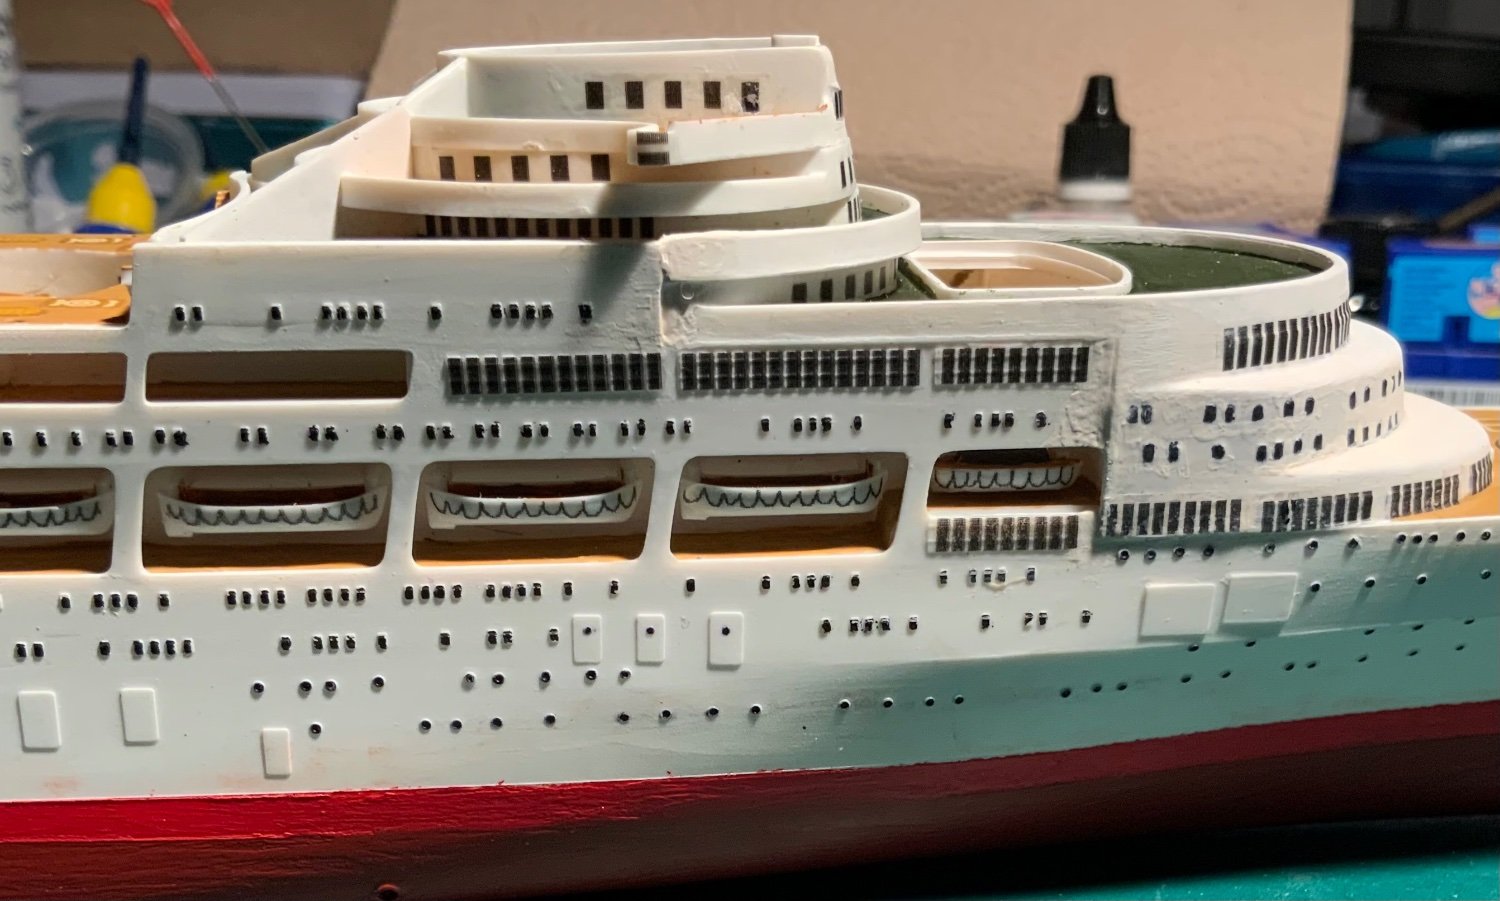
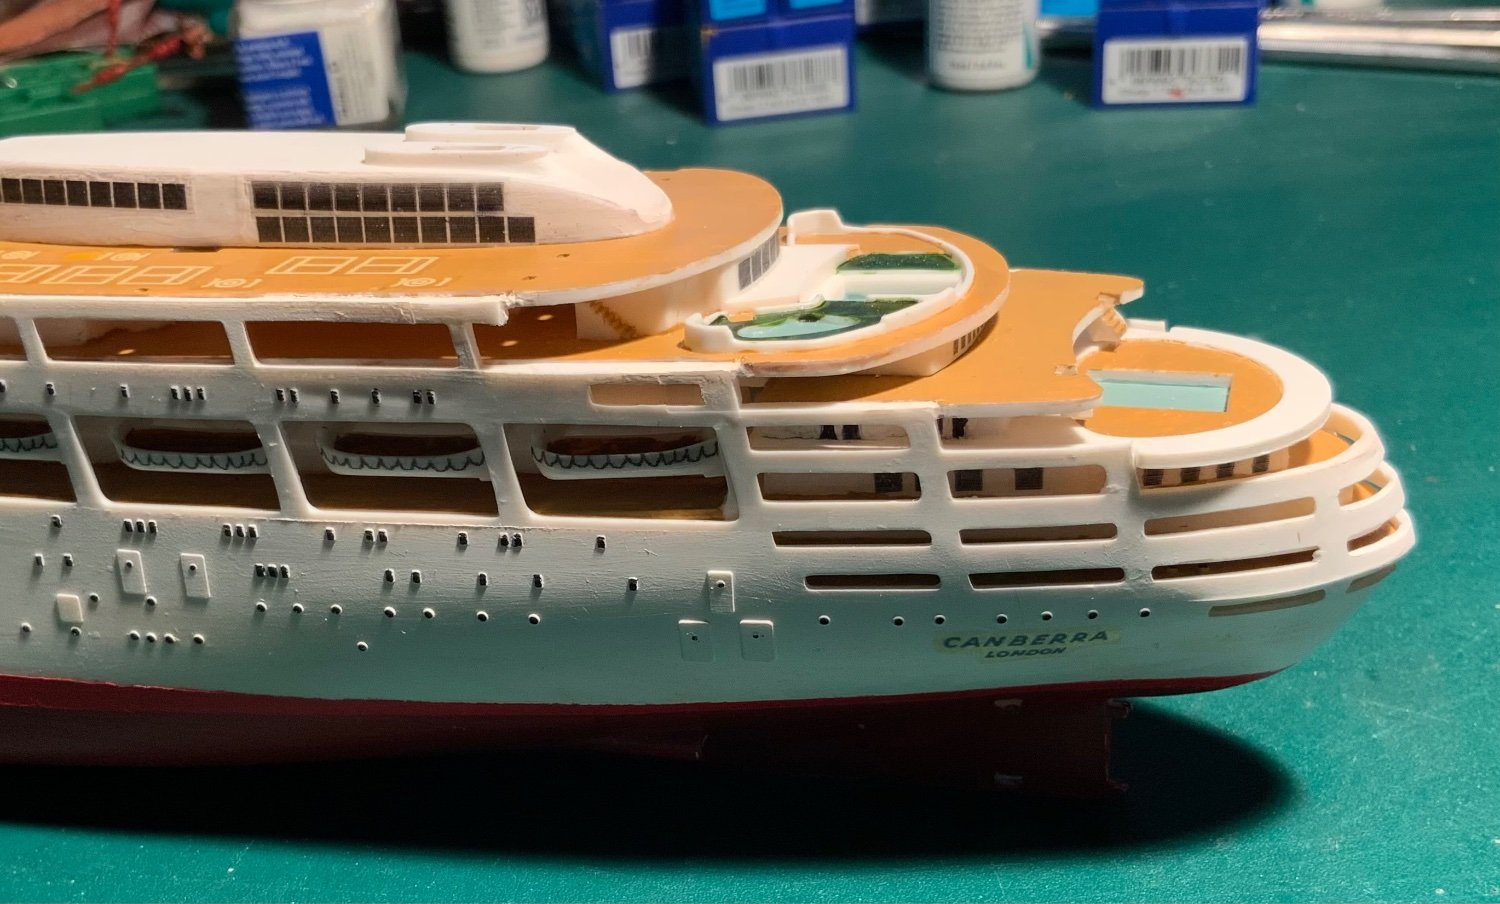
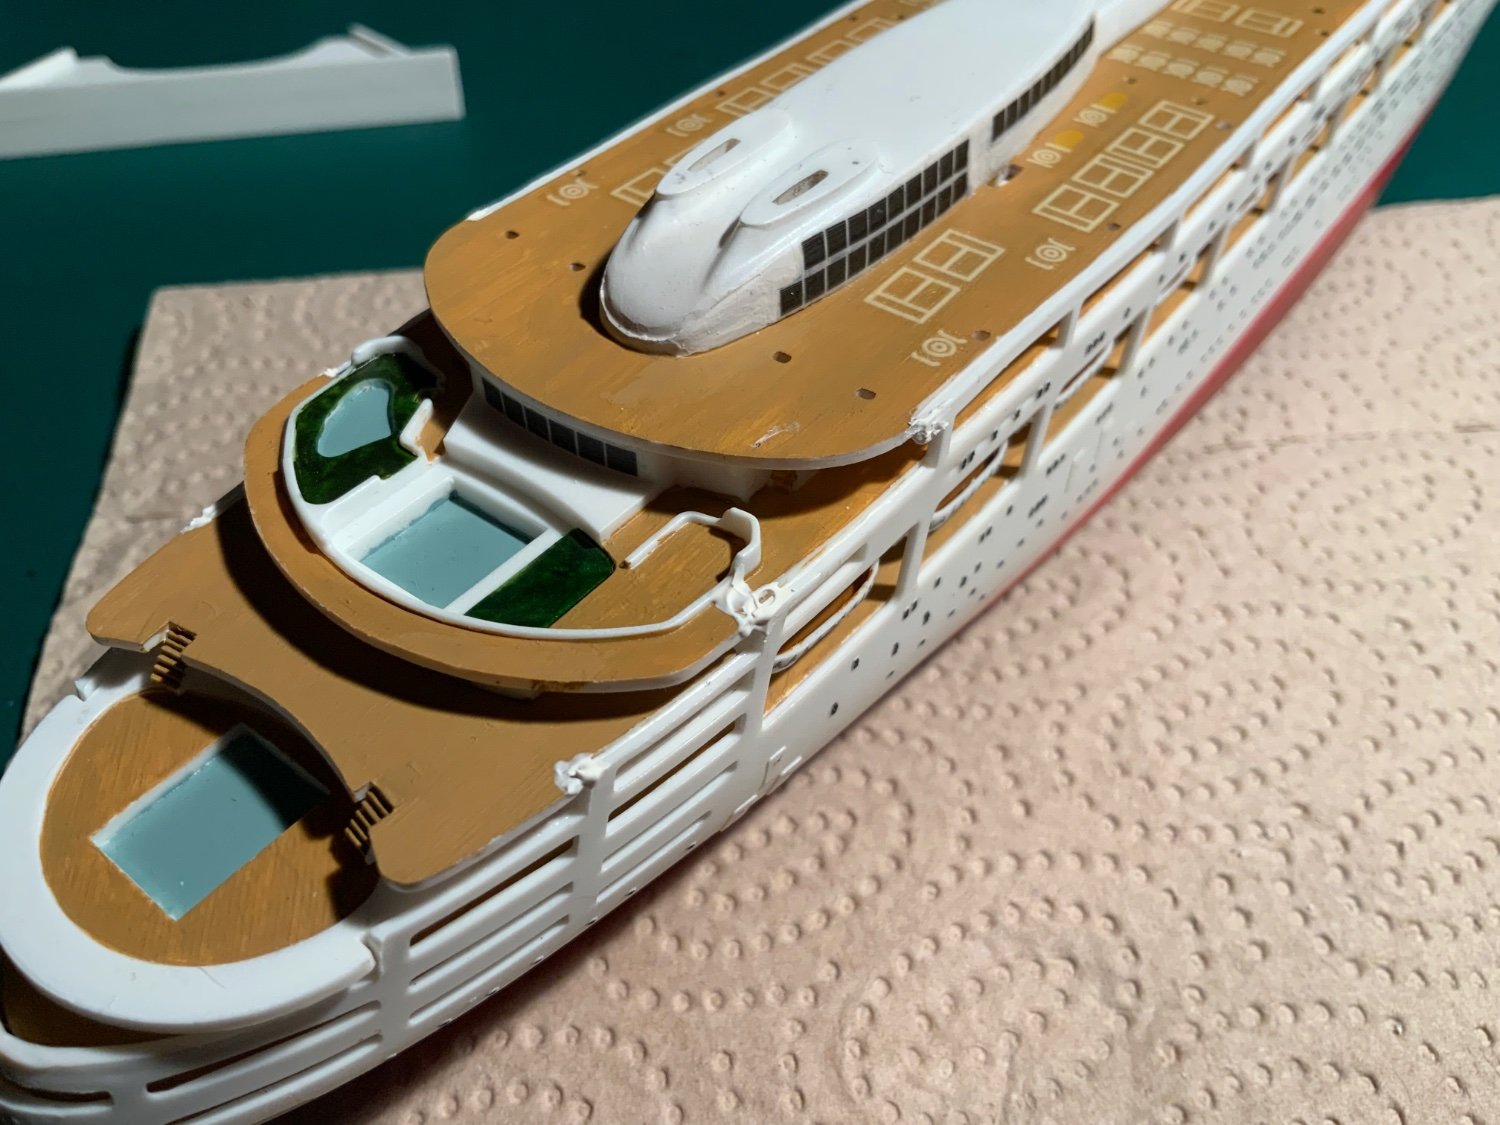
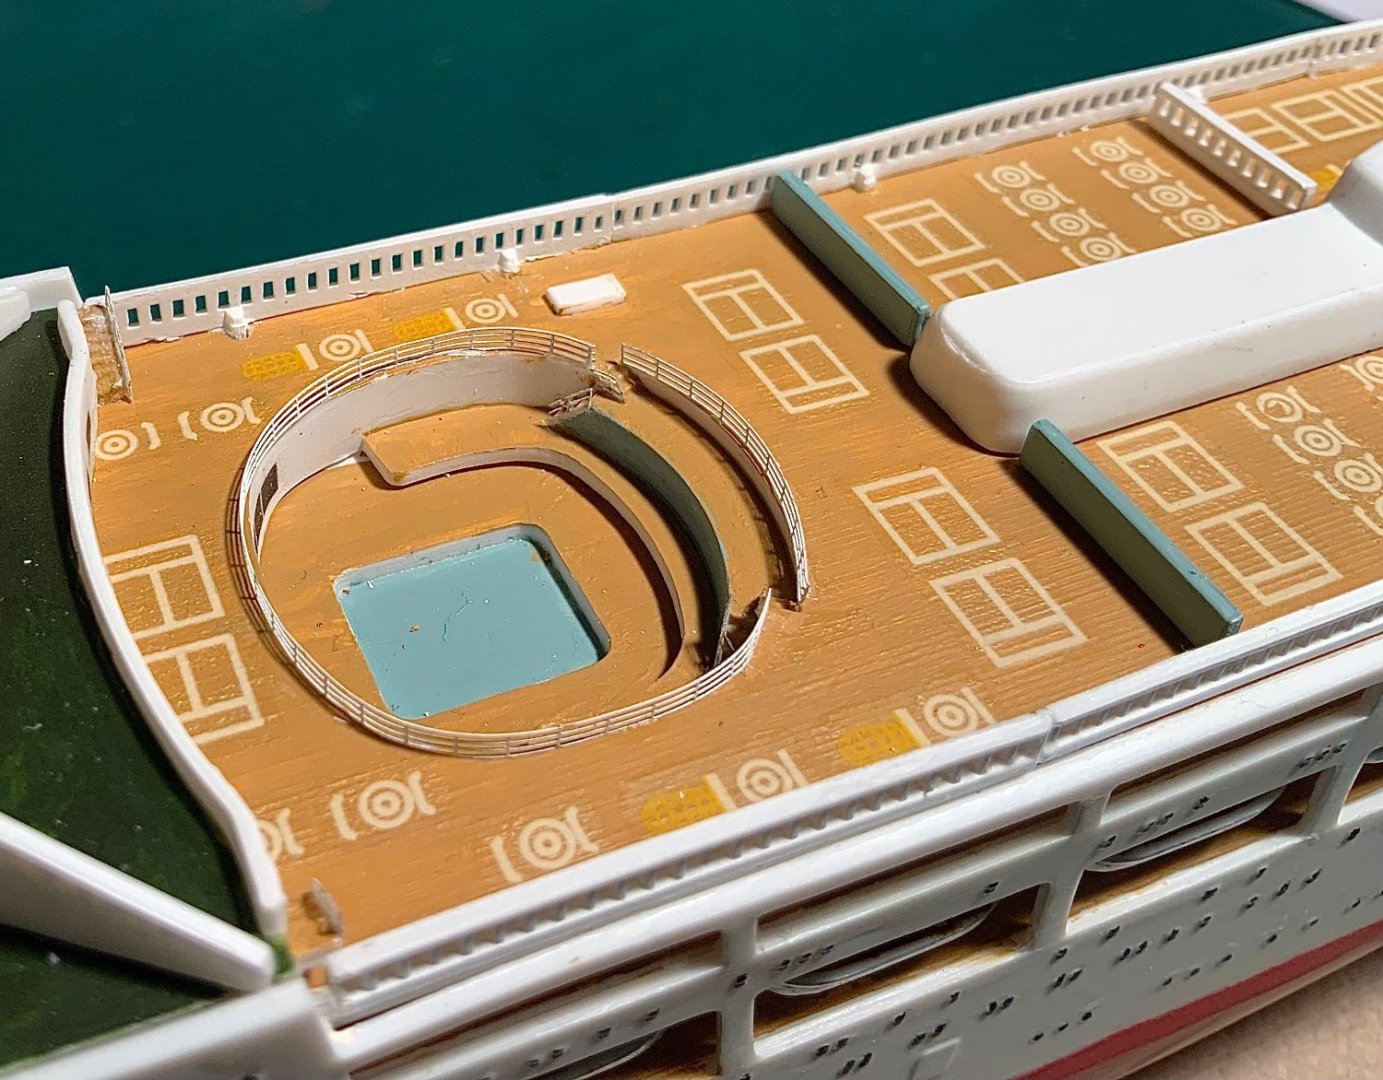
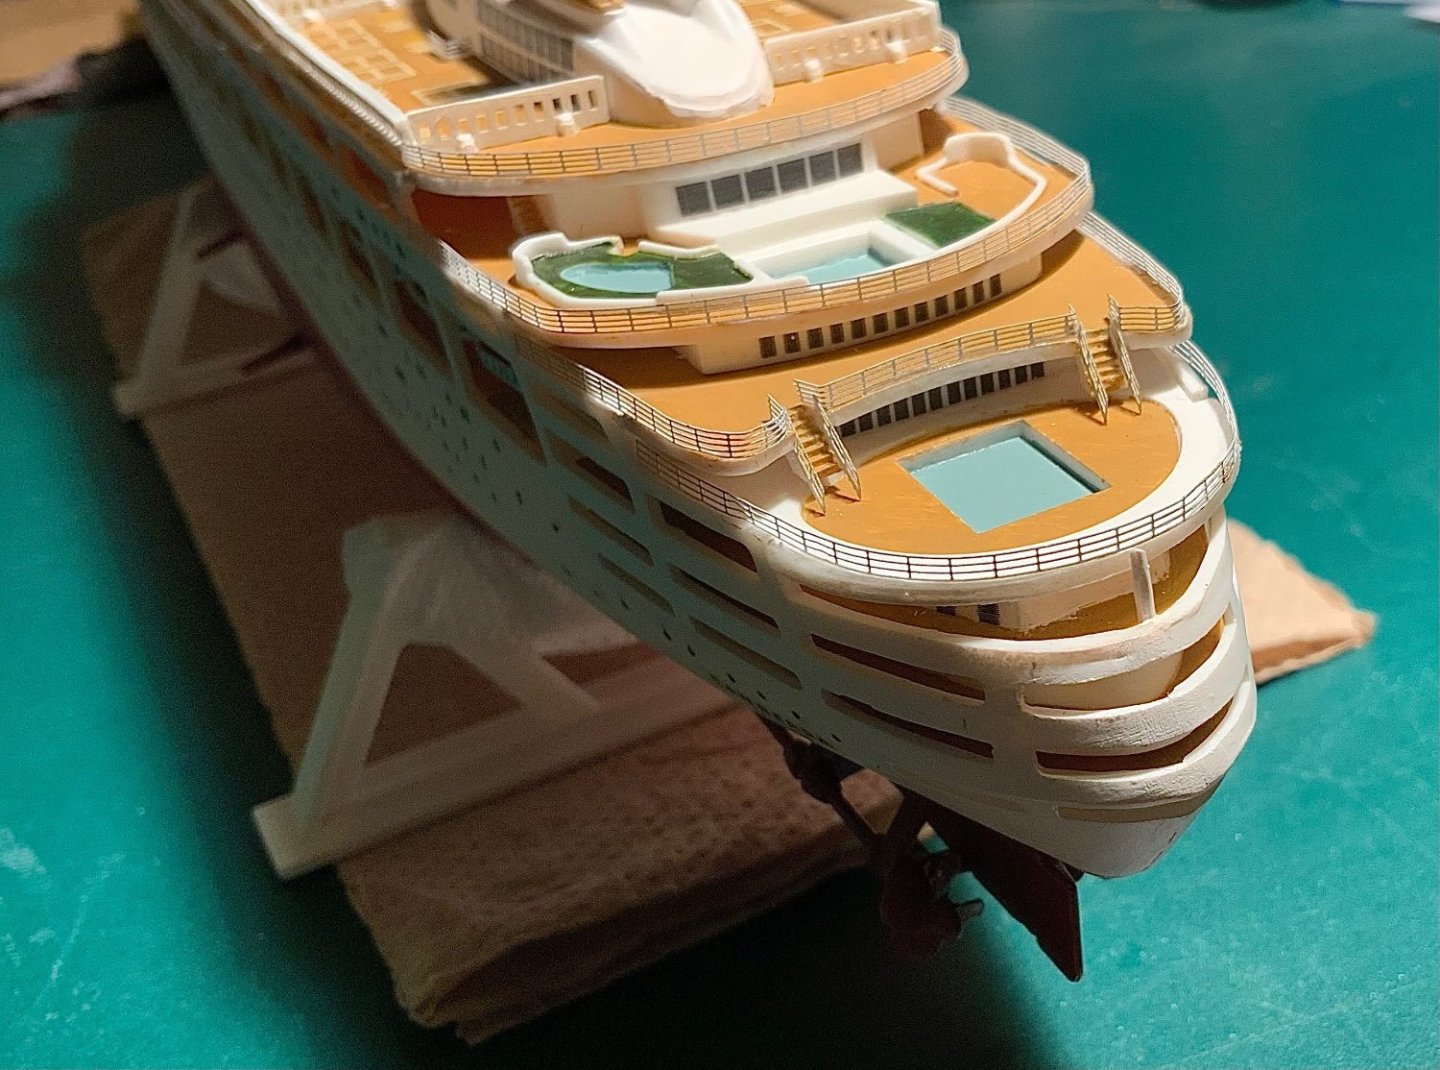
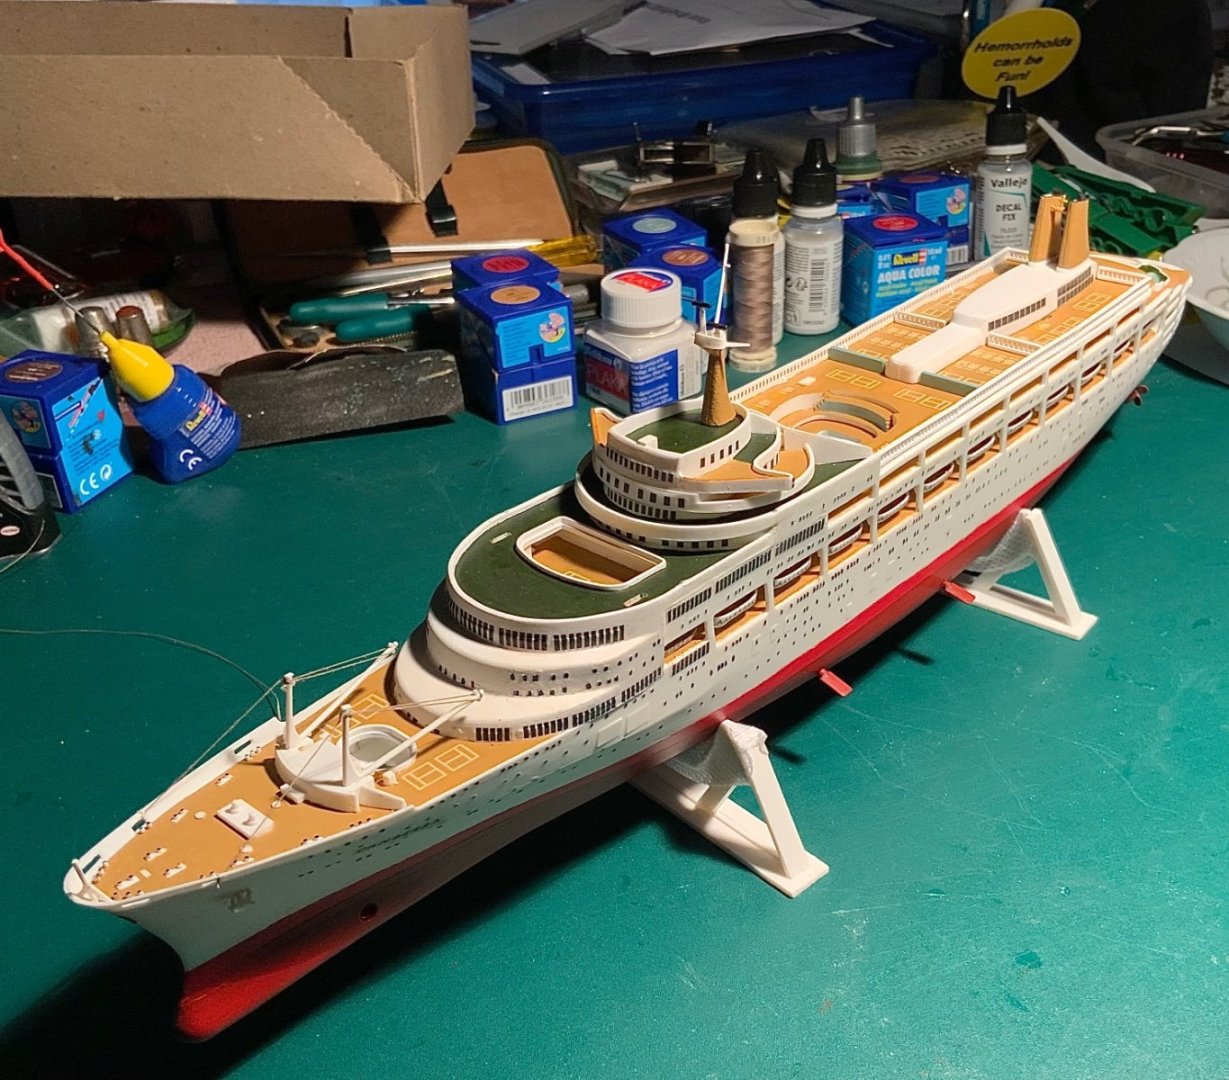
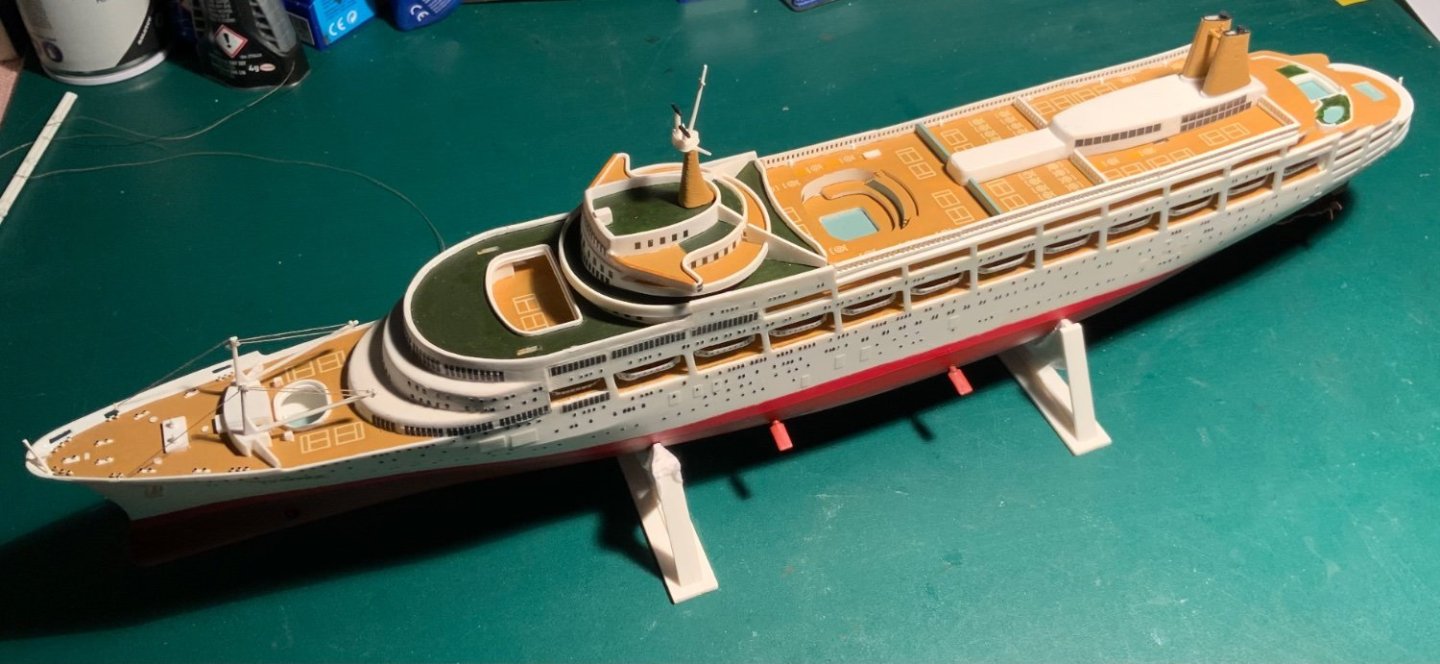
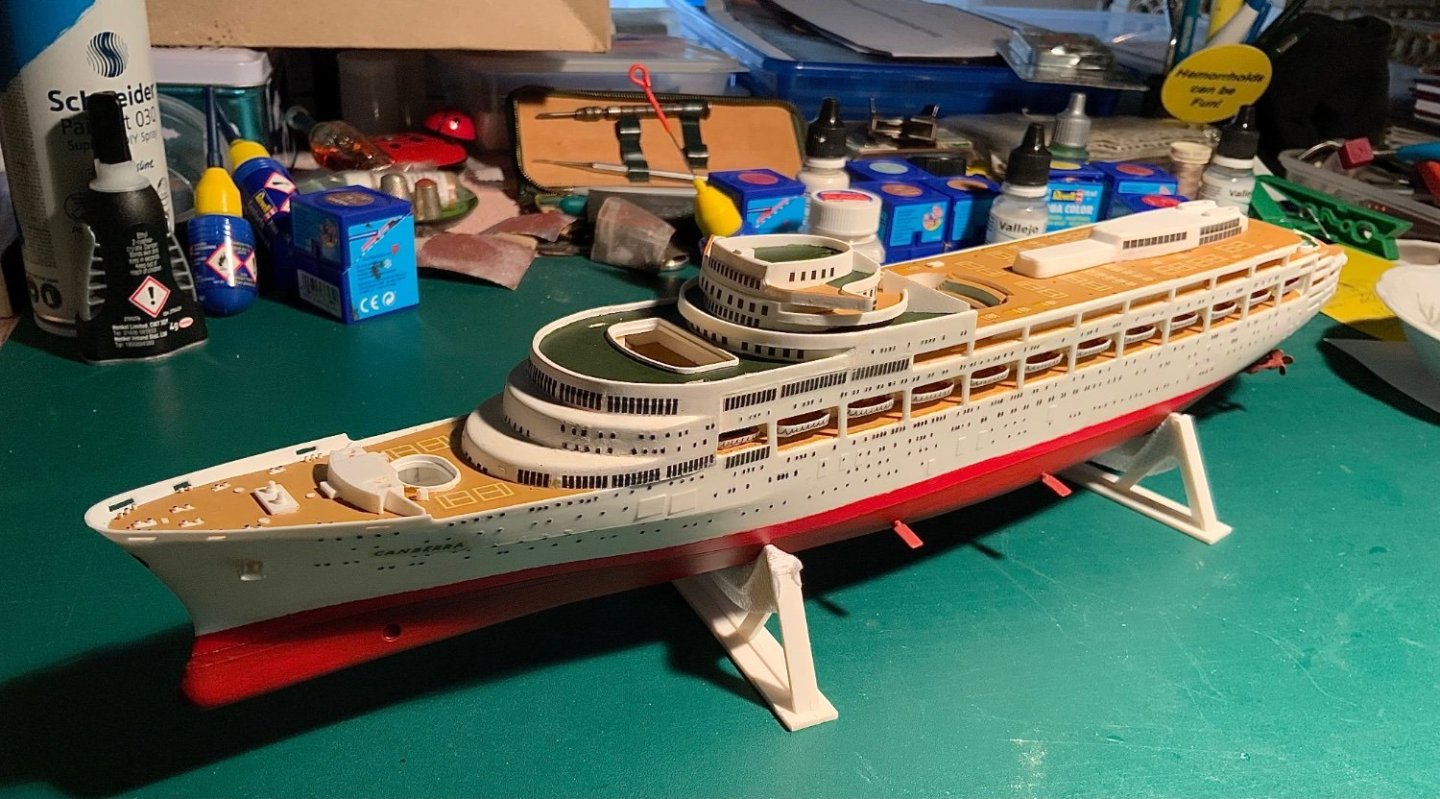
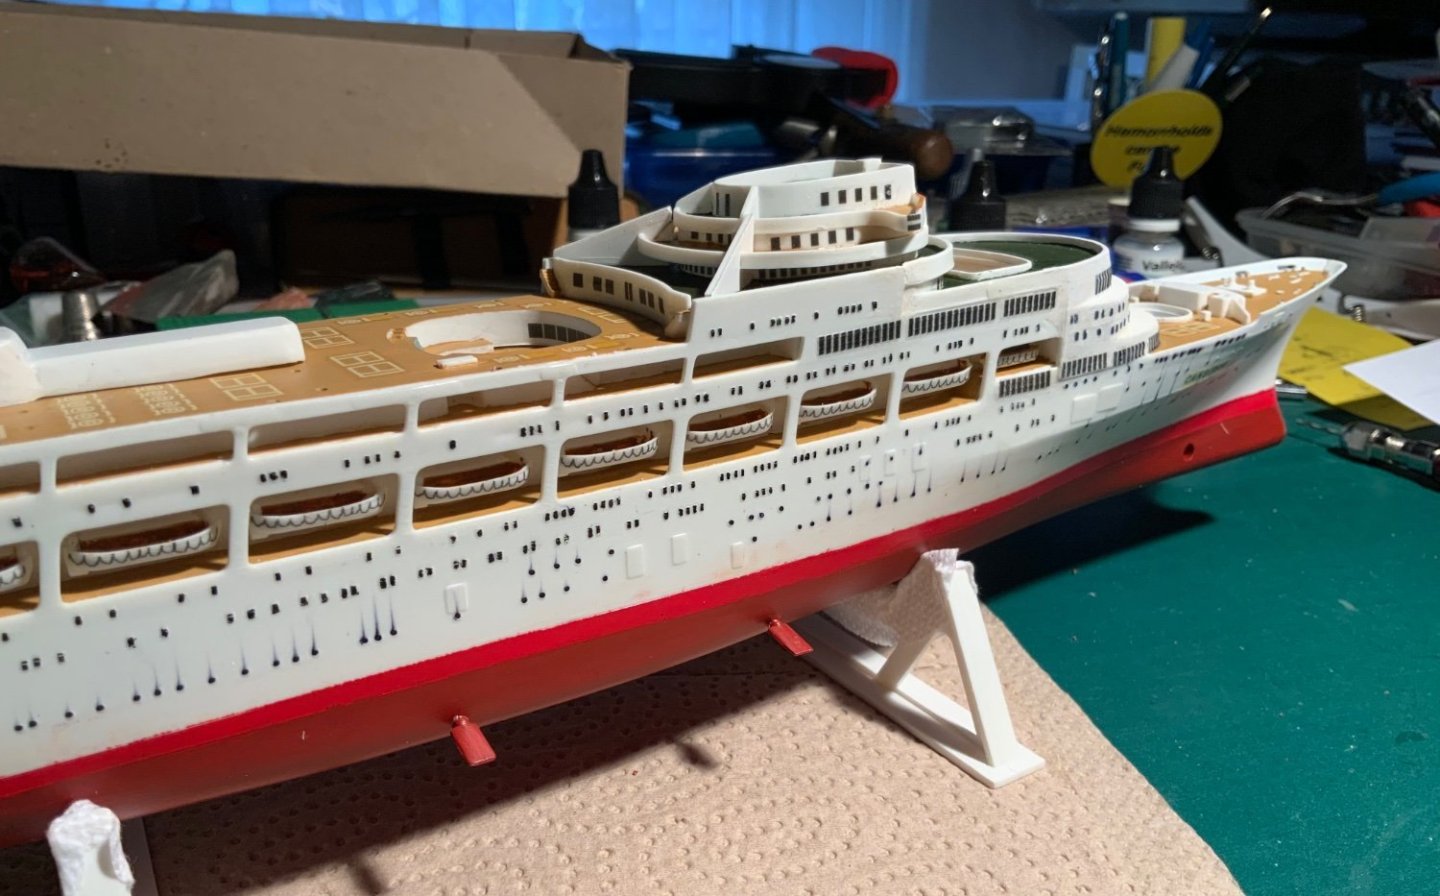
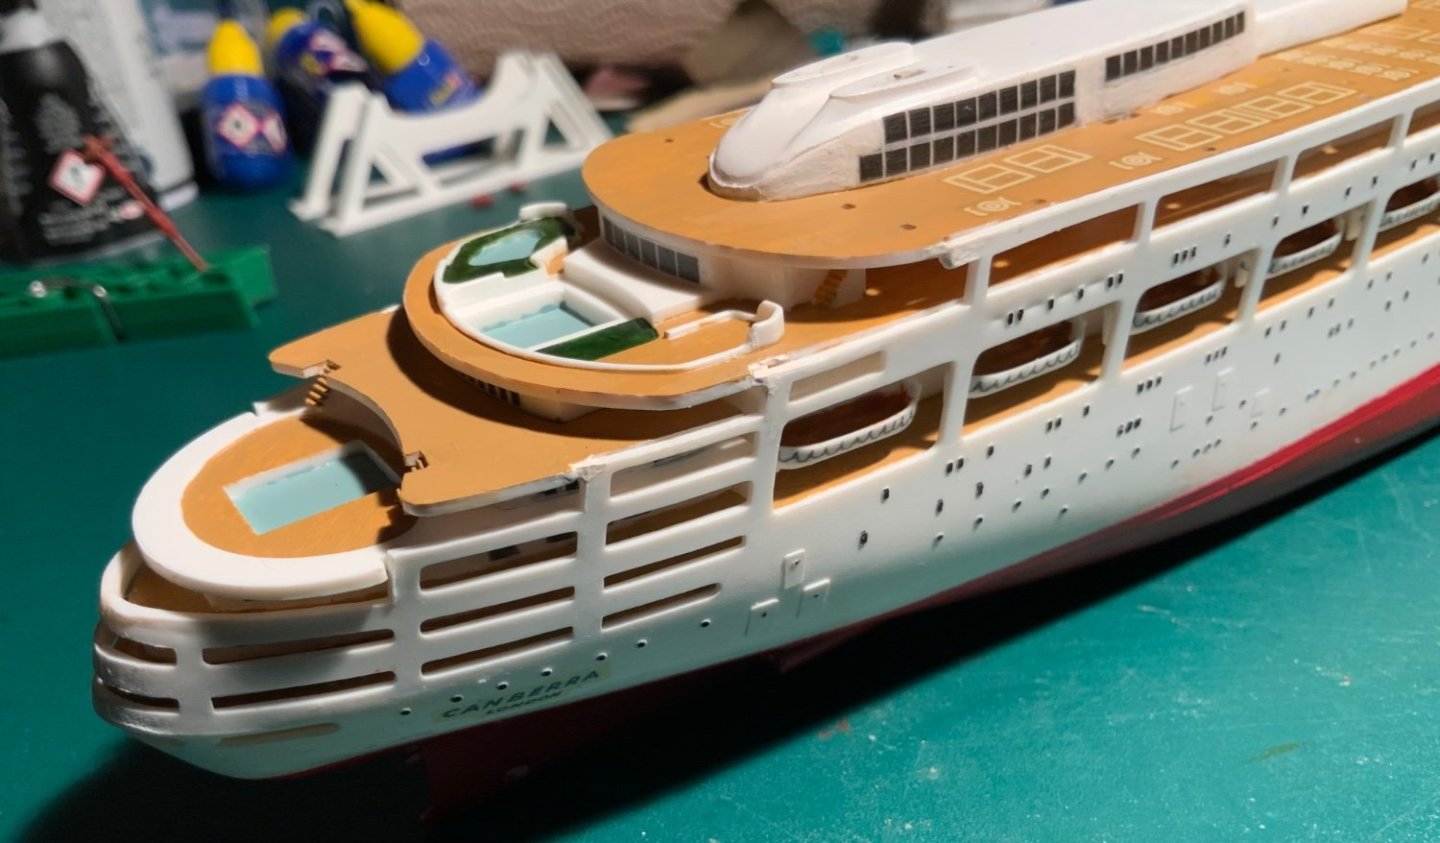
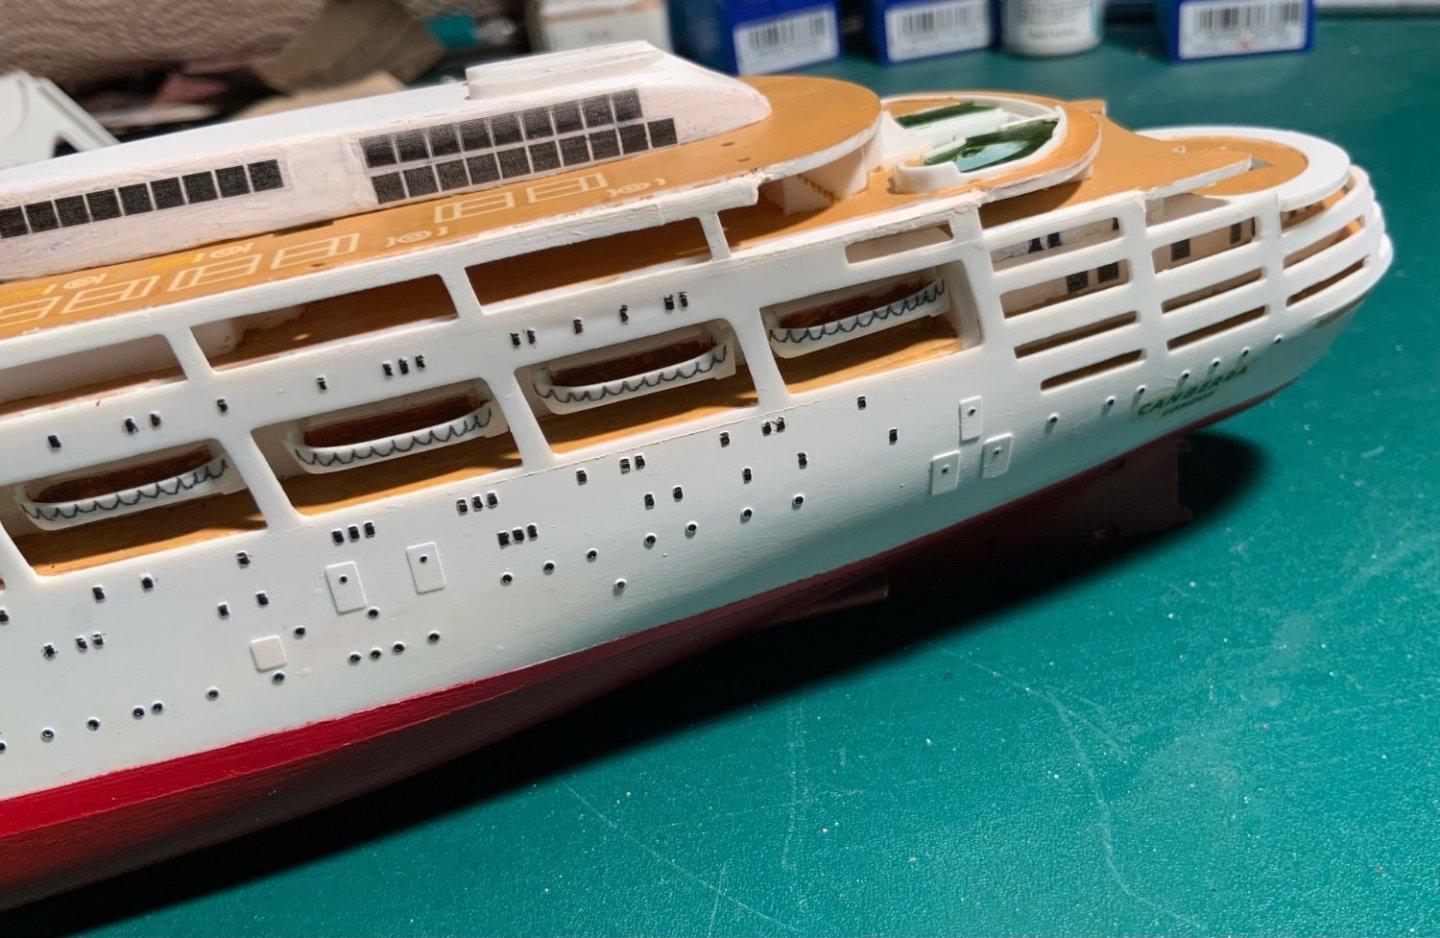
It’s nearly ‘finished’! The funnels, railings, propellor mechanisms and the stabilizers are in place. It’s difficult to understand how the latter could stabilize a big hull but I guess that they did? The mast and foredeck structures remain and then it’s the railings and ariels etc. How to do them, how to fix them and where to fix them, I know not! Help please!! Without railings the aft decks look pretty dangerous!!!


-
I’ve painted the ‘tears’ white but, of course, the white in my paint pot is not the exact white of the hull, and I’ve covered the whole ‘mess’ with matt varnish from a bottle (no spray solvent) and I don’t think that I should mess with it anymore. I won’t respray it - too much of a risk! Now it’s a bit like the English man’s view of the bagpipes - fine when heard/viewed from afar (preferably from Scotland to England) but although I agree about my Canberra, I love the pipes. The next problem is the rigging and radio wires which abound around the bridge. The scale necessitates that they be very fine but more importantly they have to be attached somewhere. The mast attachments should not be too difficult but where/how can they be attached to the bridge structures?
-
Thank you. I did try sanding but the staining seemed to be quite deep and there were too many other structures (windows etc) nearby that were prone to further damage. I did not want to make the mess even worse. When it happened the first time I did sand, repaint white and redo the windows but it was not a great success.
-
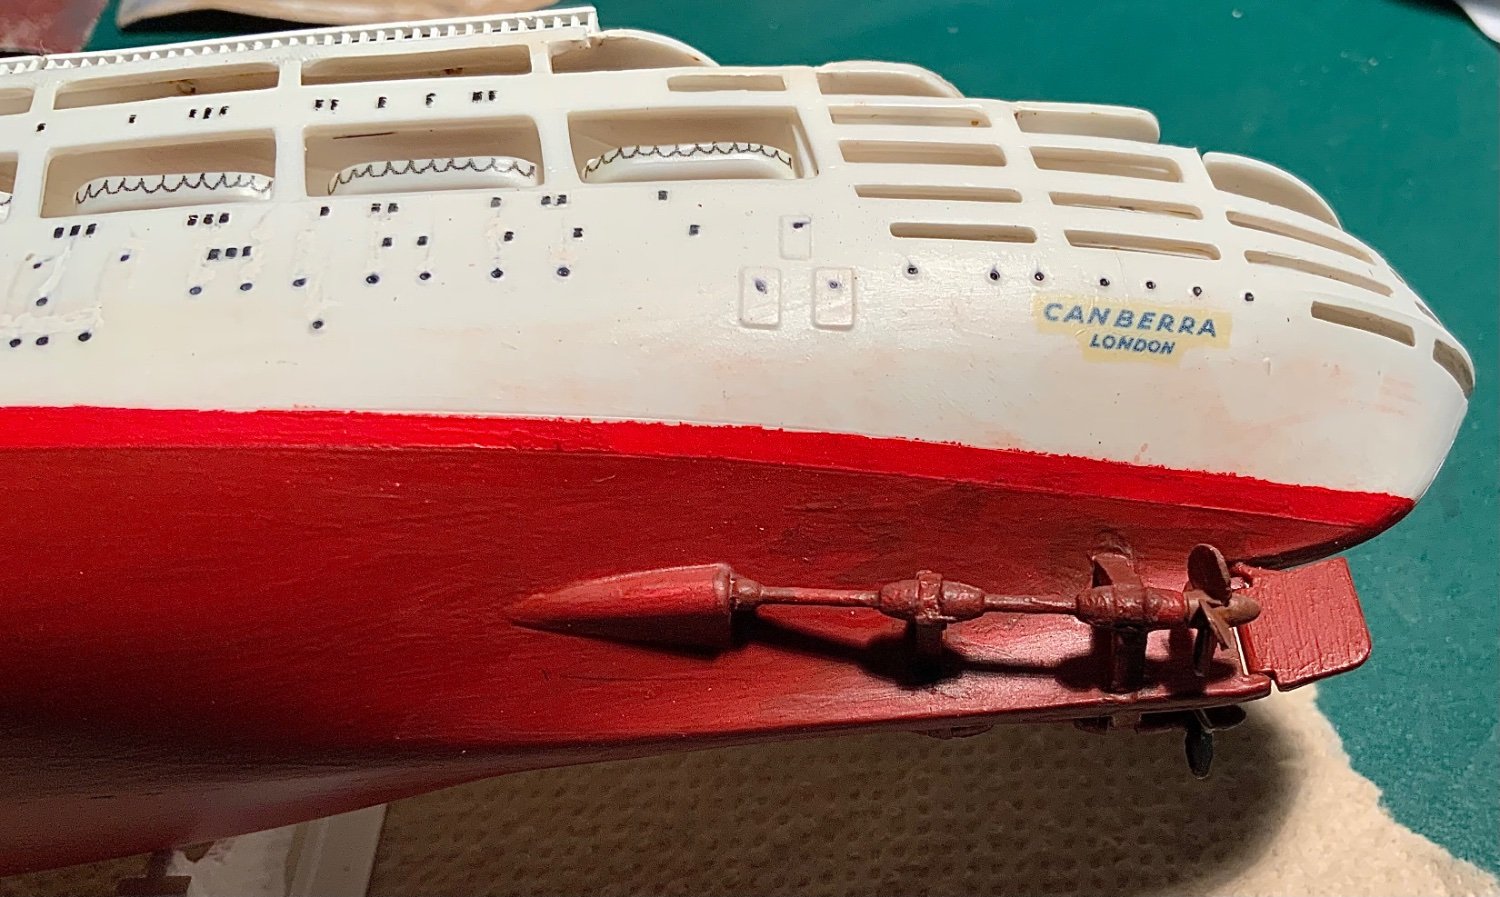
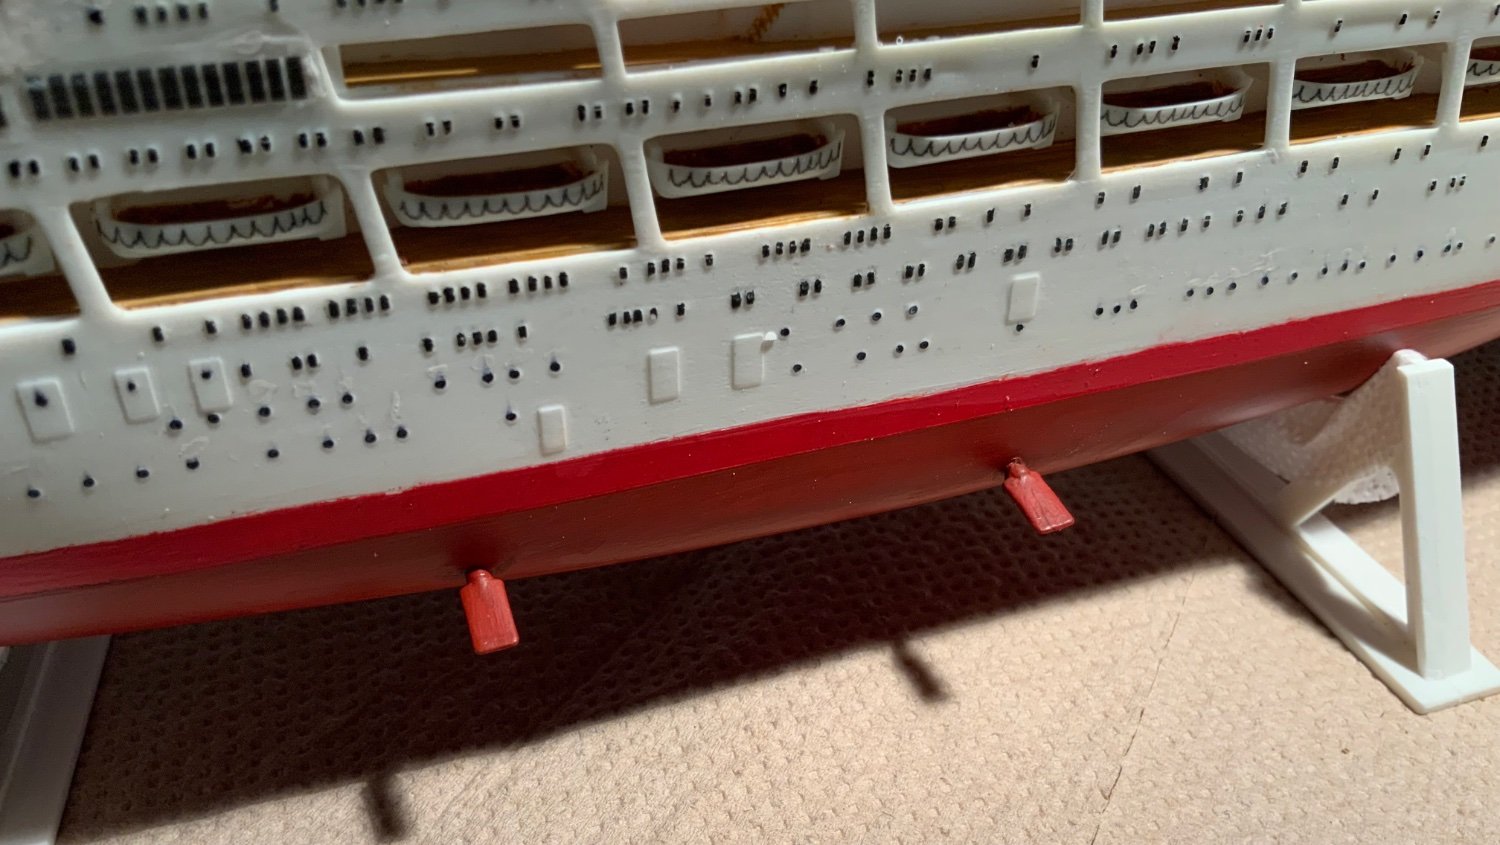
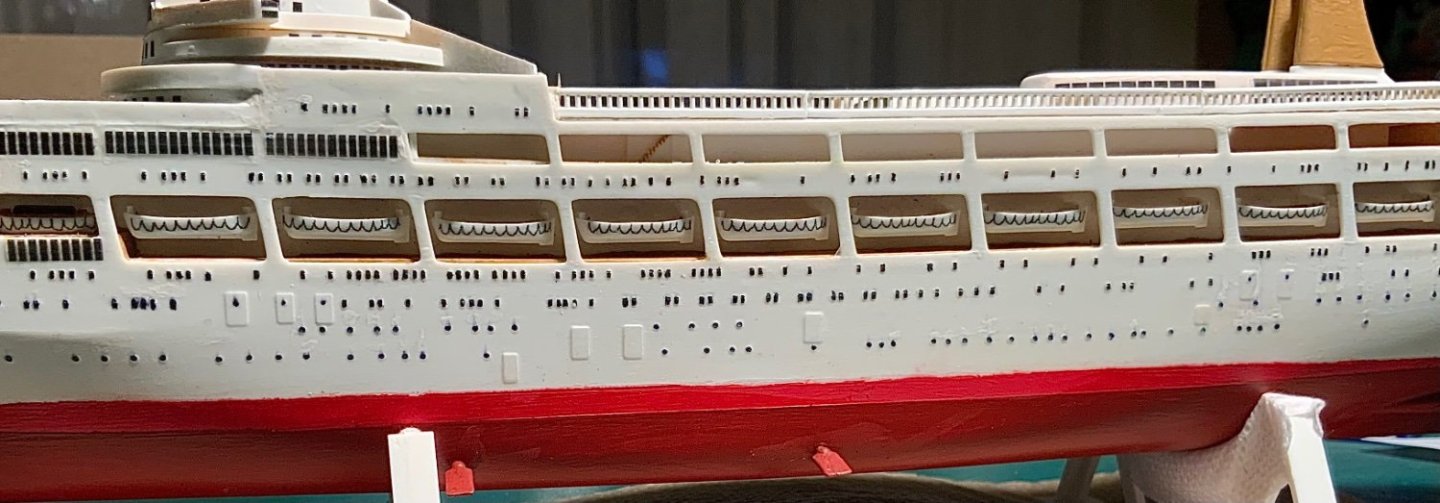
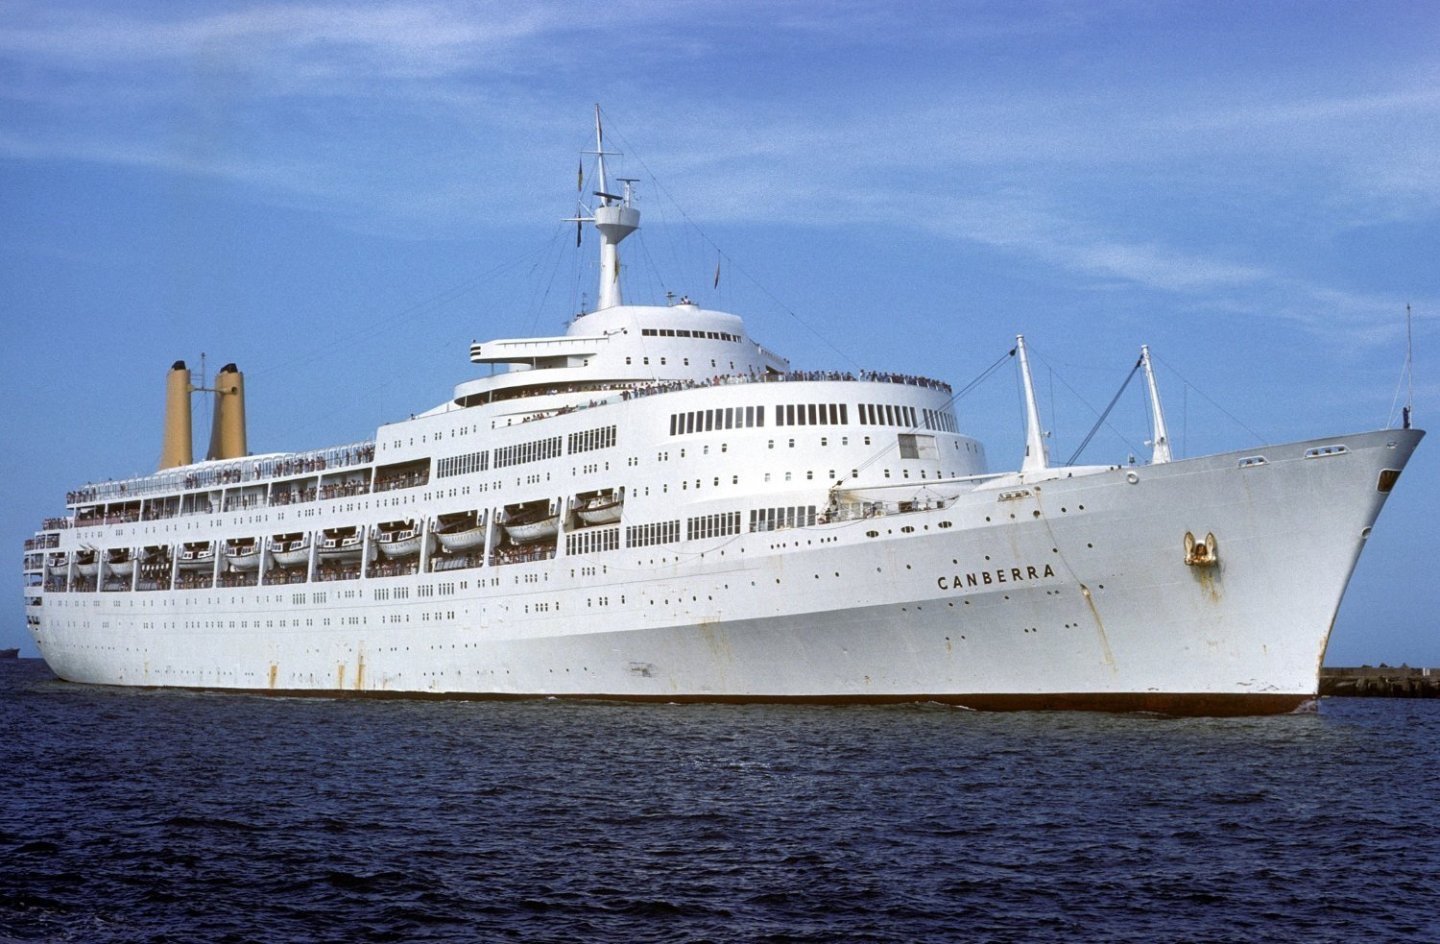
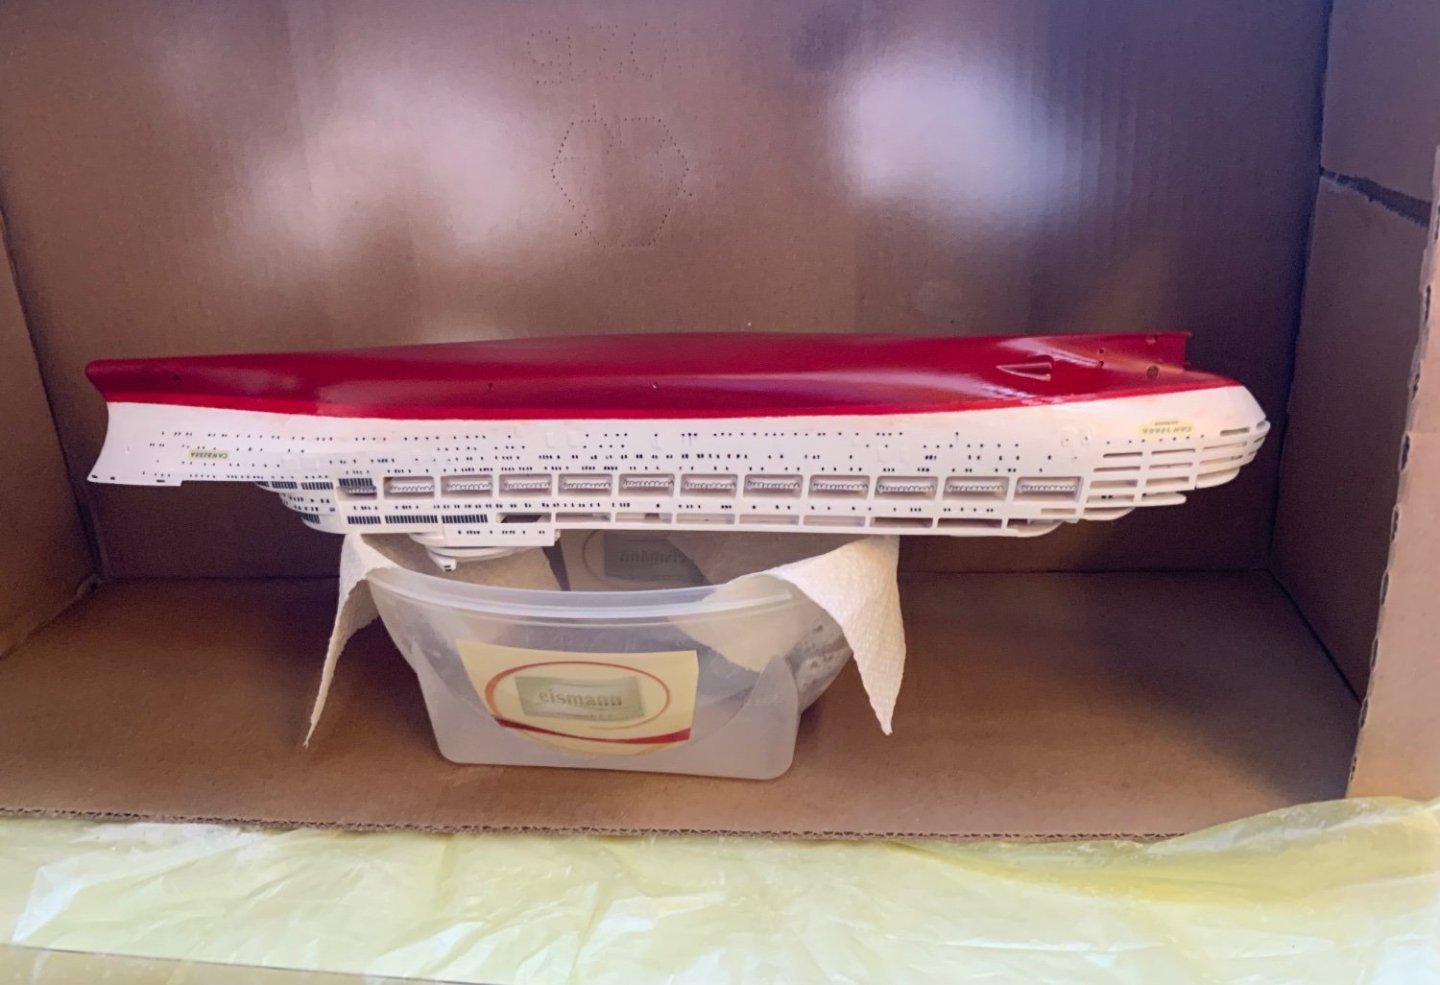
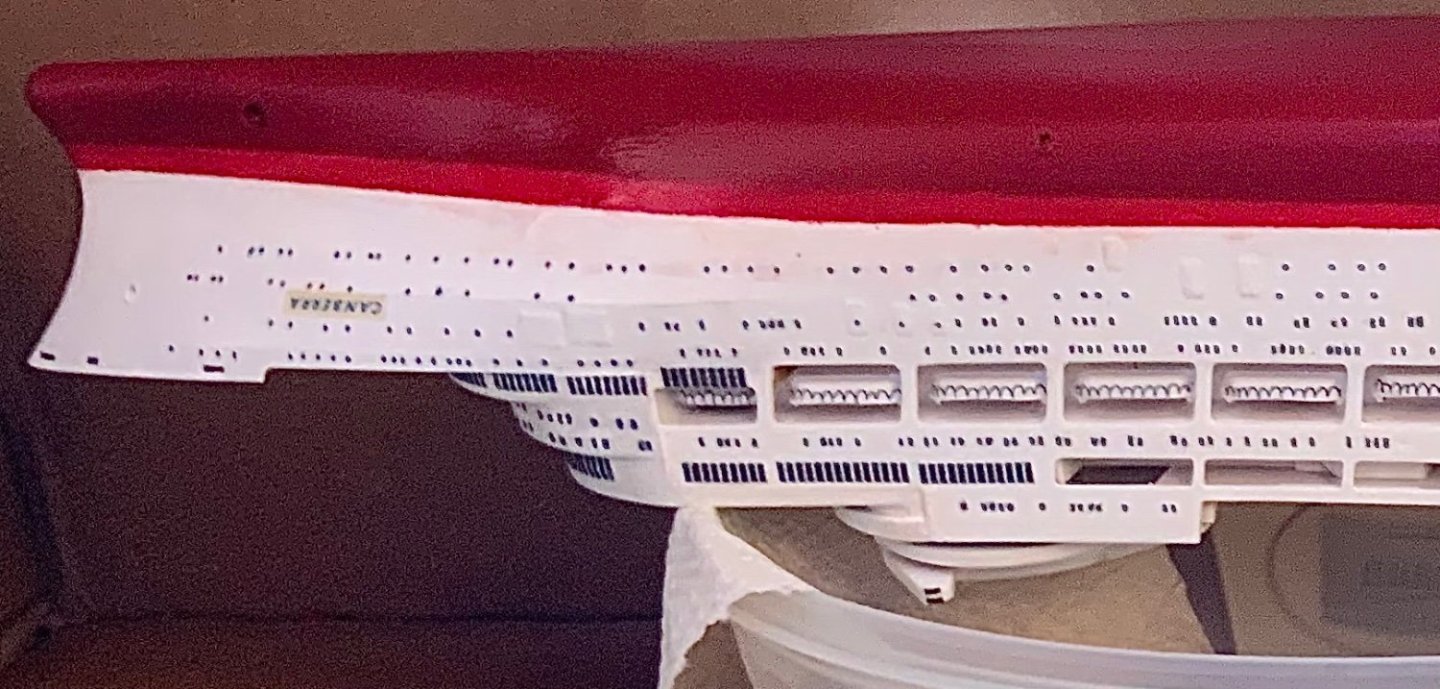
Disaster, disaster, disaster! I went to bed last night very pleased that the spraying of the hull had gone so well. There were no runs and as far as I could see the coating was pretty even. This morning when I checked on the boat, despite protecting them with a brush applied varnish before spraying (I had checked this technique on a piece of sprue with waterproof ink lines, with and without the varnish, and there was no running of the varnished ink) the hull port holes had run much like the bridge problems described earlier. Now I feel like throwing the whole thing into the waste basket - I don’t really know how to resurrect it without it looking a pretty third rate build - it was all going so well! As an occupational therapy project for a 89 year old it is very good because it just keeps going on and on and on! In 1997 the real SS Canberra was scrapped, may be it’s time to scrap this Canberra now?

-
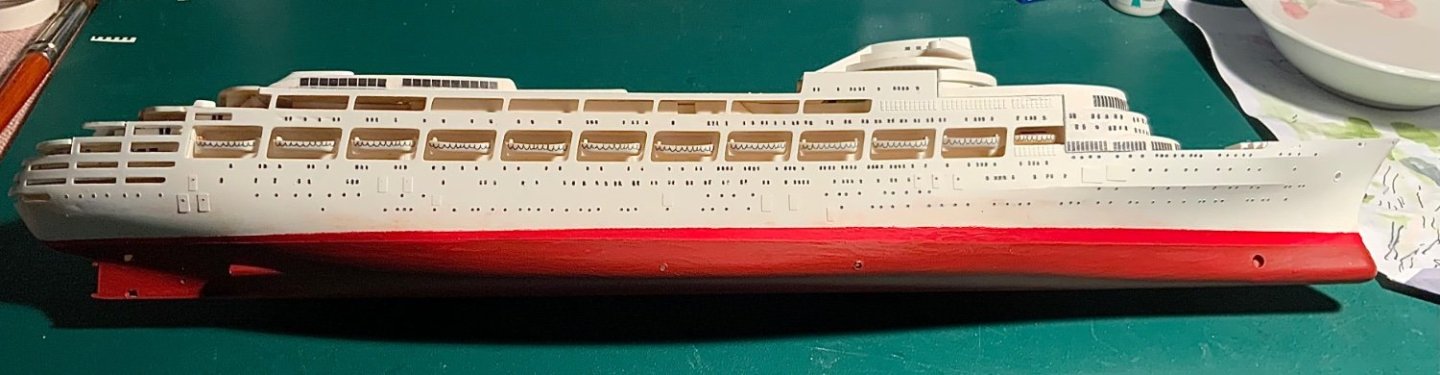
In order to stop myself fiddling more with the fillings I covered them all with three coats of matt varnish. This will help protect the hull from damage during fitting of mast, funnels etc.

-
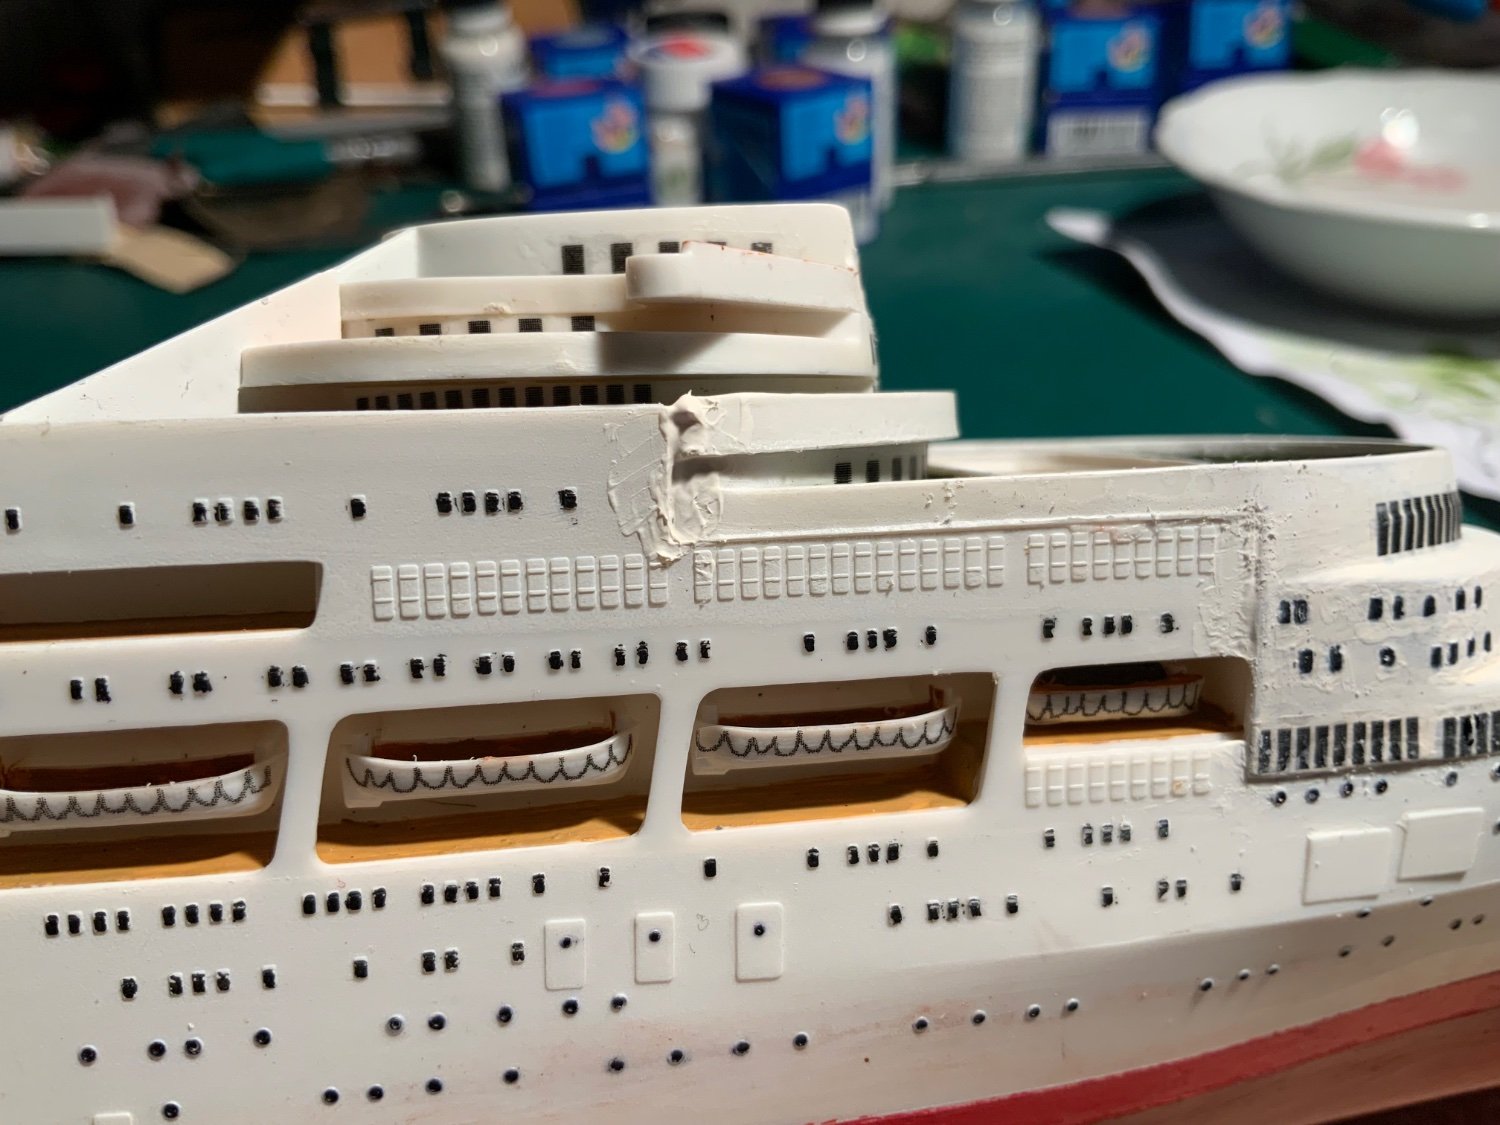
I tried to sand, cut and smooth but the filling did not look too good. I tried again and it looks a little better but I don’t think that at this stage I will get the fills any better. In retrospect I should have filled before attaching windows etc and the I could have had free access to the joins and maybe I should have made my own putty! I give up!


-
I did, in fact, apply several layers, the problem was when trying to shape the finished fill, the filler was elastic and did not sandpaper (wet and dry) very well thus precluding the ability to smooth out the surfaces. I applied more than needed in the end in order to be able to cut it back smoothly but this did not work either! I did try smoothing it out with water but it ‘set’ too quickly to get a good finish.
-
It is now 24hr. Since I tried to use the filler! The filler is not hard and ‘workable’ but rather elastic! It is not easy to tidy up and does not sand well. Maybe I’m not using it correctly or possibly it was an old bottle. I’d have been better using a wood or a fine plaster filler and then varnishing it I think! C’est la vie and I’m not undoing it now.


-
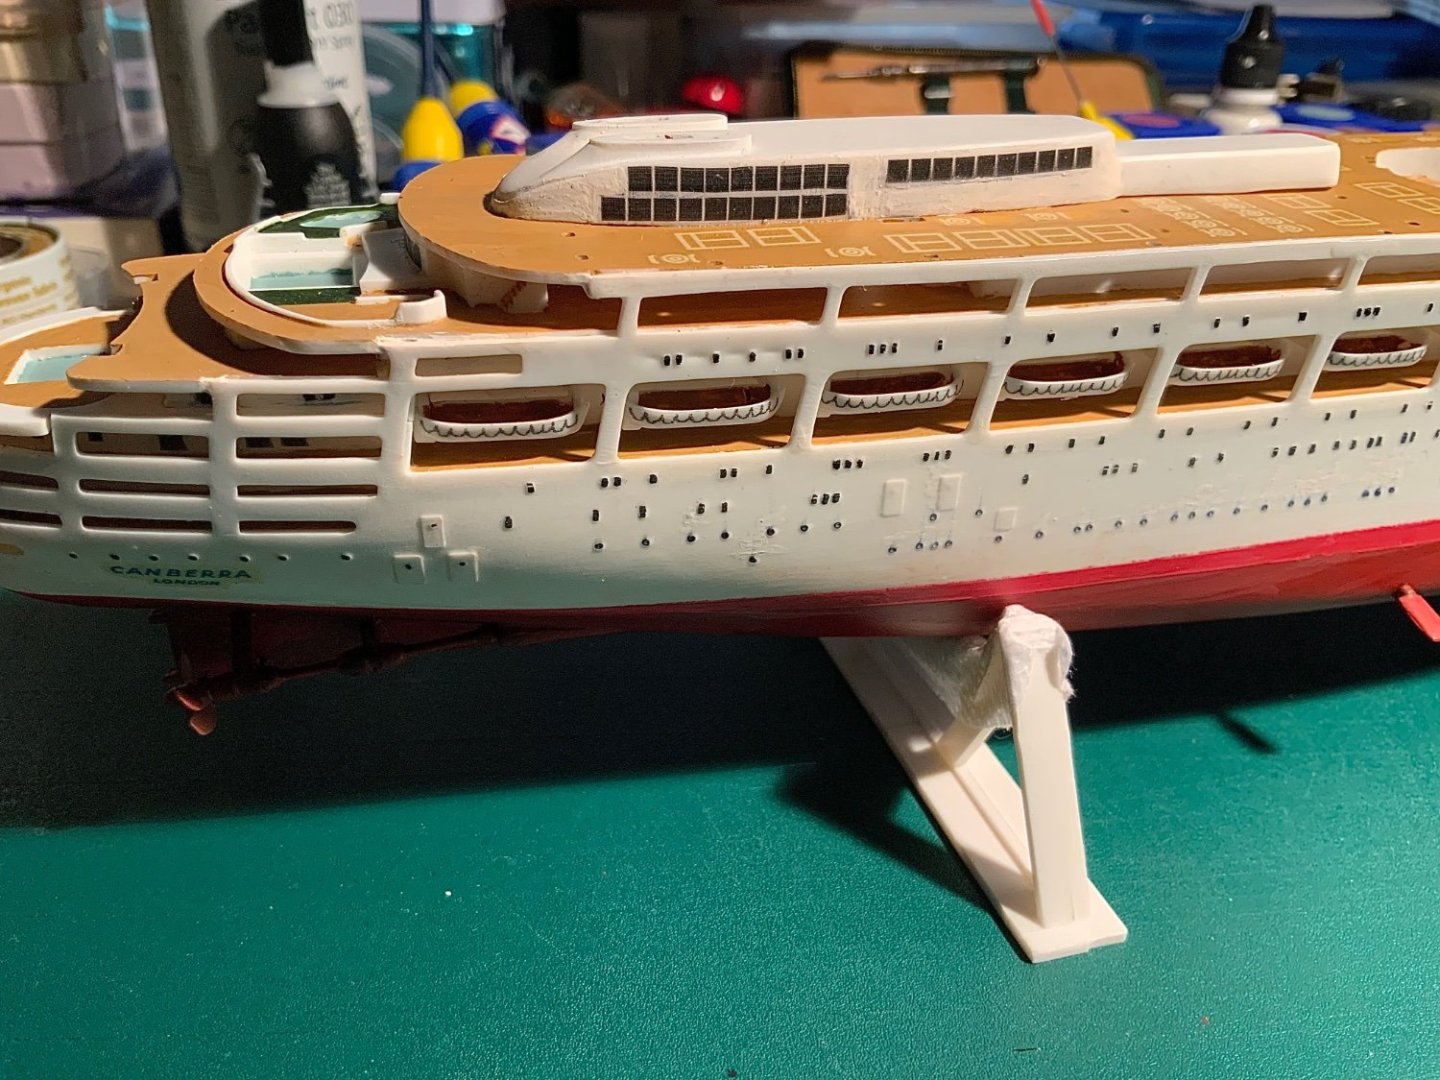
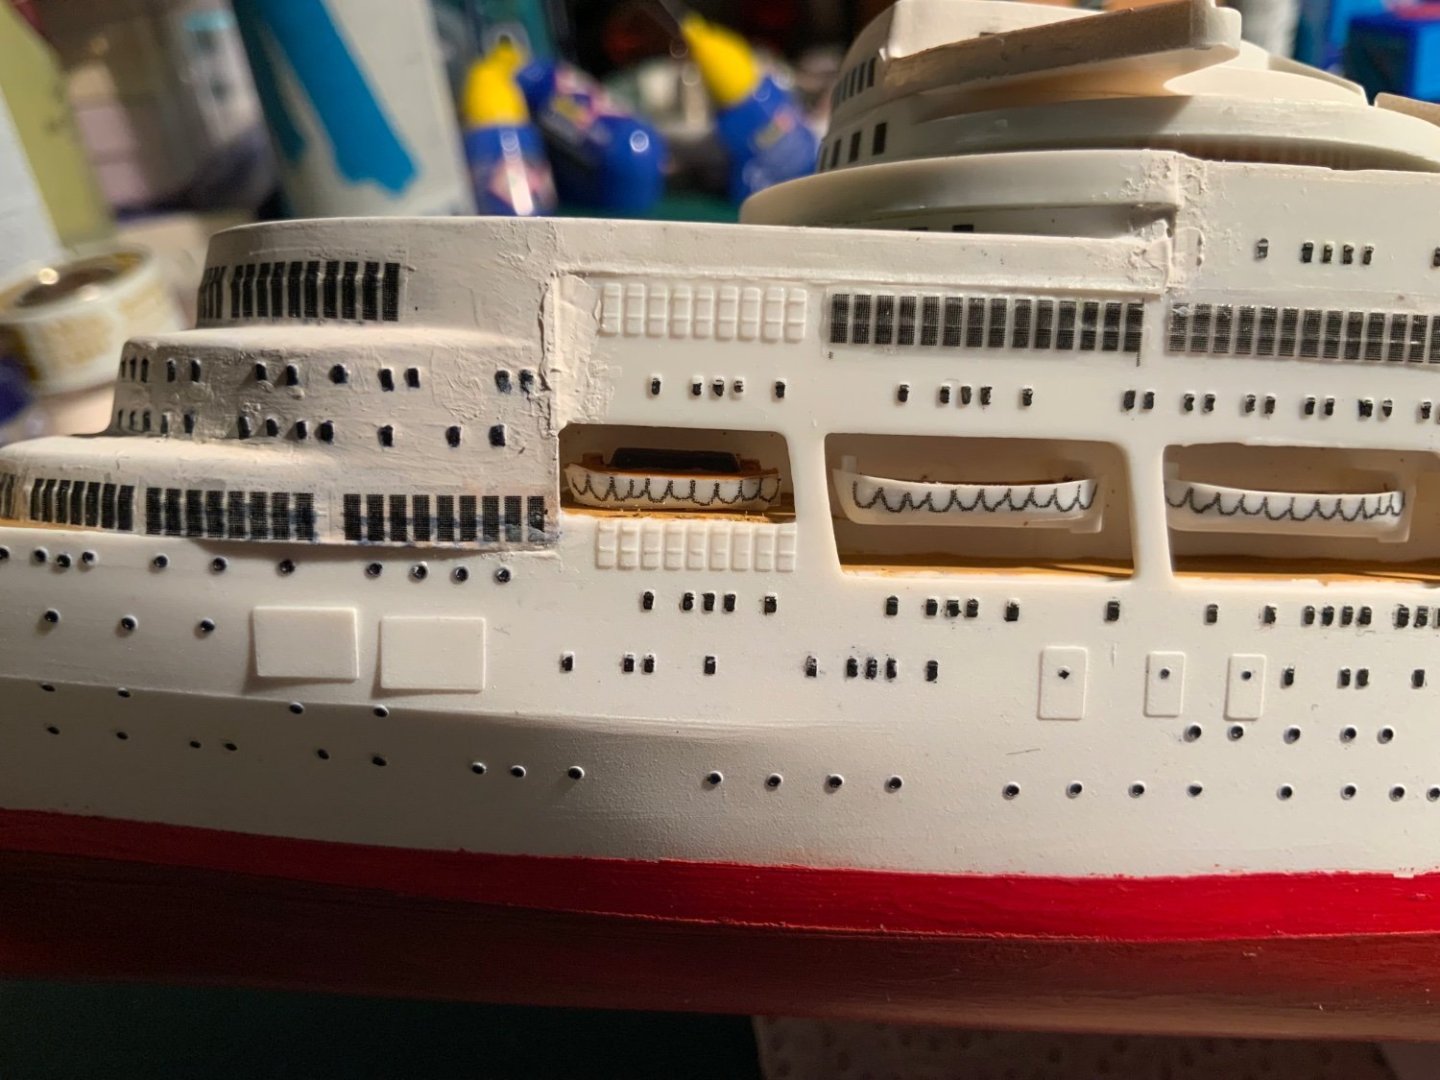
The ‘filler’ arrived today and I tried to fill the cracks! I did not find it easy to work with. Firstly it was very reluctant to come out of the bottle, it needed a big squeeze which was difficult to control. It was rather granular and dried so quickly that it was difficult to get a good finish! The gaps are in areas already painted and with windows sot sandpapering now will ruin other work. I guess again this is my inexperience - I should have filled the gaps first before applying the windows but it was easier to paint and apply windows to the individual parts before assembly. The instructions do say paint before glue - they don’t mention filler!!! I’ll learn in time, maybe? These are the gaps at present.
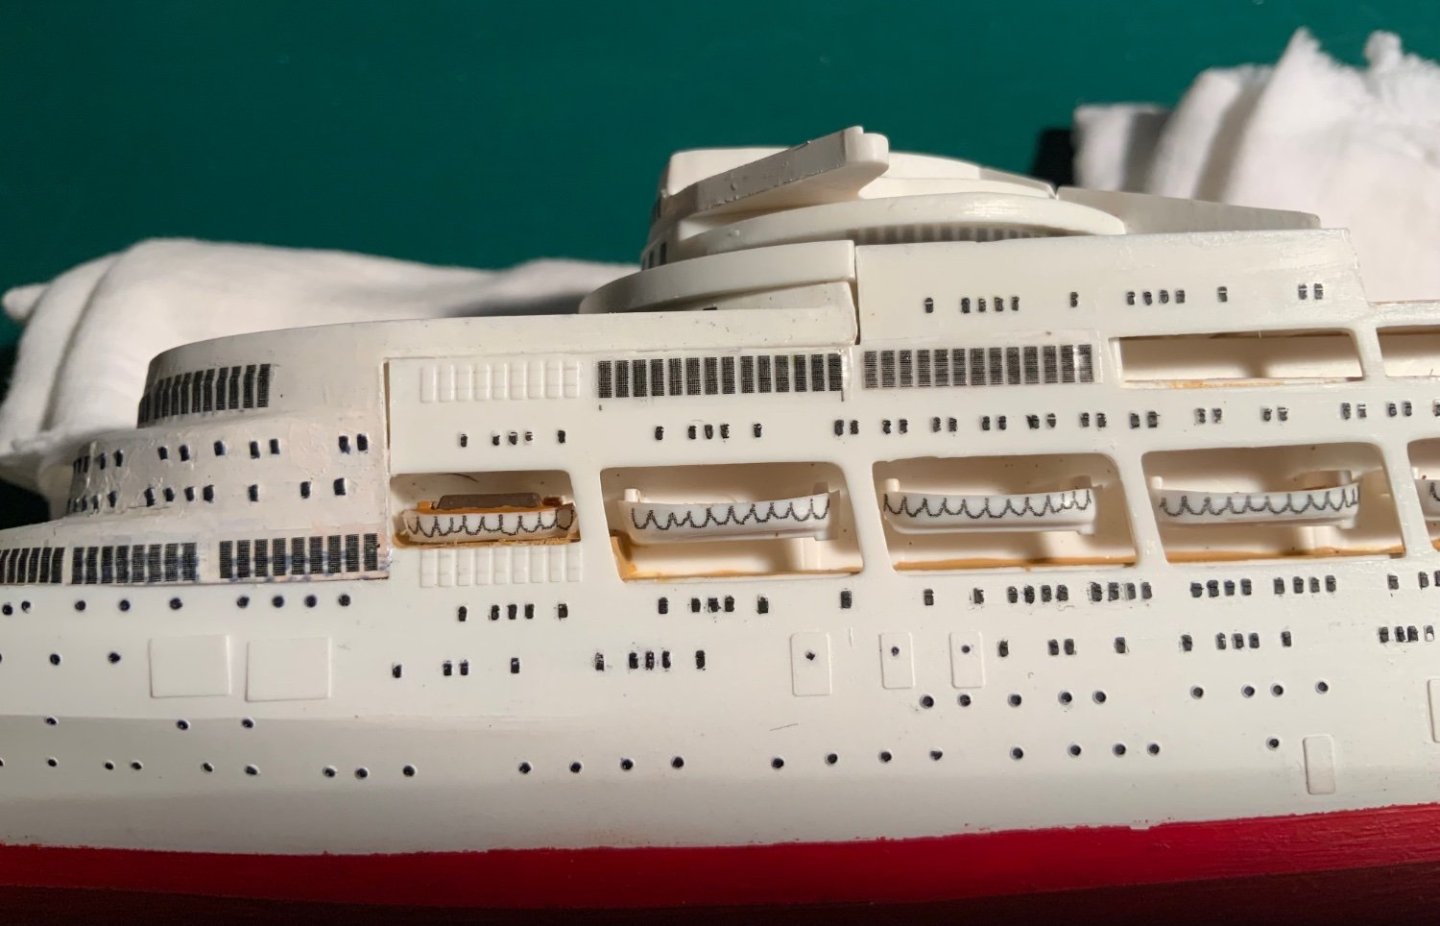

-
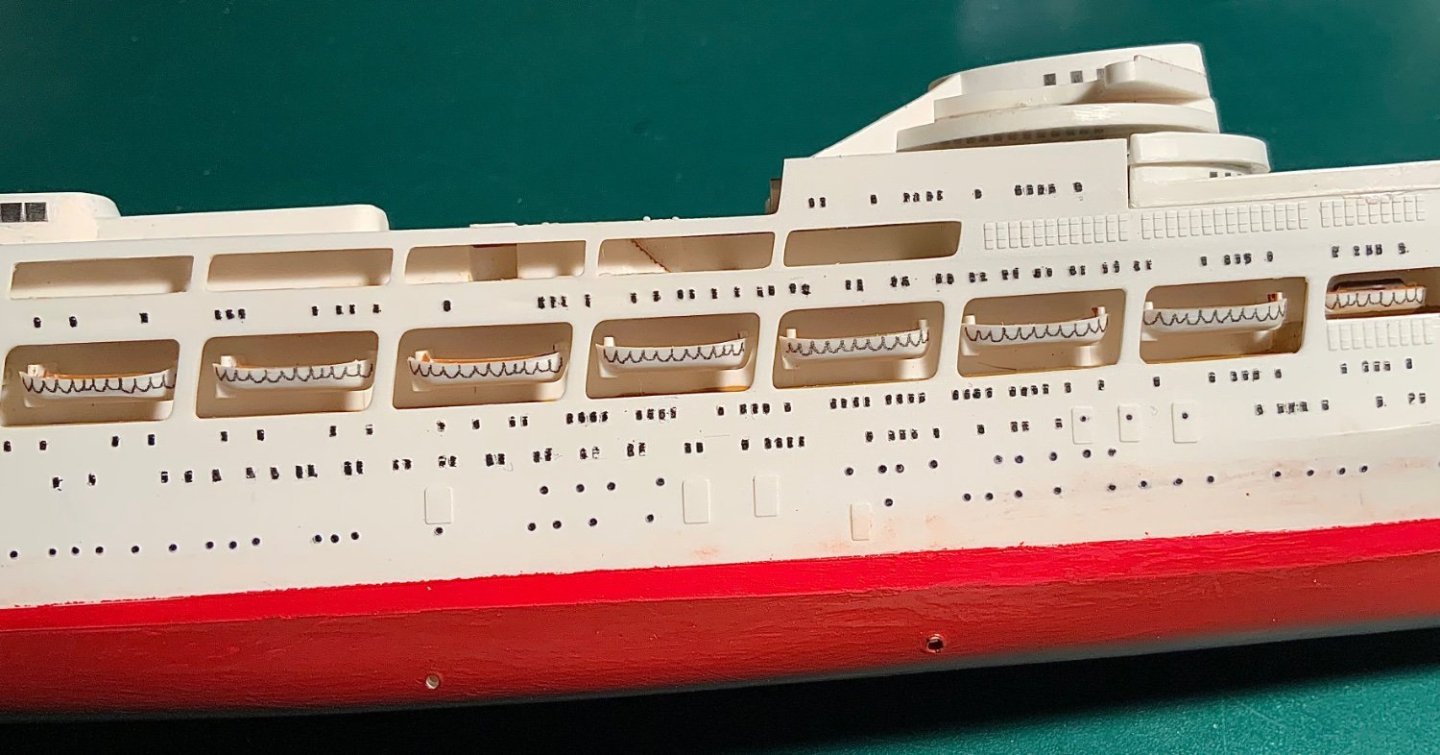
No further ideas with regard to the railings, but am pretty pleased with the lifeboat ‘grab ropes’. .
-
The actual rails needed are about 3mm. high so I doubt that I have the skills to solder and make a rail with 4 transverse wires and hundreds of vertical supports.
-
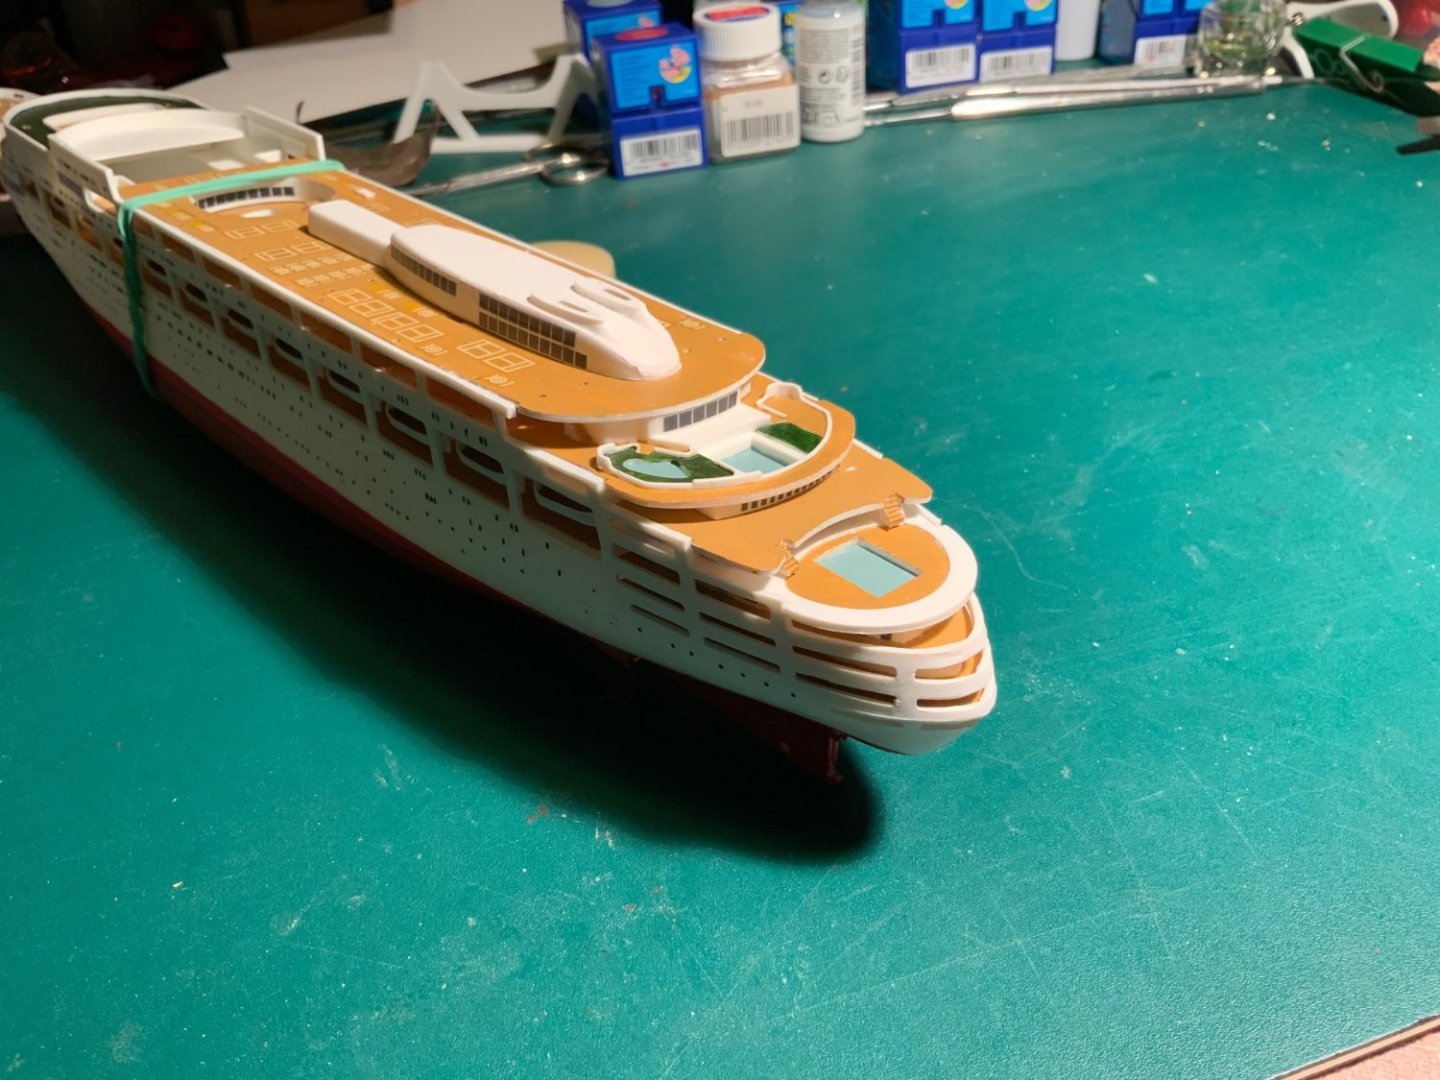
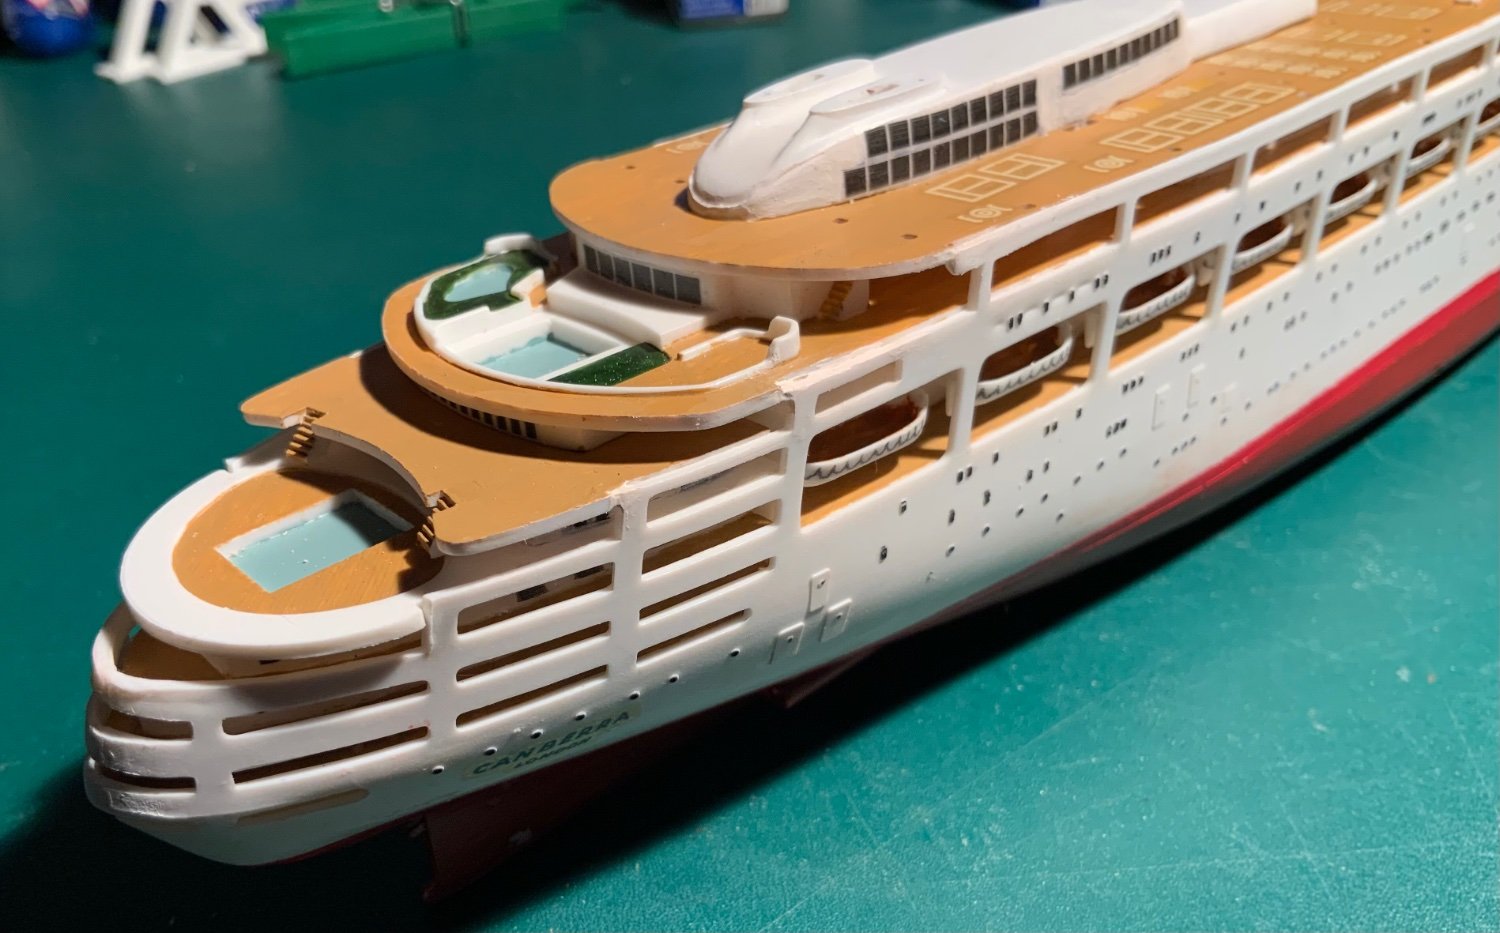
The decks are in properly lined up. The bridge structure is in place. Now the problem is what to do about the missing guard rails. I don’t understand why Airfix left them out of the kit in the first place? I can’t think of any possible way for me to fabricate them out of household bits and pieces. I know there are sheets of printed liner railings available but they don’t seem to be available here. The scale of boats here seems to be mainly 1/700 also, so accessories available are the wrong size. Importing from US or UK, for me at least, seems to be difficult and not without its problems so that I only buy items from within the EU now since Brexit! I’ll have to work on this more - any suggestions would be appreciated.