Maciek
-
Posts
20 -
Joined
-
Last visited
-
 Maciek reacted to a post in a topic:
USF Confederacy 1778 by WalrusGuy - Model Shipways - 1:64
Maciek reacted to a post in a topic:
USF Confederacy 1778 by WalrusGuy - Model Shipways - 1:64
-
Maciek reacted to a post in a topic:
USF Confederacy 1778 by WalrusGuy - Model Shipways - 1:64
-
 Maciek reacted to a post in a topic:
HMS Sphinx 1775 by Ronald-V - Vanguard Models - 1:64
Maciek reacted to a post in a topic:
HMS Sphinx 1775 by Ronald-V - Vanguard Models - 1:64
-
 Maciek reacted to a post in a topic:
HMB Endeavour by Maciek - Caldercraft - 1/64
Maciek reacted to a post in a topic:
HMB Endeavour by Maciek - Caldercraft - 1/64
-
whitejamest reacted to a post in a topic:
HMB Endeavour by Maciek - Caldercraft - 1/64
-
DavidG reacted to a post in a topic:
HMB Endeavour by Maciek - Caldercraft - 1/64
-
Ronald-V reacted to a post in a topic:
HMB Endeavour by Maciek - Caldercraft - 1/64
-
Ronald-V reacted to a post in a topic:
HMB Endeavour by Maciek - Caldercraft - 1/64
-
Russ2025 reacted to a post in a topic:
HMB Endeavour by Maciek - Caldercraft - 1/64
-
Dziadeczek reacted to a post in a topic:
HMB Endeavour by Maciek - Caldercraft - 1/64
-
ccoyle reacted to a post in a topic:
HMB Endeavour by Maciek - Caldercraft - 1/64
-
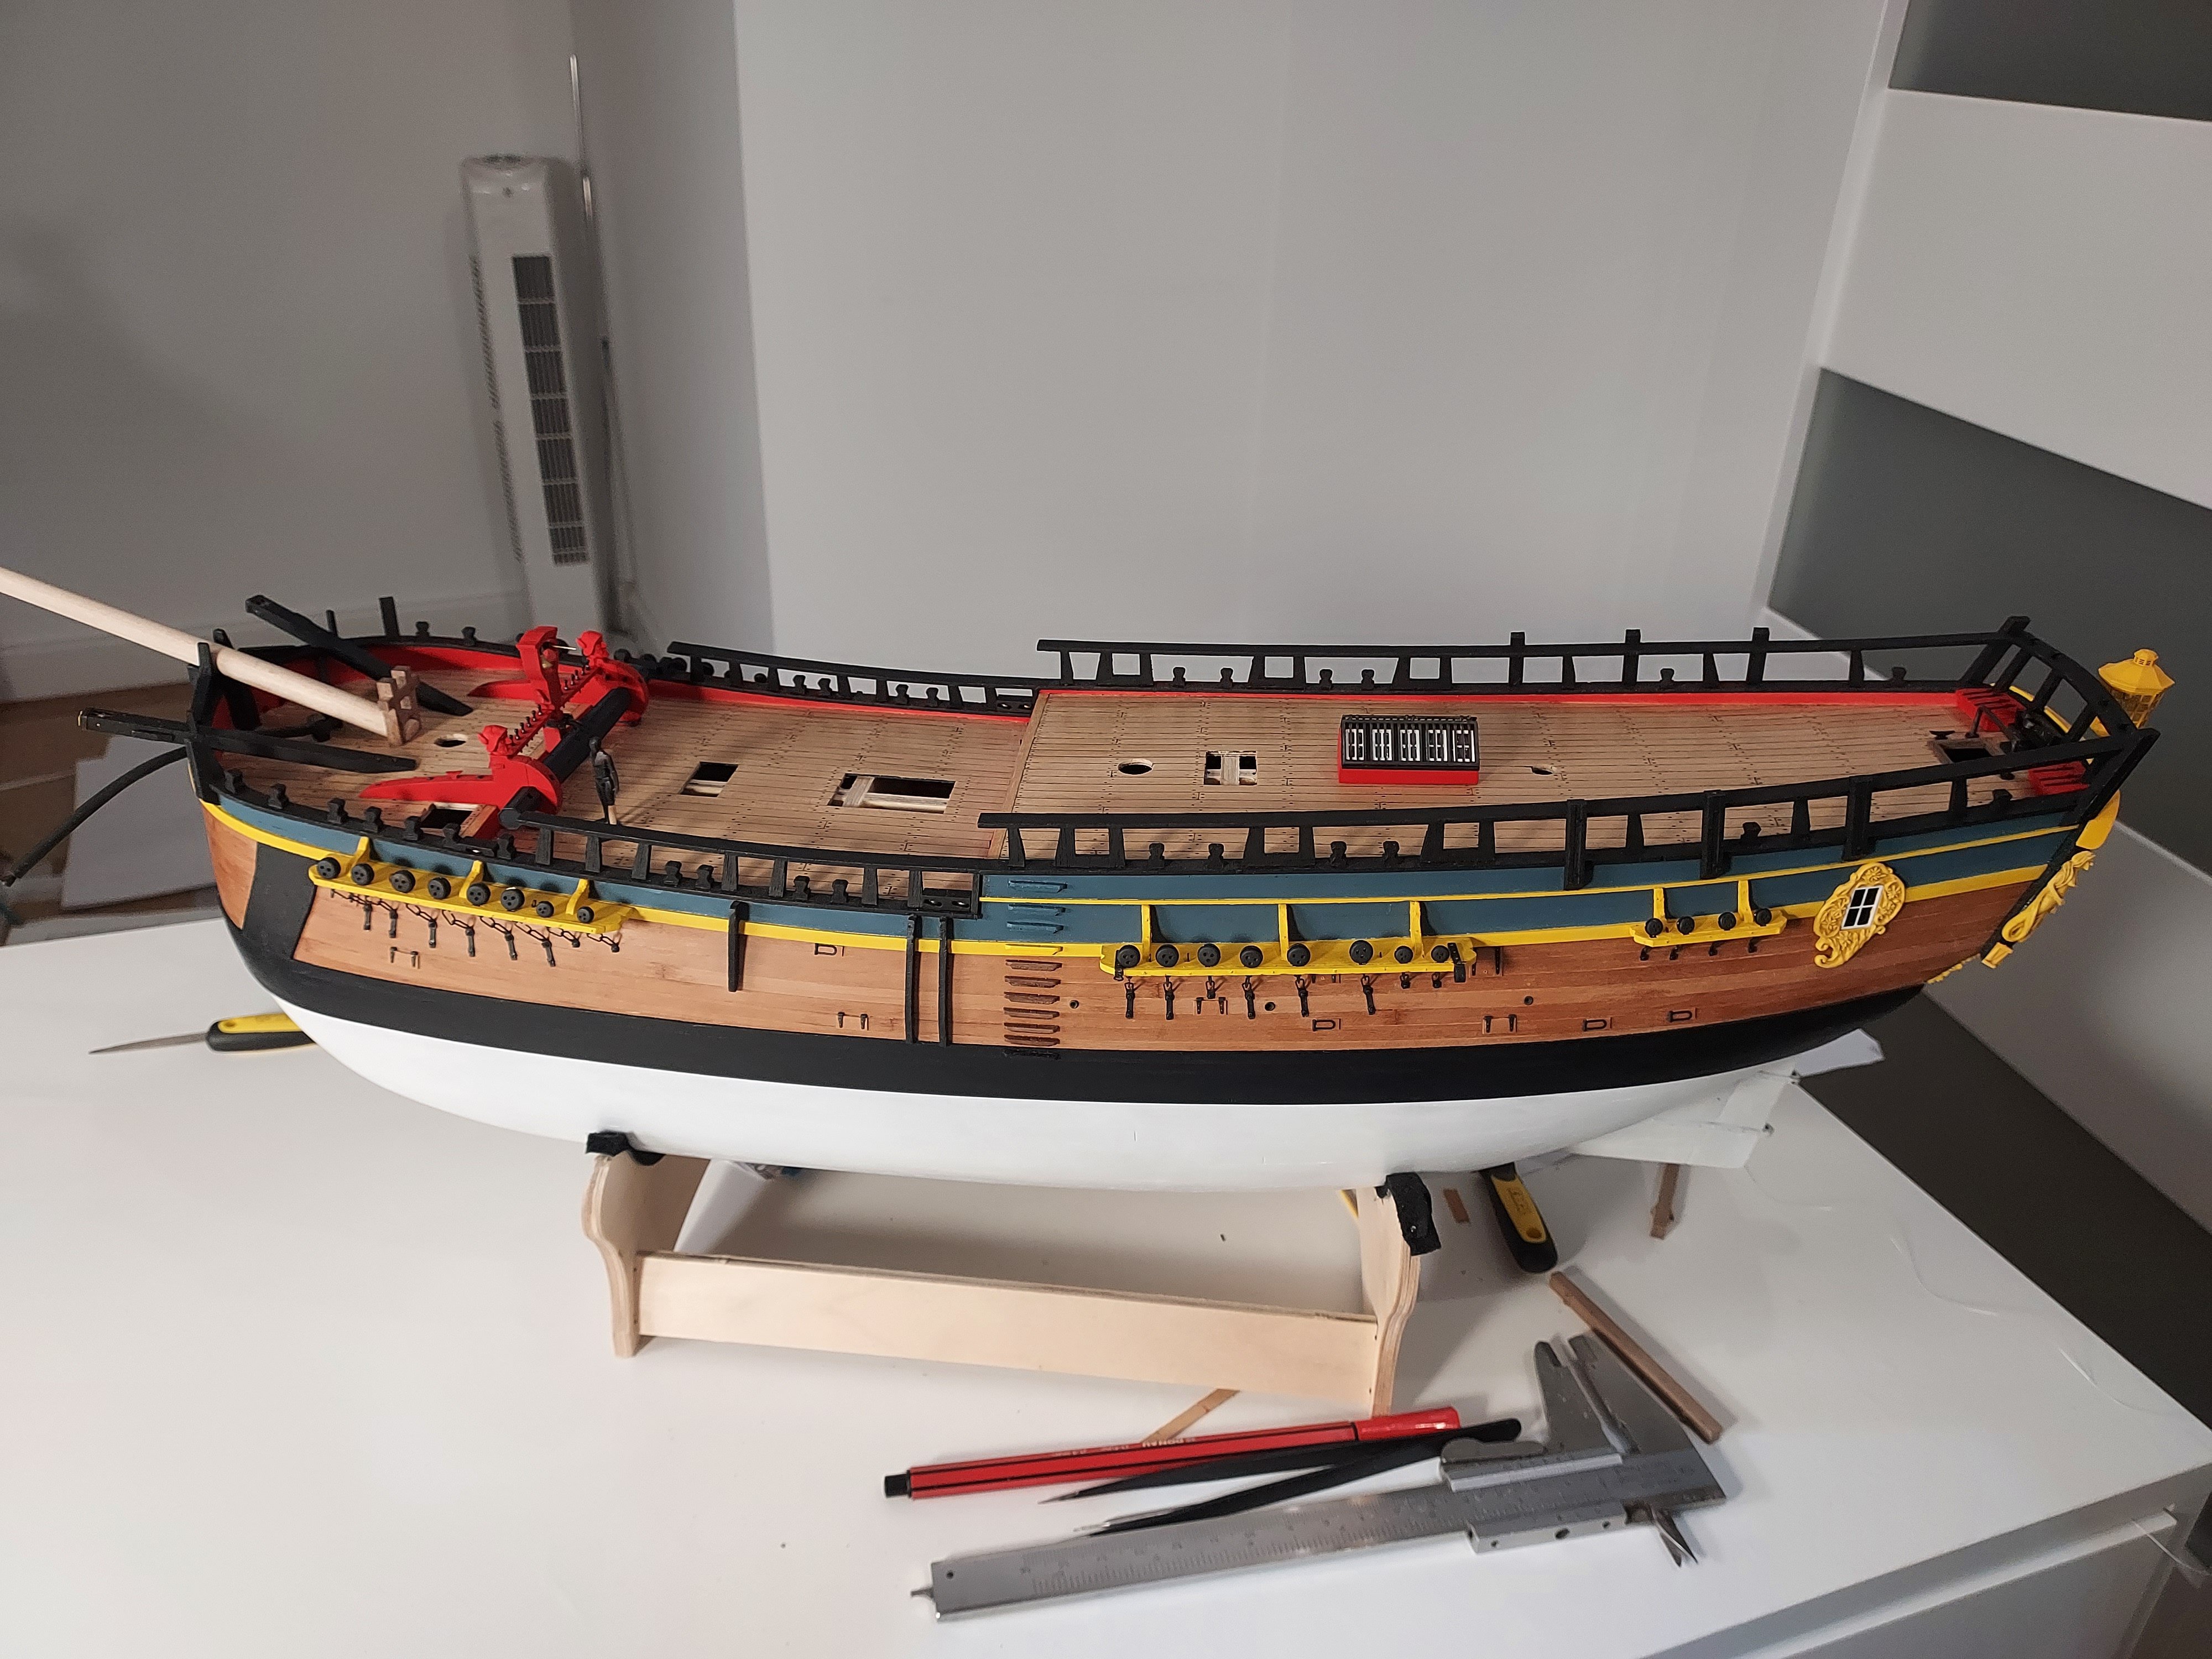
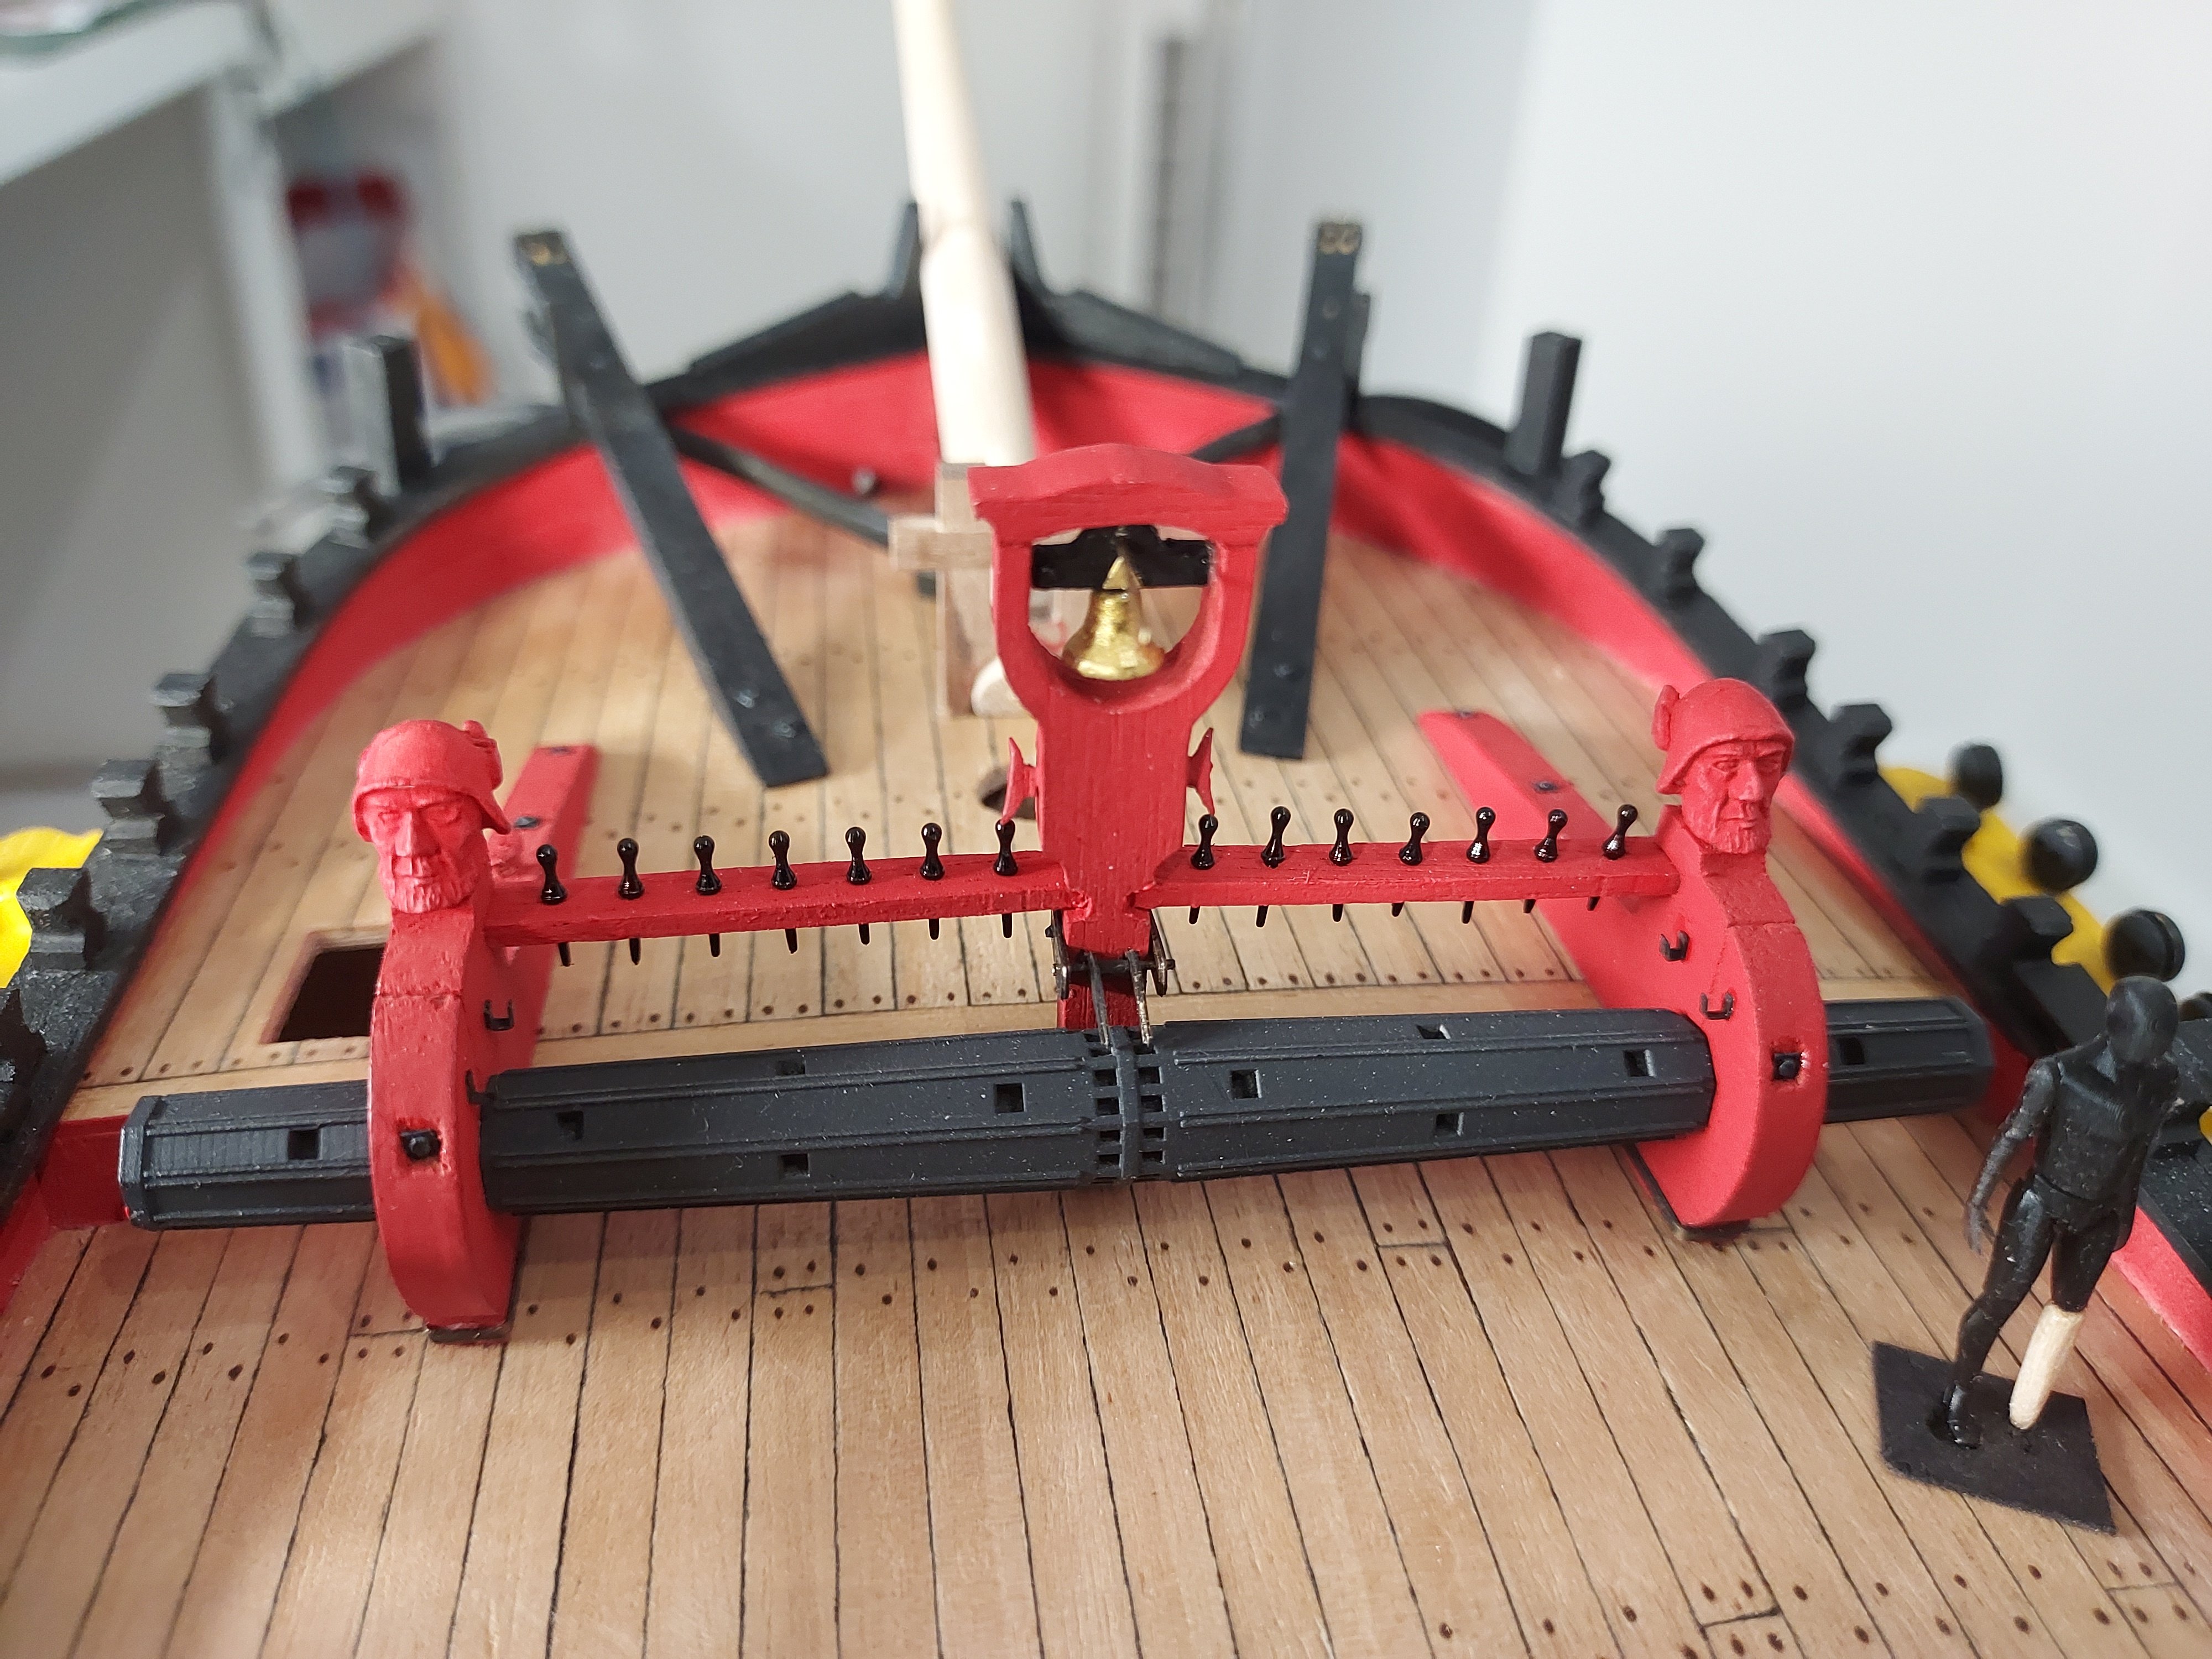
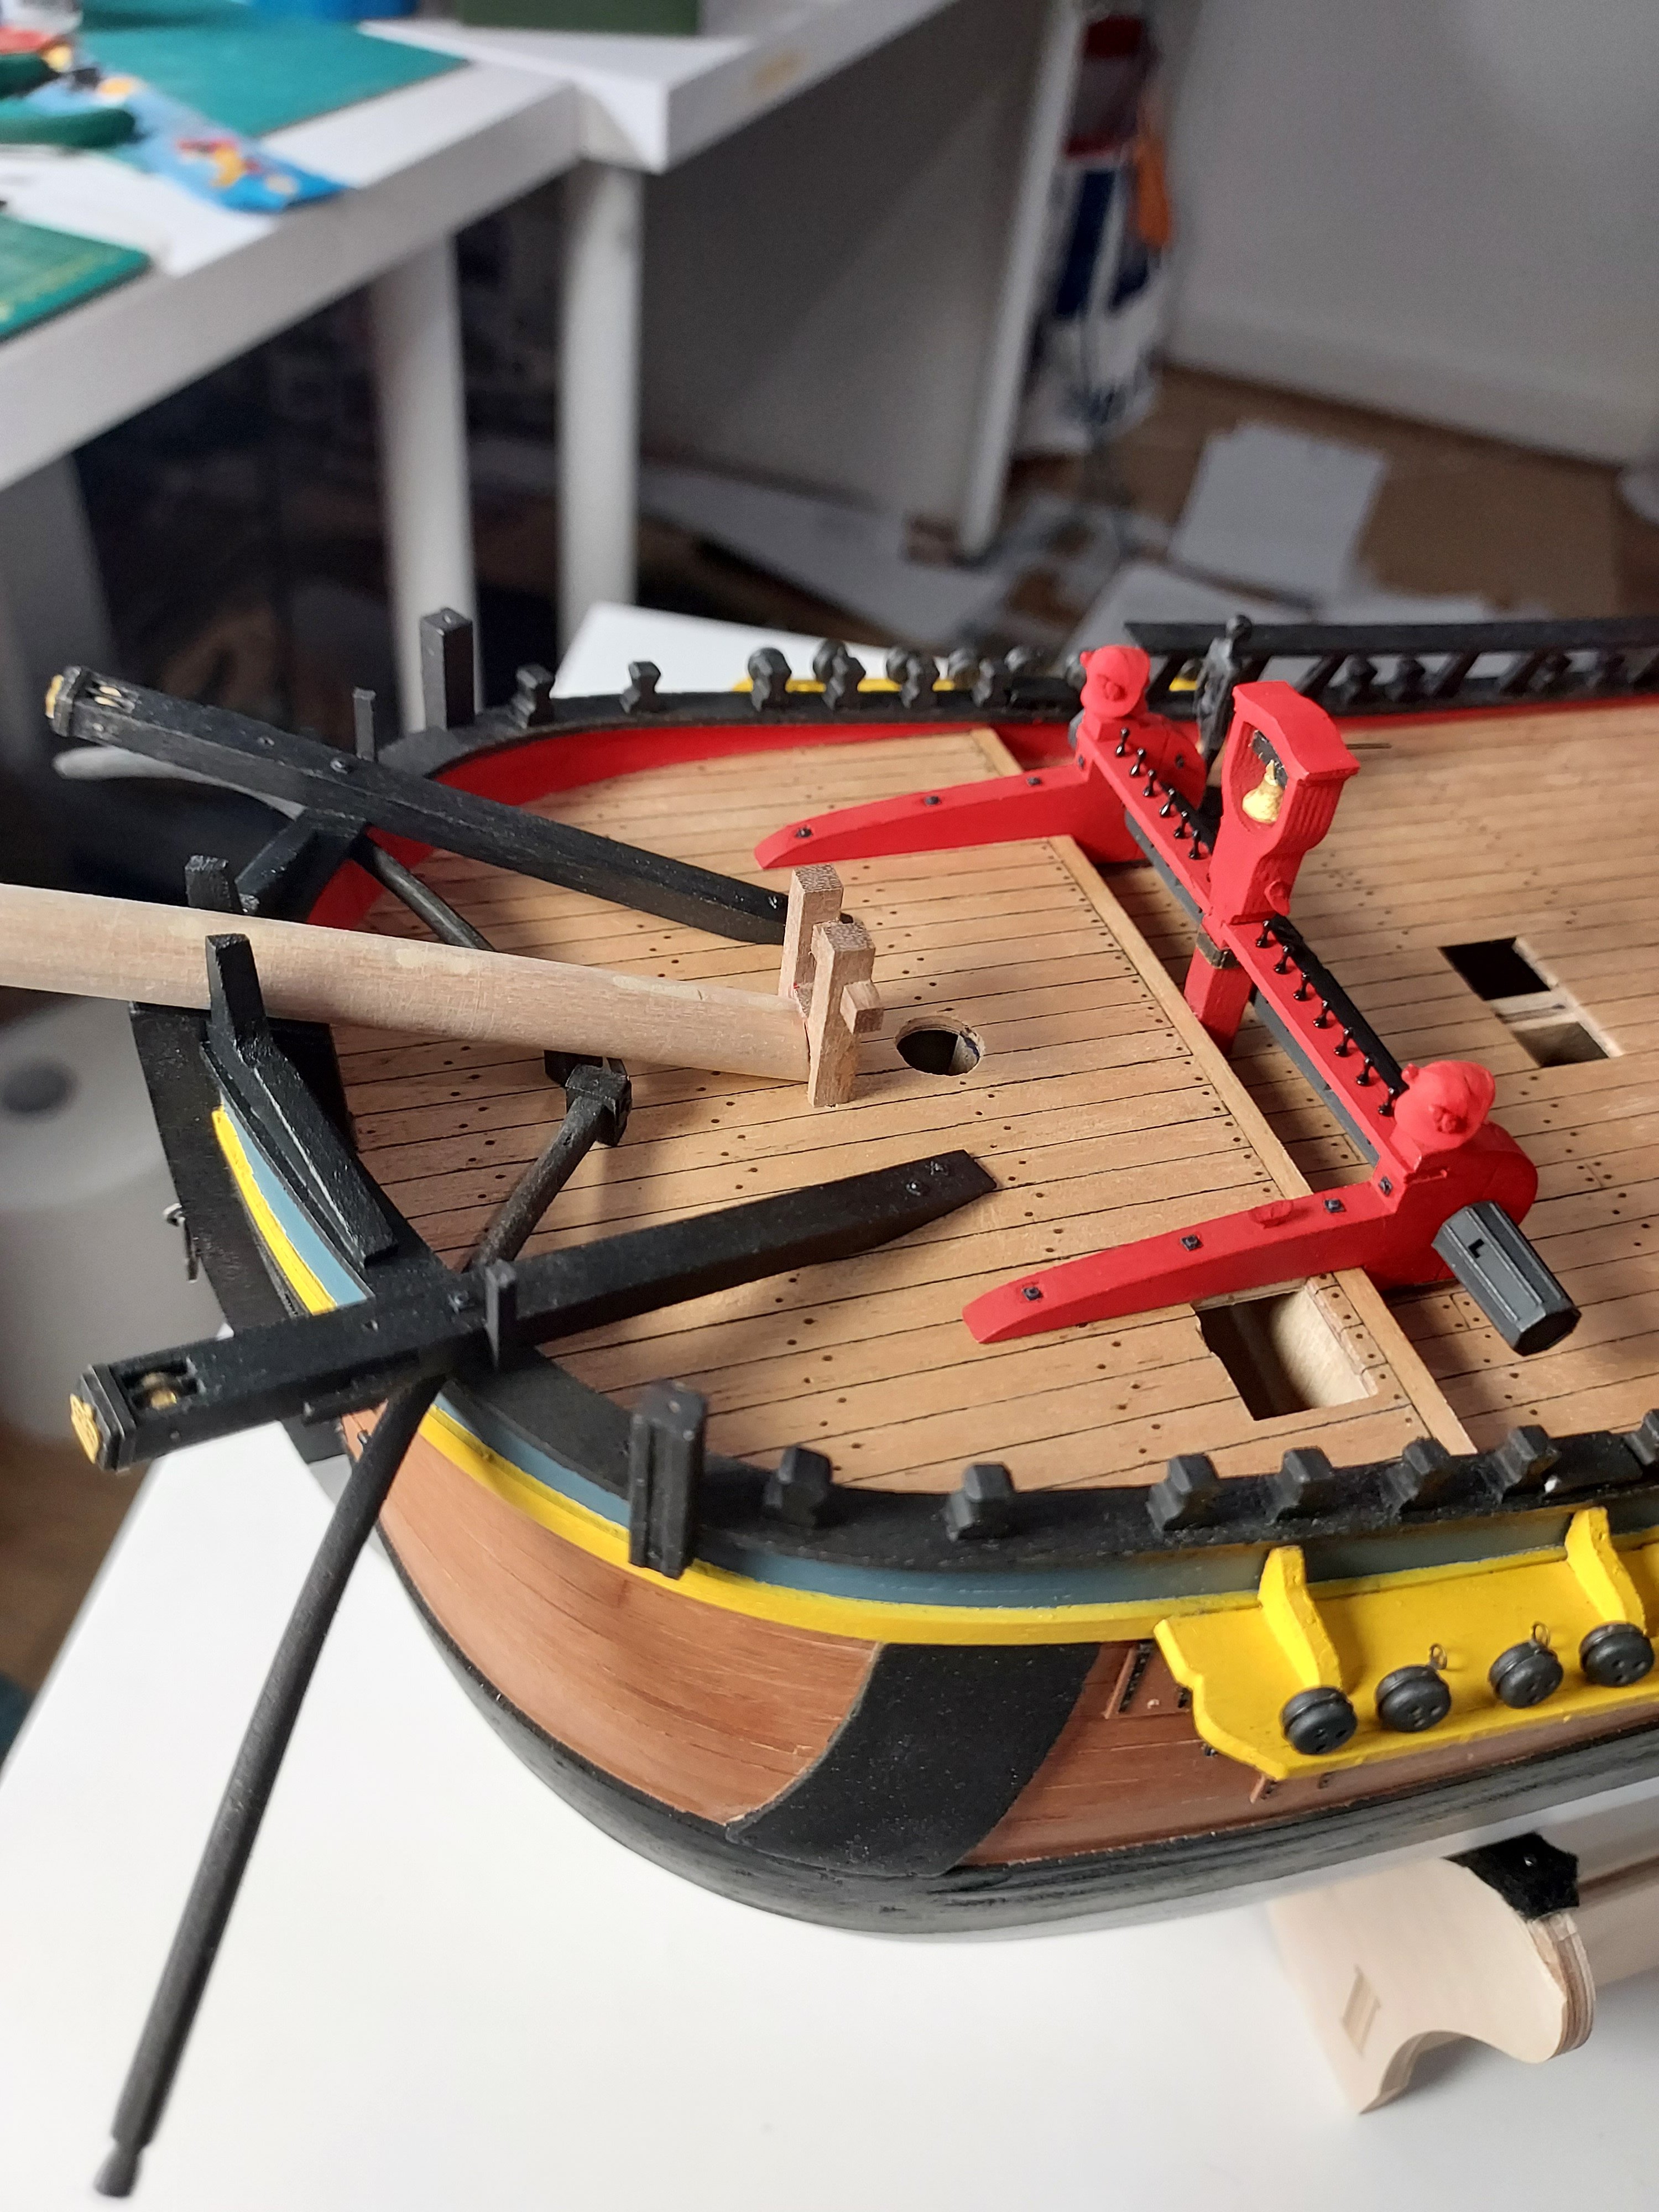
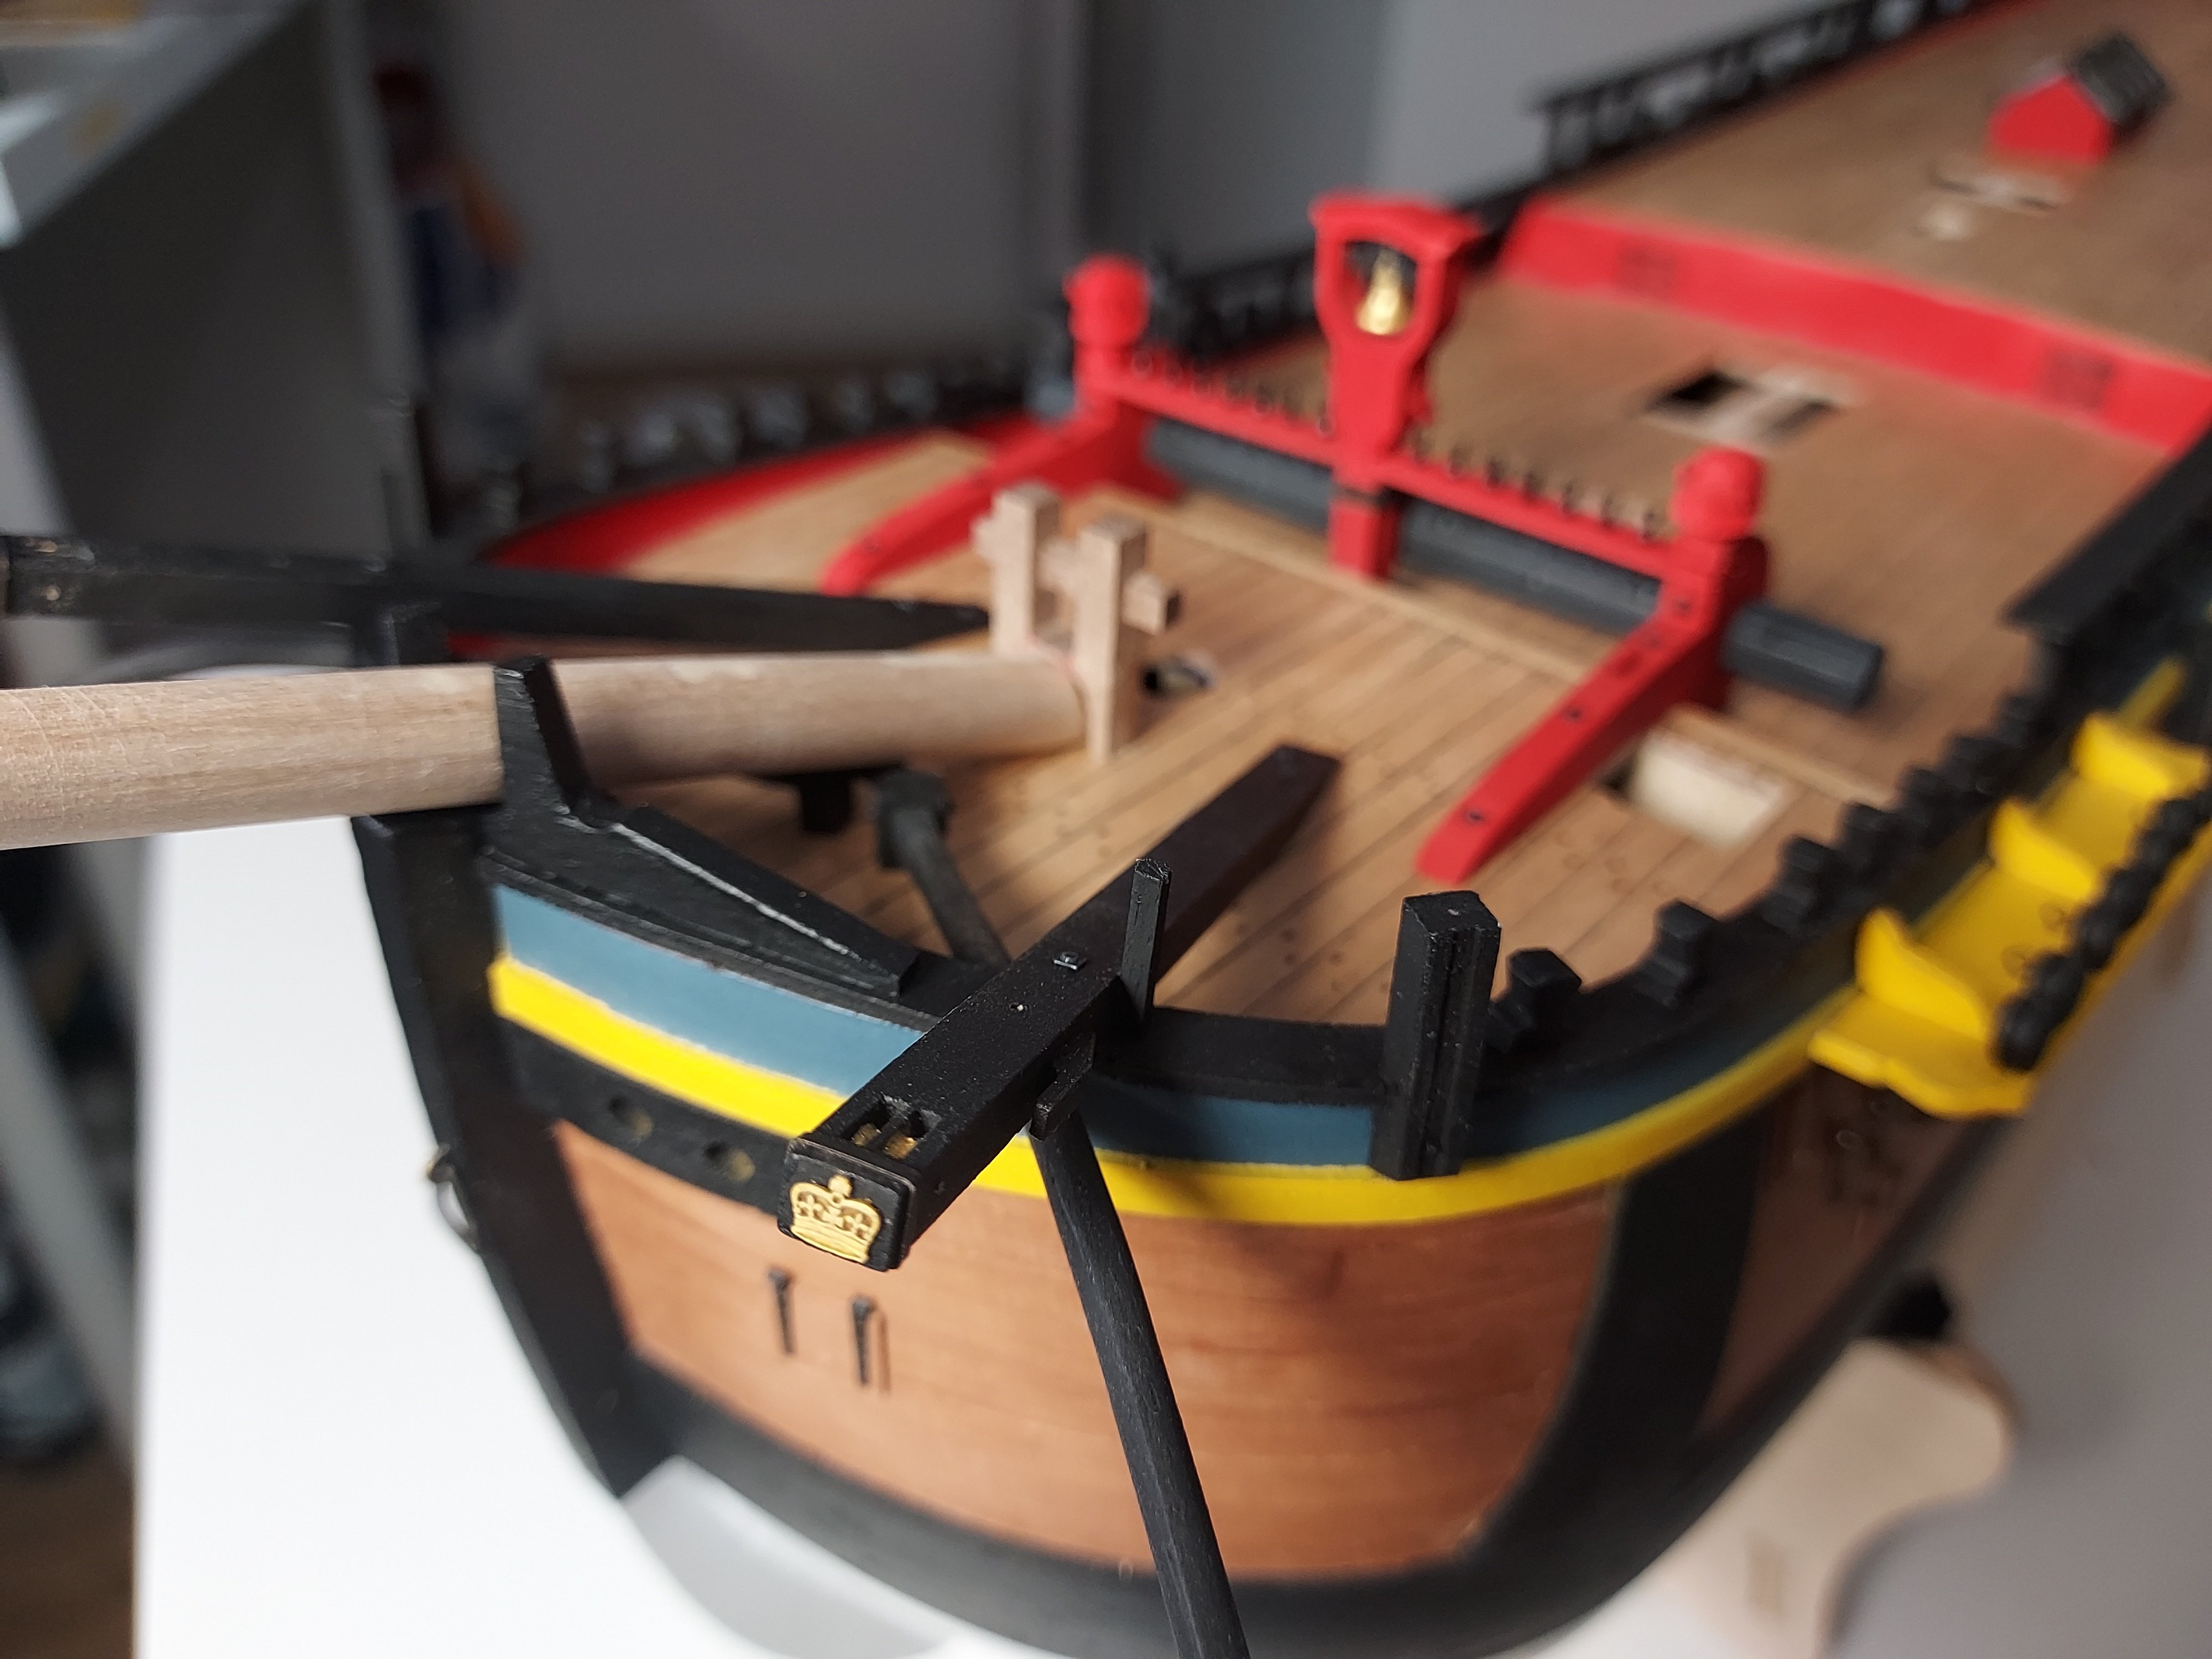
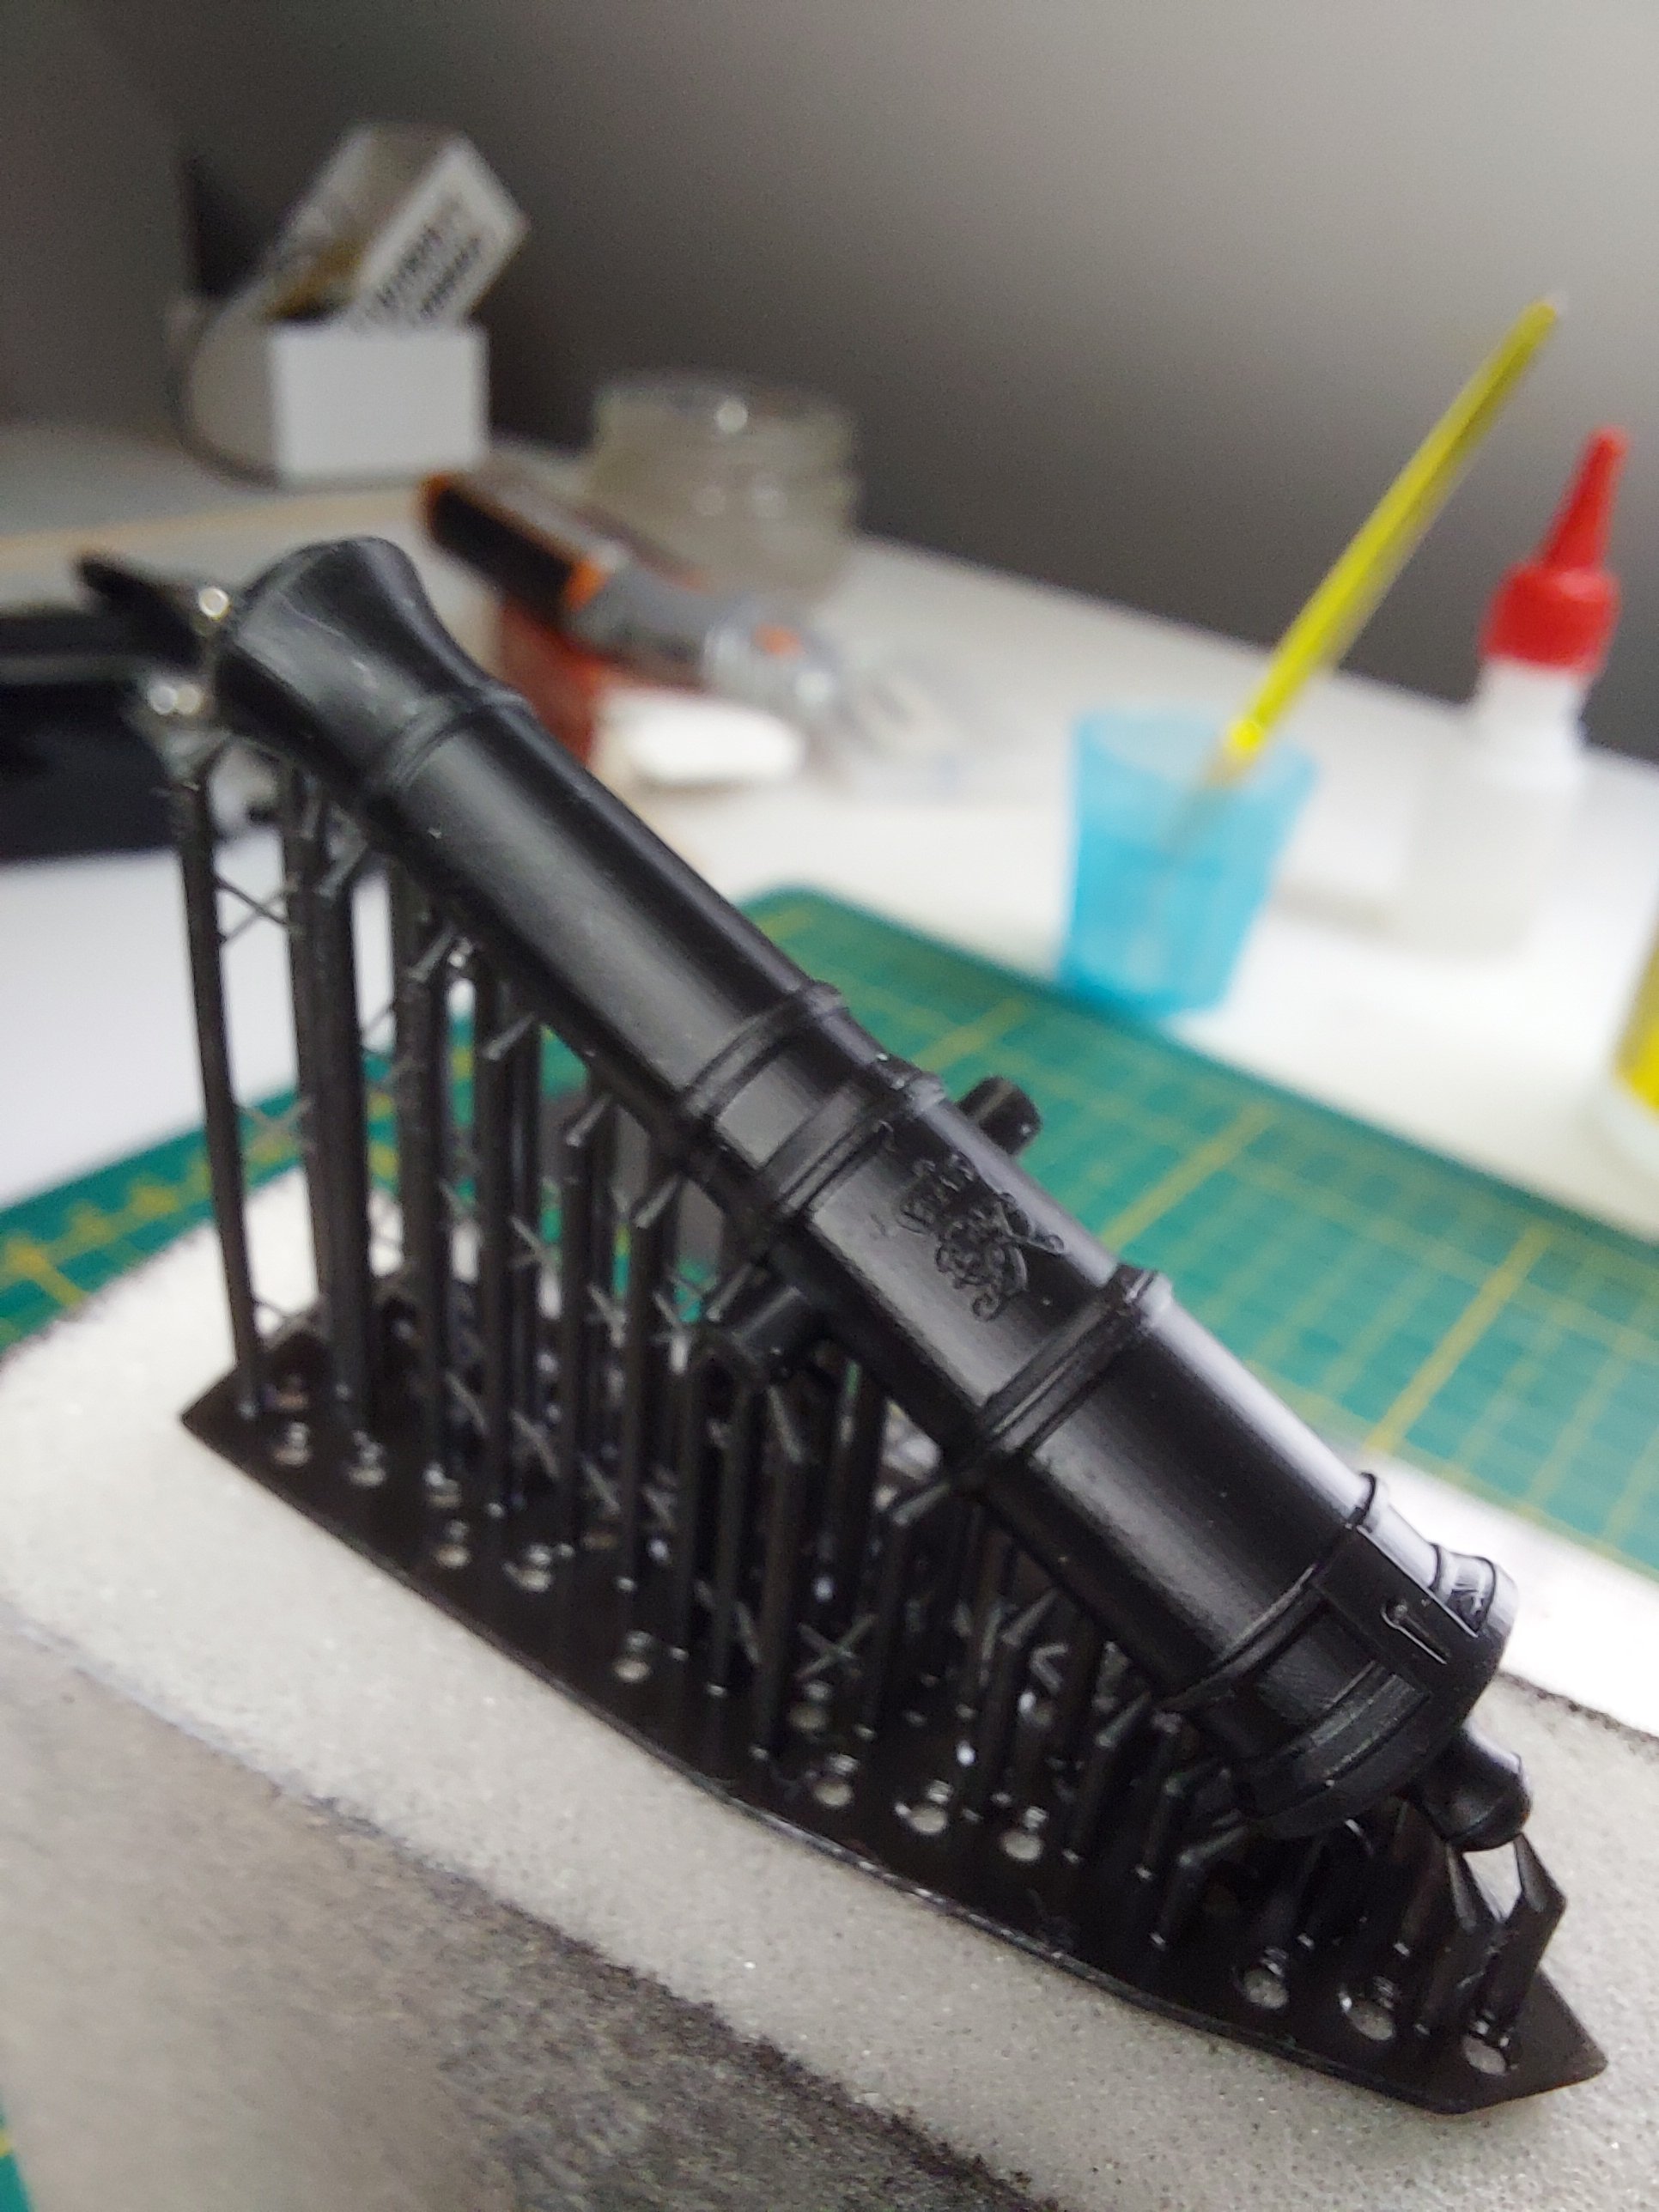
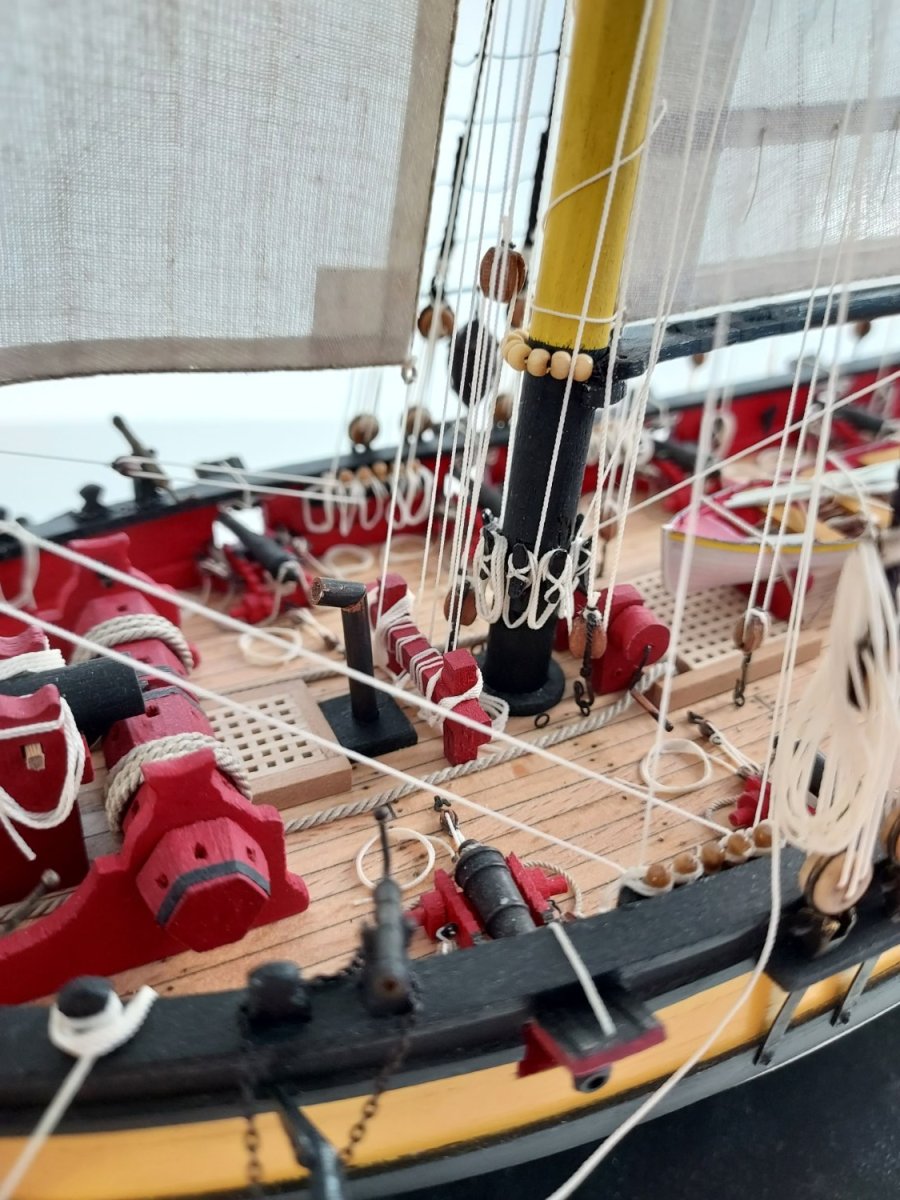
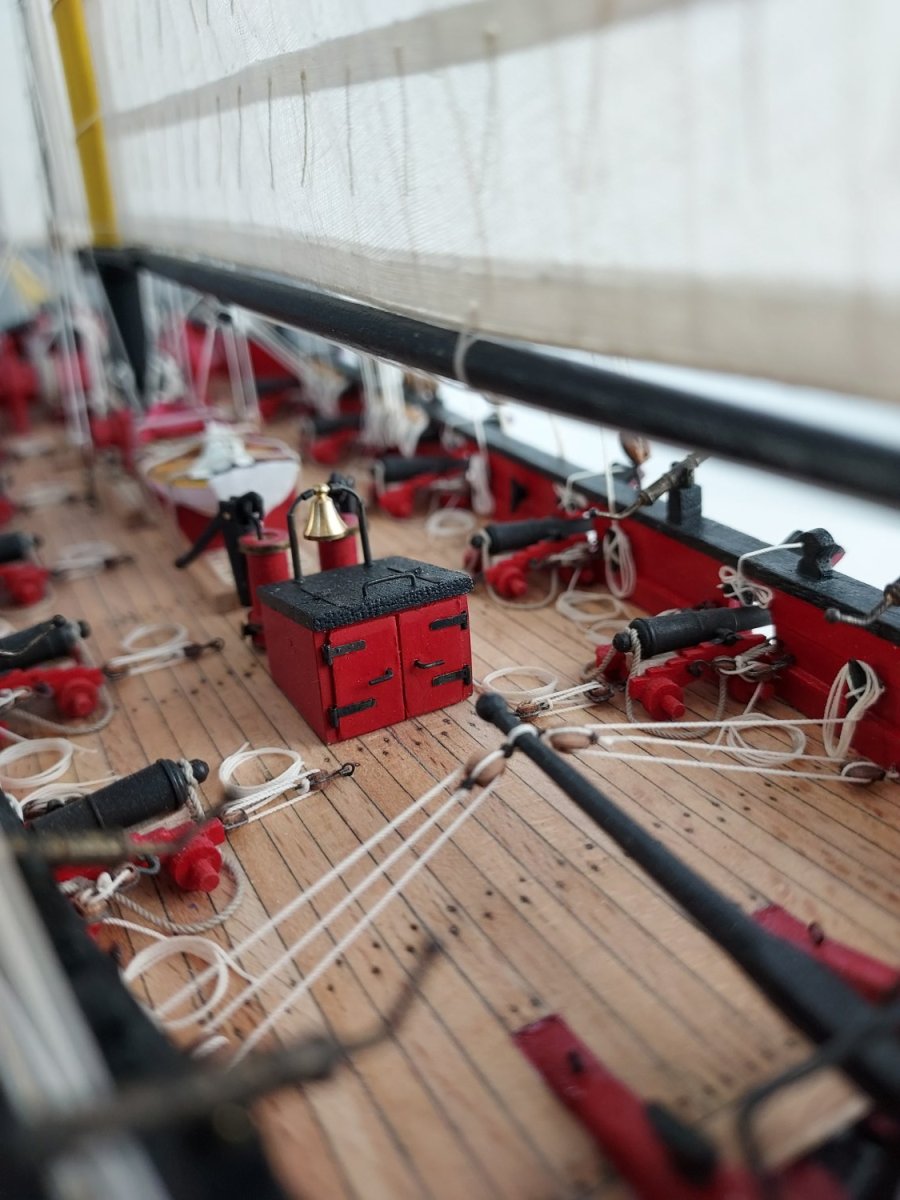
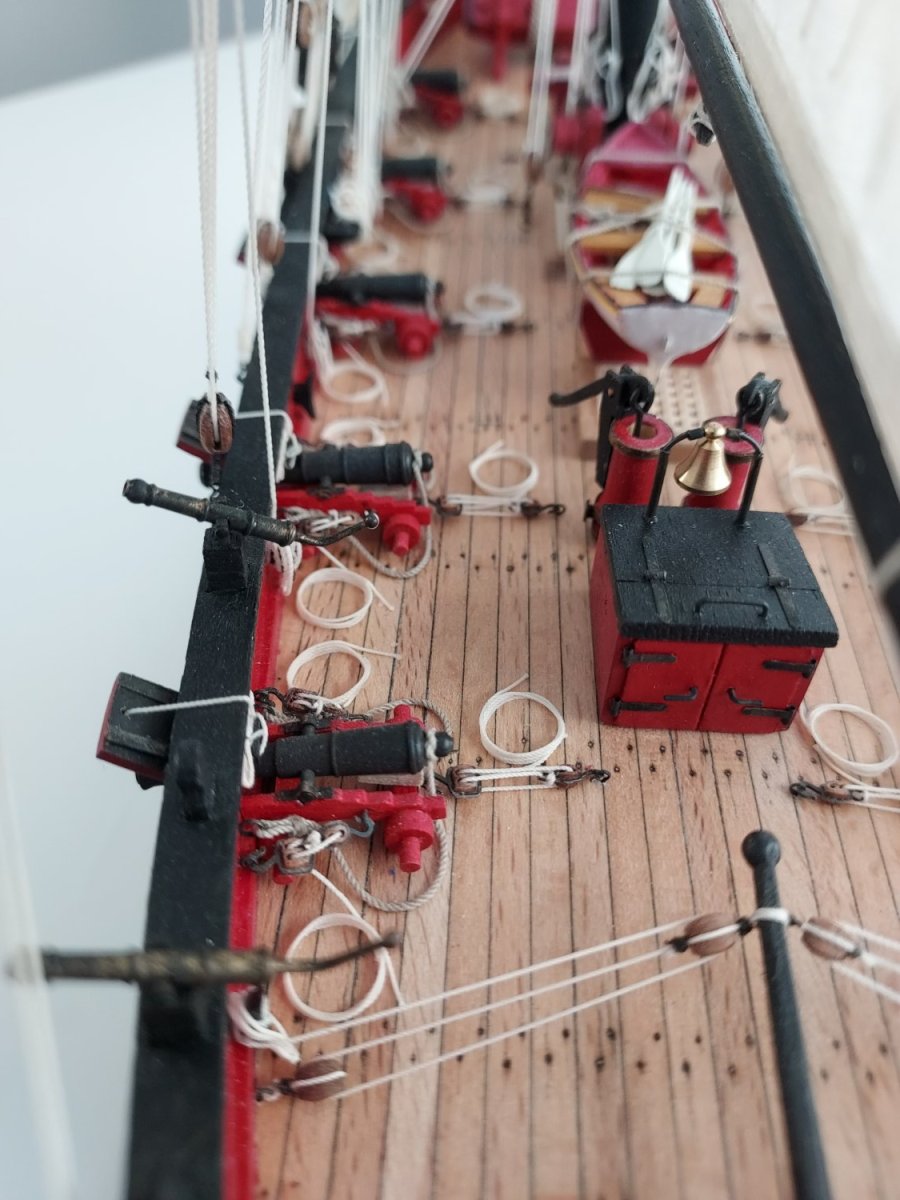
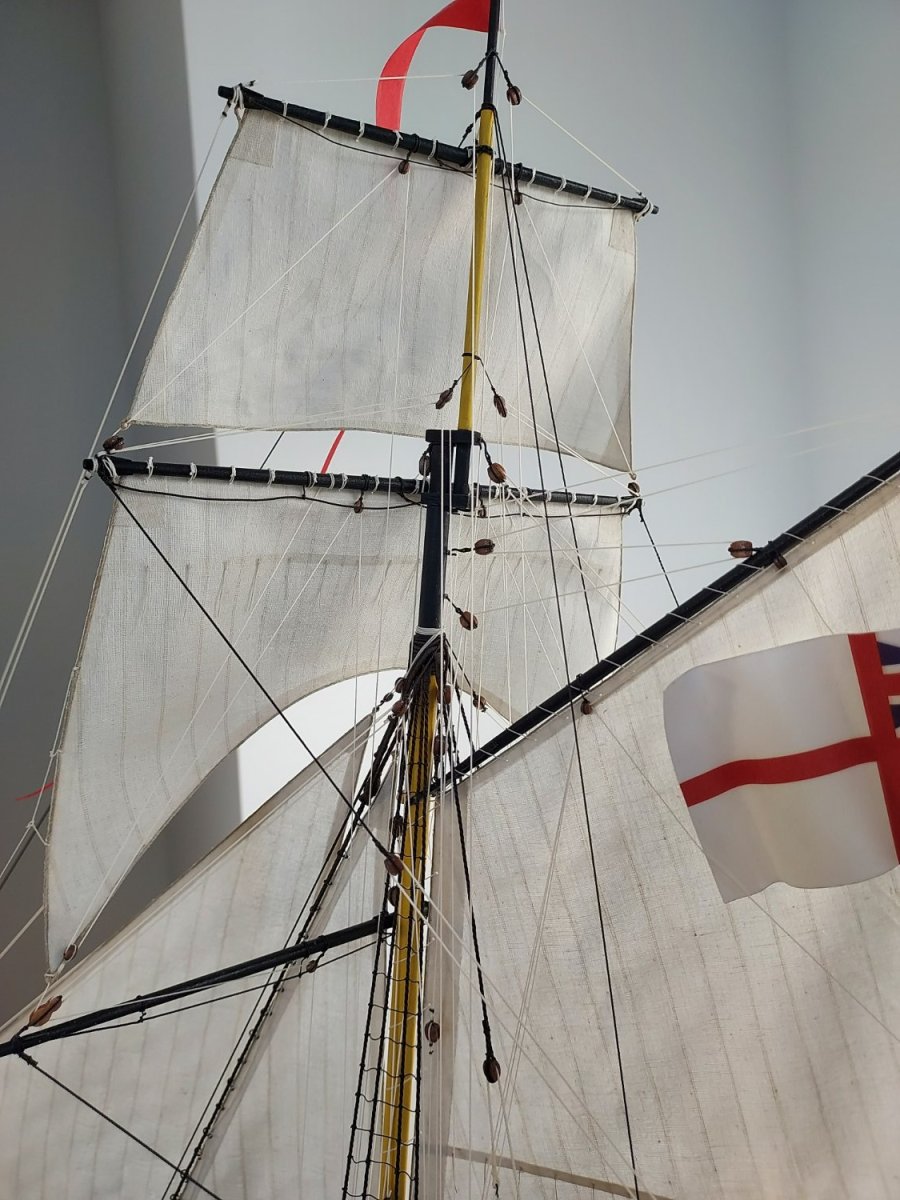
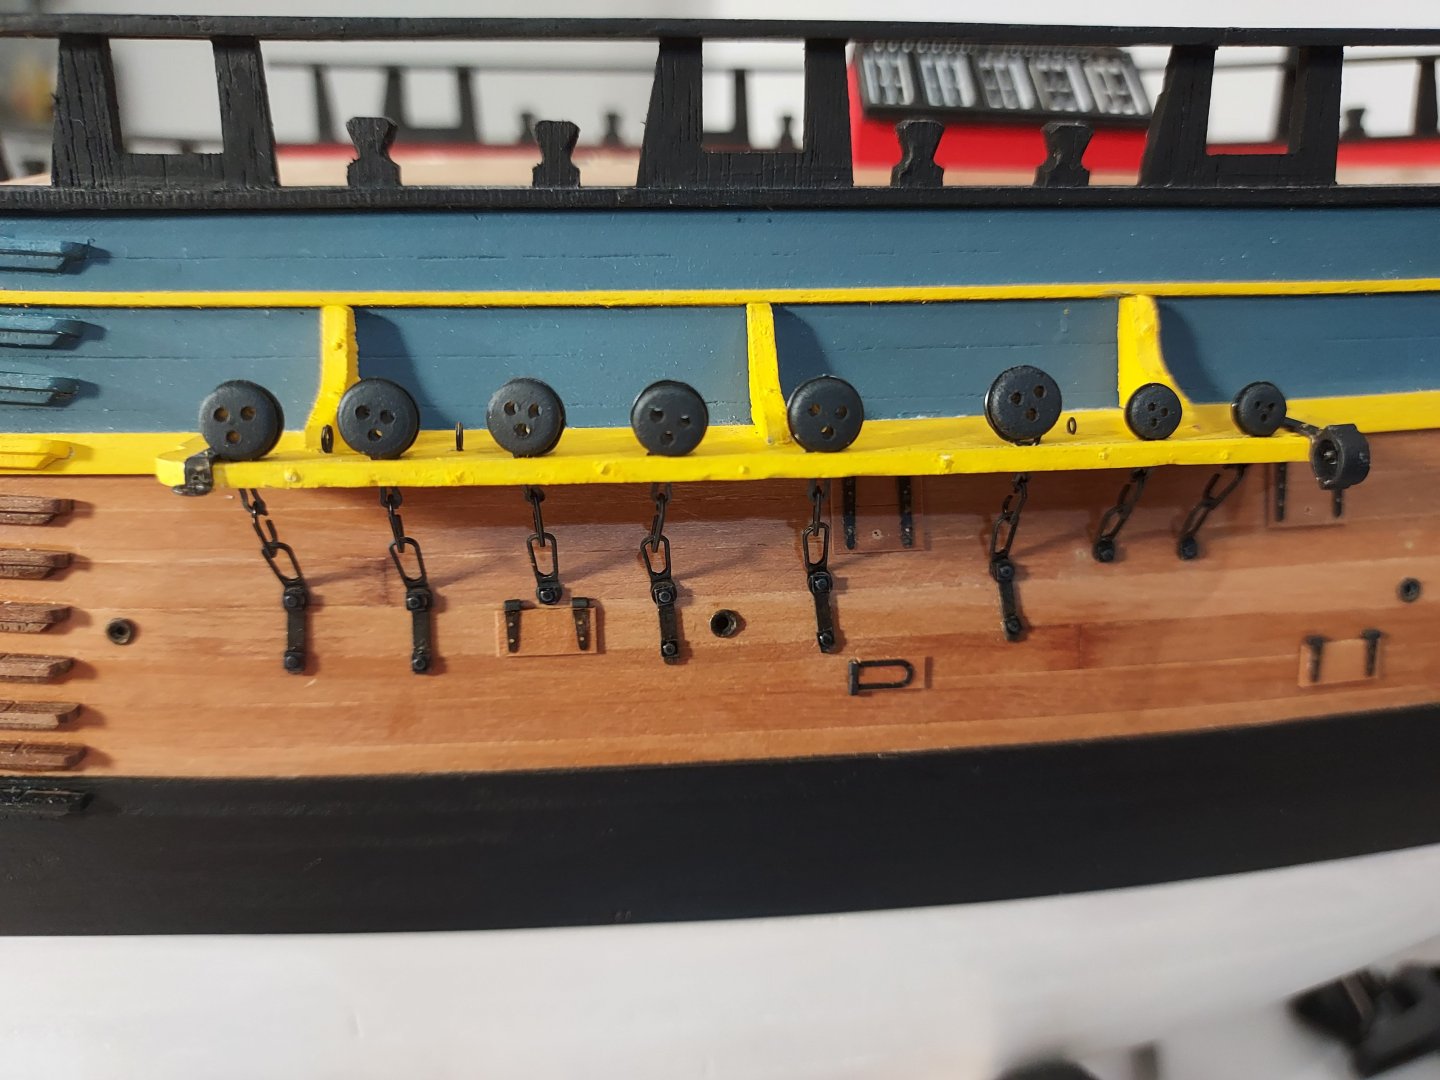
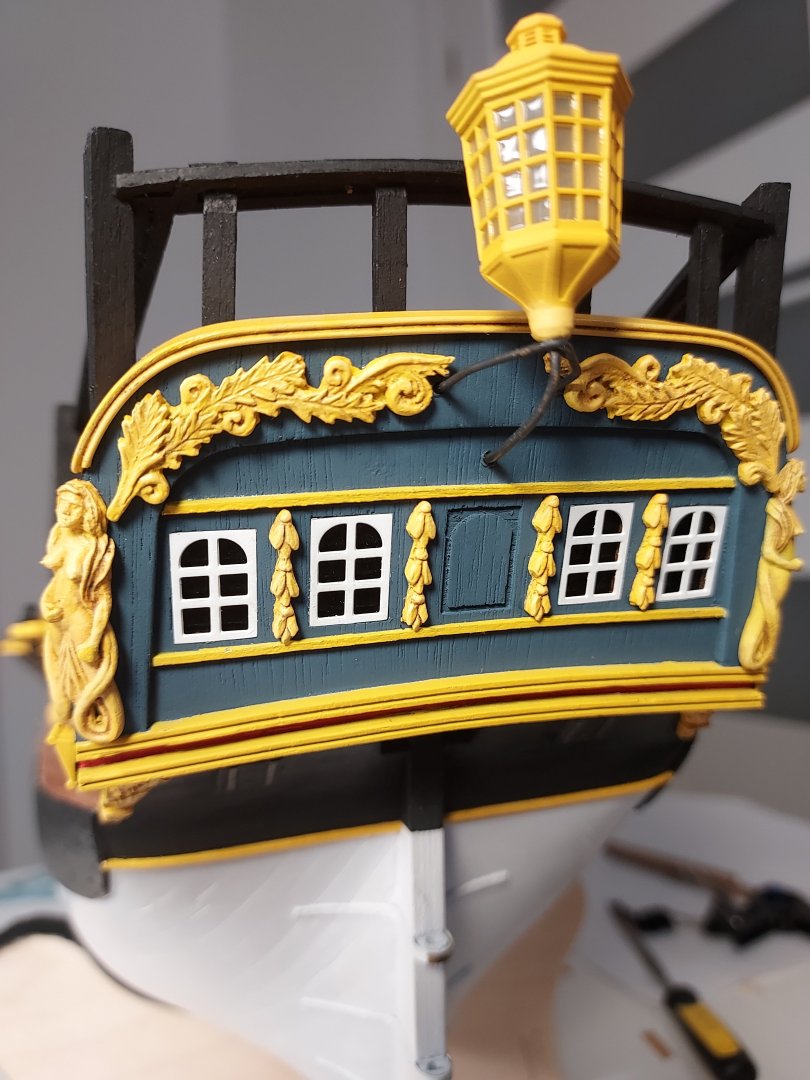
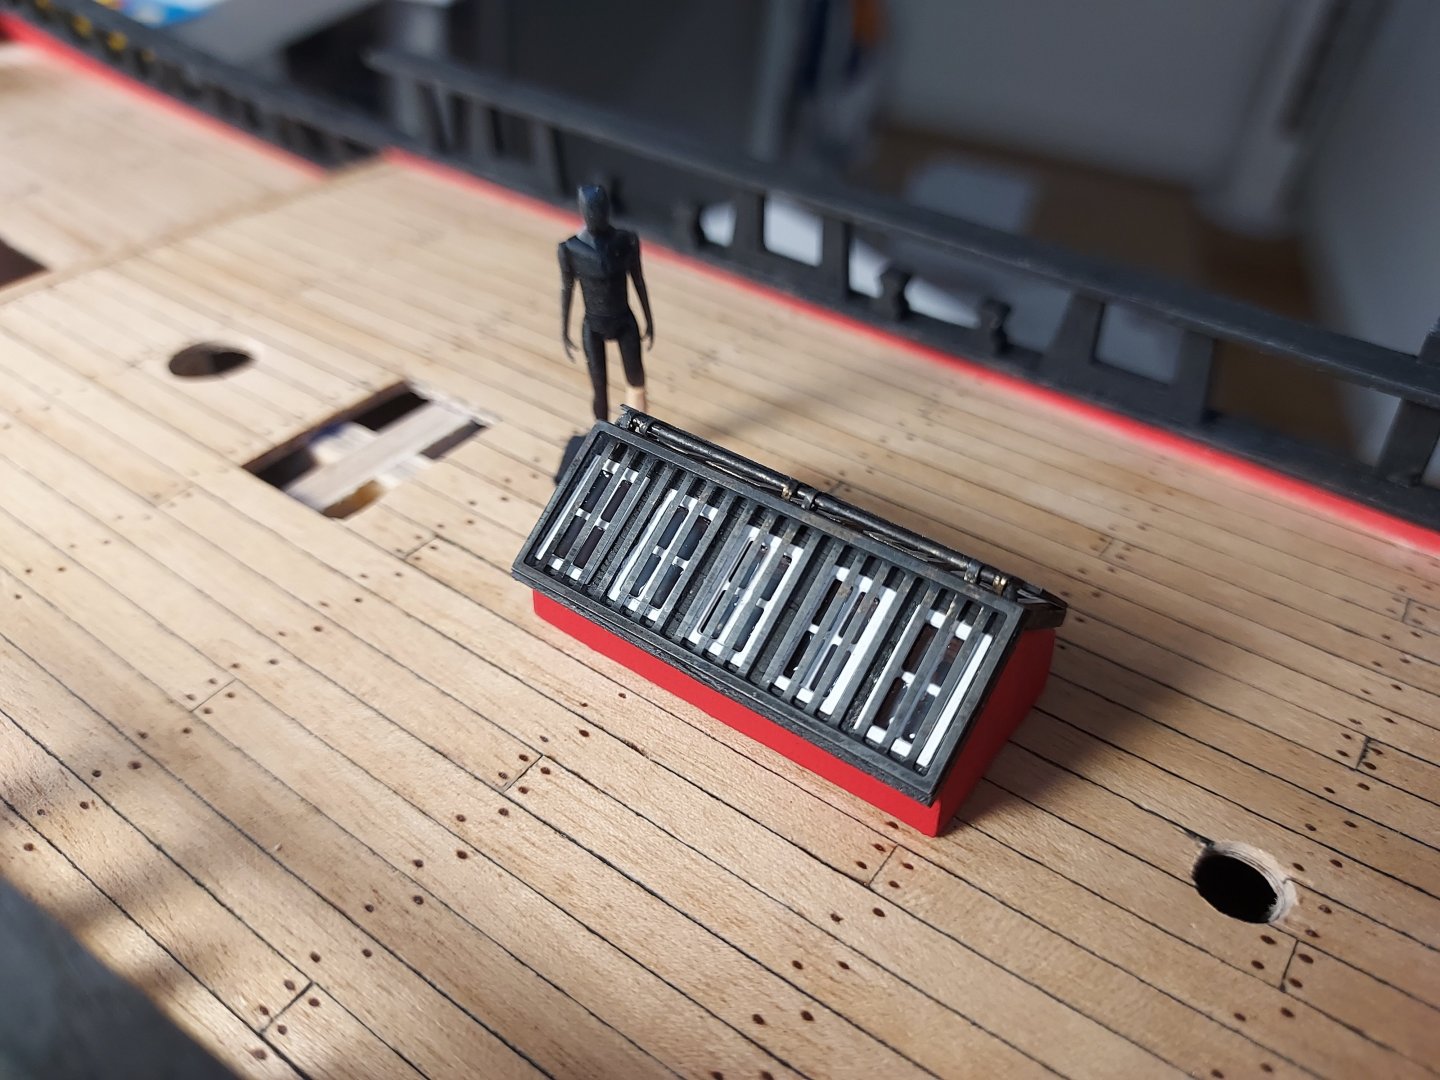
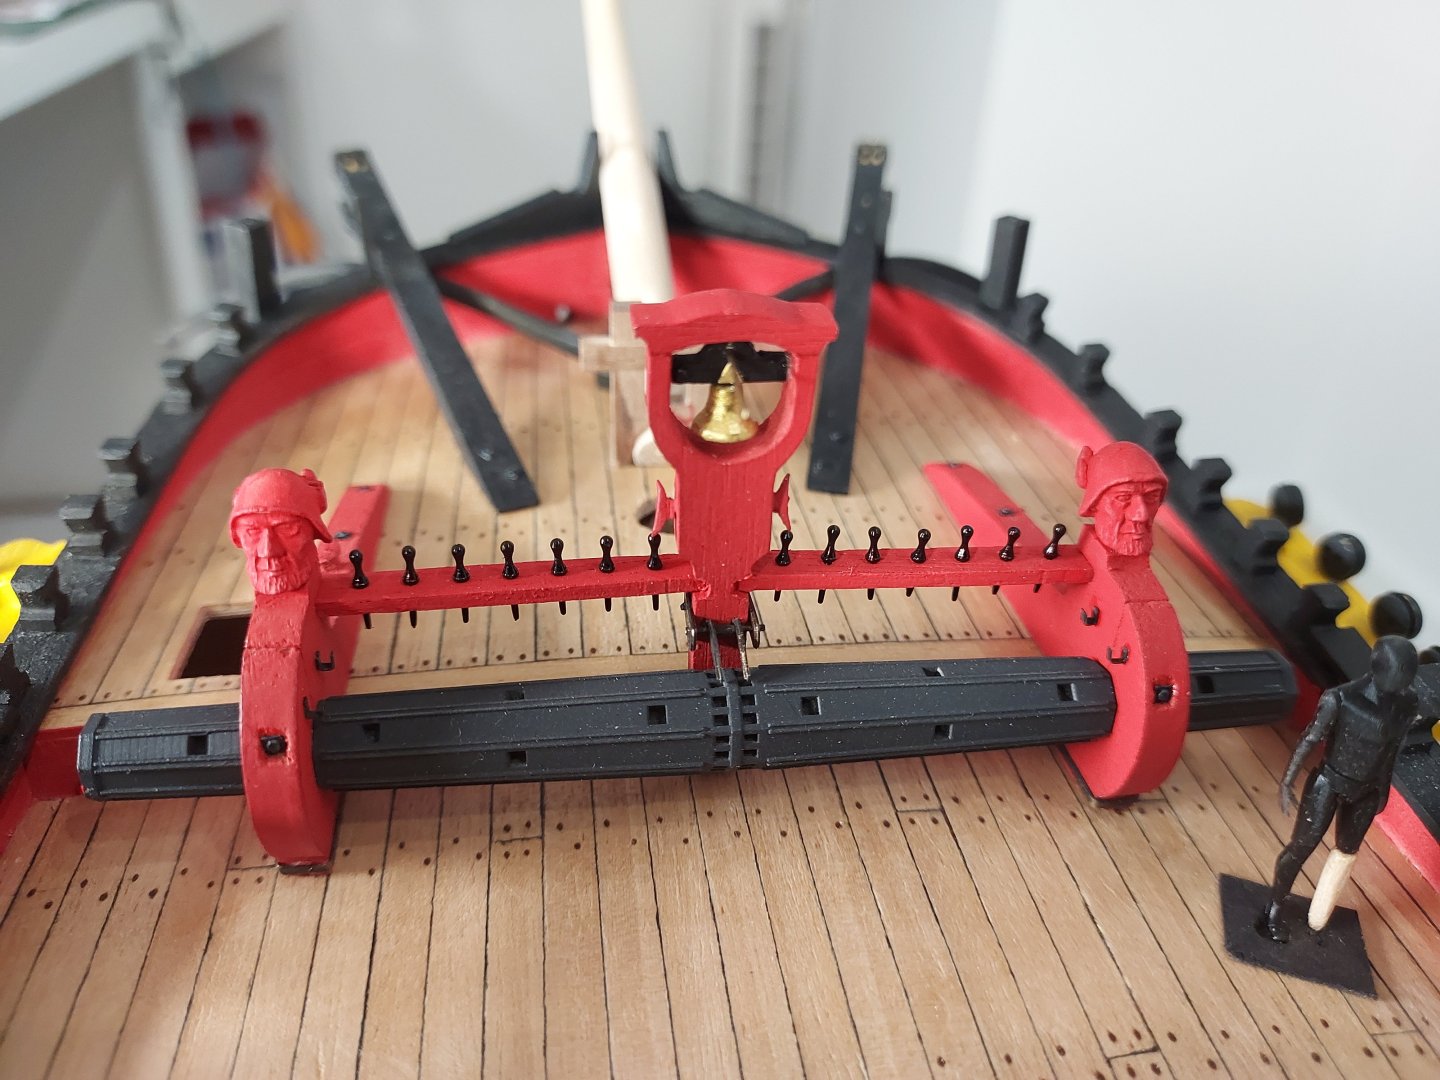
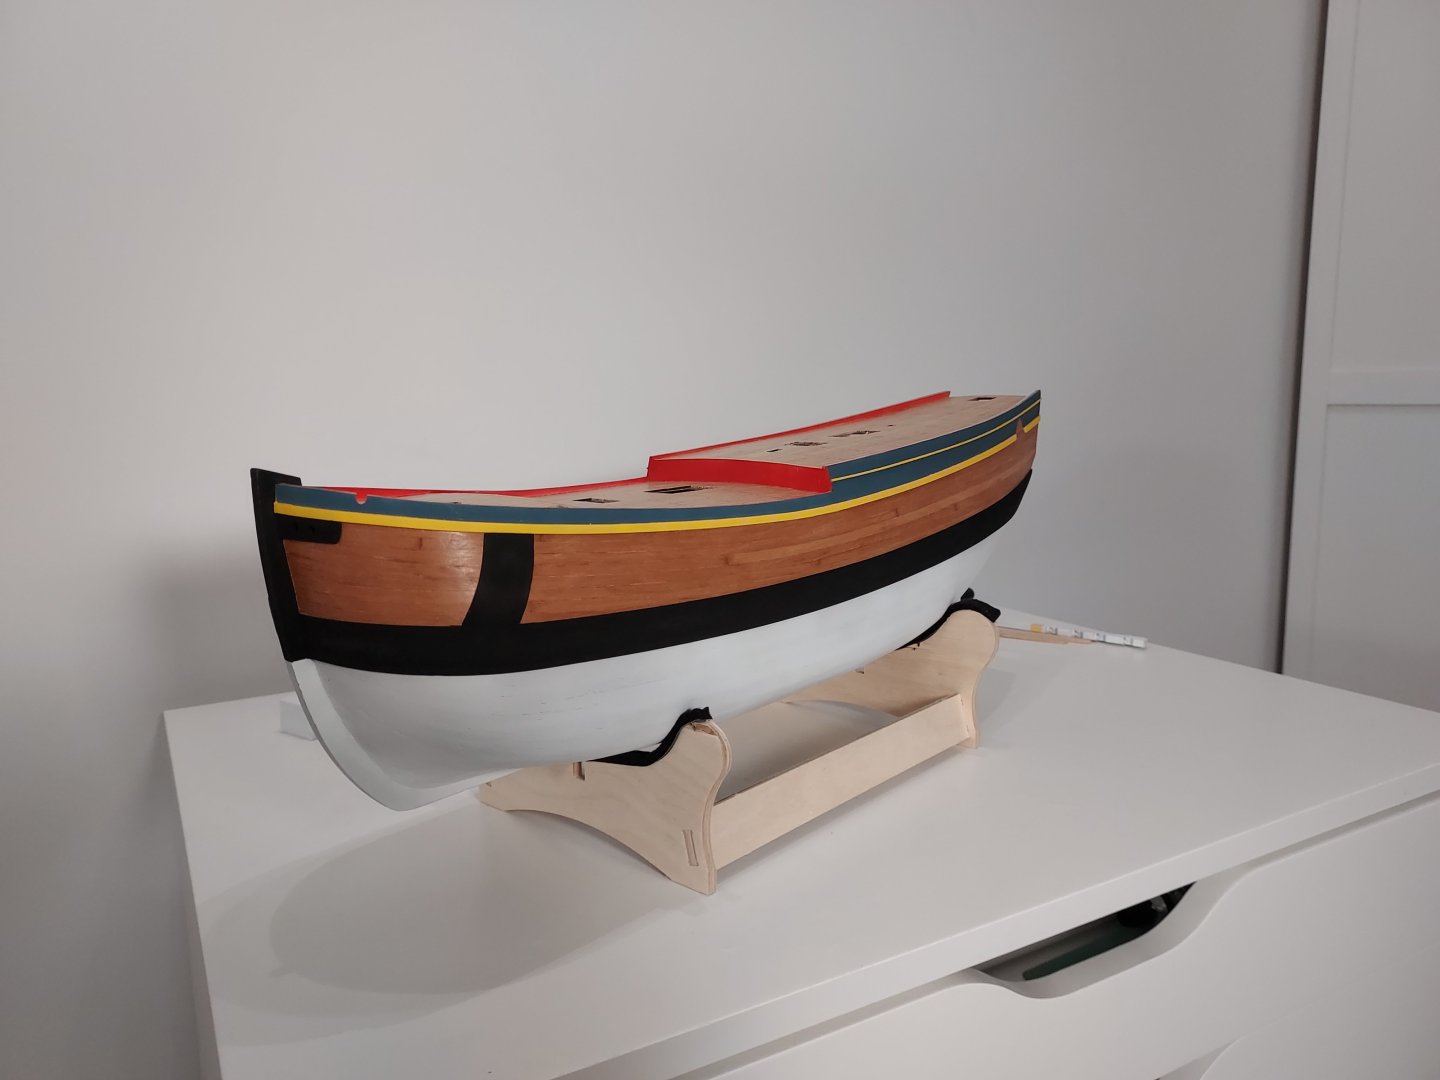
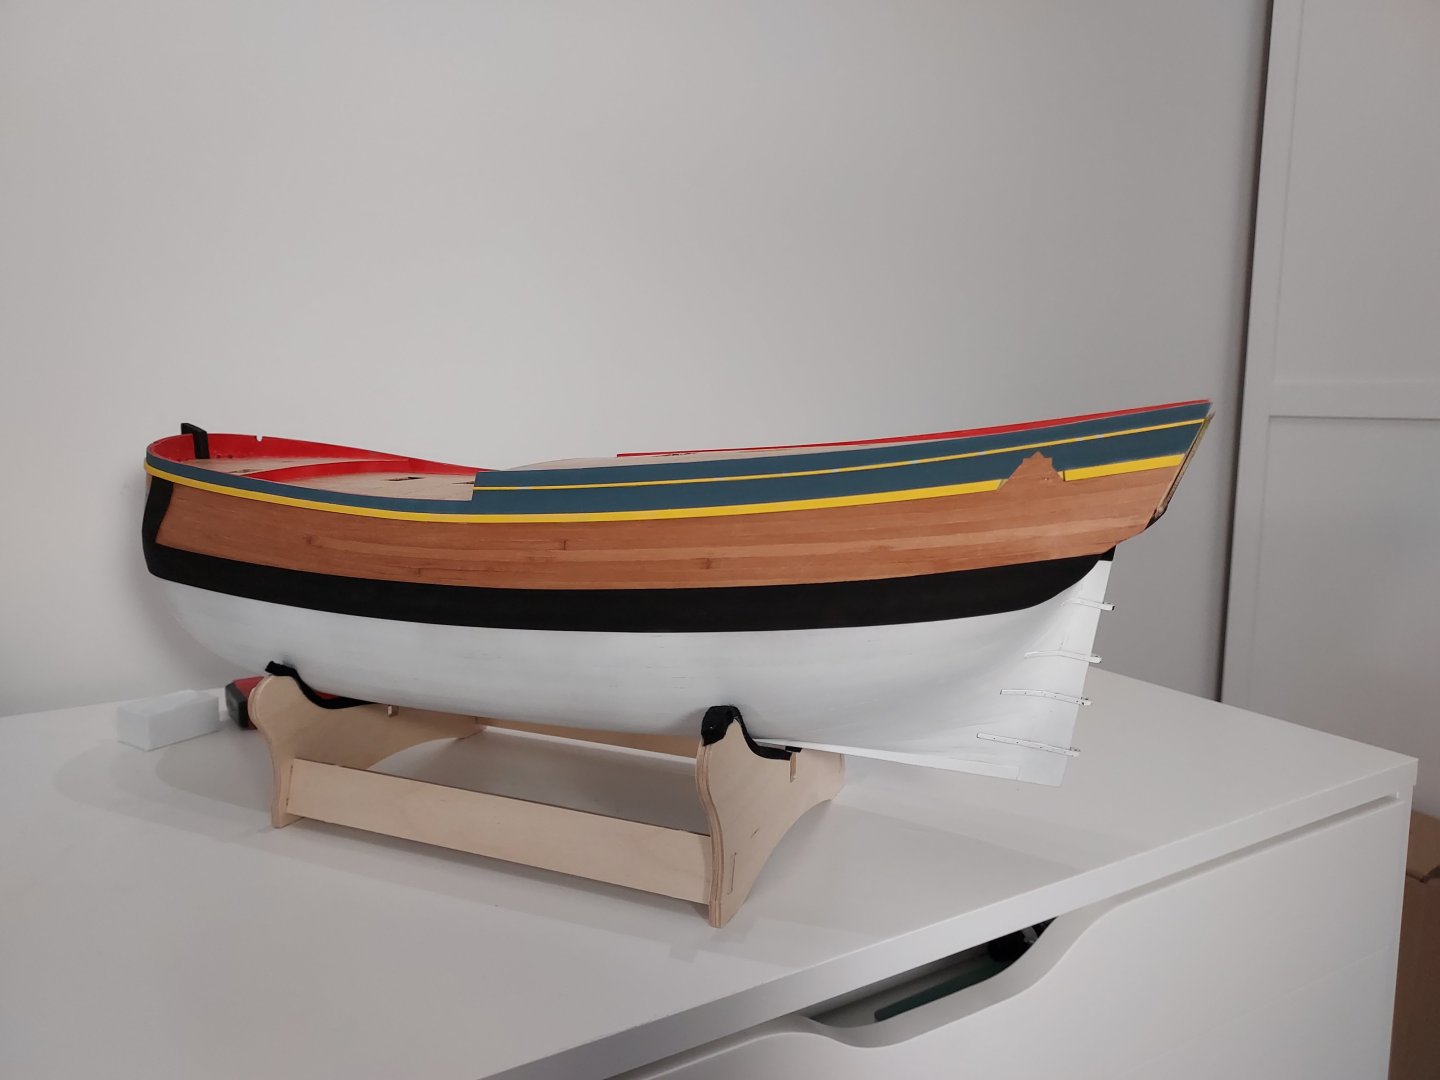
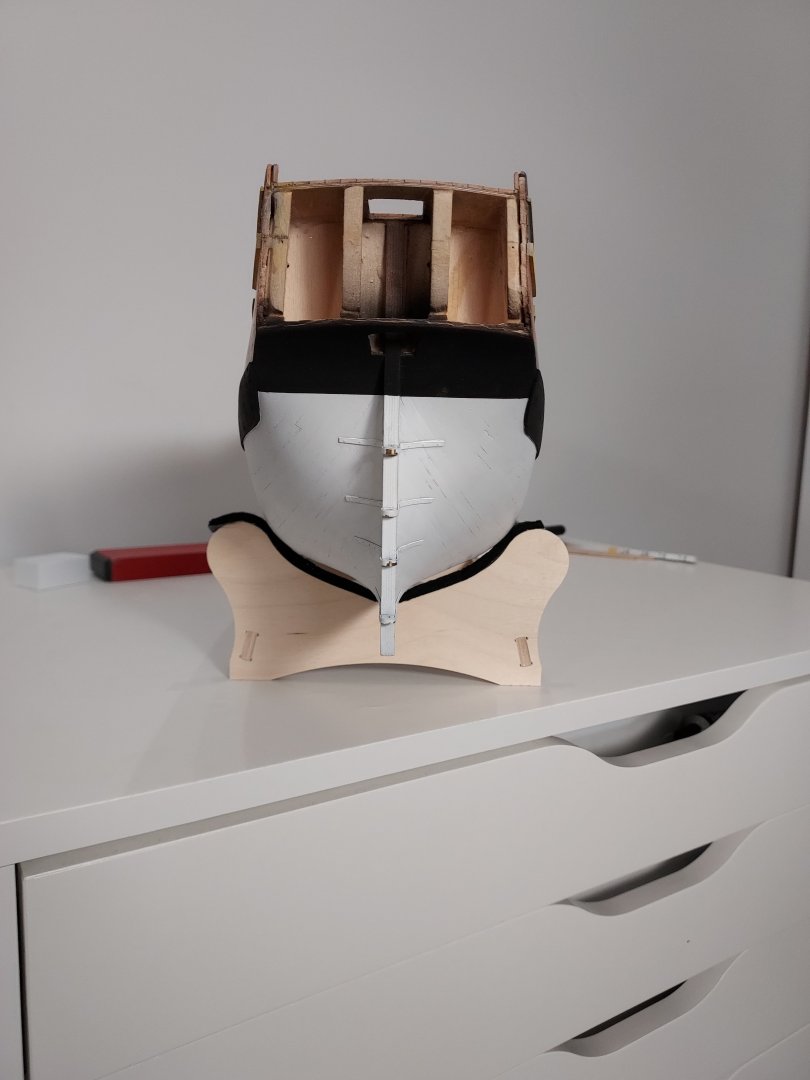
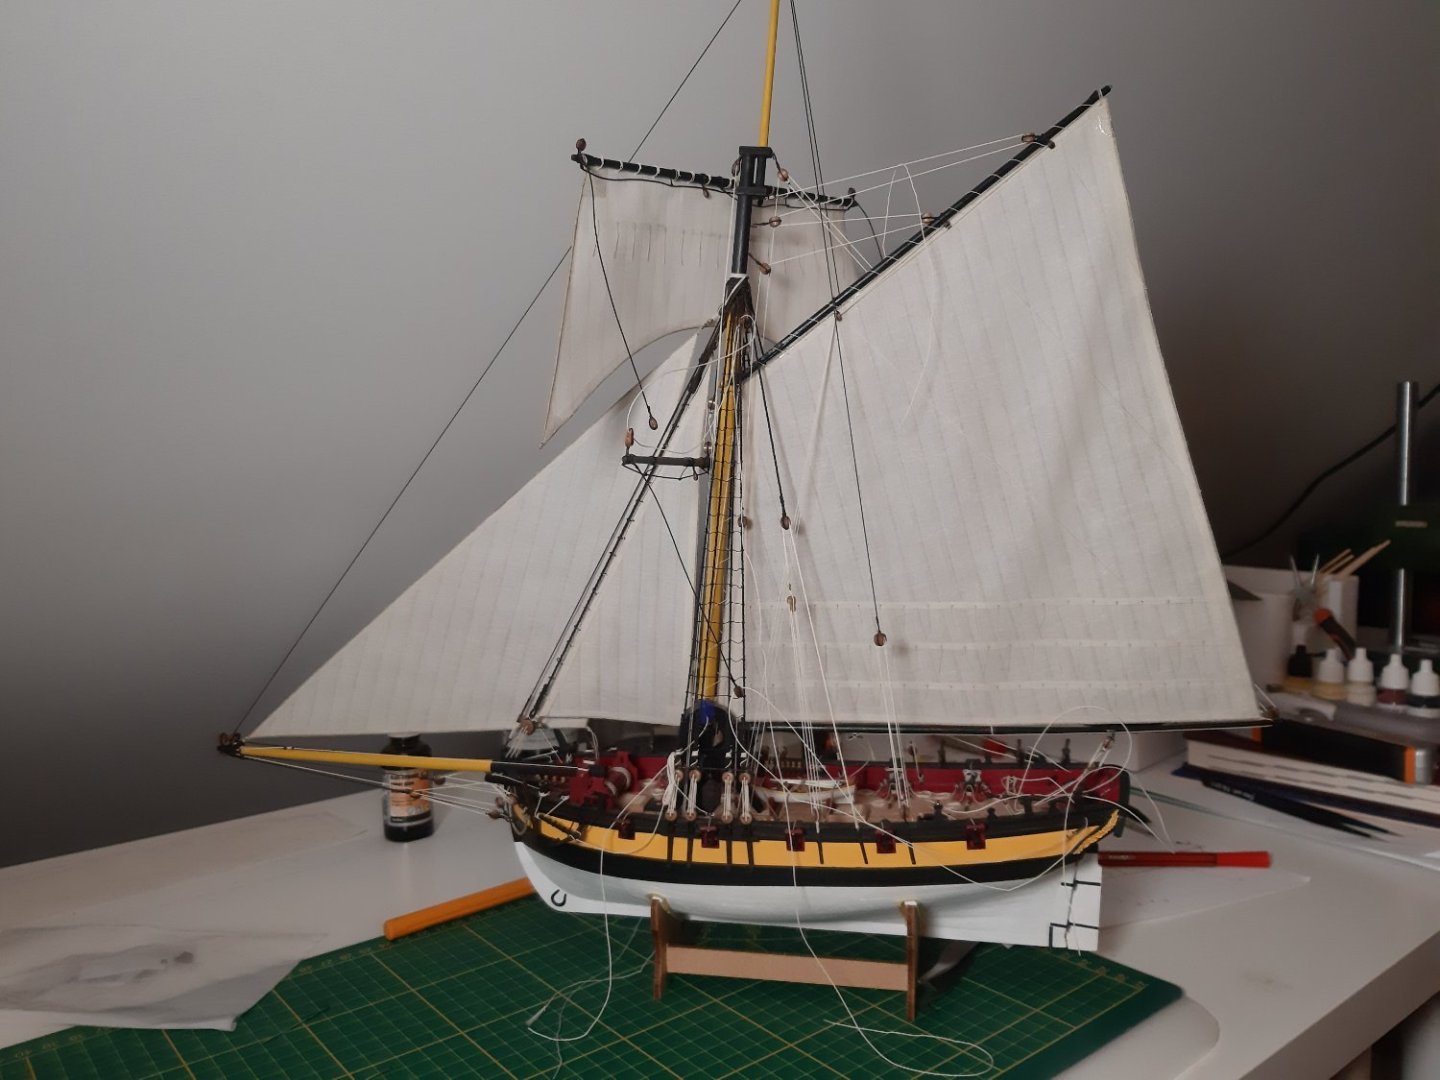
Hi everyone, I’m slowly making progress, though unfortunately, I haven't had as much time for modeling lately as I’d like. However, I’ve managed to get some work done on the Endeavour, and it’s finally time for an update. Here is how she's looking so far! First off, I've added the railings. The channels are now in place, with the deadeyes finished in black. Now going from the stern area, where I fitted my custom-designed 3D-printed lantern, the flag locker, the ensign staff bracket and the skylight. The windlass has been slightly modified with some extra details to enhance the stock kit parts. Finishing up with the bow section, I mounted the catheads (decorated with a crown coat of arms) and the bowsprit bitts. This is everything I’ve managed to complete so far. I’m always looking for ways to improve the model, so if you have any suggestions for interesting details, please let me know. Since the standard kit is quite basic, I’m relying heavily on reference books and photos to add more character. Happy modeling, Maciek


-
Maciek reacted to a post in a topic:
Lady Nelson by Lapinas - Amati/Victory Models - 1:64
-
Maciek reacted to a post in a topic:
Axel Thorsen 1810 by 0Seahorse - 1:72 - CARD - Norwegian gunboat
-
Nick 843 reacted to a post in a topic:
HMB Endeavour by Maciek - Caldercraft - 1/64
-
Tumblehome reacted to a post in a topic:
HMB Endeavour by Maciek - Caldercraft - 1/64
-
robert952 reacted to a post in a topic:
HMB Endeavour by Maciek - Caldercraft - 1/64
-
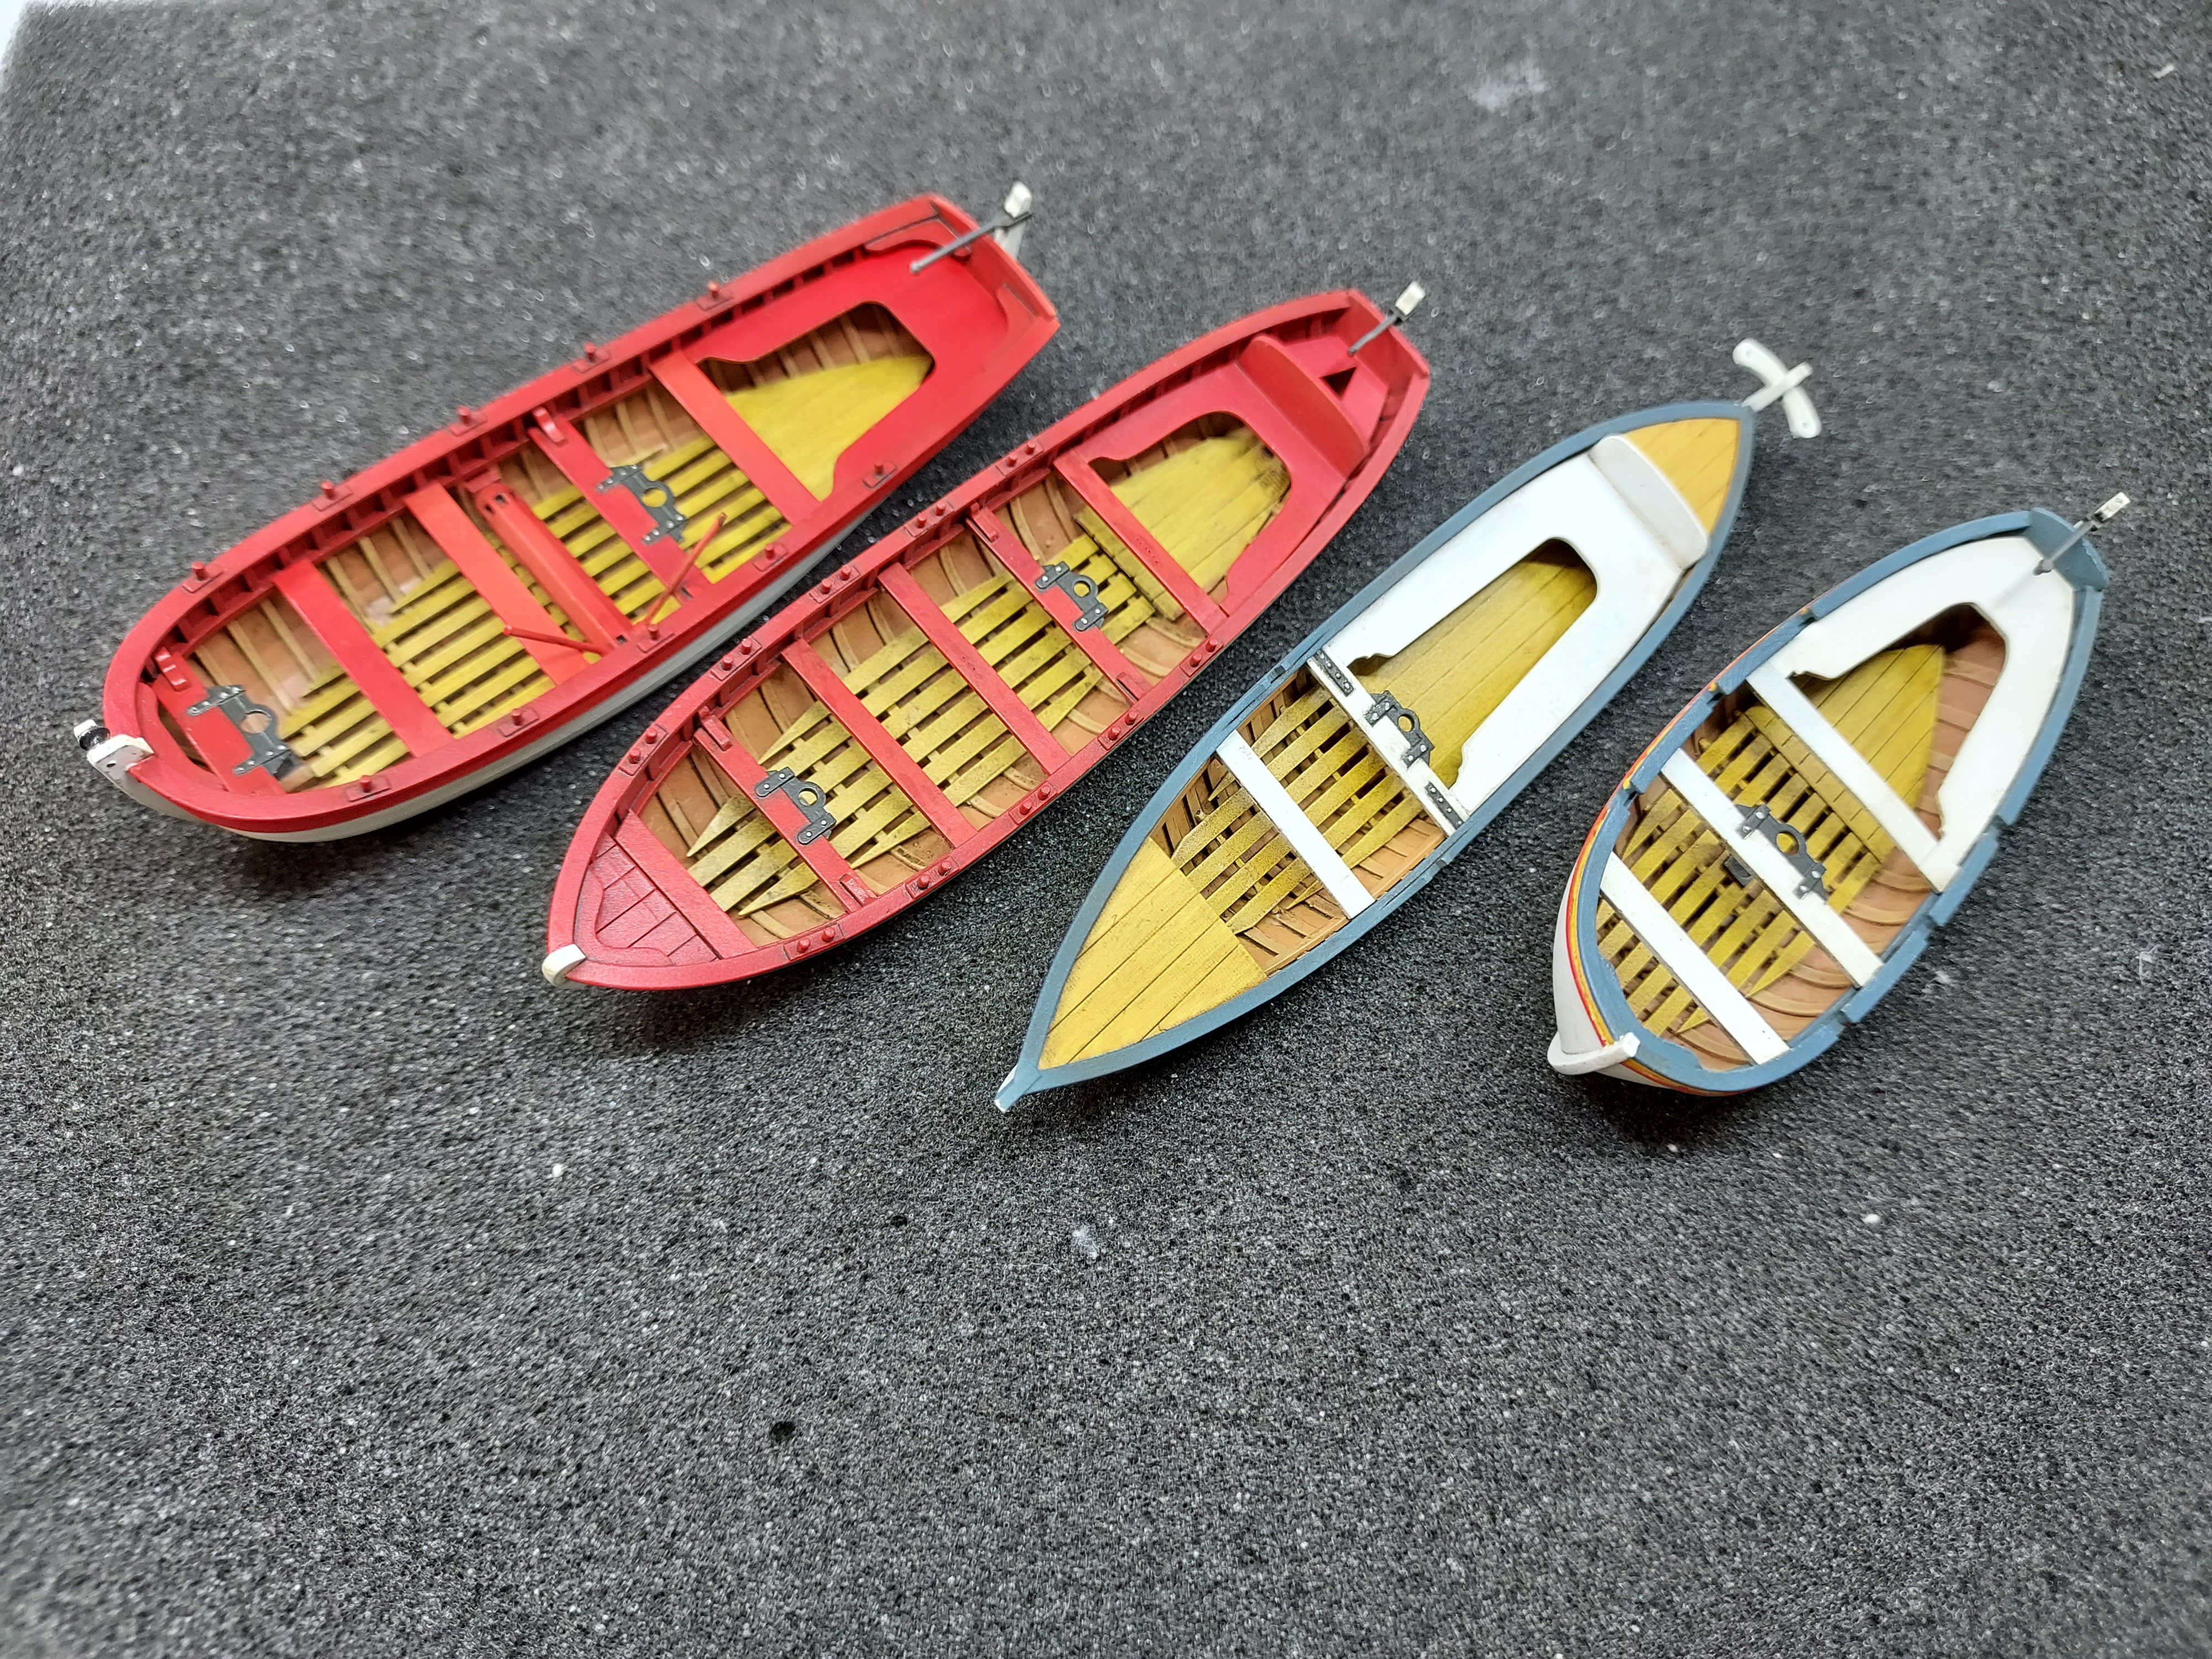
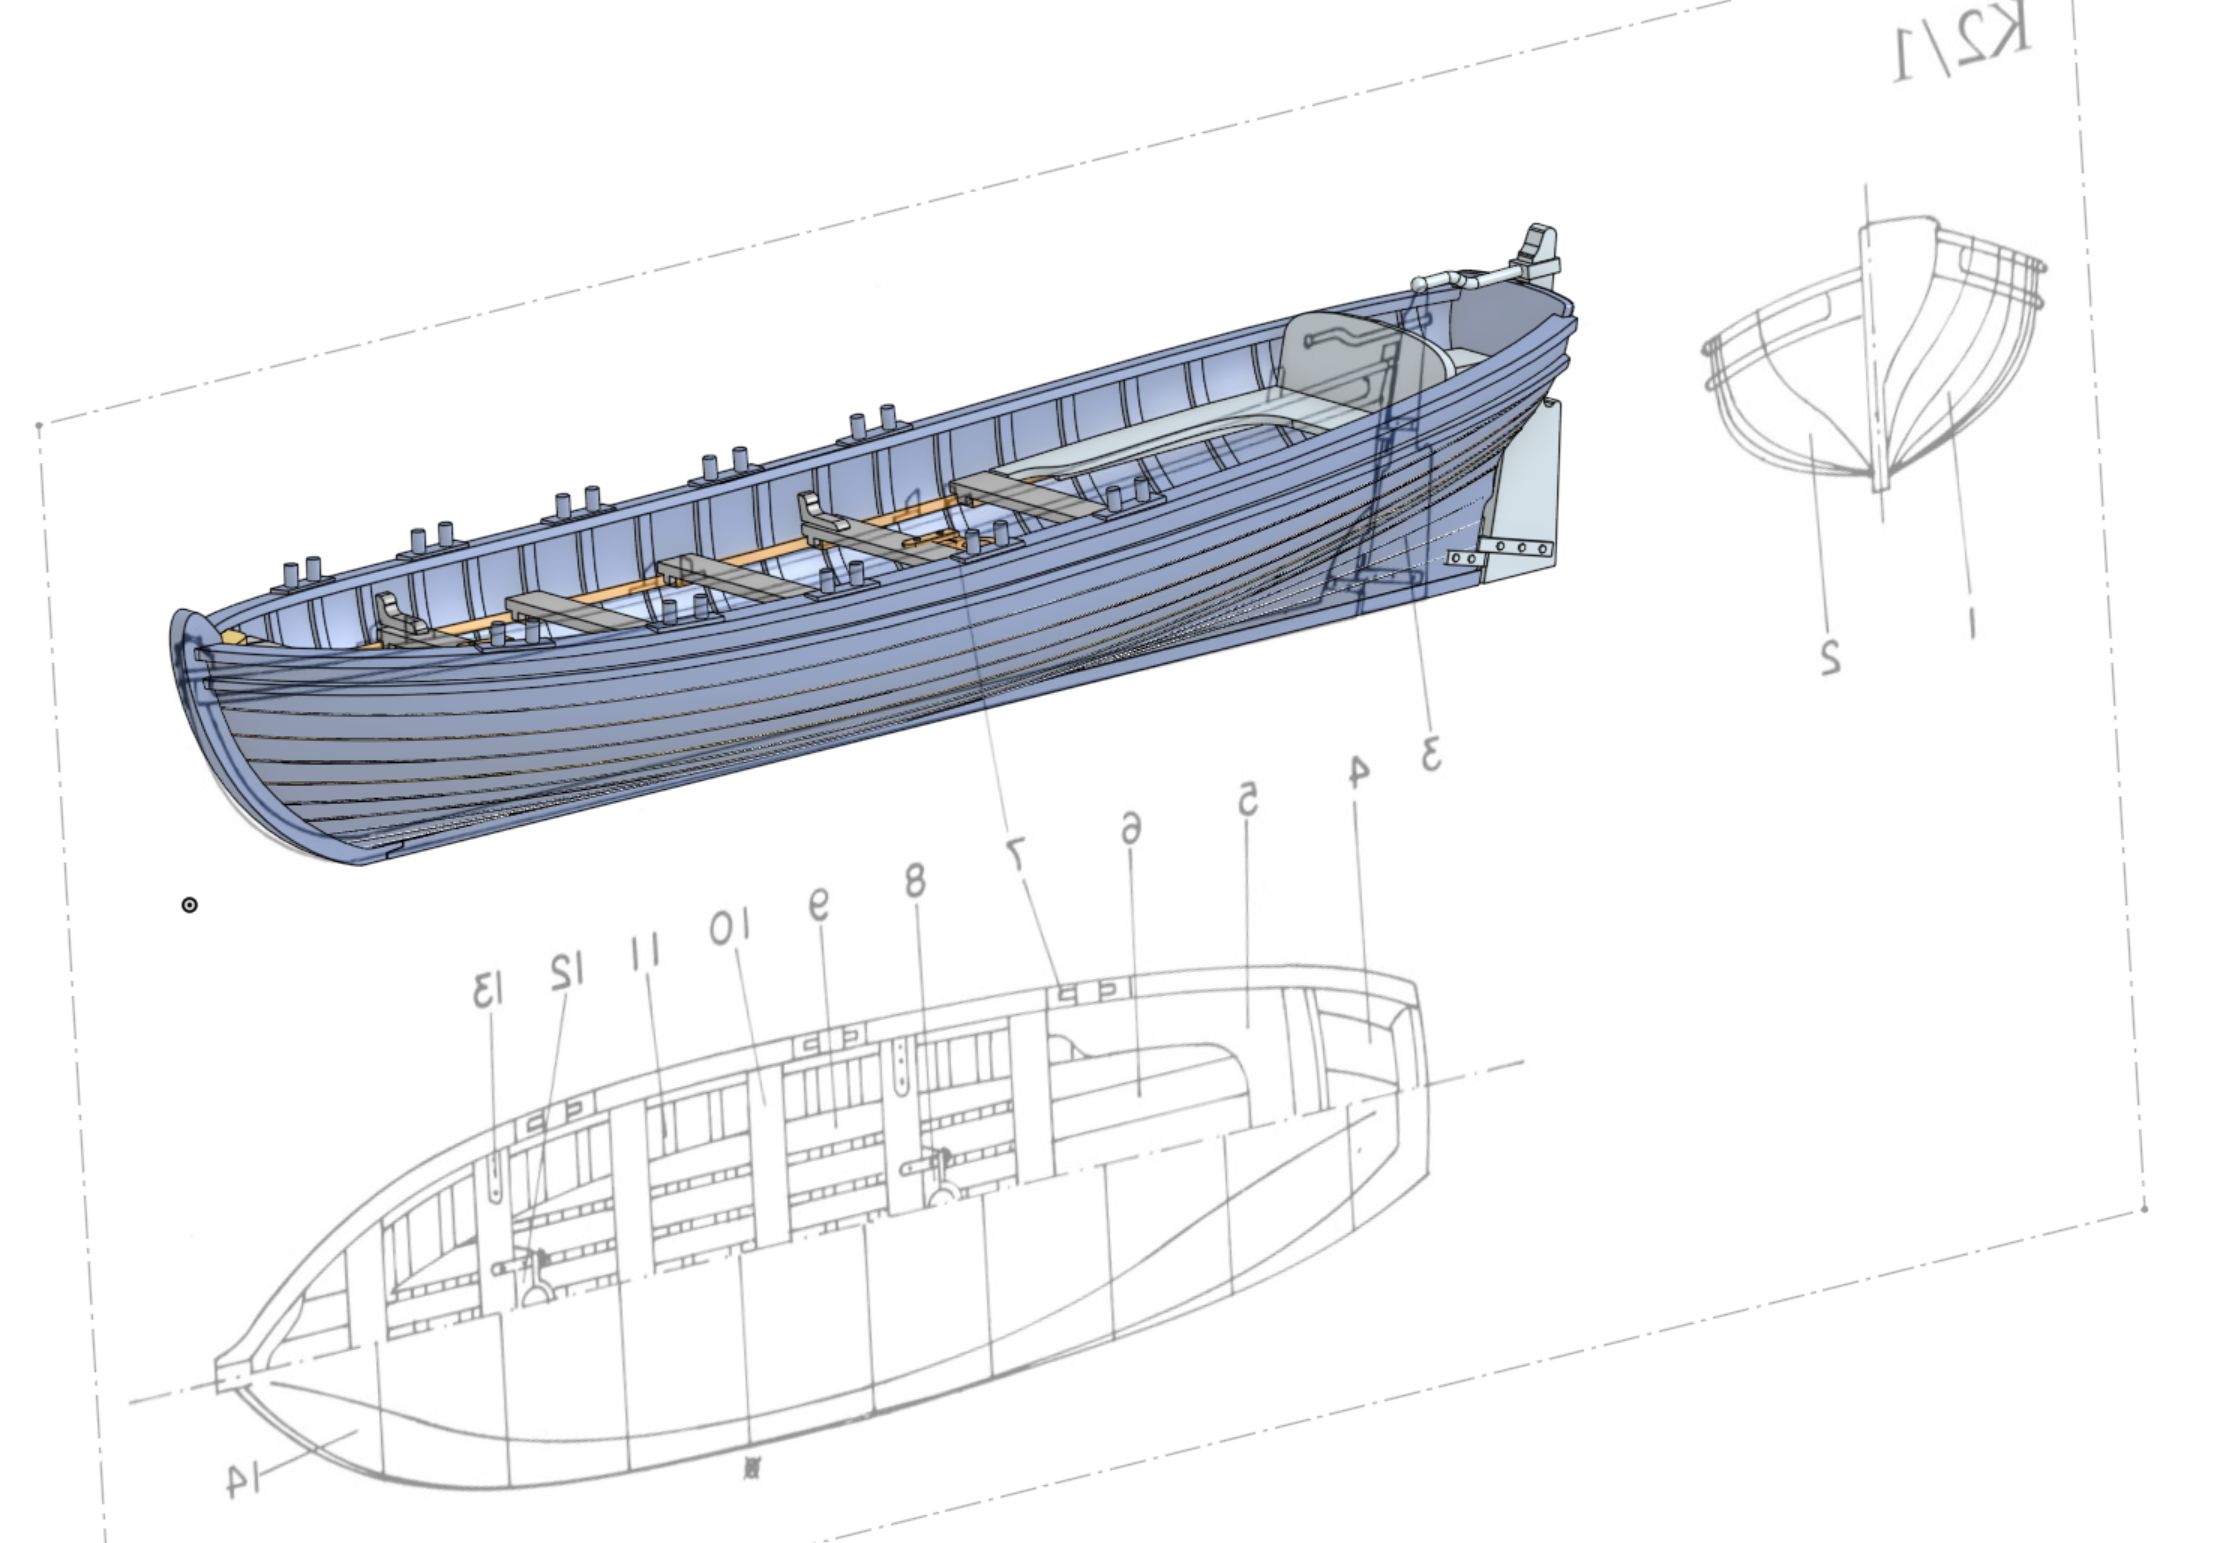
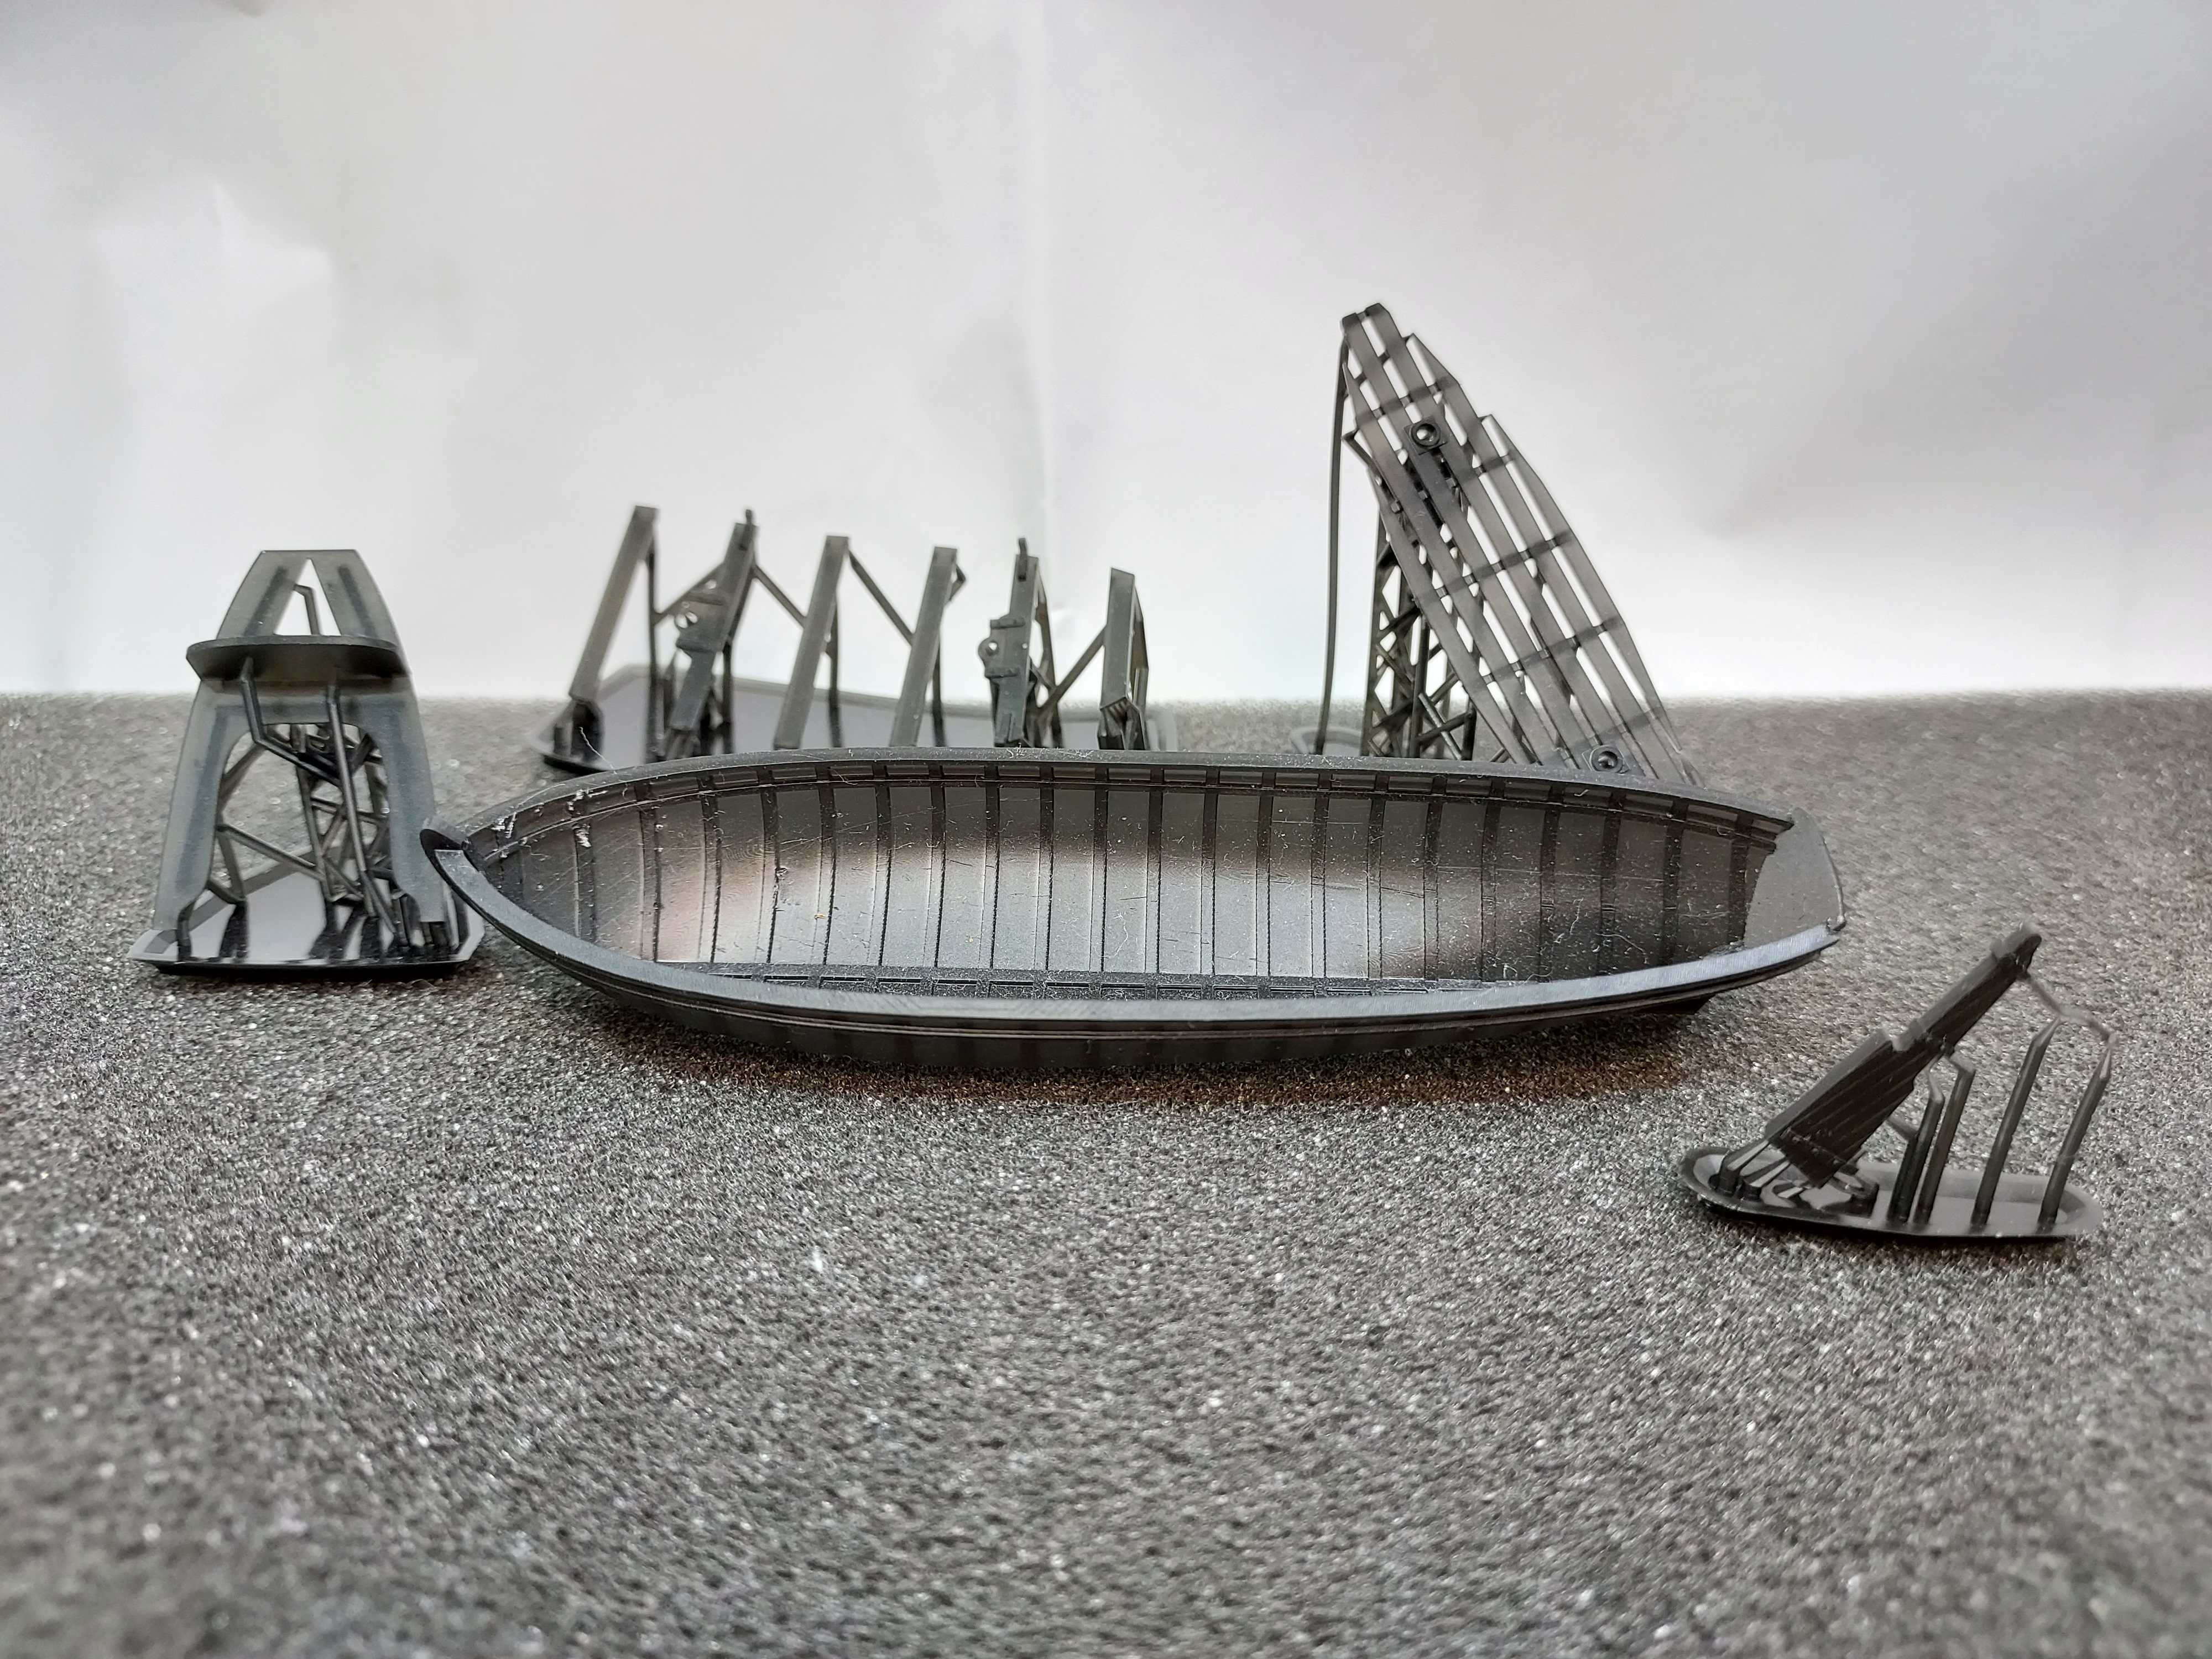
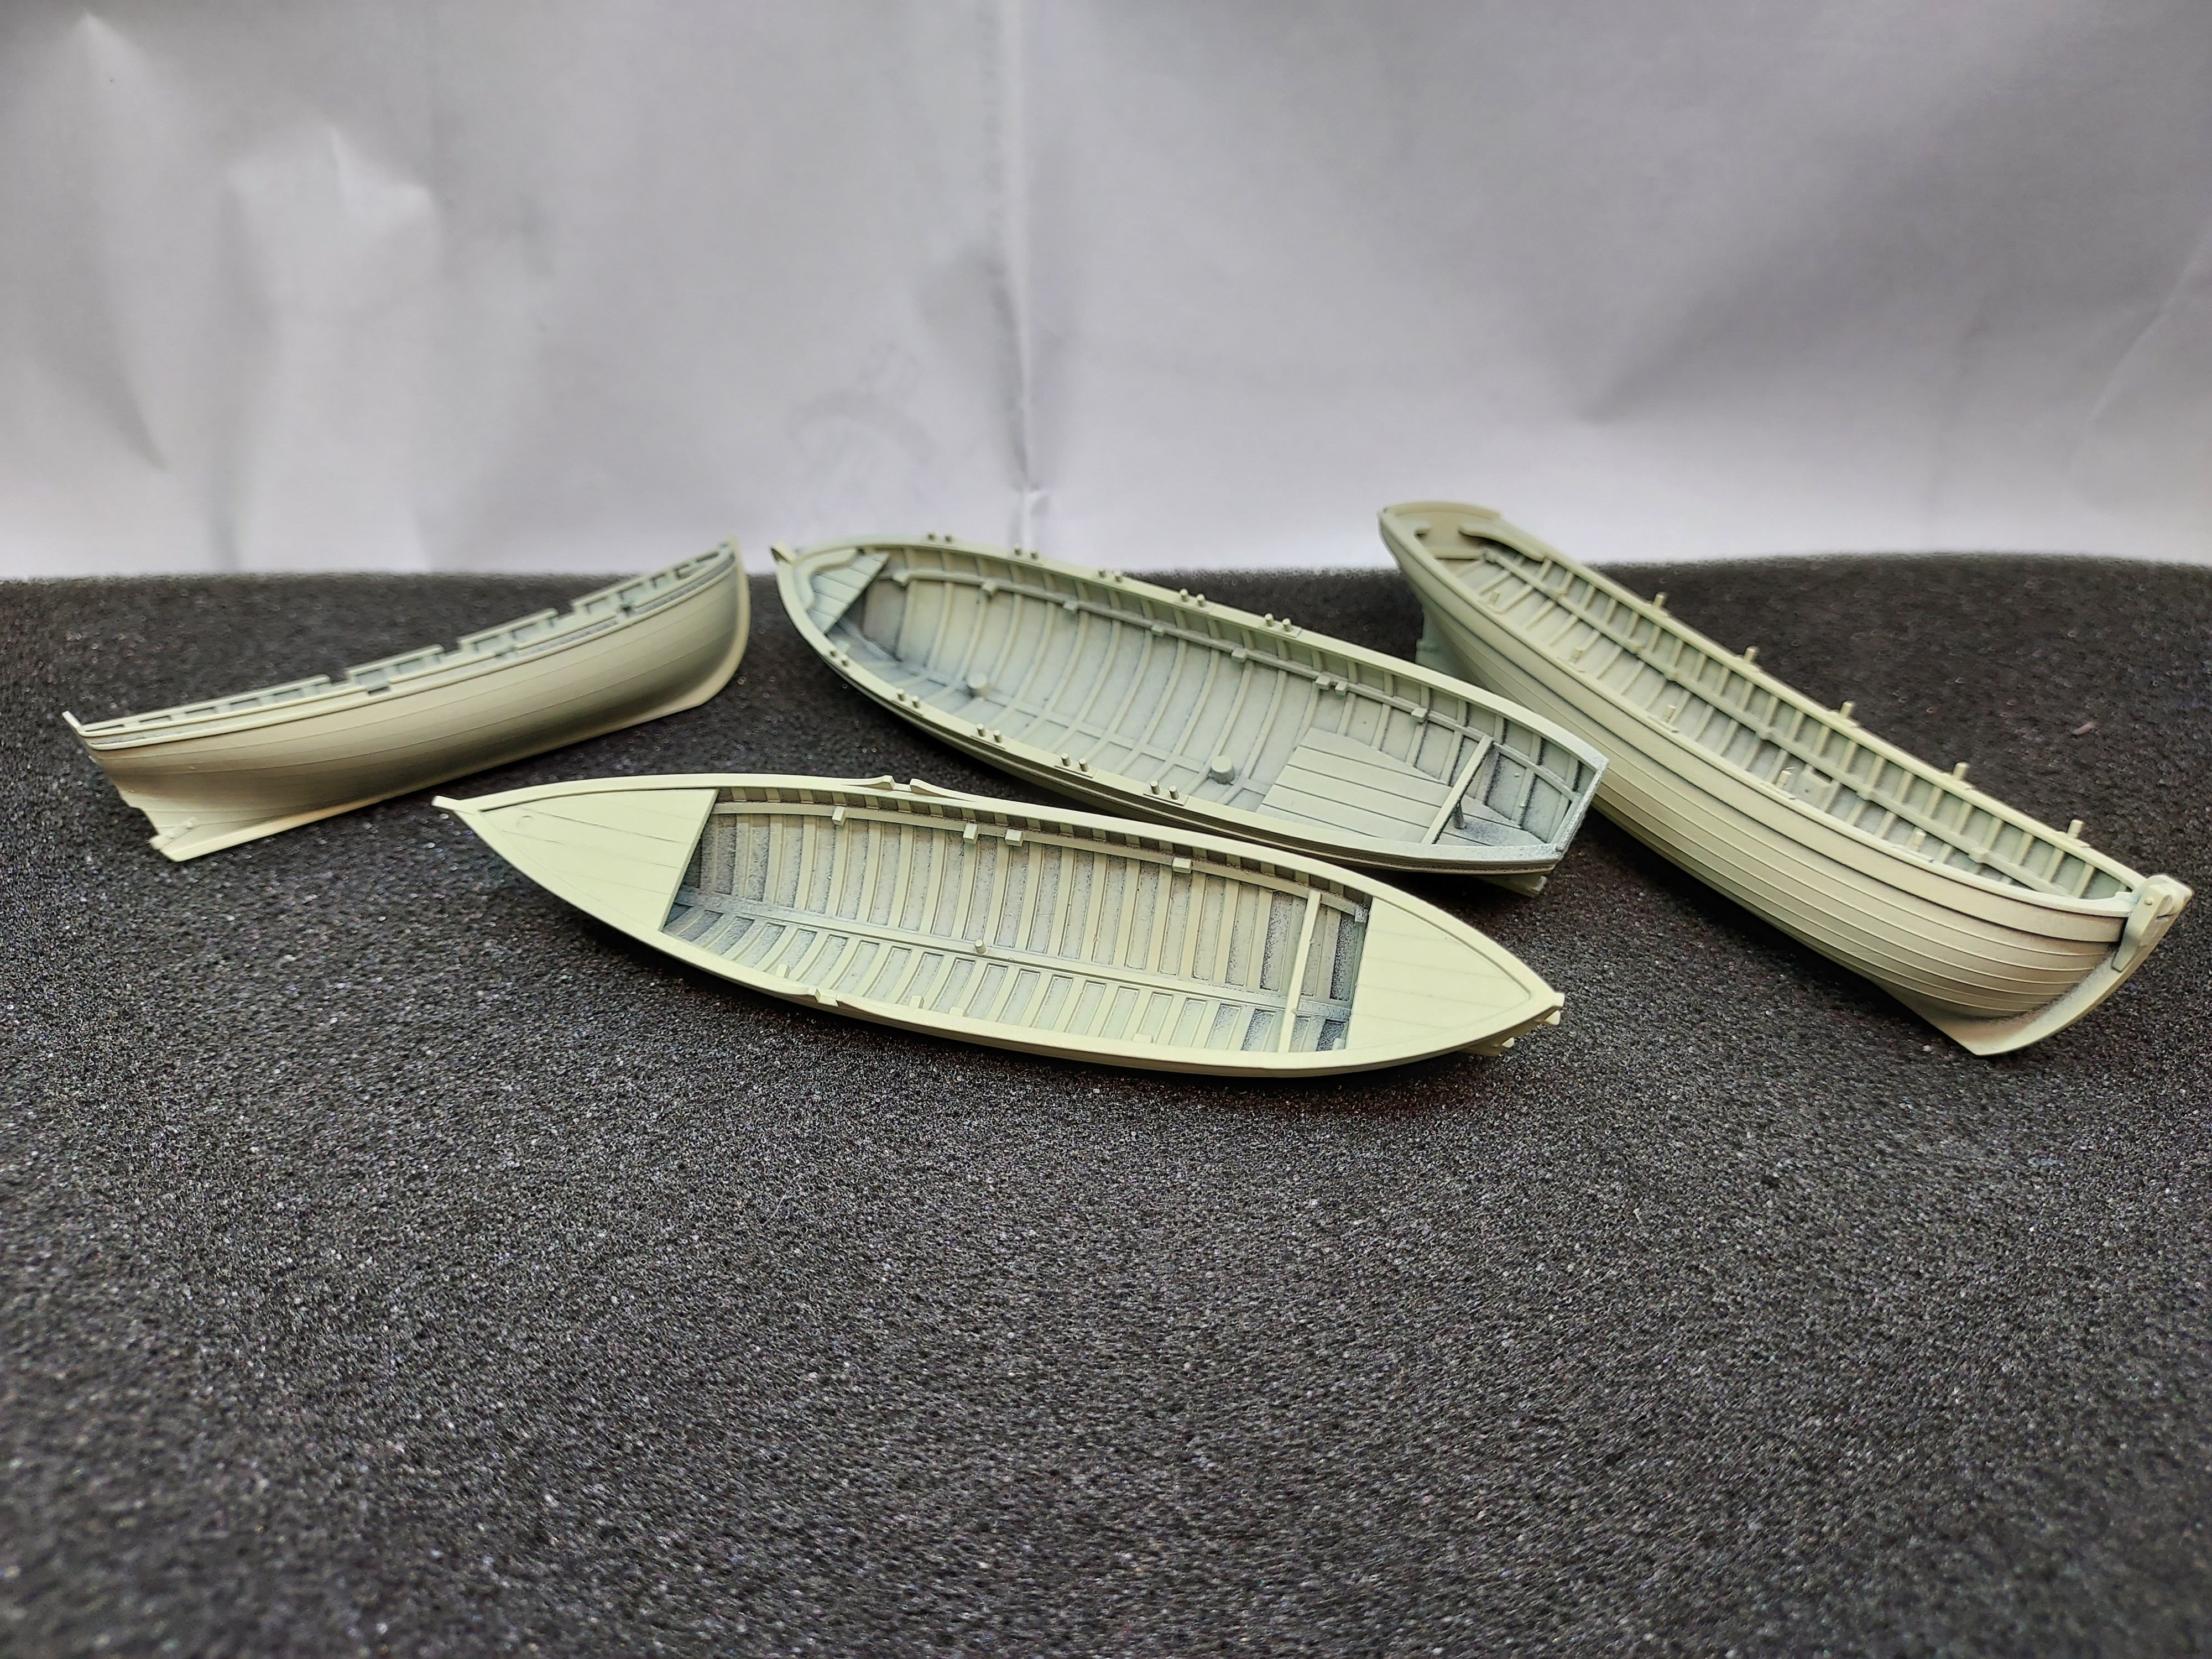
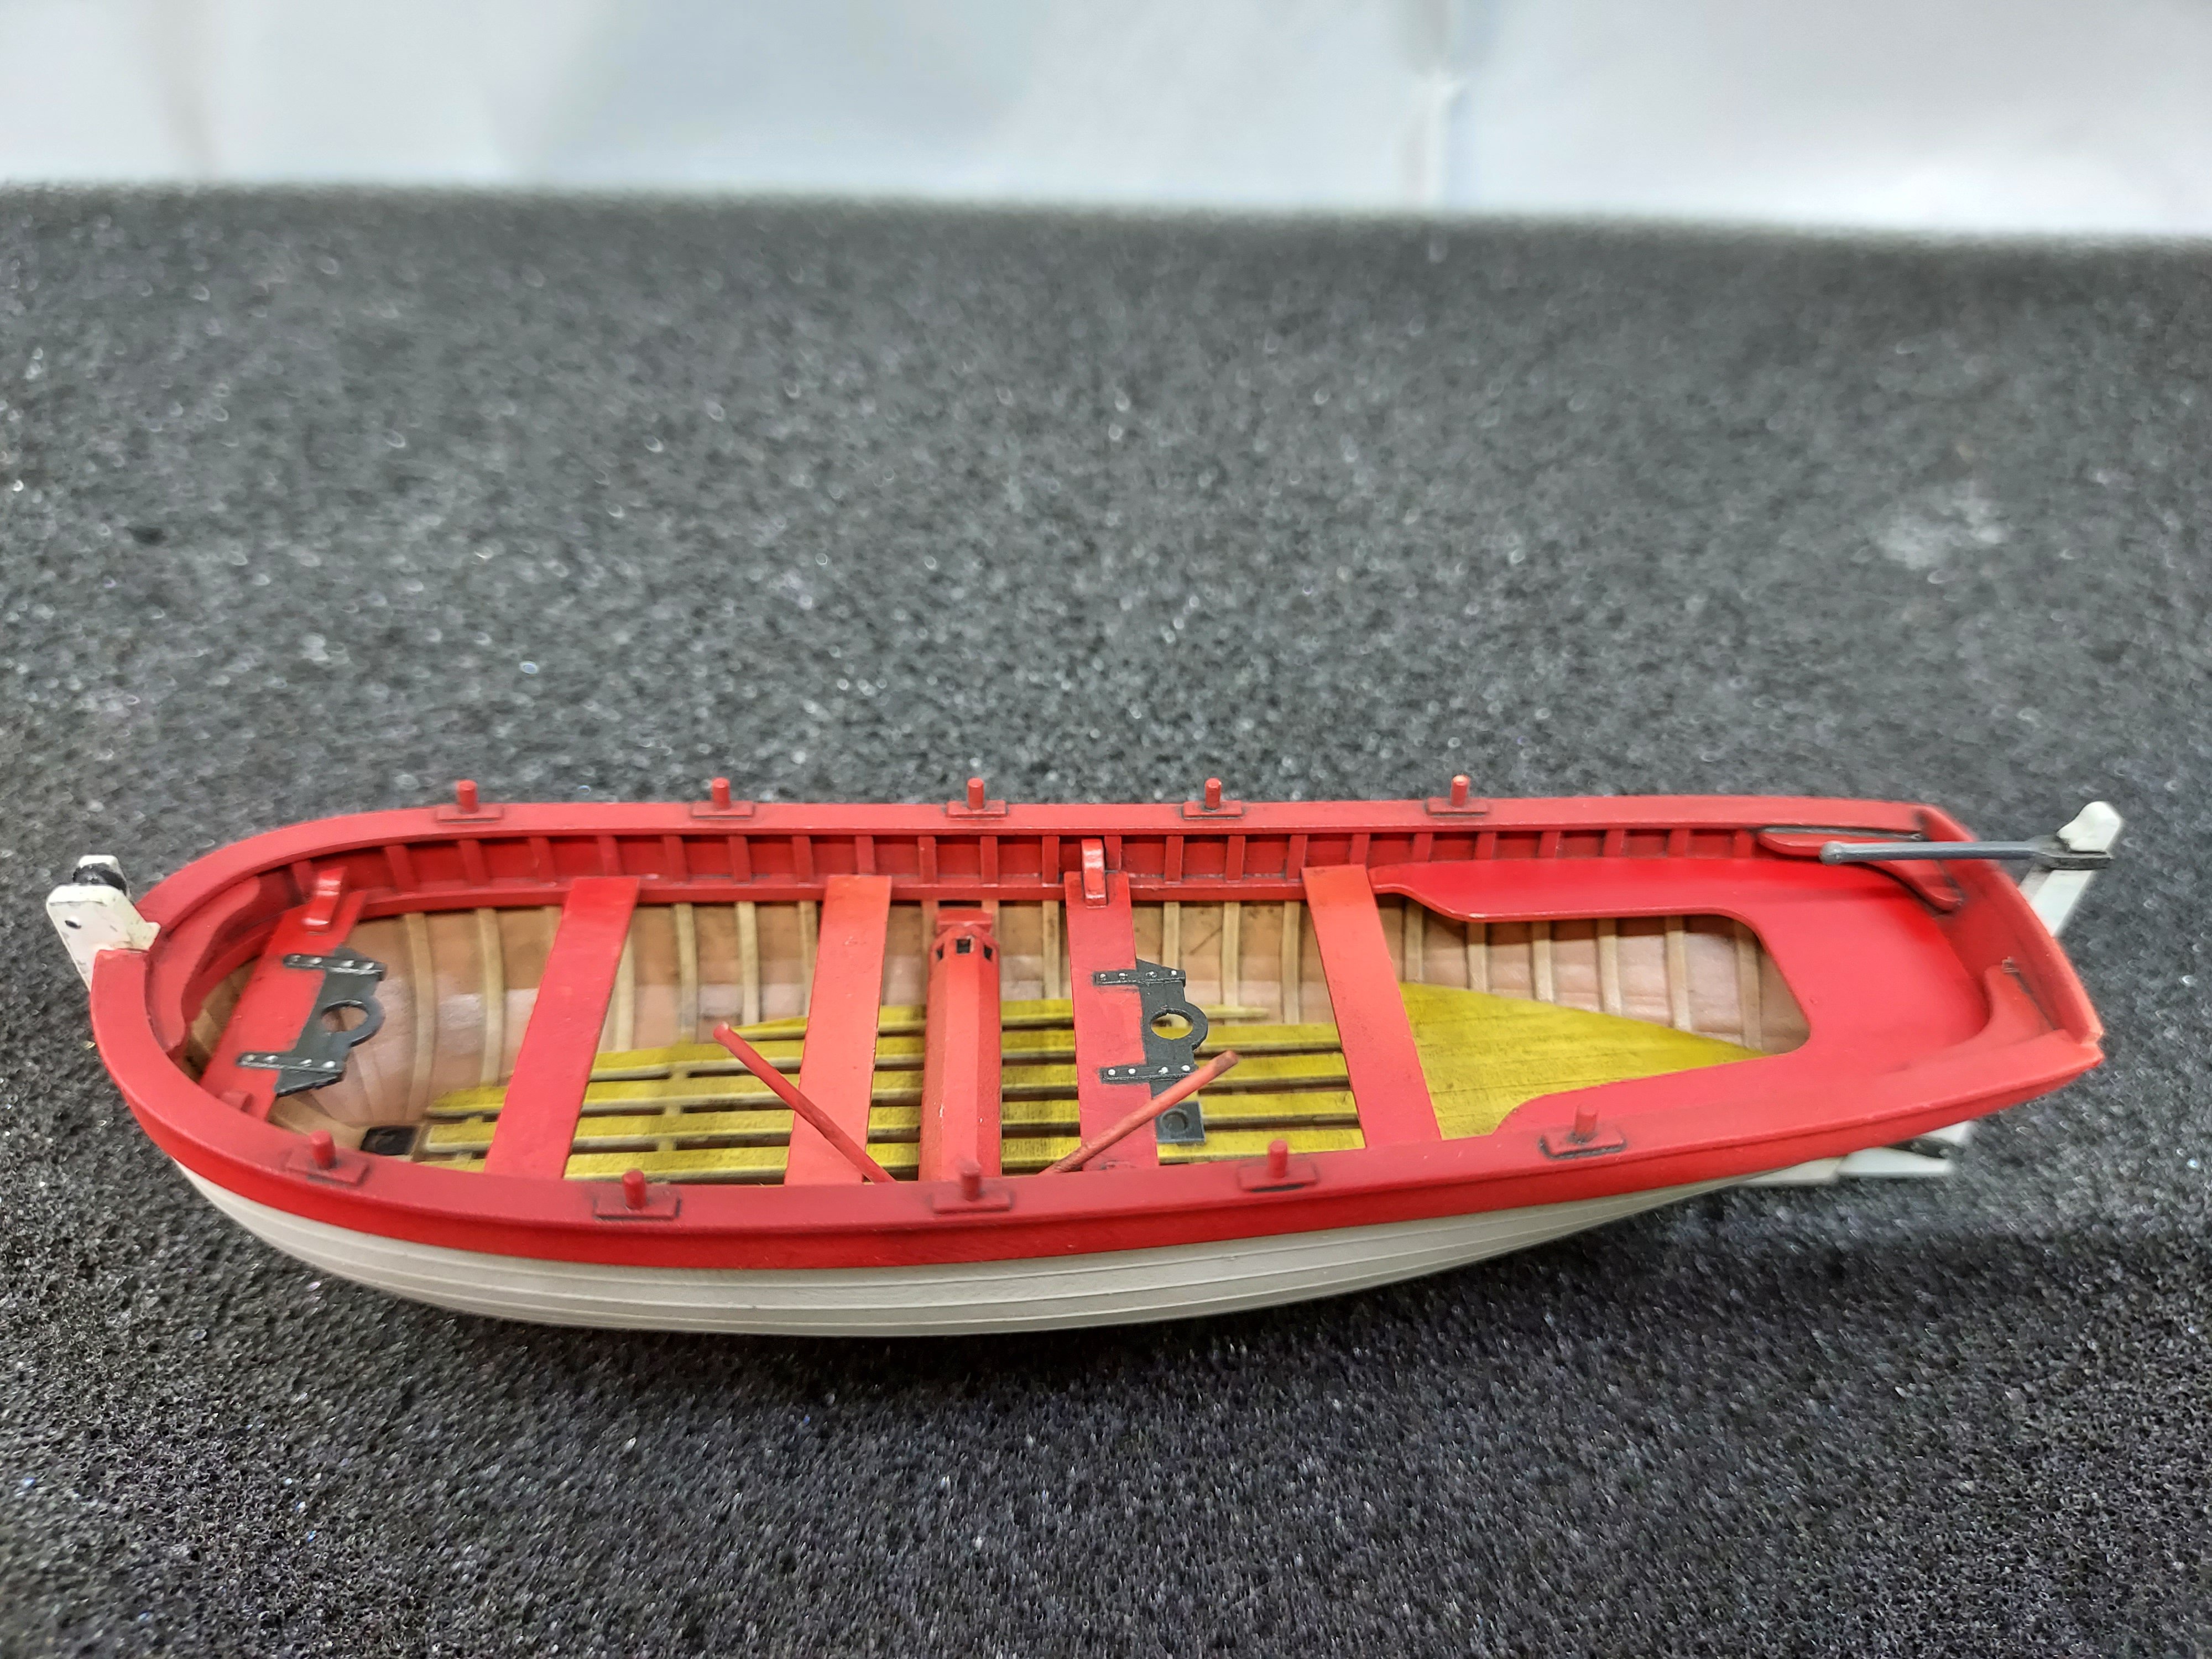
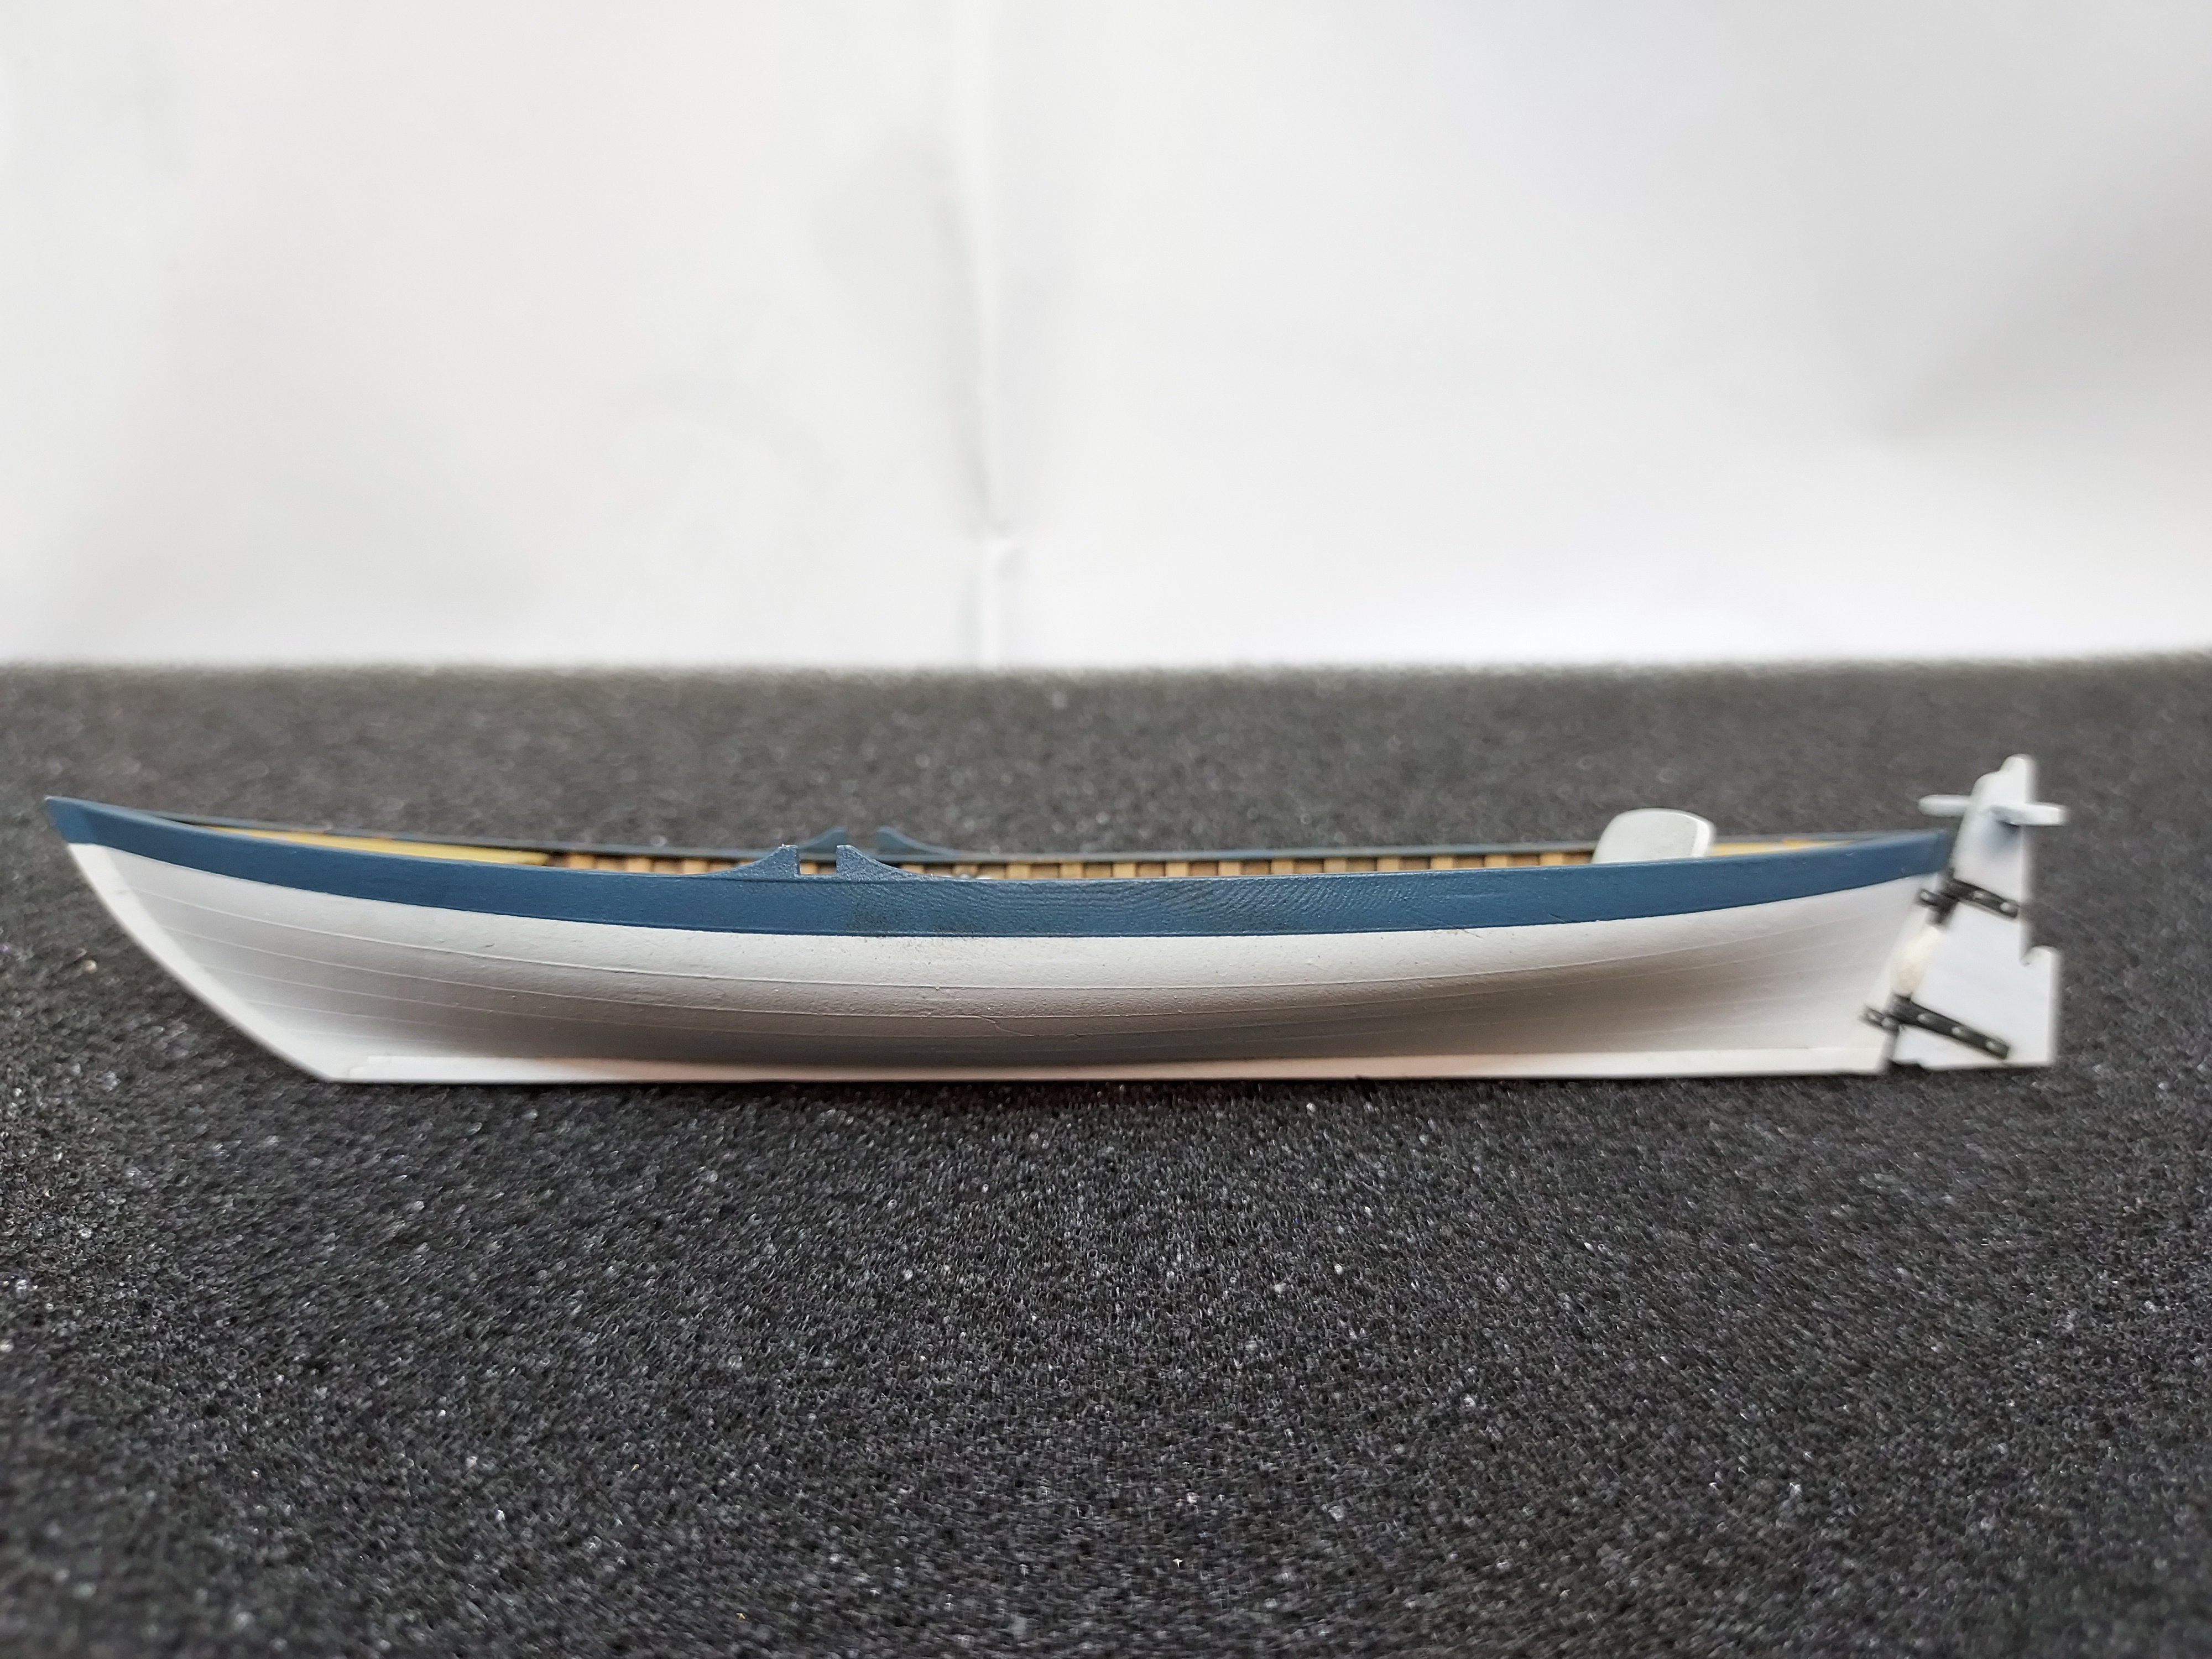
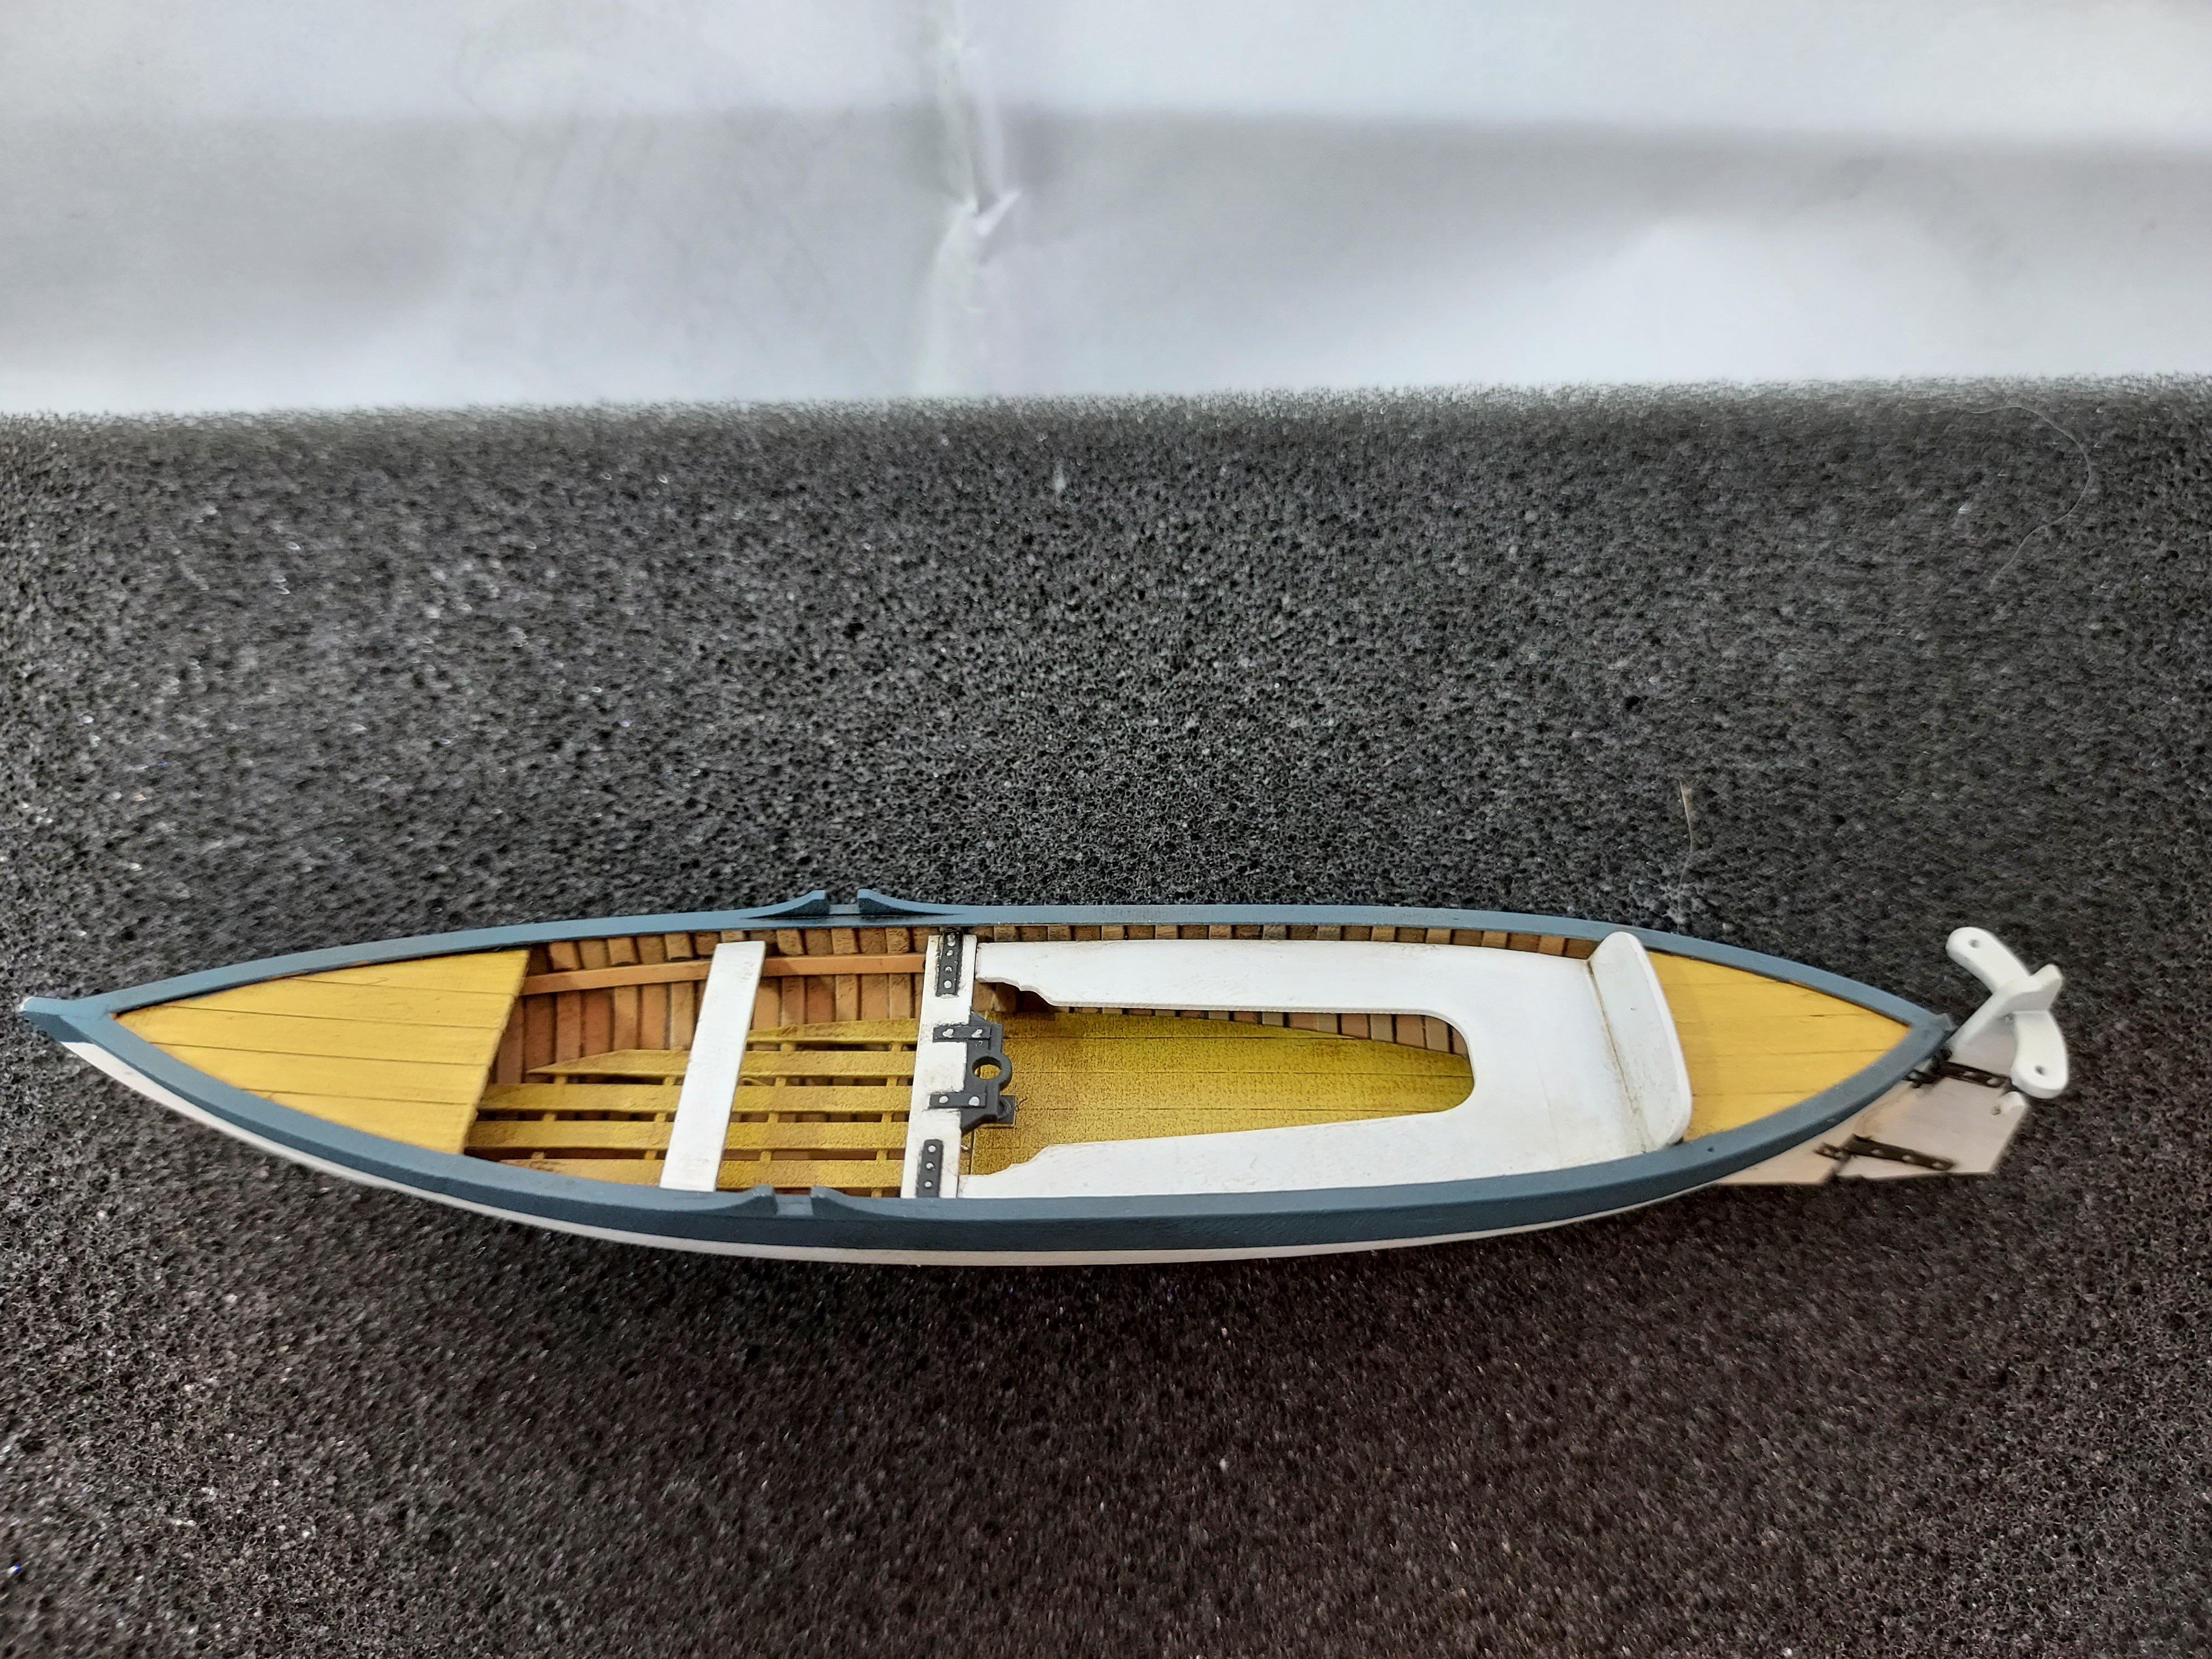
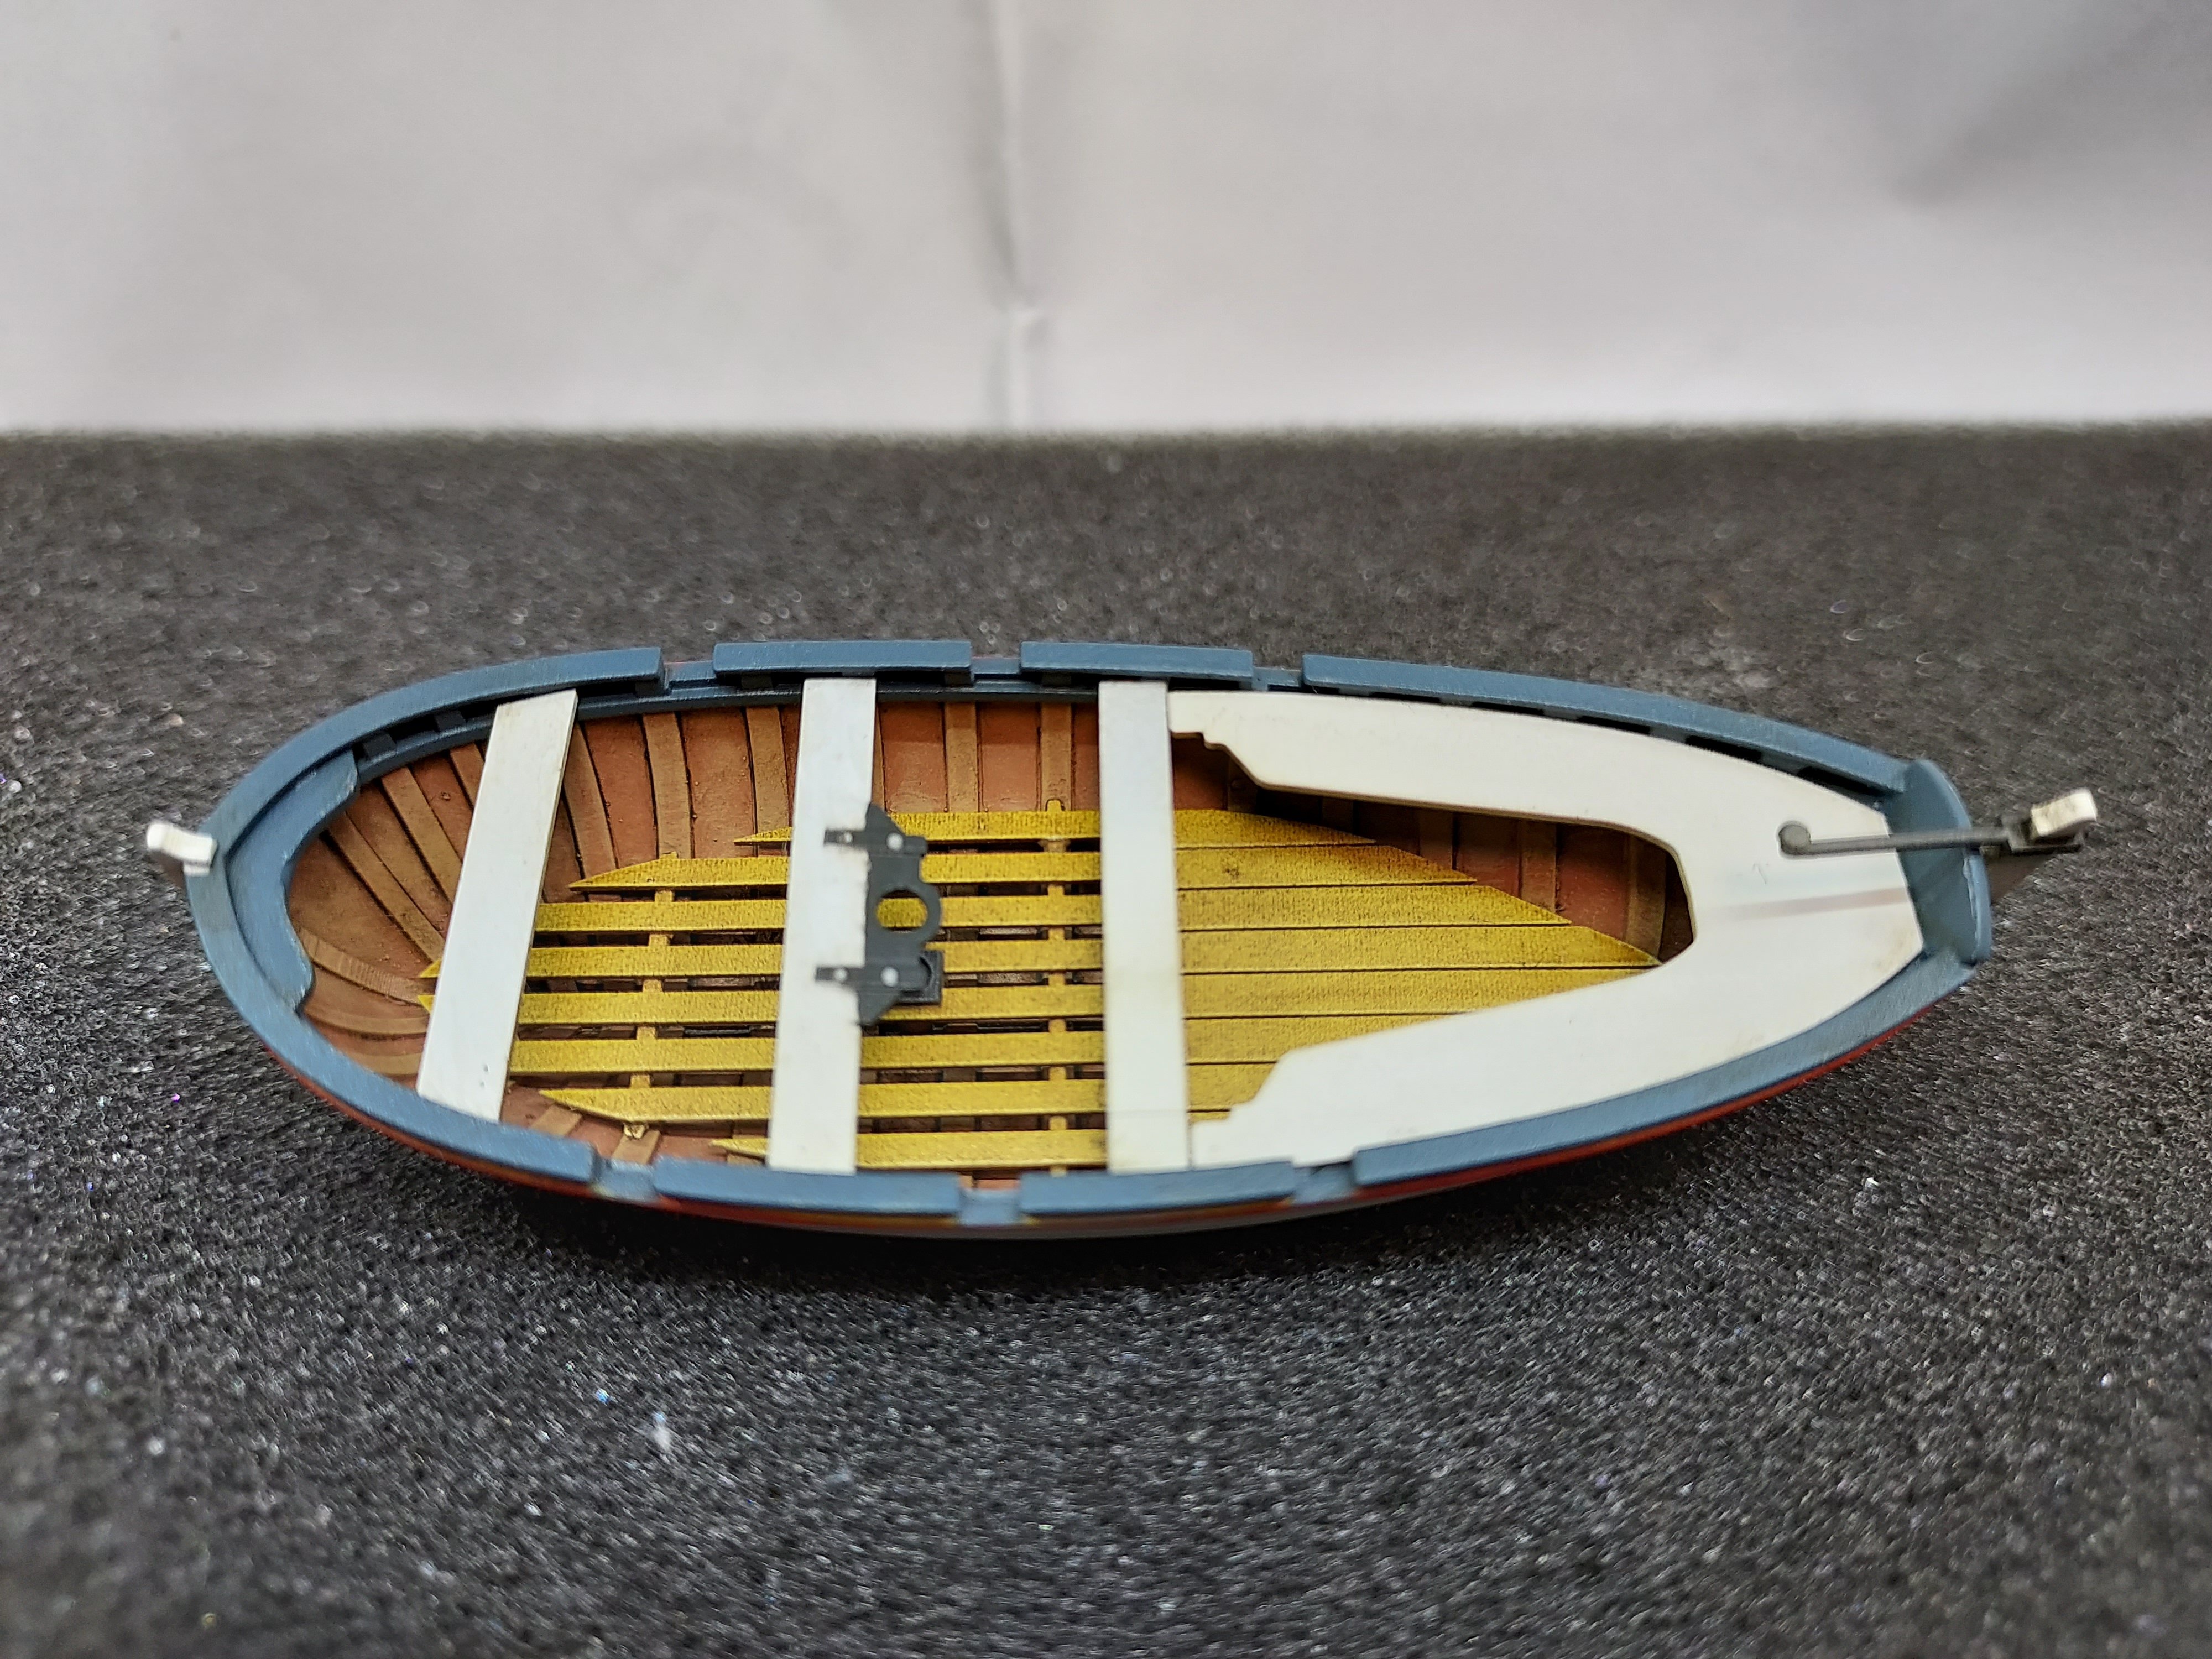
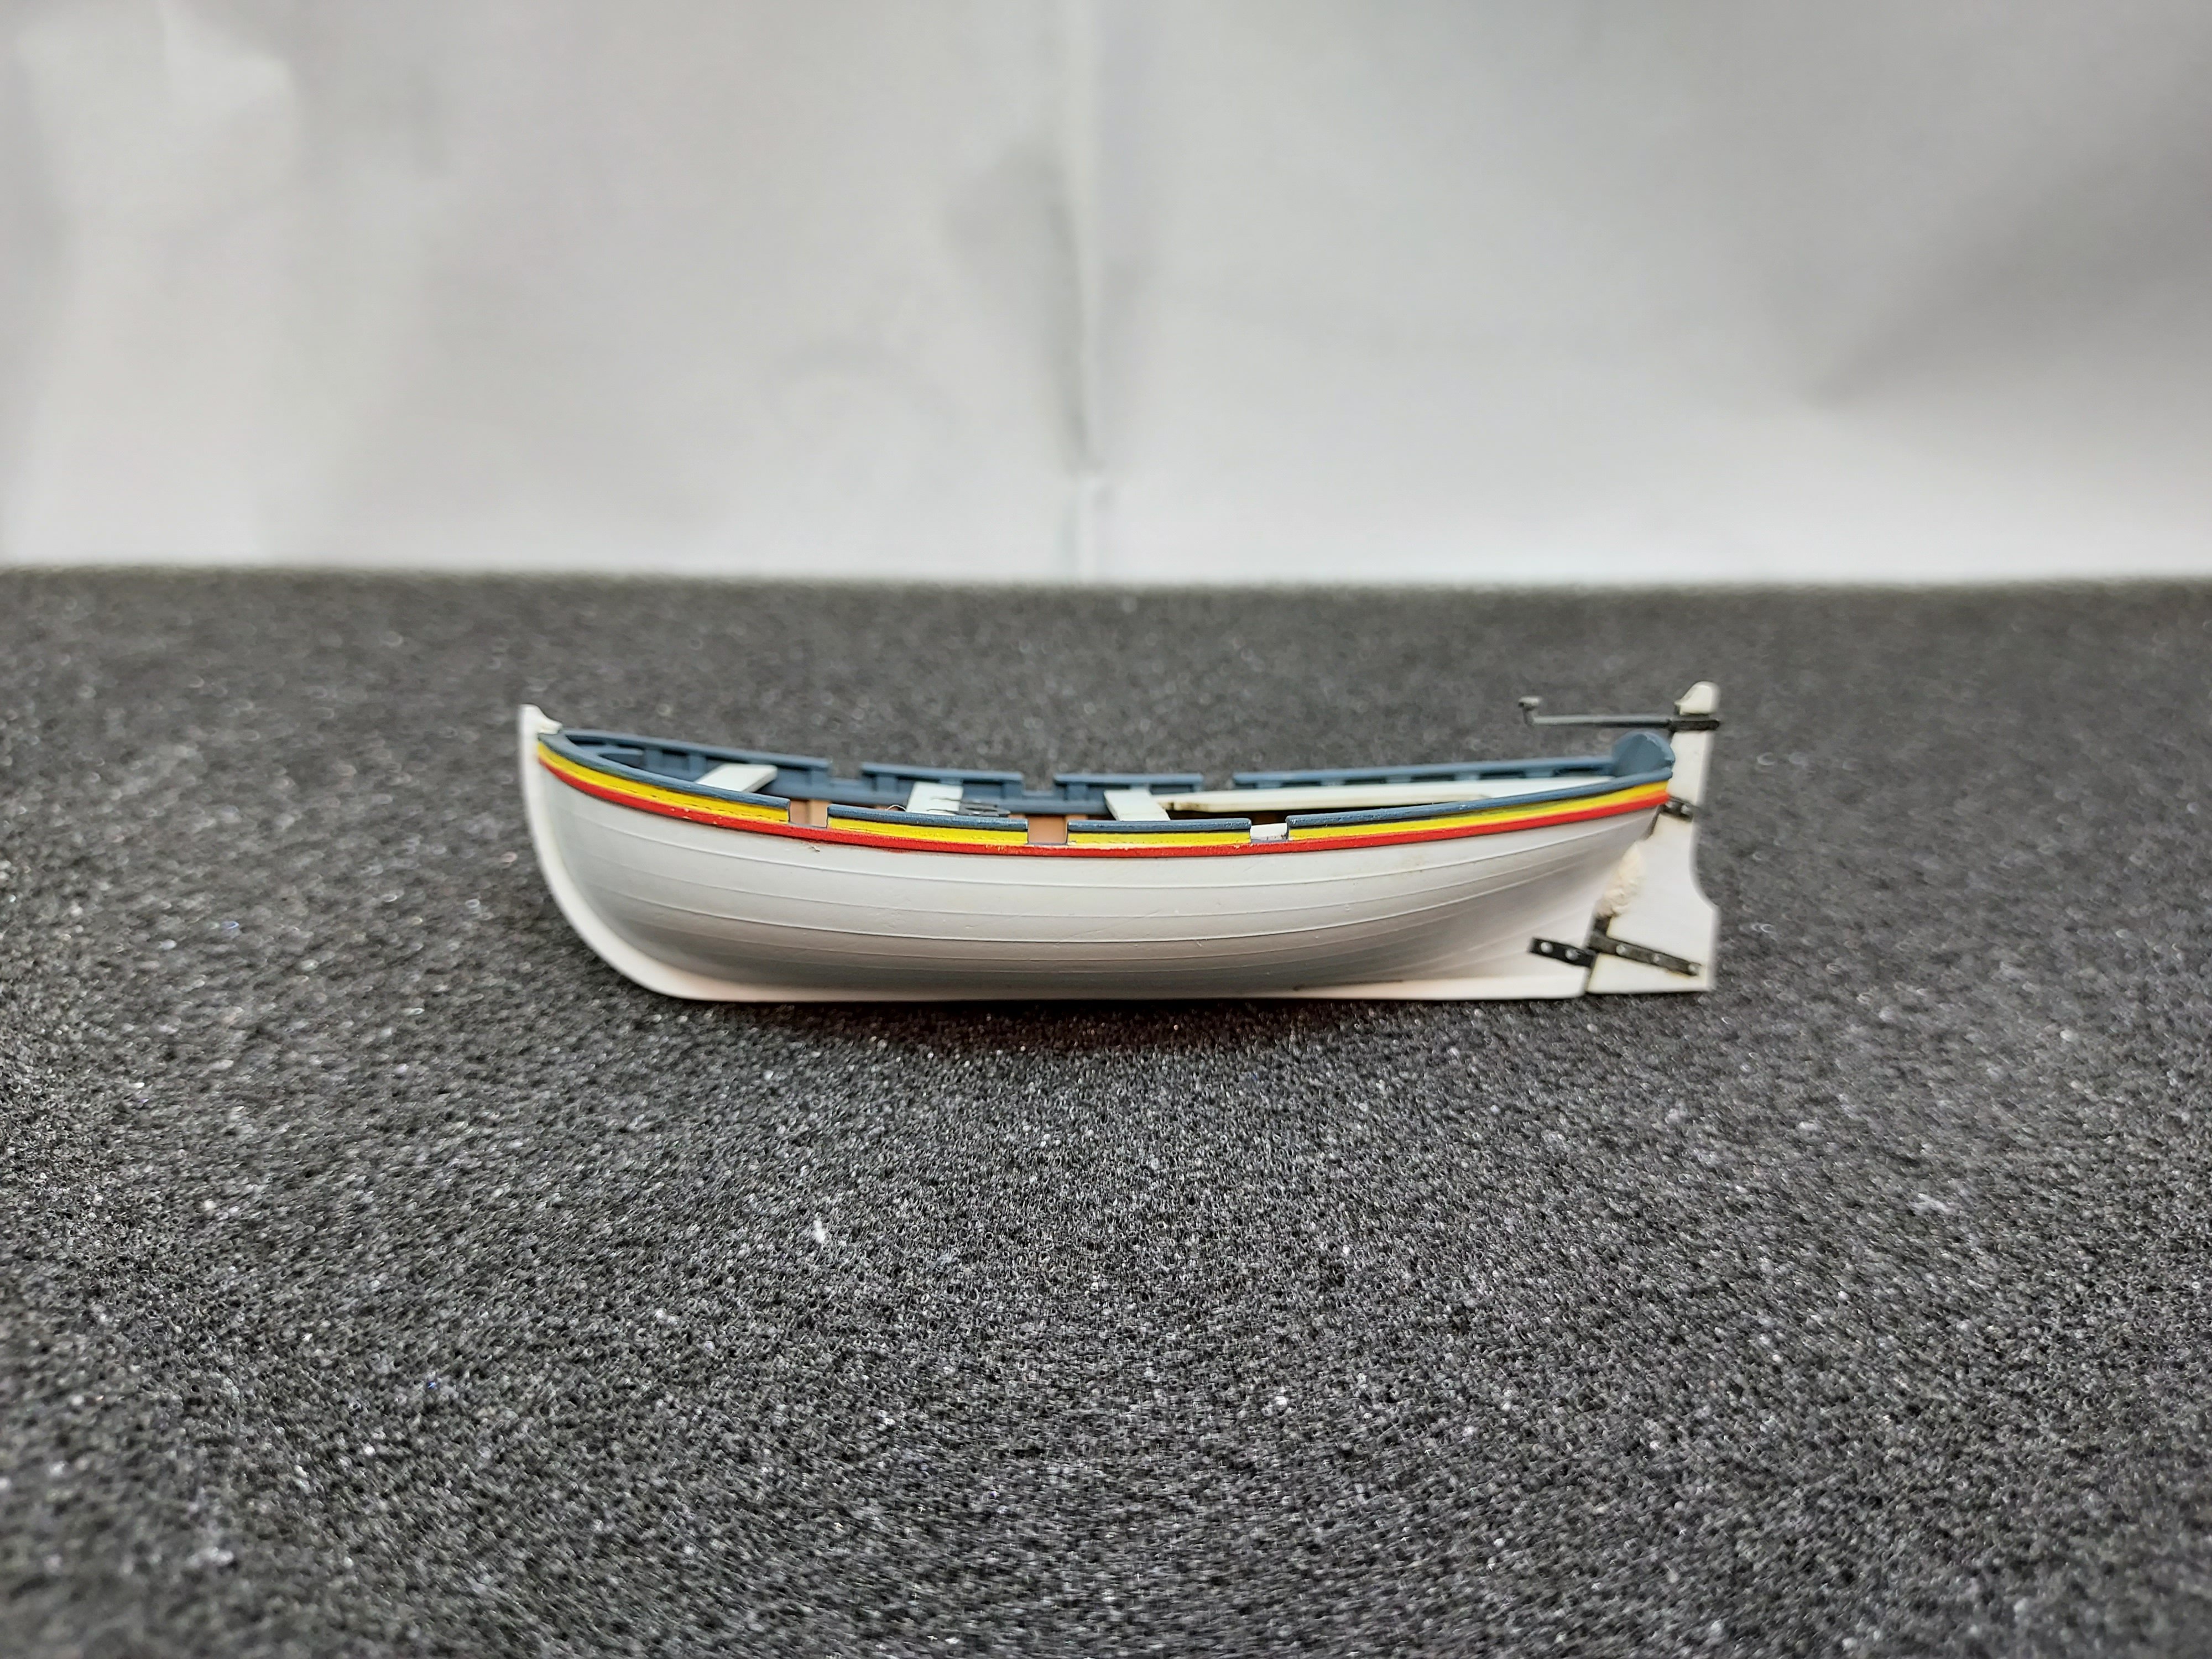
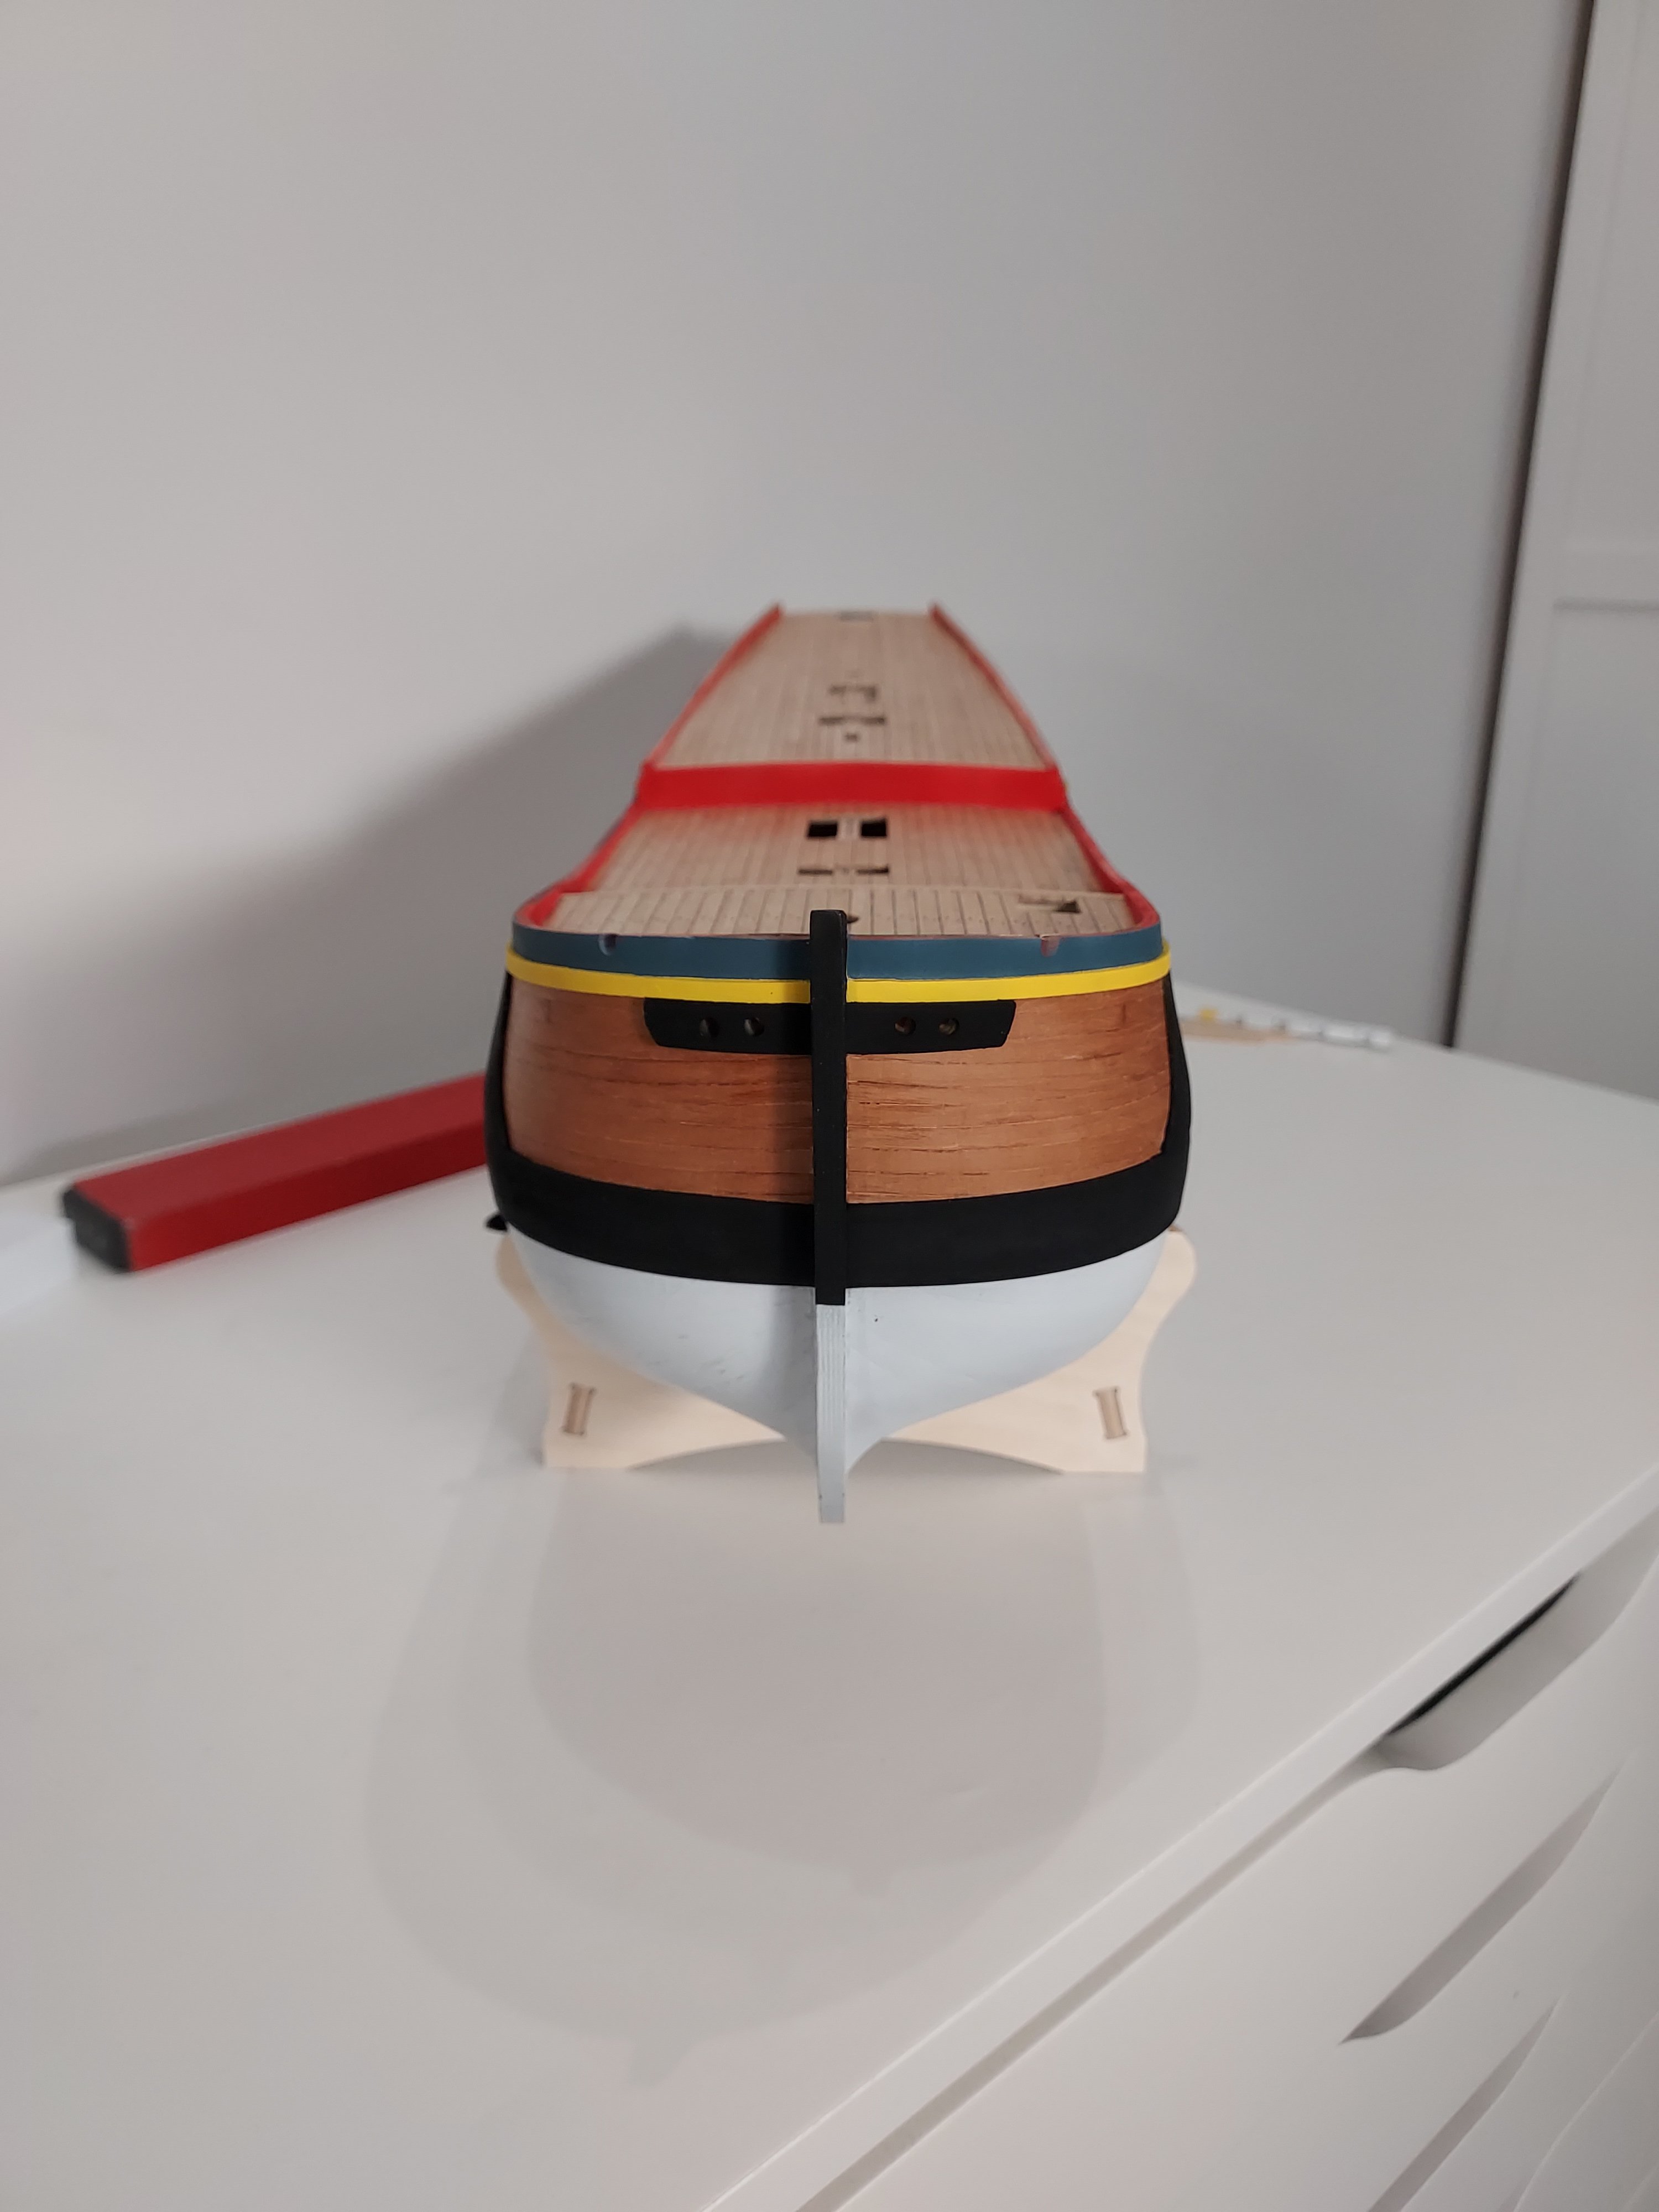
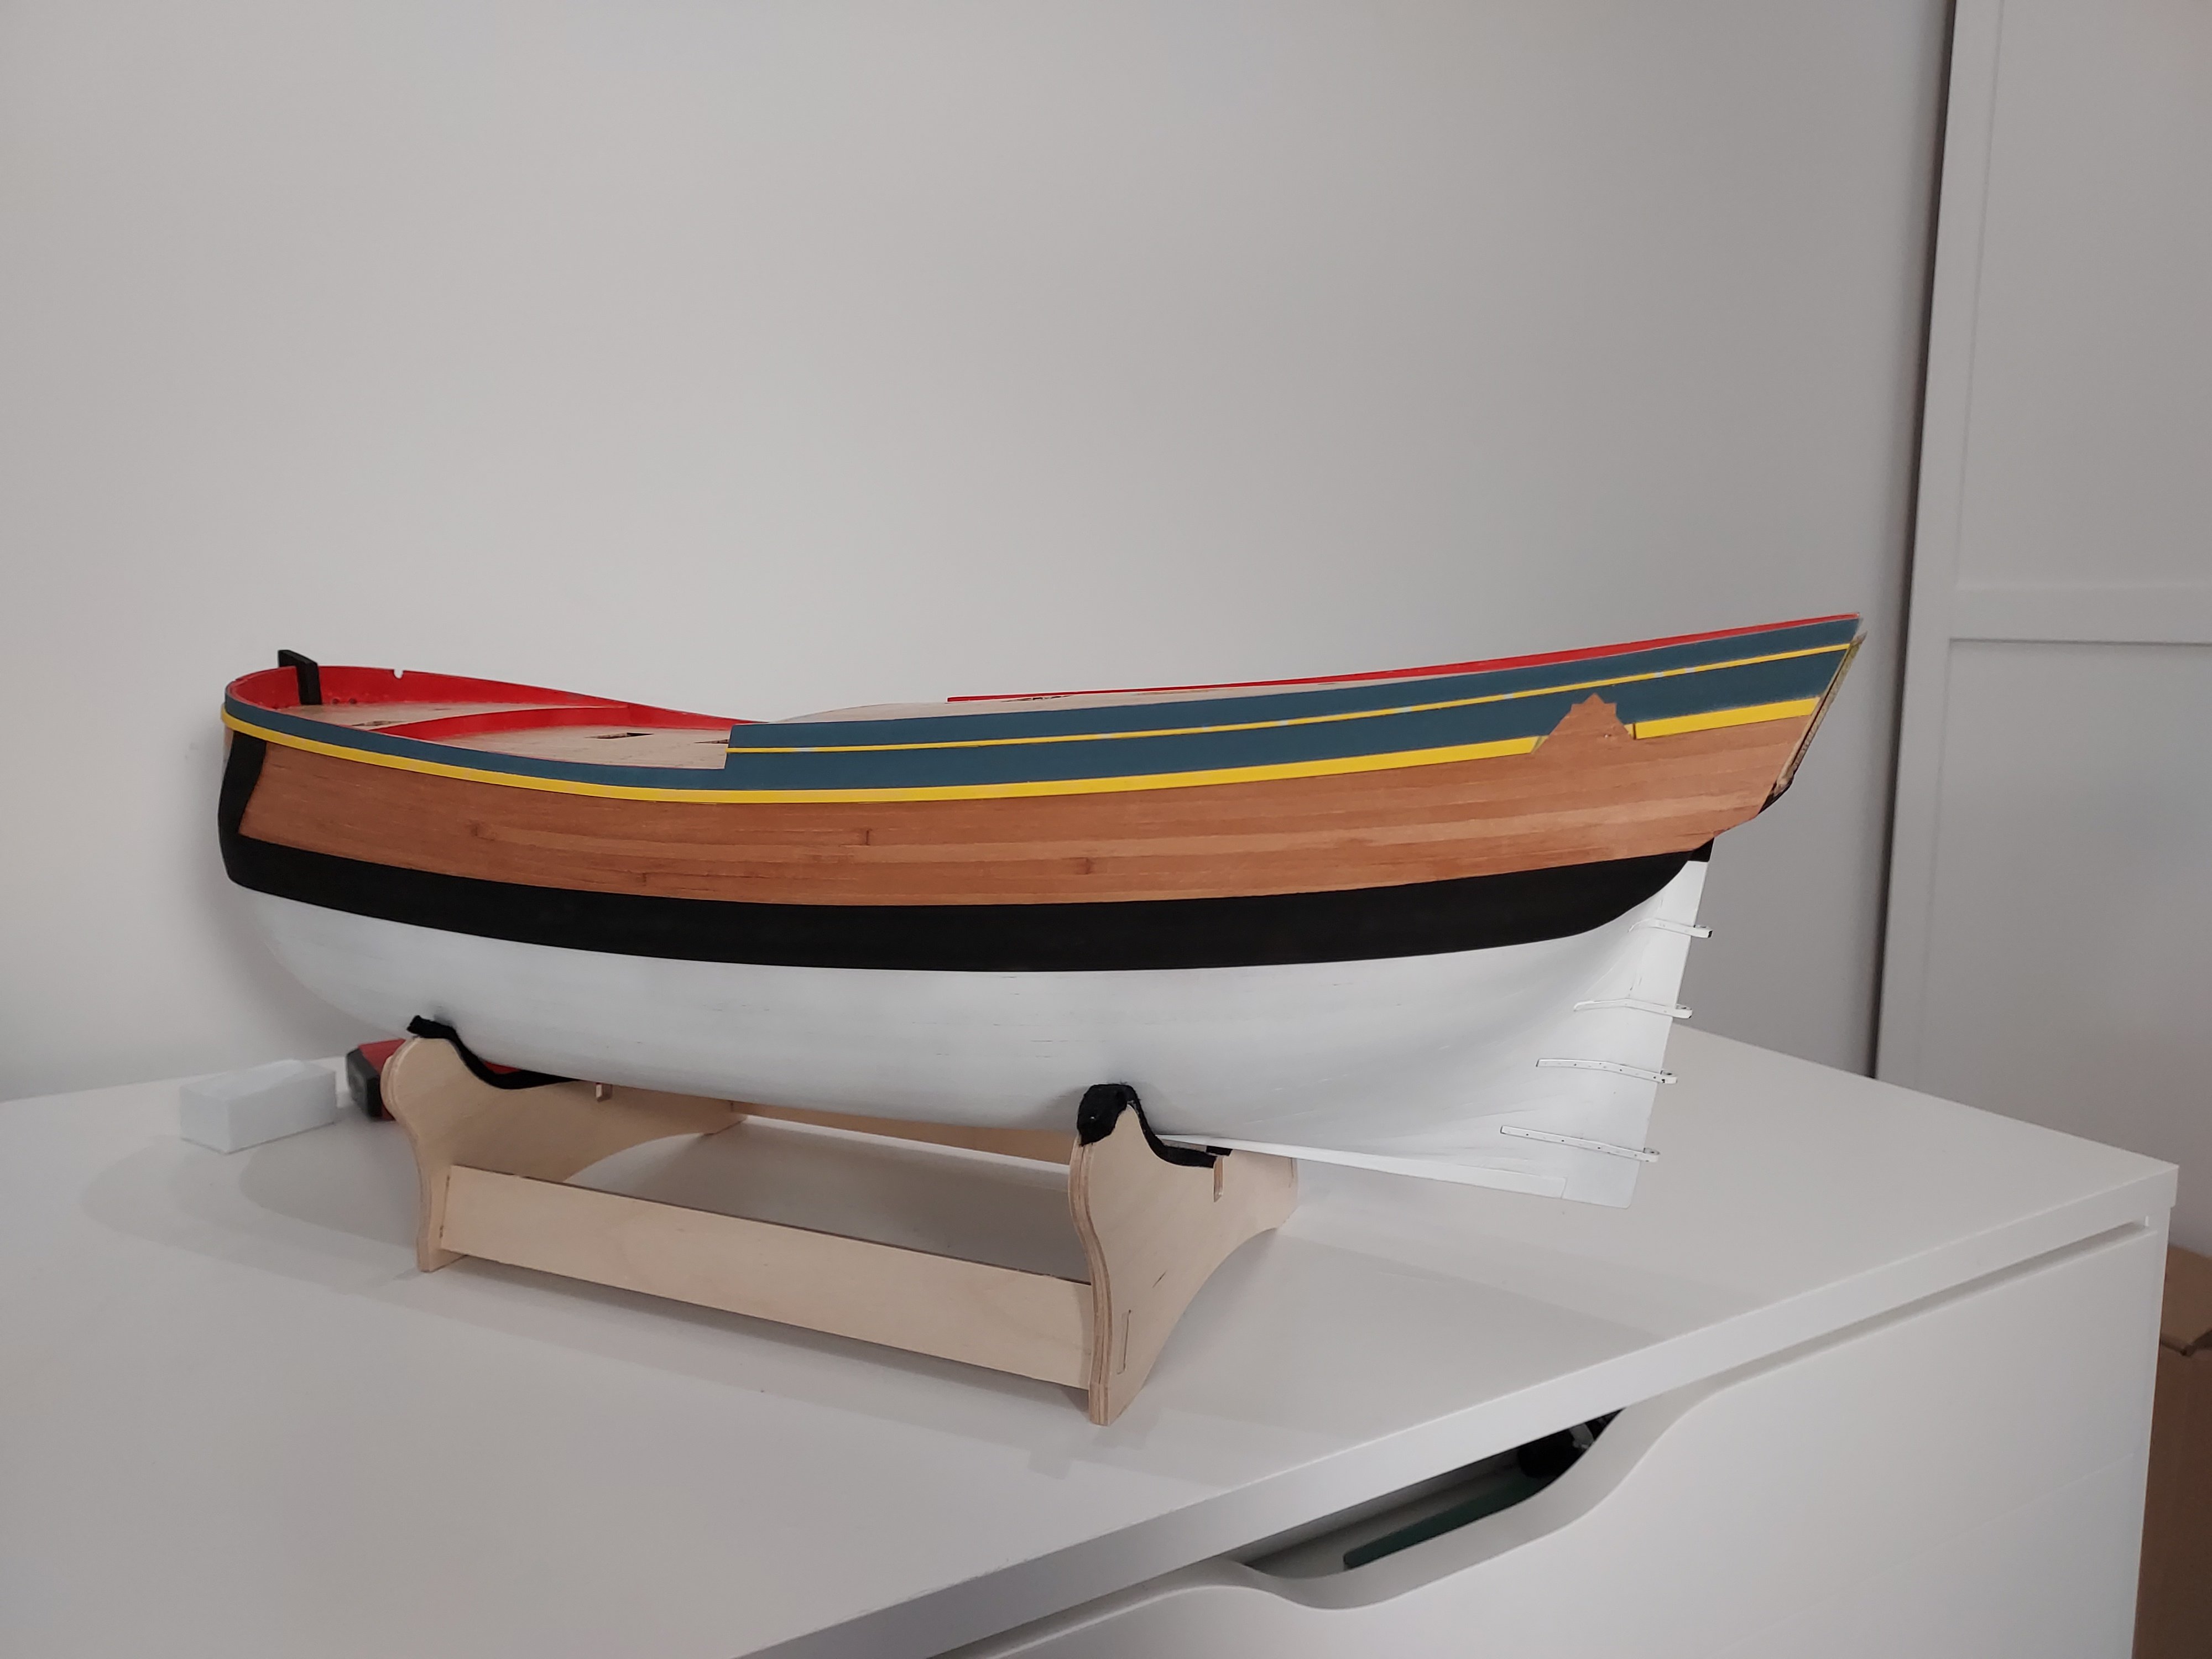
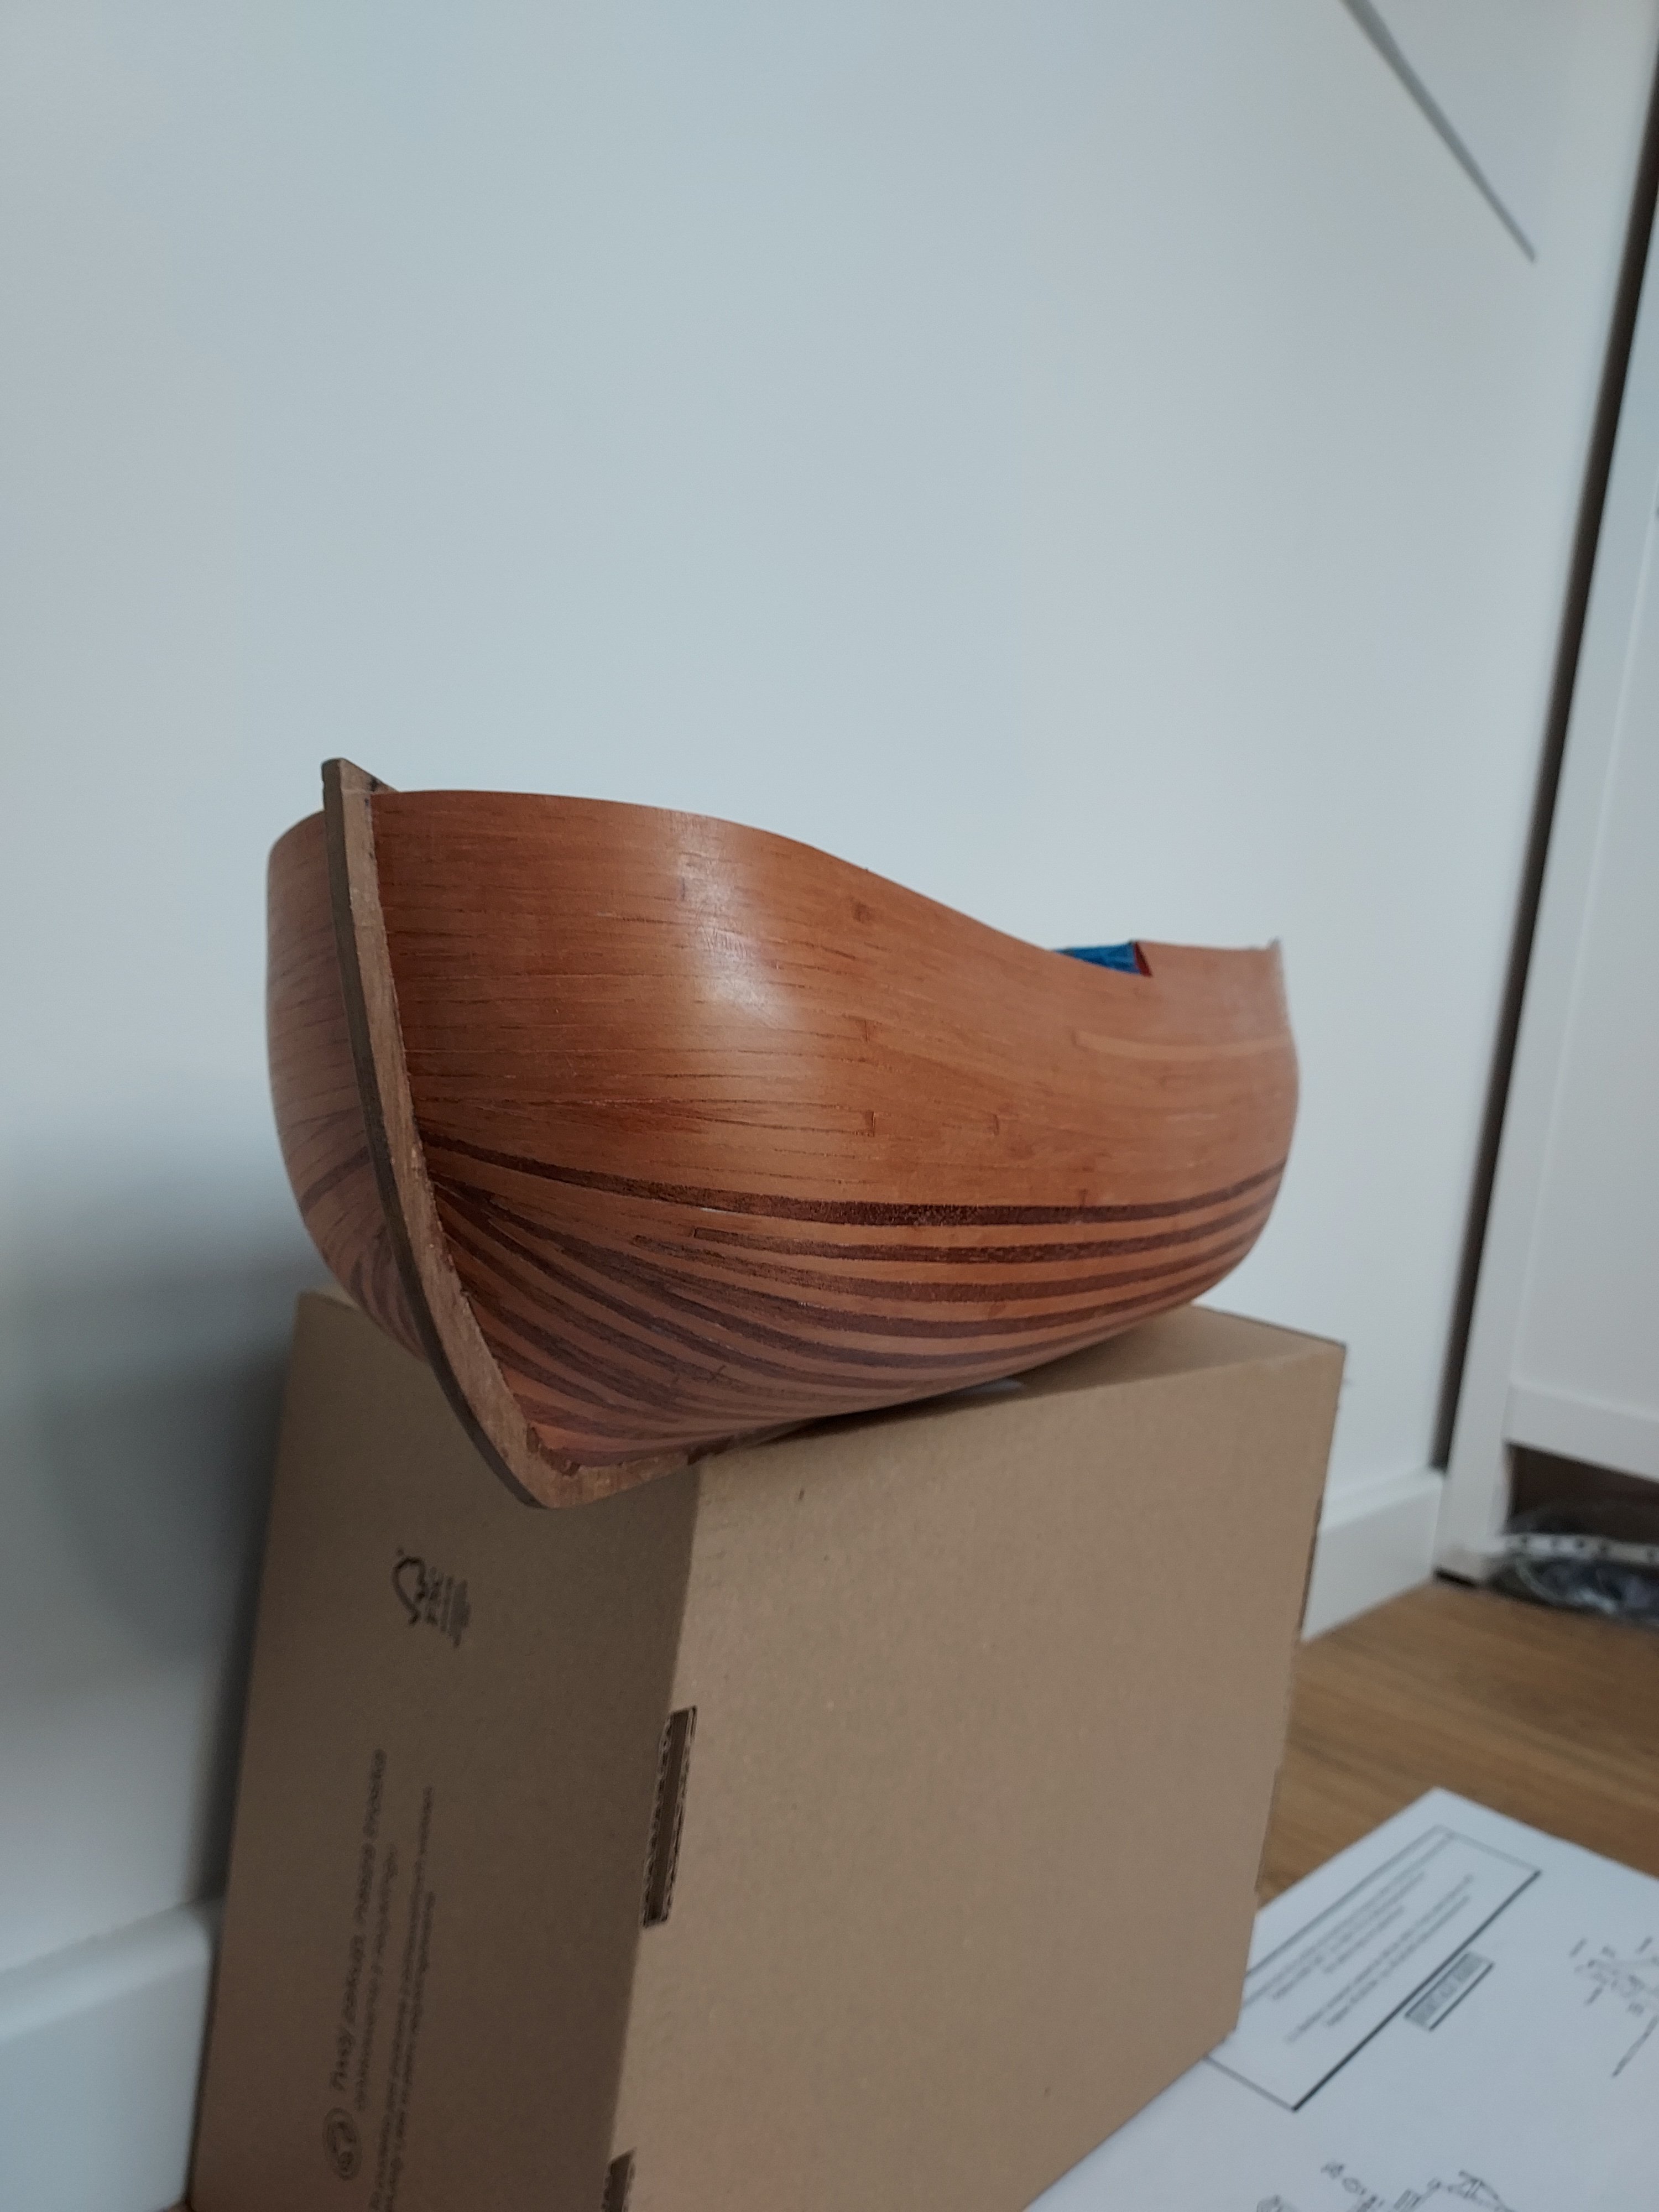
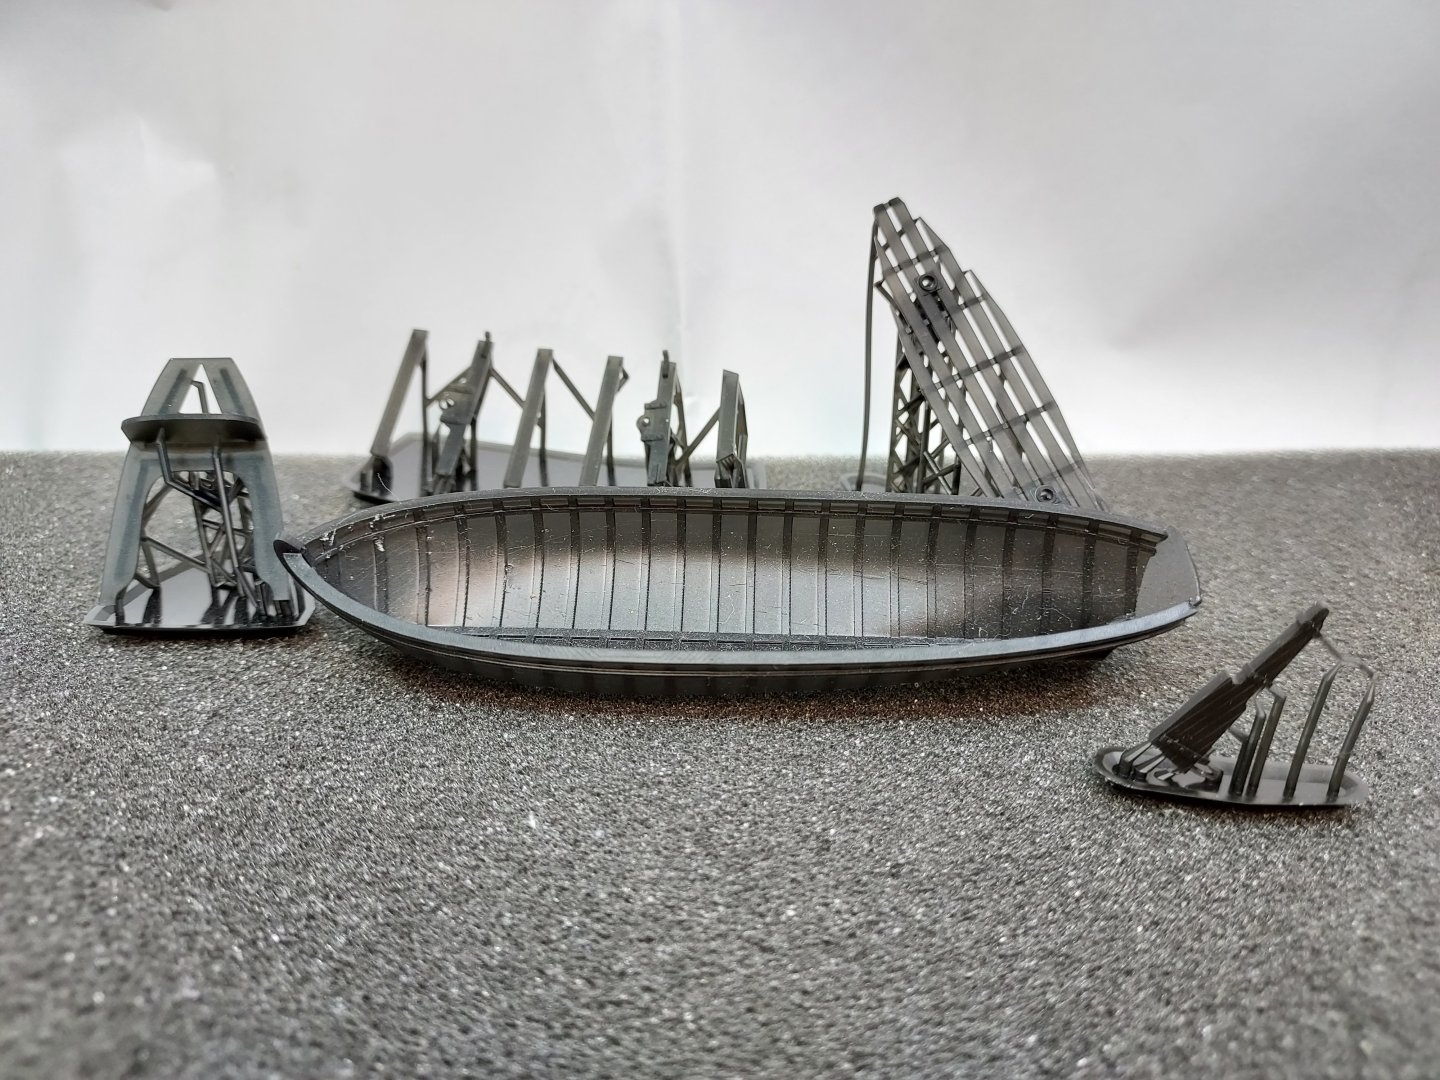
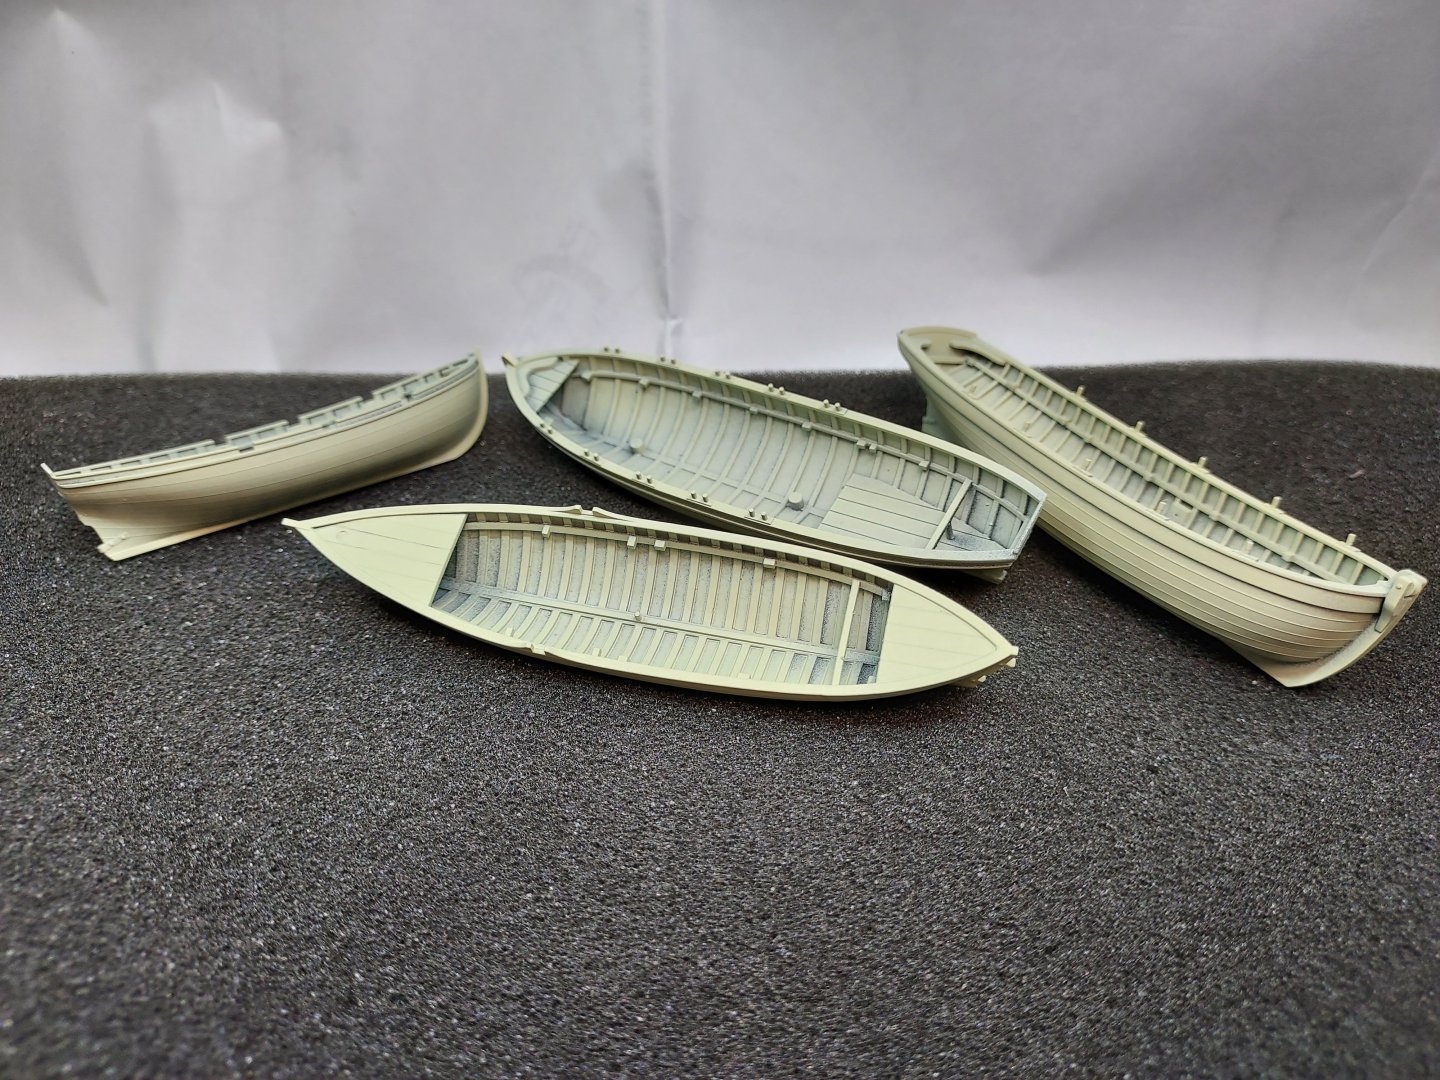
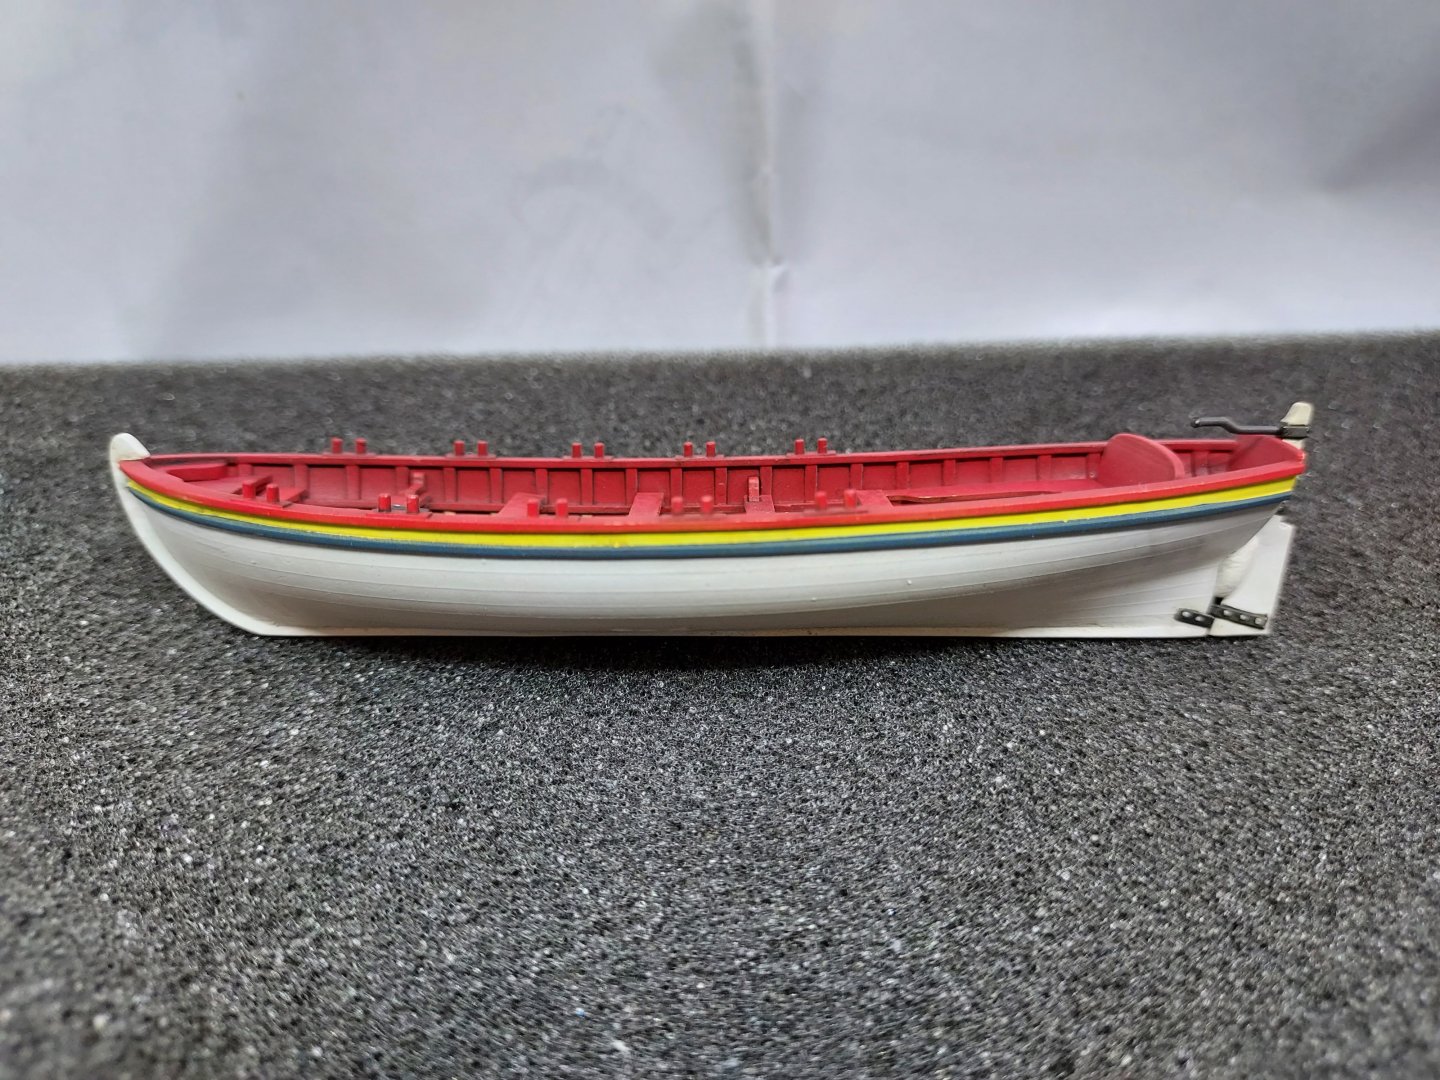
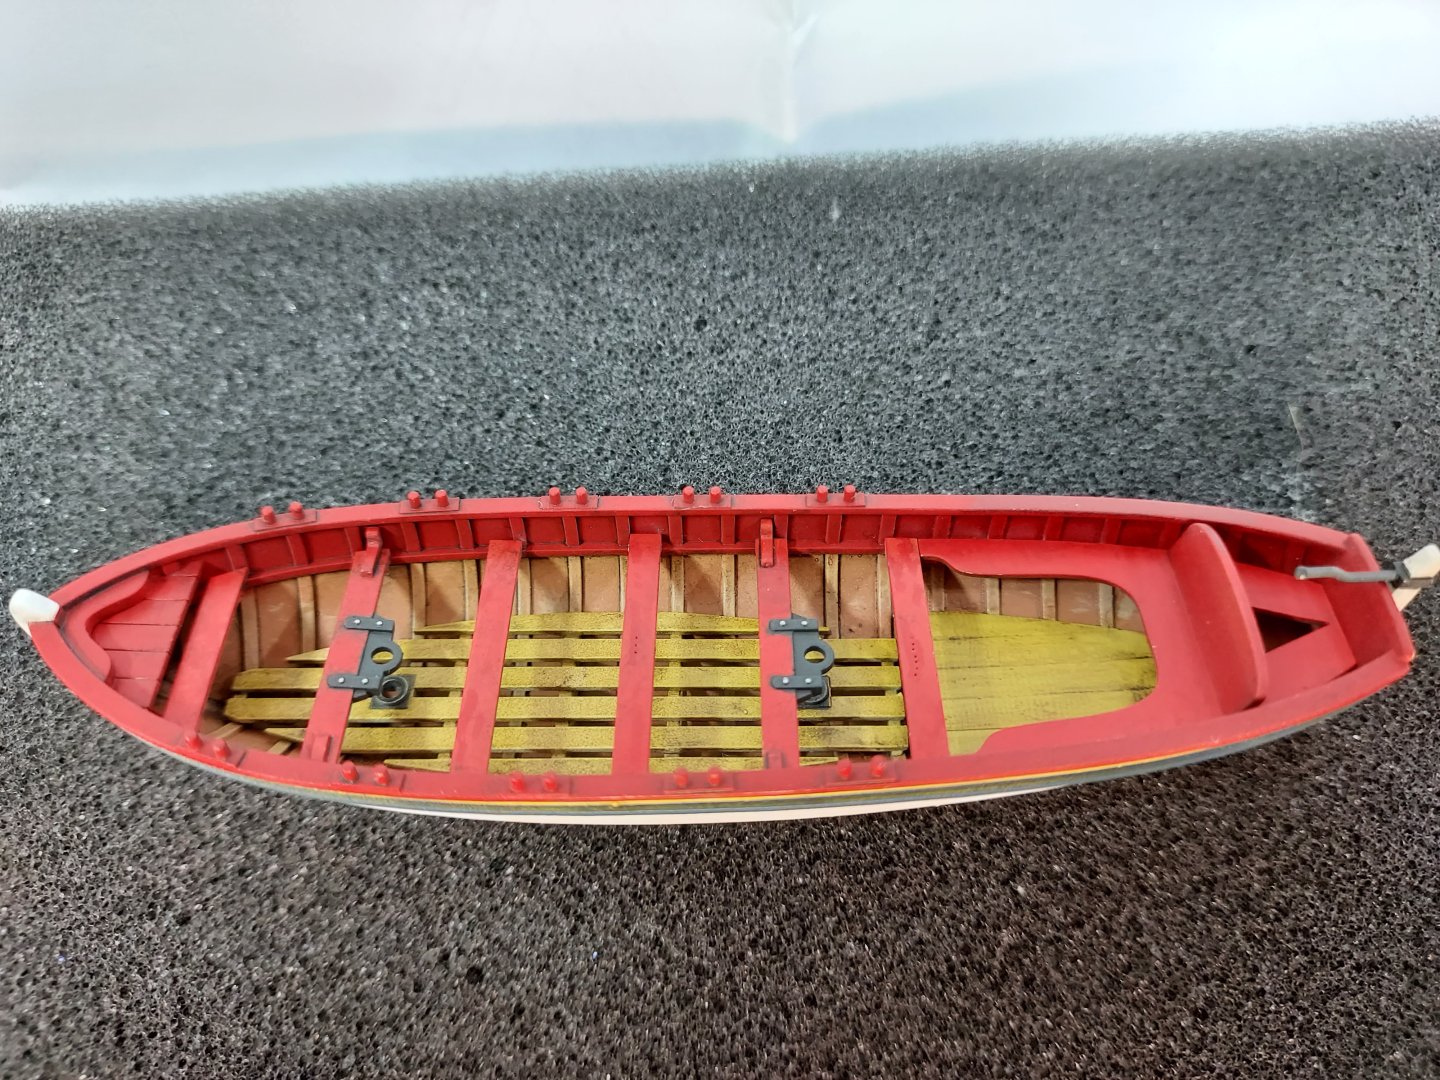
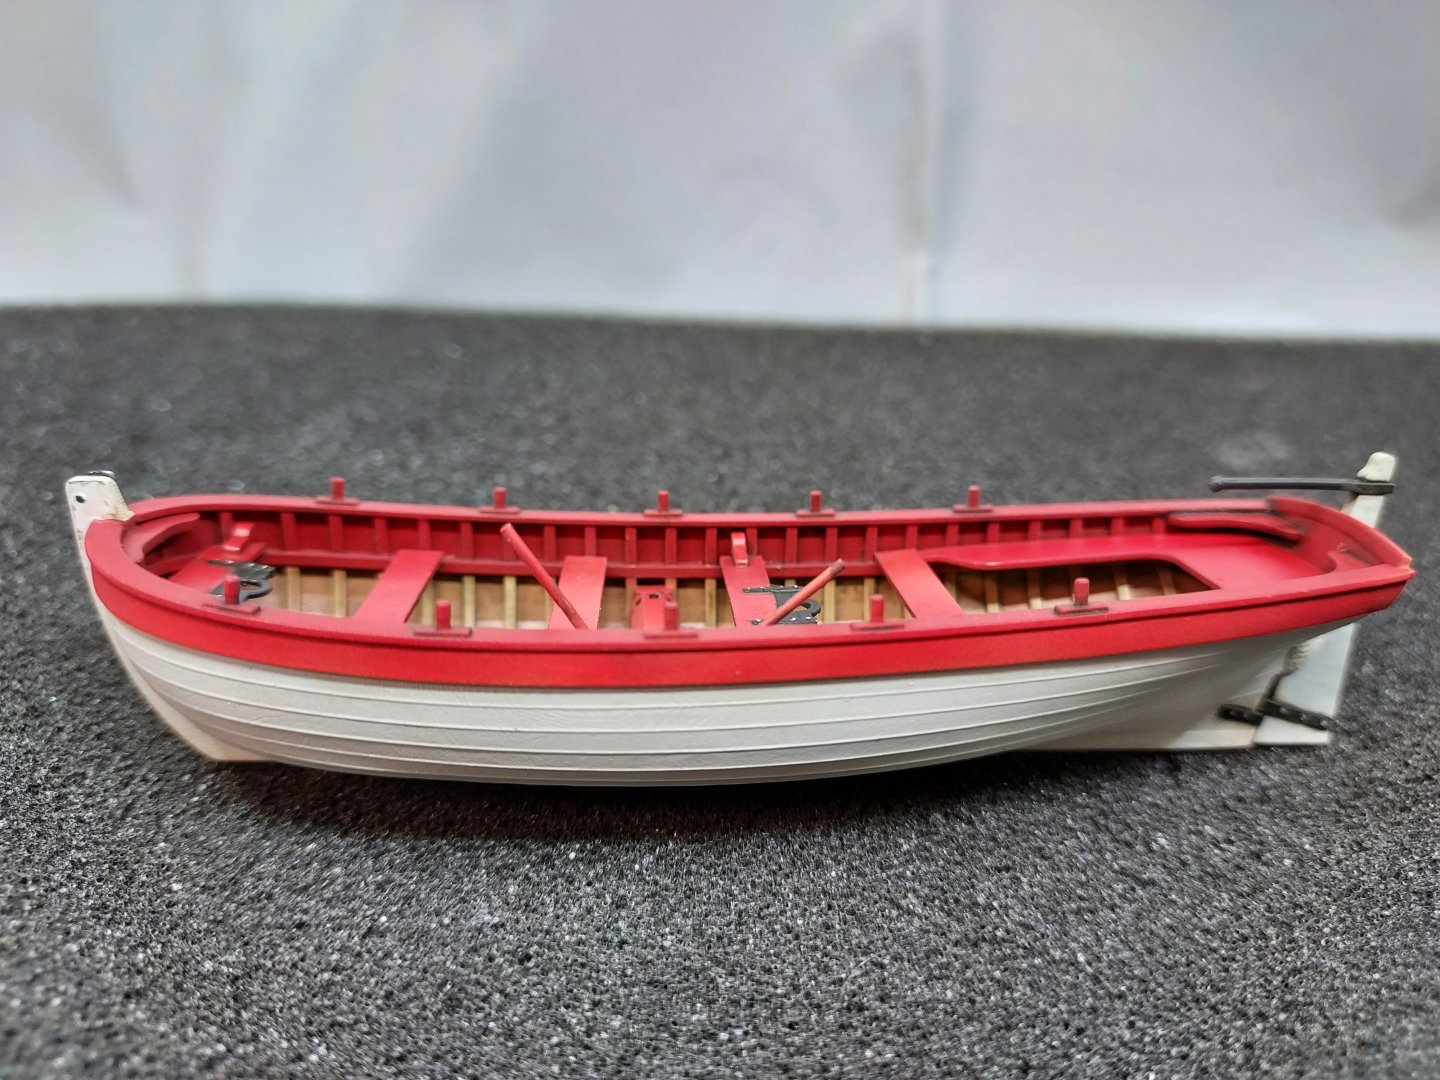
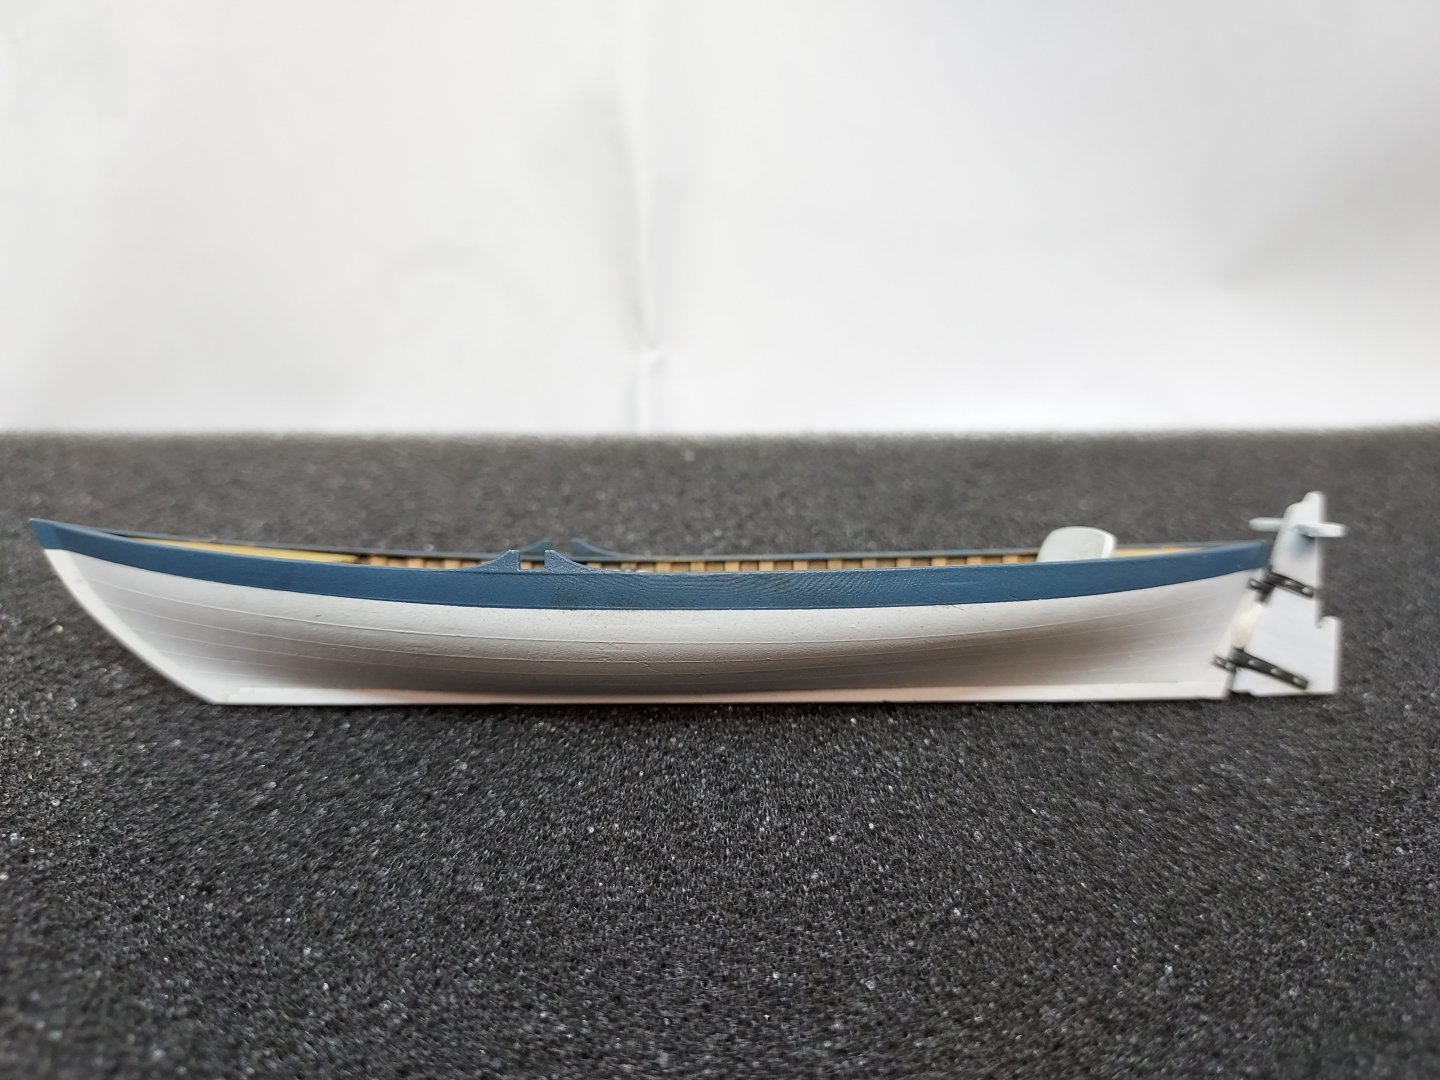
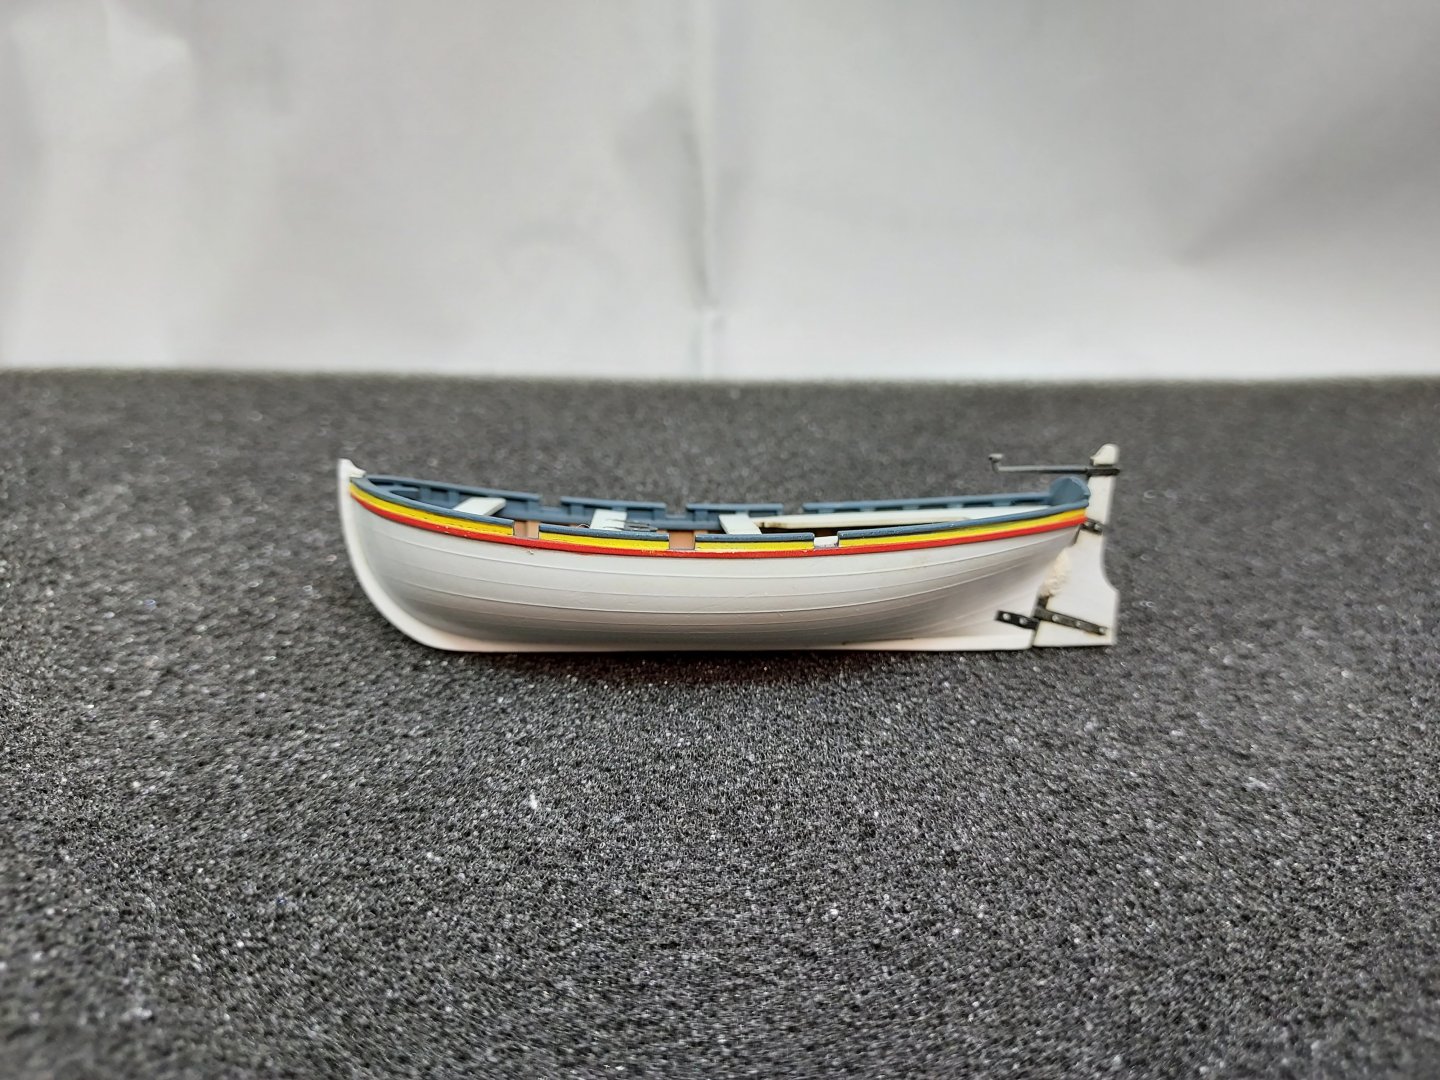
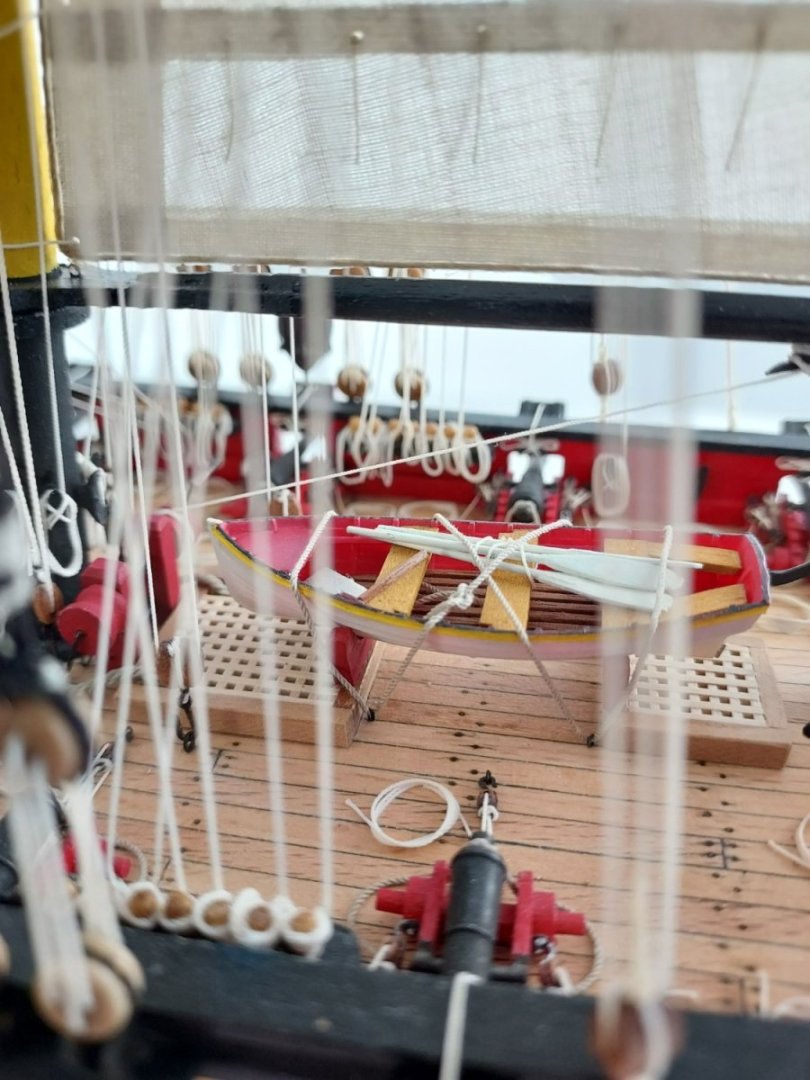
Hello, Let me introduce my small fleet, soon to be stationed on the deck of my HMB Endeavour (1/64). Each model was designed by me based on the plans from Anatomy of the Ship, and then brought to life using a 3D printer. It's been a rewarding process combining historical research with modern technology, and I’m happy to share the results as the build progresses! Below, I’ll walk you through the steps of the process — from the initial drawings to the finished miniature models. 1. To begin, I used scanned ship plans and imported them into a CAD program for 3D graphics. Based on these references, I created digital models of the boats, replicating their proportions and details. 2. To make the printing and post-processing easier, I designed the 3D model with a modular structure — dividing it into separate parts. This approach not only improves print quality by optimizing the orientation of each piece, but also simplifies sanding, painting, and final assembly. In the photo below, you can see the printed parts before any proccesing 3. Time for post-processing: this stage includes removing supports, sanding the surfaces, applying primer, and finally painting and here is the finished product PINNACE Longboat SKIFF YAWL Thats all for now see you next time!


-
Maciek reacted to a post in a topic:
HMS Pegasus 1776 by Moonbug - Amati Models - 1:64
-
Maciek reacted to a post in a topic:
HMS Pegasus 1776 by Moonbug - Amati Models - 1:64
-
Maciek reacted to a post in a topic:
HMB Endeavour by Captain Slog - Caldercraft - 1:64
-
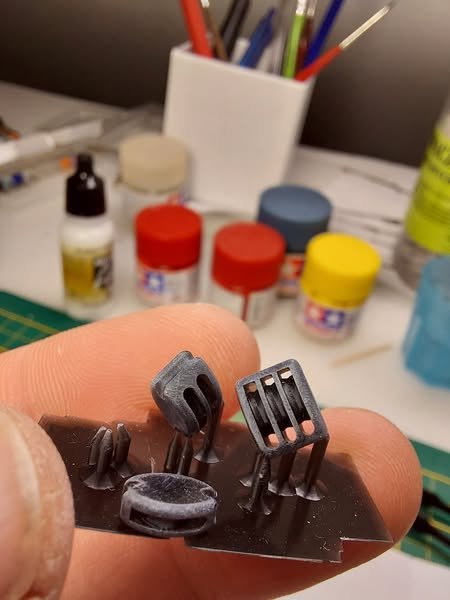
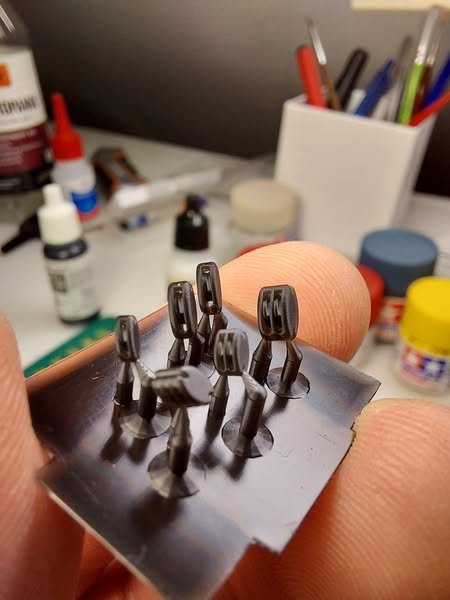
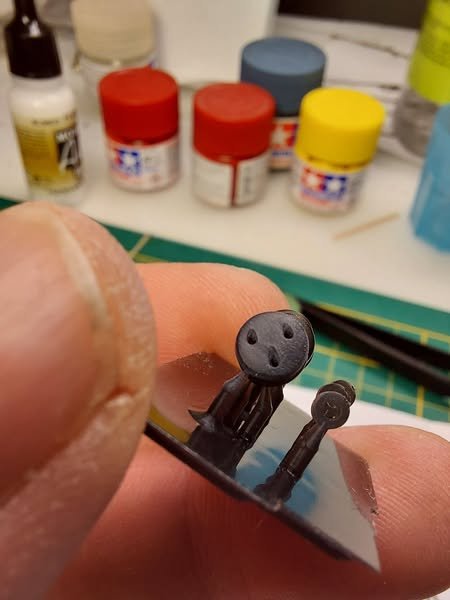
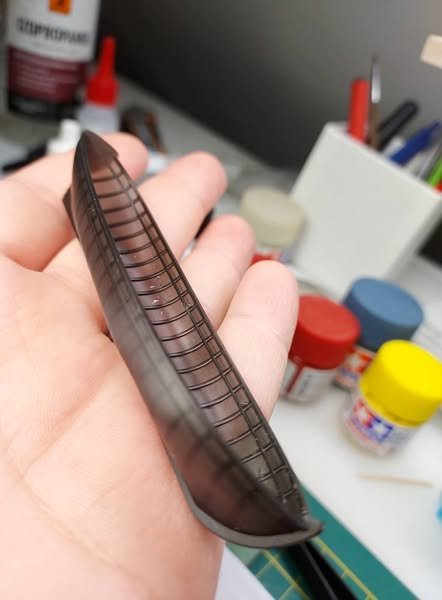
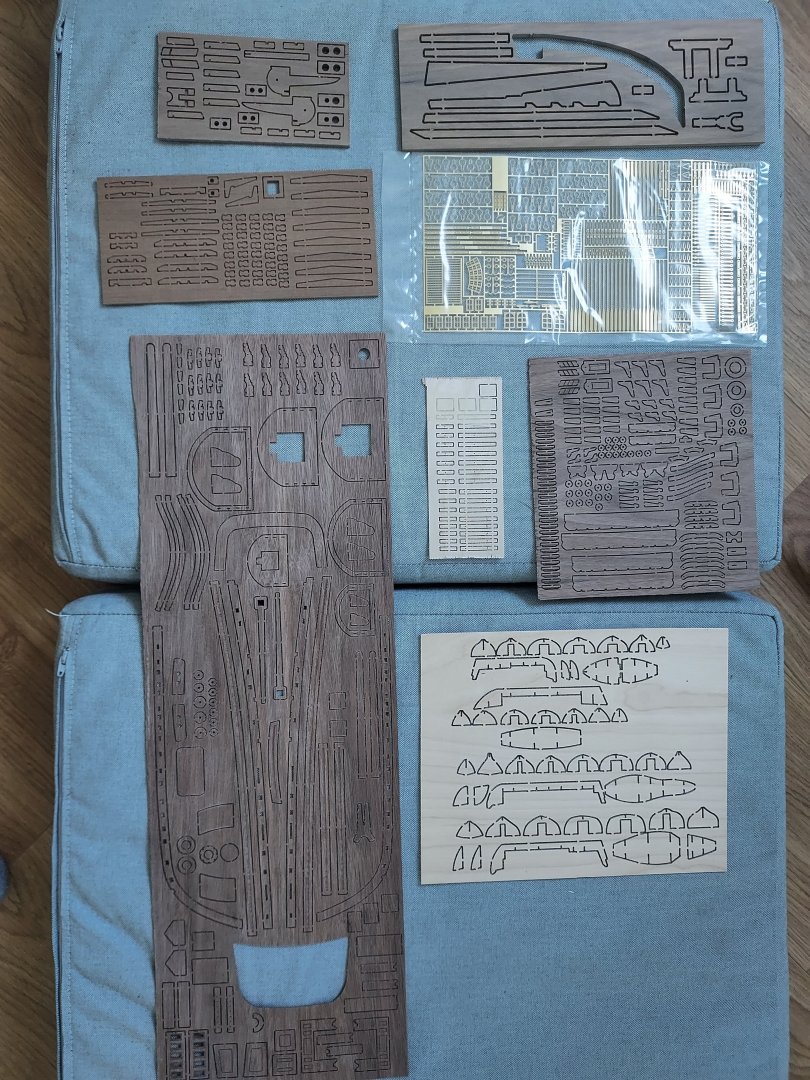
Hi, have anyone tried 3d printed pulleys before? I have just testprinted few of main design. I am very happy with results and planning tu use them. I have tried also other things and have ideas on more
-
Maciek reacted to a post in a topic:
HMS Pegasus 1776 by Moonbug - Amati Models - 1:64
-
Hello the ugly duckling slowly turns into this... some paint makes big difference painted with tamiya paints using an airbrush

-
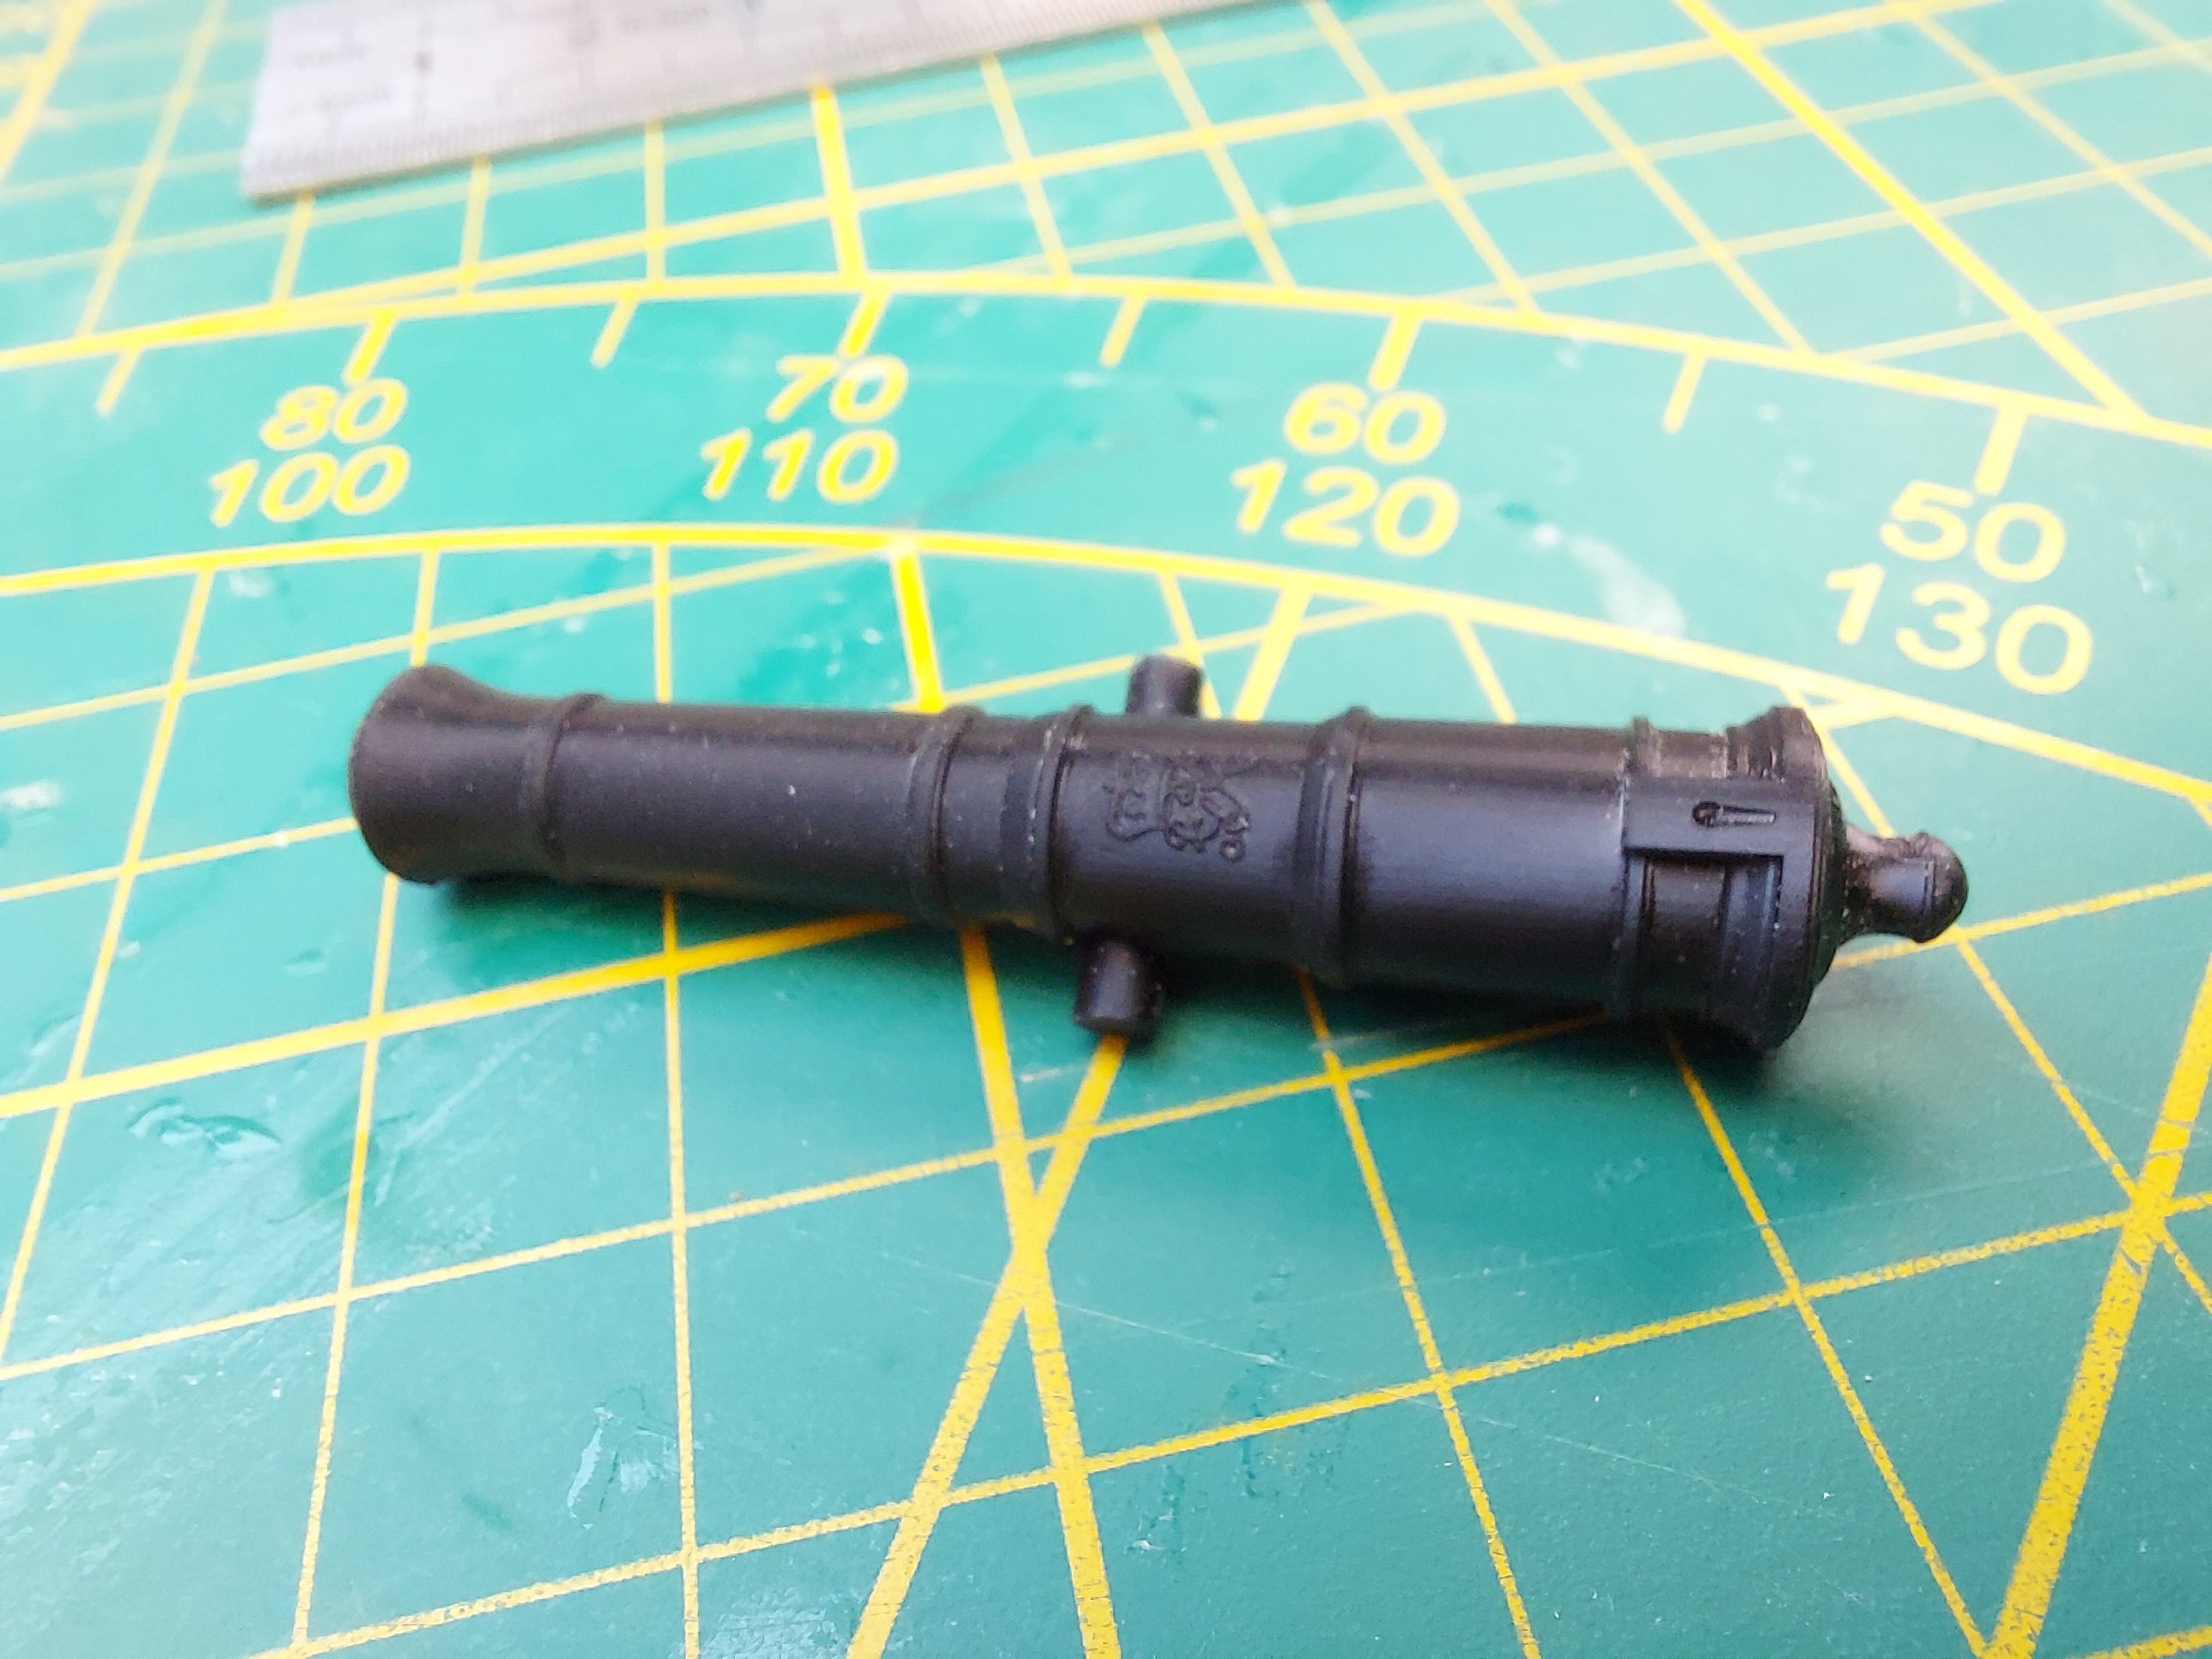
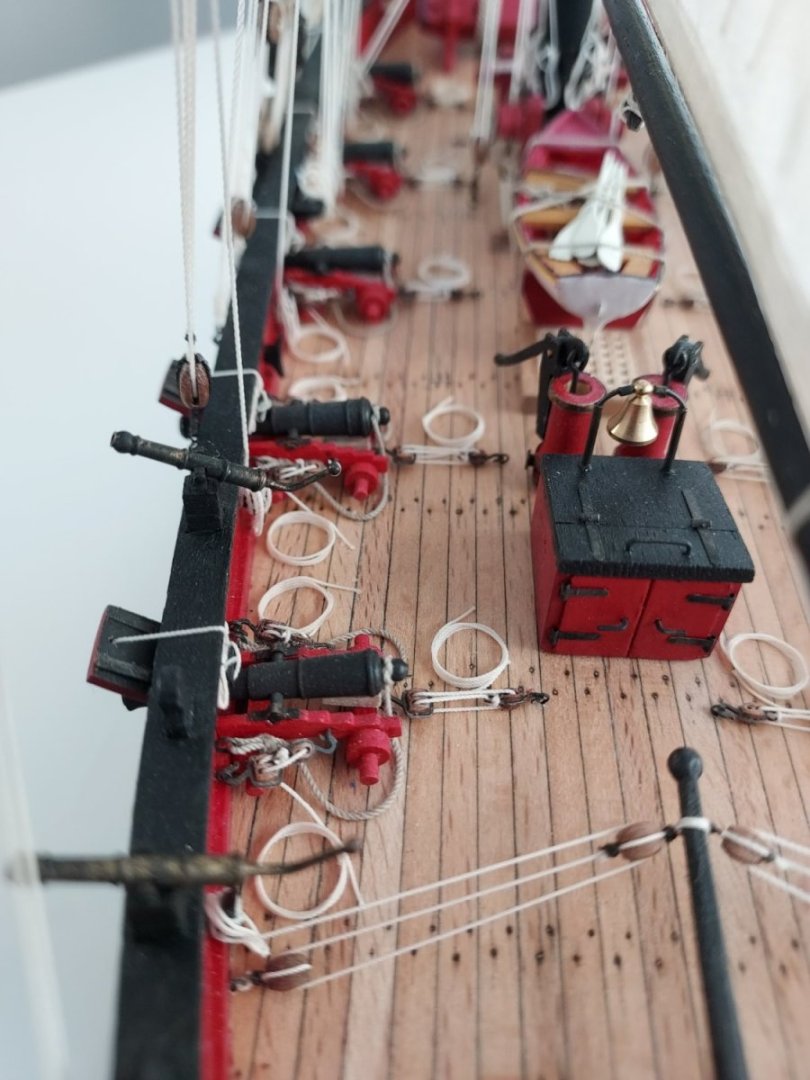
Hi next step finished, secund planking is ready. big mistake, i used ca glue sometimes in points just not to hold plank till pva sets an i have some marks :(, I thought it will disappear when varnish will be applied but it's still visible. I don't worry to much, bottom will be painted, upper part partially too, then some addins will cover come of remaining i didn't have enough of pear wood so bottom is striped it will be painted, no worry BONUS: I have test printed canon for Endeavour Best regards Maciek


-
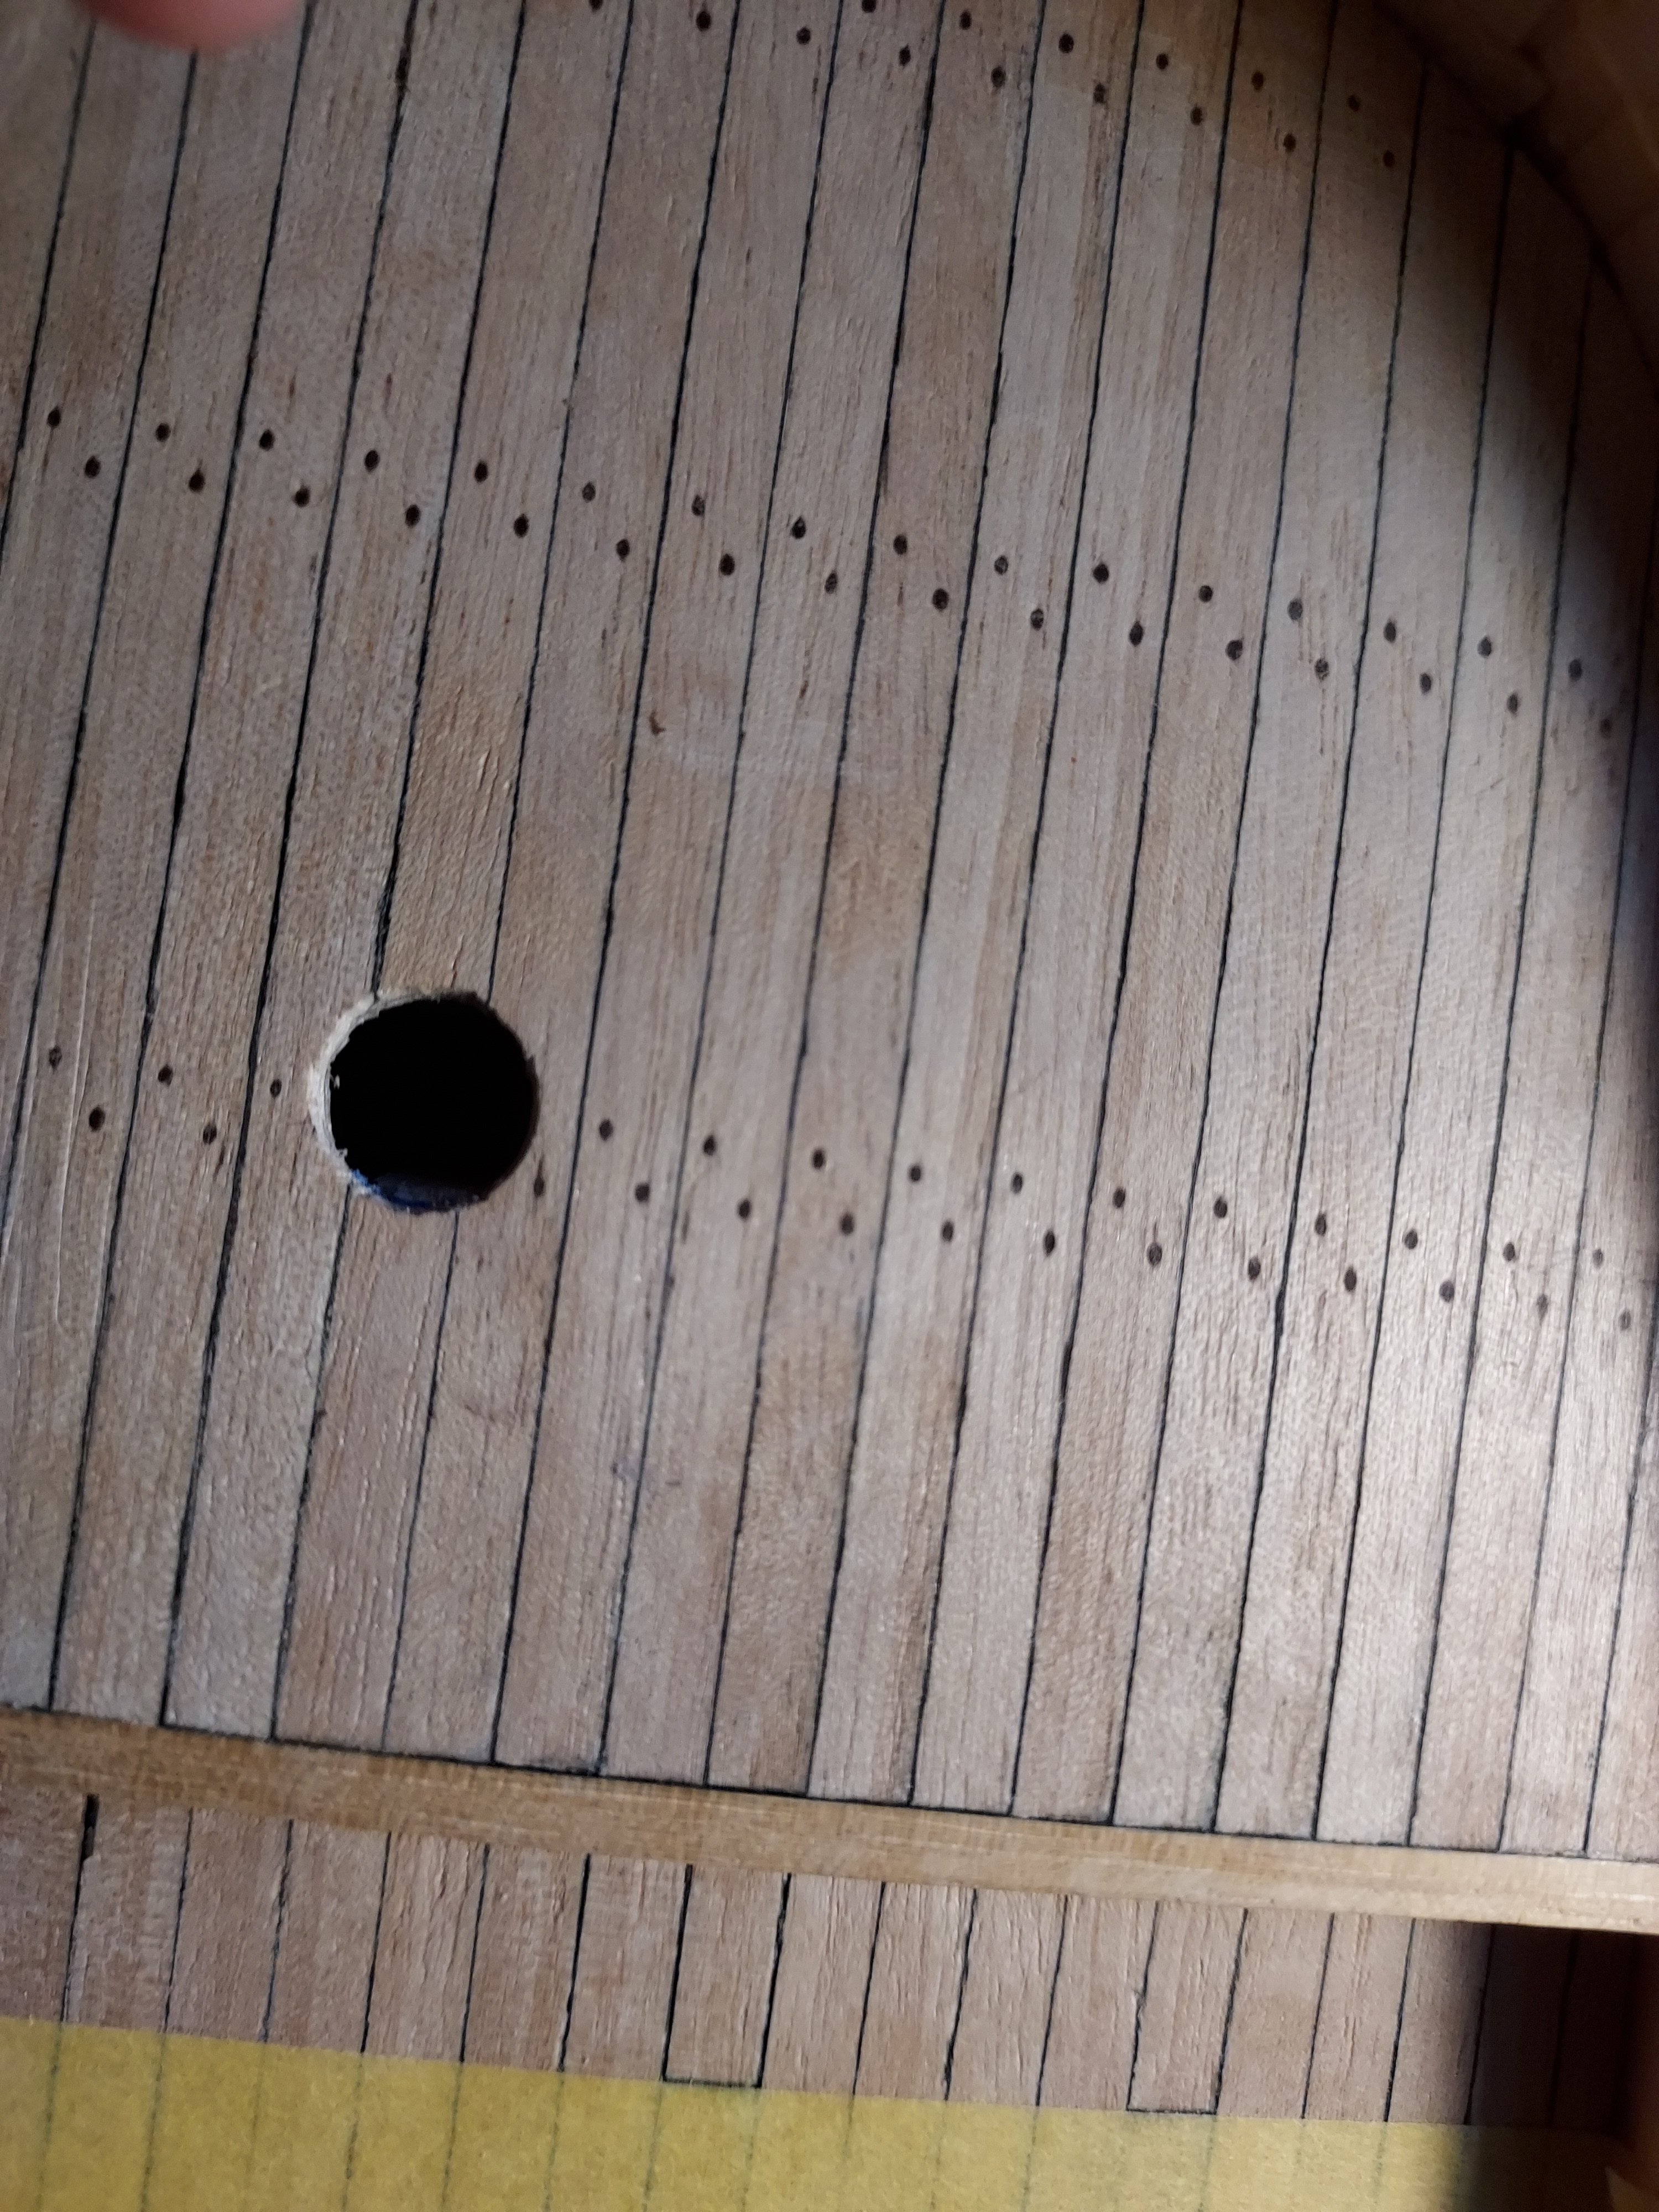
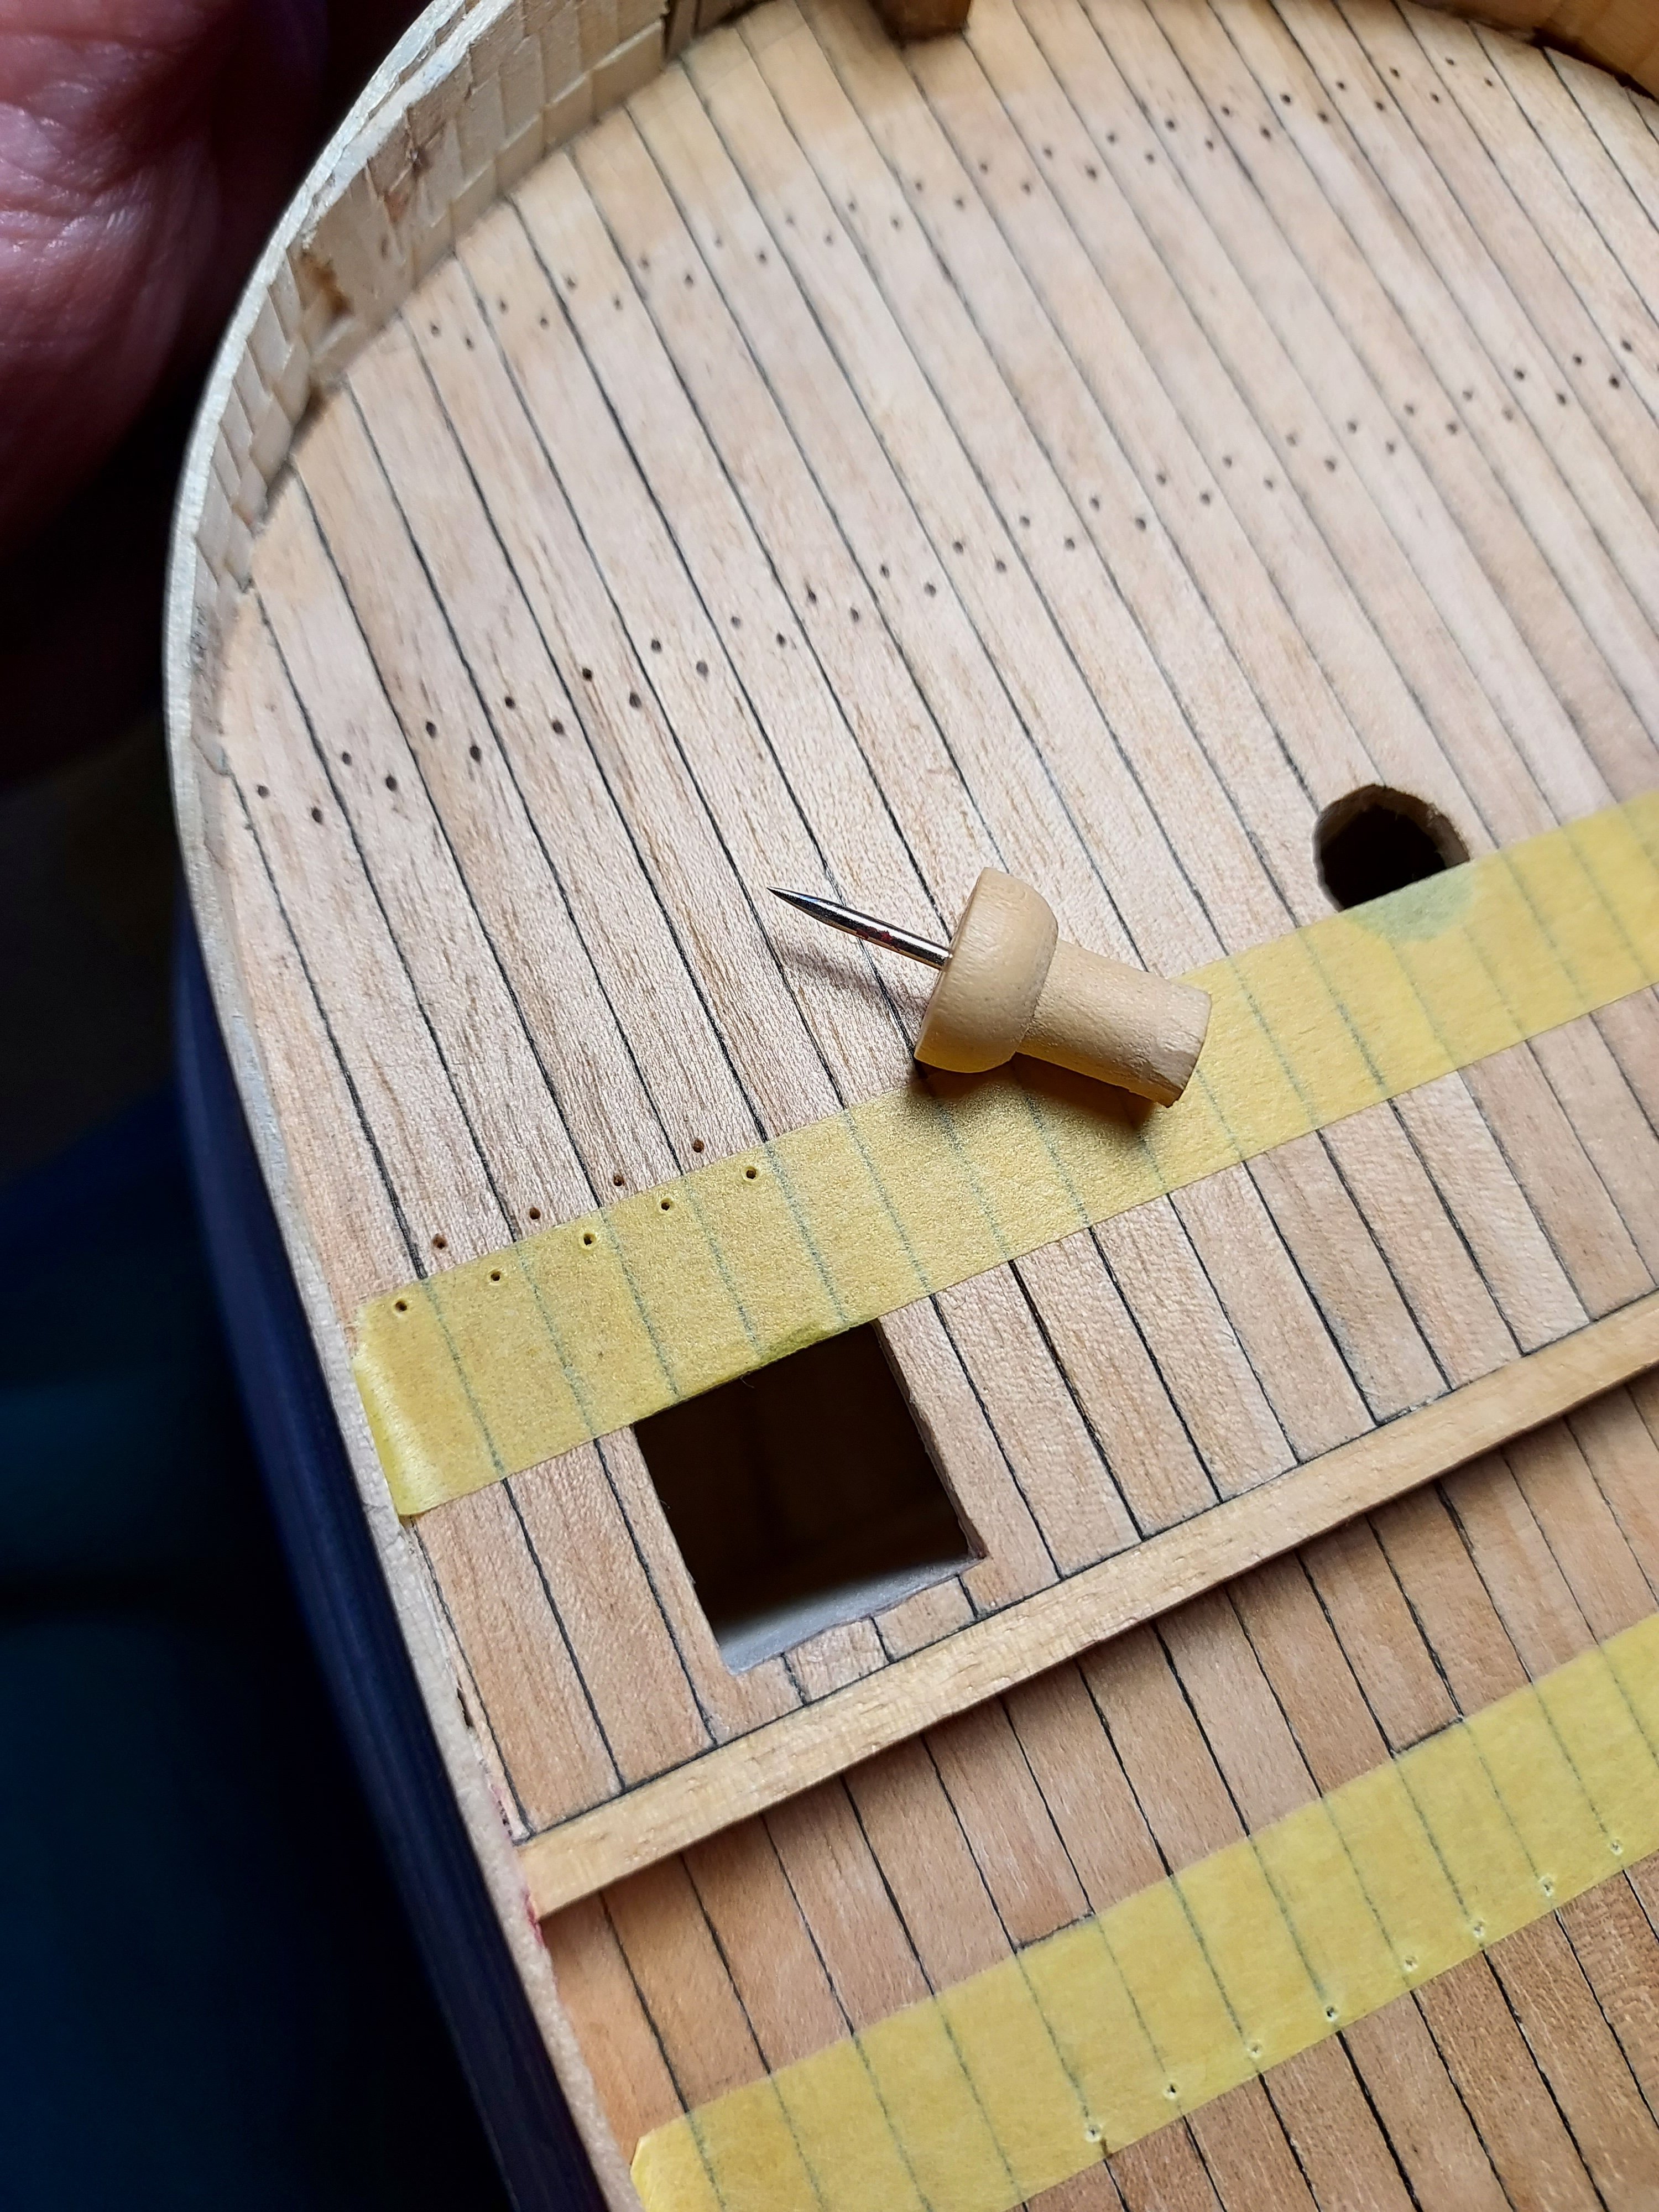
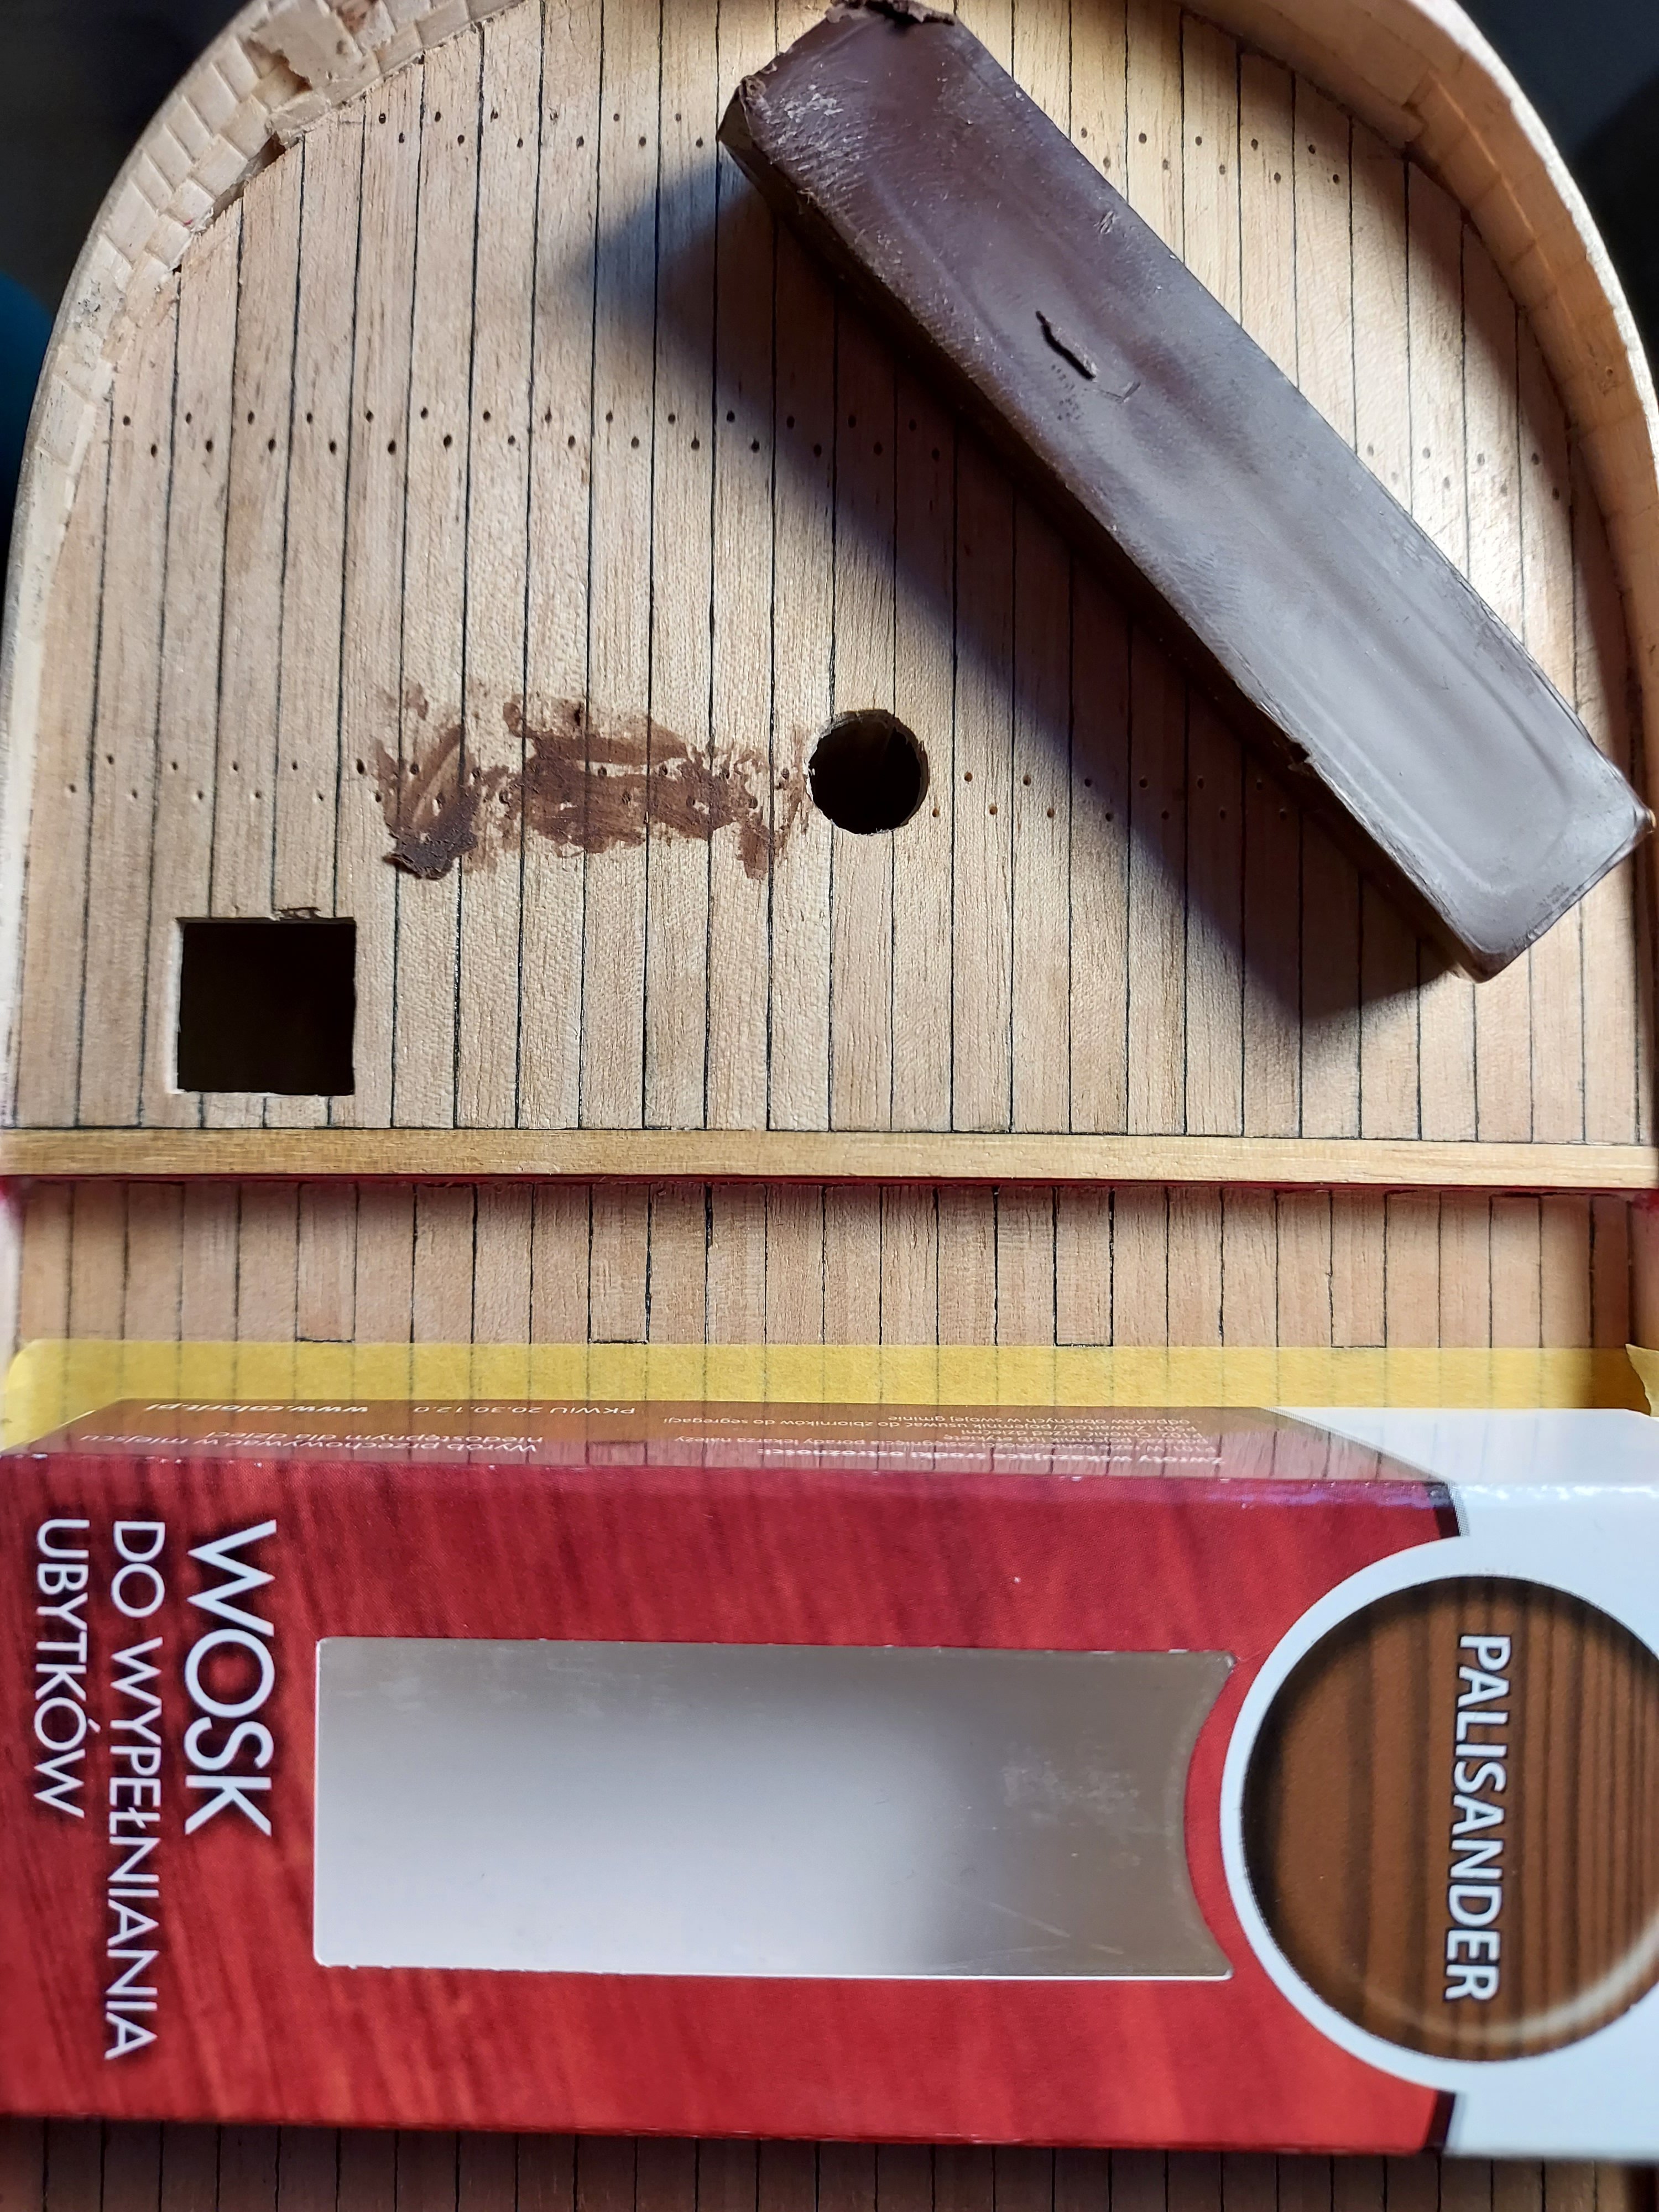
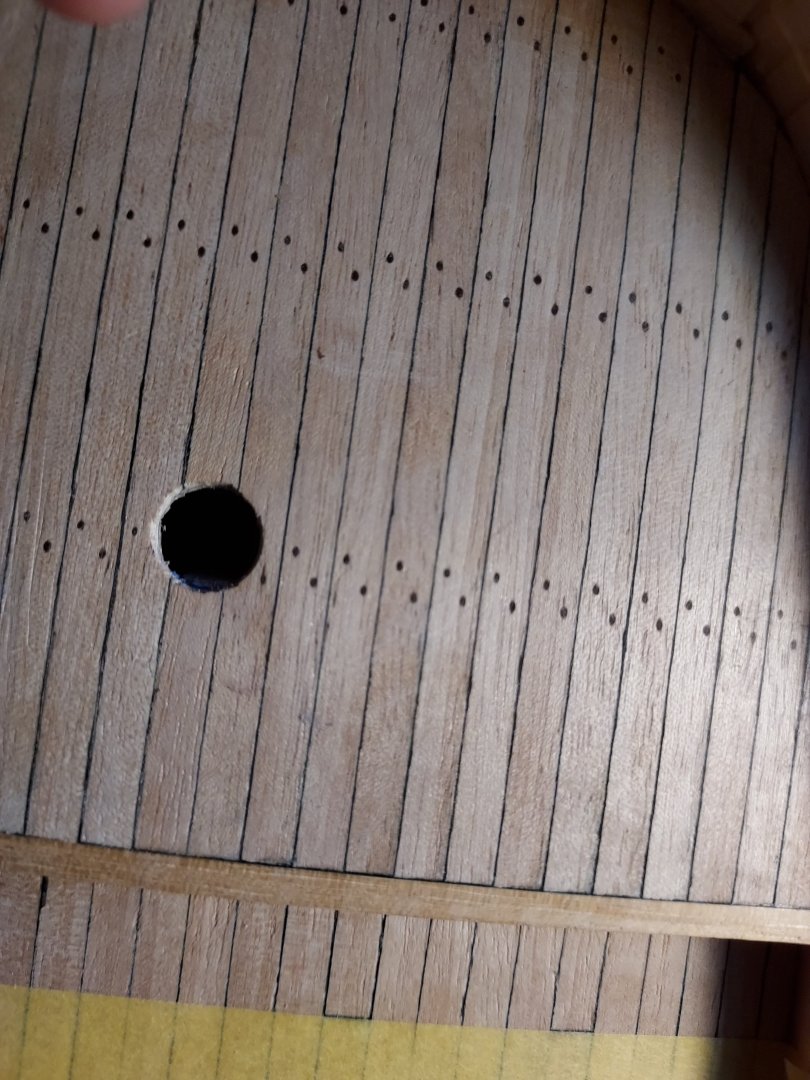
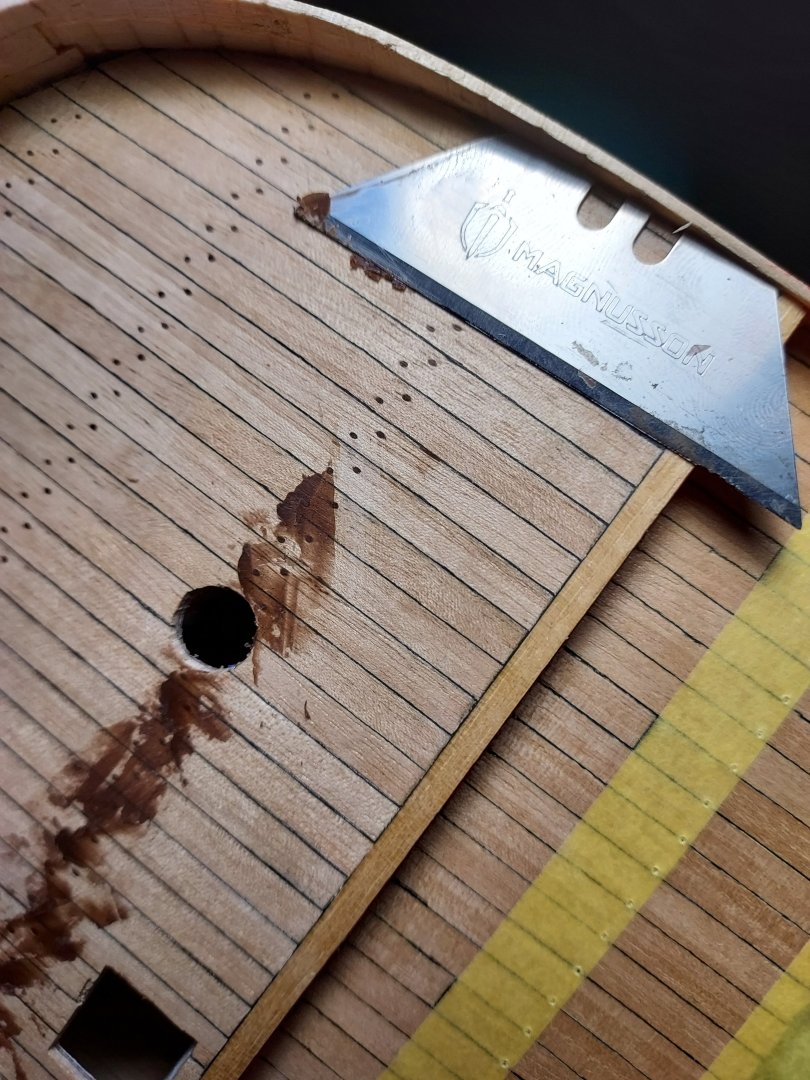
Hi works slowly progressing. First planking is completed but in this episod i want to show You deck and the way i choose to make tree nails effect. first, photos of final effect to achieve this I choose very simple method that could be describe in 3 steps 1. make a hole 2. take a wax for wood repairing 3. scrape excess wax, it comes off very easily before and after I covered the deck with clear varnish I know, tree nails should be in wood color but for artistic reasons I chose darker for contrast. thats all for today, till the next time


-
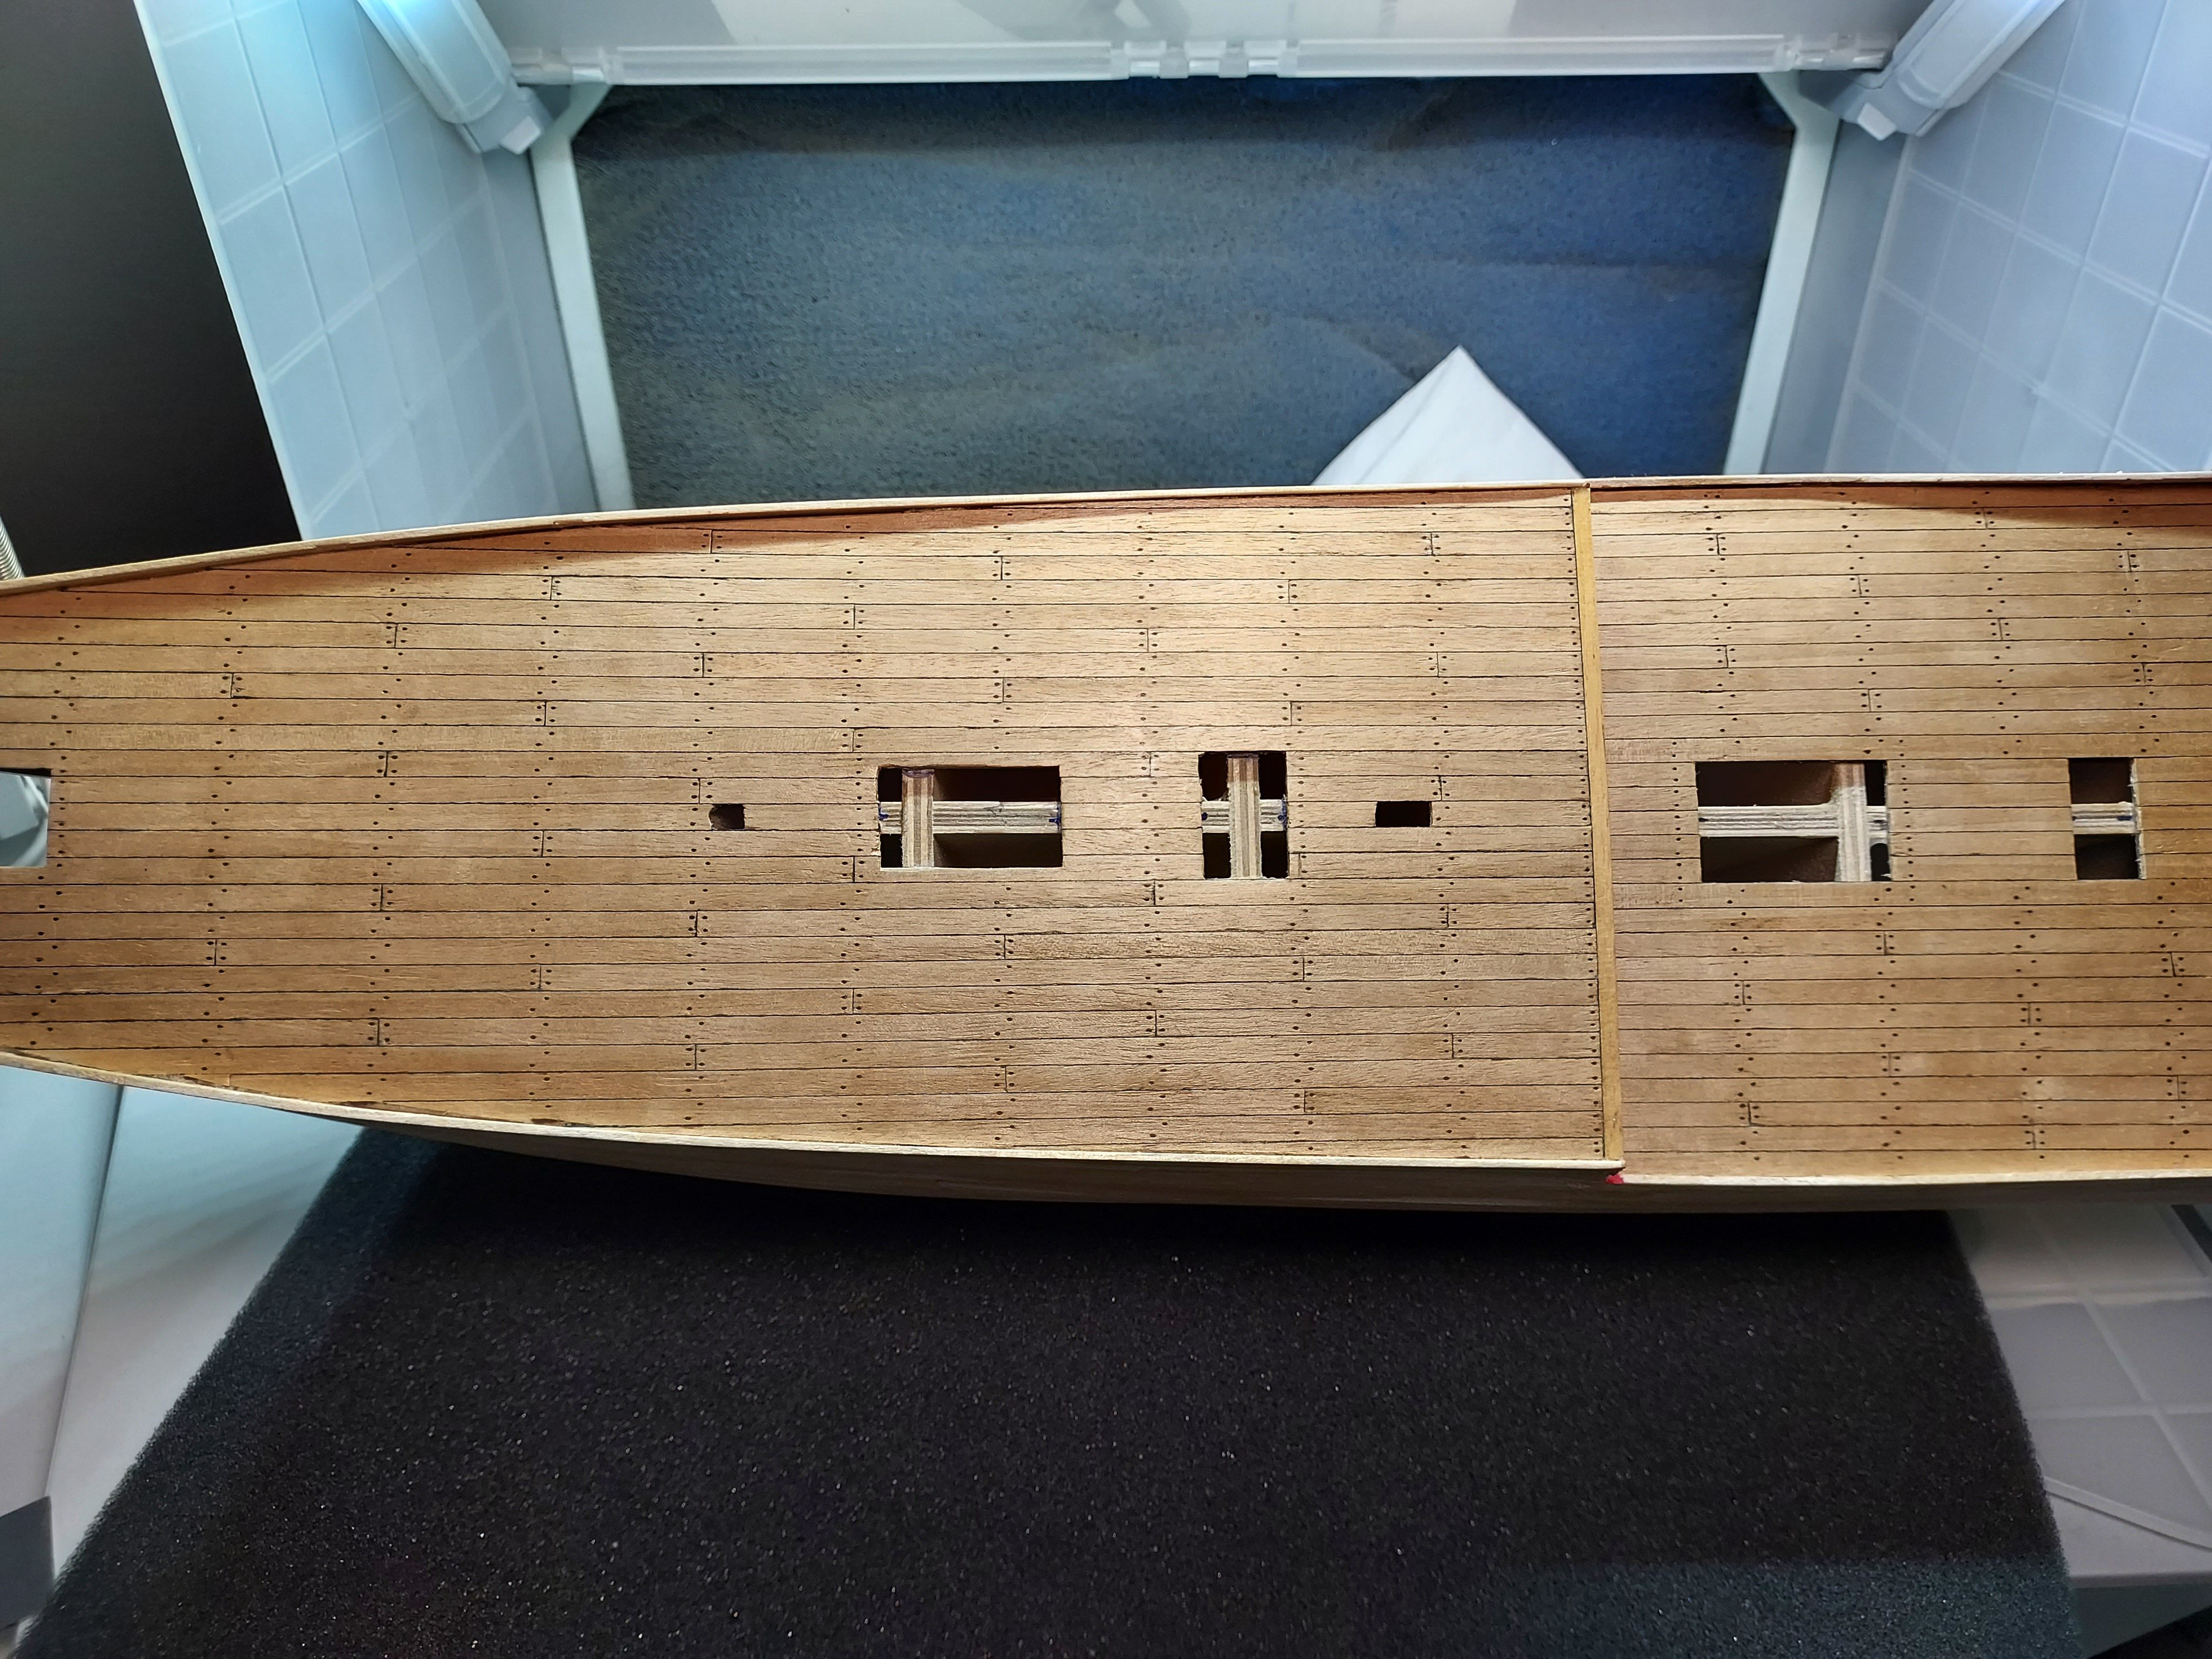
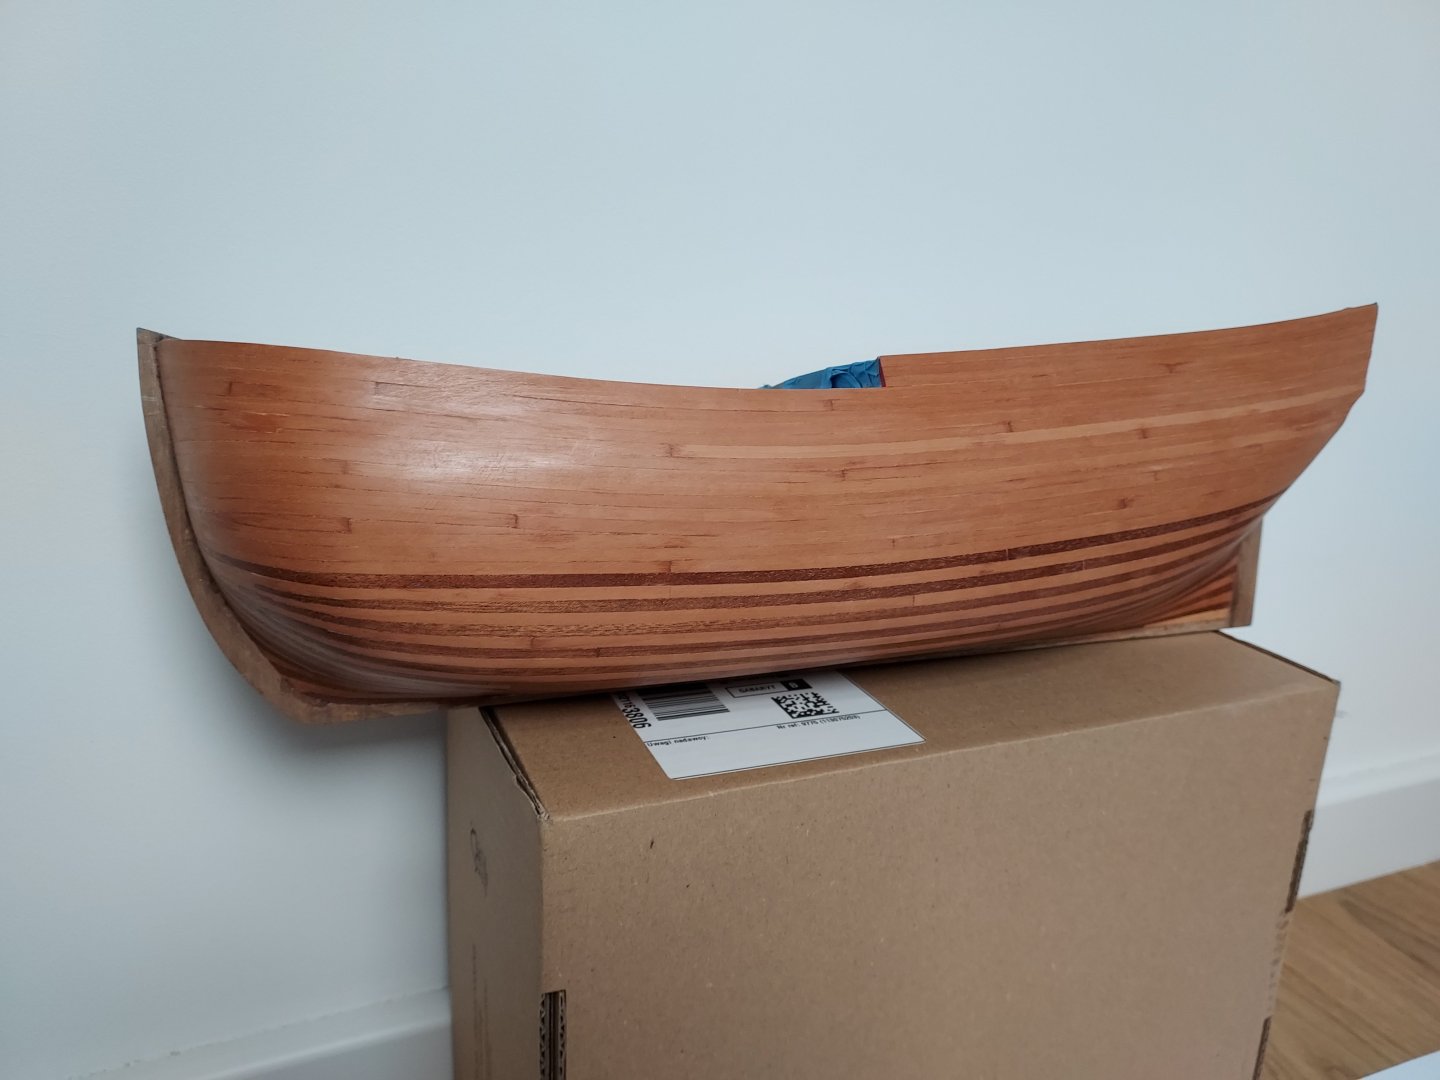
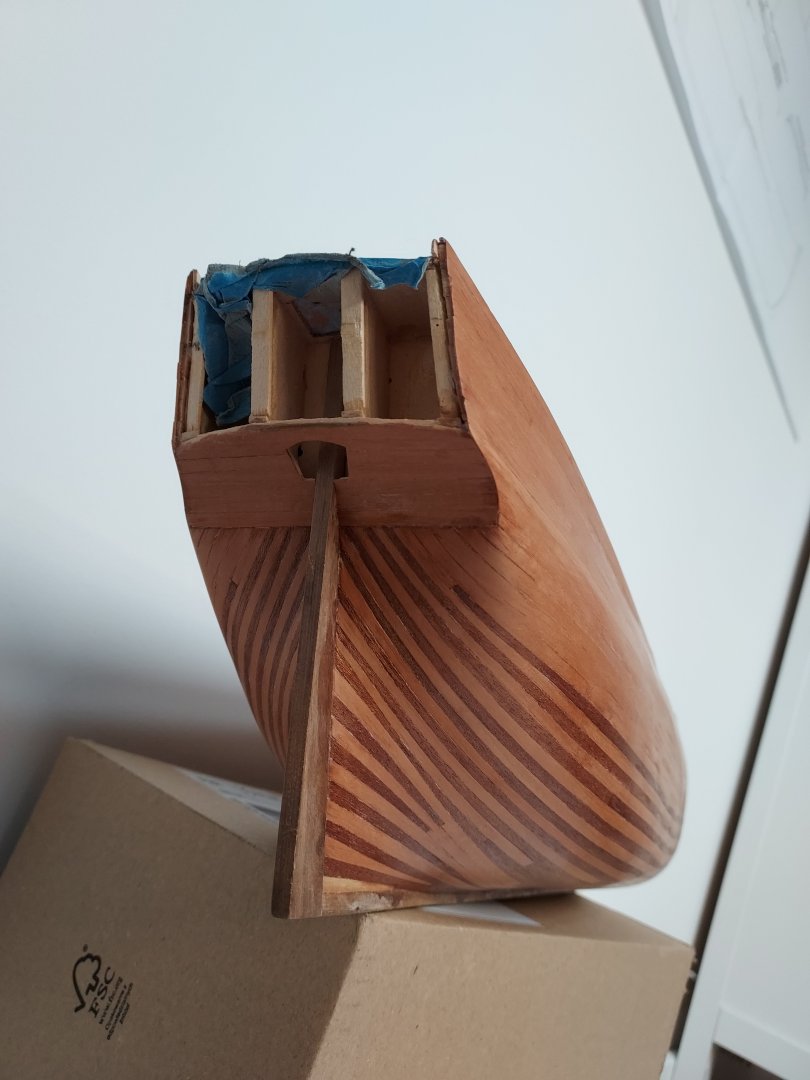
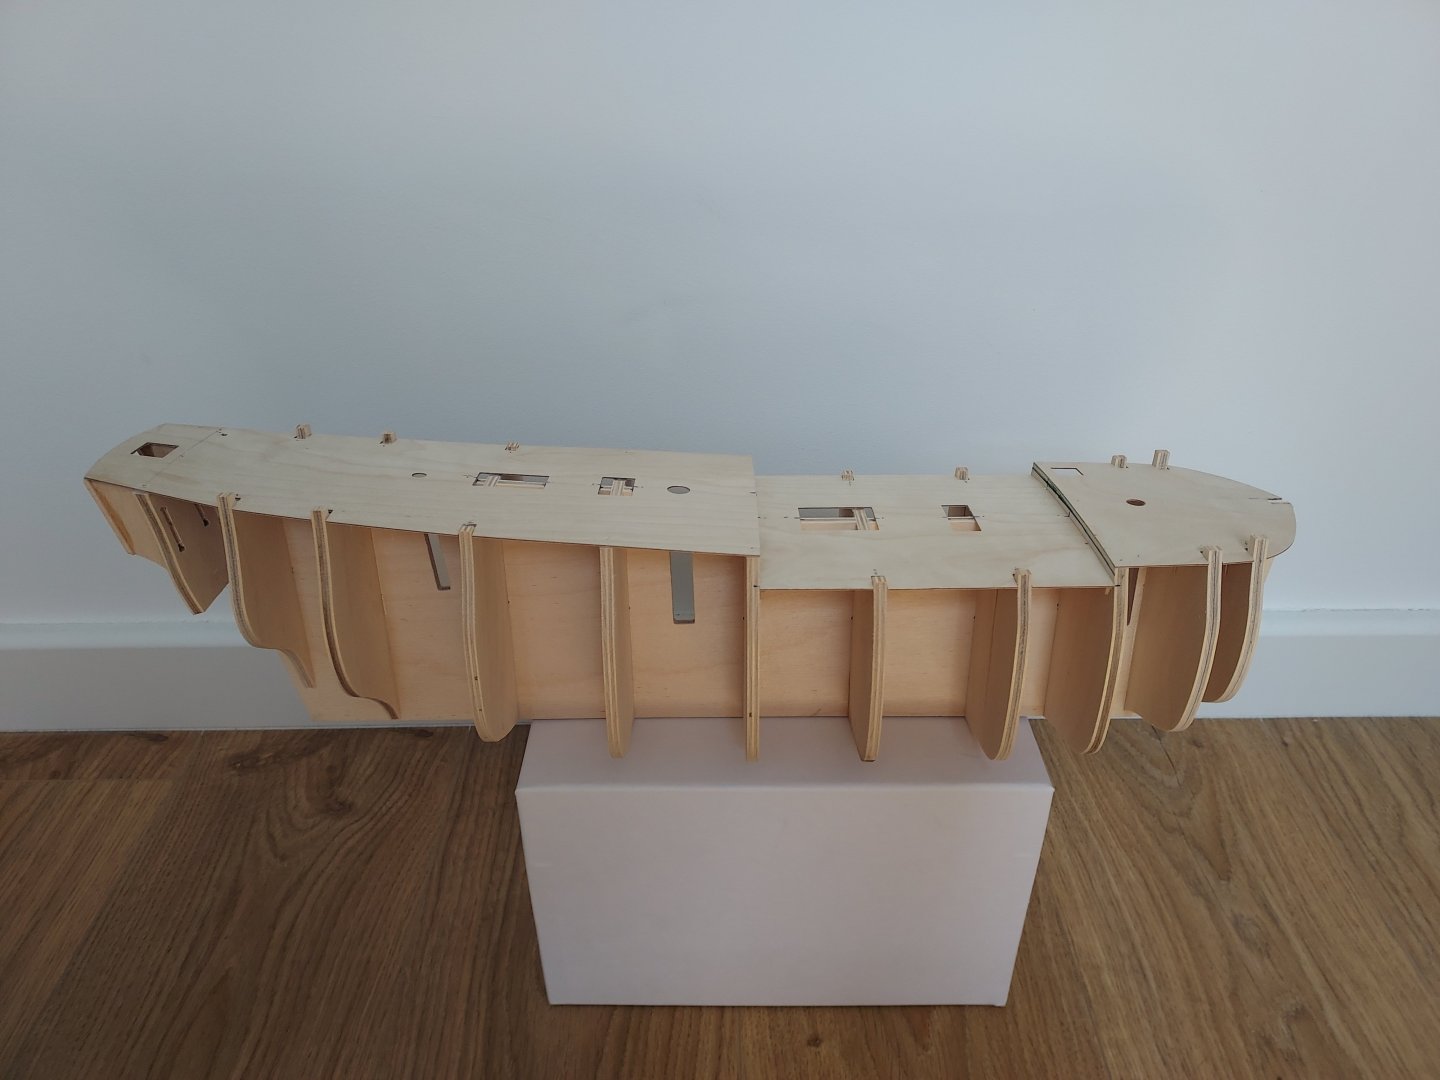
Hello time to start build log of the HMB Endeavour by Caldercraft. I am planning to make her as detailed as I can, using all source of information i can find. For now I have only Anatomy of the Ship that should be good start. Quality of parts is very good, but blocks i will change for aftermarket one fit is tight but everything fit perfectly now time to start planking Best, Maciek


-
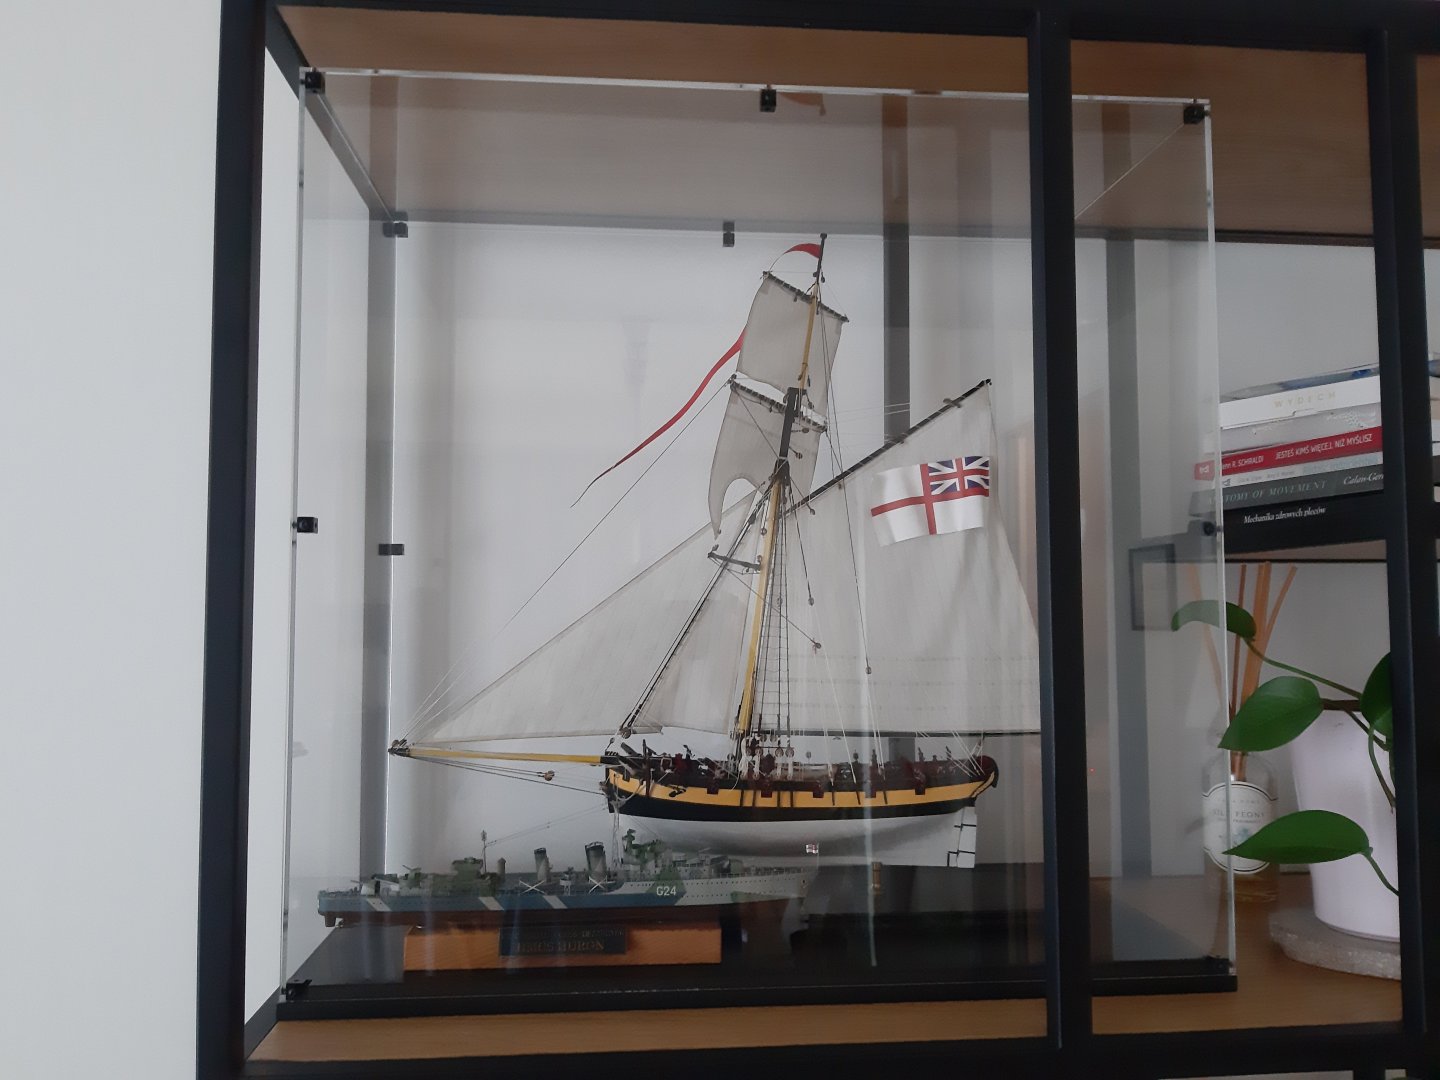
the display case is ready! she finally reached her destination
- 24 replies
-
- 3
-
-
- Lady Nelson
- Amati
- (and 2 more)
-
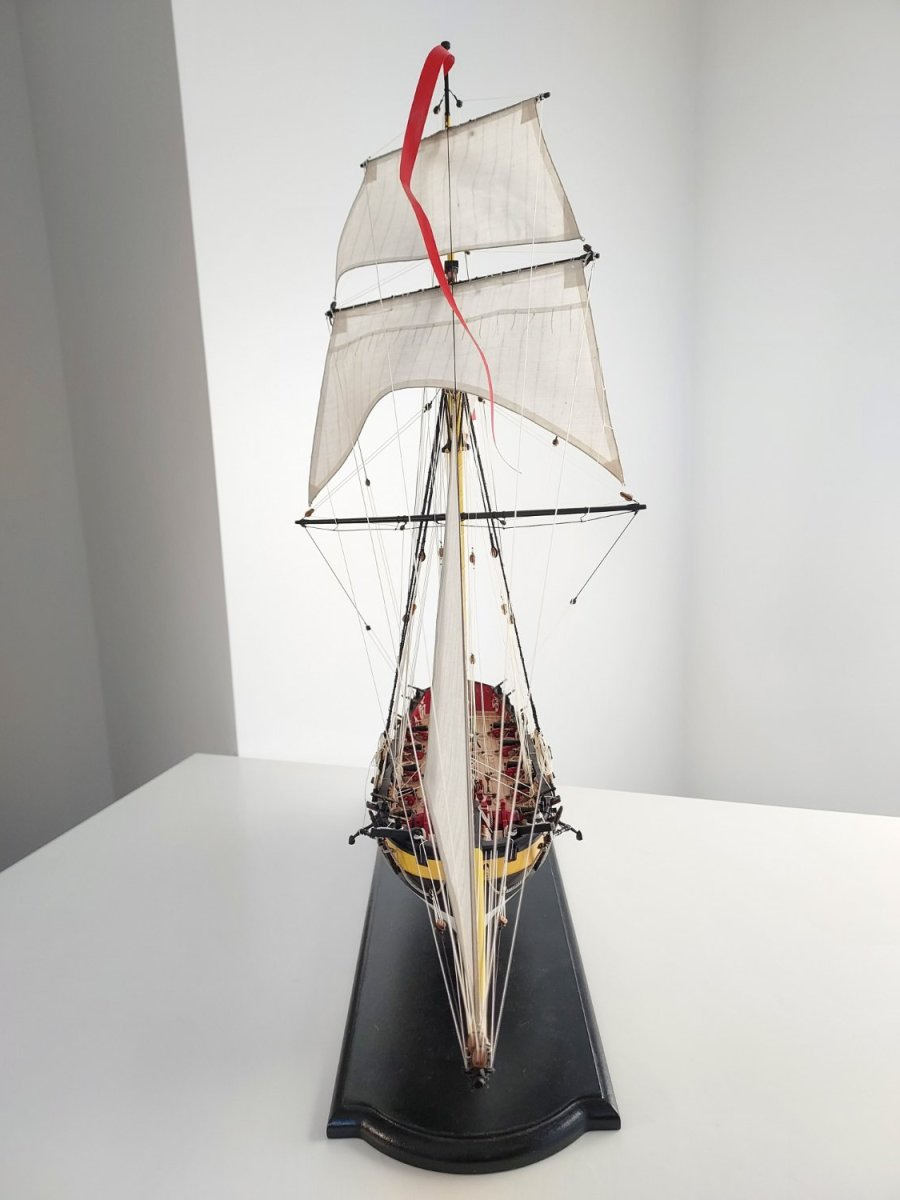
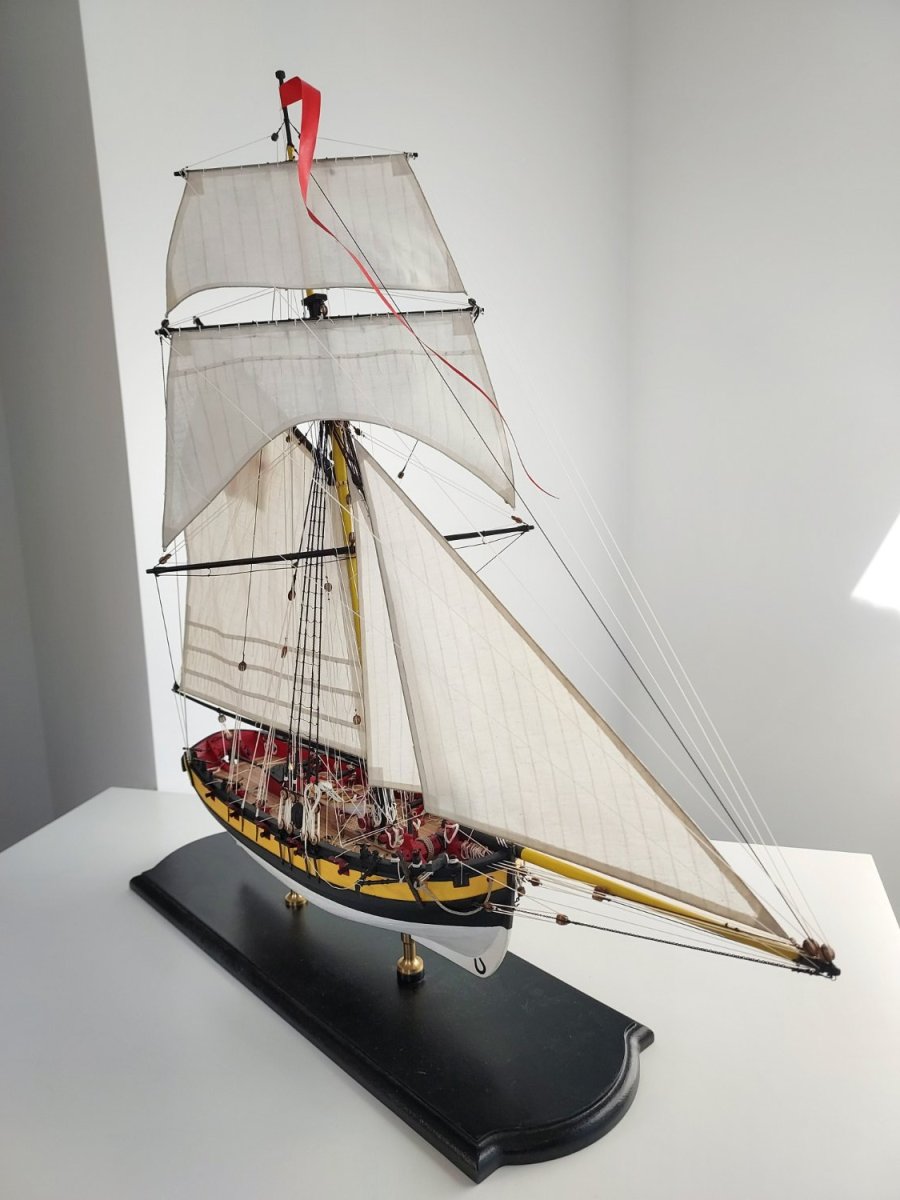
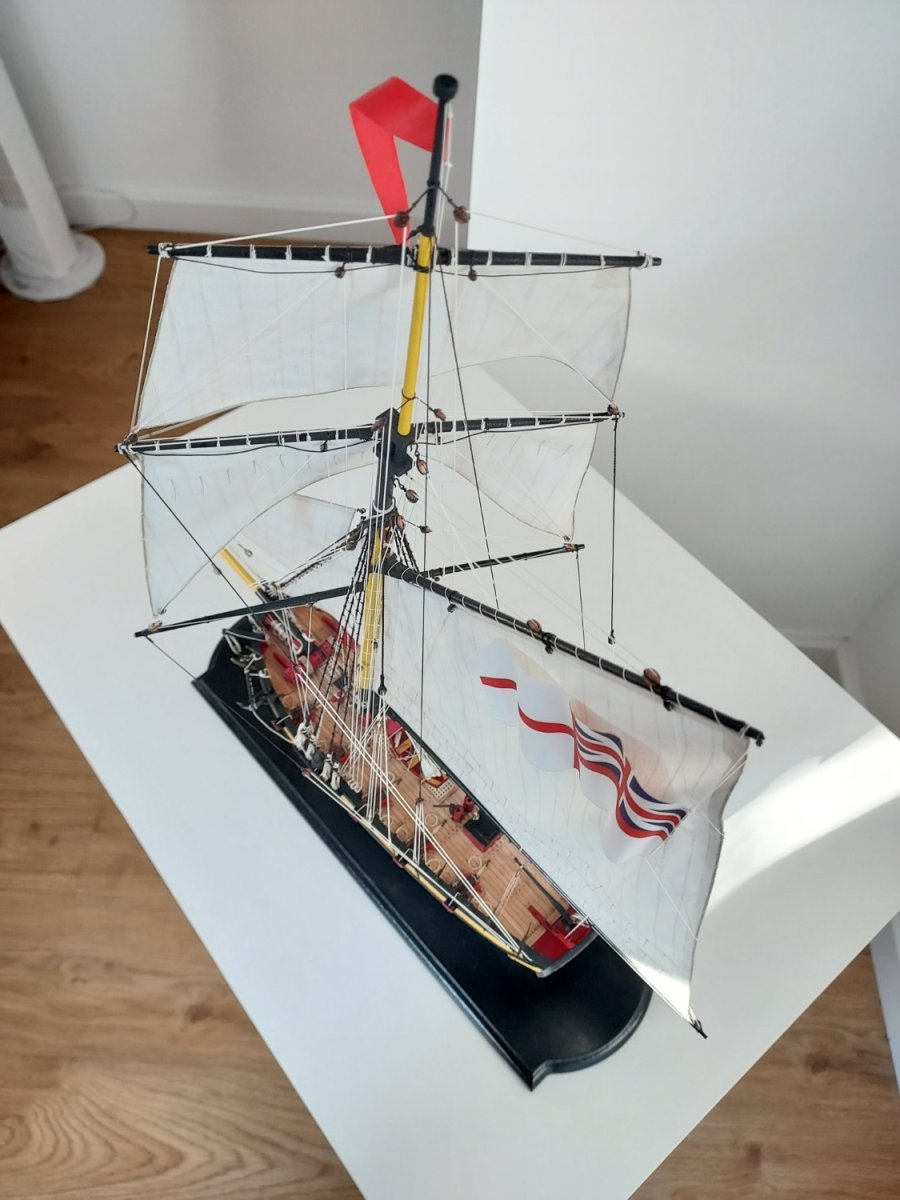
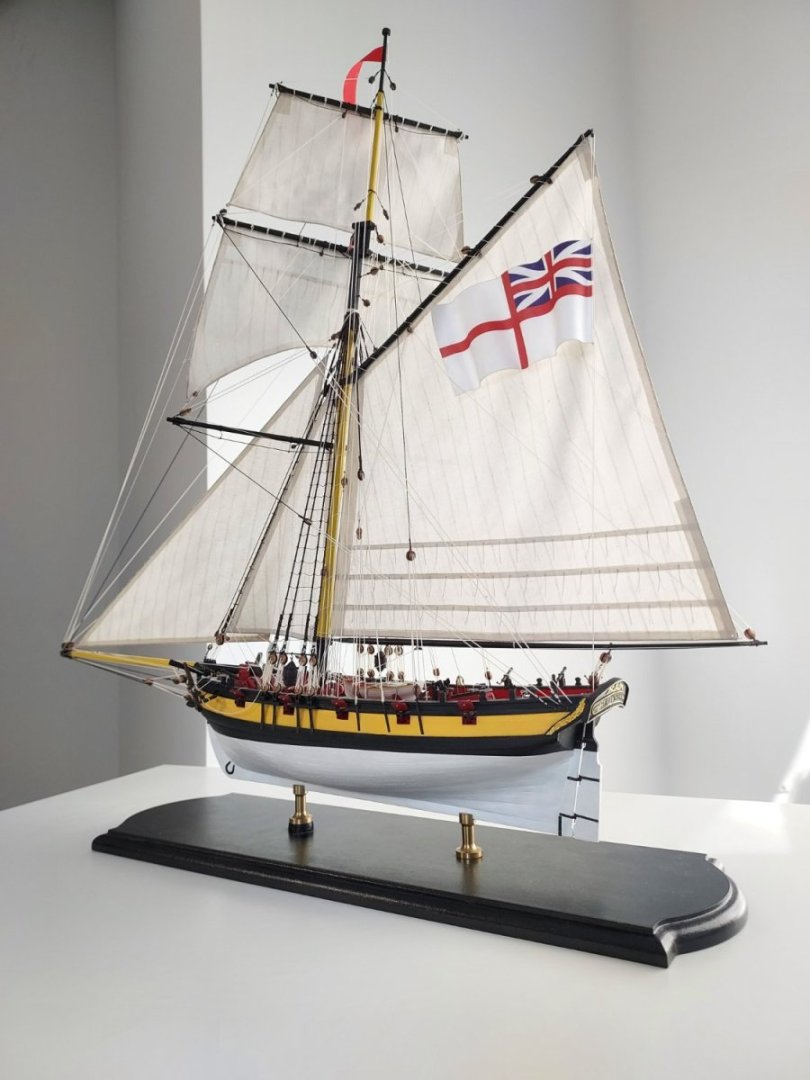
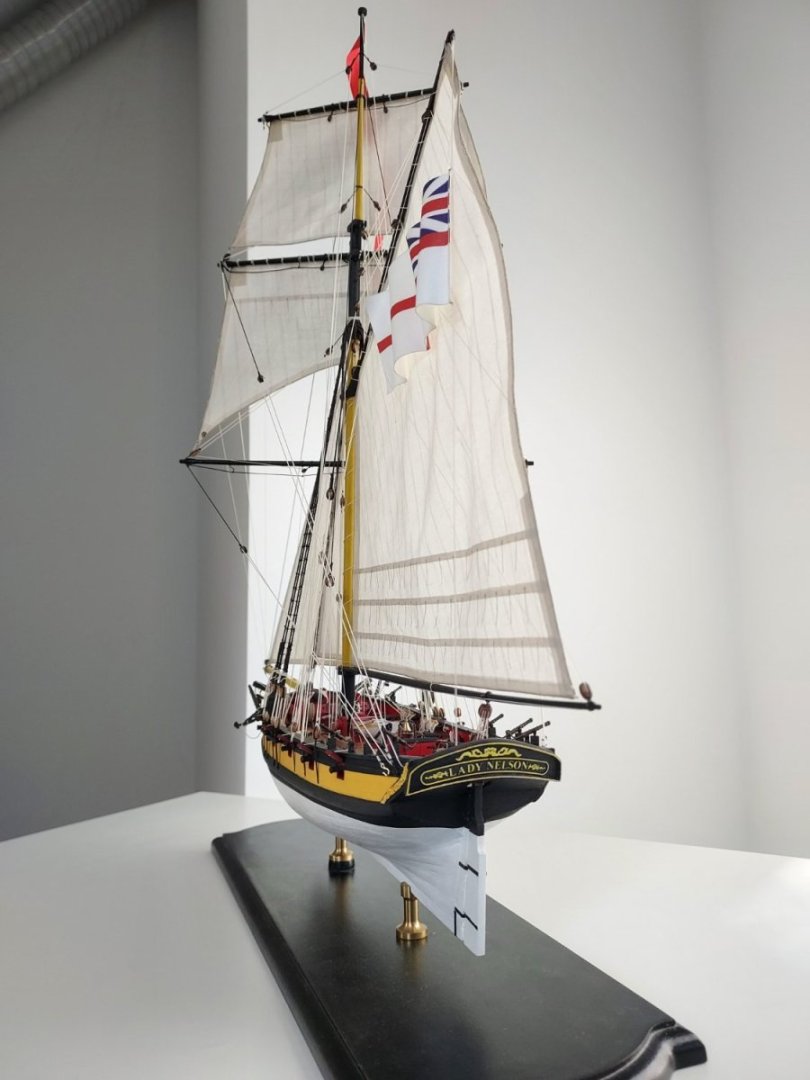
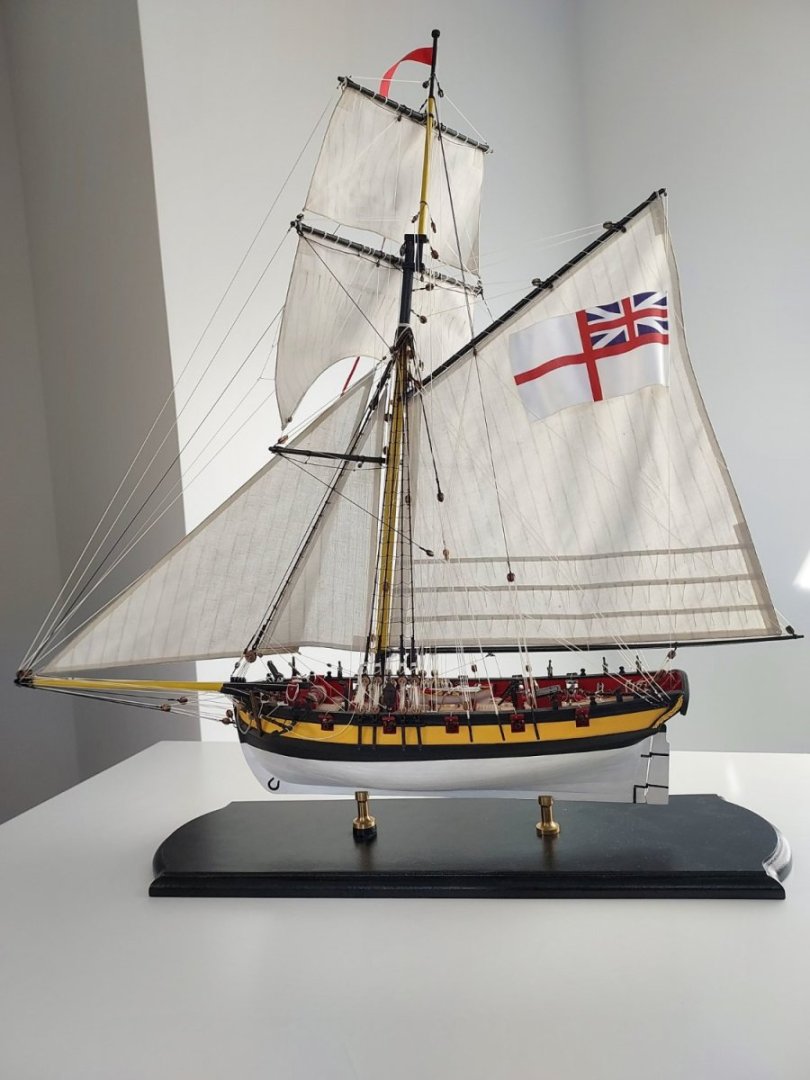
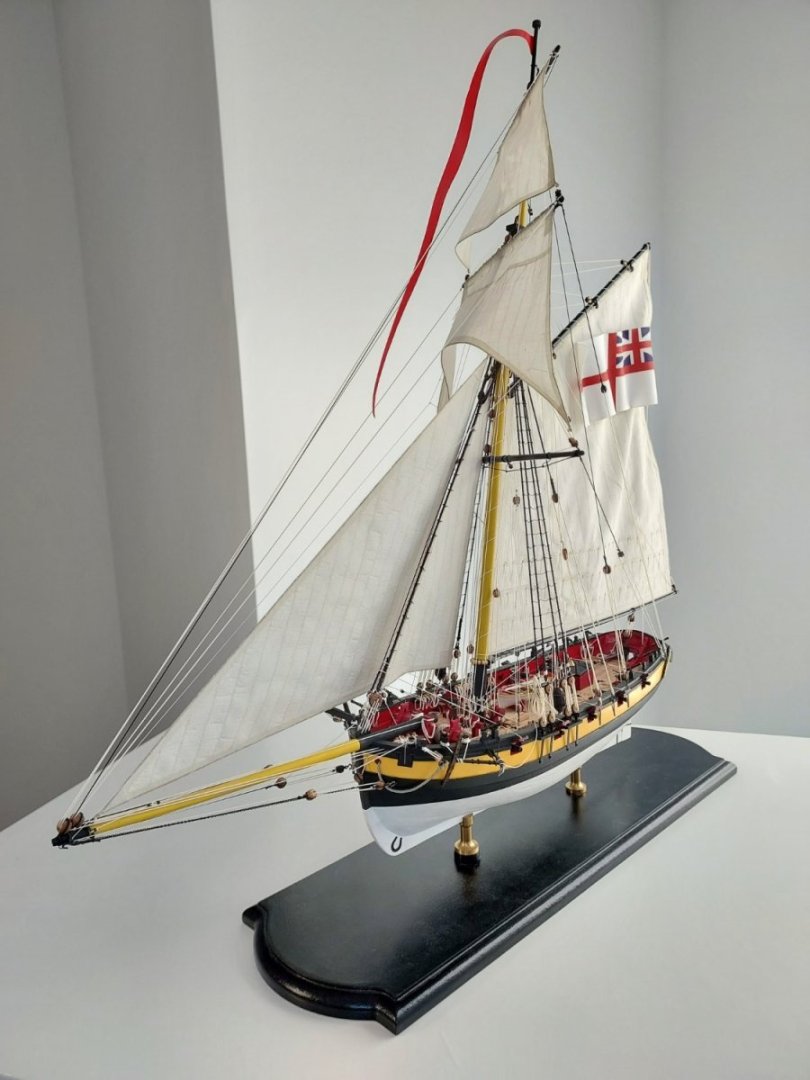
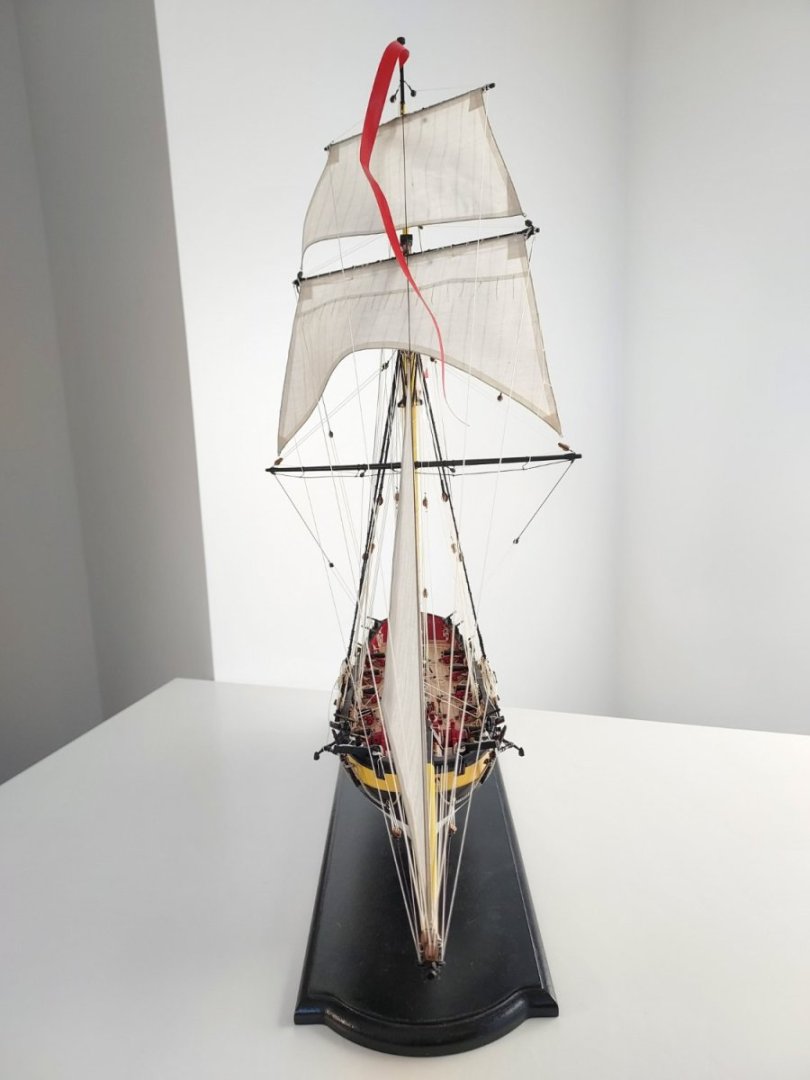
Hello! After 2 years the construction has been completed! I really like how it turned out. below some photos.


- 24 replies
-
- 6
-
-
-
- Lady Nelson
- Amati
- (and 2 more)
-
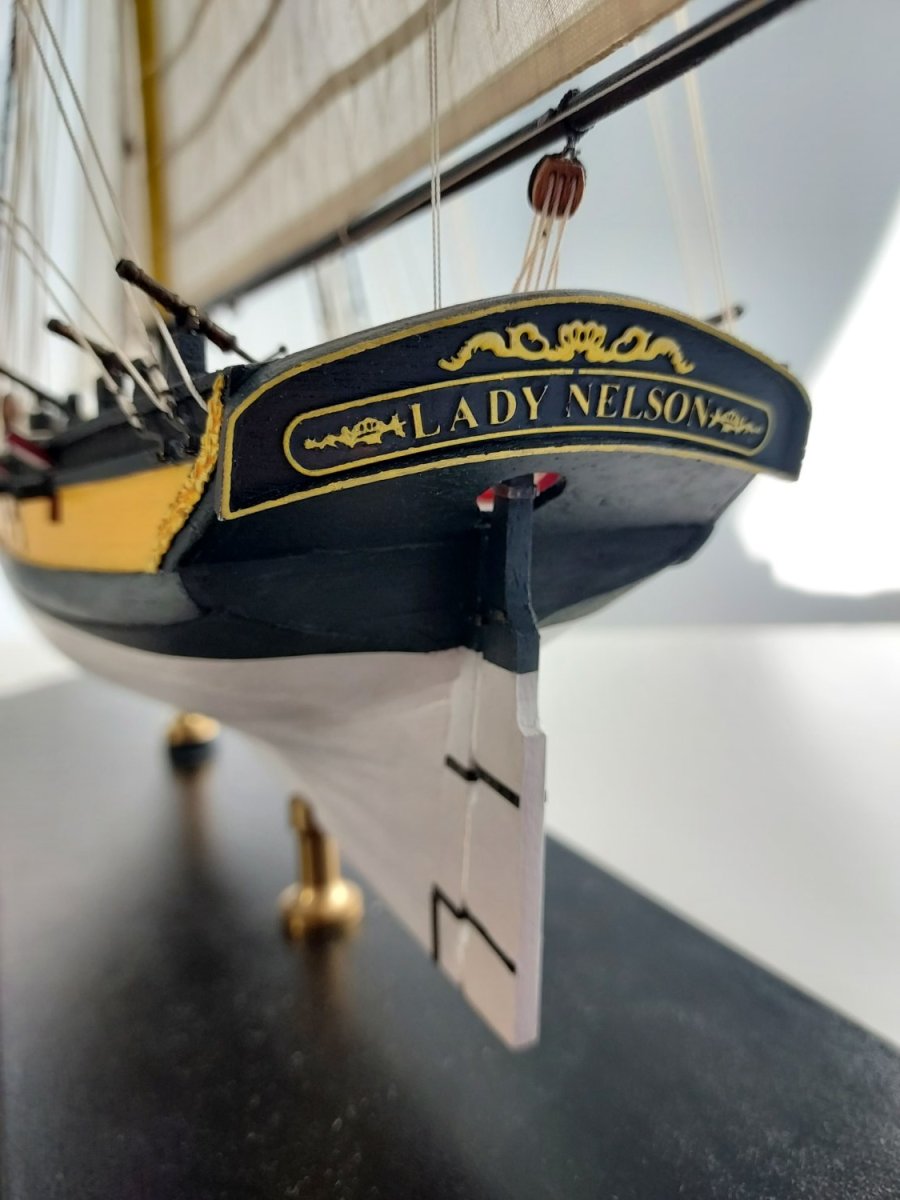
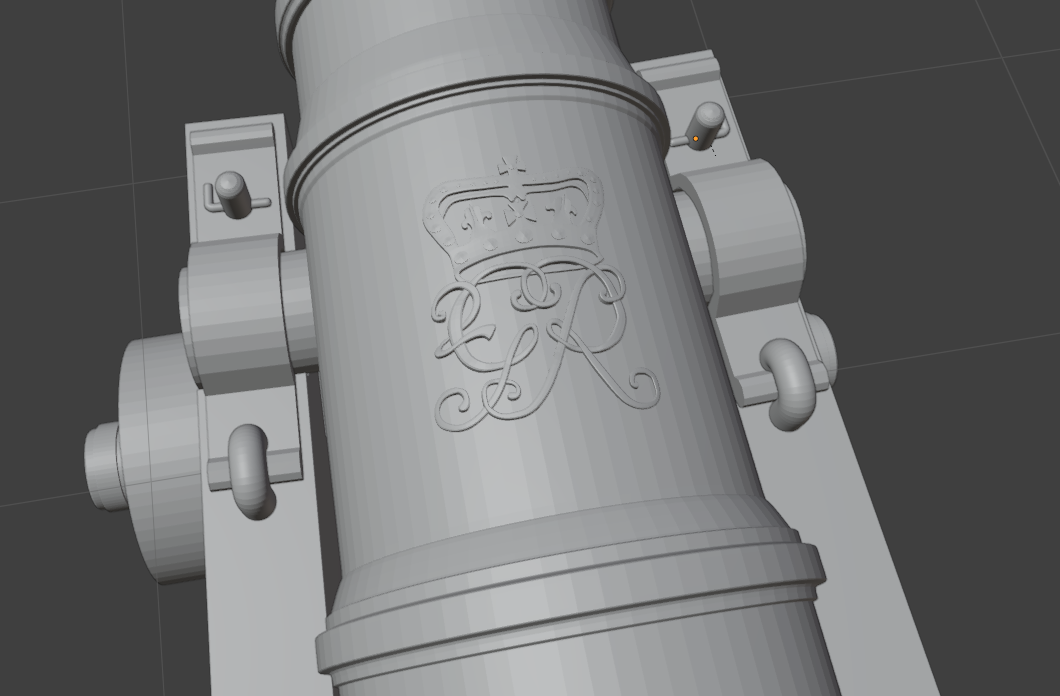
Thank You Allan, I think You right When modeling the emblem I took picture from book 'anatomy of the ship - alert' because it was more precise for me to model on it than the one for endavours book. I didn't realise that the small ornament on the left was in fact a number 2. I compared it with drwaings for endavour and this ornament looks like like 3 there. If I decide to print it some changes will be made ;). Thanks!
-
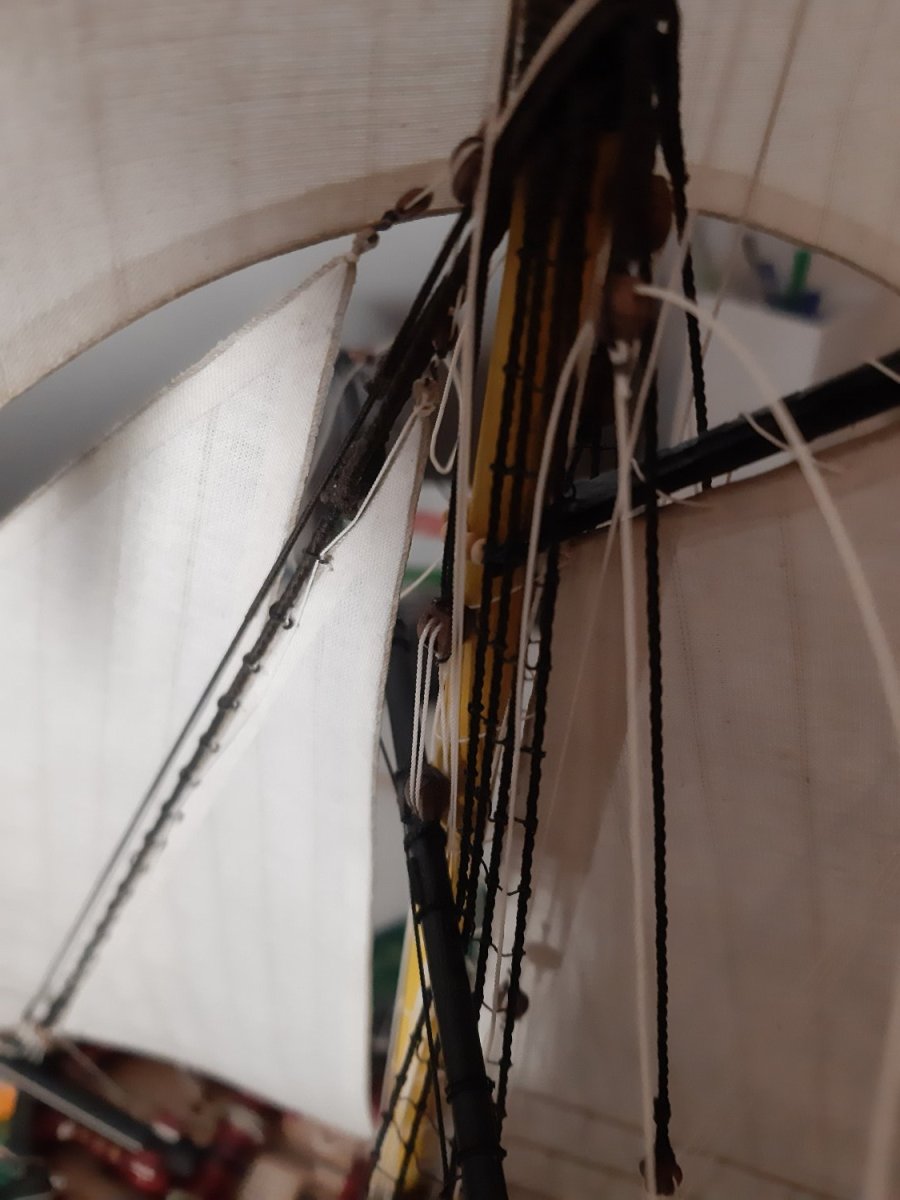
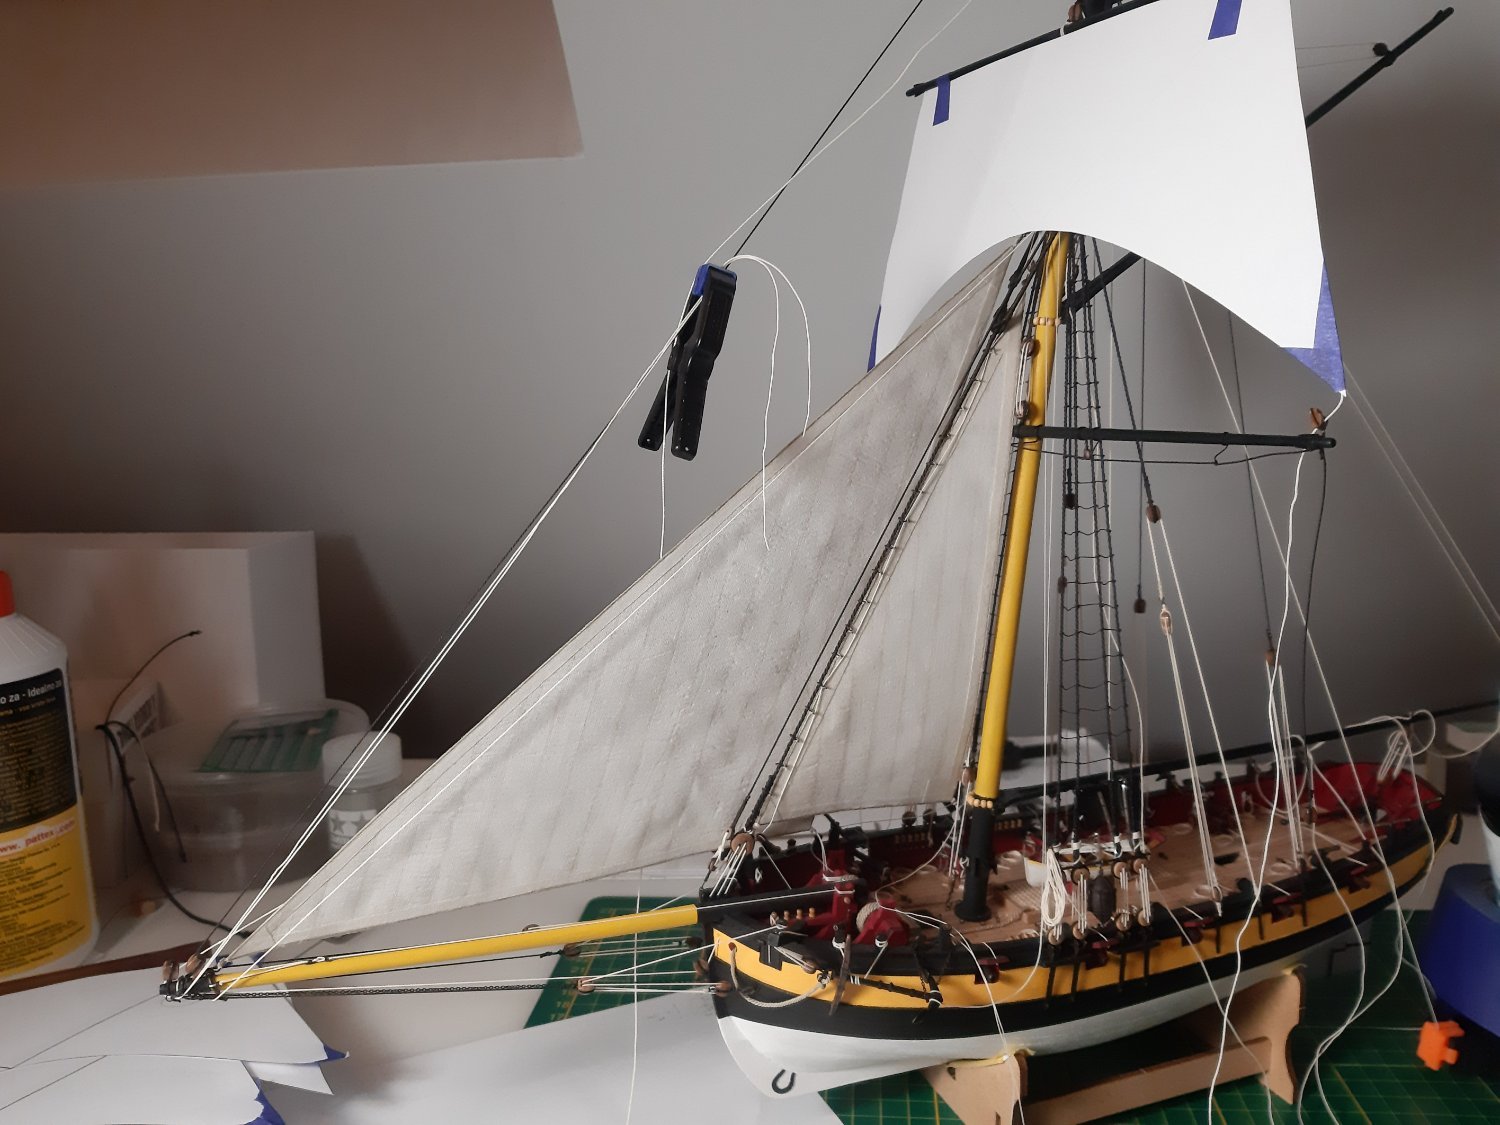
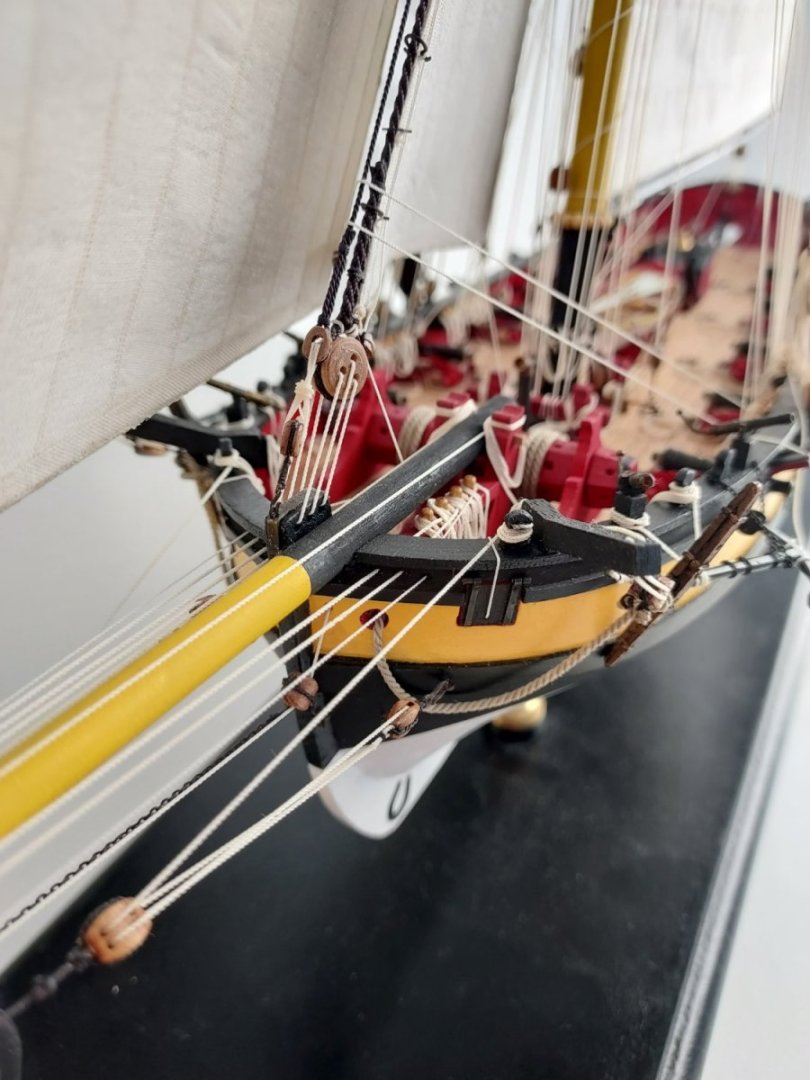
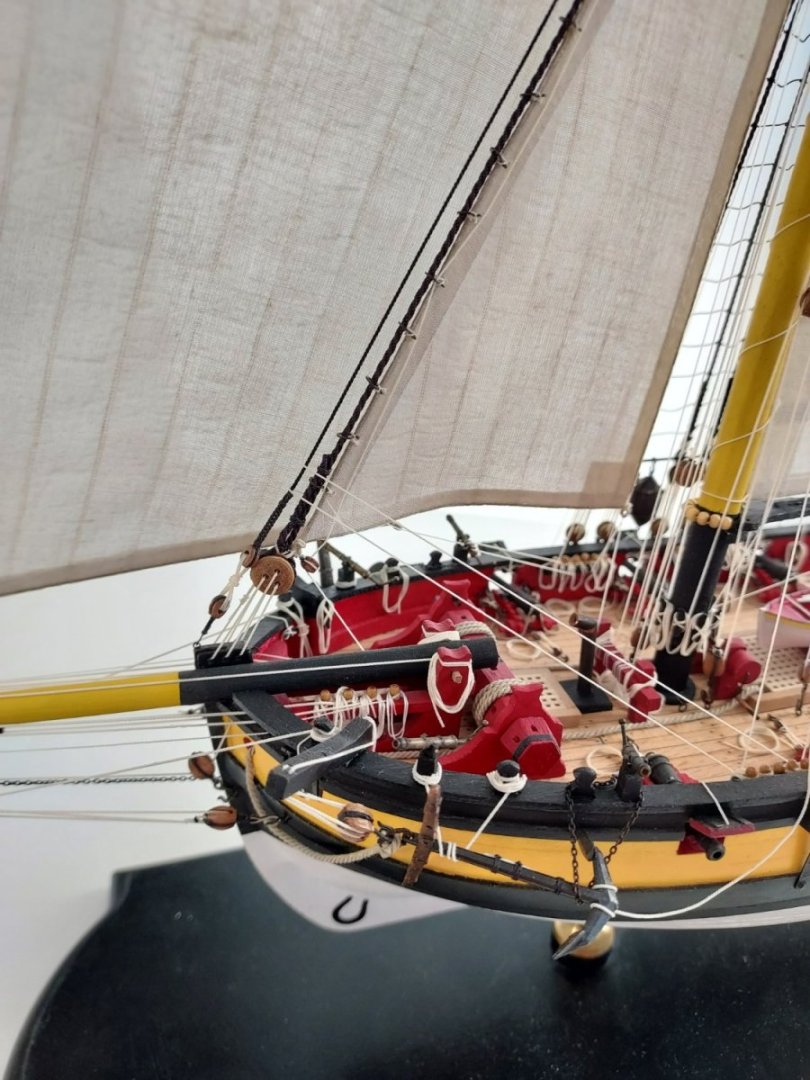
I am talking about forestays. As You can see on the picture above, forestay blocks rotation angle of the yard. I think i shoulden't deform forestays by increasind tention on yard. Mayby i need to move yard foreward away from the mast?
-
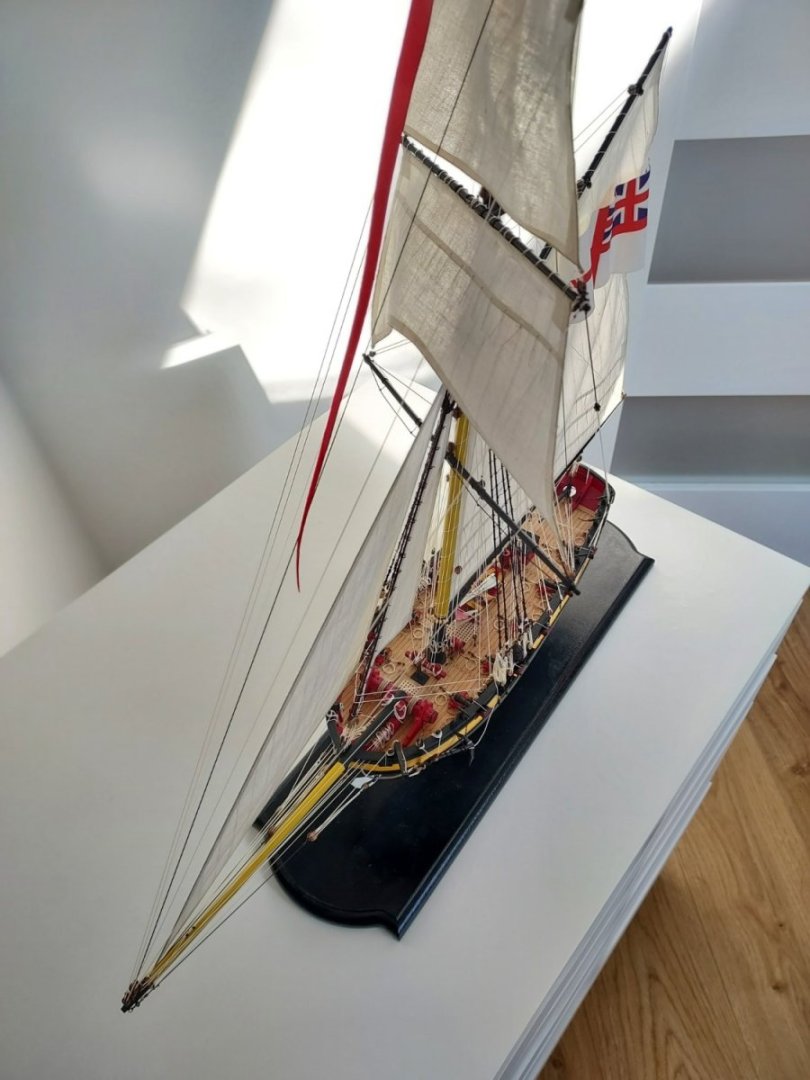
Dear All, I need some advice. I'm at the stage of mounting the yard and sails. I would like to mount squer sails as if they were catching side wind. something like that but, when i try to position the lowest yard it colides with shrouds. I couldent find any good picture how it works in real. Any ideas?

- 24 replies
-
- 3
-
-
- Lady Nelson
- Amati
- (and 2 more)
-
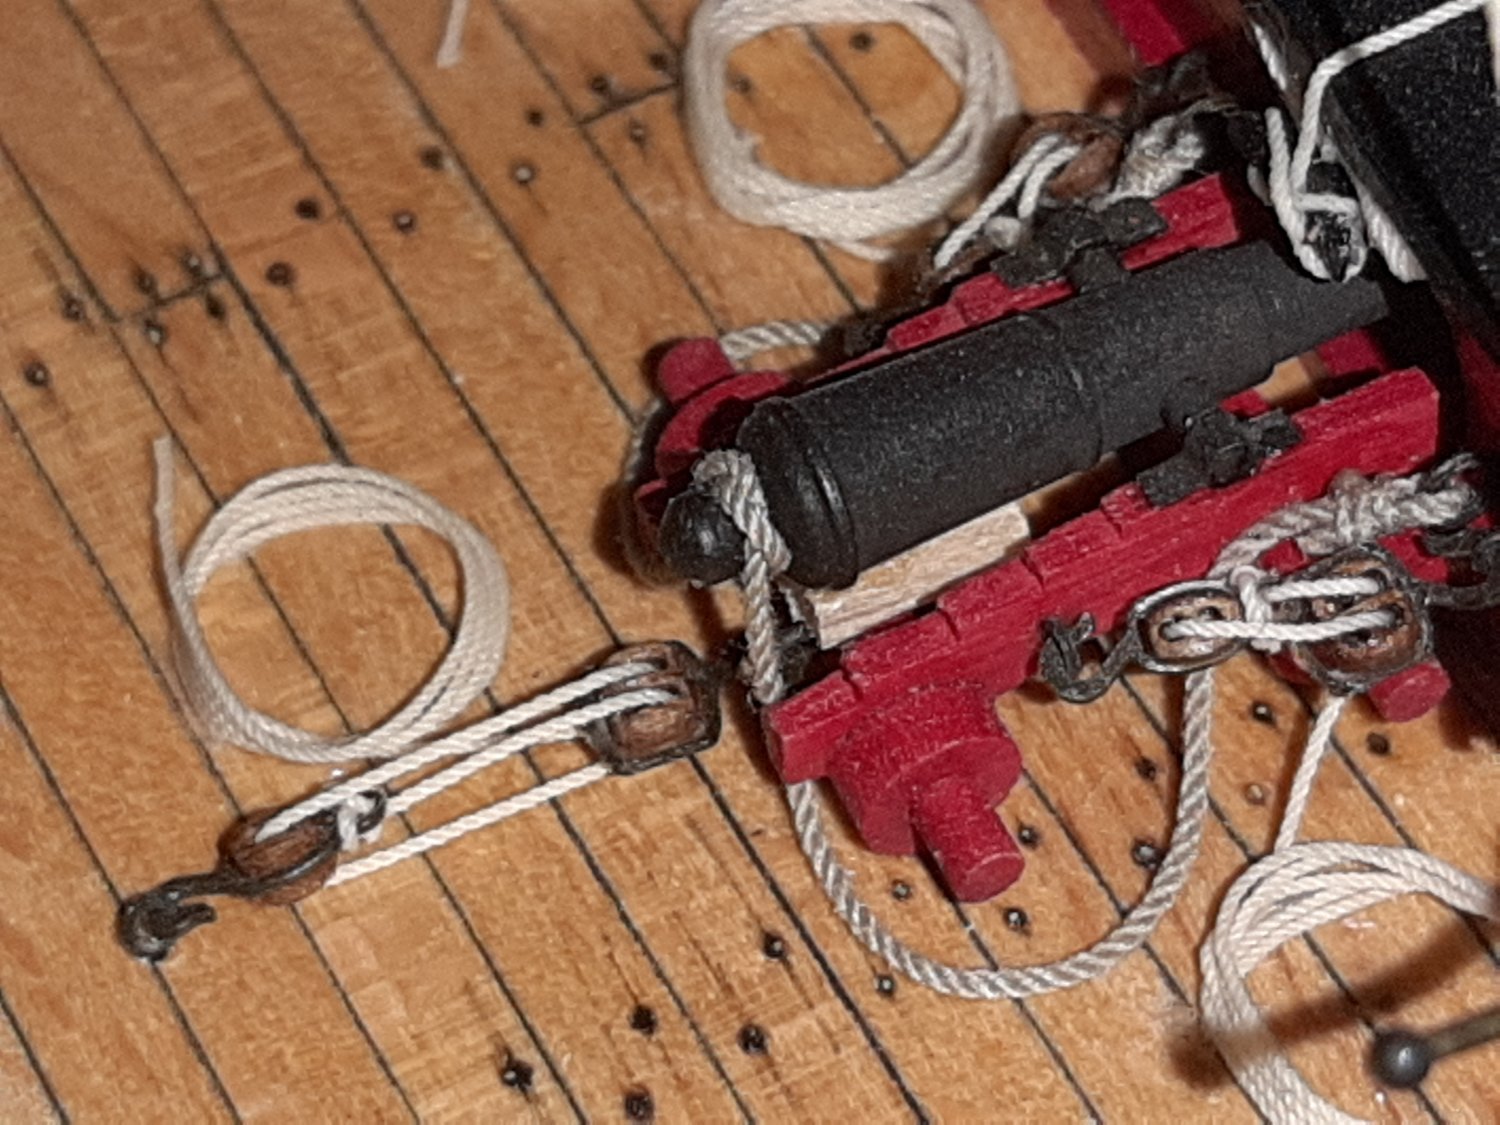
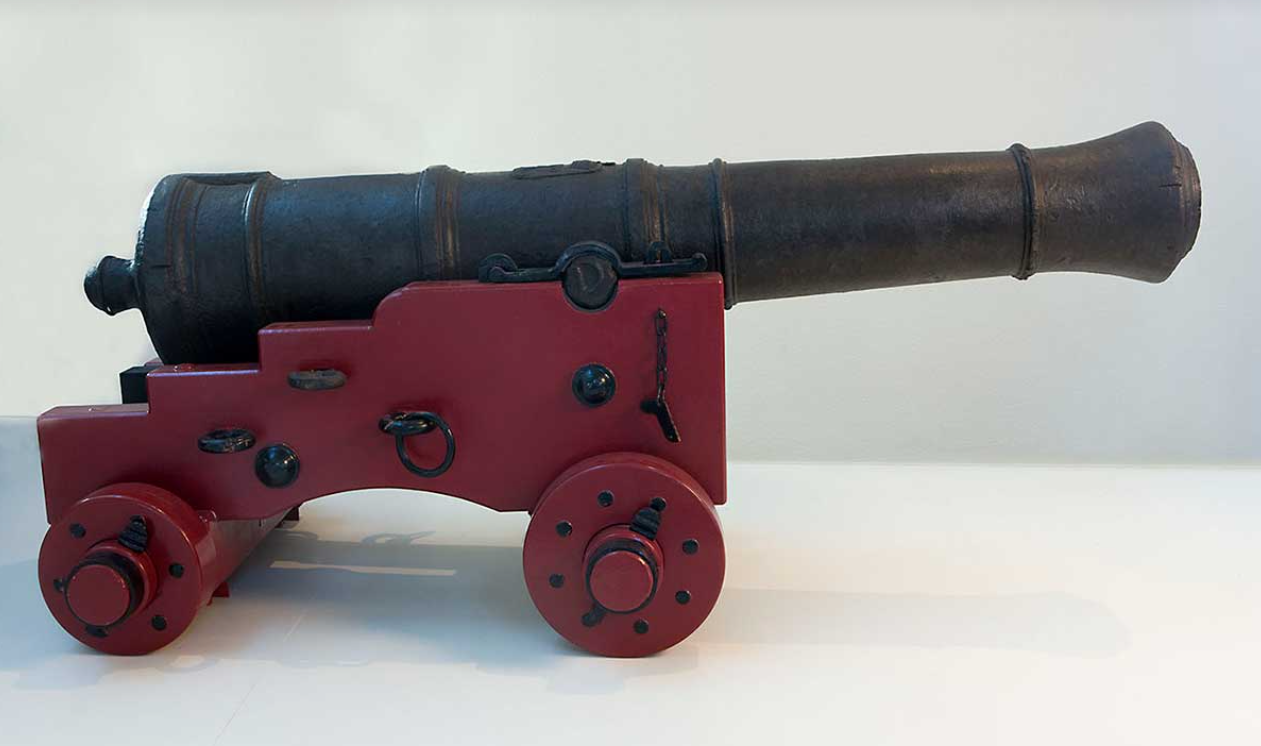
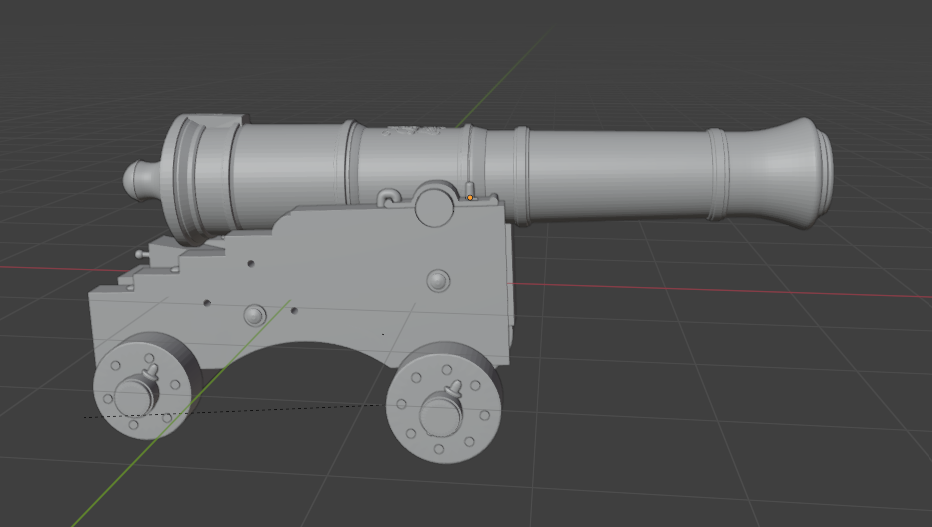
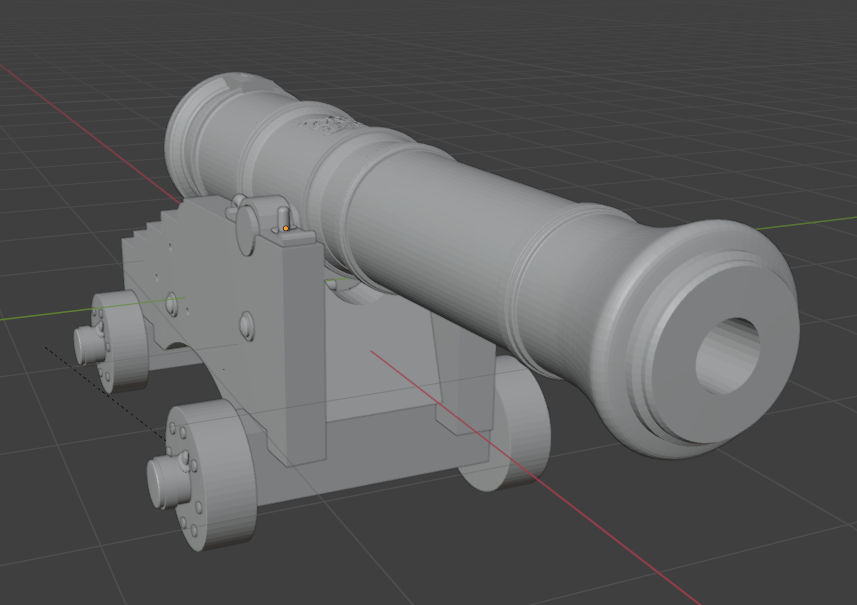
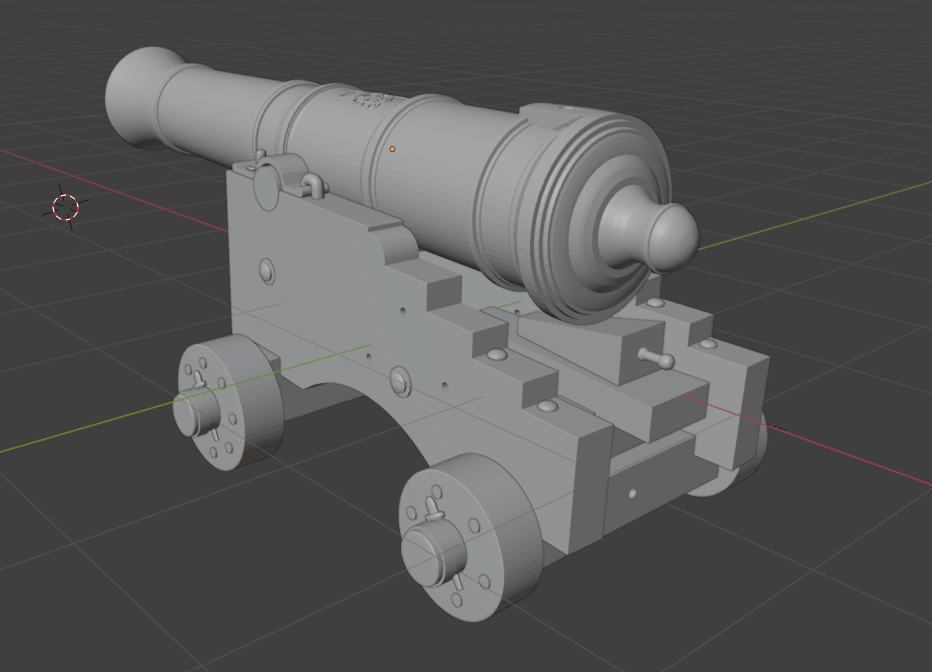
Hi taking a little break from Lady Nelson, I'm learning 3D design. For my next project, HMB Endavour, I have created model of it's cannon and hope to print it Model is based on blueprints from anatomy of the ship. Photo of orginal cannon for comparison.
- 24 replies
-
- 6
-
-
- Lady Nelson
- Amati
- (and 2 more)
-
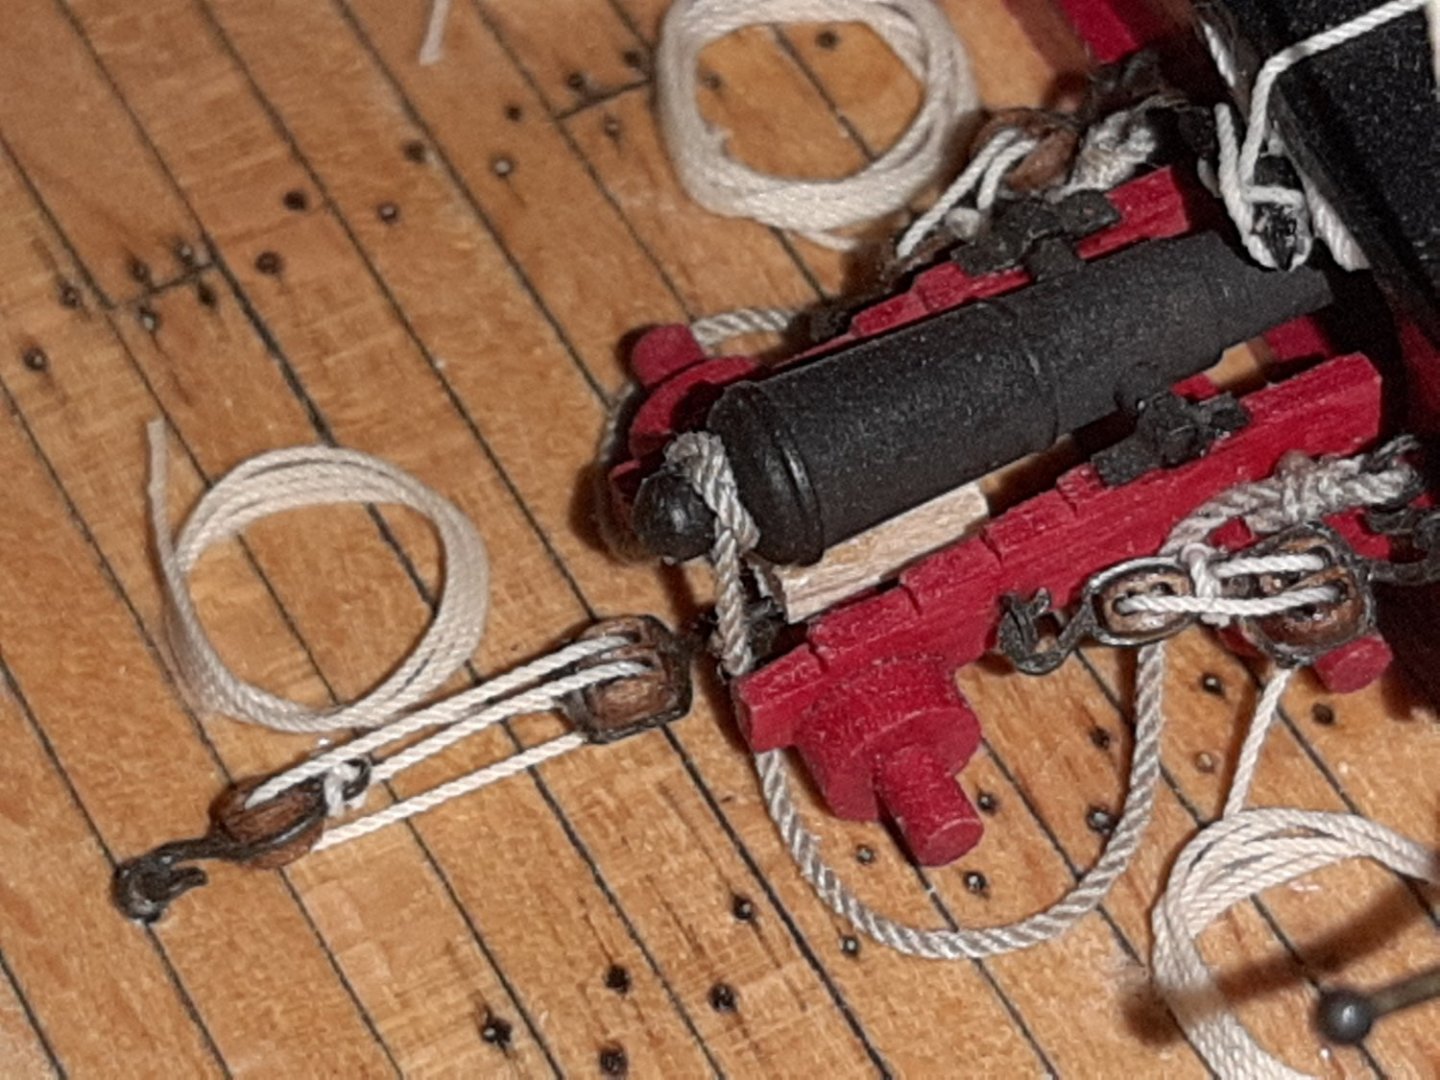
Amati didn't provide any gun tackle plans, so I took them form 'Anatomy of the Ship - The Naval Cutter Alert 1777' due to both ship are the same class and period. Maybe it's not clearly visible in previous photos but blocks configuration is single and double. Thank you! I will remember this for future projects
- 24 replies
-
- 4
-
-
- Lady Nelson
- Amati
- (and 2 more)
-
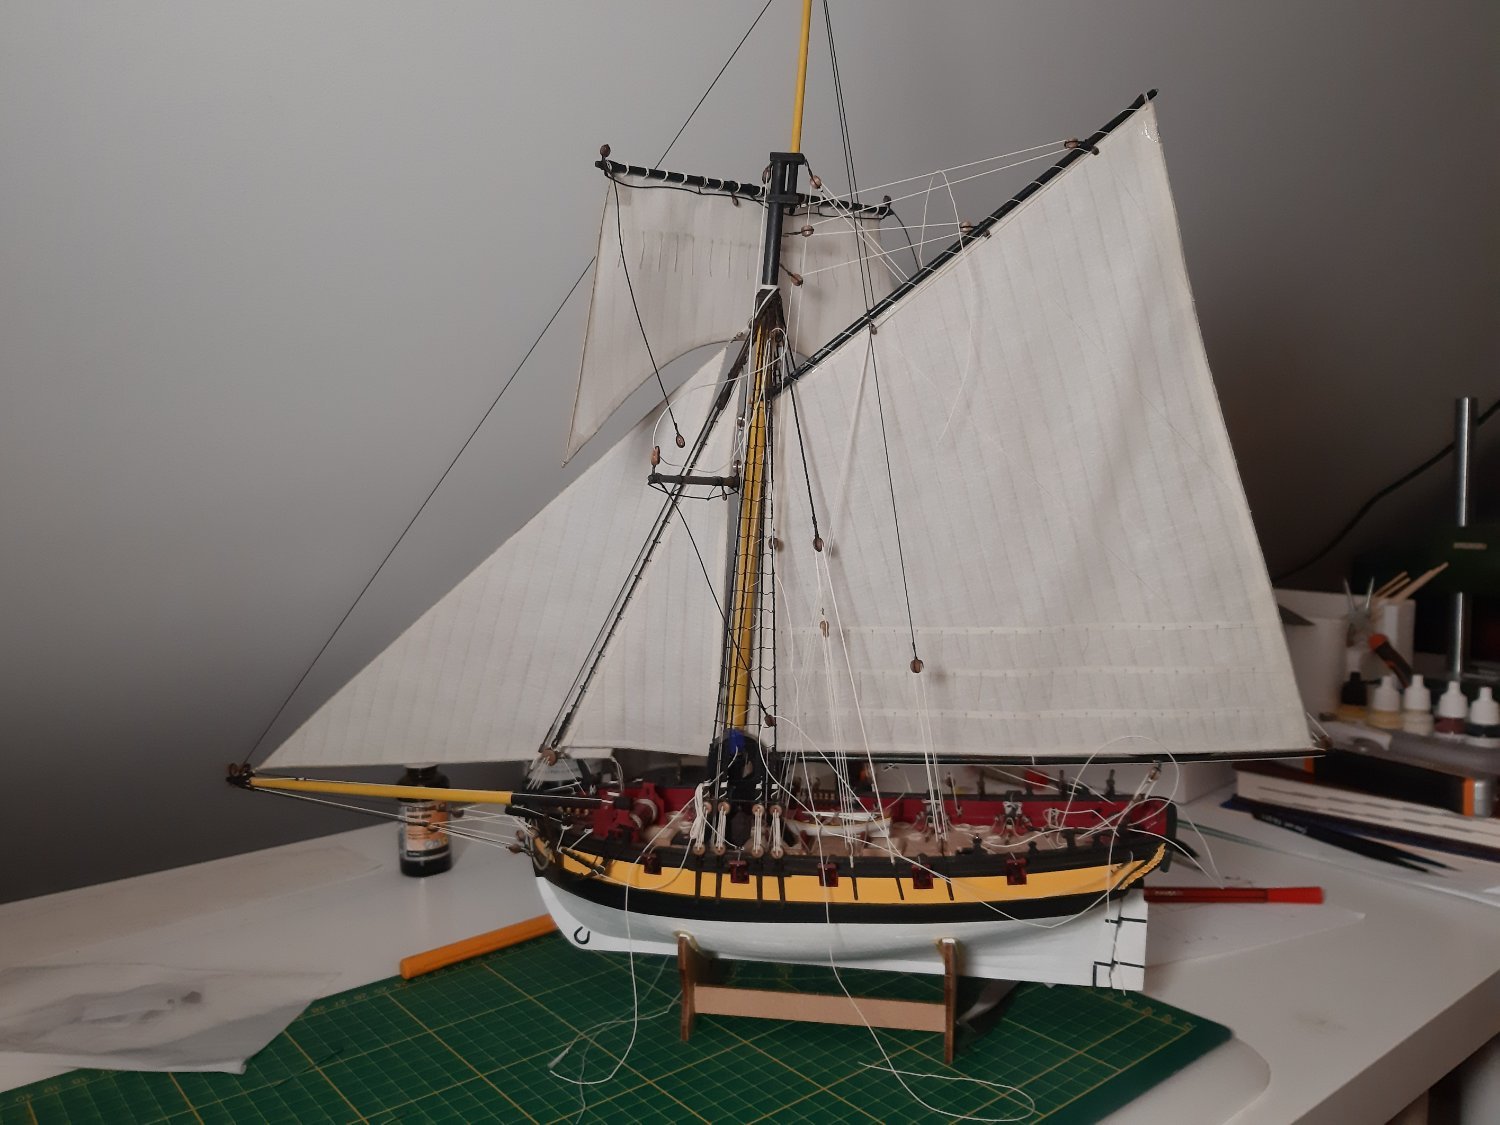
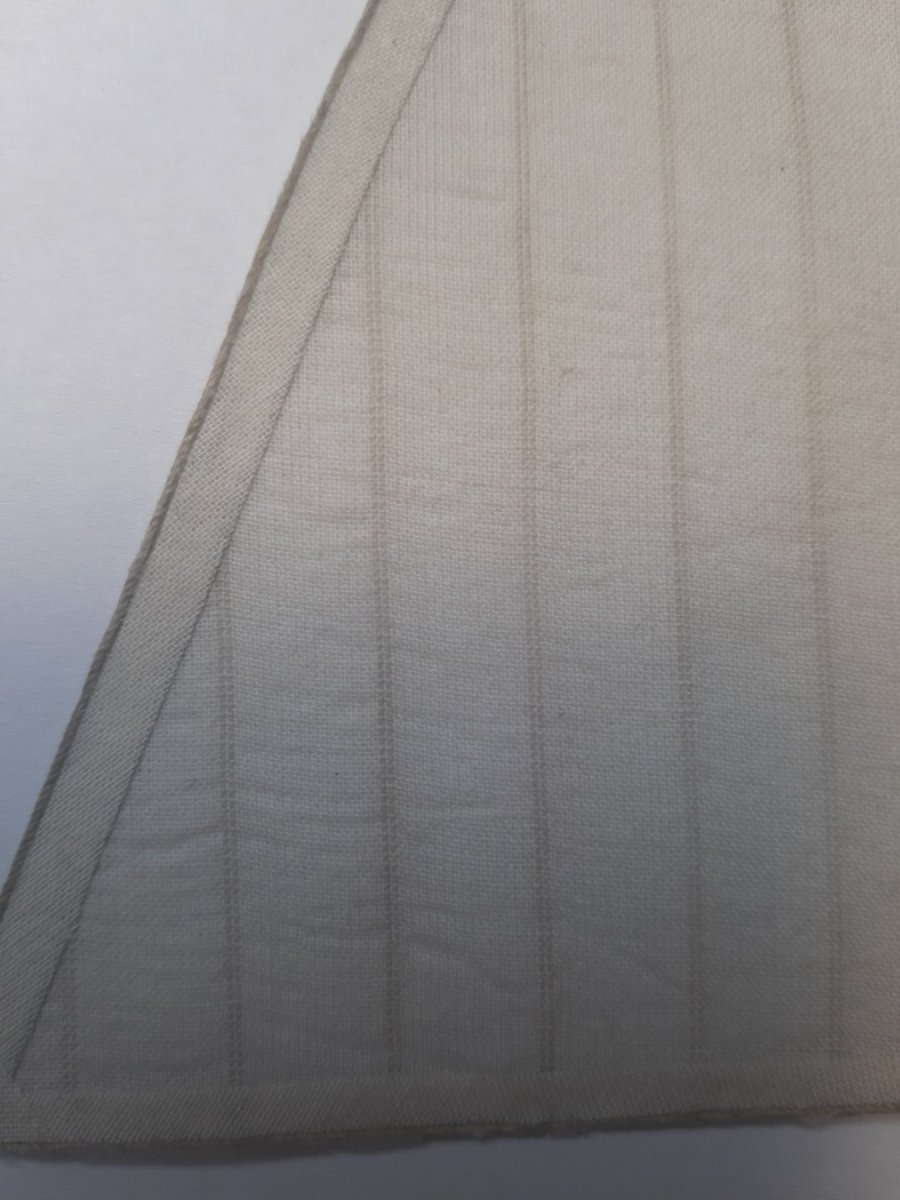
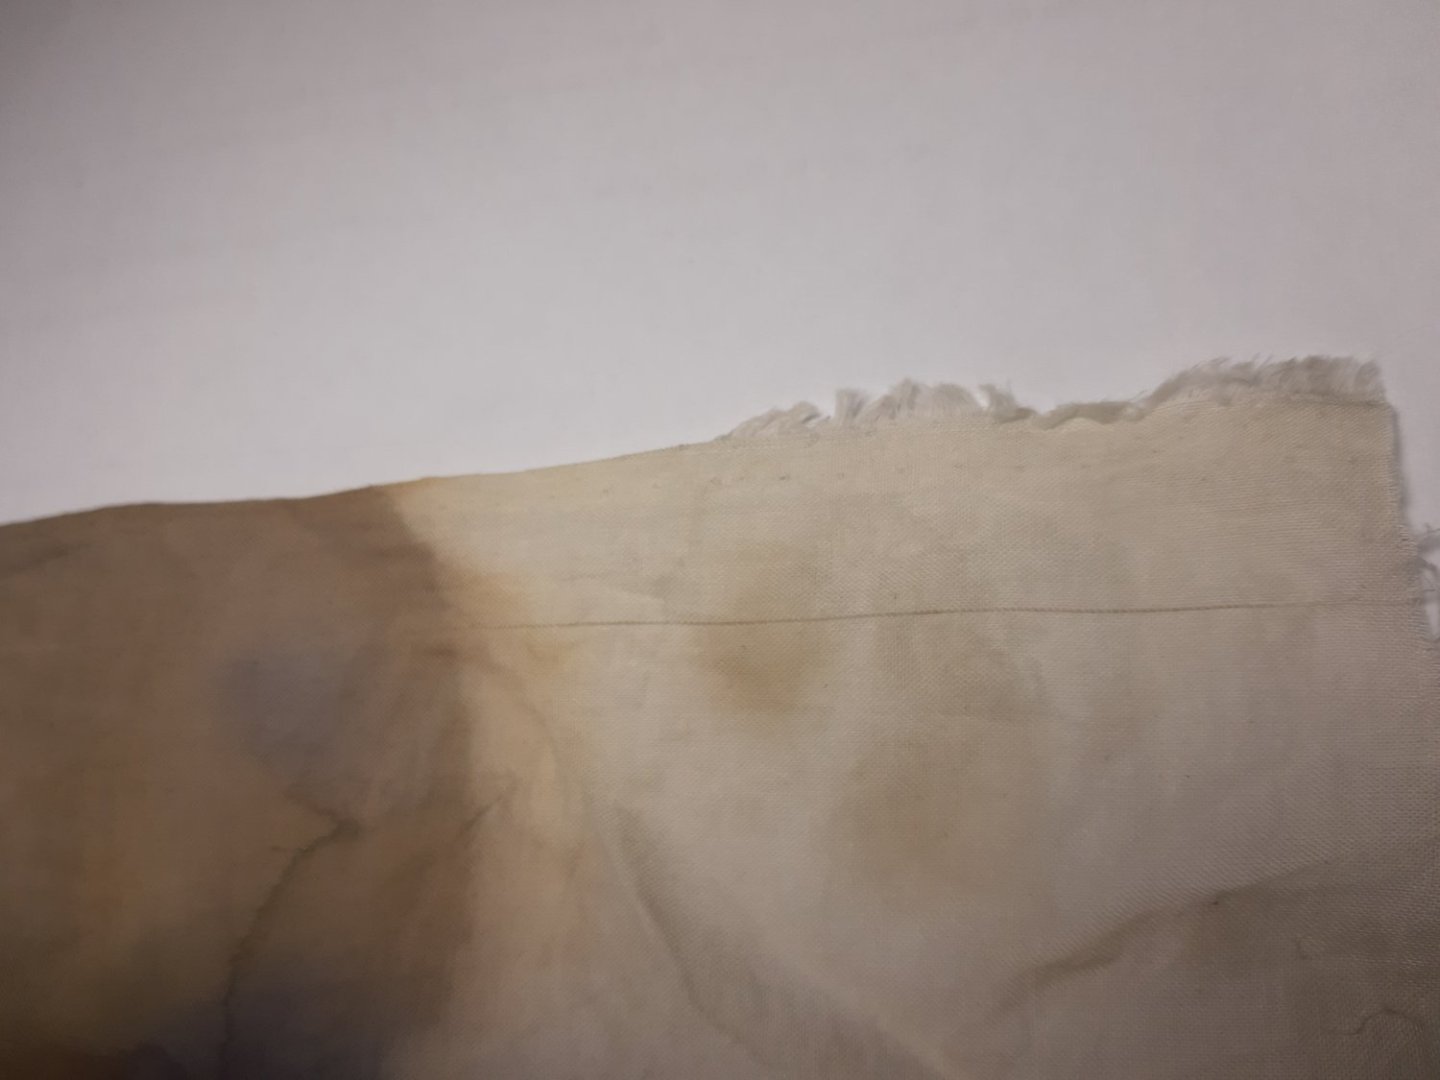
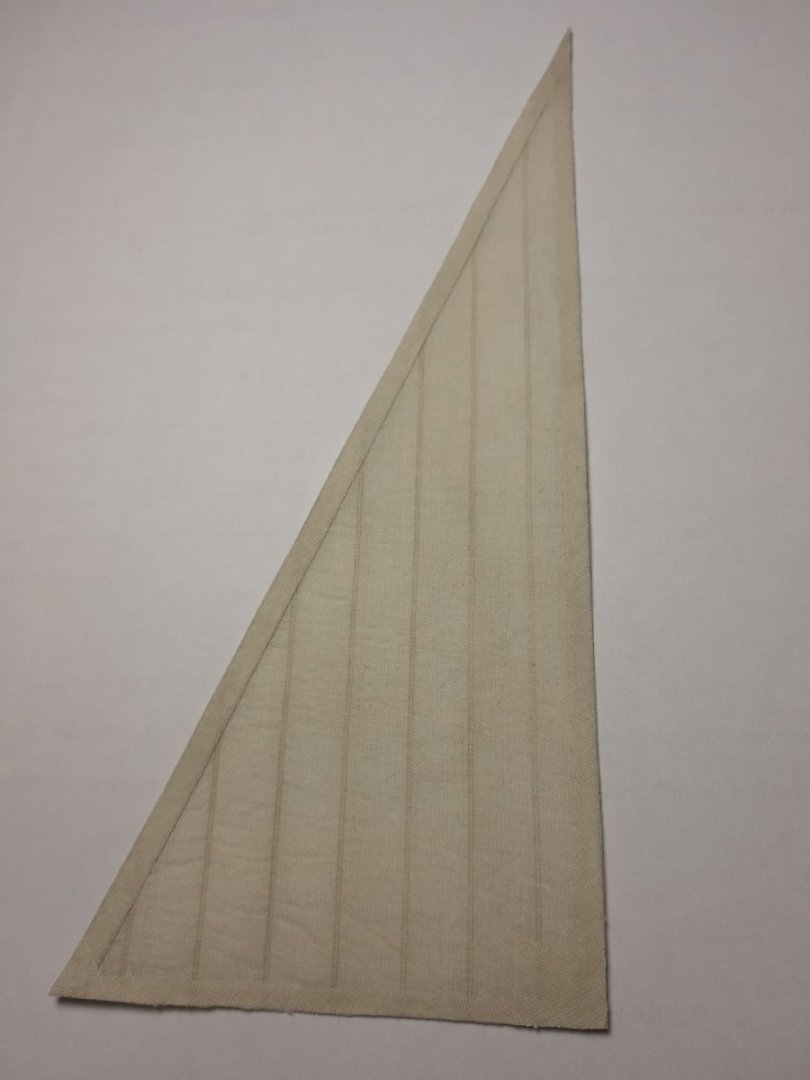
Hello, it's time to make some sails! Unfortunately I don't have access to sewing machine so my sails are glued. To imitate seam on sail I followed Olha Batchvarov built relation ( www.youtube.com/watch?v=Pj8D0VNMRAE&t=958s ) that is, pulling the colored thread out of the fabric to achieve result like this finished sail has doubel seam and glued on reinforcements on ends two sails installed, and template for third is fitted. A lot of loose line everywhere at this point Cheers Maciek


- 24 replies
-
- 10
-
-
- Lady Nelson
- Amati
- (and 2 more)