DONATION DRIVE - SUPPORT MSW - DO YOUR PART TO KEEP THIS GREAT FORUM GOING!
×


Decoyman
-
Posts
97 -
Joined
-
Last visited
Content Type
Profiles
Forums
Gallery
Events
Everything posted by Decoyman
-
 I have acquired a small selection of logs: one each of cherry, whitebeam and birch. Each log is about 200 mm diameter and they vary in length from about 900-1500 mm. I realise that they will need to be dried before I can use them and I understand that the best way to speed this process along is to slice the logs into planks and then to stack them with spacers to allow air movement around and between the pieces of timber. Although I have a small chainsaw i don't really have the facilities to slice these logs myself. I phoned our local saw mill, who said they would charge £50 per hour to mill the logs for me and that, if their blade was broken because of something in the wood, I would be charged for a new blade as well. These logs may not be of great quality and it just doesn't look cost effective to me to pay a minimum of £50 plus possibly a great deal more if I'm unlucky. Does anyone have any suggestions as to how I can slice these logs cheaply? As a secondary question what is the best slicing pattern to use? Should I just go for a simple stack of planks like slices of bread or would it be better to slice them to get as many radial boards as possible? Rob
 -
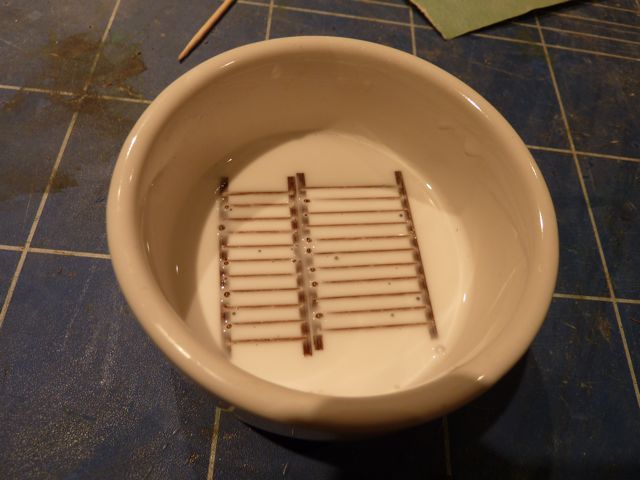
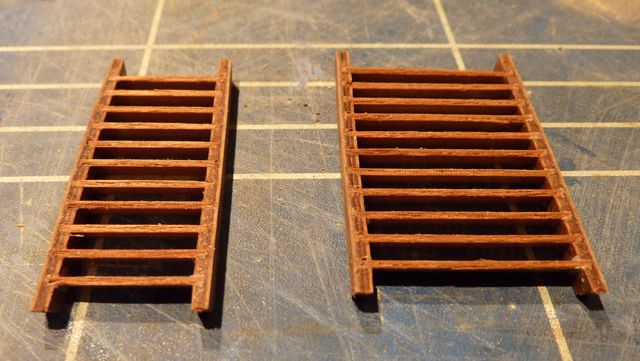
The companionway ladders were made much the same way as the gratings. The sides are pre-routed with grooves for the treads machined in; the treads are cut from 1 x 4 mm walnut. I fixed a stop temporarily in my mitre box to ensure they were all cut to the same length. Once I had the kit of parts ready I glued the top and bottom treads to the respective grooves in the sides using CA. Once these were set I slid the remainder of the treads into place and dipped the assembly in dilute PVA.
- 35 replies
-
- 1
-

-
- agamemnon
- caldercraft
- (and 1 more)
-
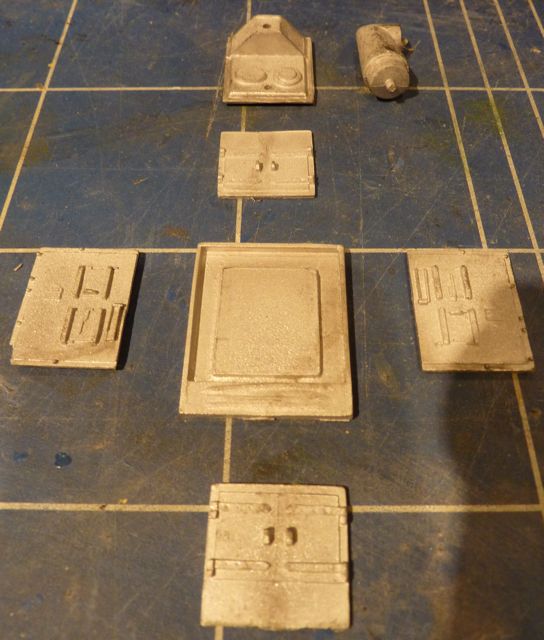
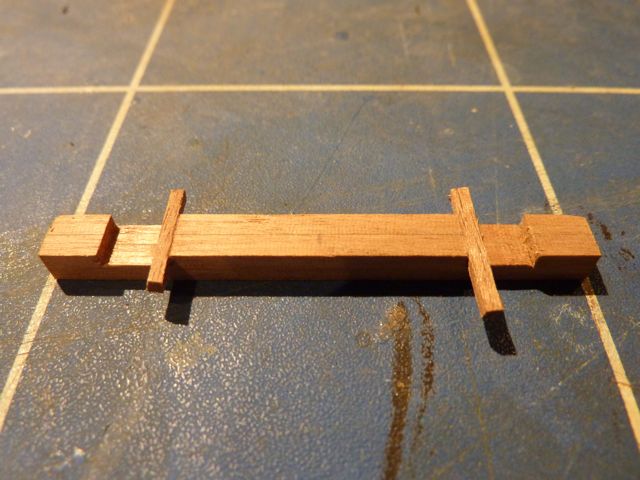
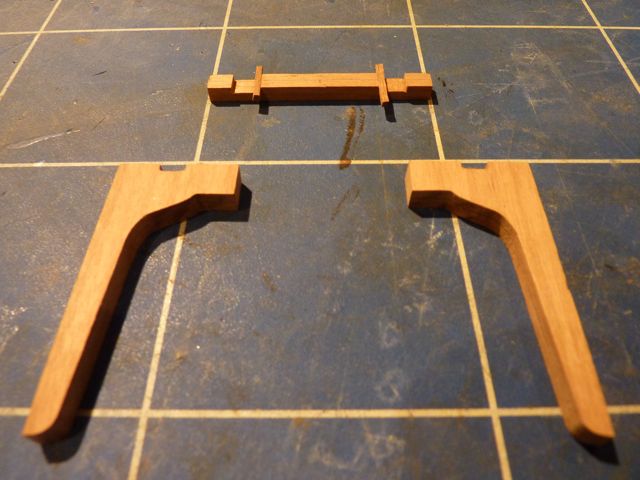
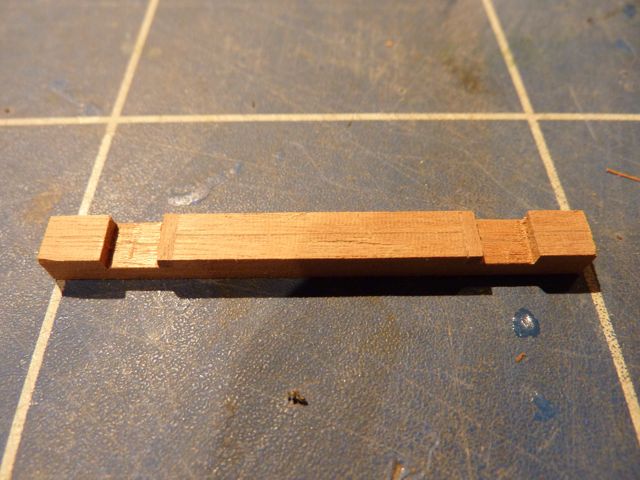
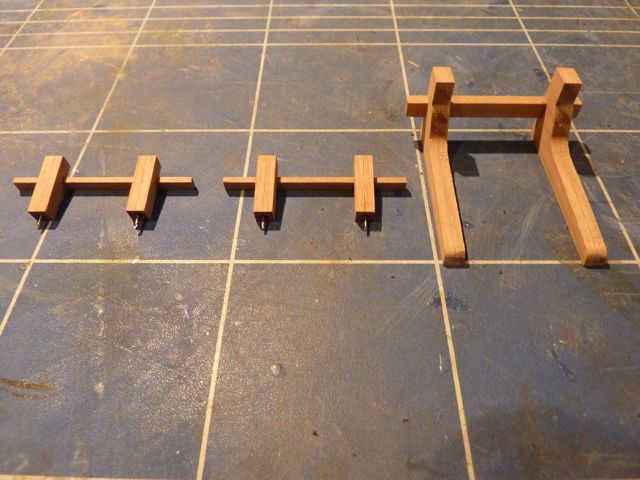
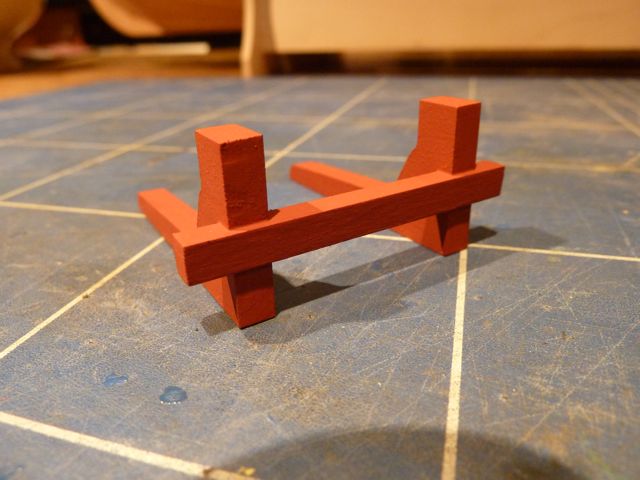
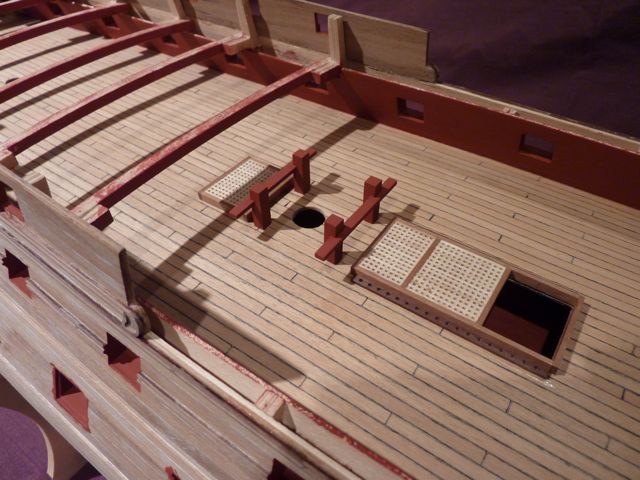
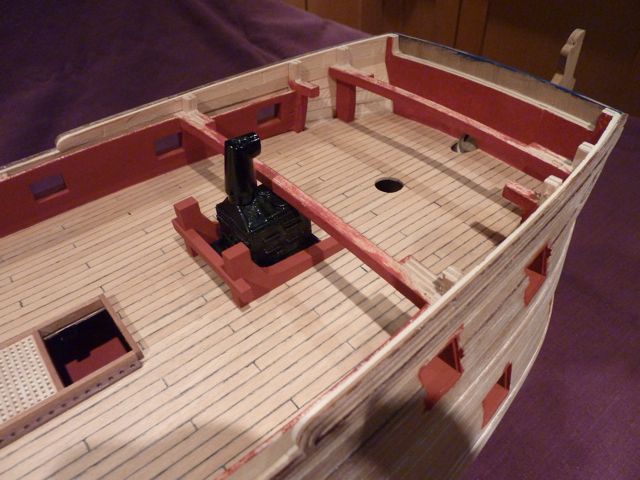
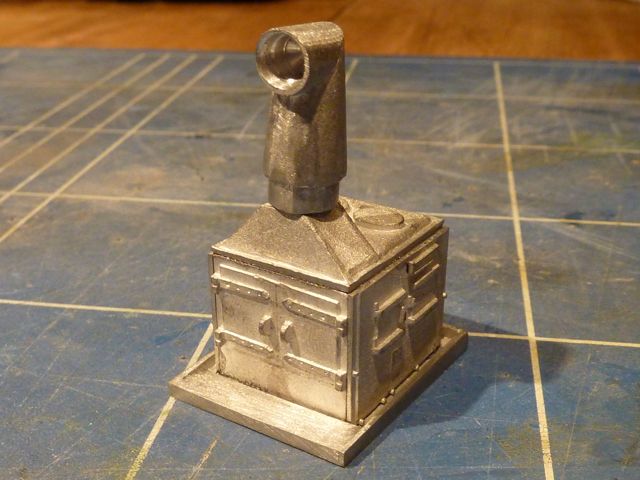
The bitts were mostly straightforward: sand the component parts, glue them together and paint them. One set - the ones which sit around the stove had the two rebates in the cross piece too close together. I had to widen each of them symmetrically and then insert small pieces of walnut to reduce them back to the correct width. Once these alterations were complete and the parts rubbed down and painted the alteration was invisible. The alterations: The finished article before painting: After painting: And installed in the ship: As you can see from the final picture above the stove was completed and installed at the same time. This is a set of white metal castings which I glued together using epoxy resin and painted. Here are a few photos of the construction sequence: More to follow!


- 35 replies
-
- 1
-
-
- agamemnon
- caldercraft
- (and 1 more)
-
Using Blacken-IT
Decoyman replied to fnkershner's topic in Painting, finishing and weathering products and techniques
I too have had mixed results trying to blacken brass (and other metals). I use Carrs' products like Blue Ensign. I have one word of caution: don't leave small parts in the solution too long! I left trunnion hasps and flintlocks in a dilute solution of Metal Black for Brass overnight and they had gone by the morning.... Assuming that no-one sneaked in and pinched them in the wee small hours then I can only assume that they must have completely dissolved. I haven't tried this little stunt again since! Rob -
Hi Mobbsie, My instructions say that all the gun ports should be lined. Those without lids on the upper deck are finished flush with the face of the planking inside and out (described in the instruction section headed 'Gun Ports'). The remainder are lined with the outer edge of the linings 1 mm inboard of the face of the outer planking, creating the rebate in which the lid sits when closed. This is described in the section headed 'Second Planking'. I think it might also be shown on one of the drawings, but I have not got the particular sheet to hand, so I can't be sure. Setting the lining back does create a slight problem, as I mentioned in my previous-but-one post, because the edge of the planking in contact with the lining is quite narrow. If I were you I would glue scraps inside the planking flush with the edge of the port to give you a greater glueing area when you come to install the linings. In answer to the rest of your question: I made each piece of lining from 1 x 10 mm walnut and, where I did not have access to the interior of the hull (on the main gun deck) I left them that width. Elsewhere I sanded them flush with the inside planking. Each piece of lining was fitted separately. I hope this helps. Regards Rob
-
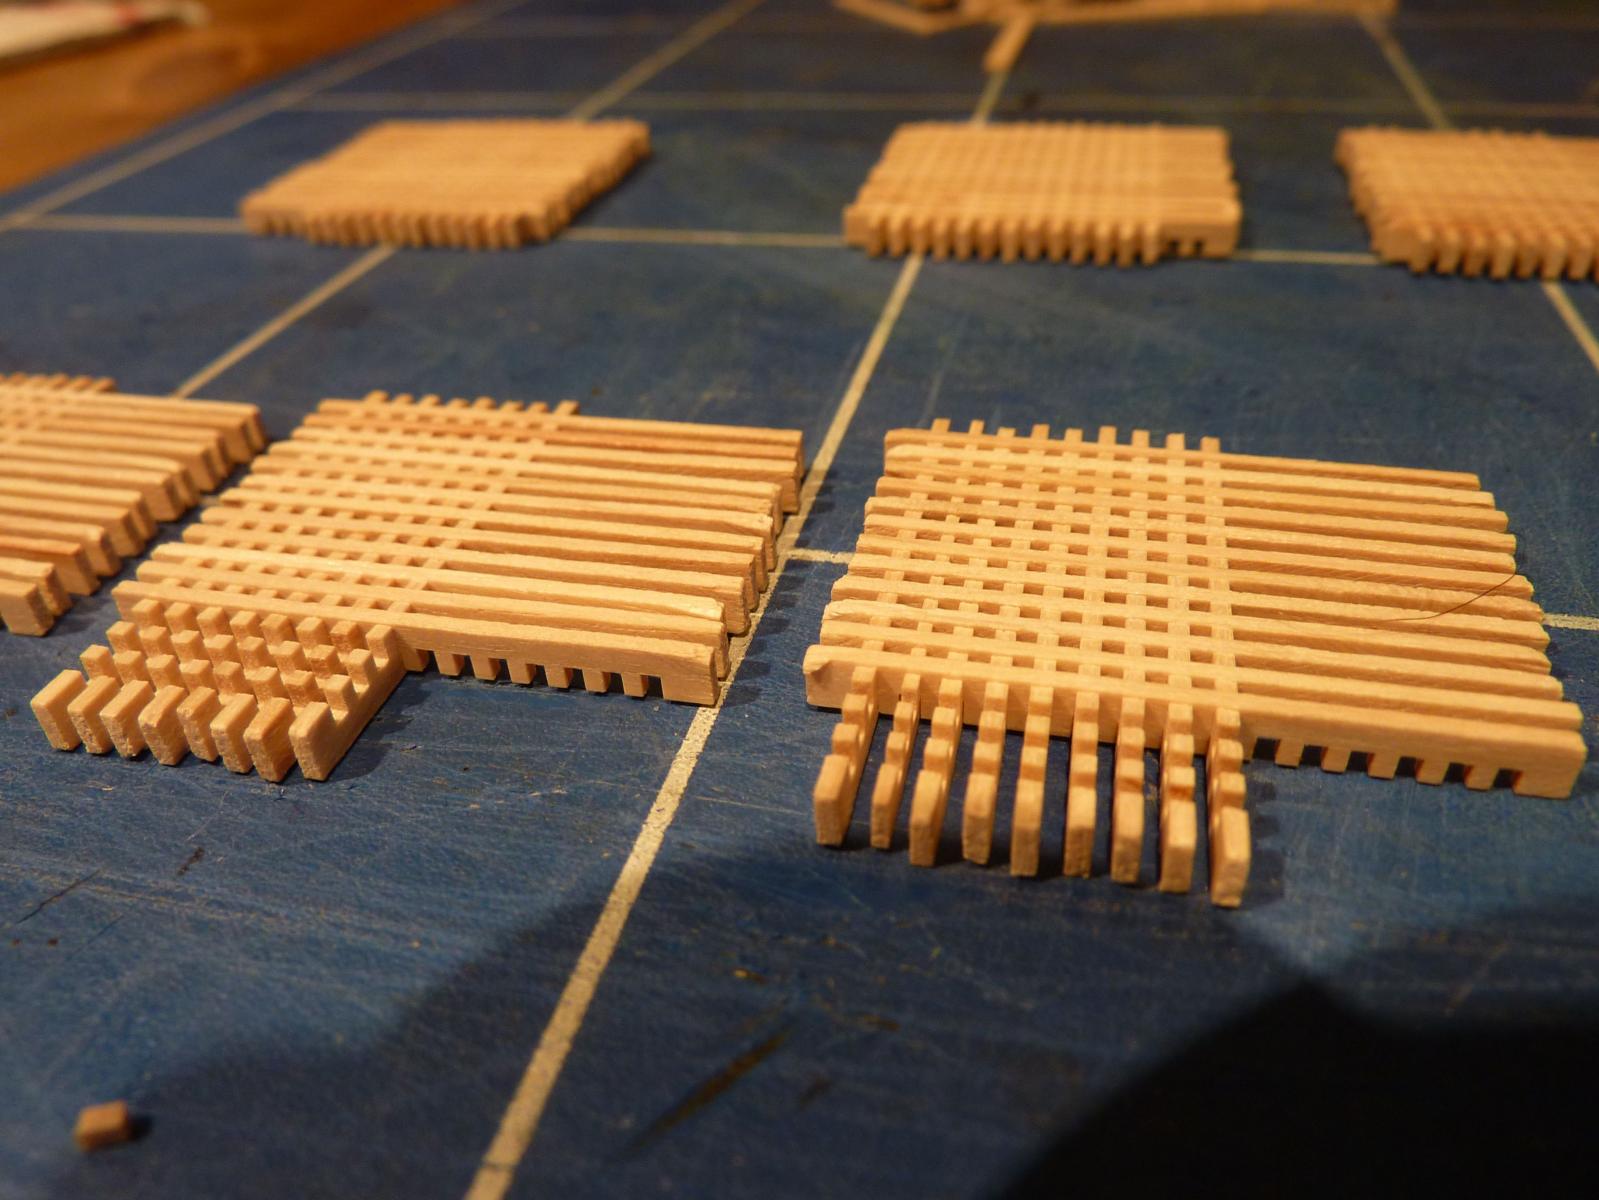
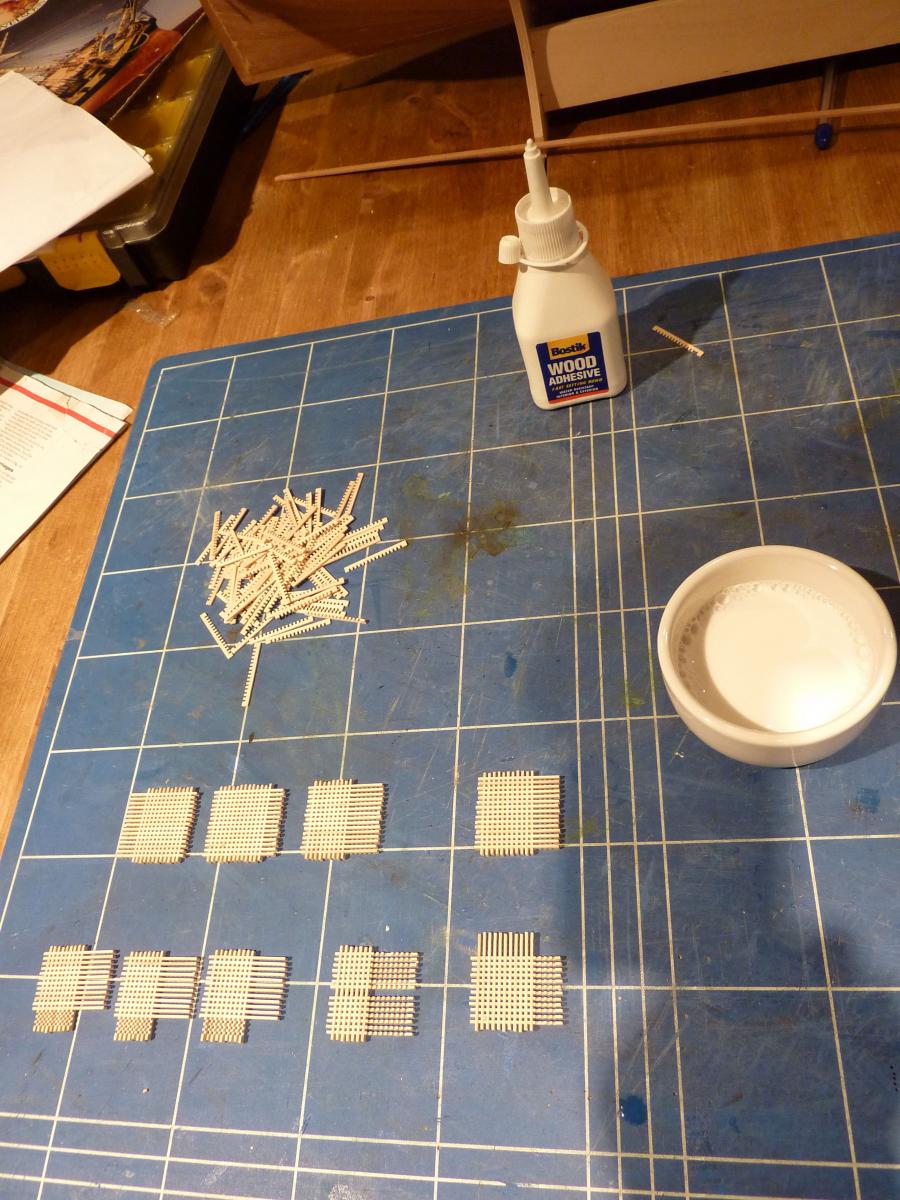
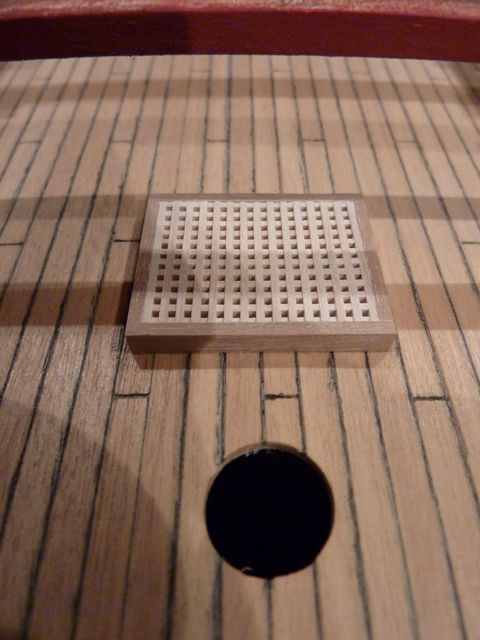
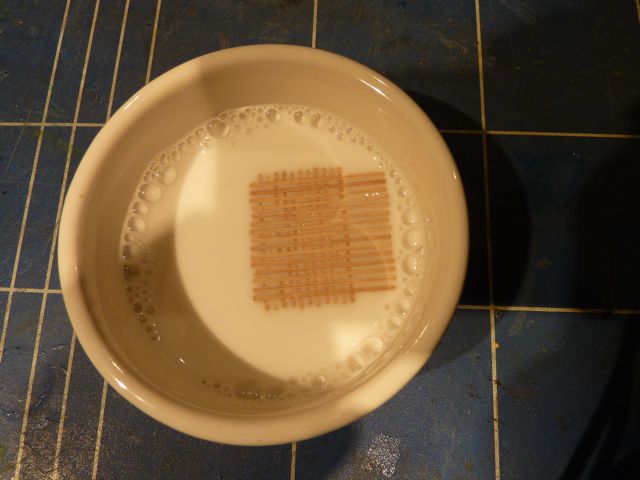
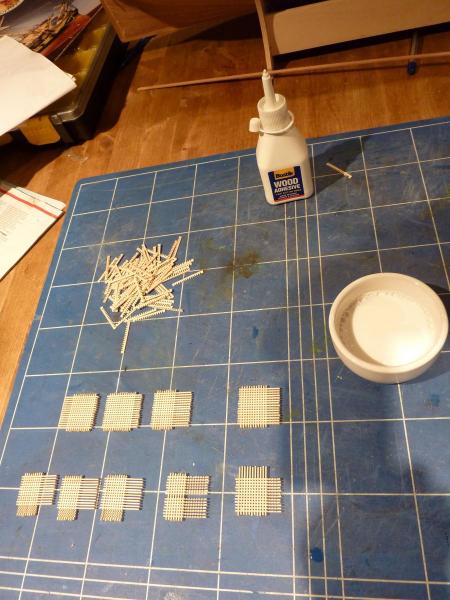
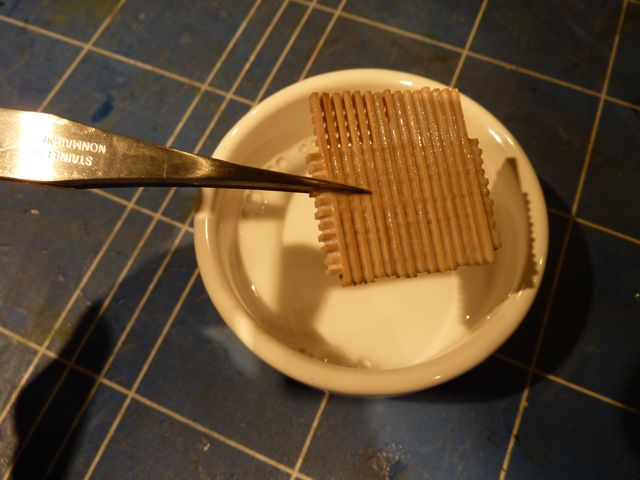
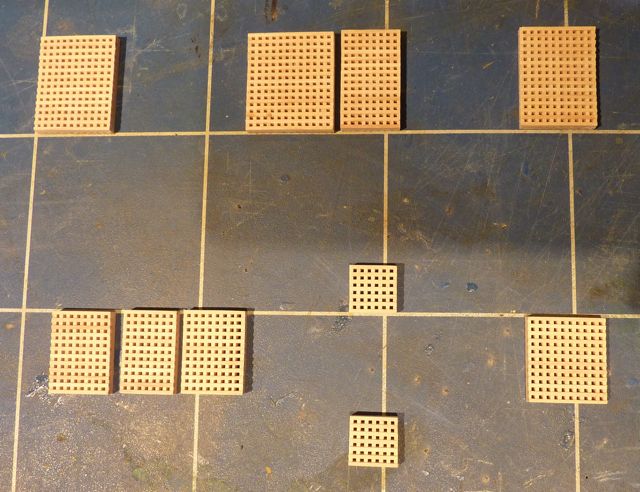
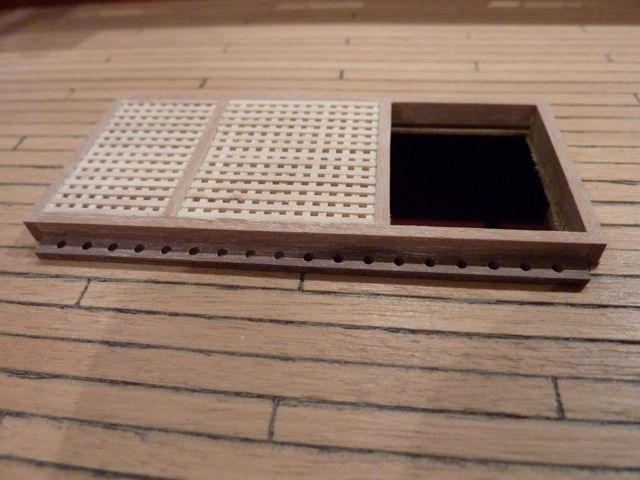
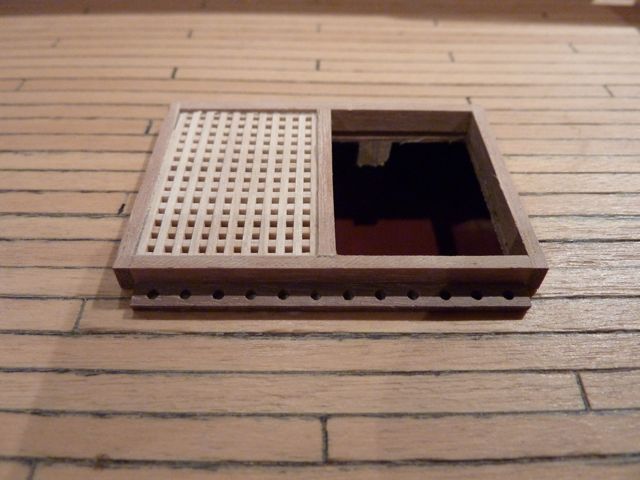
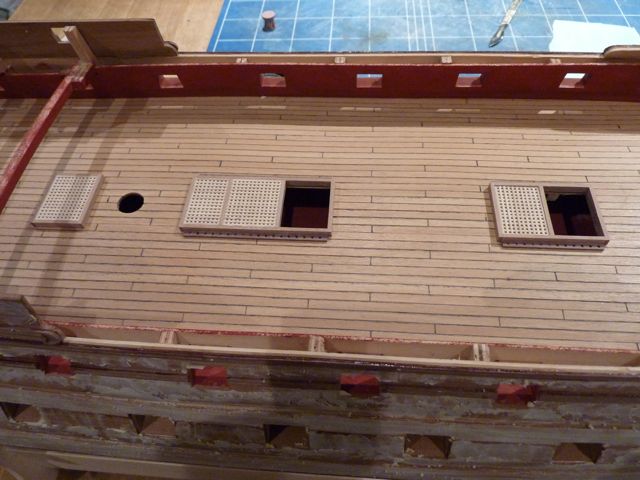
The other bit of progress achieved before I started my log was to install and plank the upper gun deck. Since then I have made the various fittings, including gratings, bitts and the stove. Like most kits the gratings come as notched strips like coarse combs. I found the easiest way to assemble these was to fit them together dry and then to dip them in dilute PVA. Once the glue had set I trimmed off the excess timber and sanded the top, bottom and sides. Here are some step by step photos: Some of the gratings dry-assembled. A 'grid' is made to suit the overall size of each grating: Next the gratings were dipped in dilute PVA and then the excess dabbed away using kitchen towel: Finally each grating was trimmed and sanded smooth: Once this stage was complete I added the coamings around each hatch, some of which incorporate the openings for the companionways between decks. Here is an example of one in situ. The corners were cut square and butted. I believe the real ones were half-lapped at the corners, but I didn't think this would be visible at this scale. And here are a few more. On some of these you can see that i have added shot garlands along the sides. Rob


- 35 replies
-
- 6
-
-
- agamemnon
- caldercraft
- (and 1 more)
-
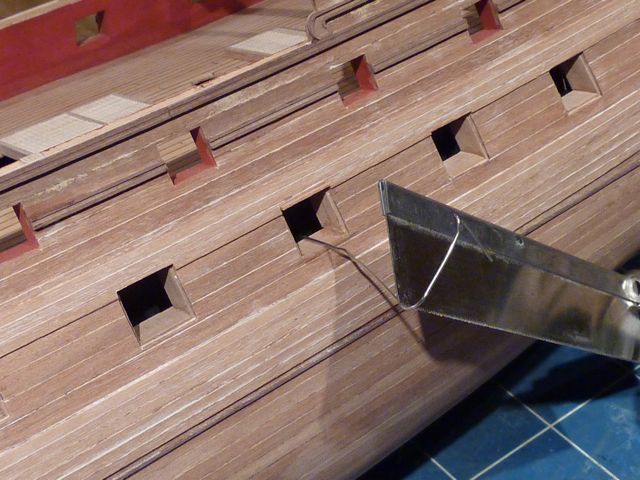
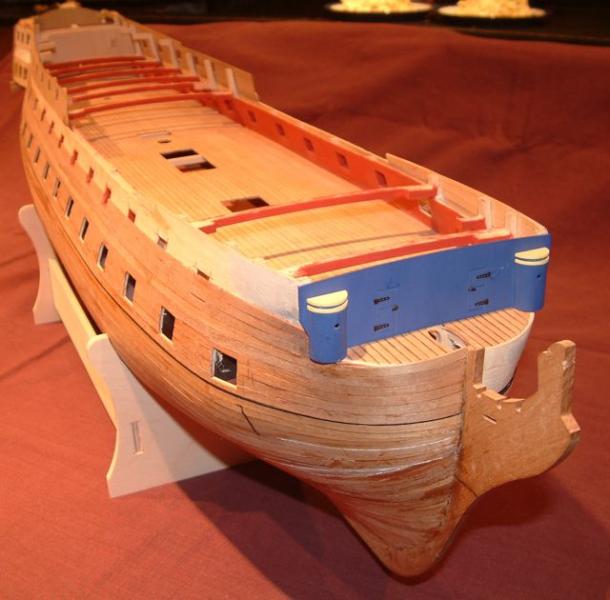
Back to the hull, and this is where I started in earnest on the build - the back end of 2009 (seven years after I first assembled the keel and bulkheads). The next stage was to finish cutting out the gun ports, one of which I managed to make about 1 mm too high. I think this was the point where I realised it was better to be good at correcting mistakes rather than mediocre at doing it in the first place. To rectify the situation I had to cut the sill lower and then insert a 'sub-lining' into the head to bring it down the side of the hull. It was fiddly, but the end result was much better than if I had left it alone. I'm sure I'm not the only one who finds my eye drawn inexorably towards the cock-ups, ignoring the merits of the rest of the model. One thing I would do differently next time is to fix 'grounds' on the back of the first planking to outline the gun ports and to provide a firmer fixing for the port linings. Glueing the linings in place with only a thin edge in contact with the side of the hull, as suggested in the instructions, is rather tricky. One of my pictures shows how I jury-rigged a paperclip and a razor saw to pull one sill lining into place. In the first picture you can see that the sixth port from the left on the main deck is too high. The next picture shows the process of moving it down the hull. You can see the weight of the razor saw levering the paperclip upwards to pull the new sill into place. The head lining has already been installed but has yet to be rubbed down flush with the outer planking. The teeth on the saw stop it slipping off the paperclip. Pat. Pend. Decoyman 2009. At this stage I applied another layer of filler and rubbed it down again to get as smooth a surface as I could manage ready for the paint. Rob

-
Hi Mobbsie, Thanks for the compliment! I have already painted her: I'll put up some pictures shortly. In fact I'm much further down the line than hull painting, it's just that my recreated log needs a lot more work to bring it up to date. Regards Rob
-
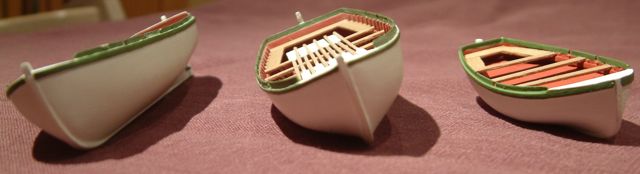
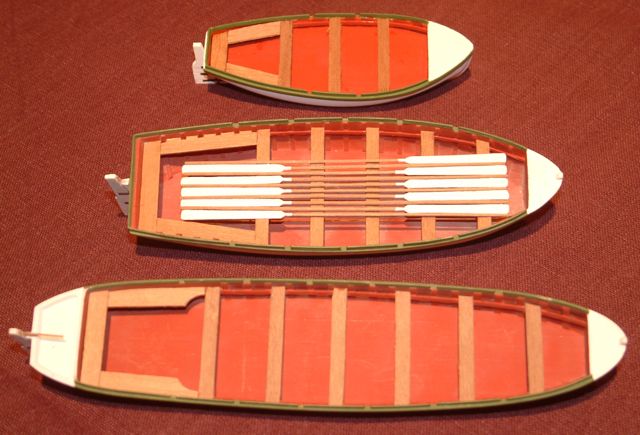
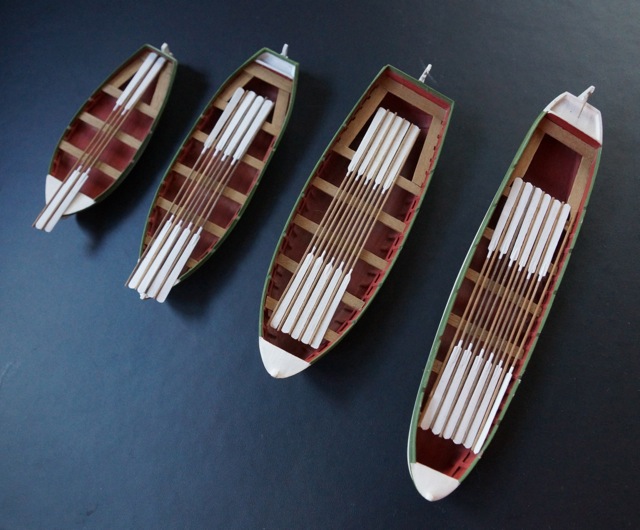
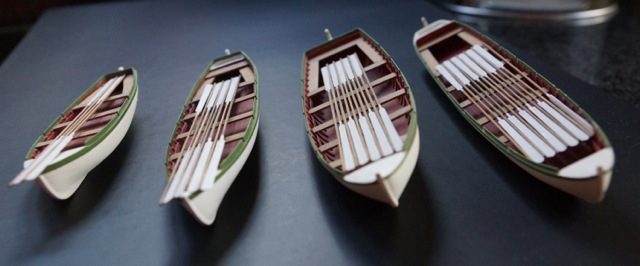
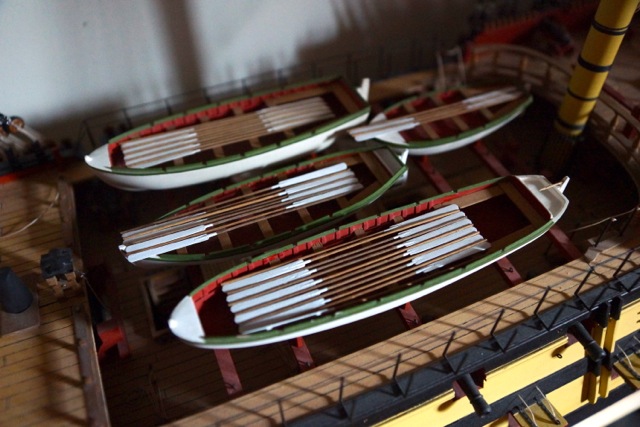
Back in the years before starting my original build log one of the reasons why I wasn't getting on with my ship was lack of space, particularly in our old house. I was however able to make the ship's boats. I followed the instructions pretty much to the letter and, by and large, this was OK. The wood provided is thin, which means it bends easily to the profile of the hull, but it is also relatively coarse-grained, so the edges tend to splinter. In fact the edges are often rough straight out of the box (which is a problem with nearly all of the timber supplied with the kit). I overcame this in the usual way - filler and paint. I'm not entirely happy with the floors of the boats, which are flat and too high and not very prototypical. I added oars made from bits of scrap (there's plenty of spare wood available), and these hide quite a lot of the floor. Here are some photos of three of the finished items. I'm afraid I didn't take any progress photos of the boats. You can see in the second picture how high and flat the floor is. Finally here are pictures of all four boats finished off the ship: And in their final position in the waist.
- 35 replies
-
- 2
-
-
- agamemnon
- caldercraft
- (and 1 more)
-
Thanks Pierre - I was looking at your build only yesterday: she's looking fine, isn't she? I'm glad you were inspired! I'll add some more posts when I have a spare minute. Not now though, I have some backstays to rig.... Rob (Decoyman)
-
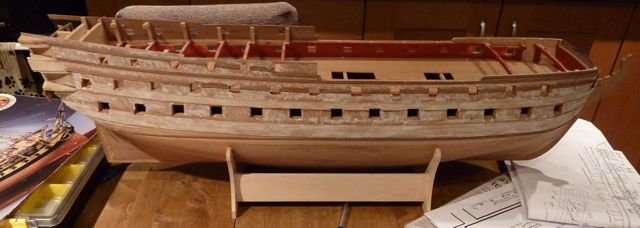
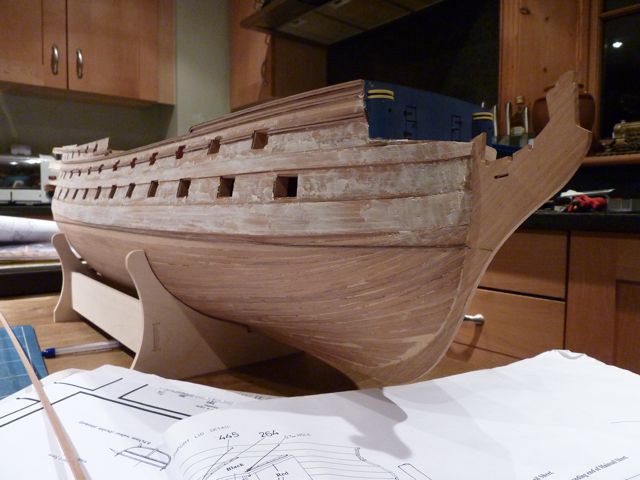
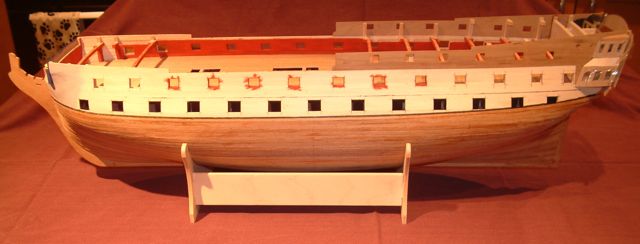
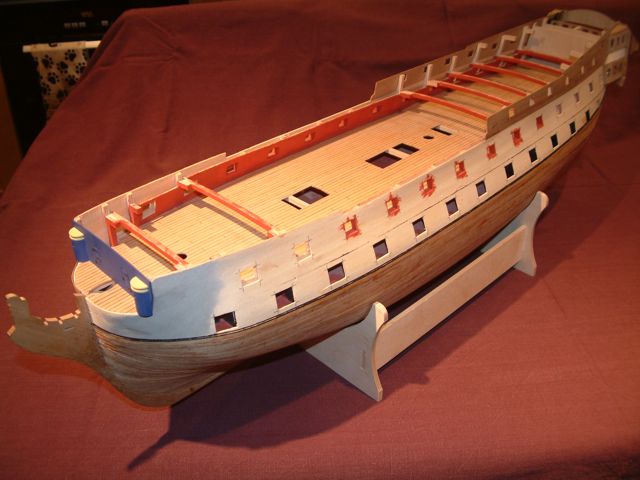
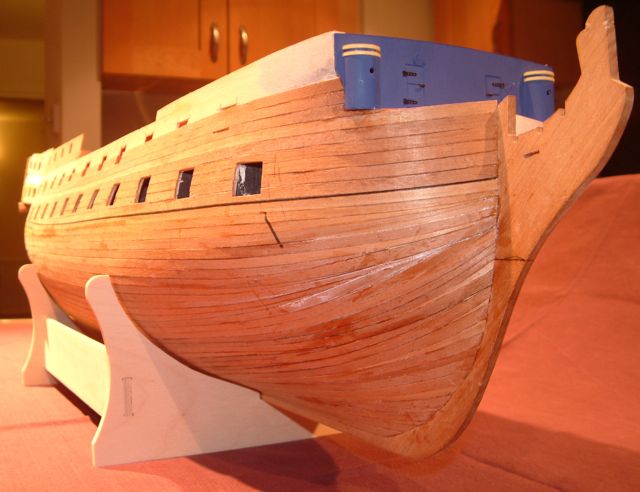
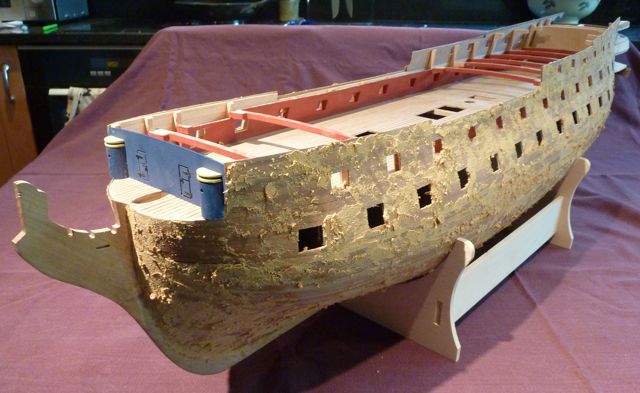
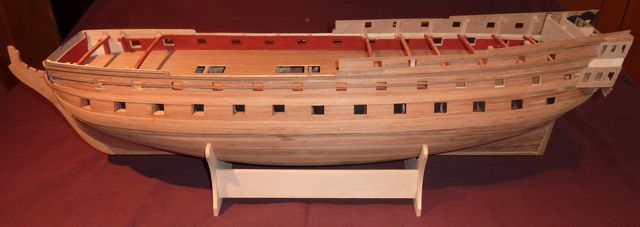
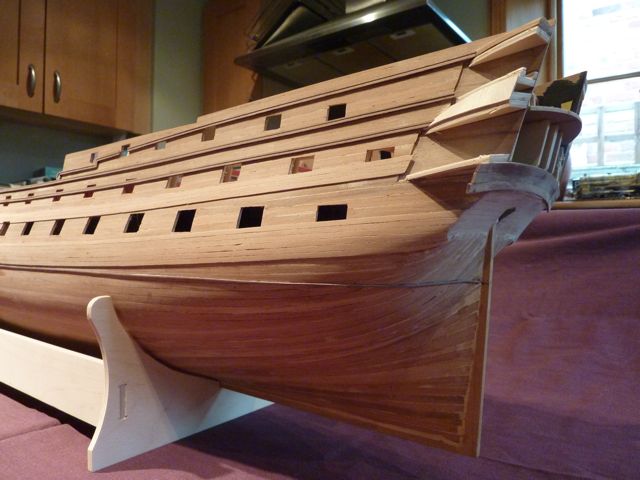
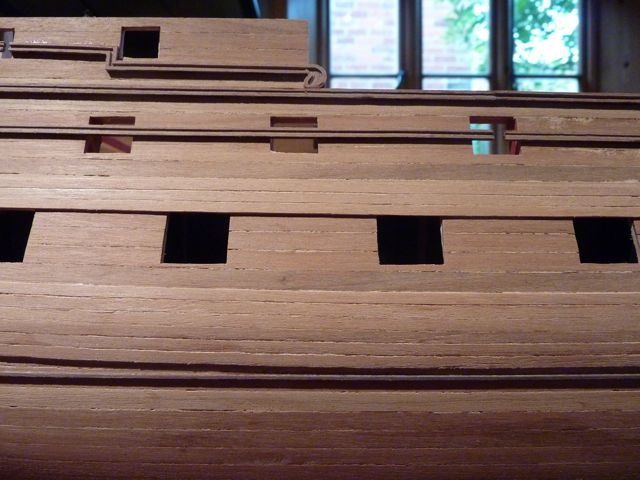
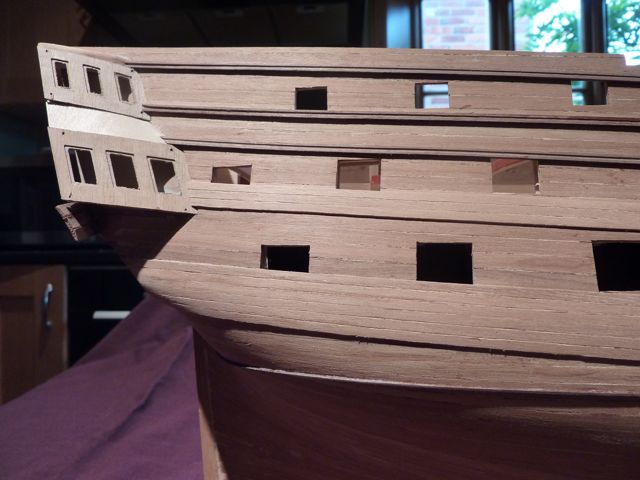
This is my previous log - HMS Agamemnon the Seven Year Itch - reposted following the Great Crash of '13 (if you can remember it you weren't there...). In fact the earlier title was getting more and more out-of-date since the build has now taken me in excess of ten years and I'm still not finished, so a change to something a bit more prosaic was probably in order. I've done a few other bits and pieces in the meantime, mind you. I started taking photos of my model at the same time as I started my log. At this time I had got as far as completing the first planking and the second planking from the wales down to the keel. The quarter gallery patterns are temporarily in place to act as a guide for the planking. You can see that the main gun deck has also been planked. In this three-quarter view there is a noticeable patch of filler, which I added to the first planking to fair the bows to a better profile. Obviously none of it will be visible once the second planking is added. Another three quarter view, this time of the starboard side. I'm a bit further on with the second planking here. And another, this time from a lower viewpoint. I've included this shot to show how the second planking was not the tidiest ever. This was before I had read the articles in the Database and the helpful threads in the technical sections. Next time I aim to do a much neater and more prototypical job. Not that it mattered because I always intended to paint the whole of the hull, so more filler was an easy option.... And here she is, encrusted with wood filler before rubbing down. I think I could have been a bit more sparing really! However, after vigorous sanding she looked like this: I've added the wales and some of the mouldings, but not yet finished cutting out the gun ports. Finally here are some detail shots of the same stage. More in my next up-date.

- 35 replies
-
- 1
-
-
- agamemnon
- caldercraft
- (and 1 more)