


George Ramey
-
Posts
20 -
Joined
-
Last visited
-
 Old Collingwood reacted to a post in a topic:
Santos Dumont 14 bis (1906) by Greg Davis - FINISHED - Model Airways - 1:16 scale
Old Collingwood reacted to a post in a topic:
Santos Dumont 14 bis (1906) by Greg Davis - FINISHED - Model Airways - 1:16 scale
-
mtaylor reacted to a post in a topic:
Santos Dumont 14 bis (1906) by Greg Davis - FINISHED - Model Airways - 1:16 scale
-
Egilman reacted to a post in a topic:
Santos Dumont 14 bis (1906) by Greg Davis - FINISHED - Model Airways - 1:16 scale
-
Canute reacted to a post in a topic:
Santos Dumont 14 bis (1906) by Greg Davis - FINISHED - Model Airways - 1:16 scale
-
Jack12477 reacted to a post in a topic:
Santos Dumont 14 bis (1906) by Greg Davis - FINISHED - Model Airways - 1:16 scale
-
I've also had a fail at the fuel tank installation, so much that in repeated attempts I've broken the mounts a couple of times such that after repeated repairs they are to weak to support the tank. Just finished making replacement parts so I'll try your method of installation which makes more sense. Agree with your assessment of the mounts material; the thin plywood seems a poor choice. I'll miss your reports as you finish your model as you have saved me some pitfalls I might have fallen into. Got a display location yet? I've got to relocate my build to my kitchen table when I get to the wing installation as my workbench is too small and more suited to peanut and walnut scale aircraft.
-
 Canute reacted to a post in a topic:
Santos Dumont 14 bis (1906) by Greg Davis - FINISHED - Model Airways - 1:16 scale
Canute reacted to a post in a topic:
Santos Dumont 14 bis (1906) by Greg Davis - FINISHED - Model Airways - 1:16 scale
-
mtaylor reacted to a post in a topic:
Santos Dumont 14 bis (1906) by Greg Davis - FINISHED - Model Airways - 1:16 scale
-
mtaylor reacted to a post in a topic:
Santos Dumont 14 bis (1906) by Greg Davis - FINISHED - Model Airways - 1:16 scale
-
Old Collingwood reacted to a post in a topic:
Santos Dumont 14 bis (1906) by Greg Davis - FINISHED - Model Airways - 1:16 scale
-
Egilman reacted to a post in a topic:
Santos Dumont 14 bis (1906) by Greg Davis - FINISHED - Model Airways - 1:16 scale
-
George Ramey reacted to a post in a topic:
Santos Dumont 14 bis (1906) by Greg Davis - FINISHED - Model Airways - 1:16 scale
-
Thanks so much for my "missing" laser sheet I've already used. After some searching, found it had wedged itself between the back of my table and the wall. George
-
George Ramey reacted to a post in a topic:
Santos Dumont 14 bis (1906) by Greg Davis - FINISHED - Model Airways - 1:16 scale
-
Greg, Ref Instruction page 36: can't seem to locate Tank supports Ta1 and Ta2. Are they wood, metal? Also Radiator Rad 1 and Rad 2 I don't seem to have. Can you take a photo of these so I can possibly reproduce them? Pretty much finished off the basic fuselage structure and rigging and will attack the canard controls next. I think I'll hold off on the landing gear apparatus until the very end. On your complaint about the wheel tire combination; I wonder why more manufacturers don't just make wheels and use O-rings as tires. Would save carefully painting tires separate from the wheels. I've already painted my tires and already have hangar rash on the paint. I'm going to try Plasti-Dip rubber coating used for dipping tool handles next. That may be a bit more durable and the color is right
-
Been trying to figure out how the ailerons are supposed to be operated. At first, I thought they may have been cross coupled the the left/right canard wheel. Found a YouTube video that shows a flying replica that has the ailerons operated by a rope from each aileron being looped to the pilot's chest and arms where he moves side to side to activate the ailerons. I can't find a rigging scheme yet.
-
George Ramey reacted to a post in a topic:
Santos Dumont 14 bis (1906) by Greg Davis - FINISHED - Model Airways - 1:16 scale
-
George Ramey reacted to a post in a topic:
Santos Dumont 14 bis (1906) by Greg Davis - FINISHED - Model Airways - 1:16 scale
-
George Ramey reacted to a post in a topic:
Santos Dumont 14 bis (1906) by Greg Davis - FINISHED - Model Airways - 1:16 scale
-
George Ramey reacted to a post in a topic:
Santos Dumont 14 bis (1906) by Greg Davis - FINISHED - Model Airways - 1:16 scale
-
George Ramey reacted to a post in a topic:
Santos Dumont 14 bis (1906) by Greg Davis - FINISHED - Model Airways - 1:16 scale
-
George Ramey reacted to a post in a topic:
Santos Dumont 14 bis (1906) by Greg Davis - FINISHED - Model Airways - 1:16 scale
-
My lever will be installed just like the plans show because I built the lever base backwards by mistake so the lever assy will be installed on the inboard side of the fuselage corner bamboo. On the canard wheel, I notice the plans have the rigging hole on the opposite side of the base which would have required the base angle to be attached to the outboard side of the fuselage corner bamboo. I'm glad you're ahead of me on the build as you have pointed out some traps I would have undoubtedly fallen into. Right now, I'm fabbing the 4 pillow blocks that attach the four fuselage corner ends to the aft cockpit. Also, for me another PIA build out of flat brass stock. I'm using a crude jig to try to get a symmetrical part but it still requires a bit of fiddling. I think I'll complete the fuselage and controls and do the wings at the very last because my work table is too small to fit the entire aircraft. YouTube has a few videos of replicas flying/attempting to fly which are interesting. George
-
George Ramey reacted to a post in a topic:
Santos Dumont 14 bis (1906) by Greg Davis - FINISHED - Model Airways - 1:16 scale
-
In my last post should have written " got the ENGINE preinstalled on the cockpit assembly". sorry for the confusion. George
-
Success! Got the cockpit preinstalled on the fuselage assembly, then installed the cockpit to the fuselage with the entire engine intact. The turnbuckles are loosely nailed to the cockpit. Rigging is next and then I'll permanently attach the turnbuckles. So relieved this worked out.
-
Greg, How do you attach the Pe2 rigging links to the nail at the pointy end? Ref page 25, 26 of the instructions. I'm considering installing the nails backwards so the nail head captures the link unless you have a way to do it per the picture. George
-
It appears that the instructions were made by marketing guys, not the designers. A though the instructions were rather nice visually, the execution was vague to poor. The firewall scribed lines for the installation of the motor mounts are too close together so I had to move each outboard so the motor would fit. This caused the gap between the fuselage sides and the bottom of the motor mounts to be less than the fuselage bamboo diameter causing me to trim the fuselage side a bit and bevel the bottom of the motor mount common to the firewall so the fuselage bamboo would nest under the firewall. Thanks for the heads up on the wing installation rib. I haven't even fit check the wings to the fuselage yet. I trimmed the canard axle tube to fit the gap so I didn't have your problem. Page 36 of the instructions is pretty sketchy on rigging the controls to be functional but it can probably be figured out. I'll send photos soon. George
-
Beautiful job, Greg. Really impressive build. Good catch on the extra crossbeams. I think I'm about a week behind. I decided not to assemble the forward and aft cockpits after the forward cockpit was installed on the fuselage as I previously proposed. Mine are now assembled, less the cross piece under the motor mount support as you suggested. Just attached the motor mounts and waiting for them to cure. Rather than disassemble the engine fuel distribution tubes from the motor to install it, I'm going to try mounting it on the mounts before sliding the cockpit assembly onto the four fuselage bamboo corners. I'll let you know if that works. George
-
Greg I'm worried about trying to remove the distribution system since that process was a royal PIA. I'll study fitting as much as brass parts on the installed forward cockpit and installing as many aft cockpit brass on the loose aft cockpit where only the rigging is left. Could be a pipe dream though. My missing forward cockpit parts are due to arrive next Tuesday, a much better response than your carb. I guess they must have ordered a few since that was a common shortage. George
-
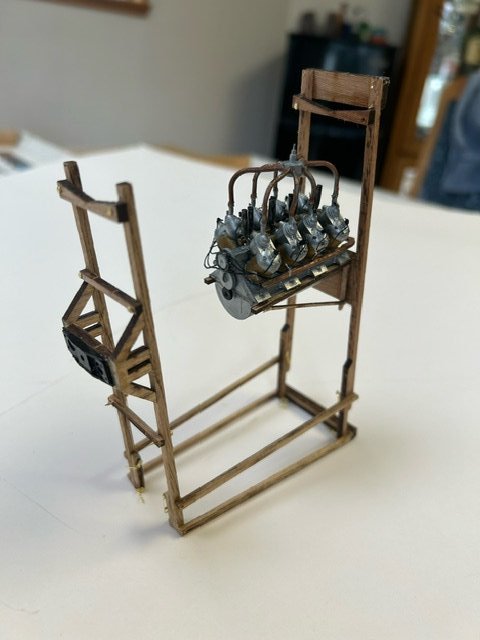
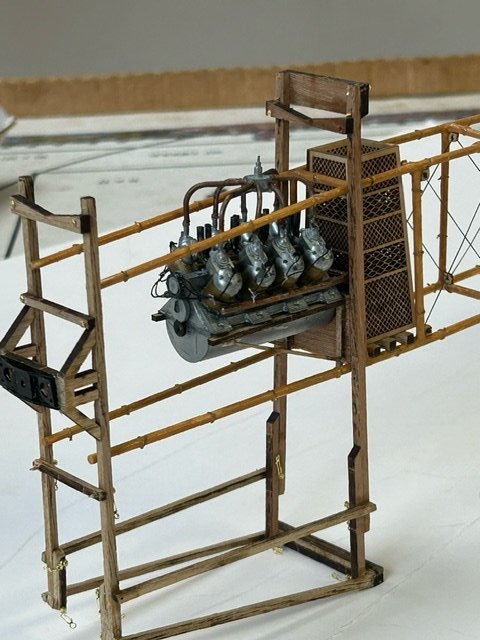
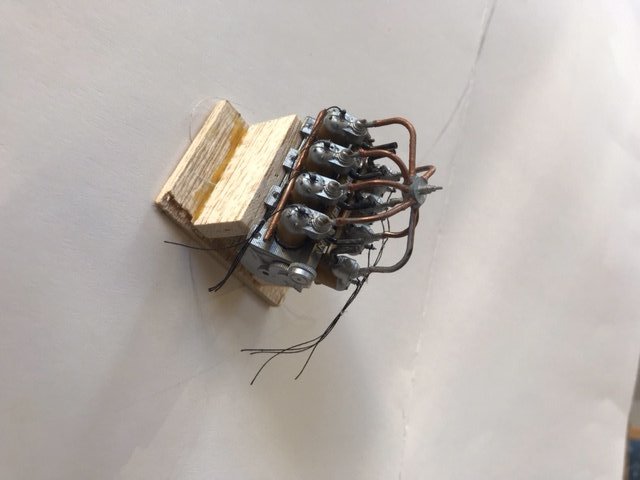
Oh my. I on the finishing stages of the engine build and am installing the plug wires. I'm using black thread instead of the thick beige stuff in the kit because it seemed to be too thick. Fuel distribution is complete so I'm worried about the engine installation. Do you think it is feasible to install the engine after the front cockpit structure and install the aft cockpit structure afterwards? I'm thinking I could splay the fuselage bamboo to install the engine and install the aft cockpit next. Your engine and cockpit area look great. I hope mine can look as good, Attached is an engine photo. Not real enthused about my fuel distribution installation. I made a jig to install the first two pipes based on measured dimensions on the two carbs farthest apart and installed that first. then each tube was individually fitted which required some tube trimming. The problem I discovered was that the carbs are not positively located on the block due to the very slight block counterbore so the carb cannot be really positively located. Also, there will be be slight clocking differences so that throws the pipe location slightly off. I made a crude engine stand out of scrap balsa which has helped working on the engine George
-
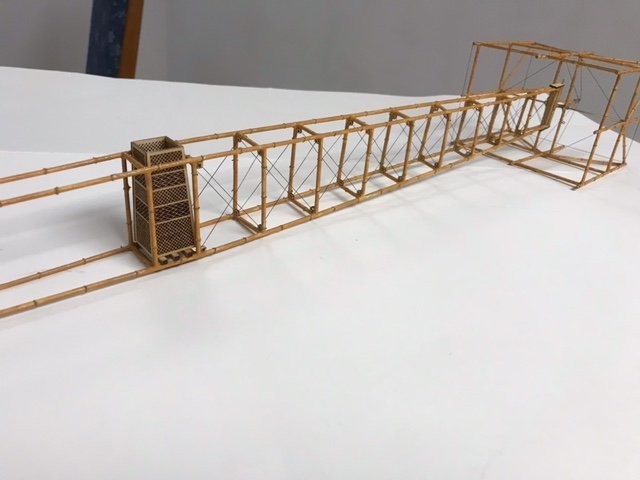
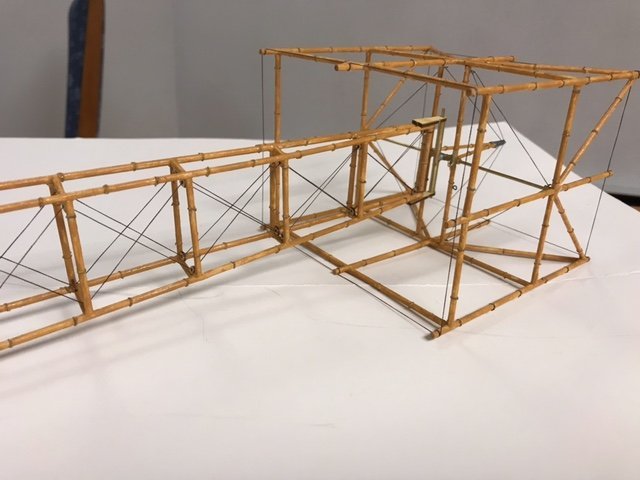
Forward part of the fuselage done and also the canard. Am working on the cockpit metal parts now and am mostly done with those. trying to figure out what to paint these bits since I'm sure they weren't made of the same material. After that the top part of the engine. getting close to fabbing the front cockpit bits like you did; don't want to have to cease work. A couple of more pics.
-
I have a feeling that the Cn2 was replaced by Sup 1 and Sup2 on the fl08 laser sheet.
-
Greg, I'm still working on the canard and humming along and am at the axis stage where I'm doing the nose and have run into a mystery. On page 30 in the instructions I've just bonded Cn 1 to the bamboo. Is this really a butt joint glued with CA? Doesn't seem very strong but that's what I've done. Tried to drill a 1mm hole into Cn1 where the bamboo butts so I could pin the joint for strength but the material is too hard for my small drill bits to make much of an impact. Also, what is Cn2? It doesn't appear on the metal parts page and your build doesn't seem to show it either. You are right about the instructions being somewhat sketchy. My bamboo treatment is the yellow ochre applied by hand using latex gloves where I dip my forefinger in the paint and rub it on after the nodes have been applied. This is followed by Diamond Glaze (by Judi-Kins available on Amazon) diluted with water to give it a slight sheen like bamboo. I like your bamboo finish which makes it looks like an aged bamboo that really looks authentic. George
