bcochran
-
Posts
615 -
Joined
-
Last visited
Content Type
Profiles
Forums
Gallery
Events
Everything posted by bcochran
-
 Do you live in SLO?
 -
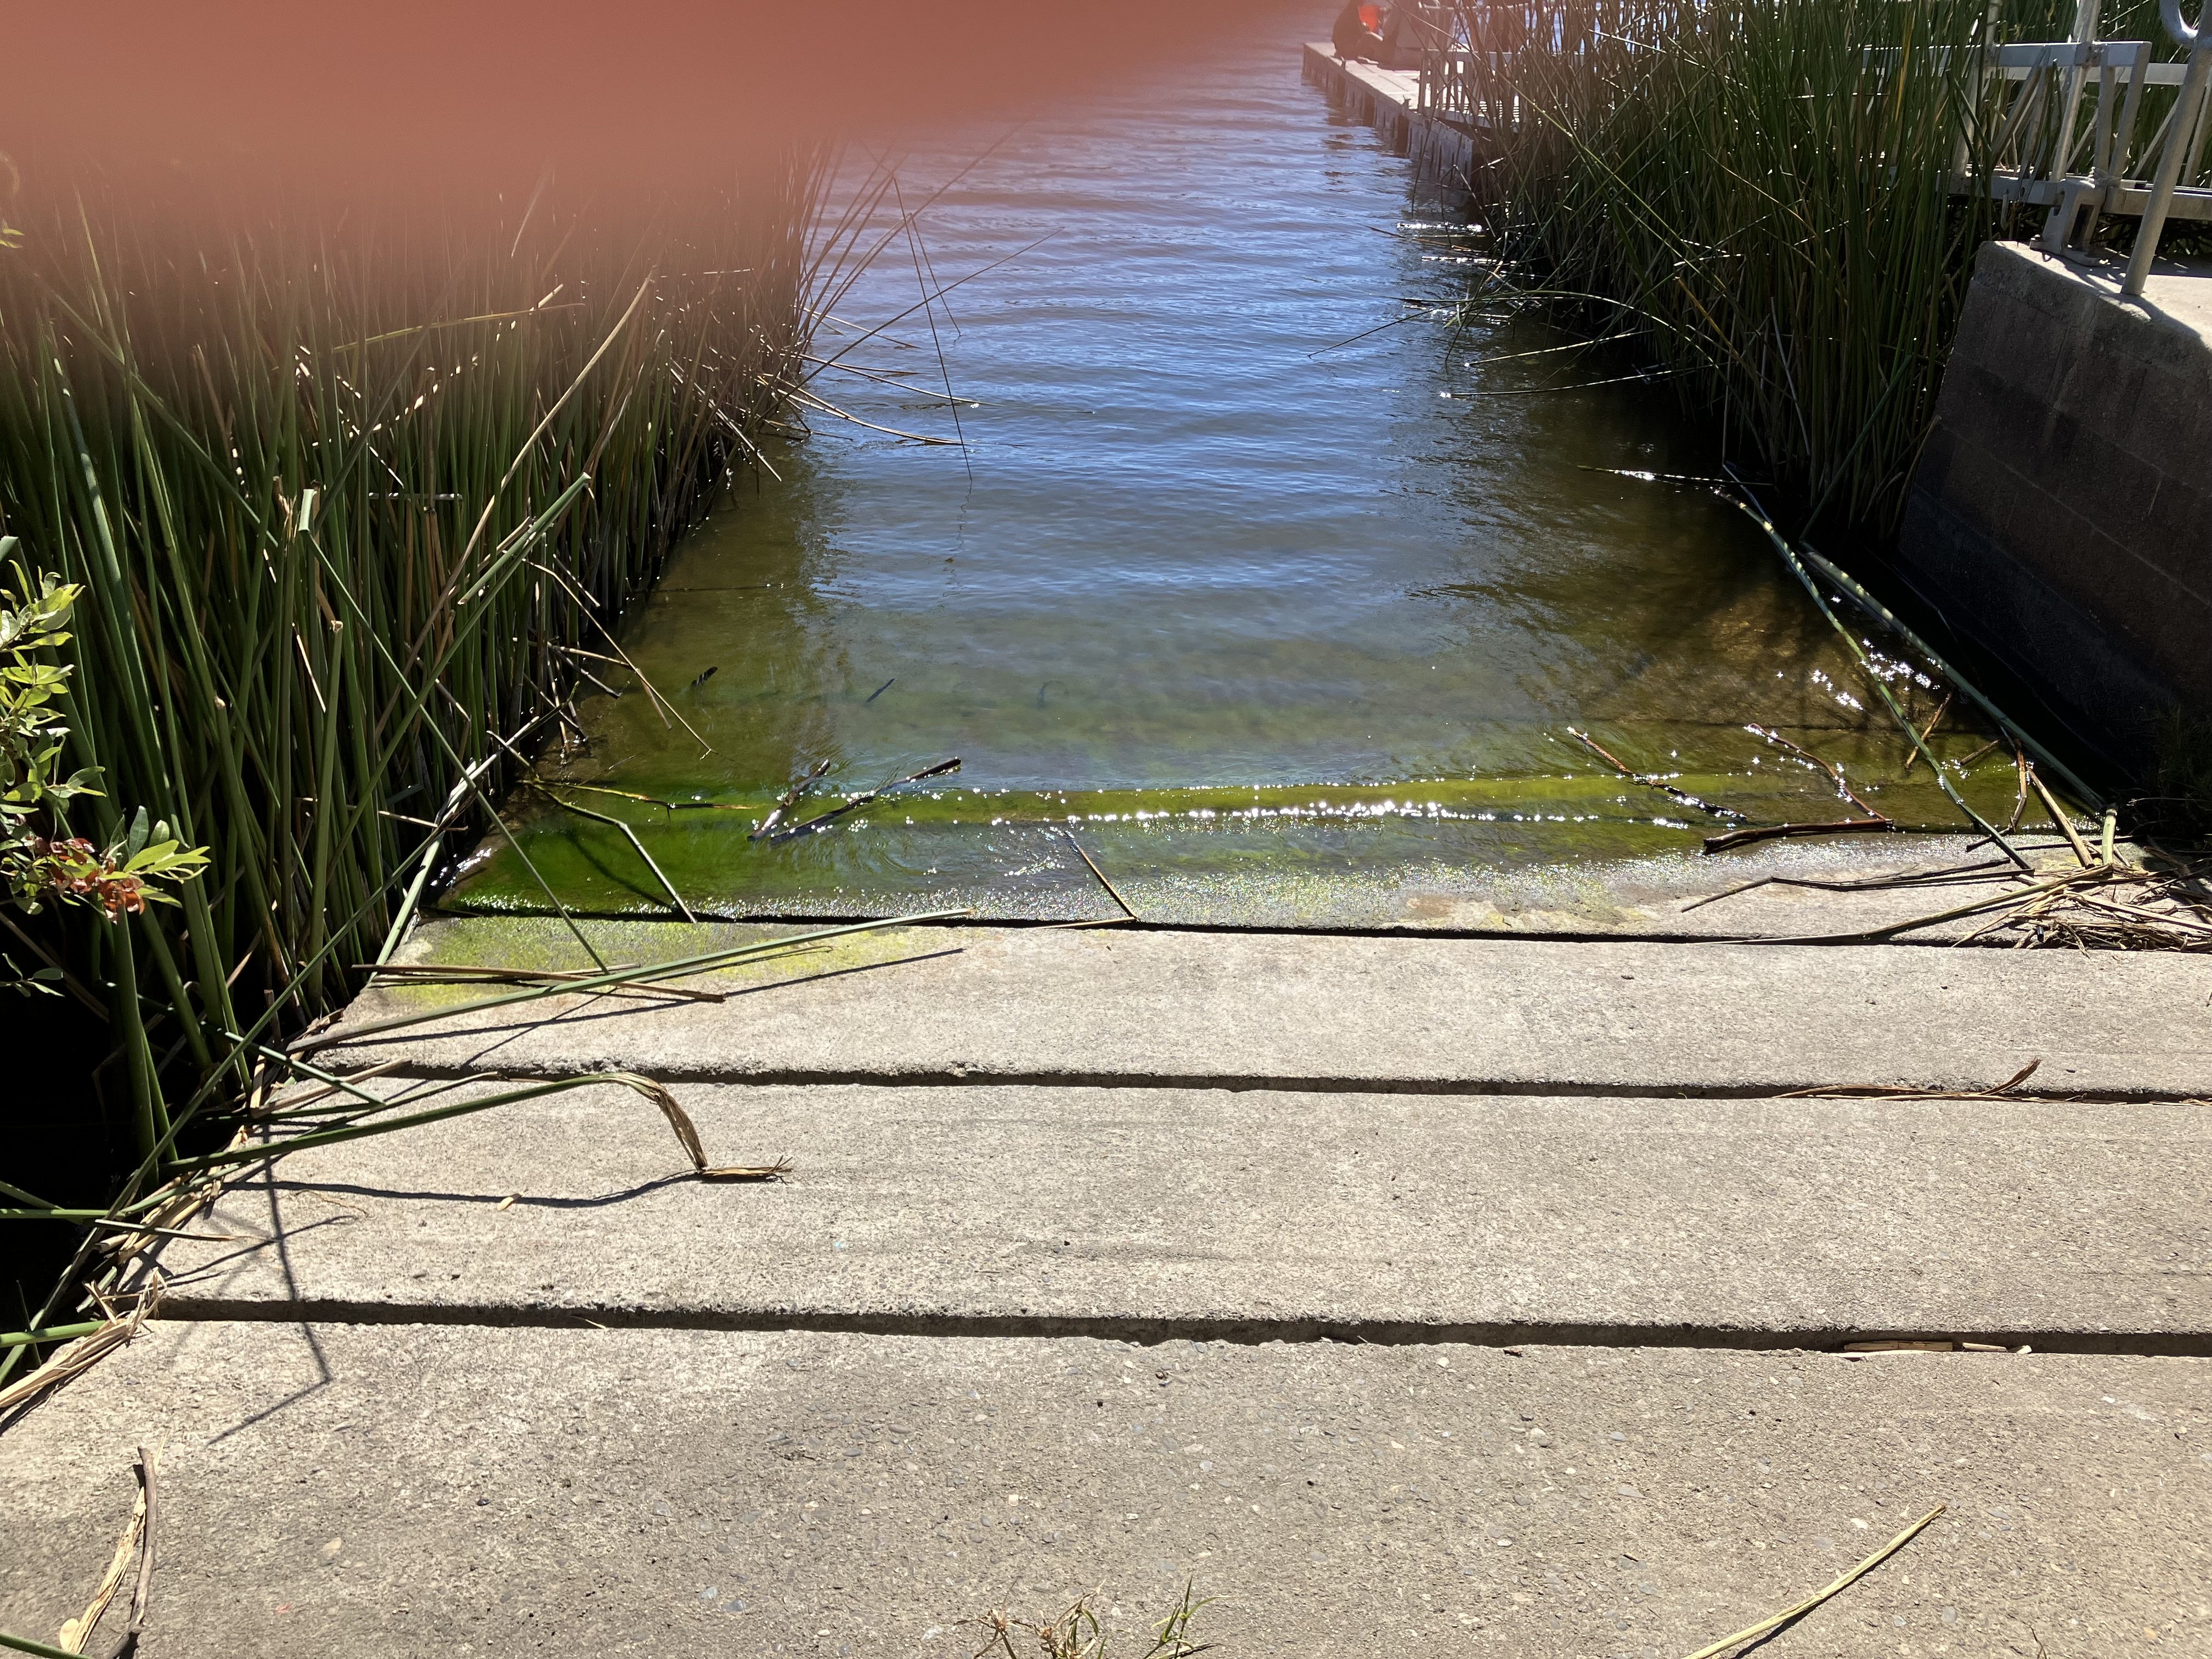
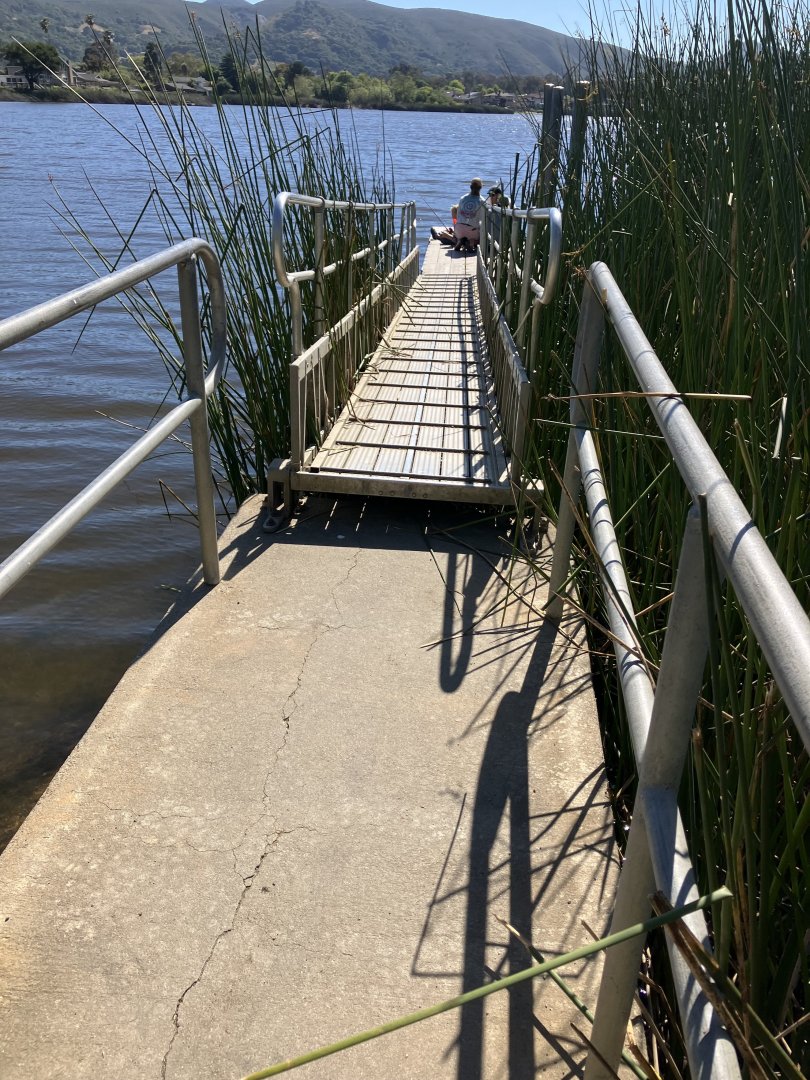
I found a place just made for R/C boats. it is at Laguna lake in the city of San Luis Obispo, CA. That is about 30 miles from my house. They built several ramps down the embankment to the lake side. Just for R/C boats.

-
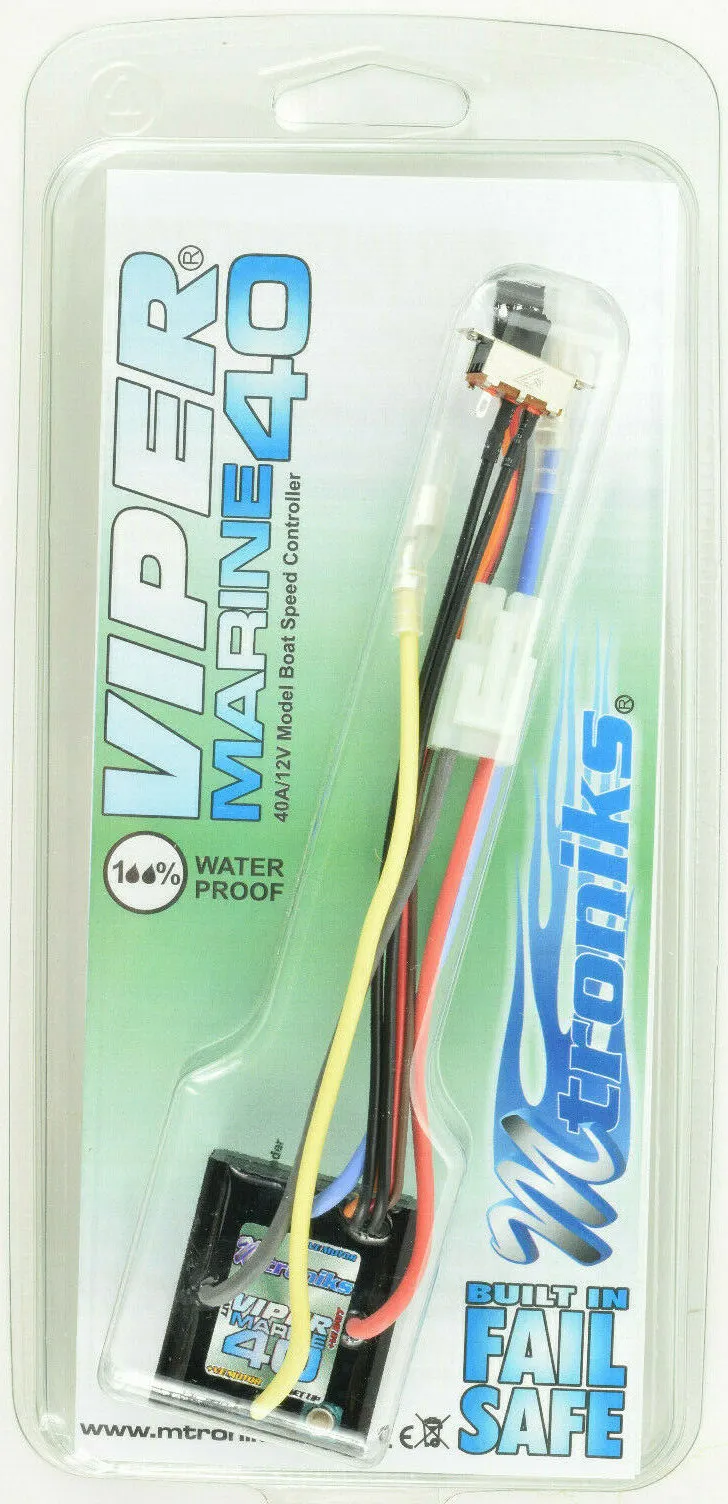
I ordered the Viper 40 amp ESC on Ebay. Harbor did not have it in stock. Everyone other one I saw was from the UK. Shipping is higher and I don't want to wait that long. The ebay one is from New York state. It should be here late next week.
-
Ian I am grateful that you are sticking with me. Your support keeps me going. It would be hard to fix this myself because I have no experience in R/C boats. if you search on Marx or Lindberg Chris Craft Constellation, links to this log are all over the images Also at times this log is the first listing you get when you search. I think other people are going through this with us. I will buy one of those ESCs.
-
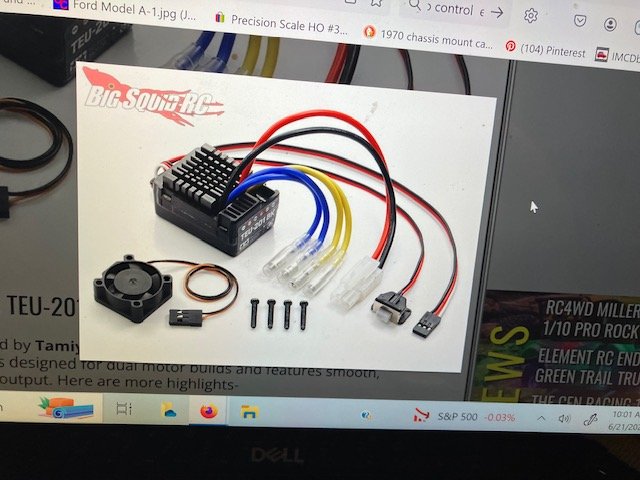
Maybe I should try Tamiya ESC
-
I am beginning to think the problem is with these ESCs I have. I put the first one back in and the receiver led was on solidly as it should and the ESC fan was turning when I turn on the receiver power via the ESC. Then after a few seconds it shut down like before. The history is that at one time everything worked as it should then the motors started to act erratic and soon everything shut down. I replaced the receiver, transmitter and ESC. The ESC fan came on for about a minute then never ran again. It seems to me the ESCs are failing. Both of my ESCs are the same. My one last hope is to replace the ESC with a different brand. One with instructions. Does any one have a suggestion? It needs to be a brushed motor speed control
-
With everything connected per instructions this is what happens when the receiver is turned in. IMG_2216.mov
-
IMG_2215.mov With the motors disconnected turning on the receiver the red led comes on the flashes and goes out. The fan on the ESC does not run when it gets power i am so damned pissed that I buy things hook them up as shown and they do not work as described! I don’t want to throw anymore money into this. And I am fast getting to the point where I don’t want to throw anymore time into it. IMG_2215.mov
-
The ECS has a blinking light on with out it being plugged into the receiver. The fan is not running.
-
I think something is wrong. See the video. I turn on the transmitter then turn on power to receiver and it lights up as it is supposed to do. When I pull the trigger it turns on and of motors do not turn service does not move. i think the ESC is not working. i am about to give up!
-
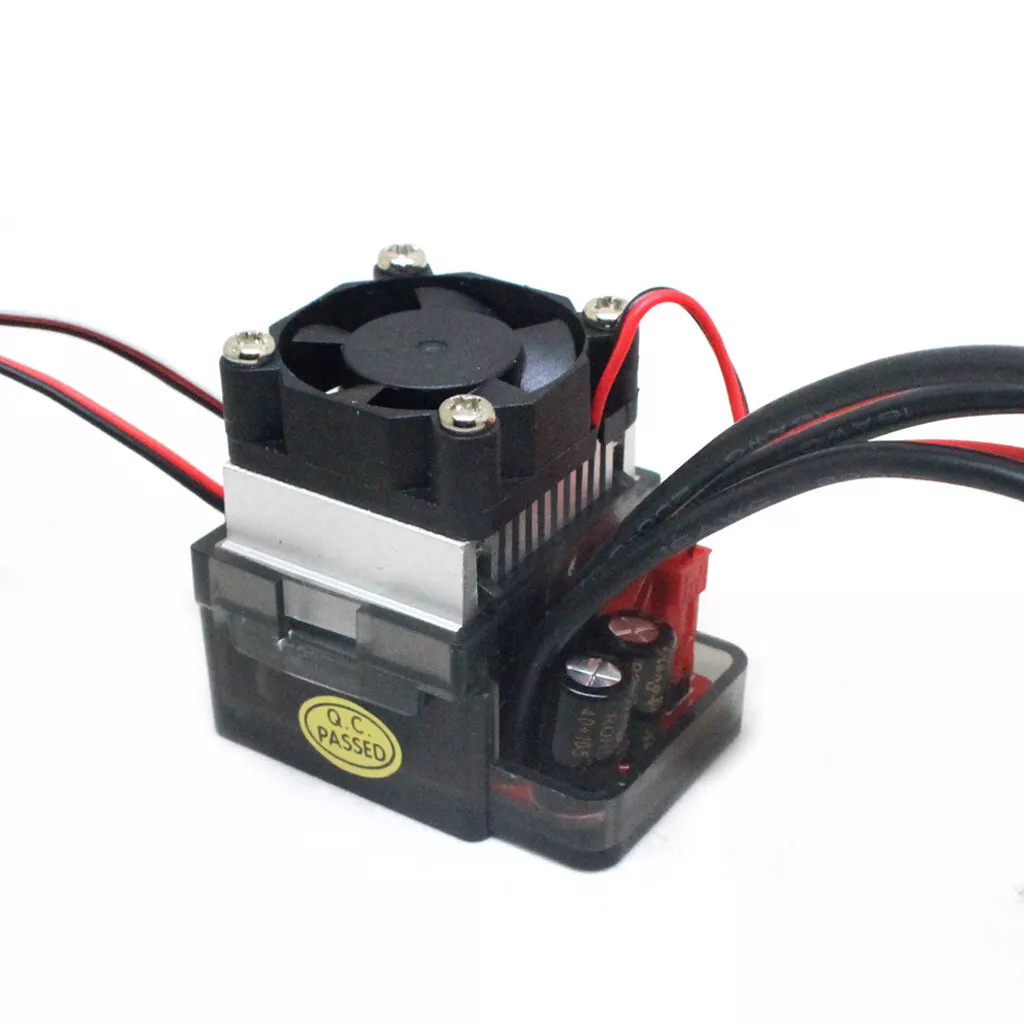
I ordered it on eBay. It is like the one that came from MACK. Those instructions just said to connect the red to red and black to black wires to motors. Since the screws are meant to turn in opposite direction I think I am ok to connect black to red on one of the motors.
-
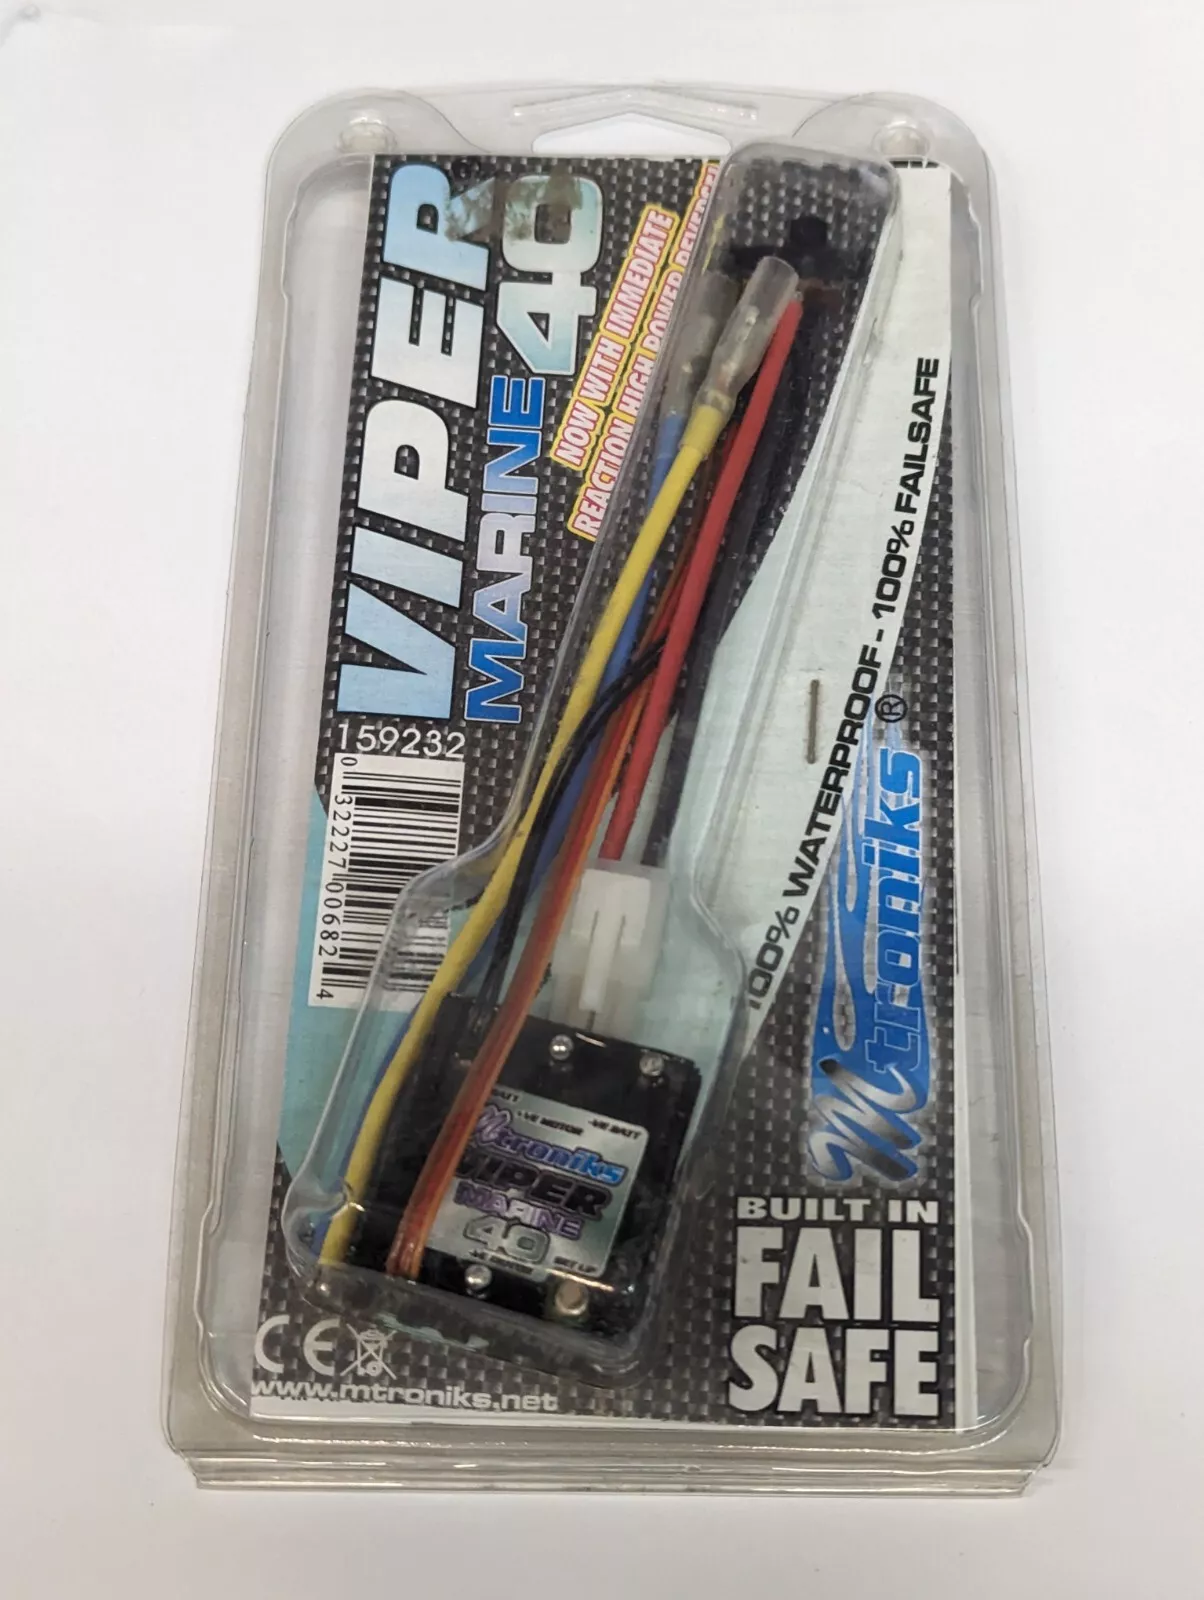
Here is the new ESC. There was no information about it in the package. It looks very much like the first one I had. I assume I plug it into the receiver with the ground wire facing toward the side of the receiver.
-
I will as the seller if there is any information about it. If this boat ever makes it to the pond you guys will have had important parts you played in getting it there.
-
It does not have a manufacturer or part number. I will as the seller if he knows. Description: 2-Way 6-12V 320A High Voltage ESC Brushed Speed Controller for RC Car Truck Boat
-
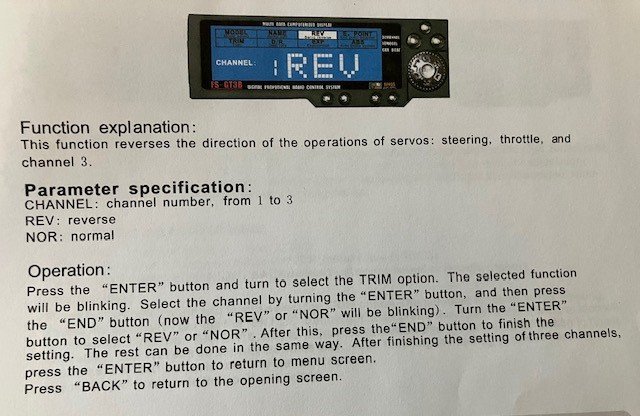
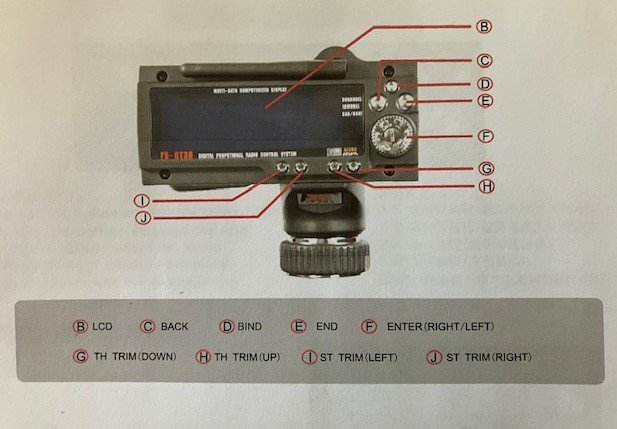
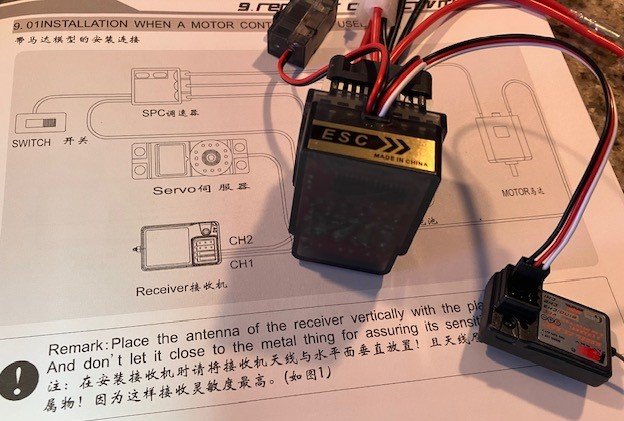
Here is the diagram for hooking up the new transmitter/receiver I have. I think I could just connect the components like this and it should work.
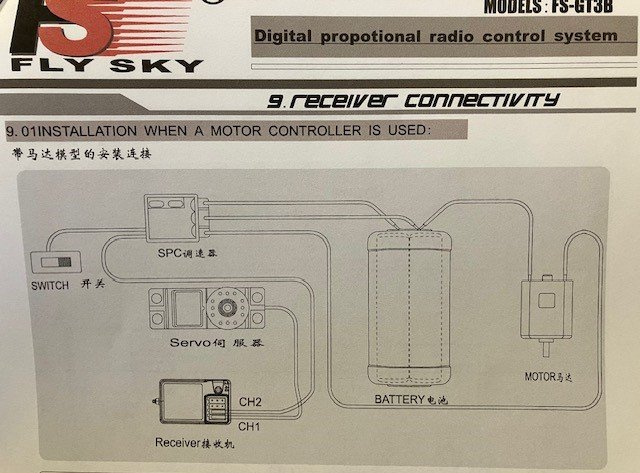
-
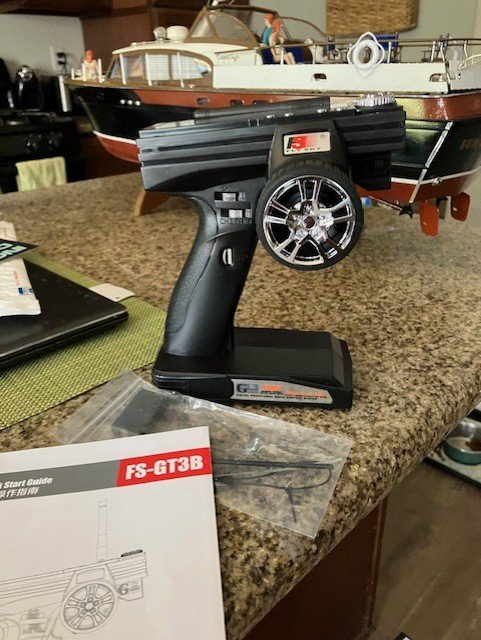
My new transmitter is bound to the receiver from the factory. They say you don't need to bind it. My new ESC will be here on Fri. I don't see why I don't just swap out my old ESC and receiver with the new ones and it should work. The land transmitter is for cars or boats. The wheel on the side controls the rudders and the trigger controls boat speed. The other buttons and etc are for trim.
-
The servo gets power from the receiver. The receiver gets power from the ESC. The ESC gets power from the batteries. I don't get how you get power to a servo outside the boat.
-
Are you saying to connect the ESC to the receiver and receiver to the servo without connecting the motors to the ESC to test the servo?
-
I got a new transmitter and receiver. The new ESC is coming on Friday. I am not clear what I should do before putting the receiver and ESC in thee boat. I have only one servo and it is attached to the hull.
-
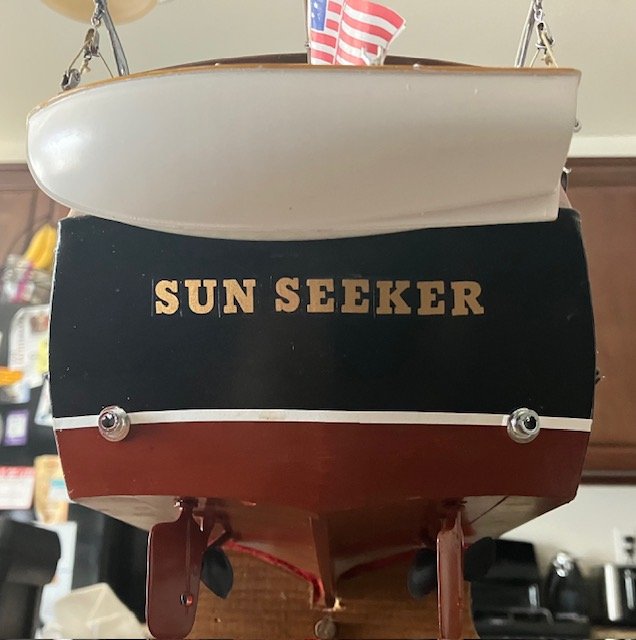
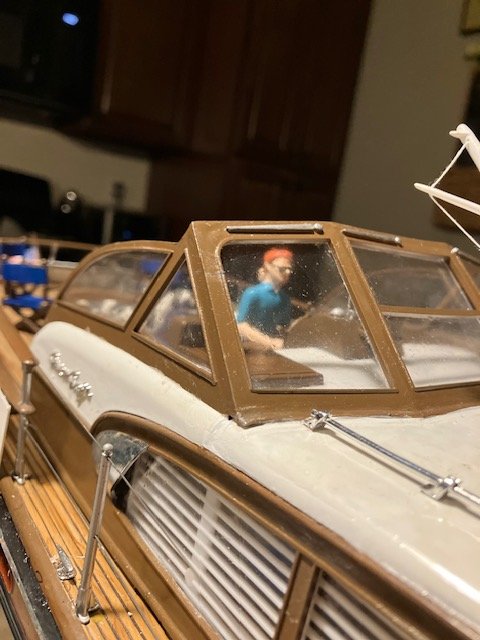
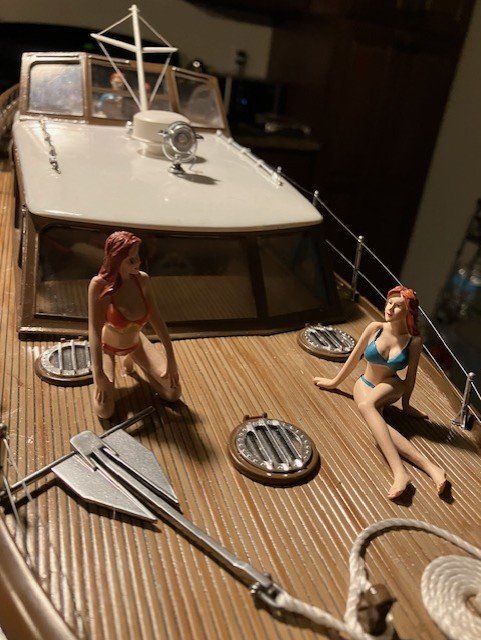
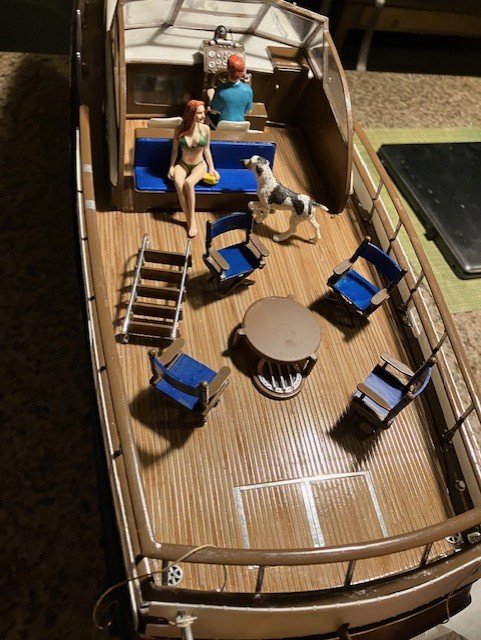
Just a few detail shots while I wait for my new Tx/Rx and ESC. At times I don't like the way this boat looks. And at other times I do like it. It is not a perfect build for sure. But I like these detail pics so here they are.


-
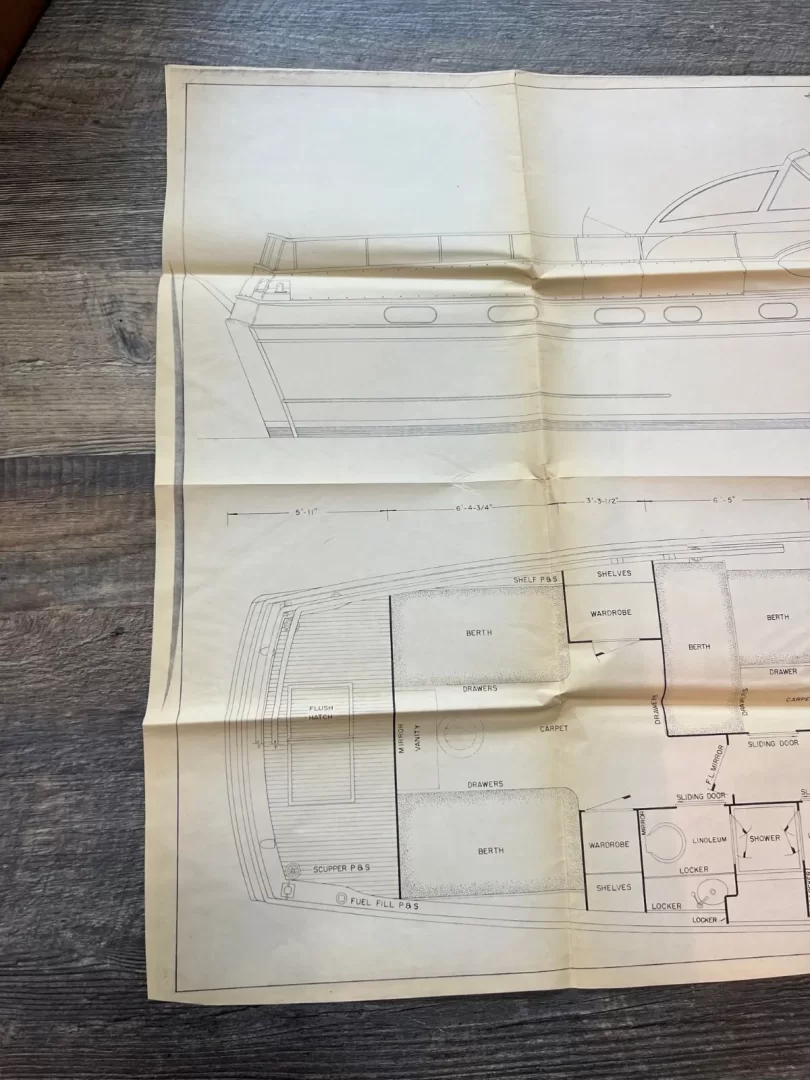
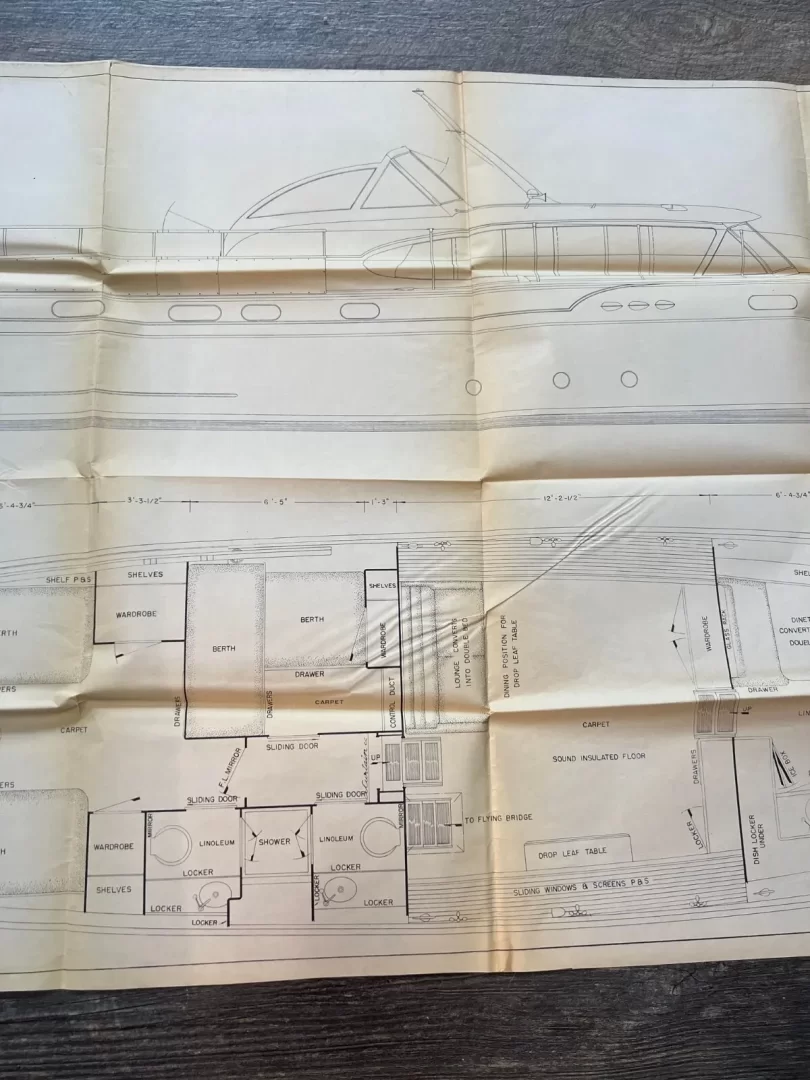
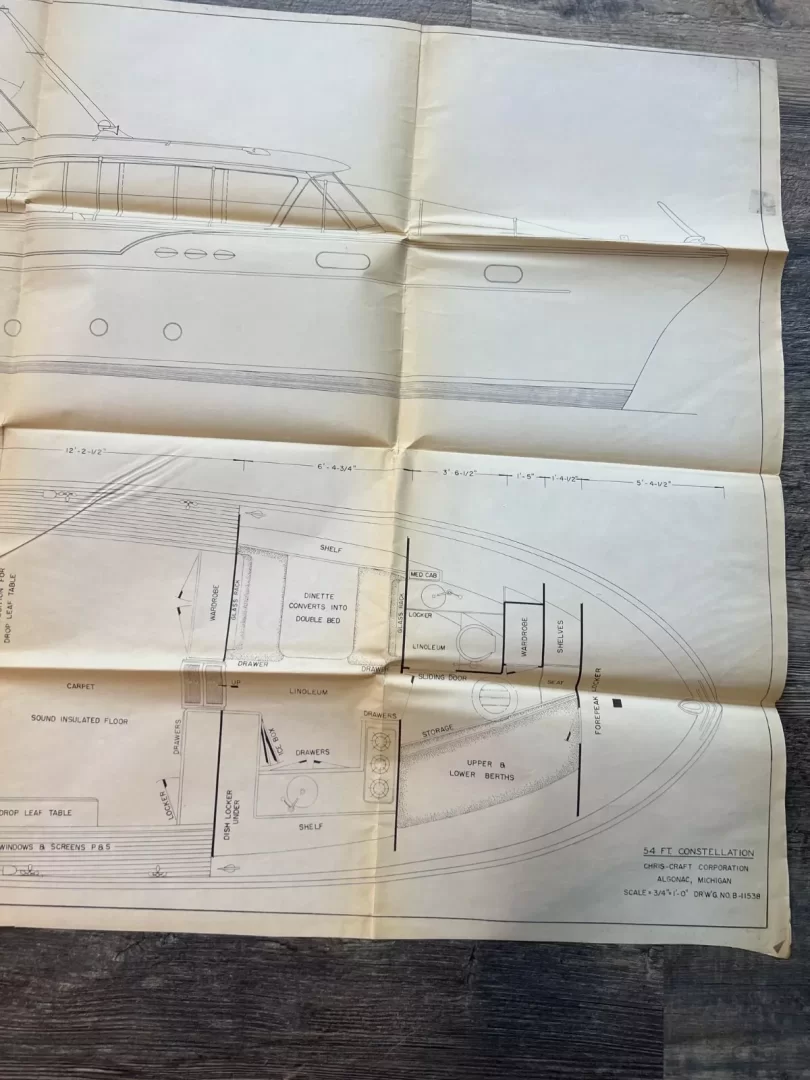
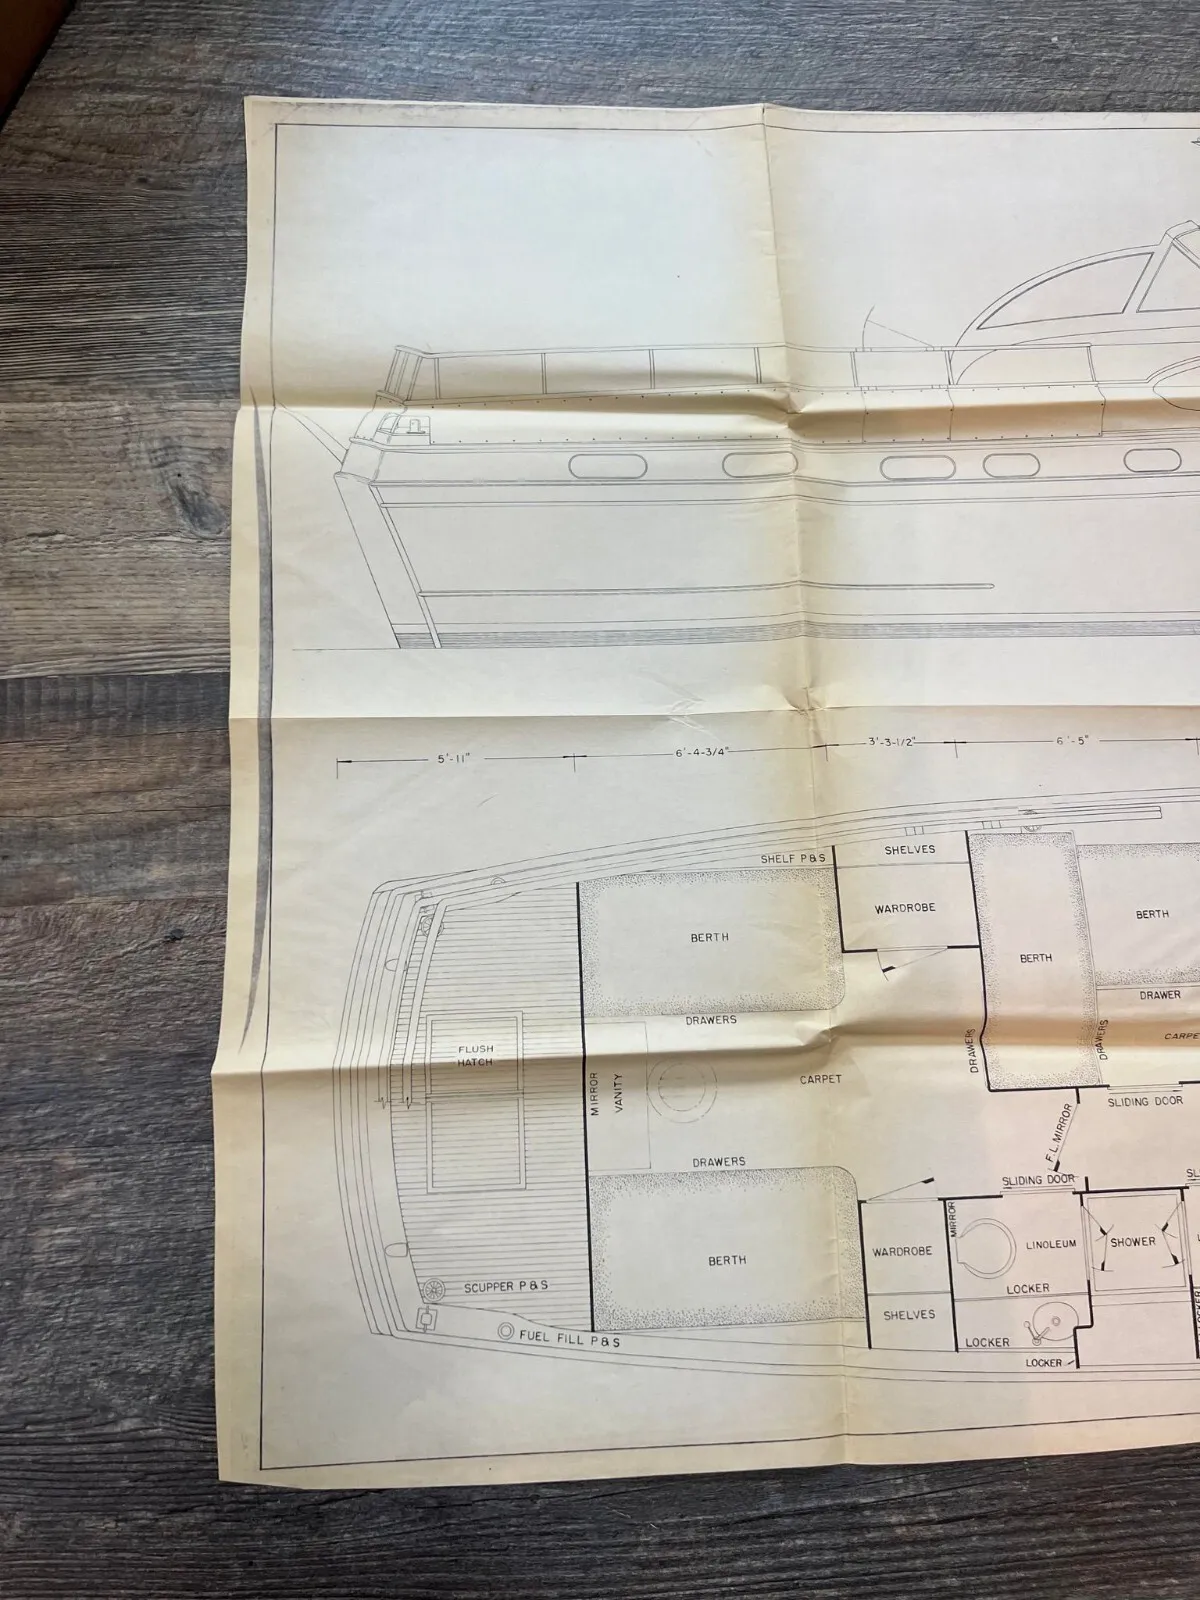
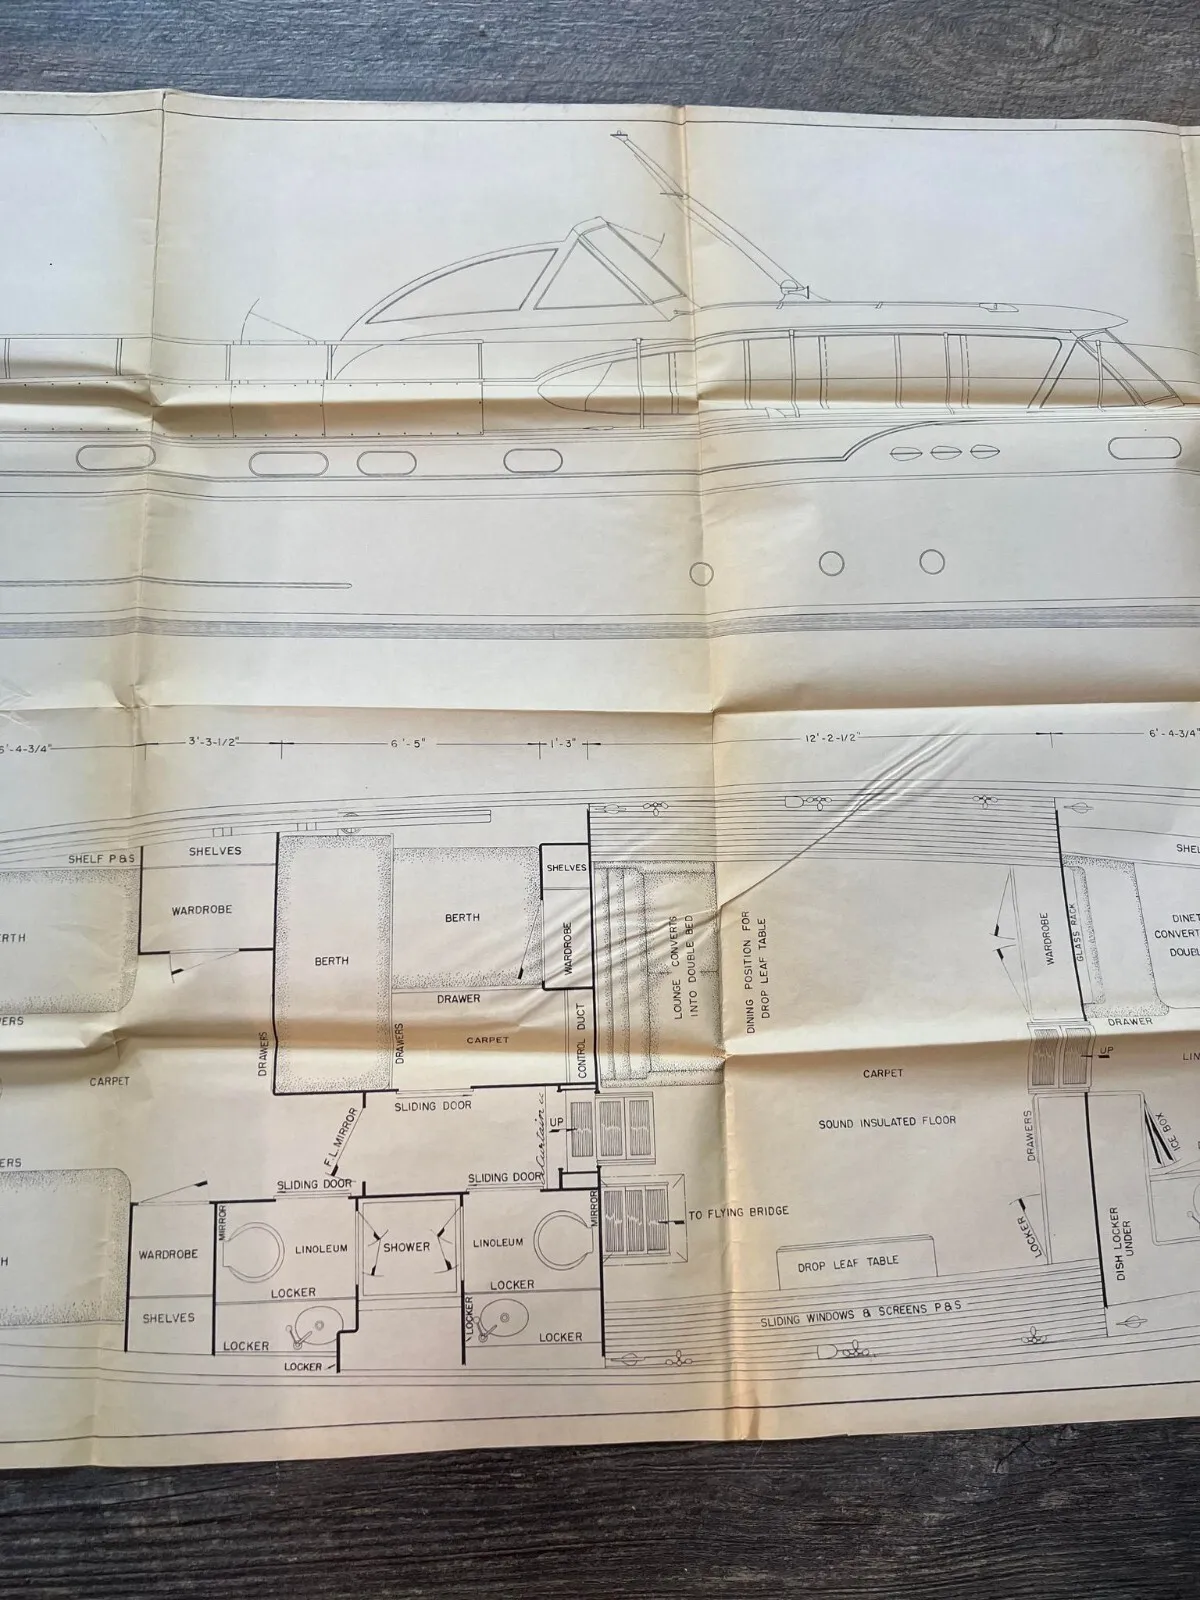
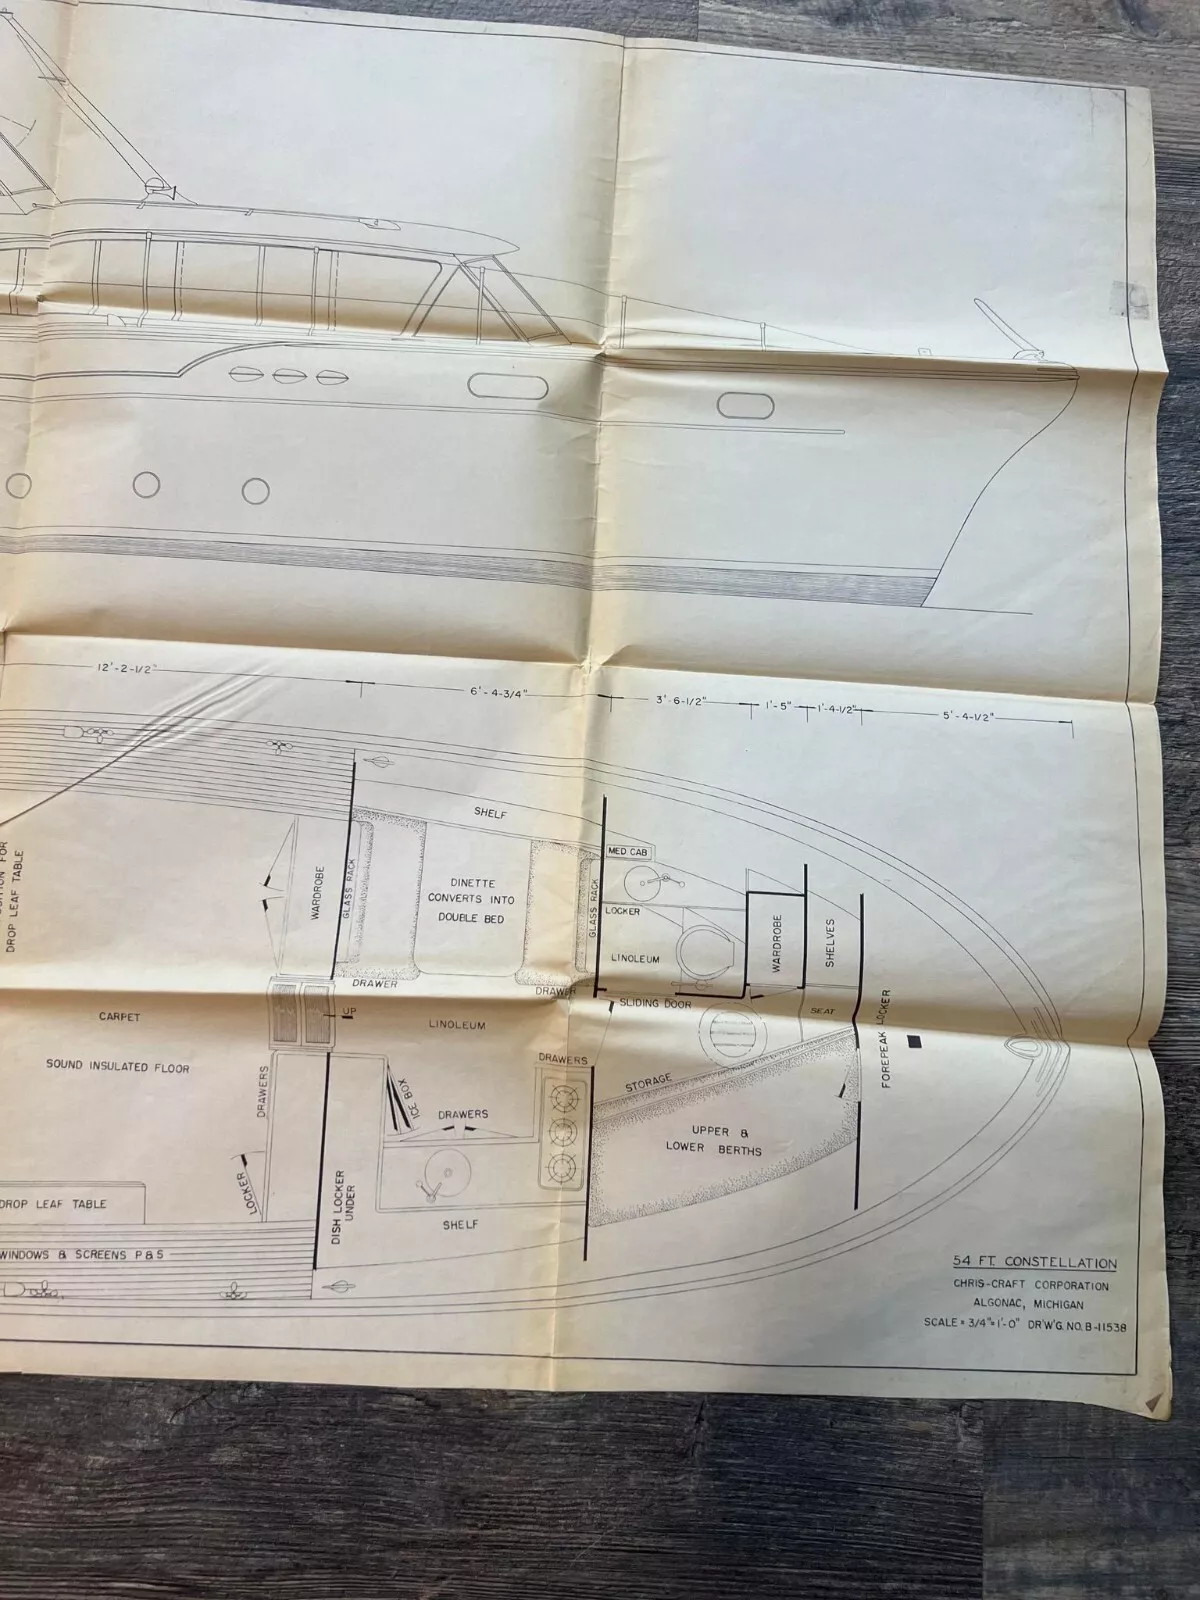
Wow that must have been fun. I know nothing about R/C boats. My main hobby has been model trains. I have built trains, planes, boats, ships, cars, trucks and other things. I am amazed how involved you can get with models. I found this drawing on ebay. This drawing may be of the real boat or it may be a plan for a model. I bought the Marx version of this boat on ebay and with this drawing I may complete a model with a complete interior.