Yabuhebi
-
Posts
54 -
Joined
-
Last visited
Content Type
Profiles
Forums
Gallery
Events
Everything posted by Yabuhebi
-
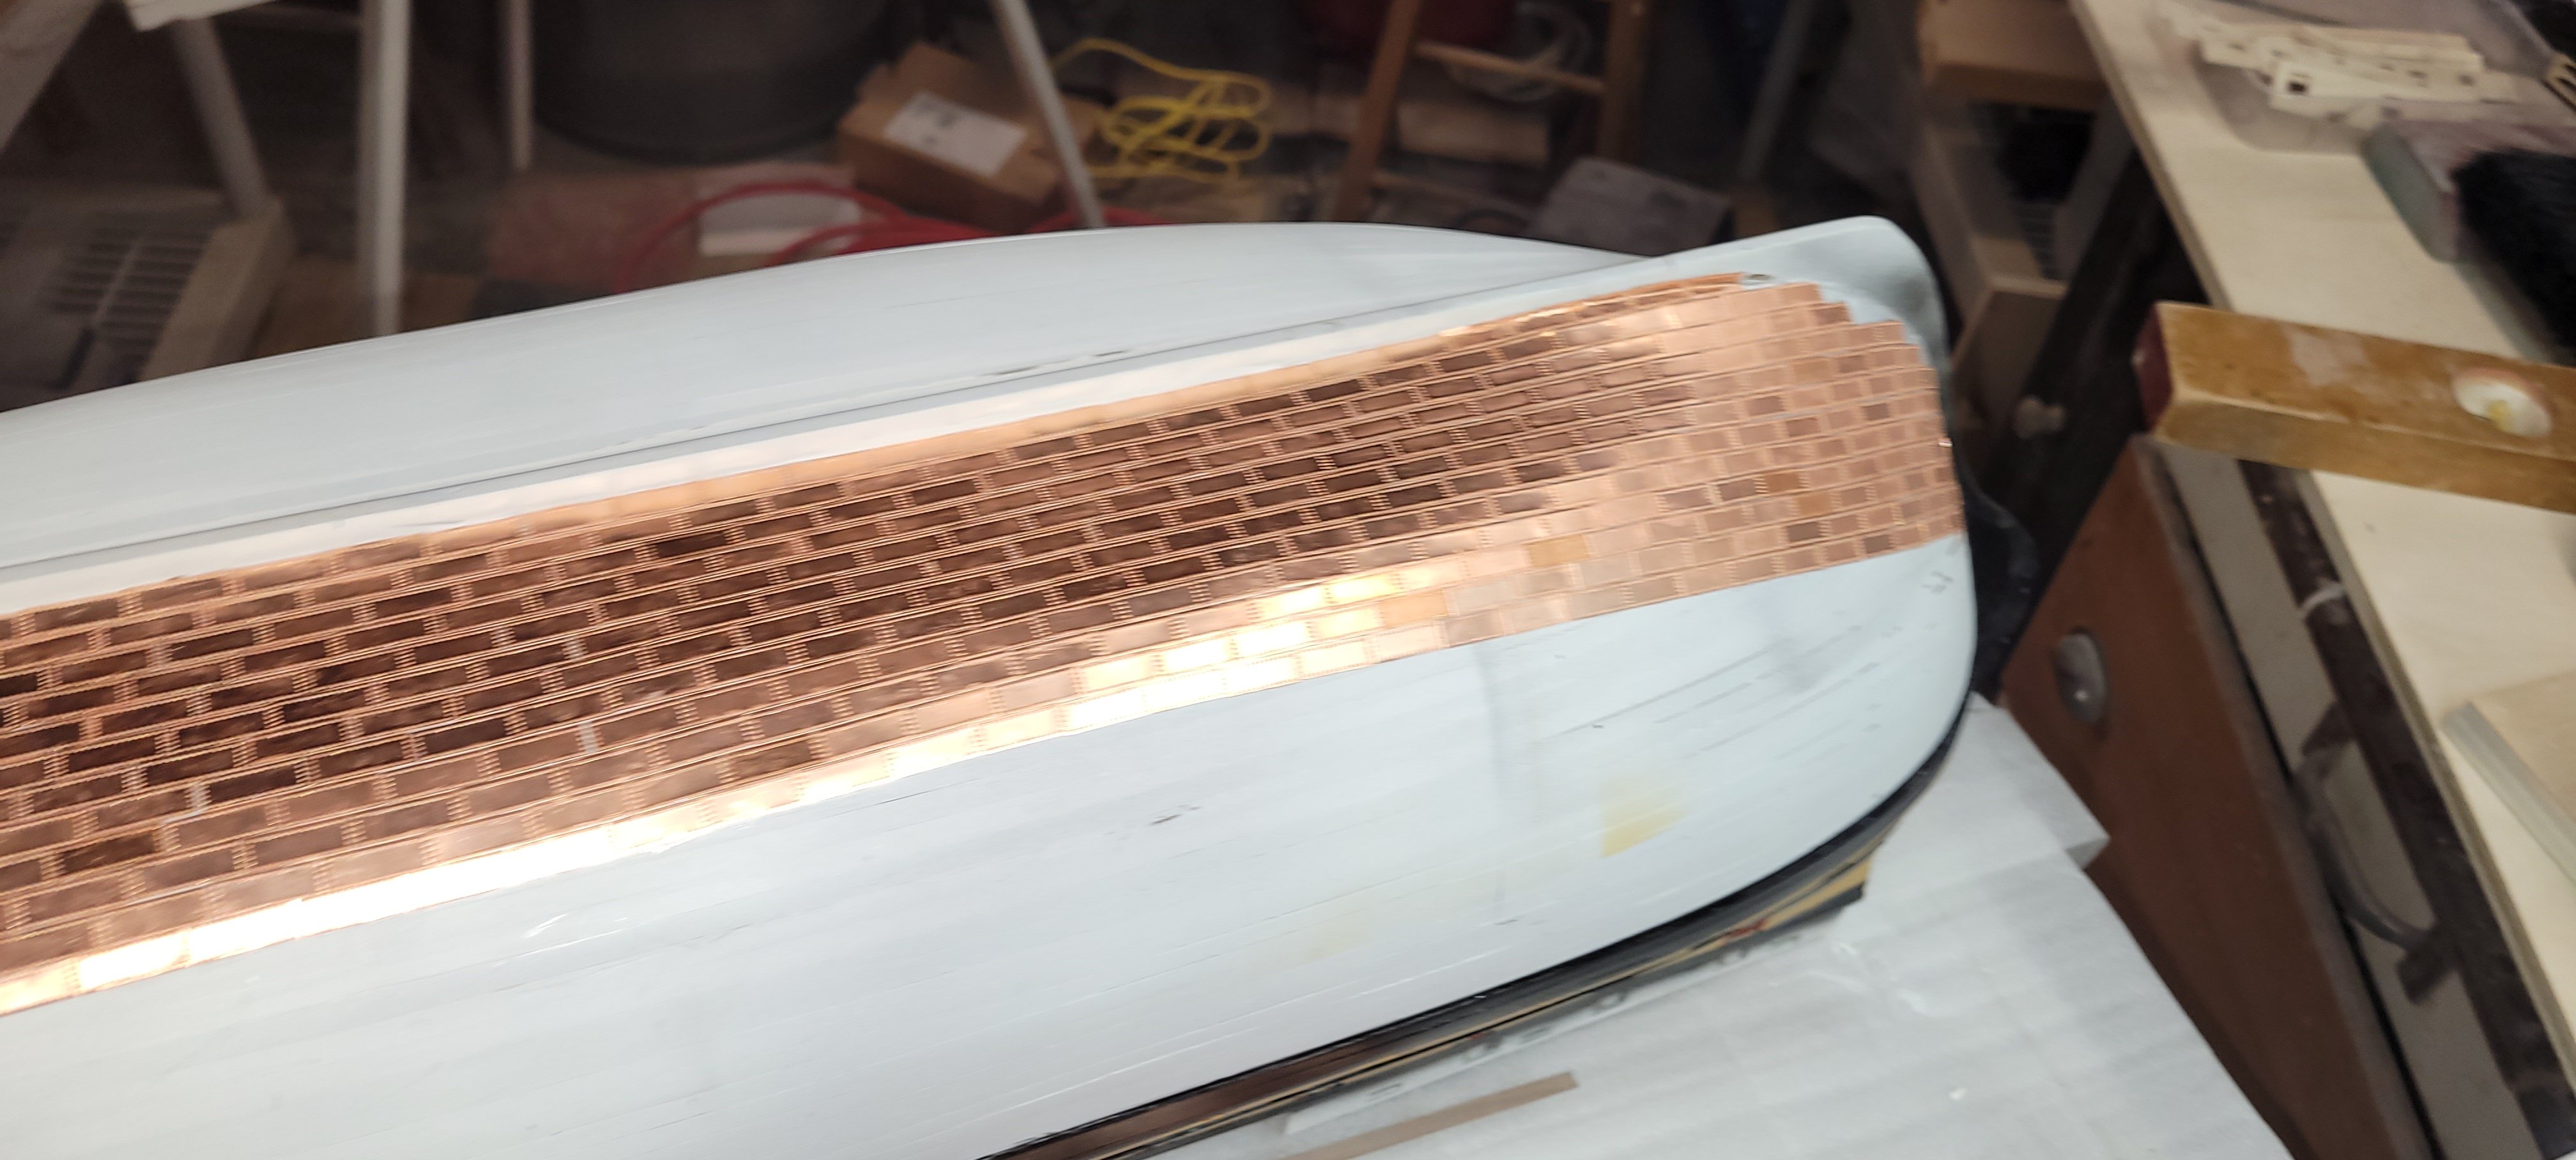
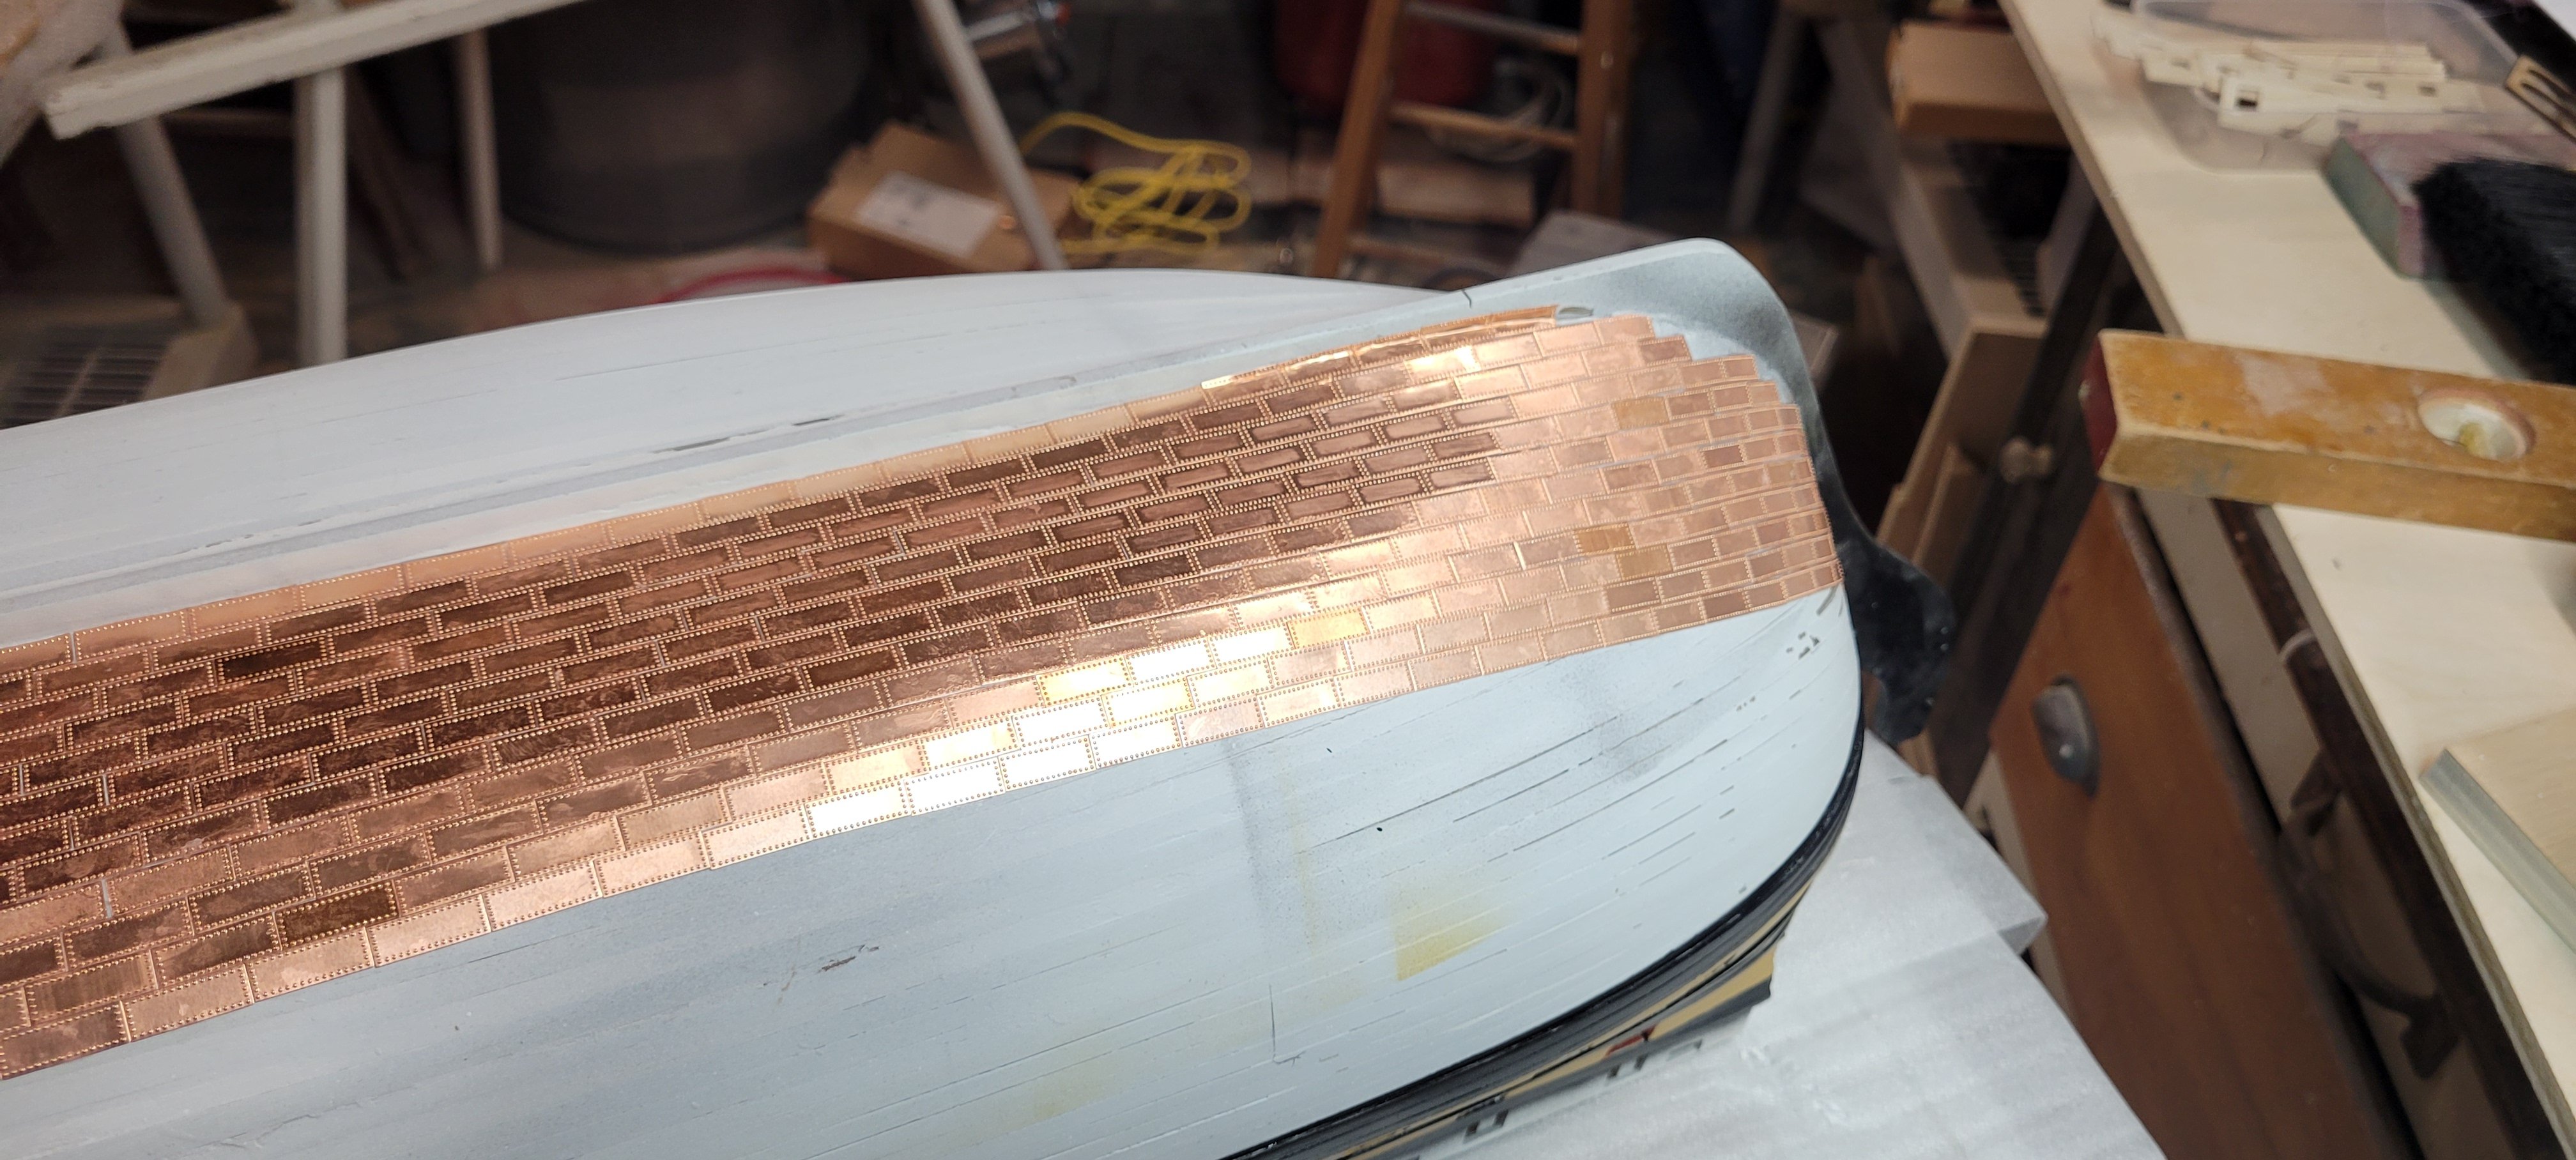
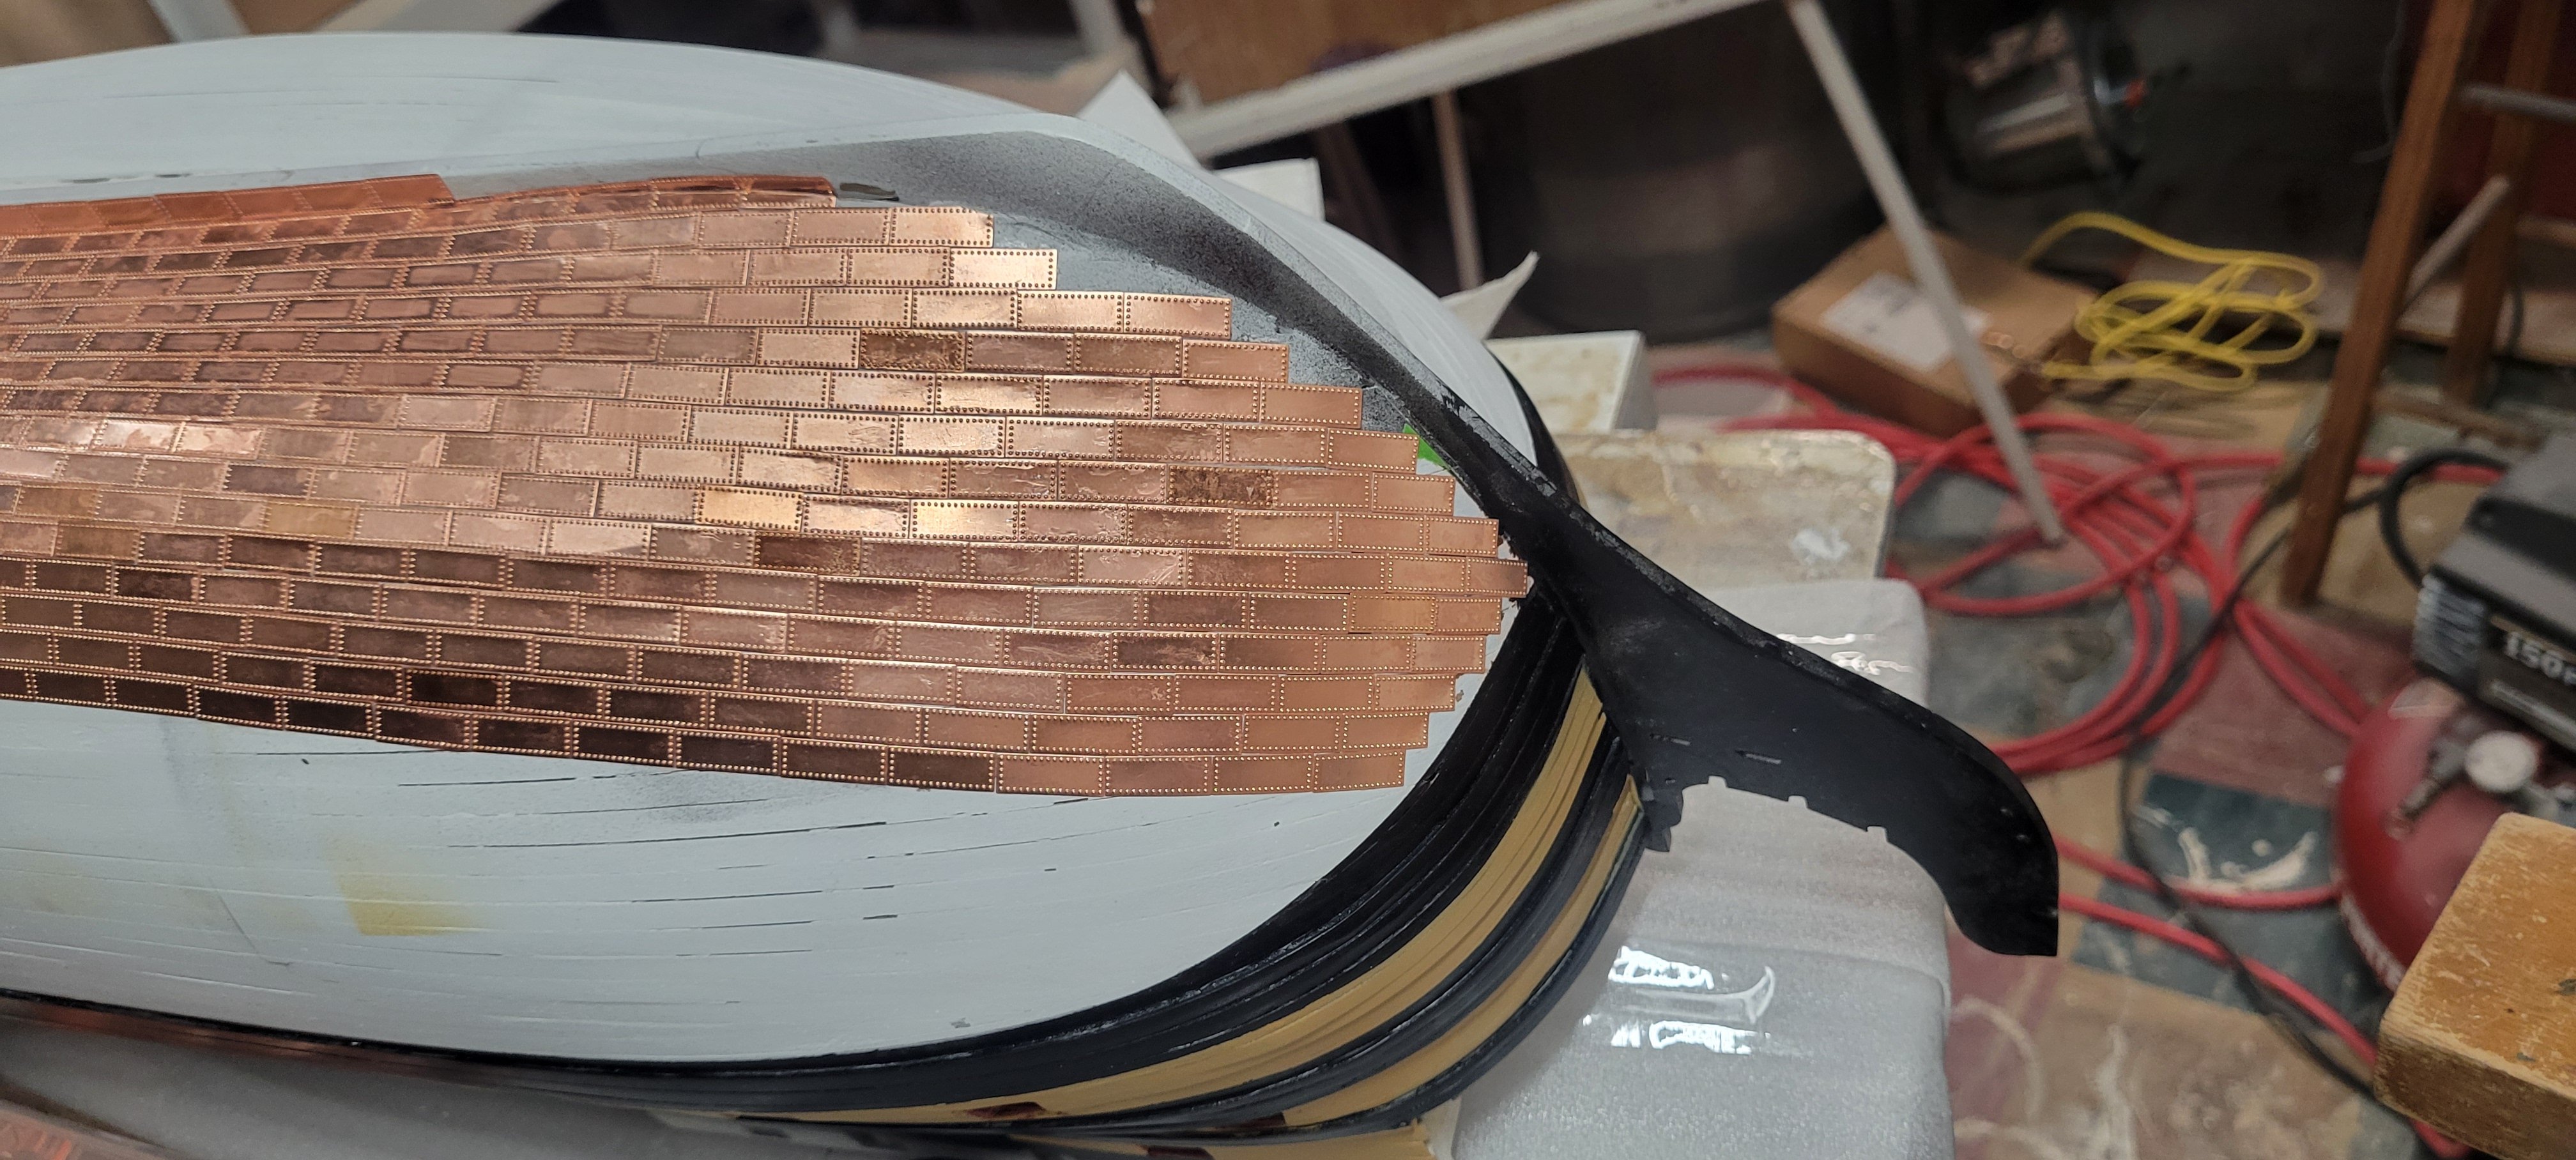
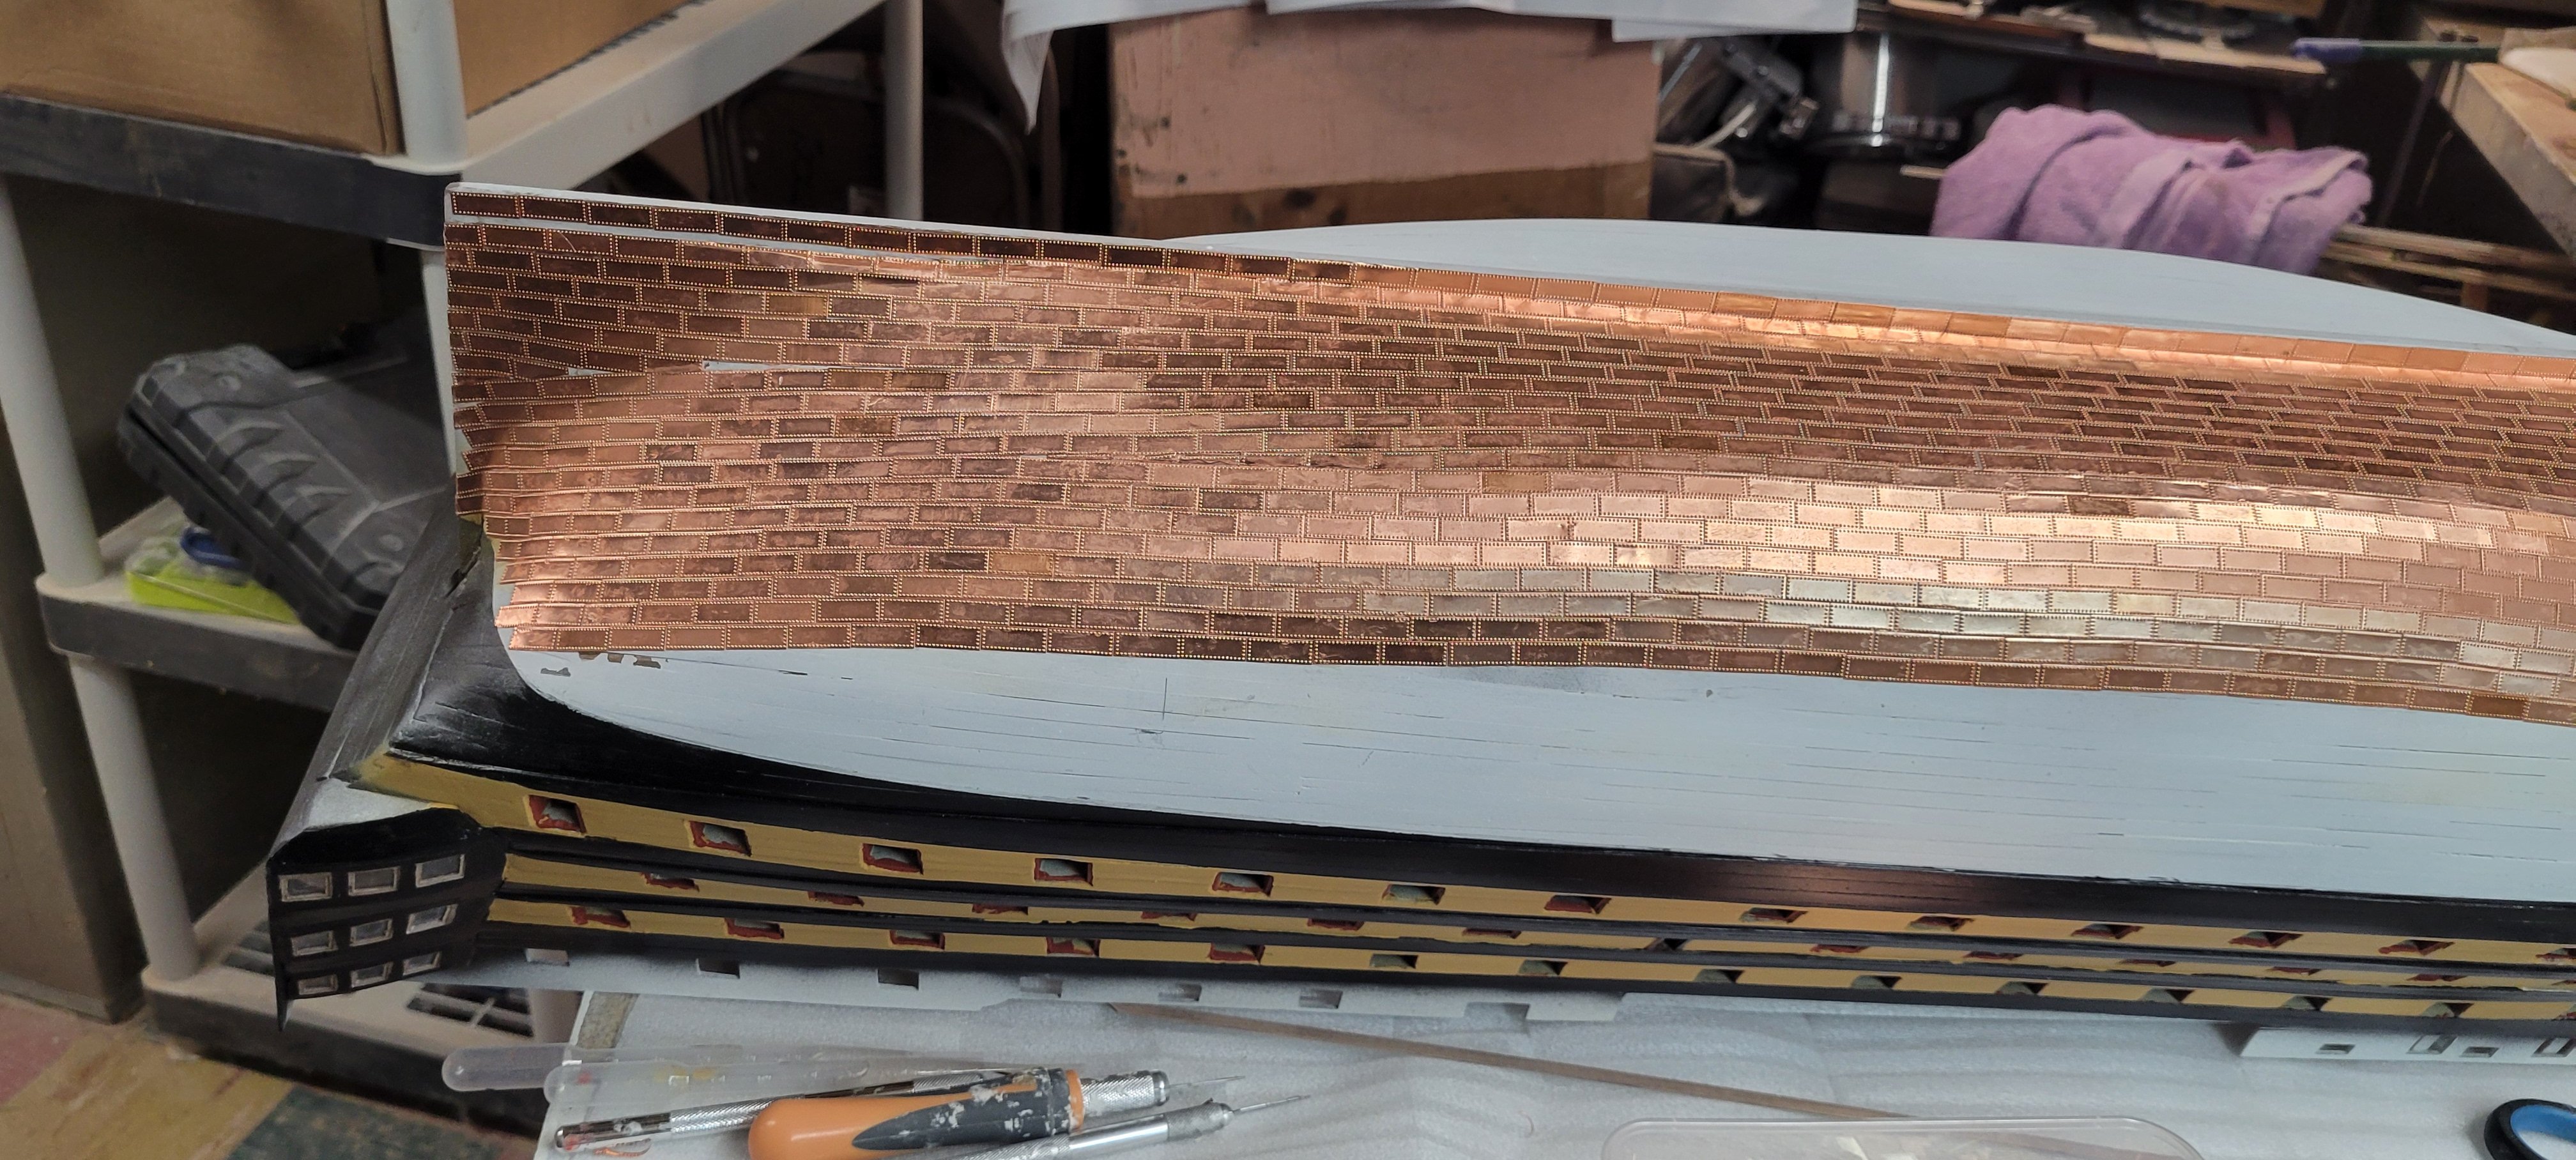
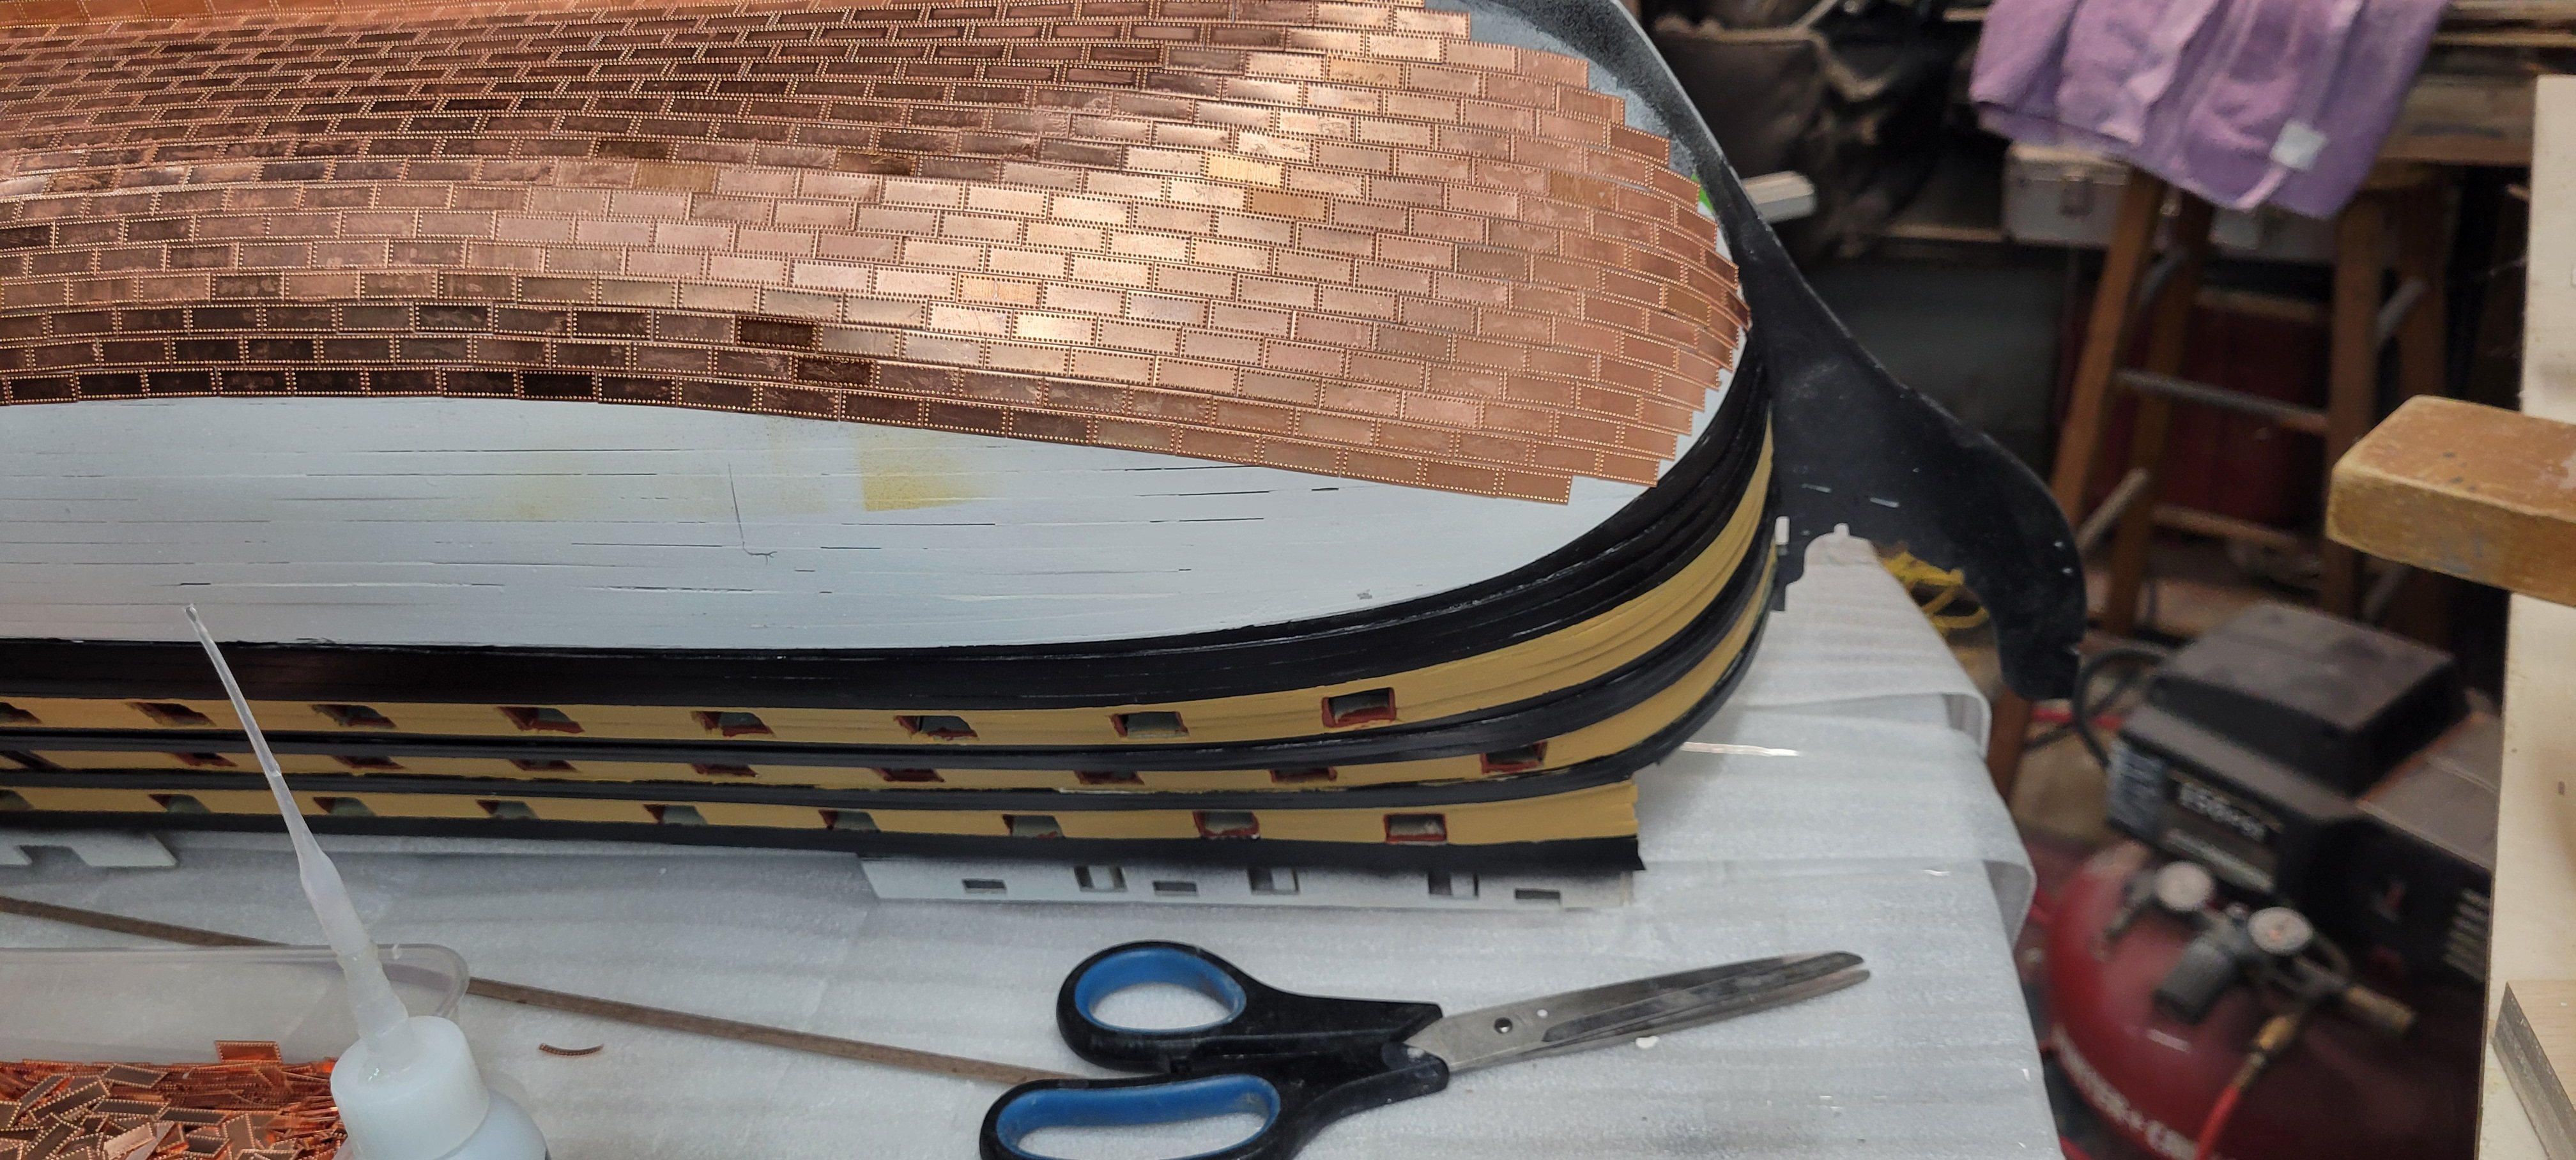
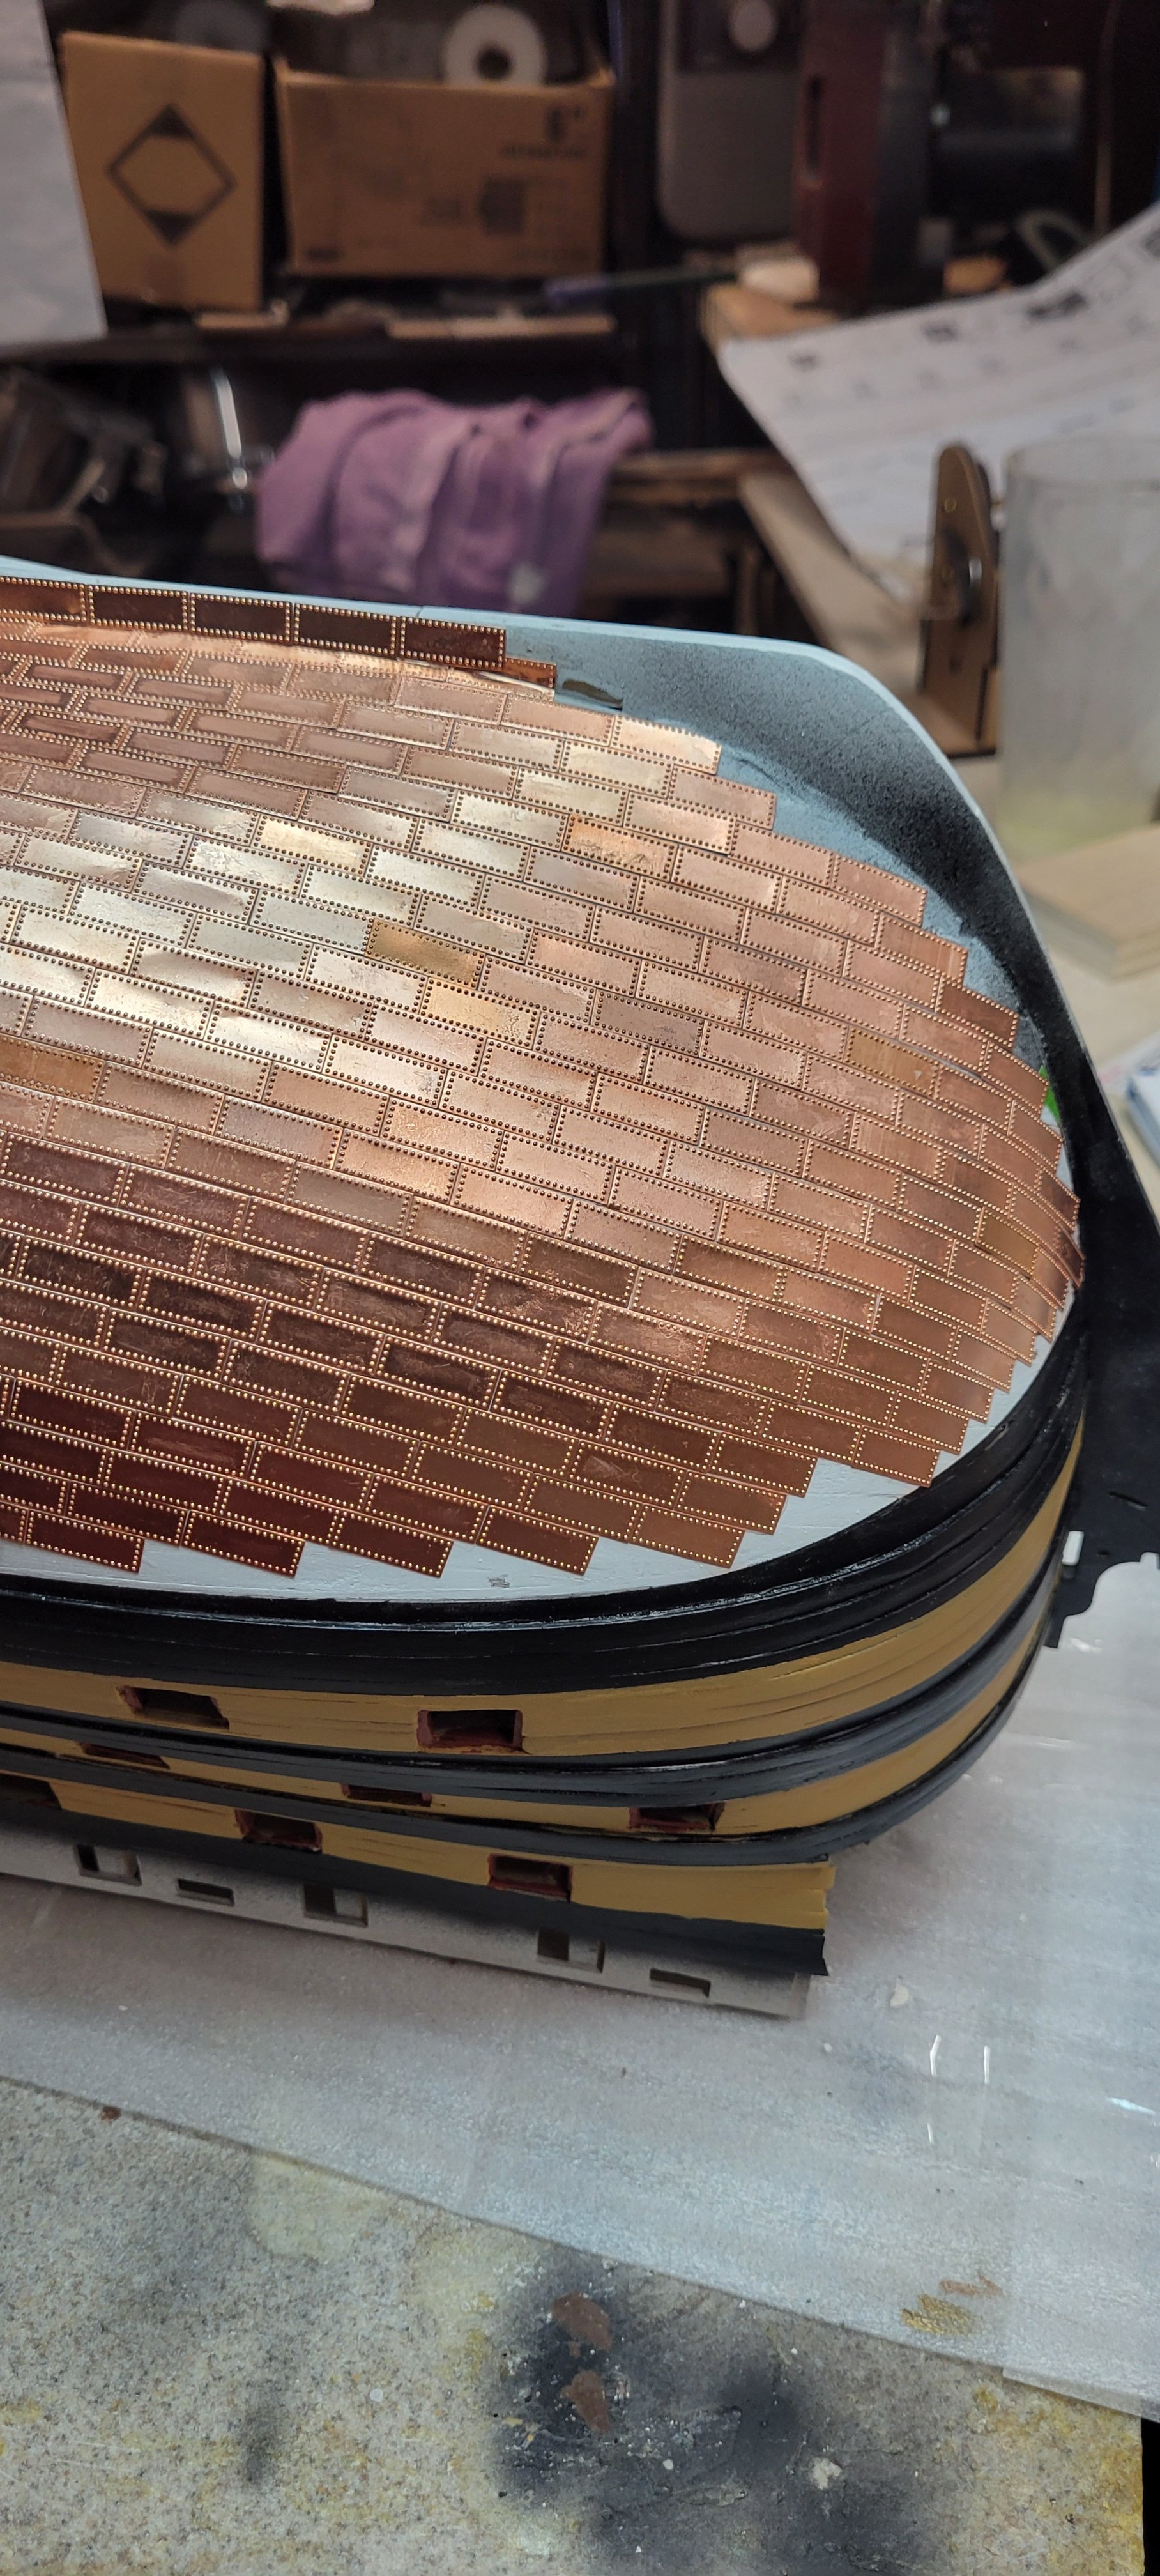
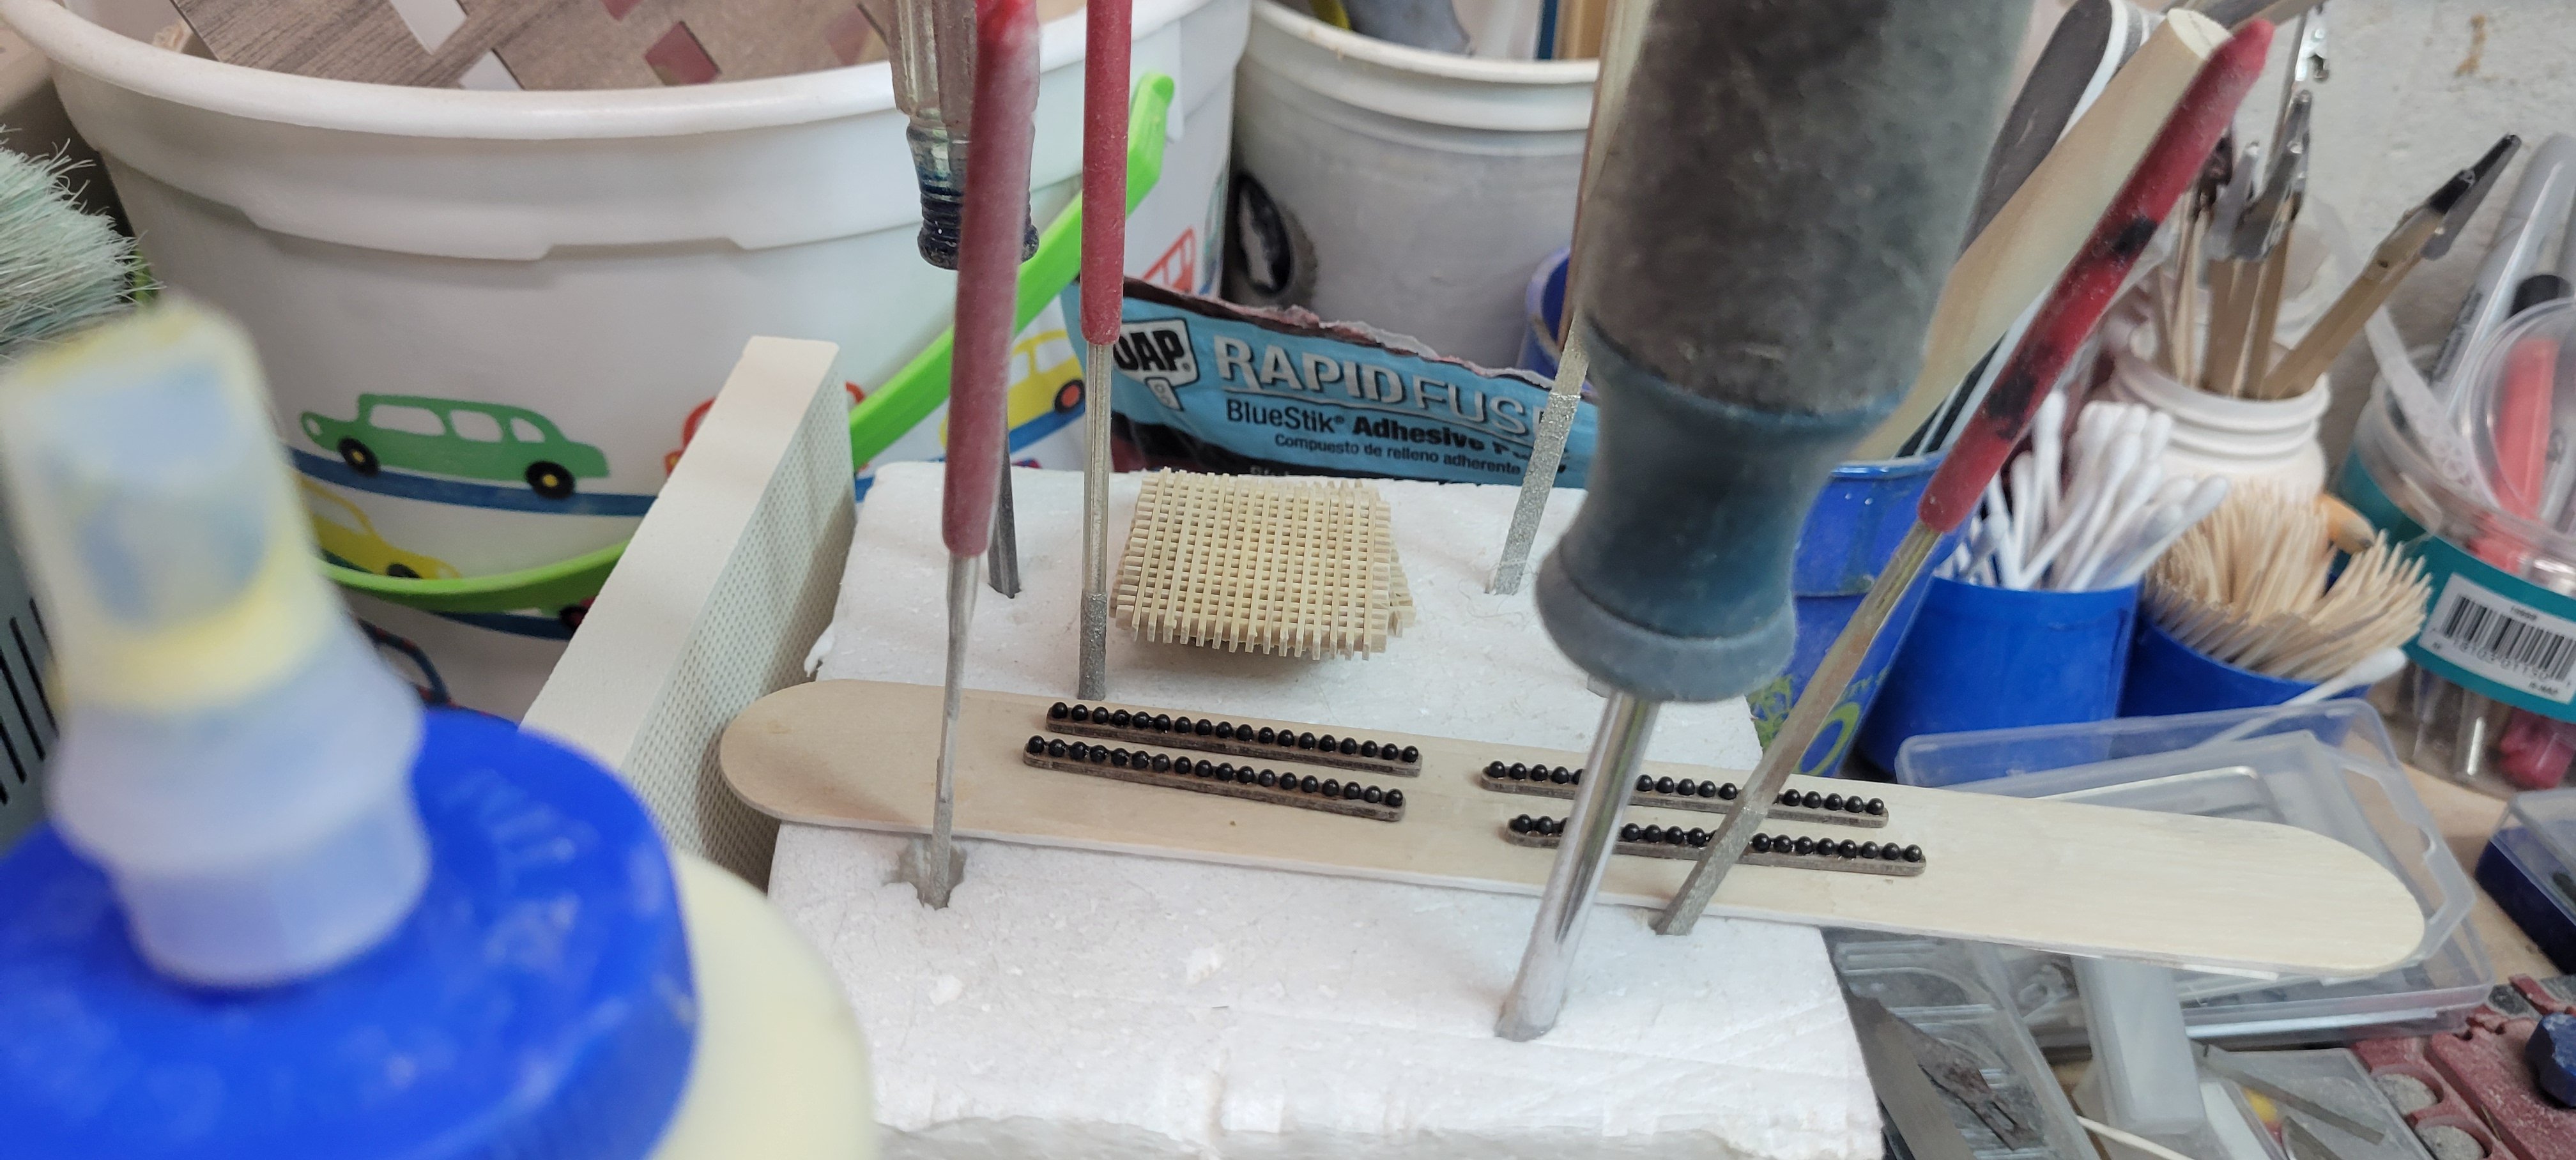
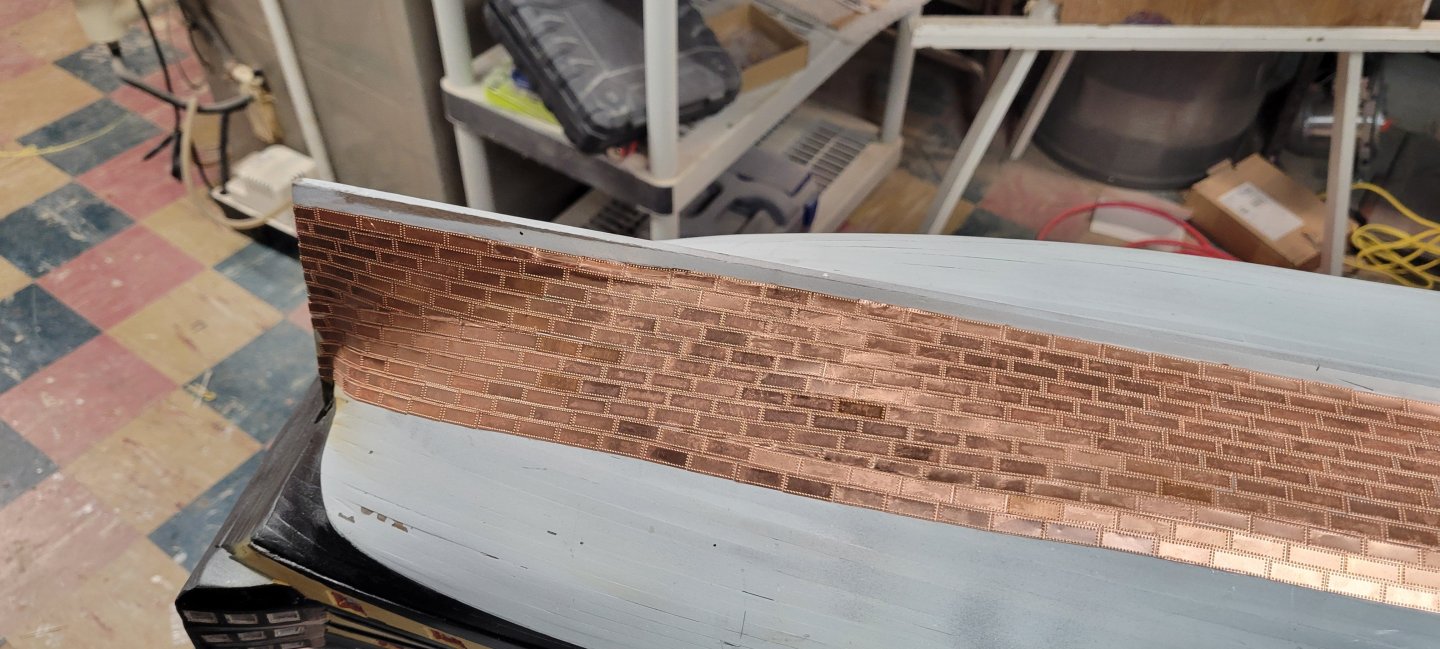
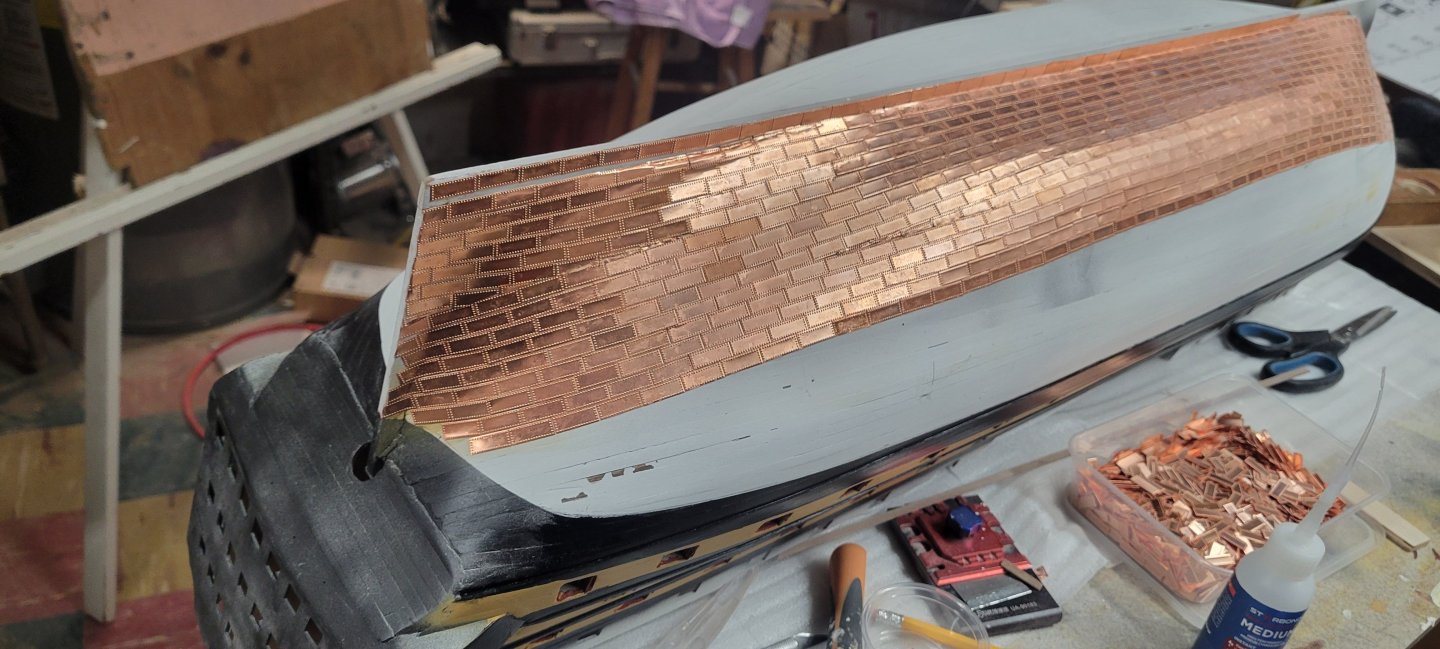
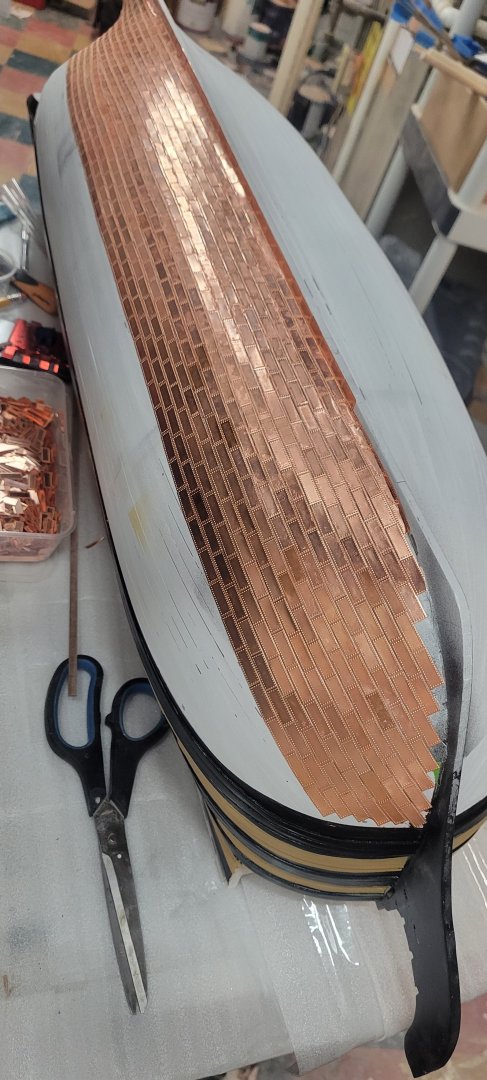
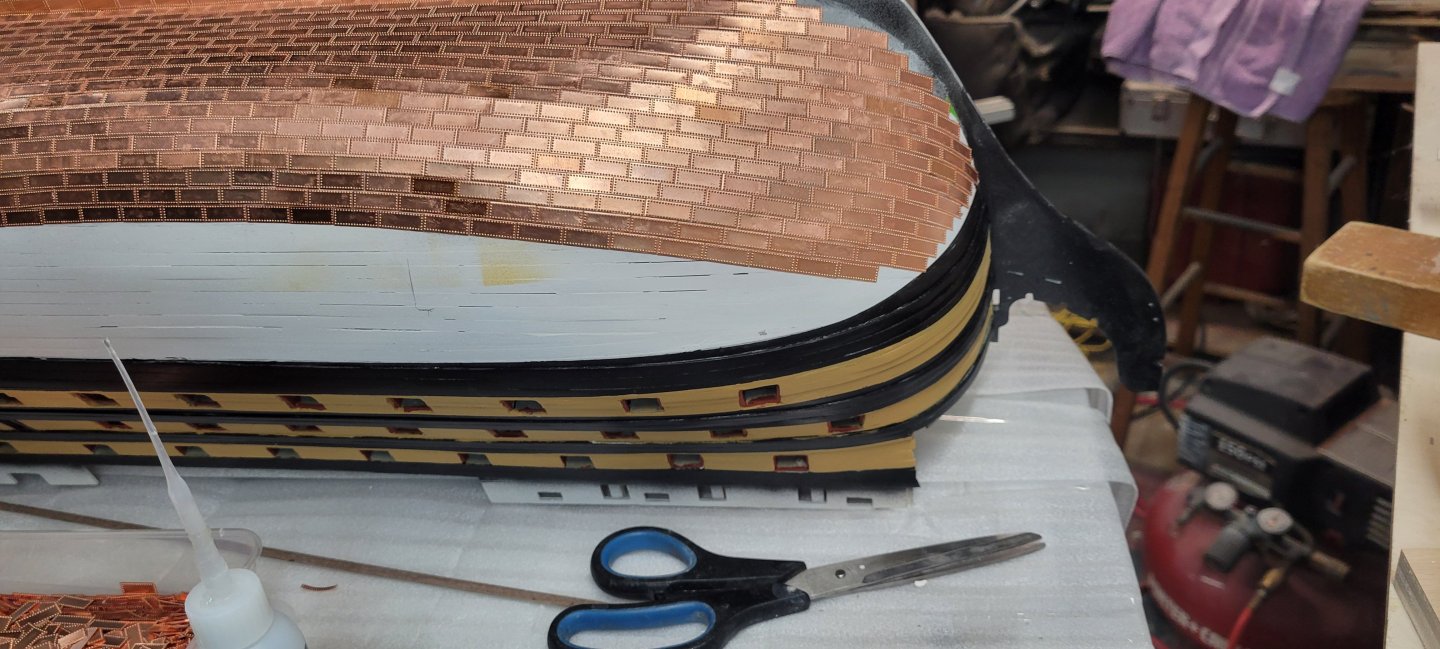
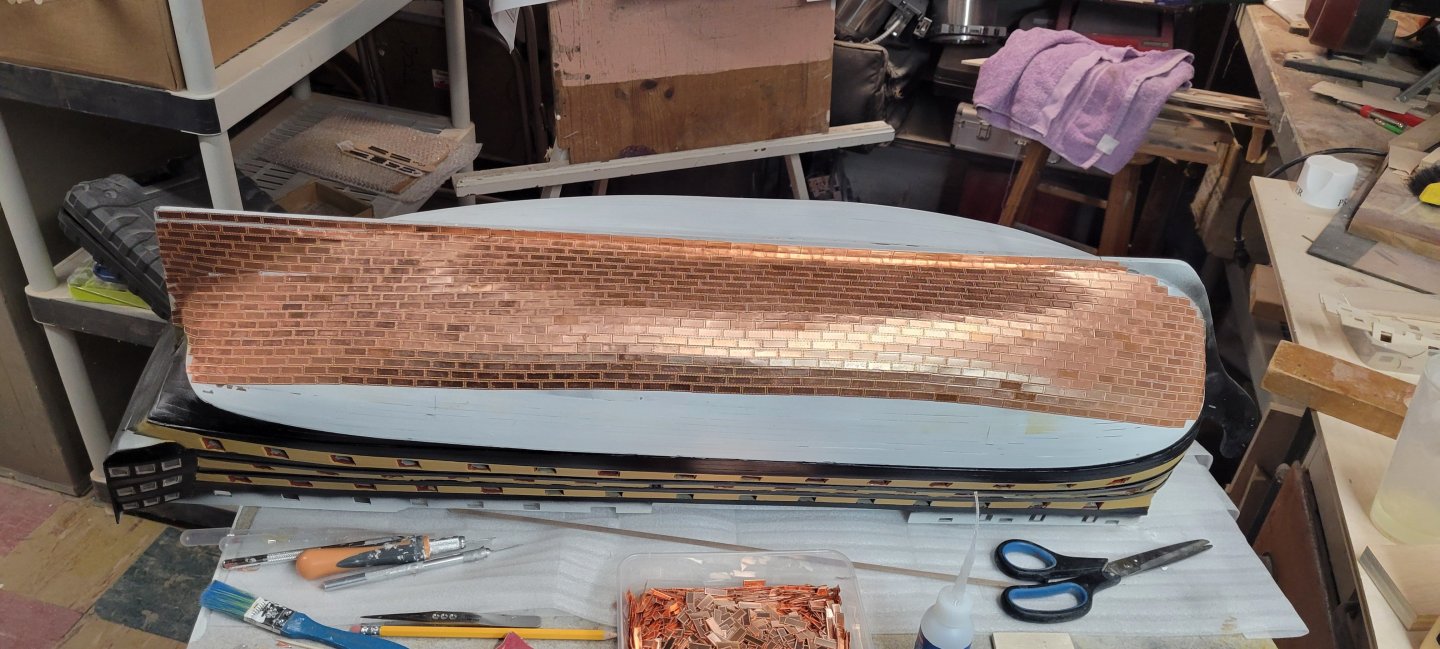
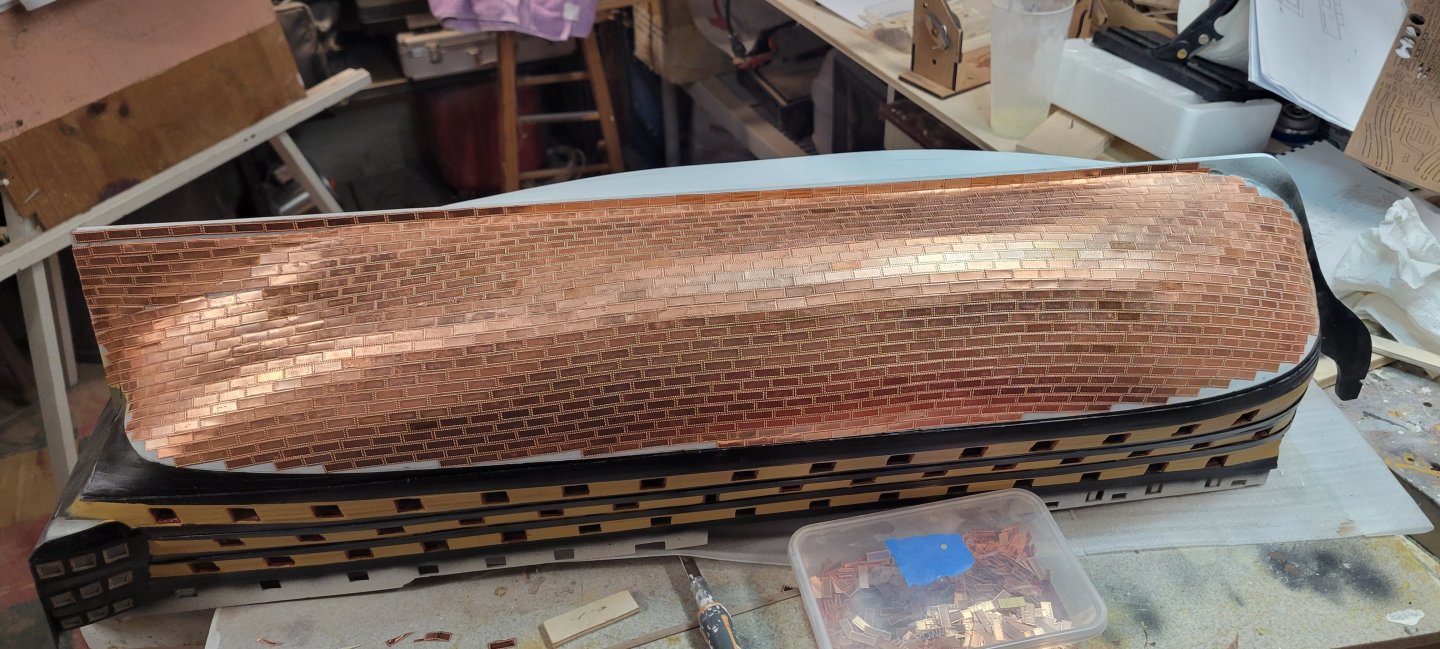
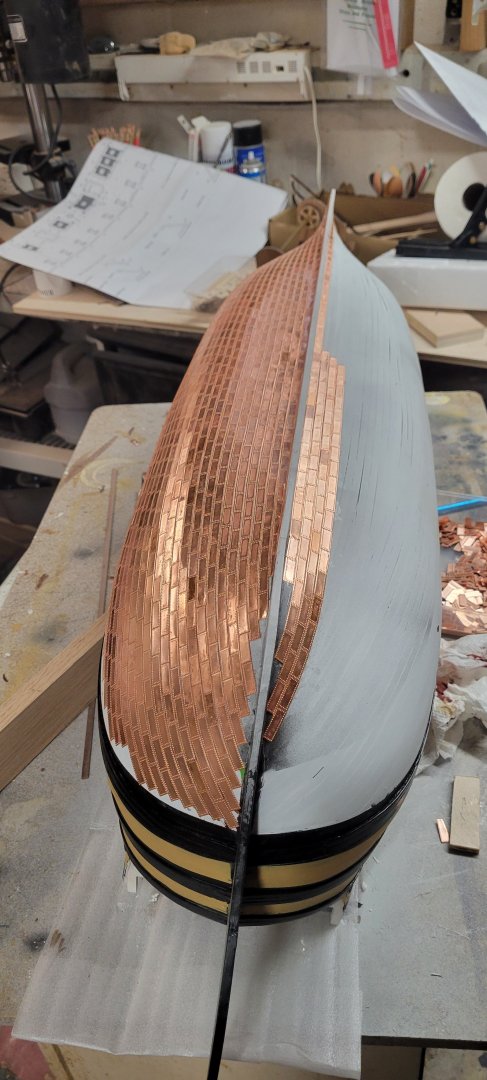
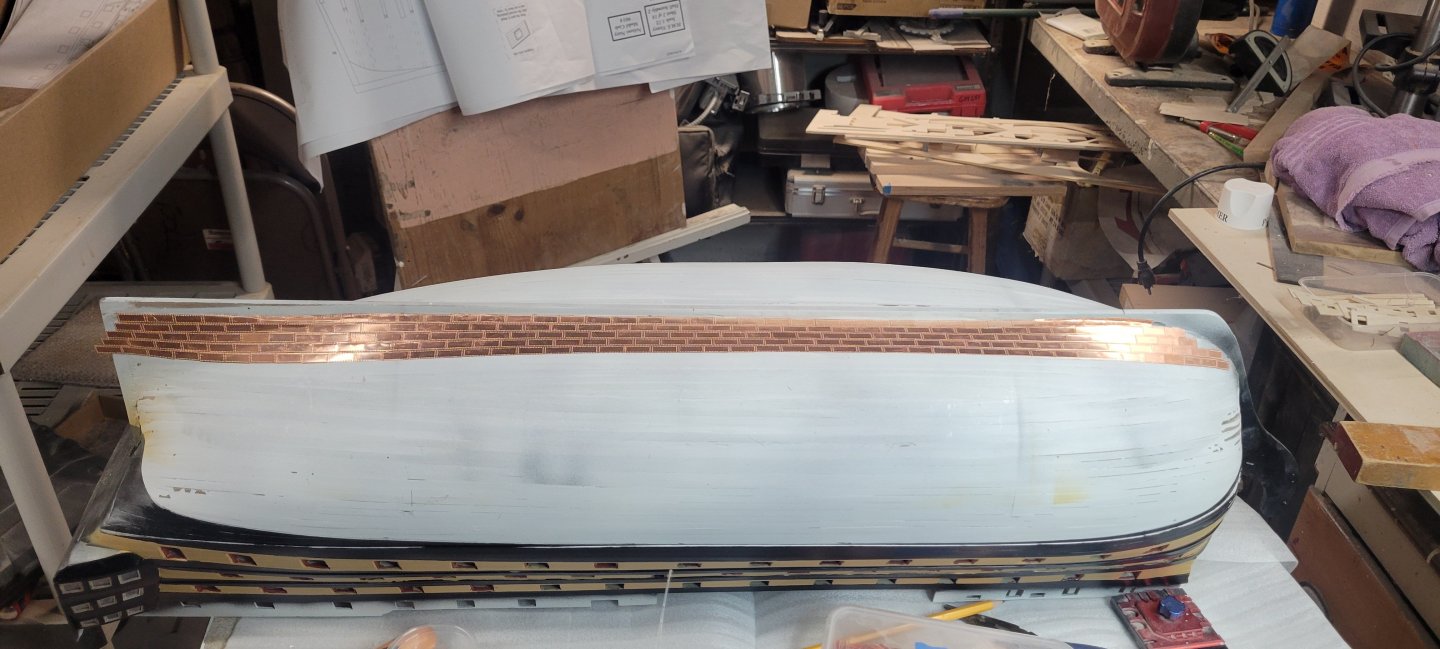
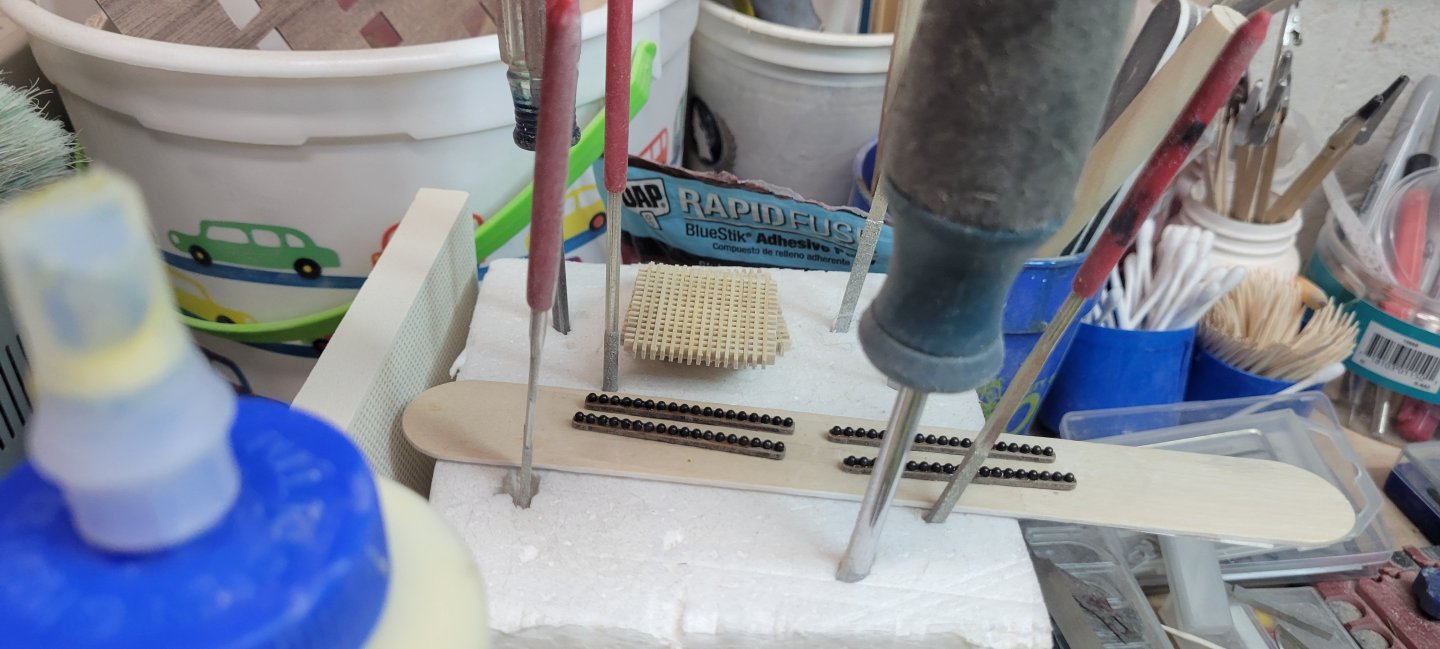
 Over the past 3 weeks, I have spent about 2-4 hours at a sitting working on the copper plates. I did begin filling in some of the stealer plates, but I used regular scissors to cut them (which works, they cut easily) but they do bend a bit and when I installed them, they didn't look very clean. I stopped installing more partial plates and concentrated on full plates only. Once I am done, I will go back and tackle the partials. I removed any of the partials that I did that looked bad. I also have a bit of a gap between the hull and the keel on the port side nearer the stern. I should have filled this in before. It will be visible when done, but nothing more I can do other than remove those plates and fill the gap. We'll see.... I finished the port side and I'm working on the starboard side. However the weather has finally turned for the better up in the northeast US and I have been concentrating on getting my boat in the water. I guess you see that a lot in builder logs....huge gaps between spurts. I also started working on the cannons as a break. I would do 4 or so courses of plates and then remove five cannons and build the bases. I don't have any pictures of that. So far, that is pretty standard work. Cutting out the carriages, axles and wheels is fairly easy, the stock is thick and does require a bit of power to cut through the sprue to get them free. I sanded all of the carriages and axles to remove any fuzz. I also drilled out the holes for the bed bolt. The factory holes are a bit smaller than the 1mm wire provided. I created a crude jig for the fitting the carriages and axles together. Just some small blocks glued to a larger piece of wood to hold the carriages apart while adding the 2 axles. Having seen some builders add a wire loop to the back of the cannon to hold the breaching wires. I like that. I'm thinking I would run all 30 cannons through a piece of wire to hold them all upright and then seeing if my looper pliers can create a small enough loop to suit the task. ...that's down the road a bit, but I think that doing a few different tasks when working on something like copper plating or planking helps to keep the builder motivated.


-
Just fantastic so far. An absolute joy to look at and an inspiration for other builders....
-
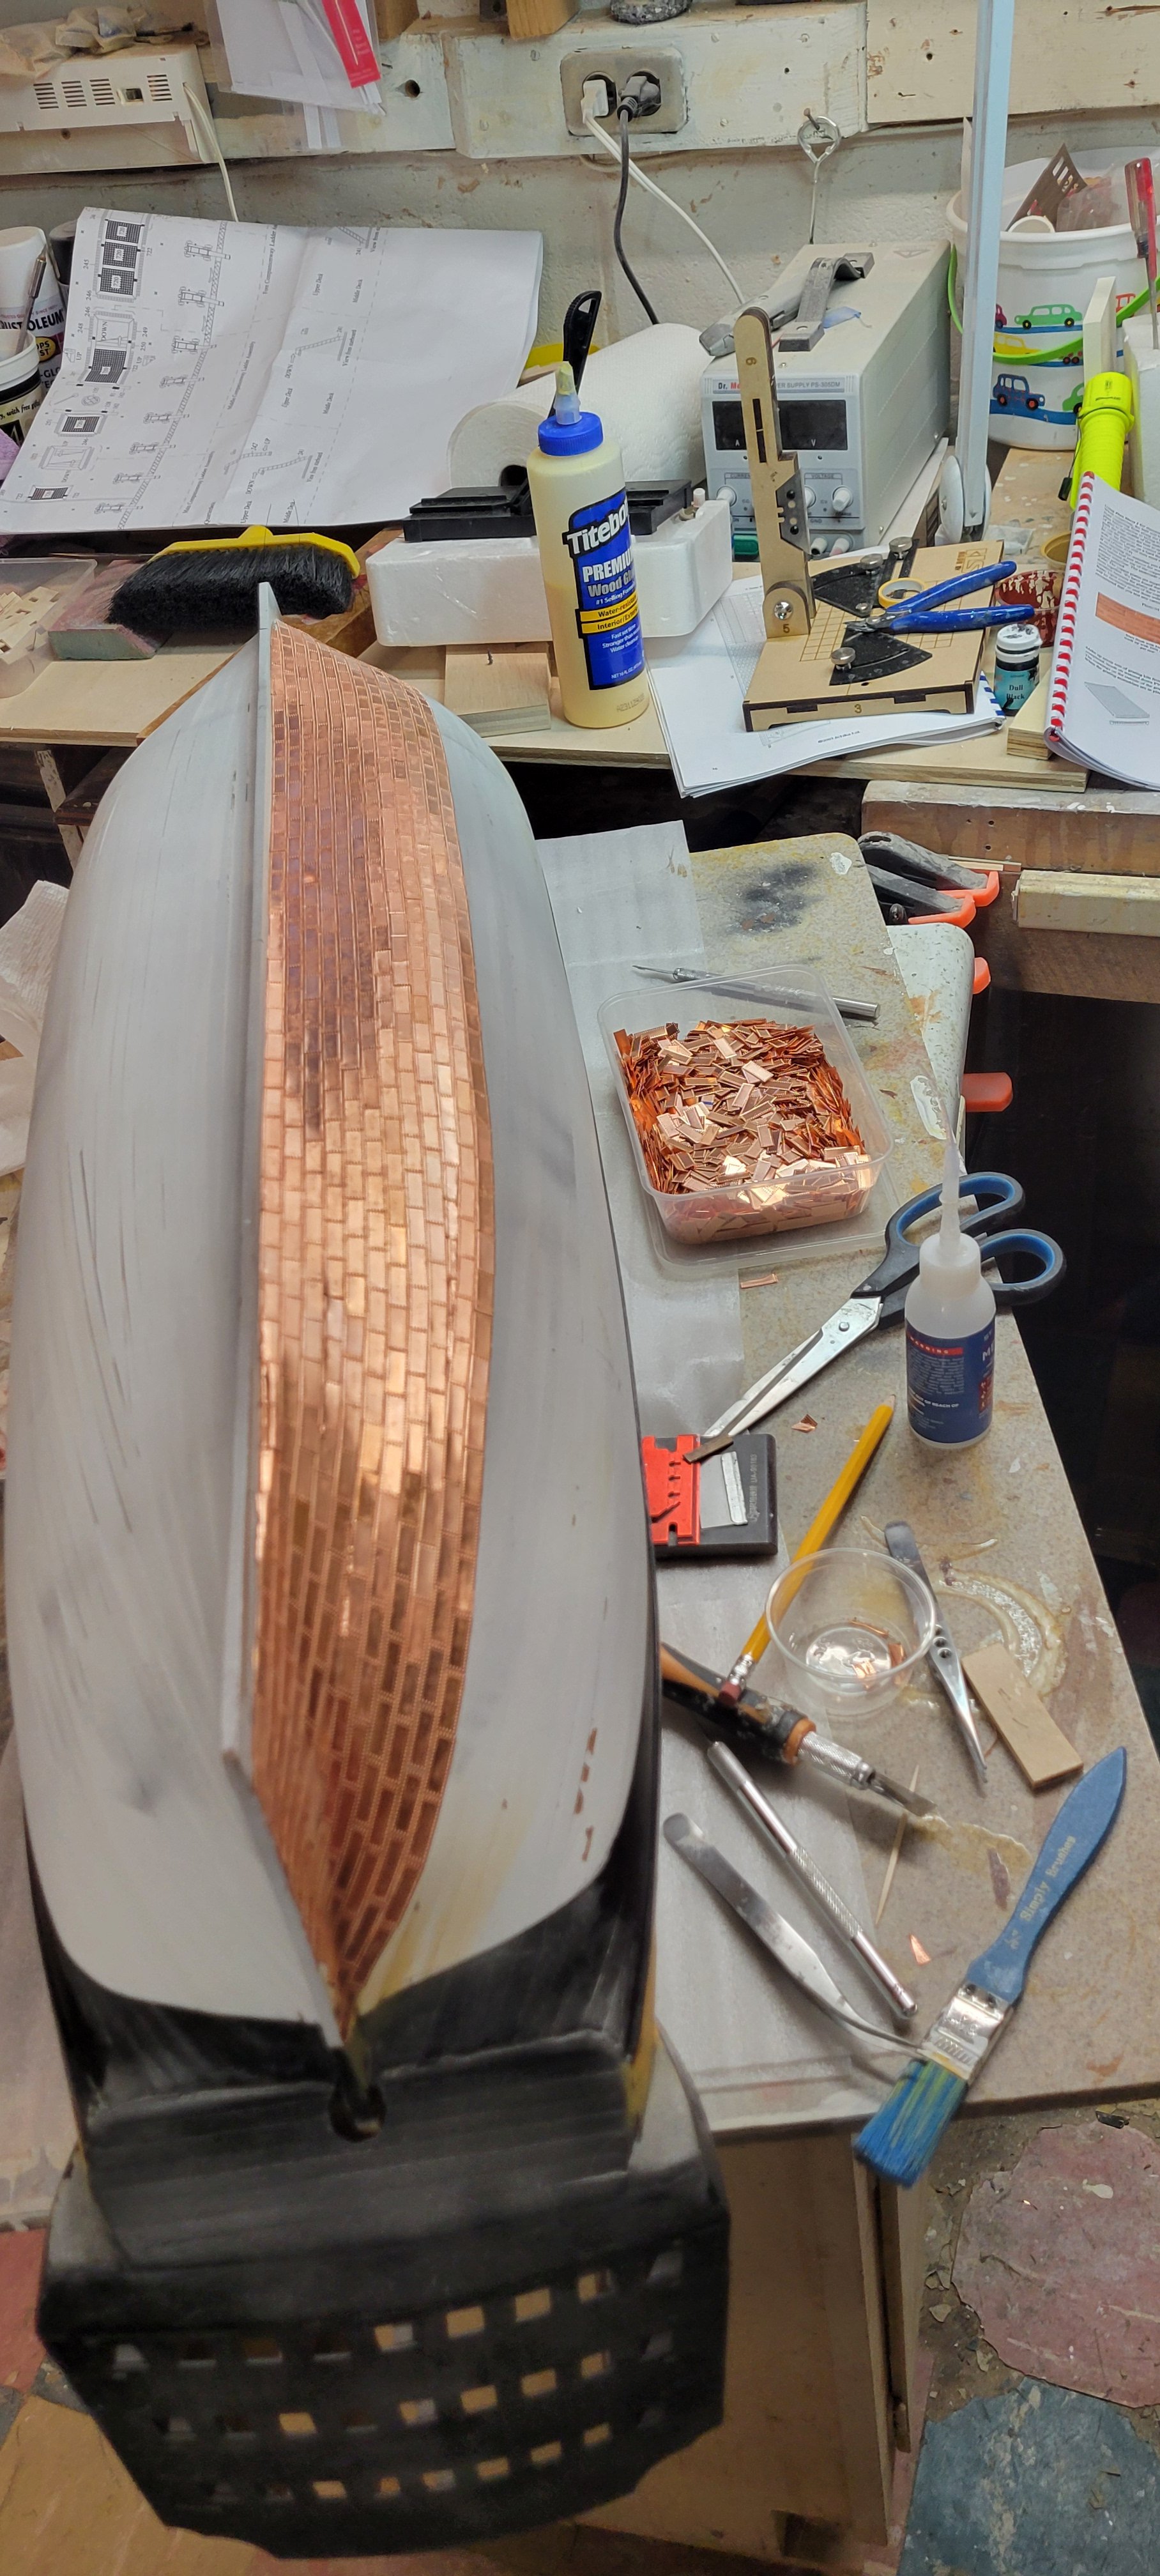
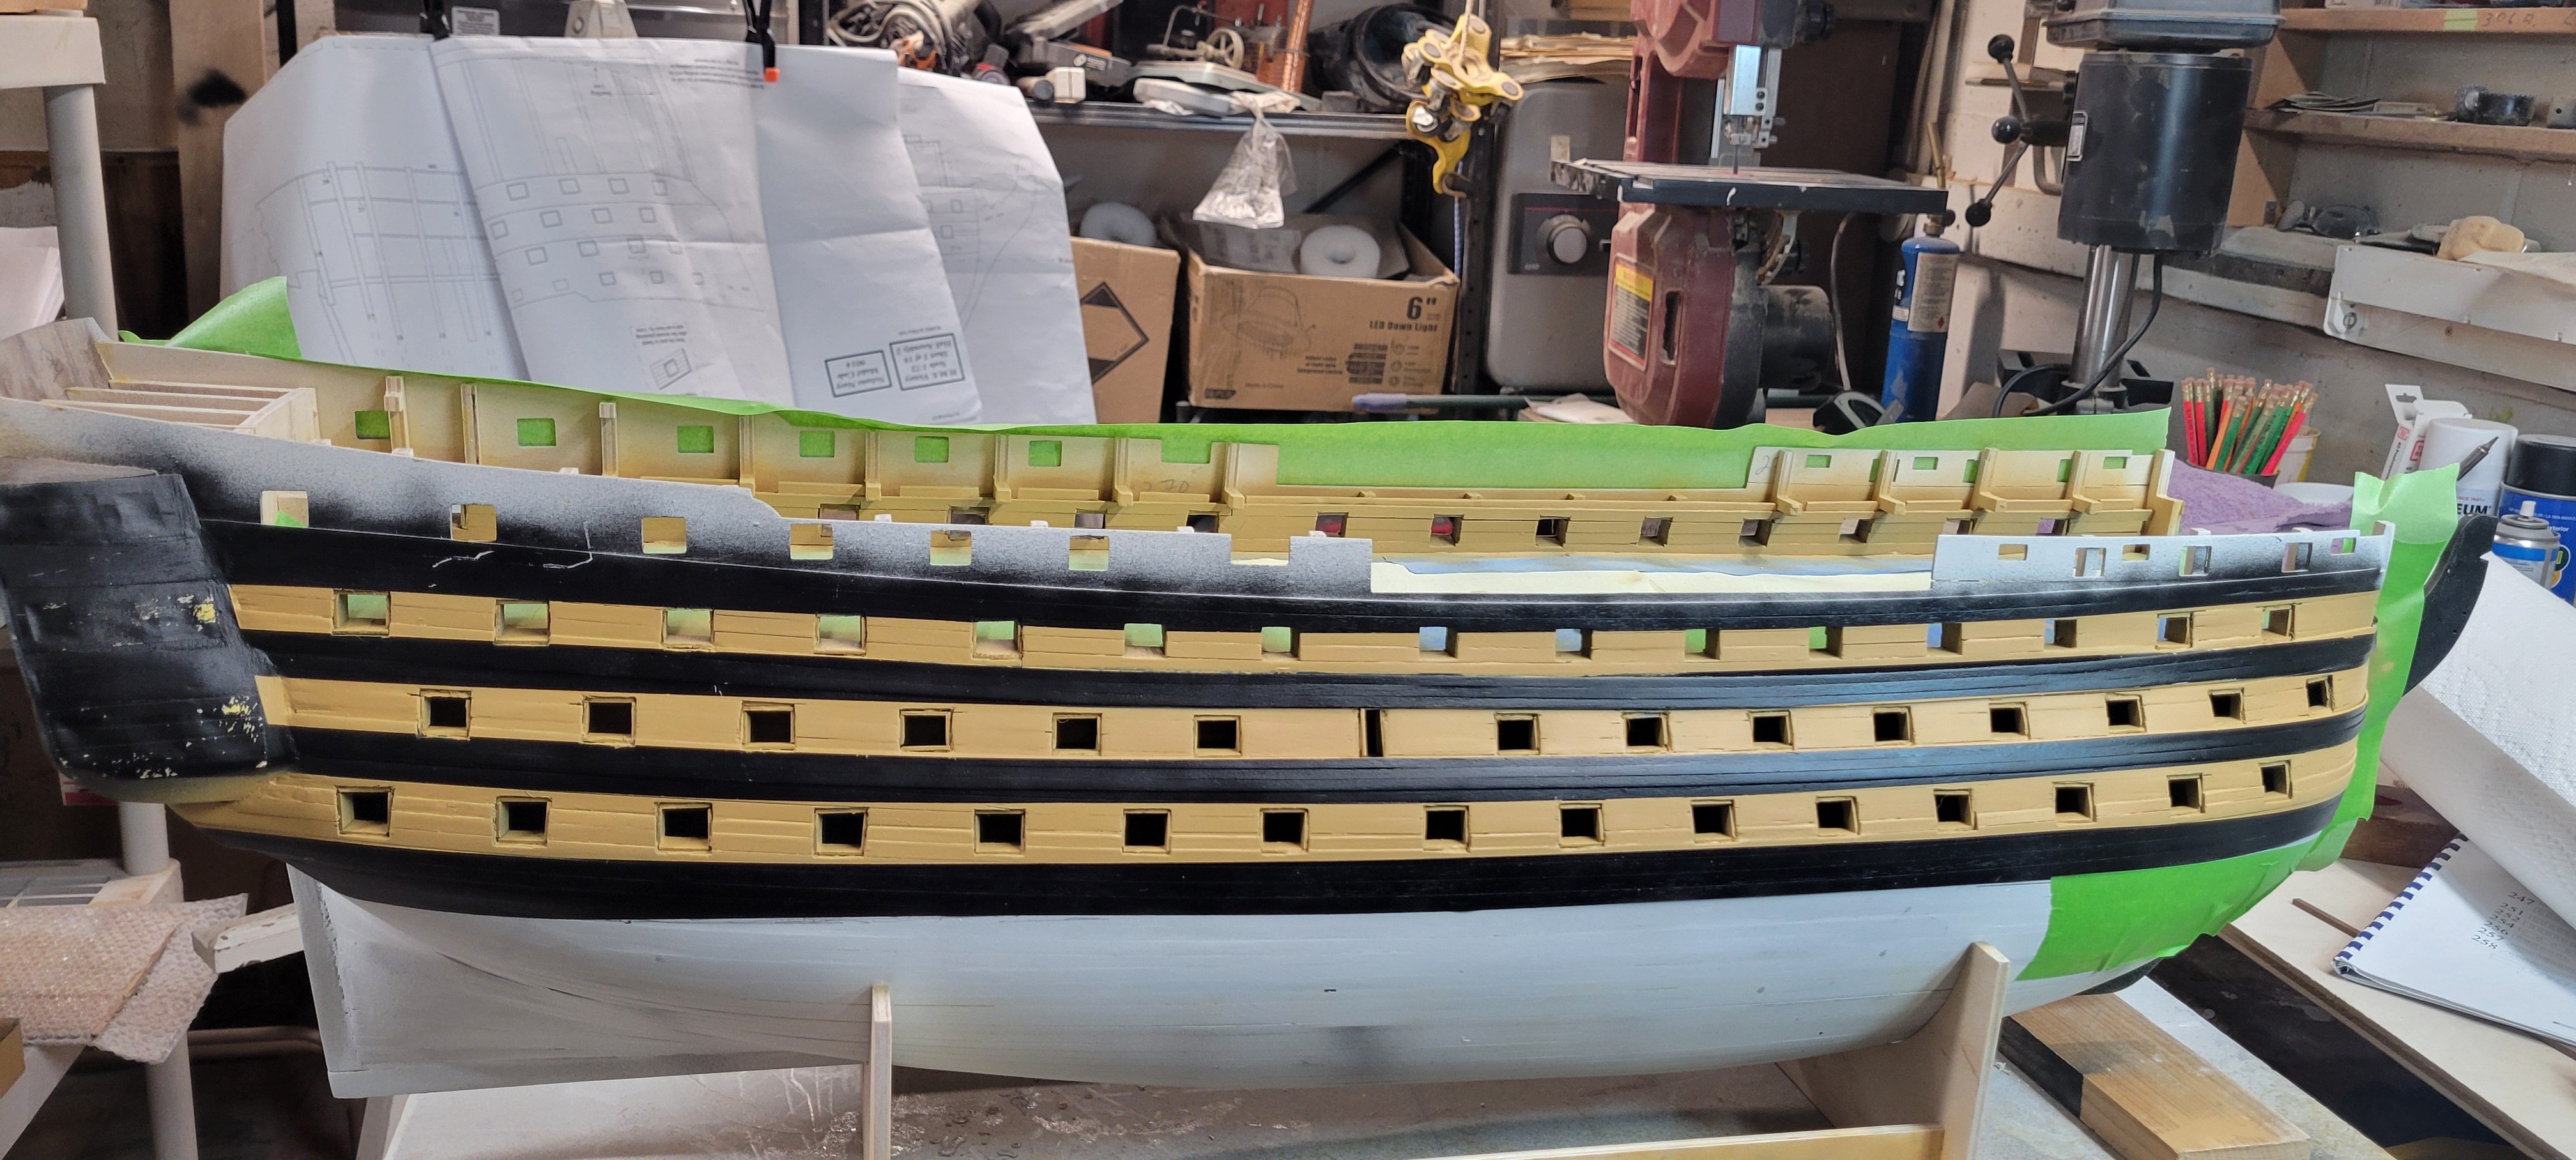
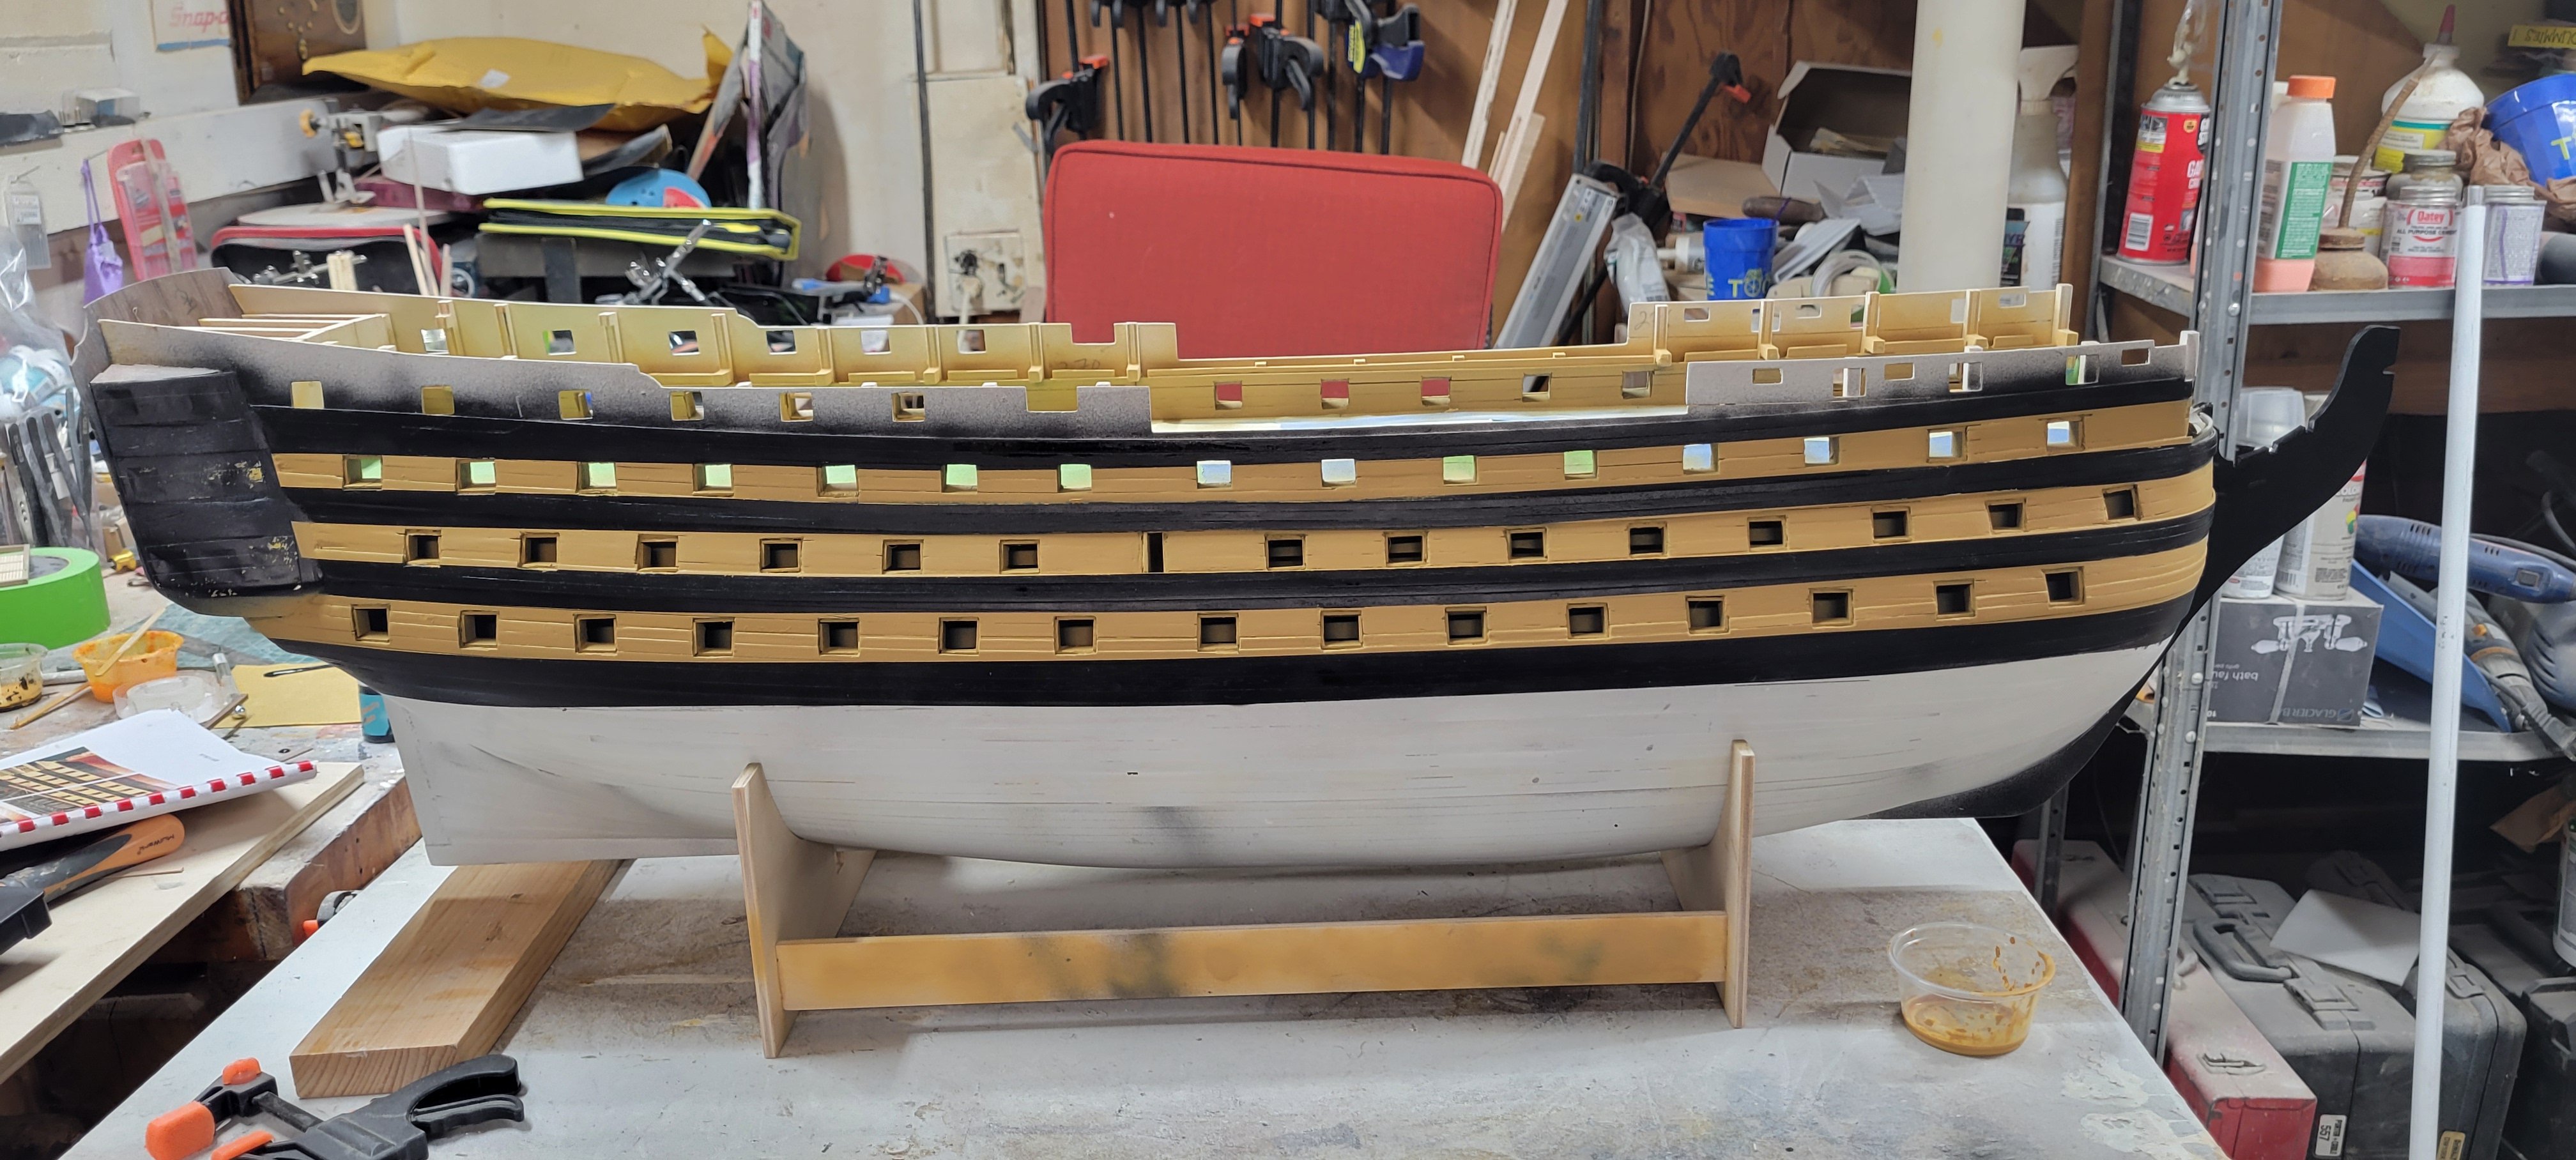
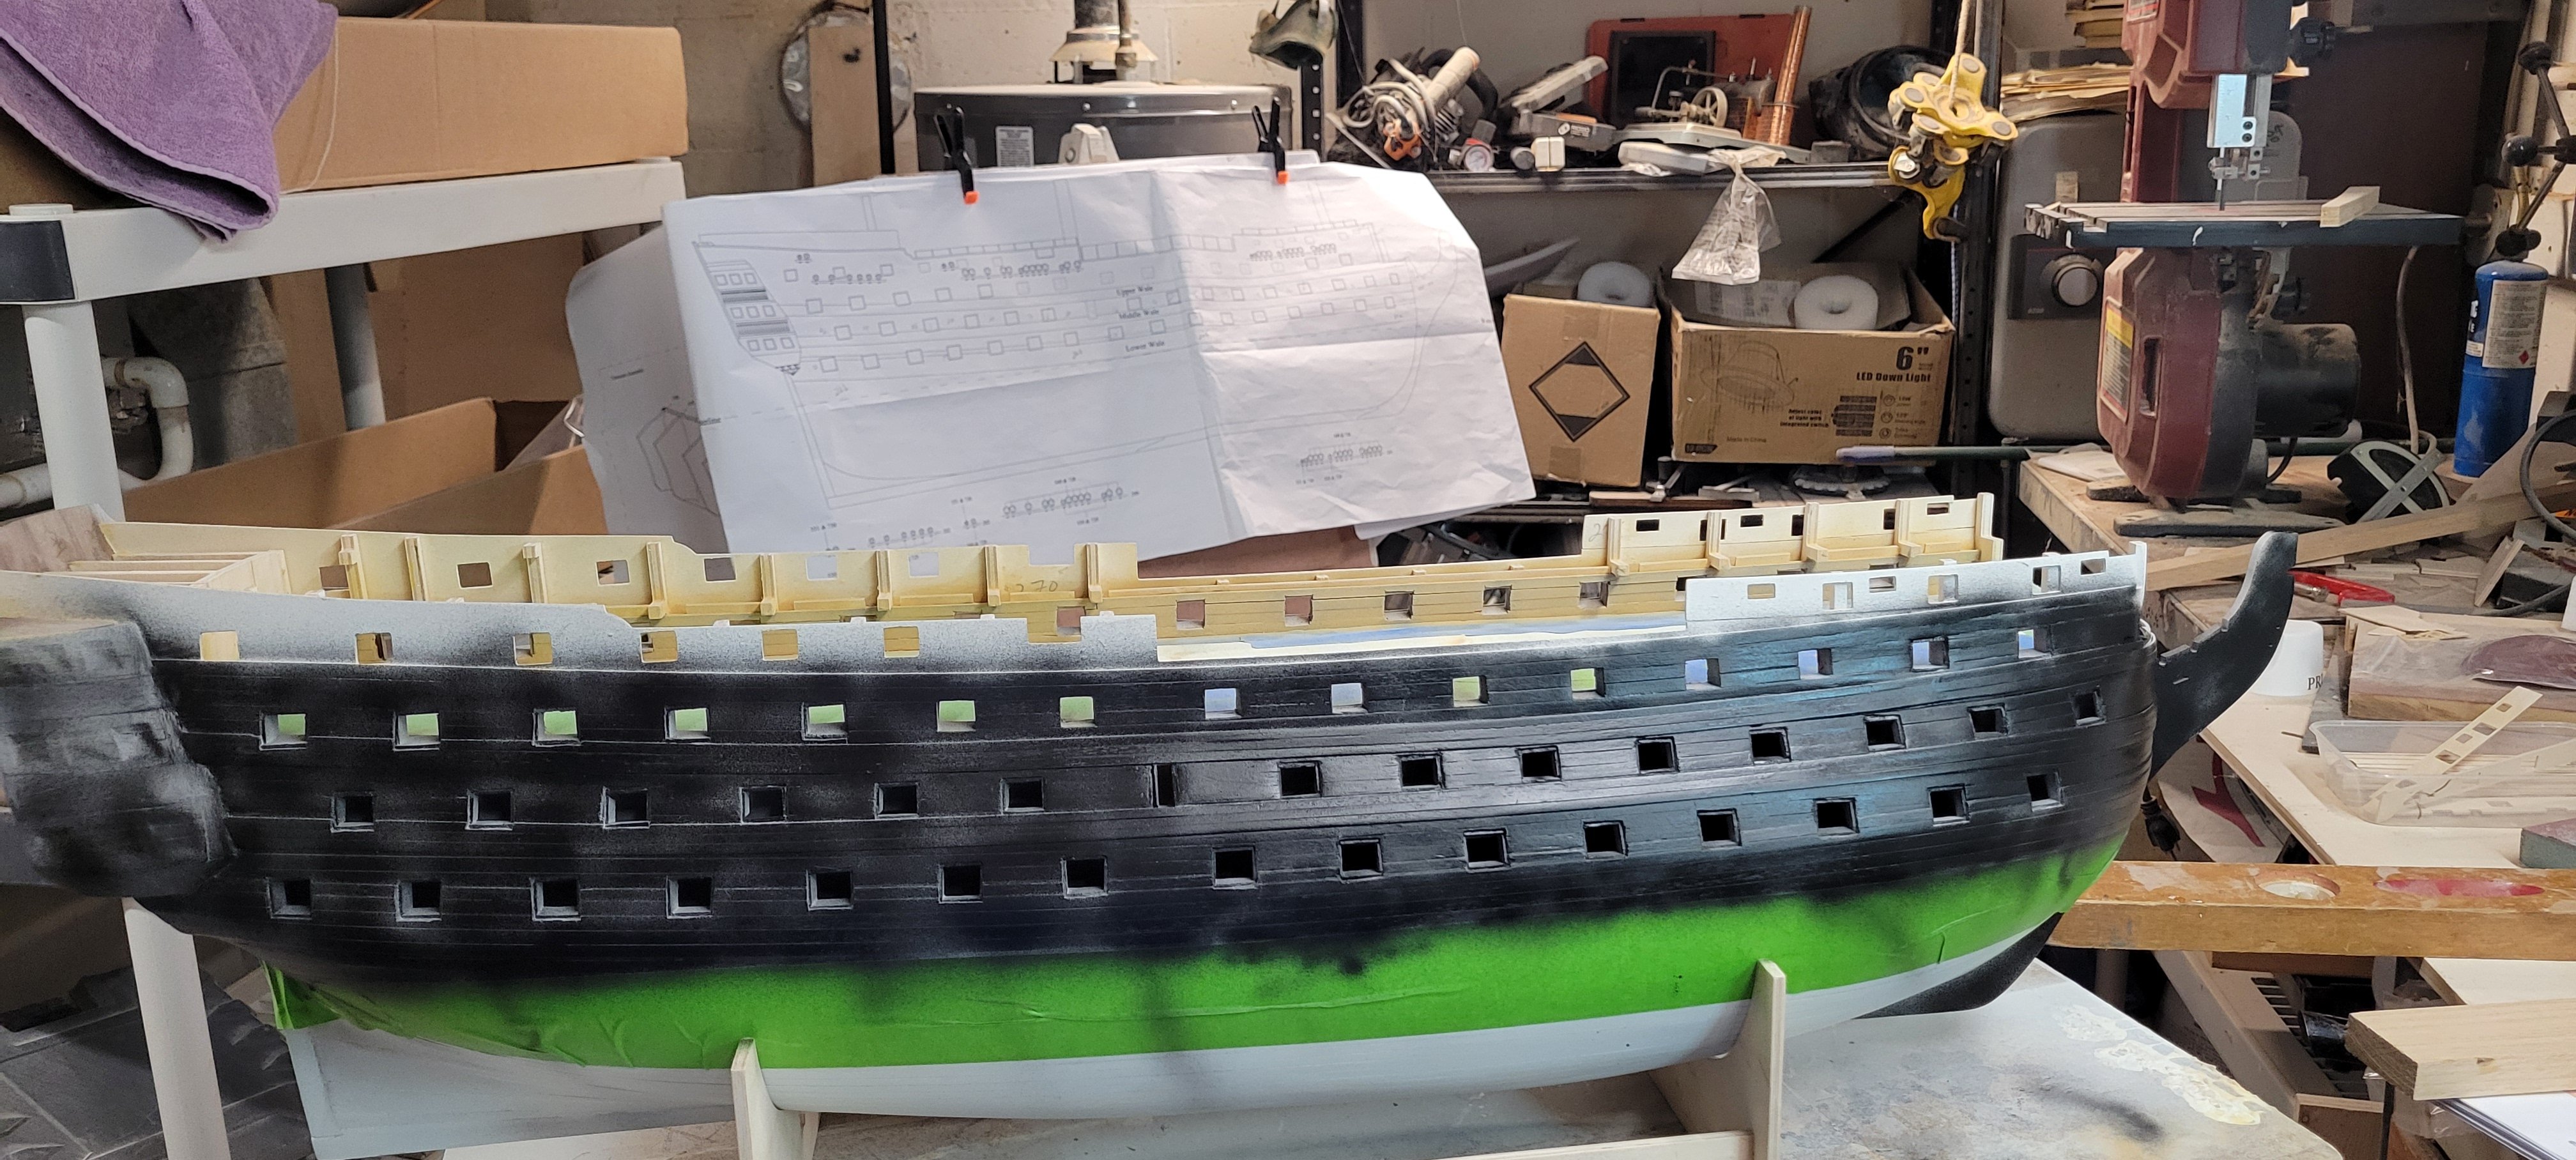
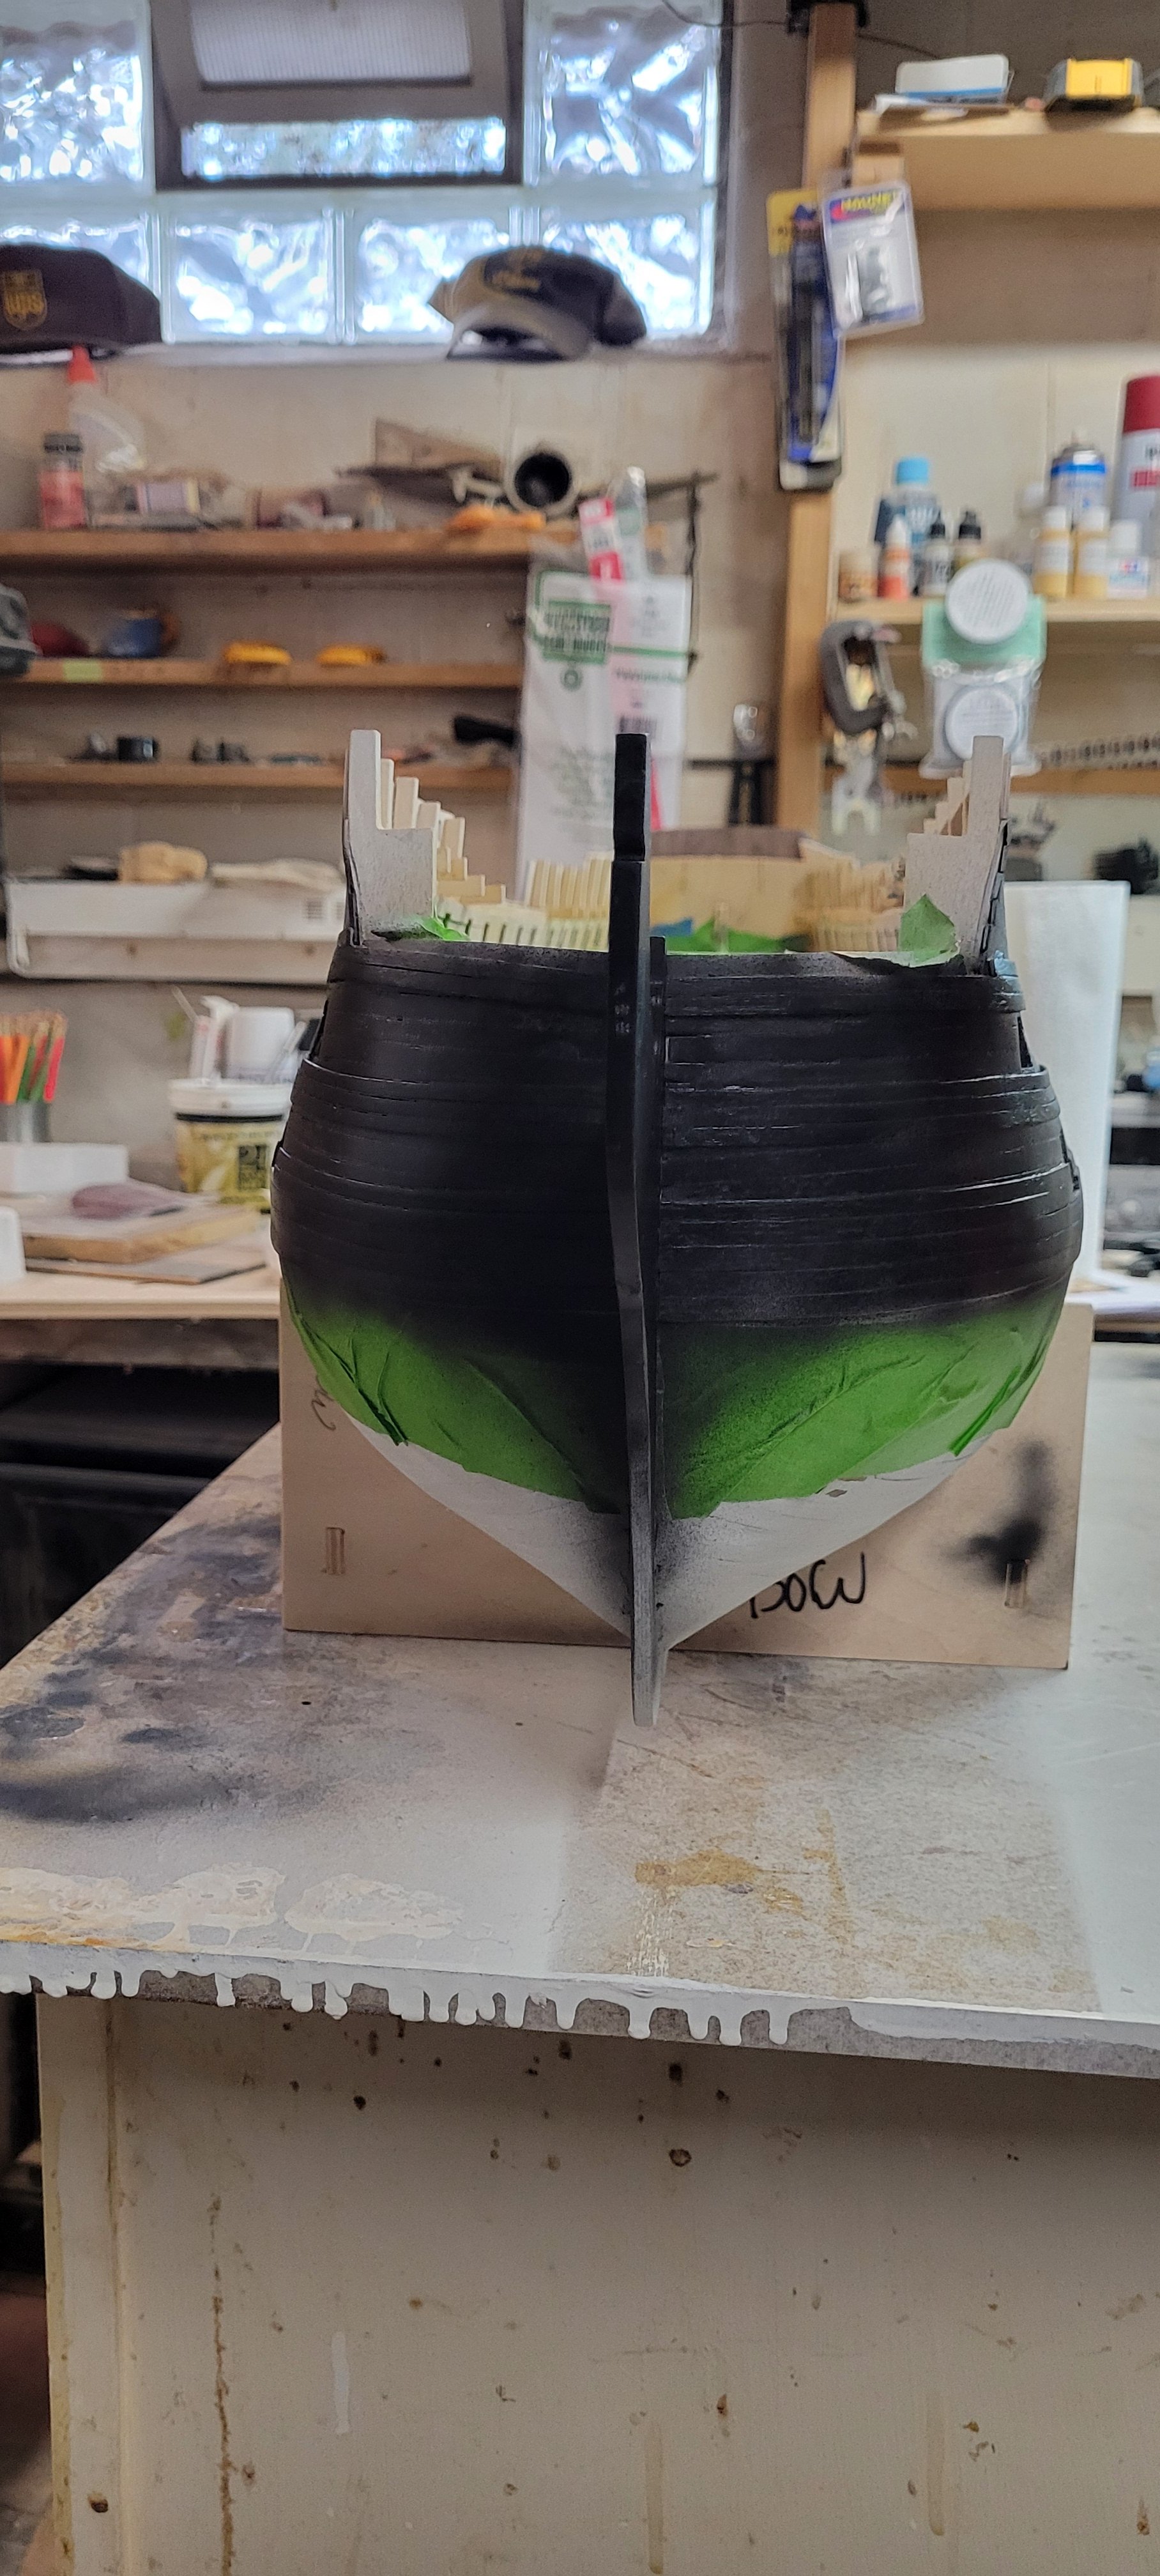
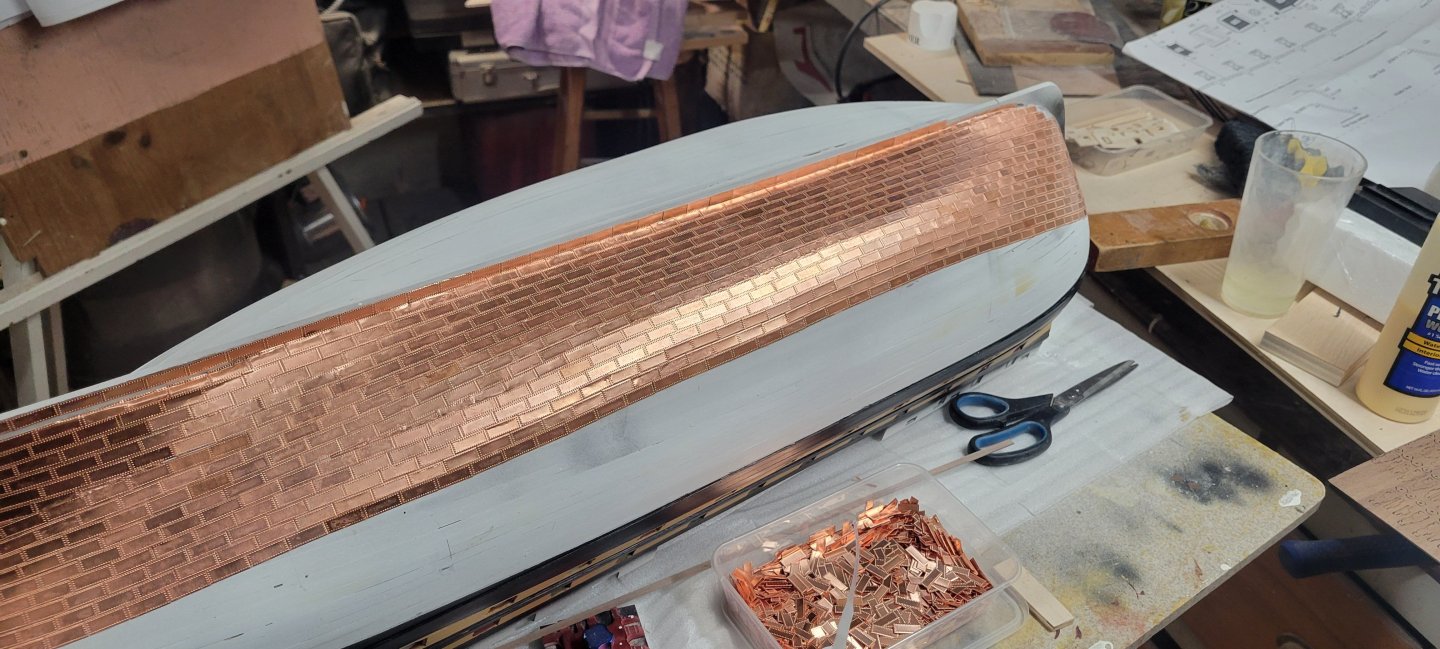
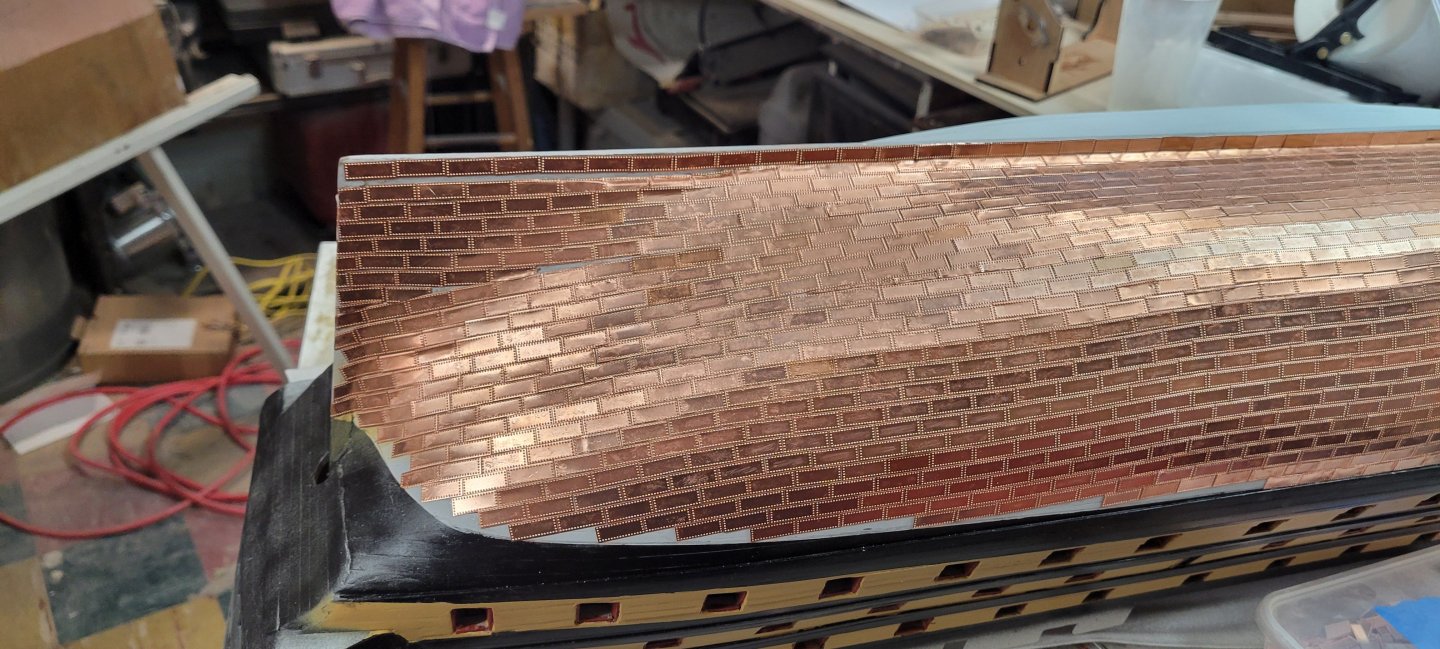
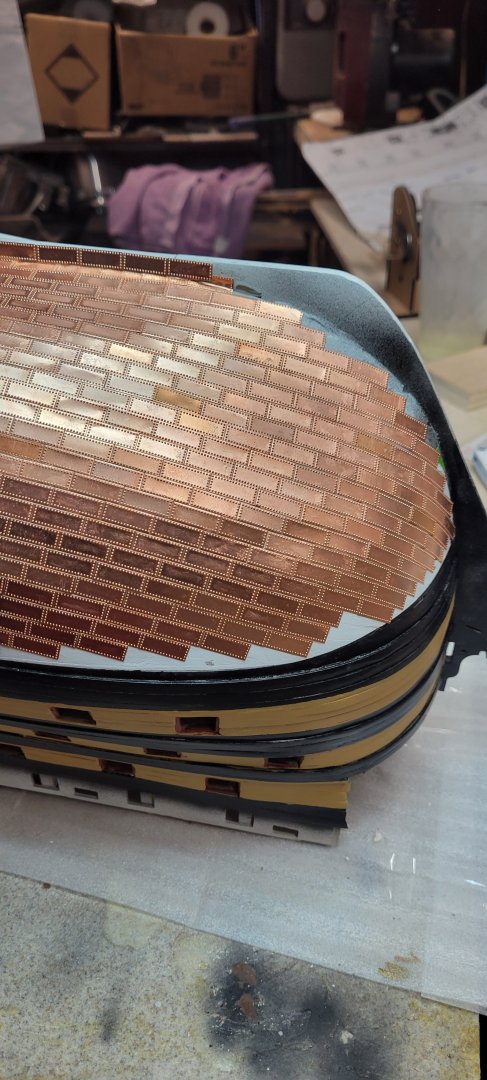
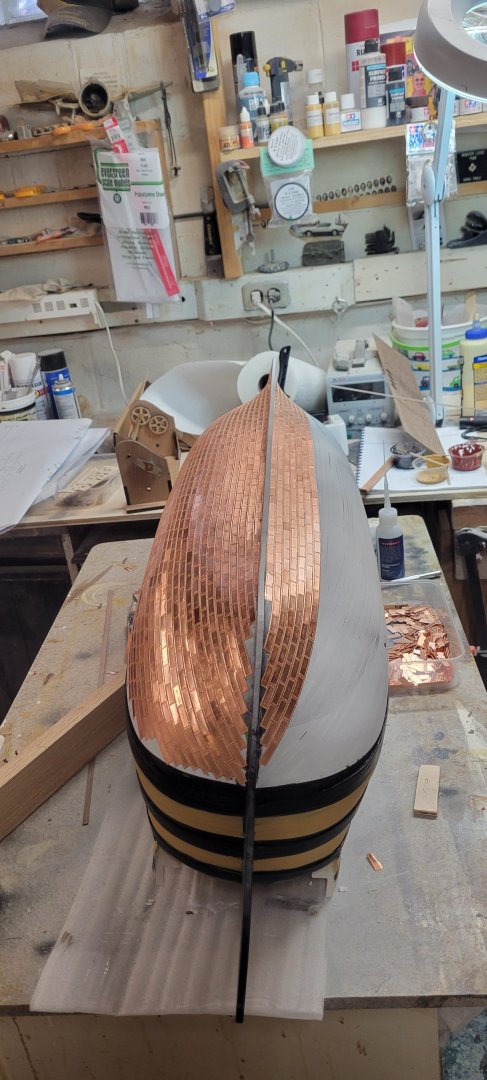
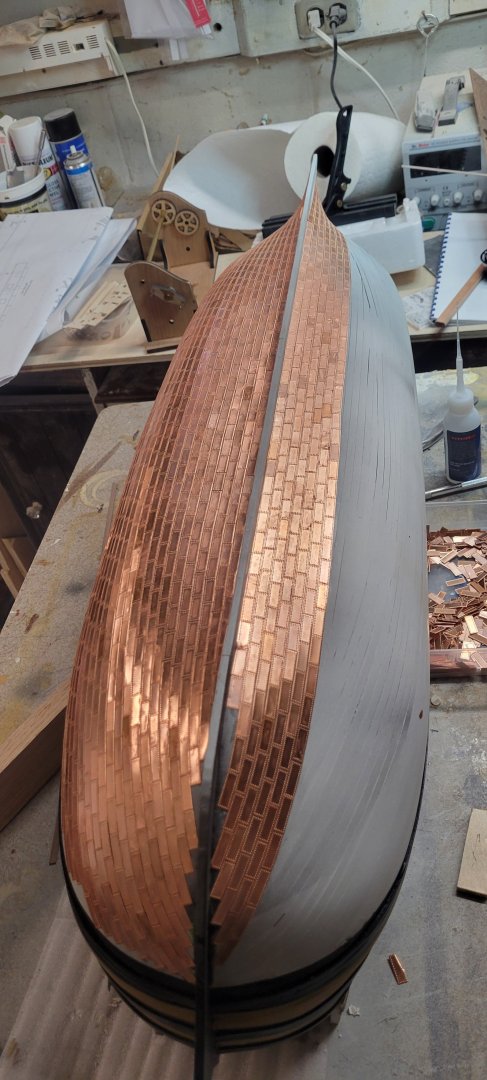
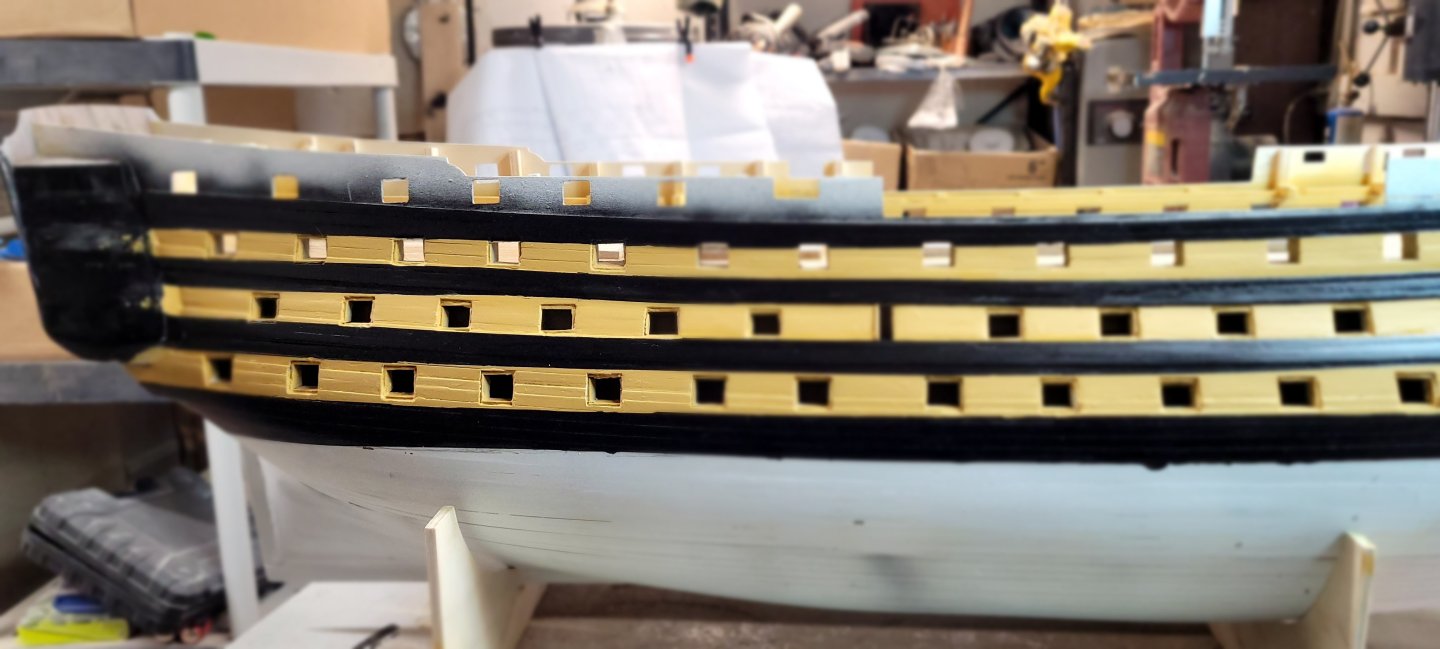
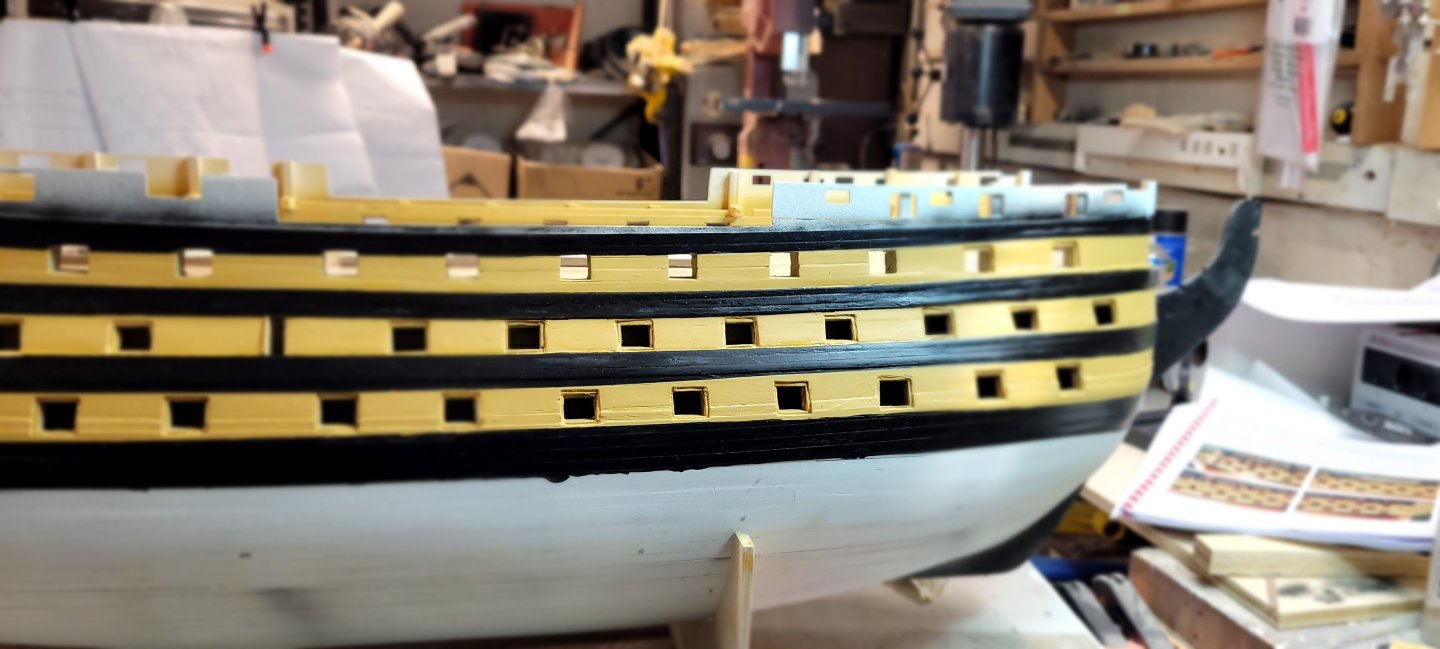
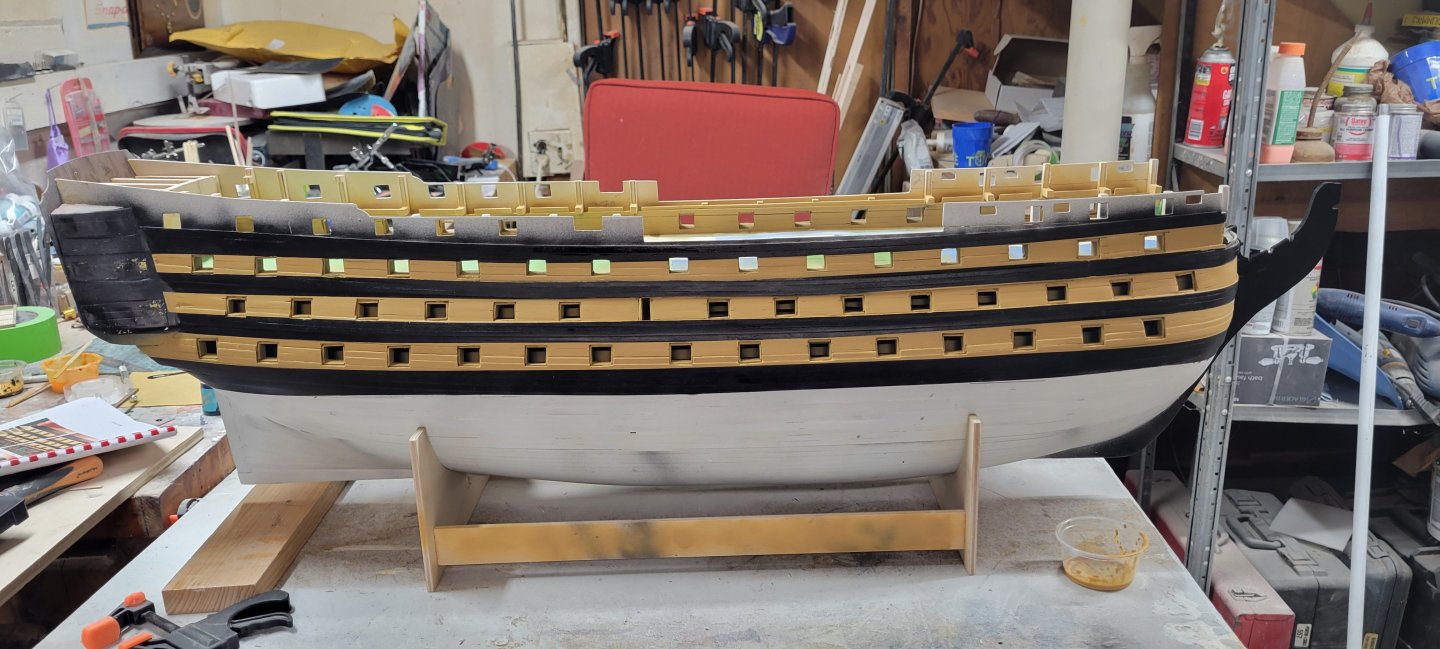
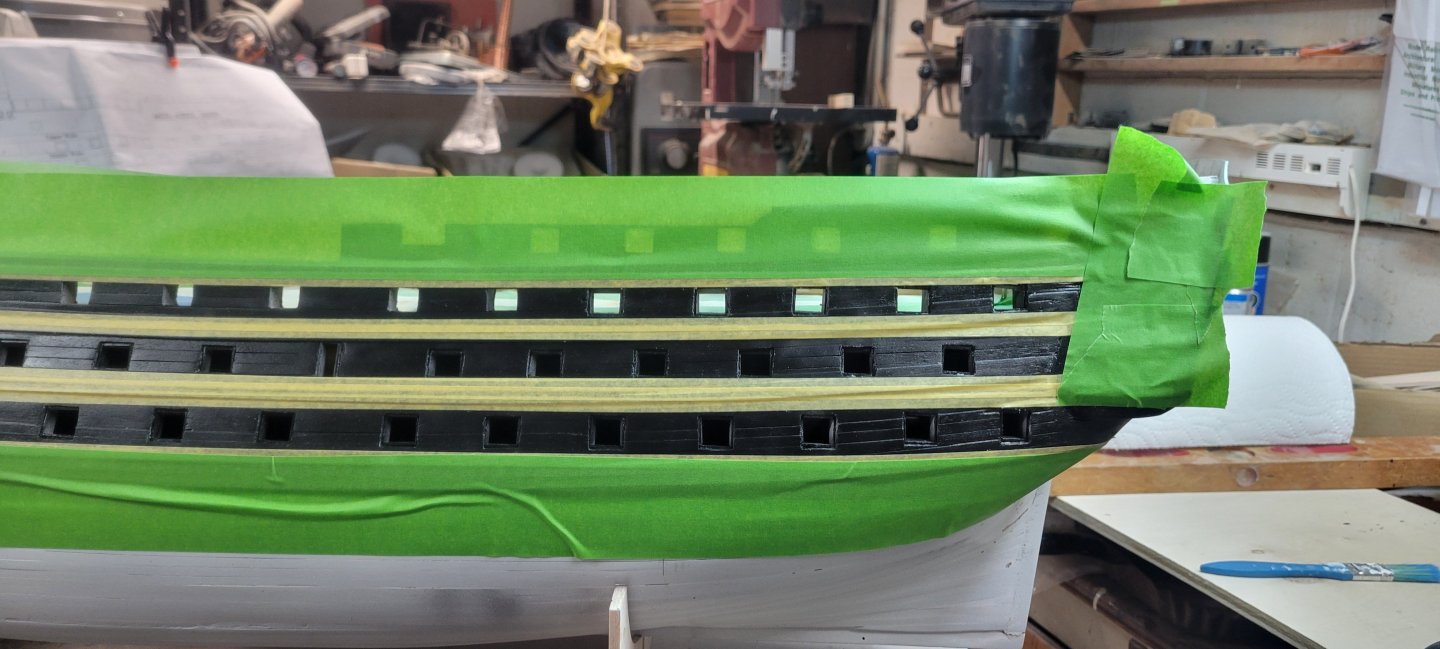
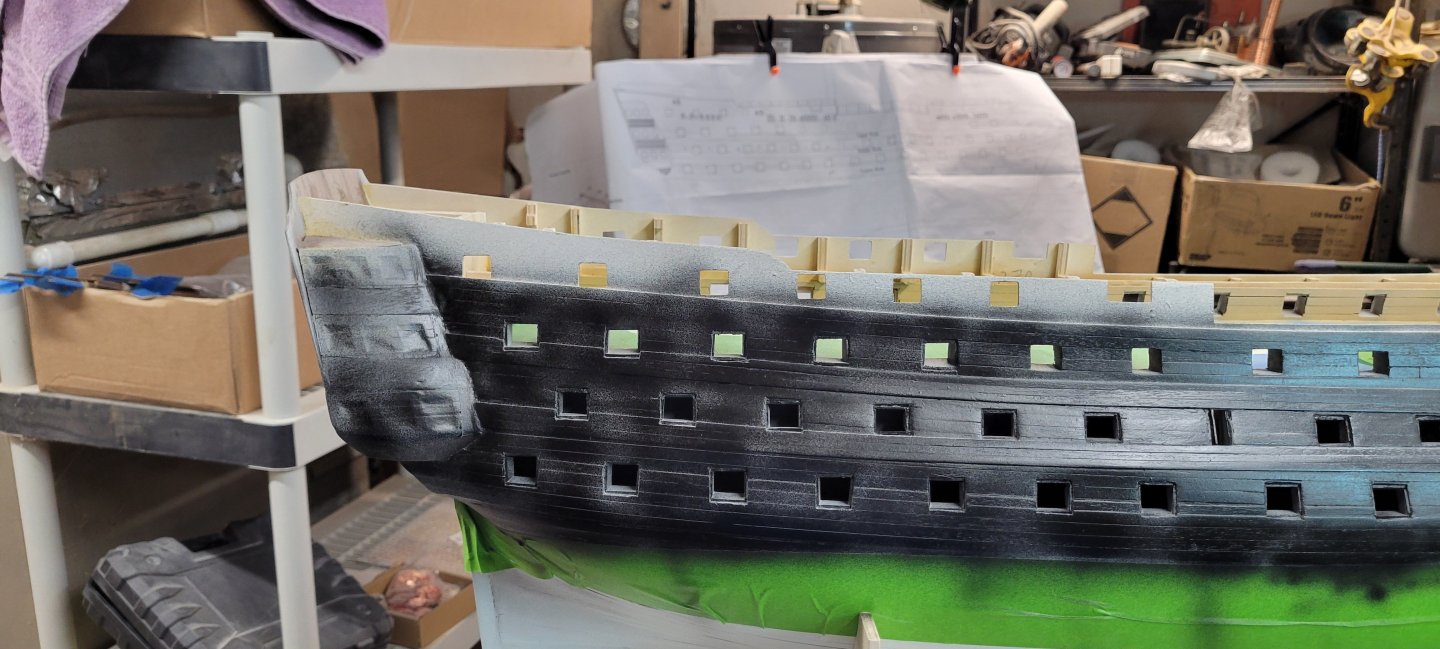
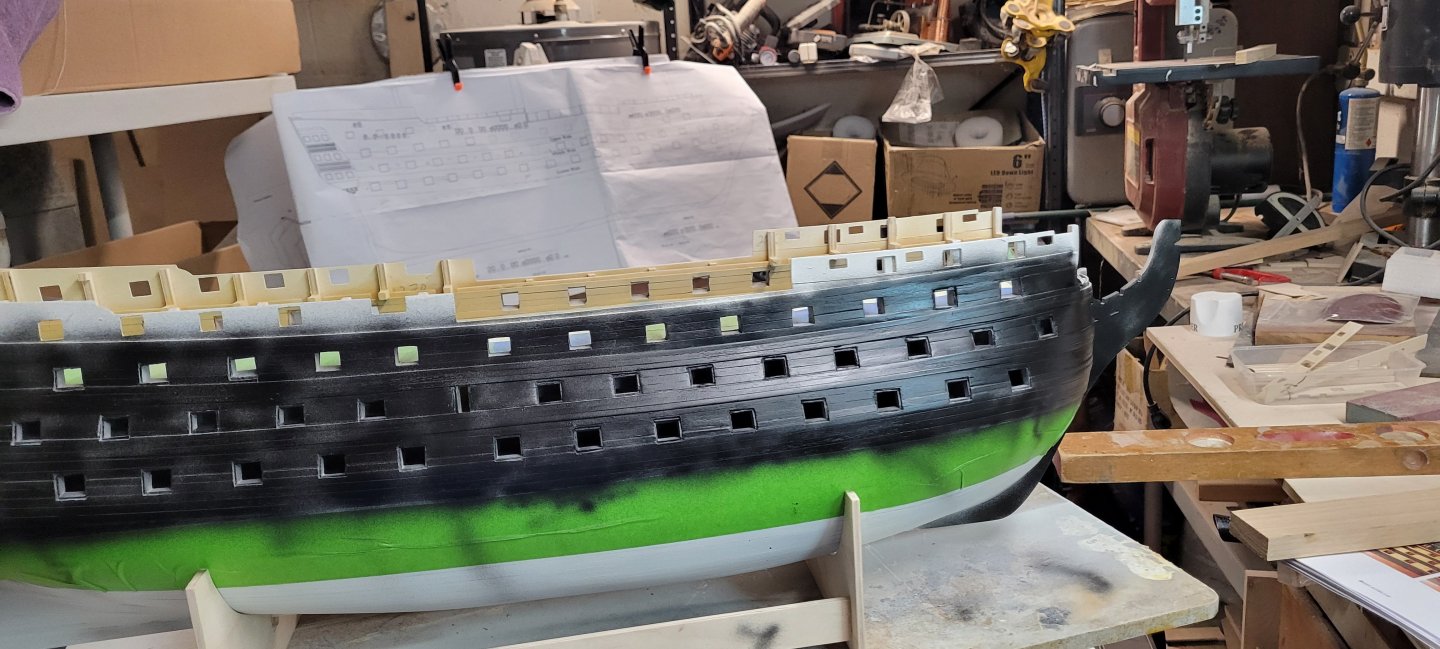
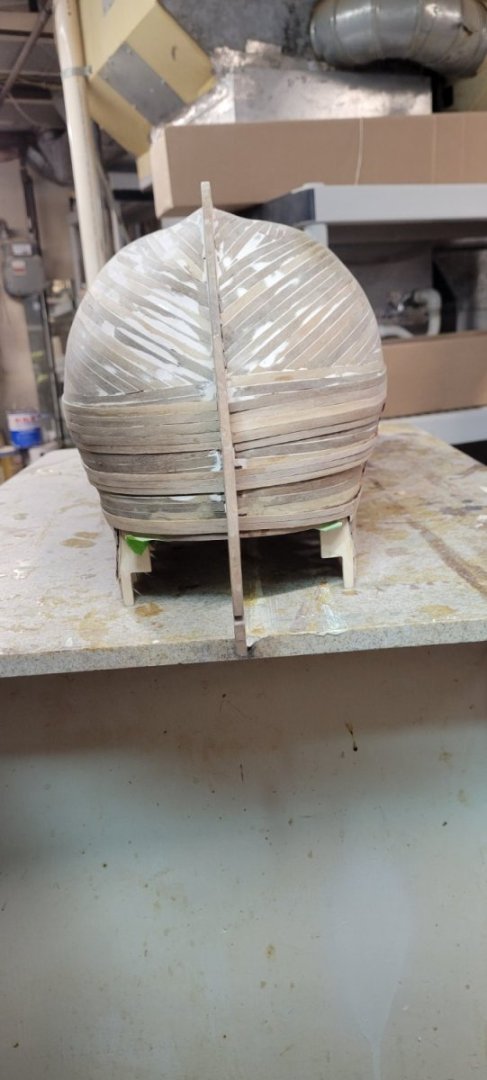
I finished touching up the gunports. I still have some minor spots to get at and needed to flip the hull upside down to get the 'top gun ports' I didn't get any pictures of where I am so far but decided to start the copper plating. I started at 1:59pm in the first pic and the 2nd pic at 5:43pm. I took about 30 minutes or so in the middle to eat lunch and check some other builds and my books to make sure I had a plan in place for laying out the tiles. So 5 rows in about 3-3.5 hours. I'll see you when it's done!!!!
-
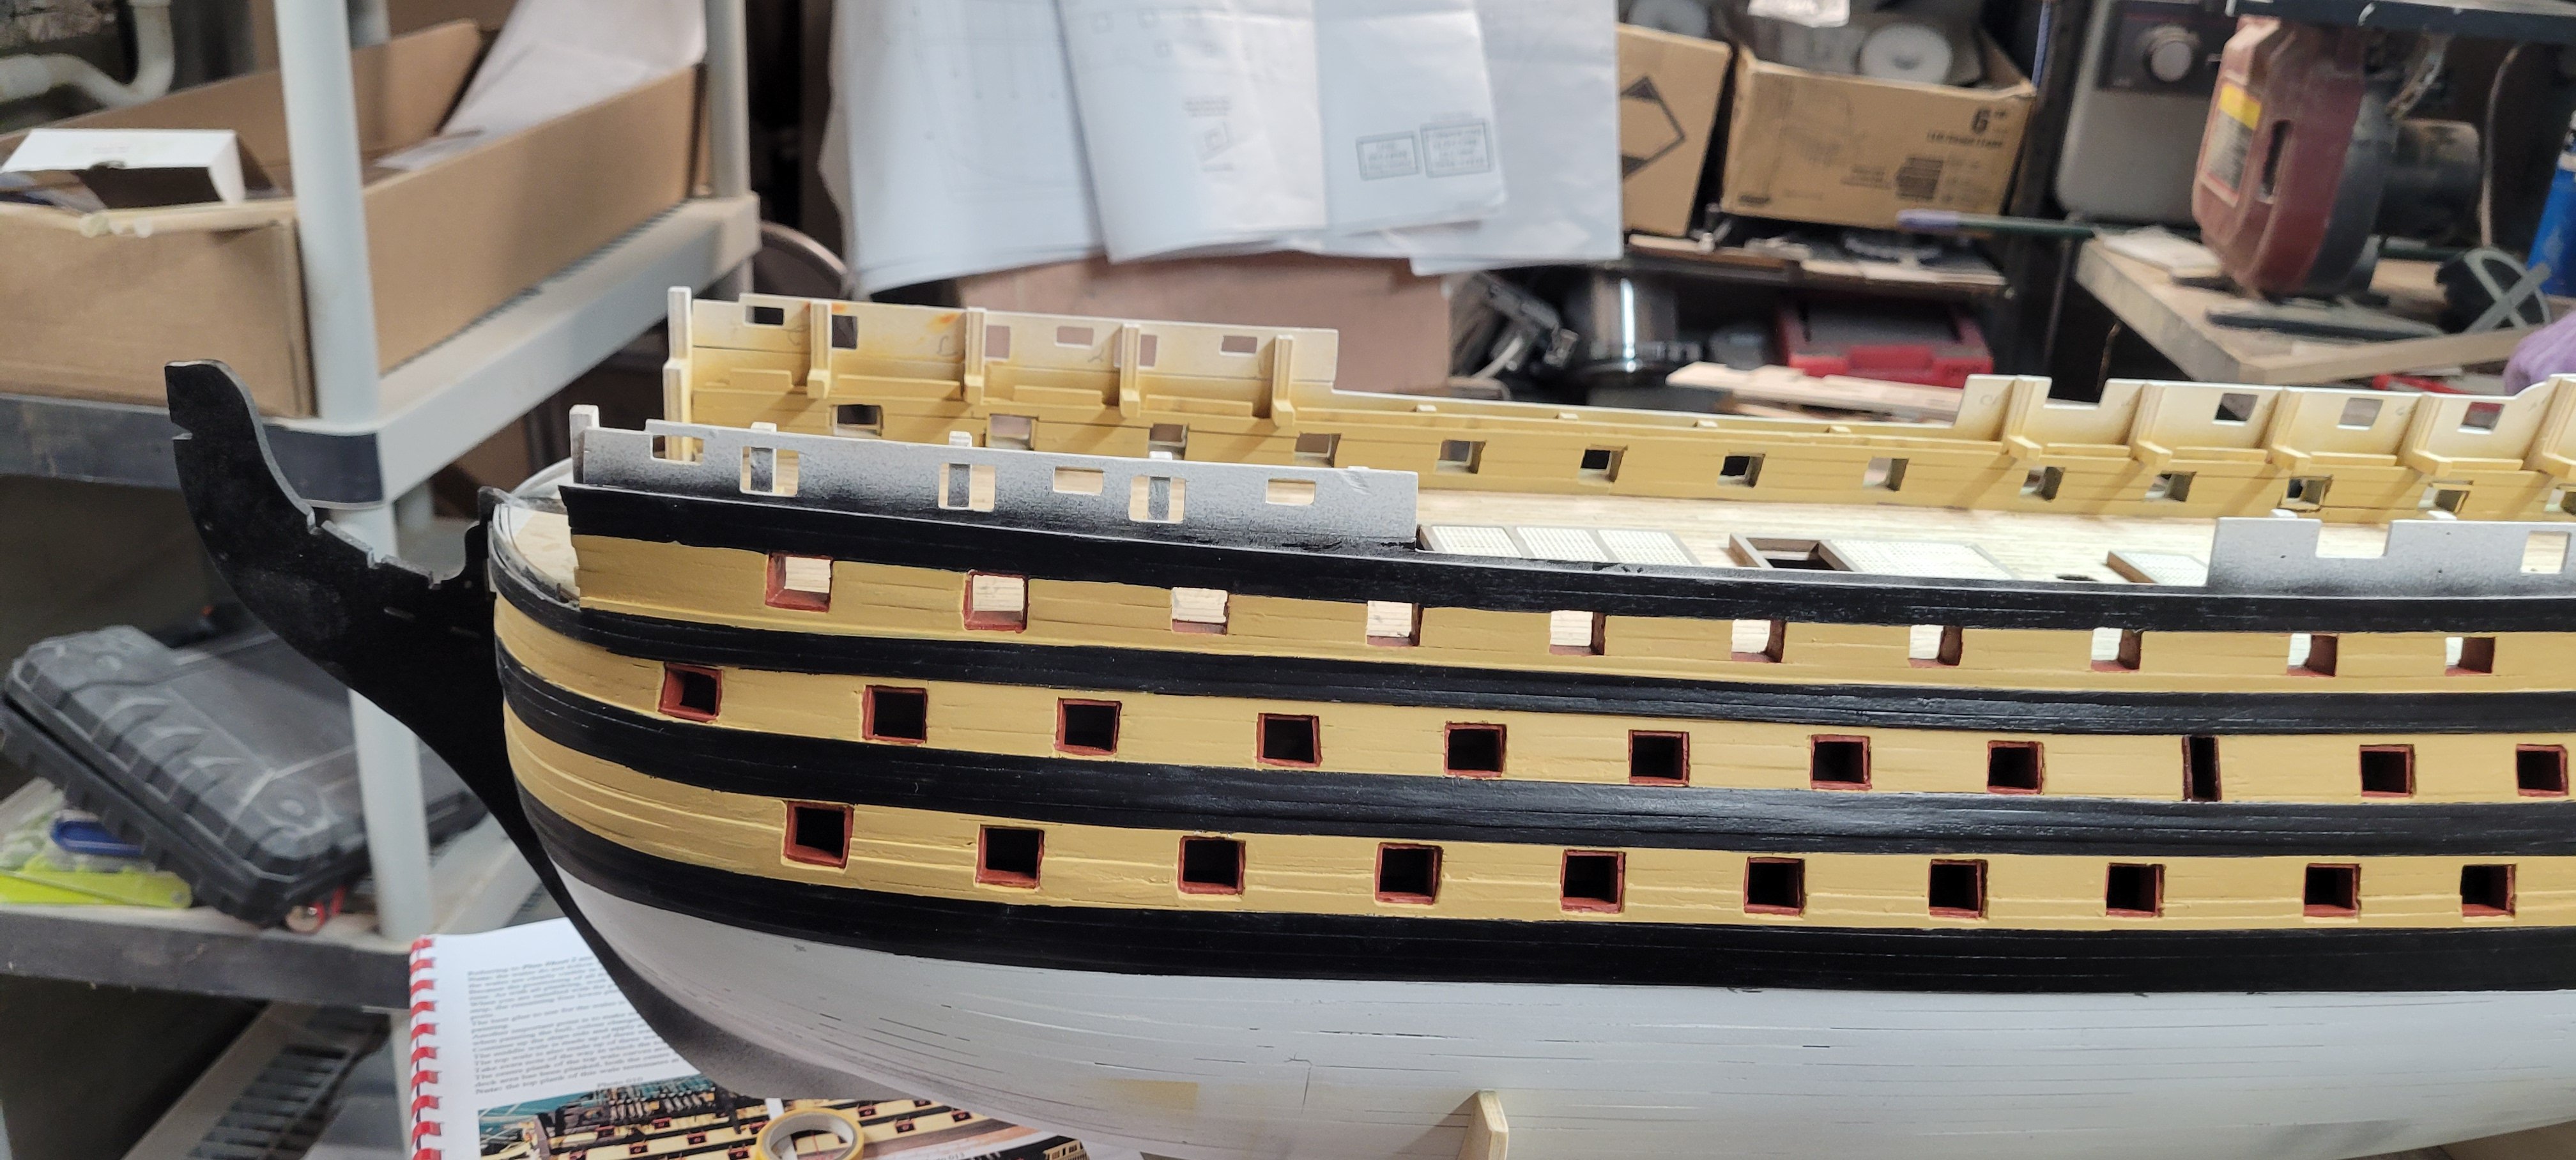
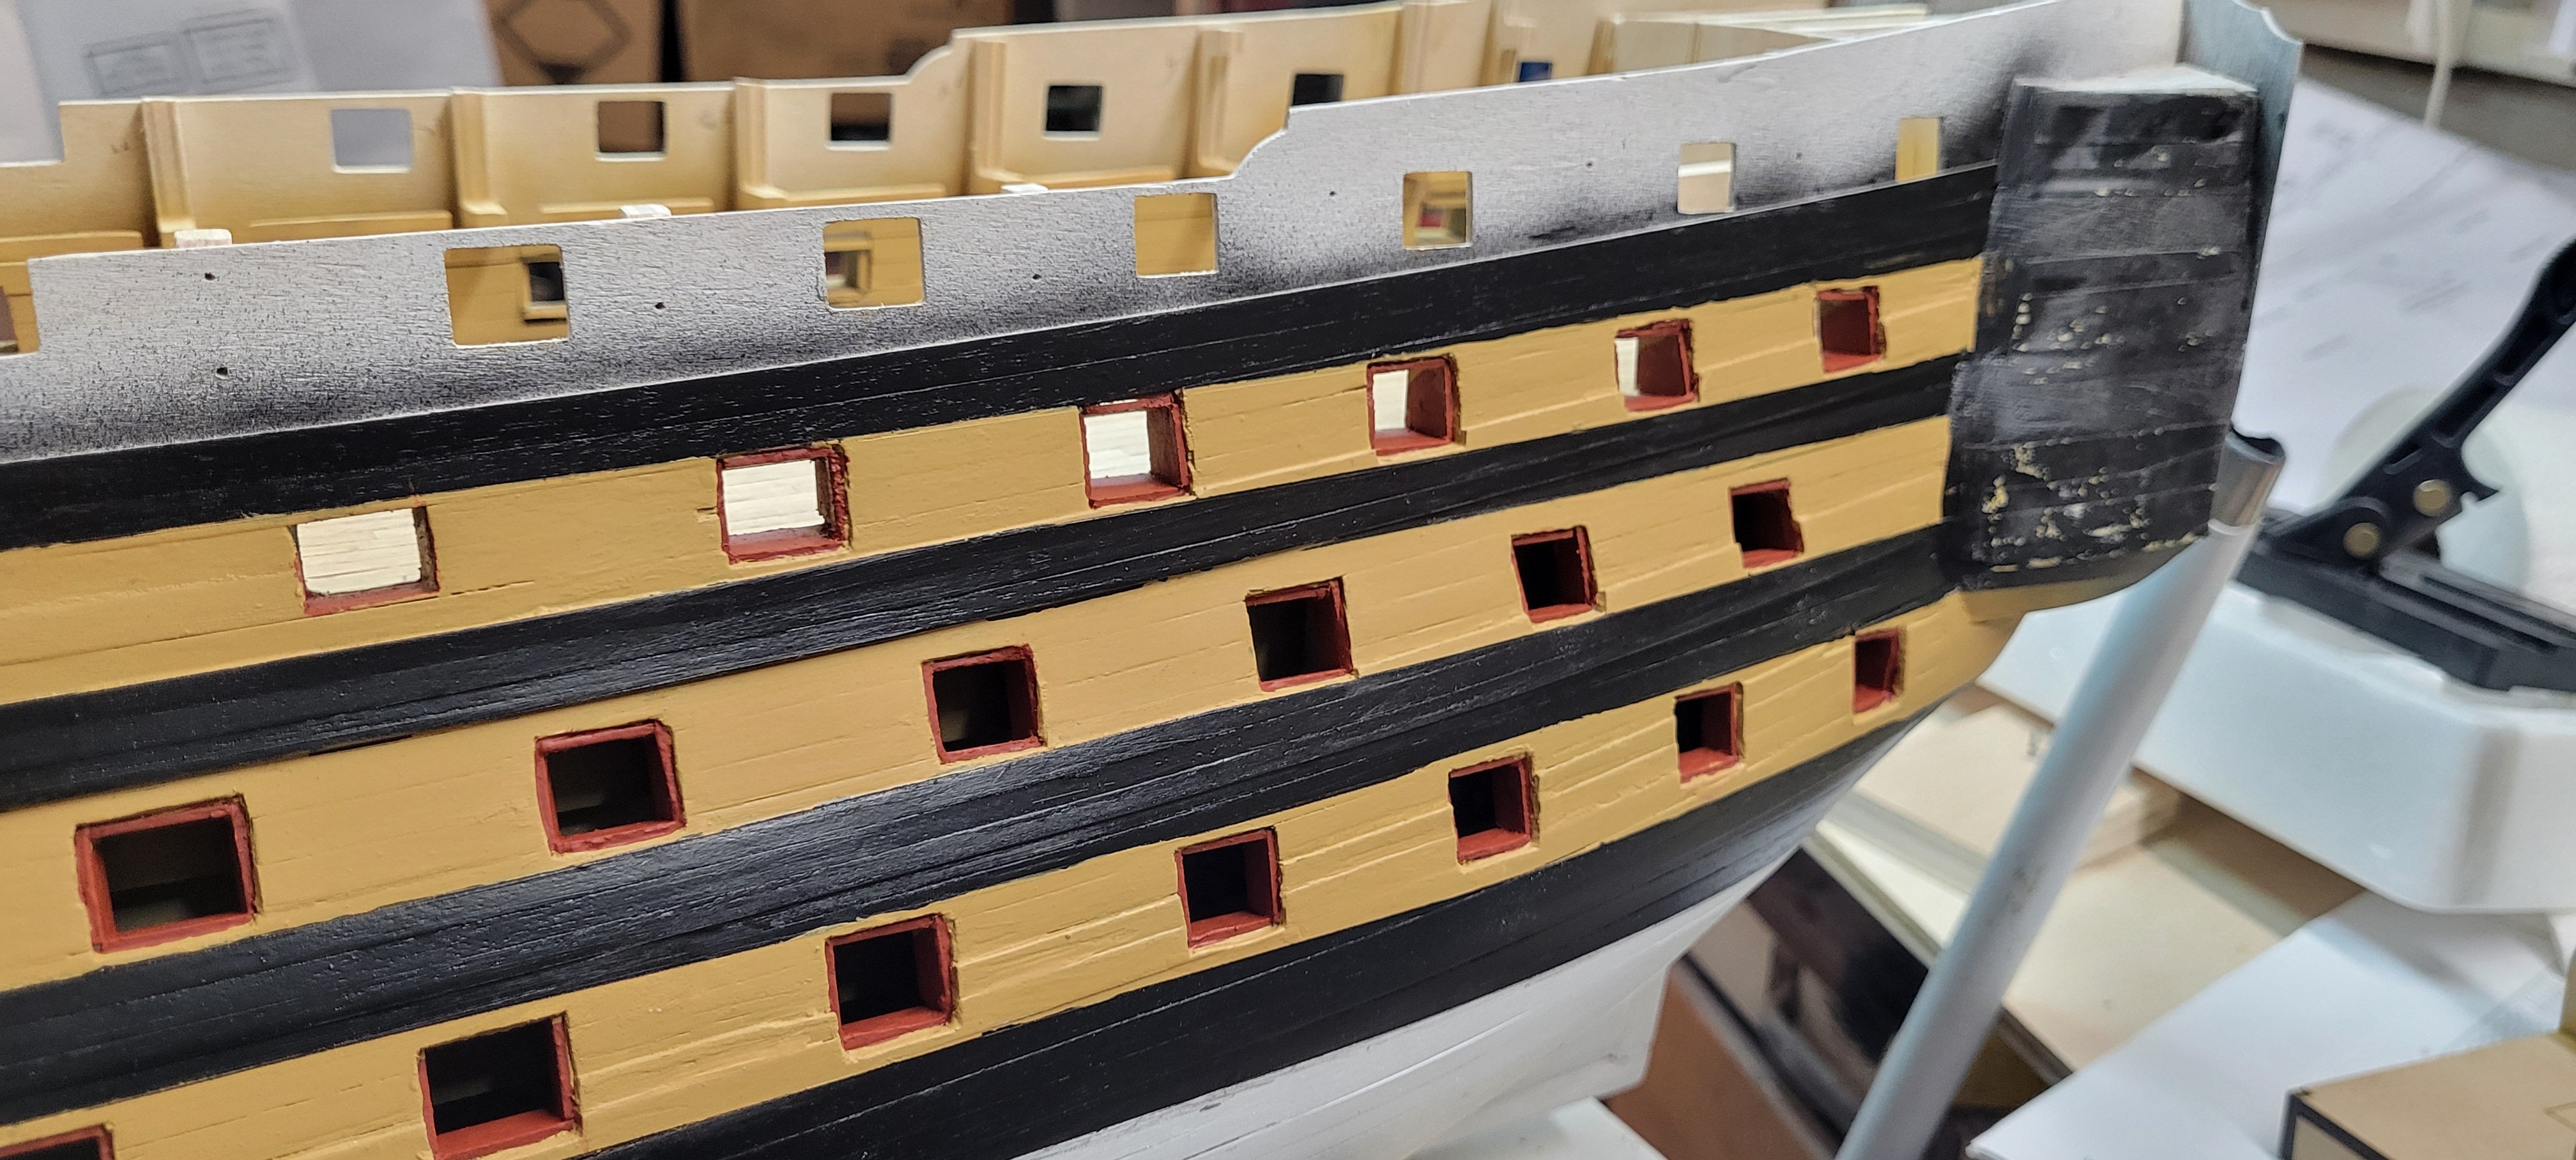
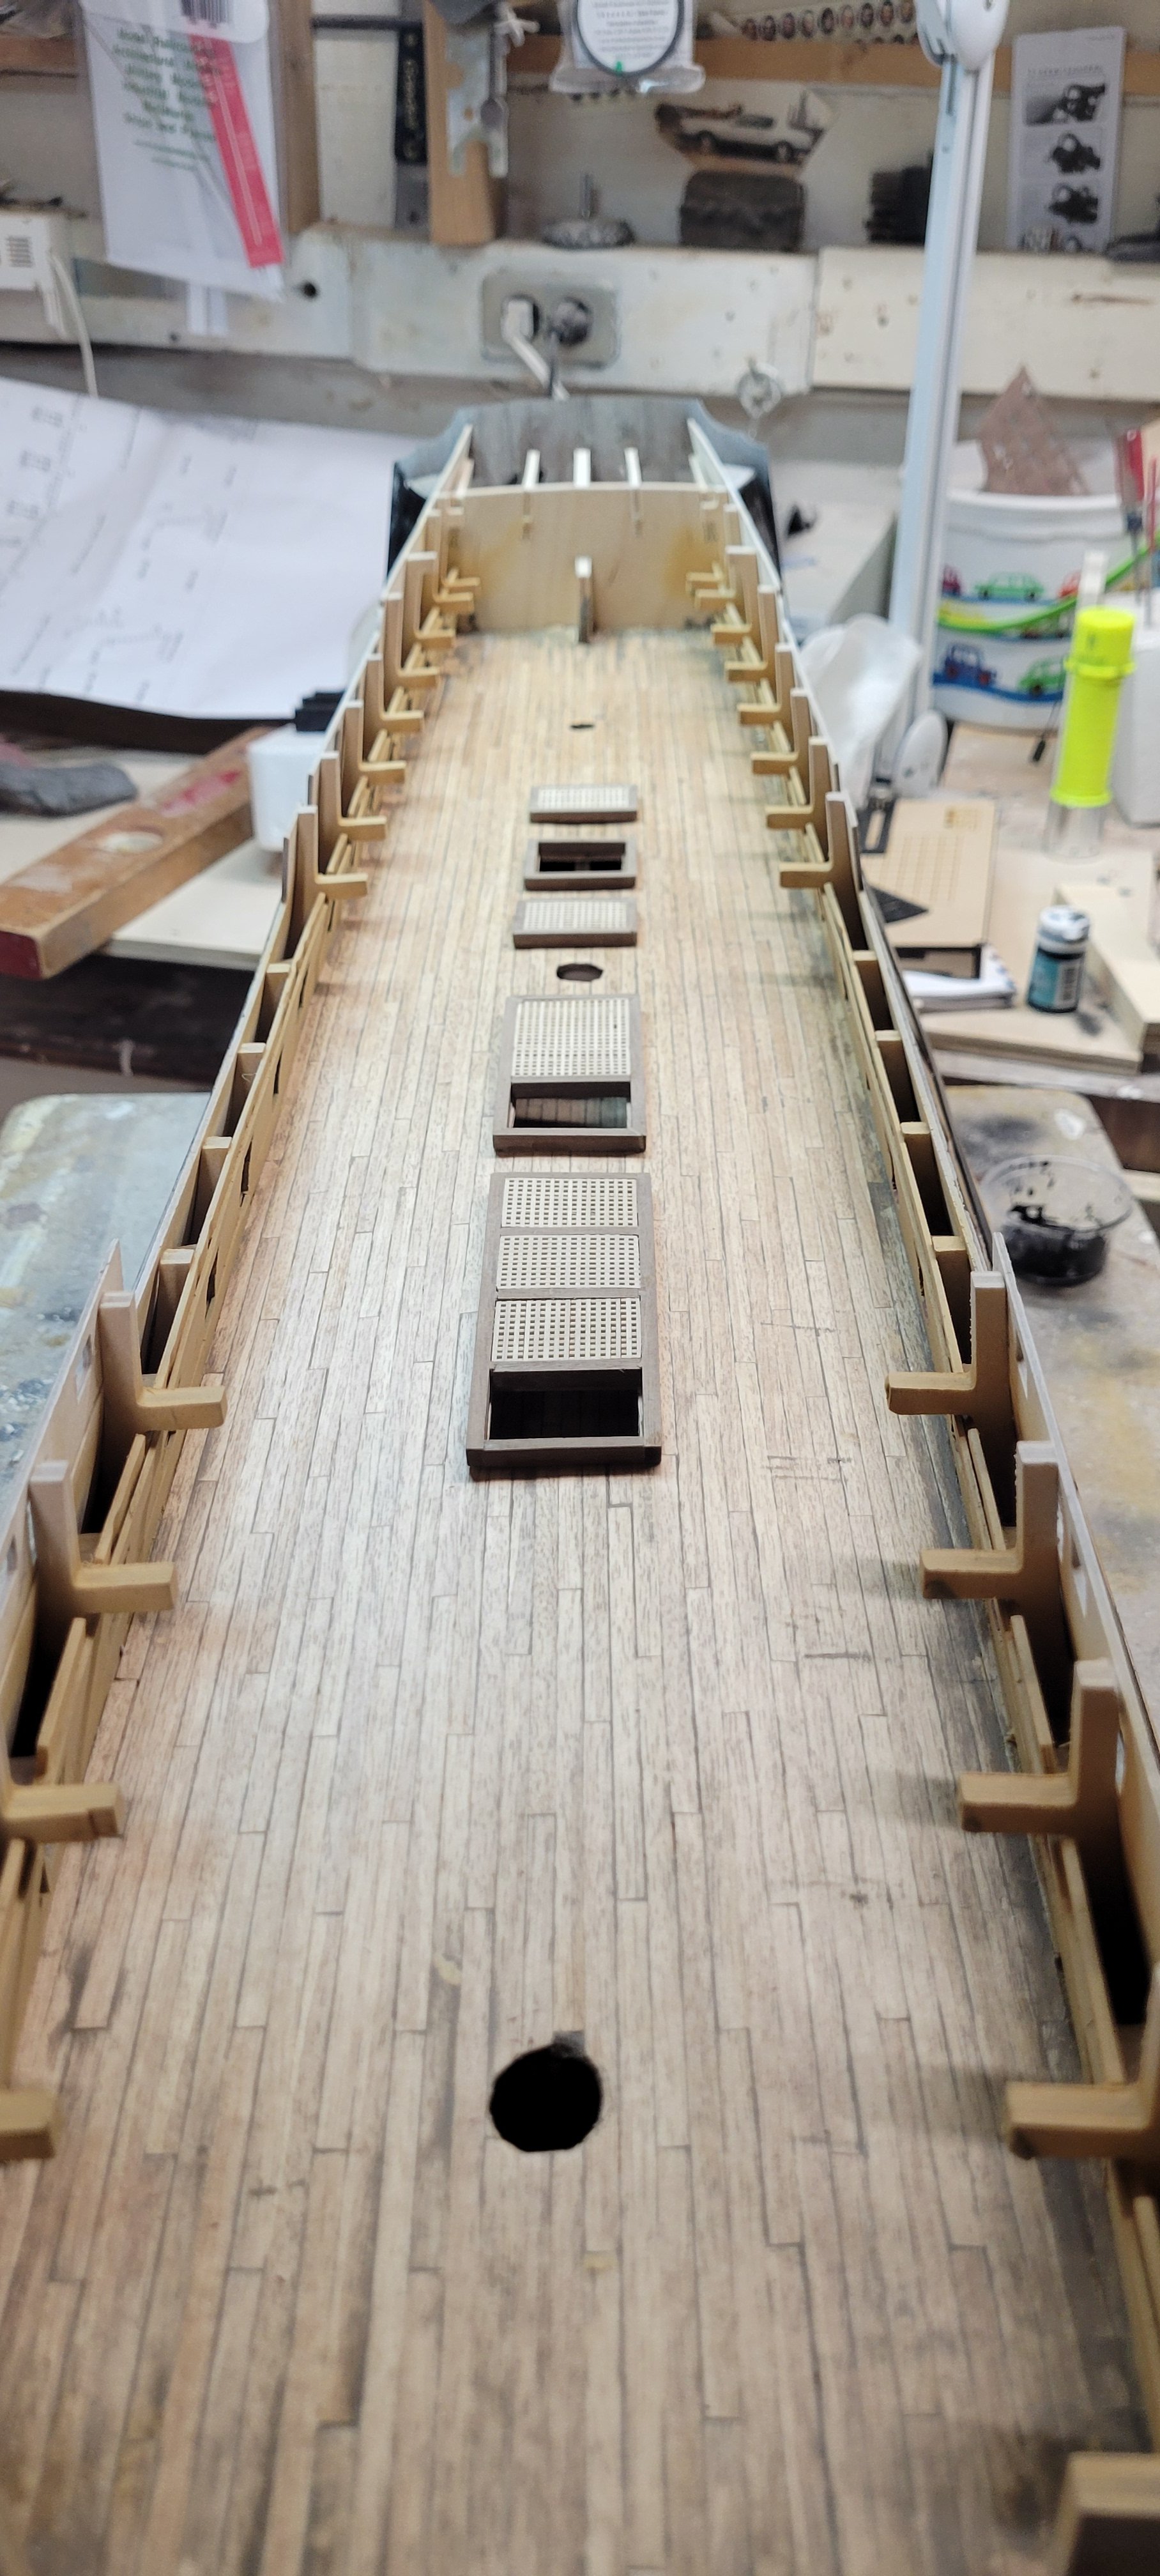
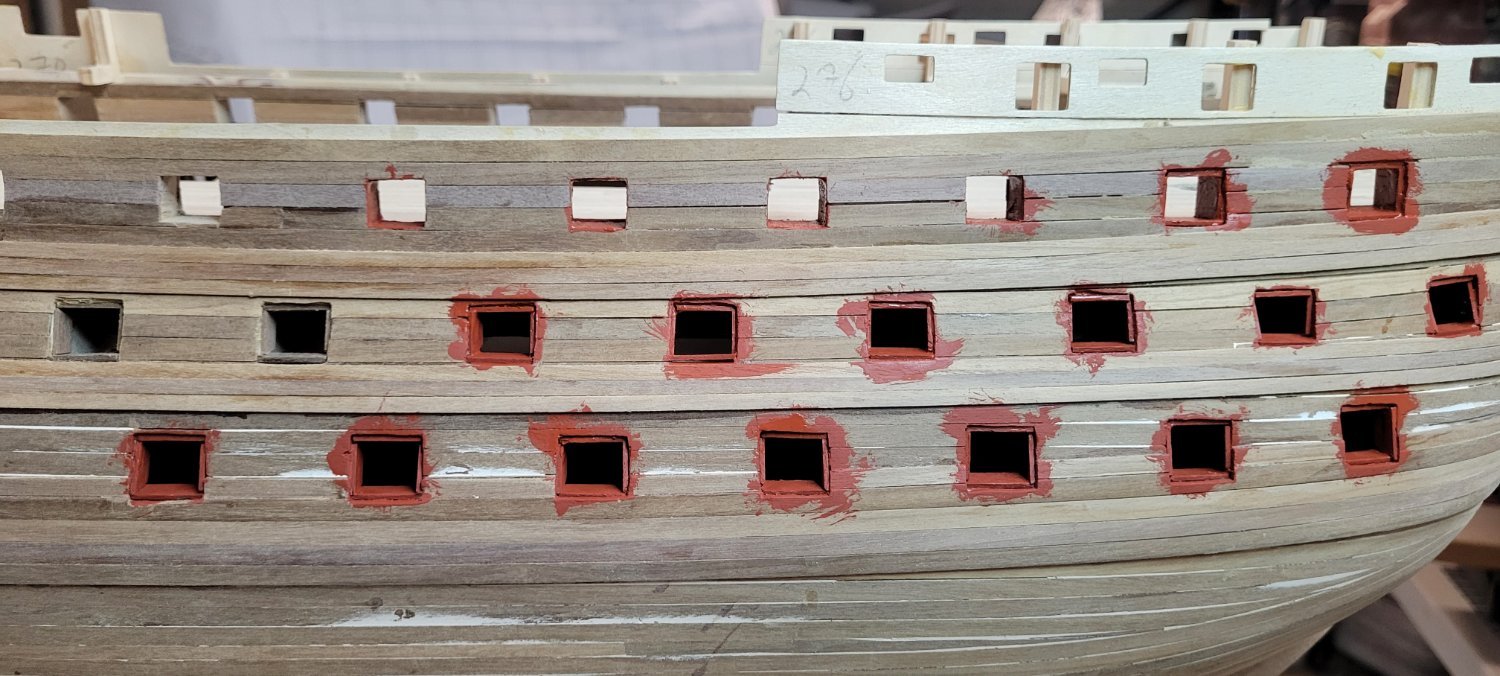
I added the red ochre to the port side gun liners. Again a little more paint touch up and another once over of the yellow and black and I think I am going to call the port side done. I will do the starboard side tomorrow.... Installed the coamings and gratings and they look fine...or grate?!!


-
After the taping and painting which I did my brush this time, I was left with a little bit of leakage that I had to carefully touch up. Did it help? A little. Other than starting from scratch, ripping all the wales and lids away, sanding smooth and starting again, this was my only choice.

-
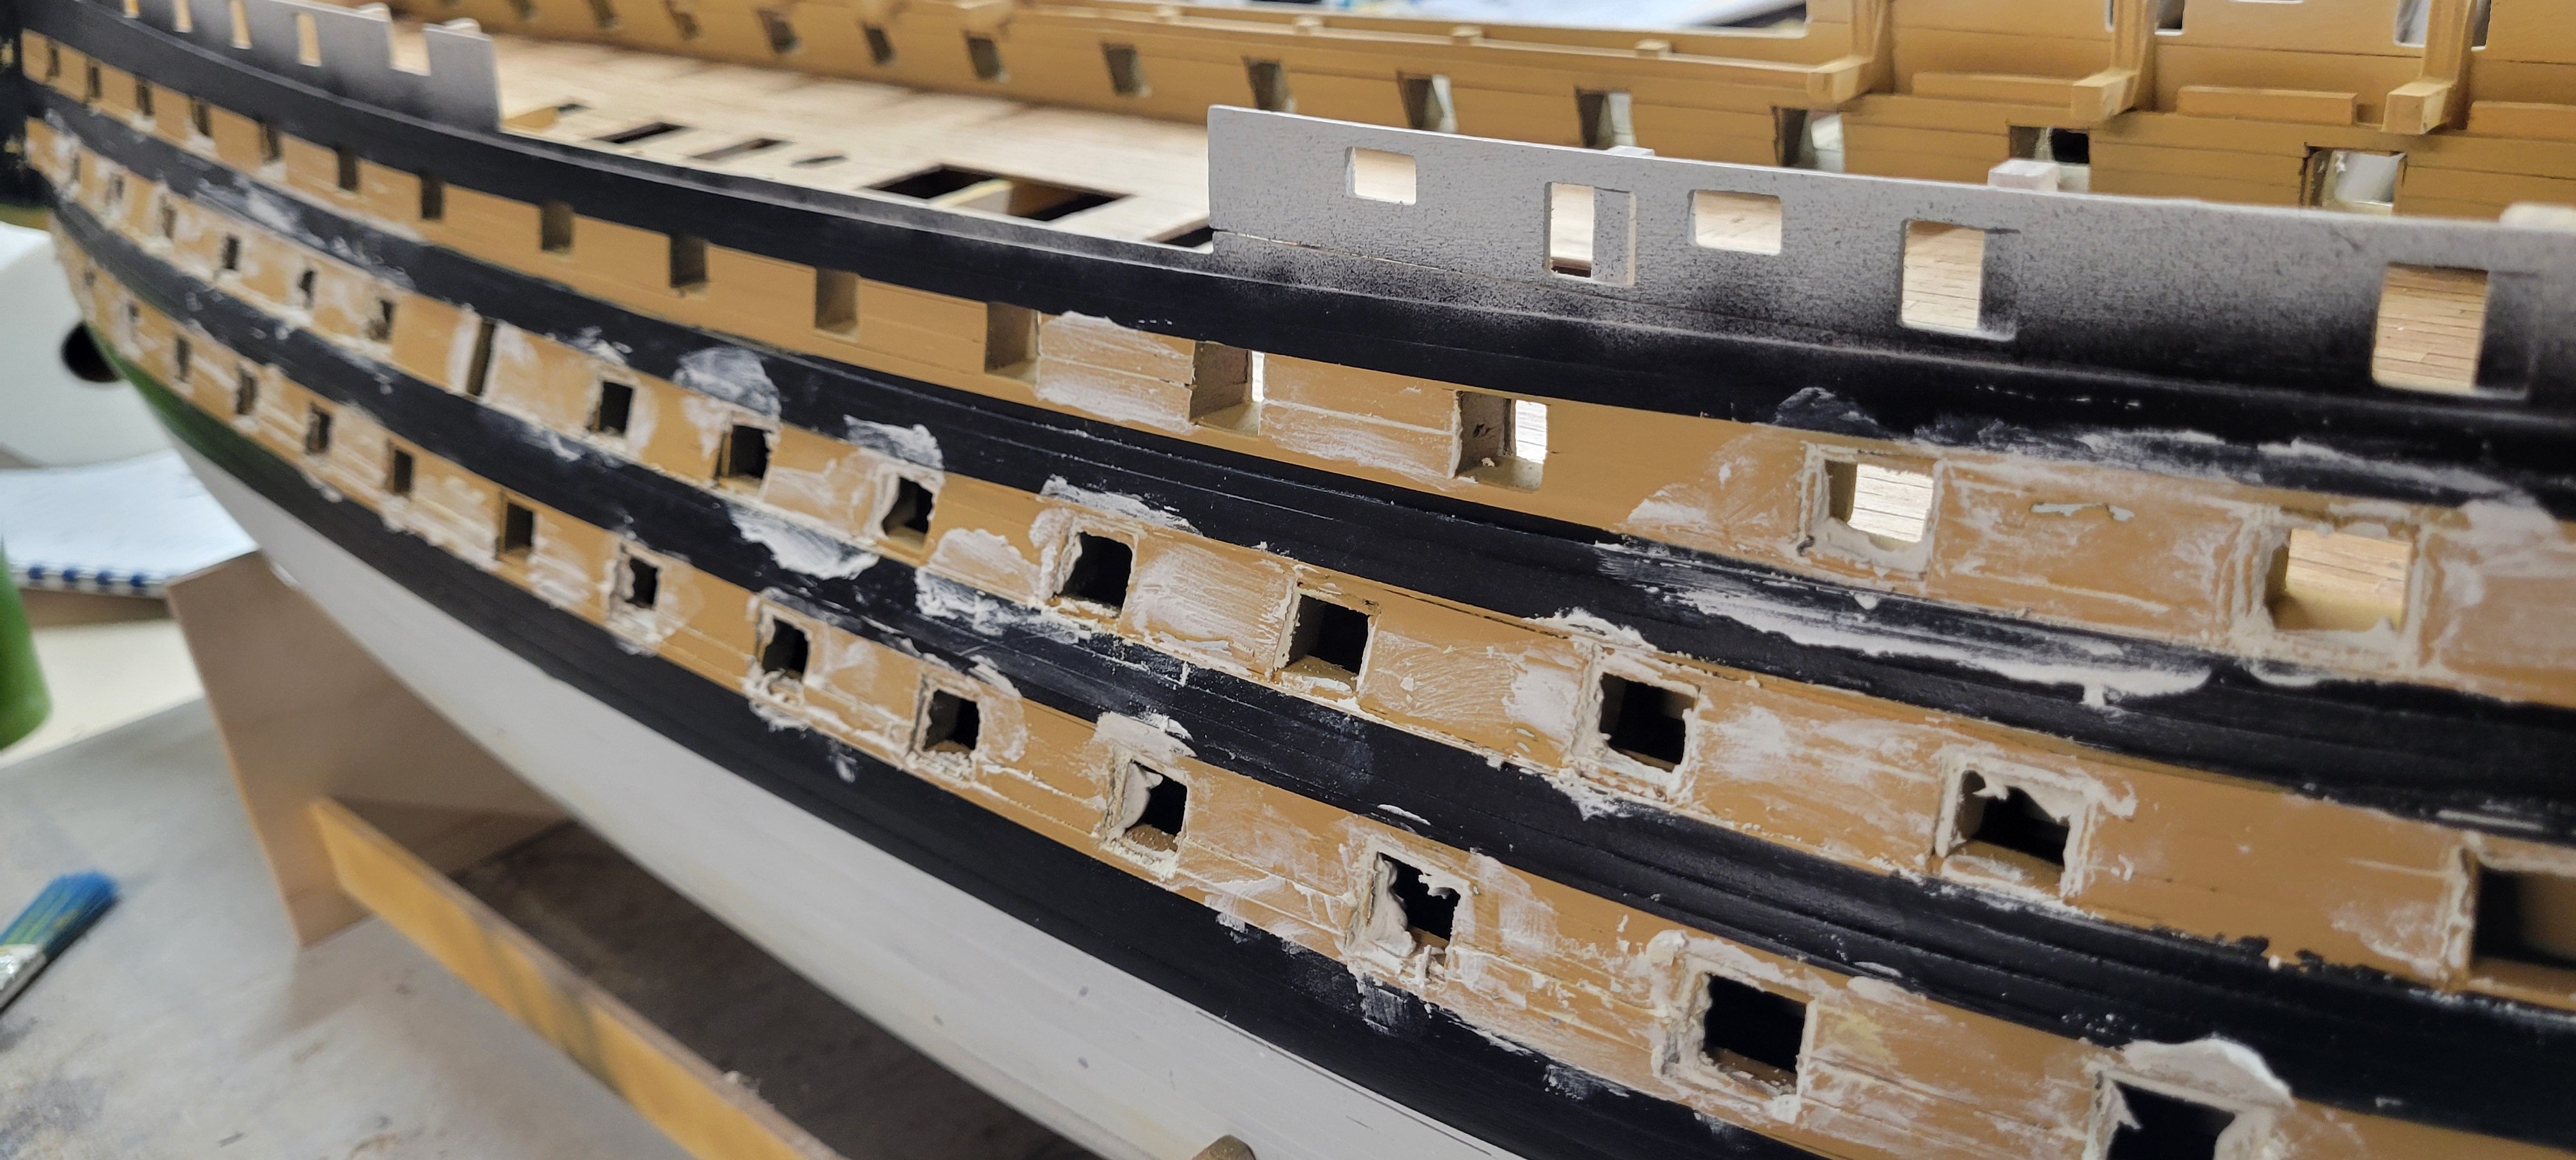
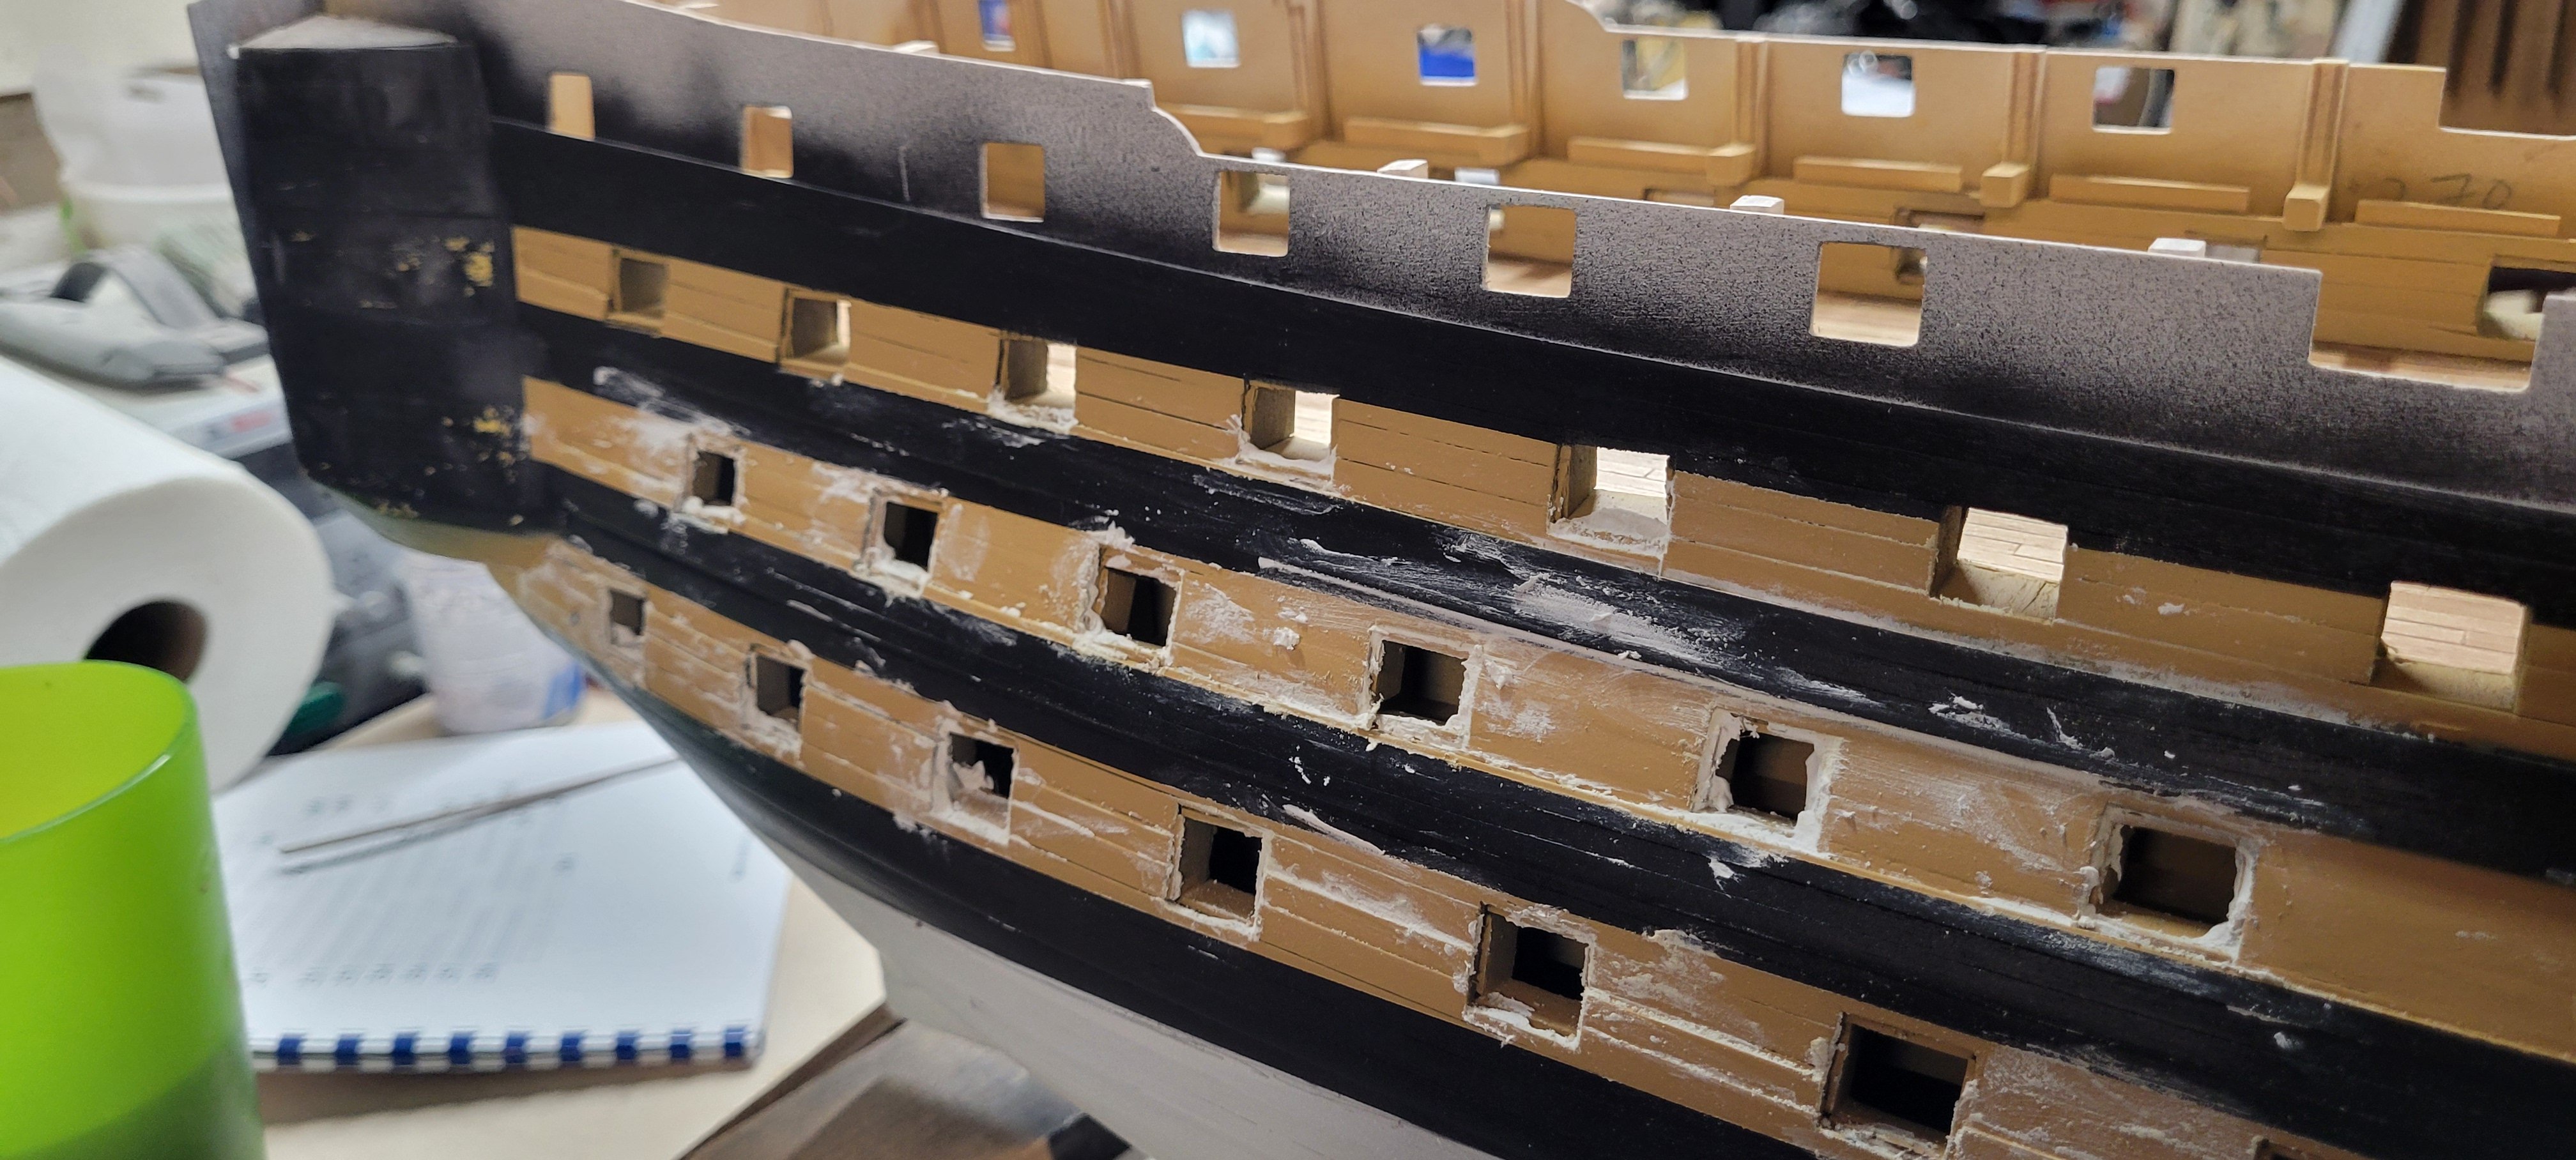
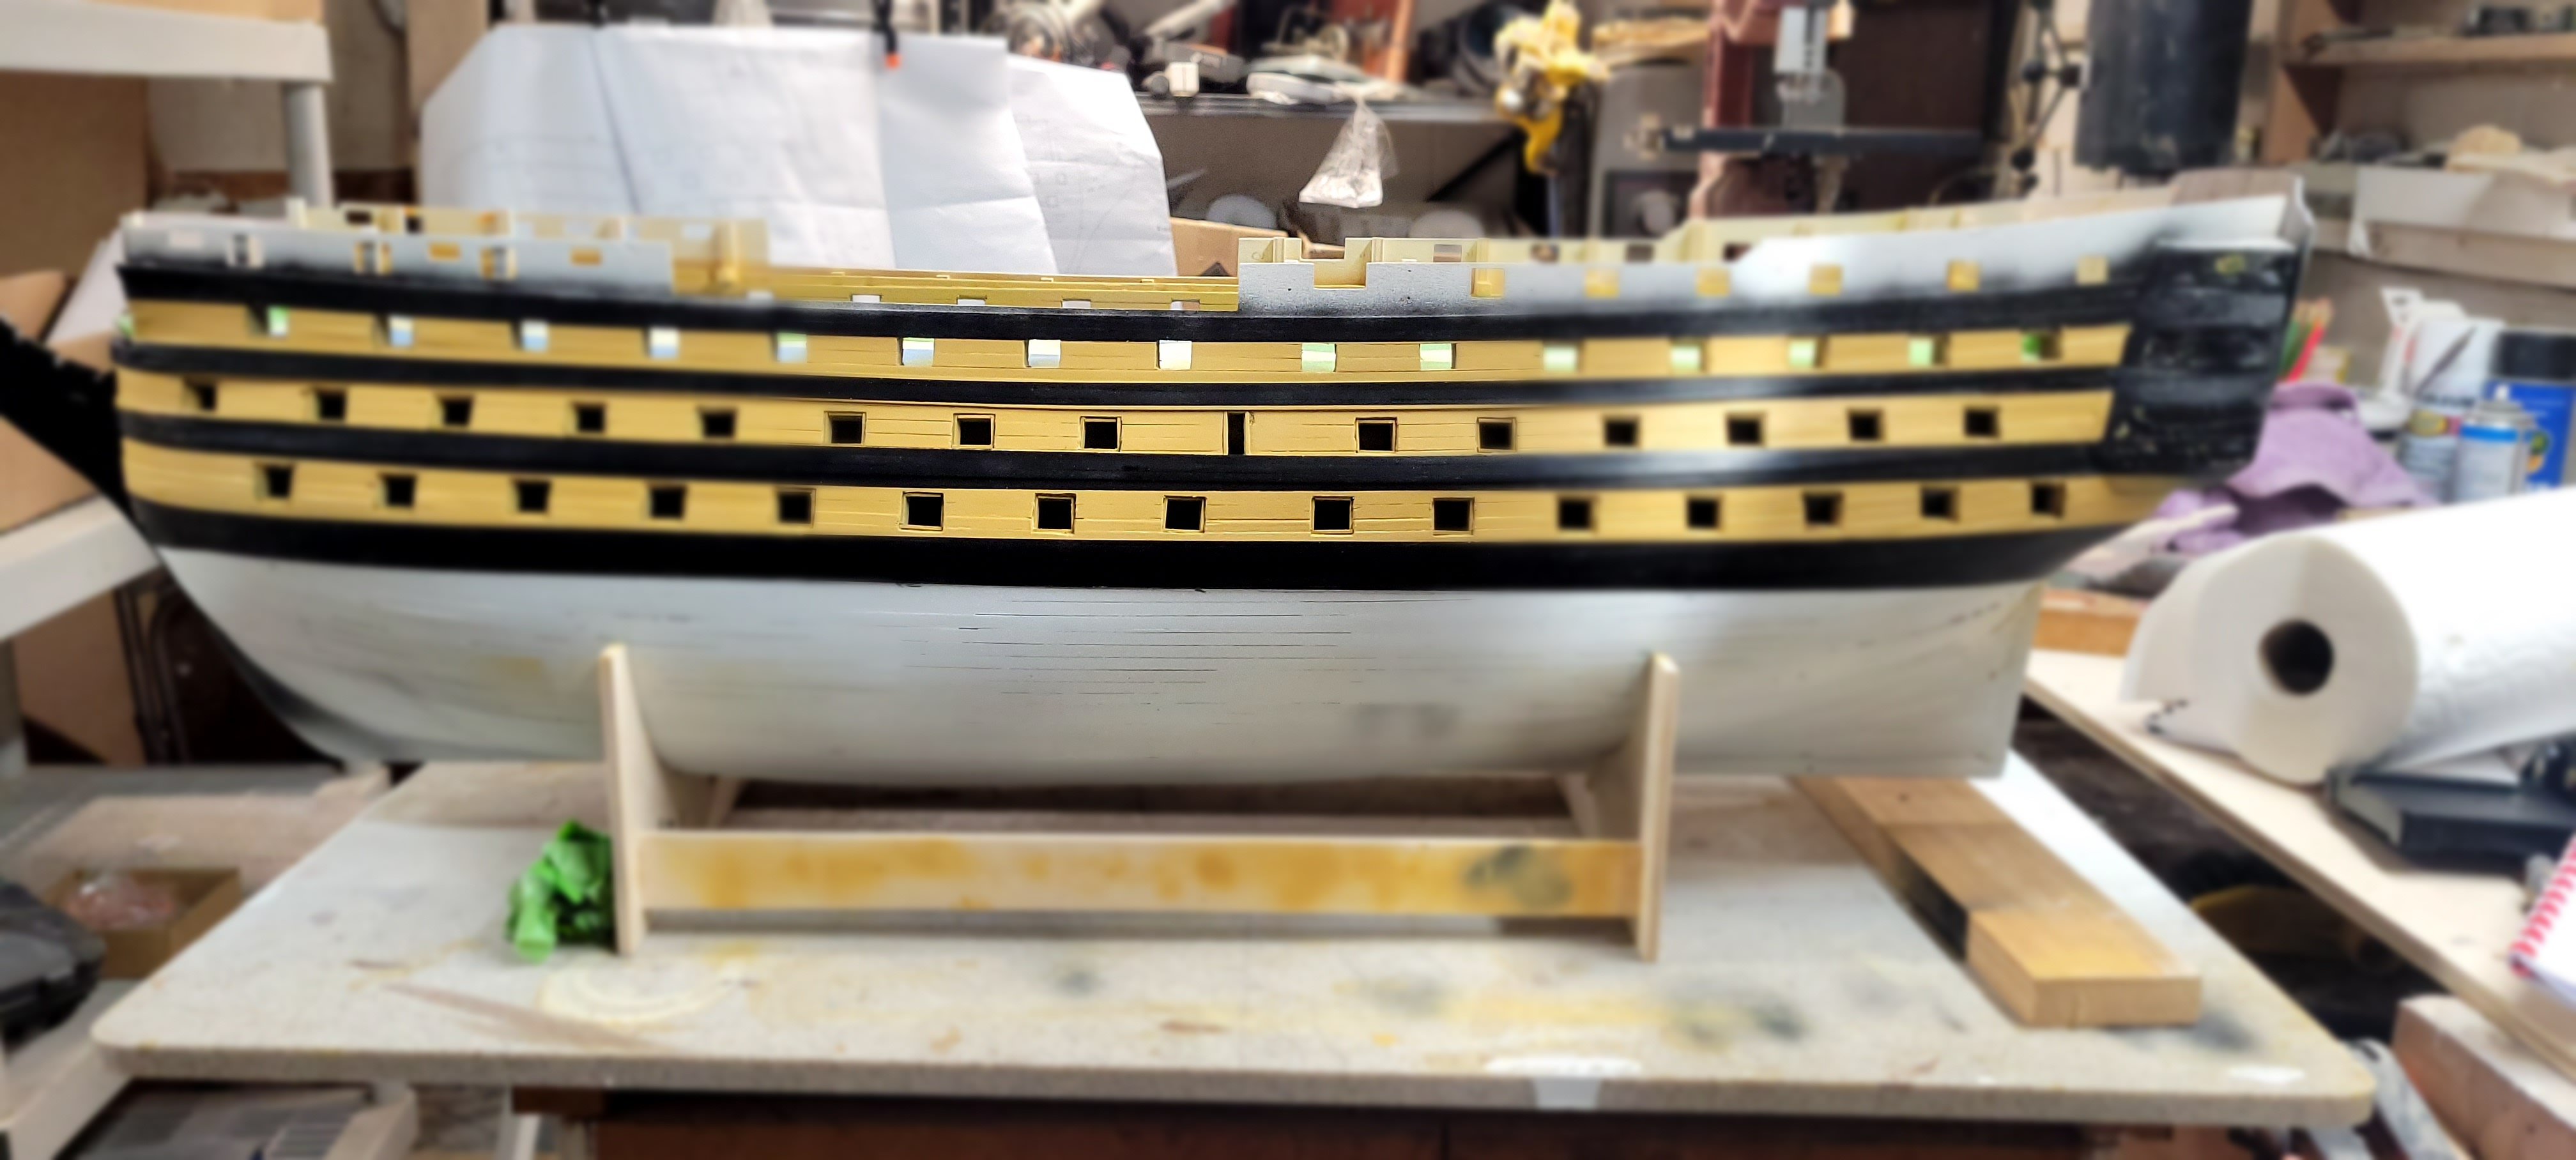
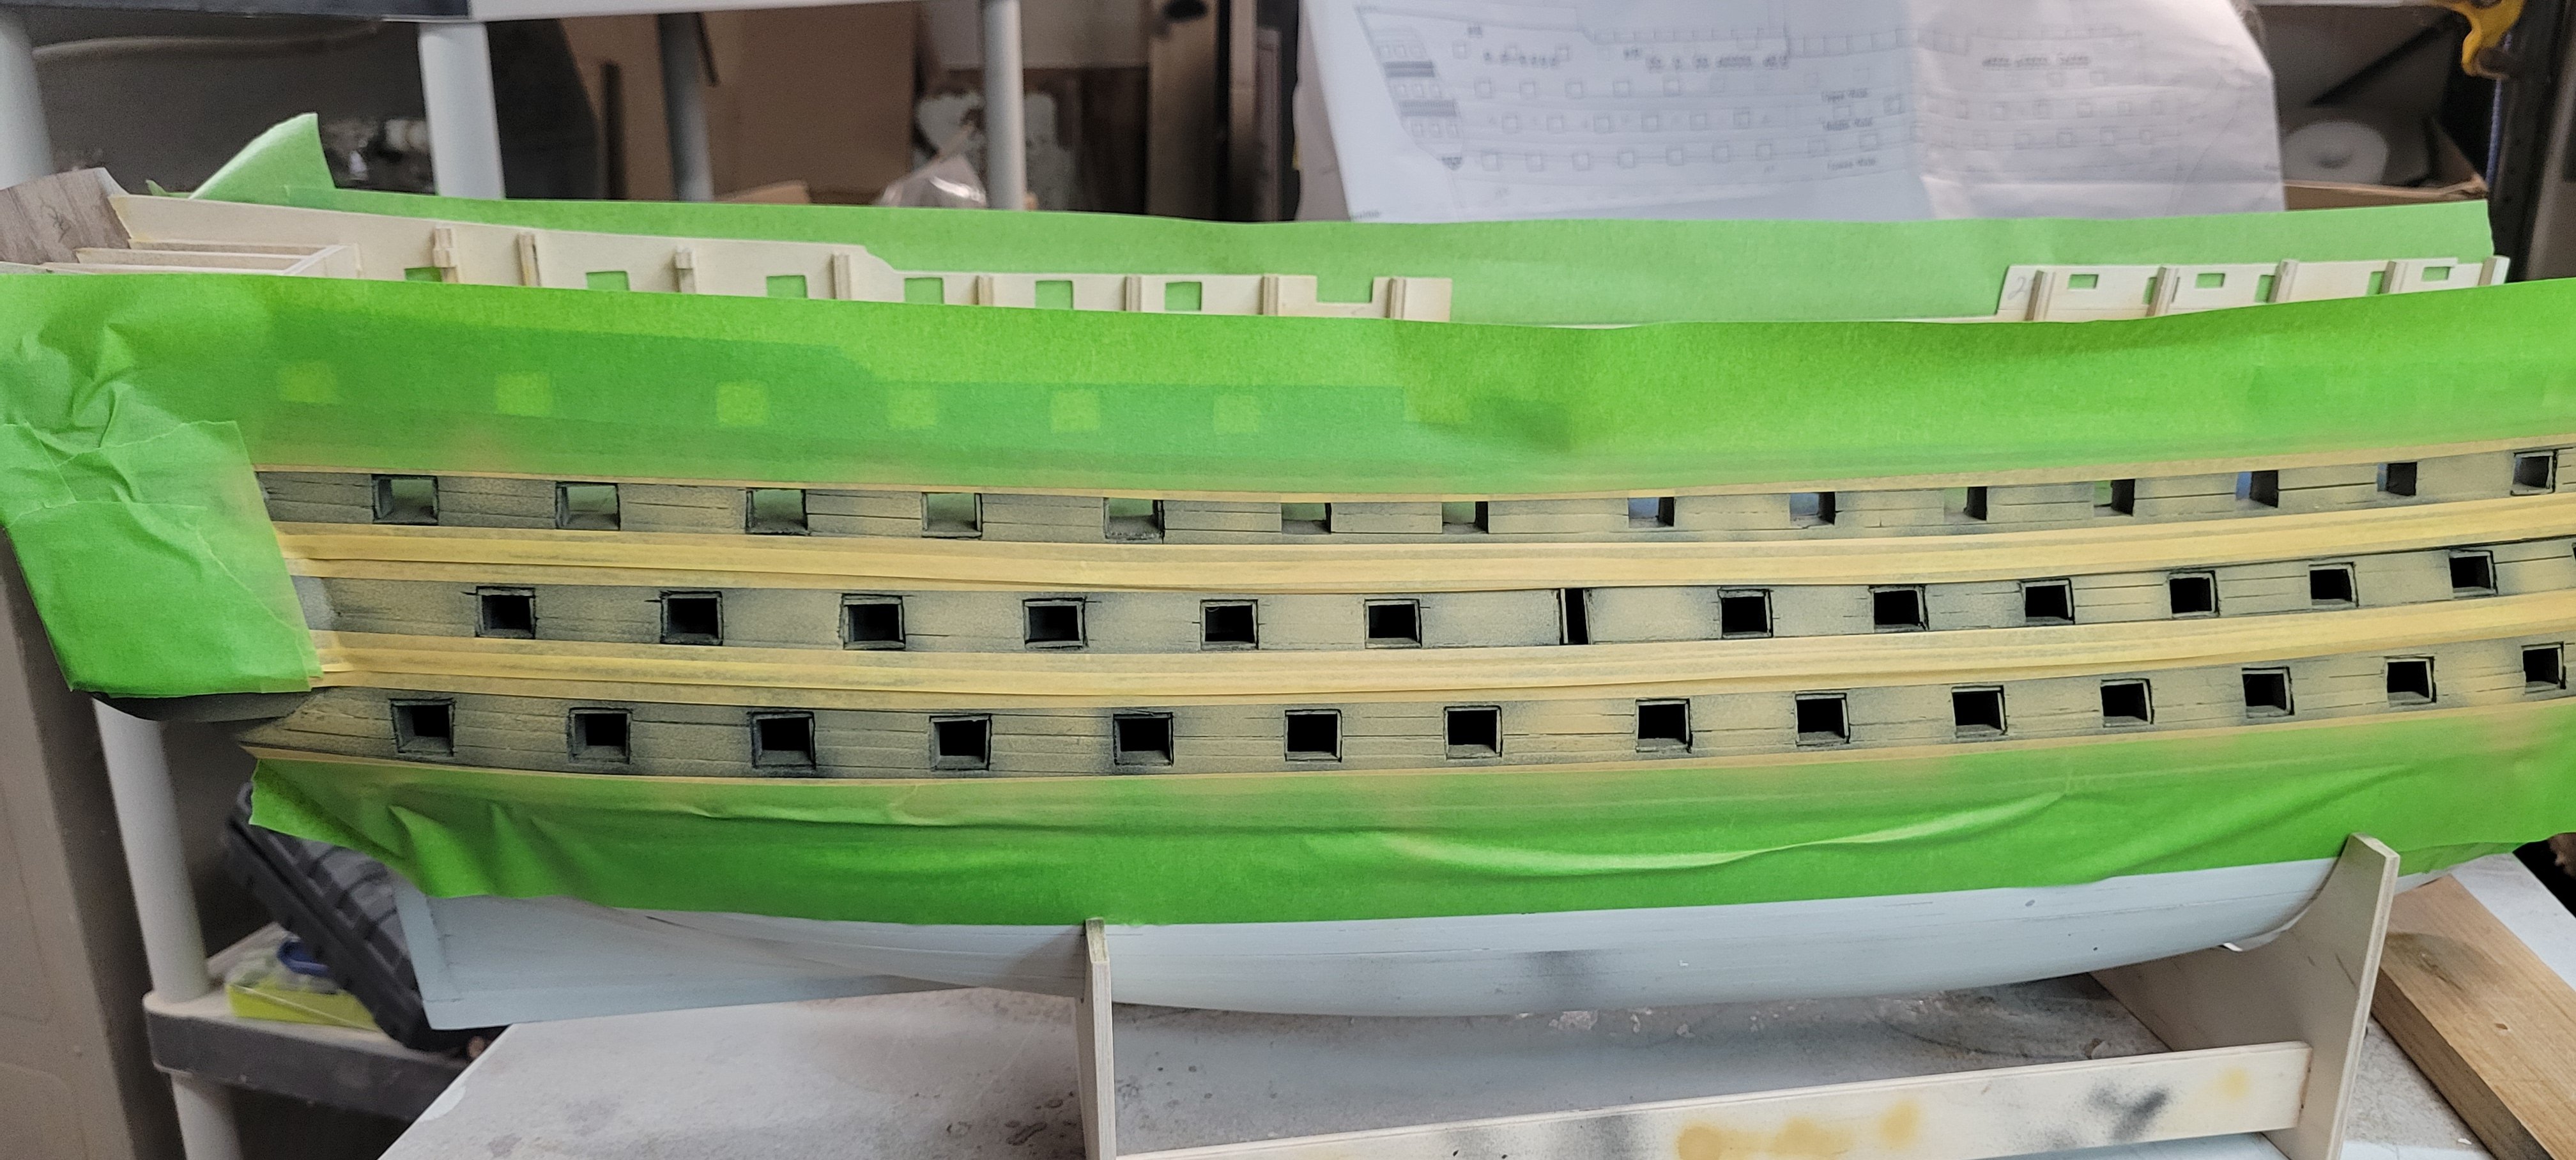
So after stressing and mulling, I broke out my filler and went crazy. I bought little sanding 'sticks' with the sanding material glued to the ends and filled every gap and crevice I could find. Then sanding, sanding and more sanding. Once done, I had to re-tape everything, painting the yellow ochre then waiting for it to dry and doing the black.


-
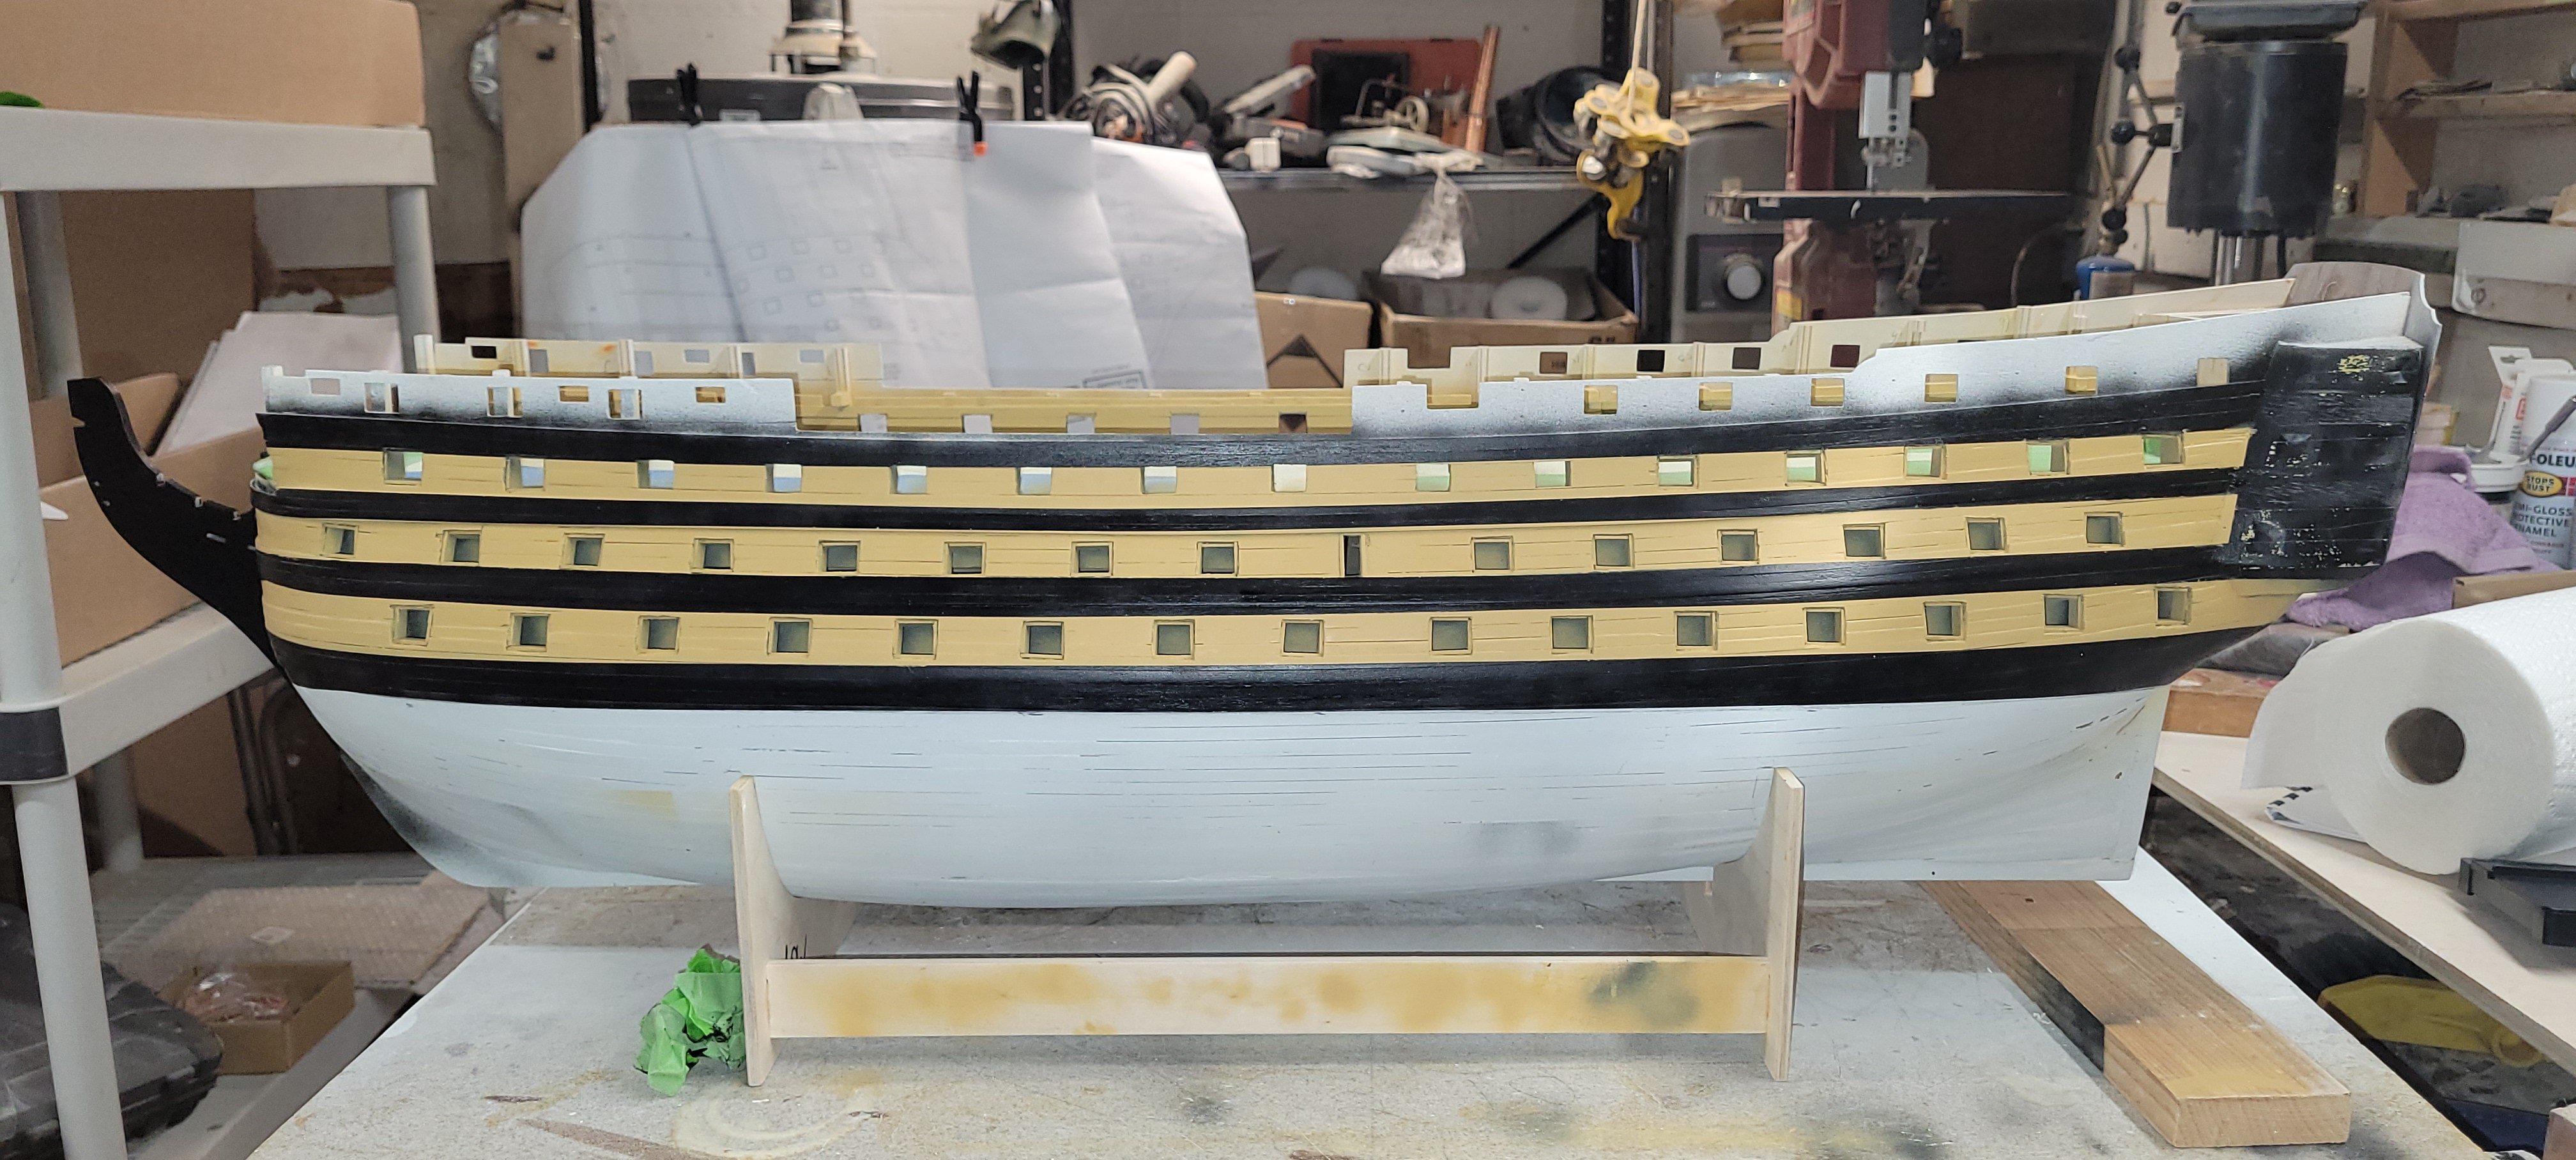
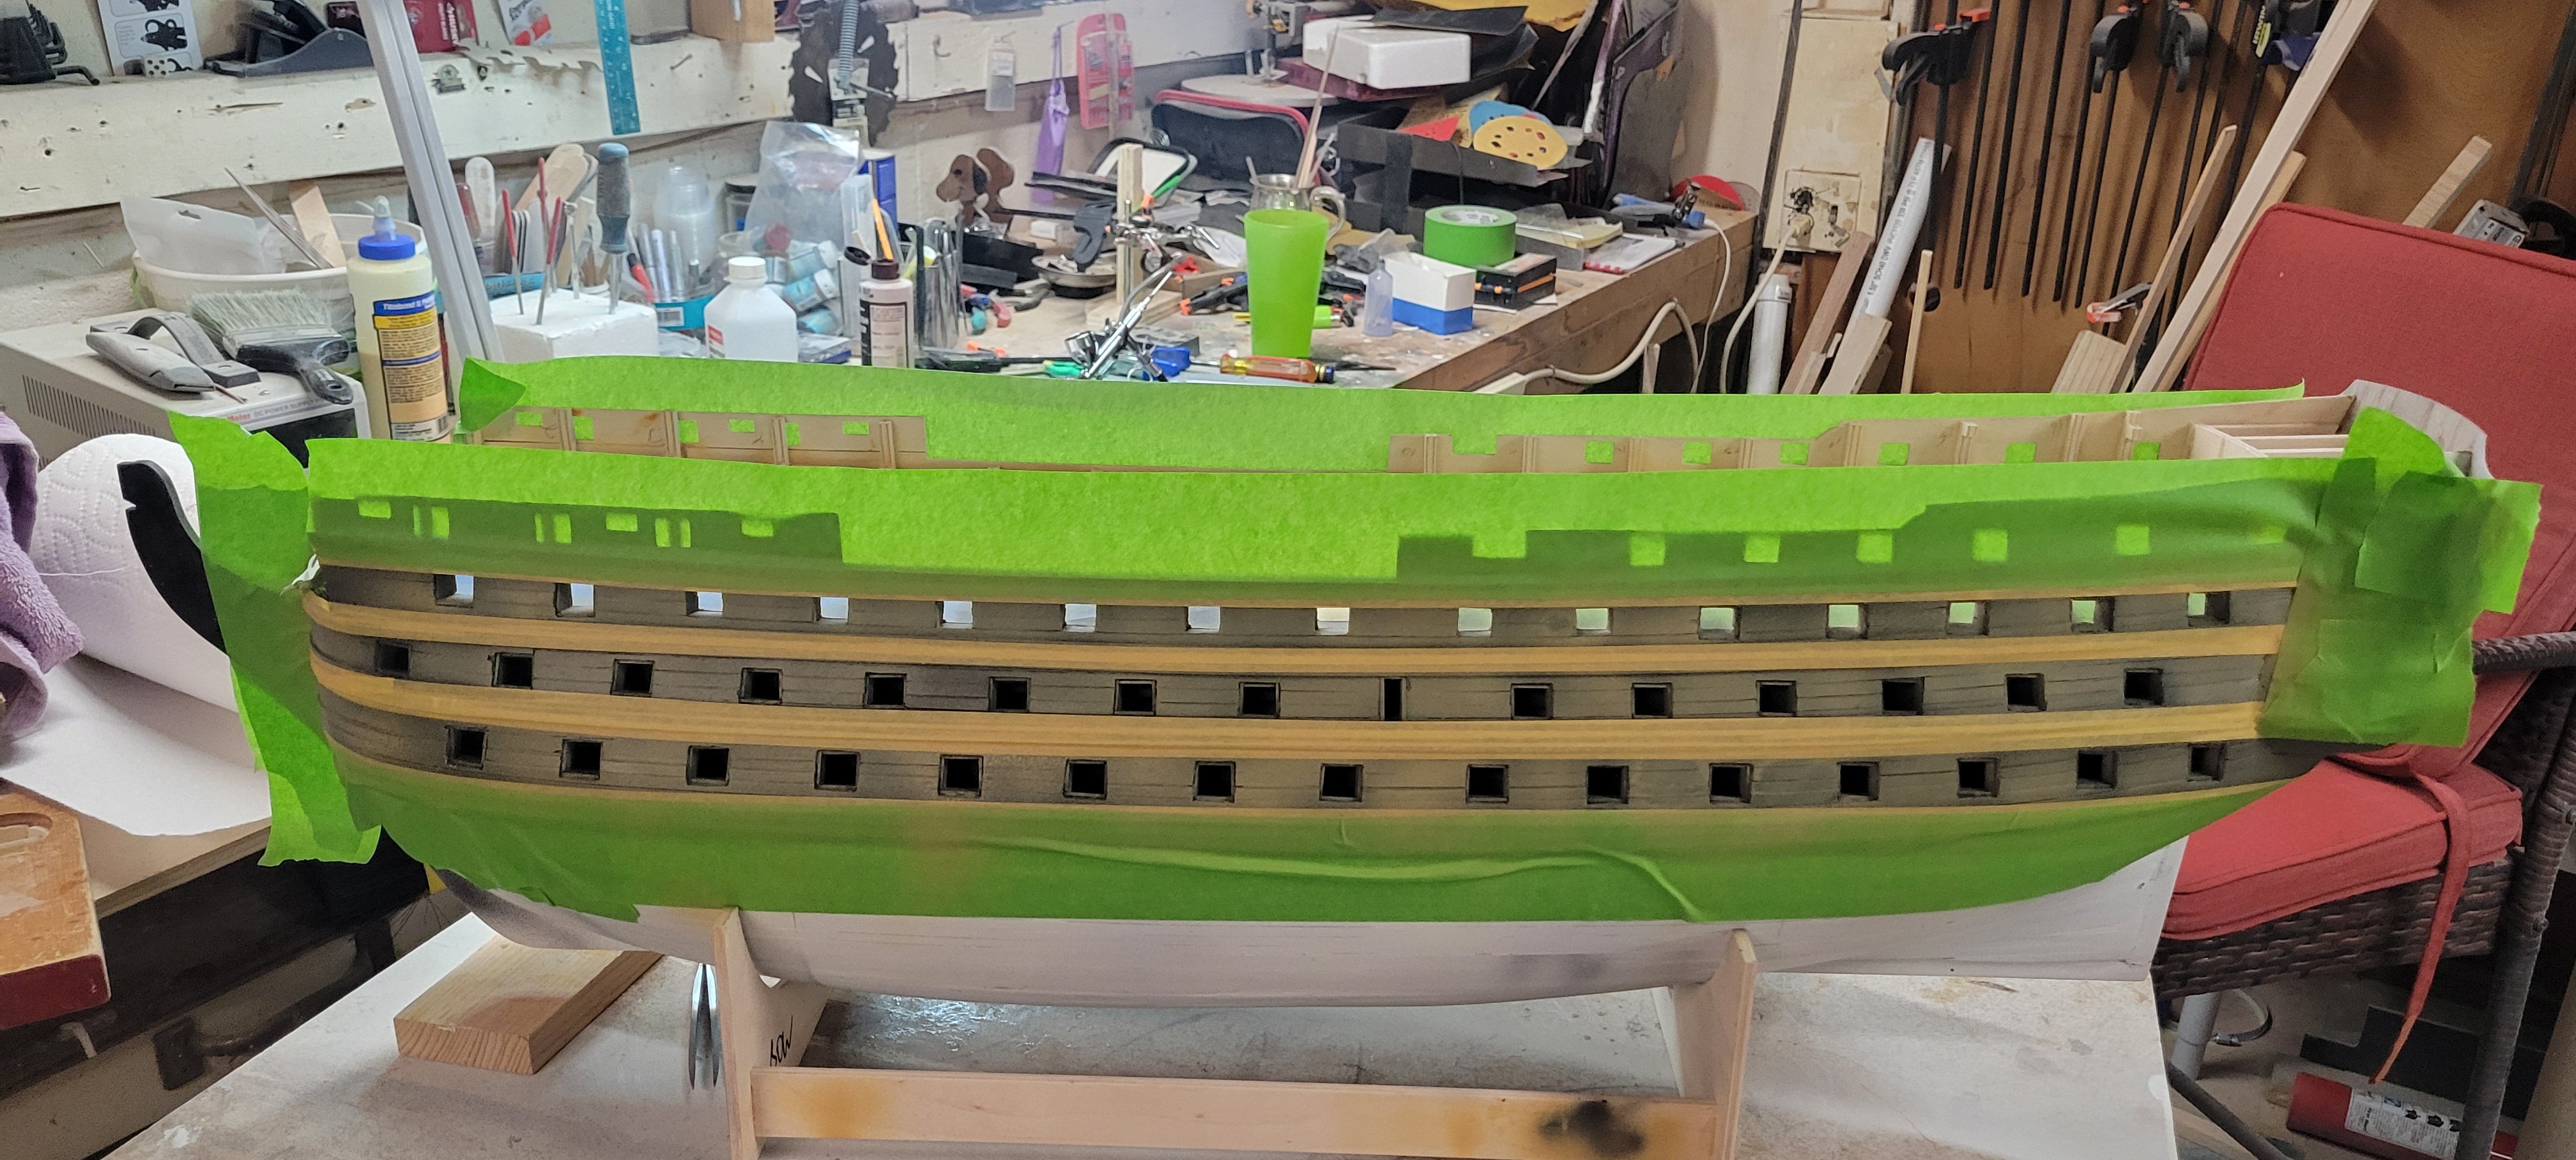
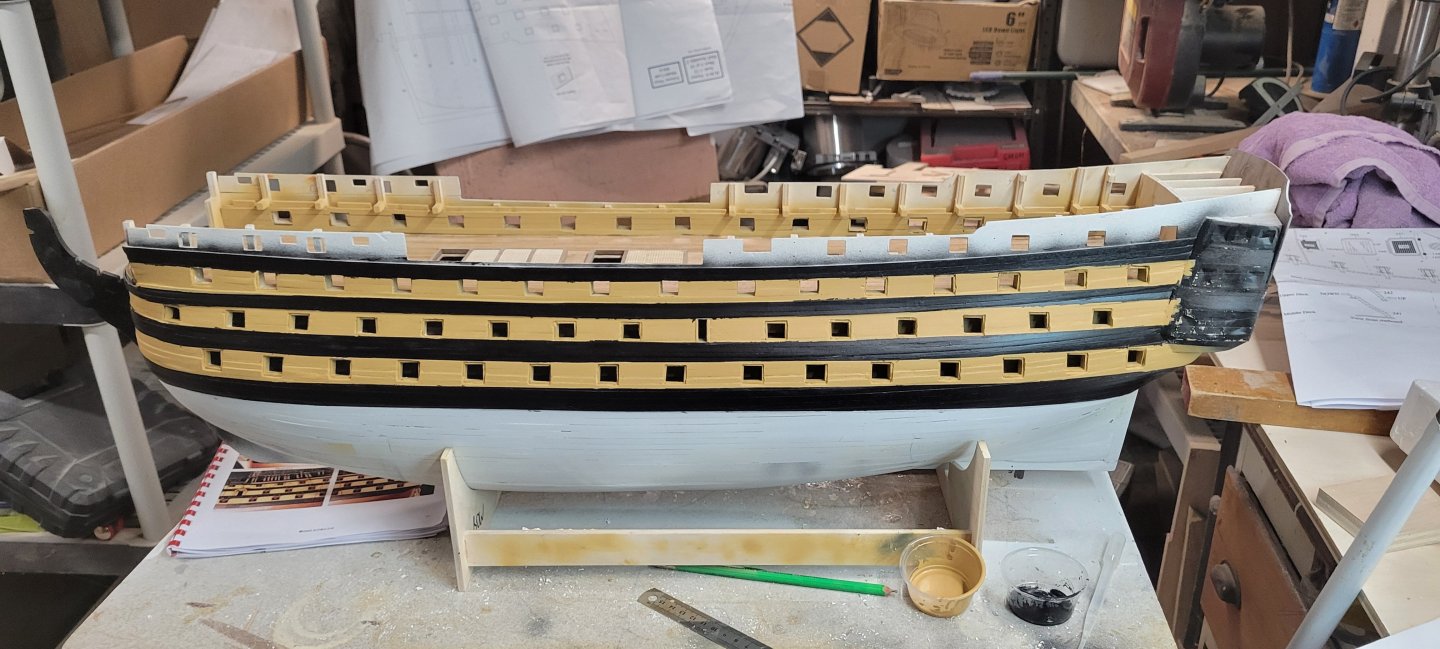
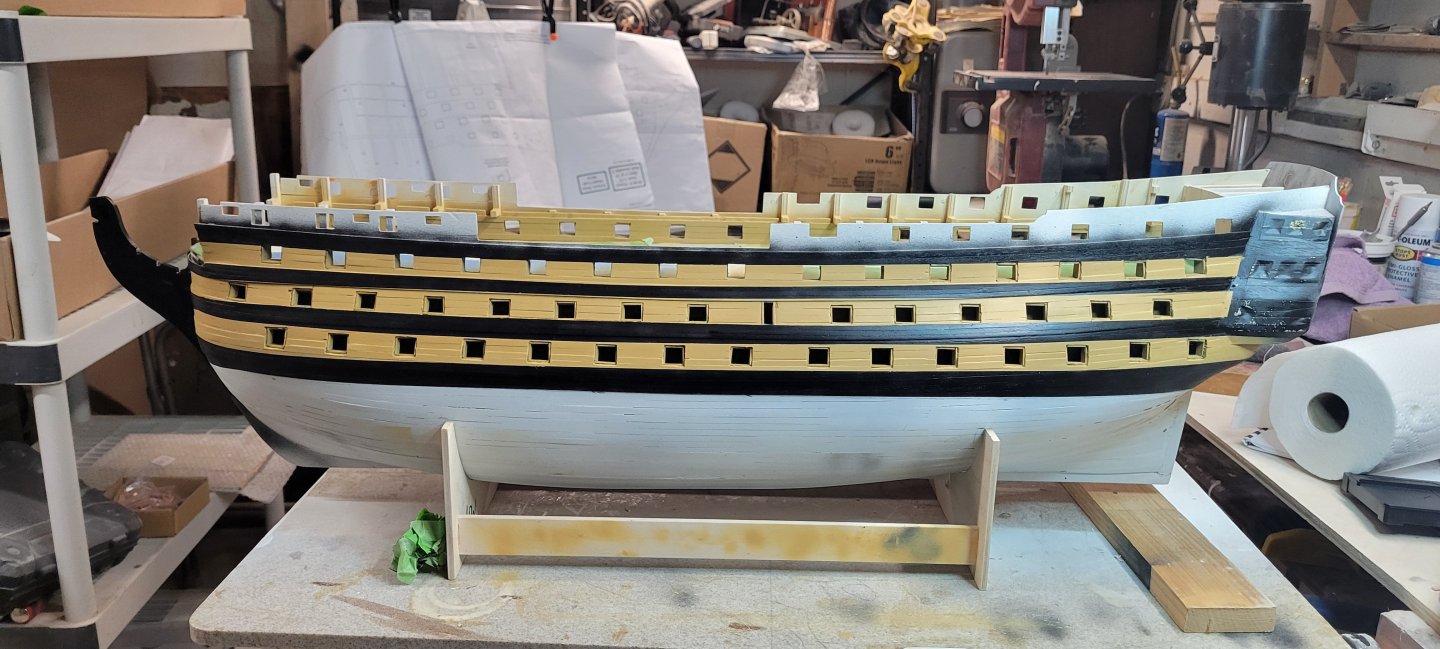
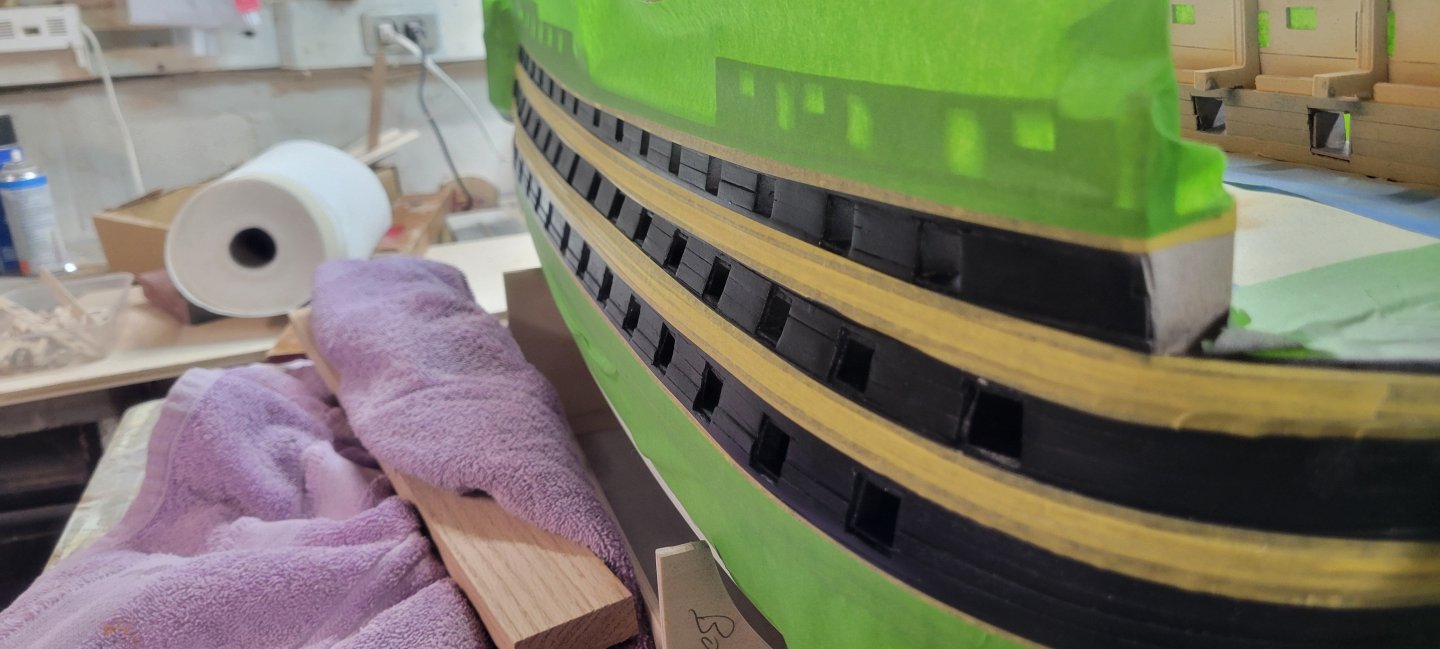
Got my chucking nut and laid down the yellow ochre. After finishing it and removing the tape, I was semi happy with the striping. There are a lot of pictures here because I tried different camera modes to try an capture the correct colors. I thought the final painting was going to solve my concerns over the quality of the hull work thus far. I did not. I only made the flaws and gaps much more noticeable. It was just too much to handle. I've said elsewhere, this kit is VERY DIFFICULT. I don't think I was fully prepared for the hurdles I was going to have to jump through. In retrospect, I should have tackled a less difficult model to gain experience in planking and the yet to come rigging. Is this model ok for on the job learning? I don't know. The Trumpeter Titanic was the same way, so many pieces, so much small detail on a 1/200 scale ship. The nice thing about this model is the quality of the manuals. Detailed and plainly written...while in contrast Trumpeter's was 20 or so pages of pictures, no words. Also, the Titanic model has many quality YouTube builder logs that I was able to follow while doing my model. There are very few Caldercraft specific Victory YouTube logs, I have watched all of them and still continue to search. There are certainly many other wooden ship models that have helped with specific tasks and I continue to search and save. Either way, I will press on, but am less than happy with certain aspects of my work.


-
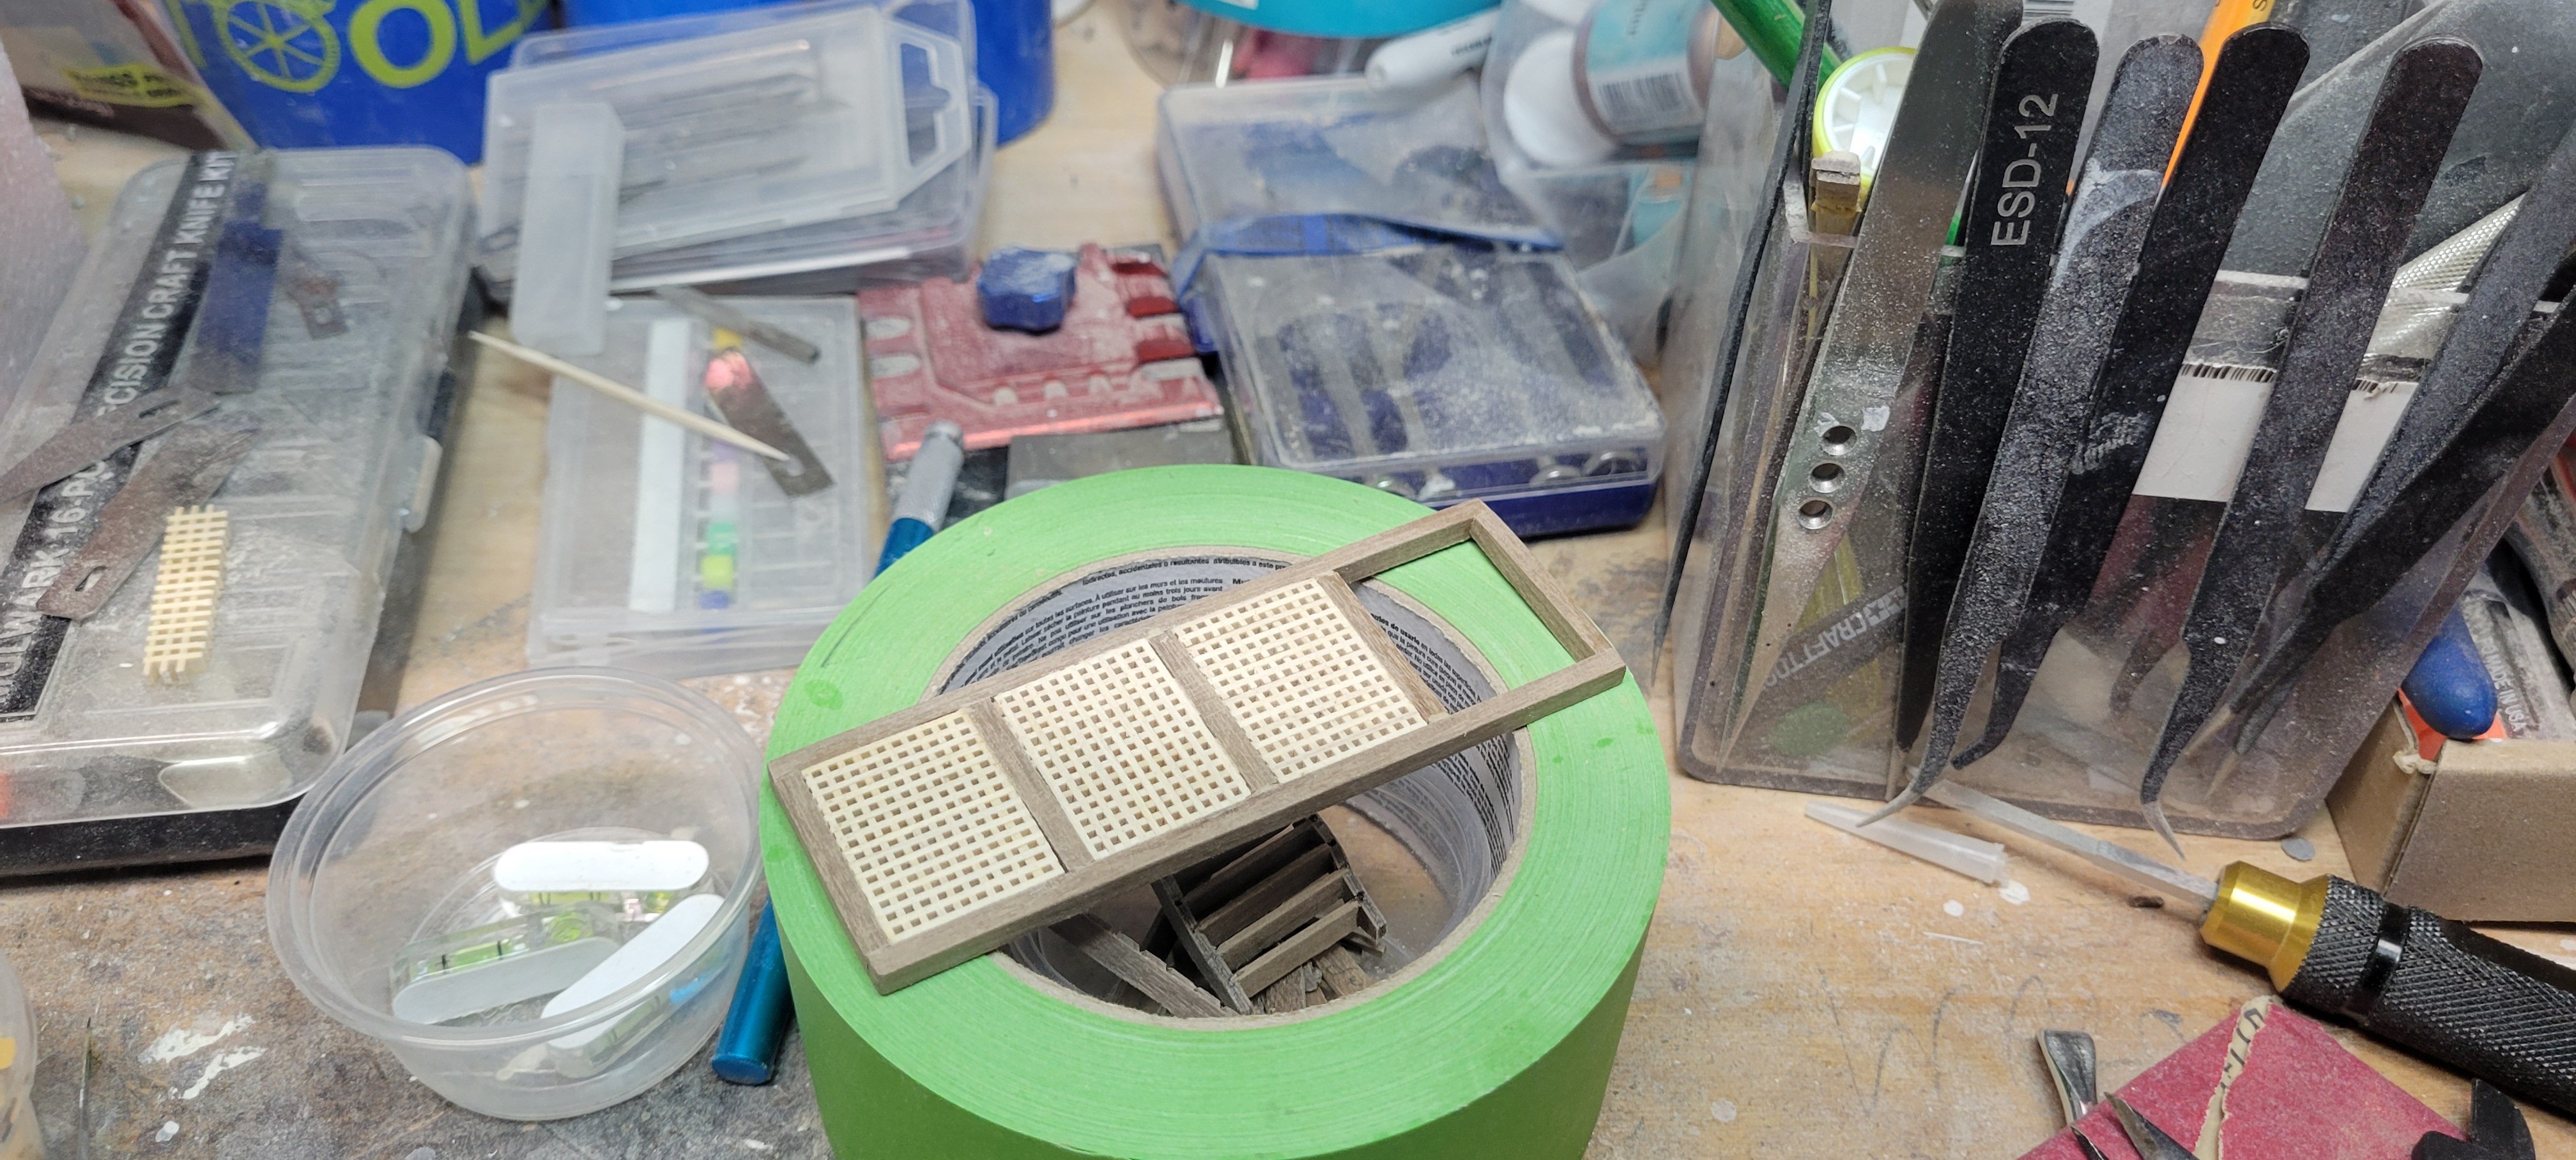
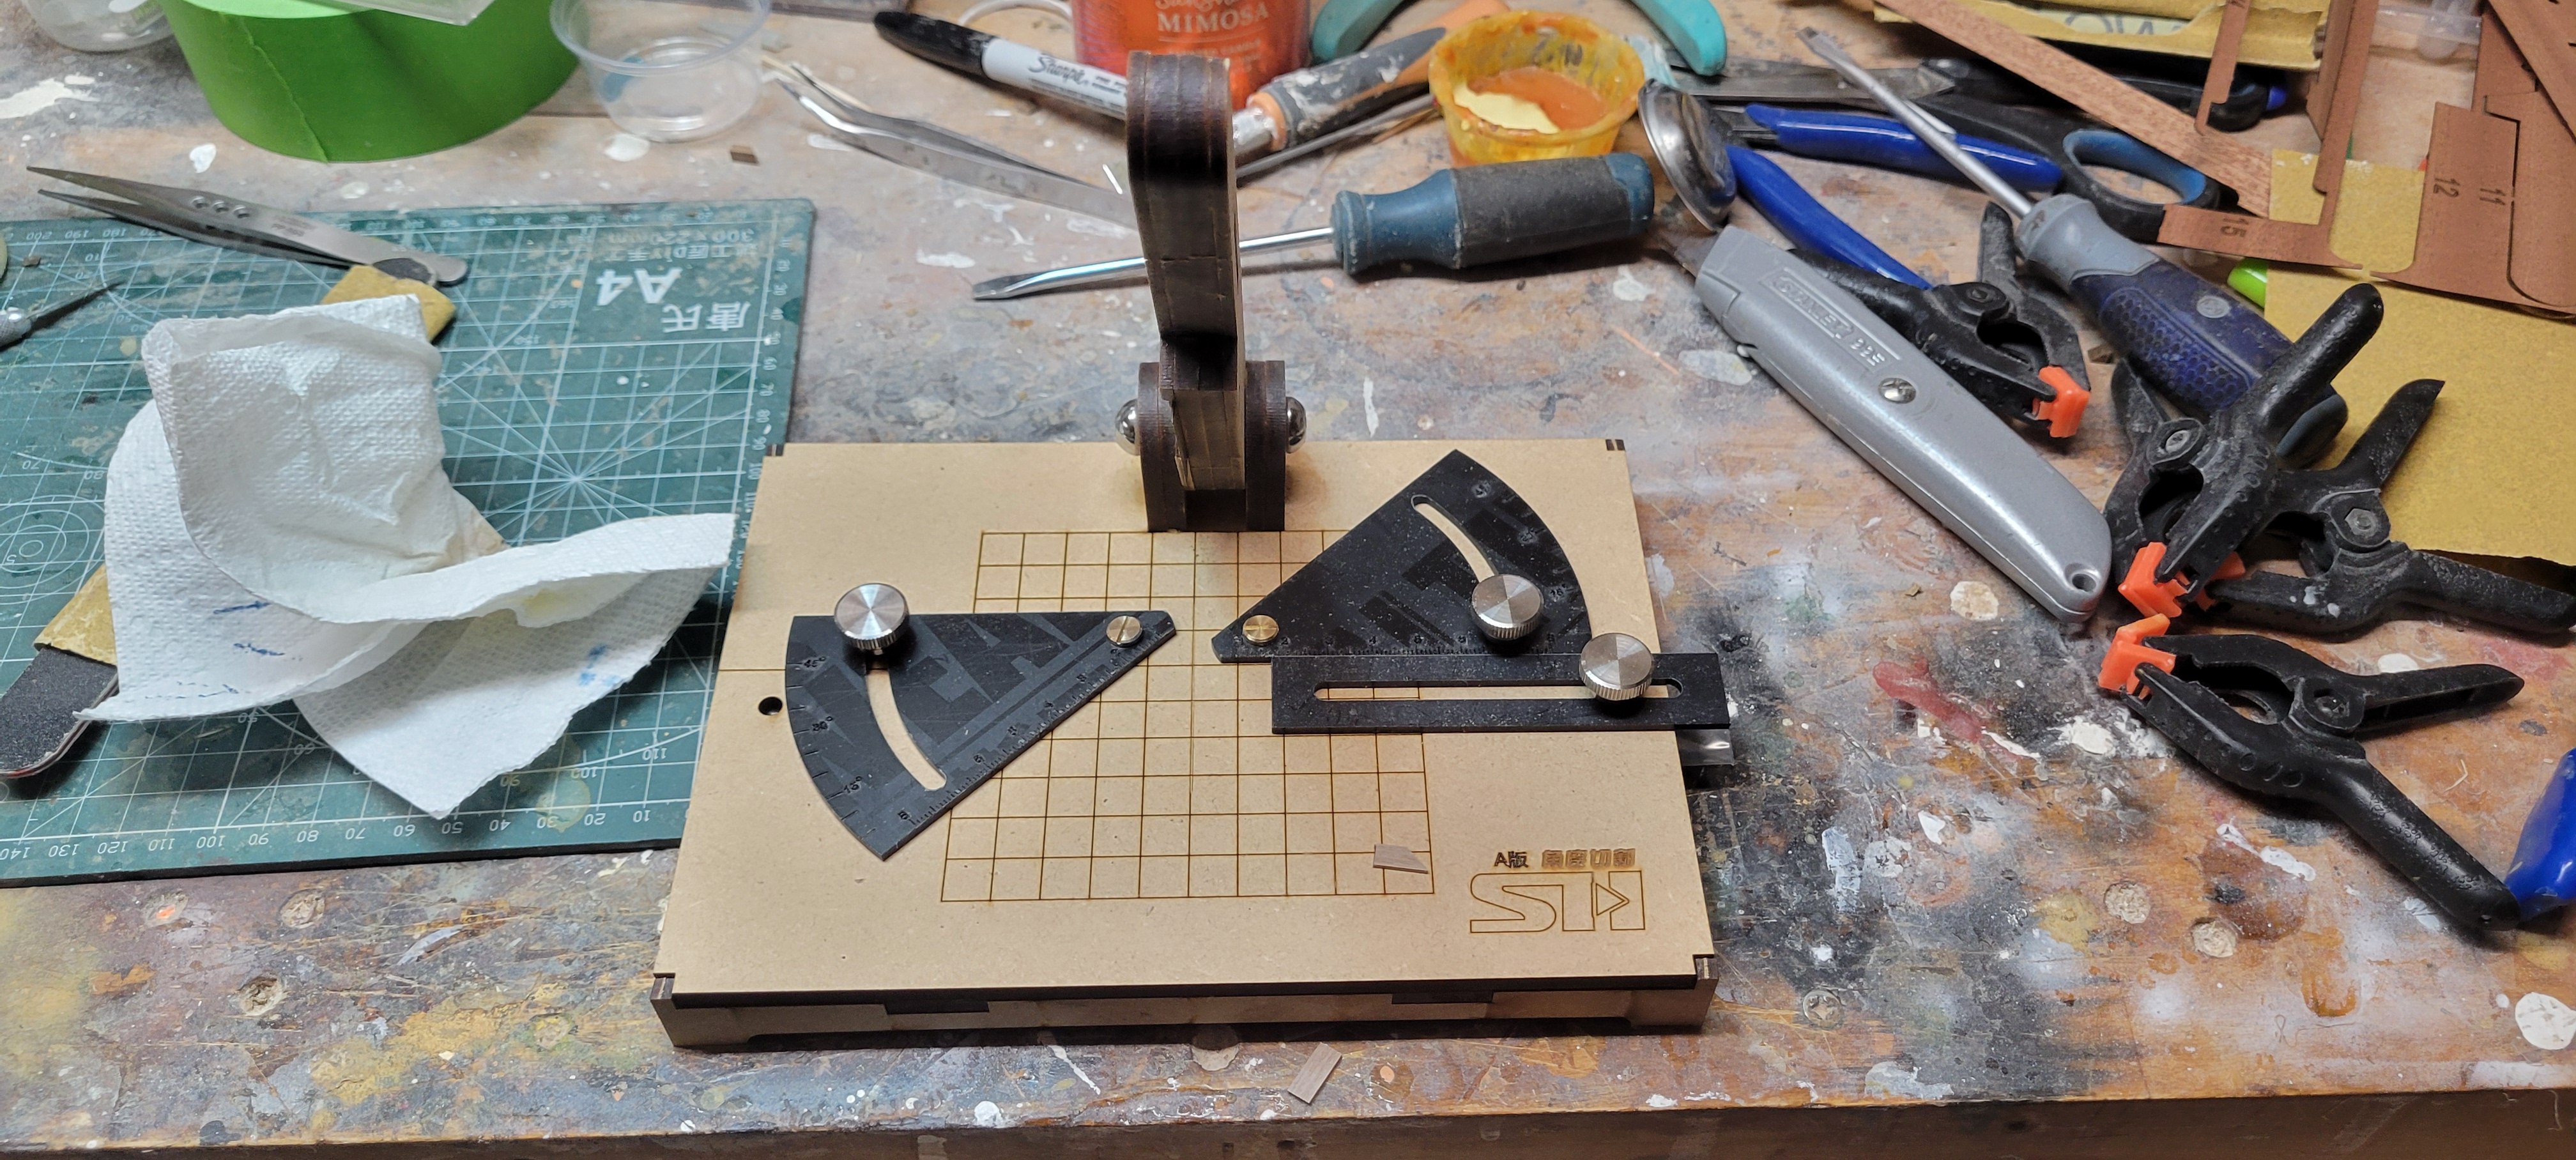
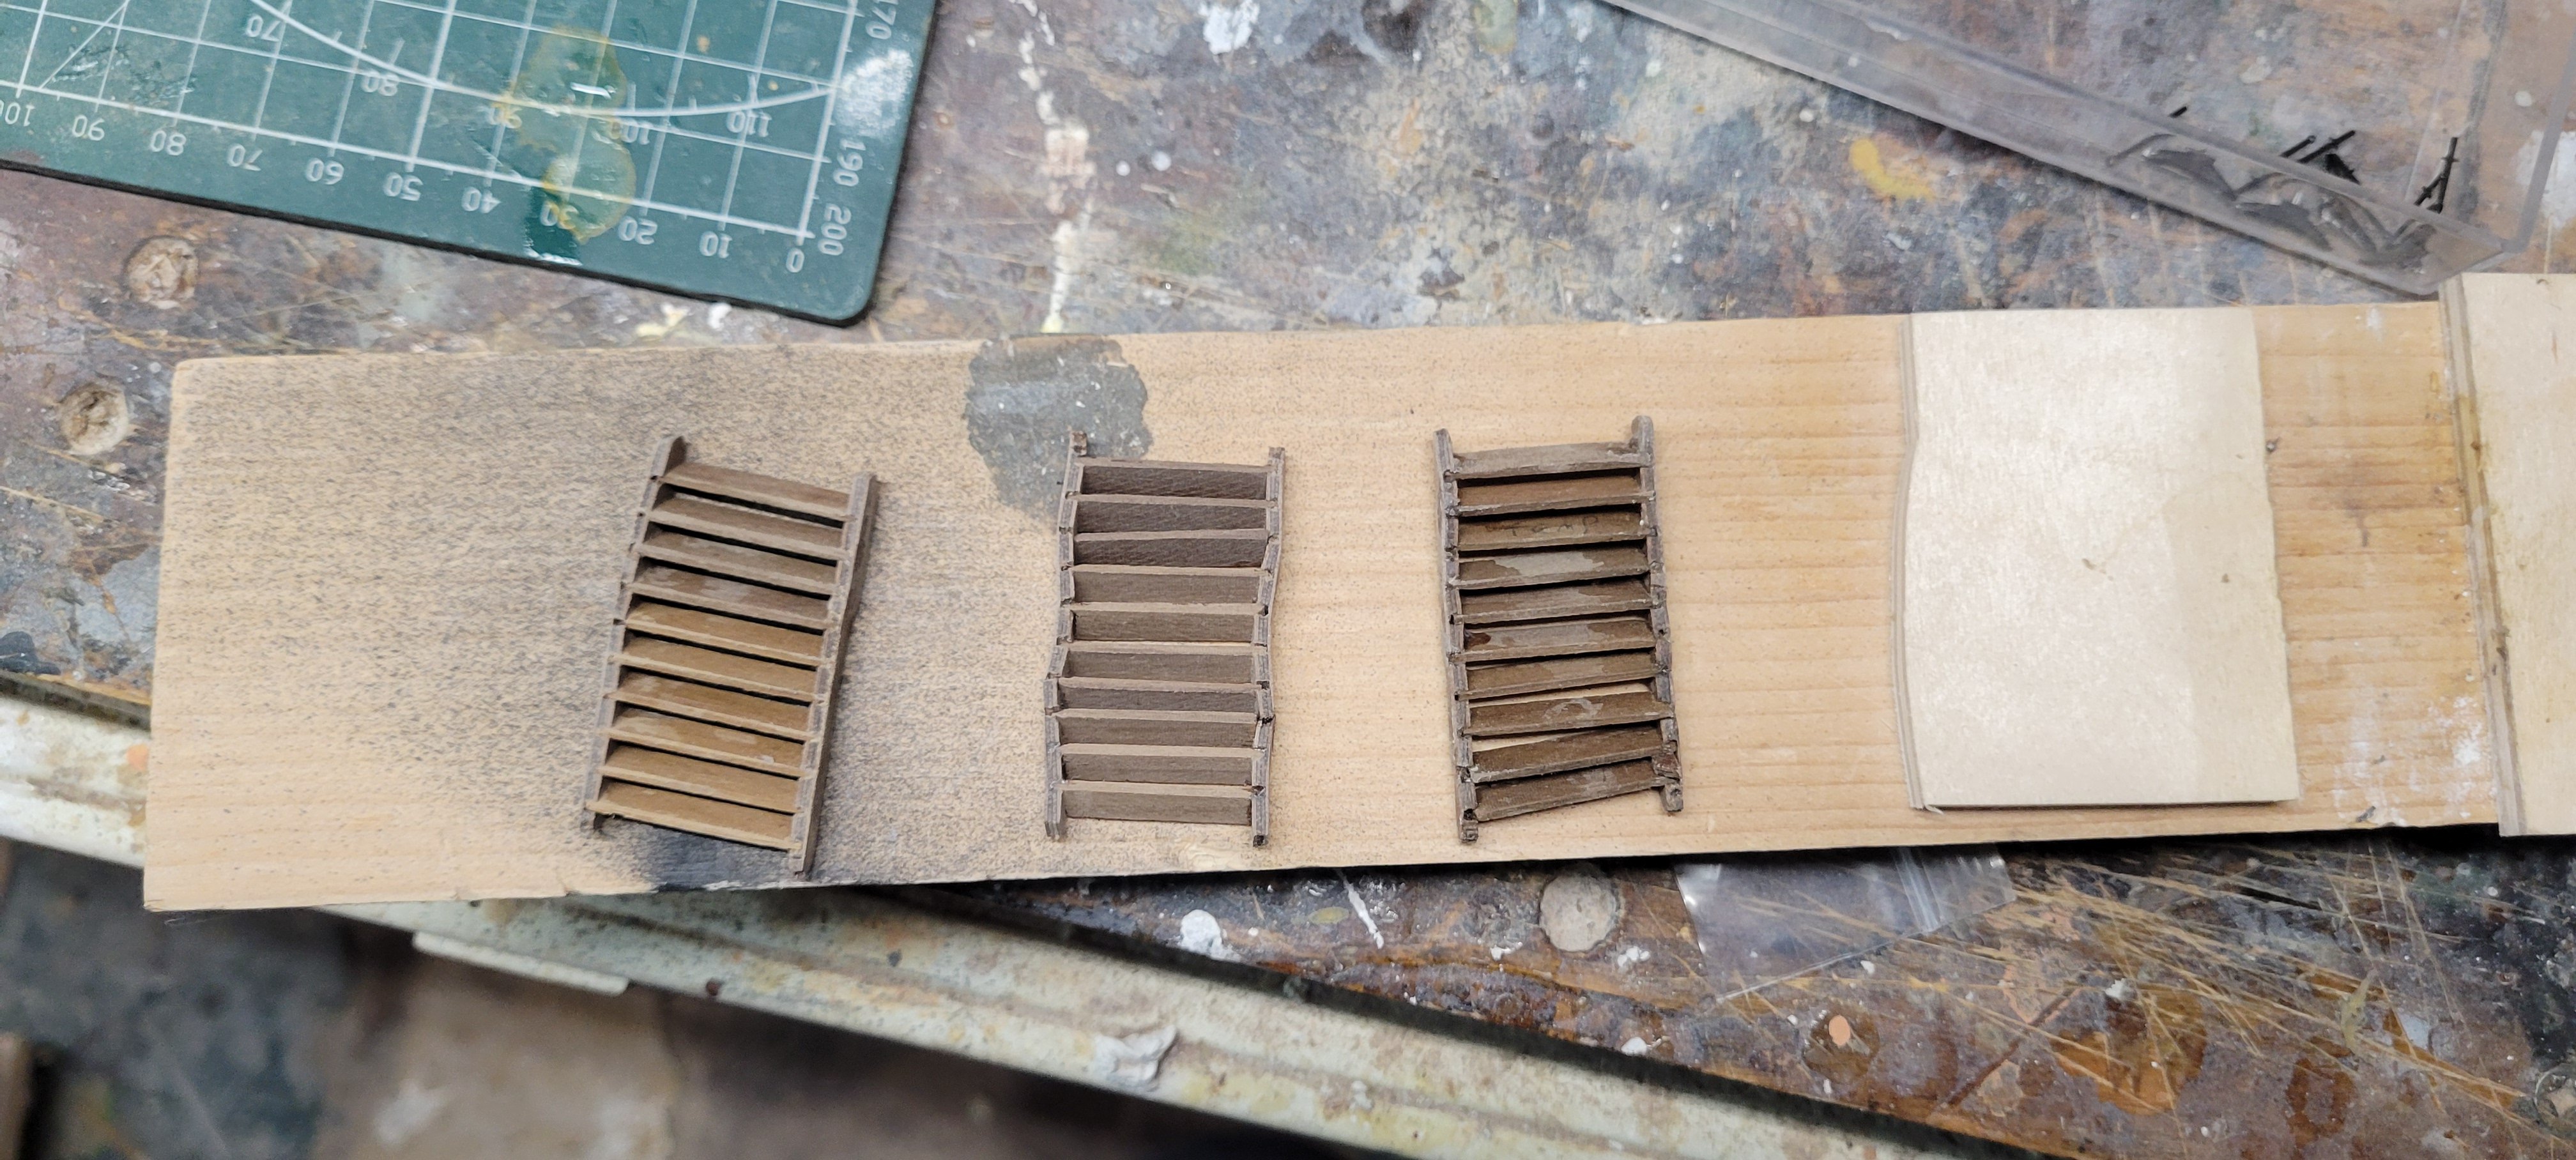
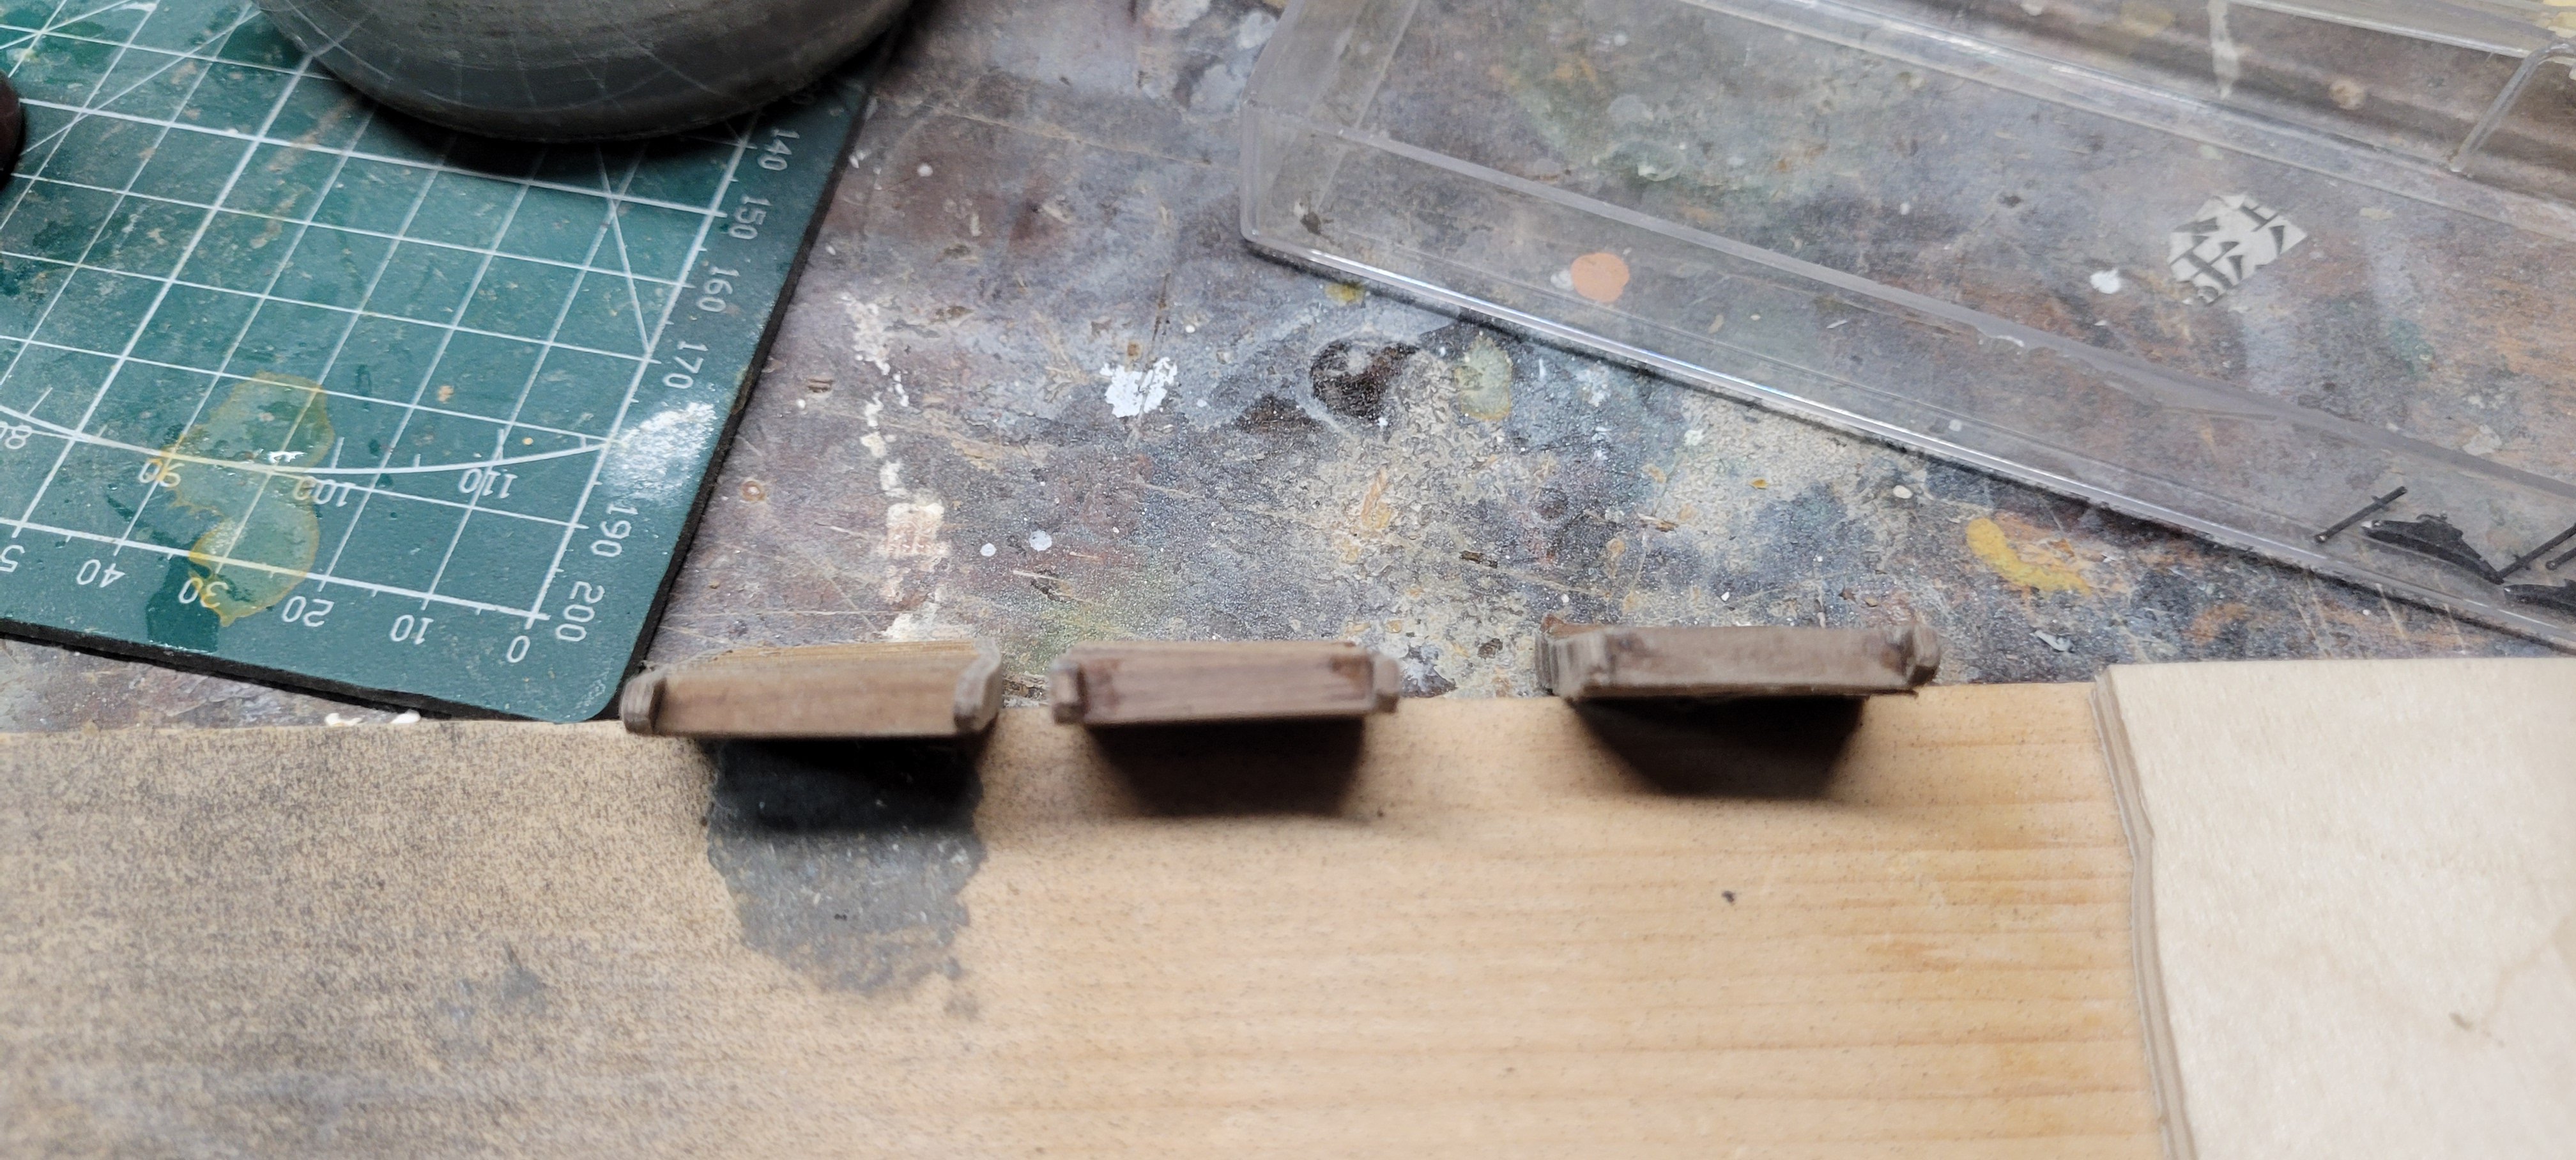
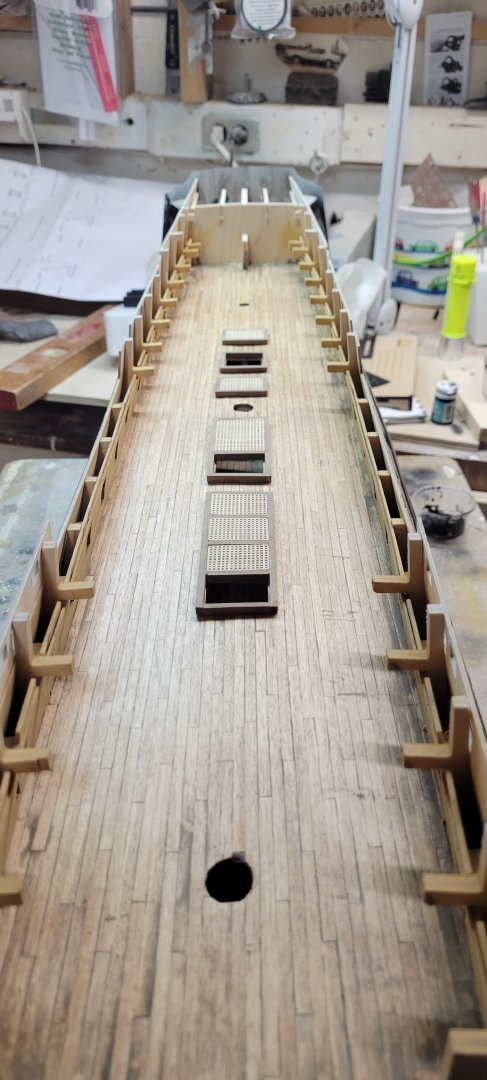
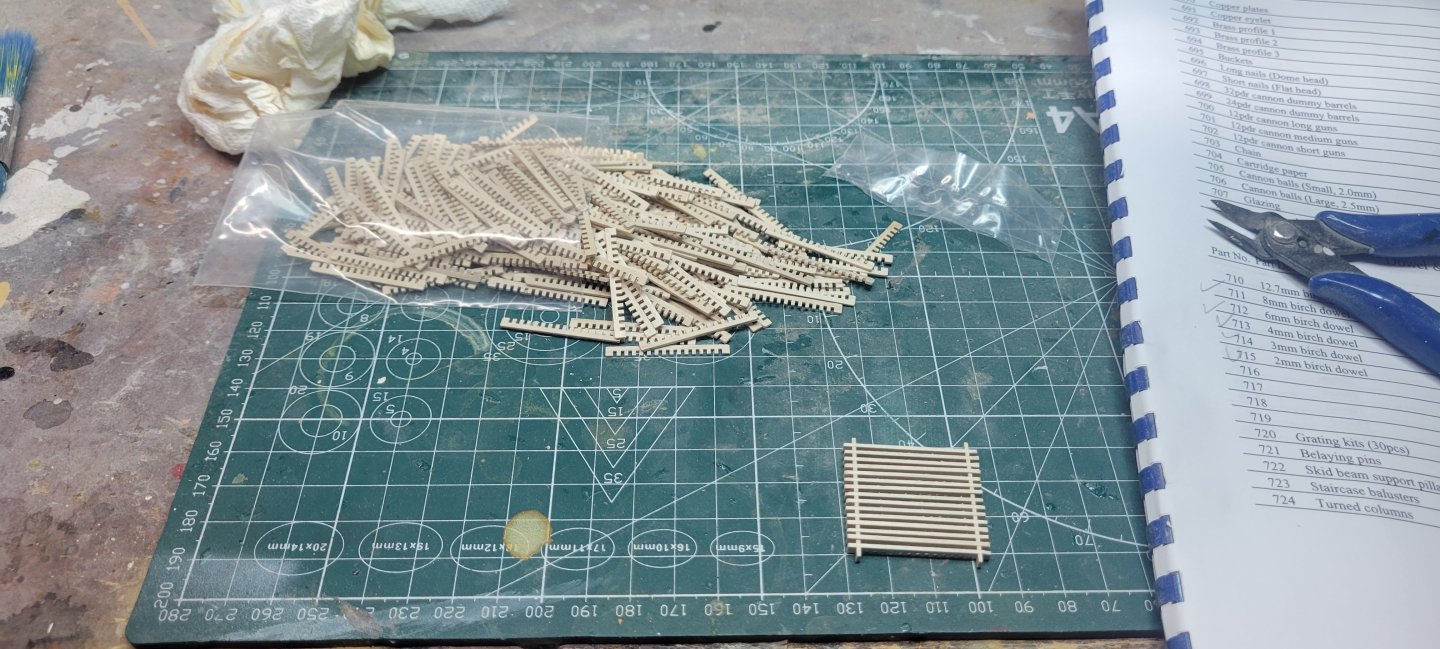
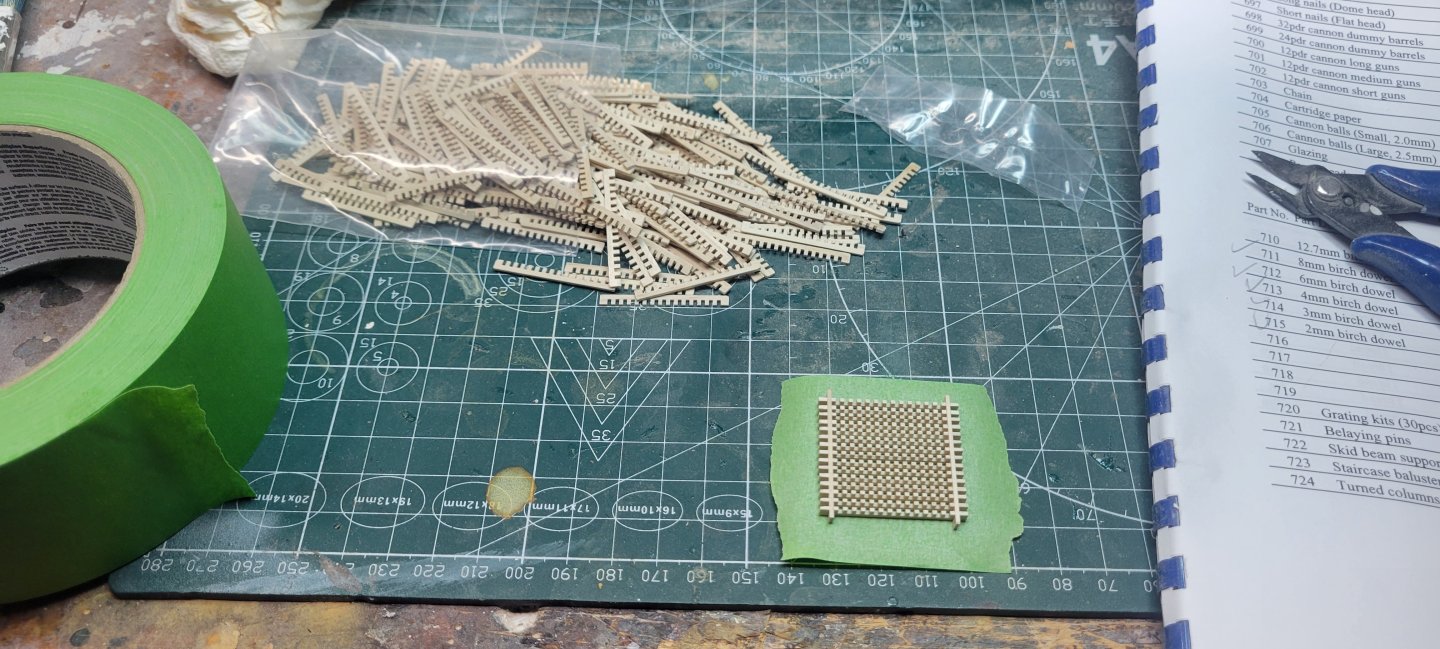
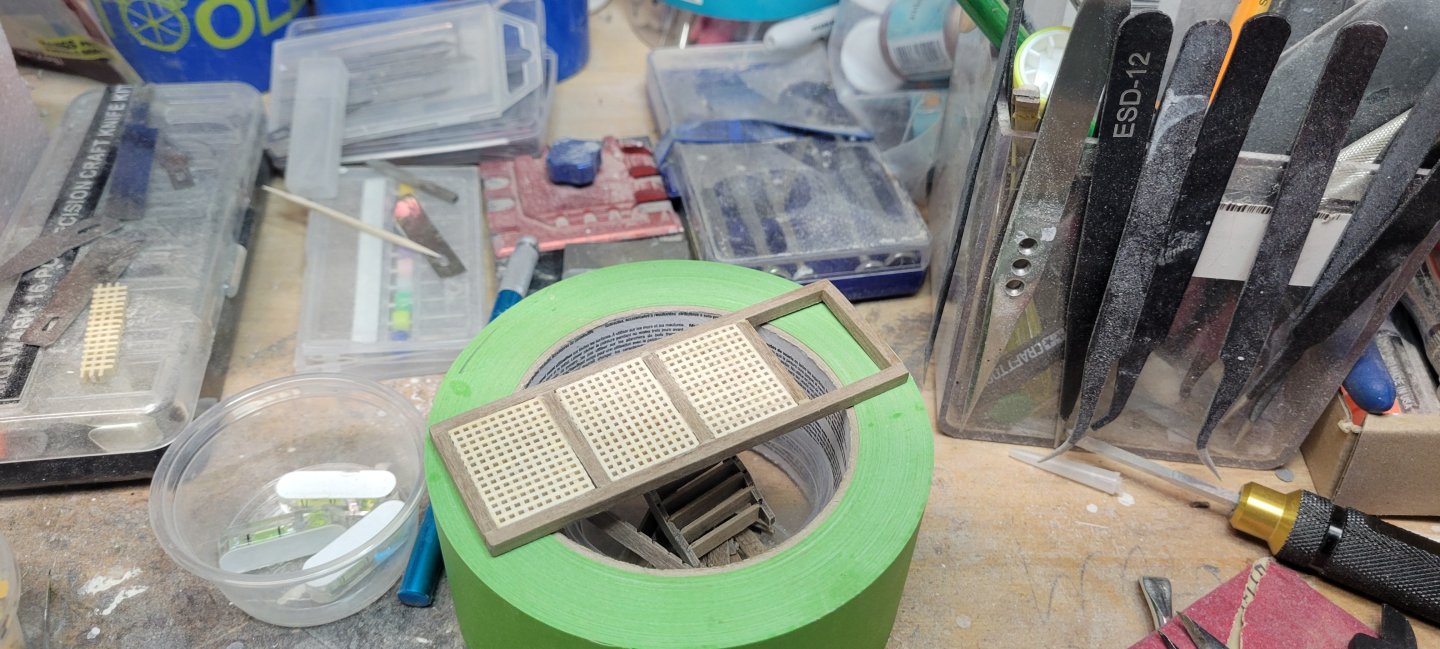
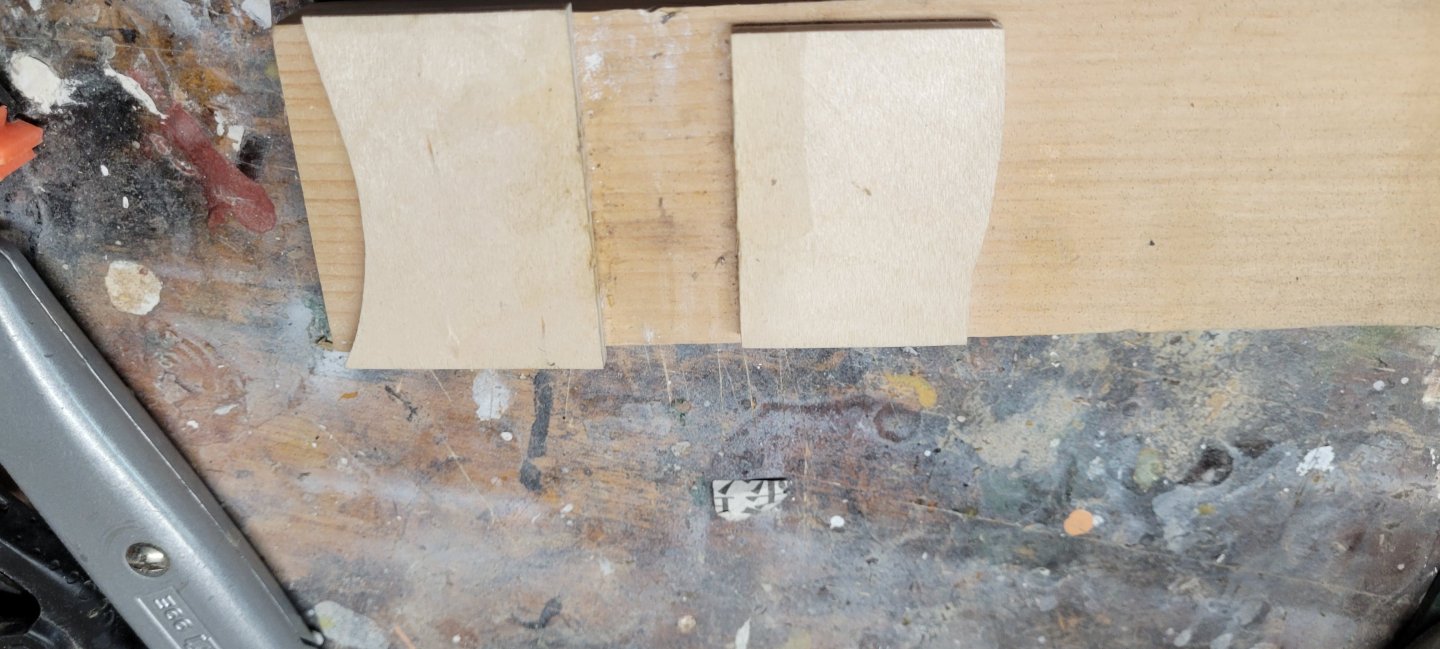
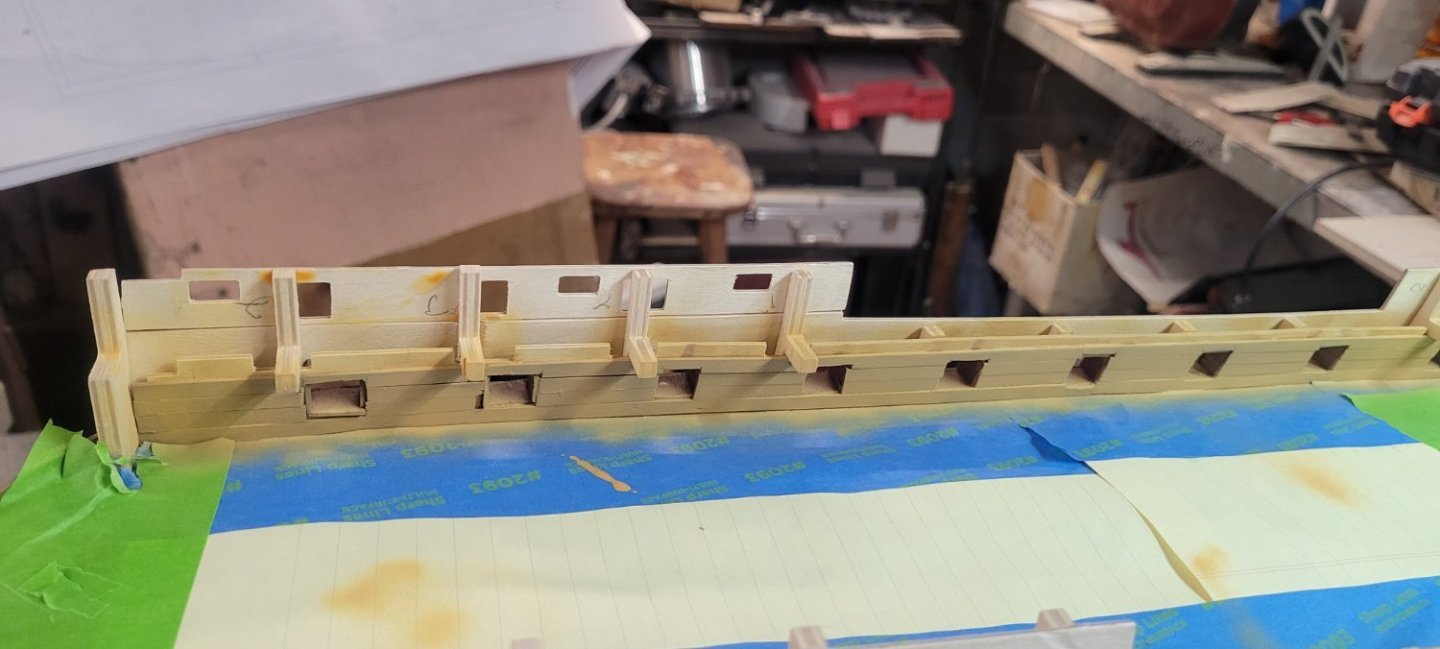
As I waited for that part, I took a stab at some other items. I needed 7 grates and they went together pretty easily. The first one, I installed all the grates for one side, then put a piece of masking tape over the whole piece to flip over. I thought that was a good tactic but the tape keeps the assembly from moving, so if it isn't square, the next set of grates are harder to install. After that, I removed the tape after flipping it and it went very easy after that. Installing the coamings for the grates was a bit of a task. The plan required mitering of the corners. I didn't have anything to cut reliable angles, but I do have a full size band saw with a small 1/4" blade but I don't have any slides for cutting angle. So the first grating I just cut everything at 90 degree angles. It worked fine. I ordered a cheap cutter and it came the next day. I cut 2 or 3 pieces of 3mmx4mm walnut and the blade broke. In addition, it cut lousy angles and it was impossible to see my cutting lines. I ordered a more expensive wooden version of a cutter and while I haven't used it yet, it appears to be a higher quality. I finished all the gratings with the plastic cutter and filled any gaps with wood putty. Making the stairs was hell itself. The instructions suggest the ideal tactic is to make a jig. I do not believe you can do this without using a jig. The treads at 1mm in thickness just do not easily fit into the side rails without a bit of force. You can see just below the 3 stairs I did. The middle one was my first non jig attempt. It is a horror to look at. The one on the right was with the jig, but I took it out too soon. The pressure created by the tightly fitting treads pushed the whole thing a part and the side rails broke trying to get humpty dumpty back together again. The left one, I left in till the glue set up better. My fear is that once dry, I wouldn't be able to get the stairs out. So it's a dance to get it out at the right moment. My only saving grace is that these stairs are mostly hidden under the upper deck which is mostly hidden by the quarter deck....and they will prepare me for what I need to do for the stairs on the quarter and top decks which will be very visible.


-
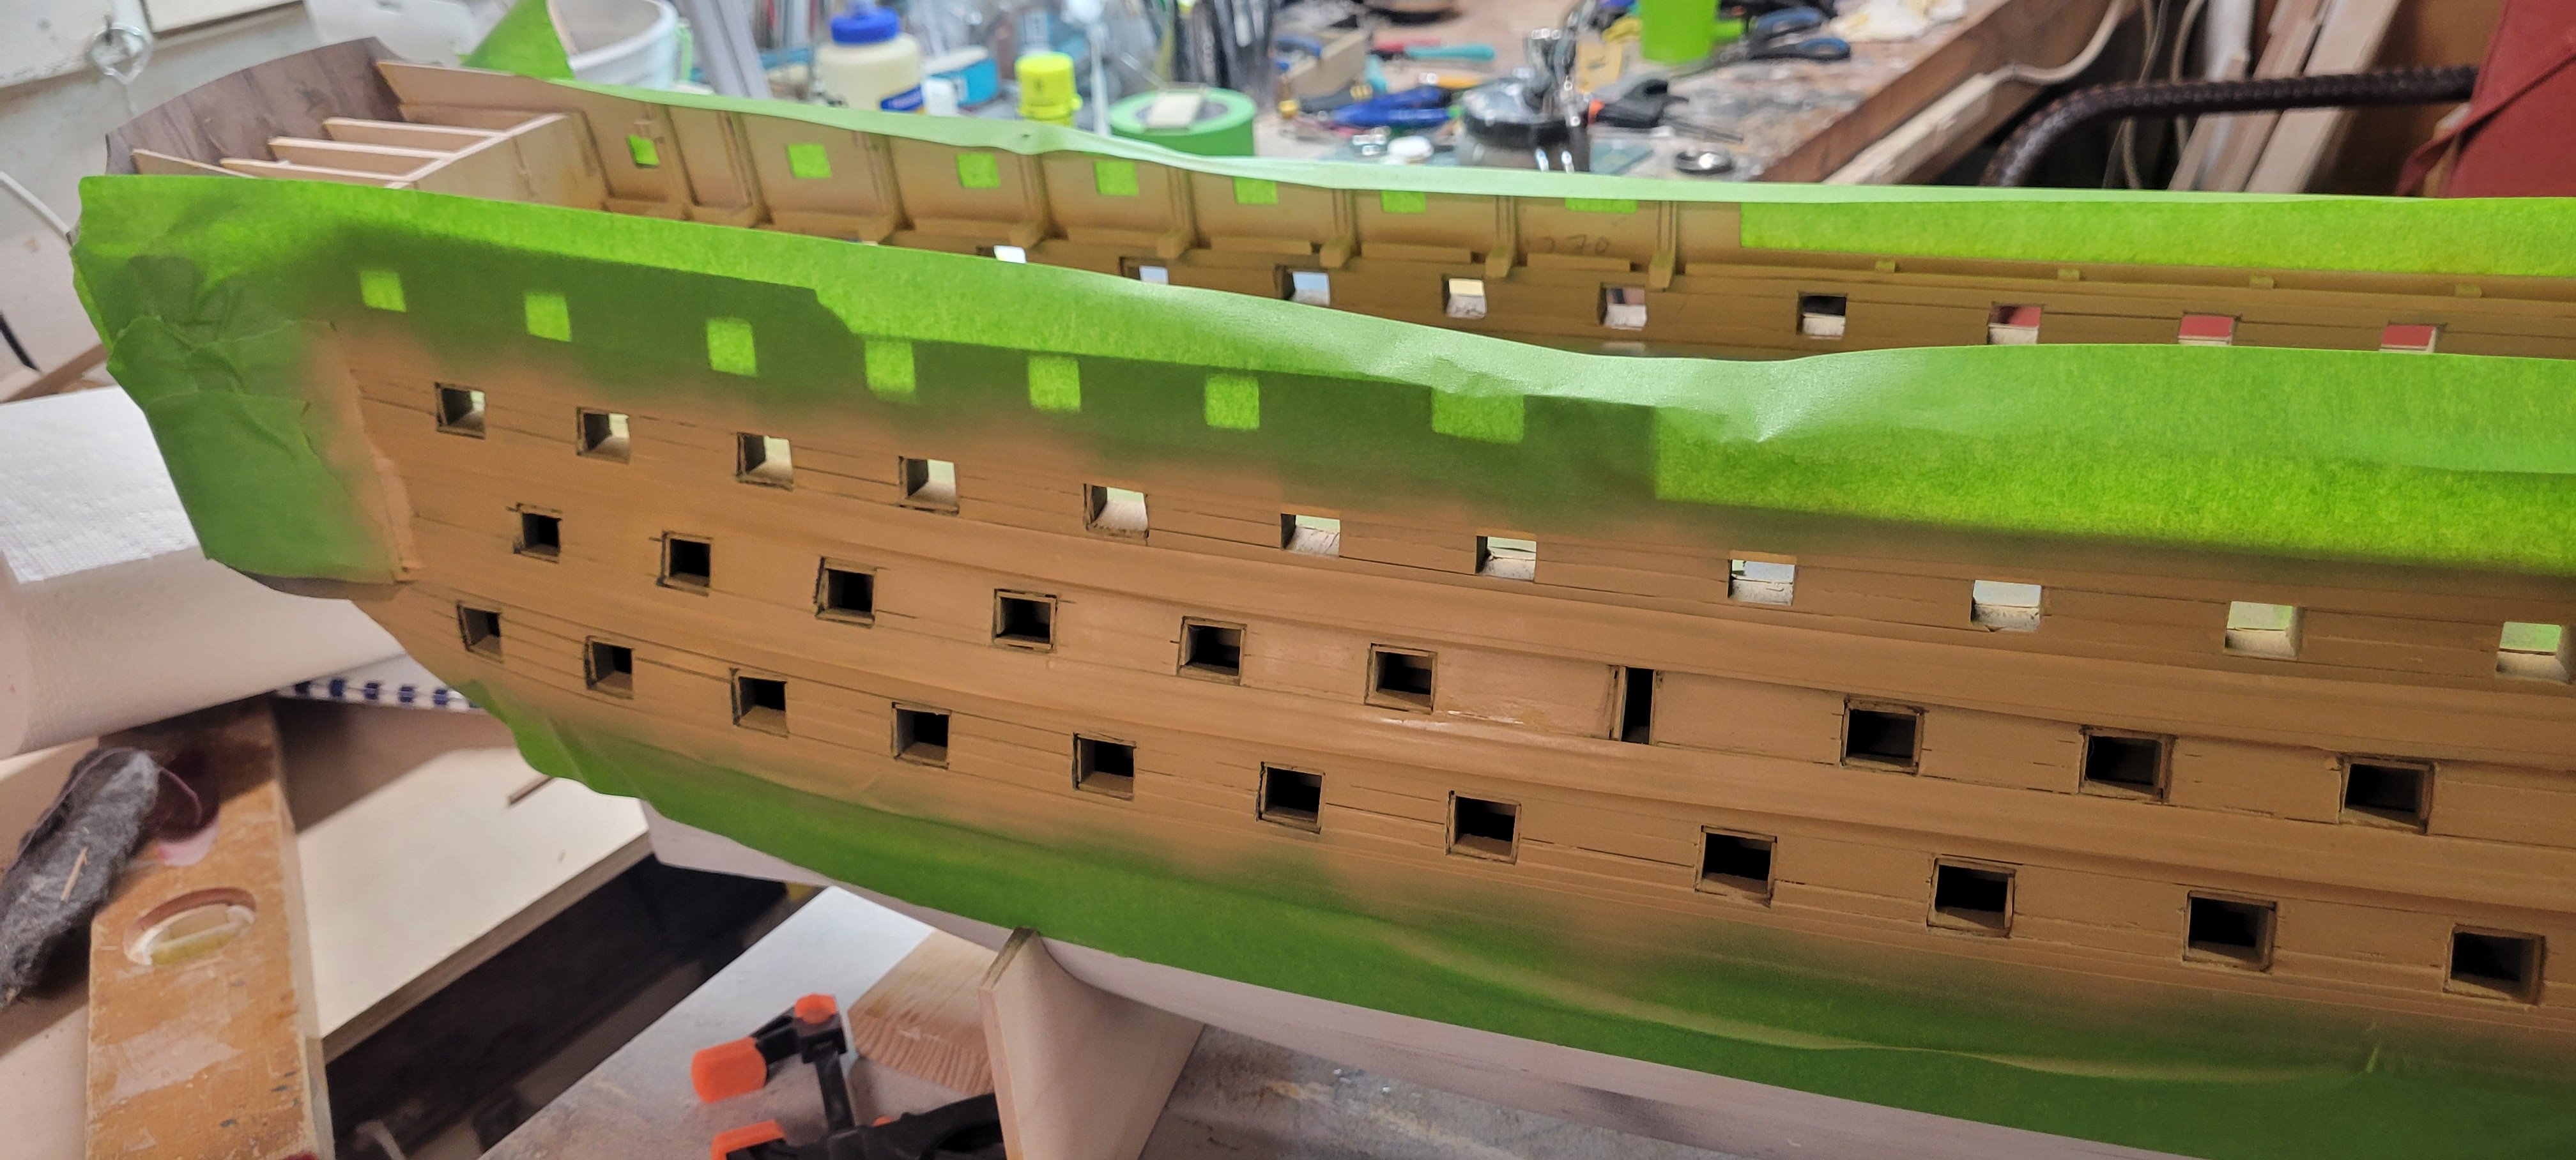
I taped off striping for the hull and then began laying down the first layer of yellow ochre. Unfortunately, while cleaning the airbrush, the chucking nut that holds the needle in place fell on the floor. This is the second time I've done that. Last time while painting my Titanic model and I never found it. I did not find this one....I tried to paint without it, but the flow was too heavy. So I had to order a new one....ordered two this time.


-
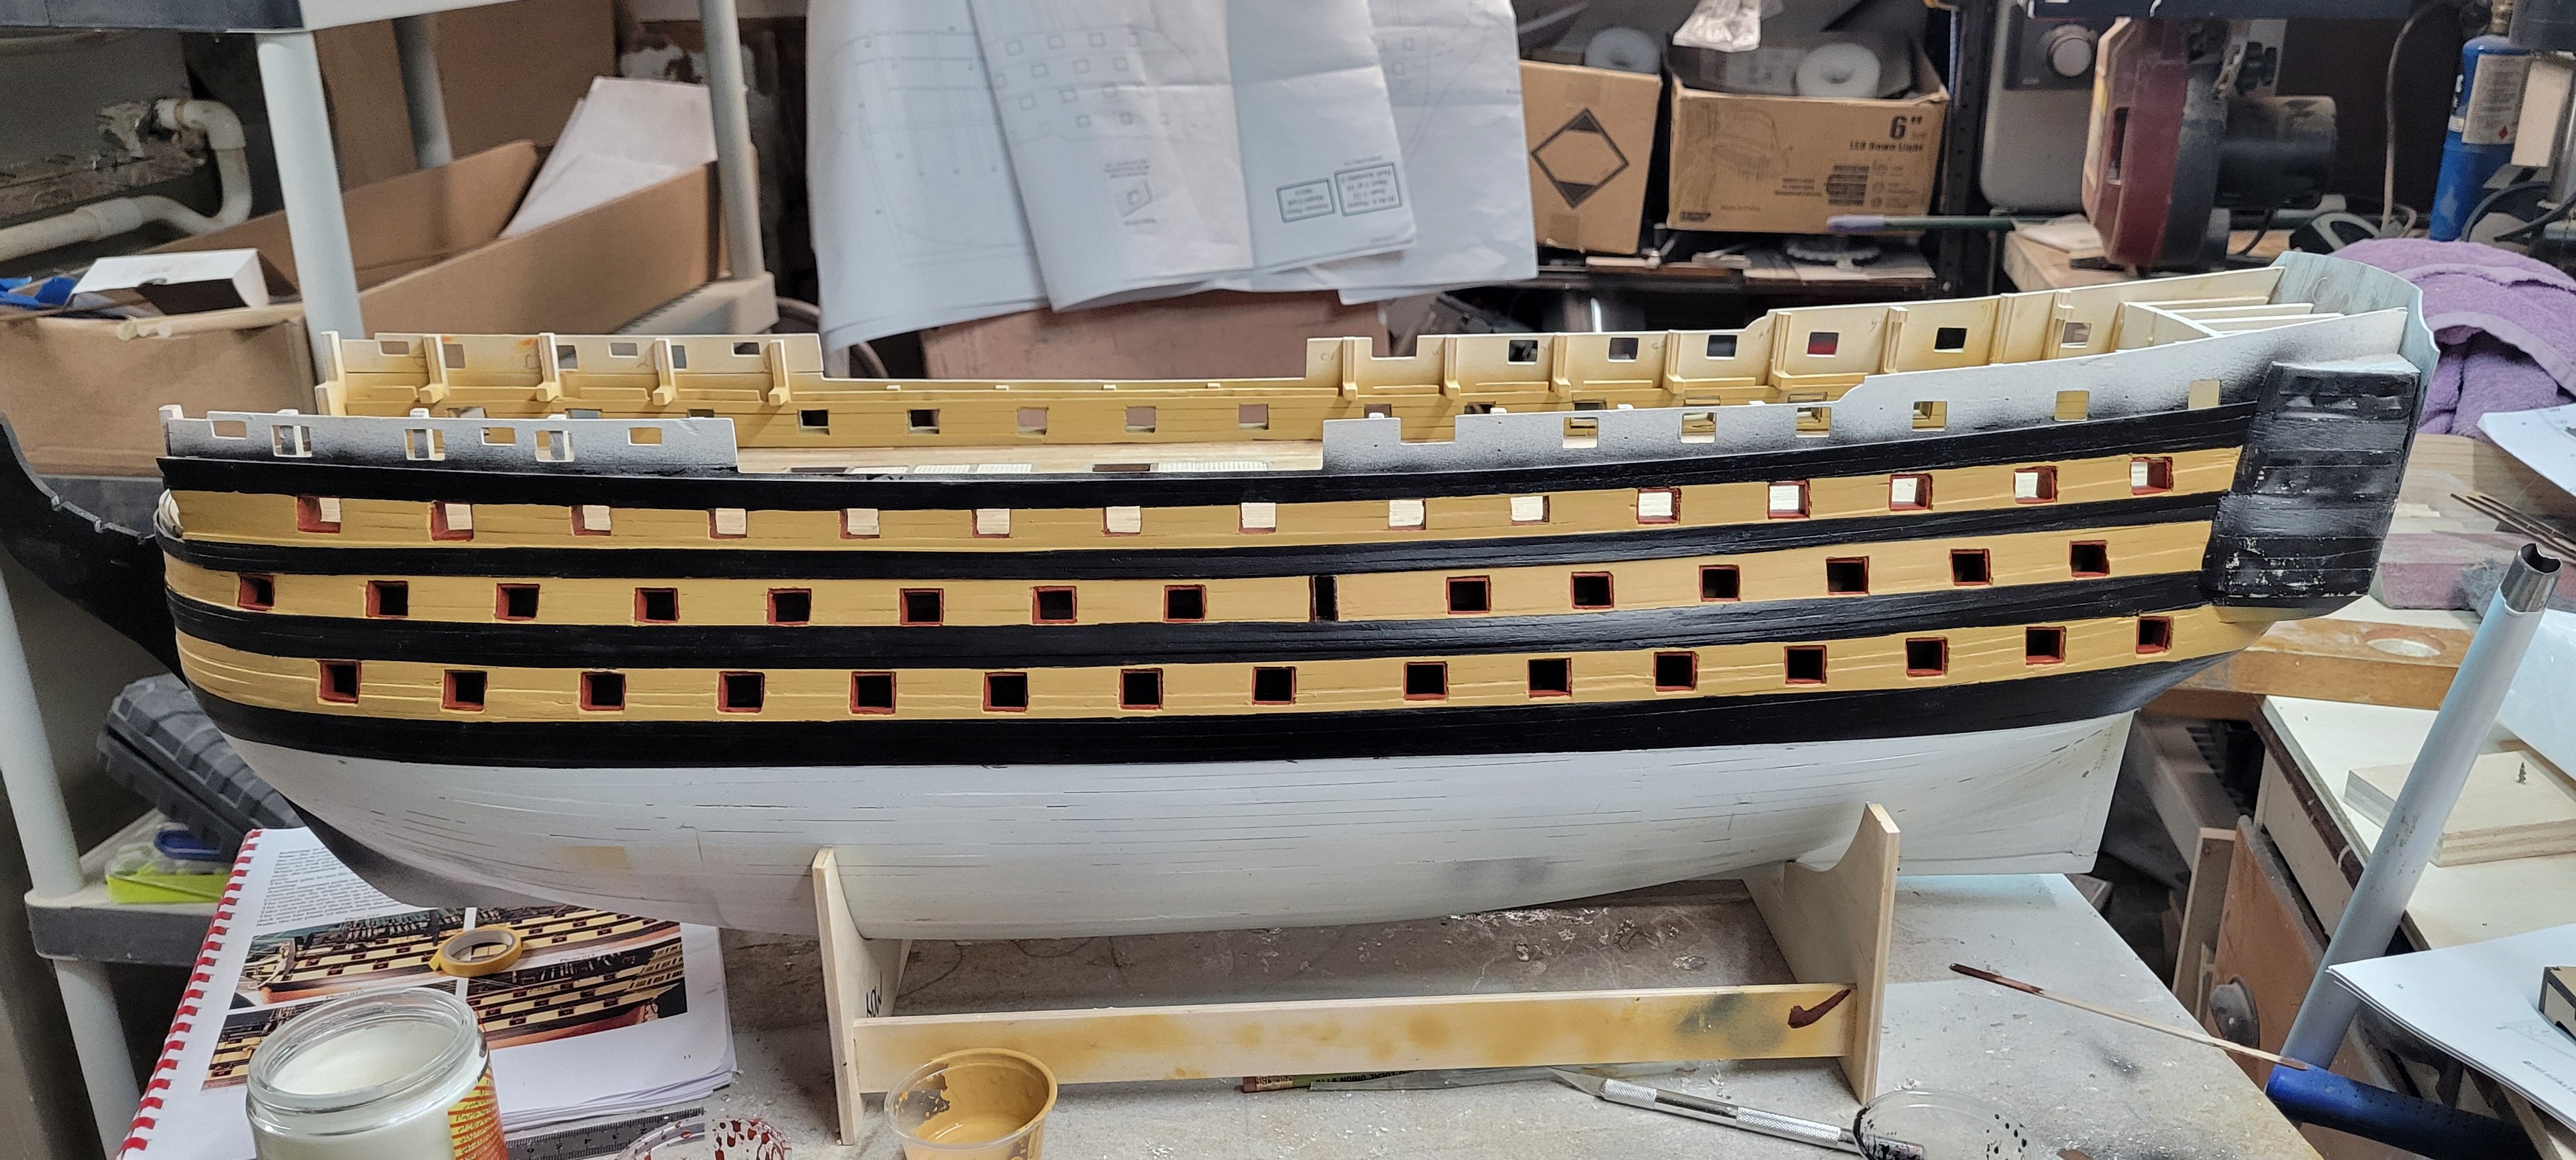
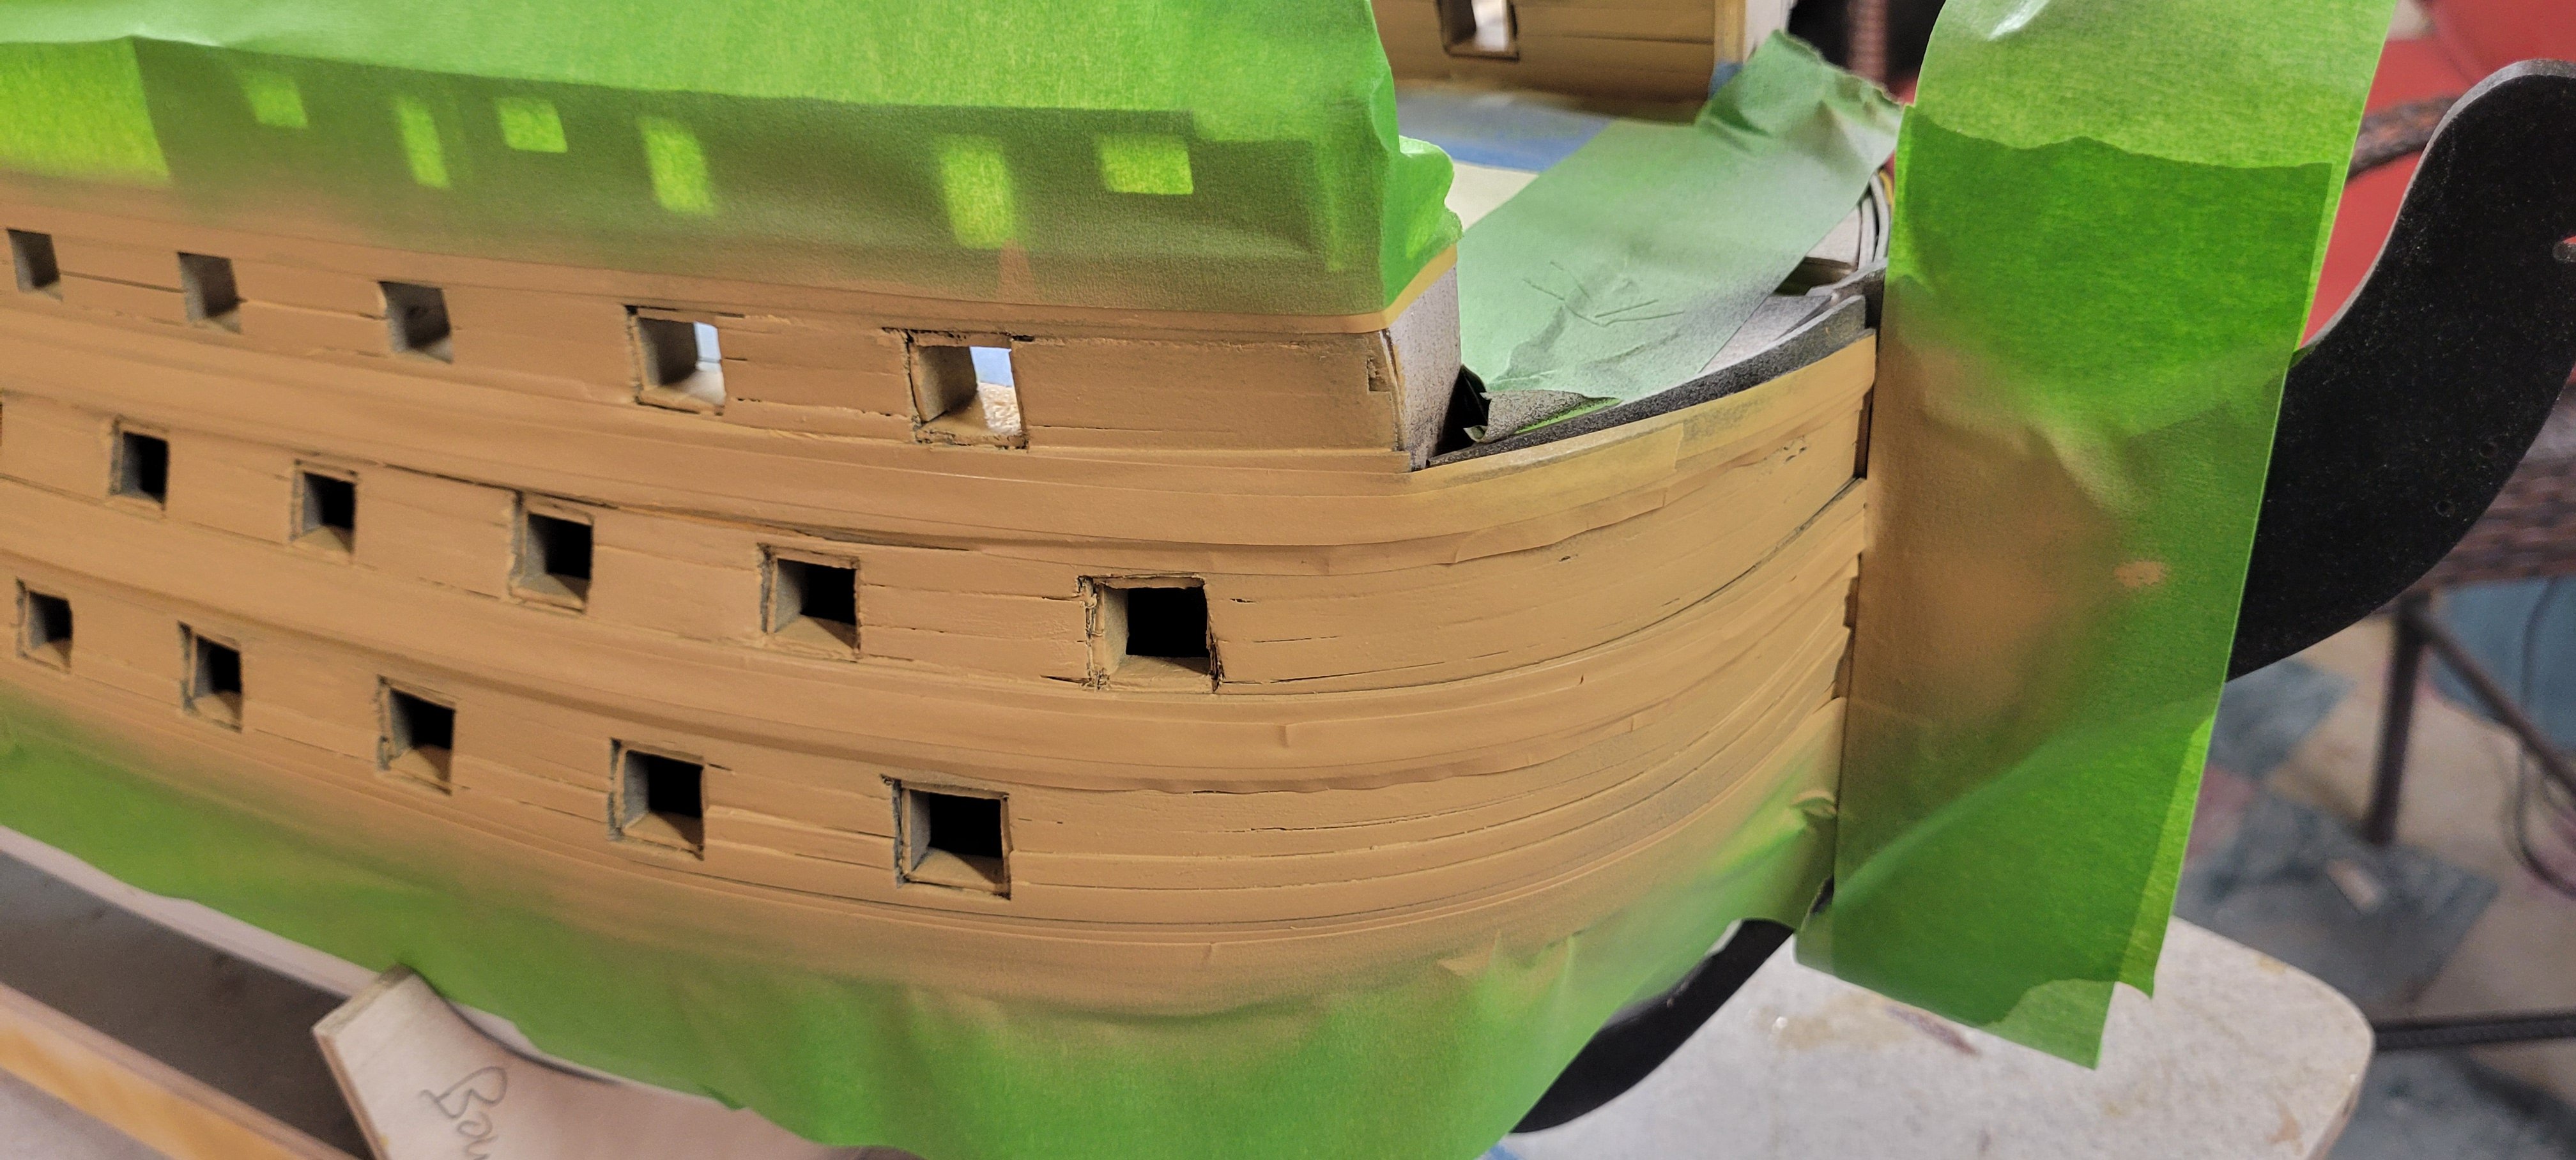
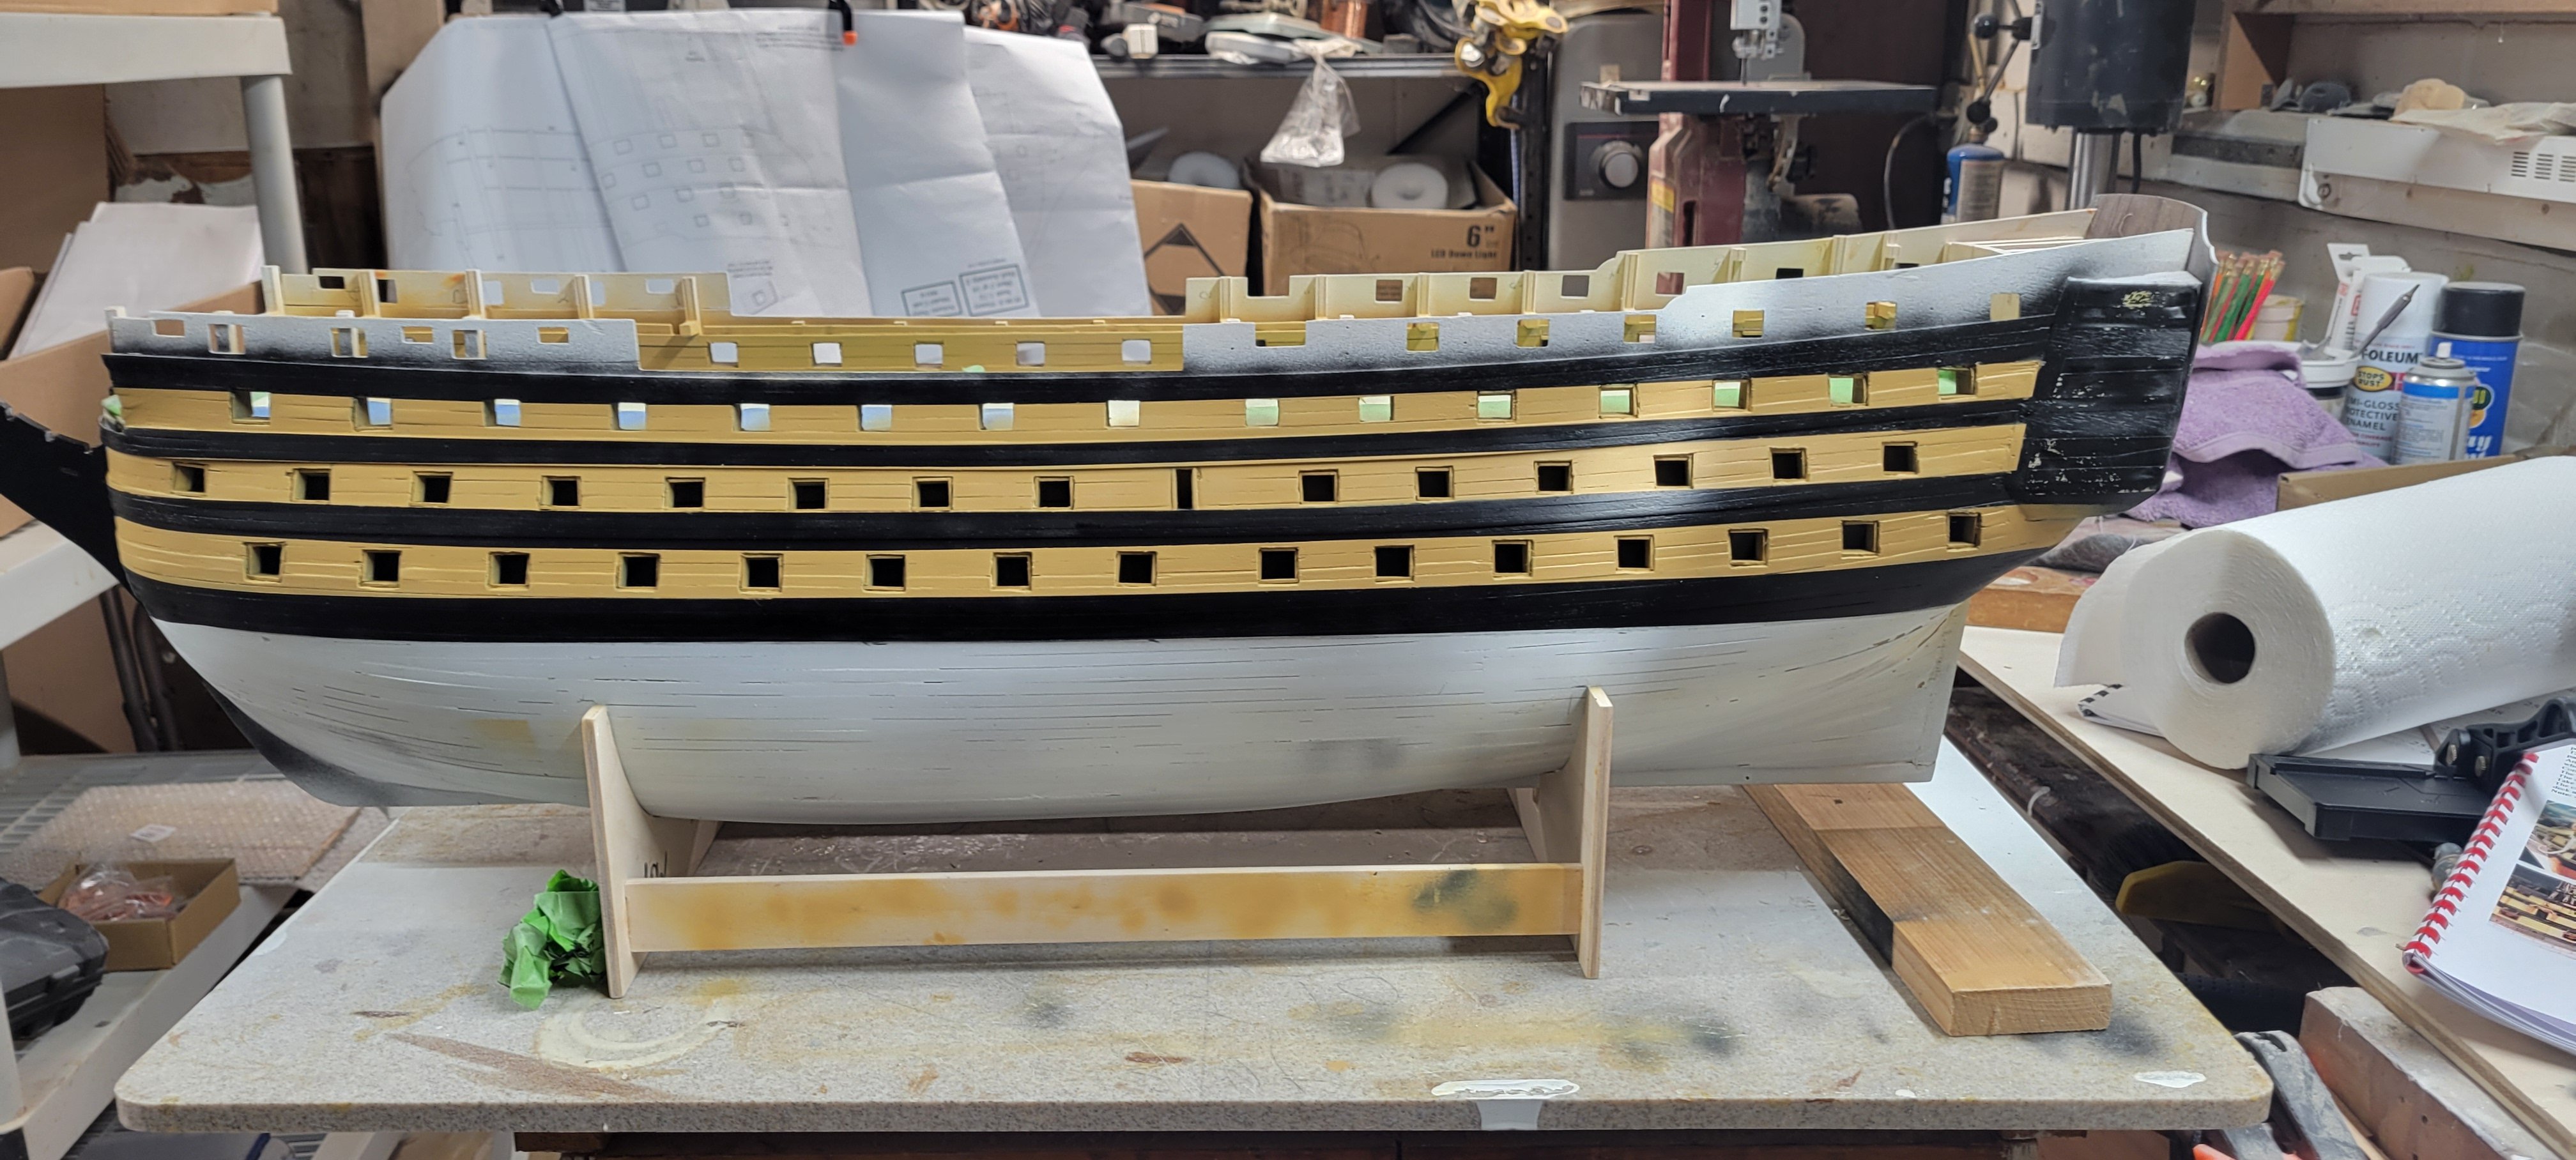
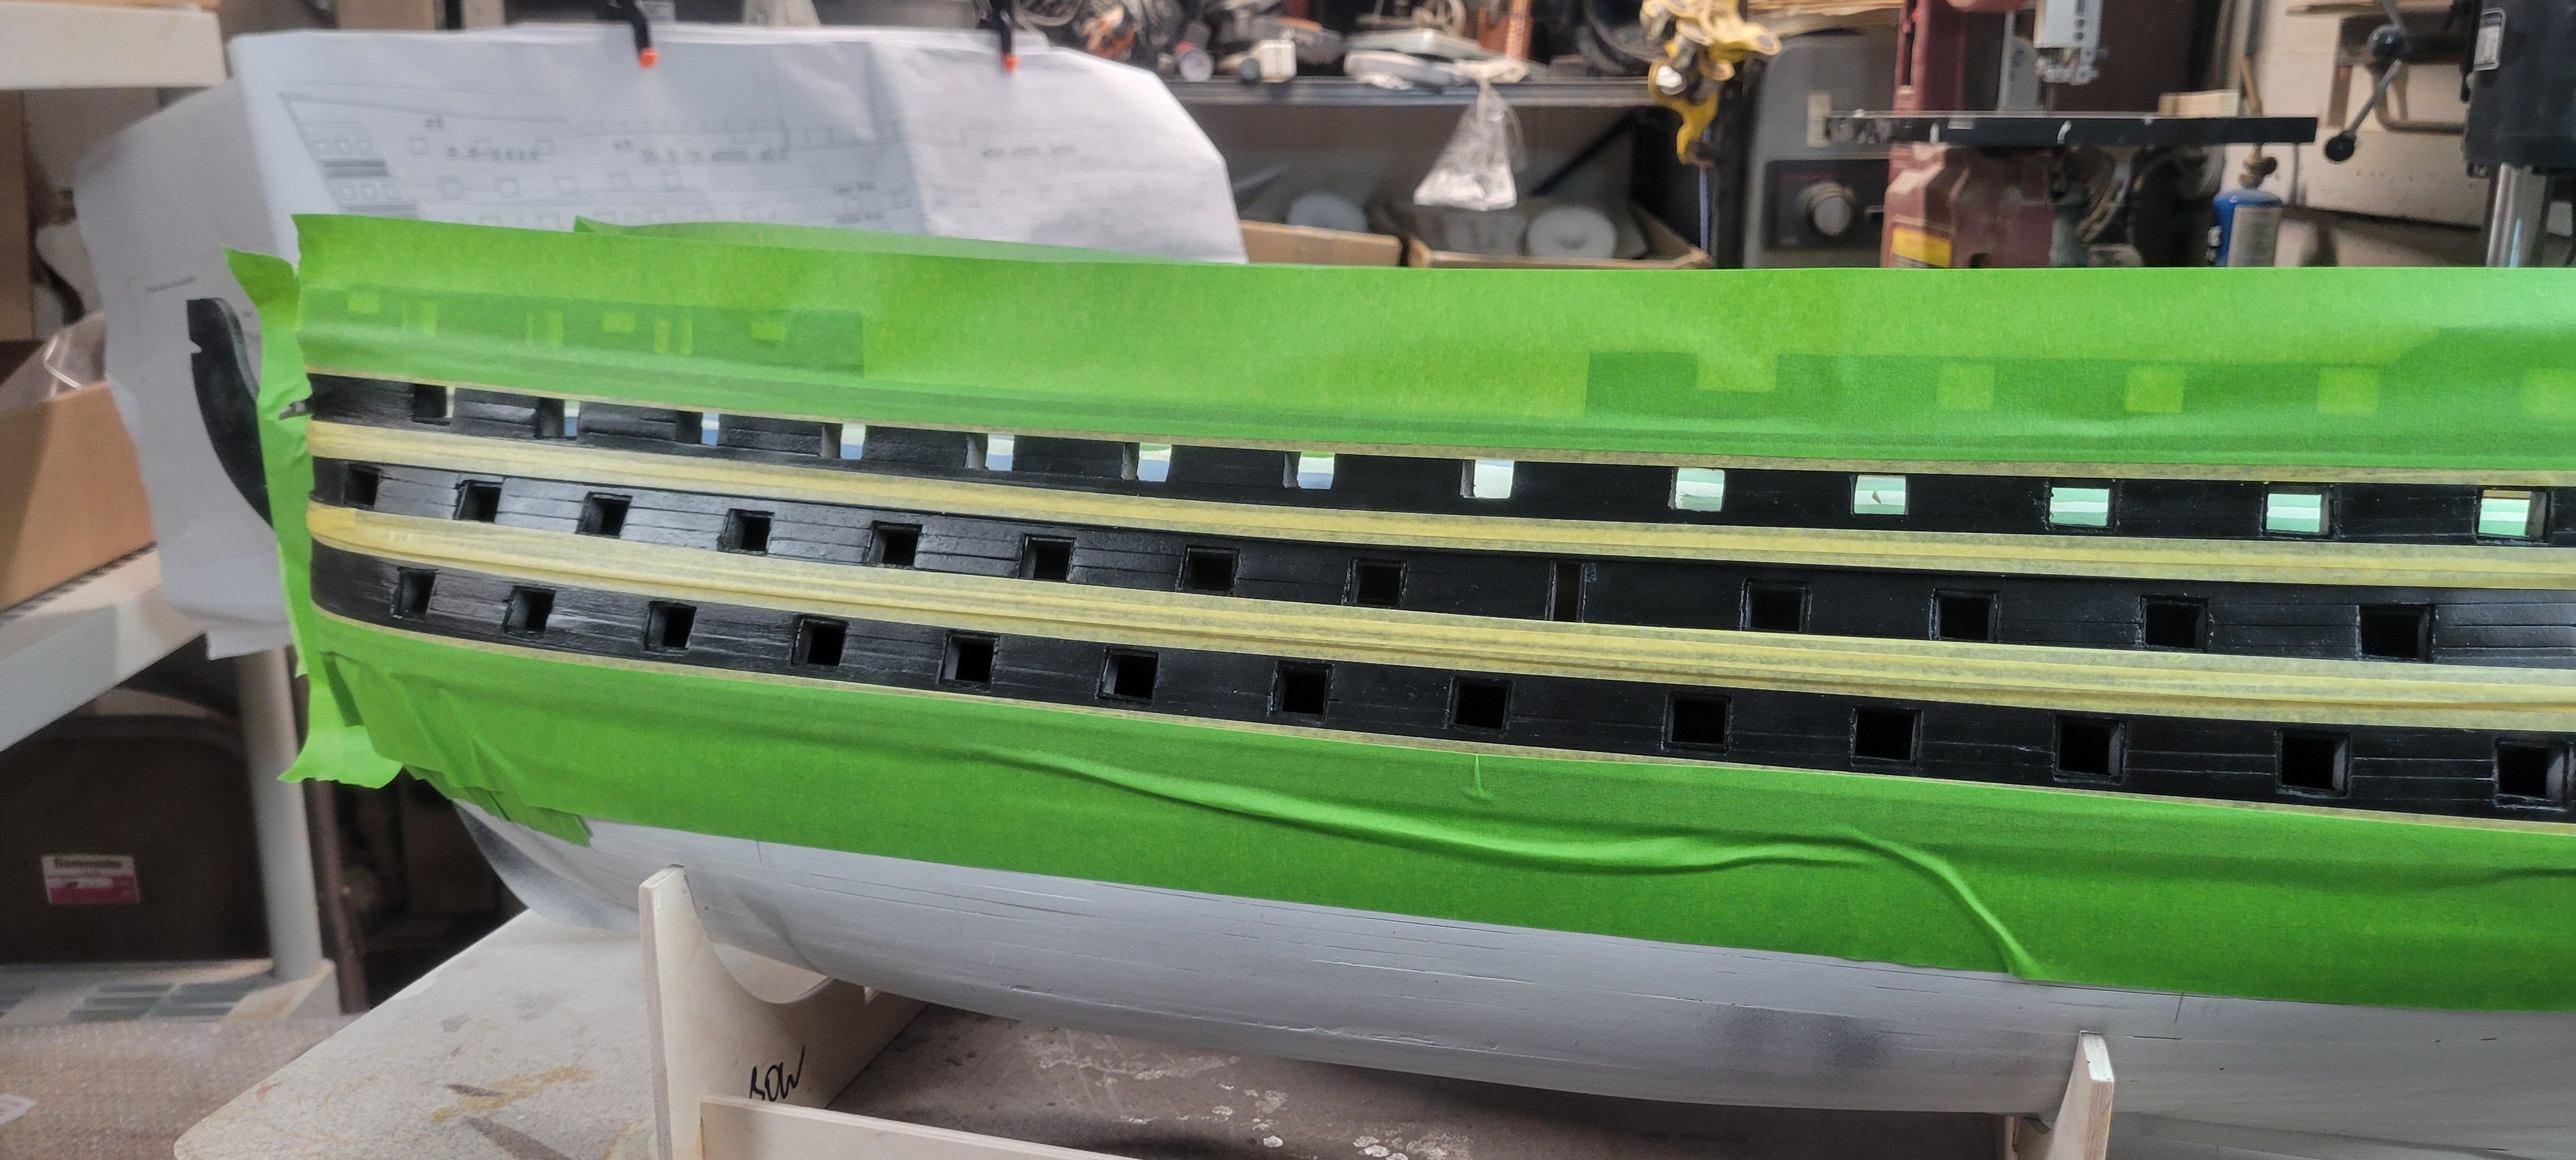
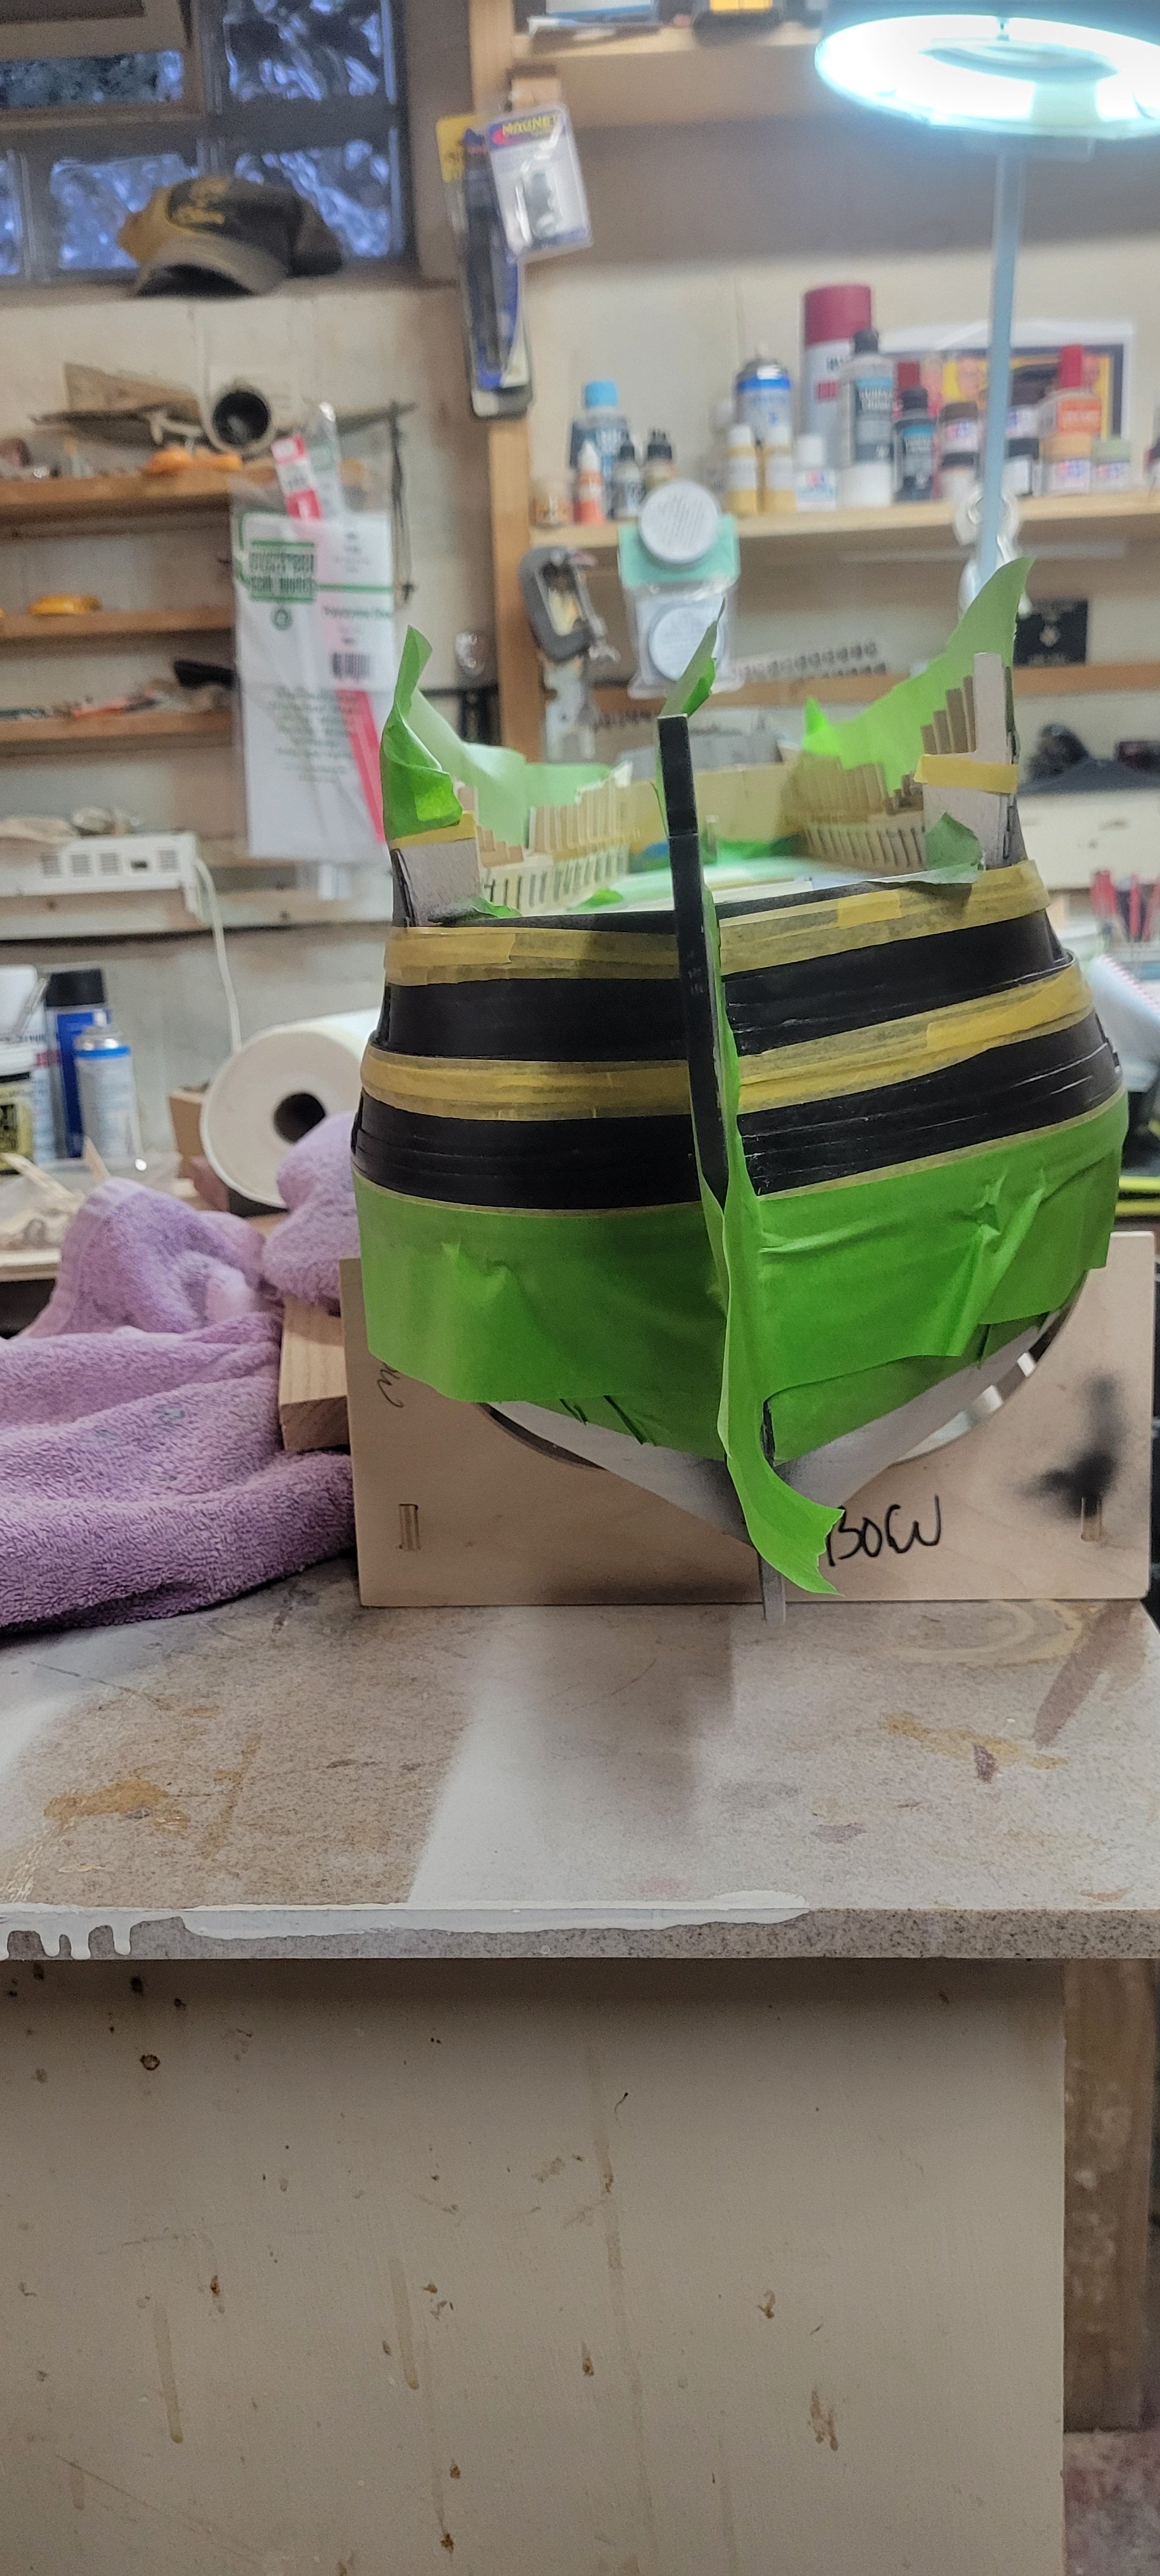
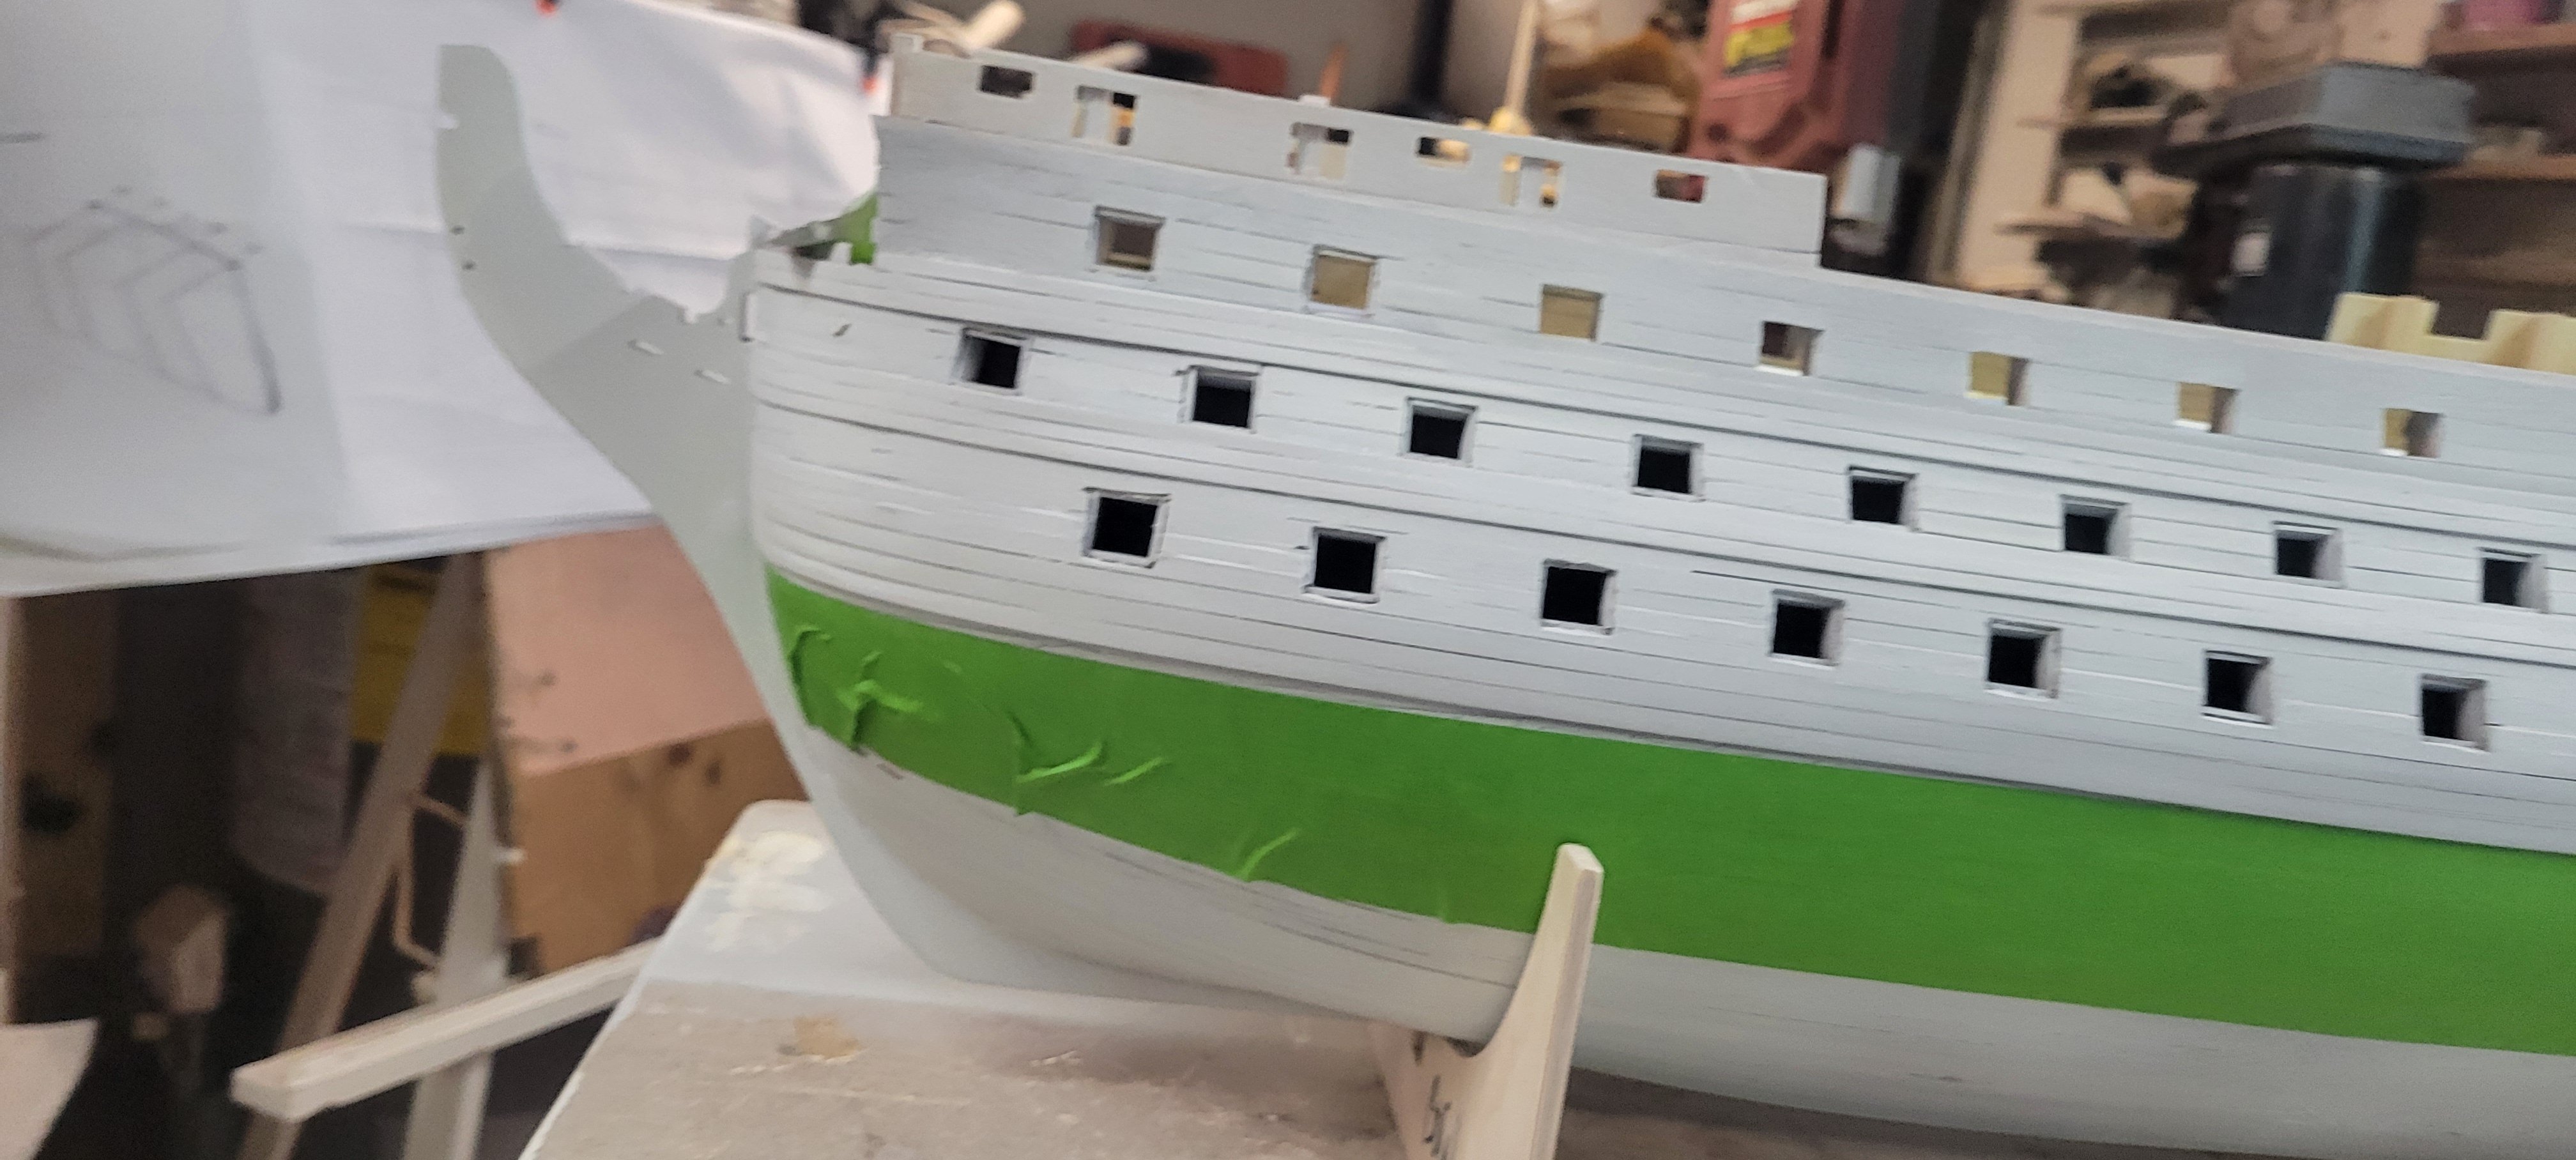
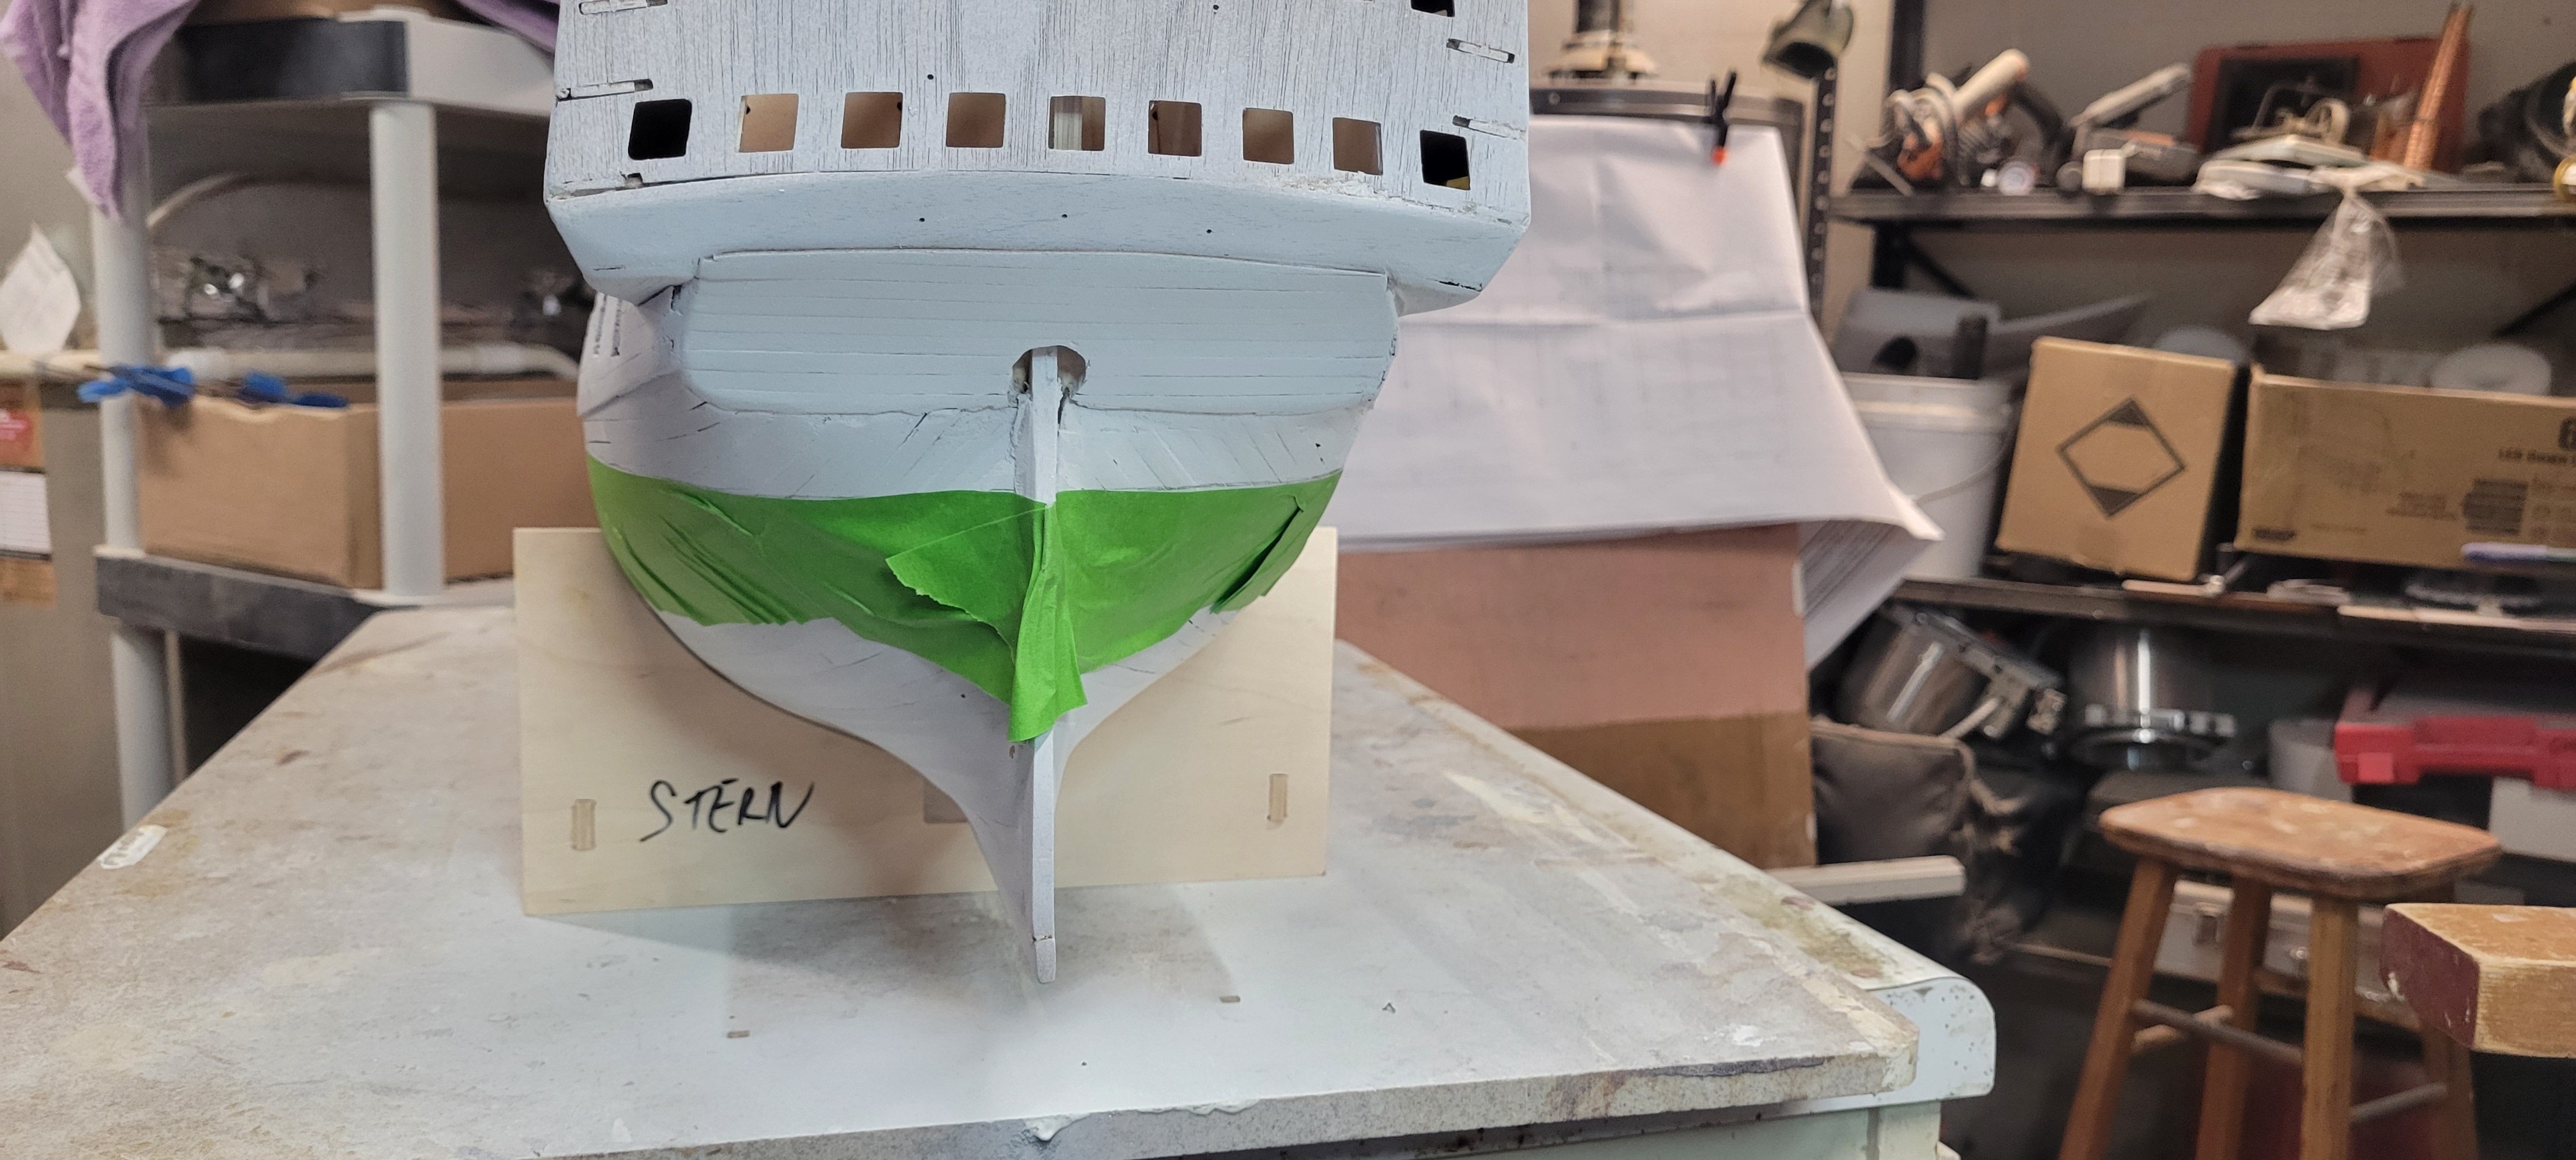
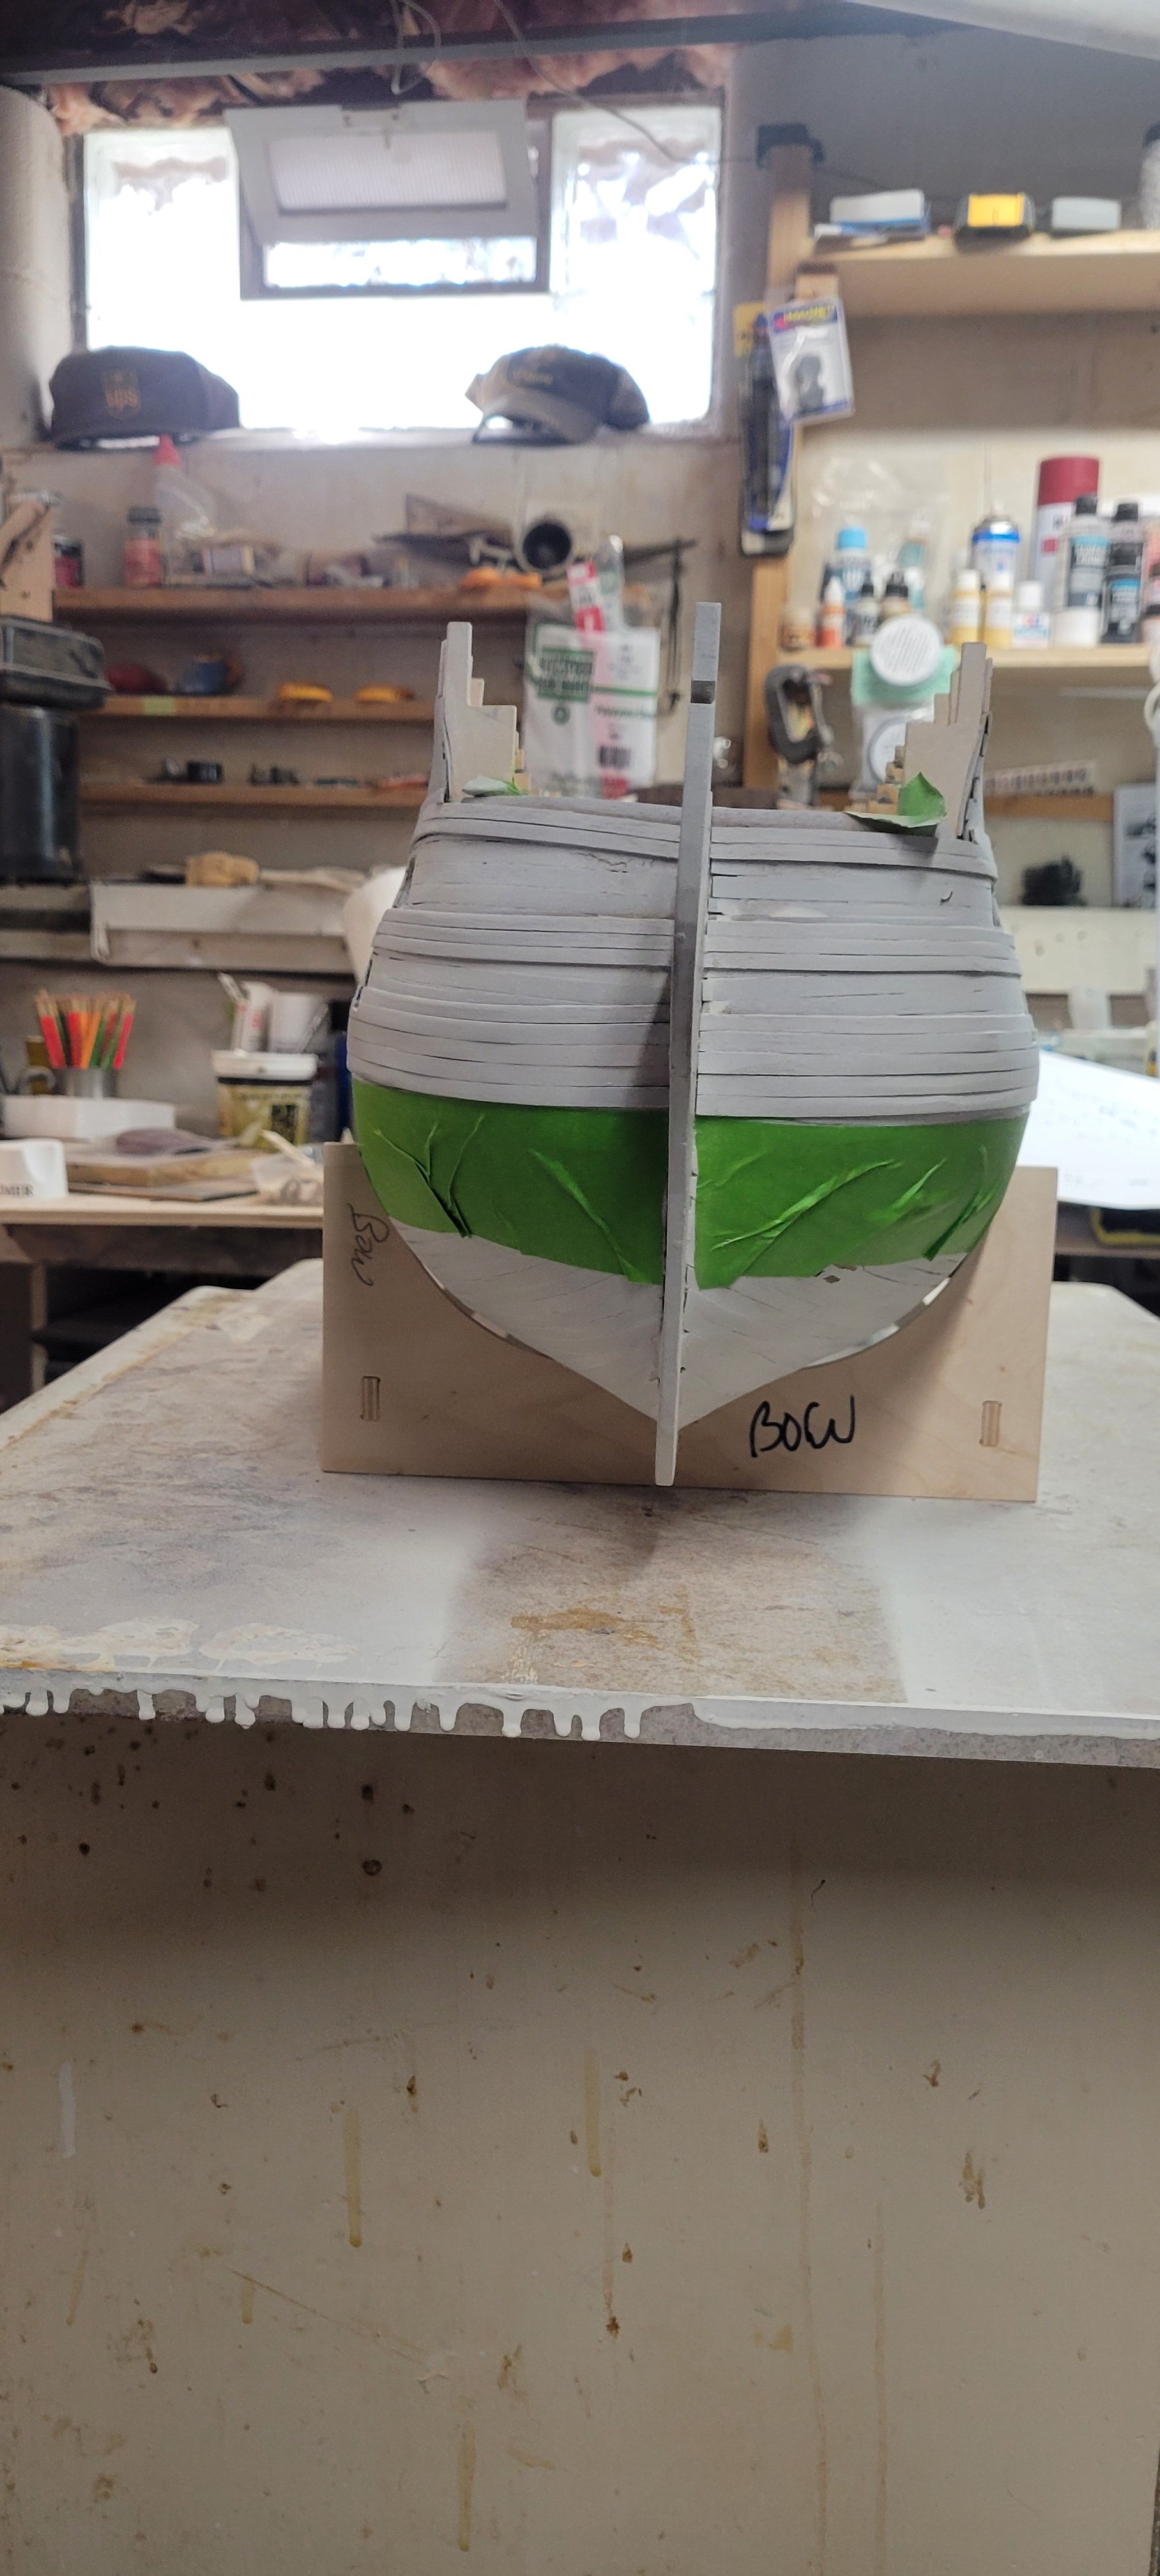
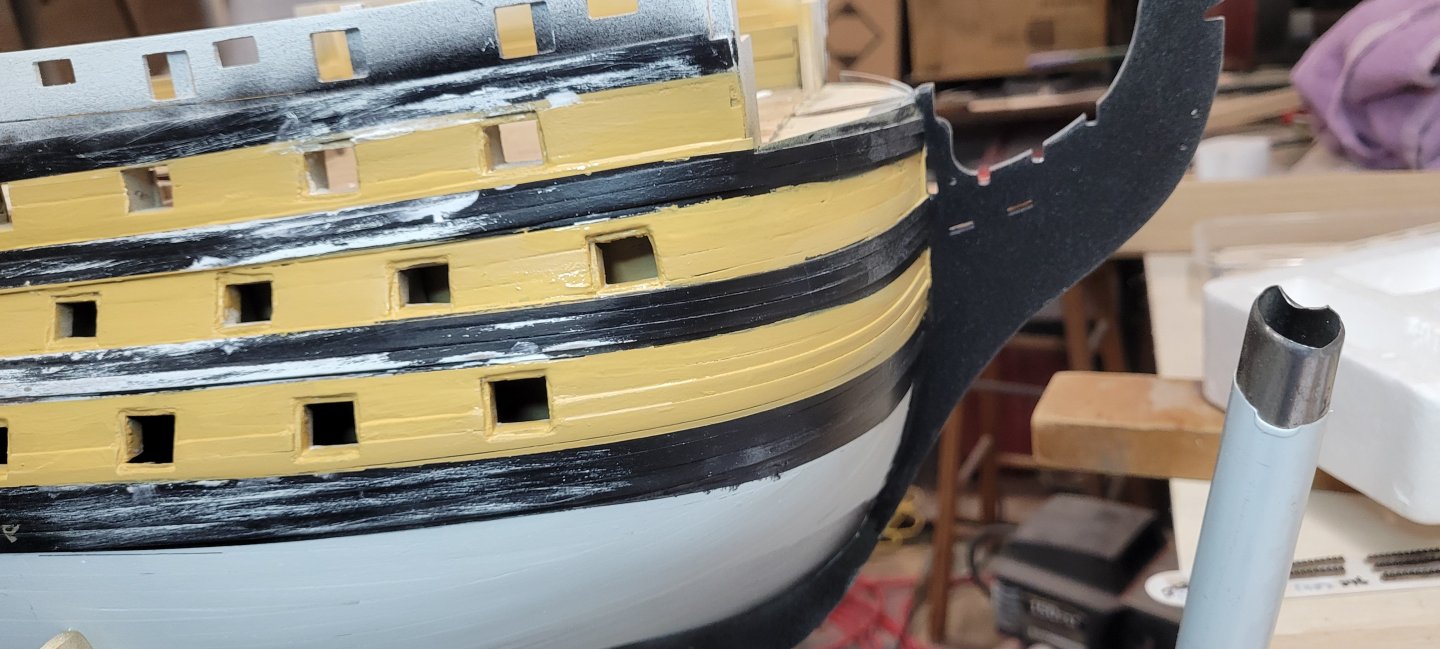
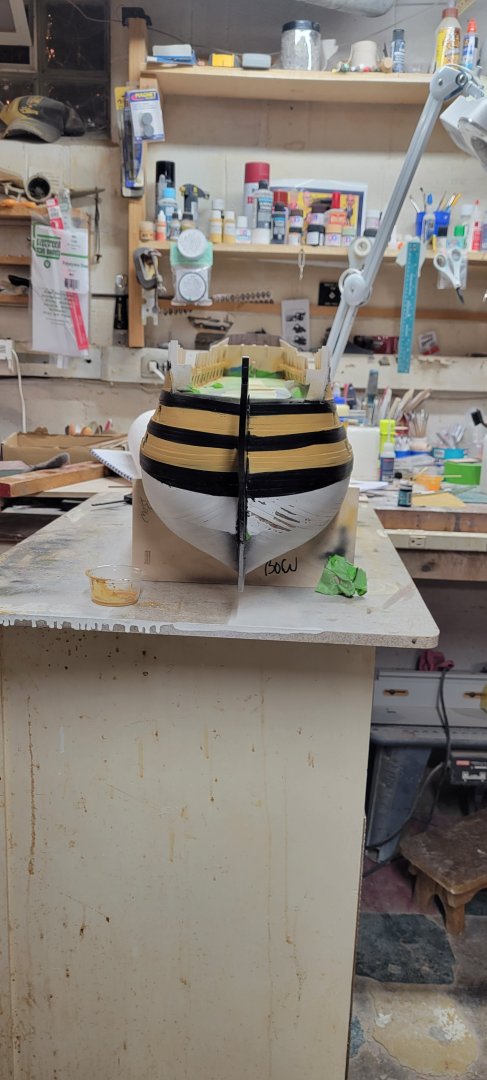
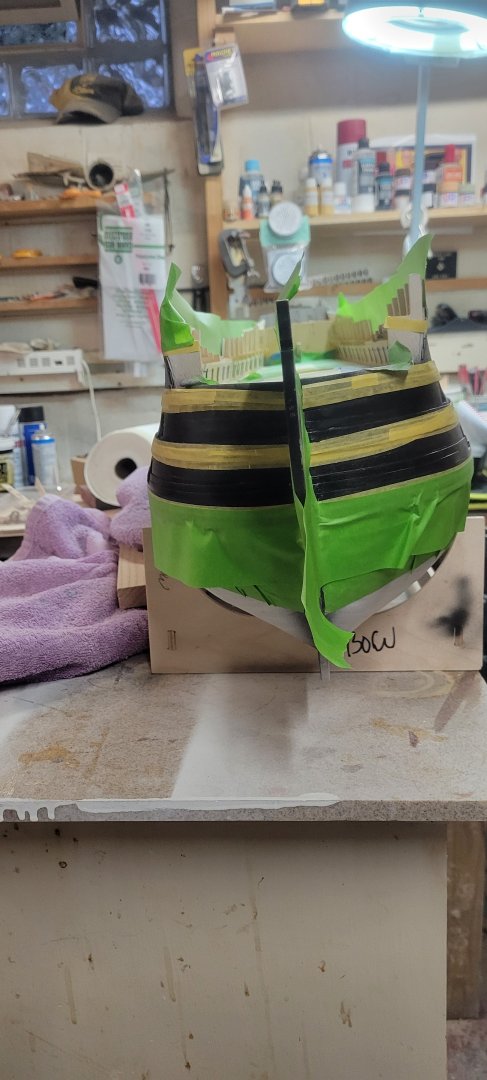
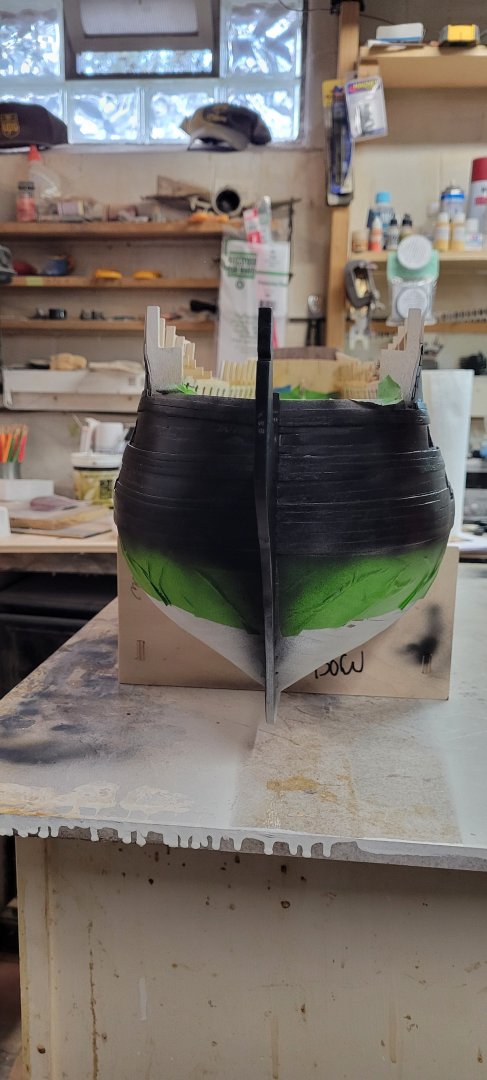
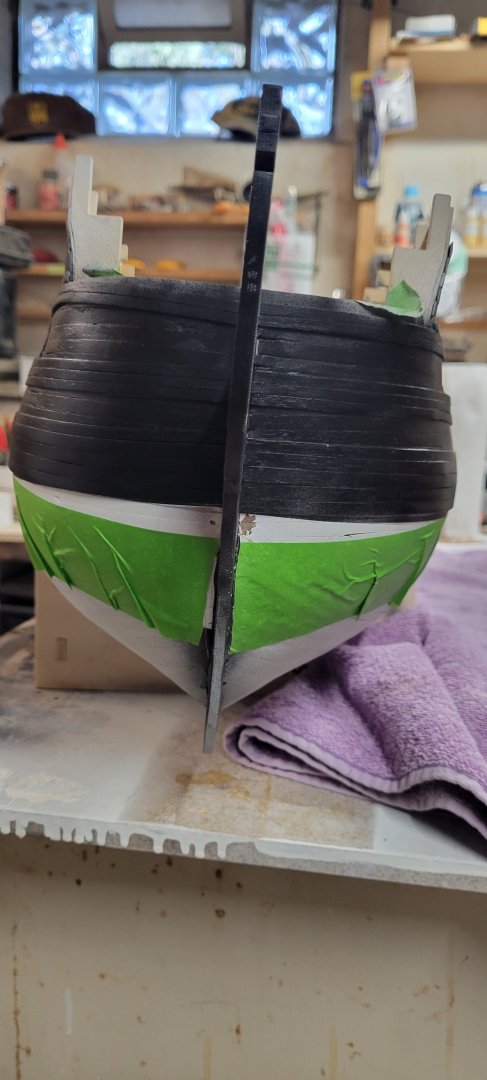
After taping off everything, began painting. I used my airbrush and began experimenting with various thinners I have in stock. I had tried Tamiya and that didn't seem to work well. Neither did AK, Vellejo or Real Color thinners. Ultimately after getting an email from Jotika suggesting I use water, that's what I went with and it seems to go well....just watch how thin you make it. You can see here that the water line is too high at the bow. It needs to actually follow my planking that is barely visible here. I re-taped the bow and fell like that will be more realistic.


-
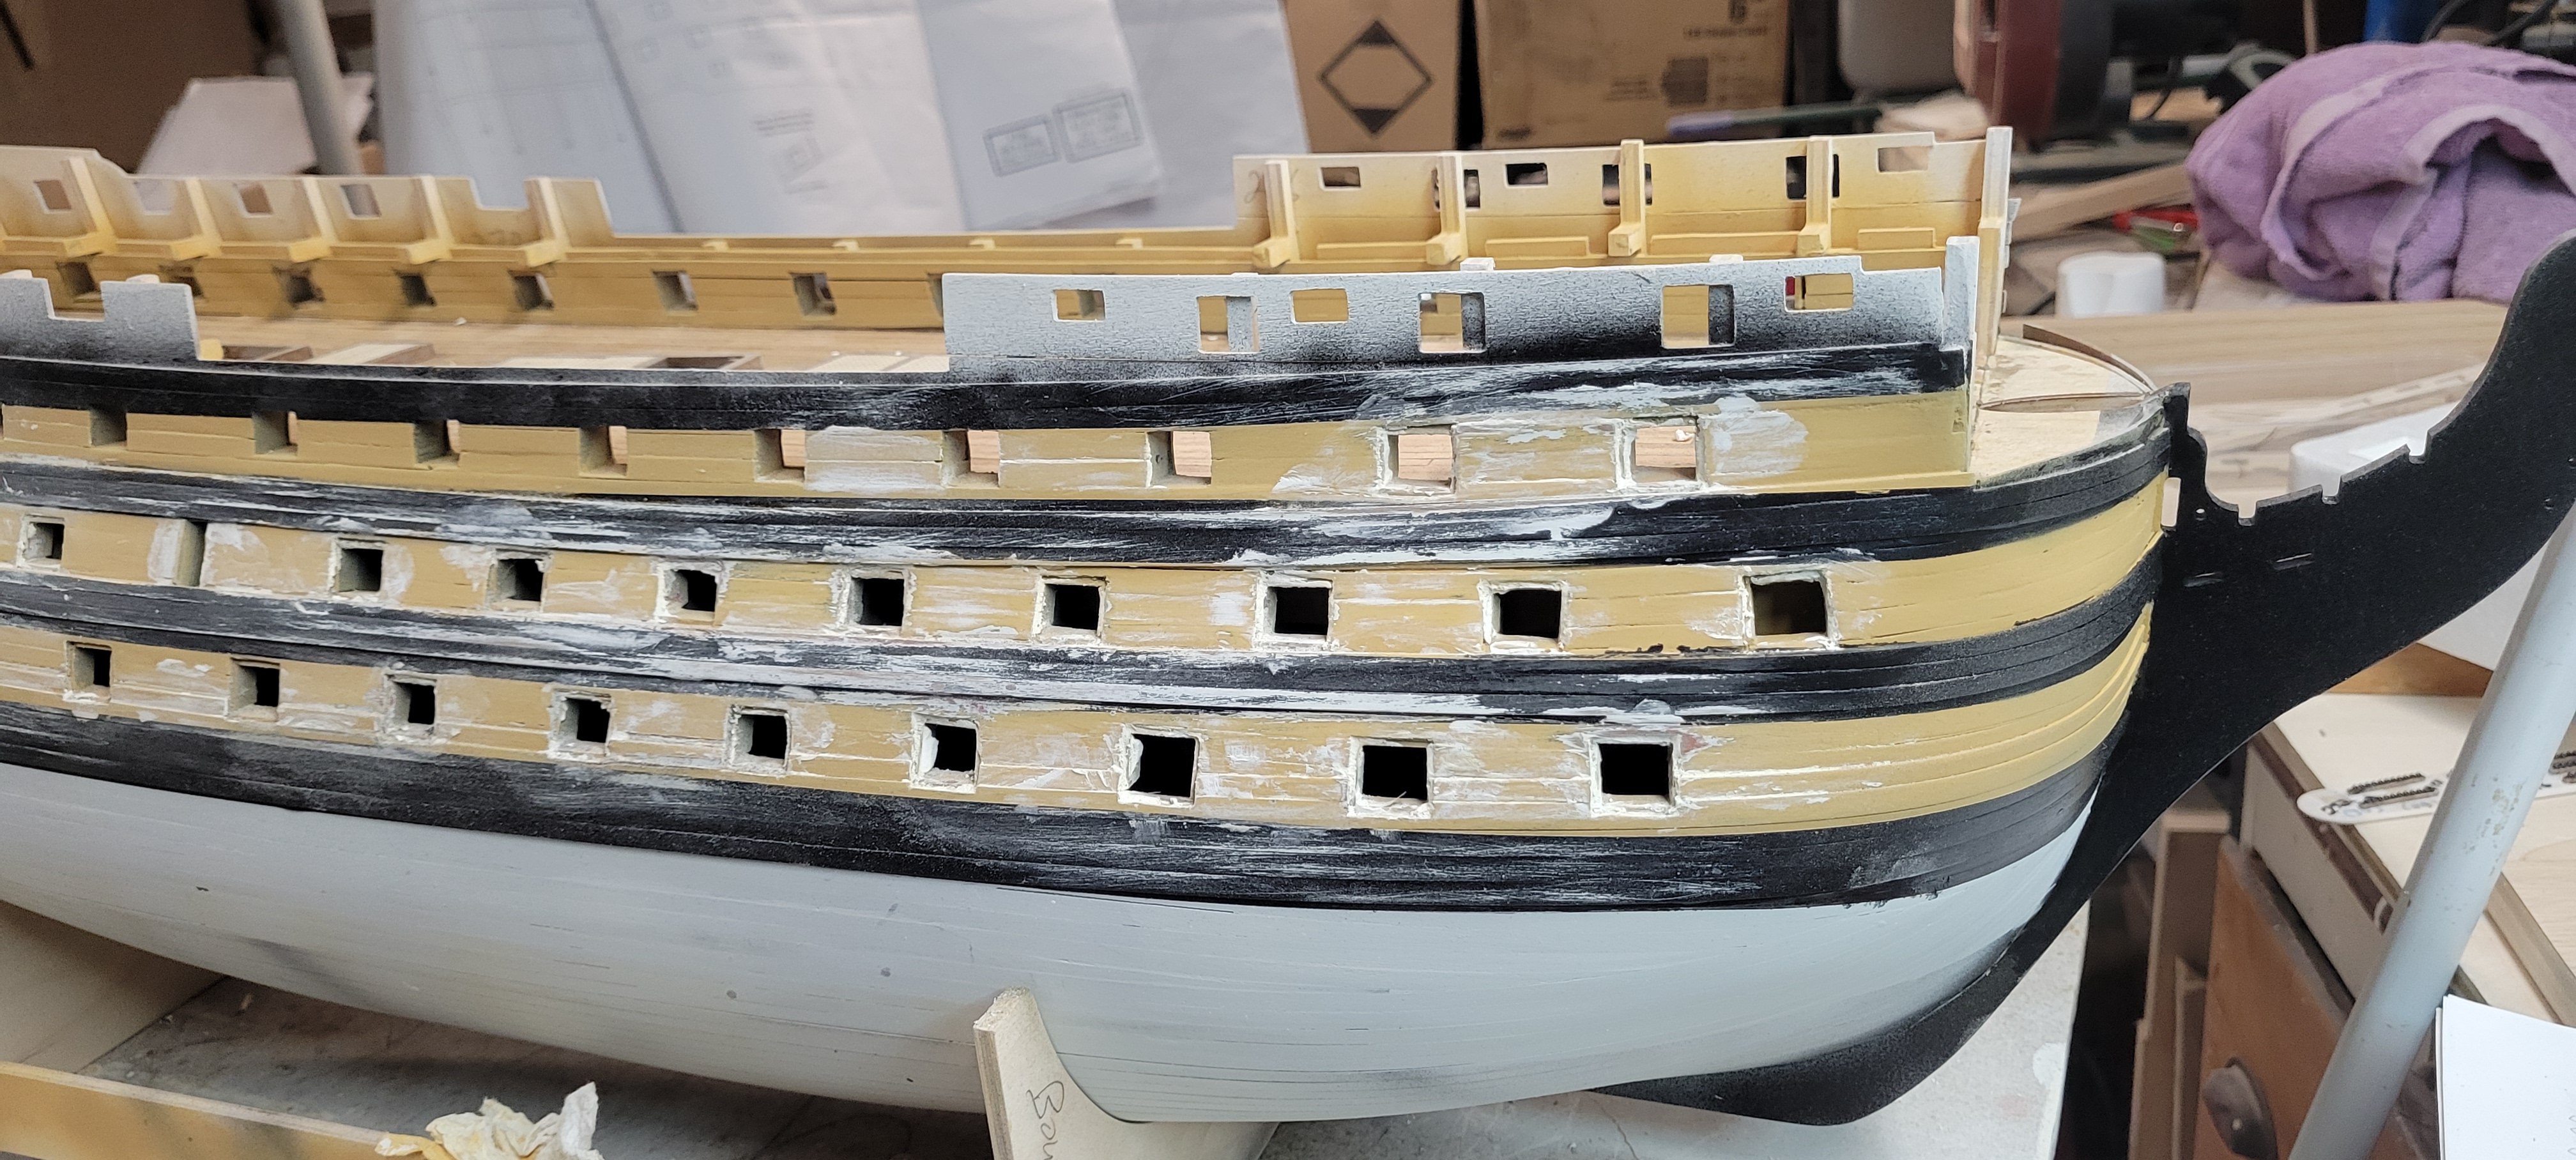
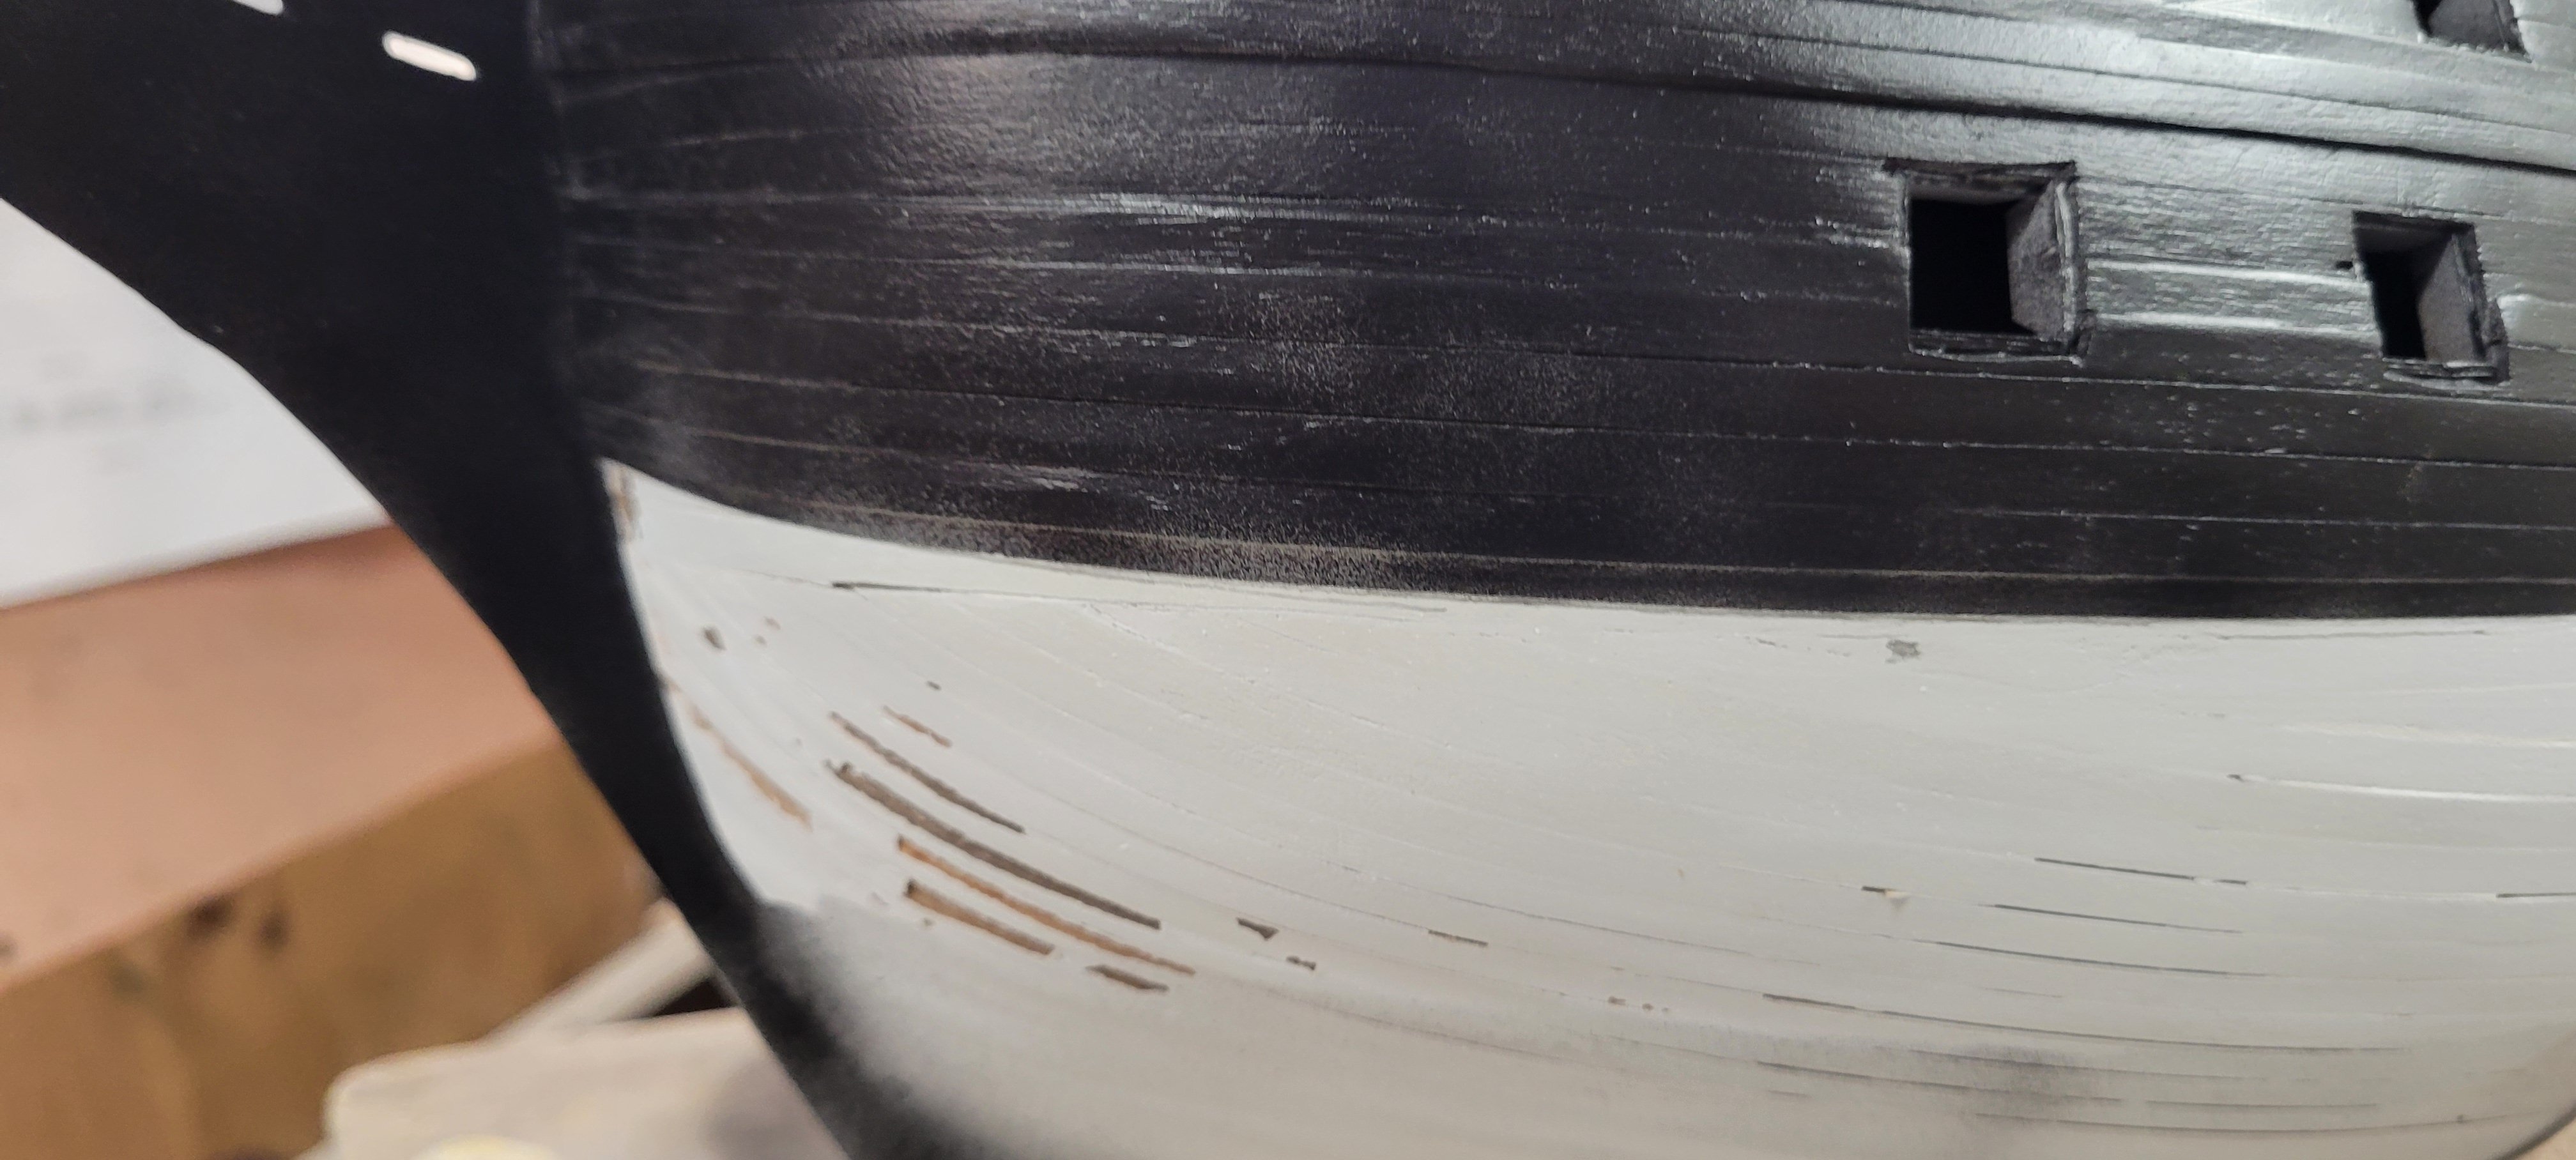
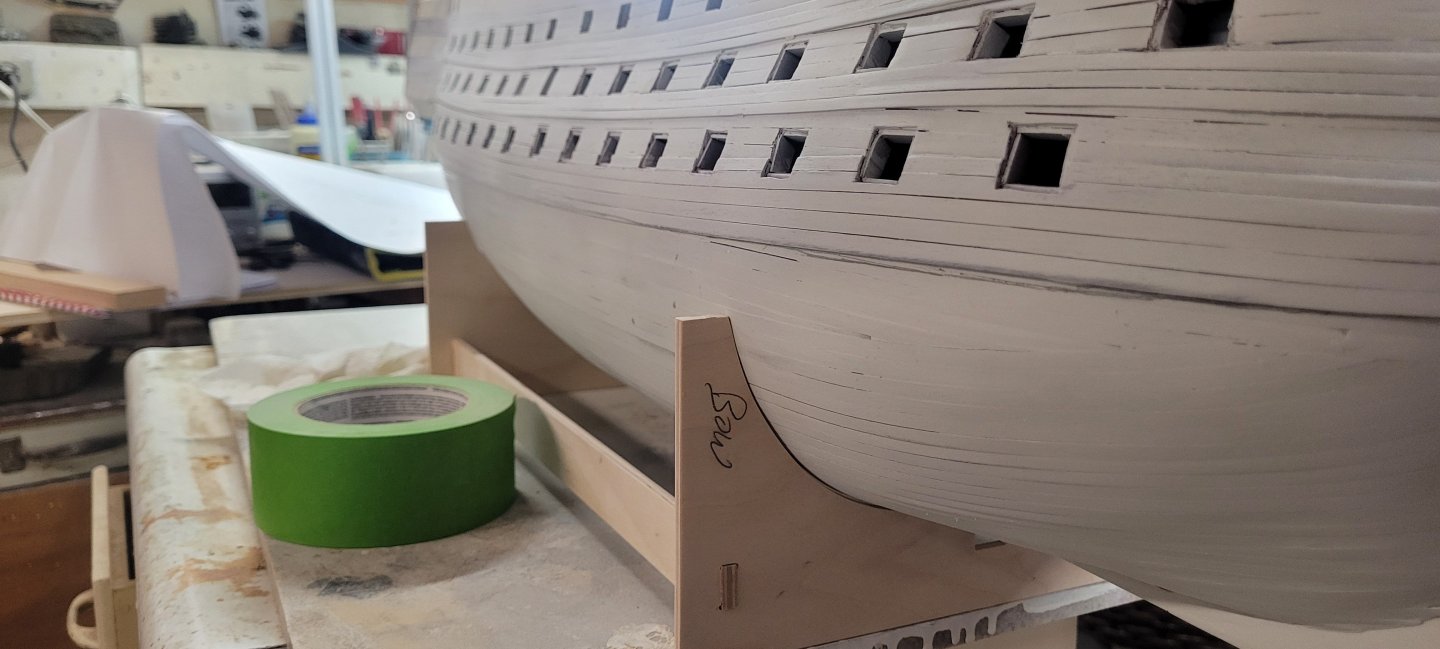
Been a while, but I have moved along. Not always for the best, in fact as I stand here today, I am both happy and very unhappy with progress so far. Laid out the water line per the plans. Just jury rigged a pencil to a piece of wood and drew my lines after leveling the hull as best as possible. My error was the line at the bow. It follows the wales and while it looked ok before painting, looking at other builds after the fact it seemed to me that there needs to be more of the planking below the lower wale before the water line begins. After painting, it was clear that I needed to fix that....


-
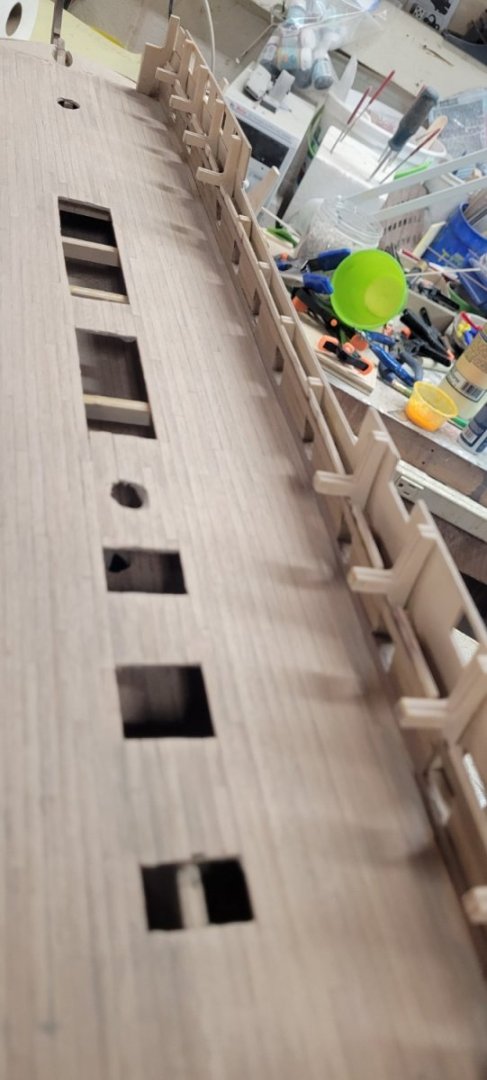
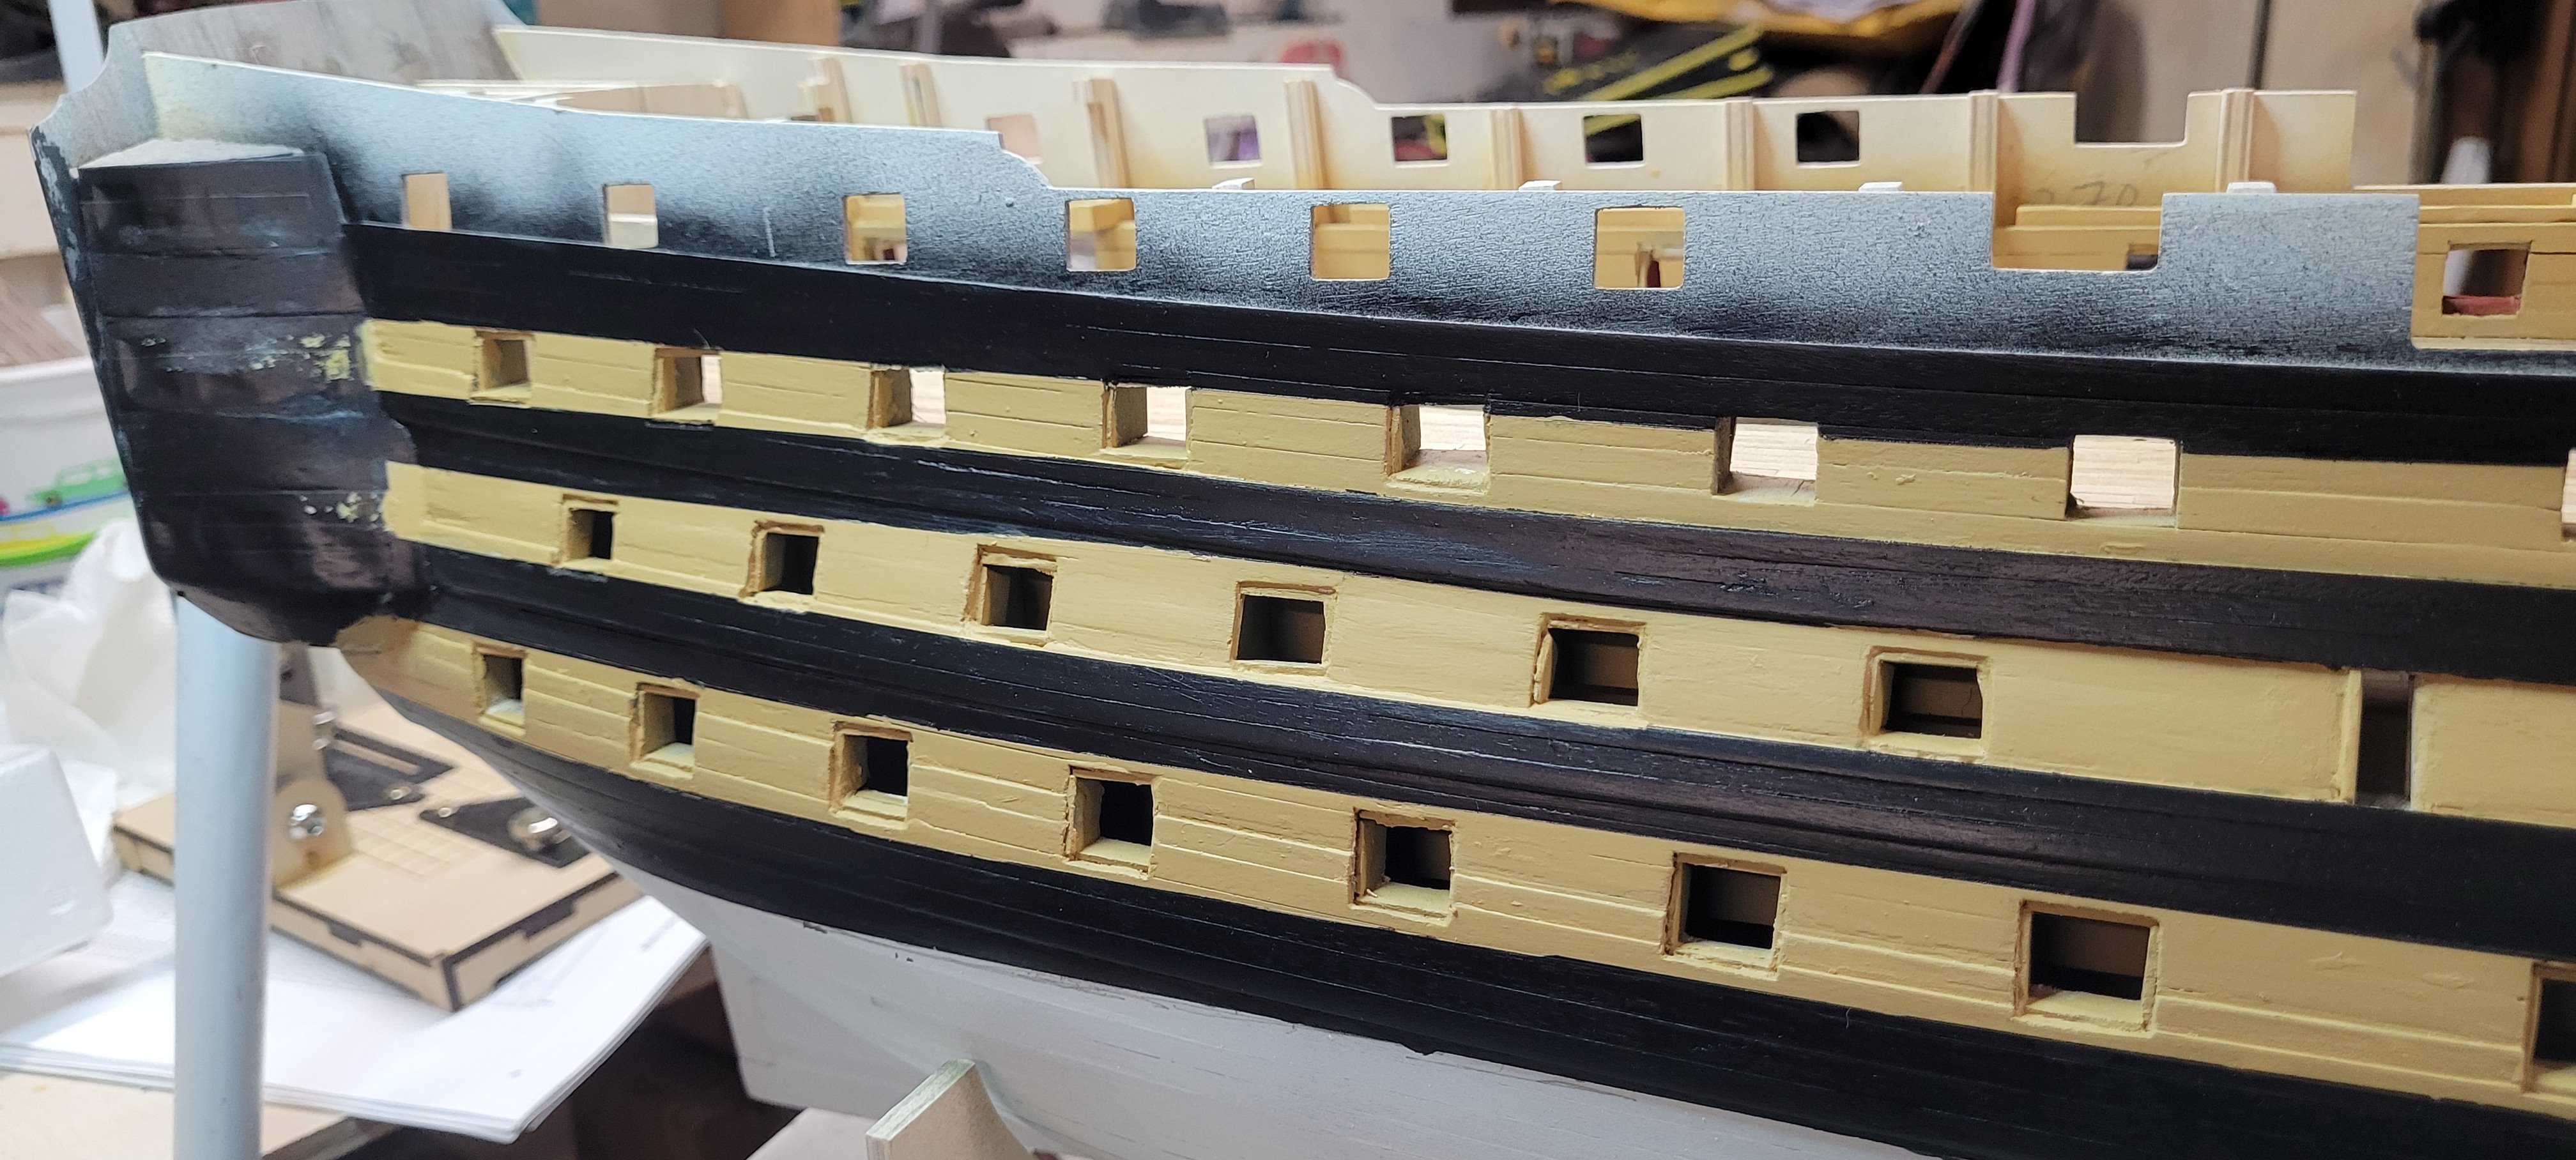
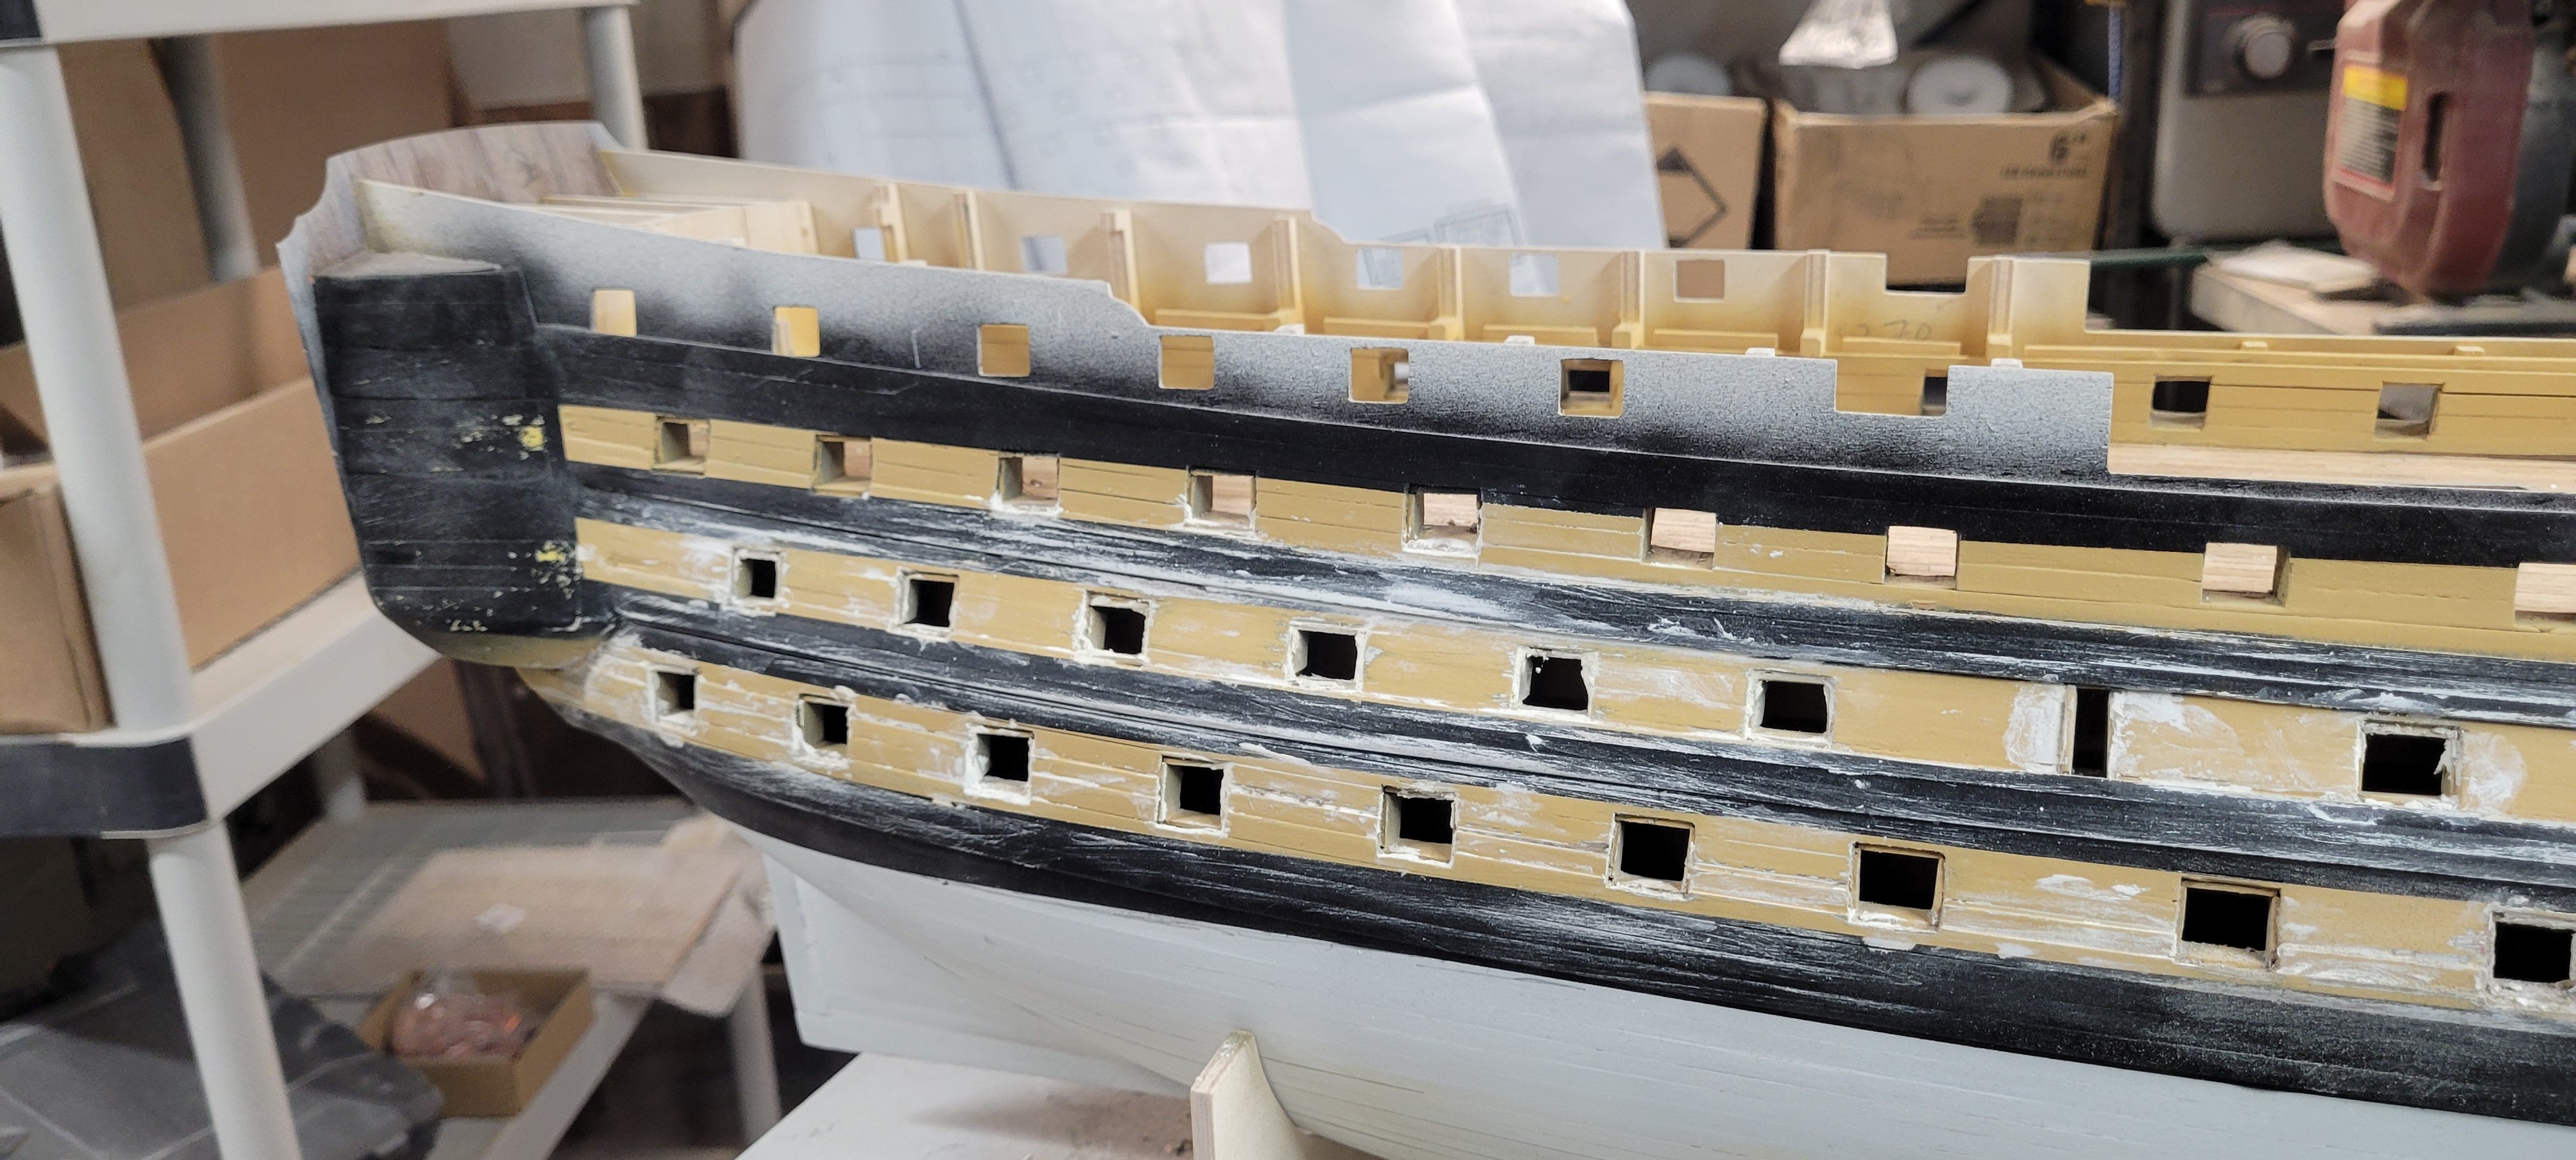
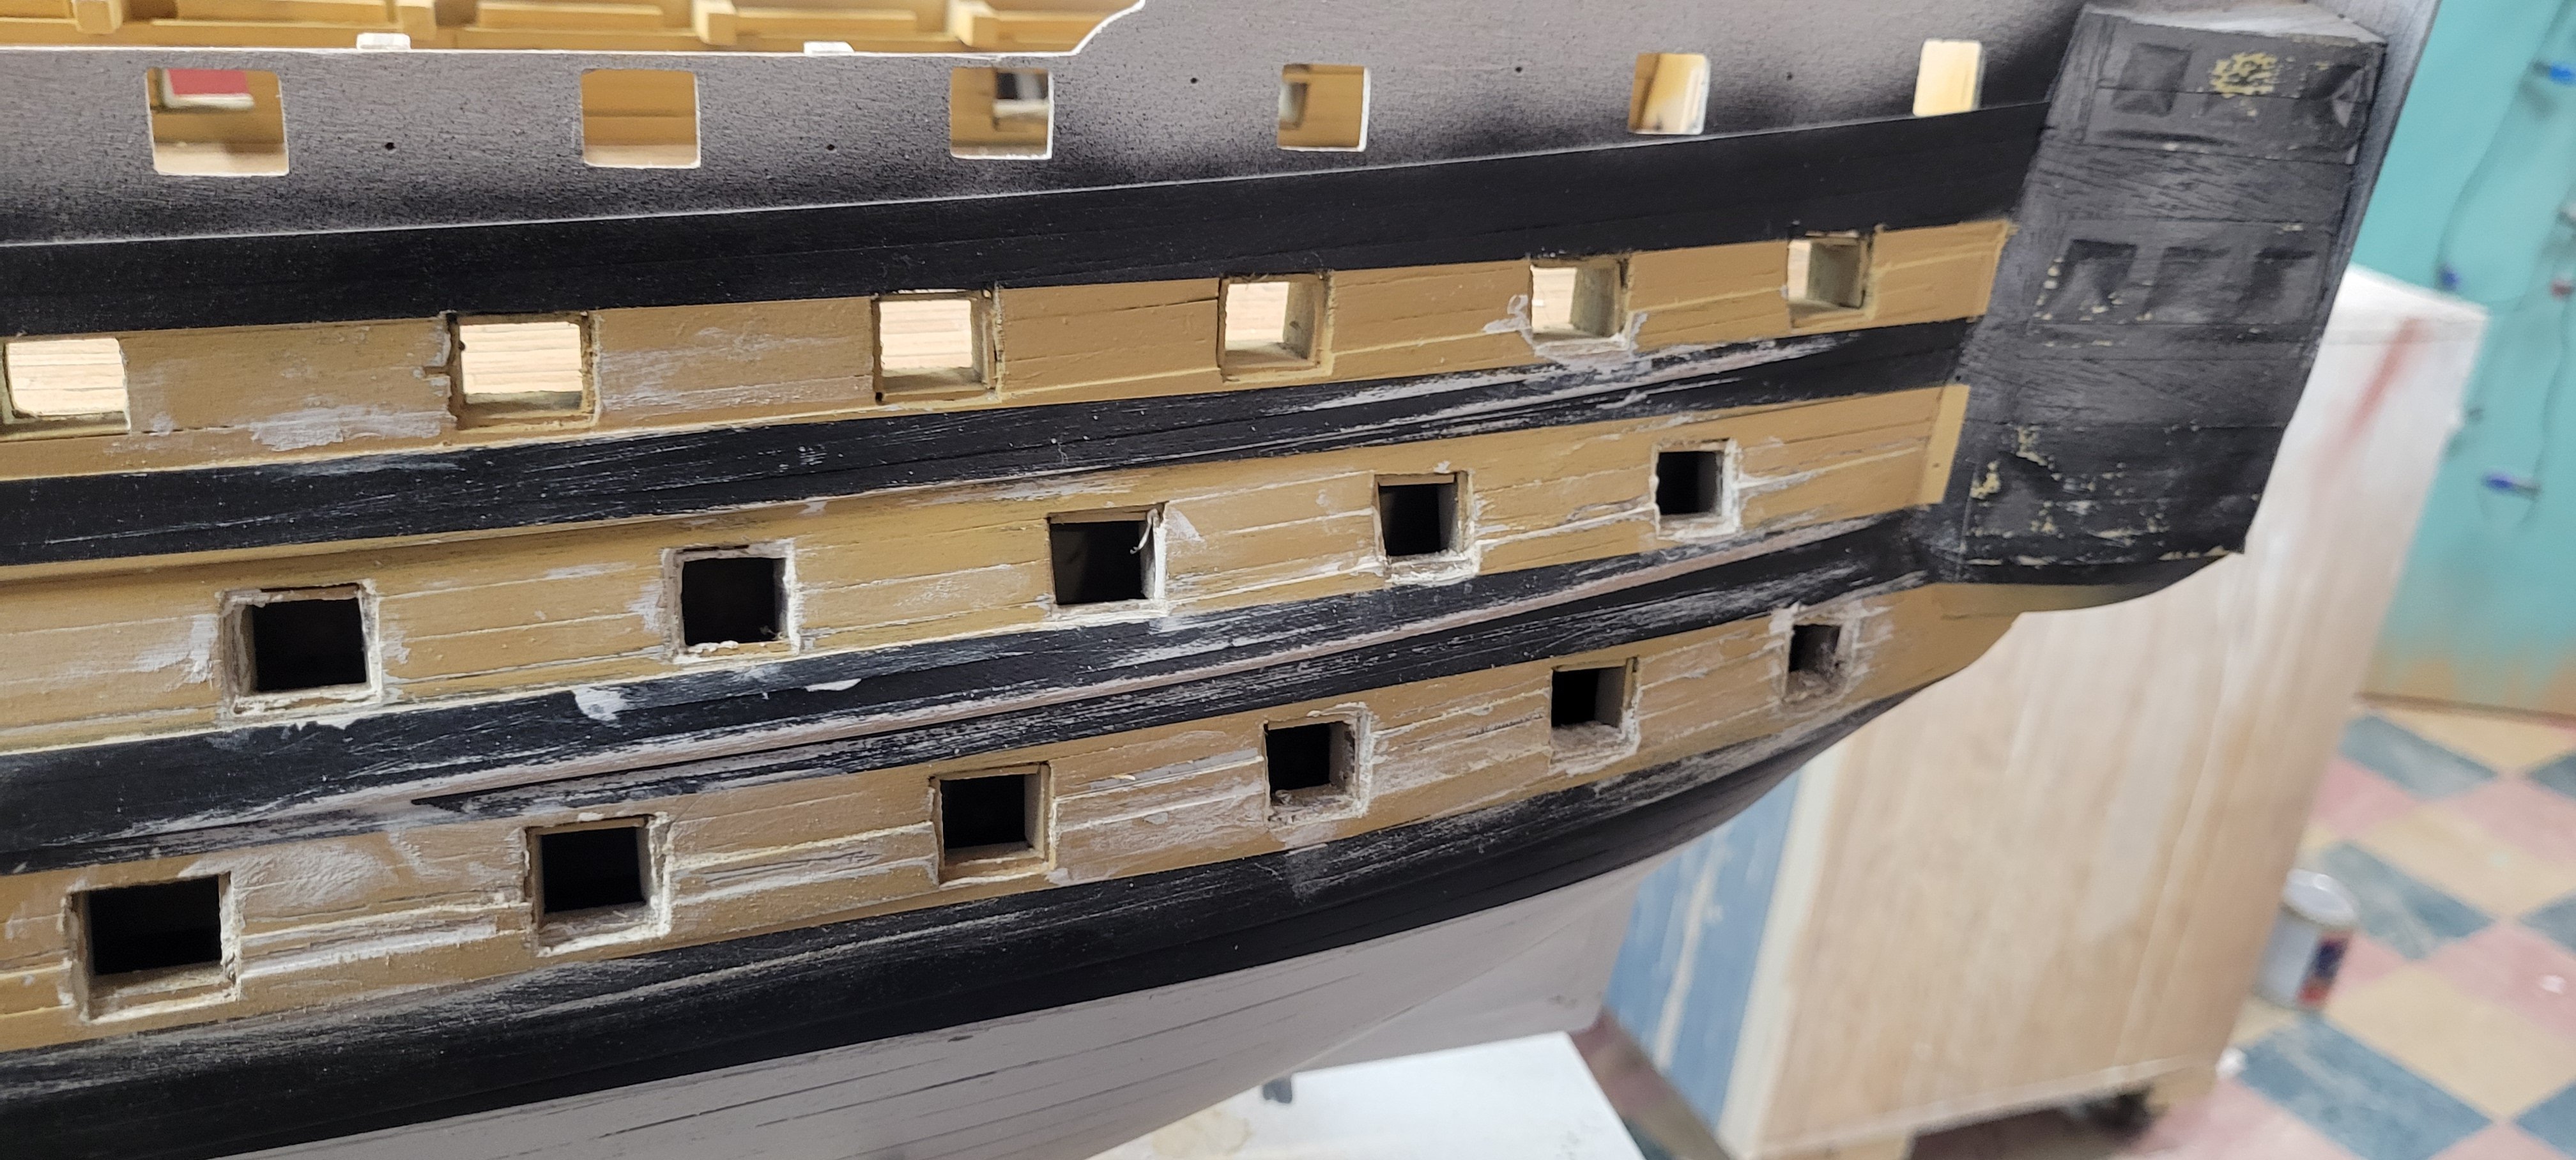
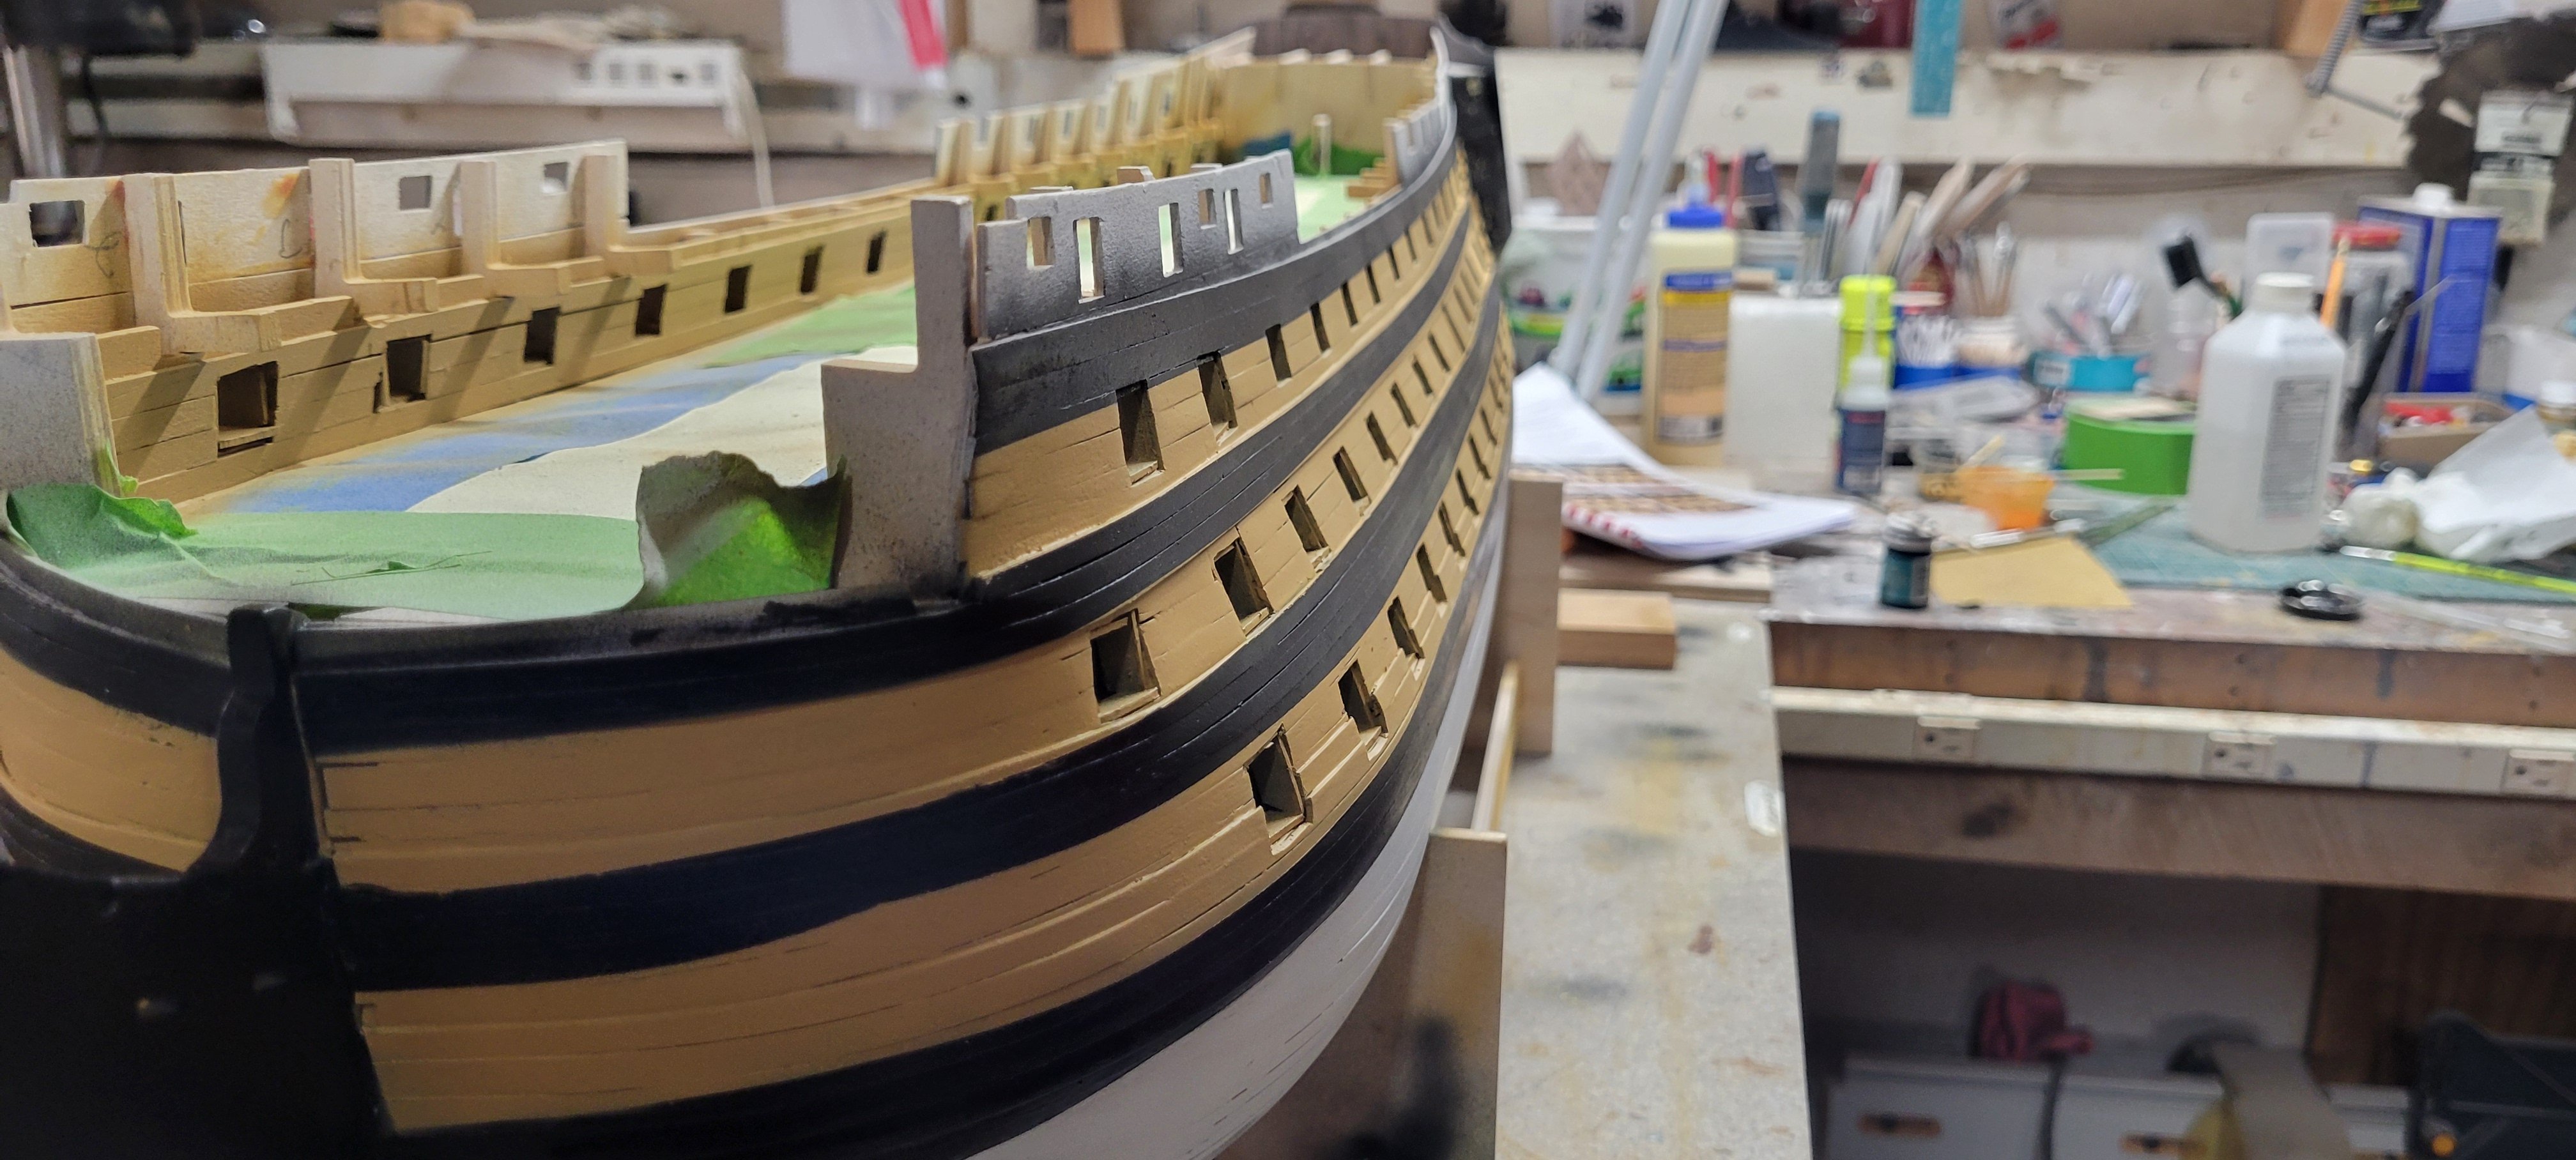
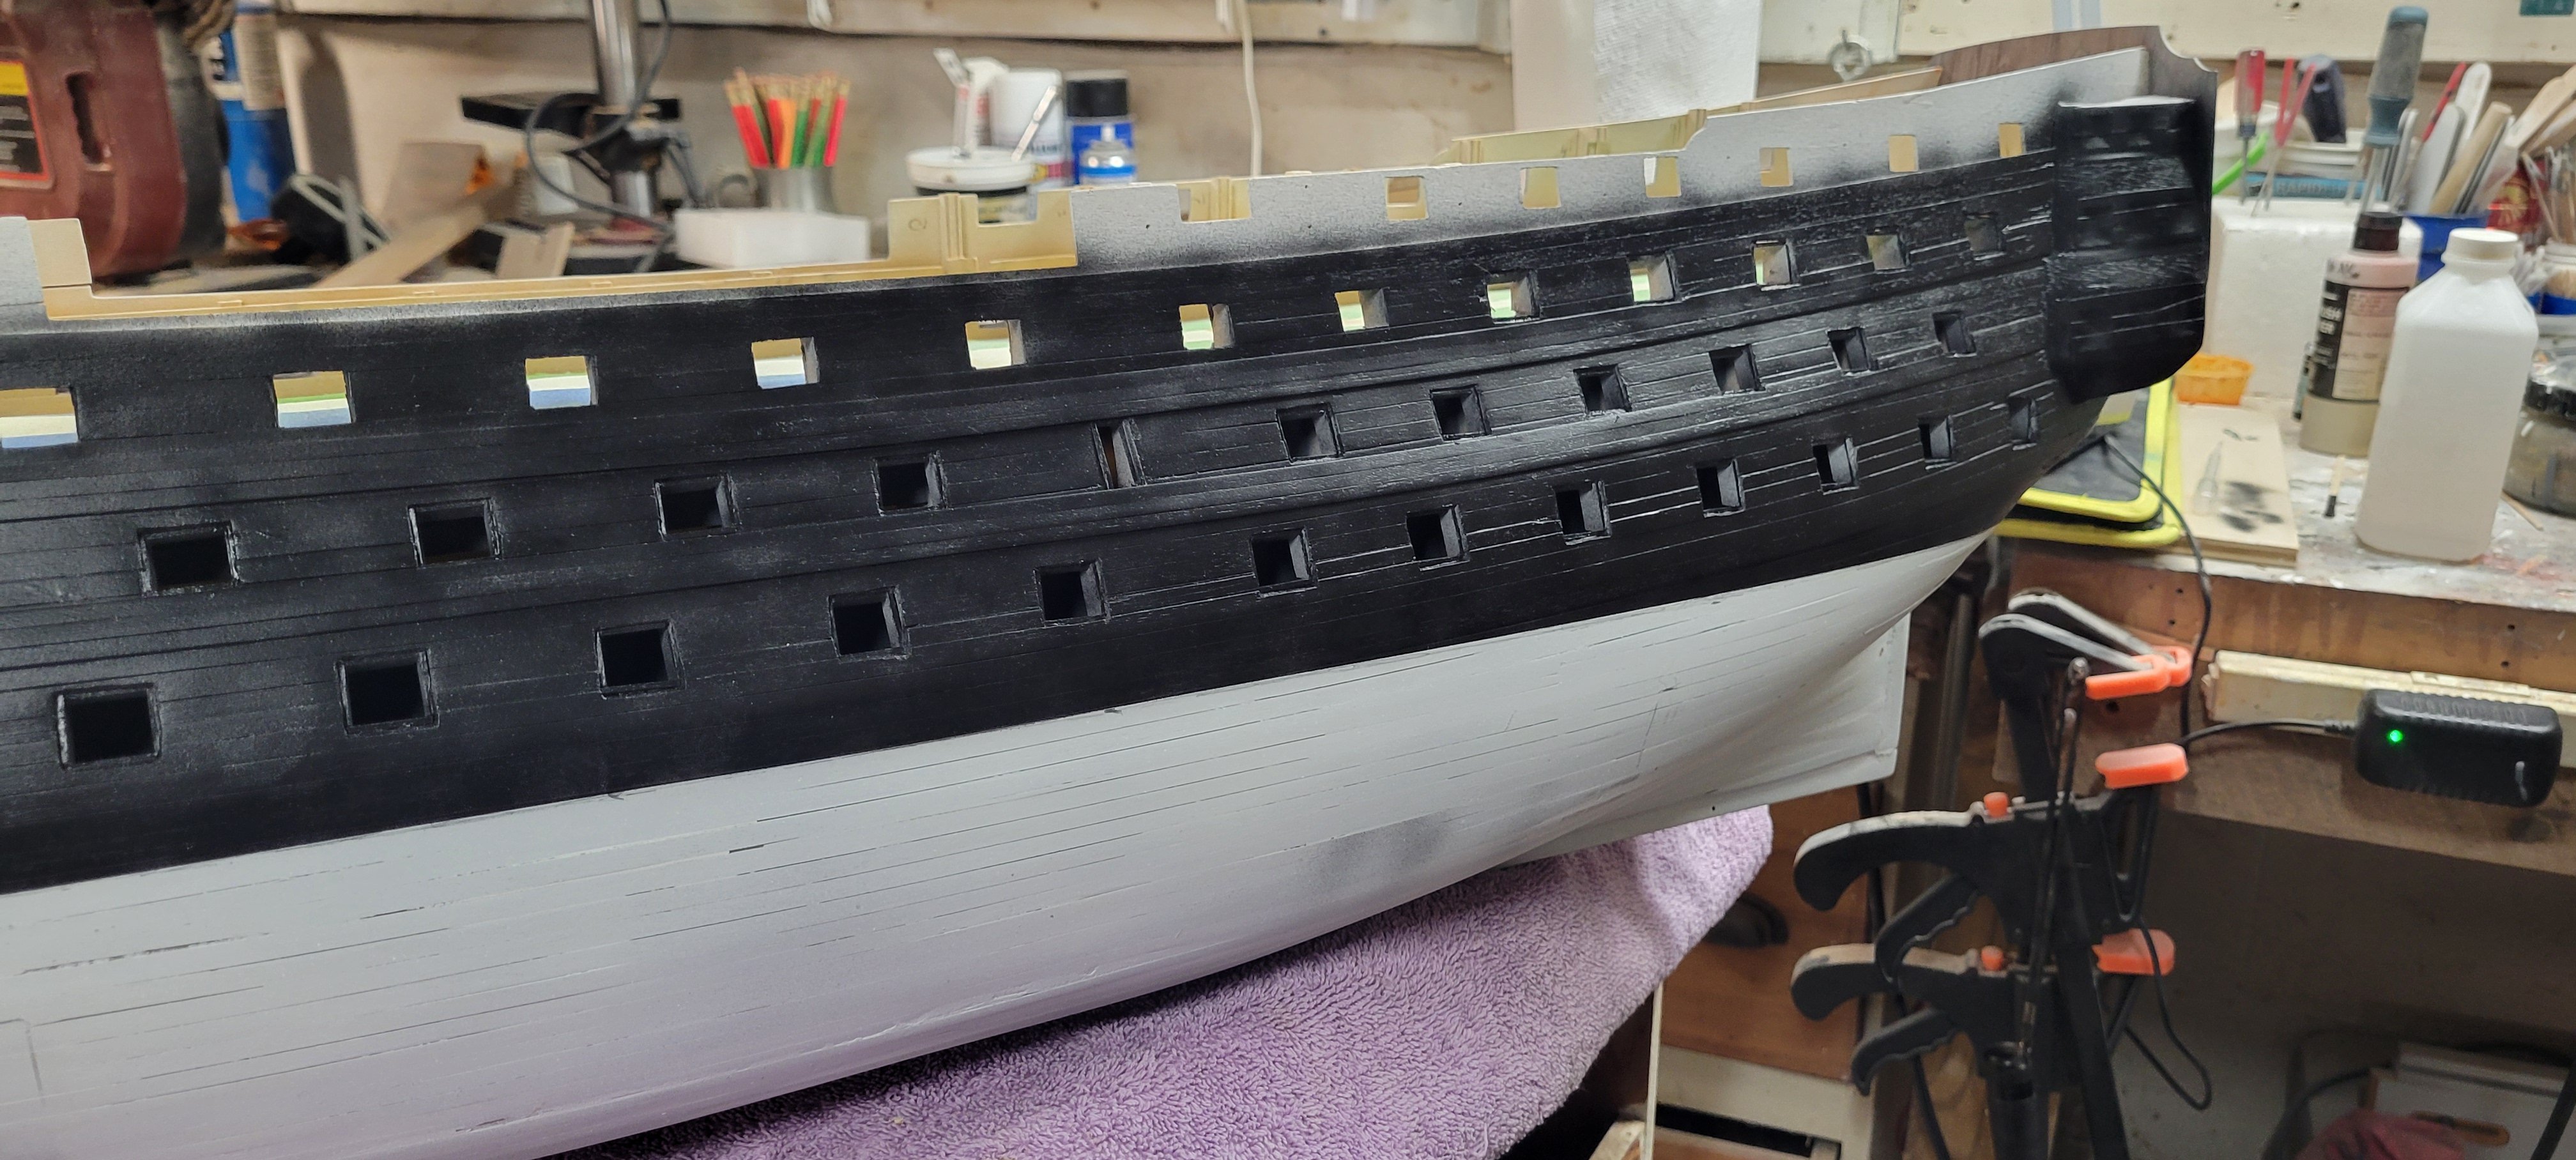
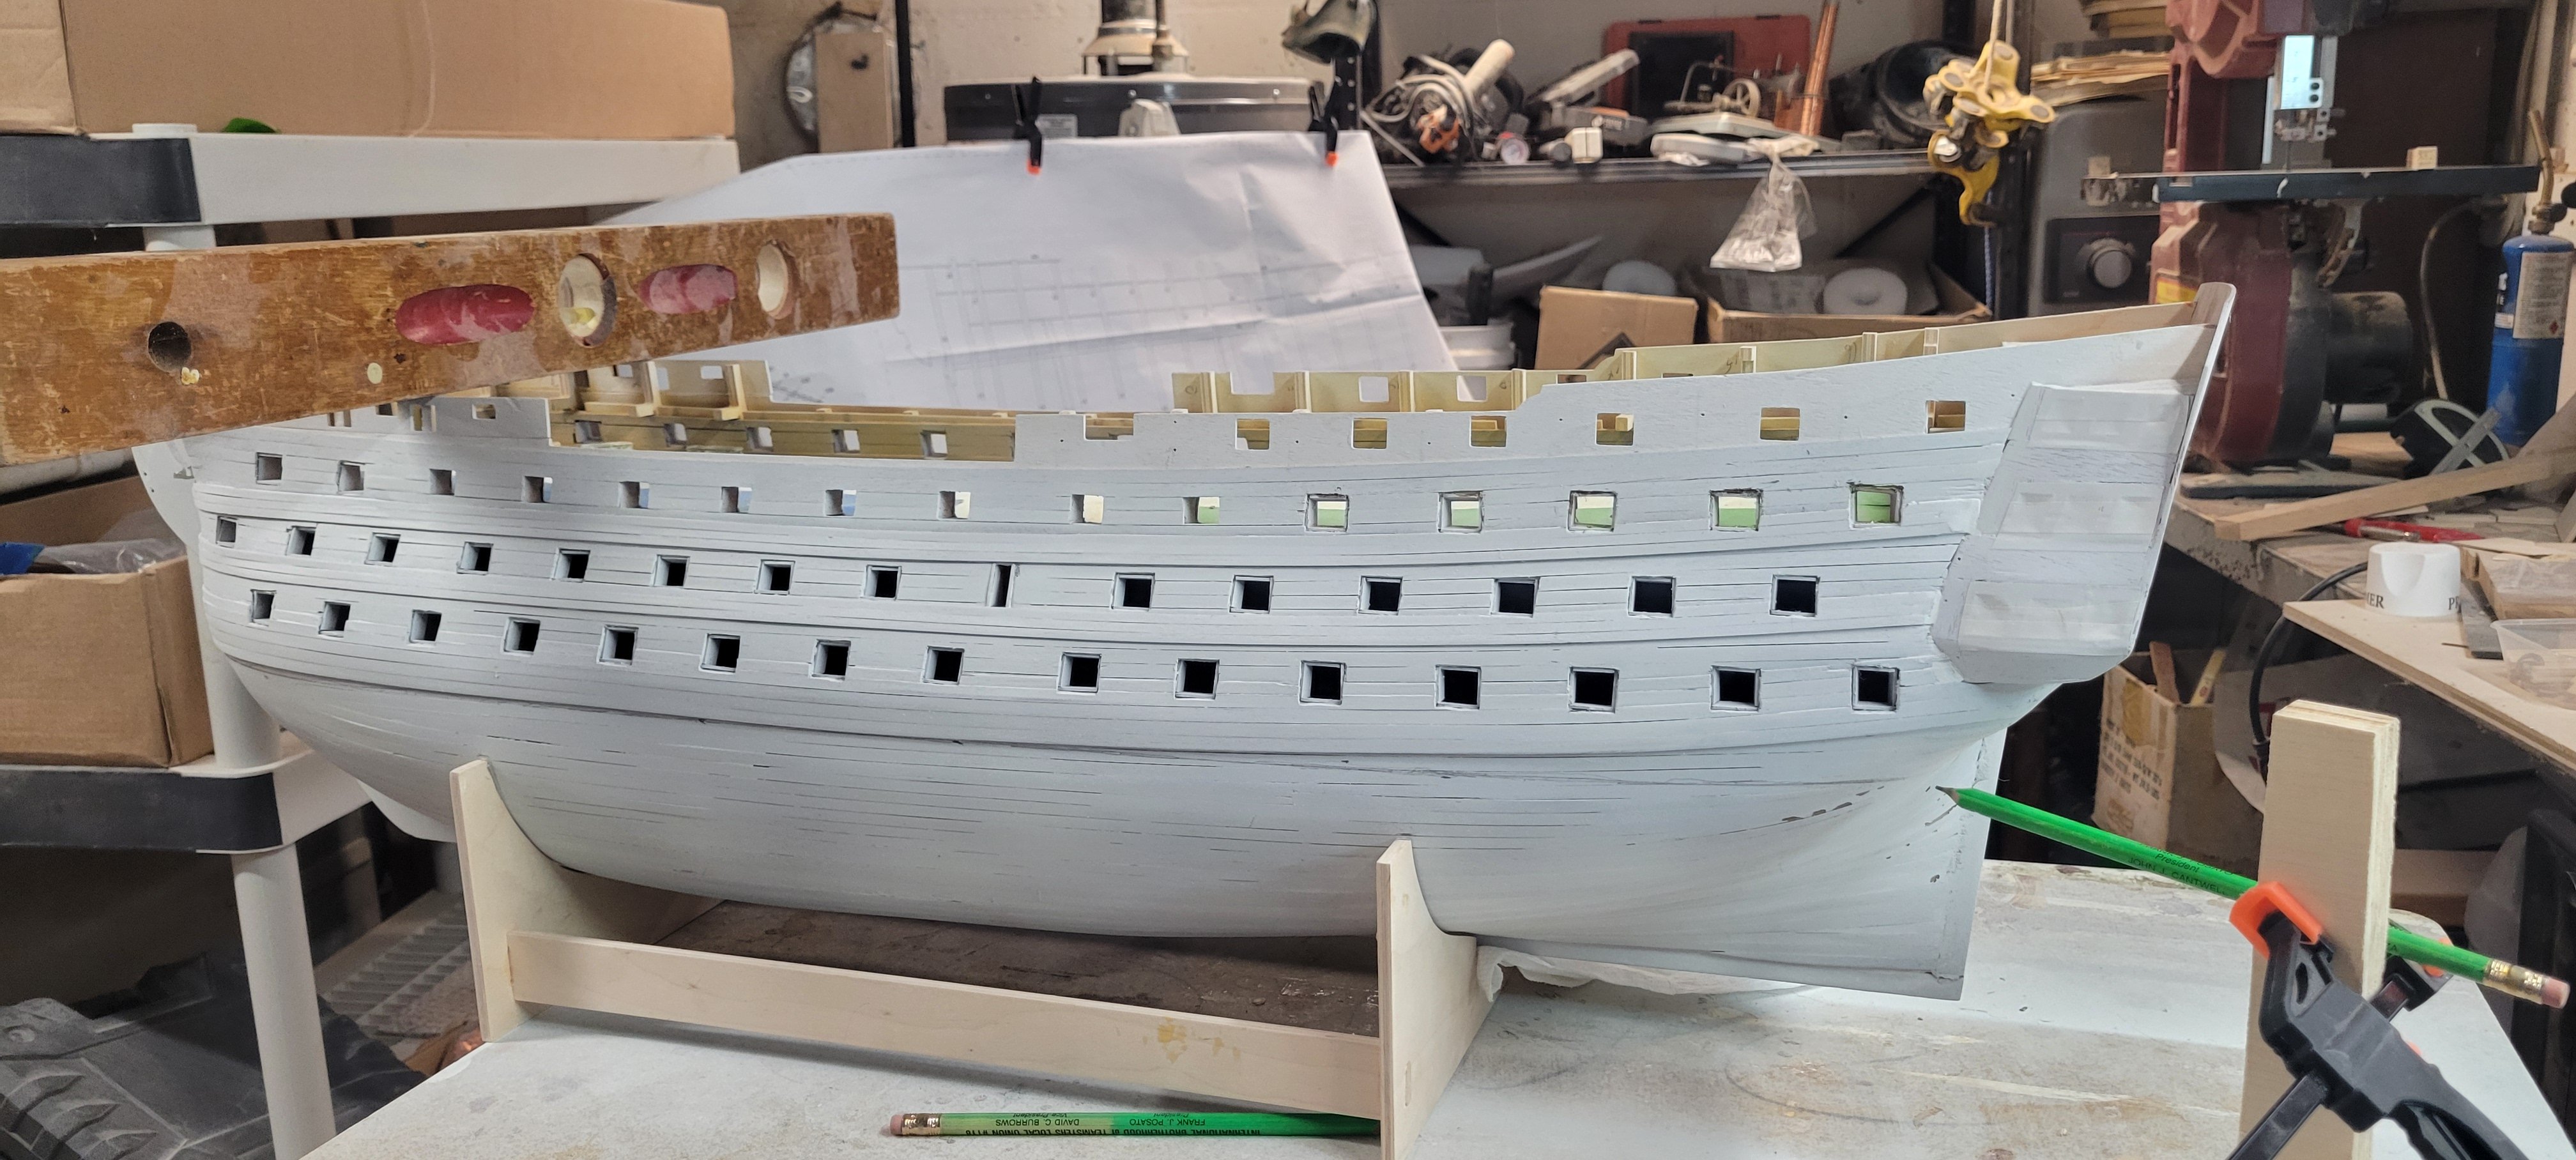
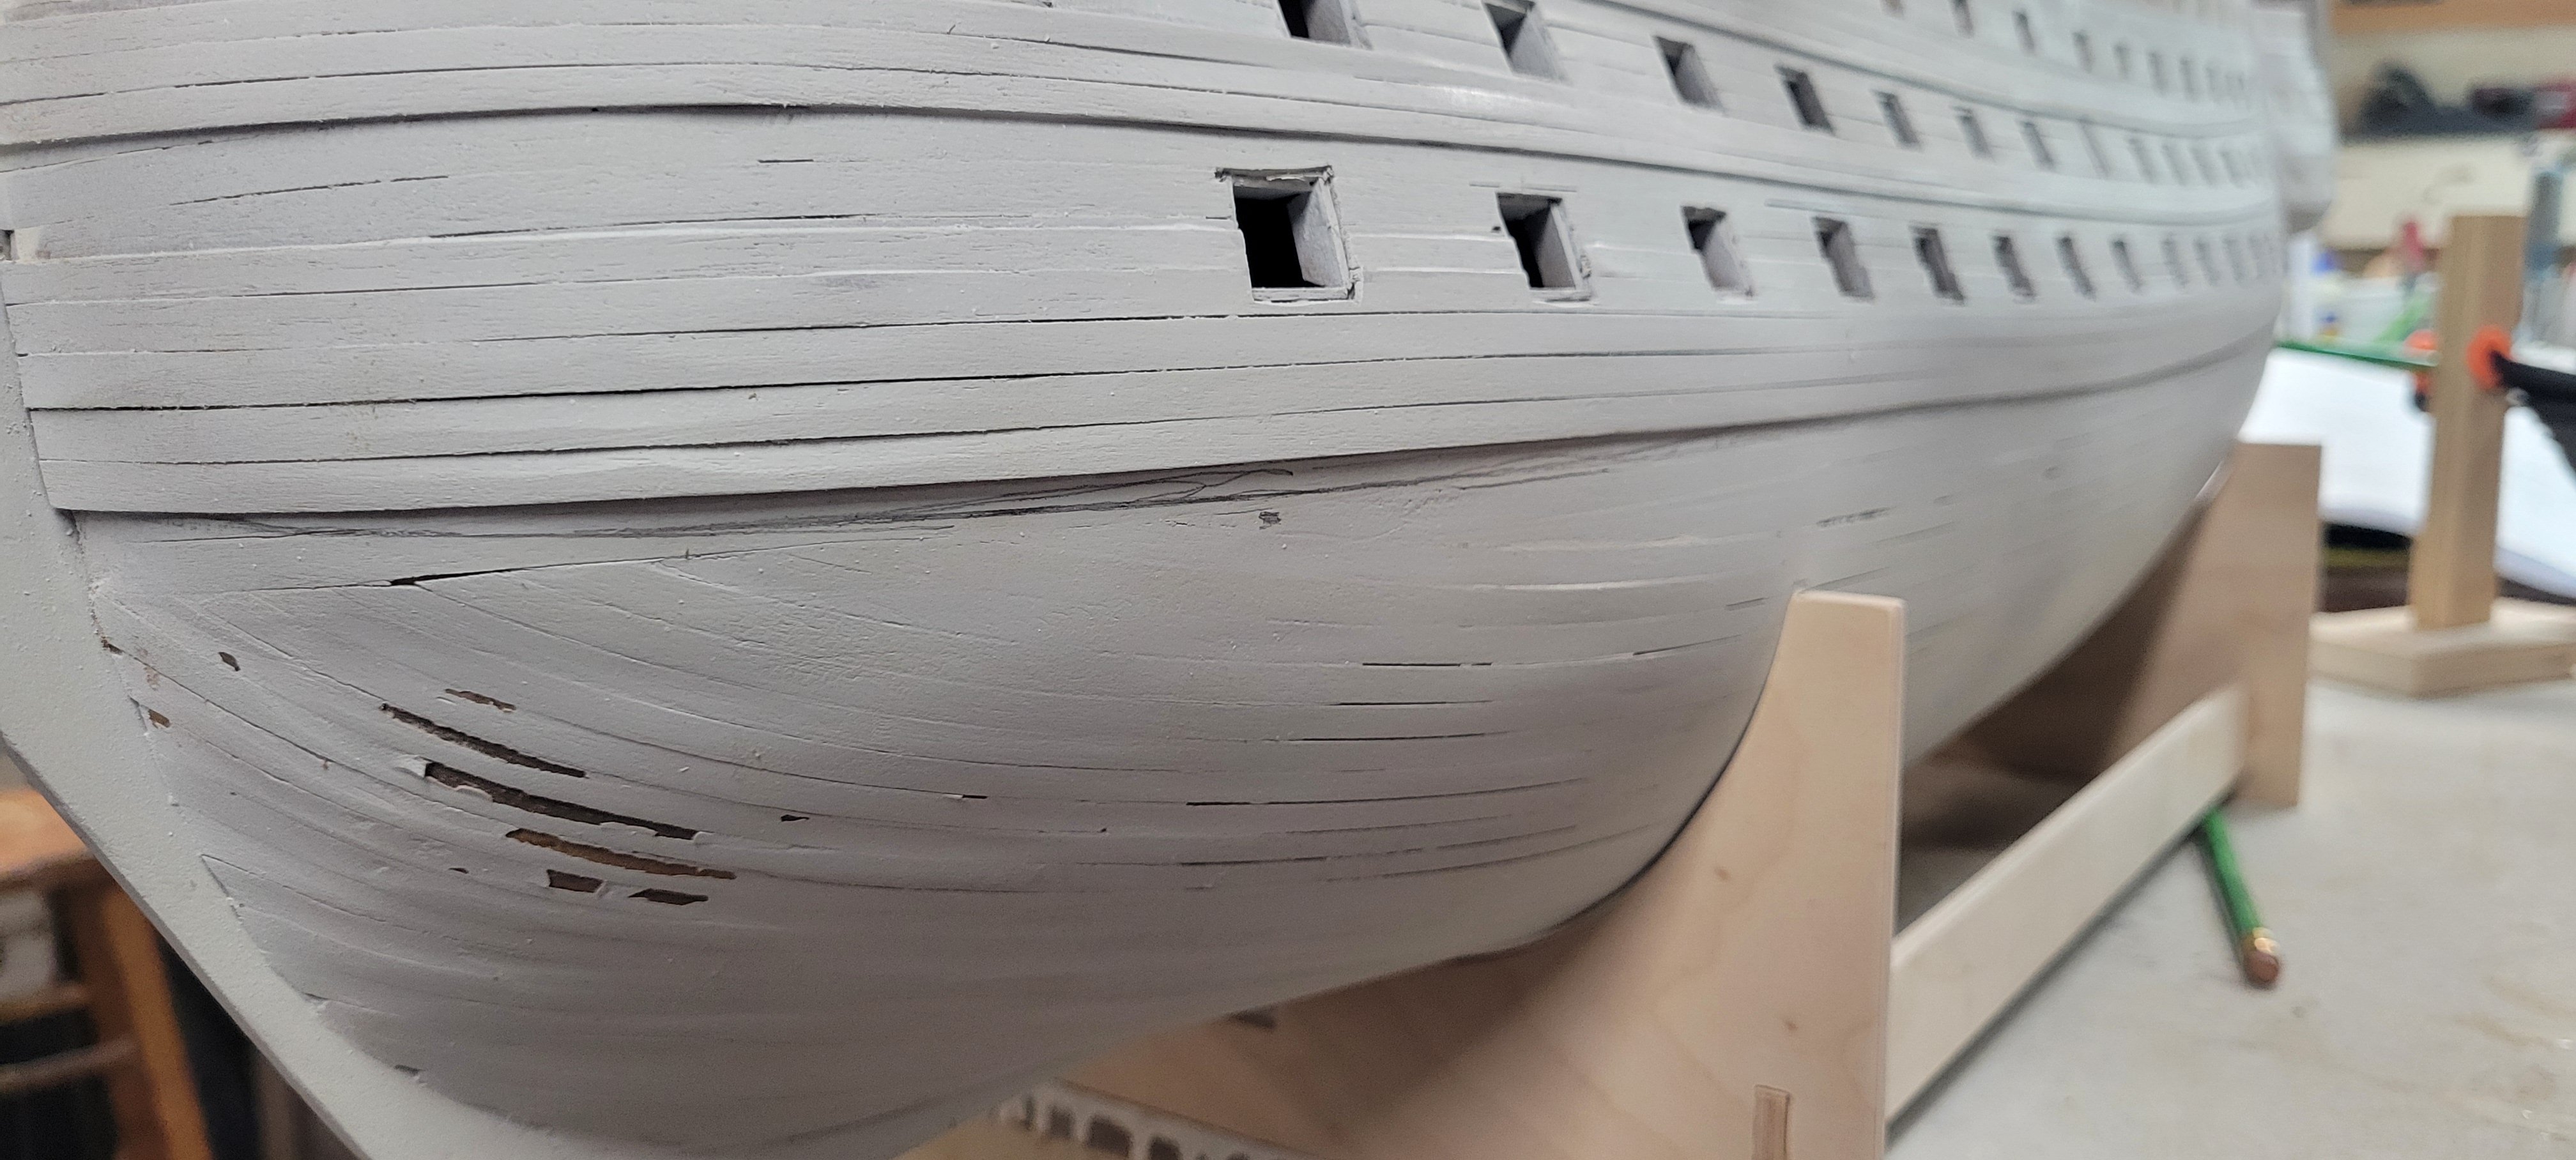
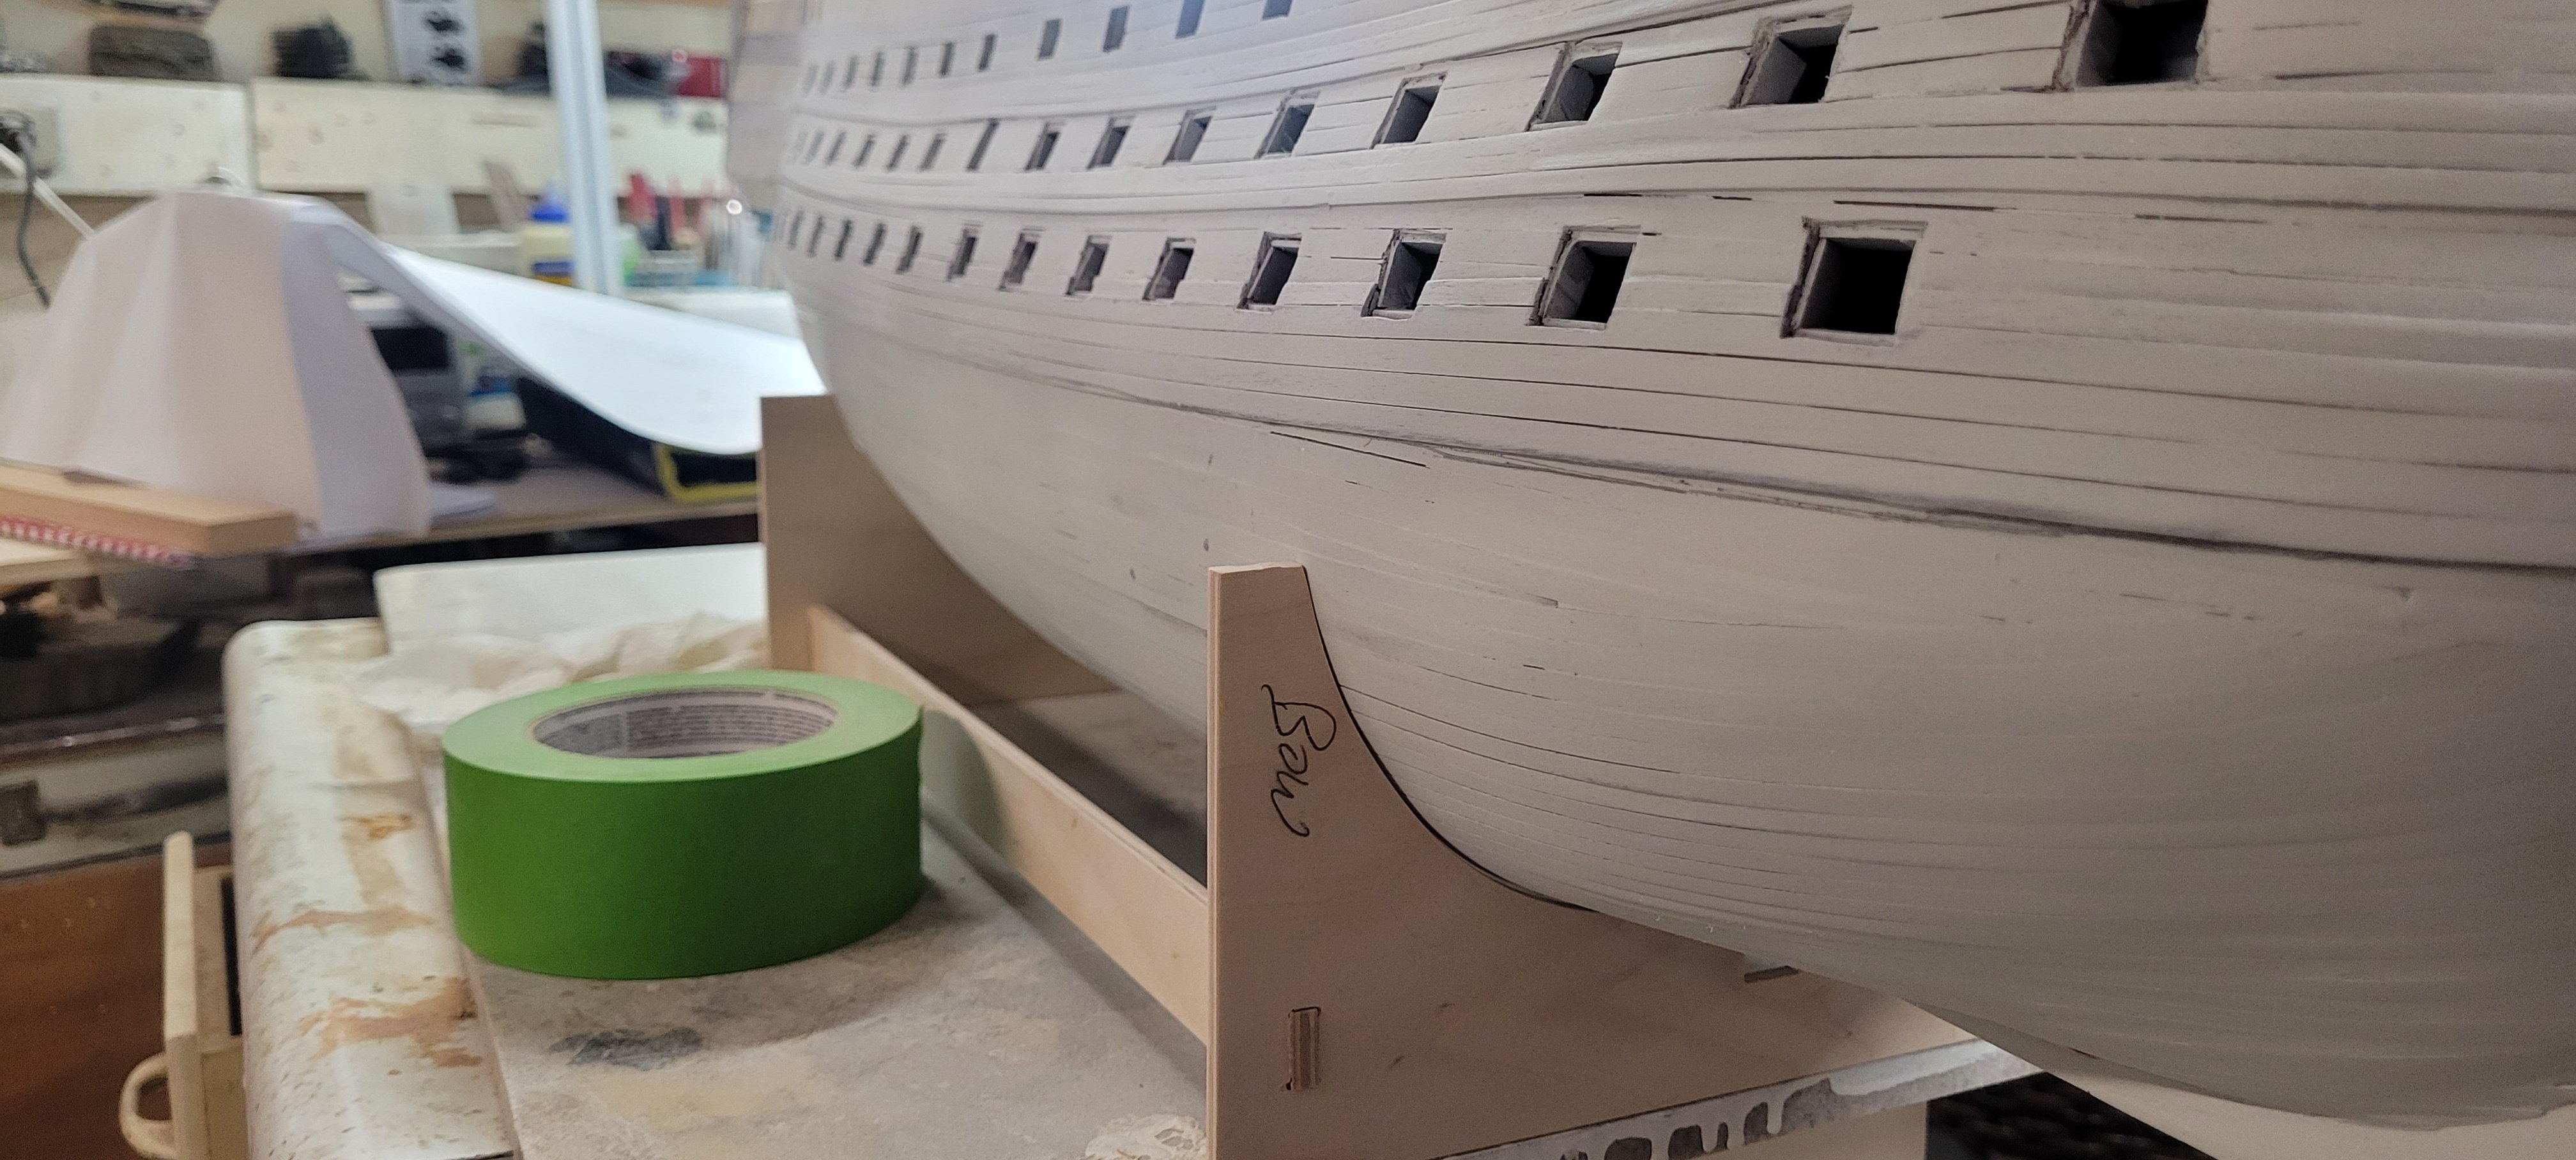
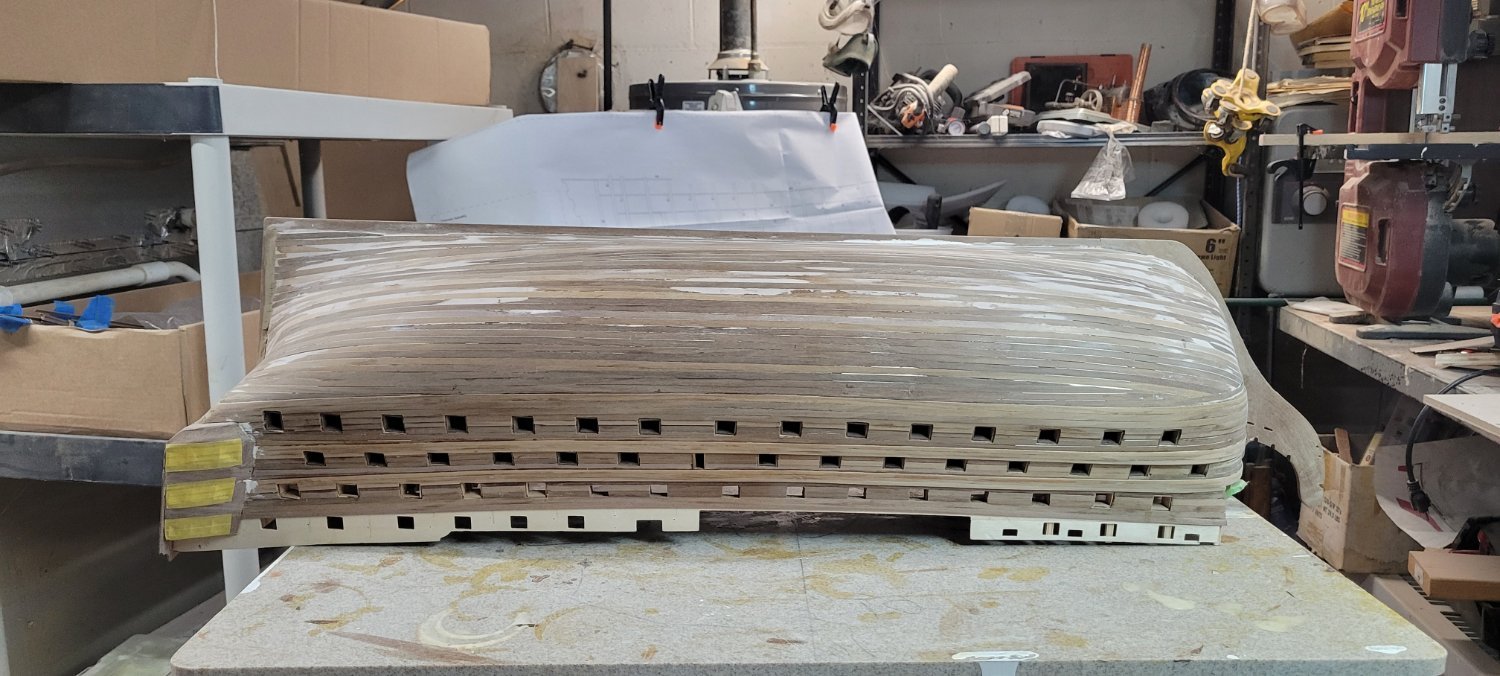
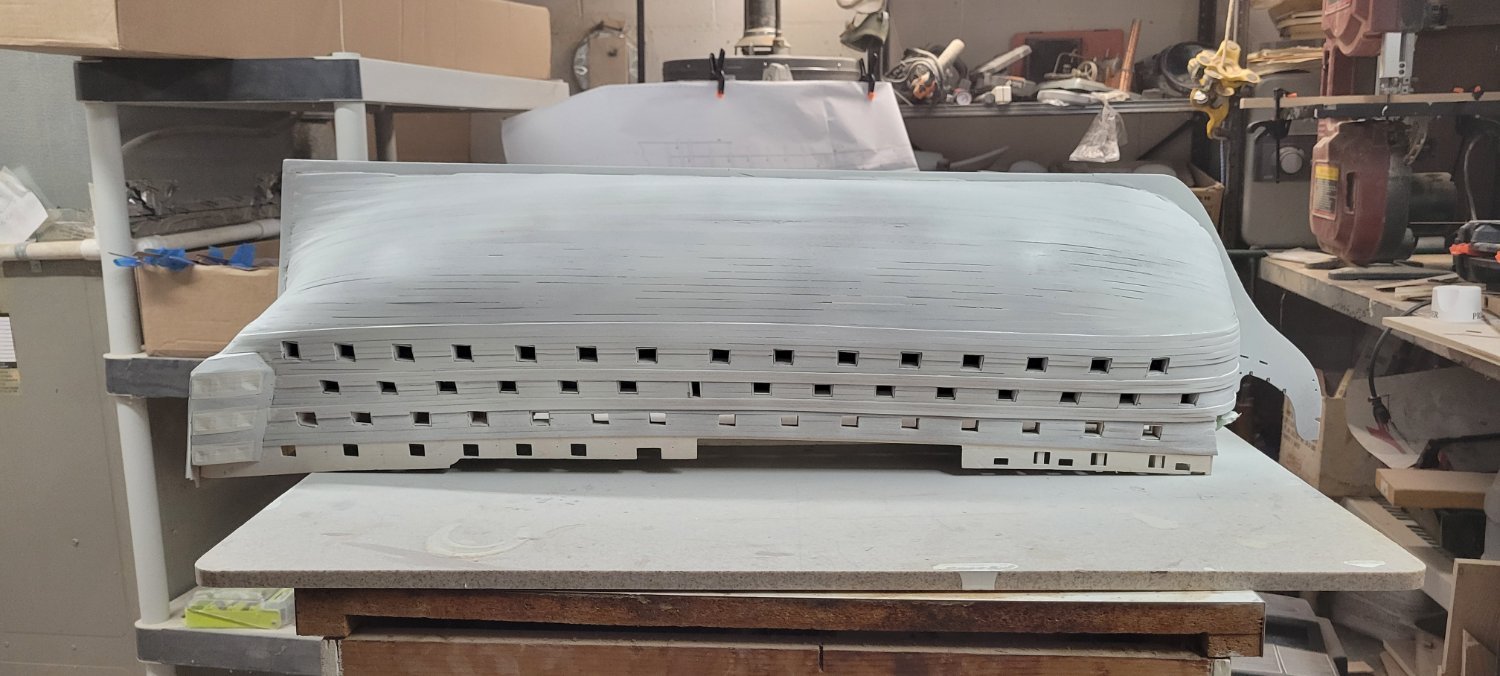
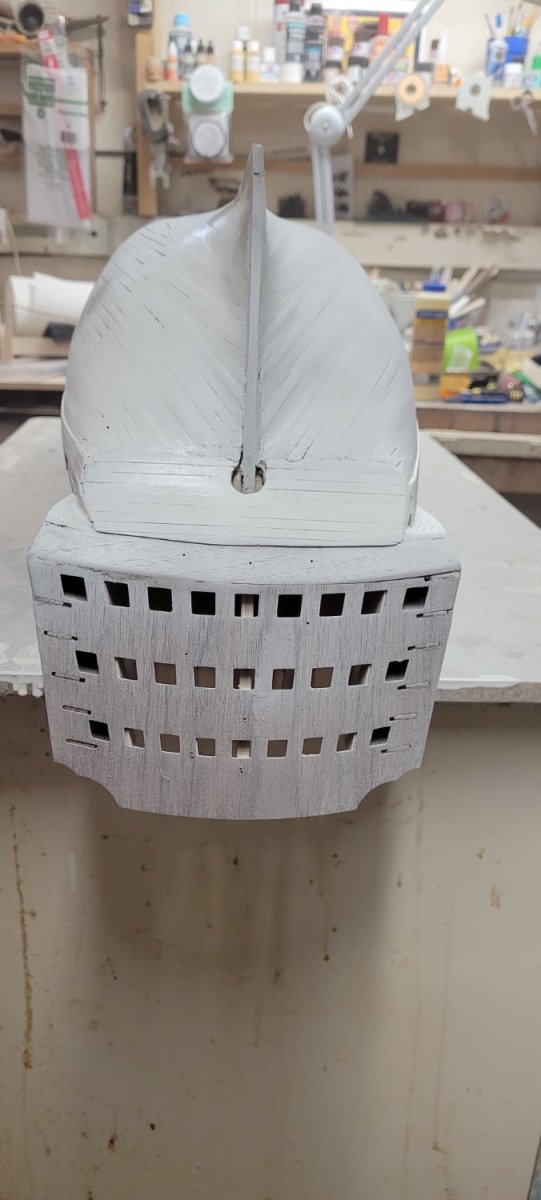
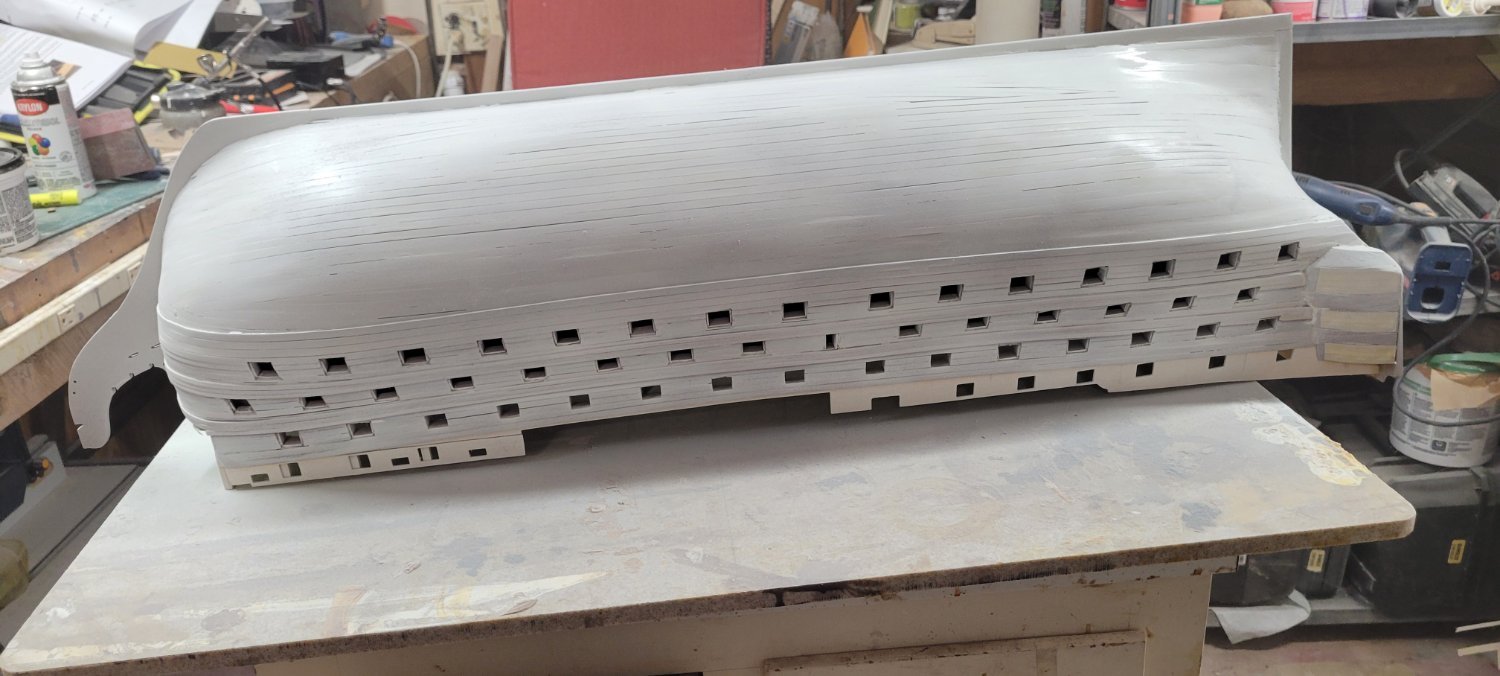
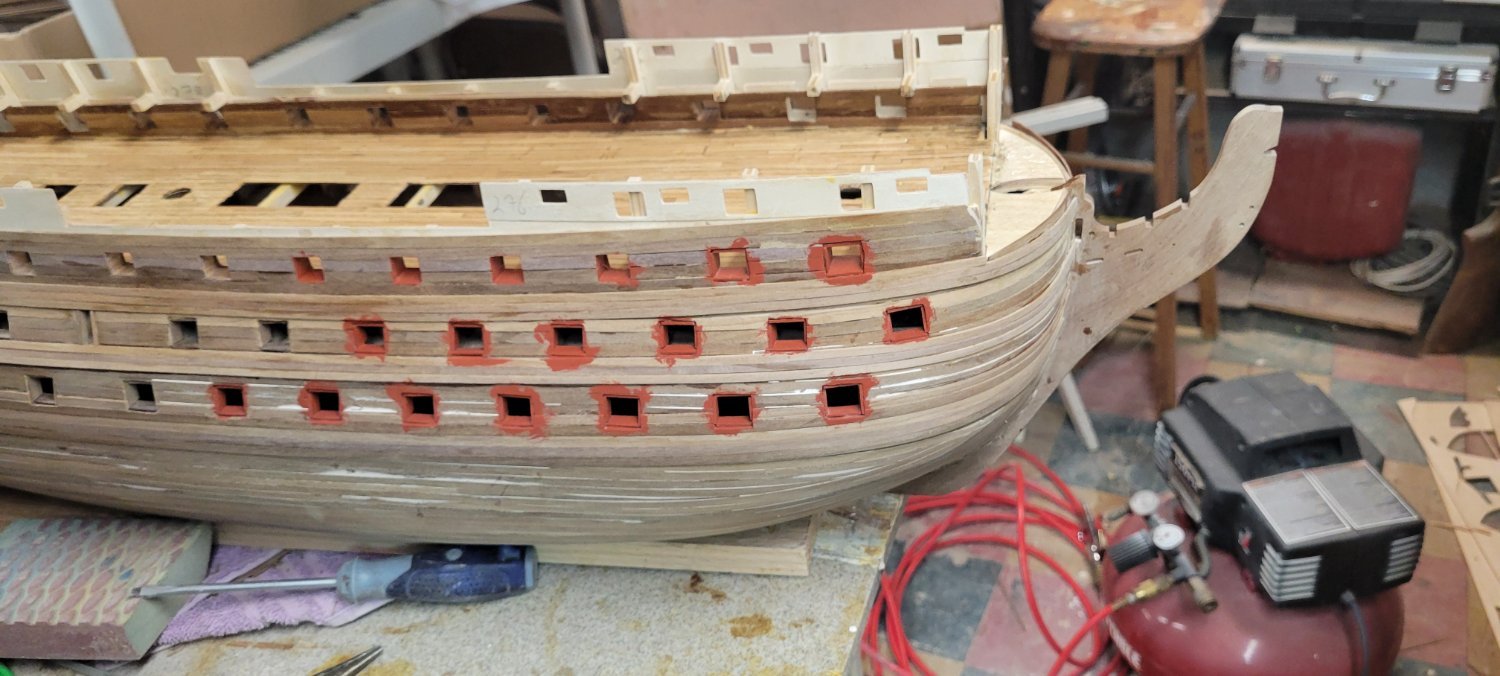
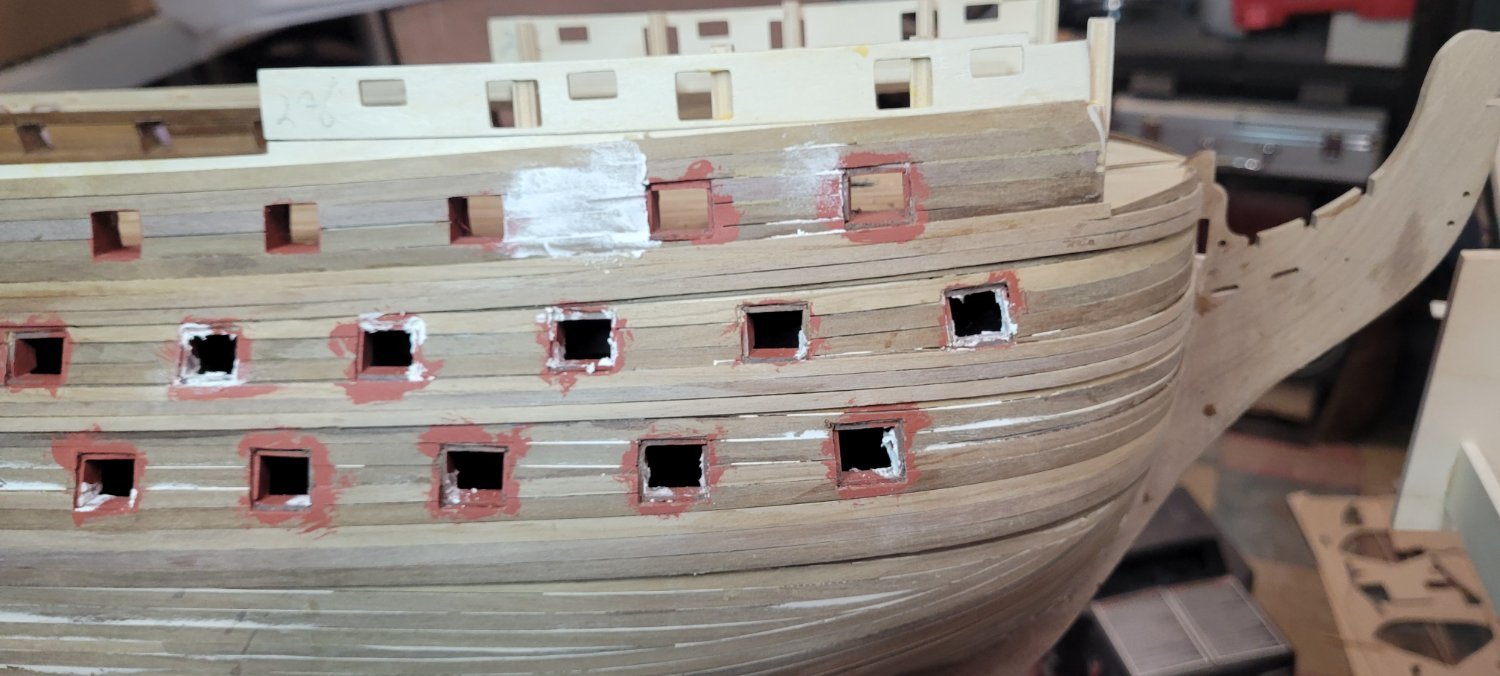
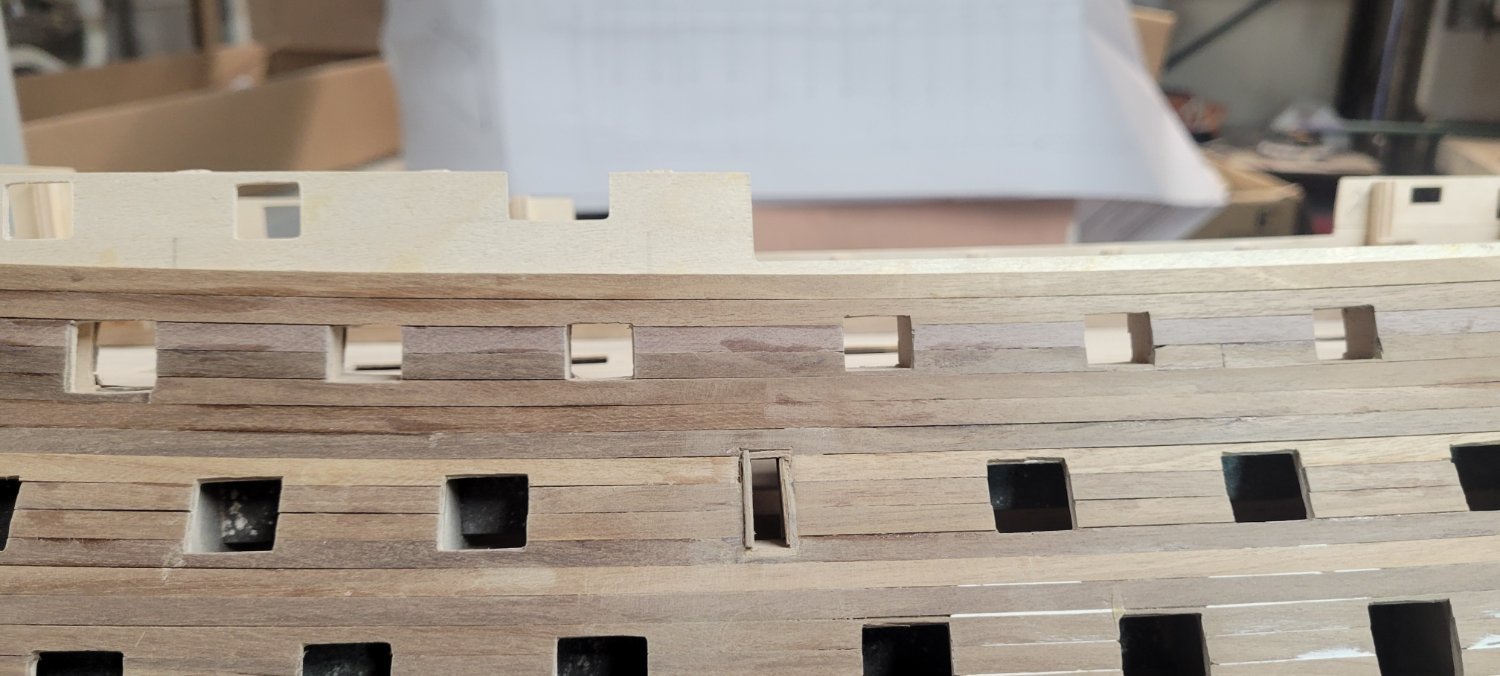
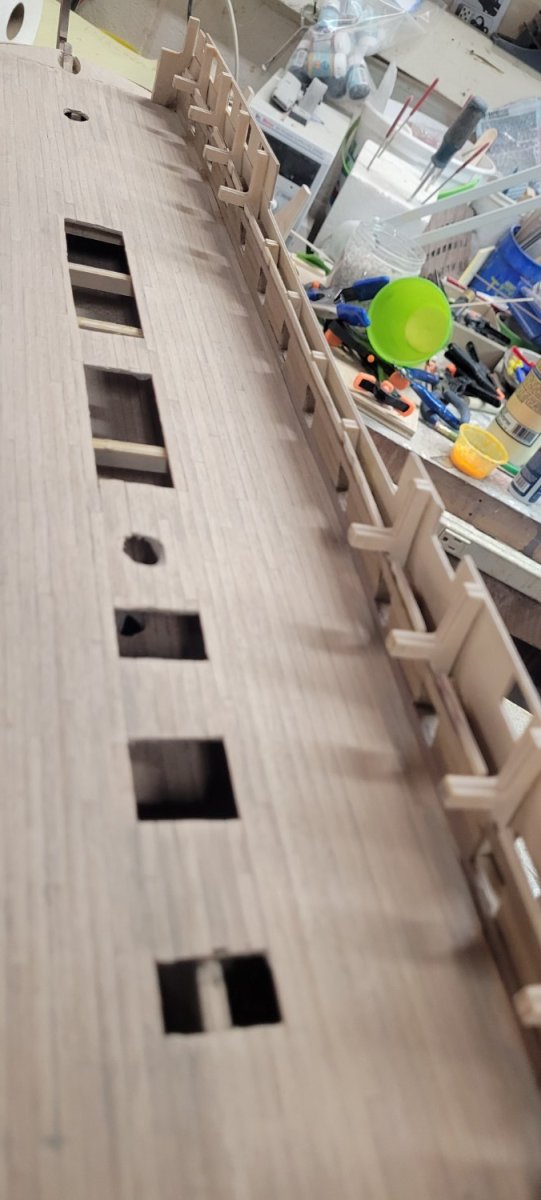
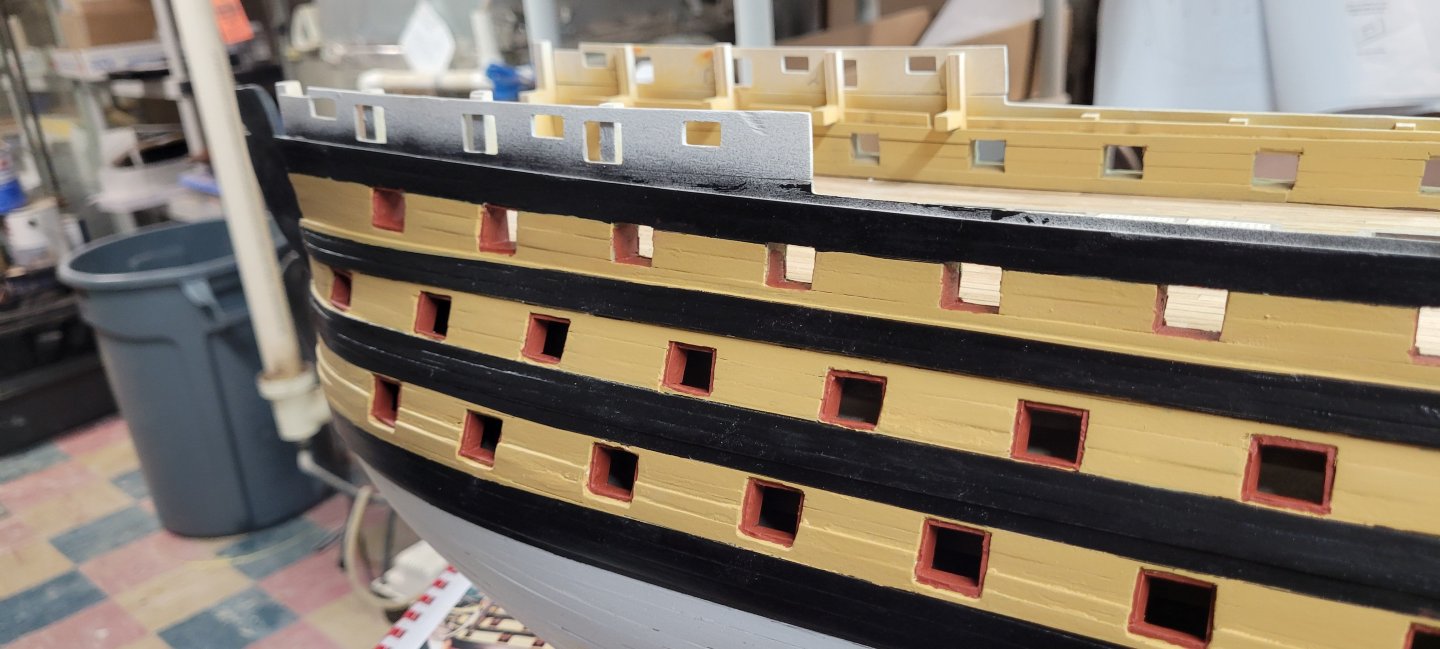
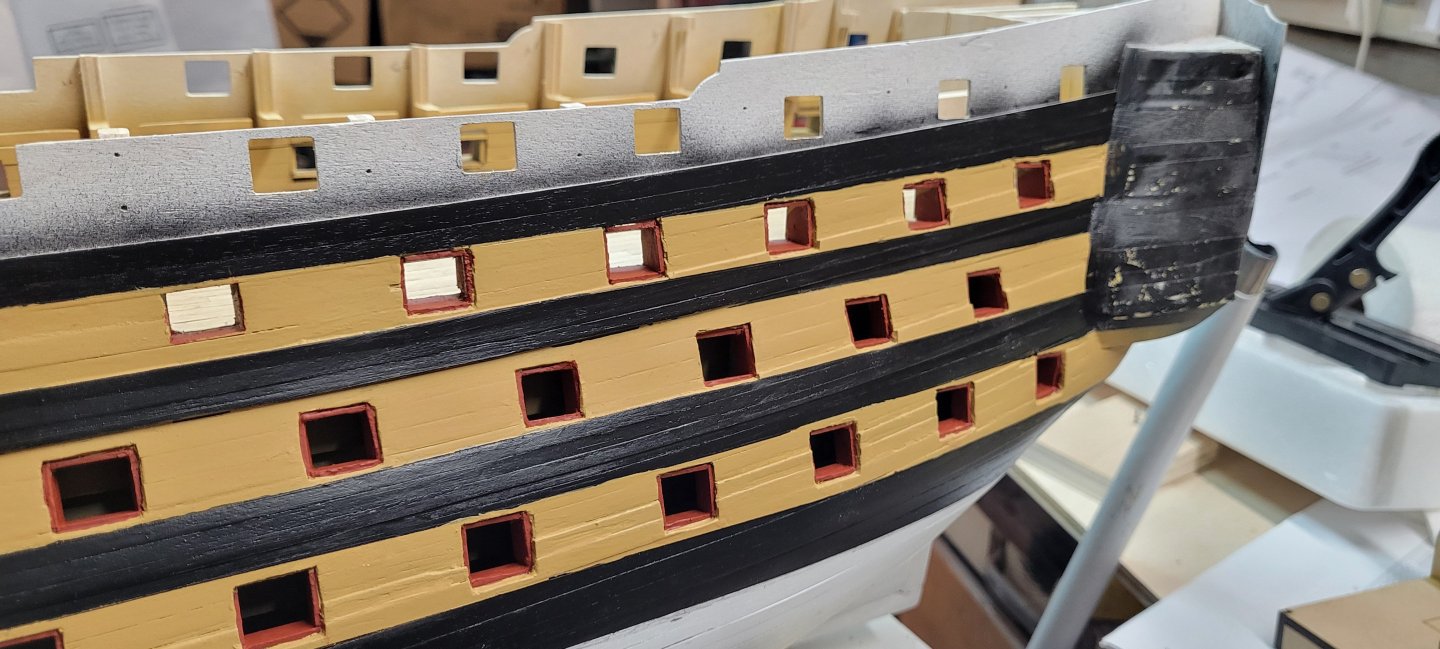
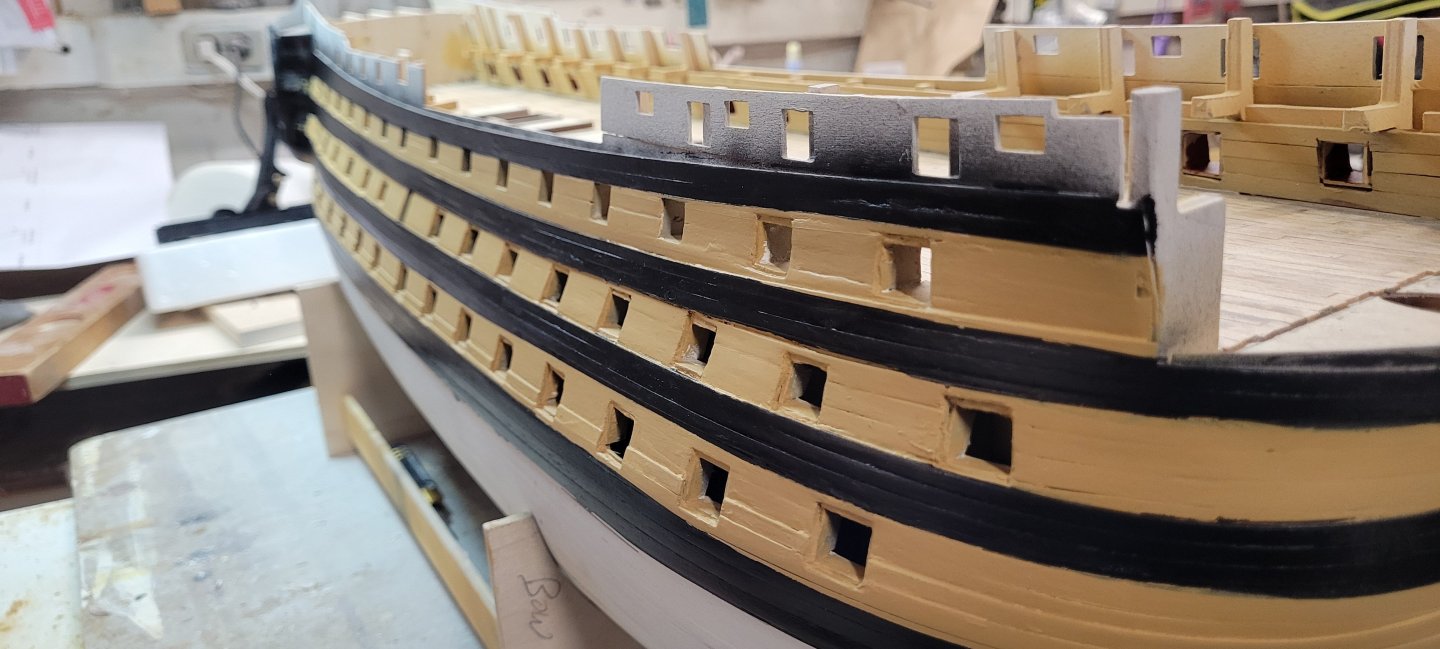
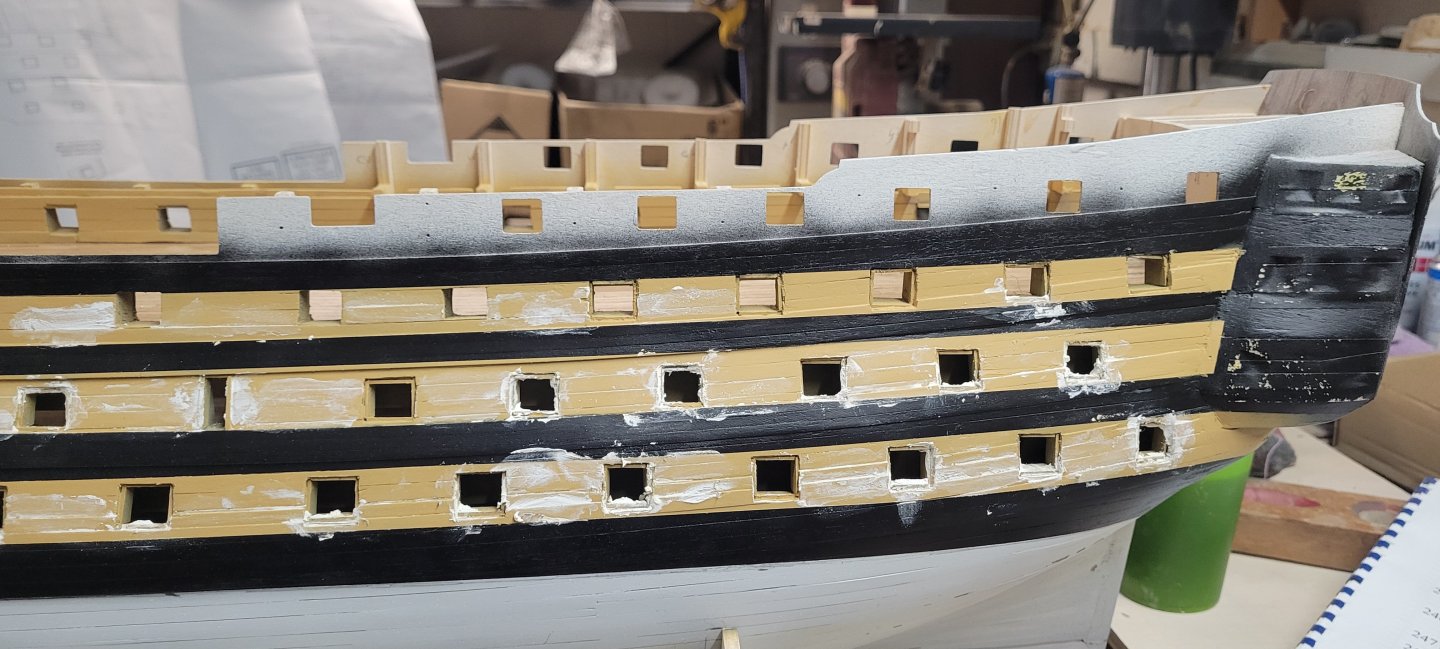
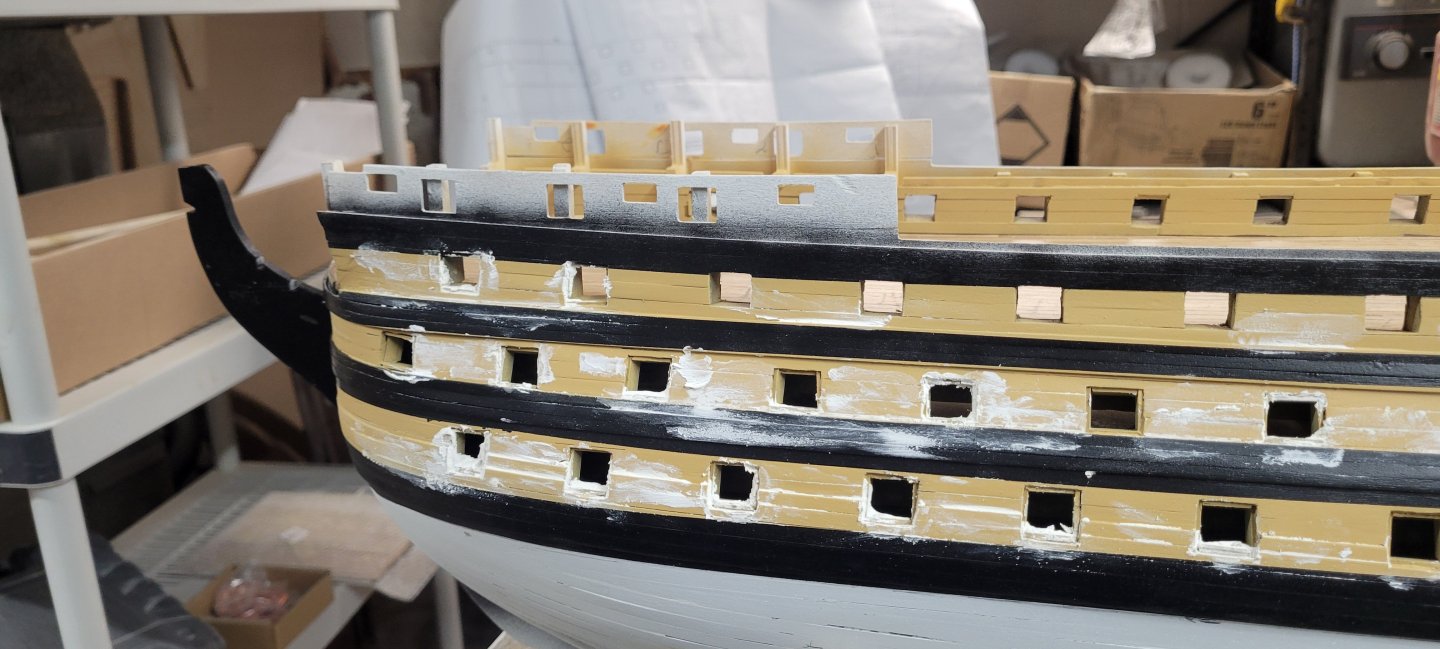
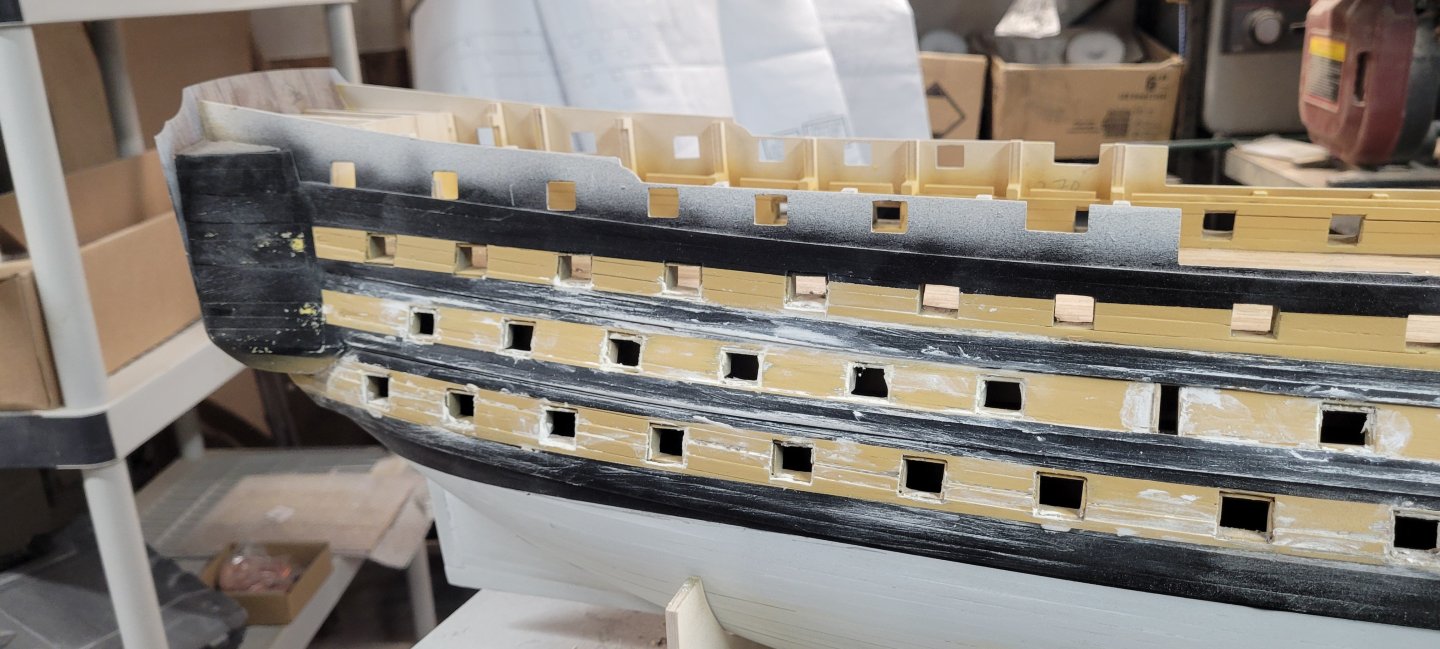
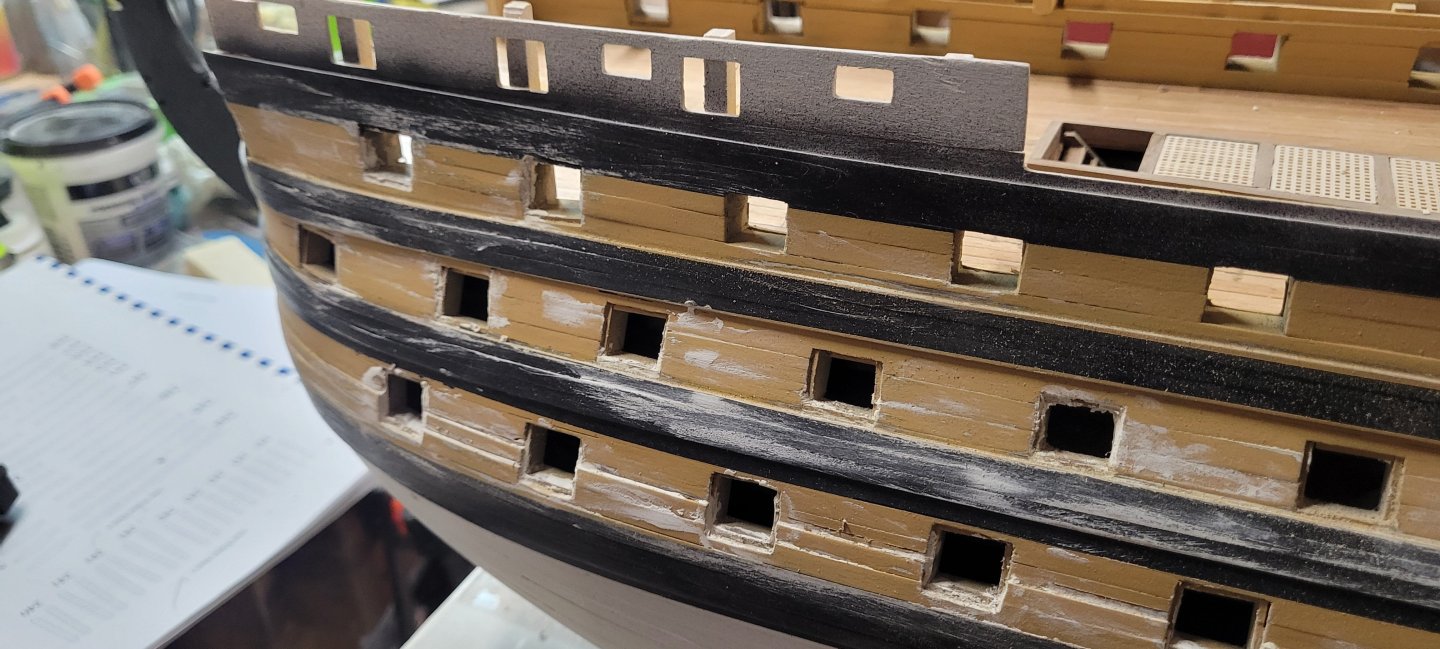
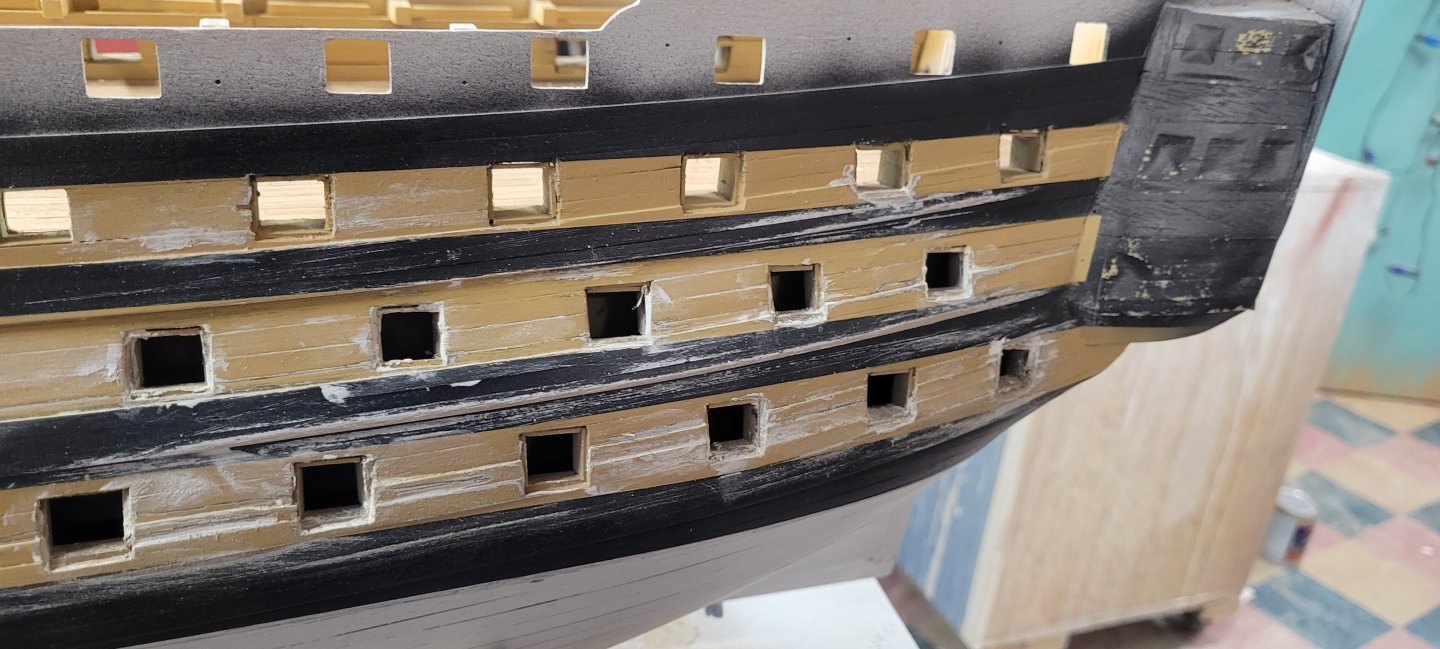
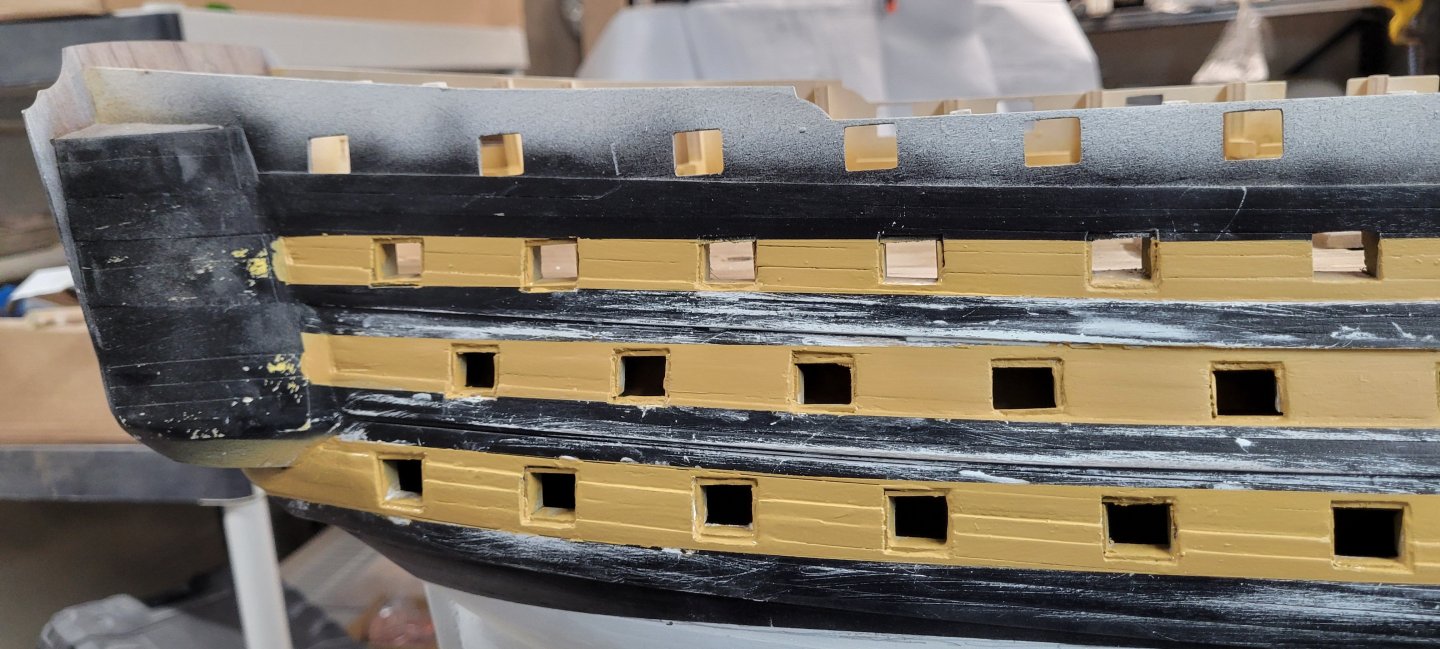
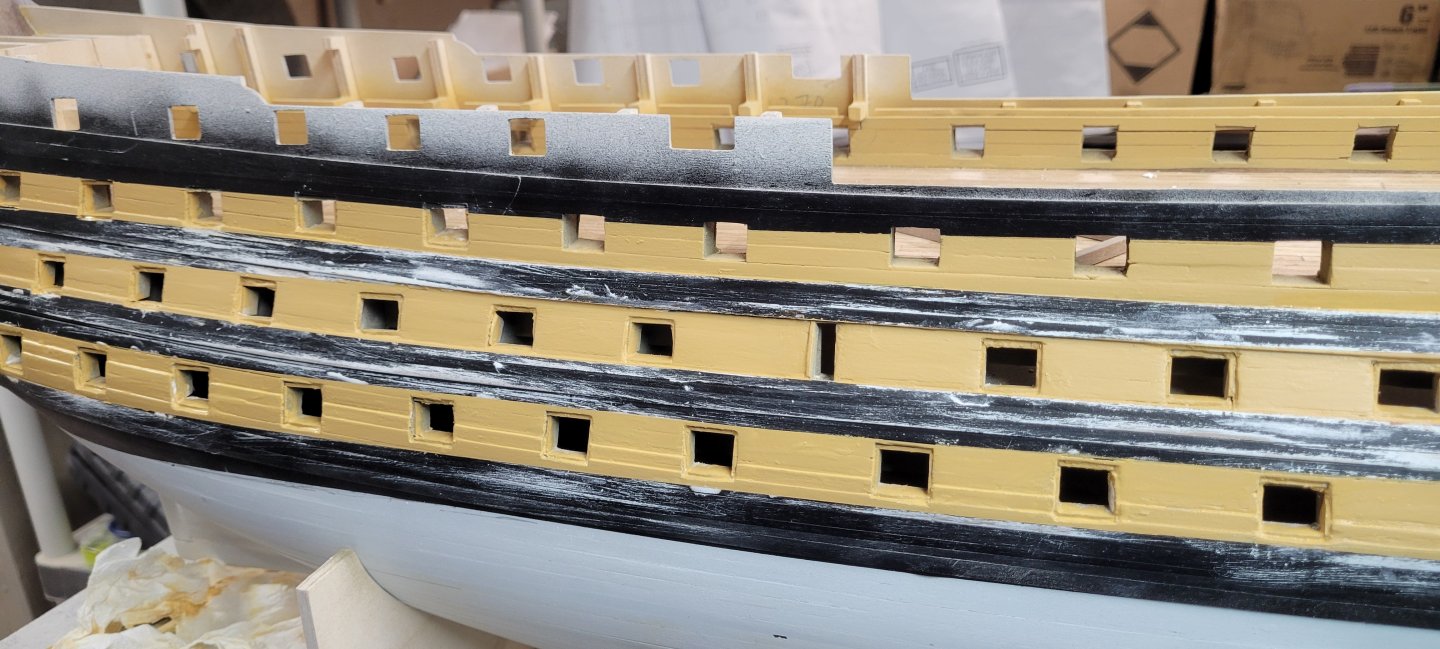
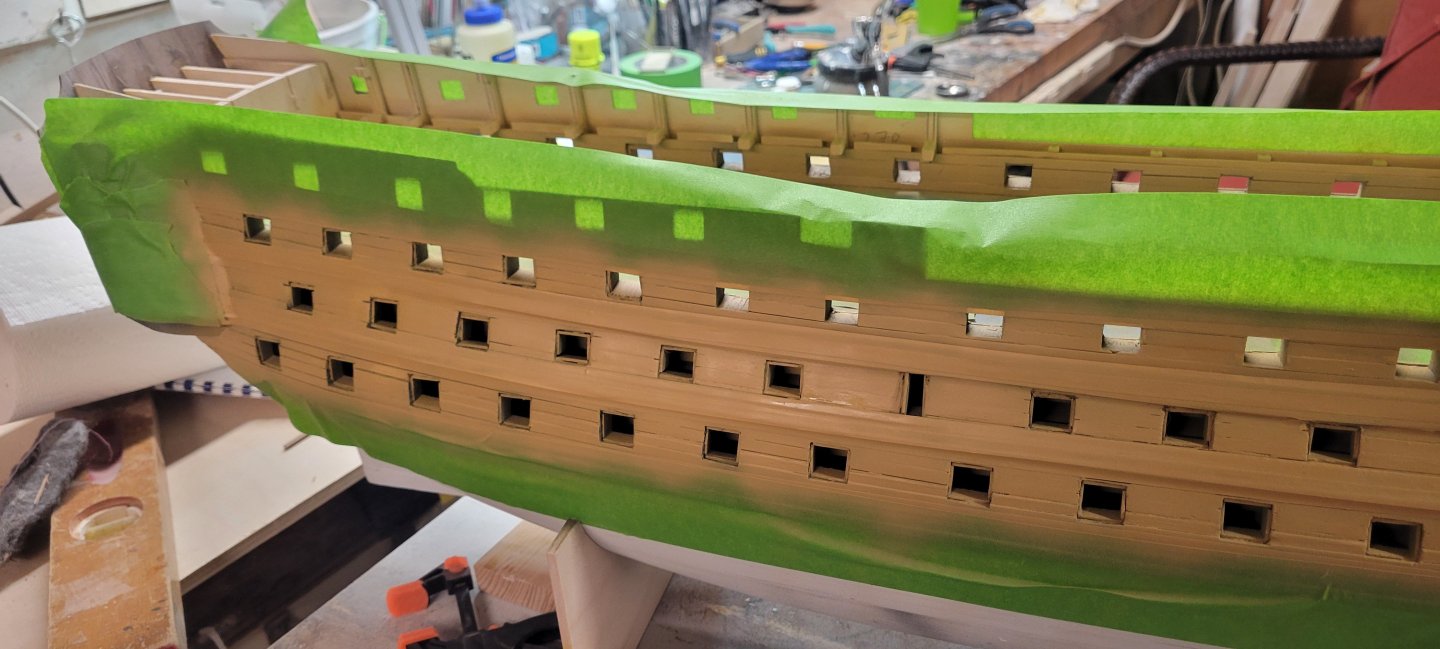
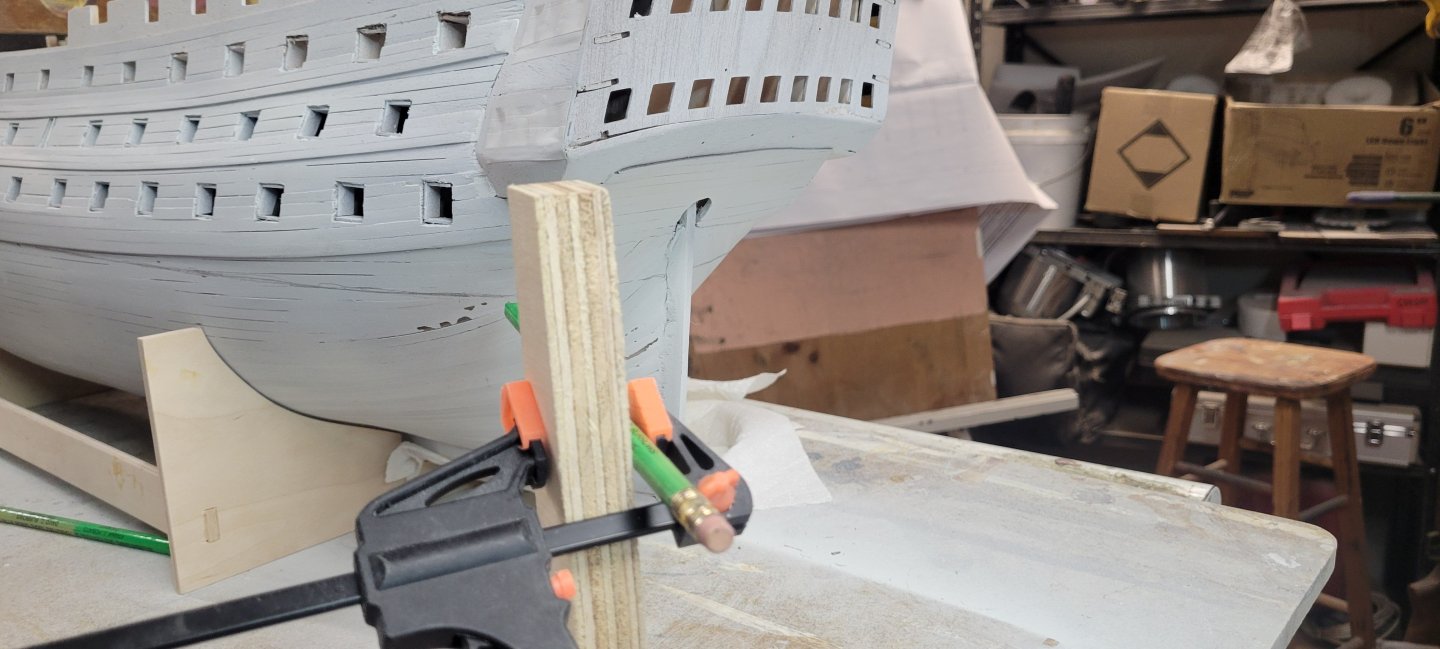
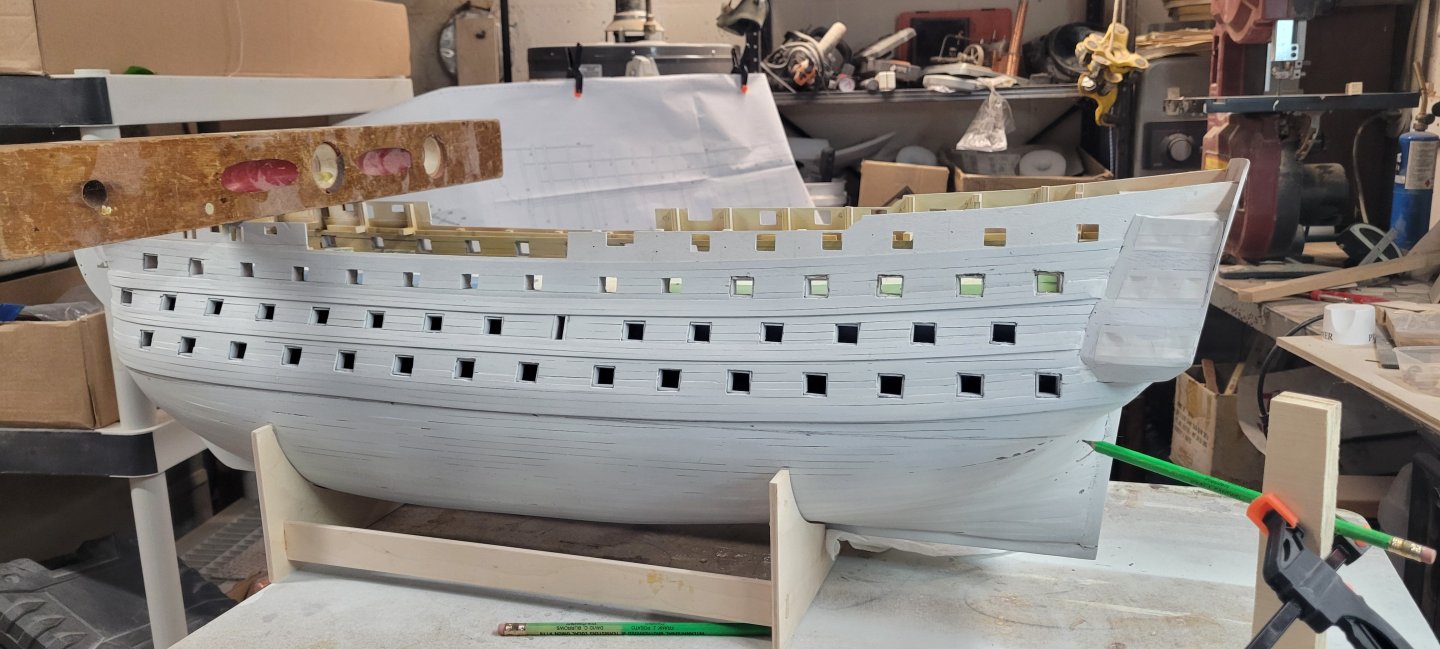
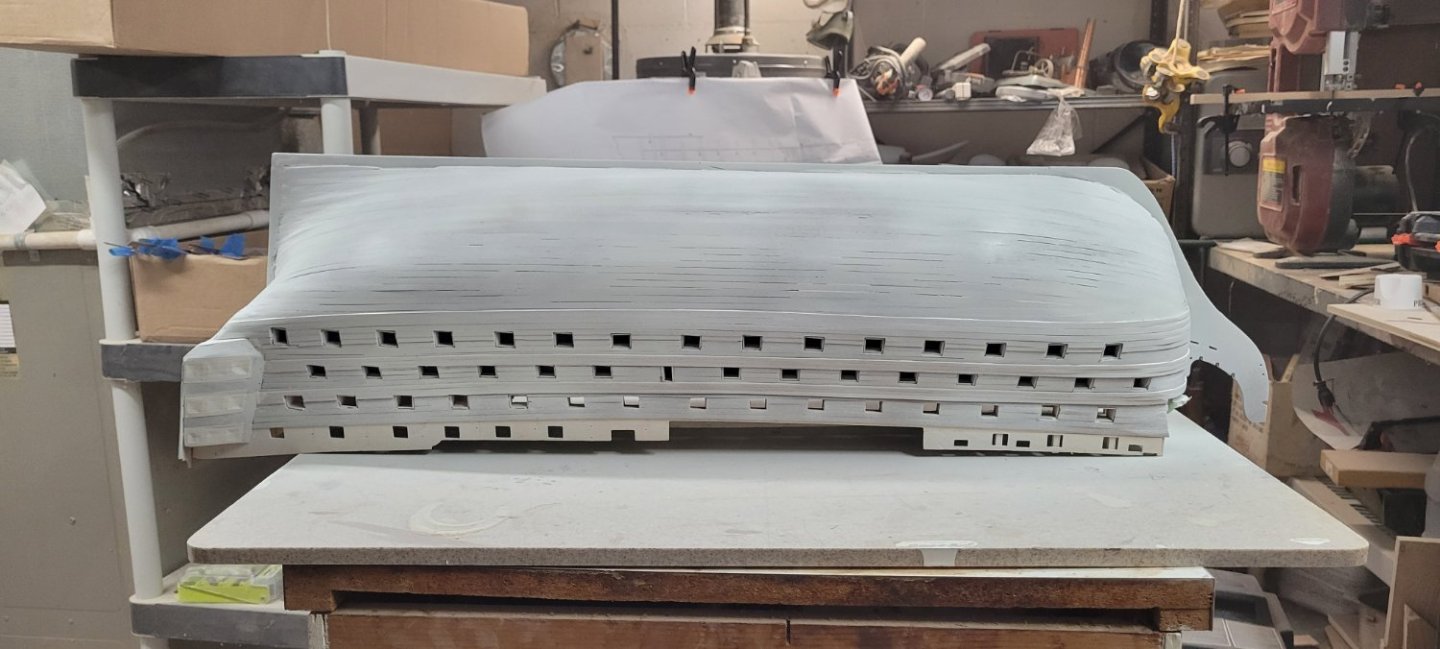
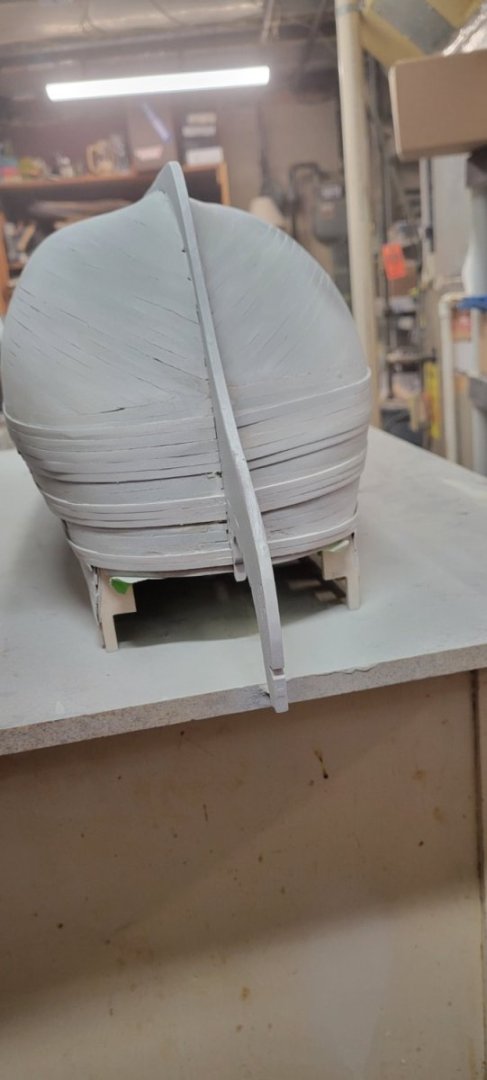
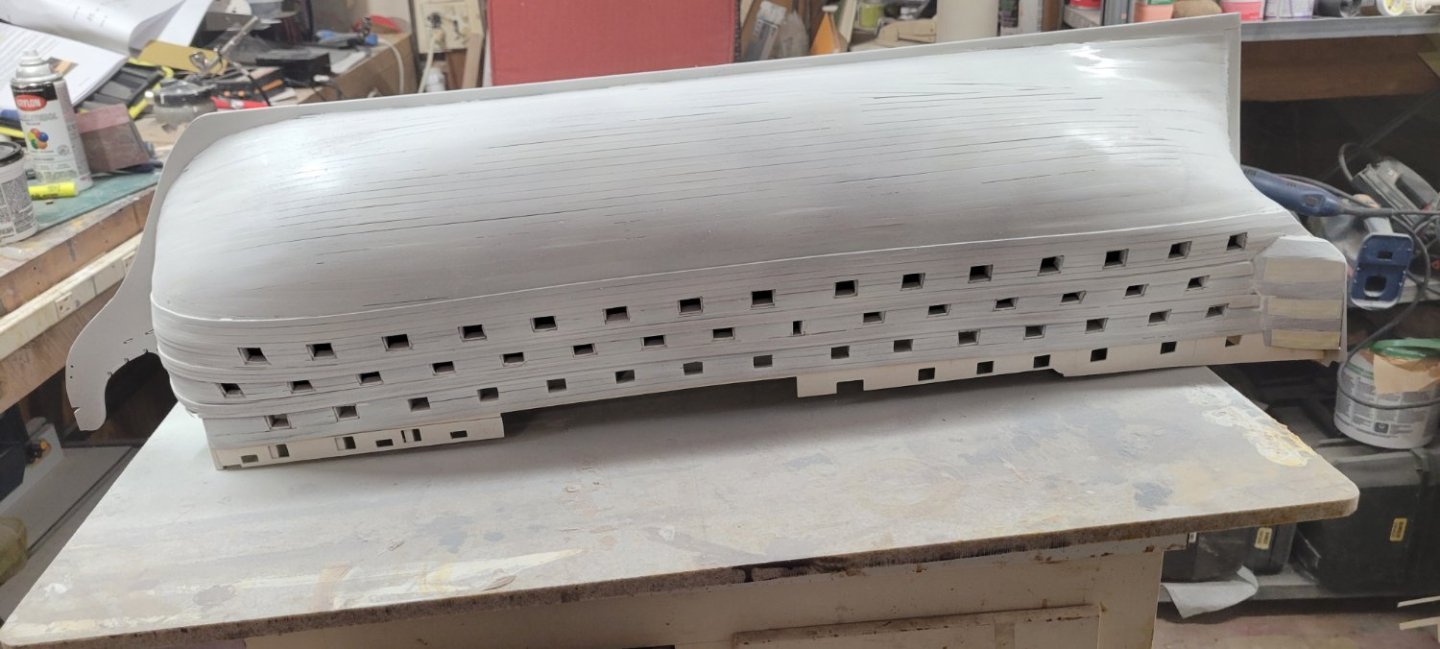
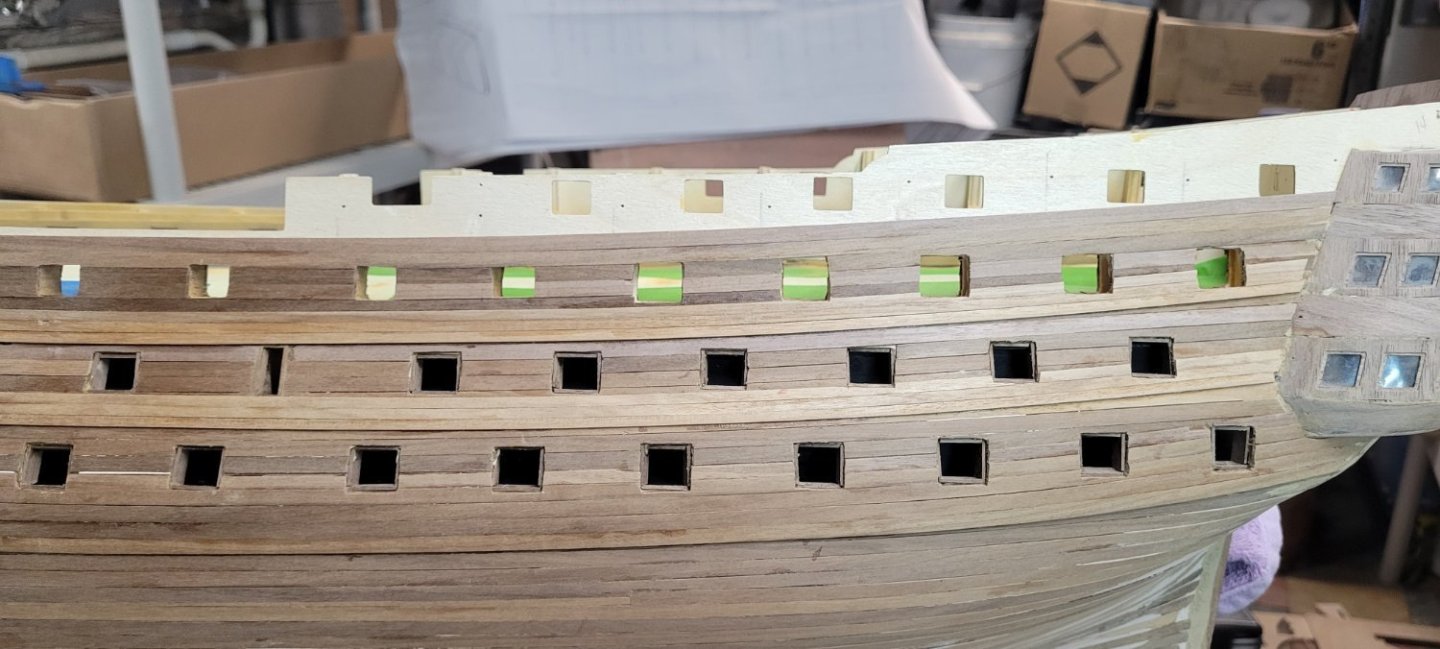
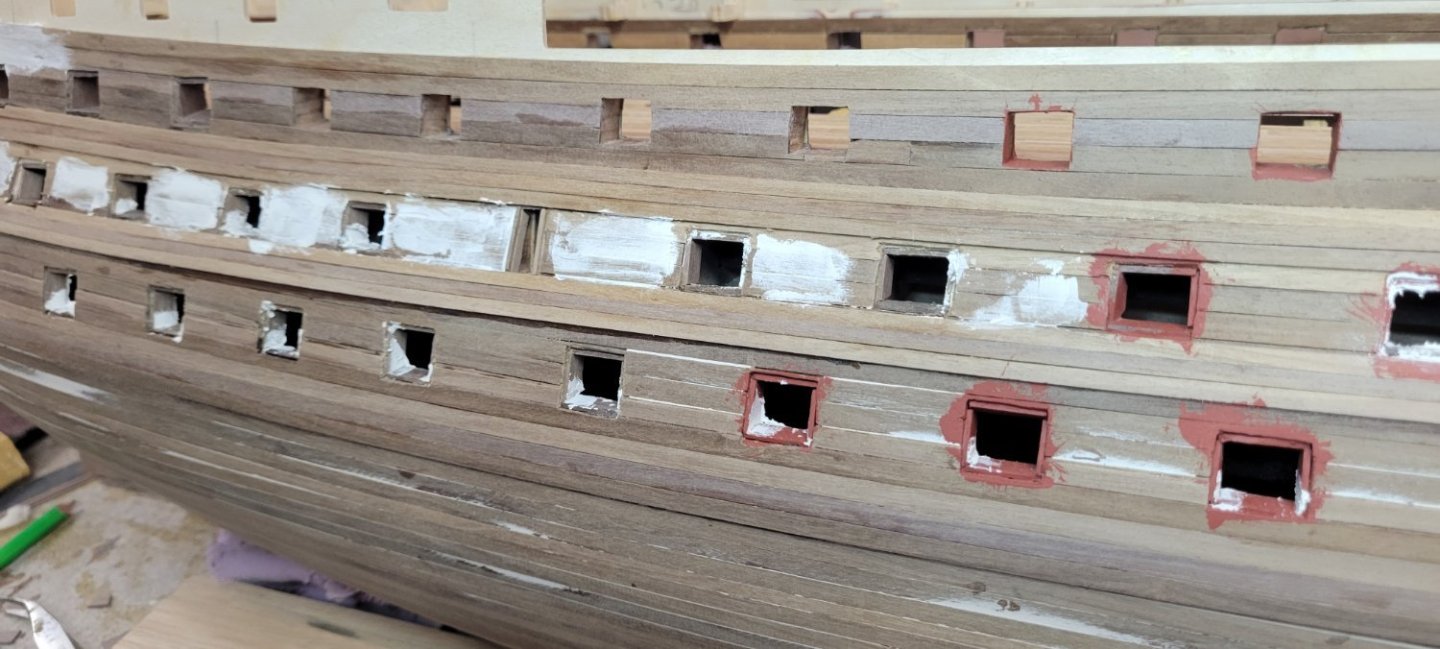
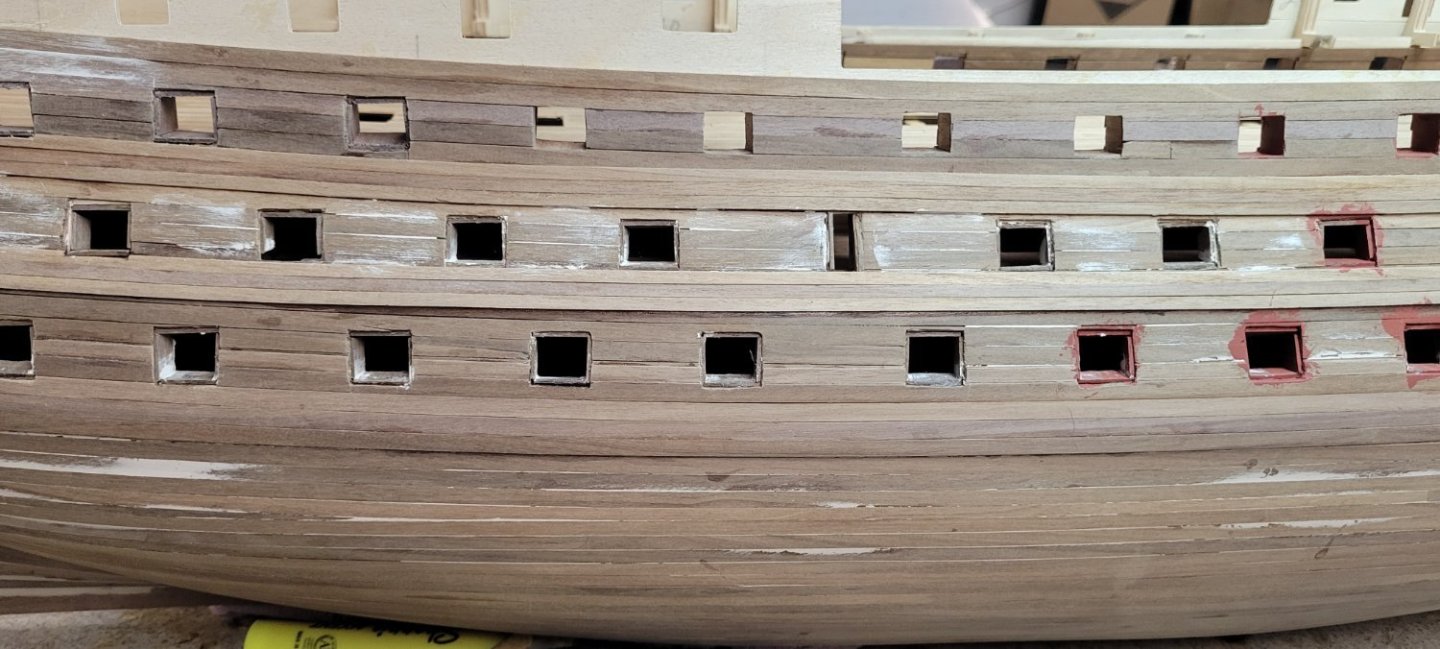
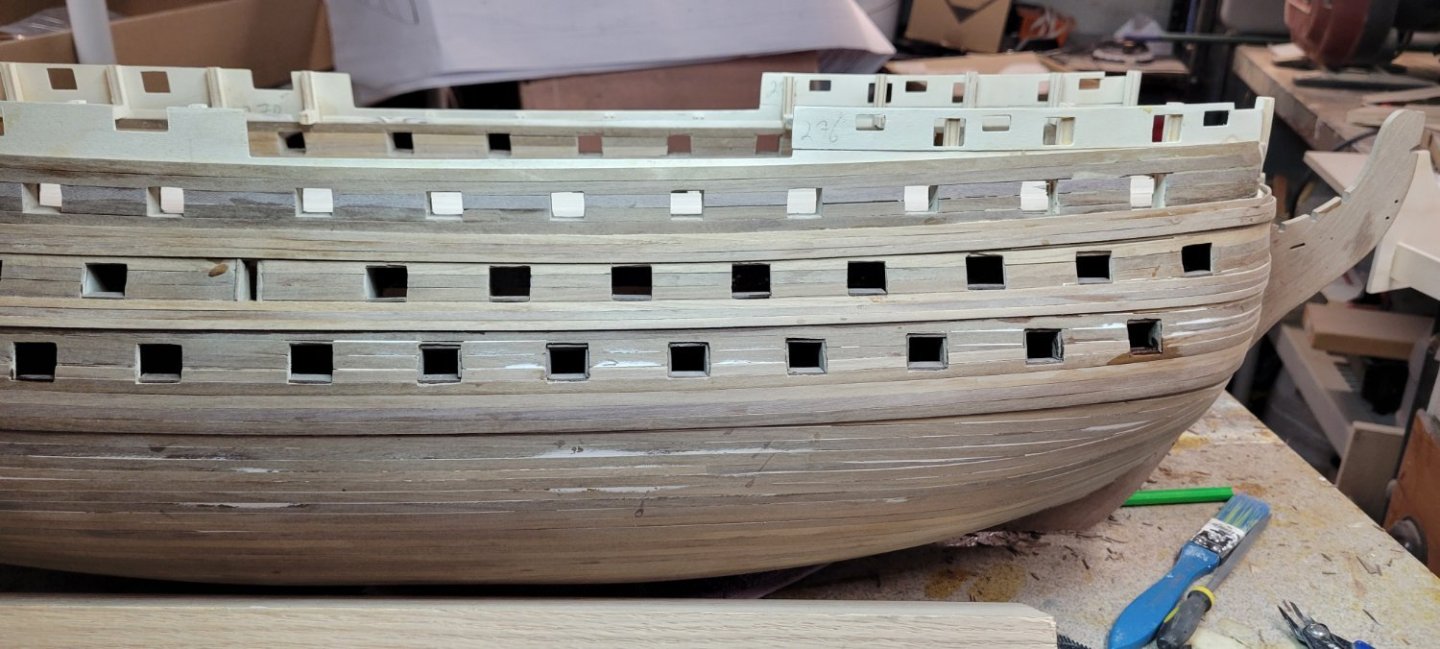
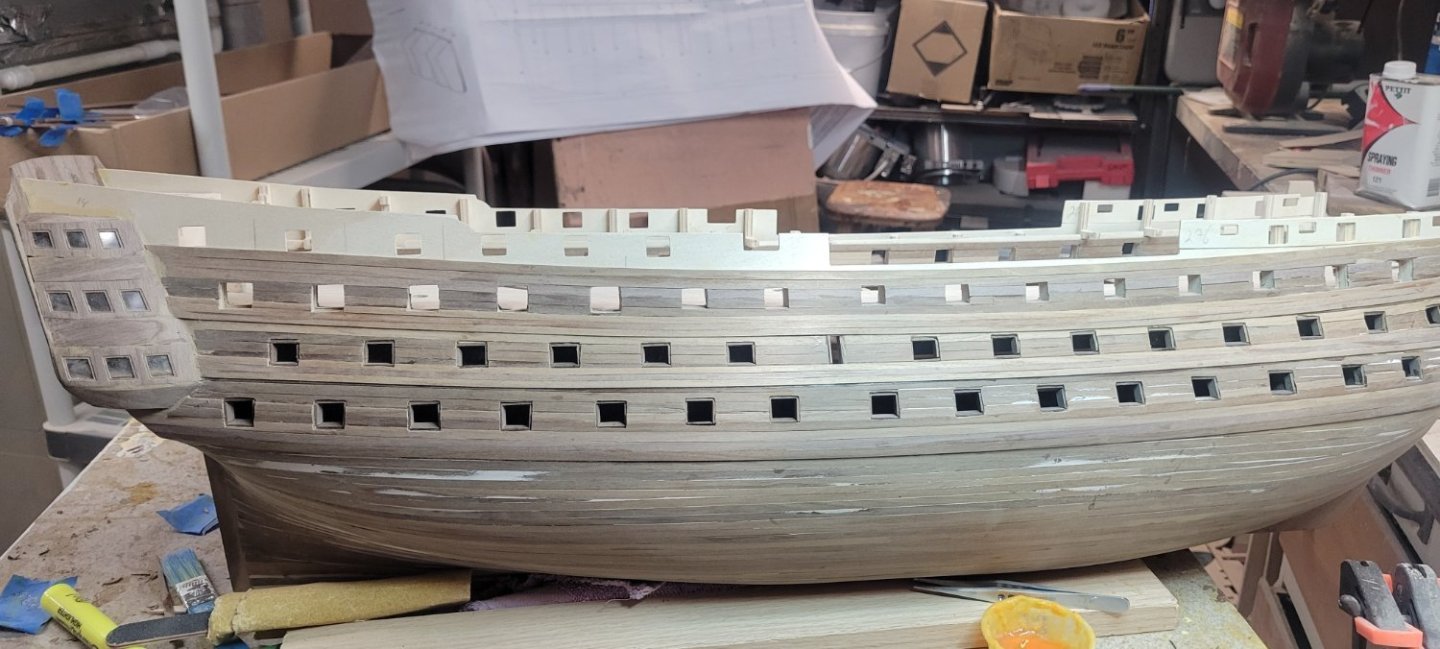
I finished all of the gun port liners. I did go over some of them again to try and square them up, but opted to put a coat of primer on to bring out any issues easily. The dark woods tend to hide issues and as can be seen here, once everything is white, you can see where I may need to make accommodations. I did notice that some of the 2nd planking doesn't fit tightly together. I know much of it will be hidden by the copper plates. And there are also gaps in the upper planking that will be visible. I want to add one more coat of primer after this one dries and I have had a chance to quickly and lightly sand it in a few days. Perhaps that coat and then the addition of the two different stripes will help to fill in some of the voids or at least smooth them out and make them less visible. I also notice some of the wales are bulging out and will have to be sanded back a bit.


-
This is the area you mean because these anchor entry points and bow trim work actually go over the top of the wales thus they need to be reduced for fitting?
-
Ah, I see what you mean. Ironically, they are a bit thinner because of the clinking effect I created when I installed them. Once I sanded them, they are definitely tapered and should unknowingly work to my advantage!
-
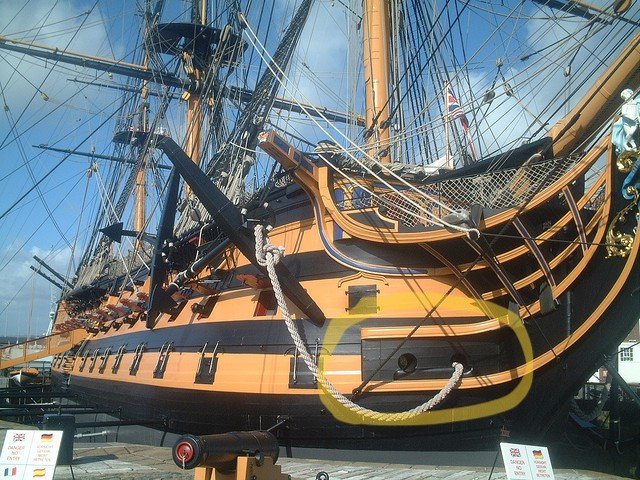
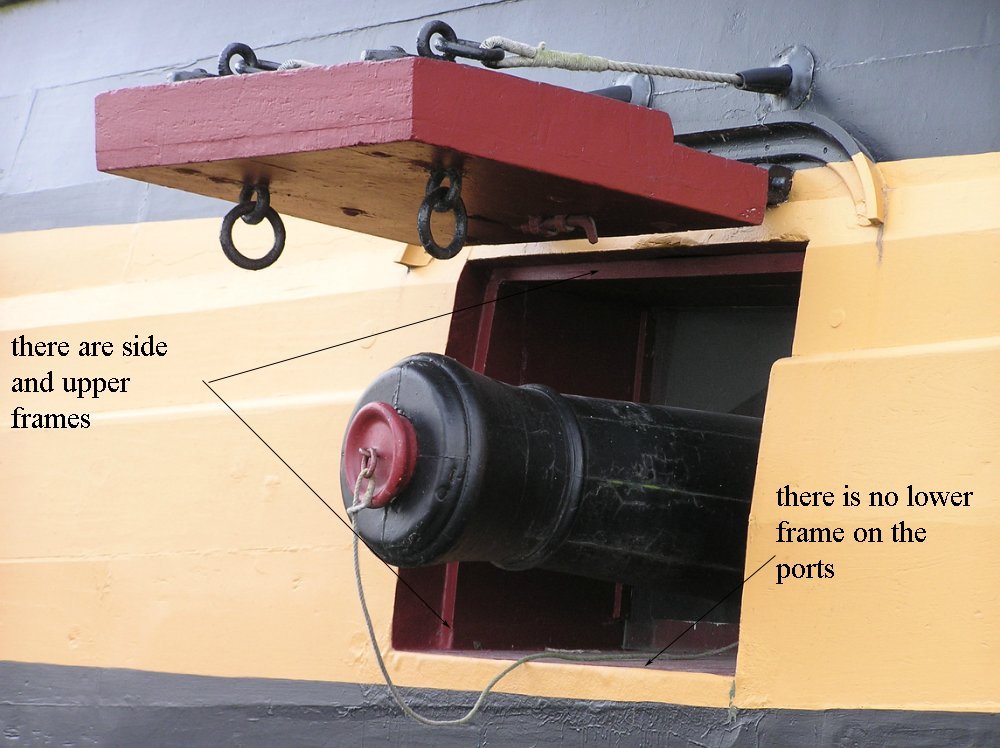
Allan You make a great point about the many refurbishment projects on the boat. Someone just posted this pic from the ship with a completely different point of view! Interesting that there is no recess here. Now this appears to be a lid from the lower wale? Rather than a stop on the lower sill, the lid just fits into the opening smoothly. Also, what do you mean by this: "Don't forget that the thickness of the wales at the rabbet at the stem was reduced to the same thickness of the adjacent planking so it would seat properly in the rabbet. It looks like you did that on one wale, but hard to tell from the angle of the photos." If there is something I need to do, now is going to be the time!
-
Lol....now you tell me!!!! Yeah, I just finished all of the liners and was very diligent to create a stop for the upper liner too! I'd like to think that my version of the Victory was from an alternative reality where the designed needed stops on all four sides! Whew.....crisis averted. I do appreciate the info though and hopefully new builders will see this and work accordingly. I also just checked the instructions and they don't mention that there is no need to recess the upper sills. My feeling though as people will be looking down at the model when finished, they won't see that. Although I am going to have to account for the fact that I may have to place the gun ports up a bit higher now.... THANK YOU!!! Chris
-
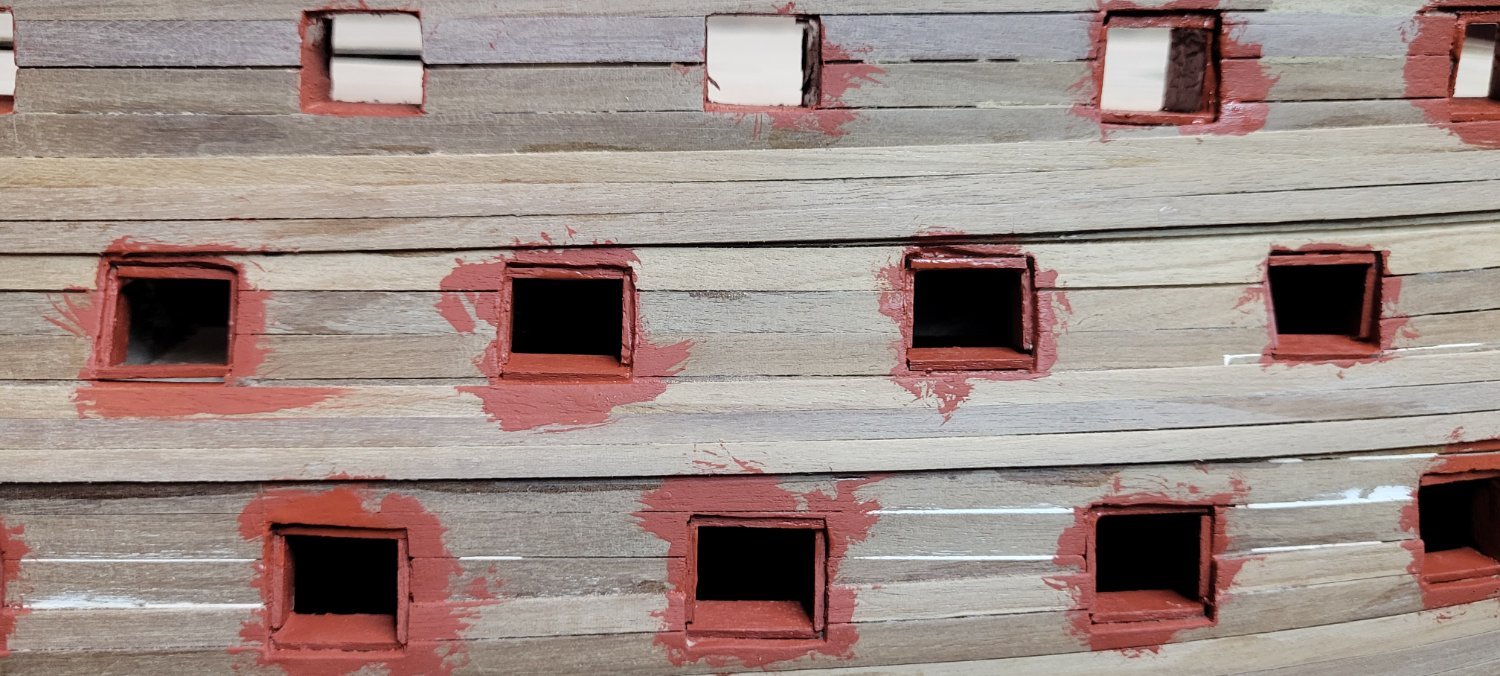
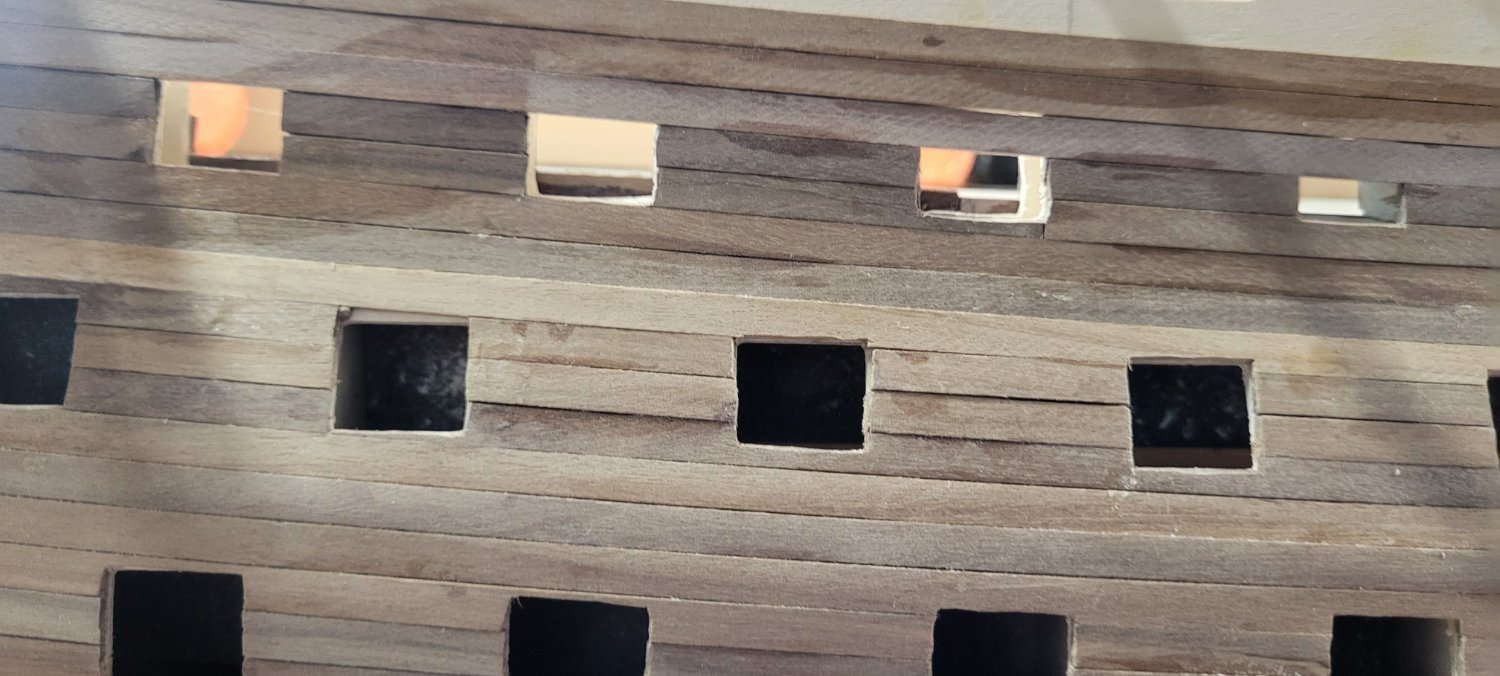
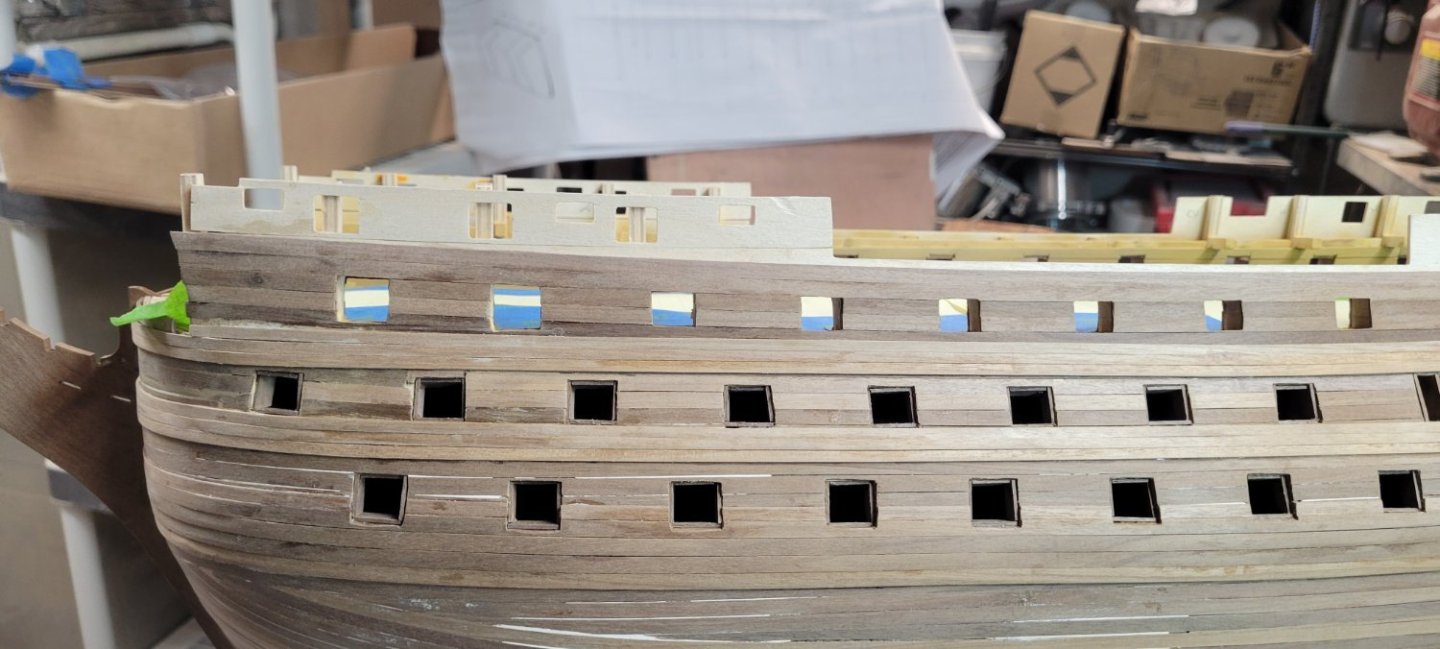
While getting ready to switch from the starboard to port liner task, I decided to try and paint the interior gun ports. I was curious to see how the paint lays and what it would look like. The planking and fit on the interior isn't the best but I struggle worrying about areas that are not going to be seen. Now in retrospect, that seems kind of heretical. I mean, in theory, I don't really have to do any of the cannons hidden from view. But I fully intend to create the cannons as they should be and then rigging them as close to real as possible. So, if I am doing that, why am not doing the same for this interior planking? I mean, I am not laying the very top plank because of the camber beams and they will NEVER be visible and I don't seem to mind that the liners are sticking out a bit on the extreme fore and aft port openings. Those are the questions that will haunt me for days to come. But I do have a question about the paints. I am using the Admiralty Paints. They are VERY thick in the bottle. I used an airbrush which was very difficult given the angle needed to get into all the nooks and crannies. I still have to apply a final coat, again, more curious than anything. What do I use to thin these paints? I used Tamiya acrylic thinner and it seemed to work ok, I had to keep the air pressure at it's highest range and the paint did seem to thicken in the pot too quickly. I do have other thinners, AK, Vallejo, isopropyl and a few others I can't remember right now. Any suggestions? Thanks! Chris

-
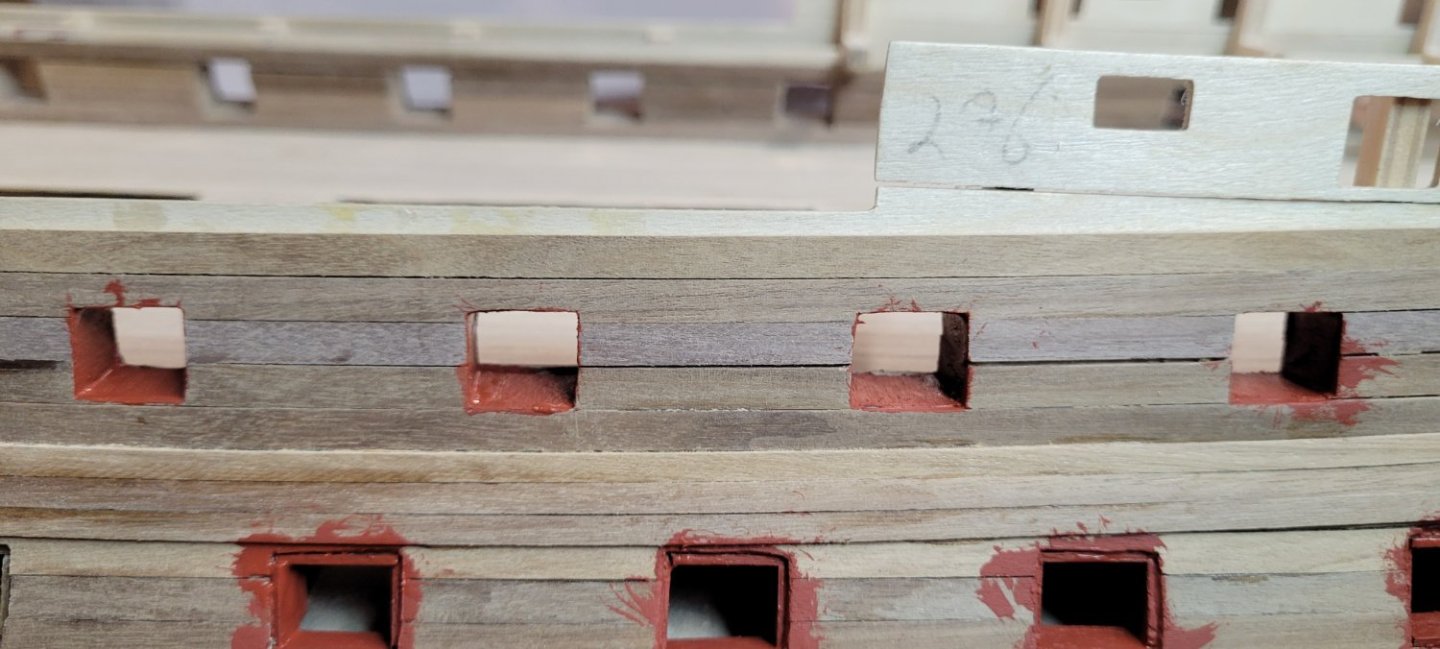
On to the port side!!! I took a lot more time on this side. Instead of cutting a bunch of liner strips, I actually cut each one separately. I still glued the sill first. Then went down and did all the vertical liners on the left side. Then the right. It was hard to do the right ones, I use my right hand for the tweezers and needed to cross over to hold the piece in place....a lot of sailboat twister going on. I actually lost my little liner jig in the boat. I am not kidding, I was doing one of the lower ports and my hand slipped and whoop.....there it went, down in the bilge, never to be seen again. What are the freaking odds!!!!! When I finished, I am actually a little more pleased with the results. I still need to go back using a 1mm chisel and exacto blade and square some areas, but I think these look pretty comparable to many of the other build logs.
-
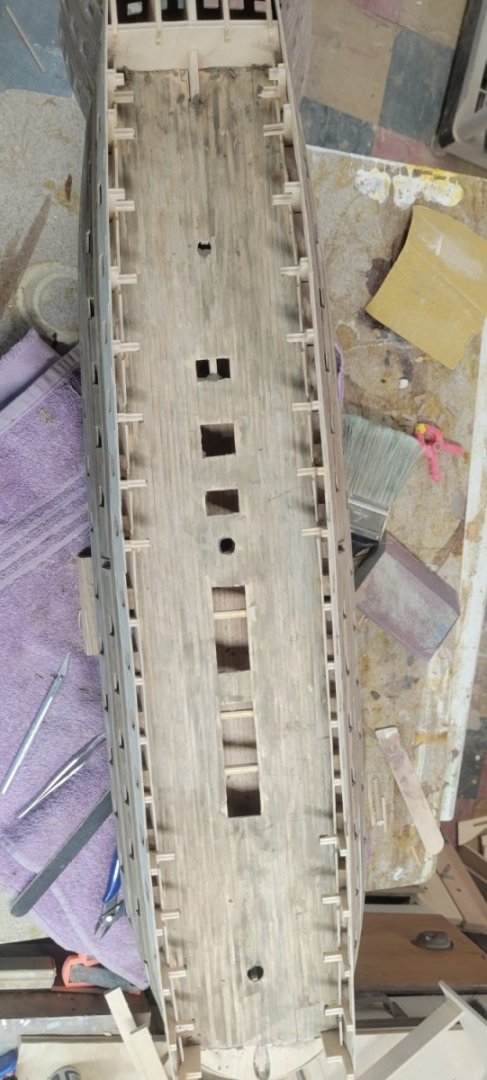
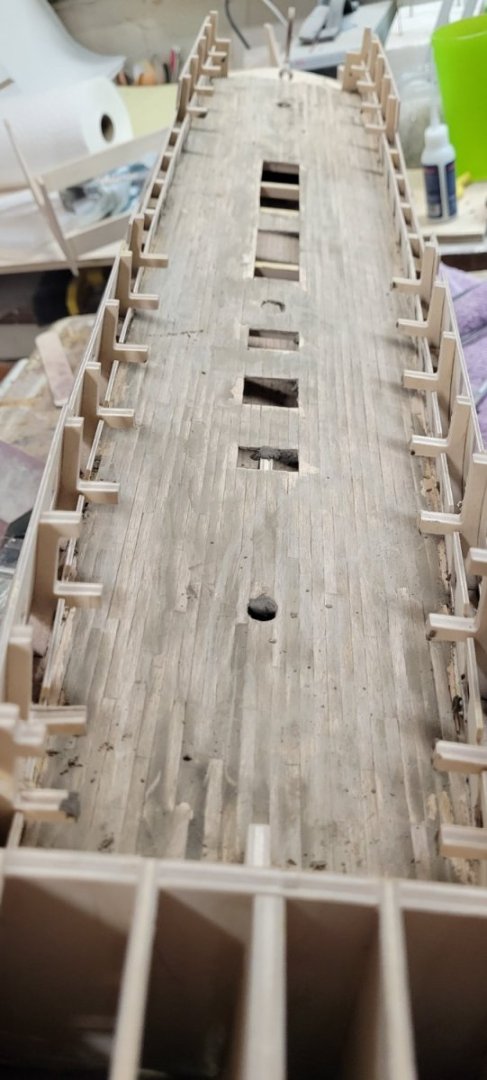
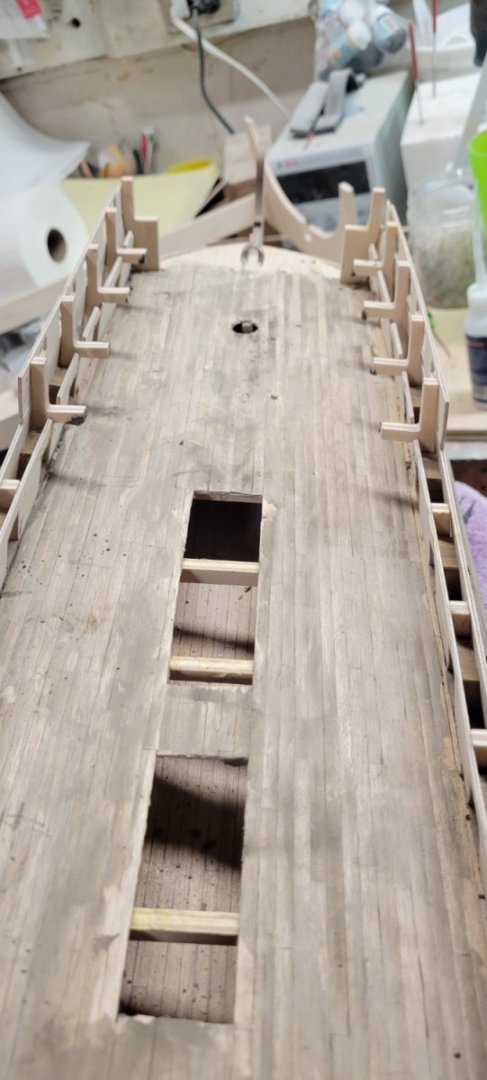
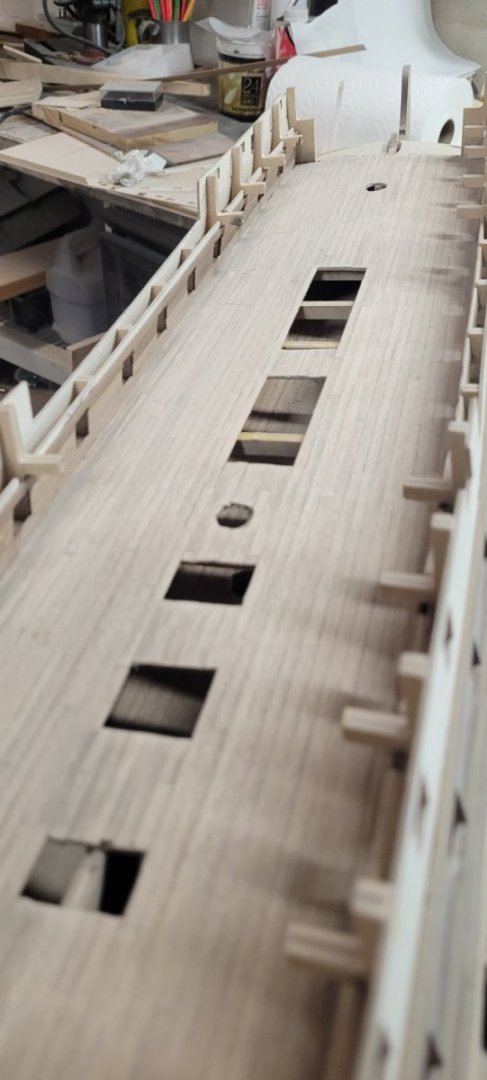
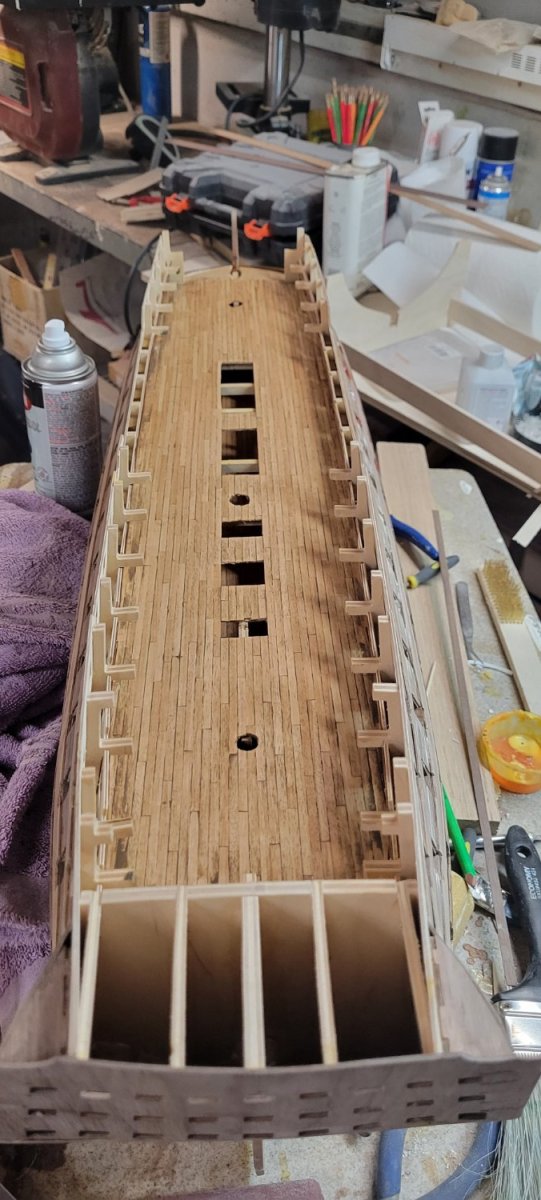
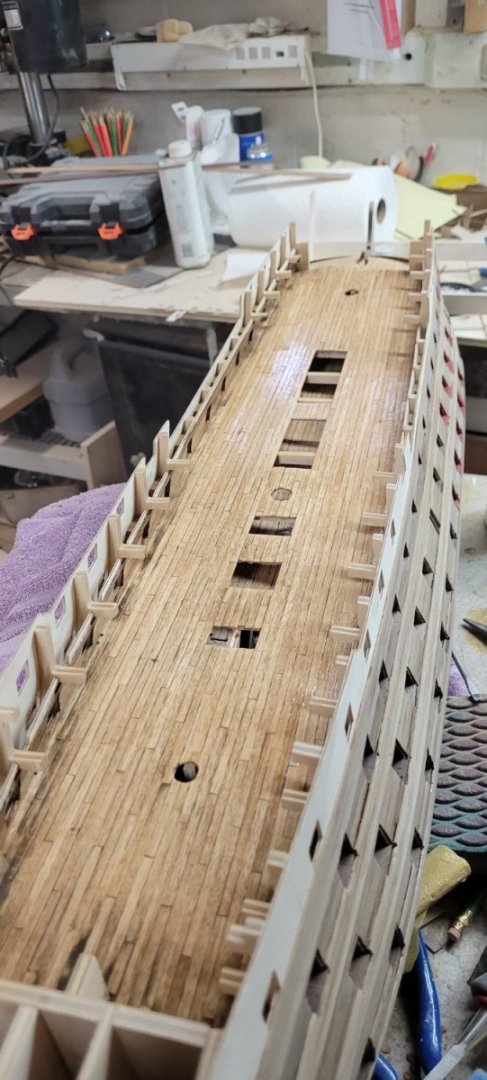
I put two coats of matt finish on the upper deck (I still have to refer to the instructions to remember which deck is which) I did add some filler and stain again. Unfortunately, it was very difficult to get it out of the edges under the bulwark stubs. Chewed up my knuckles something fierce, even using sanding sticks, sand paper around sanding pads....just very tough. The only saving grace is this deck is almost completely hidden.

-
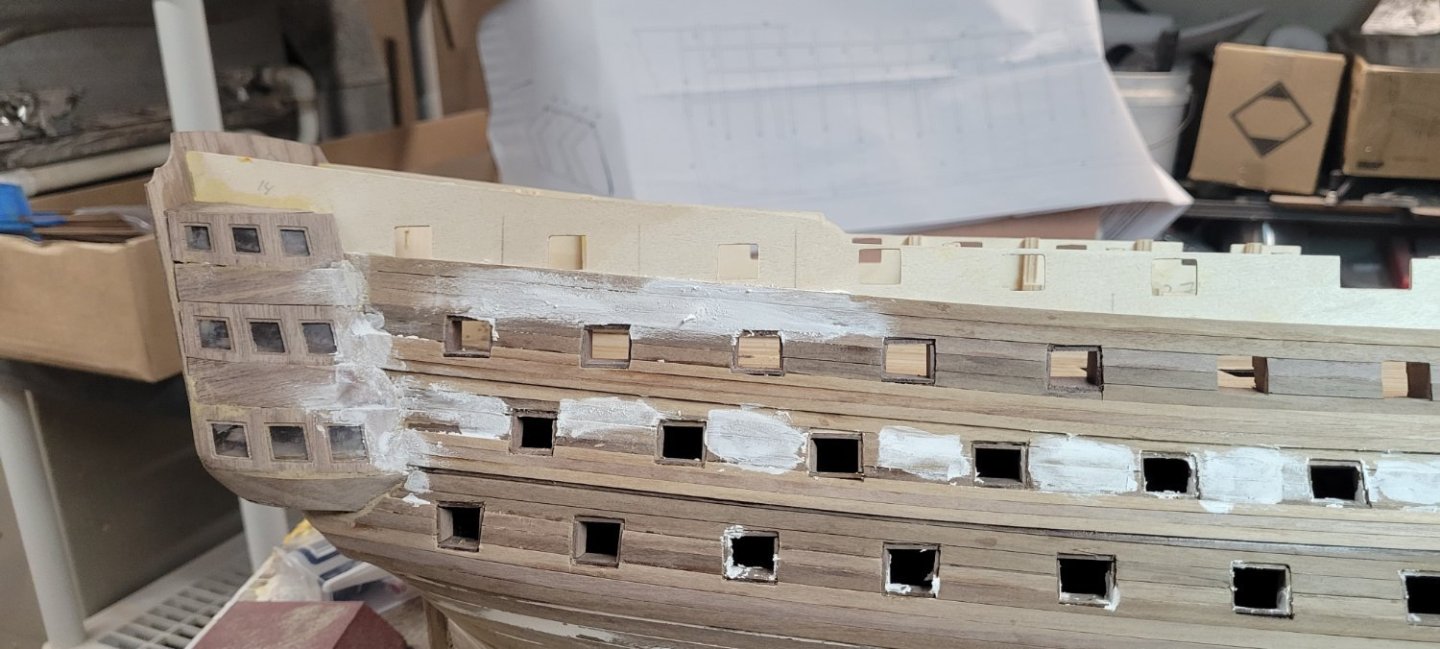
I think mainly because I was getting bored that I wanted to paint the gun liners. Hoping that would make them look better. Instead it just magnified to poor fitting and bad cutting. So with the failure staring me right in the face, I decided to see if I could fix it. I opted to use the wood filler rather than putter as it dries fast and sands easy. When it was all said and done, I am not sure if I did any good. I plan of priming the whole hull, so hopefully when I do that, the primer will fill some of the voids and create a smoother finish. If not, I will take another stab with the filler.


-
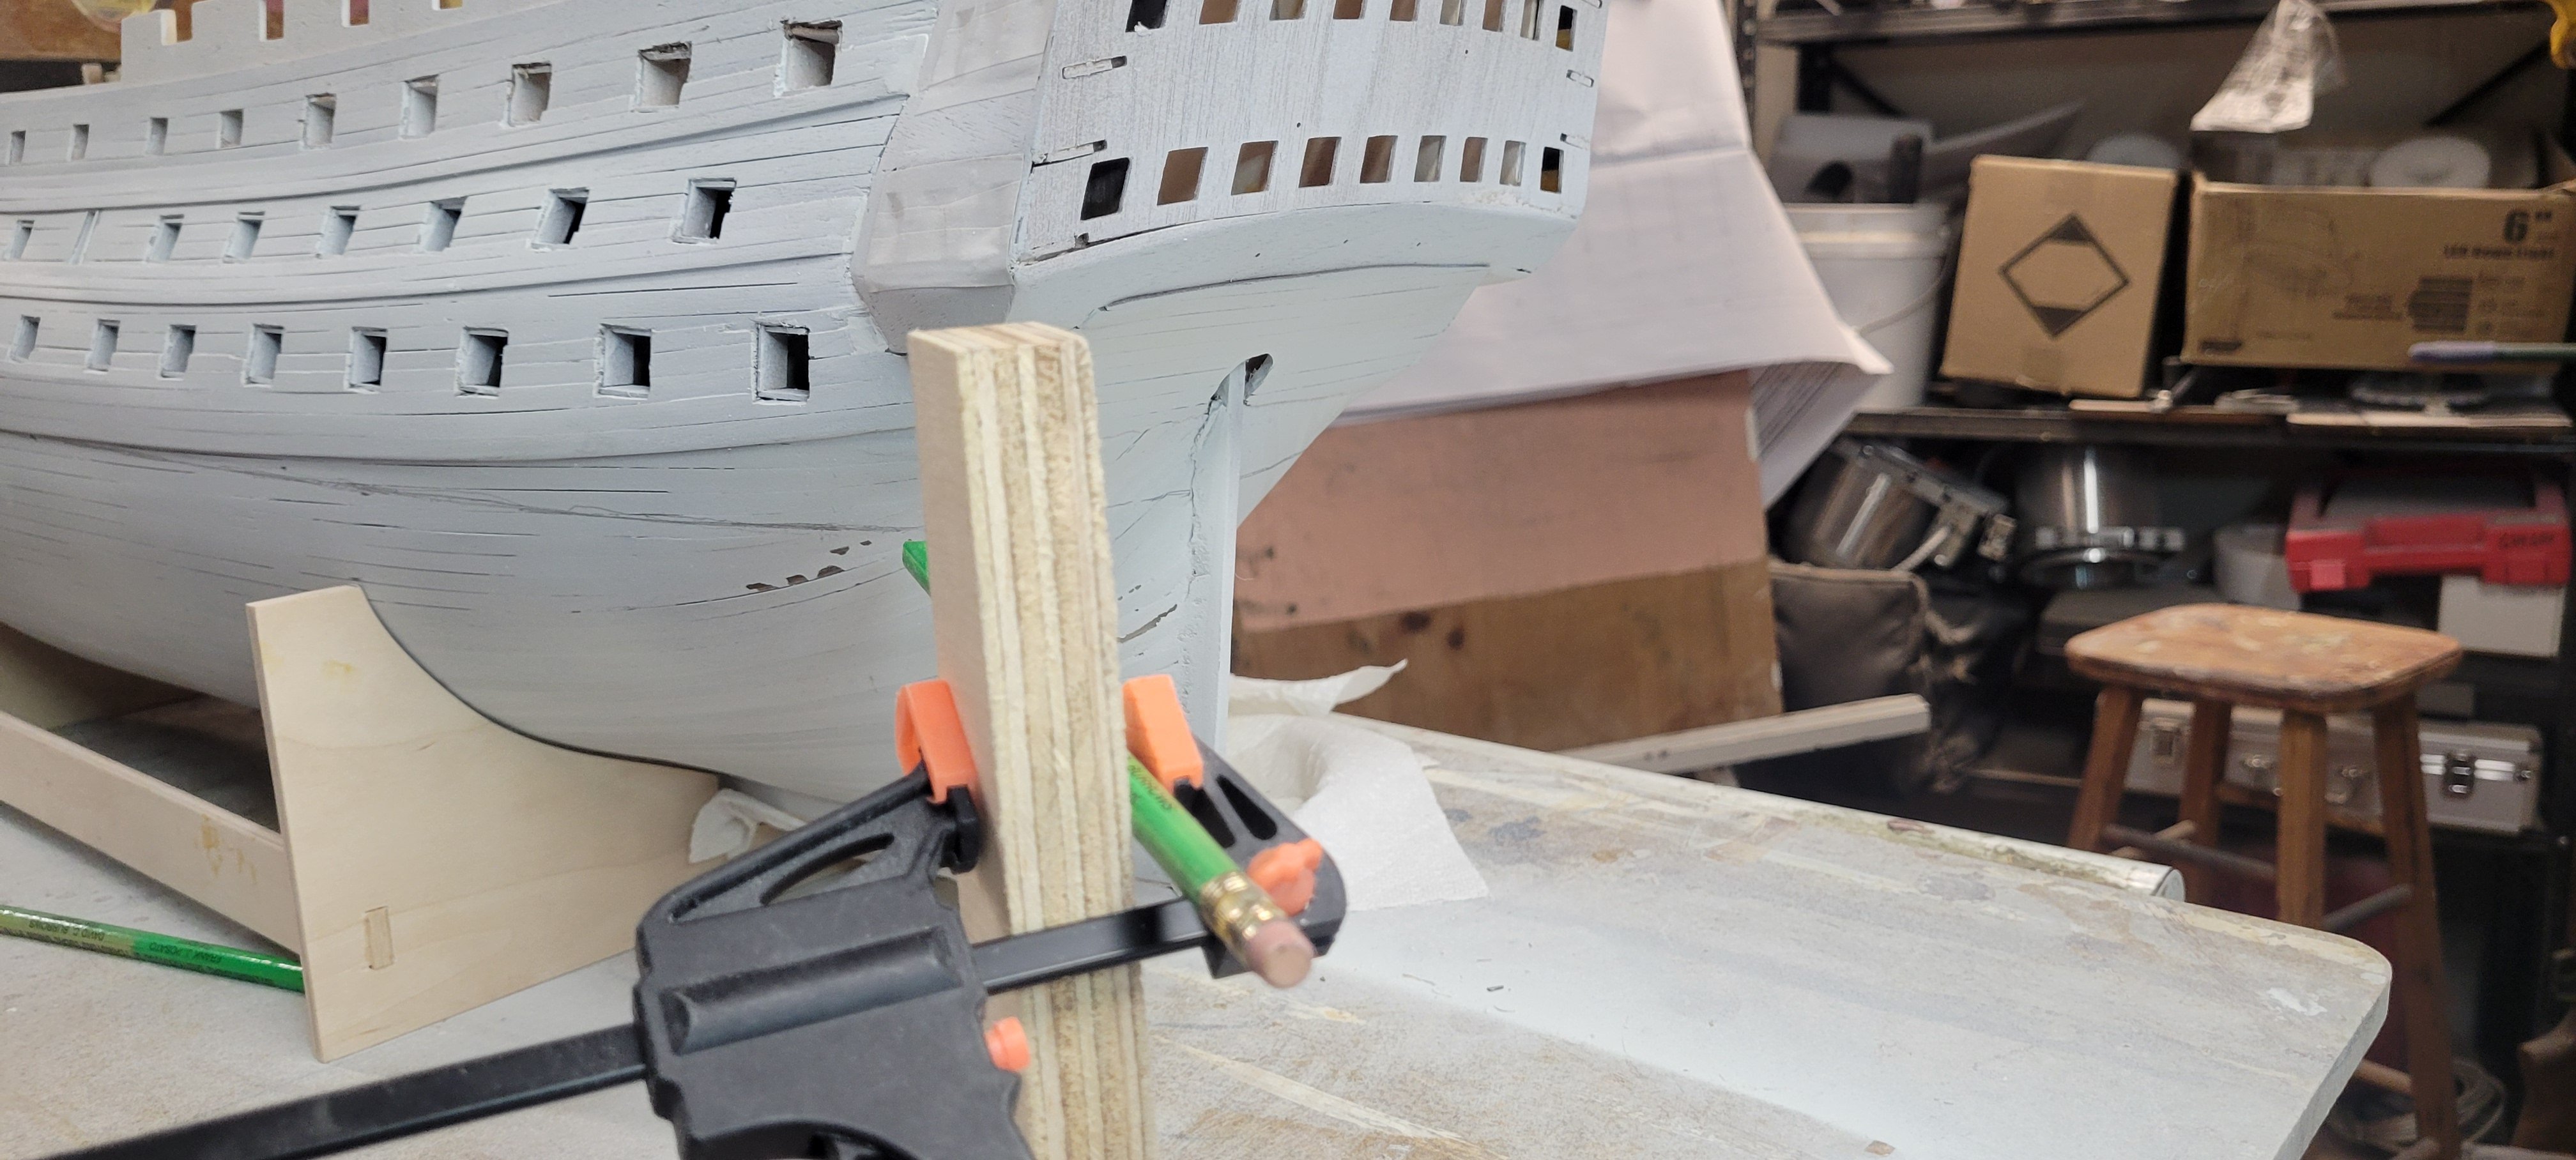
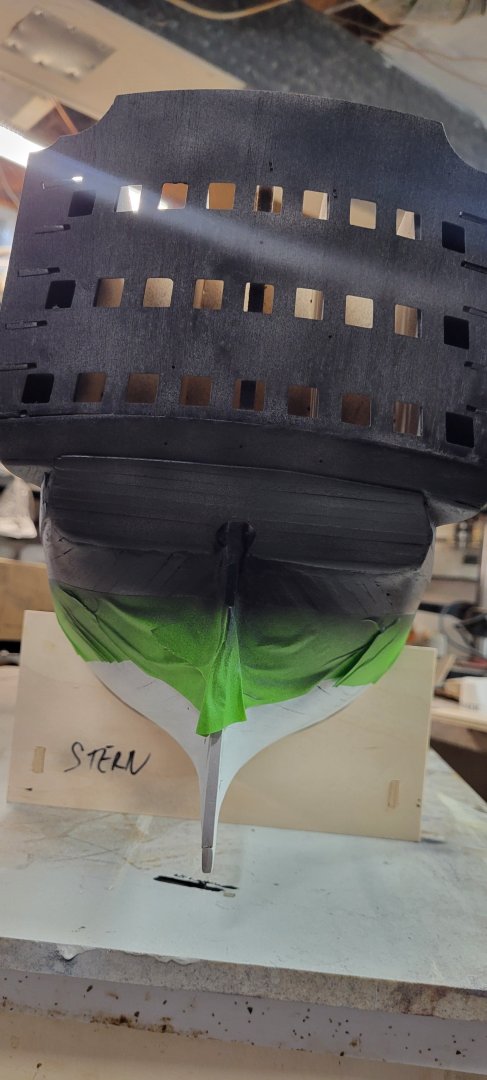
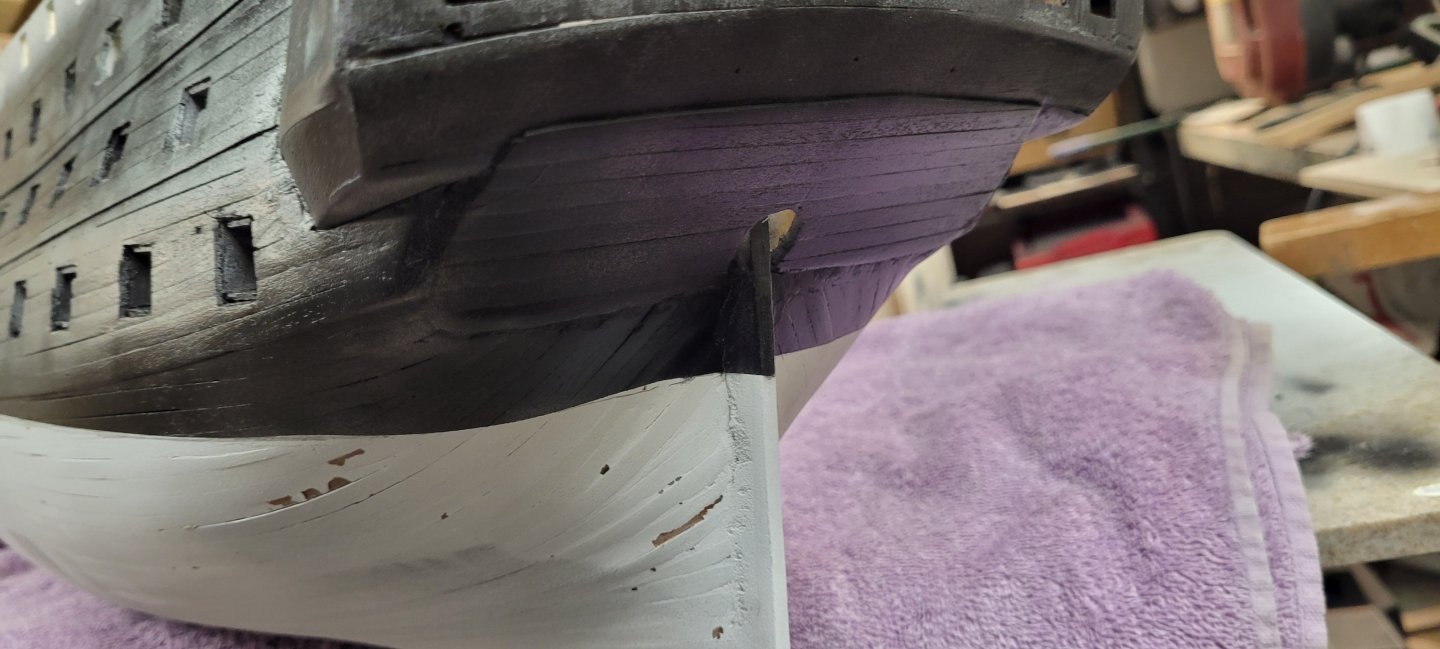
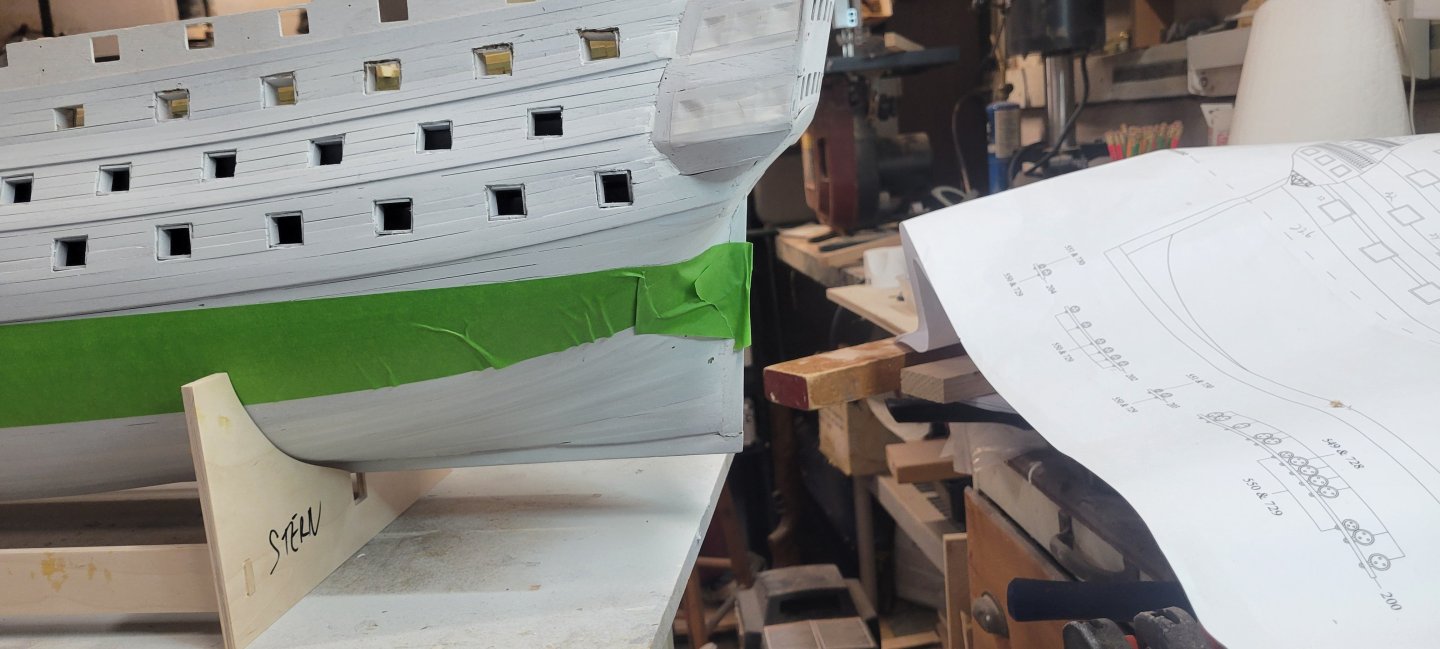
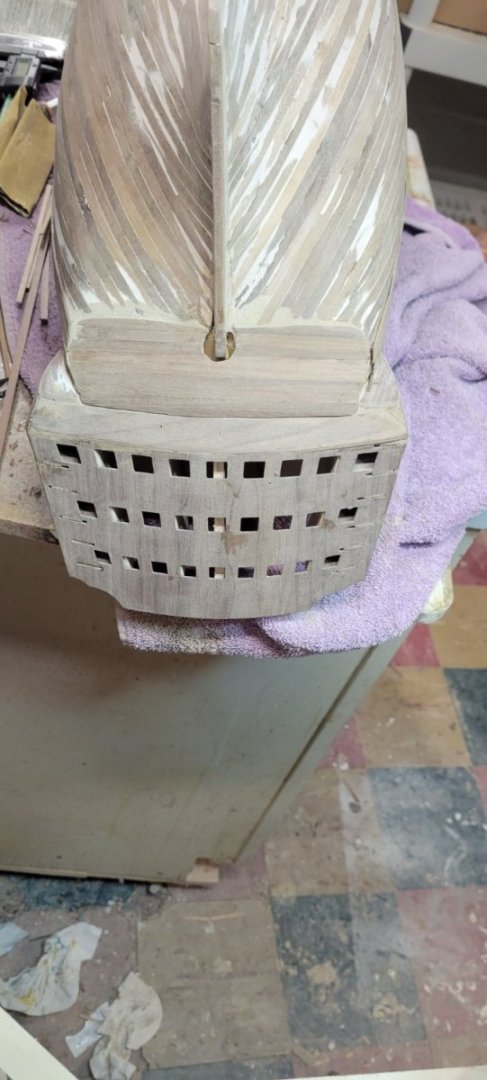
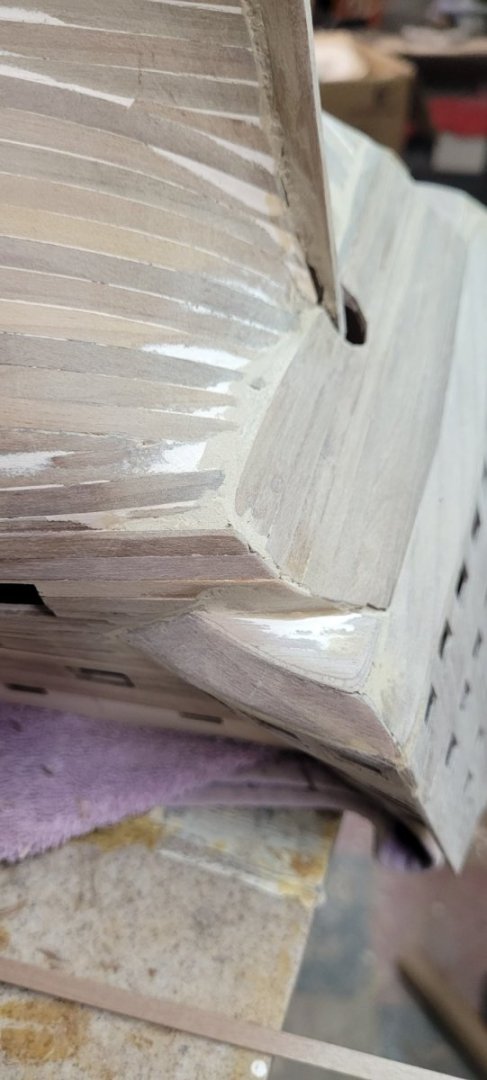
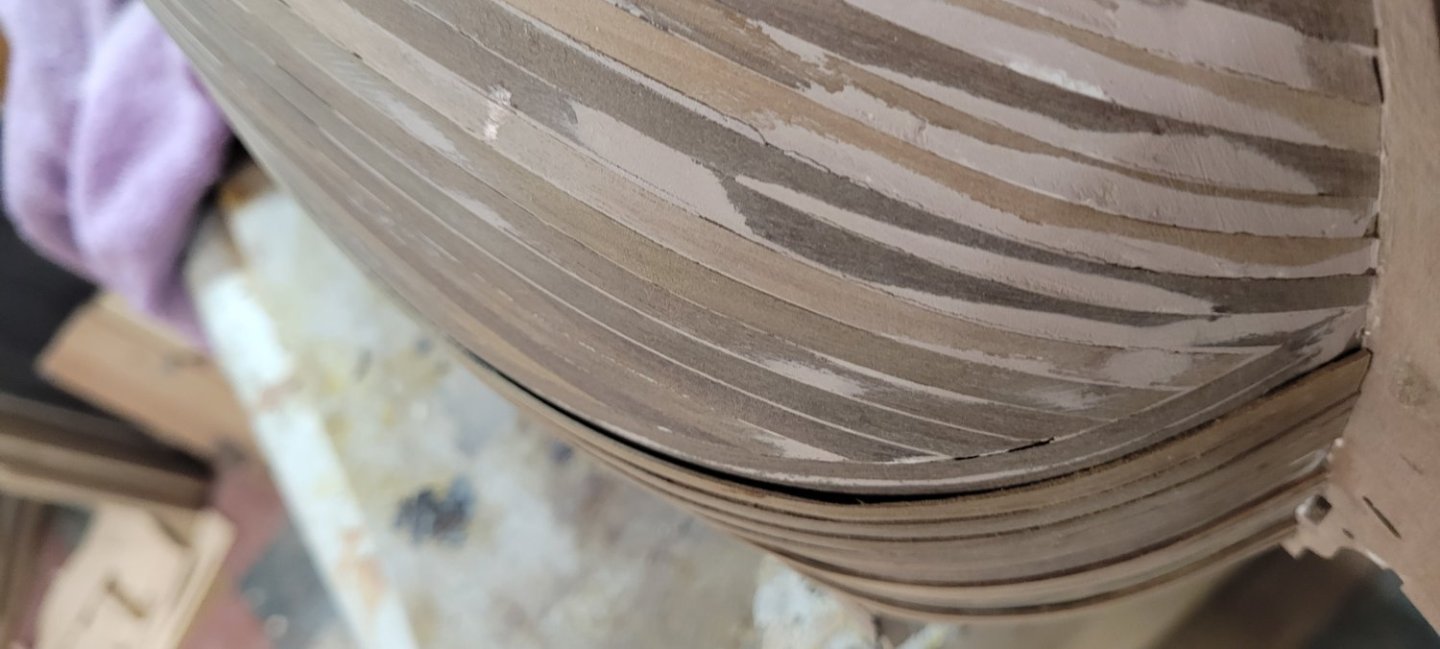
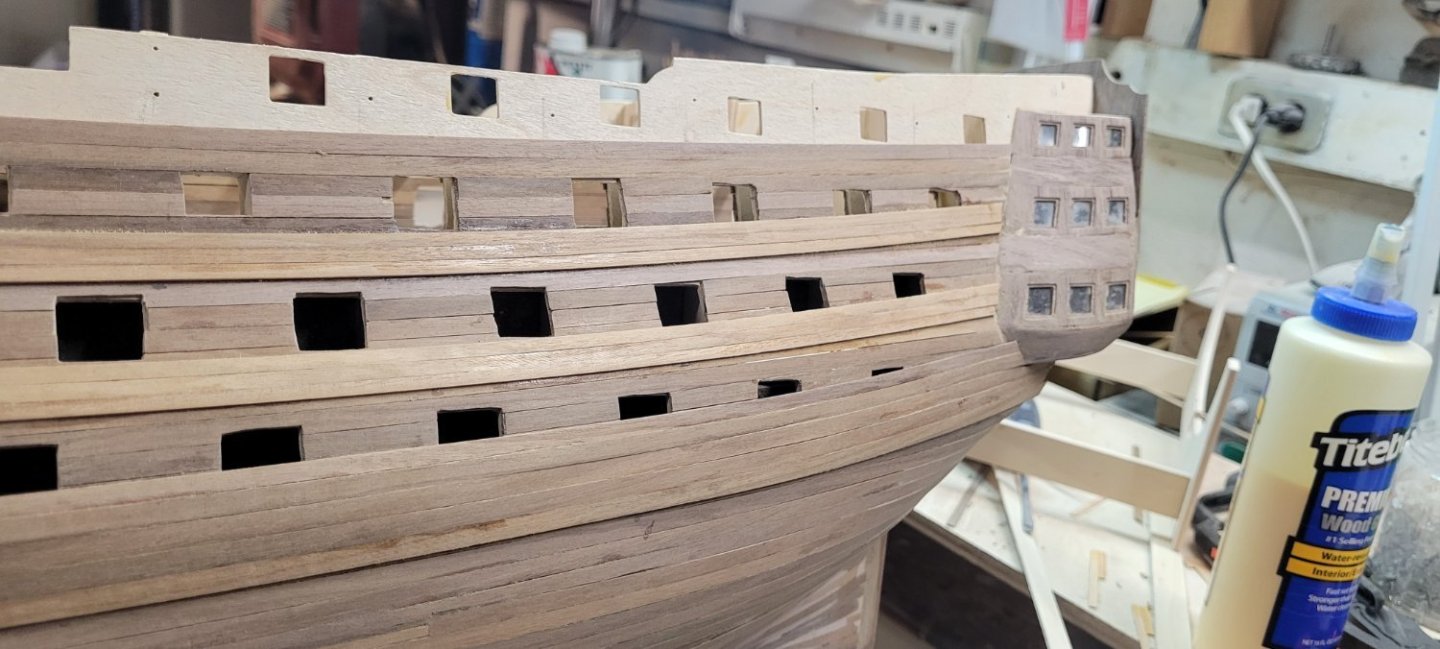
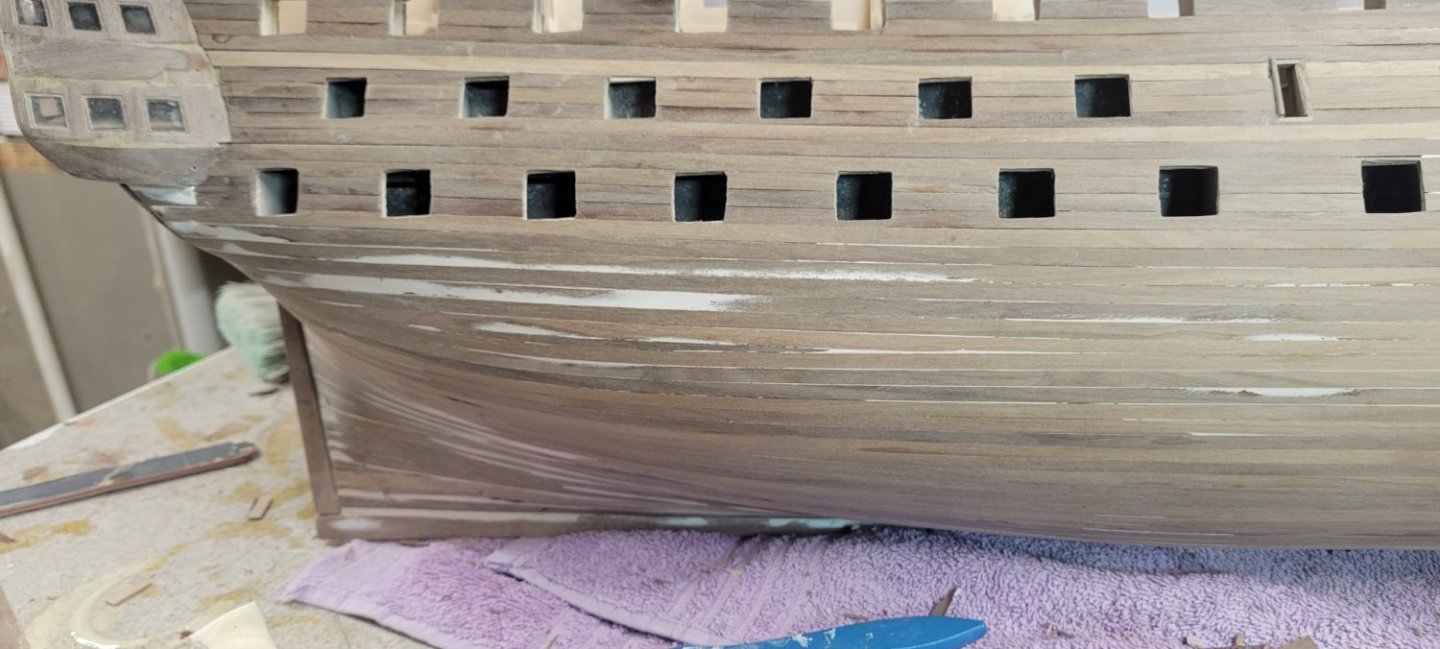
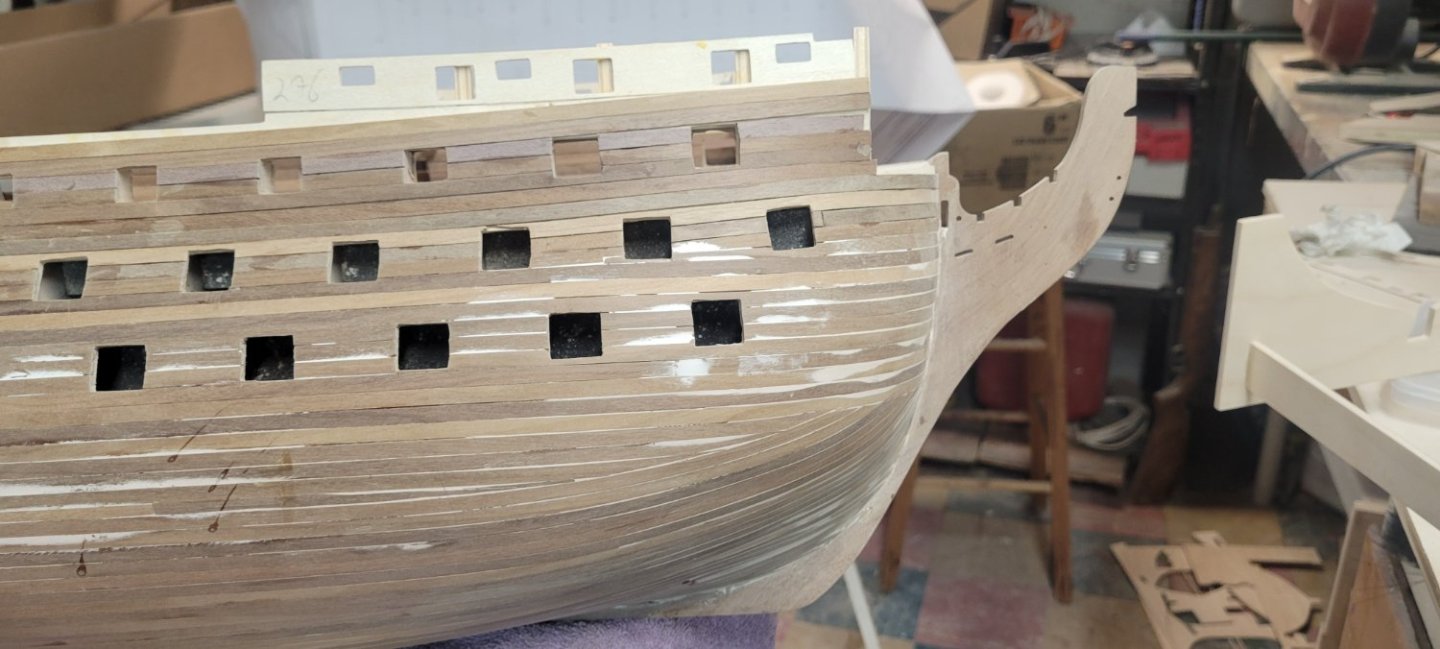
I decided to plank the lower stern section and I will cut away the stern port doors later. I also used filler to smooth out the seams and smooth out the transition from the hull and the stern post....something somebody warned me about earlier!!!!! They were right!

-
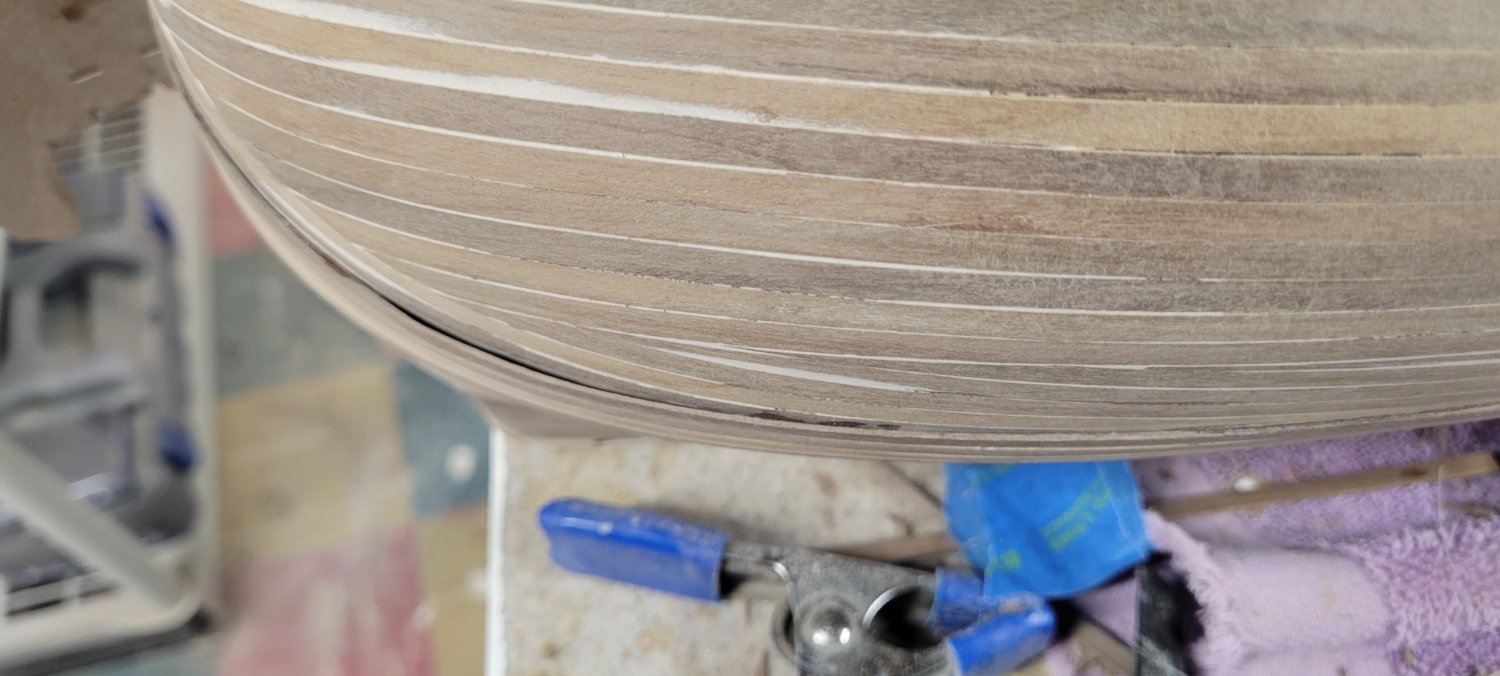
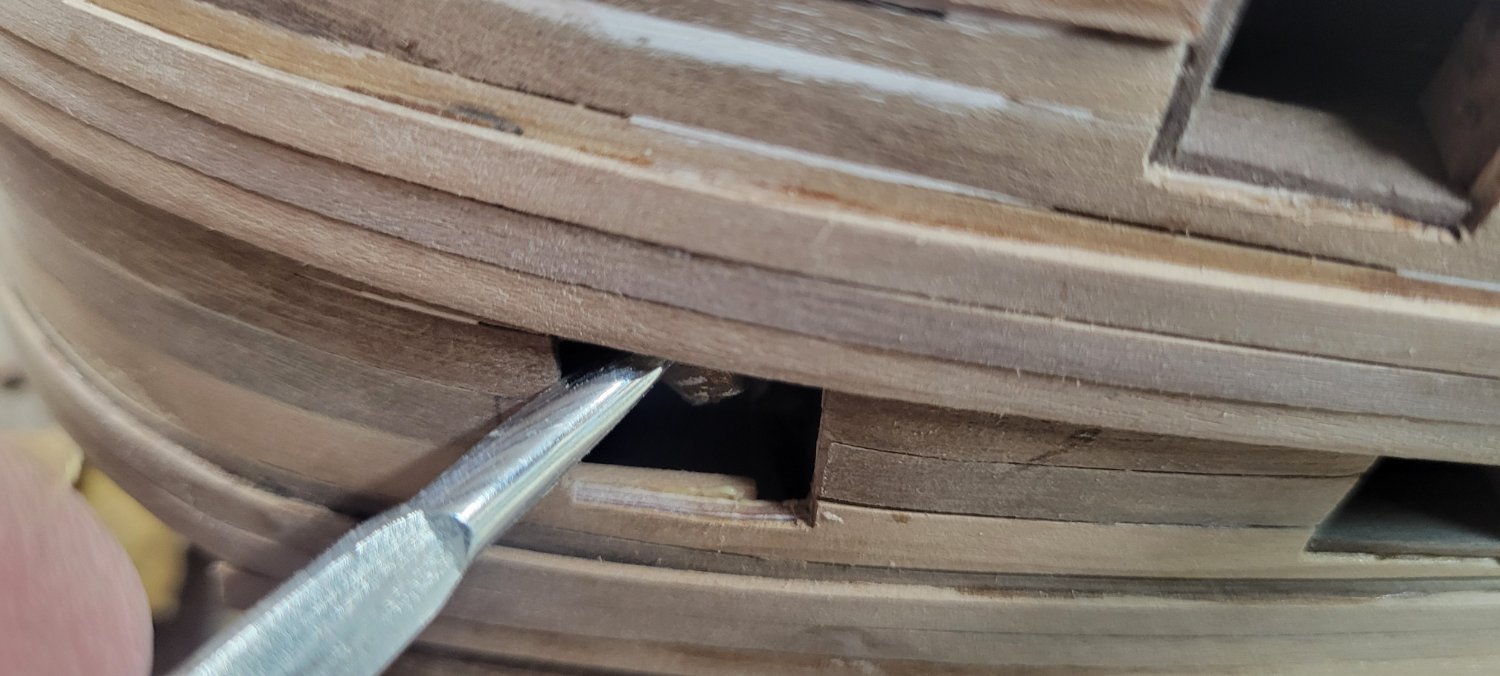
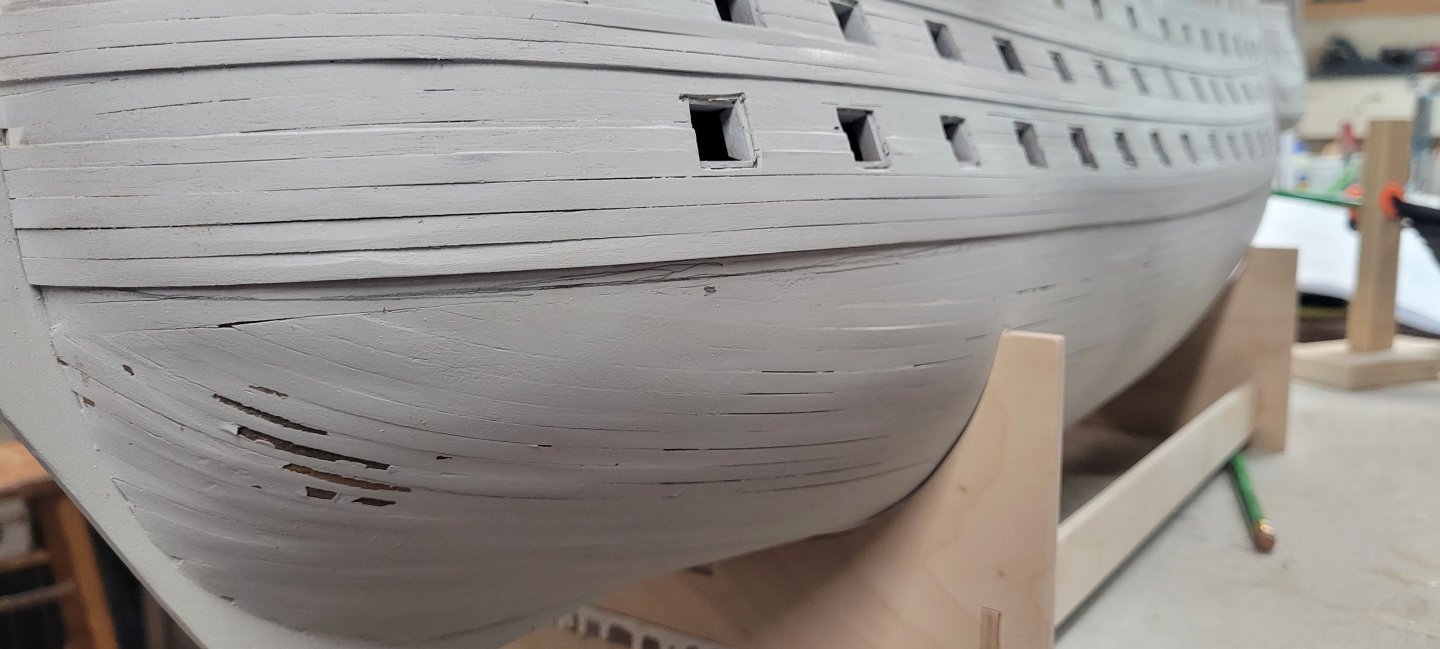
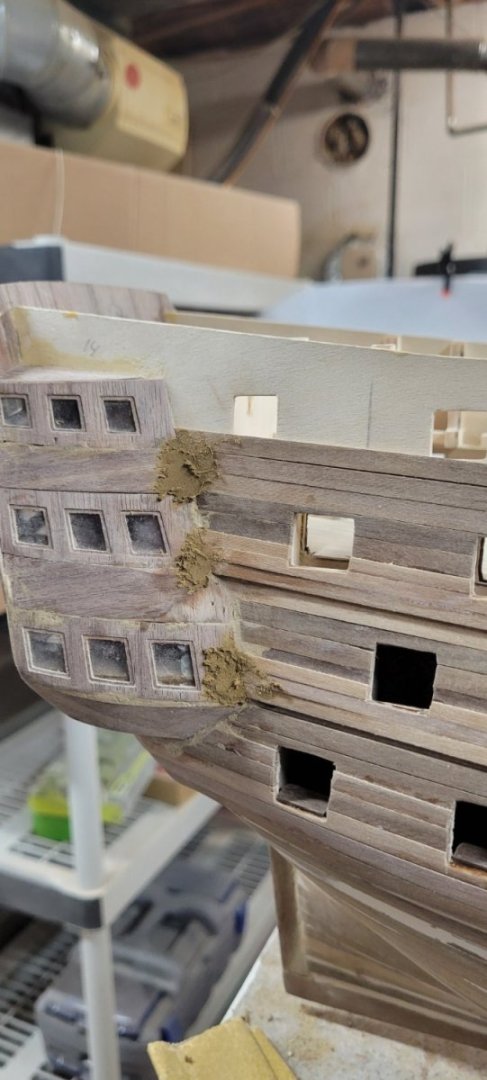
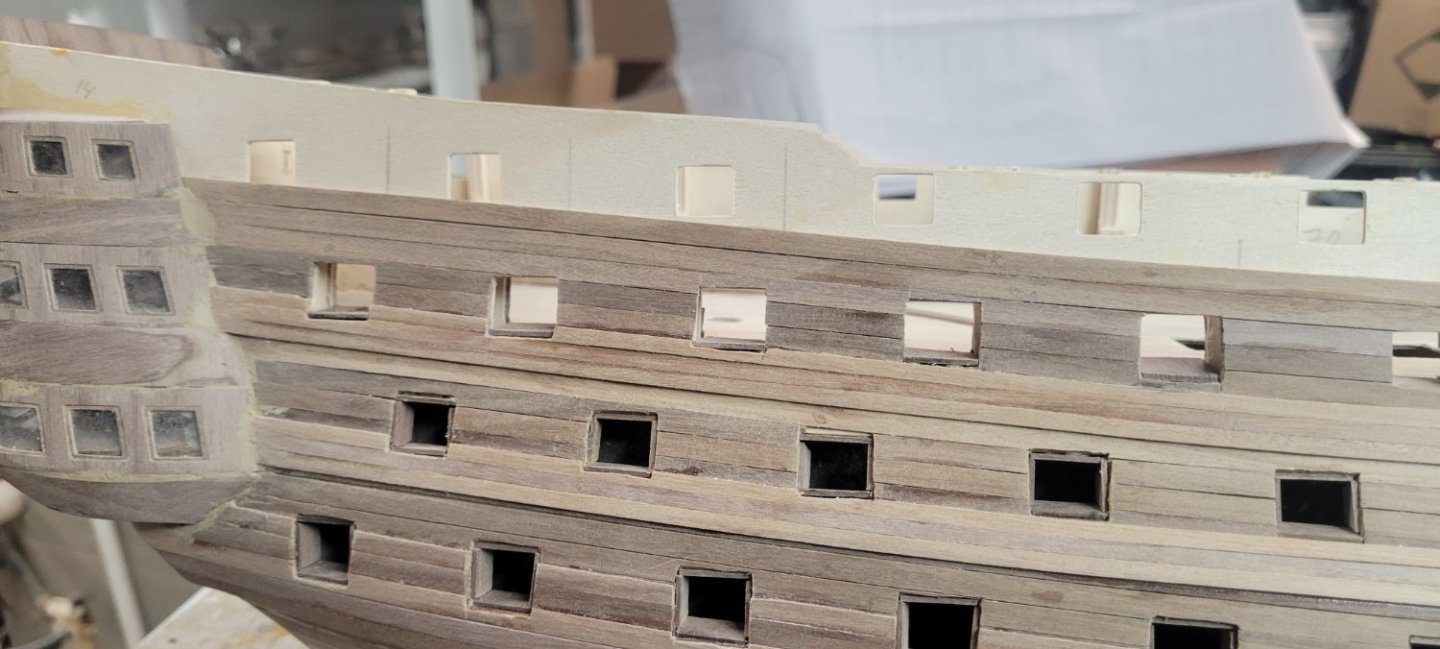
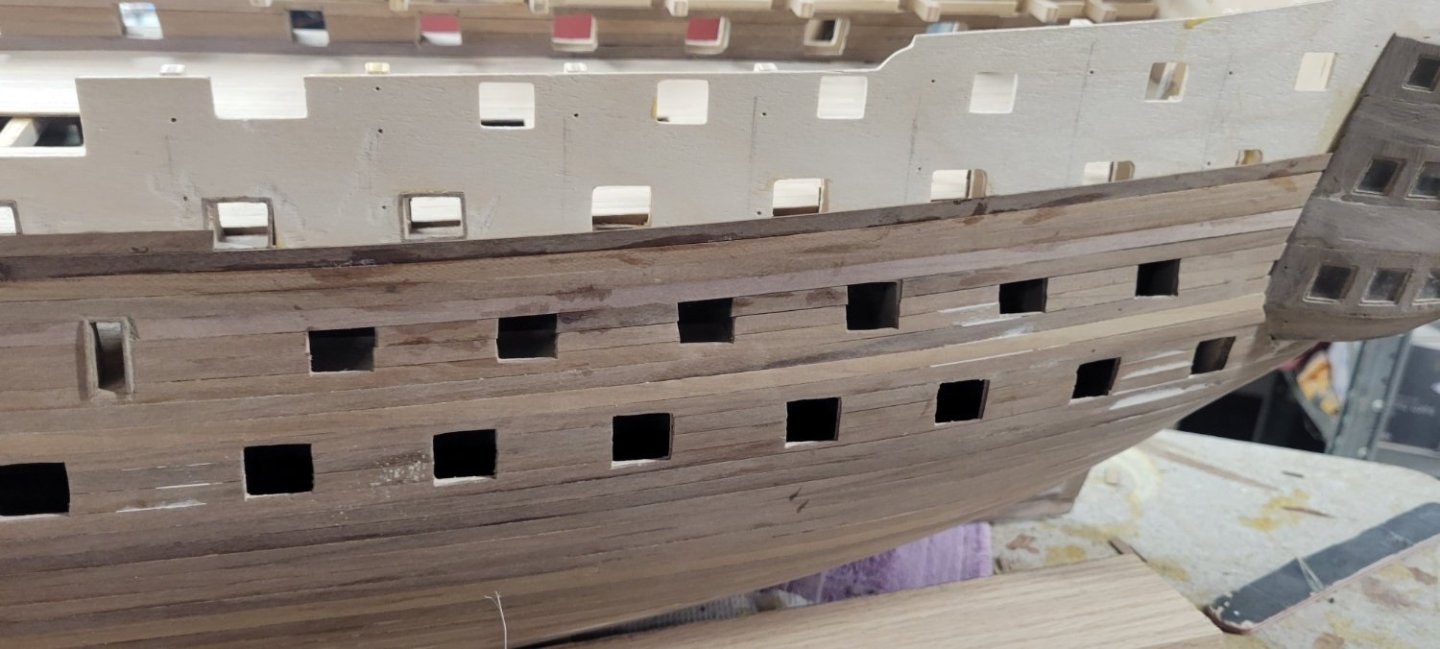
Continued with my wales over the past week or so. Once again, I did notice that on the underside of the bow, some of the wales just didn't fit to the hull. That's my fault for not making sure the planks were glued tightly and perhaps either not tapering or splining them? I think the port side wales look a bit better than the stbd side. I should love my children equally, but what can I say!!!! Overall the starboard wales look pretty good. I also started the gun port liners. At first, I was using CA glue, but it does cause some spill over if you use too much. In addition, my finger tips are still fried from the 2nd planking. I did not take care to be stingy with the glue and my index and thumbs are just raw. I worked for UPS for 20 years and during the winter, all my finger tips would dry out and split. Just so cold and dry, I would wrap them in first aid tape (like Michael Jackson!) to protect them. As I type, both thumbs are taped up! After that, I switched back to wood glue. I found that I could attach the liner, then move on to the next one. Once I was done with that, I would go back and gently tweak the previous liner a bit to straighten it out. I didn't like the ending fit of the wales into the stern quarters so I took a stab using some wood putty. It does sand away.... One of the forward gun ports didn't have a lot of 'meat' to attach to. I had sanded down so much that I didn't have much. So I took a piece of 1st planking to glue to the inside of the port to provide something to glue to. The problem was getting the piece to come up tight to the back of the gun port template. If only I had a teeny, tiny finger to reach in and pull it tight! In the end, I looked up and saw my little paint lid opener. That worked! And it gave me enough room to glue the liner to. In all honesty, I think the liners would be a breeze if all the gun port liners had a backing frame on them just for this purpose. I know that some of them might have issues with the bulkheads, but it would have allowed for a 2mm ledge. If only!!!!! See! The wood putty does sand away!!!! As I was wrapping up, I still have frustrations on the gun ports and the liners. They just aren't perfect or square, something I was really hoping to achieve.


-
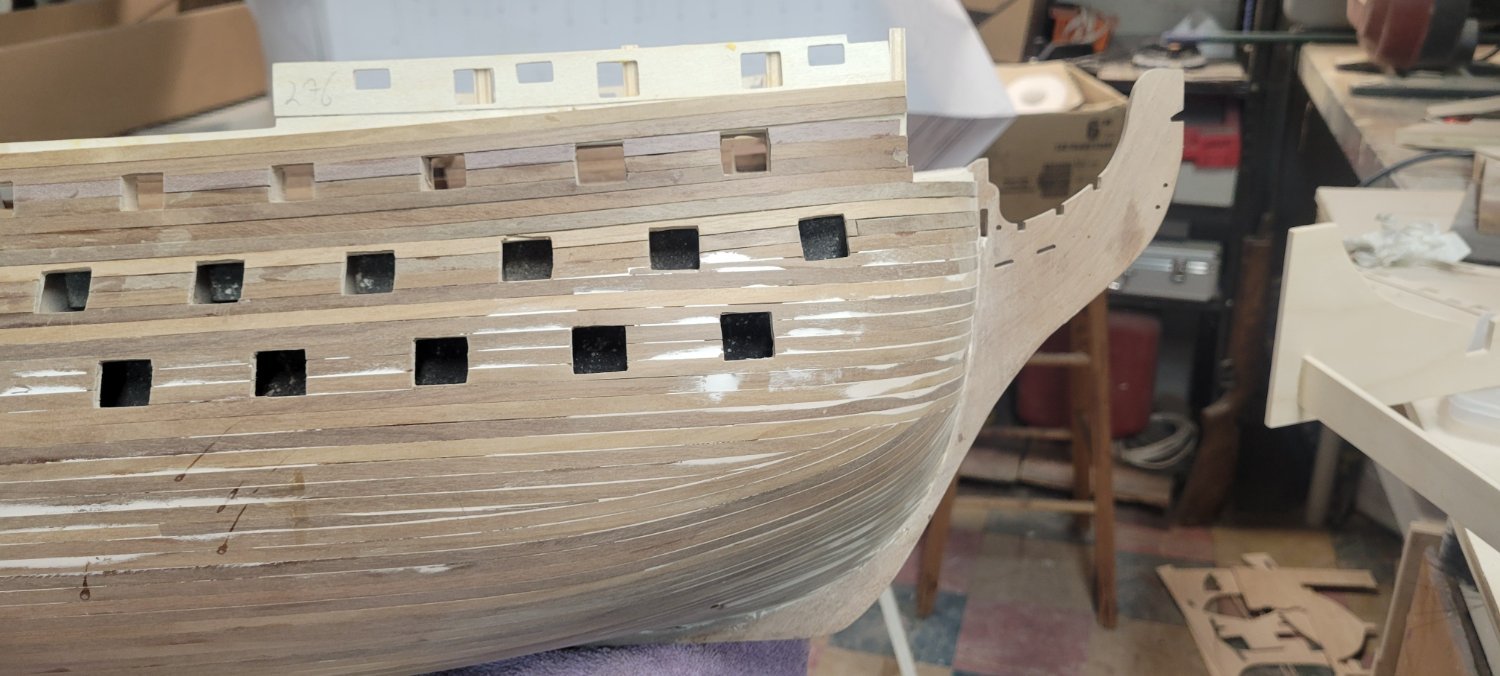
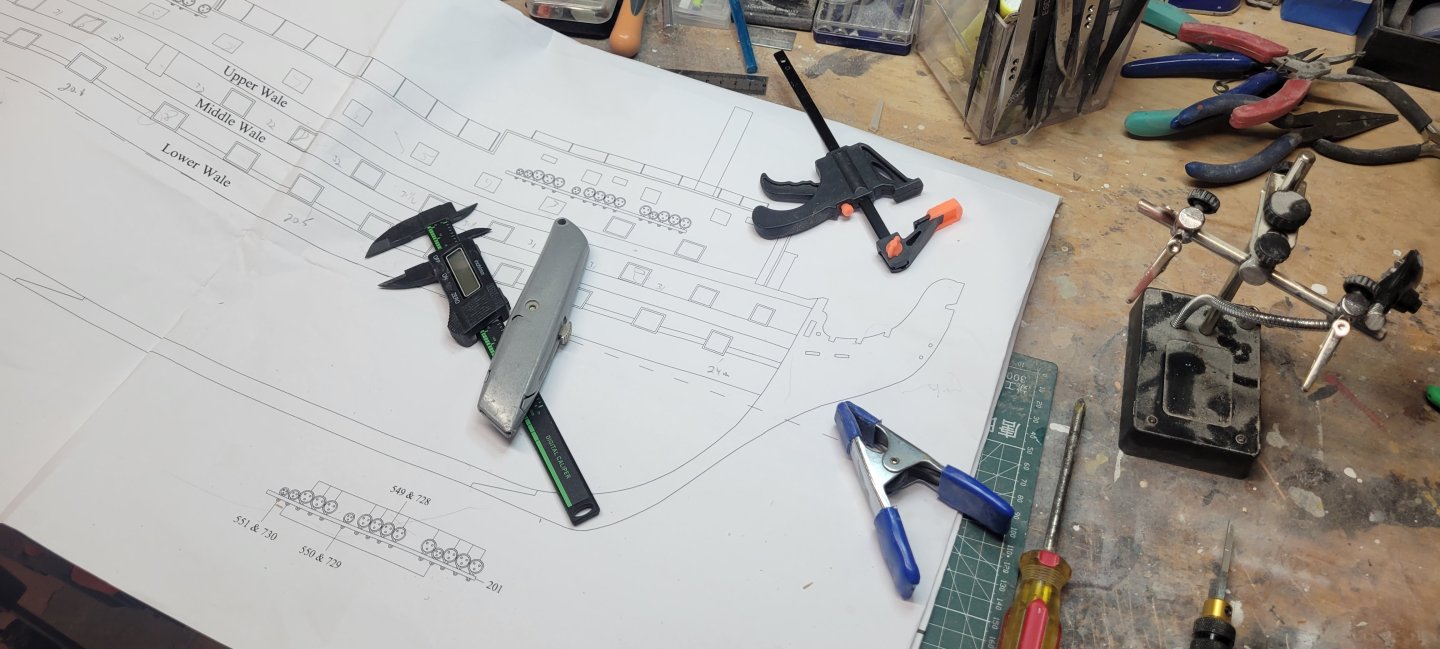
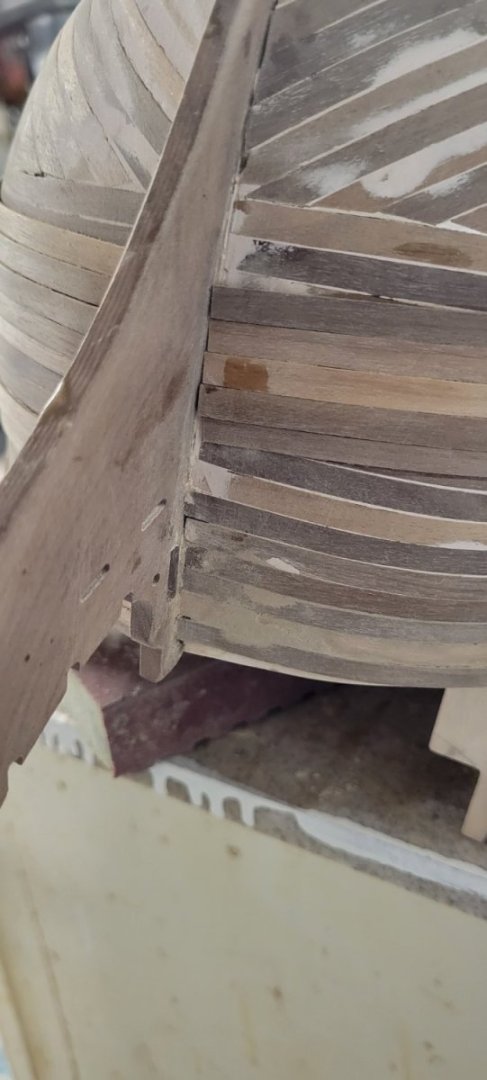
Started work on the wales. Taking careful measurements of the schematics, I was able to translate the locations from the plans to the hull. It is still difficult to lay that first plank on the hull. I didn't draw a continuous line, relying on small pencil marks to make sure the plank followed the correct path. Once that first plank is laid, the others are easy to glue into place. My frustration was that I was so careful to make sure the wales from each side lined up. I was POSITIVE that I had done it correctly, only to see after laying the first lower plank on the lower wale that they didn't match side to side. Overall, I am satisfied at the results. They will need some sanding and maybe a bit of filling. Also looking at the wales from the bottom up, there are some gaps caused by the curvature of the bow. I will have to fill those in to create a solid line


-
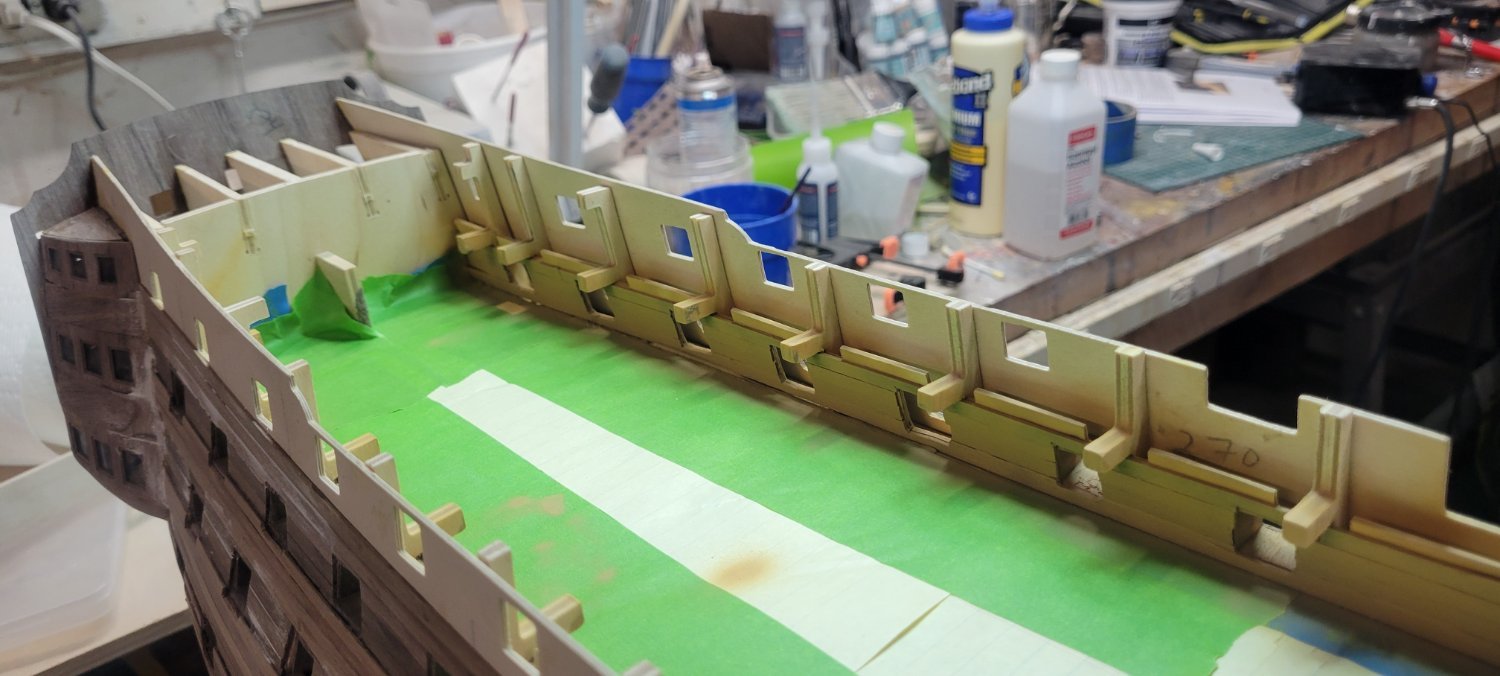
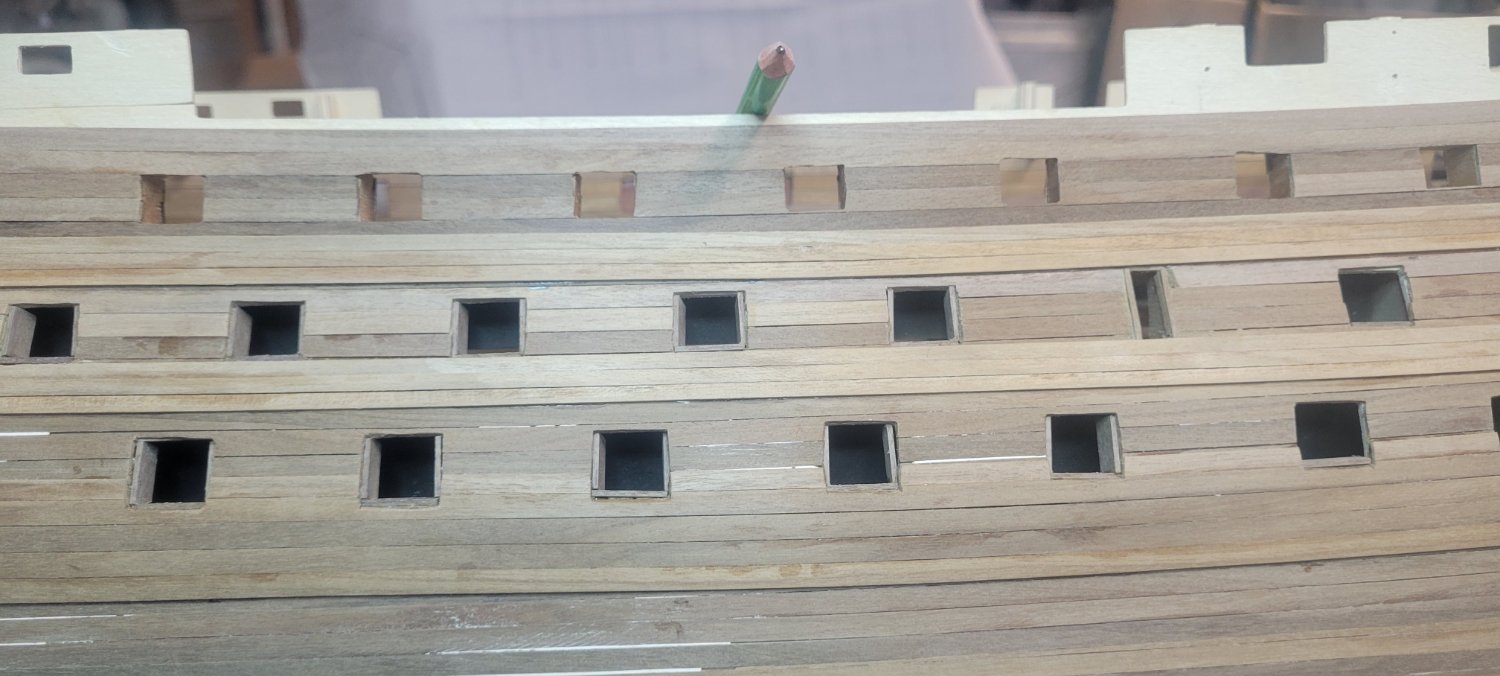
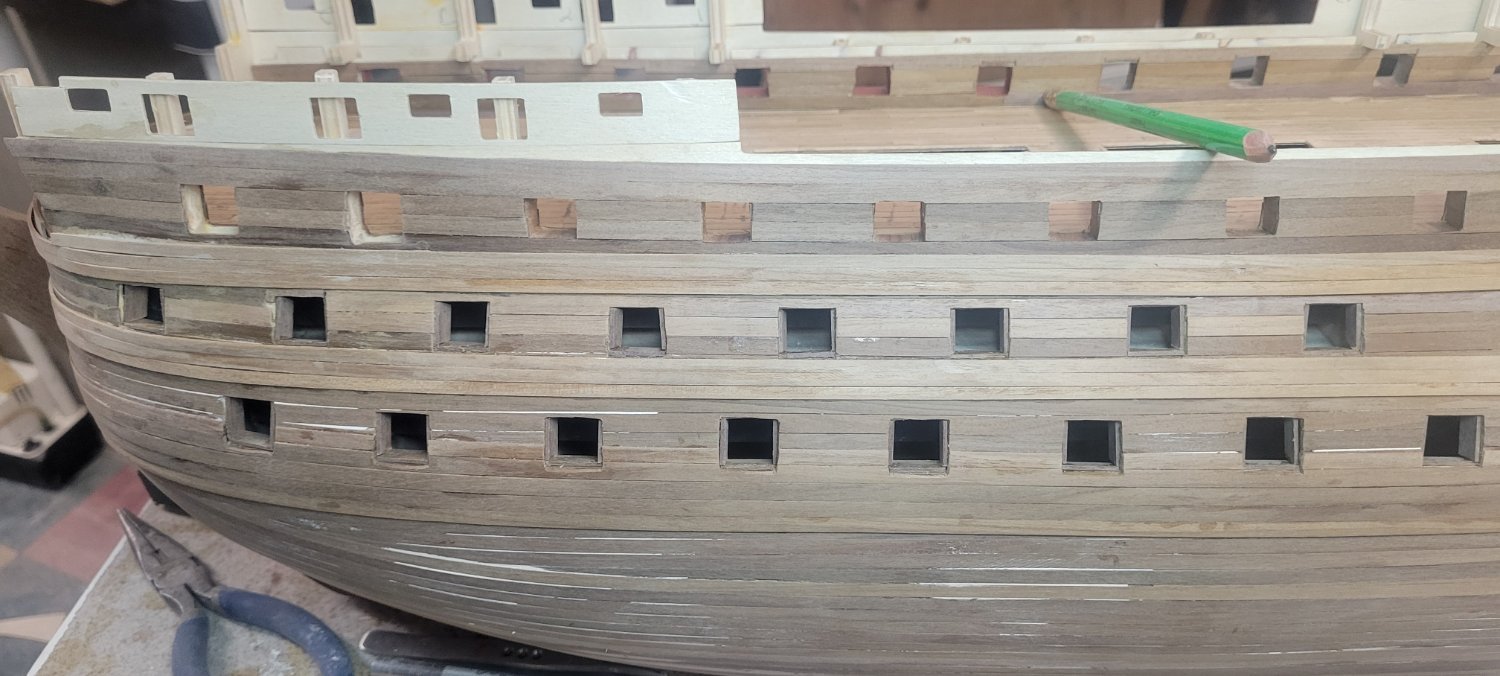
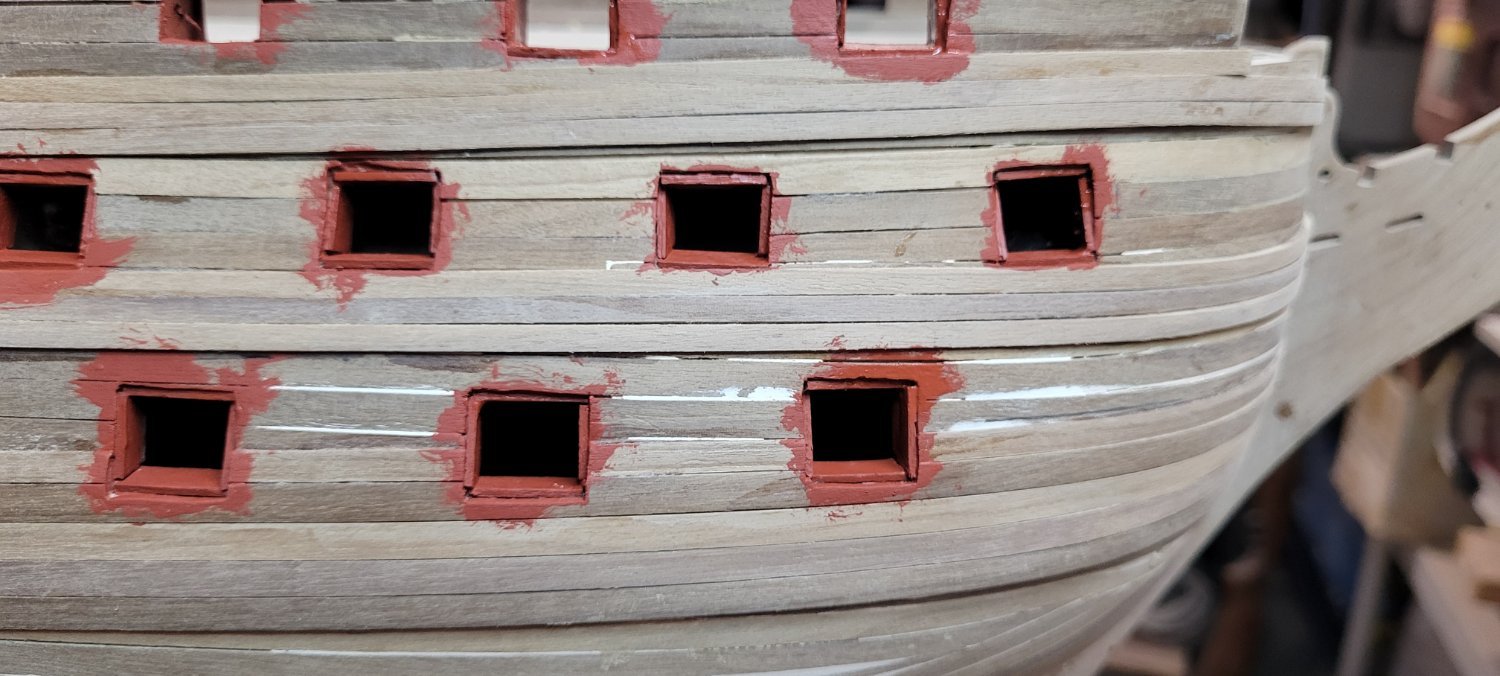
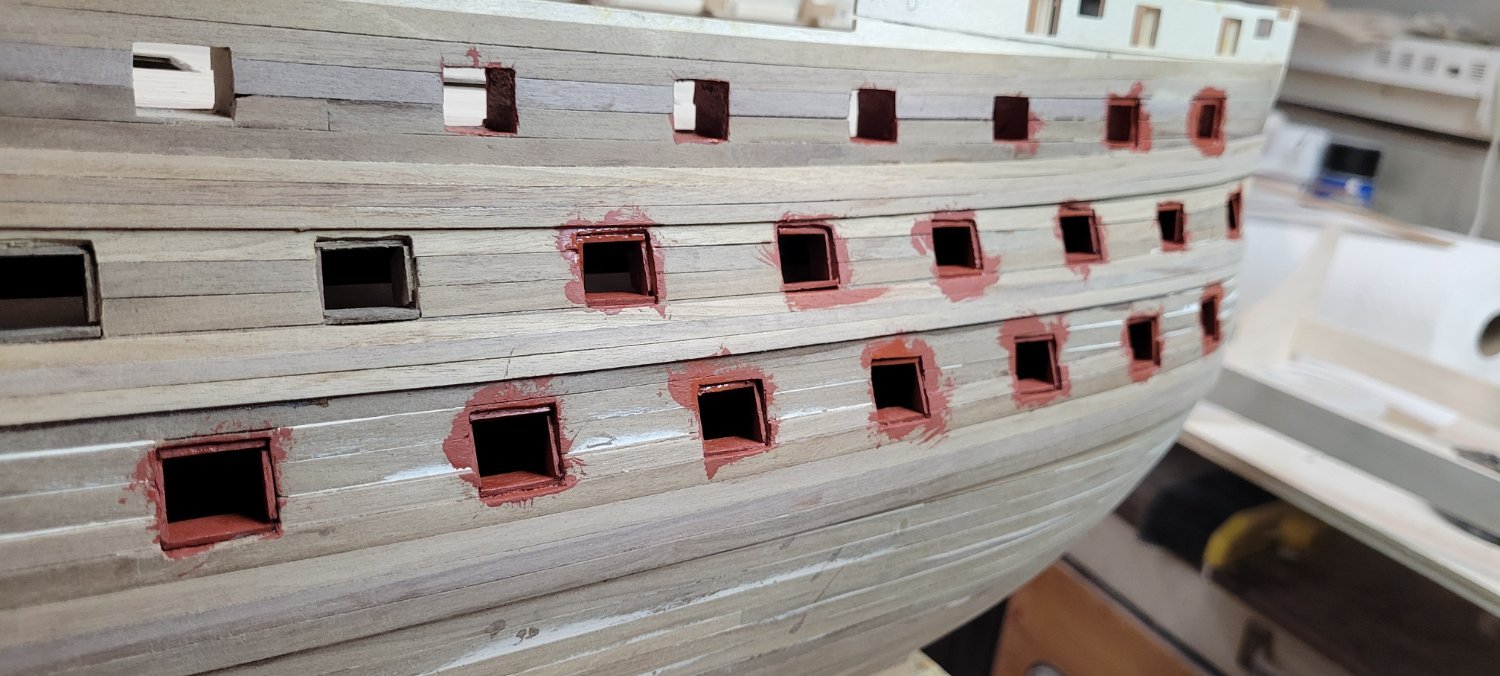
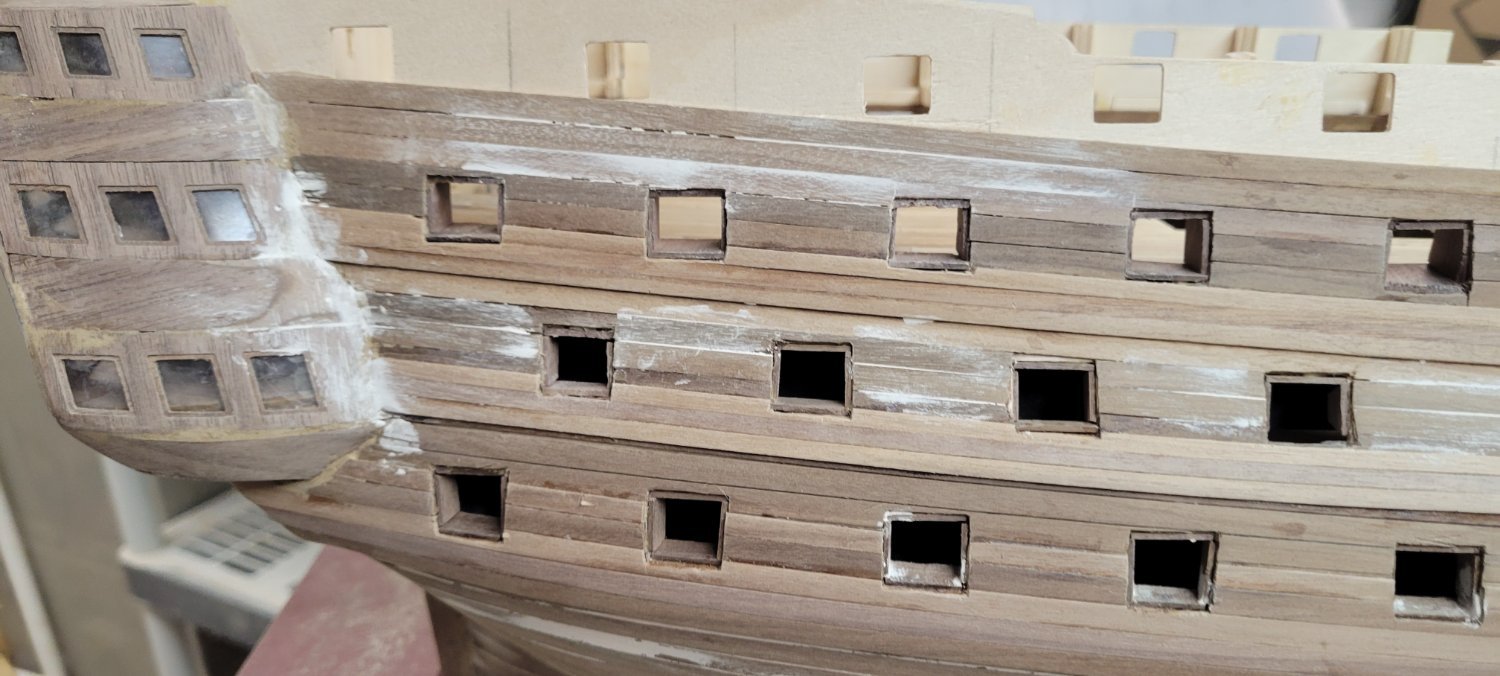
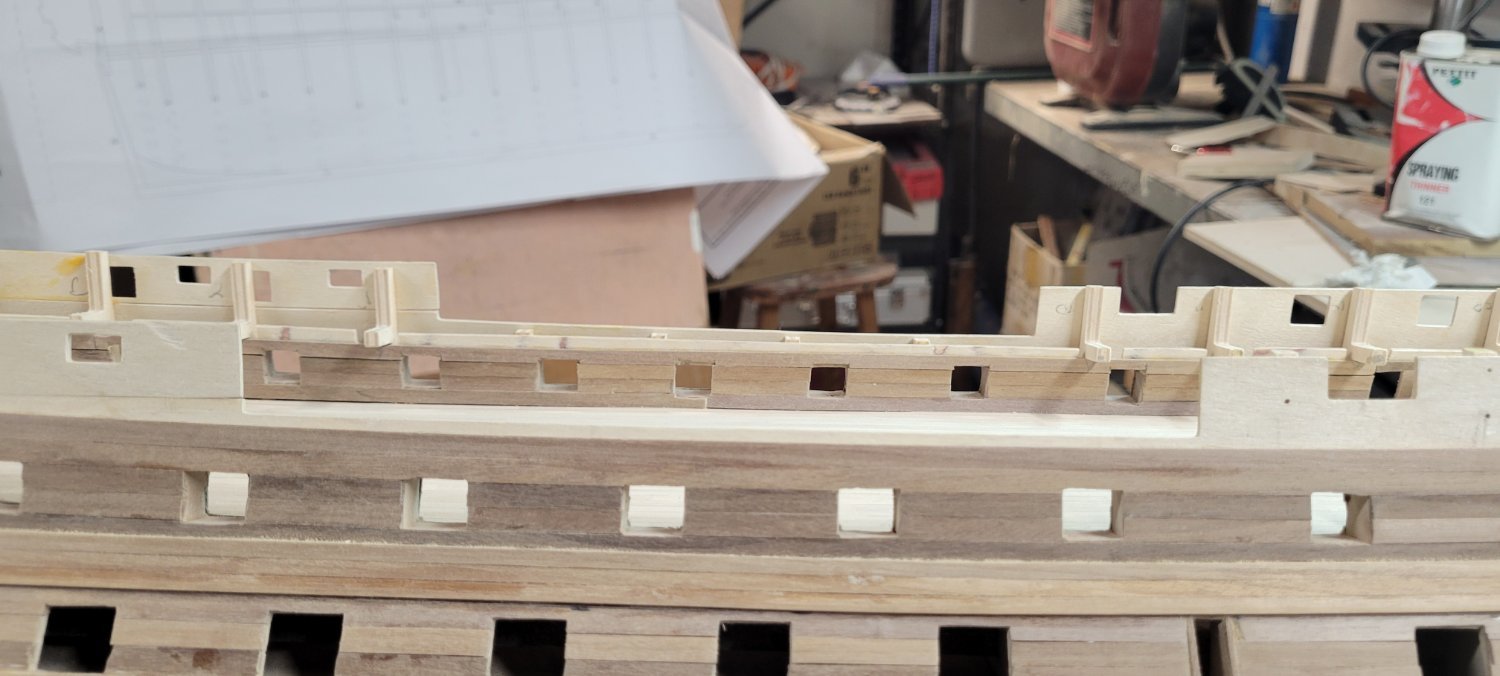
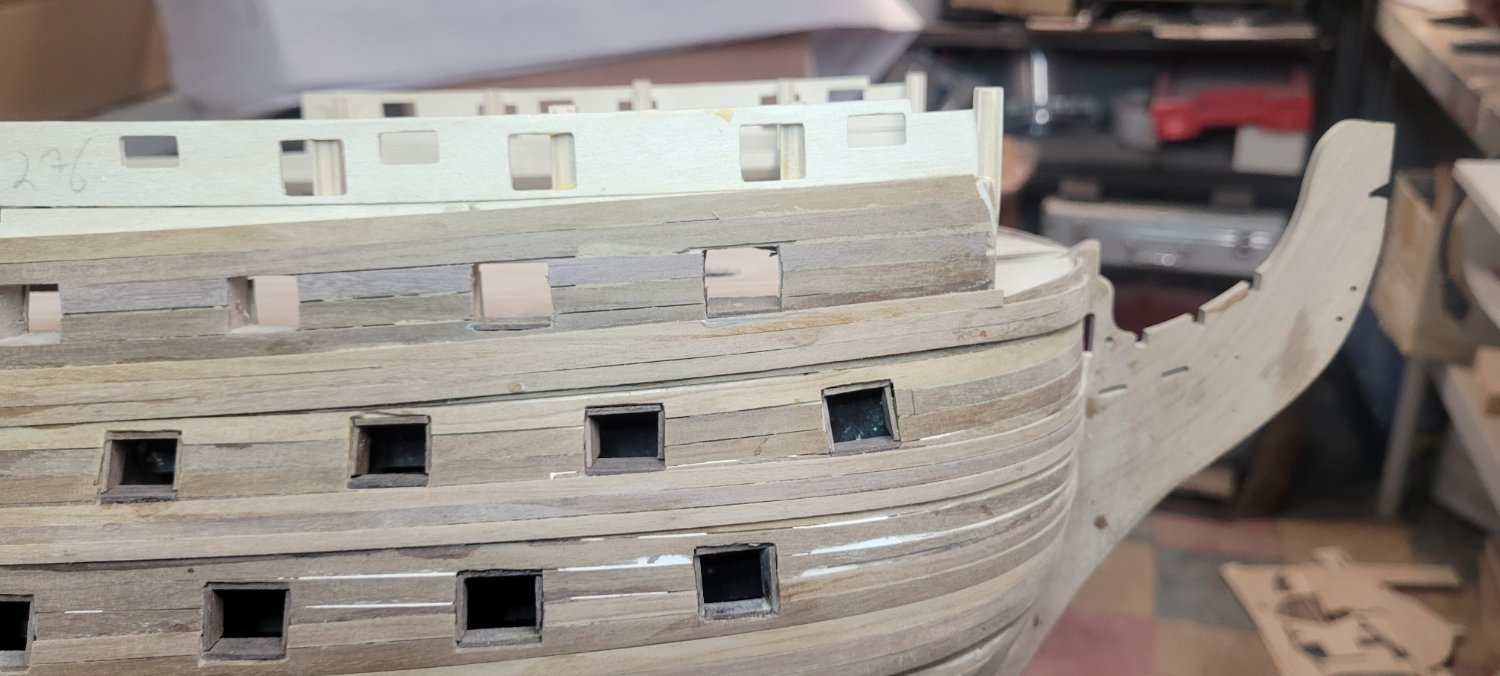
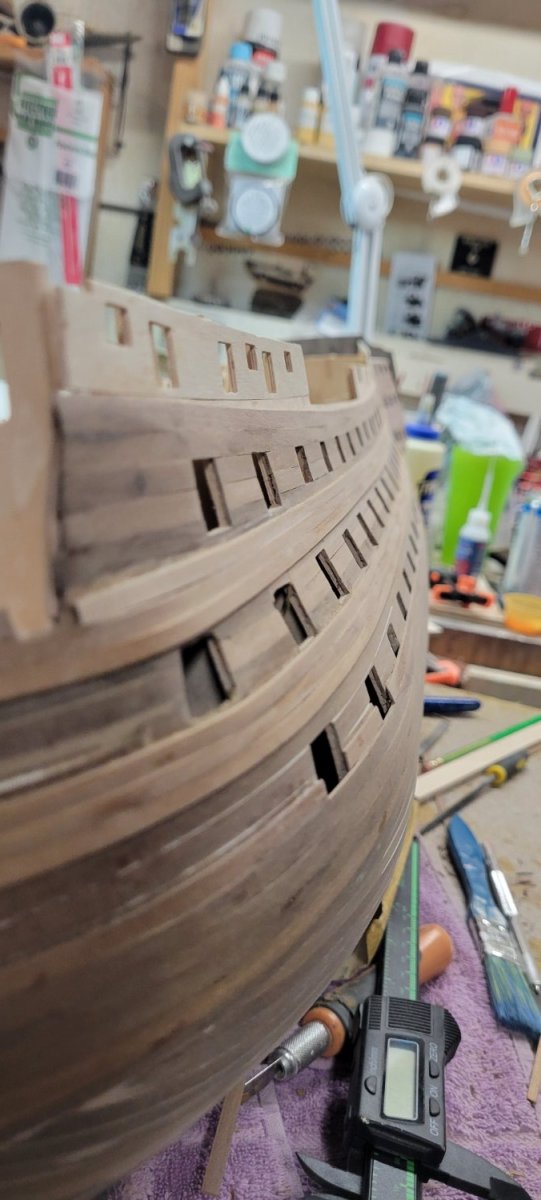
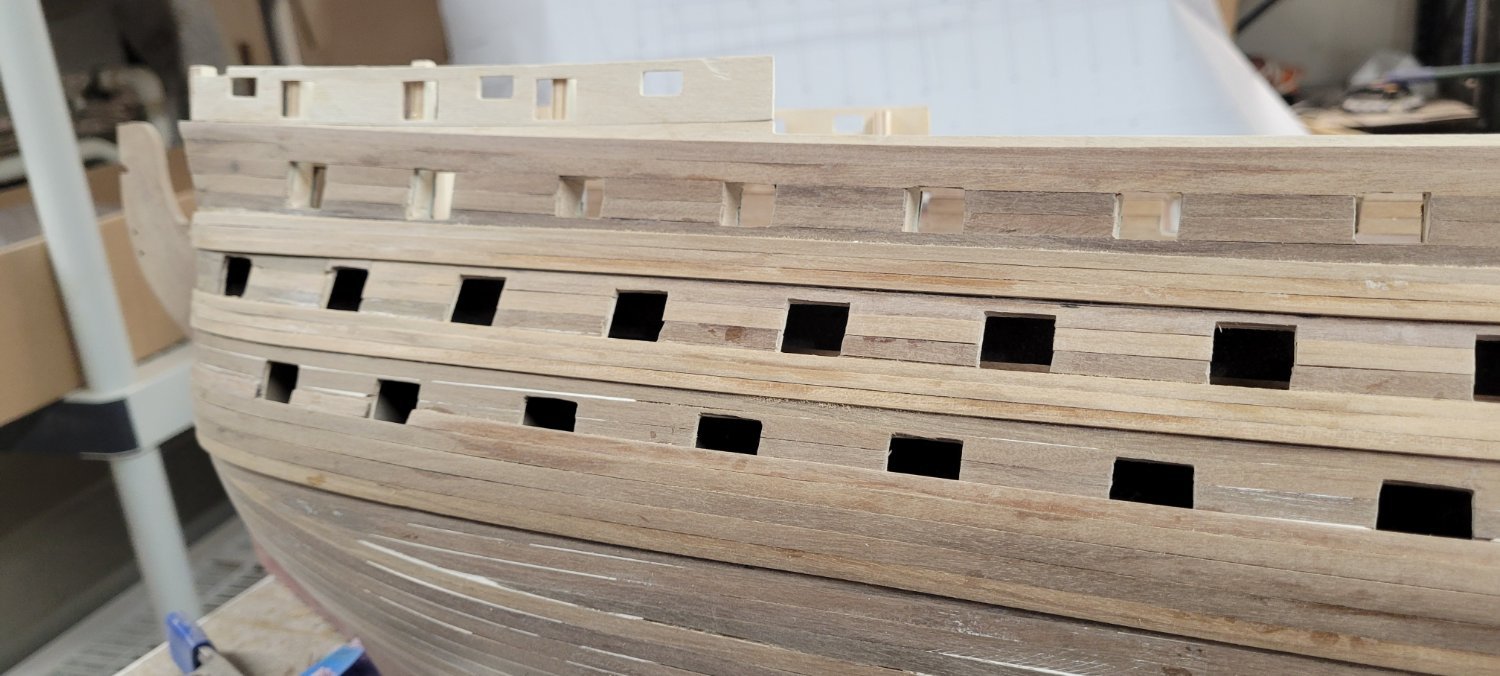
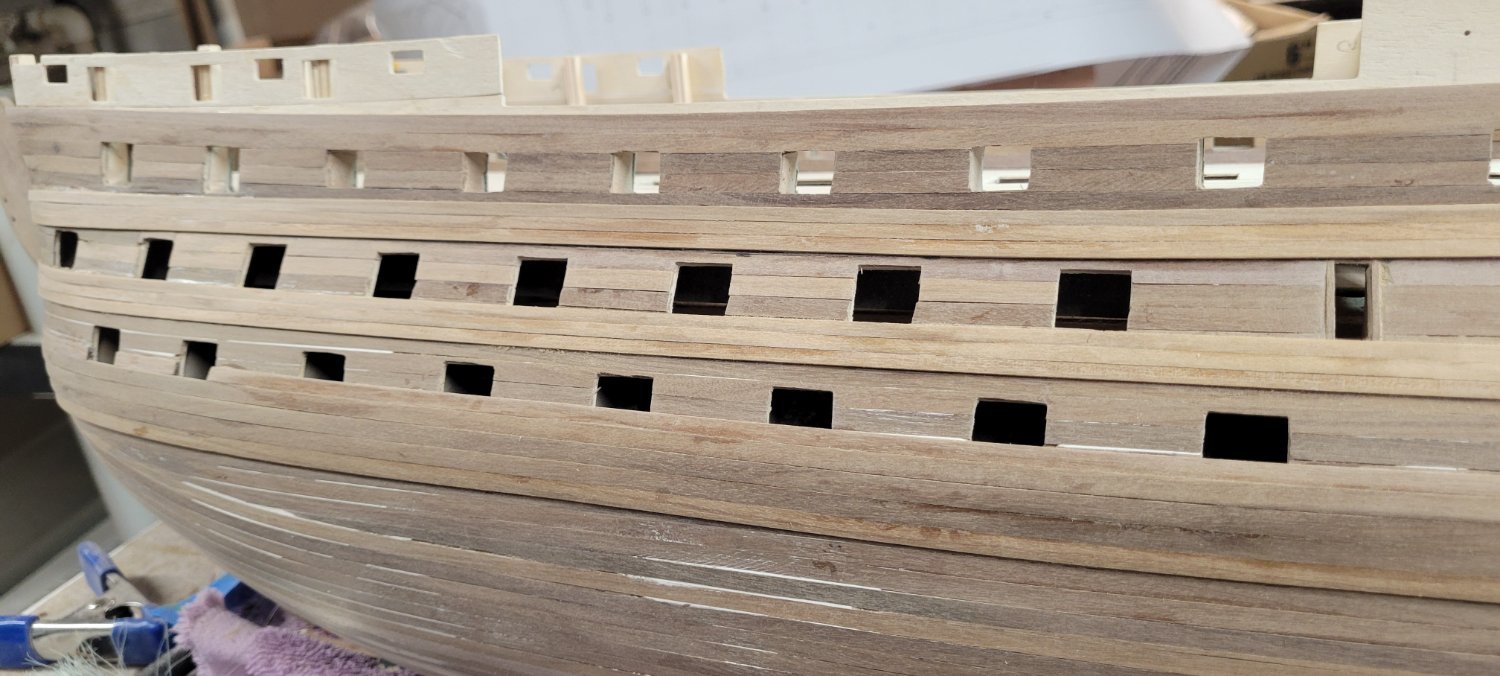
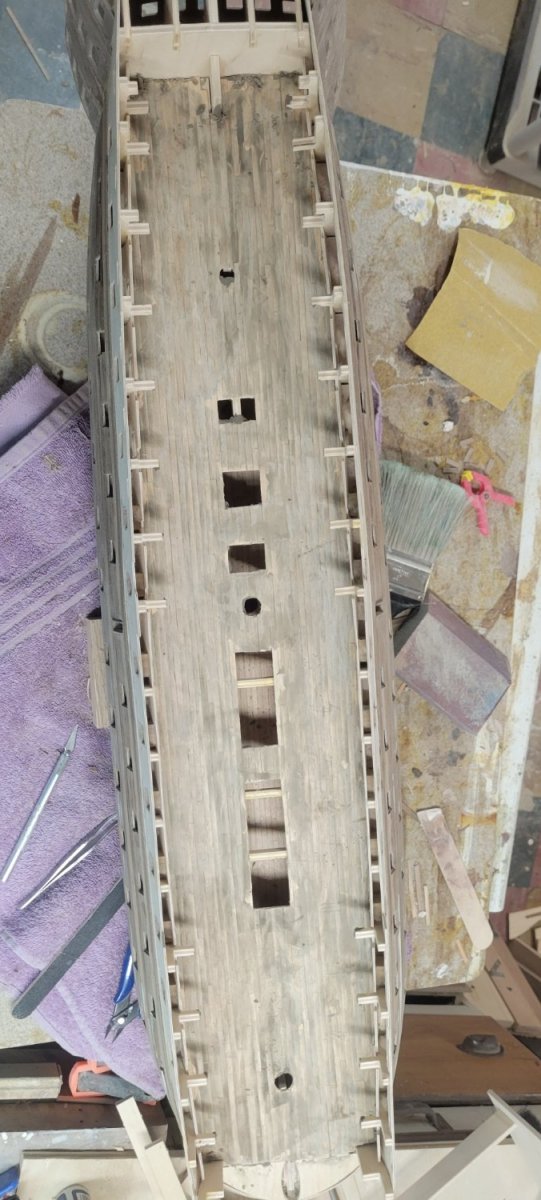
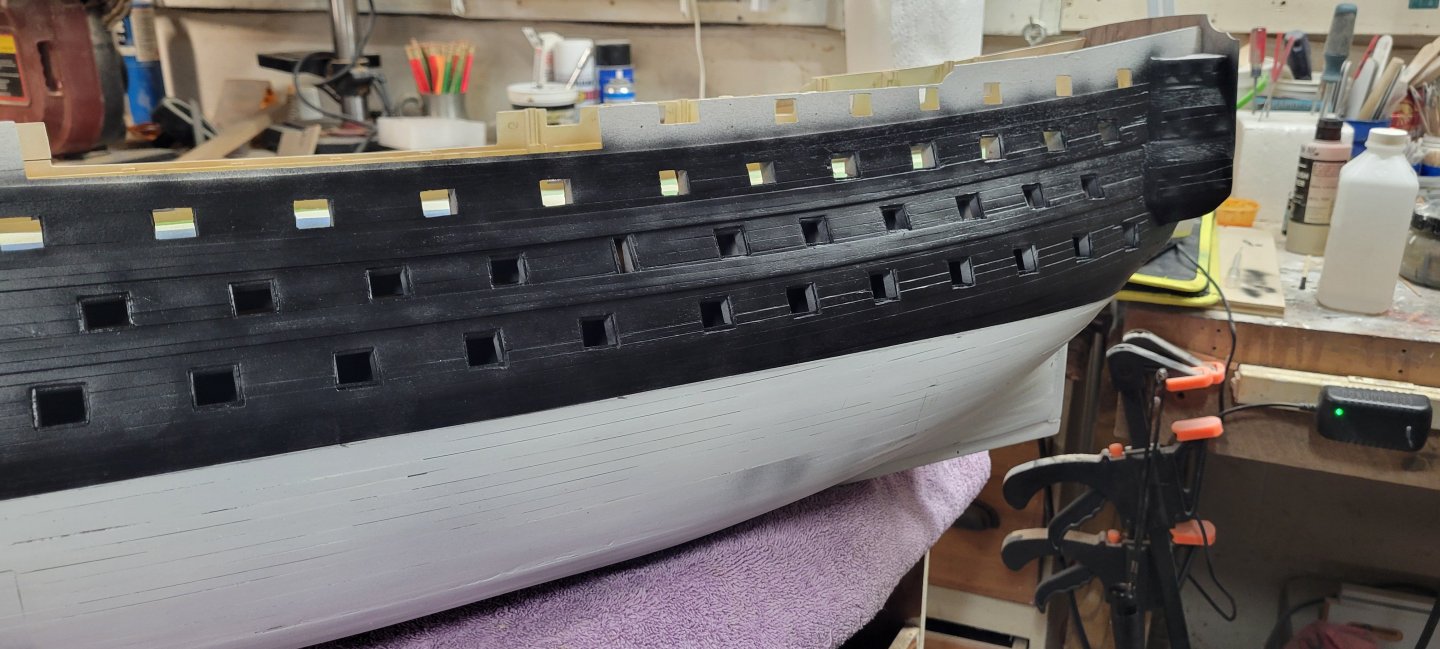
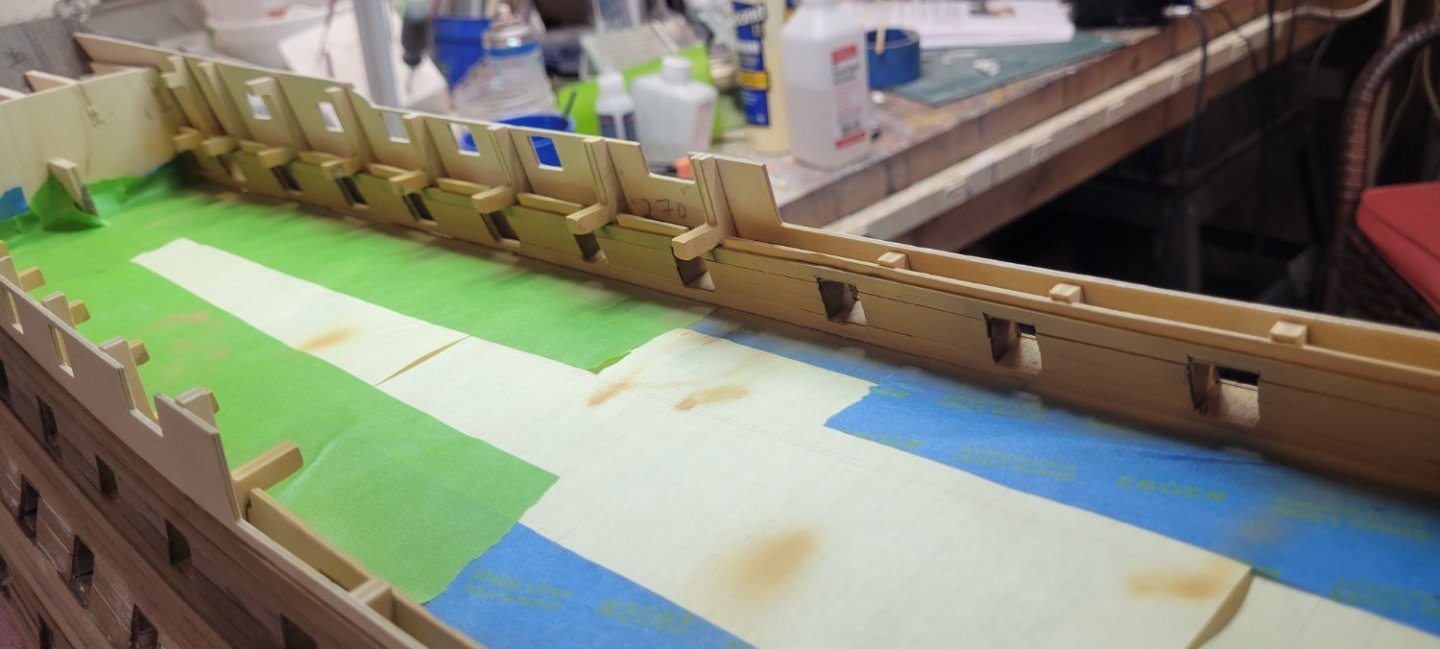
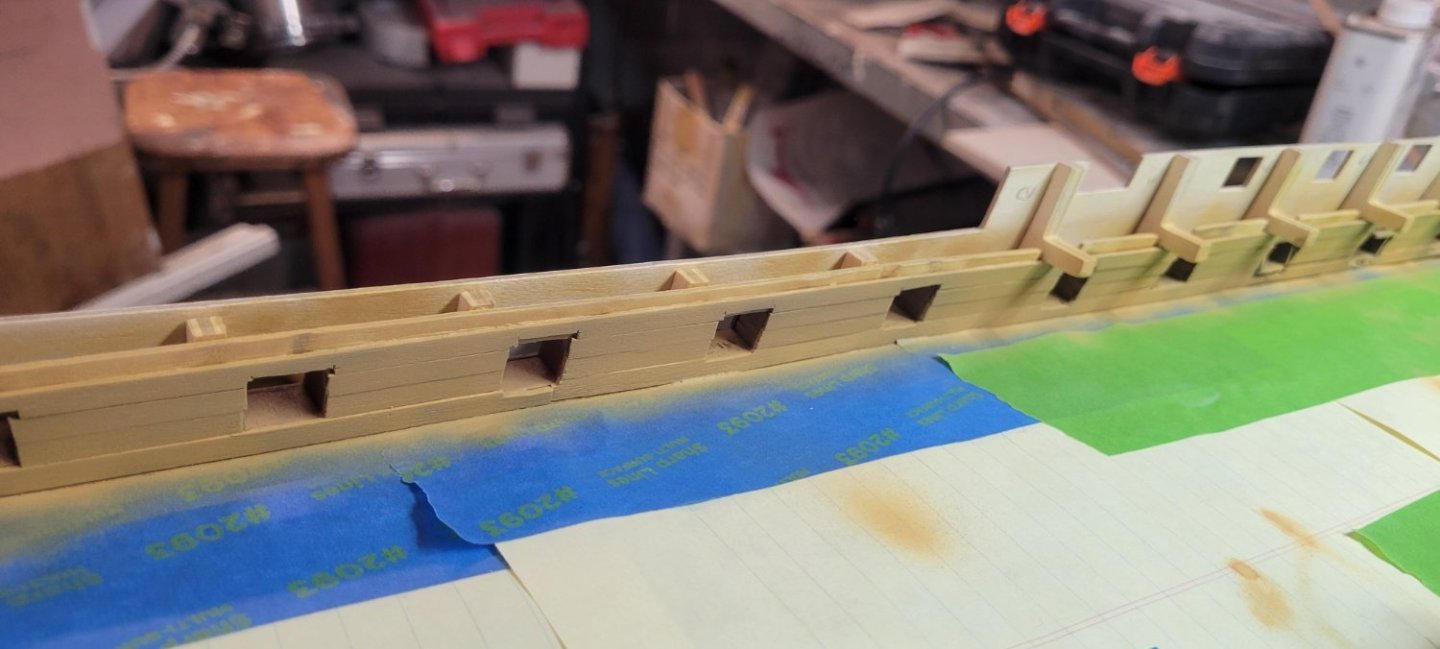
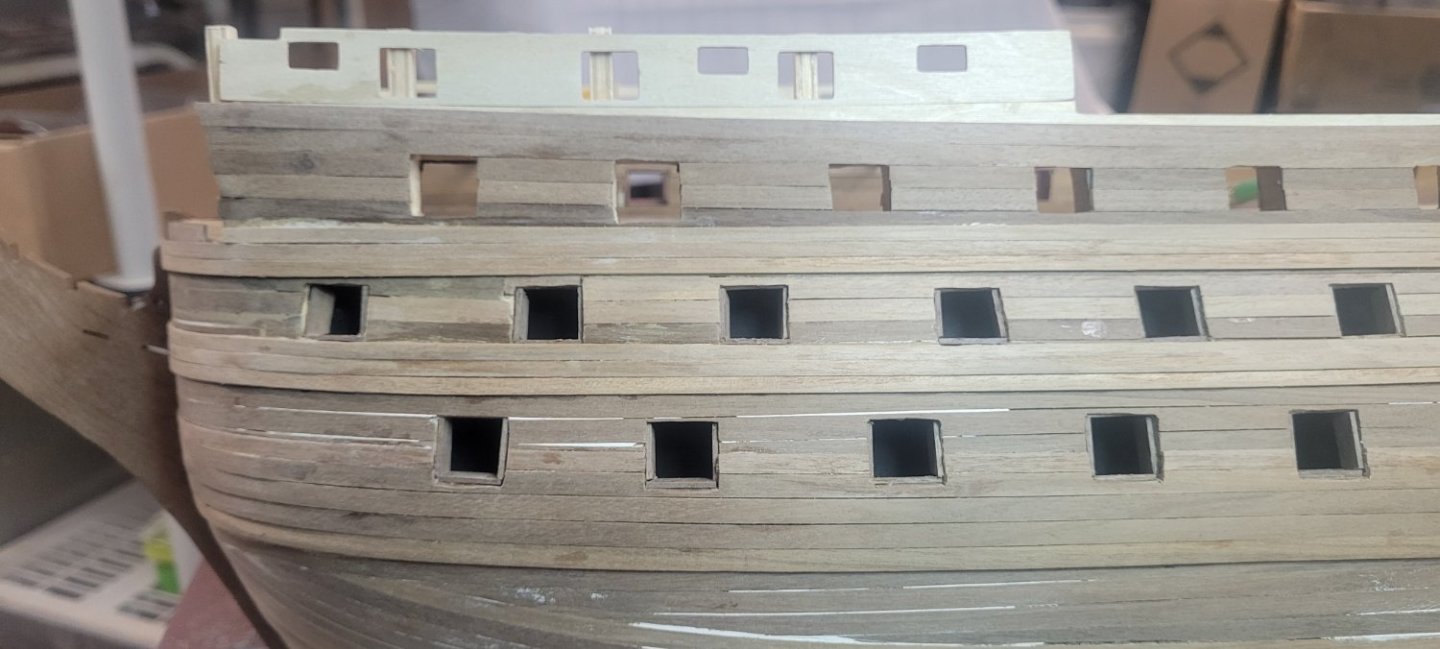
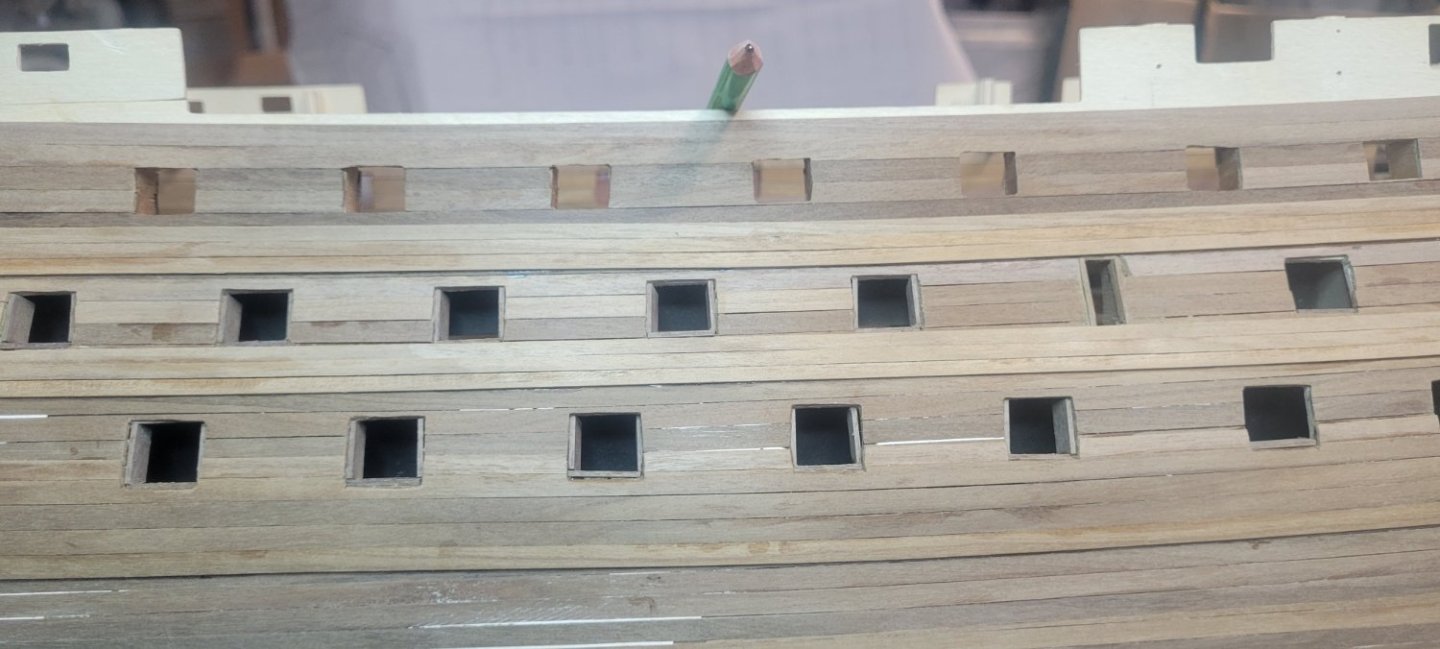
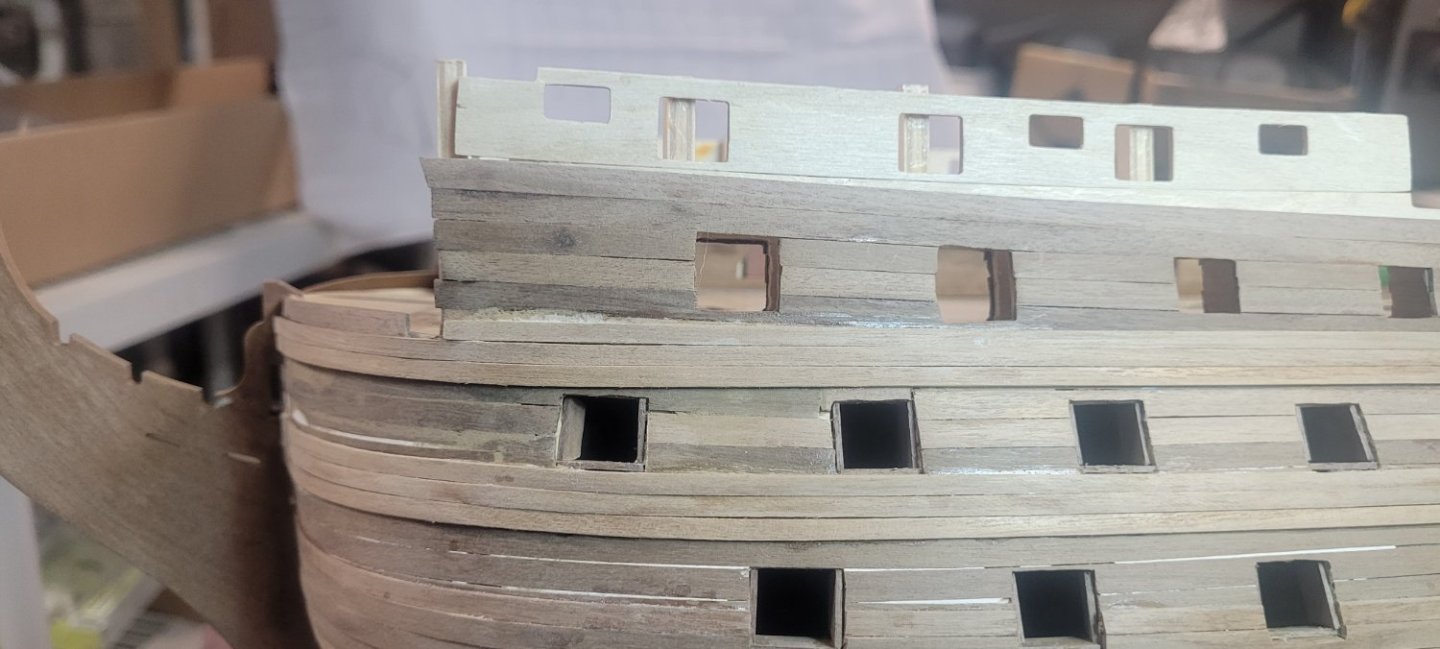
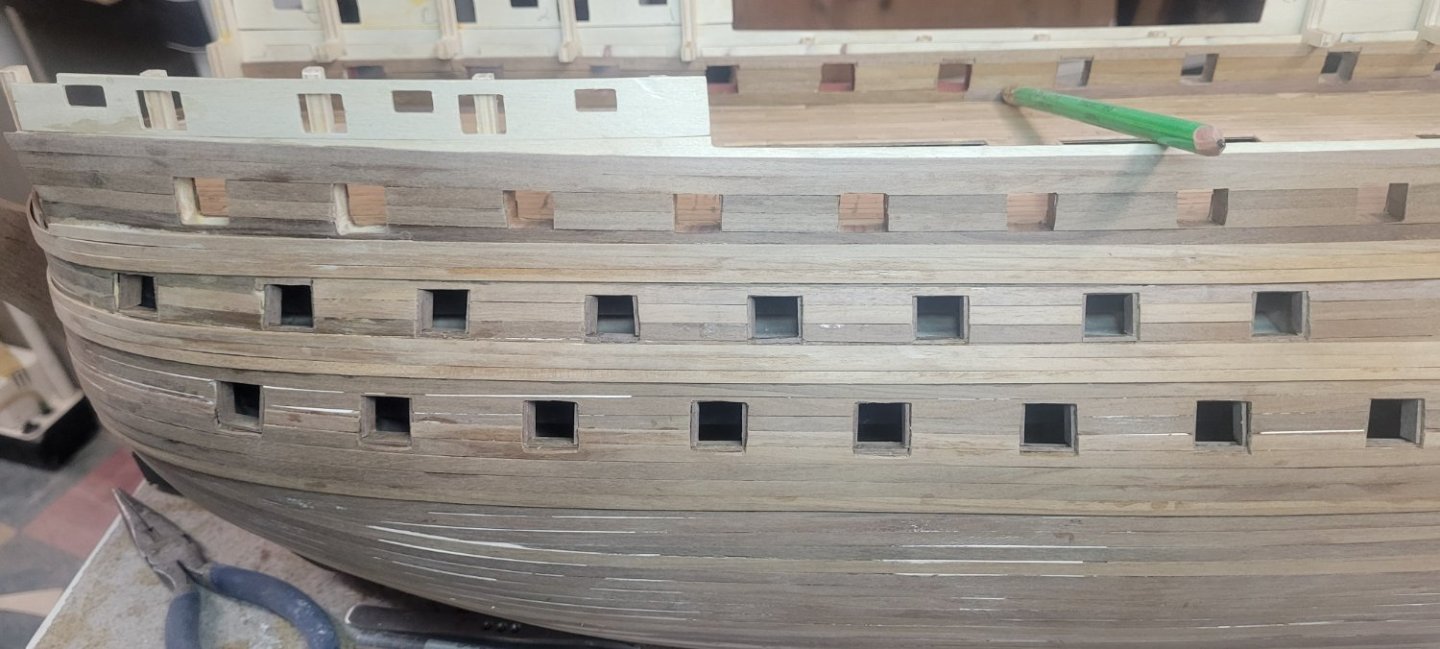
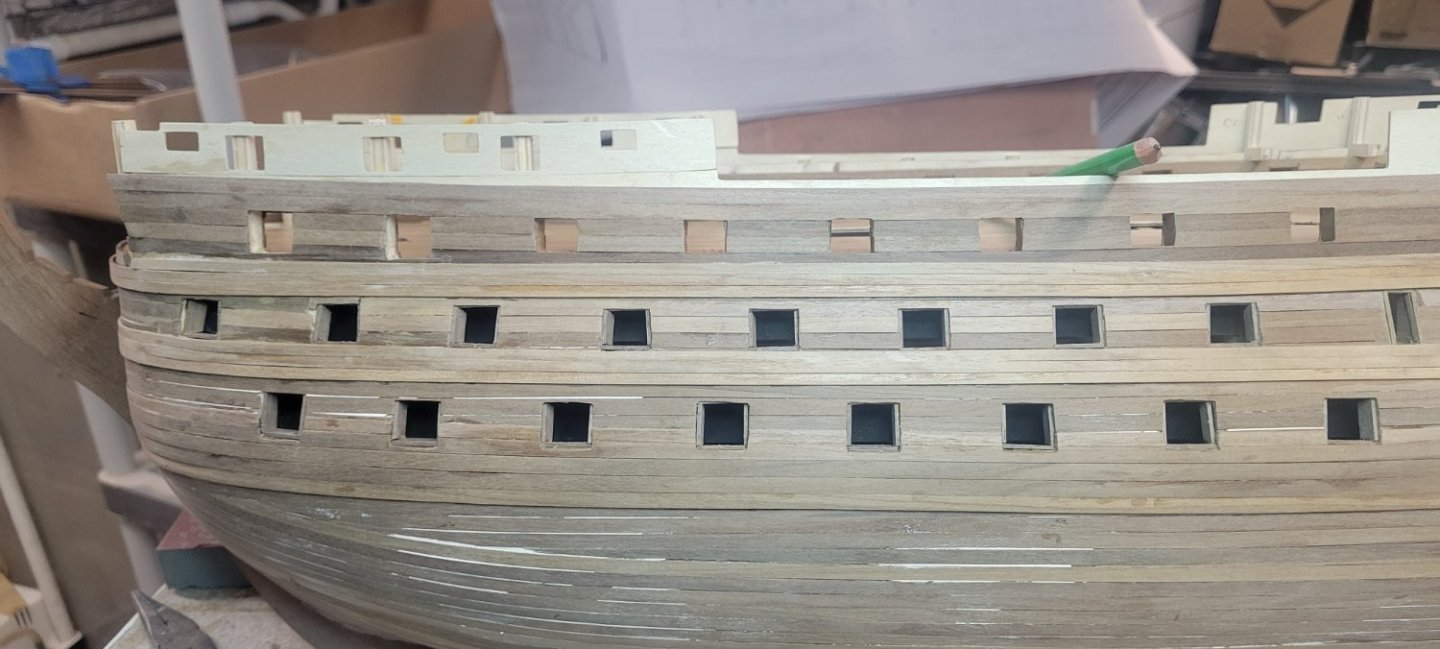
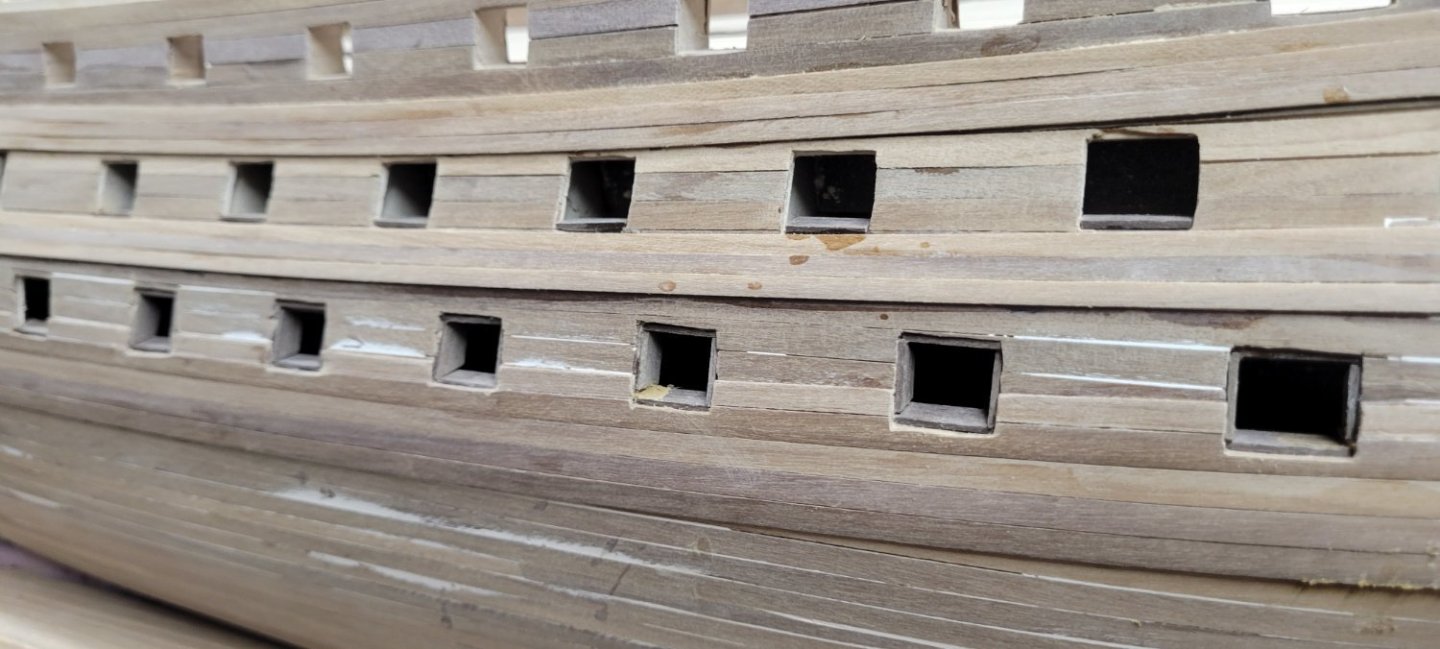
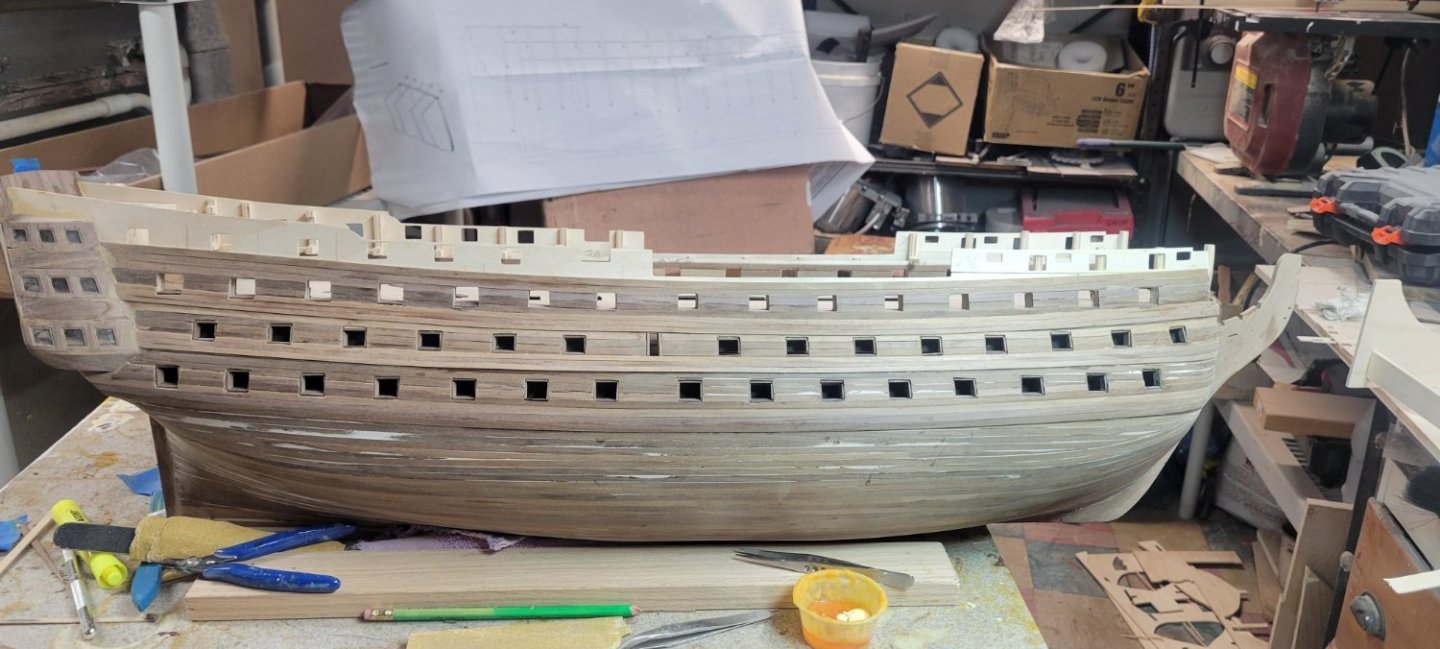
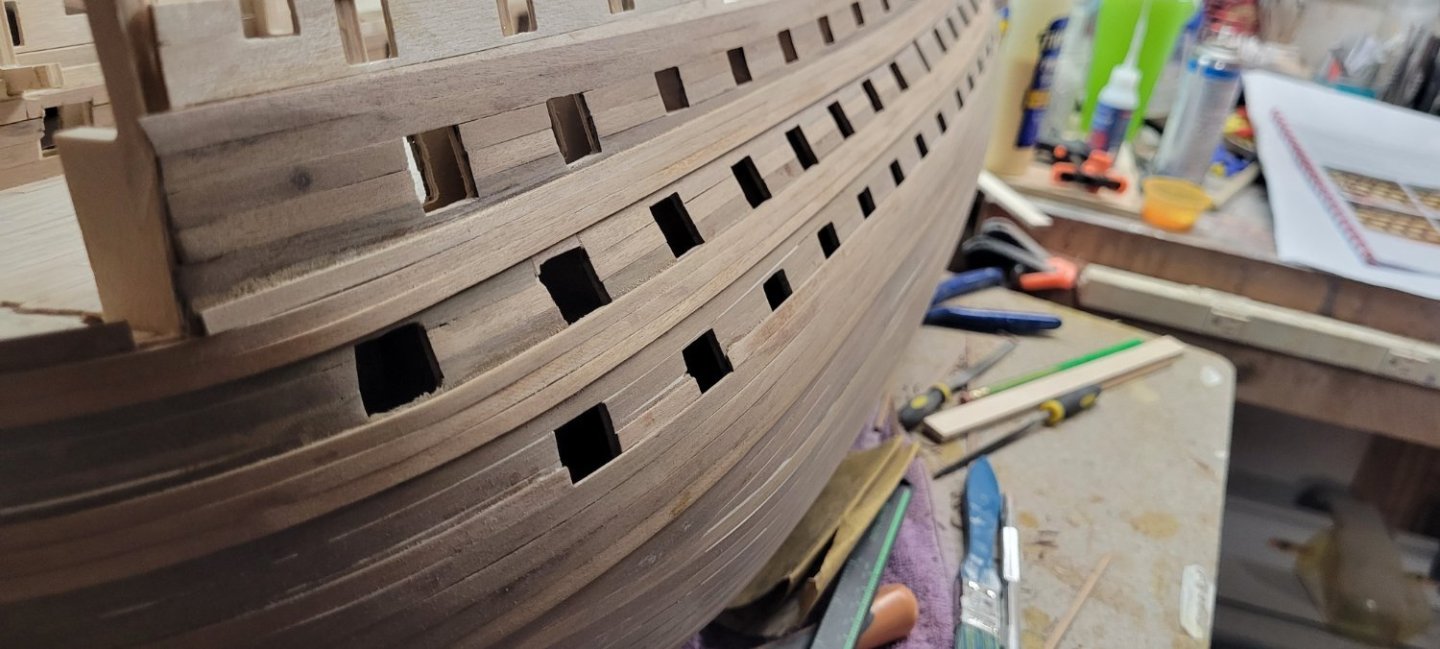
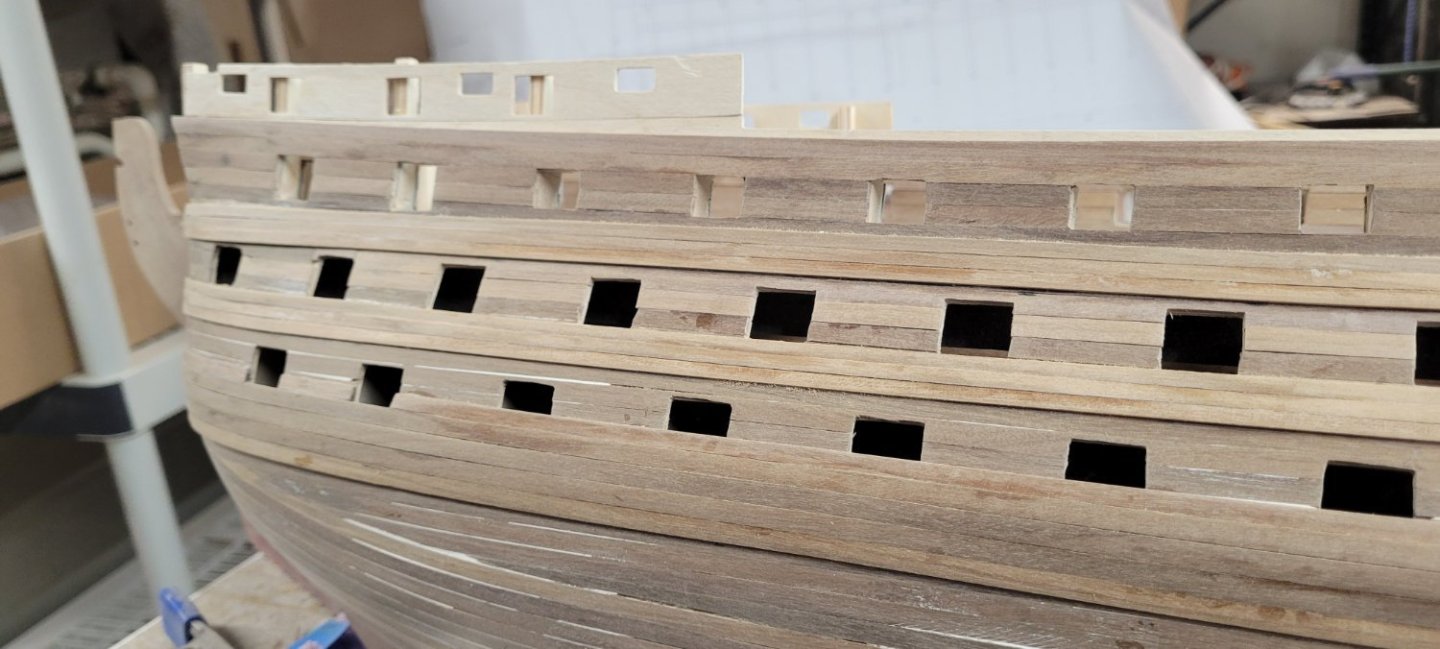
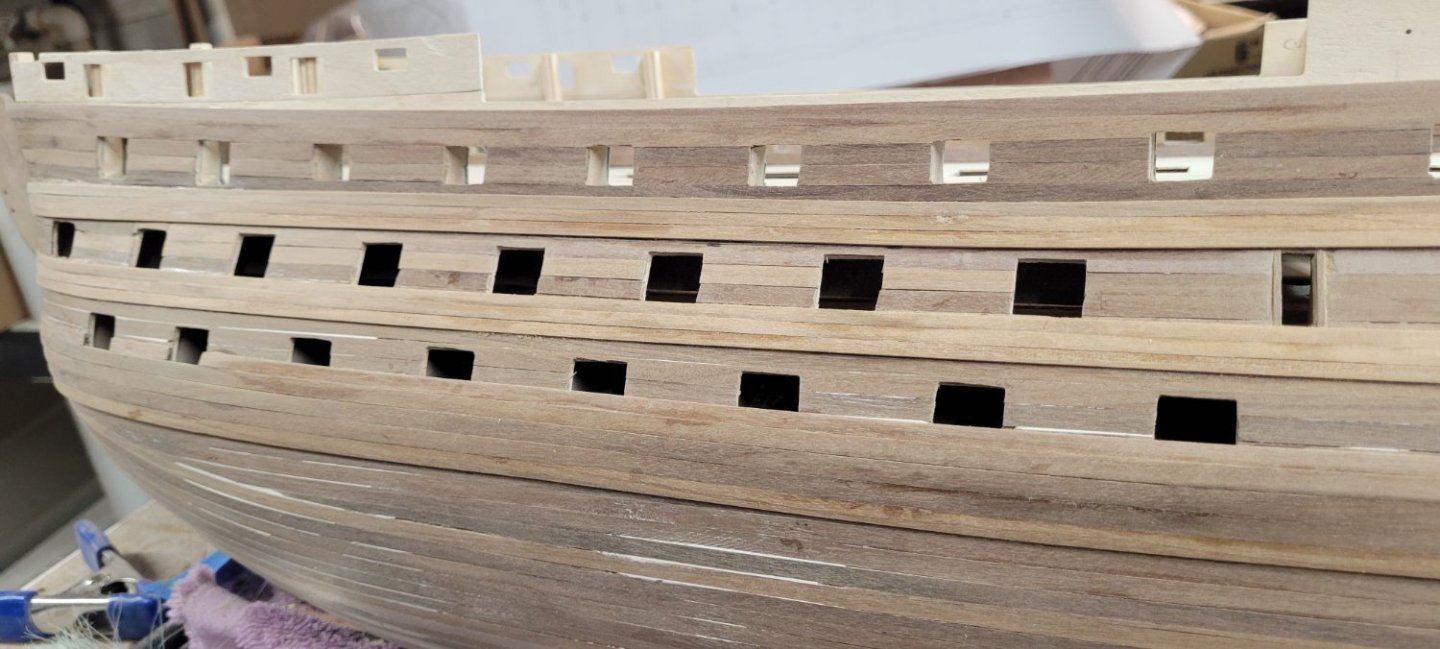
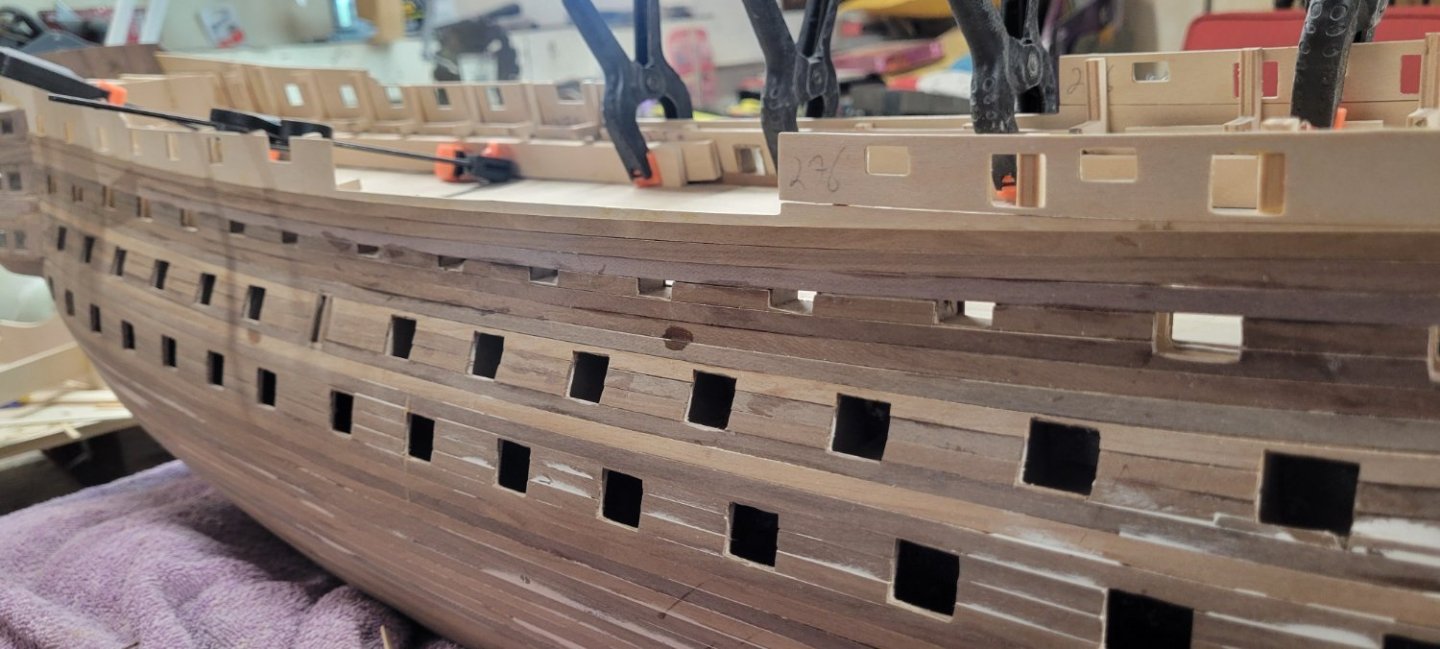
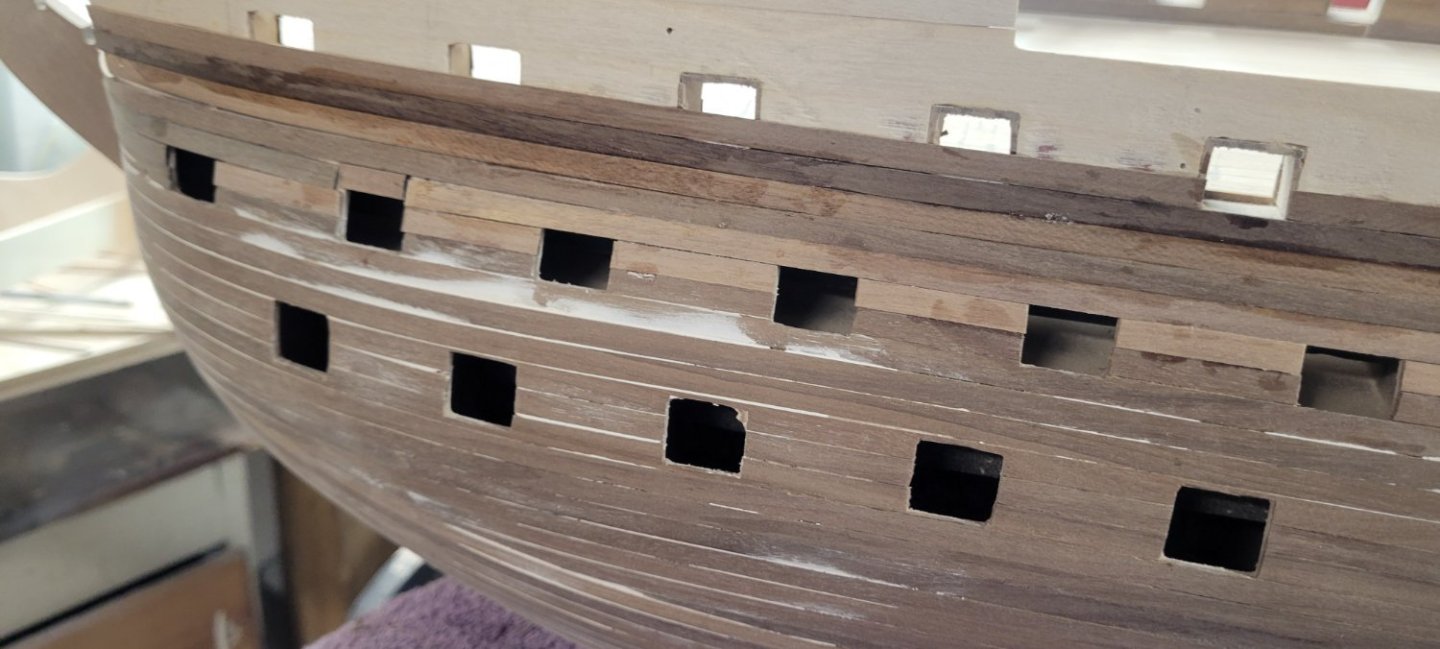
Once I finished the gun port liners and the interior planking on the side walls I continued to plank the hull. I kind of used a dual approach to installing them. For some, I just ran one long plank and then cut out the gun ports. For others, I just added planks from opening to opening. Both have their pluses and minuses. In the end, my biggest struggle is getting the openings to look square. I continue to spend a lot of time picking away at the ports, for that perfect square!


-
The deck filler does look pretty scary going on, but the end result provides a nice color and fills in the joints very nicely.