Yabuhebi
-
Posts
53 -
Joined
-
Last visited
About Yabuhebi

- Birthday July 25
Recent Profile Visitors
110 profile views


-
 CraigVT reacted to a post in a topic:
HMS Victory by Yabuhebi (Chris) - Caldercraft - 1:72
CraigVT reacted to a post in a topic:
HMS Victory by Yabuhebi (Chris) - Caldercraft - 1:72
-
CraigVT reacted to a post in a topic:
HMS Victory by Yabuhebi (Chris) - Caldercraft - 1:72
-
 CraigVT reacted to a post in a topic:
HMS Victory by Yabuhebi (Chris) - Caldercraft - 1:72
CraigVT reacted to a post in a topic:
HMS Victory by Yabuhebi (Chris) - Caldercraft - 1:72
-
CraigVT reacted to a post in a topic:
HMS Victory by Yabuhebi (Chris) - Caldercraft - 1:72
-
CraigVT reacted to a post in a topic:
HMS Victory by Yabuhebi (Chris) - Caldercraft - 1:72
-
CraigVT reacted to a post in a topic:
HMS Victory by Yabuhebi (Chris) - Caldercraft - 1:72
-
CraigVT reacted to a post in a topic:
HMS Victory by Yabuhebi (Chris) - Caldercraft - 1:72
-
mort stoll reacted to a post in a topic:
HMS Victory 1805 by kiwiron - Caldercraft - 1:72
-
 Just fantastic so far. An absolute joy to look at and an inspiration for other builders....
 -
CraigVT reacted to a post in a topic:
HMS Victory by Yabuhebi (Chris) - Caldercraft - 1:72
-
CraigVT reacted to a post in a topic:
HMS Victory by Yabuhebi (Chris) - Caldercraft - 1:72
-
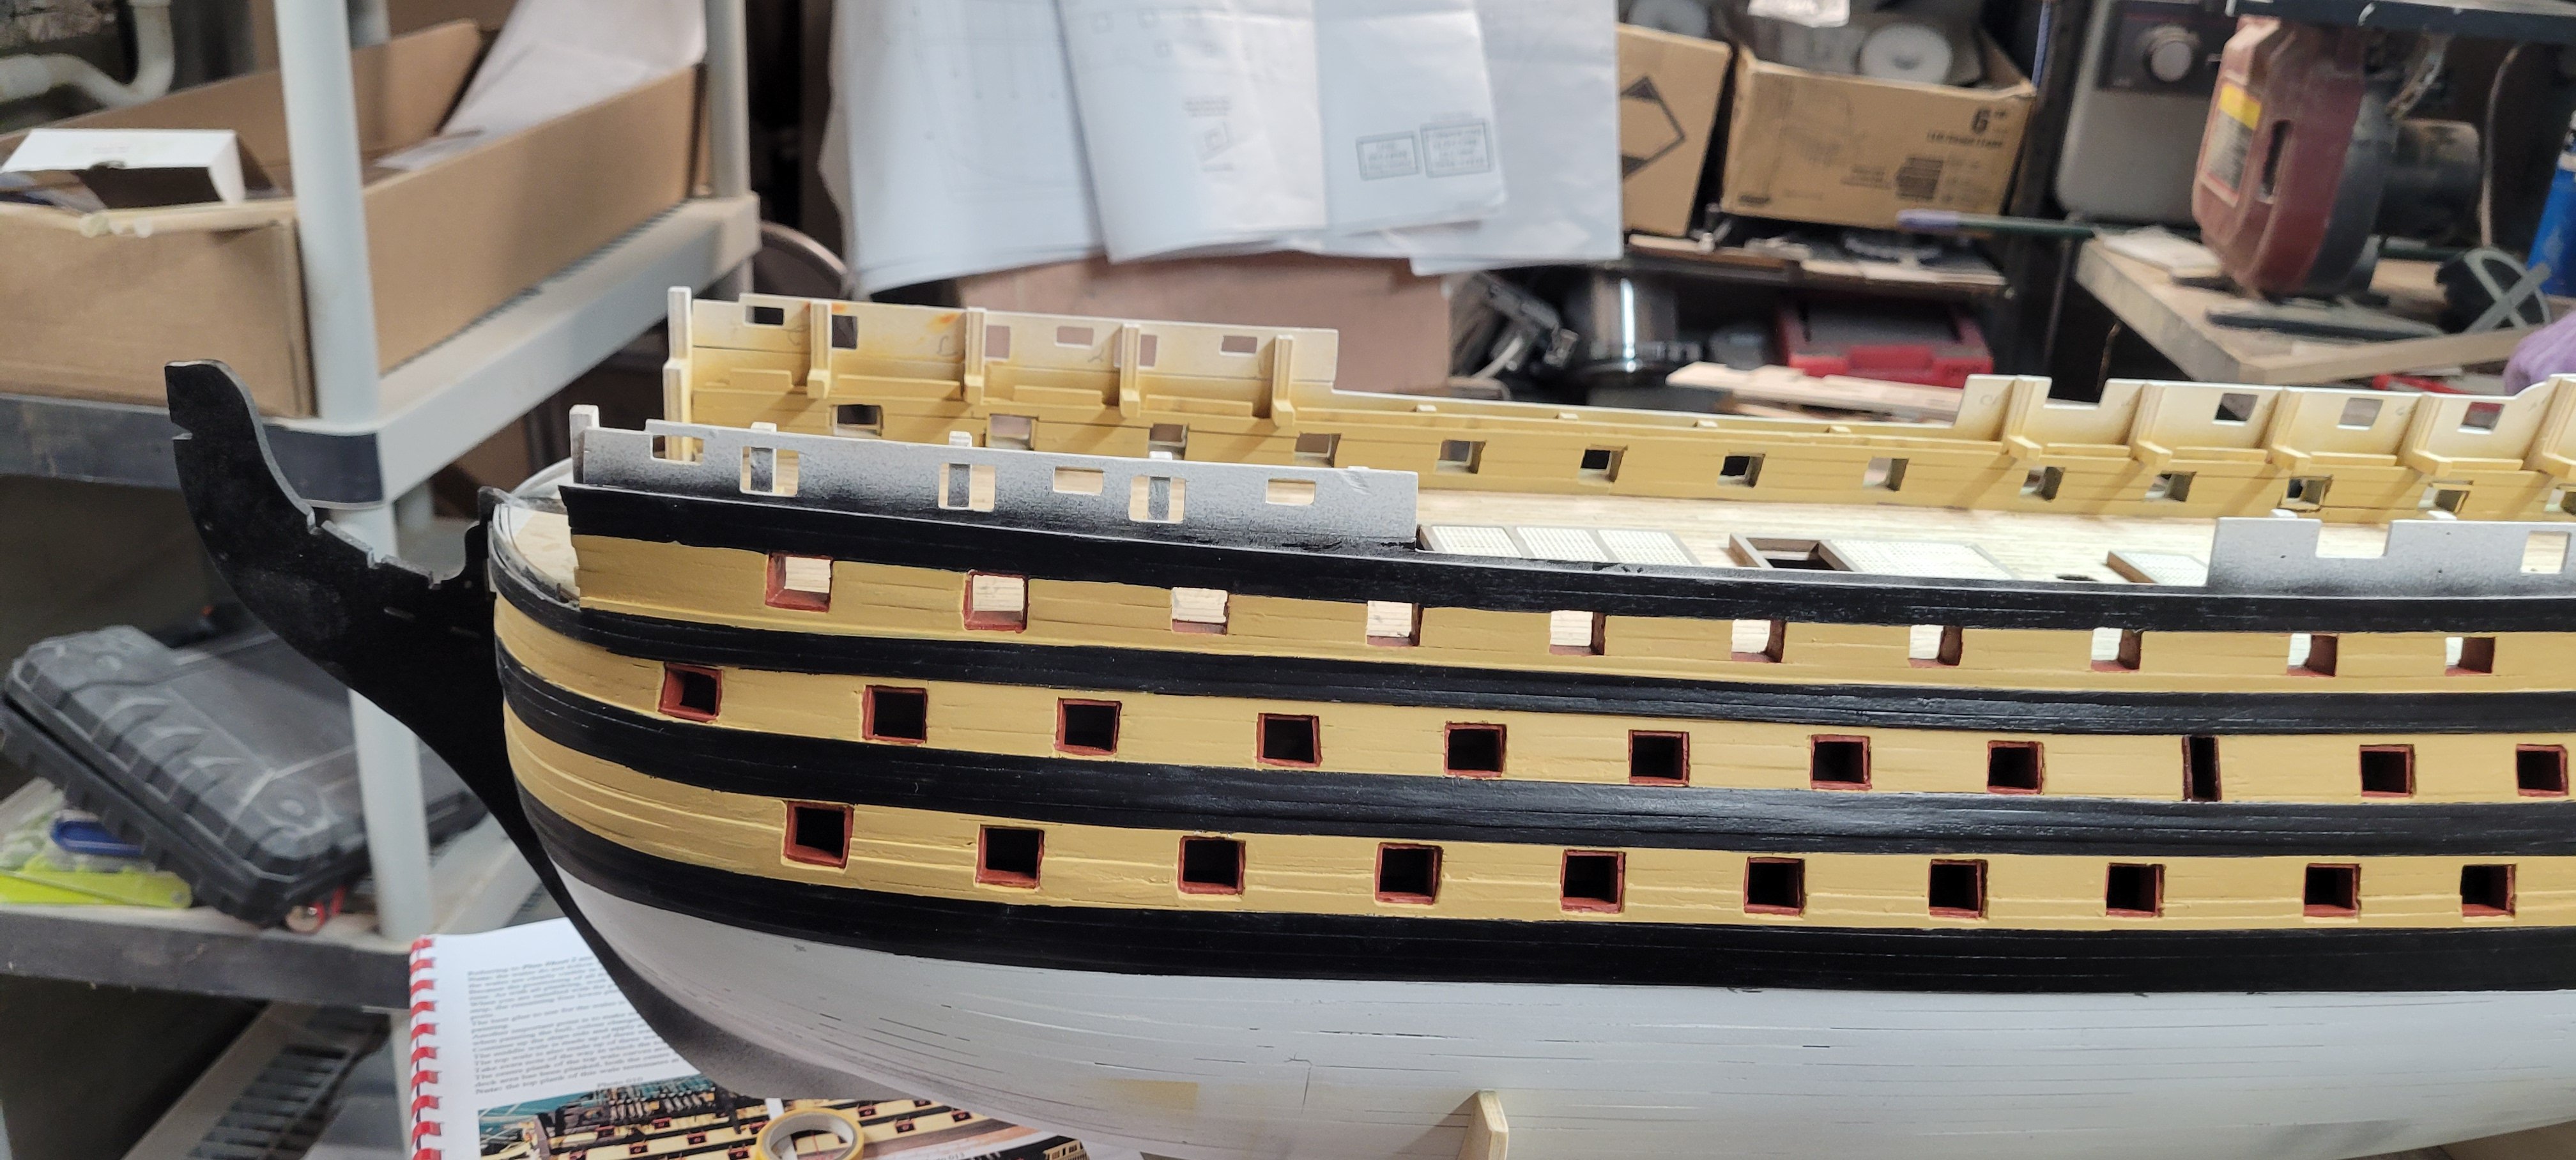
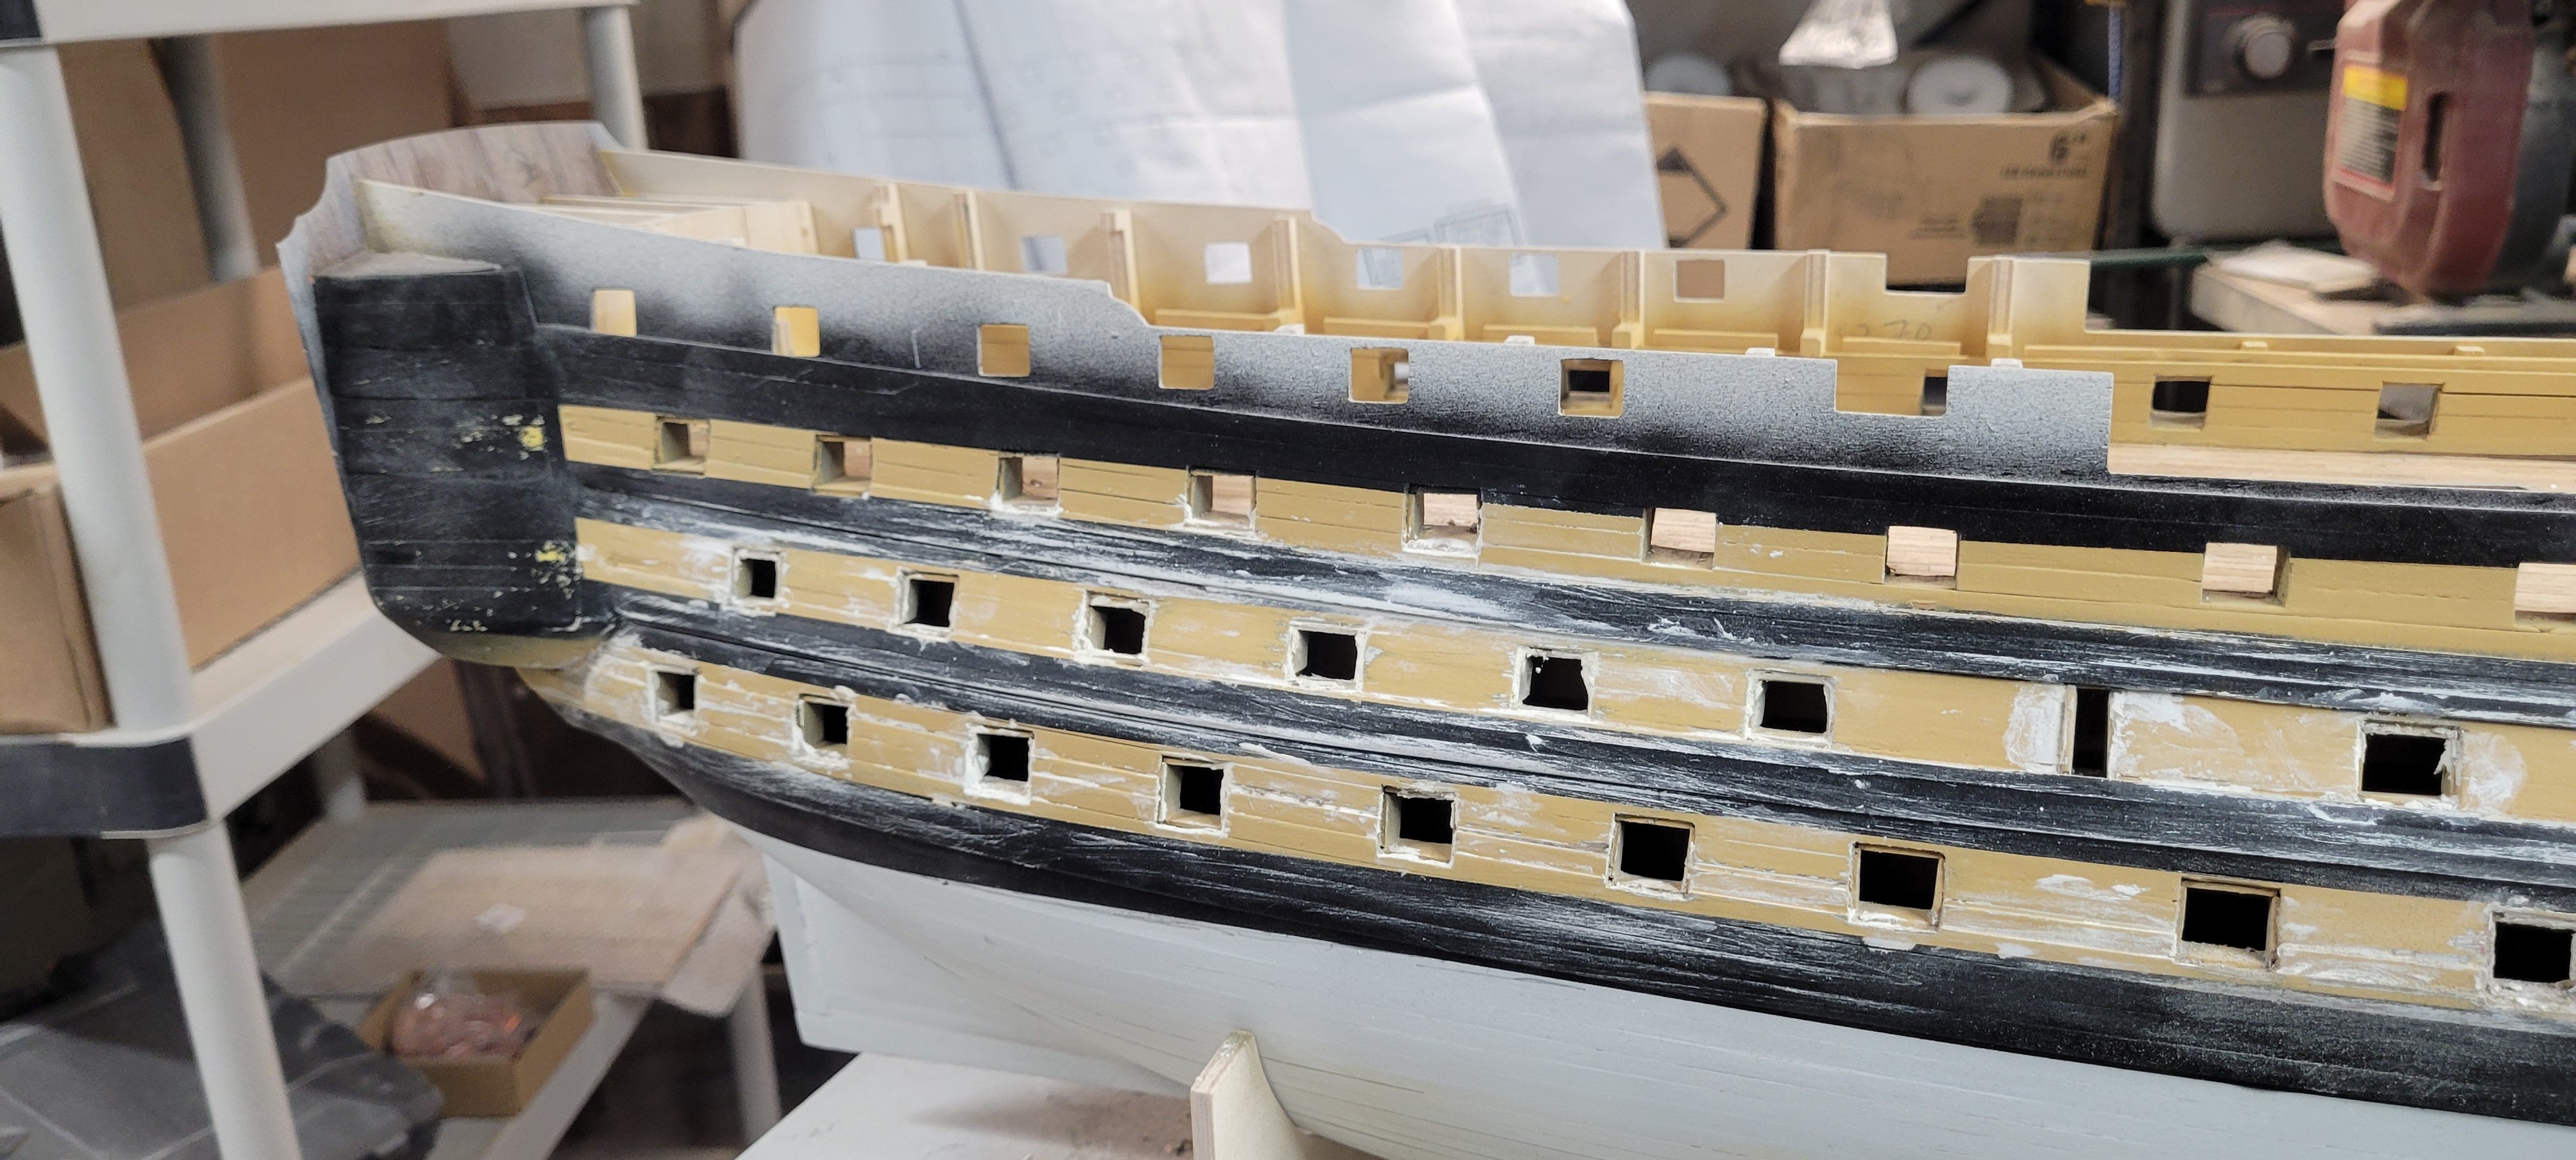
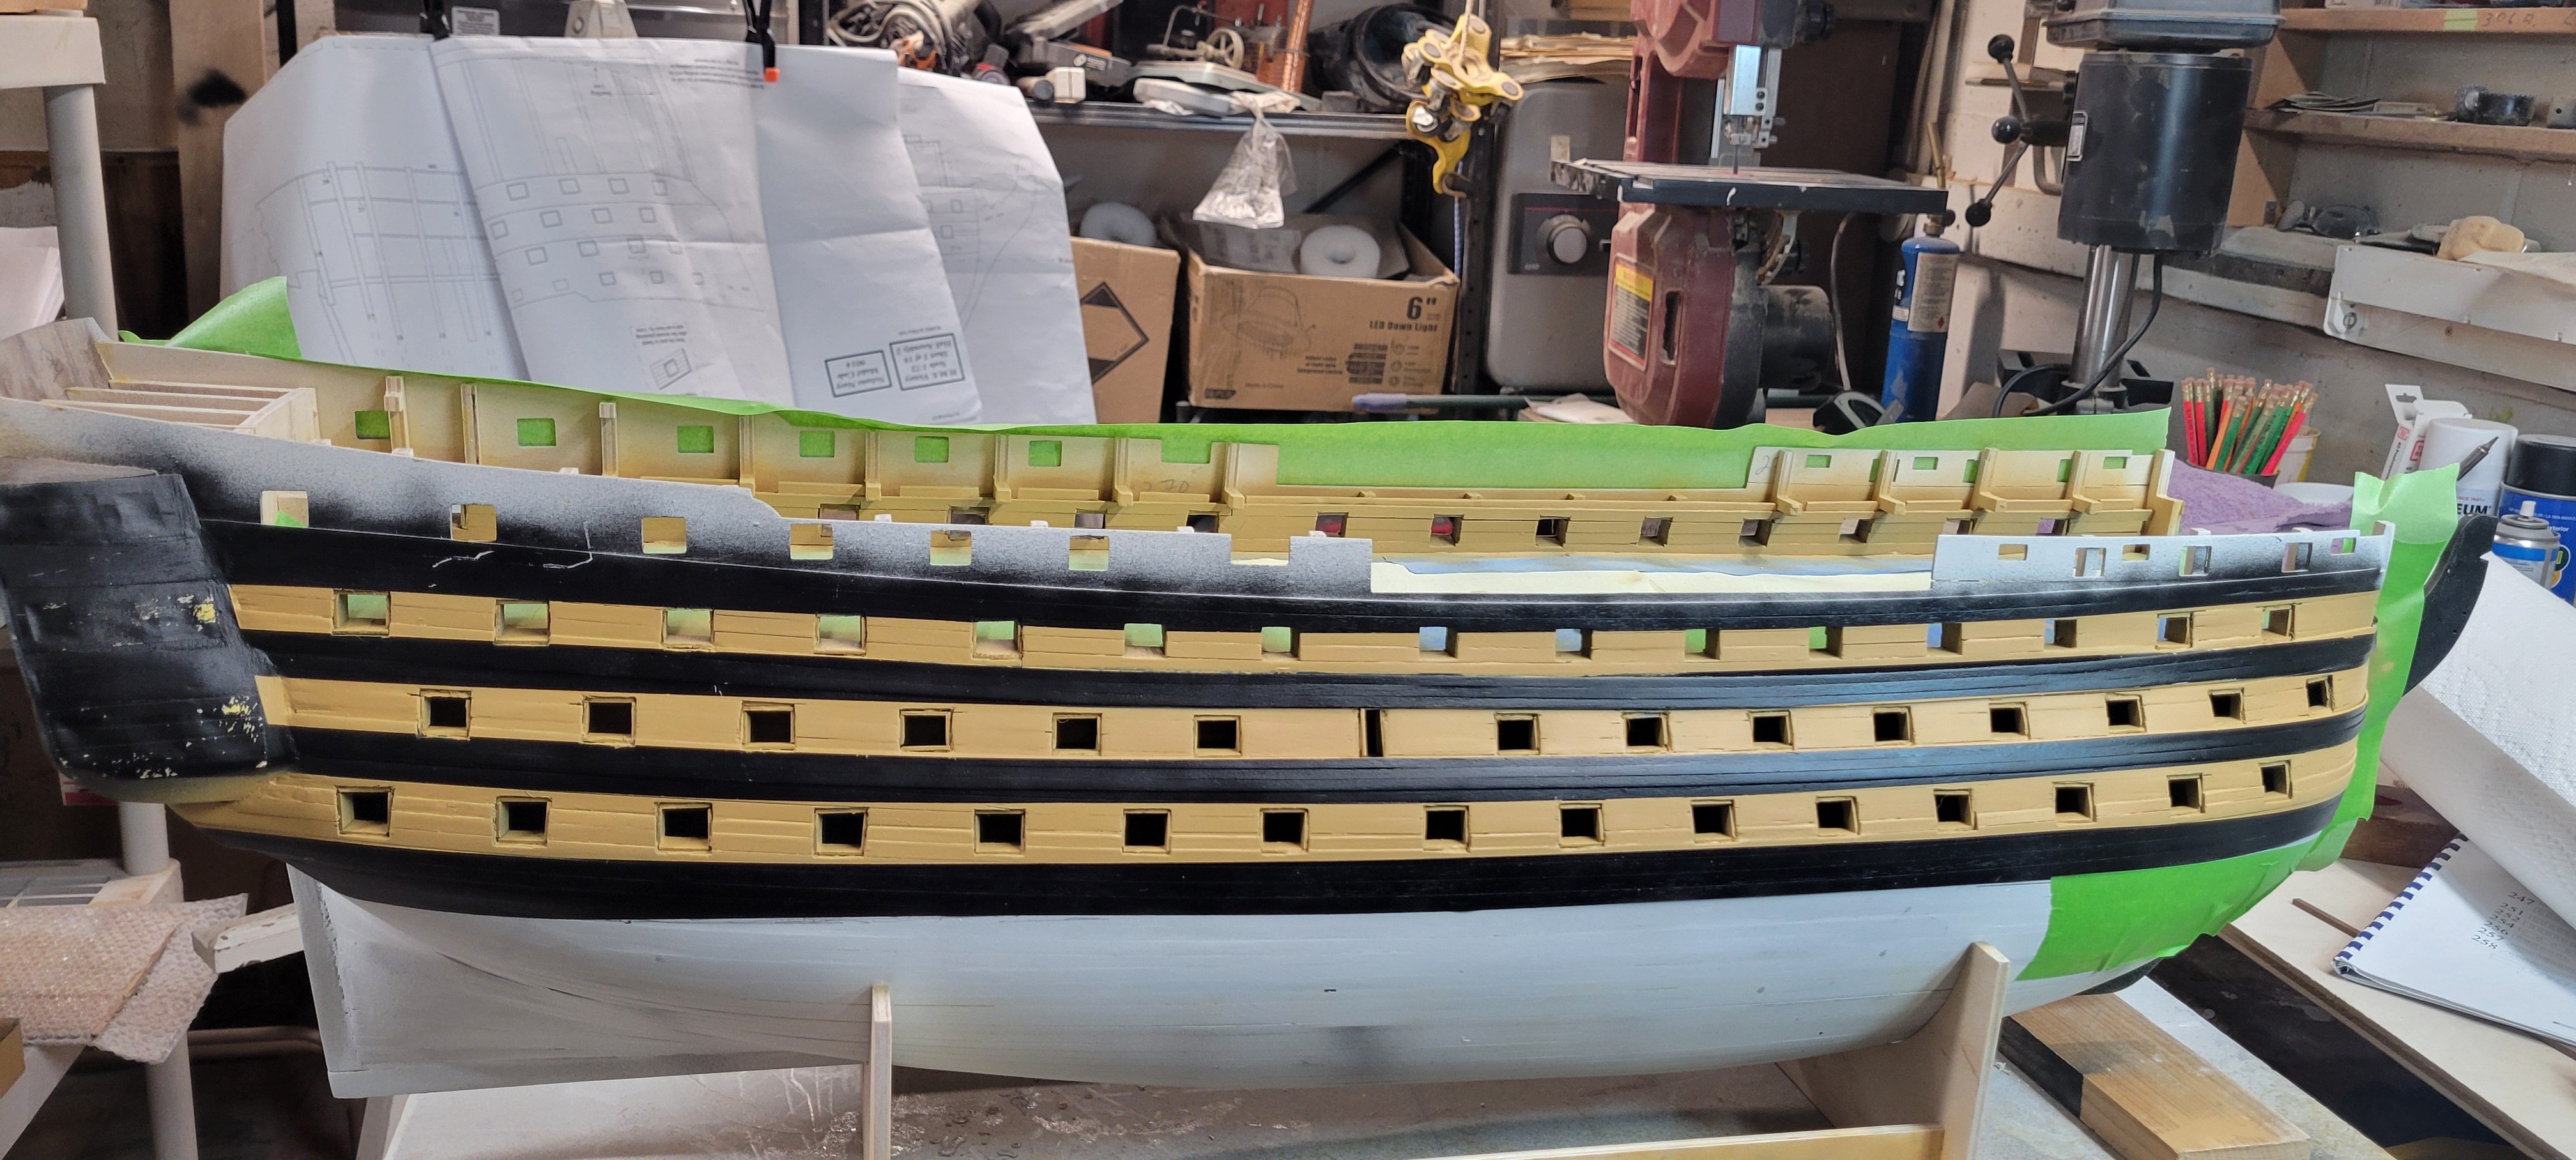
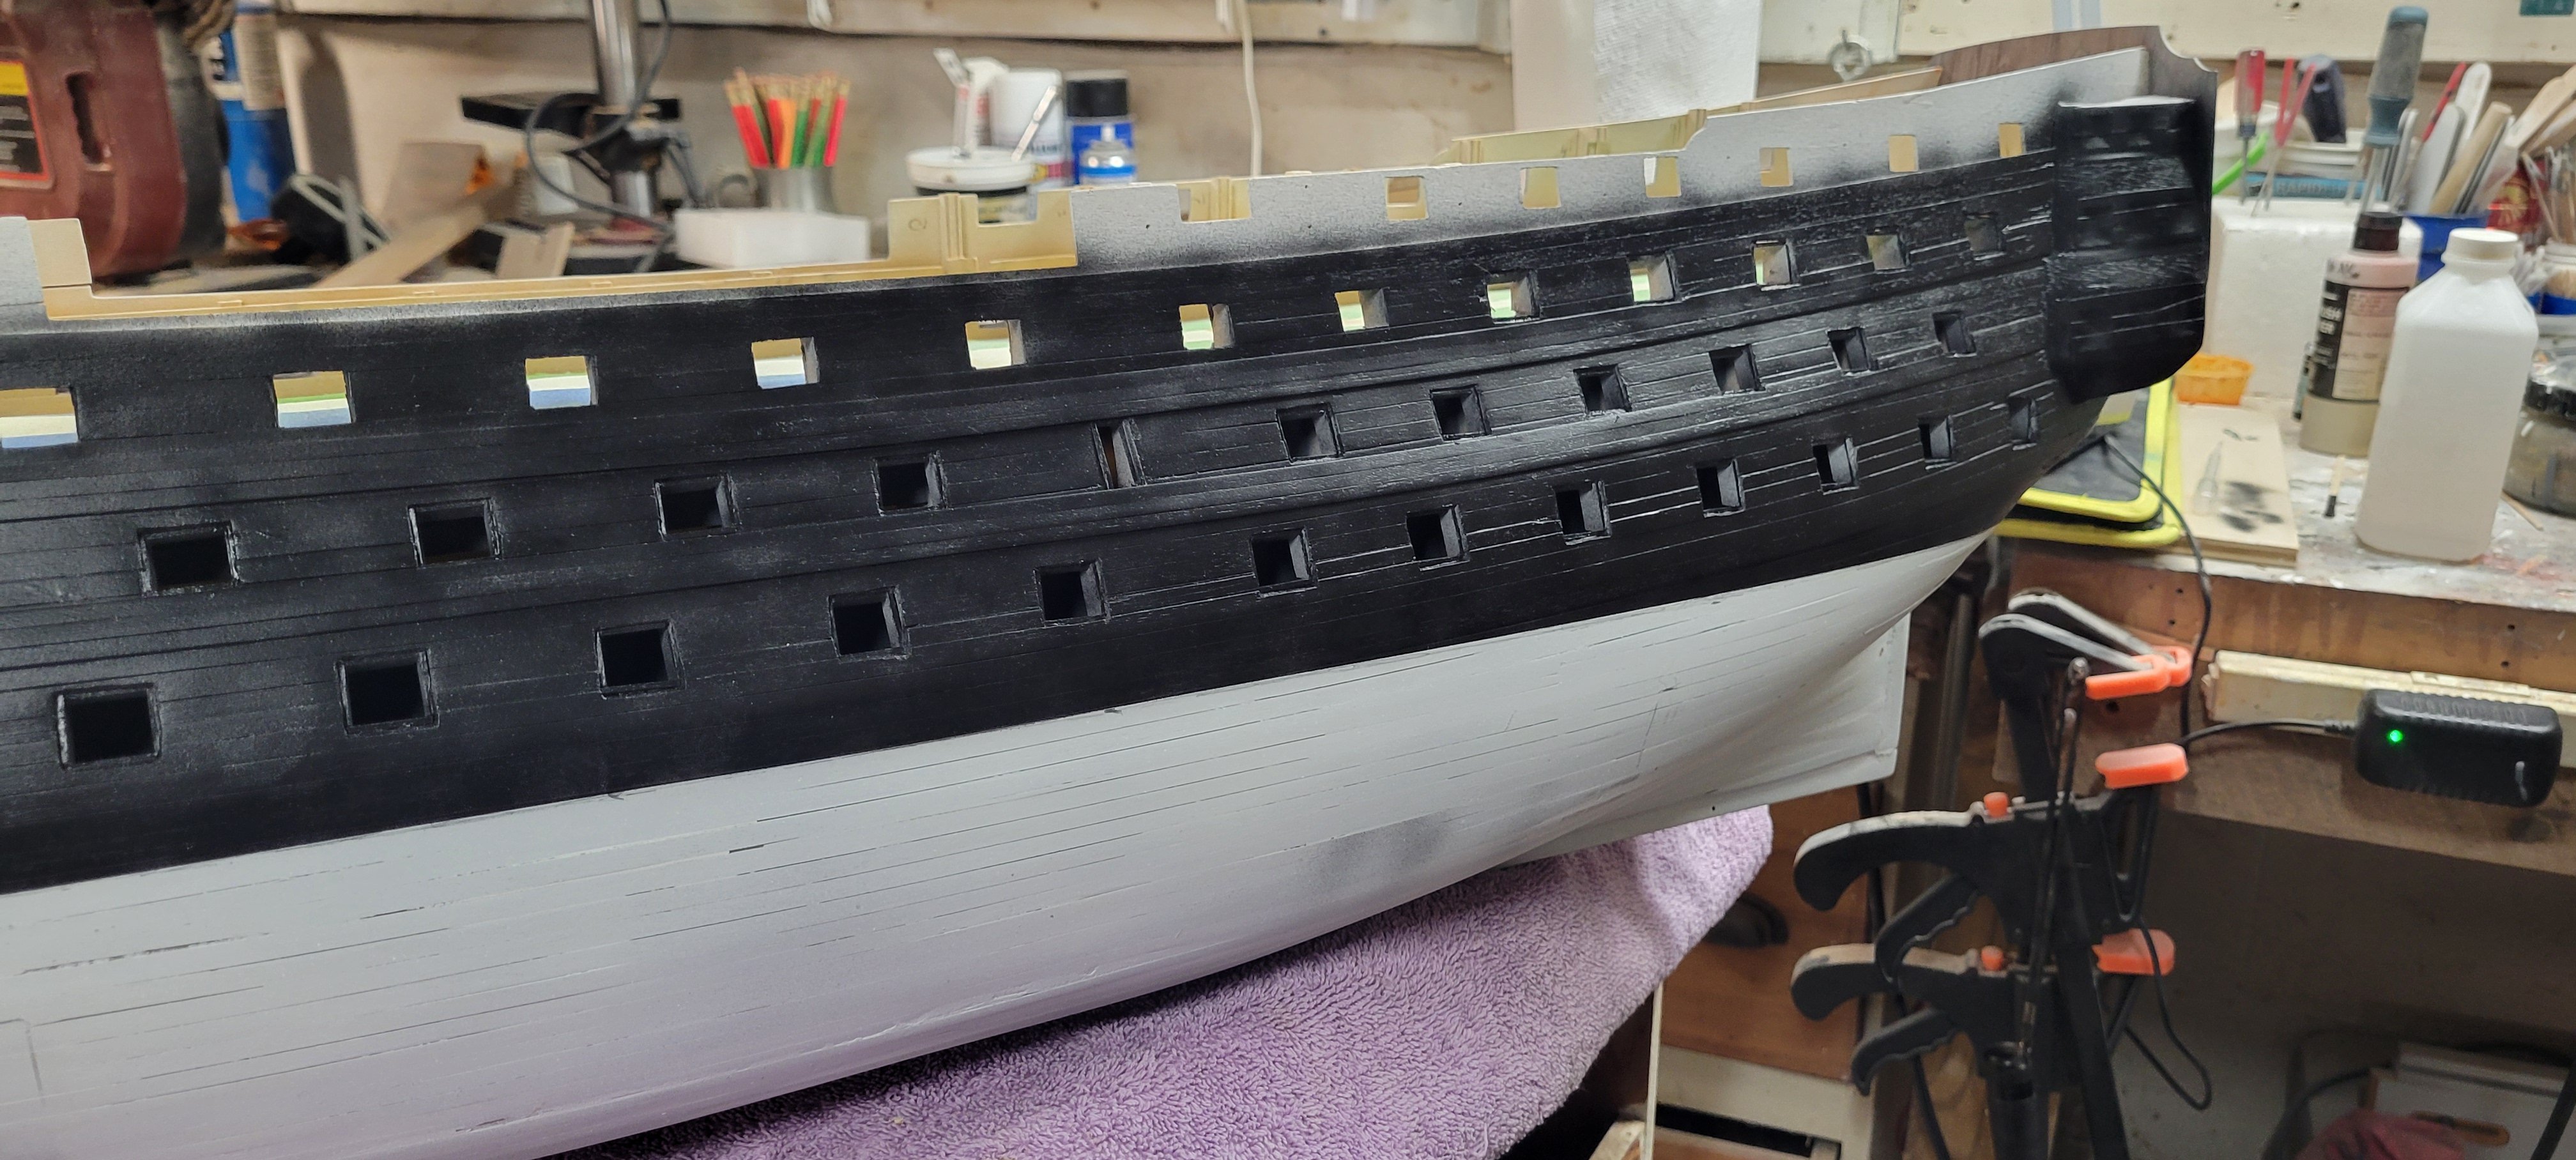
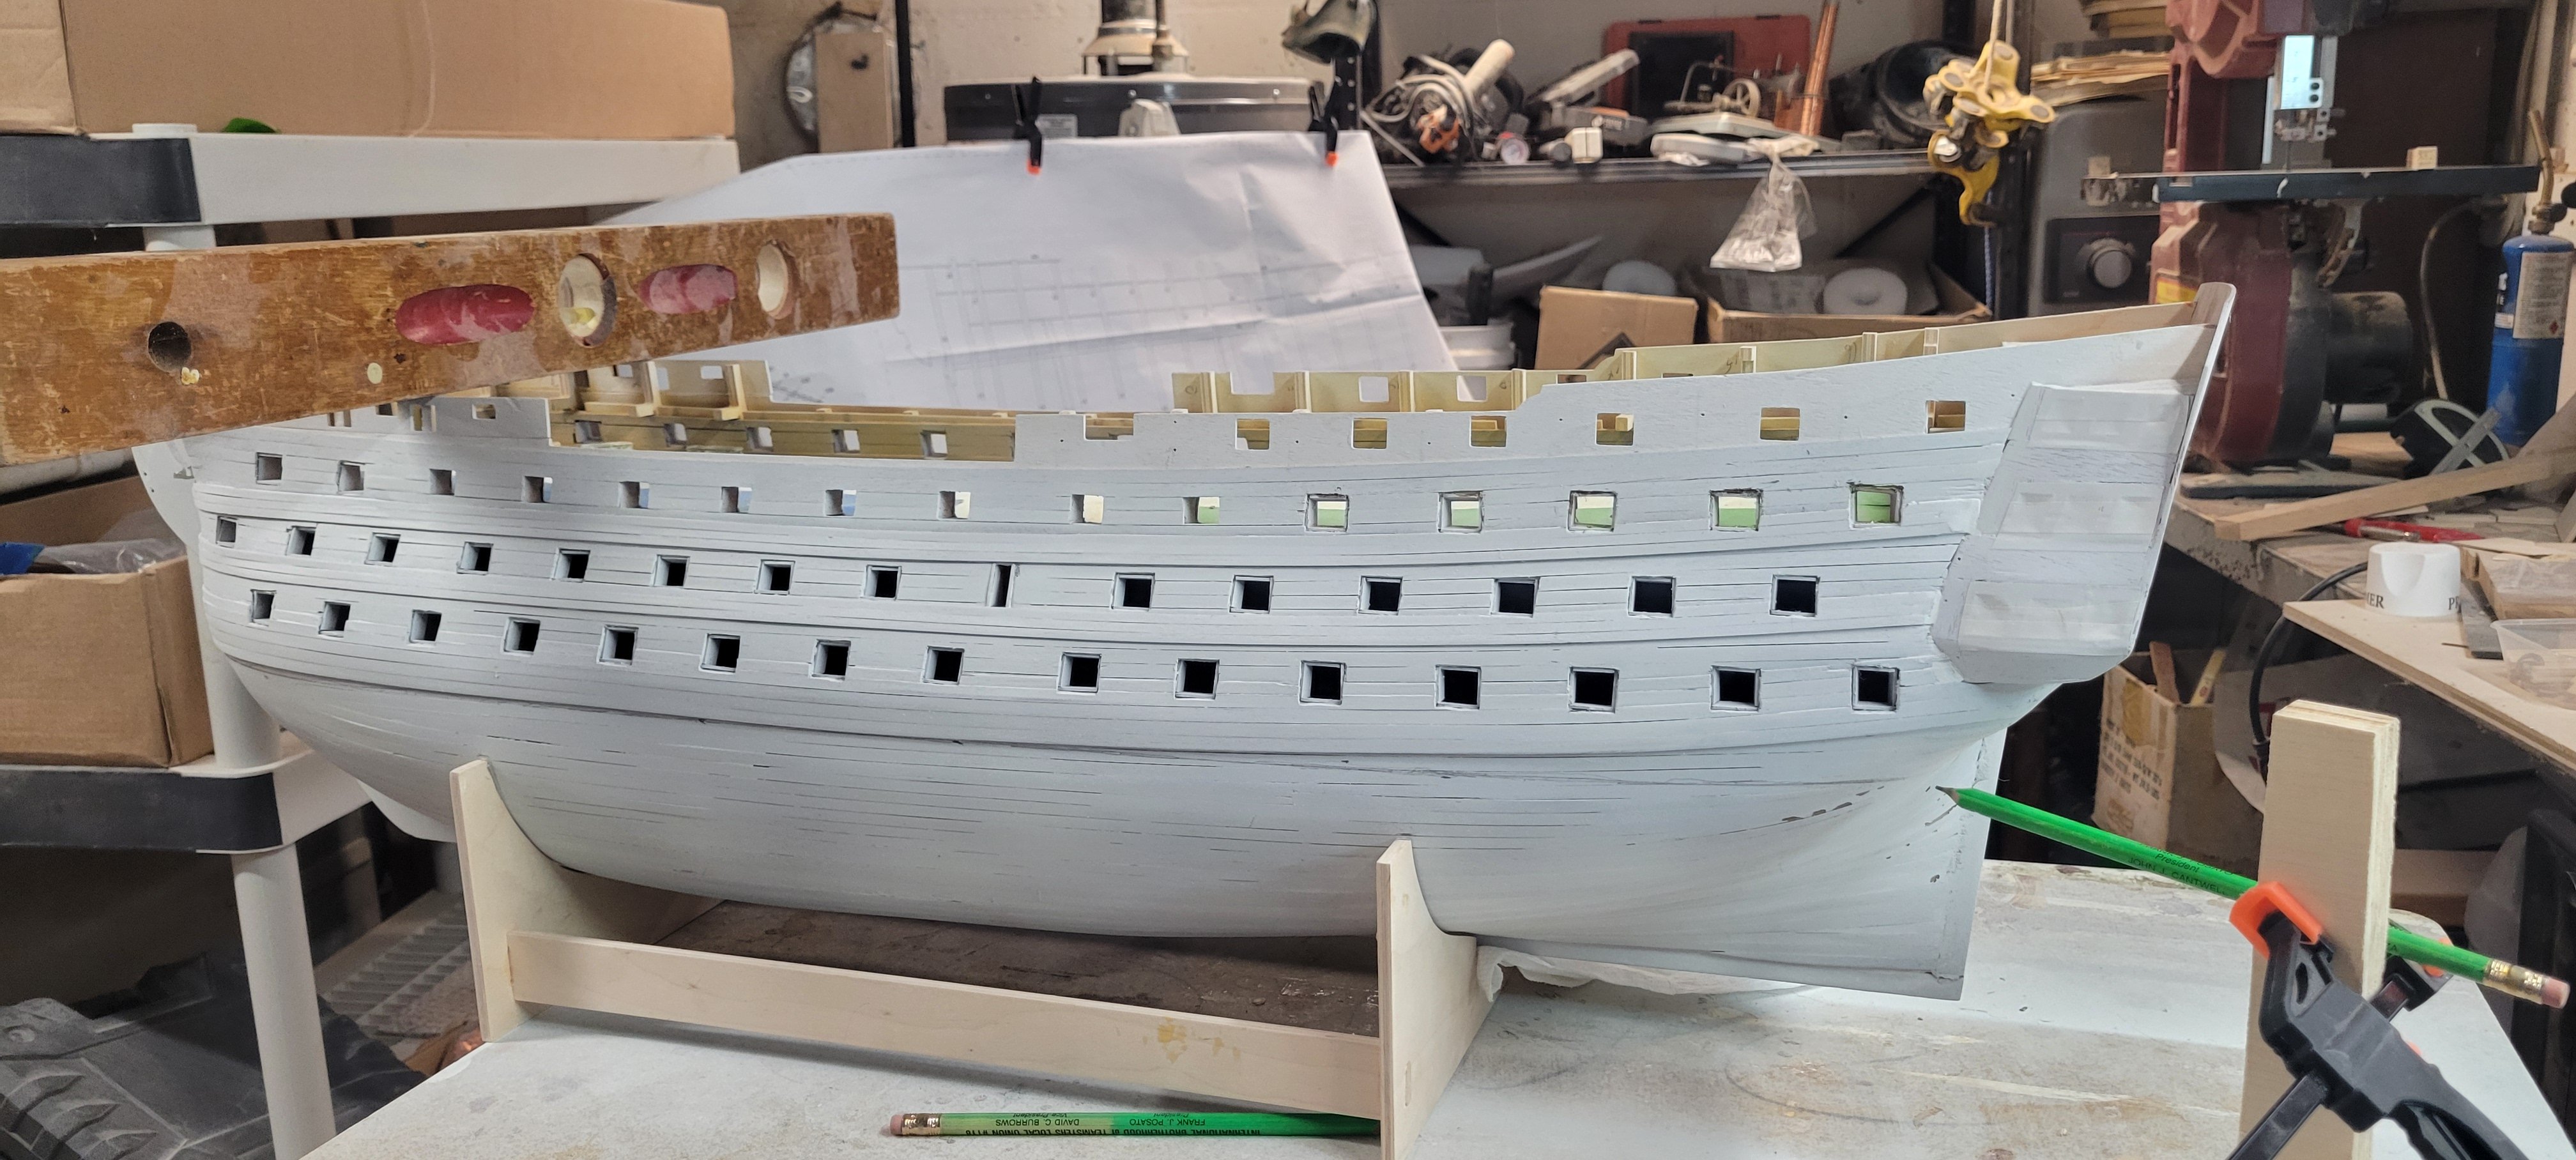
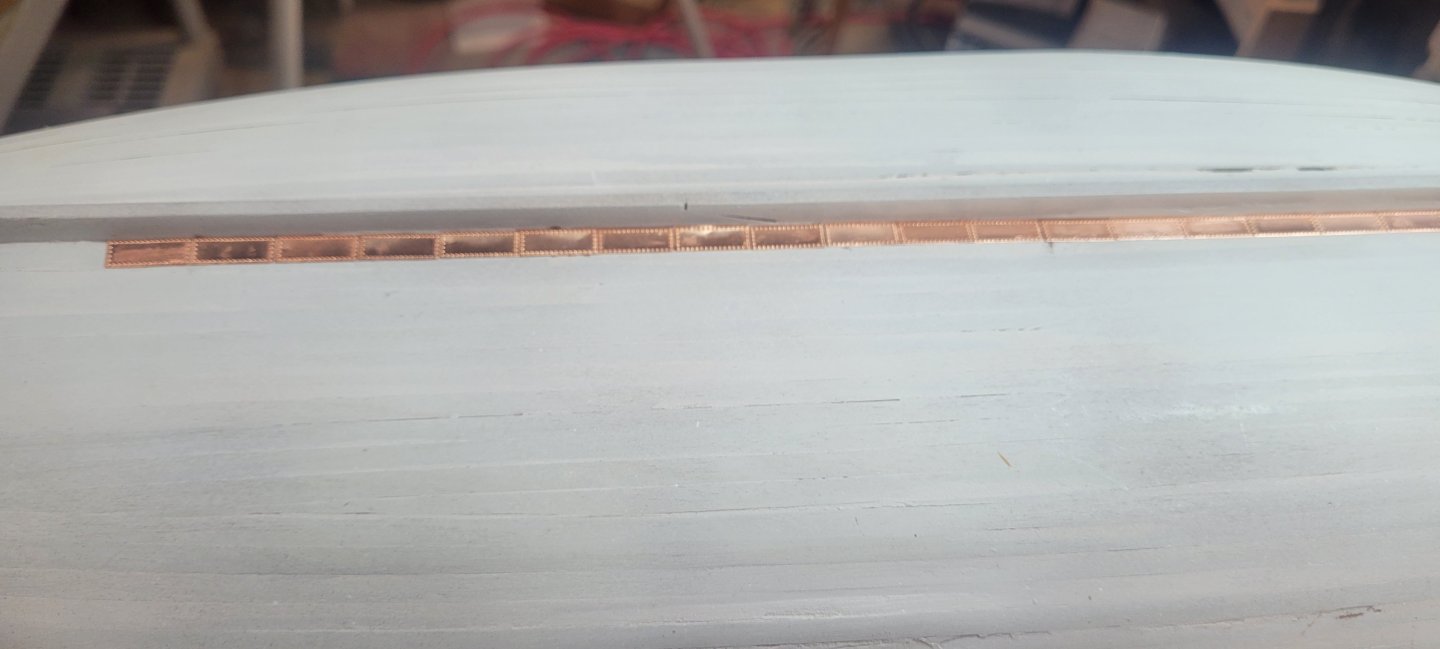
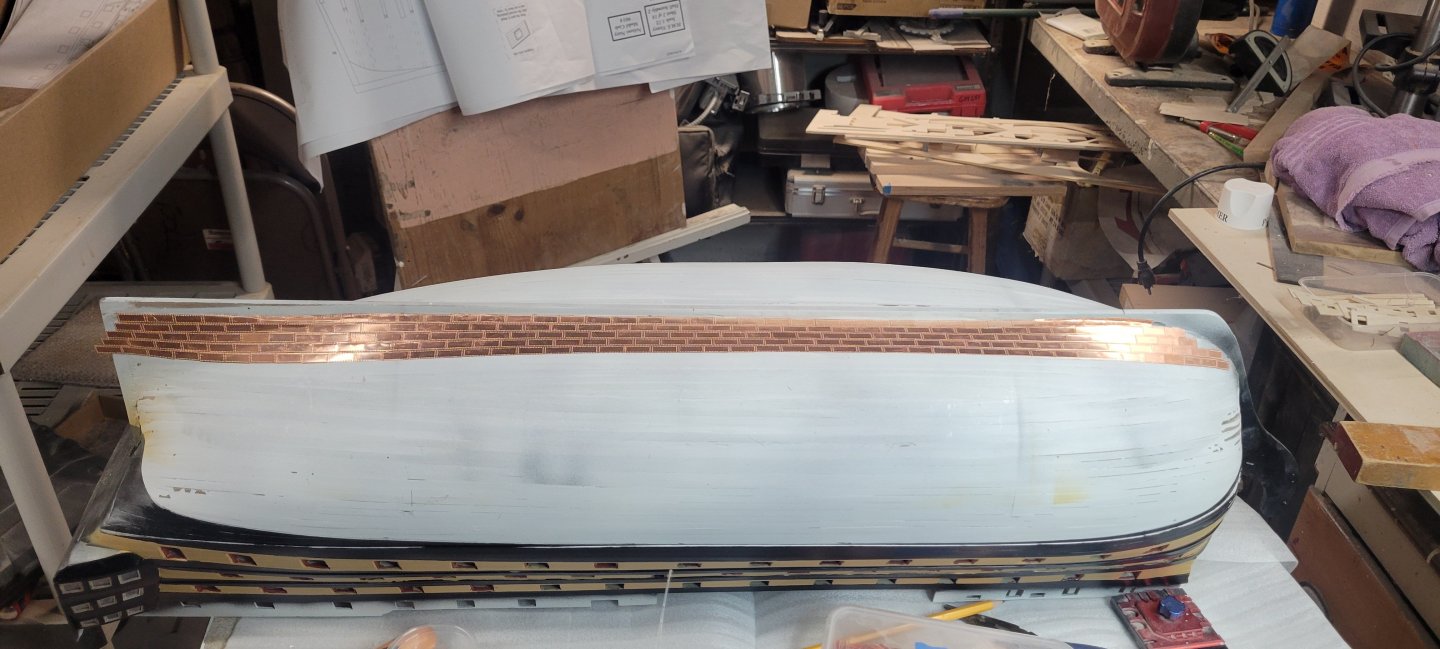
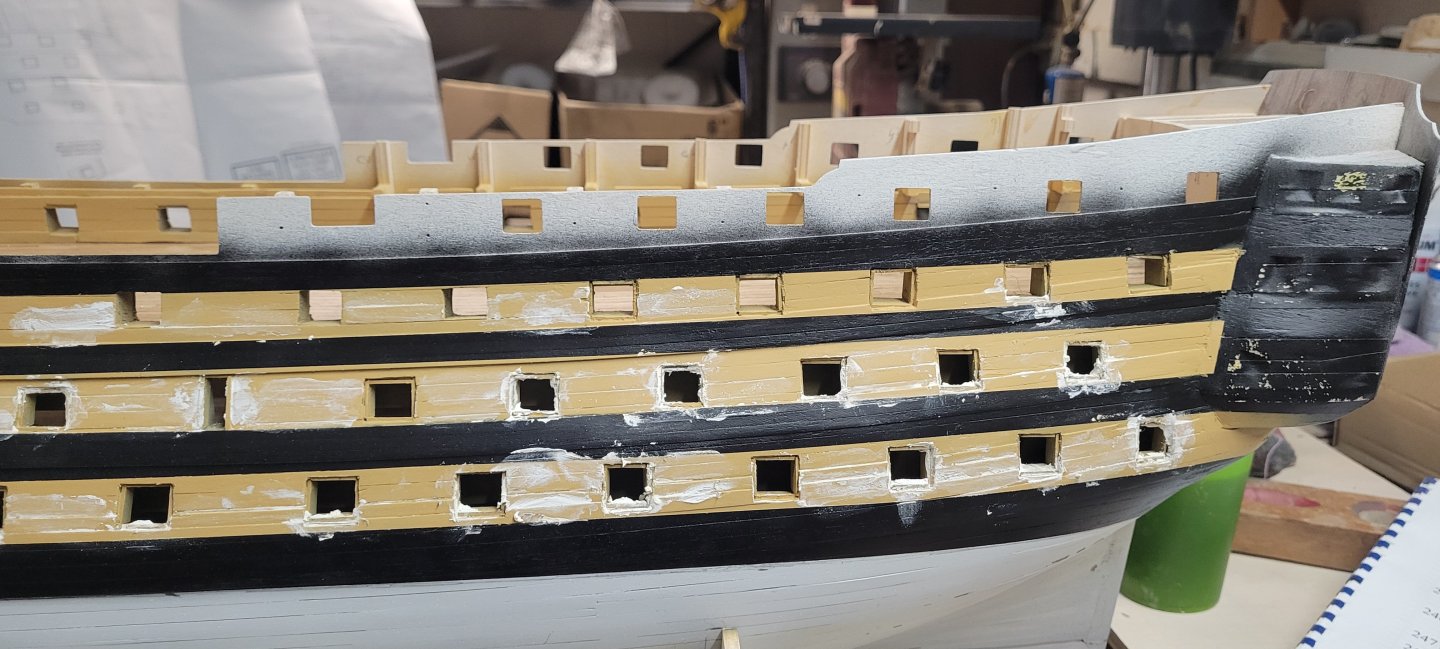
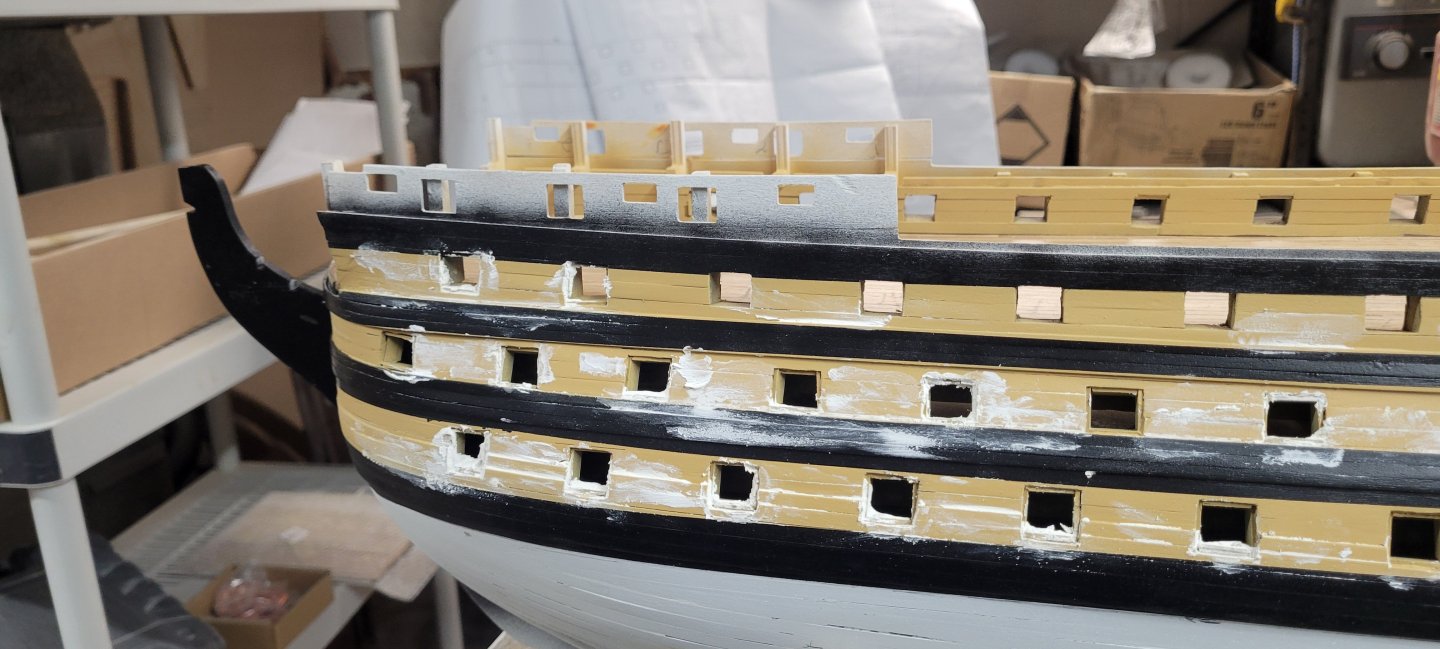
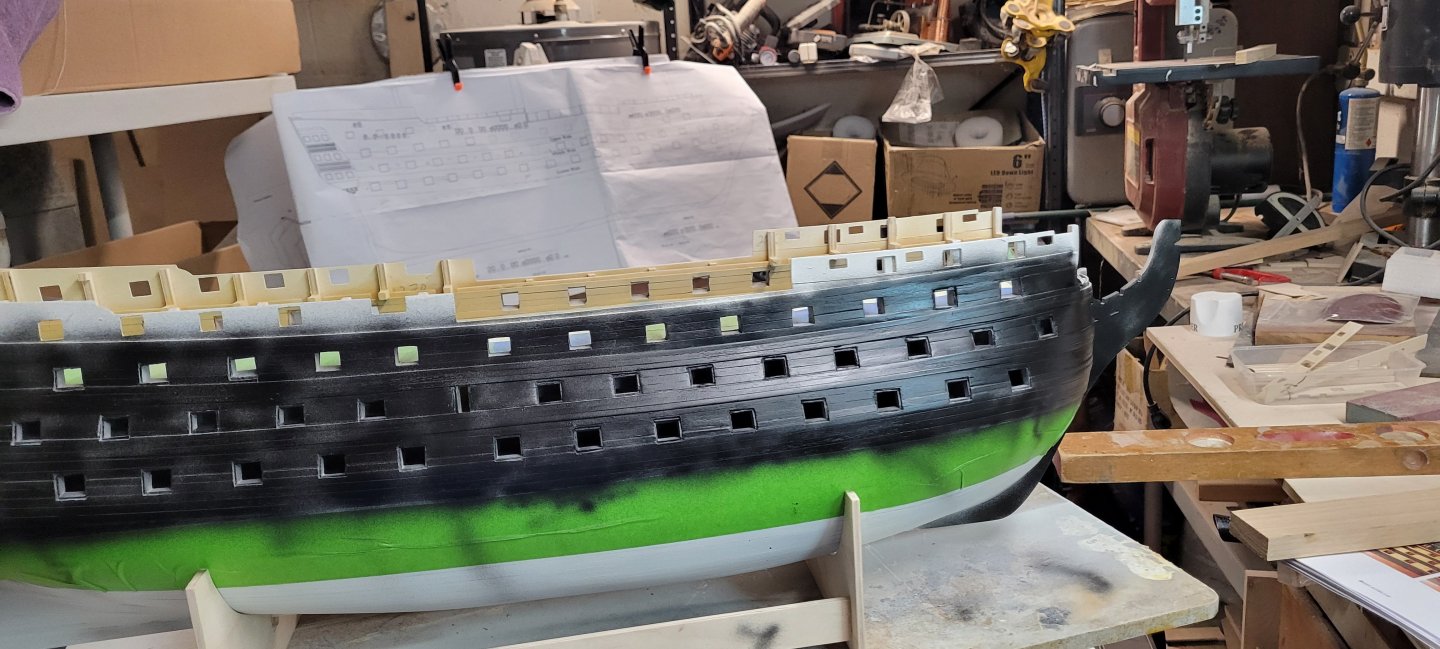
I finished touching up the gunports. I still have some minor spots to get at and needed to flip the hull upside down to get the 'top gun ports' I didn't get any pictures of where I am so far but decided to start the copper plating. I started at 1:59pm in the first pic and the 2nd pic at 5:43pm. I took about 30 minutes or so in the middle to eat lunch and check some other builds and my books to make sure I had a plan in place for laying out the tiles. So 5 rows in about 3-3.5 hours. I'll see you when it's done!!!!
-
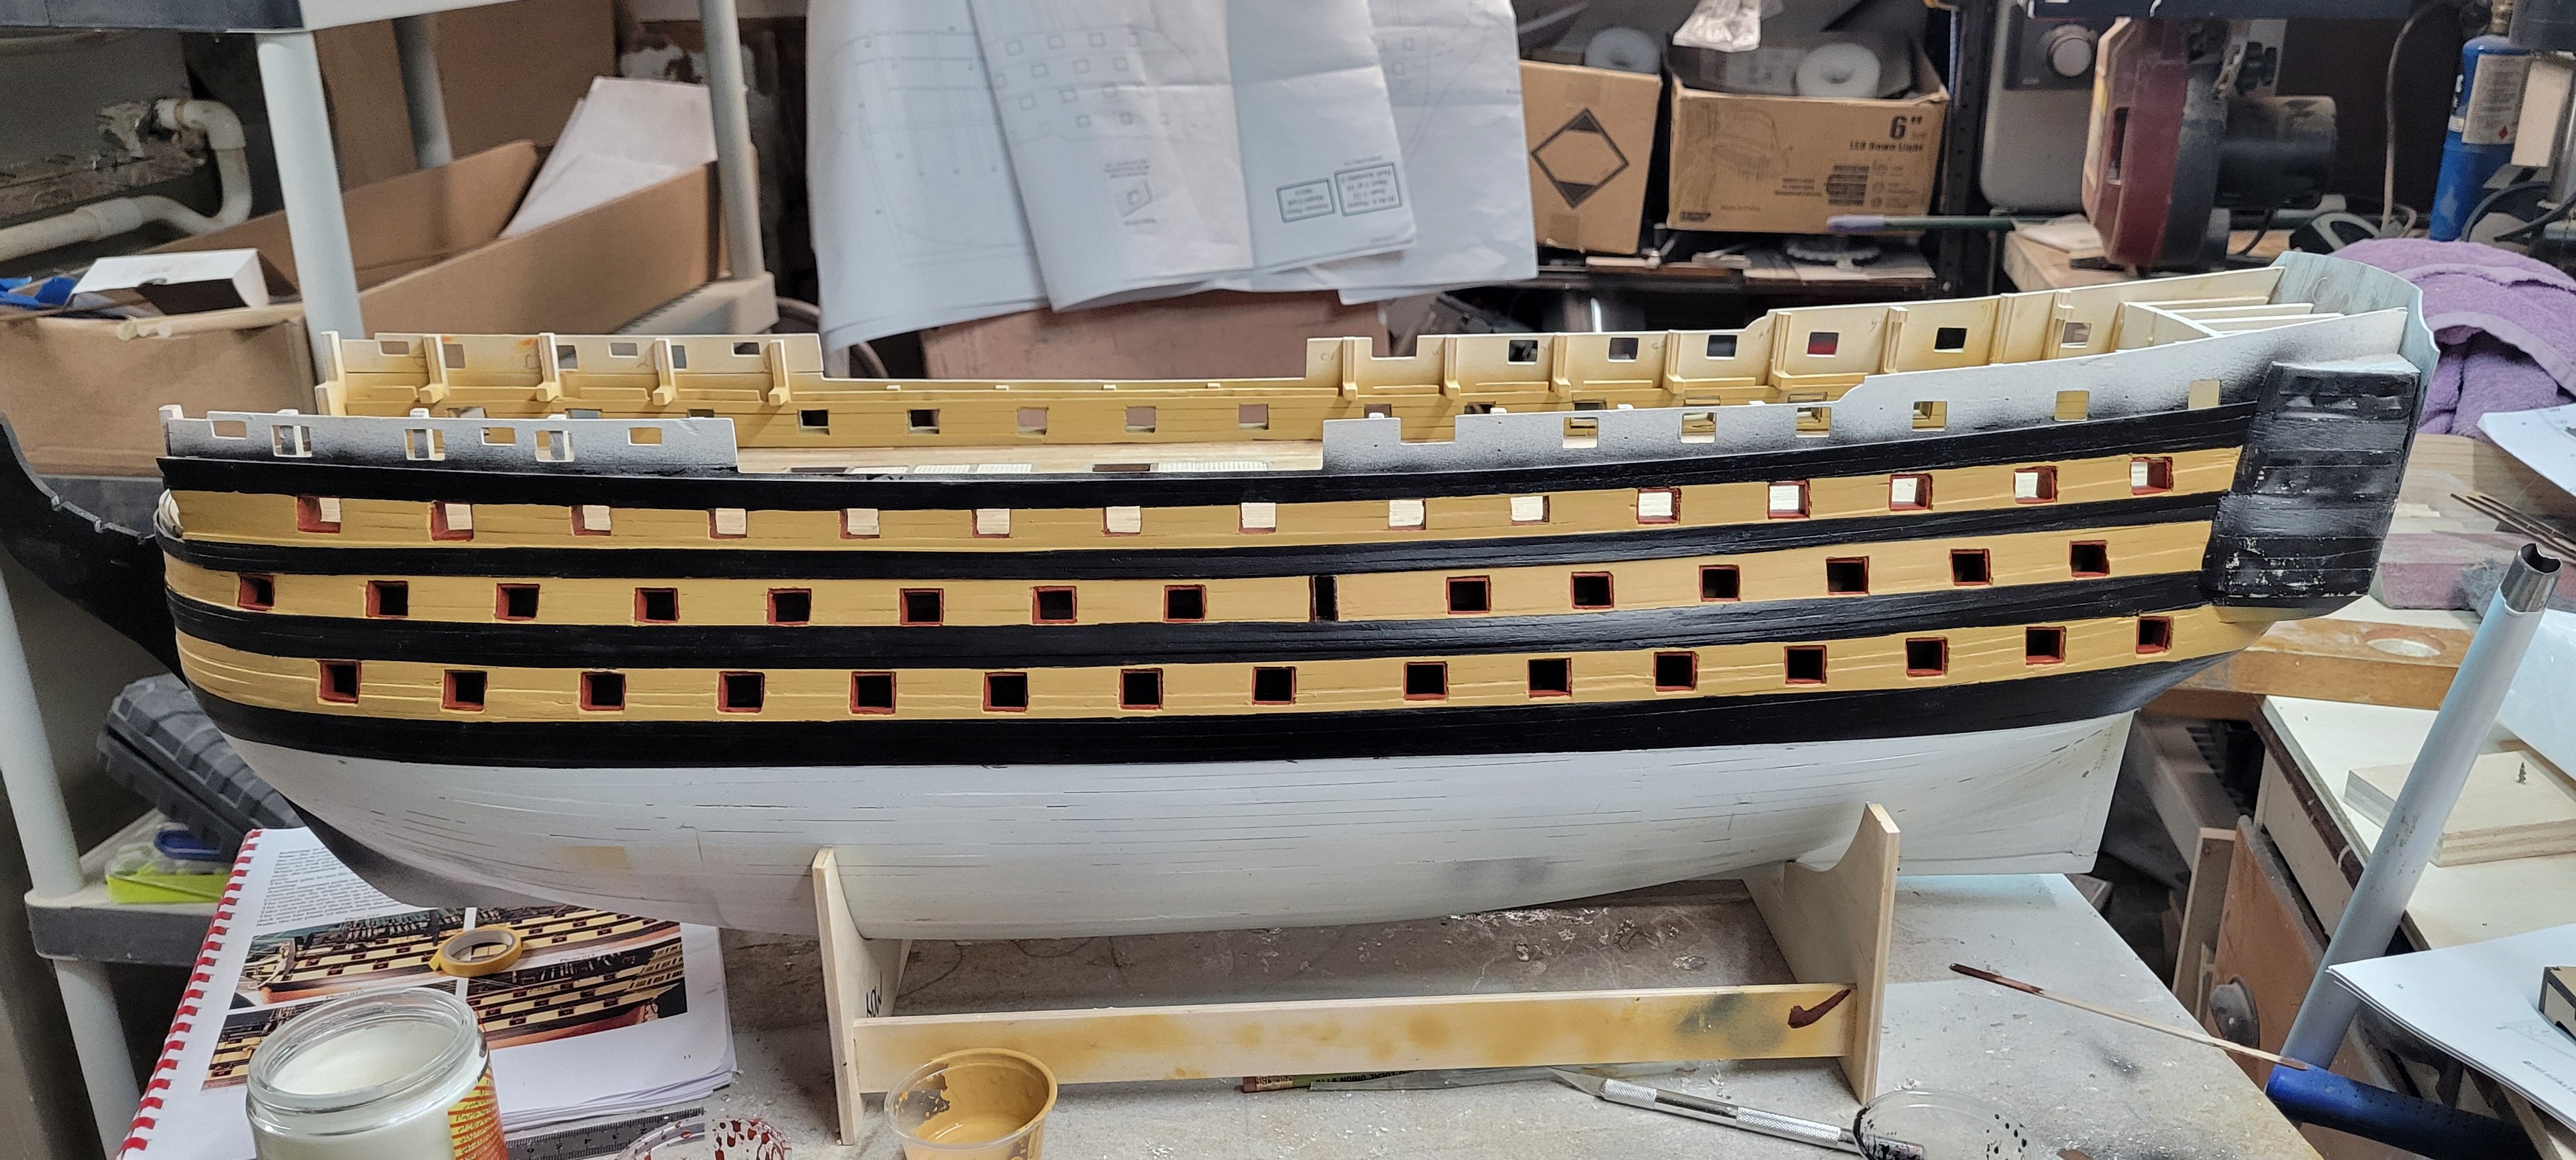
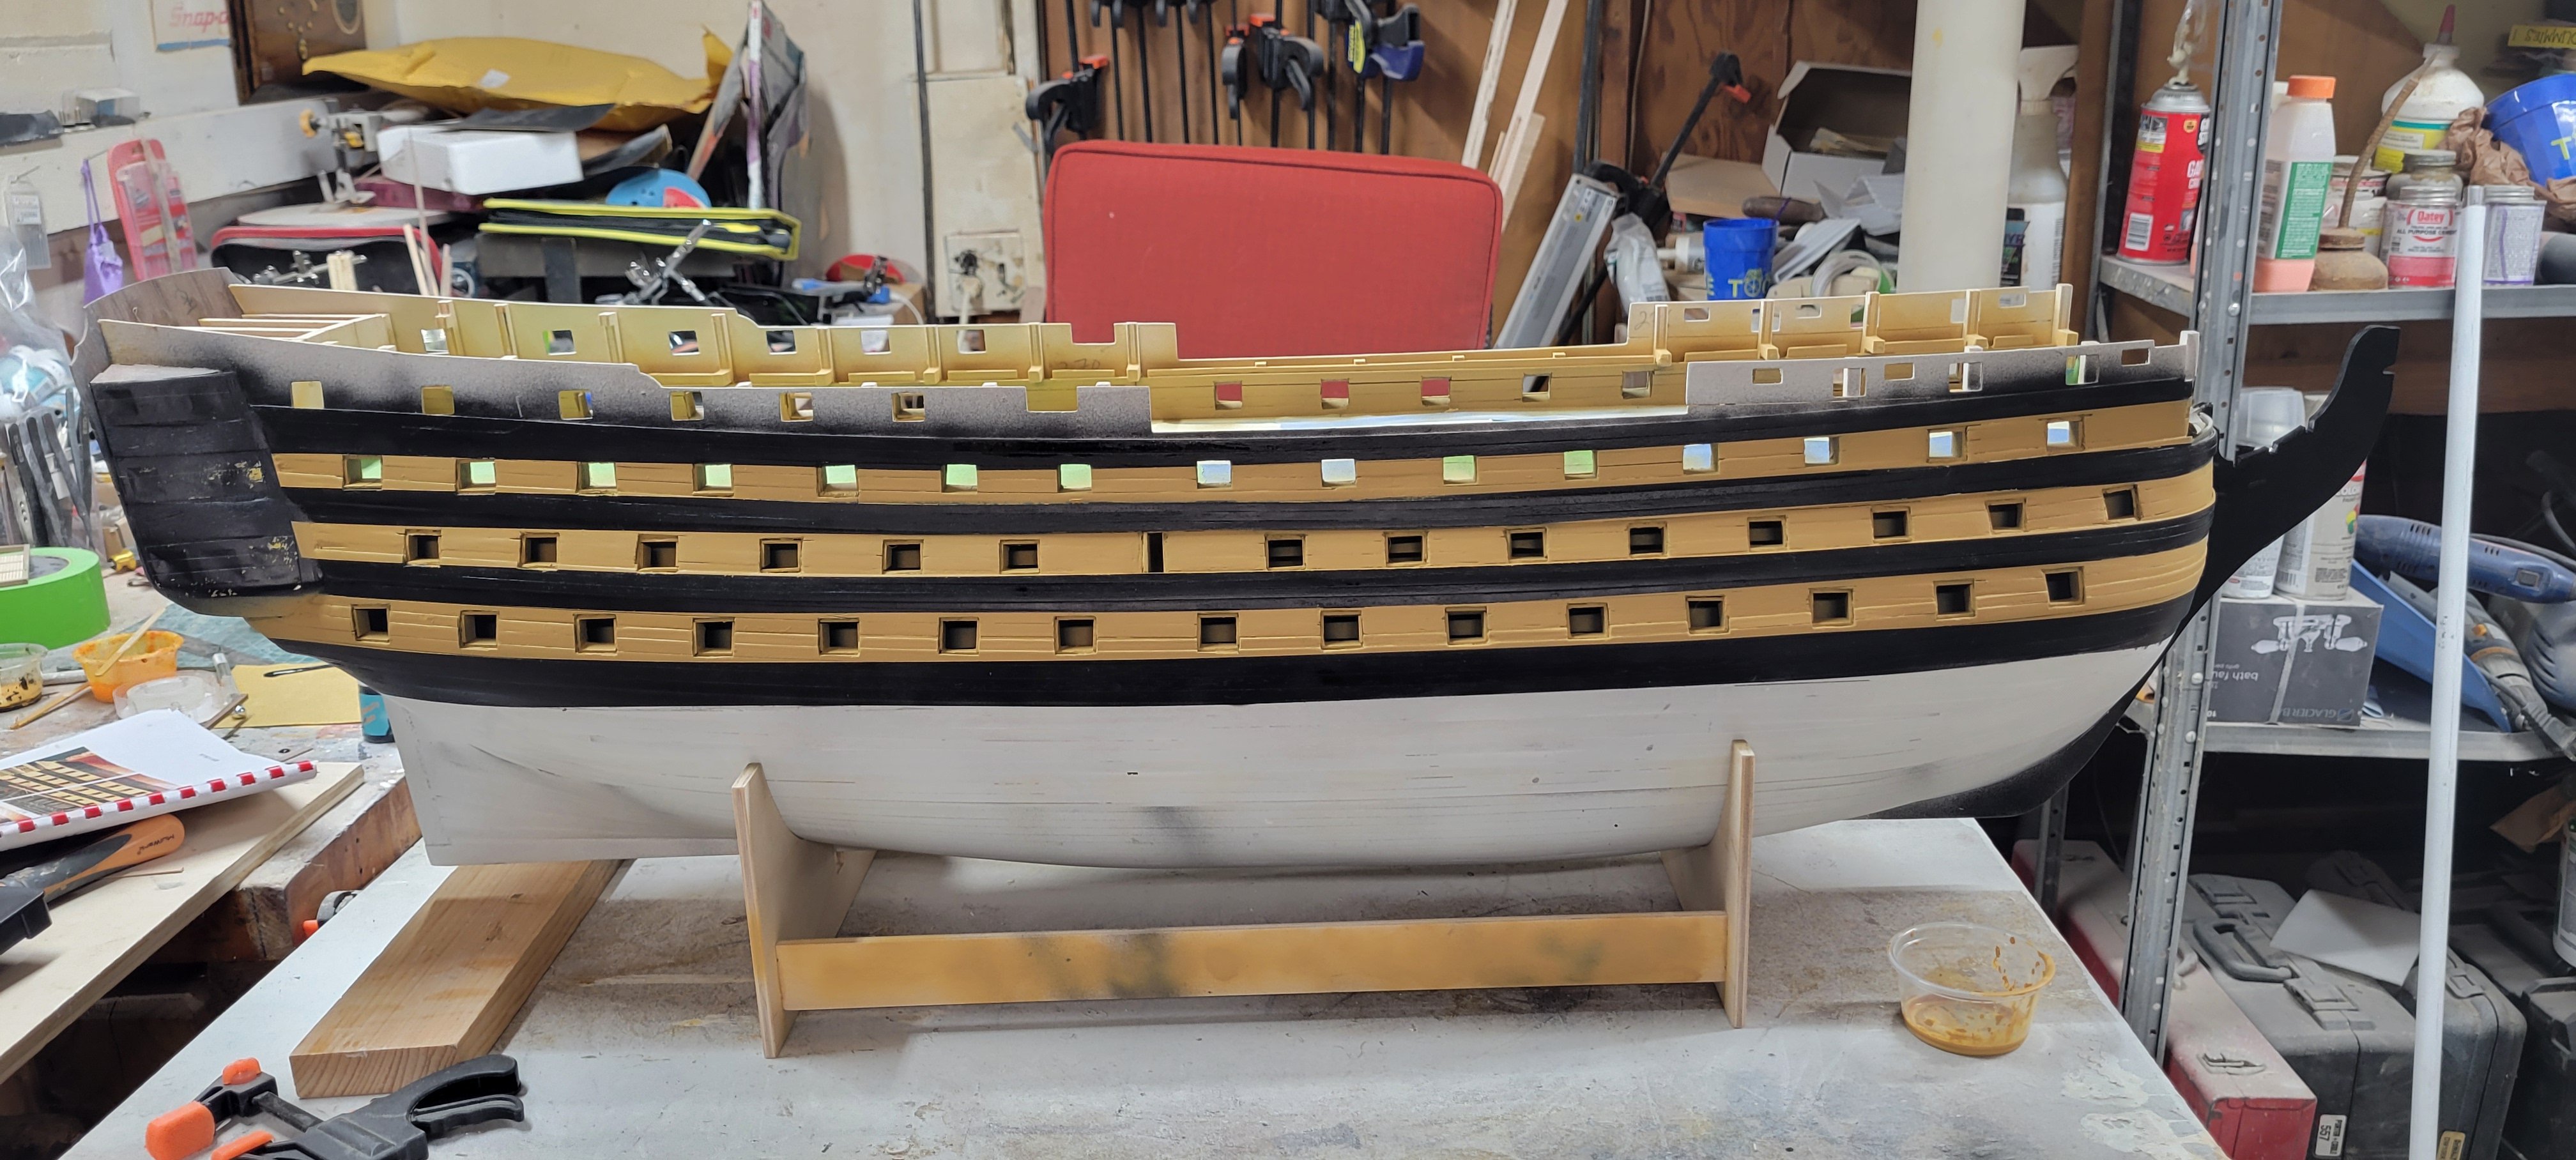
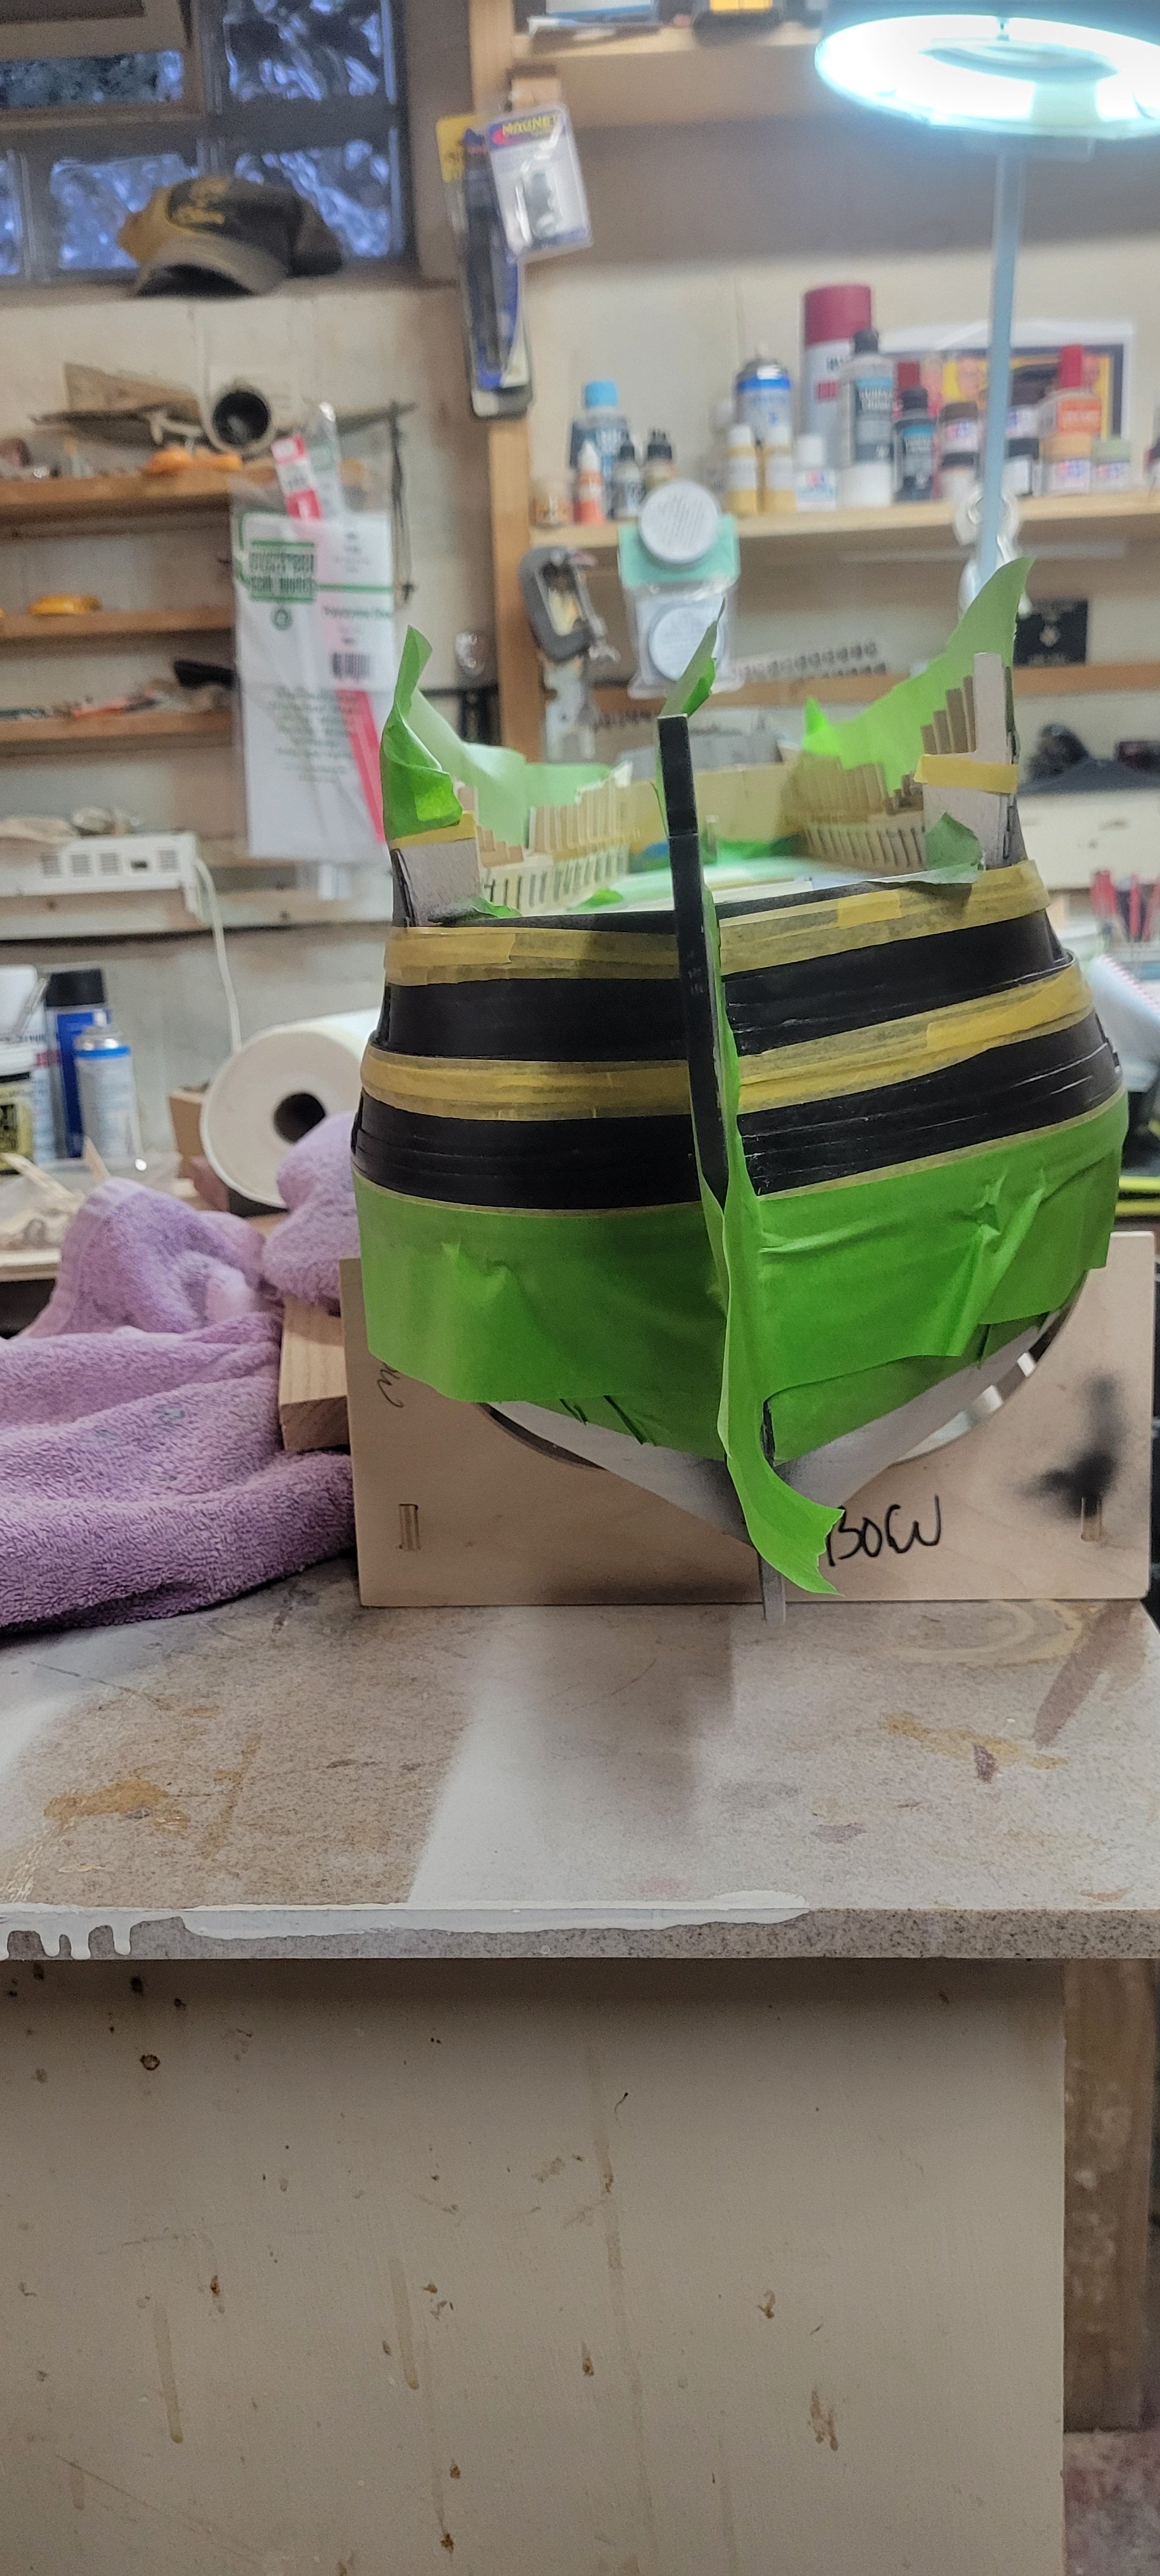
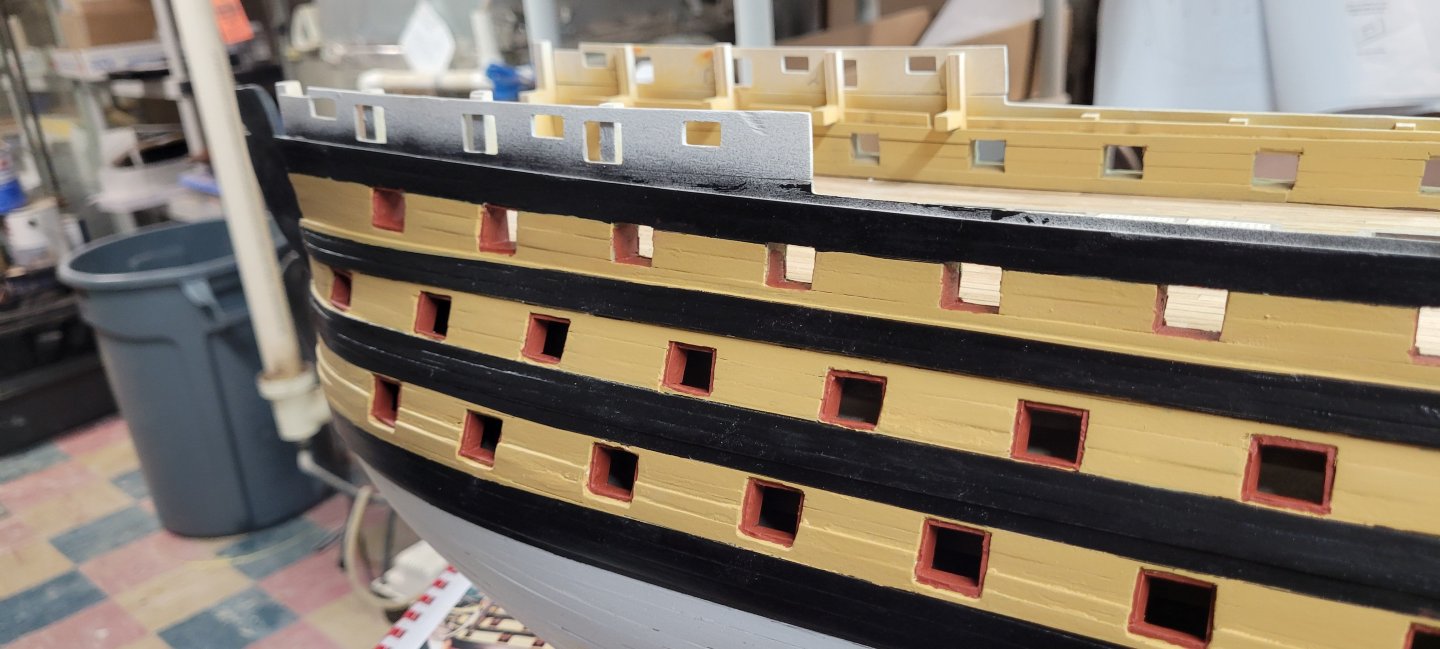
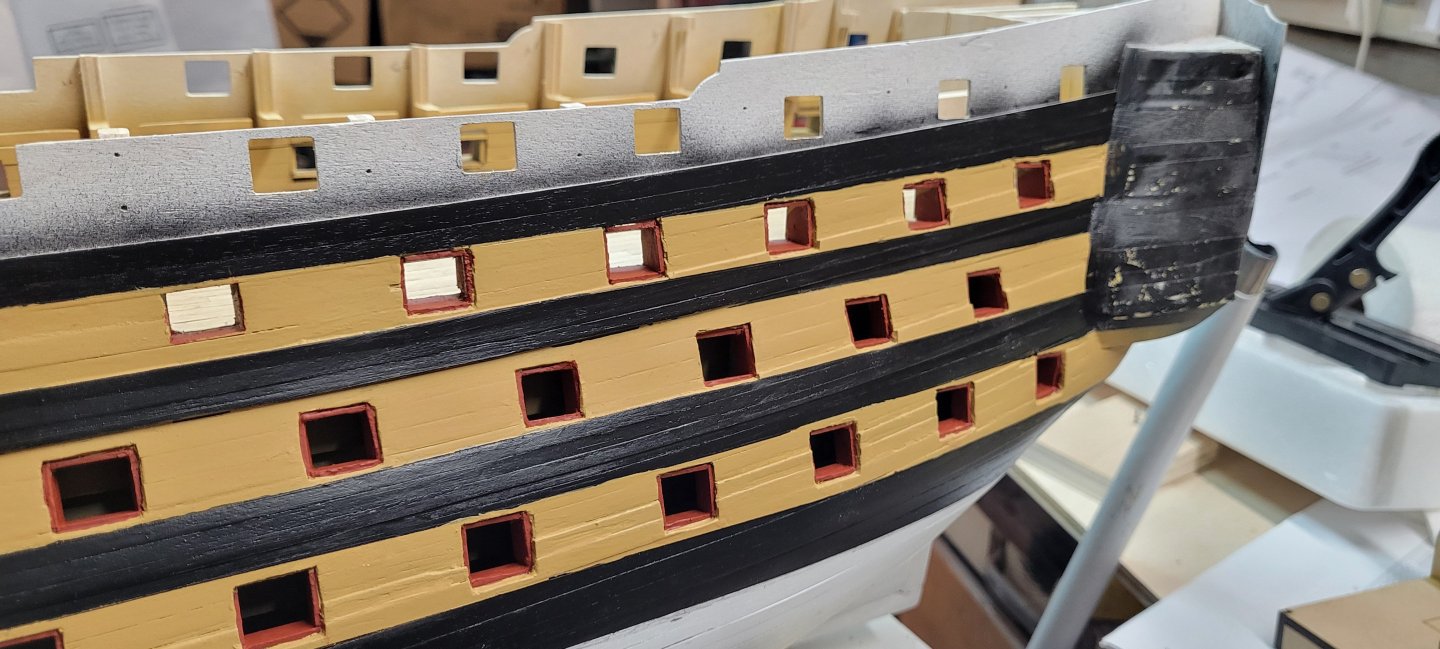
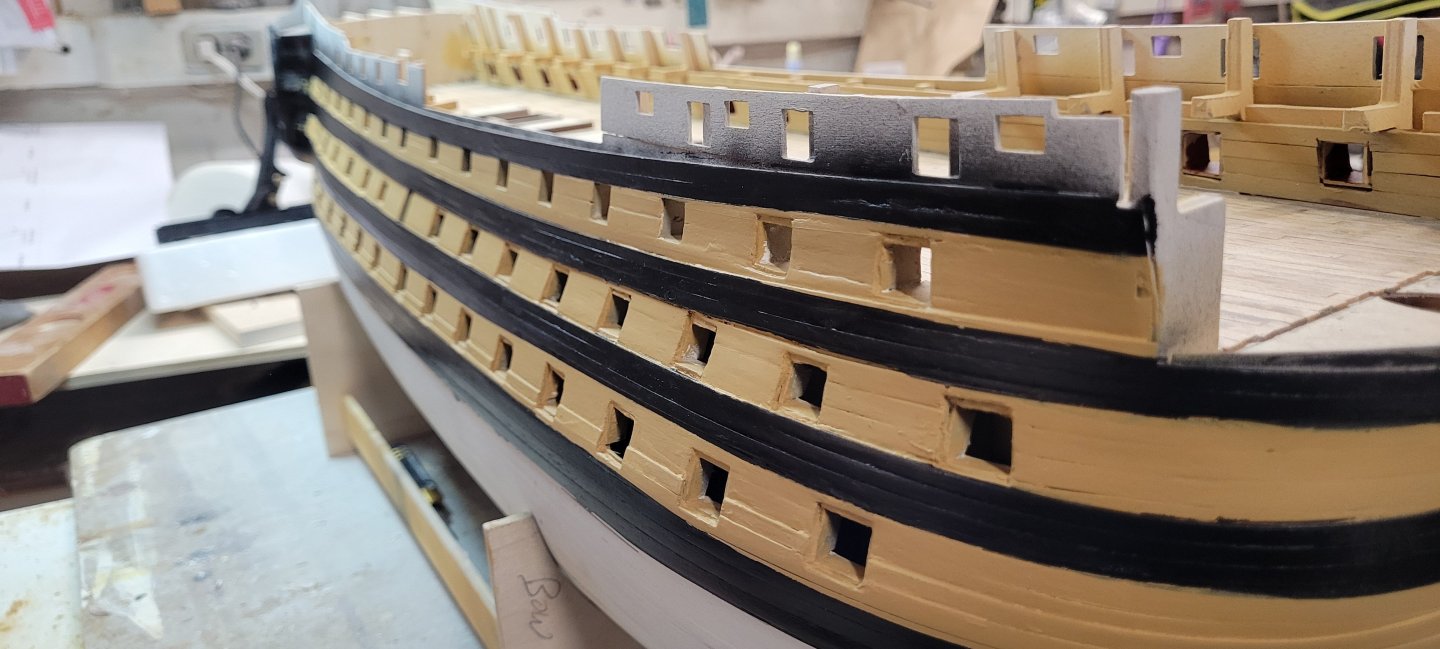
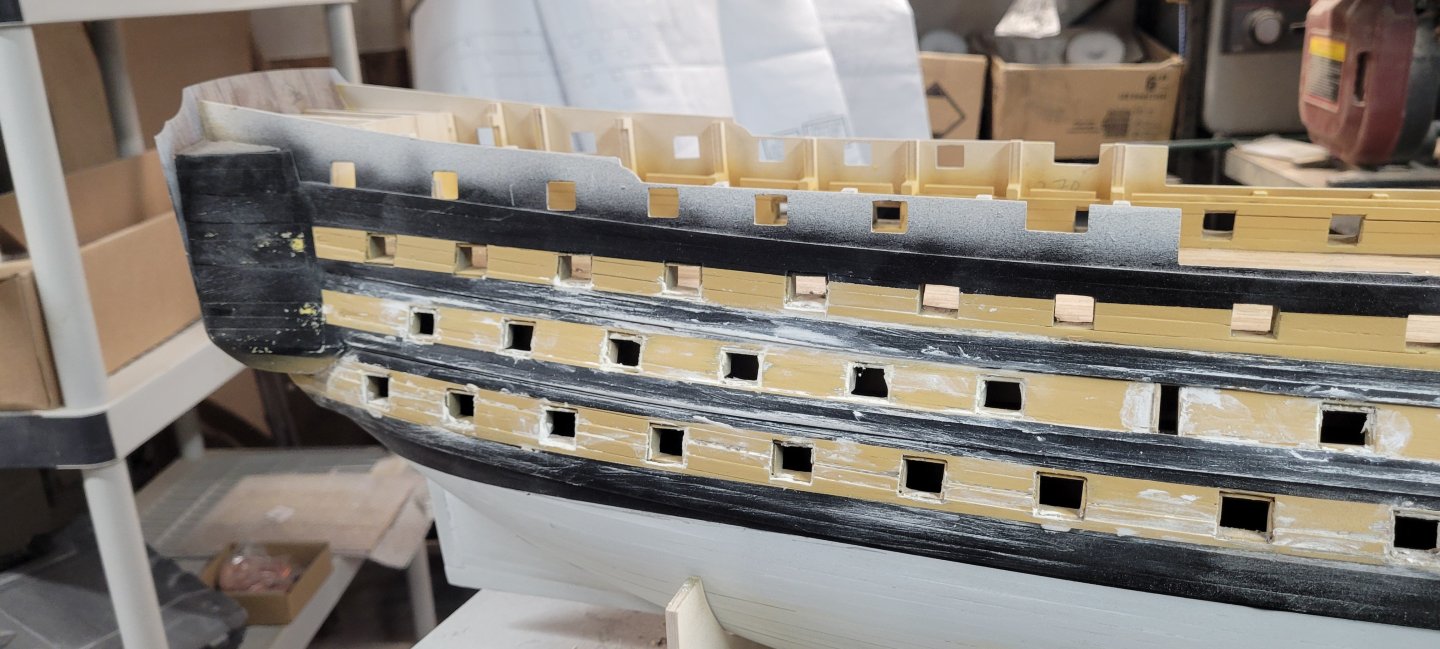
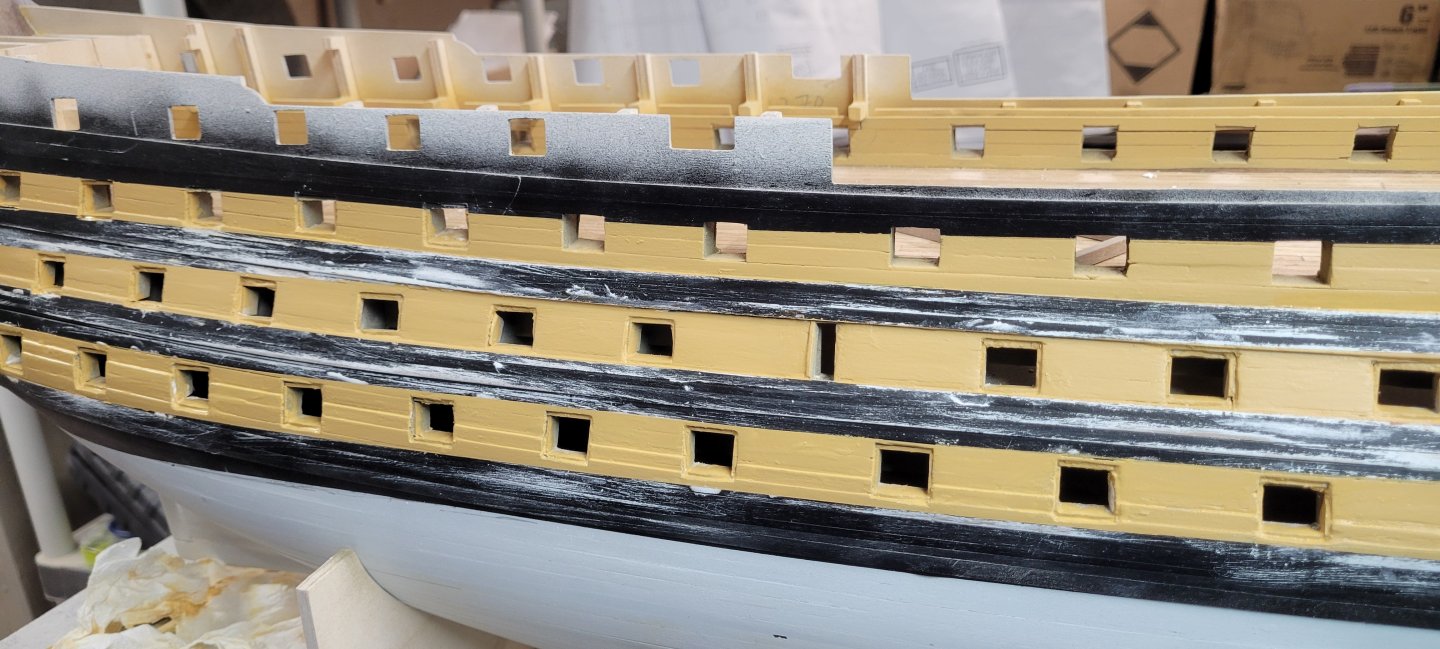
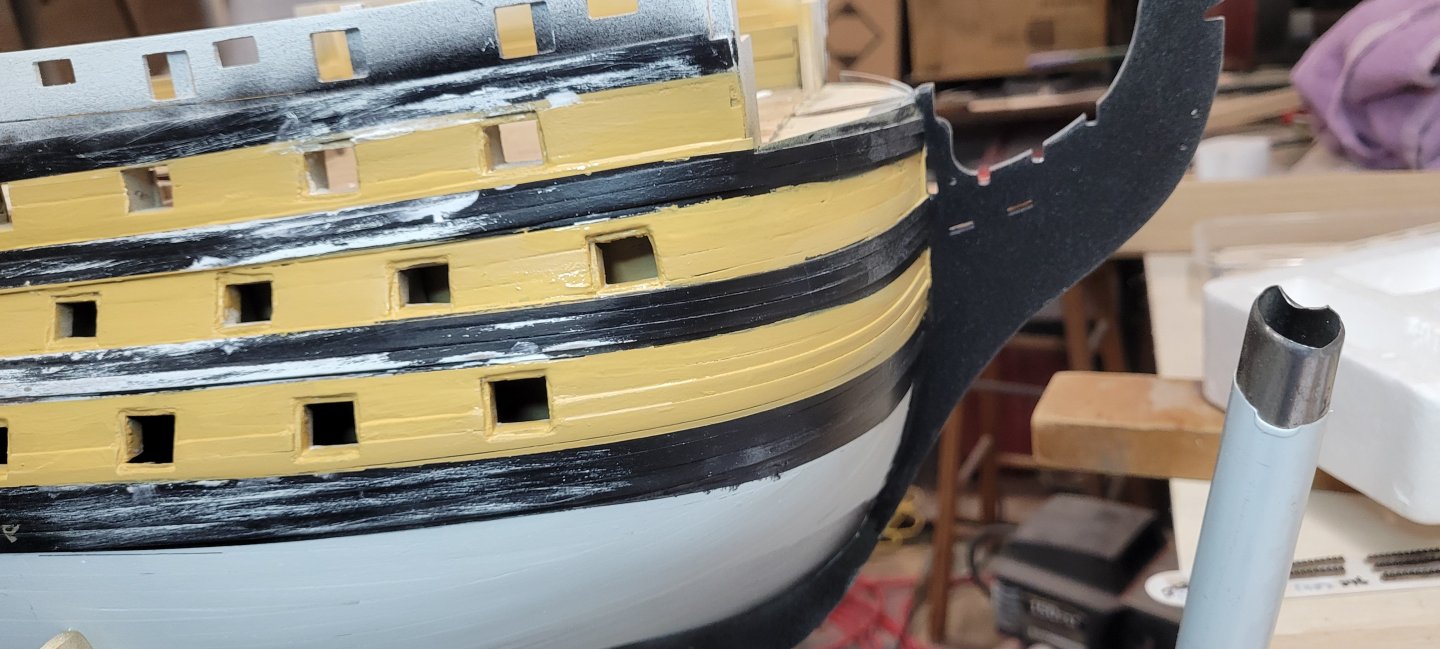
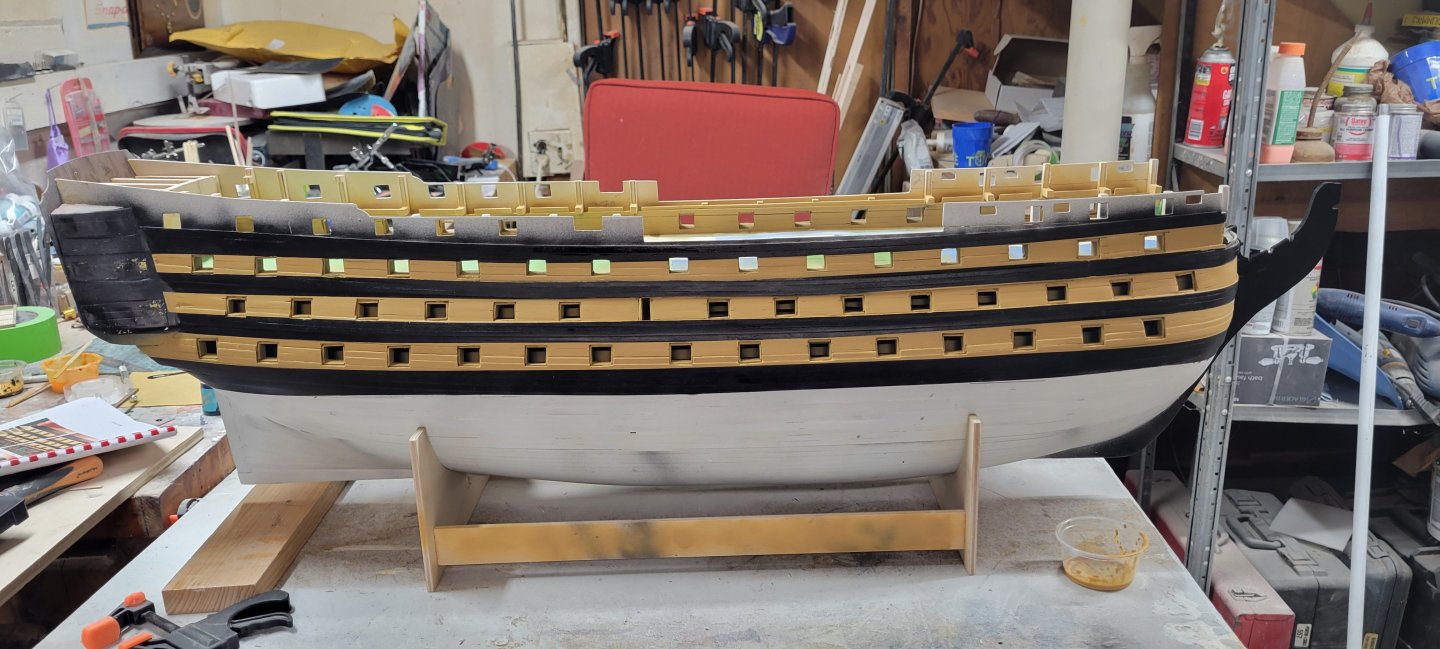
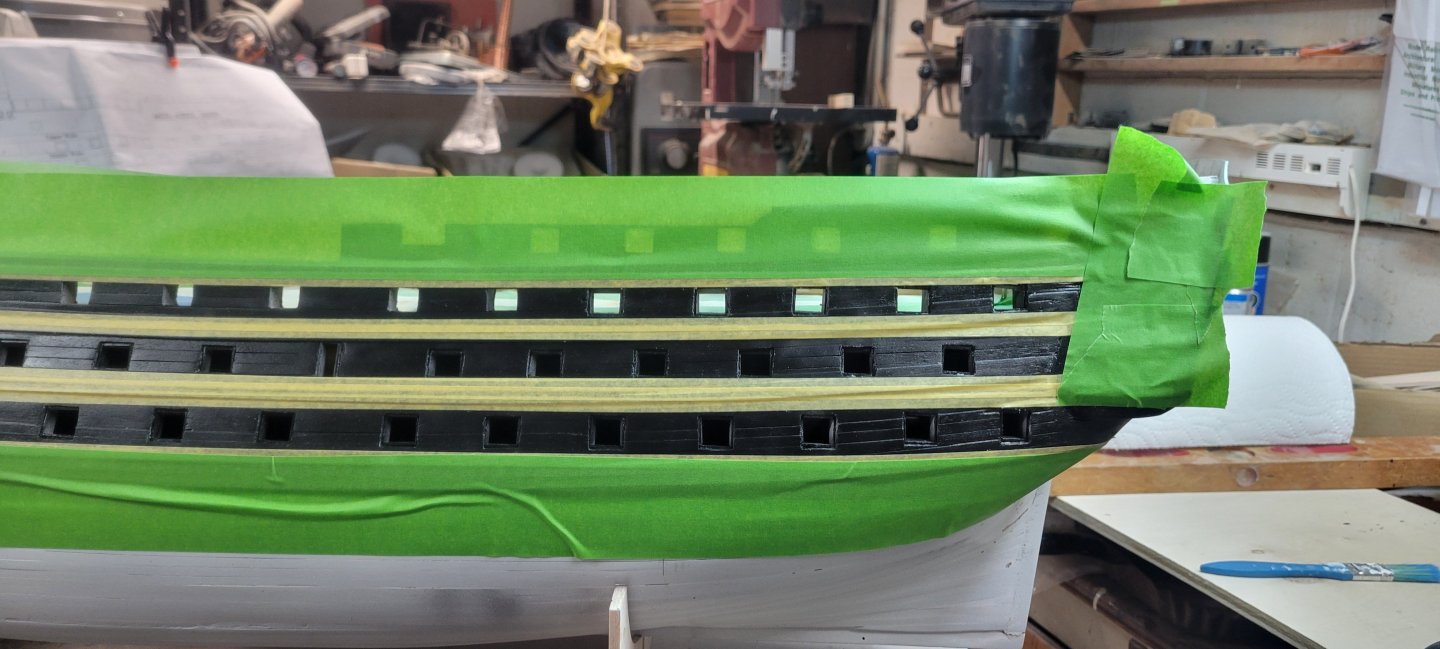
I added the red ochre to the port side gun liners. Again a little more paint touch up and another once over of the yellow and black and I think I am going to call the port side done. I will do the starboard side tomorrow.... Installed the coamings and gratings and they look fine...or grate?!!


-
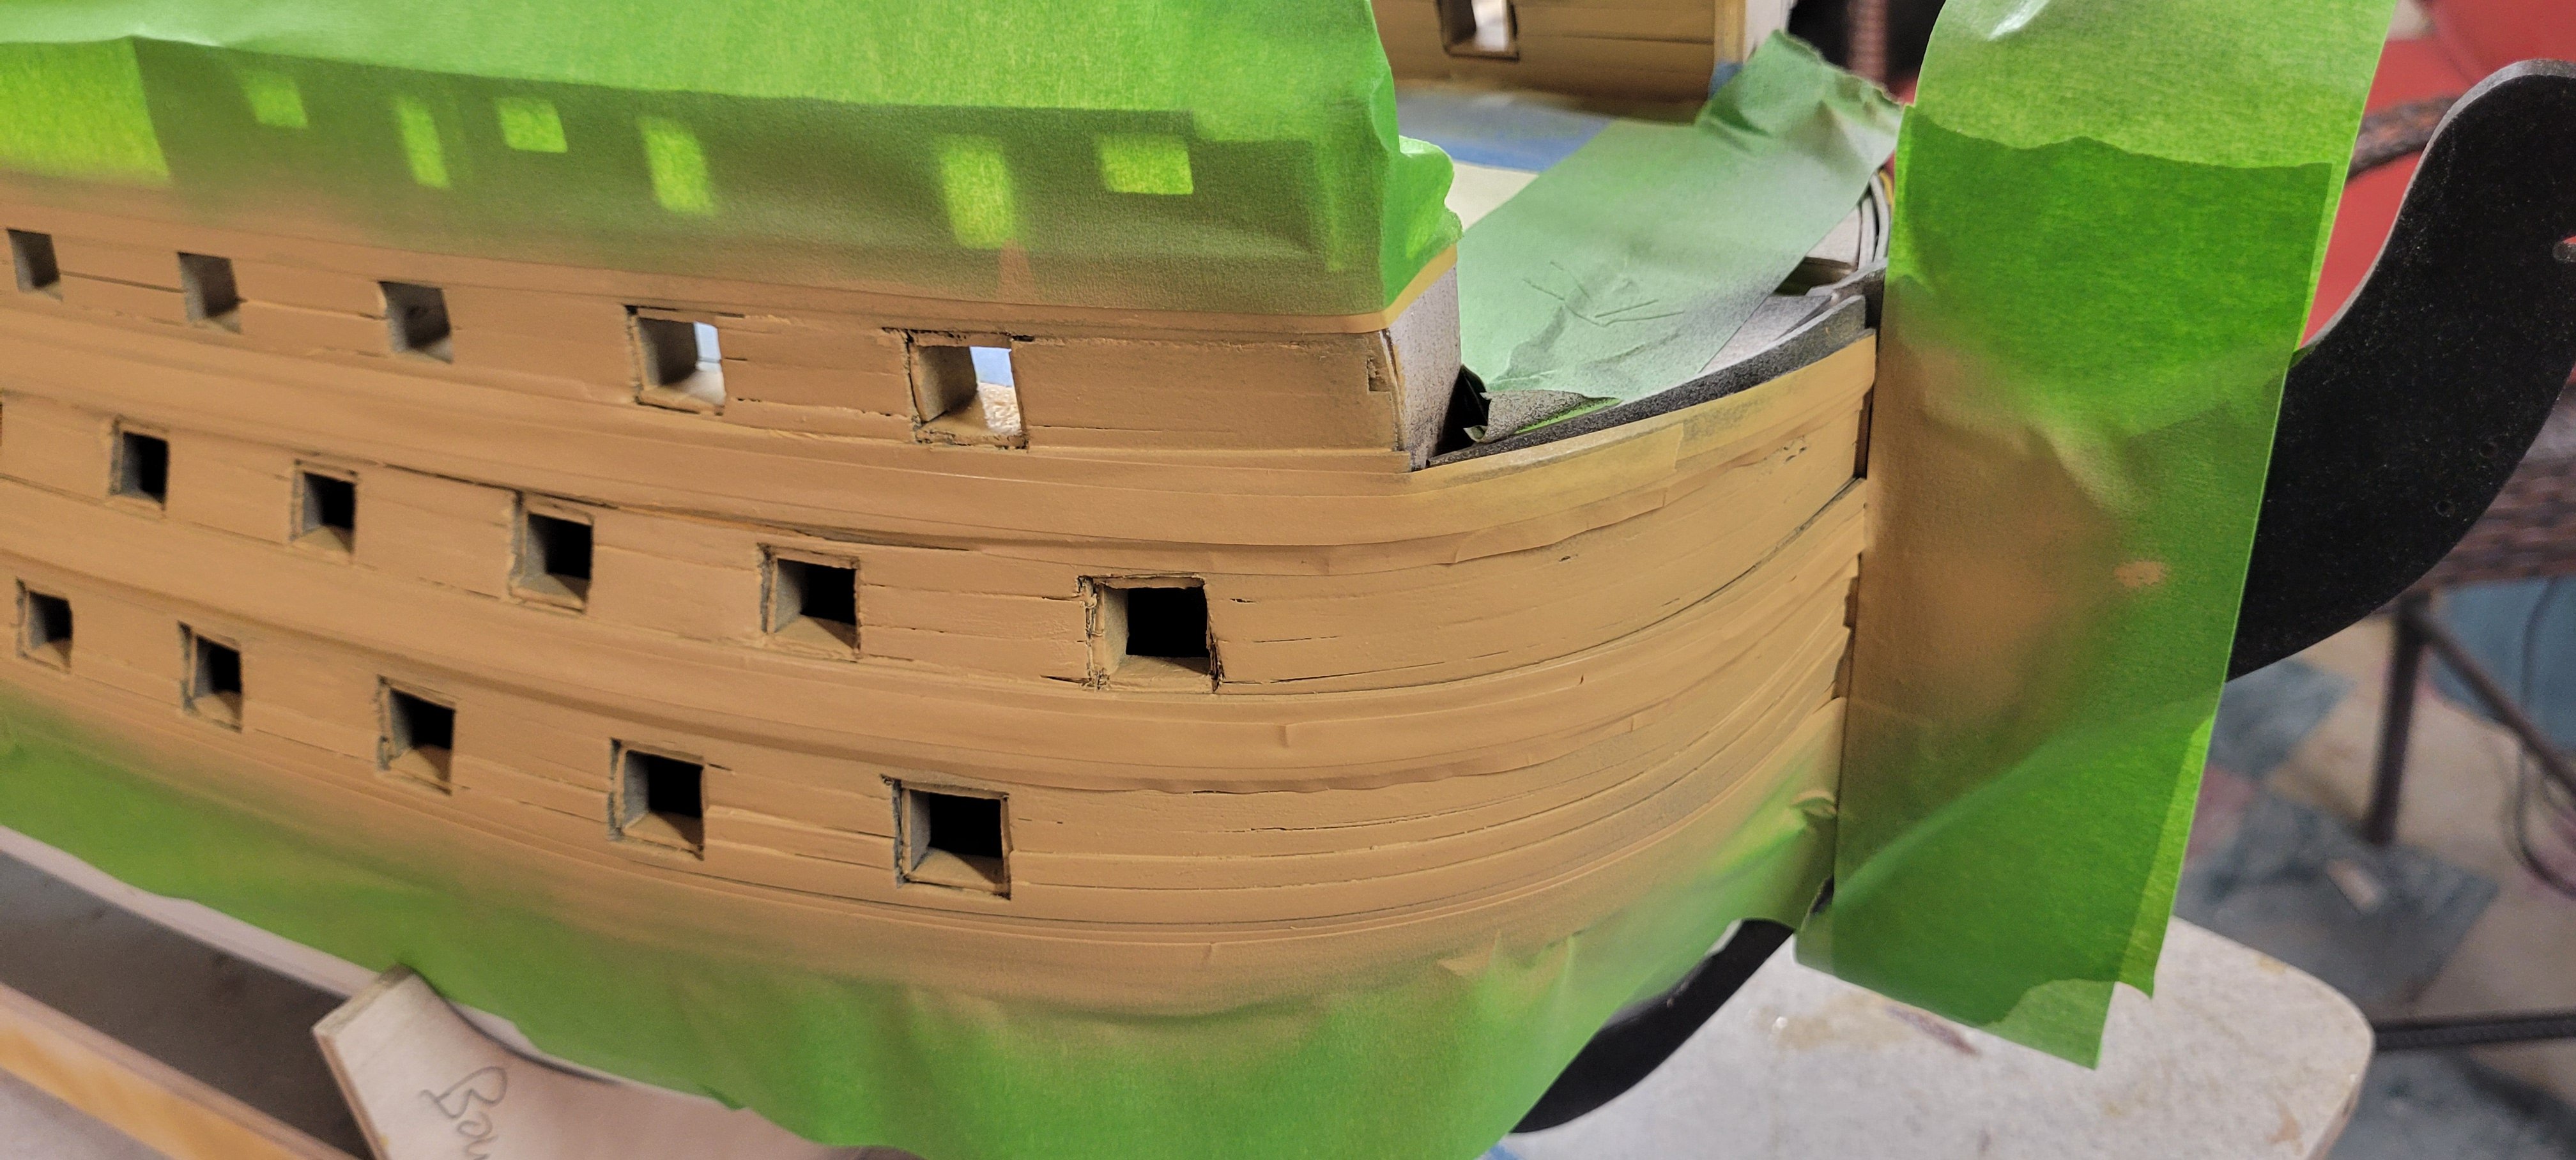
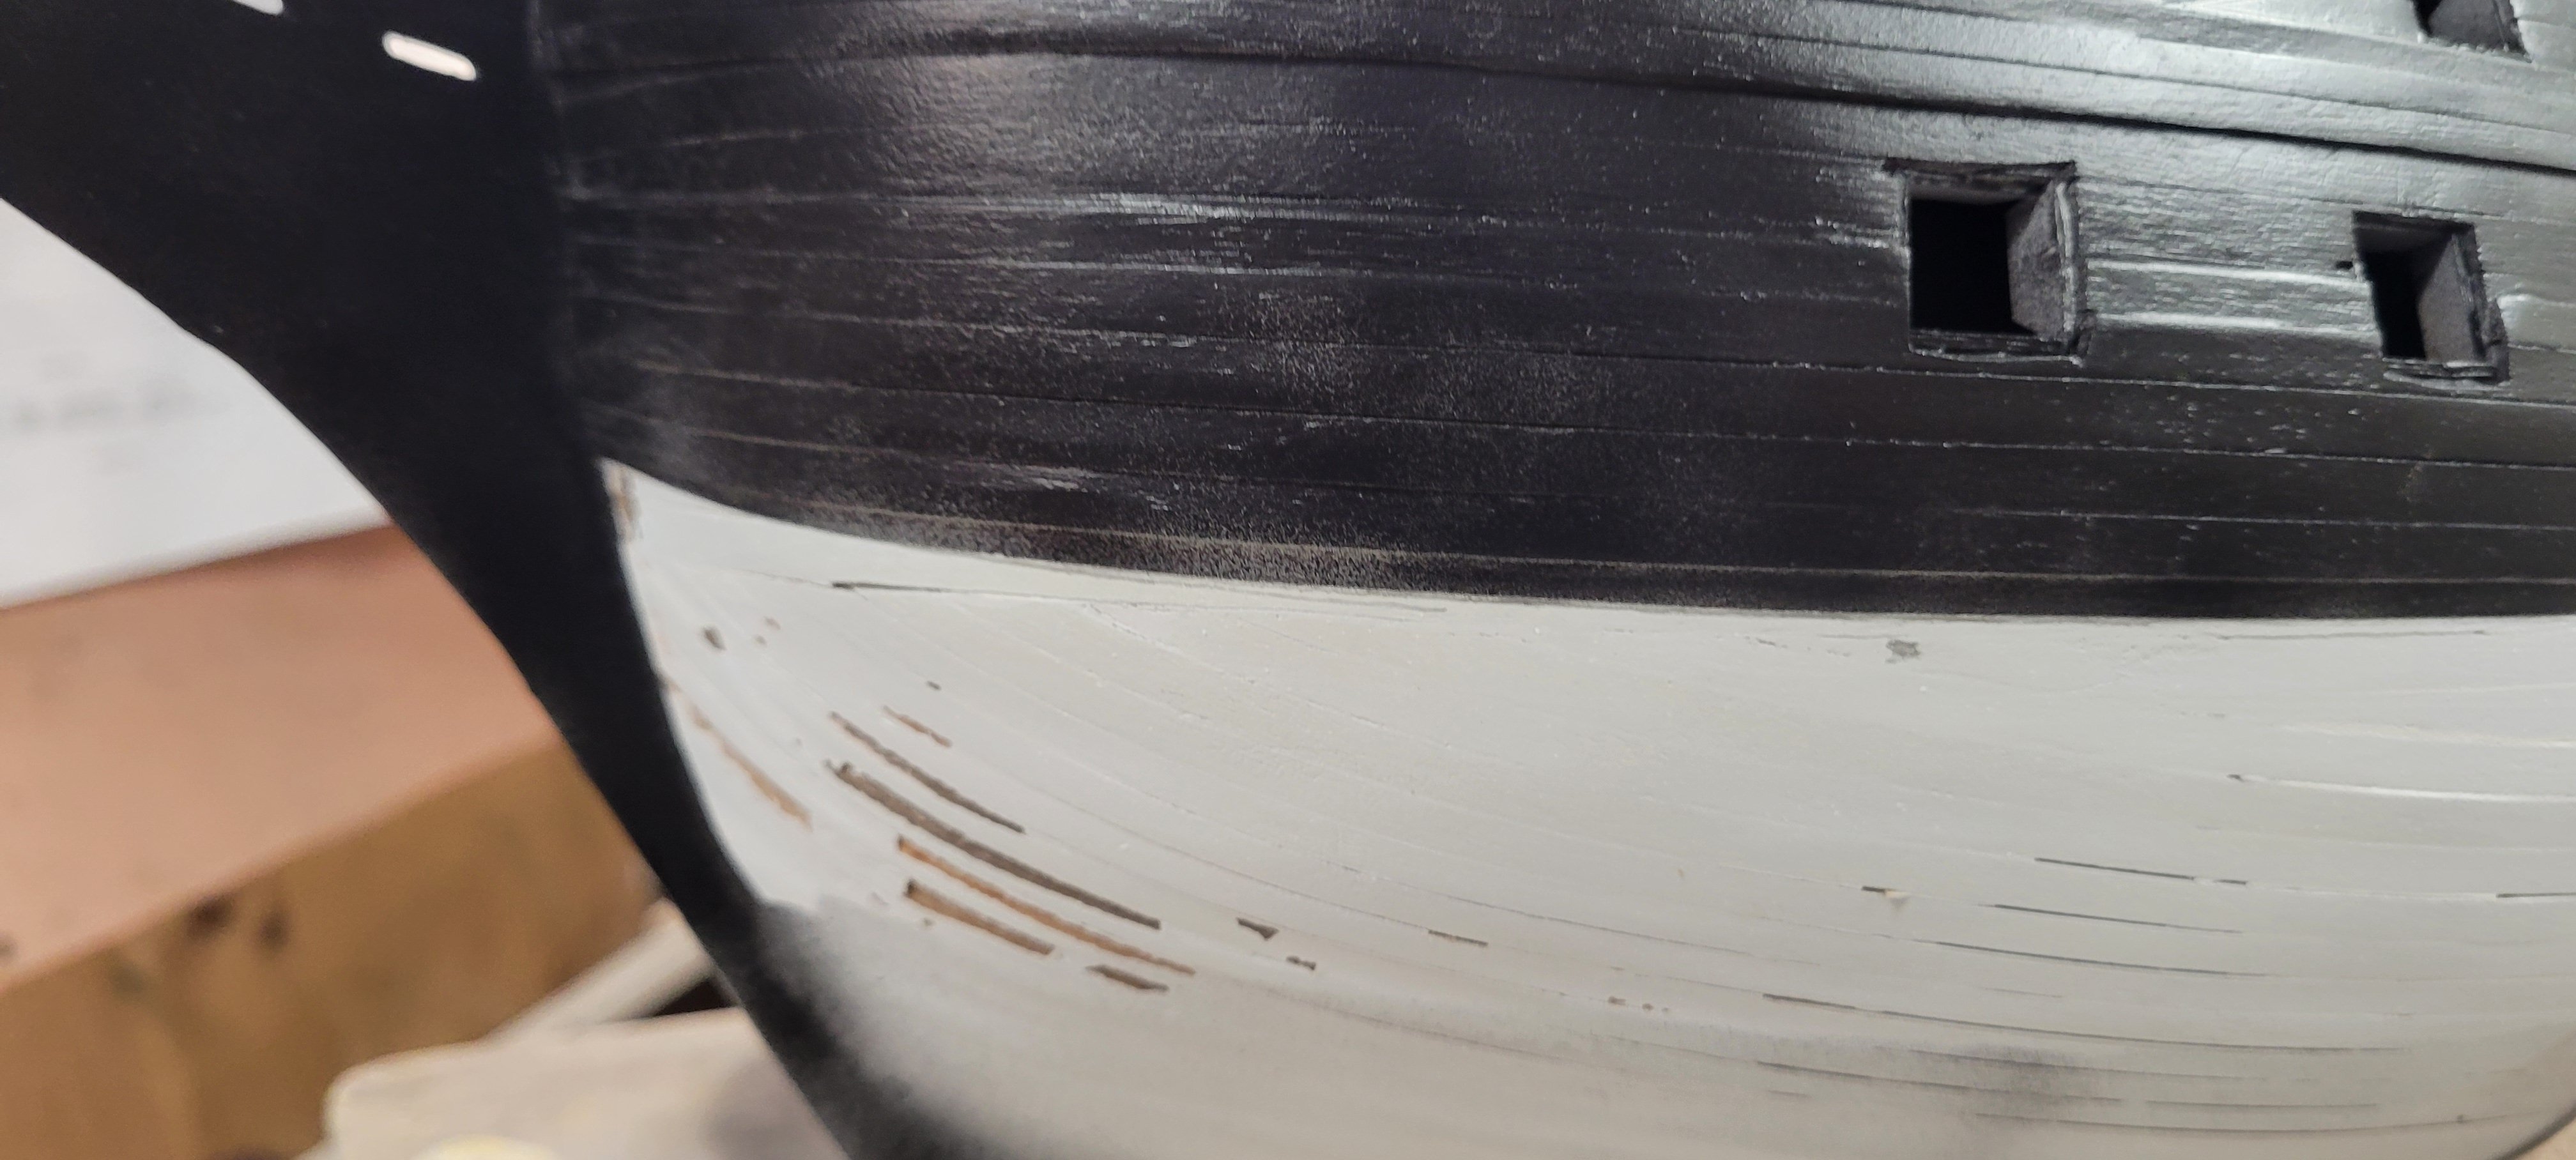
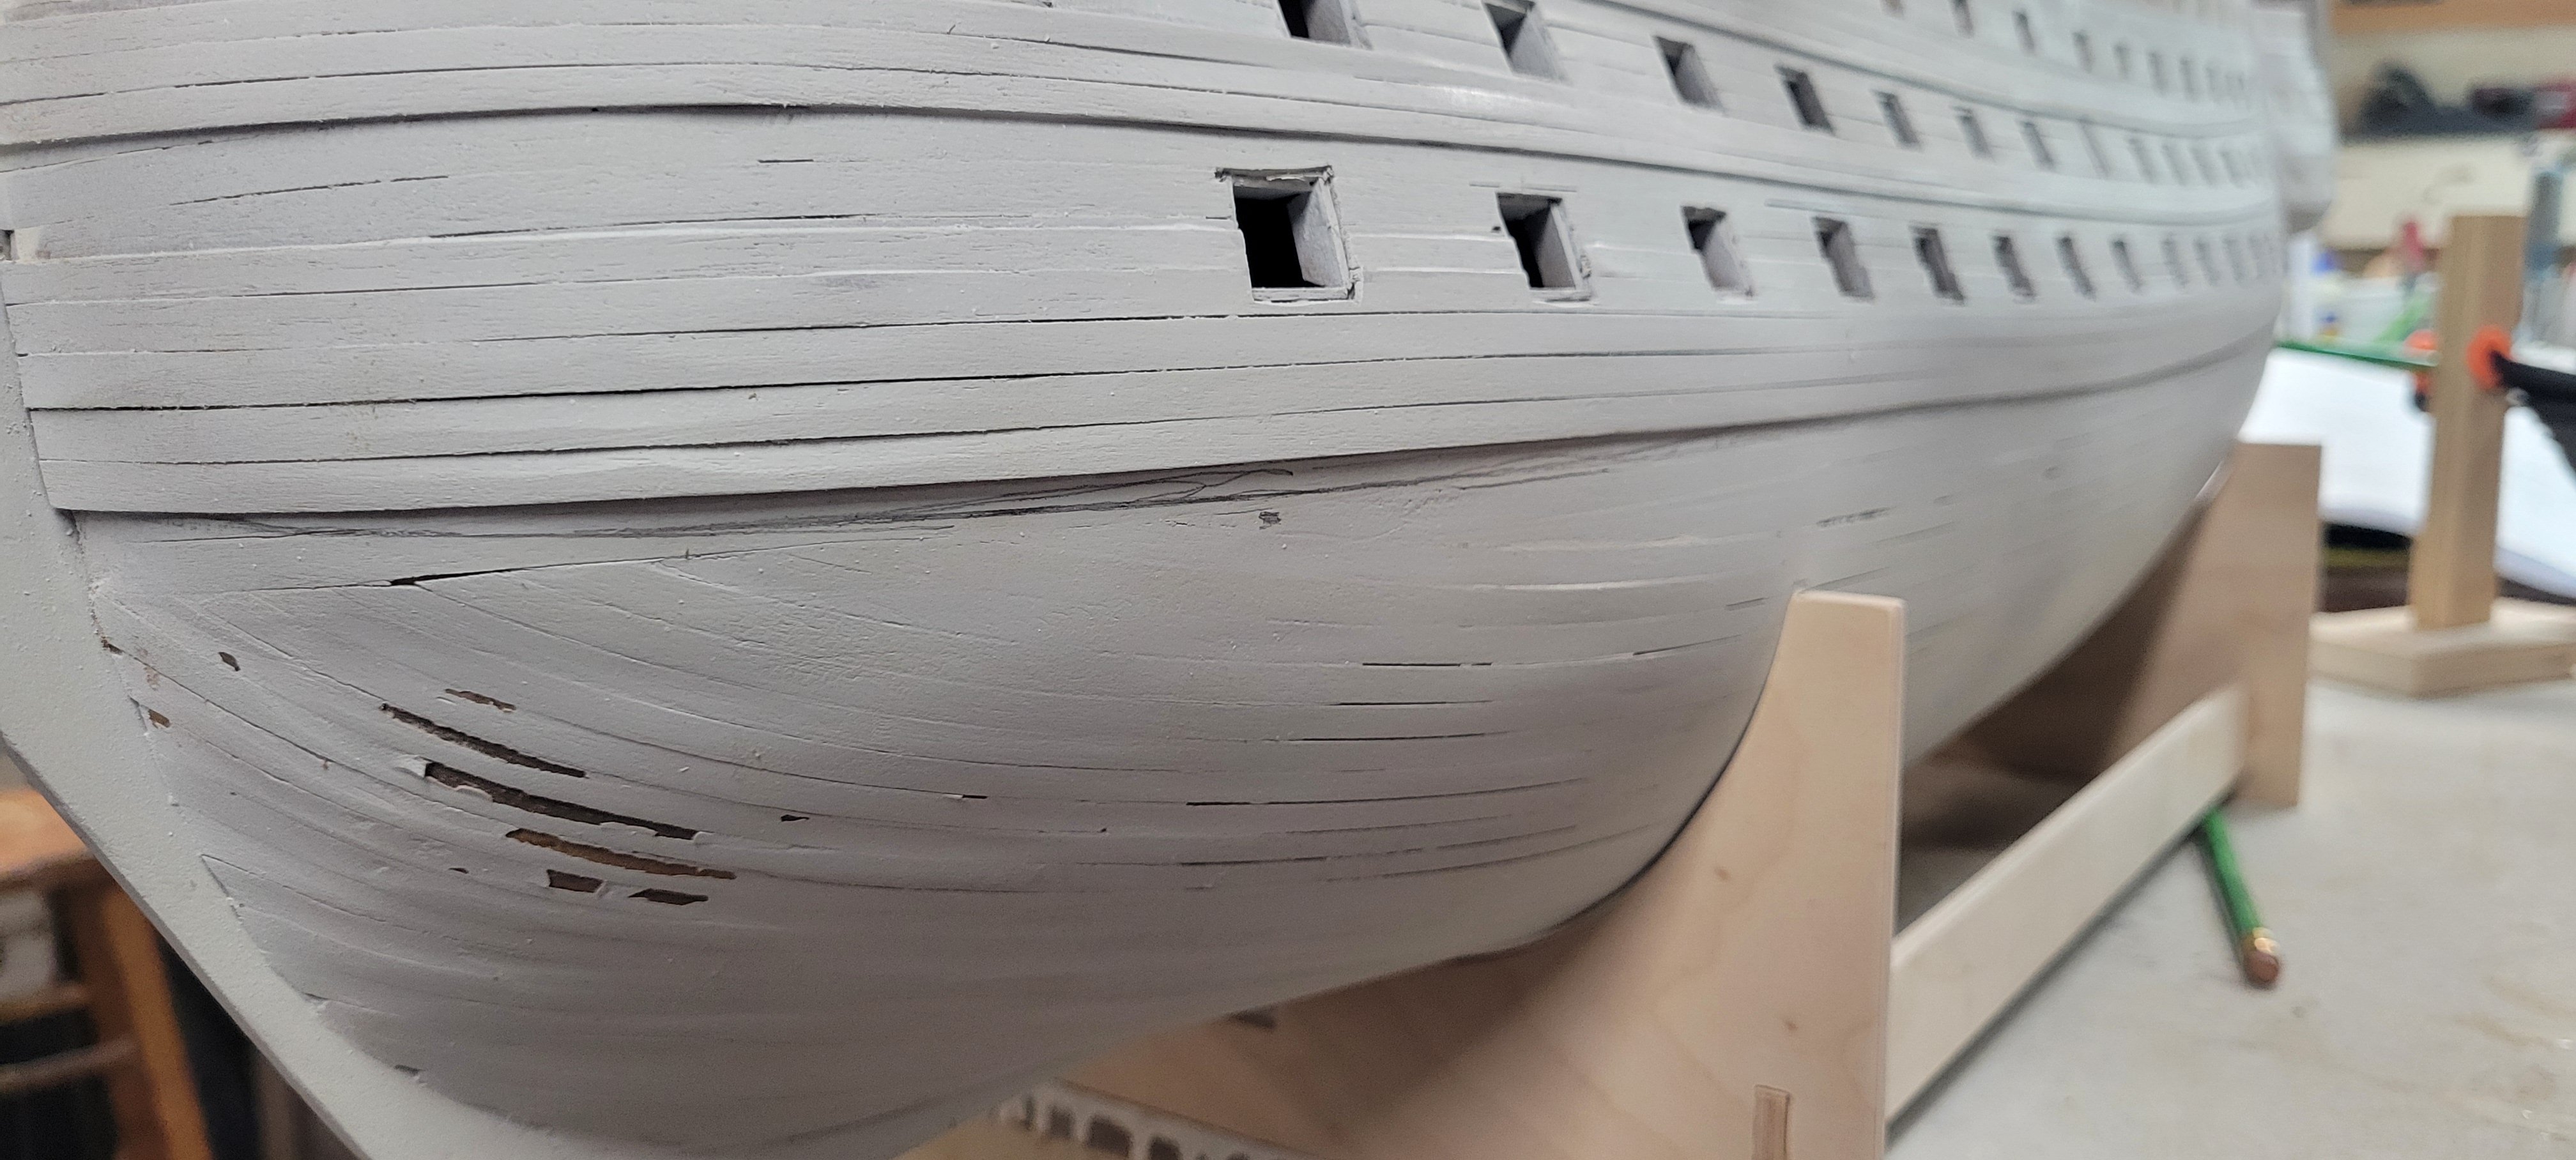
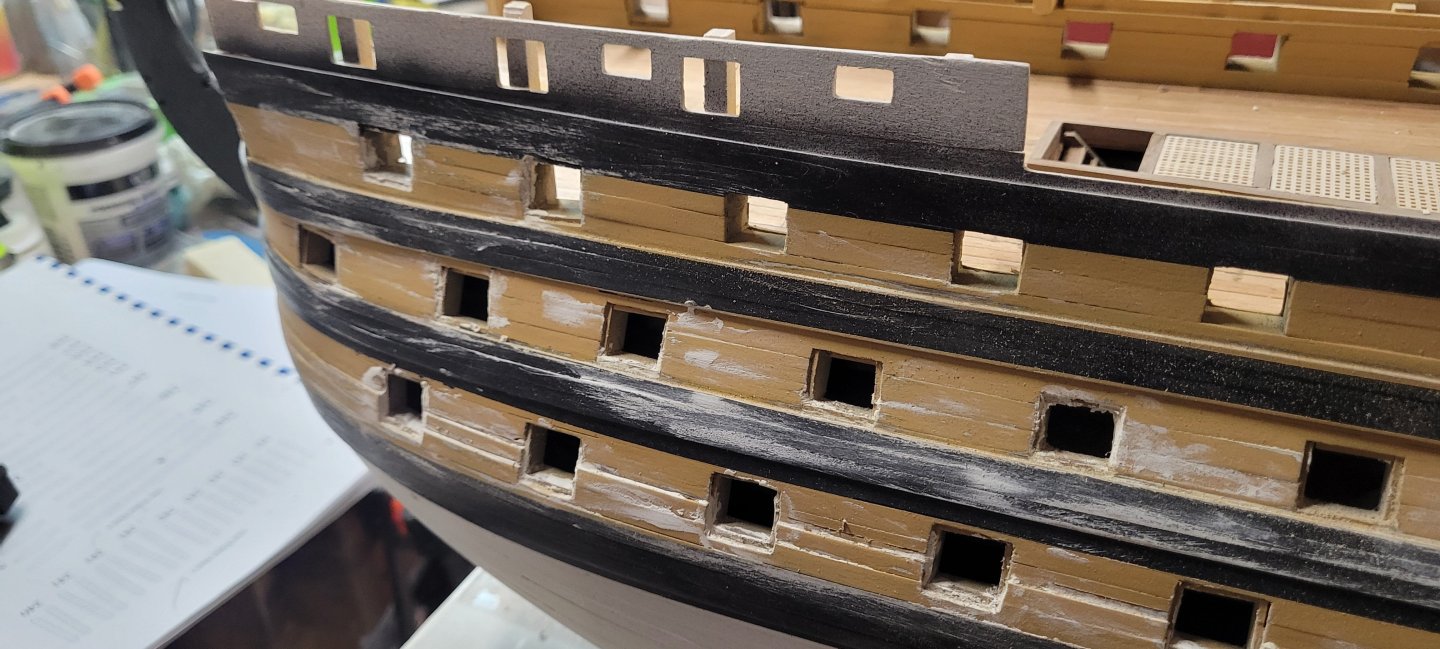
After the taping and painting which I did my brush this time, I was left with a little bit of leakage that I had to carefully touch up. Did it help? A little. Other than starting from scratch, ripping all the wales and lids away, sanding smooth and starting again, this was my only choice.

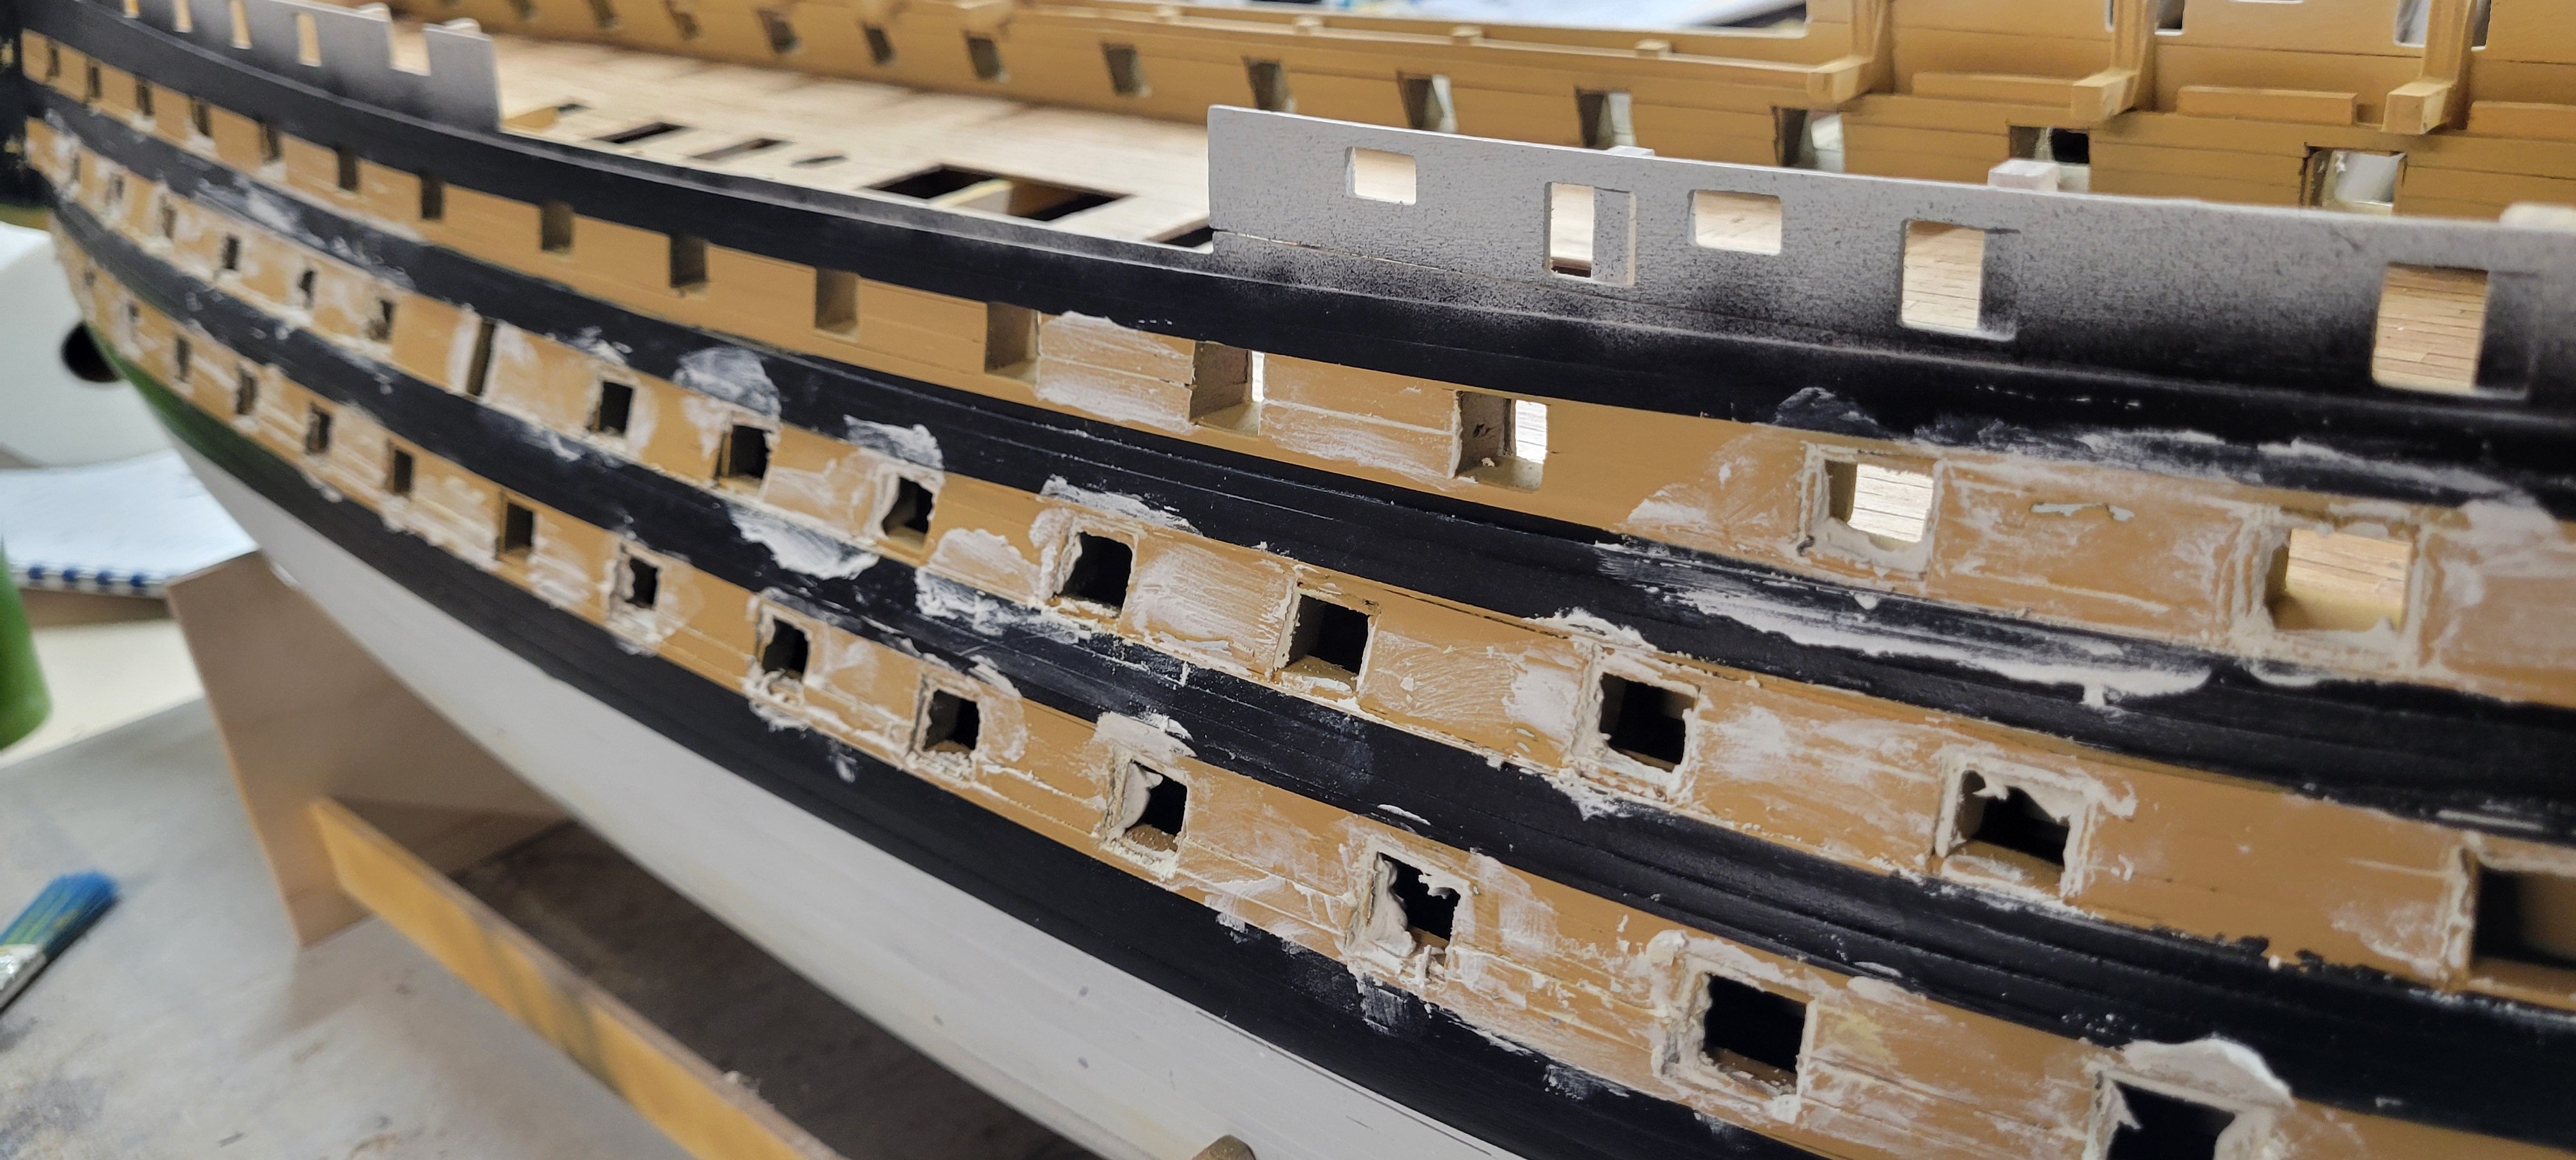
-
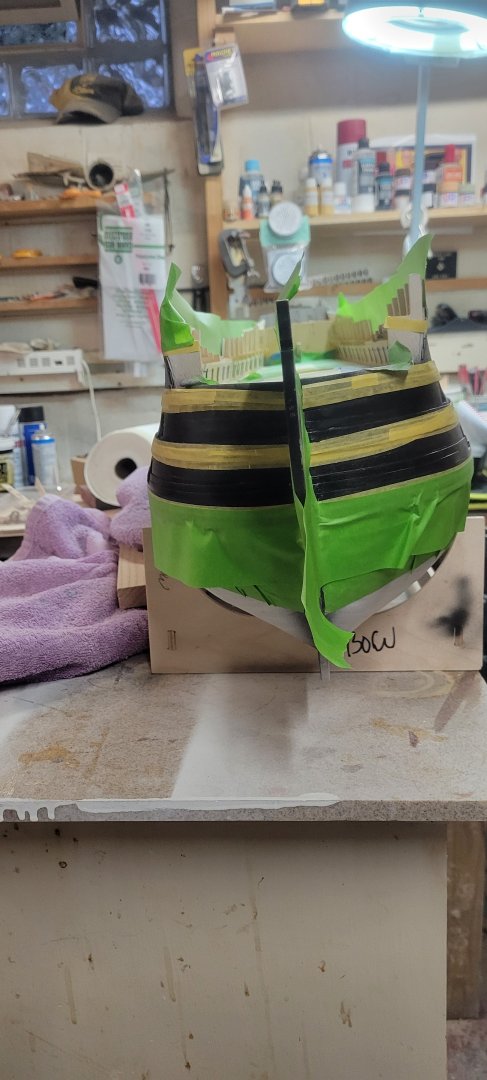
So after stressing and mulling, I broke out my filler and went crazy. I bought little sanding 'sticks' with the sanding material glued to the ends and filled every gap and crevice I could find. Then sanding, sanding and more sanding. Once done, I had to re-tape everything, painting the yellow ochre then waiting for it to dry and doing the black.


-
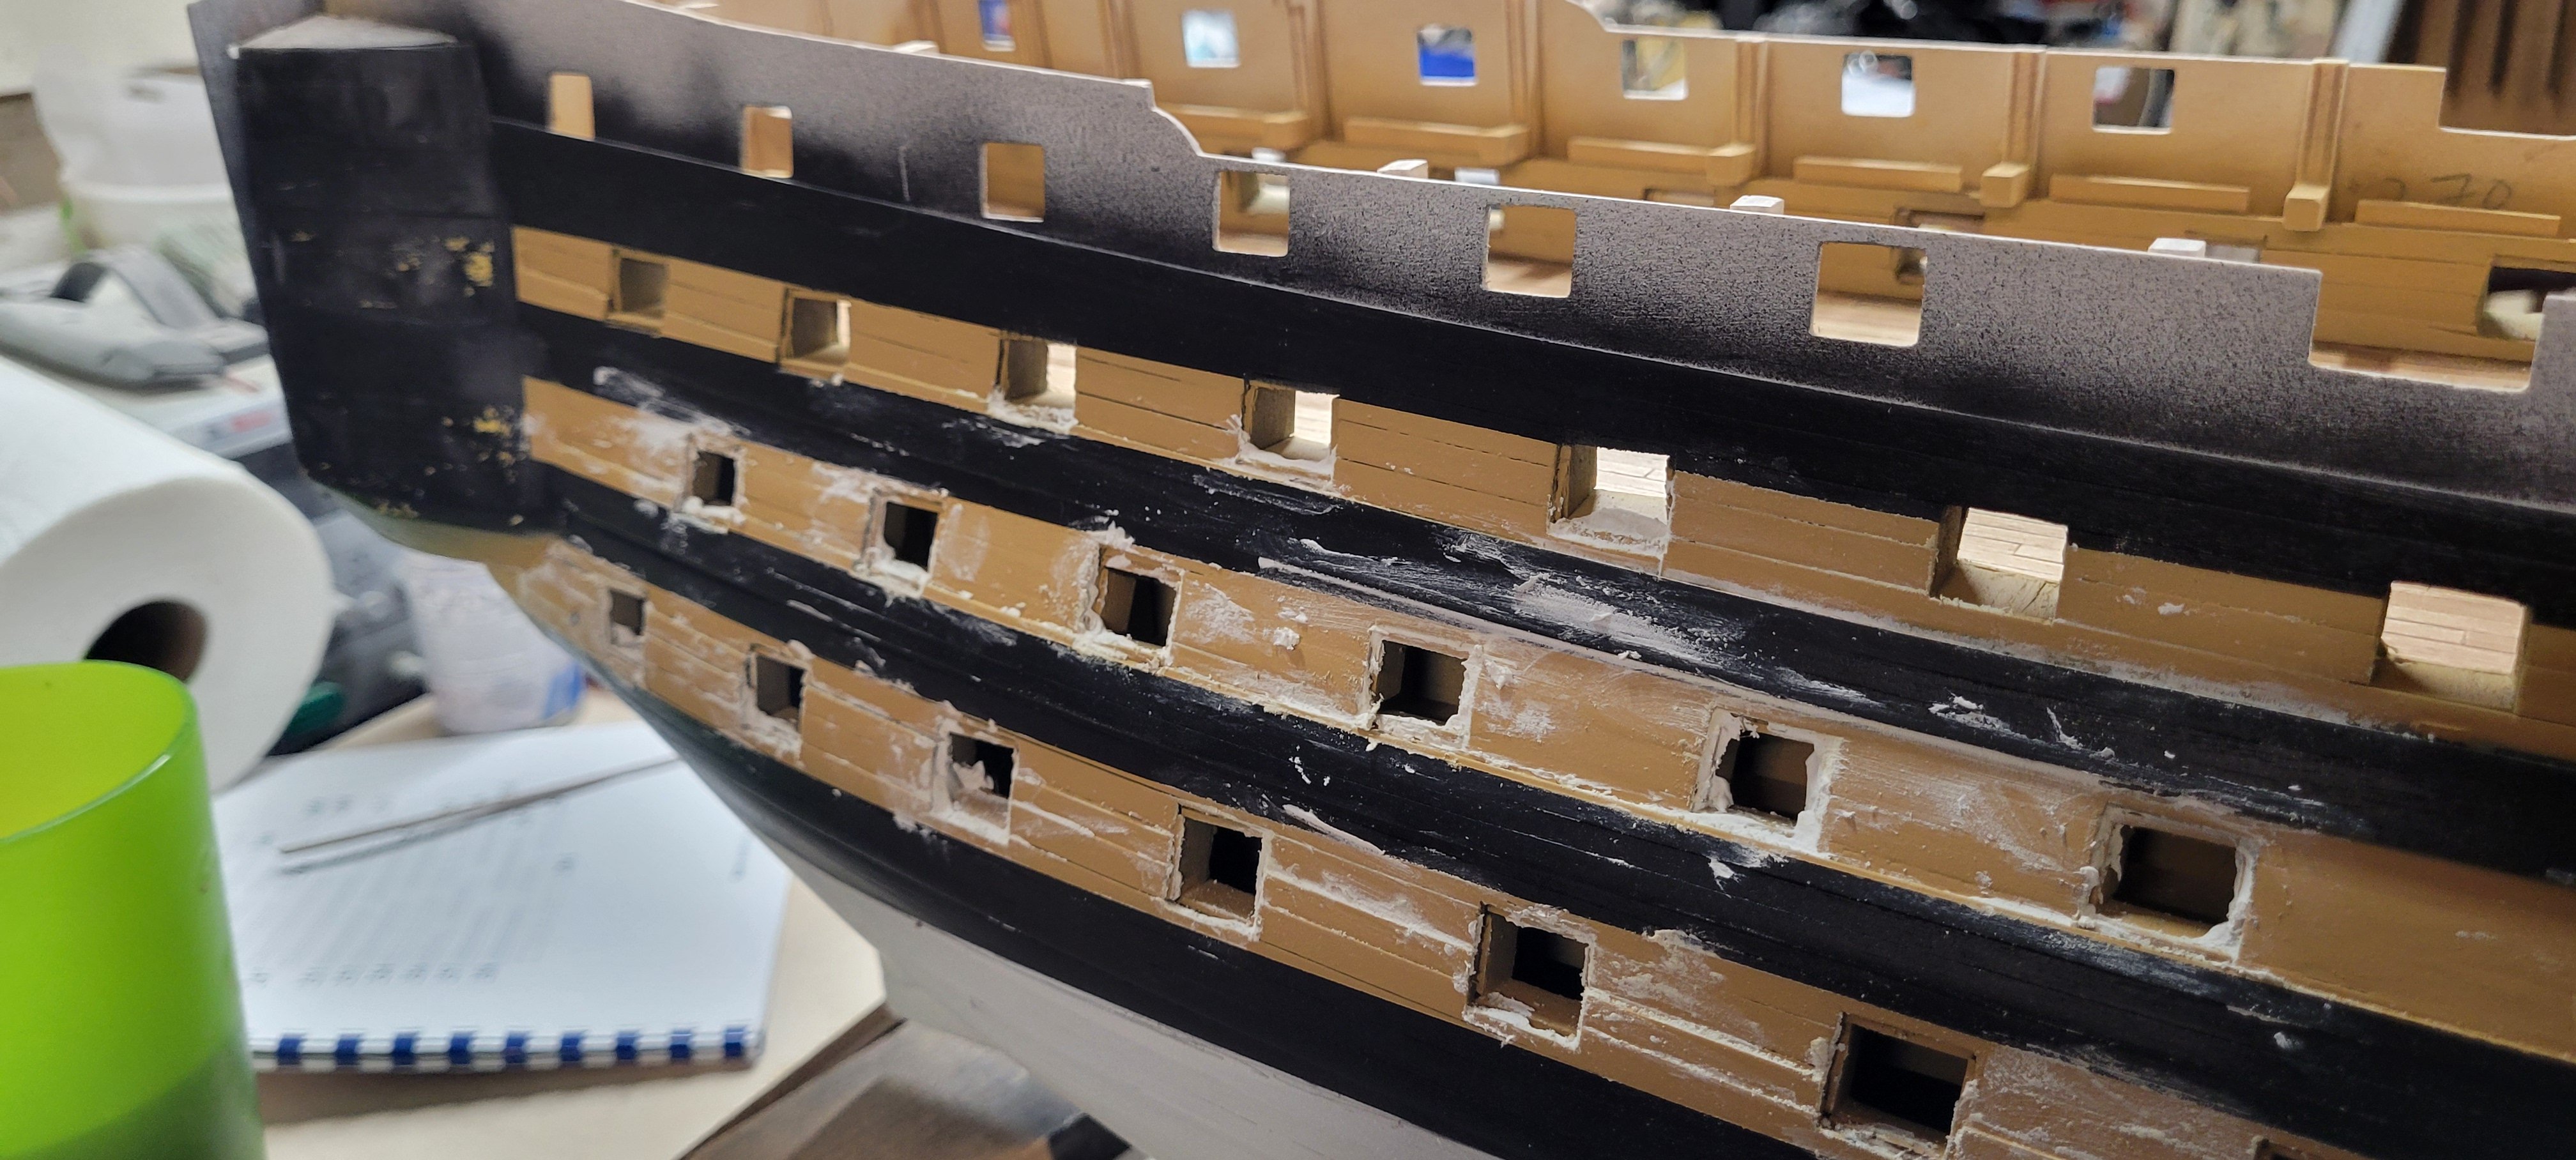
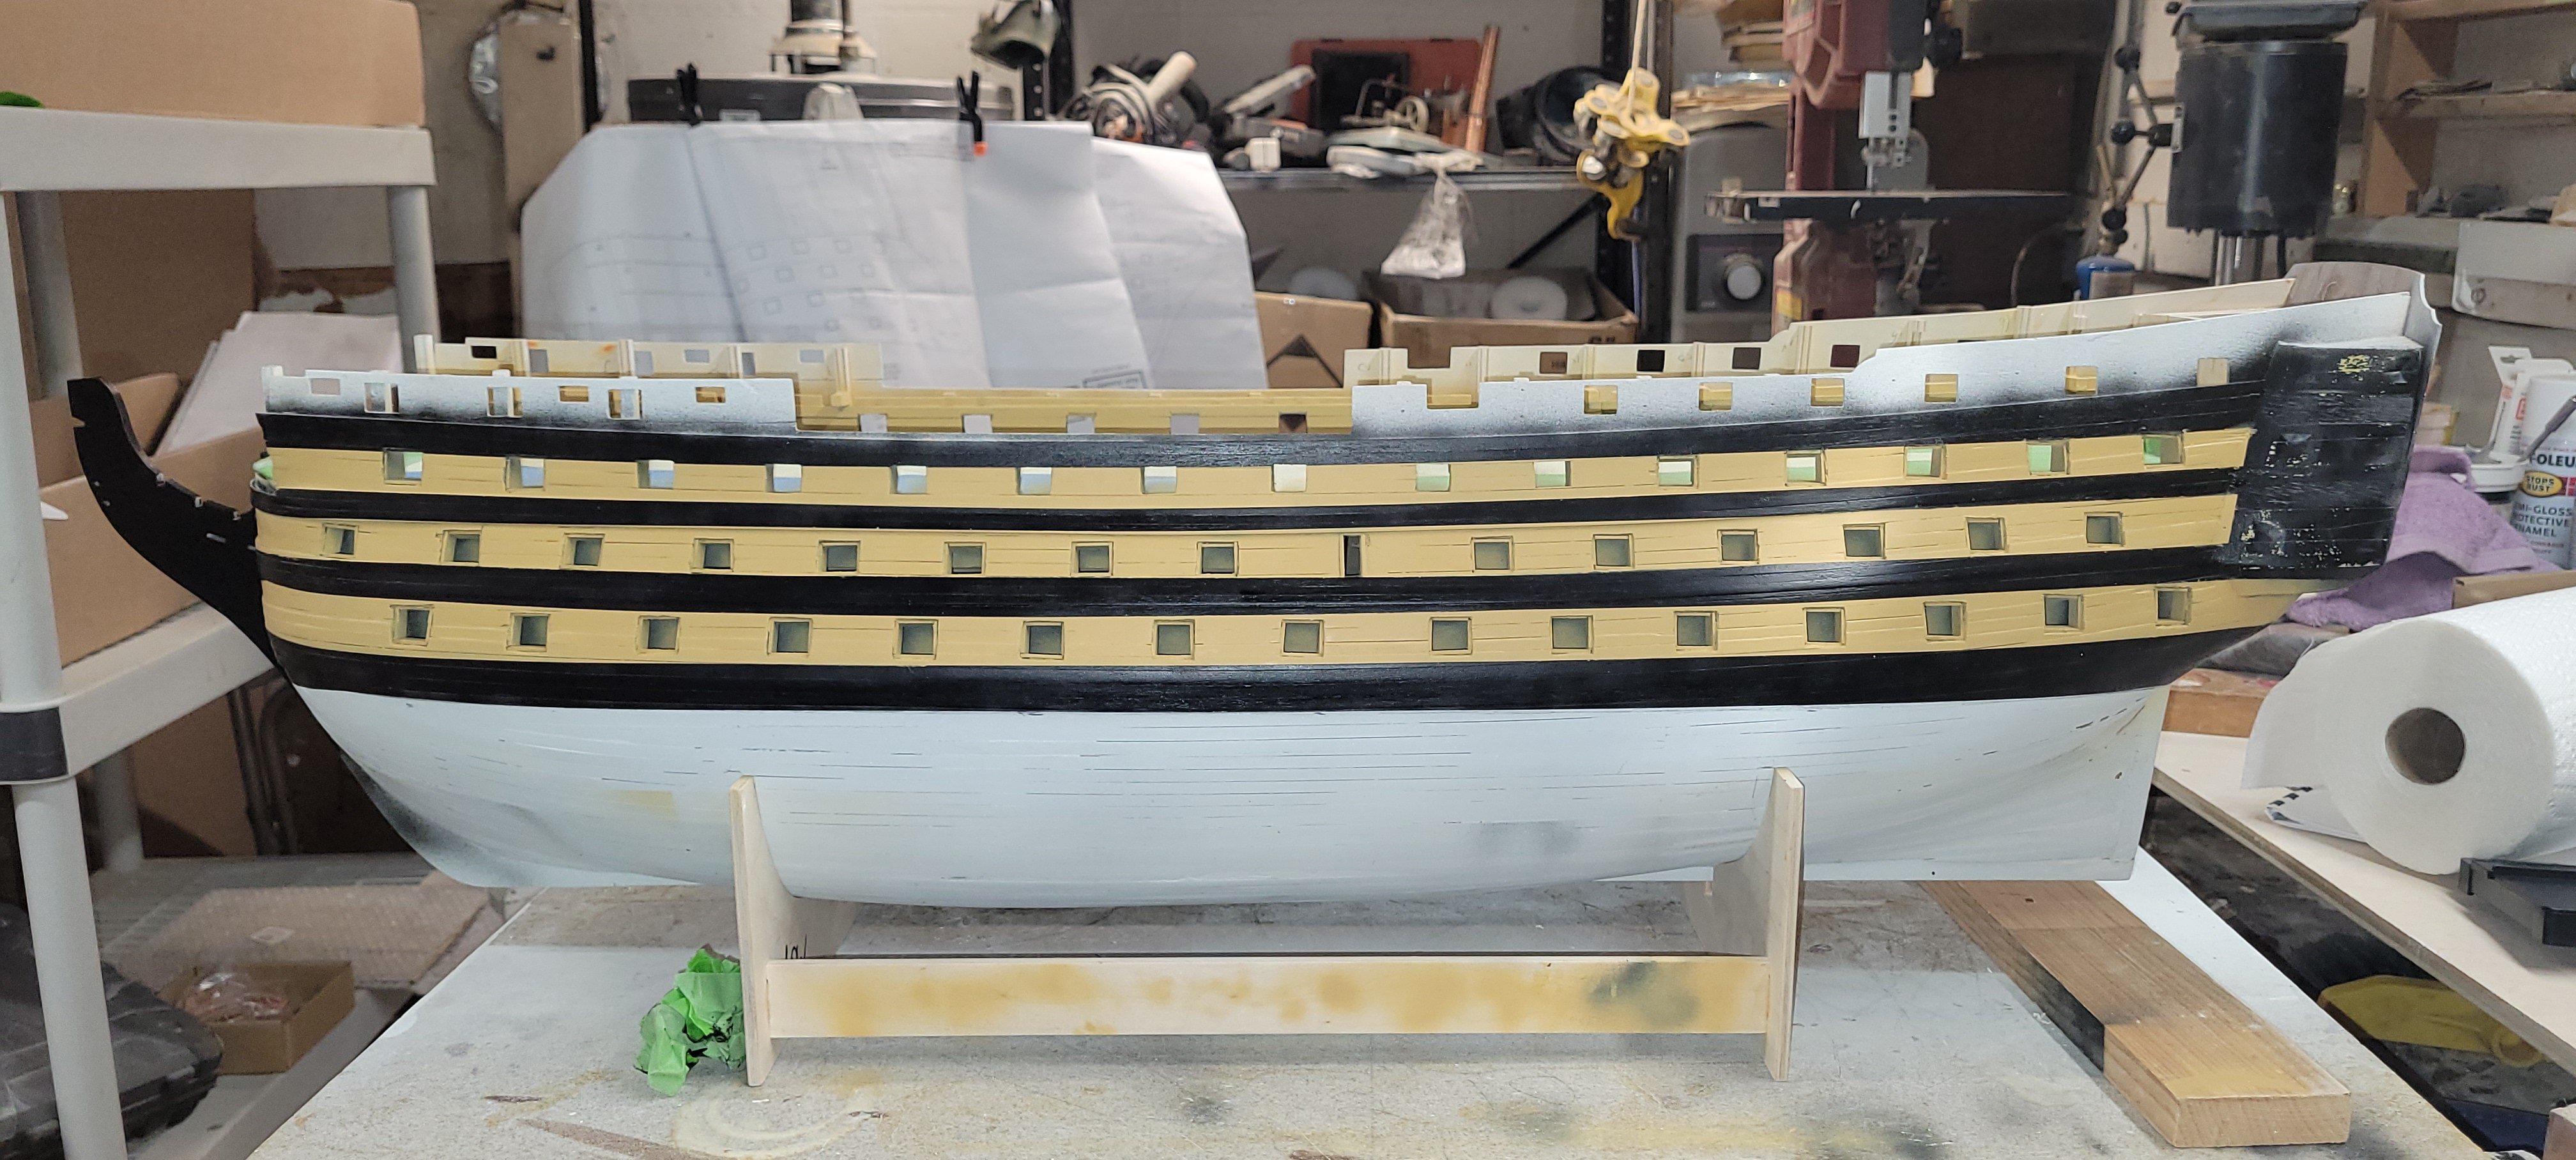
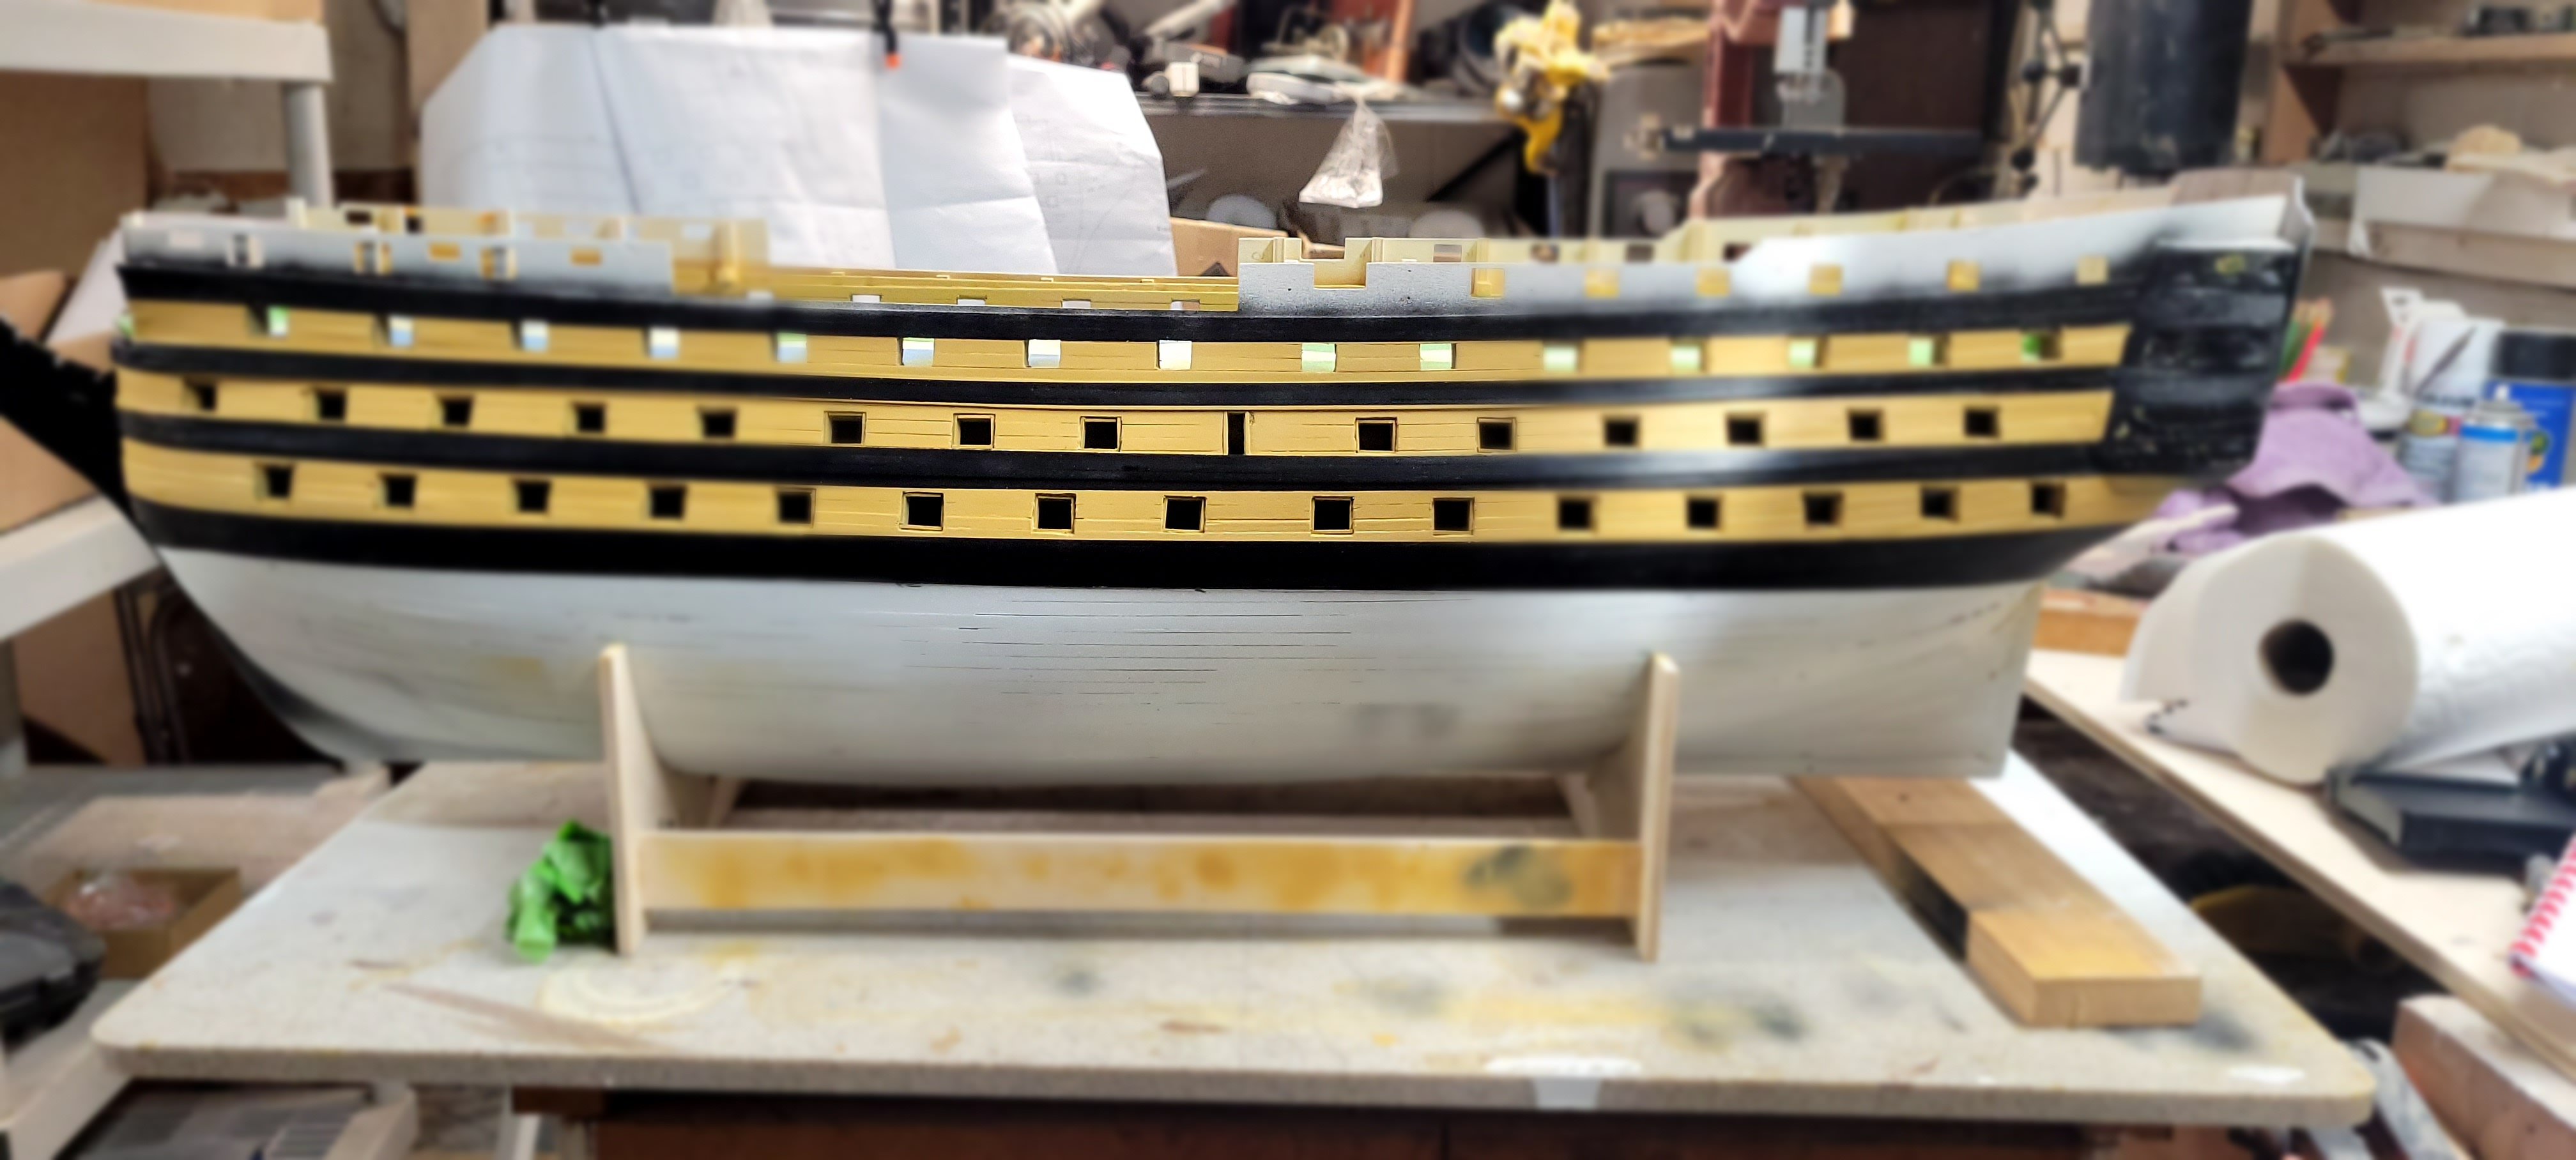
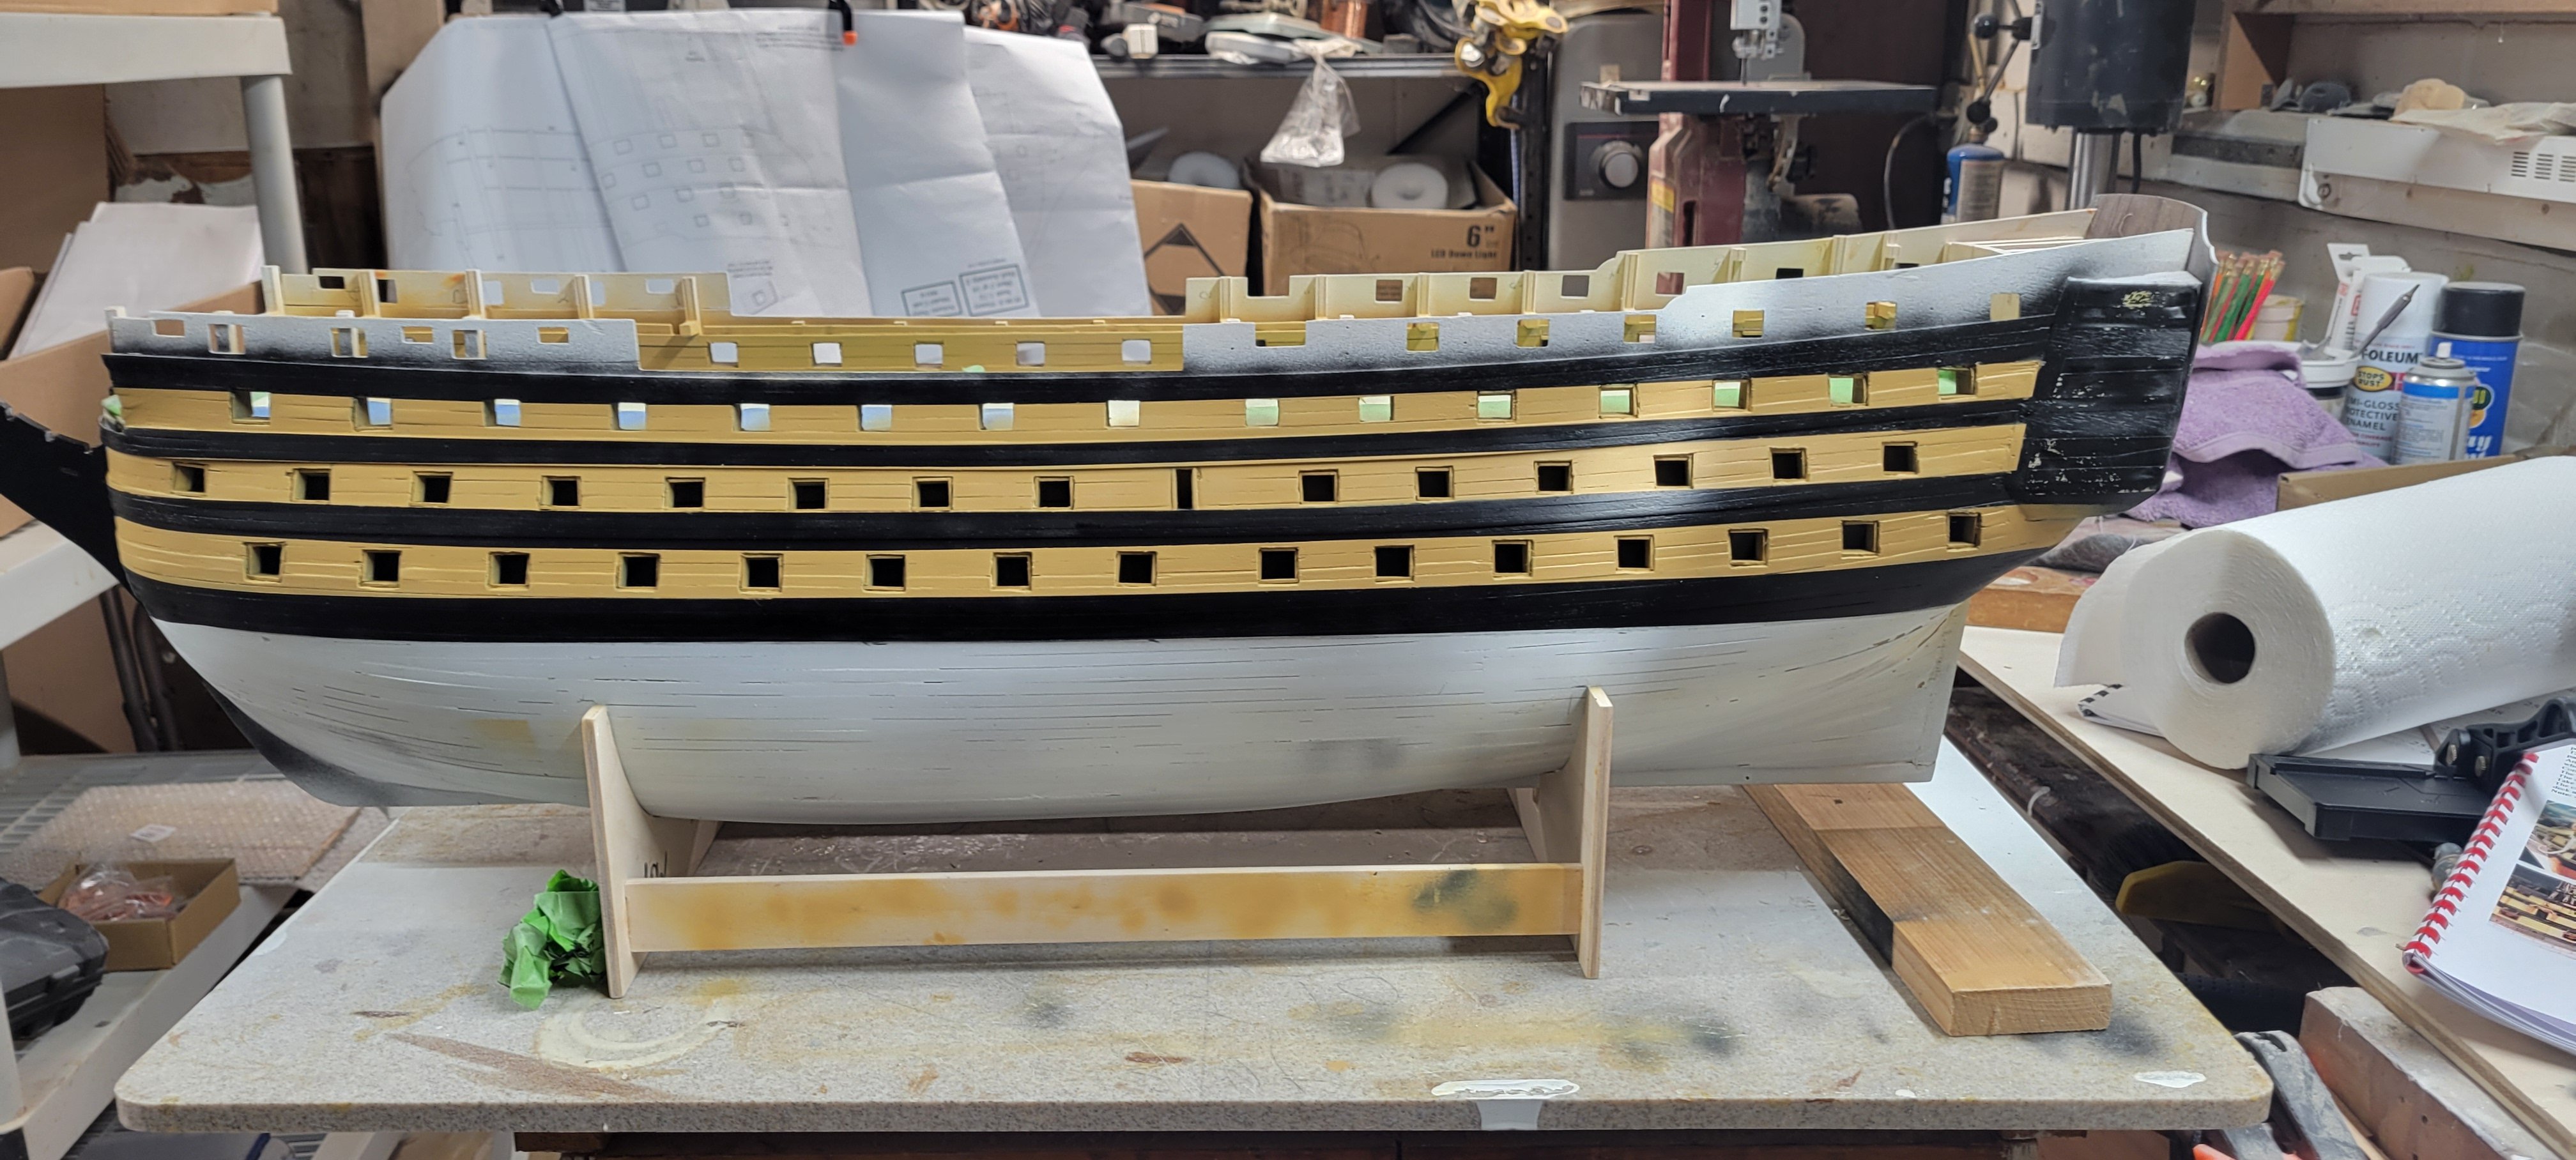
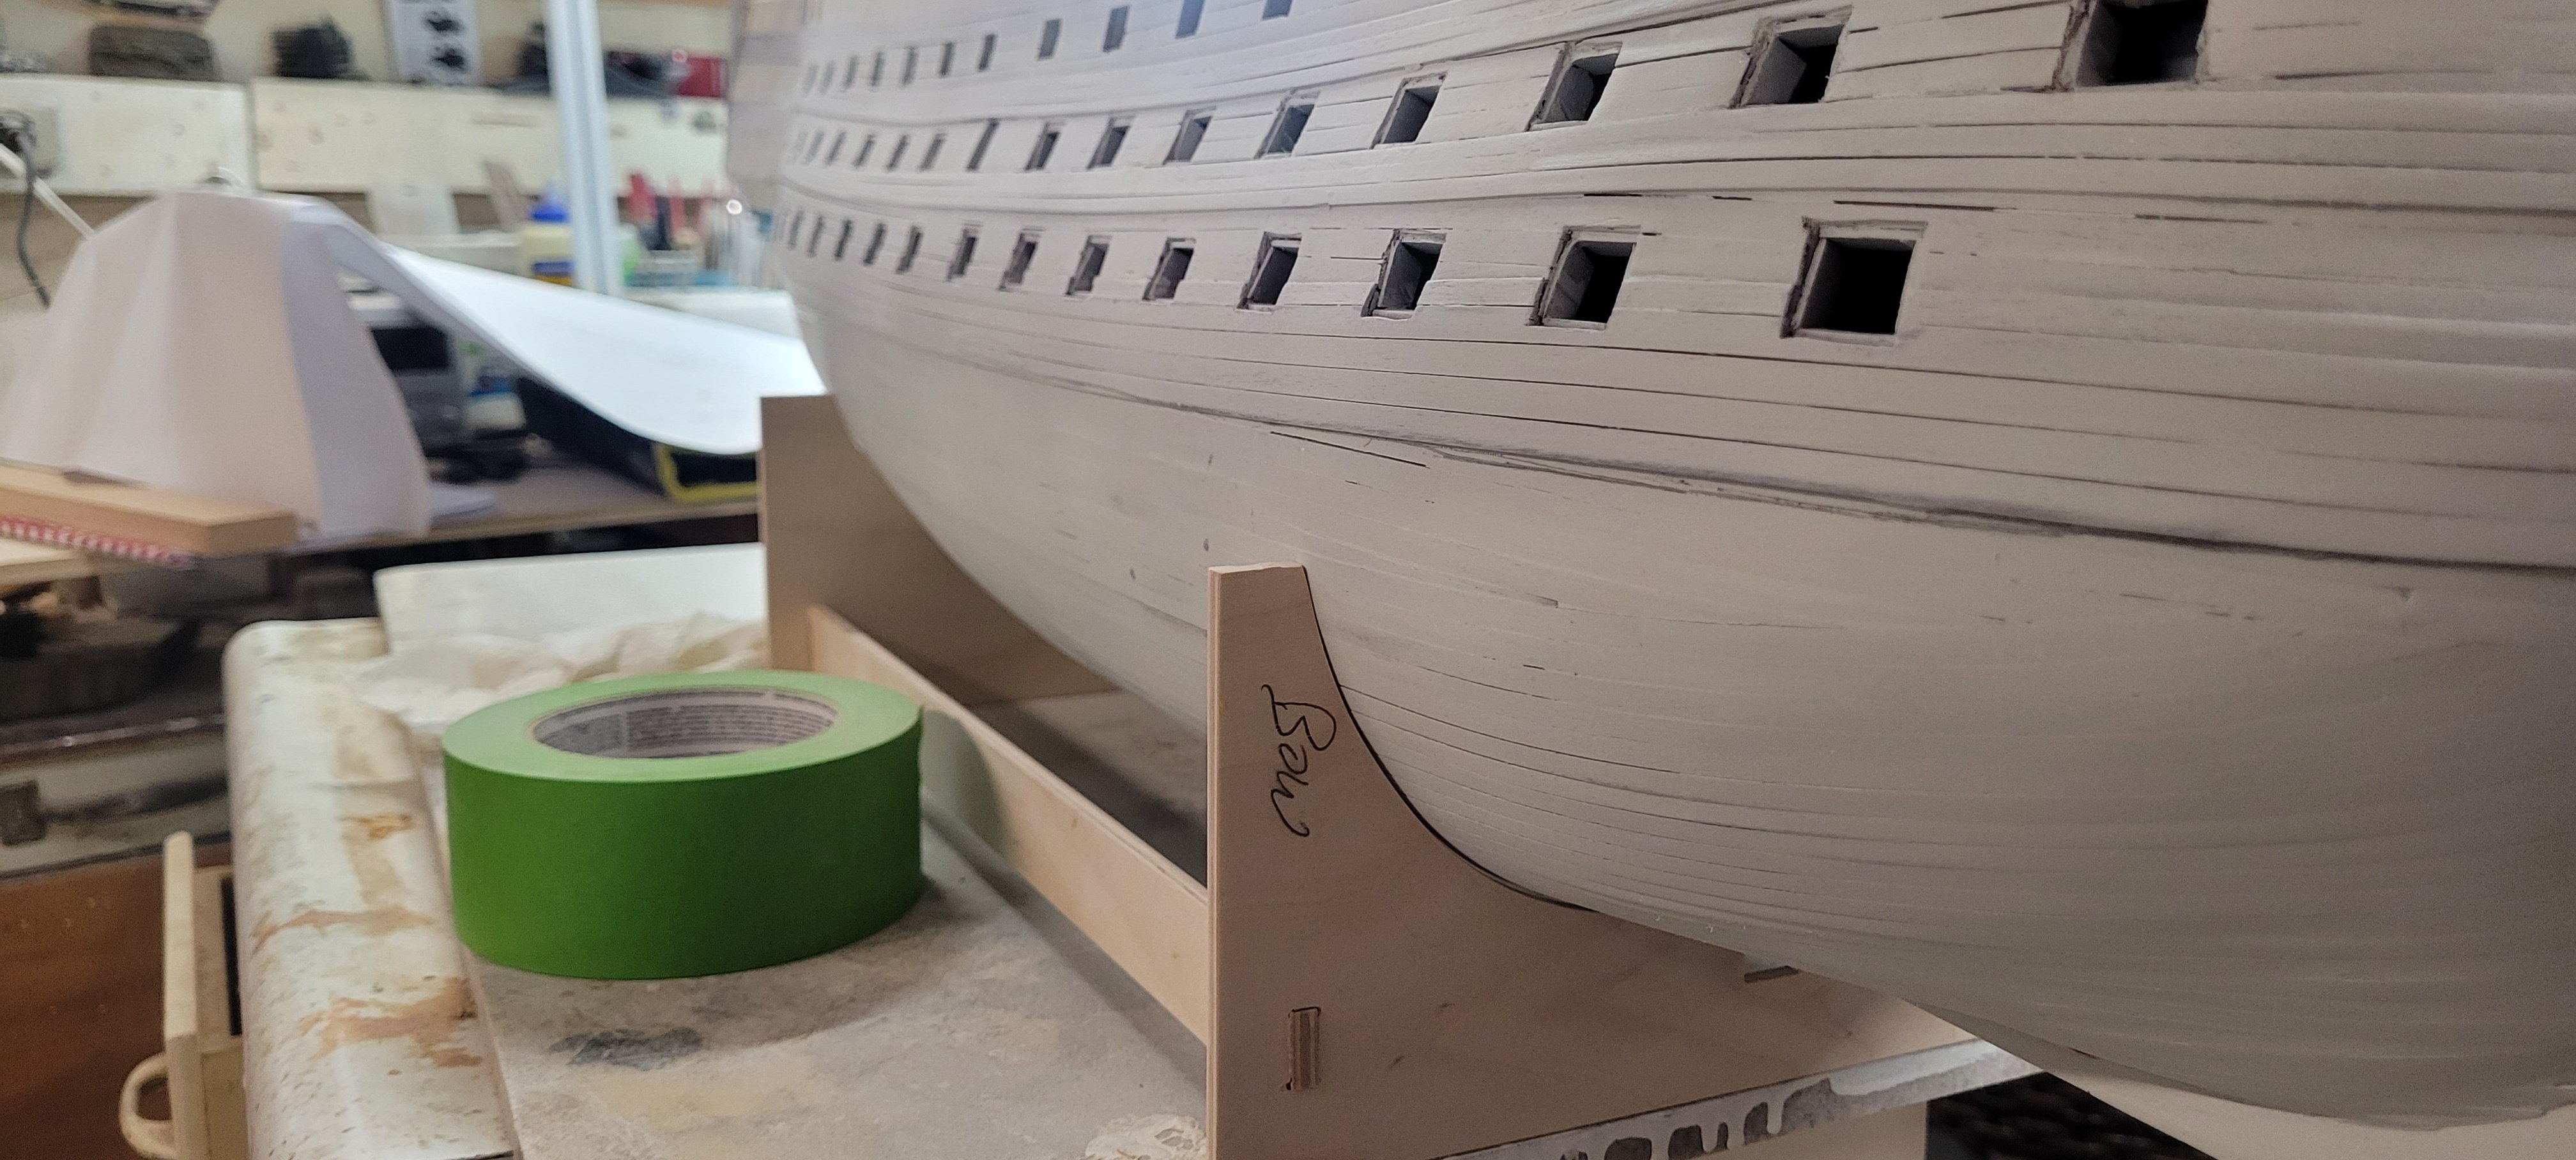
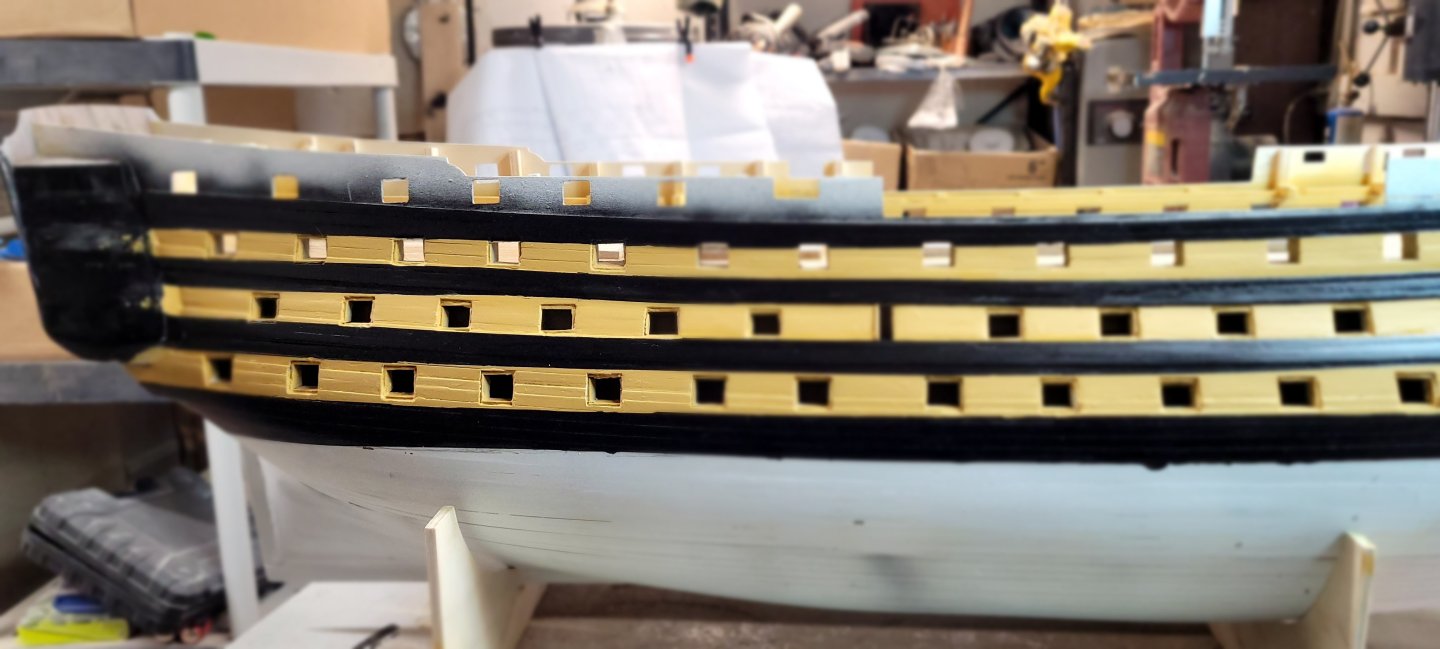
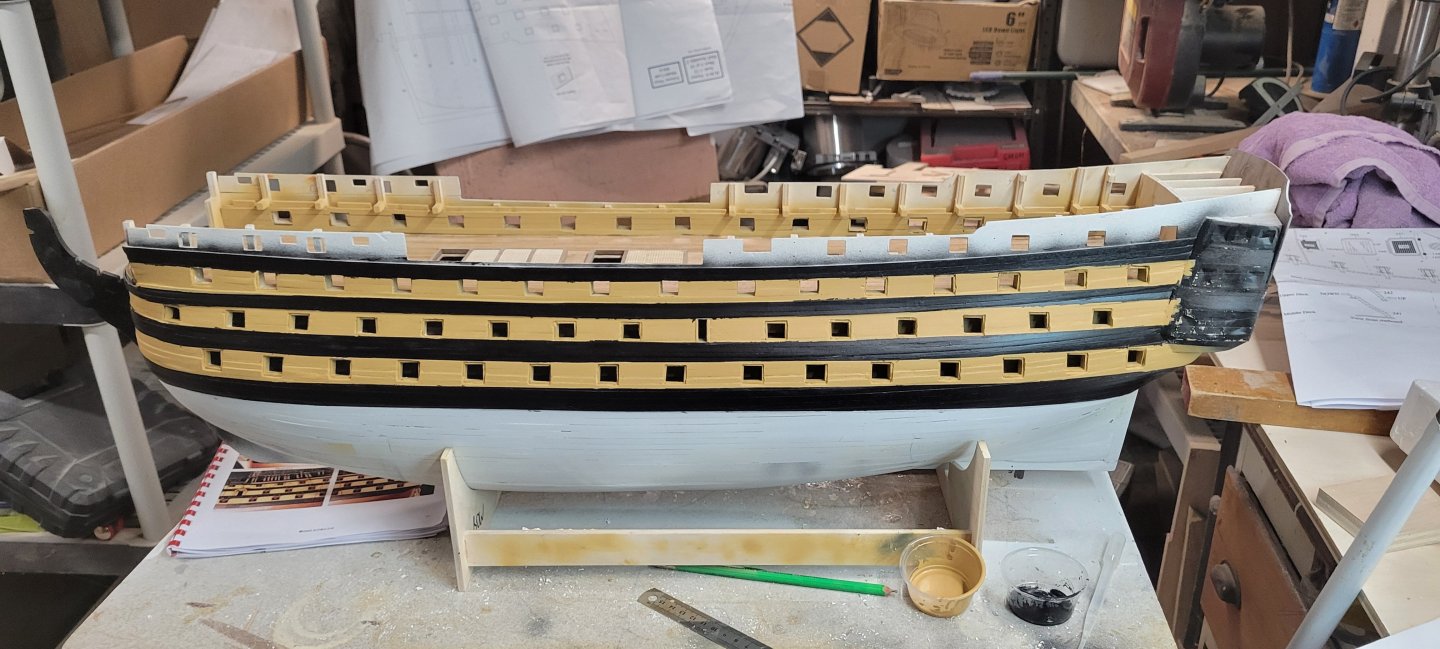
Got my chucking nut and laid down the yellow ochre. After finishing it and removing the tape, I was semi happy with the striping. There are a lot of pictures here because I tried different camera modes to try an capture the correct colors. I thought the final painting was going to solve my concerns over the quality of the hull work thus far. I did not. I only made the flaws and gaps much more noticeable. It was just too much to handle. I've said elsewhere, this kit is VERY DIFFICULT. I don't think I was fully prepared for the hurdles I was going to have to jump through. In retrospect, I should have tackled a less difficult model to gain experience in planking and the yet to come rigging. Is this model ok for on the job learning? I don't know. The Trumpeter Titanic was the same way, so many pieces, so much small detail on a 1/200 scale ship. The nice thing about this model is the quality of the manuals. Detailed and plainly written...while in contrast Trumpeter's was 20 or so pages of pictures, no words. Also, the Titanic model has many quality YouTube builder logs that I was able to follow while doing my model. There are very few Caldercraft specific Victory YouTube logs, I have watched all of them and still continue to search. There are certainly many other wooden ship models that have helped with specific tasks and I continue to search and save. Either way, I will press on, but am less than happy with certain aspects of my work.


-
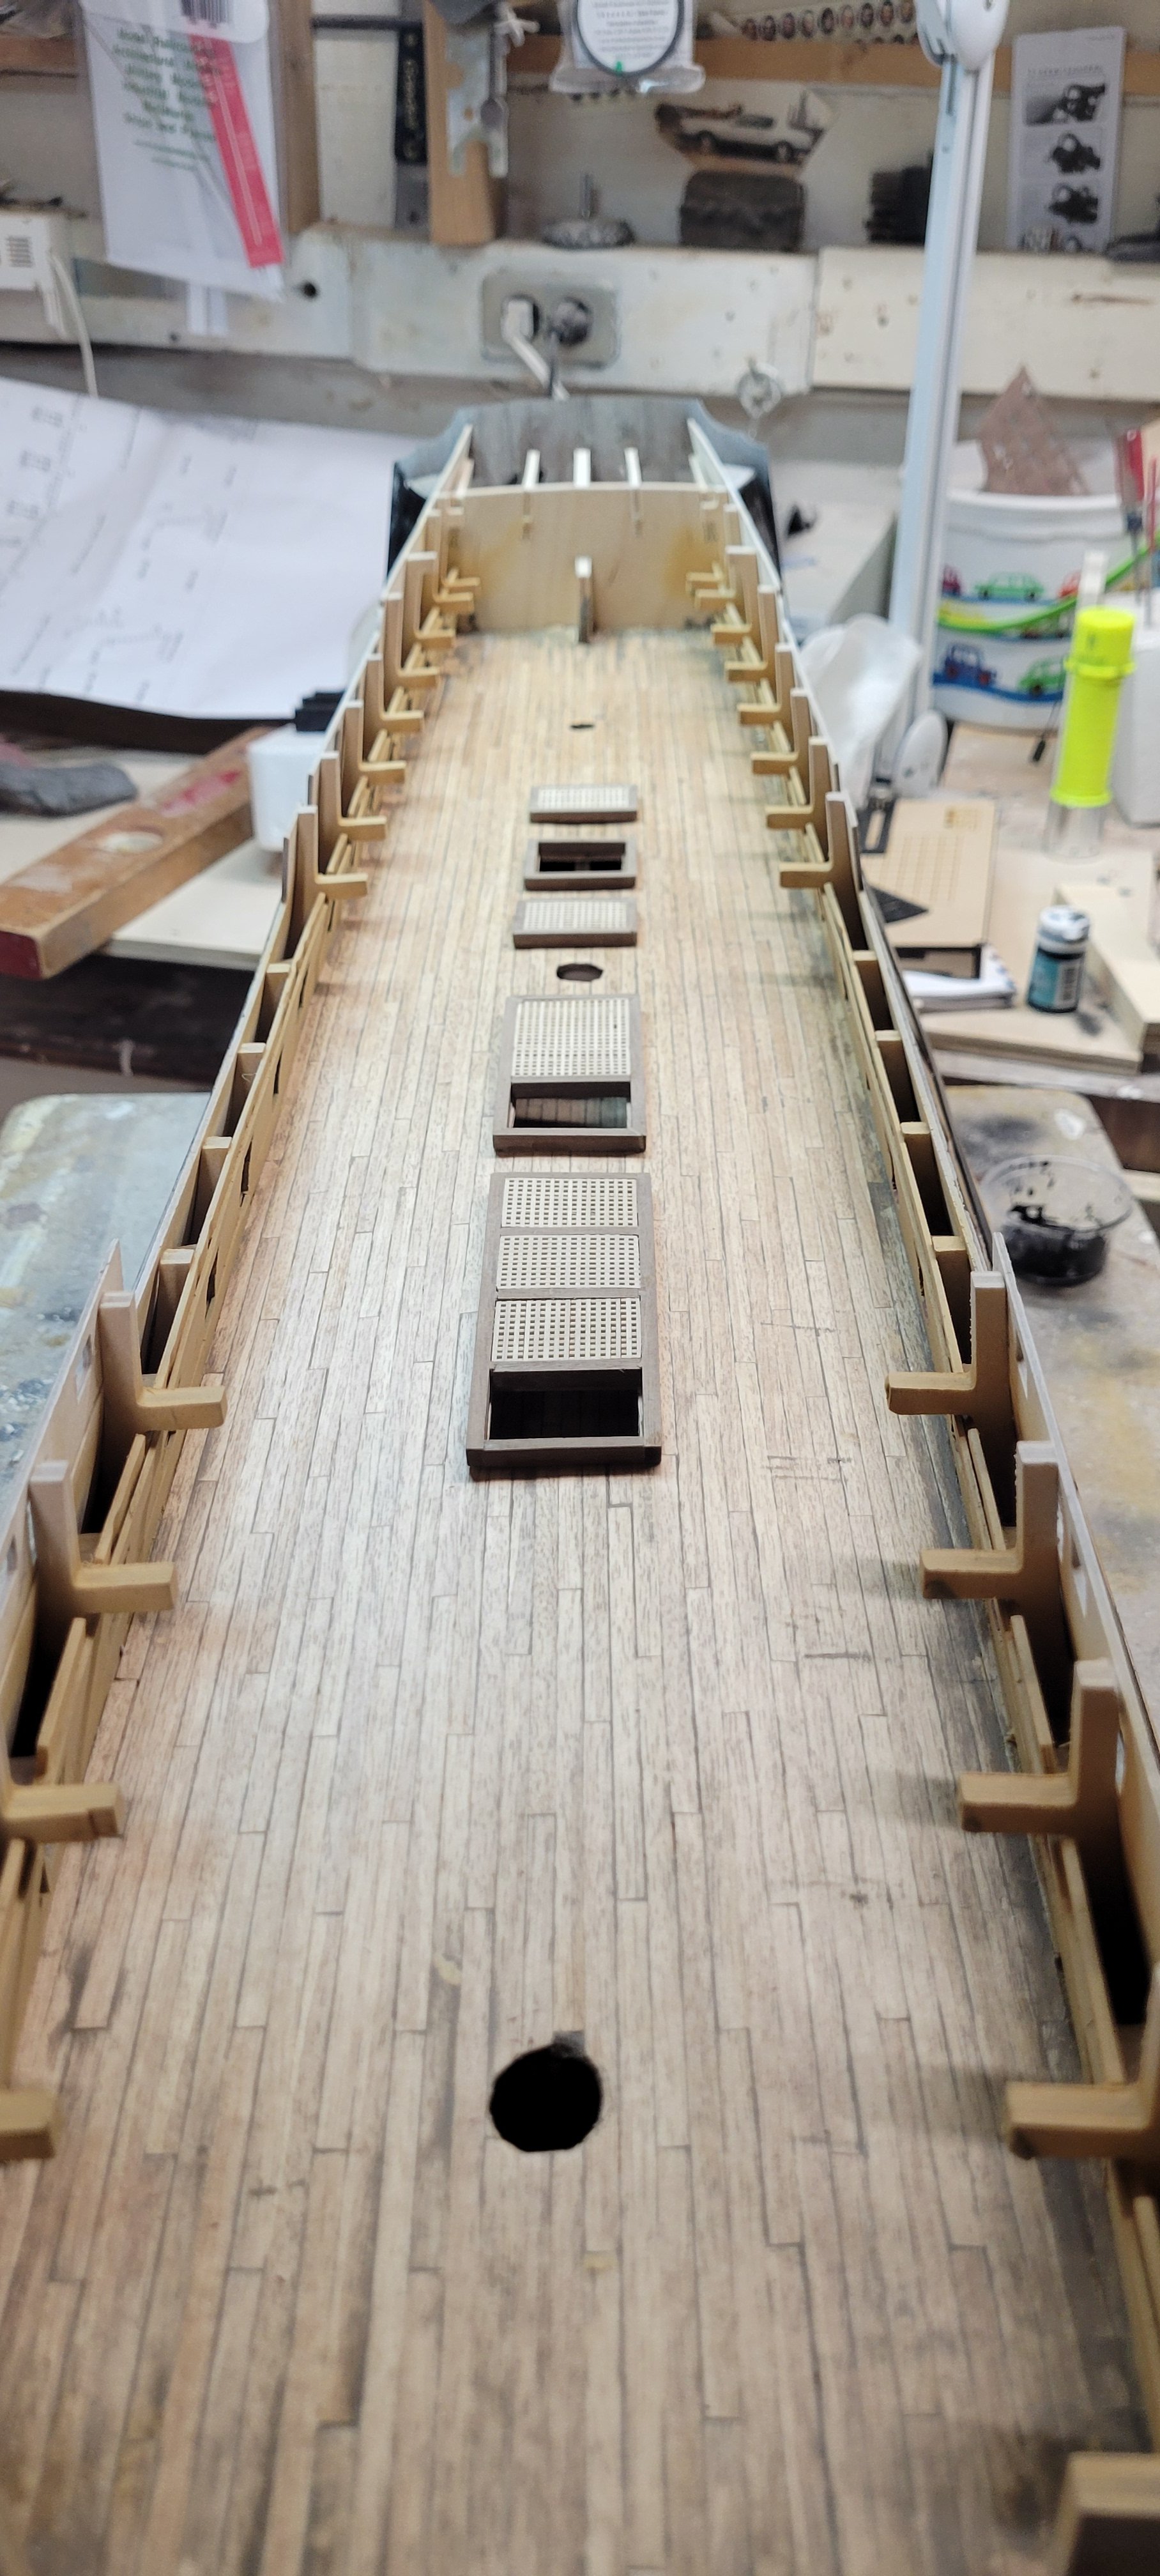
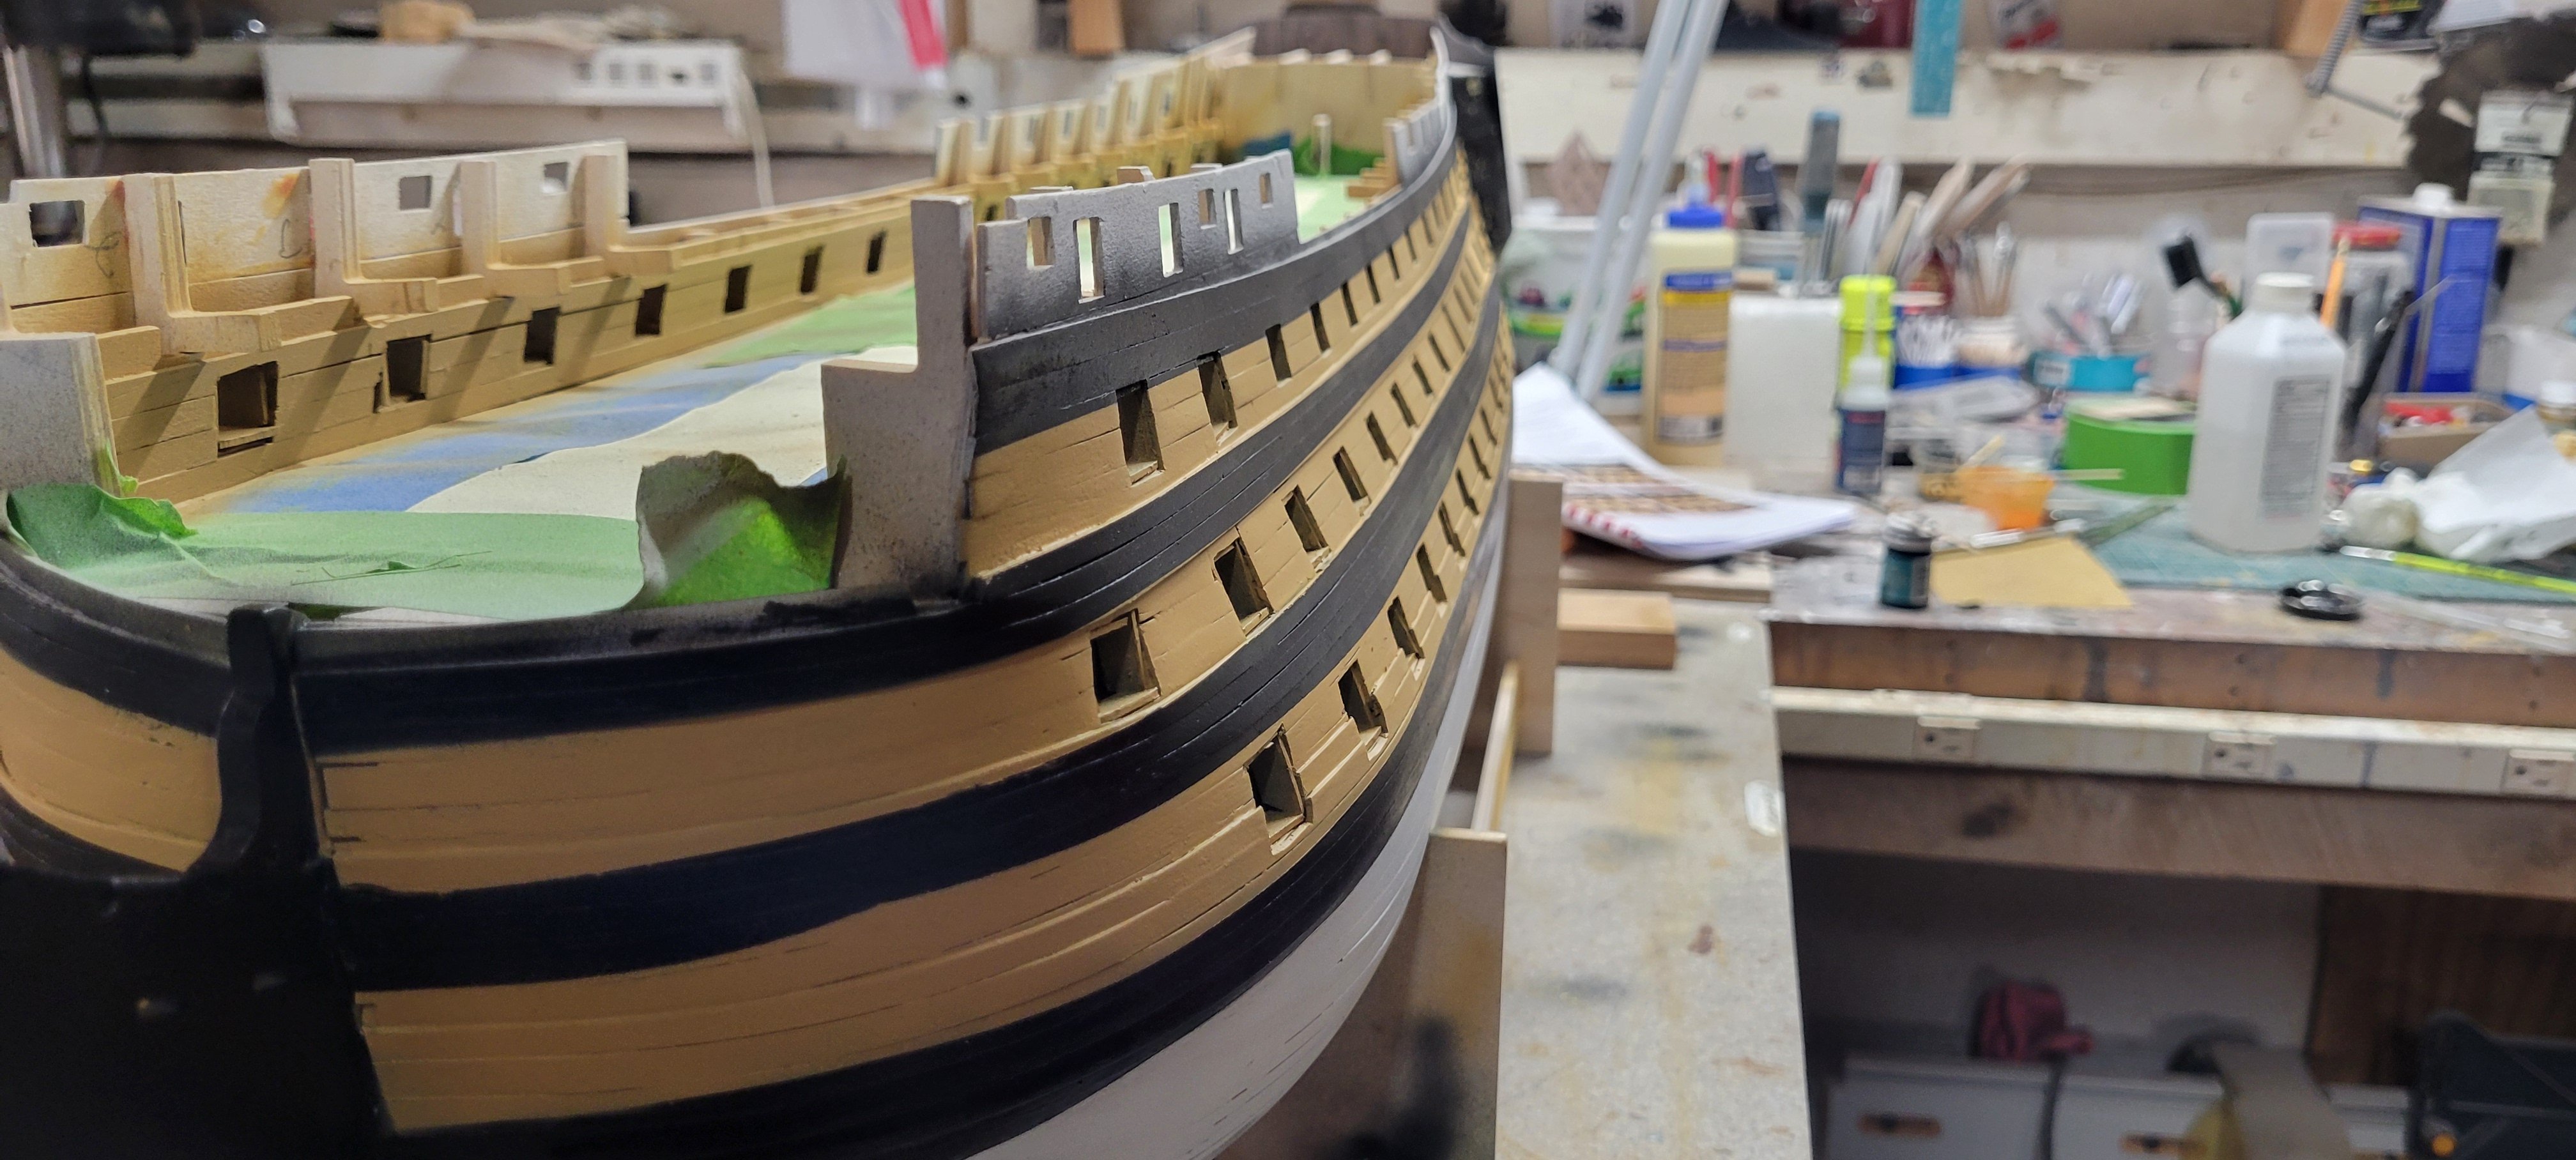
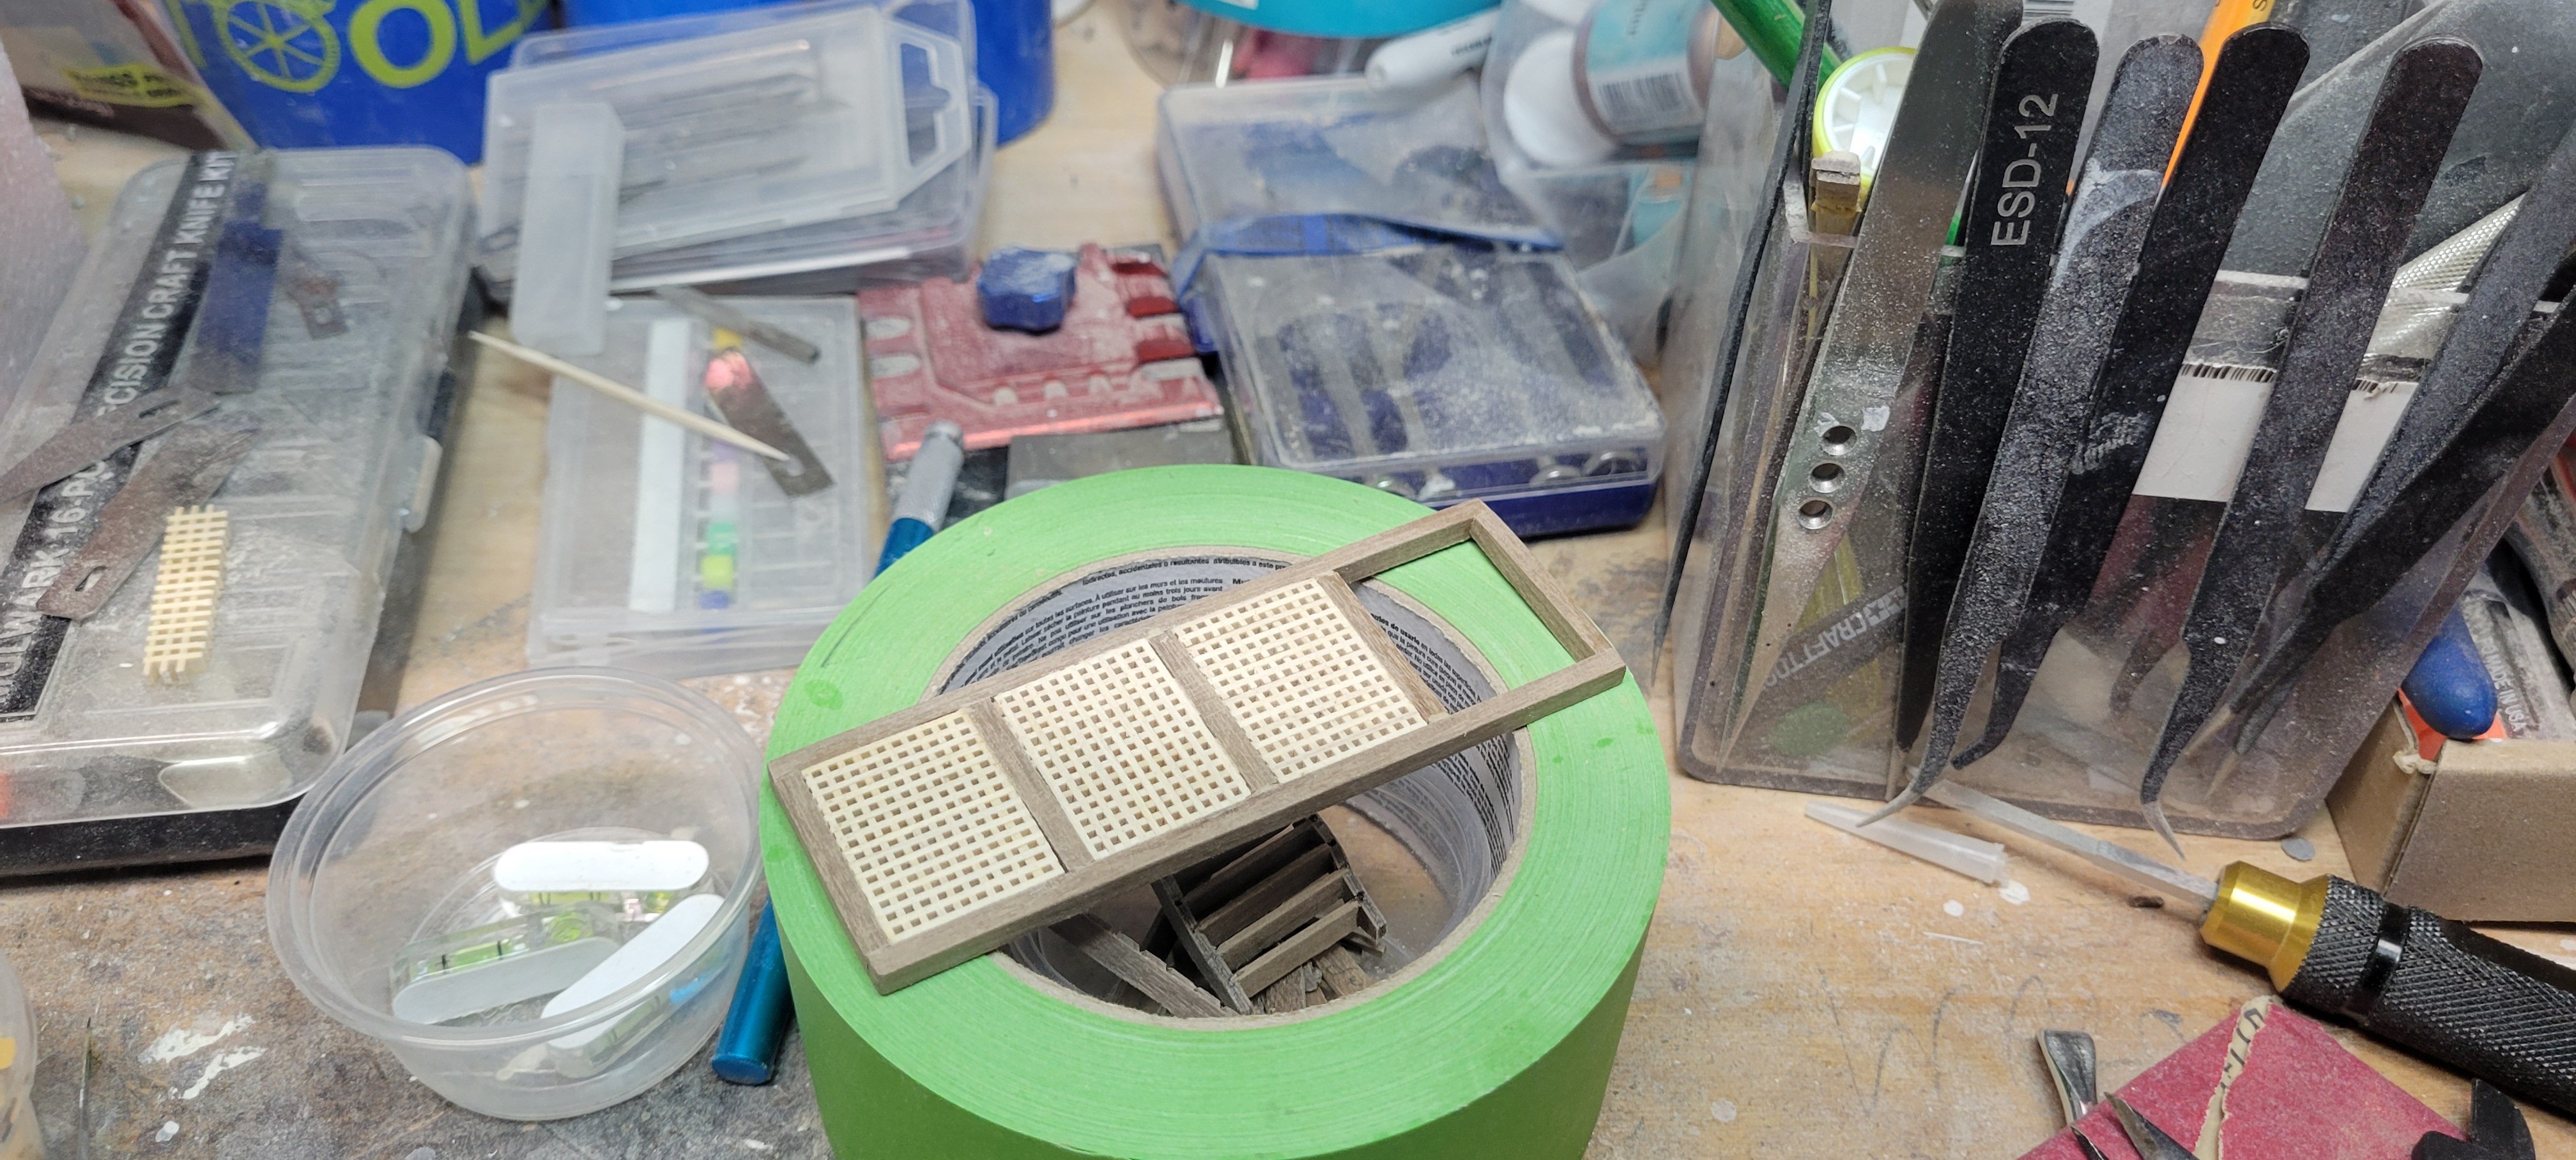
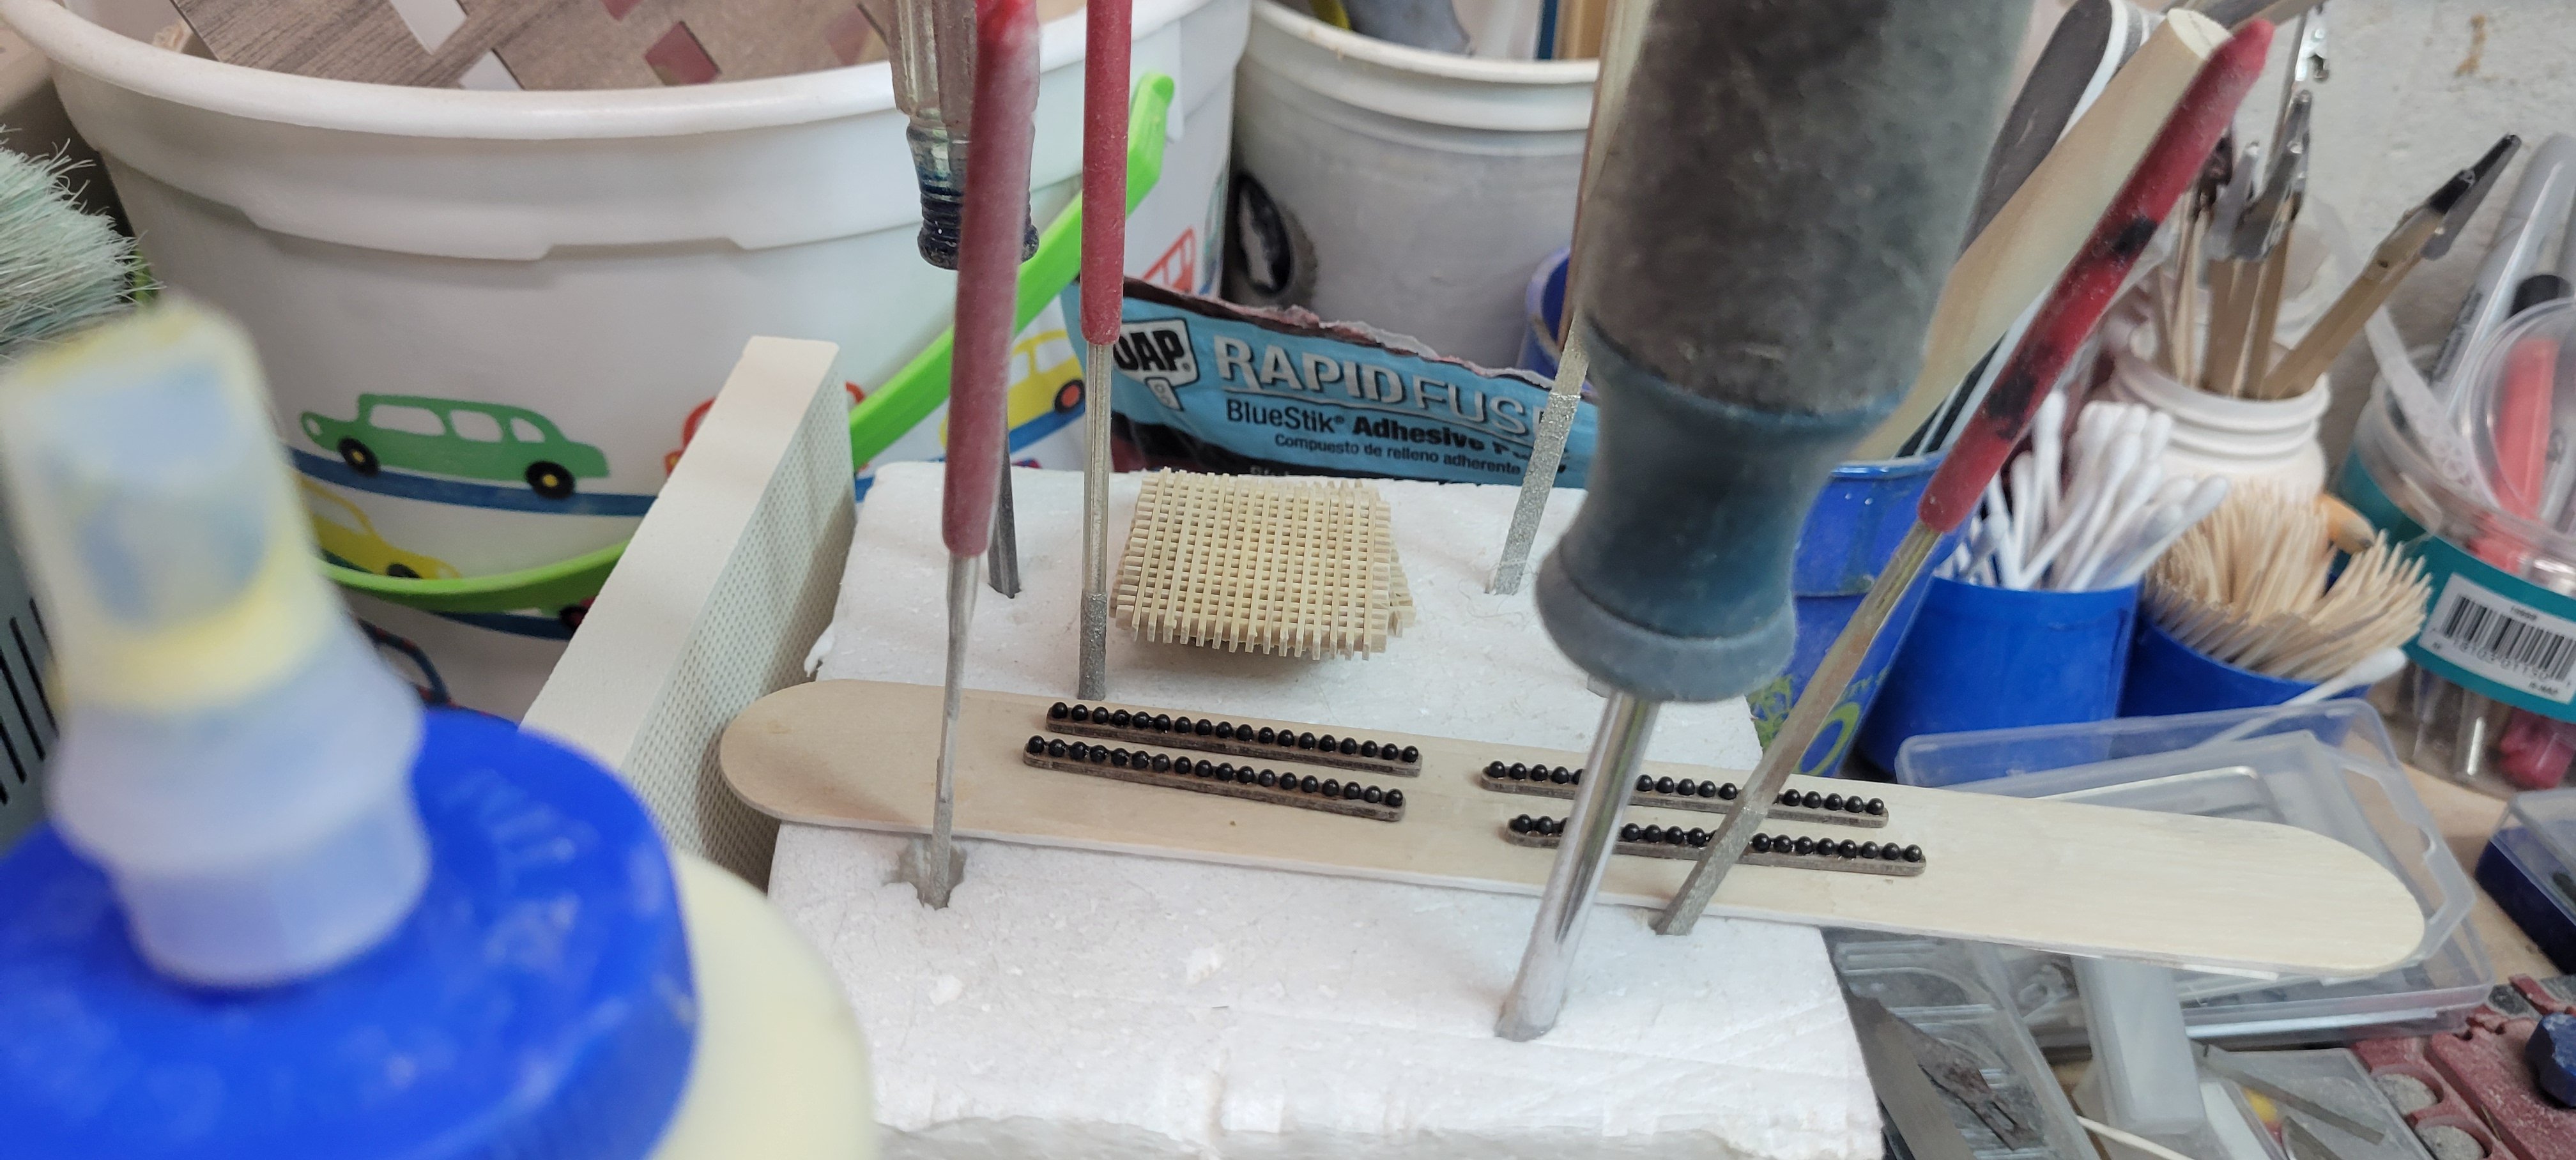
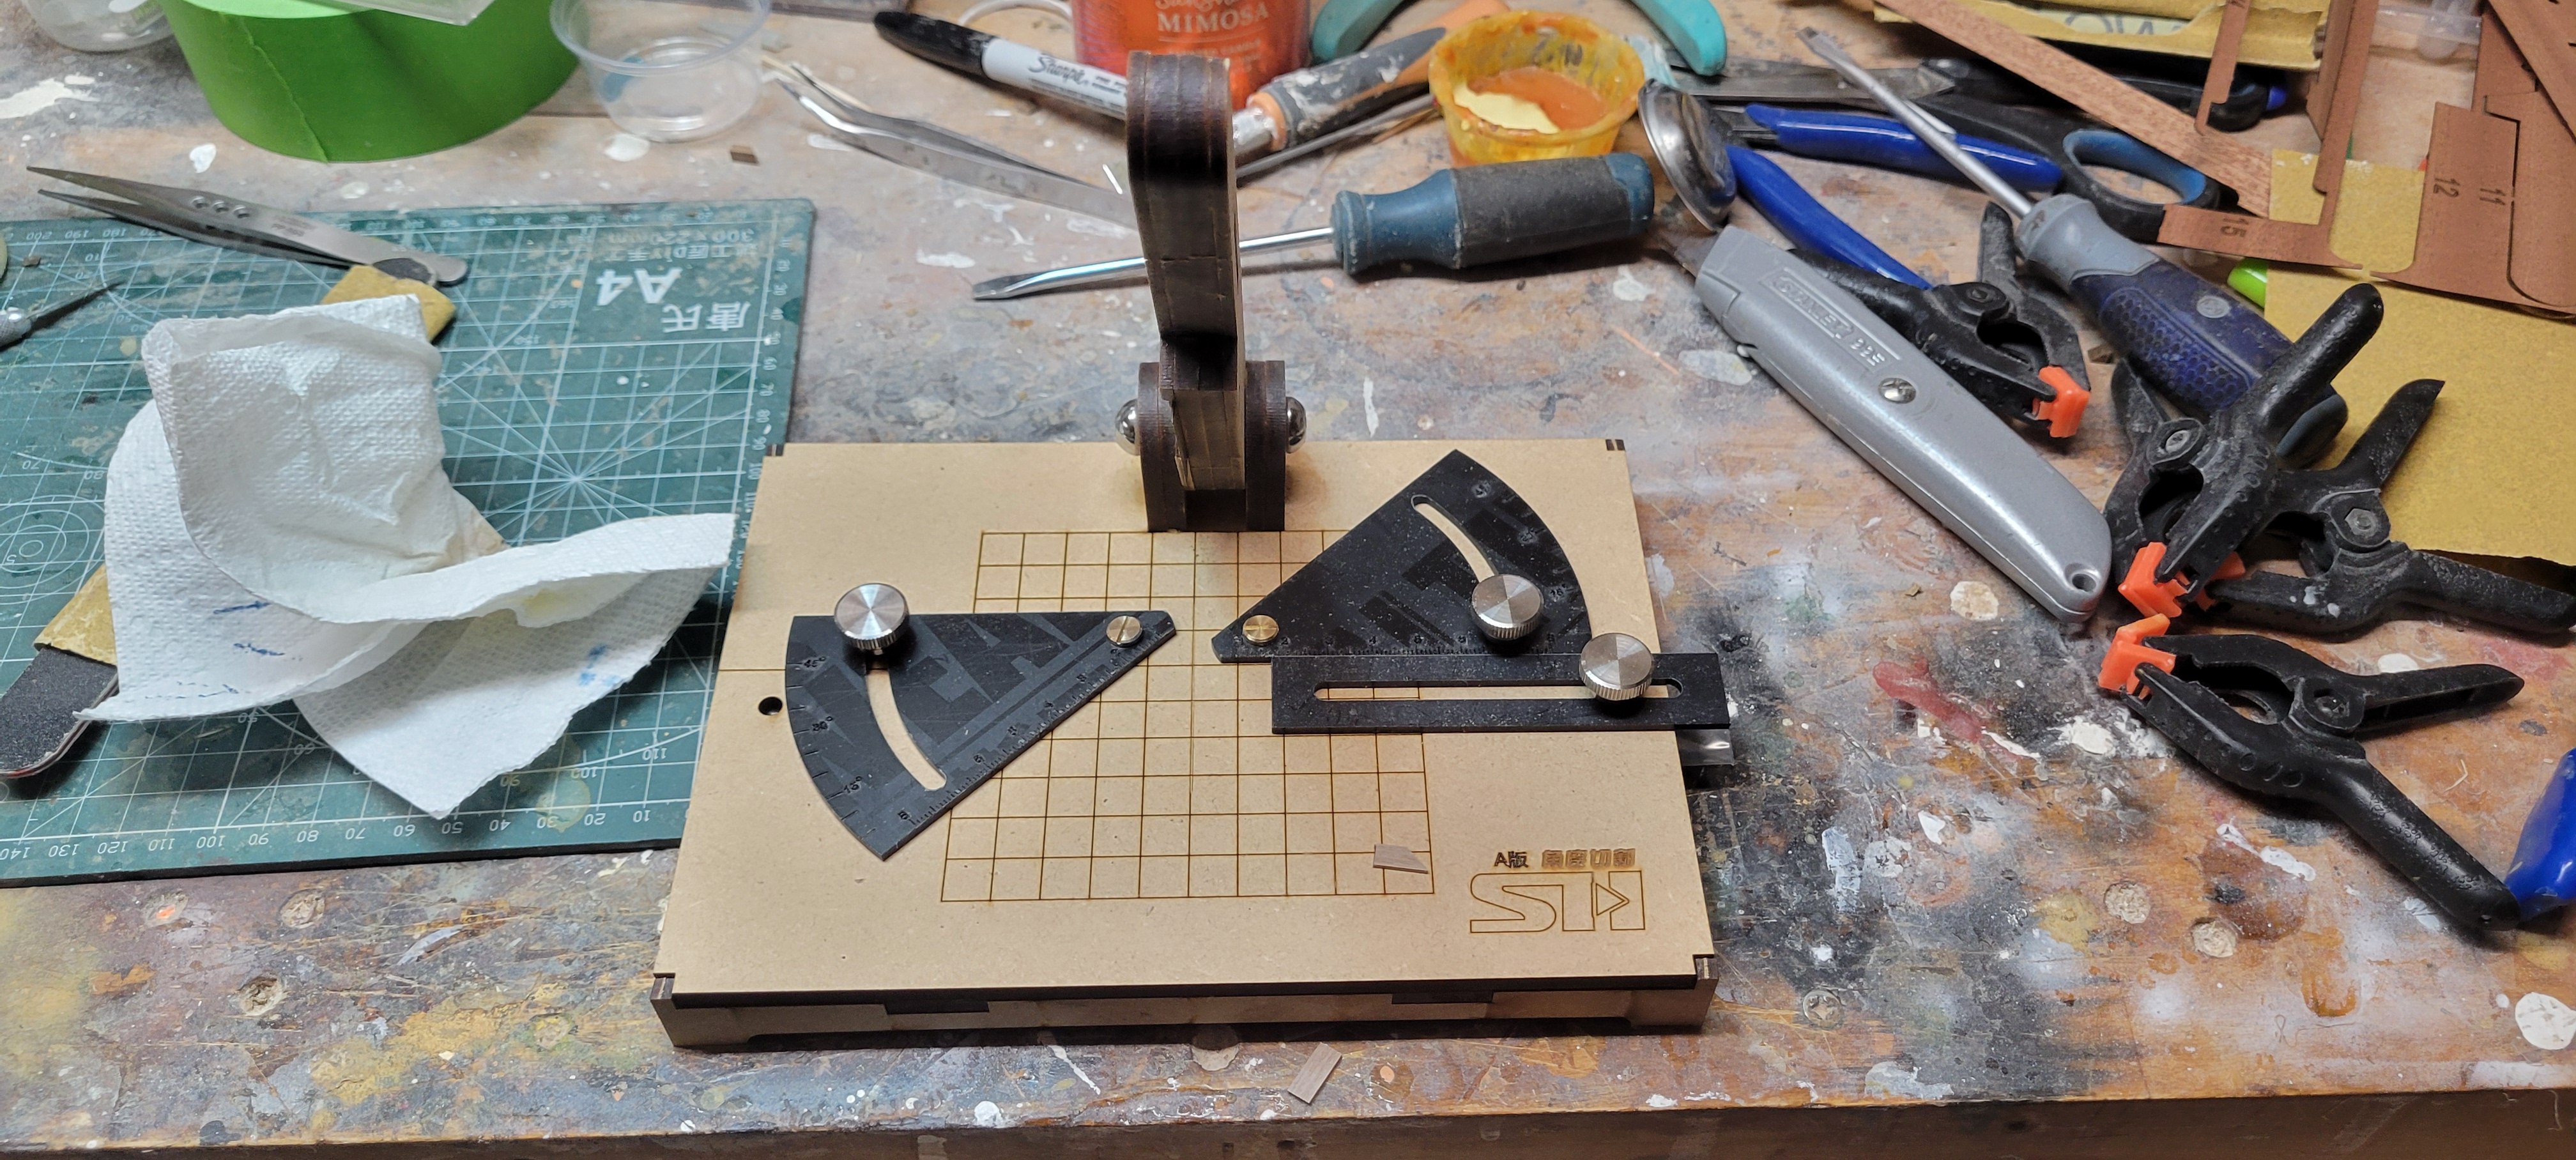
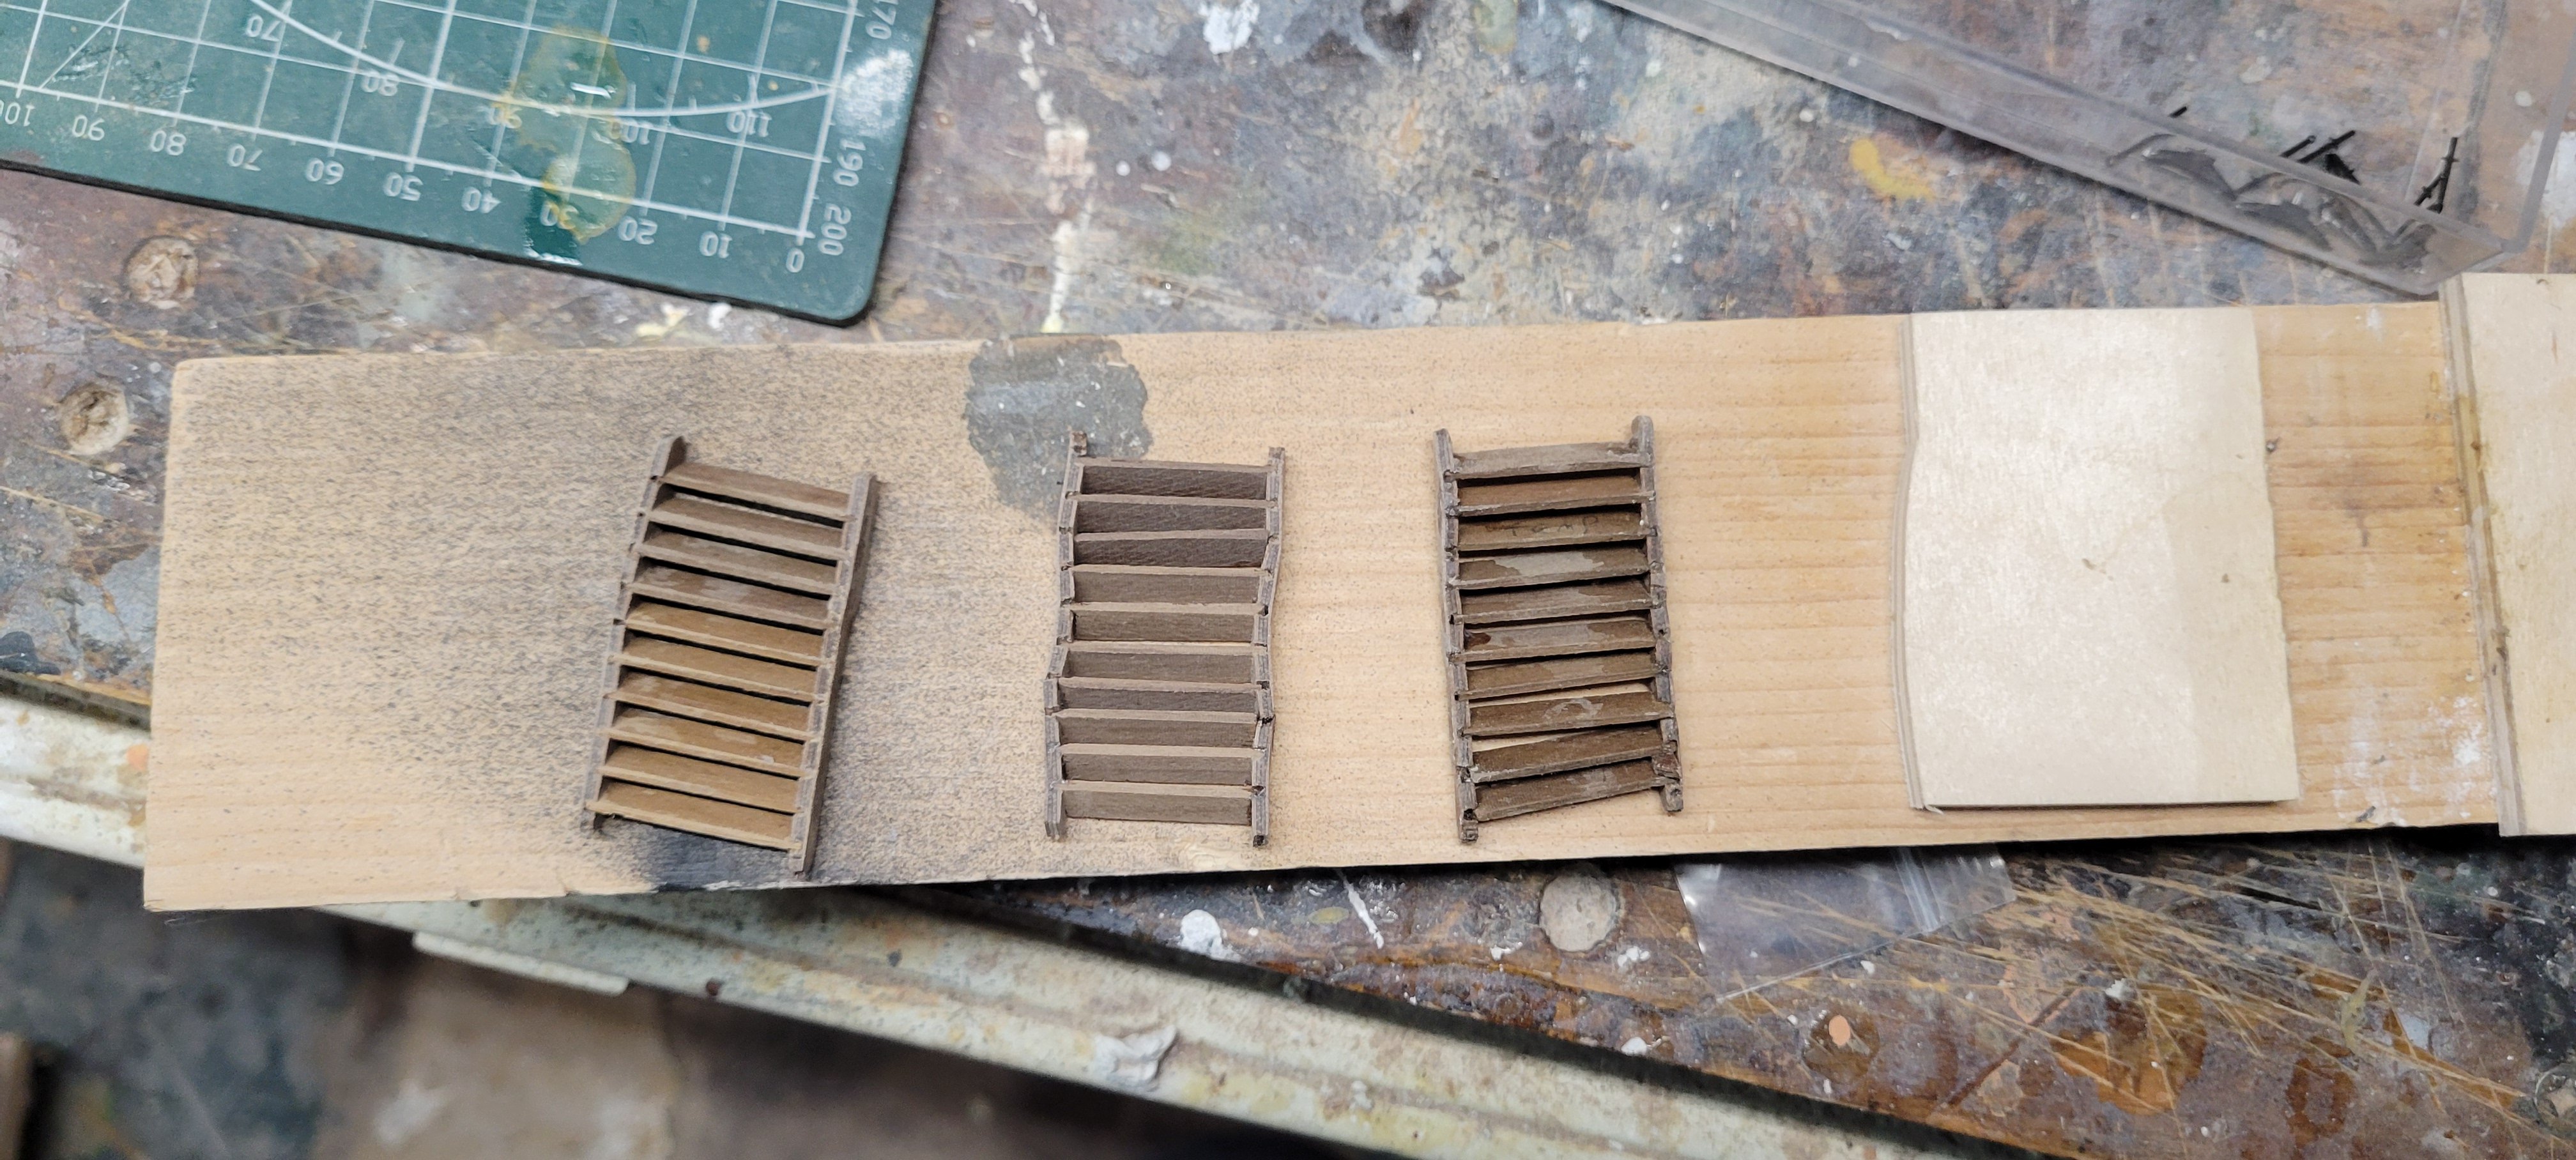
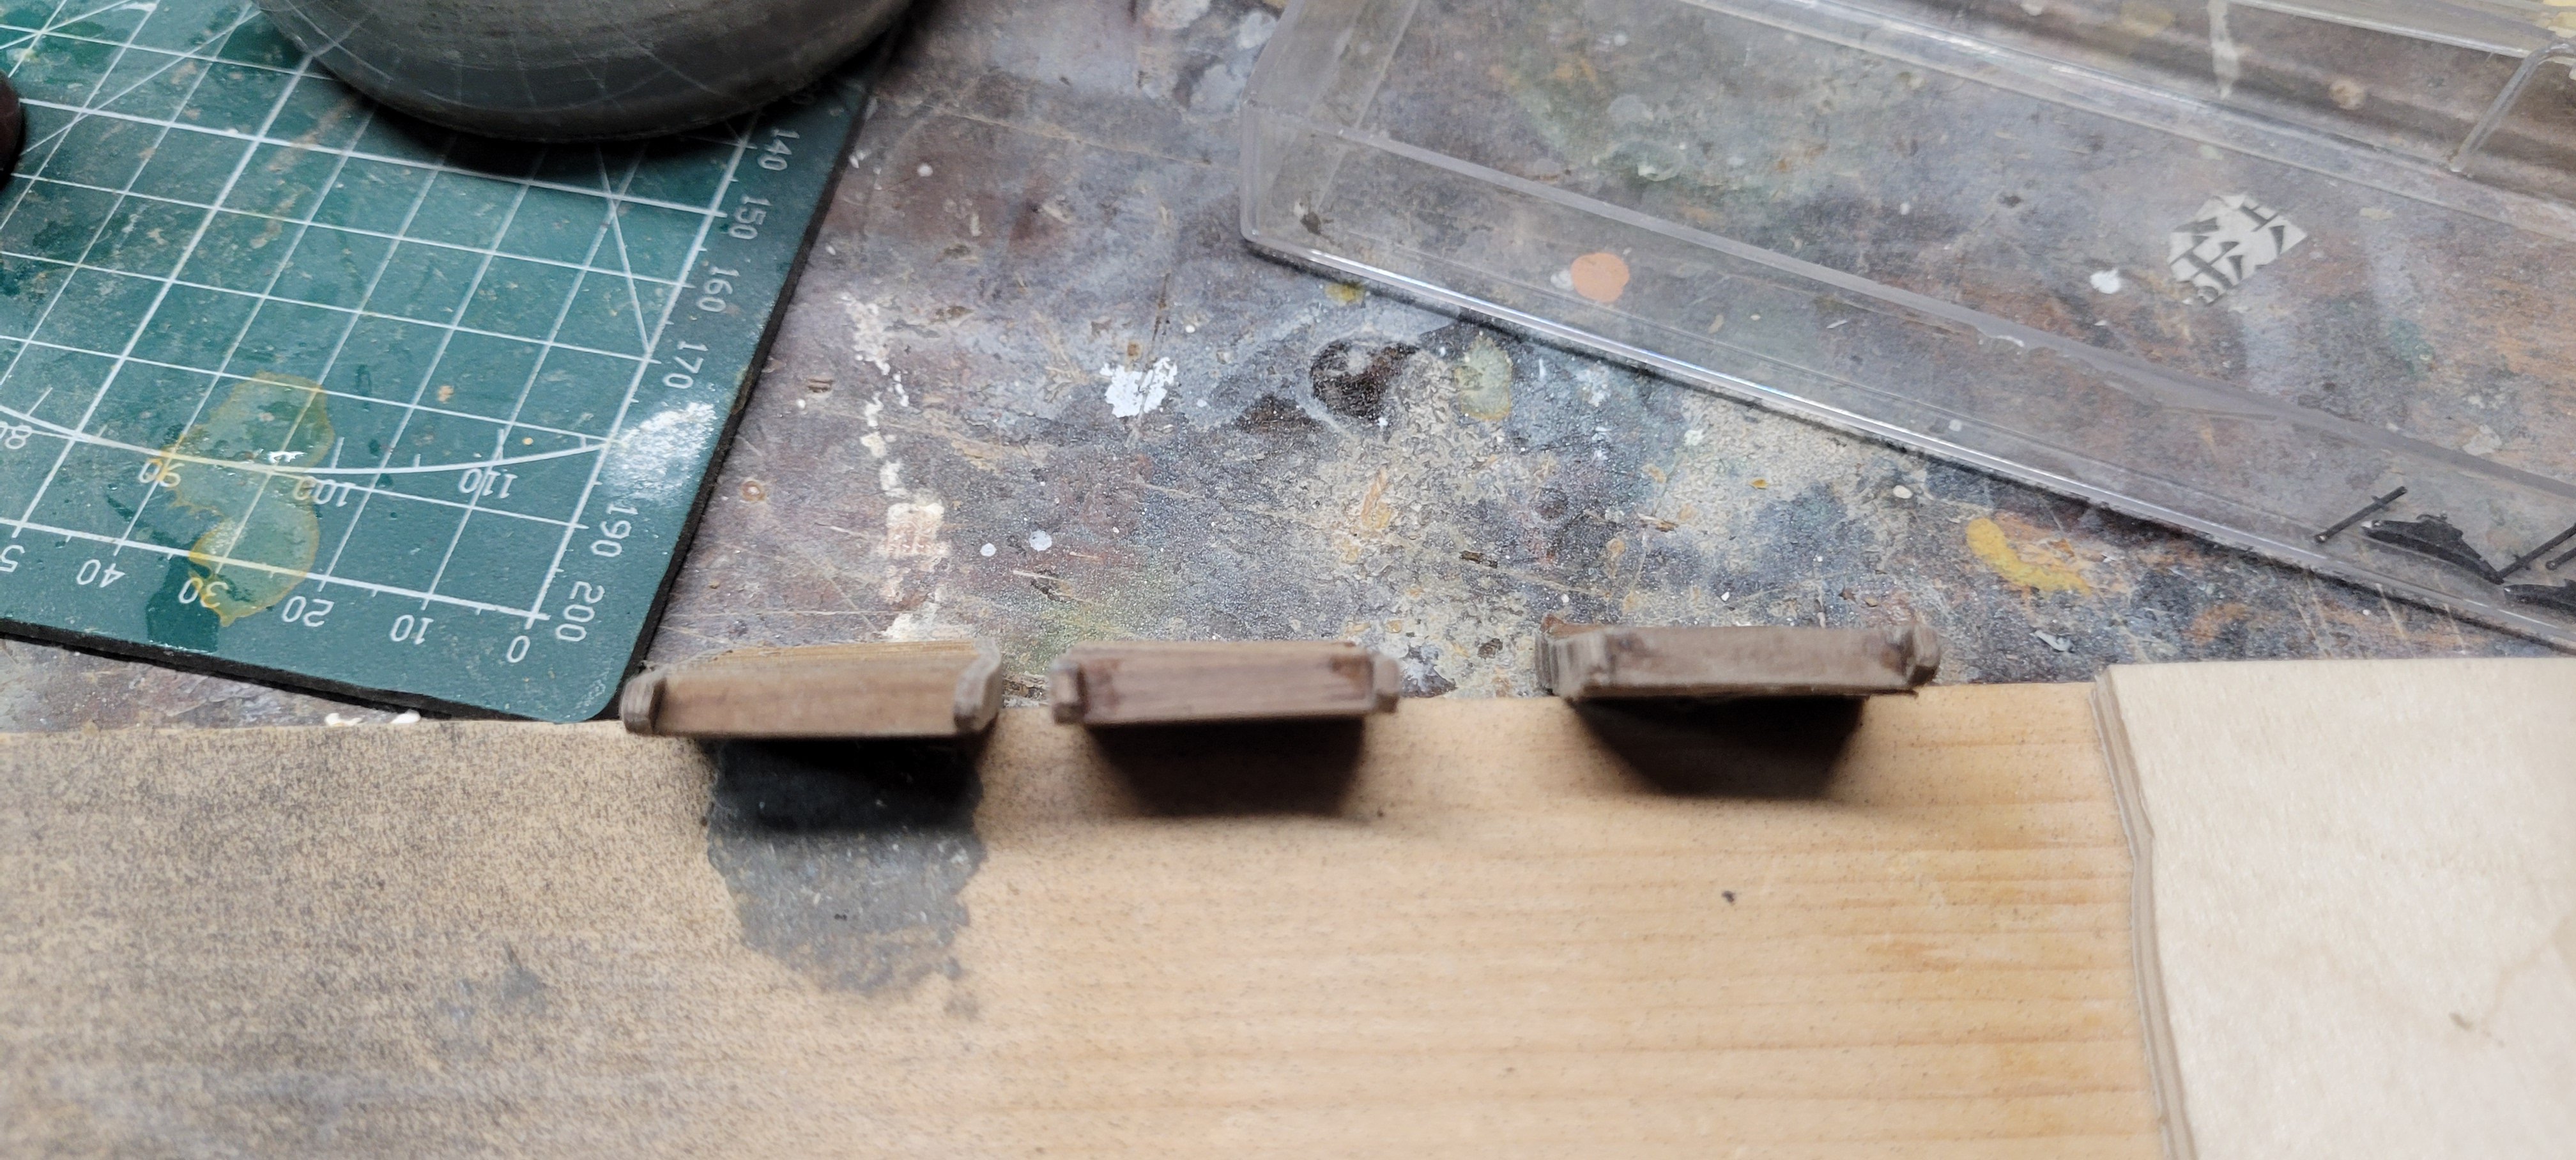
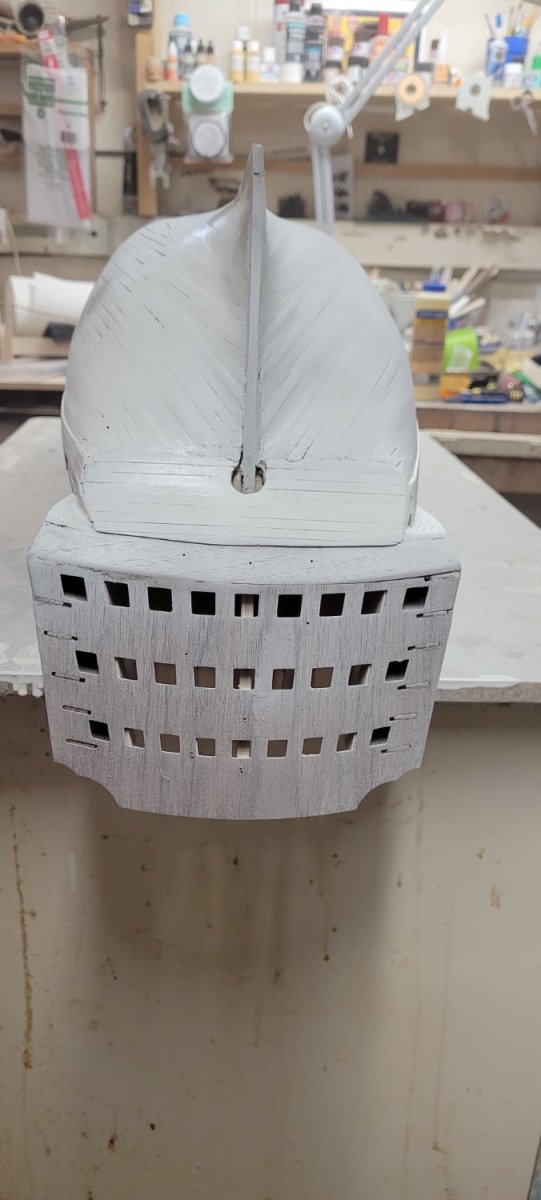
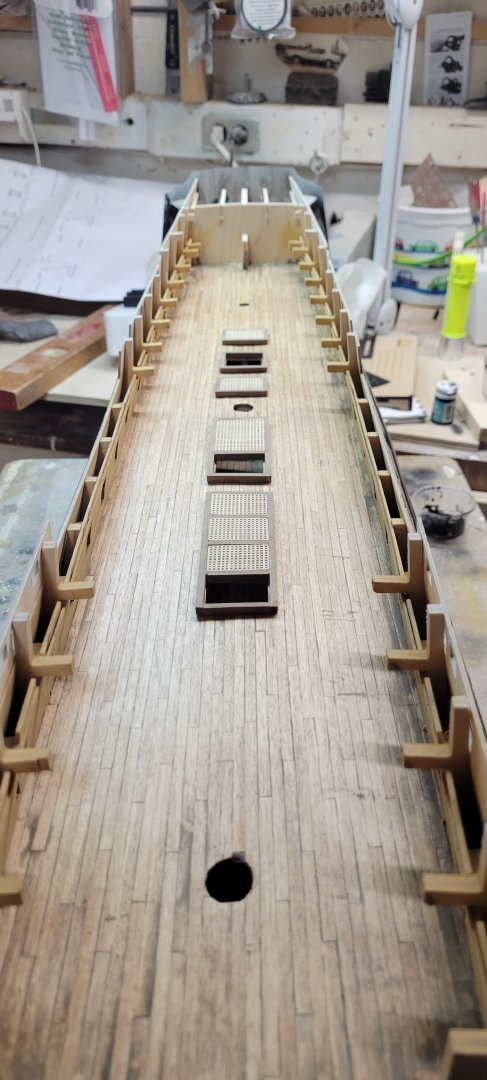
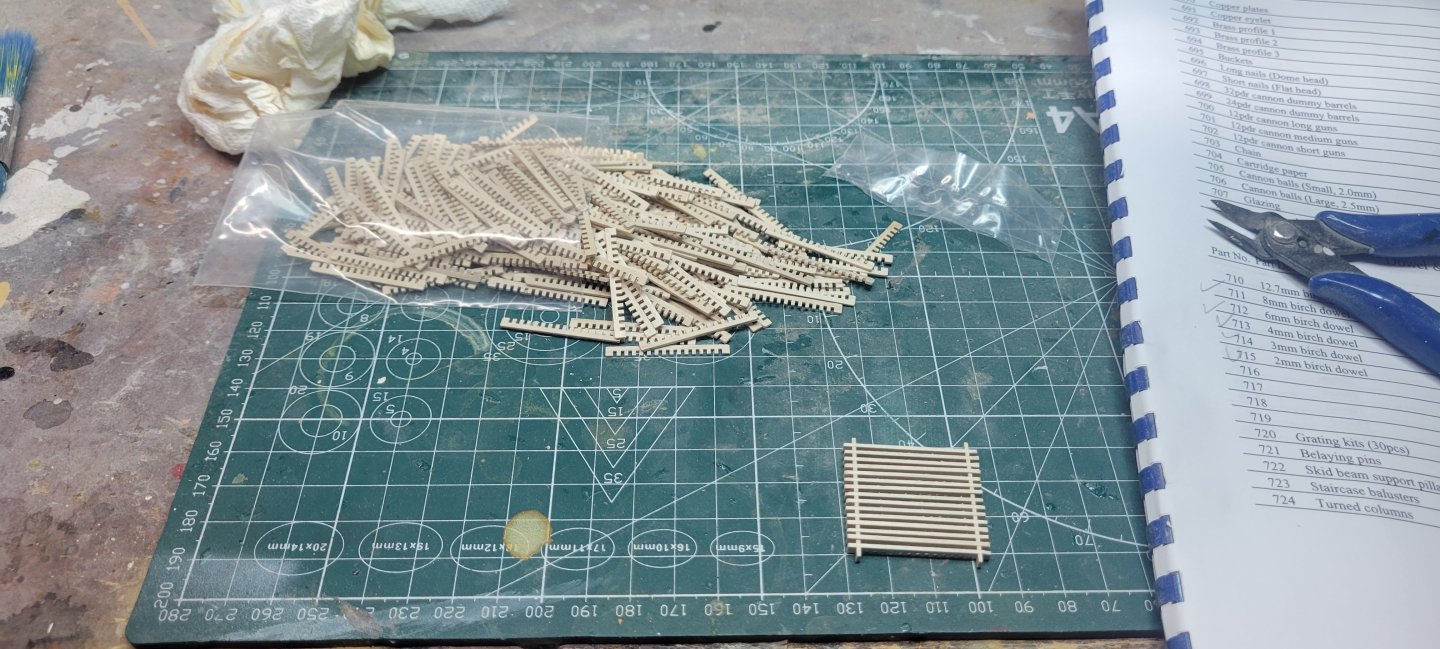
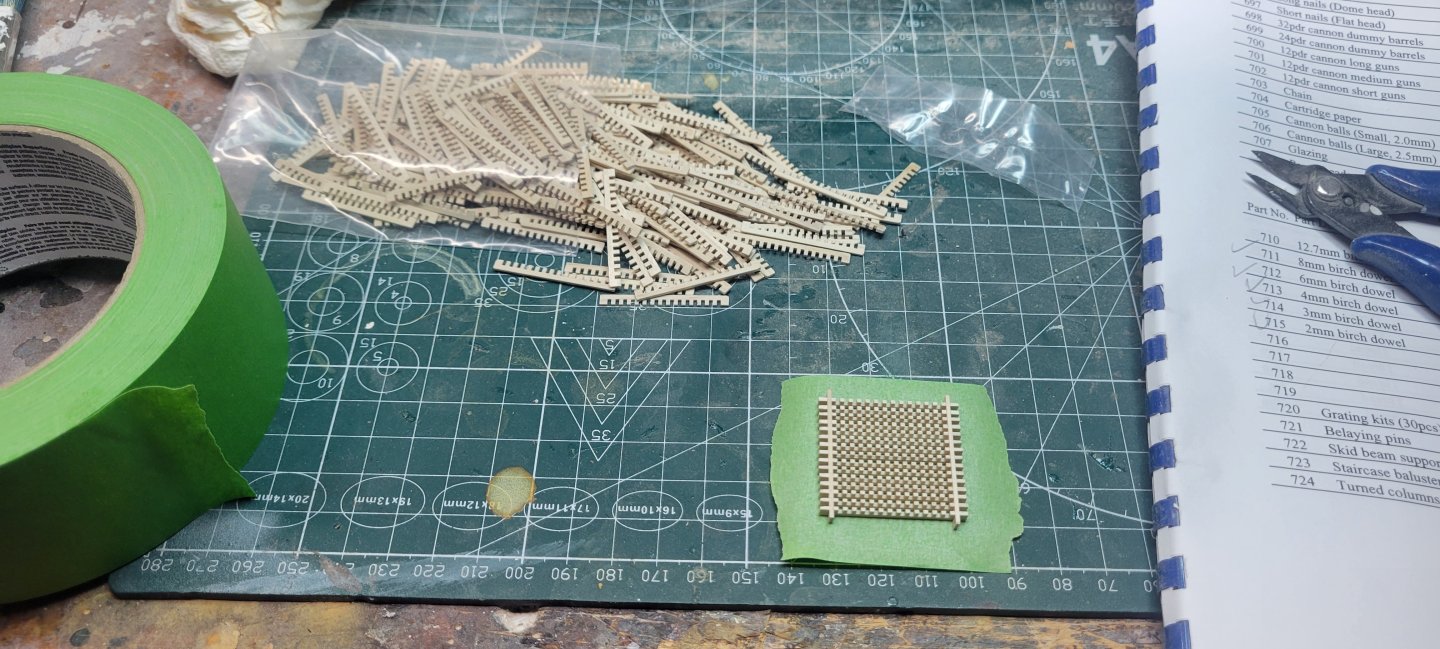
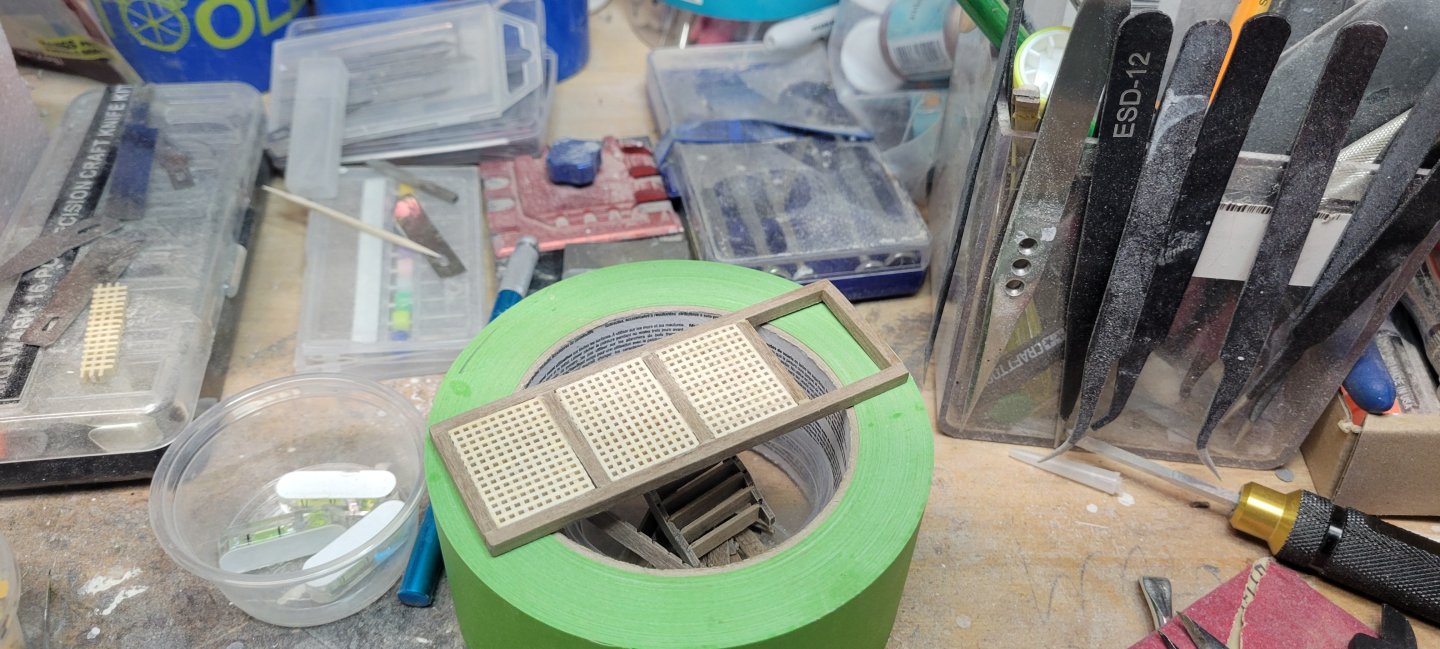
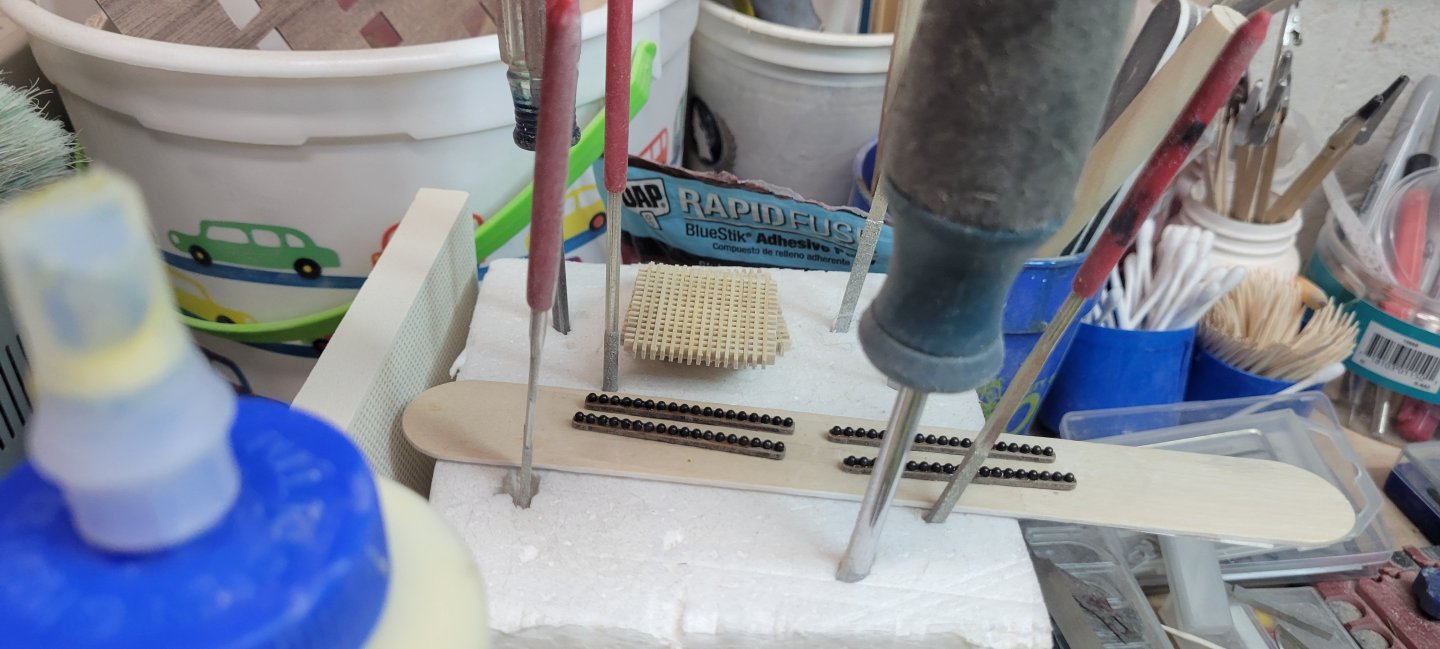
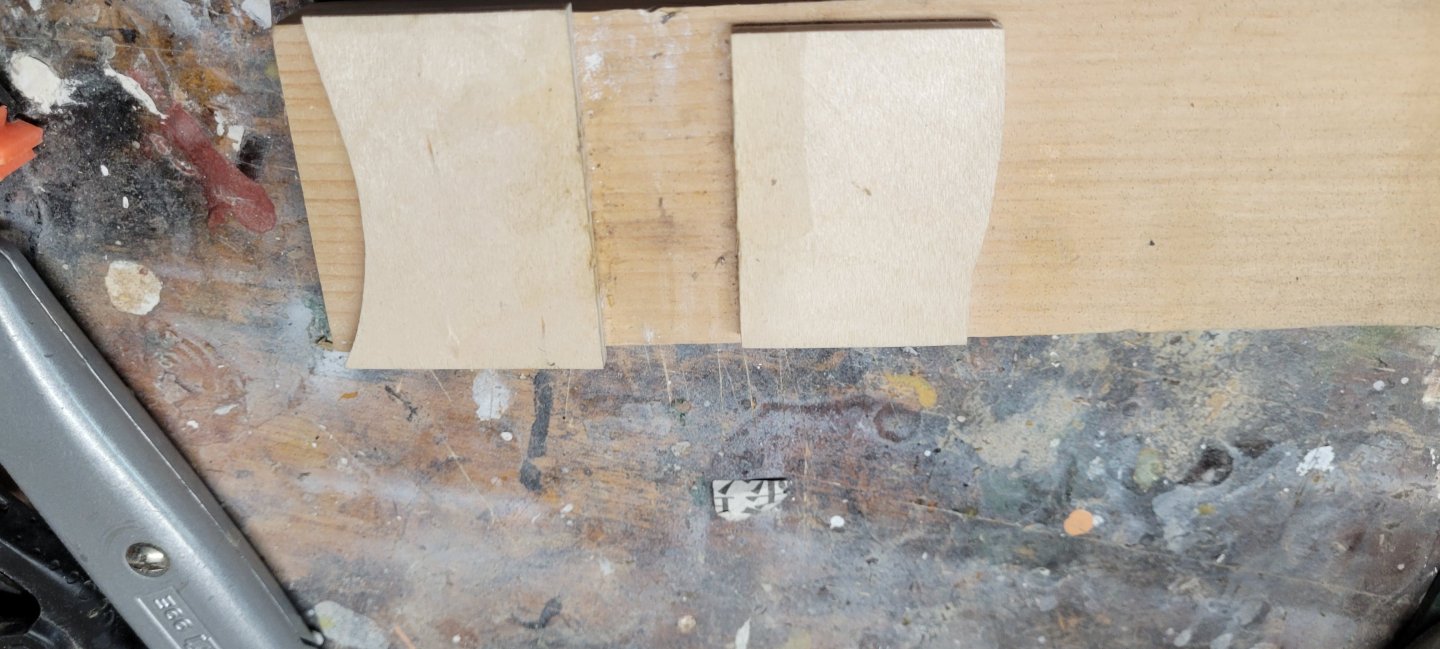
As I waited for that part, I took a stab at some other items. I needed 7 grates and they went together pretty easily. The first one, I installed all the grates for one side, then put a piece of masking tape over the whole piece to flip over. I thought that was a good tactic but the tape keeps the assembly from moving, so if it isn't square, the next set of grates are harder to install. After that, I removed the tape after flipping it and it went very easy after that. Installing the coamings for the grates was a bit of a task. The plan required mitering of the corners. I didn't have anything to cut reliable angles, but I do have a full size band saw with a small 1/4" blade but I don't have any slides for cutting angle. So the first grating I just cut everything at 90 degree angles. It worked fine. I ordered a cheap cutter and it came the next day. I cut 2 or 3 pieces of 3mmx4mm walnut and the blade broke. In addition, it cut lousy angles and it was impossible to see my cutting lines. I ordered a more expensive wooden version of a cutter and while I haven't used it yet, it appears to be a higher quality. I finished all the gratings with the plastic cutter and filled any gaps with wood putty. Making the stairs was hell itself. The instructions suggest the ideal tactic is to make a jig. I do not believe you can do this without using a jig. The treads at 1mm in thickness just do not easily fit into the side rails without a bit of force. You can see just below the 3 stairs I did. The middle one was my first non jig attempt. It is a horror to look at. The one on the right was with the jig, but I took it out too soon. The pressure created by the tightly fitting treads pushed the whole thing a part and the side rails broke trying to get humpty dumpty back together again. The left one, I left in till the glue set up better. My fear is that once dry, I wouldn't be able to get the stairs out. So it's a dance to get it out at the right moment. My only saving grace is that these stairs are mostly hidden under the upper deck which is mostly hidden by the quarter deck....and they will prepare me for what I need to do for the stairs on the quarter and top decks which will be very visible.


-
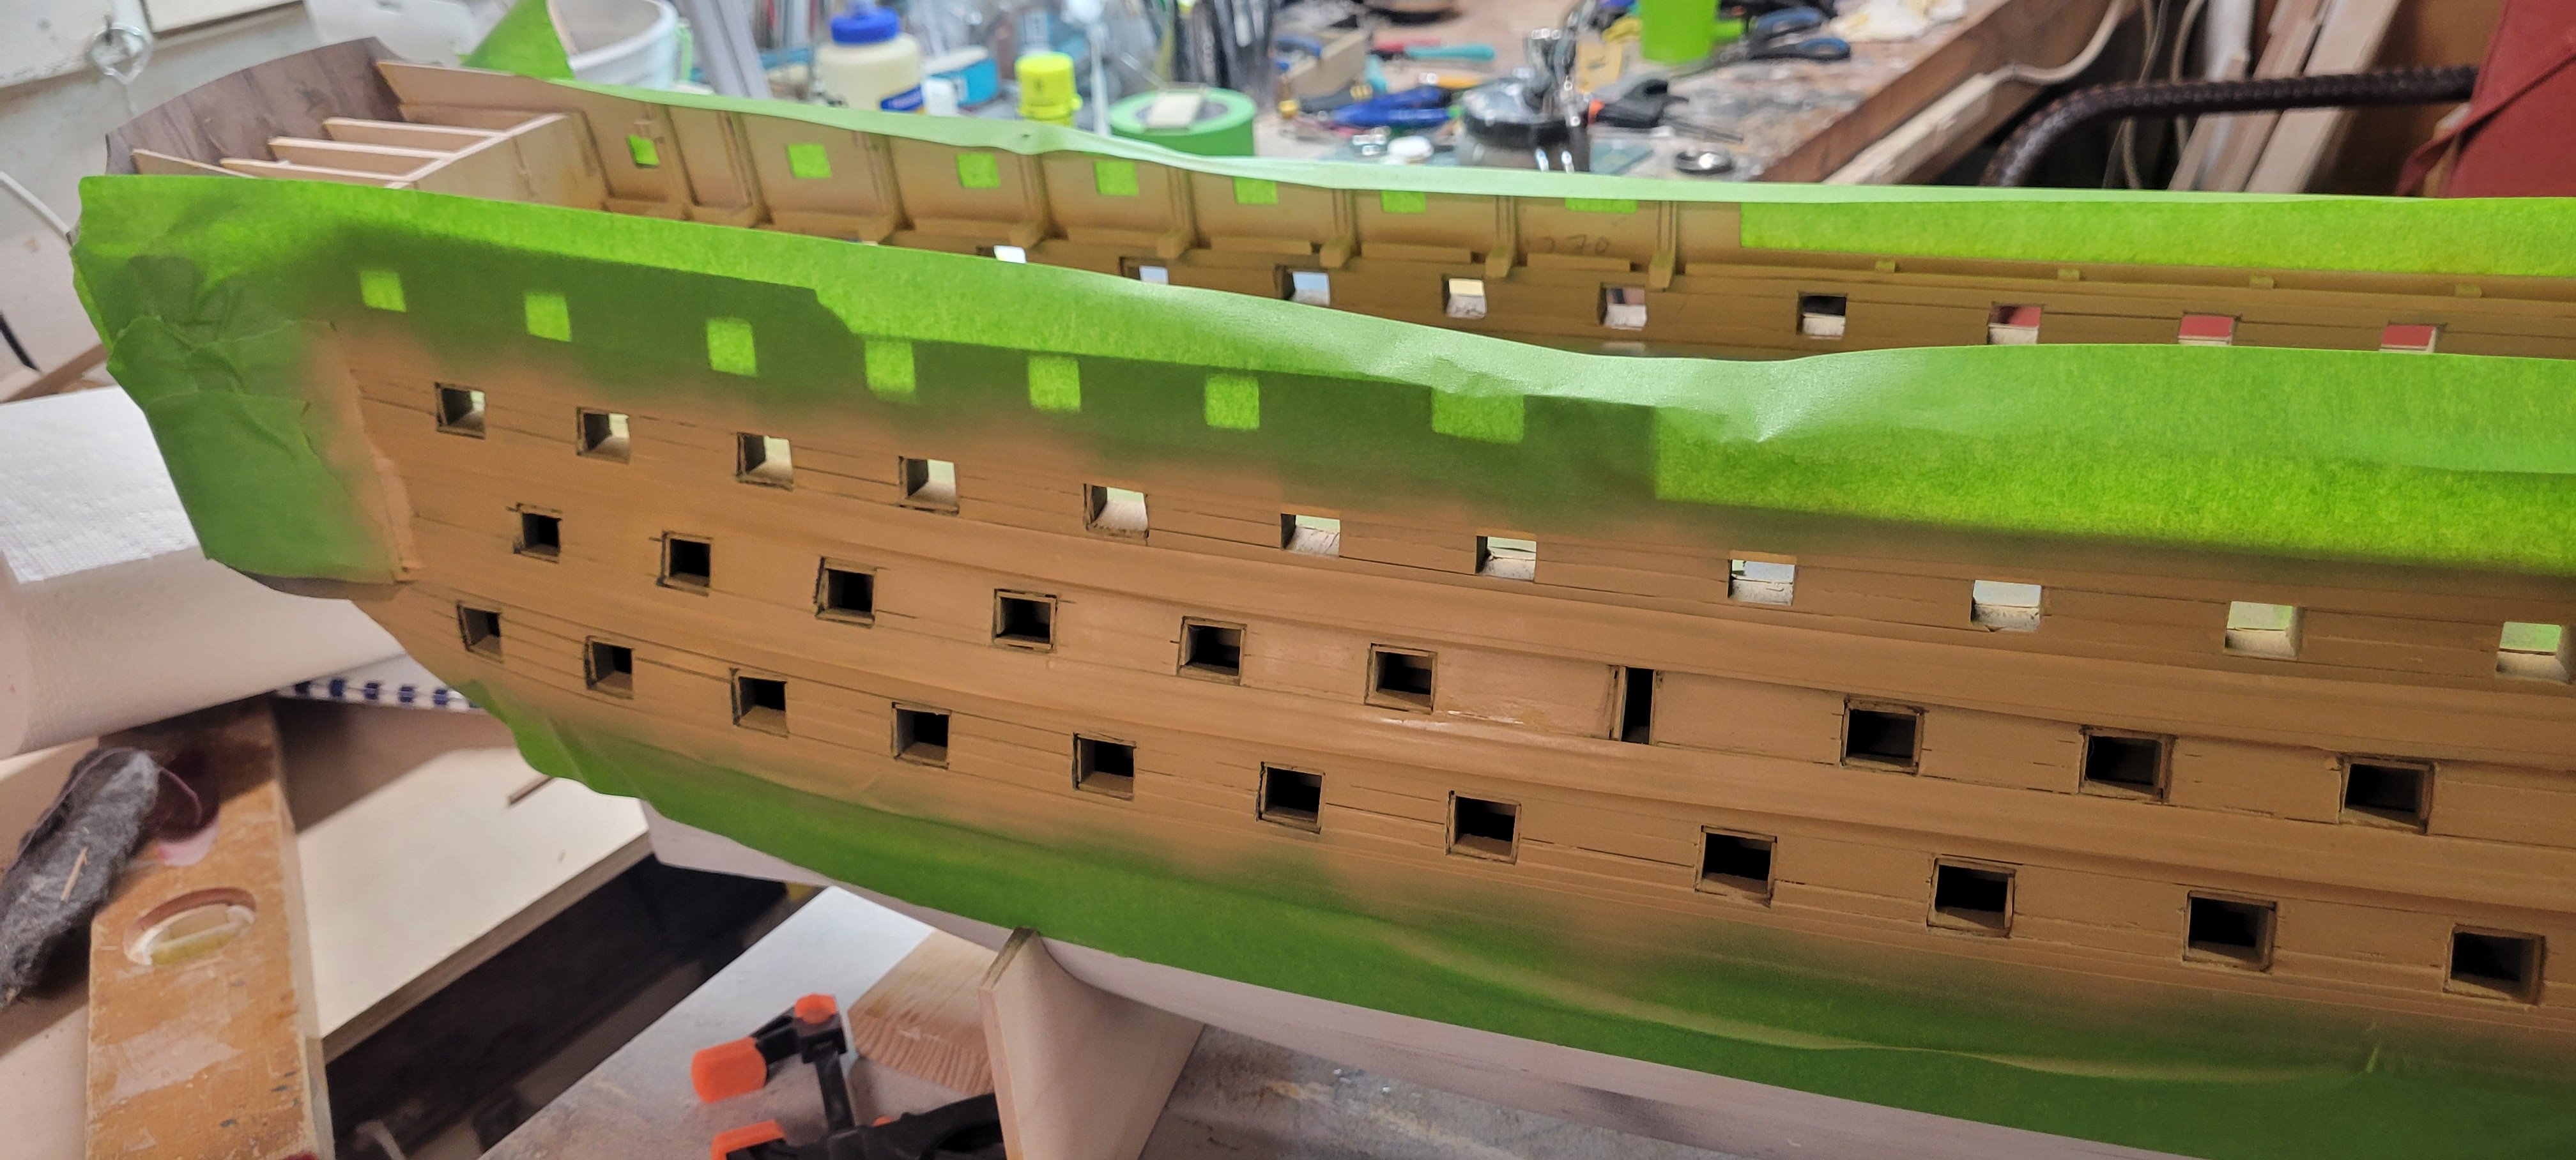
I taped off striping for the hull and then began laying down the first layer of yellow ochre. Unfortunately, while cleaning the airbrush, the chucking nut that holds the needle in place fell on the floor. This is the second time I've done that. Last time while painting my Titanic model and I never found it. I did not find this one....I tried to paint without it, but the flow was too heavy. So I had to order a new one....ordered two this time.


-
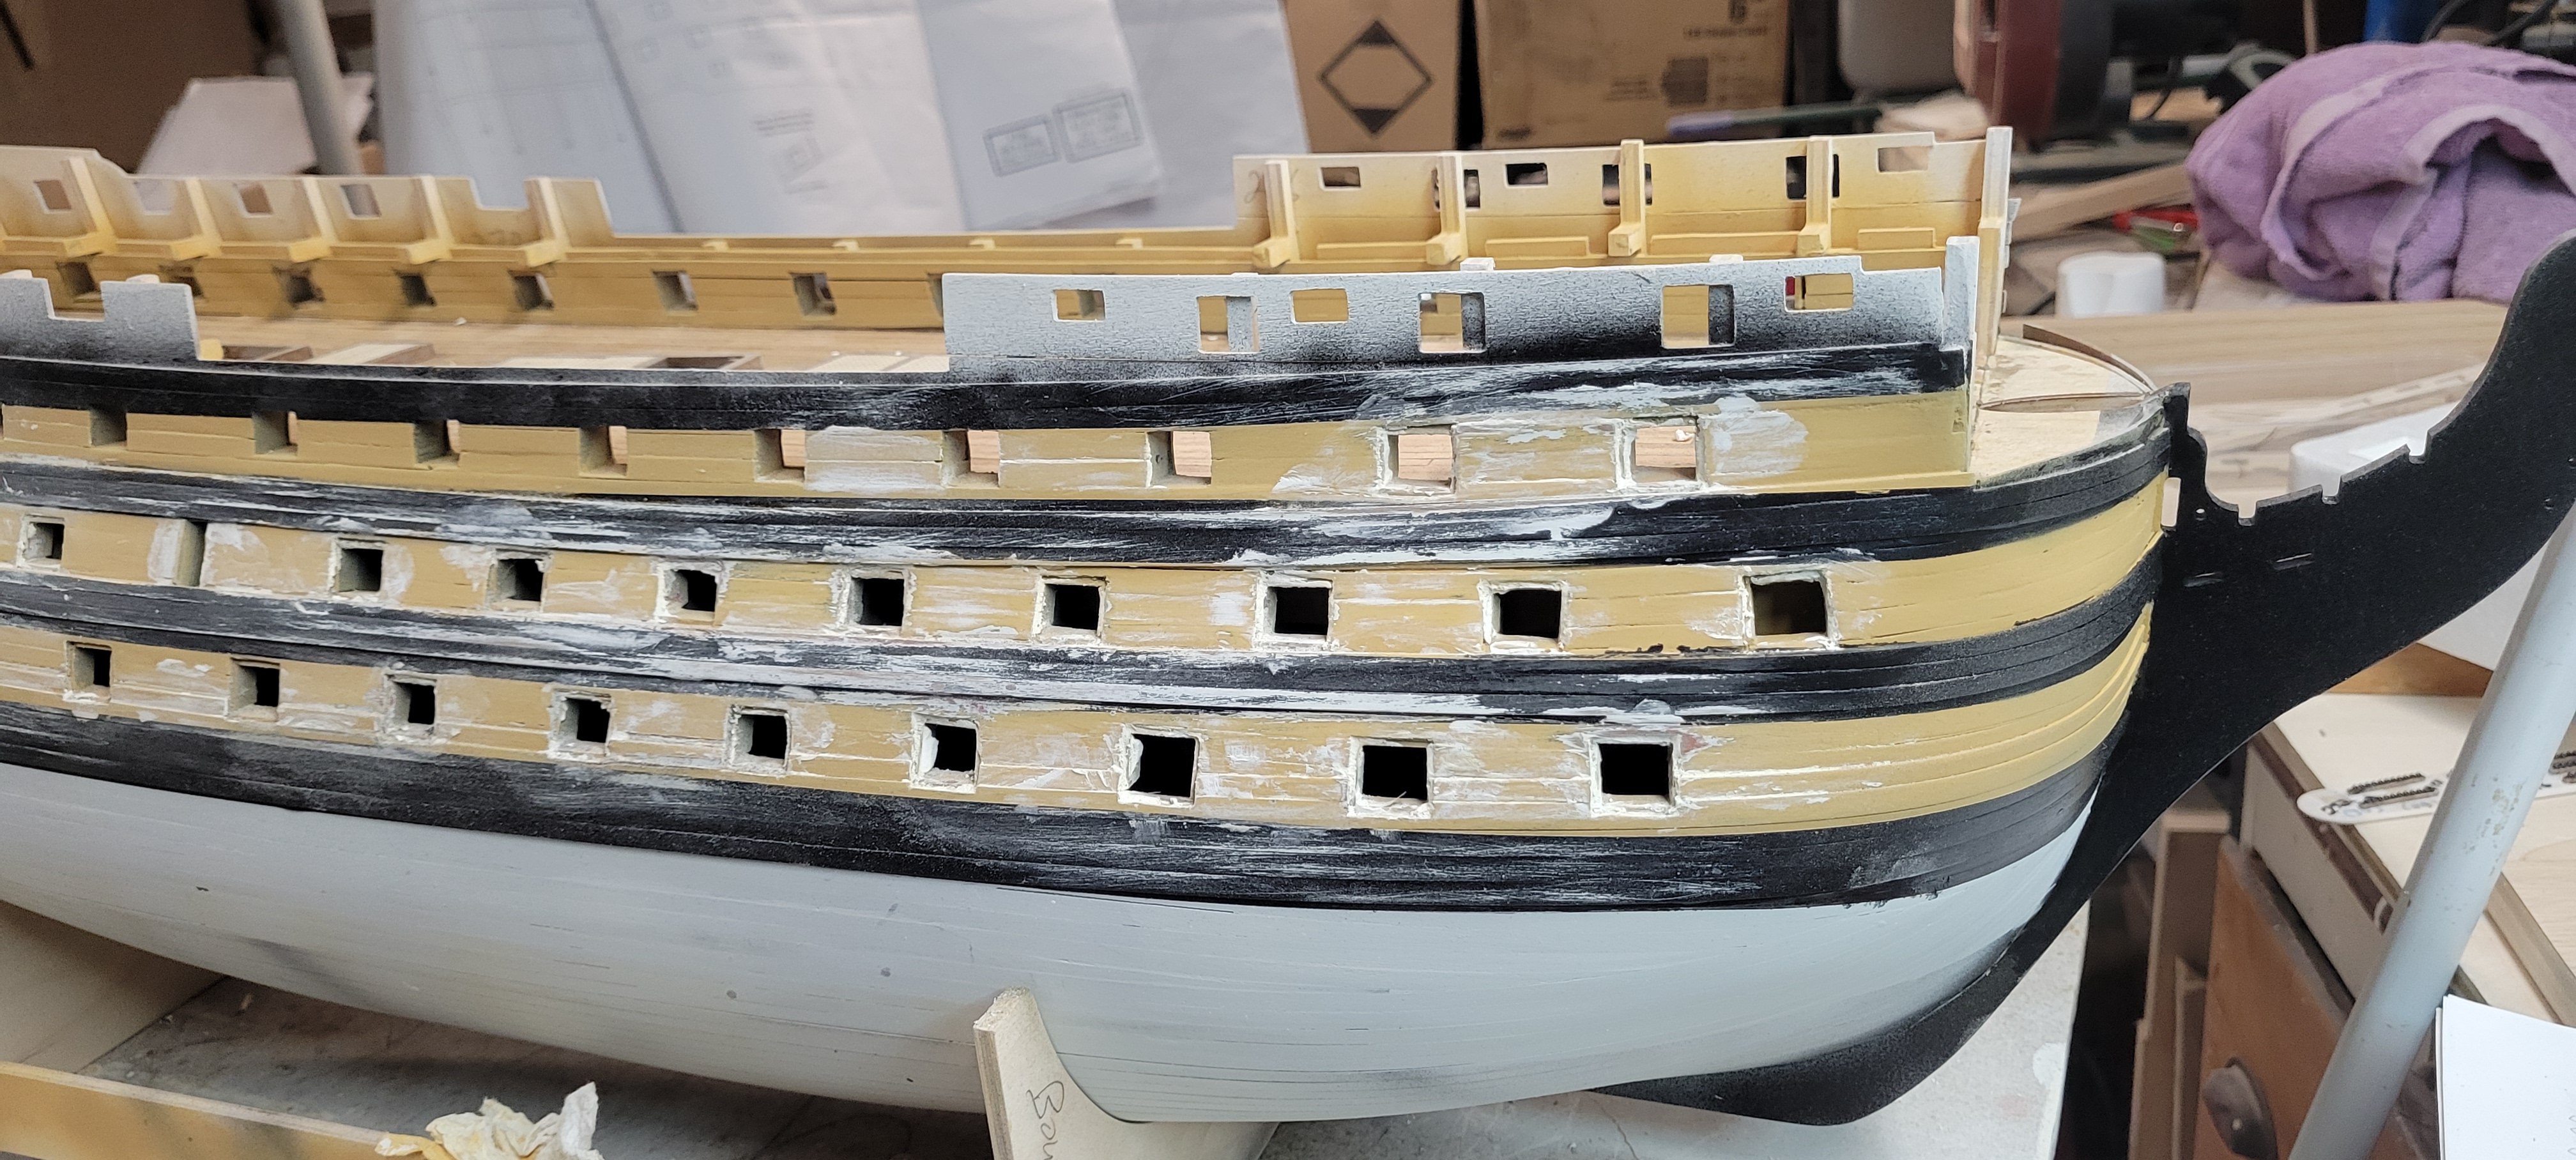
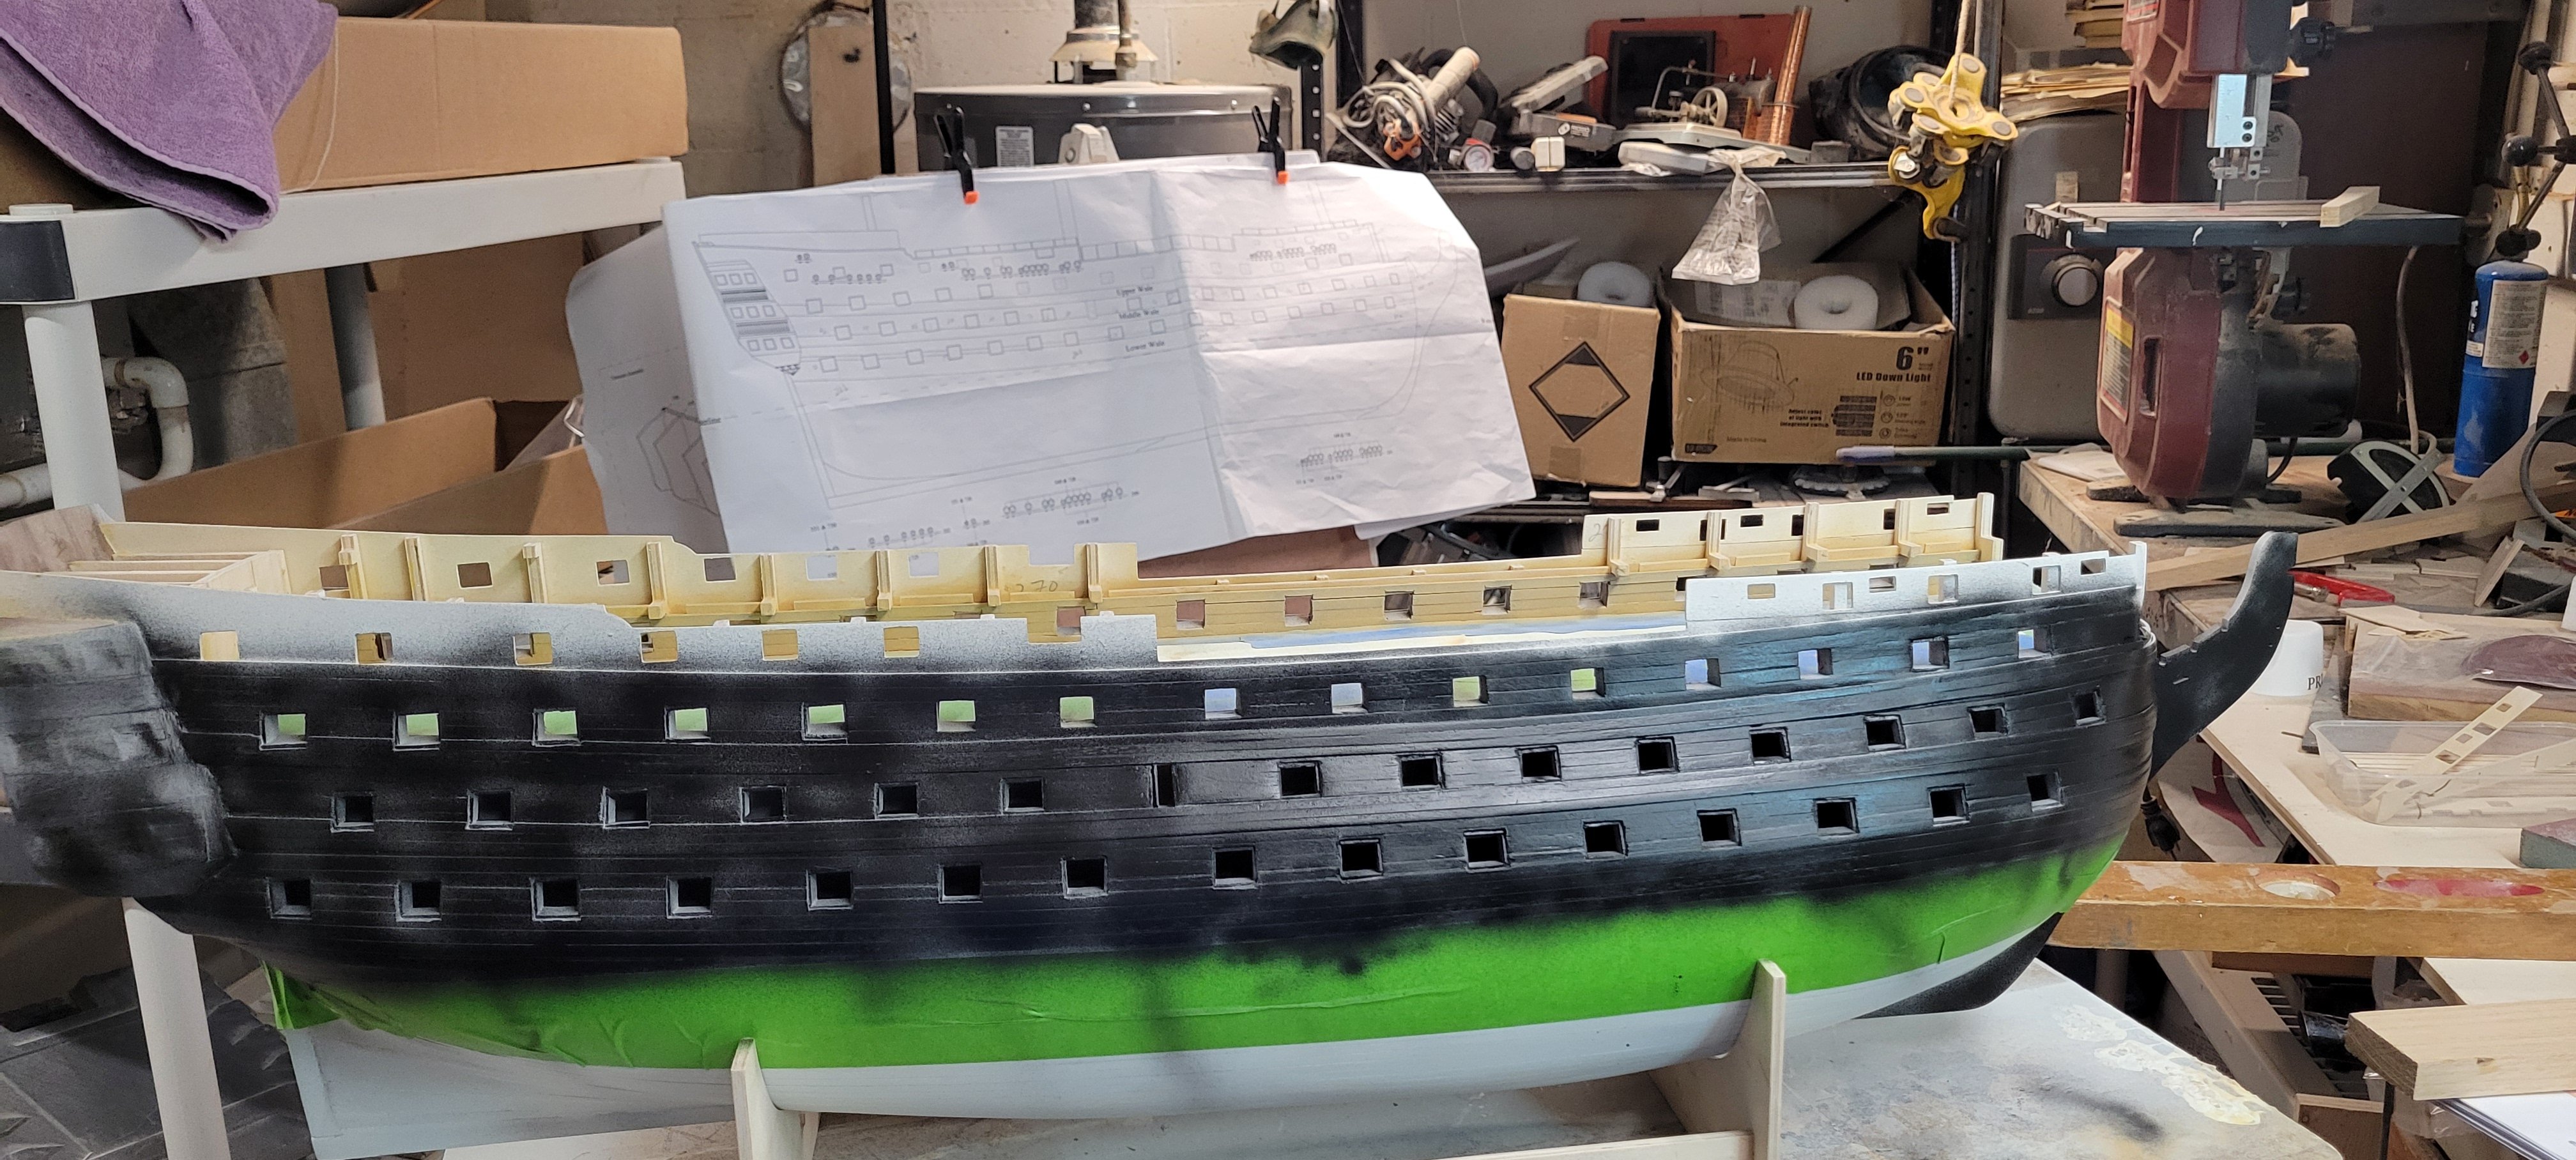
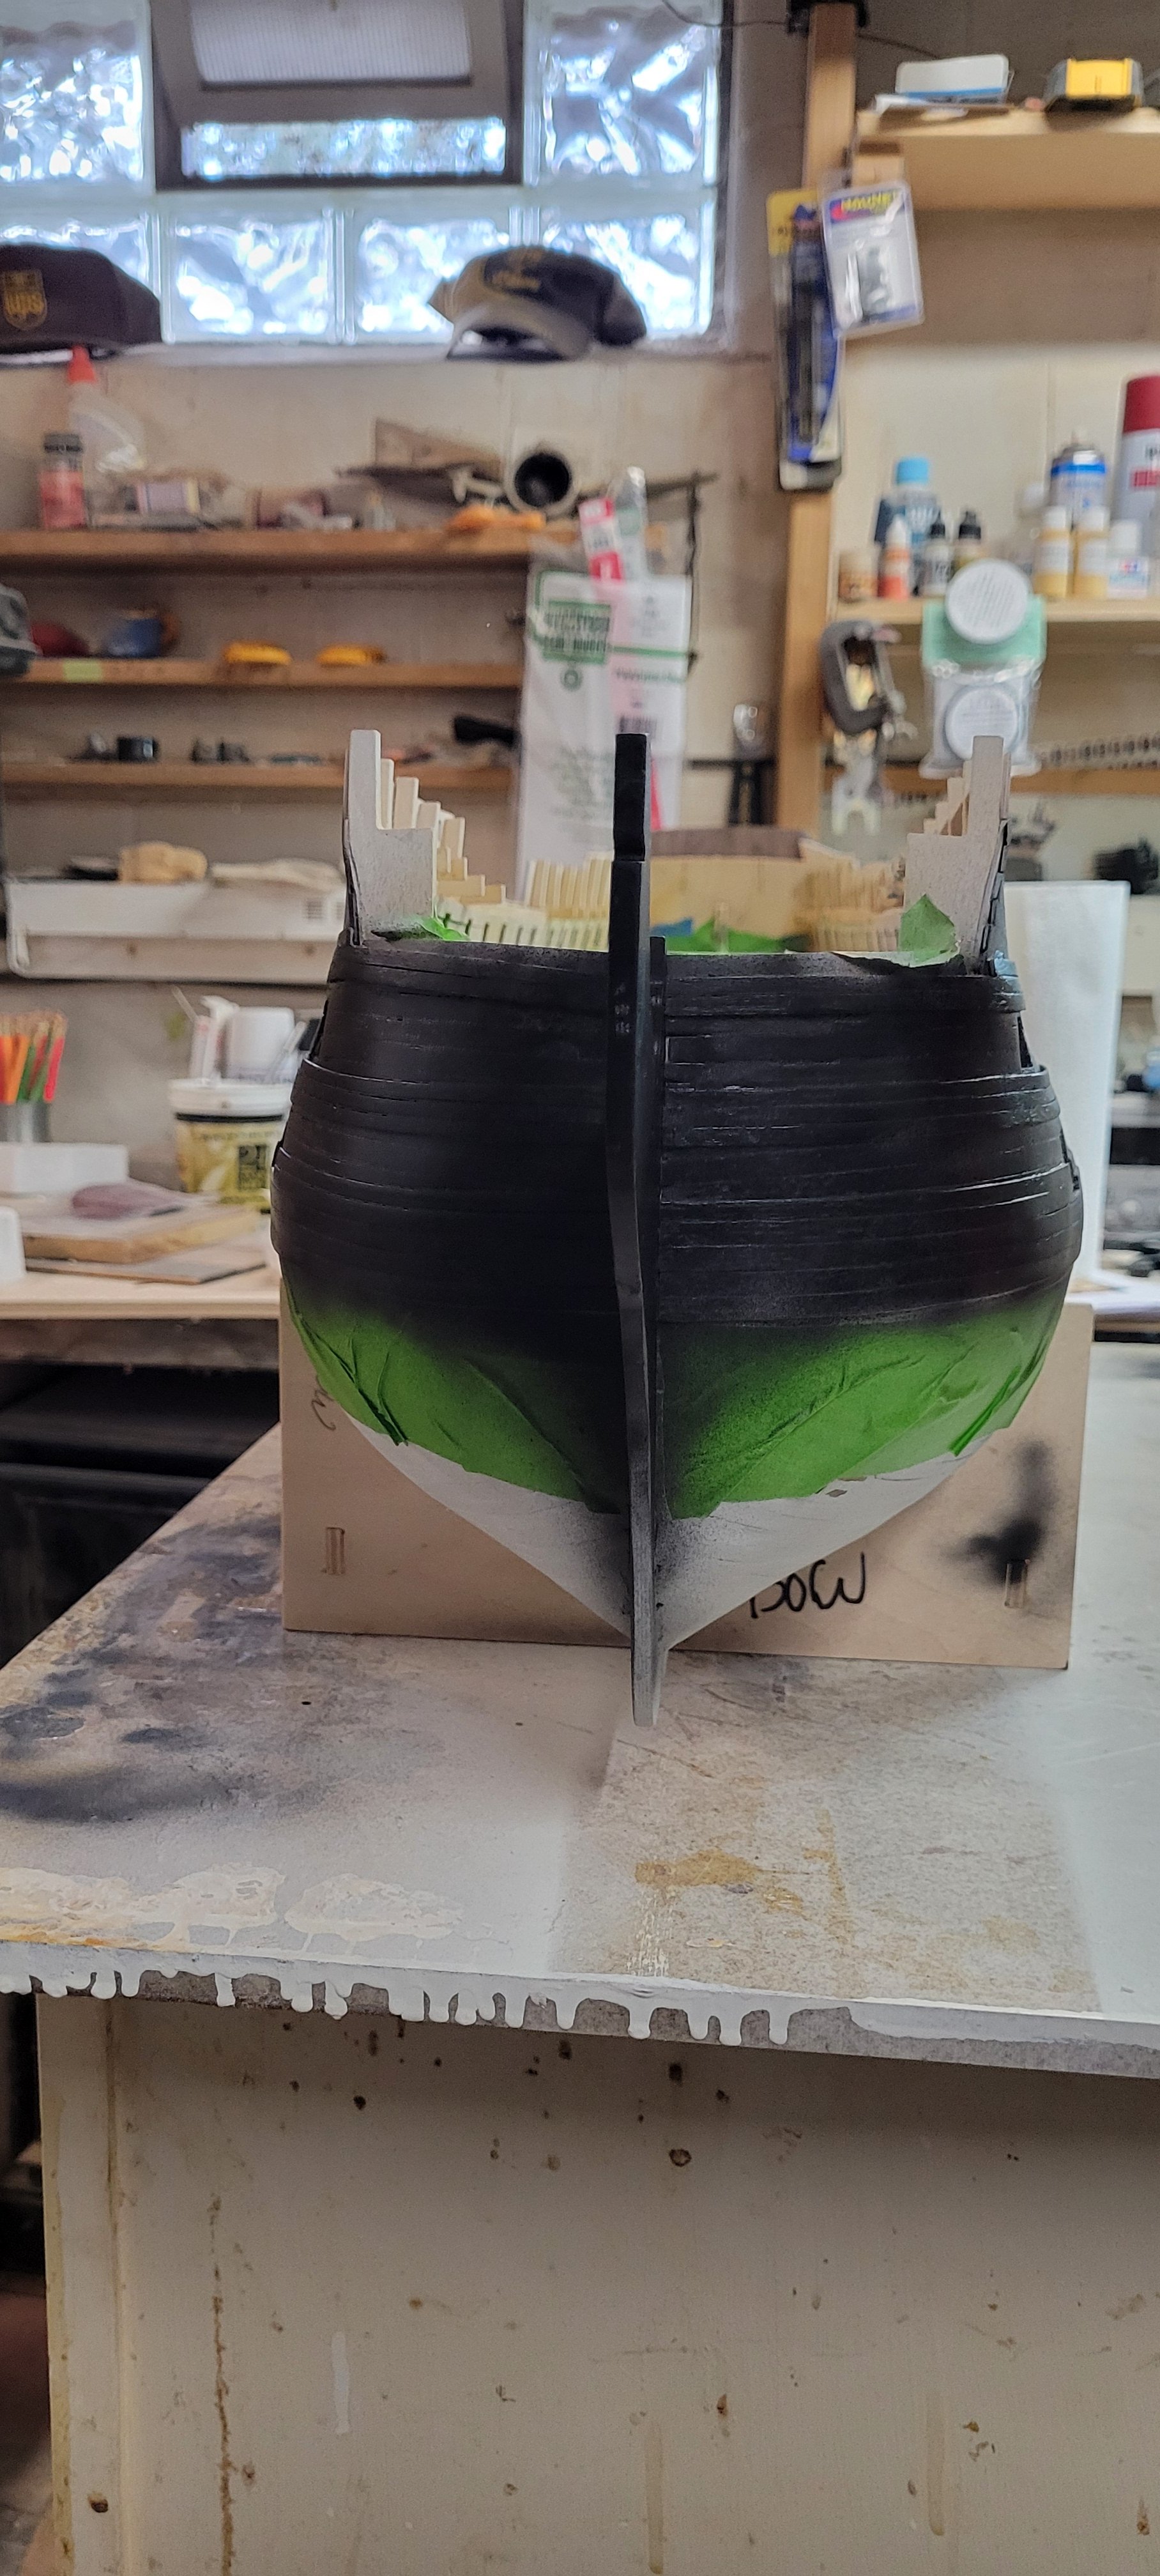
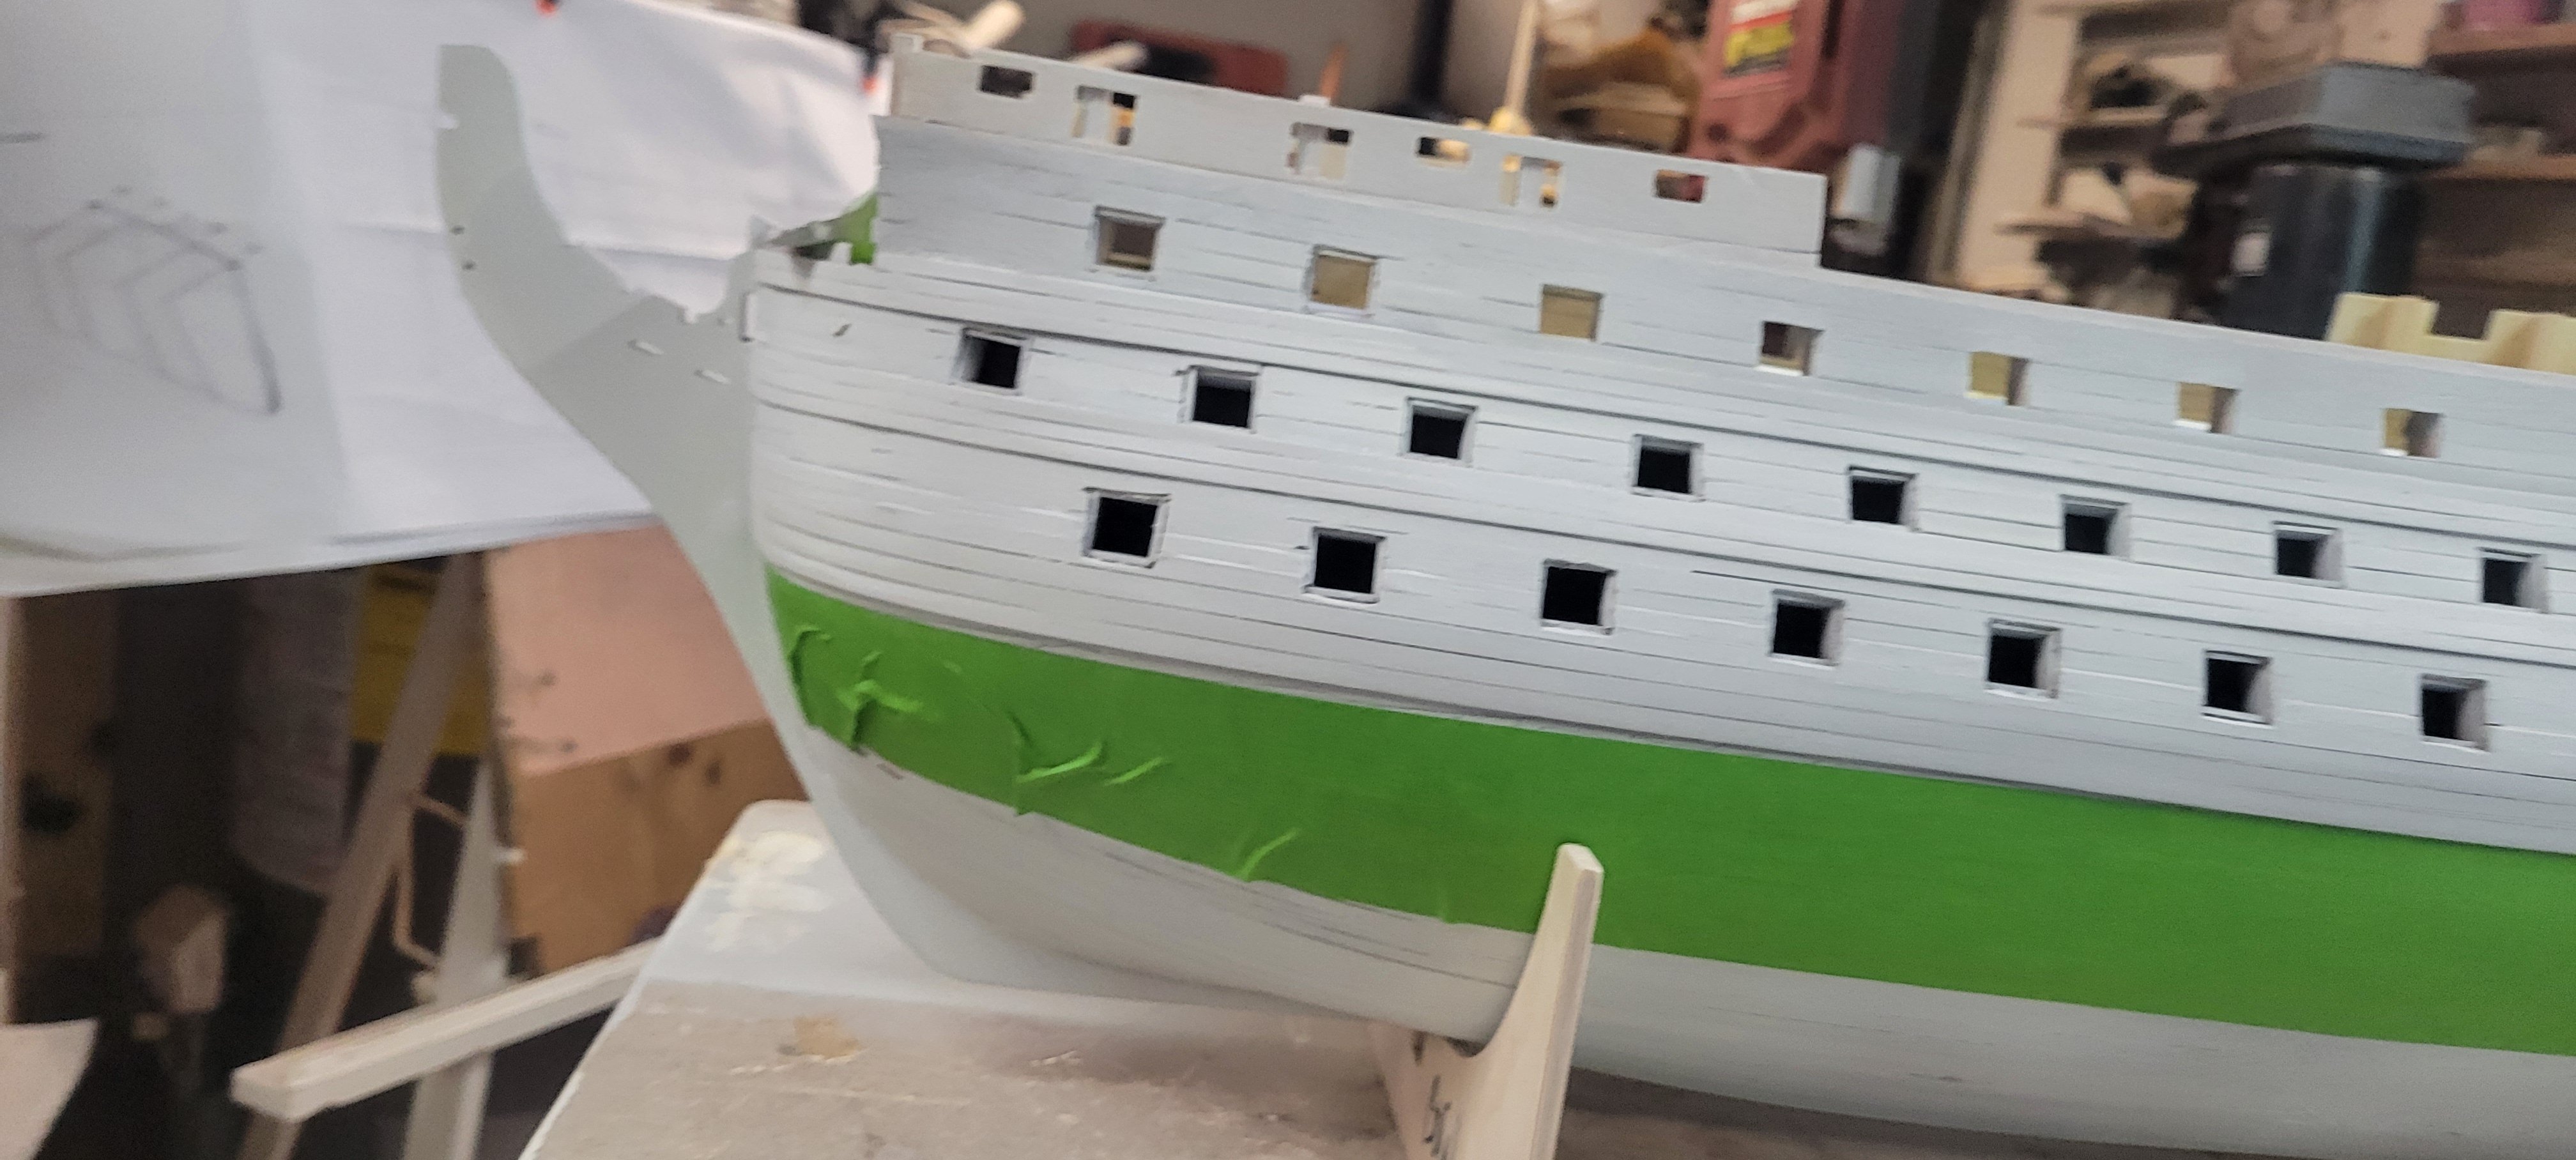
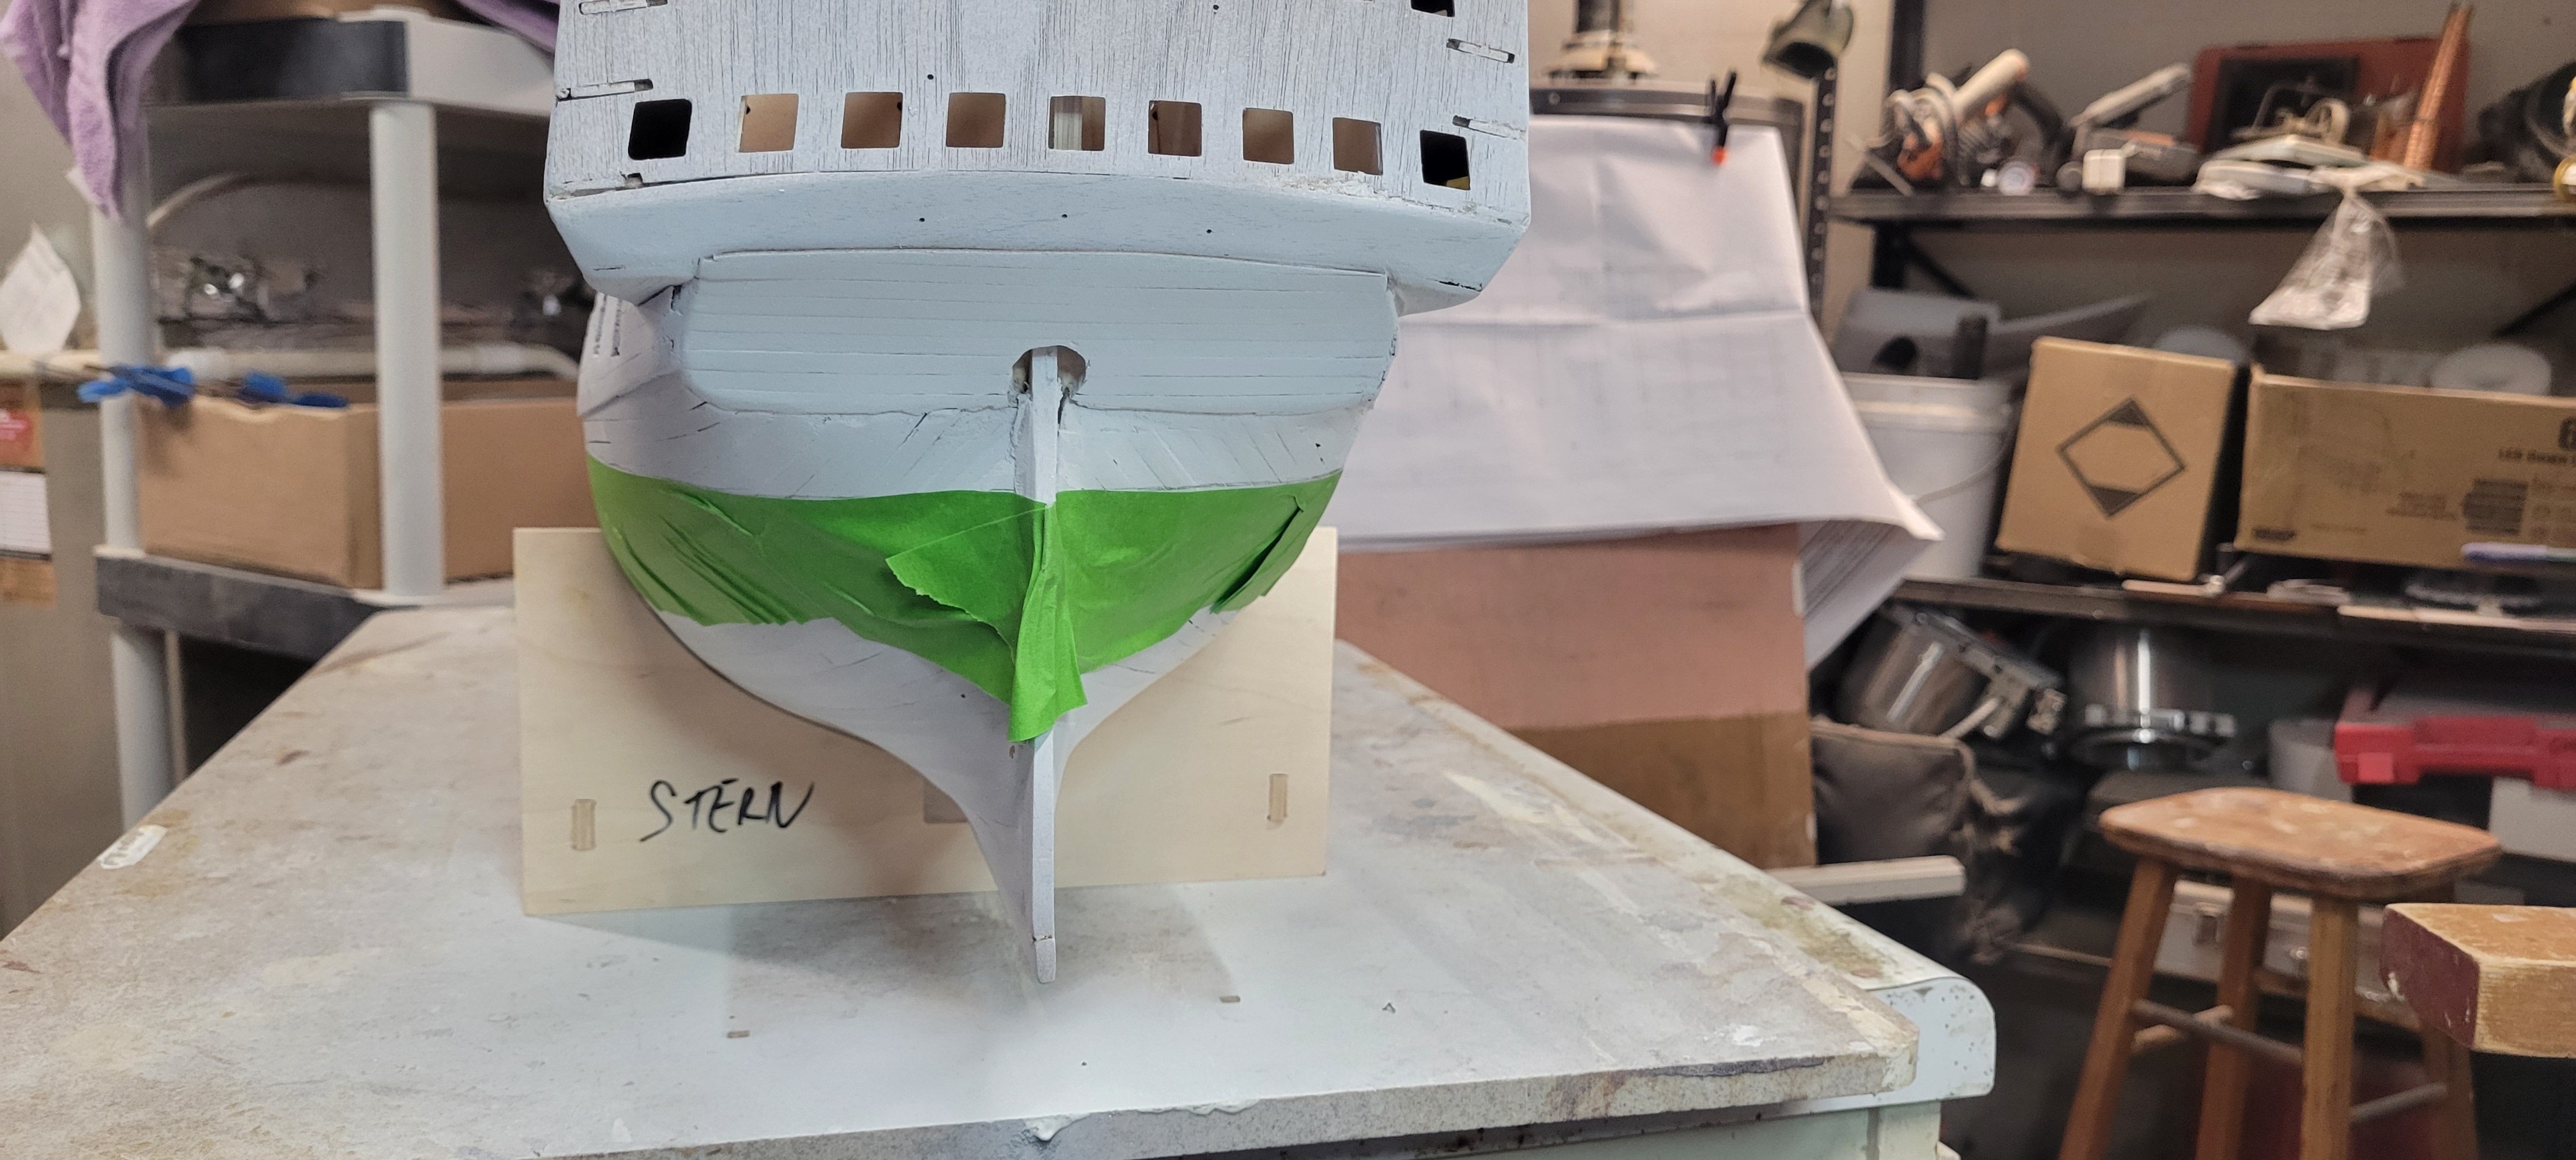
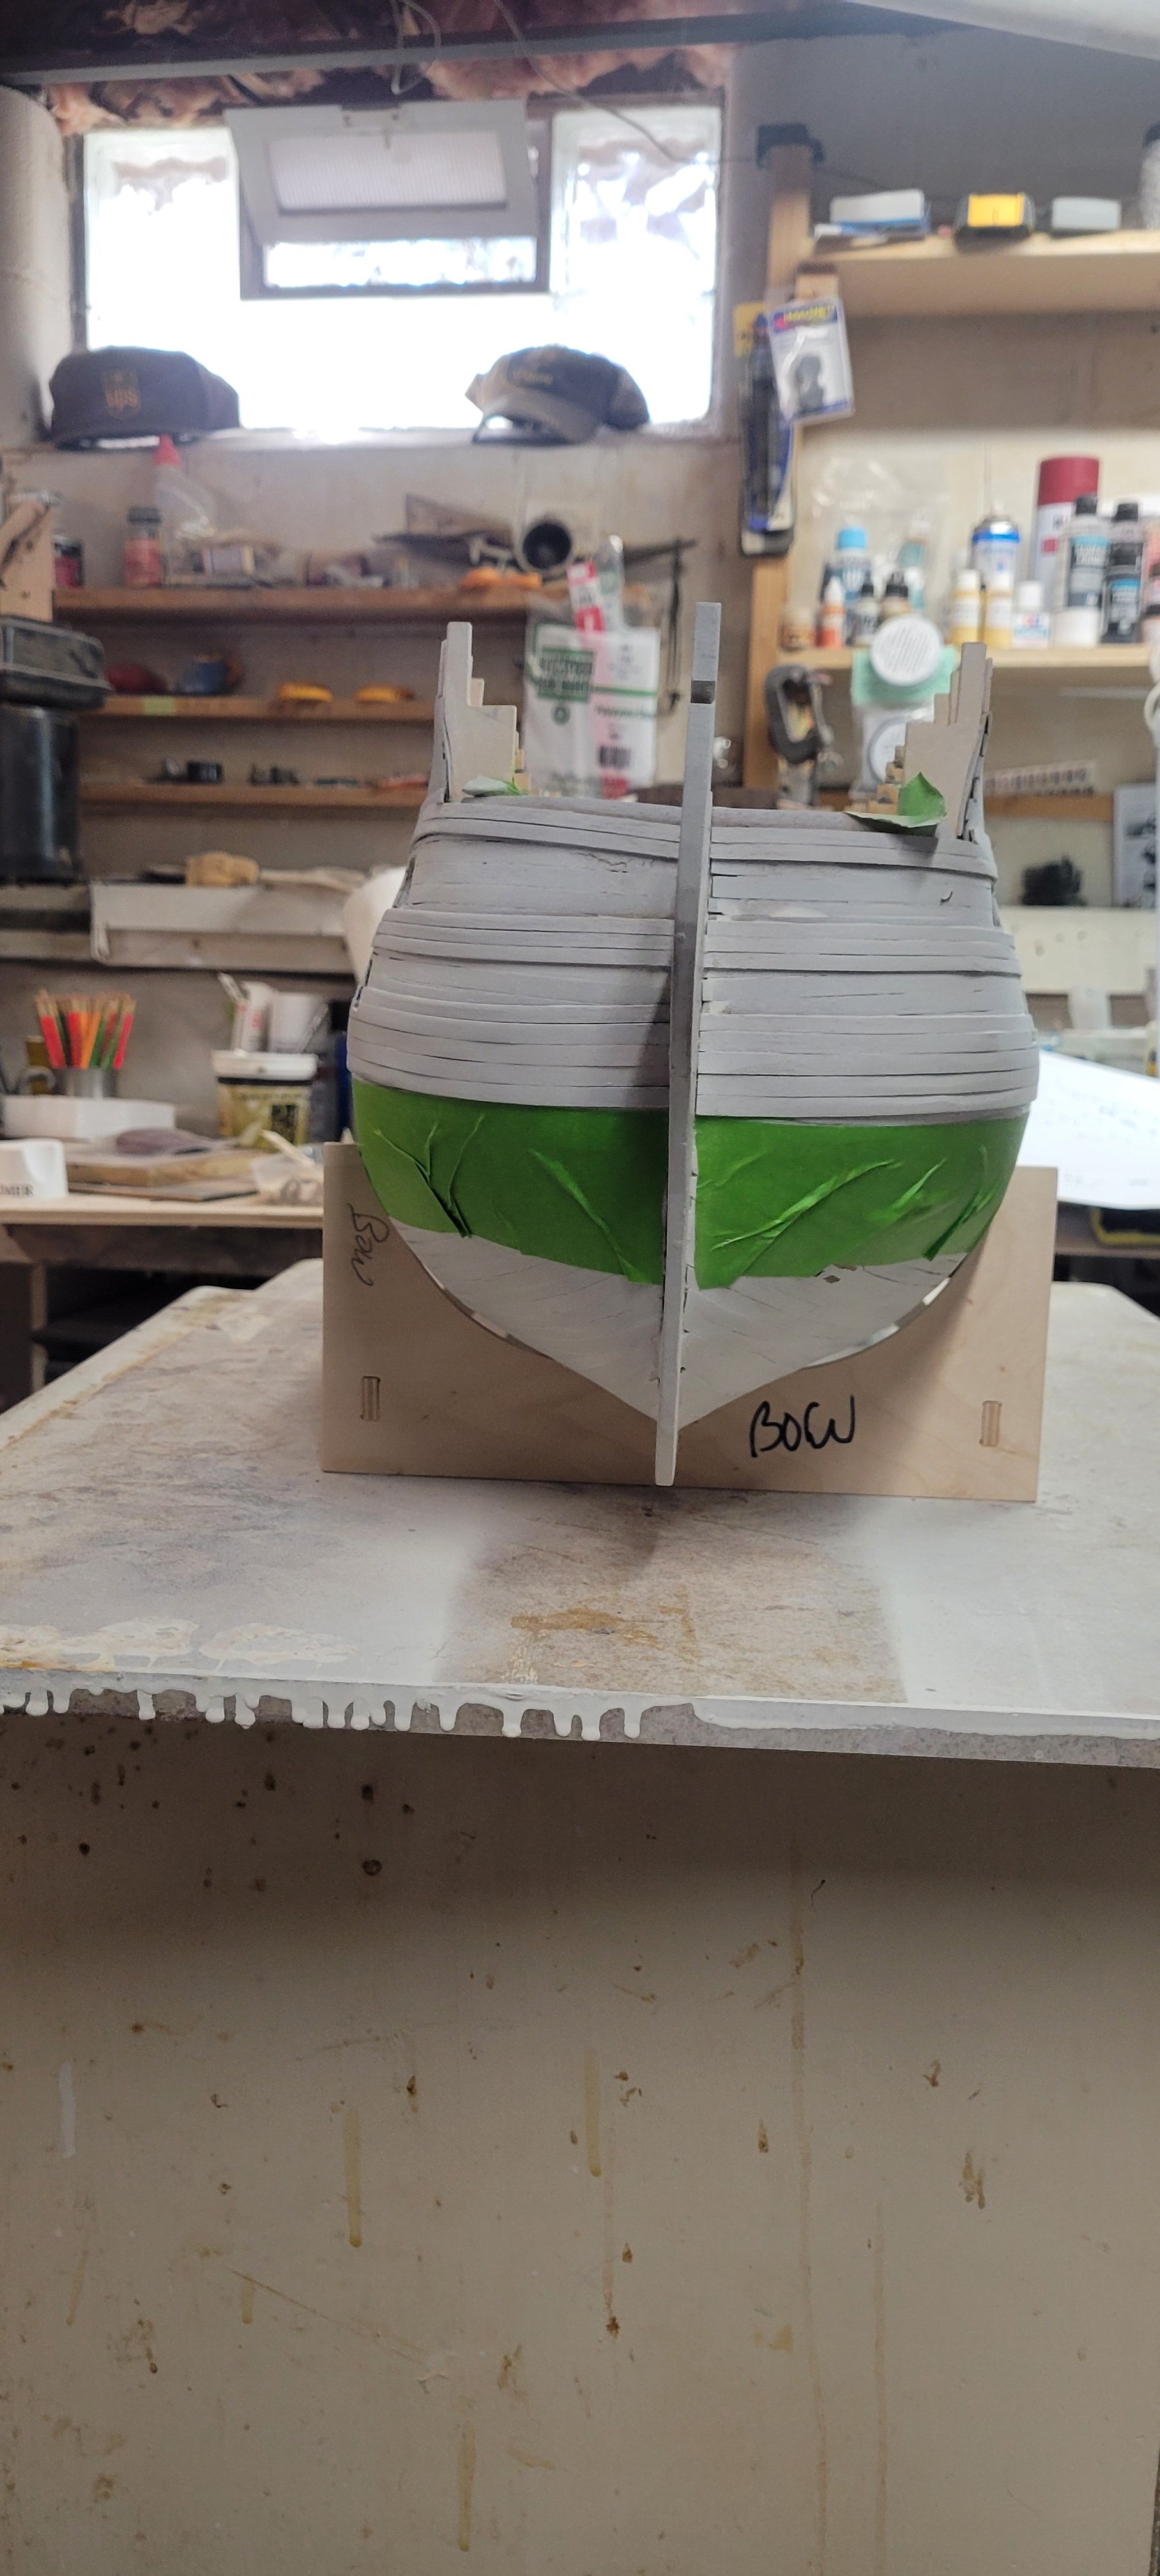
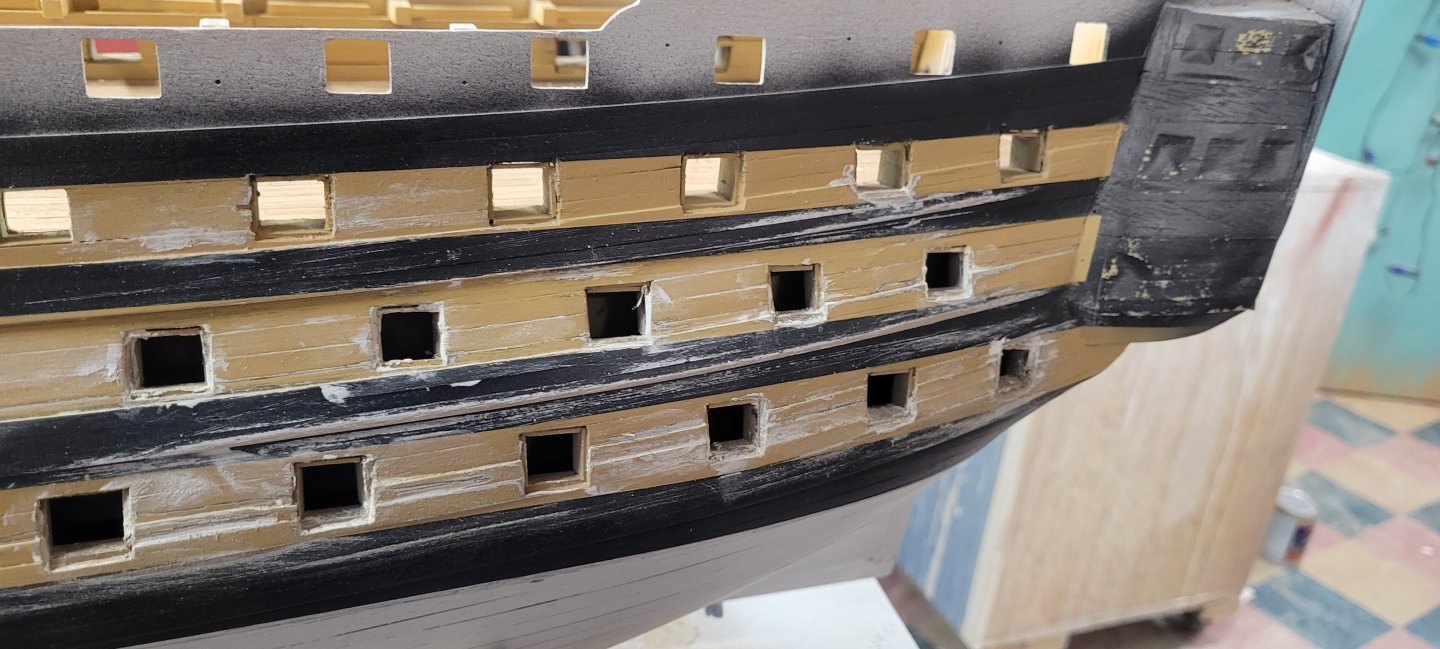
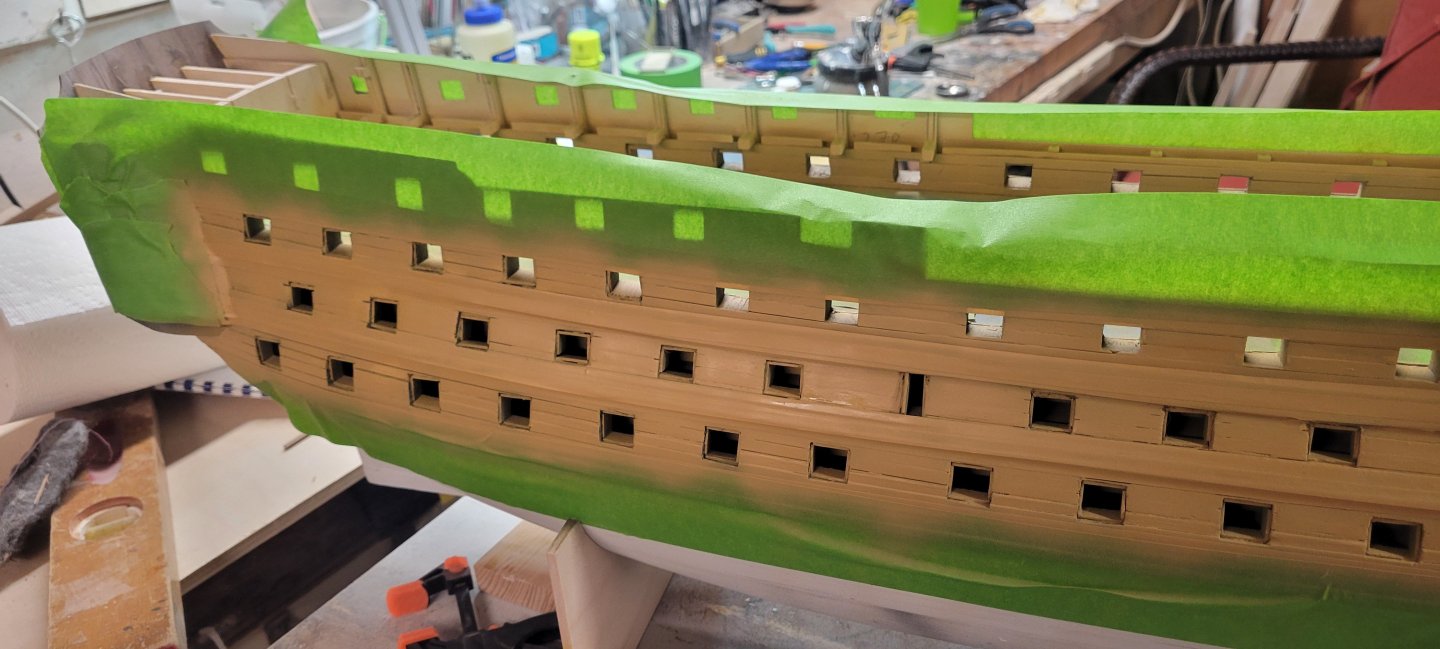
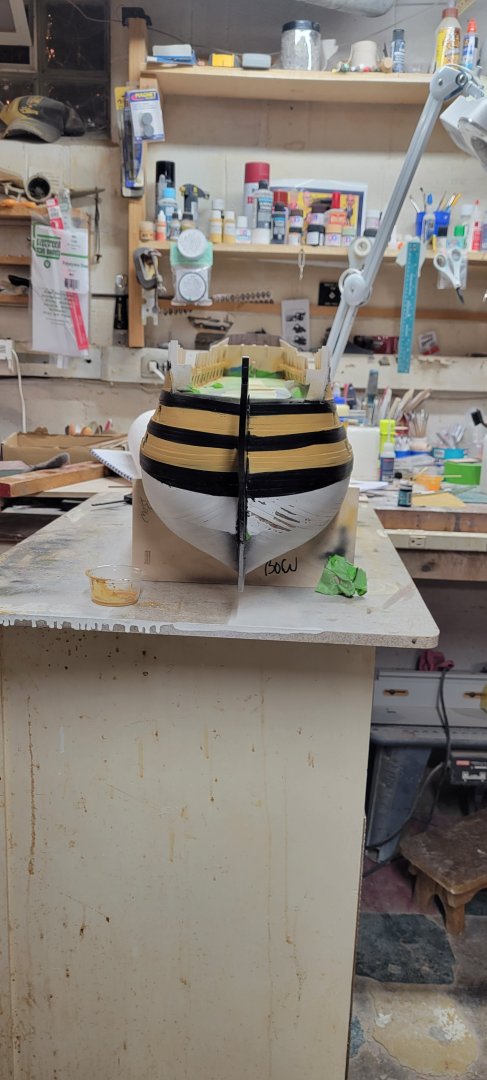
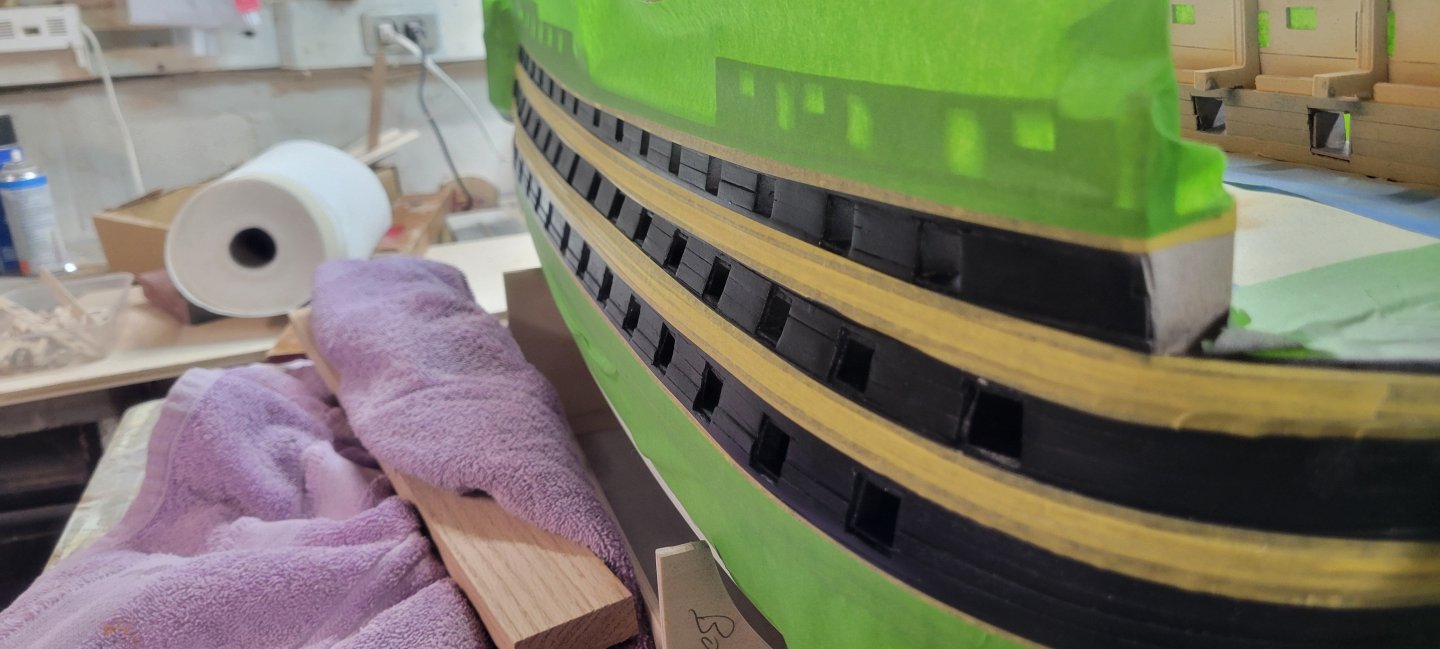
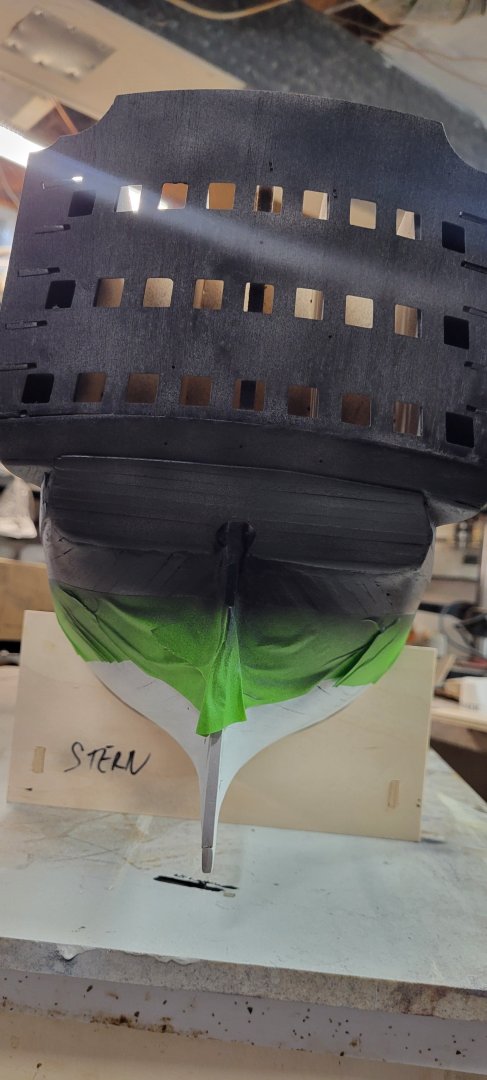
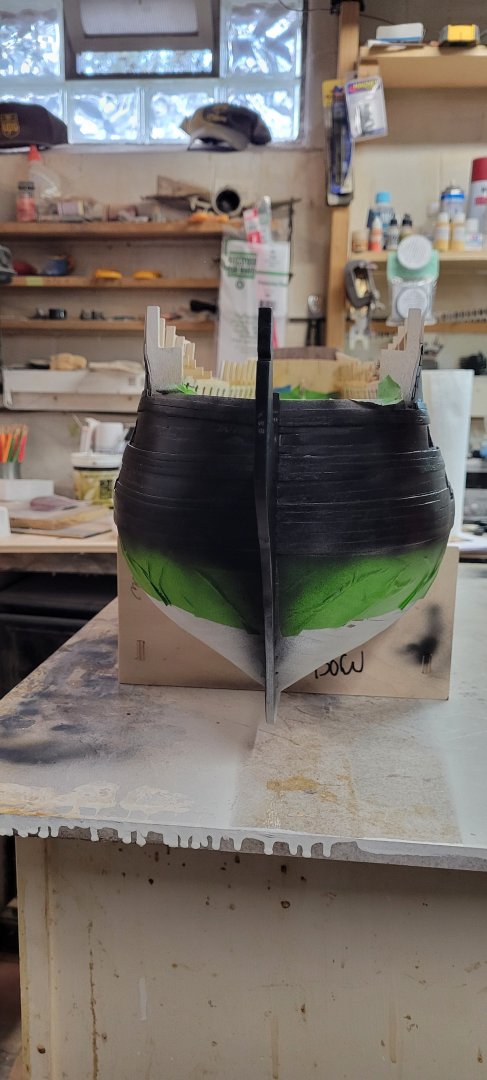
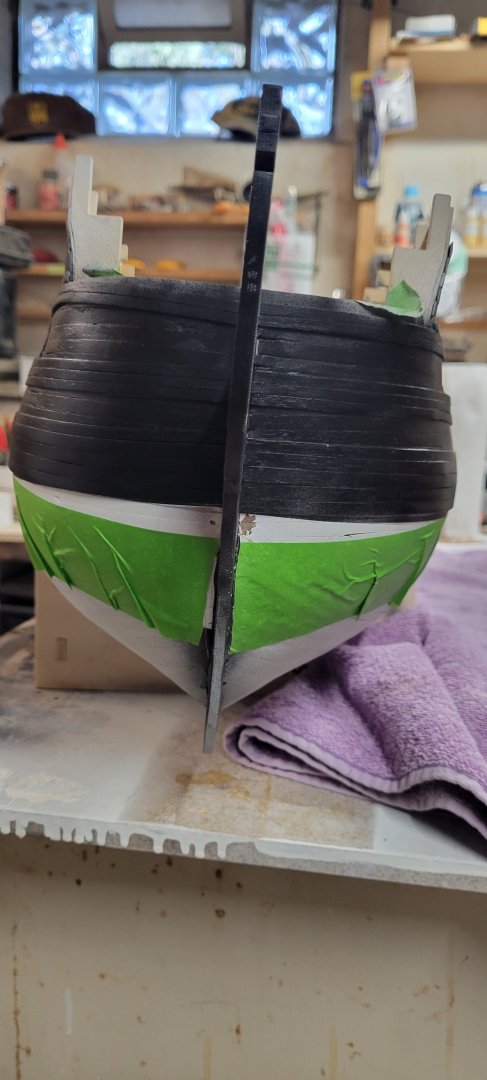
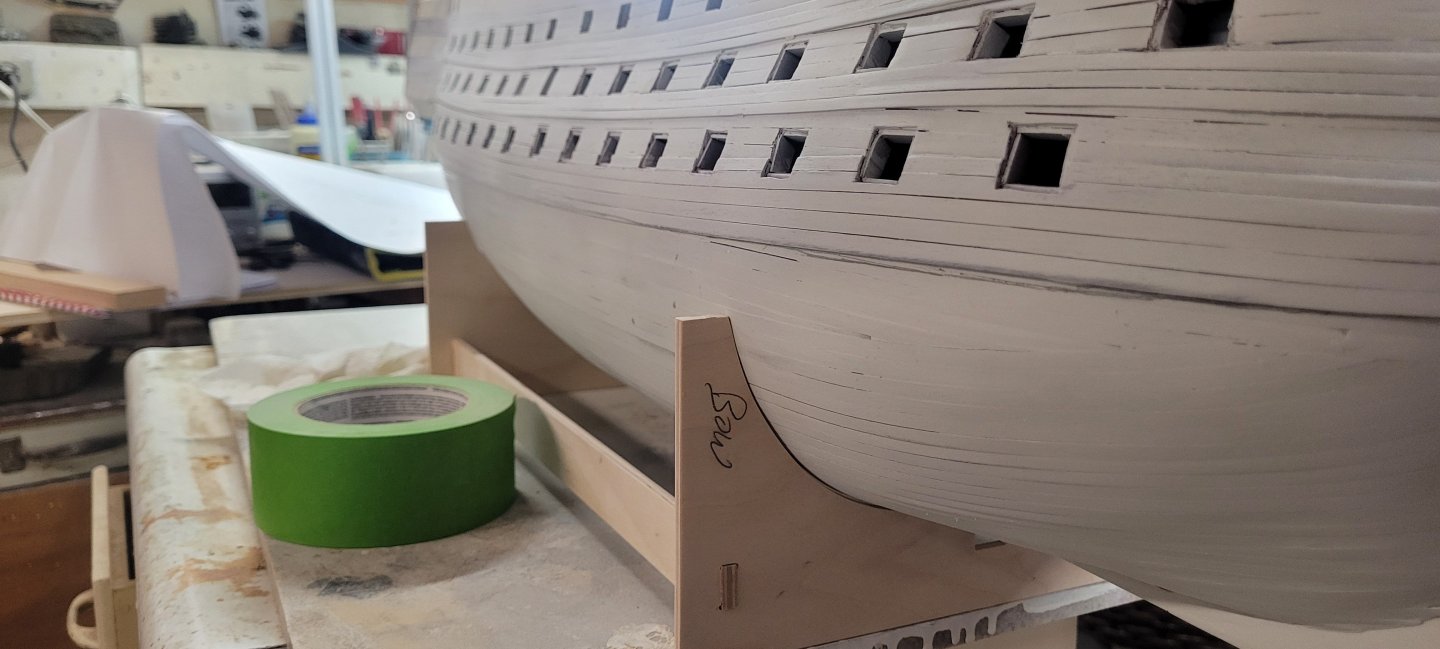
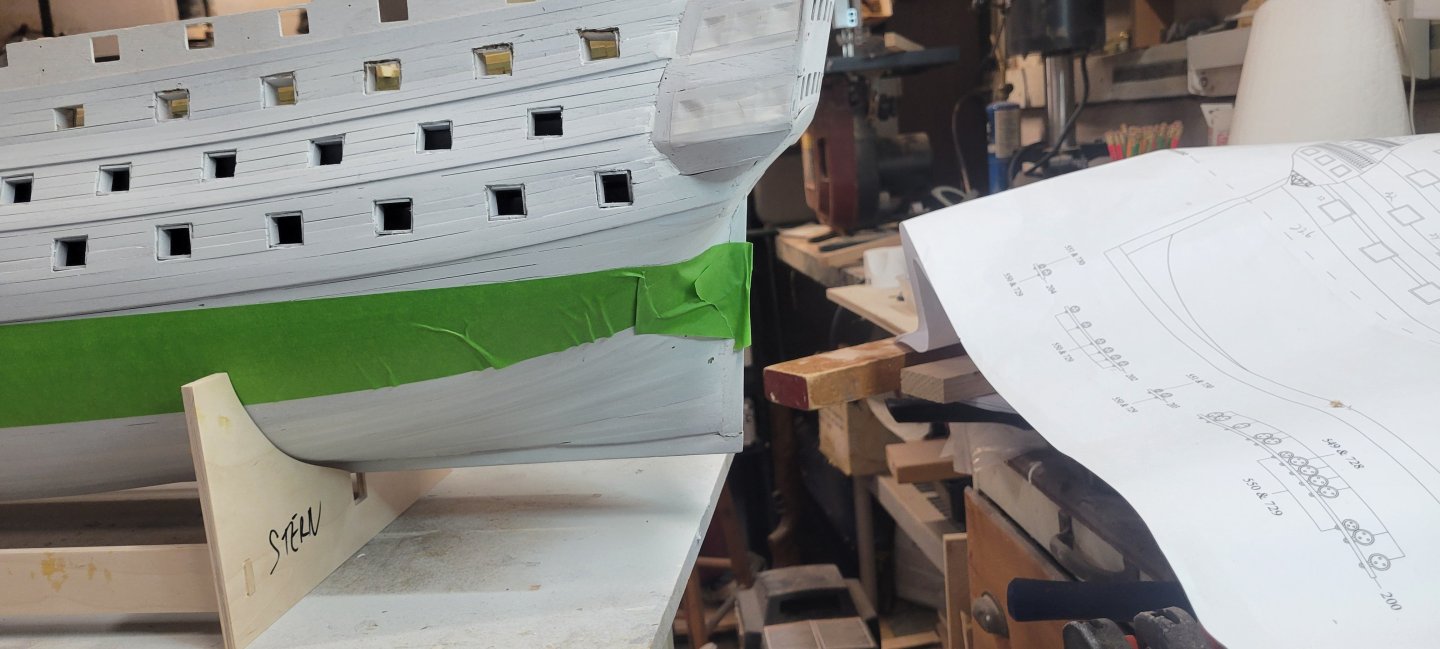
After taping off everything, began painting. I used my airbrush and began experimenting with various thinners I have in stock. I had tried Tamiya and that didn't seem to work well. Neither did AK, Vellejo or Real Color thinners. Ultimately after getting an email from Jotika suggesting I use water, that's what I went with and it seems to go well....just watch how thin you make it. You can see here that the water line is too high at the bow. It needs to actually follow my planking that is barely visible here. I re-taped the bow and fell like that will be more realistic.


-
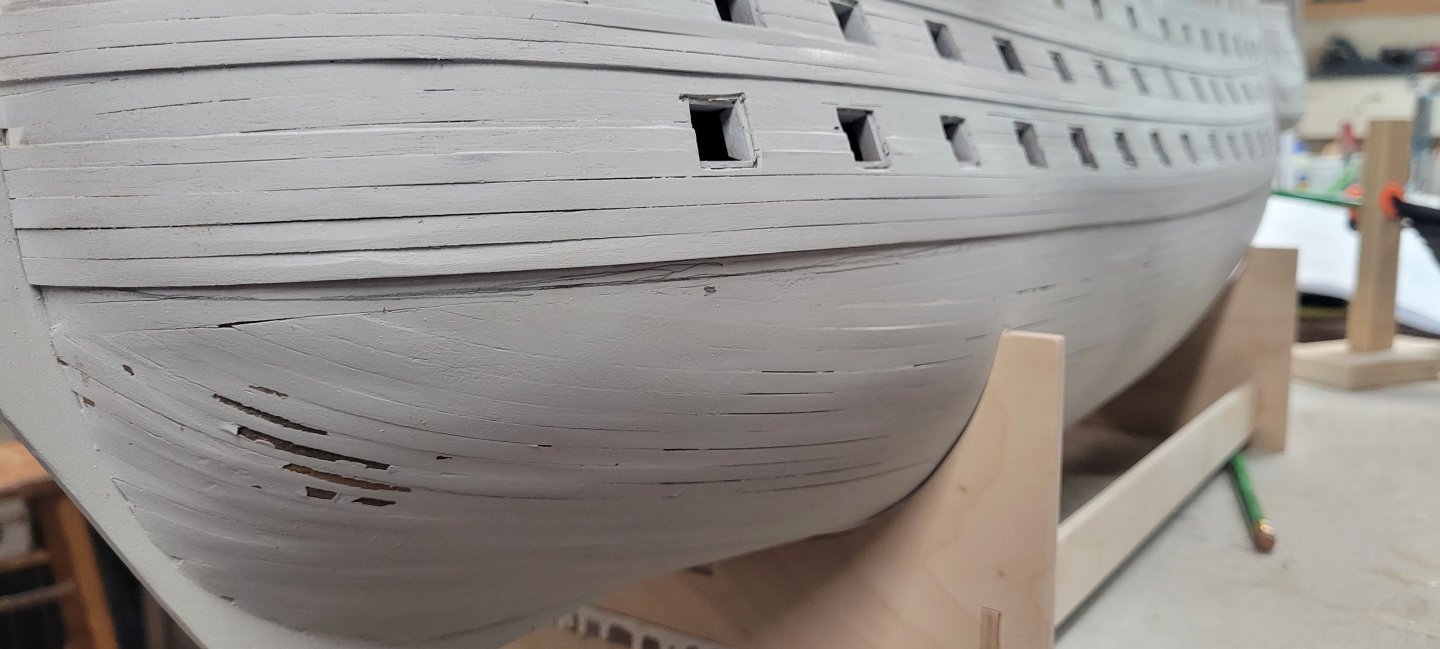
Been a while, but I have moved along. Not always for the best, in fact as I stand here today, I am both happy and very unhappy with progress so far. Laid out the water line per the plans. Just jury rigged a pencil to a piece of wood and drew my lines after leveling the hull as best as possible. My error was the line at the bow. It follows the wales and while it looked ok before painting, looking at other builds after the fact it seemed to me that there needs to be more of the planking below the lower wale before the water line begins. After painting, it was clear that I needed to fix that....


-
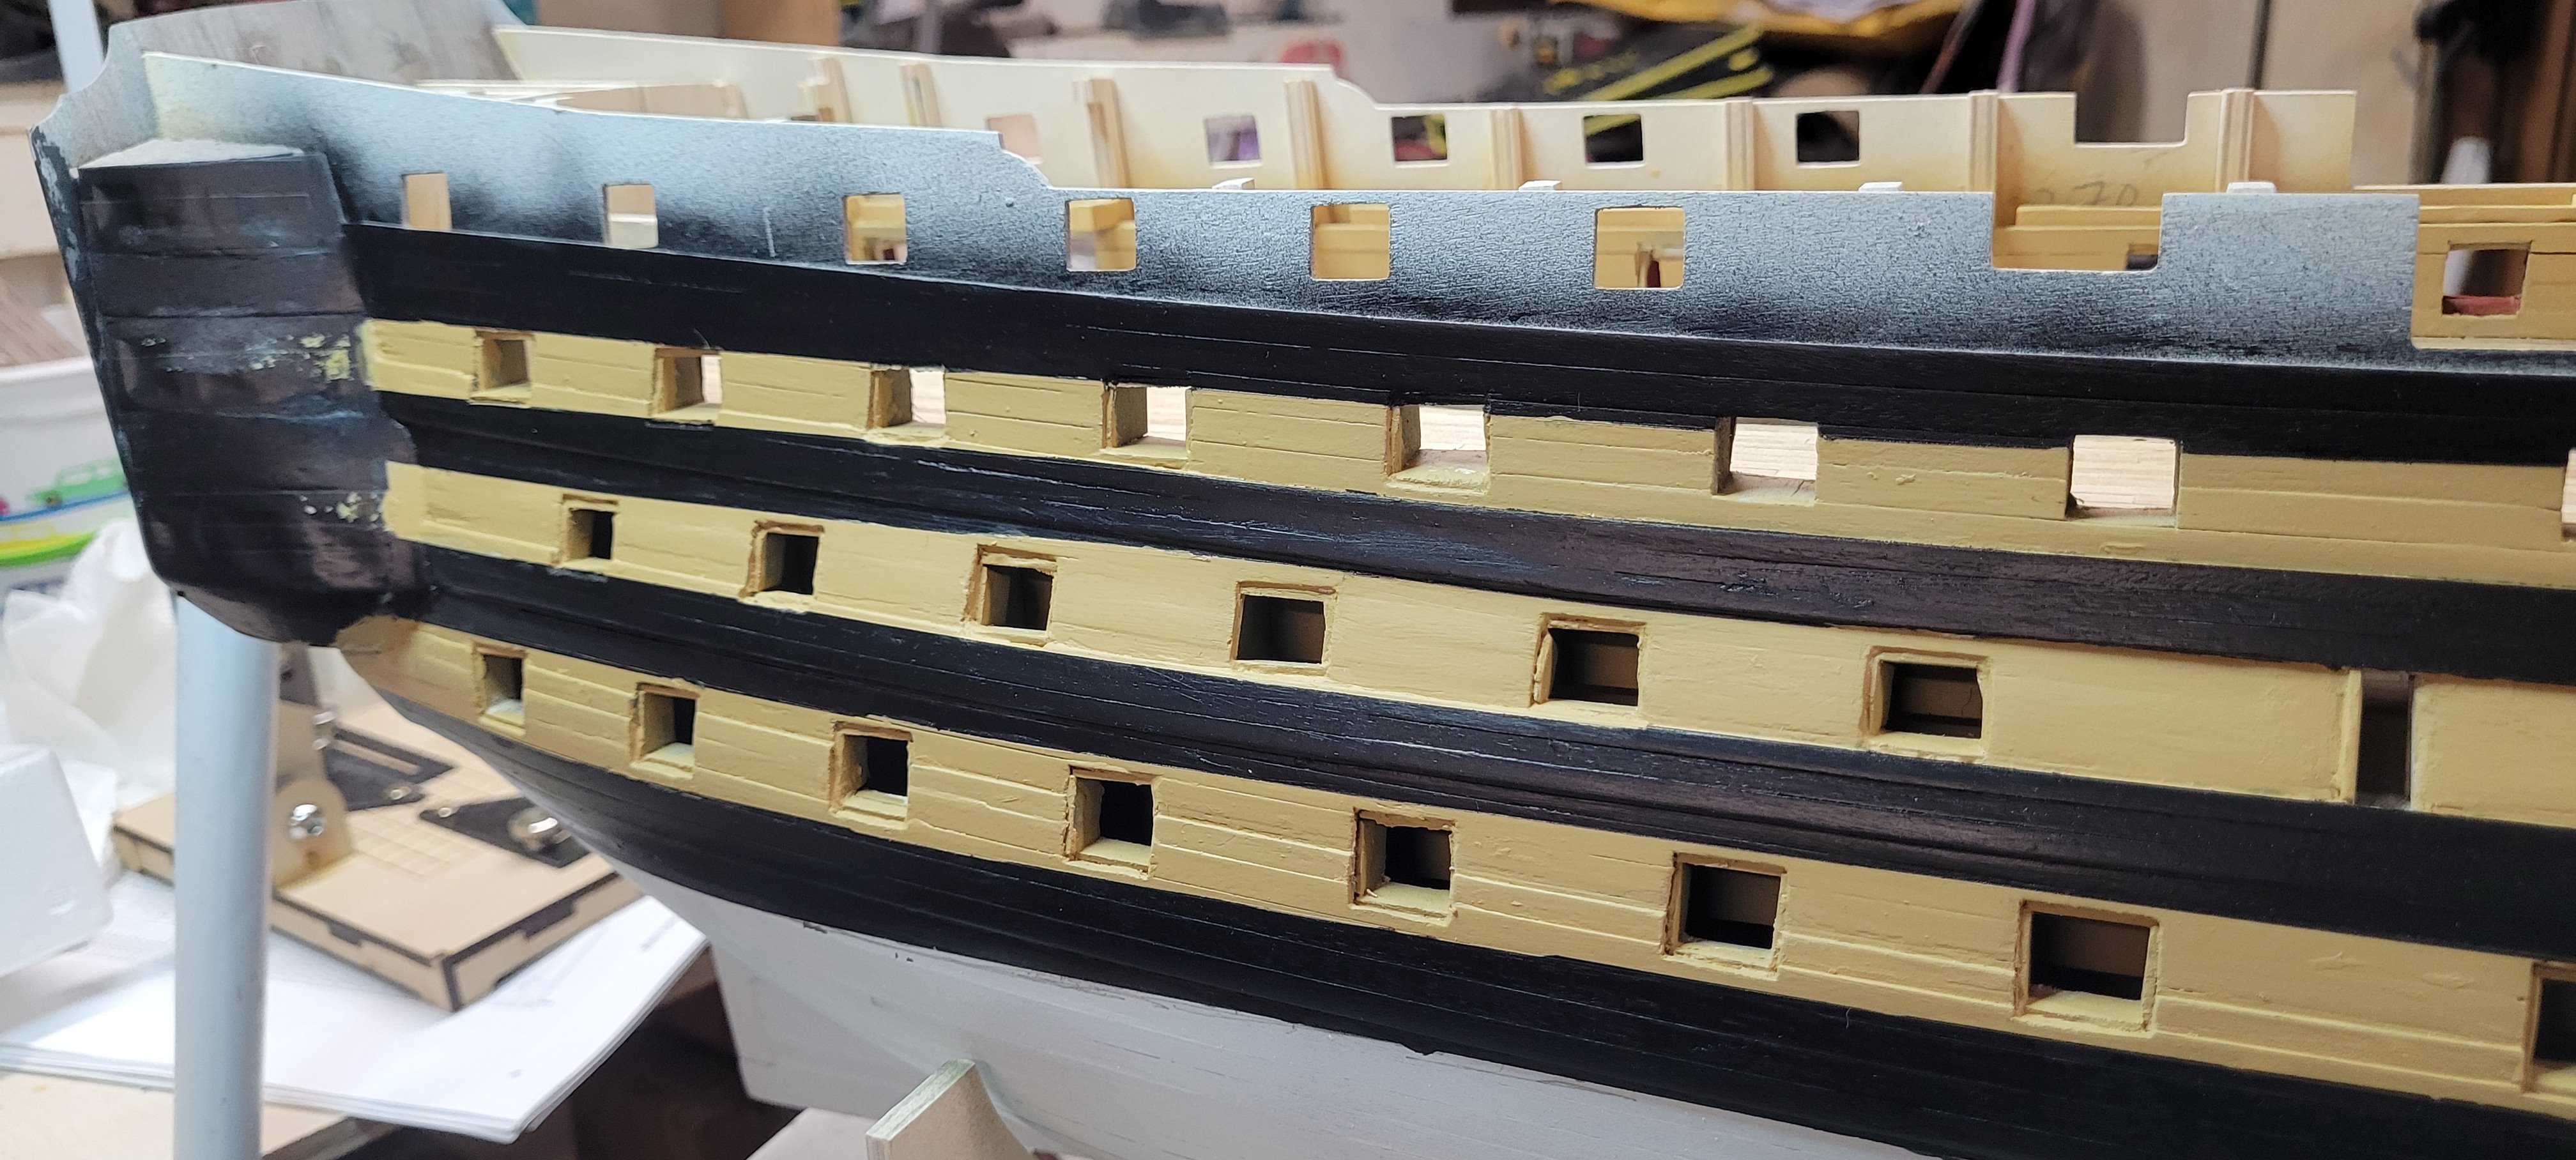
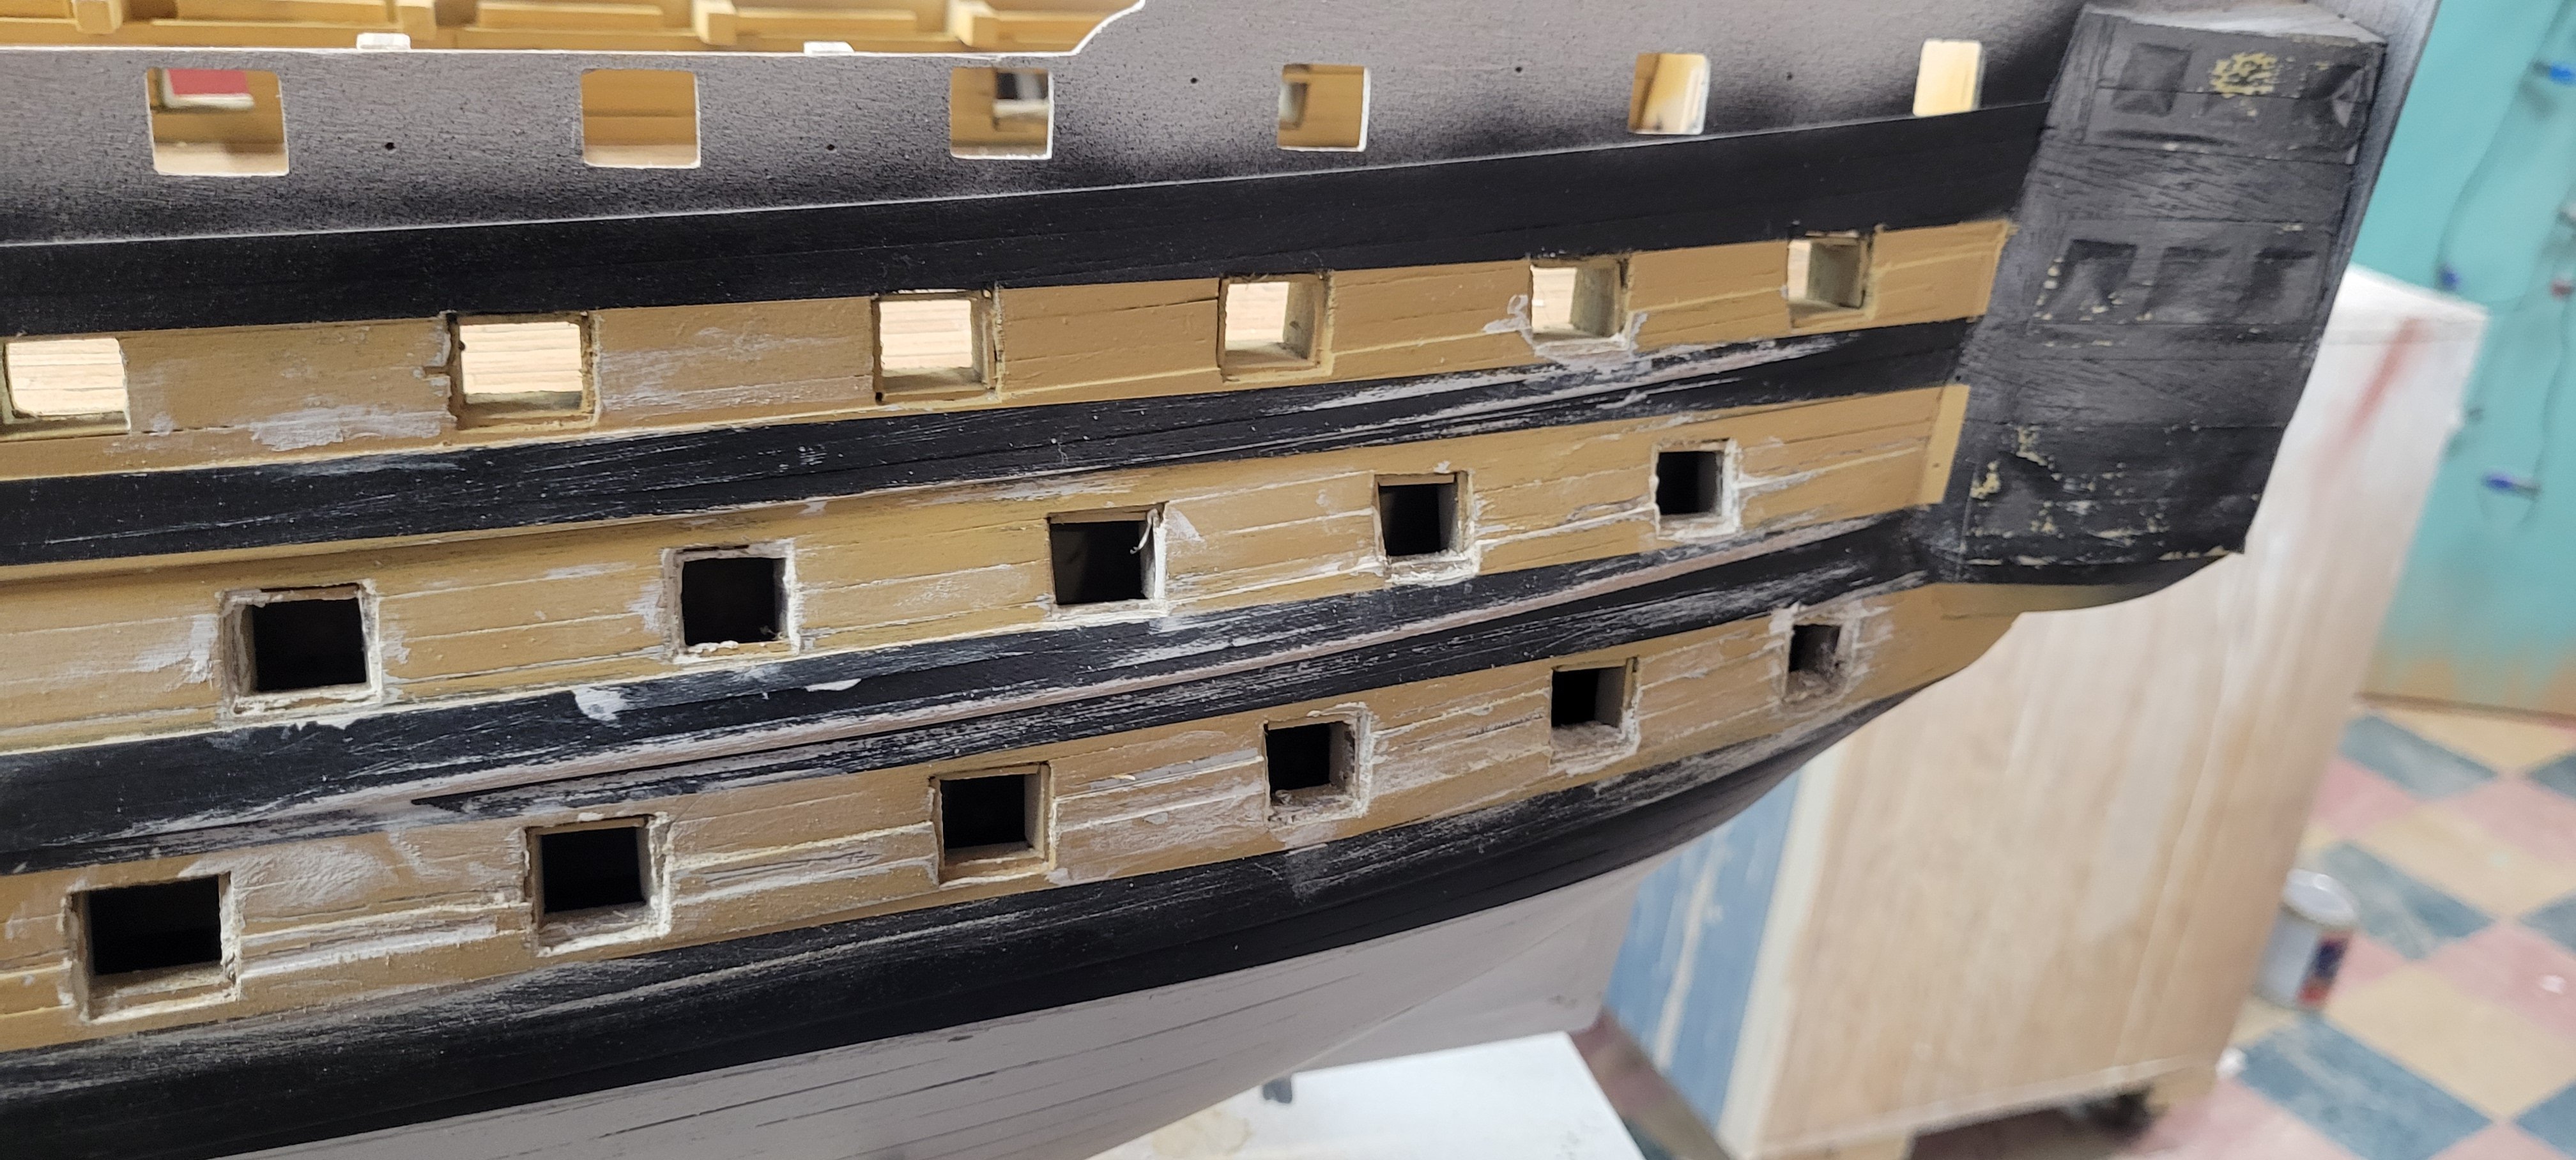
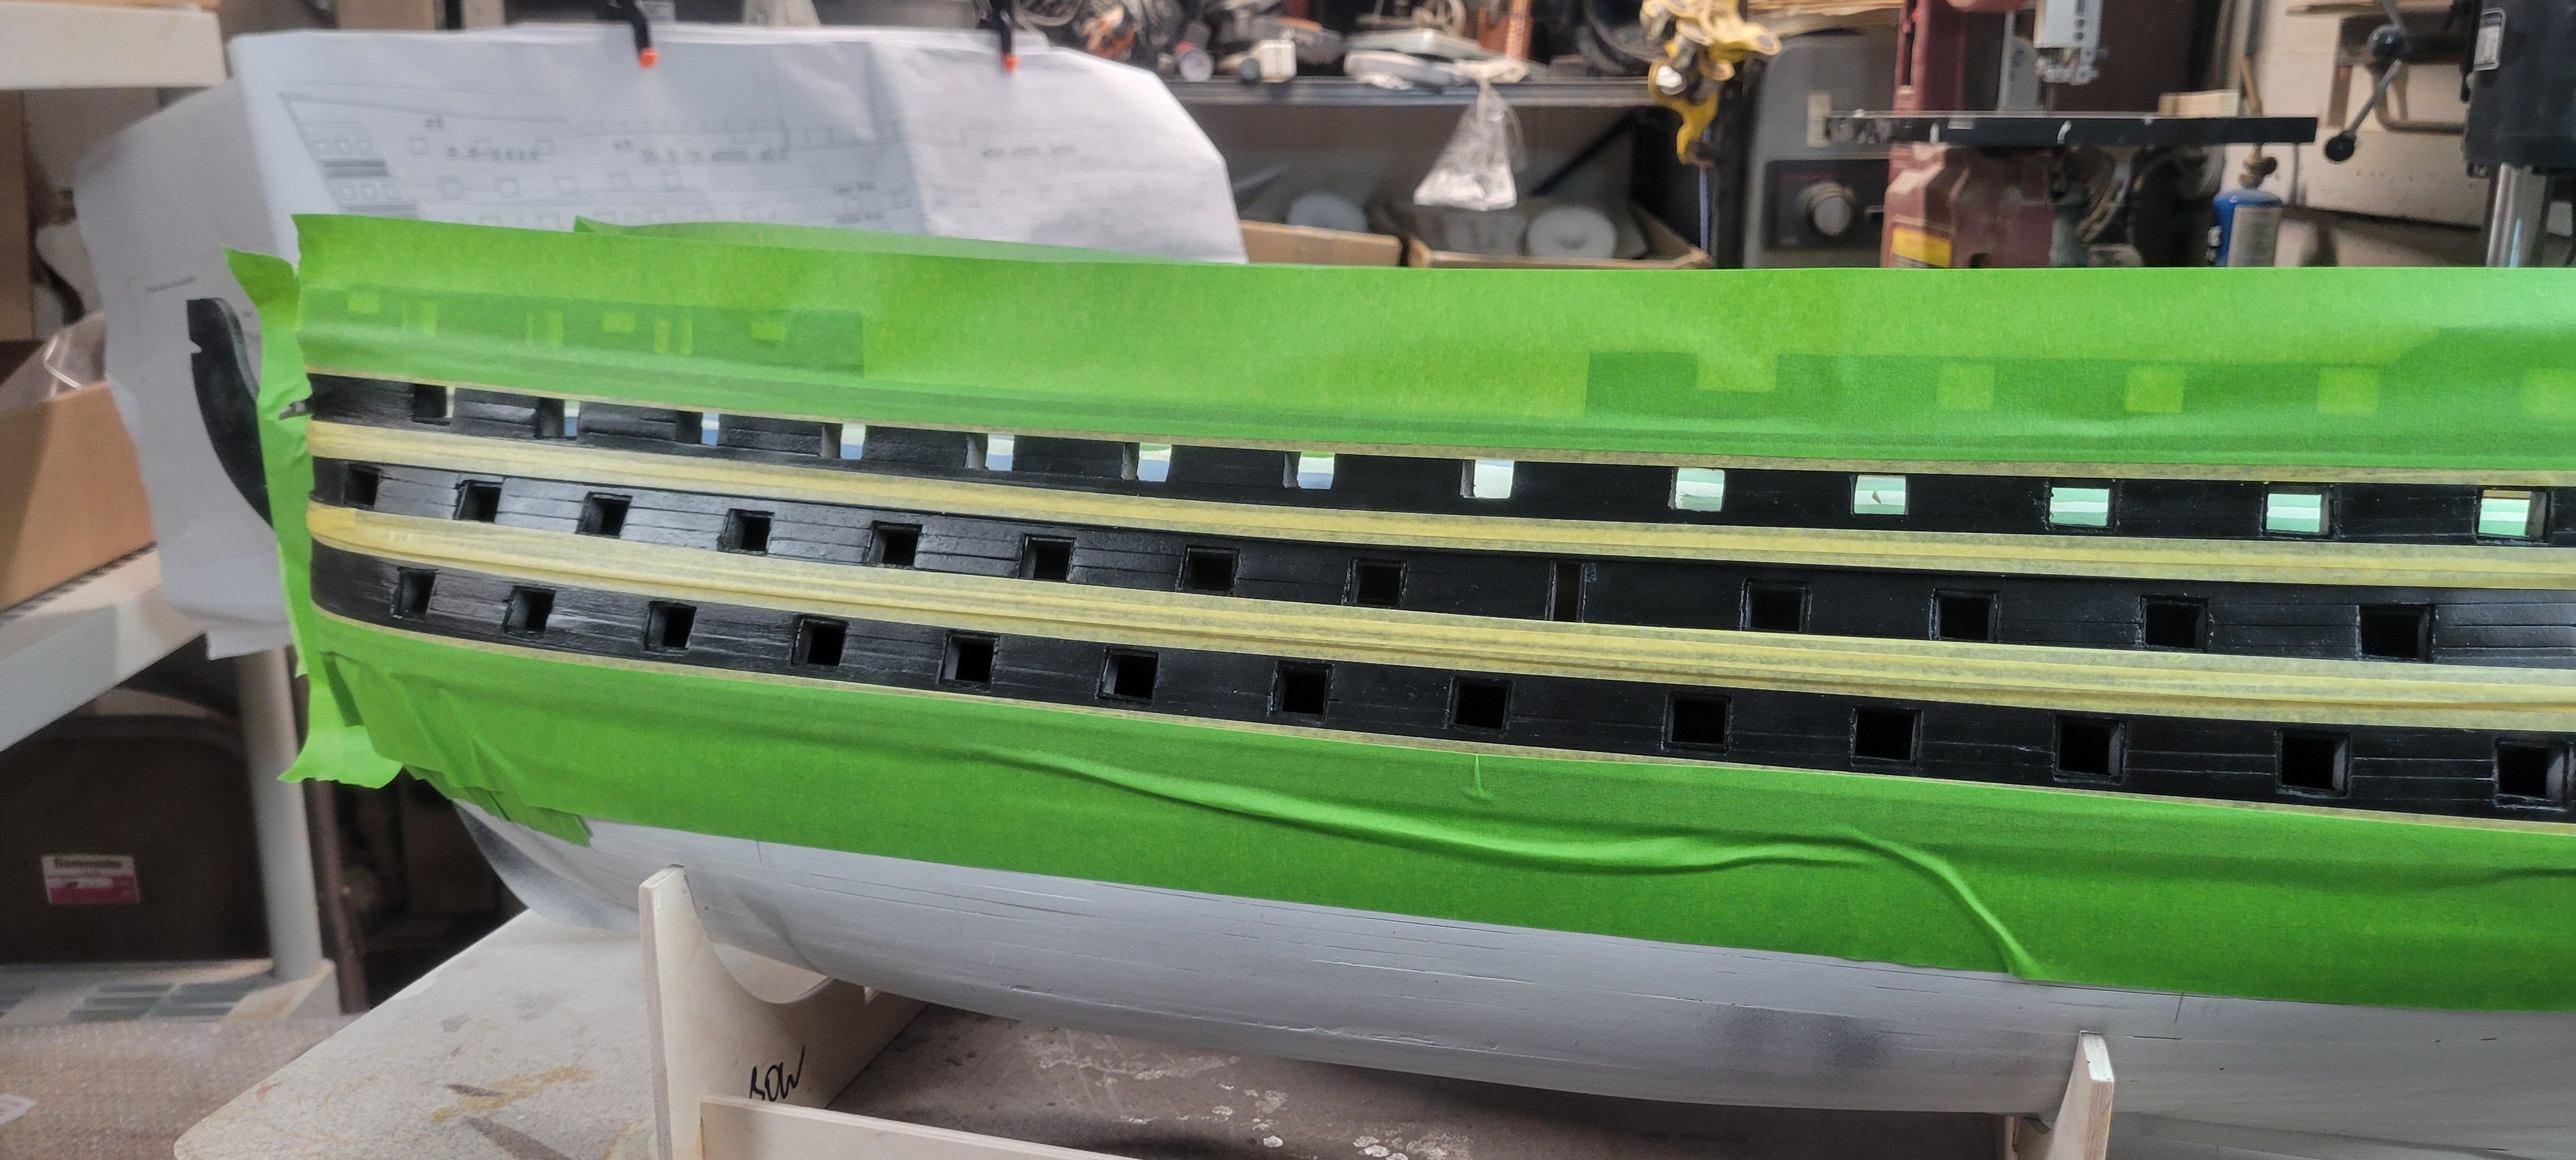
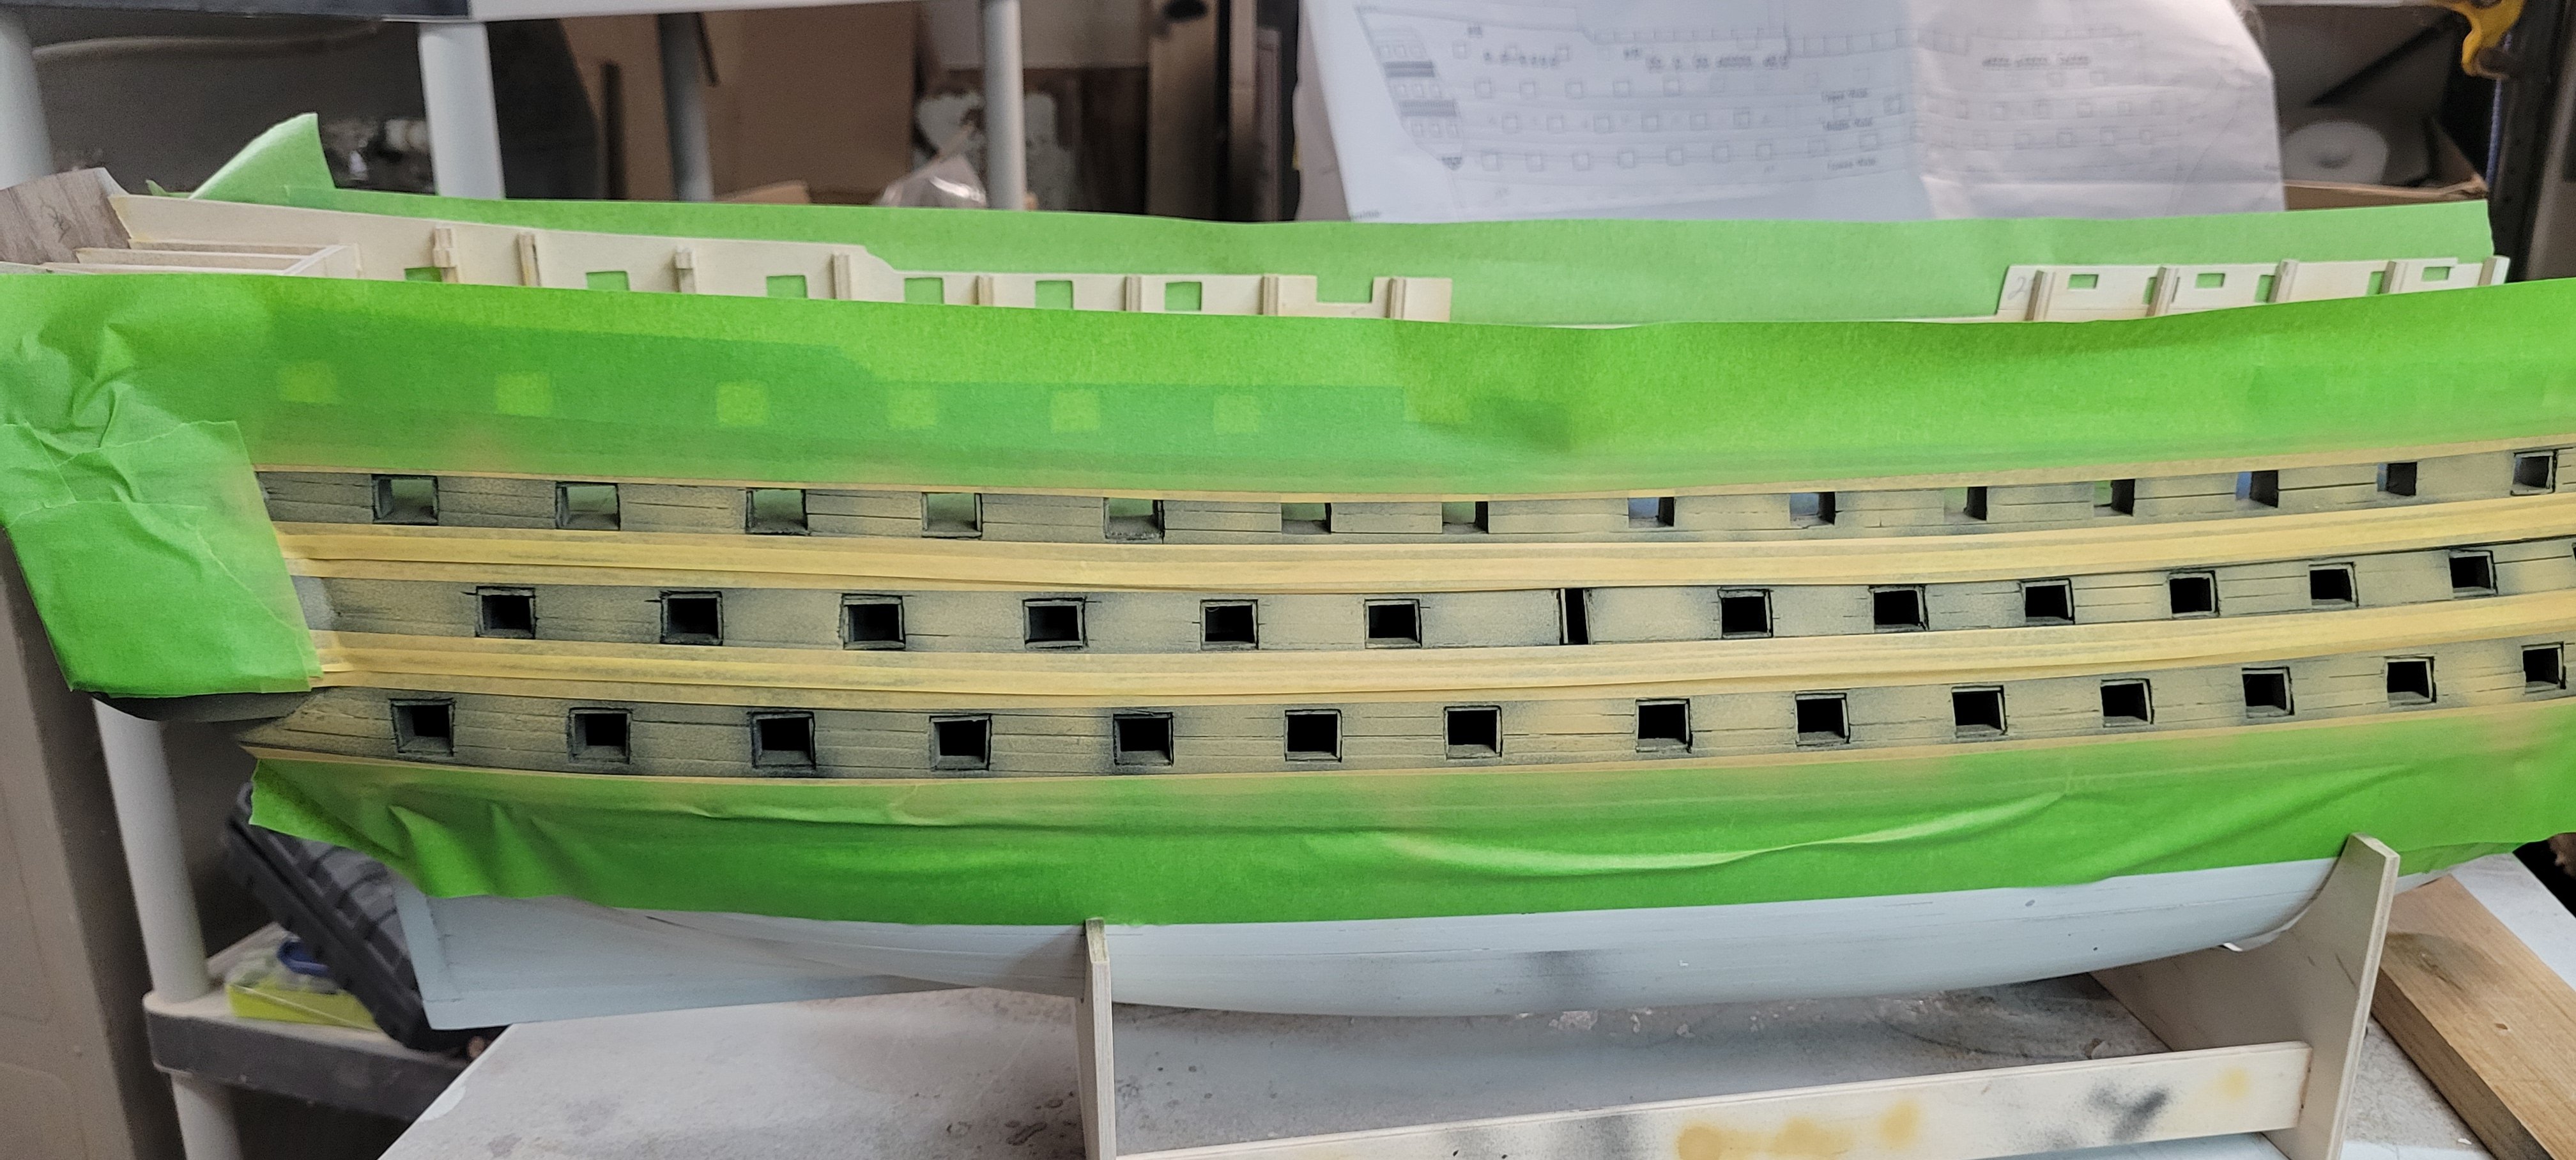
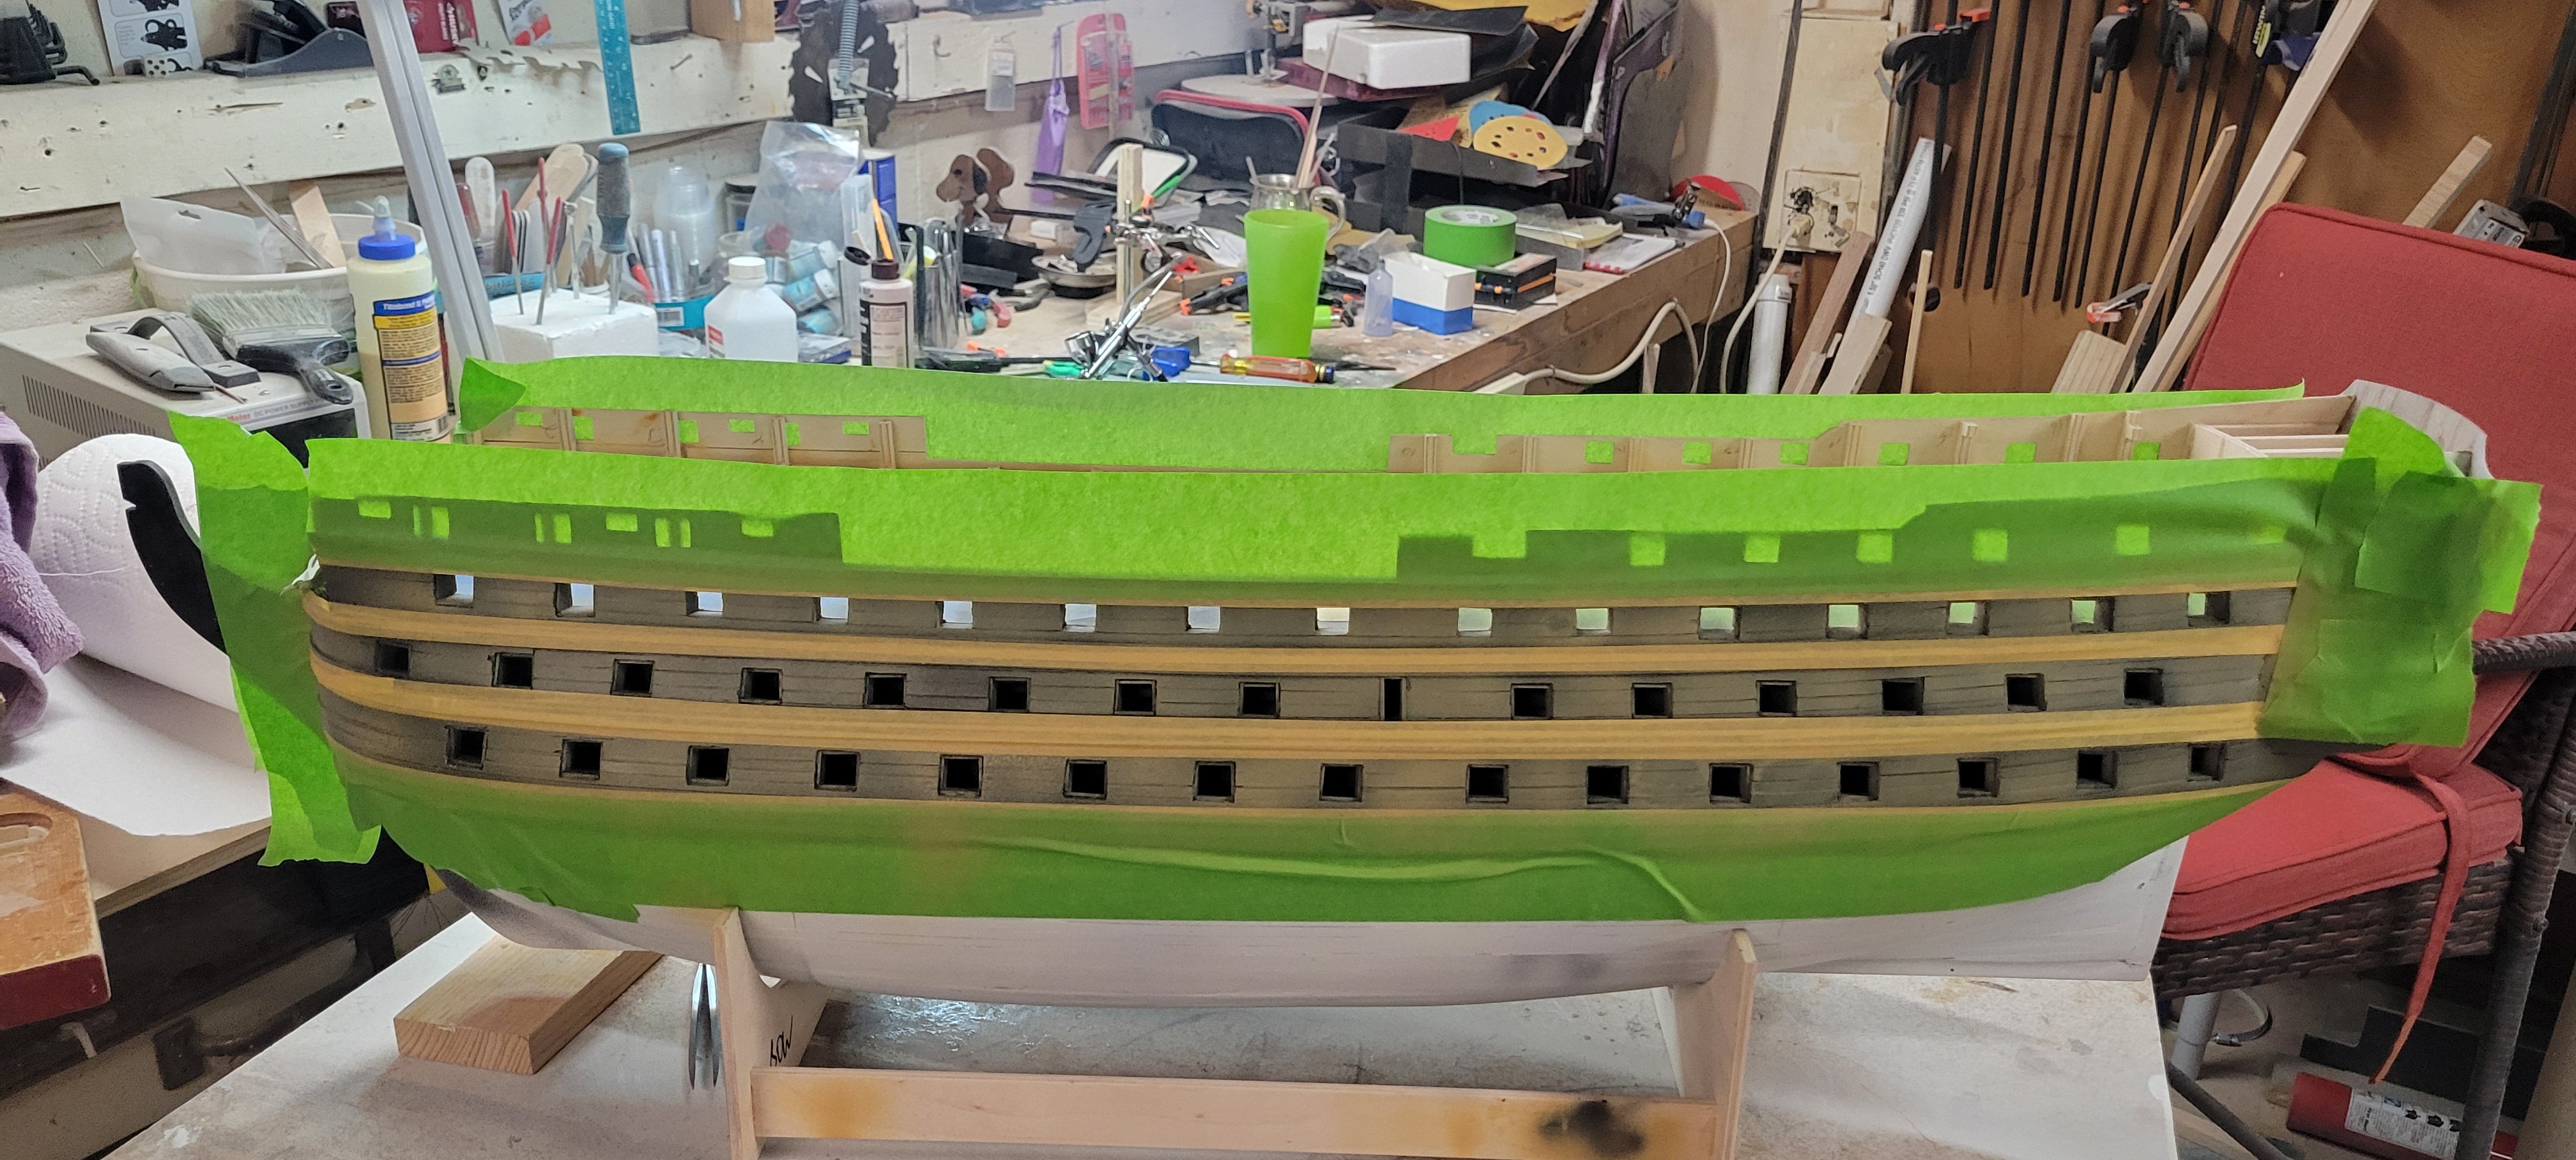
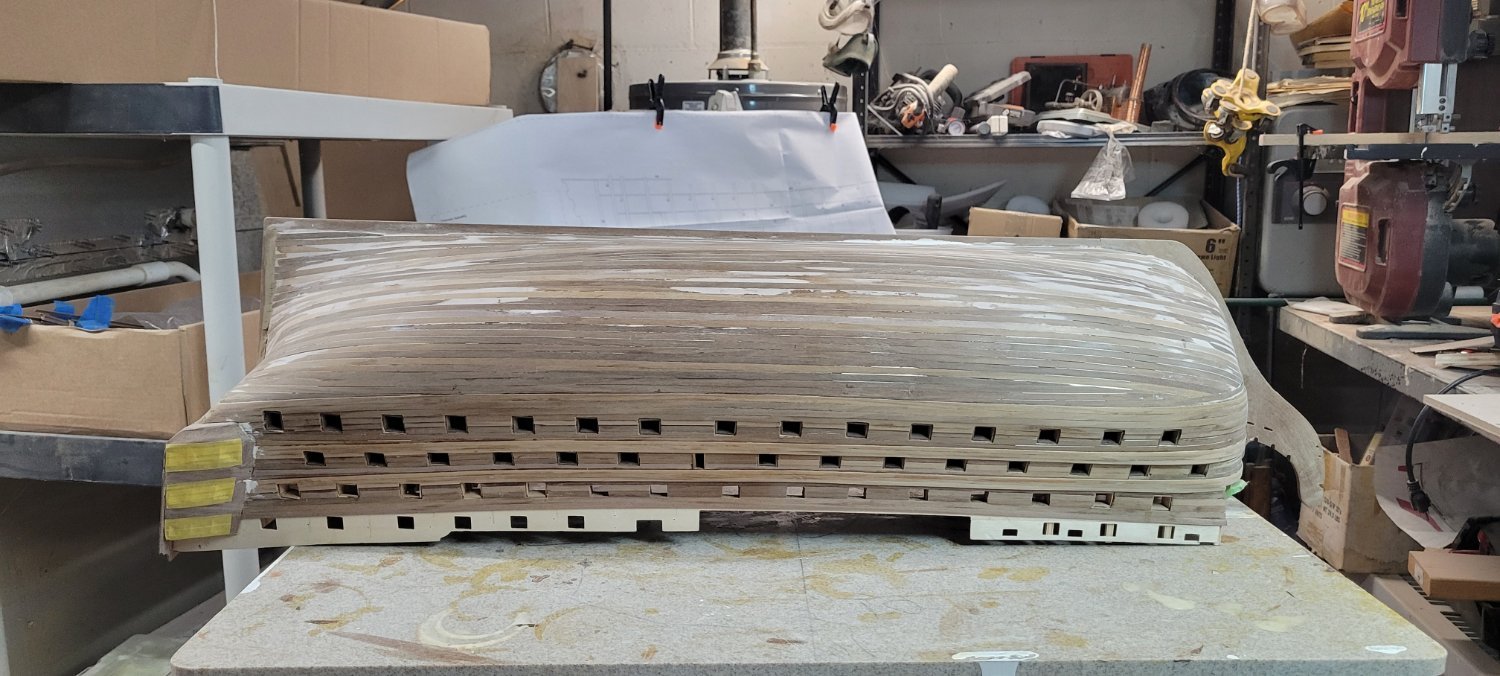
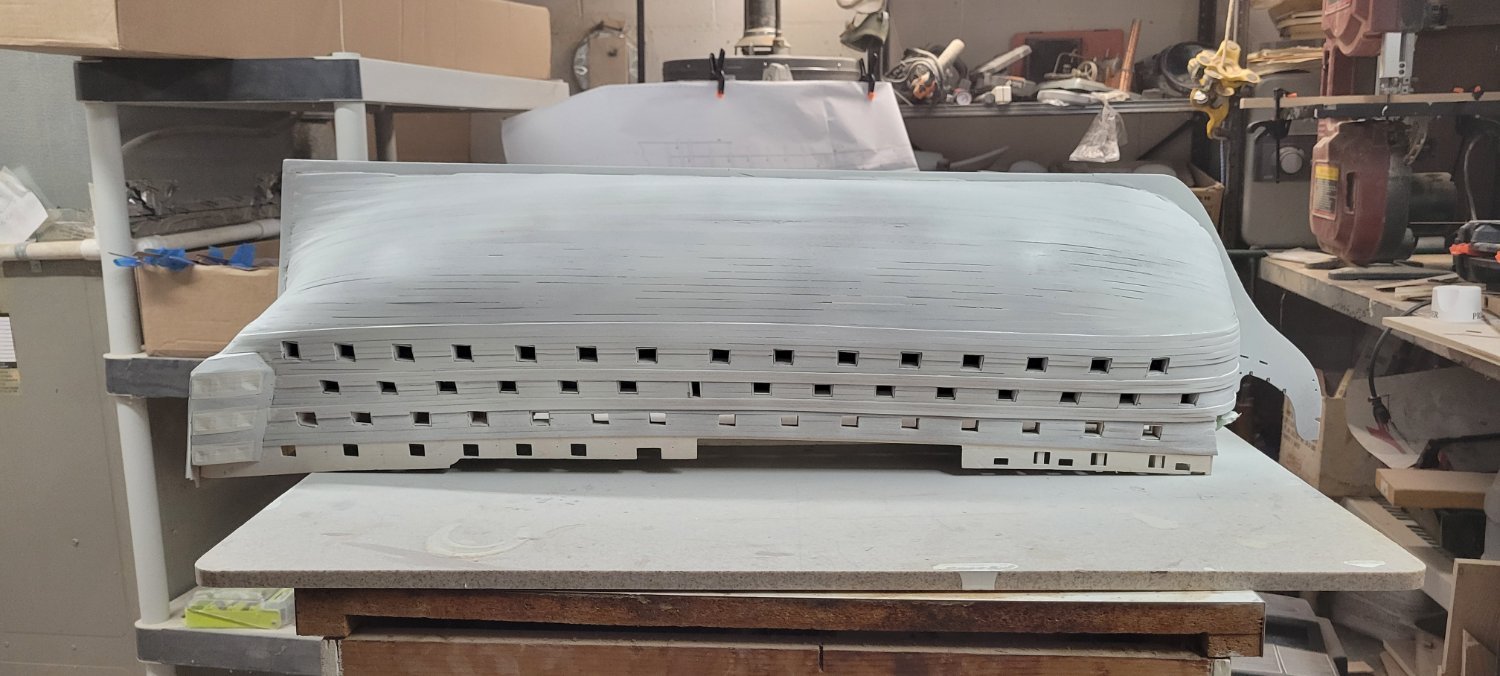
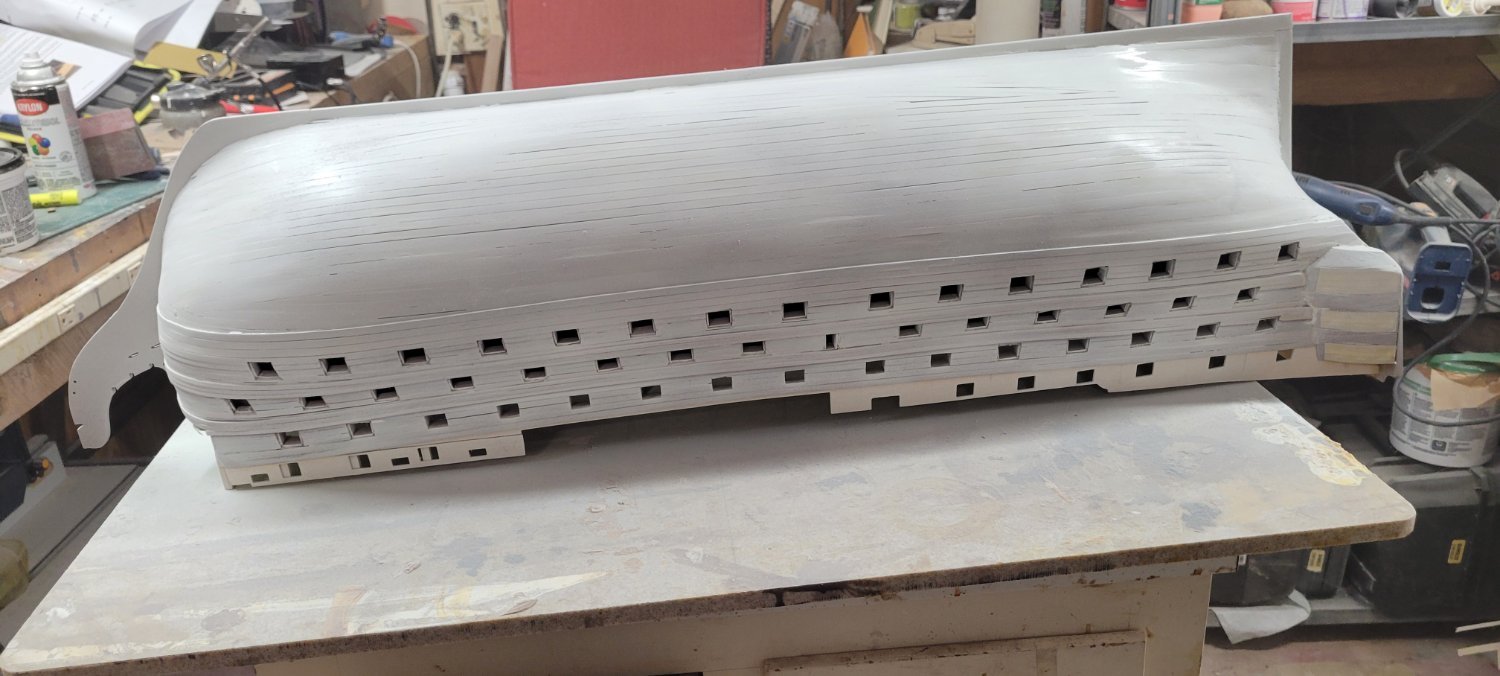
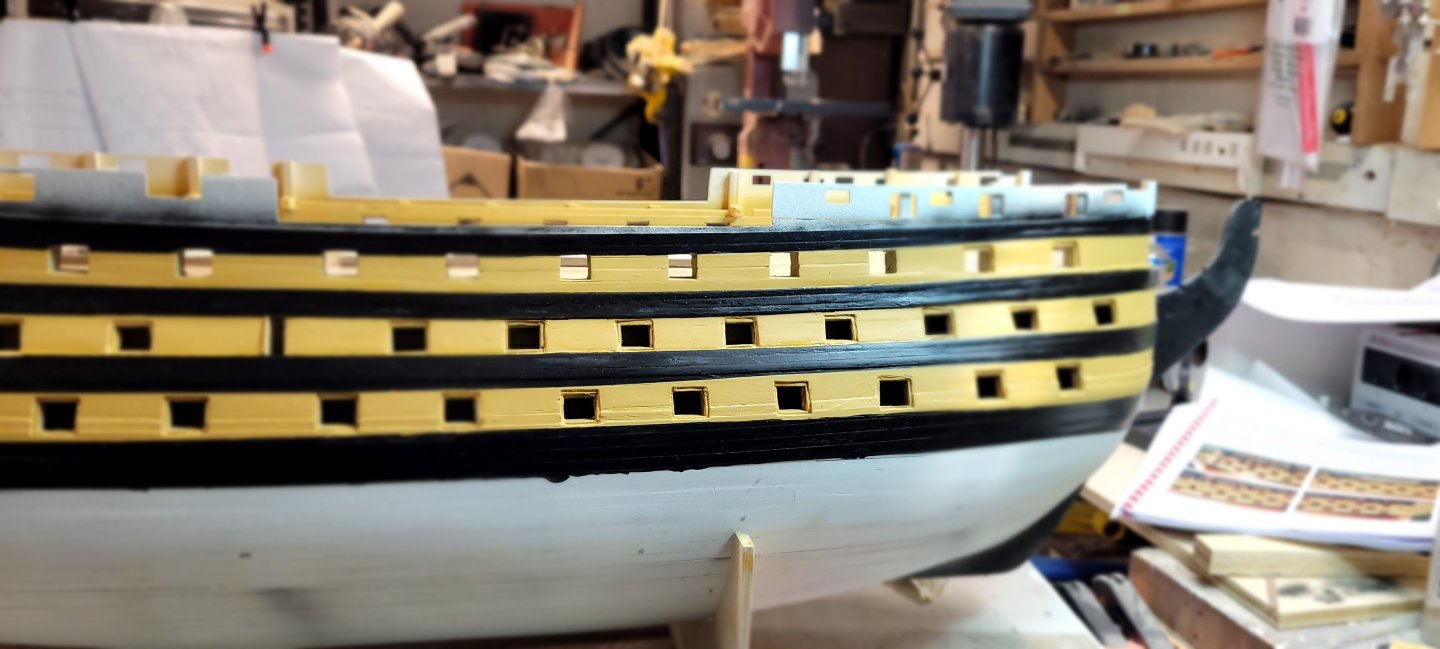
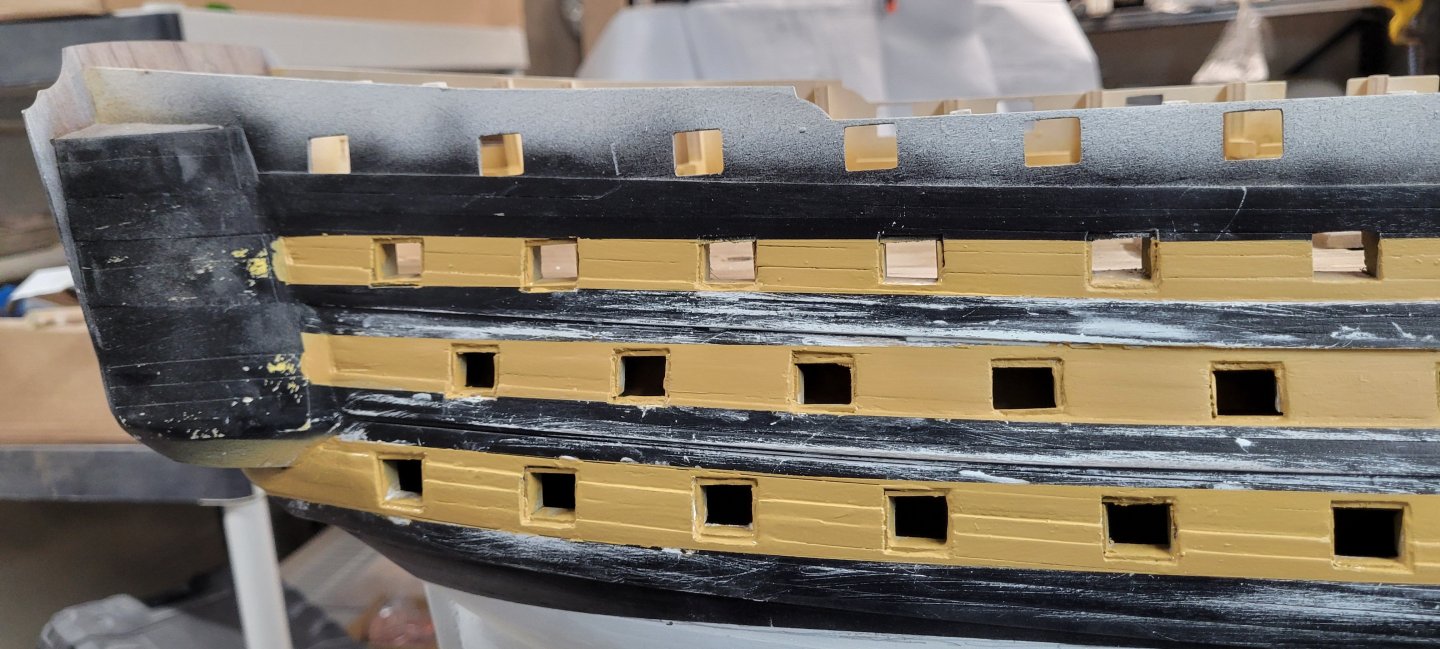
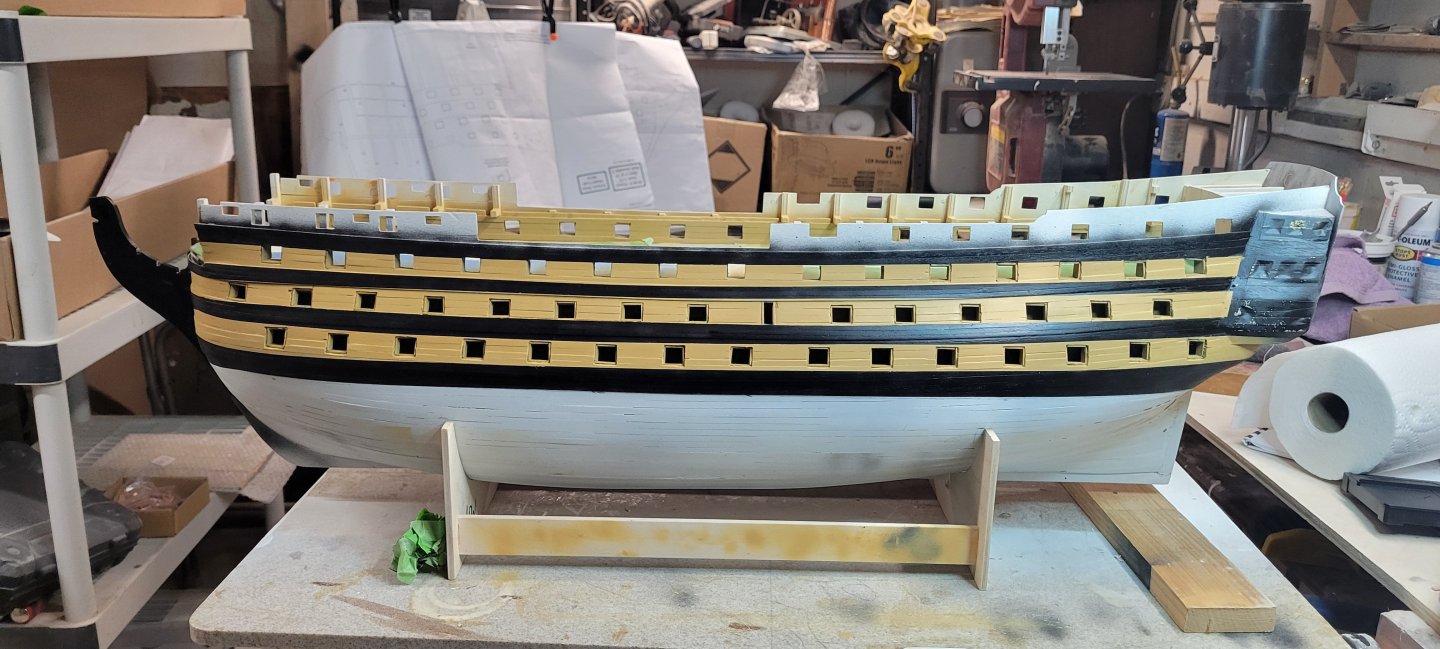
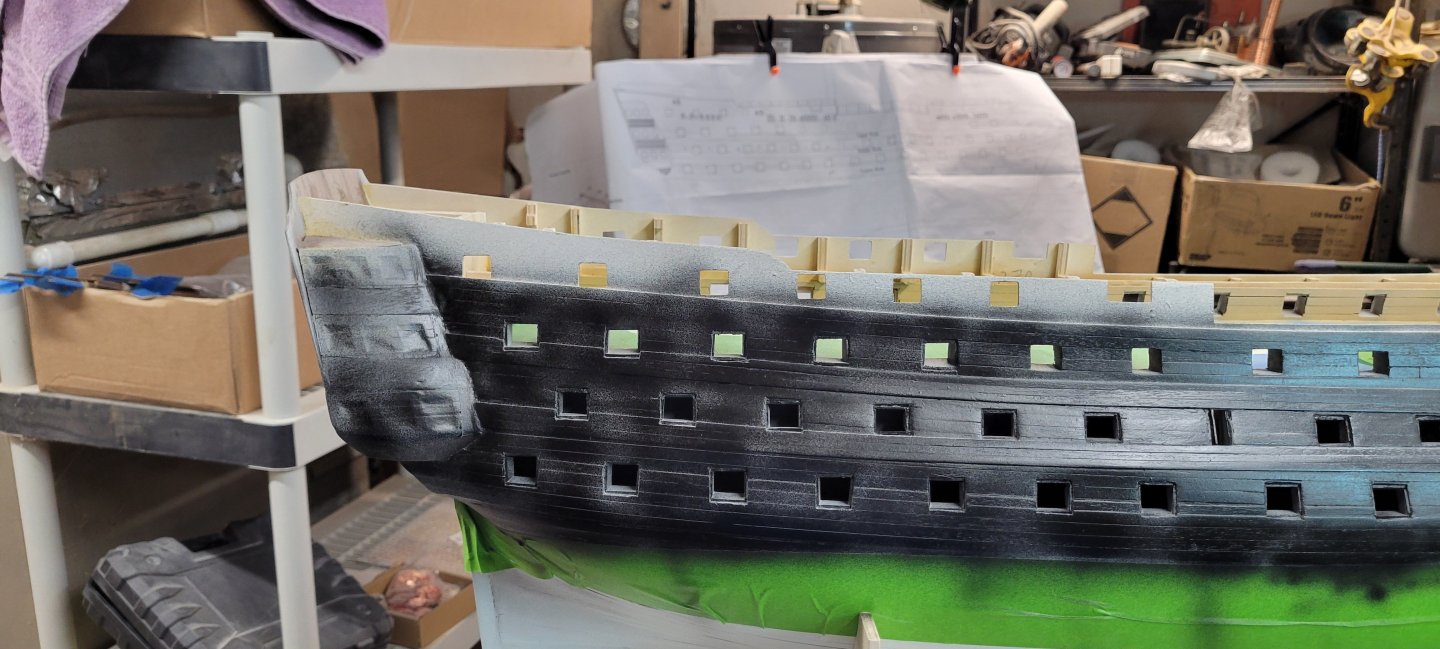
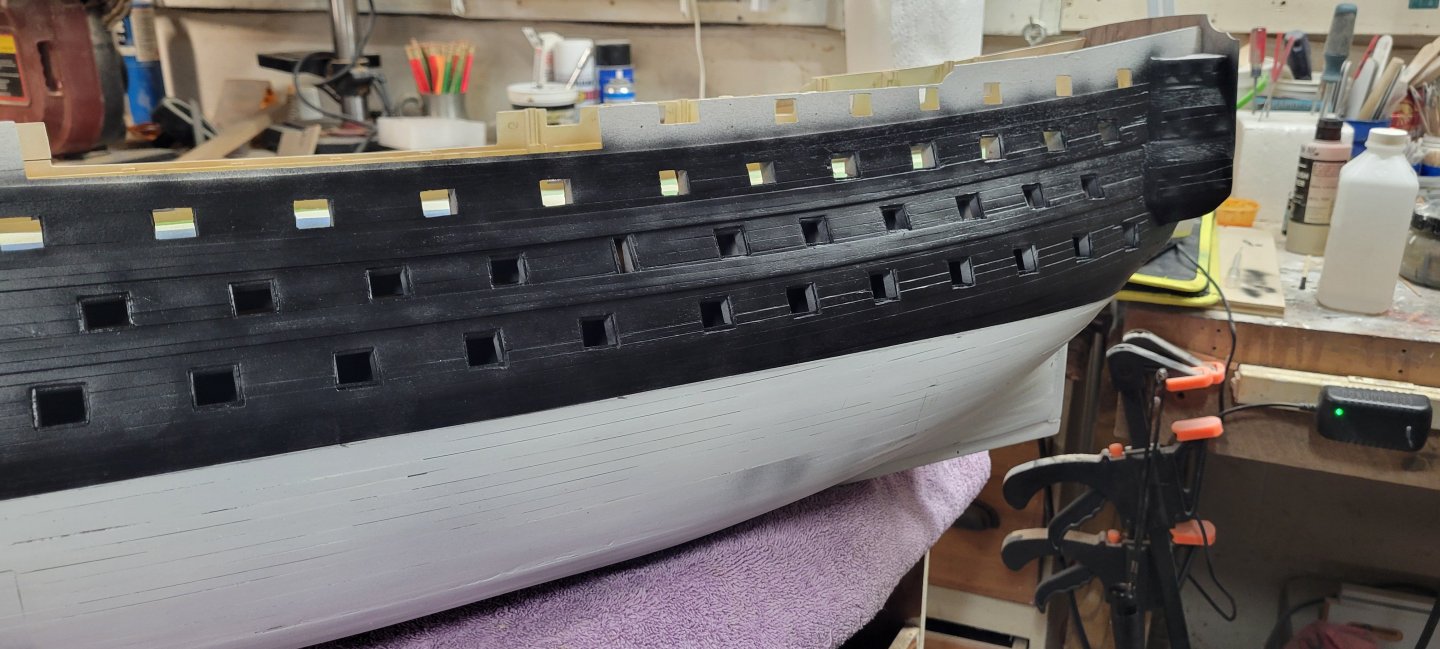
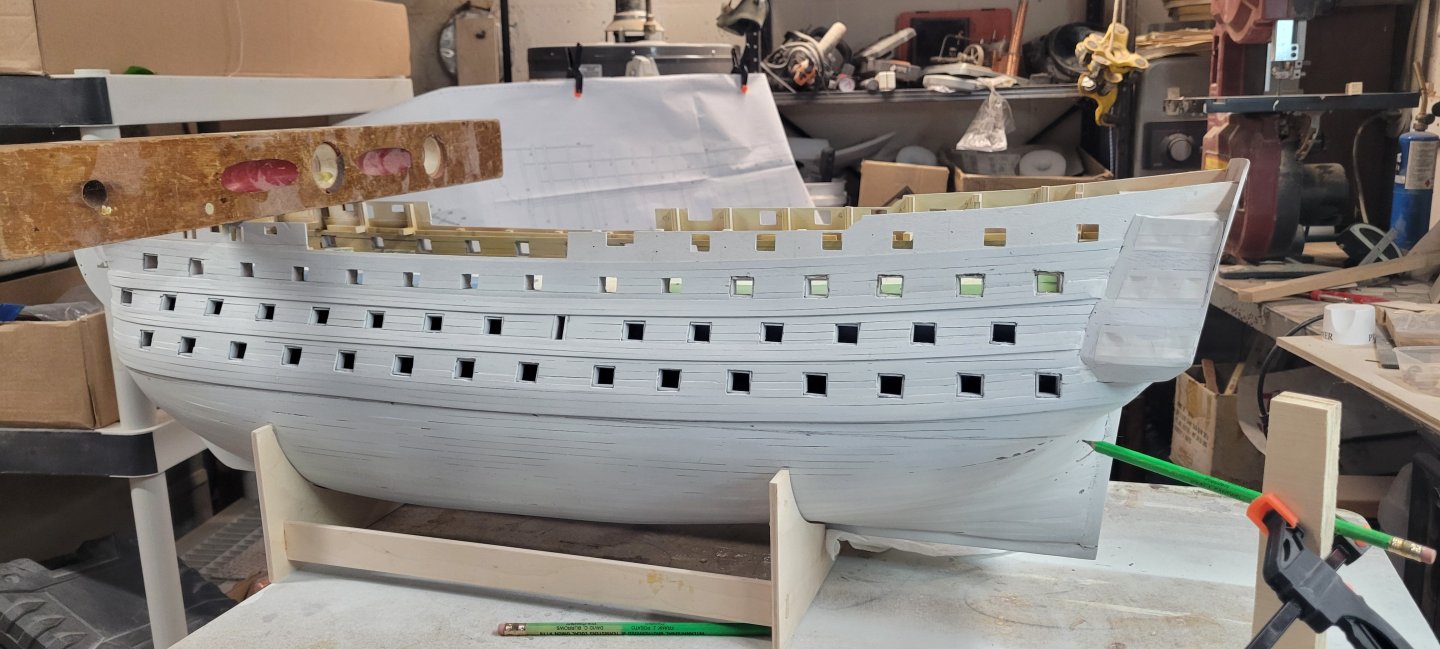
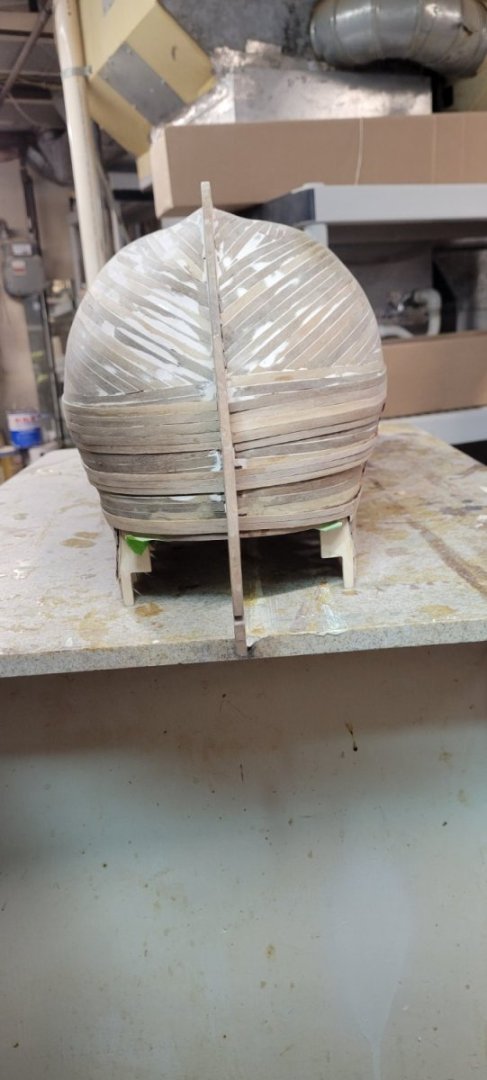
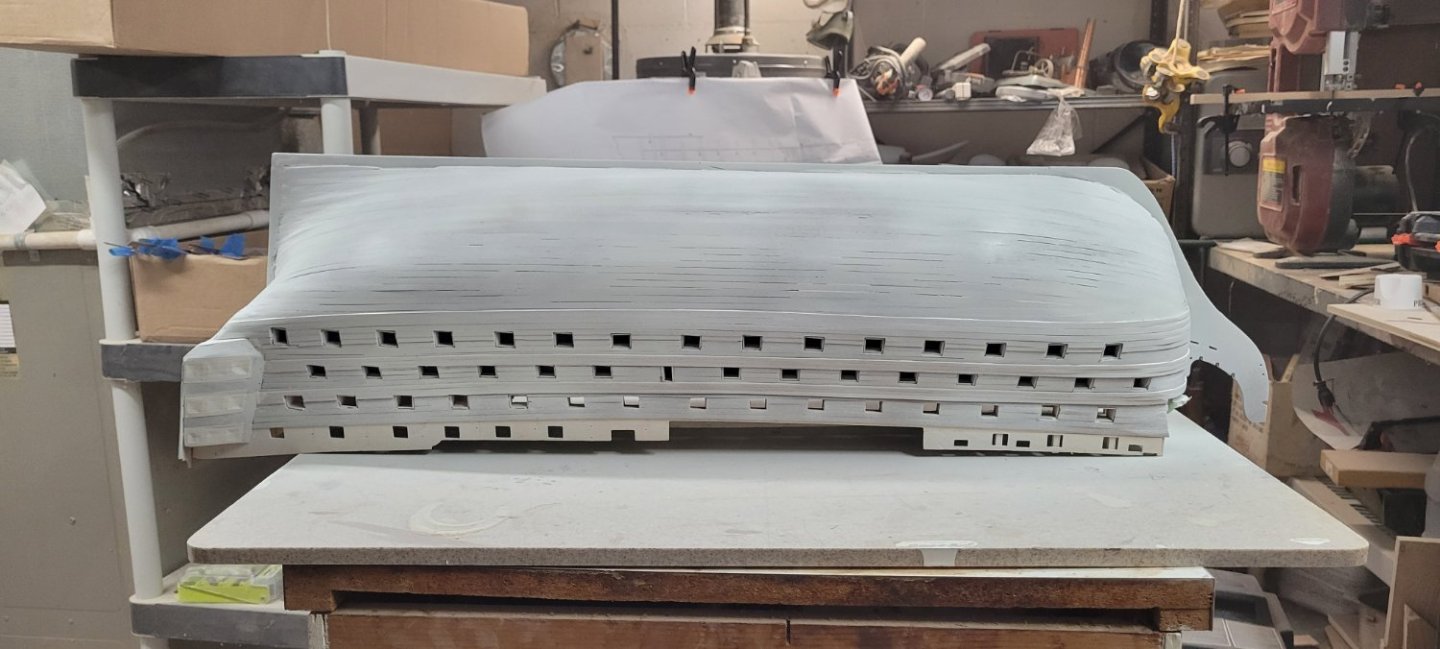
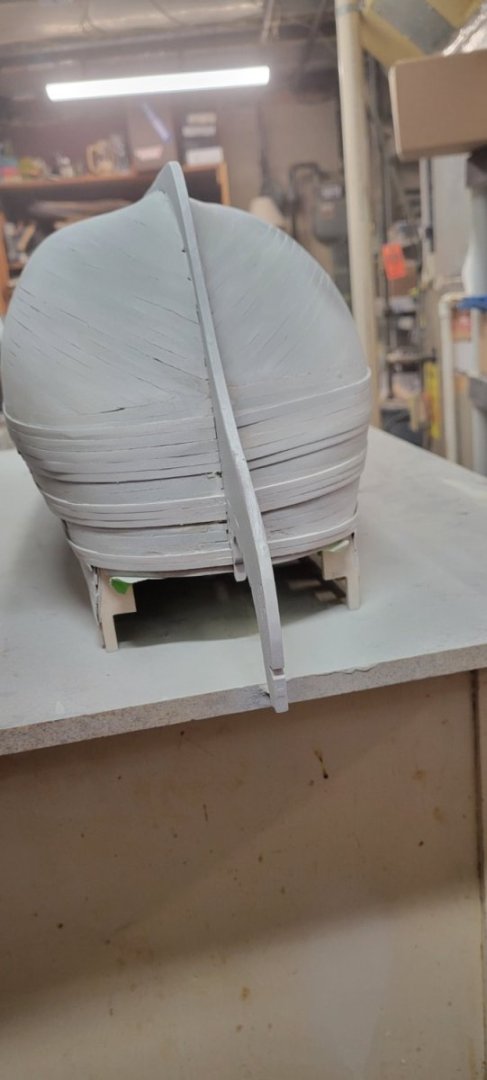
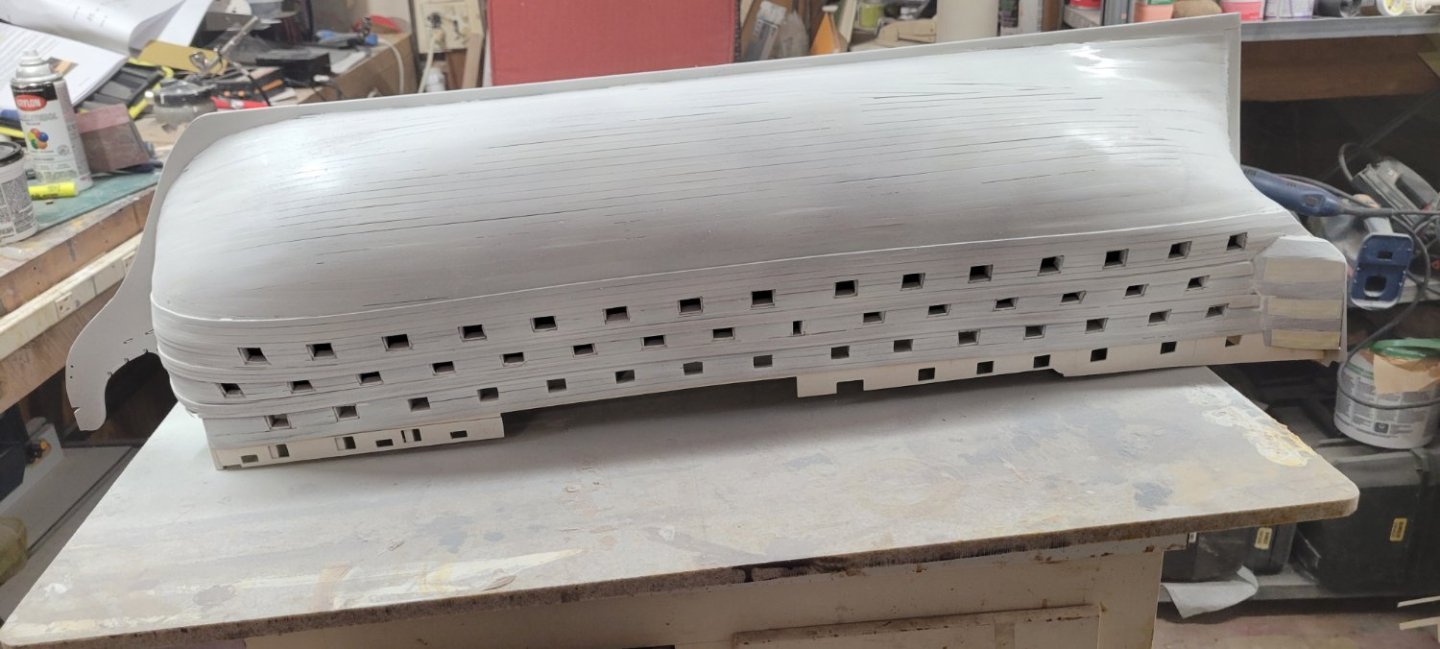
I finished all of the gun port liners. I did go over some of them again to try and square them up, but opted to put a coat of primer on to bring out any issues easily. The dark woods tend to hide issues and as can be seen here, once everything is white, you can see where I may need to make accommodations. I did notice that some of the 2nd planking doesn't fit tightly together. I know much of it will be hidden by the copper plates. And there are also gaps in the upper planking that will be visible. I want to add one more coat of primer after this one dries and I have had a chance to quickly and lightly sand it in a few days. Perhaps that coat and then the addition of the two different stripes will help to fill in some of the voids or at least smooth them out and make them less visible. I also notice some of the wales are bulging out and will have to be sanded back a bit.


-
Yabuhebi reacted to a post in a topic:
HMS Victory by Yabuhebi (Chris) - Caldercraft - 1:72
-
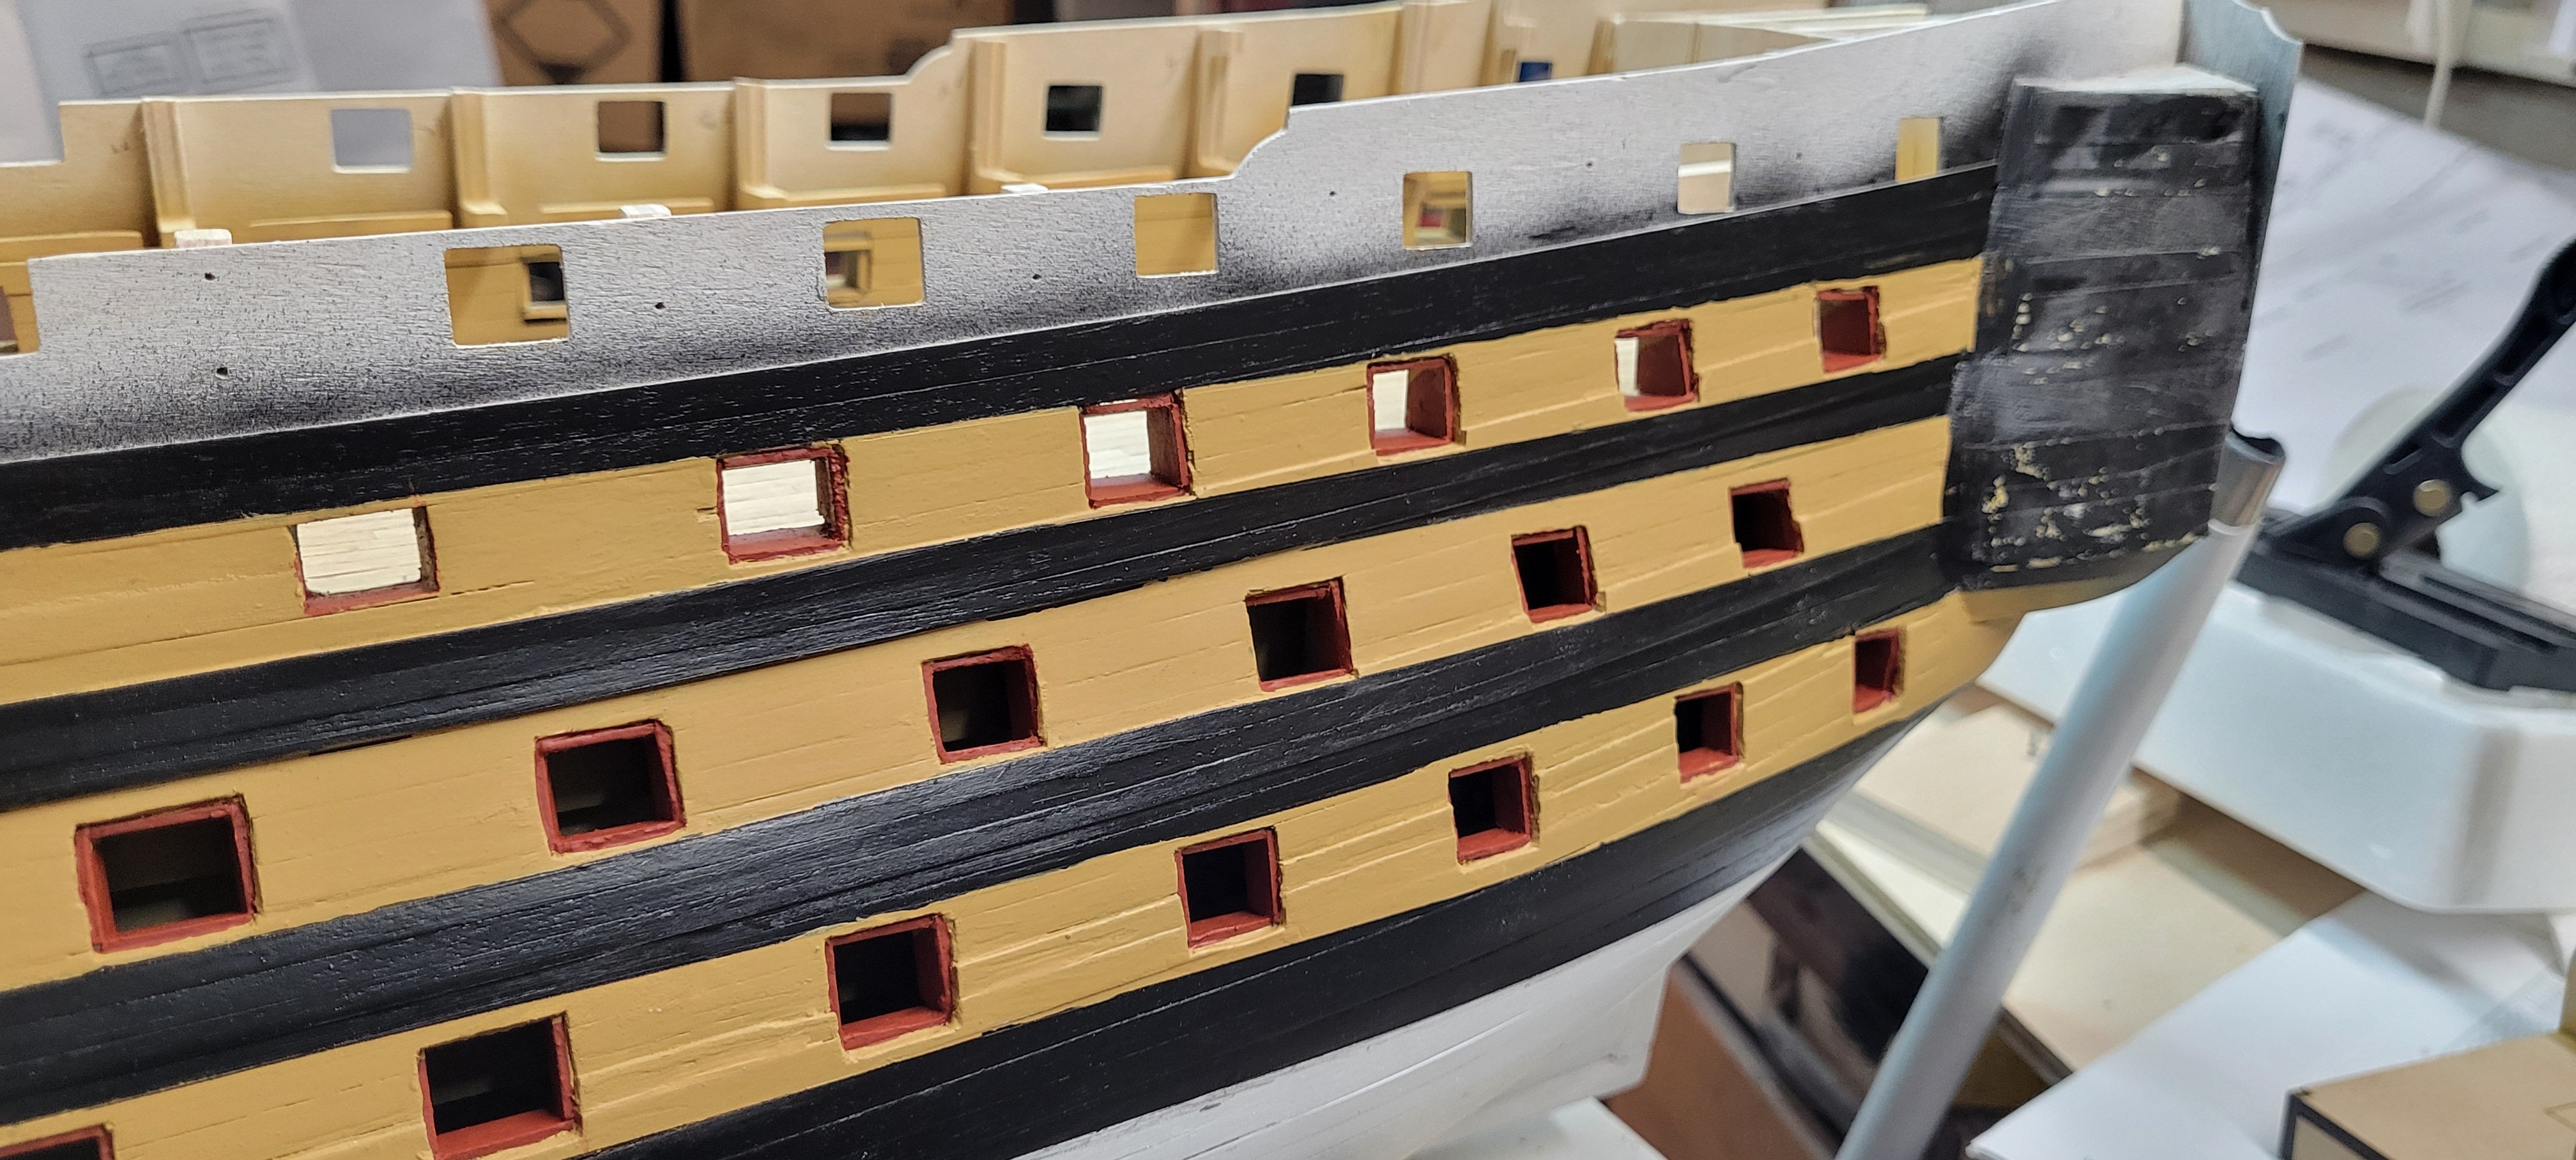
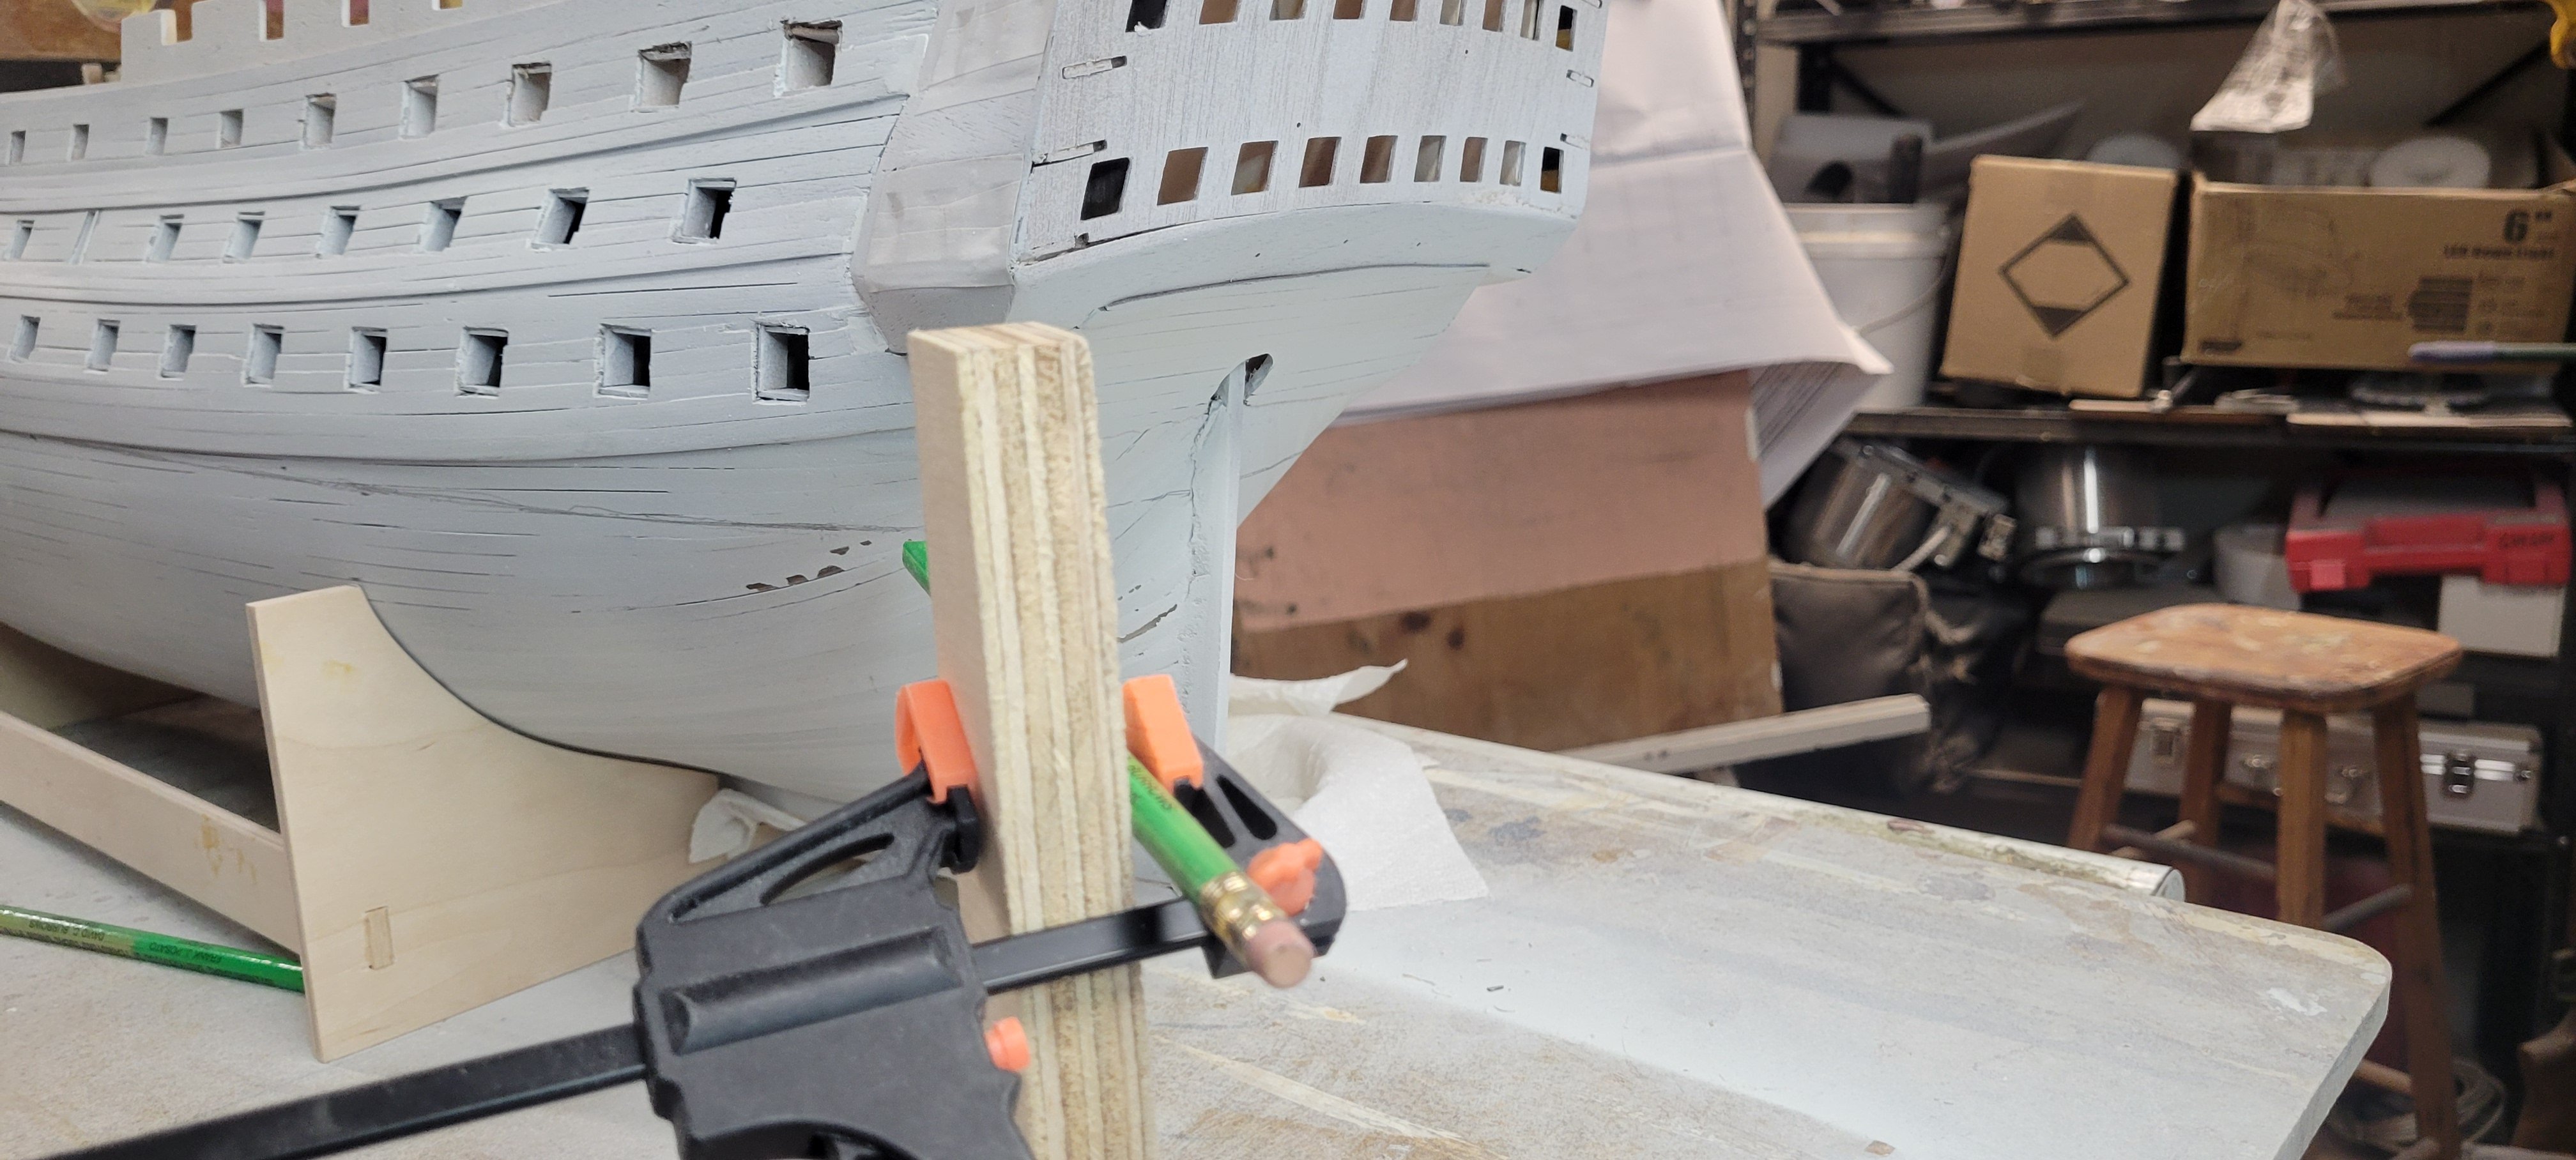
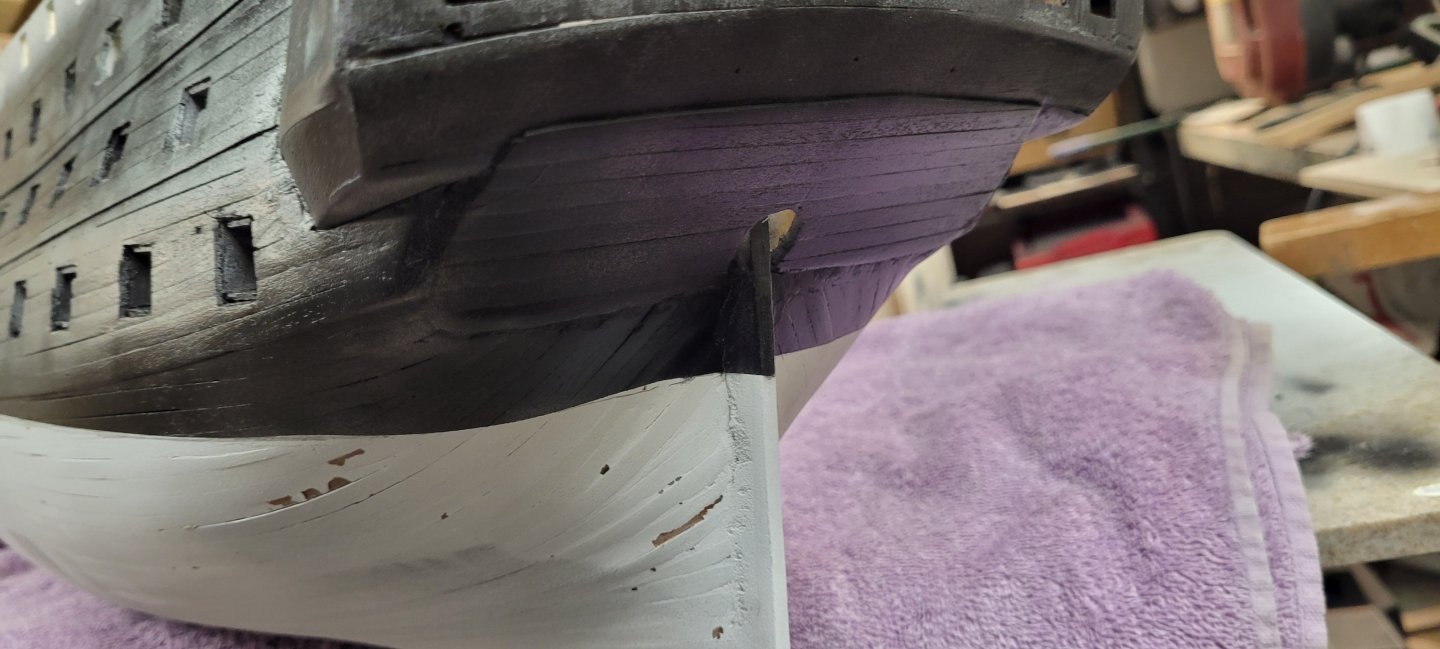
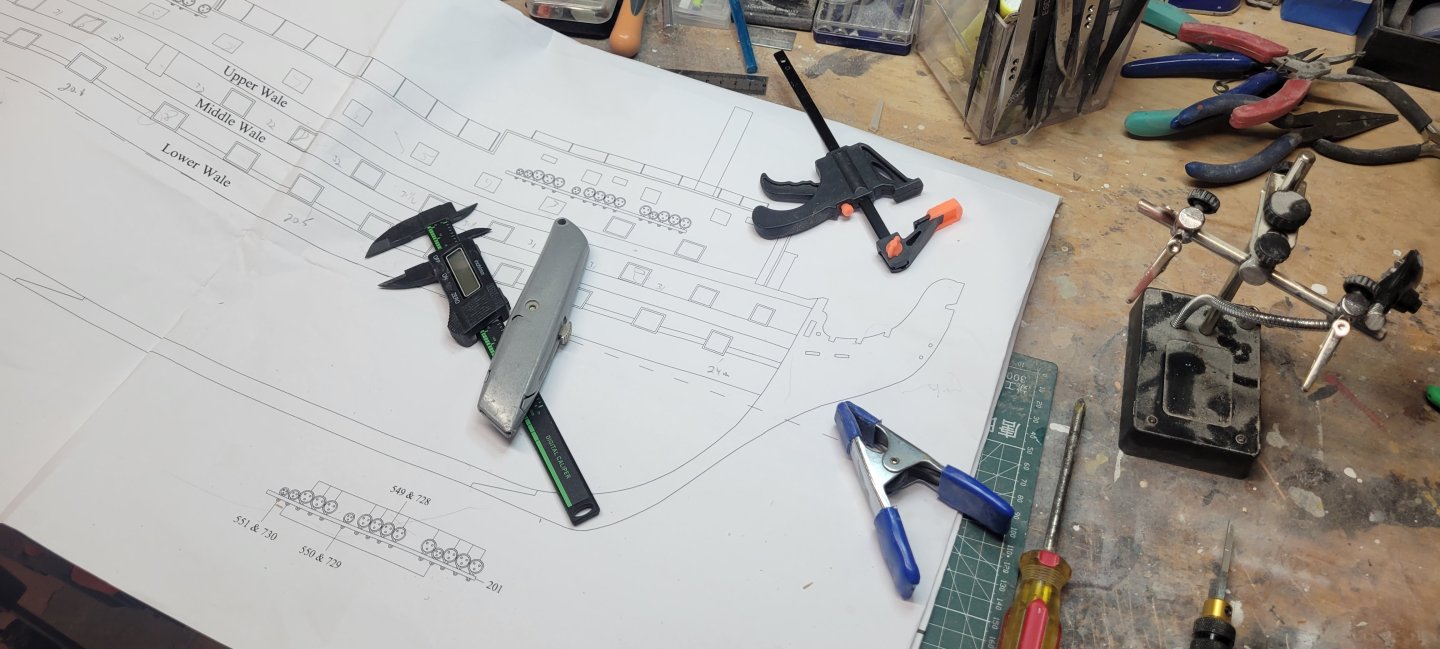
This is the area you mean because these anchor entry points and bow trim work actually go over the top of the wales thus they need to be reduced for fitting?
-
Ah, I see what you mean. Ironically, they are a bit thinner because of the clinking effect I created when I installed them. Once I sanded them, they are definitely tapered and should unknowingly work to my advantage!
-
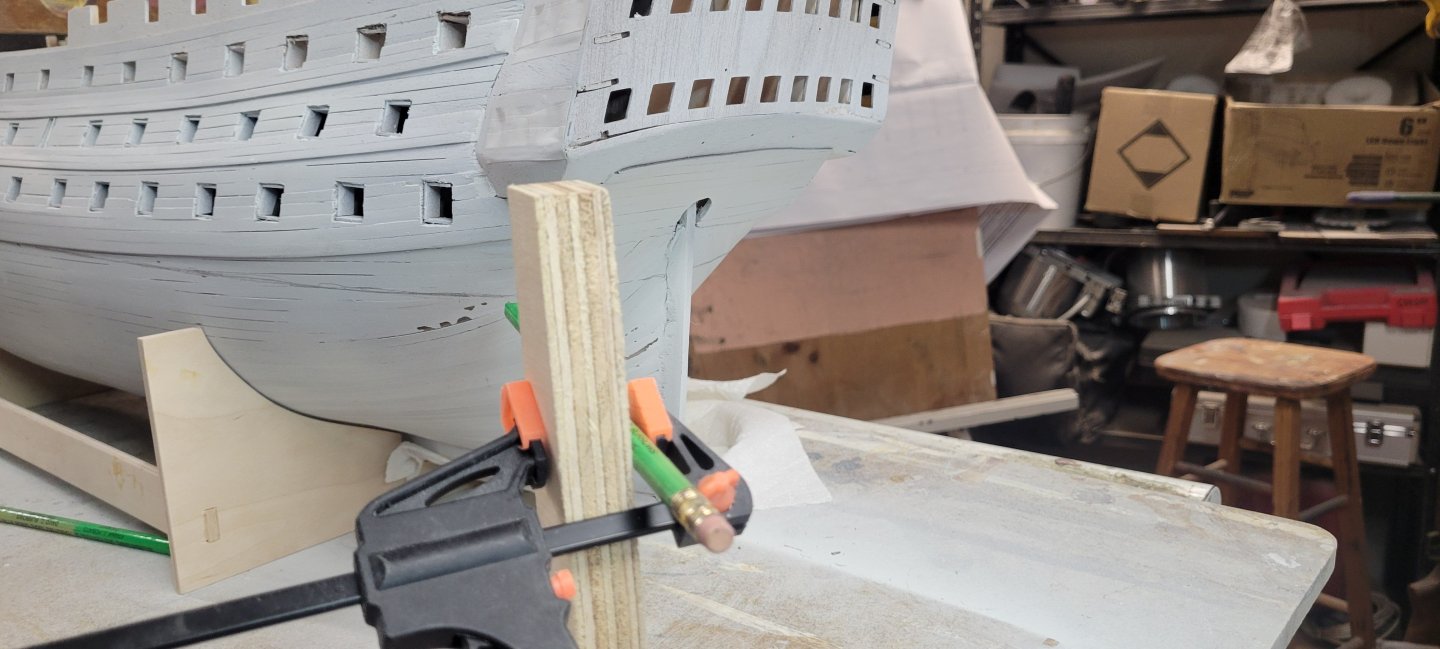
Allan You make a great point about the many refurbishment projects on the boat. Someone just posted this pic from the ship with a completely different point of view! Interesting that there is no recess here. Now this appears to be a lid from the lower wale? Rather than a stop on the lower sill, the lid just fits into the opening smoothly. Also, what do you mean by this: "Don't forget that the thickness of the wales at the rabbet at the stem was reduced to the same thickness of the adjacent planking so it would seat properly in the rabbet. It looks like you did that on one wale, but hard to tell from the angle of the photos." If there is something I need to do, now is going to be the time!
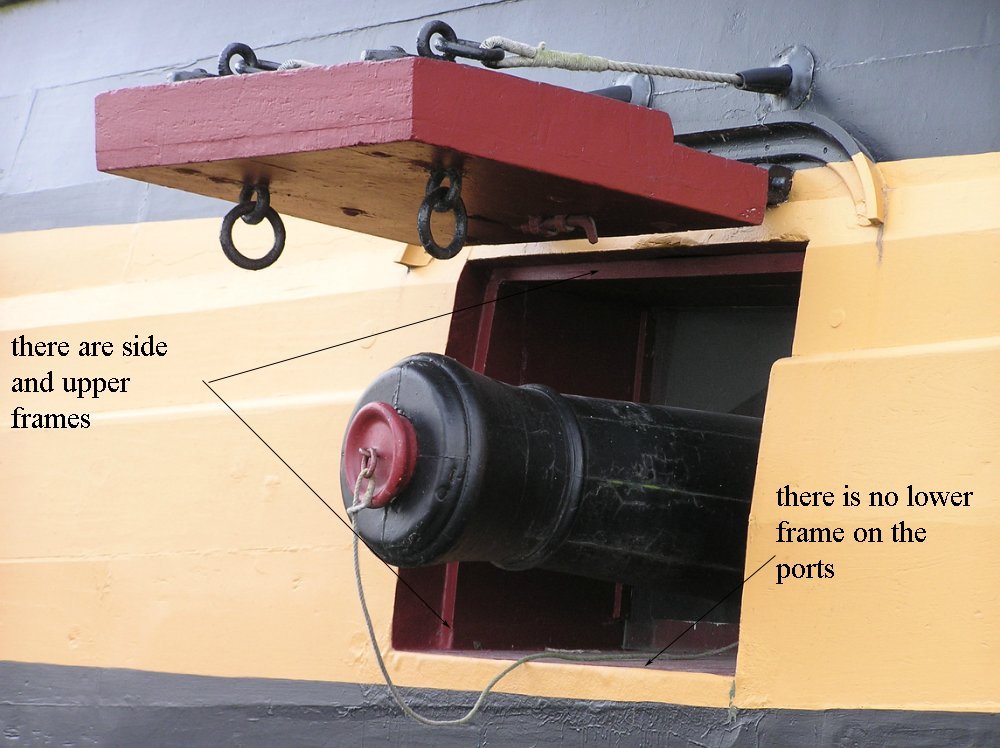
-
Lol....now you tell me!!!! Yeah, I just finished all of the liners and was very diligent to create a stop for the upper liner too! I'd like to think that my version of the Victory was from an alternative reality where the designed needed stops on all four sides! Whew.....crisis averted. I do appreciate the info though and hopefully new builders will see this and work accordingly. I also just checked the instructions and they don't mention that there is no need to recess the upper sills. My feeling though as people will be looking down at the model when finished, they won't see that. Although I am going to have to account for the fact that I may have to place the gun ports up a bit higher now.... THANK YOU!!! Chris