Yabuhebi
-
Posts
210 -
Joined
-
Last visited
Content Type
Profiles
Forums
Gallery
Events
Everything posted by Yabuhebi
-
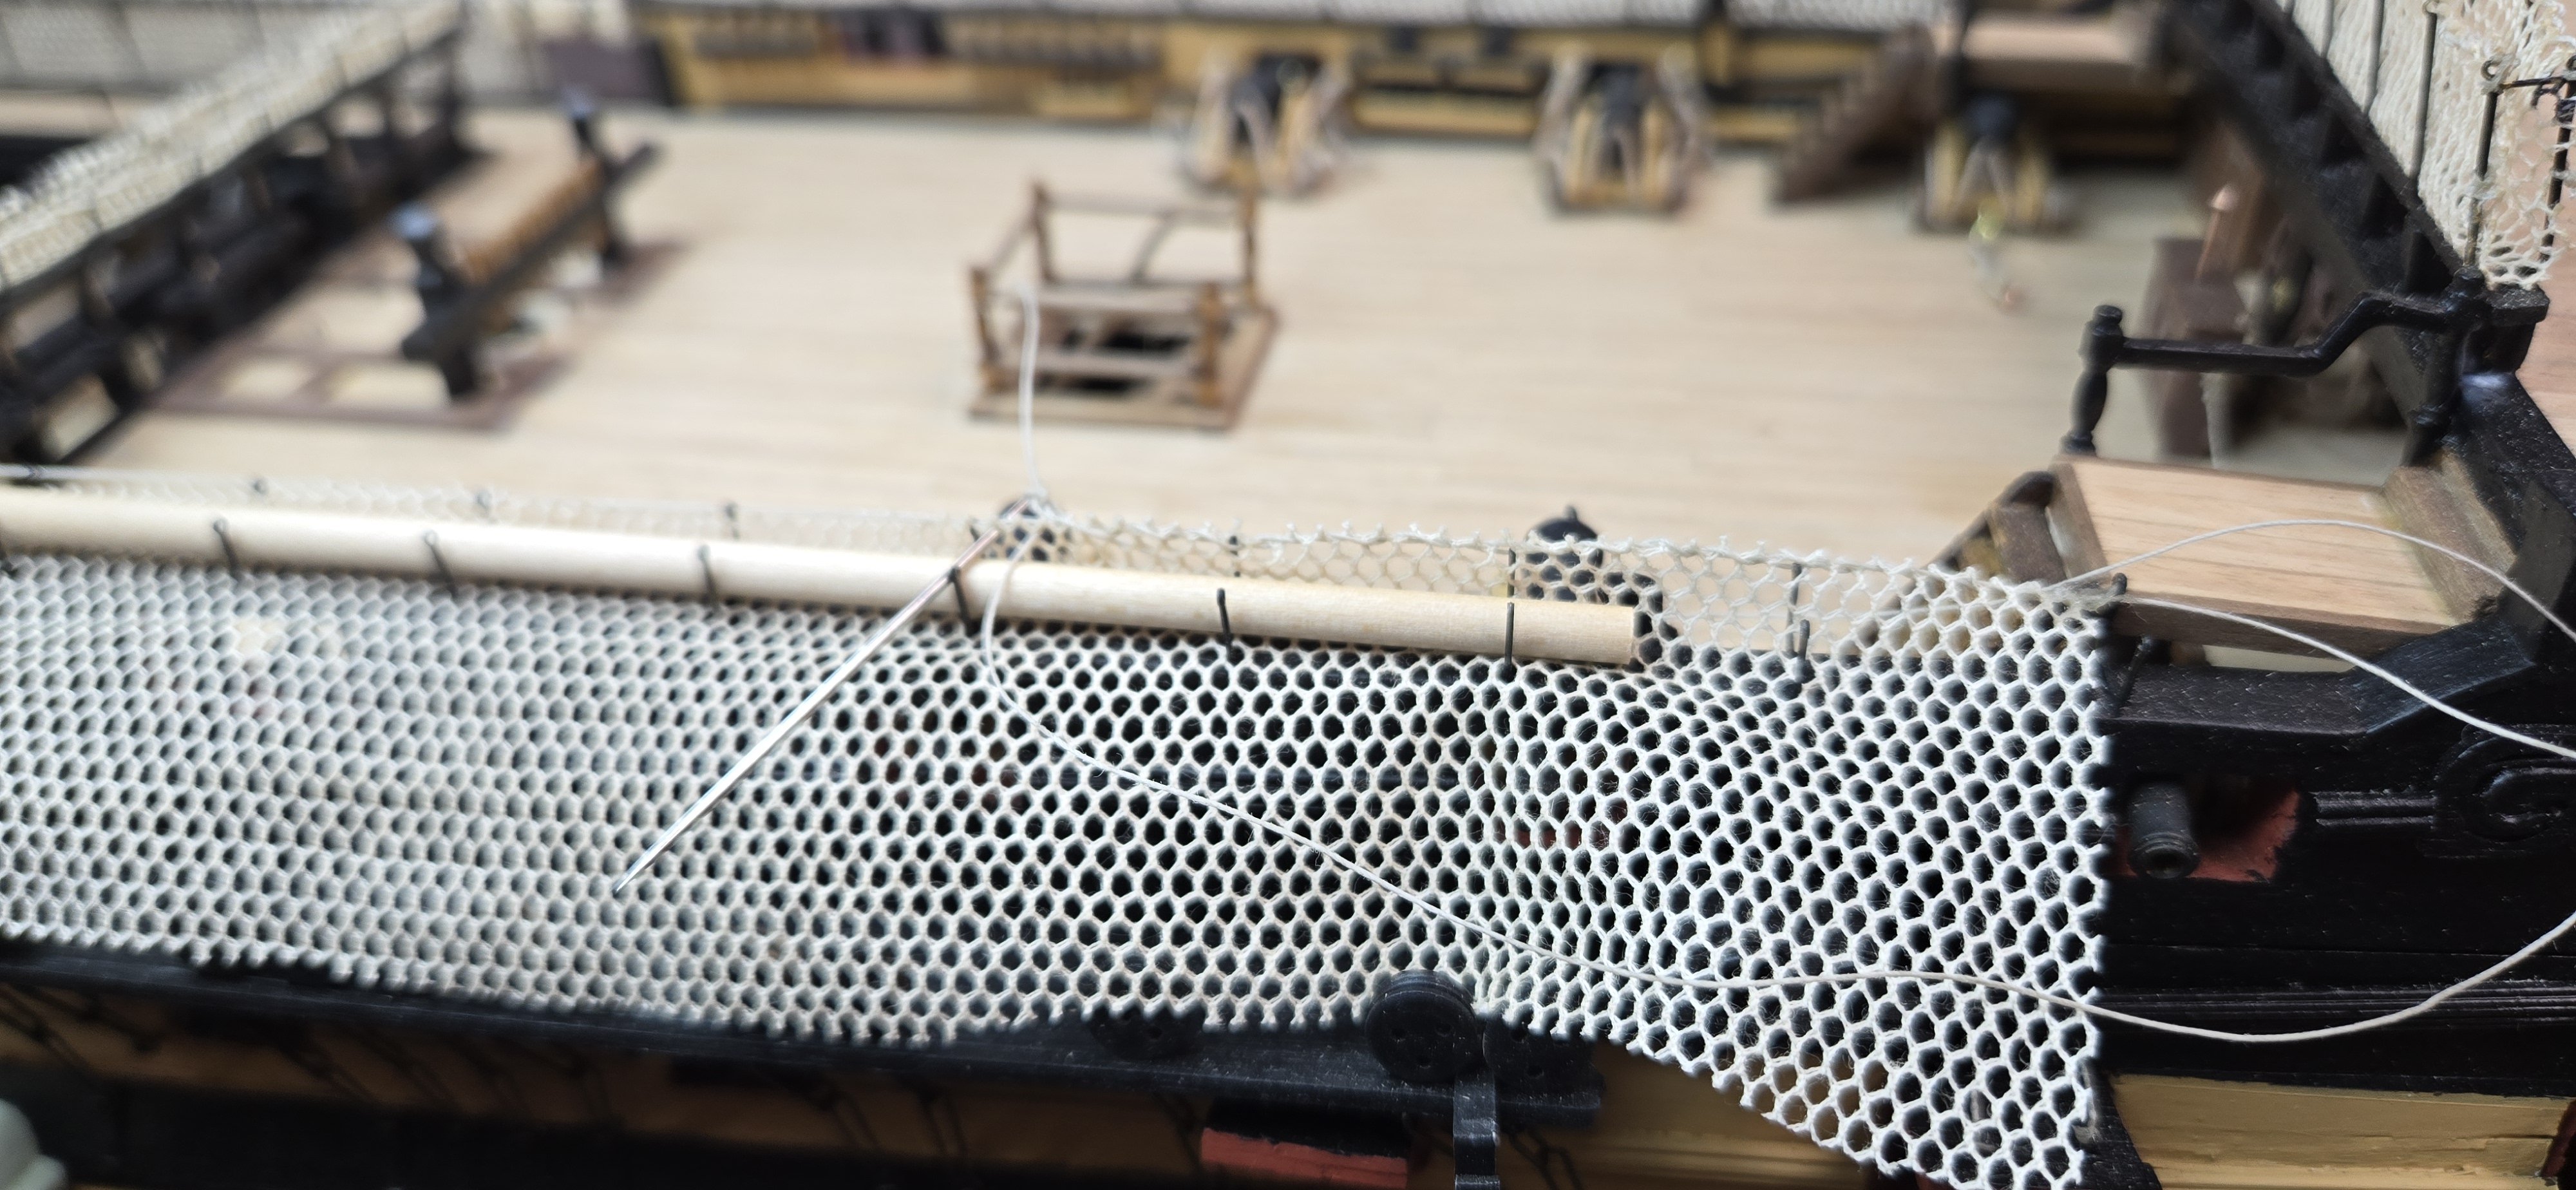
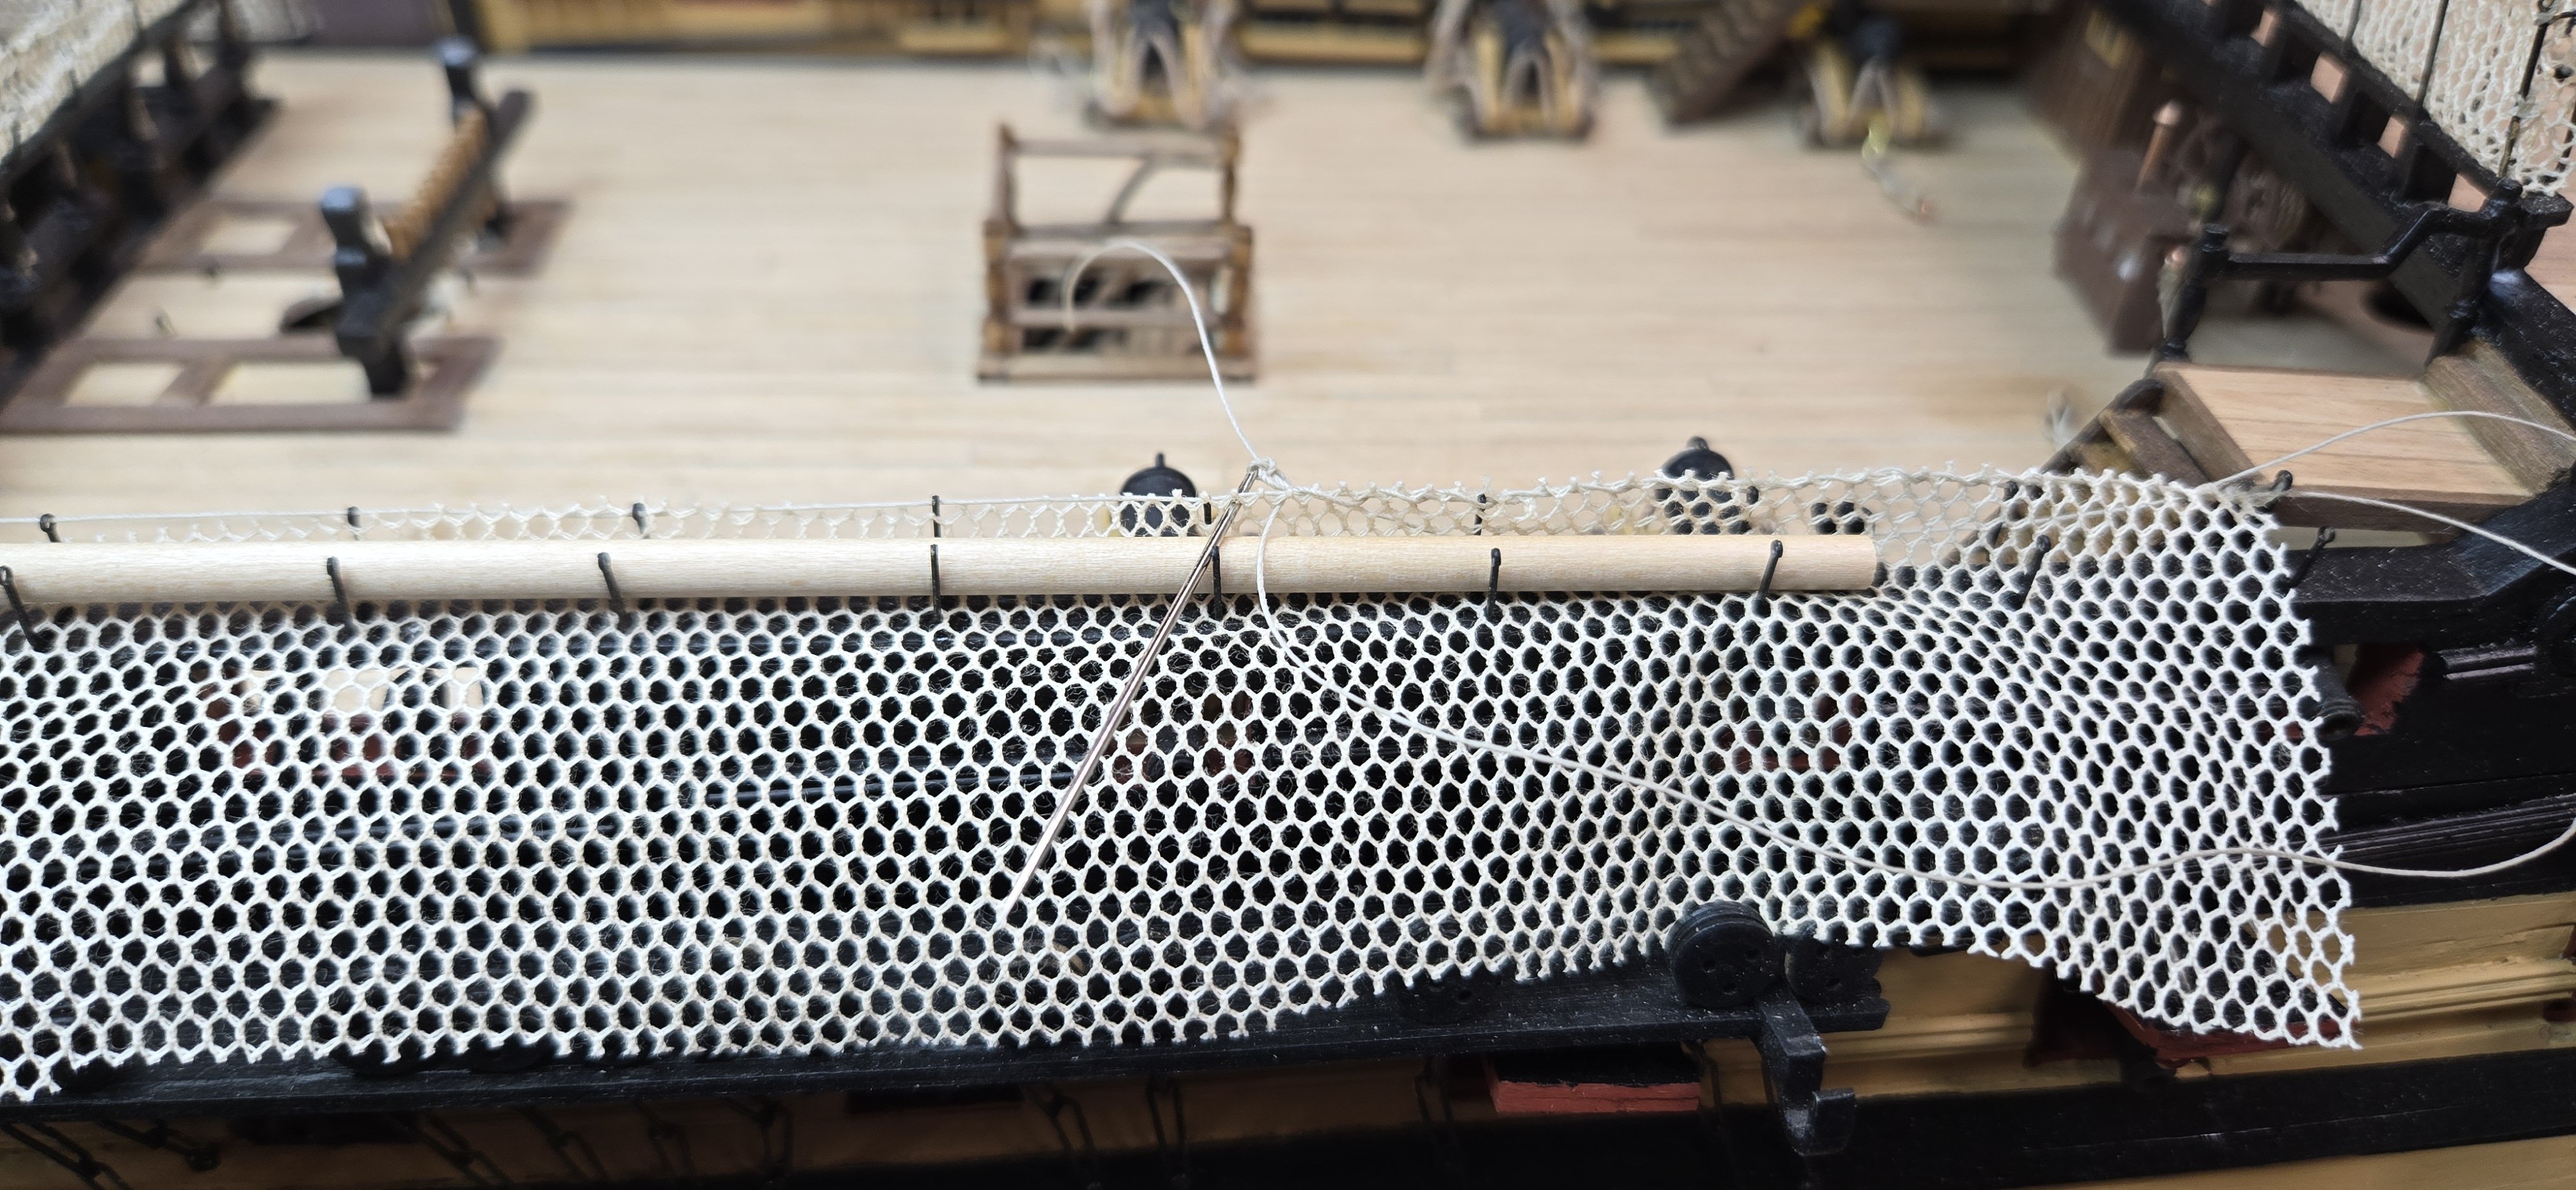
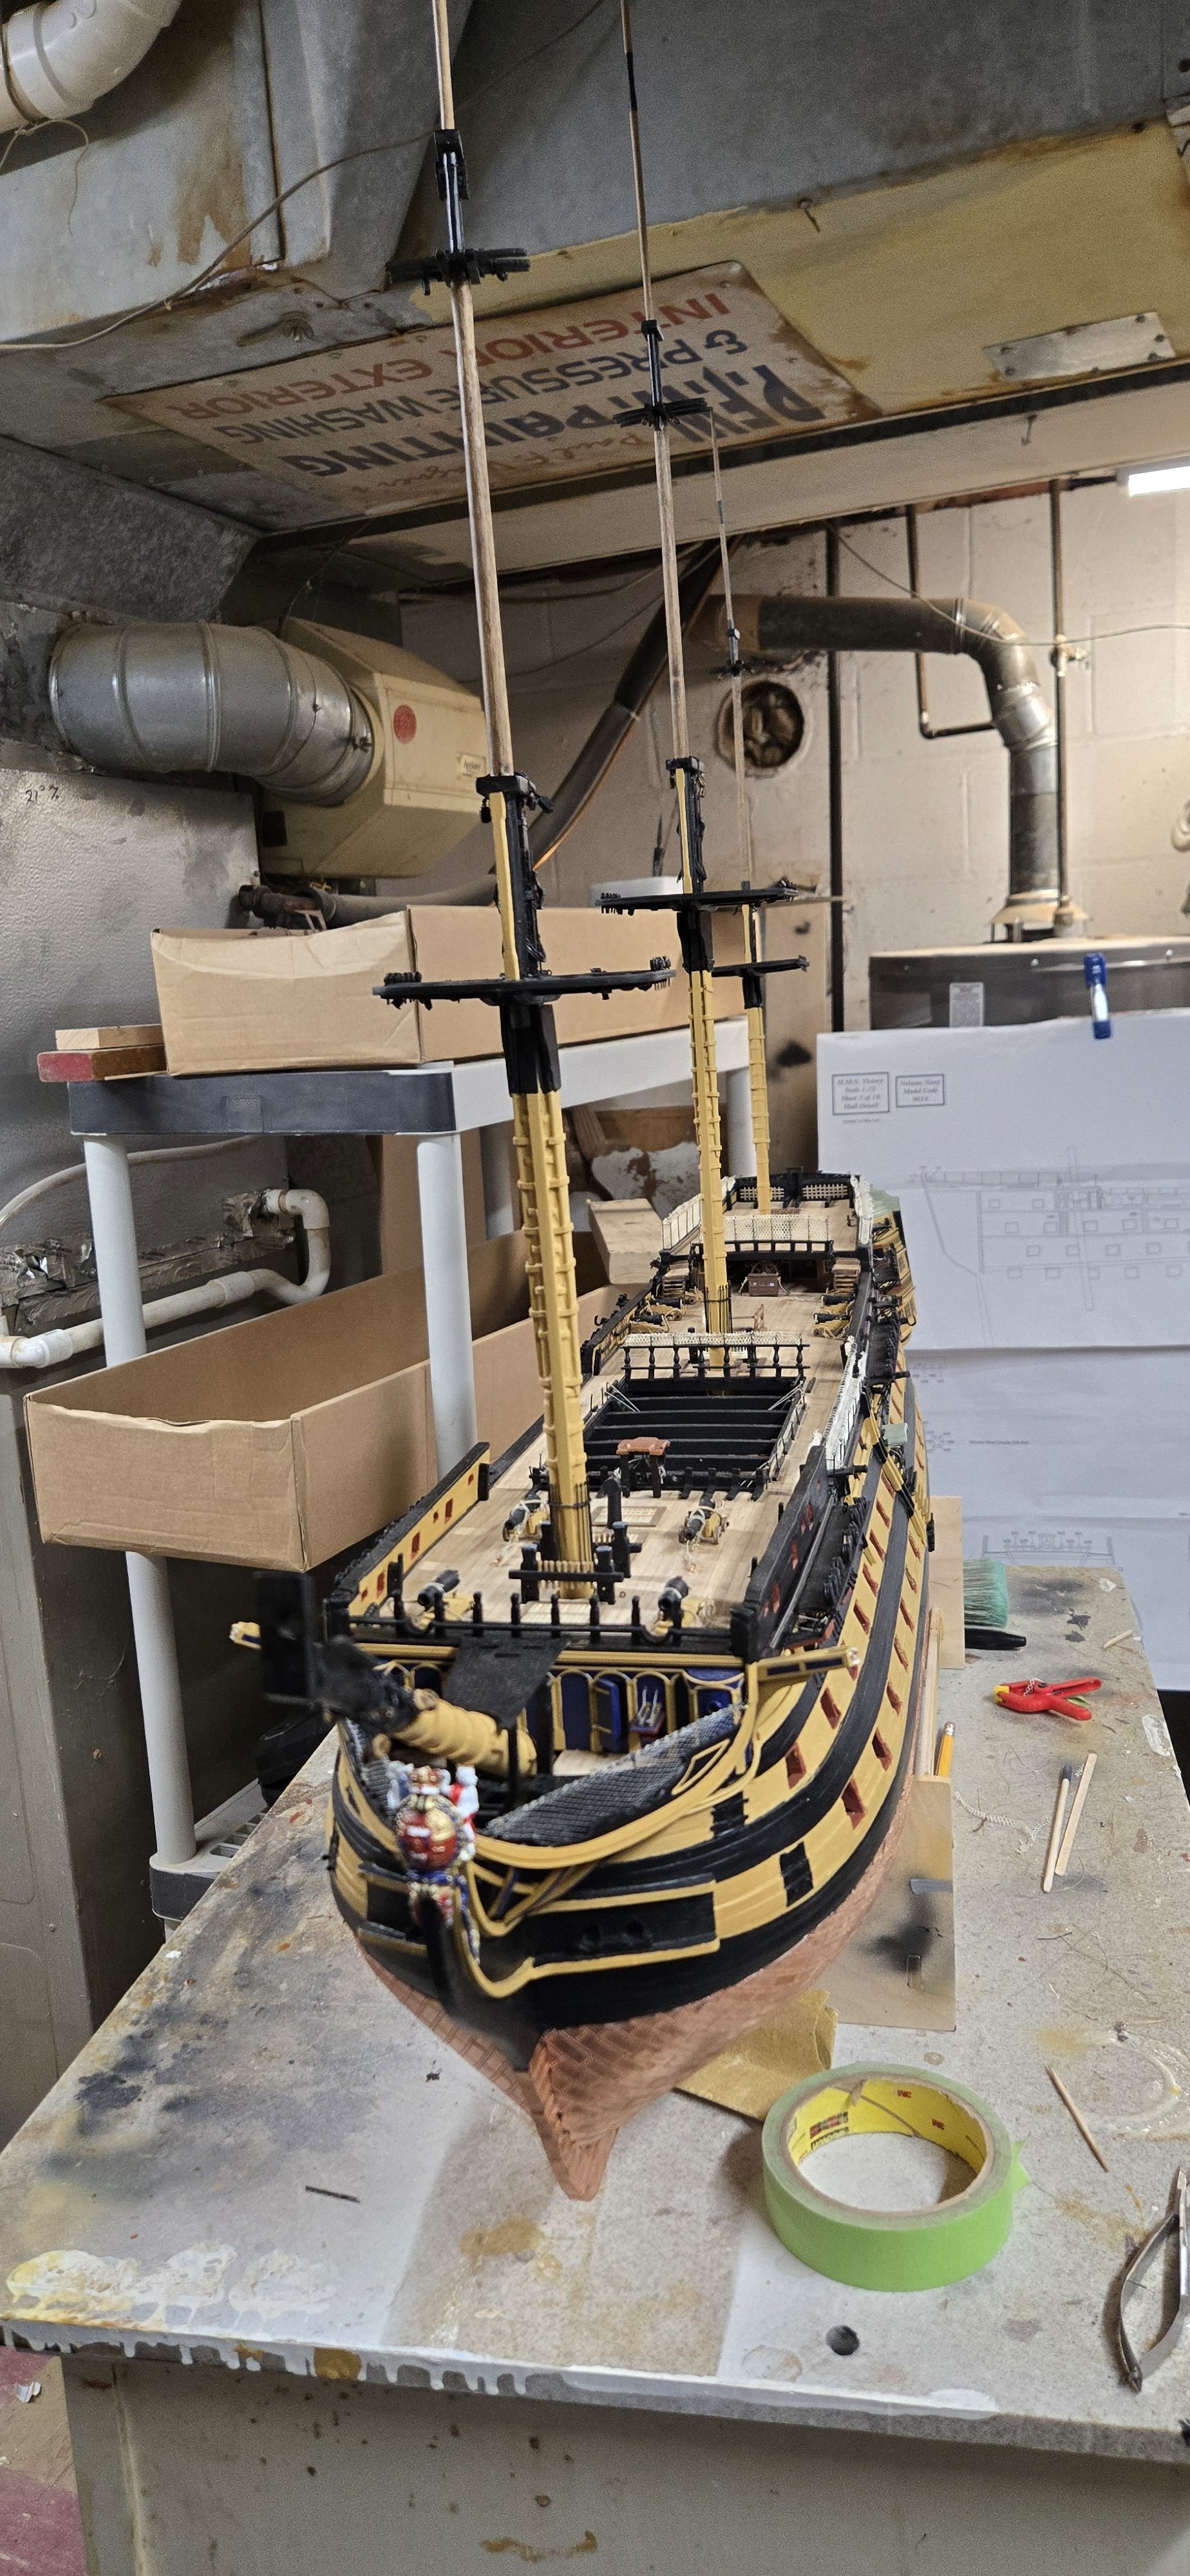
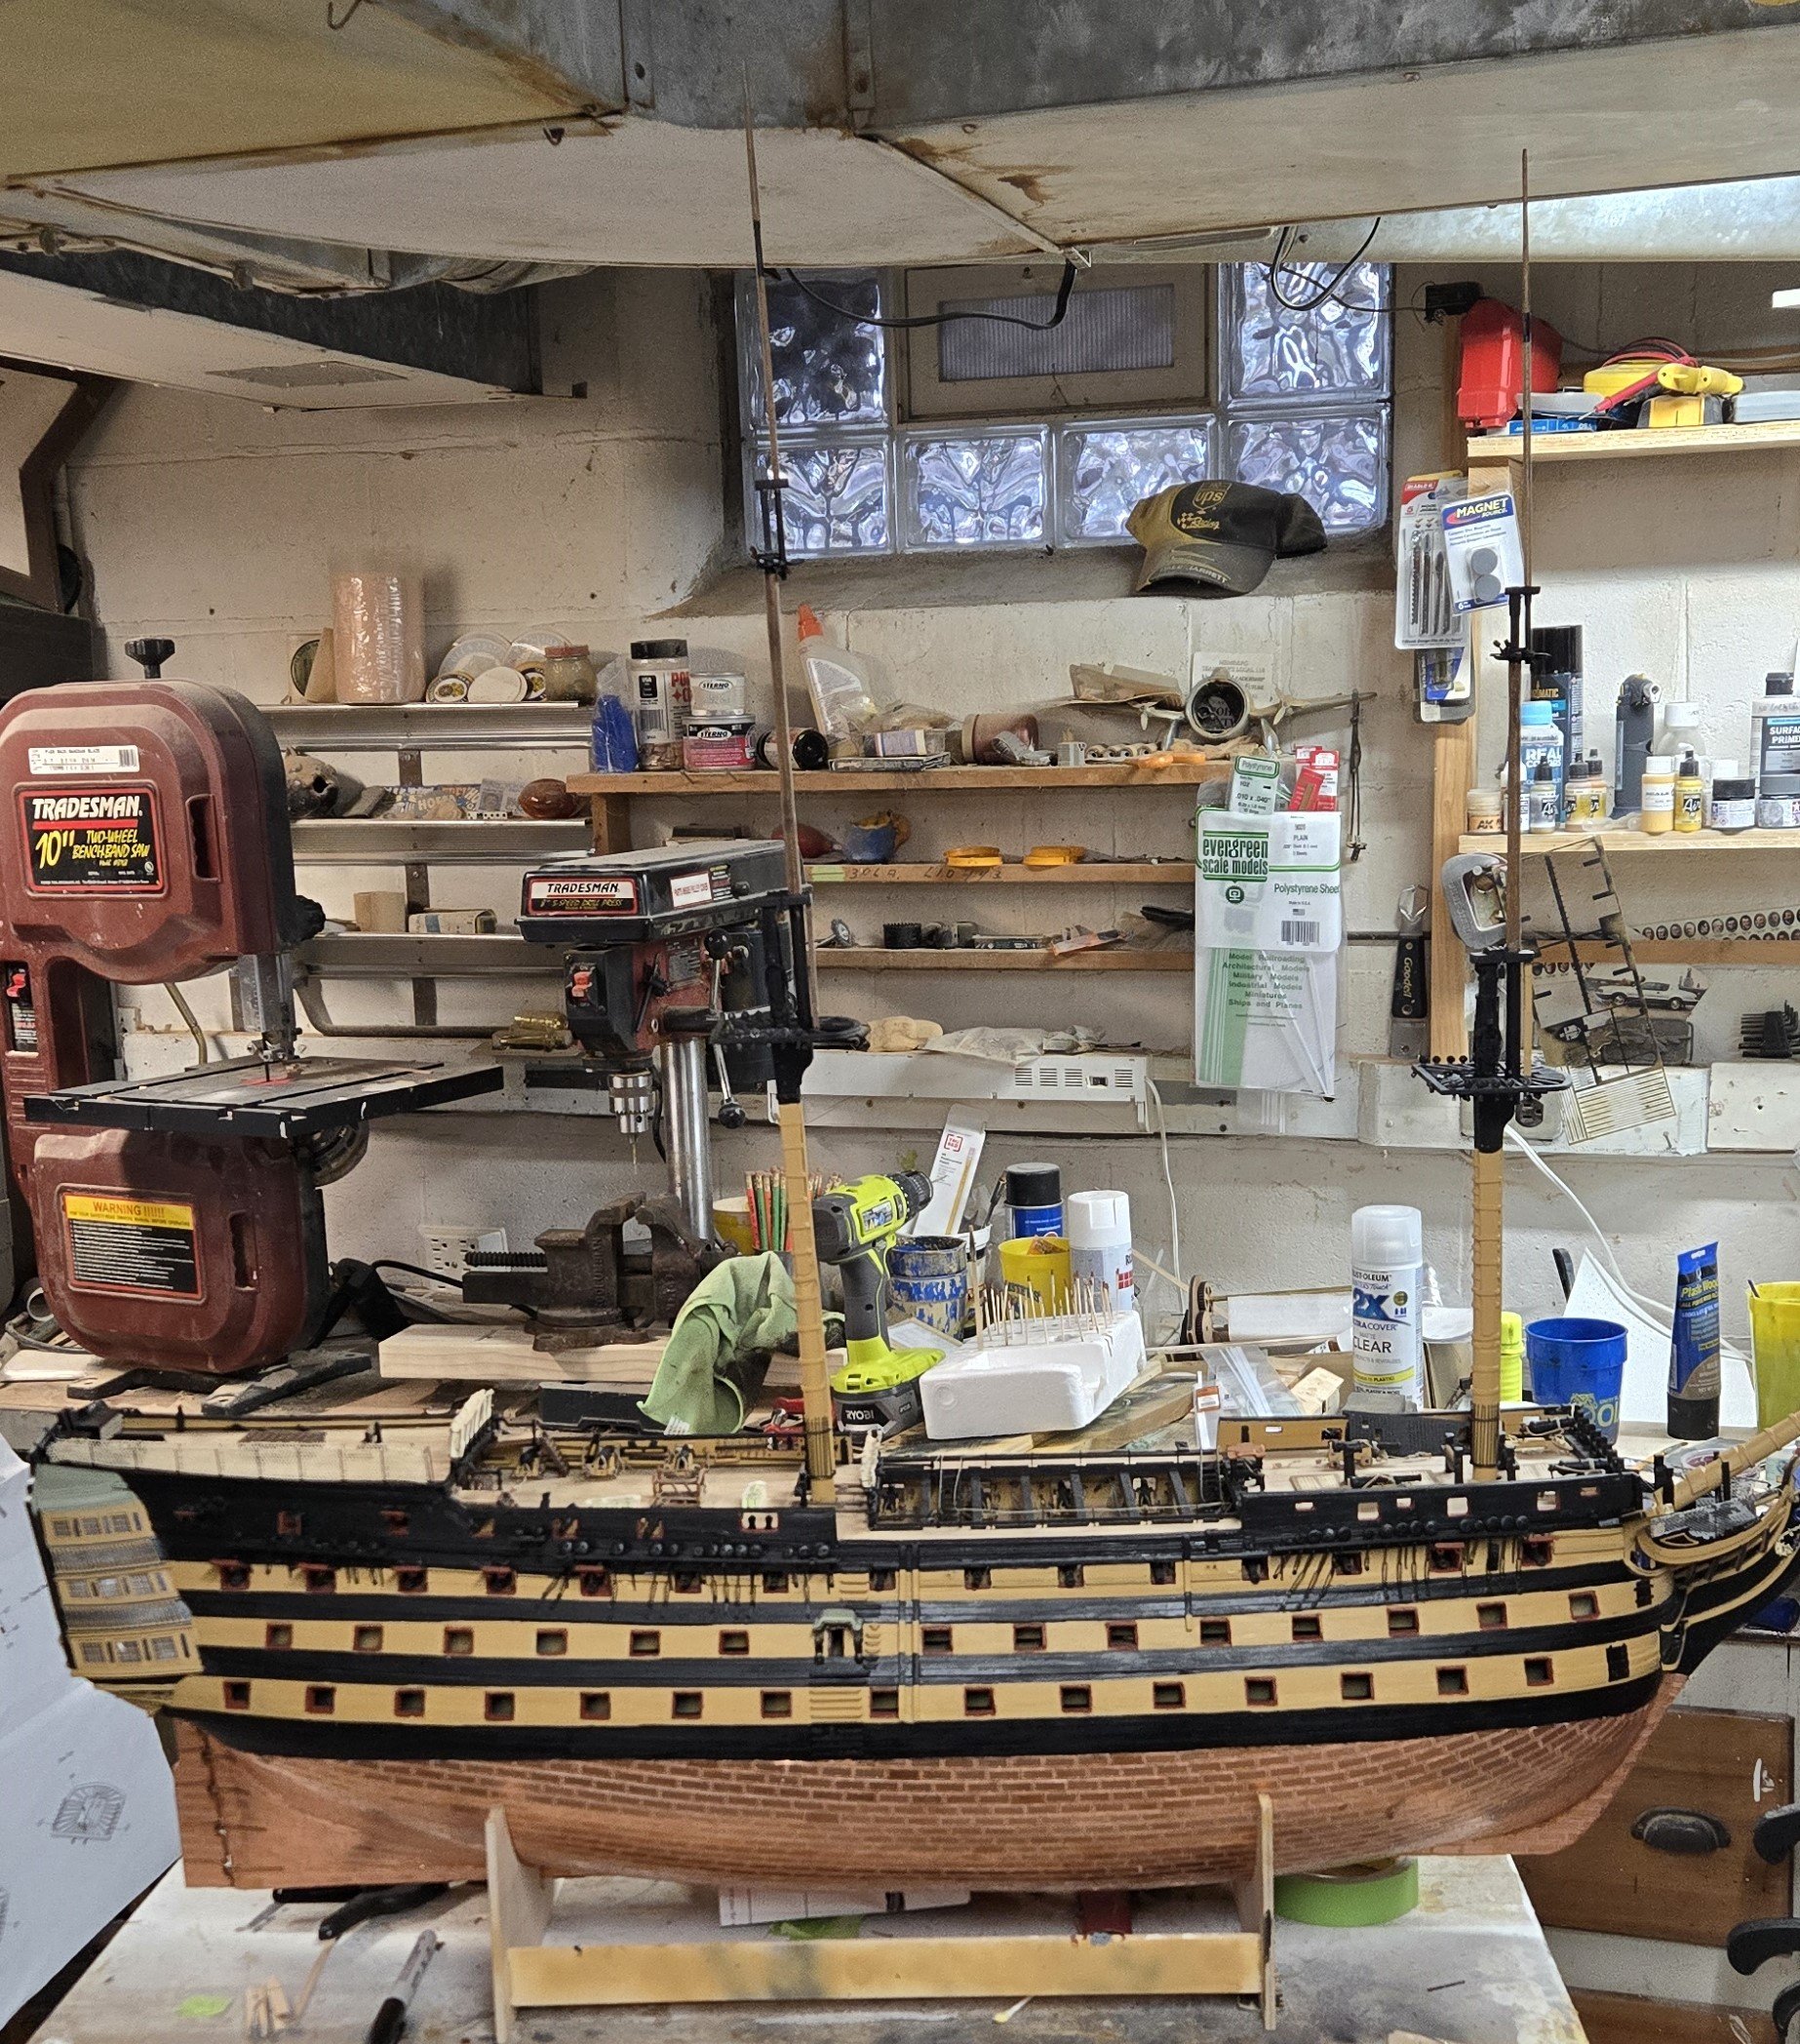
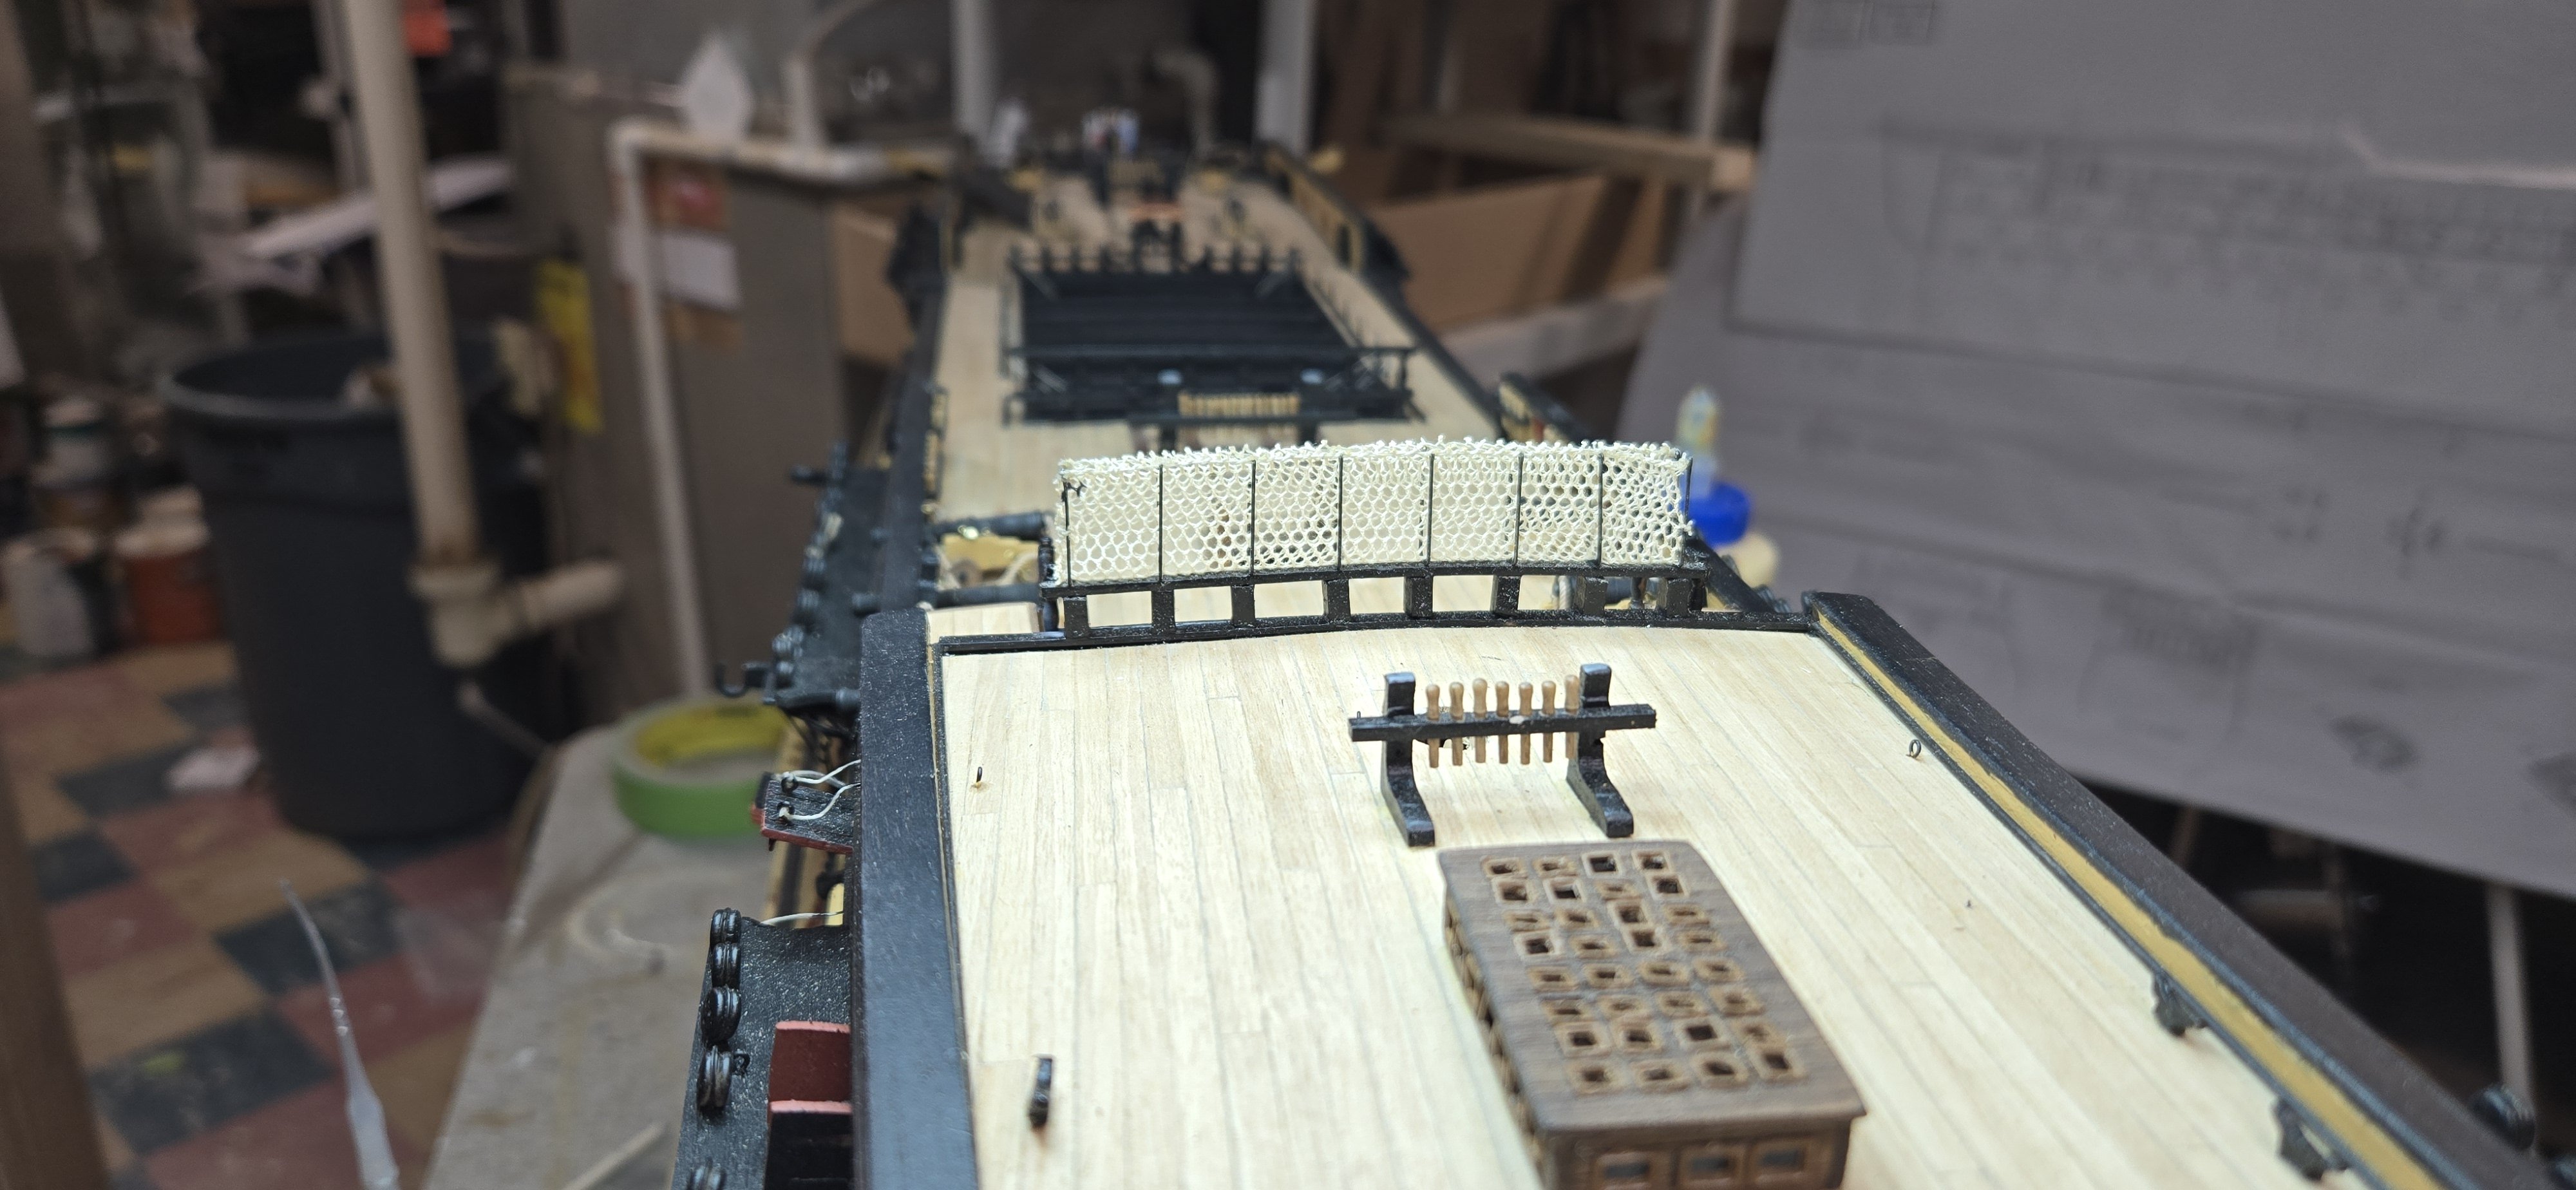
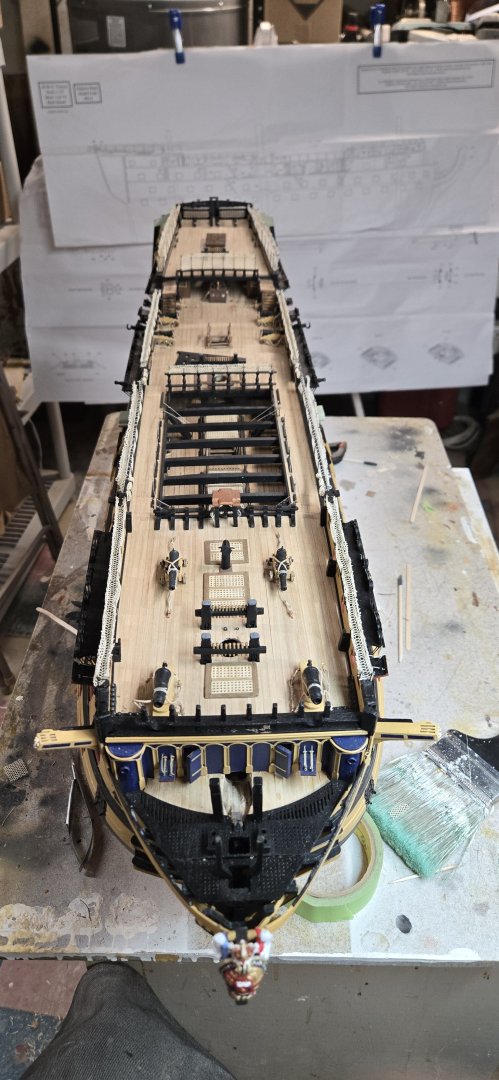
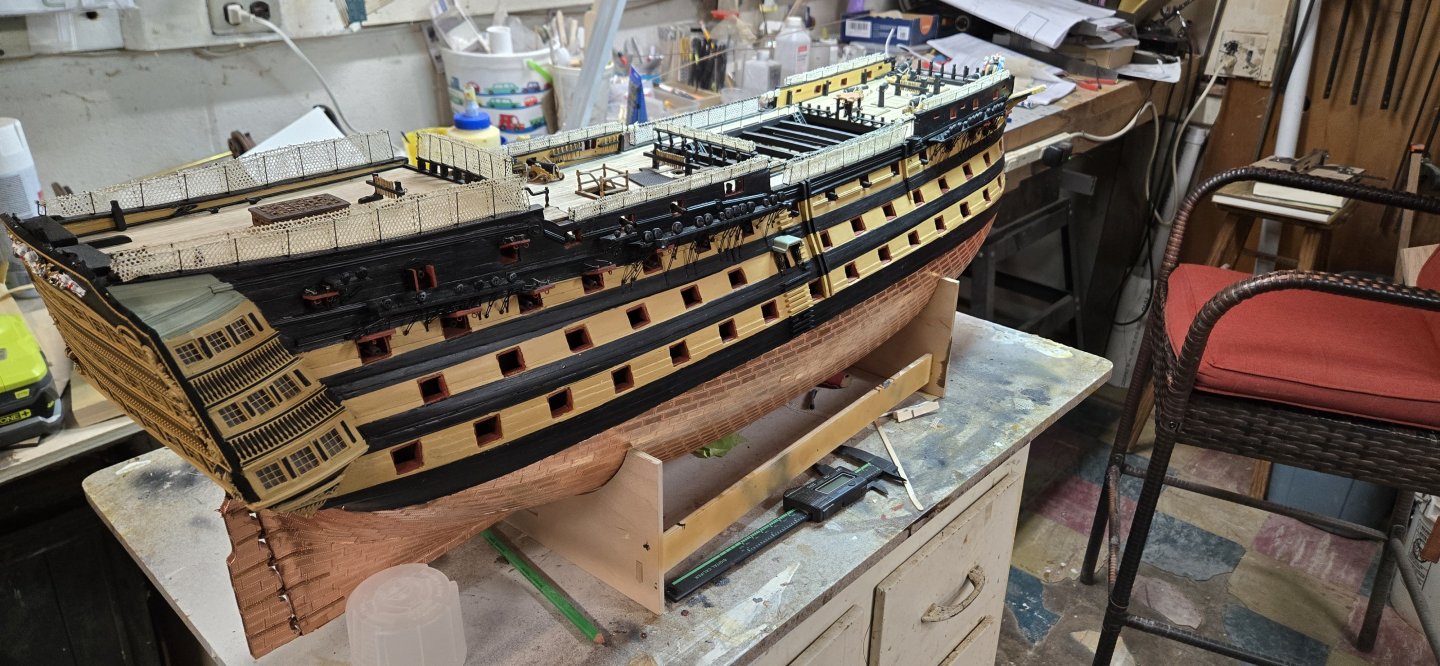
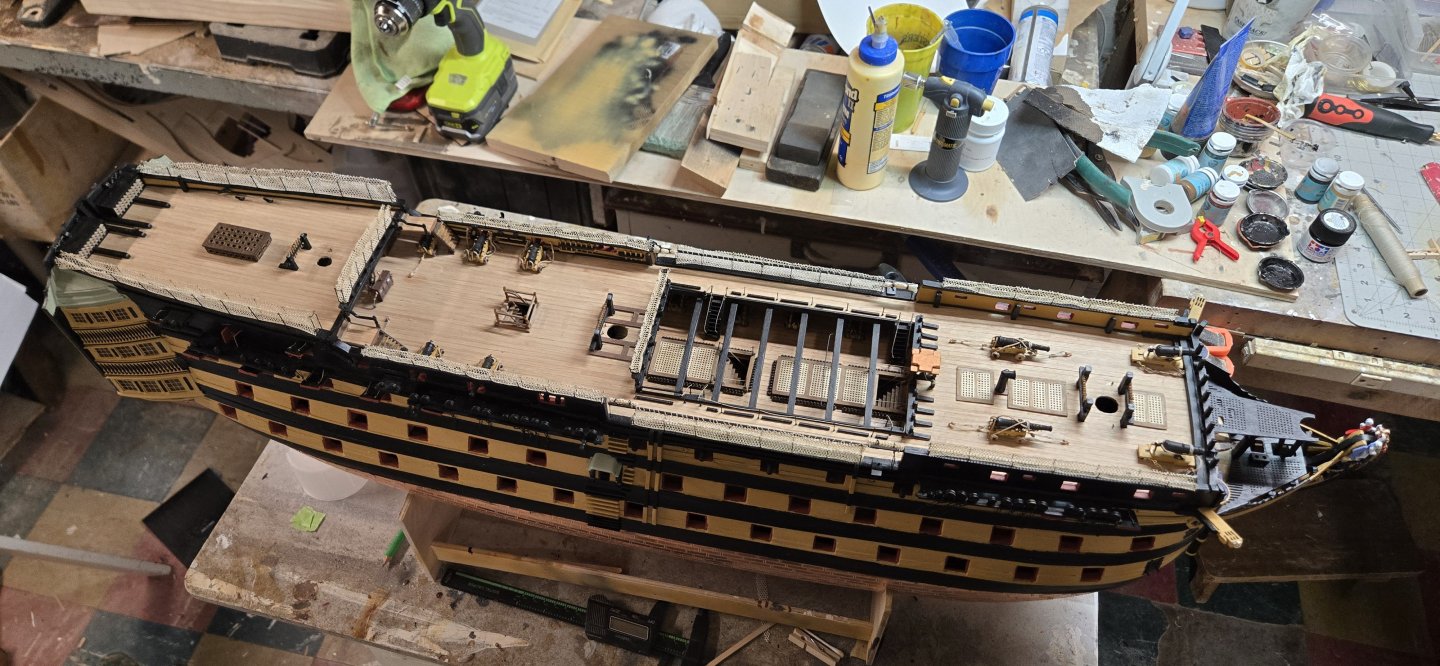
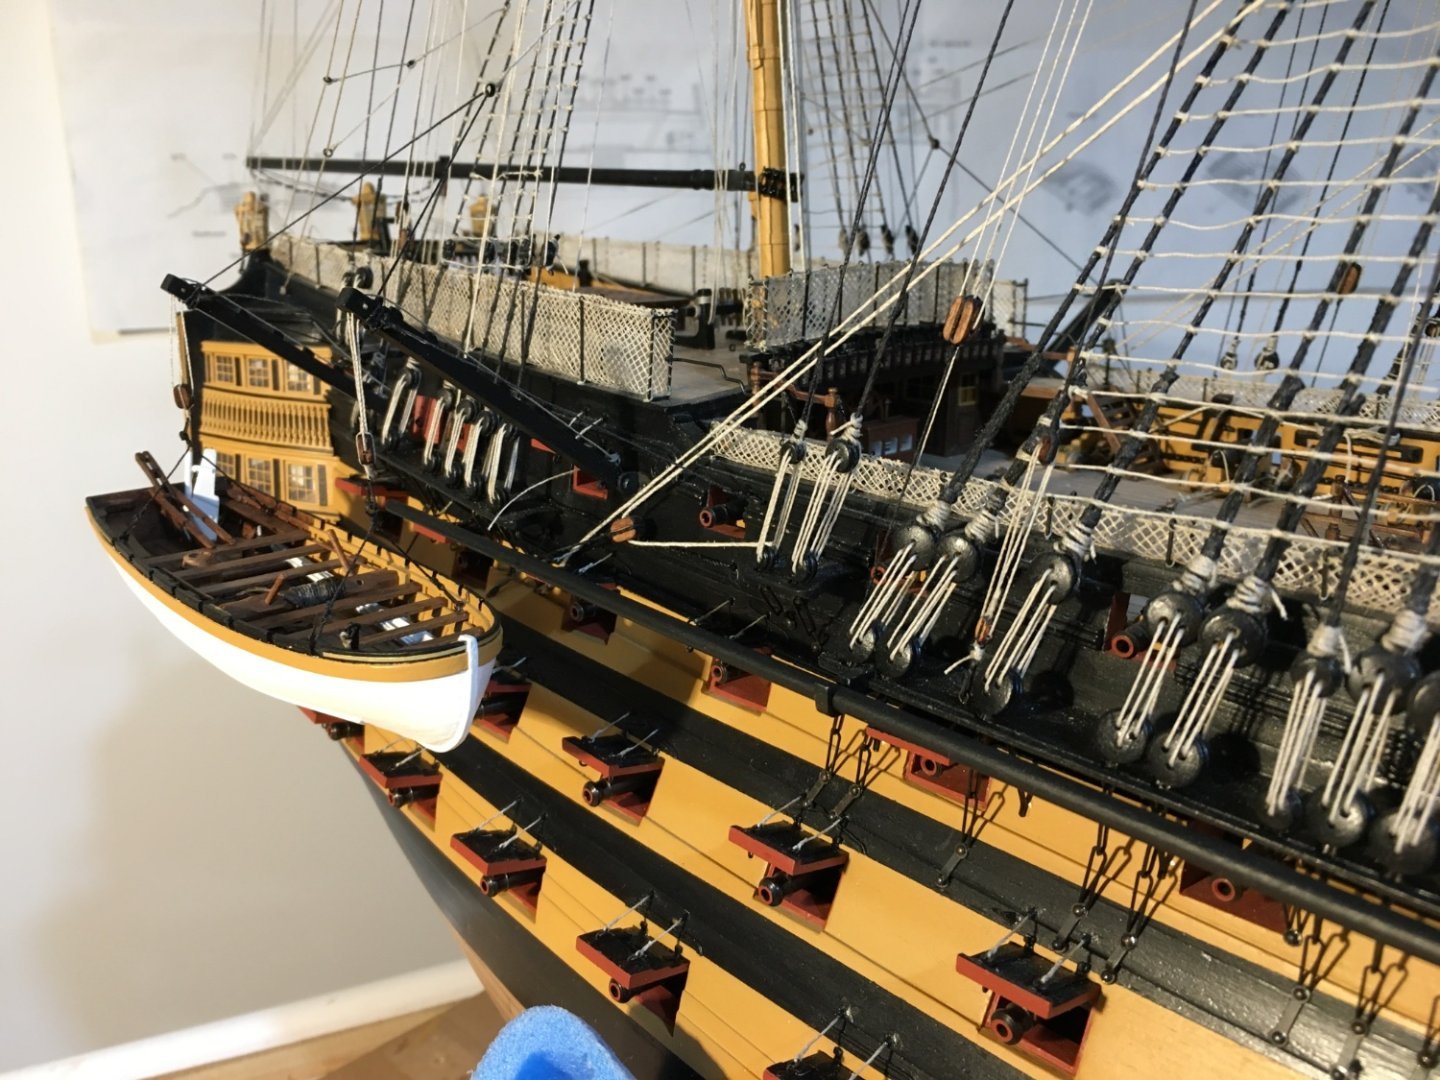
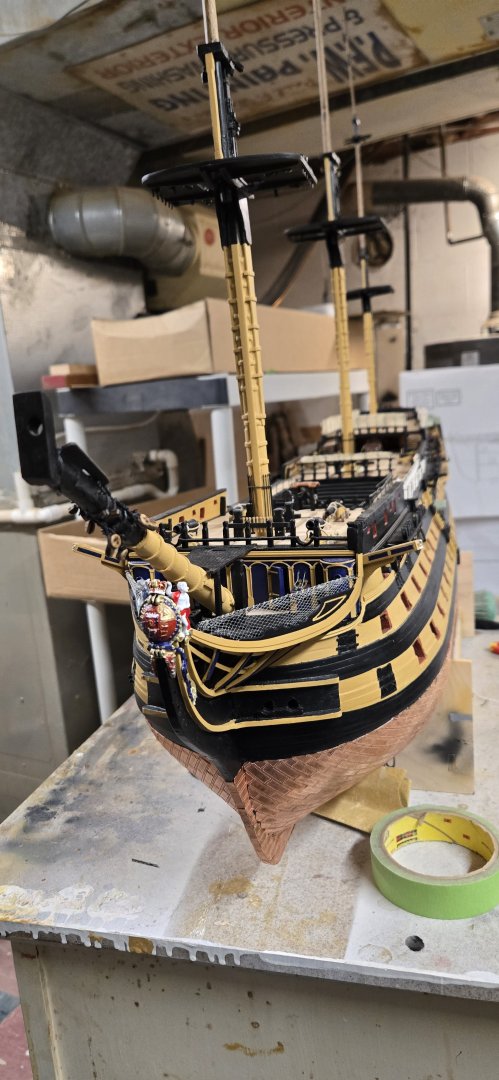
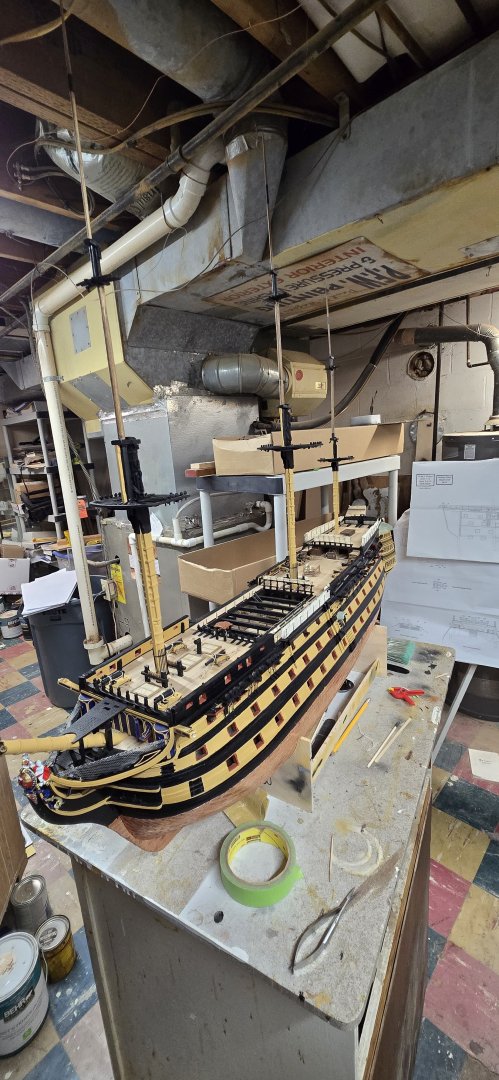
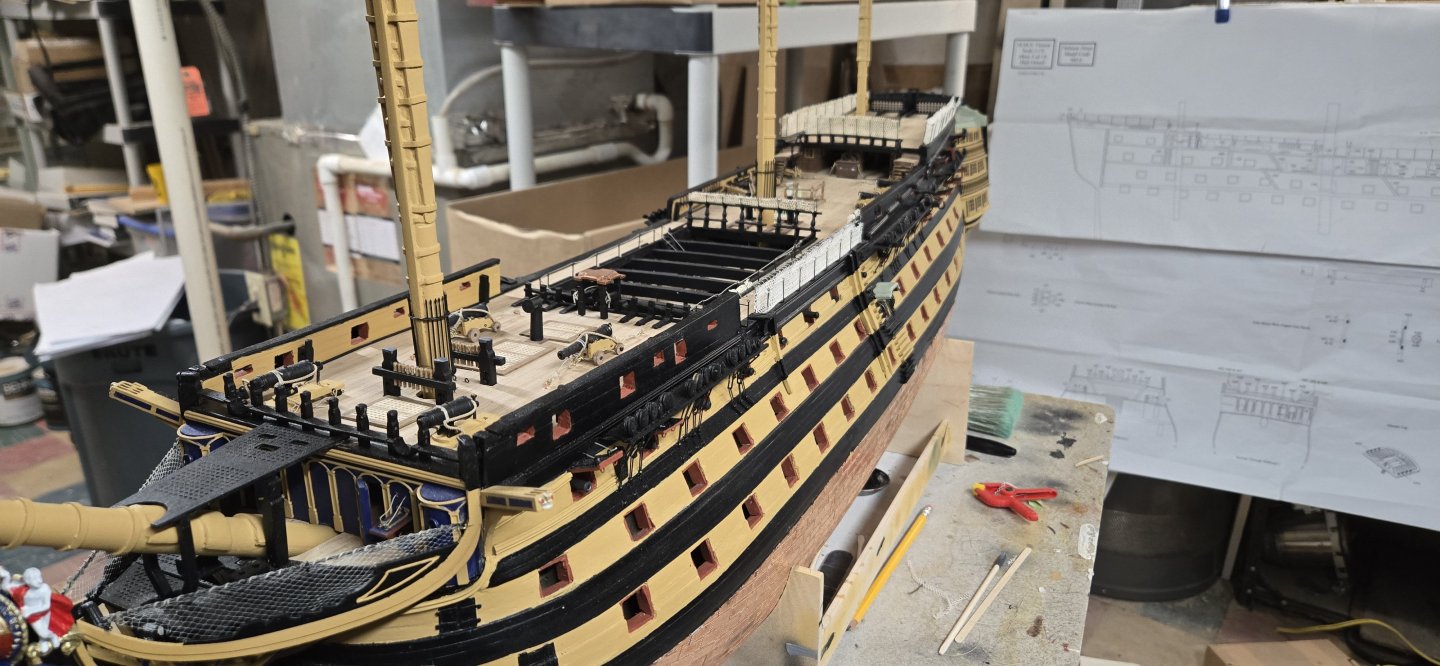
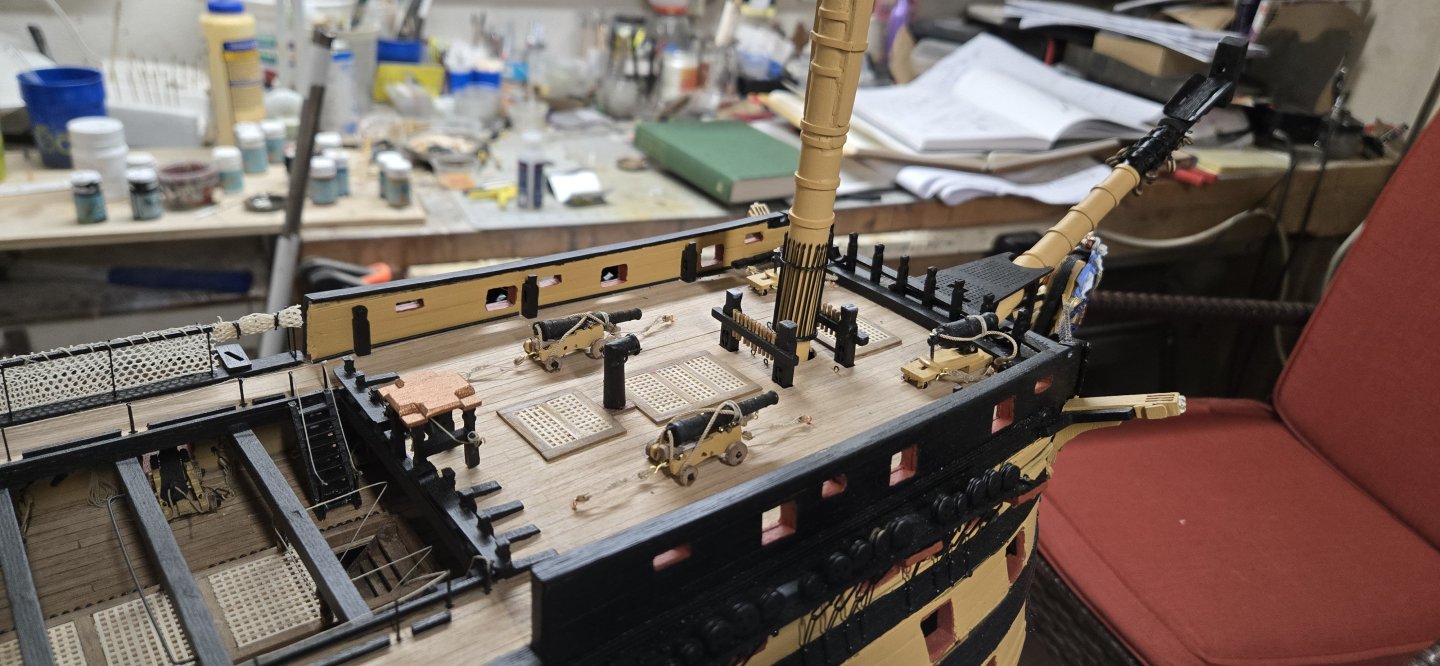
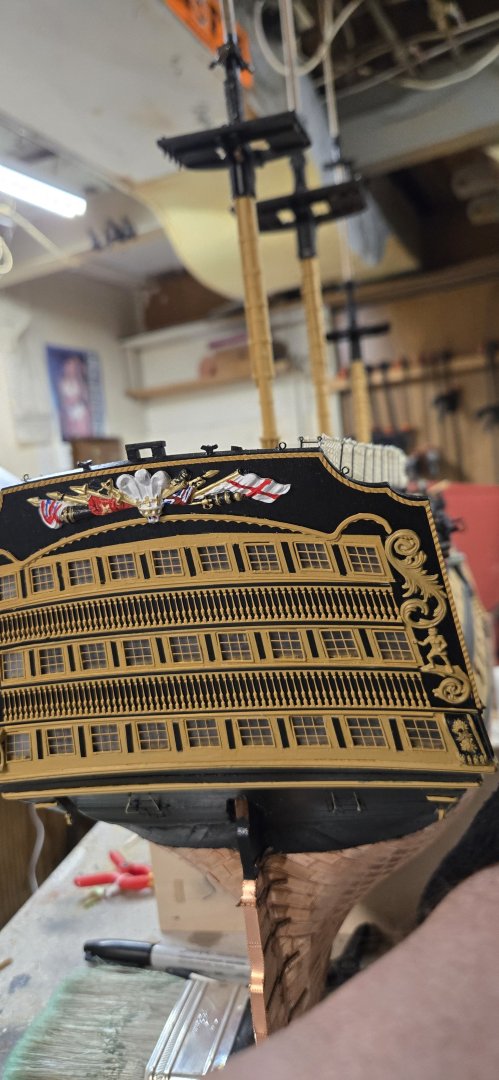
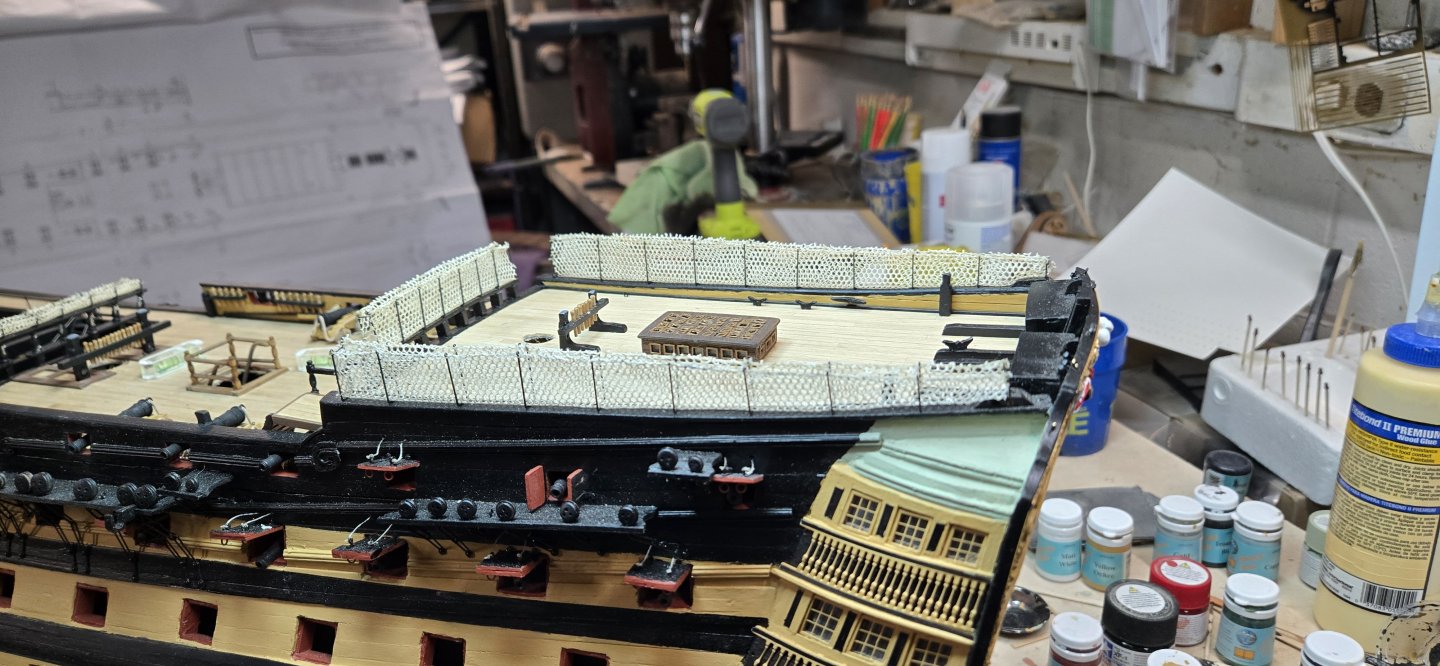
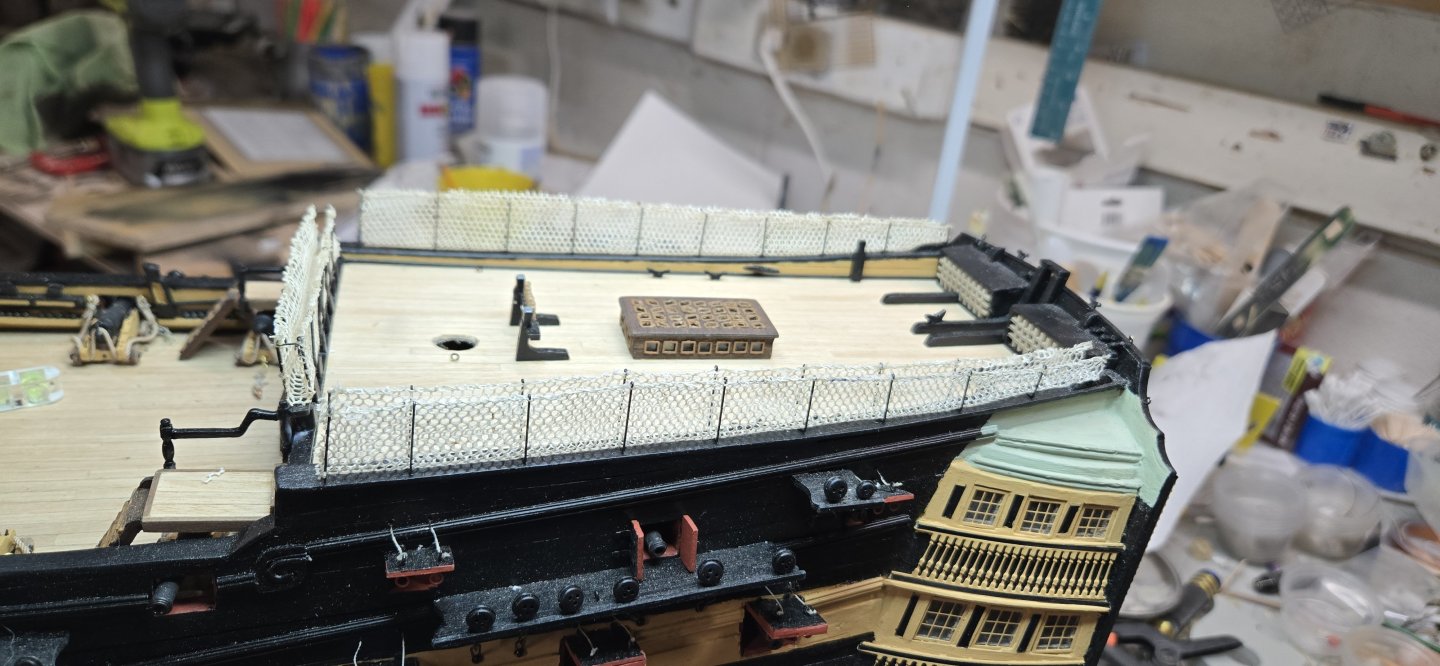
 DONE, DONE, DONE!!!! Those pesky hammocks are done. Yes, I am sure I will be this excited when I post that I've finished all the ratlines...just as I was excited when I finished the copperplating! I removed the original netting on the bow and am going to redo with this netting. I also have to add the rails for the platforms and add netting there, but I want to make sure if I add those now, they won't interfere with rigging, especially the standing rigging. I just started working on the last 4 cannon tackles I need to do. After that, I want to go over the hull directions line by line and be sure that I have added everything that is required. Once done with that, I'll add all of the remaining copper eyelets I may have missed. I also have to go over all of them and paint them black. Last thing will be to build the cannon hatches for the lower decks and add them and the cannons. It's a party now!!!!
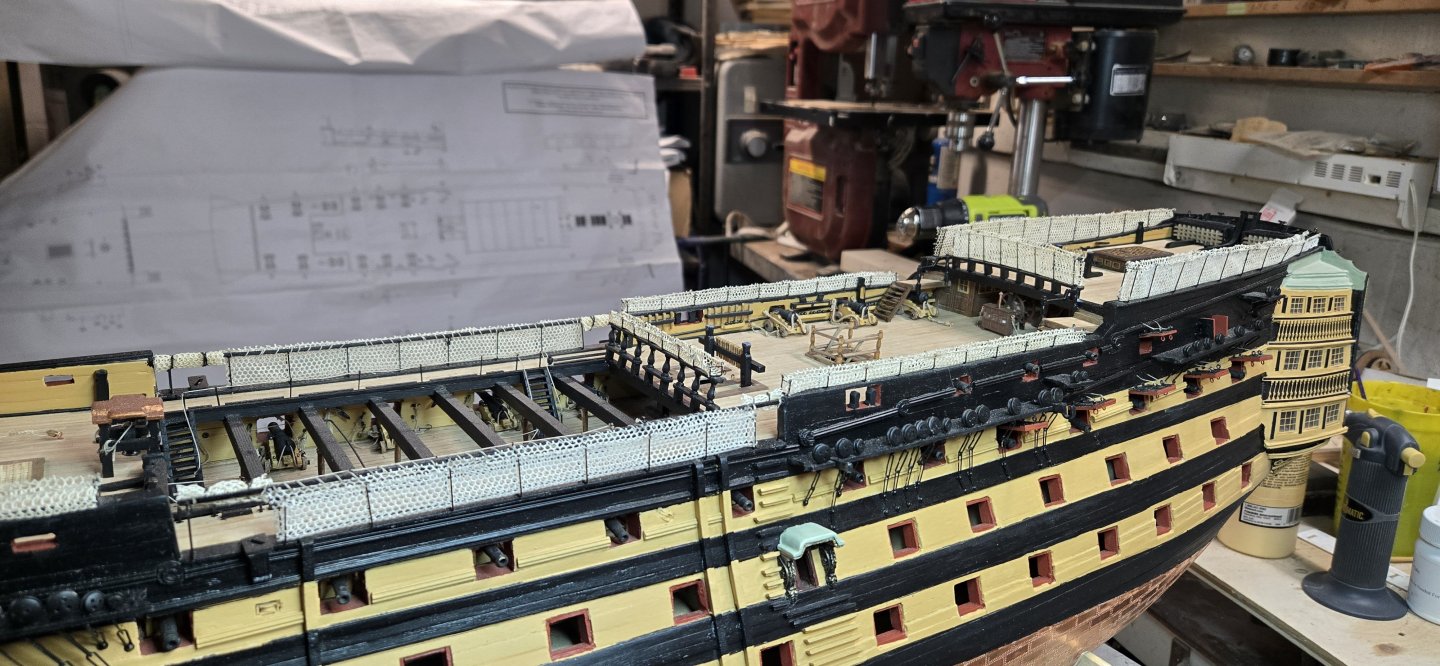


-
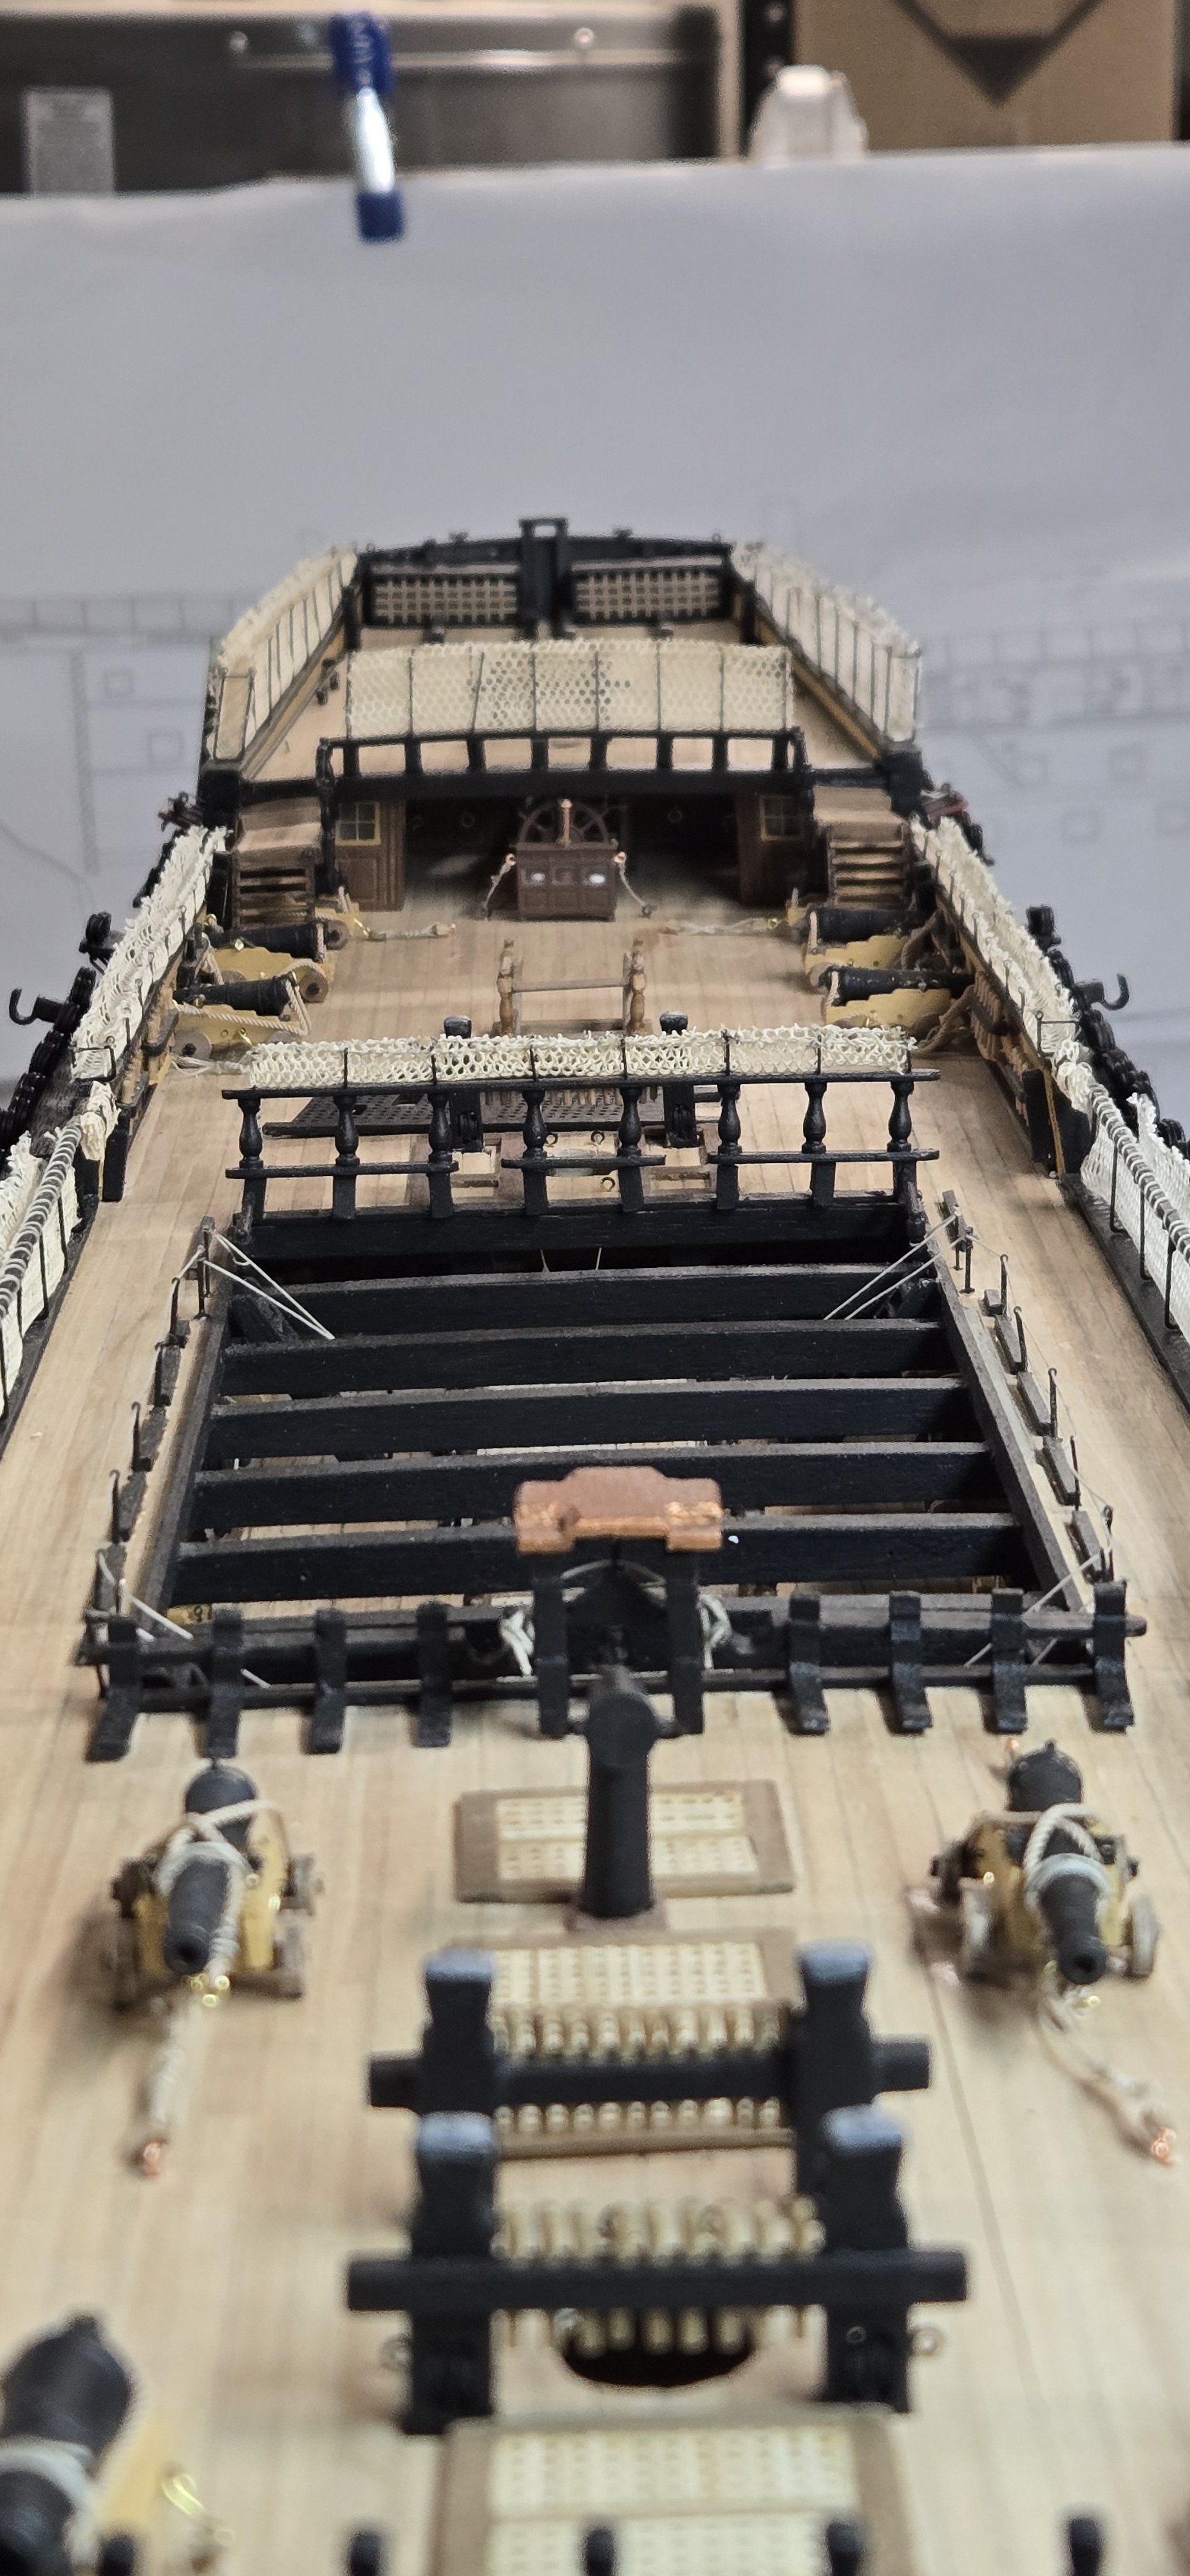
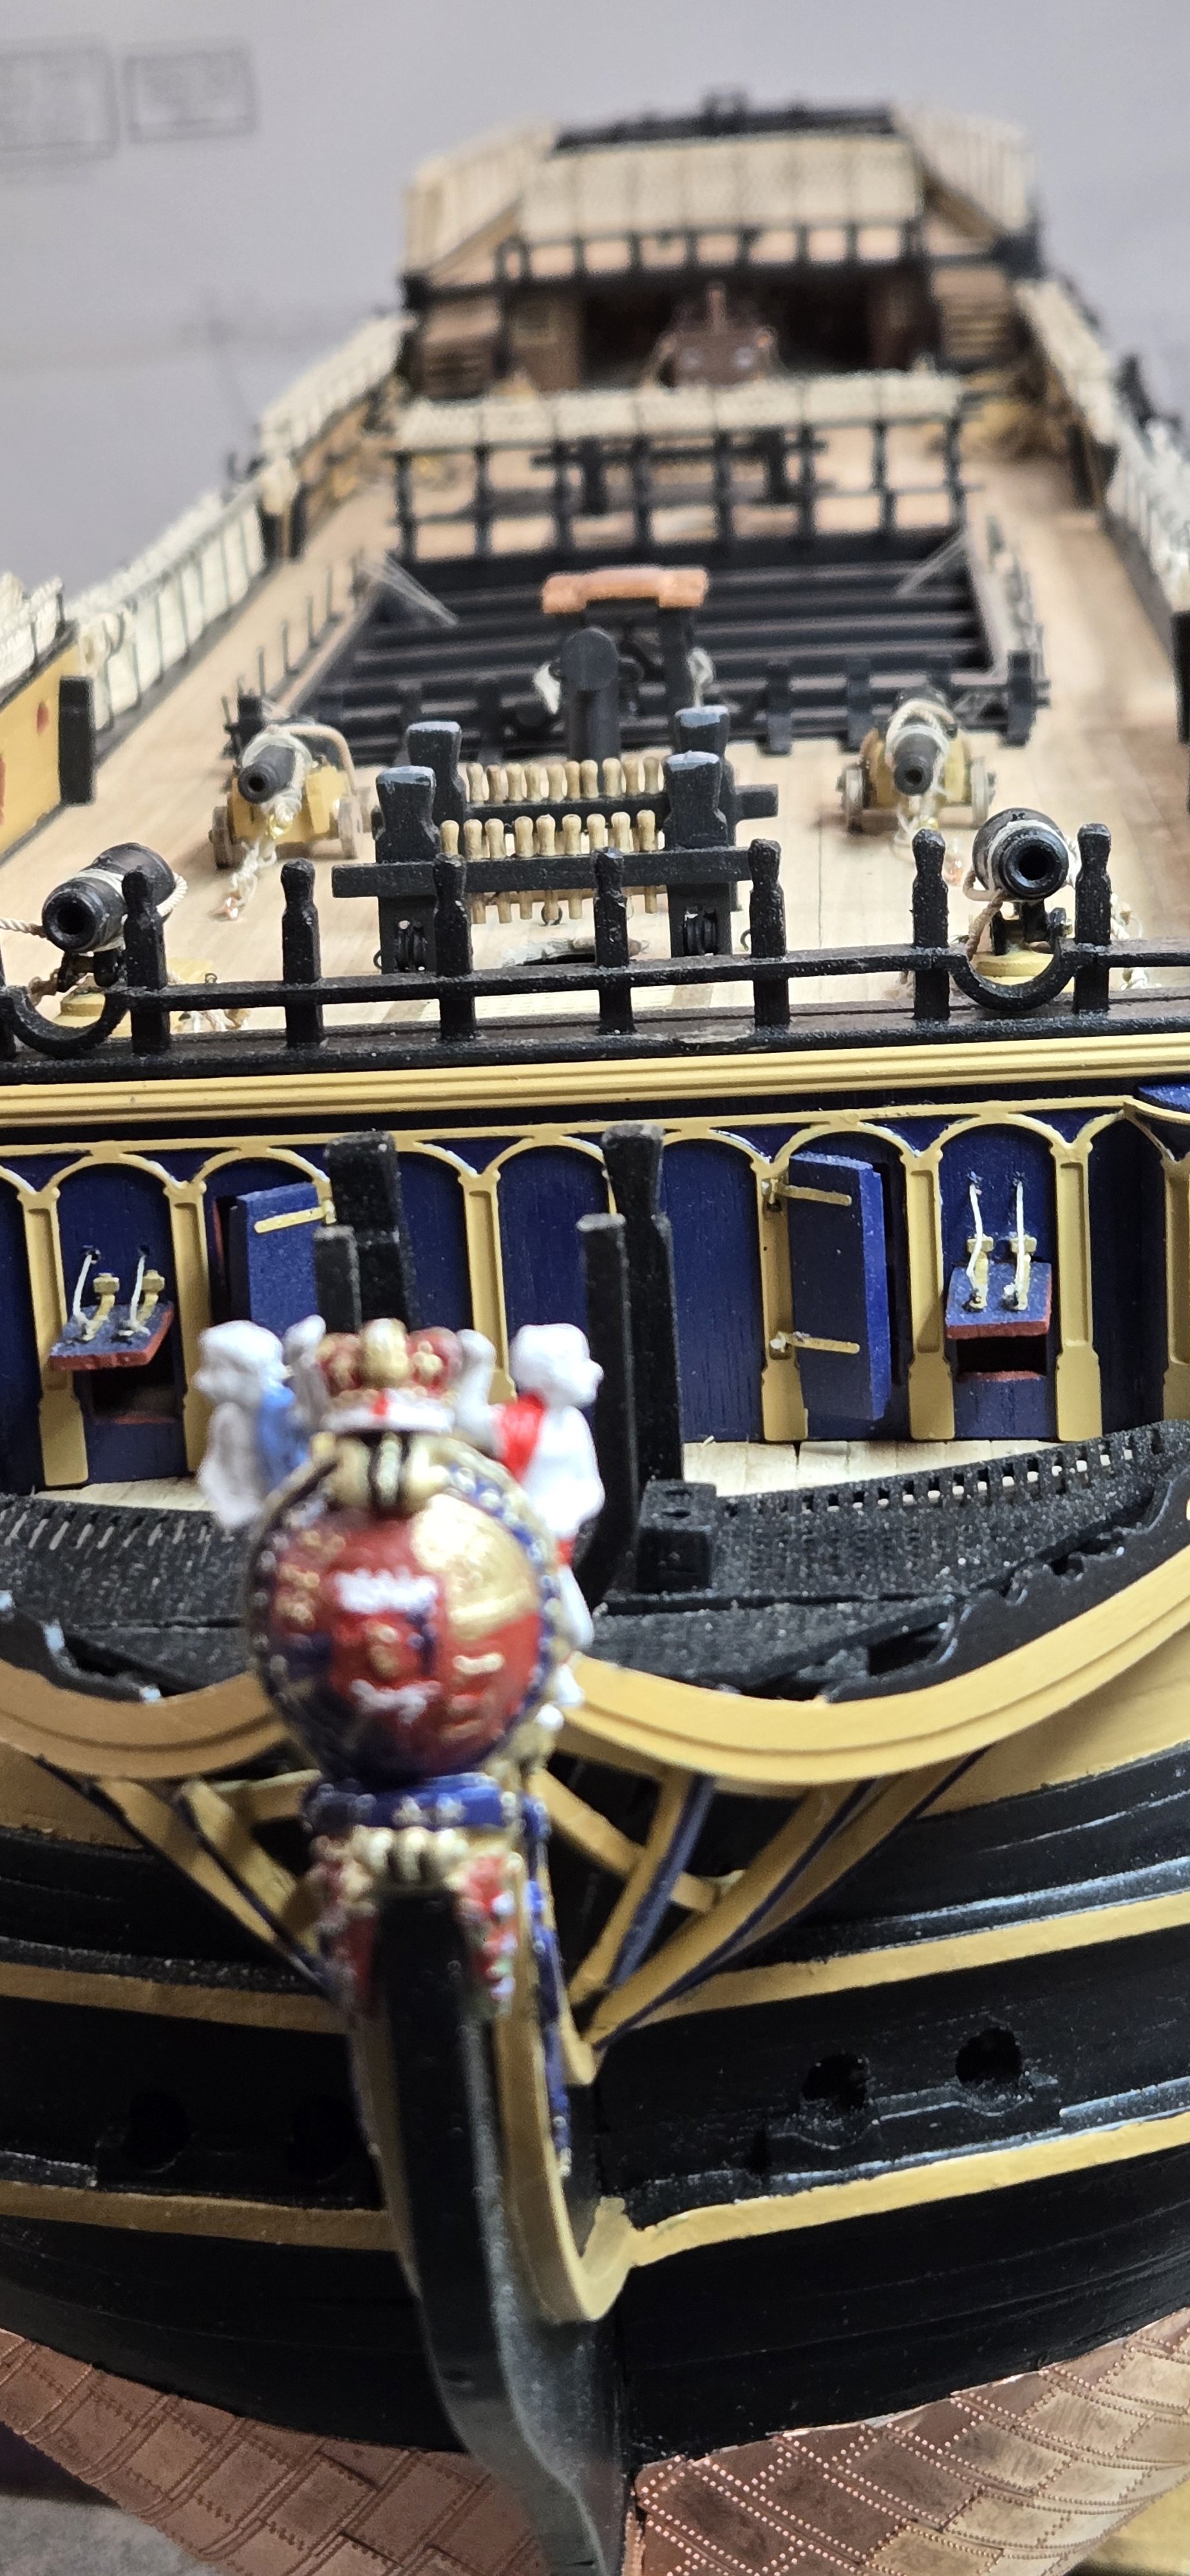
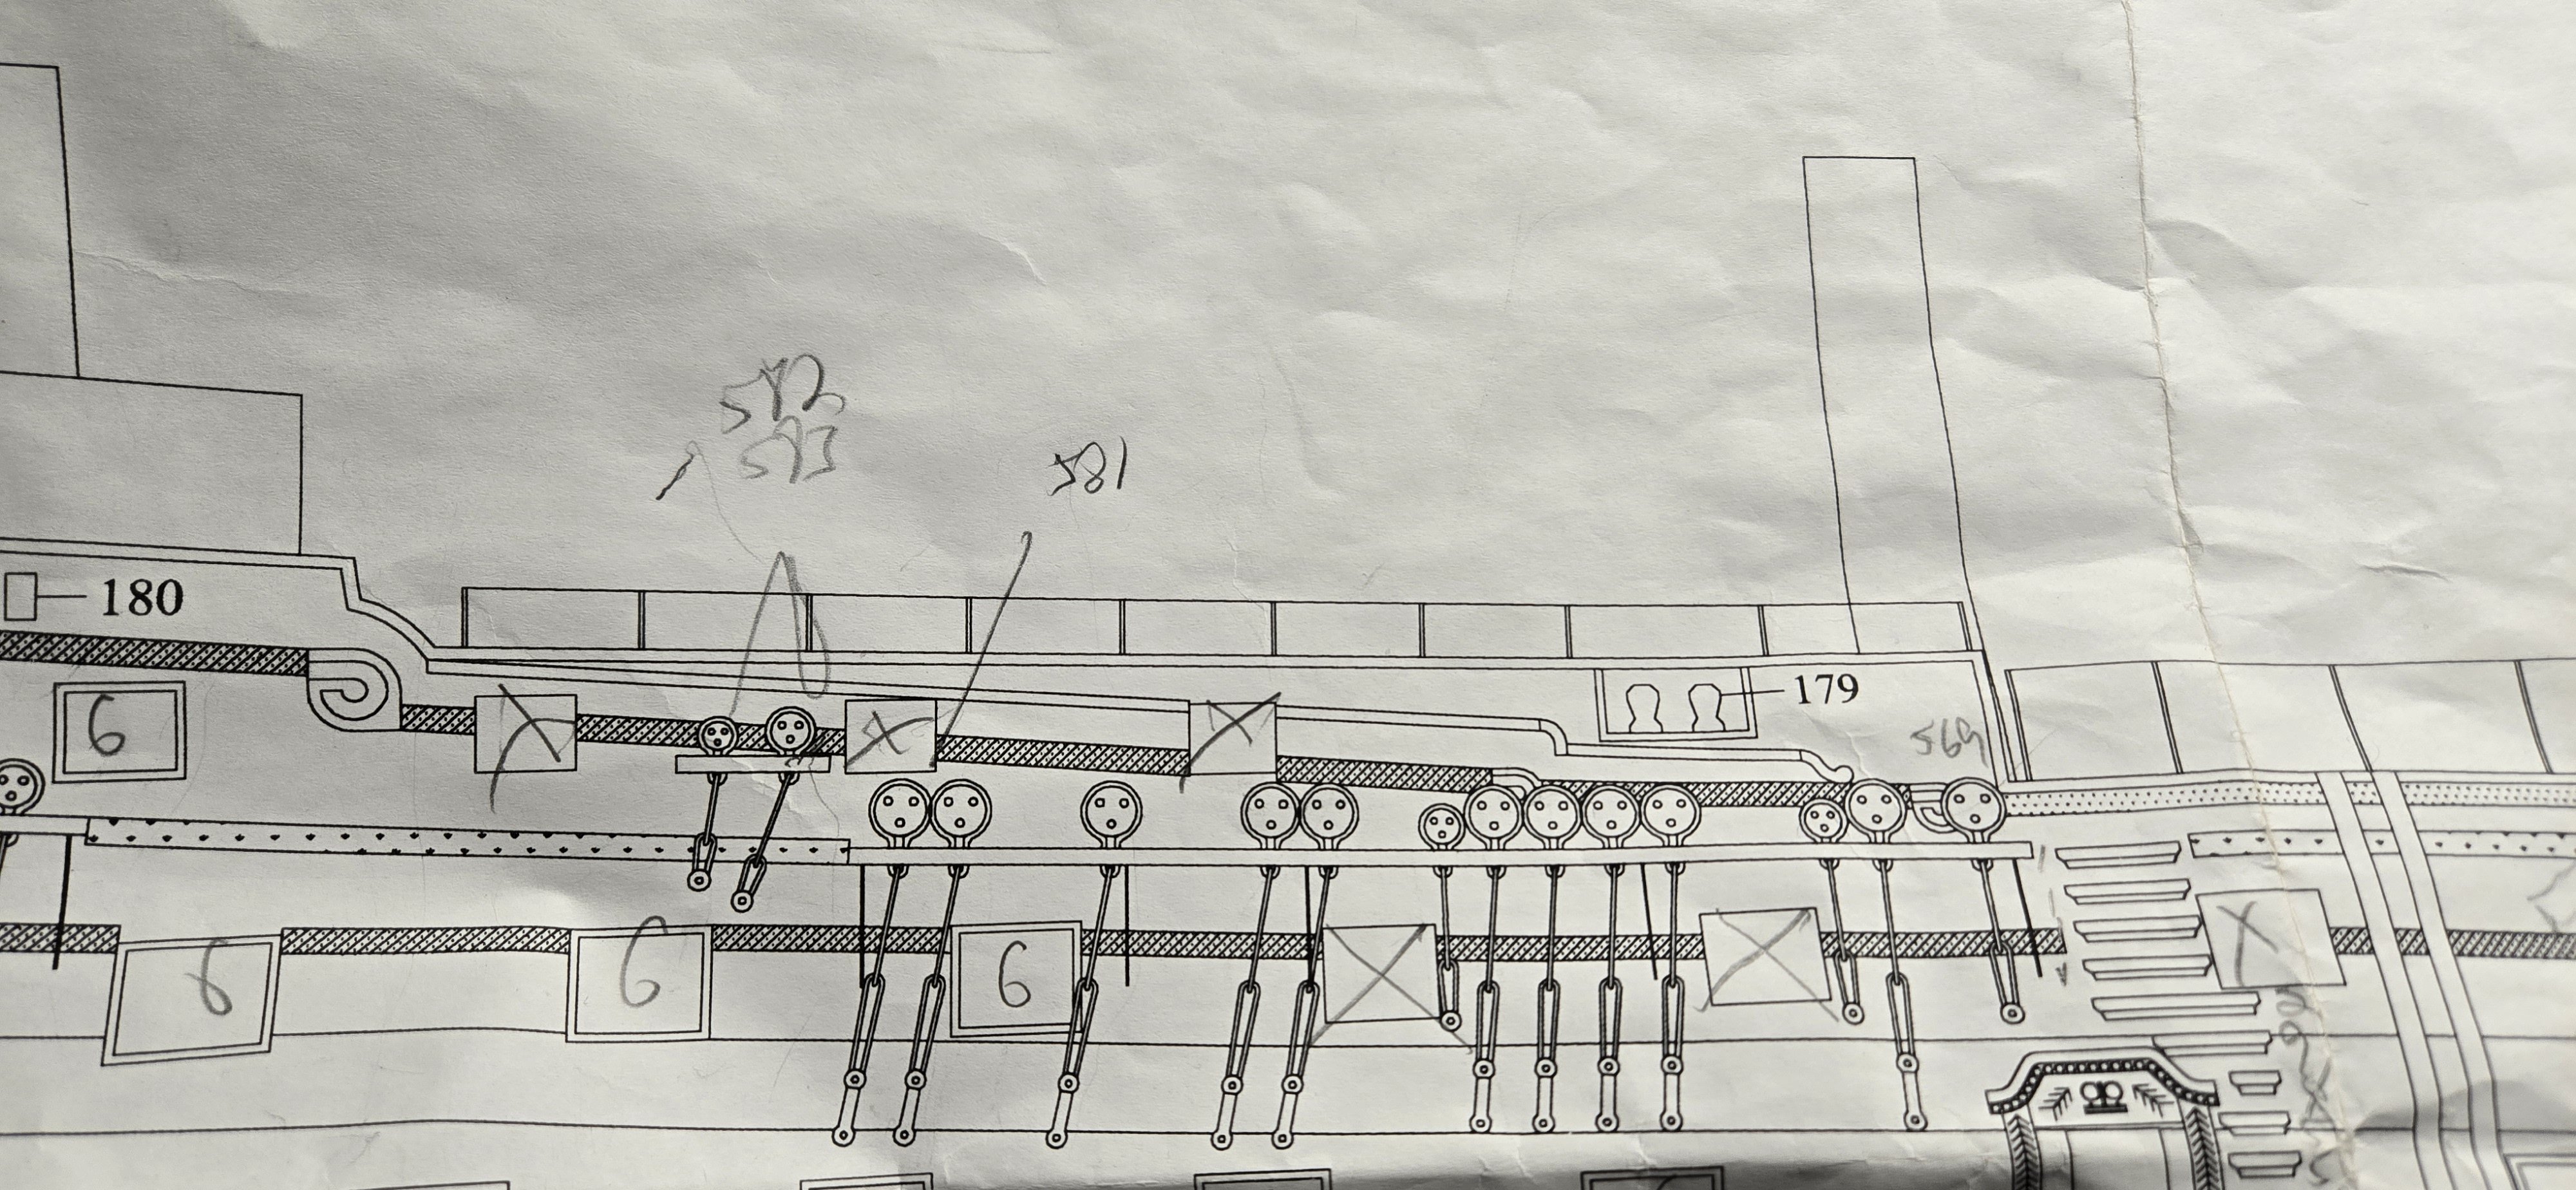
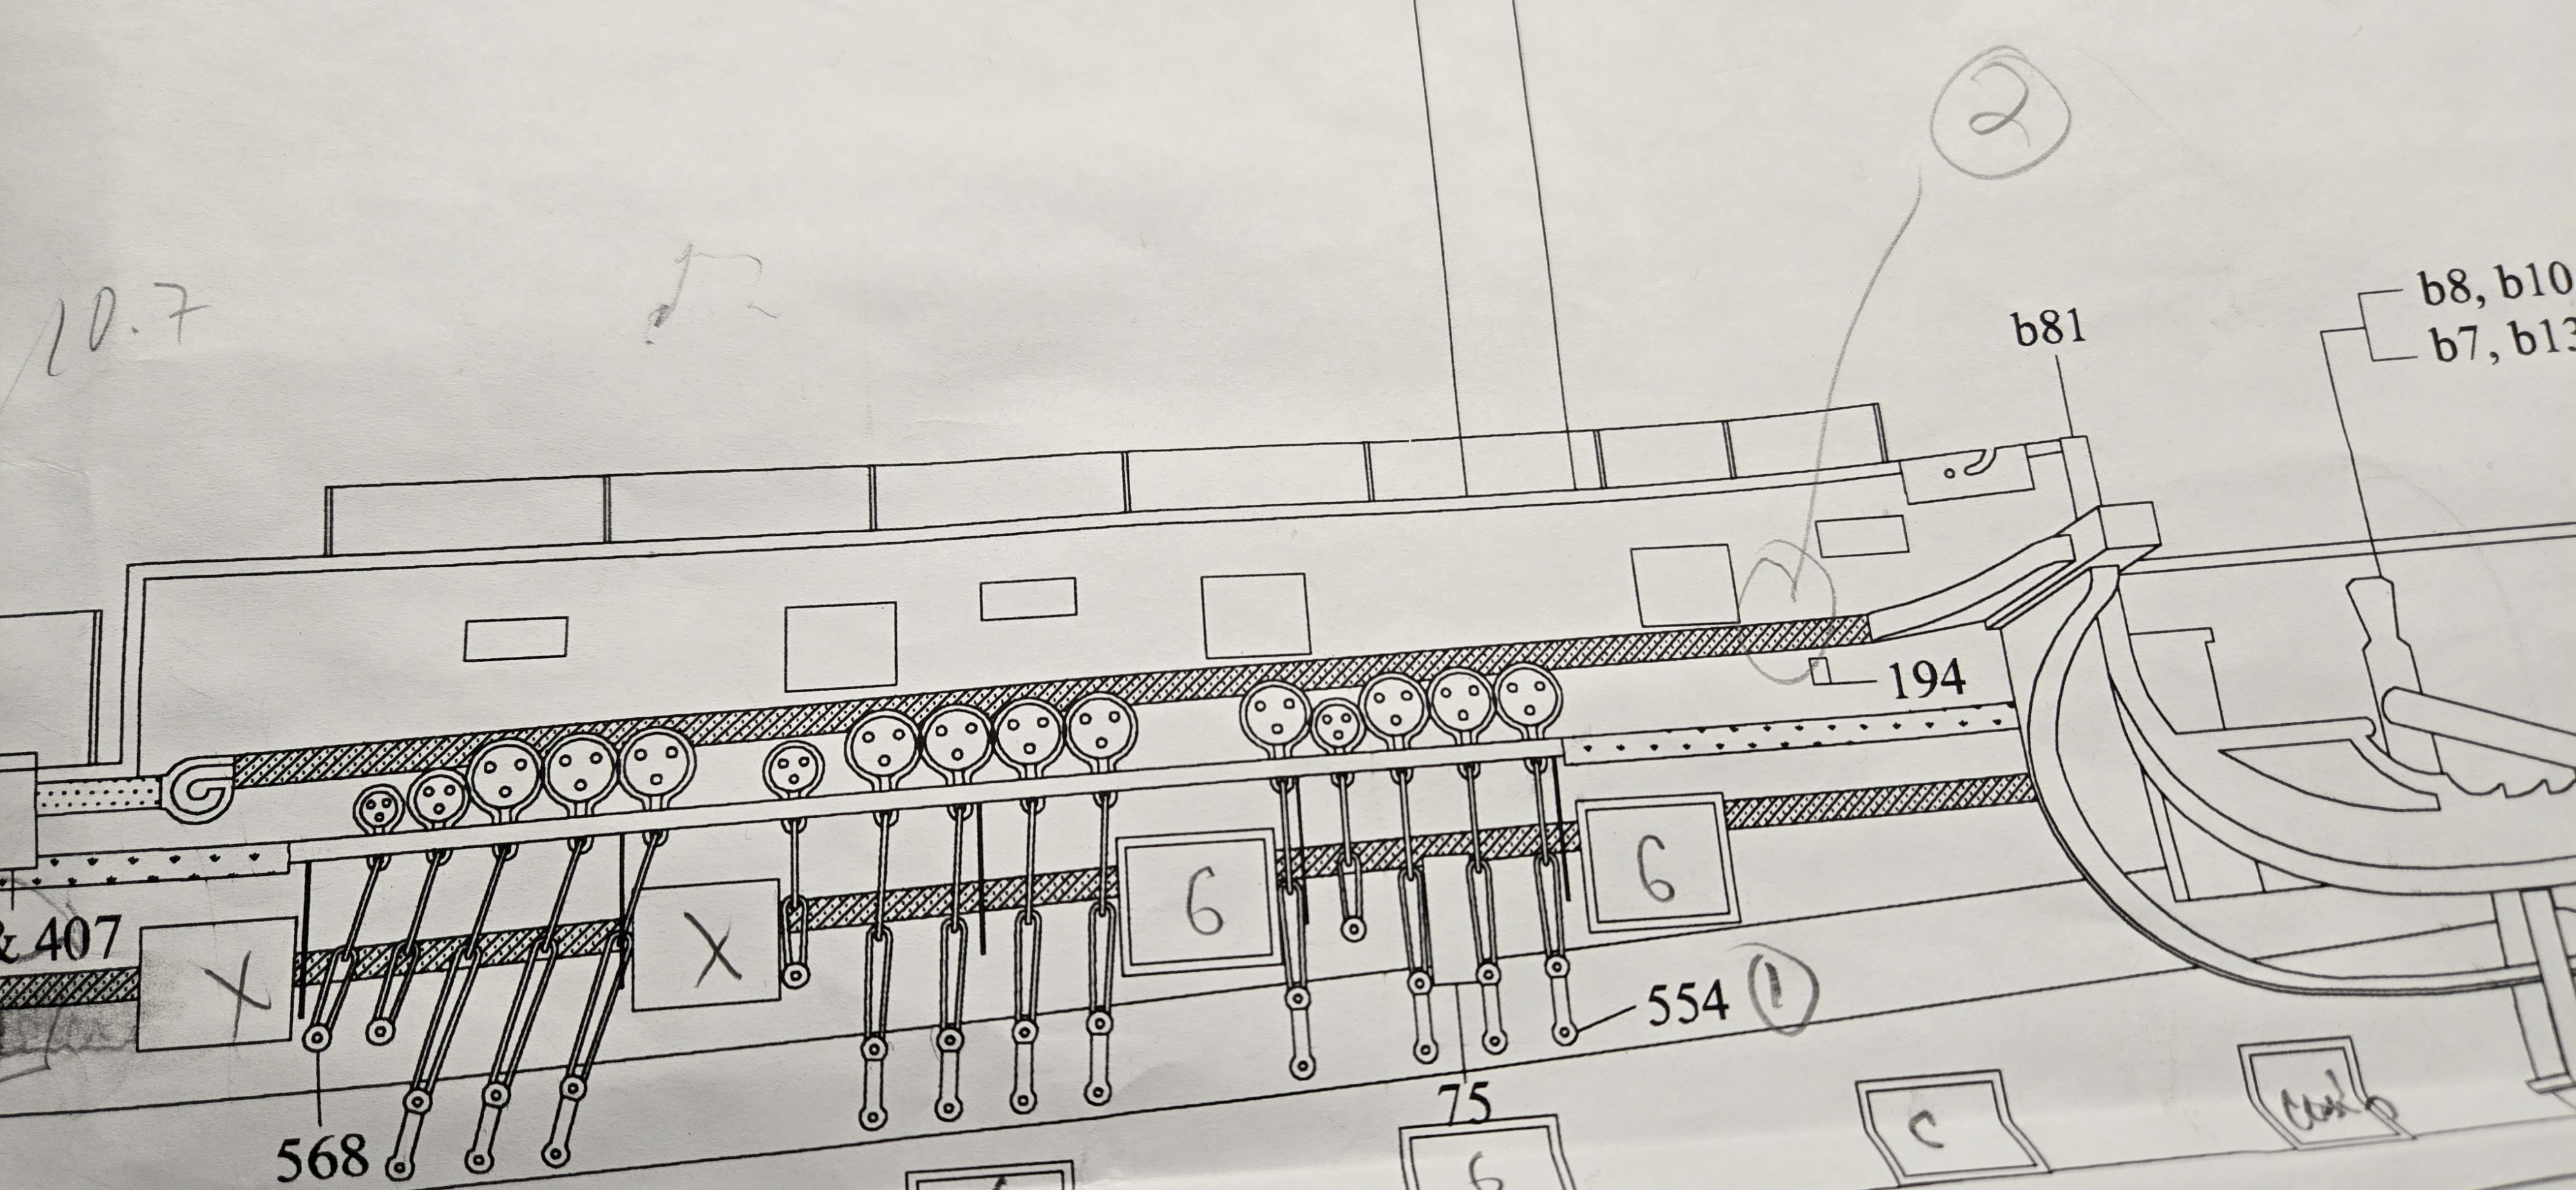
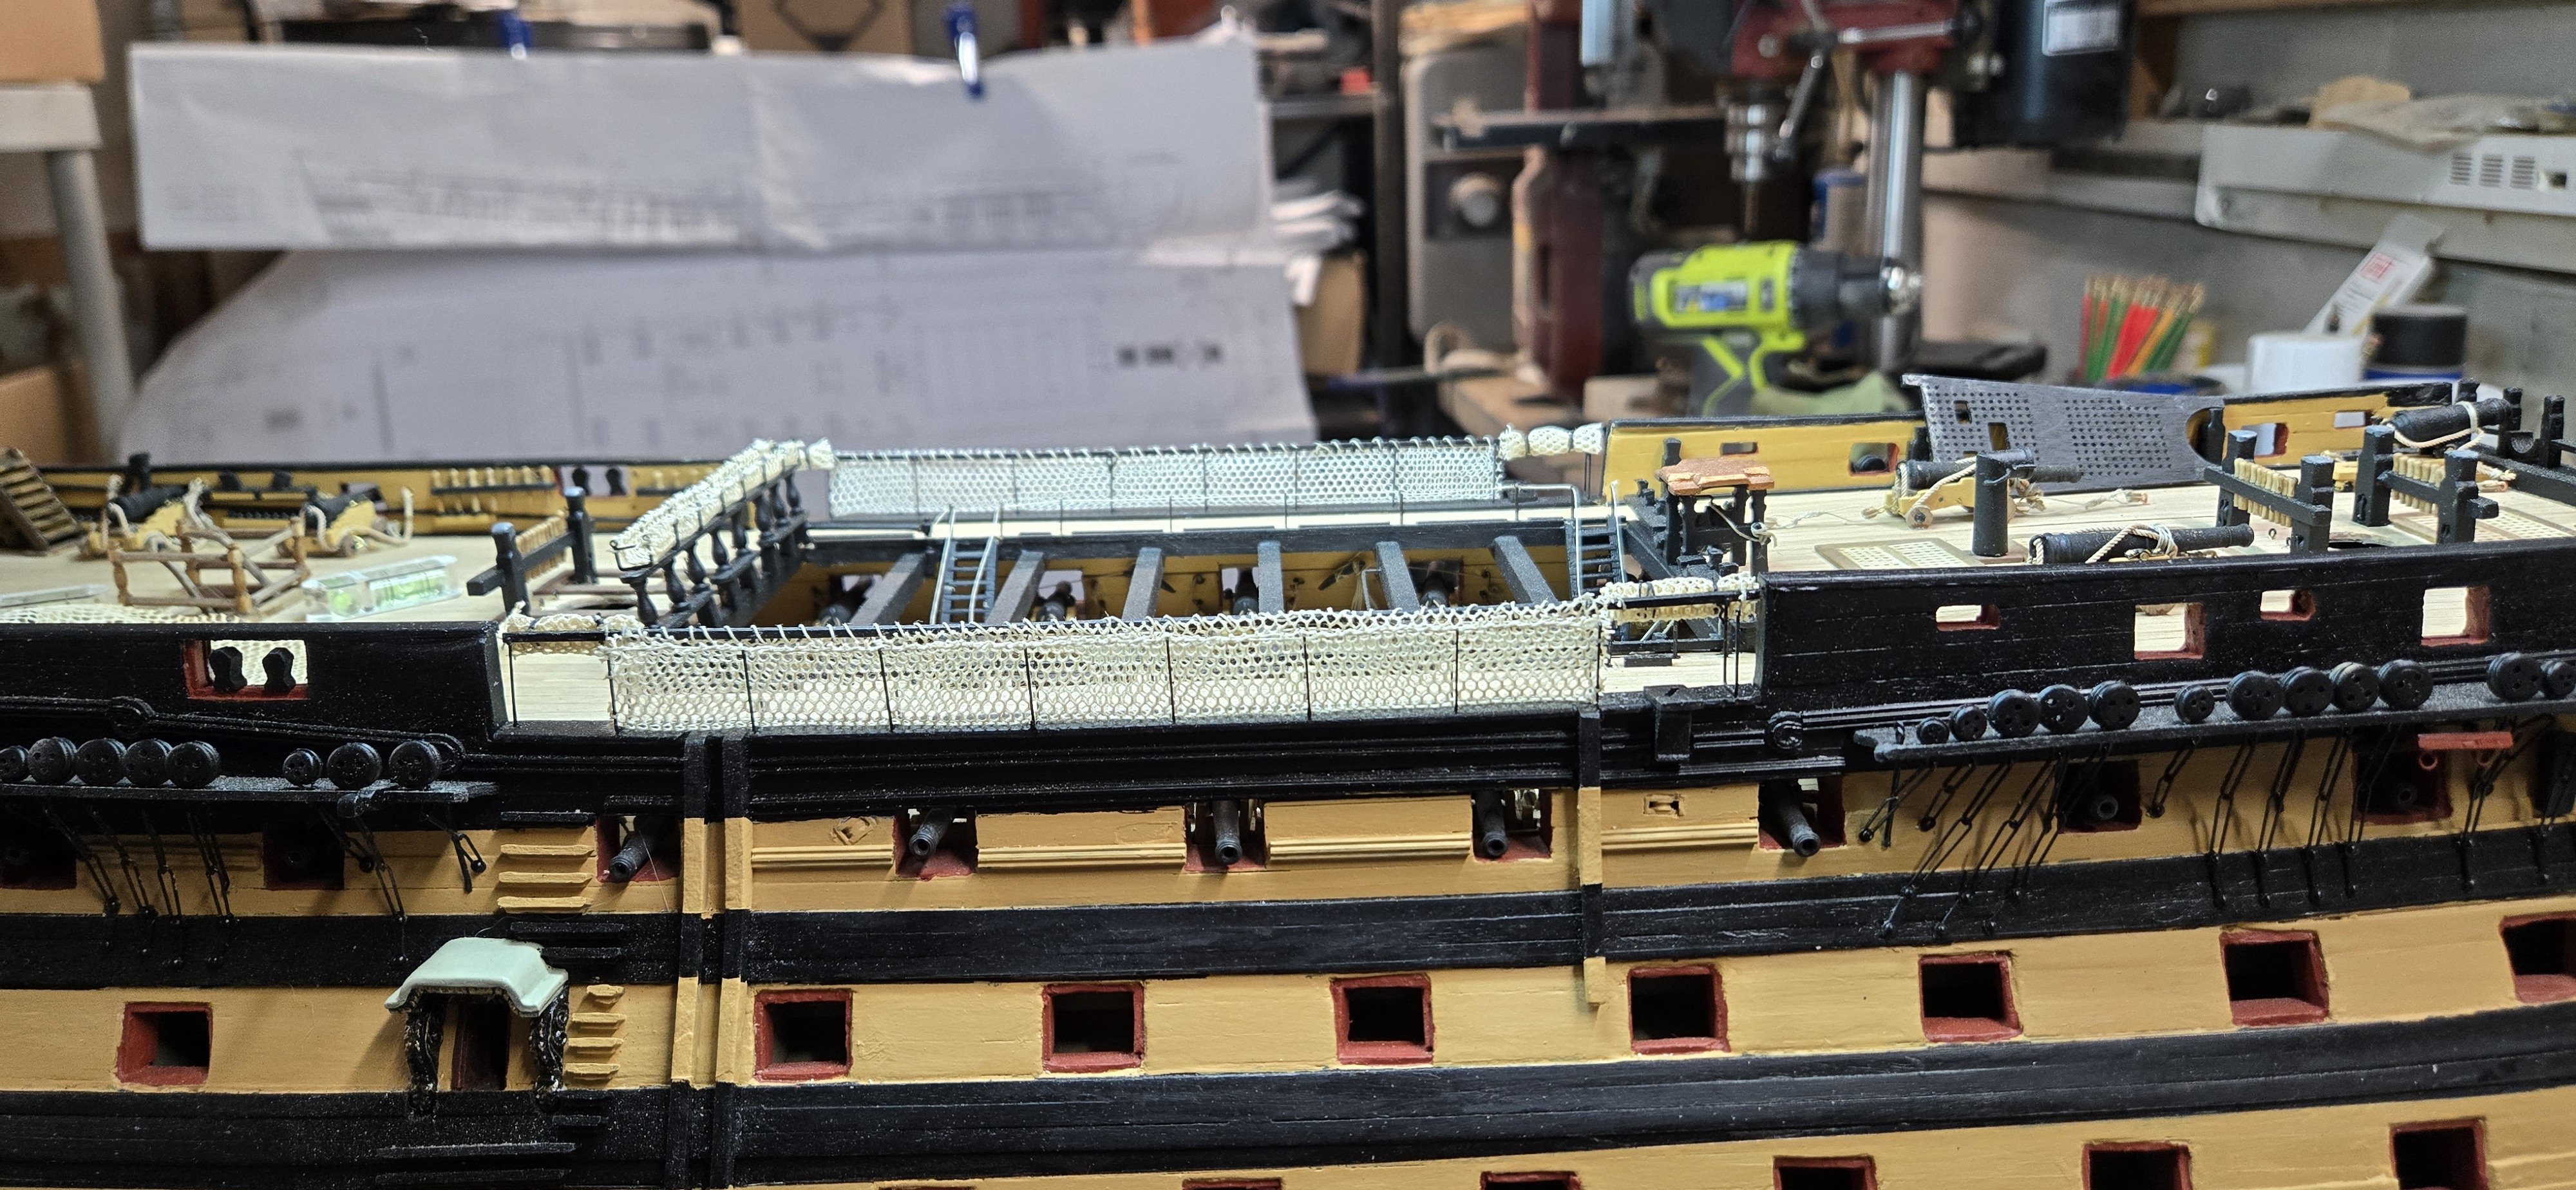
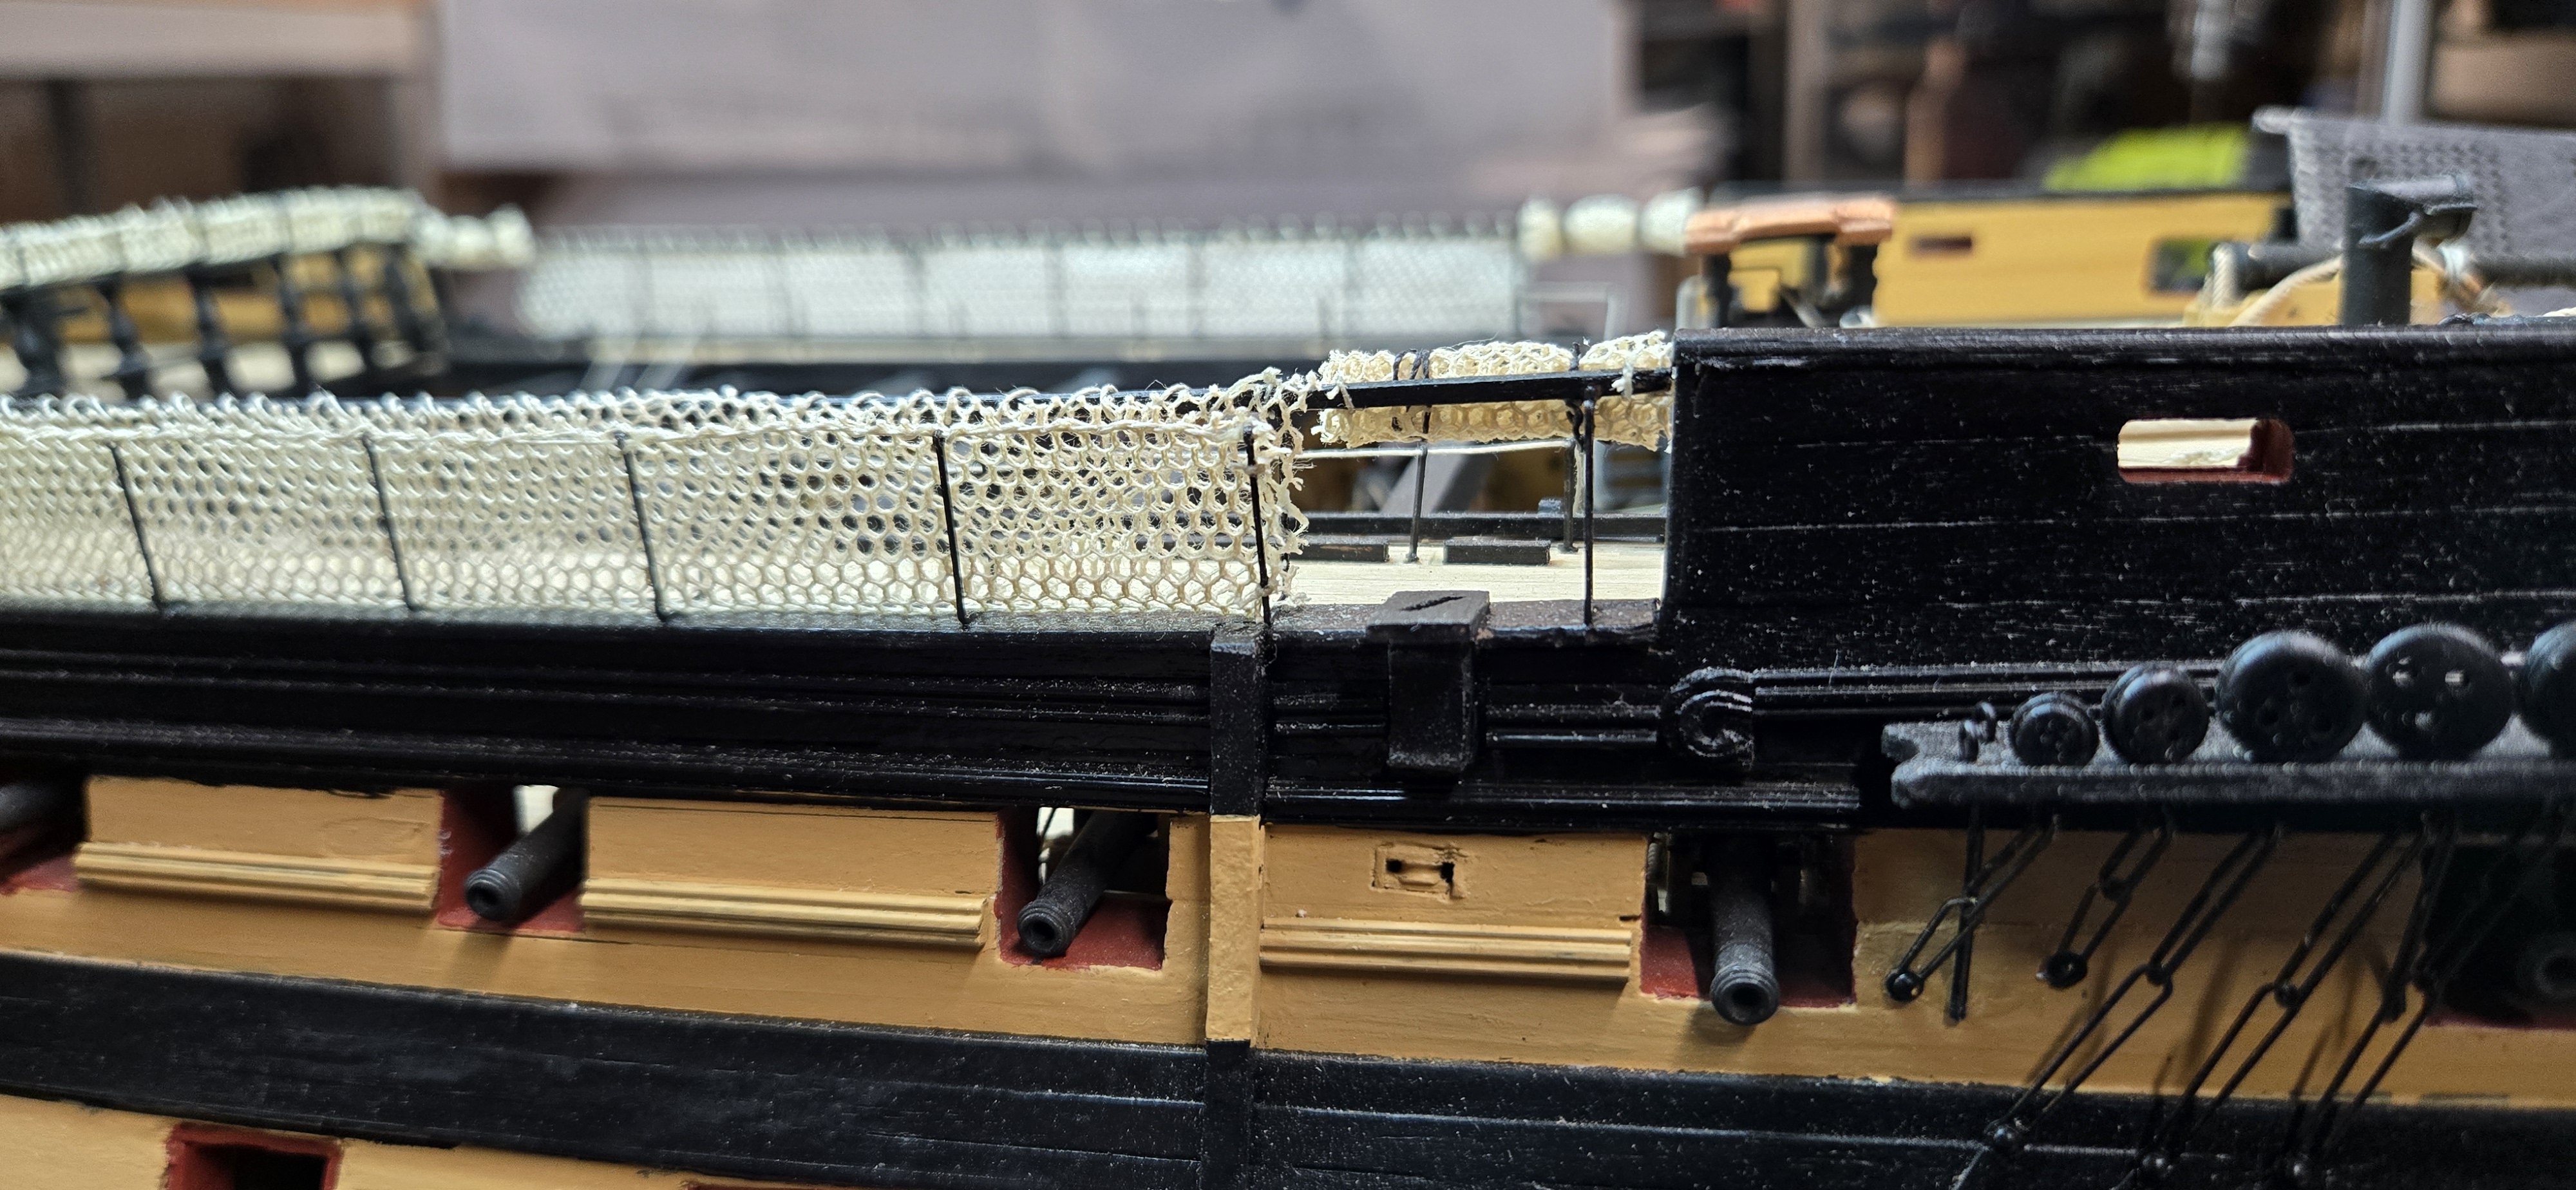
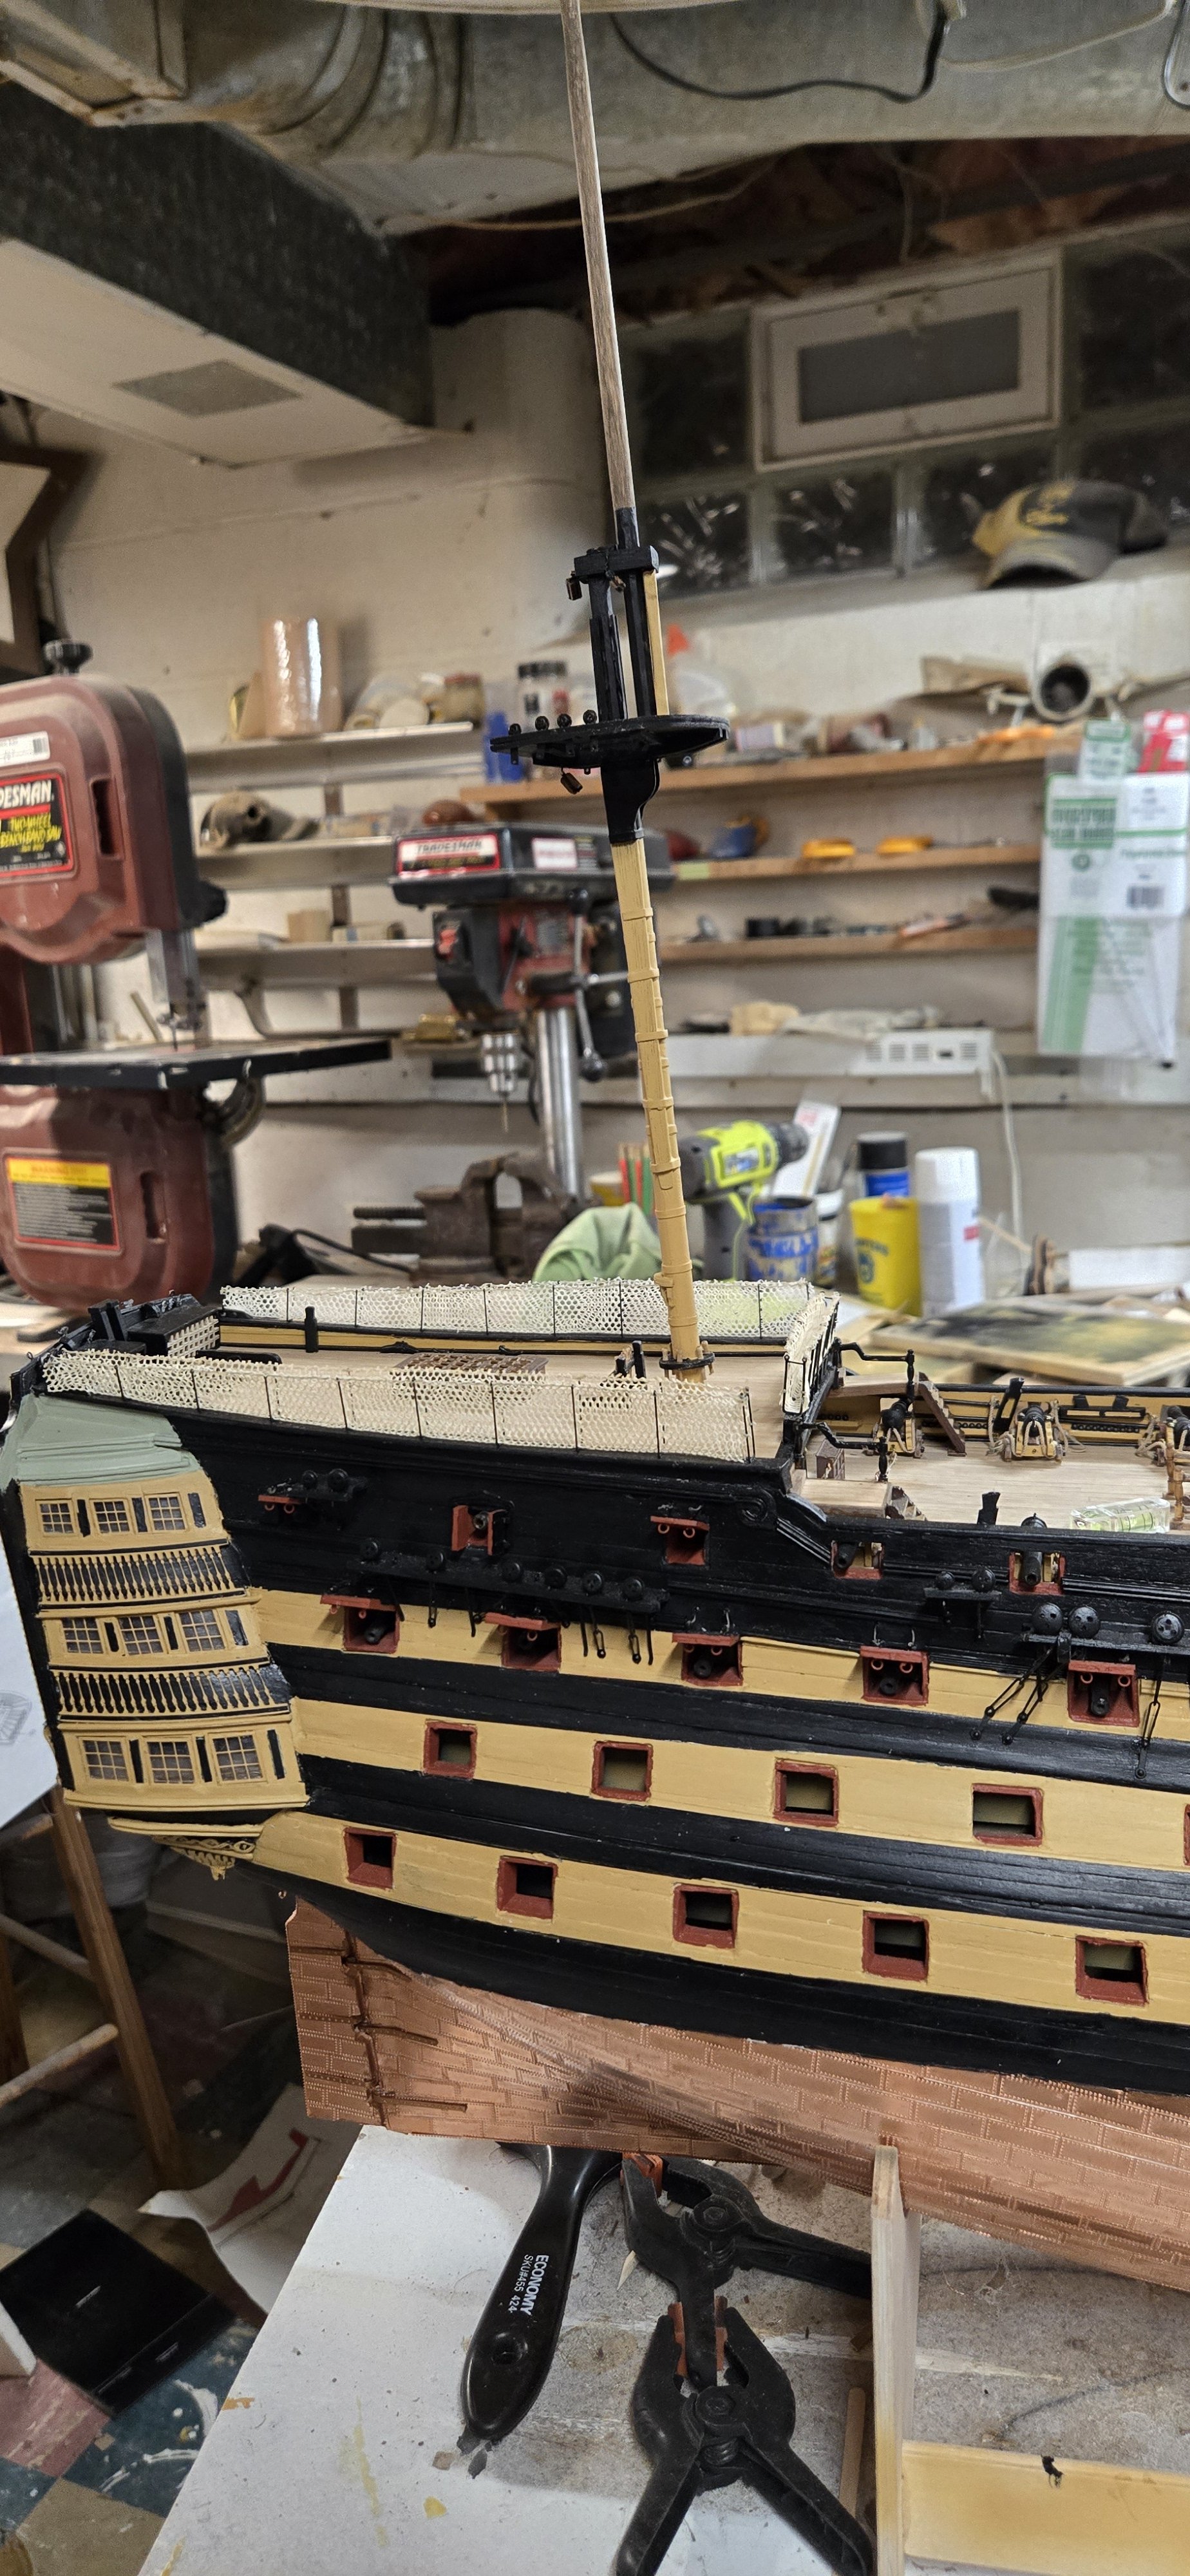
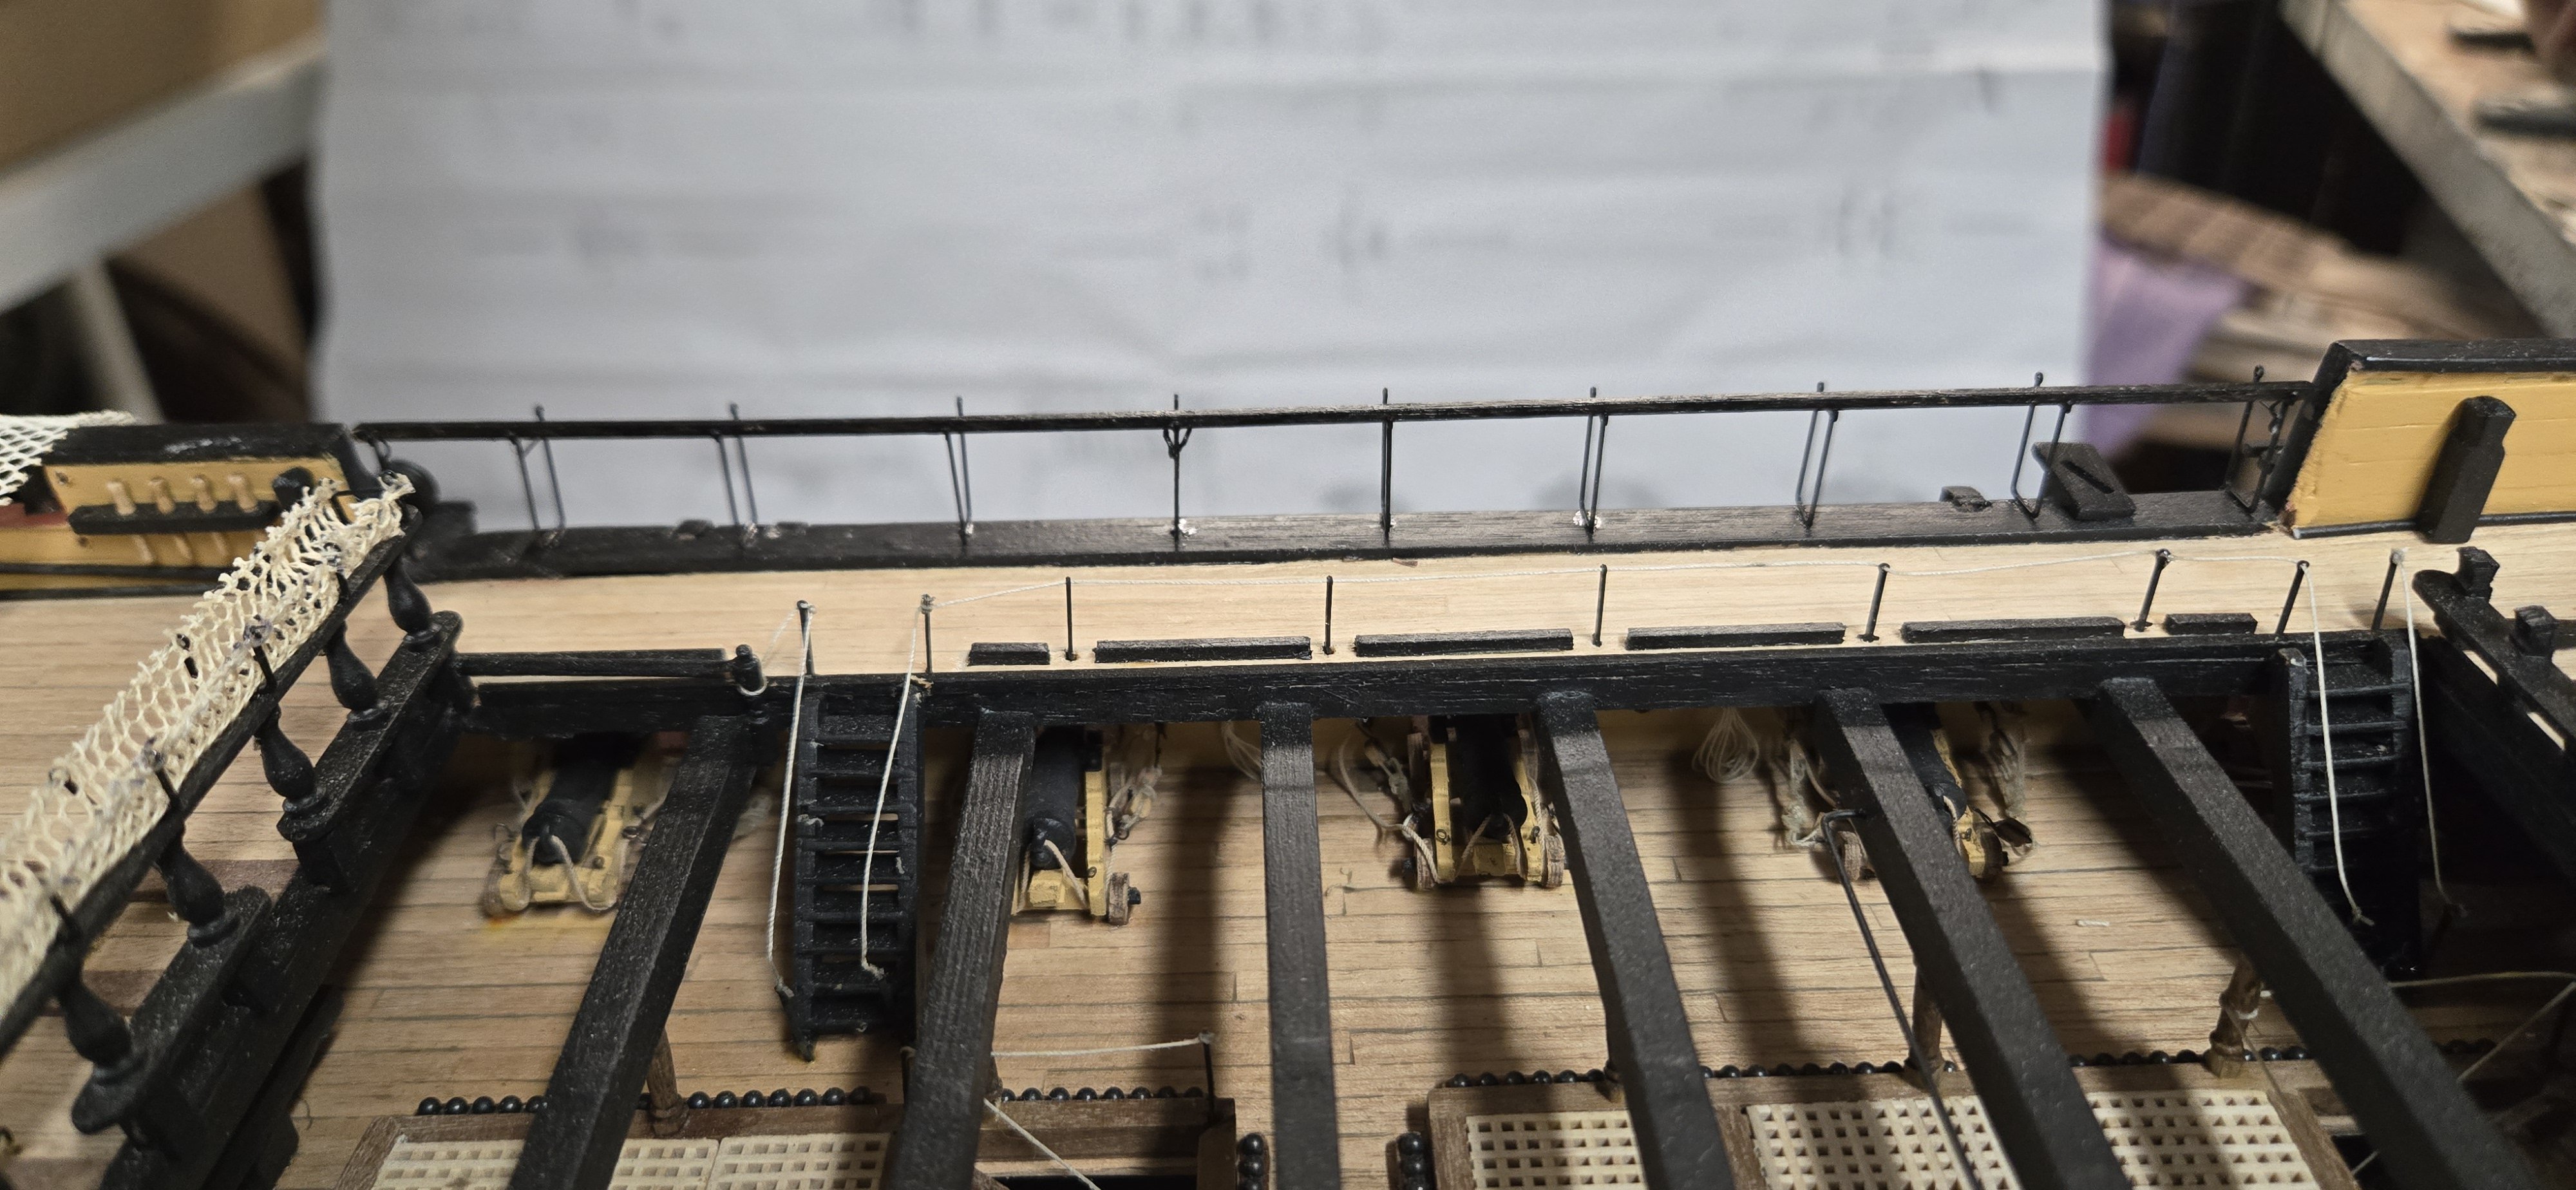
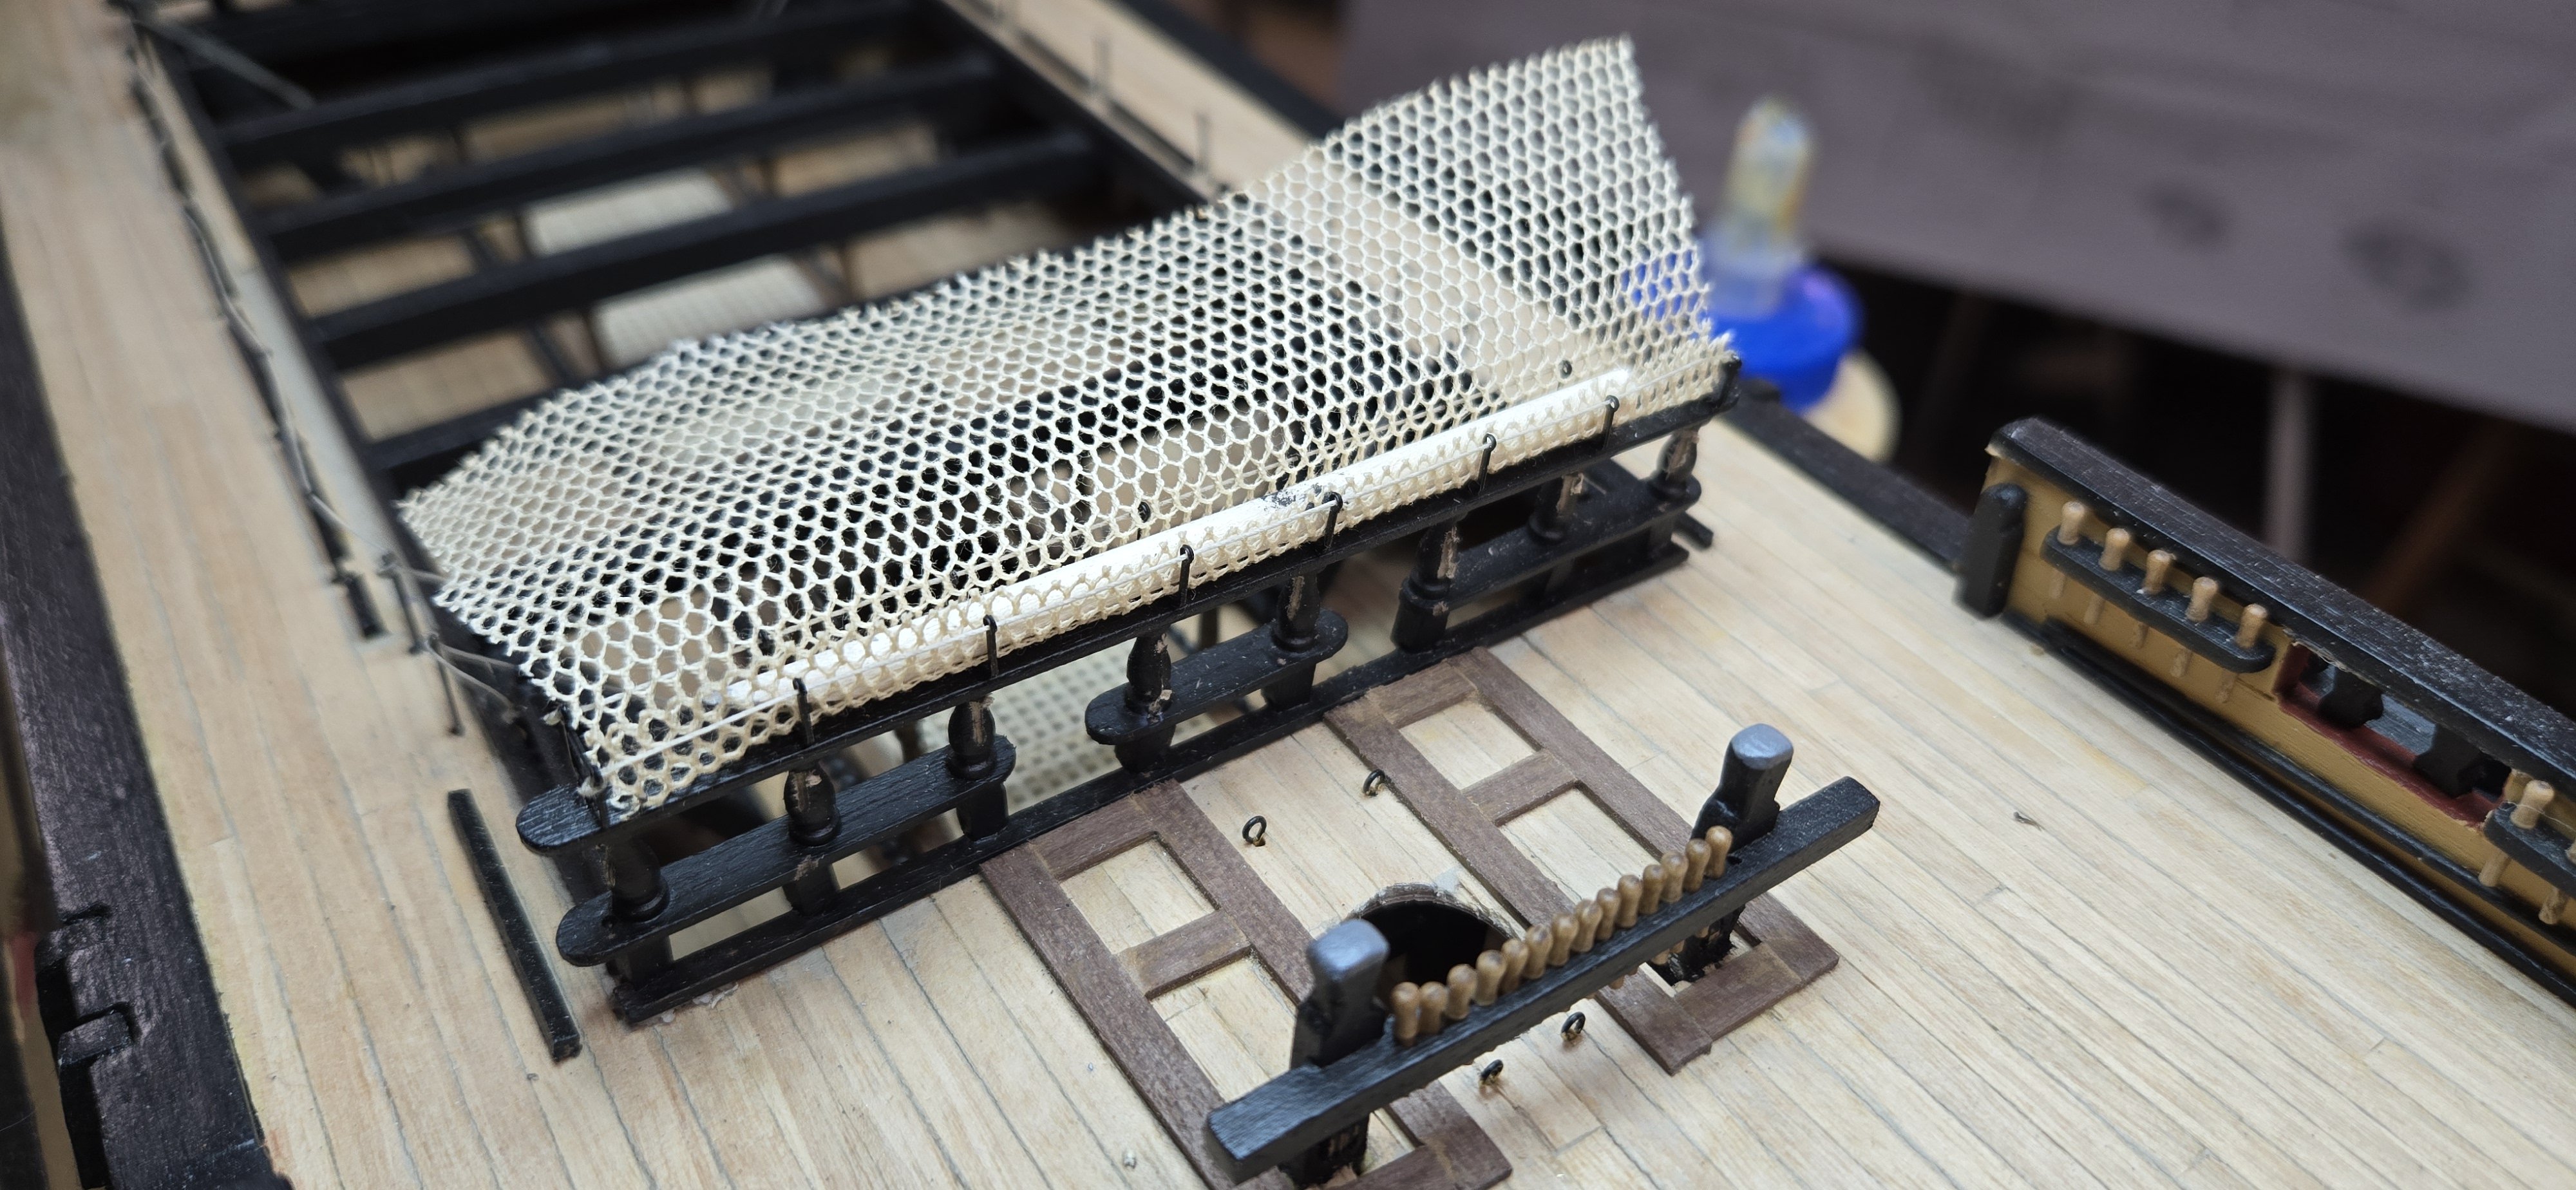
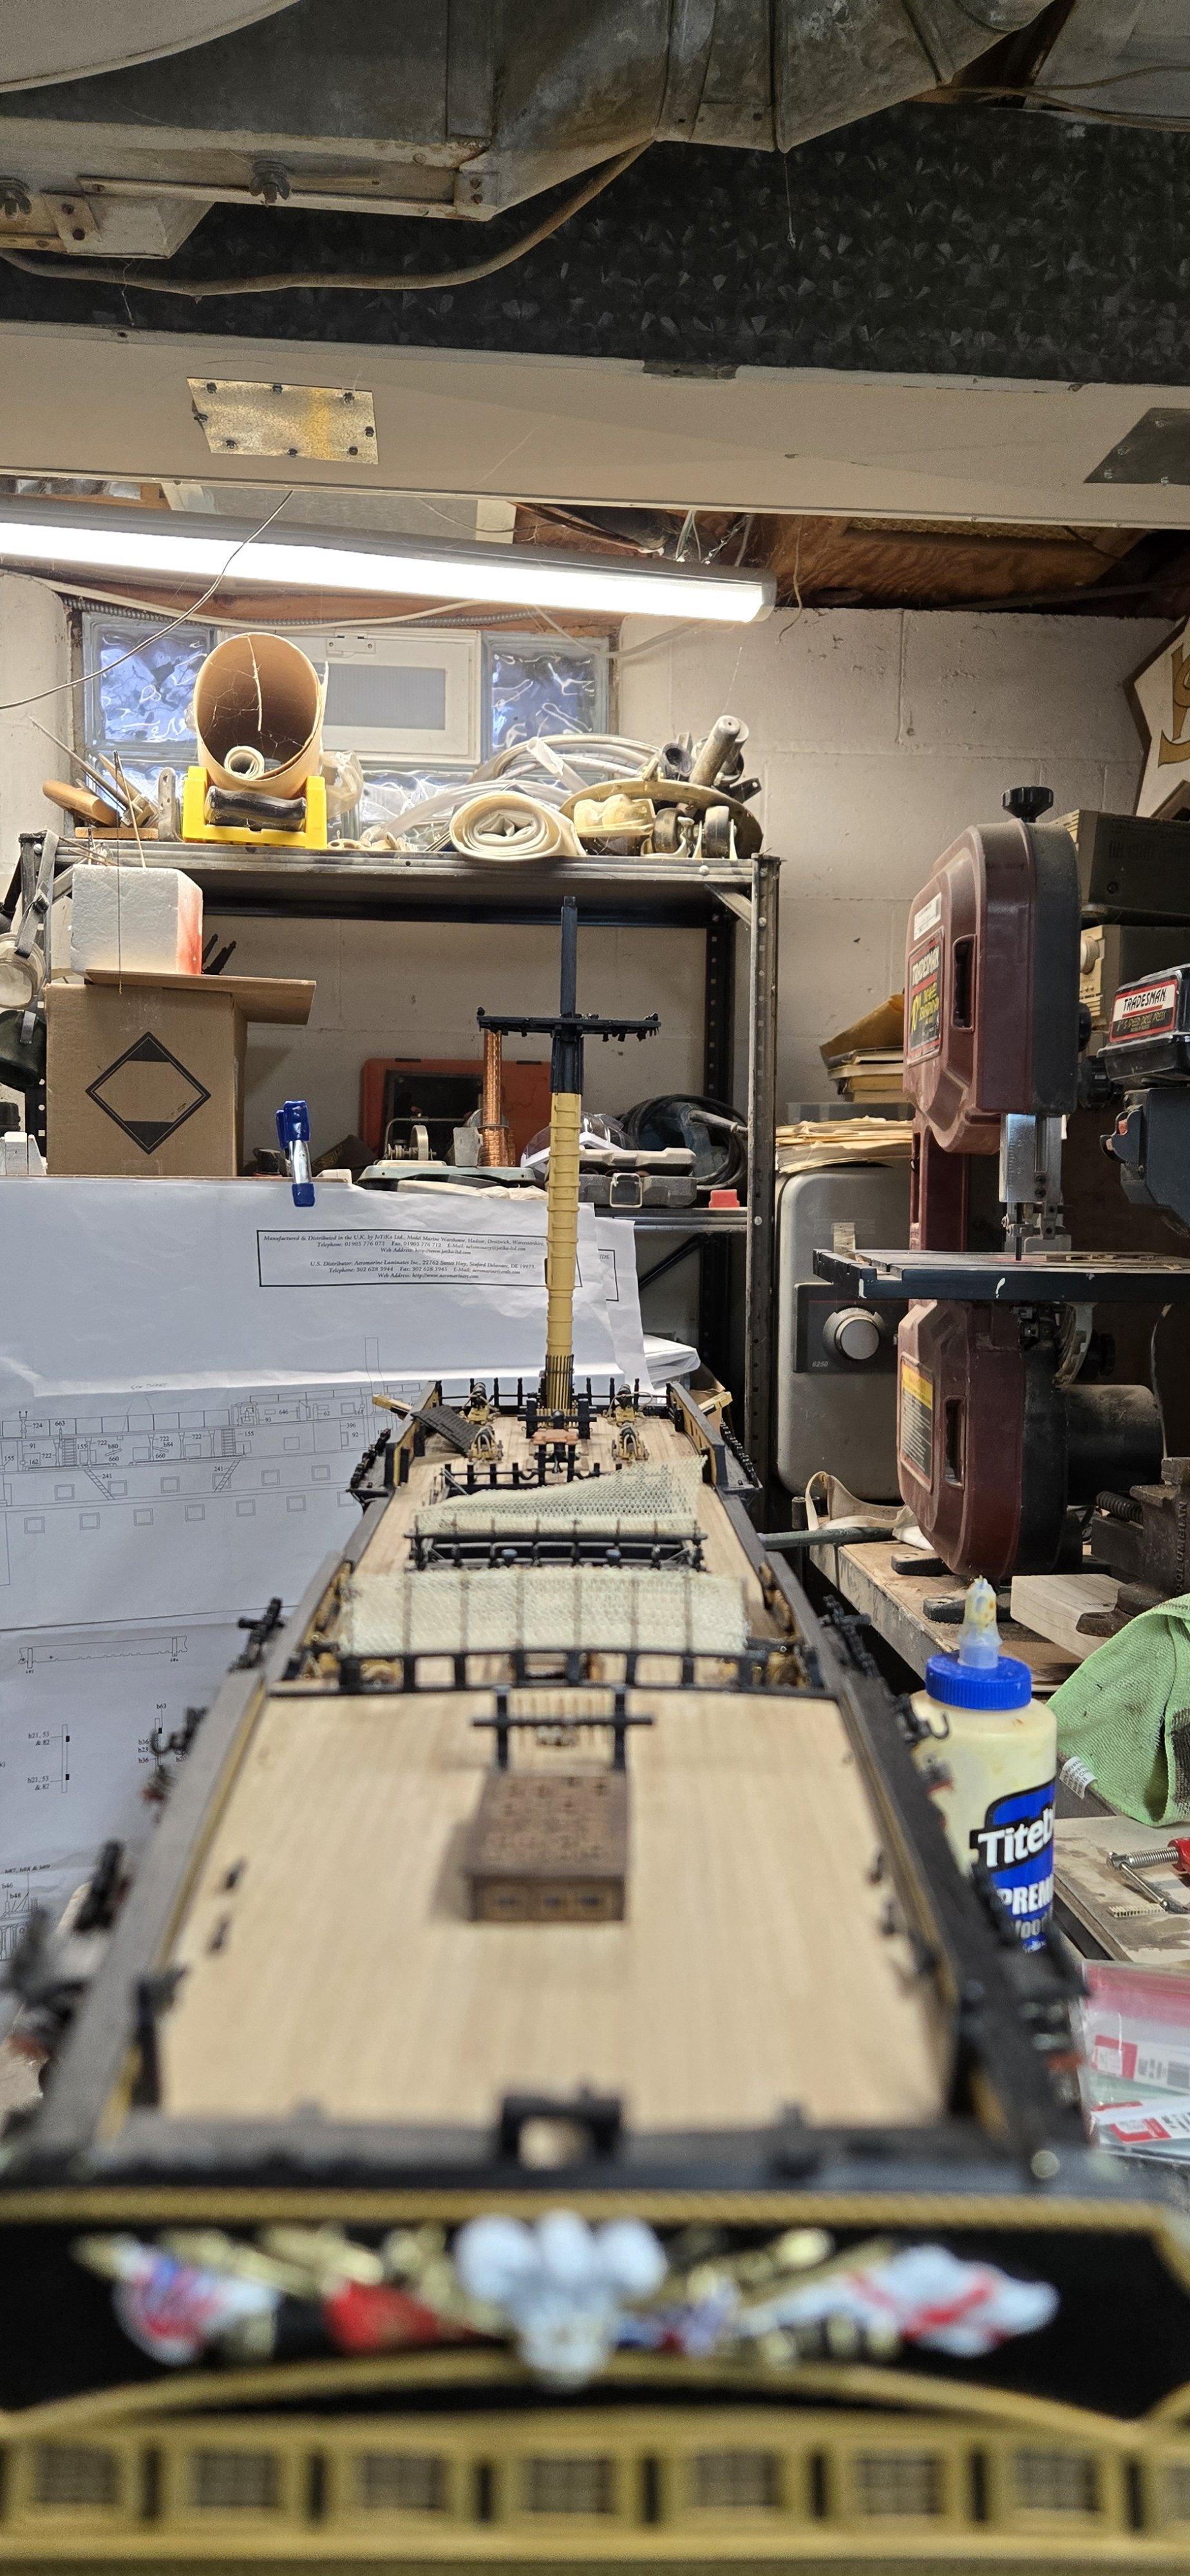
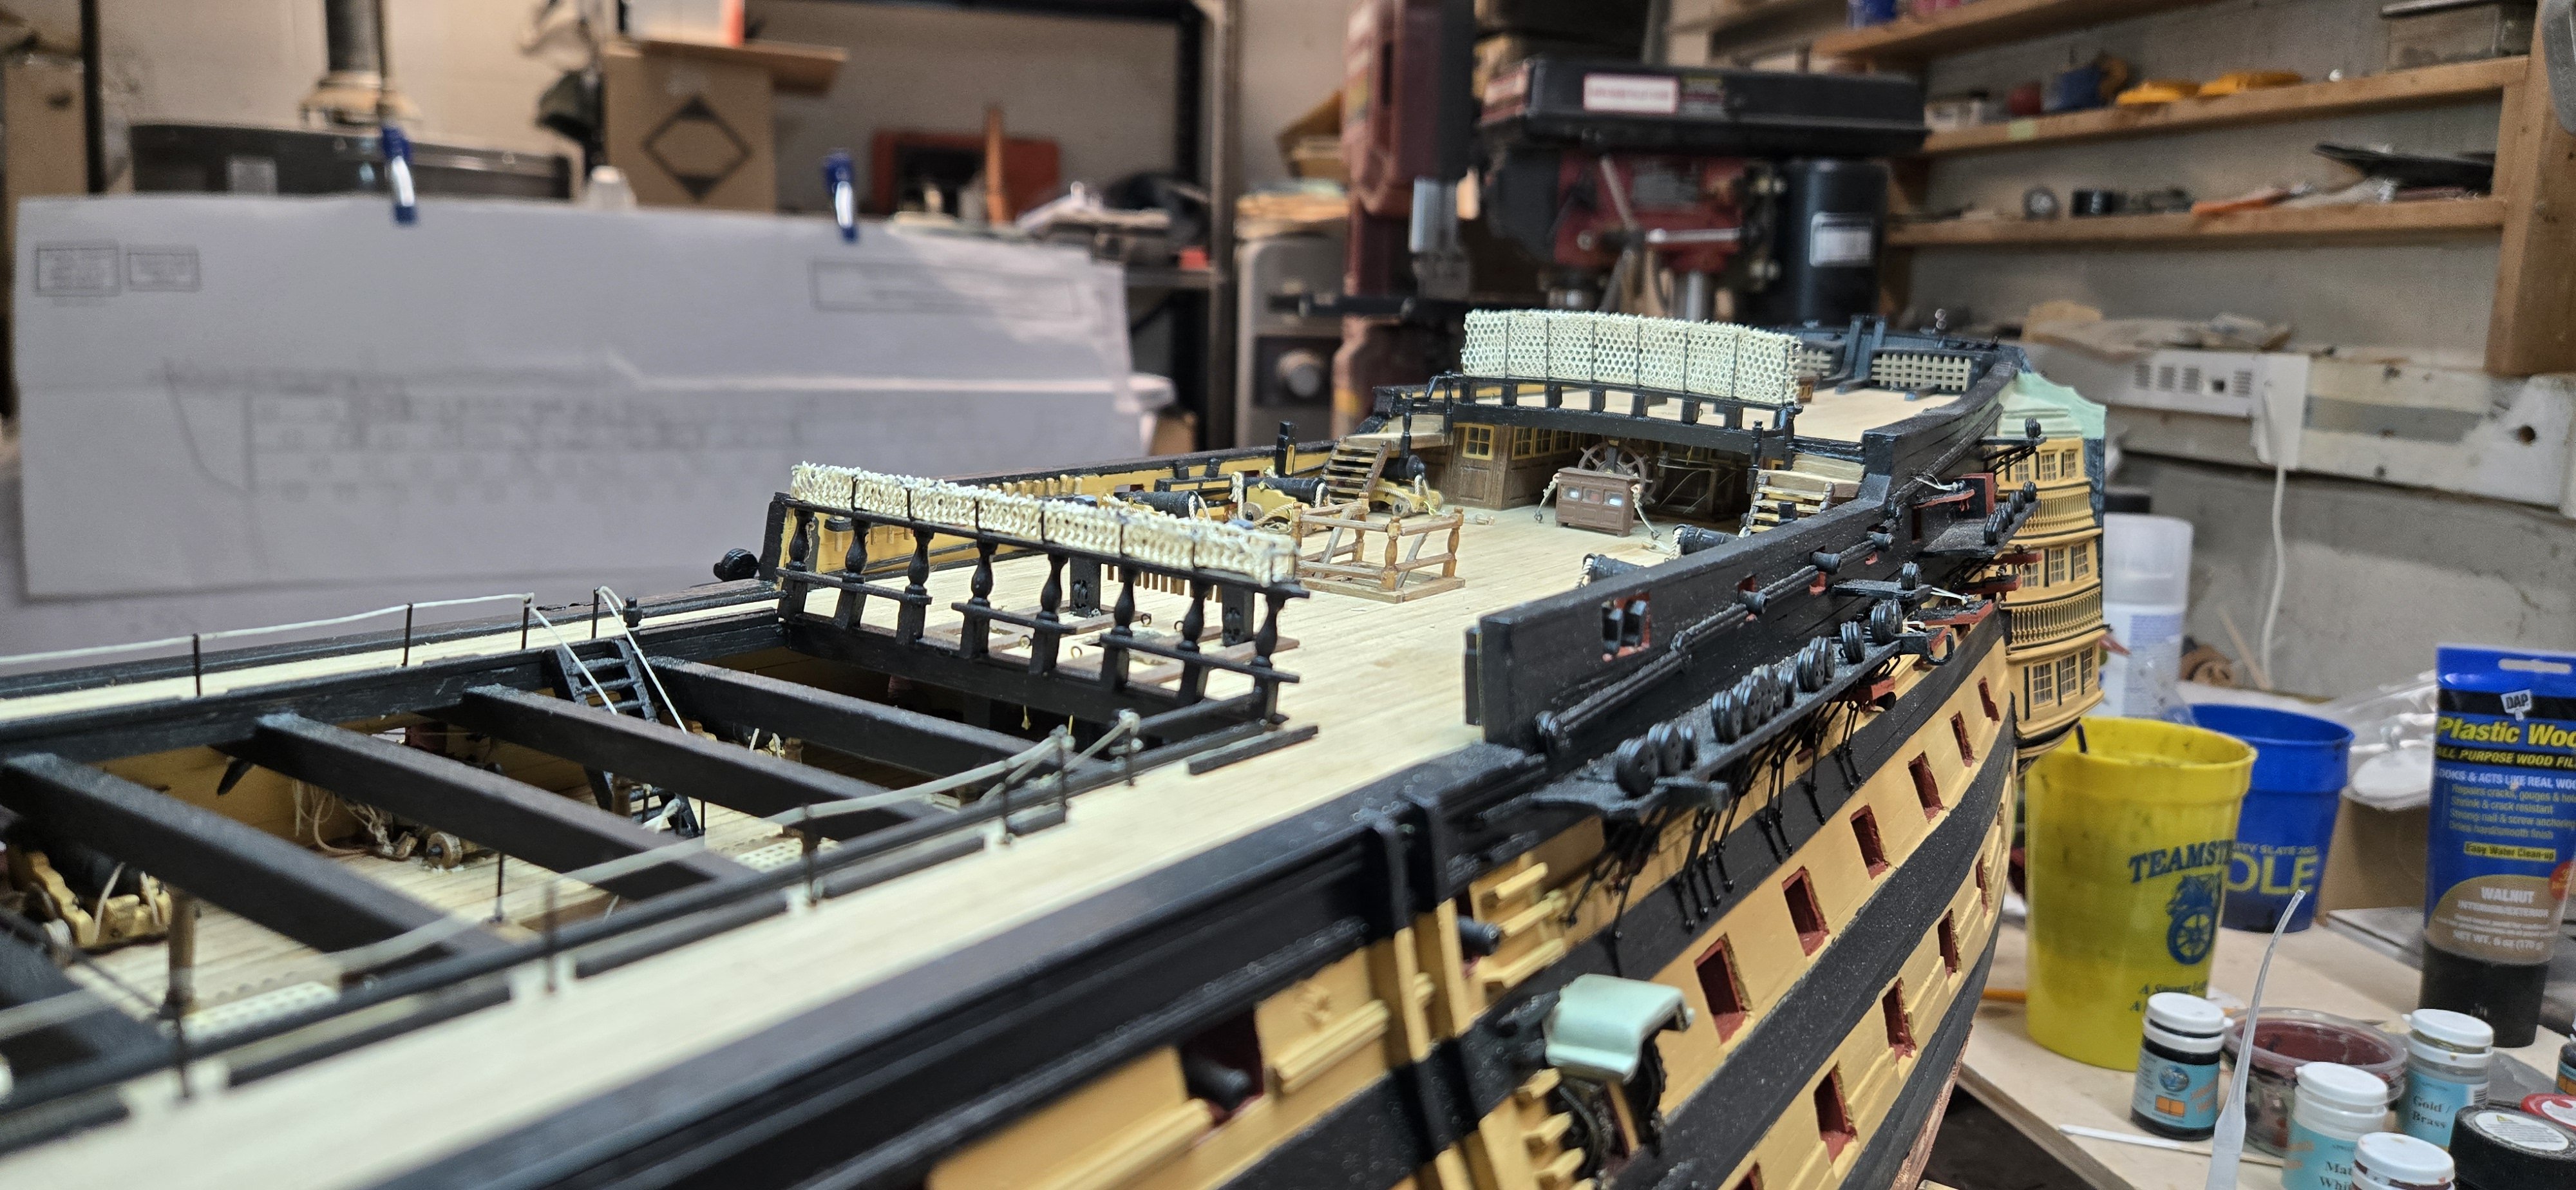
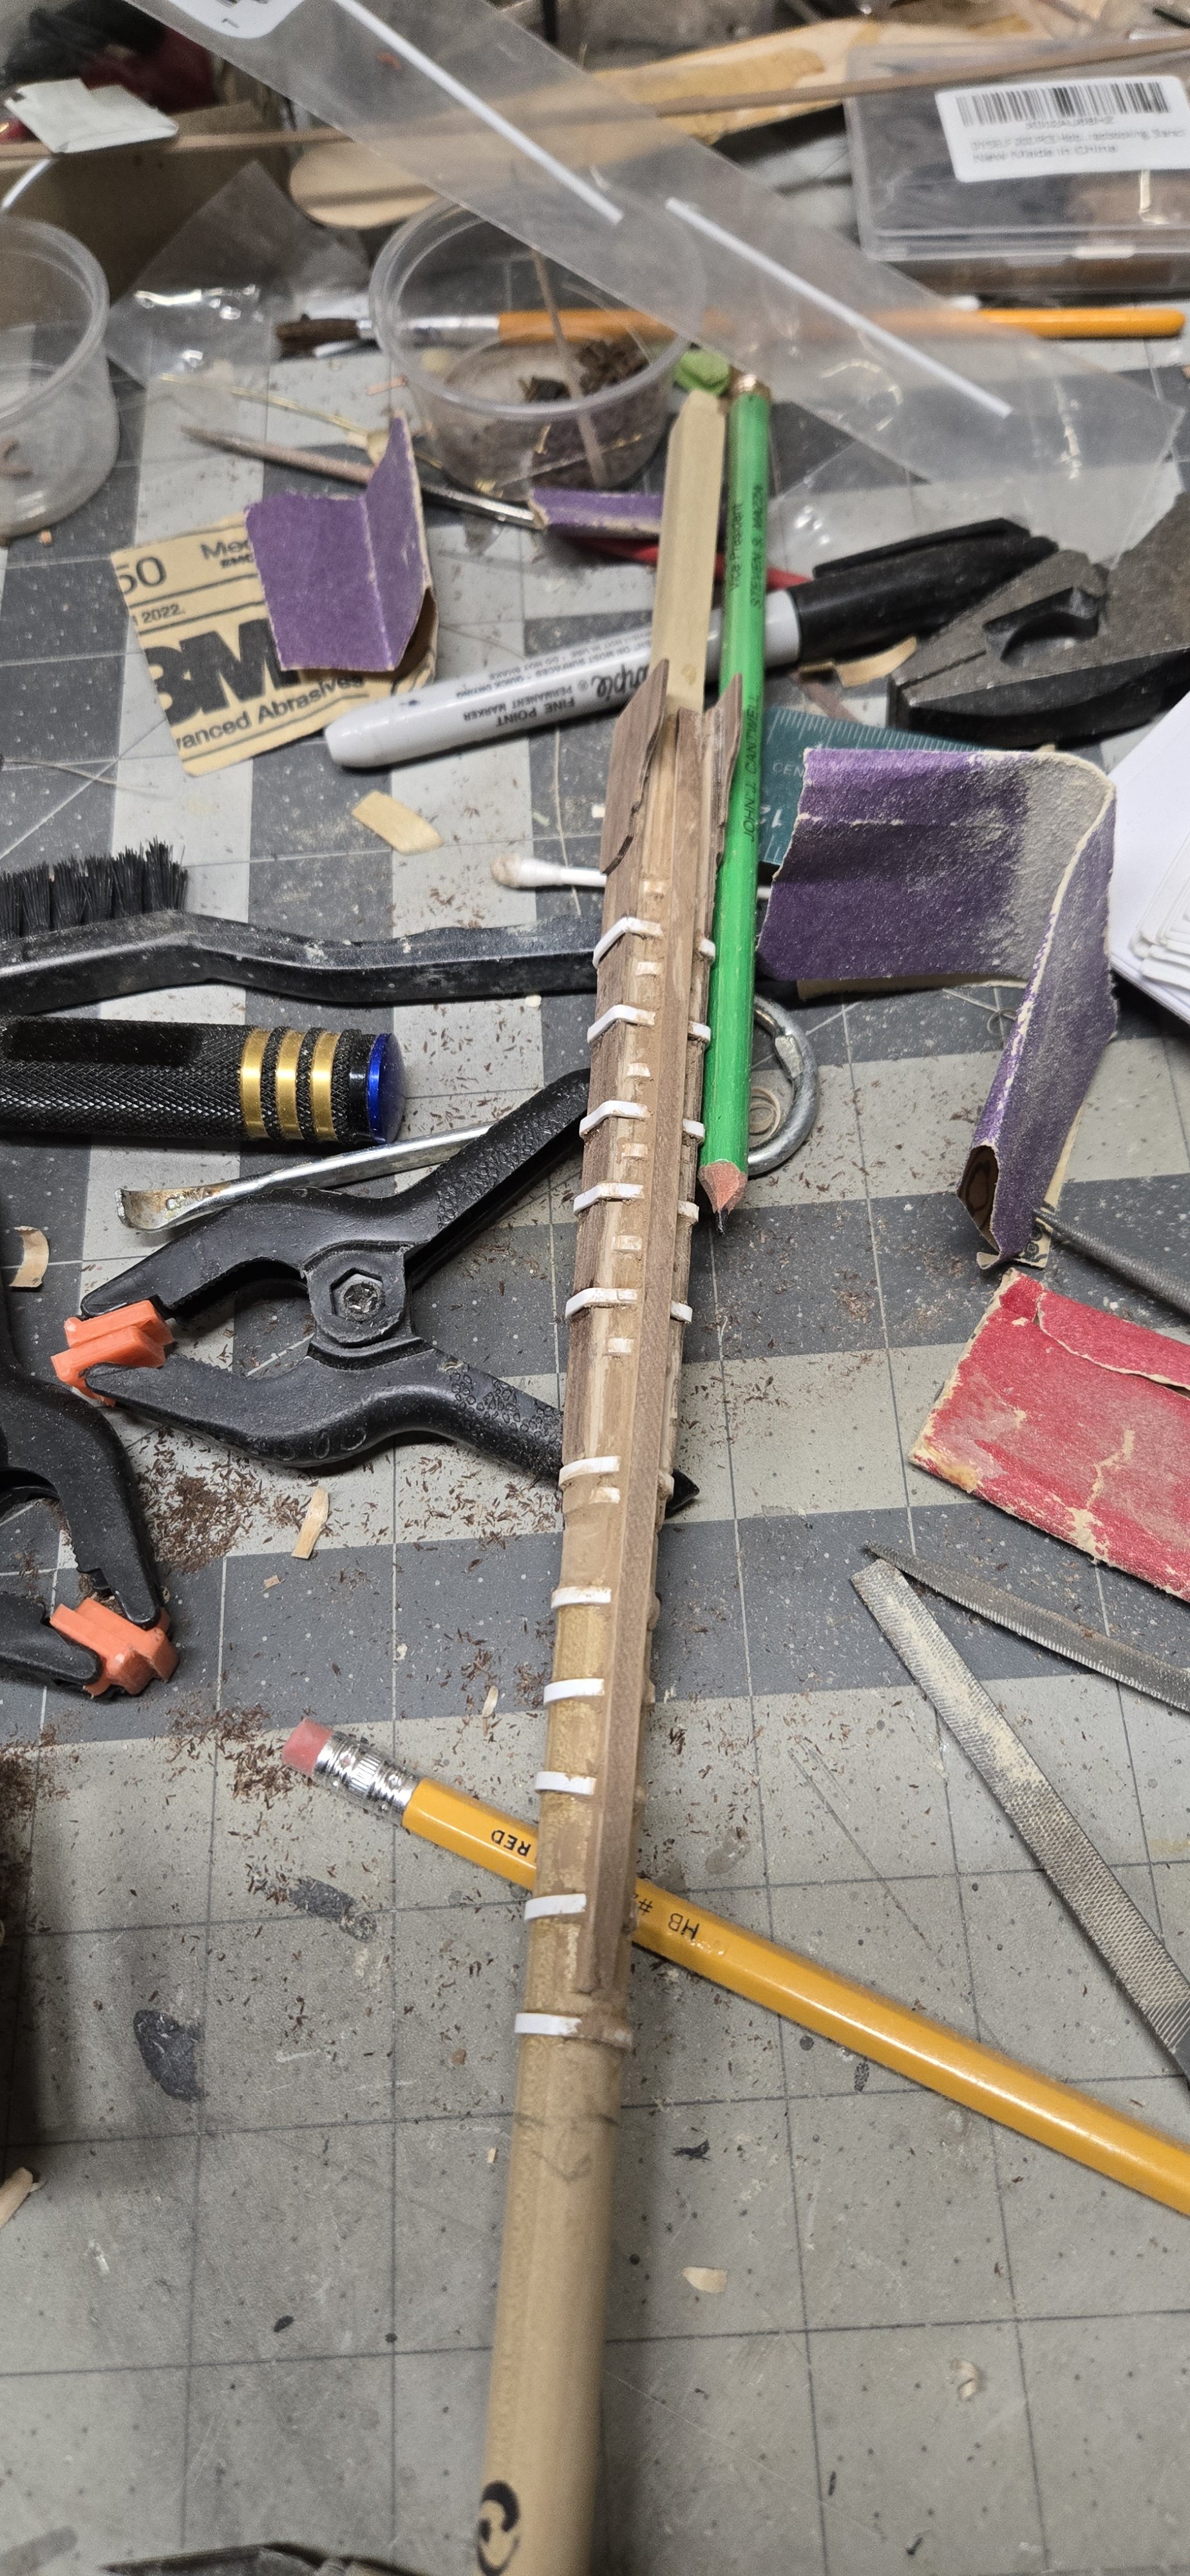
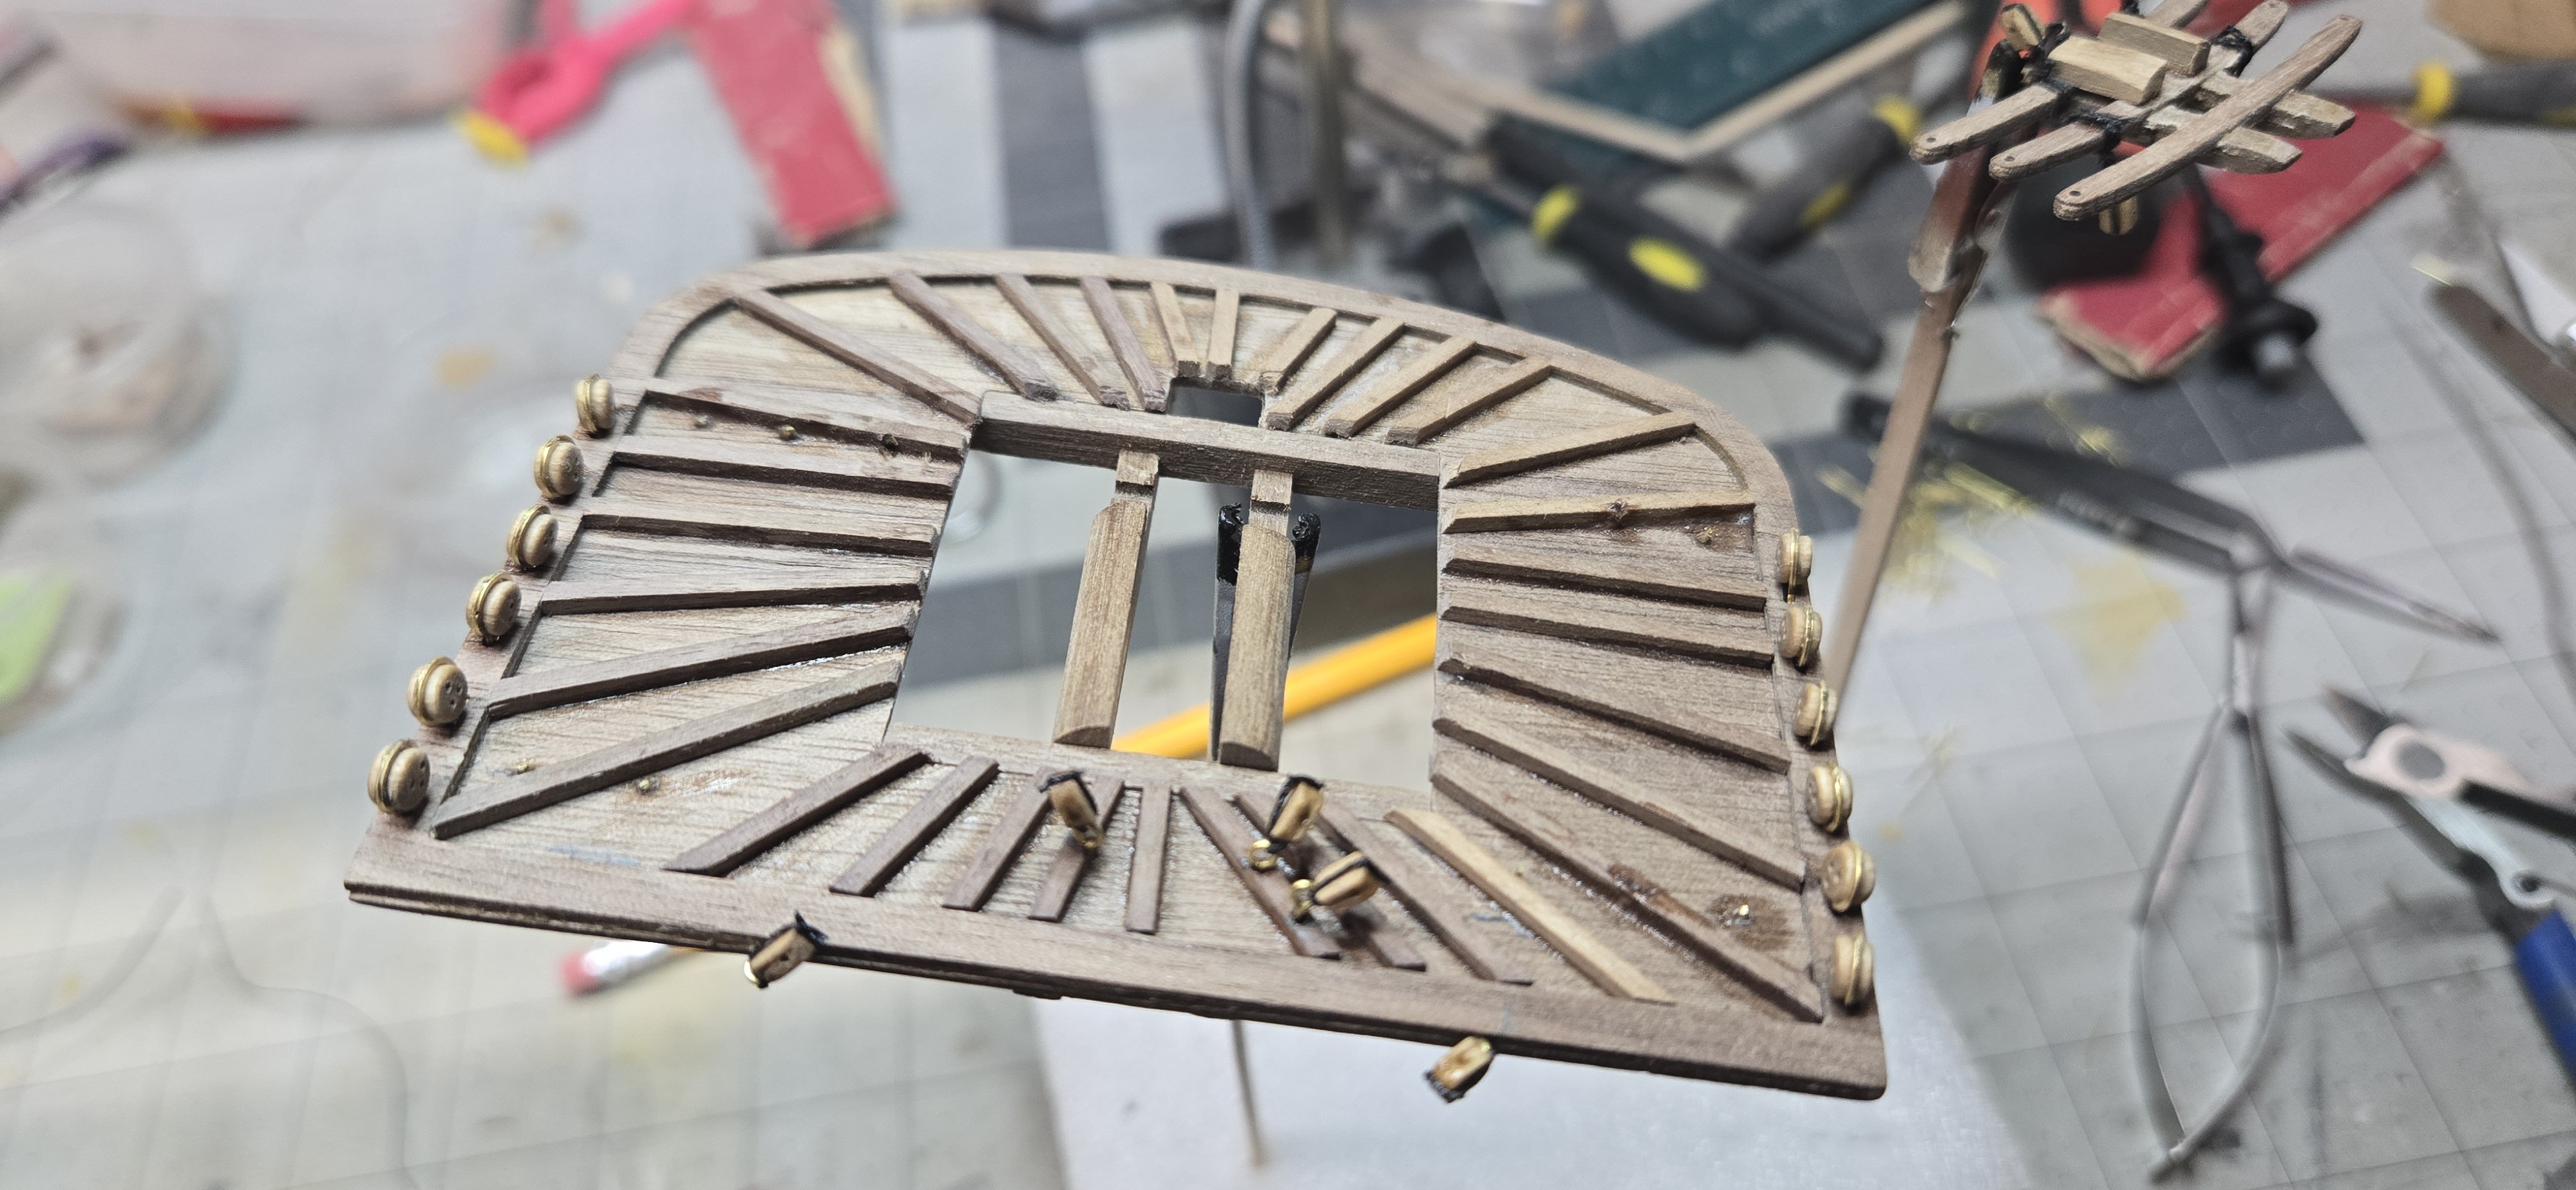
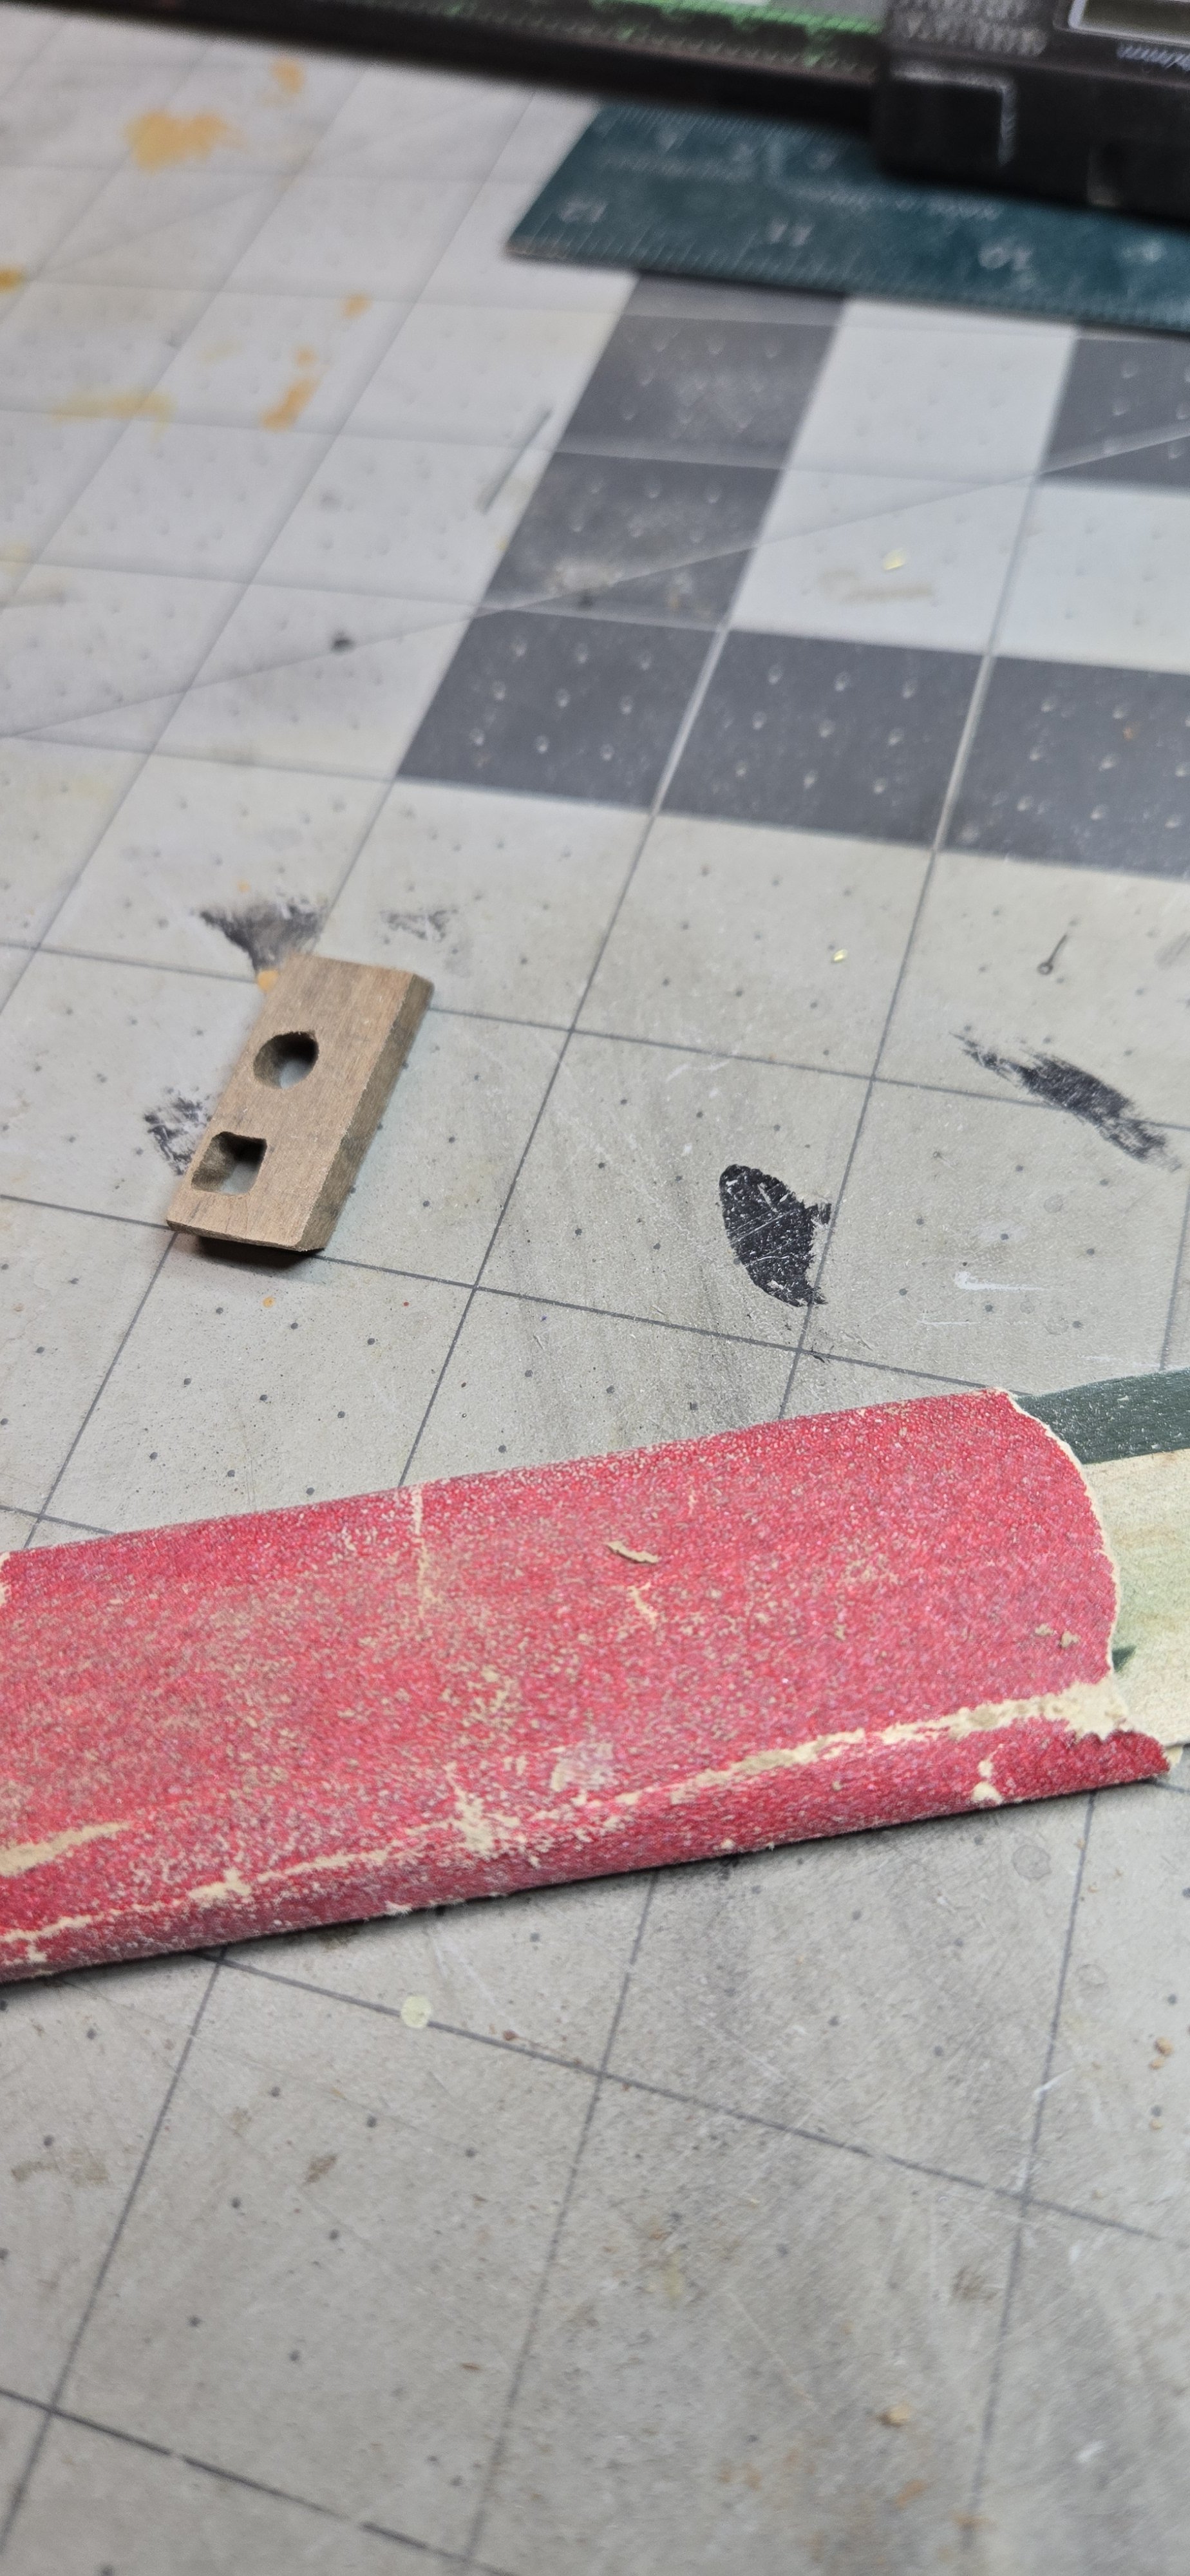
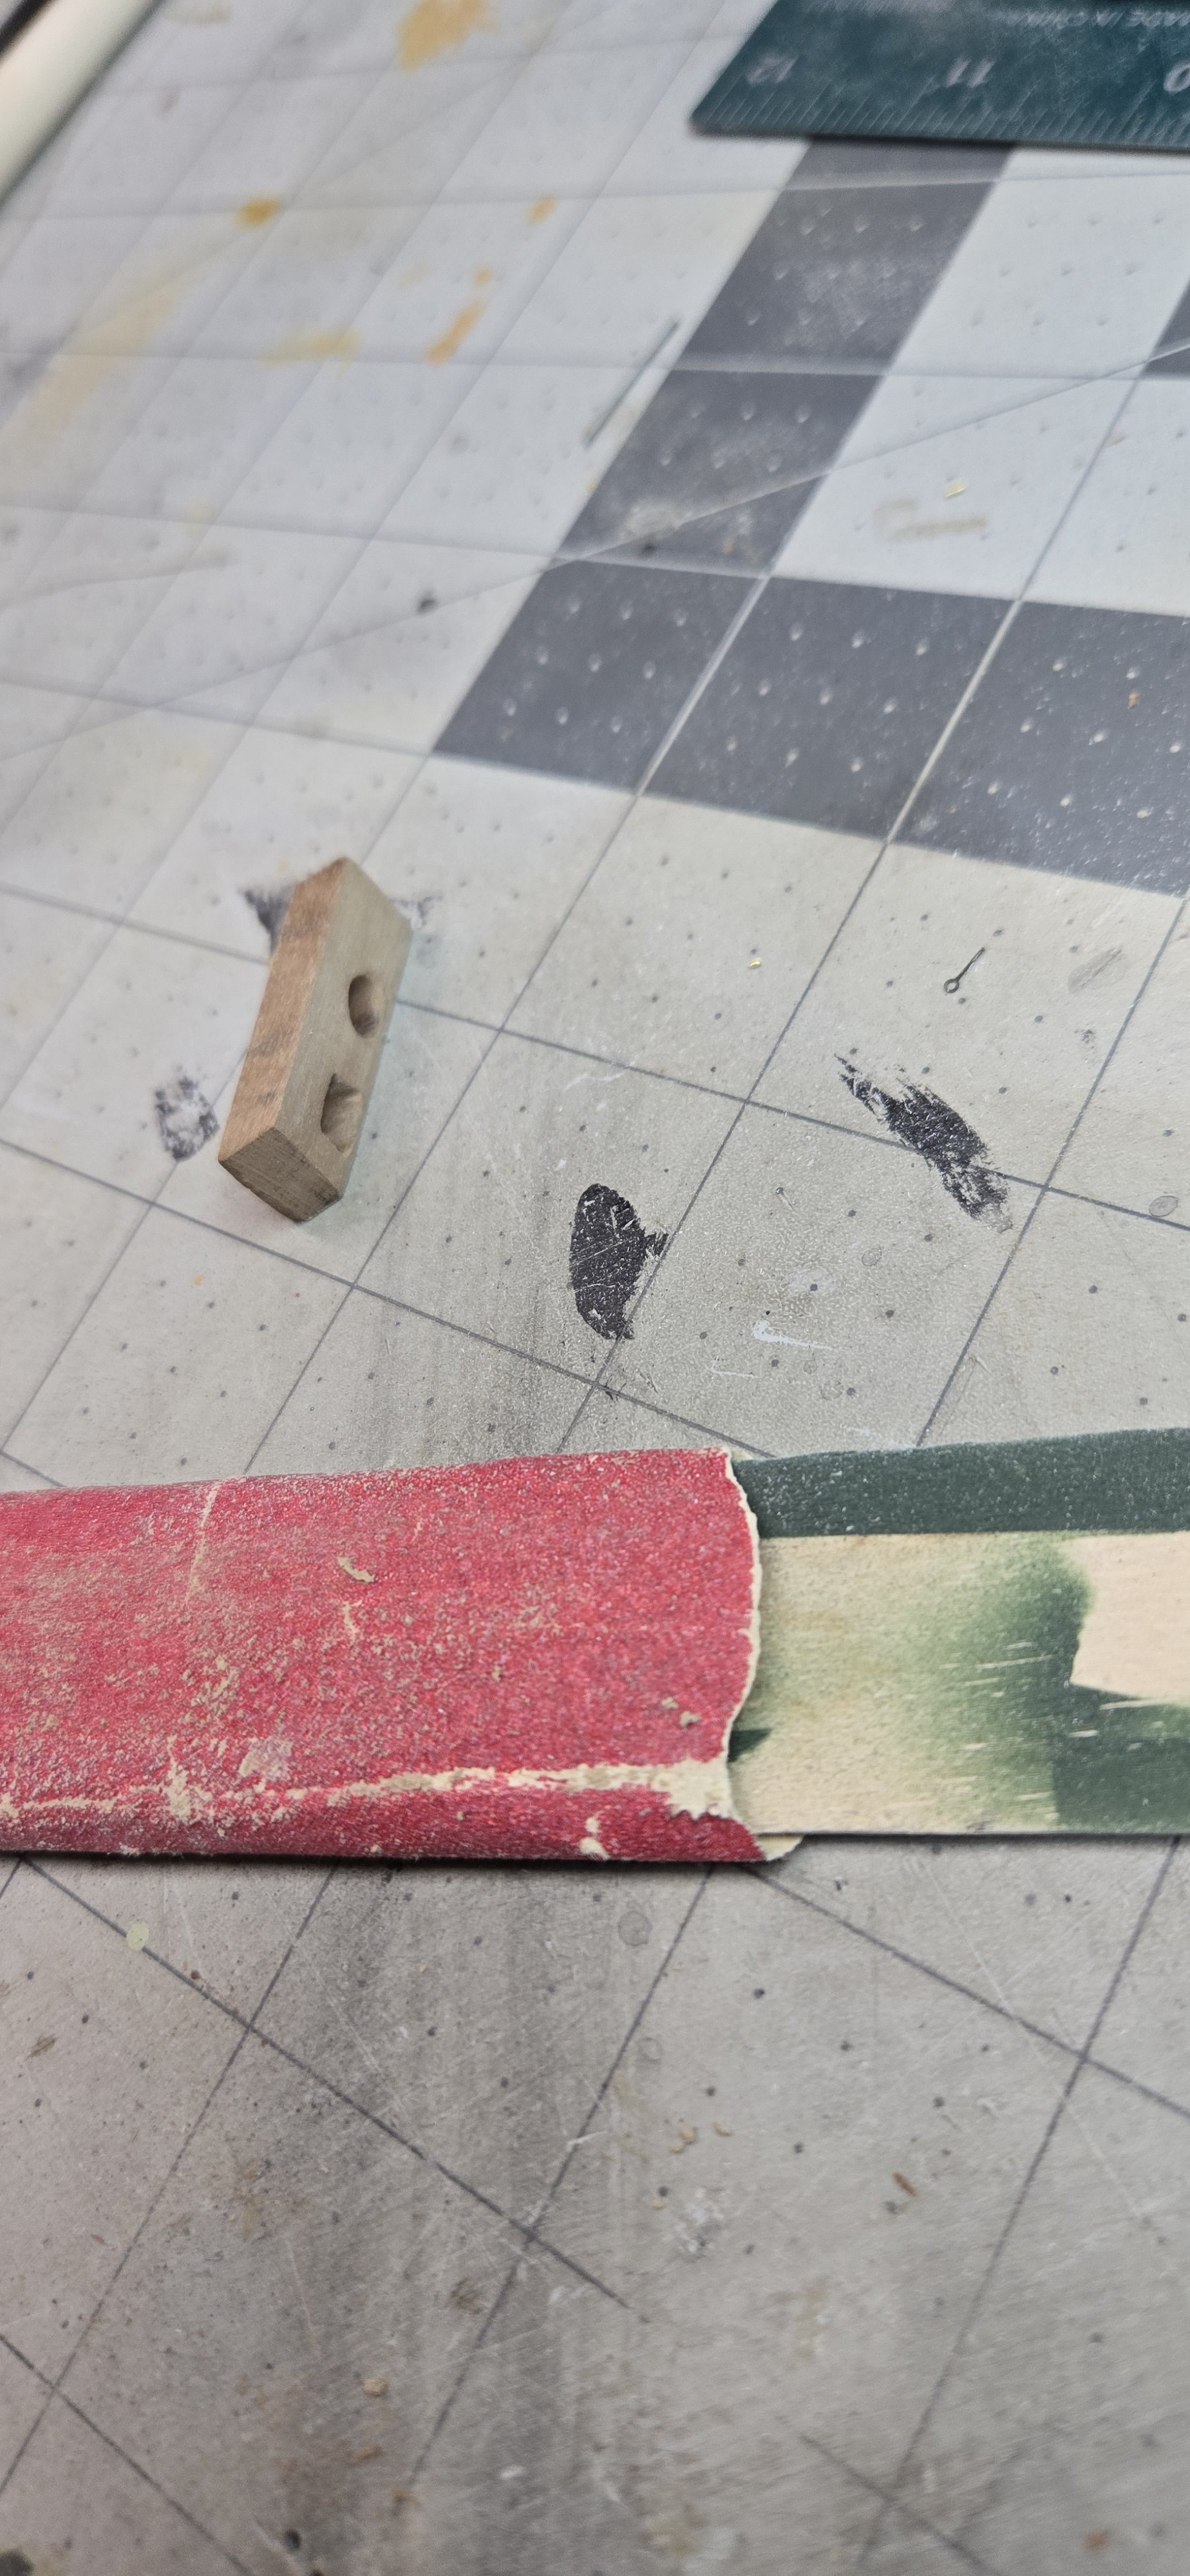
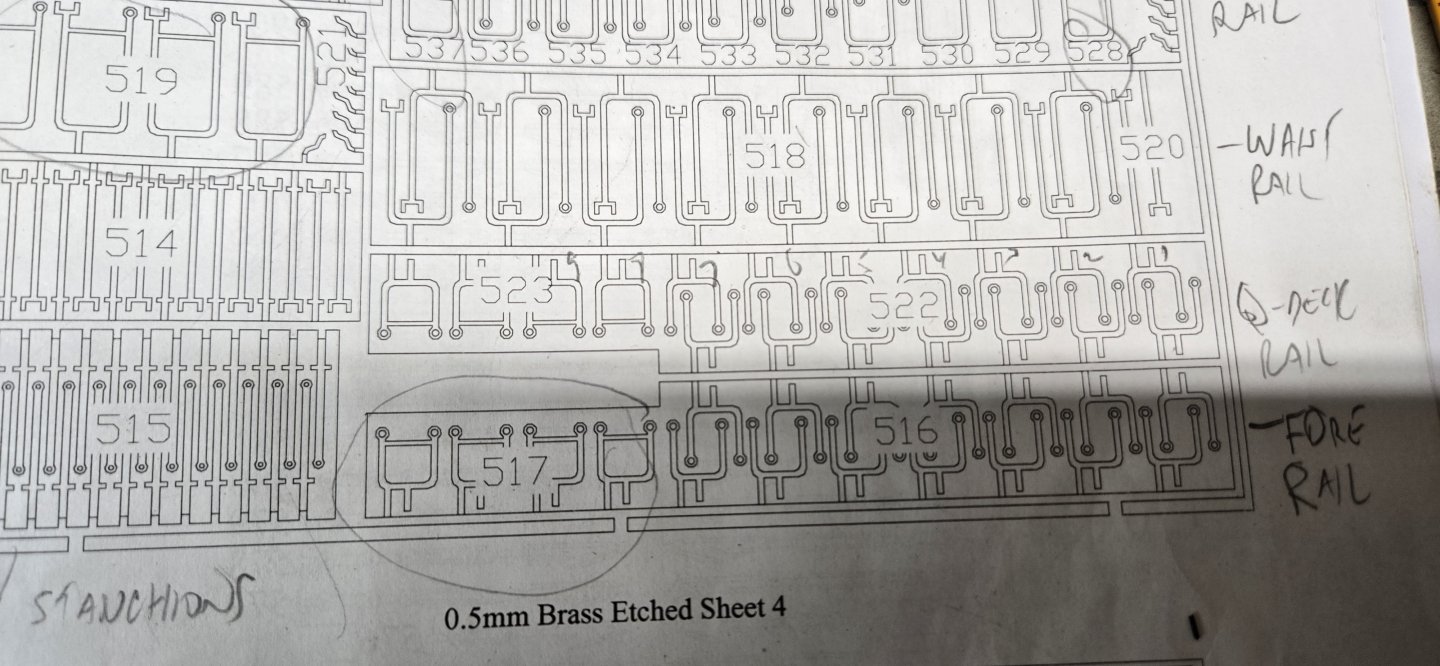
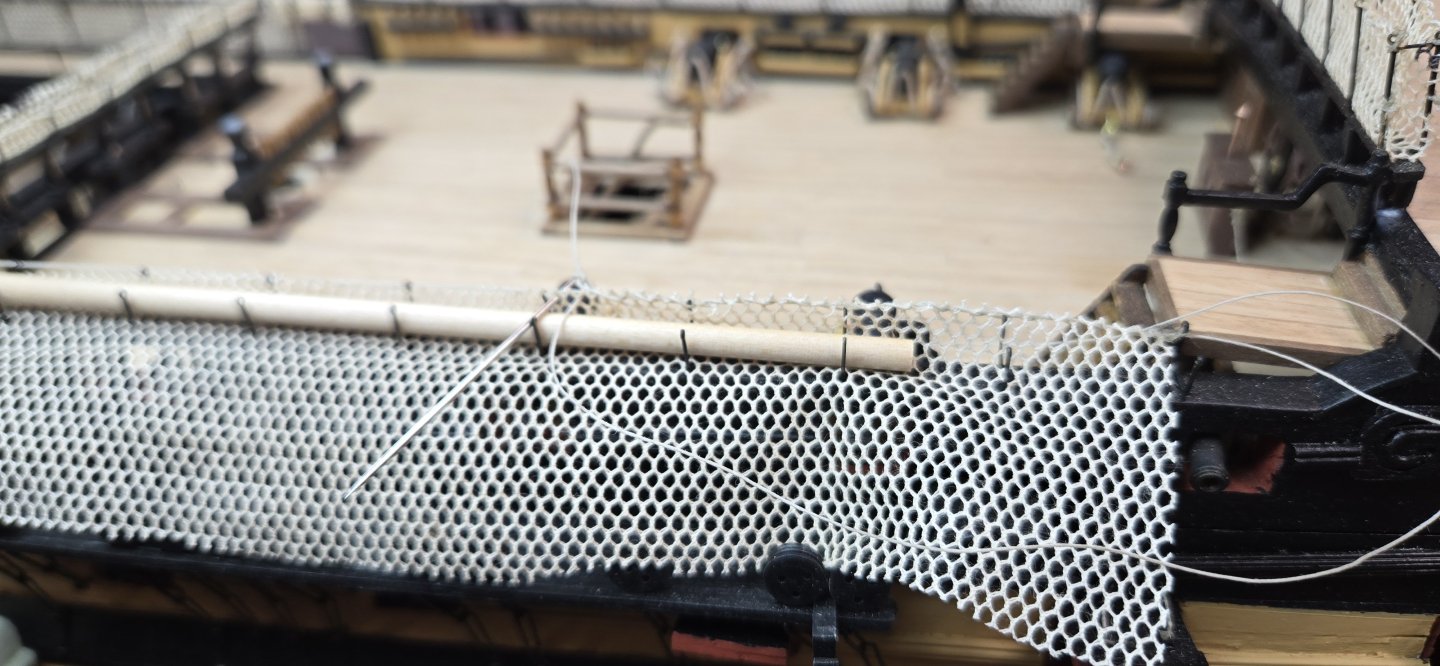
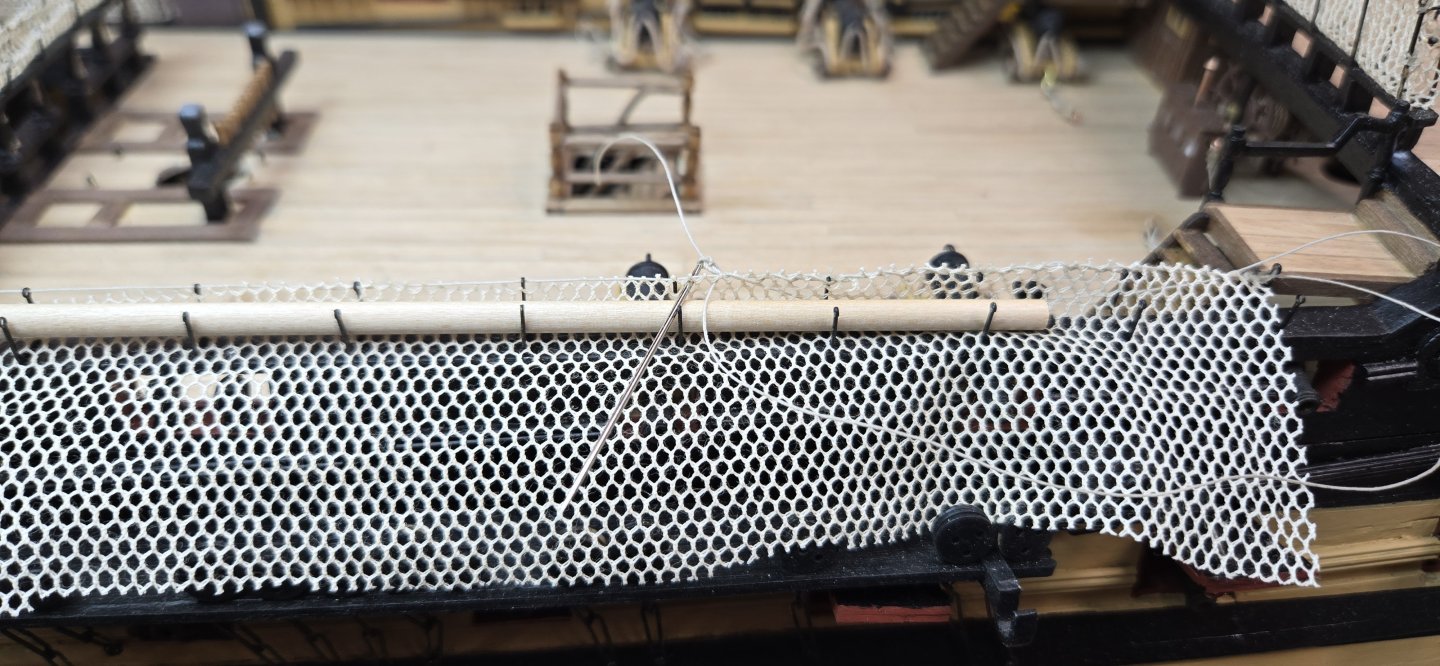
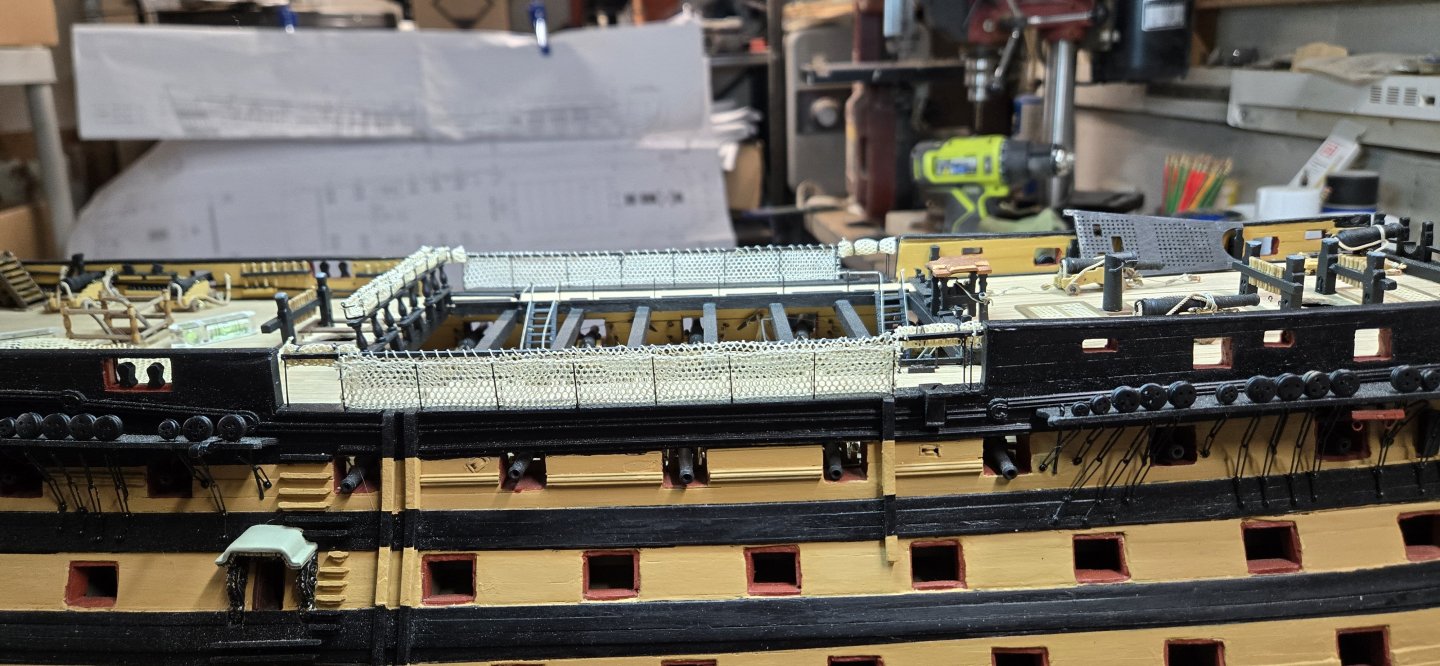
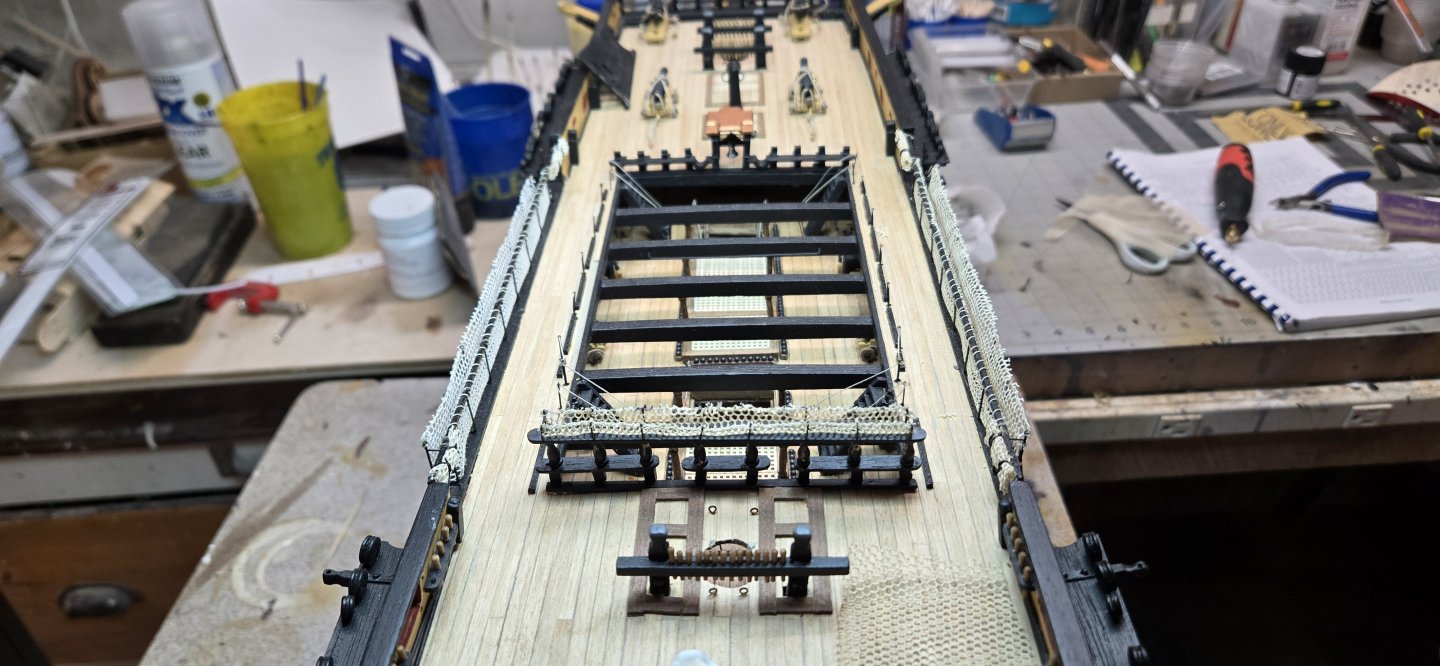
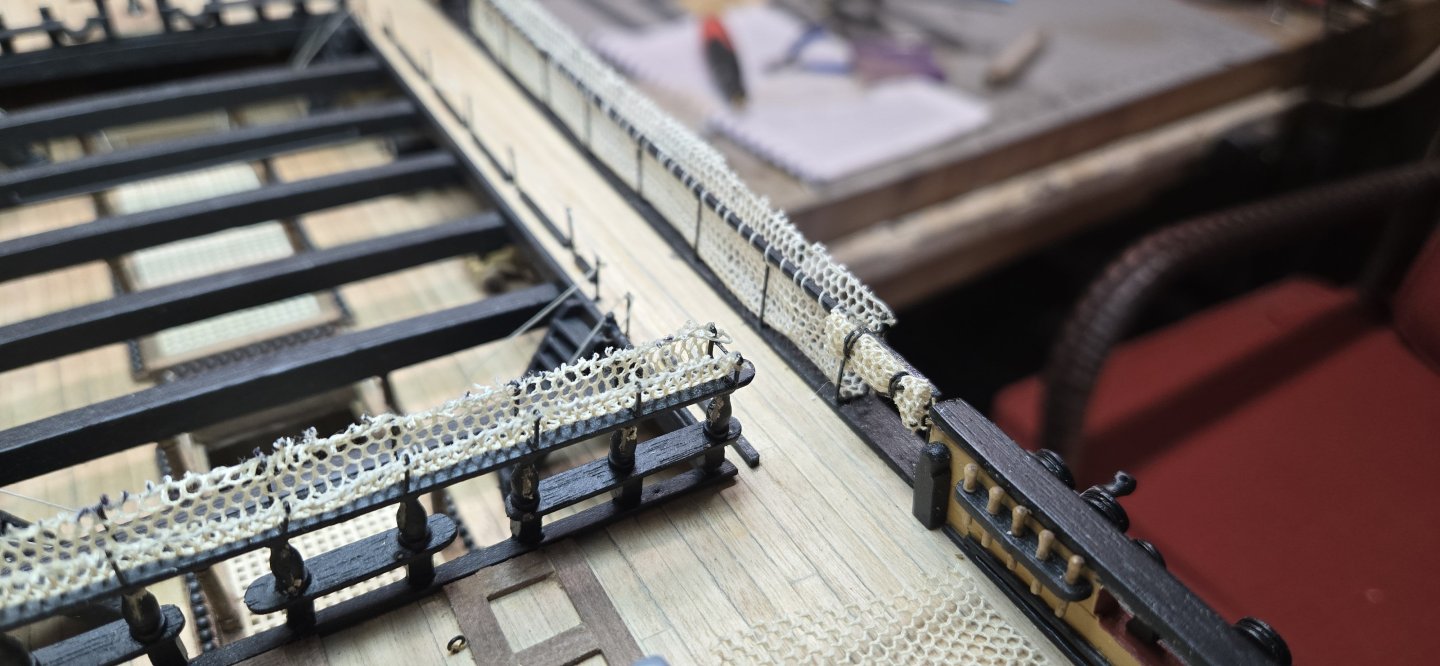
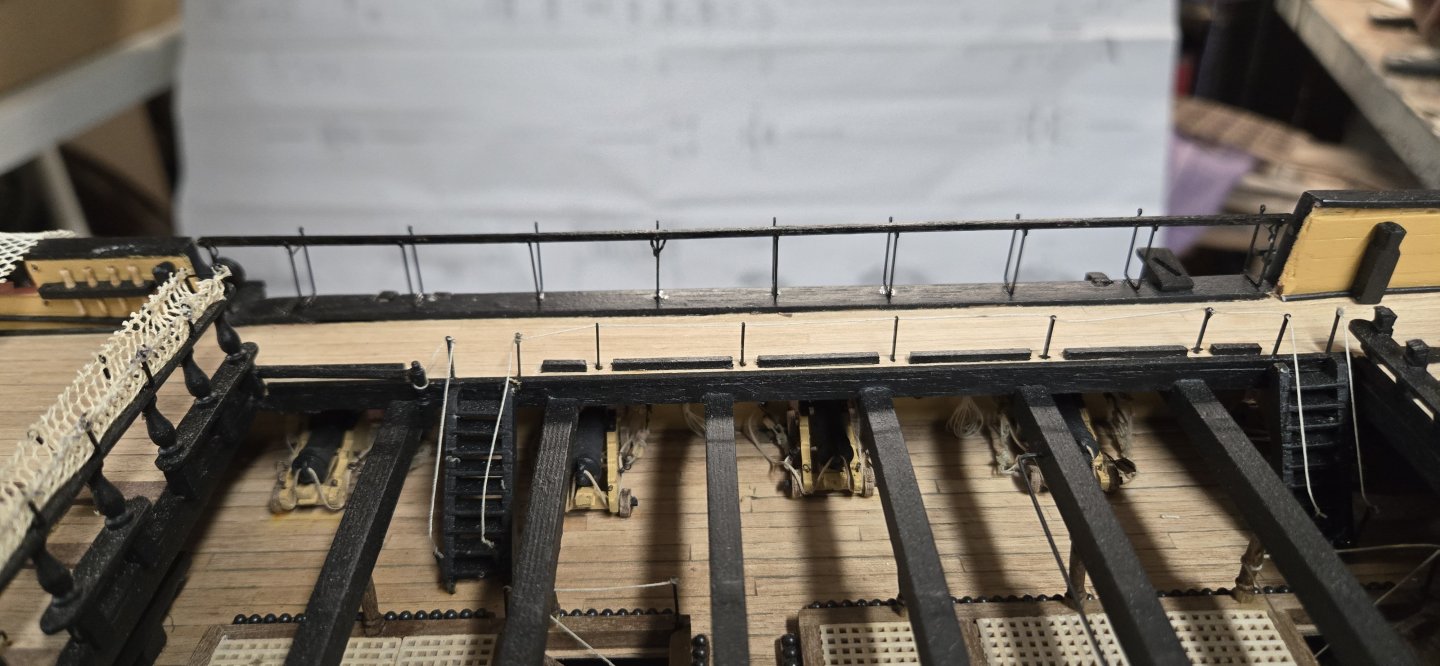
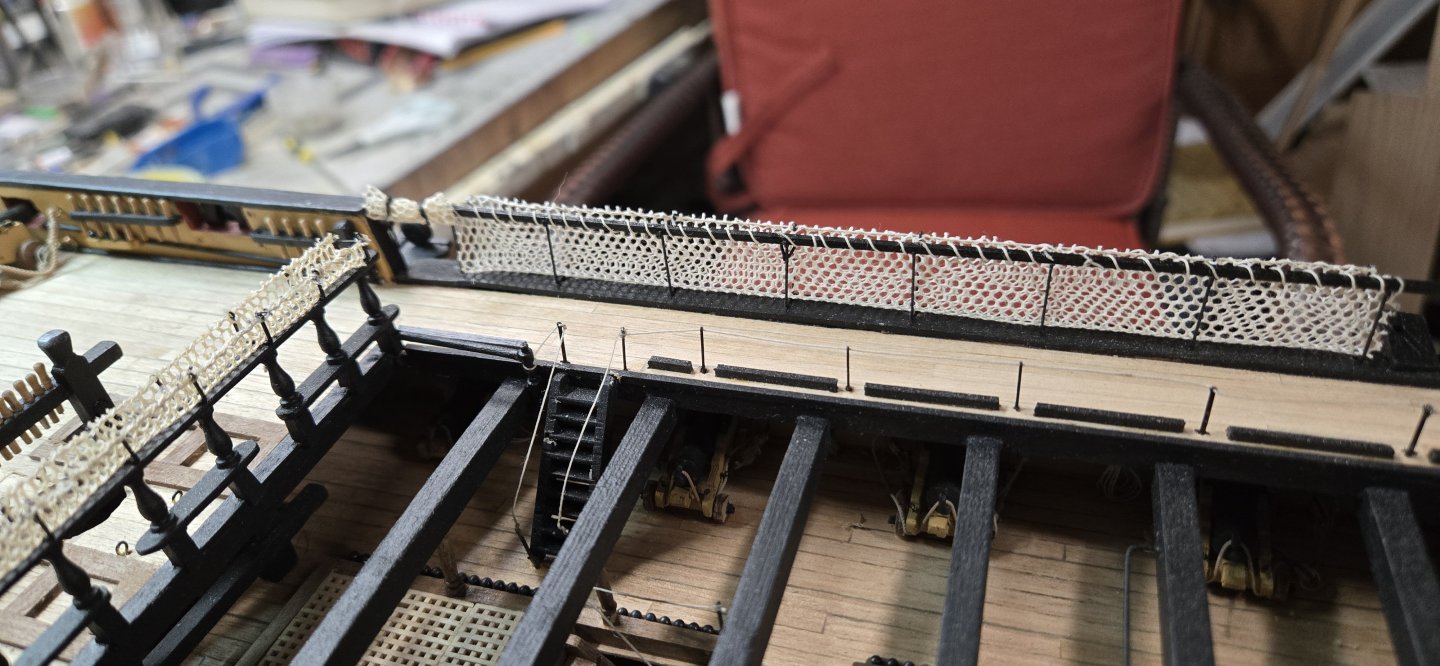
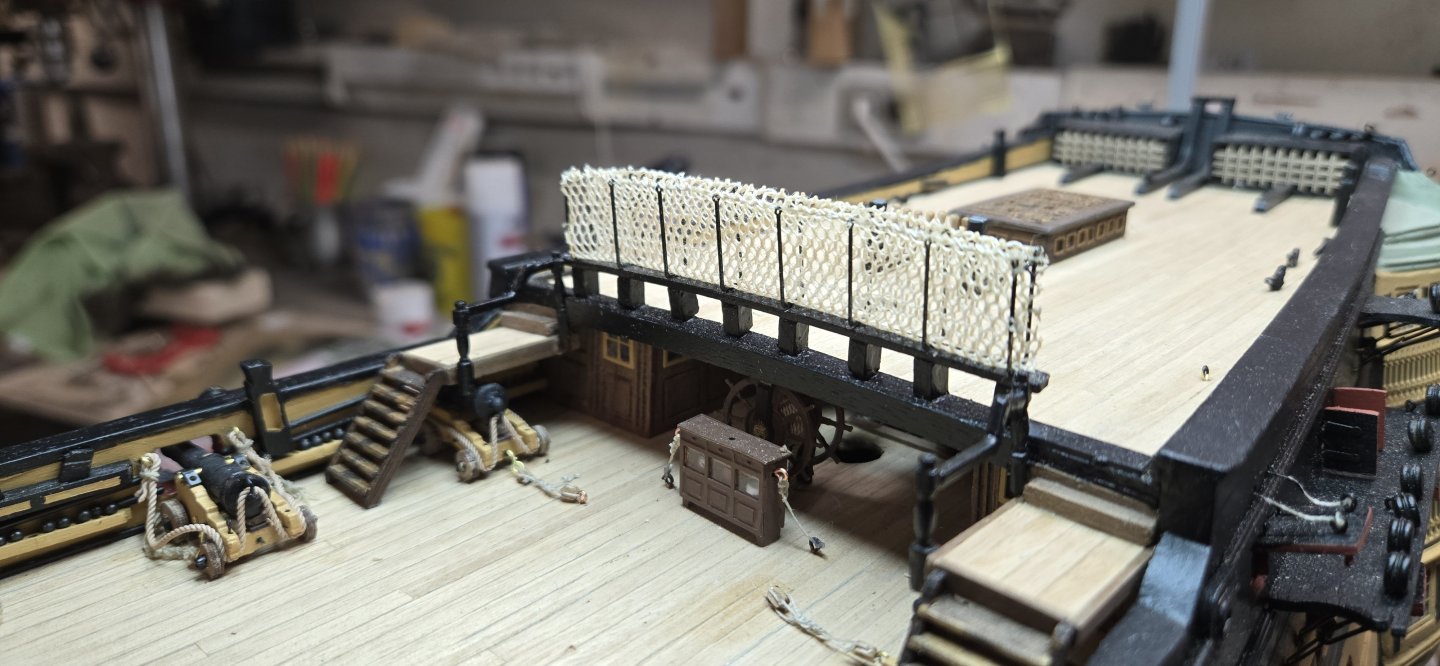
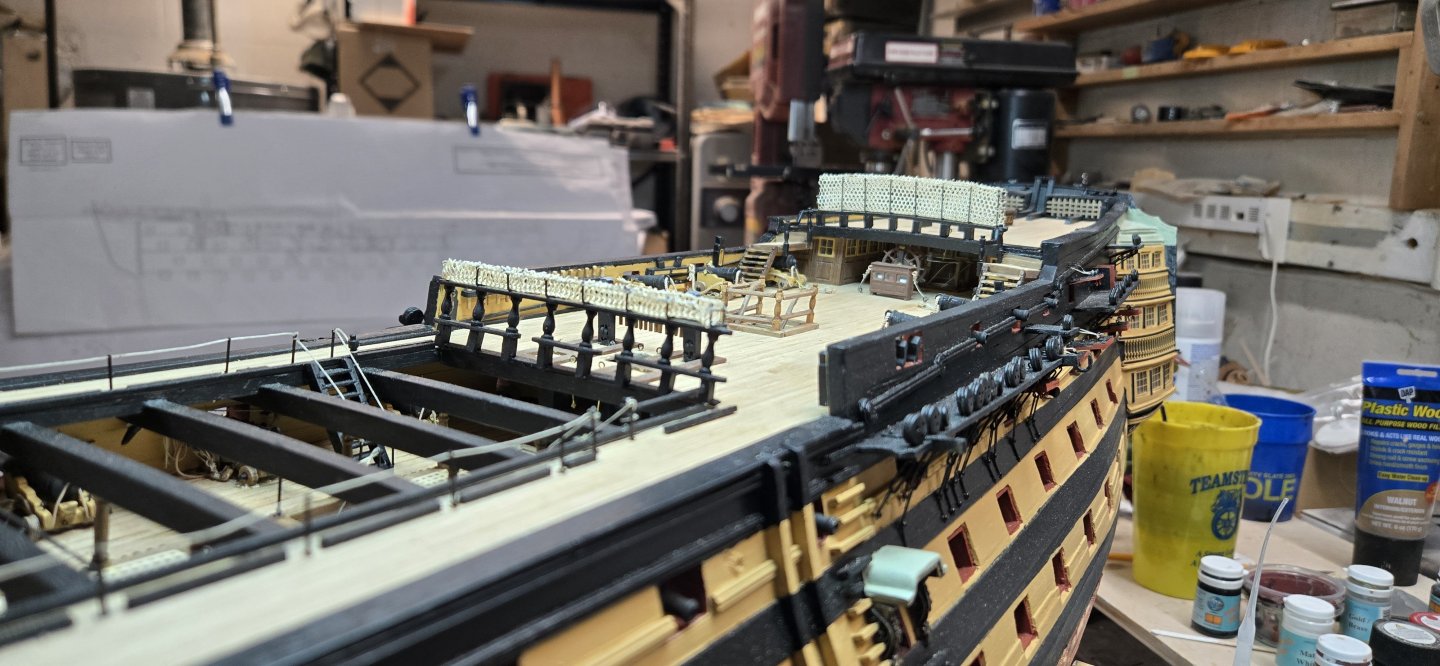
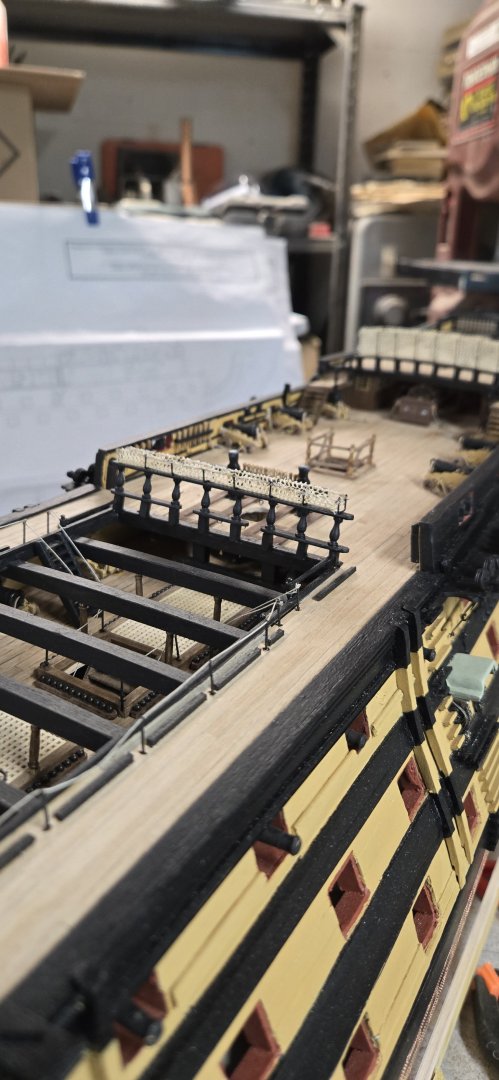
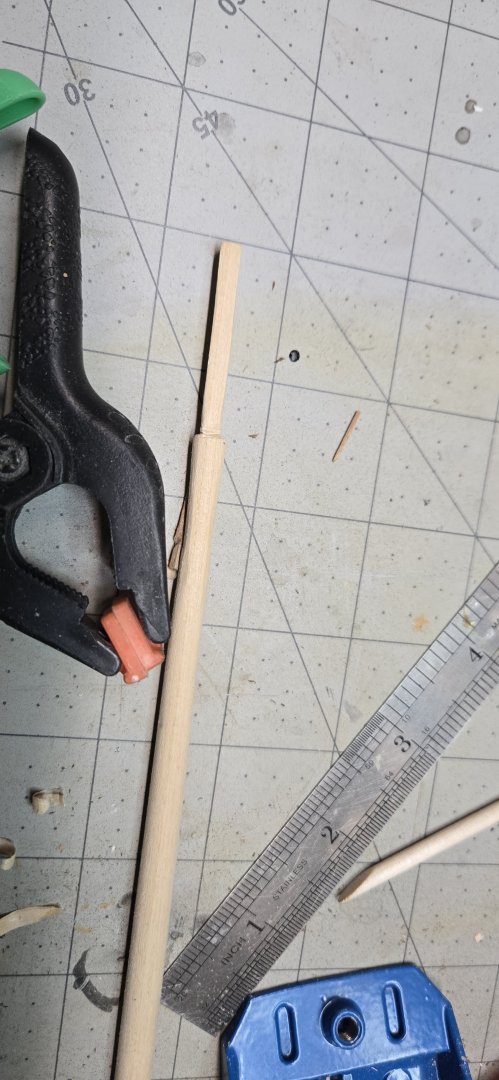
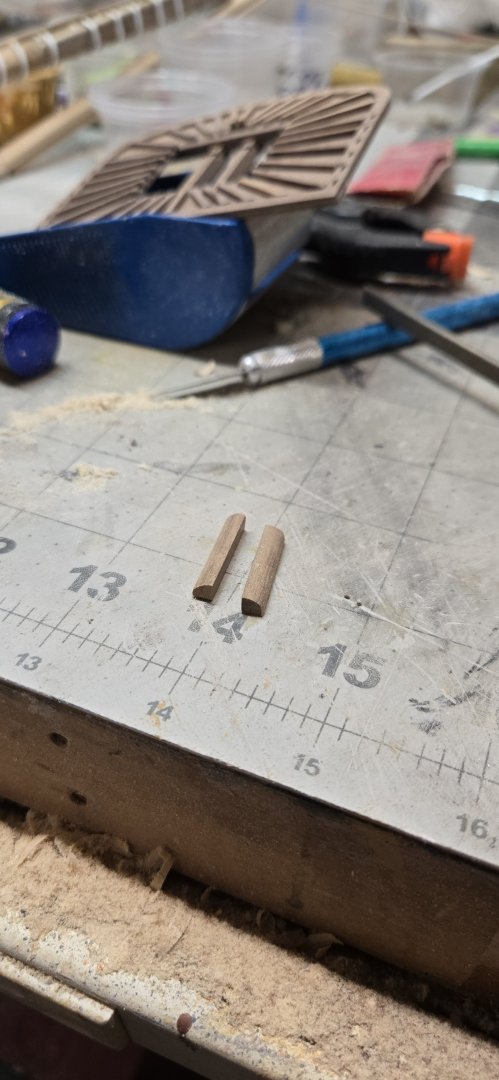
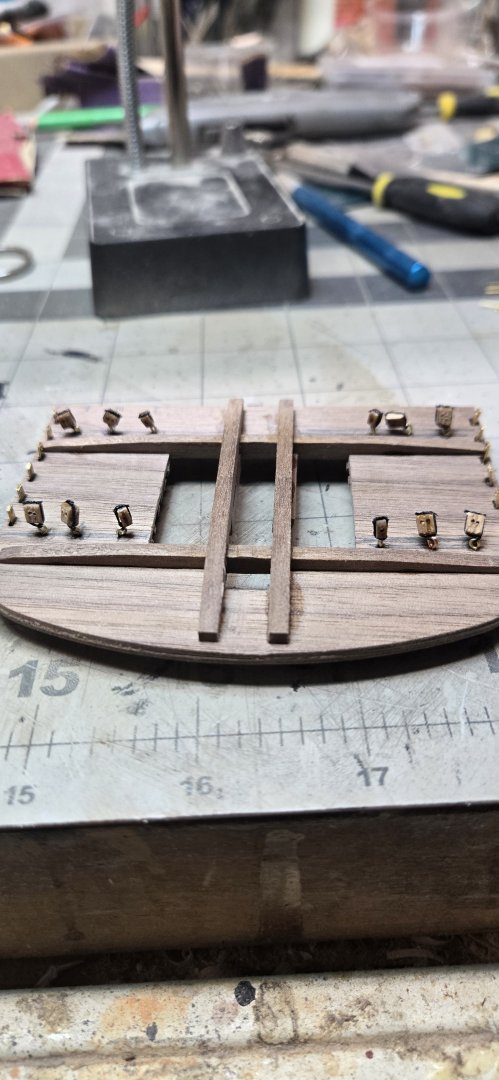
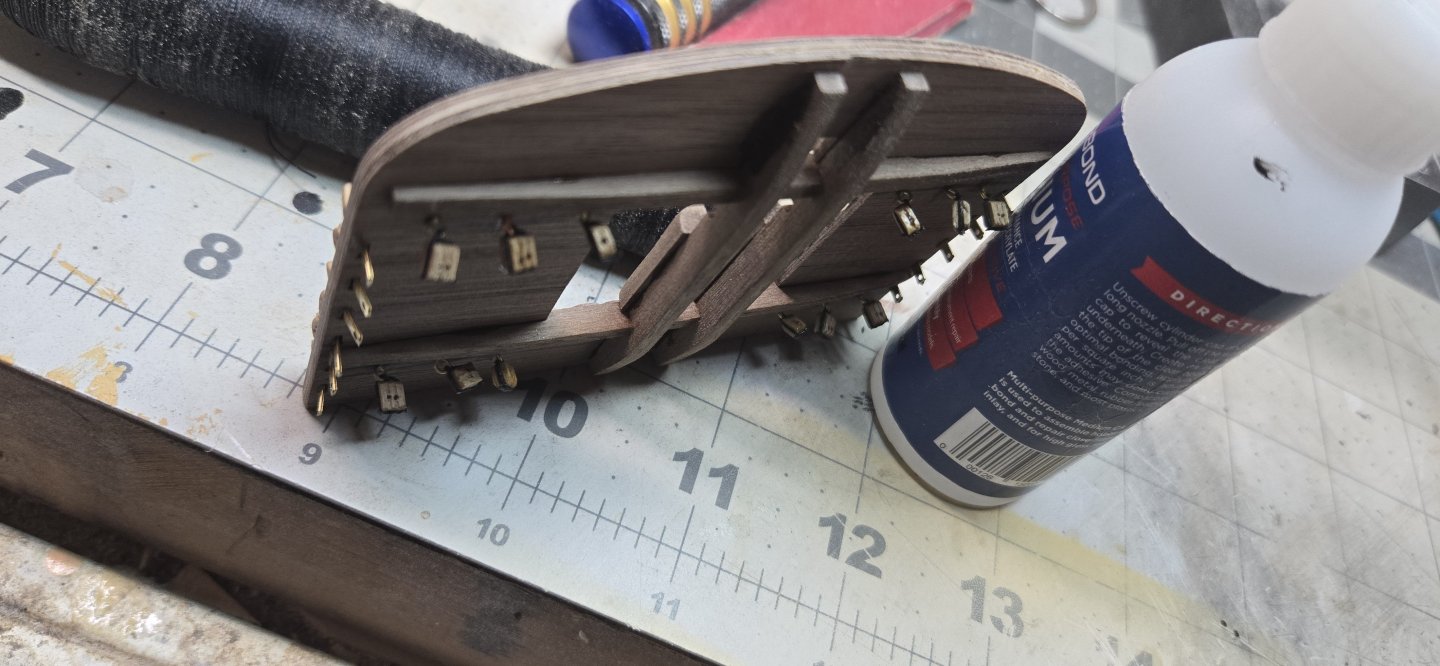
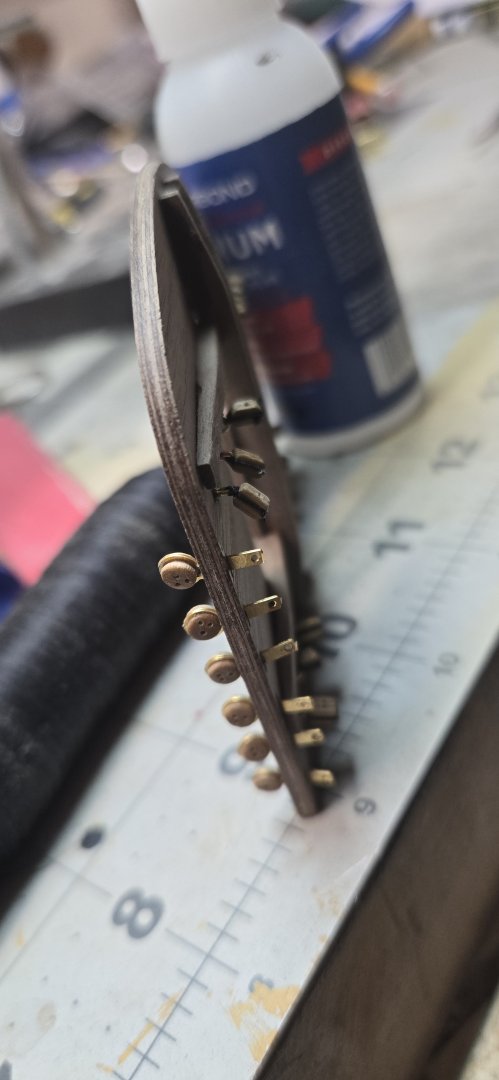
As always, I continued on my quest to finish the hammocks. I did encounter an error in the instructions...or at least a missing step concerning the installation of the quarterdeck and foredeck hammock brackets. The directions don't mention this, but the quarterdeck require 8 brackets (not including the ends) and the foredecks only require 6 (not including the ends). However, each group provides 7 inside and 2 outside for each side of the ship. So the numbers work out, but it isn't mentioned anywhere... You can see that I just sew the netting onto the bracket lines. Perhaps a curved needle would make things easier. Alas, I am not a surgeon!
-
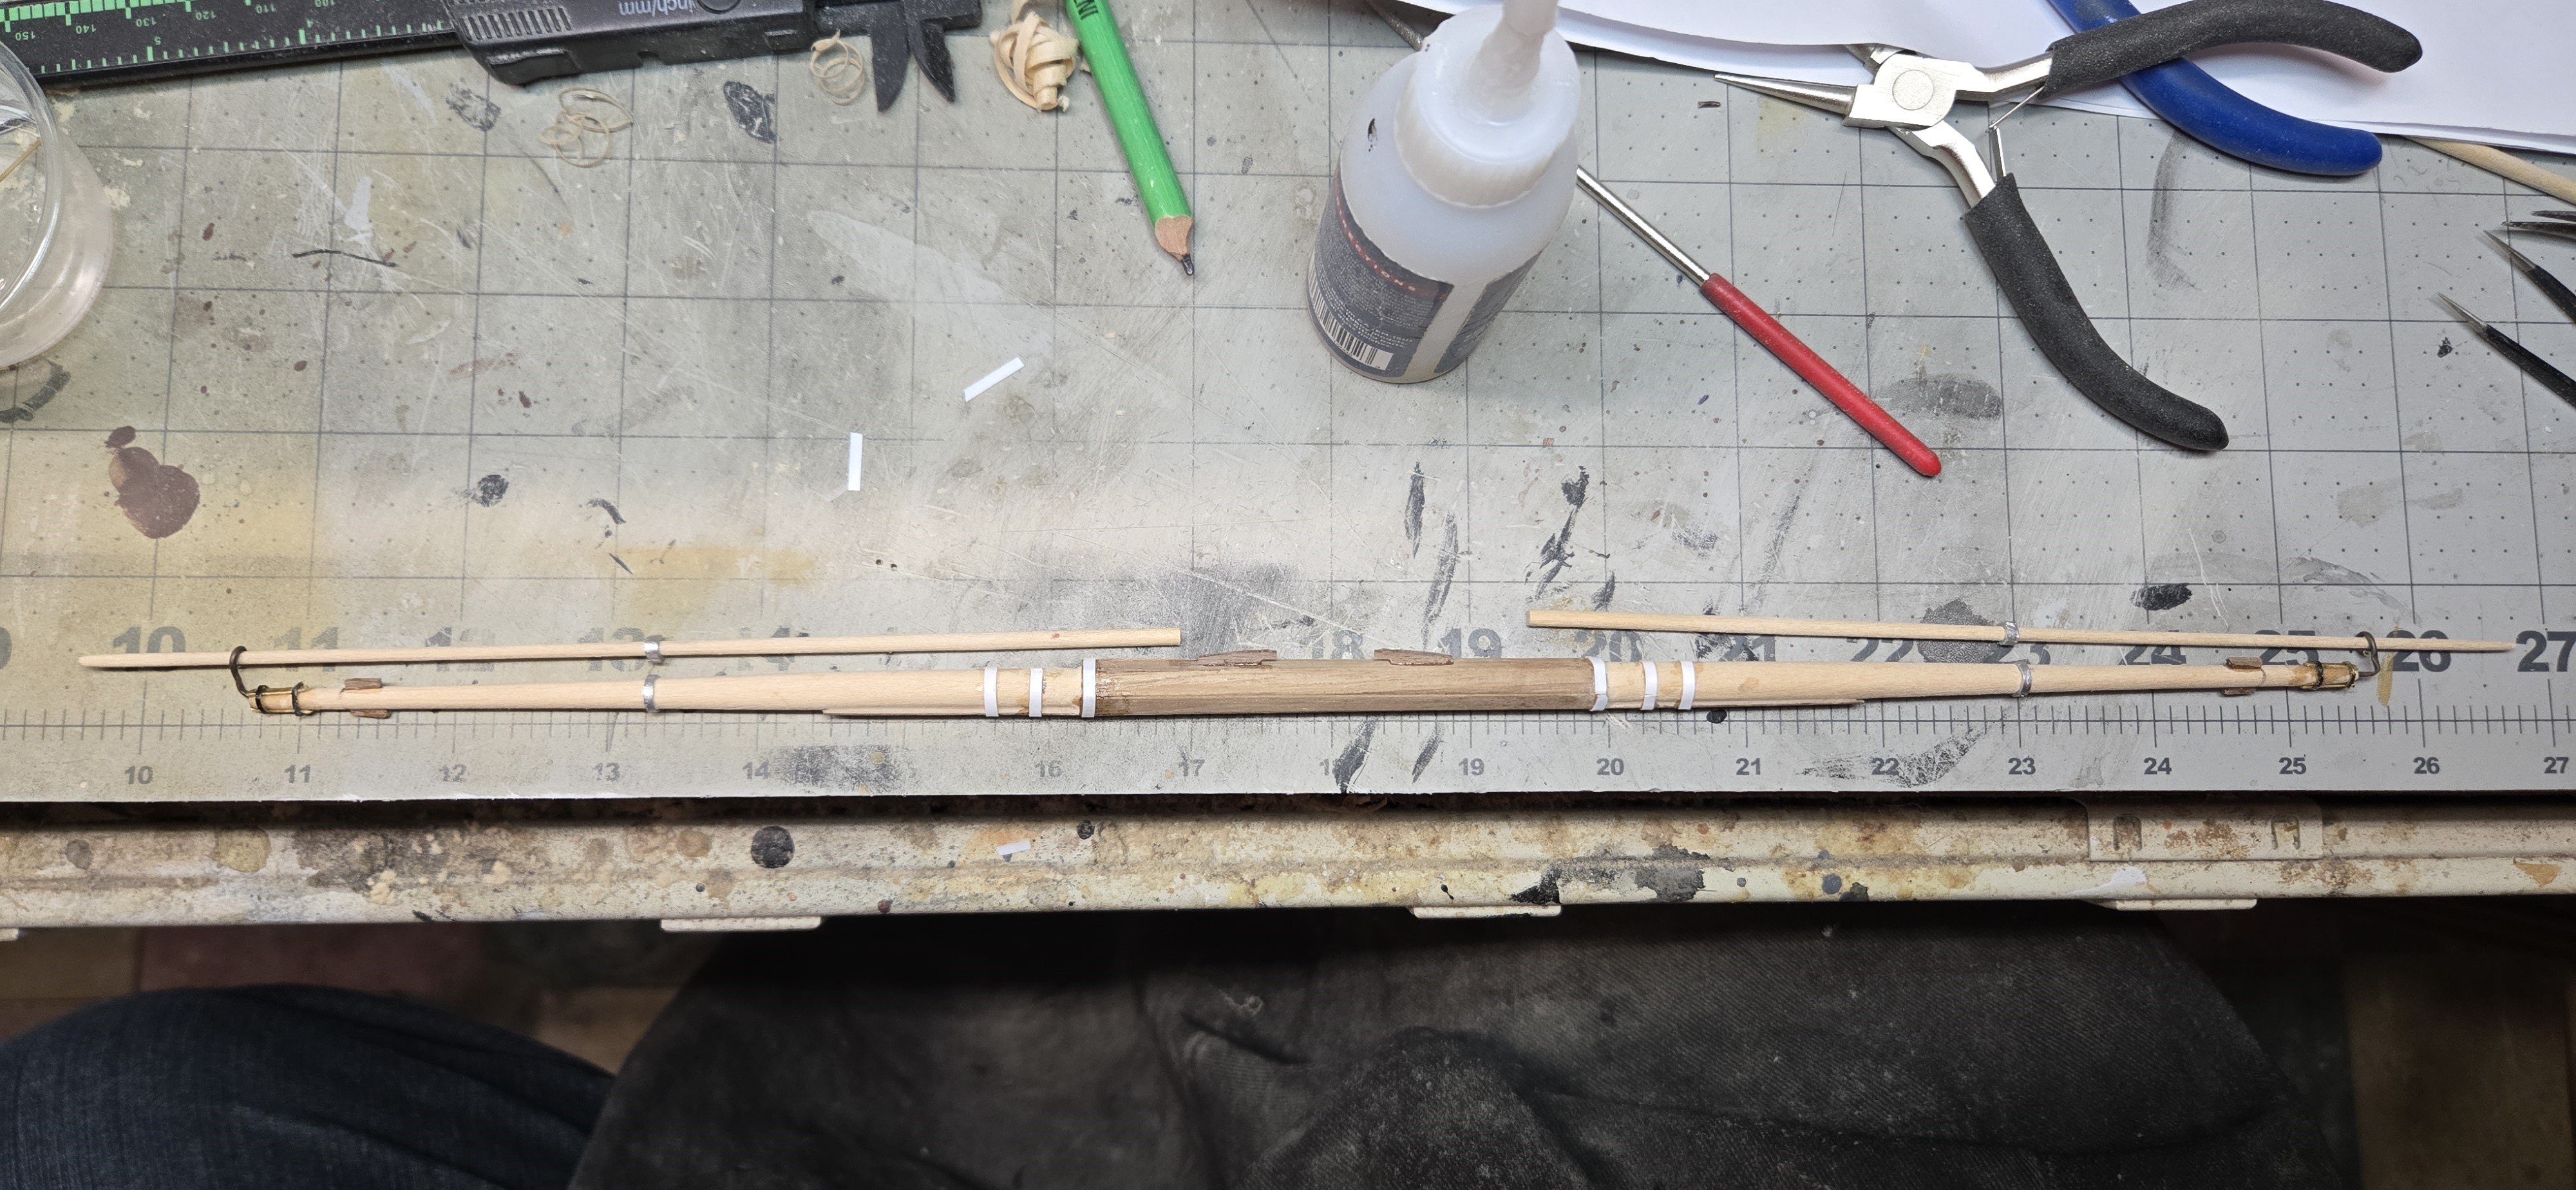
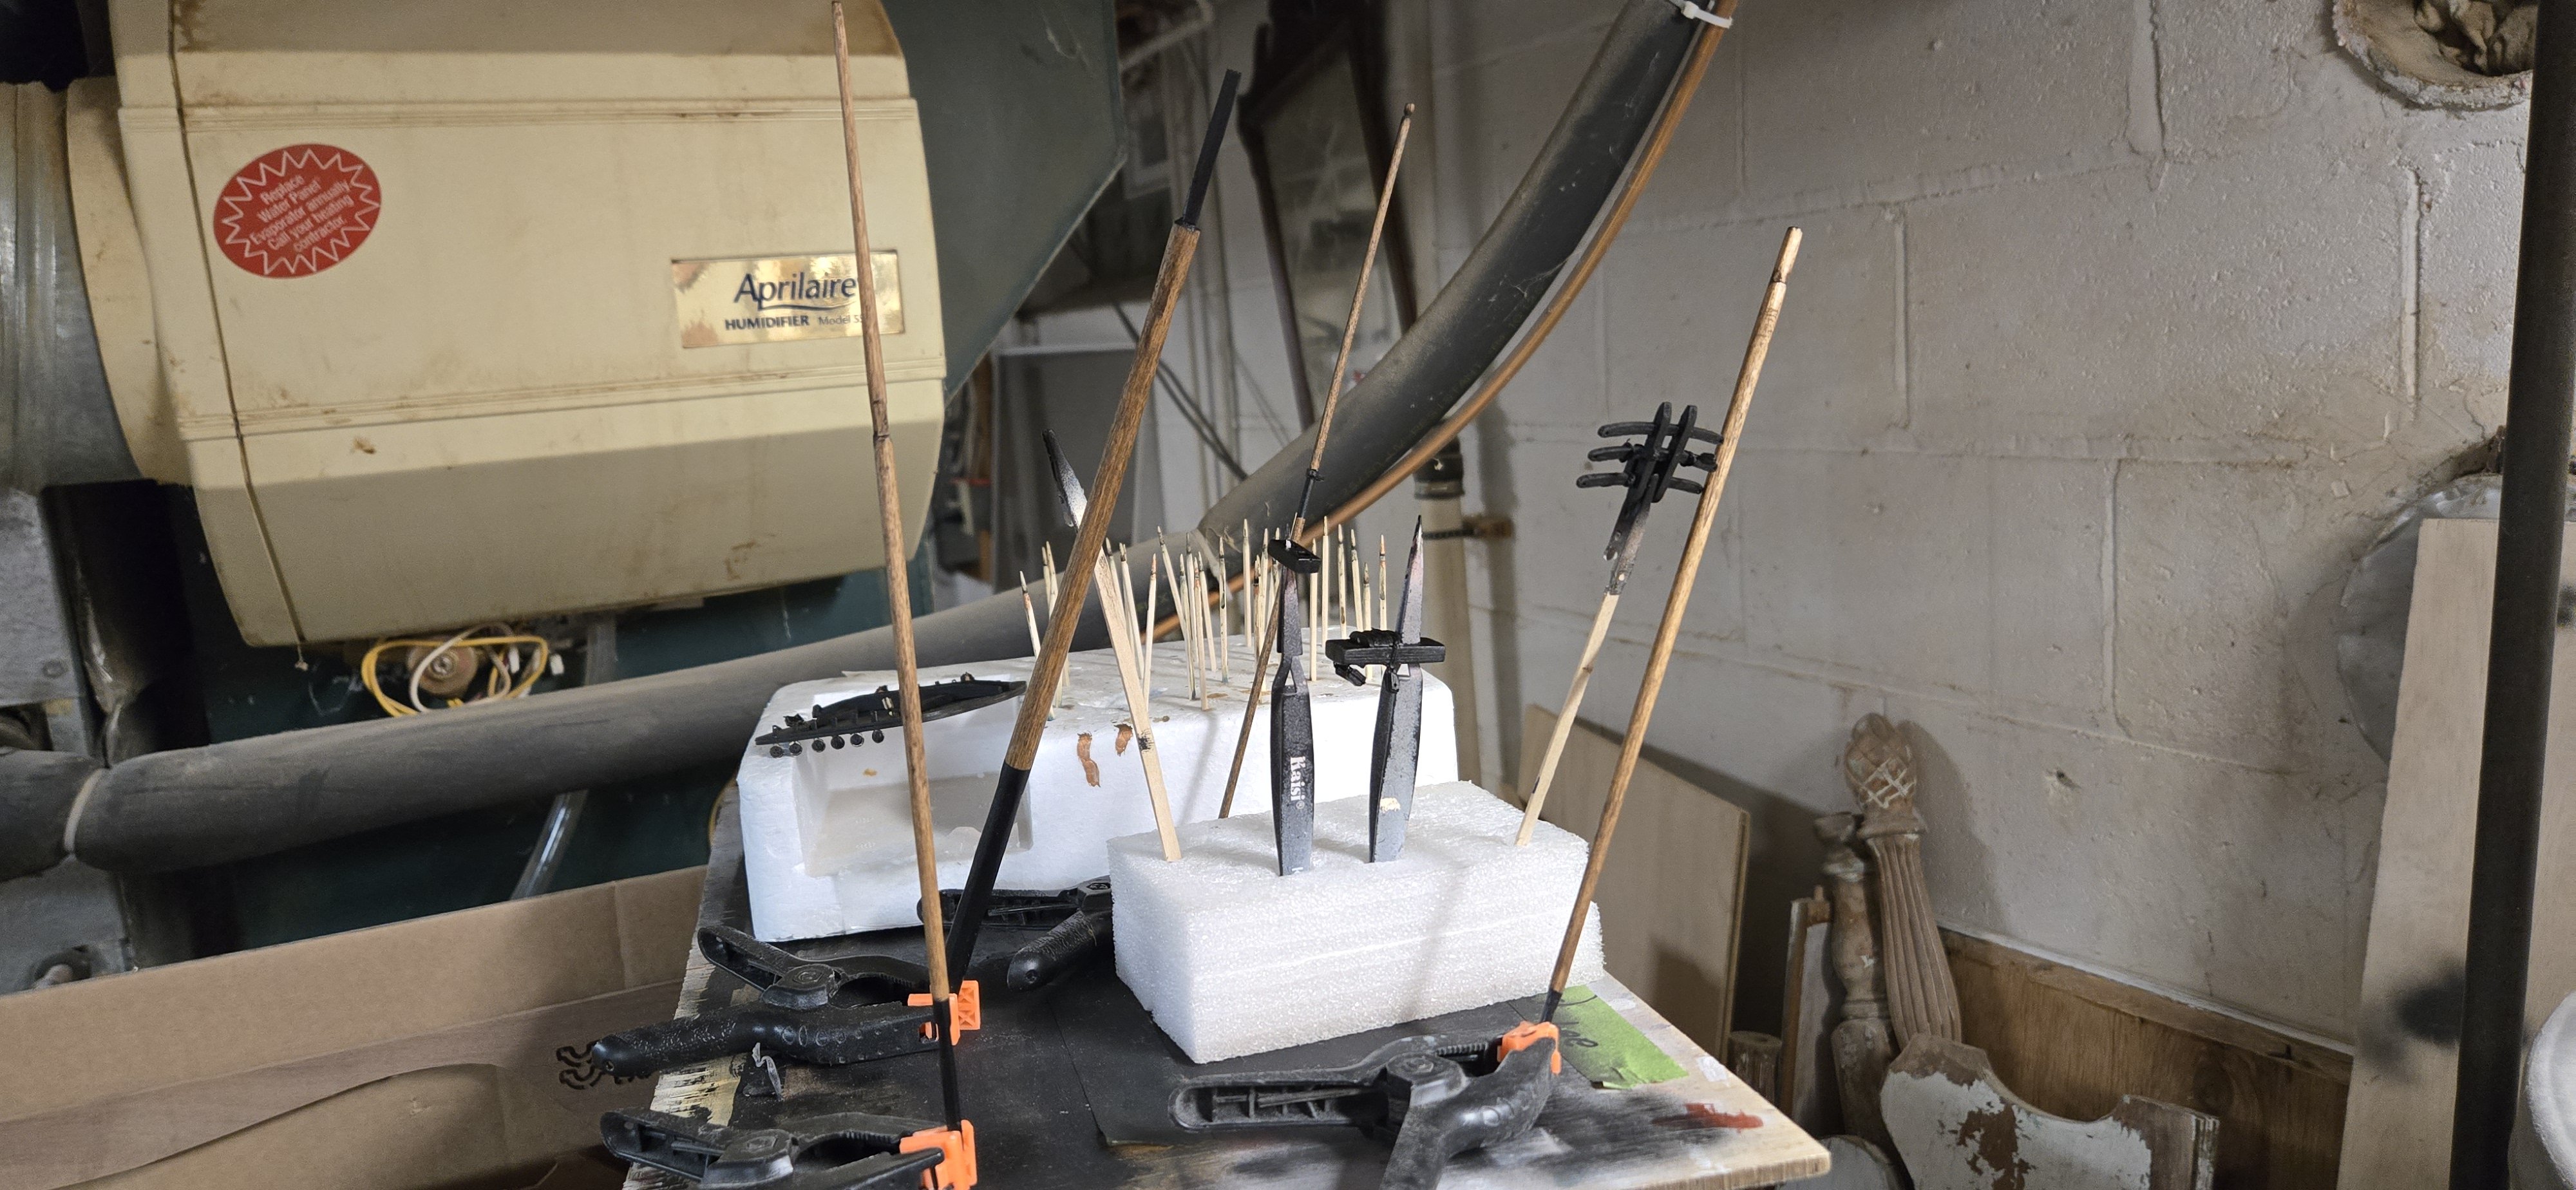
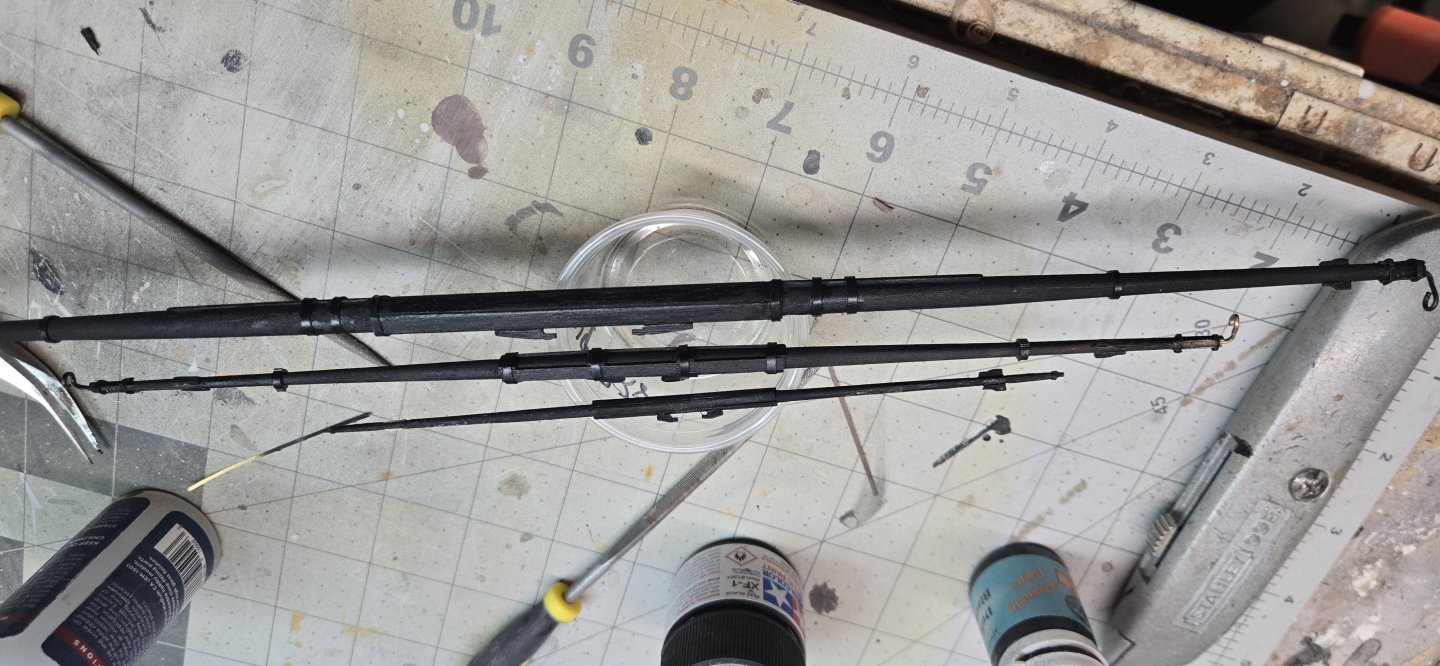
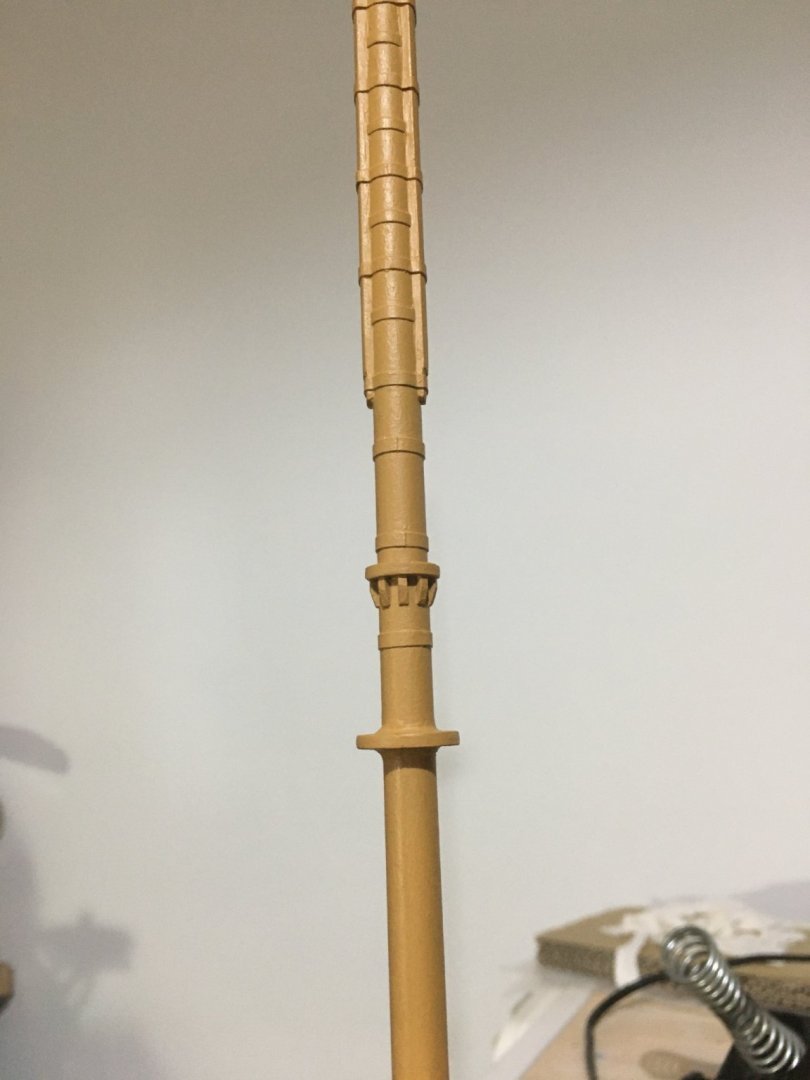
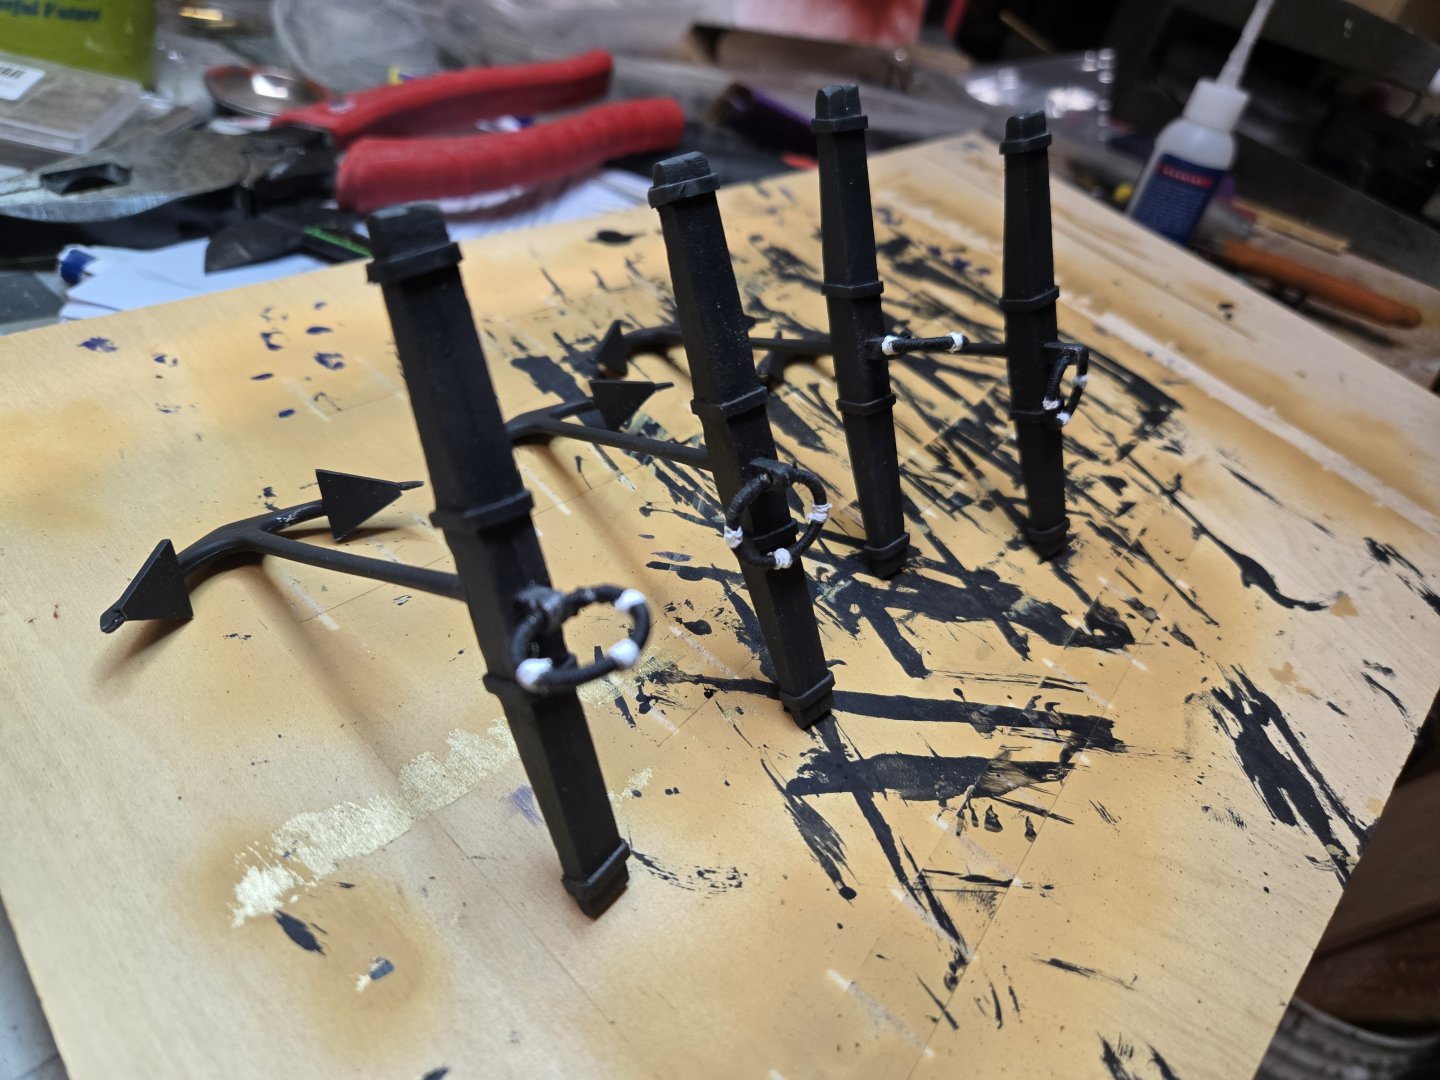
Hello! I believe I have finished the yards and stunsail booms. I may have to do one more coat on the driver boom and gaff. For the other yards, I have also added a couple of coats of clear matt finish. Looking at other builds, I attempted to guess where the black trim for the stunsail booms would be. I did misplace the cast iron rings for the main yard brackets that would hold the lower stunsail booms. I have some thick brass plating and using tin shears, was able to cut some strips to create those rings. I've seen other builds use this process to create all the rings and double rings to hold these booms. I opted to just do the ones I was missing. I was able to easily shape them after annealing the brass. It also allowed me to file them so they weren't so sharp. Again, once painted, they tend to blend together.


-
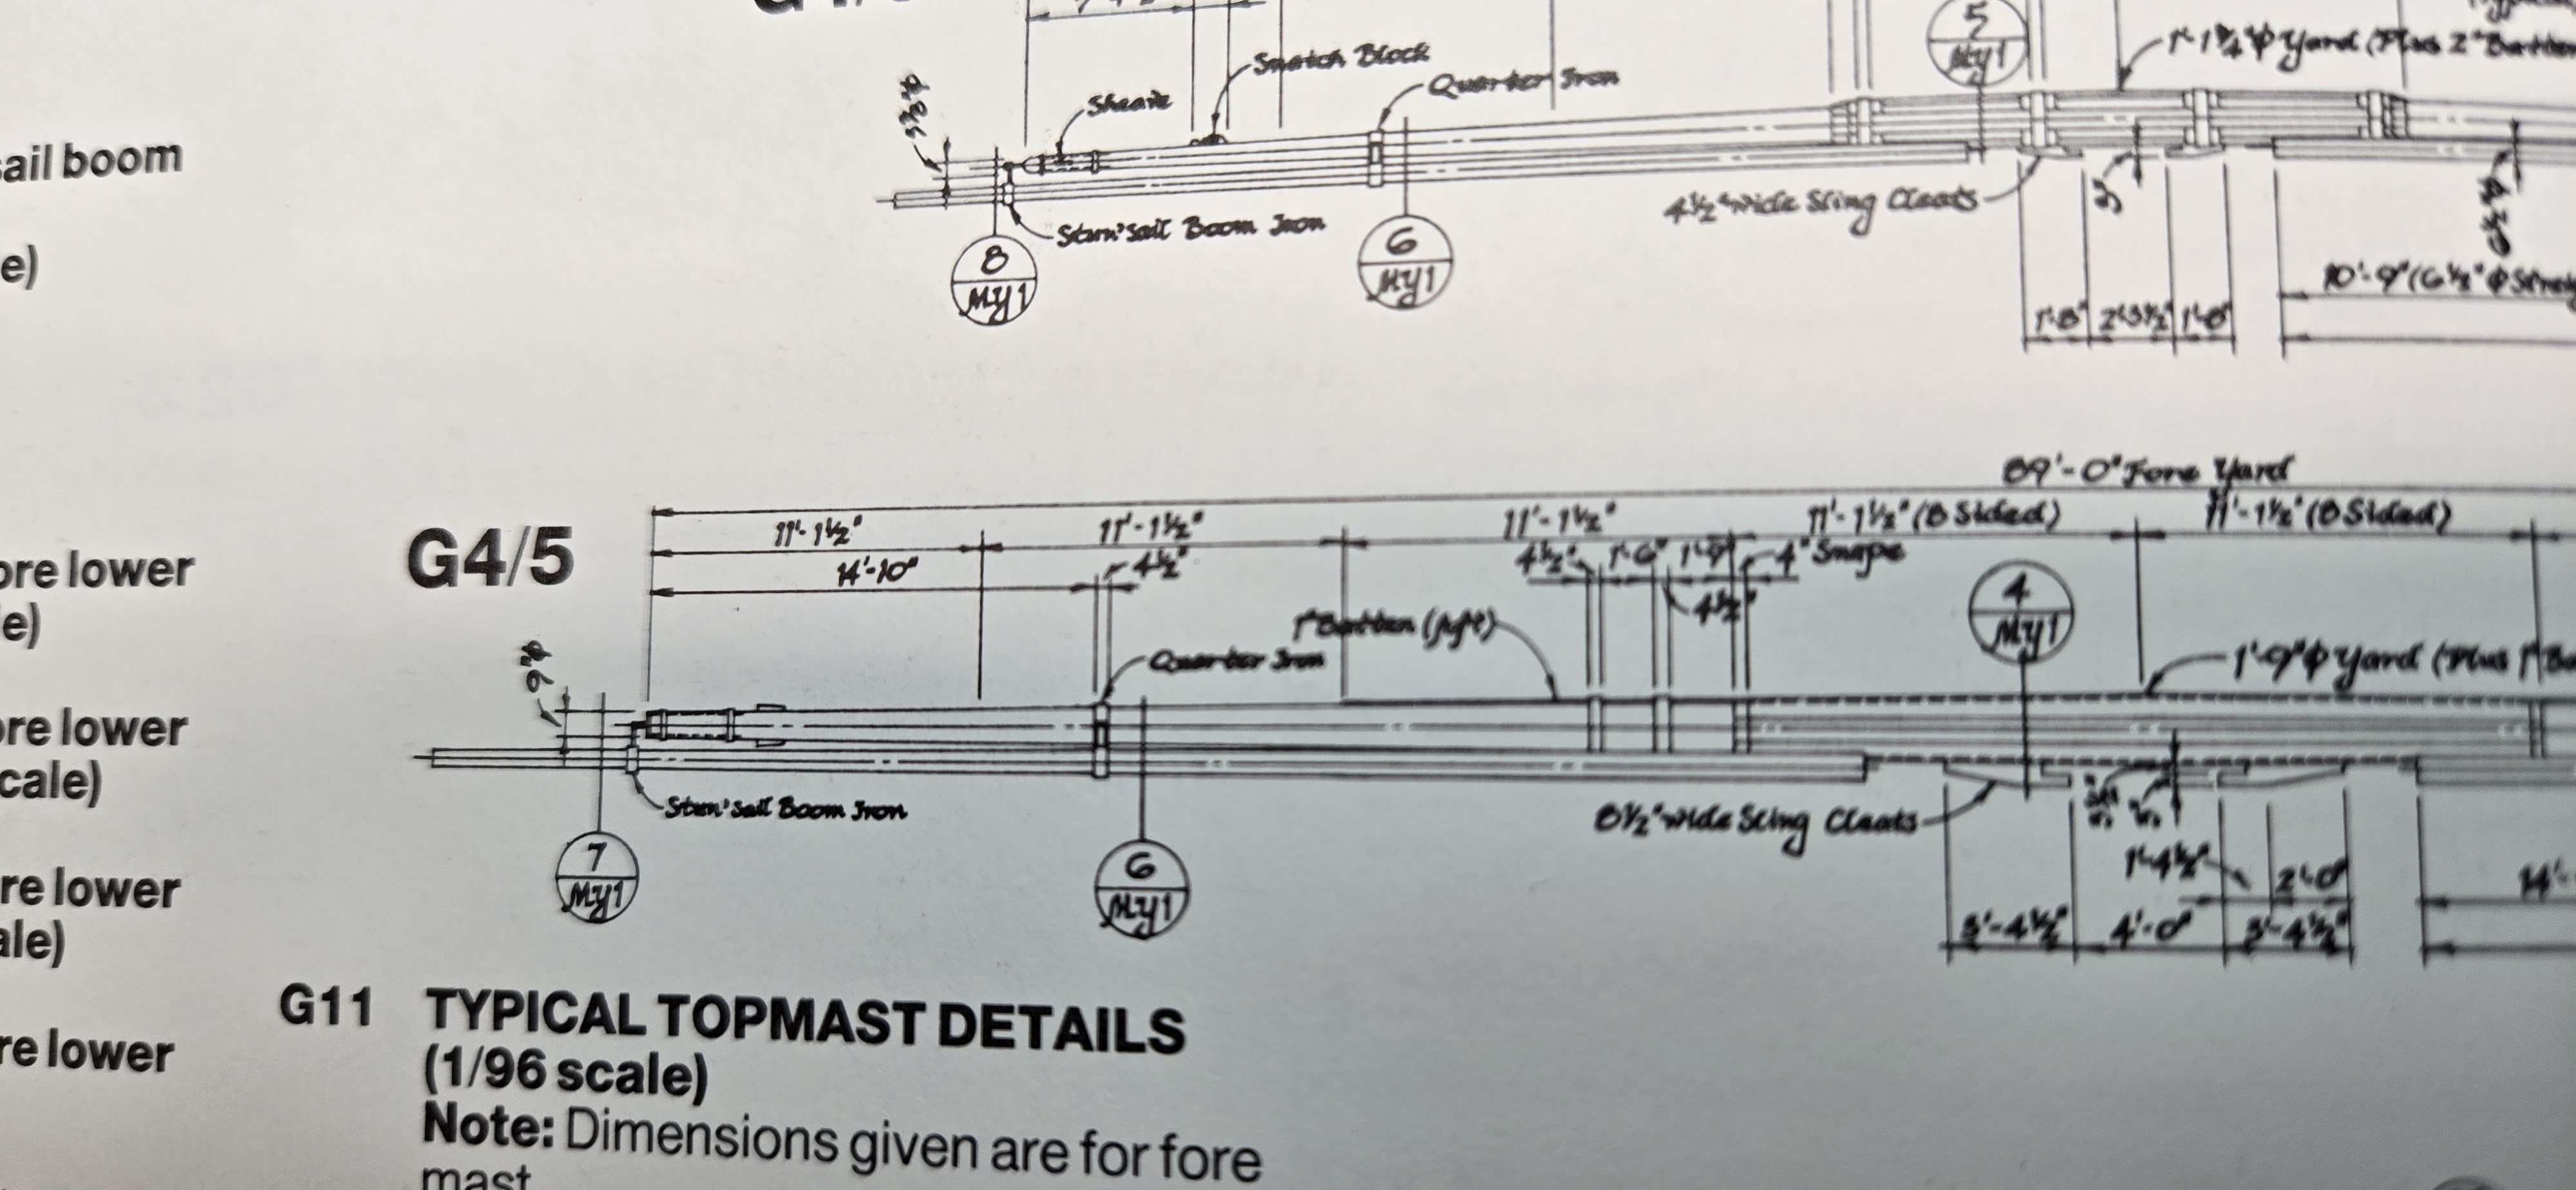
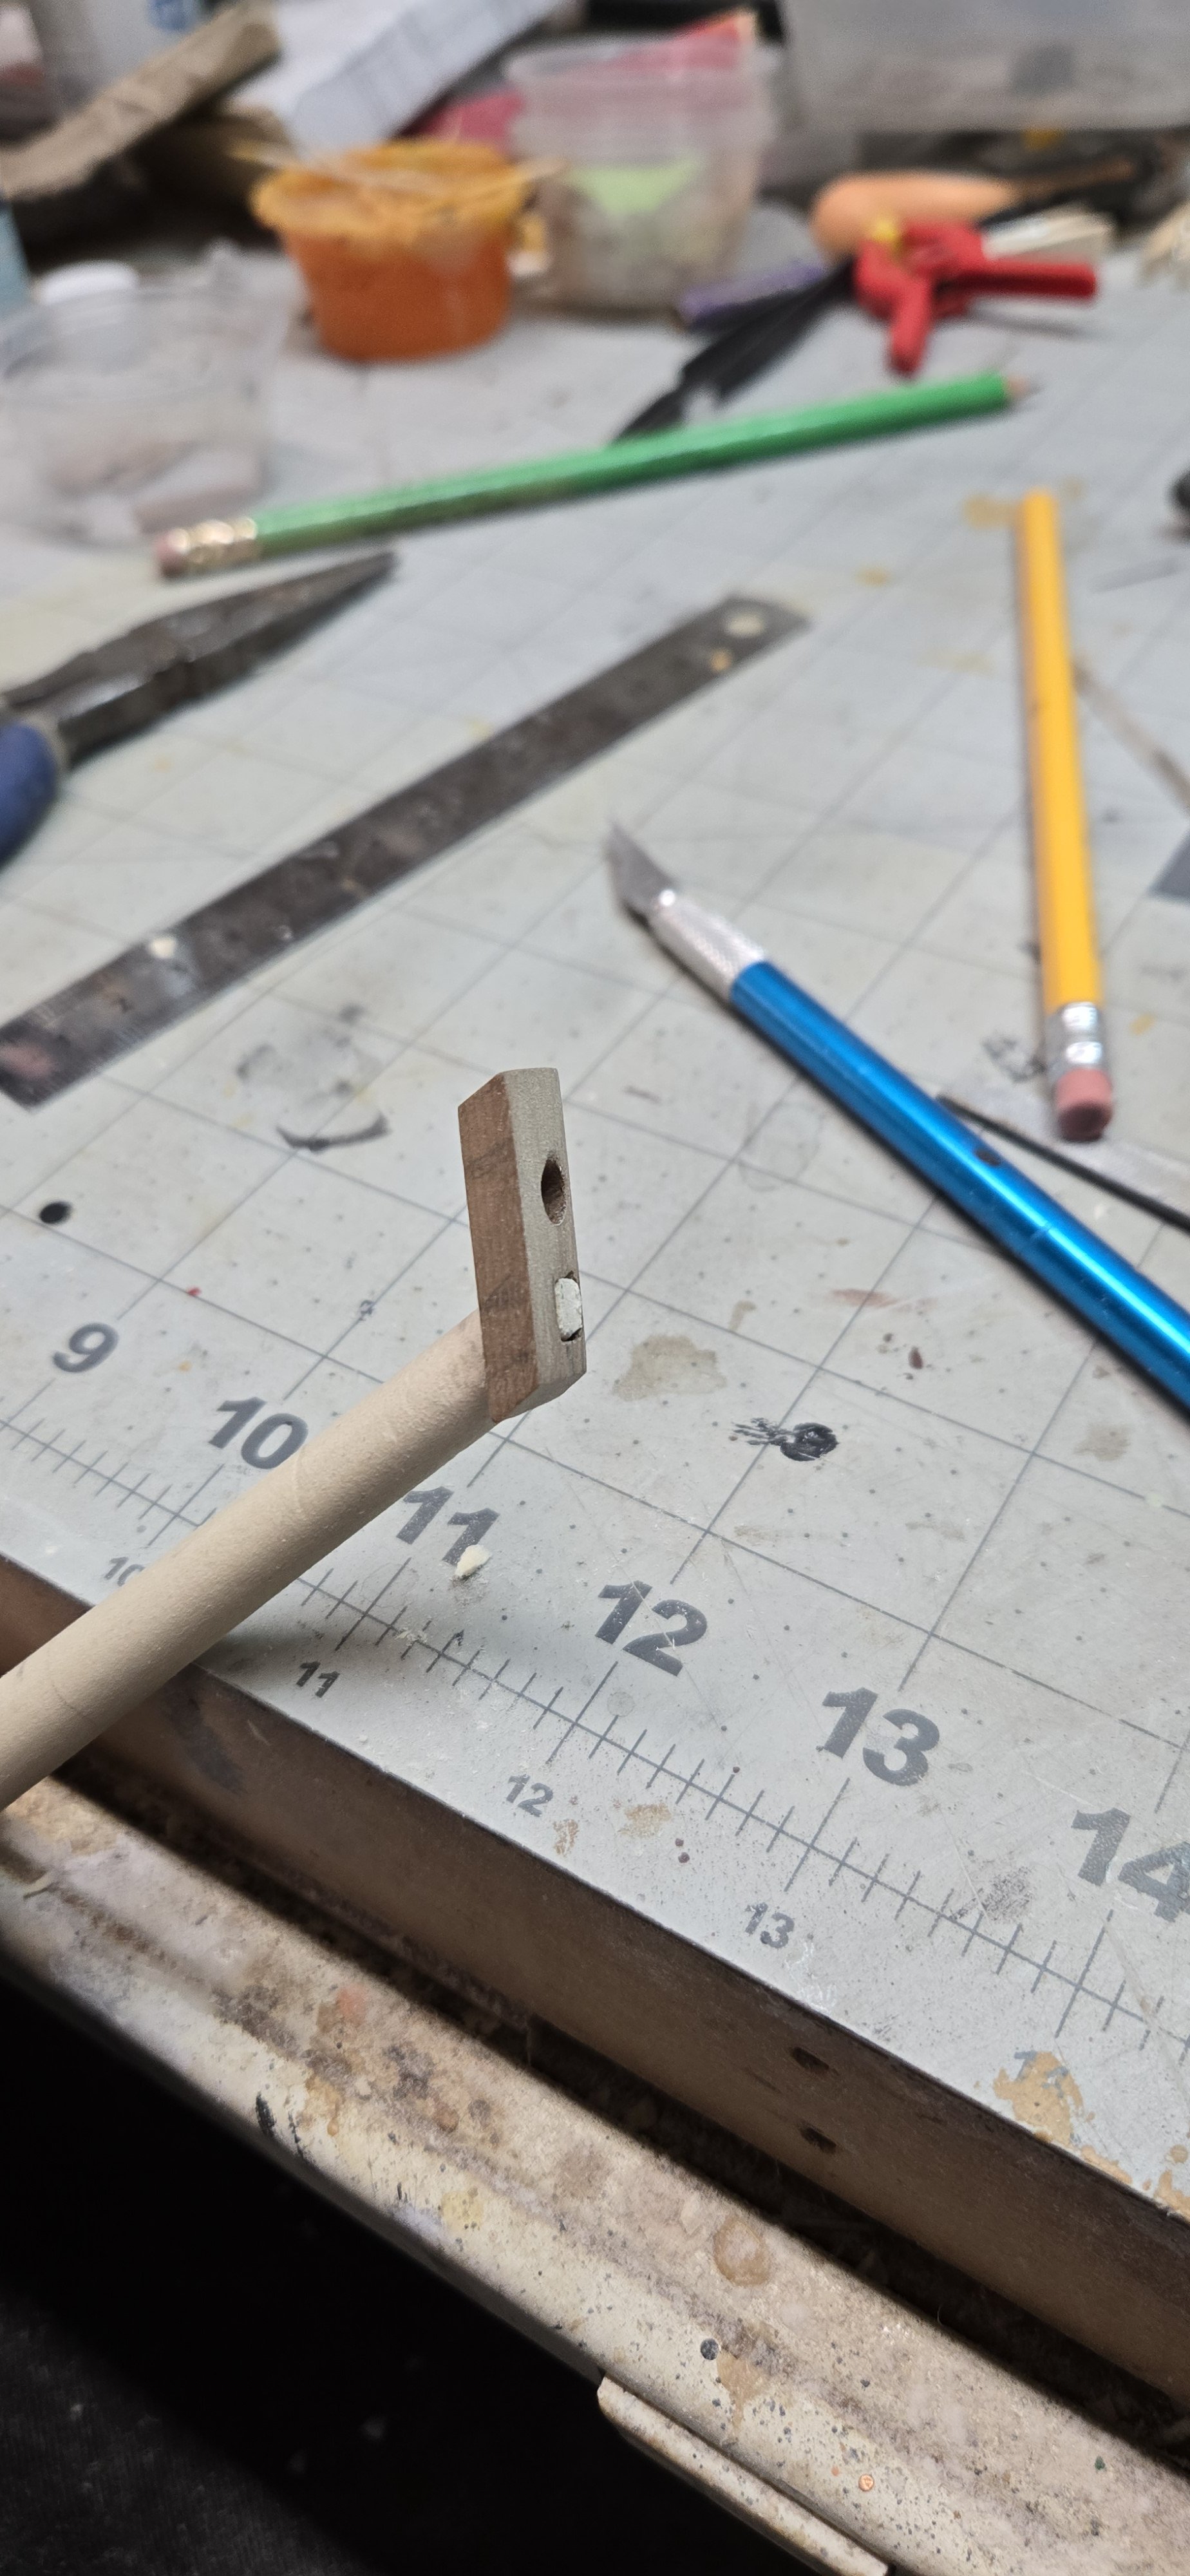
Plugging away, trying to finish all the yards and booms and finish up the hammocks. There are 2 booms that are barely mentioned in the plans. The fore and main lower stunsail booms. I see them referenced in the blueprint plans and there is a brief mention of them in the hull direction as you assembly the main mast channels and a mention of the 4 cast pieces that create the brackets and supports for 2 of these booms. Longridge takes the position that they are a clutter and not typically rigged or shown on models. The other books do show how they would be rigged, what blocks to use, the various guys to stabilize them, etc. I know the main booms would be stored on the channels, but I haven't seen anything about where the fore stunsail booms should go. I think I read that they would be typically stored on the deck near the anchors, but not on the side of the hull so as to not interfere with the anchors. In my mind, that means to not even bother creating these, or do so and create some type of tie-up system. I've searched as many finished Victory wooden models as I can but it is really hard to see if any of these booms are actually installed on them. And the one pic I have seen, it doesn't look like anything was added to the boom, only that it is set onto the channel brackets. Any suggestions or thoughts as to what others have done? These are not my pics.....
-
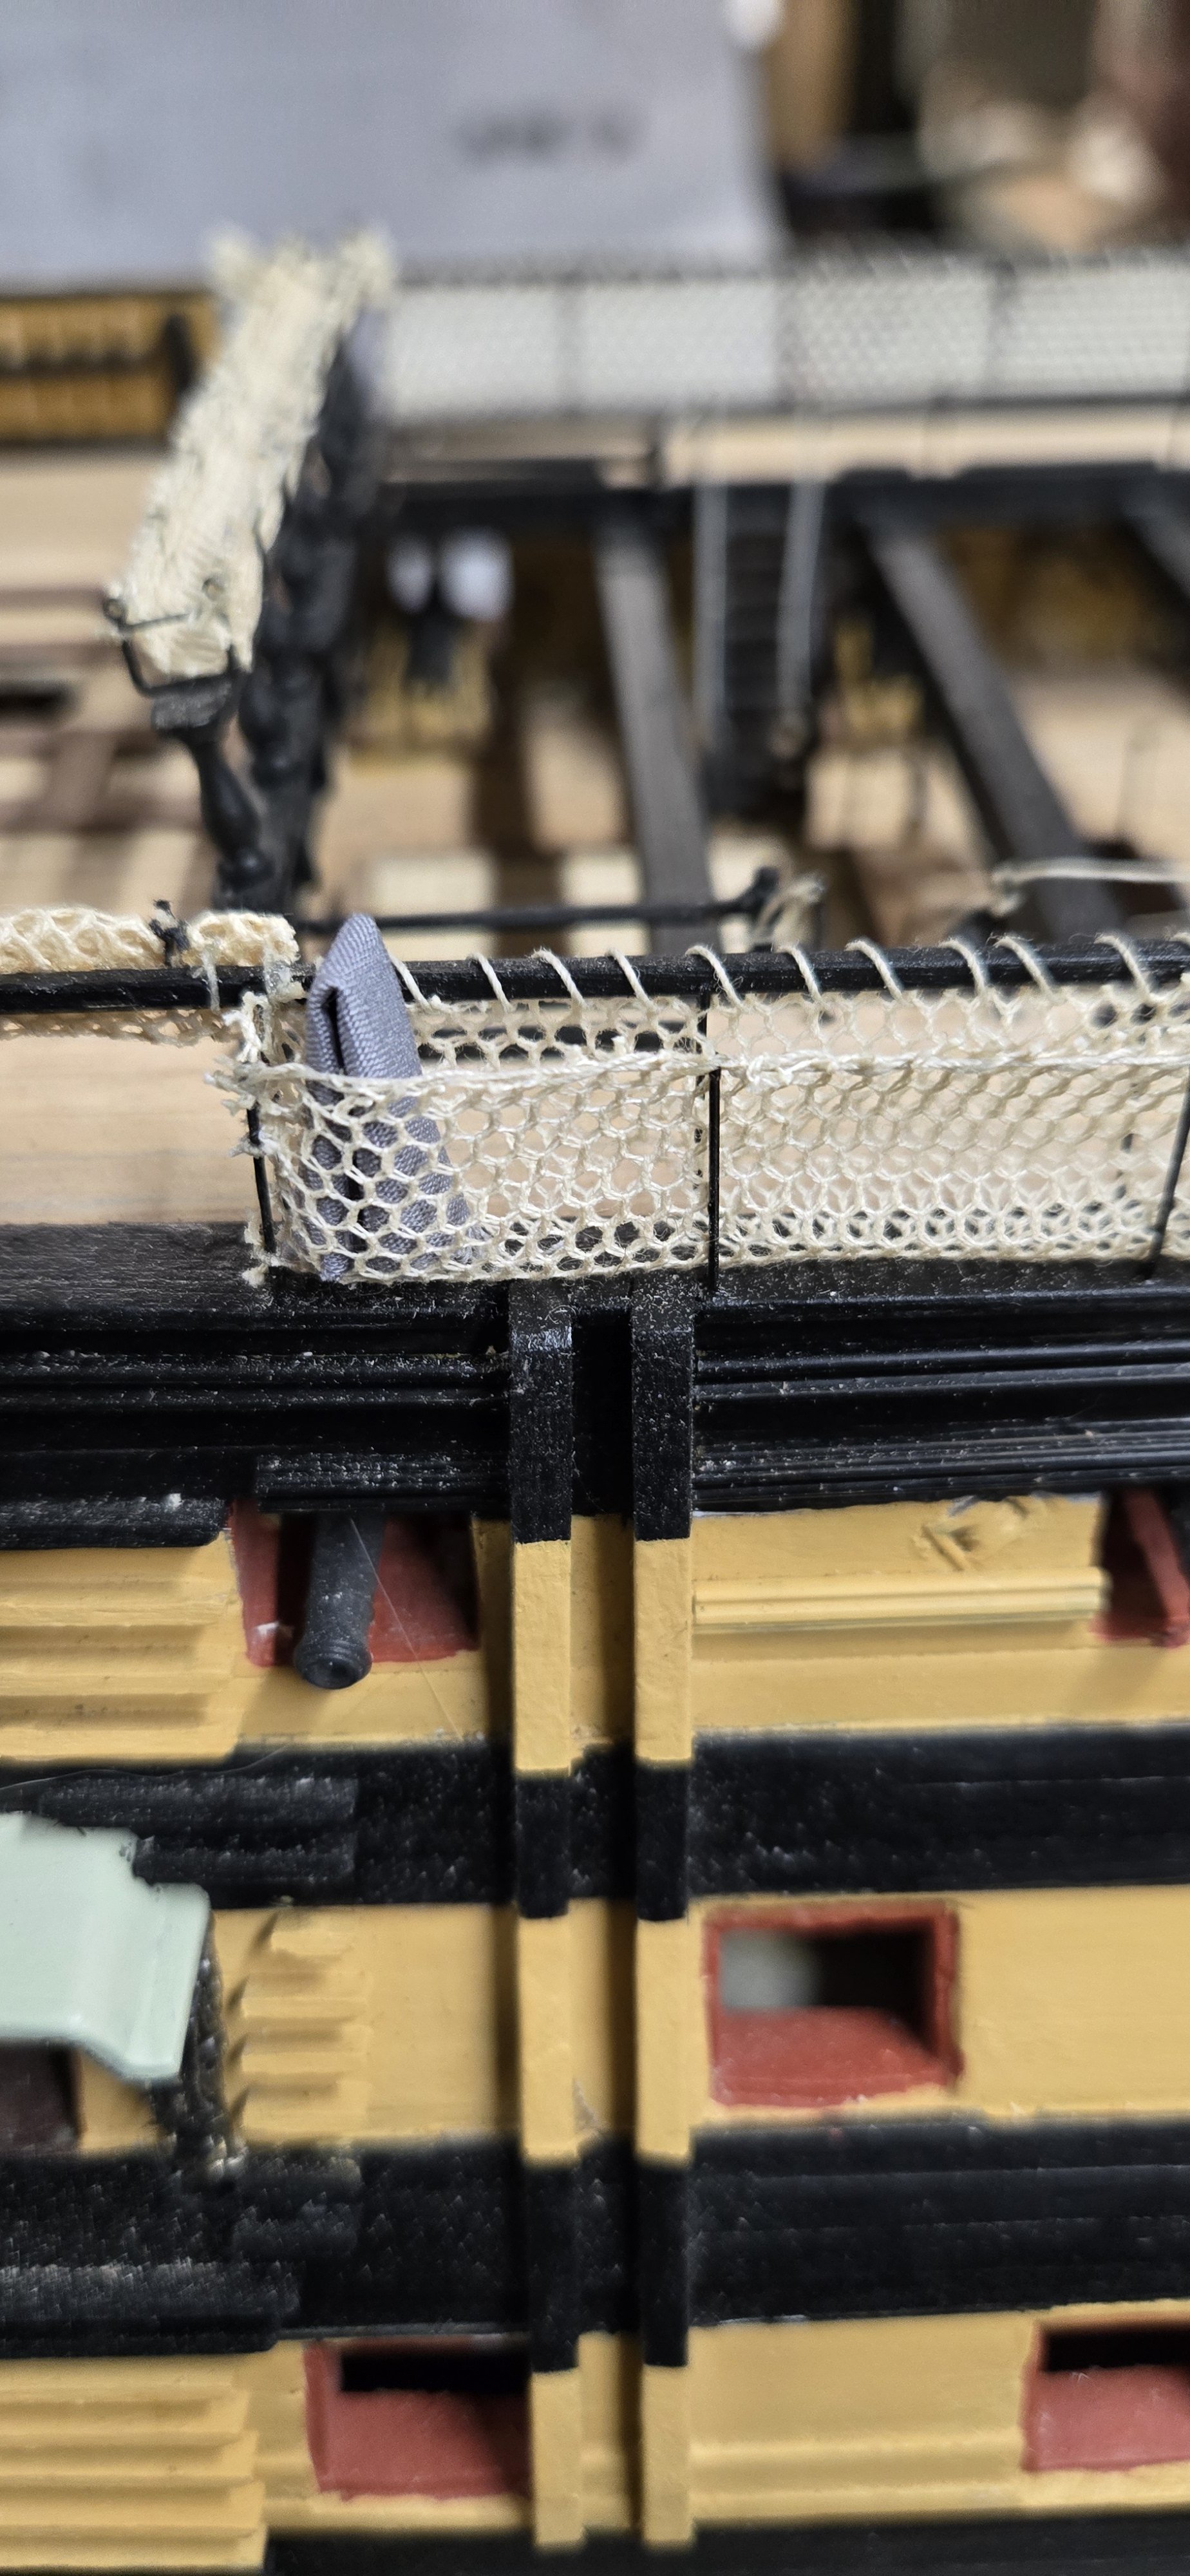
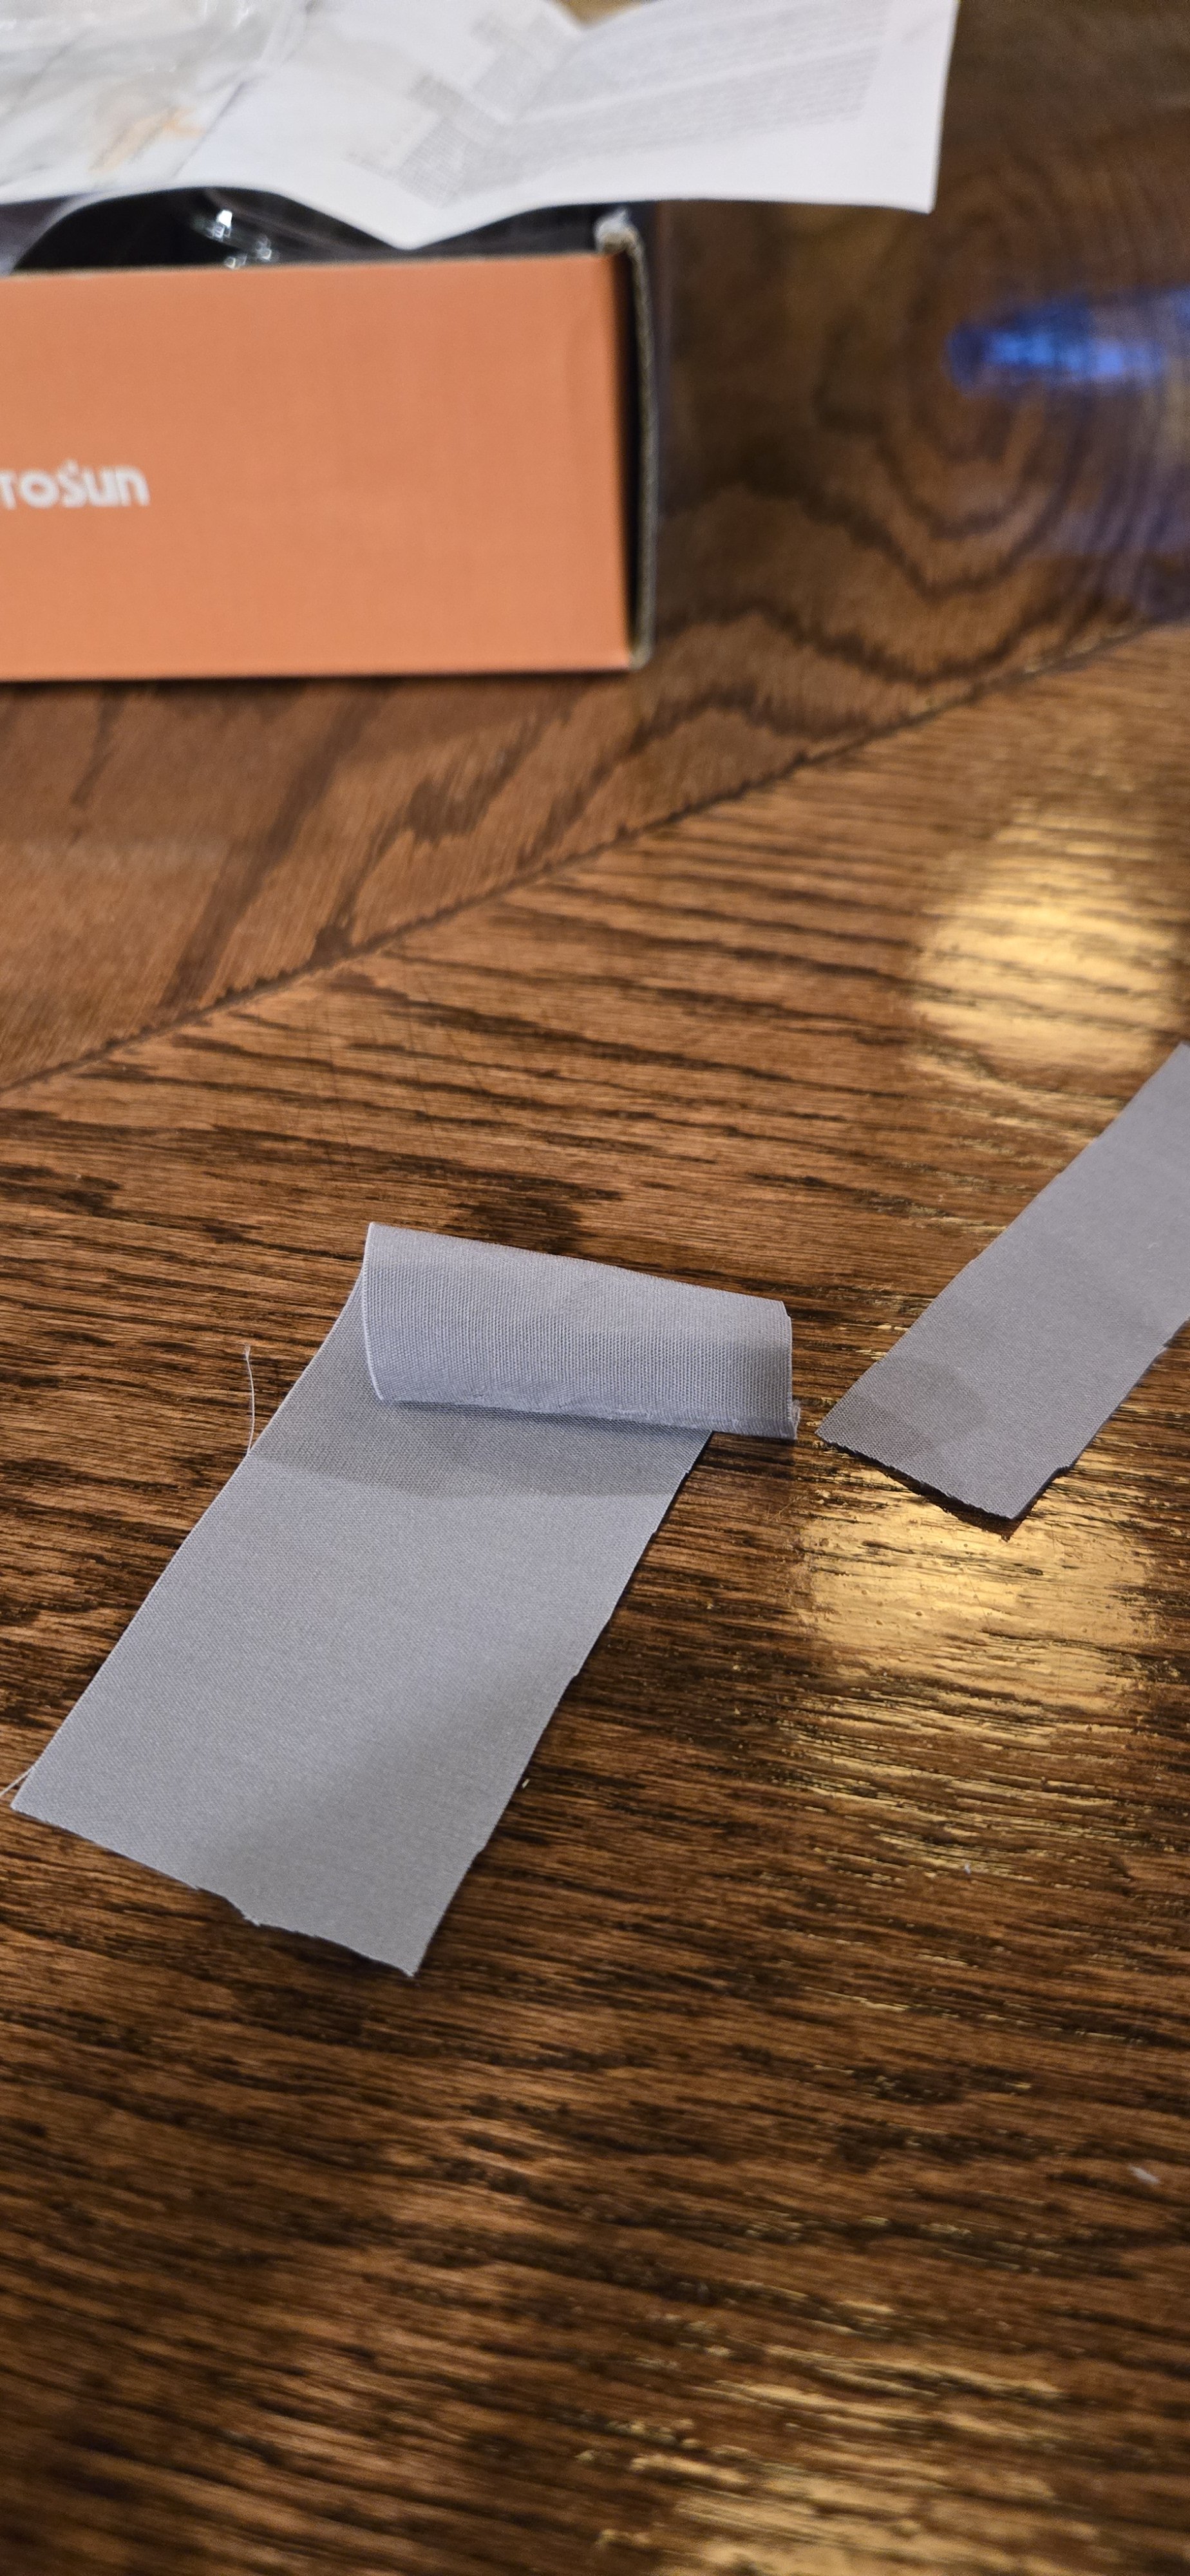
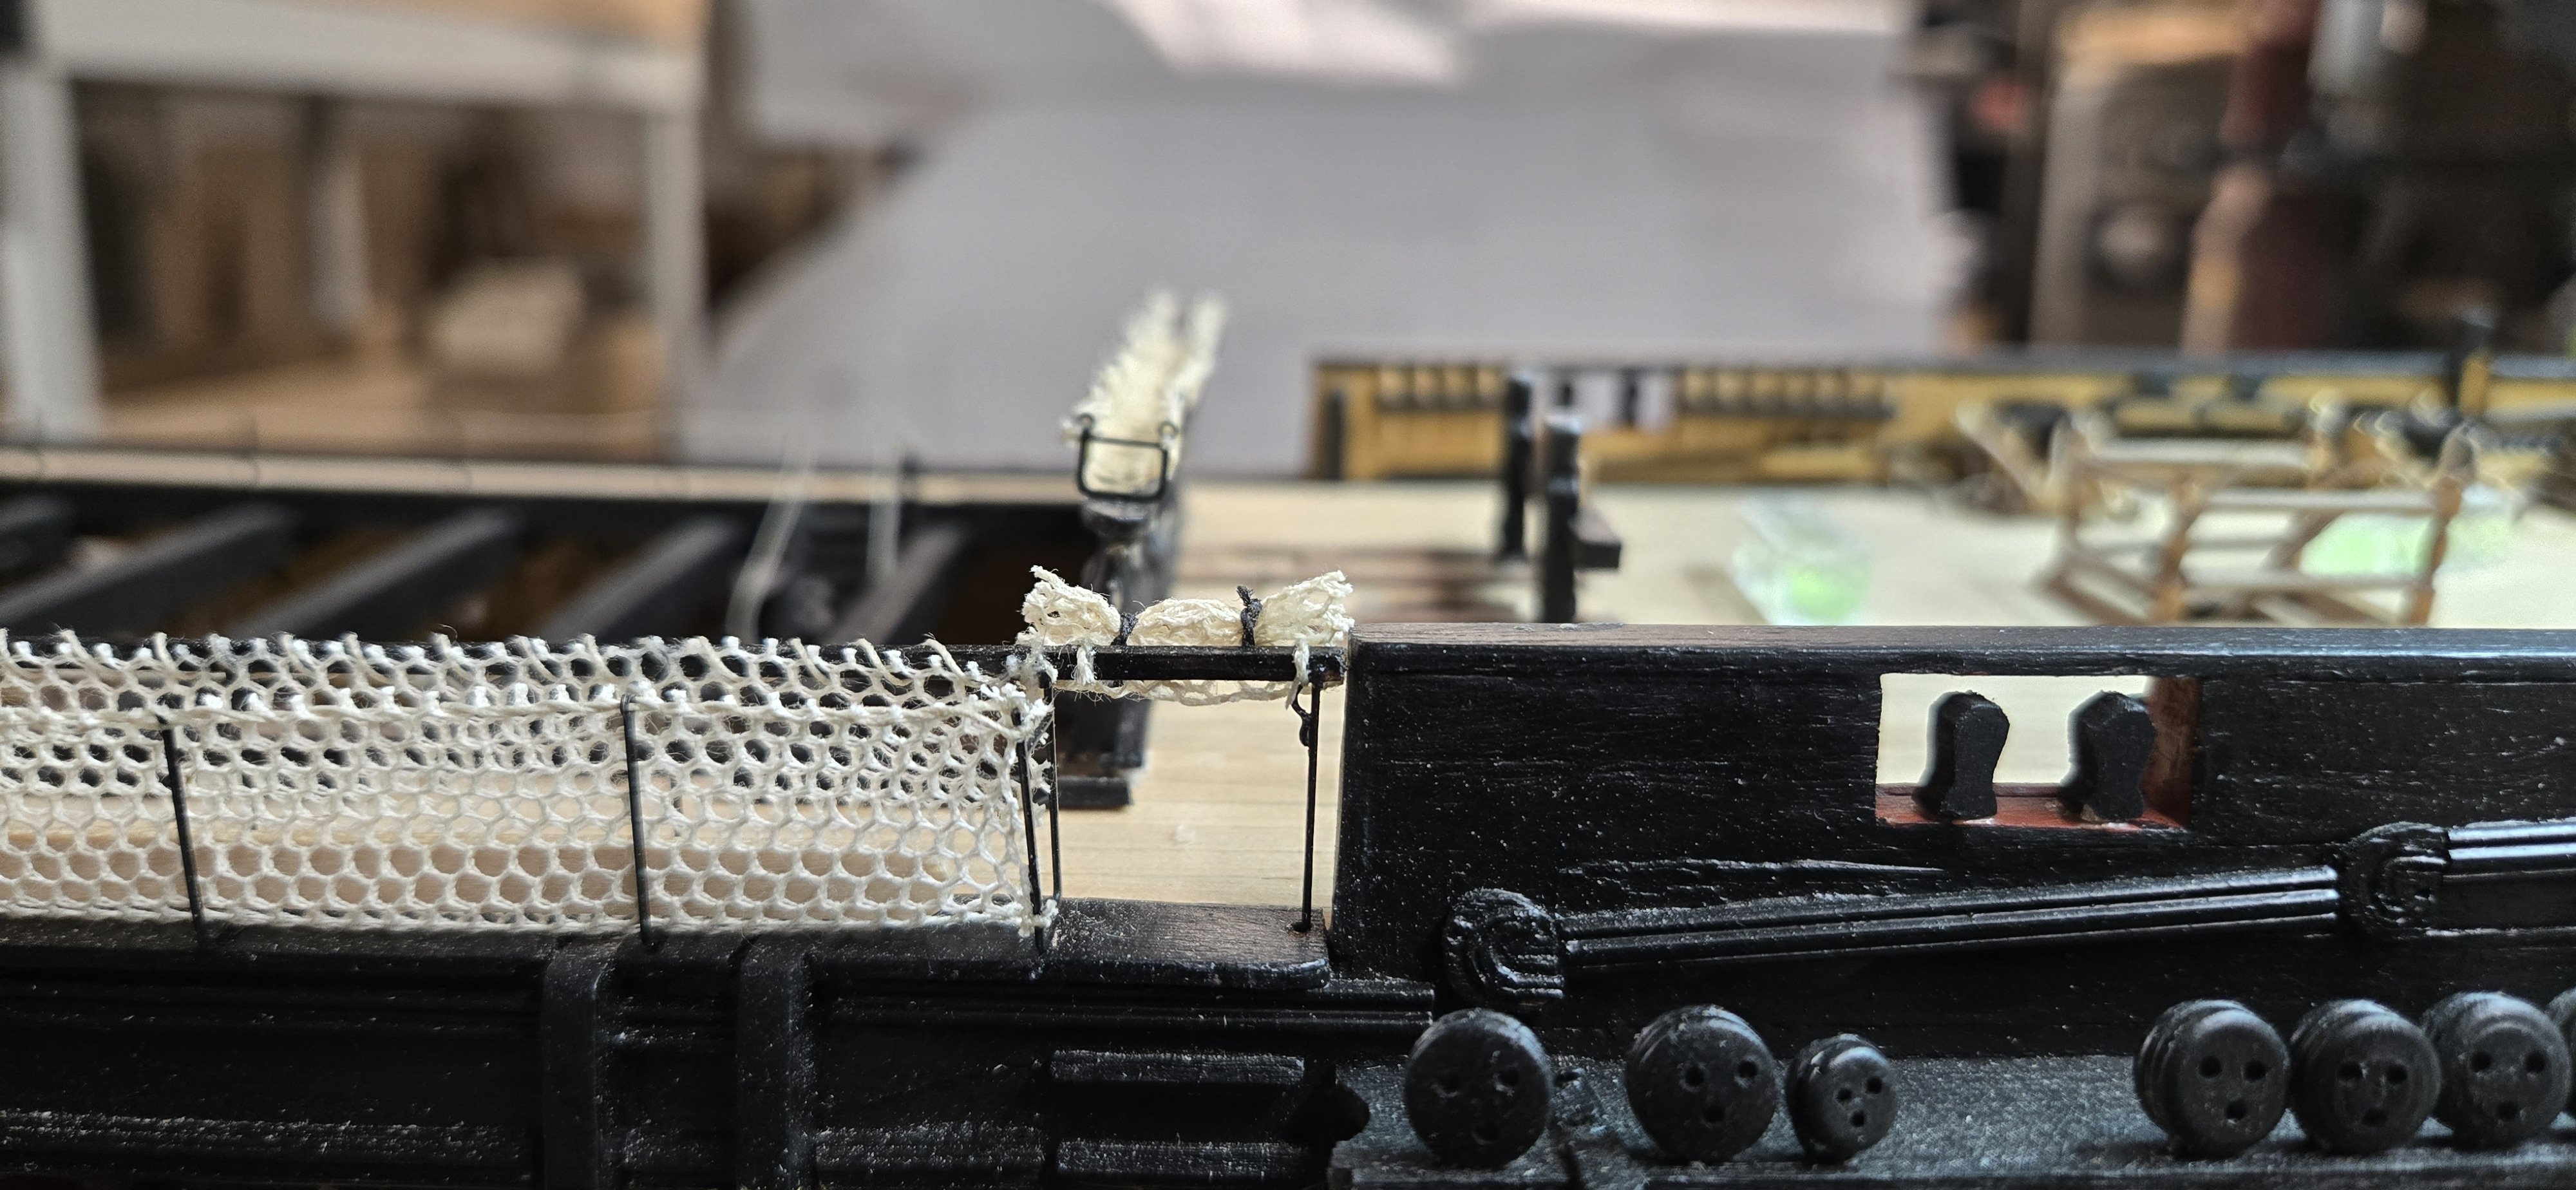
While painting, I dug into another hammock. I tackled the other waist hammock. For some reason, when I started sewing the netting, I sewed away from me, instead of towards me. This just didn't feel right, there was no muscle memory and I don't know why I didn't stop and reset! It's done. I had ordered a set of magnifier glasses and cuticle scissors which came tonight, so I may try going over all the netting with fresh non-shakey hands tomorrow. I also have some gray fabric that I've thought about creating actual hammocks. I spent a few night searching ships of the line hammock storage. I know lots about rotating hammocks, port and stbd watches, partners taking care of each other's hammocks, etc. I also found a few pics of rolled up hammocks. It looks like the are rolled up long wise and that the ropes used to swing from have hoops on them to secure them. Perhaps sailors would store blankets, or pillows (if that was a thing) in their hammocks too? I rolled some of the fabric up to try it. I kind of like the color. It's a bit too dark, but I see that the hammocks would be a dirty white or very light gray. The gray I have would add some contrast to the decking and help add some depth. The only problem is that the fabric is a bit 'tight' and when I roll it up and then fold it over, it seems to crease too sharply. I am sure I can work that out. Then I have to think about what color thread to use to tied them up. Black, tan...or find a gray? So many decisions to make!!!!


-
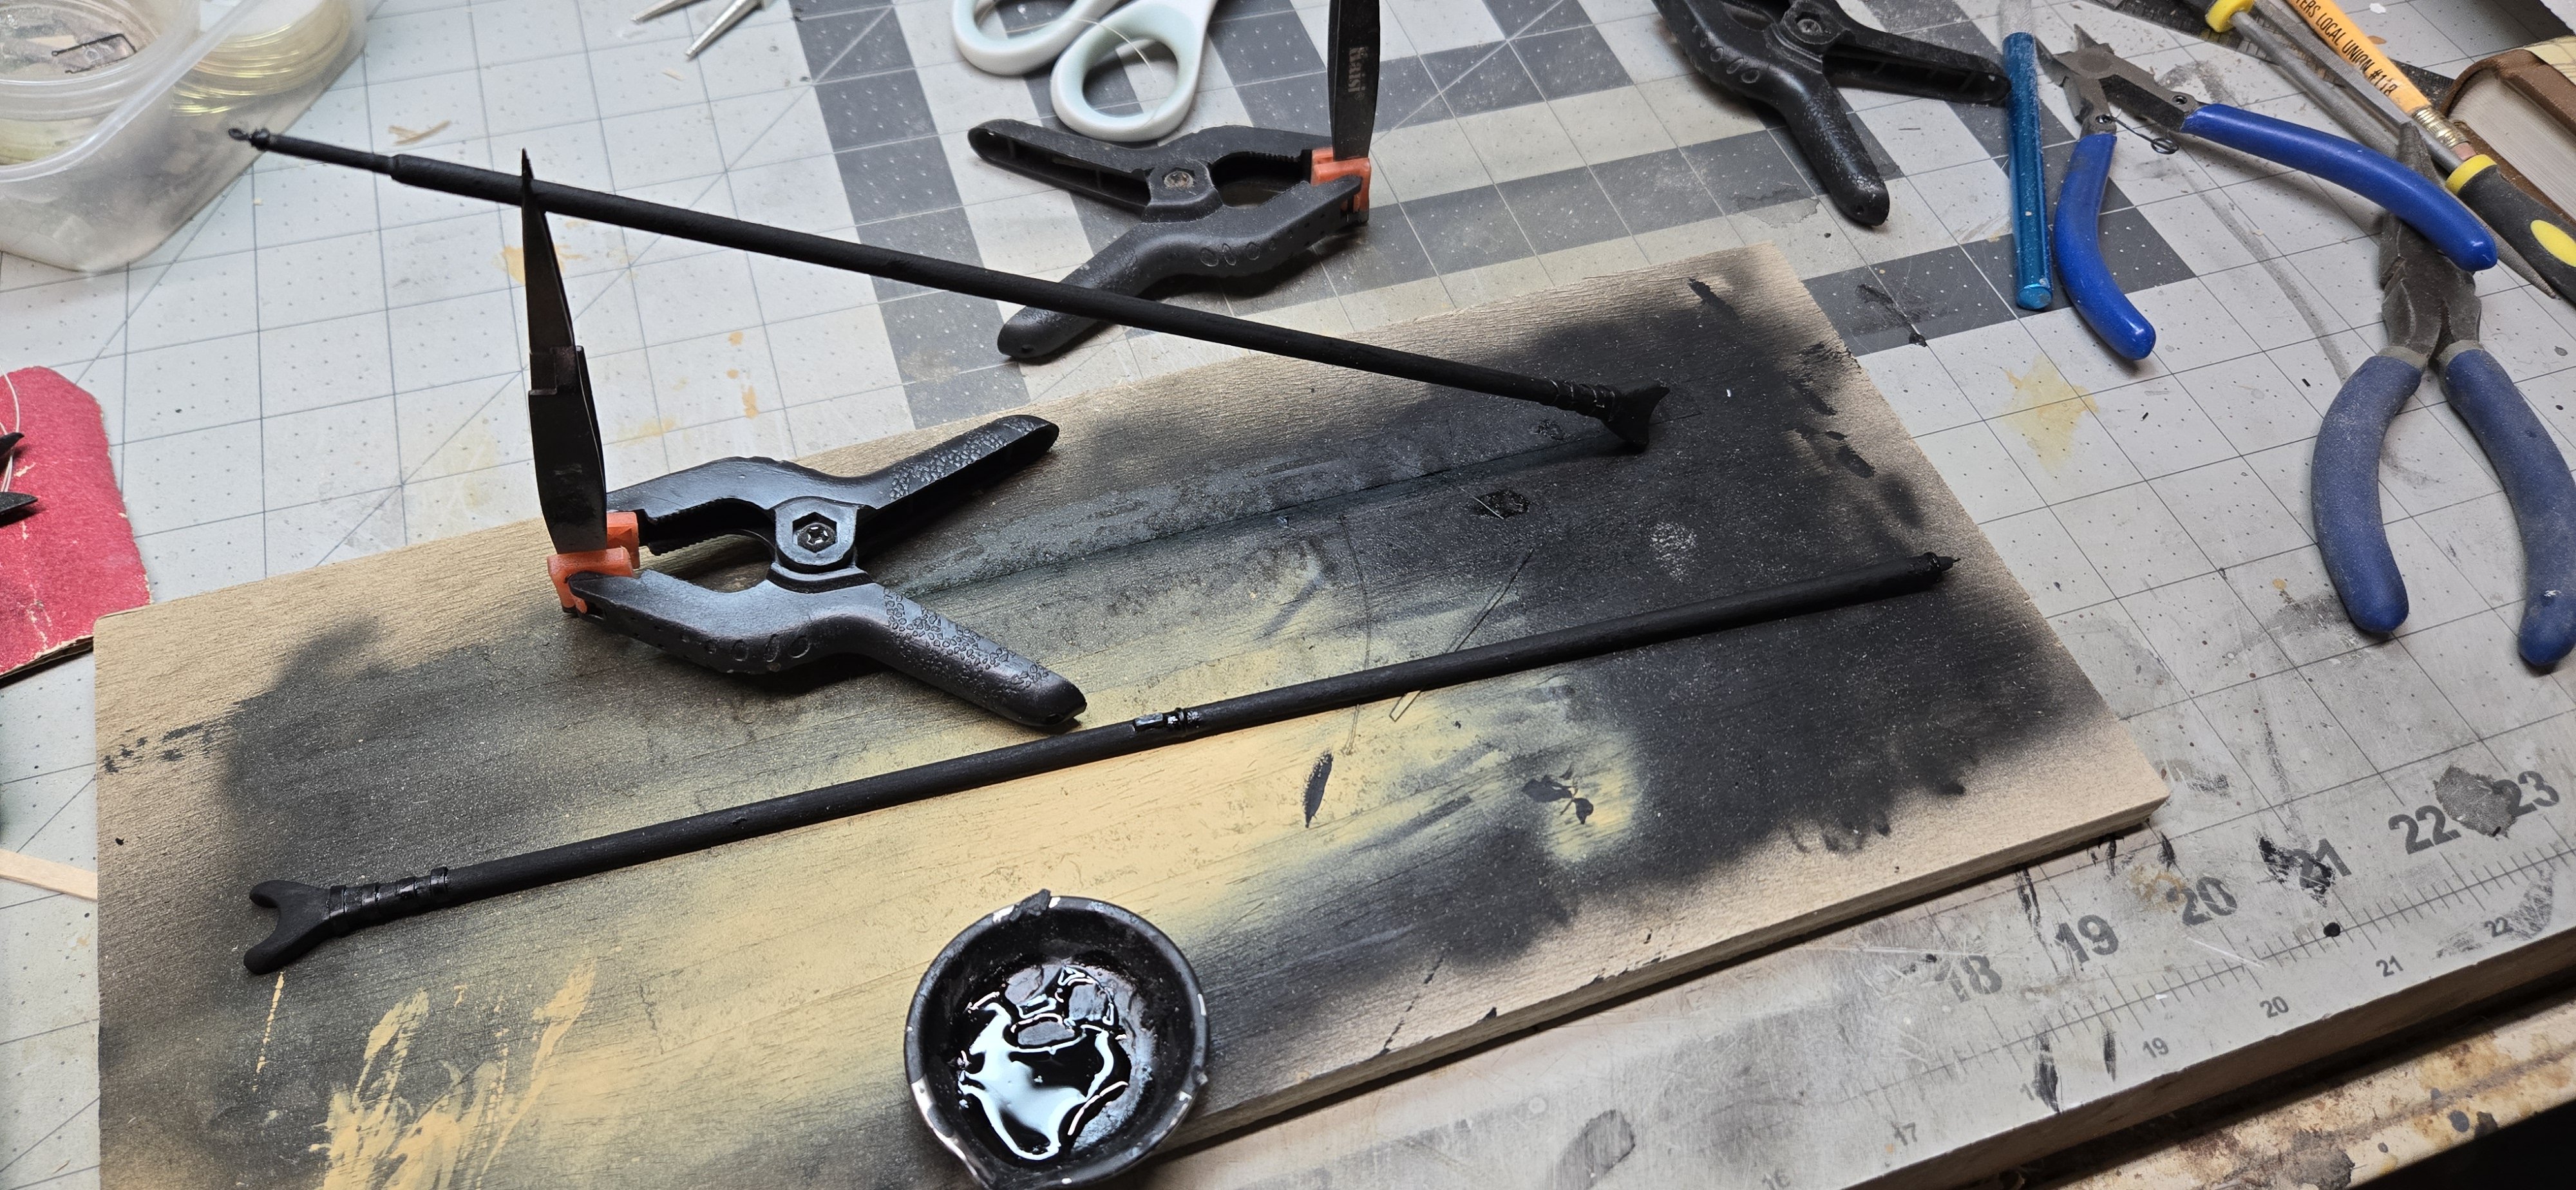
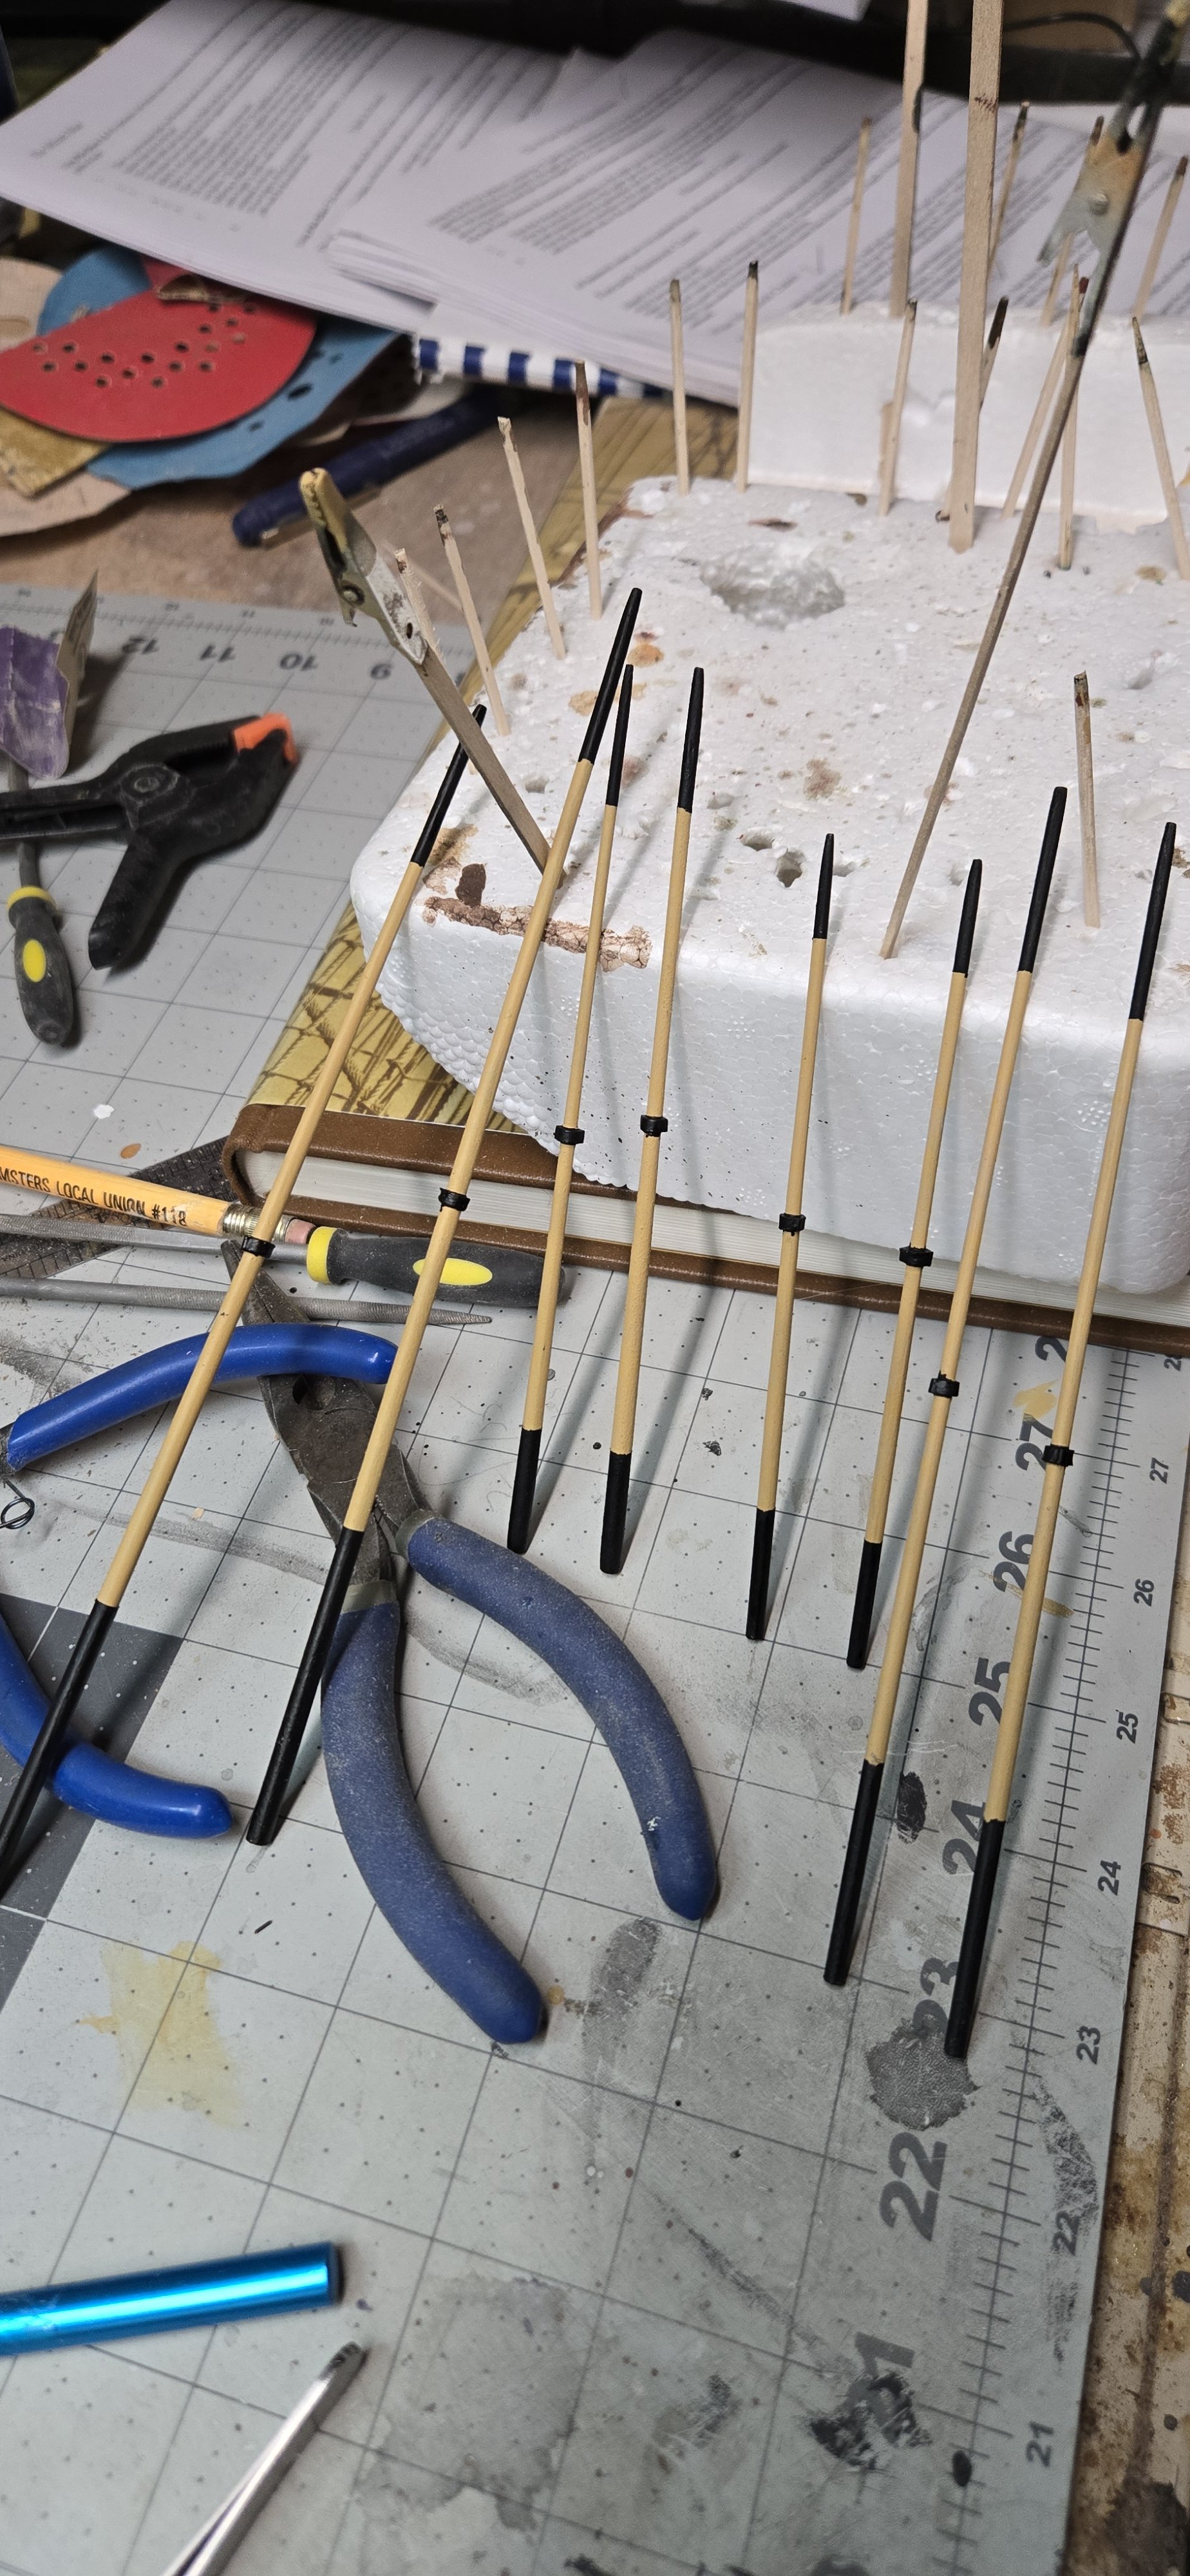
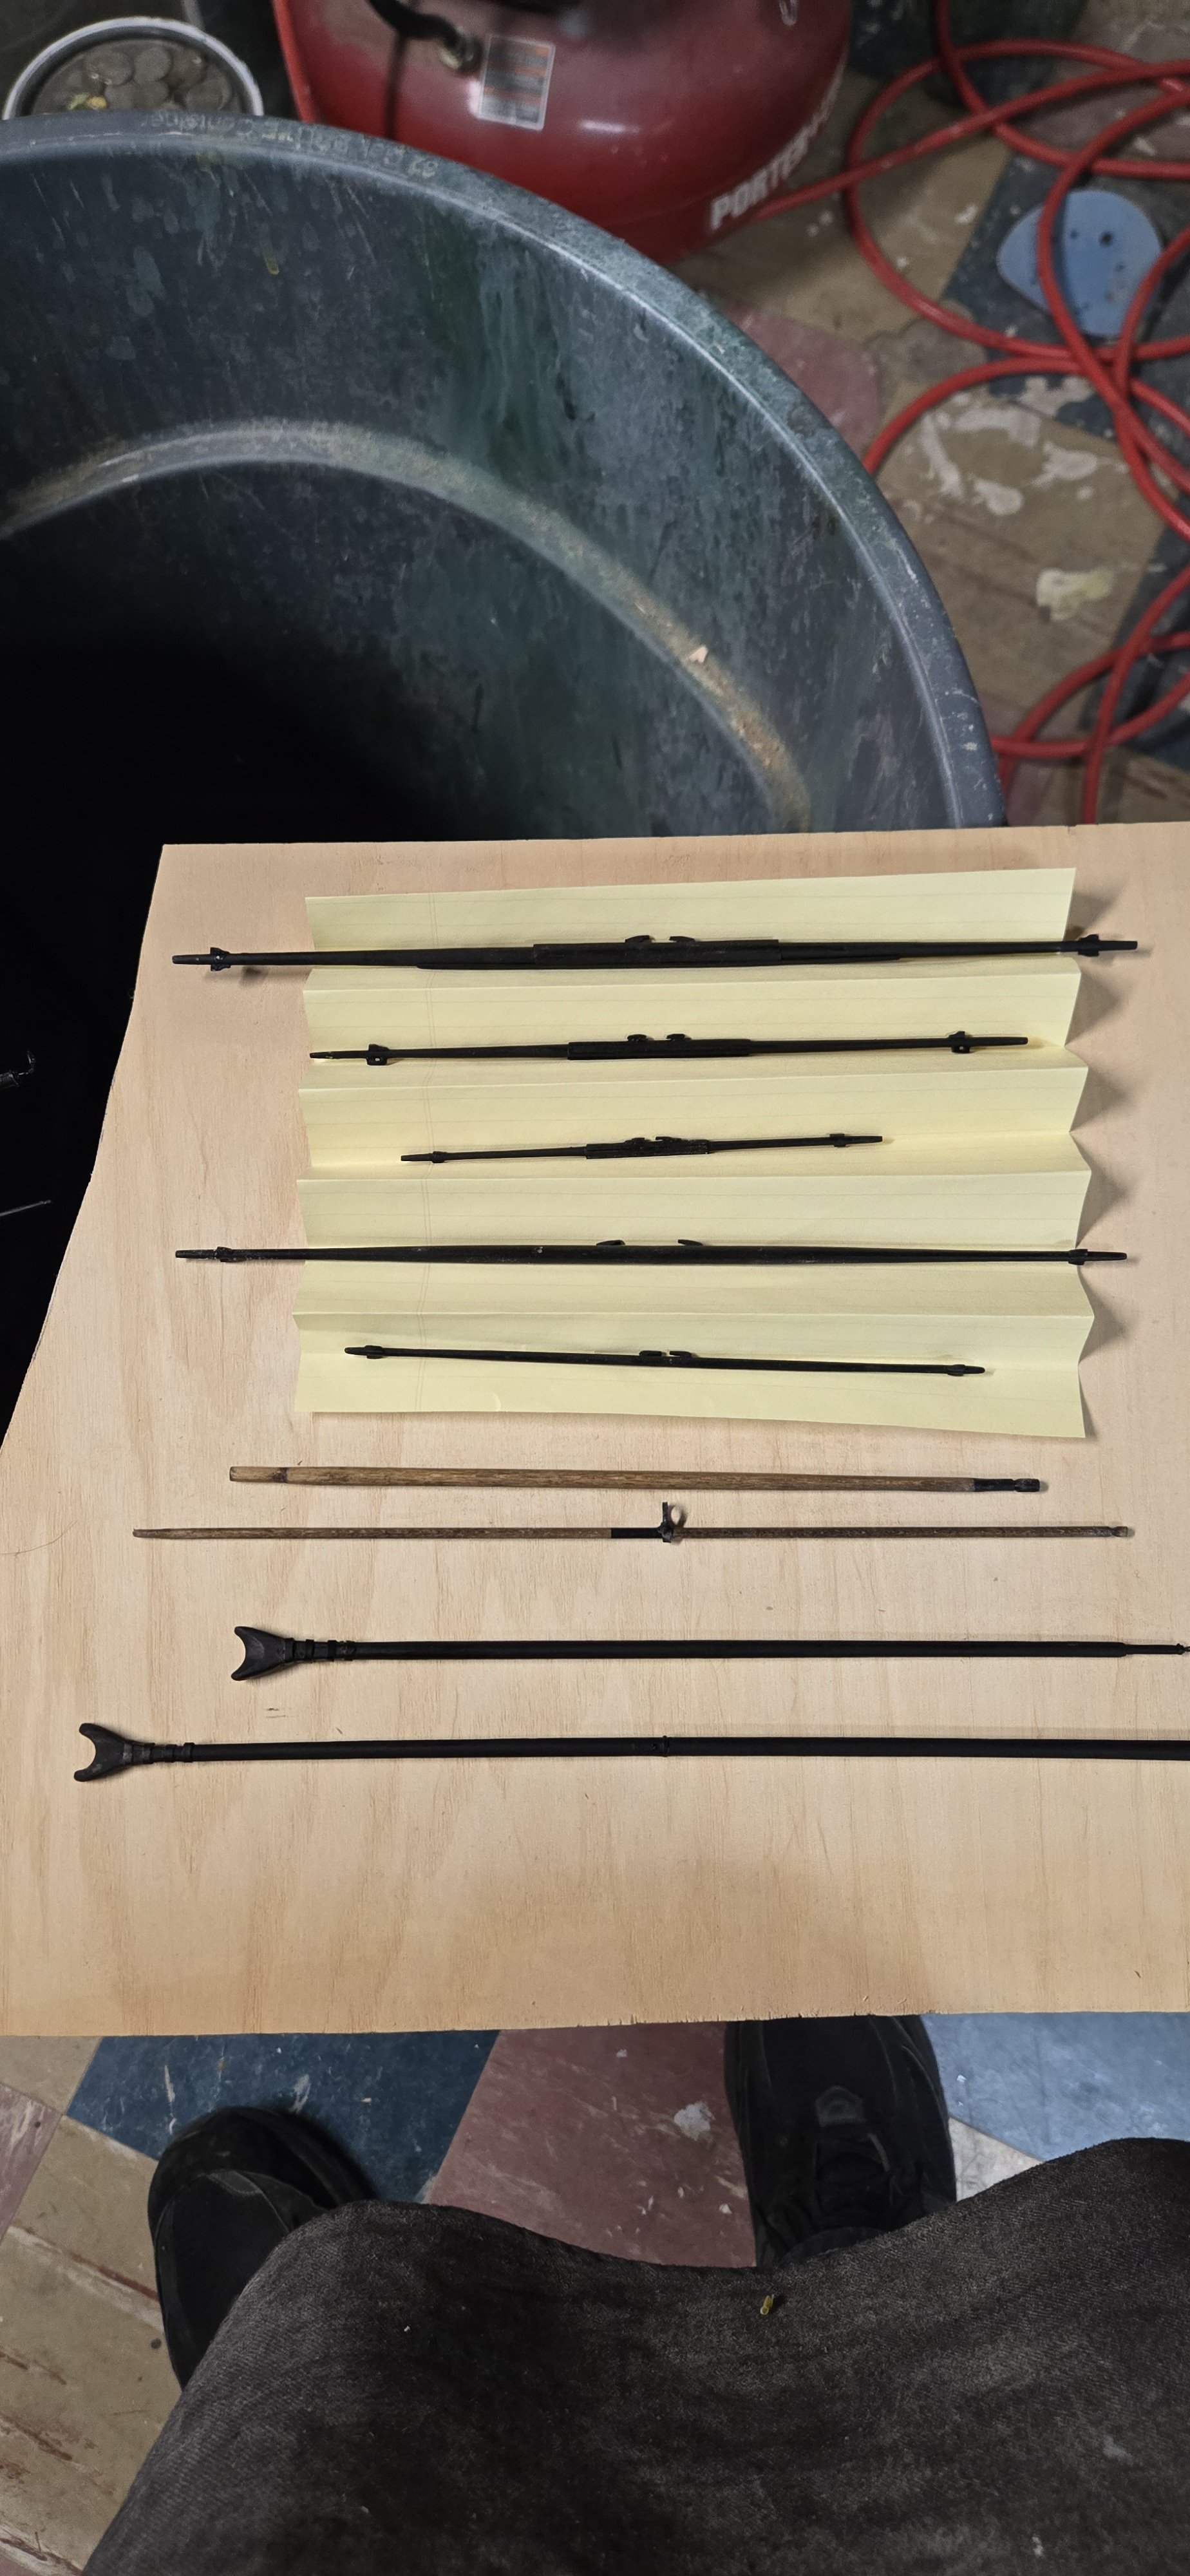
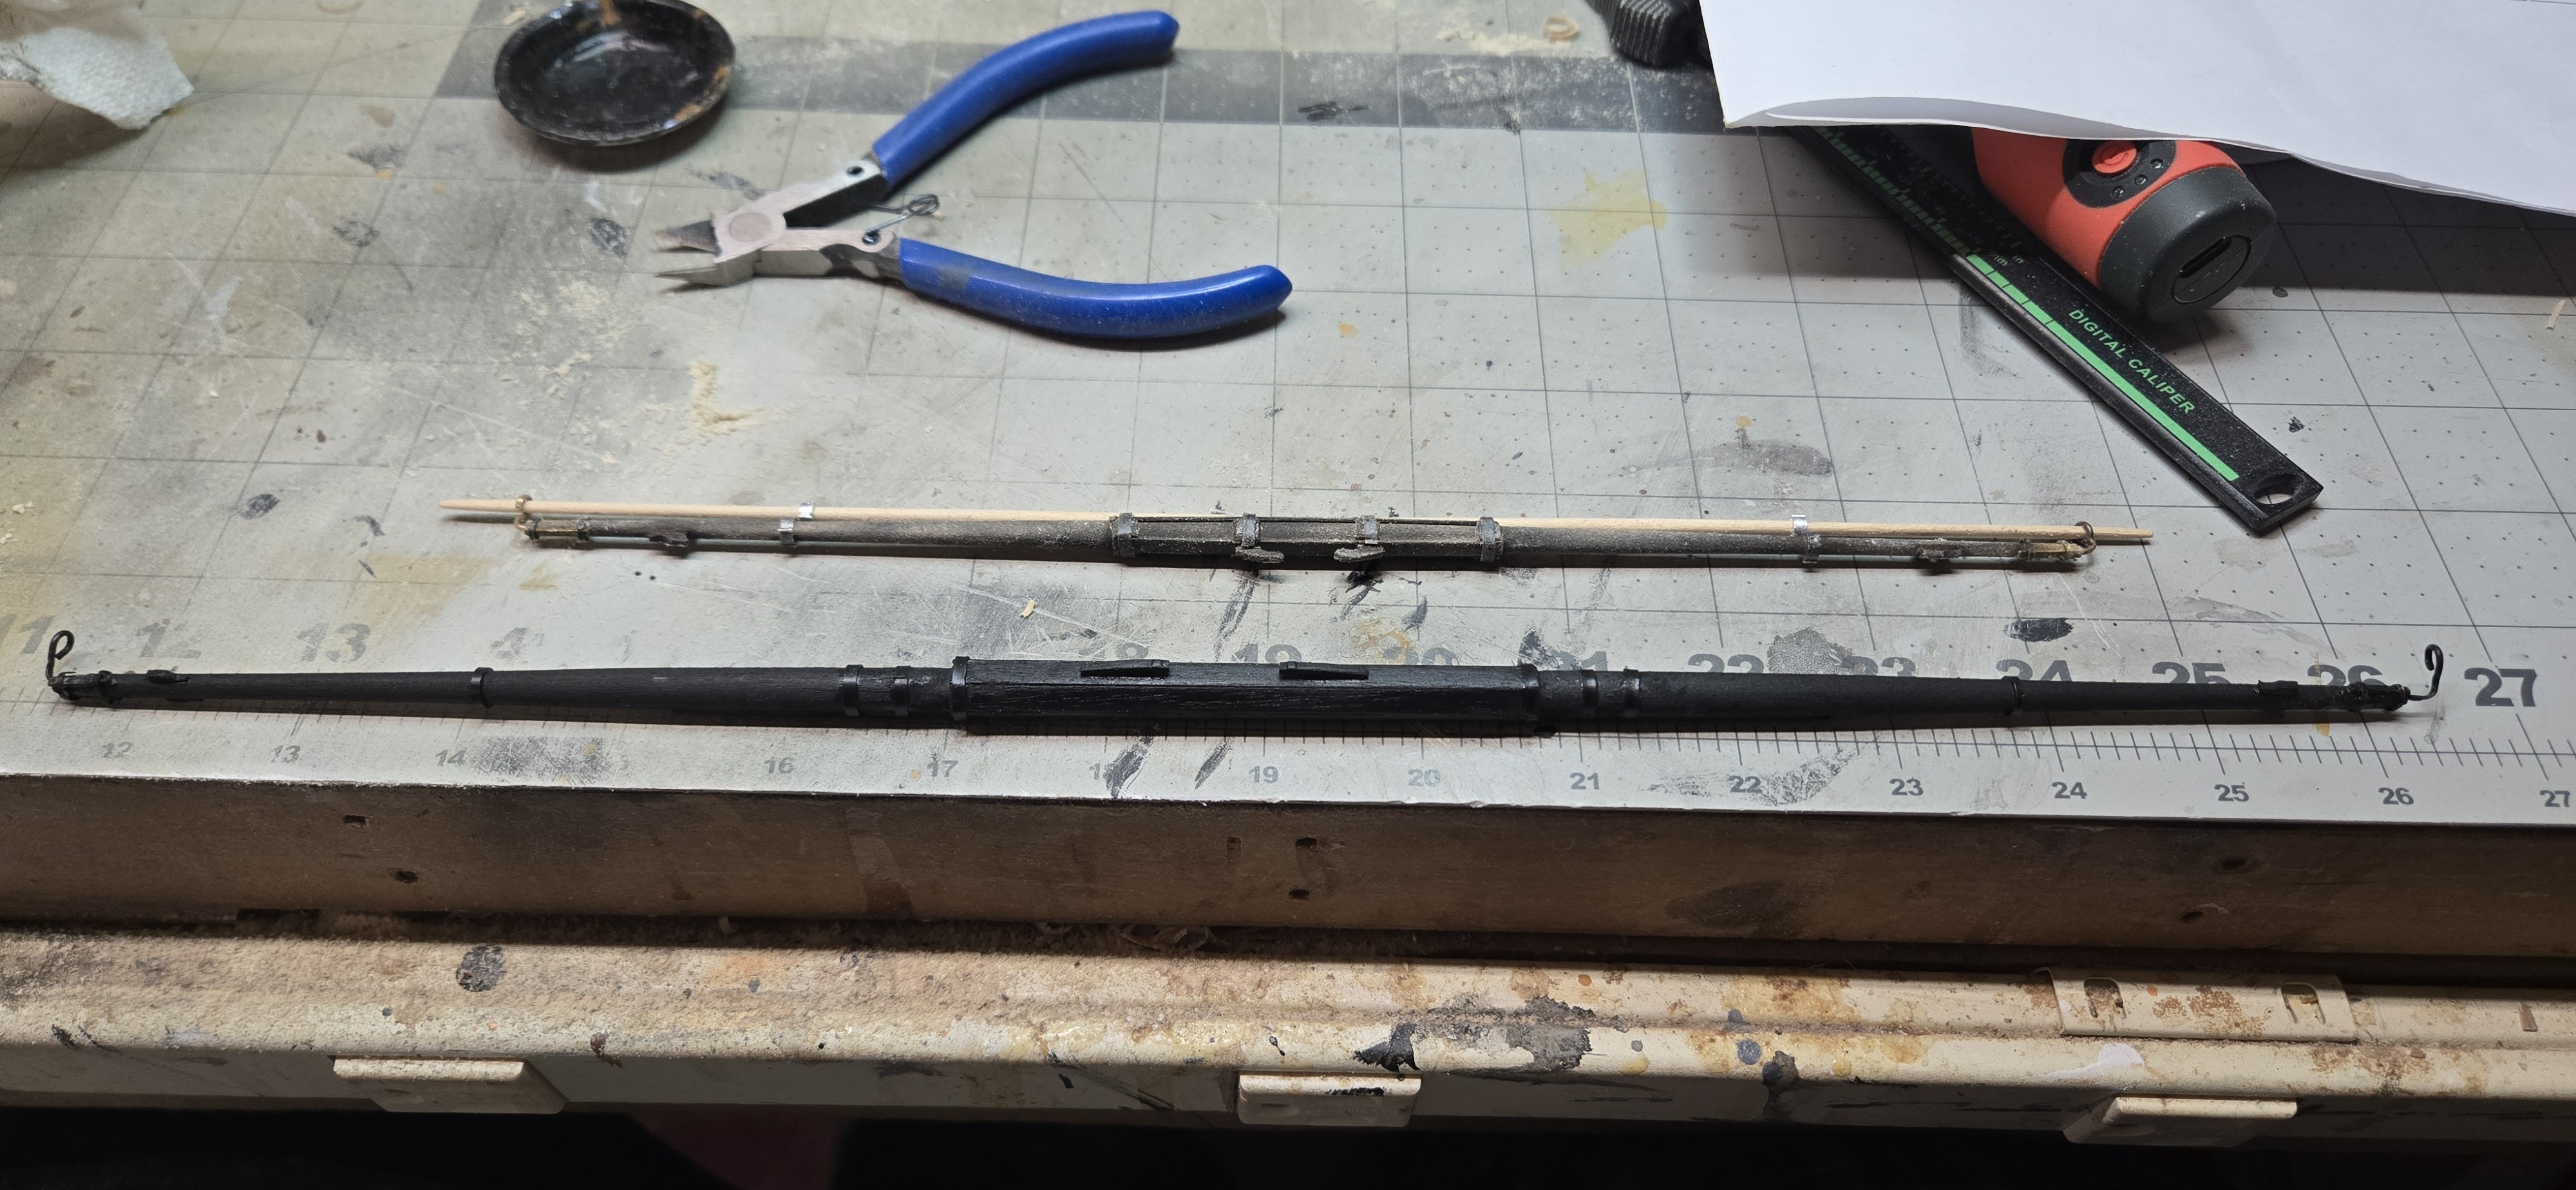
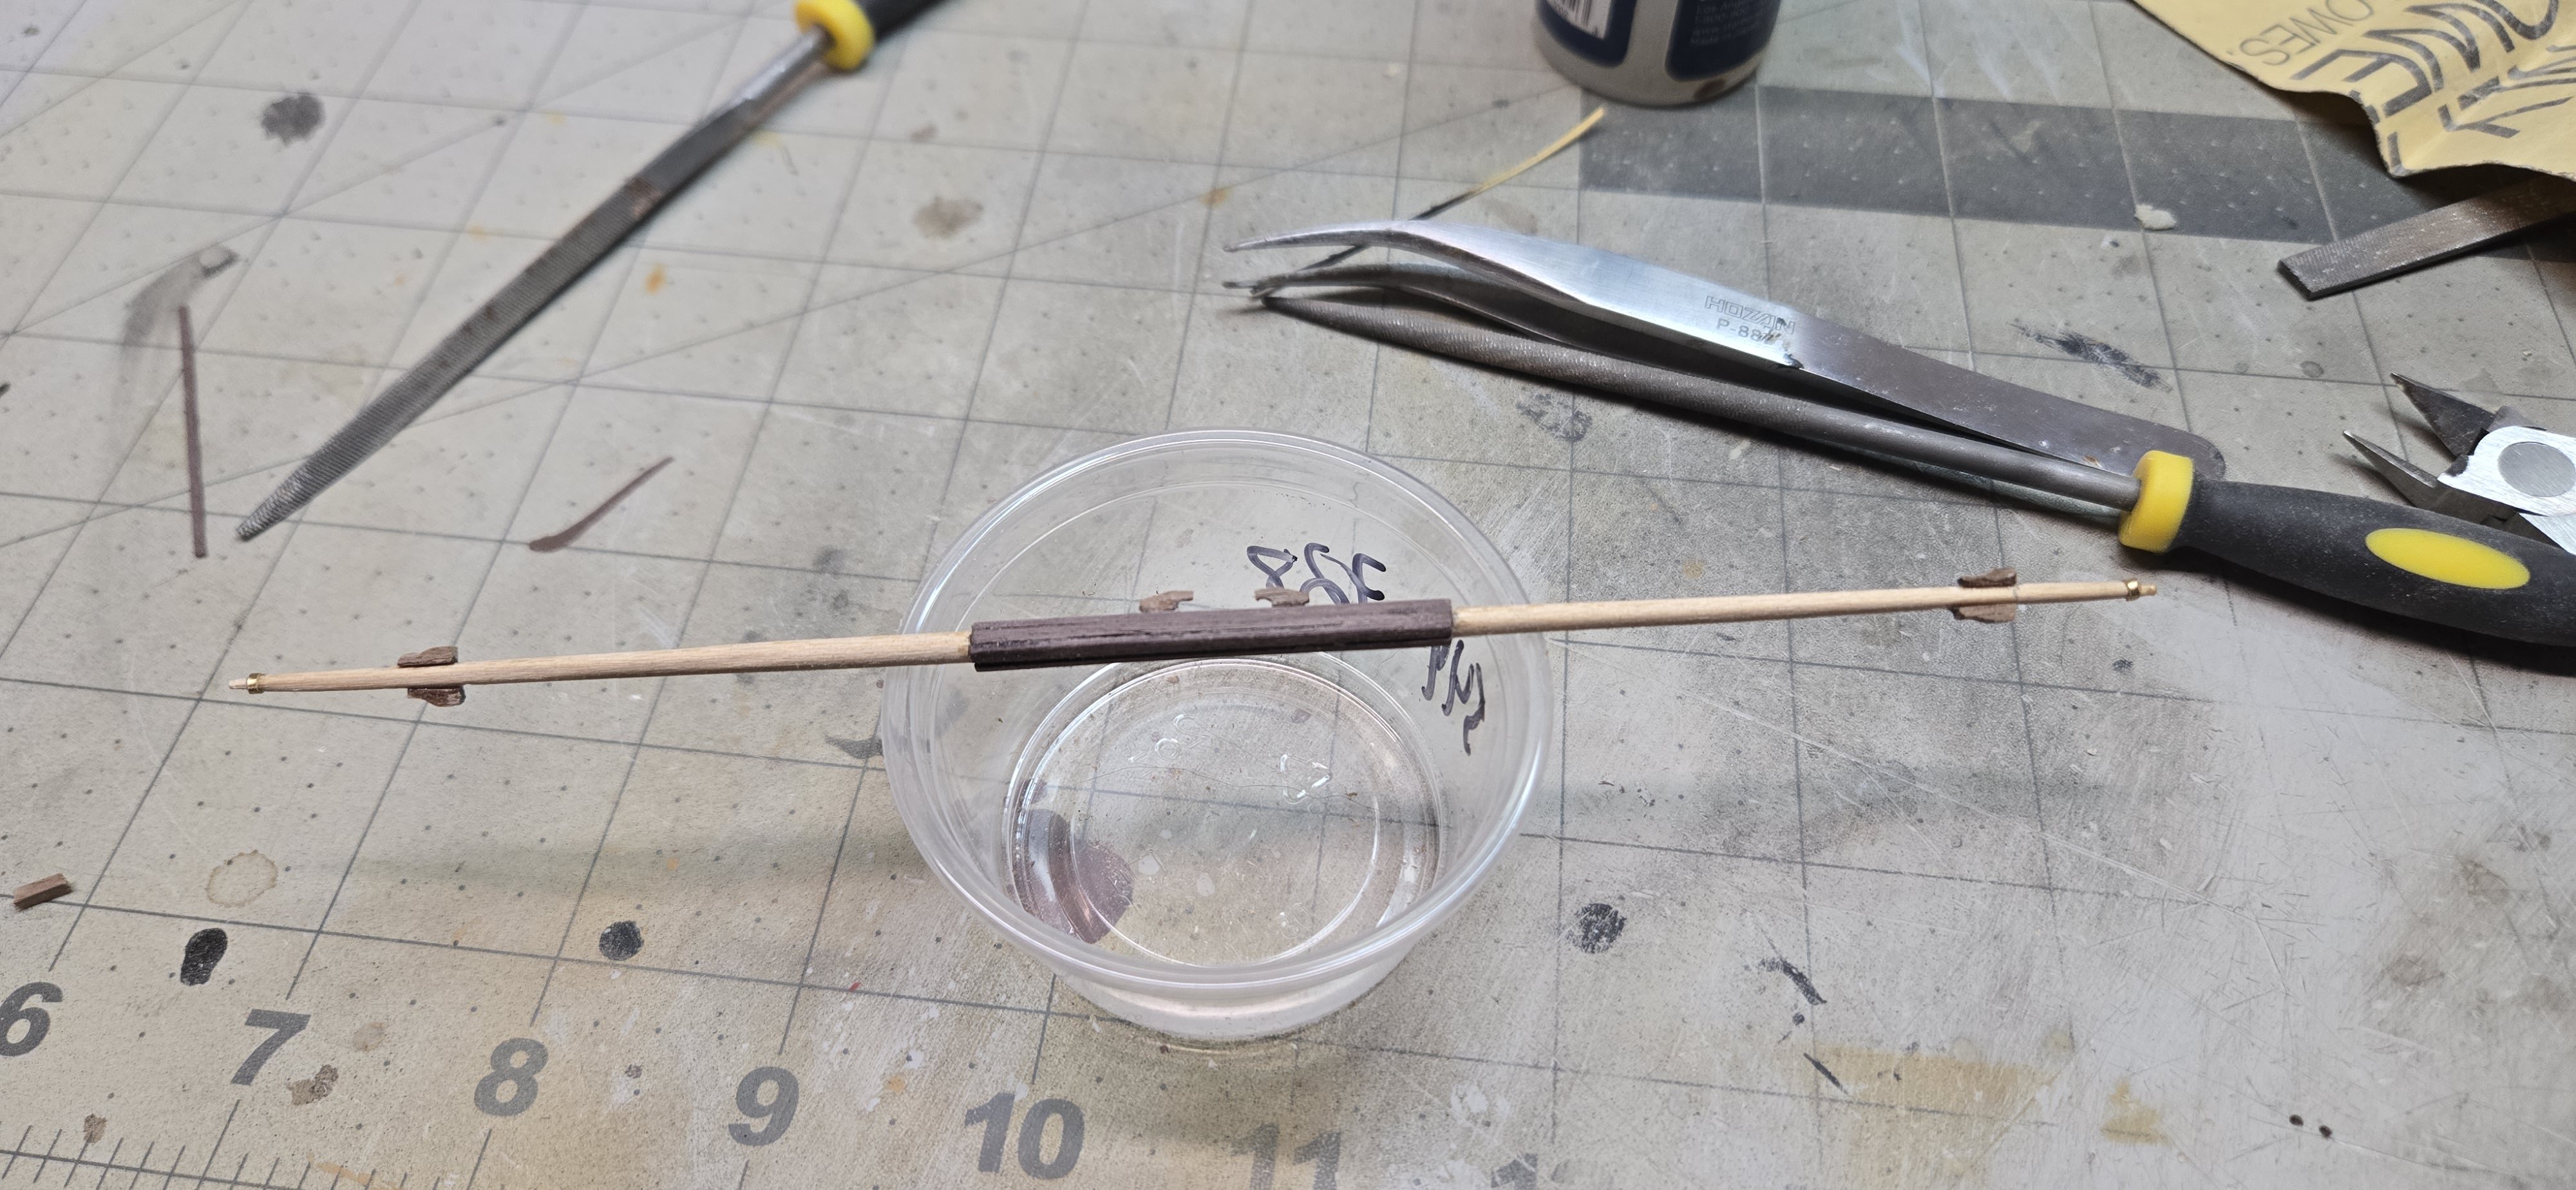
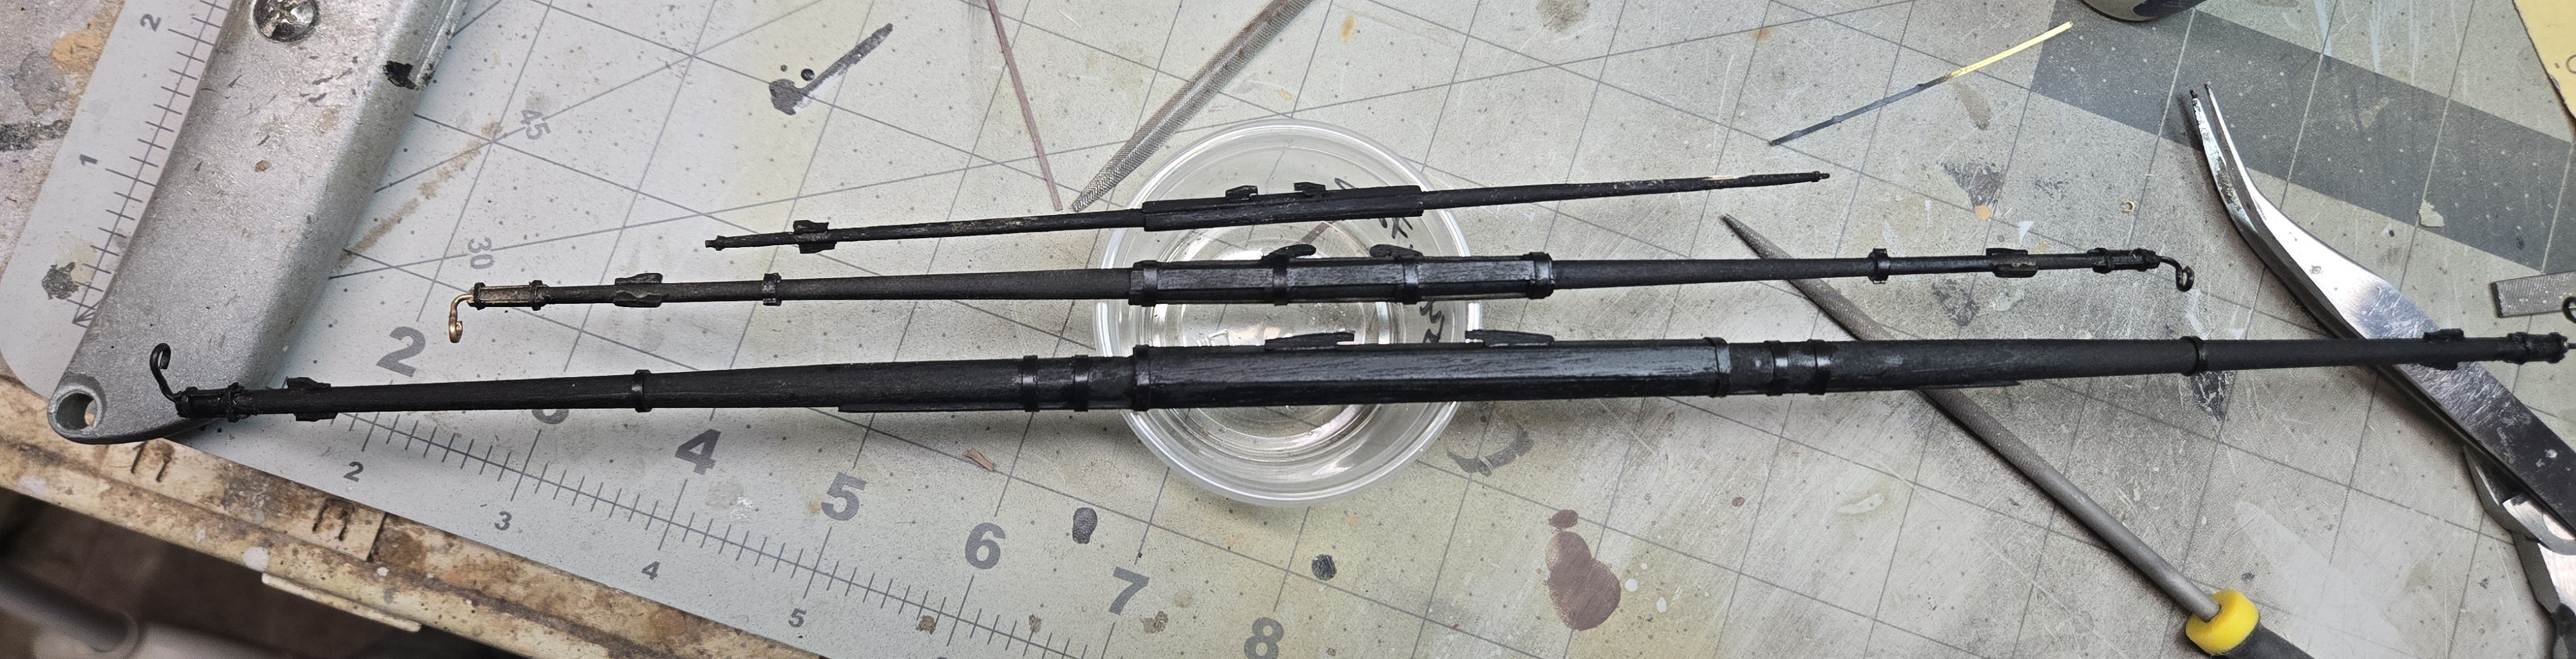
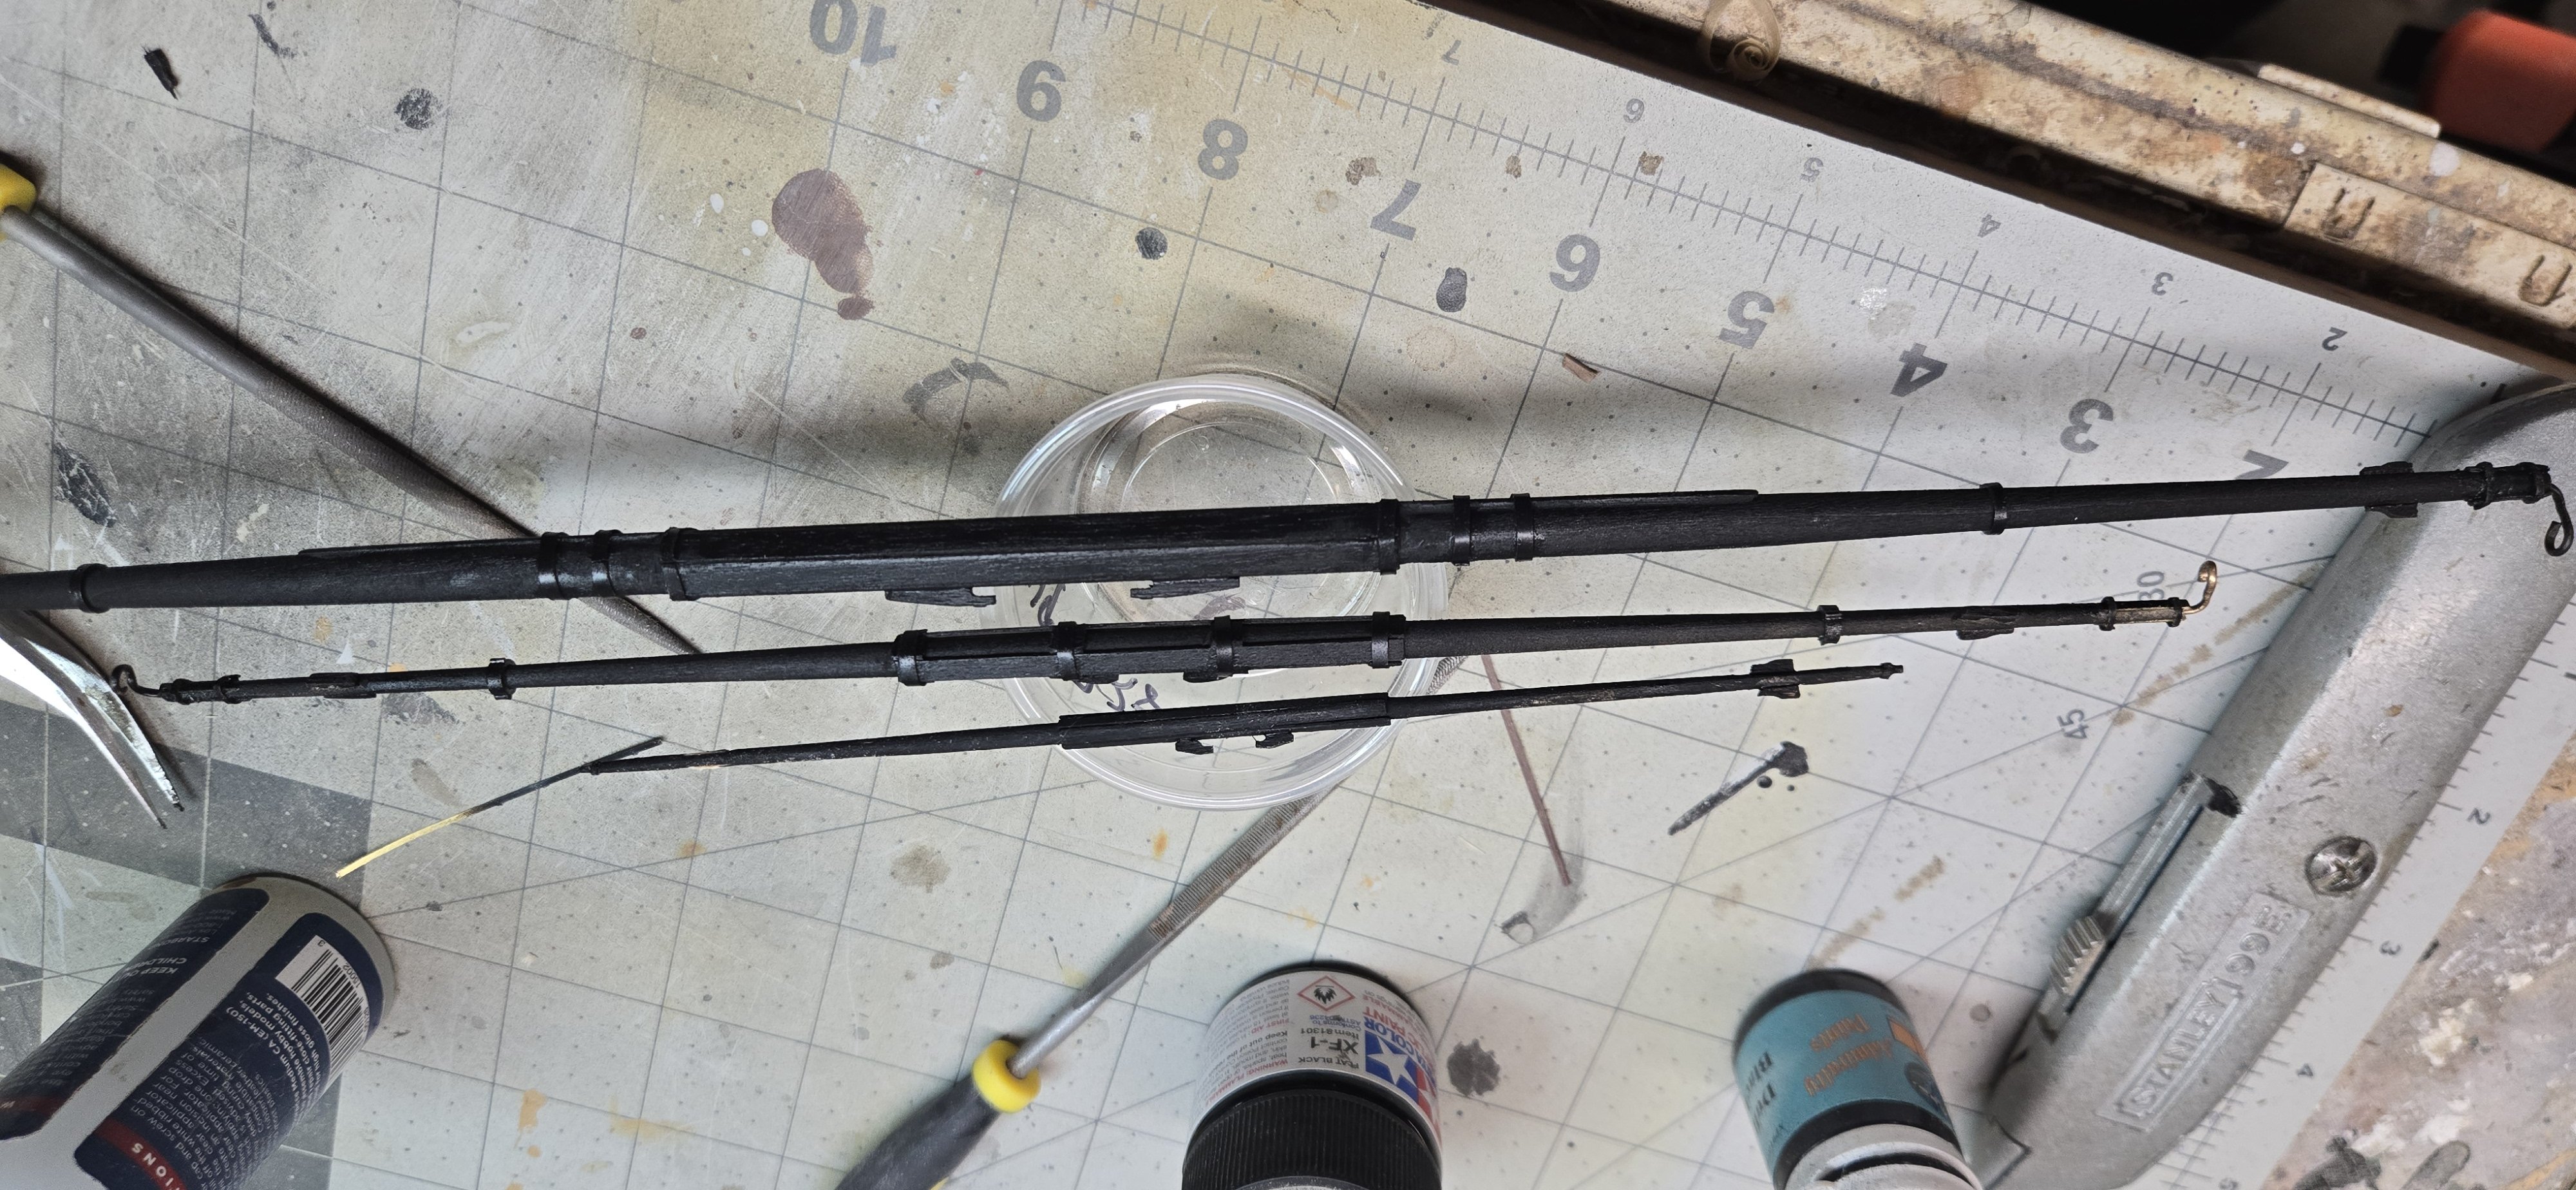
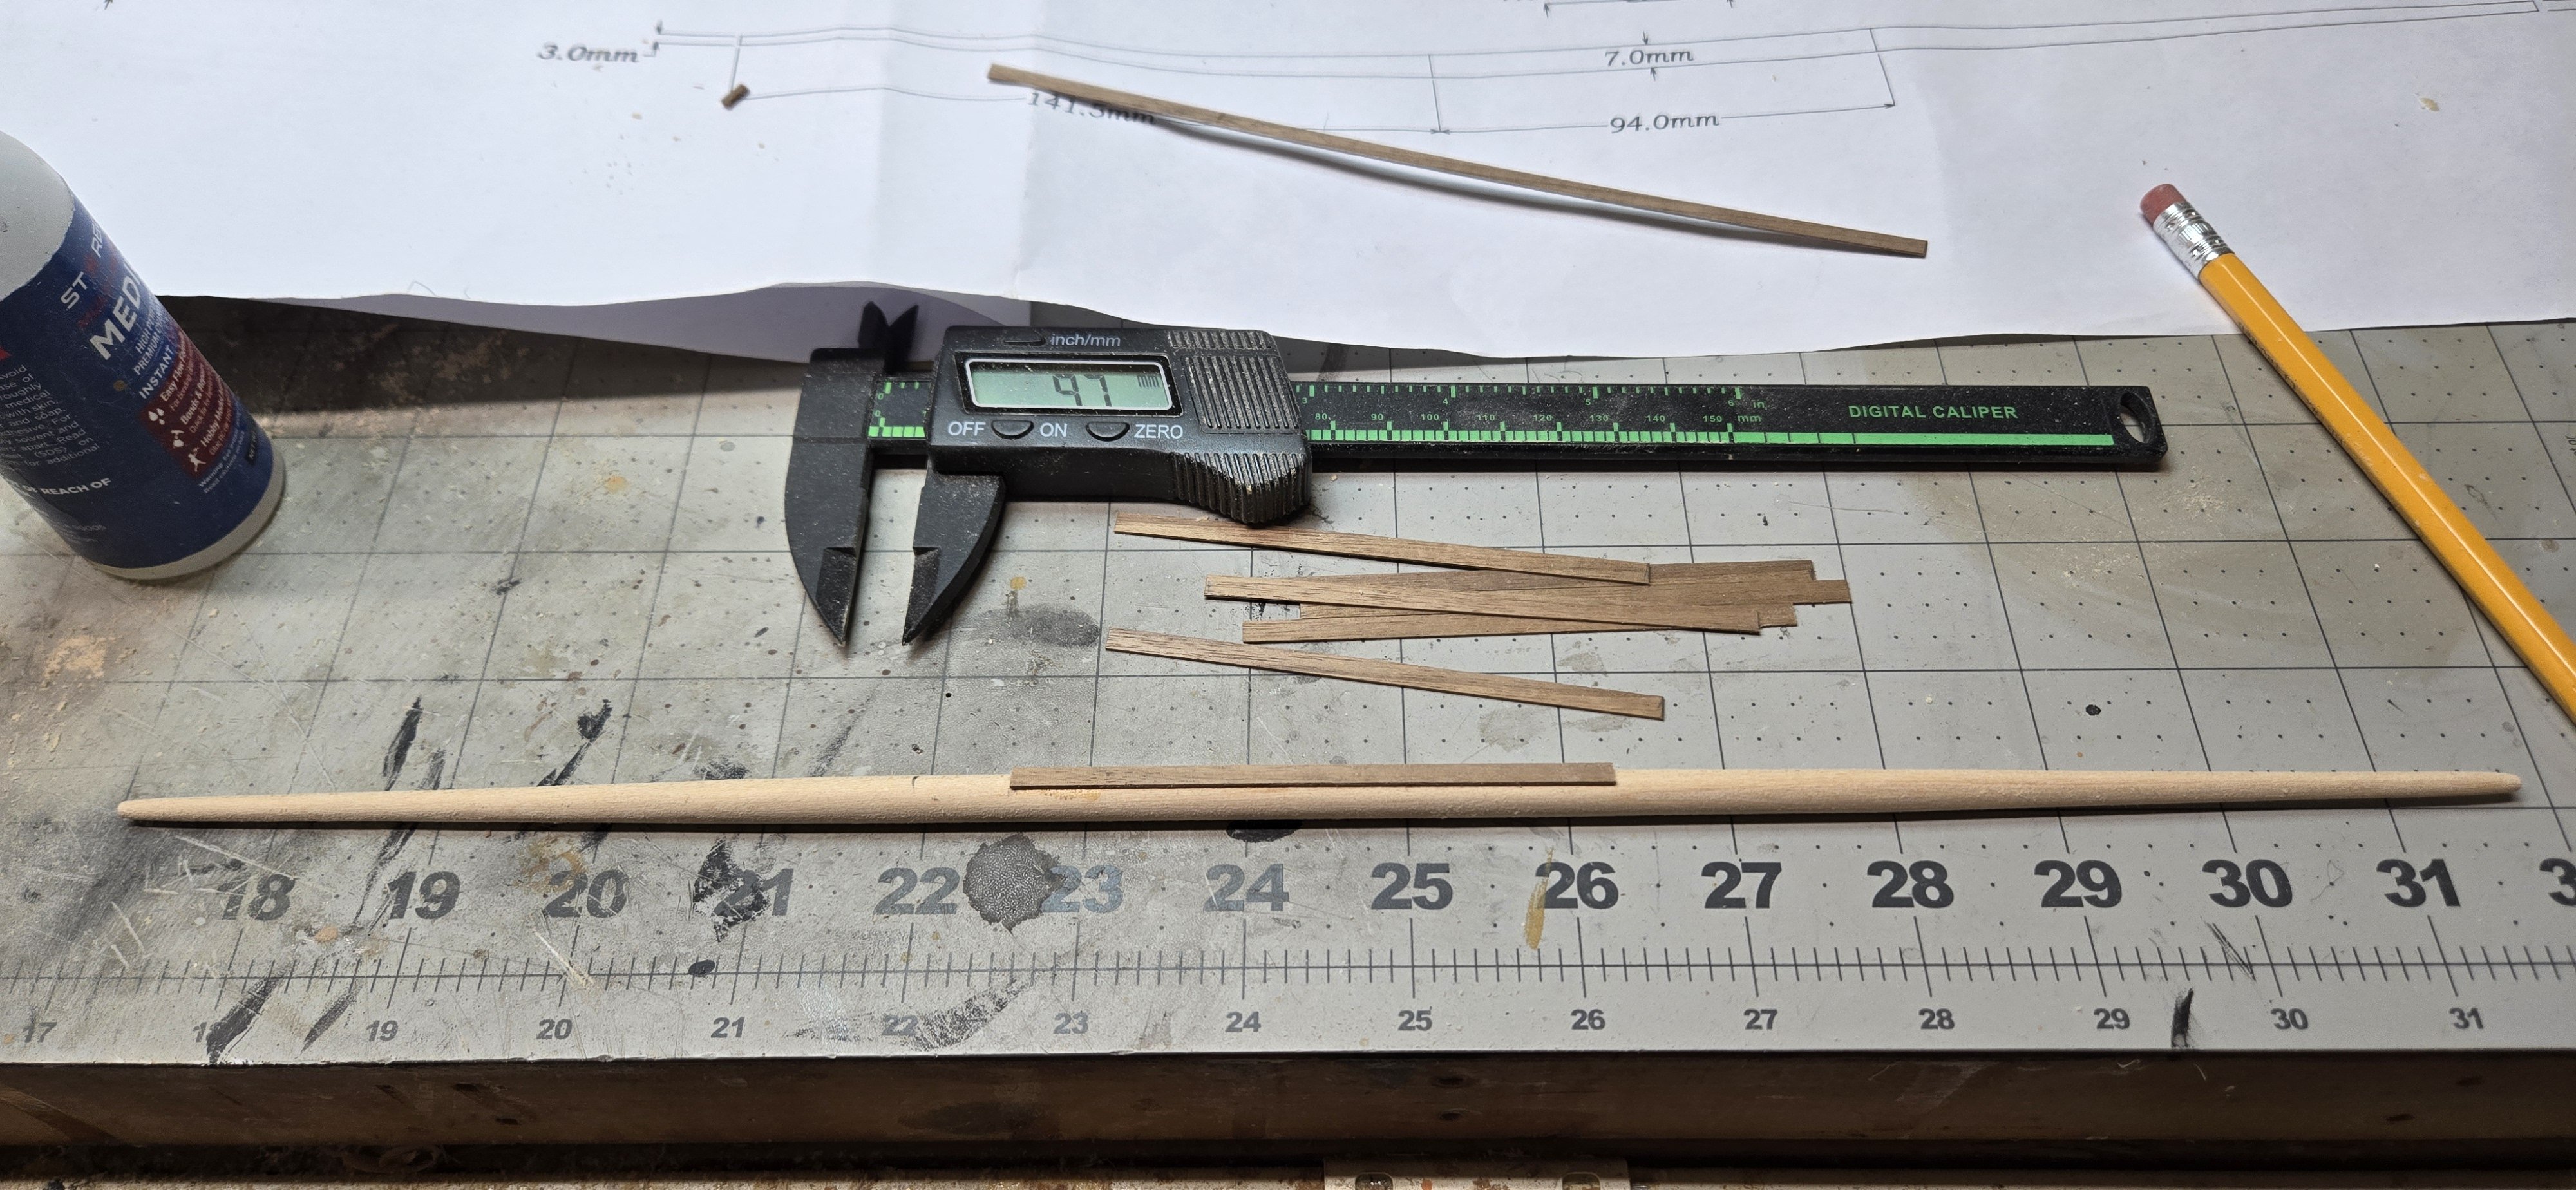
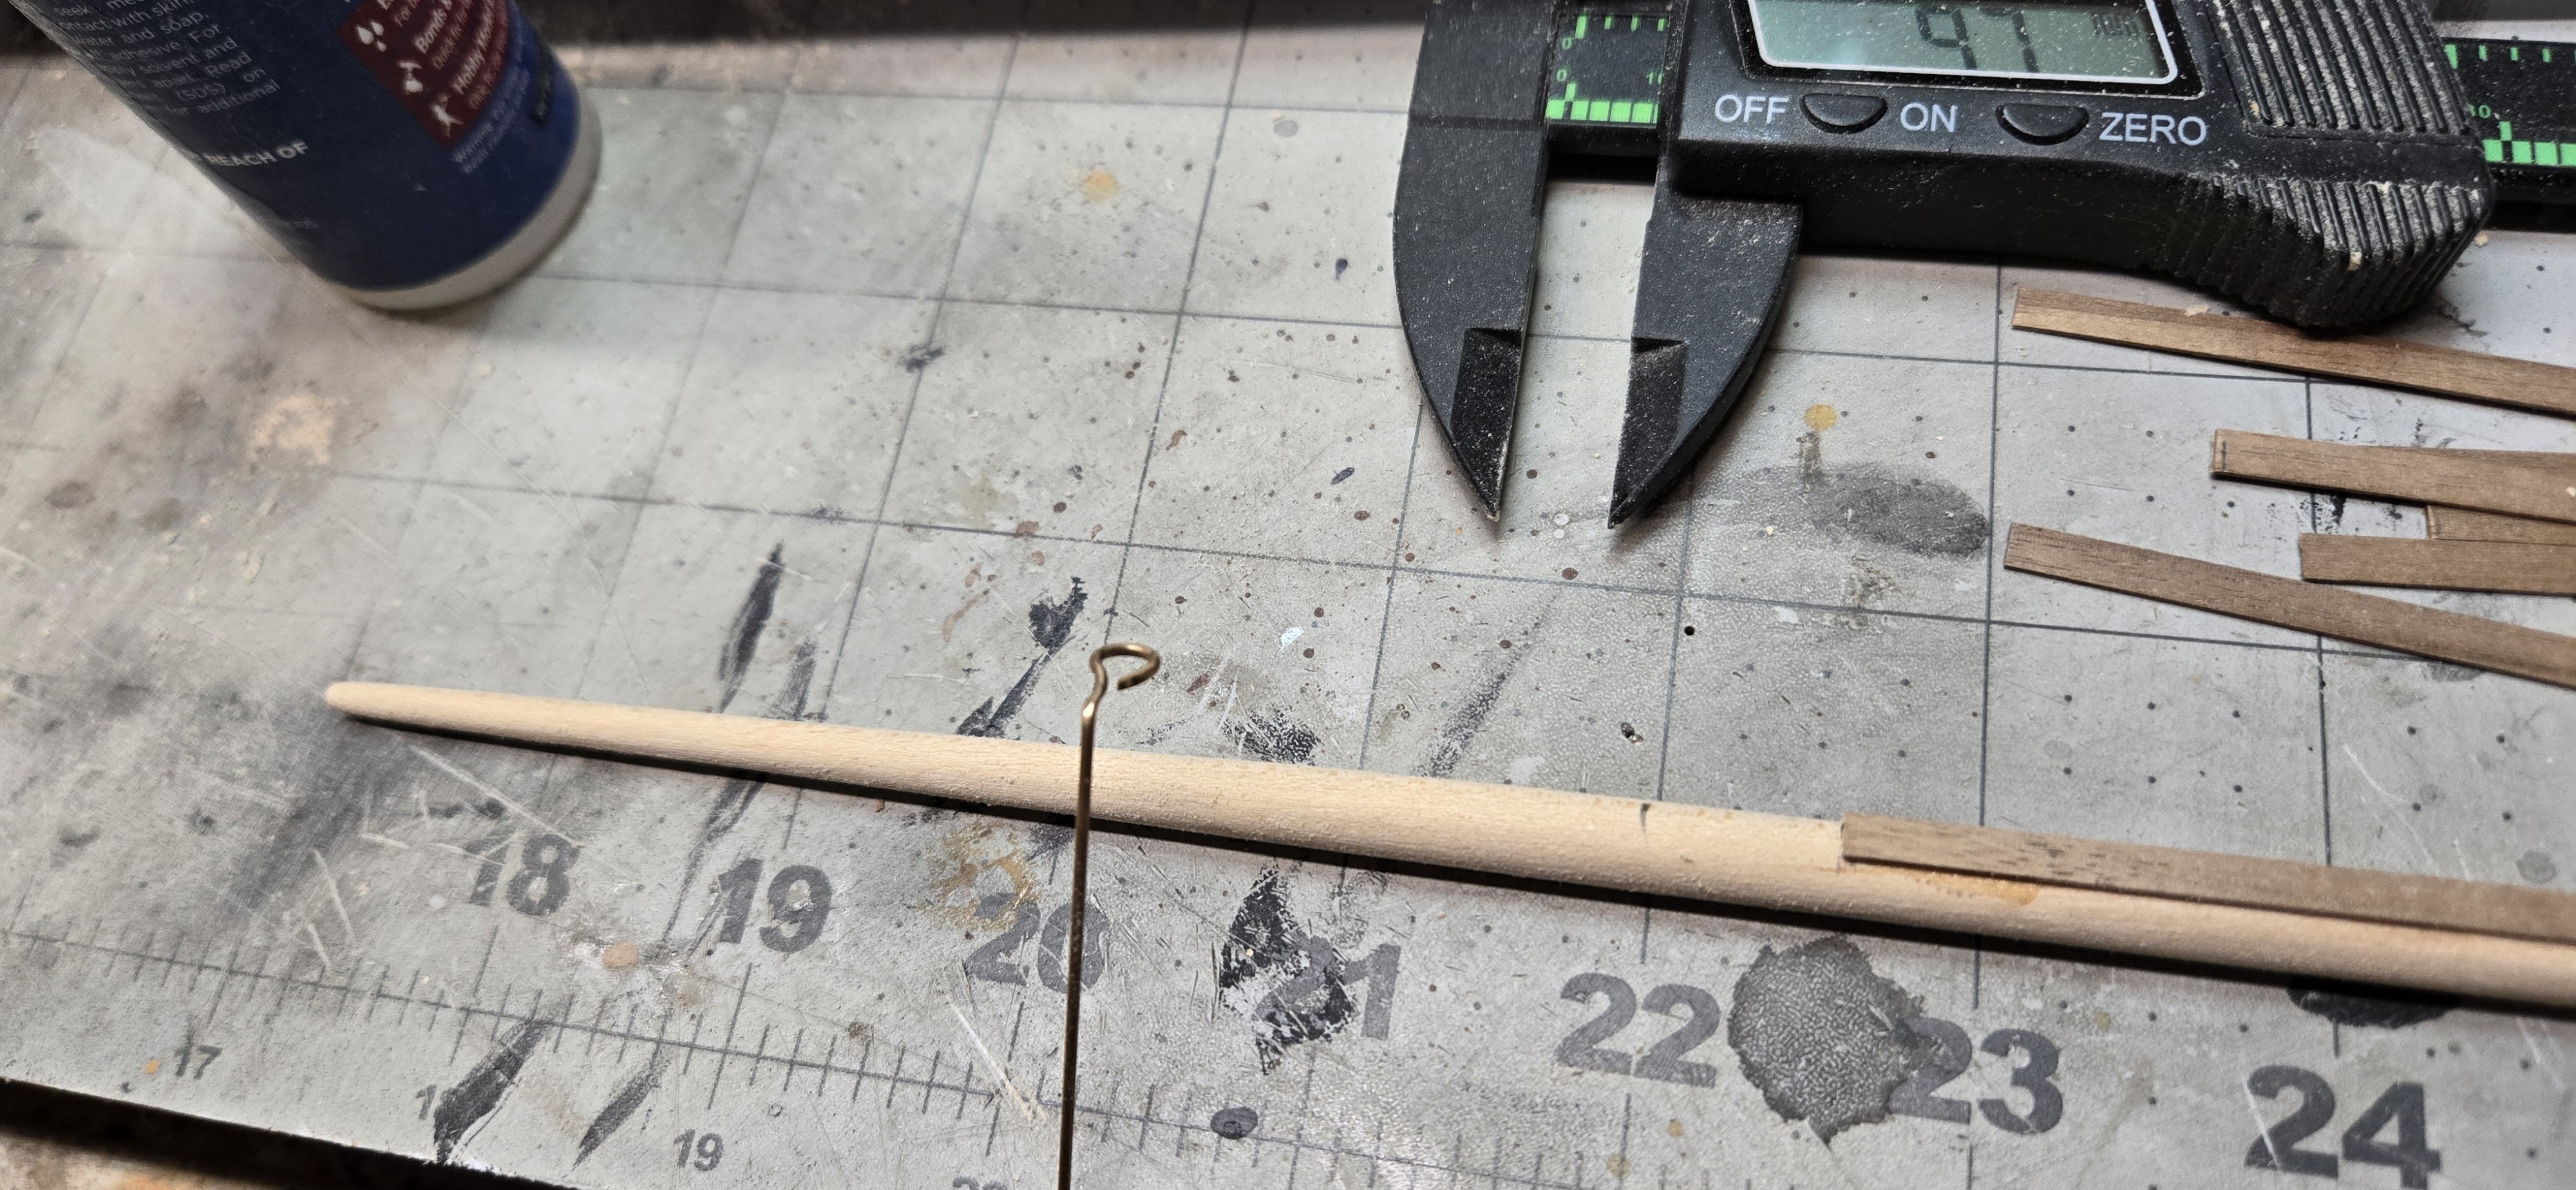
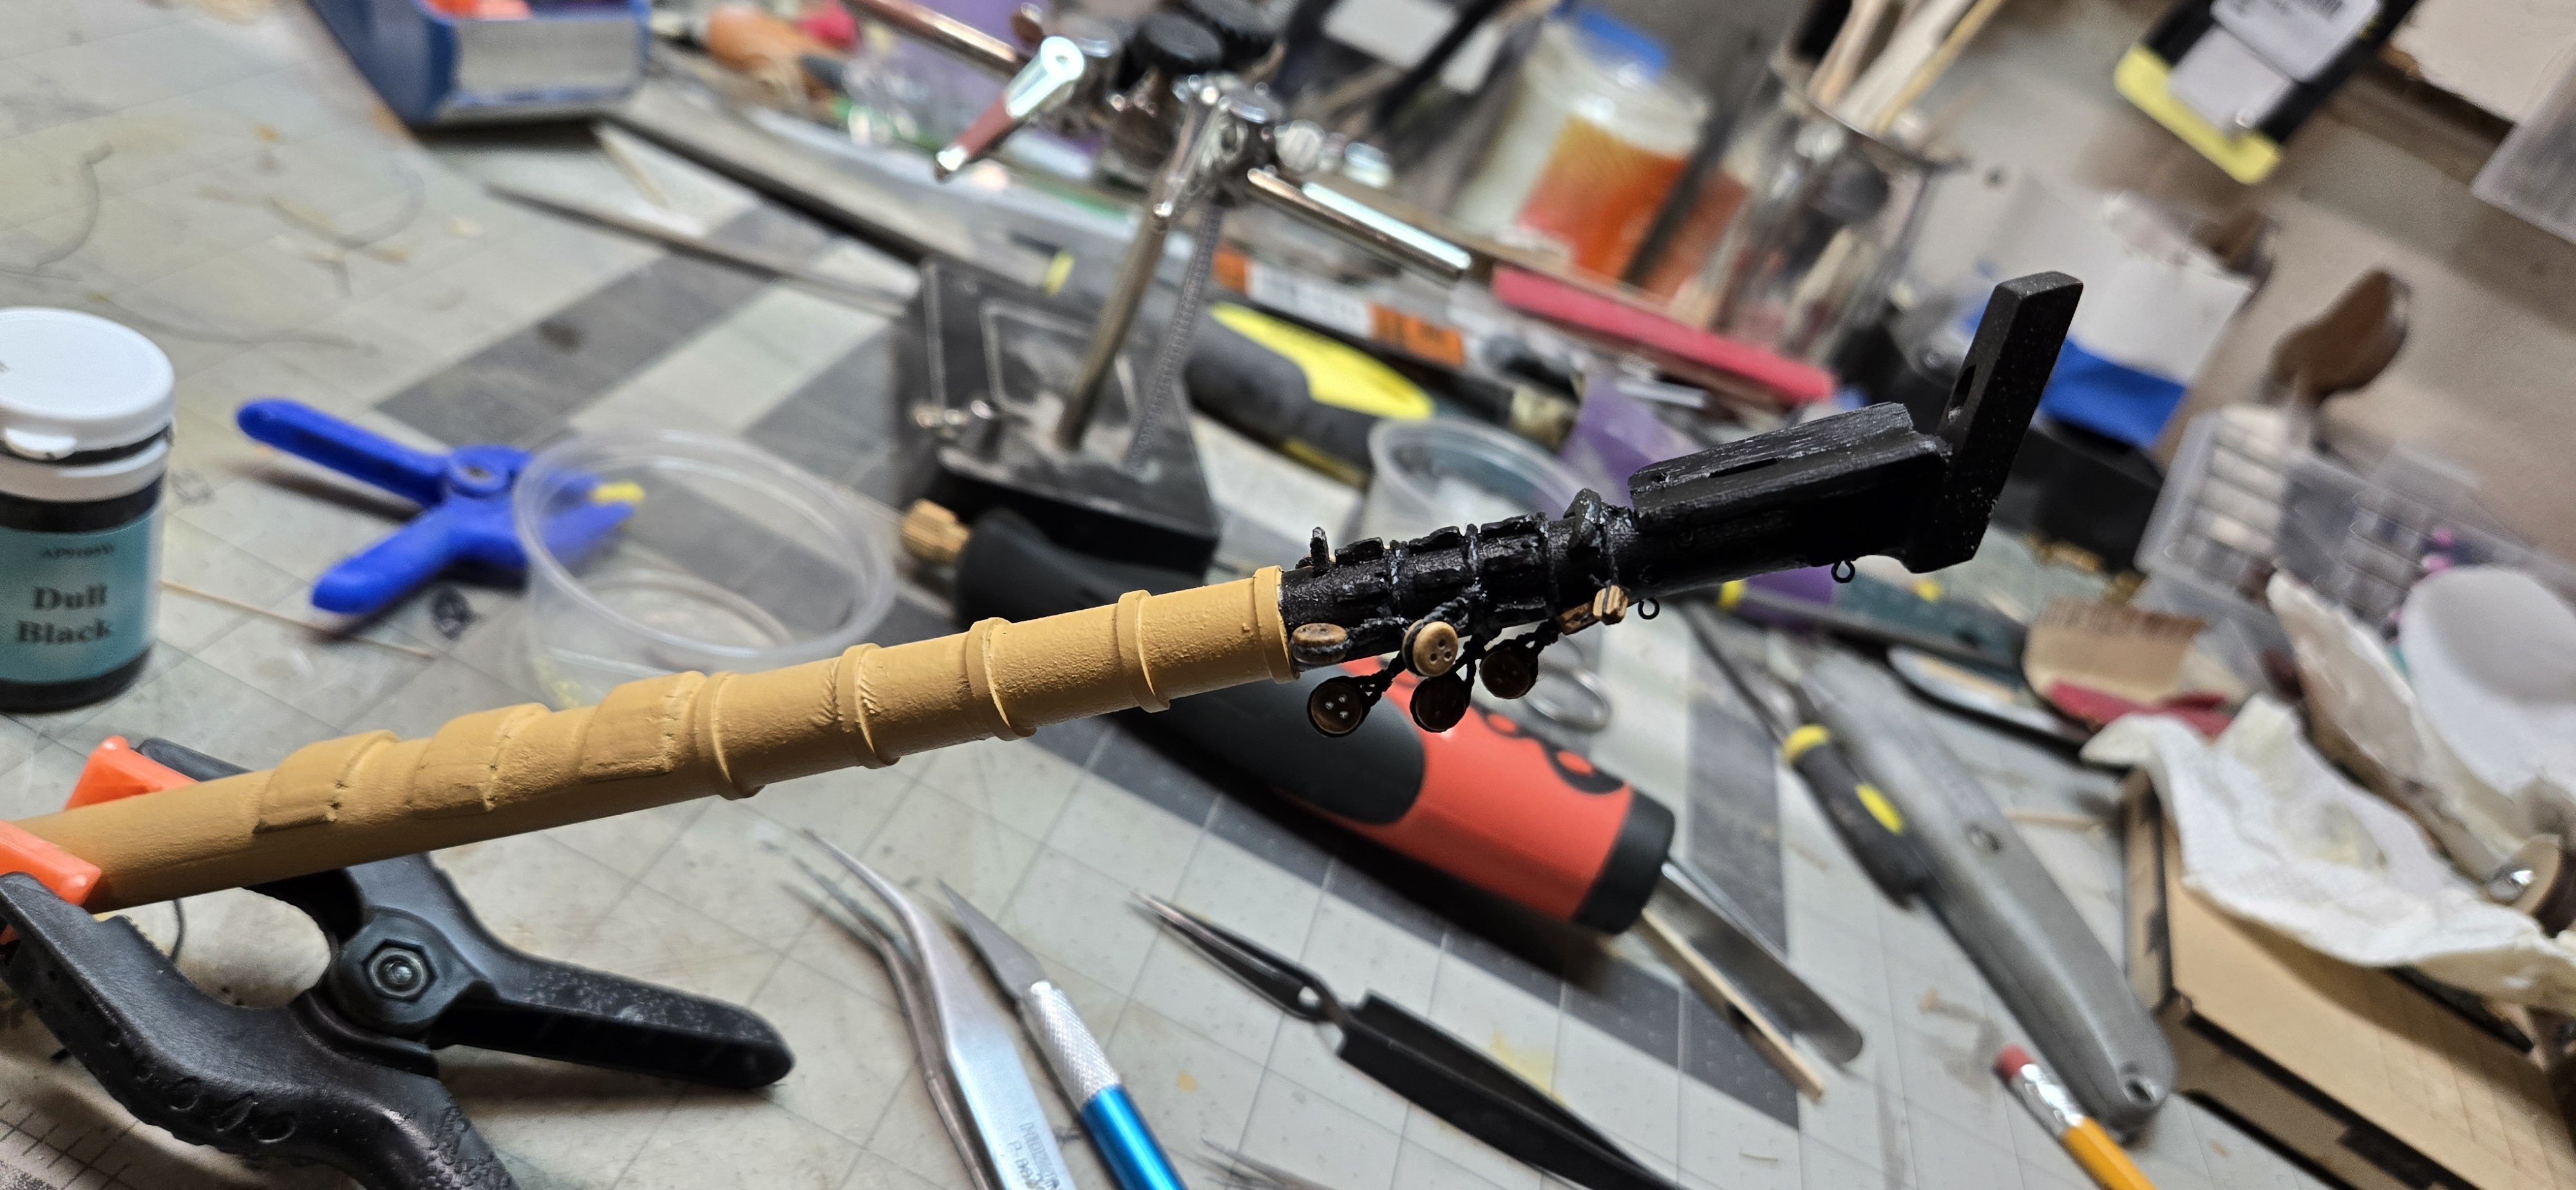
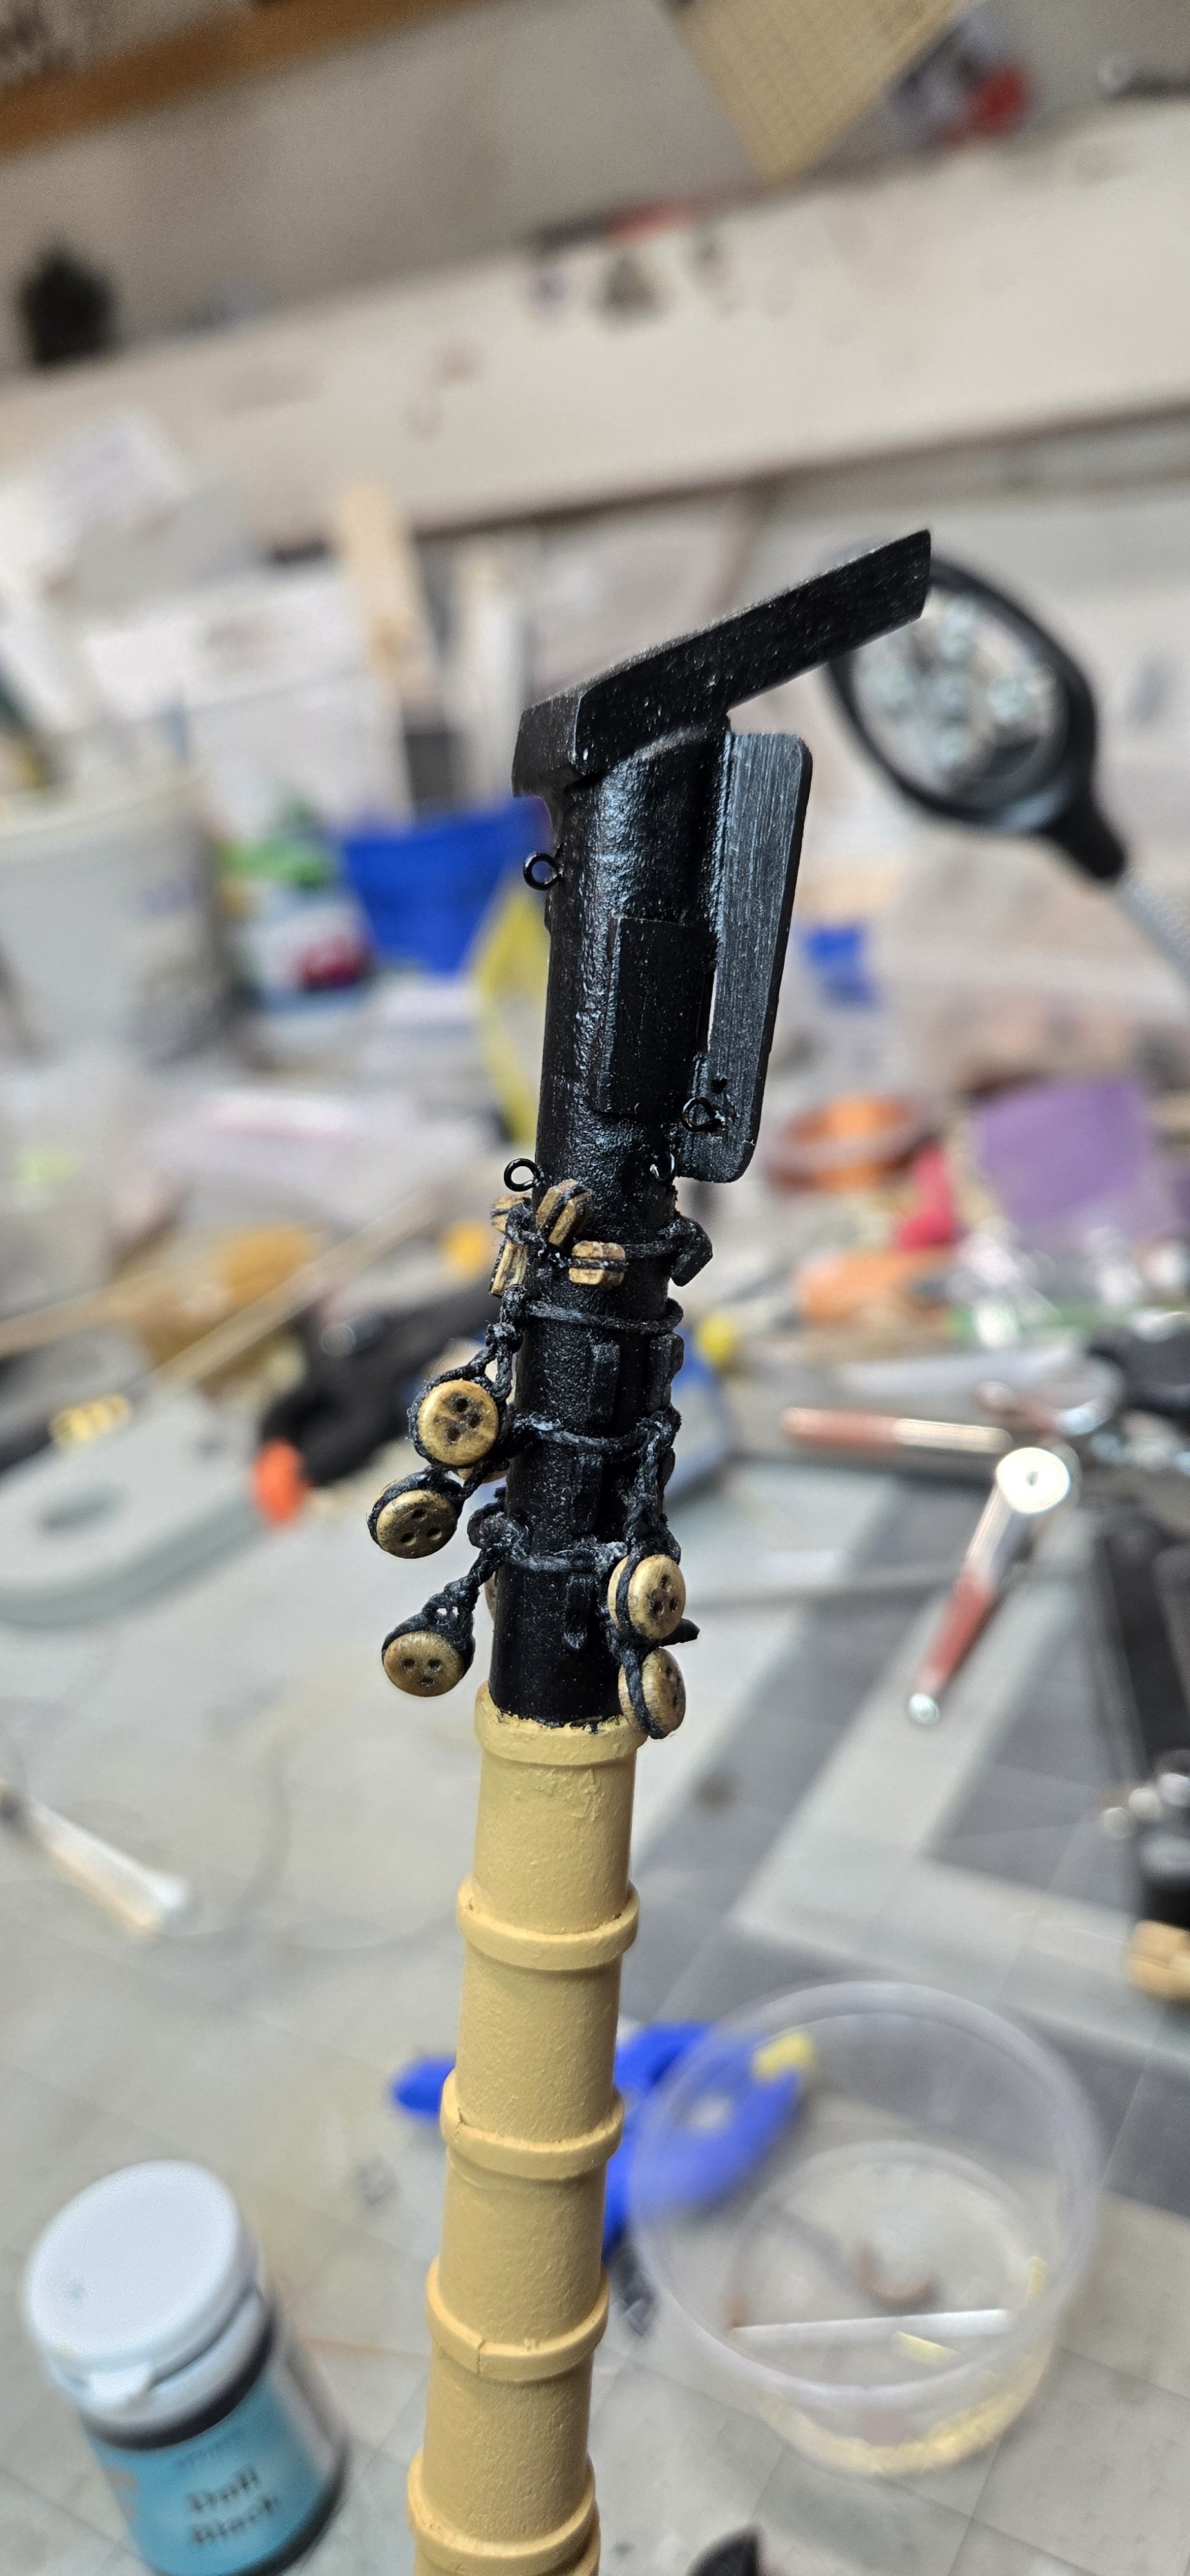
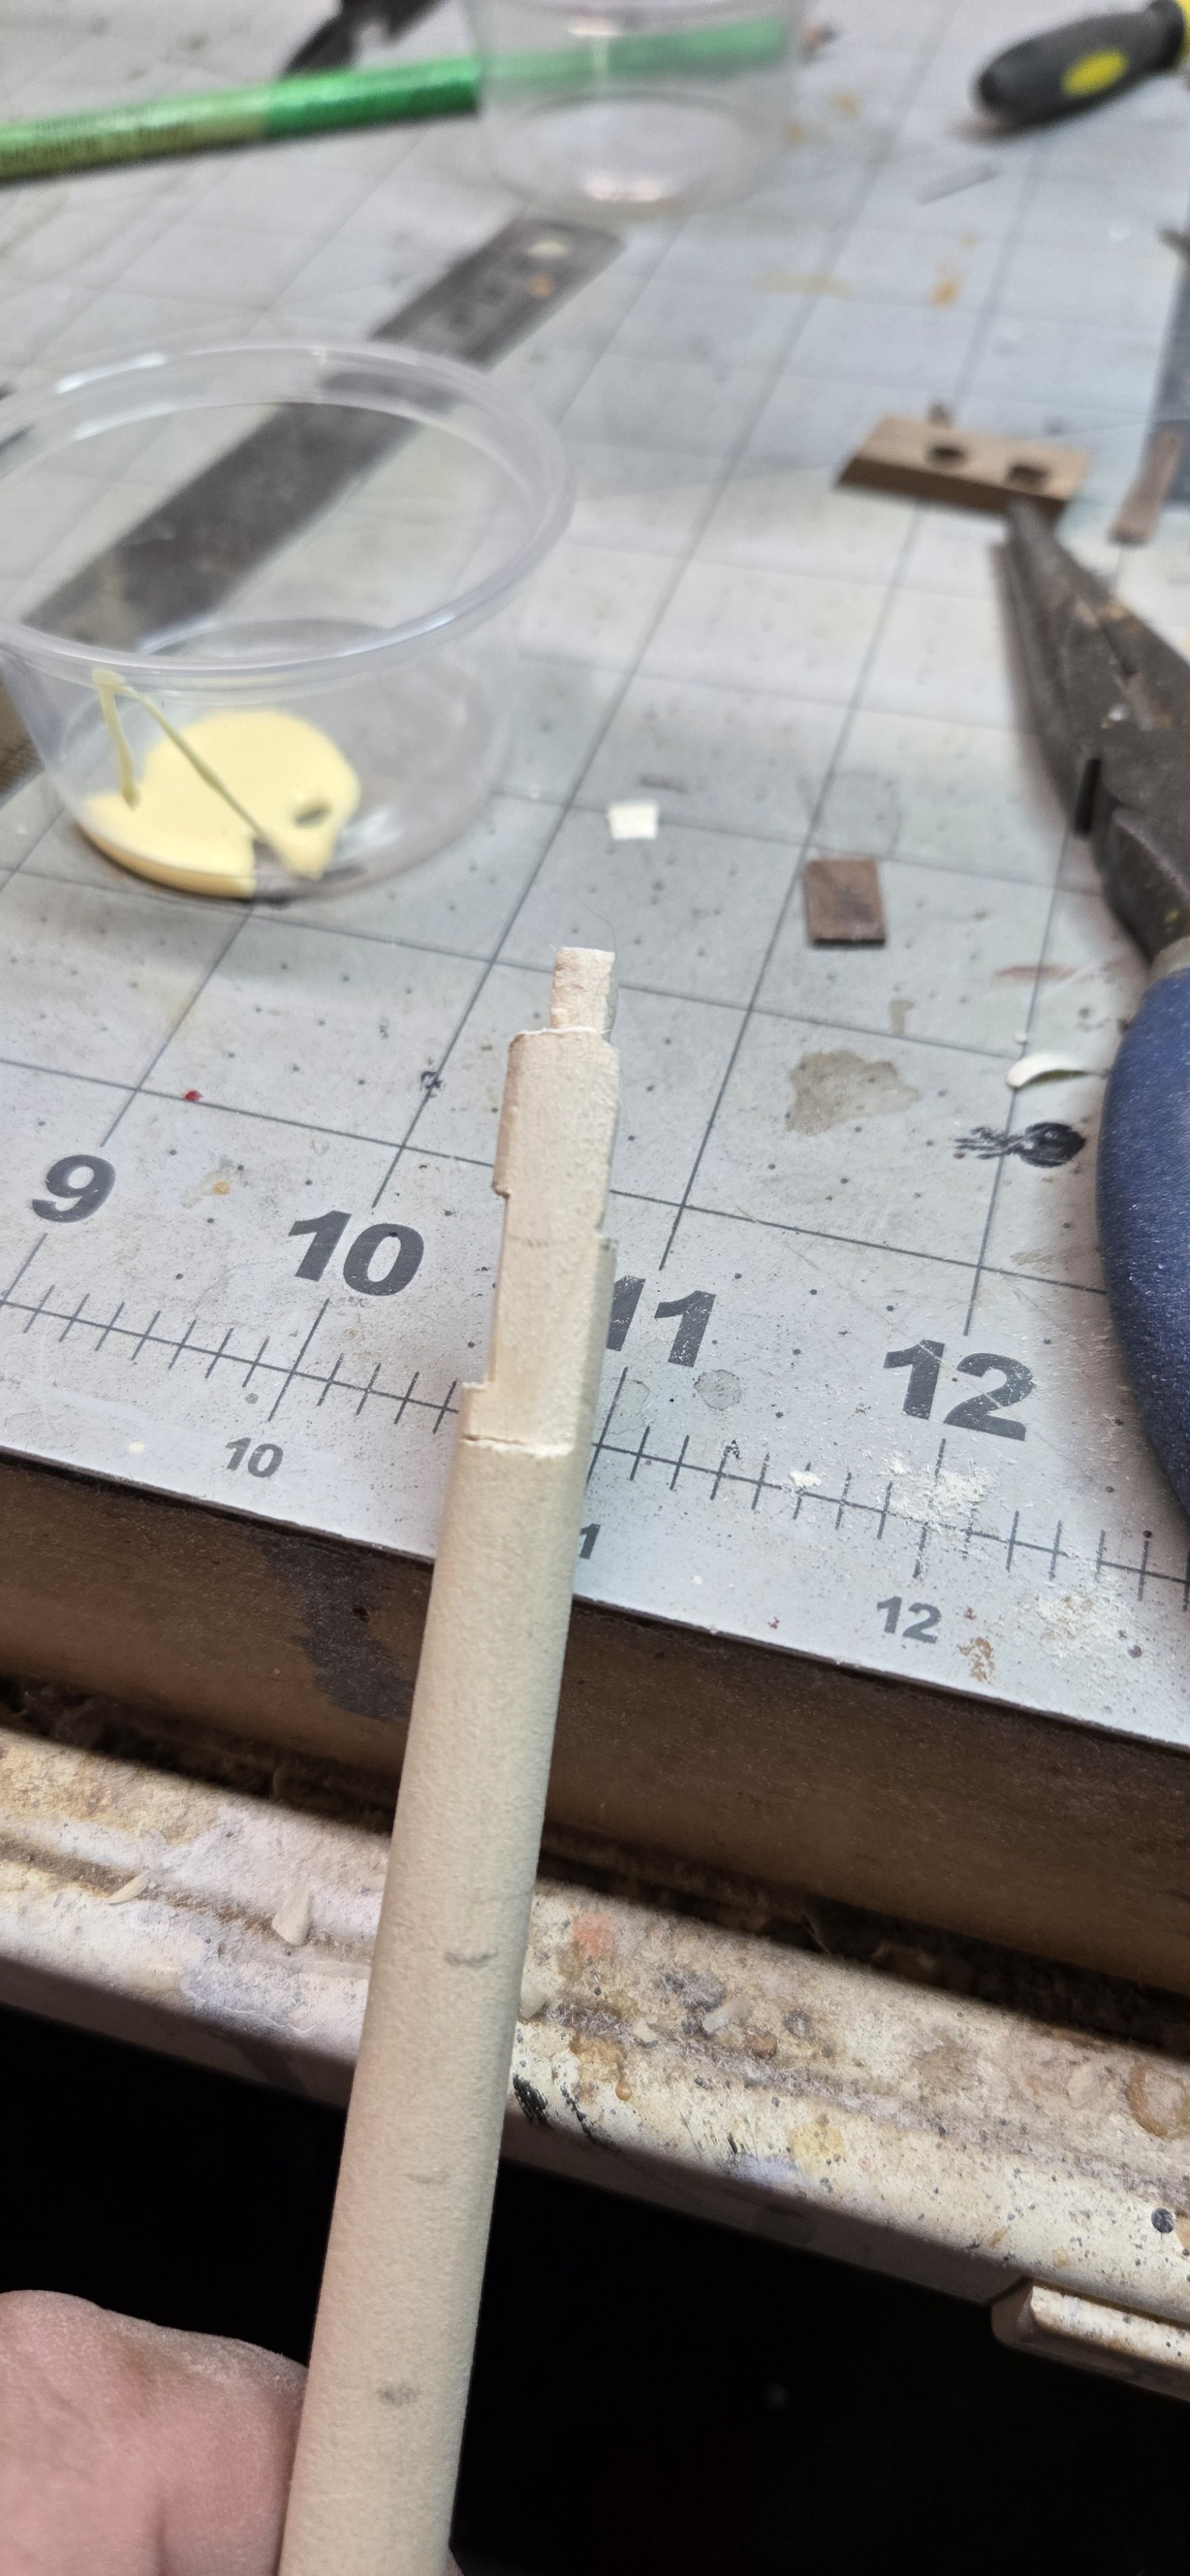
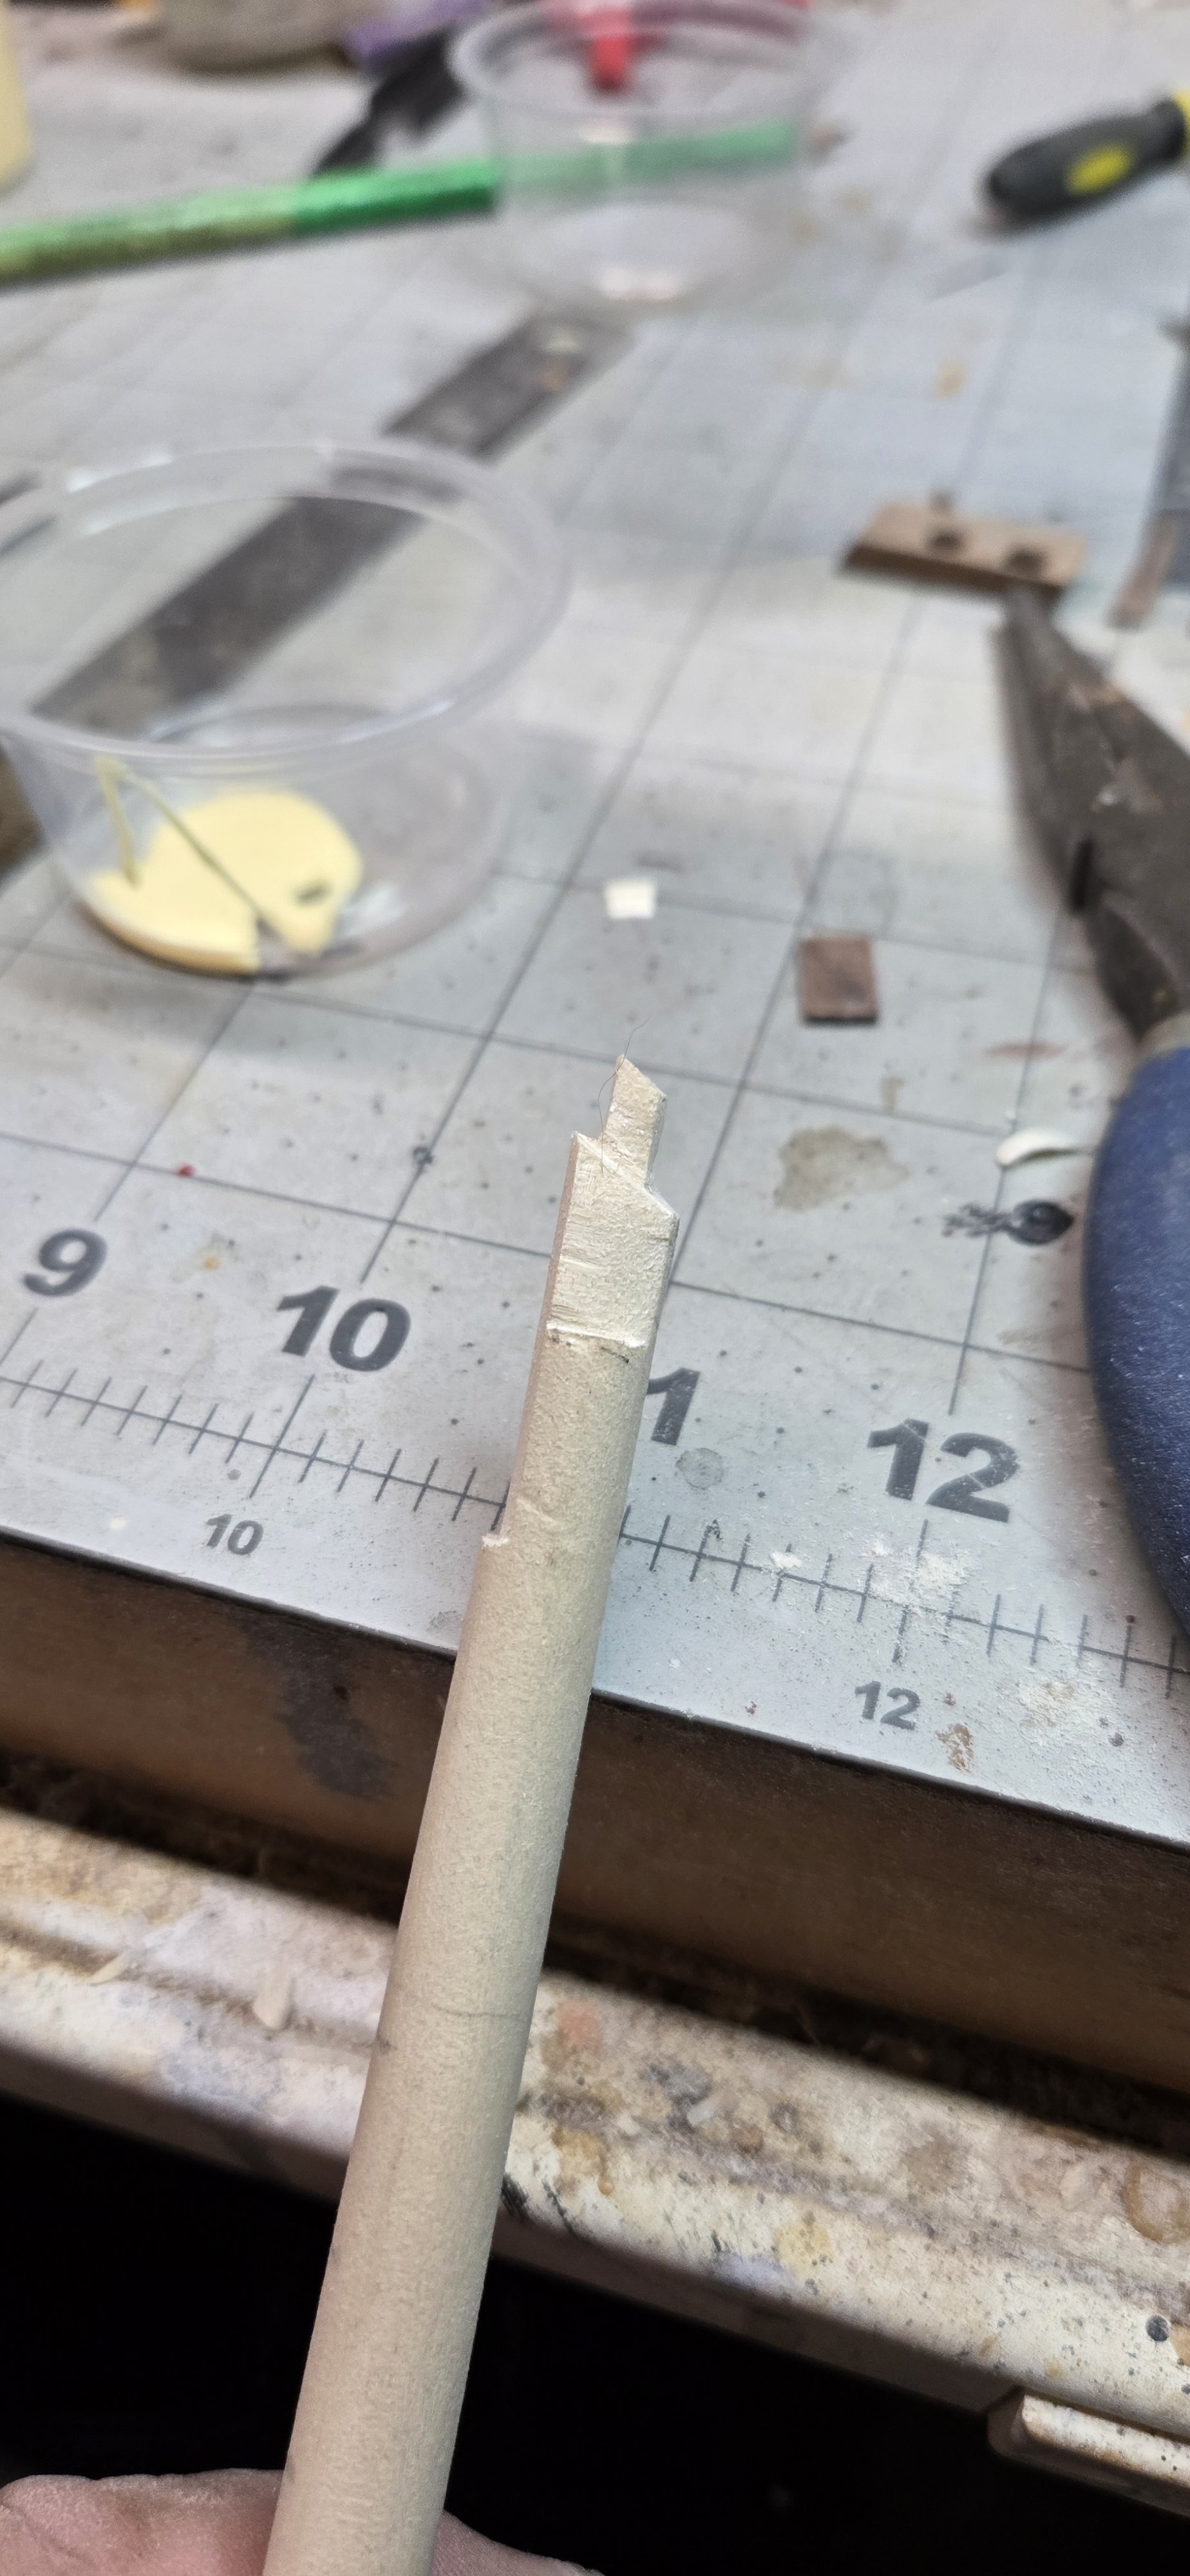
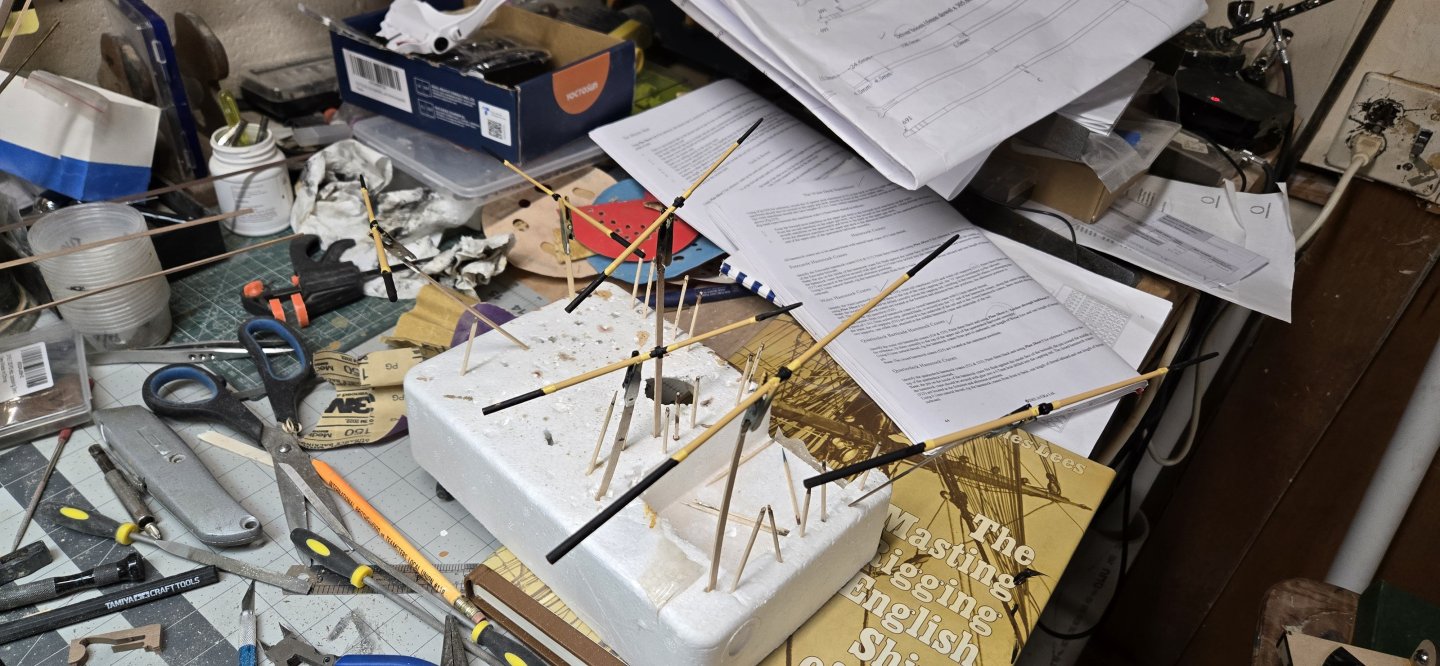
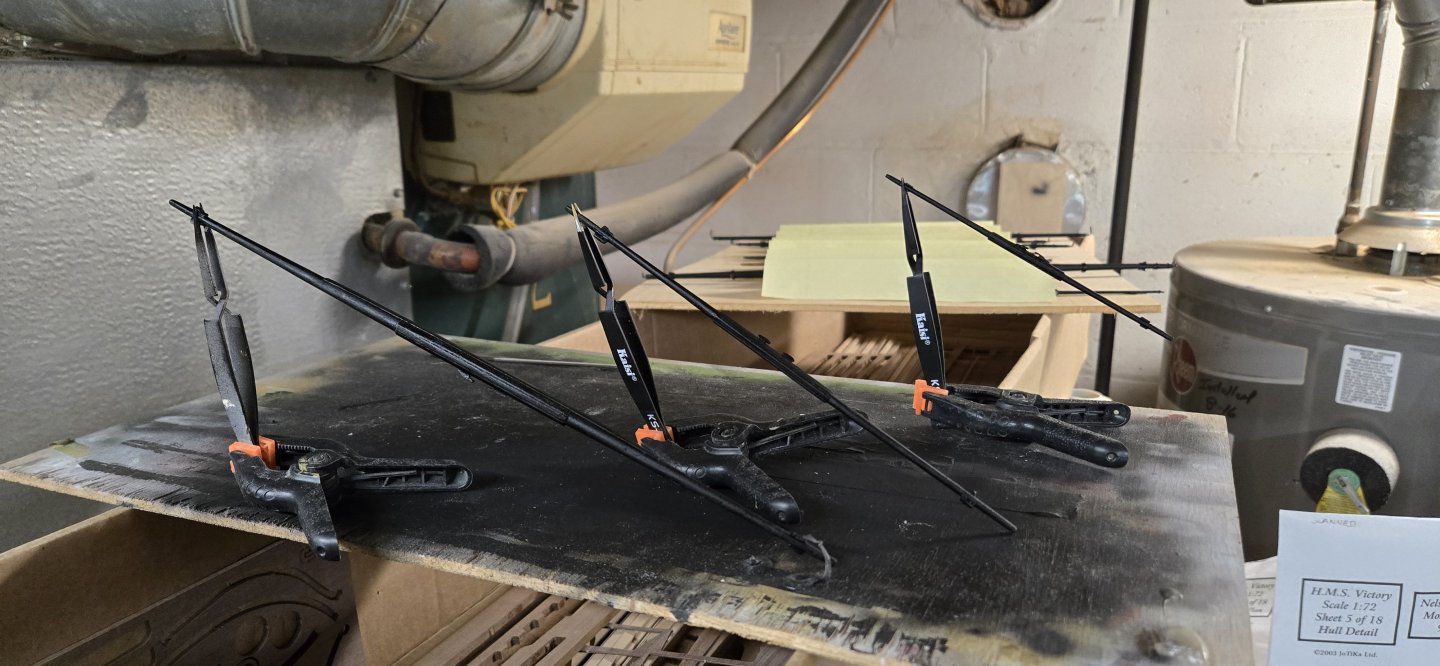
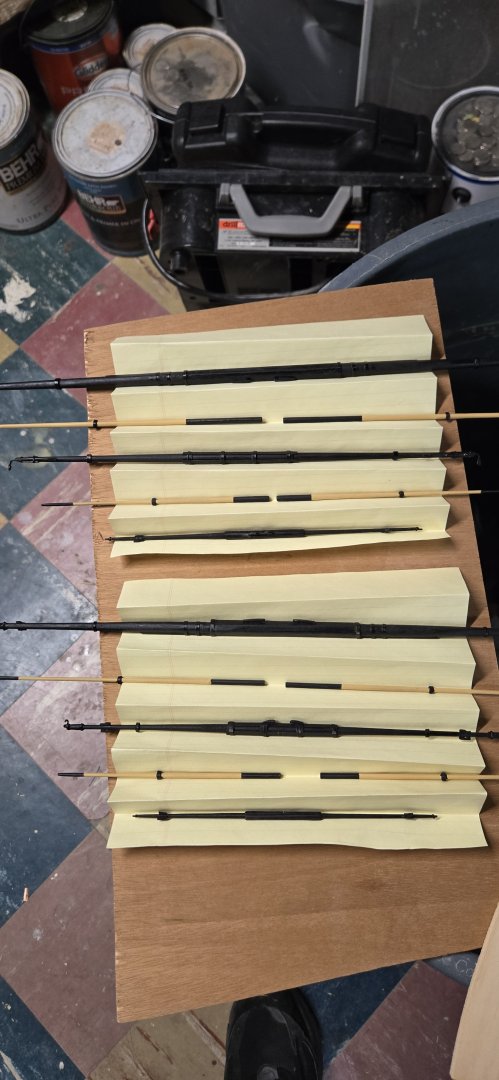
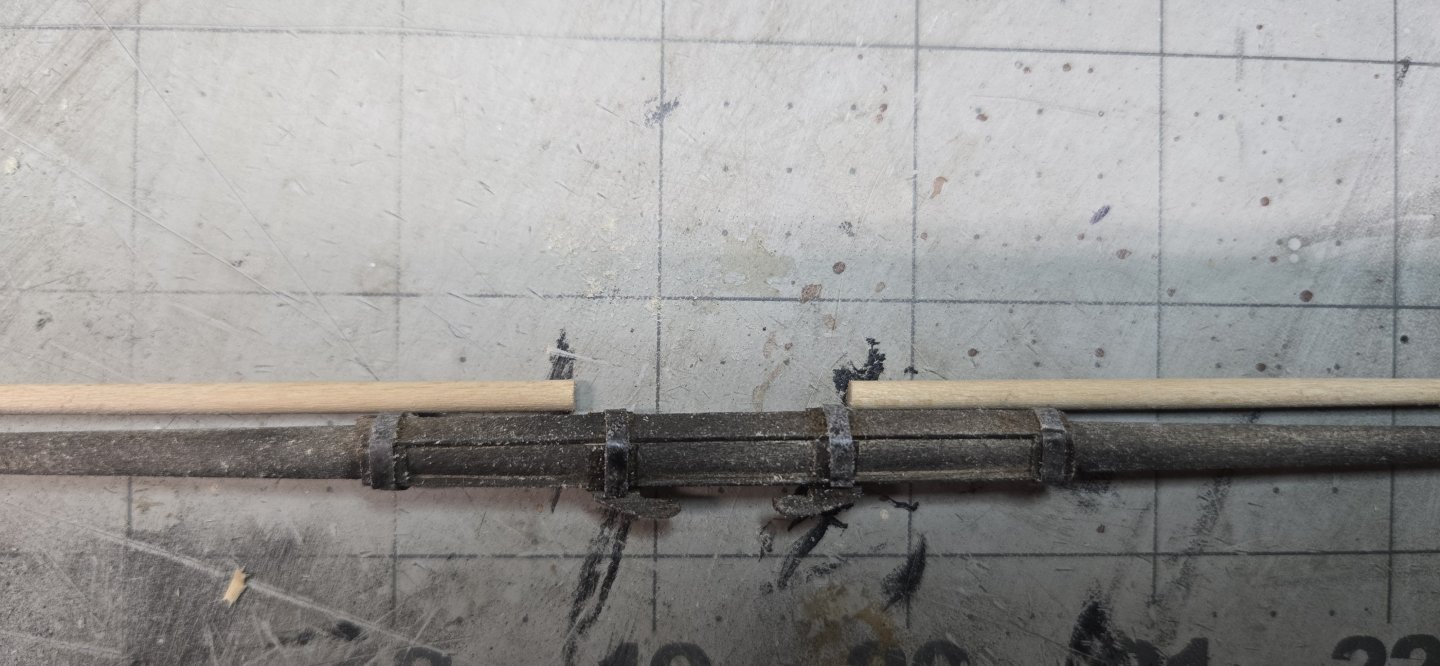
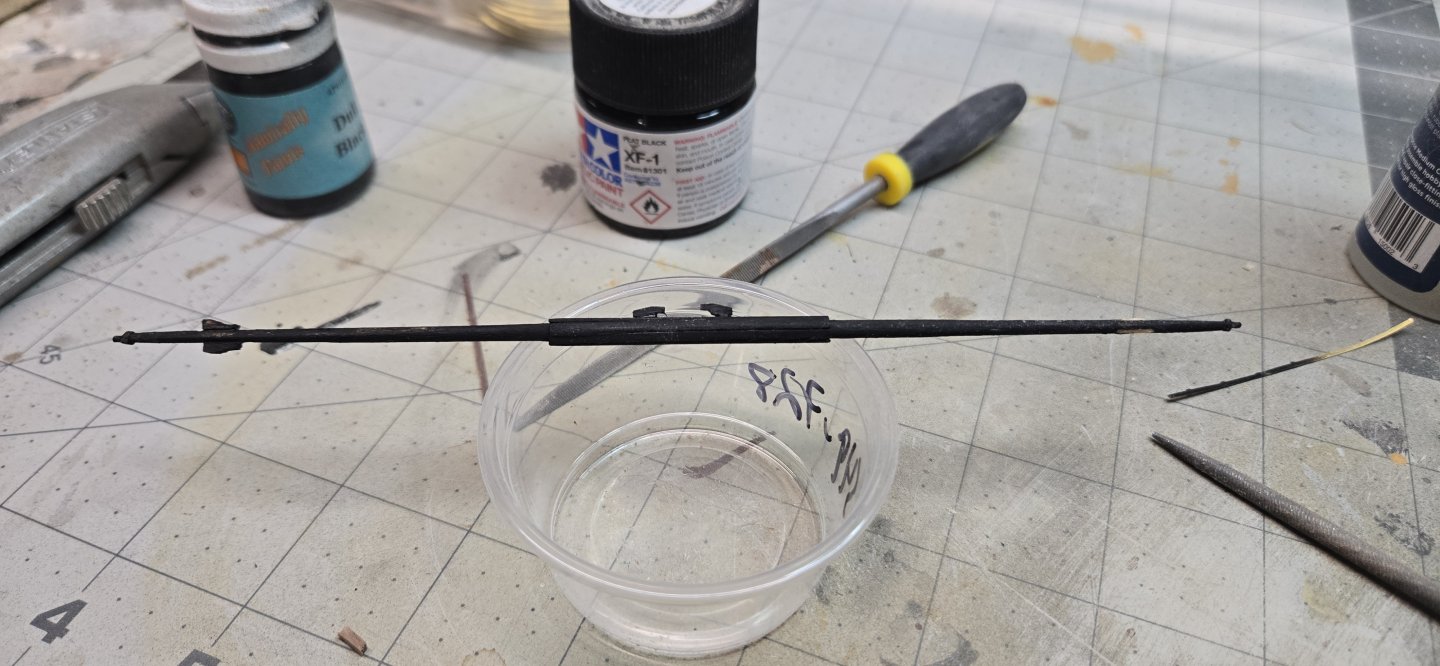
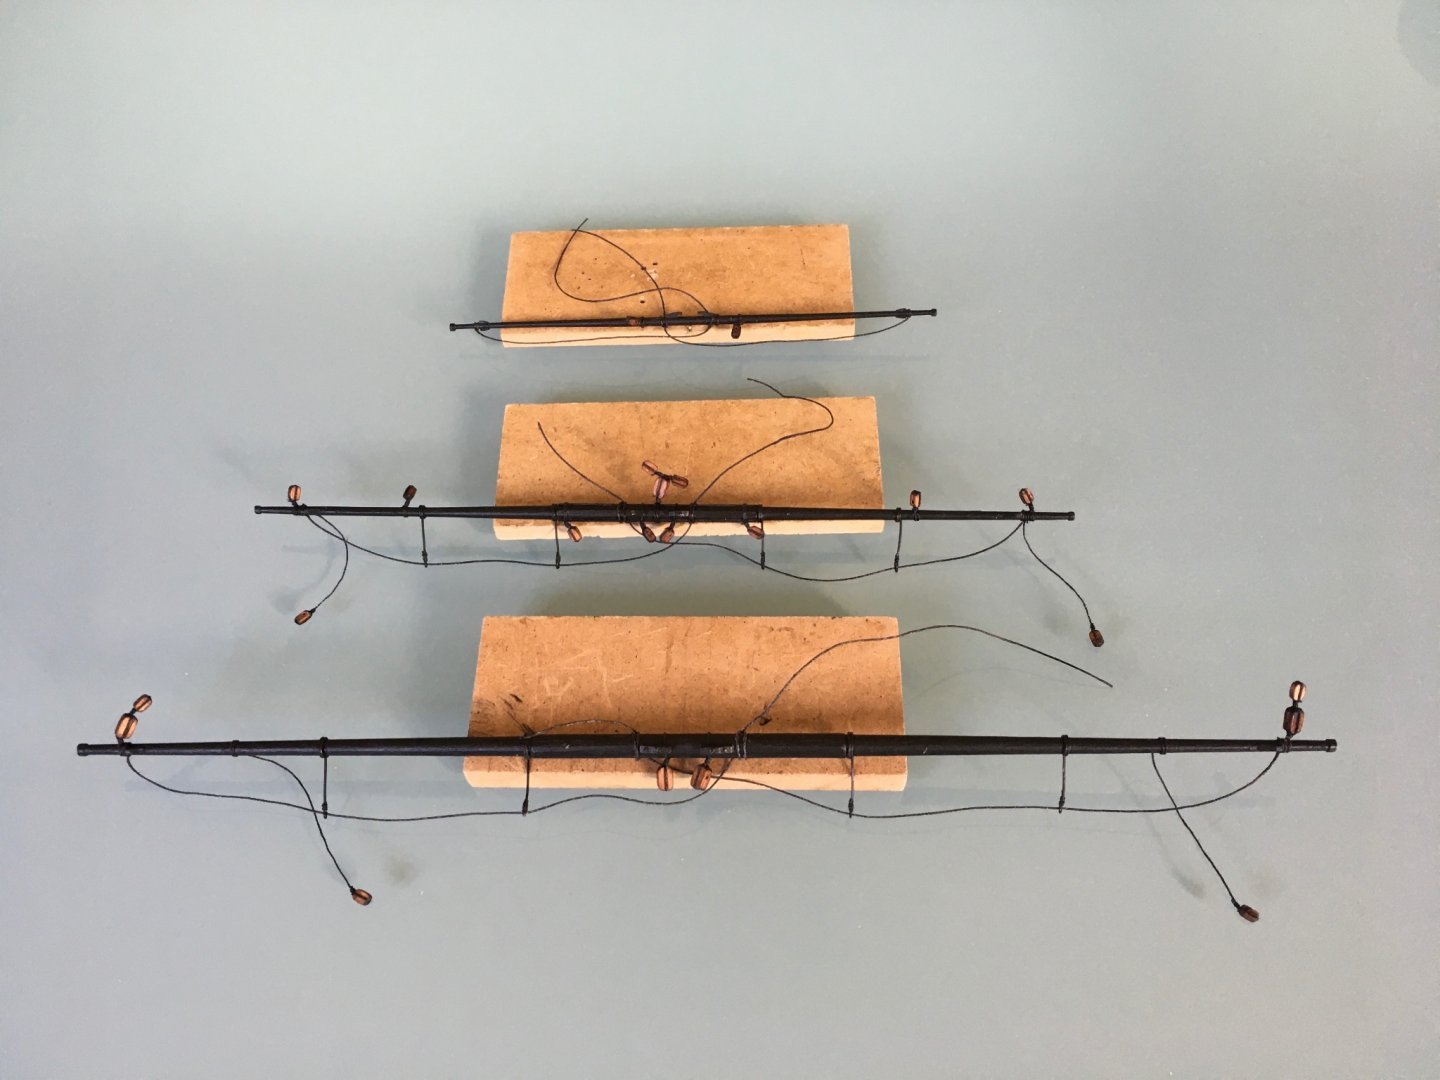
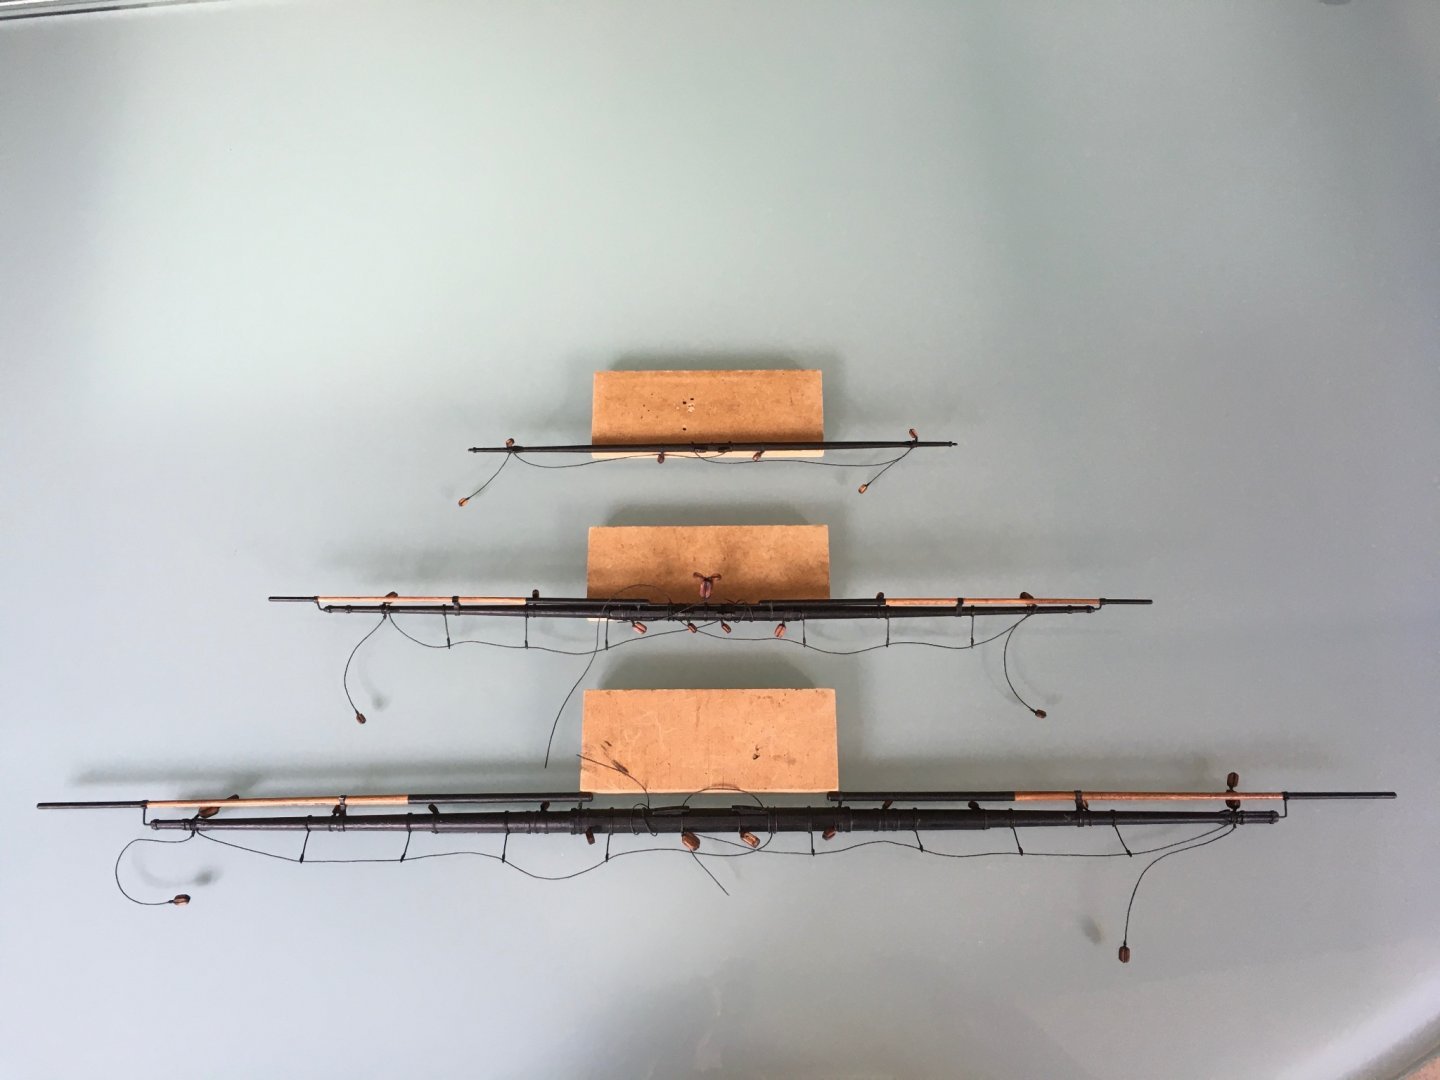
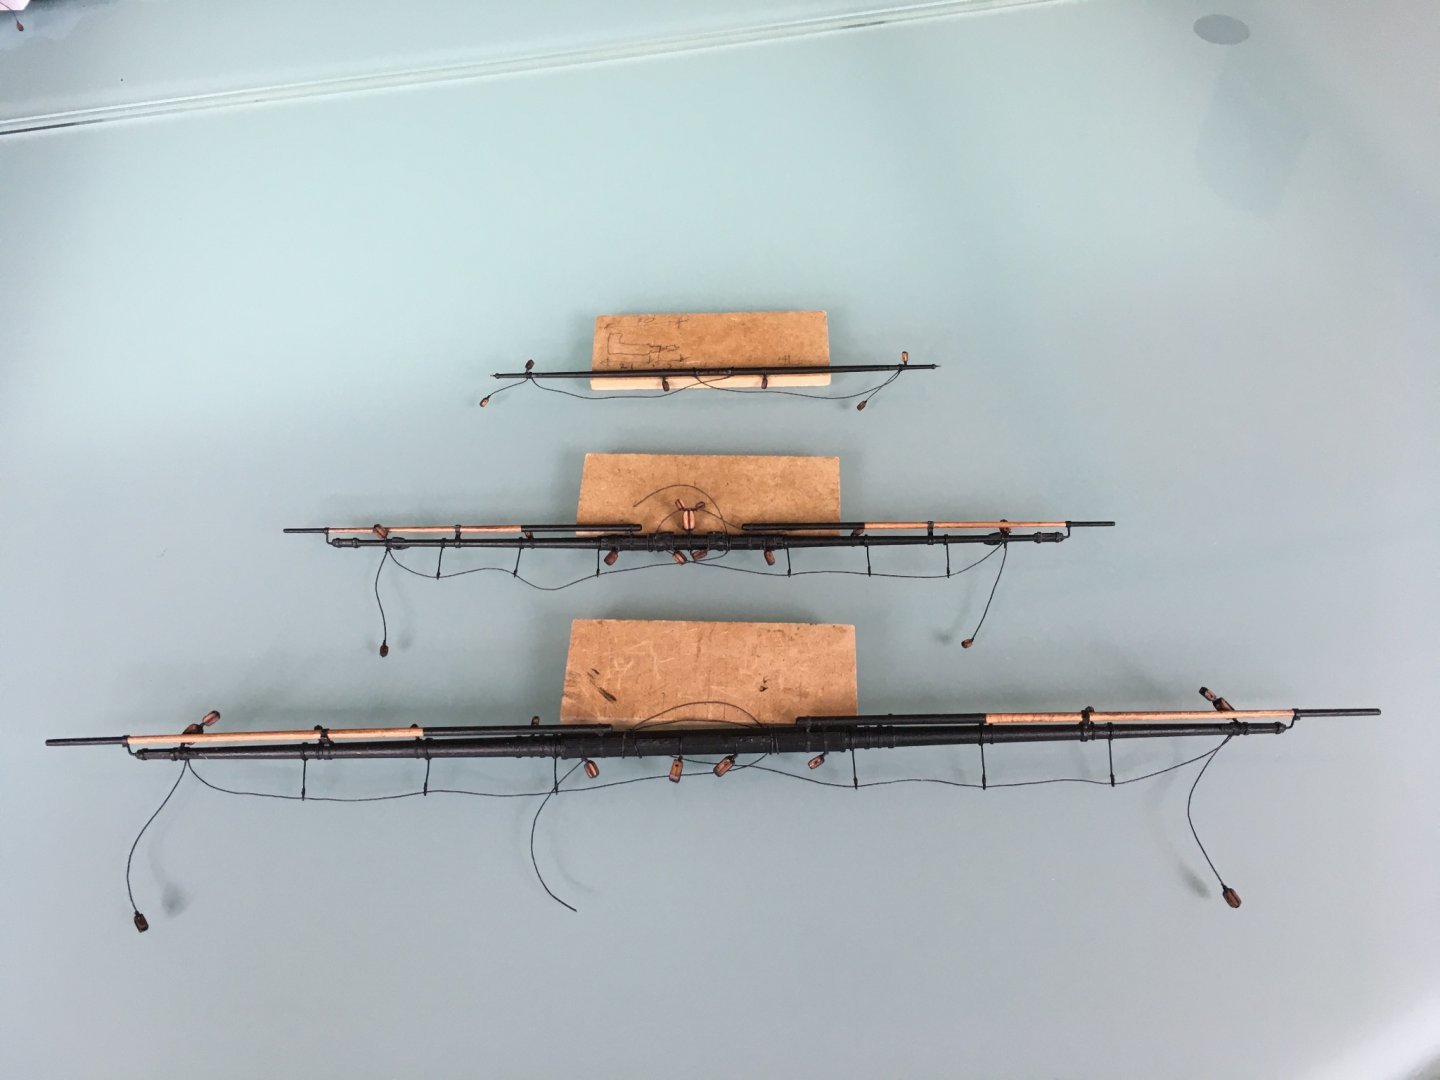
After figuring out the stunsail yard, I have moved on! After a good night's sleep and with steady hands, I was able to drill small .5mm holes into the side of the topmast yard and then follow up with a larger bit. I was then able to add the same brass wire and they look great. After, I moved on to the top gallant yard. This one has banding on the center, but I didn't see any reference to how think the banding is. Measuring the blueprints, I think it looks to be about 1mm wide. So I cut some .5x3mm into 3 strips and applied them. That seemed to work fine, one is a bit thicker, but after sanding and painting they look good. The ends of this yard looks like it has a point to accept rigging/blocking. Had I looked ahead, perhaps I could have drilled the hole first and added a brass nipple to the end. Since I didn't, I added some PE sprue to the end and then file/sanded the very end to create that nipple. You can also see on the top gallant yard, I messed up on one side of the stops, I have them backwards. I noticed them when I started painting and fixed them. After, I had to paint them. I am running low on the flat black paint. I have about 1/3 of a jar left and even adding water to the 1st and 2nd coats, I wonder about making it last. I do have a full jar of iron black, but....for some reason I ordered that for the cannons. I decided to try Tamiya dull black. I have 2 jars from a previous build and honestly, it looks pretty close. If I have to, I can always go over it with the kit dull black.


-
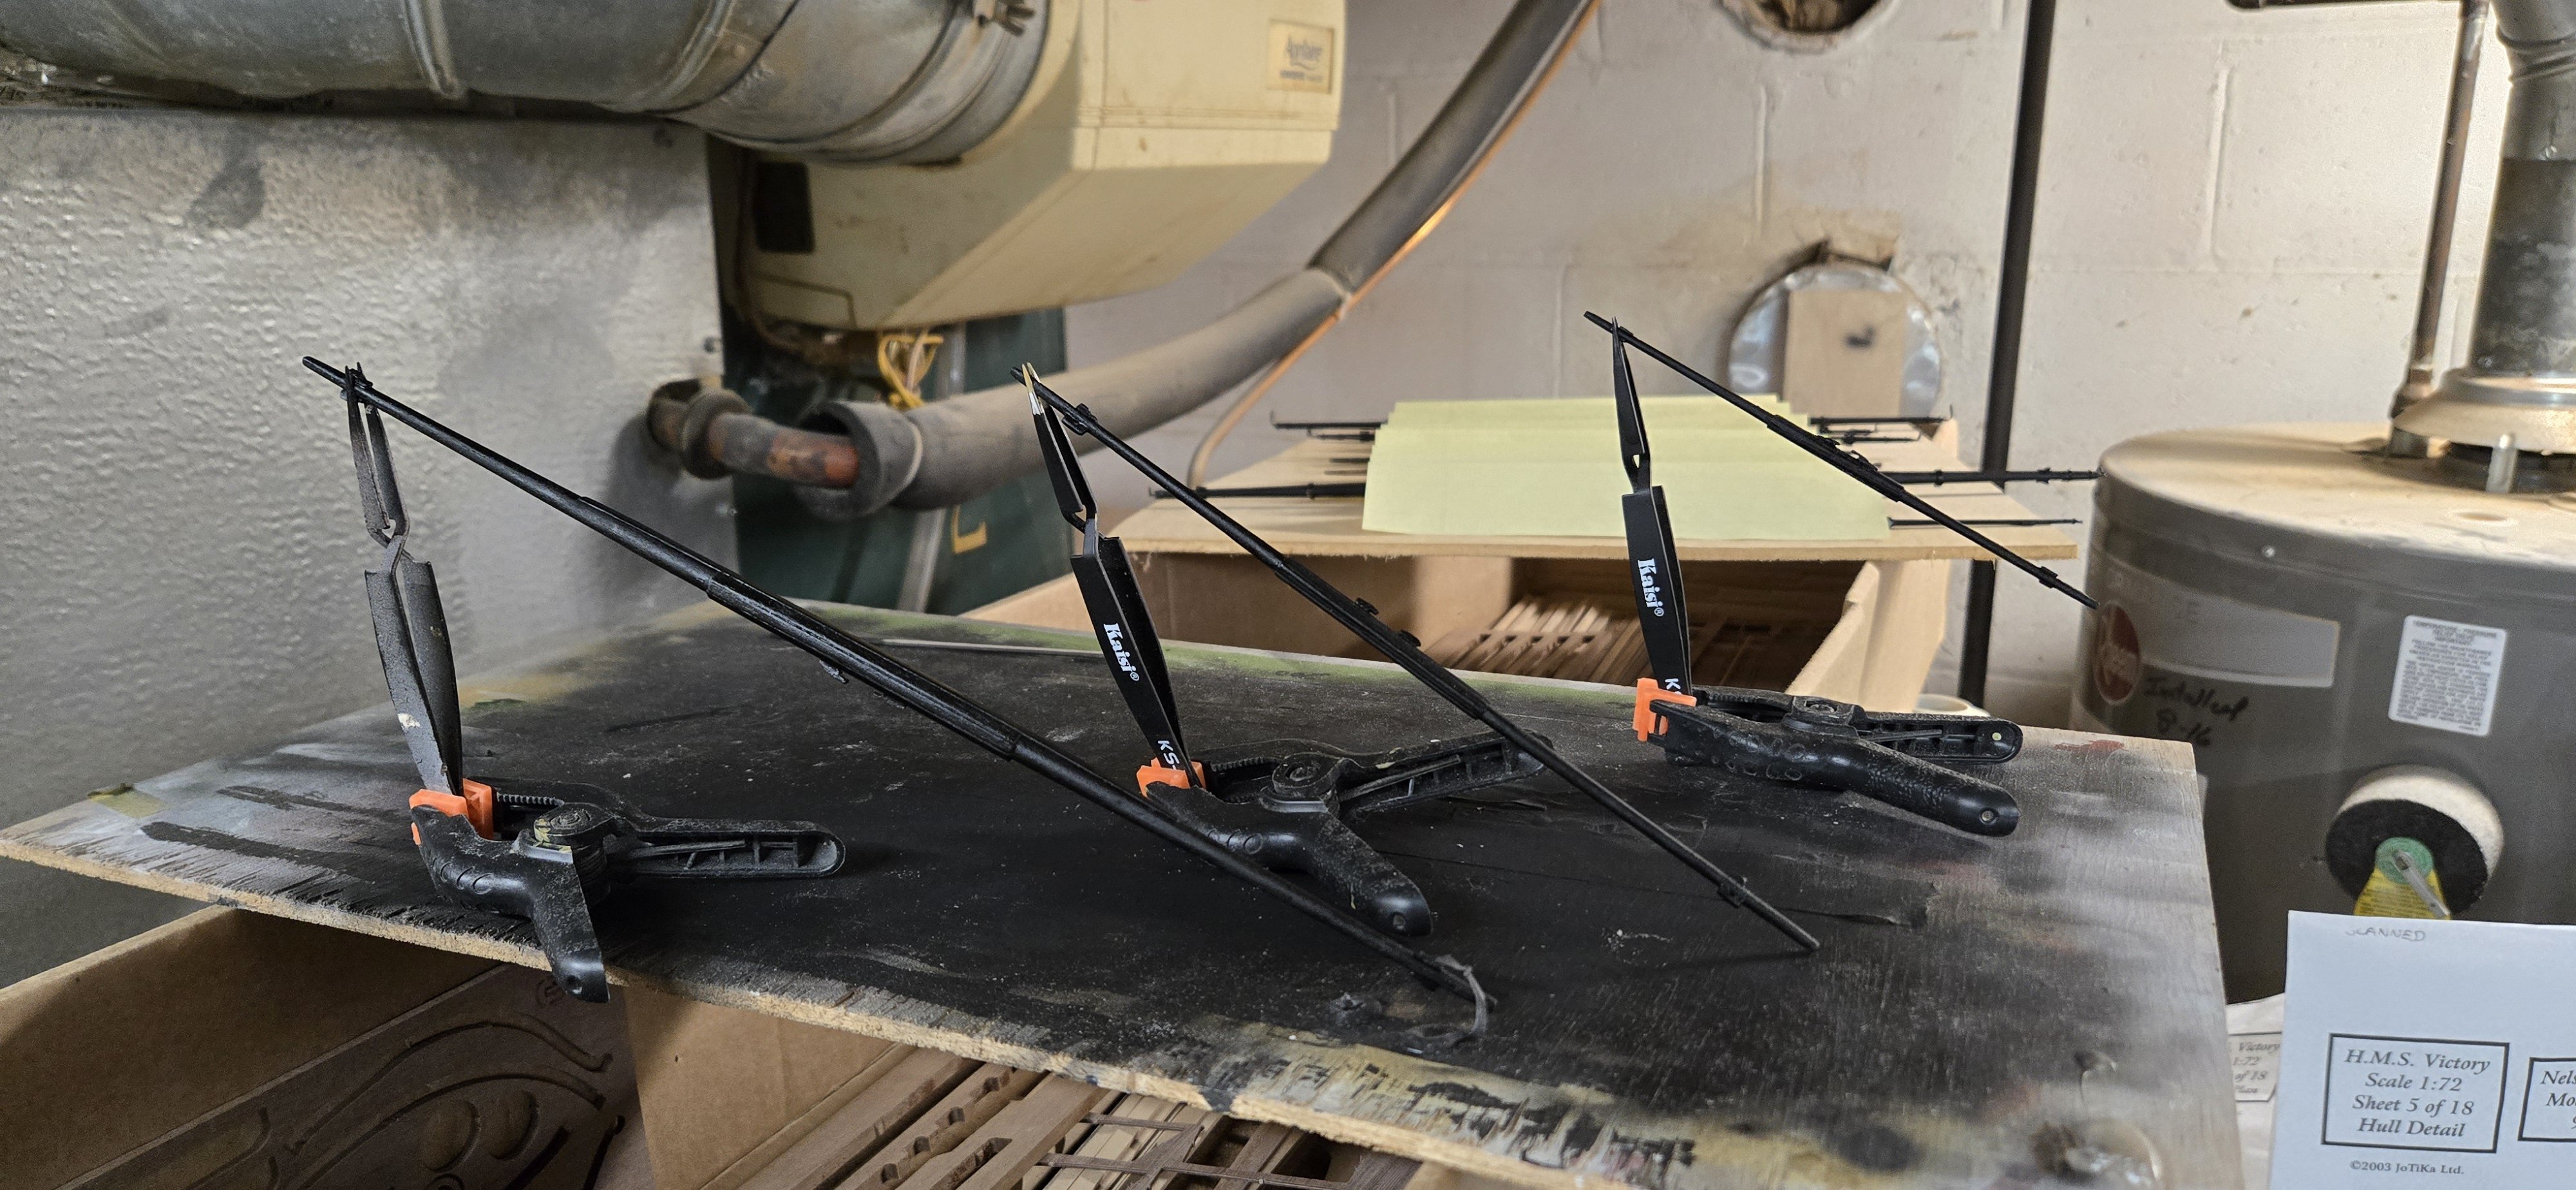
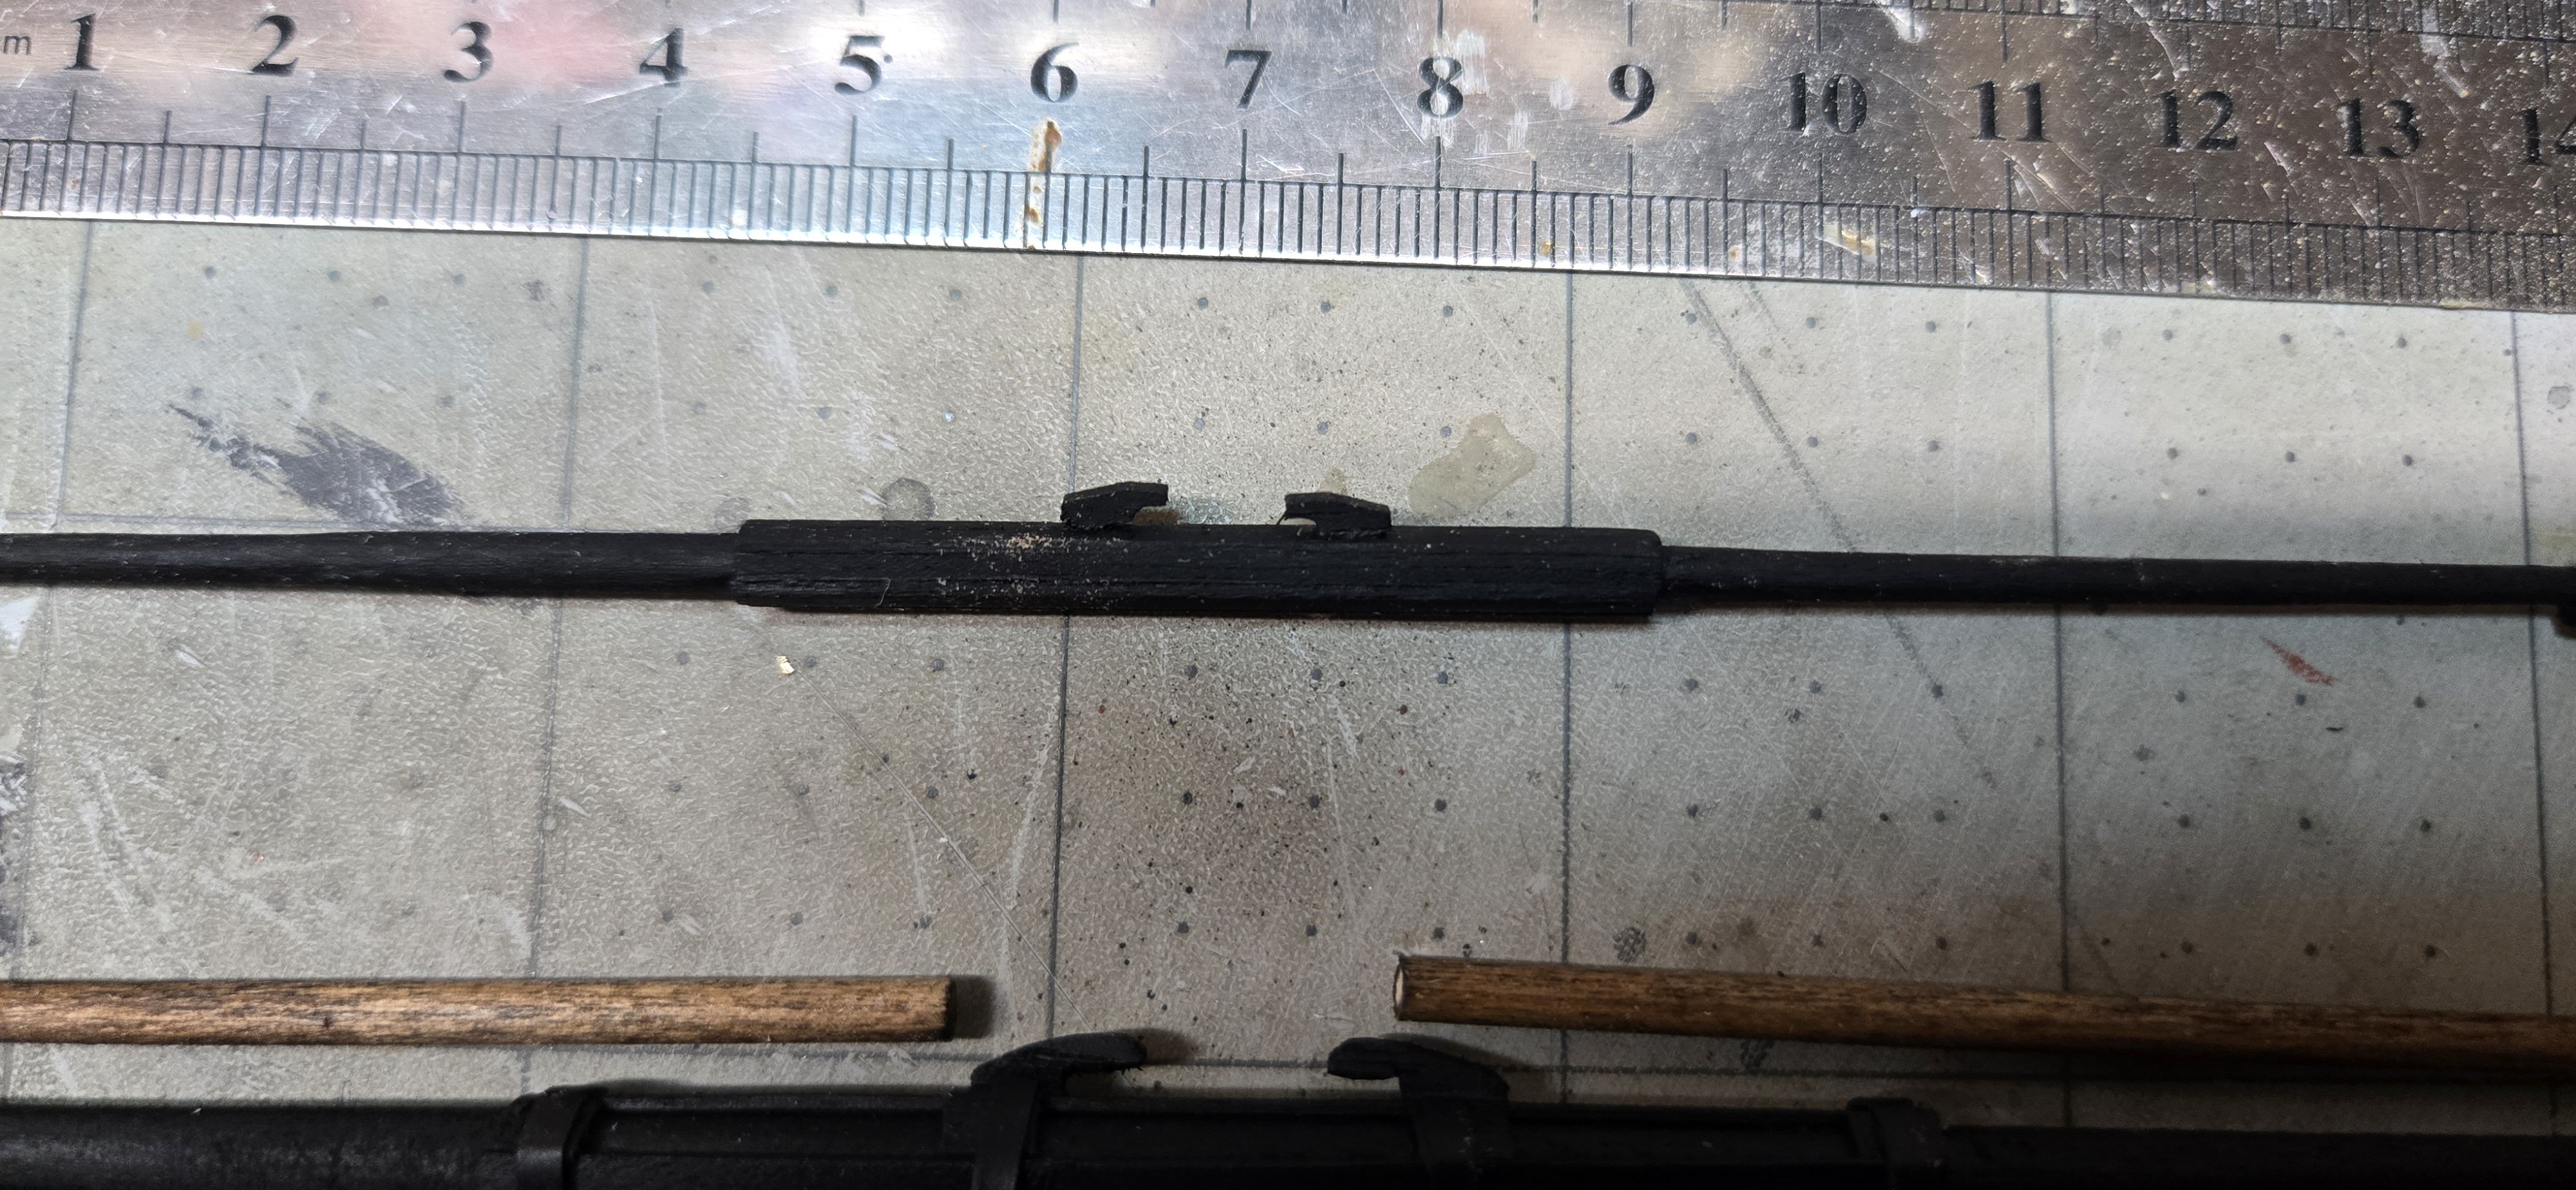
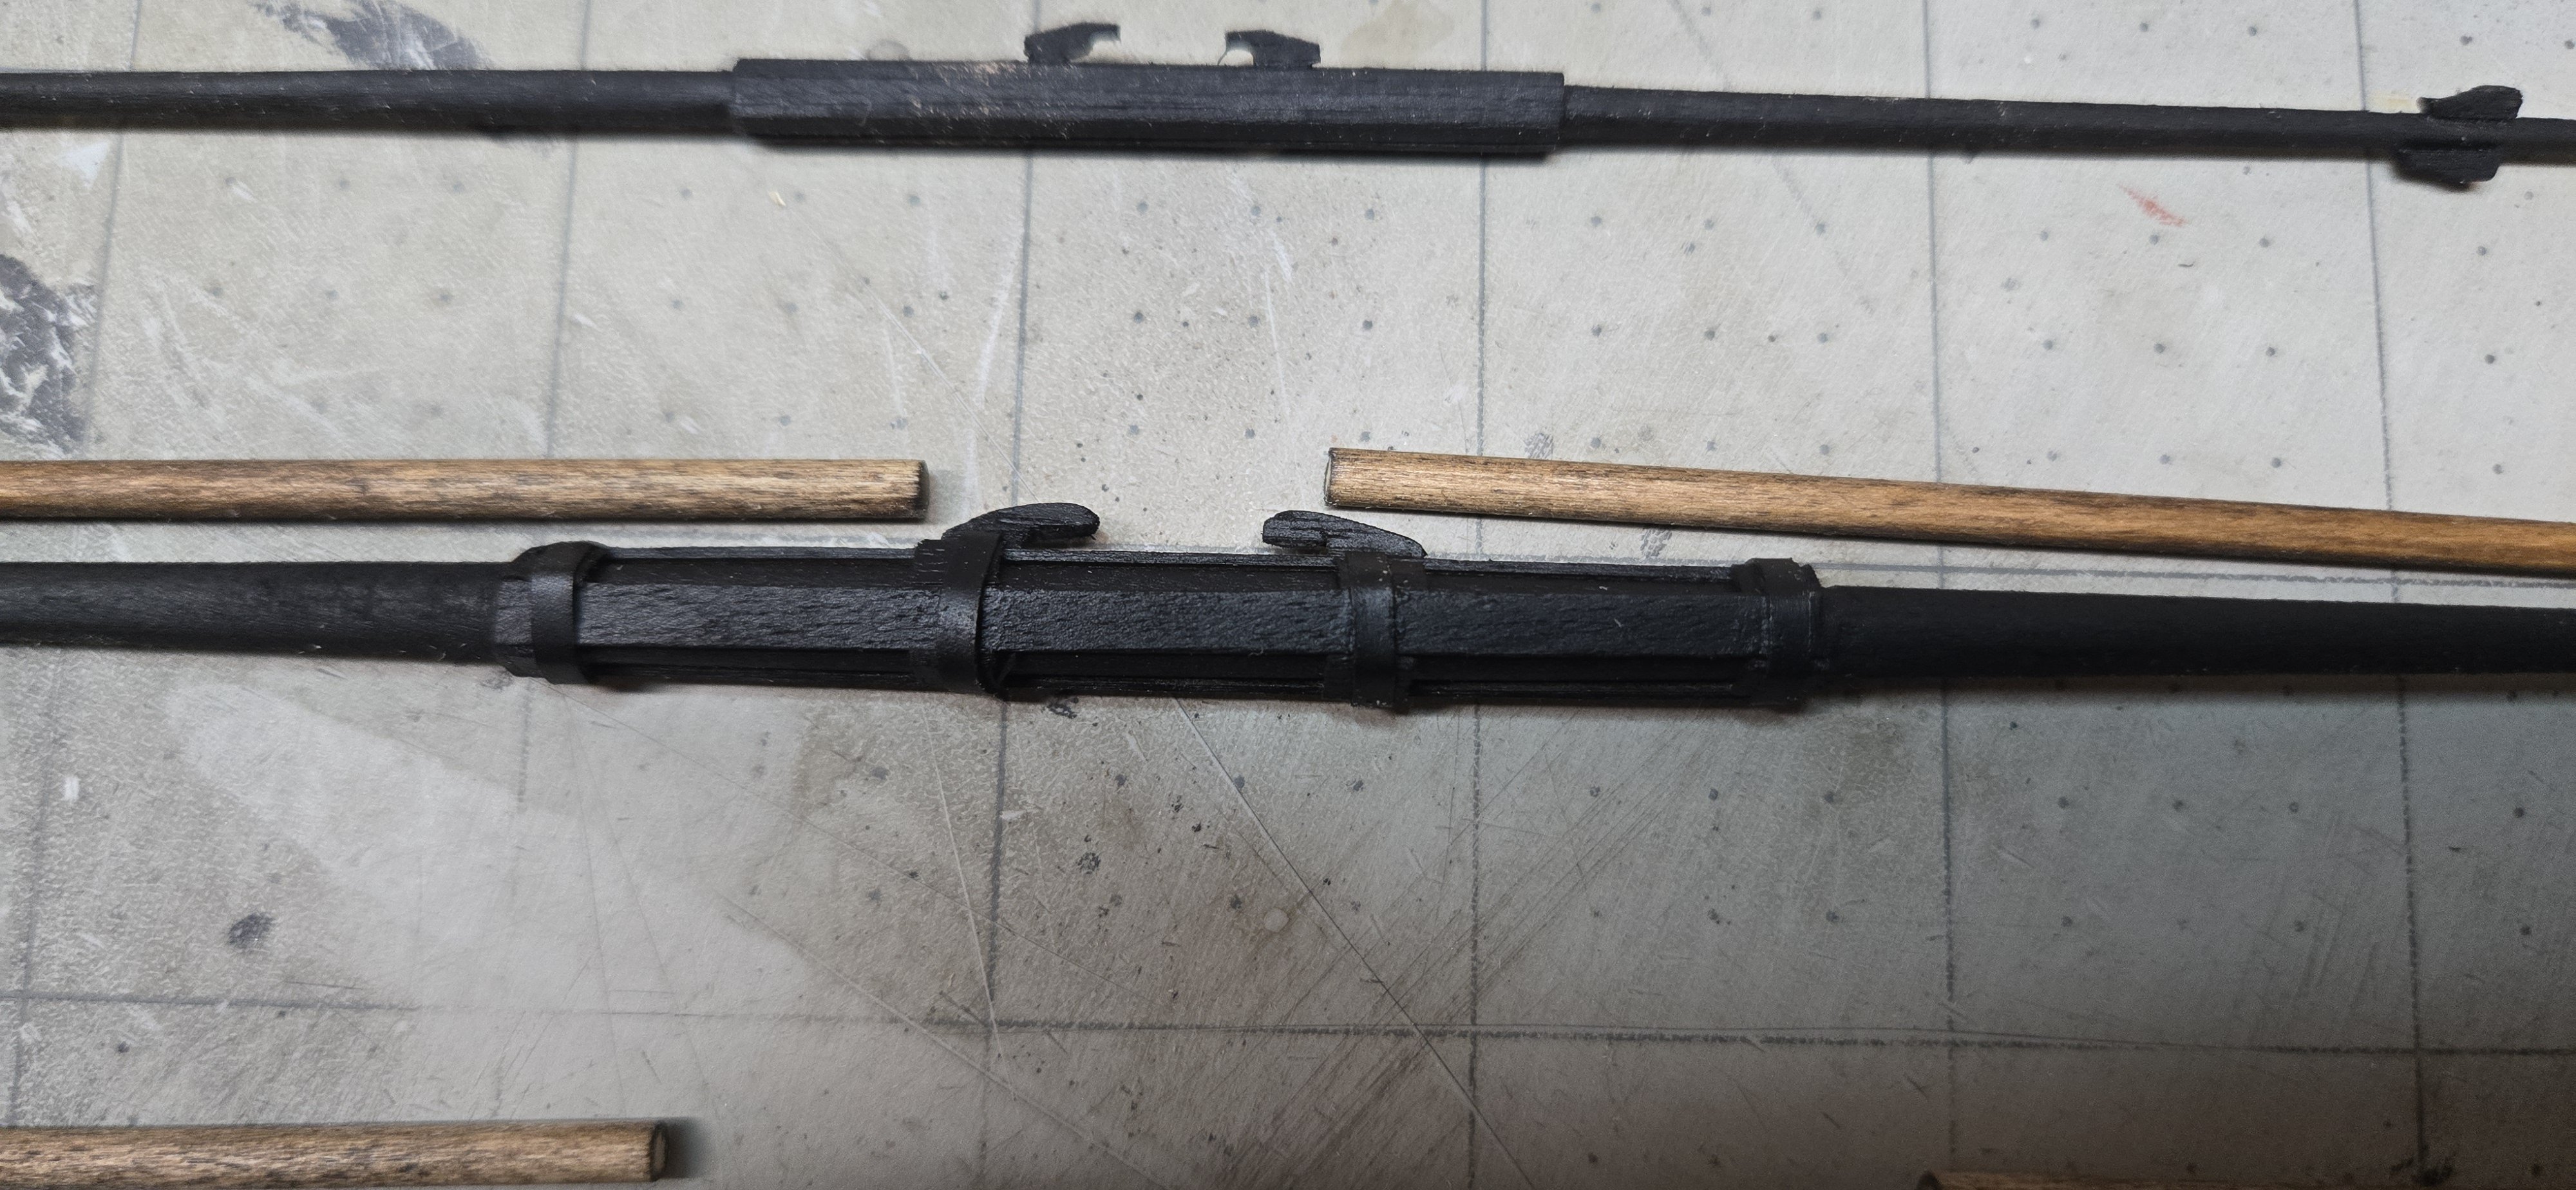
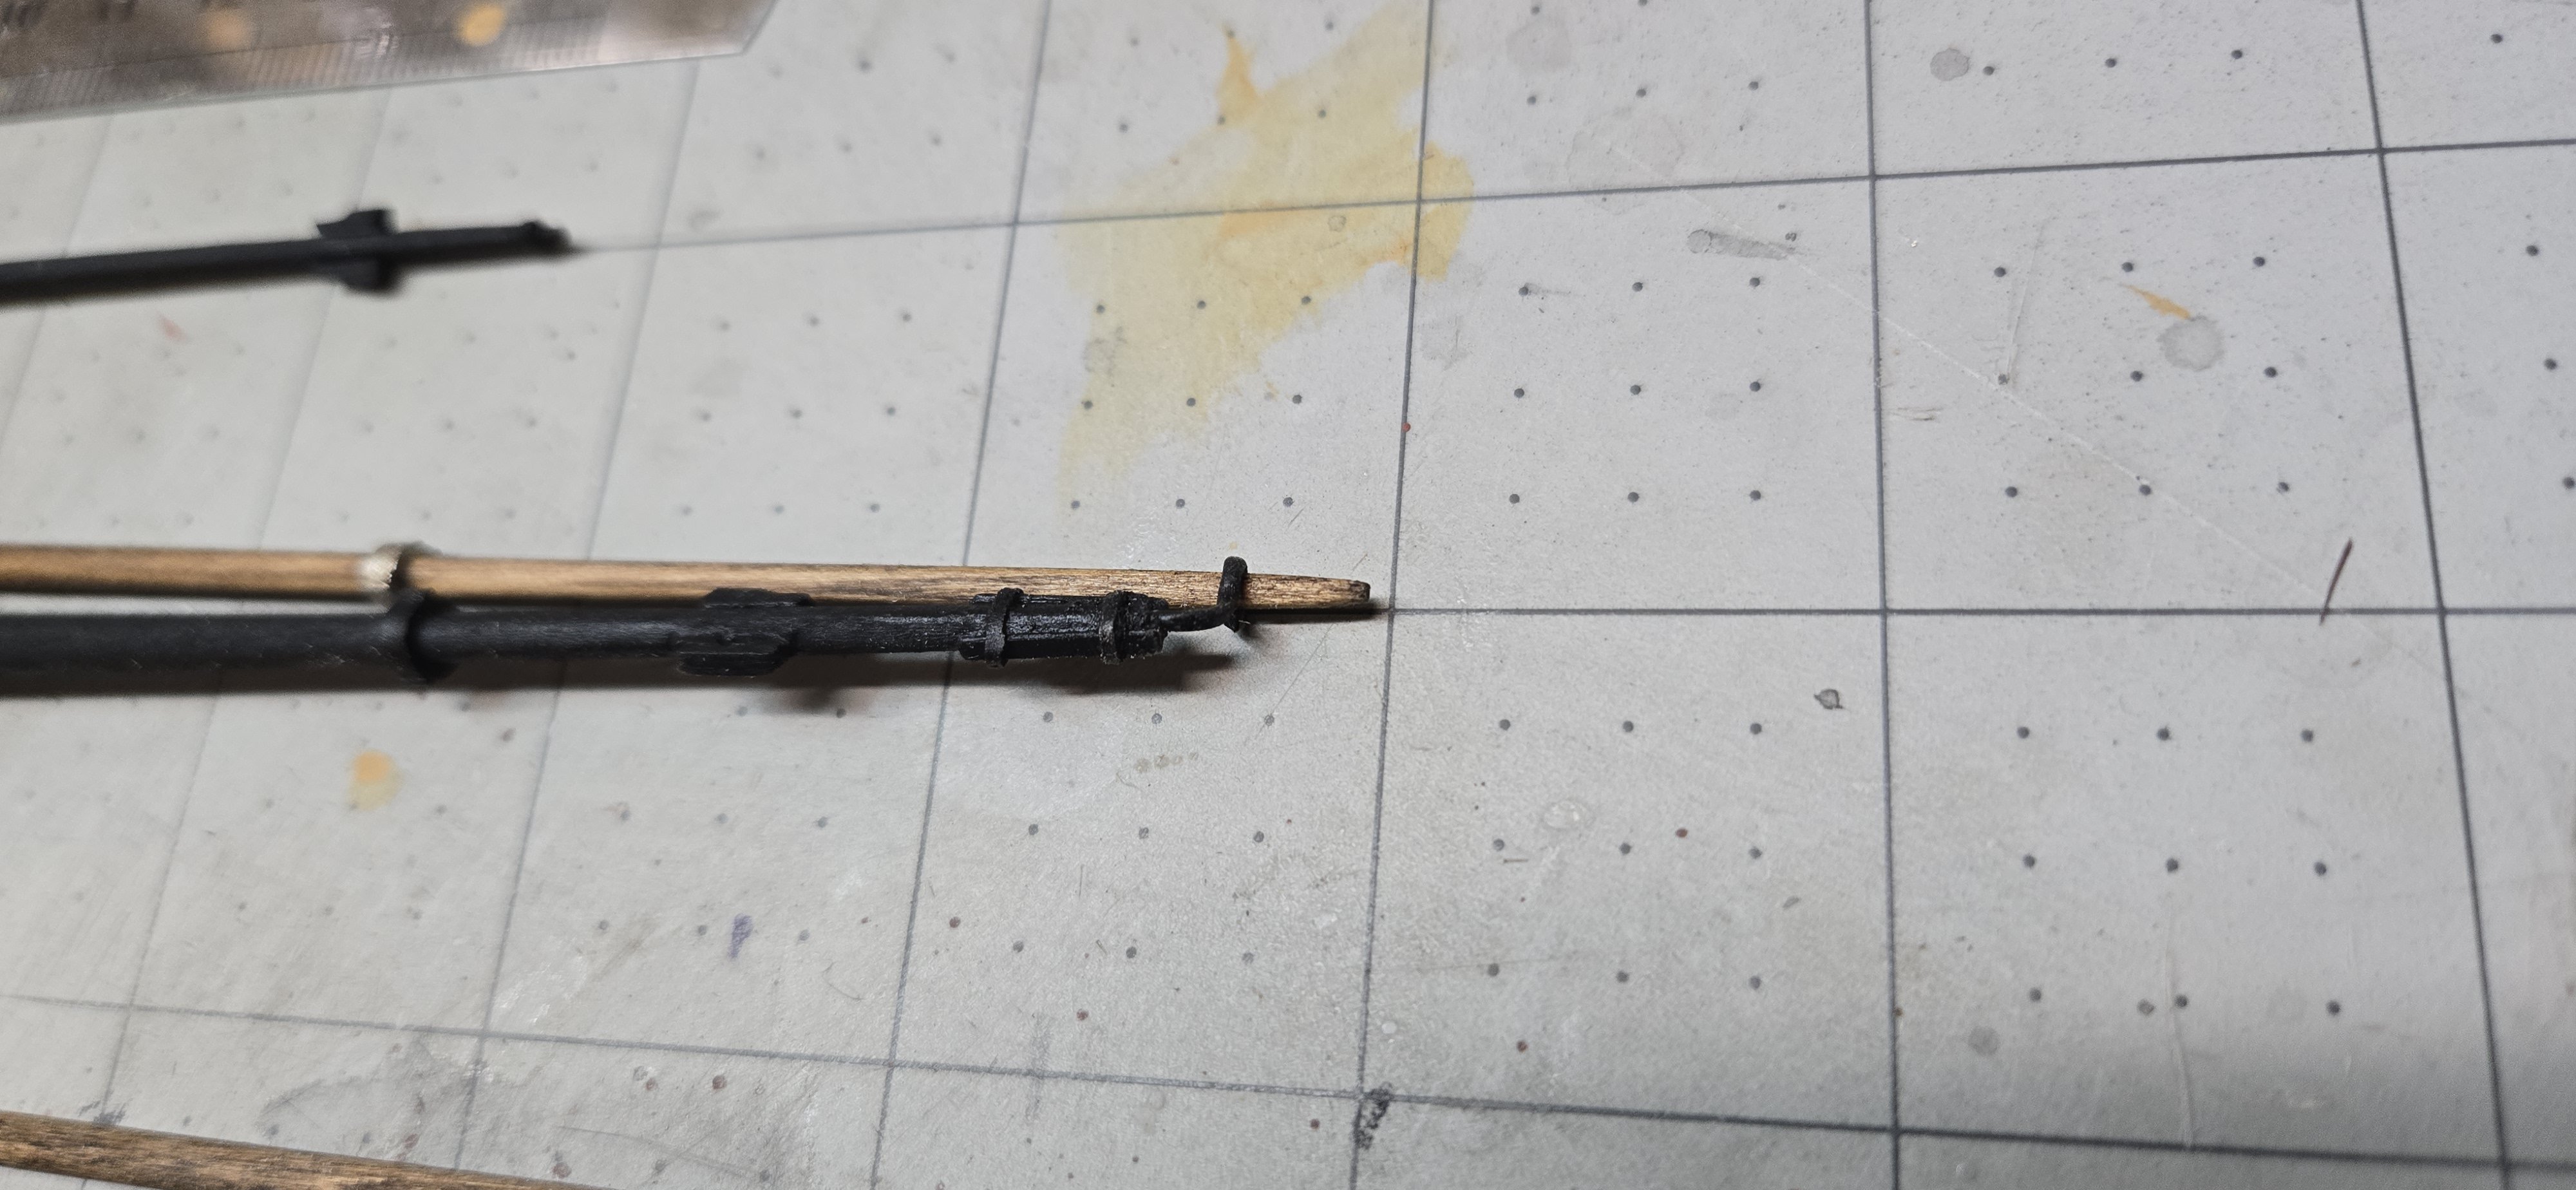
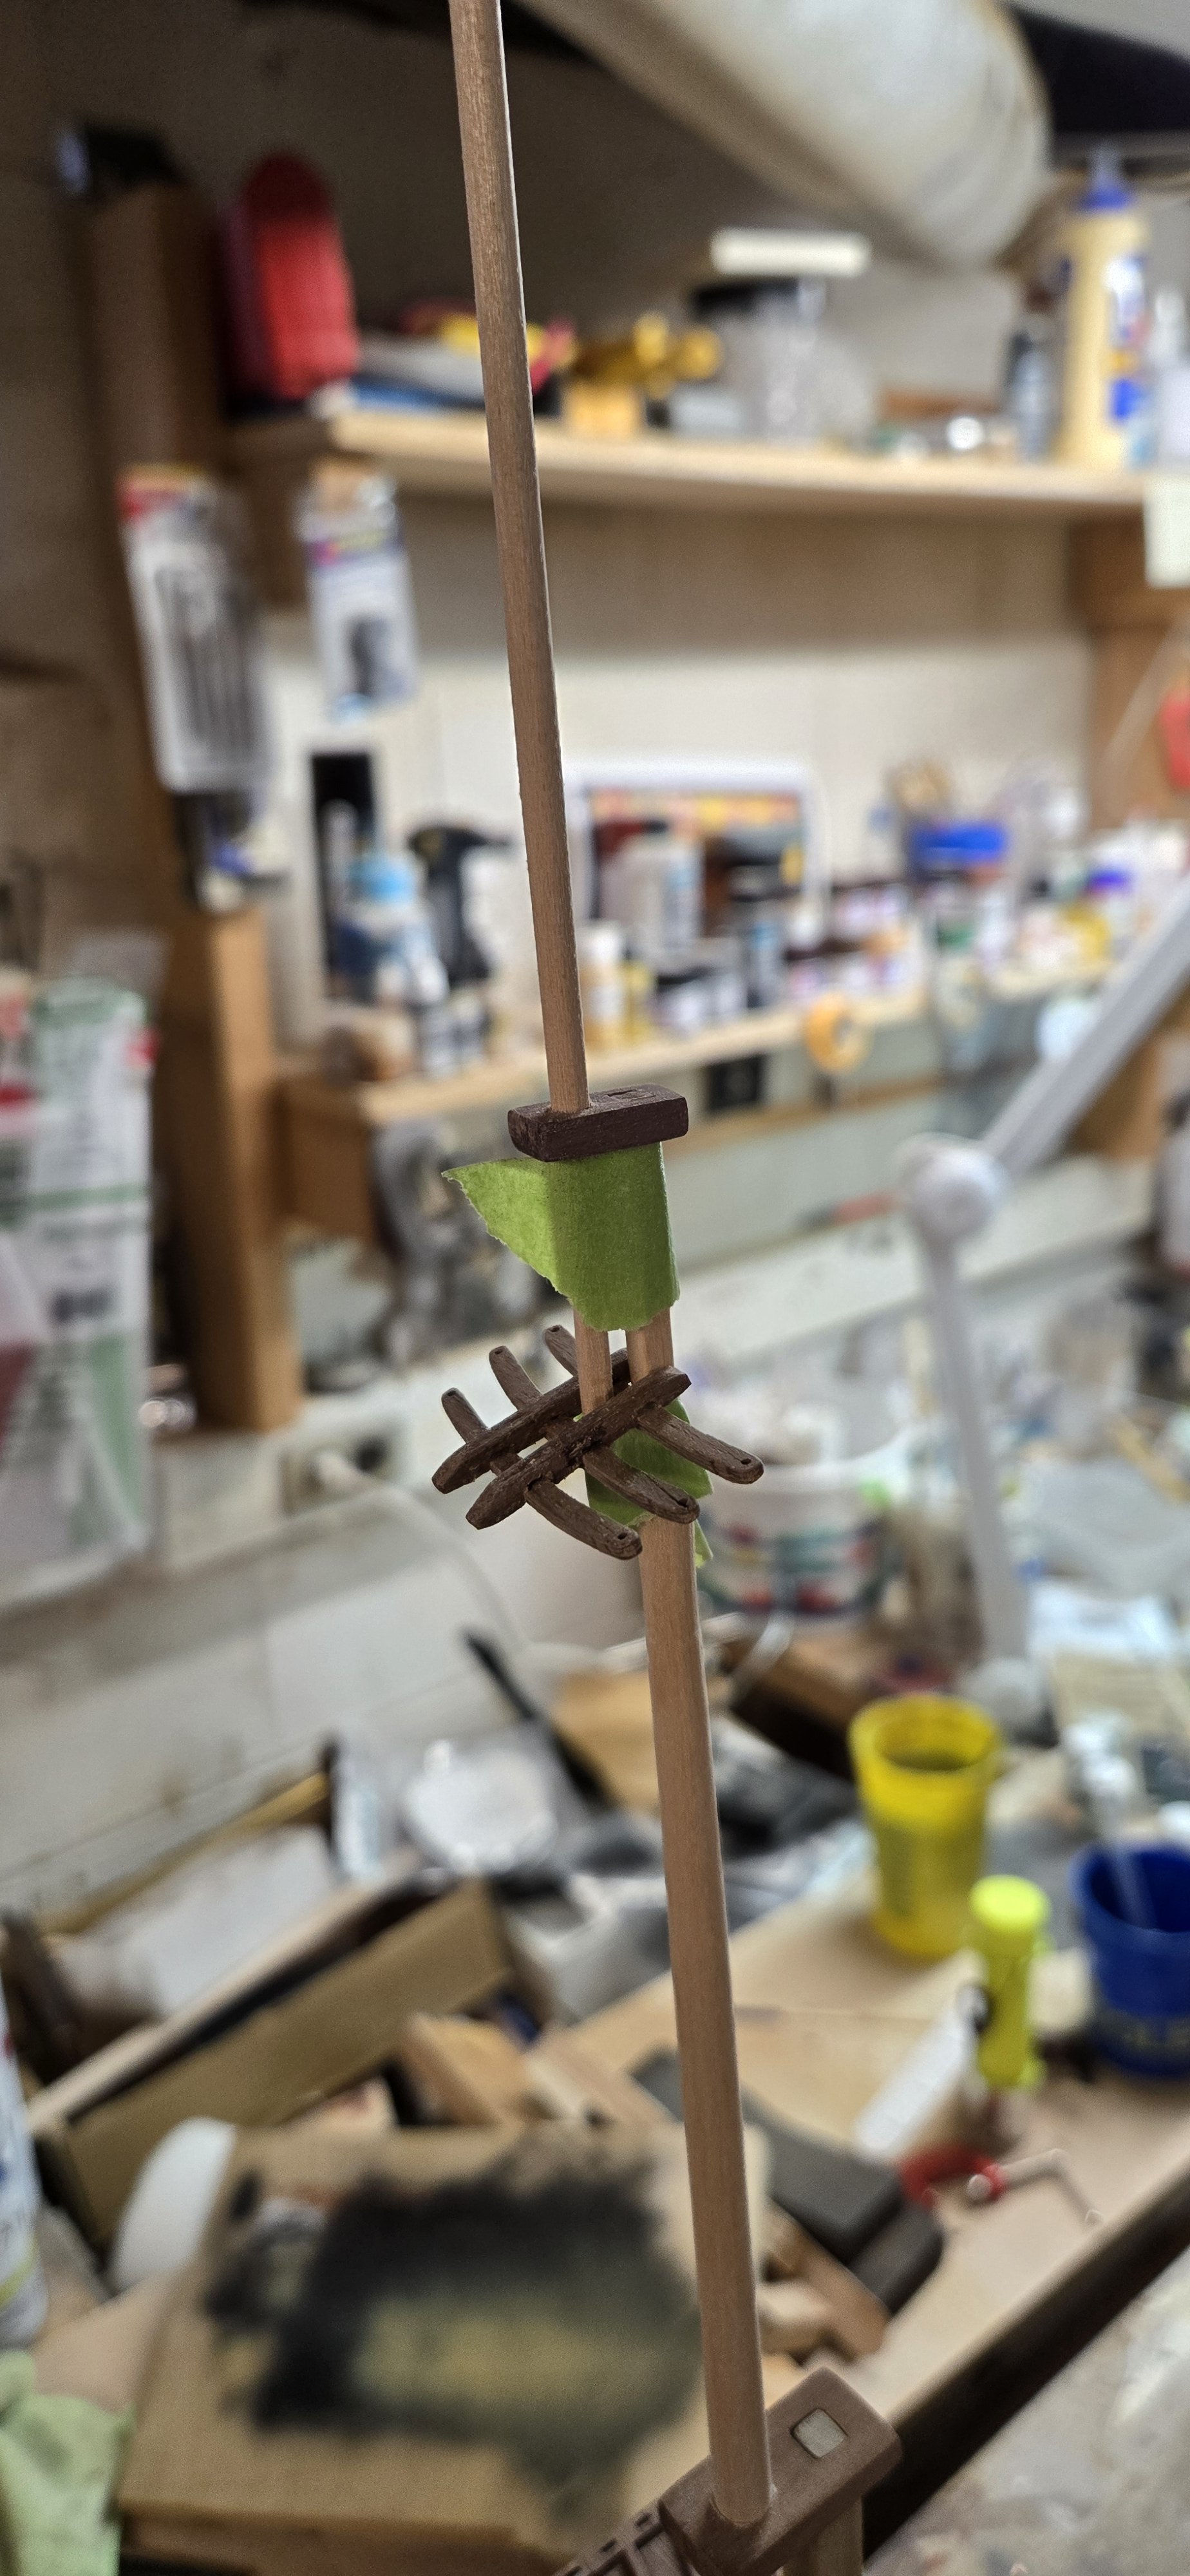
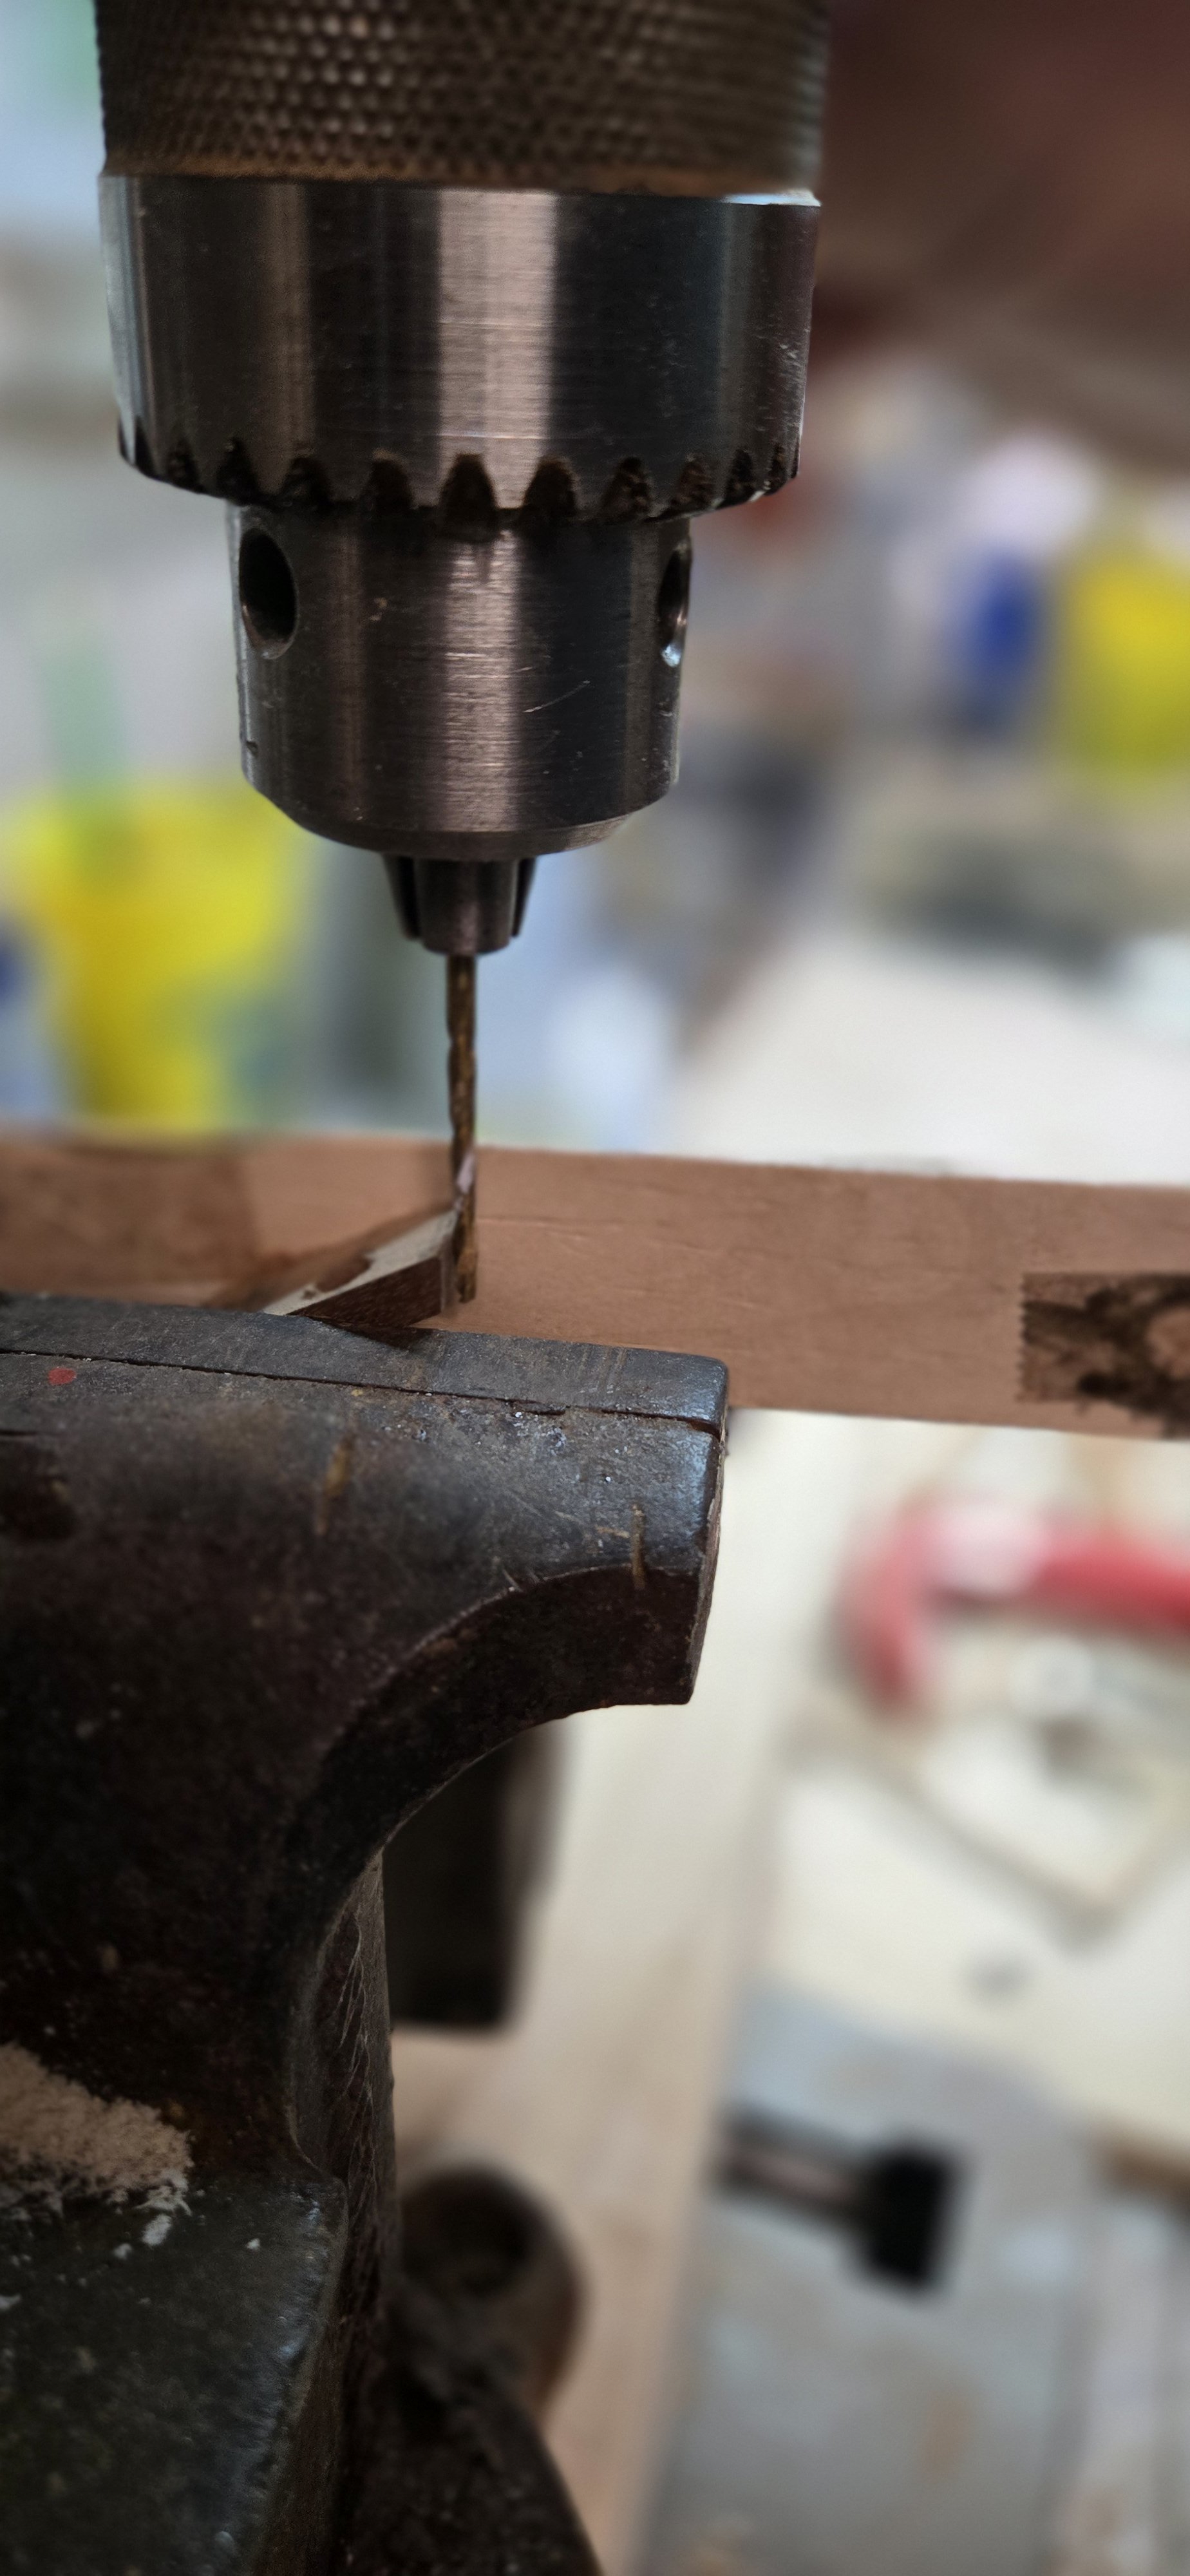
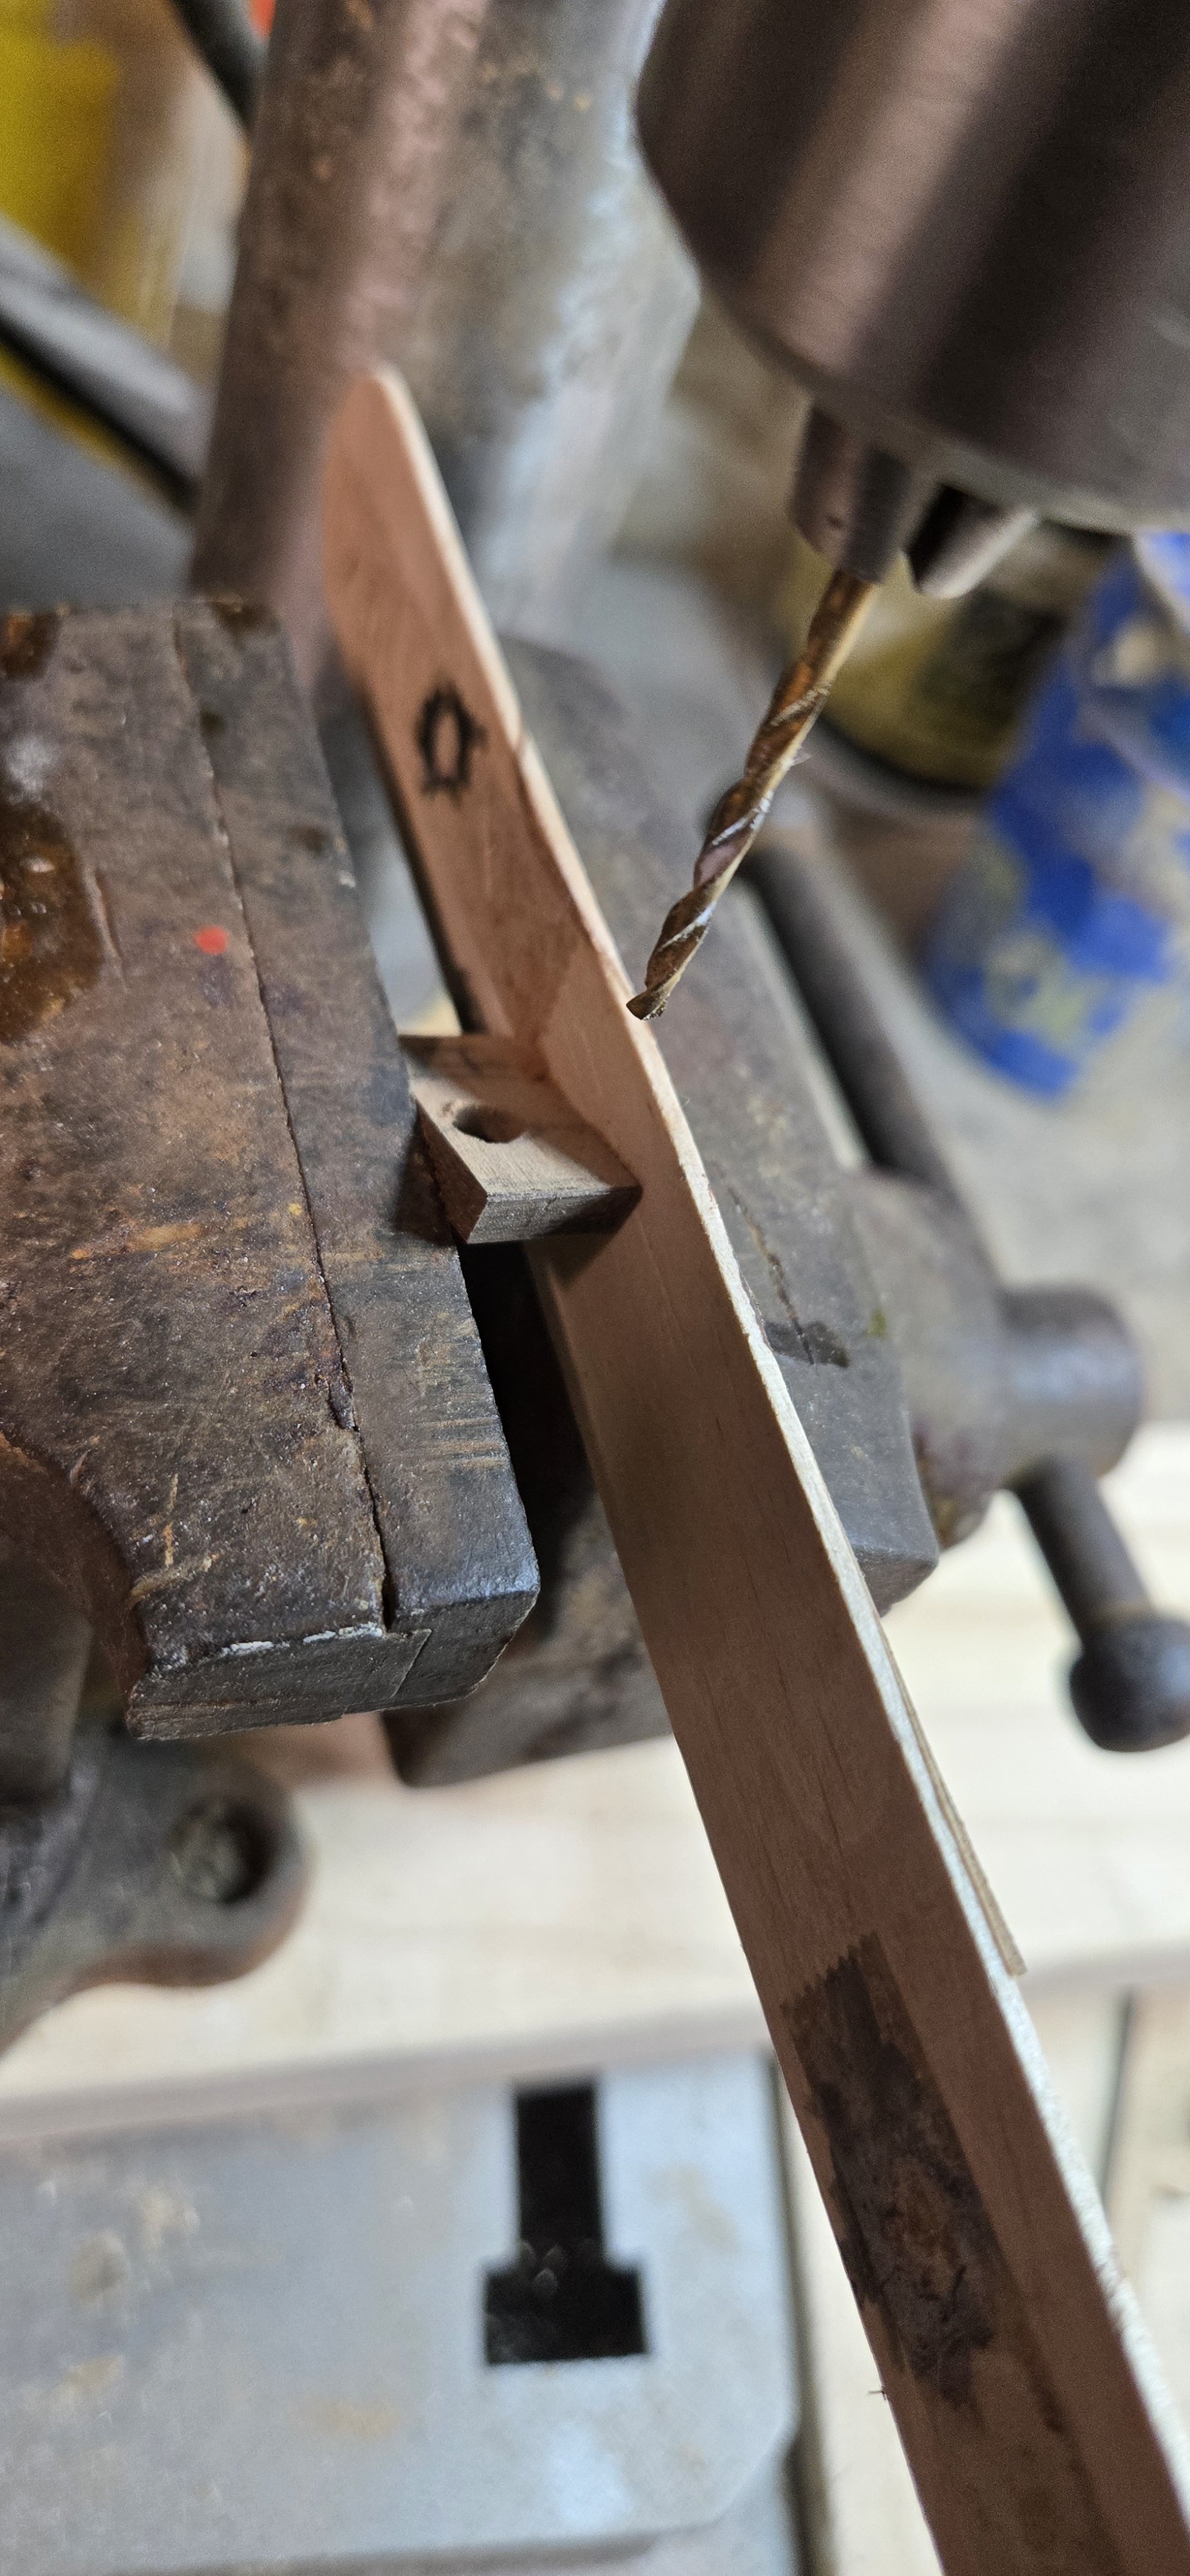
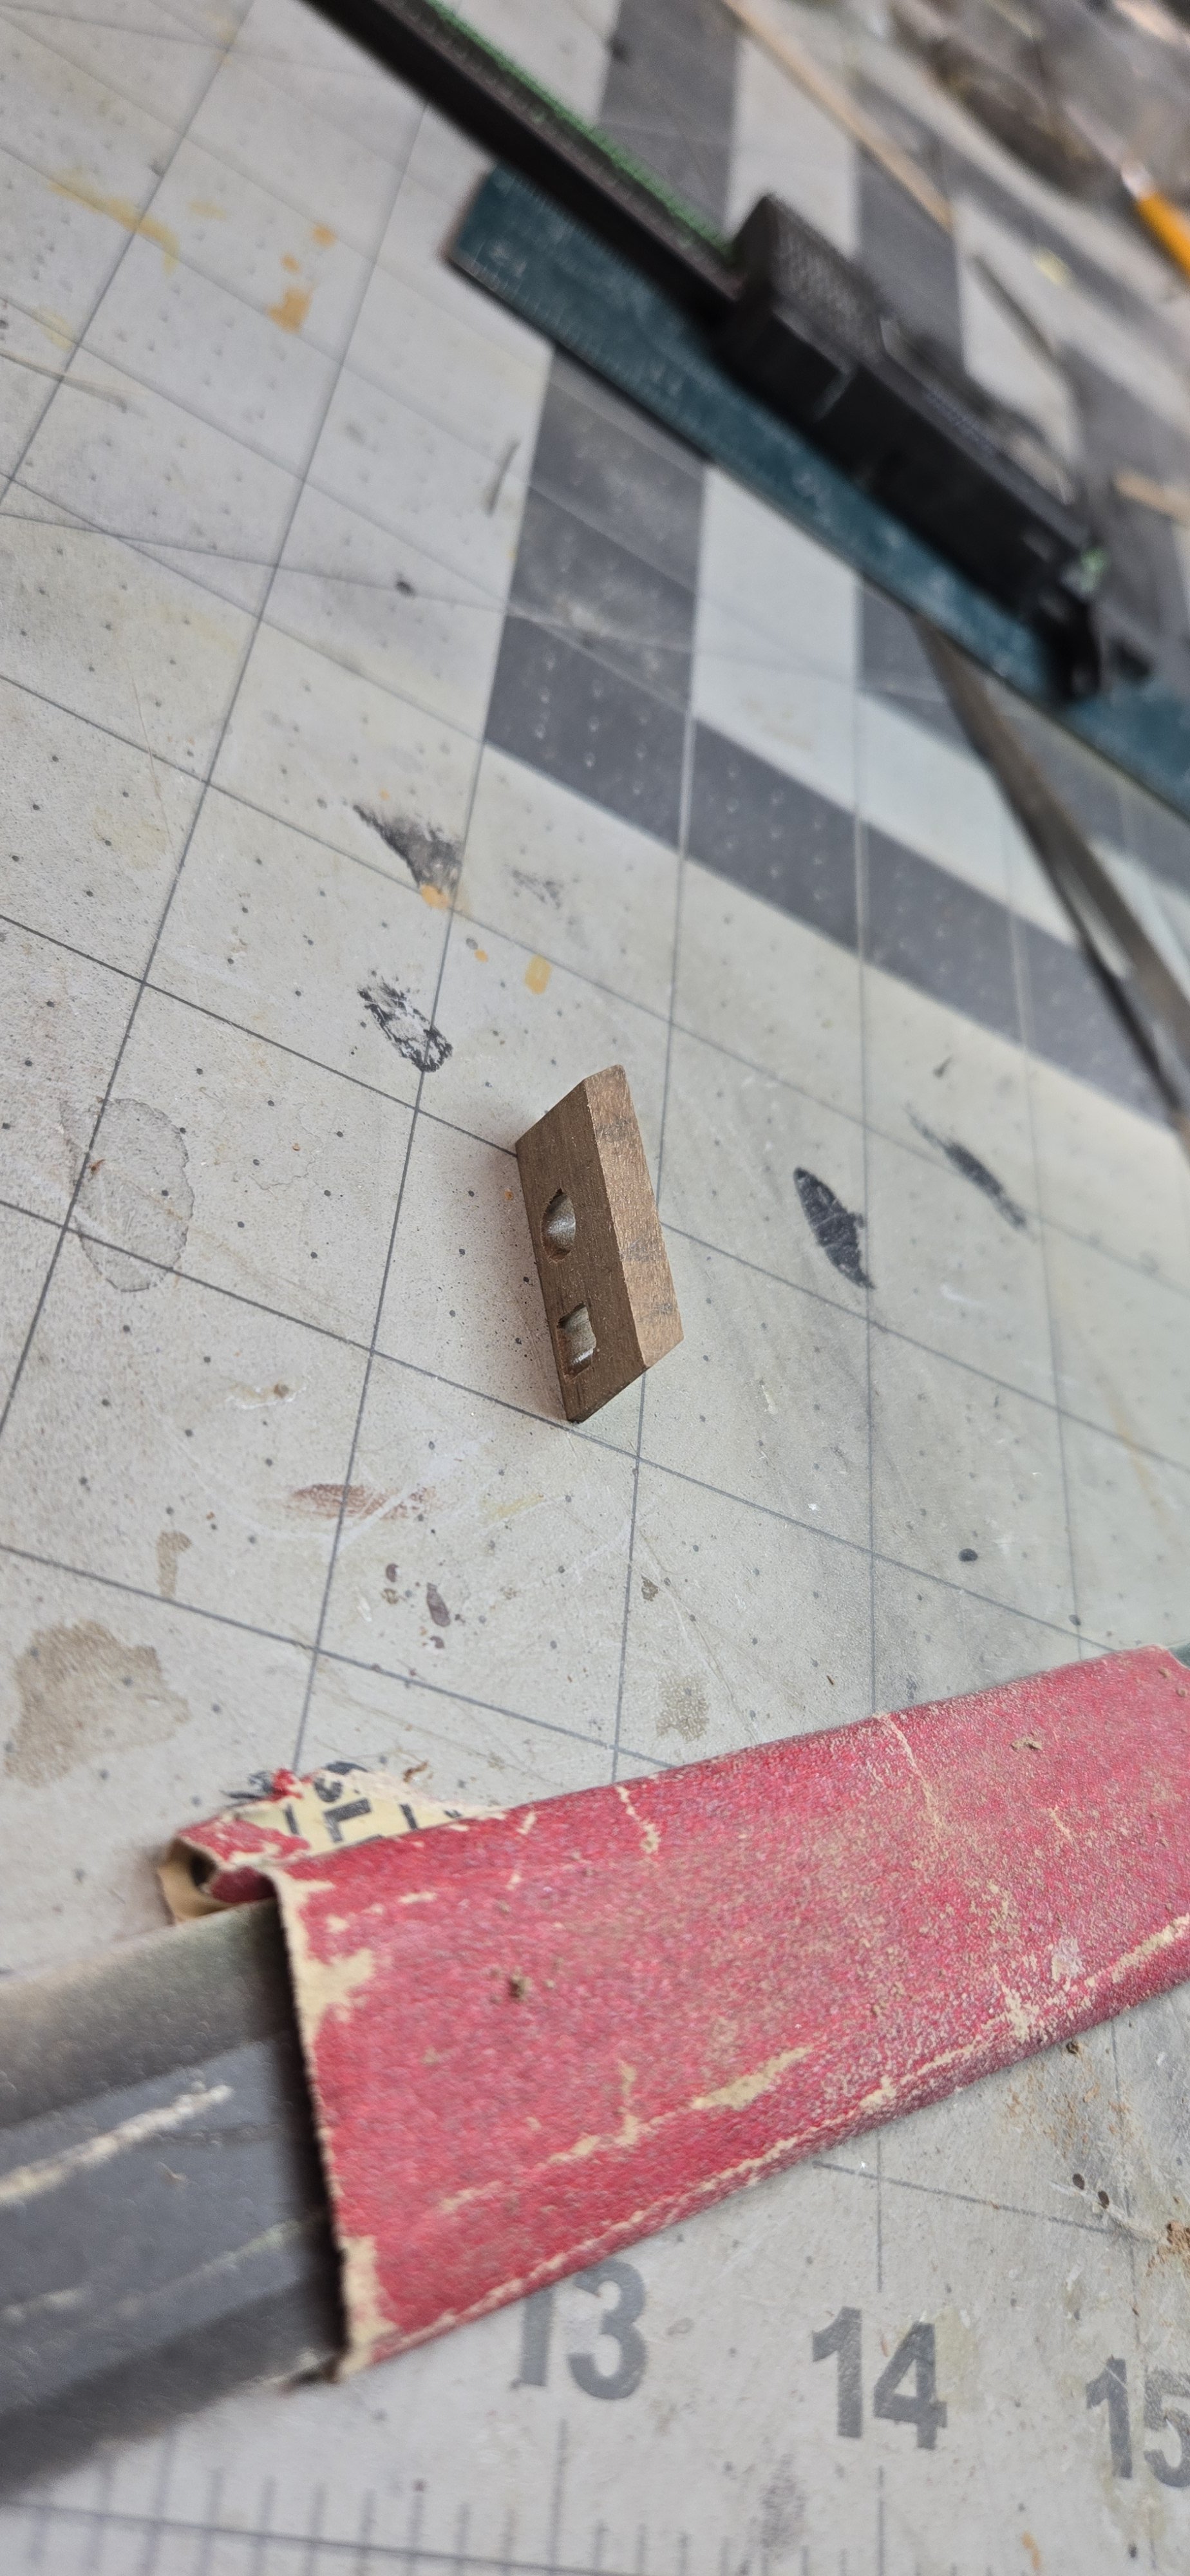
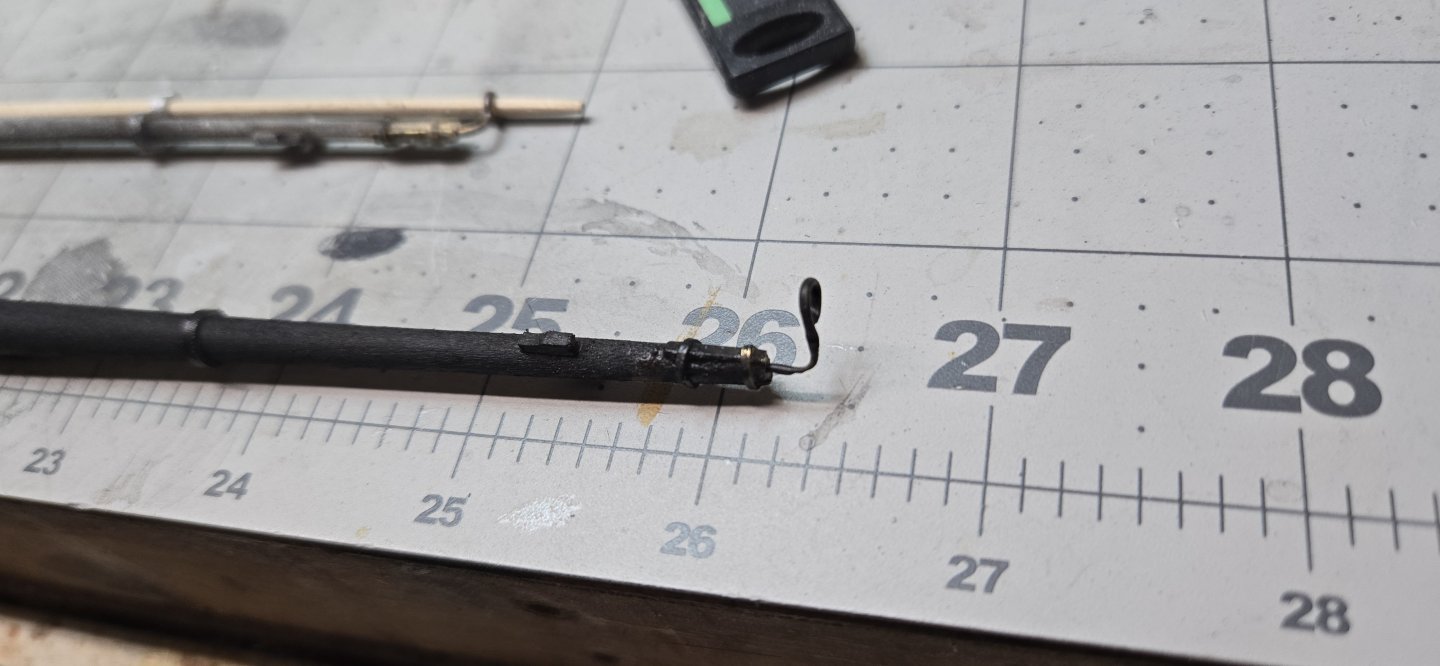
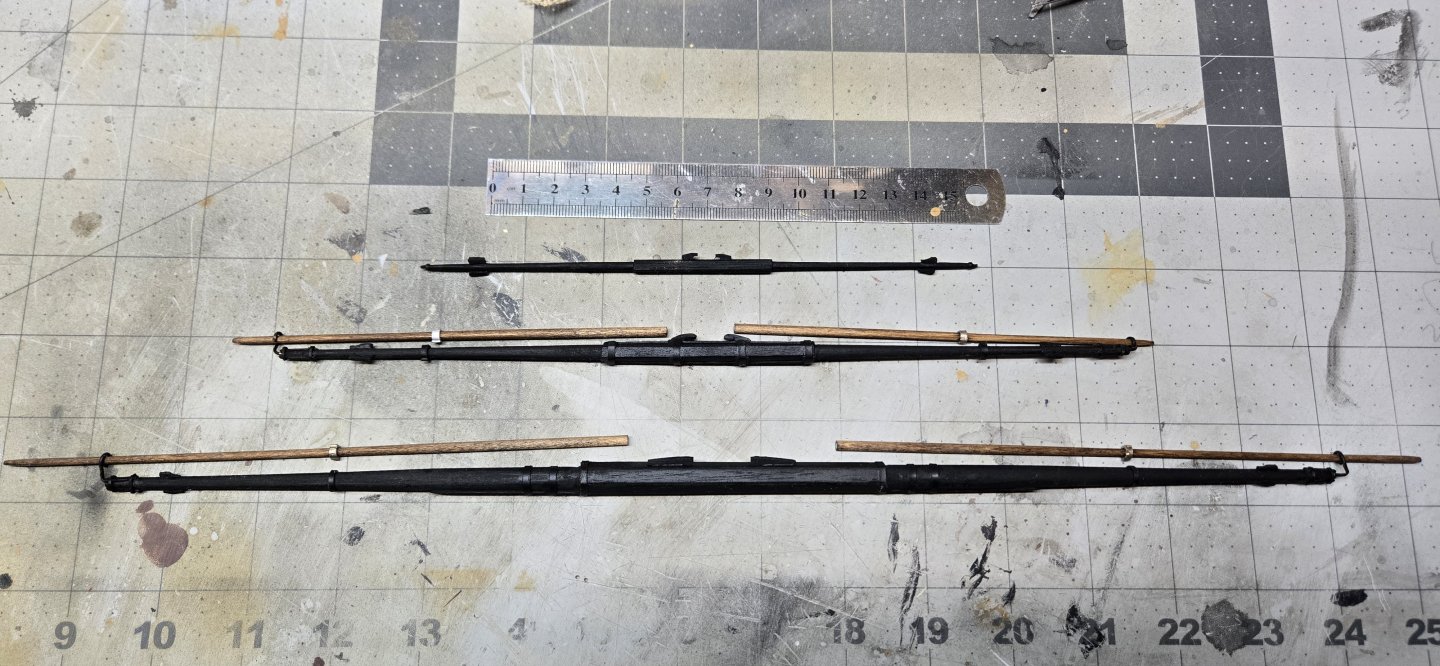
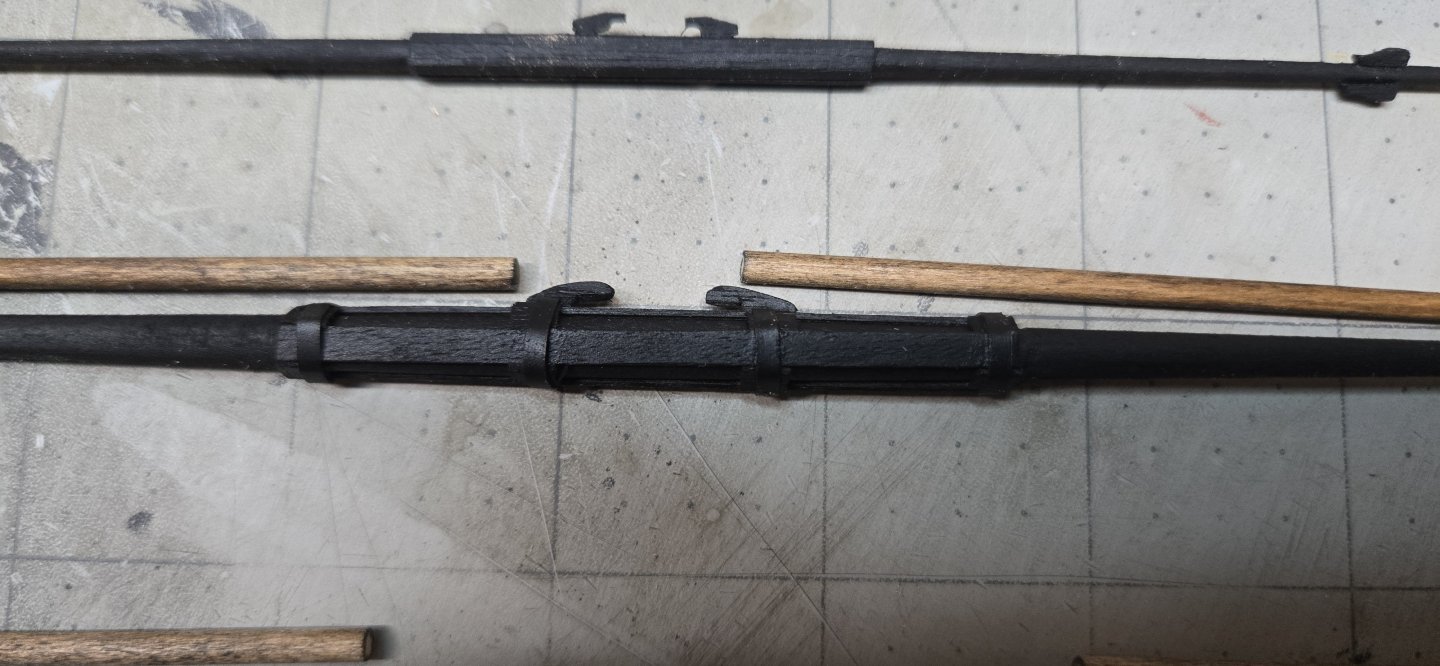
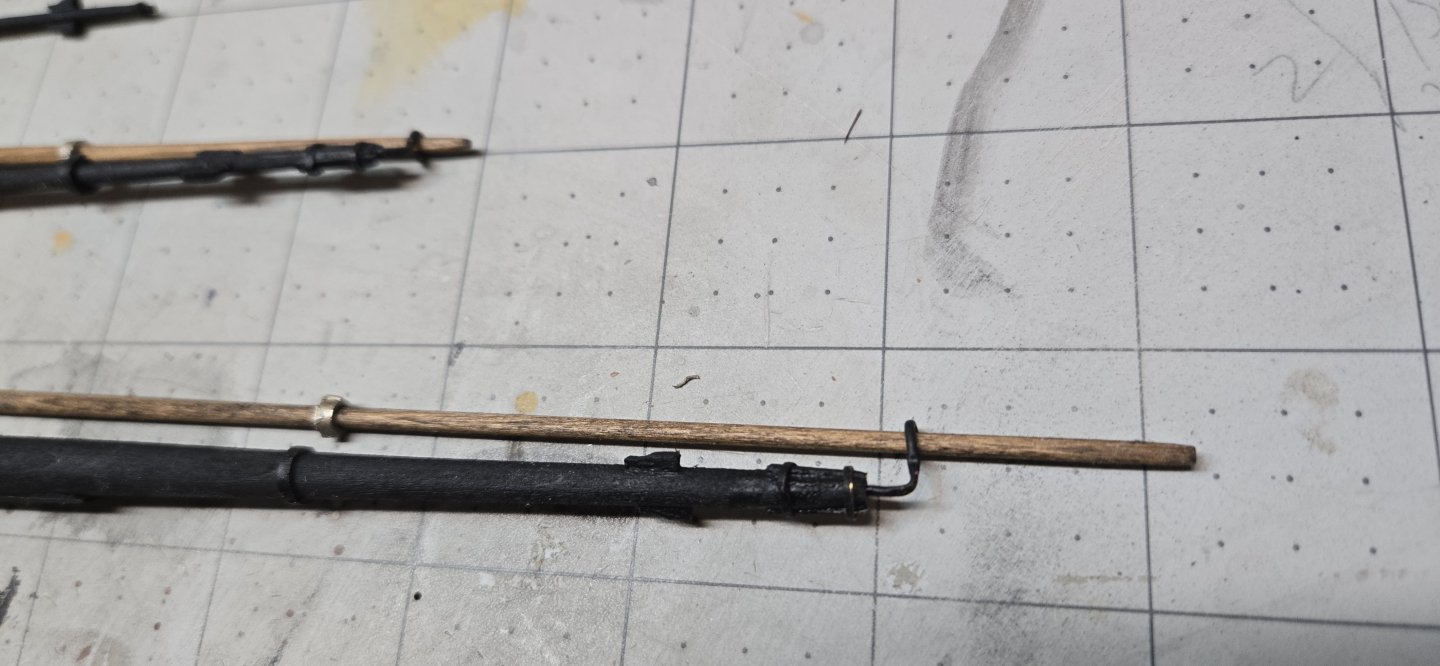
I have both the fore main and topmast yards close to done. I was able to use the kit's cast iron pieces for the rings that will hold the main yard to the stunsail booms. There is a piece of photo etch banding that goes on the end of both yards. One of the requirements is to create a wire ring/hoop system that would allow the stunsail boom to slide out when needed. I used brass wire that I annealed and bent into the proper shape. I could not drill through the iron banding once I had installed it. The trick would be to drill it while it's flat and then install. The second tip is it might be better to also drill into the ends of the yards BEFORE you begin tapering. This way there is enough meat to grab onto to and make sure you have a properly centered hole. I didn't do that for either of the yards and I was forced to cut the tip of the banding off to get access to the end of the yard. It was easy to drill the hole in the fore main yard. As of right now, I cannot get the drill into the smaller topmast yard. At 2mm, it's just too small for the bit. Which means I will have to use a smaller width wire for the hoop ends.... I used regular styrene banding for the middle of the yards and clean PE sprue for the tiny banding around the iron ends of the yards. Once painting, a lot of that blends in...I haven't taken pics yet. One more thing....when doing the topmast yard, the plans call for only 4 wooden strips around the center with some spacers in between. I assumed it would be the same .5x4mm size, but it is the smaller .5x3mm. I used the 4mm strips and could only get 3 around it. I tossed about taking off and redoing, but it was late and I think once it's painted and all of the jeer blocks are installed, it will get lost in the forest.

-
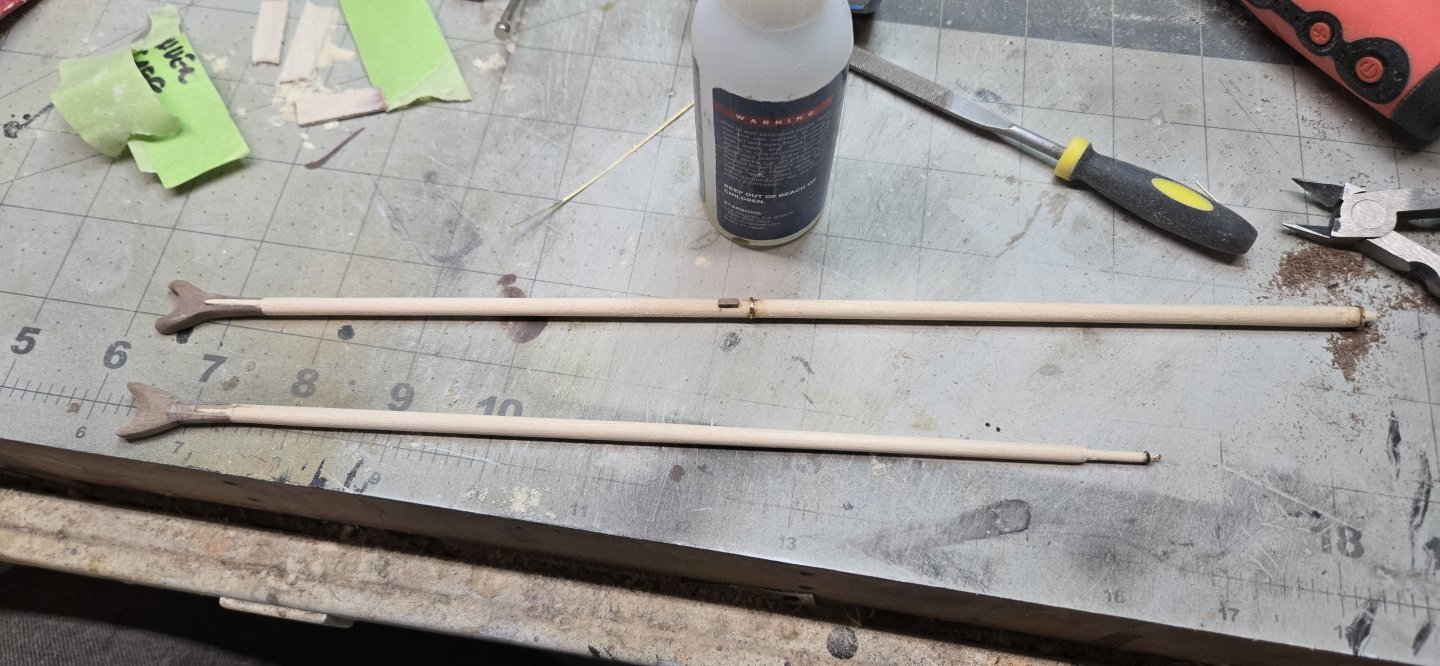
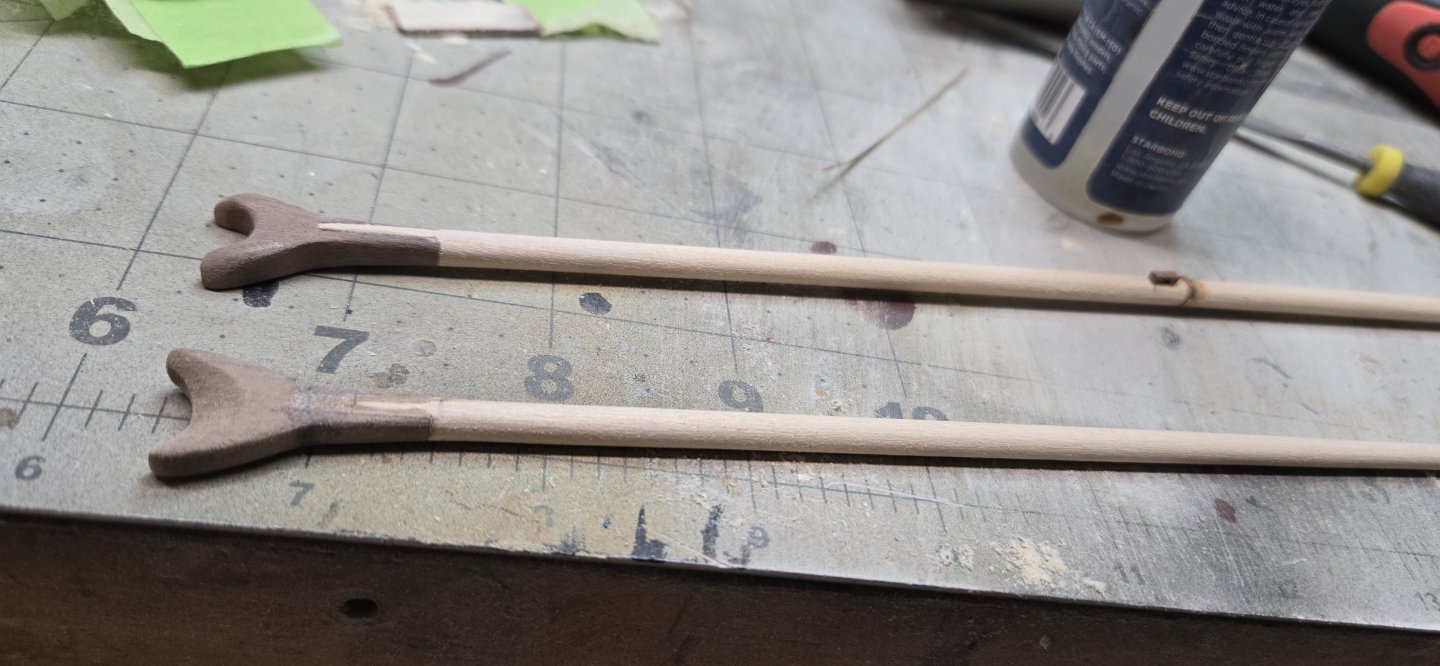
Well!!!! Look at this...it was here the whole time! I was just going to wing it and have the stunsail booms be half the length of the yard they were married to. I started prepping the fore yard and there it is....WHOOP! It's funny, there is not reference to the word stunsail in the rigging directions. Not one. Not even for stun or sail! The parts manual does reference the iron straps for the boom. So I am back in action!!!!


-
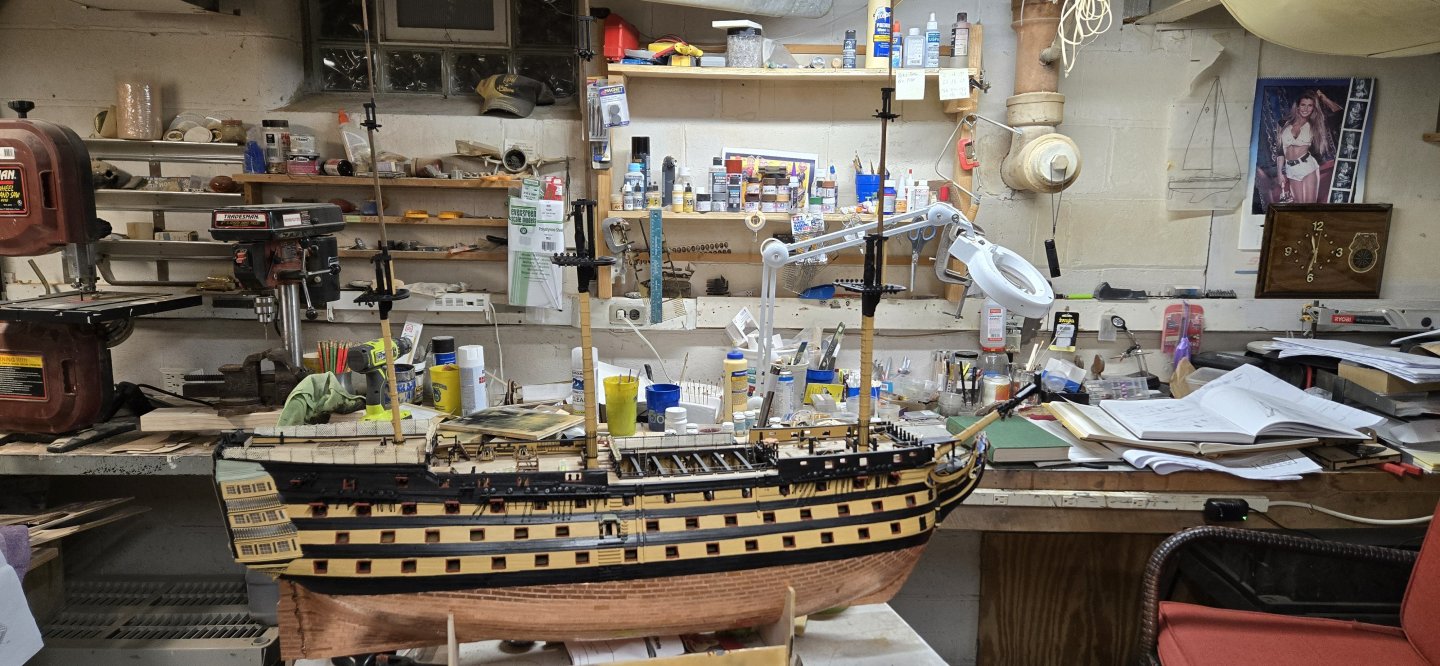
Still a little tweaking and touch ups to the masts, but I really like them. I didn't notice until I took a picture, but the last hammock netting I did, the colors didn't match up! They looked fairly good a few days ago, but now it seems whiter and cleaner. I do know that I stained the first three hammocks in coffee before attaching them. I then left the coffee in a plastic cup. Figured I would use it as I needed it. I don't drink coffee so I have to rely on my wife to make it....I have no idea how!!!! Lol..... When I soaked that last piece in and pulled it out, it had little chunks of coffee in it. Oops. What do I know. I guess I rinsed it out a bit too much. Not much I can do, but I am going to stain enough of the lace material to do the rest so they are at least consistent. I really hate the close up pictures, but man, when I stand a bit away from her, she really is starting to look good. I just have NO IDEA where I'm going to put it when it's done! Thanks to all! Chris


-
As I'm working on the yards, I think I've finally put together how the manual wants them done. The manual mentions using brass wire to make the outermost rings that are placed in holes drilled at the ends of the appropriate yardarms...over the boom iron straps. Again, that's it. No mention of the part numbers (#493-496) or how they are put together. It does mention booms and that they should be above the yard and 45 degrees in front of it so that any and all blocks attached to the yards are behind the booms. But the word boom is used interchangeably with other pieces...mainly the driver boom and driver gaff. No worries. However, I'd love to add these 'booms' or more correctly stunsail yards. I can't find any reference that provides the actual length of these yards. I can guess and probably get pretty close to the length, and probably guess as to the width too. Anyone have an idea? I have searched online for the specs on stud sail yards, stunsail yards, etc. Not much in the stat category. McKay and Longridge have similar drawings. Lee and McGowan show the yards, but no real dimensional detail. Thanks!!!! Chris
-
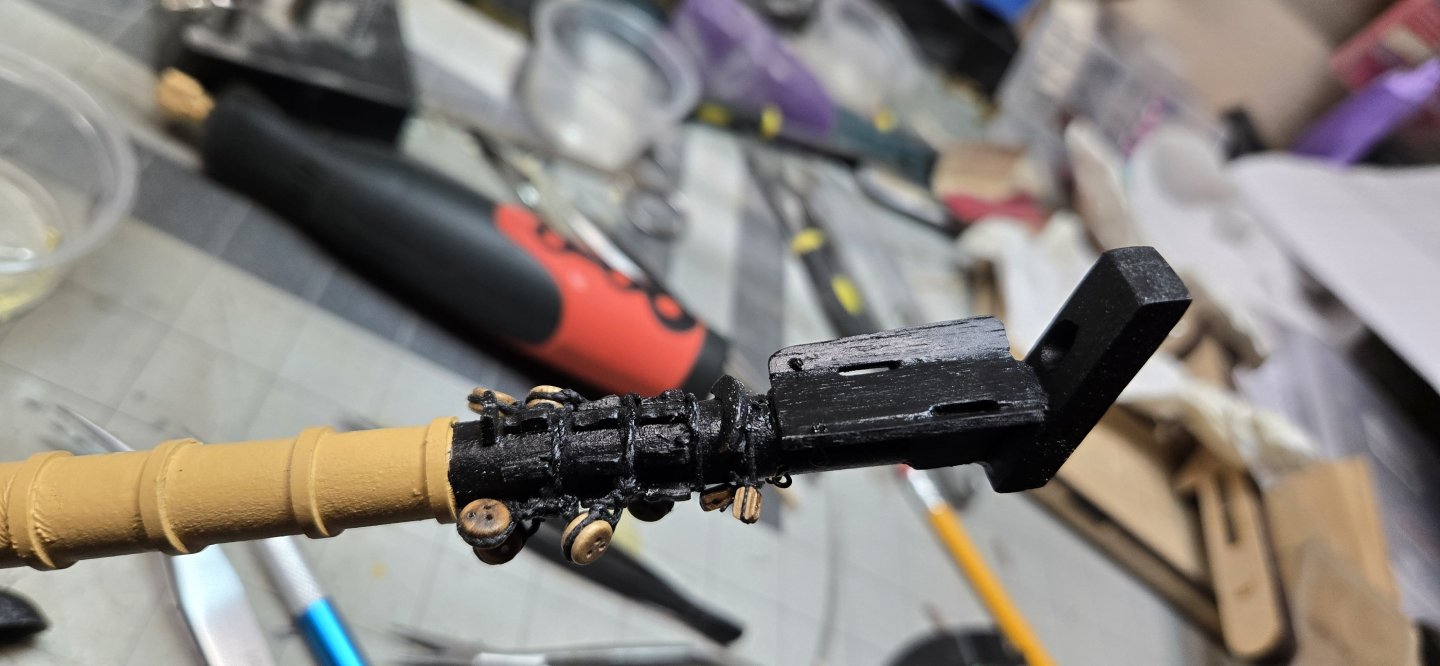
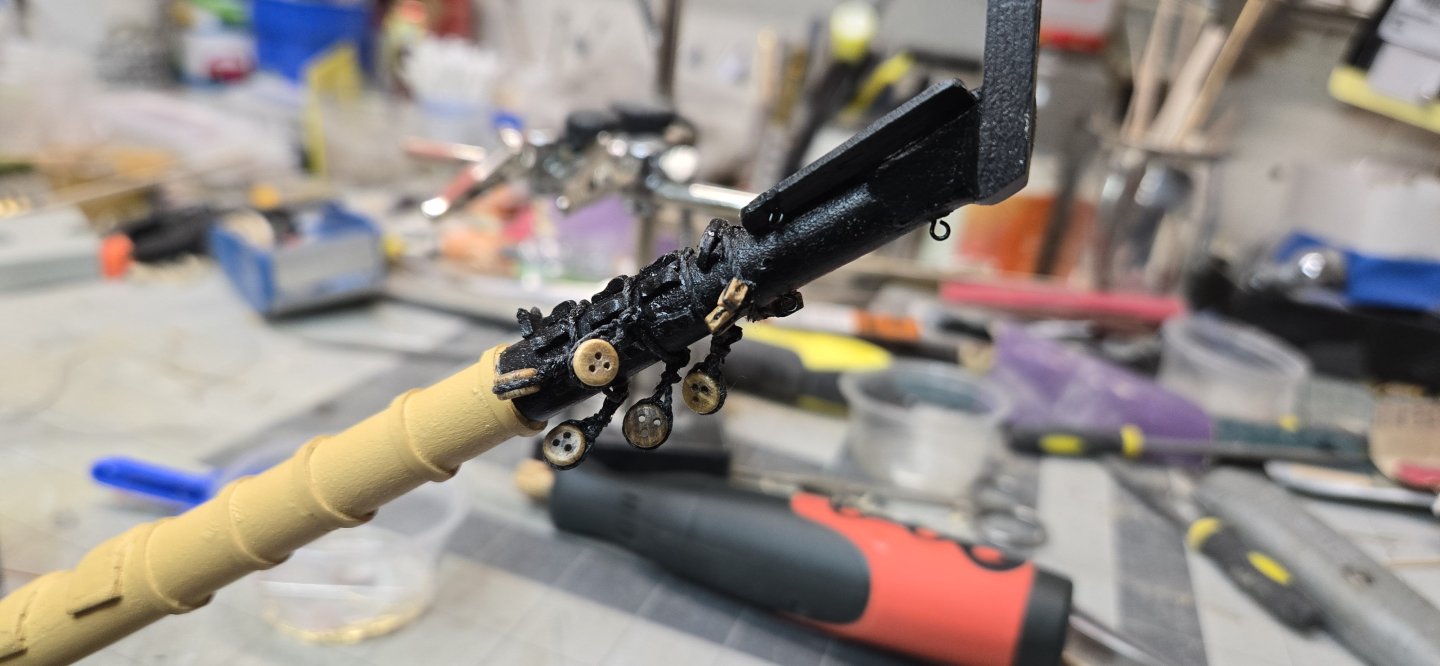
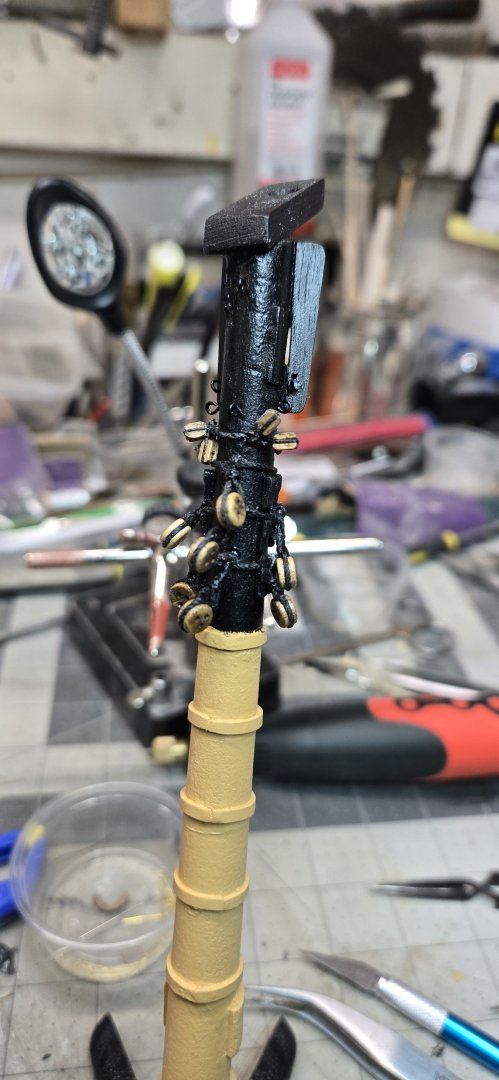
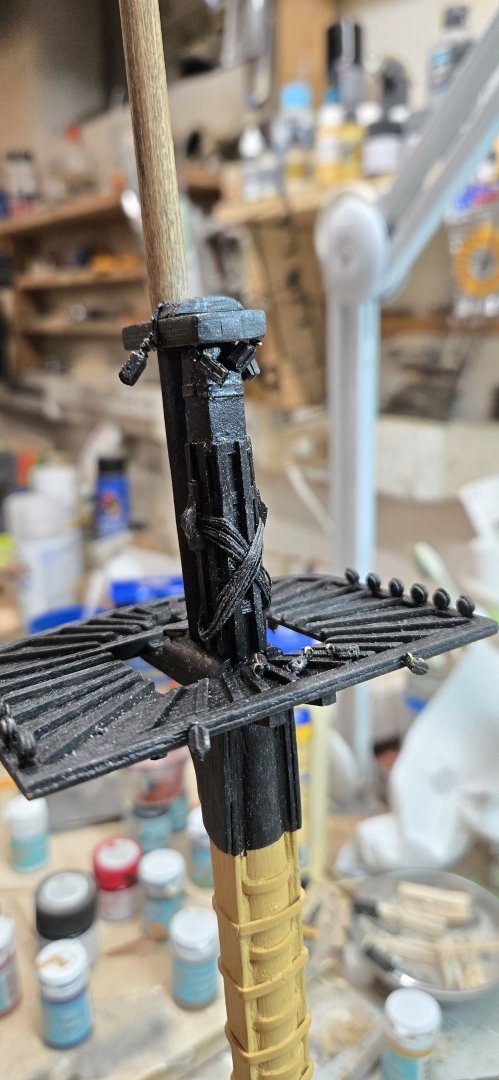
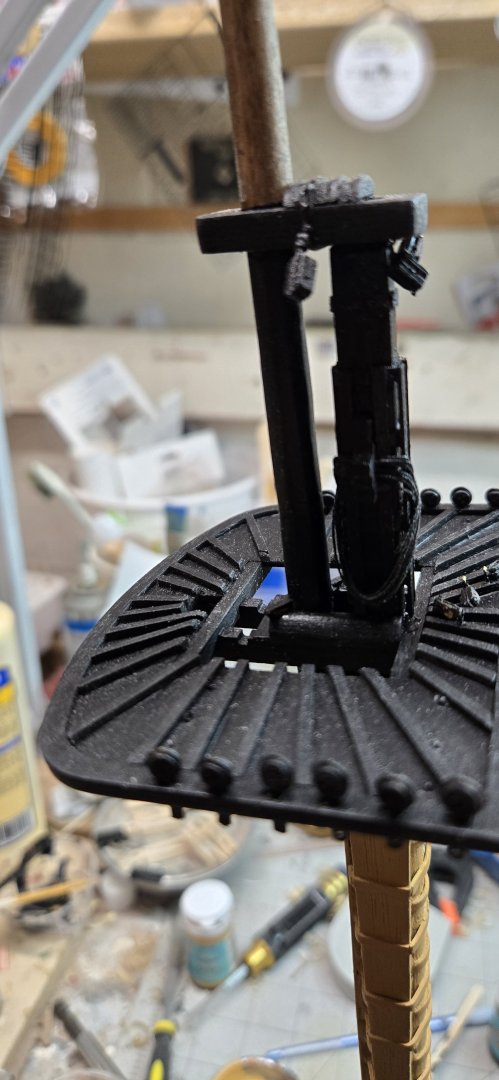
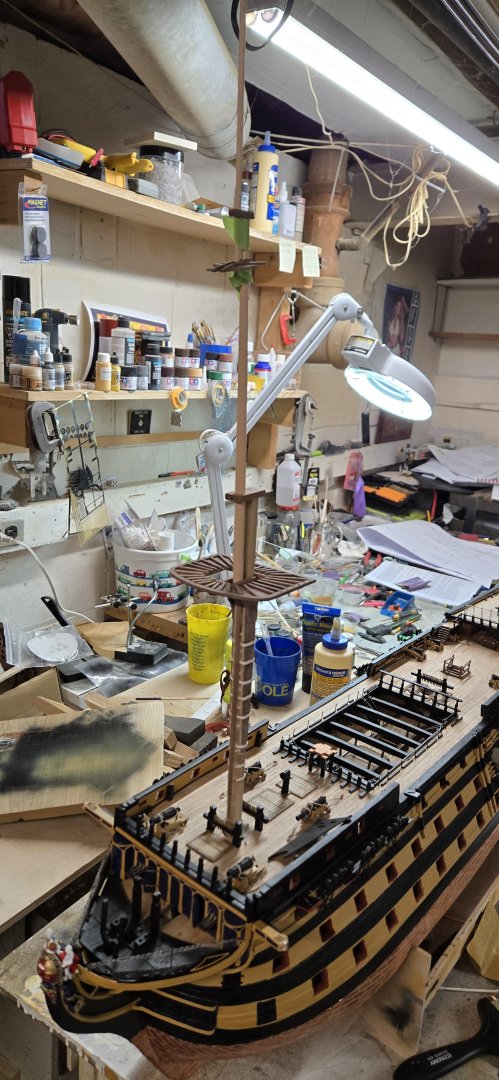
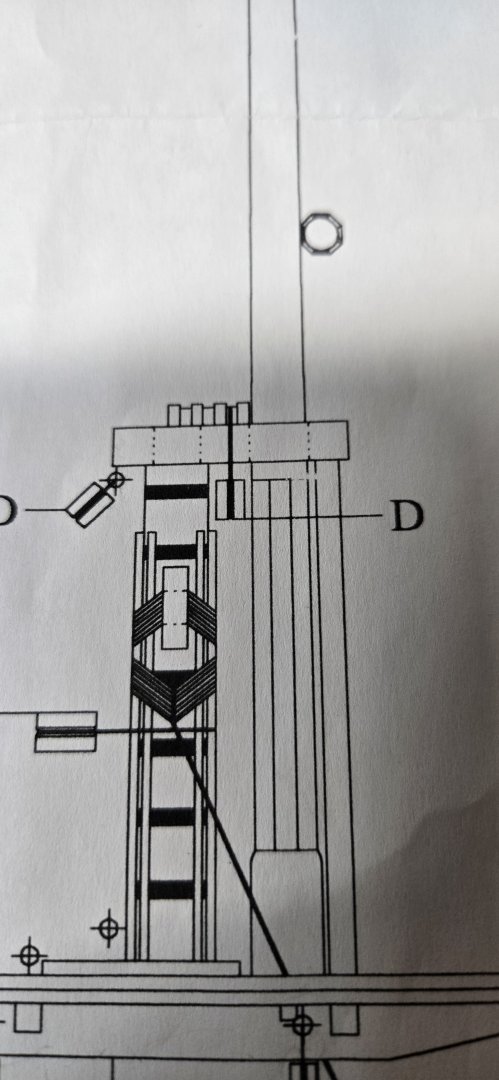
I'm wrapping up the mizzen mast and was reviewing some past builder logs to start getting a plan in my head for what is next. I came across Robert29's blog and a few references to adding a driver boom saddle to the mizzen mast. To the best of my knowledge, there is just one reference to this part....#212 driver boom saddle. That's it. It isn't in the rigging or hull manuals. I just went downstairs and pulled all of the unopened rigging blueprints and see nothing. Other than the location of the driver boom. The mizzen only blueprint doesn't have anything on it and the generic plan for all three masts is also lacking any reference to it. Longridge does mention the saddle. Describing it as a semi circle bracket supported by 7 fluted brackets. Ironically, it does not give any dimensions as to where it would be on the mizzen. Surprising as he is very detailed as to where many parts need to be located. There is nothing in Lee's book and McCay doesn't show the saddle in any of the drawings for the mizzen. I suppose I can guess where it should be based on Robert's pic below. I suppose a millimeter error here or there is only a few inches in real life....
-
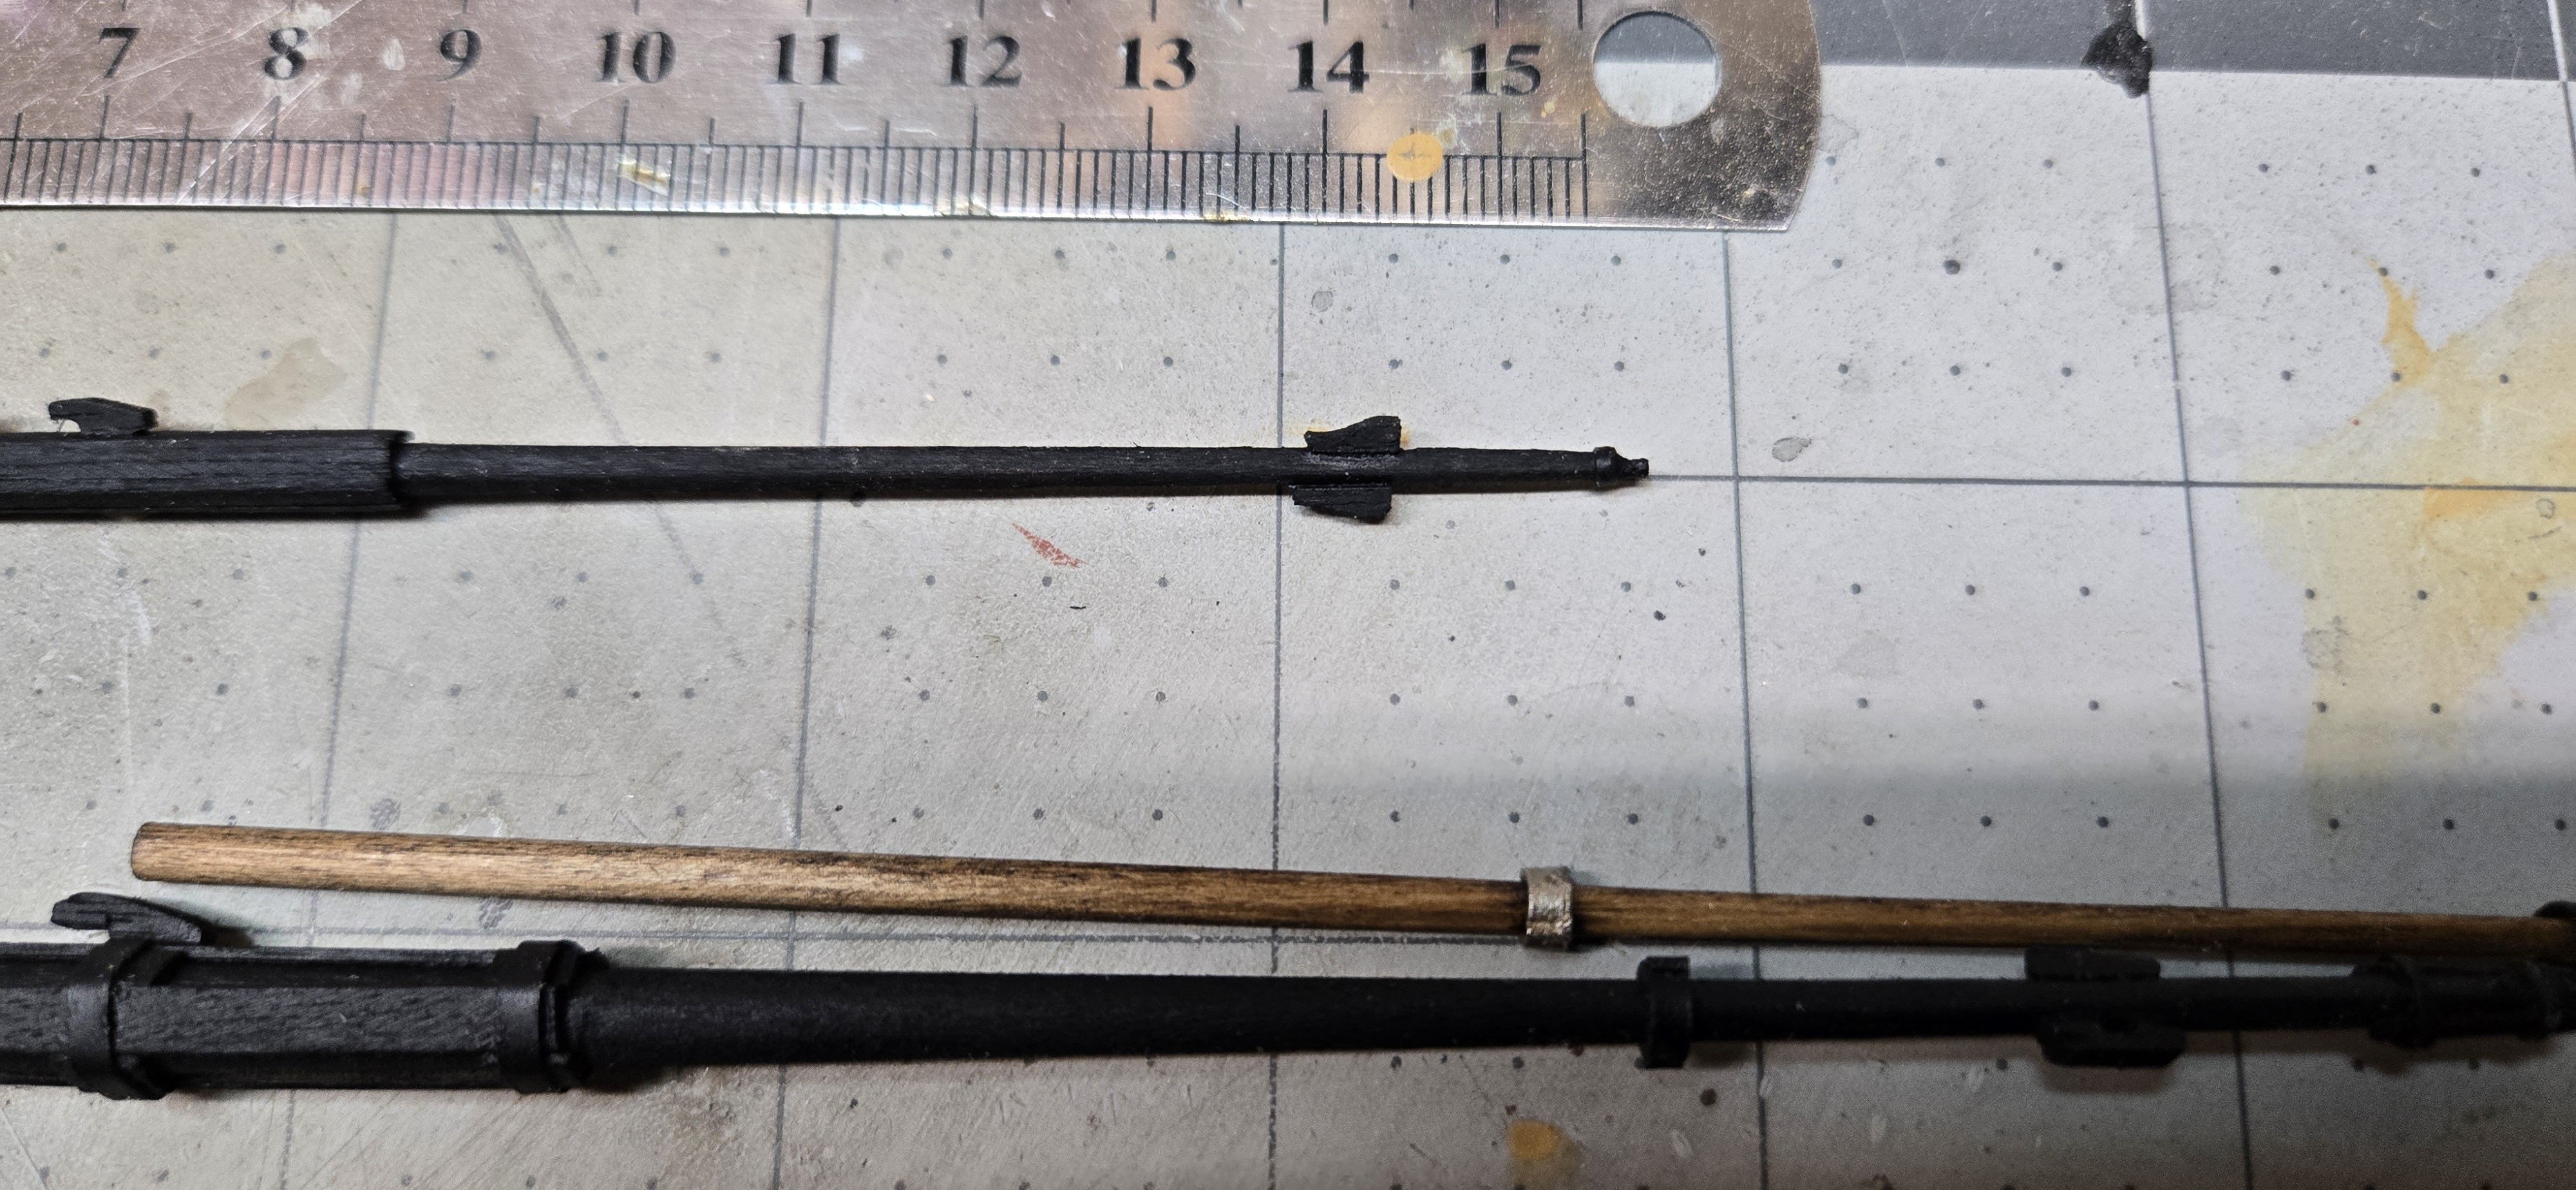
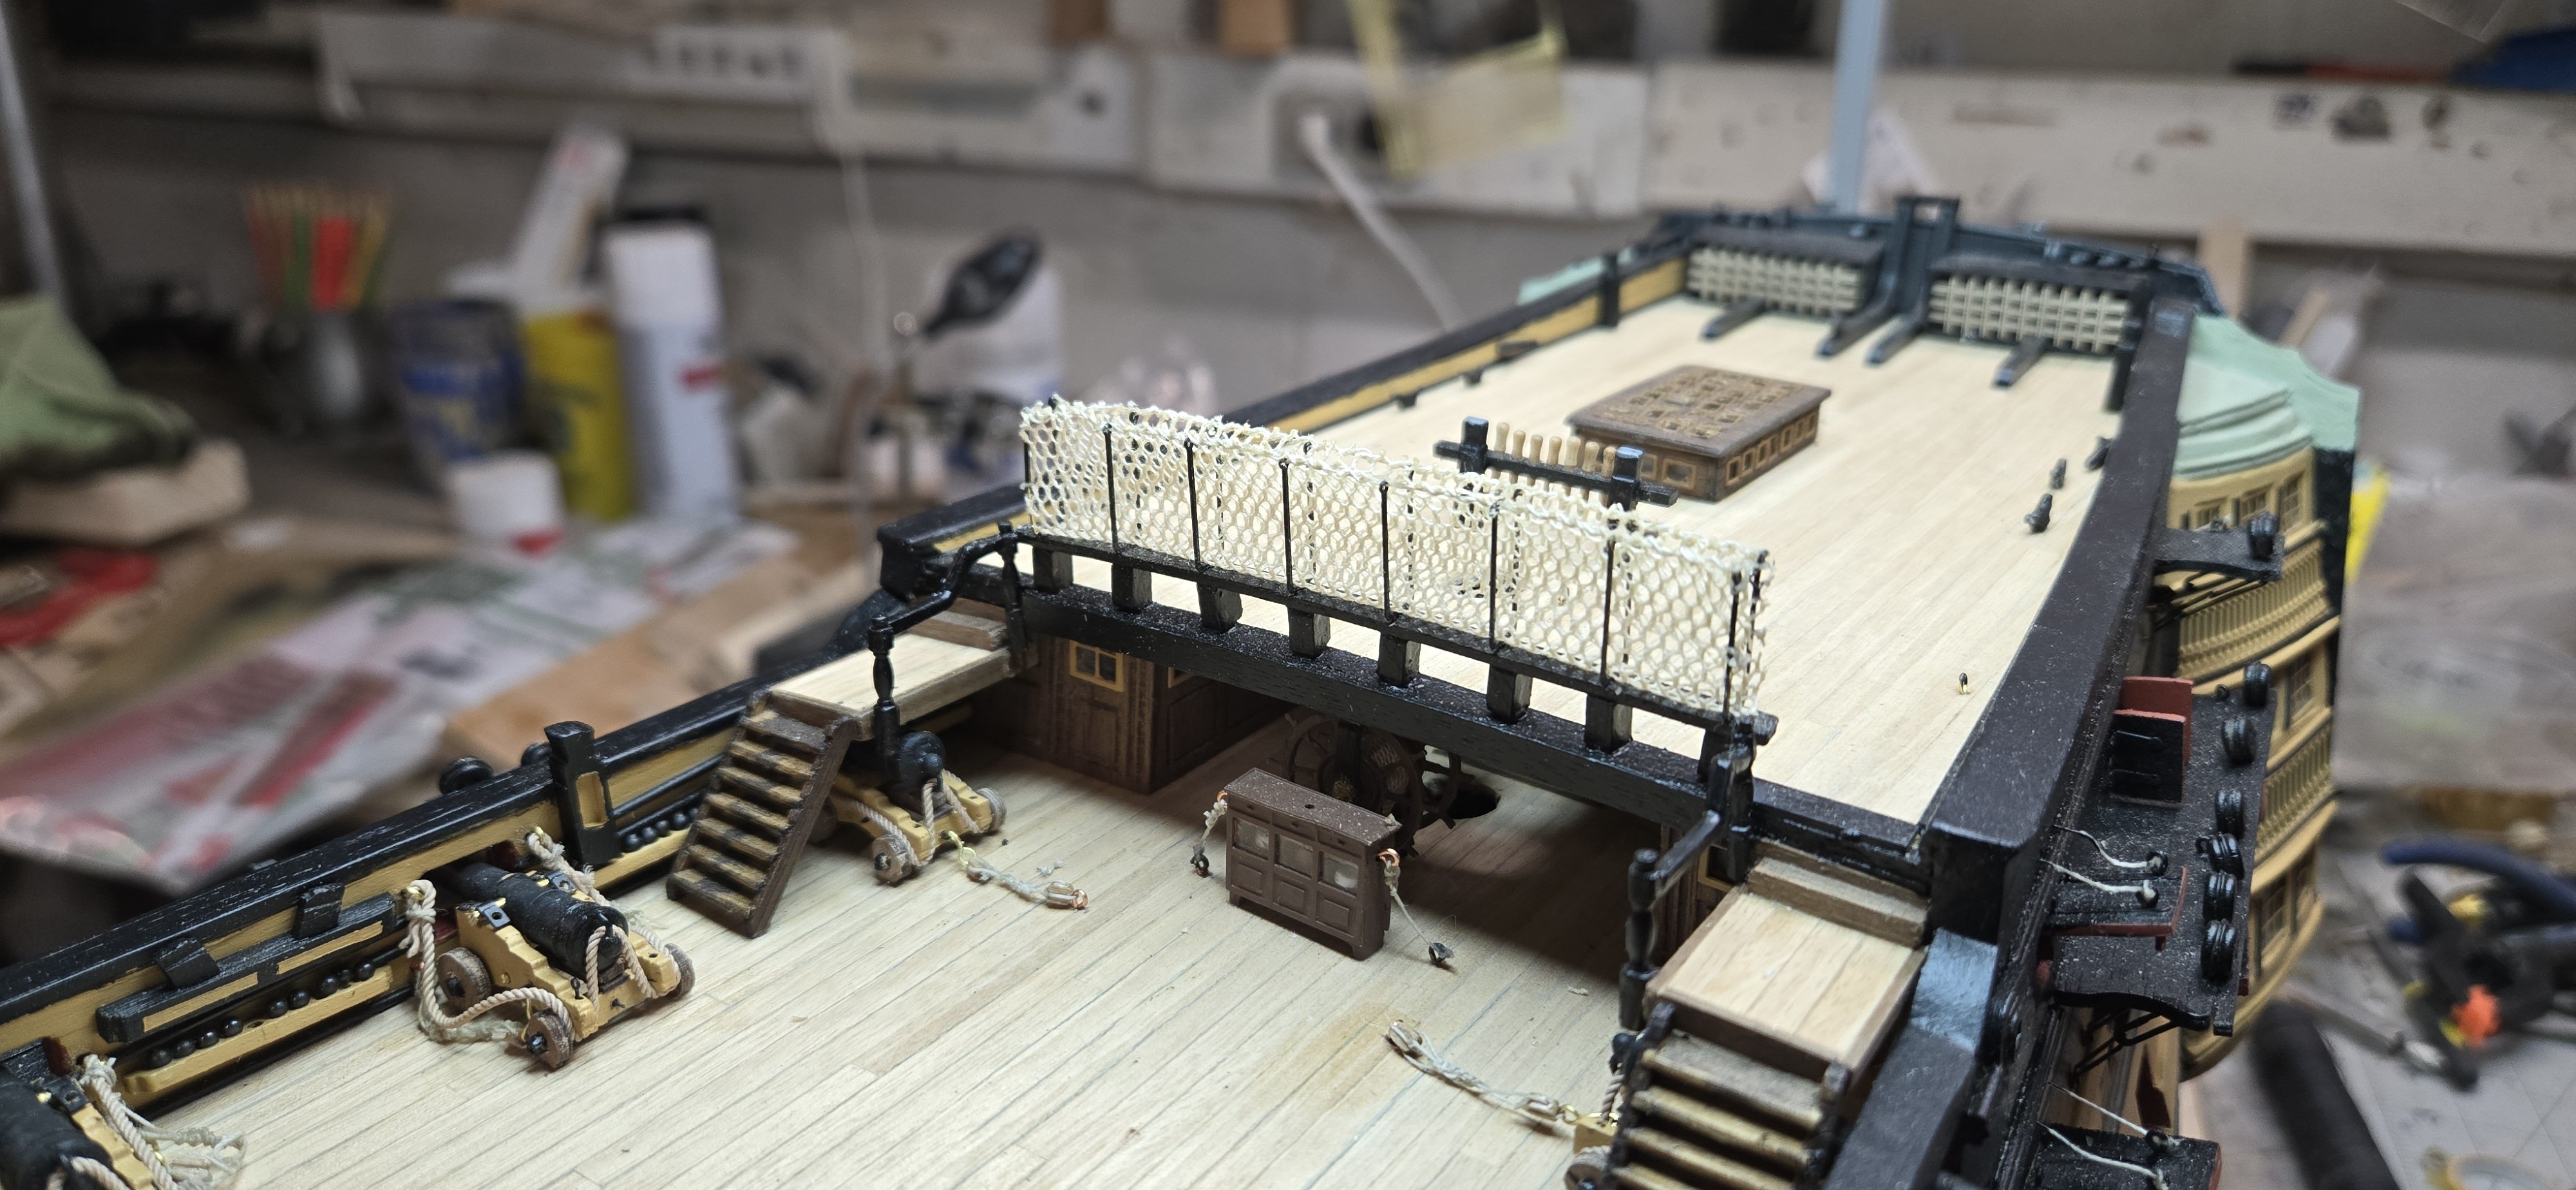
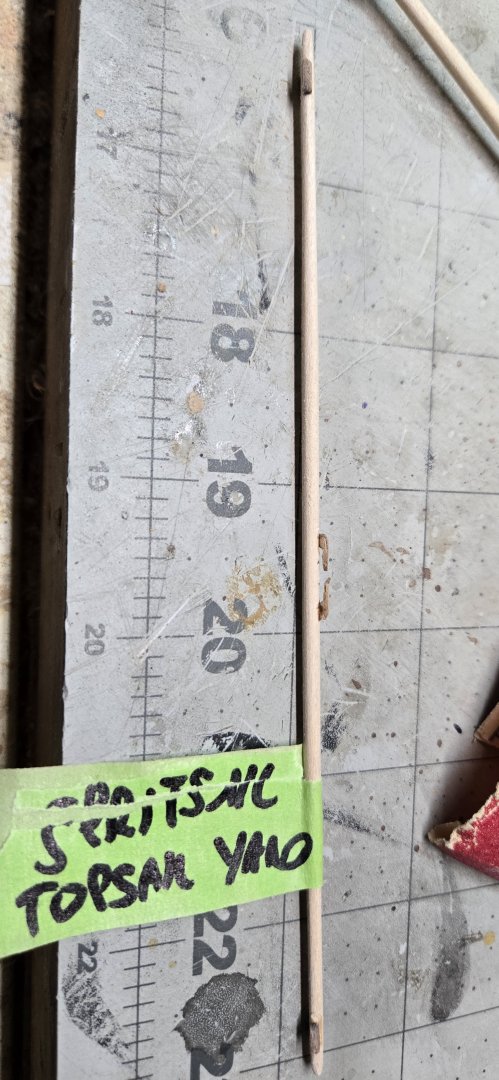
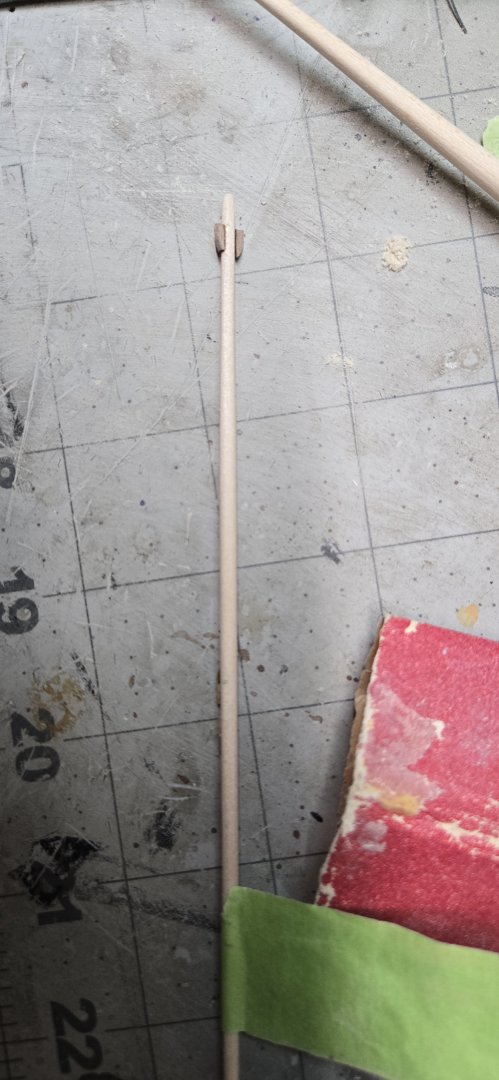
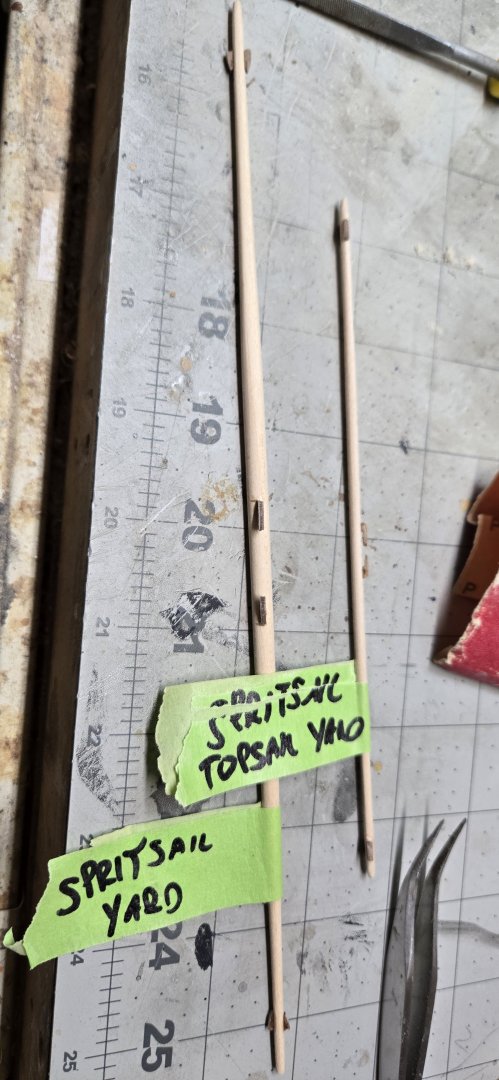
Work, work, work! I have my fingers in multiple tasks here. I'm painting the structures for the mizzen mast black and the mizzen mast itself yellow. While that dries, I have continued working on the hammocks. I won't do them all at once, they get tedious and I'd rather do other things! I did the other hammock for the poop deck. I am not entirely happy with this one. I wasn't very careful when I cut the netting prior to installing it. Because of that, I cut too far into the next row and the looping frayed or cut. When trying to sew the netting to the hammock line, it wouldn't take. I had to go down a layer and this created a lot of fringe. I tried gluing the top as I went, but it doesn't quite work. You can see that on the poop barricade hammock and opposite poop rail. Too much fringe and it is very hard to try and cut away. I then did the waist hammock. This one seemed to go much easier with the wooden bannister. In addition, I was VERY careful cutting the netting to get ready. Not a lot of frayed edges or bad fringes. Like others, I opted not to attach netting to either side where the anchor or hull stairway is. But, I thought in the real world they would put something up while underway. So in boredom, I created a little net that rolls up. So silly..... I also started on the yards. Going from left to right per the blue prints, the next set of yards after the bow family were the spritsail and spritsail topsail yards. They require little pieces of 1.5x1.5mm walnut strips to be shaped as stop cleats on each end. The larger spritsail yard also requires 2 sling cleats (#381). There is something showing on the topsail yard, but it is not labeled.... I went to the references I have on hand and was able to deduce that the smaller yard also has sling cleats. They are mentioned in Longridge's book and I just received James Lee's THE MASTING AND RIGGING OF ENGLISH SHIPS OF WAR 1625-1860. I found a wonderful deal on AbeBooks for about $65USD used. It came from one of their sellers Frey Fine Books. Frey did a tremendous job, the original dust cover is in new condition and they covered in a clear cover and actually wrapped the book in paper before boxing it. Just above and beyond. Both books really get into the details of it all. Lee's provides dimensions for any and all parts of the rigging. It was very comforting to be able to convert both Lee and Longridge's real life dimensions of feet/inches into millimeters and have them come out almost perfectly. I now have to clear space so that these books are open and ready for the rest of this project. I am headed into an area that I have no experience in!!!! Can't wait. Chris


-
Thank you Walter....of course, you're not down stairs when I spend 75% of my time sweeping under the bench trying to find all the pieces I keep dropping. I assure you, no patience then!!!!!
-
I'll just plugging along. Now that I'm here, there are now videos and blogs that focused on rigging that I can now start pouring over. Thanks! Chris

-
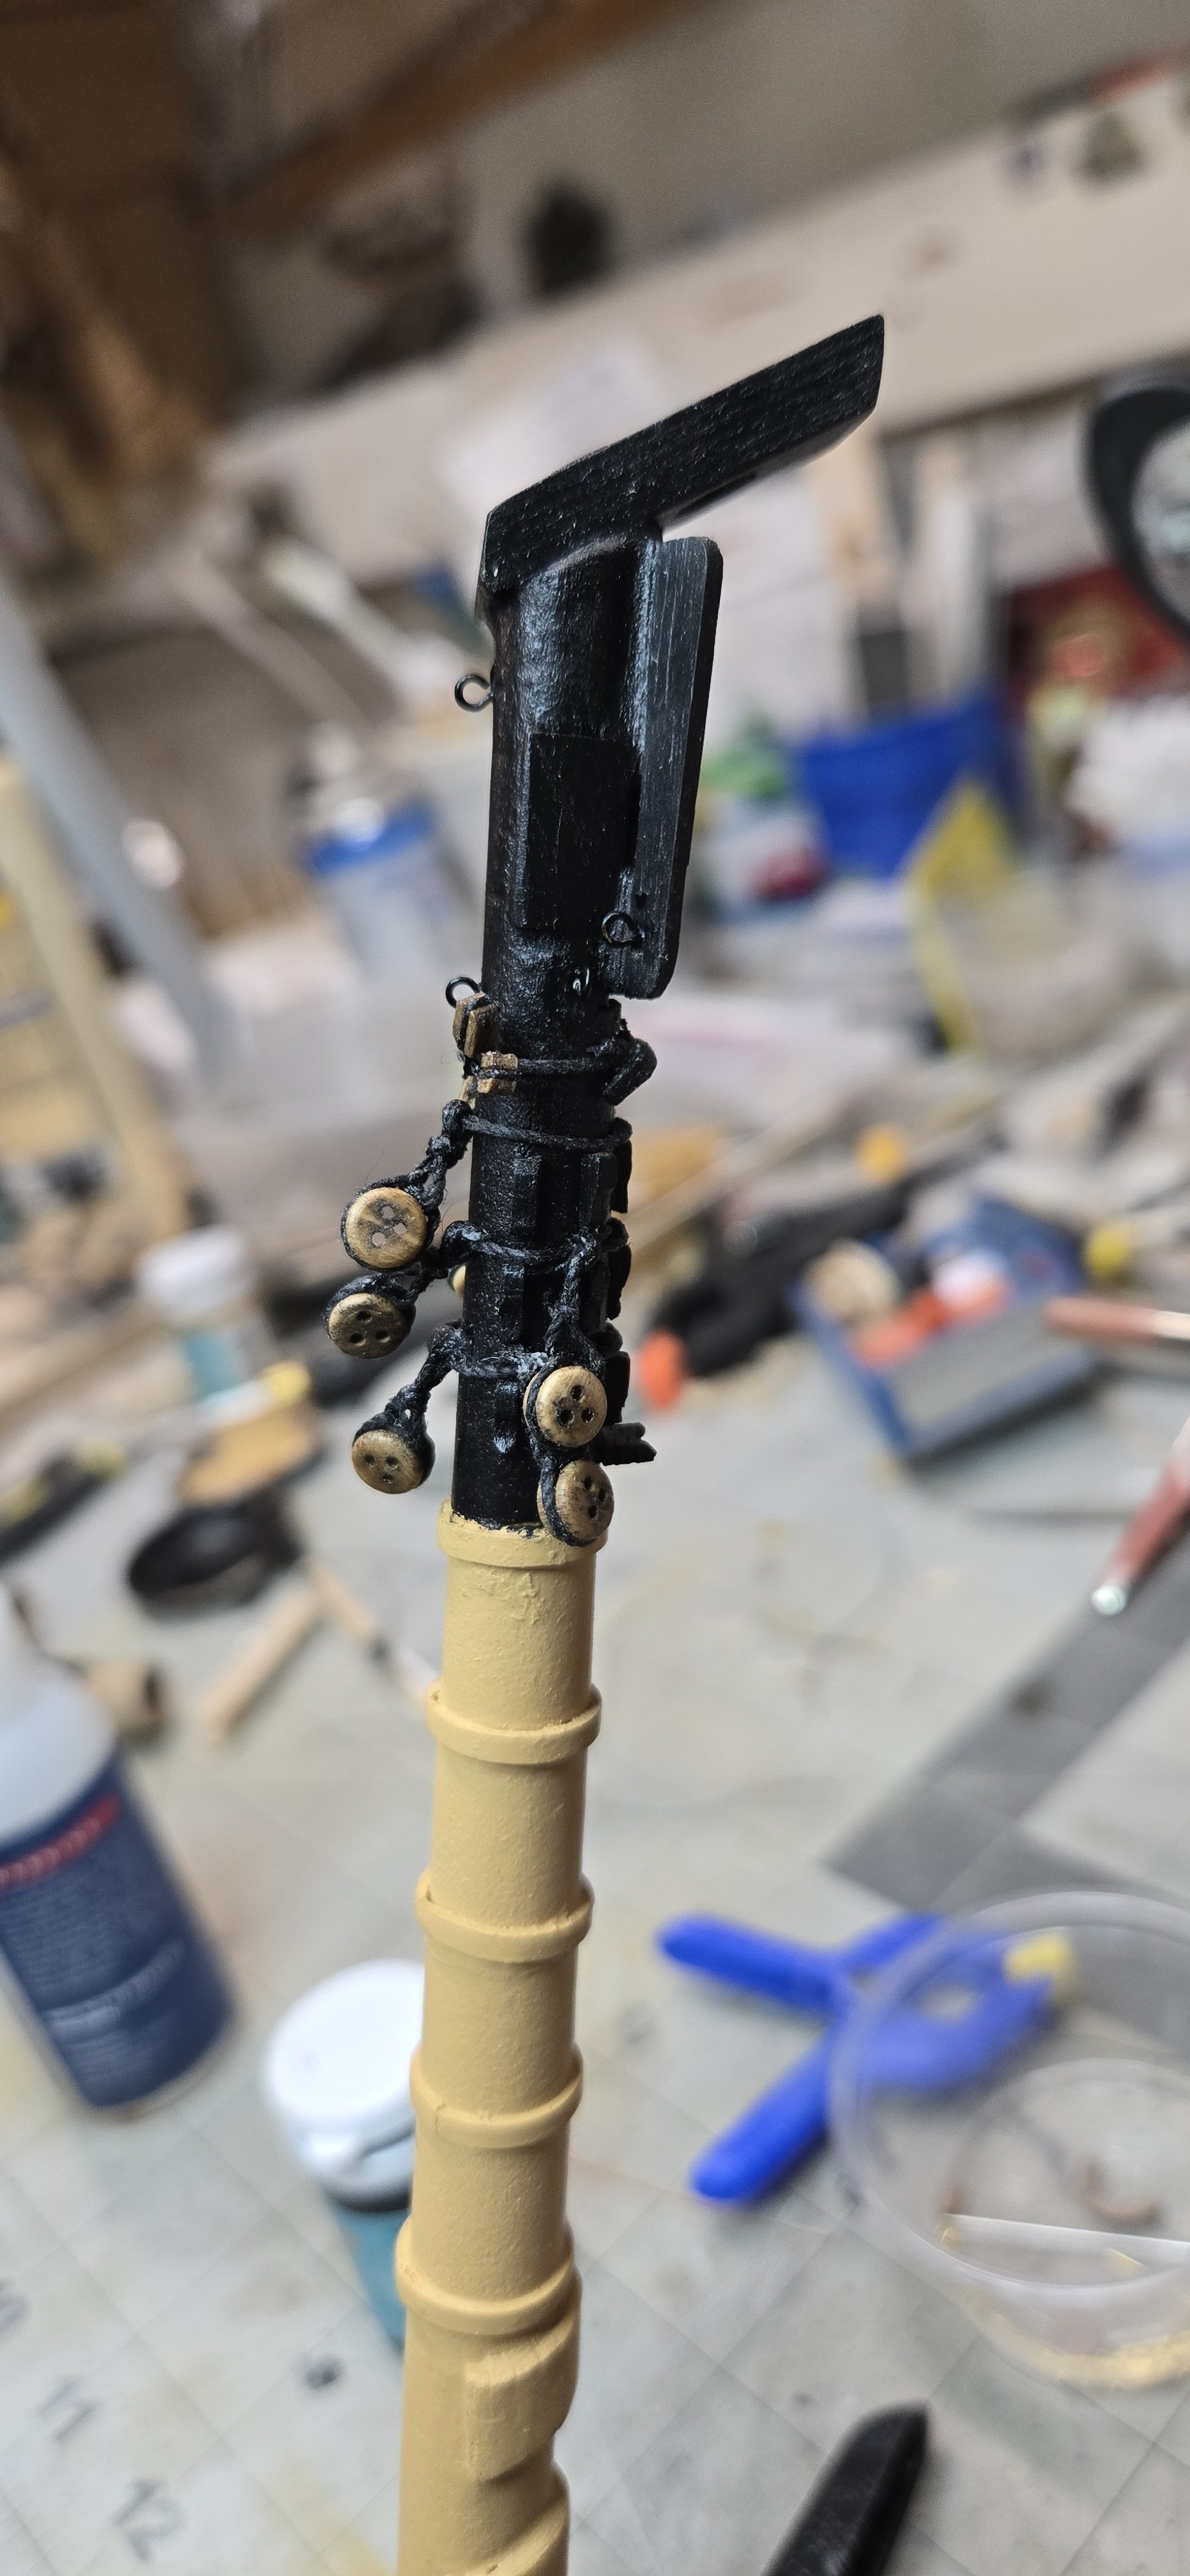
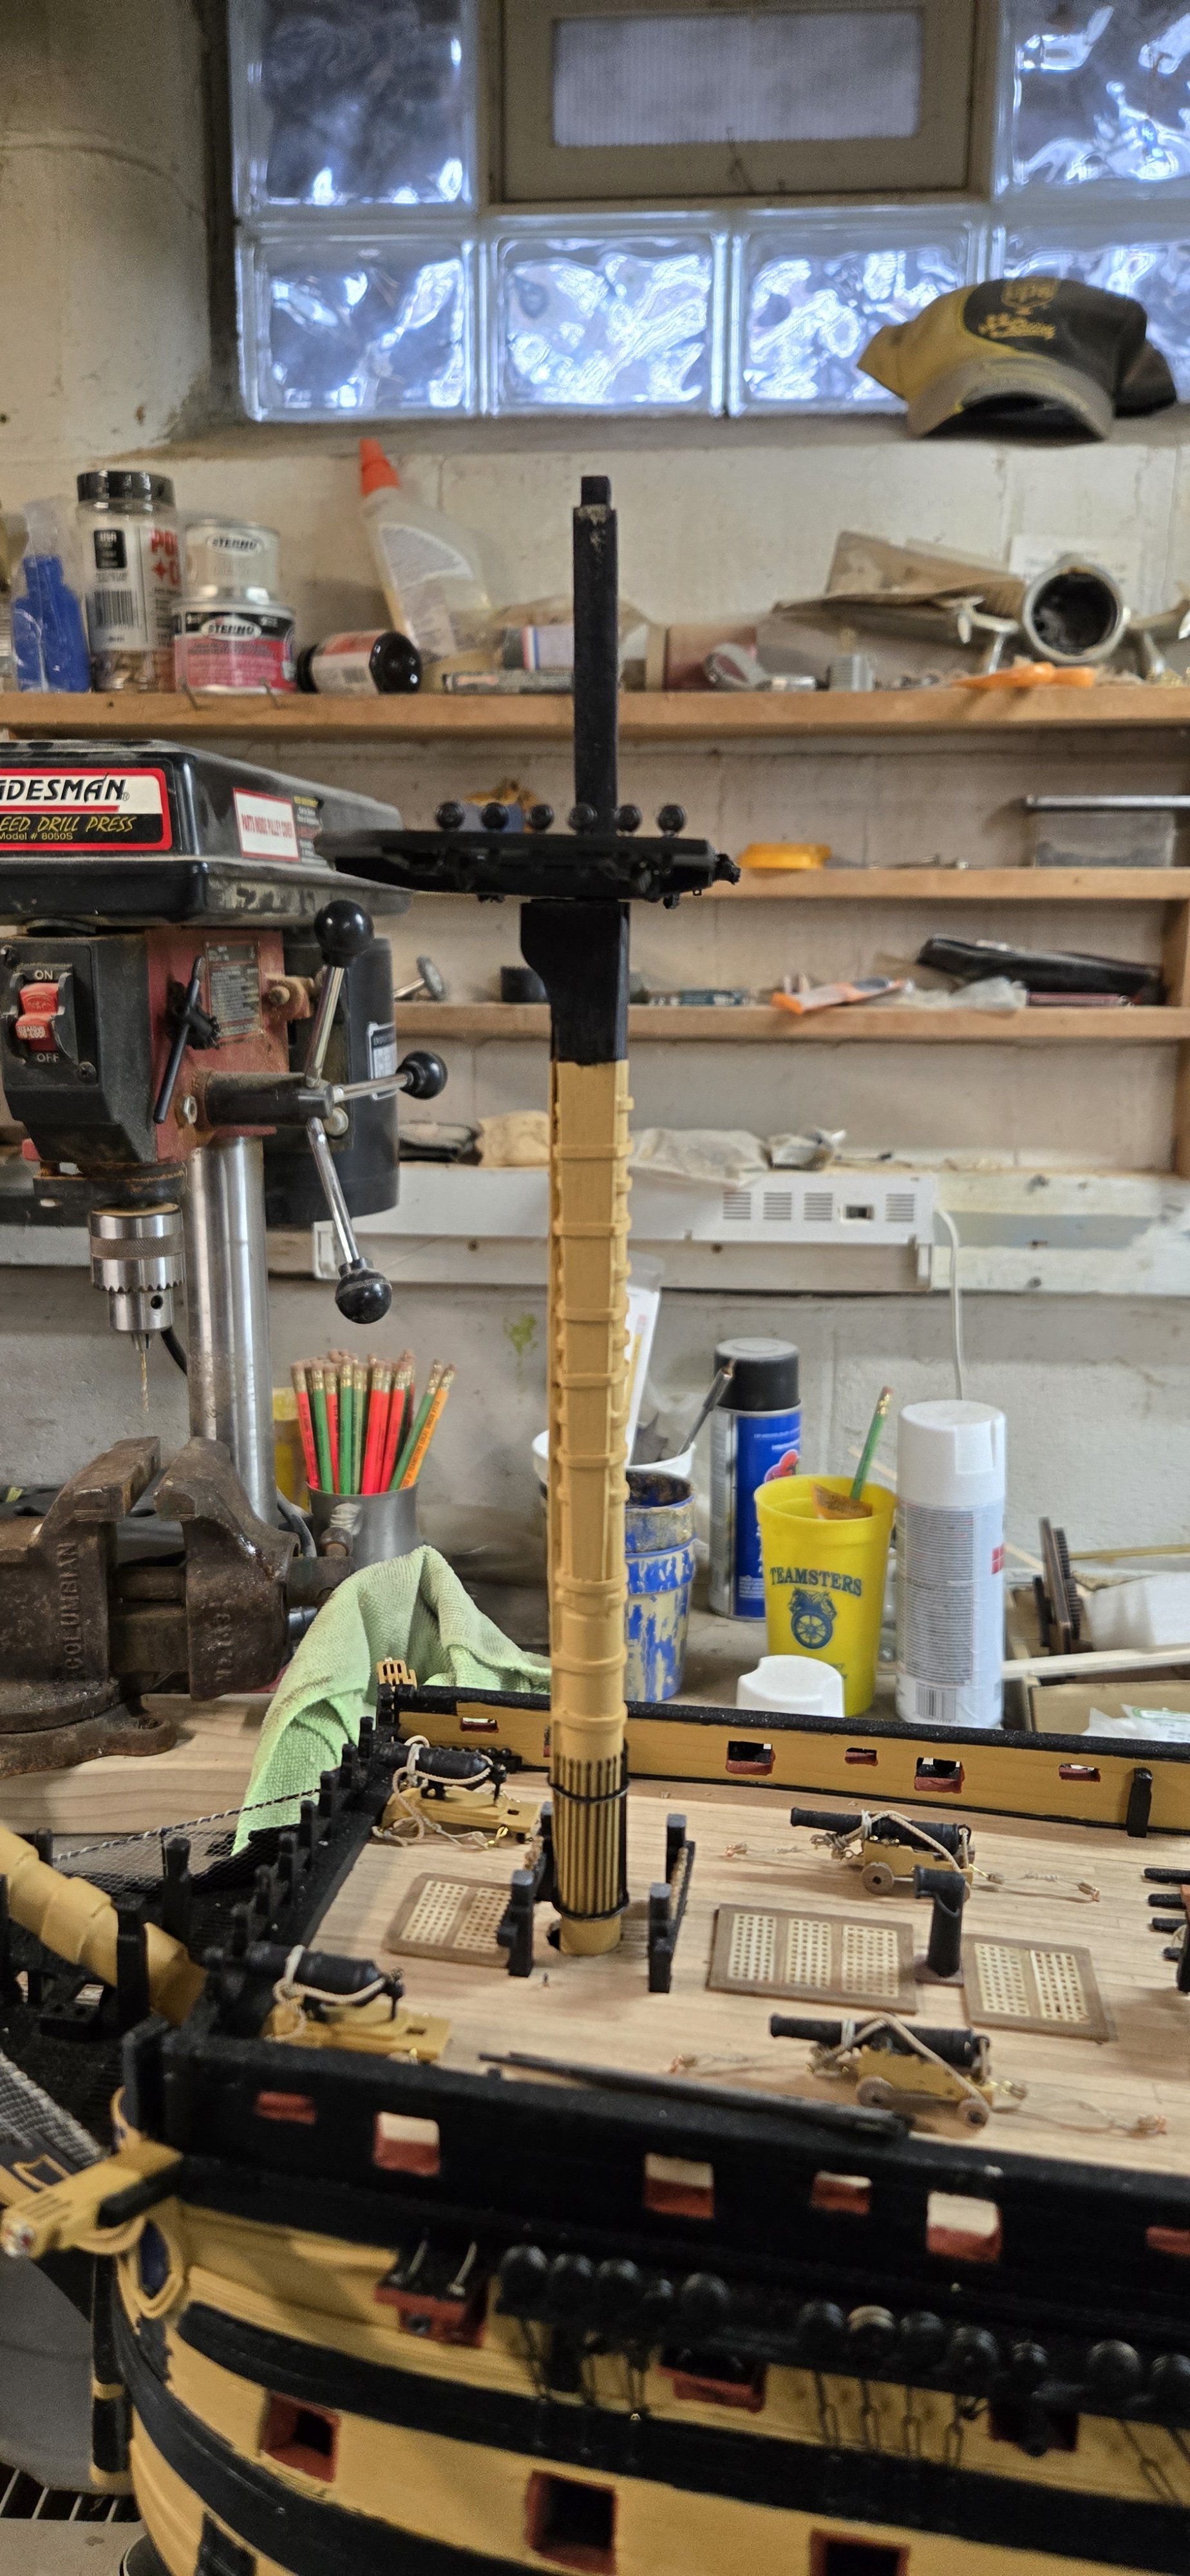
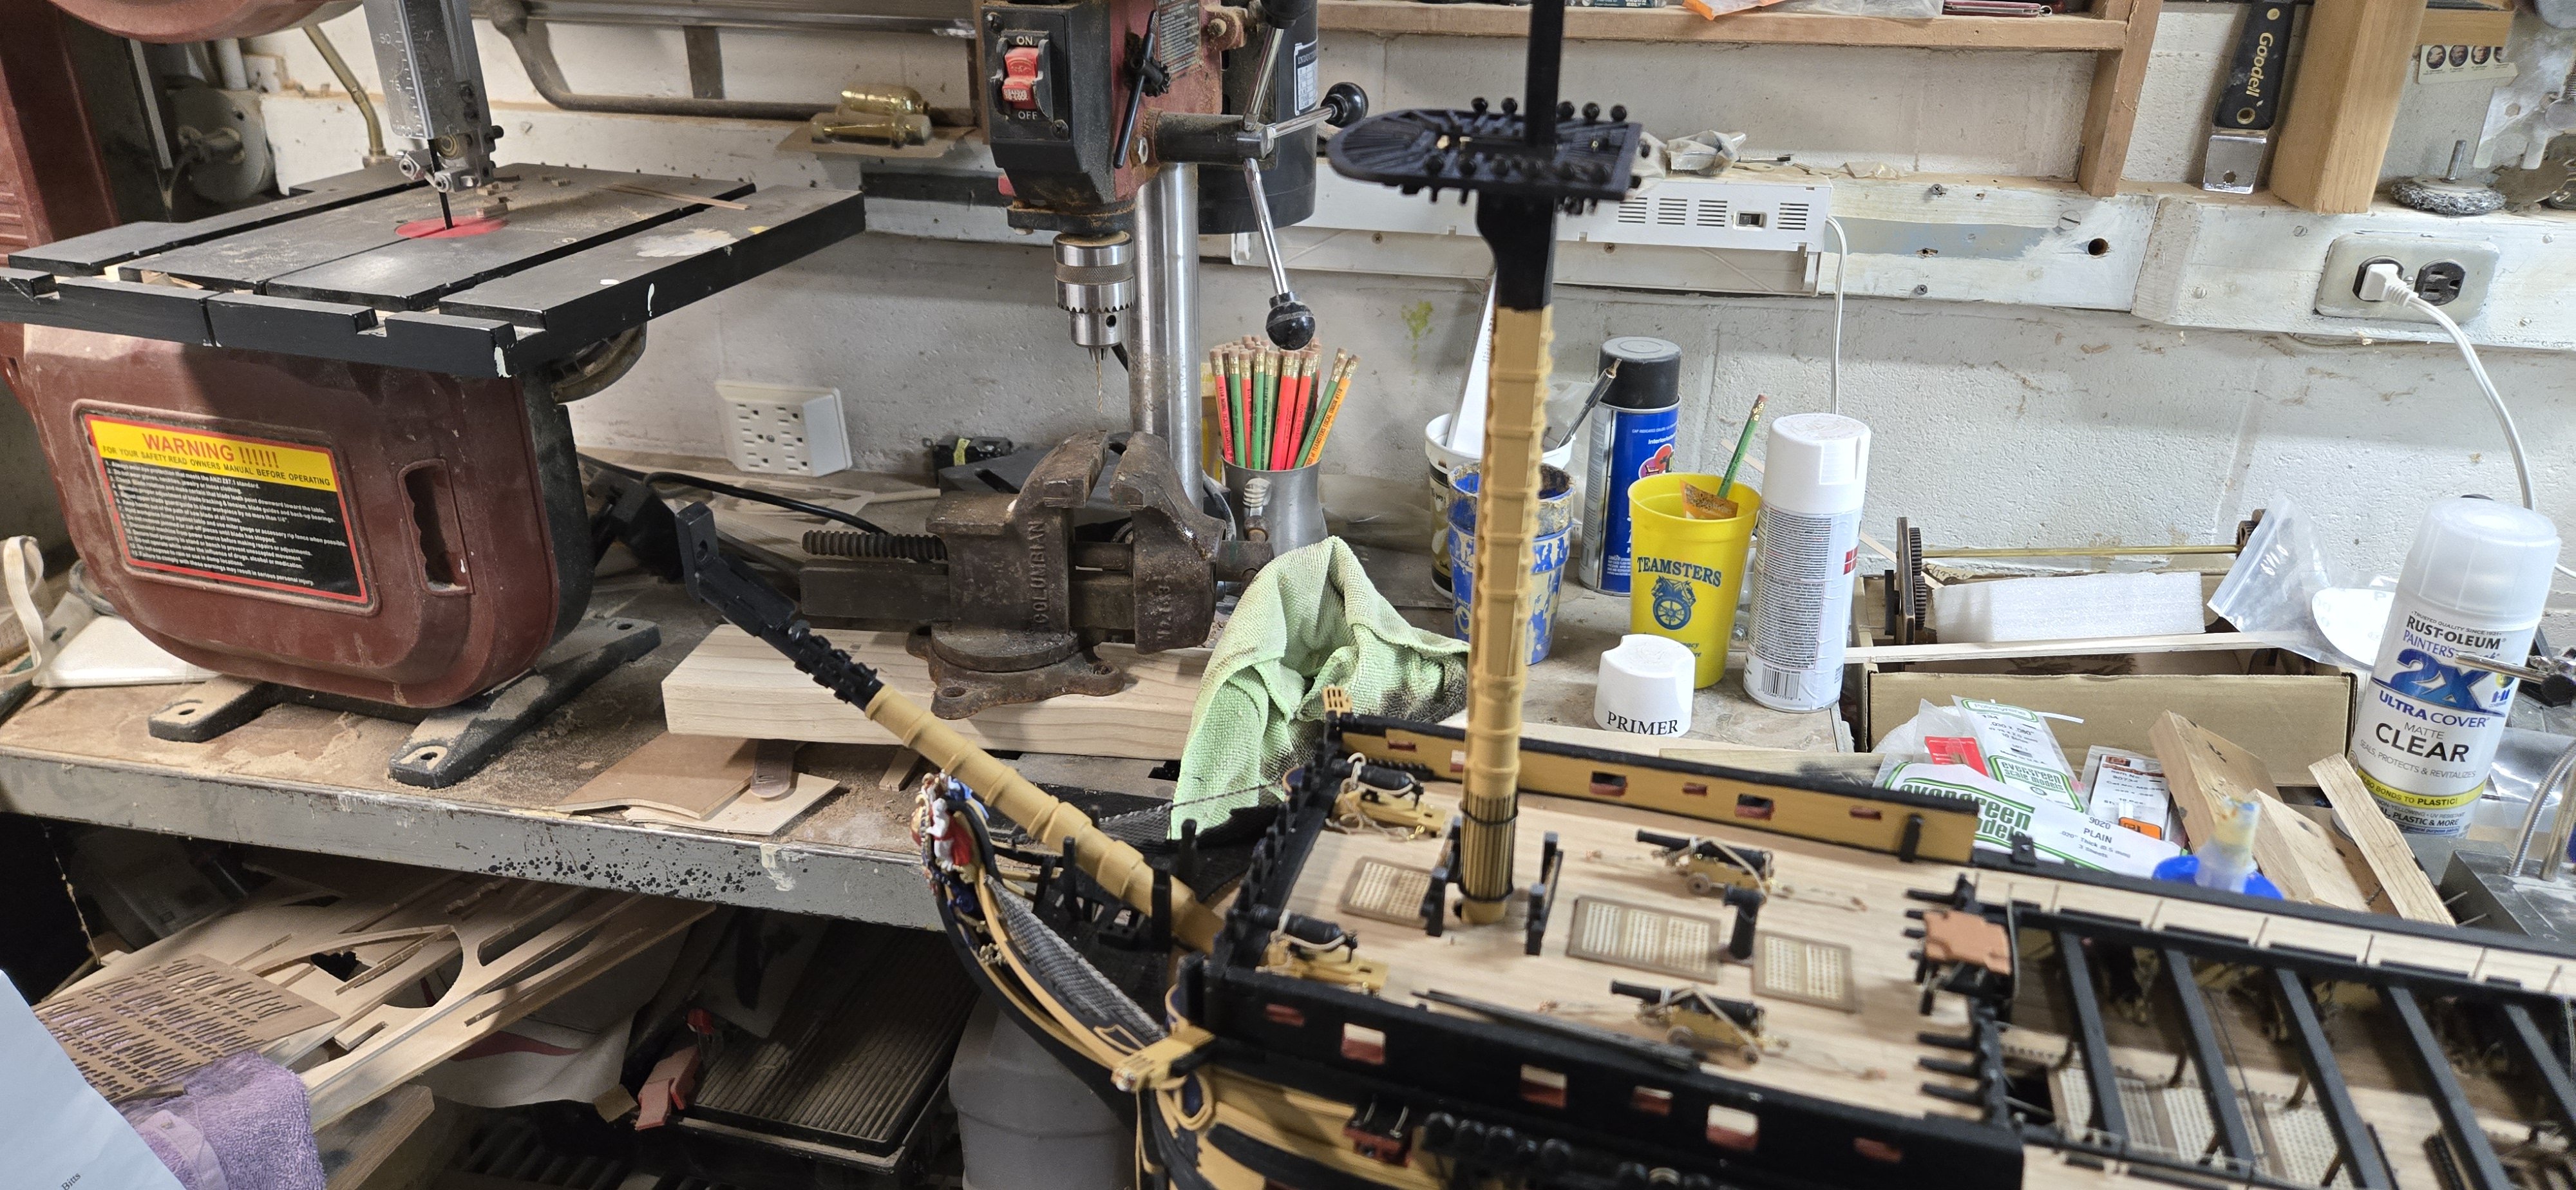
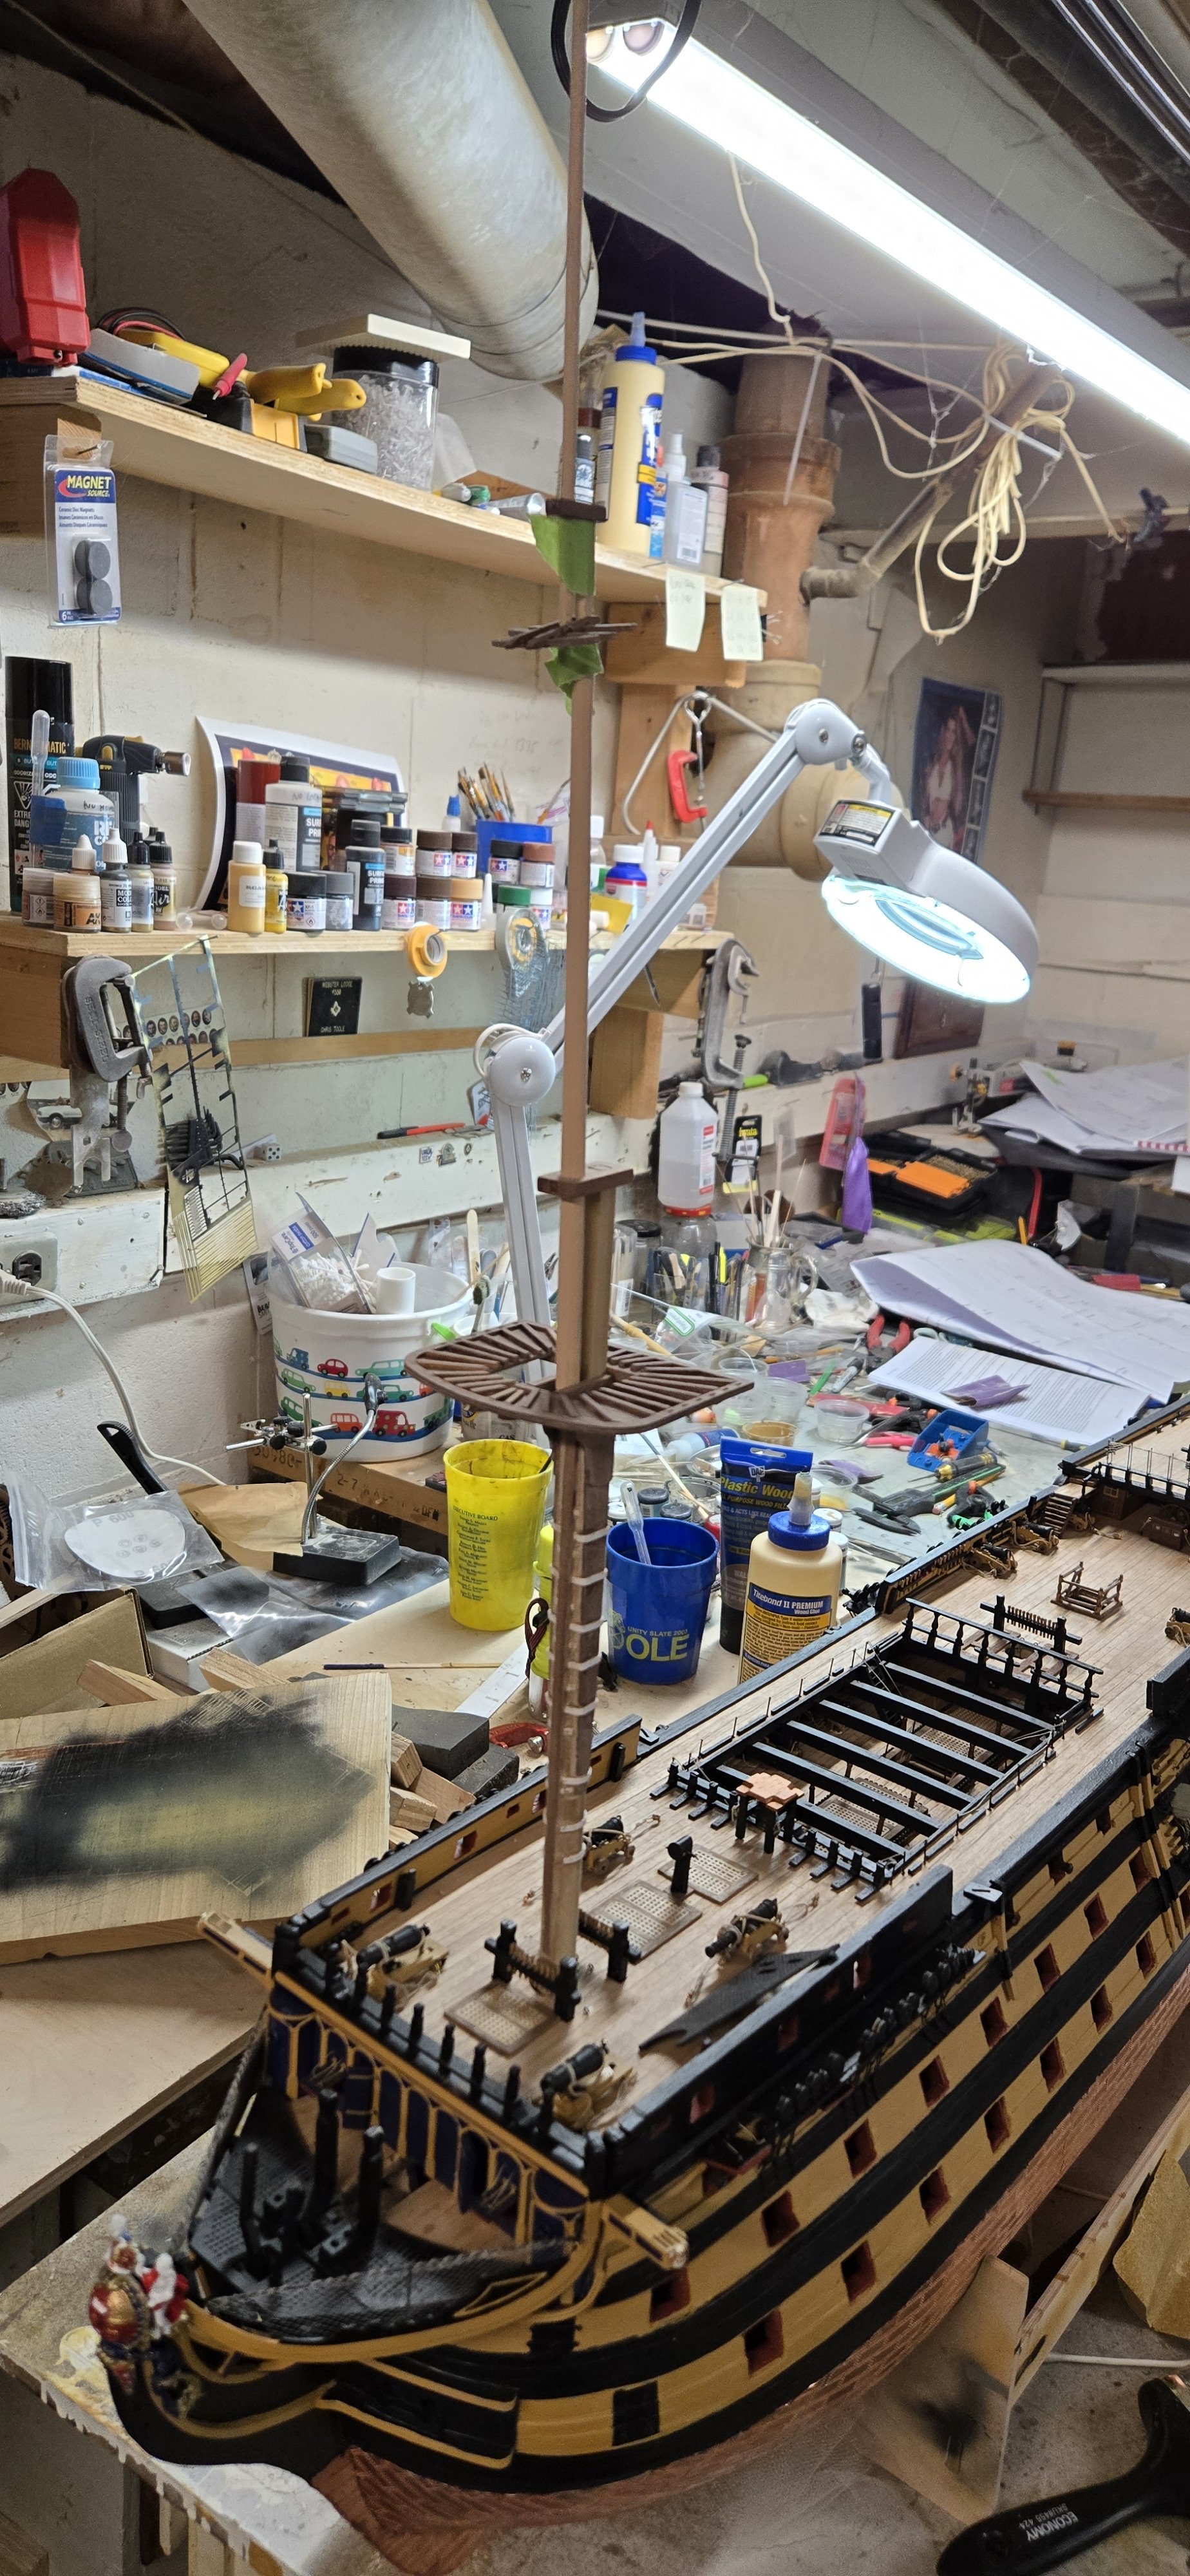
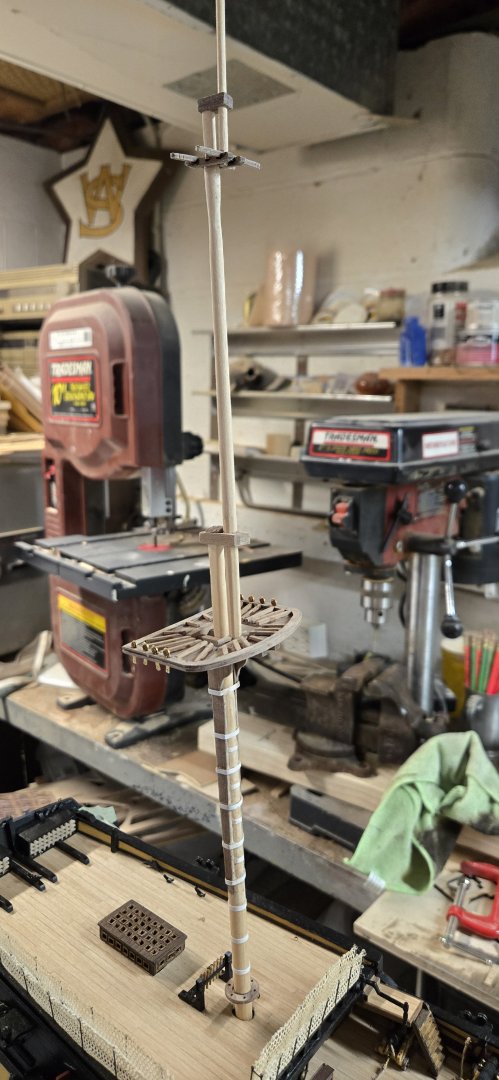
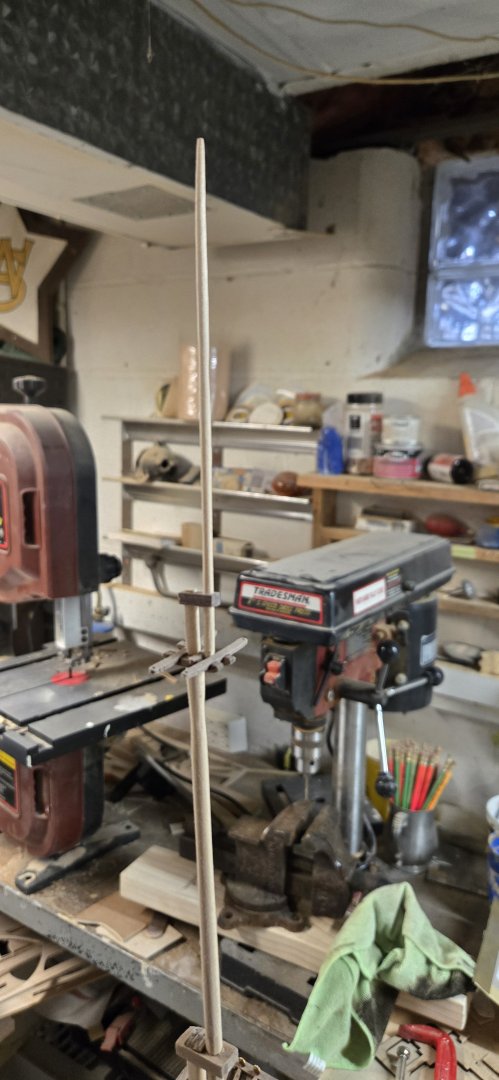
Working on the mizzen. Right now I've added the first 2 coats of paint. The banding went fine and I added wood putty again. I just wanted to be consistent. The top and t'gallant mizzen masts are very small in diameter and trying to get the octagonal shape was difficult. I did the best I could, but ended up with more rounding than anything.
-
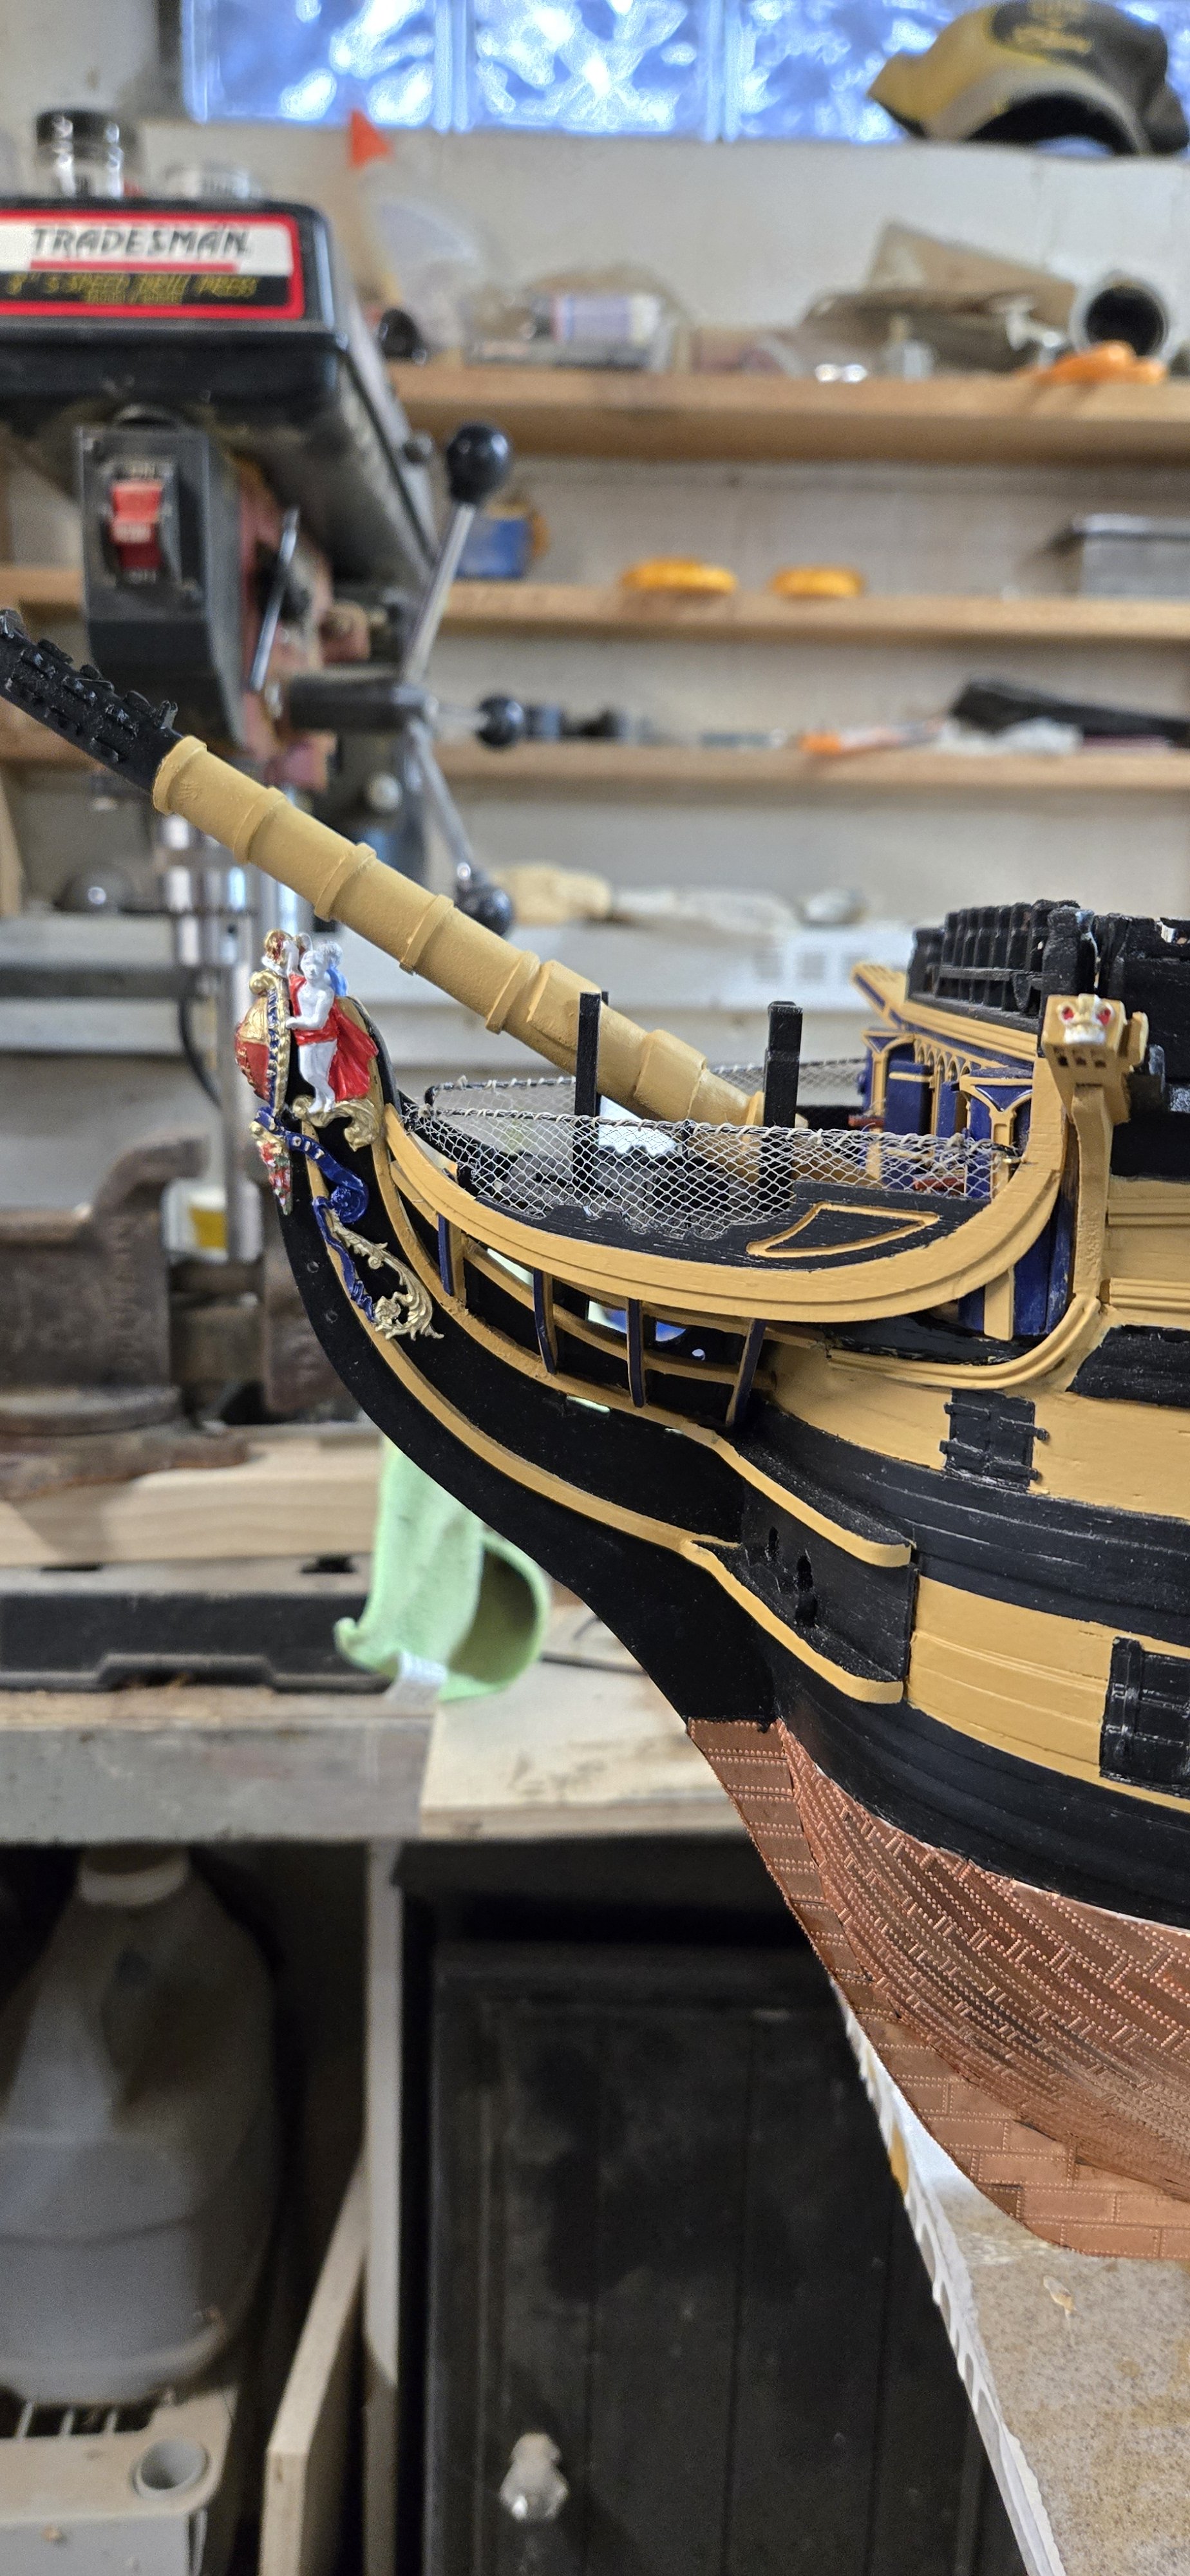
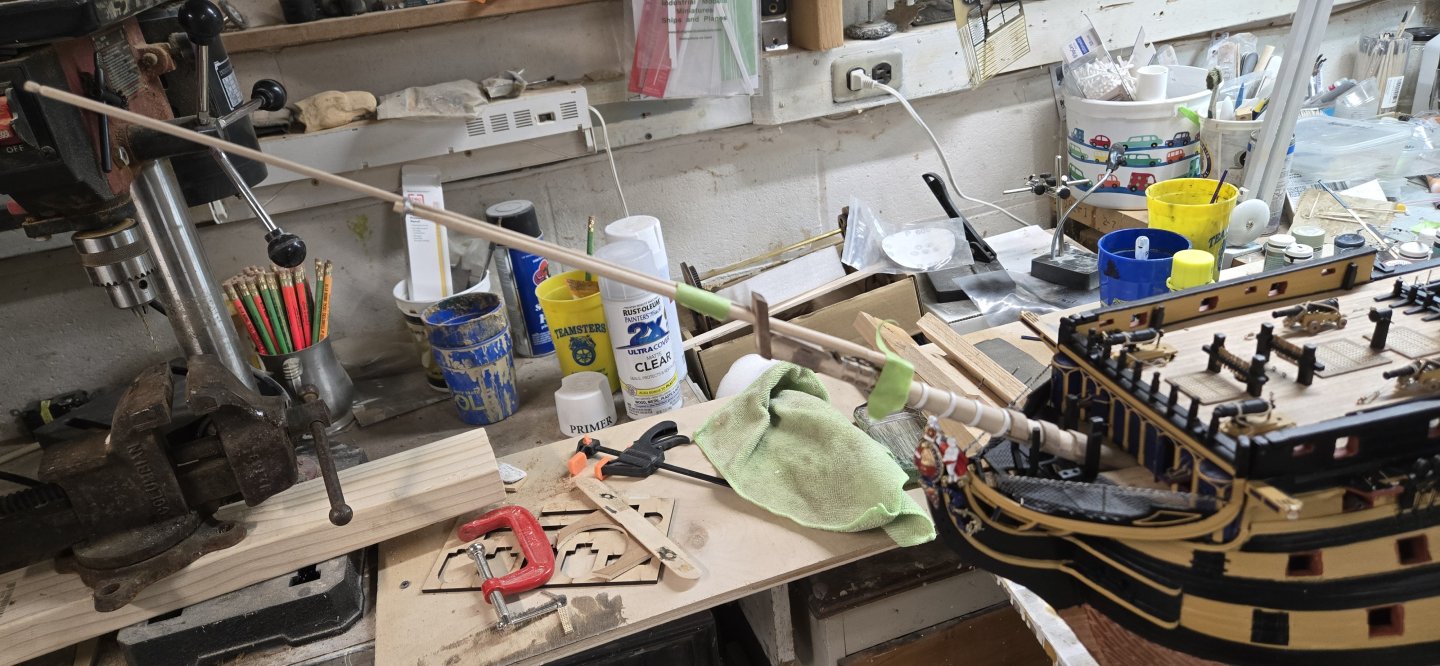
I also worked on adding the blocks to the bowsprit. I had to use Longridge's book to help get the blocking right. I really want to put the bowsprit on and try and get some of the rigging in place, including the gammoning. But I just know if I do that, I'll knock the boat off the table when I'm moving around the shop. So I'll wait!


-
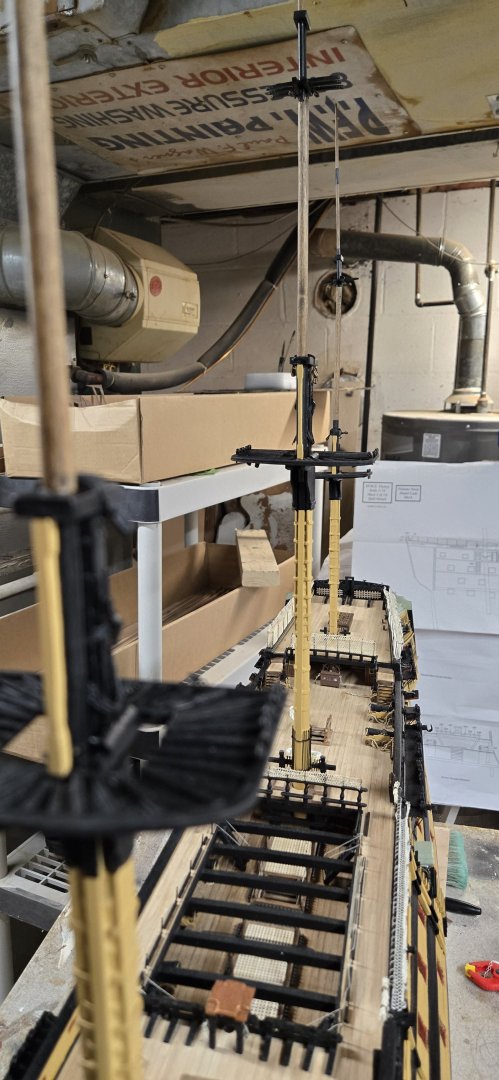
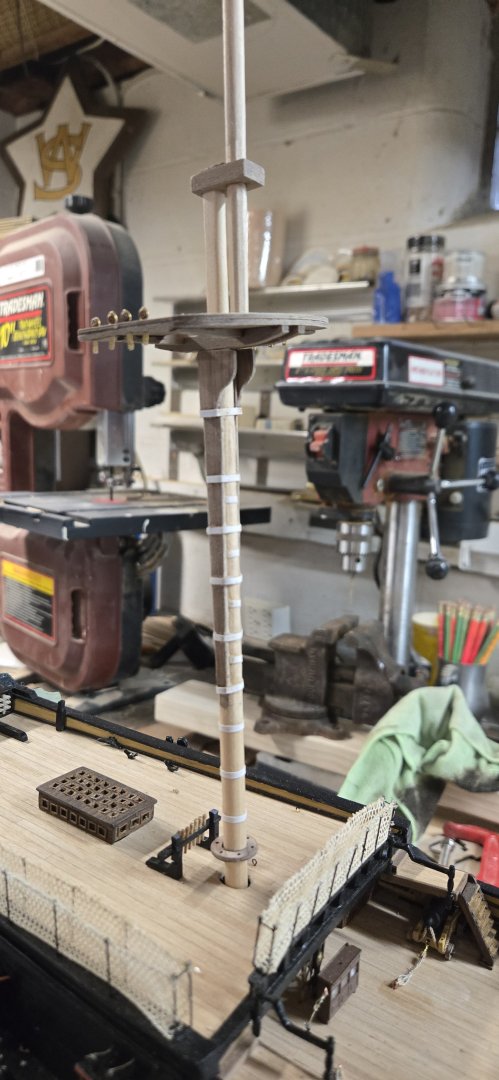
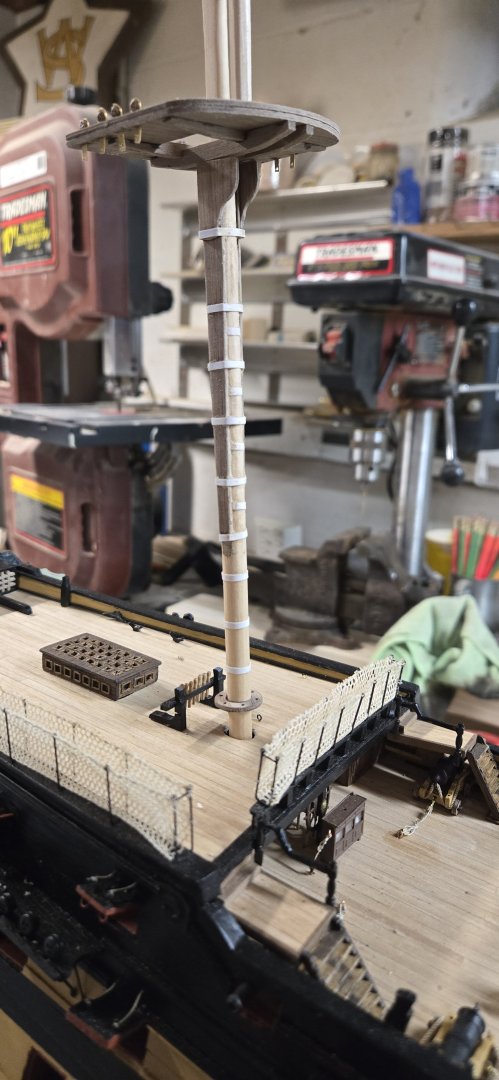
After pulling apart the platform, I was able to move it forward and then installed the top foremast correctly. You can see the hand mast in the front, I had lost the actual piece. When cutting other pieces earlier, it must have come loose from the sprue. I thought I had put it back in the parts box, but couldn't find it. I made one from scratch and installed. After the fact, I read that the hand mast should be rounded in between the top and bottom. I have done that with the main and mizzen.
-
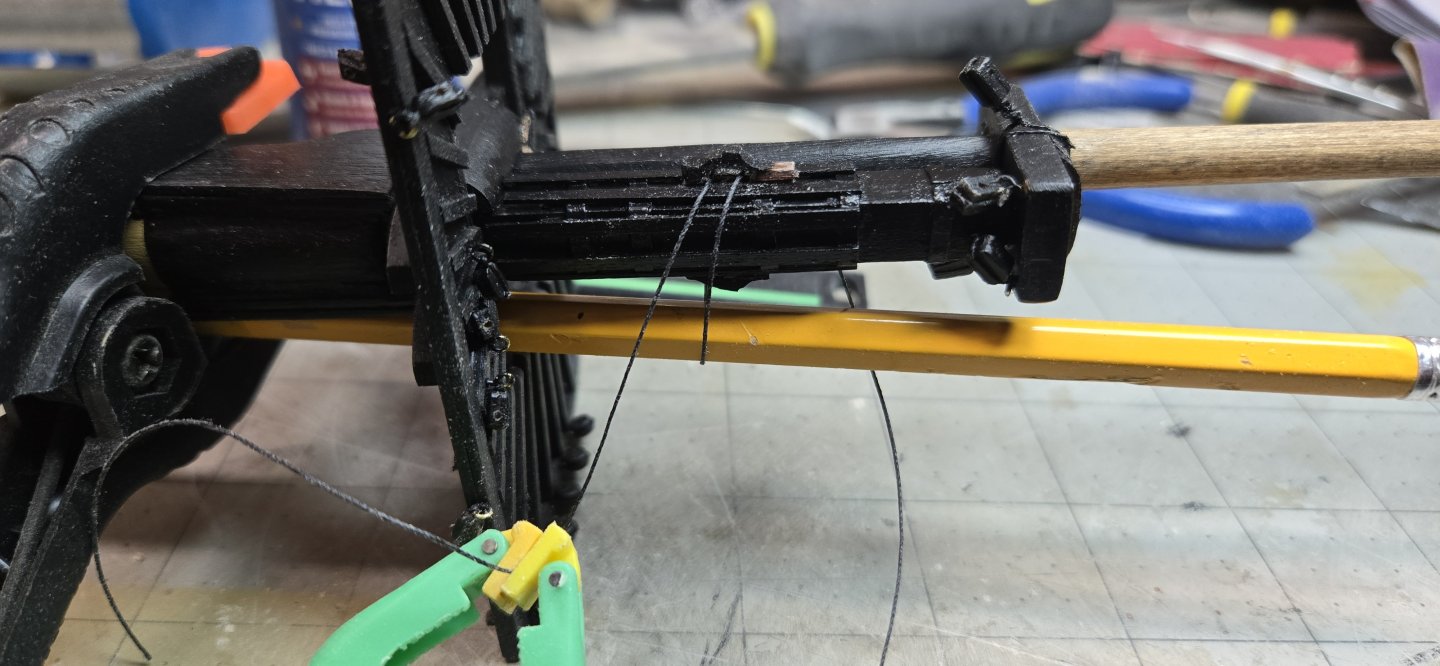
I'll try to catch up here. First made some installation errors on the foremast platform that I didn't see at first. I put together all 3 sections of the foremast, but the topmast didn't seem to fit right on top of the platform and then it seemed like the location where the hand mast needed to go just didn't make sense... After a bit of sanding, I was able to put the pike rail on and I opted not to place banding under the pikes themselves. After completing the foremast, I was correct and the jeer block strops are too low and the side long bands get in the way. I was forced to add some blocking to get them high. To run the rigging, I clamped a pencil under it to give it something to wrap around and give it some length. The only thing was making sure the loops laid nice and flat to give a good look. I am pretty happy with how they ended up, but assume they will be truly hidden by all the rigging that will be attached to this area and surrounding it. Ok, the lighting is kind of bad, but you can see that I did not put the platform far enough forward. I really thought I had laid it out per the plans. Even laid the mast onto the blue prints. Put I was off. You can see that the fid, which is sideways sits on top of the bolsters instead of in that slot. Had I done that, then the hand mast would fit nicely under the cap and on top of the platform. I was going to just leave it, but wasn't sure if this would alter the angles of the upper rigging negatively and after some advice, I took the risk and pulled the platform apart.


-
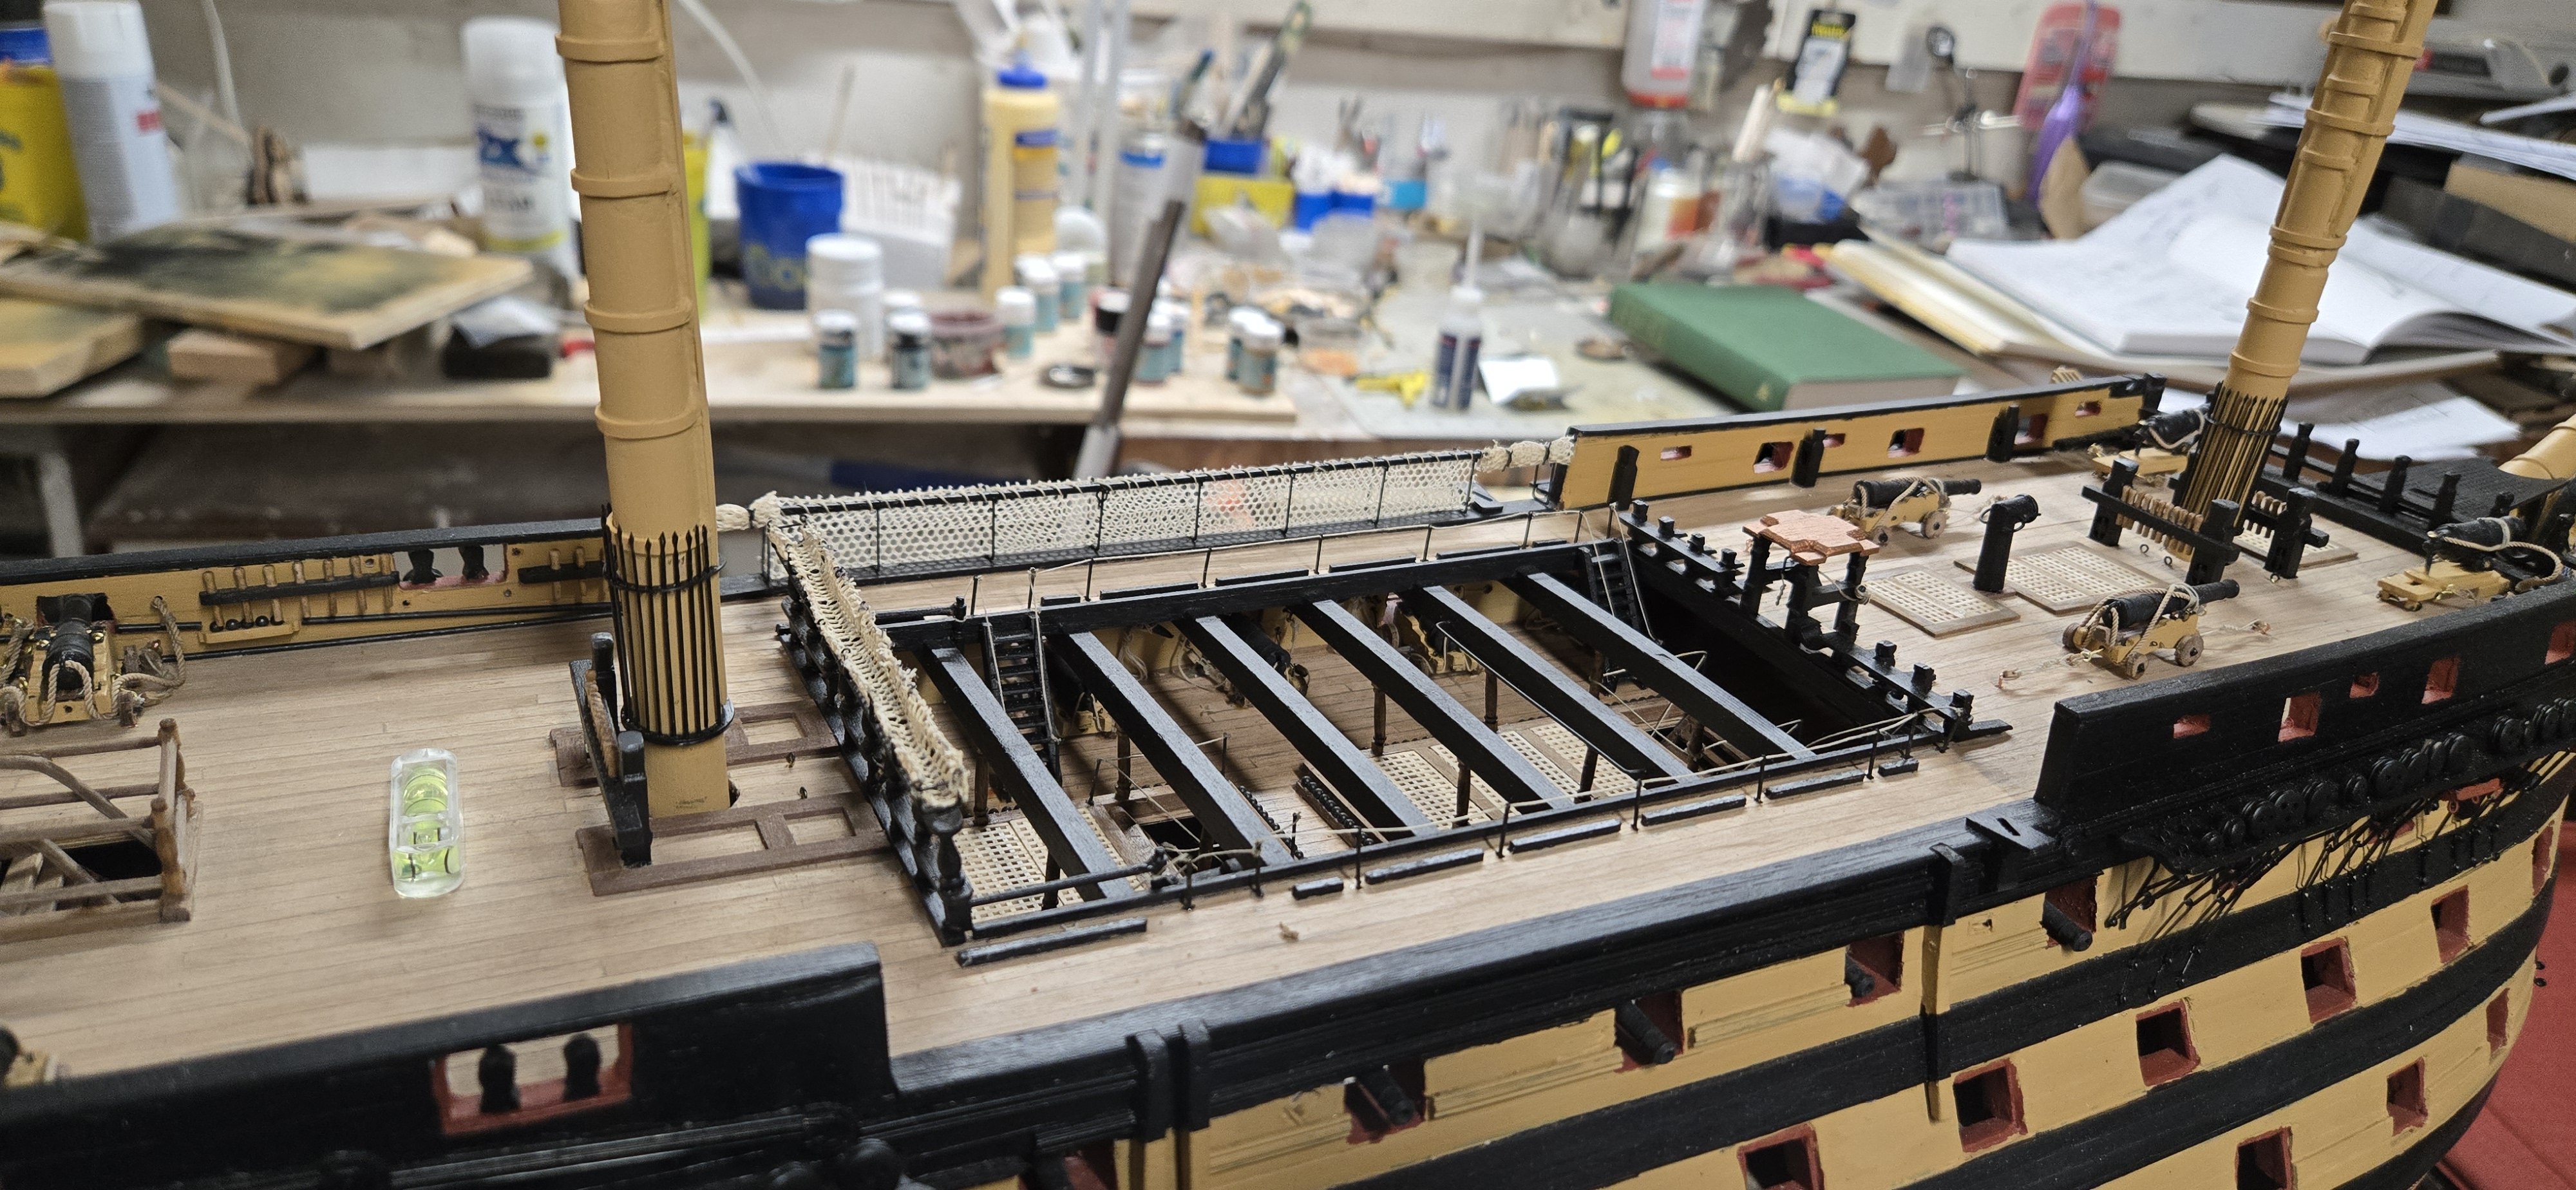
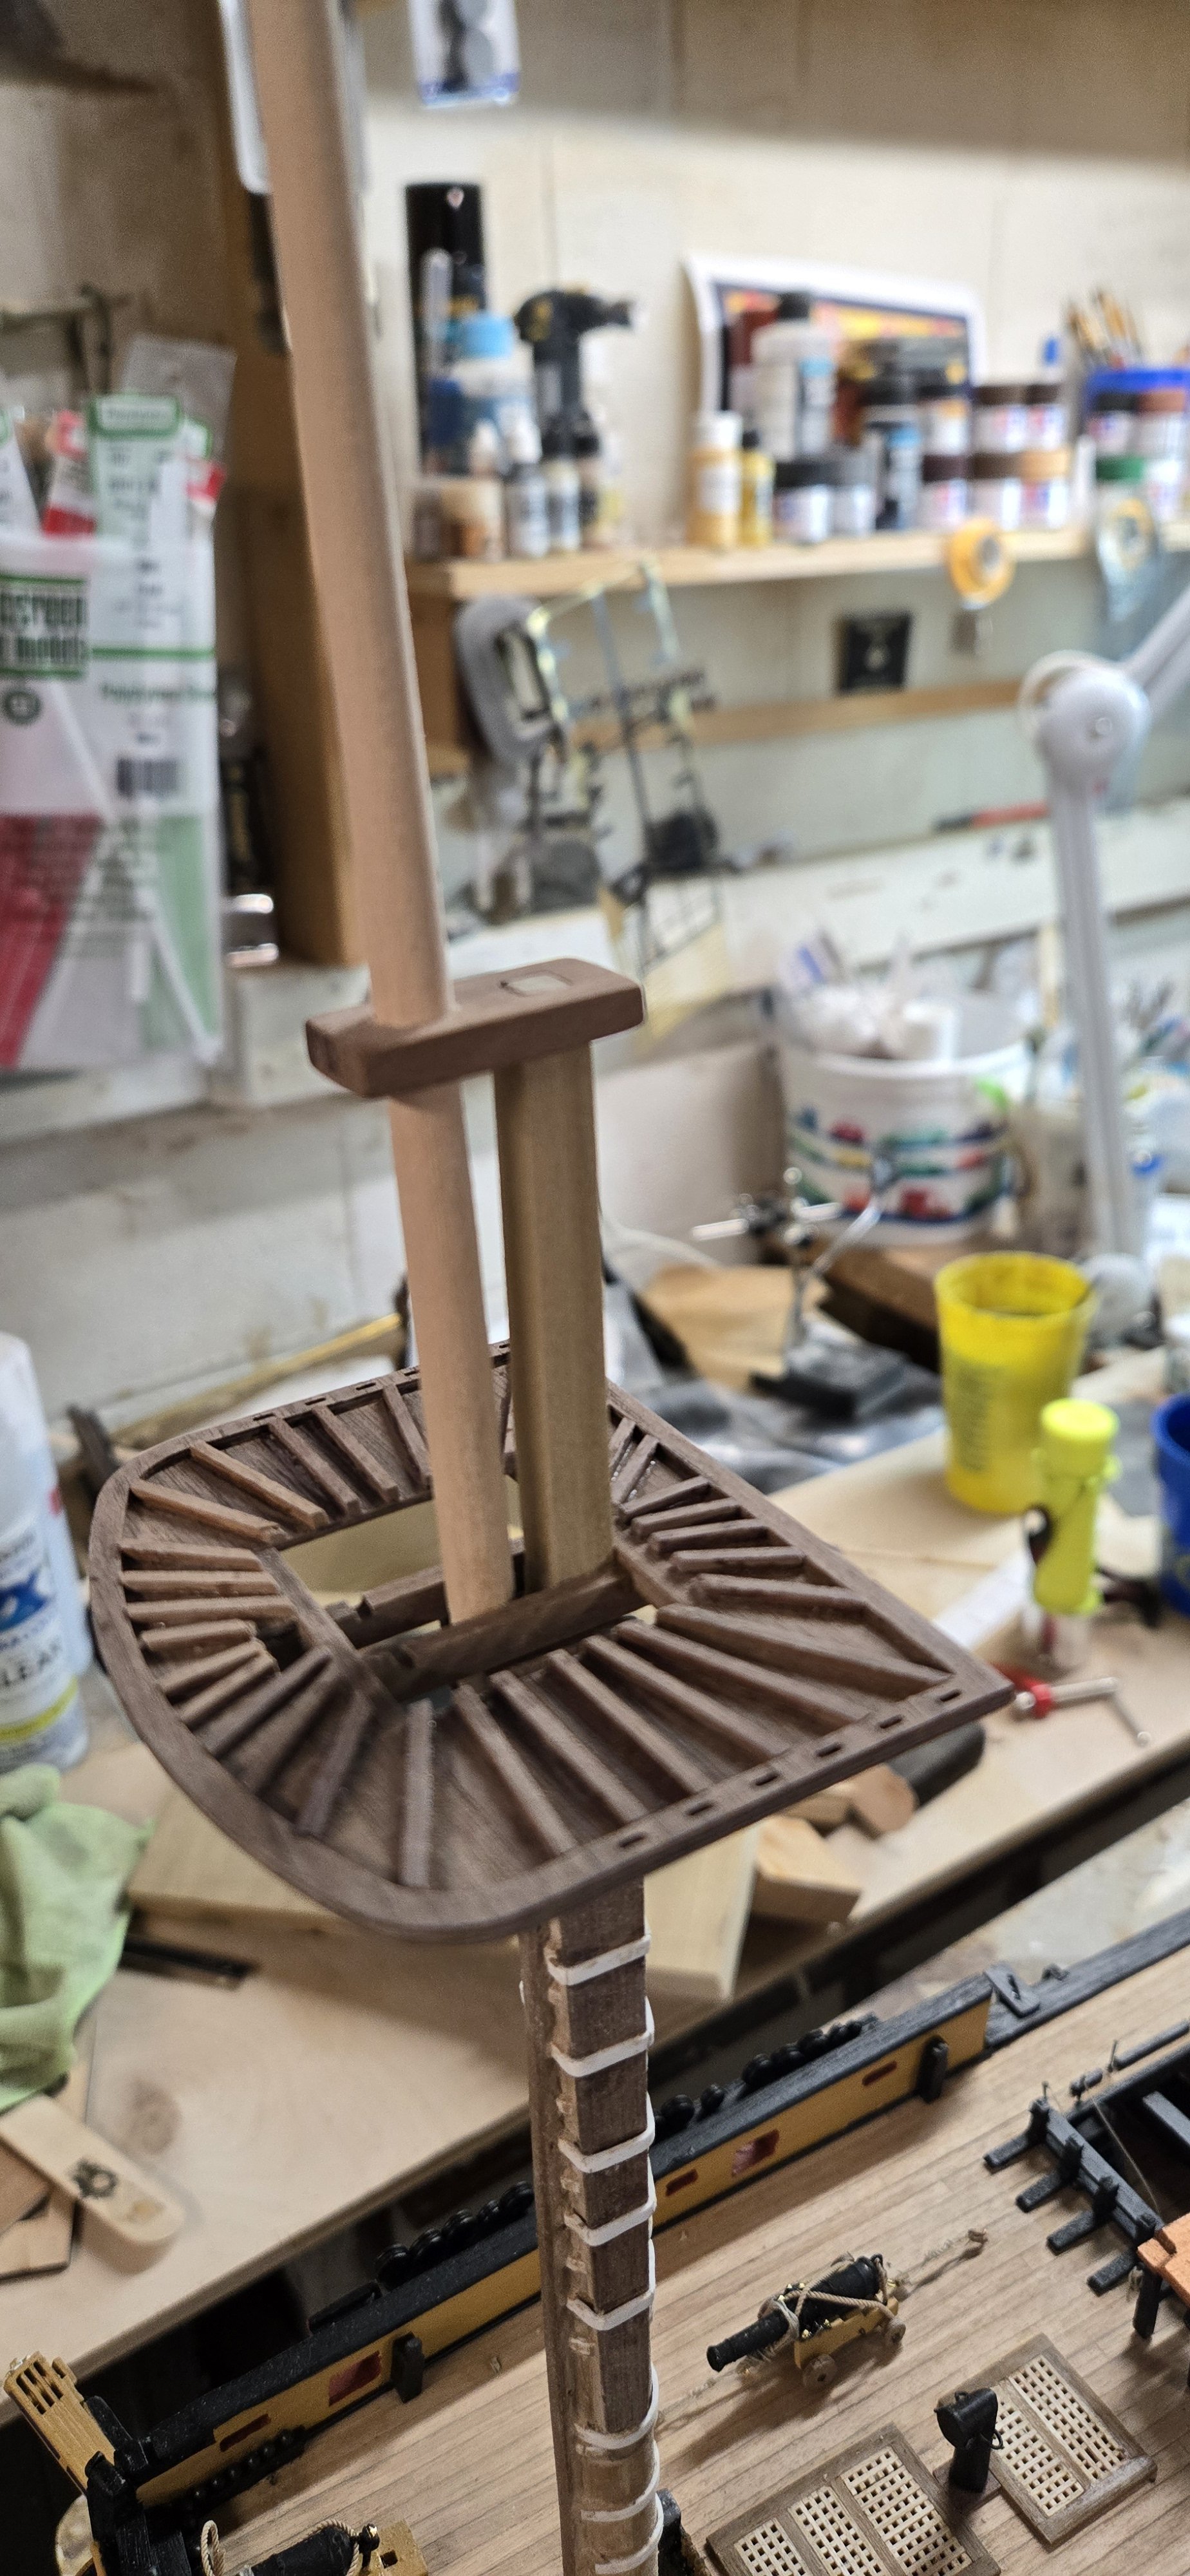
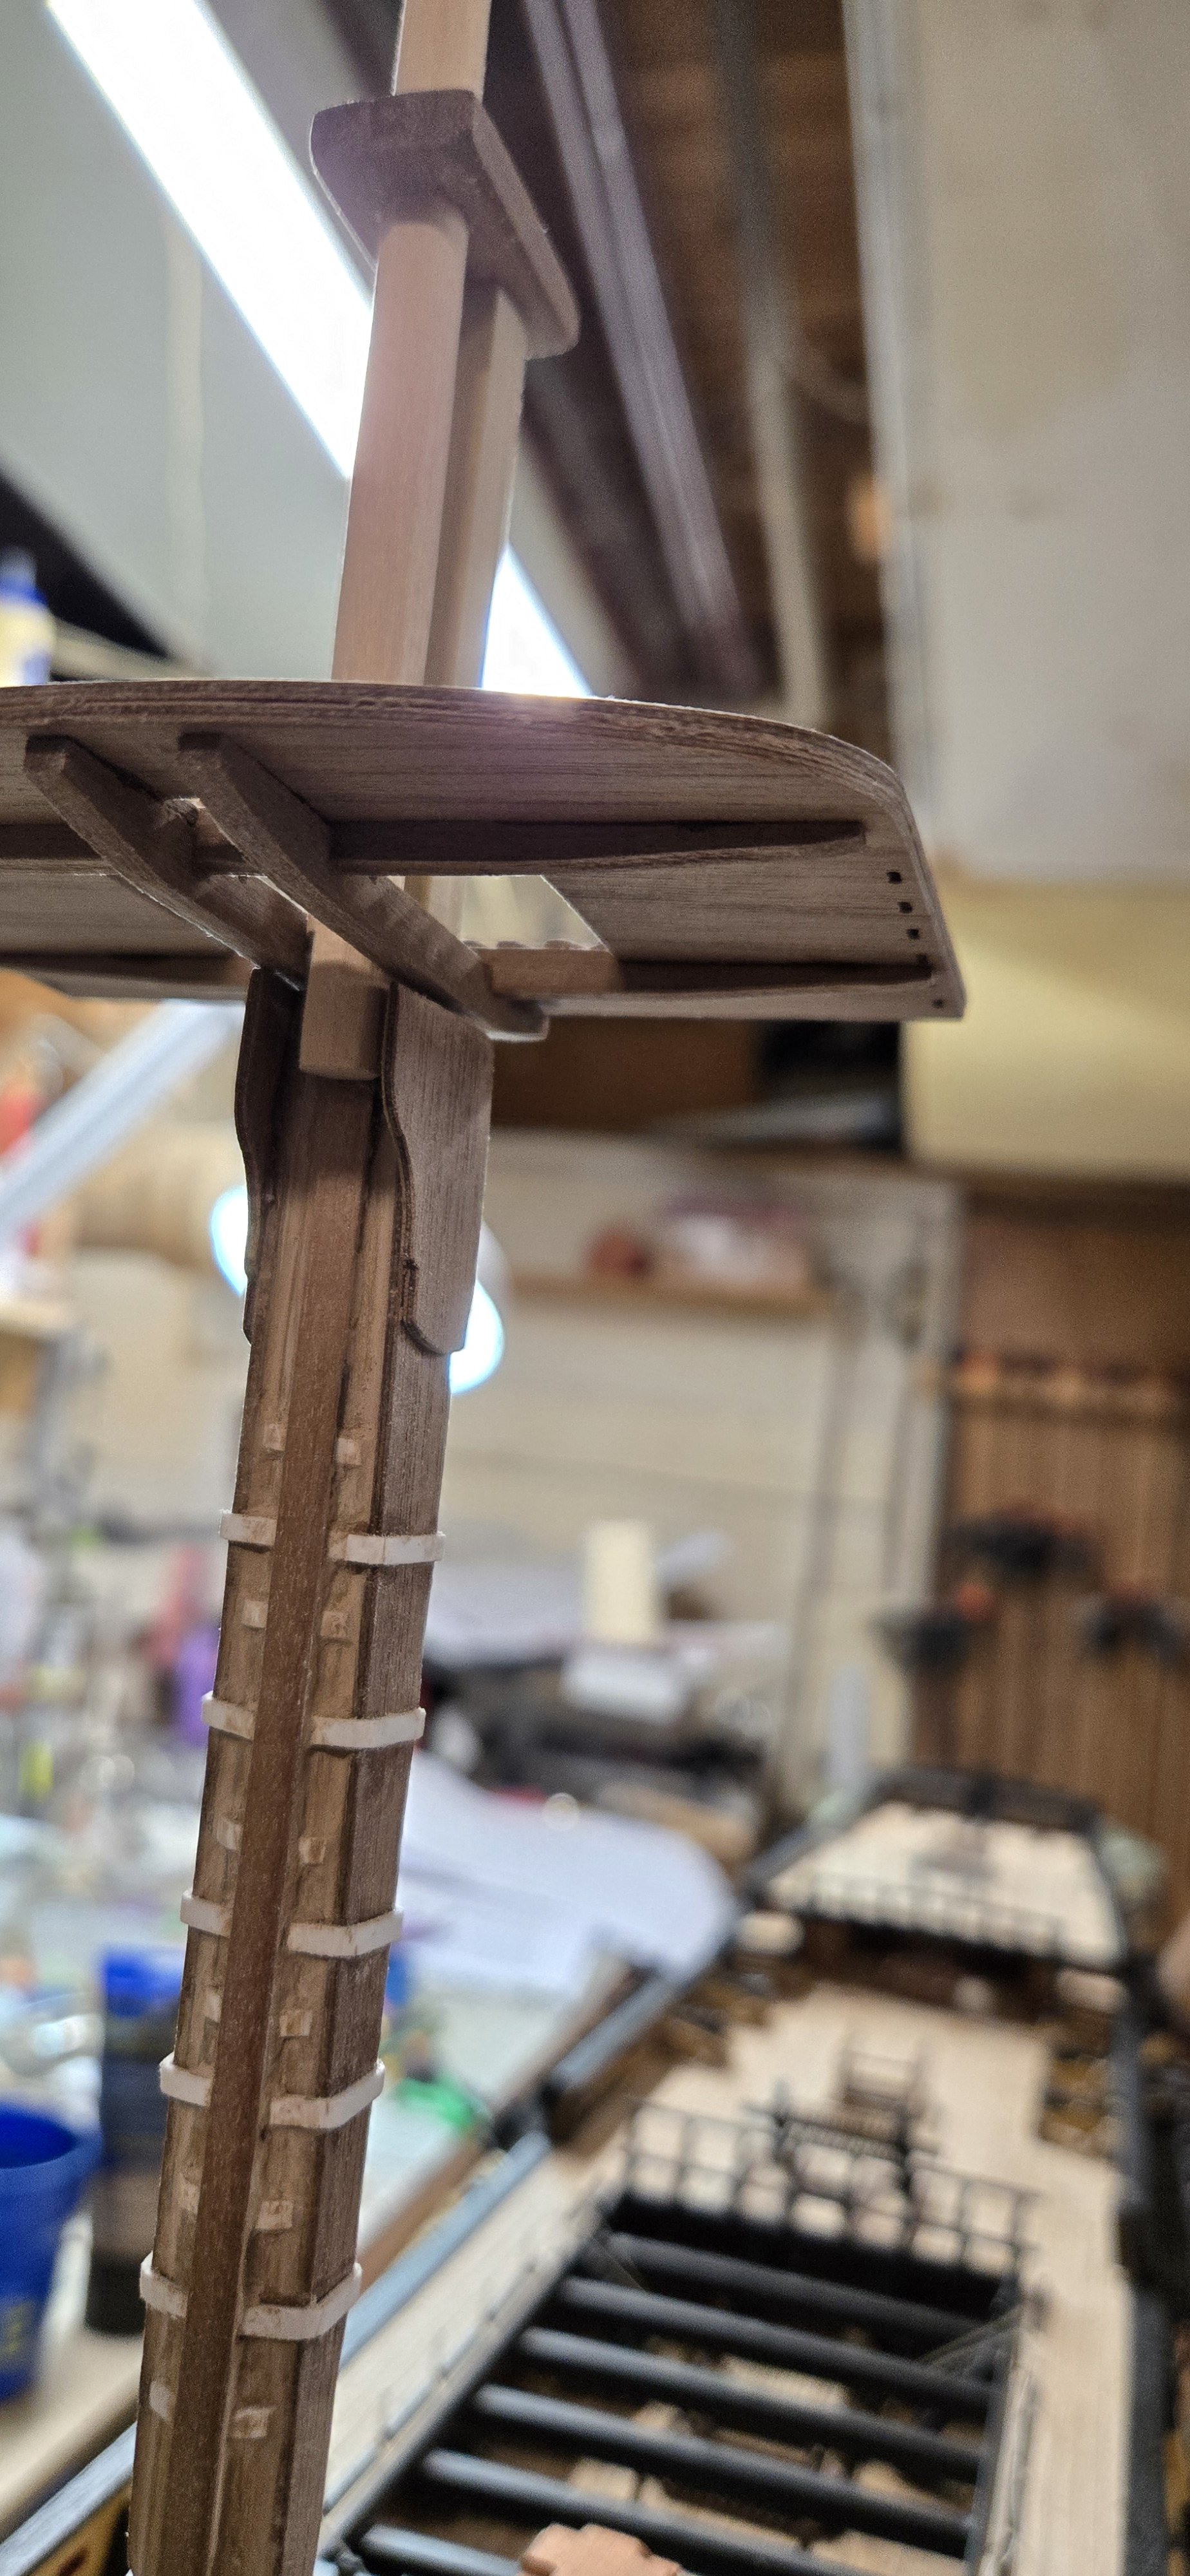
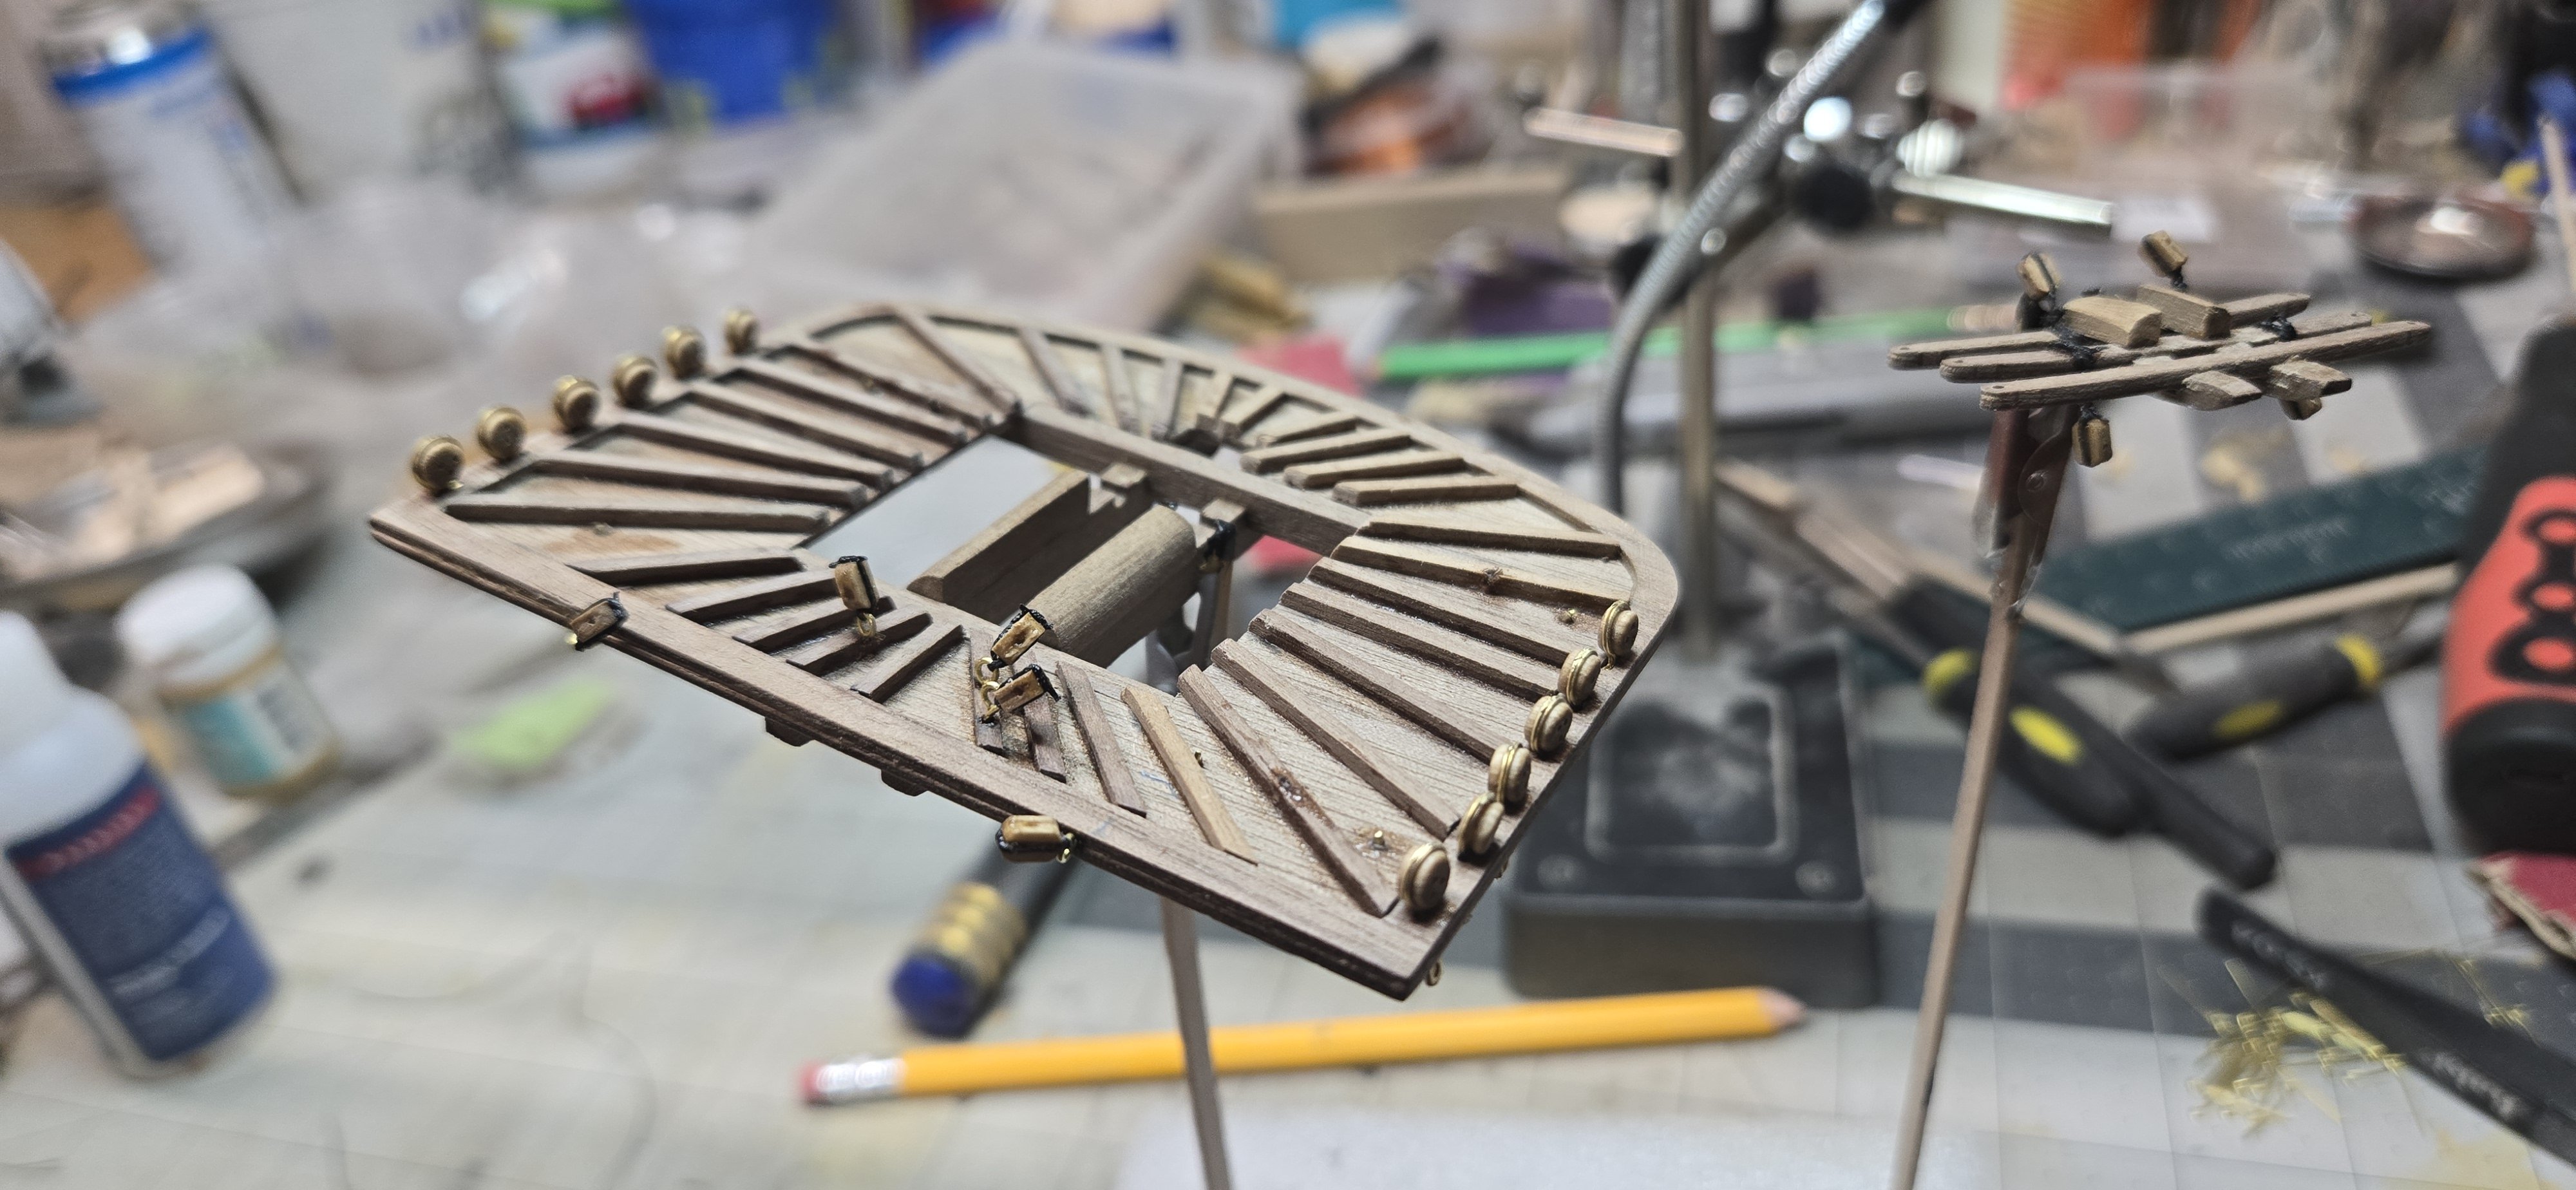
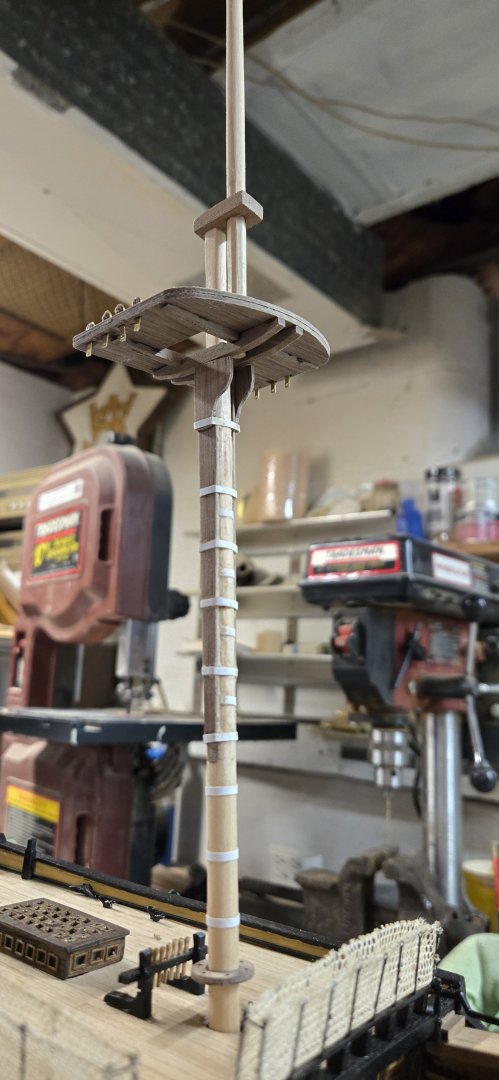
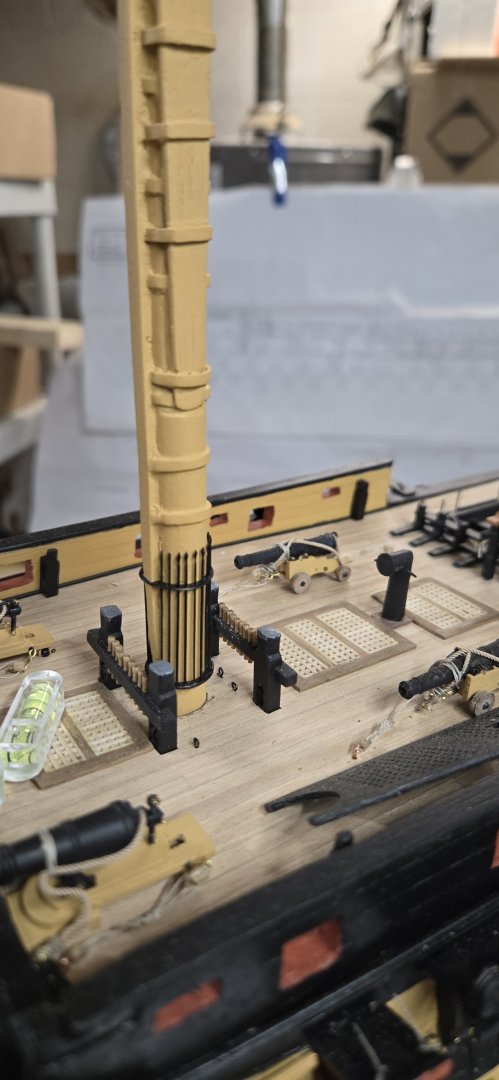
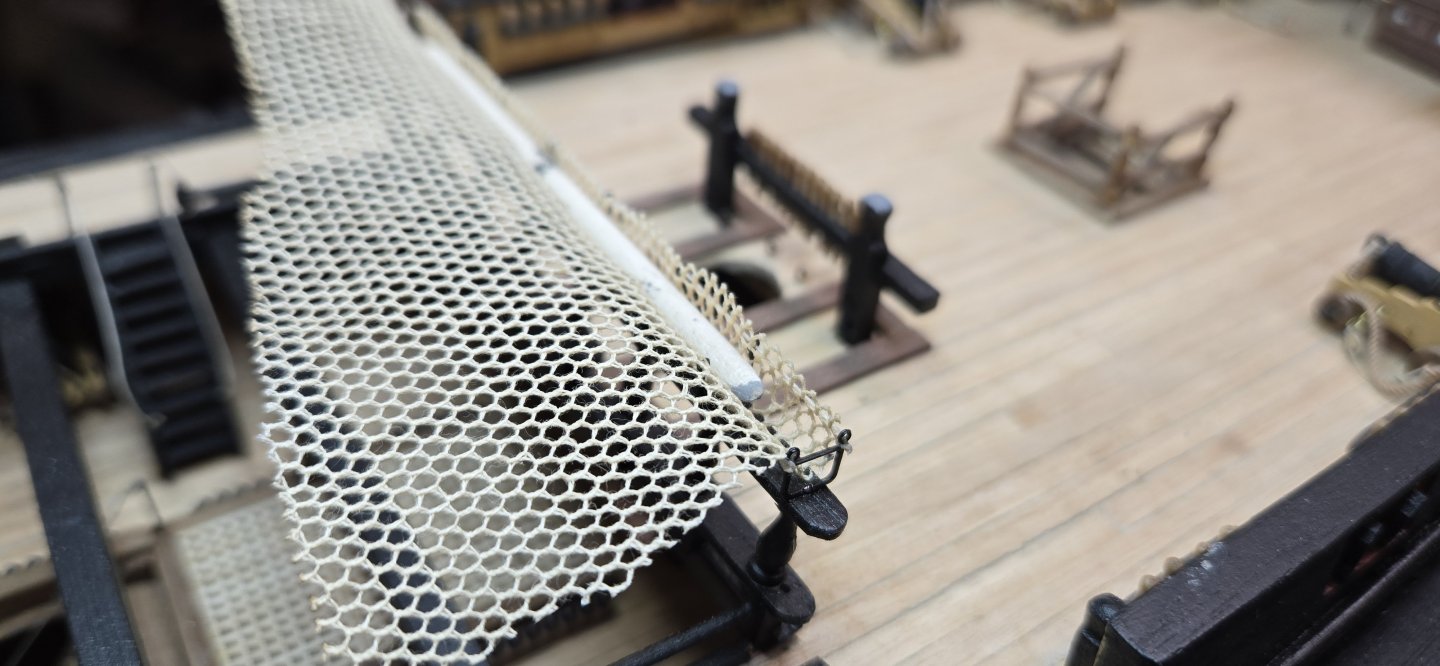
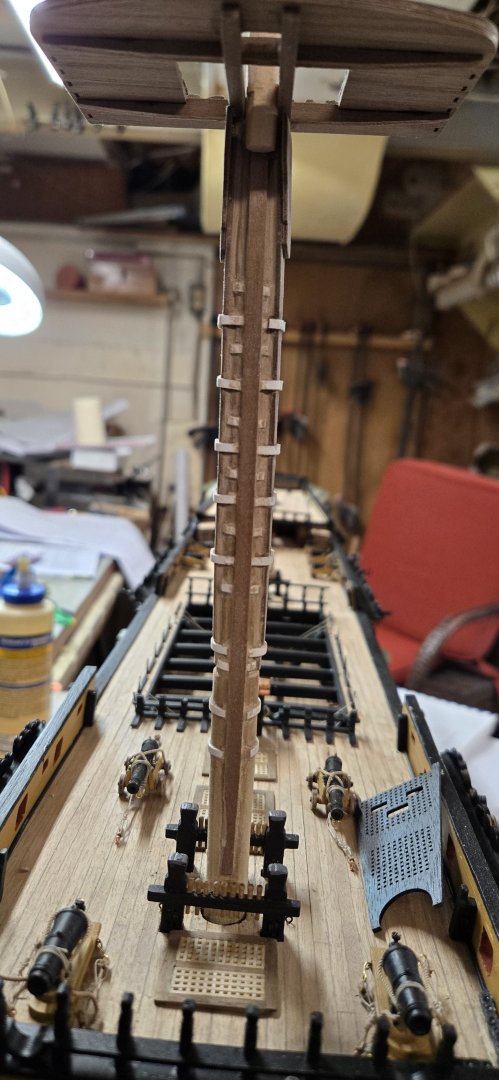
Switching time between the masts and going after the hammocks. I stained the cotton lace with tea and then coffee, the tea didn't quite make it dark enough, so I went with the coffee. It's a learning curve doing the netting. With this stuff, I tried to cut it as close as possible to a joint, without getting so close that it would cut into the next row and unravel. The only problem then is it creates little tufts that are visible. The CA glue does help to tame them as you can see. I cut the piece to the correct width of the hammocks and then fitted it into the slots of the hammock slings. I have little sand sticks that are dowel shaped and I was able to put one of these at the bottom of the sling to keep everything steady. You can see it when doing the quarterdeck barricade hammocks.... I found that when doing the first one I had an easier time sewing the netting towards me as I sat behind the stern, than when I did the forward side and was sewing away from myself. If you look closely you can see that one side is cleaner than the other because of this.... I also finished painting the bowsprit and foremast parts and began assembly. I still have to add a number of blocks to the bowsprit, so I'll hold off. I did place the bowsprit onto the hull and hope I didn't mess up the gammoning stops too bad...they seem to be slightly too high. I glued the main platform to the foremast, because I wasn't as precise in my installation of the cheeks and bibs, there are some gaps under the platform. I did my best to make sure that the platform is level fore and aft and side to side with the deck and hope that is correct. I added the banding to the top of the foremast squared off section and then added the strips of .5mm banding to the corners as well as the jeer block strop cleats. My concern with this is that these cleats seem pretty low and those bandings on each side seem to interfere with the opening of the strops, which in a bit will home to lashings. I guess, I will see. Before putting the platform in place, I also ran a small drill bit through the holes of the blocks to be sure they were clear. I don't think I'll paint the remaining blocks, but will try placing them in a can with dark stain and installing them after painting the structures they will be attached to...except the deadeyes, I'd like to keep them all consistent in color. Today I will drill the hole where the top foremast sits on top of the platform. I also have to drill the fore t'gallant mast where IT sits on the crosstree. Once I have those in place, I can put the whole mast together and temporarily install to be sure it's all plumb. Then I'll remove it for safe storage while I continue to work on the hammocks and the mainmast and begin work on the mizzen mast structures.


-
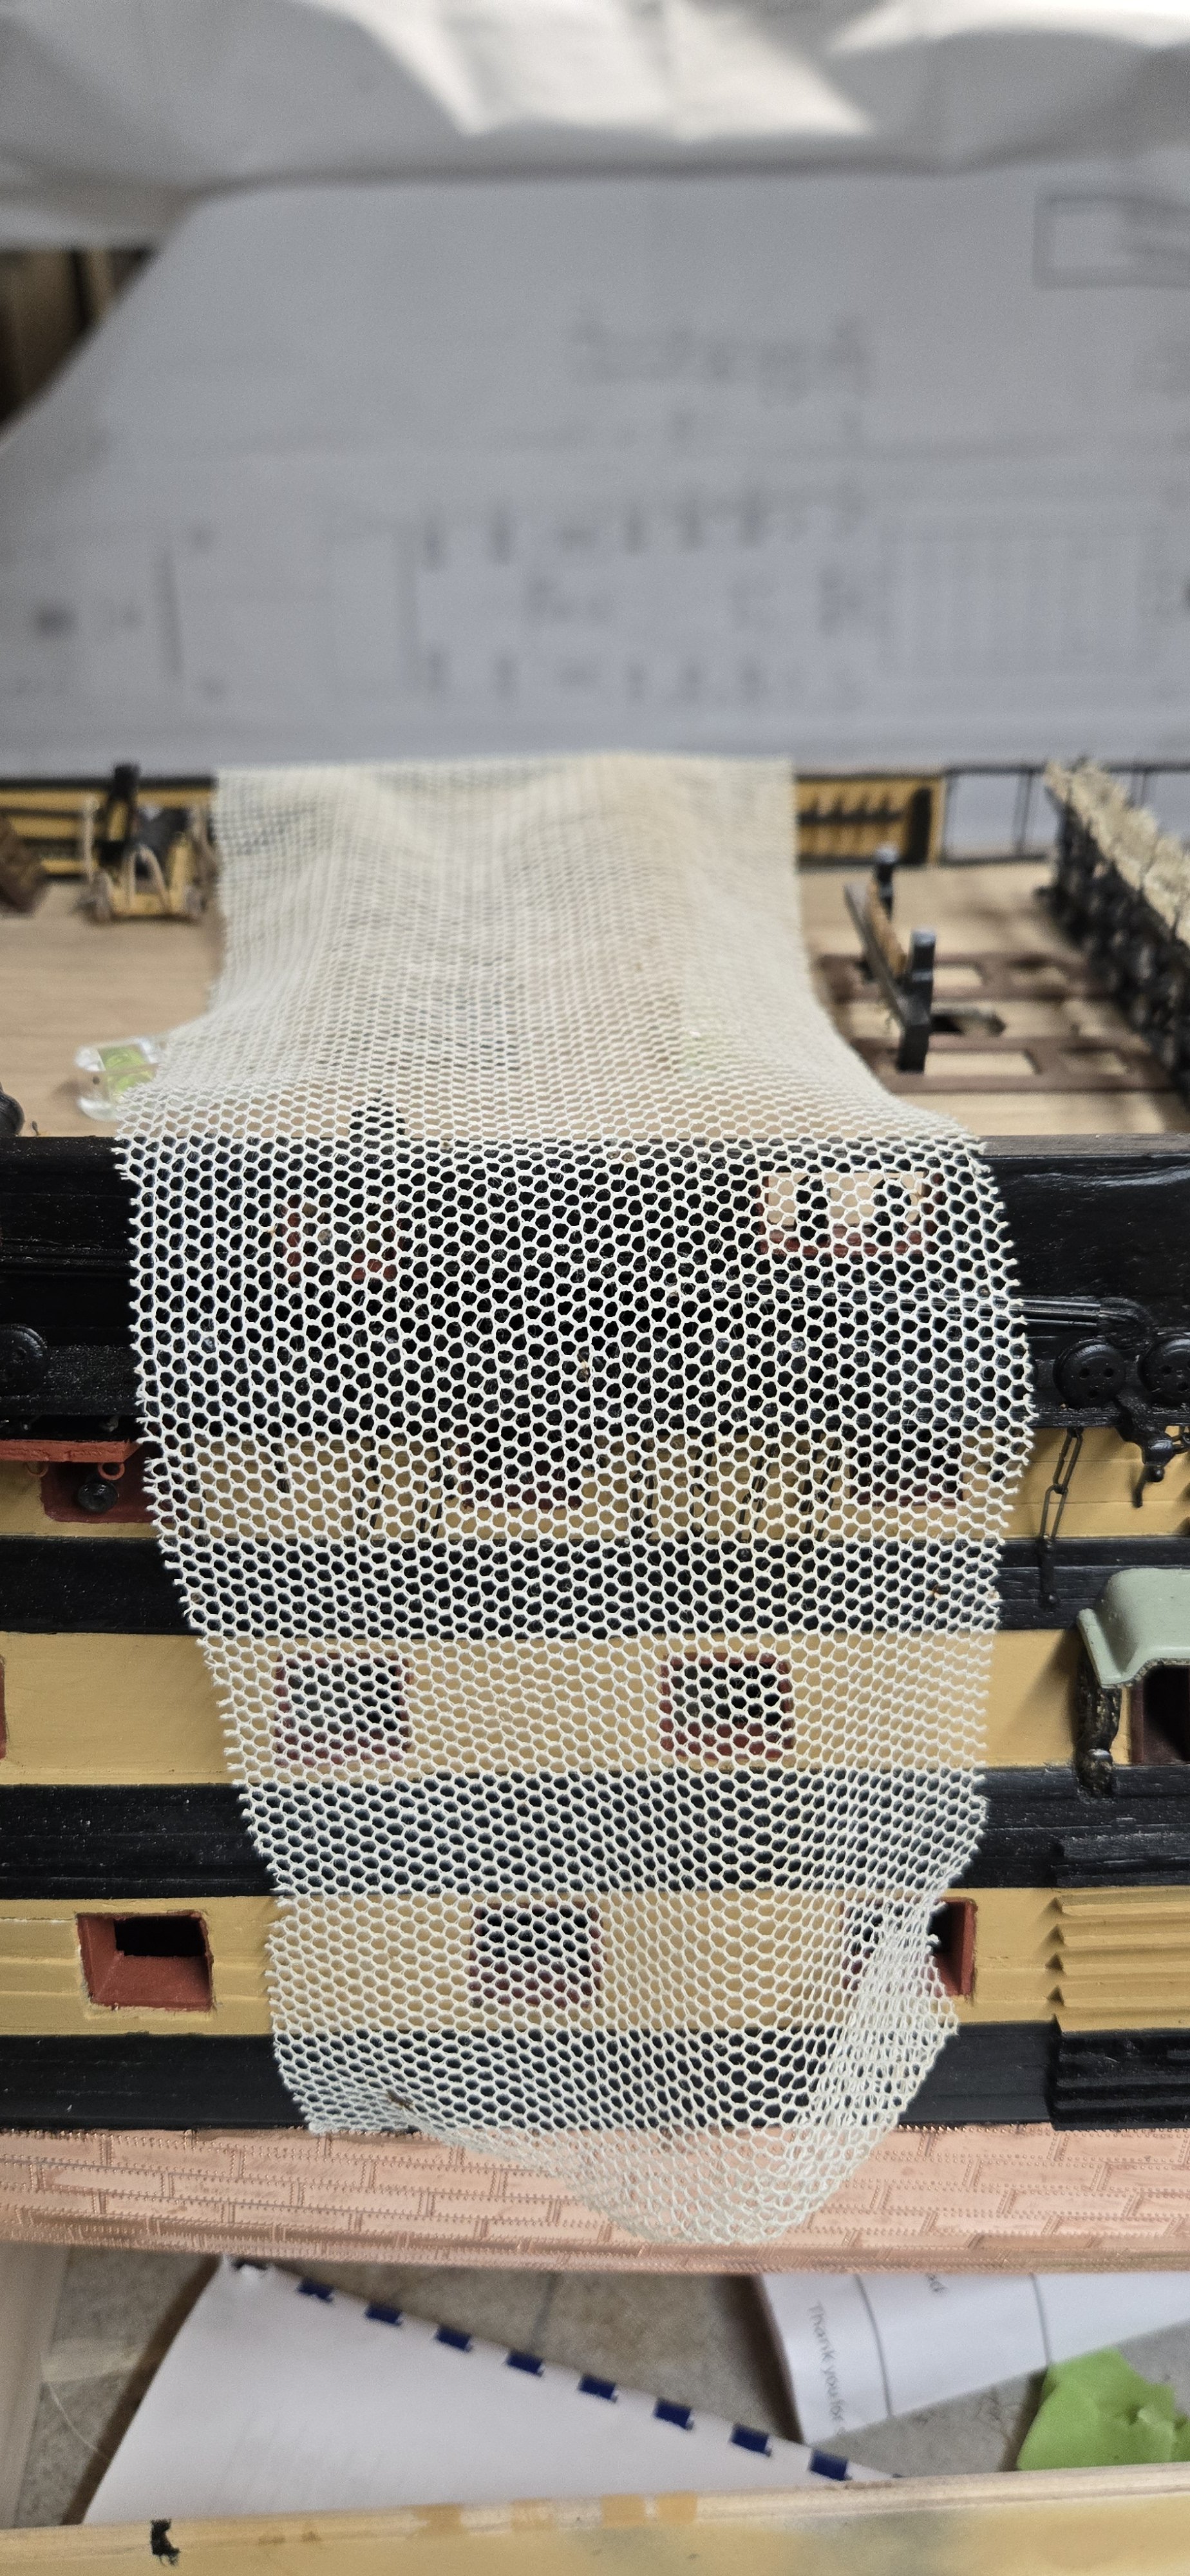
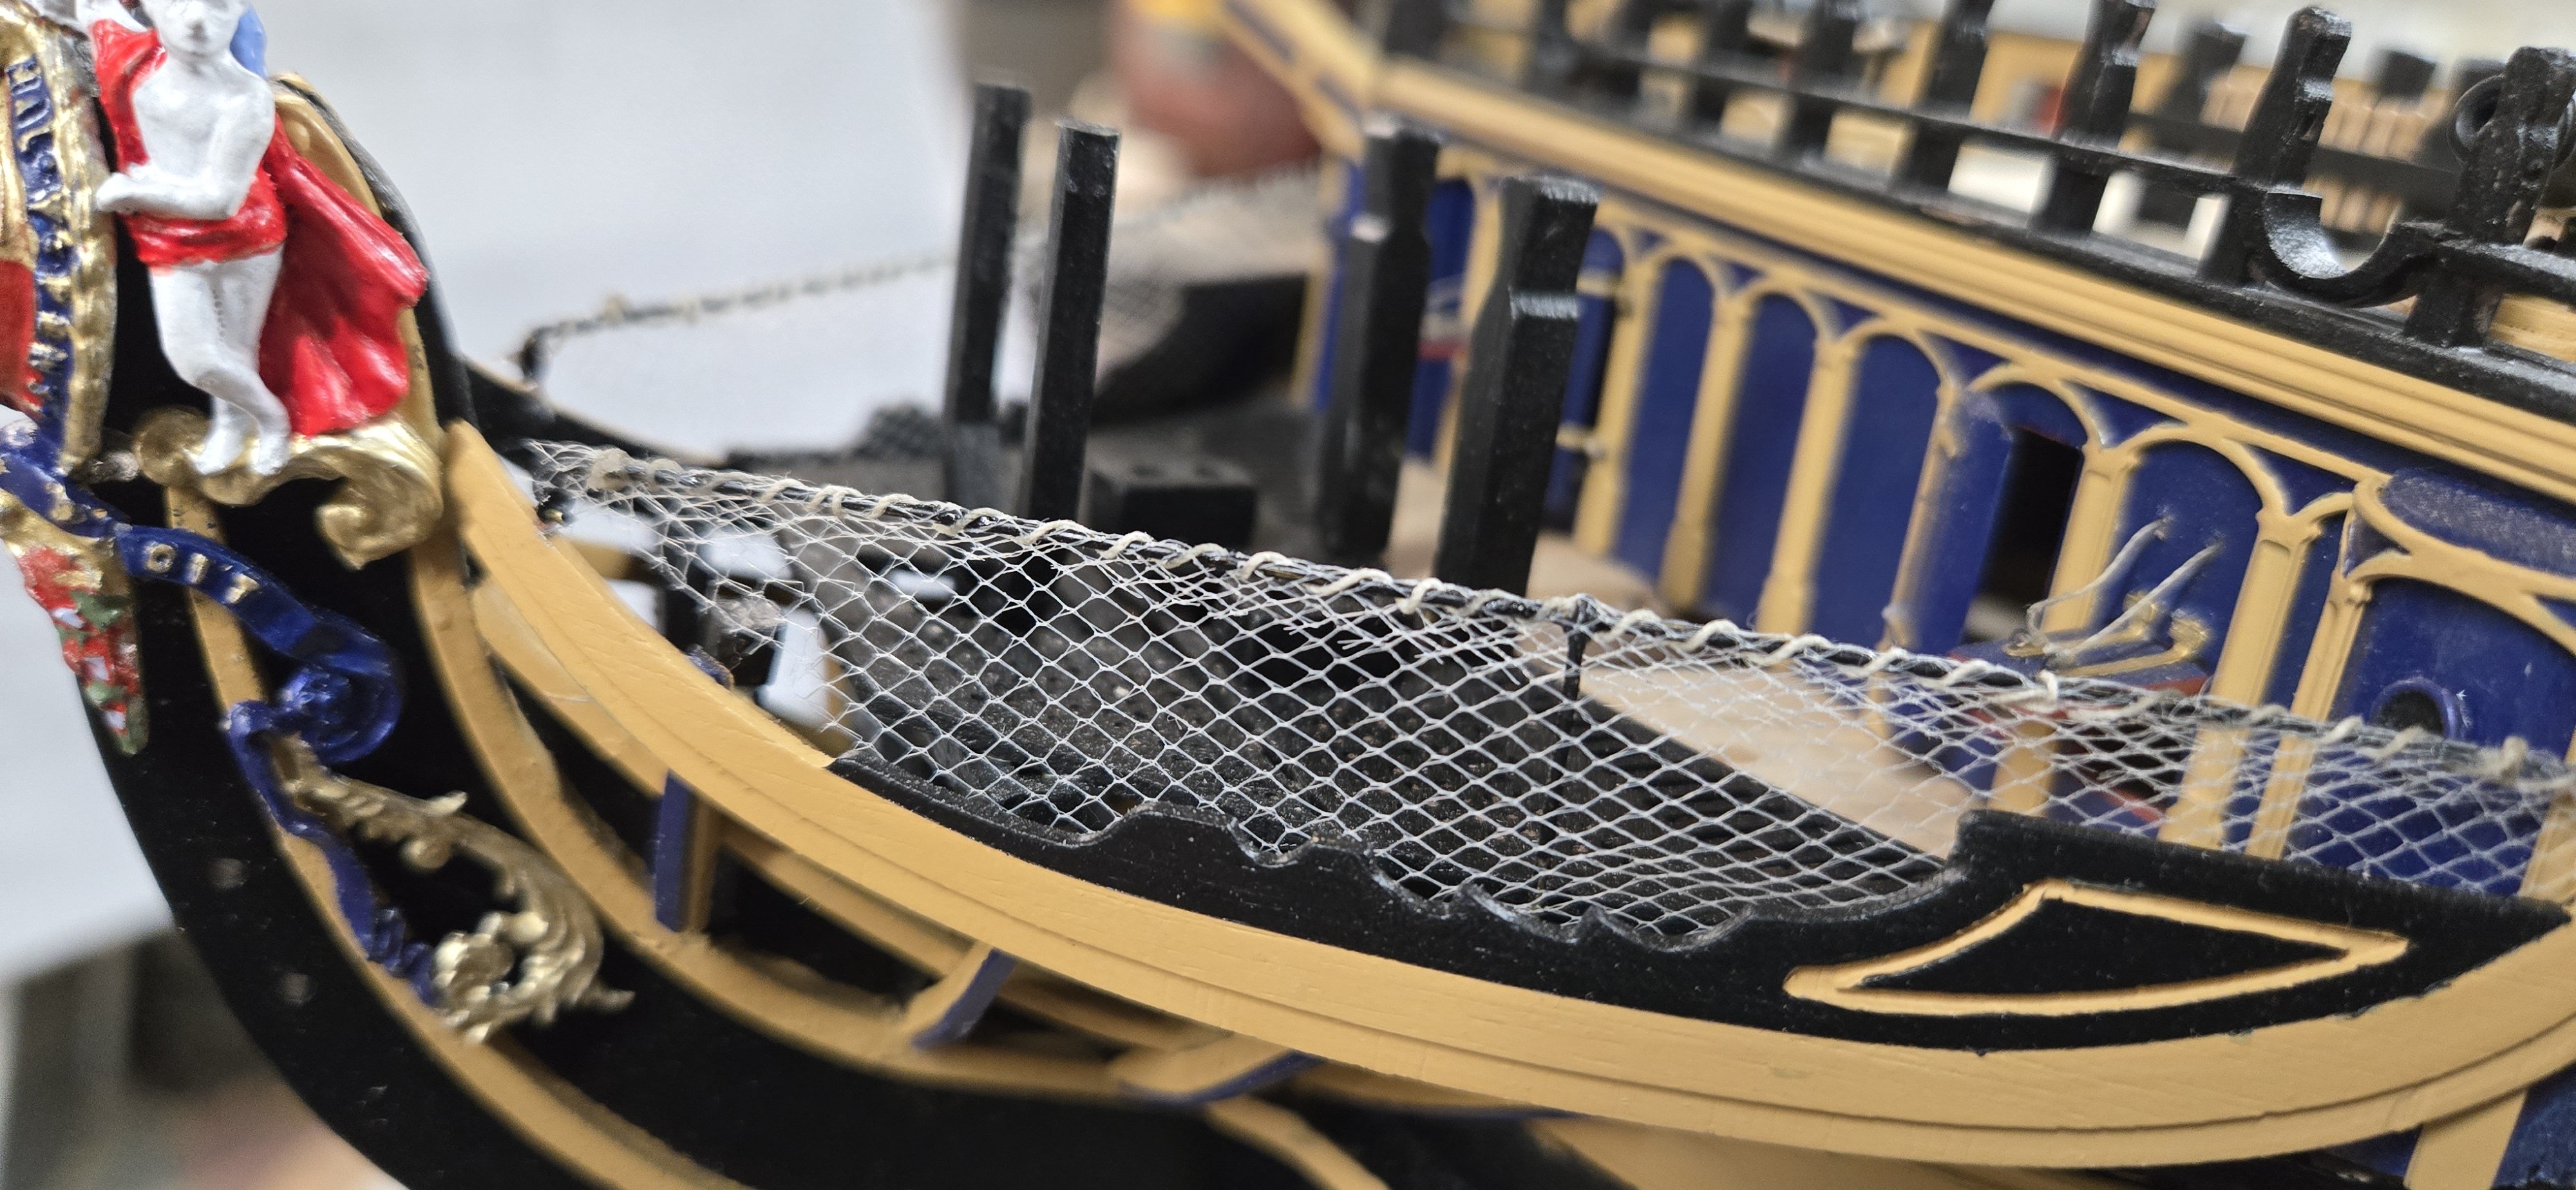
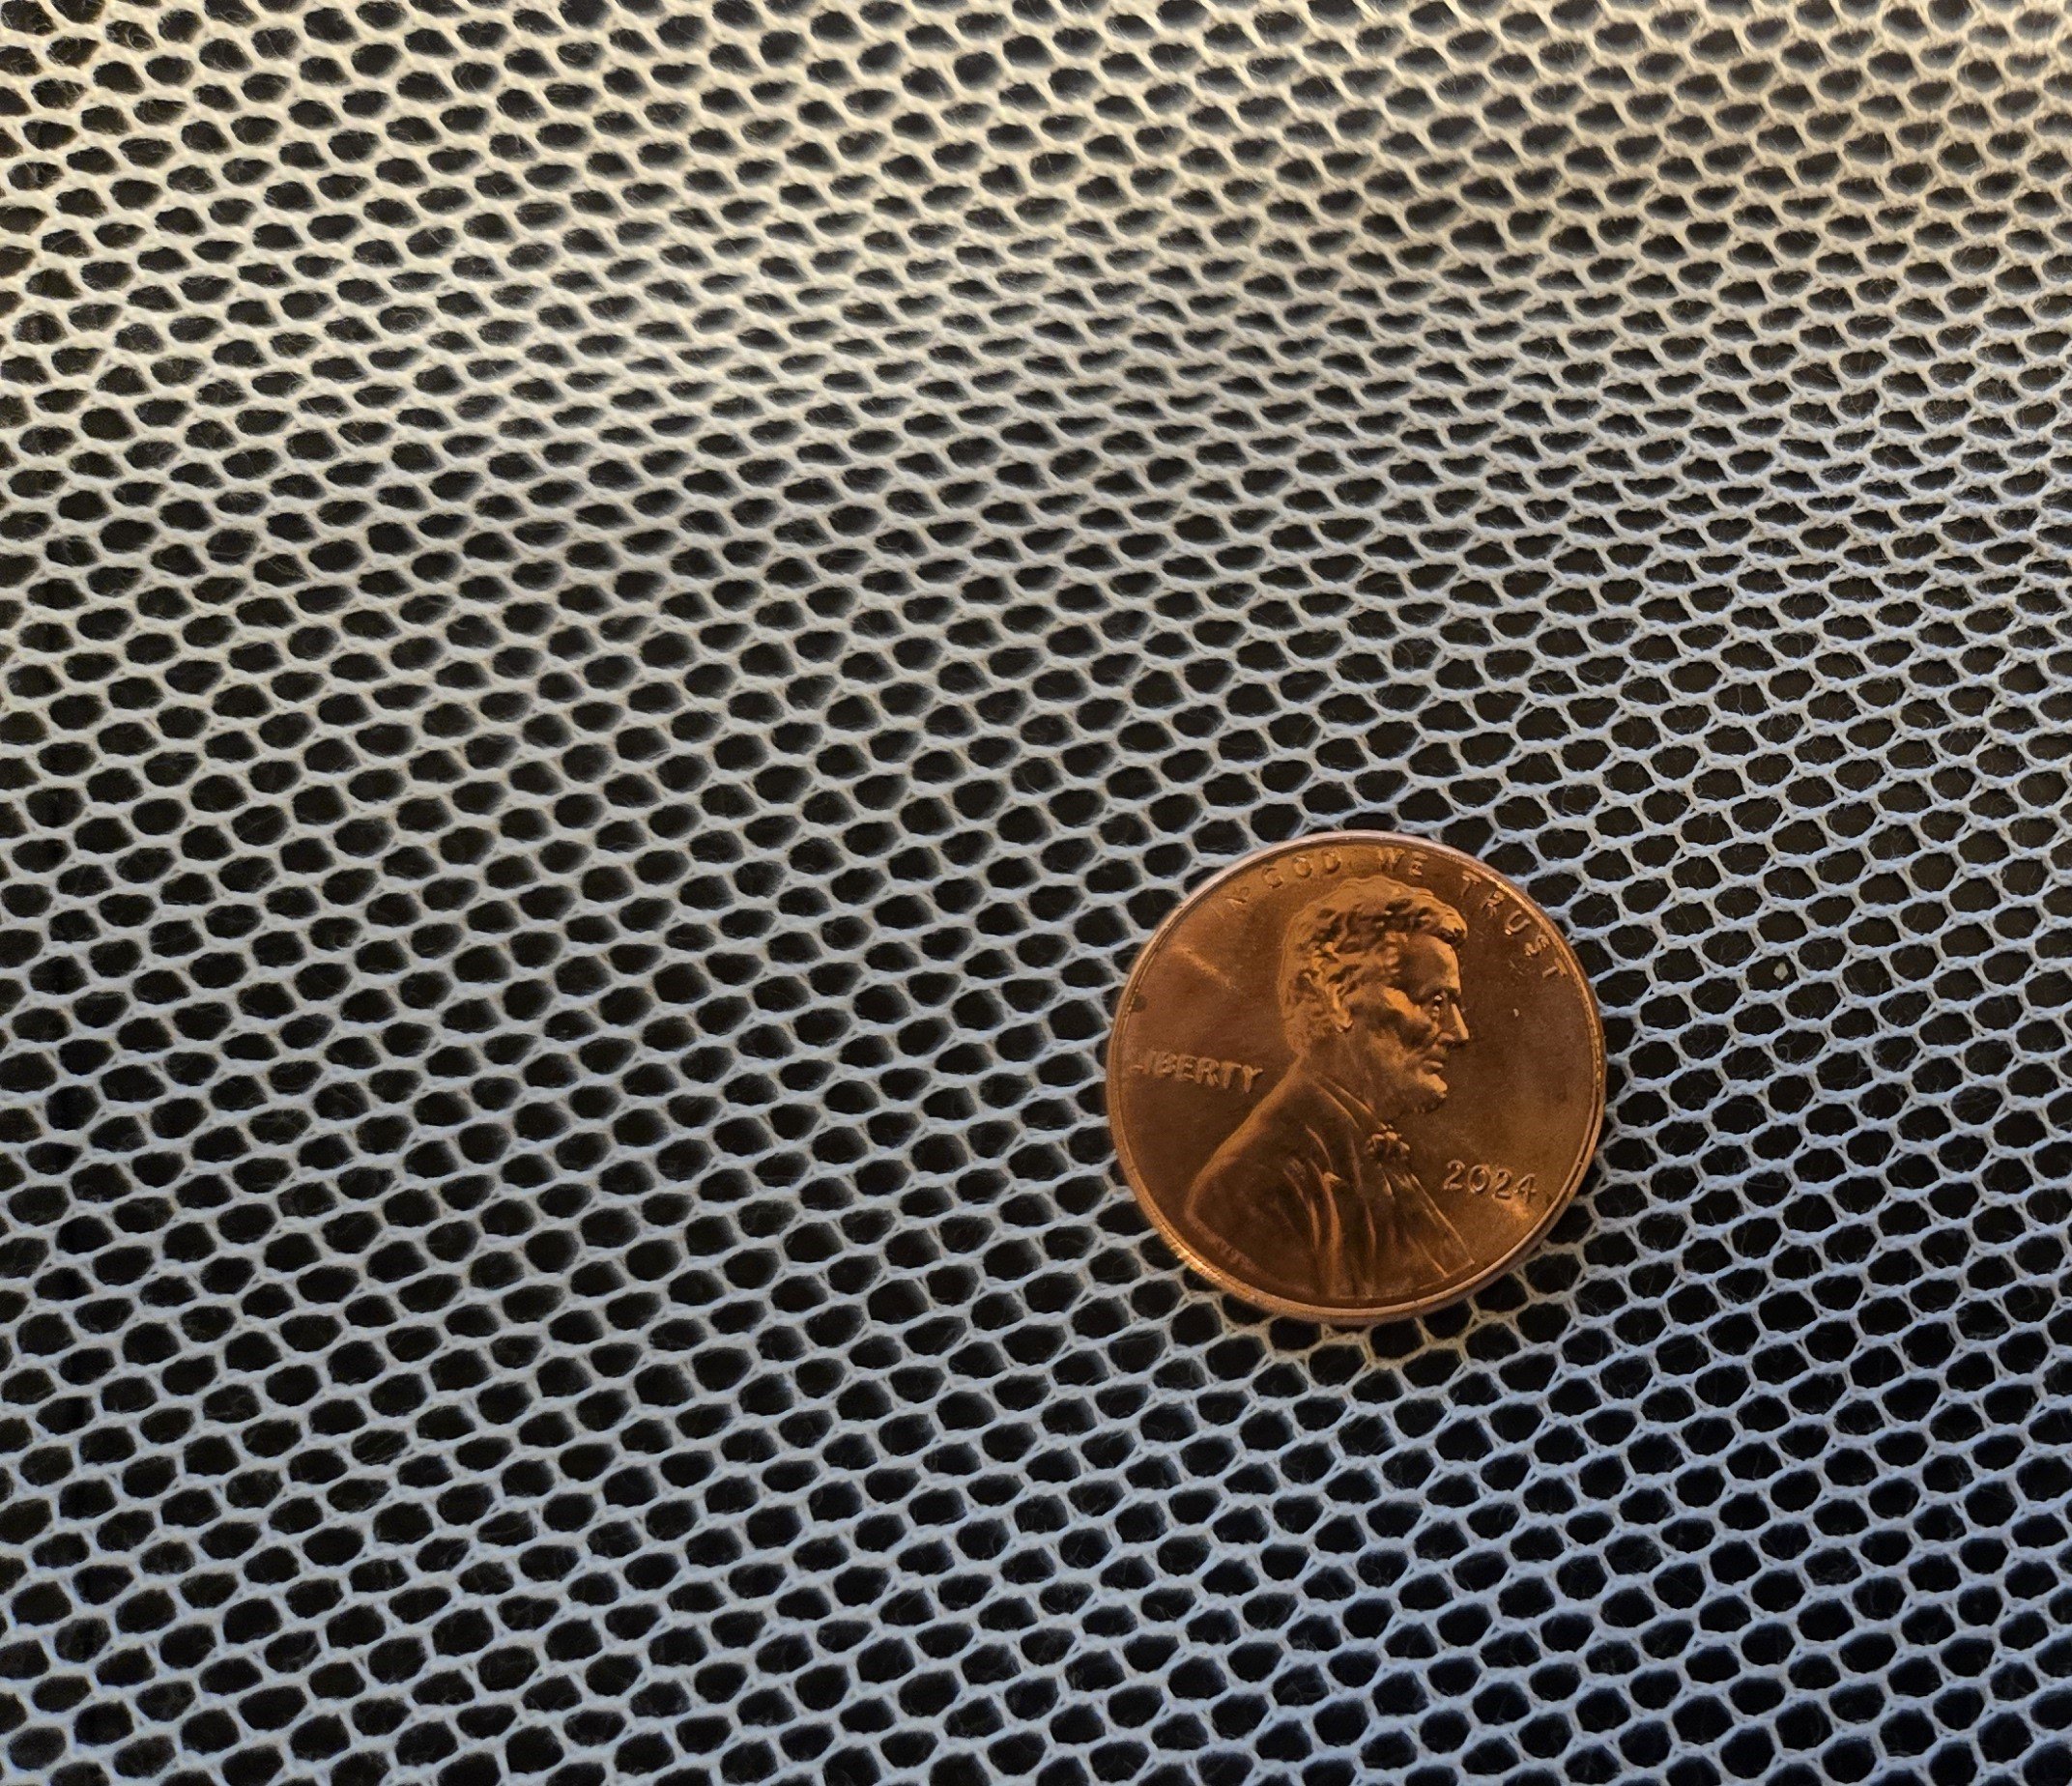
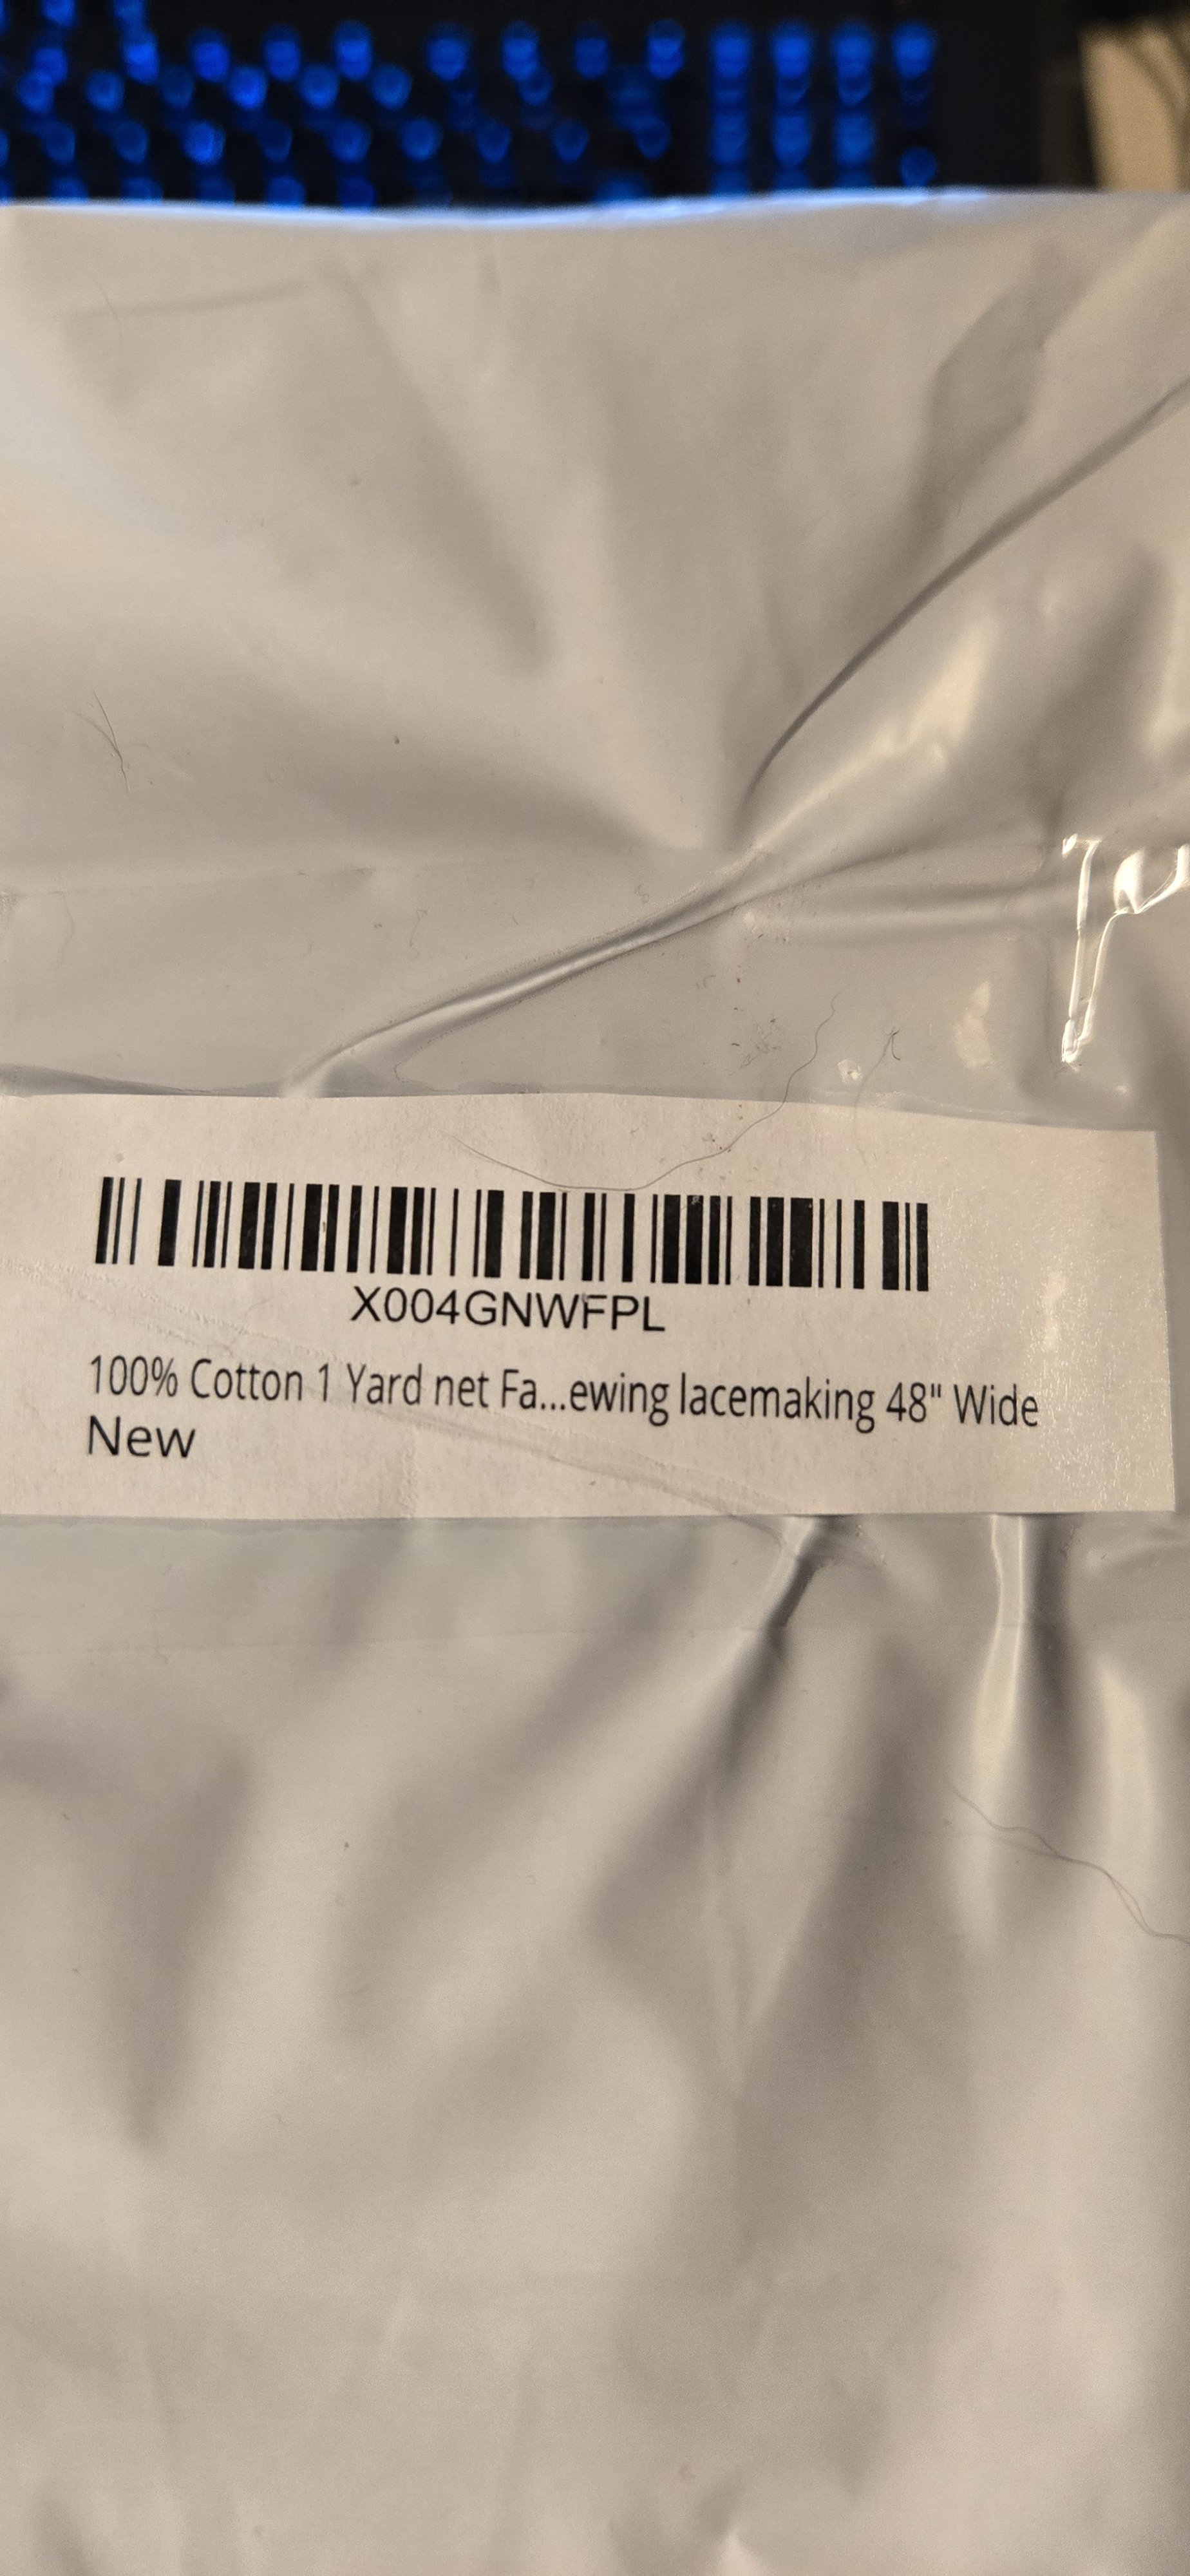
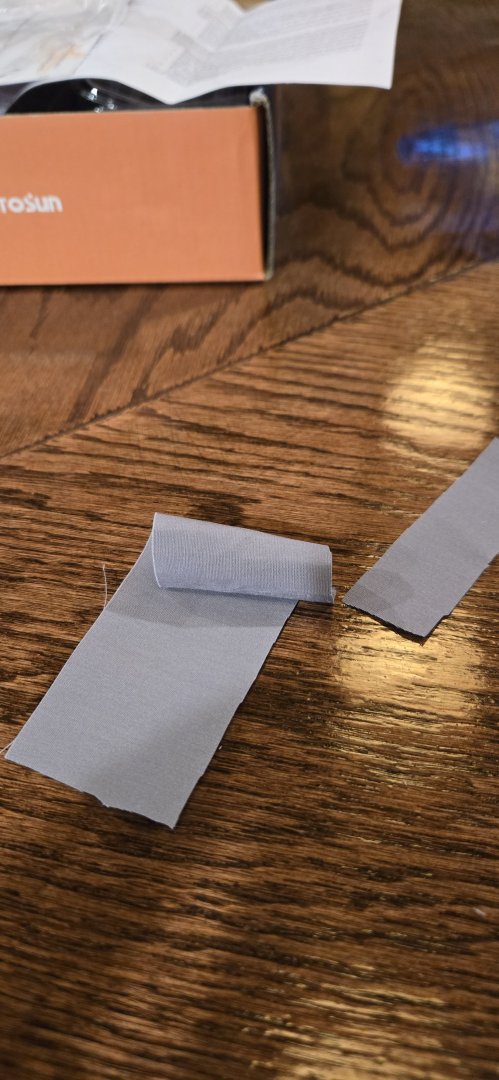
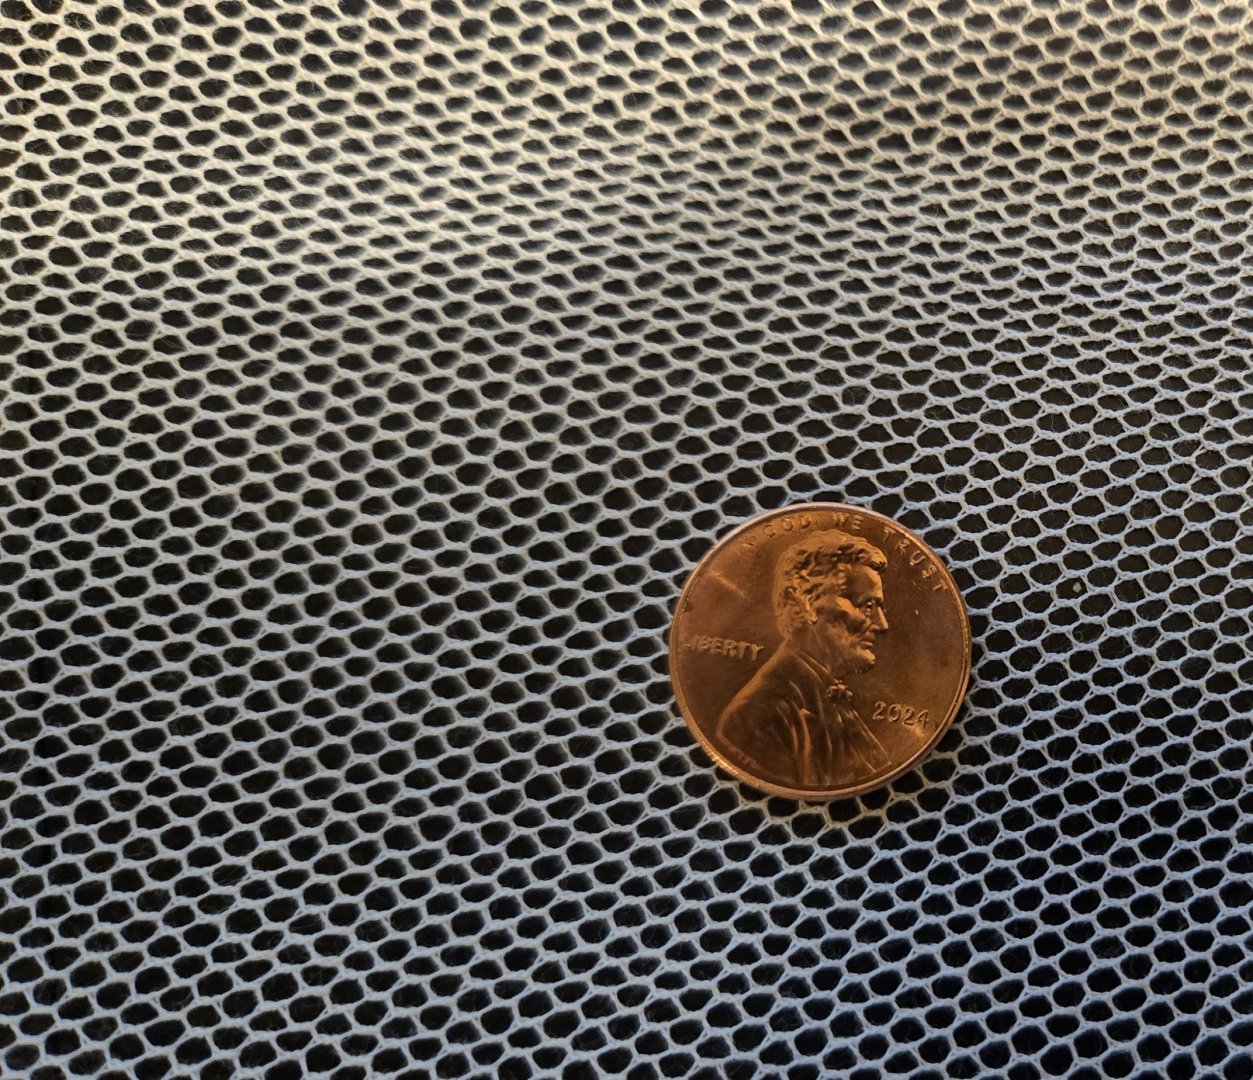
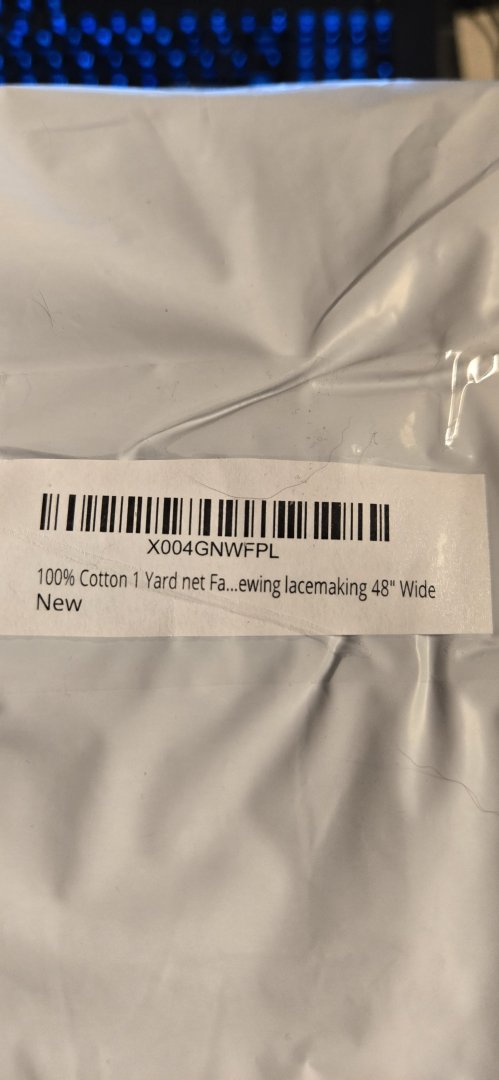
OH!!!! One more thing, I had ordered some very cheap $9USD polyester tulle from Amazon and I have installed it on the bow and began working on the poop barricade hammocks last week. But I just hate it. The poly is so sticky and while it looks good, it's going to be a bear doing the rest. But I found some cotton lace. I know the shape isn't quite up to snuff, but I think...hope, it'll be easier to work with! https://www.amazon.com/dp/B01M060A0P?ref=ppx_yo2ov_dt_b_fed_asin_title It was $15USD for a yard, enough to do 10 Victory's!!!! I could even stain it, I think! Just the feel of it is nicer. It doesn't quite have the right pattern as others, but I think it'll be great! Chris
-
While painting all of the pieces of the foremast, I started working on the main mast. I was so happy...I had the lower main on my drill and was sanding it down to specs. Then I laid out the square and shaved and filed that into place. The main plans that I used to get the proper lengths for the mast were pretty clear and I was excited....NO BANDING!!! Oh sure, there was banding shown on the fore mast. But NOT A ONE on the main or mizzen. Ok! The directions are just as vague...just build the main like you did the fore! So I get it all tapered and got the 8mm square in place and then the smaller 6mm square. Then I filed down the sides for the cheeks. Then the unthinkable! Instead of just using plan #6, I decided to check out #9, which is solely for the main mast. Sigh, there is banding! After I had installed the cheeks AND the rubbing paunch. I took off the paunch (or broke it actually) but I didn't want to risk that with the cheeks. I added the outer banding around the cheeks, with many breaking and making a mess. I ran out of styrene, so I bought more and also bought some thinner strips that I used to fake the banding that was supposed to go 'under' the cheeks. After, I added wood putty and tomorrow I will sand it clean and see how it looks. I just don't understand why they took the time to add banding to the foremast on plan #6, but then decided to leave it out for the rest. What can I say! I will work on cleaning up my messes tomorrow and keep you posted! Thank you for all the likes, the comments of support and encouragement and most of all, providing me a place to spend some time each day talking about what I've done. VERY MUCH APPRECIATED! Chris

-
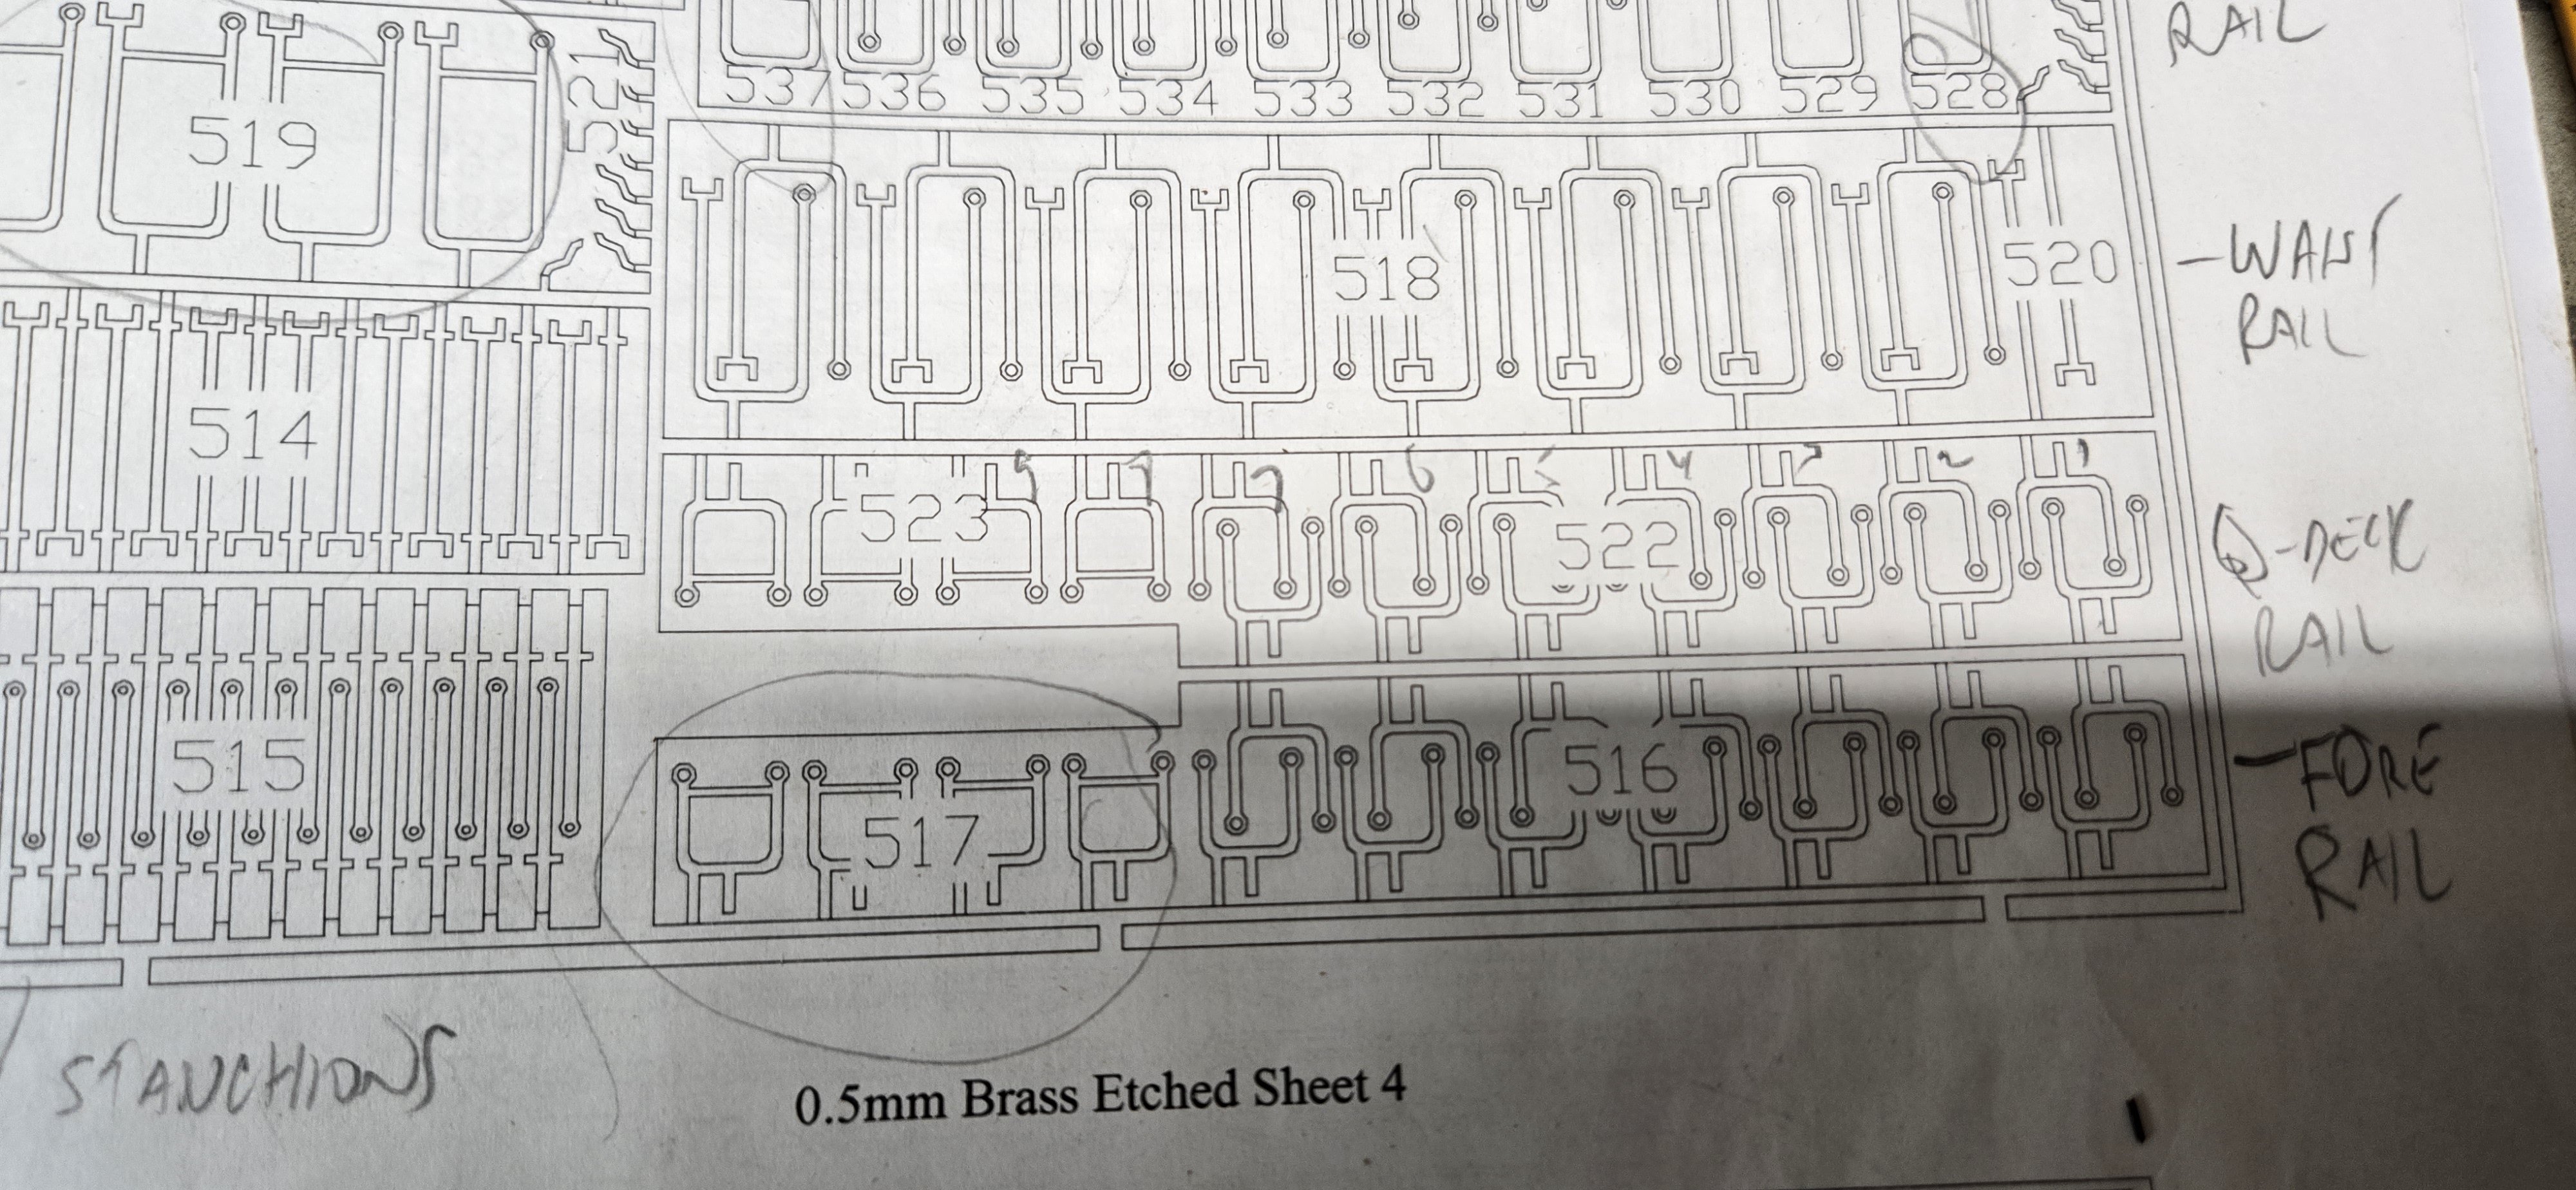
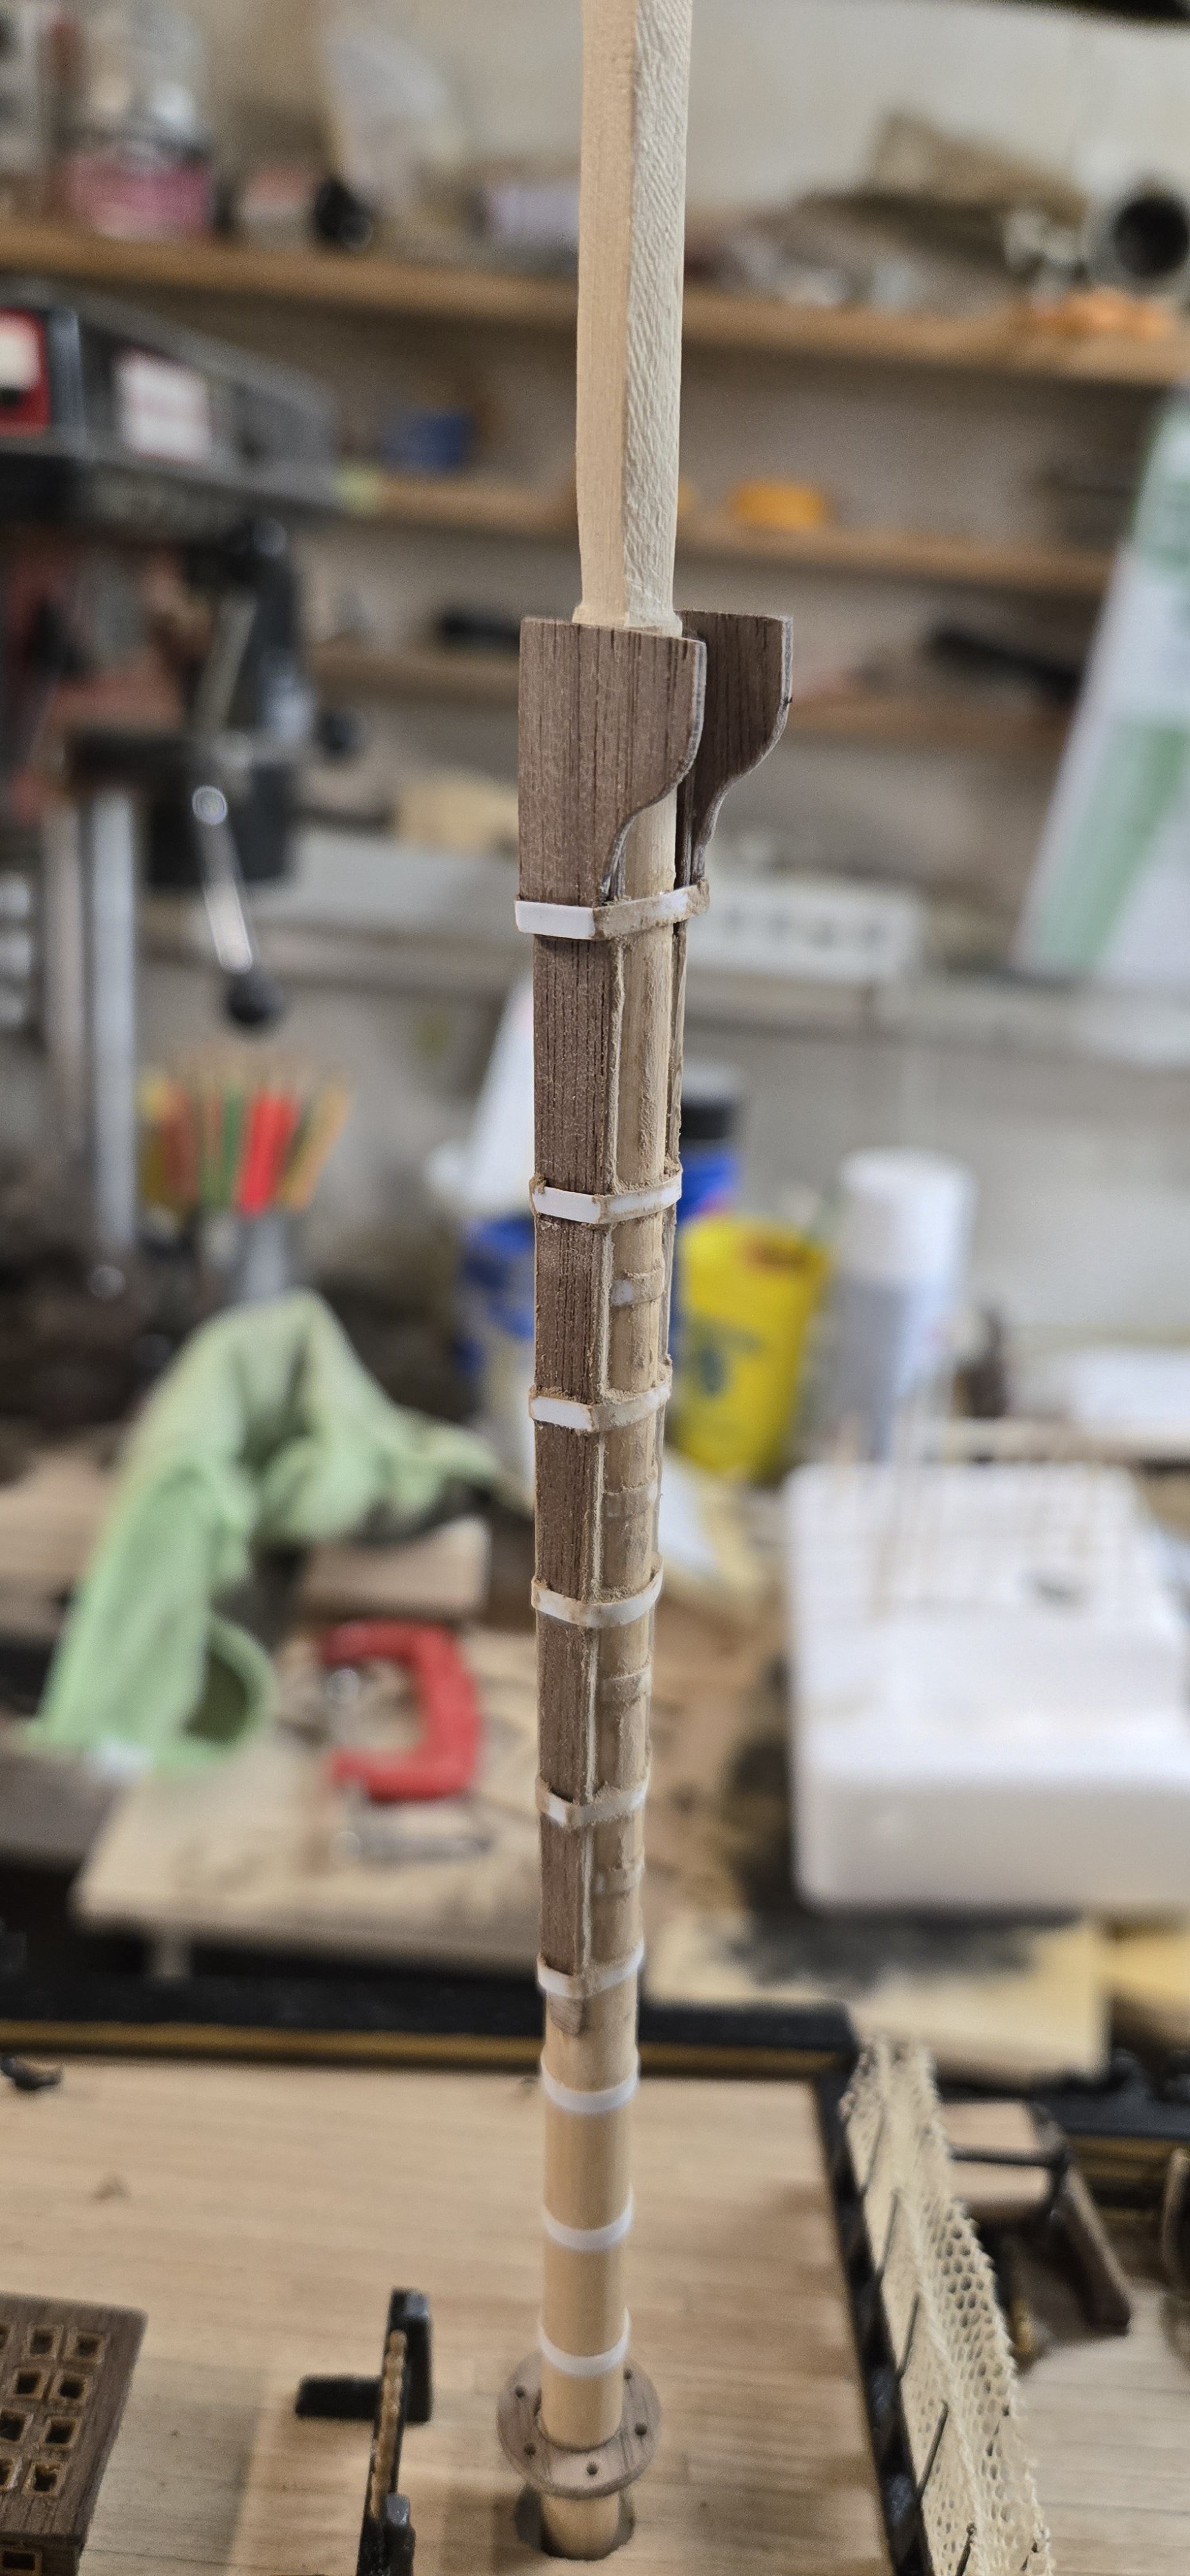
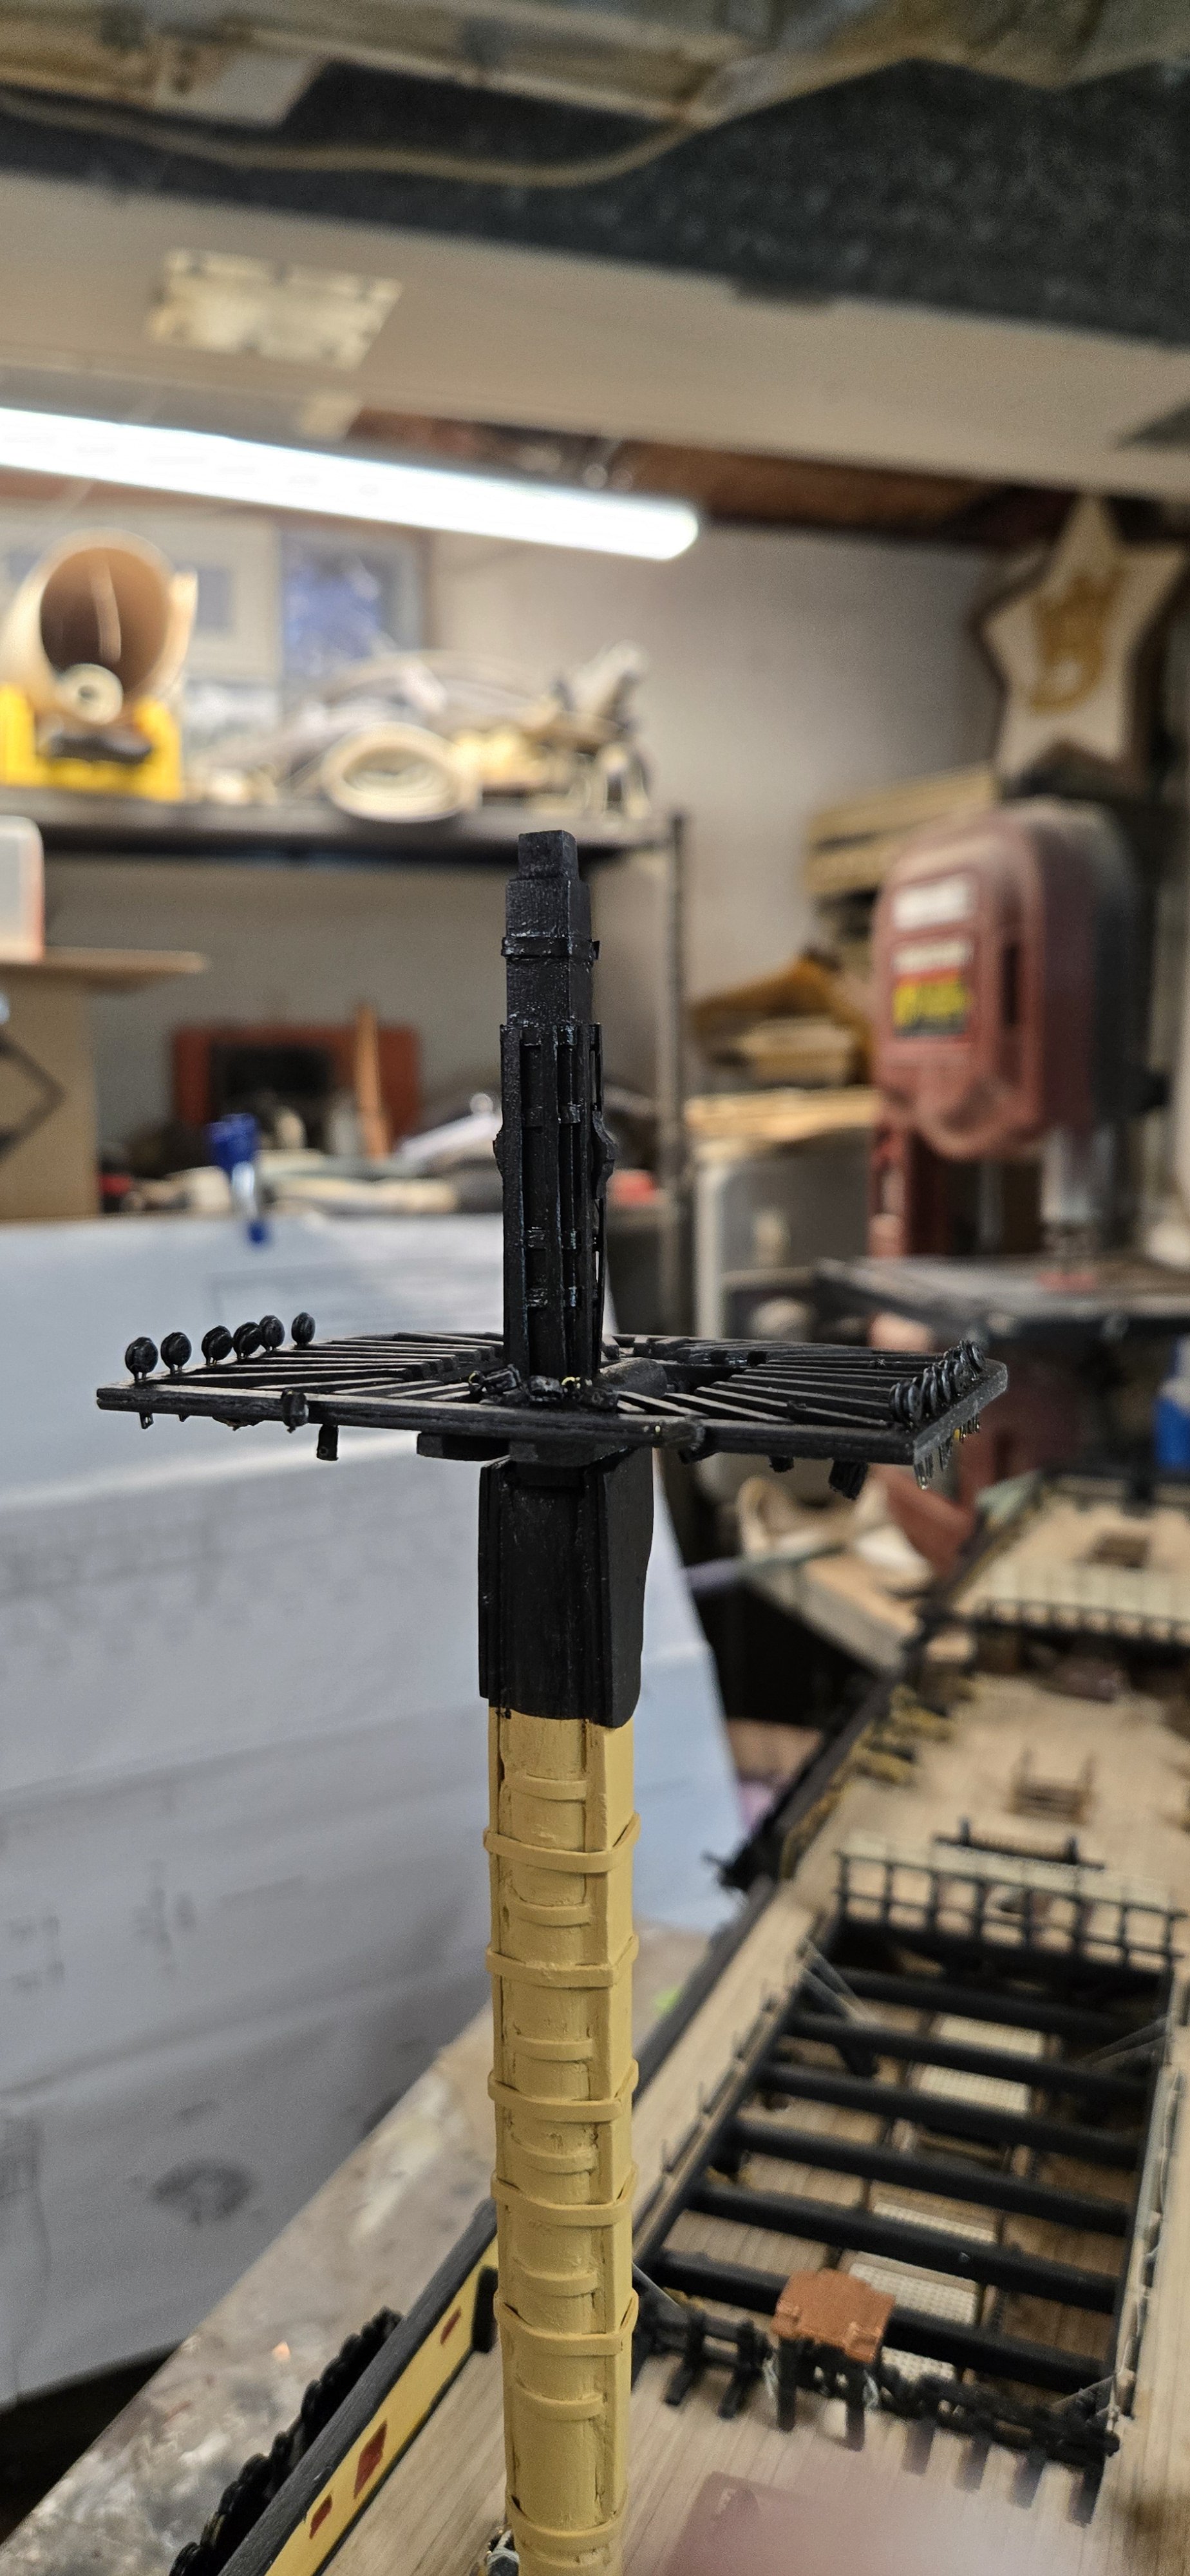
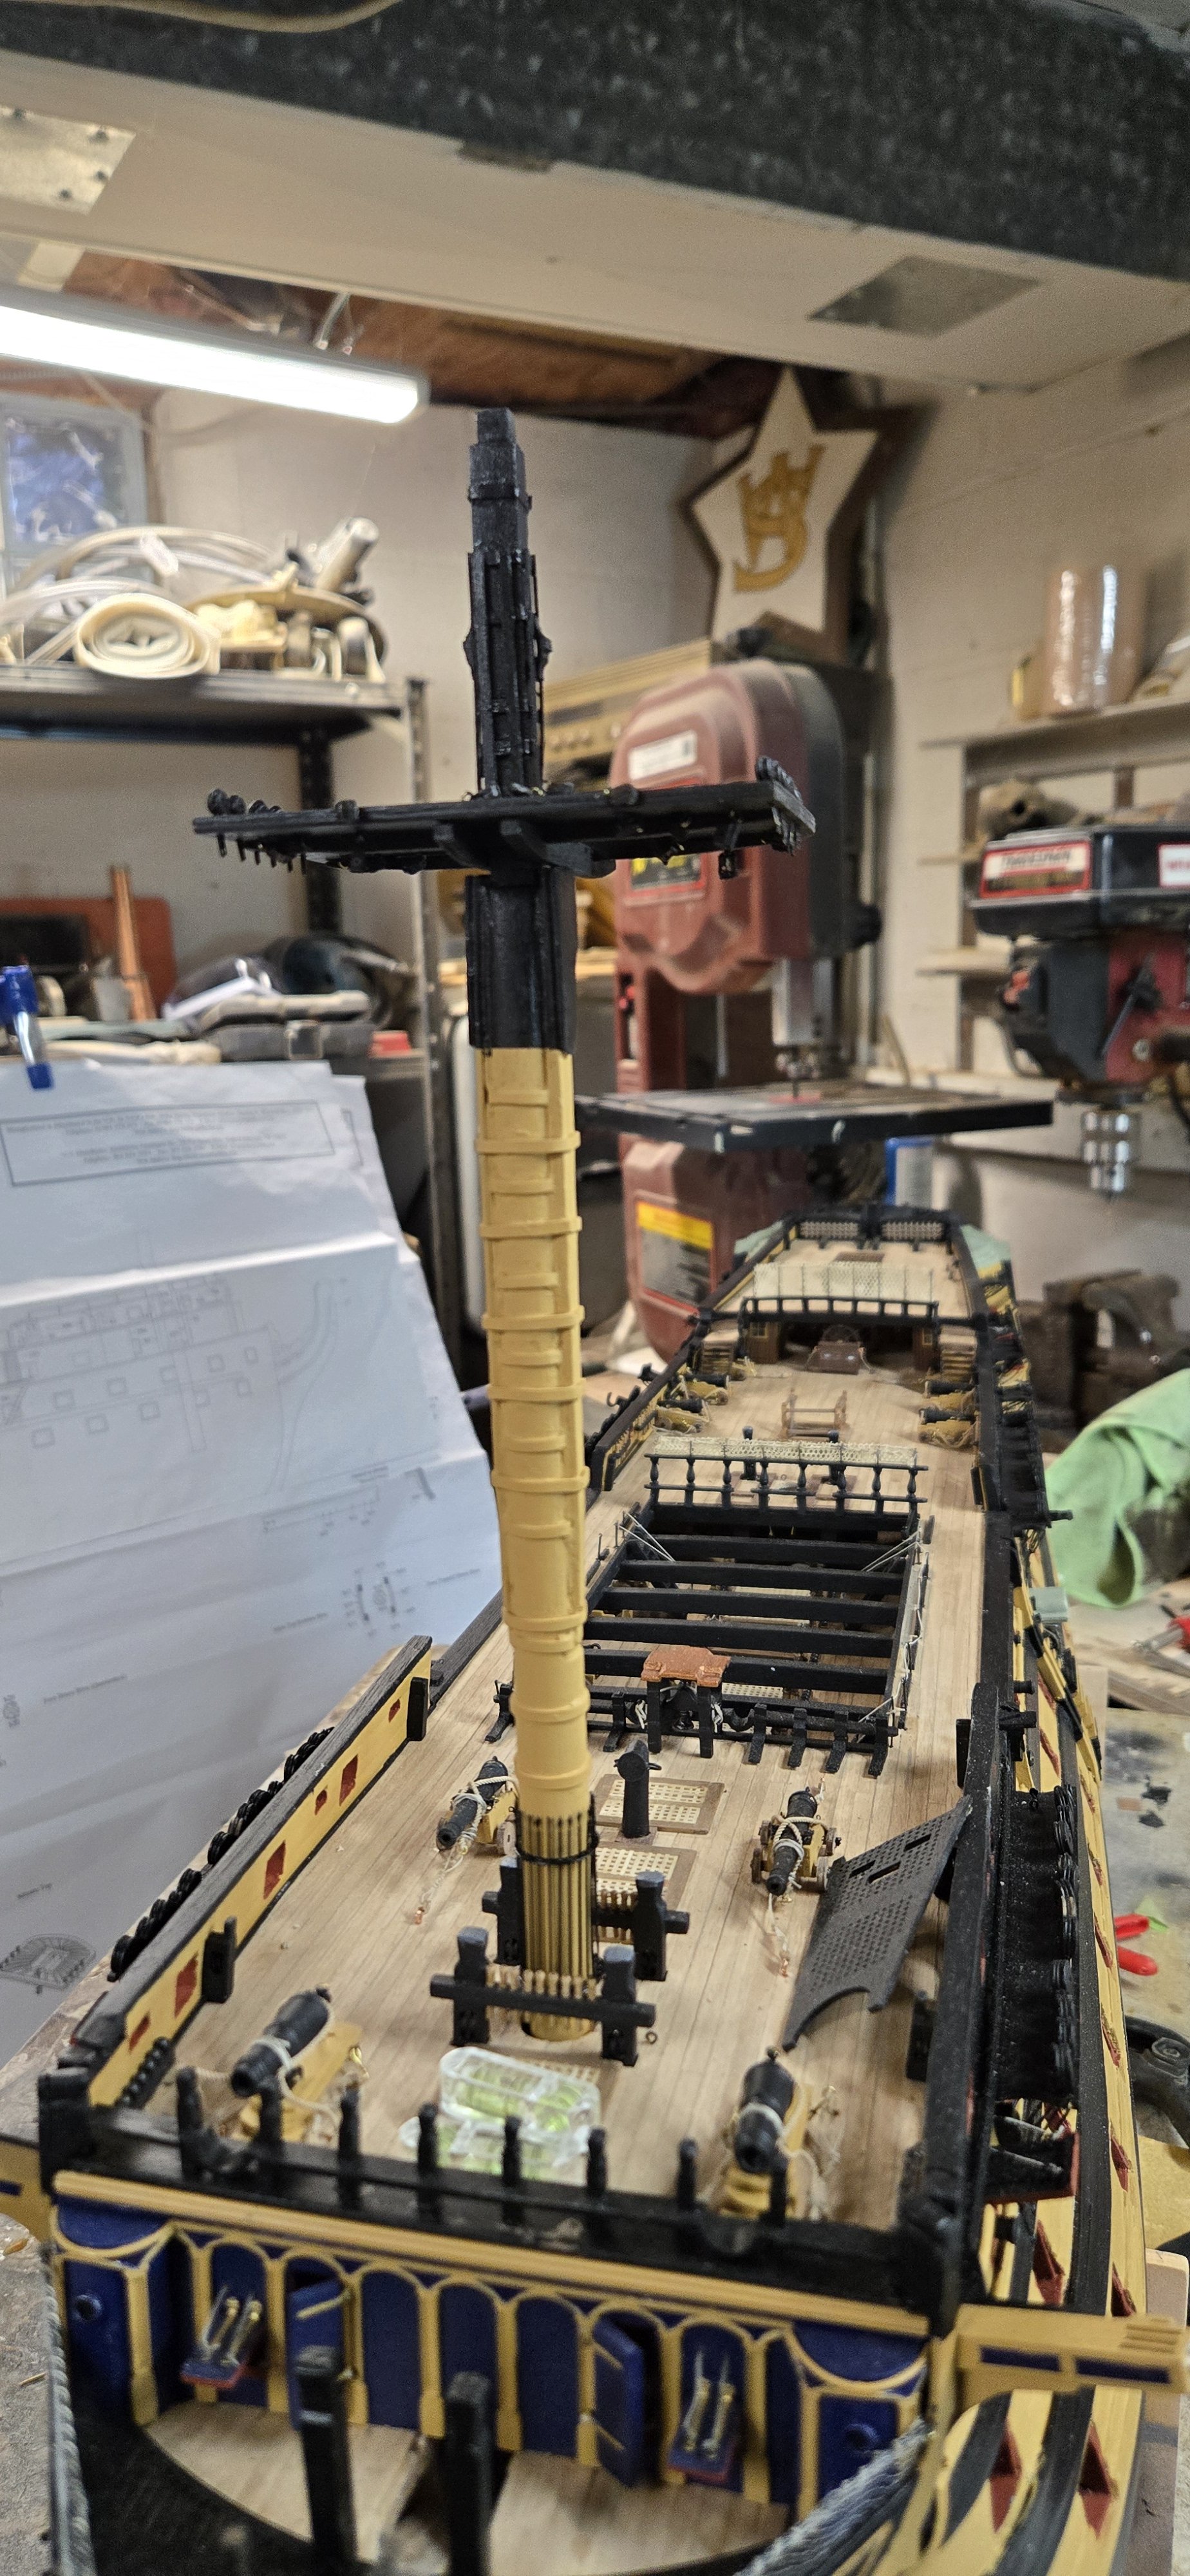
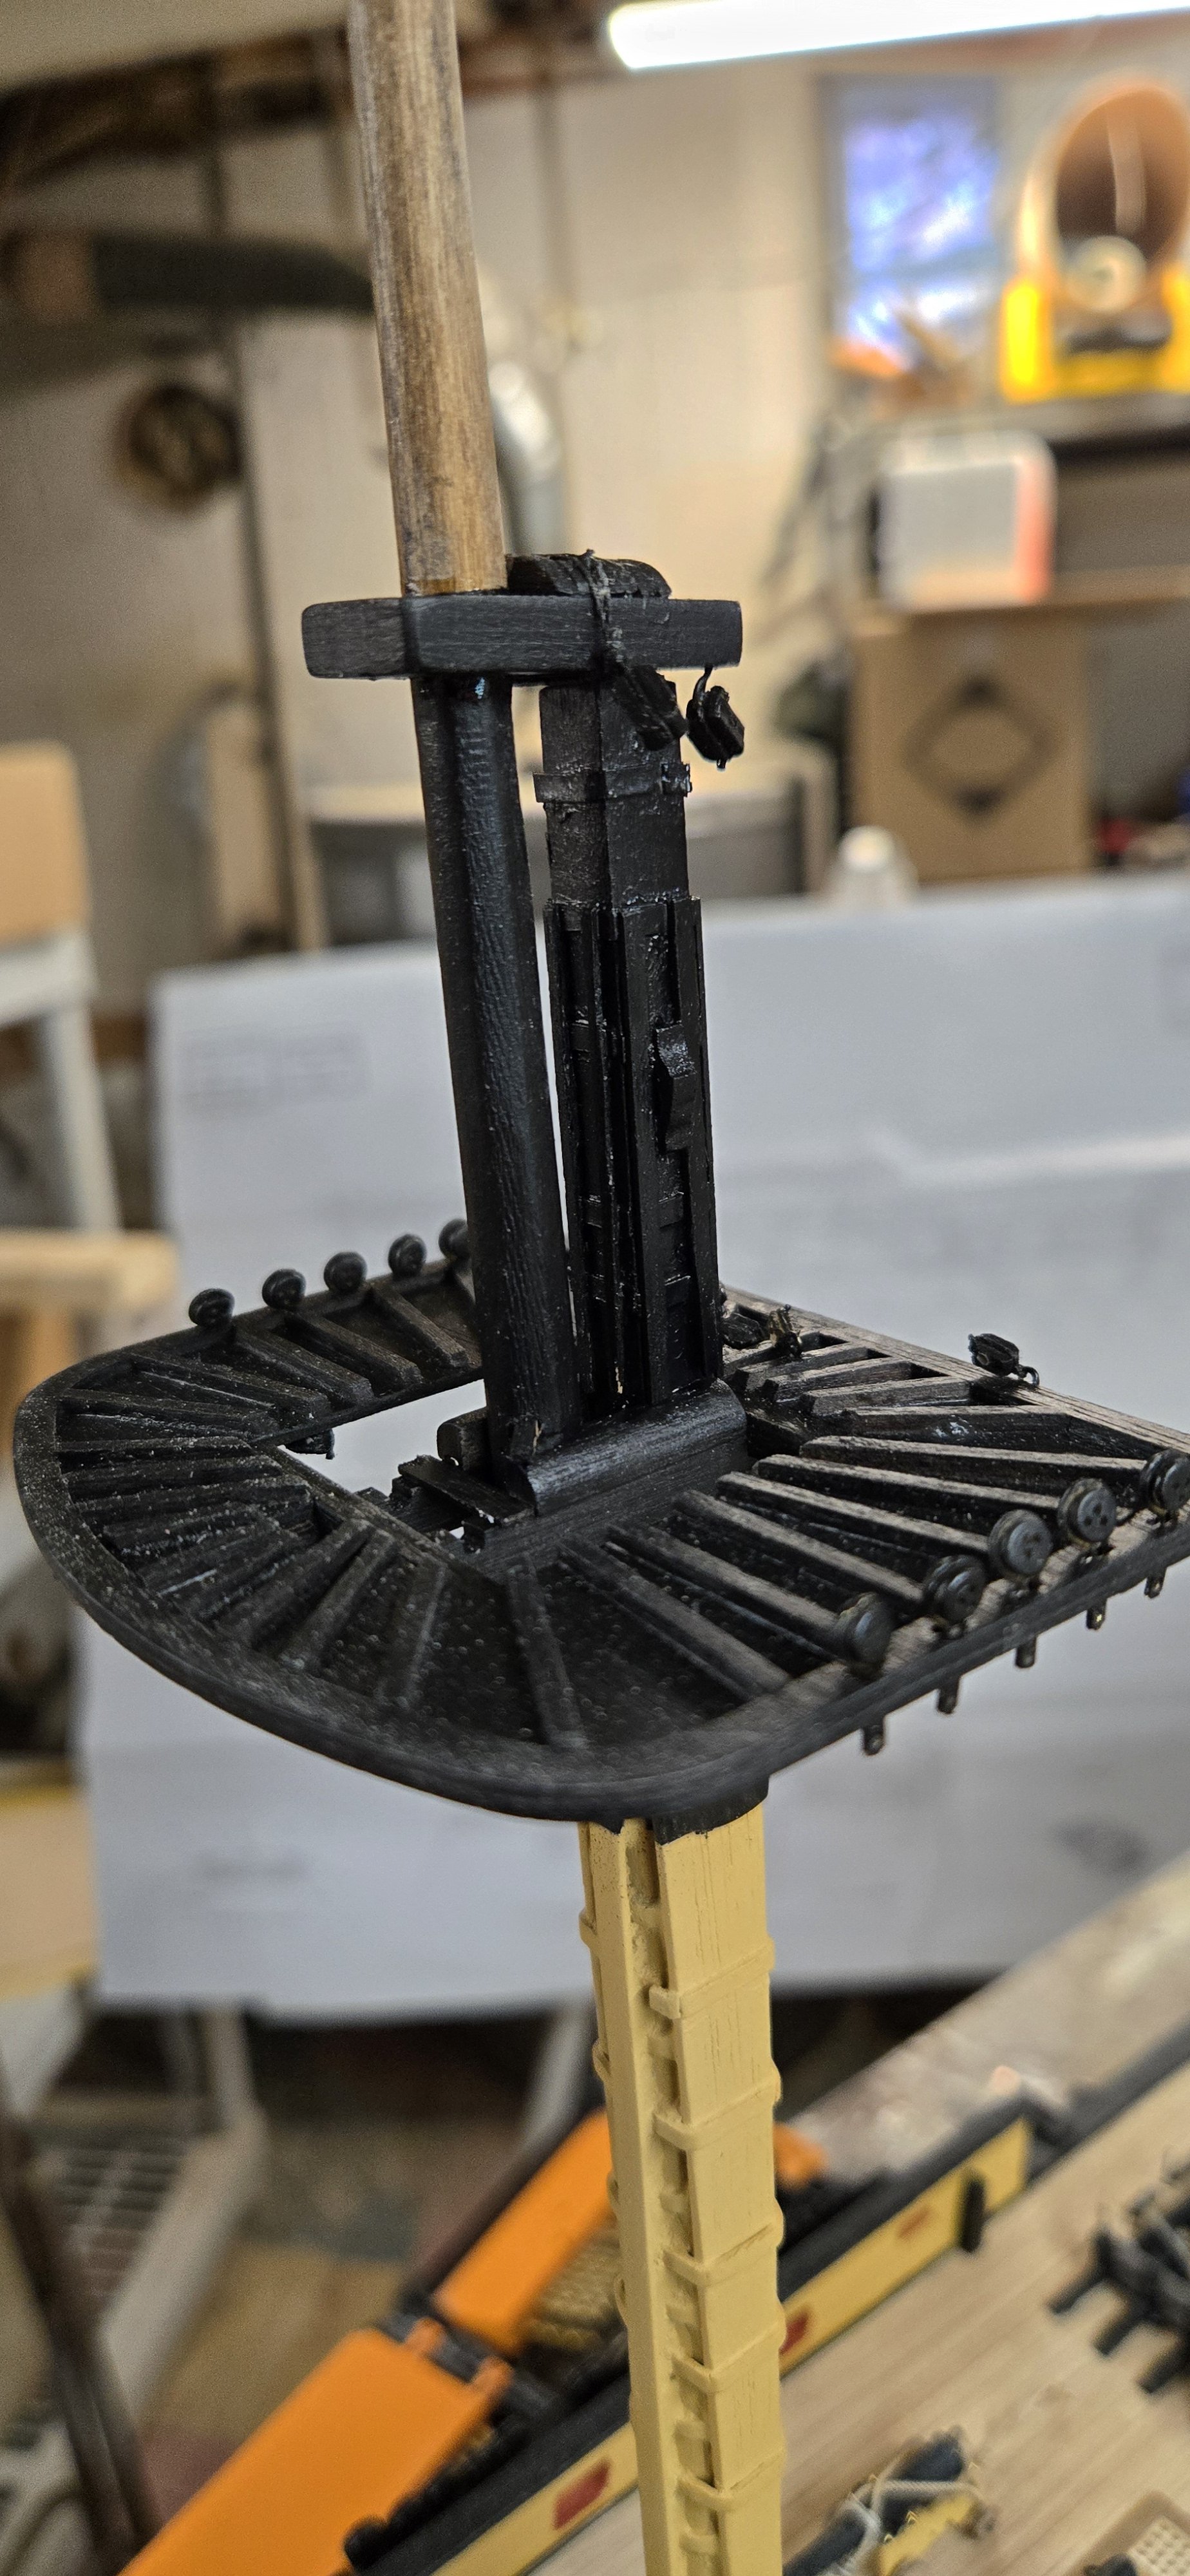
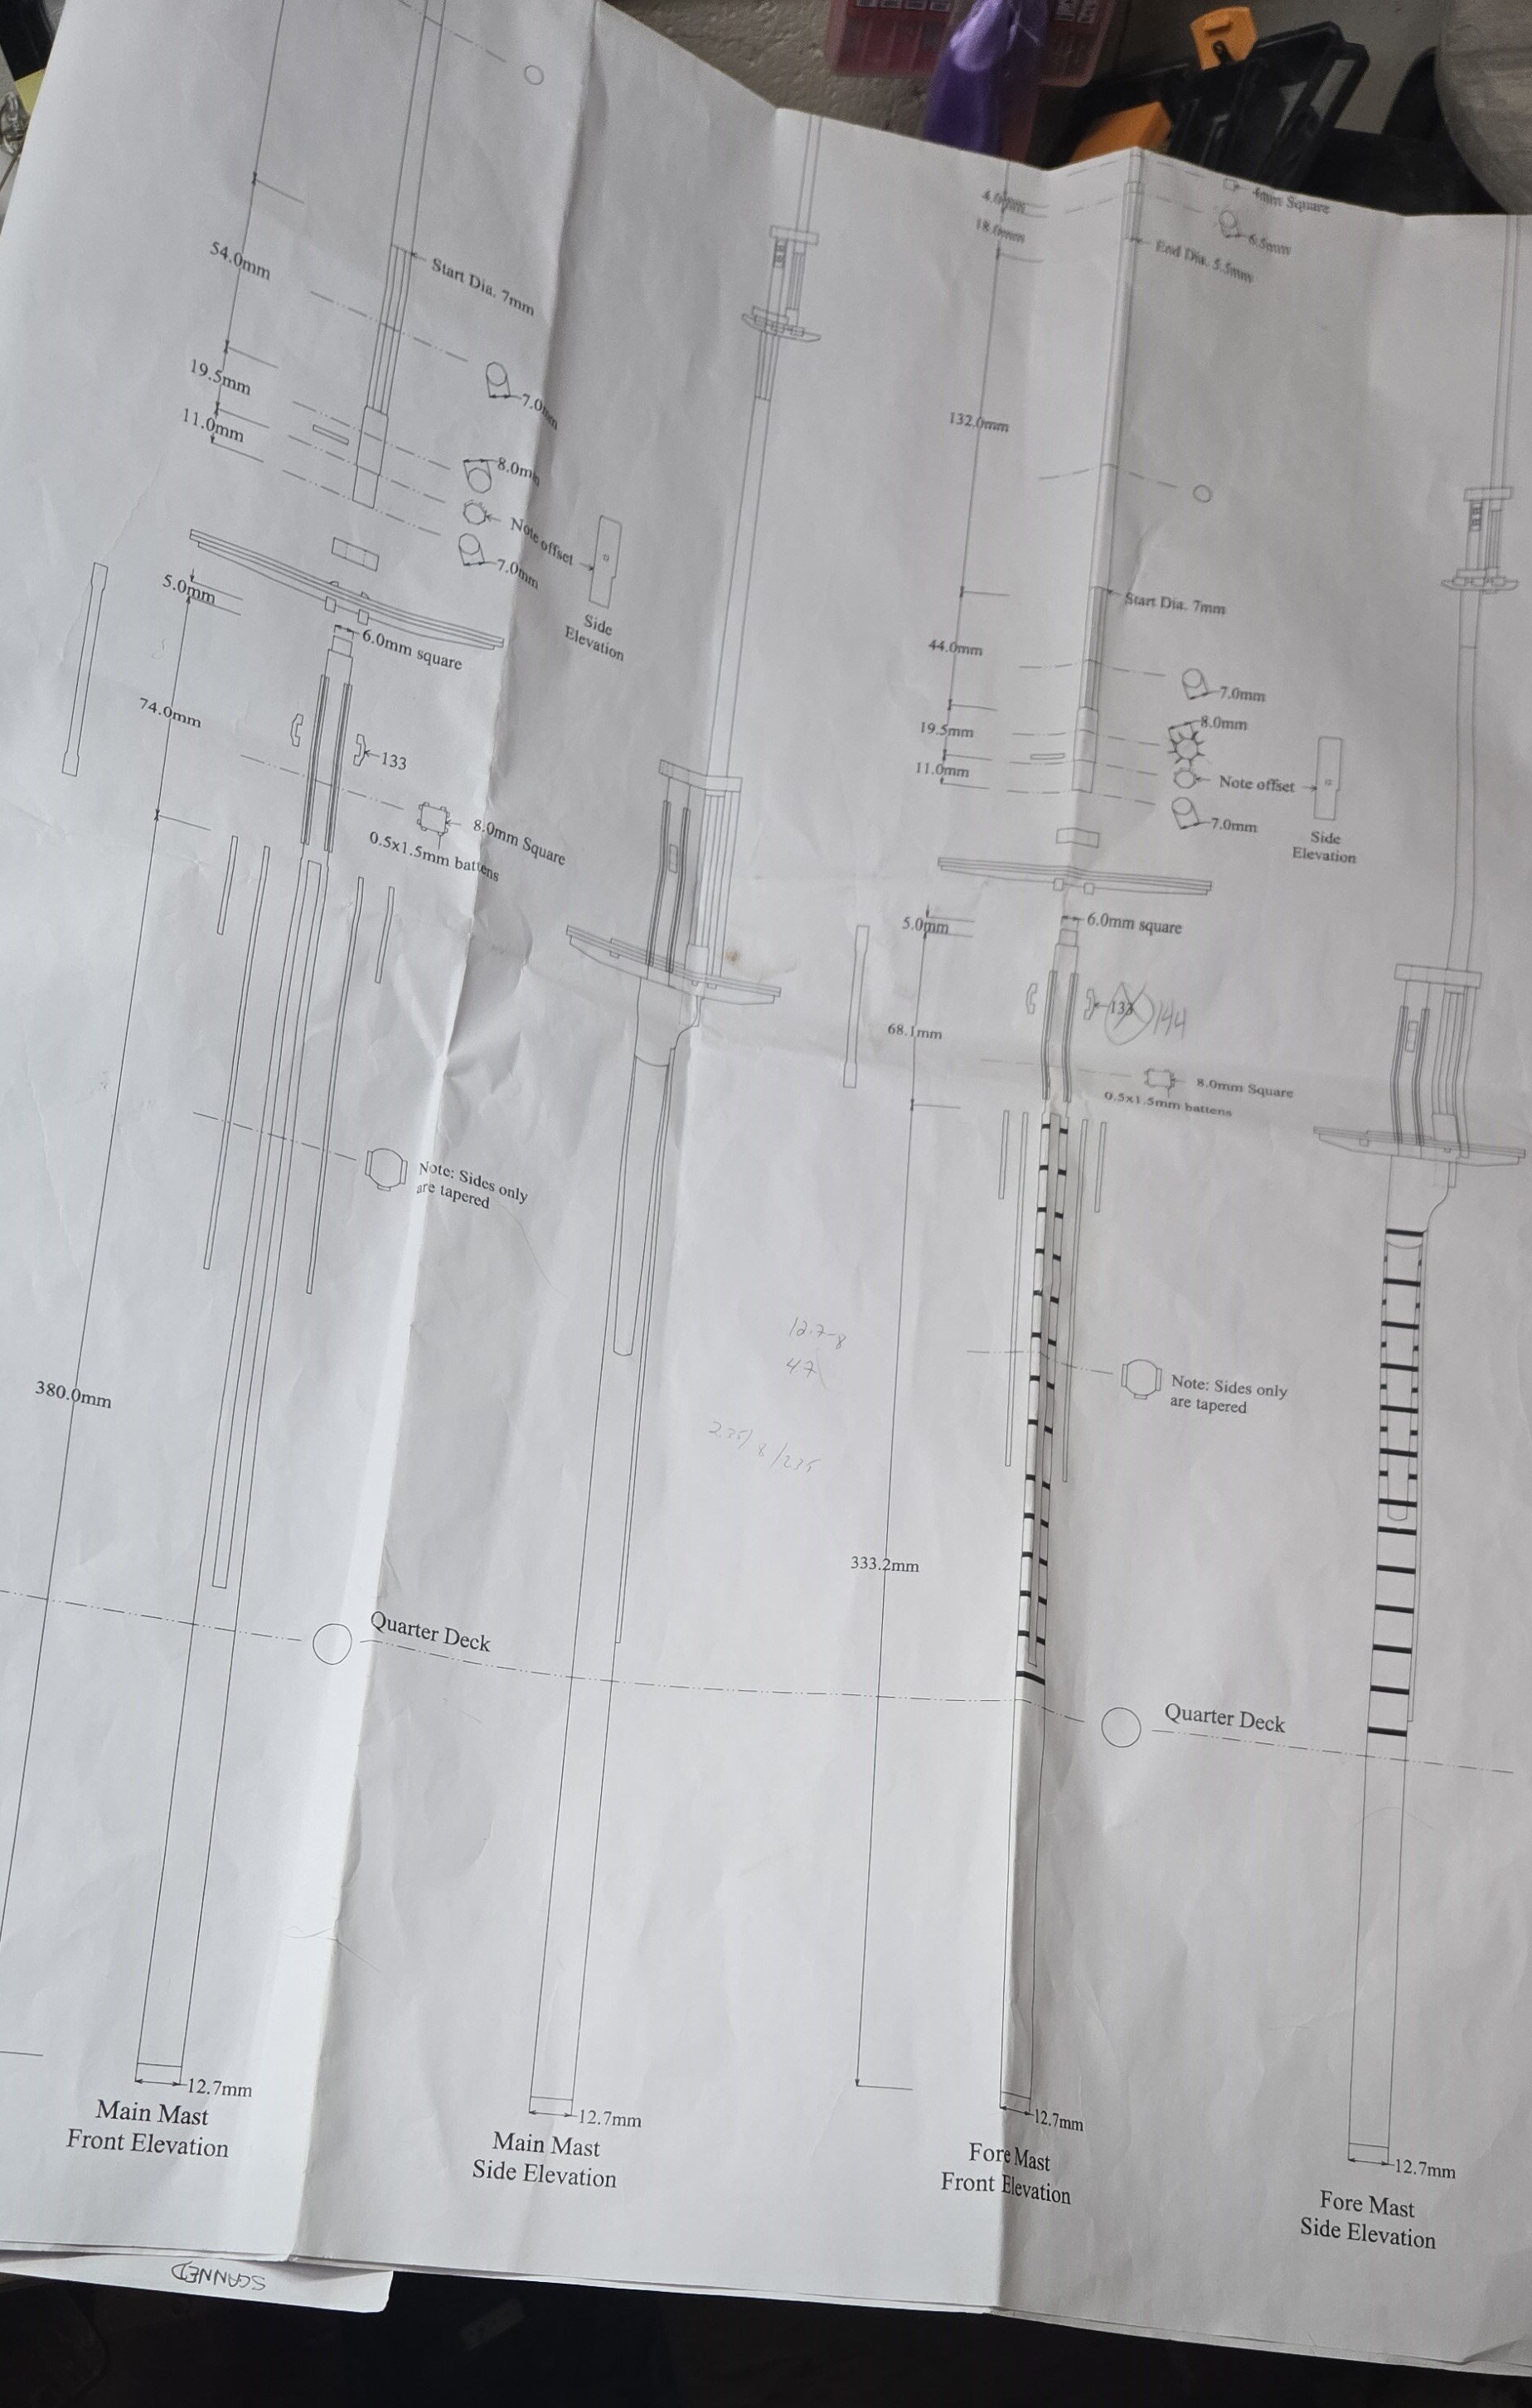
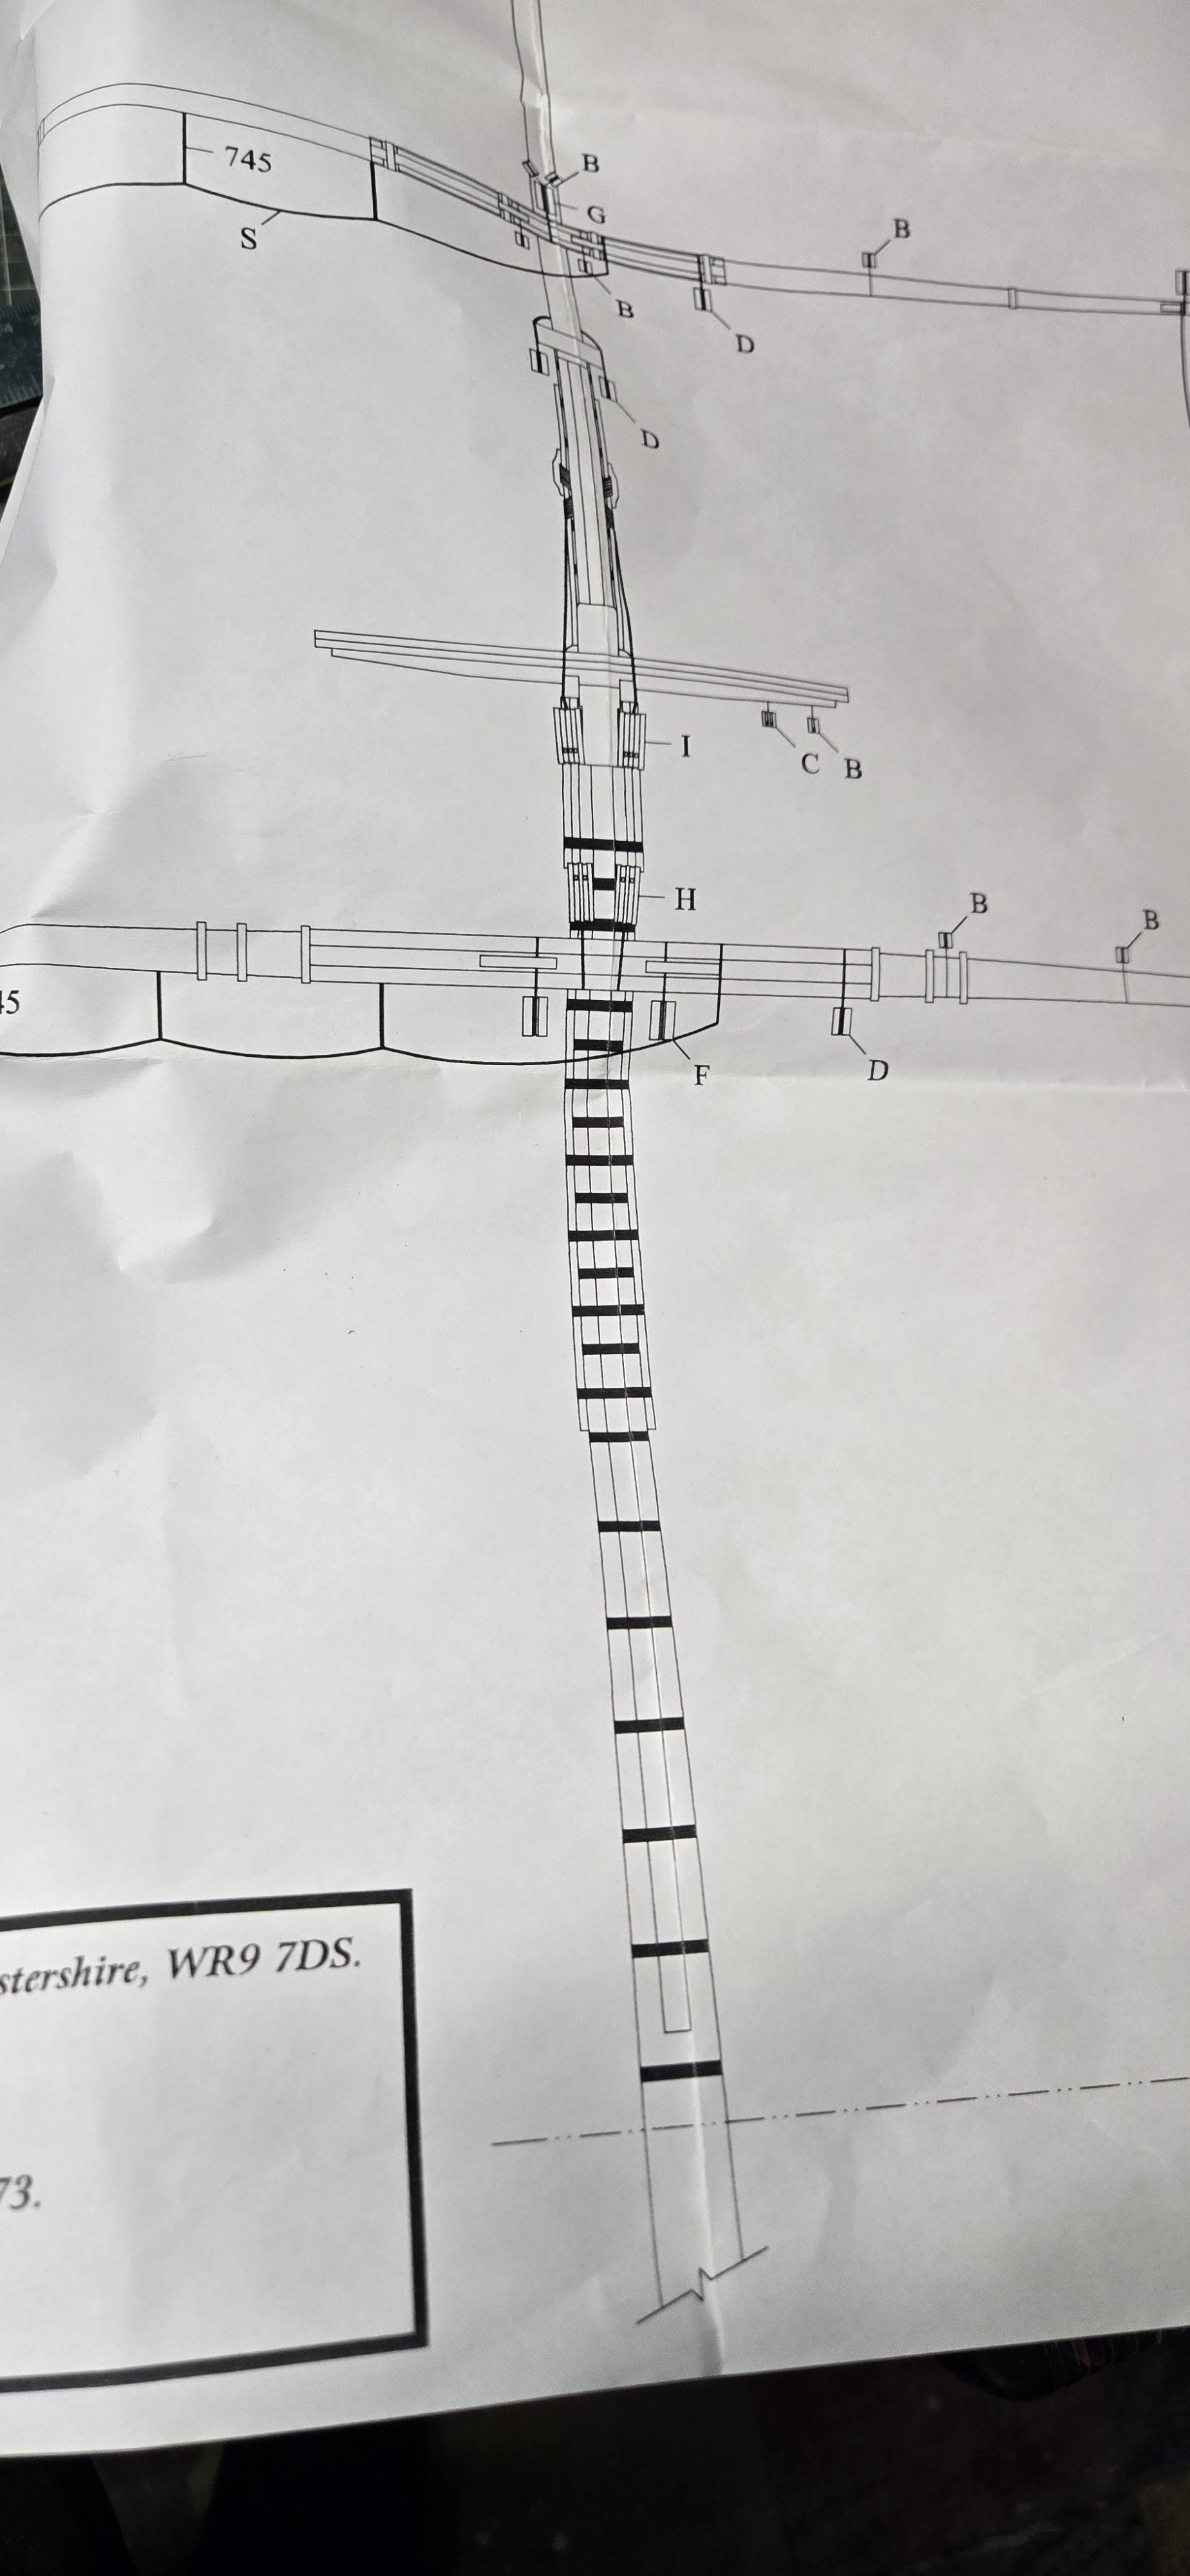
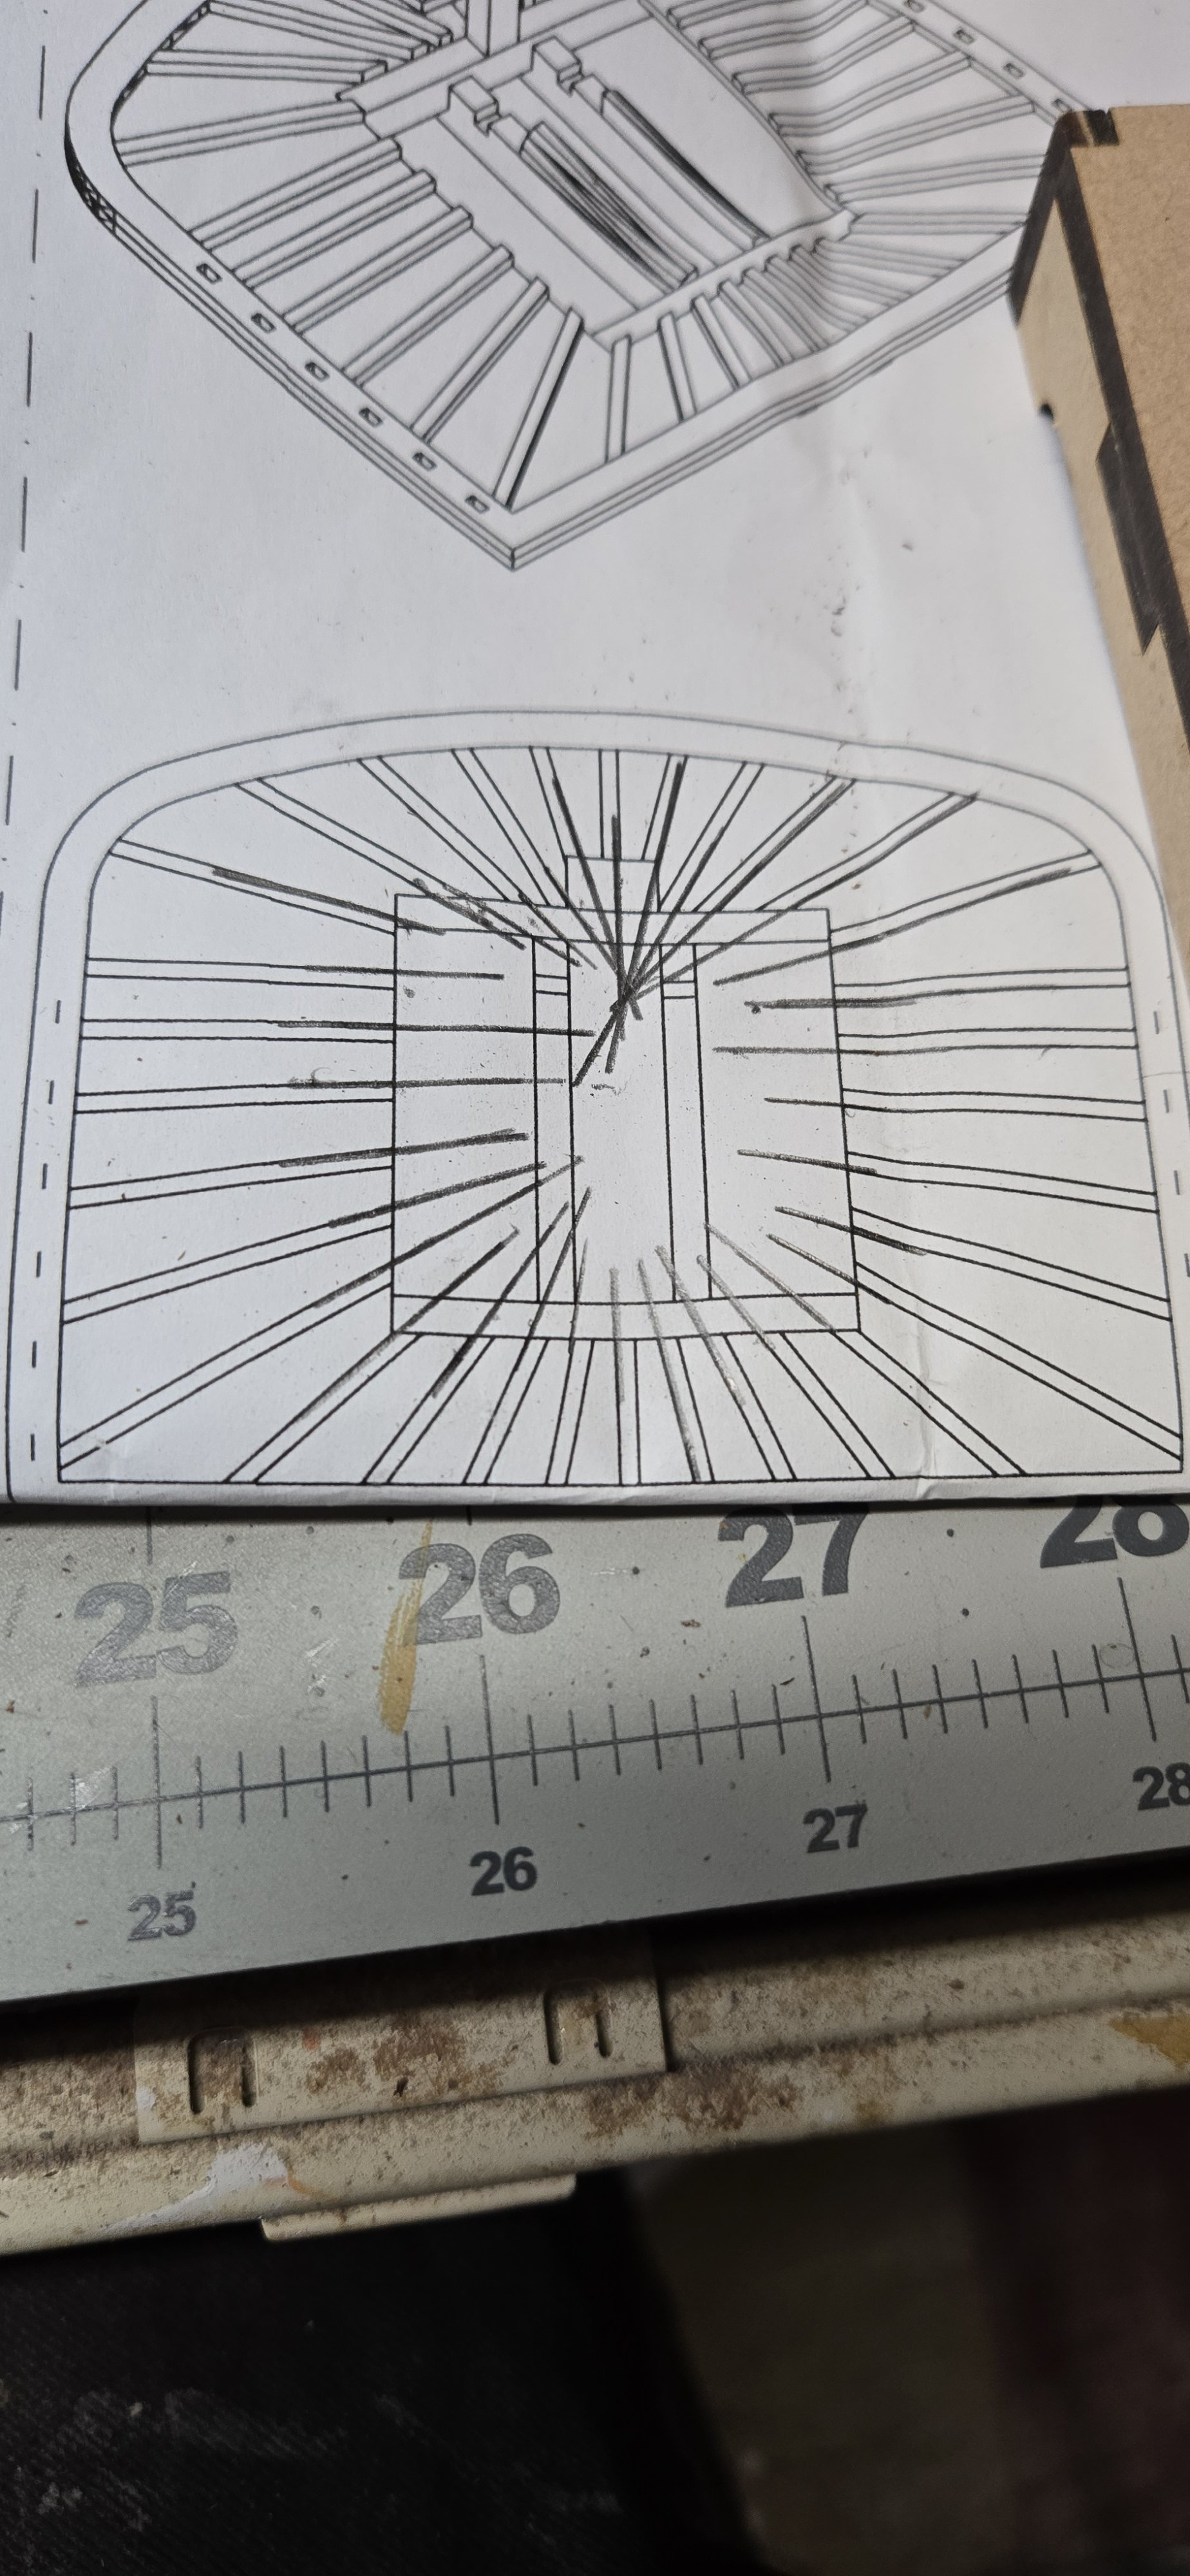
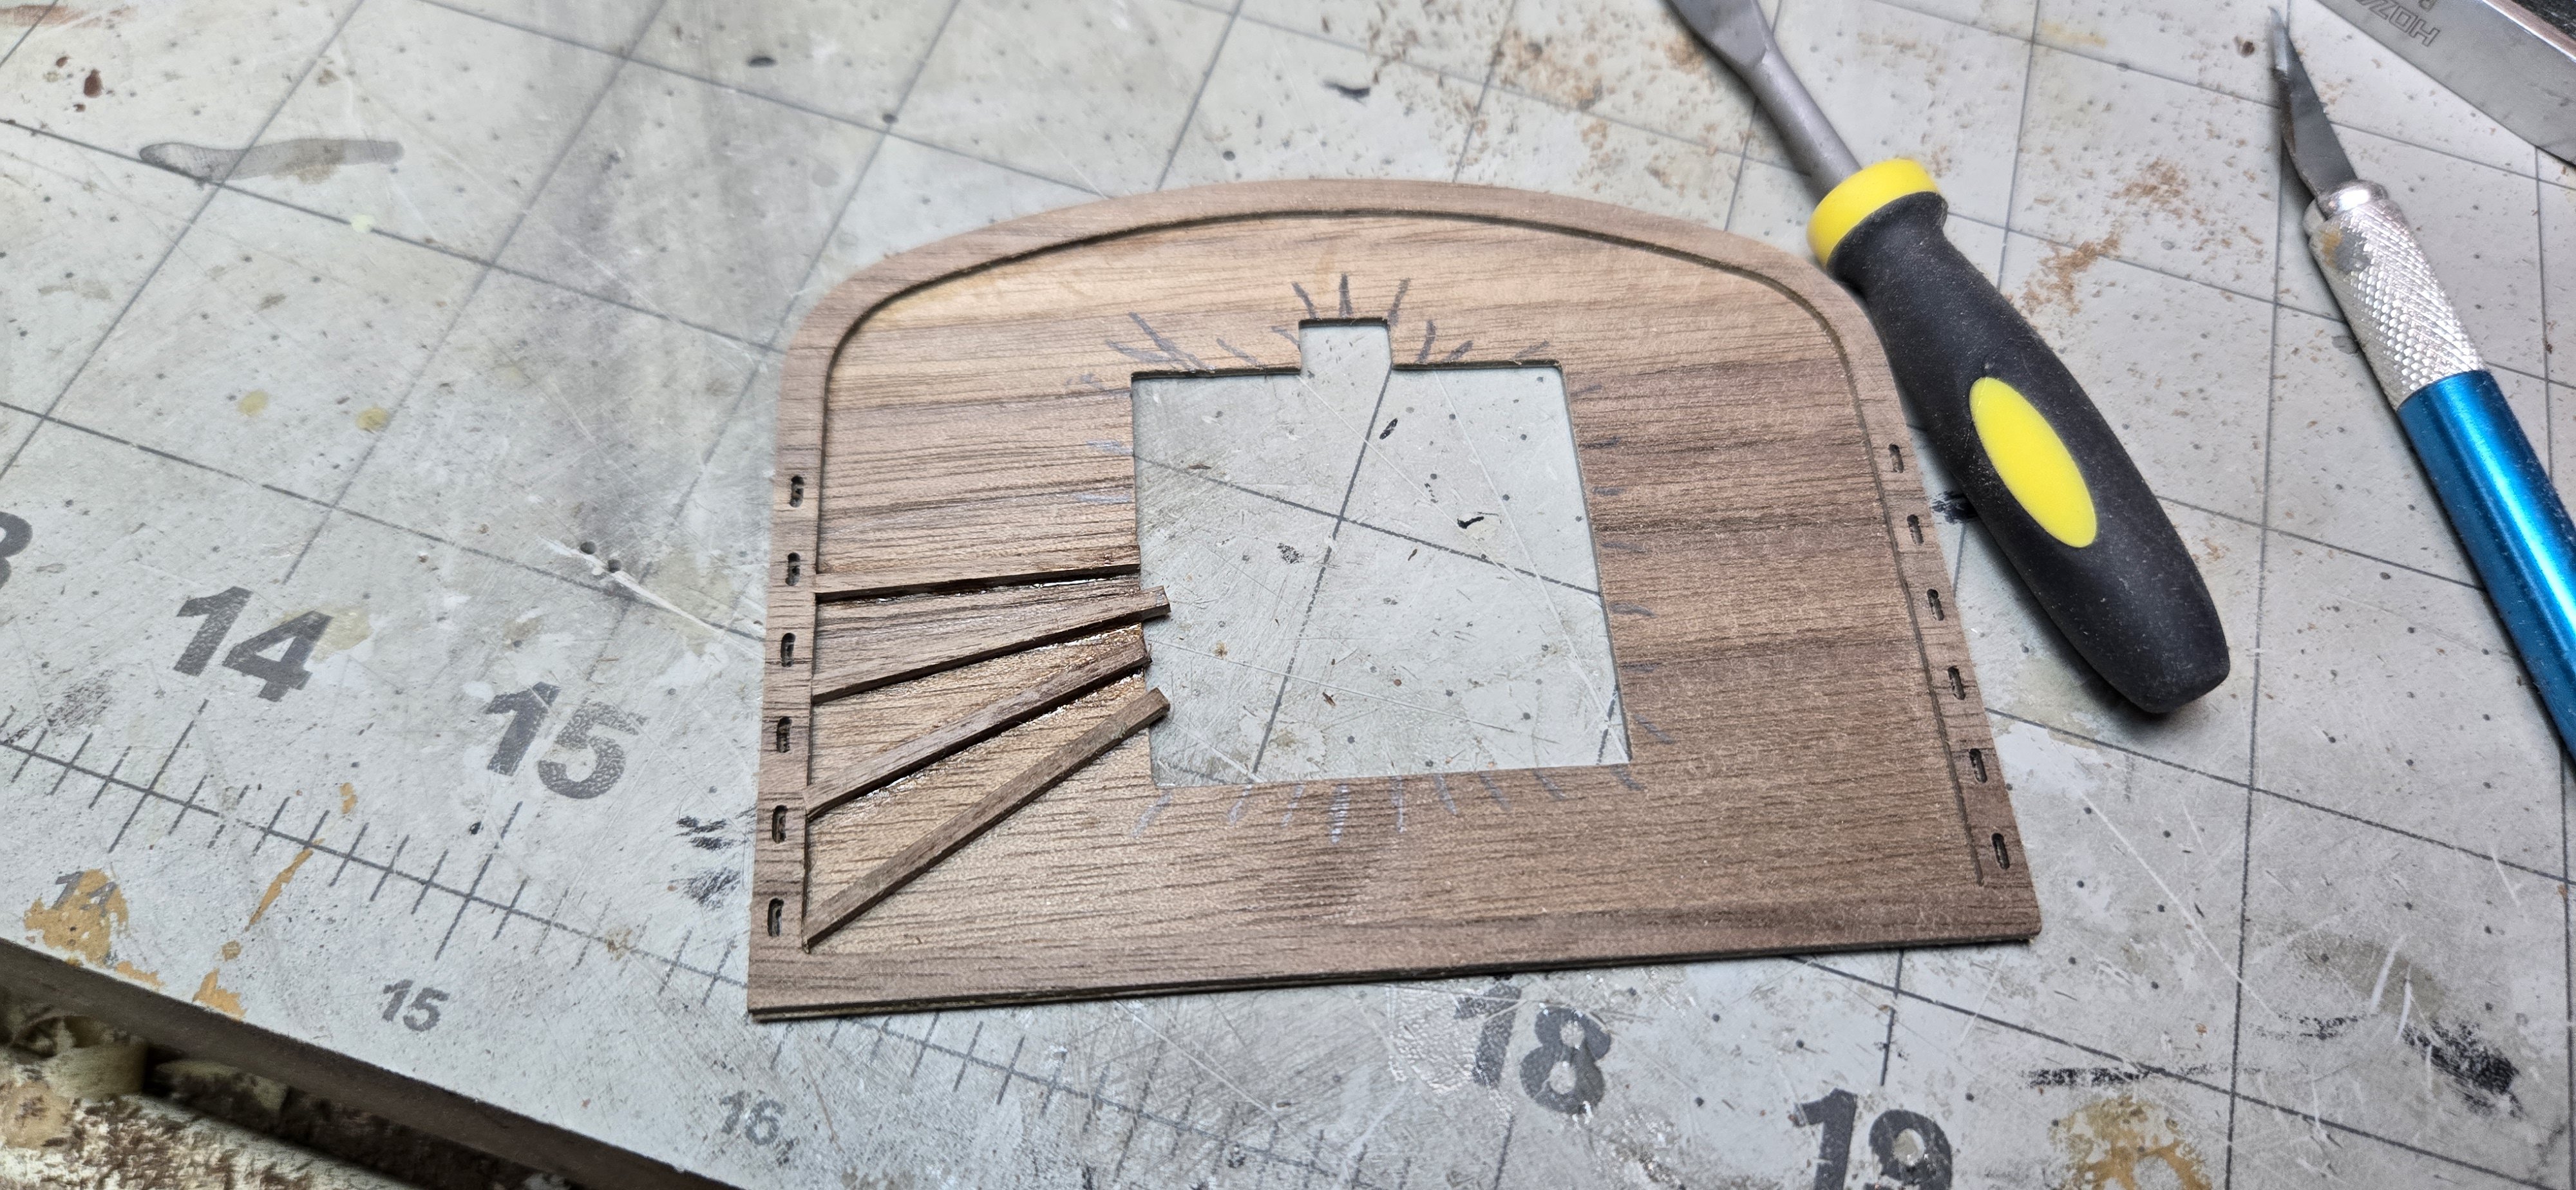
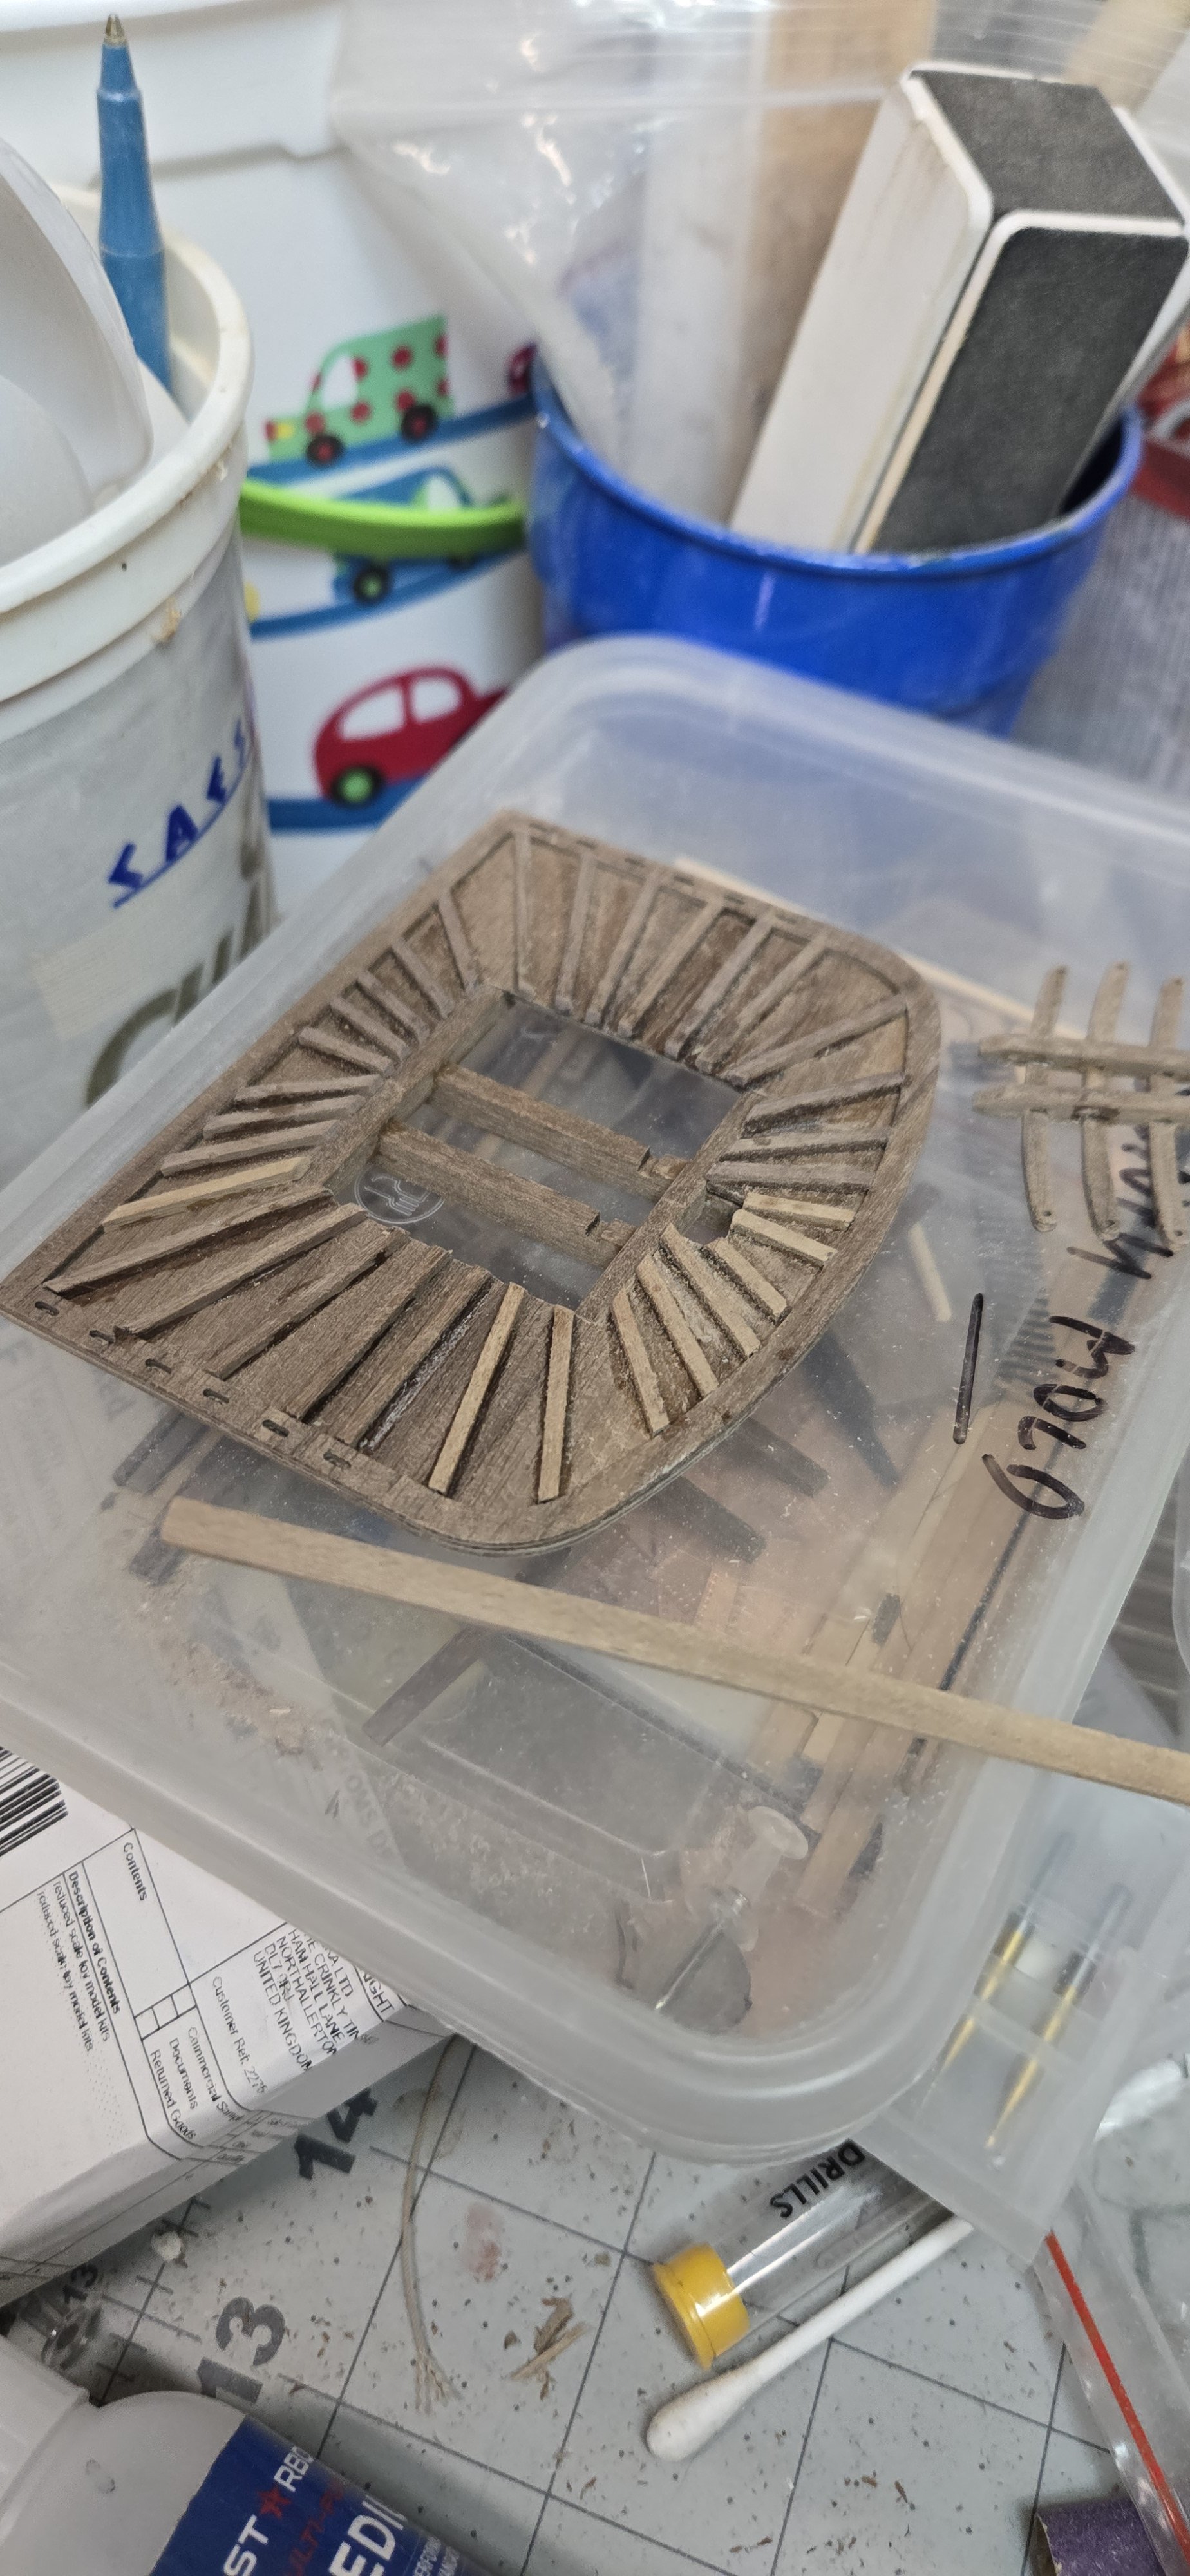
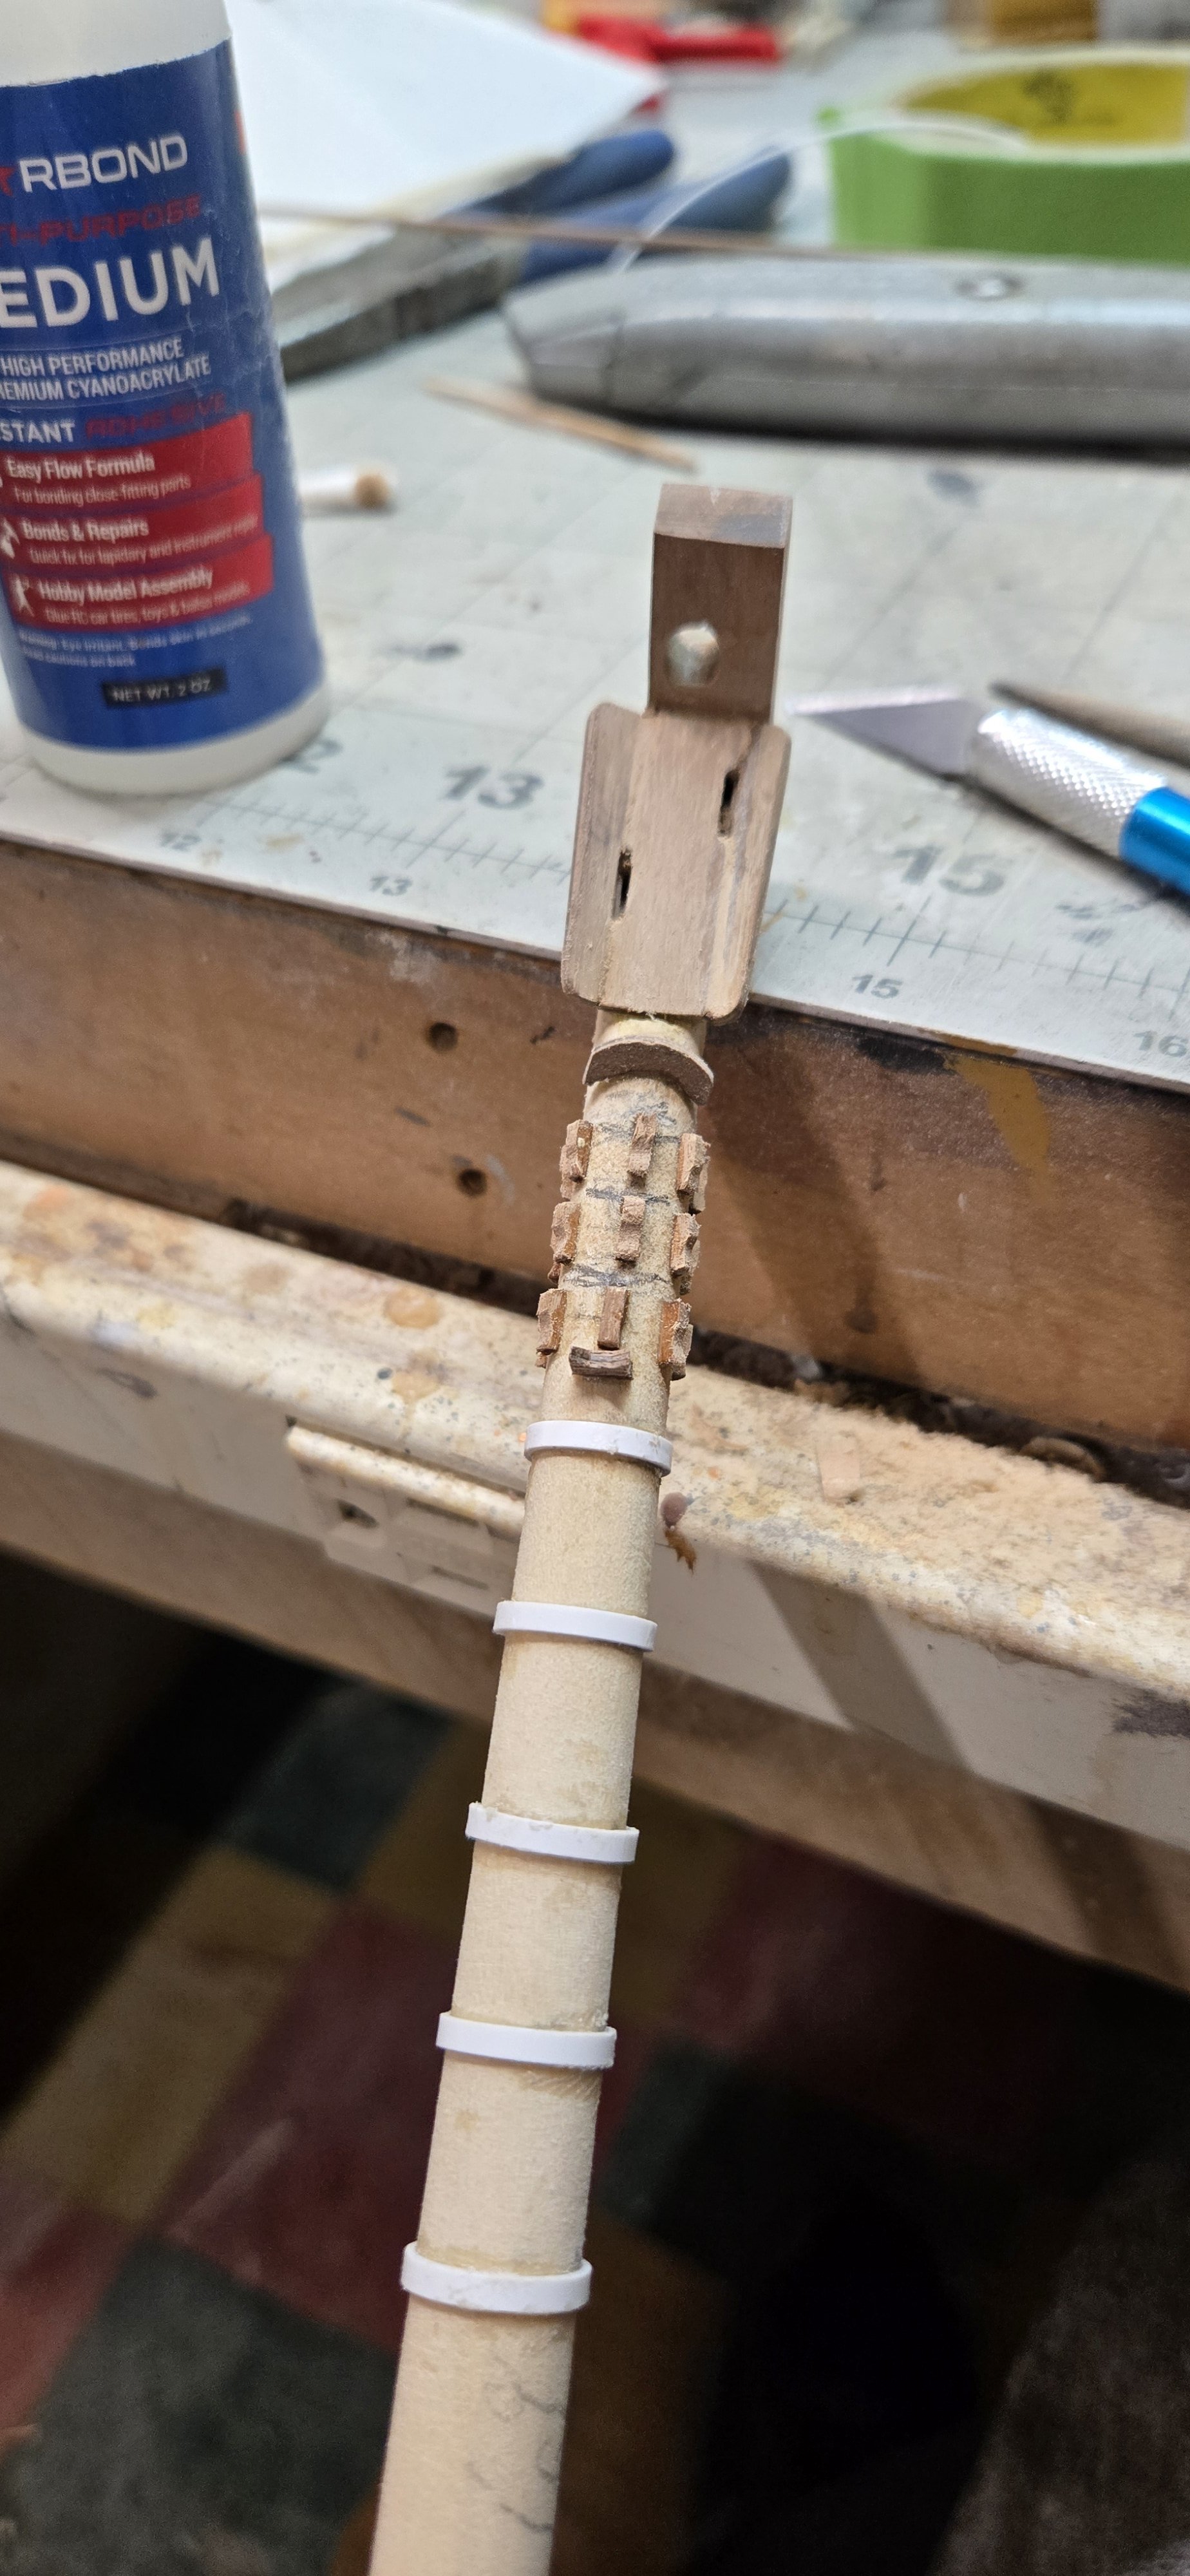
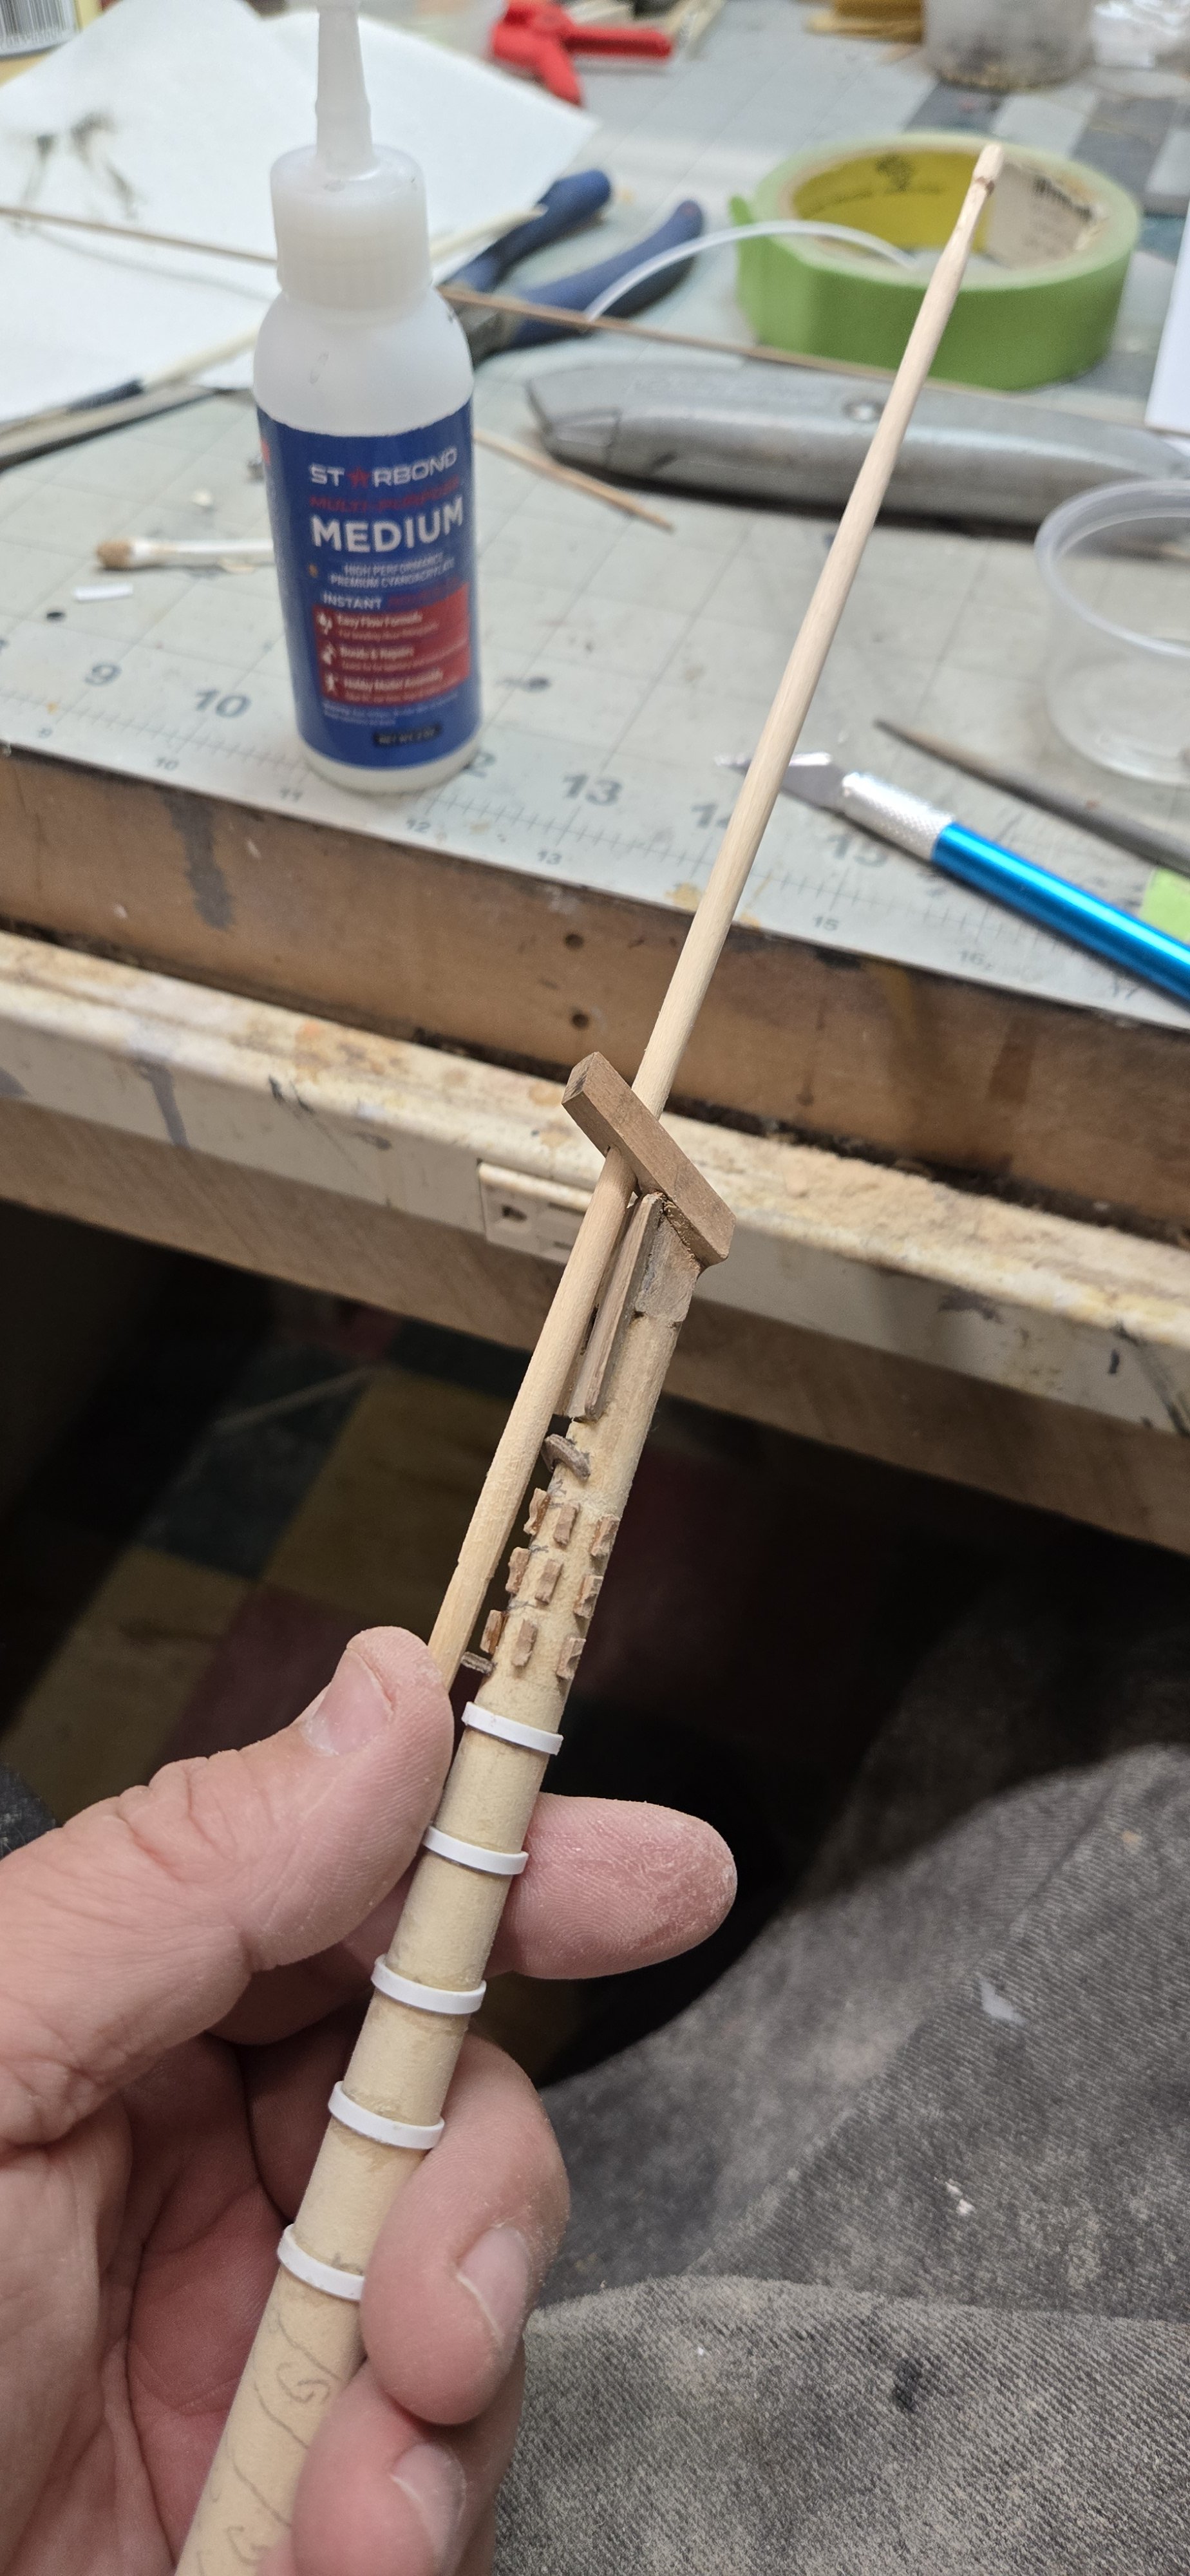
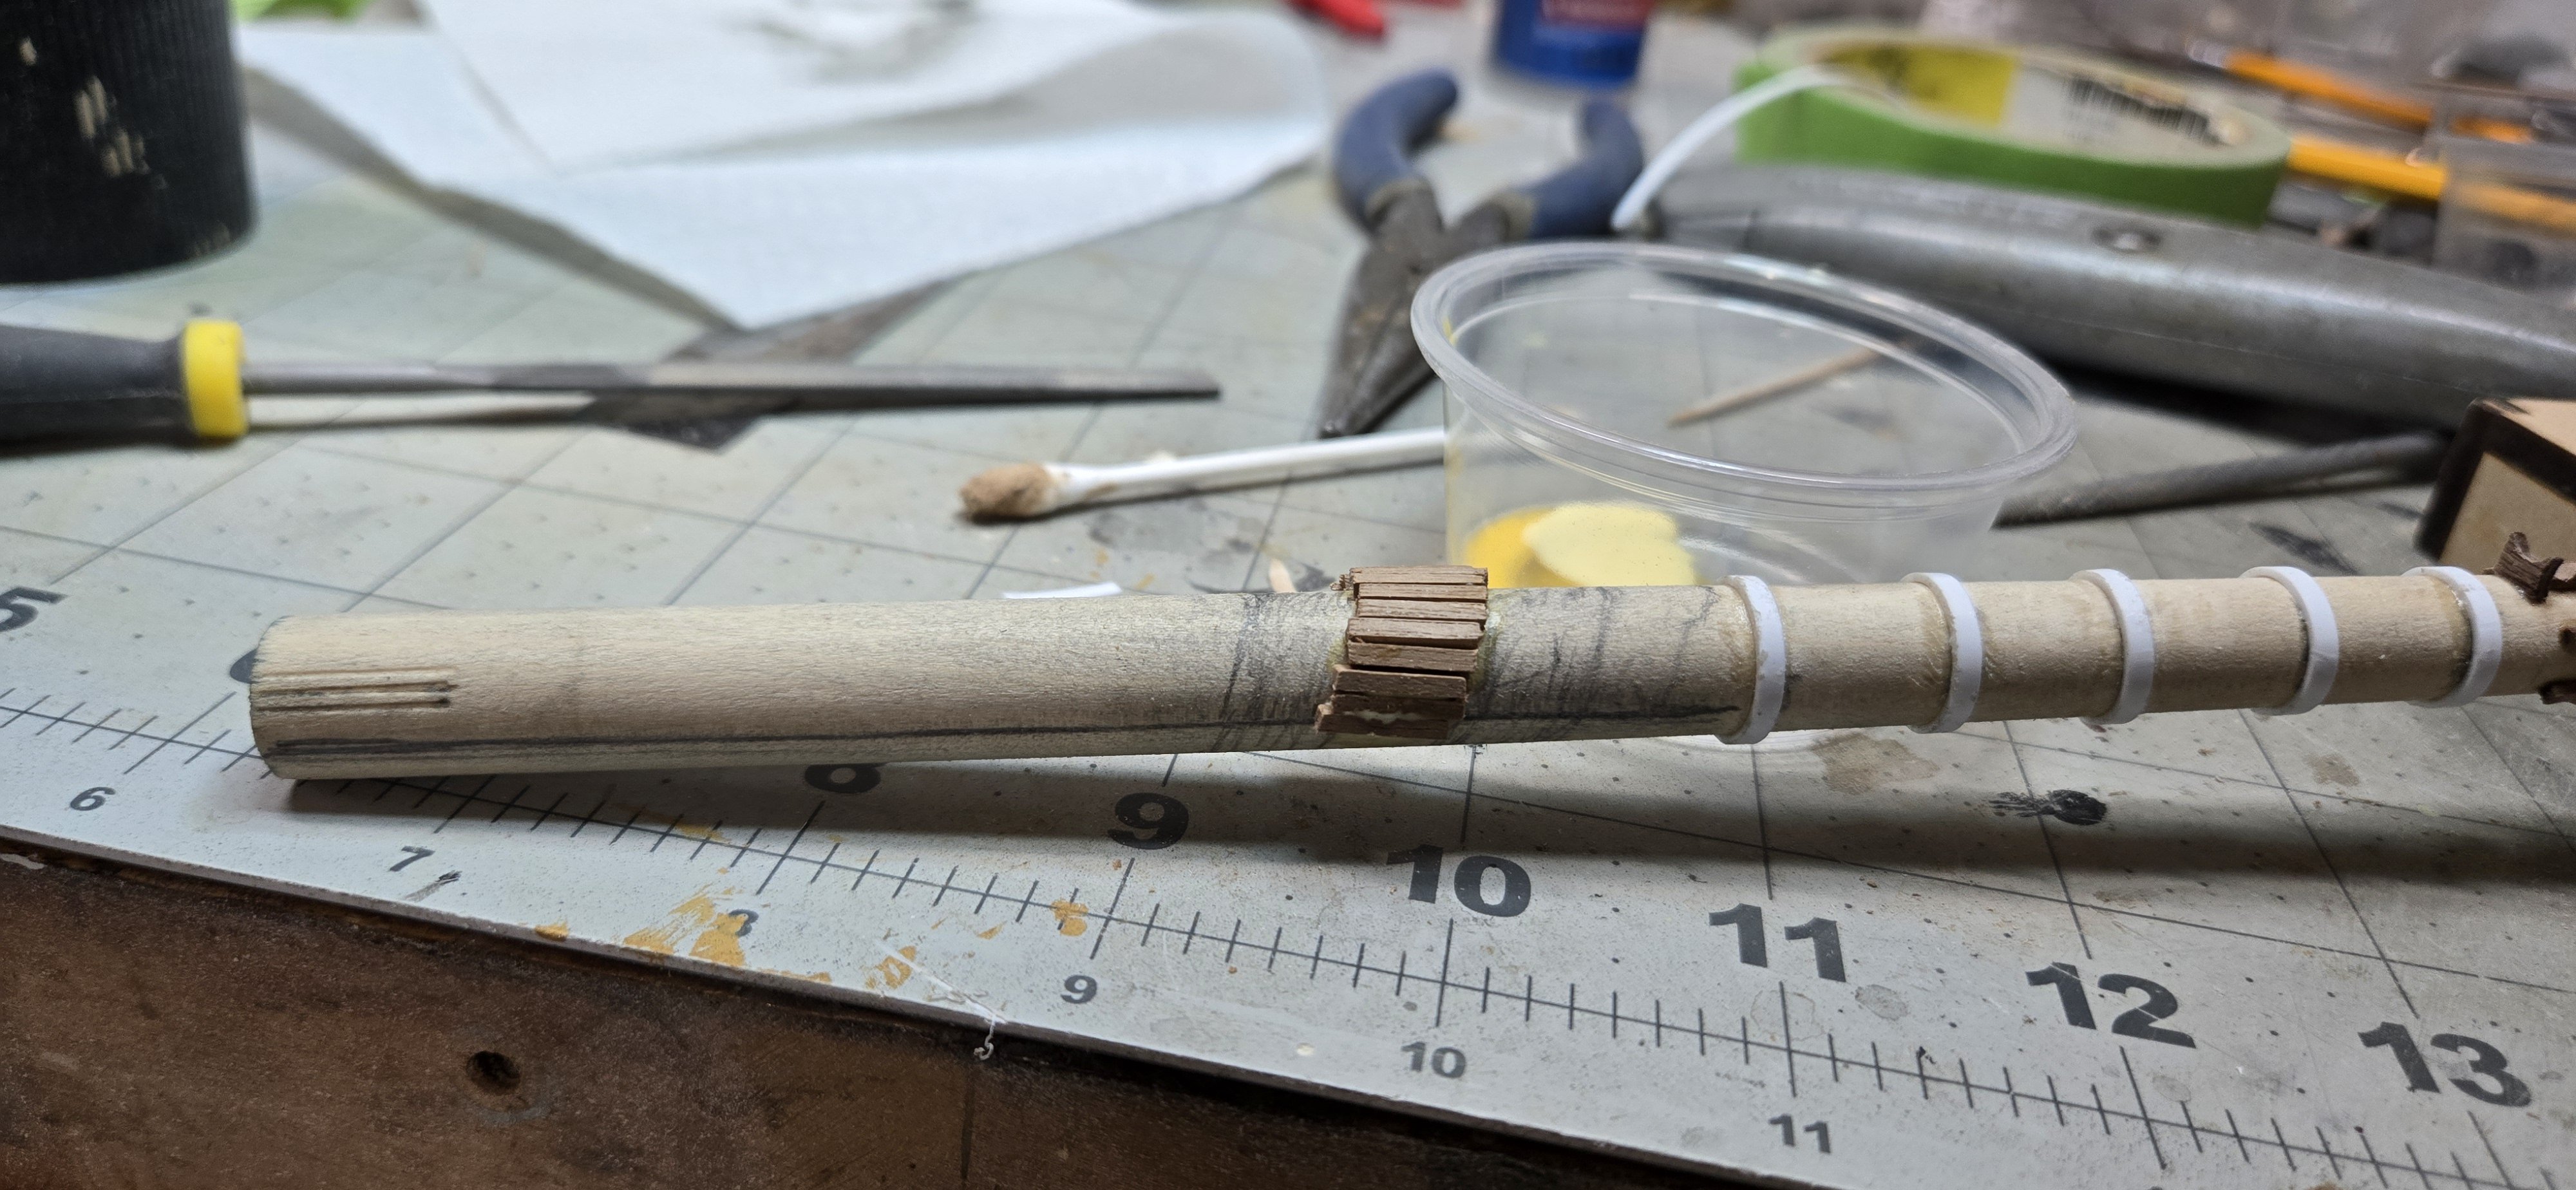
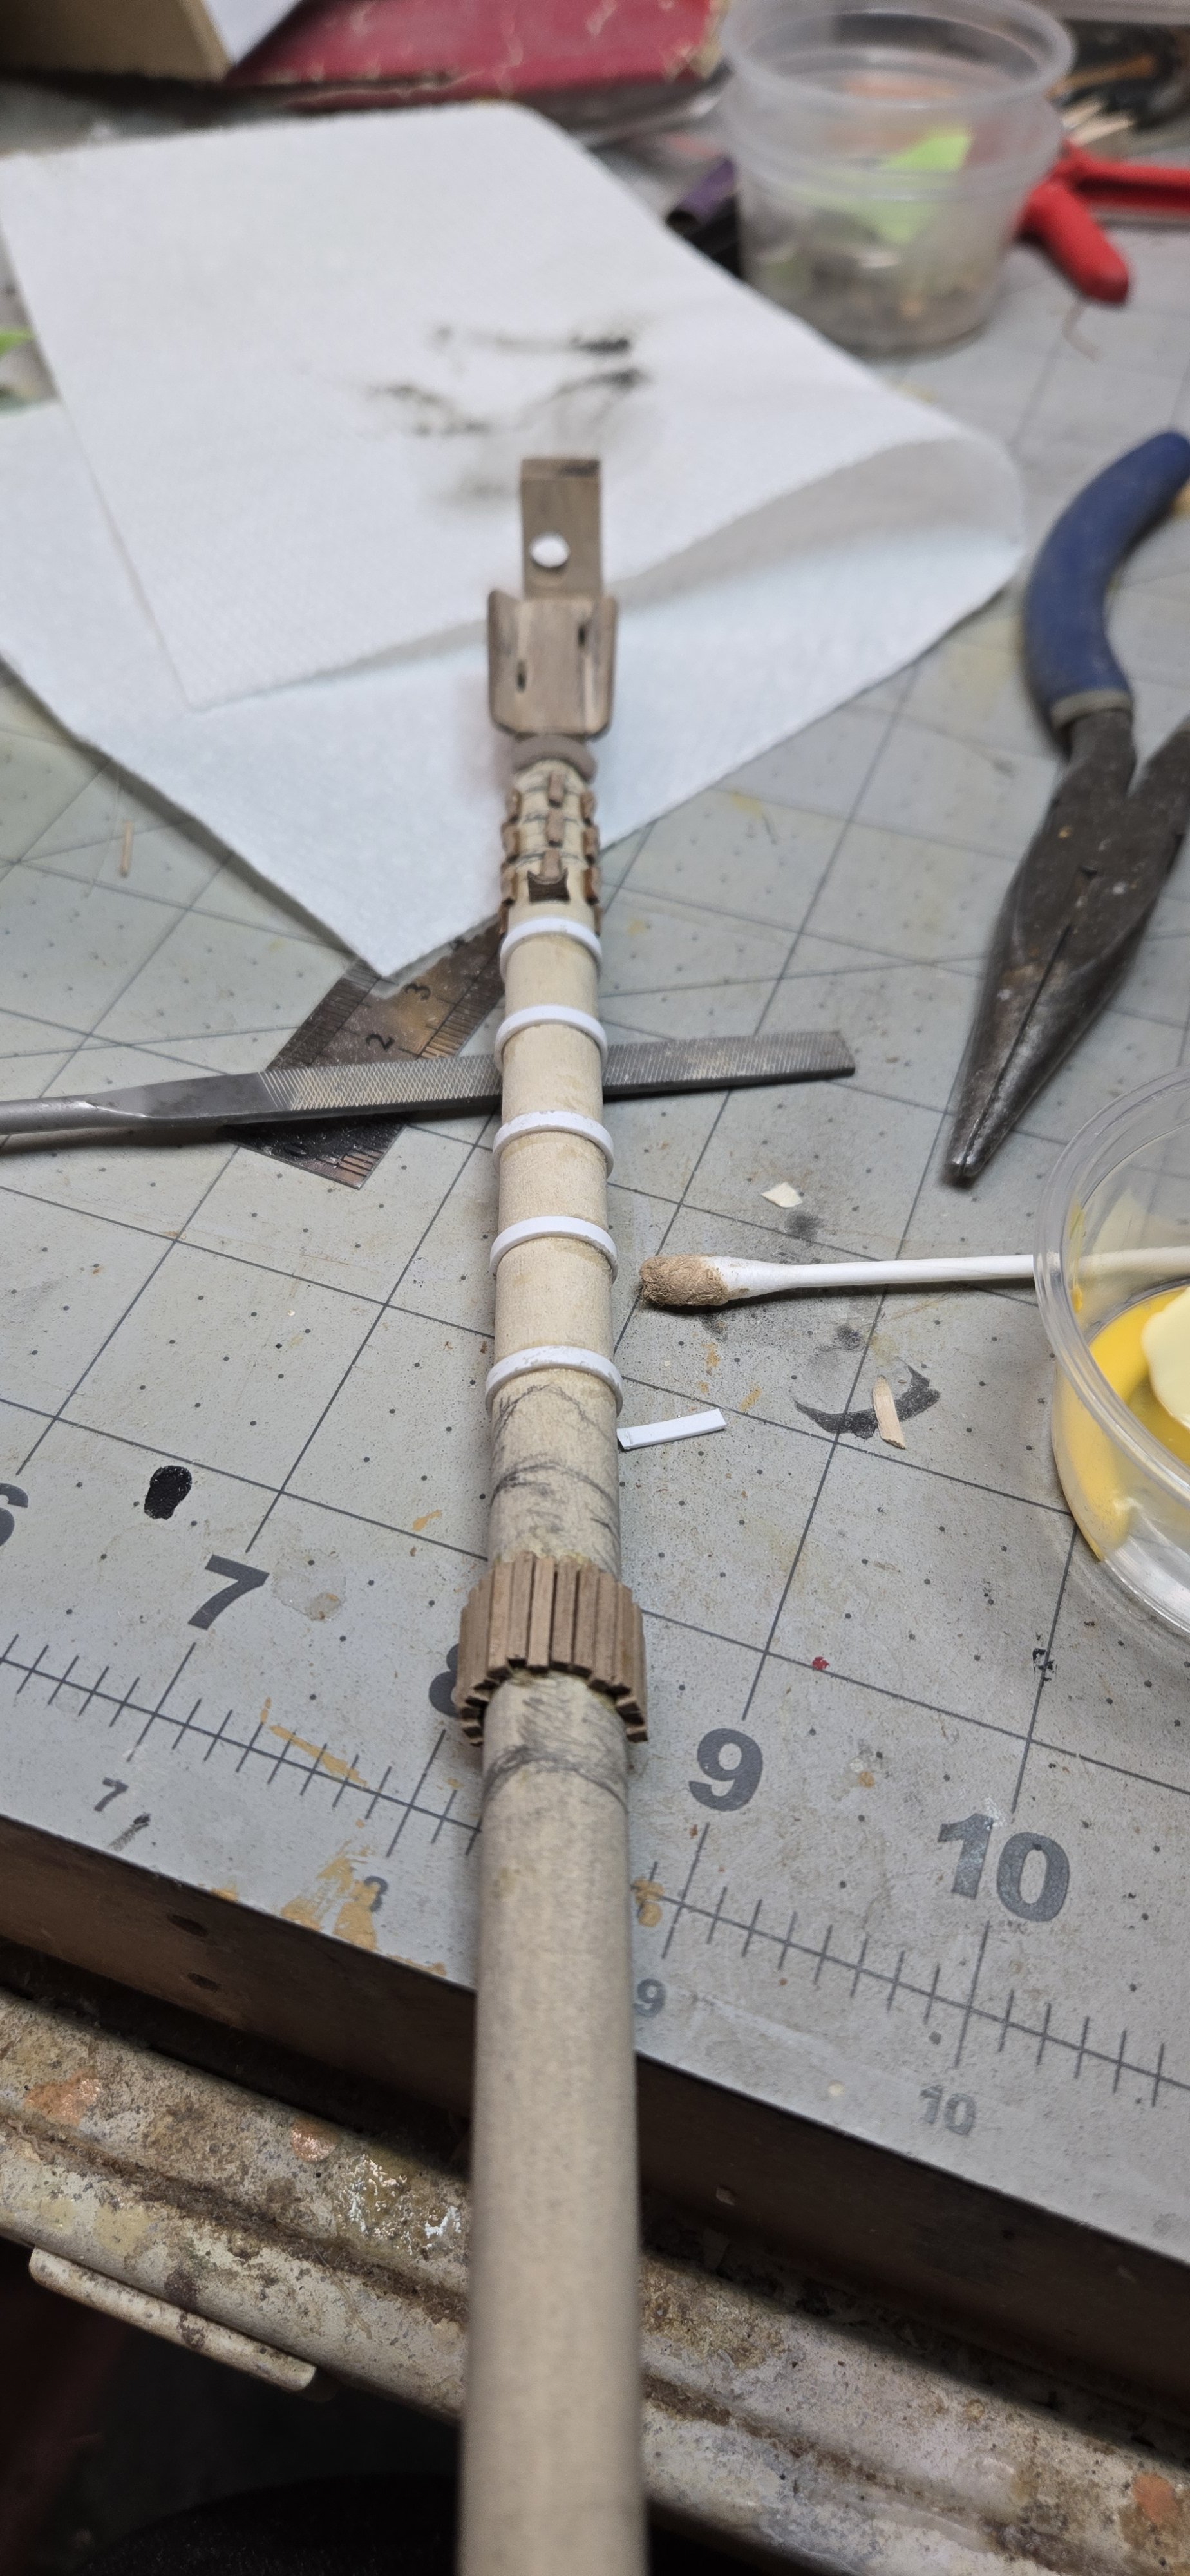
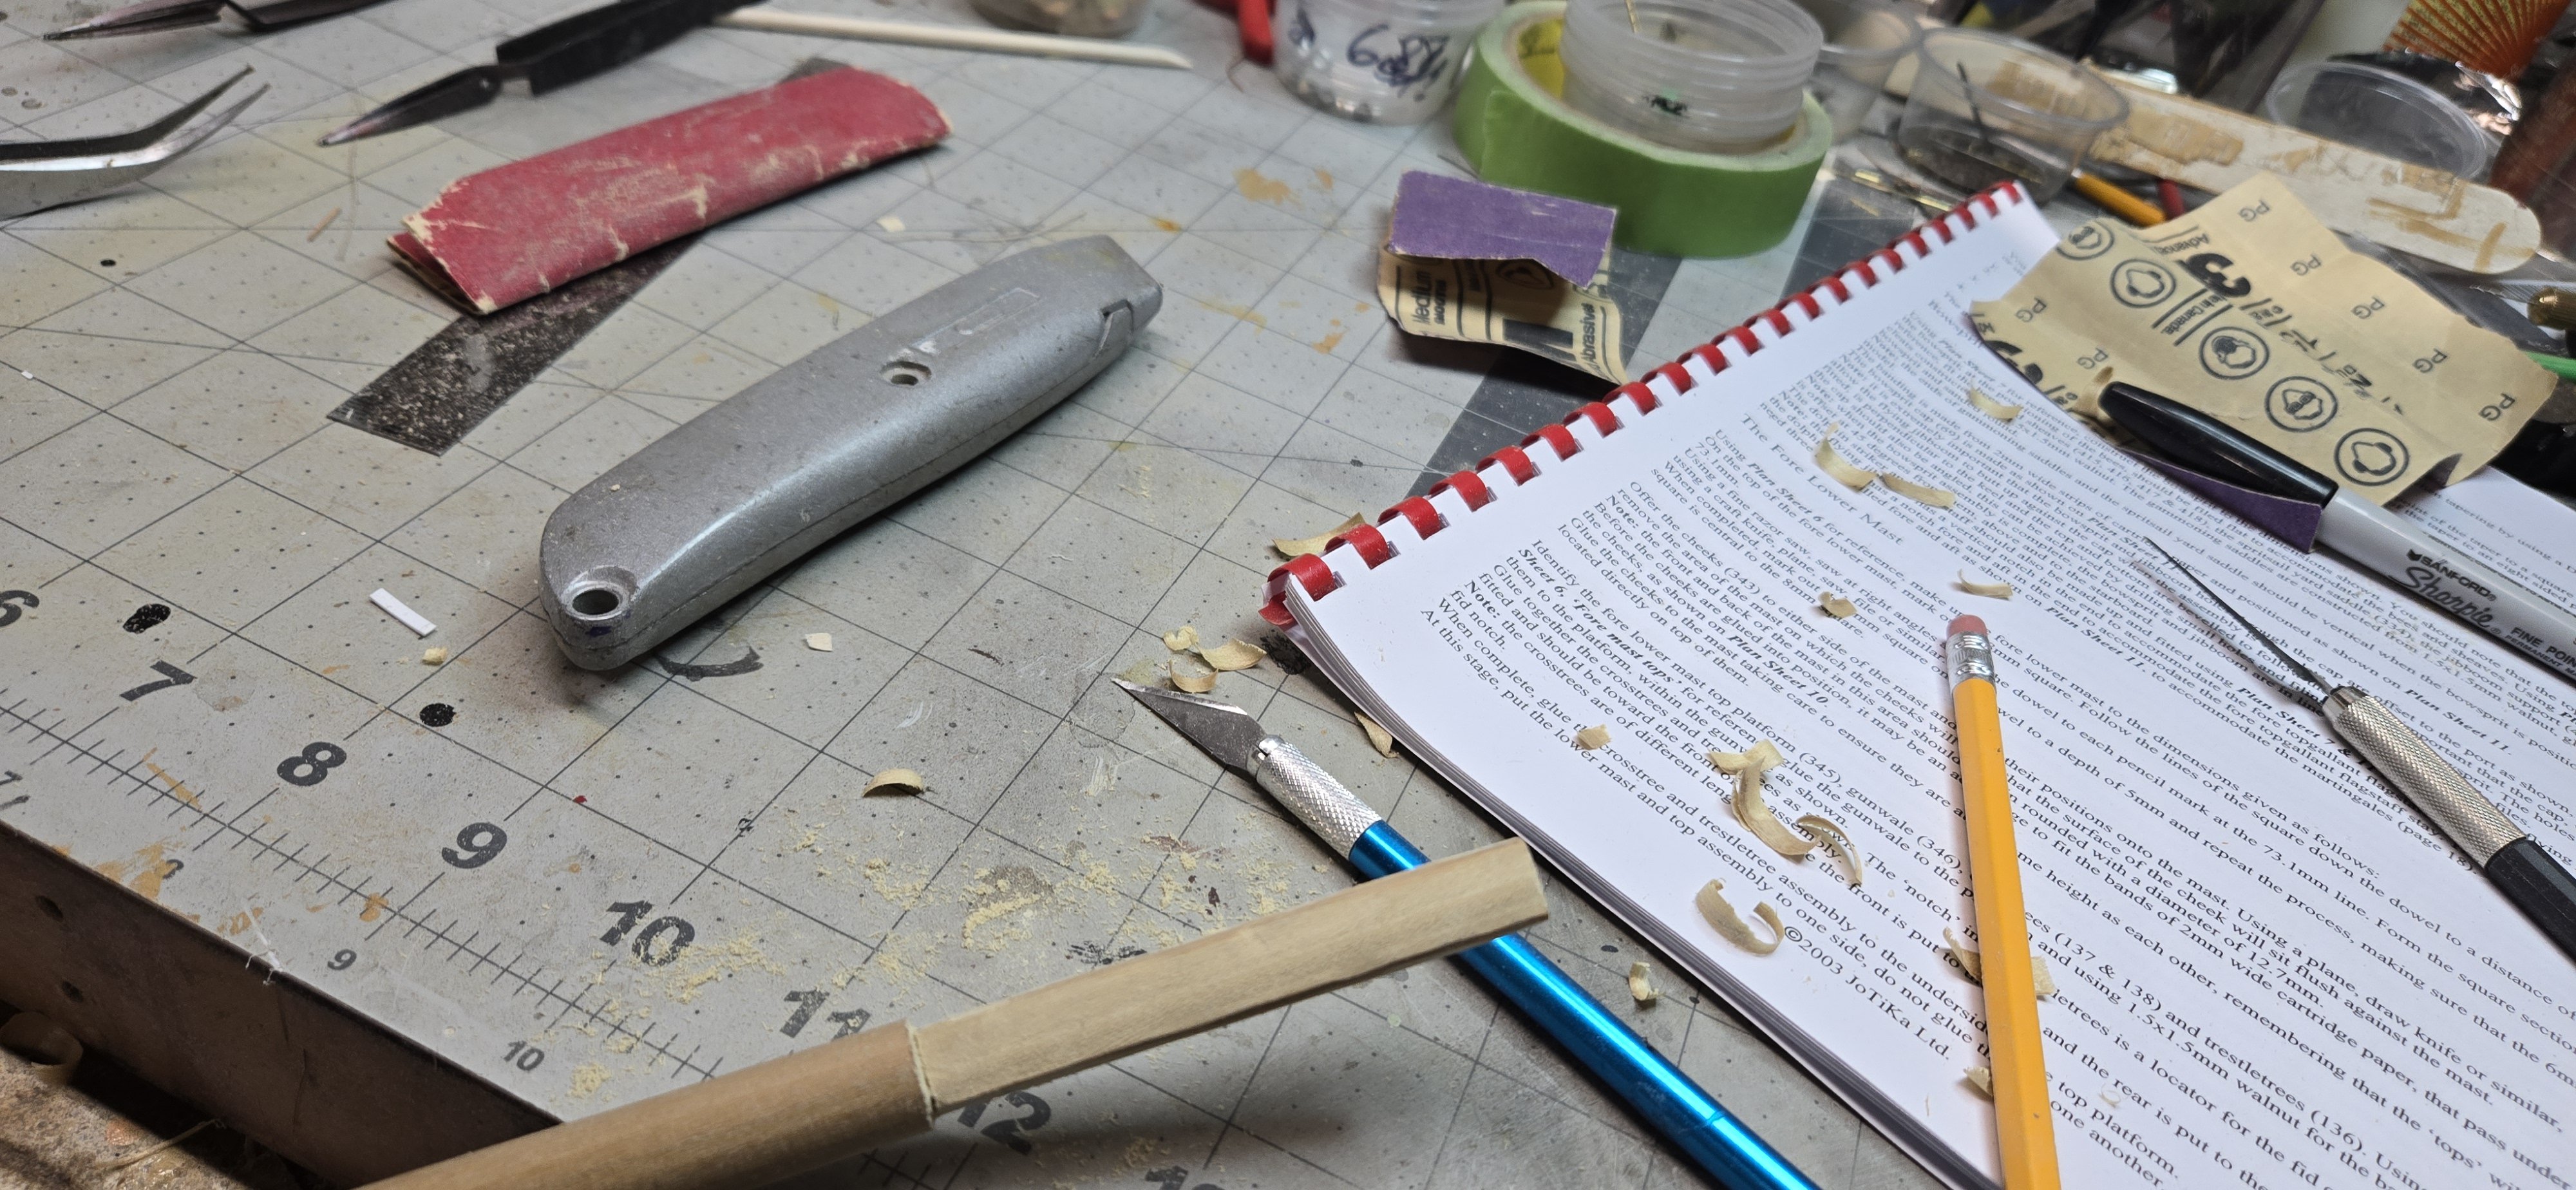
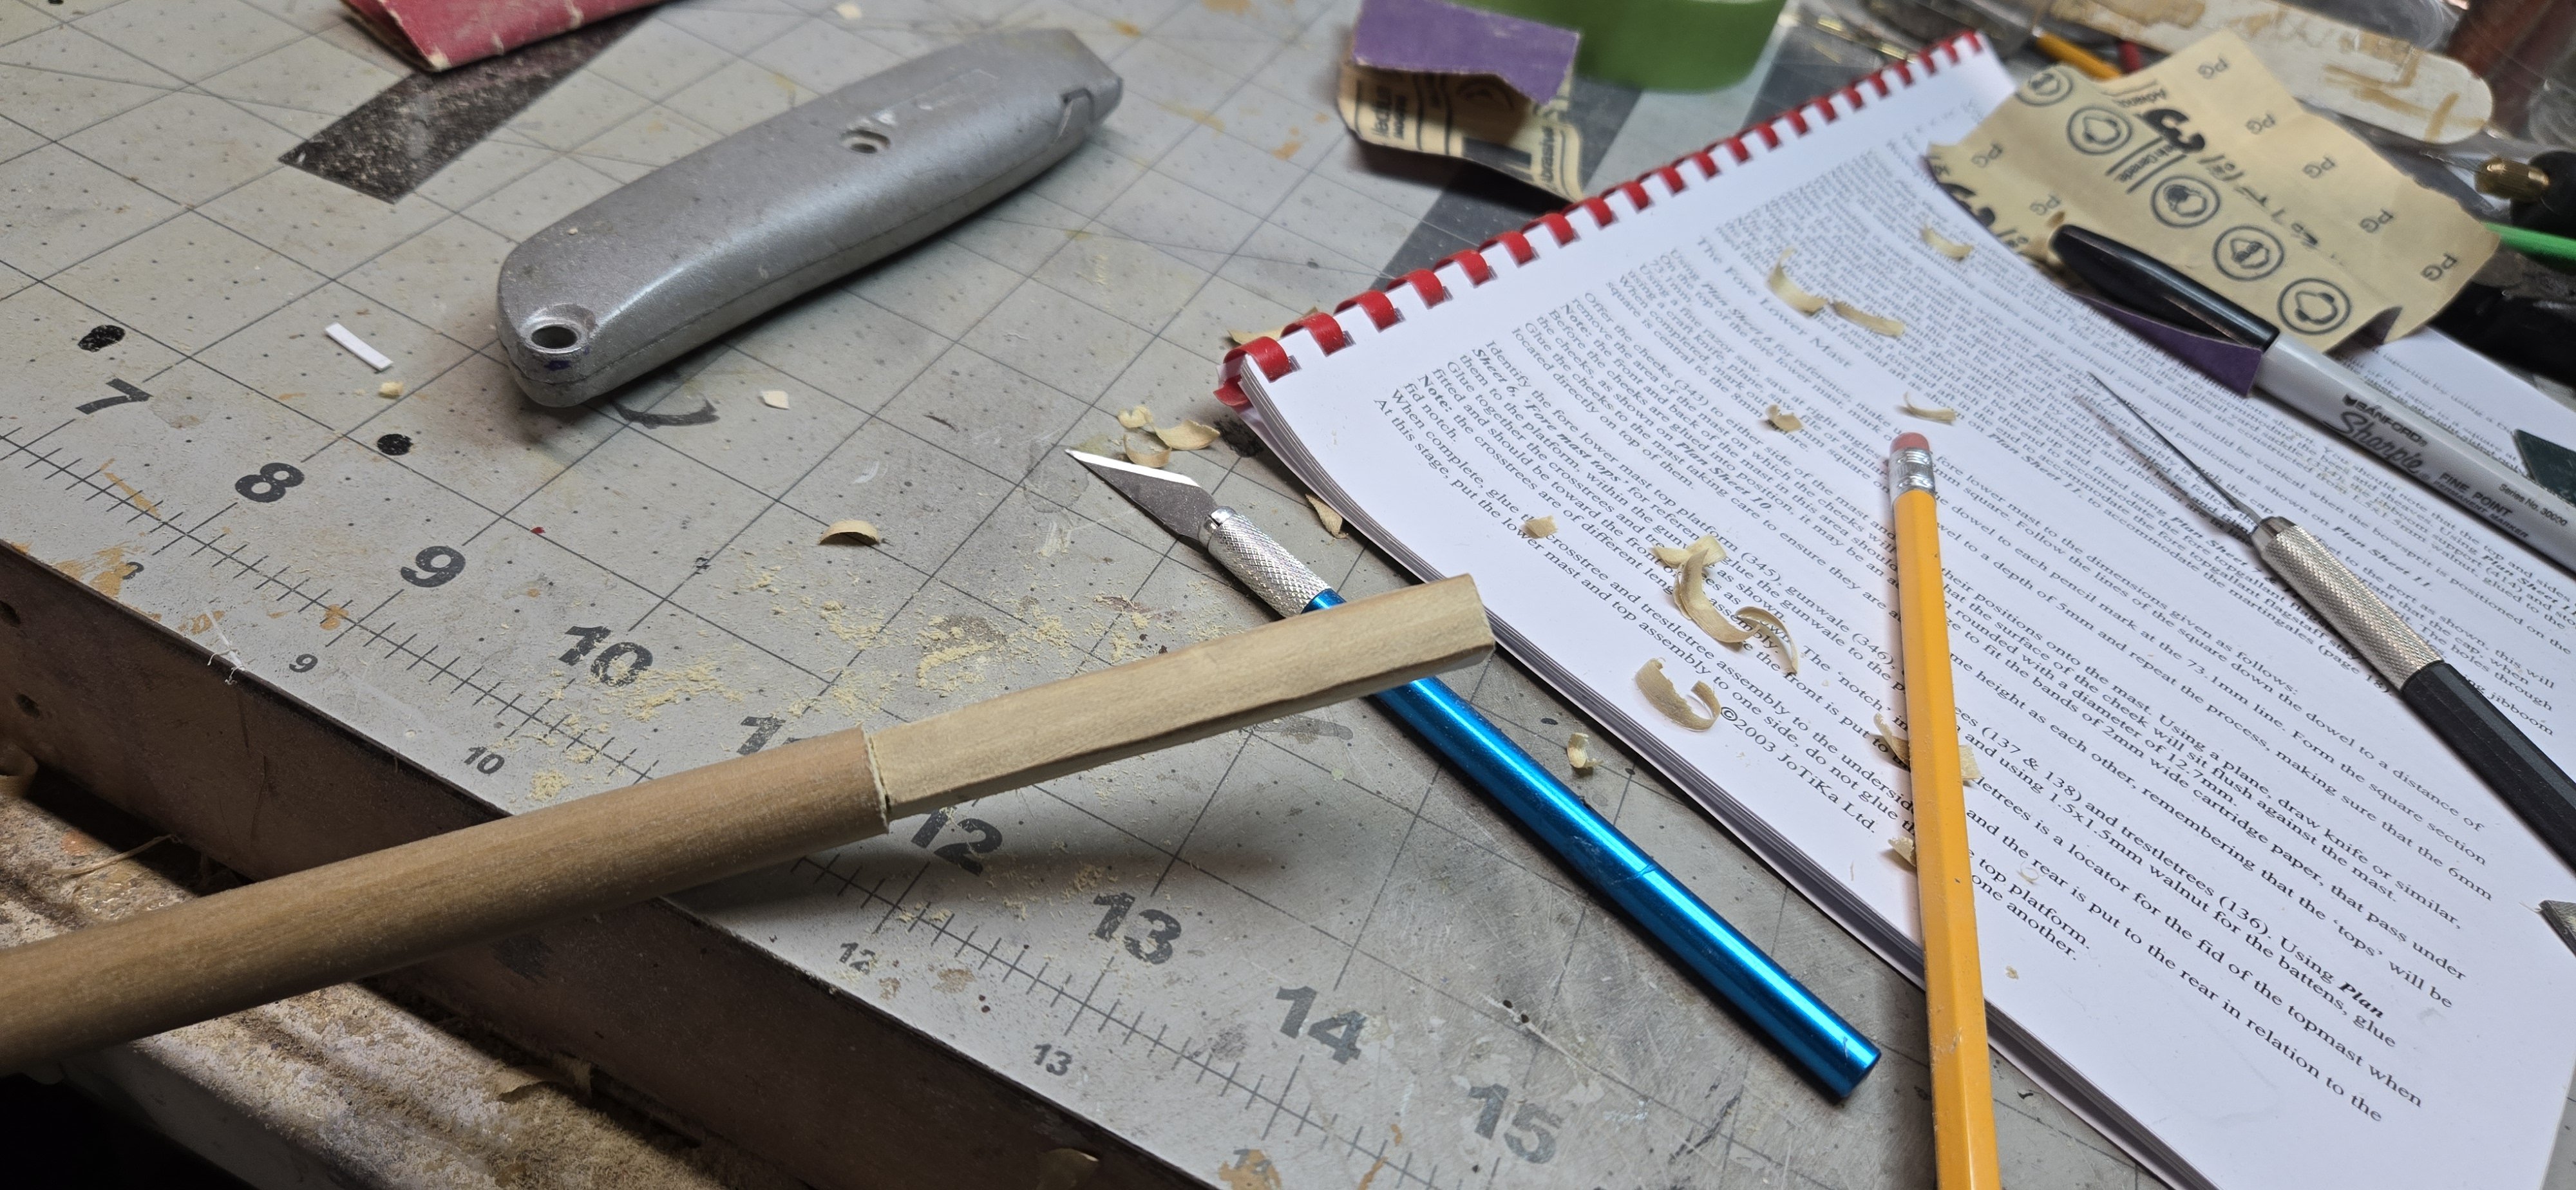
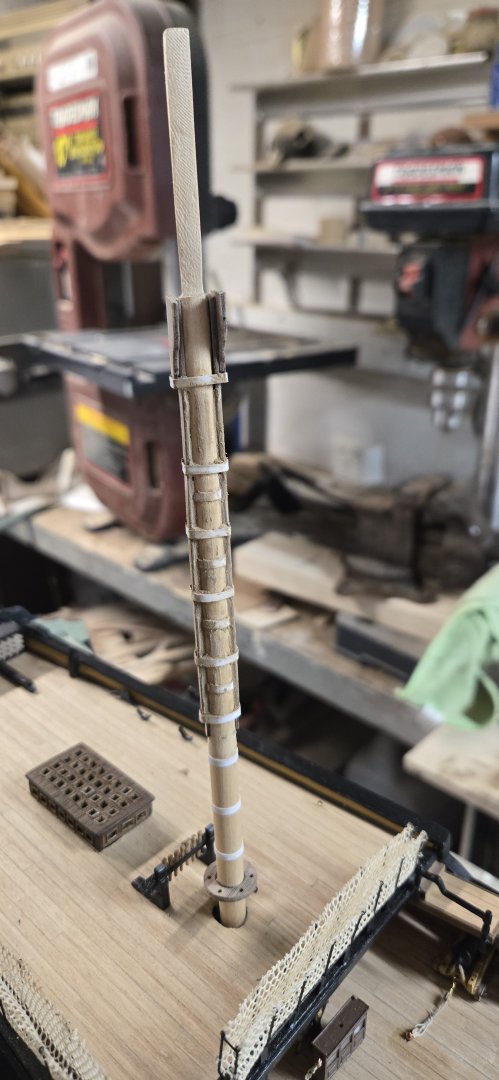
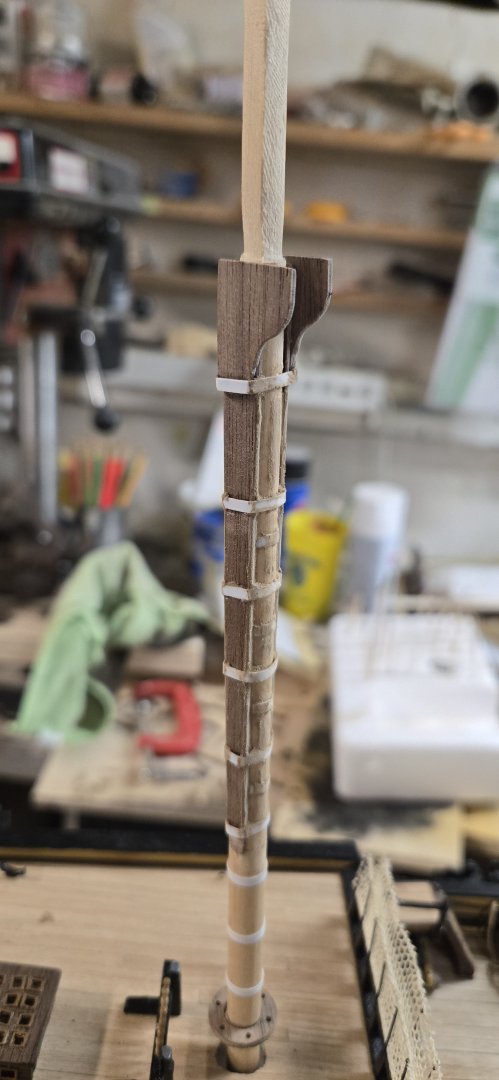
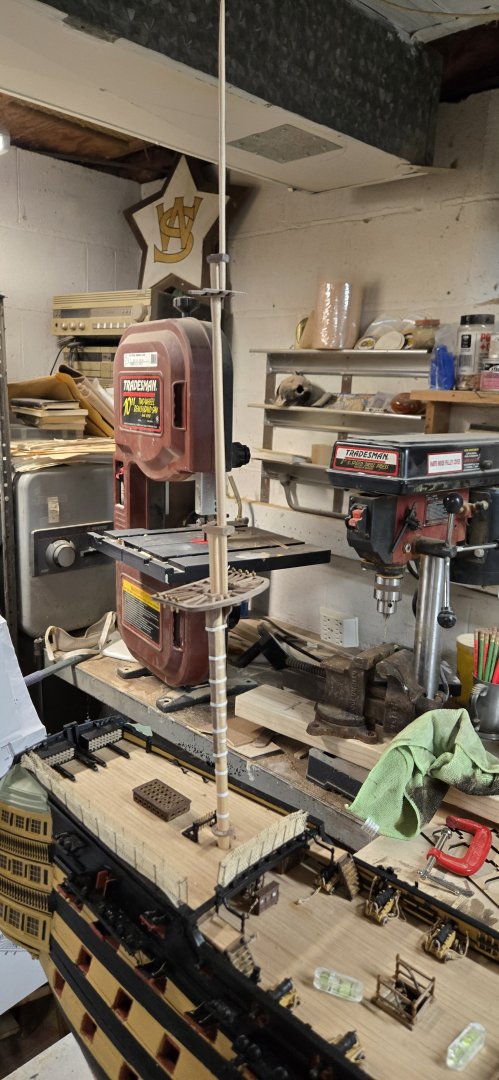
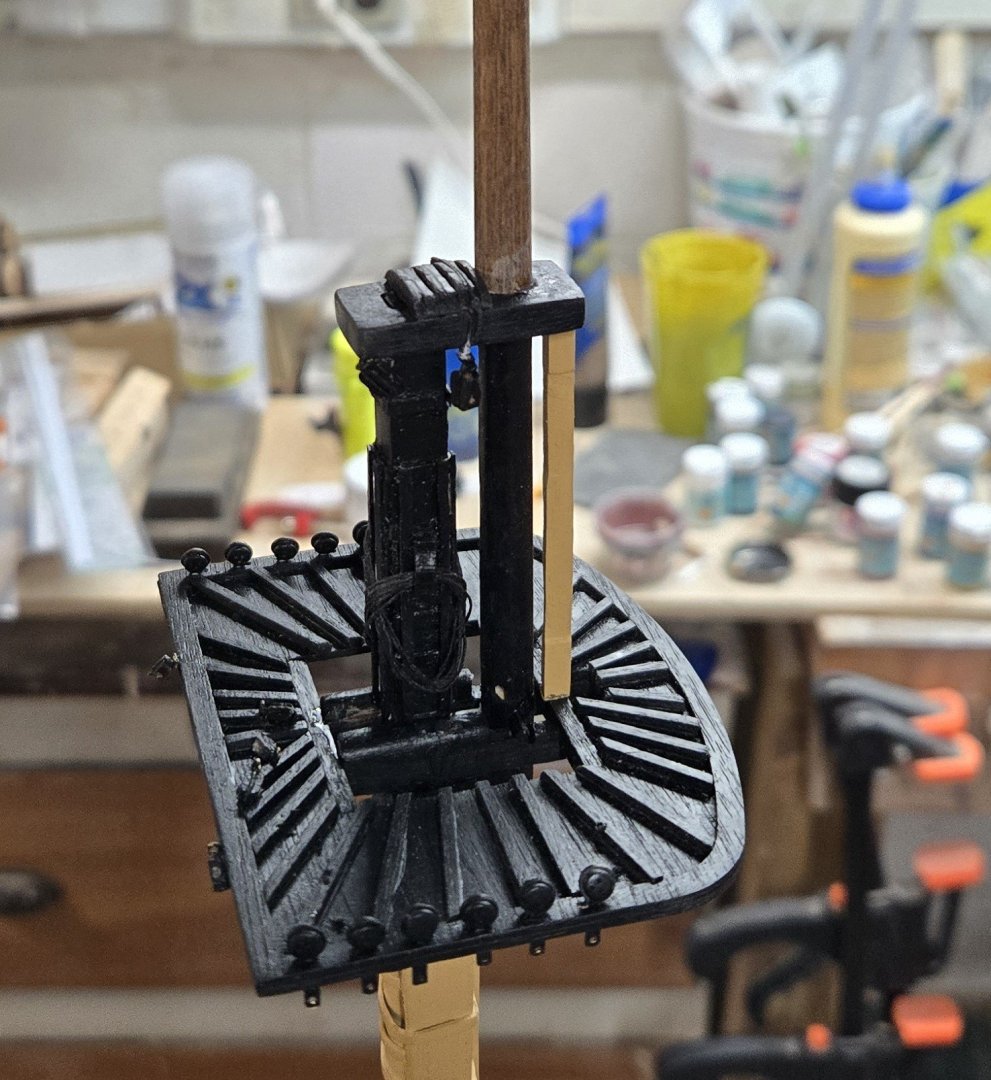
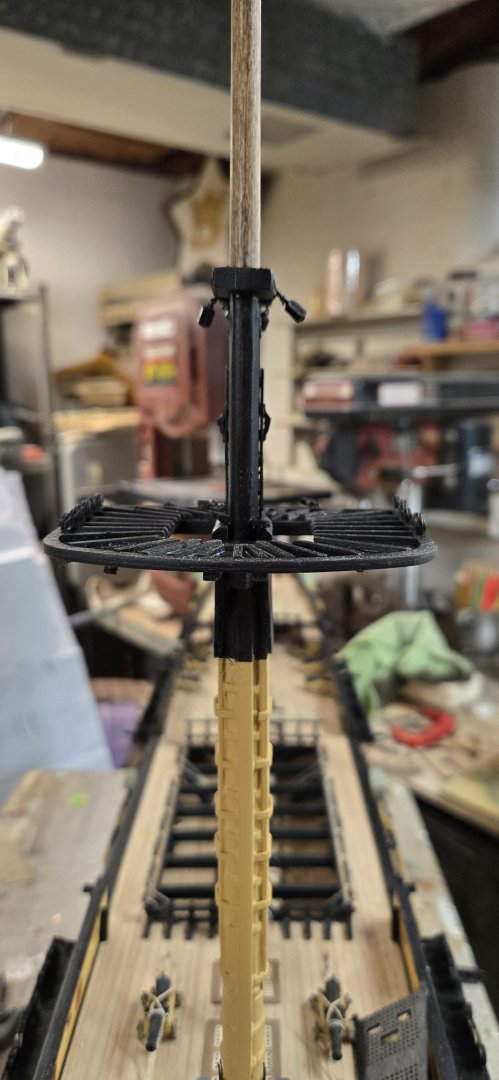
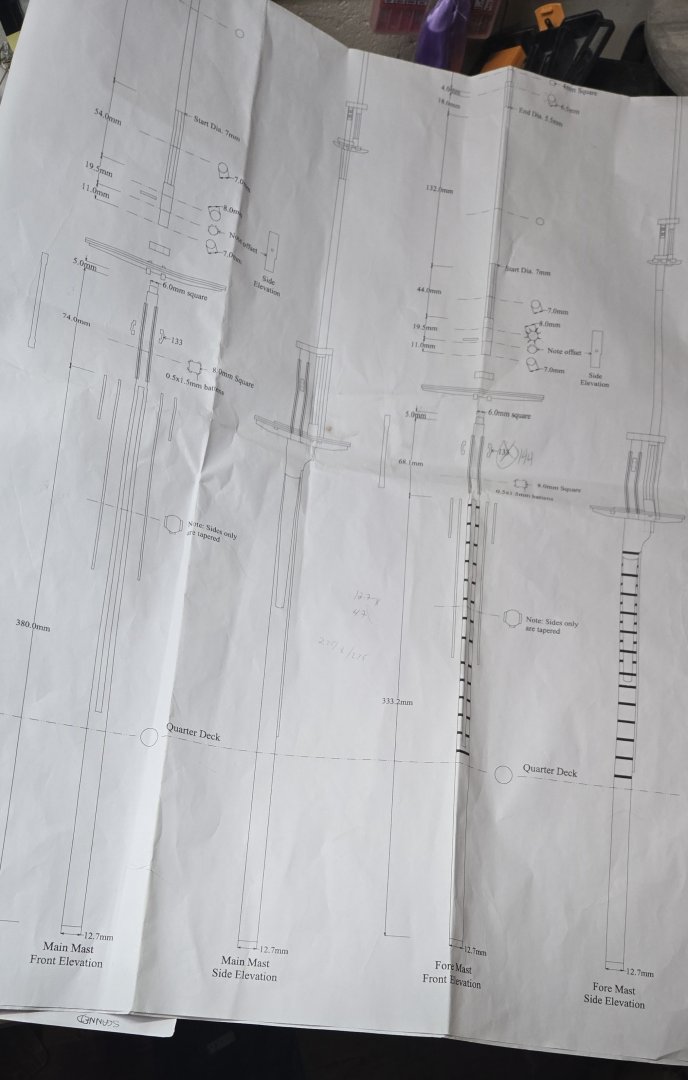
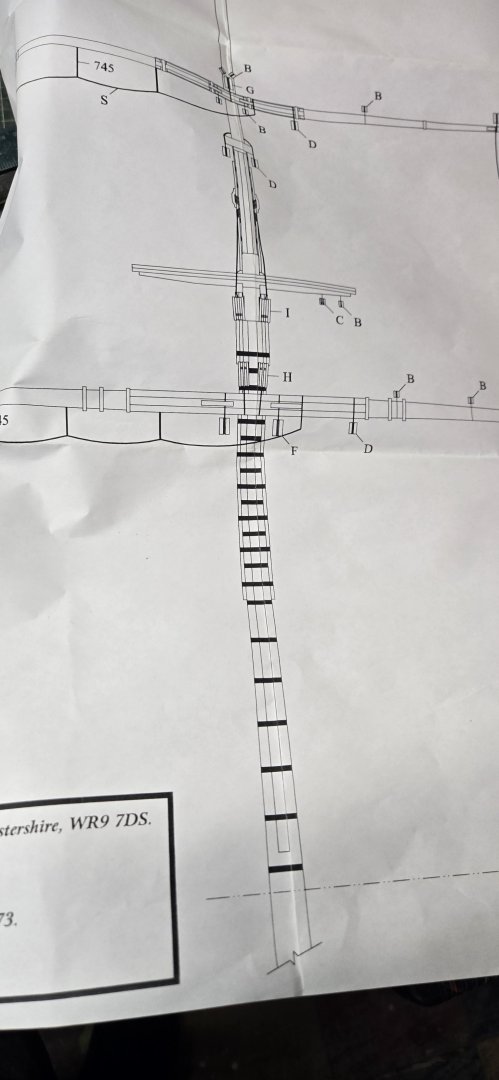
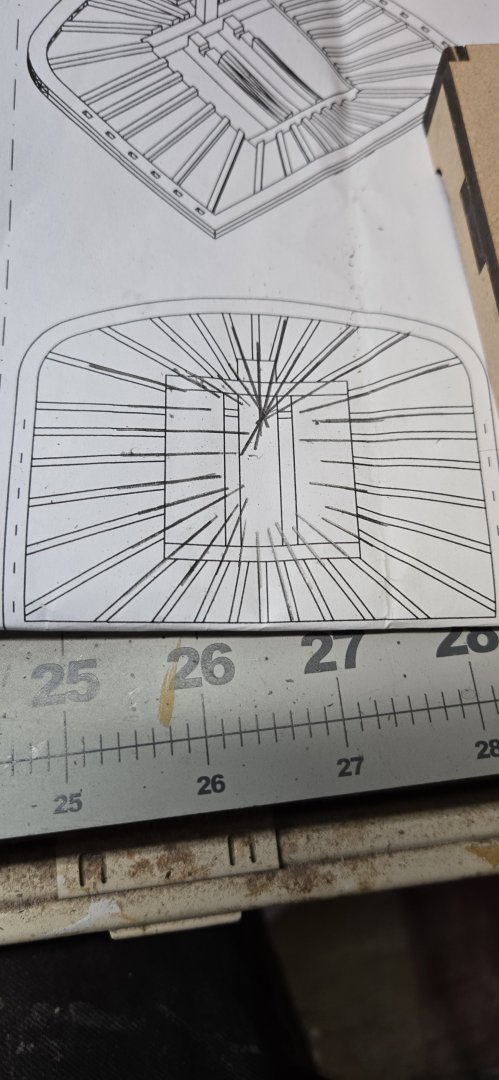
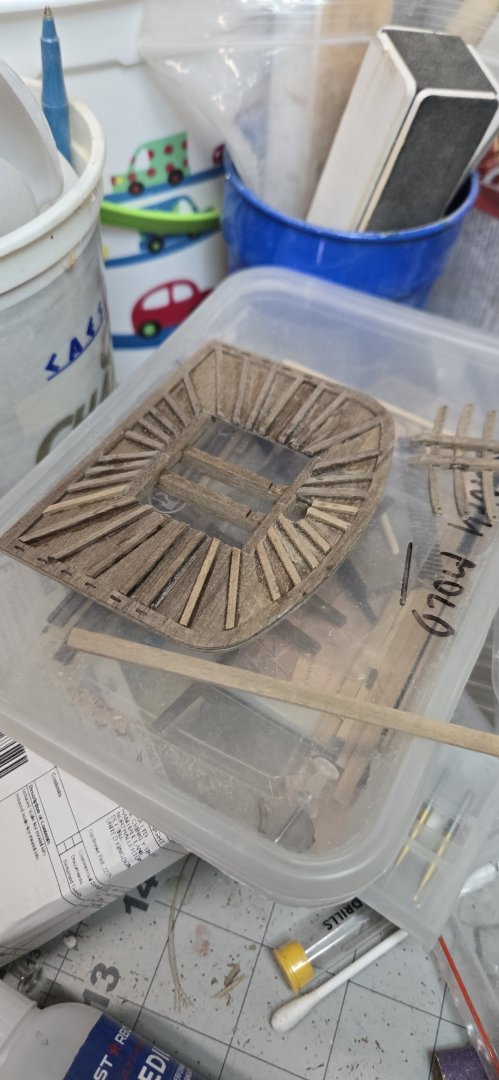
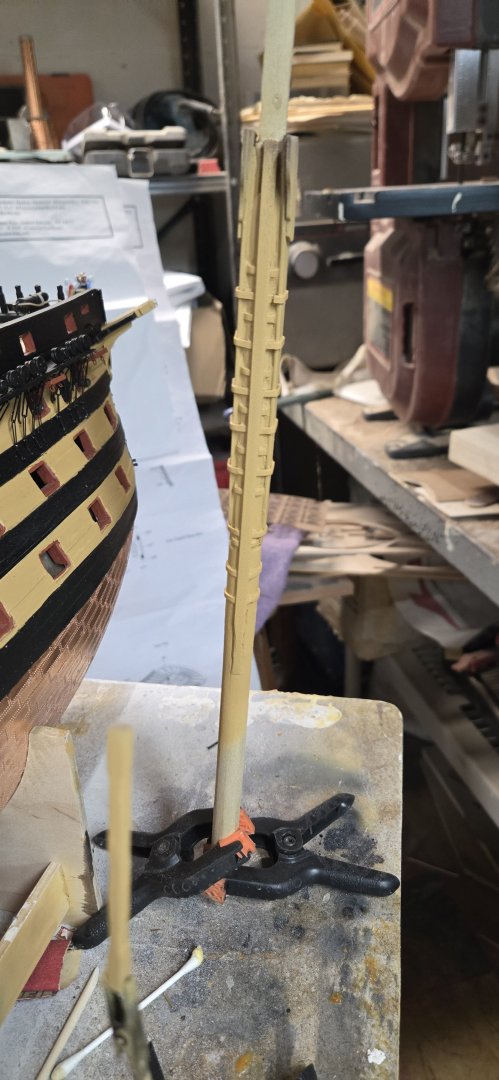
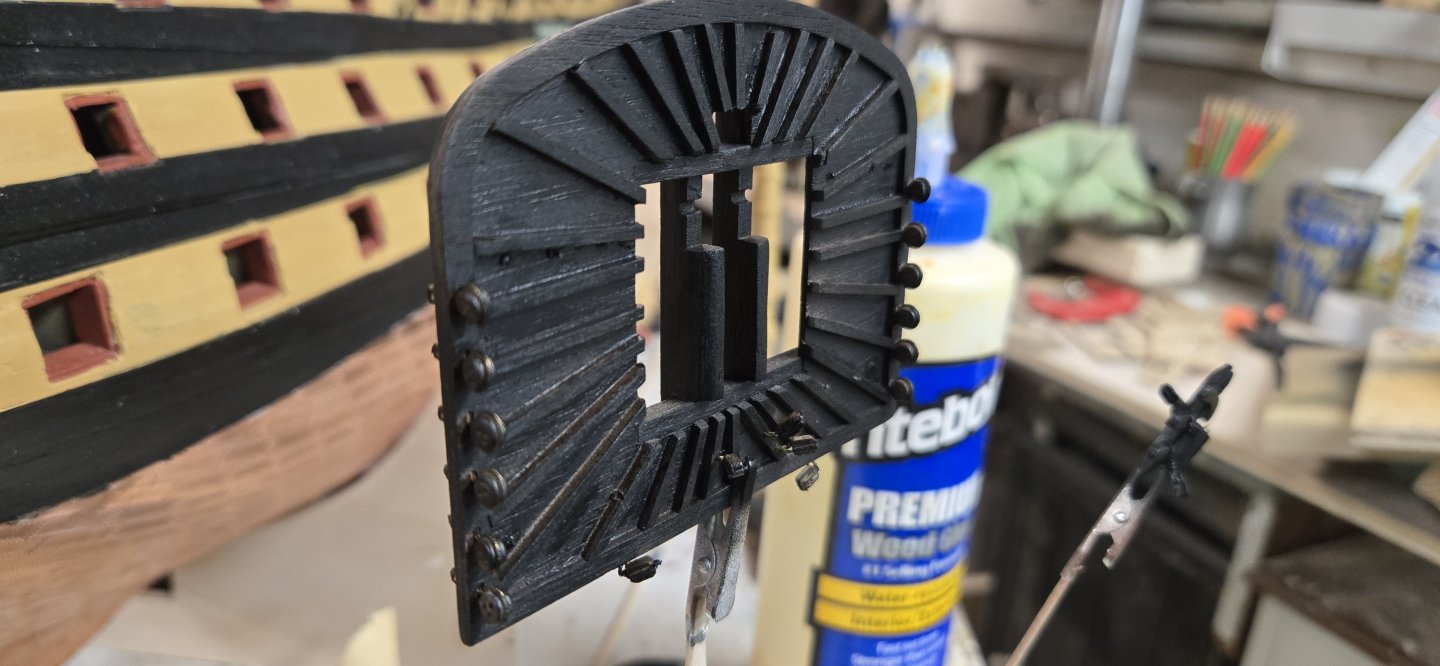
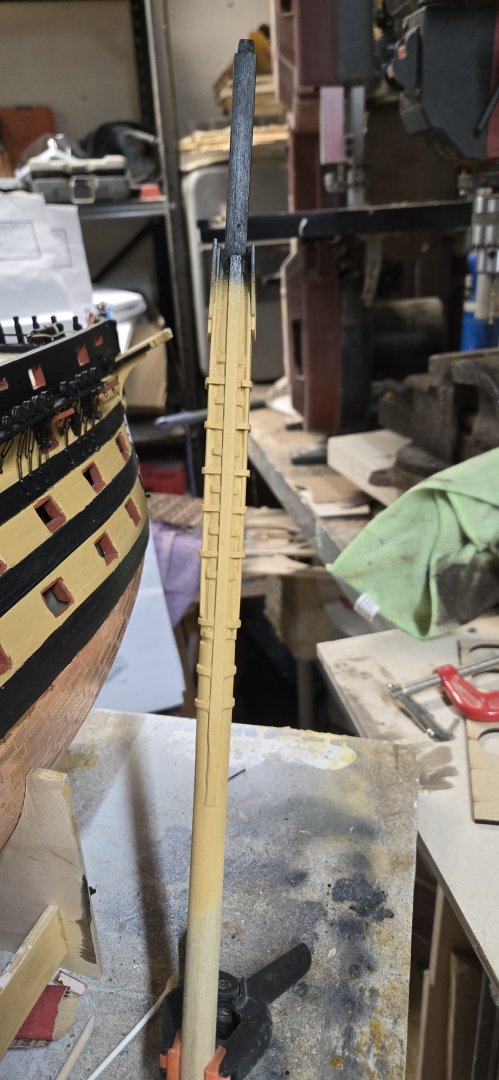
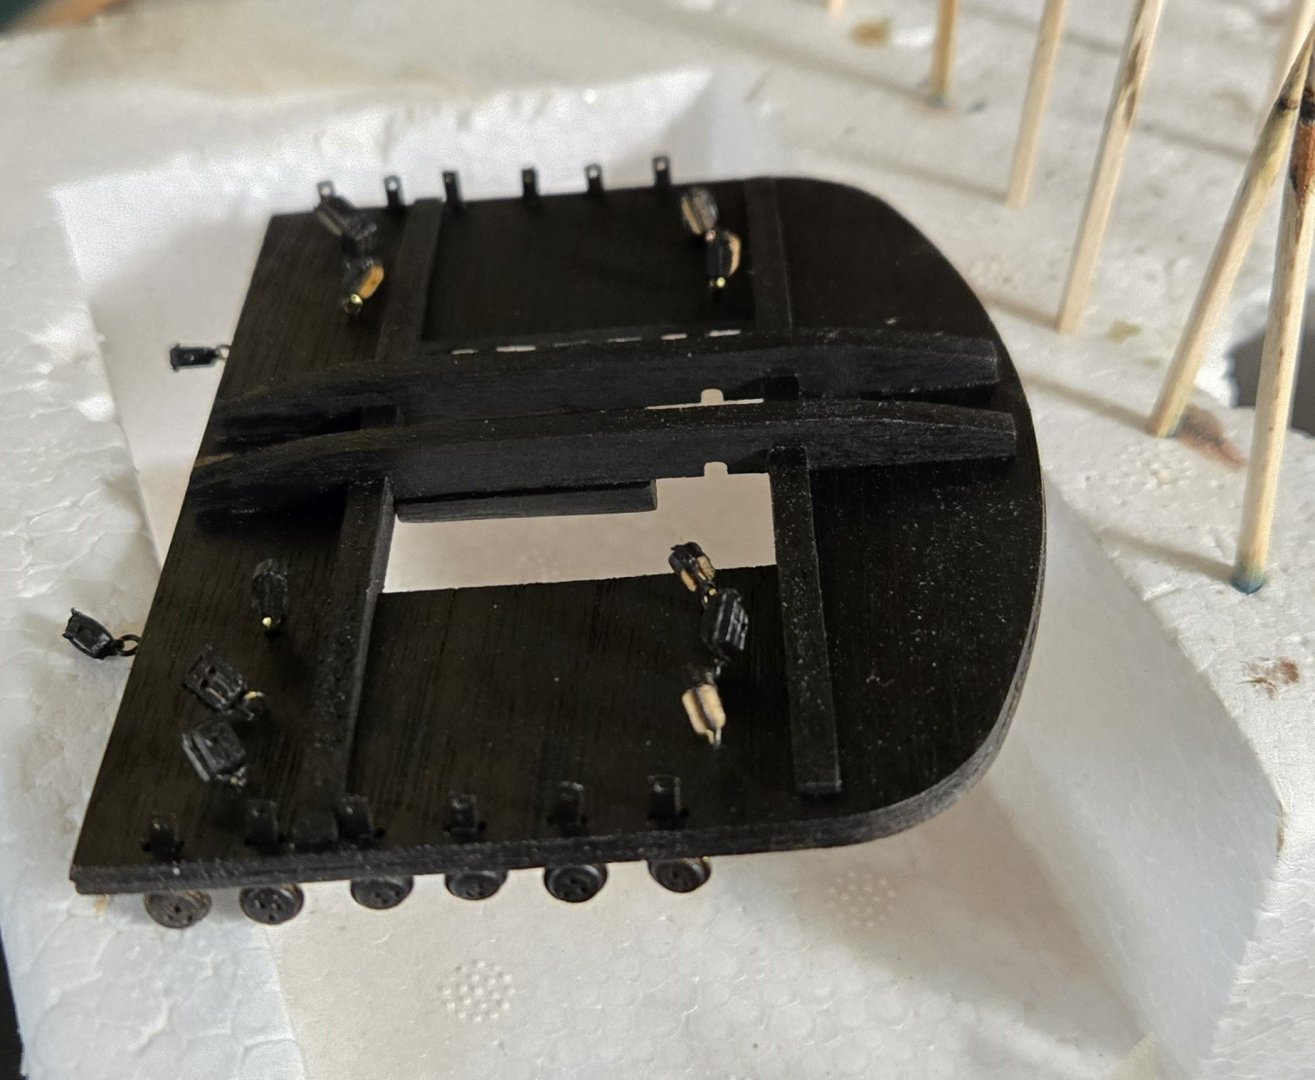
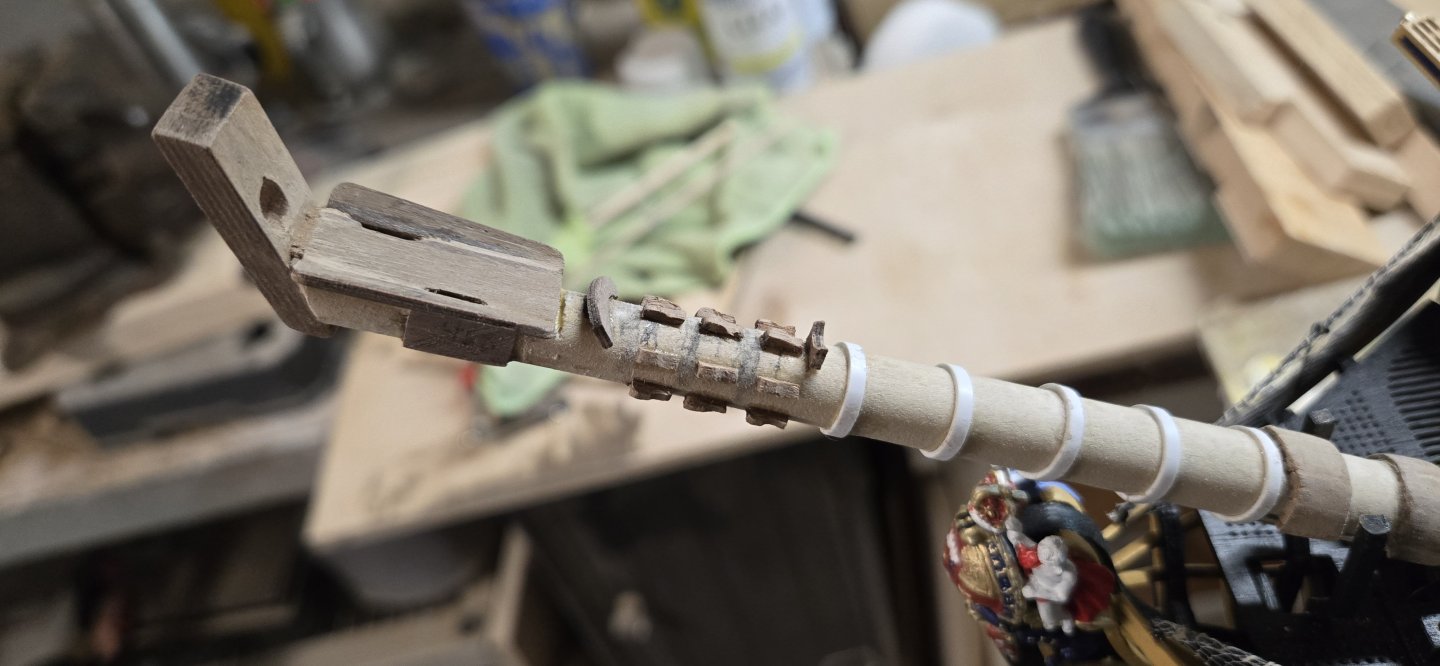
Started painting the bowsprit and also continued working on the foremast. The directions are very specific, but I think they require an advance understanding of how model ship masts are created. I don't have that experience and while most of the parts are laid out in various areas of the build, they are not intuitive. In addition, many builds kind of gloss over the creation of the 3 masts, focusing on the end results. That makes it hard to understand or see behind the scenes. Using Longridge's book has helped and there are a few blogs that provide some detail. First, the pics and results you're going to see are indicative of a very inexperienced builder, but after getting to the finish of the foremast build up, I can see the logic and beauty of what they are trying to do. I am going to try and lay that out here for prospective new builders who will be in the same quagmire as me!!! The first and biggest hurdle is the installation of the metal banding that keeps the mast in one piece. I believe the real mast is a set of long square/rectangle beams that are put together in various fashions (dowels, tenons, etc) and held together with these bands. The directions call for the use of provide cartridge paper. I'm not sure if I received that and I assume in the USA, they are talking about construction paper? As others have done, I used styrene, 2mm wide strips. They suck and the hobby shop near me doesn't have any copper or brass strips close to that. This stuff breaks all the time, the glue will stick INSTANTLY to my fingers but NEVER to the damn mast. NEVER NEVER NEVER!!!!! My first attempt at creating the cheeks went ok. I now have a better, smaller plane to help shape areas for the future (it worked better when doing the main mast). However, before putting the cheeks in place, you have to add bands that the cheeks will sit on top of. There is nothing mentioned about how this works. Do you have to file down spaces on the undersides of the cheeks to accommodate the bands? I didn't see that anywhere. There aren't a lot of clean pics of the live ship to help and none of the 3 books really dive into this. I think that looking through Robert29's build it appears that he filled in the voids between the cheeks and bands and the paunch and the bands. That is what I did. You have to really be careful attaching the bands, since this is a dowel, it can be hard to make sure the bandings are ...horizontal to the deck?....straight. You can see that some of mine tend to wander....who I am kidding! They all wander. I place the first round of bands that go under the cheeks and then installed the cheeks to each side. After that, there are bands that go around the outside of the cheeks, I opted to cut these so that the open ends would be behind the rubbing paunch on the front of the mast. As you can see above, I added wood putty to the cheek voids and then the paunch voids. Using small sanding sticks, I was able to remove as much as I could before painting. One note: The plans call for banding down to the bottom of the mast. However, you need to add the pike rack and this WILL NOT fit over the banding. So don't add the 2 lower bands until you've added the pike base and top first. Then add your bands before finally adding the pikes. While that was drying, I worked on the 2 platforms. The first is the main, larger one (#345, 346). These go together fine. The other is the cross tree/trestletree. Once you make the platform, you have to add 1.5x1.5mm strips to create the battens. It's strange that this is on top, forcing sailors to have to navigate this while up there, especially in any type of moving seas, where movement up high would be amplified. I suppose there's a reason! I laid the platform over the plans to get a feel for where the battens go. Some folks have traced the locations on tracing paper and transferred them. Whatever will work! The plans also mention the addition of bolsters to both platforms, these are 3x3 or 4x4 pieces of walnut that need to be shaped into quarter round pieces. I was able to use tweezers or small clamps to hold the small pieces and use a file to shape the quarter round. You can see where they need to be placed: While working on this, I was also working on the next higher mast or Fore Topmast. At this point, I was still unsure of how it all went together. Creating the 8 sided shapes is hard. I have experience and am good at drawing lines on wood that need to be cut, just holding a pencil and dragging it along a straight edge. That seems to be the way here, but a dowel isn't really straight and if you're not careful, you will drift as you draw. I tried placing the end of the dowel over the plans and marking the corners of the octagon at the bottom and then trying to draw lines down. I did my best, the next step was creating a small octagon that is off set from the larger one. I wasn't sure why, but here is how it will all fit! This platform will slide down the lower past square and rest on the bibs. You must push the platform all the way forward. The rectangle foremast cap (#66) fits on the lower mast (the square hole) and facing forward has a round hole where the fore topmast will slide into. I don't have the blueprints with me and will edit this if I have to, but I believe that when you install the whole mast, you need to drill a hole into the lower end of the topmast so that it rests correctly on the platform. There is also a hand mast (#149) that will be placed on the back of the mast to sit on the platform and under the cap. This creates strength to the mast as the stays pull on the mast and keeps it from bending or raking back....just some sailing fyi. I lost my hand mast. As I have been cutting away pieces from the sprue, poor old #149 must have gotten separated. I am sure it's in the box, but I can't find it. It was easy enough to create a new one from scrap. The topgallant mast will fit through the top mast cap (#88) and the base of the t'gallent mast with a fid will rest on these cross trees. I added the bolsters before all this, but the directions say to glue the bolsters after you've installed all 3 parts of the mast. Before adding the top and t'gallant masts, you'll need to add banding to the lower mast square tops and then add 0.5x1.5 strips to the 4 corners...can't do that until the lower mast is in place. The blue prints also require jeer block strop cleats on all 3 lower masts squared sections...but they state it as part #133, it is #144. Another vague part issue are the foremast saddles (#348 &349). It references plan #10 but that too is vague. The directions have these terrible 'squared off' pictures of the various platforms with an isometric view. Especially the pic of the cap block. However, I saw on one of the other blueprints a side view of the cap and you can see that you need to glue the pieces so that 2 of the smaller saddles are sandwiched in between 3 of the larger ones....so 348/349/348/349/349/348 or L/S/L/S/L I think that the process would be to put all of this together, keeping an eye on everything being plum to the deck. After, you would then go after adding the various deadeyes and blocks. I opted to add all of the blocks that I can see as of right now before. The deadeyes went much easier than the channel deadeyes. Making the various blocks was ok. I could have done a better job of trimming the excess string off the tops of the blocks and will work on that. I don't like that most of the single and double blocks are attached to the platforms with eyelets. I don't like that they stick through the platform decking. You can see the pin holes, not happy. Once done, I began painting it all. I have opted to paint the blocks and deadeyes instead of leaving them either natural or stained. I may have to run a drill bit through them, but using the airbrush on the channels, I didn't have any issues with those deadeyes. Just some pics of painting, these are only the 1st or 2nd coats of thinned paint, but it's starting to lay down....


-
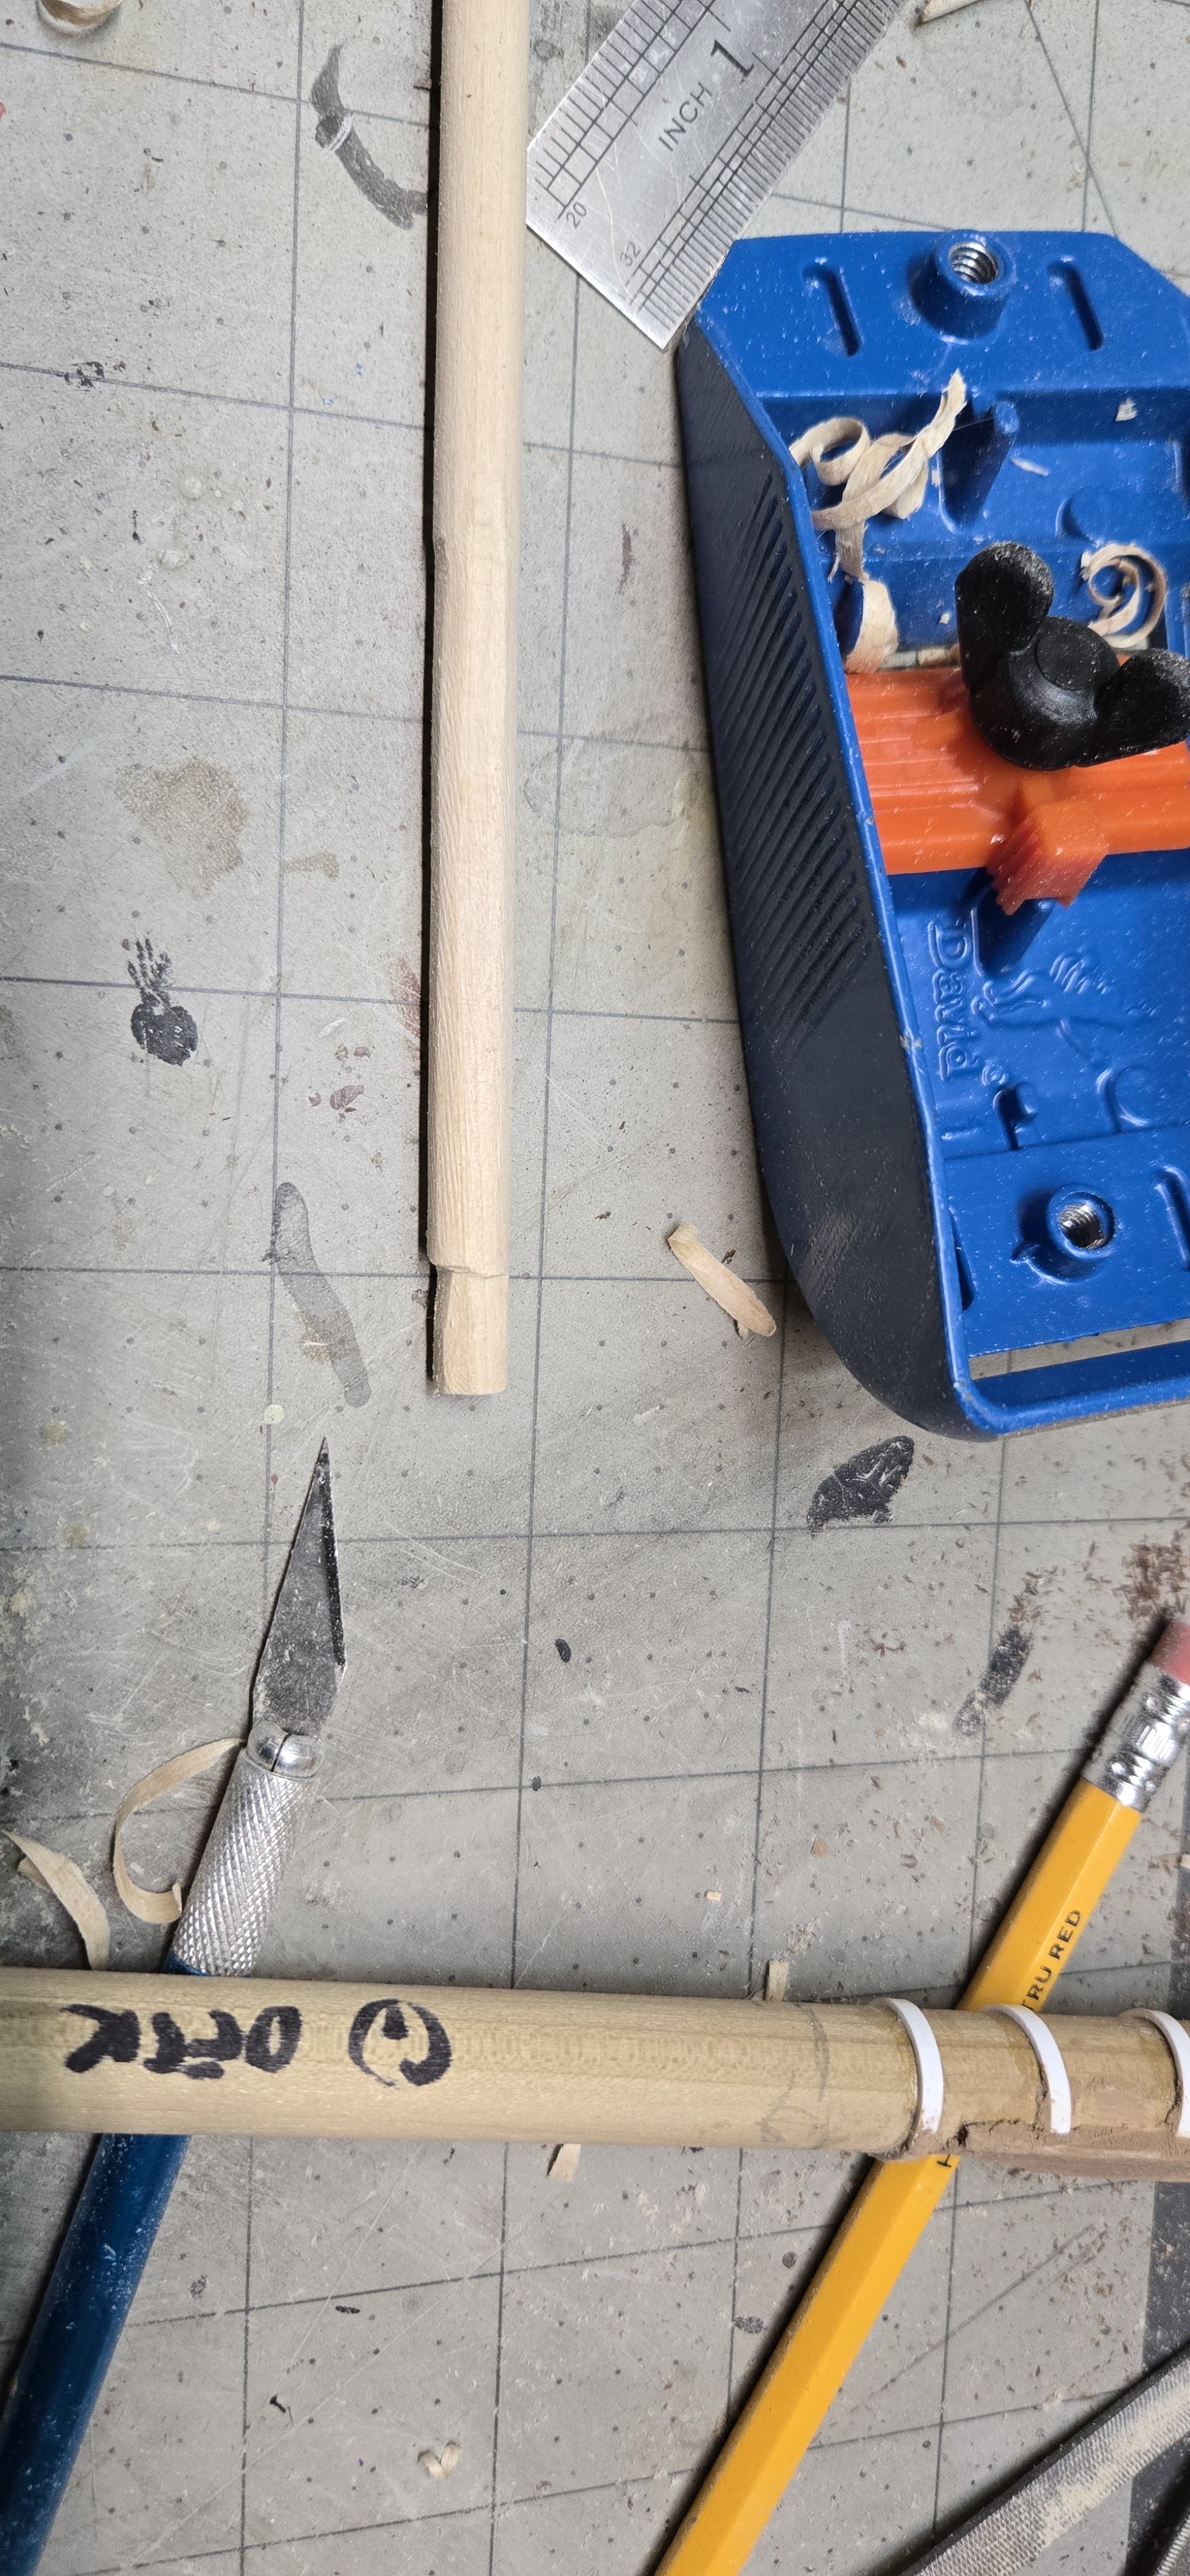
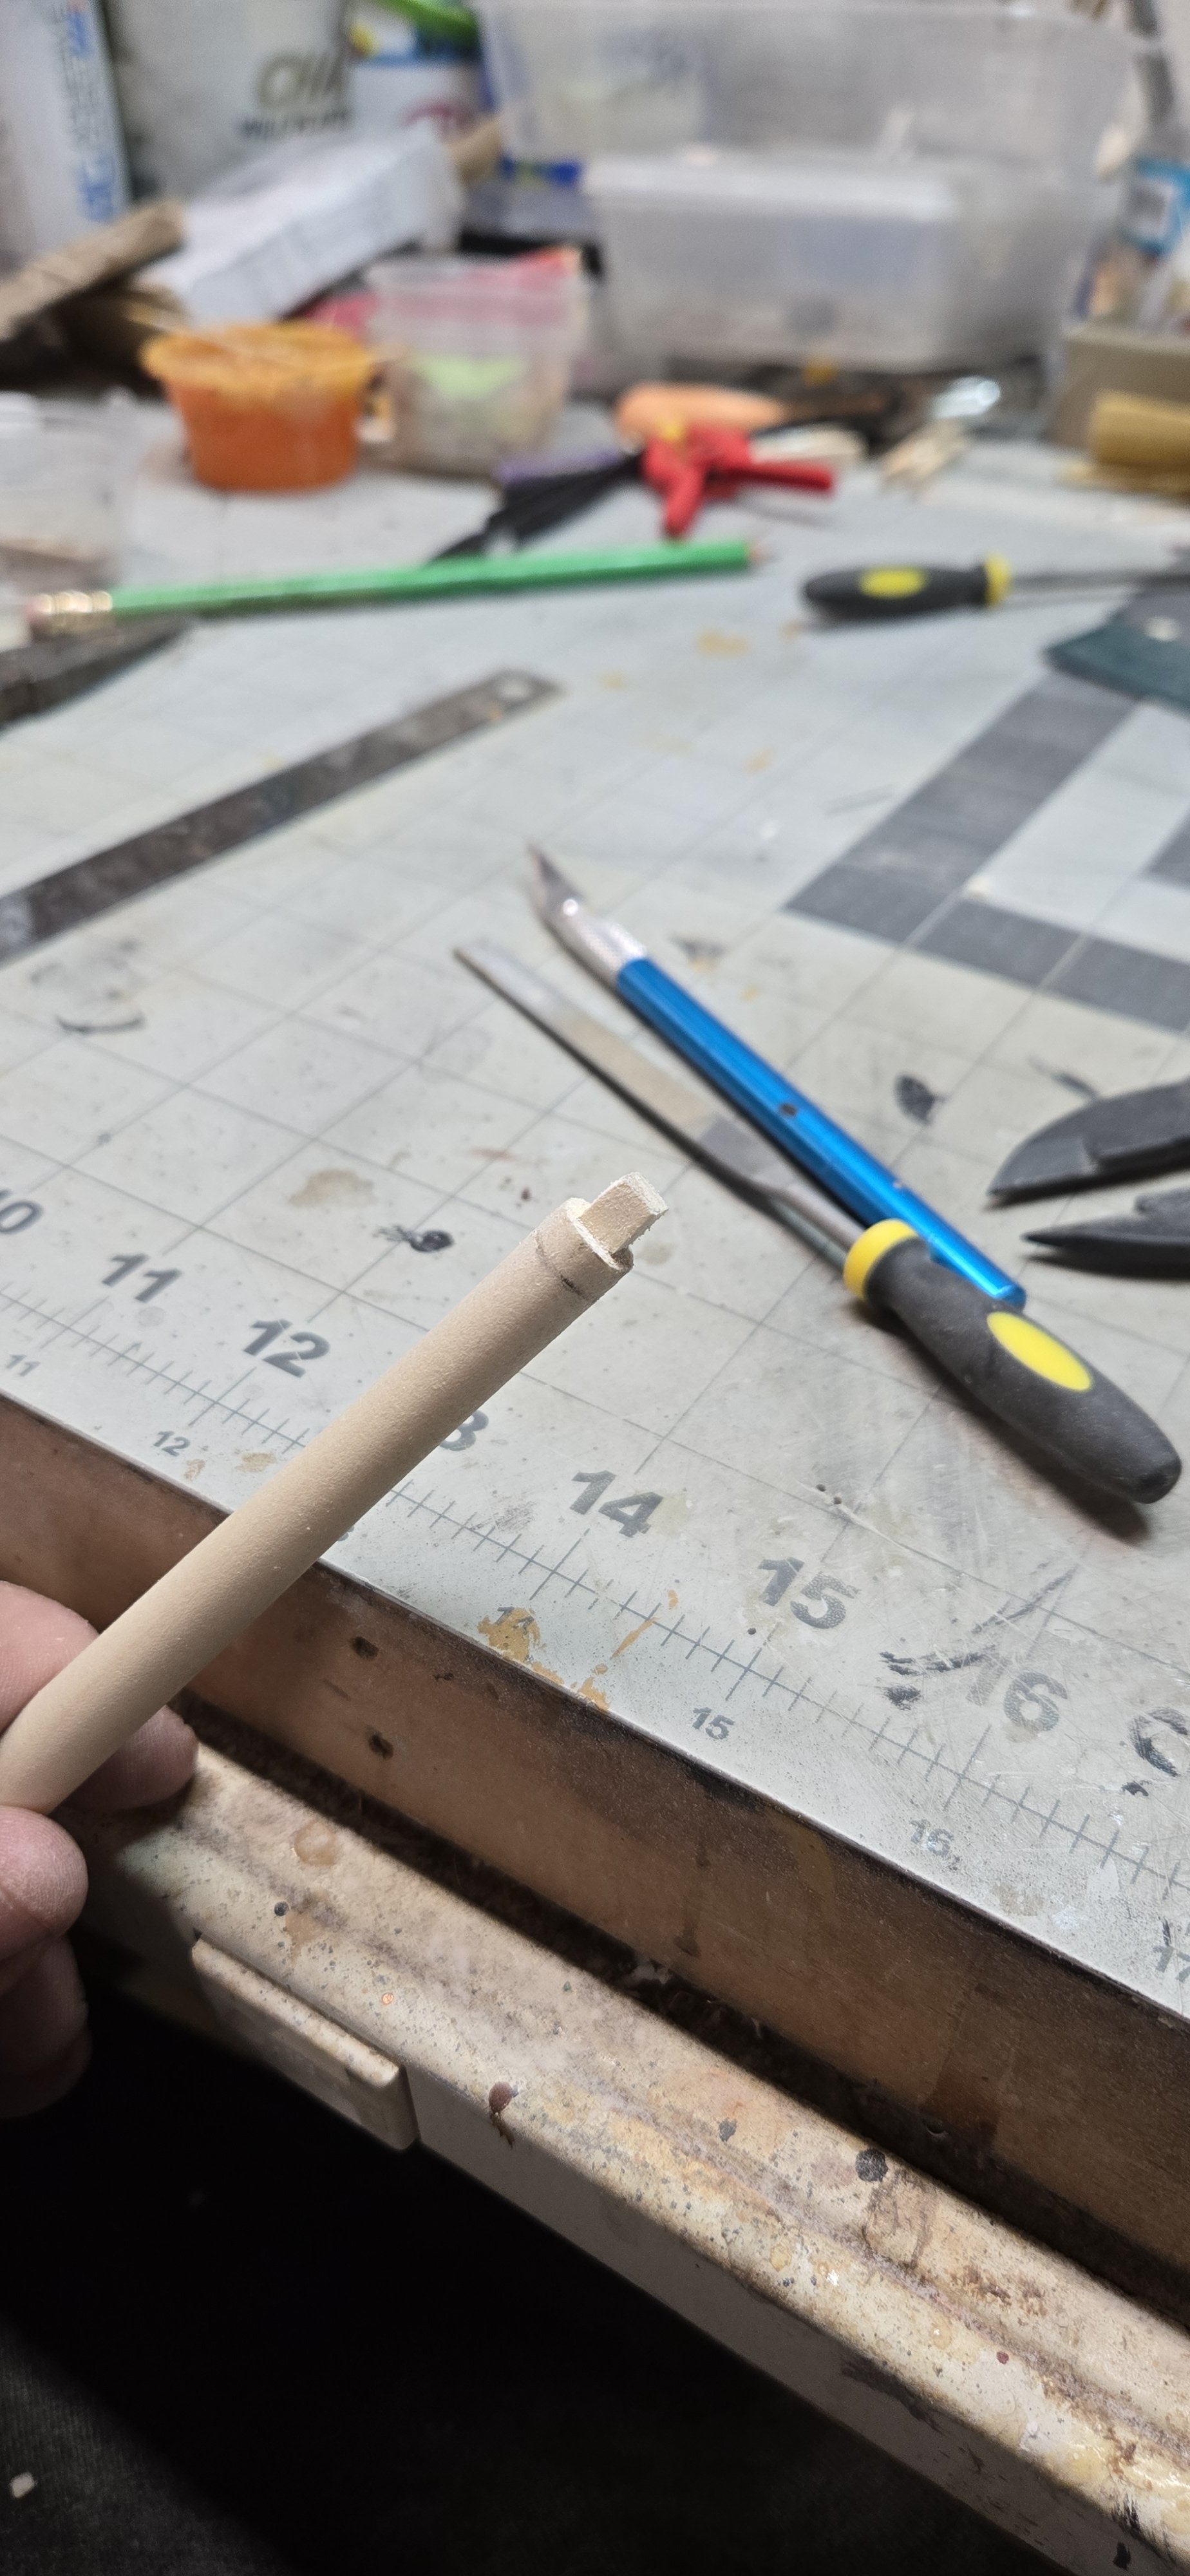
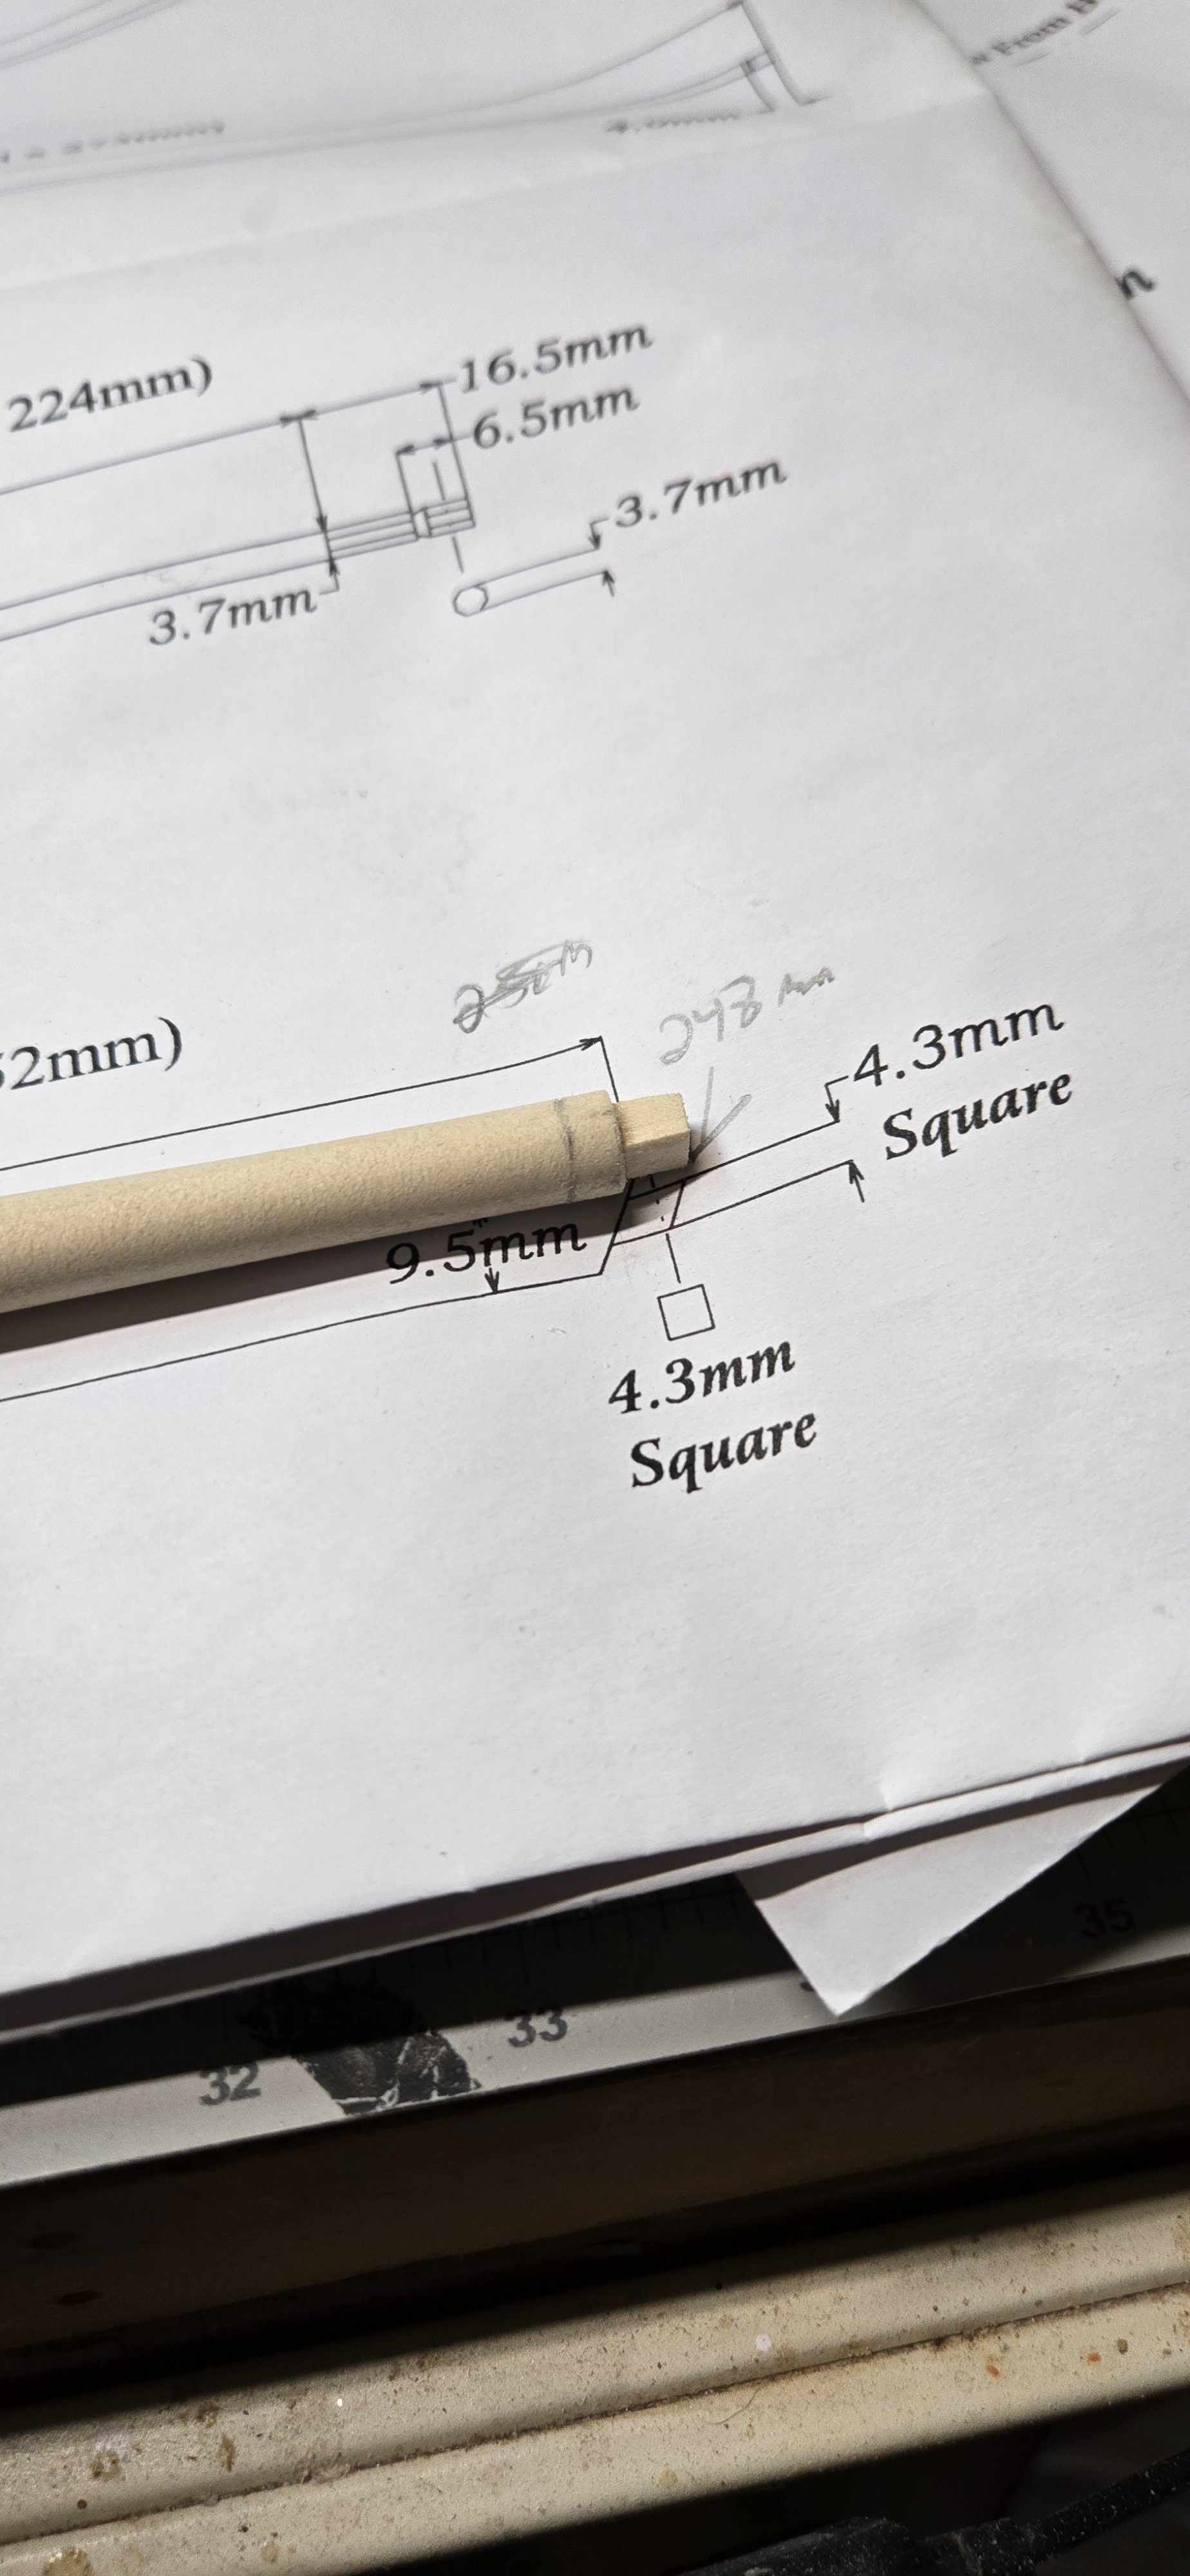
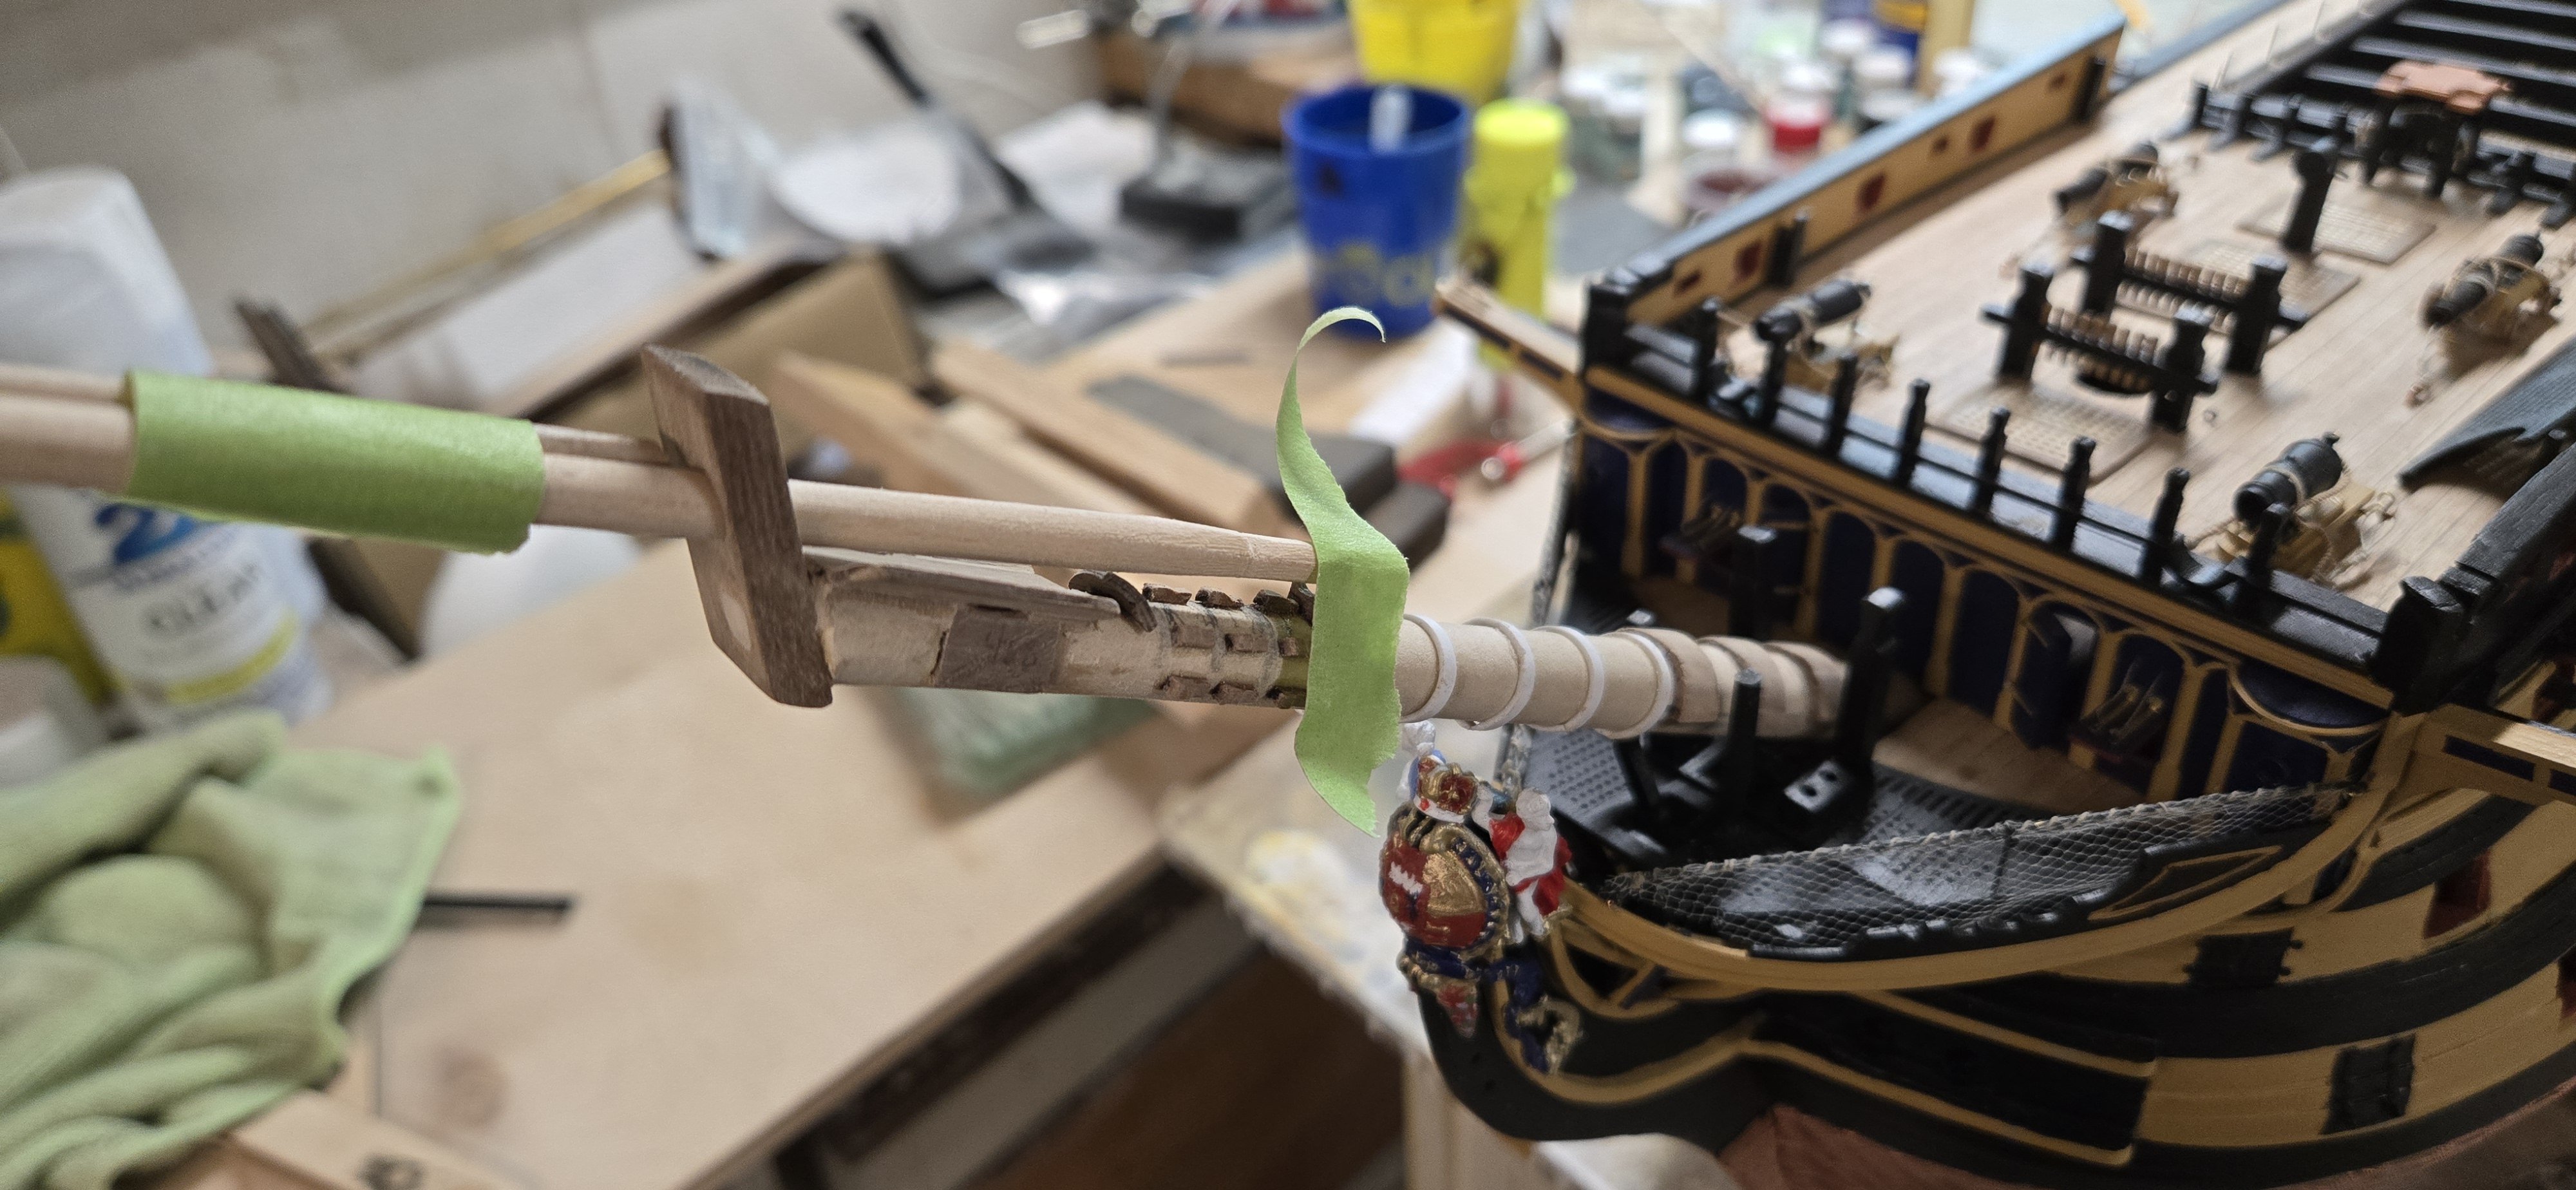
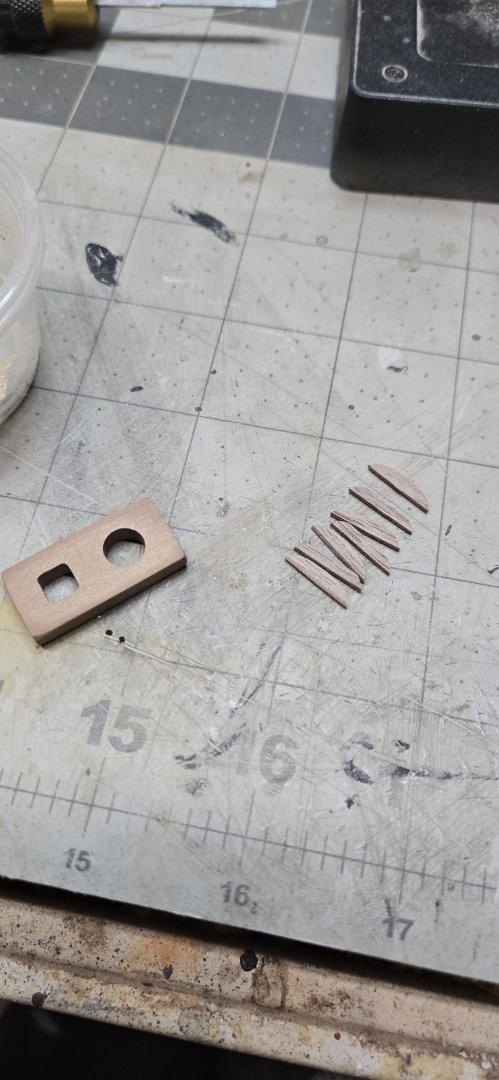
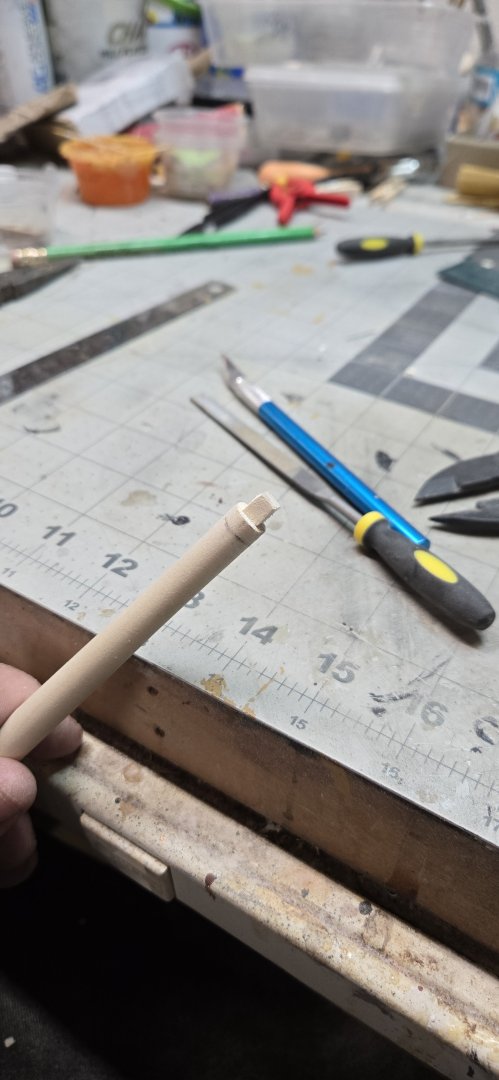
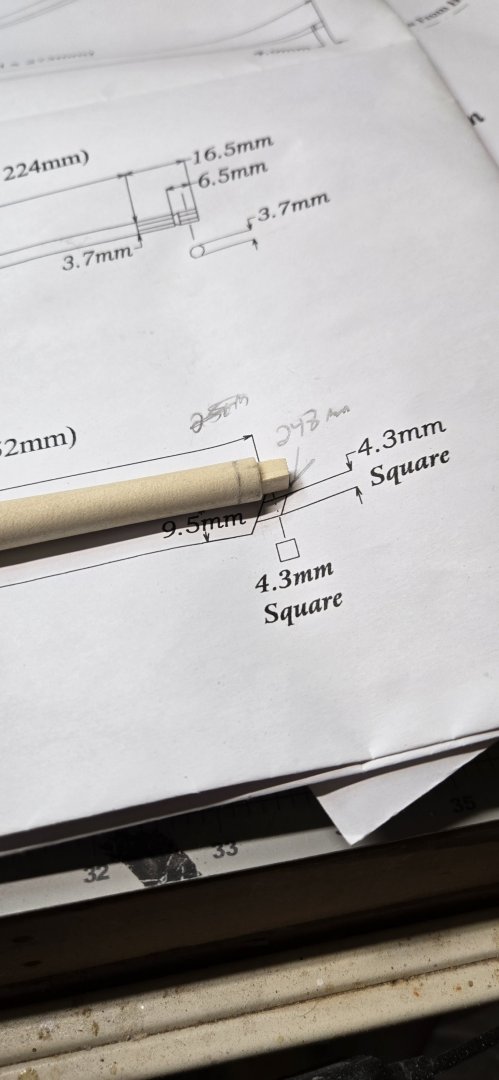
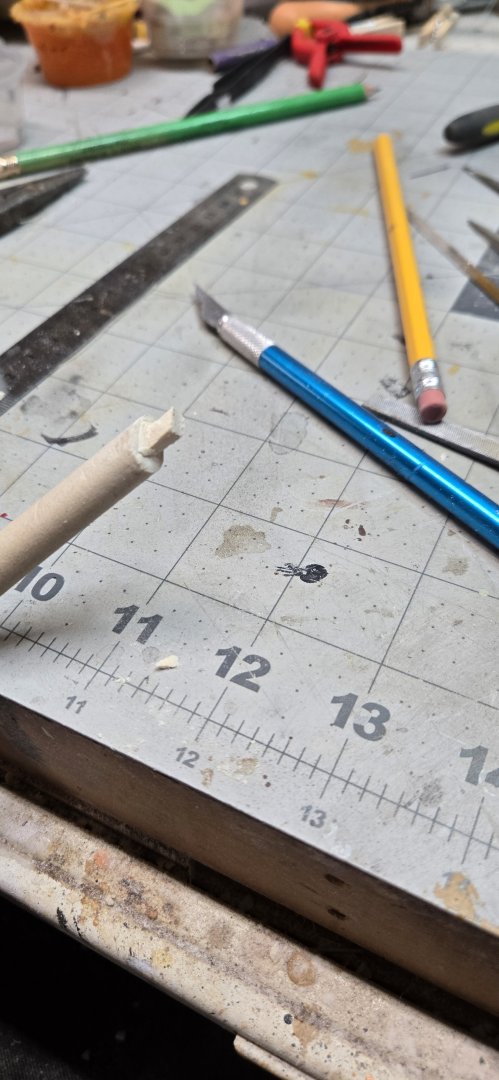
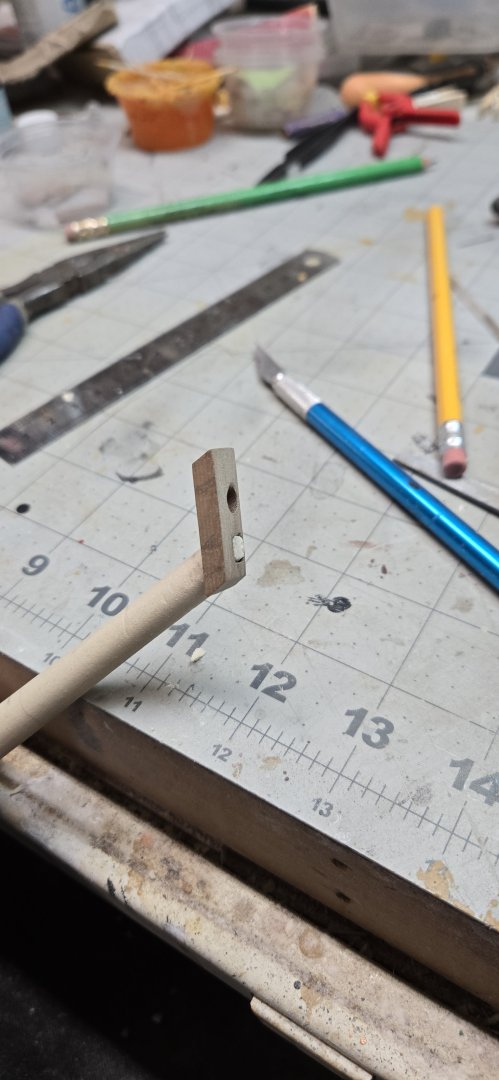
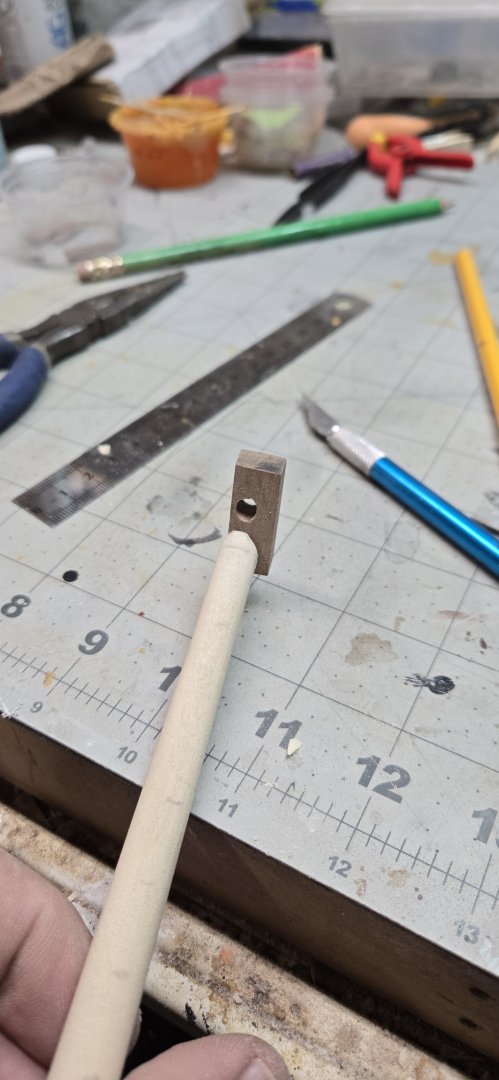
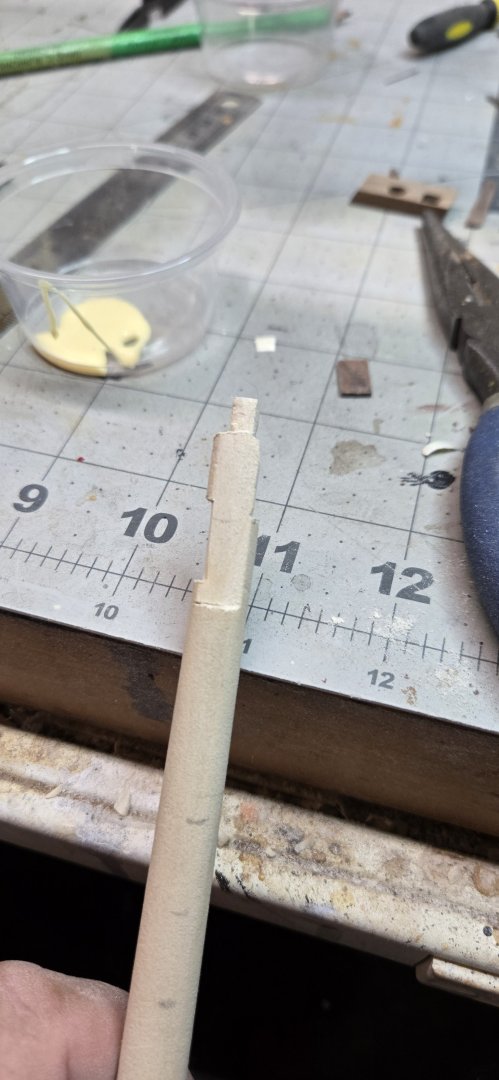
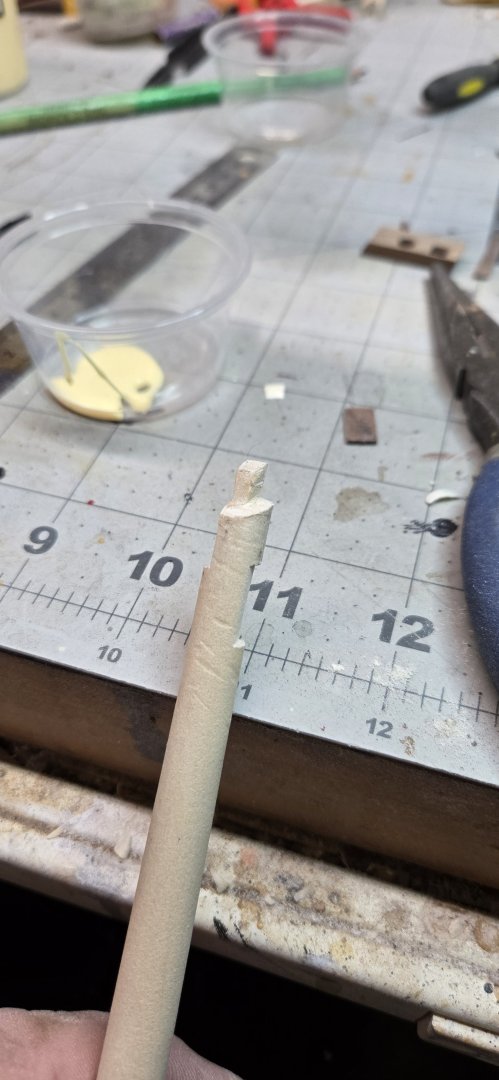
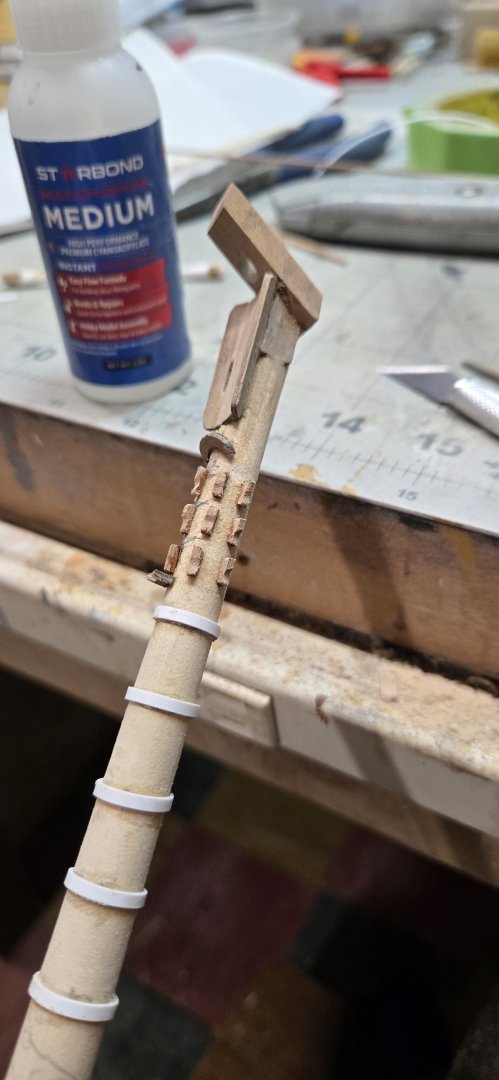
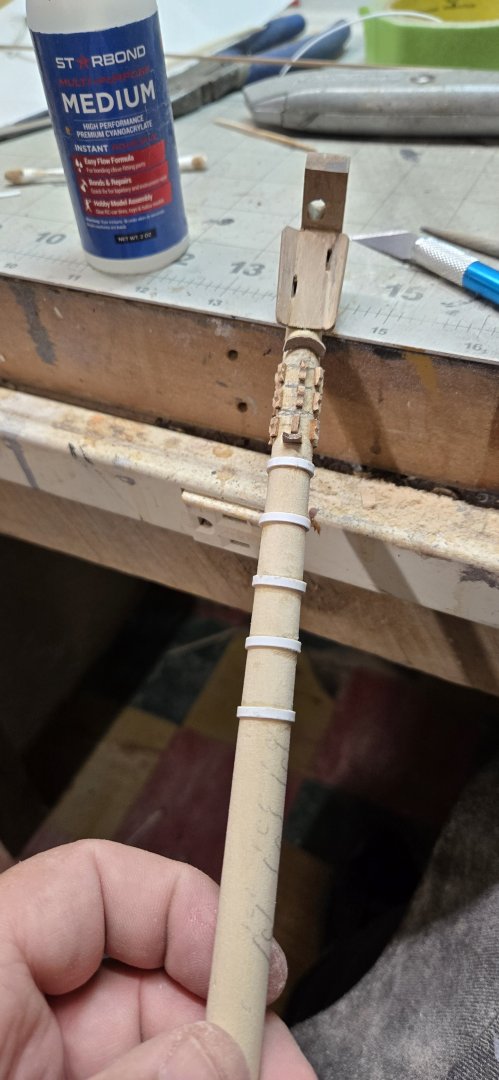
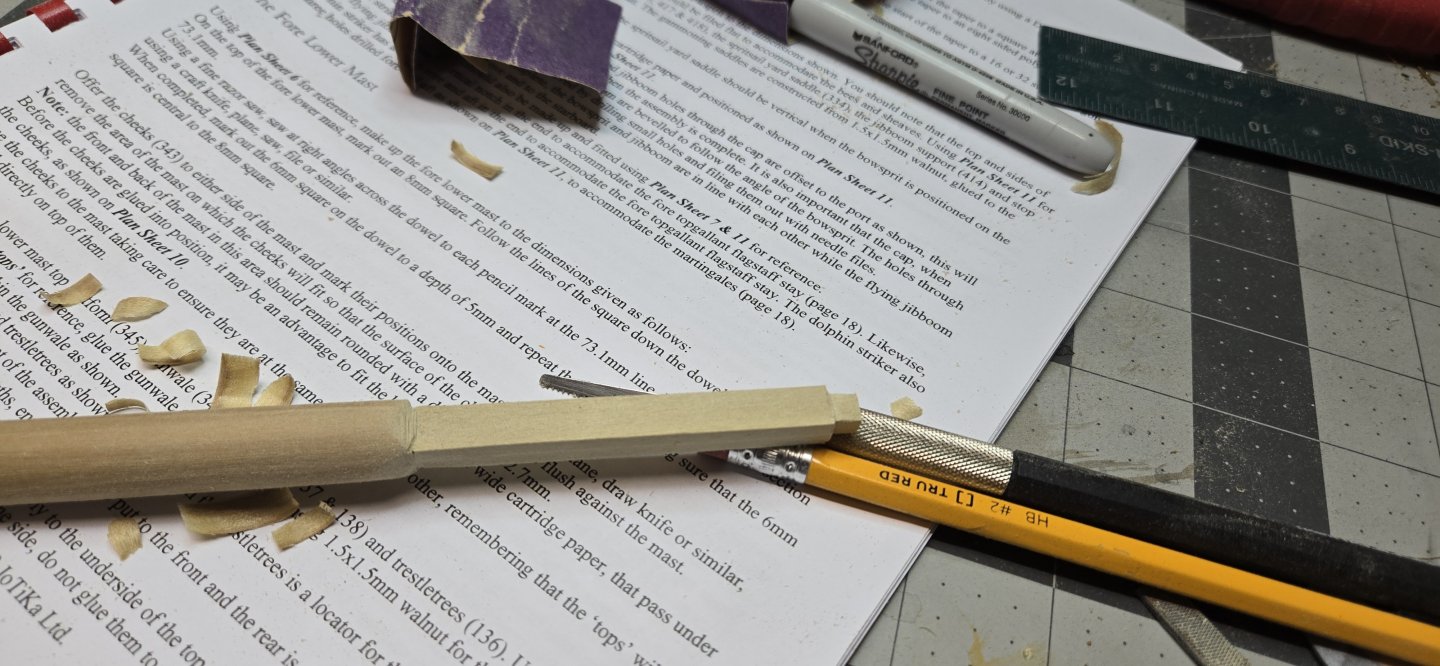
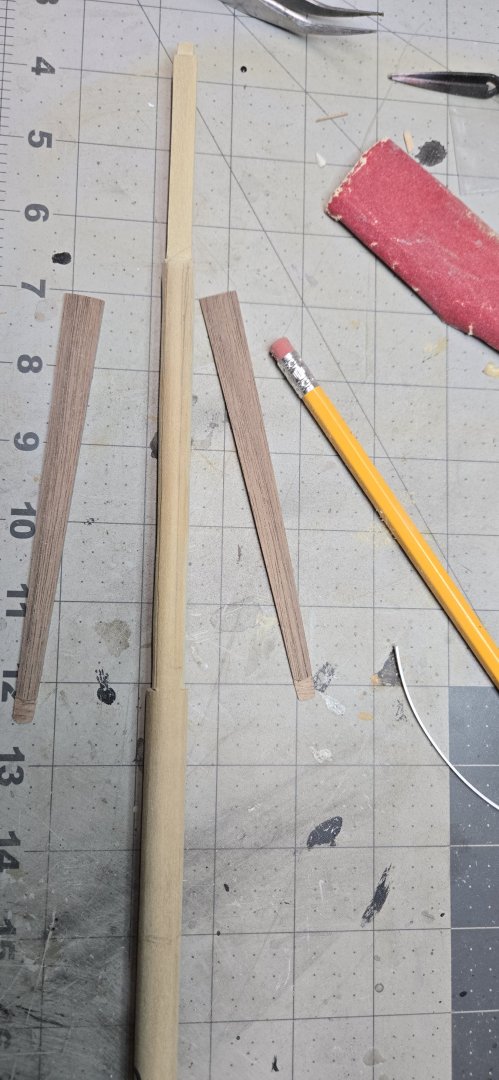
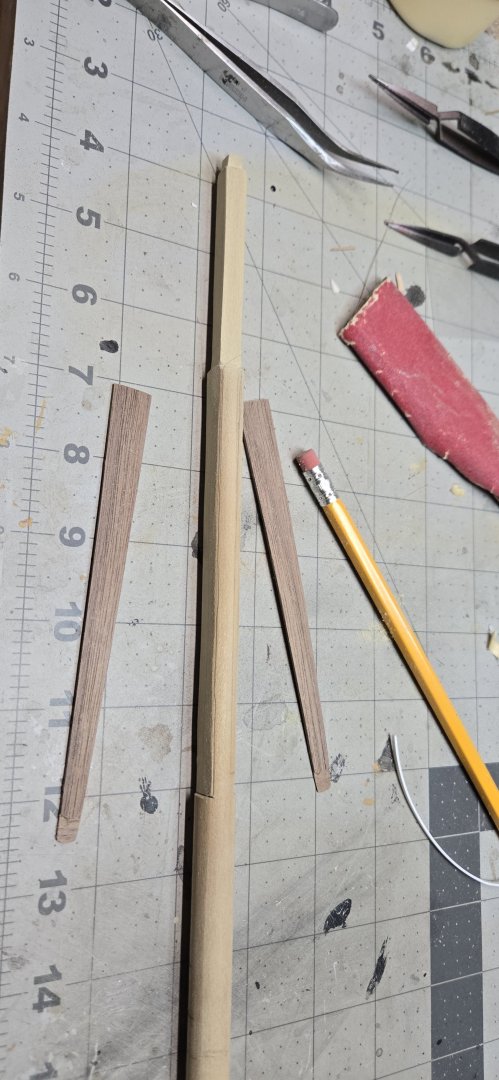
Began working on the bowsprit, because I am still delaying the rigging of the last cannons and starting on the hammocks. The instructions and the blueprints are a bit underwhelming when it comes to the building of the masts and yards. Perhaps if you've worked either on a Caldercraft model in the past or work on other square sailed ships, it will be more apparent. As my first, there is a lot of nomenclature that has to be learned. Thankfully, there are some great builder logs here that I have been studying relentlessly!!!! I started on the bowsprit. The first step is to create the cap (#69). You have to taper the ends and then add a square and round hole to fit both the end of the bowsprit (main mast so to speak) and the jib boom which runs through the cap out forward of the ship. I tapered the ends using my disc/belt sander. Getting the exact points to drill the holes was a matter of lining up the cap with the diagrams (which are to scale). I was a bit too far to port when I finished, but shouldn't cause any issues. Drilling the hole at the same angle required the use of a bench vise, I aligned the drill bit parallel to the edge of the cap. I was able to drill the hole at the right angle and then use a rounded file to clean it up. Doing the square hole was harder. I tried to drill 4 holes which I thought I would then cut out and file square. The problem I encountered was I used a small drill bit size and because of the angle of the wood I was drilling into, the bit tended to slide down the slope I had created. I was able to drill 2 holes, but made this work. The next step was creating the square notch at the end of the bowsprit. Since this was my first attempt, I wasn't 100% sure what tactic to try. In the end, used a mini Japanese saw to cut small notches in the dowel. Then I used a sharp exacto knife to whittle down to a square. I also used a file to help square up my work. After creating the square peg, I tapered back the end to create an angle to fit into the cap. As you can see, I am a bit too far over. The next step was very confusing concerning the installation of the bees. Going through my books helped immensely. Again, I wish the instructions would include some better pictures of what they are talking about. The blueprints are fine, but they include all of the parts and they can become cluttered. So you need to shave off material on the top of the bowsprit so that the flat bee (#415) fits flush on top. It as 2 notches, the starboard one is up front, the port one is about mid way. You have to then shave off material on both sides so that you can fit the bee sheaves (417, 418). These little pieces simulate a sheave which you could probably make real with aftermarket pieces. I didn't have sheaves that big, so I left them. The starboard bee sheave fits tight to the cap. You would glue the cap, the flat bee on top and the 2 bee sheaves on each side. Once attached, there are 2 pieces (416) simply called bees. These create little wings on top. Glue all this together and if needed, apply some wood putty to smooth it all out. Be sure to clear the 2 holes for the sheaves, the books say the forestays will go through the holes. Once done with that, you have to add 3 rows of stop cleats. I believe each row has five 1.5x1.5mm walnut pieces about 2mm long. I cut them out and glued them as close to what the plan requires as I could. Once set, I used a round file to create the unique shape you see....just filing the bottom until they became rounded. There are two other pieces that need to be installed and then I used 2mm styrene to create the bands. The next step was creating the gammoning stops lower on the bowsprit. I cut little pieces of 1.5x1.5mm walnut and glued them onto the bowsprit. Using the plans I tried to get the angles correct. Honestly, I laid the bowsprit on the plans and tried to mark off where the stops should be. The pic in this post was my first attempt. I laid down white glue and then placed the walnut pieces on the dowel and tried to create the angle. Creating the jib boom and flying jib boom required tapering and creating some 6 sided ends. I didn't do a very good job of this, they look like crap, but I think once they are painted, they'll clean up. You also need 2 of the cast pieces to create the bracket to hold the flying jib boom to the jib boom. I was able to CA glue them and they seem to fit good. I tried to fit them together to see how it looks. I'll so some sanding and give the paint a shot at making it look good! I then started on the fore mast. You have to create an 8mm square peg to one end with a smaller 6mm peg at the very end. Doing the math, there would be 4.7mm of excess material that has to be cut away to create the 8mm center...or about 2.35mm on each end. So I created the square on the end of the dowel and drew 4 lines to create a template to cut away. I then cut down about 1.5mm all around the dowel and using an exacto knife, I began cutting and/or shaving down. When I got close, I used a file to square things up. Cutting away was easy, but I did have to cut towards myself and I was very careful doing this, too many accidents when wood stops grabbing at the wrong time and the blade takes its own path....right into your hand. When all was said and done, I think I got the squared off end pretty close to 8mm and then the little 6mm piece went pretty quickly. After that, I had to create the flat sides for the cheeks (#343). I stopped after this, because the instructions require some banding under and over the cheeks. I wasn't sure if I needed to file space under the cheeks to fit the bands or allow then cheeks to have 'daylight' under them. Also, there is another piece on the front of the mast, that isn't covered in this part of the instructions and there are a number of bands that once again, go above and below it. It's the rubbing paunch and is mentioned later on...can't wait! So, tomorrow, I'll plod on!


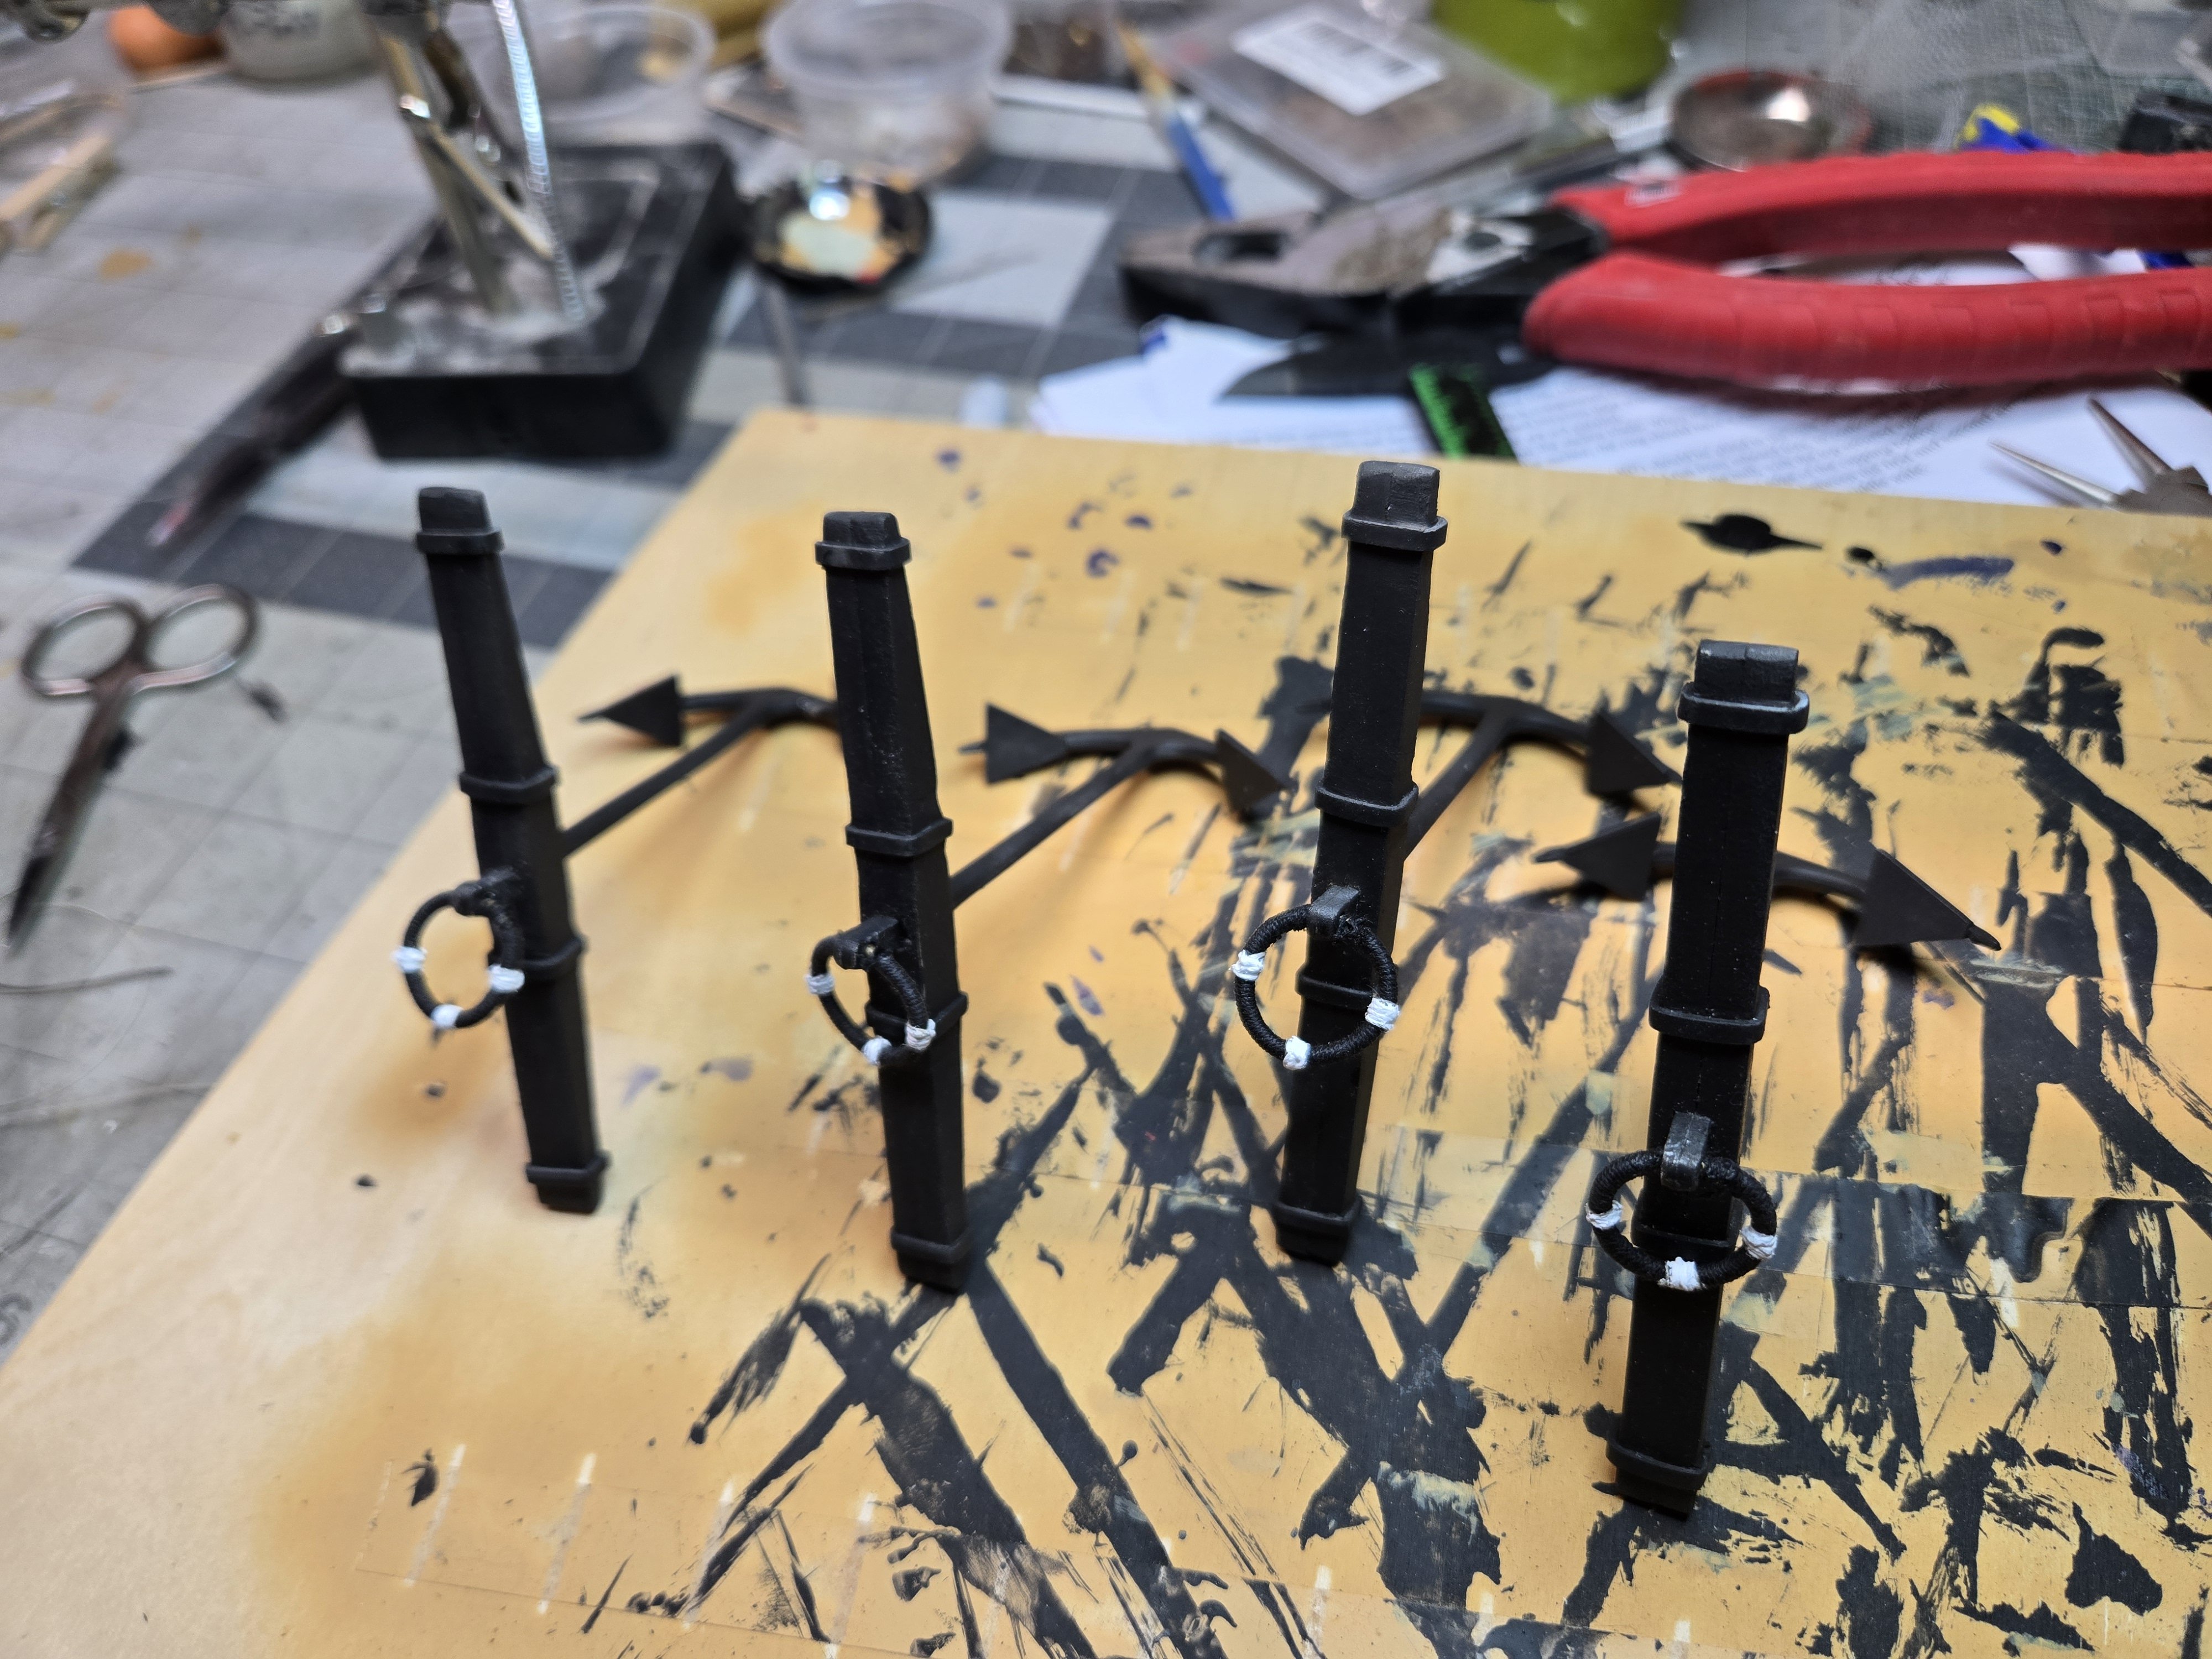
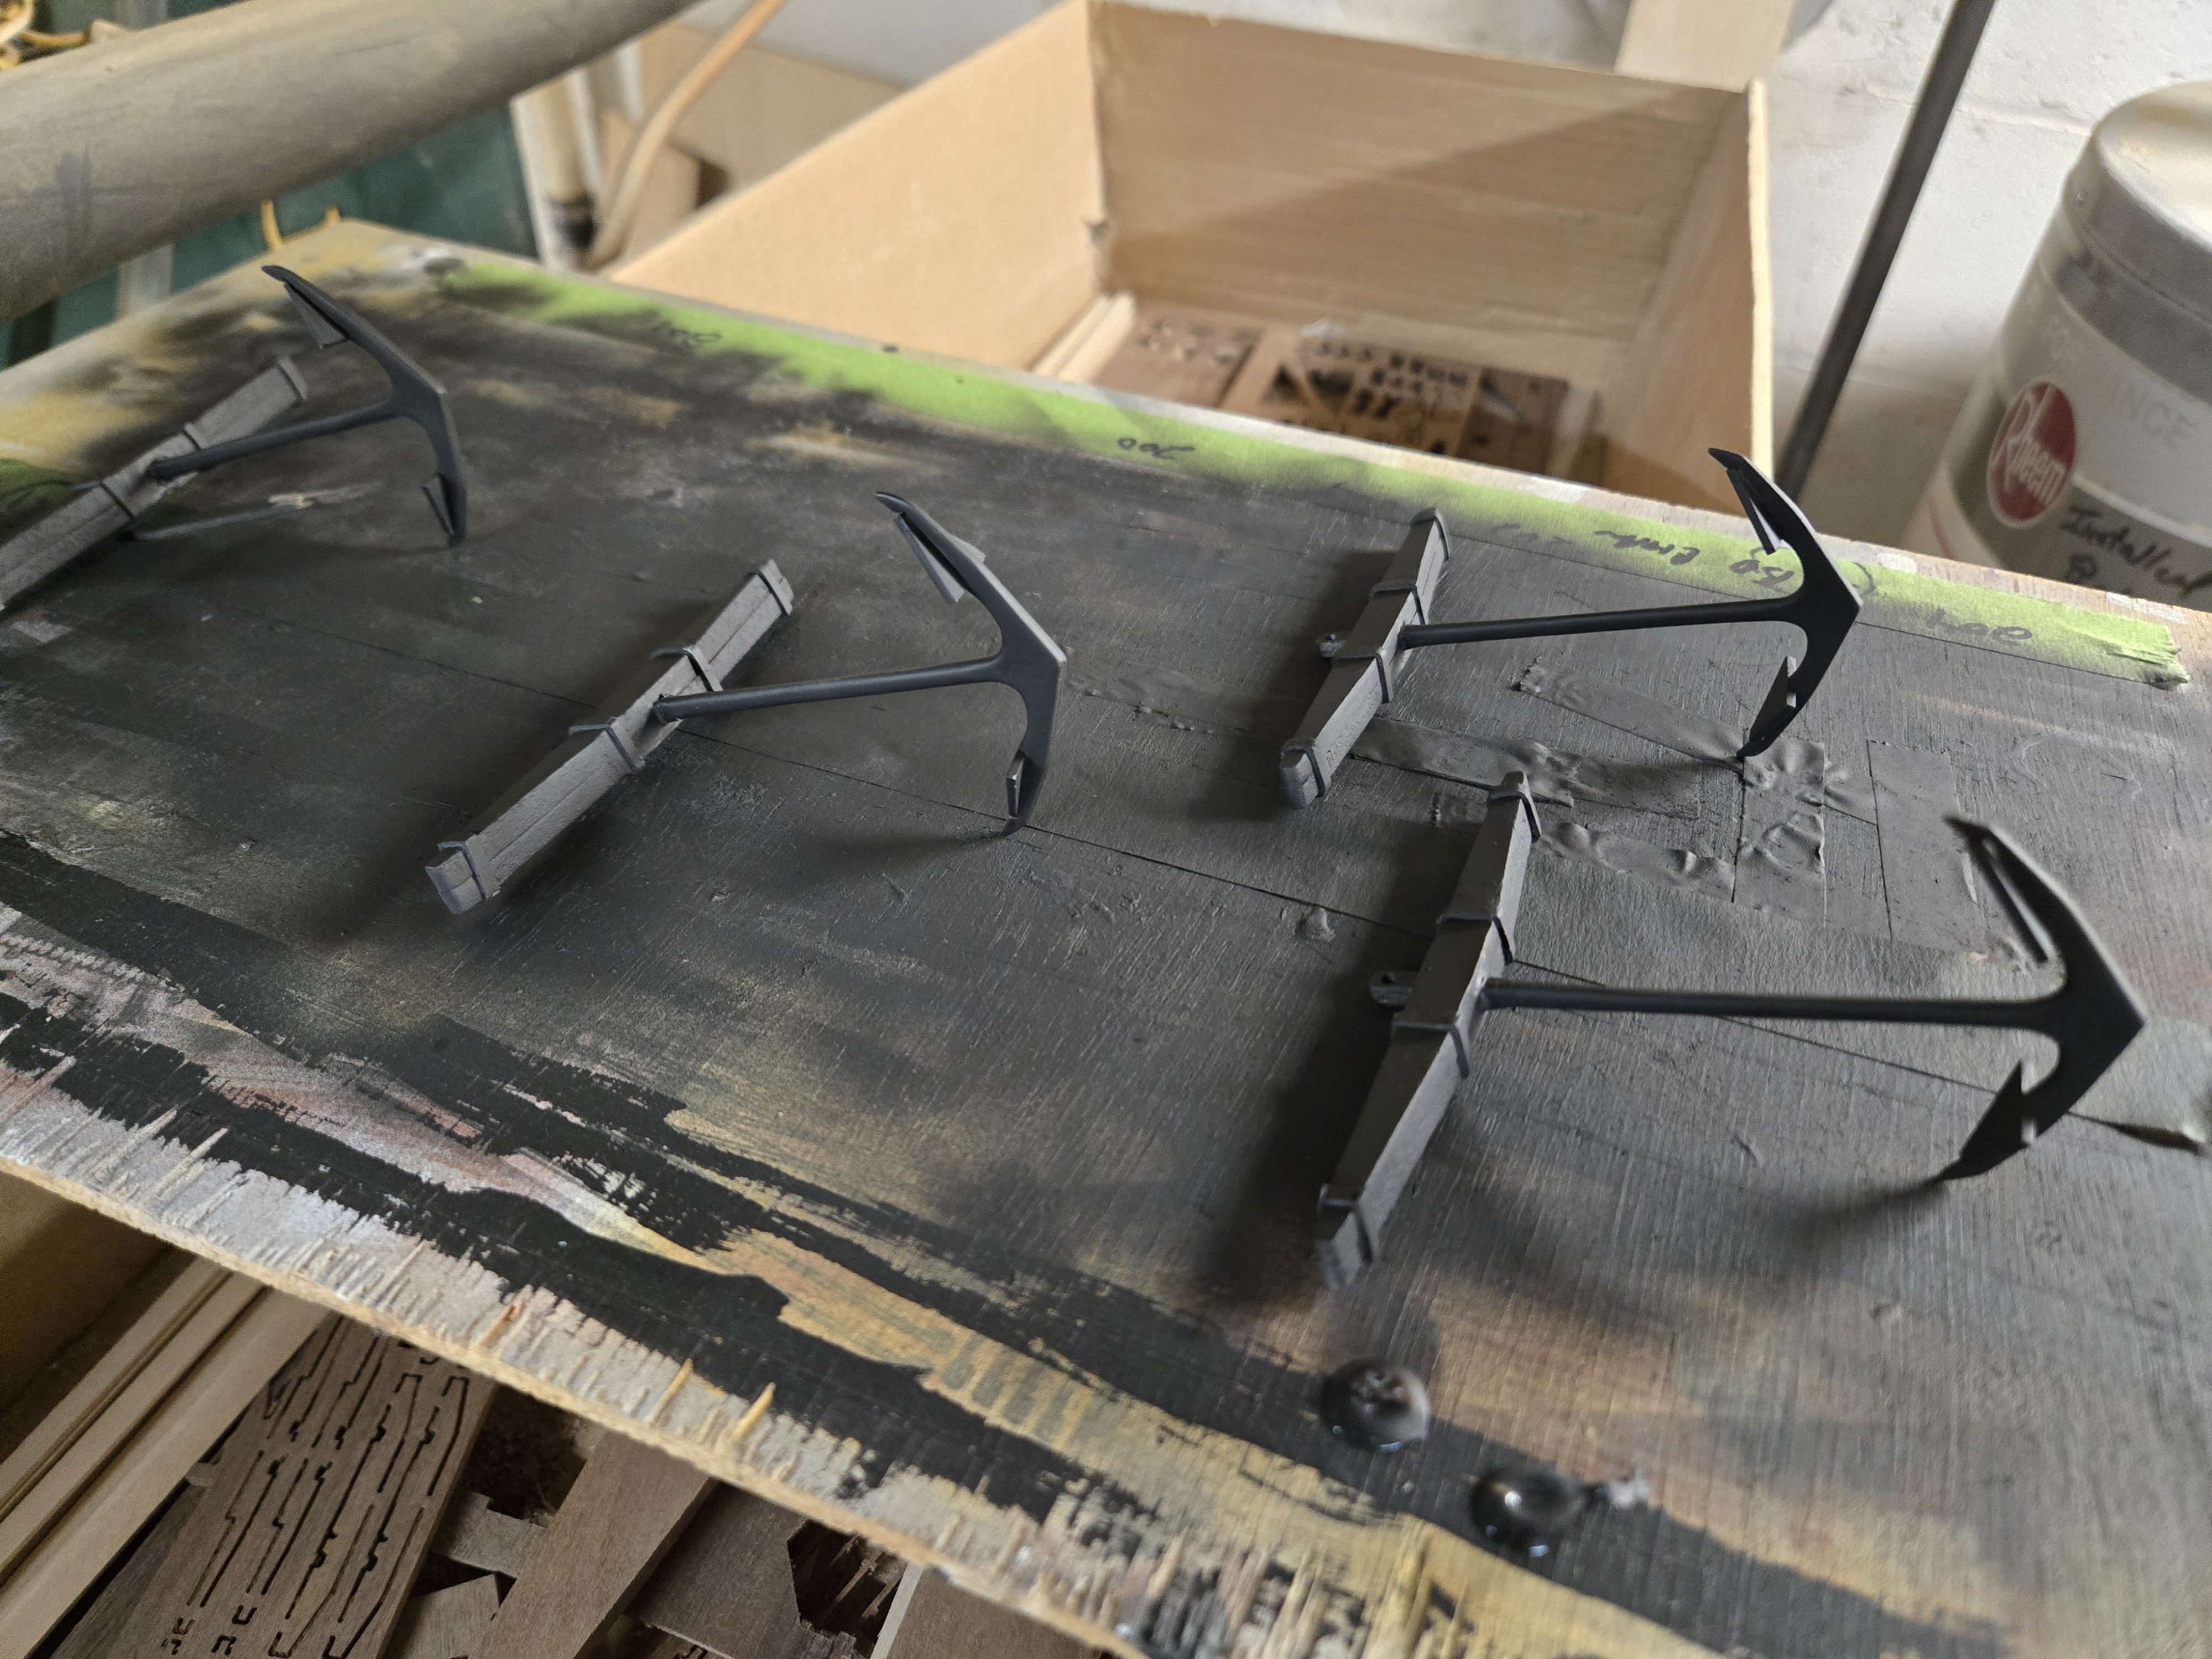
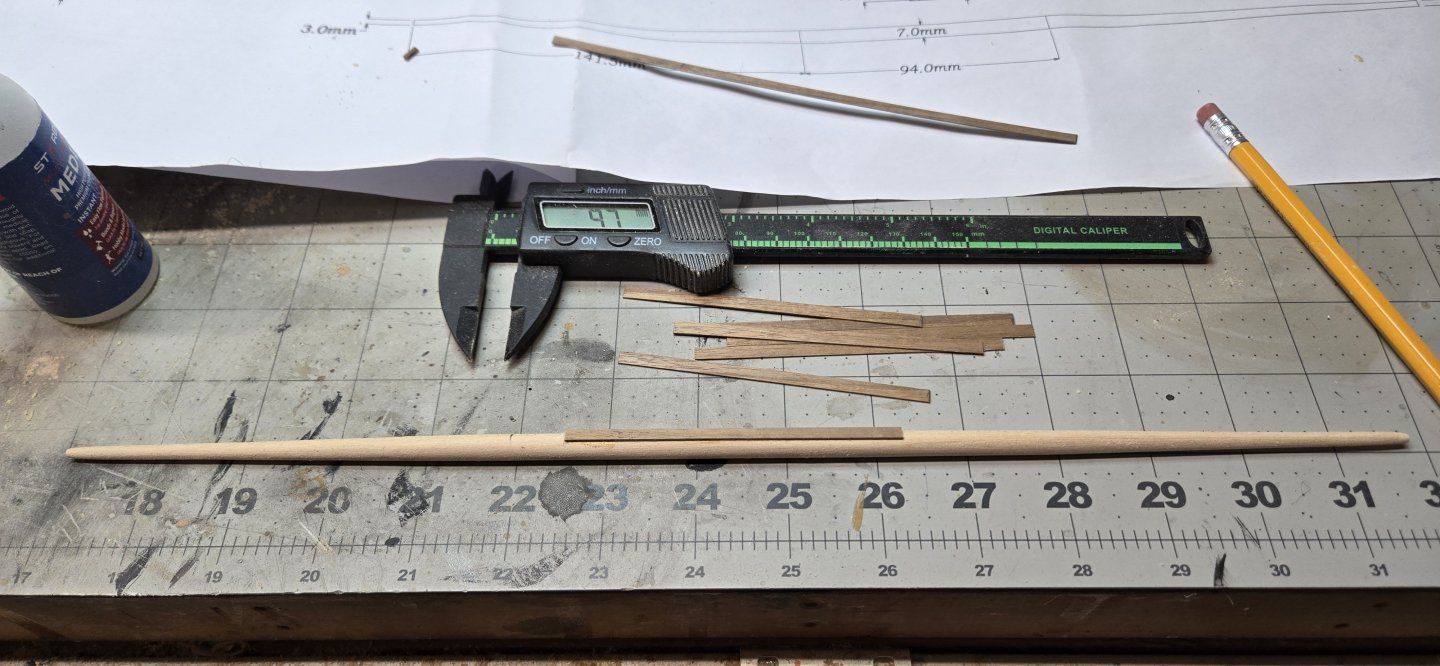
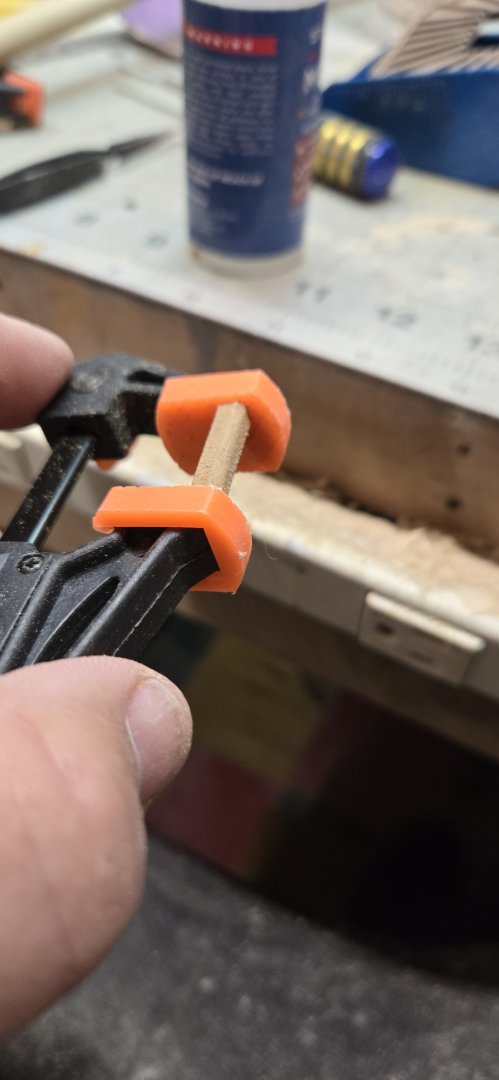
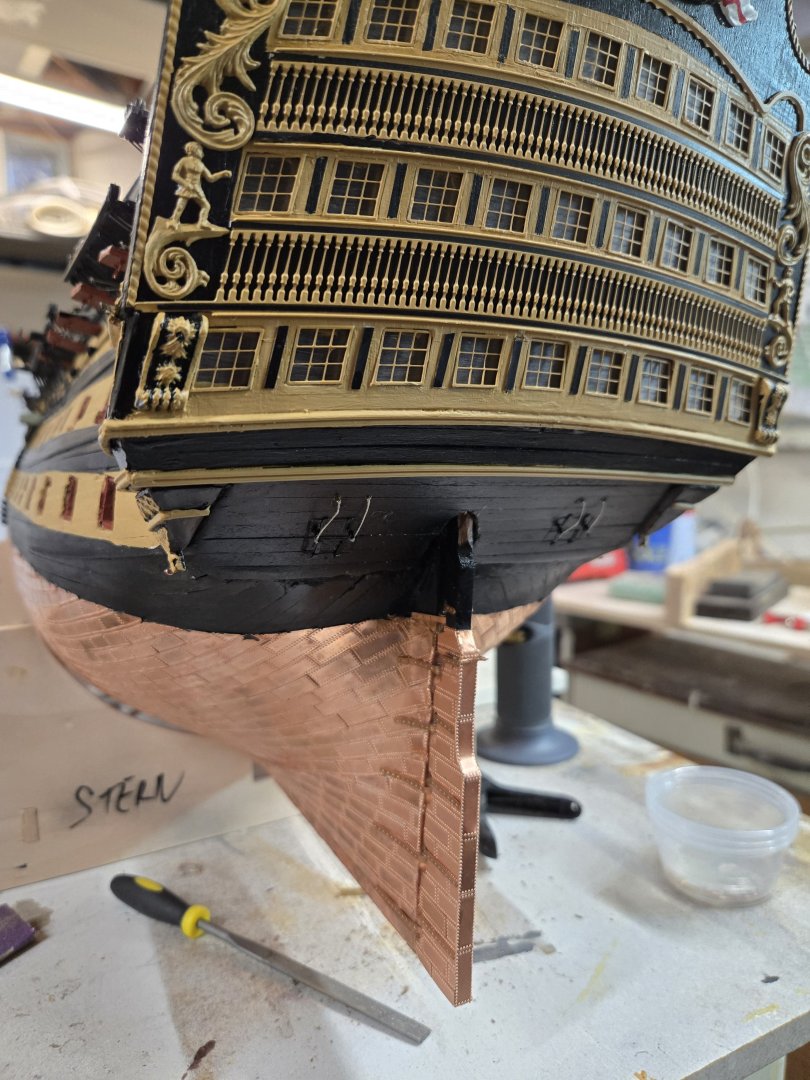
-
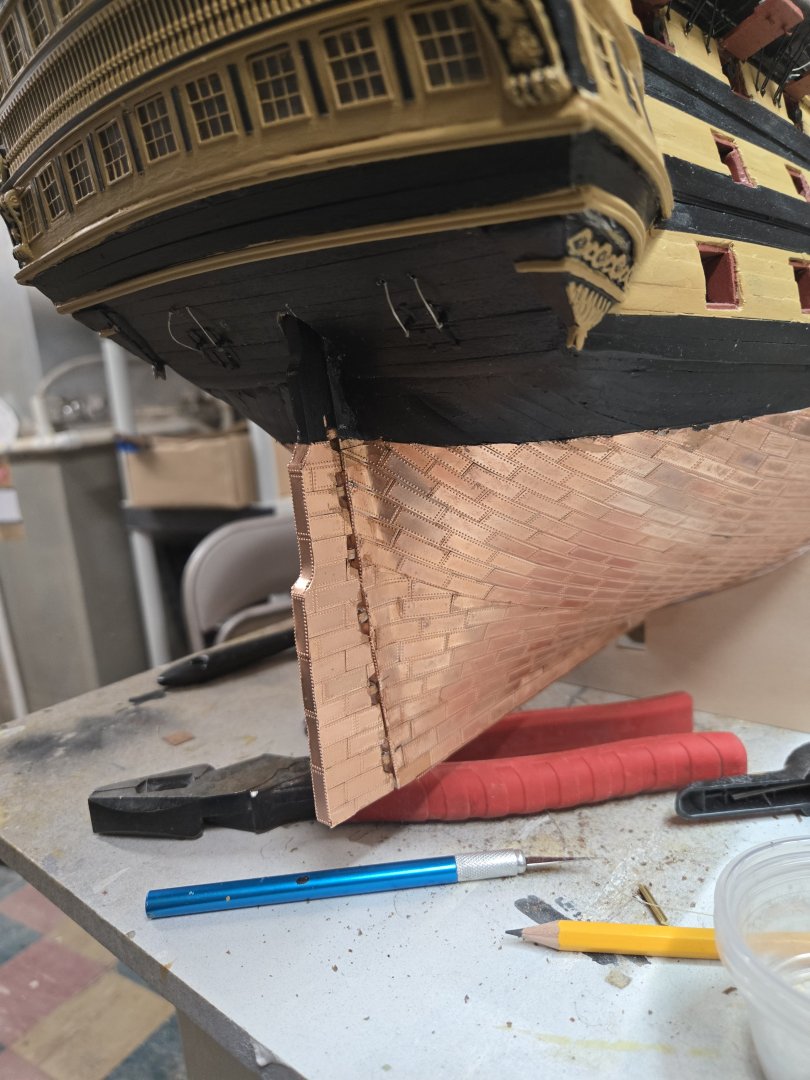
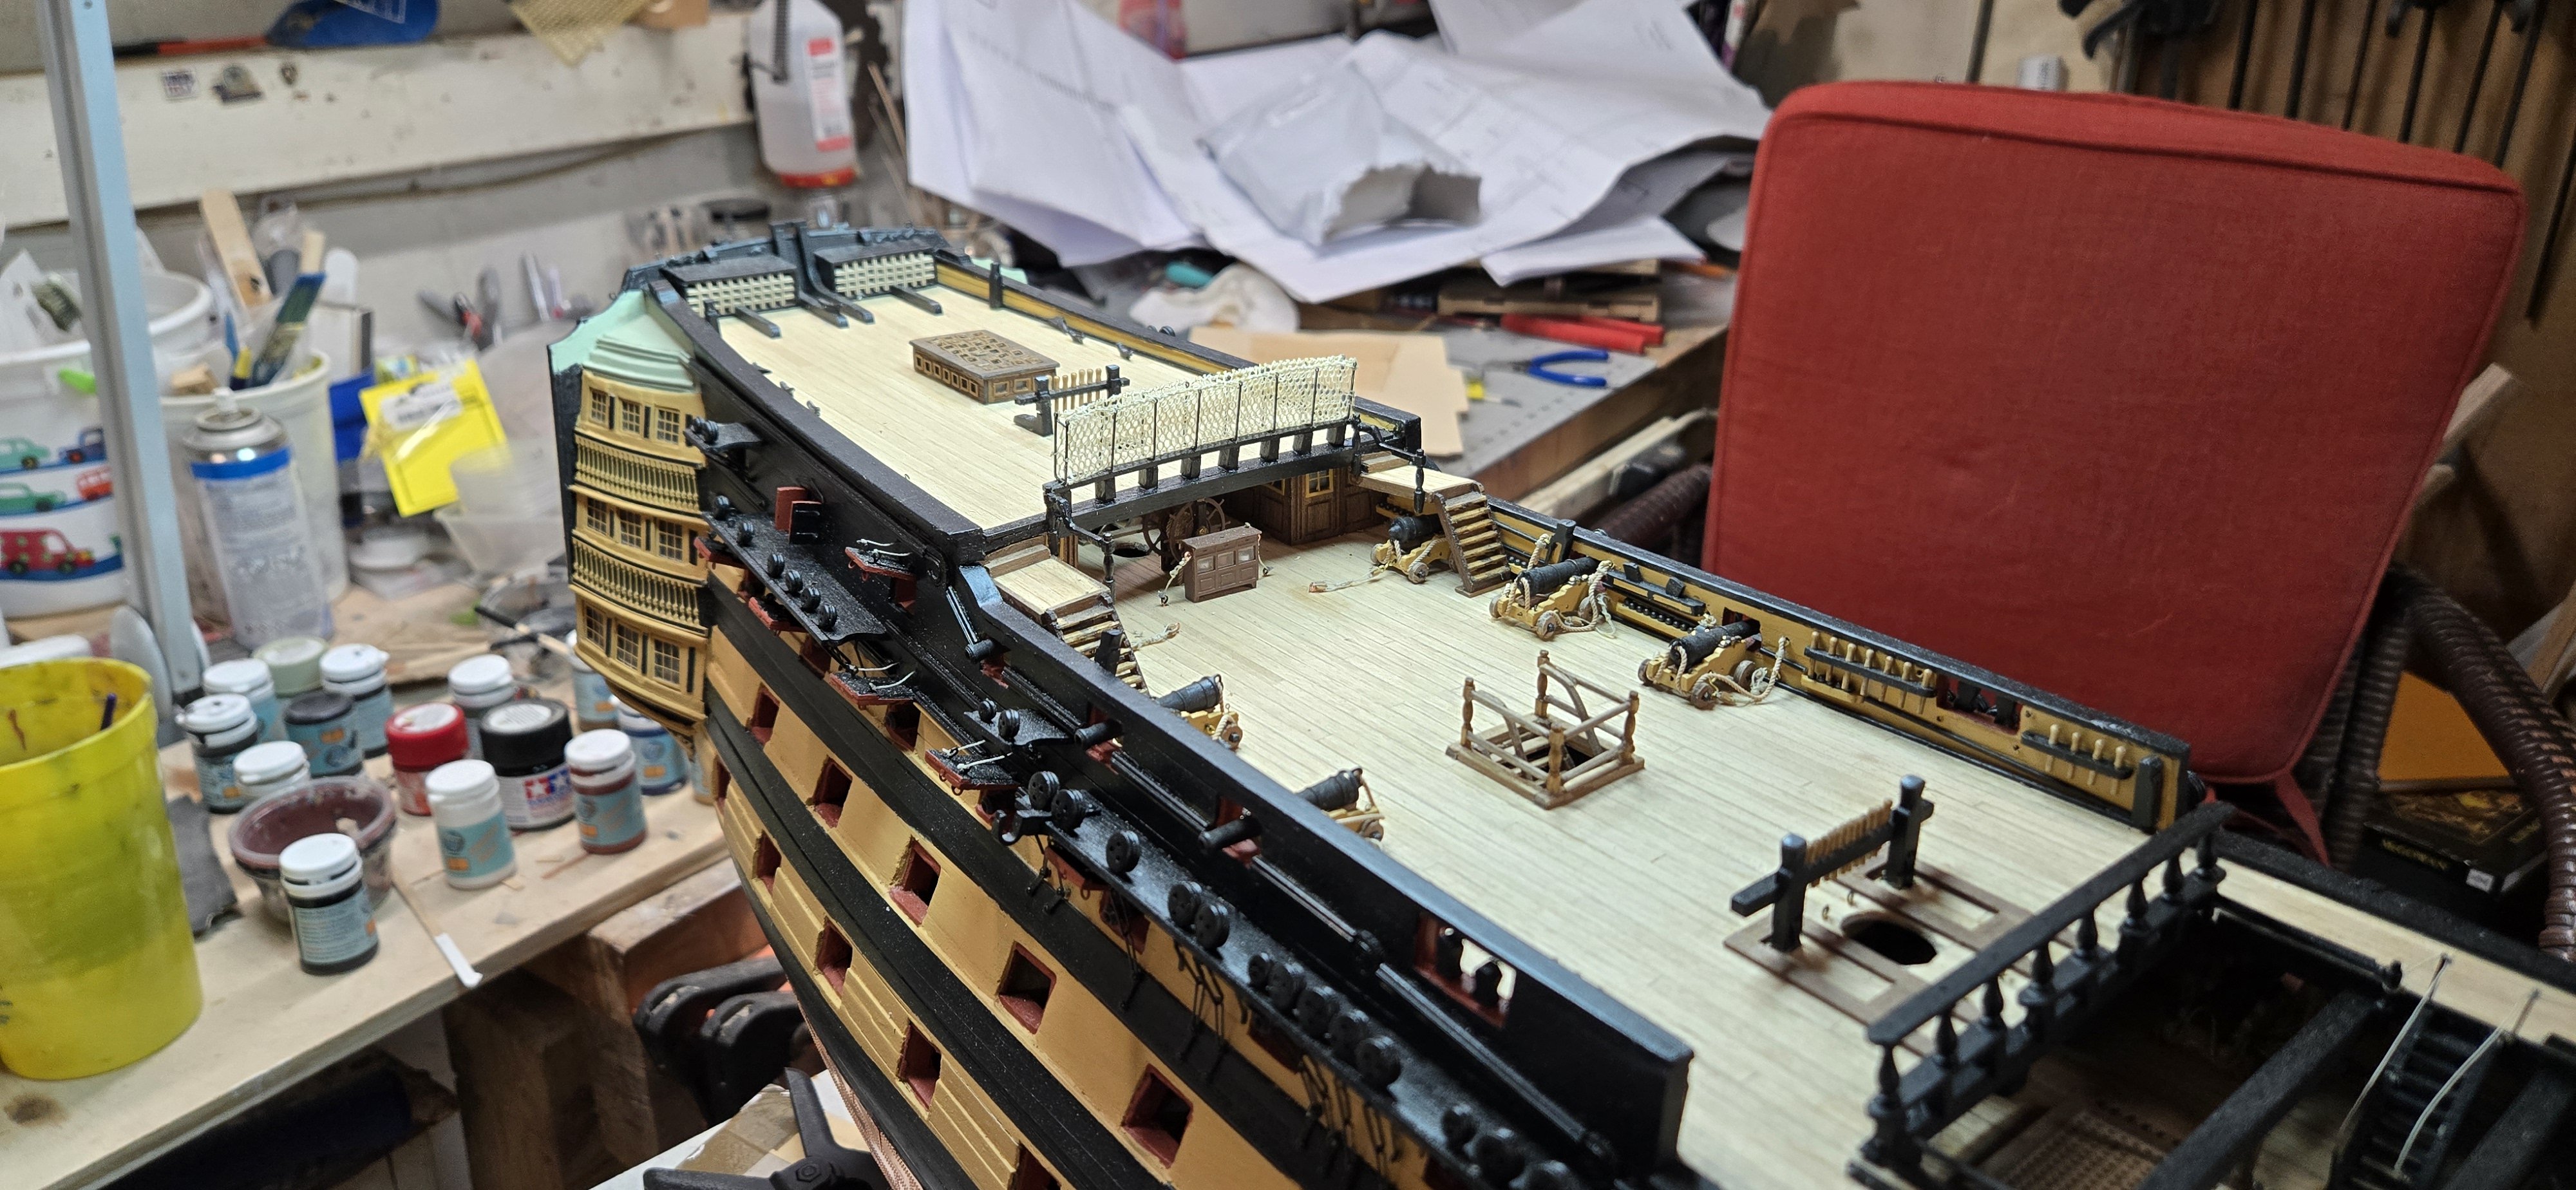
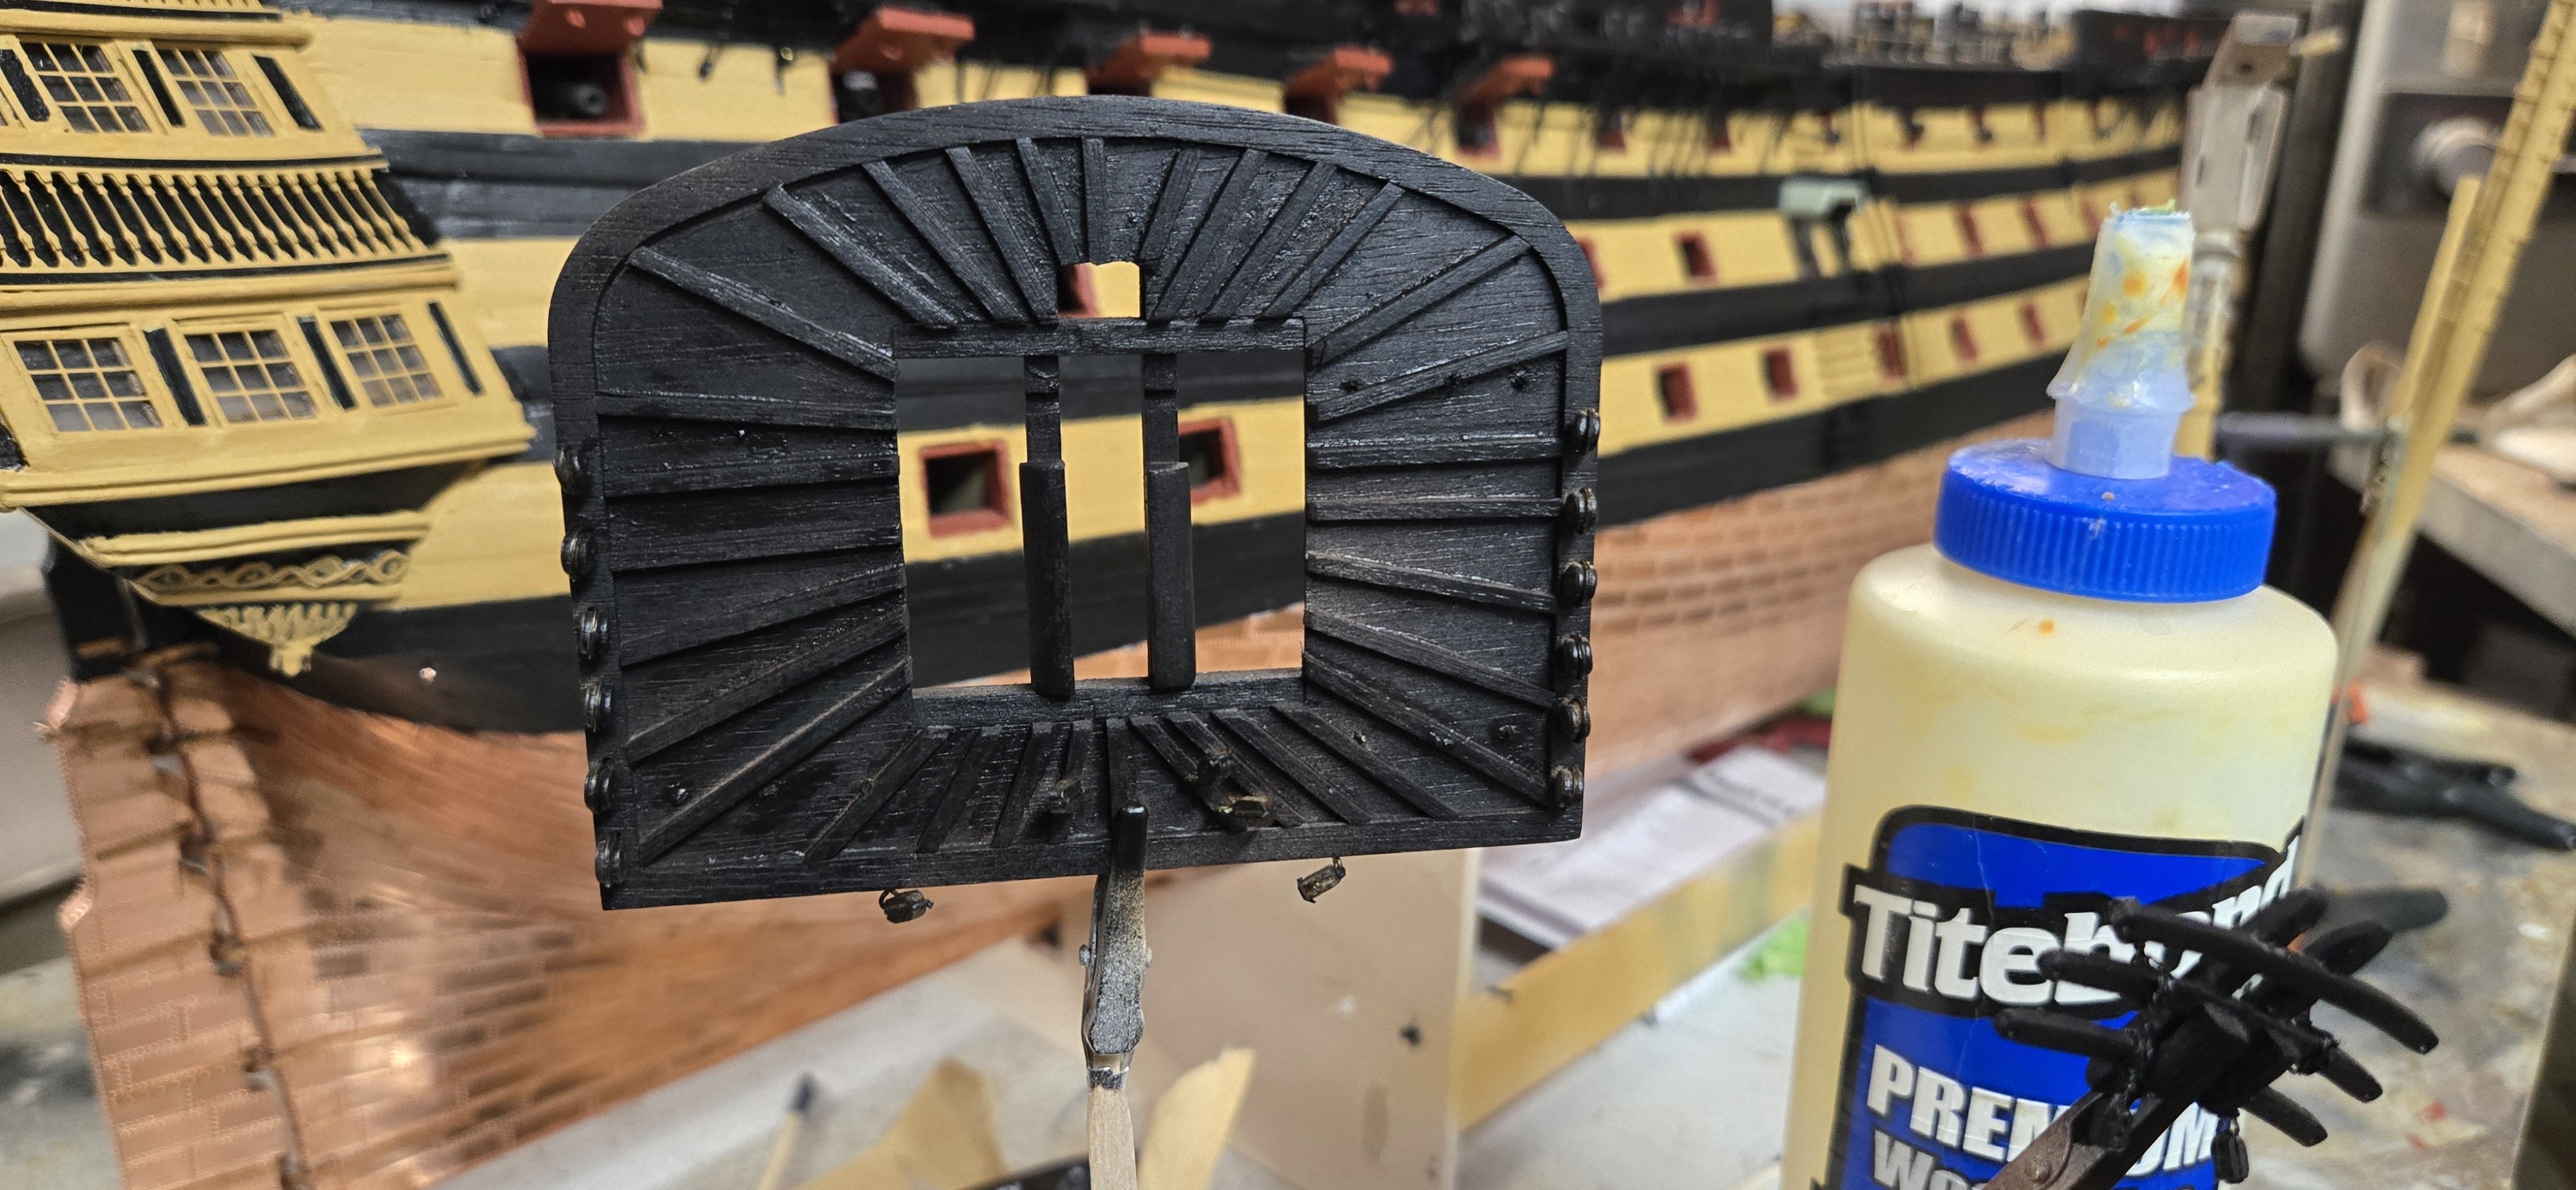
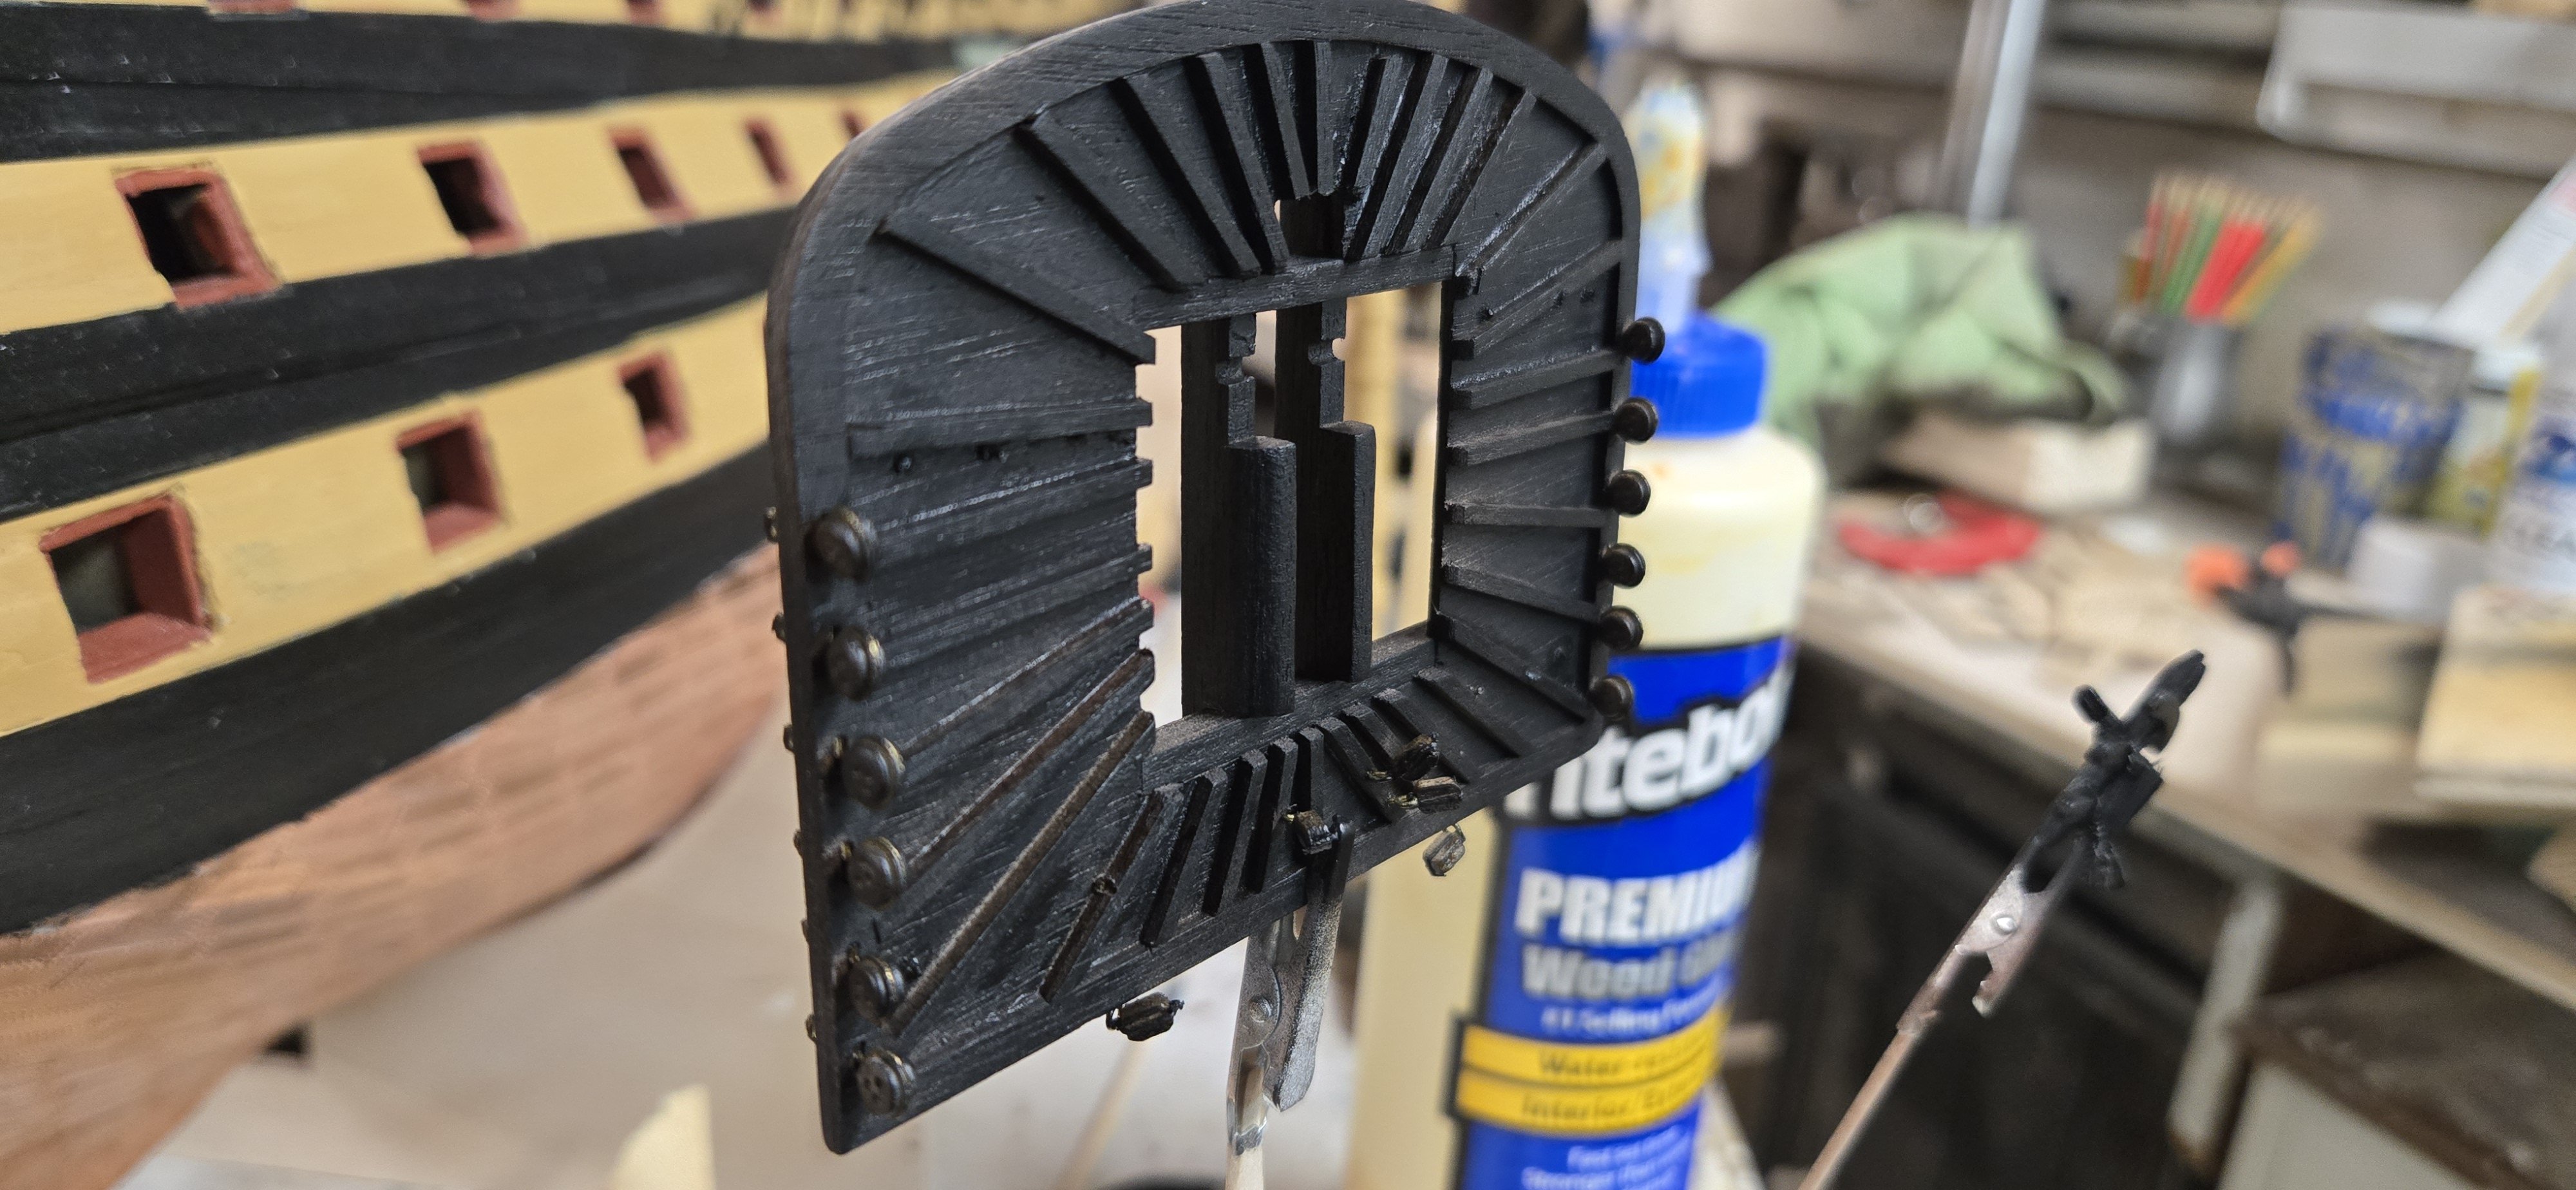
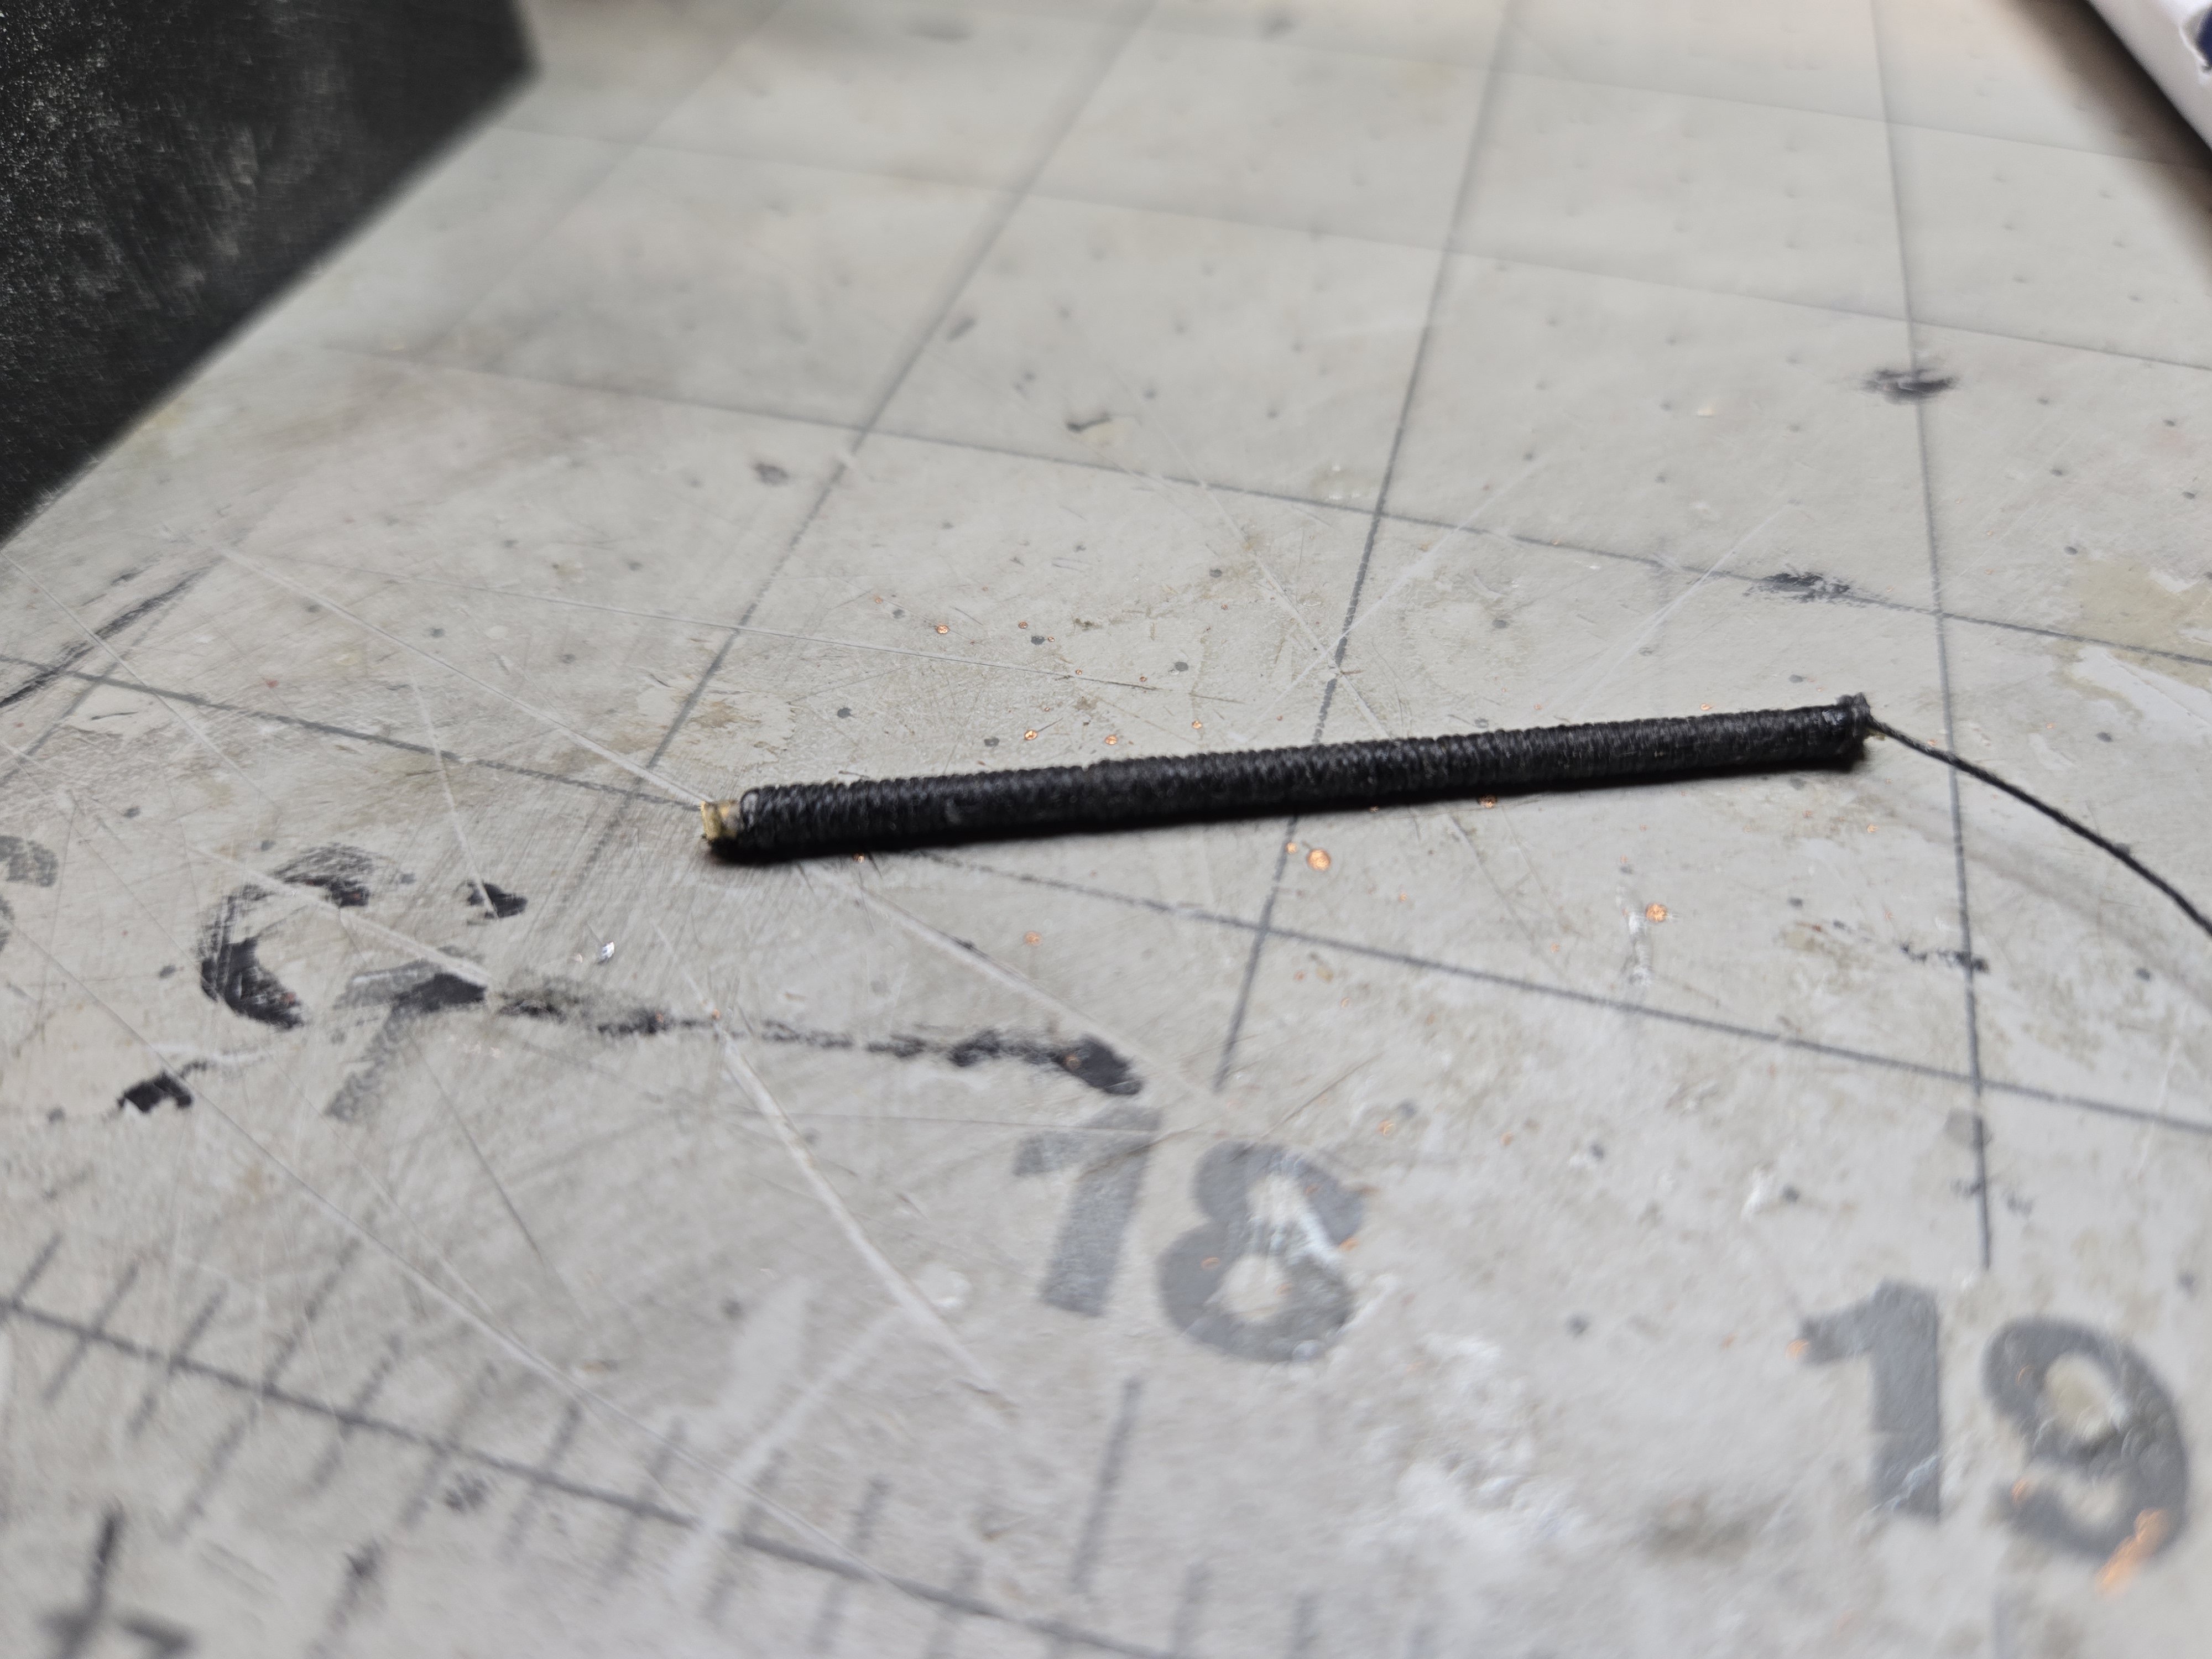
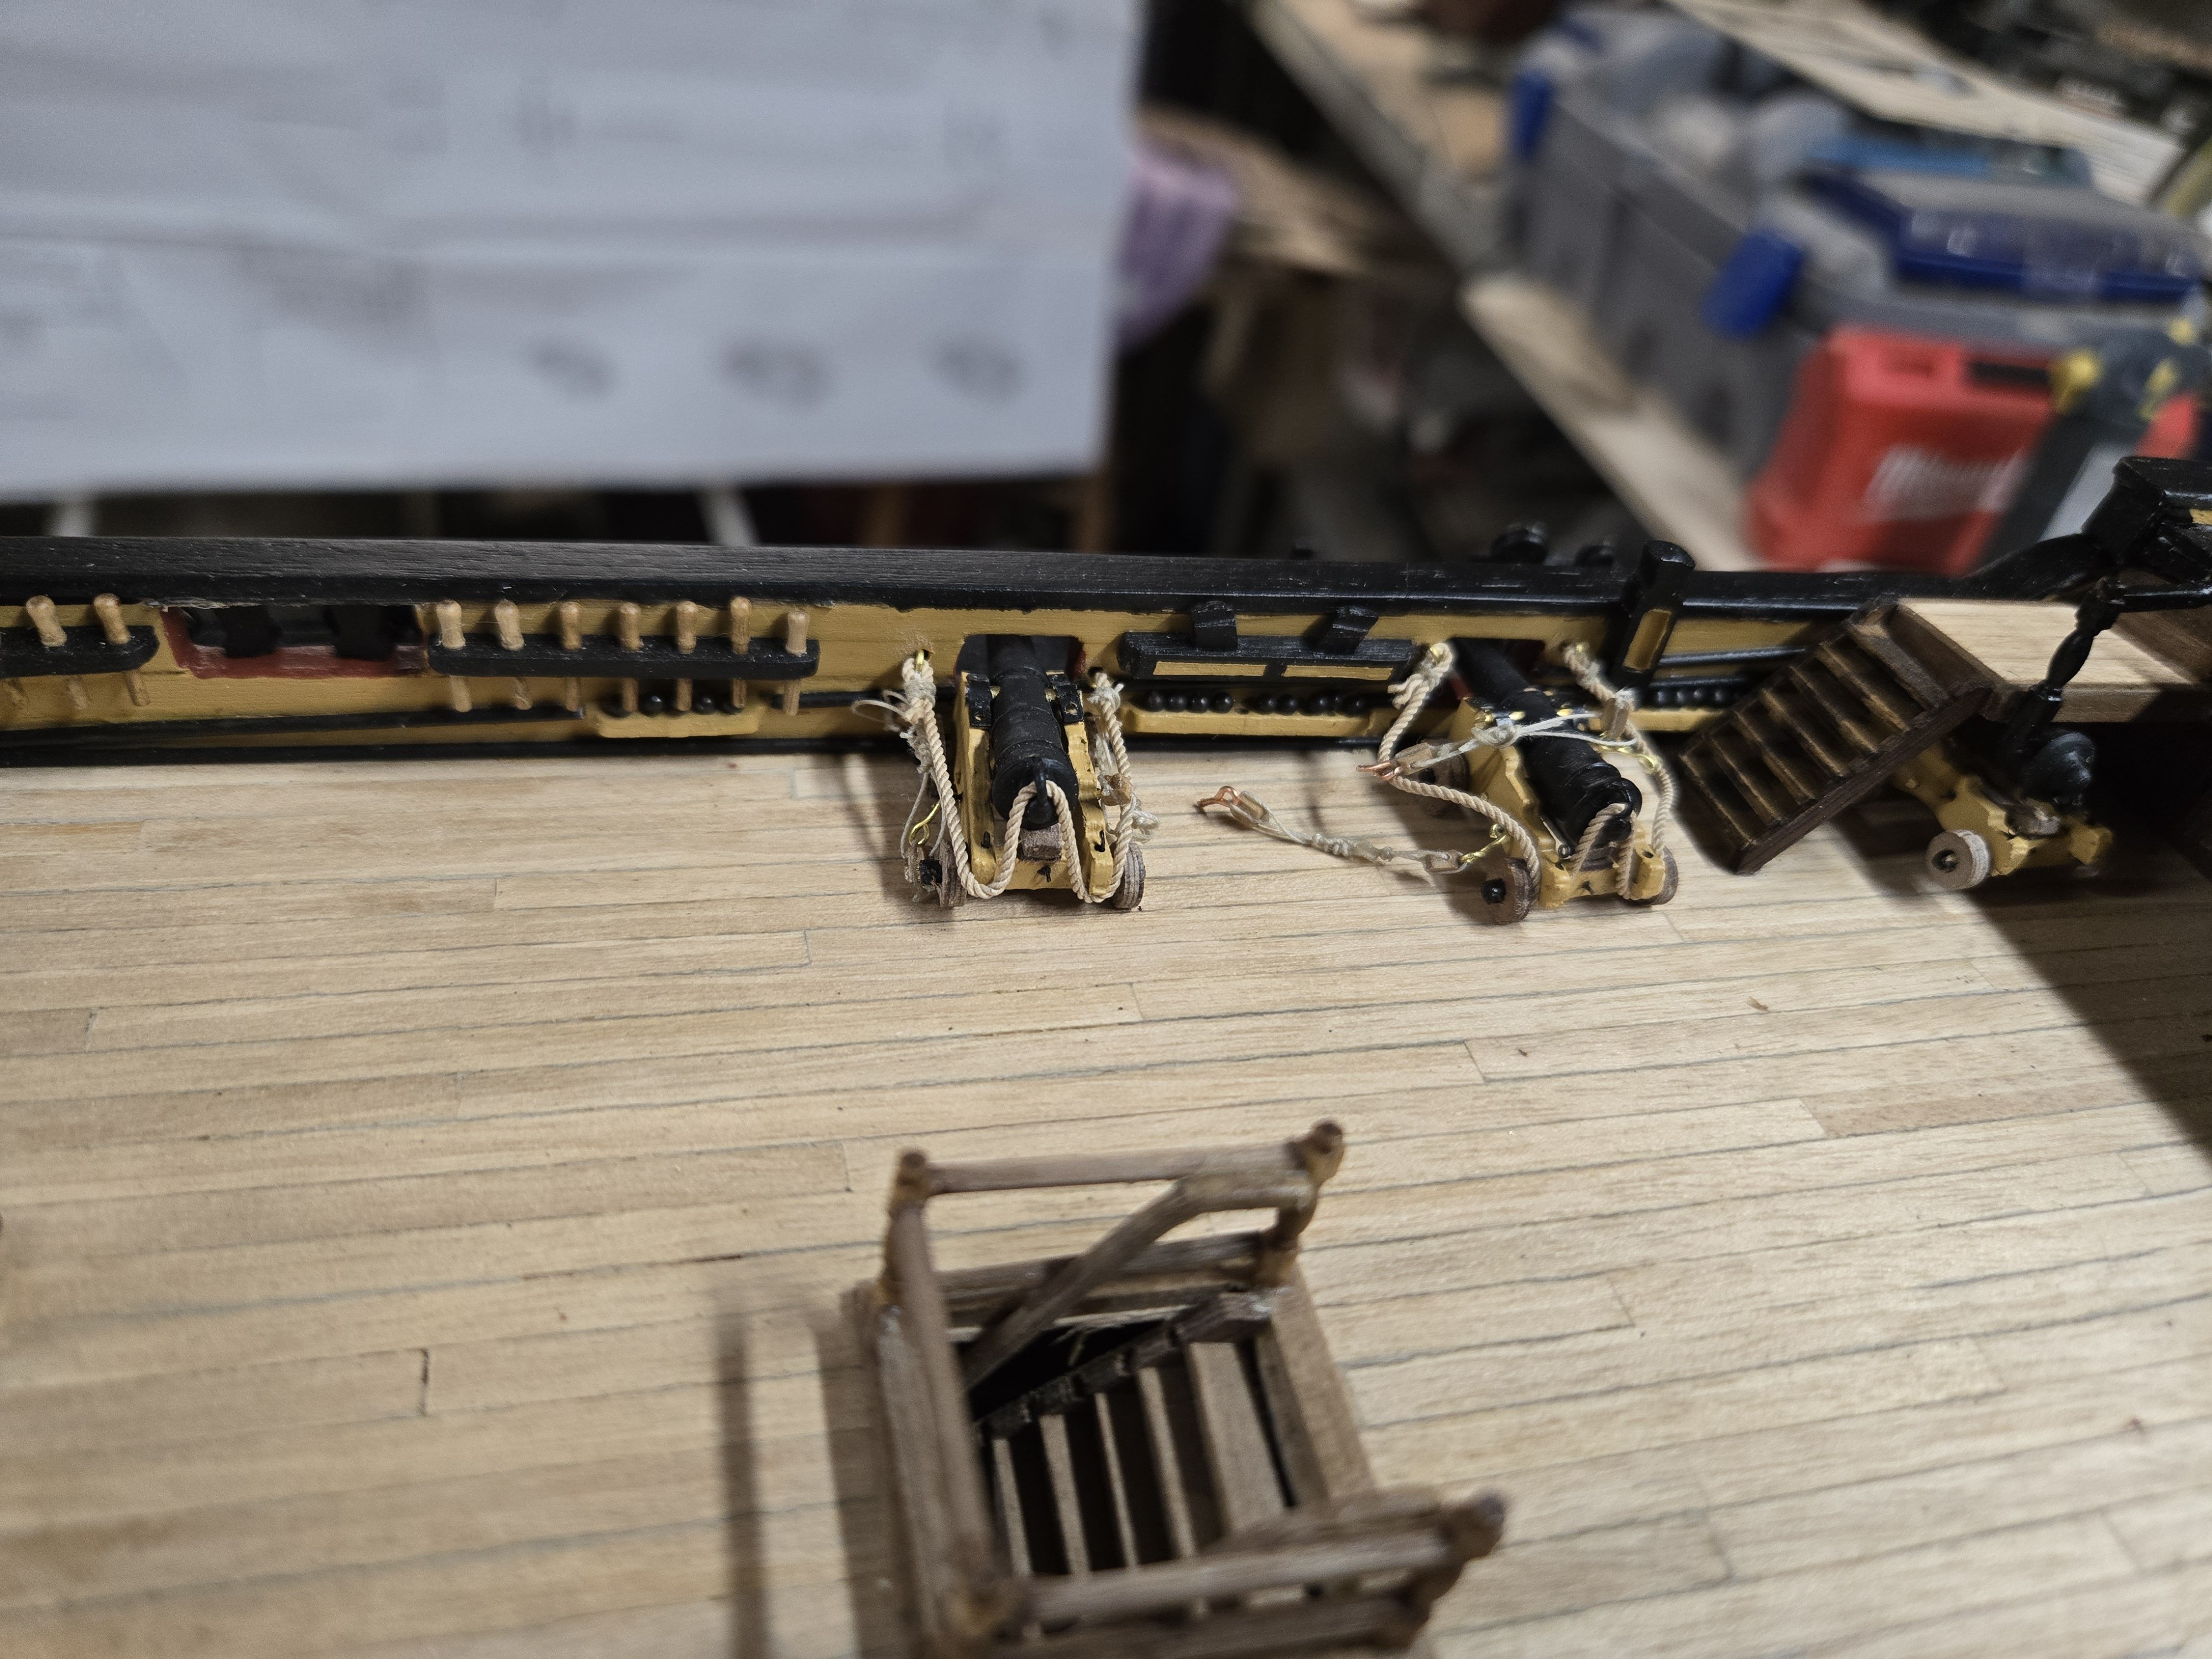
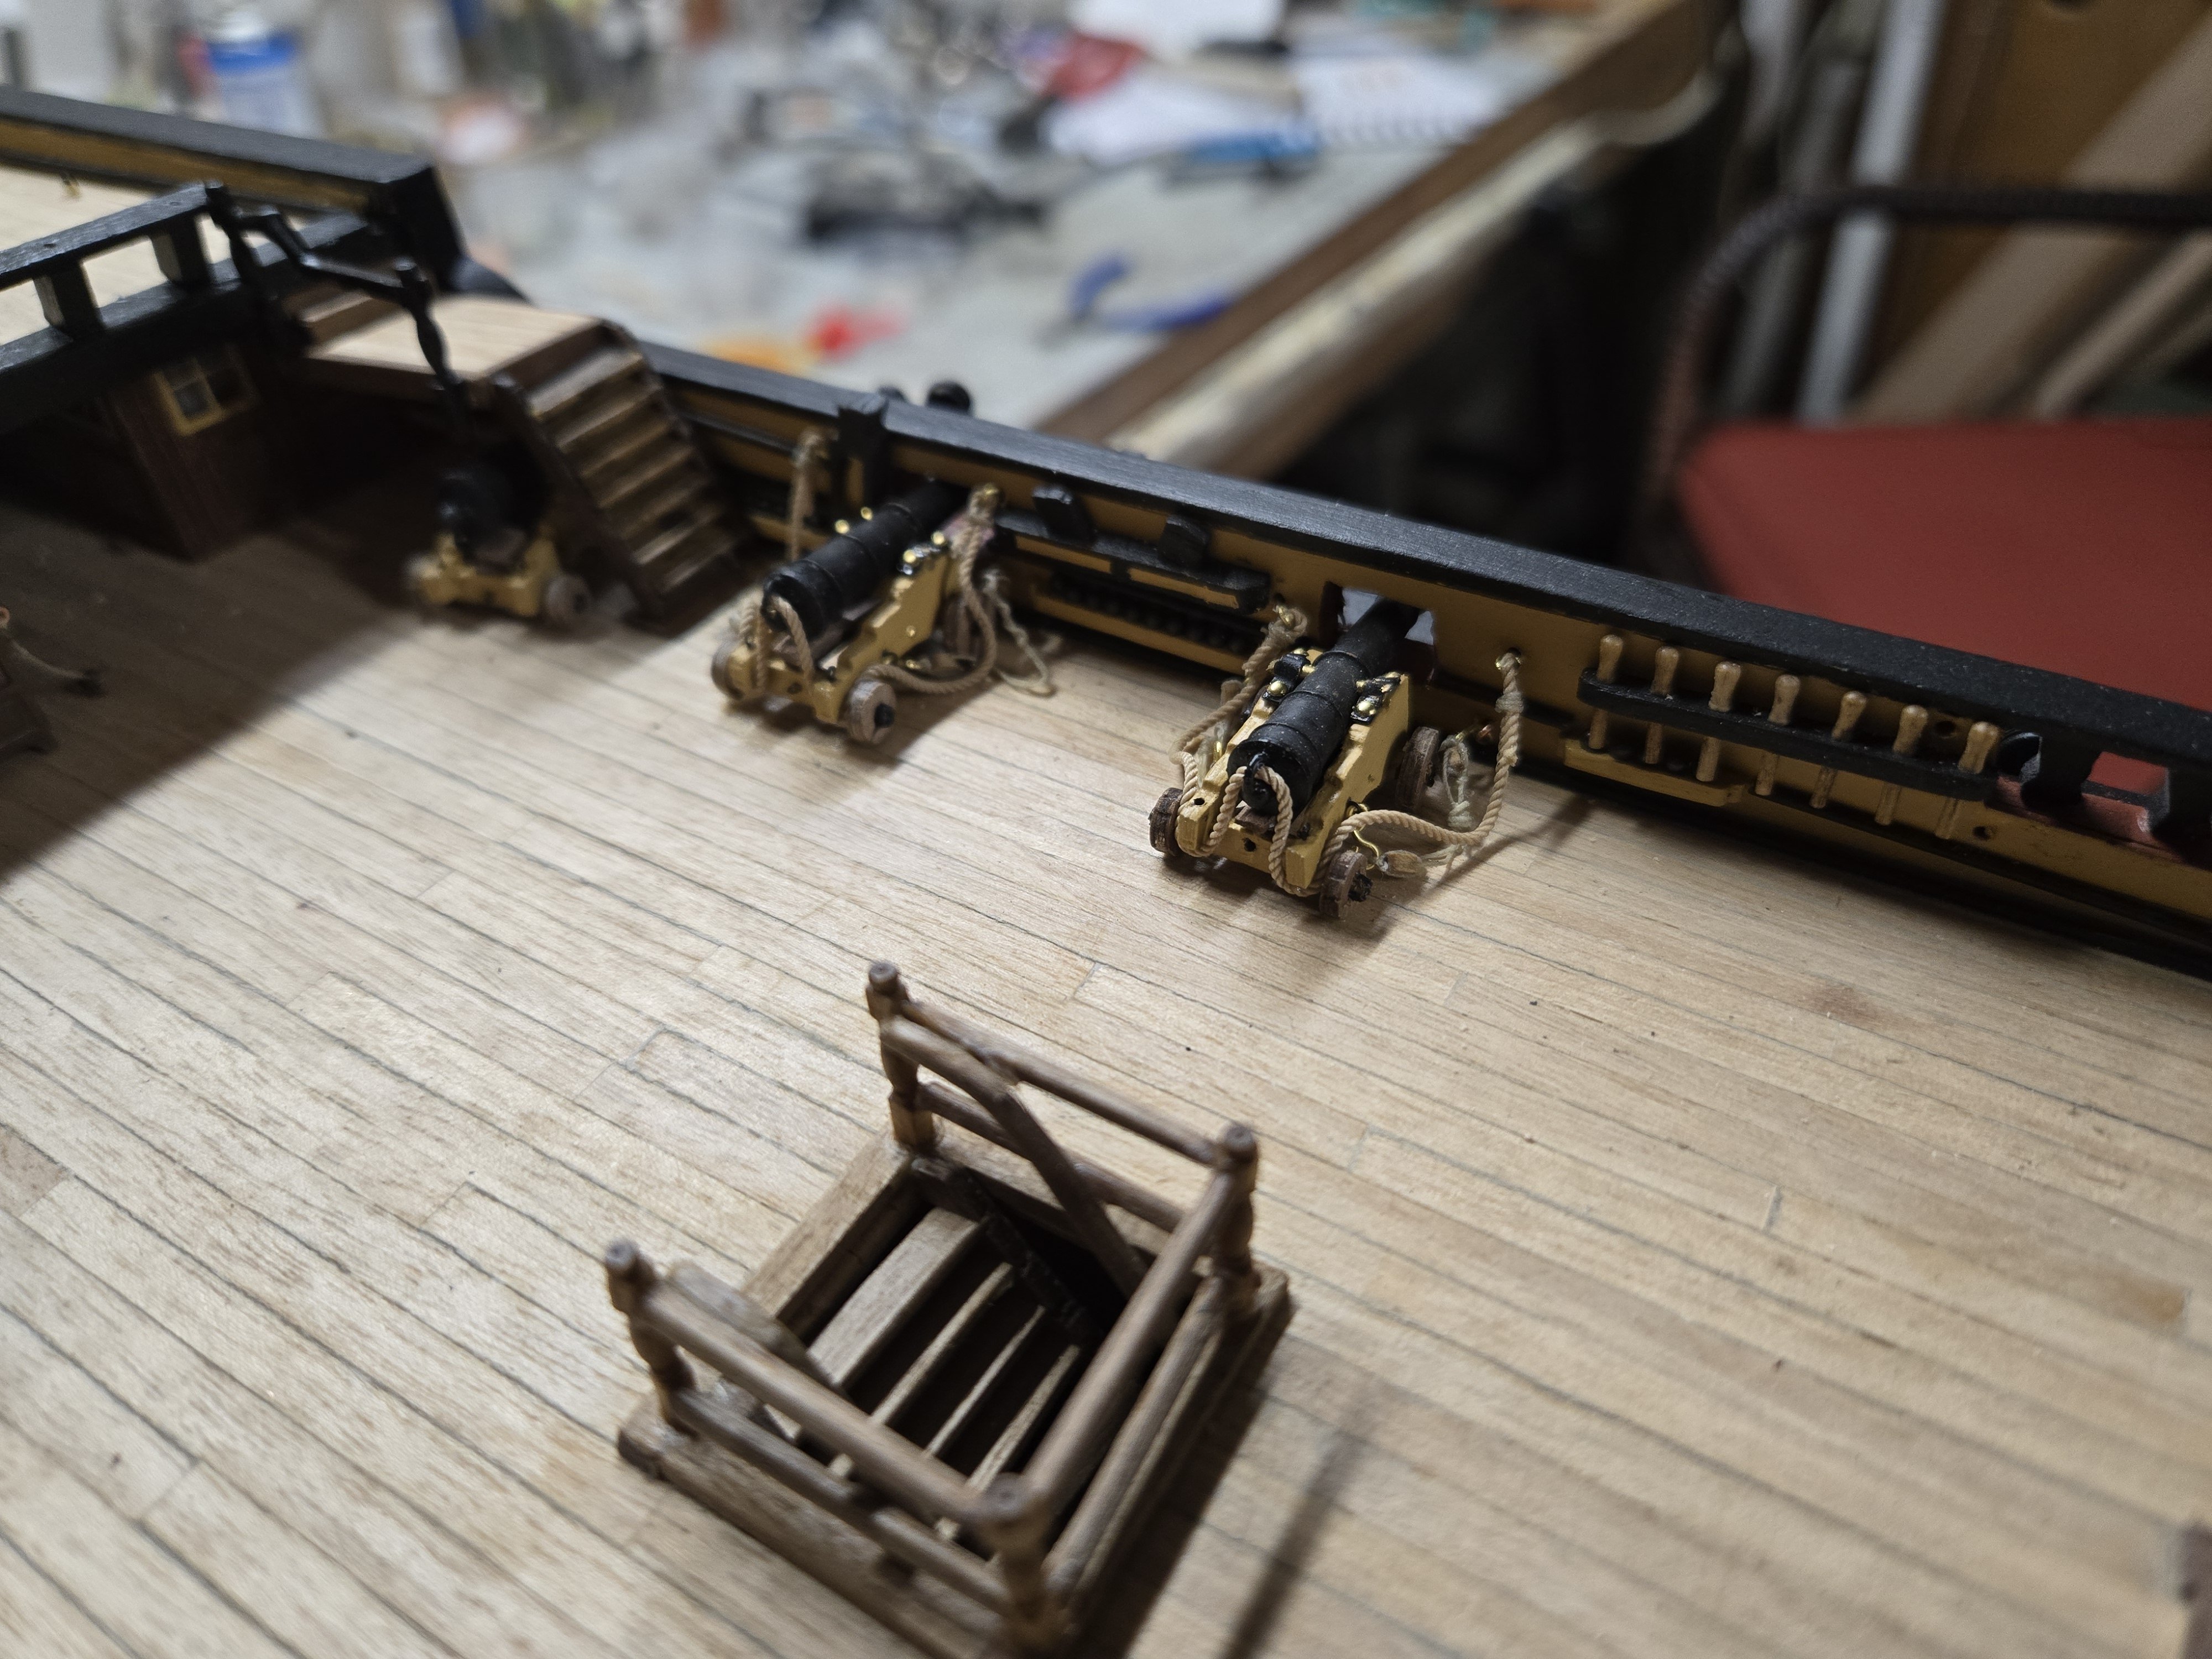
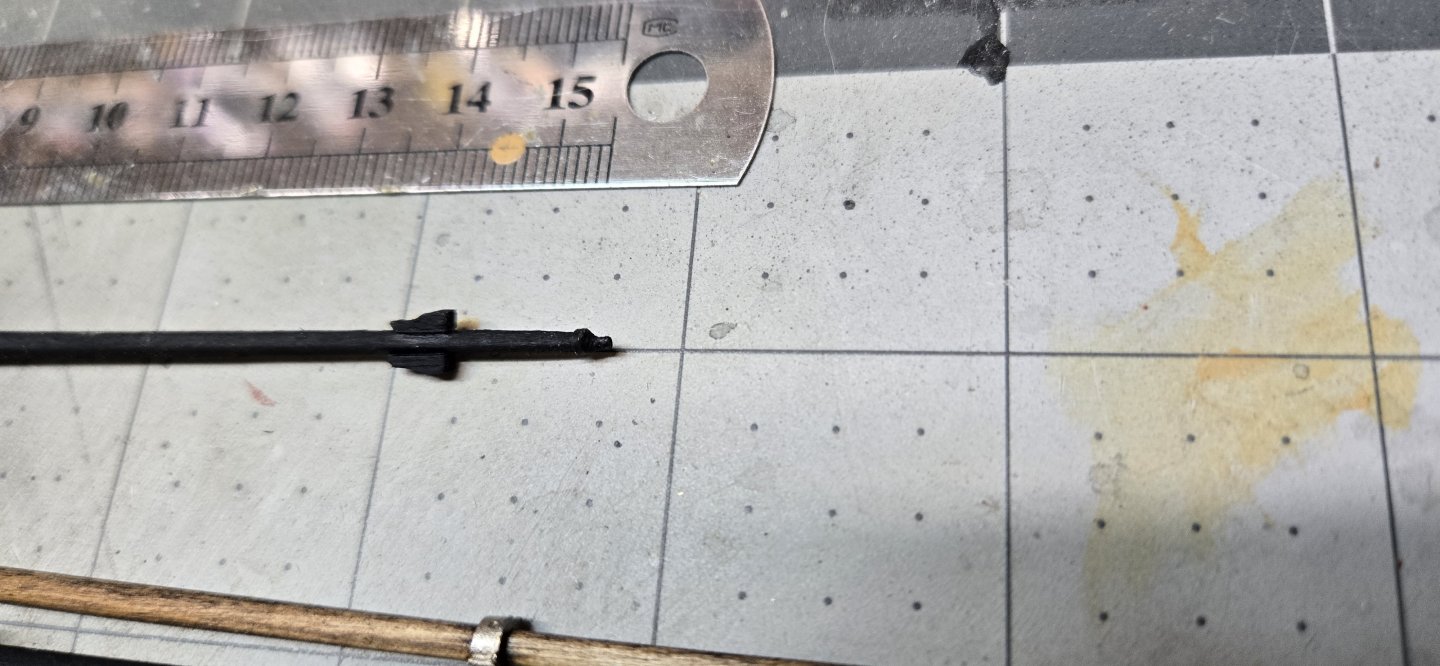
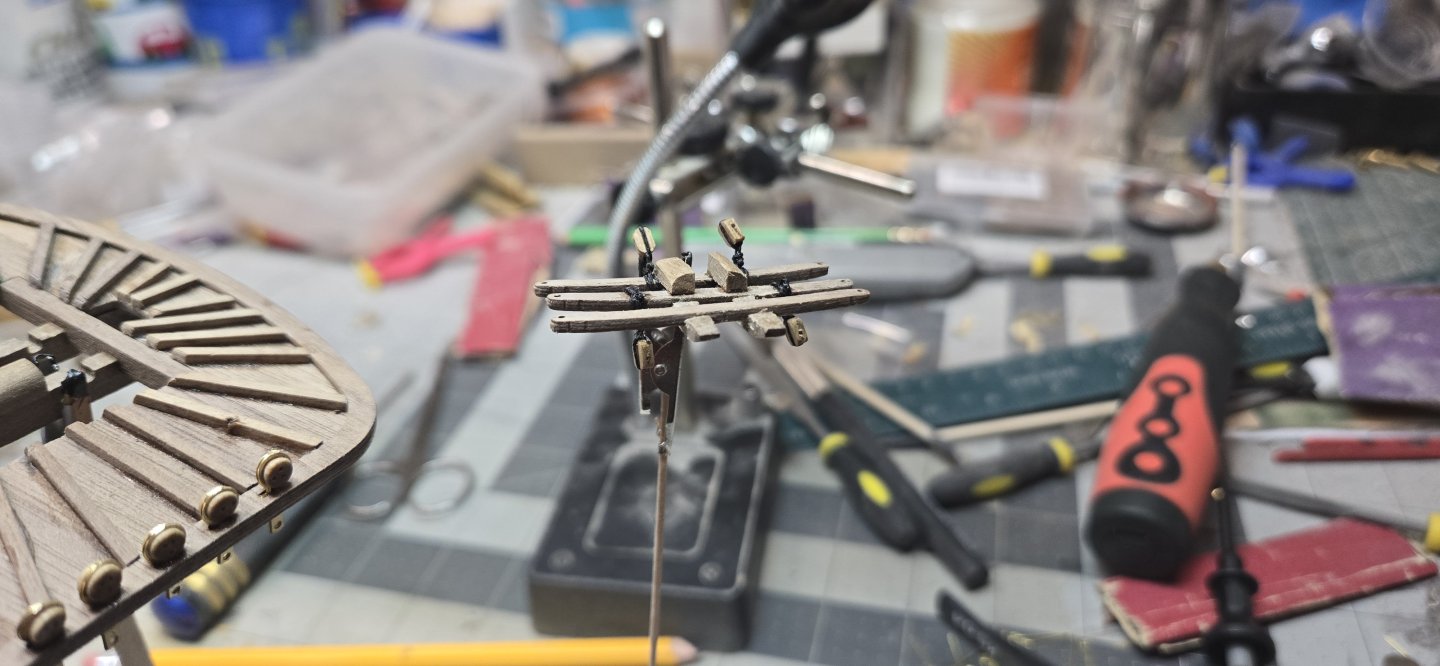
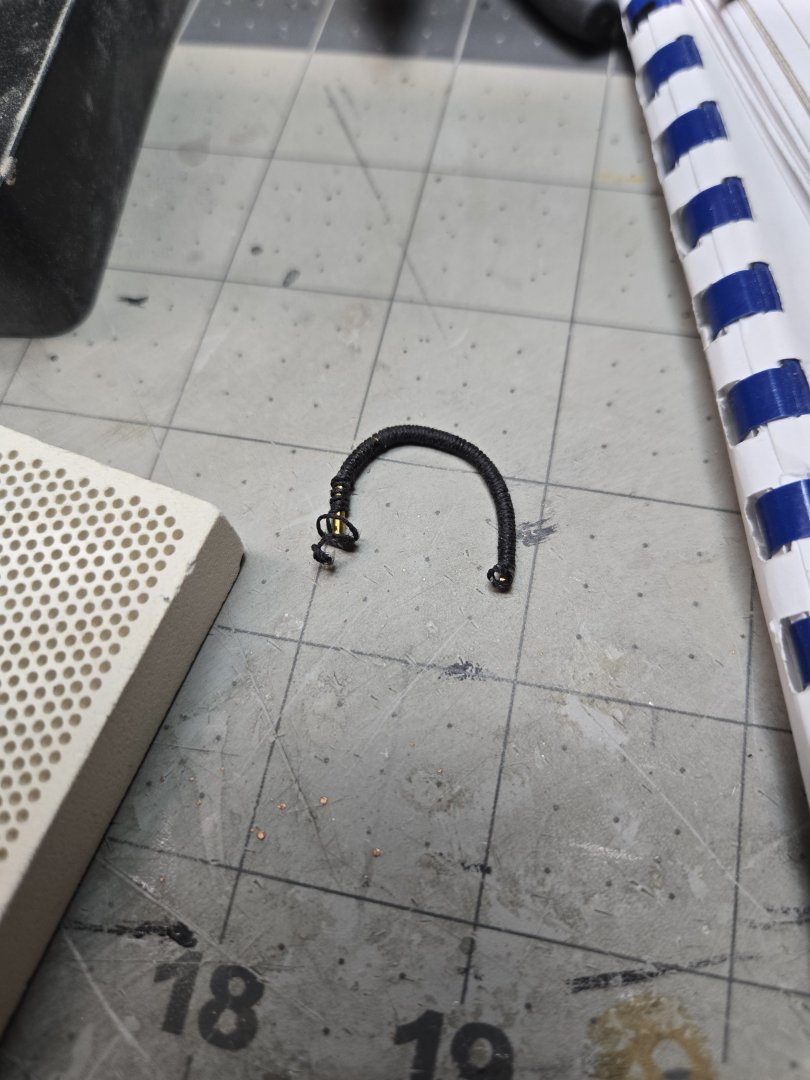
Pugging on! My idea of 'seizing' the brass wire before turning it into a ring actually worked...after some failures. Tying one end, I was able to easily and quickly twist the tube while rolling the string around it. Every 5 or 6 turns I would put a dab of CA glue on it to keep the work I did set. The problem was trying to bend it after! The instructions call for a 15.5mm diameter ring...which is about a 47.1mm circumference, or length of brass. That is pretty short and VERY hard to bend. Even using some pliers, I ended up ruining the puddening on the ends. Annealing the 4 pieces made them very easy to bend. I have a little mini butane torch and ceramic pad (you can see in one of the pics) and the process goes fast. I quenched the pieces and that did the trick. (you don't have to quench them, but it makes it easy to get back to work quickly) Once done, I used a pair of round nose pliers (for making jewelry) and was able to bend them around a fat sharpy pen and then attach to anchor stocks. After the first one, I left about a 1mm bare on each end to facilitate their attachment. After that, I added a bit of black line to cover those bare spots. Putting the tan decorative line on the 3 'corners' went fine. Although while doing this, it is apparent to me that adding the black line while the tubing was straight was far easier than what I would have encountered had I tried to add the black line to a ring...which would have required actually 'sewing' the line on. A barrel of anchors....sorry, couldn't resist. For me though, the tan line was fairly dark as the CA glue does stain the line. I didn't like that, so I painted them white. Perhaps I could have added some black to dull down the white a bit, but in the end, it adds a nice contrast and I'm fine with it. I also added the PE hinge straps to the rudder and hull. Once again, the directions just say to attach or secure the straps. There is nothing of detail there or on any of the many blue prints. However, the parts manual lists where each one goes and made it easy to make sure I did it correctly...given my propensity to not read ahead or follow simple instructions! I also noticed that my waterline is a bit higher than it should be at the stern. Nothing I can do about that, but it seems that more of the rudder and the spectacle plate (the little PE piece that will hold the anchor chain for back up steering) should be black. The rudder doesn't quite fit tightly to the hull at the bottom, but will pass casual observations. I did add a piece of copper plating to very bottom between the hull keel and the bottom of the rudder to help keep it in place in case it's bumped. Also continued to work on the tackle rigging! Practice makes almost, close to getting there! I have 4 down and 4 to go, then I still have to make and install the...'reset' tackle that pull the cannons away from the gun ports. So not even part way there. I also ran out of rounded pin nails, there is a hobby shop up the street that may sell these .6mmx10mm pins, we shall see!

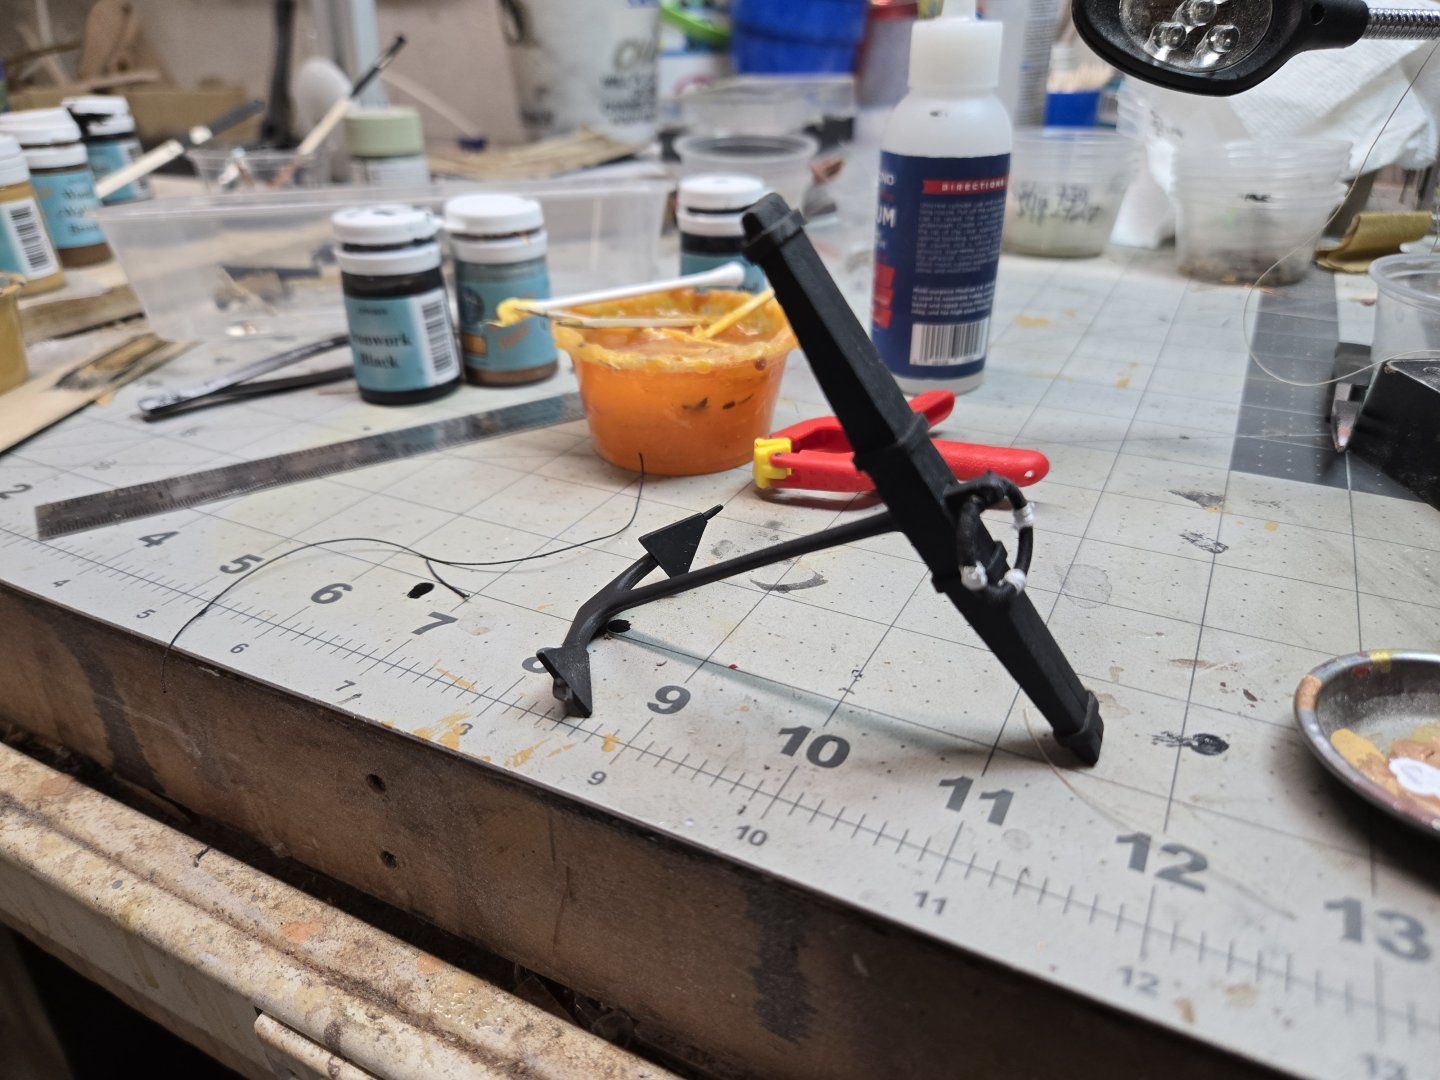
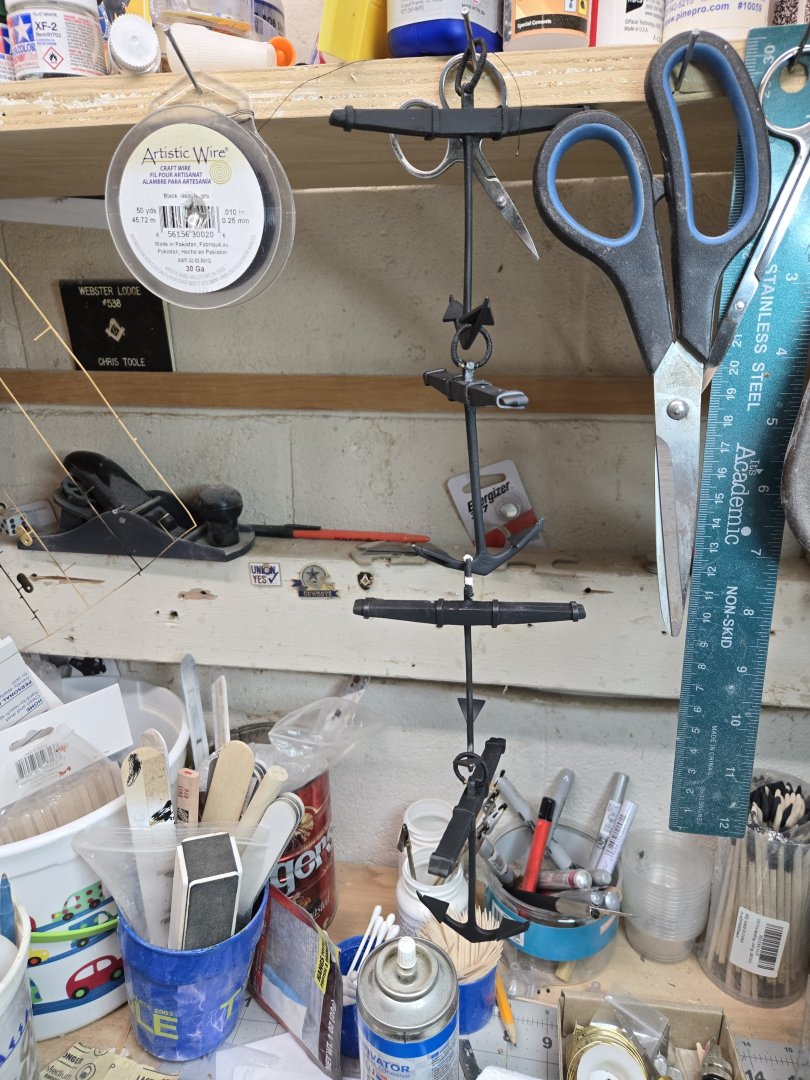


-
Welp, fixing the anchors wasn't easy or actually even possible. I used white glue to attach the stocks together, but I must have used a dab of CA glue to hold the anchor itself. They wouldn't budge and the cast is very soft so I couldn't try a more aggressive brute force tactic. In the end, I had to cut them off and reglue them. I guess that's brutal! Hopefully, they won't give me issues when I go to attach them. I am thinking ahead about the puddening of the anchor ring. I was thinking that I could use the same method used for seizing the shrouds. Maybe just start at one end of a wire and seize it as long as the diameter required for the ring. Glue the ends to keep things tight, then create the ring, attach to end of anchor with glue and then add the additional tan decorative bands. Just a thought. Began working on the rudder attachment too. Have the hinges in place and will add the copper straps next. I did have to cut the pins on the other hinges, it was much easier to attach the whole rudder and I will ultimately use CA glue to finalize it. The rudder is just sitting there in this pic.