Yabuhebi
-
Posts
206 -
Joined
-
Last visited
Content Type
Profiles
Forums
Gallery
Events
Everything posted by Yabuhebi
-
 Ain't that the truth! Thank you!
 -
Thanks Chris!!!
-
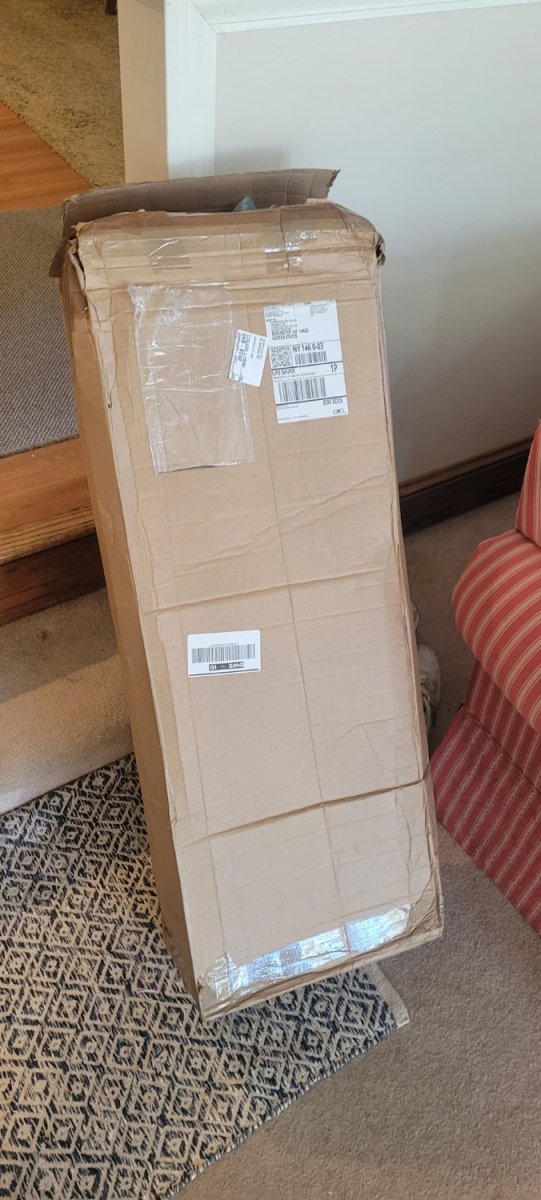
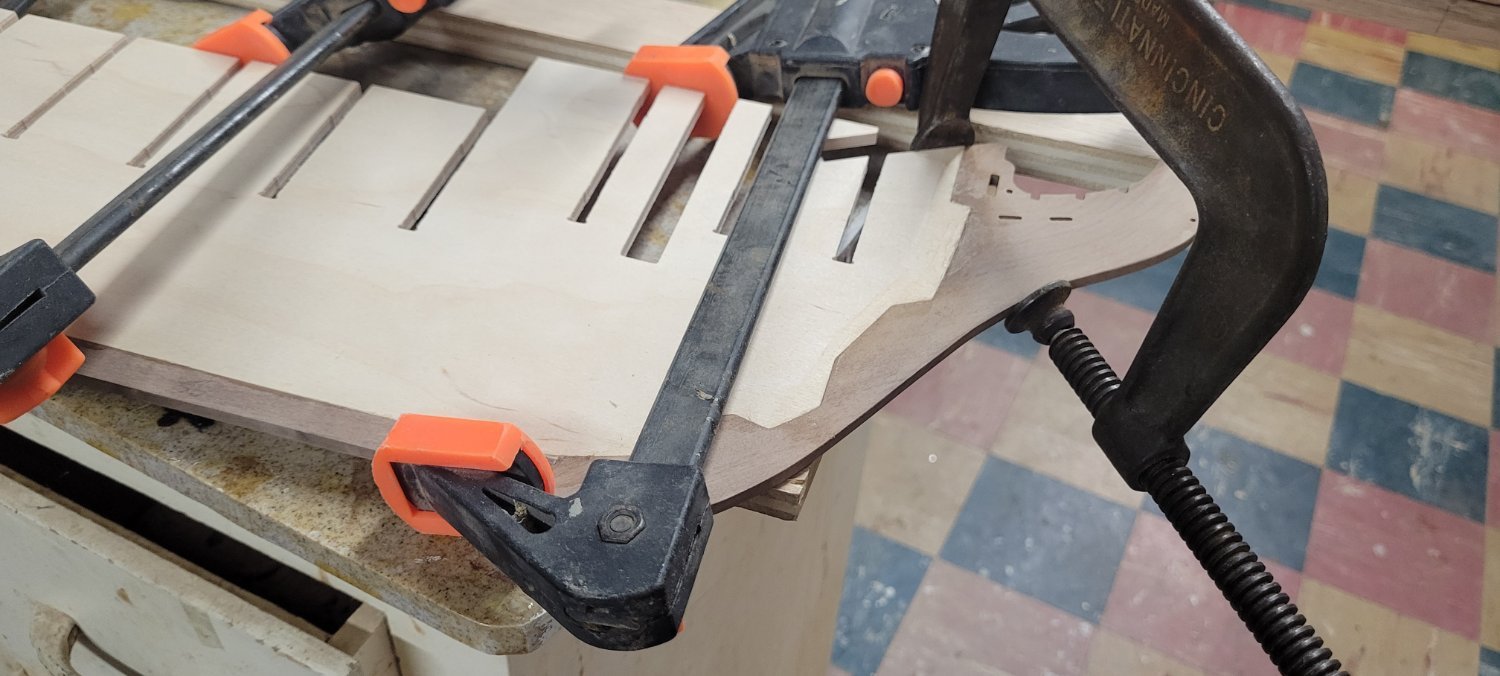
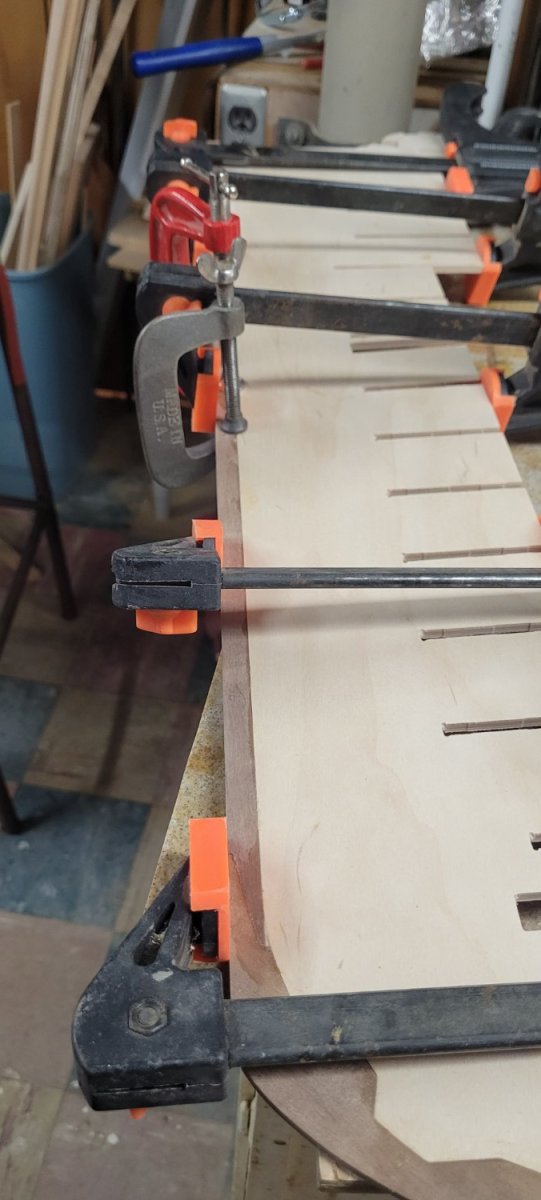
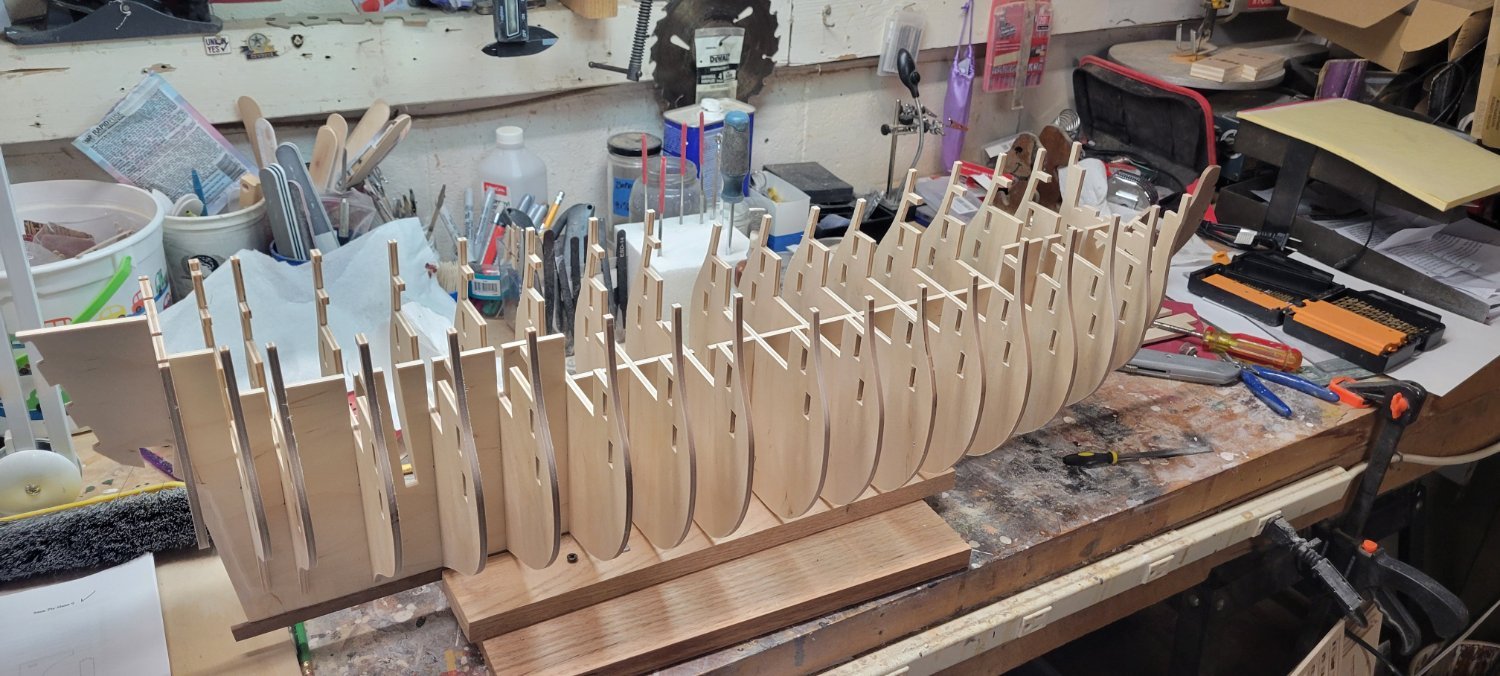
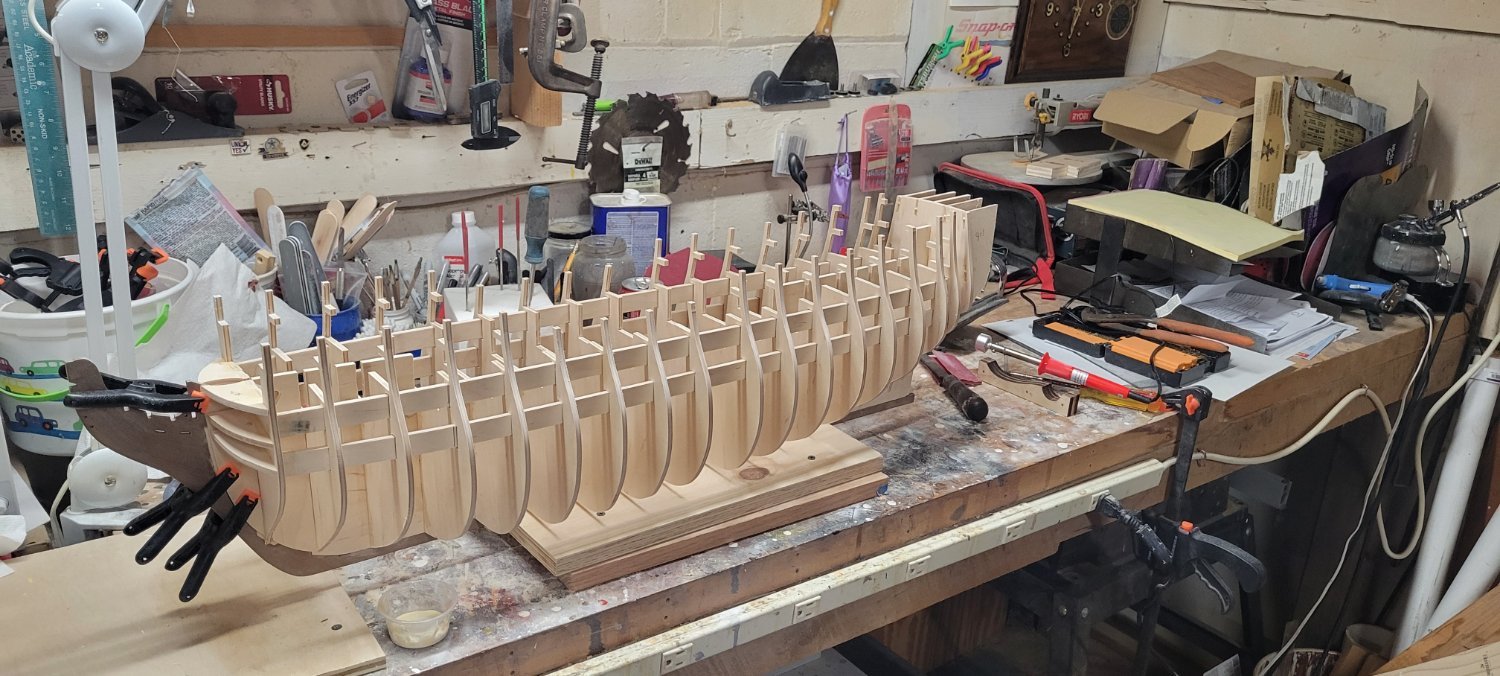
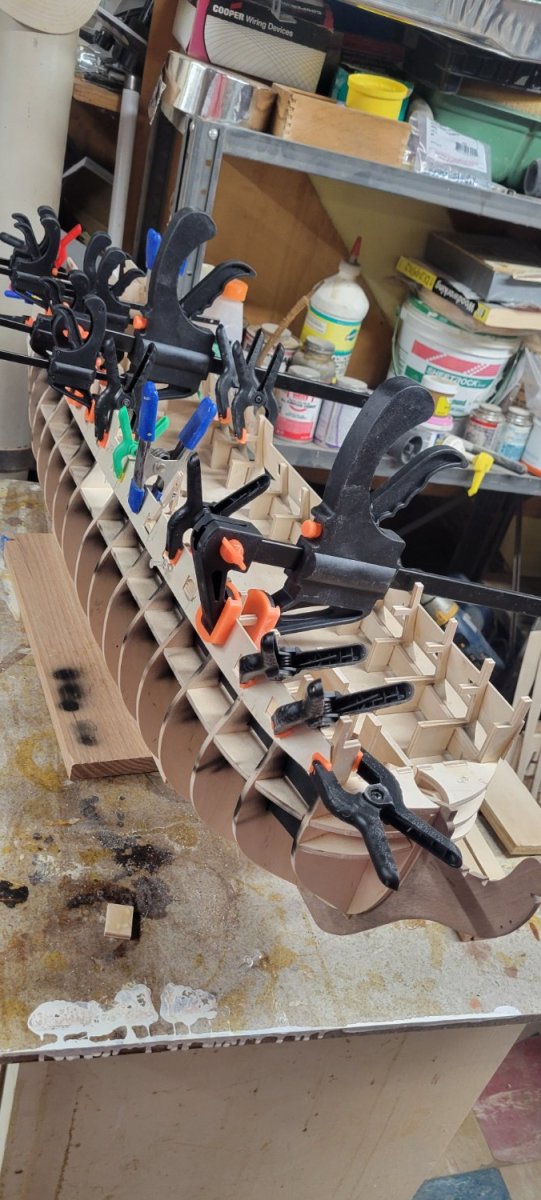
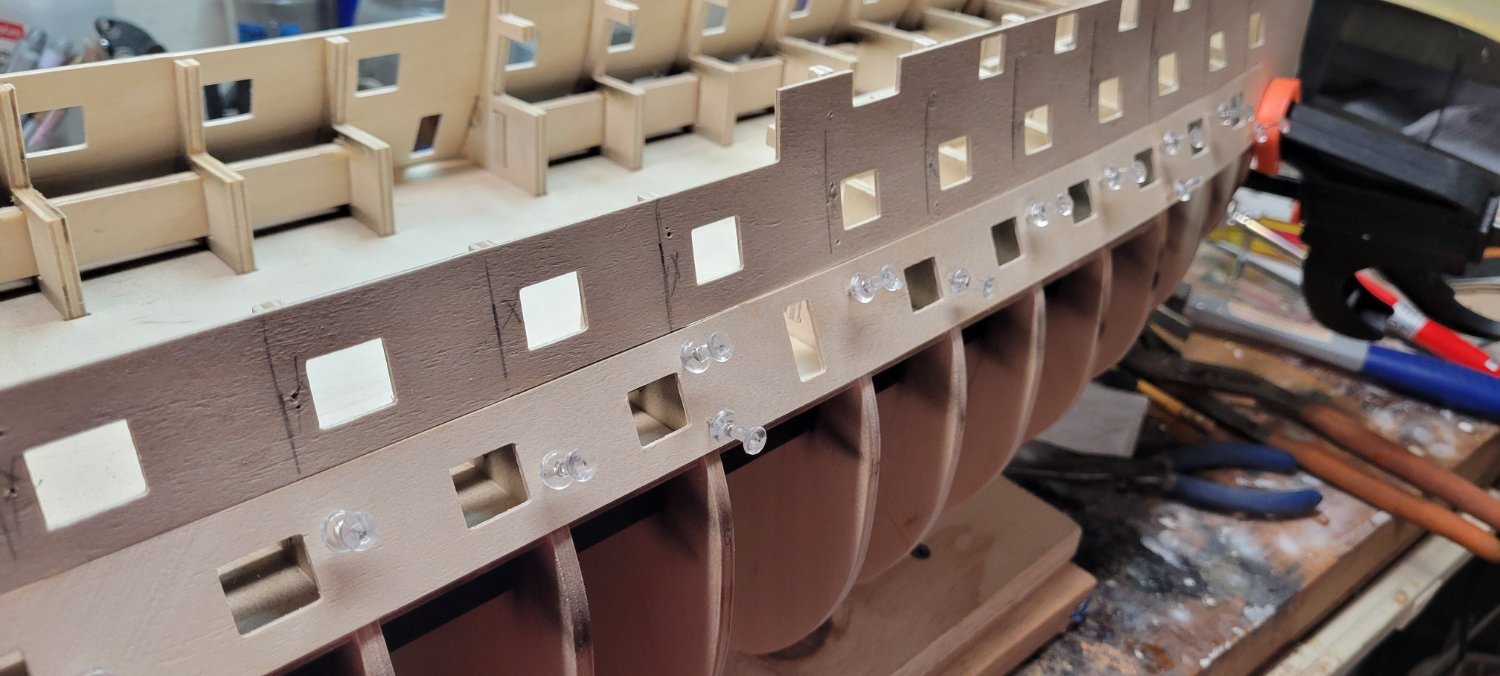
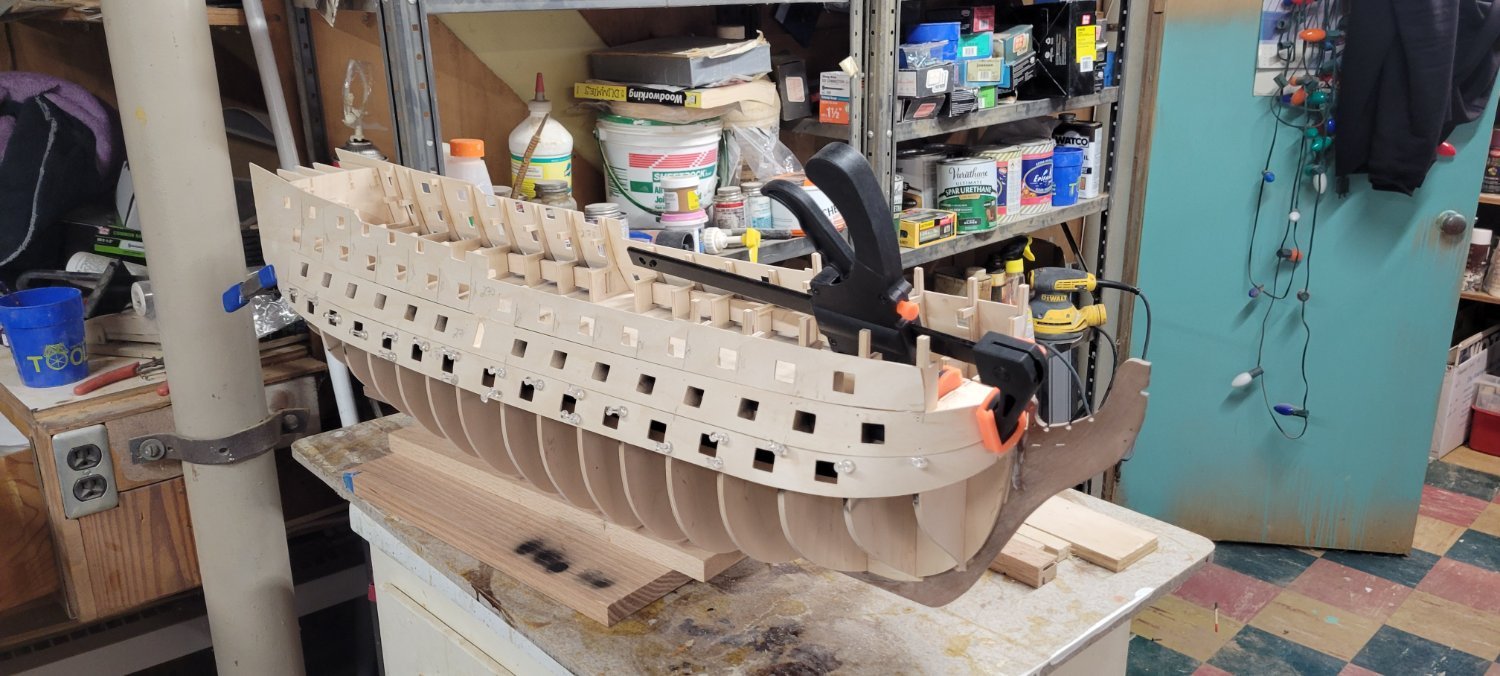
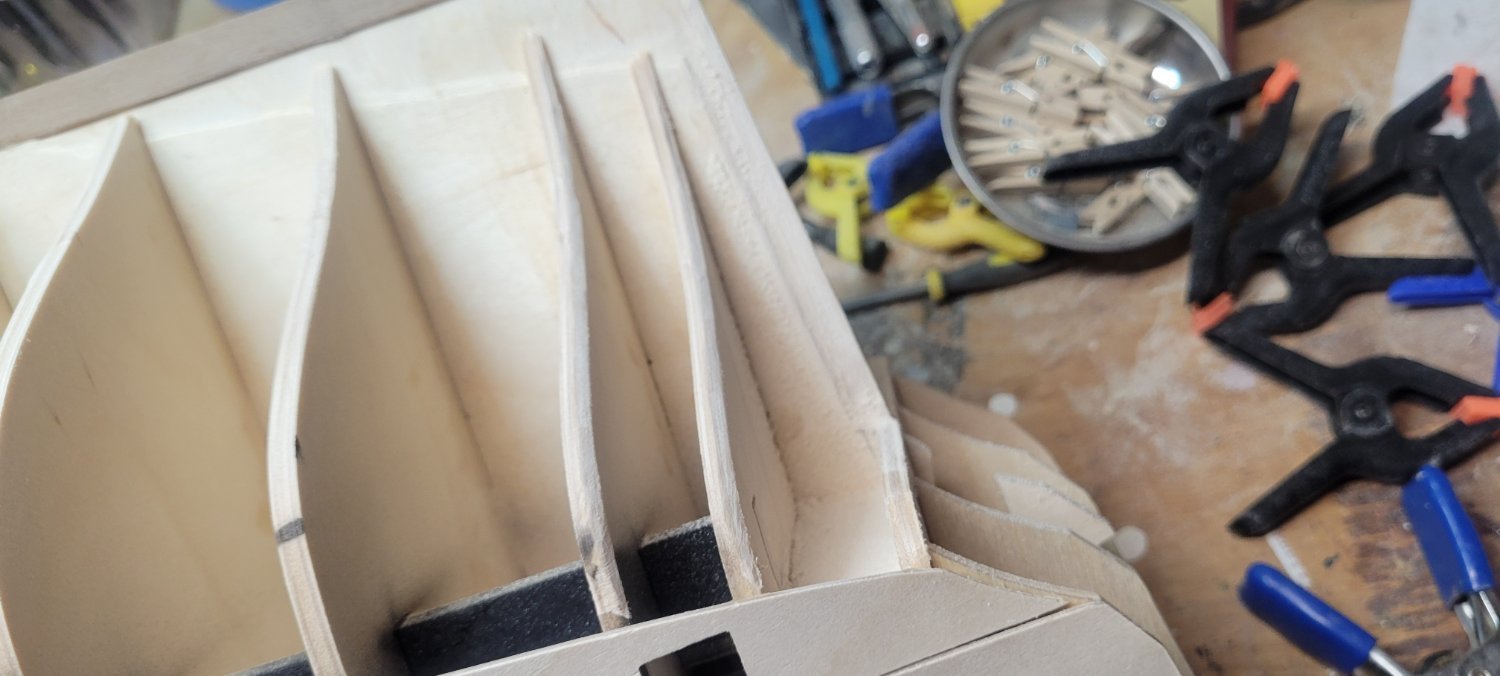
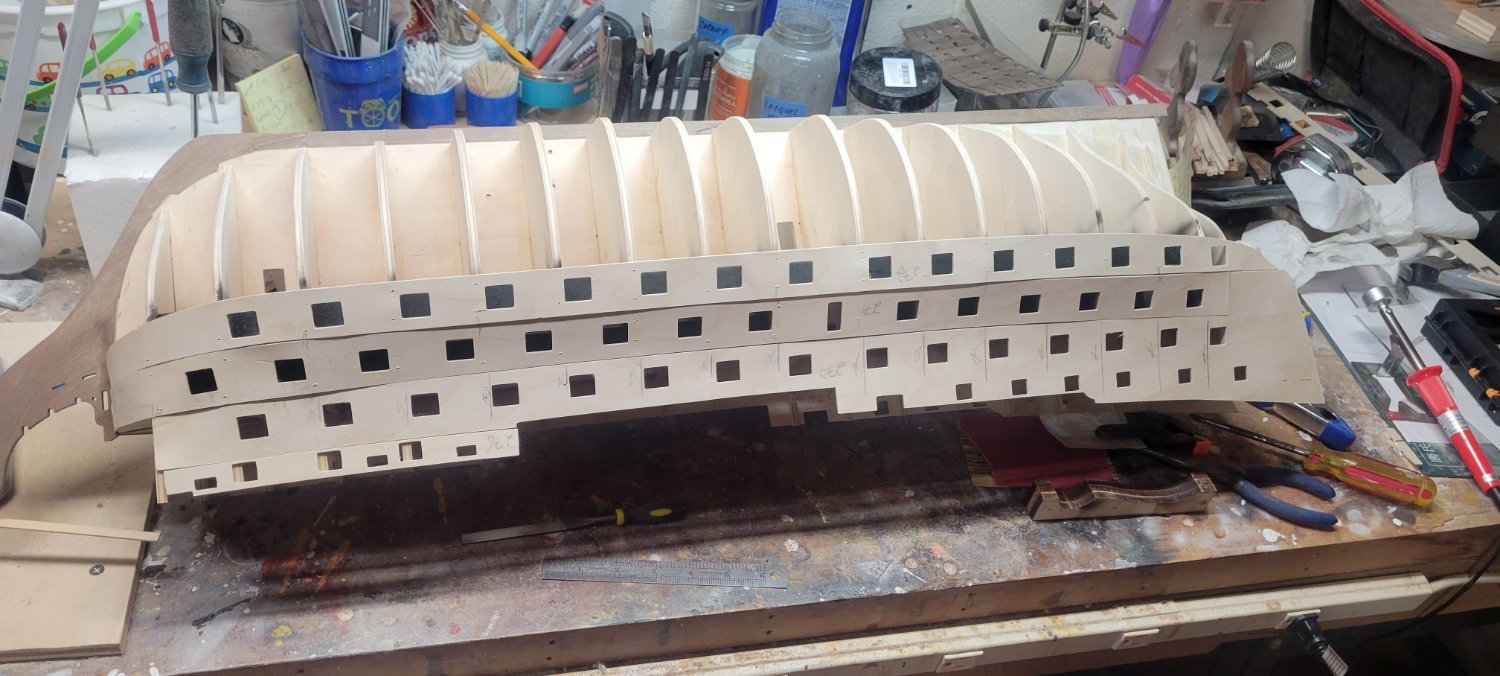
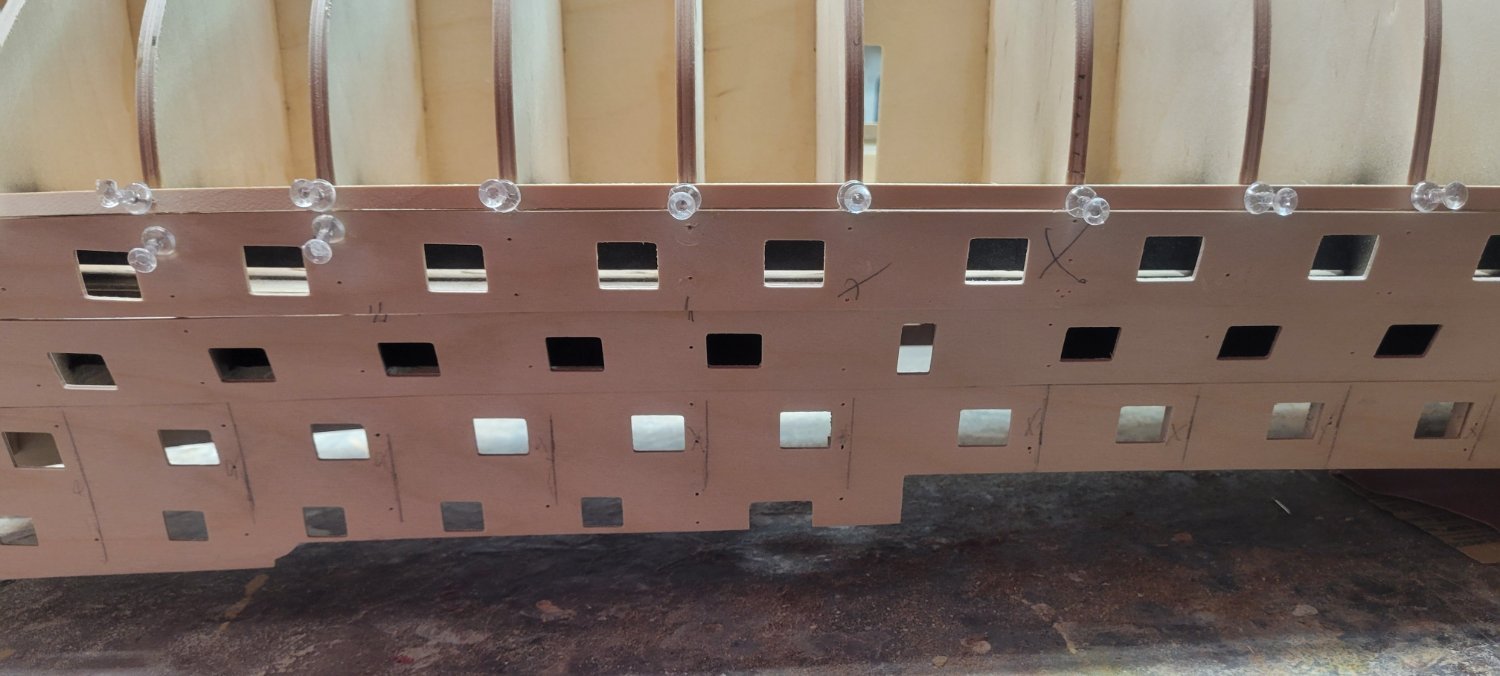
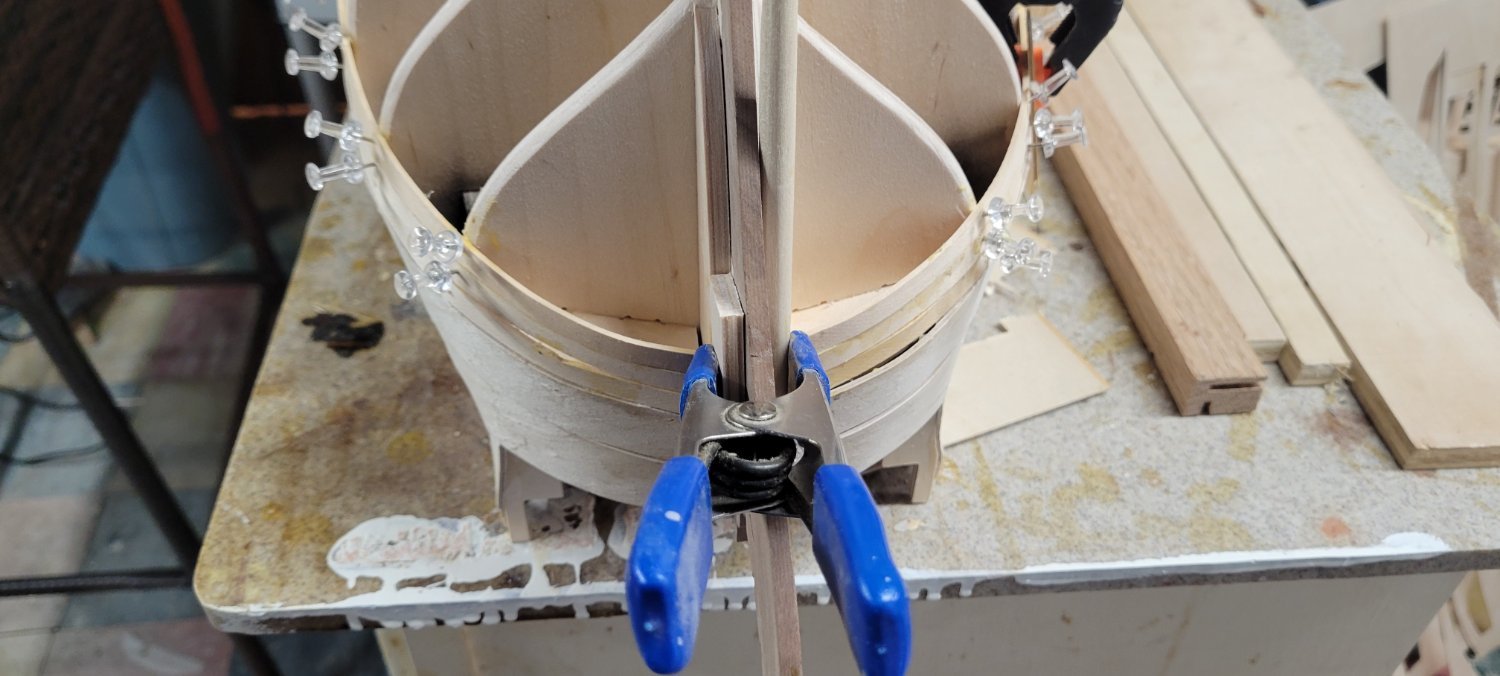
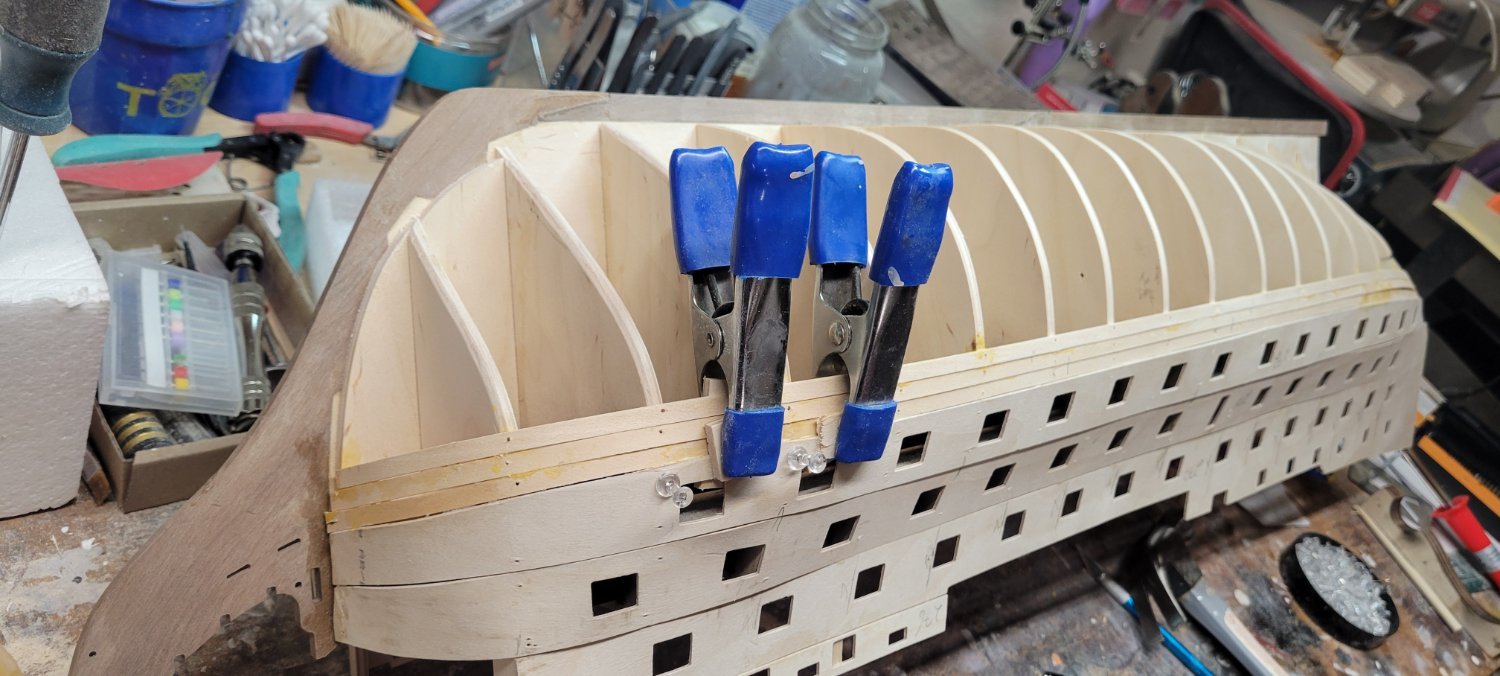
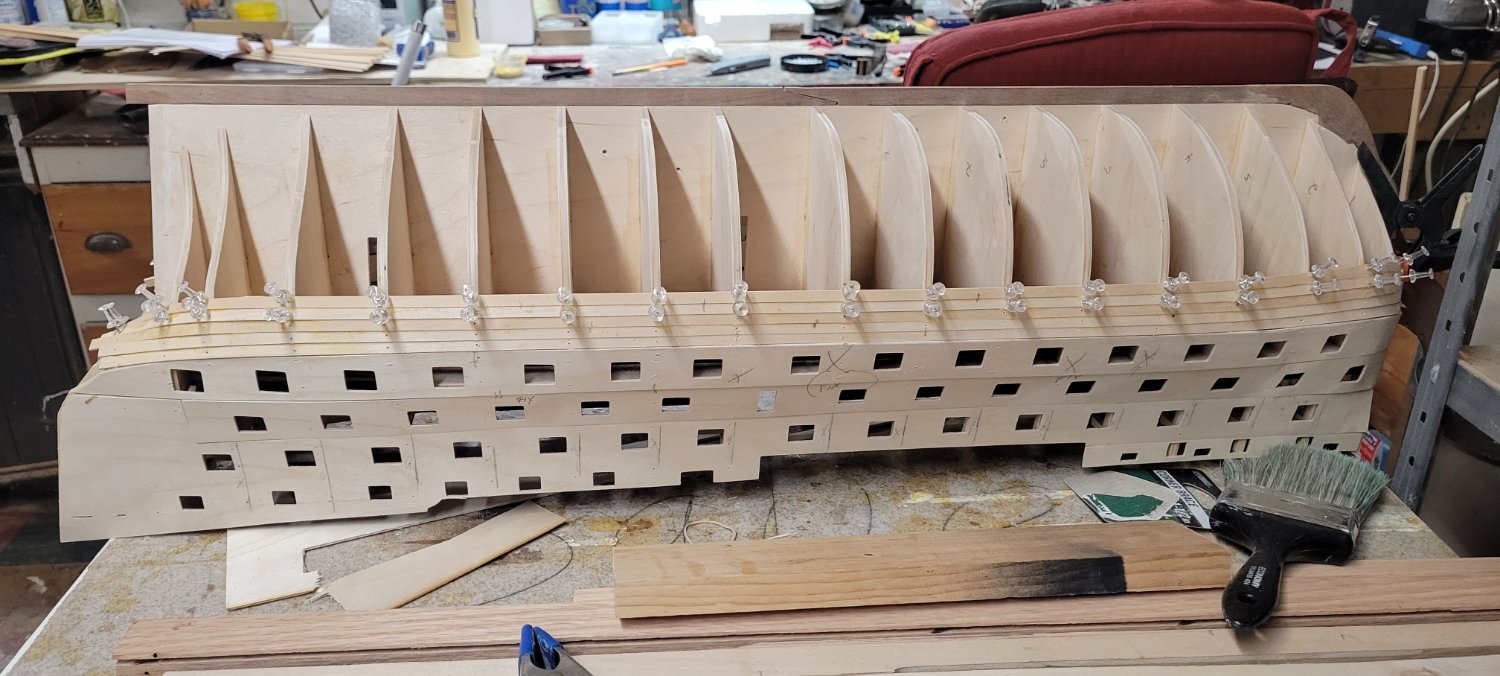
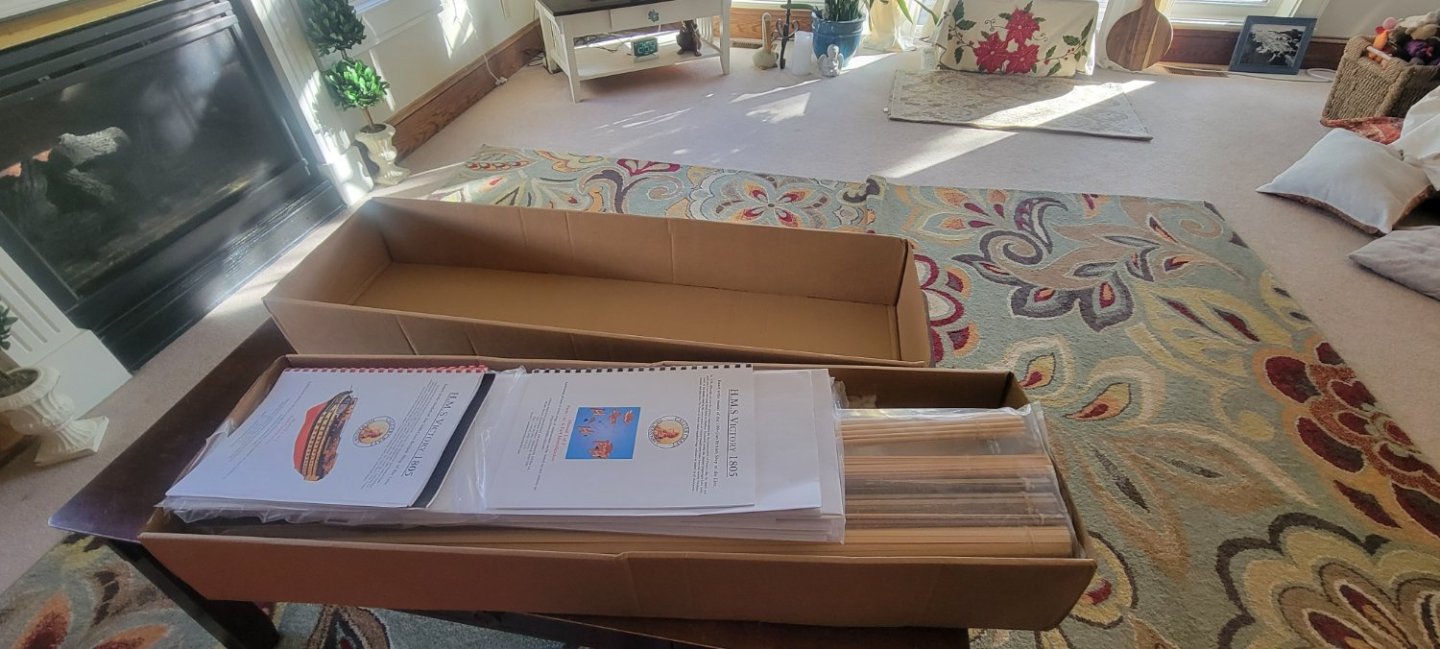
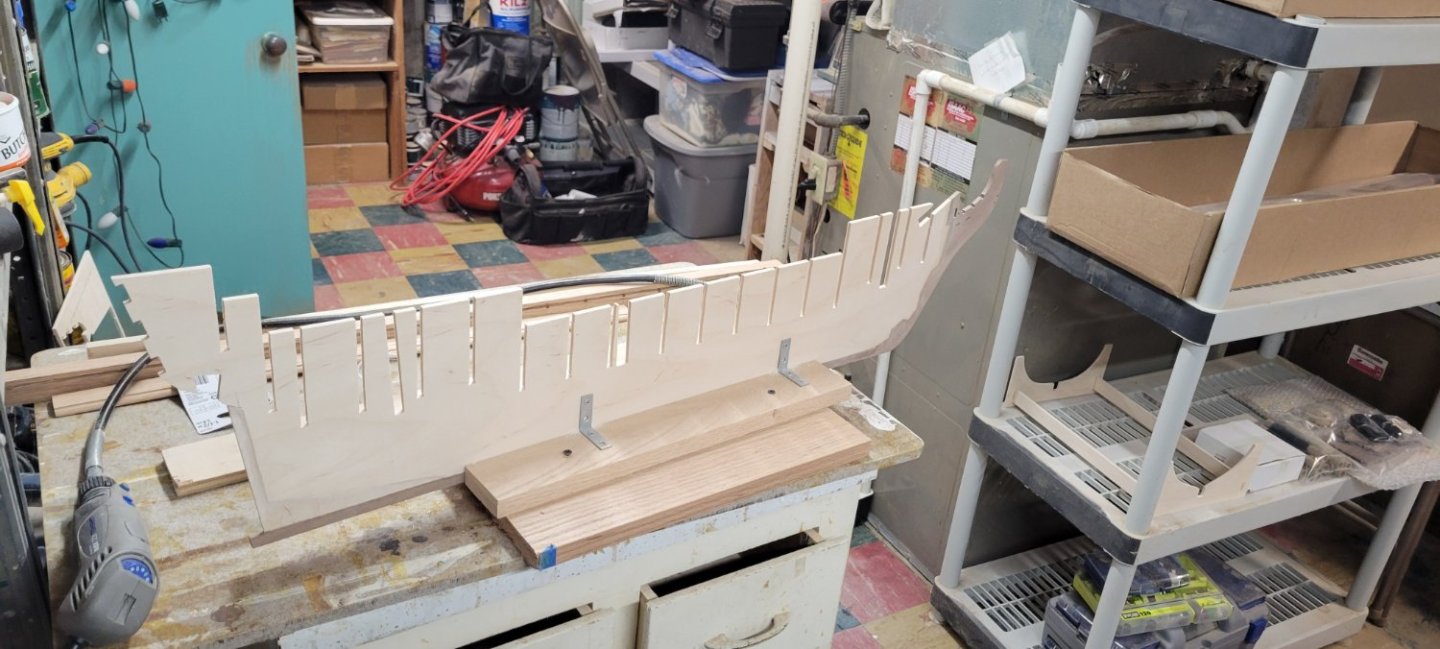
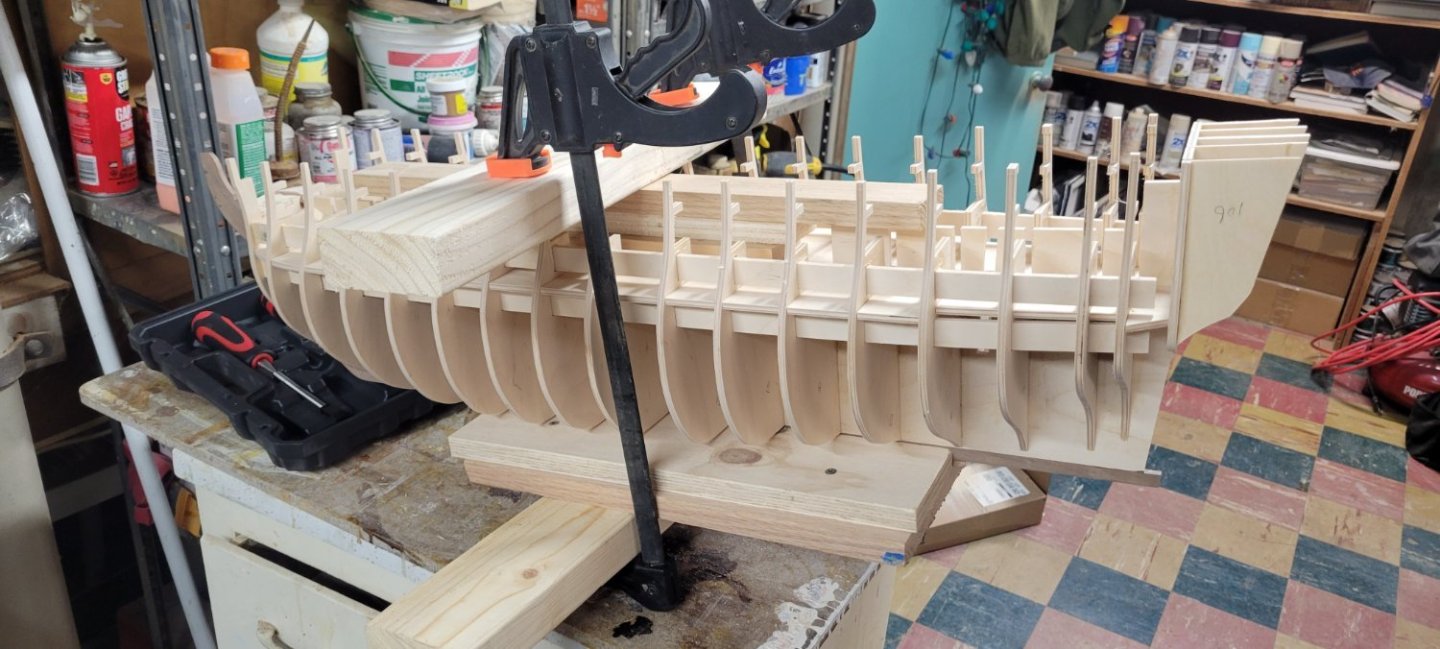
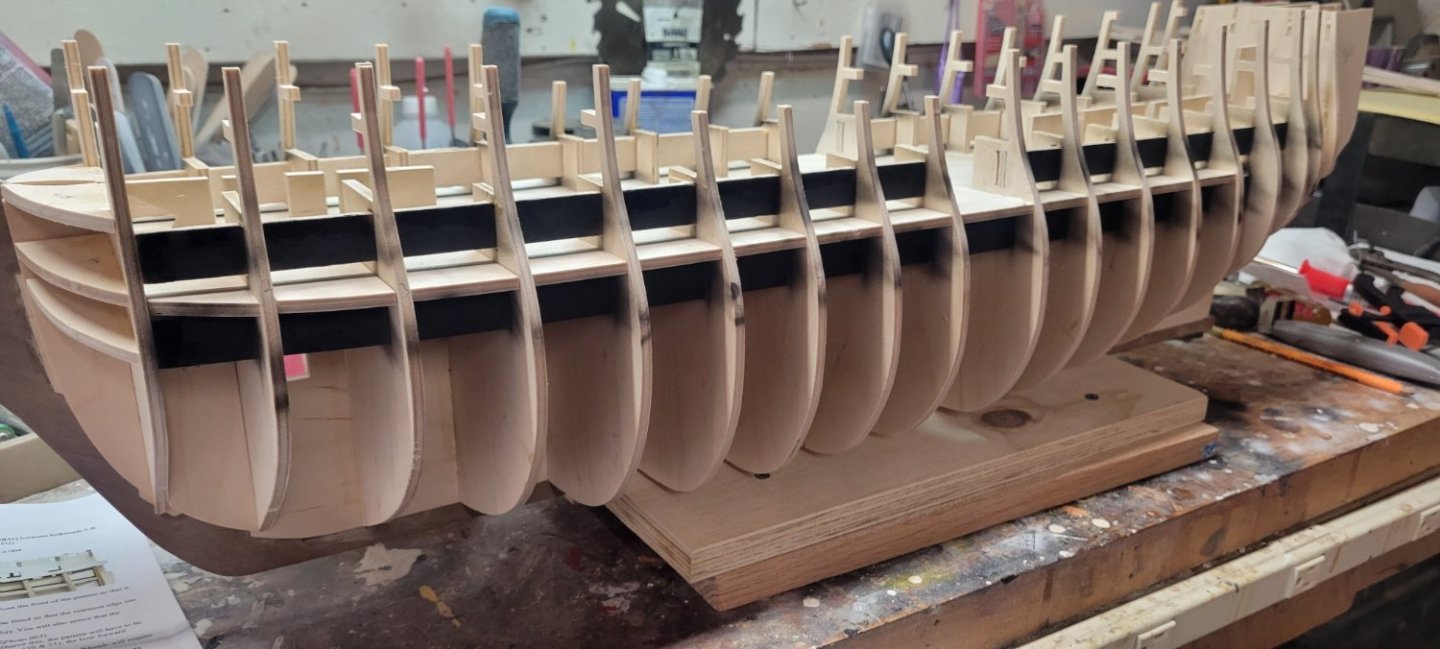
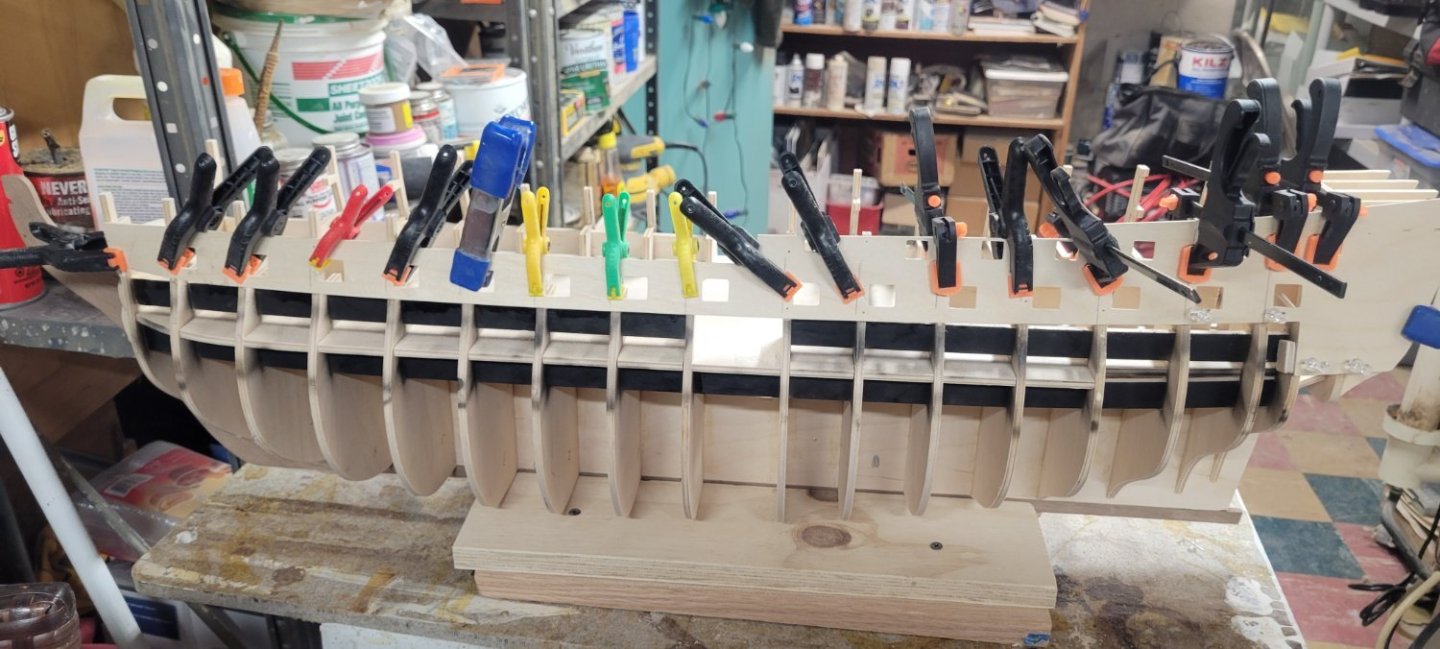
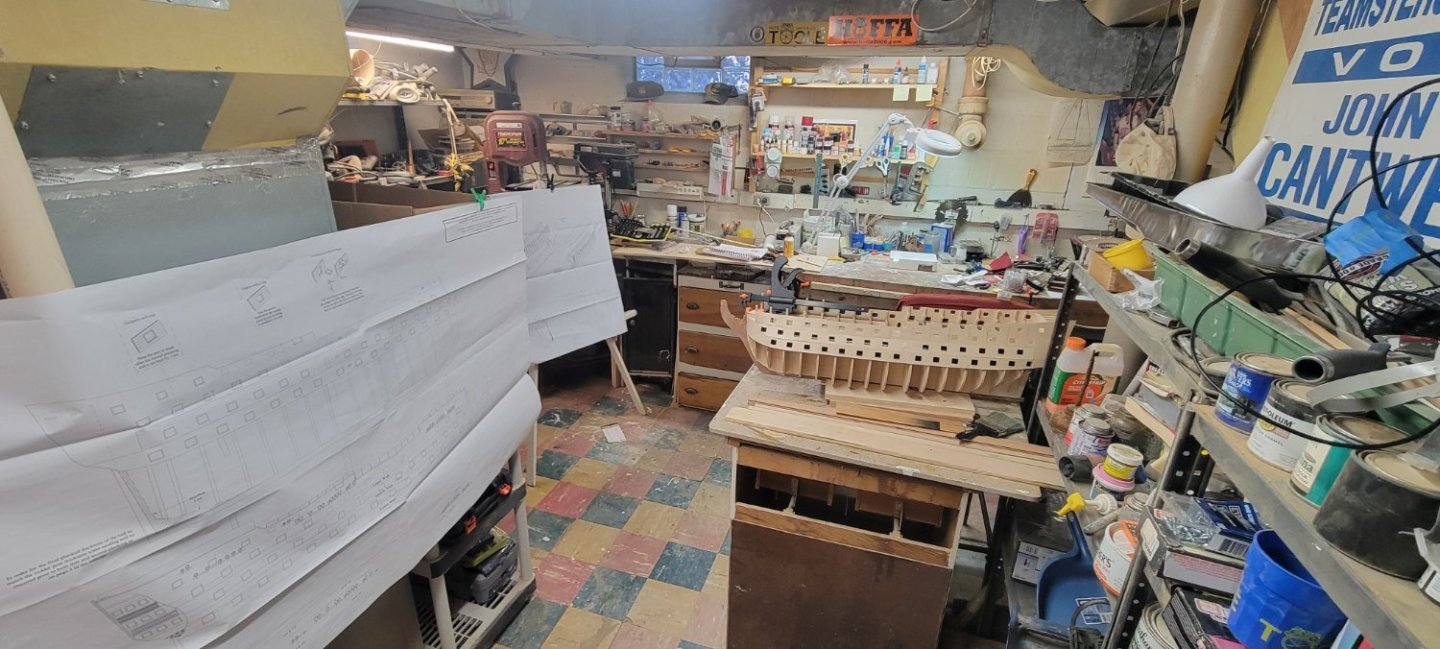
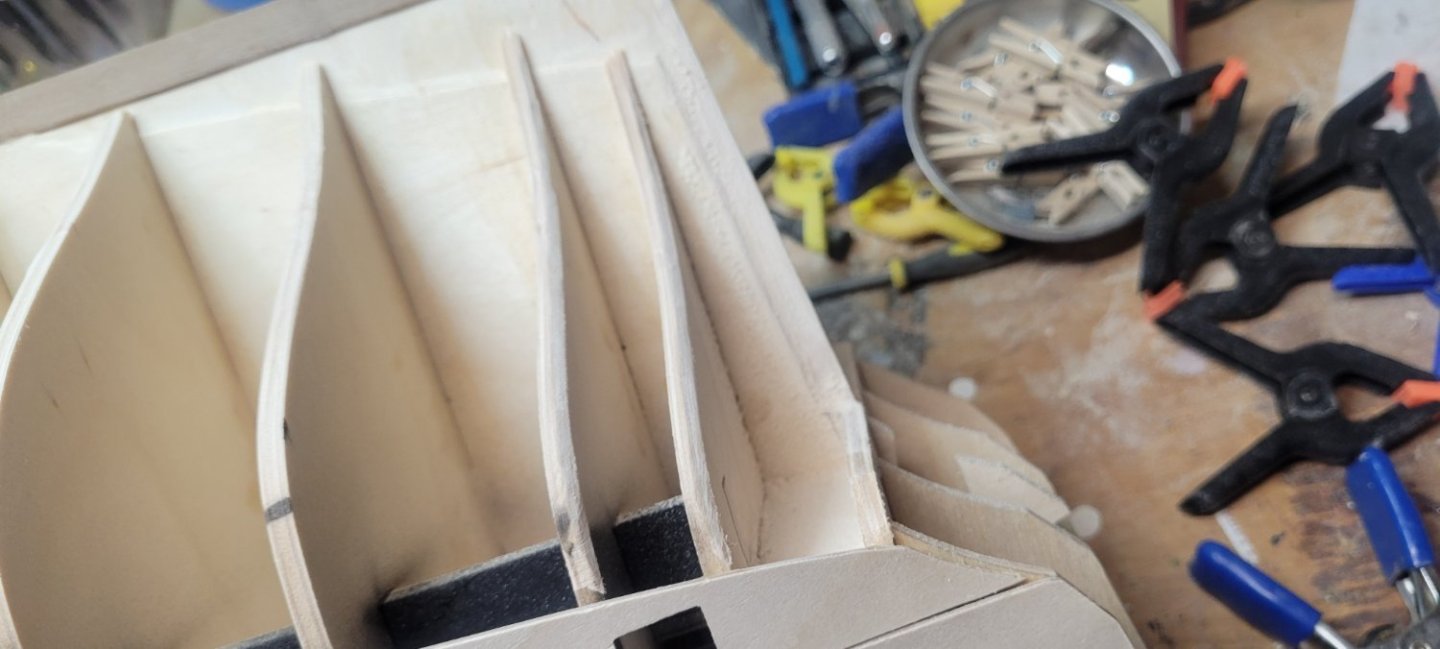
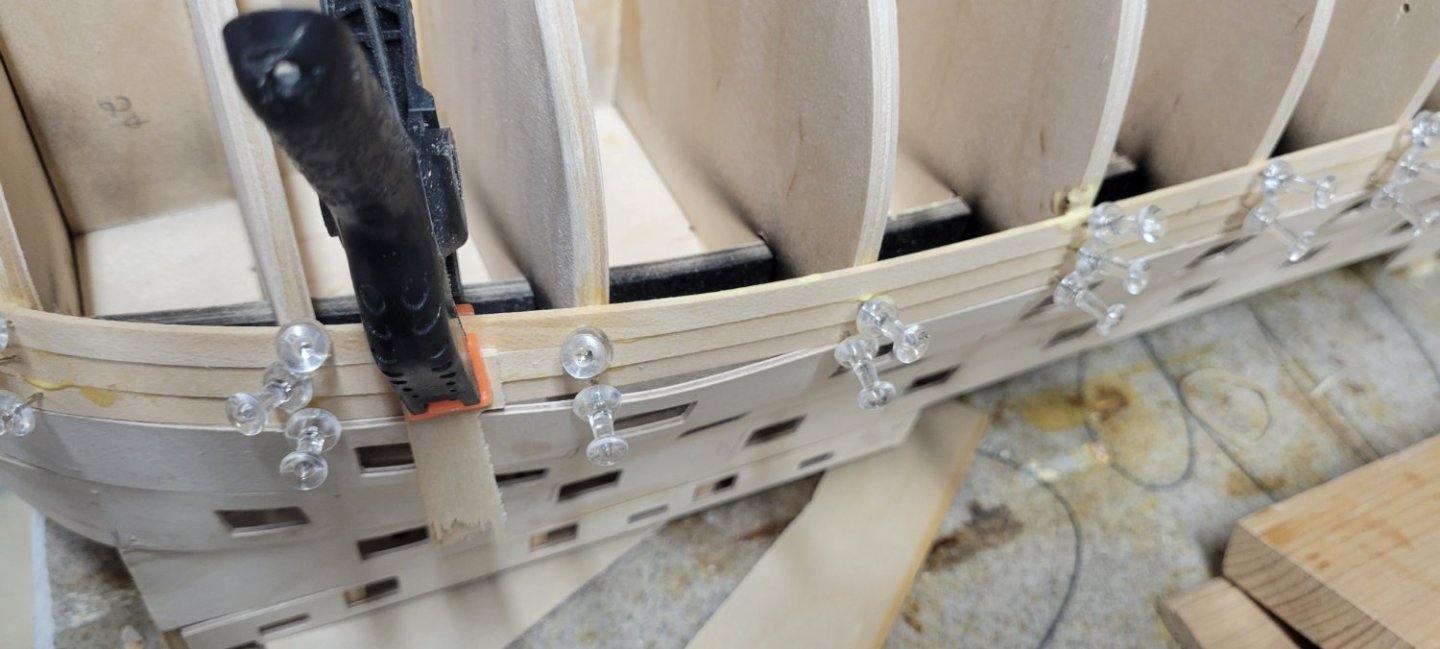
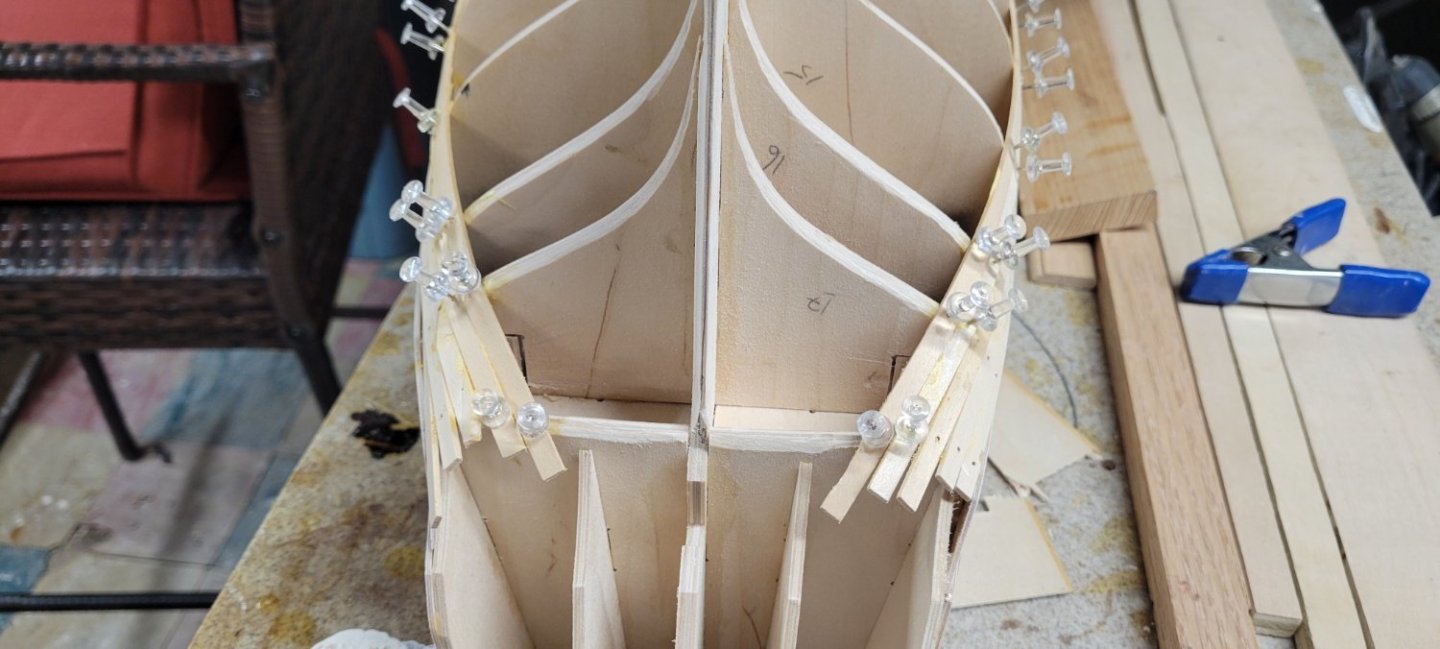
Day one, I received my kit. As there is a back log on this particular model, I was asked if it was ok to send in a plain box to speed up delivery time. I didn't really care about that and she arrived on February 14, 2024. Is there a way to alter or reduce the size of the photos in the post, so that they are not so big? Also....is it better to just attach pictures to my post so that they are down below or post in the message? Remembering that I am gearing this log for new builders with very little experience. RULE # 1: Read the instructions, read a few paragraphs for the next task and then RE-READ what you are about to do. RULE #2: Dry fit everything first, take a brief second and think about what you are doing and then go back to Rule #1 just one more time! I did not do that. As you can seen I glued the stern pieces to the keel and they should be left off until later. After some thought, I decided to just leave them on. Hopefully it won't matter or at the very least, I can fix it with sanding and putty. Once done, I created the little base to set the keel into as I began the process of adding the bulkheads. I just used some scrap wood. One tip: be sure you raise the keep just a bit up or make sure the bracing you are using doesn't interfere with the bulkheads. Mine did and I had to raise it just a bit. I added the bow pieces that help with plank backing. Mistake #2: I had read the instructions, but didn't pay attention to the order of things and got into a jackpot. I started thinking, what have I gotten myself into! I checked the fit of the lower gun deck. It is the beefy deck that I gives solid strength to the model before beginning all of the other tasks. It was fine so I removed it and then added BOTH dummy barrel strips. I had to soak all 4, but didn't do it long enough. In addition, despite some good sanding and filing to make sure the bulkhead slots were clean, the wet barrel strips would bind. After a few moments and some delicate persuasion, they went in. All set. However, when I went to put the lower gun deck in, it just didn't seem to look right. I kept thinking, it looks too high. But I glued it in and stepped away for awhile. I then realized that the lower deck goes UNDER the bottom dummy strip. Sigh, I had to pry the deck off and figure it out. I could not get it to fit under the upper dummy strip and there was no way I was going to risk breaking a bulkhead to remove the strips. So I cut the lower deck down the middle. Slid it into place, glued it and once dry, sanded the seam and added a bit of sawdust and glue to smooth it out. Whew.... The battle scar....we all have them! I then painted the dummy barrel strips. I just used what I have, Tamiya Flat Black. I have ordered a full set of Admiralty Paints, but they may take a bit to arrive in the US. No worries. Next up were the 6 gun port pieces on either side. The biggest issue for me was the use of the provided pins. I bought a cheap (after the fact) brad pin pusher from Amazon and I just can't make the damn thing work. It bends every nail I try to use. EVERY SINGLE ONE OF THEM! I tried pre-drilling and it was of no use. So I bought a can of map pins and they seem to work. They break a lot, but I think I have a couple of hundred in the can. Not many issues with the first piece (#270). Just some nervousness. I did the next two pieces and while there are some fitting issues along the tops and bottoms, they seem ok. My tip is to fit them dry, mark a line from an already attached piece to the new one you are working on so that they align right, pin nail or whatever from the middle out. First fore, then aft. That way they tend to 'smooth' out and you won't get any buckling. That's what happened to me and I should have know better. Again, a little sanding and putty will fix it...I hope! I am a bit more fortunate than many as I have a bit of a closed off area in my basement where I can work. Not enough room to lay out those crazy blue print plans, but enough to move around with just a minimal of bumping into things. I then beveled the fore and aft bulkheads. I did not do #18 and I should have. I am having issues with broken planks at that junction and shaping AND wetting would have stopped it. You can see the fitting and buckling below. I was able to suck that in a bit with clamps and glue. I began the process of laying the planks as detailed in the instructions. I soaked the ends good and long and decided to use full planks, just cutting off about 10-12 cm of each to fit. As I could not drive the pins into the sides of the bulkhead, I resorted to hammering in the map pins. At first, I was splitting the delicate planks, so I started predrilling the planks. That did the trick. I placed a small (IDK, .5mm?) bit with just about 2-3mm showing and it works great. I would hammer the pins in and the planks would fit fine. I can only do about 3 before the pins get in the way though... For the bow, I just used a good clamp with wood blocking to hold the planks to the bow backing. This way there are no chances of splitting the planks. Again, you can see the buckling. Very bad. But, I was able to mitigate it as much as possible. Here is where I am as of today. 5 rows done and I am very happy with it thus far. There are a couple of areas on the gun ports that I have circled, these need to be drawn in. Also, if you notice the little pencil marks on the planks between 2 planks? Those are the aligning marks I was talking about. They help to ensure I have everything lined up with the ends. Might be better ways, but this works for me. As you can see the planks do not terminate very well on bulkhead #18. I did bevel it going forward. A few of the end broke because of the bend, so be sure to soak this end too.


-
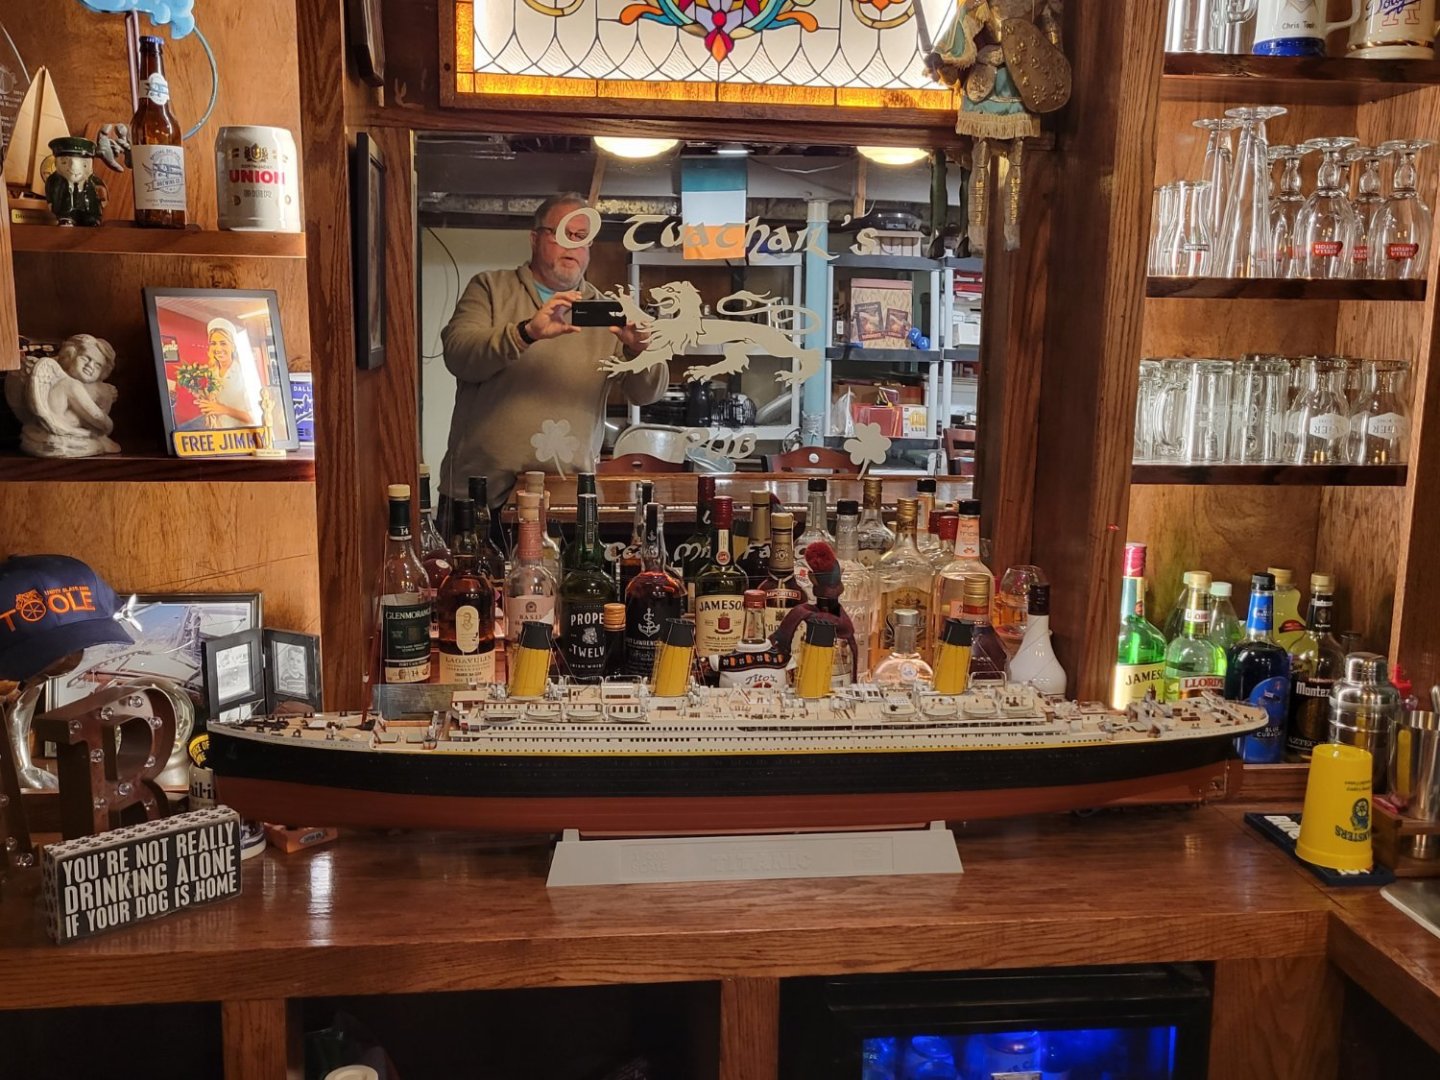
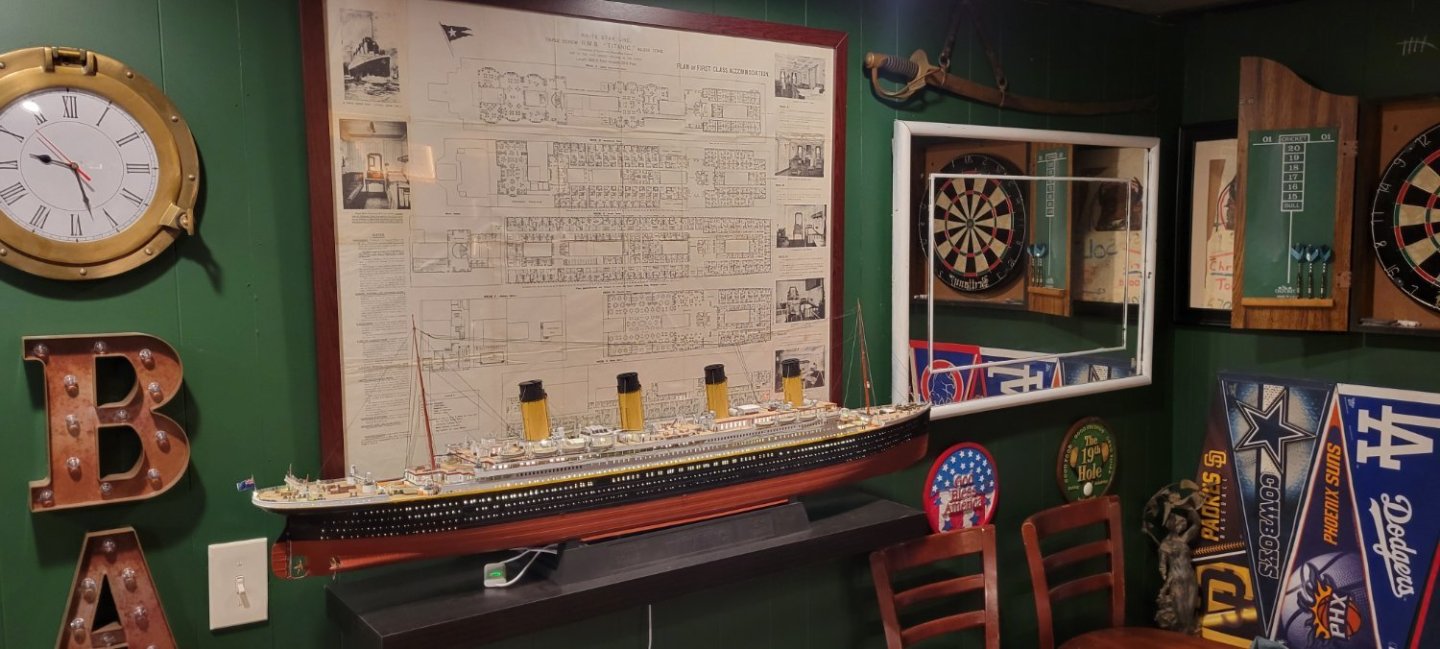
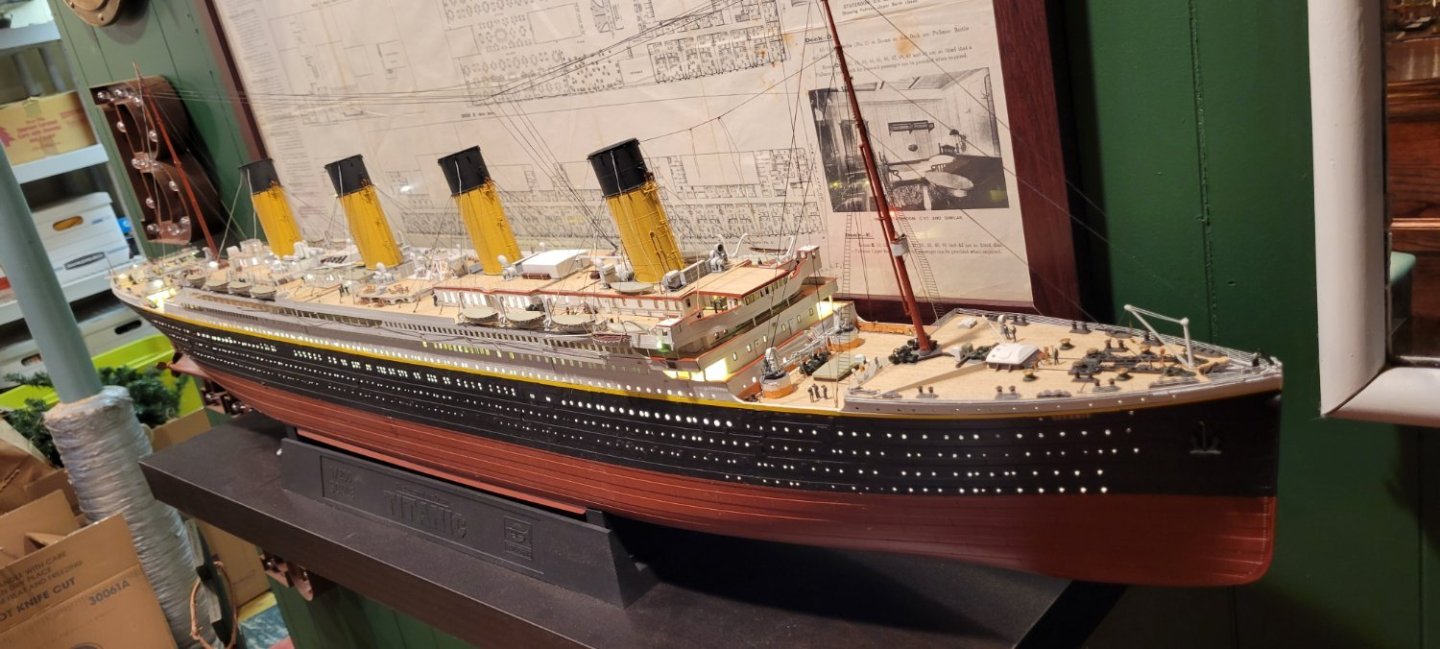
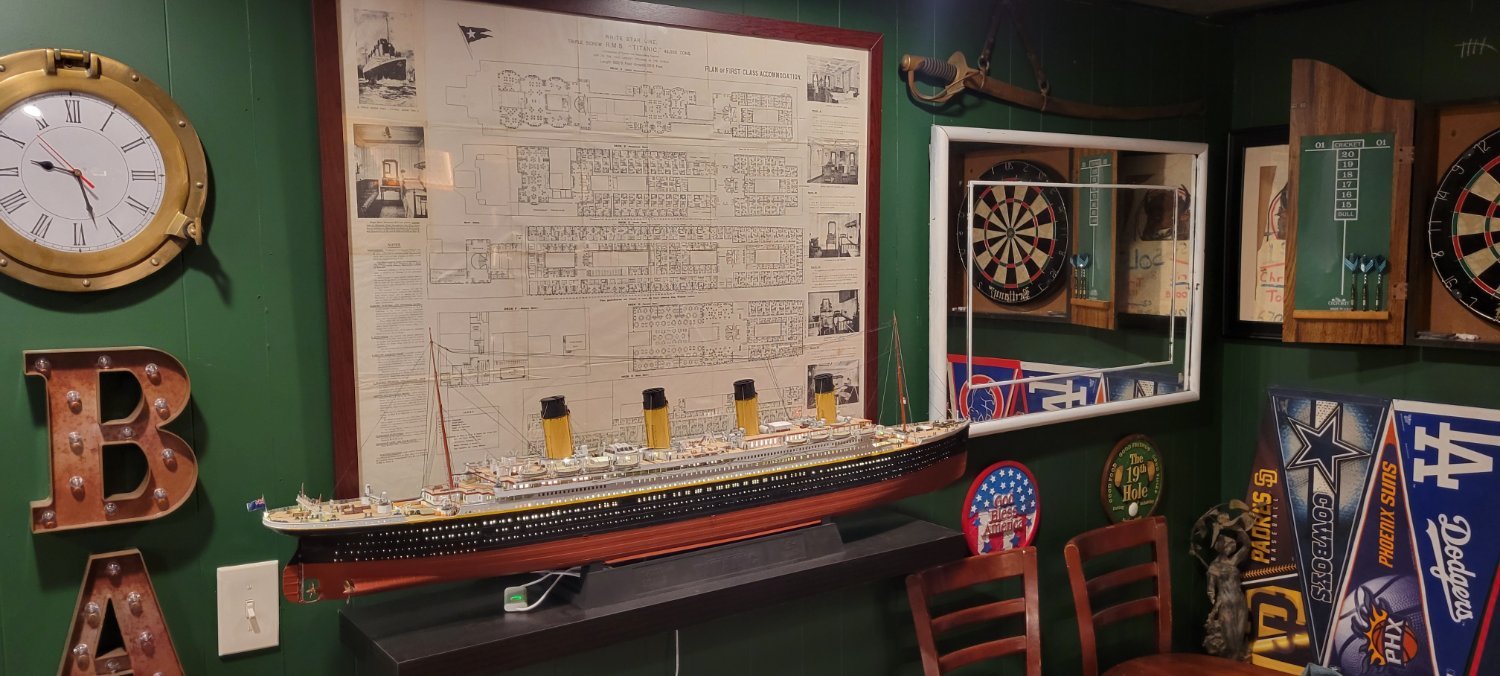
Hello everyone! Well....after 40 years of work, I retired 2 years ago and have been trying to find things to do. As a teenager, I certainly worked on plastic models, with all their glue stings and poorly fitting parts and horrific paint jobs. I remember getting a small Cutty Sark wooden model, with poor instructions and parts that were only printed to wood sheets. Everything had to be cut out and even the hull was a solid block of wood that had to be shaped and sanded....never came close to finishing. Last year I took on a plastic model, Trumpeter's Titanic. It was a massive undertaking and took just about a year to finish. I had to learn how to handle photo etch, a paint gun, the use of CA glue and manipulating teeny, tiny parts. I took most of last summer off in the build as I own a sailboat in upstate NY, USA and that took priority, but I finished her last November or so. Is she a show room piece? Lol, no, but I am very proud of how she looks. I have fairly good wood working skills and can problem solve a lot of things with wood. I love sailing and have always wanted to buy one of those pre-made wooden ships for my office. The ones that cost about $500-$700 USD. Instead, I decided, why not try to build one!!!! I know this kit is VERY hard and having never even tried to build a wooden model or the subsequent issues and tasks concerning rigging, I just wanted to take a stab at it. So I found a kit in stock in the UK through Arrow Models. I ordered her and within about 2 or 3 weeks it arrived in the USA. Arrow did a great job and while I was a bit nervous working with an overseas company where I could find little feedback, they were tops! Great communication and great customer service. There are a few Caldercraft 1:72 build logs on MSW (I see more now as I've learned the search process here) and a few YouTube video logs that I am using. Perhaps (upon my initial search) not as many as some of the other models and kits. I thought I would add a log that is from a person with absolutely NO experience with this type of kit and certainly a kit that requires a high degree of skill or expertise or as is my hope....just the patience and perseverance to gut it through! I've posted a few Titanic pics in this post, I promise going forward it will be all Victory all the time. I just want to see how the posting process works and I will start adding right away. As of Feb 21, 2024 I am on the first planking task, about 5 planks up. So.....I'll see you at the finish line and thank you! Chris I use 3 books and they are a tremendous help. I looked for used versions. Longridge's took some time. The book has many pull out plans that help with any model's build and I wanted to be sure the book I bought had them intact. I included Google links. Used Books Anatomy of Nelson’s Ships – Longridge, Nepean HMS Victory – McGowan The 100 Gun Ship Victory – McKay I use many videos, and many listed below have dedicated playlists that help keep their HMS Victory builds separate from their other work. YouTube Video Blogs Wooden Ships – Greg Wislon Just A Good Place This is a Spanish blog for Artesania Latina model Johns Wooden Ships - John Aliprantis Many blogs of wooden ship models including HMS Victory (NOT Caldercraft) John Builds Iconic Military Models – John Mansell Huge playlists for 2 different HMS Victory models Olha Batchvarov – Olha HUGE database of builds, how to’s and more including DeAgostini version Paul Vickers – Paul Vickers There are only 8-9 videos before he stopped posting. So good for a new starter only I am a member of two model ship builder sites. Both are great and offer so many tips, hints, links, etc. Ship of Scale The site has an advanced search enabling you to input exact issues you want to research and the ability to 'watch' build logs and get notifications when the builder adds new content. Paulv1958 – Paul Vickers Hasn’t done much and incorporates the use of his YouTube blog Traumadoc – As of 11/8/24 he is finishing up stern and hammock rails. I believe he is a novice builder just like me, but has done remarkable work while juggling a full-time job and taking the time to log his work. Peterg – Major blog with high quality build, including lighting and custom features. As of 11/8/24 on quarterdeck w/ cannons Serikoff – Sergey Custom built HMS Victory using Mantua plans. Just started builders log in October, 2024 but has brought it up to date with what he has done. He provides EXTENSIVE information concerning his build, how to’s and more. Julian – Occre model, but has similar build issues that will help Y.T. – Mamoli scale 1:90 Model Ship World A great site, a lot of interaction between builders, a great search engine and the ability to monitor other builders as they add content. Kiwiron – Ron As of 7/24 completed quarterdeck, stern, bow and more Robert29 Finished Caldercraft HMS Victory – one of the best builds I have seen and use extensively while doing mine. Charter33 As of 5/24 he has finished quarterdeck and is working on outerhull trim and deadeye platforms. Very good build, meticulous Heinz6672 Wood only (no paint) museum quality work, but stopped posting while doing rigging around 2020 Paulb – Paul Last posts around 2023 with work on standing rigging. Very detailed work There are many other blogs on both sites and searching will also pull many recommendations for help on various tasks needed during the build. I didn't include links to topics such as laying hull planking, deck planking, rigging tips, making rope, etc. These are things each builder will have to do to get to know the process. I am a NOVICE builder with just one model under my belt. A plastic large scale model of the Titanic. It took me a year to build and that was pretty quick given that I have a lot of time as I'm retired. In addition to the above, I spend a lot of time searching specific issues when needed. When working on cannons, I would search keywords: cannons 1700 era ships, hms victory cannons, cannon rigging, cannon tackle. Once Google provided me with their search, I would save pictures for future reference. Hope this helps and good luck! Chris