HOLIDAY DONATION DRIVE - SUPPORT MSW - DO YOUR PART TO KEEP THIS GREAT FORUM GOING!
×


Yabuhebi
-
Posts
197 -
Joined
-
Last visited
Content Type
Profiles
Forums
Gallery
Events
Everything posted by Yabuhebi
-
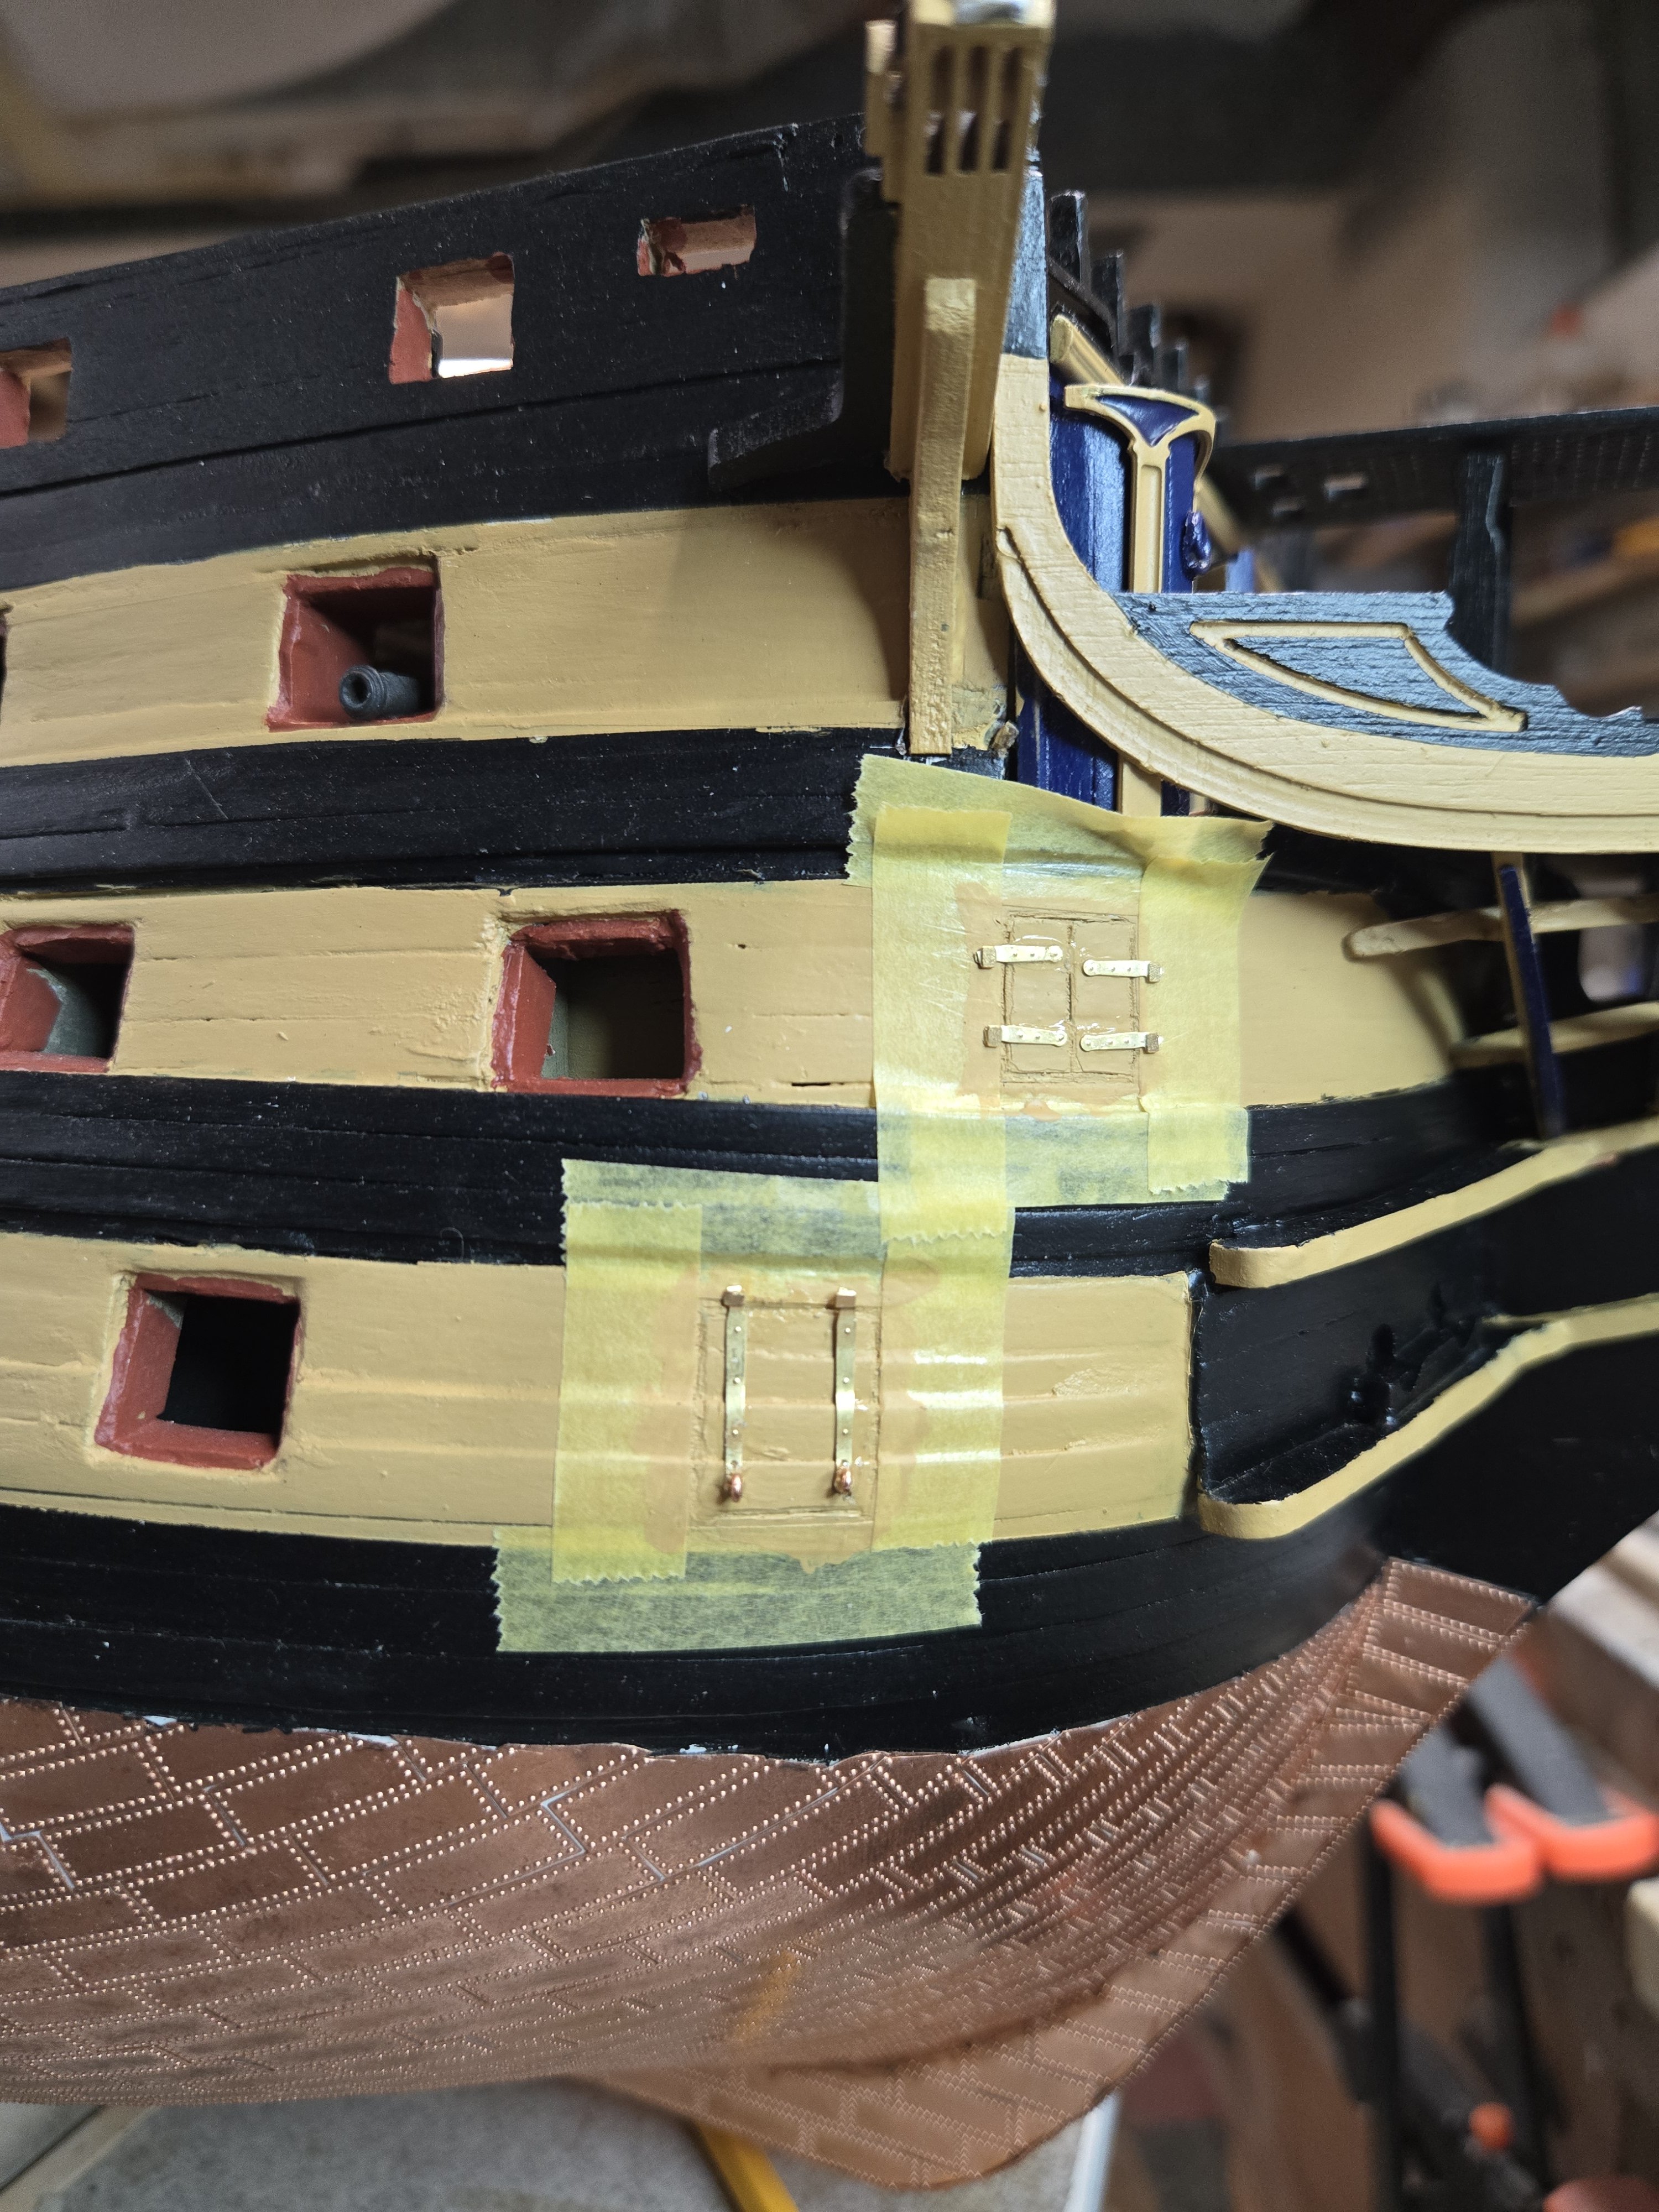
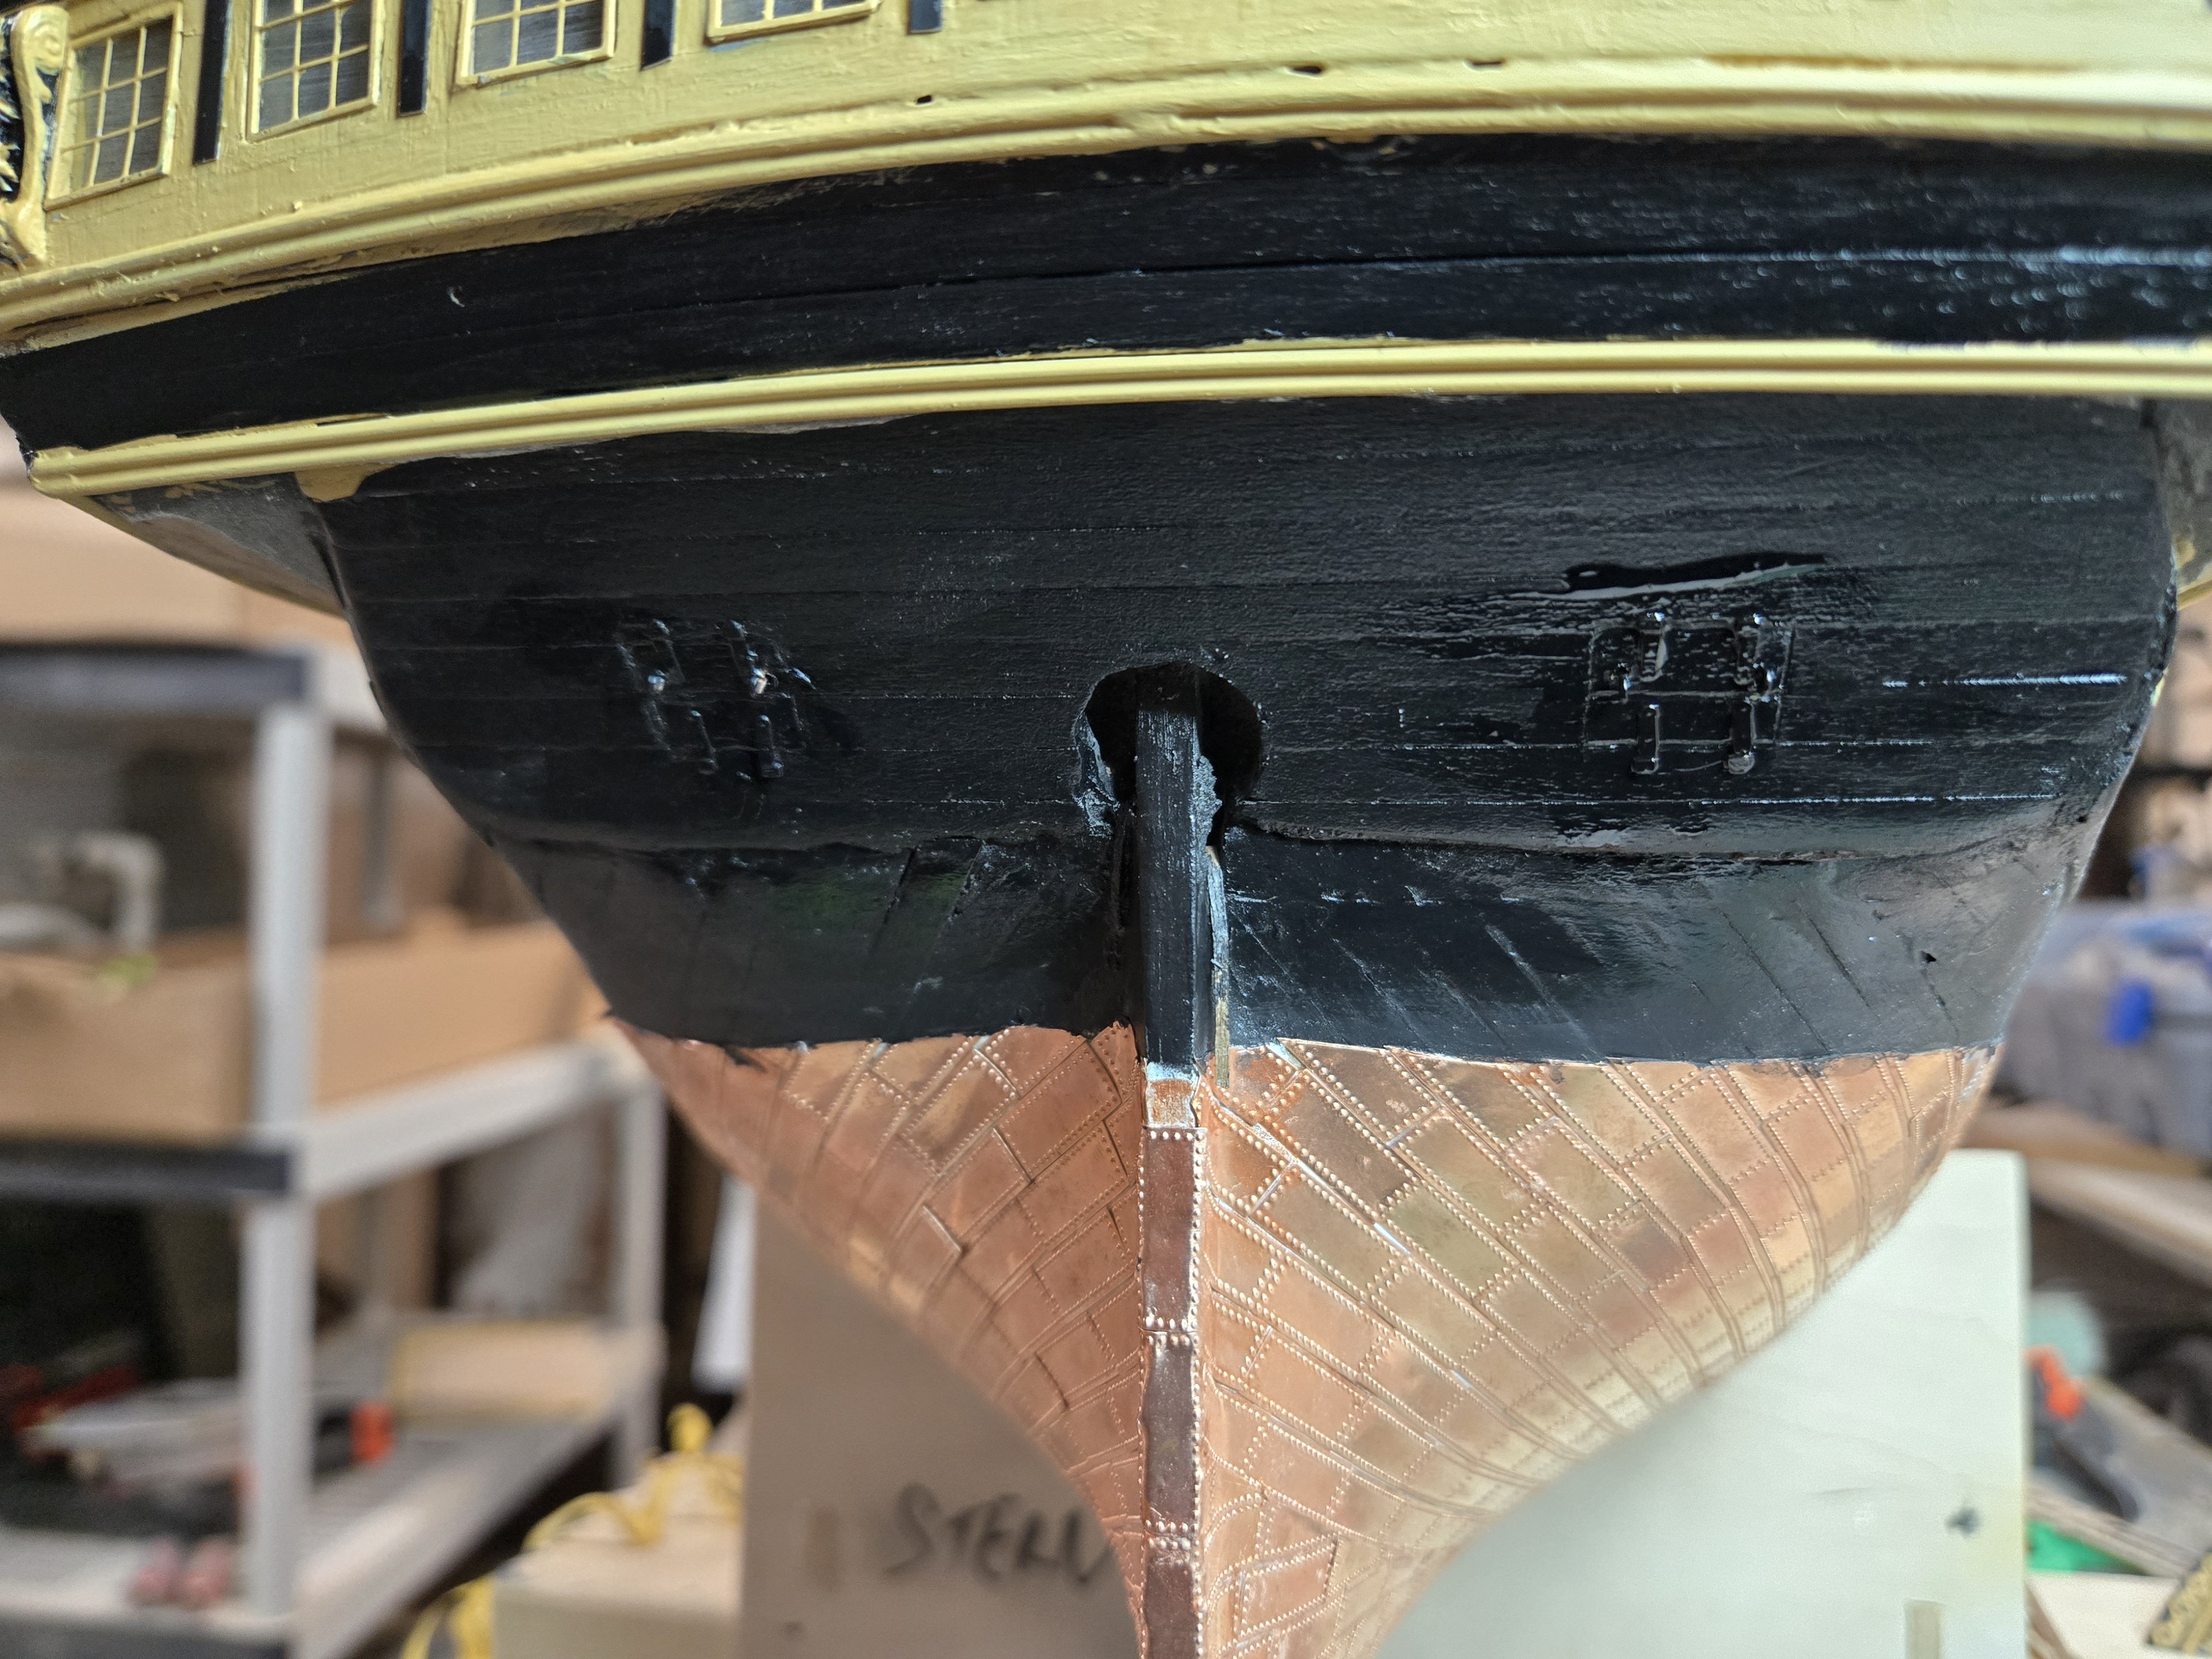
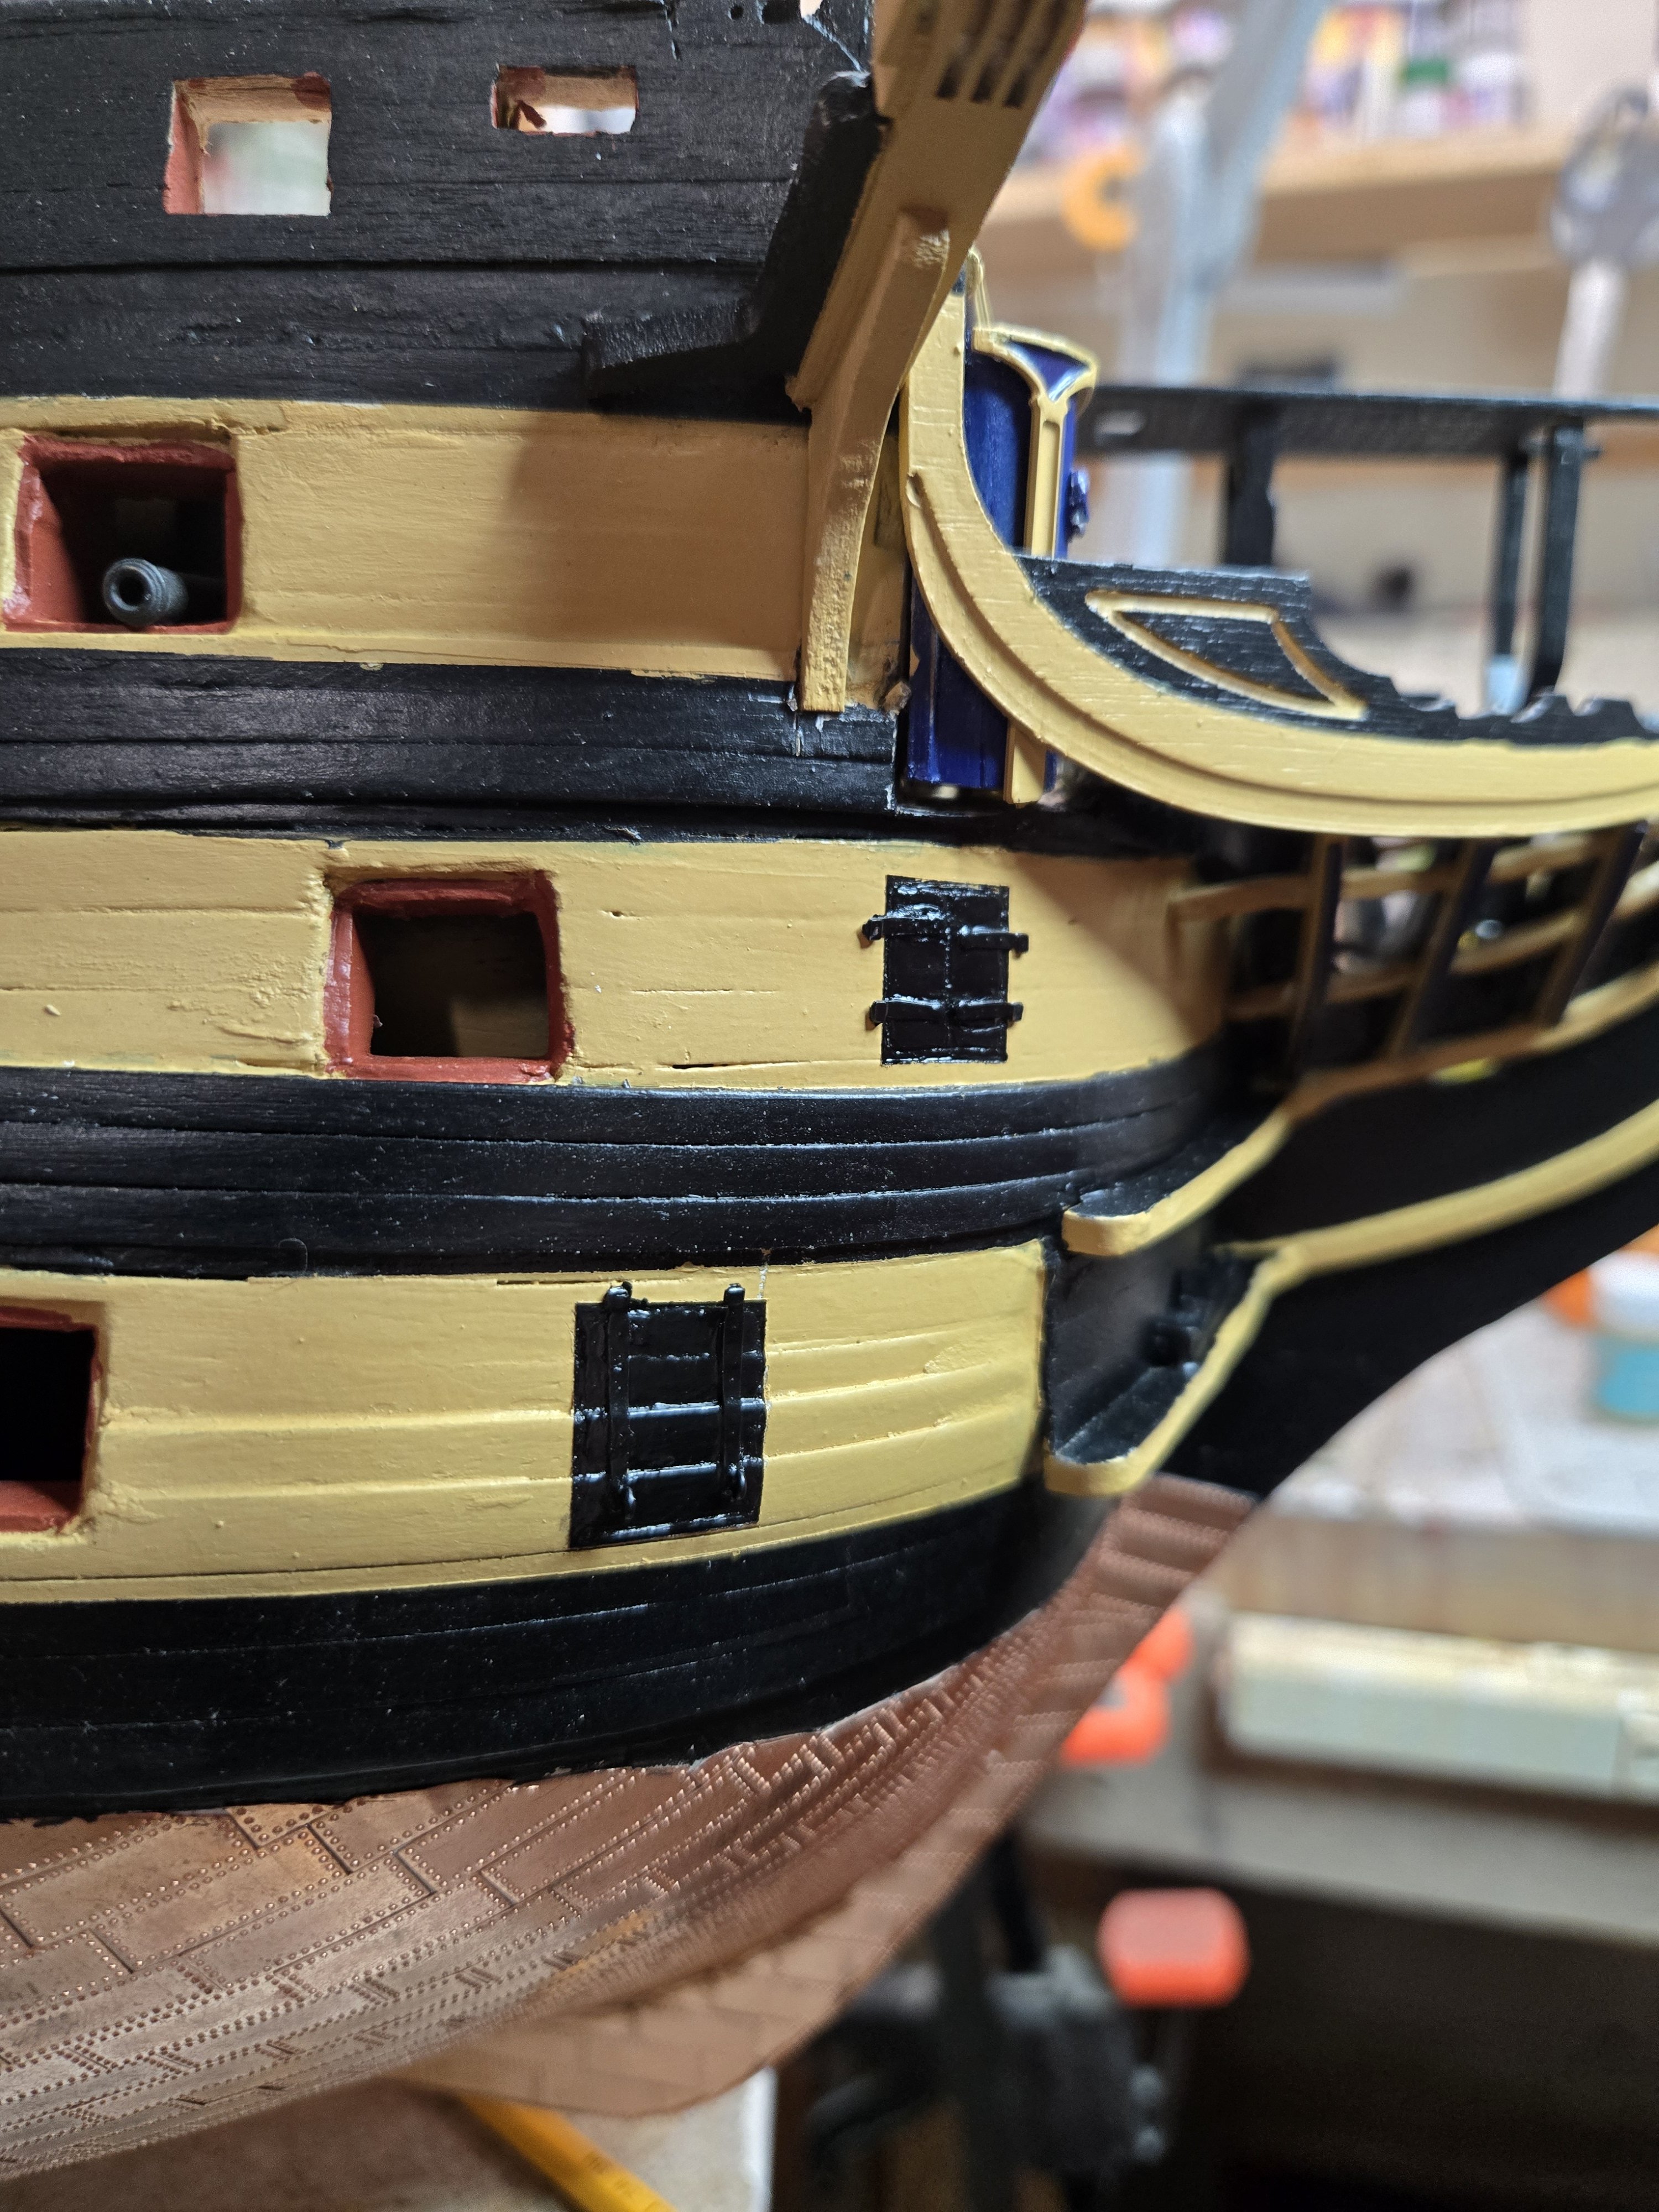
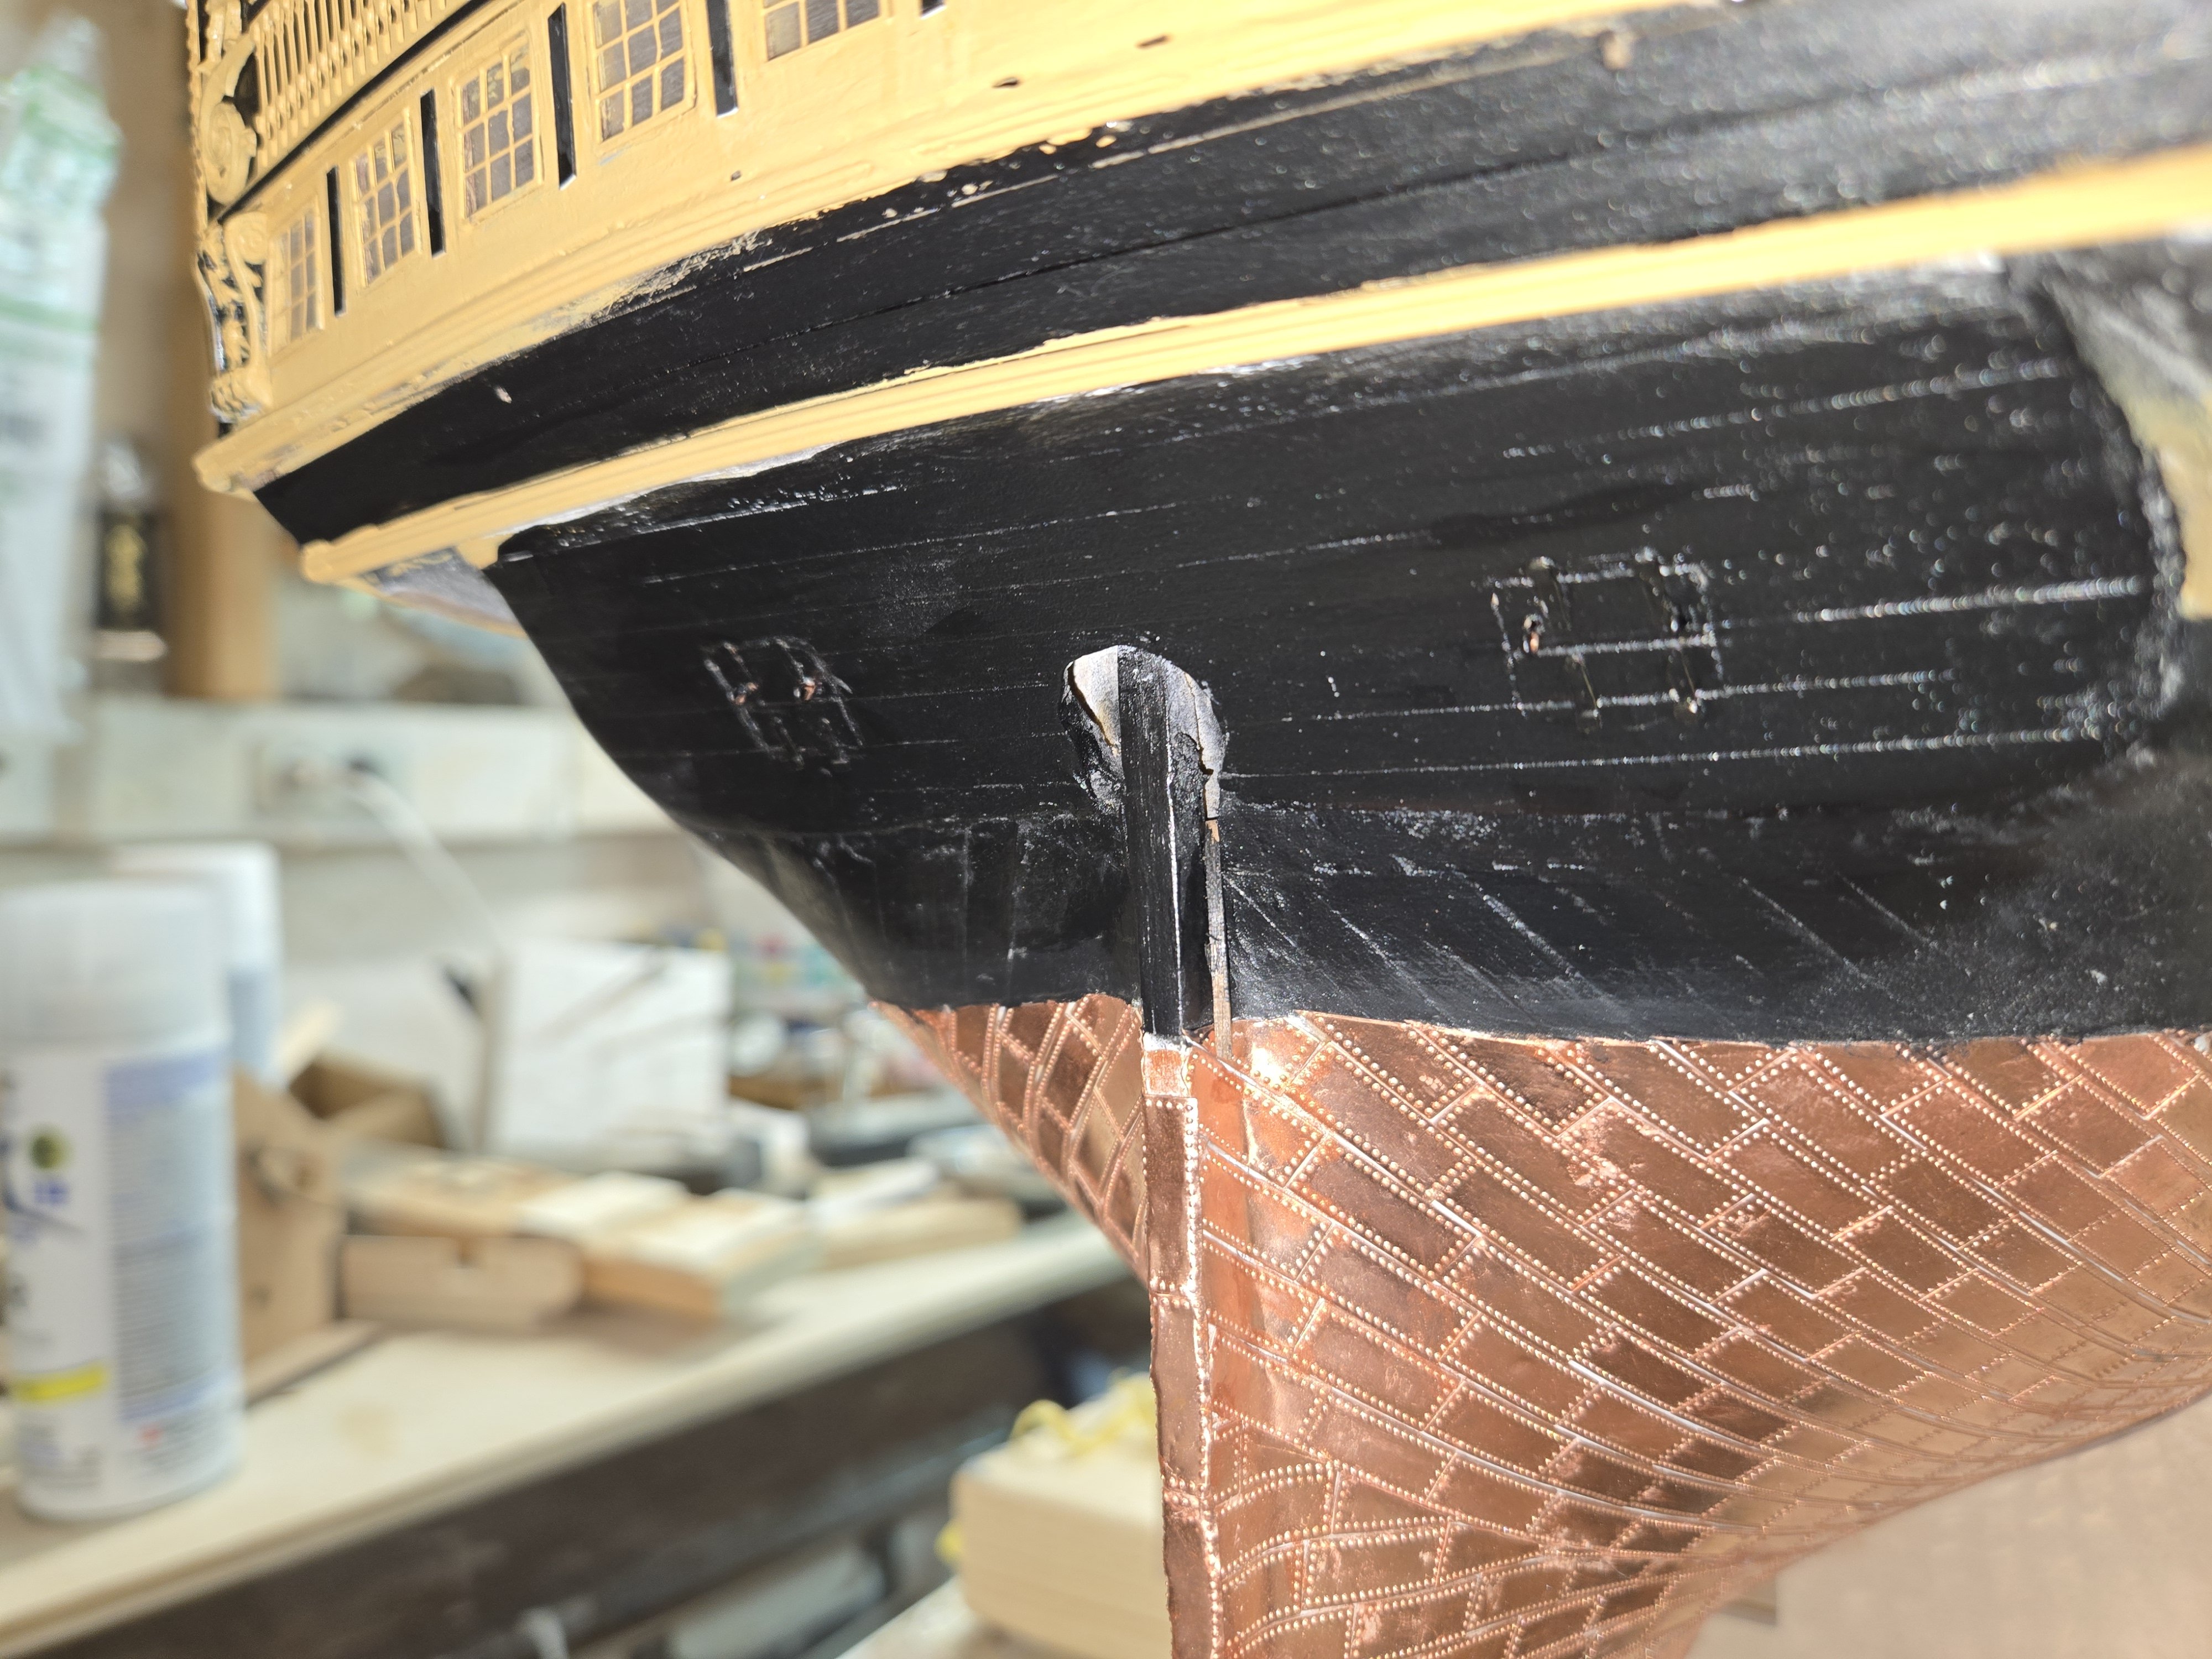
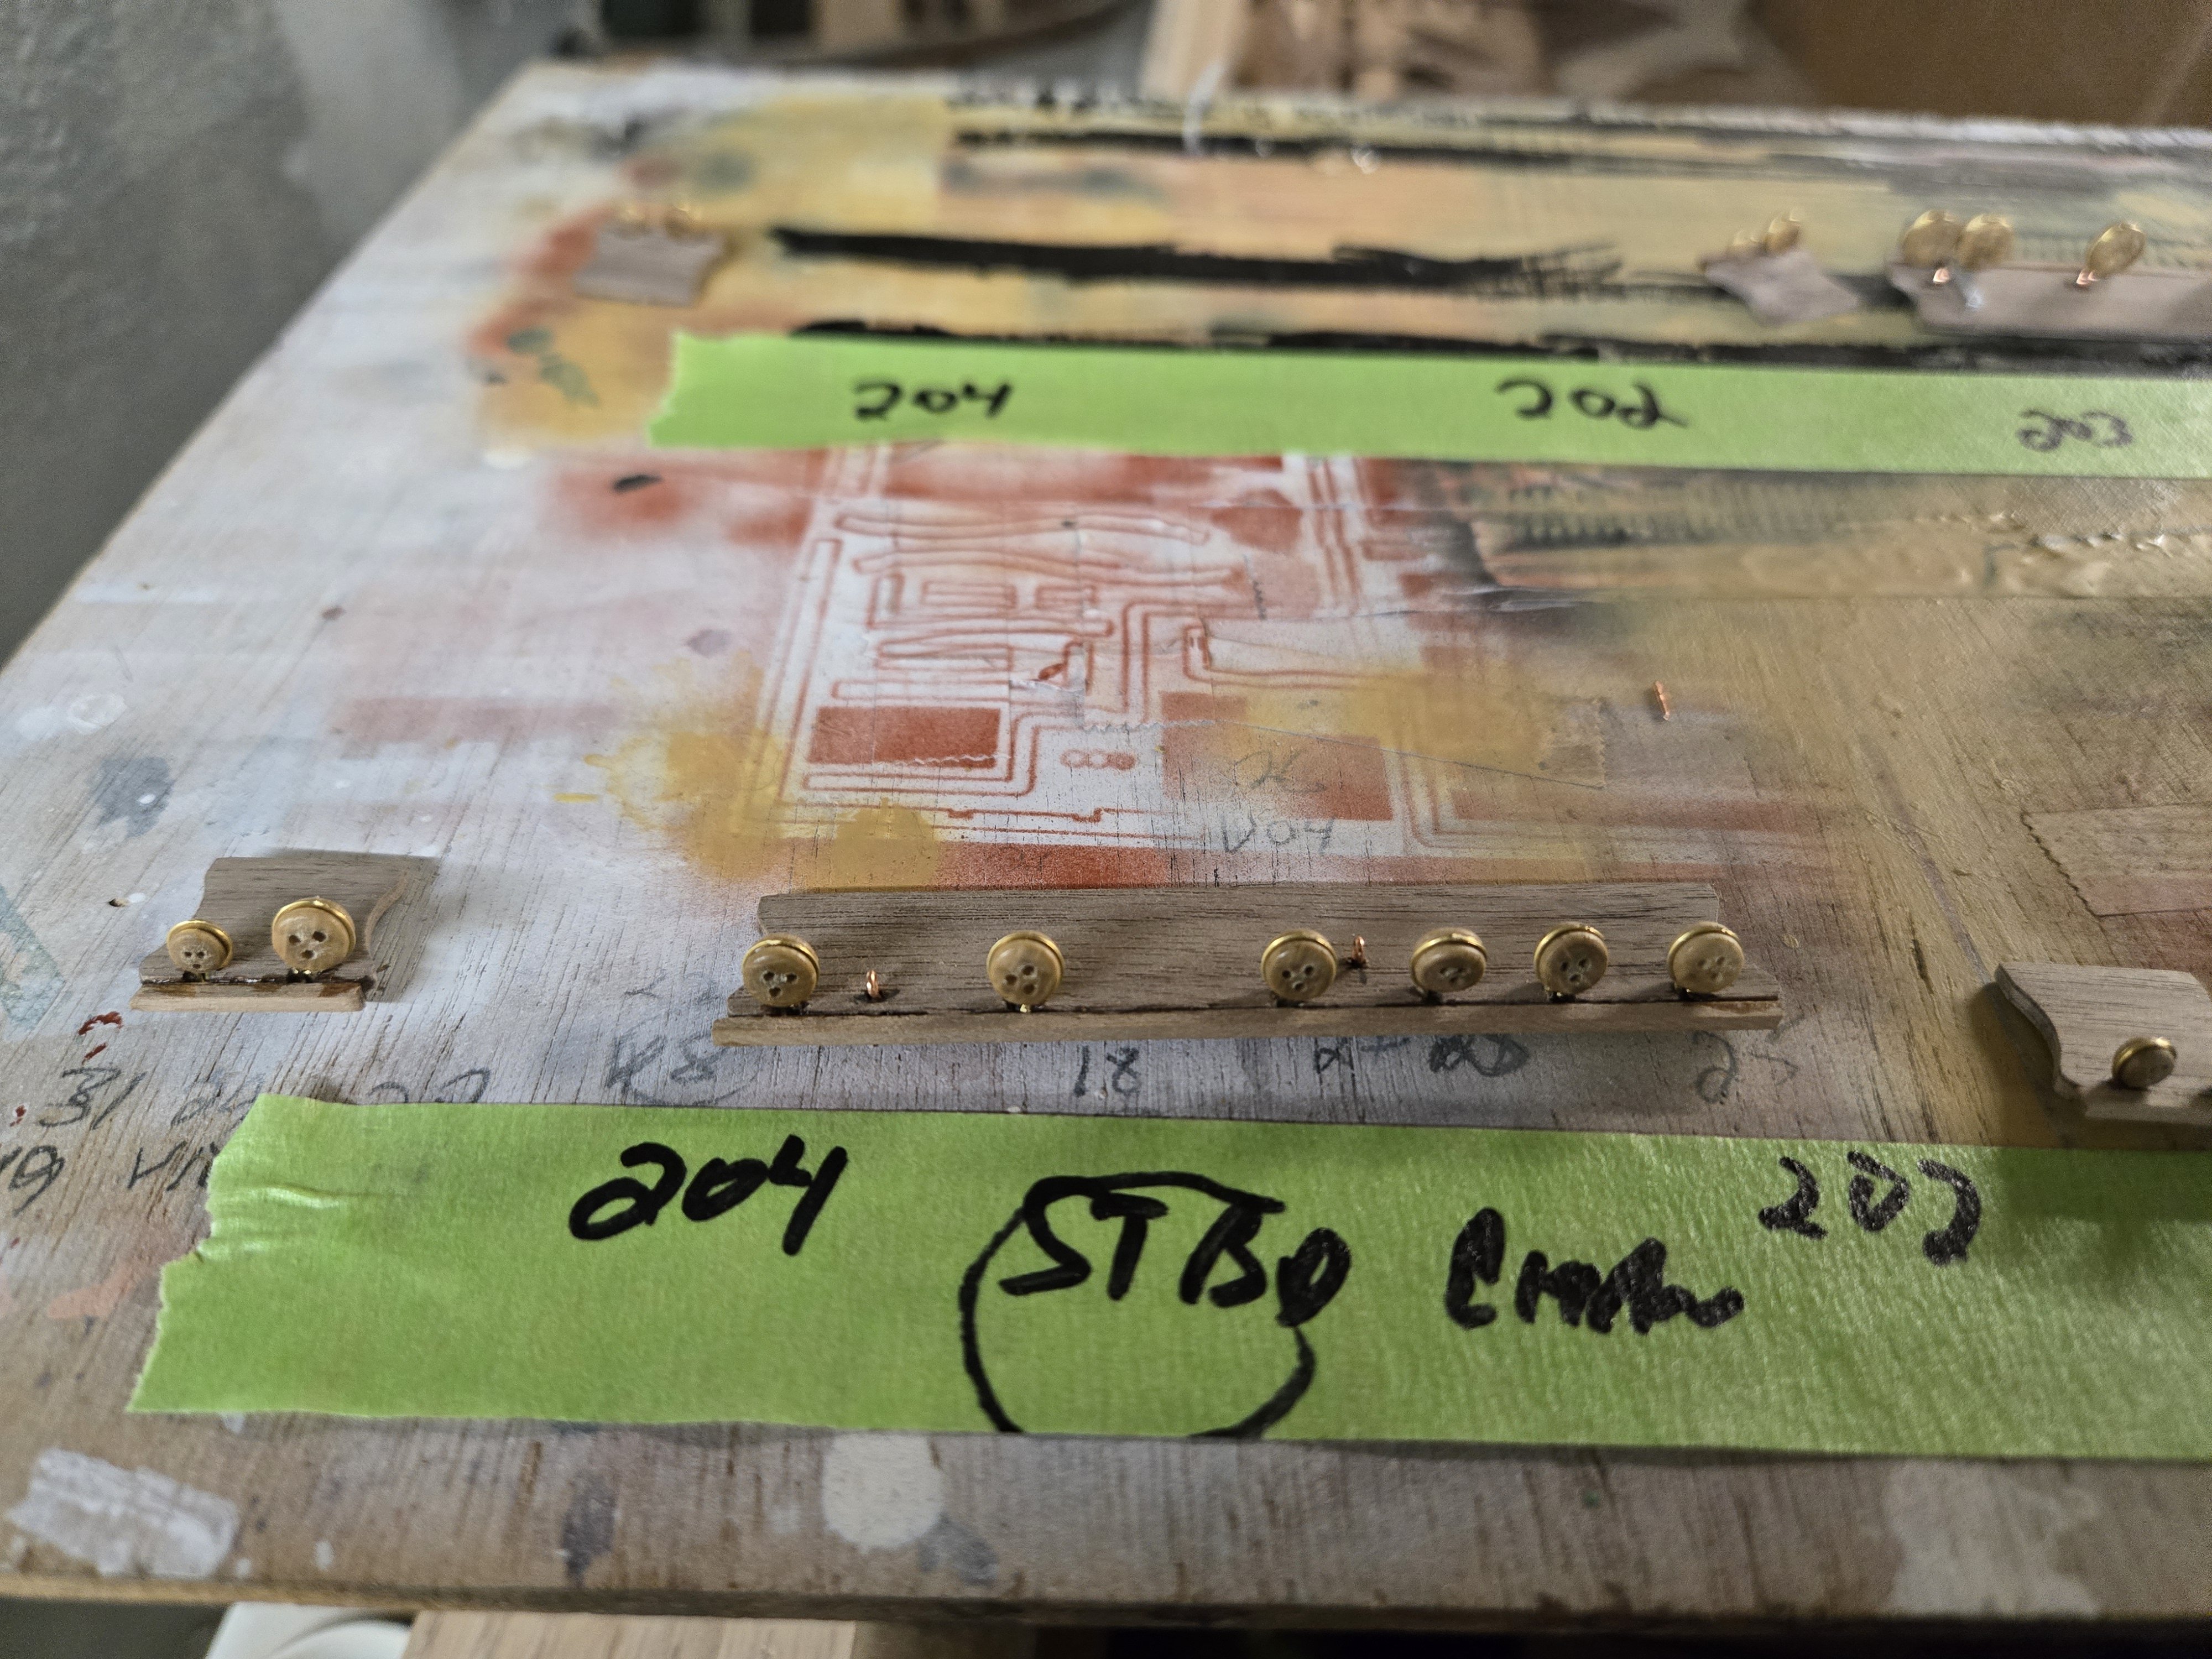
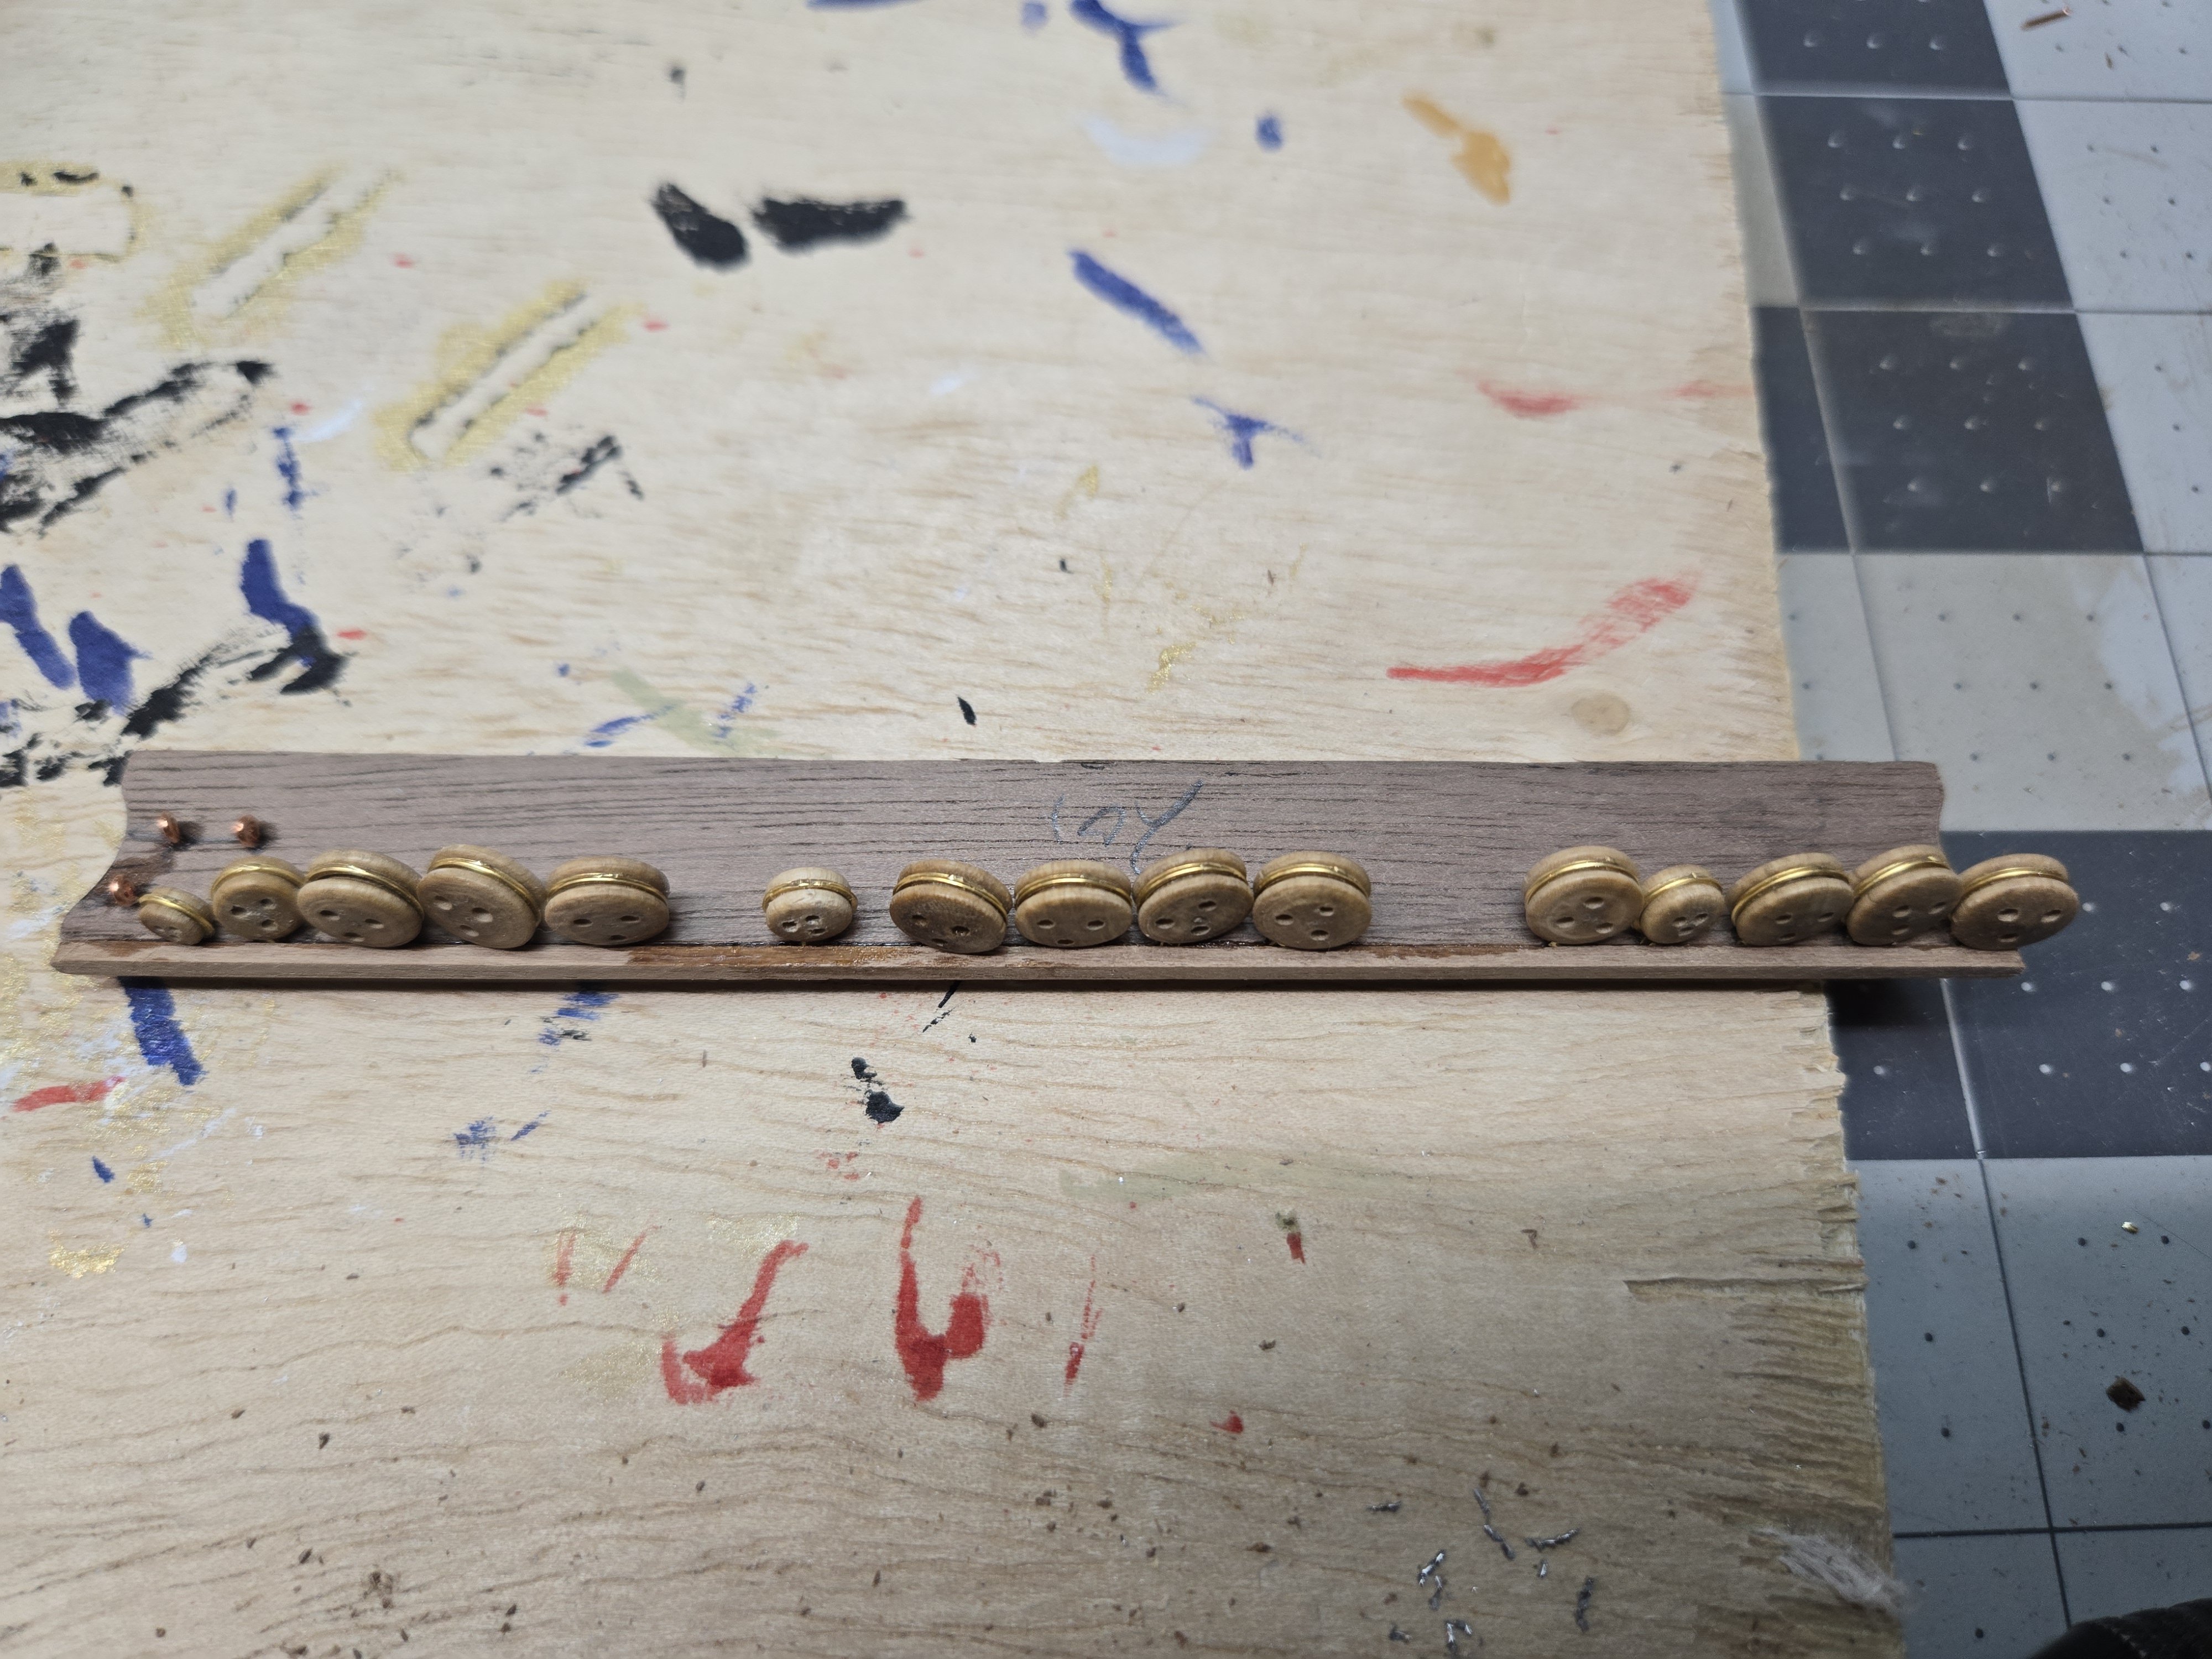
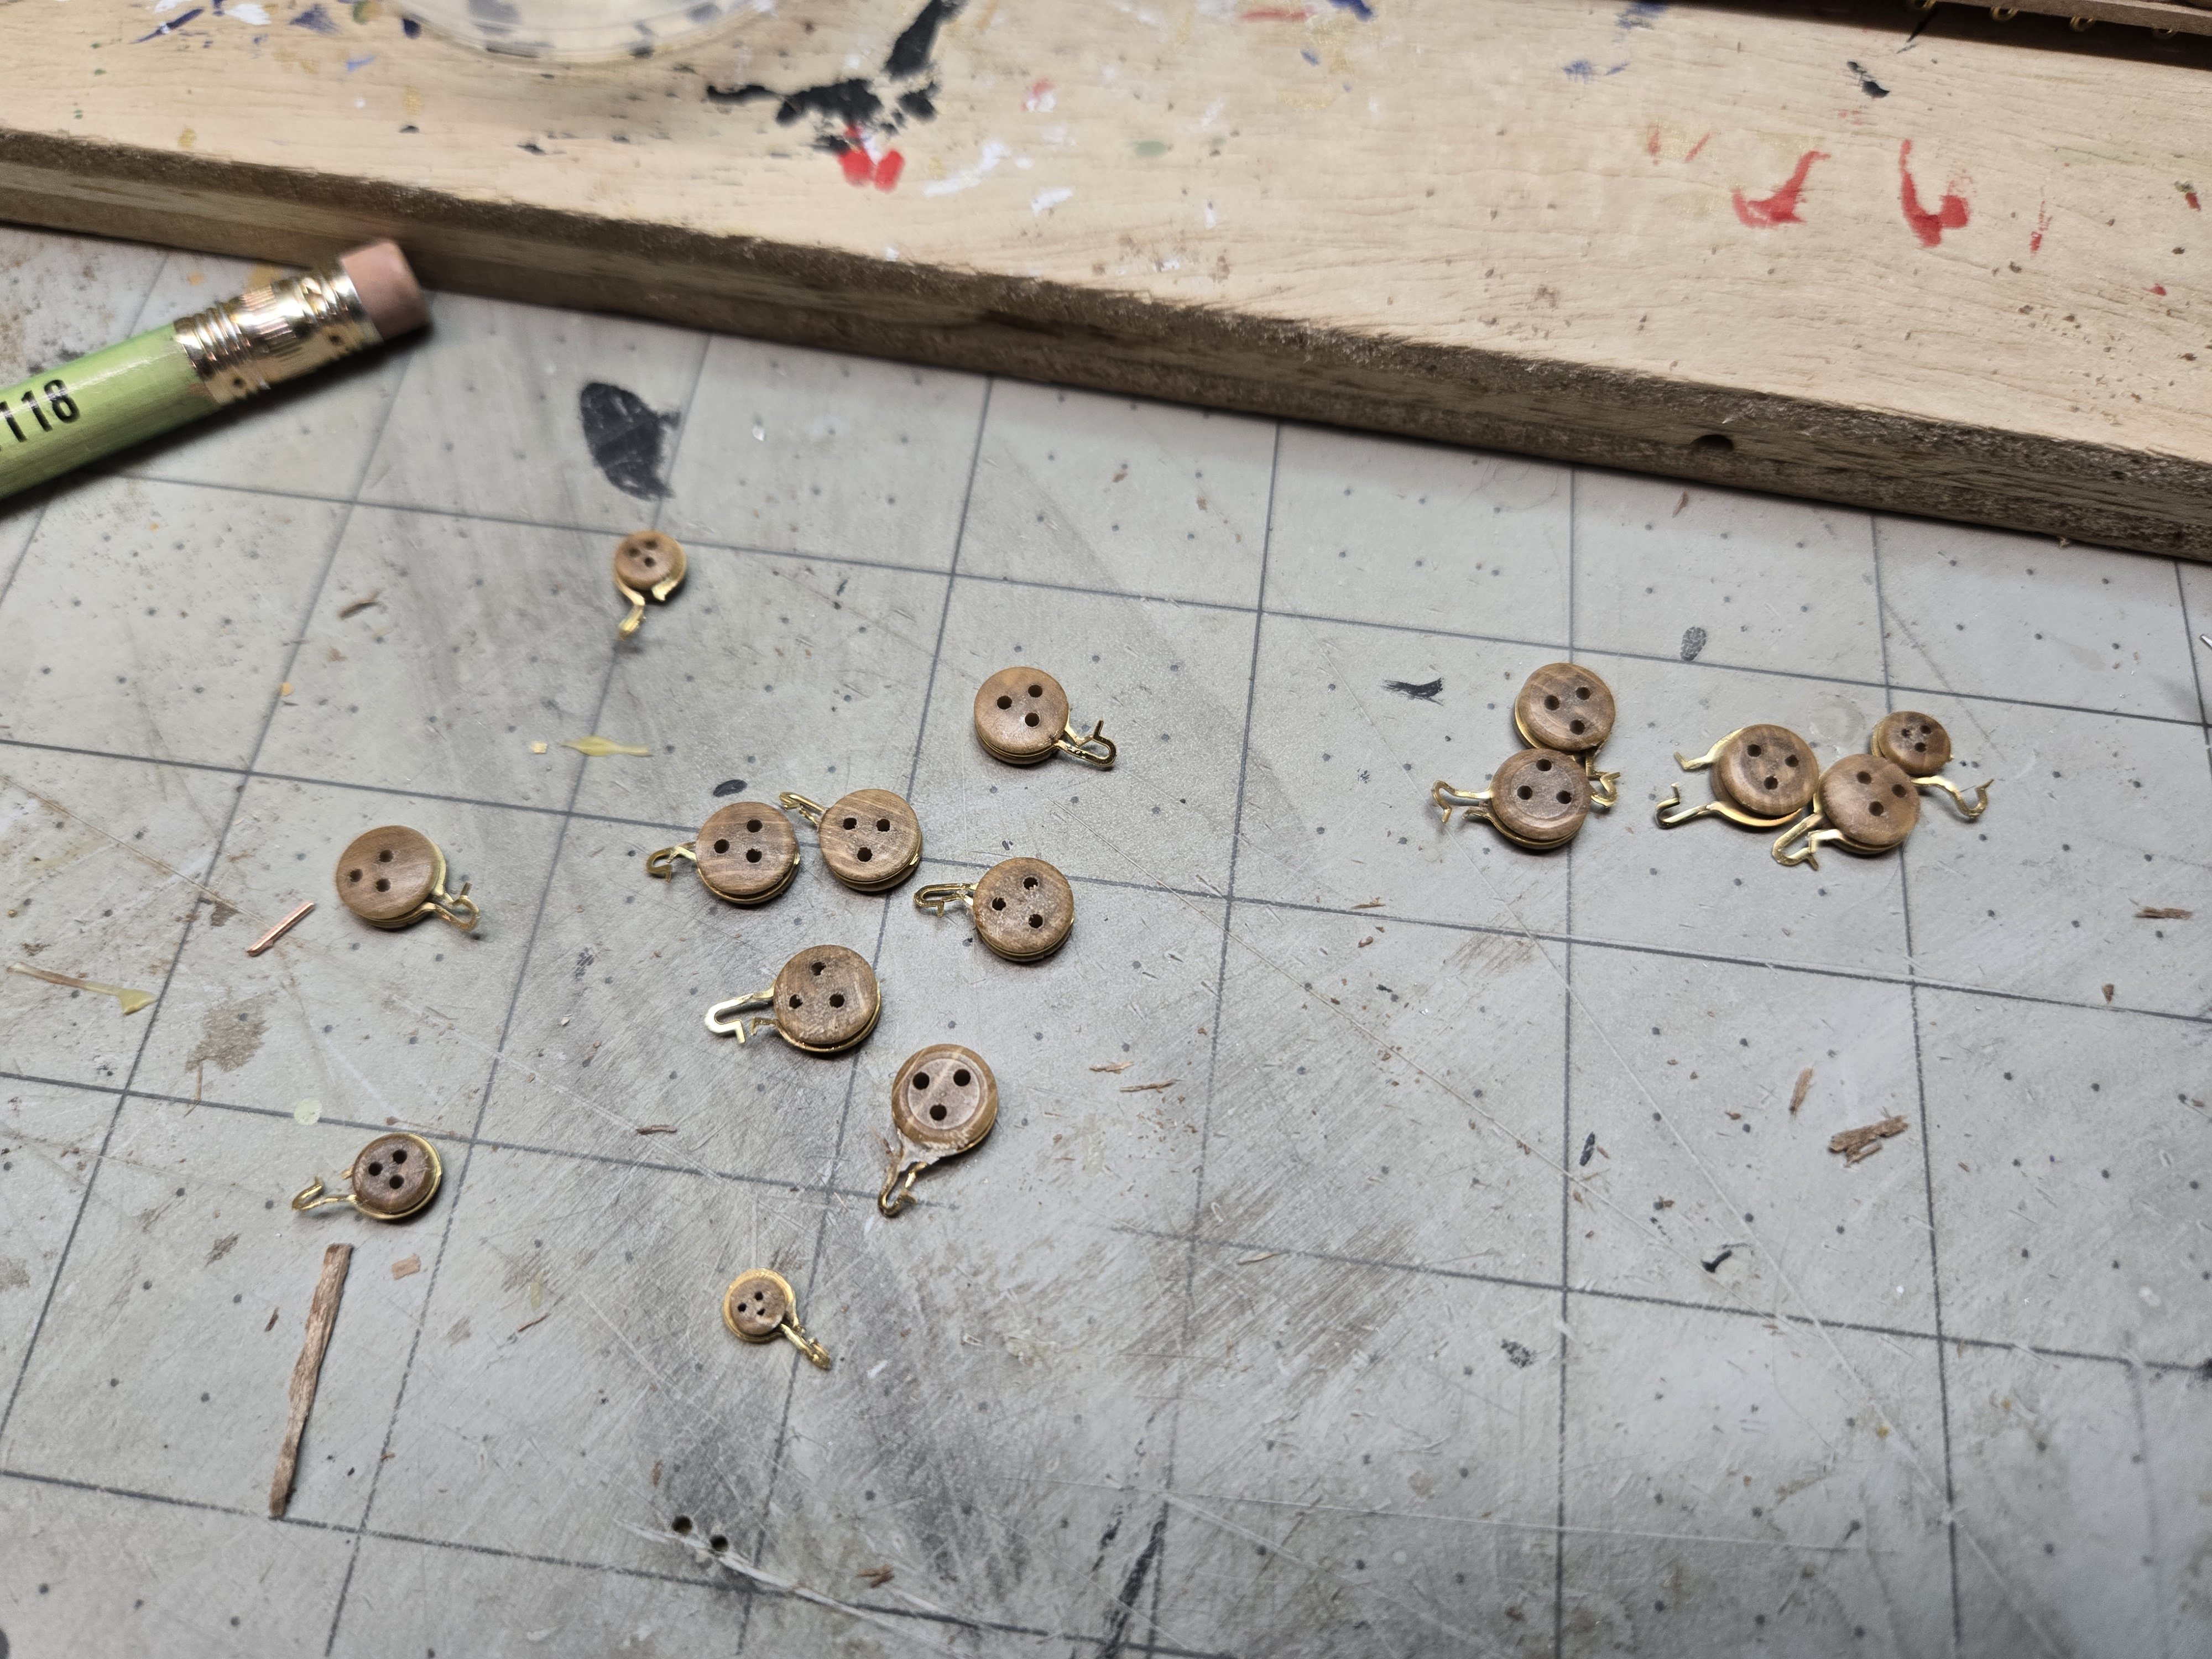
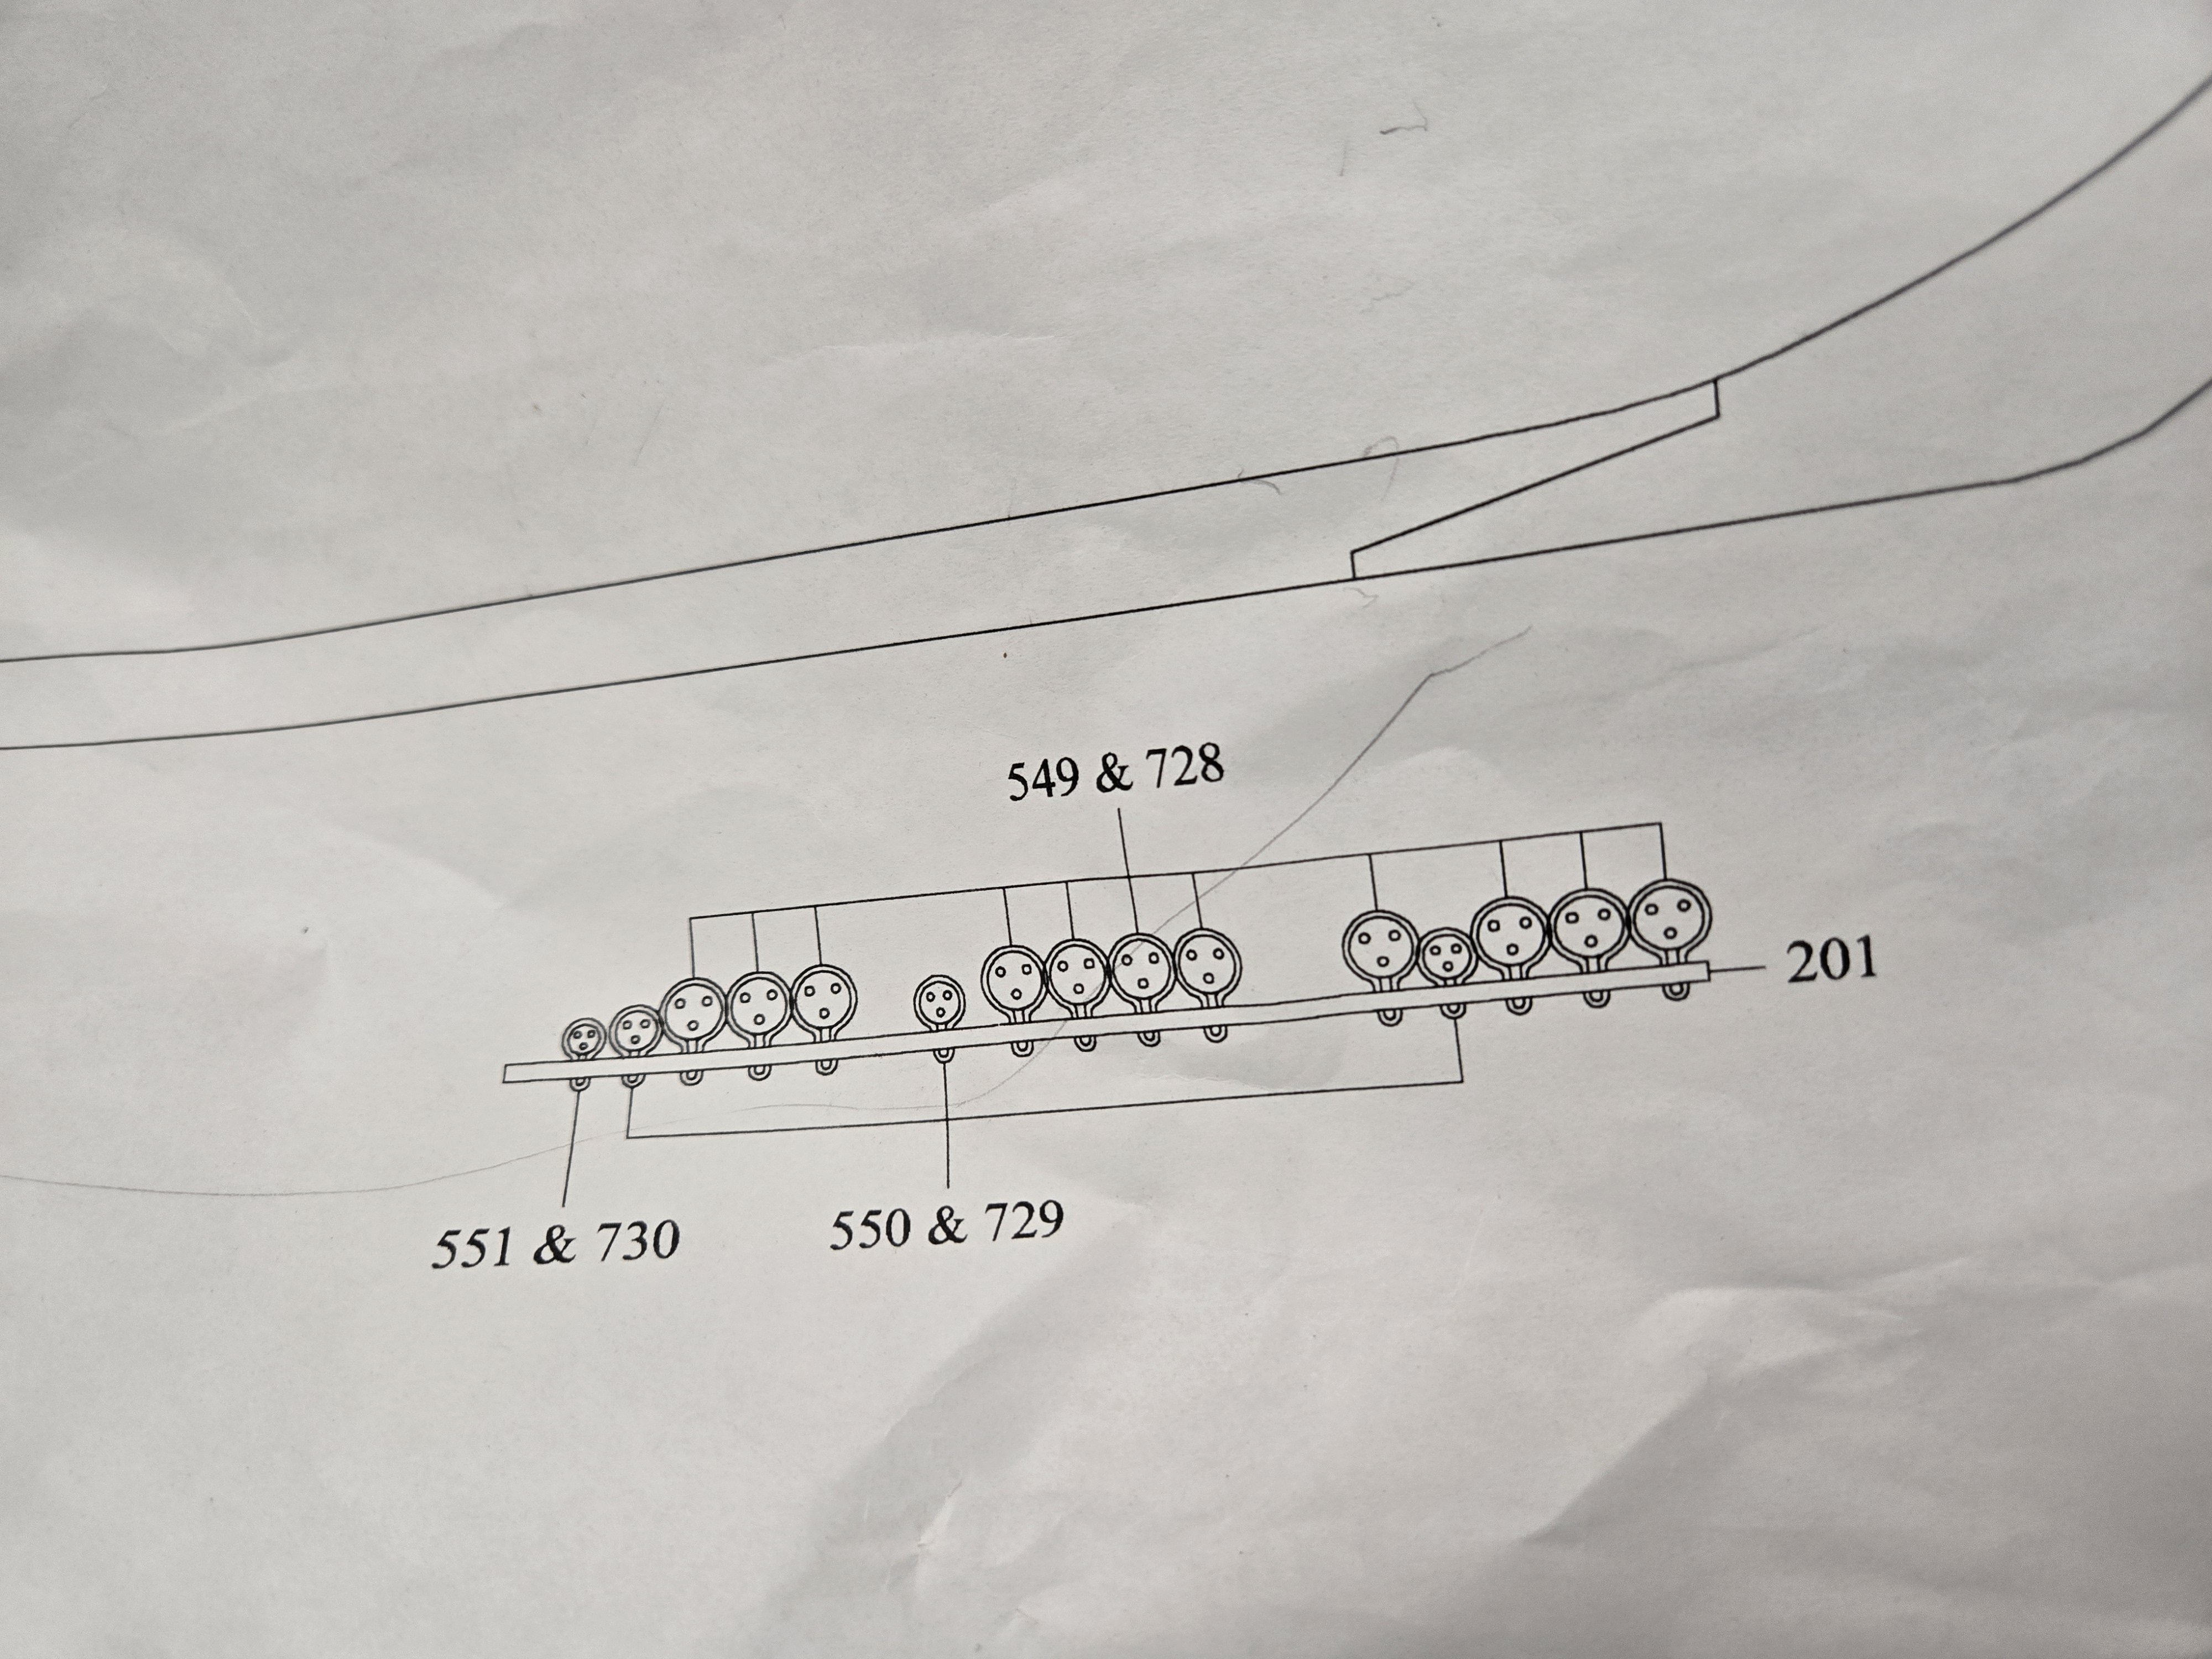
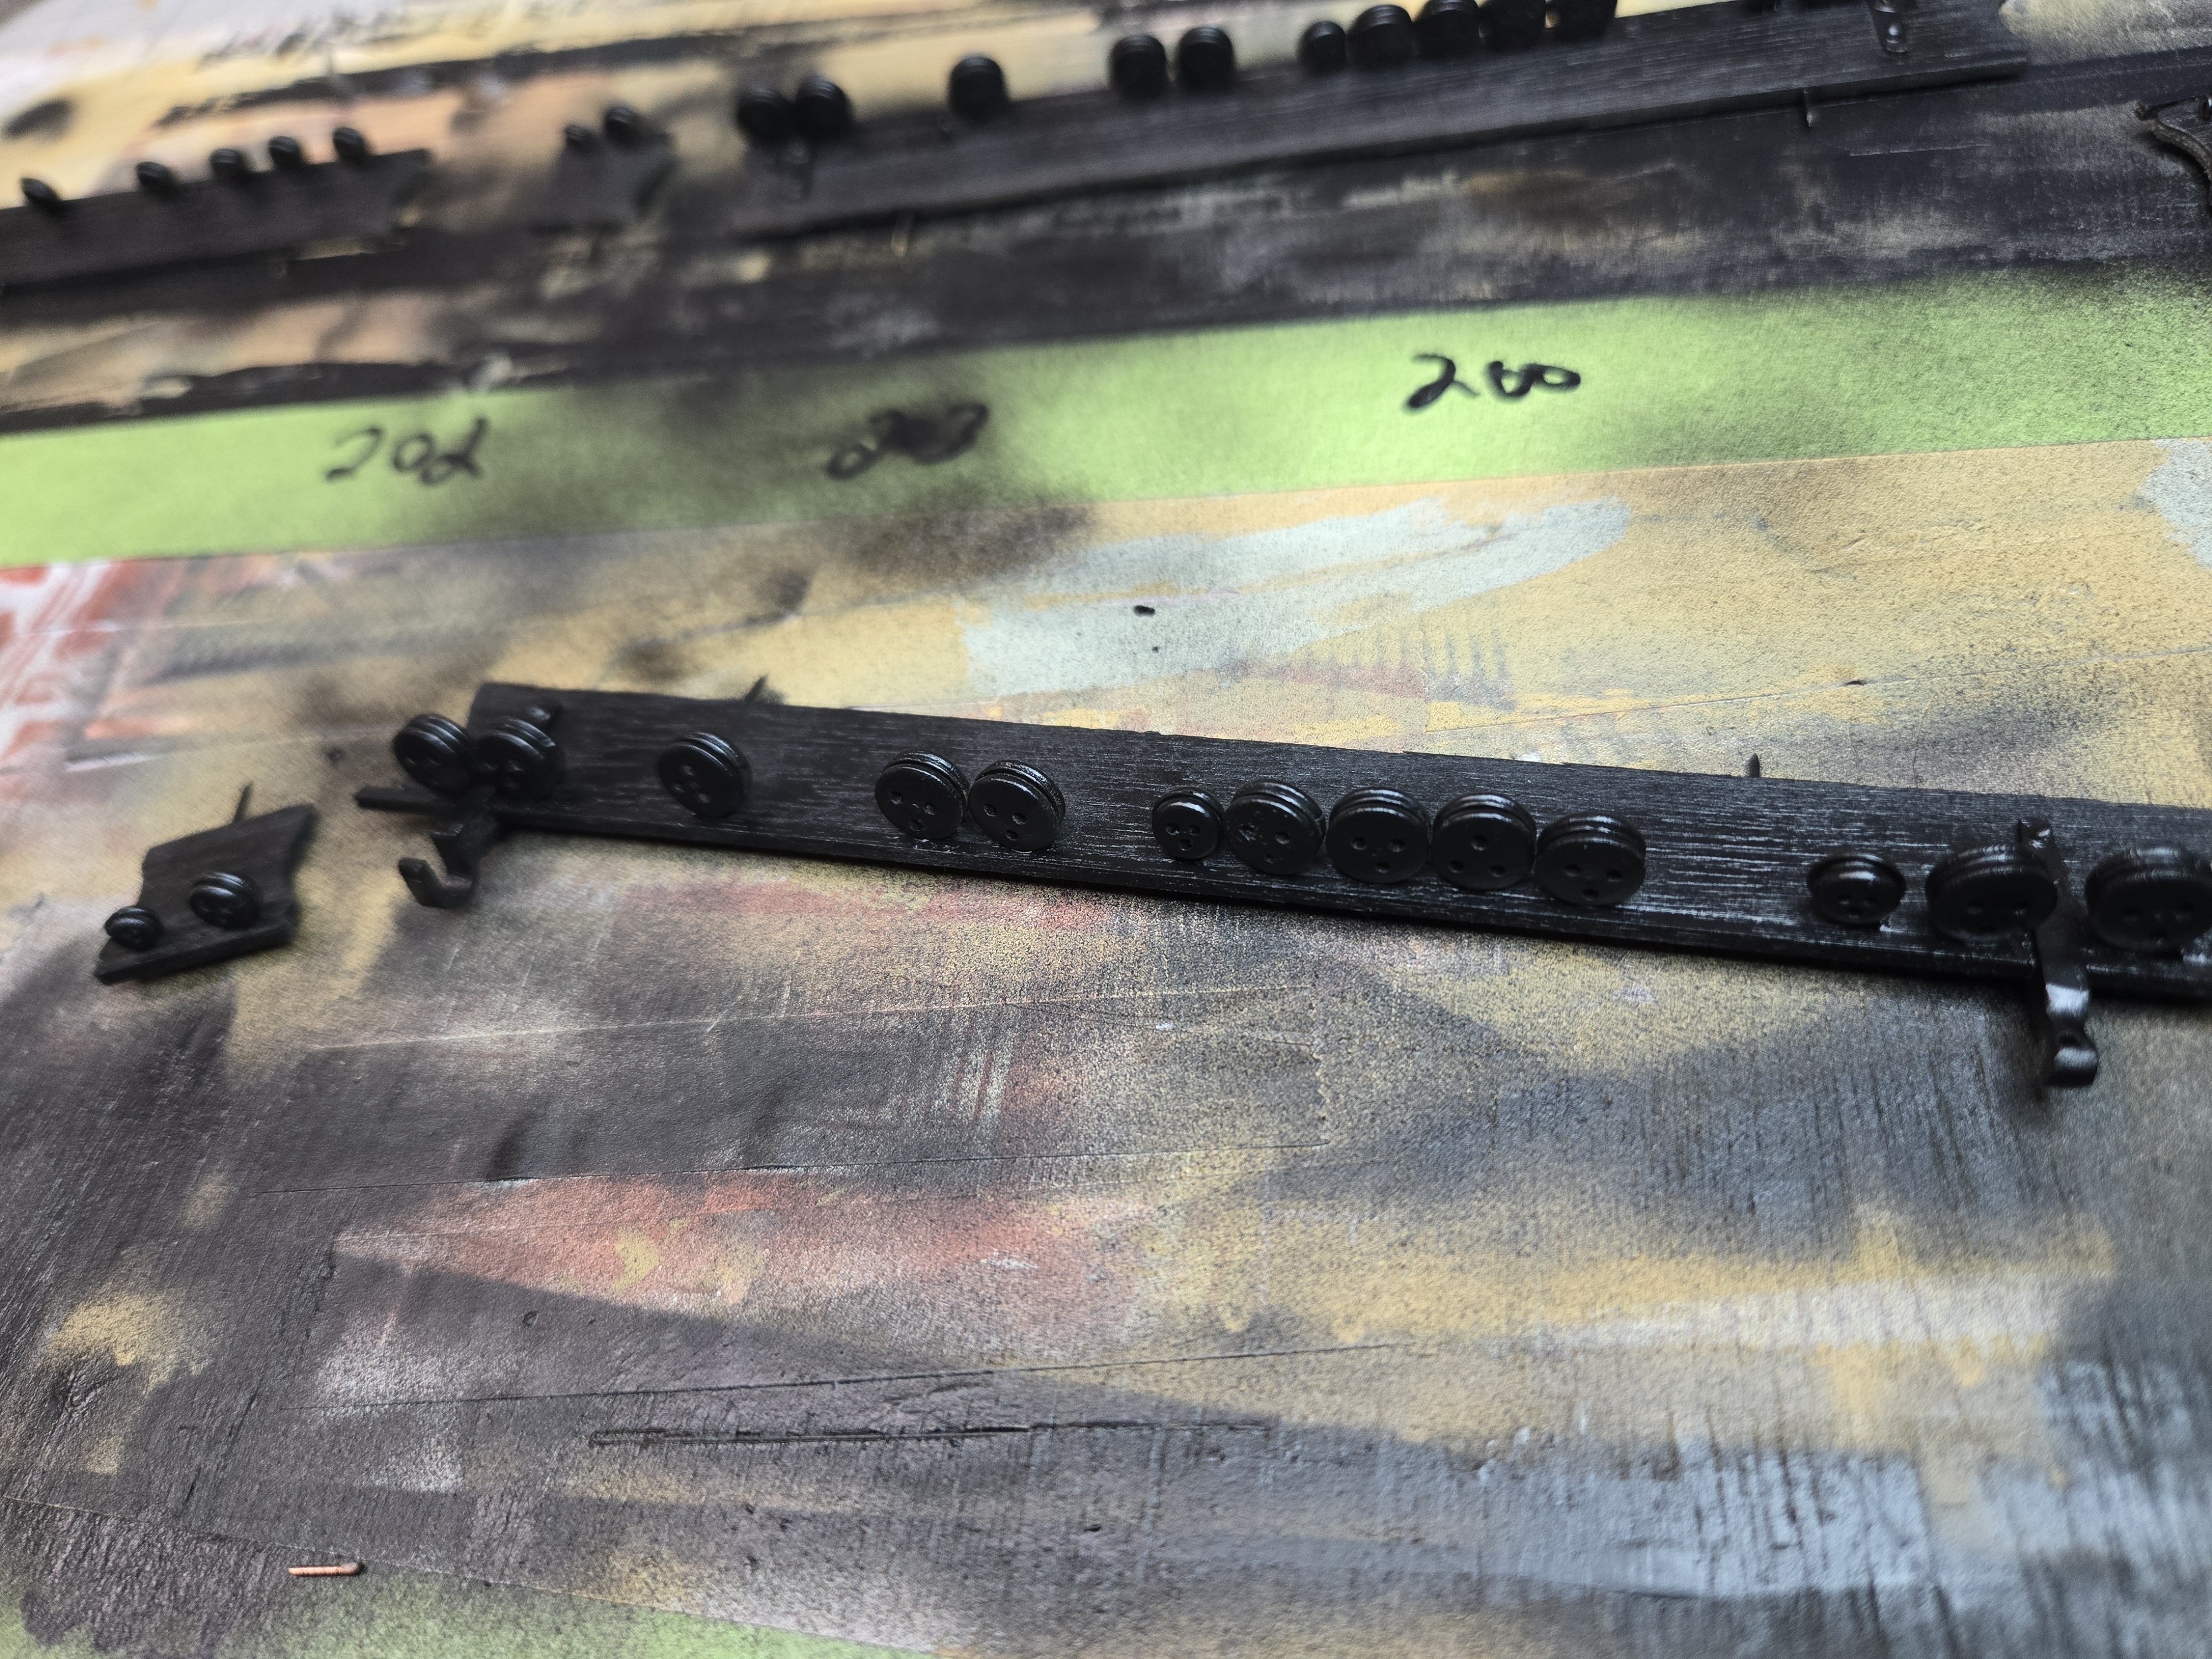
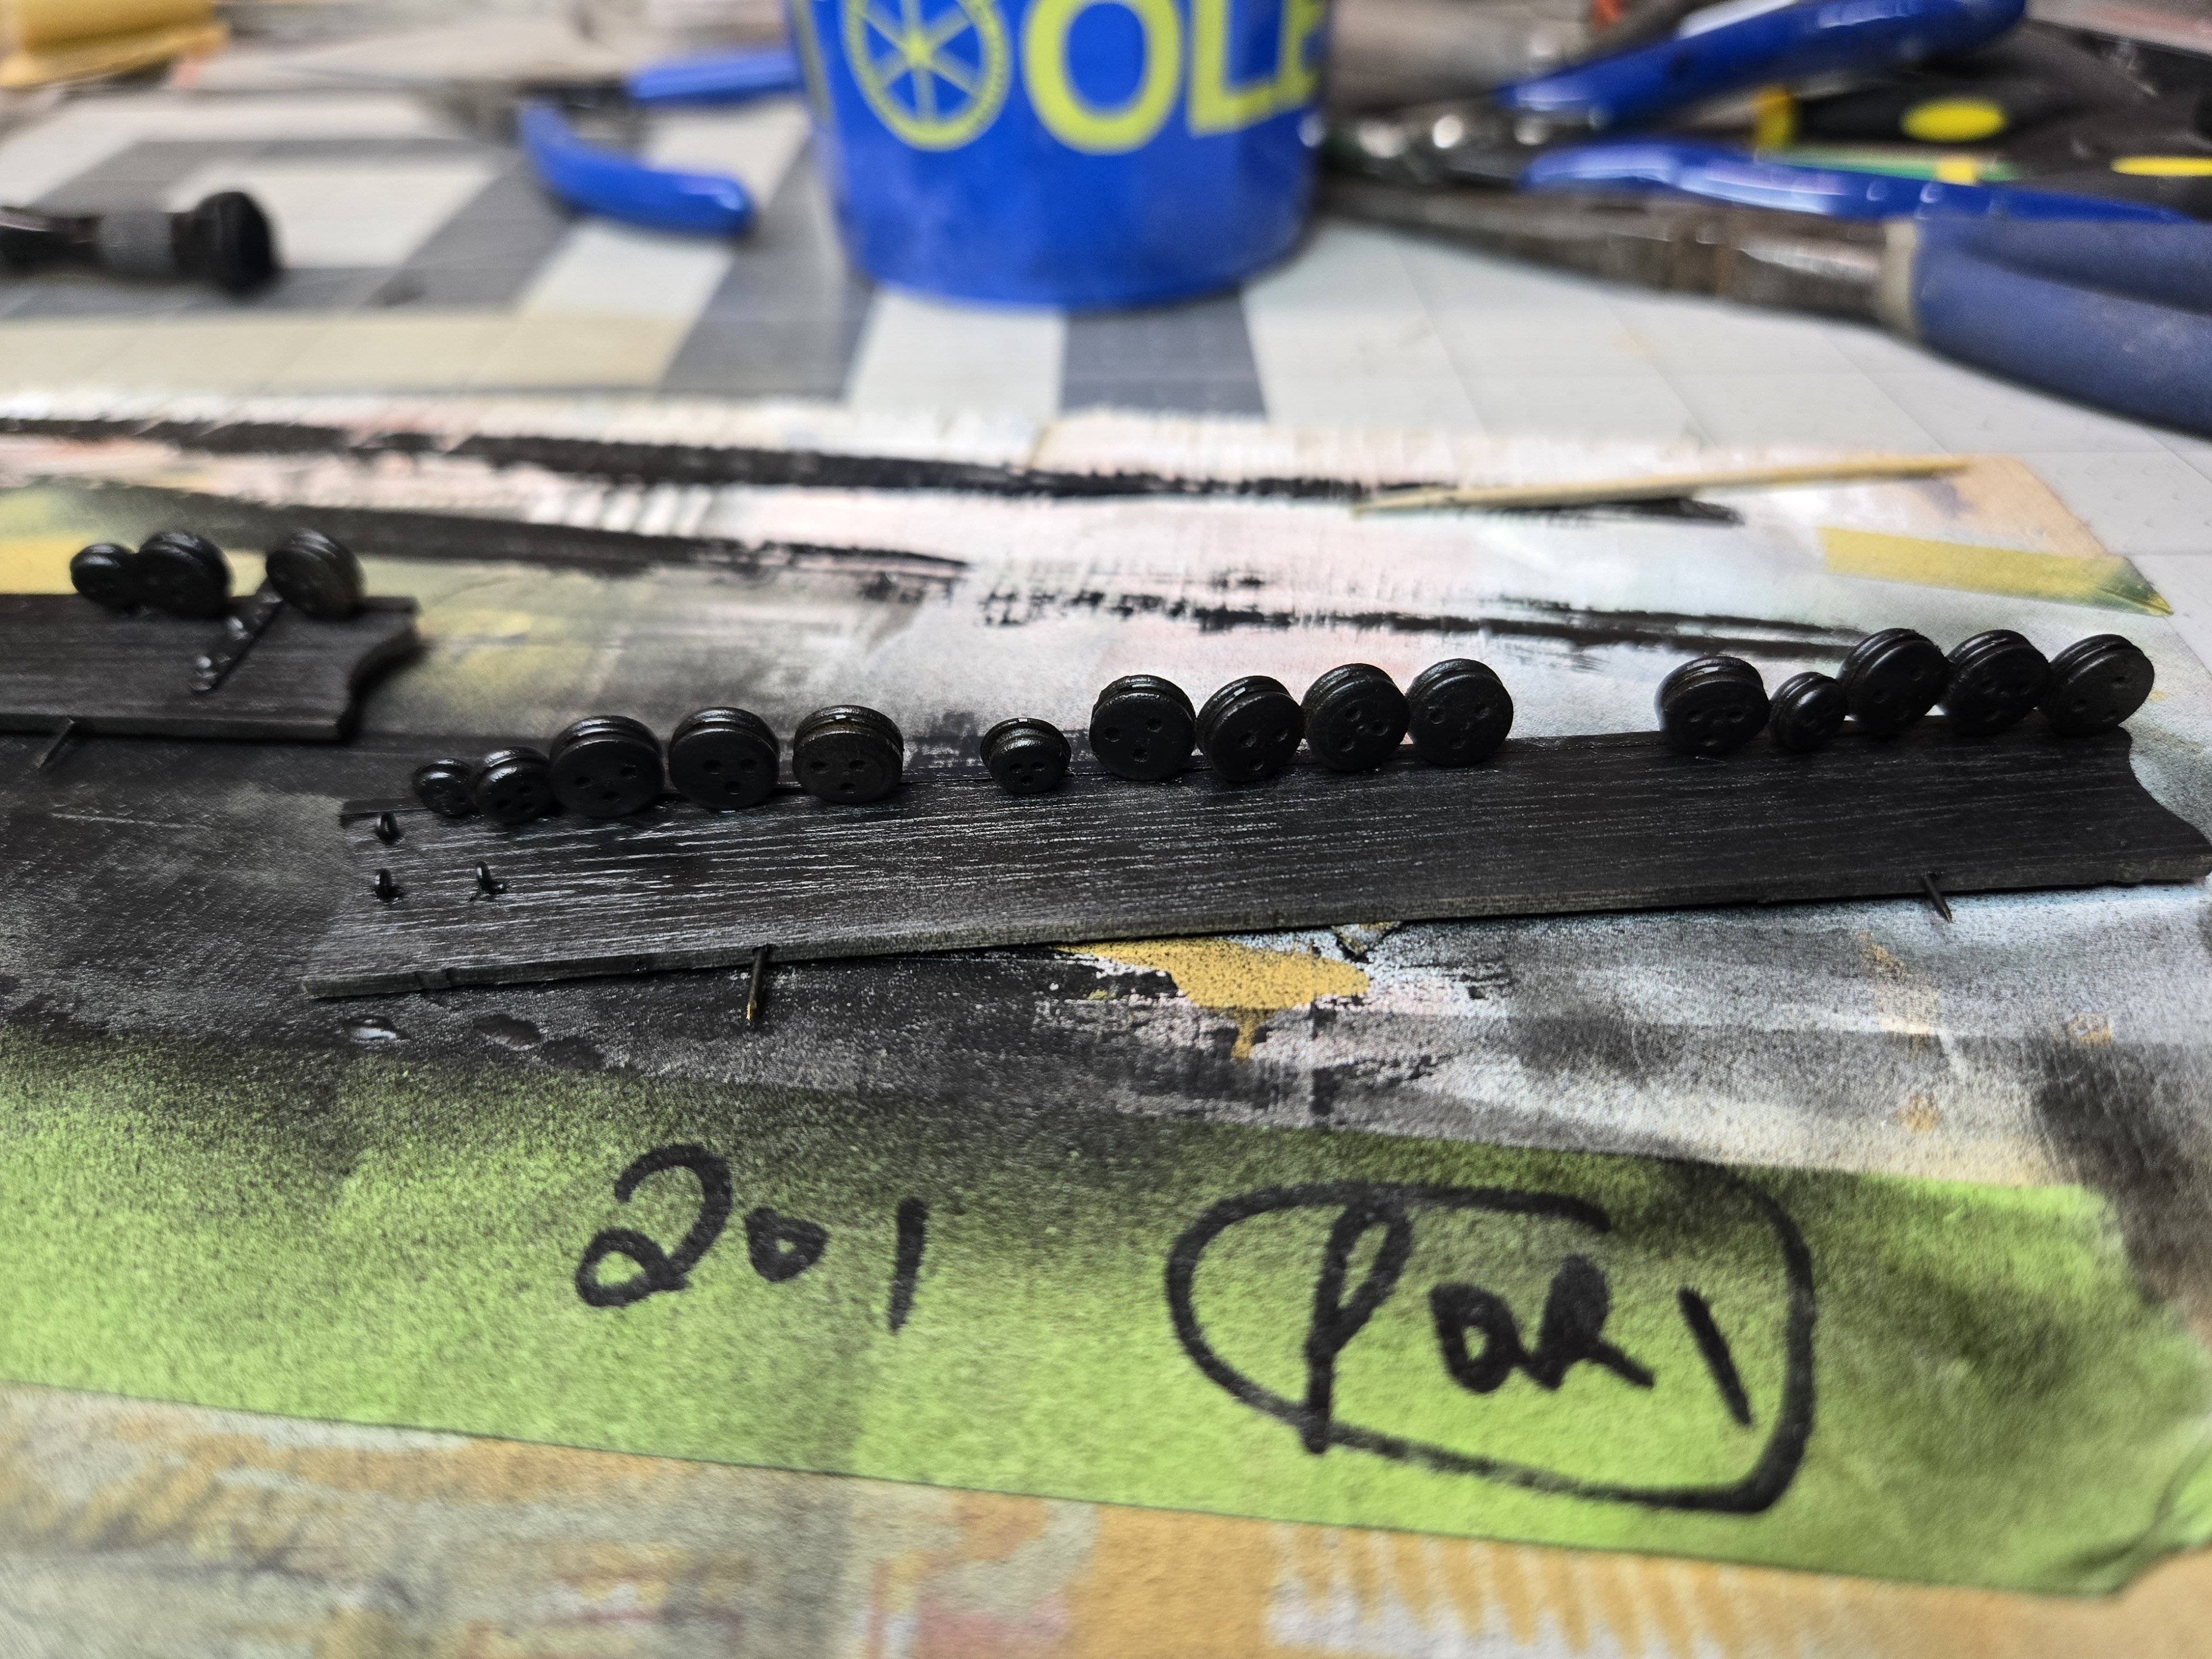
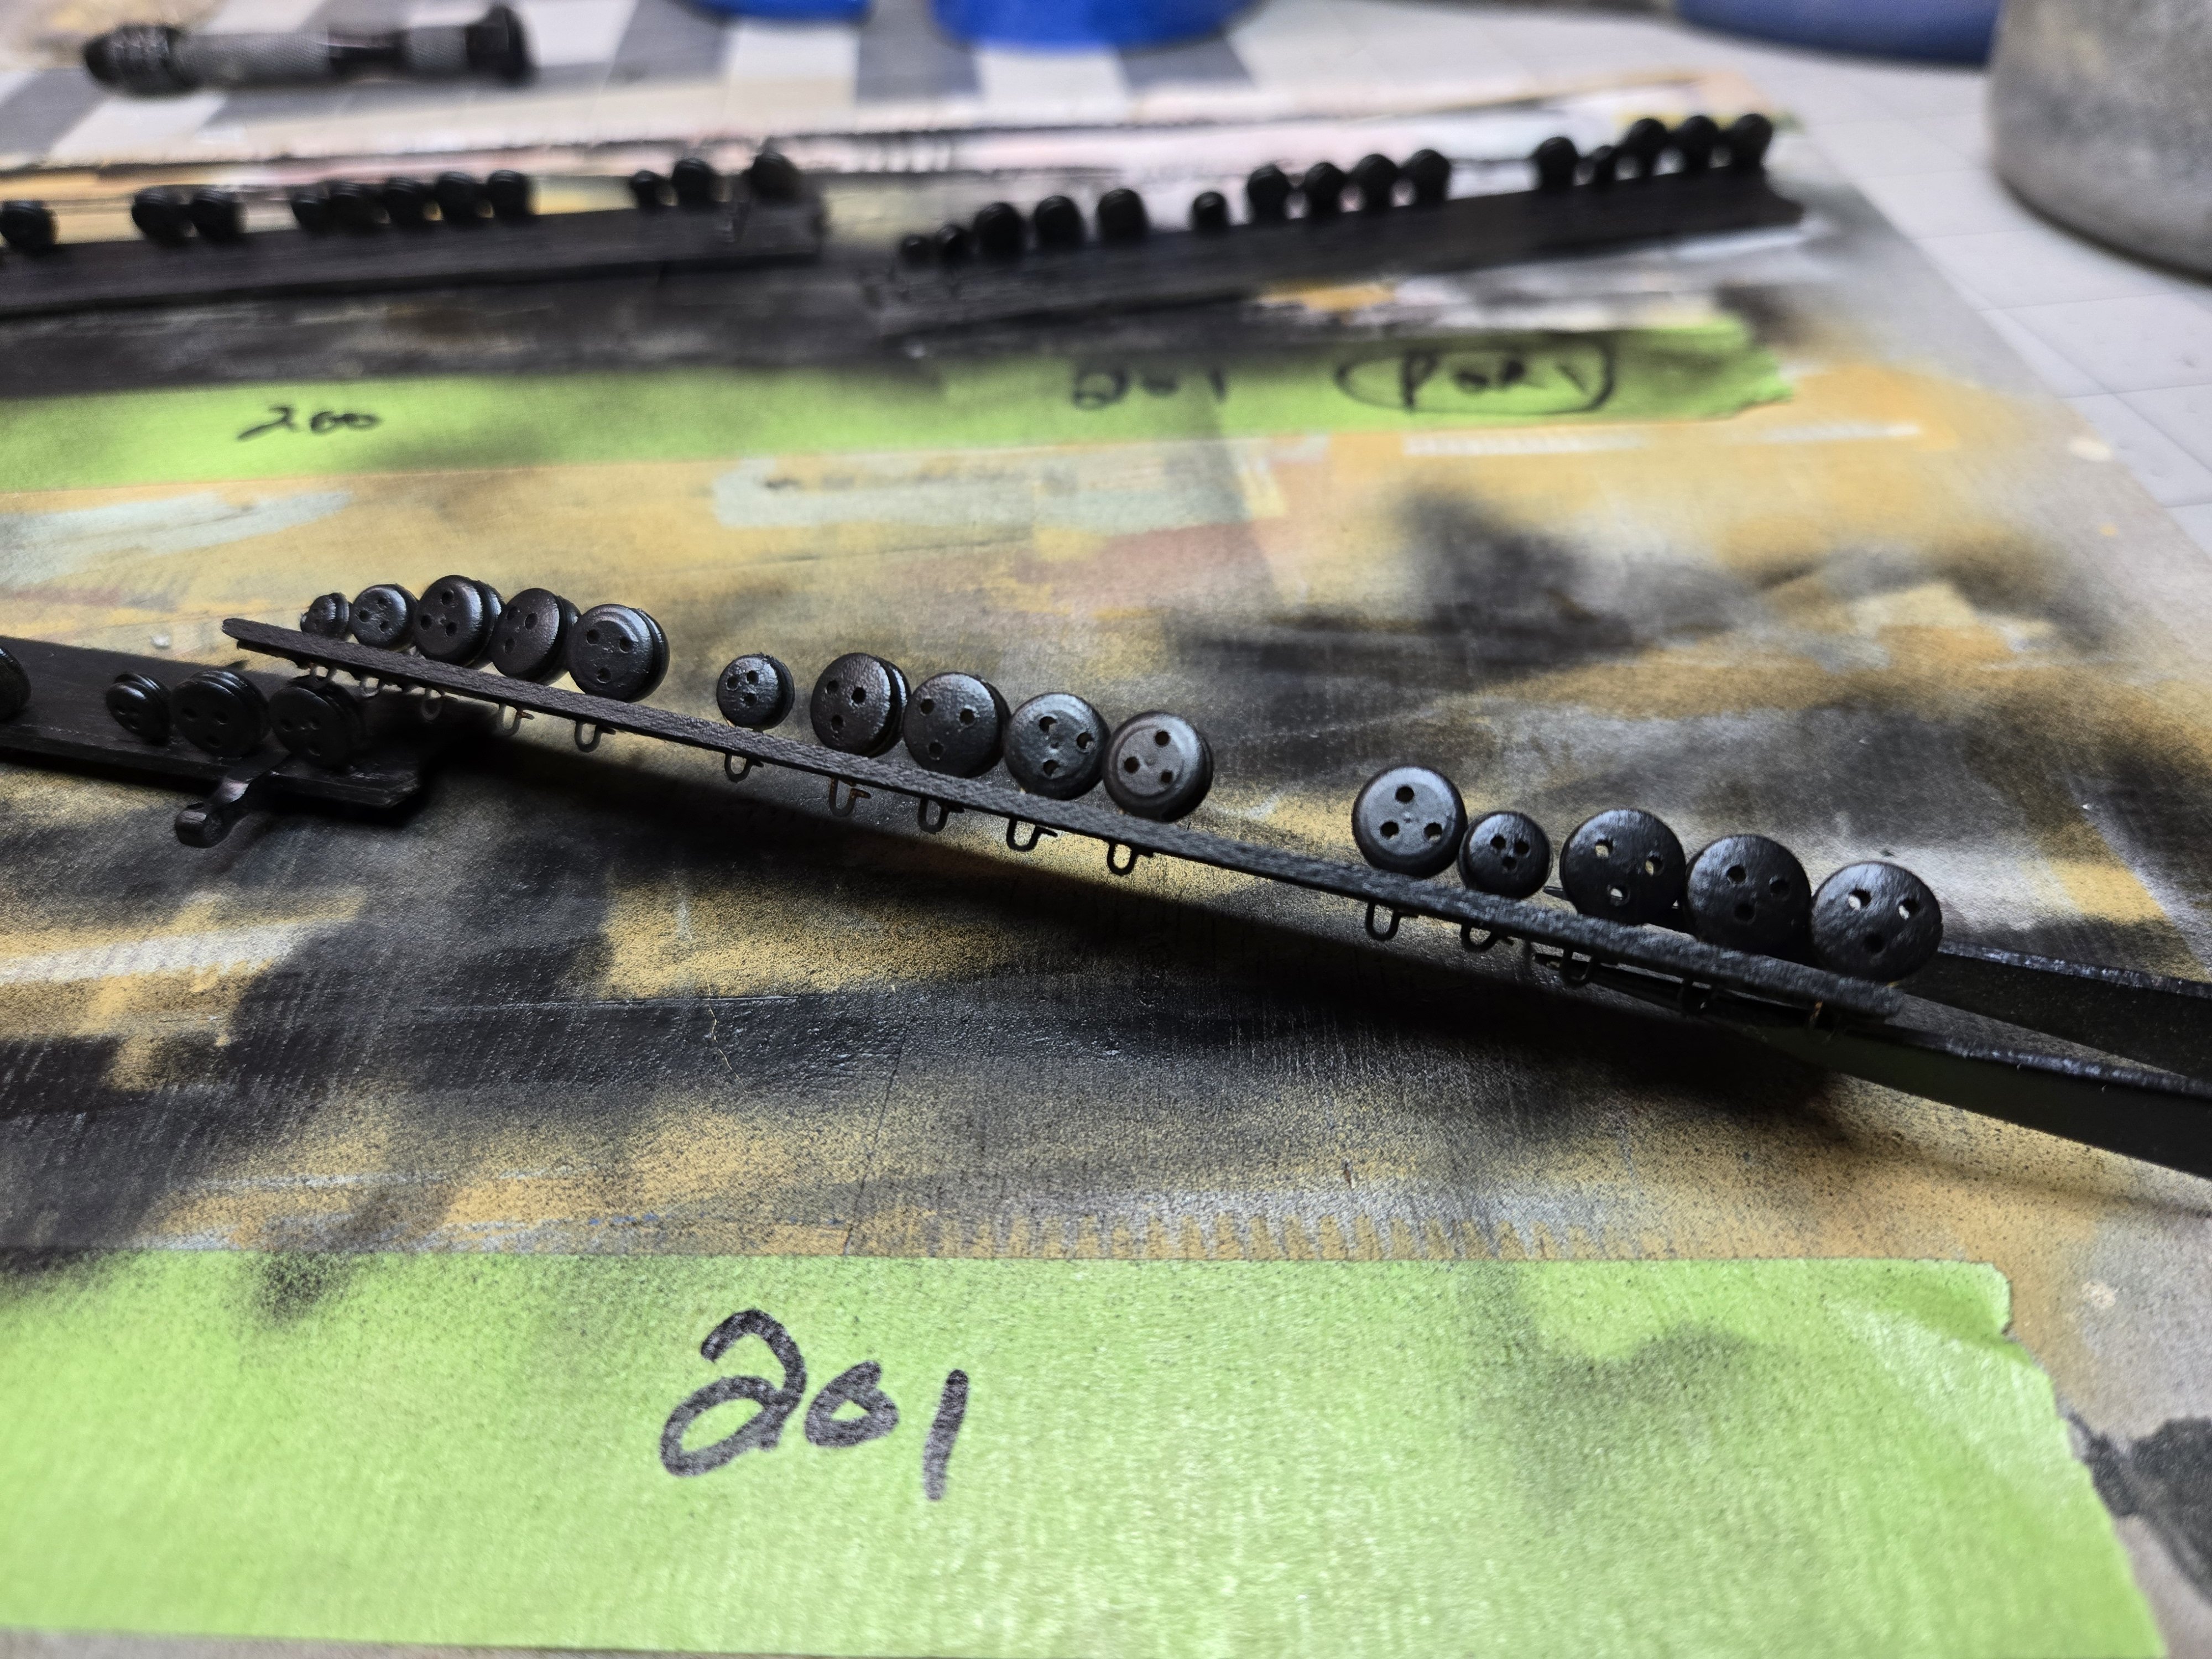
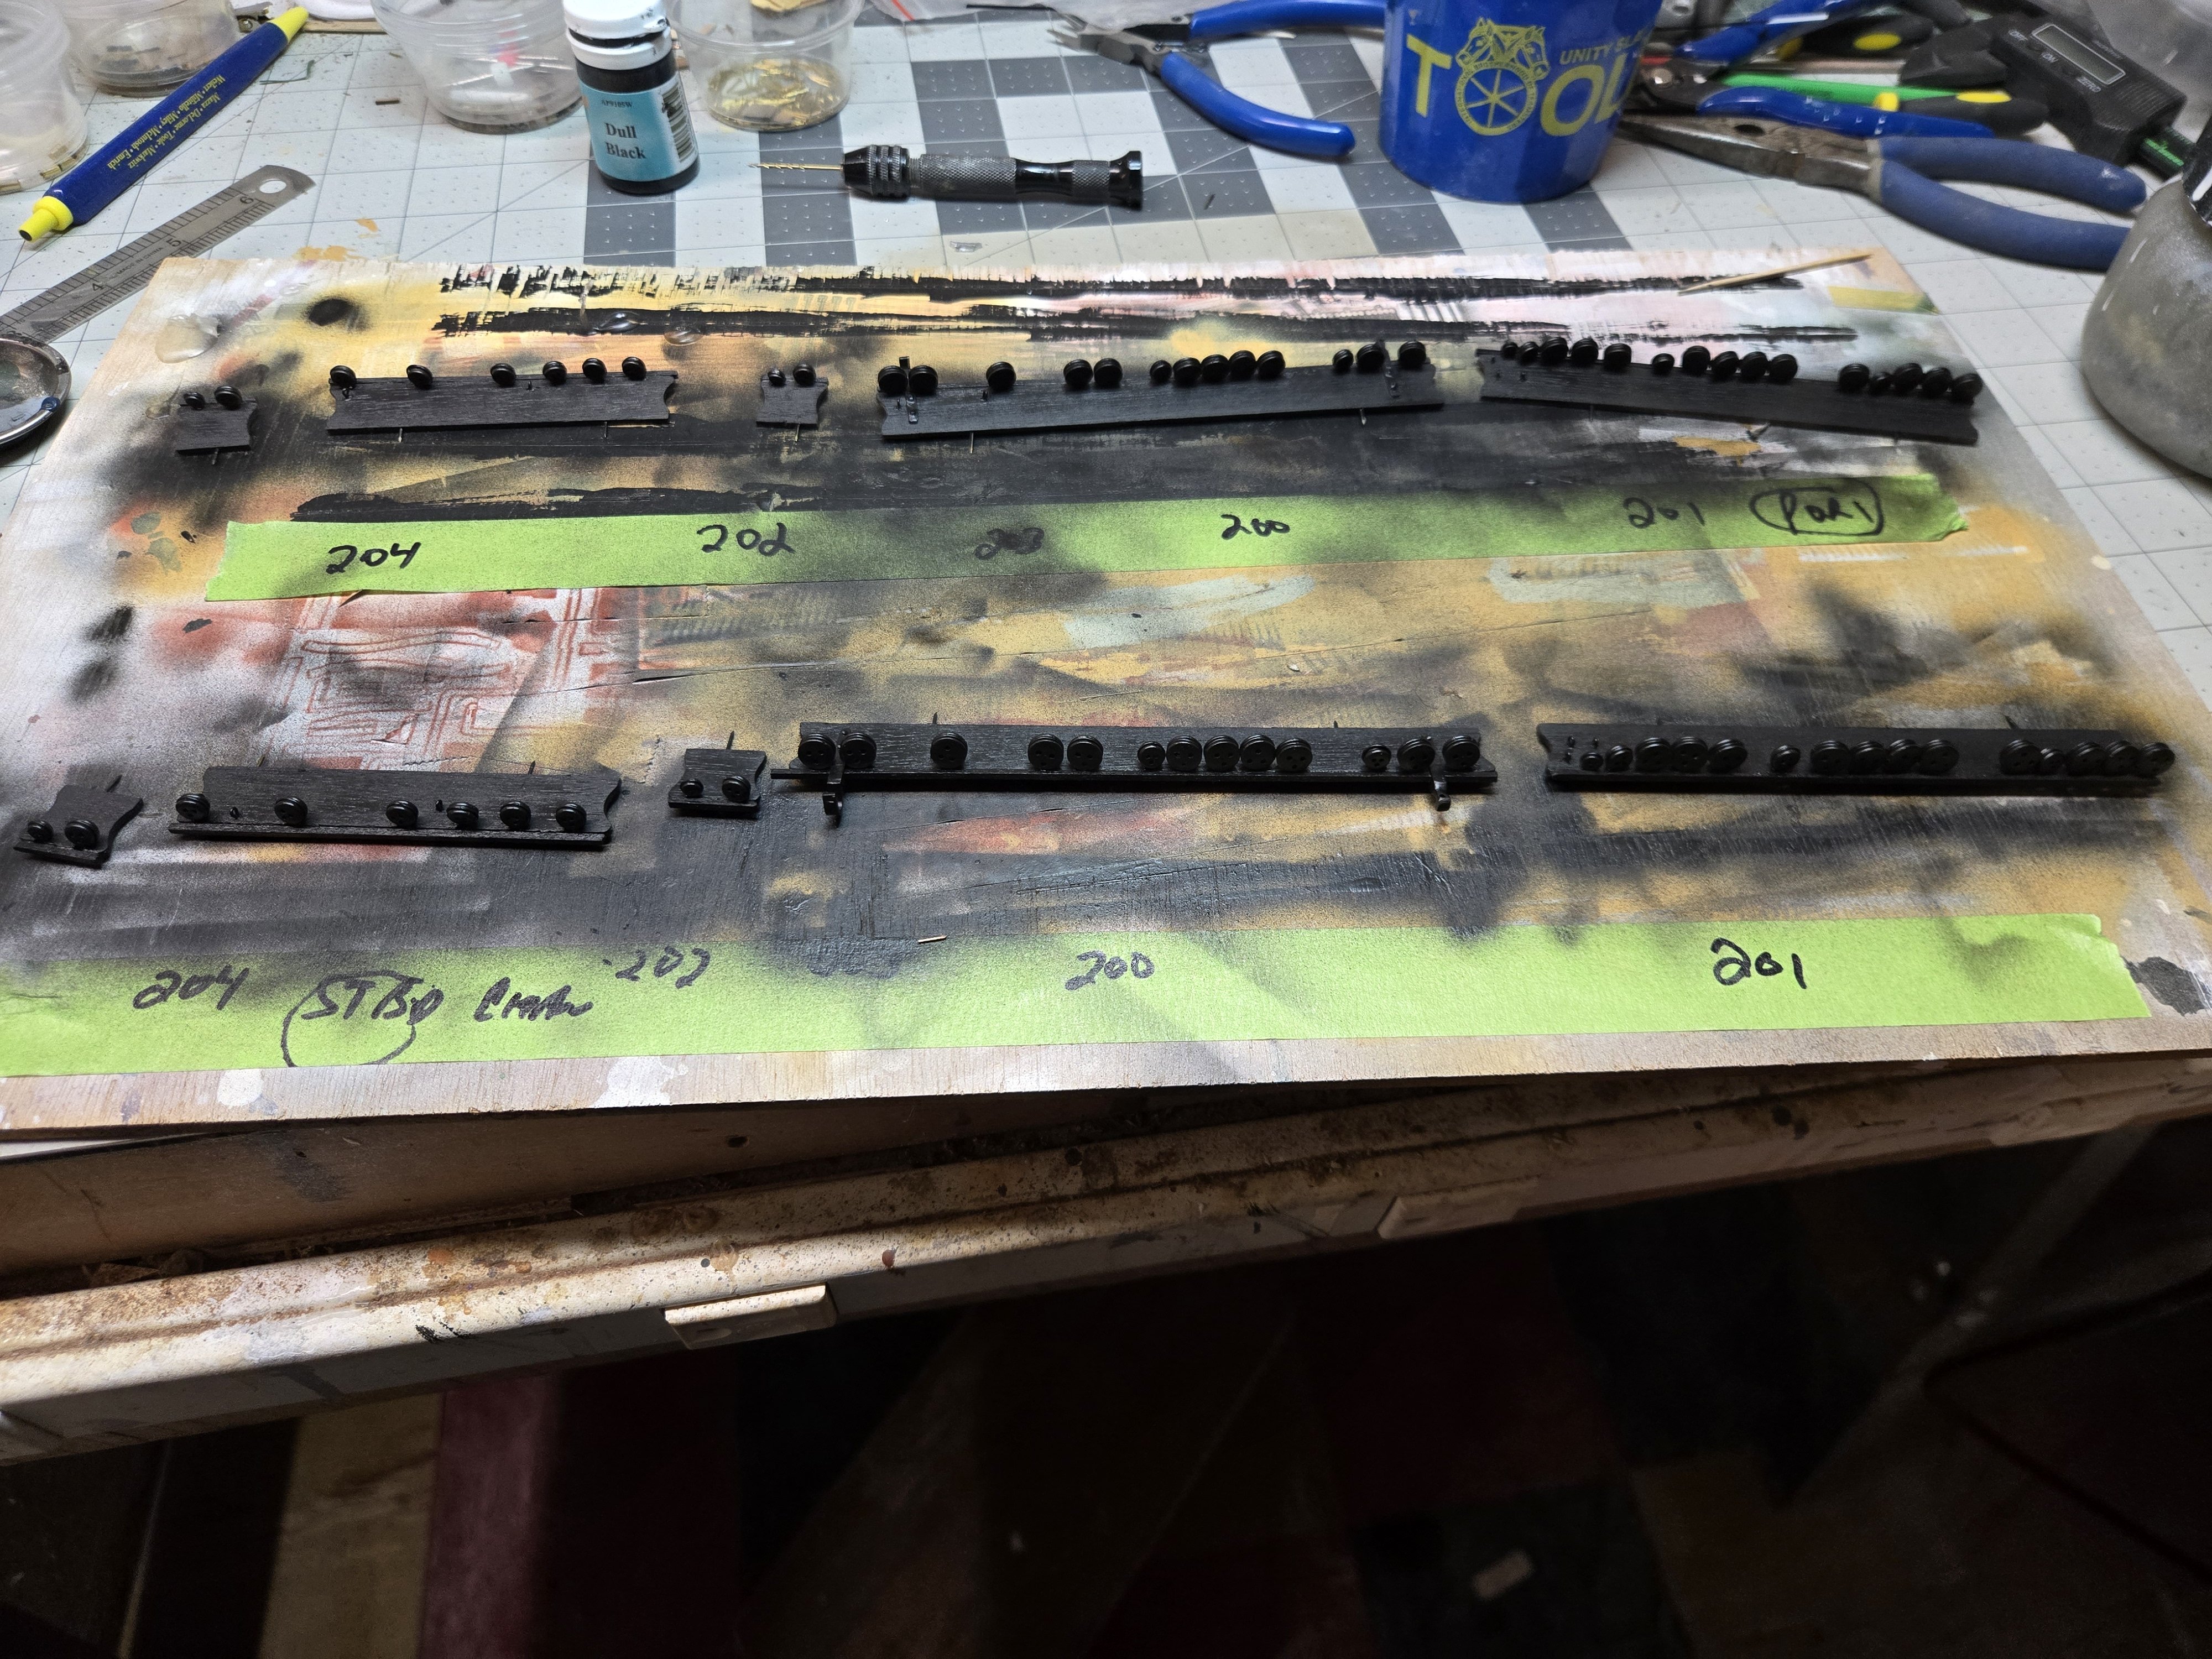
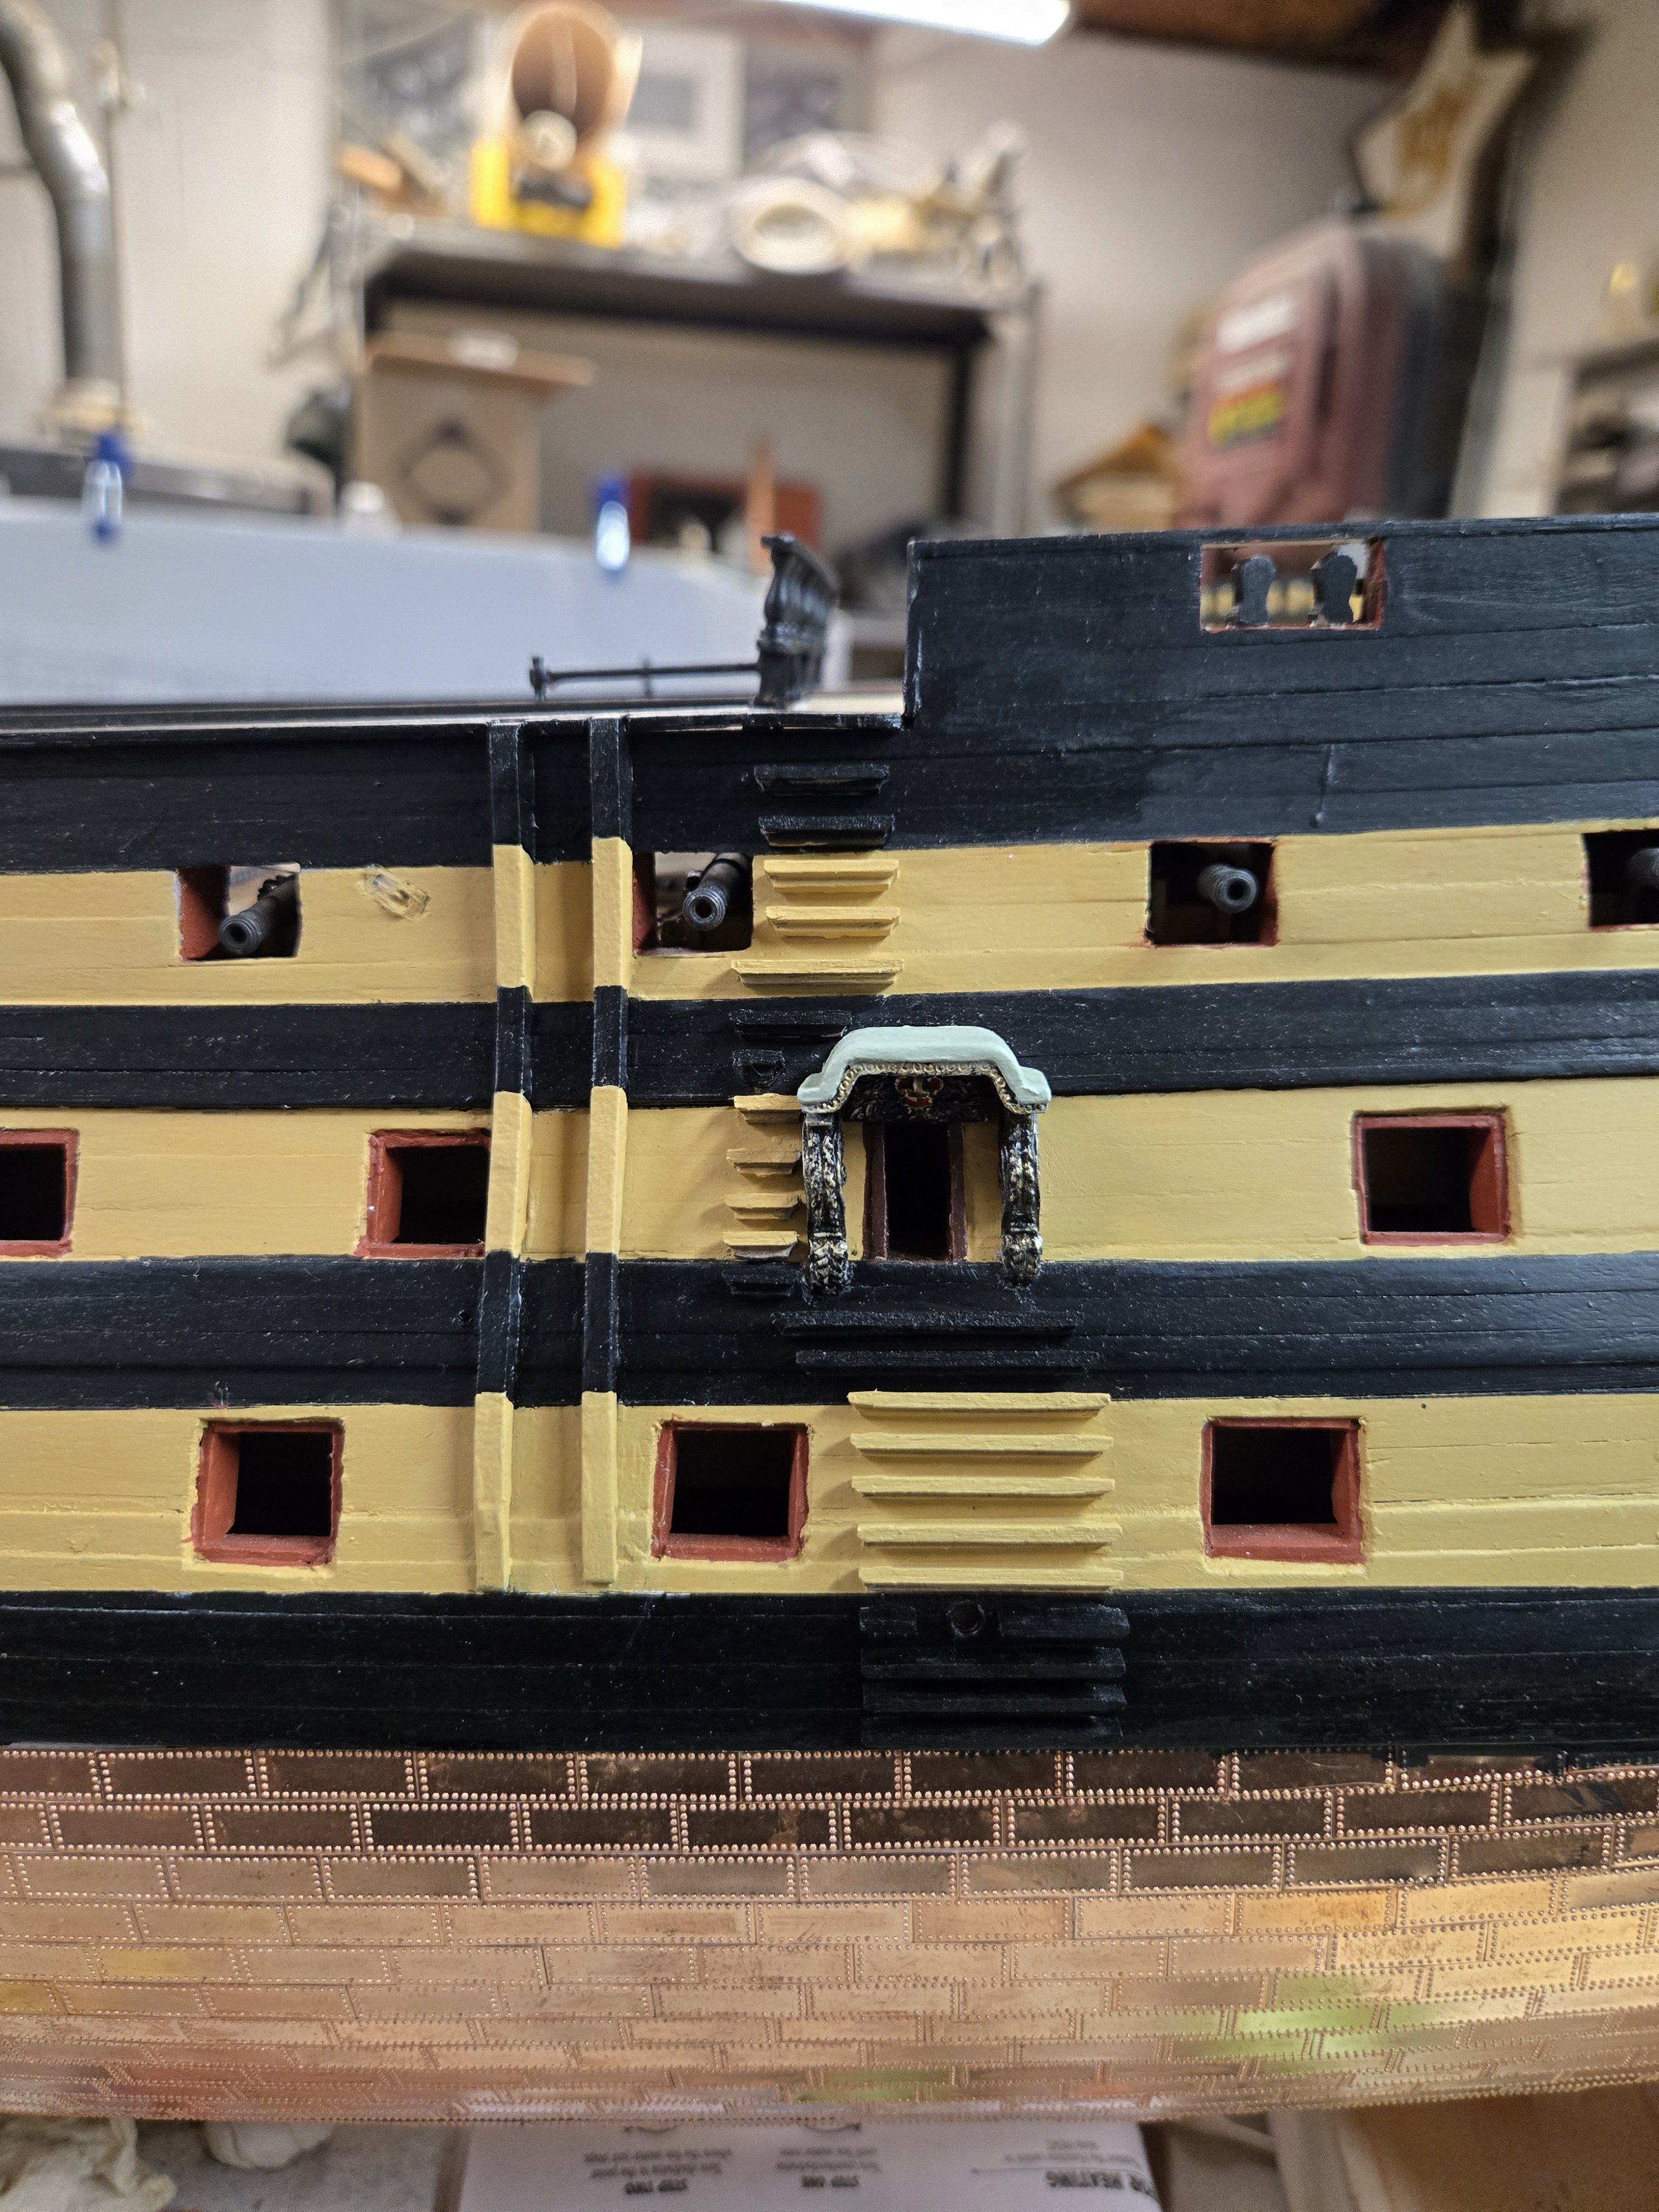
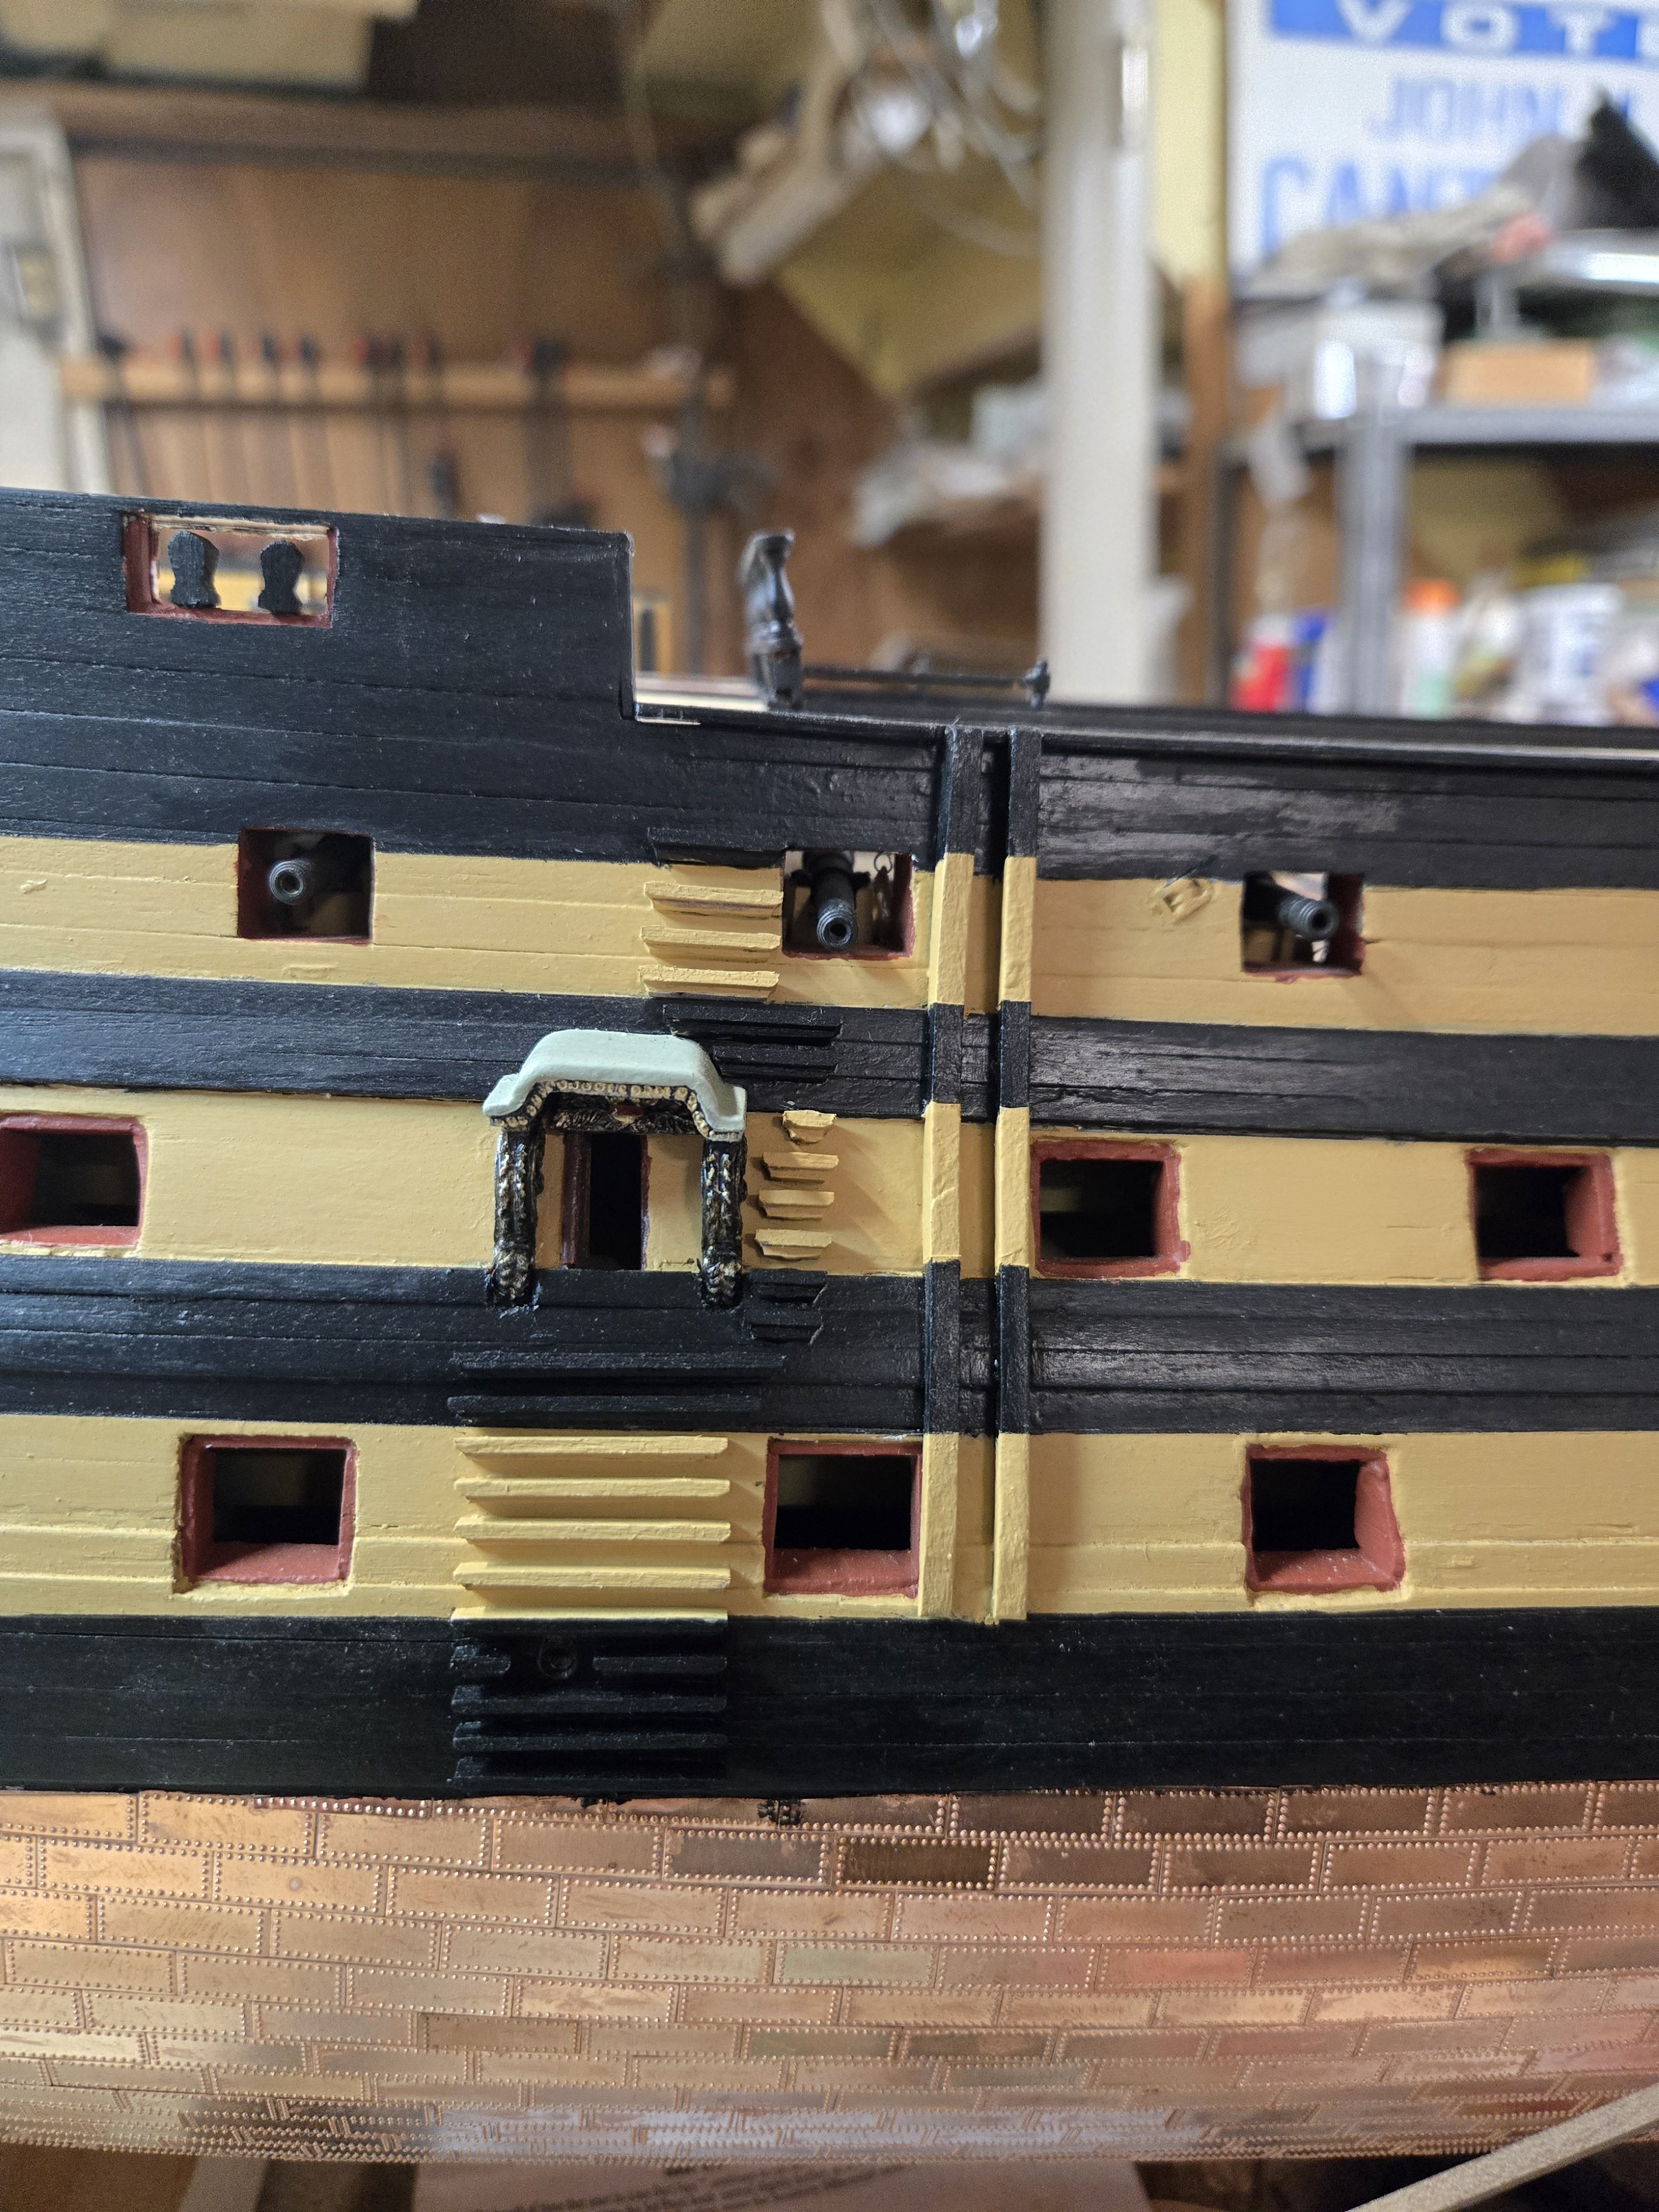
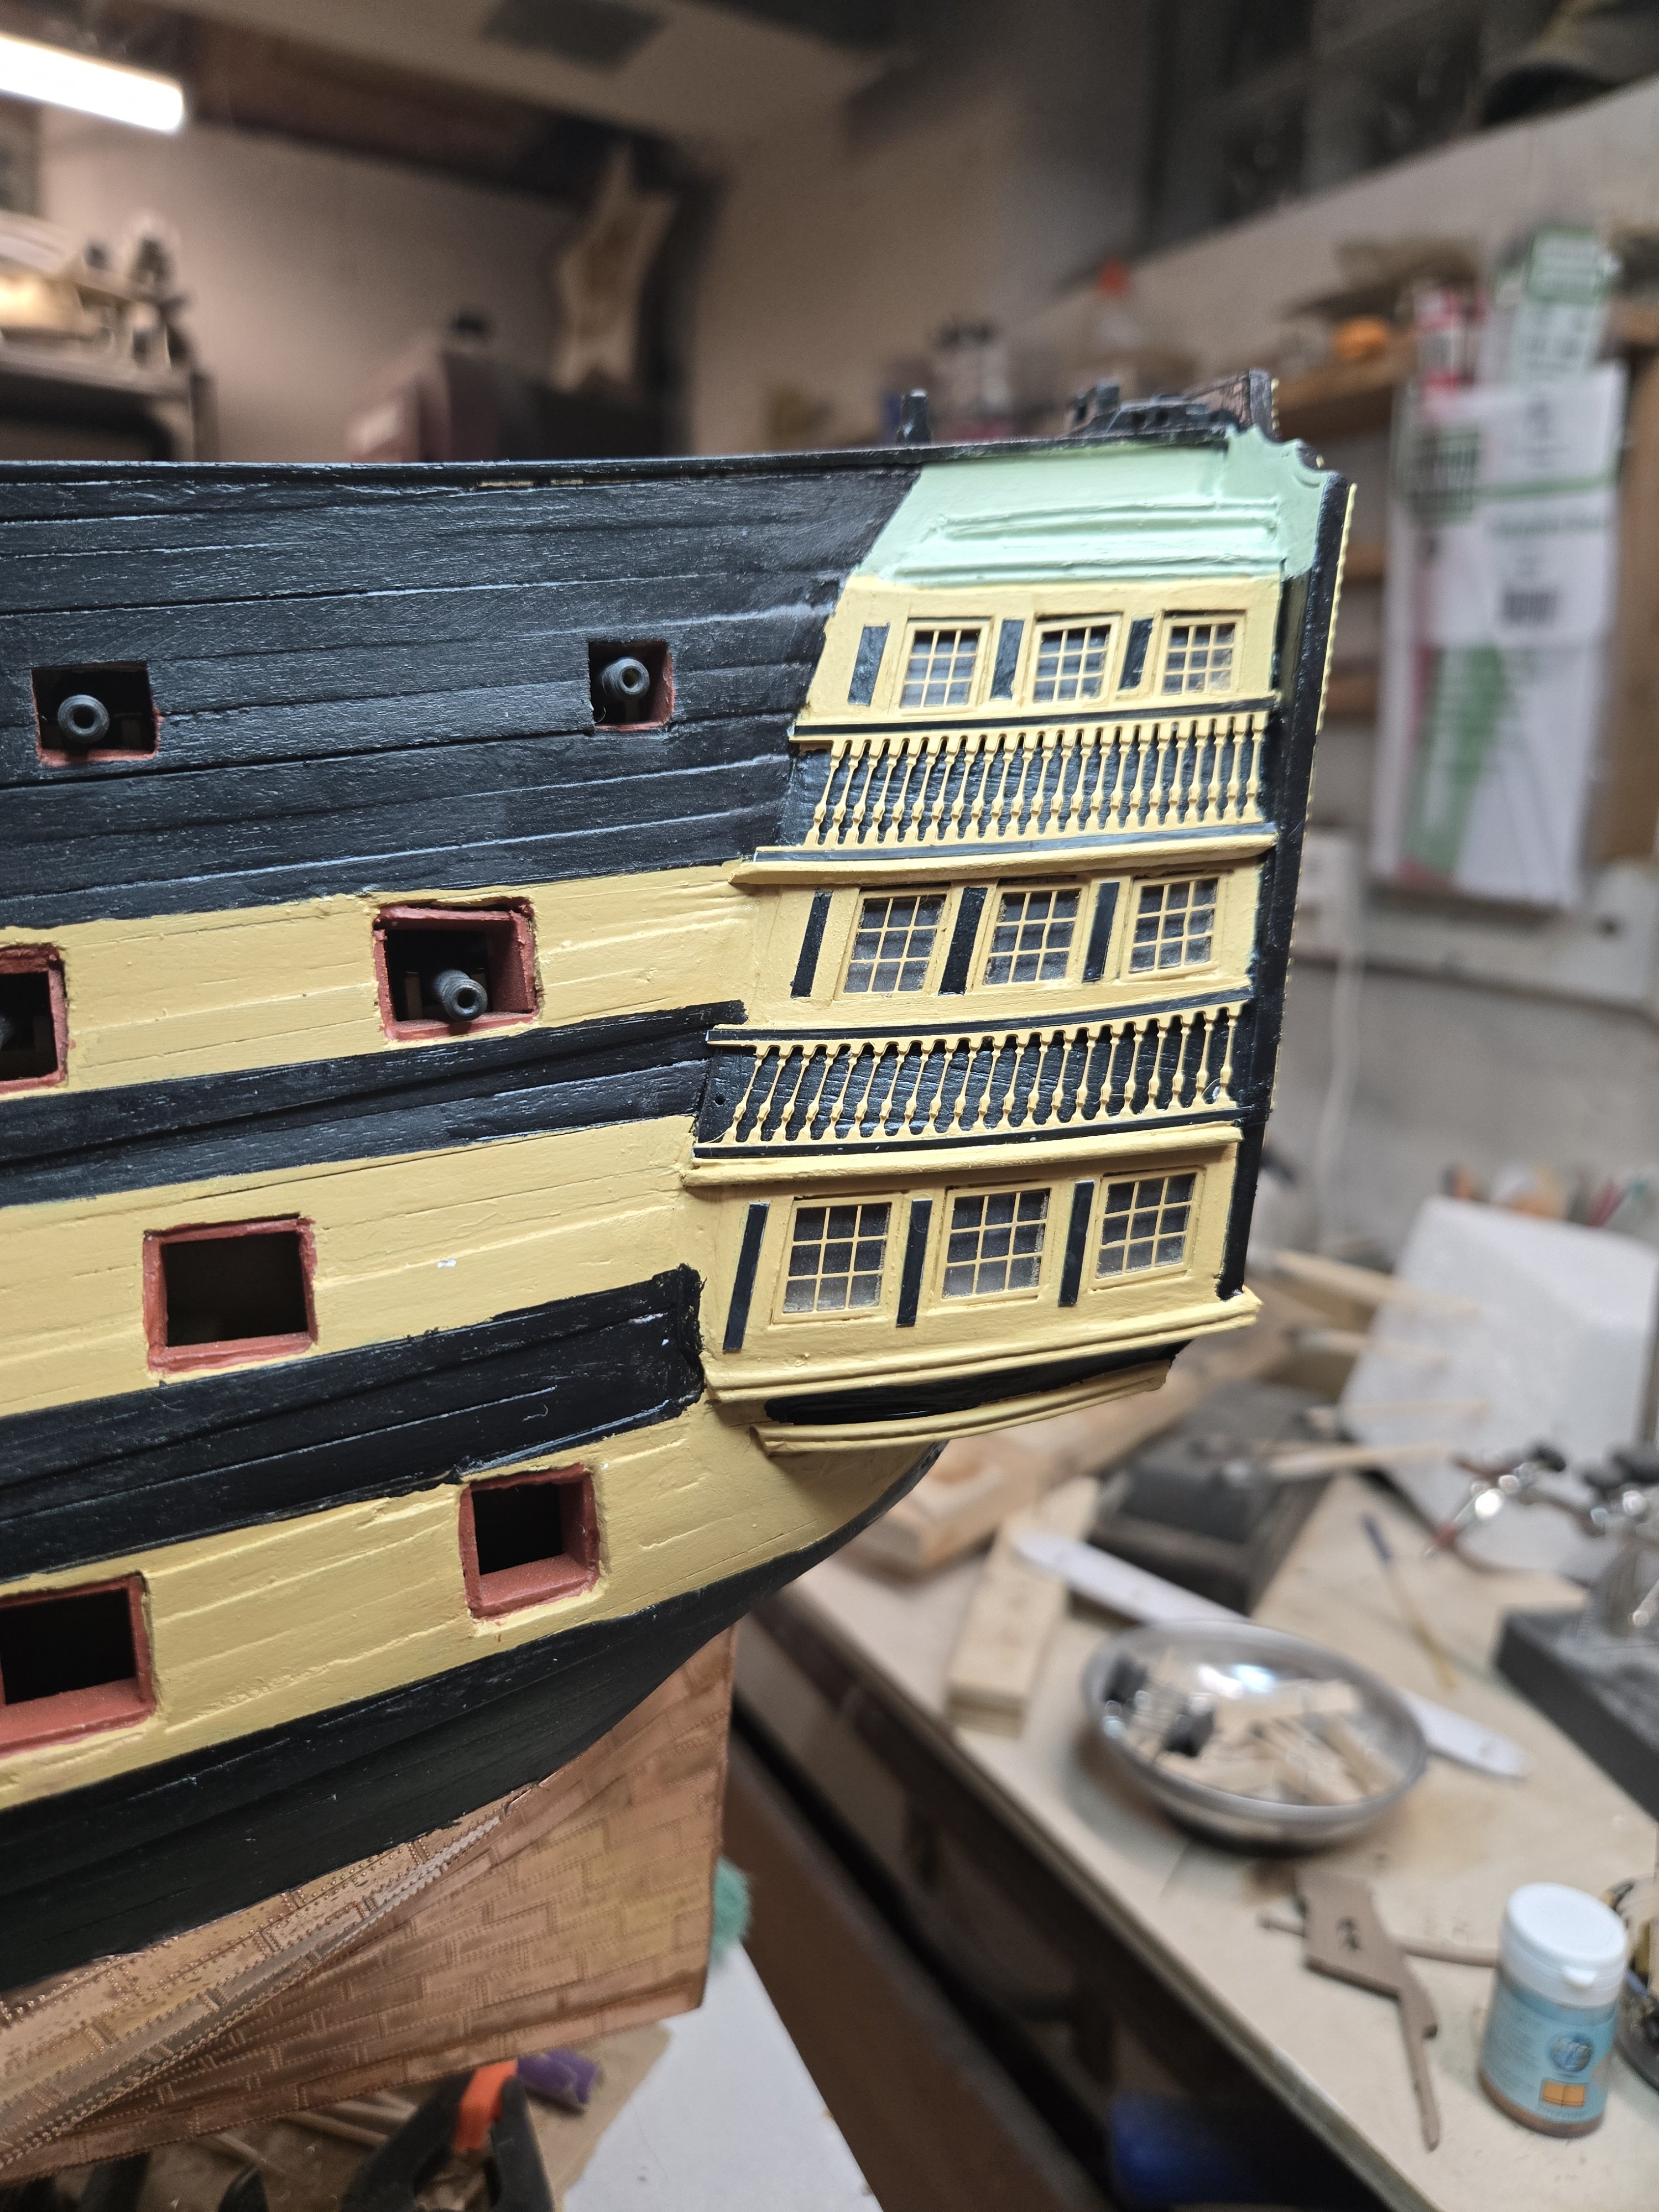
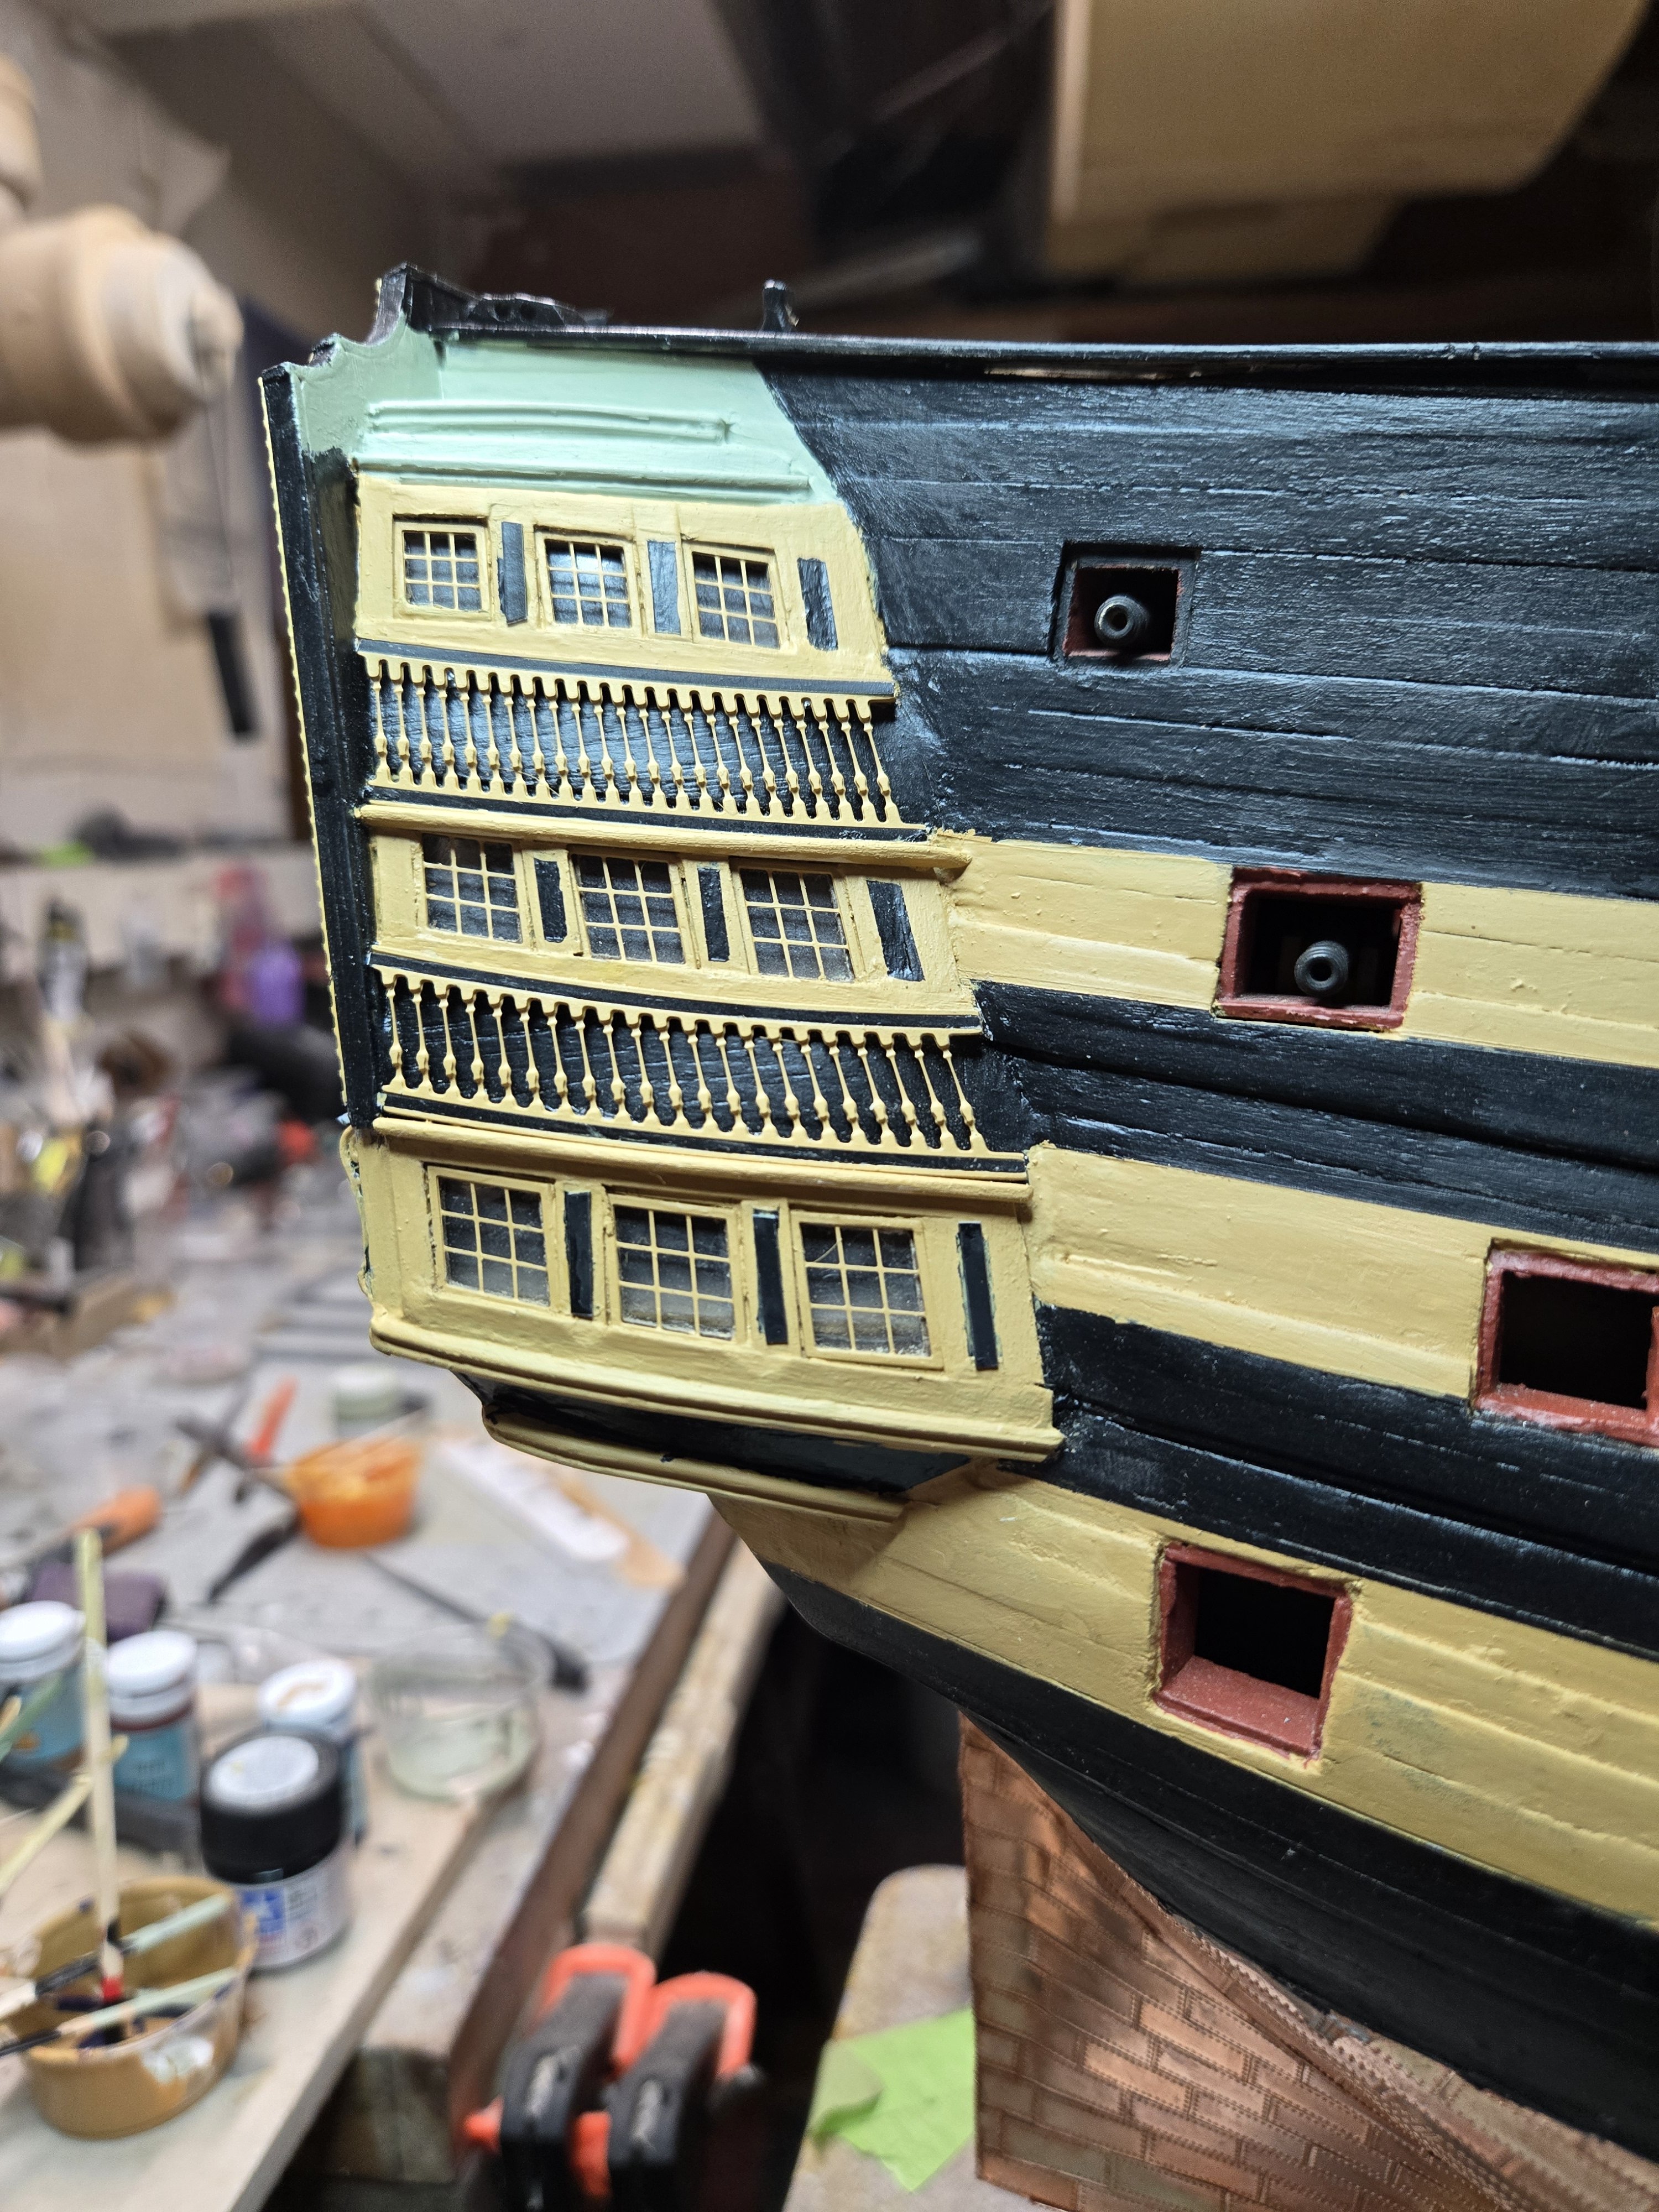
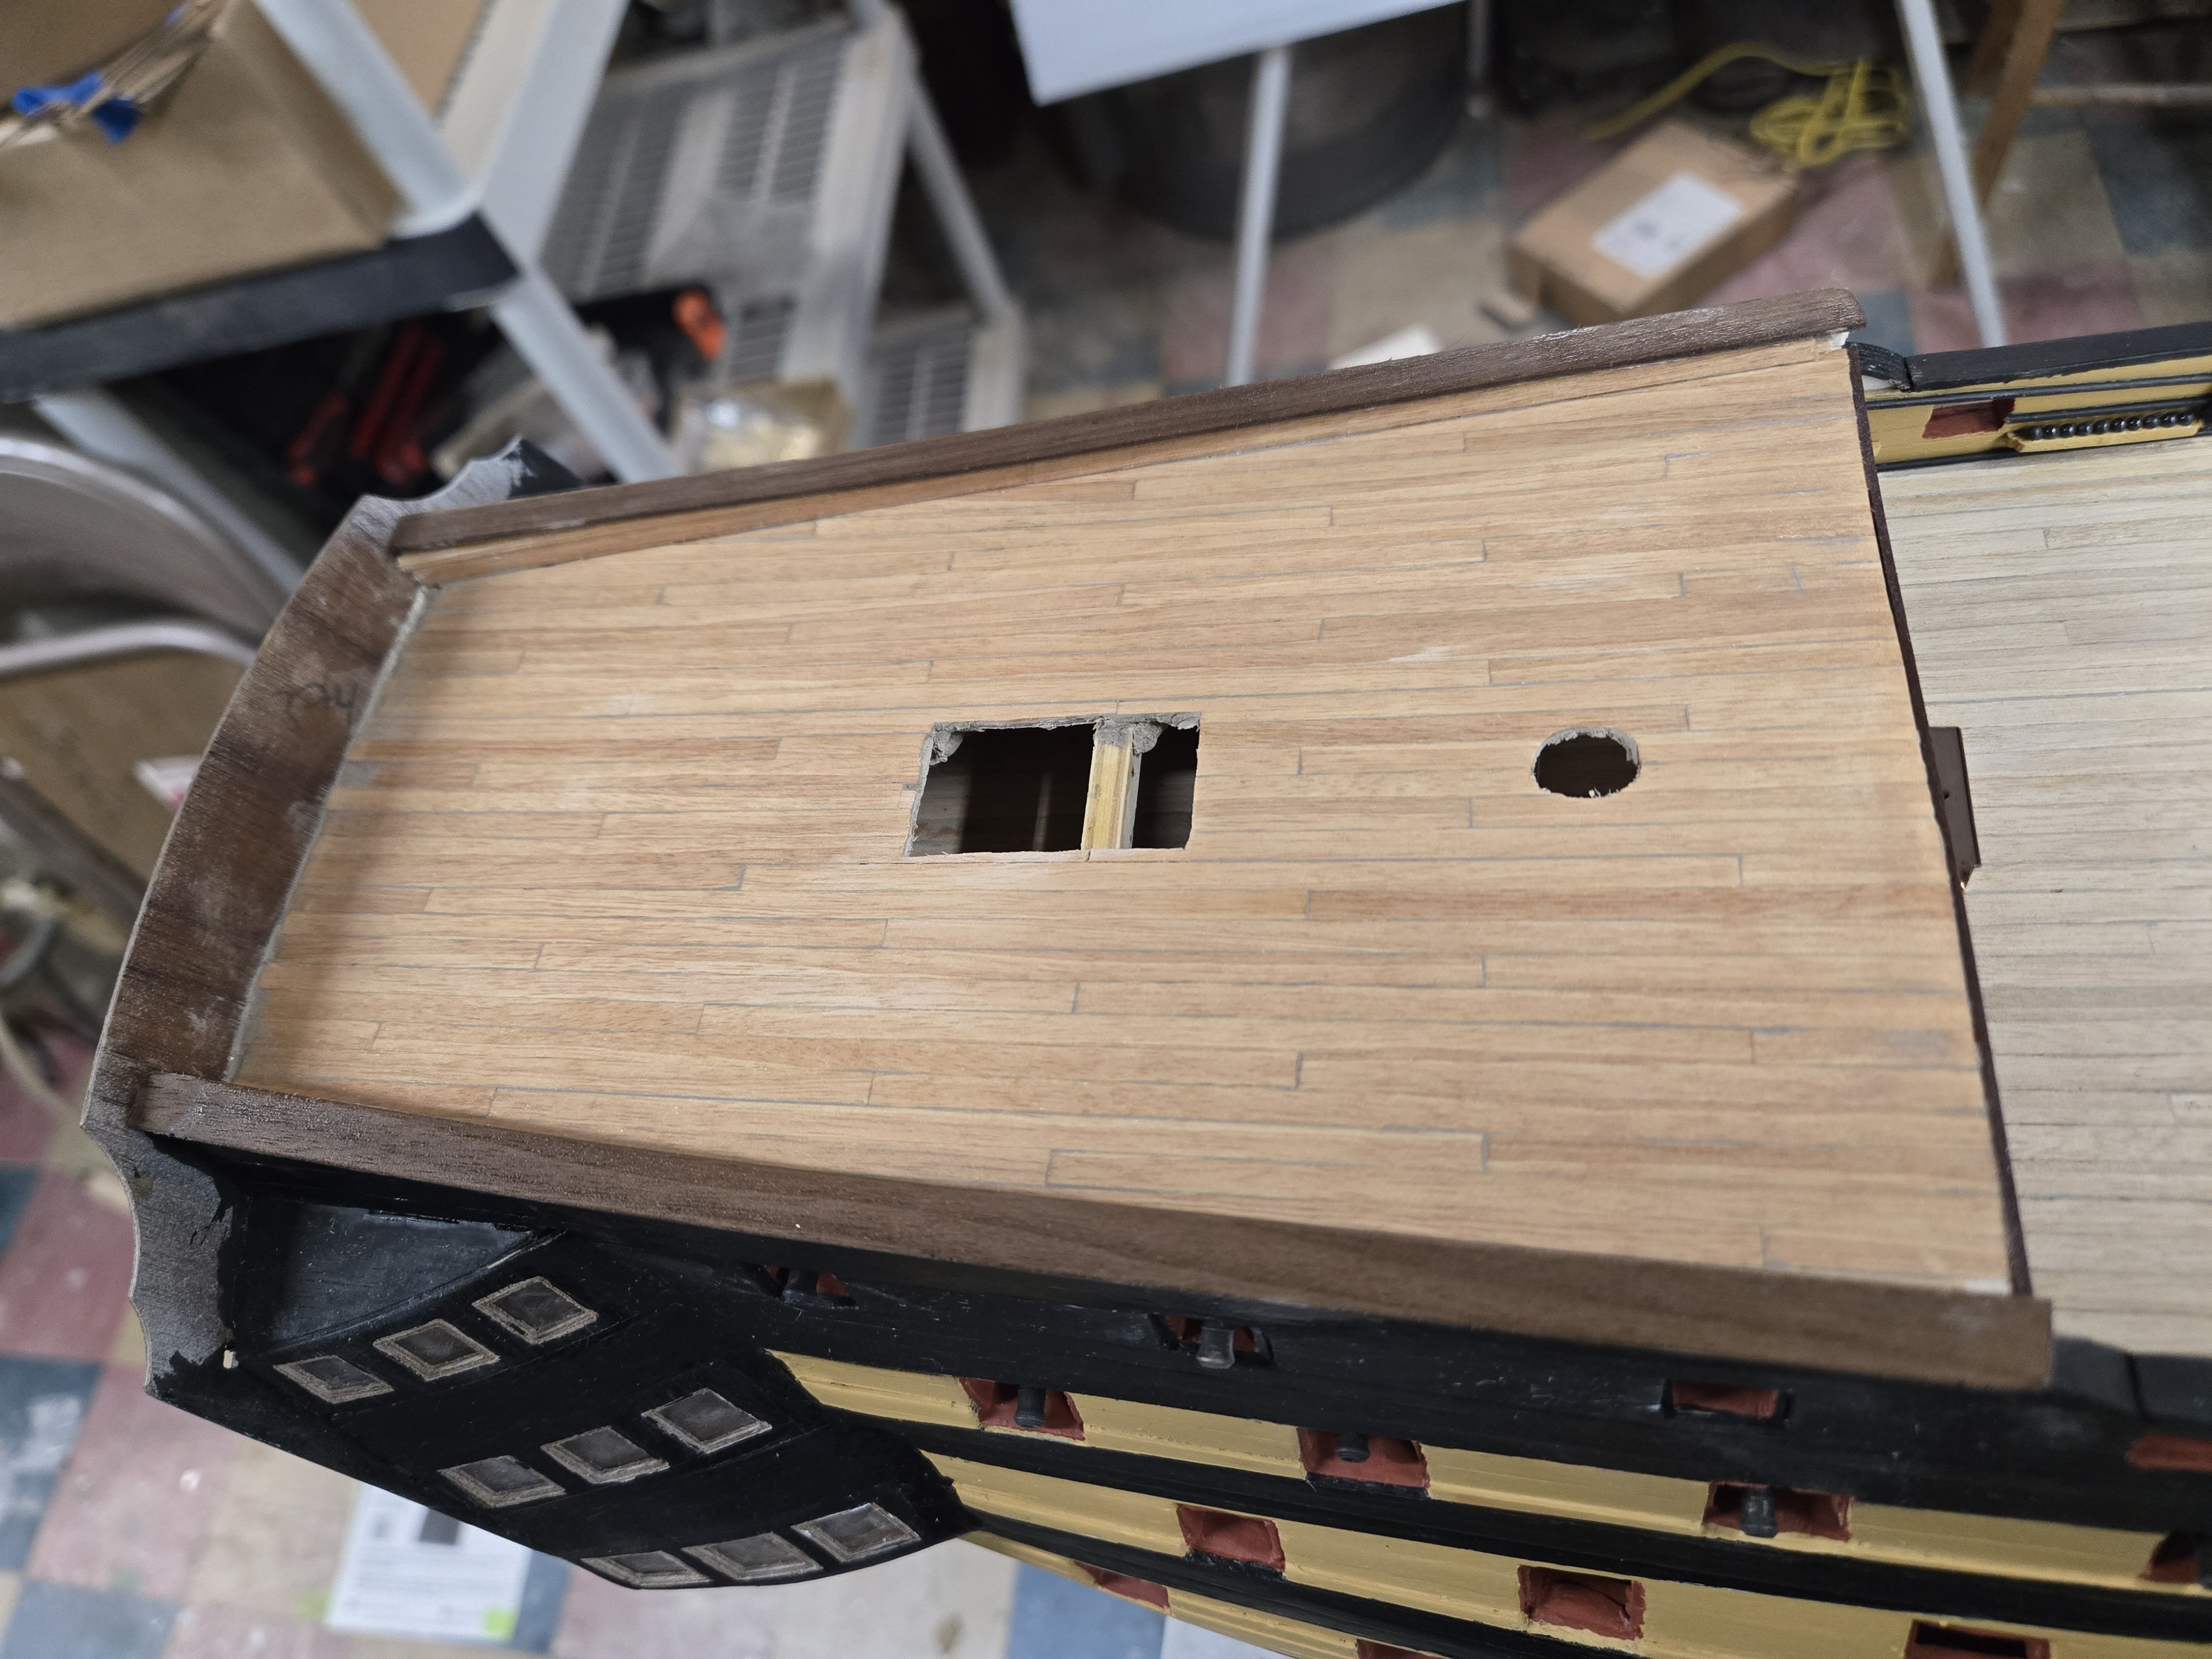
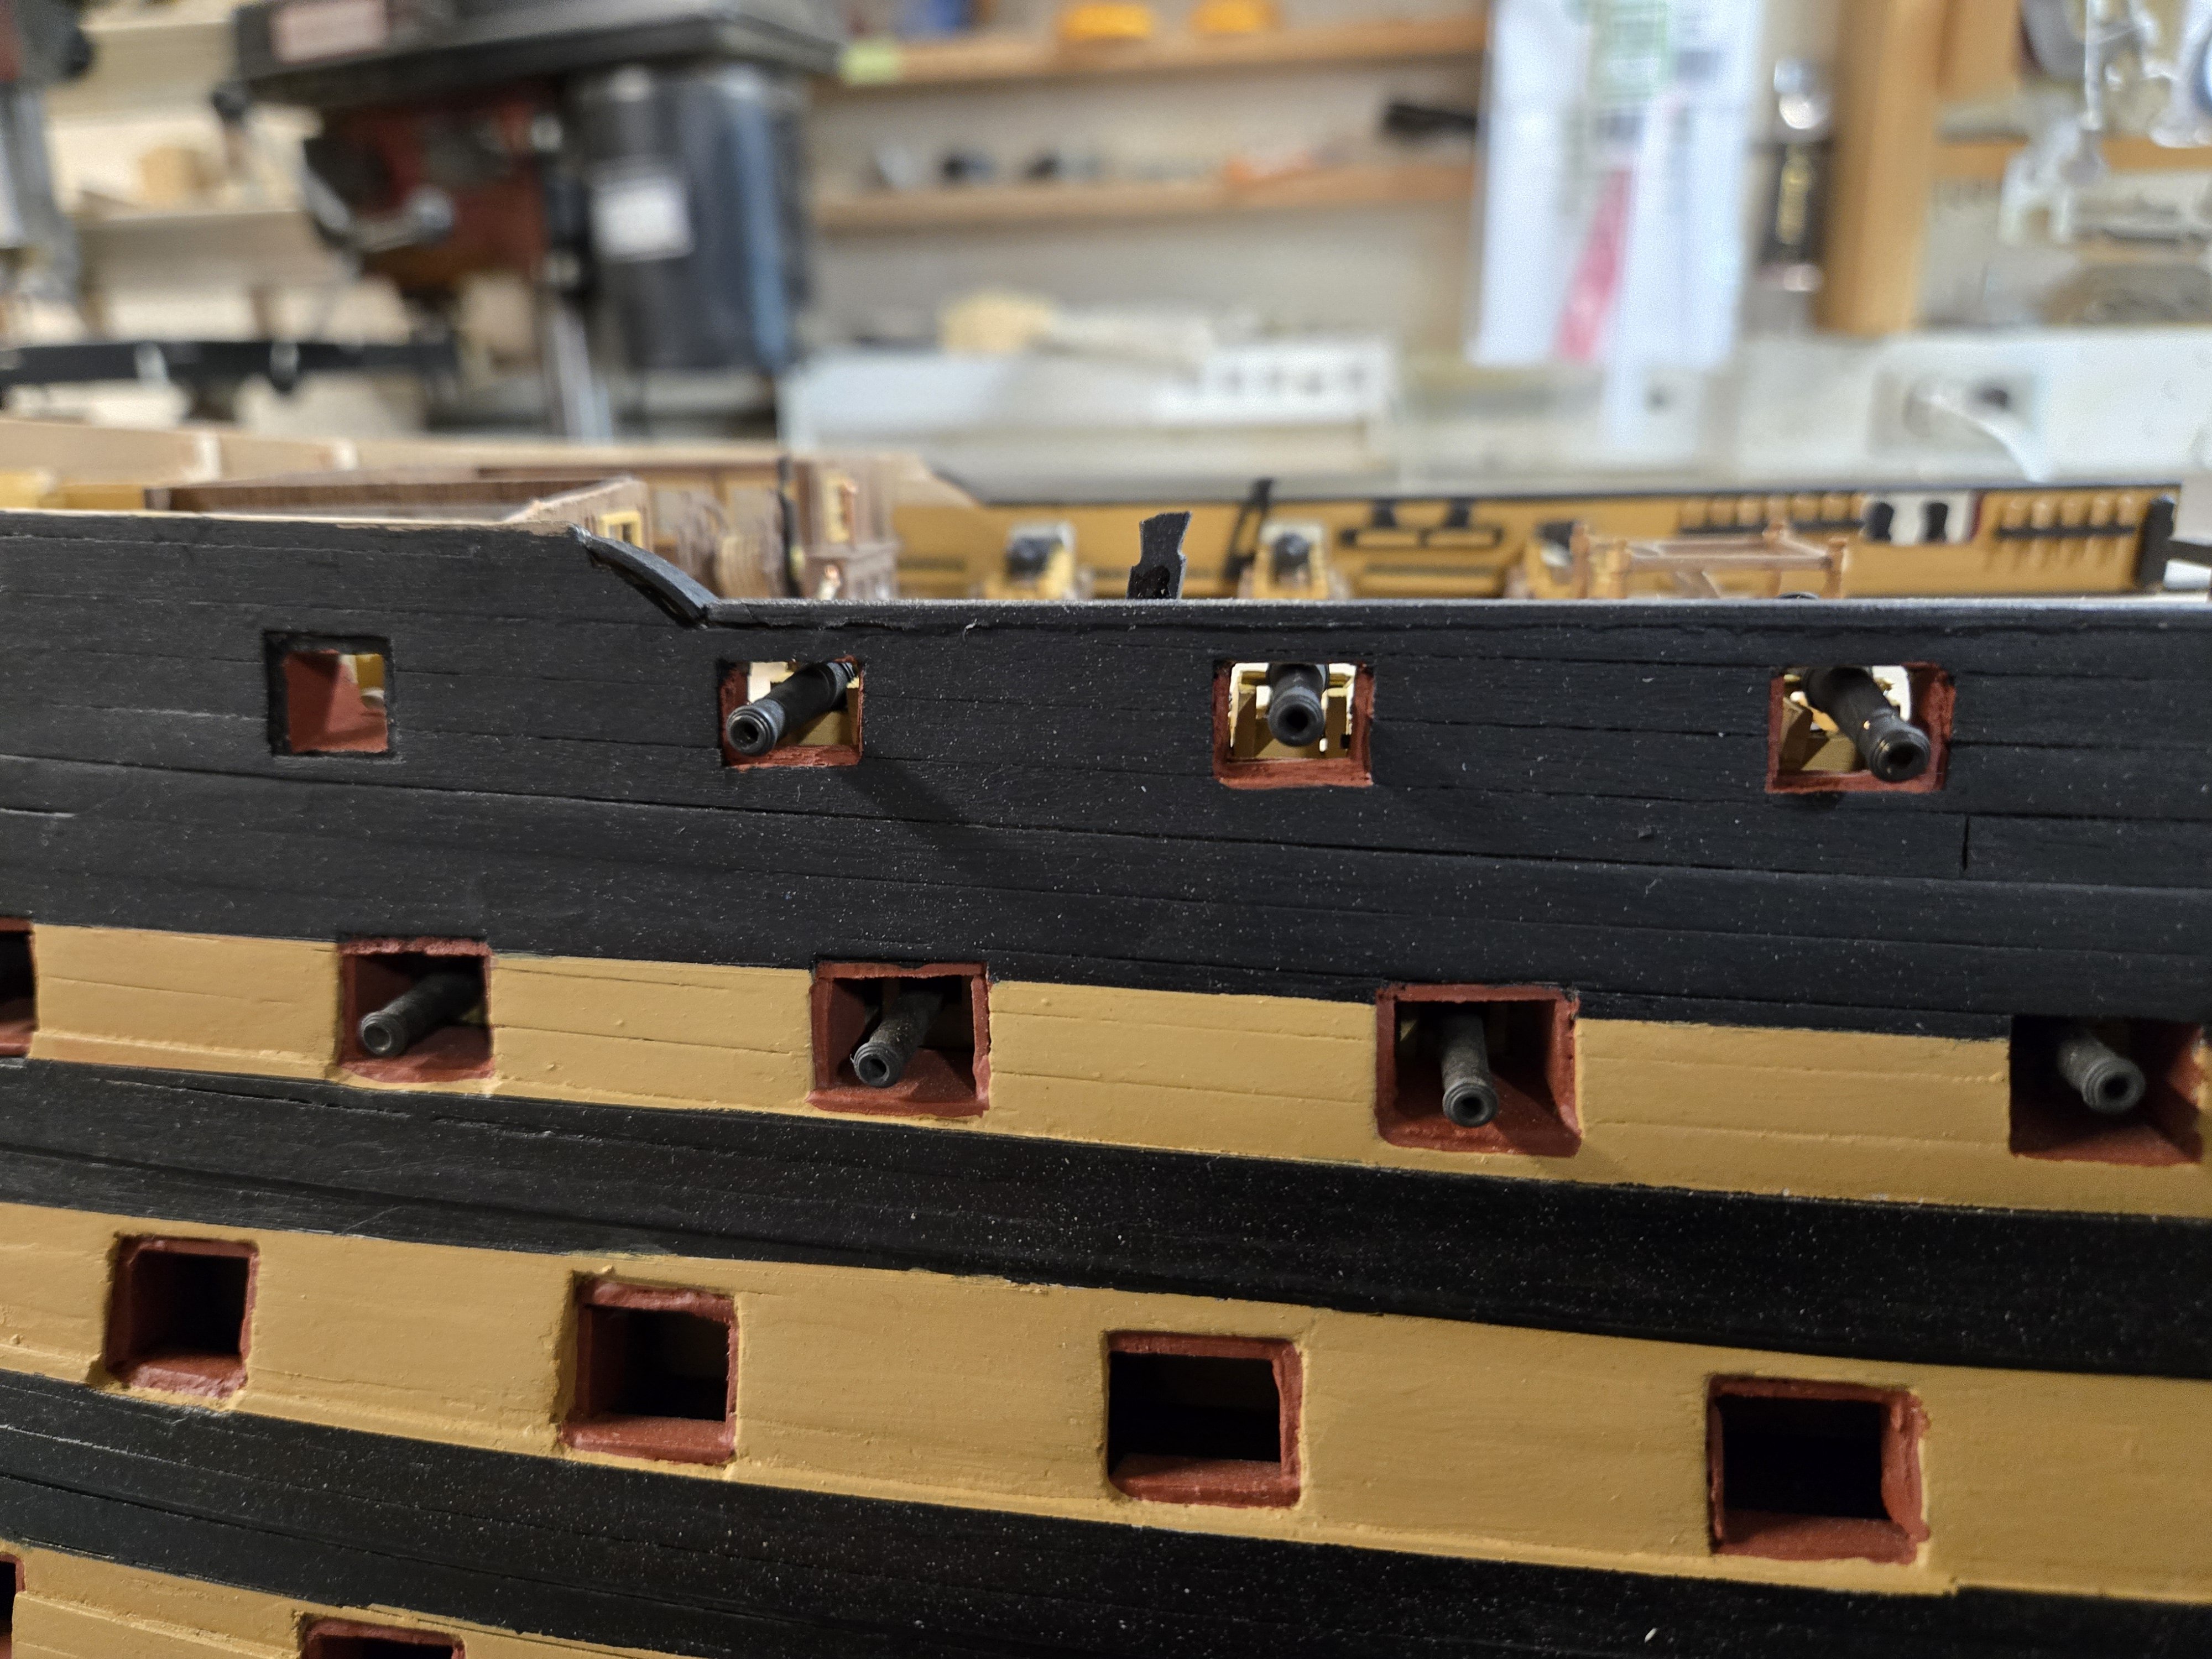
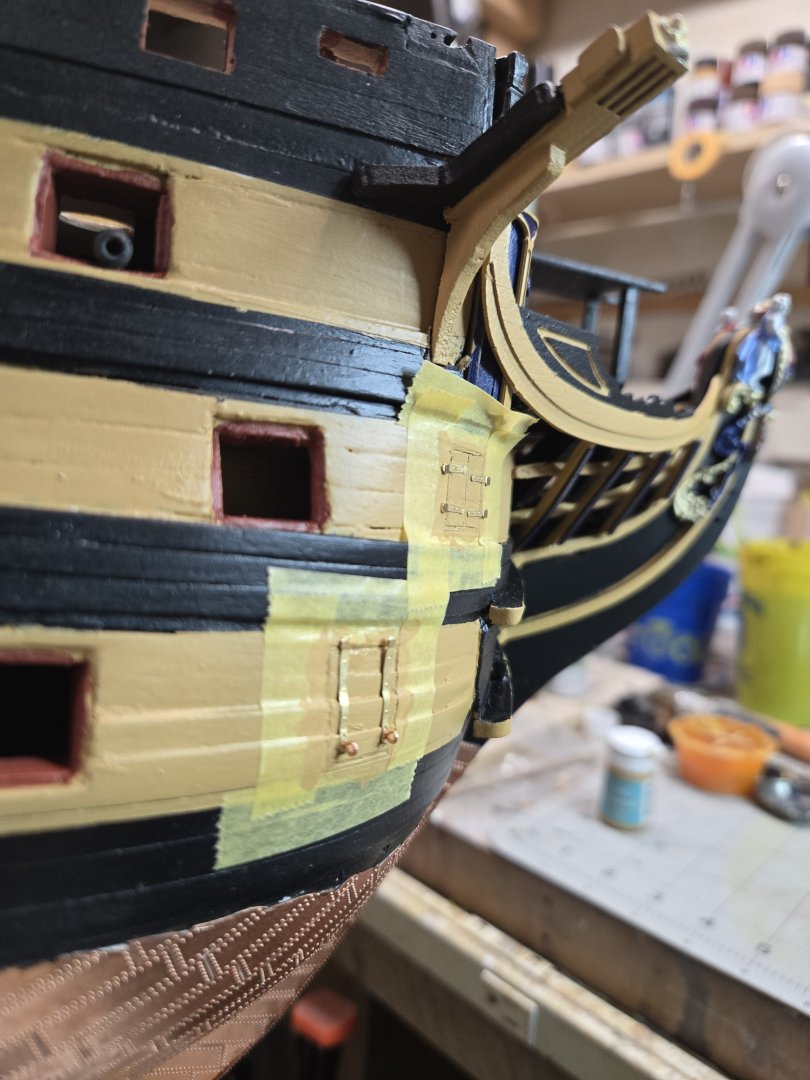
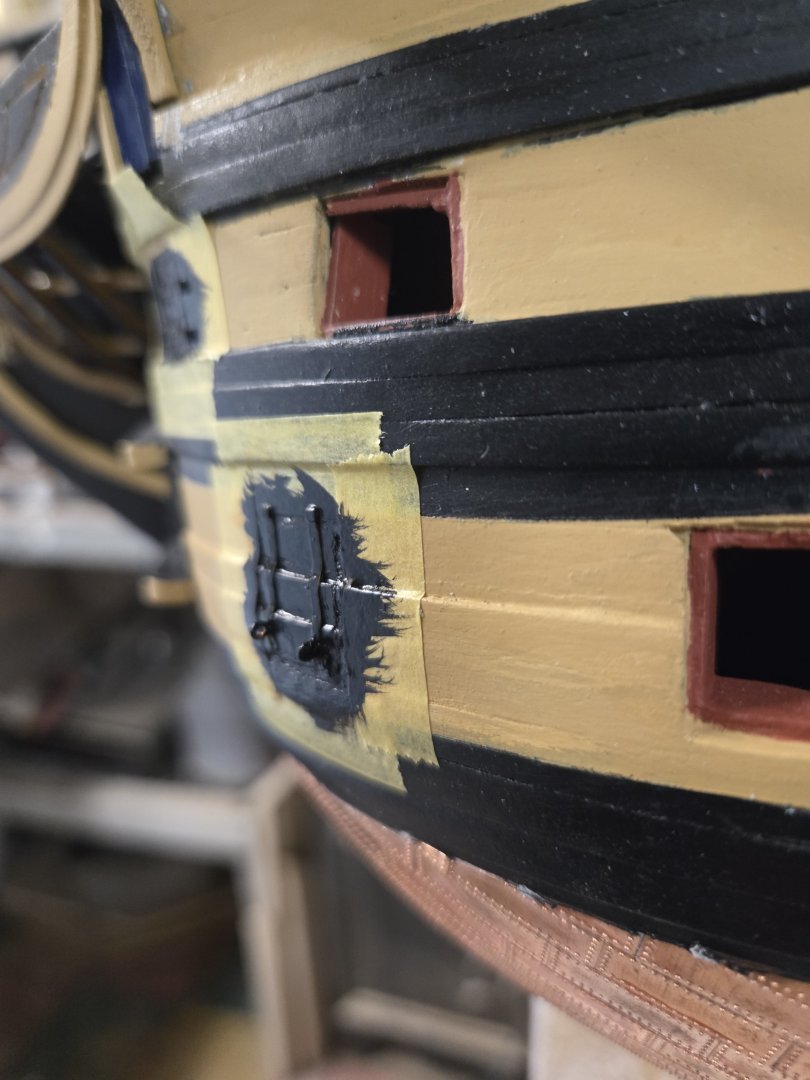
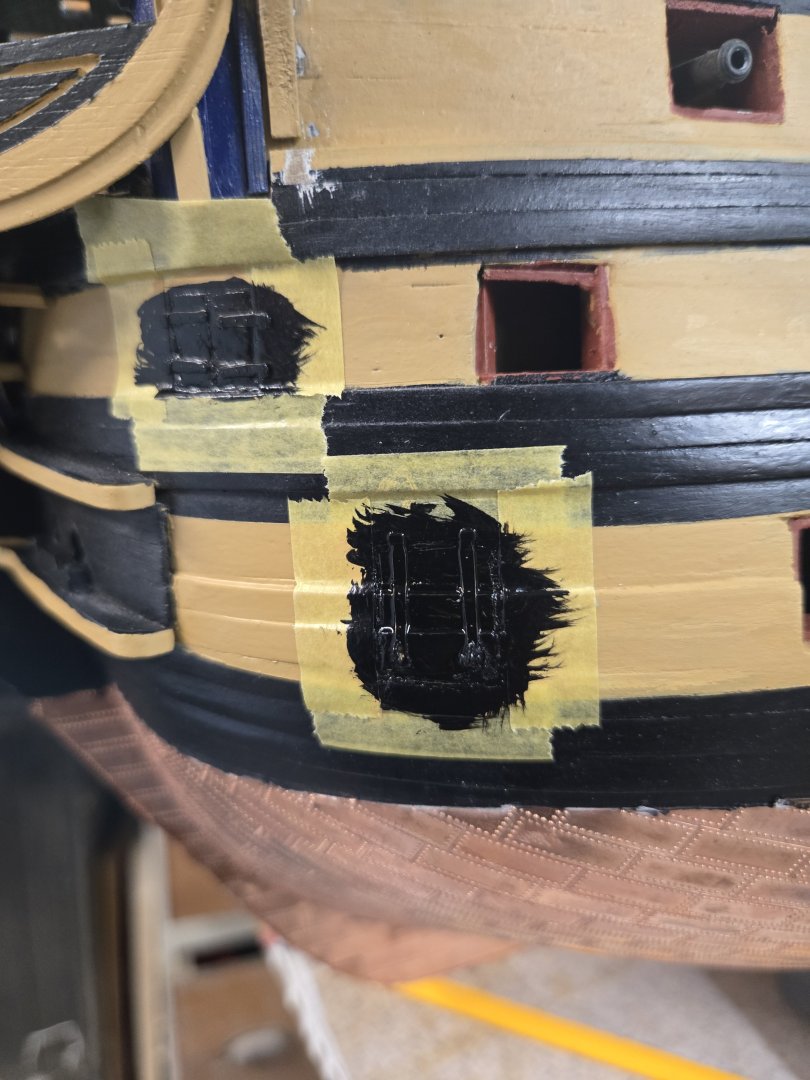
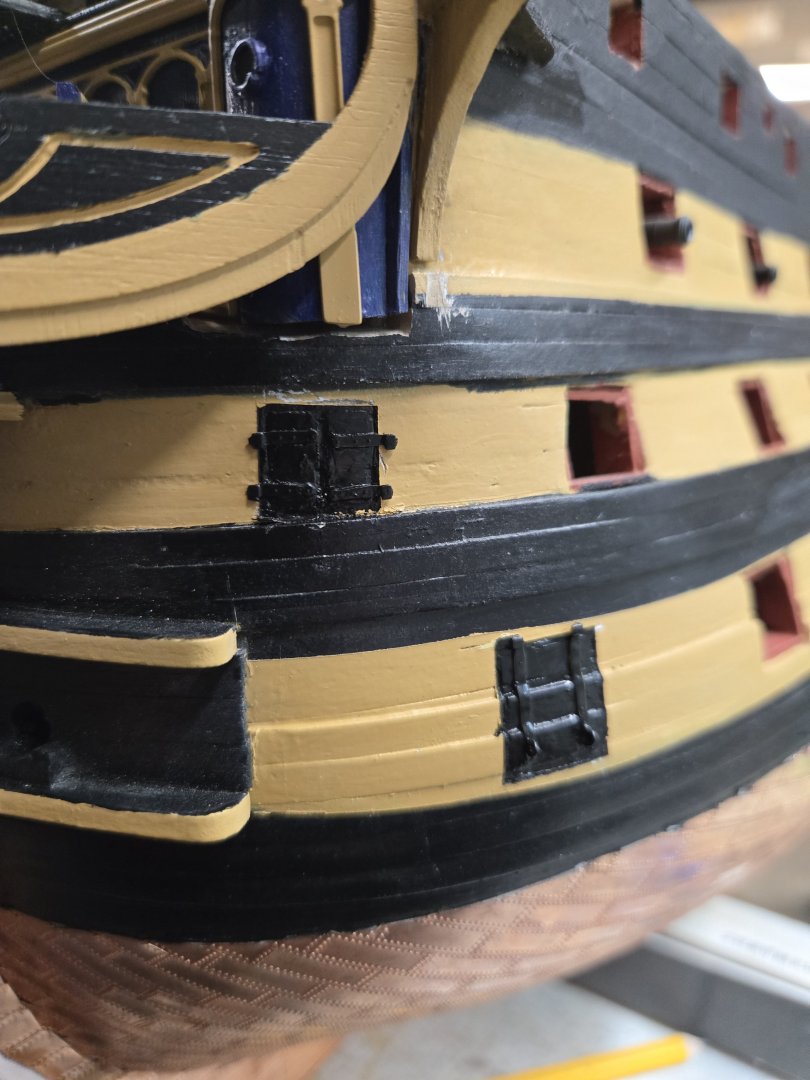
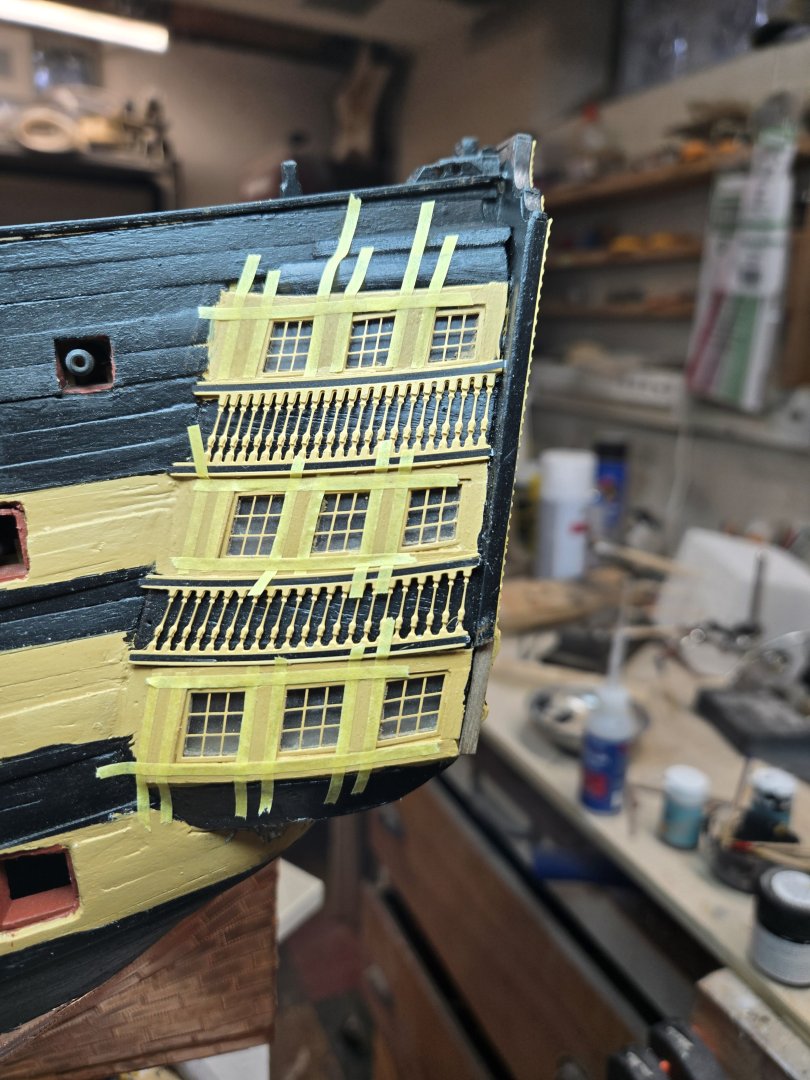
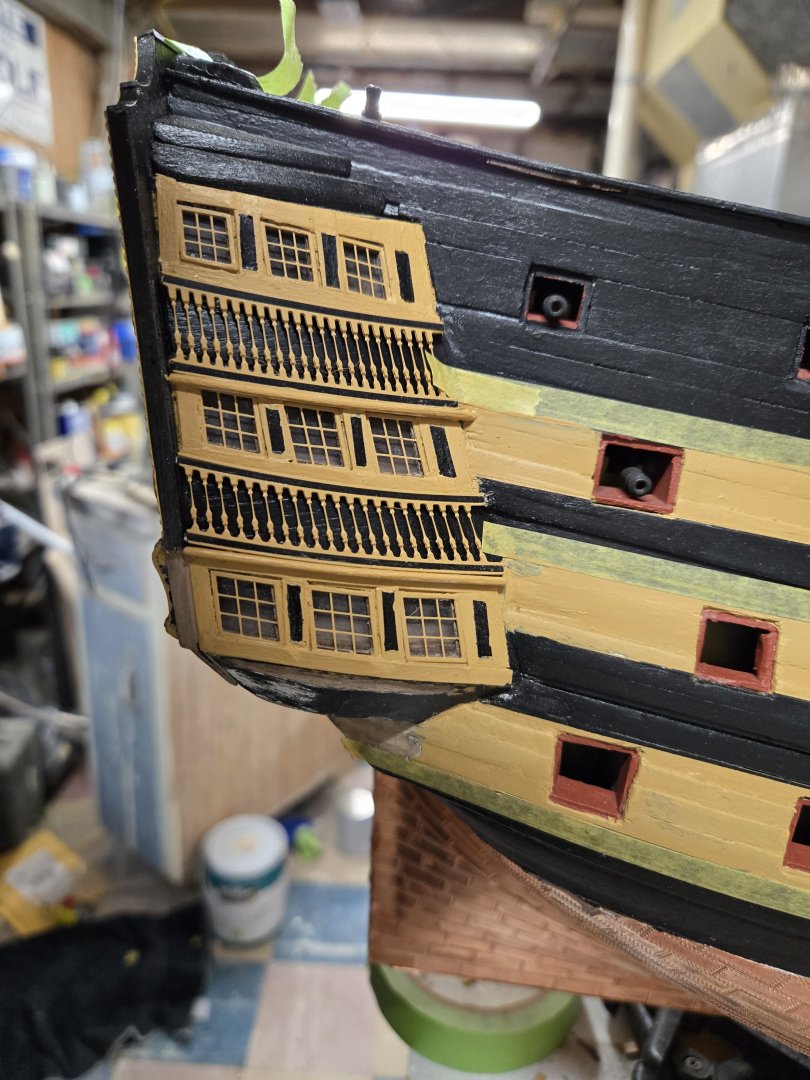
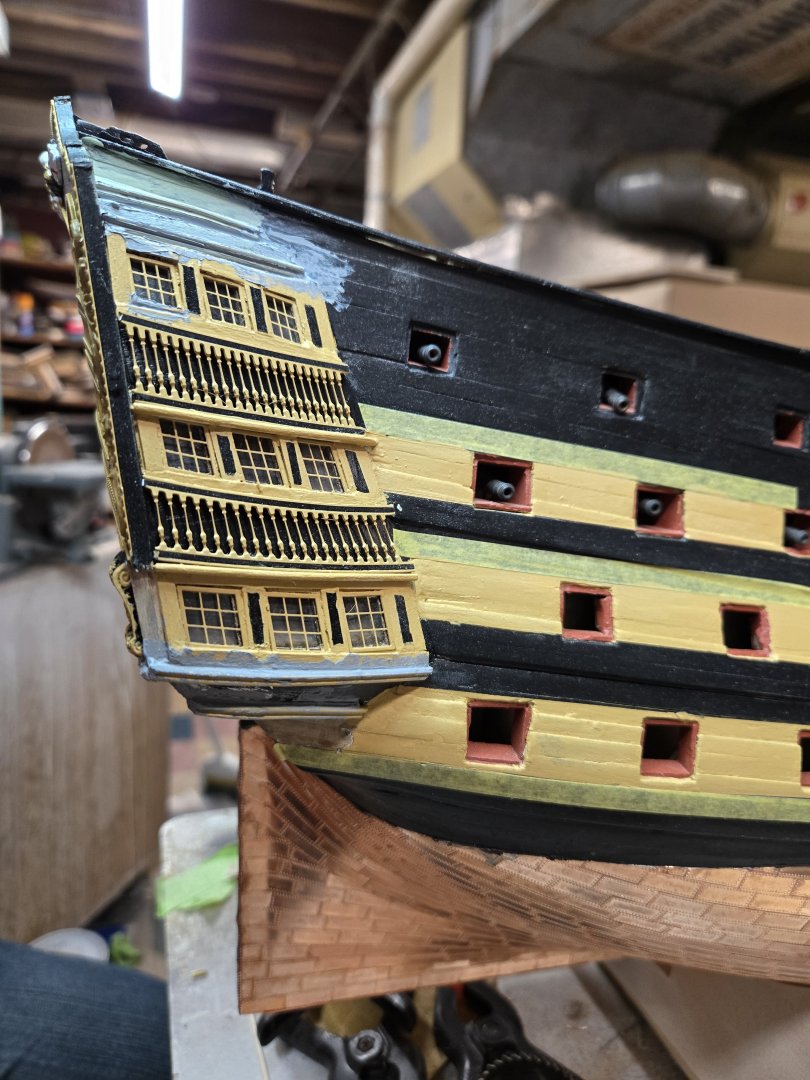
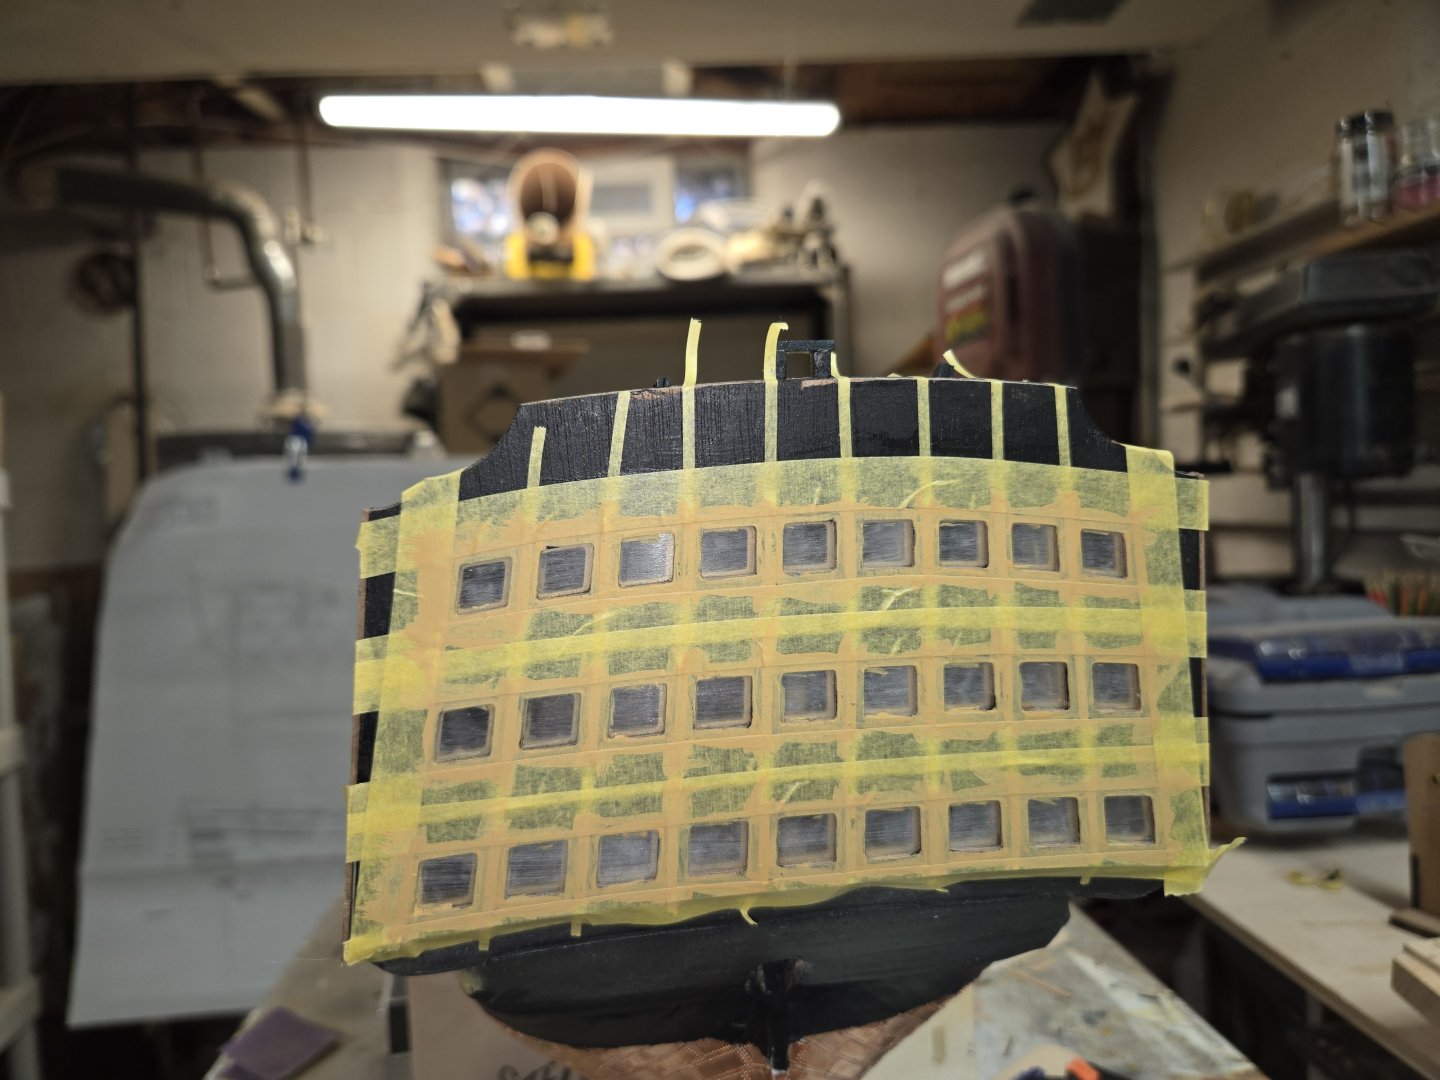
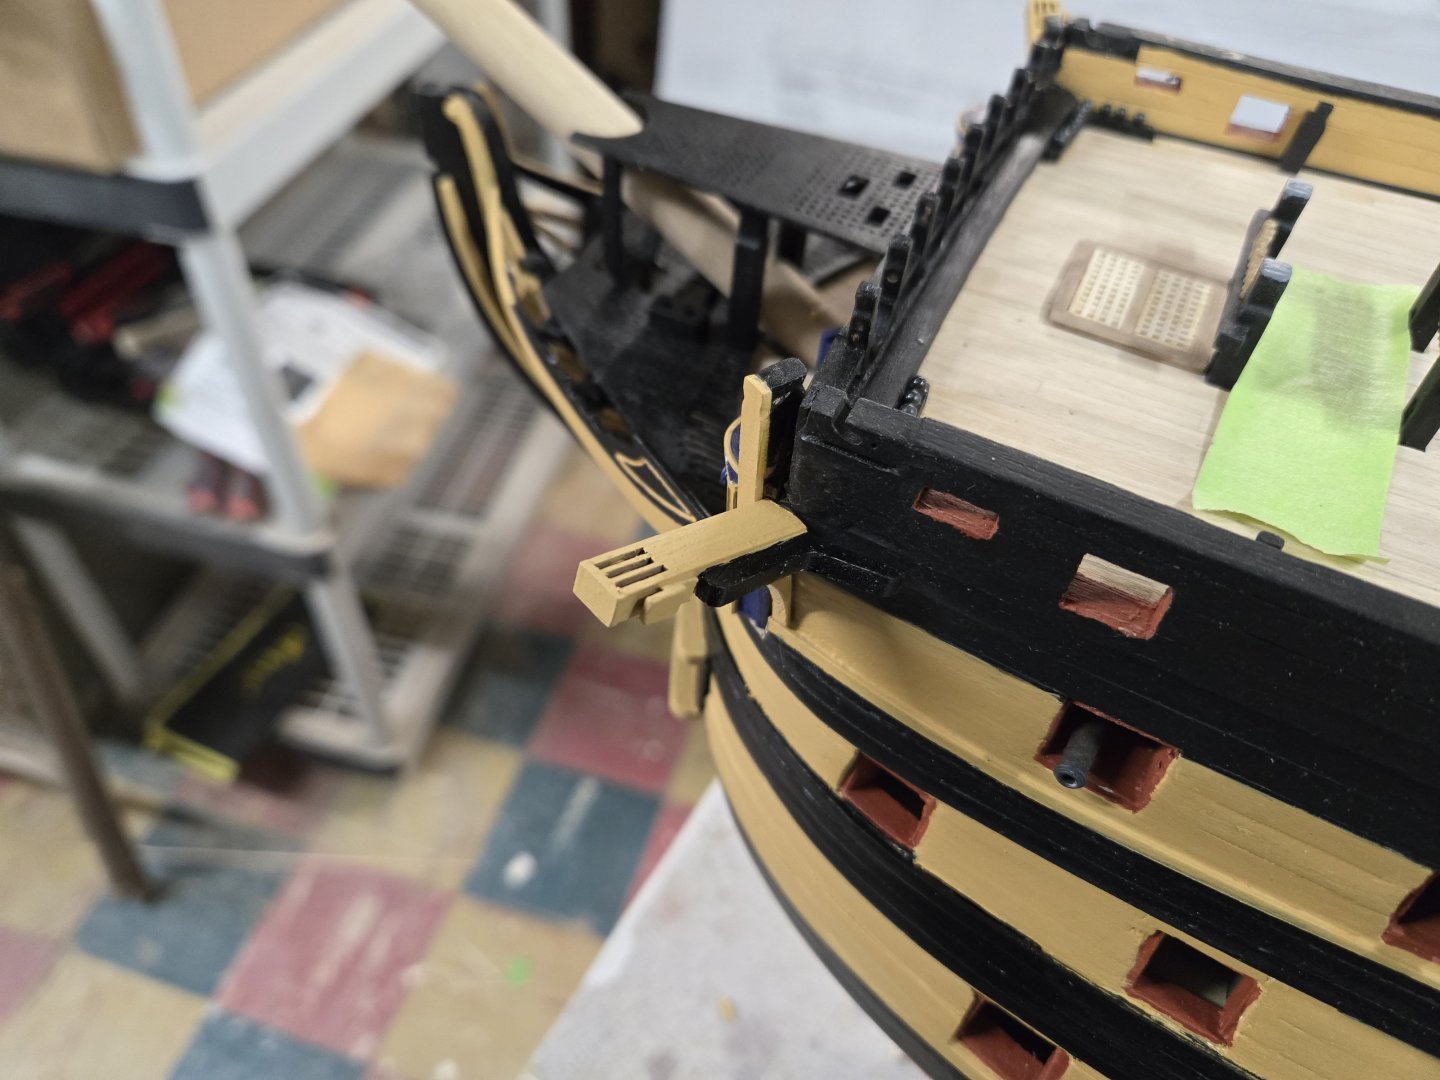
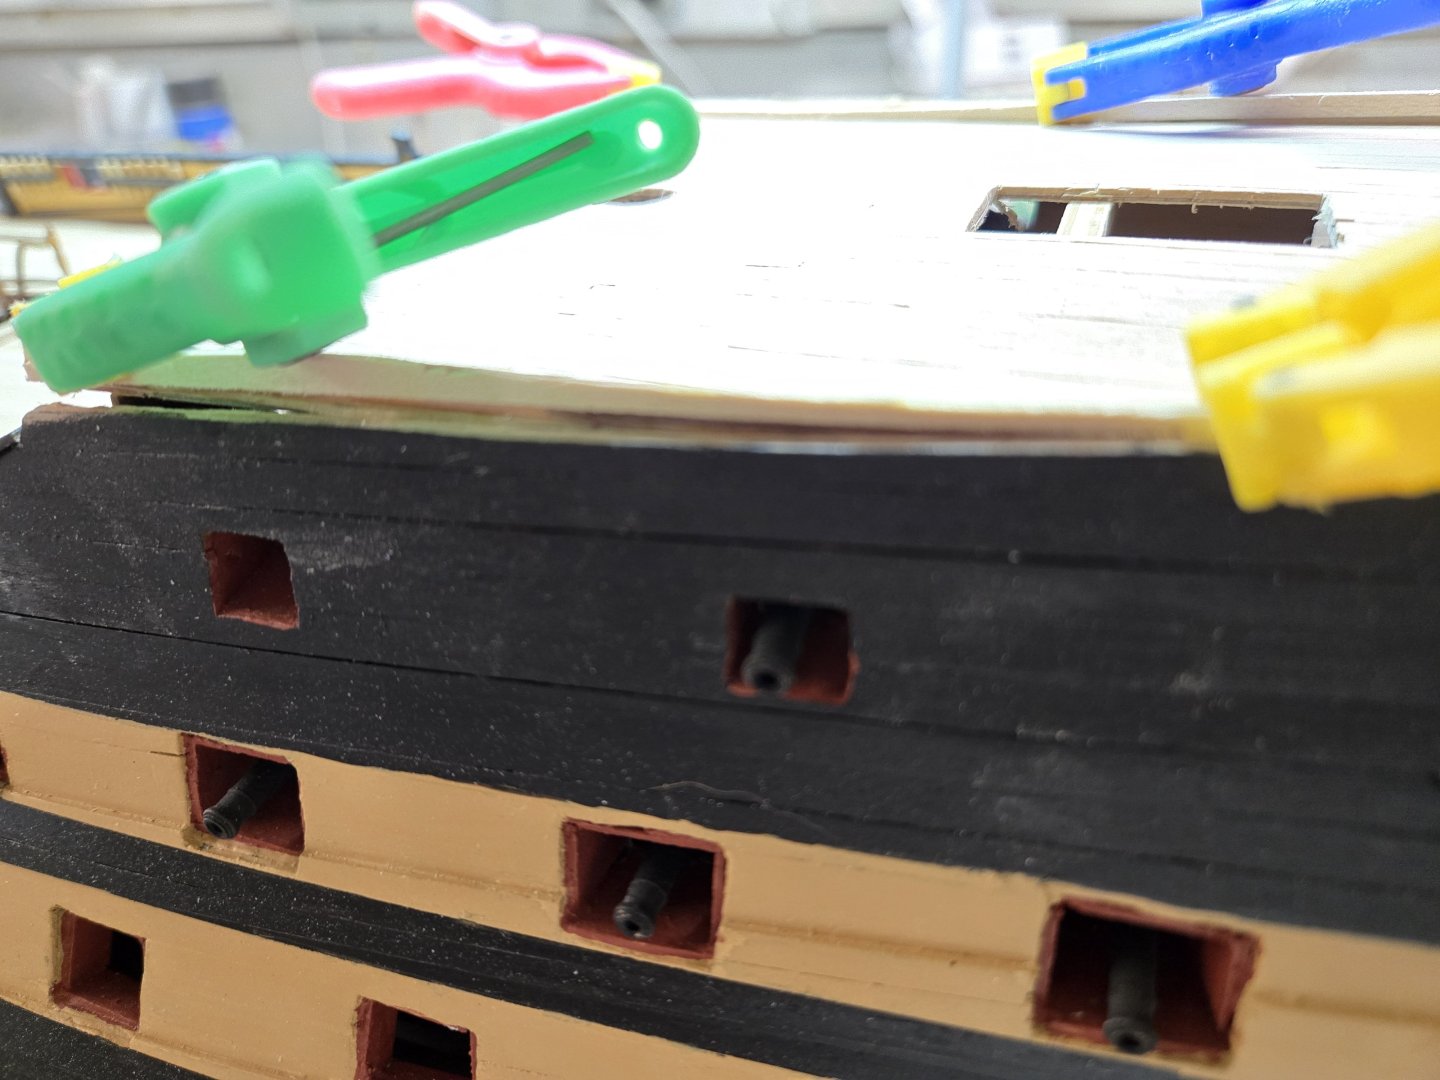
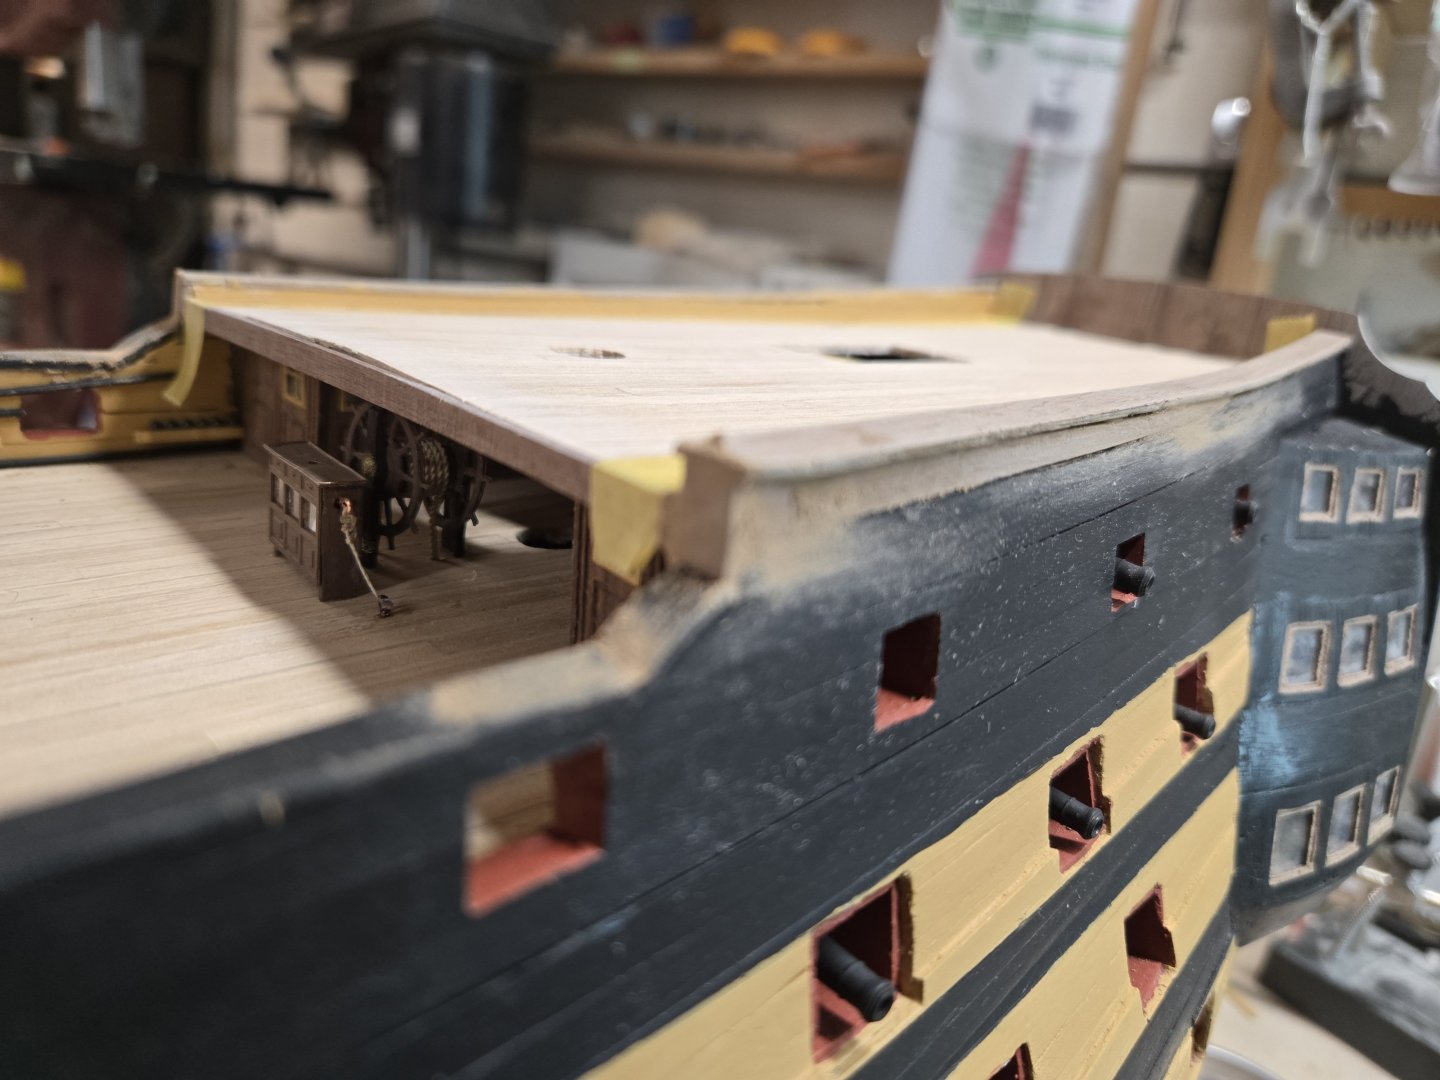
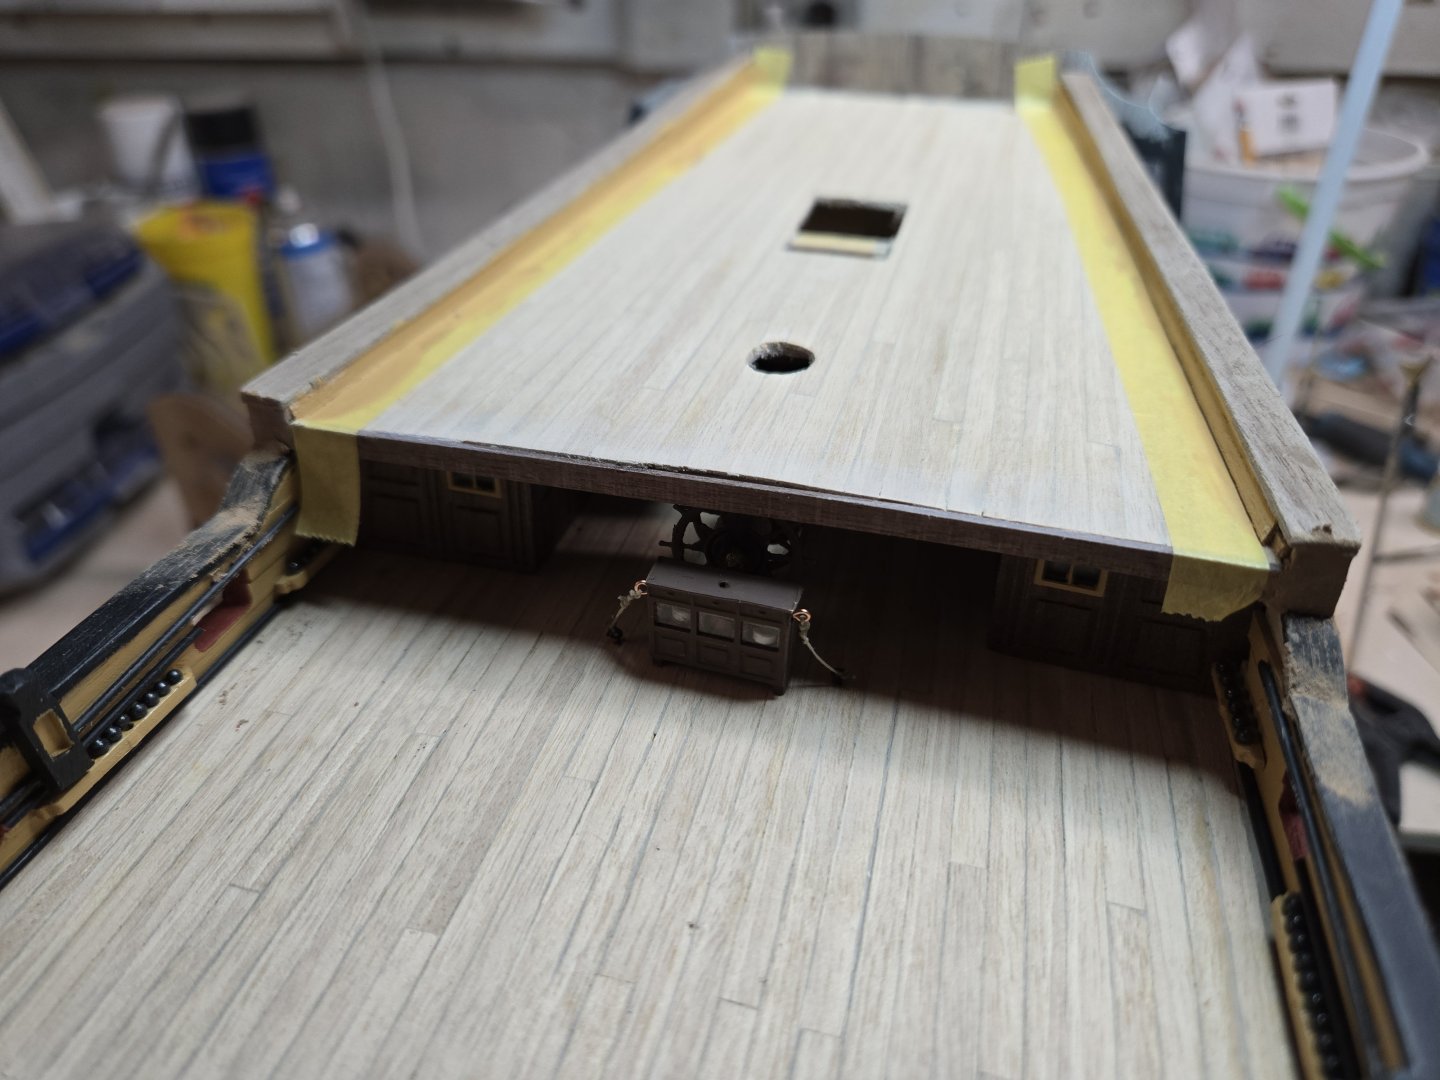
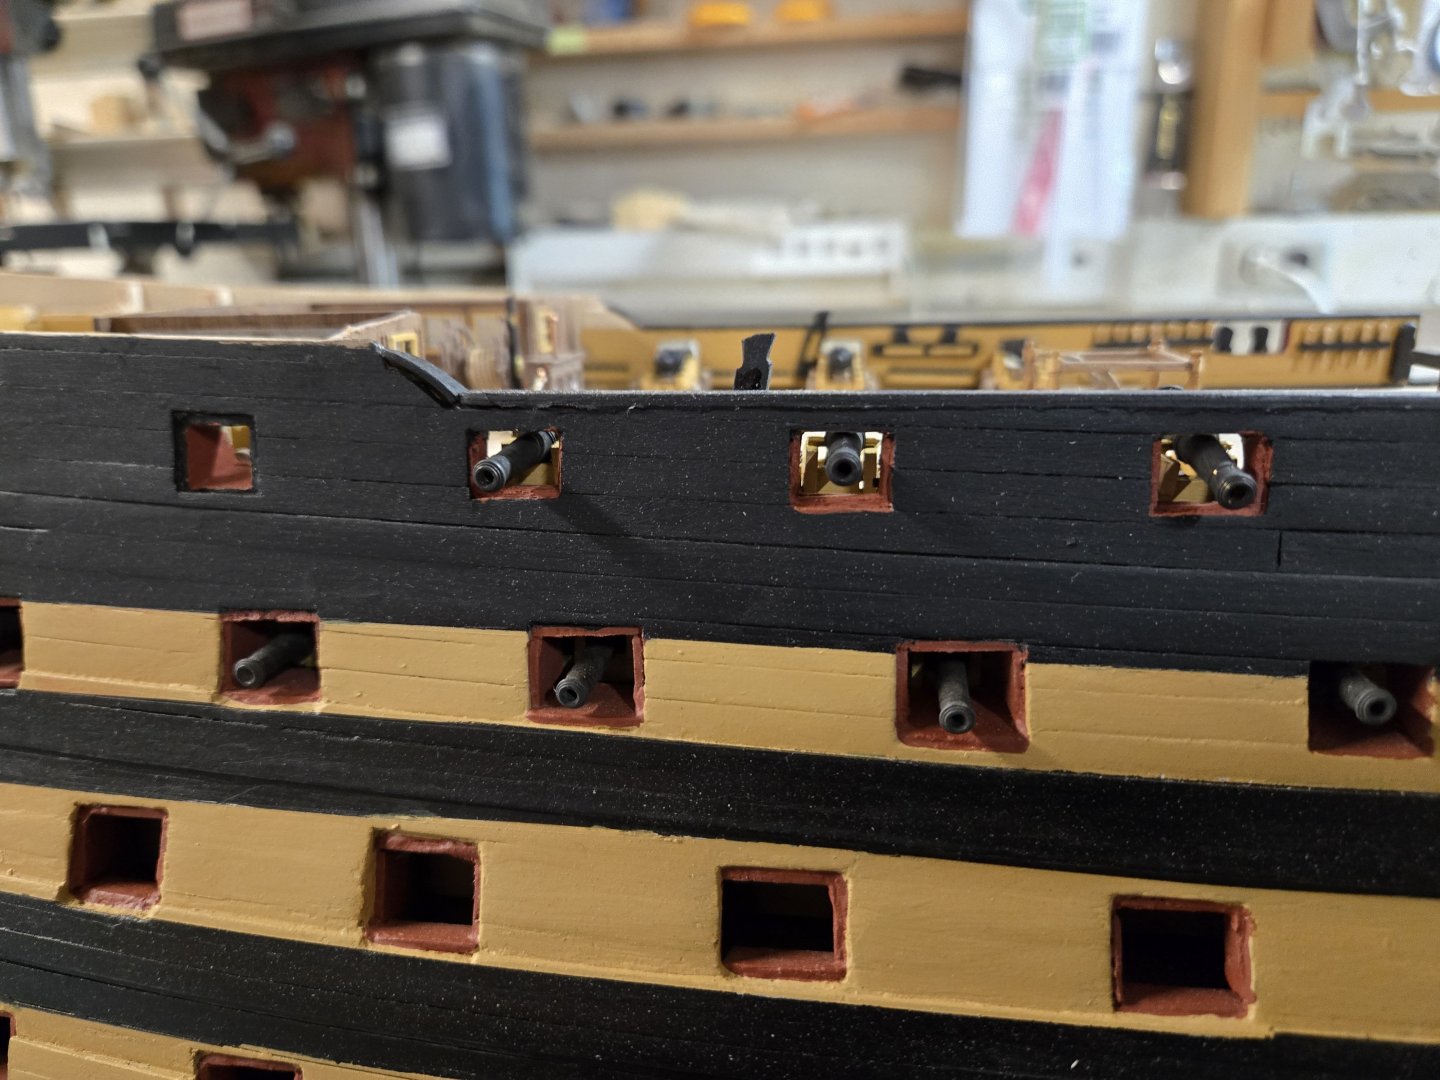
 For some reason, I kept putting off the creation of the 4 dummy gun ports by the bow and the 2 in the stern (I planked over pattern #372 on the stern). I used one of the blueprints and tried to create a little template to mark out the openings. I used an exacto knife and then went over the edges with the blunt tip of one of my smaller files to create some depth. I taped off the areas on the bow. This time after they were taped, I re-painted the open area with yellow...to seal in under the tape in case there was leakage. Then I wanted to add the various hinges. The plans don't specify WHICH hinges go with WHICH gun ports. Except the 2 stern ports, they want me to use PE #489. It looks like I used a few already, not sure where, the hatches and doors for the beakhead openings use #'s 490 & 492. Got me...and they aren't the only missing PE parts!!!! The manual towards the end does provide a diagram of the various gunports, how the hinges should be aligned and where the eyelets go, but no actual list of which PE hinges go where. I looked through all the blue prints and couldn't find anything...so if you know, please let me know. I will be starting on the gun ports pretty soon!!!! I added 8 hinges to the stern ports, I took a stab. I also added the upper copper eyelets and then painted the area black...again! I am not sure if the grooves I cut will be deep enough to be seen, but I think they'll be ok. For the the bow ports, the 2 little double door ports were fine and I again guessed at some of the smaller hinges and went with them. For the two lower deck ports, I went with the larger (more numerous) hinges. They went fine, however, the eyelets are supposed to go through the hinge. I have about 20 .5mm drill bits, but there is no way I could get them through the hinge (full of CA glue)...so I just cut the eyelet part off and glued it. I painted it with 2 coats of black and pulled the tape. With the exception of one small area, the over painting process works. I wish I'd done it for the major striping, it would have lead to perfect, clean lines. Ah...such is life!


-
Looks great. Crisp paint lines and your gun ports, just beautiful! Very jealous!
-
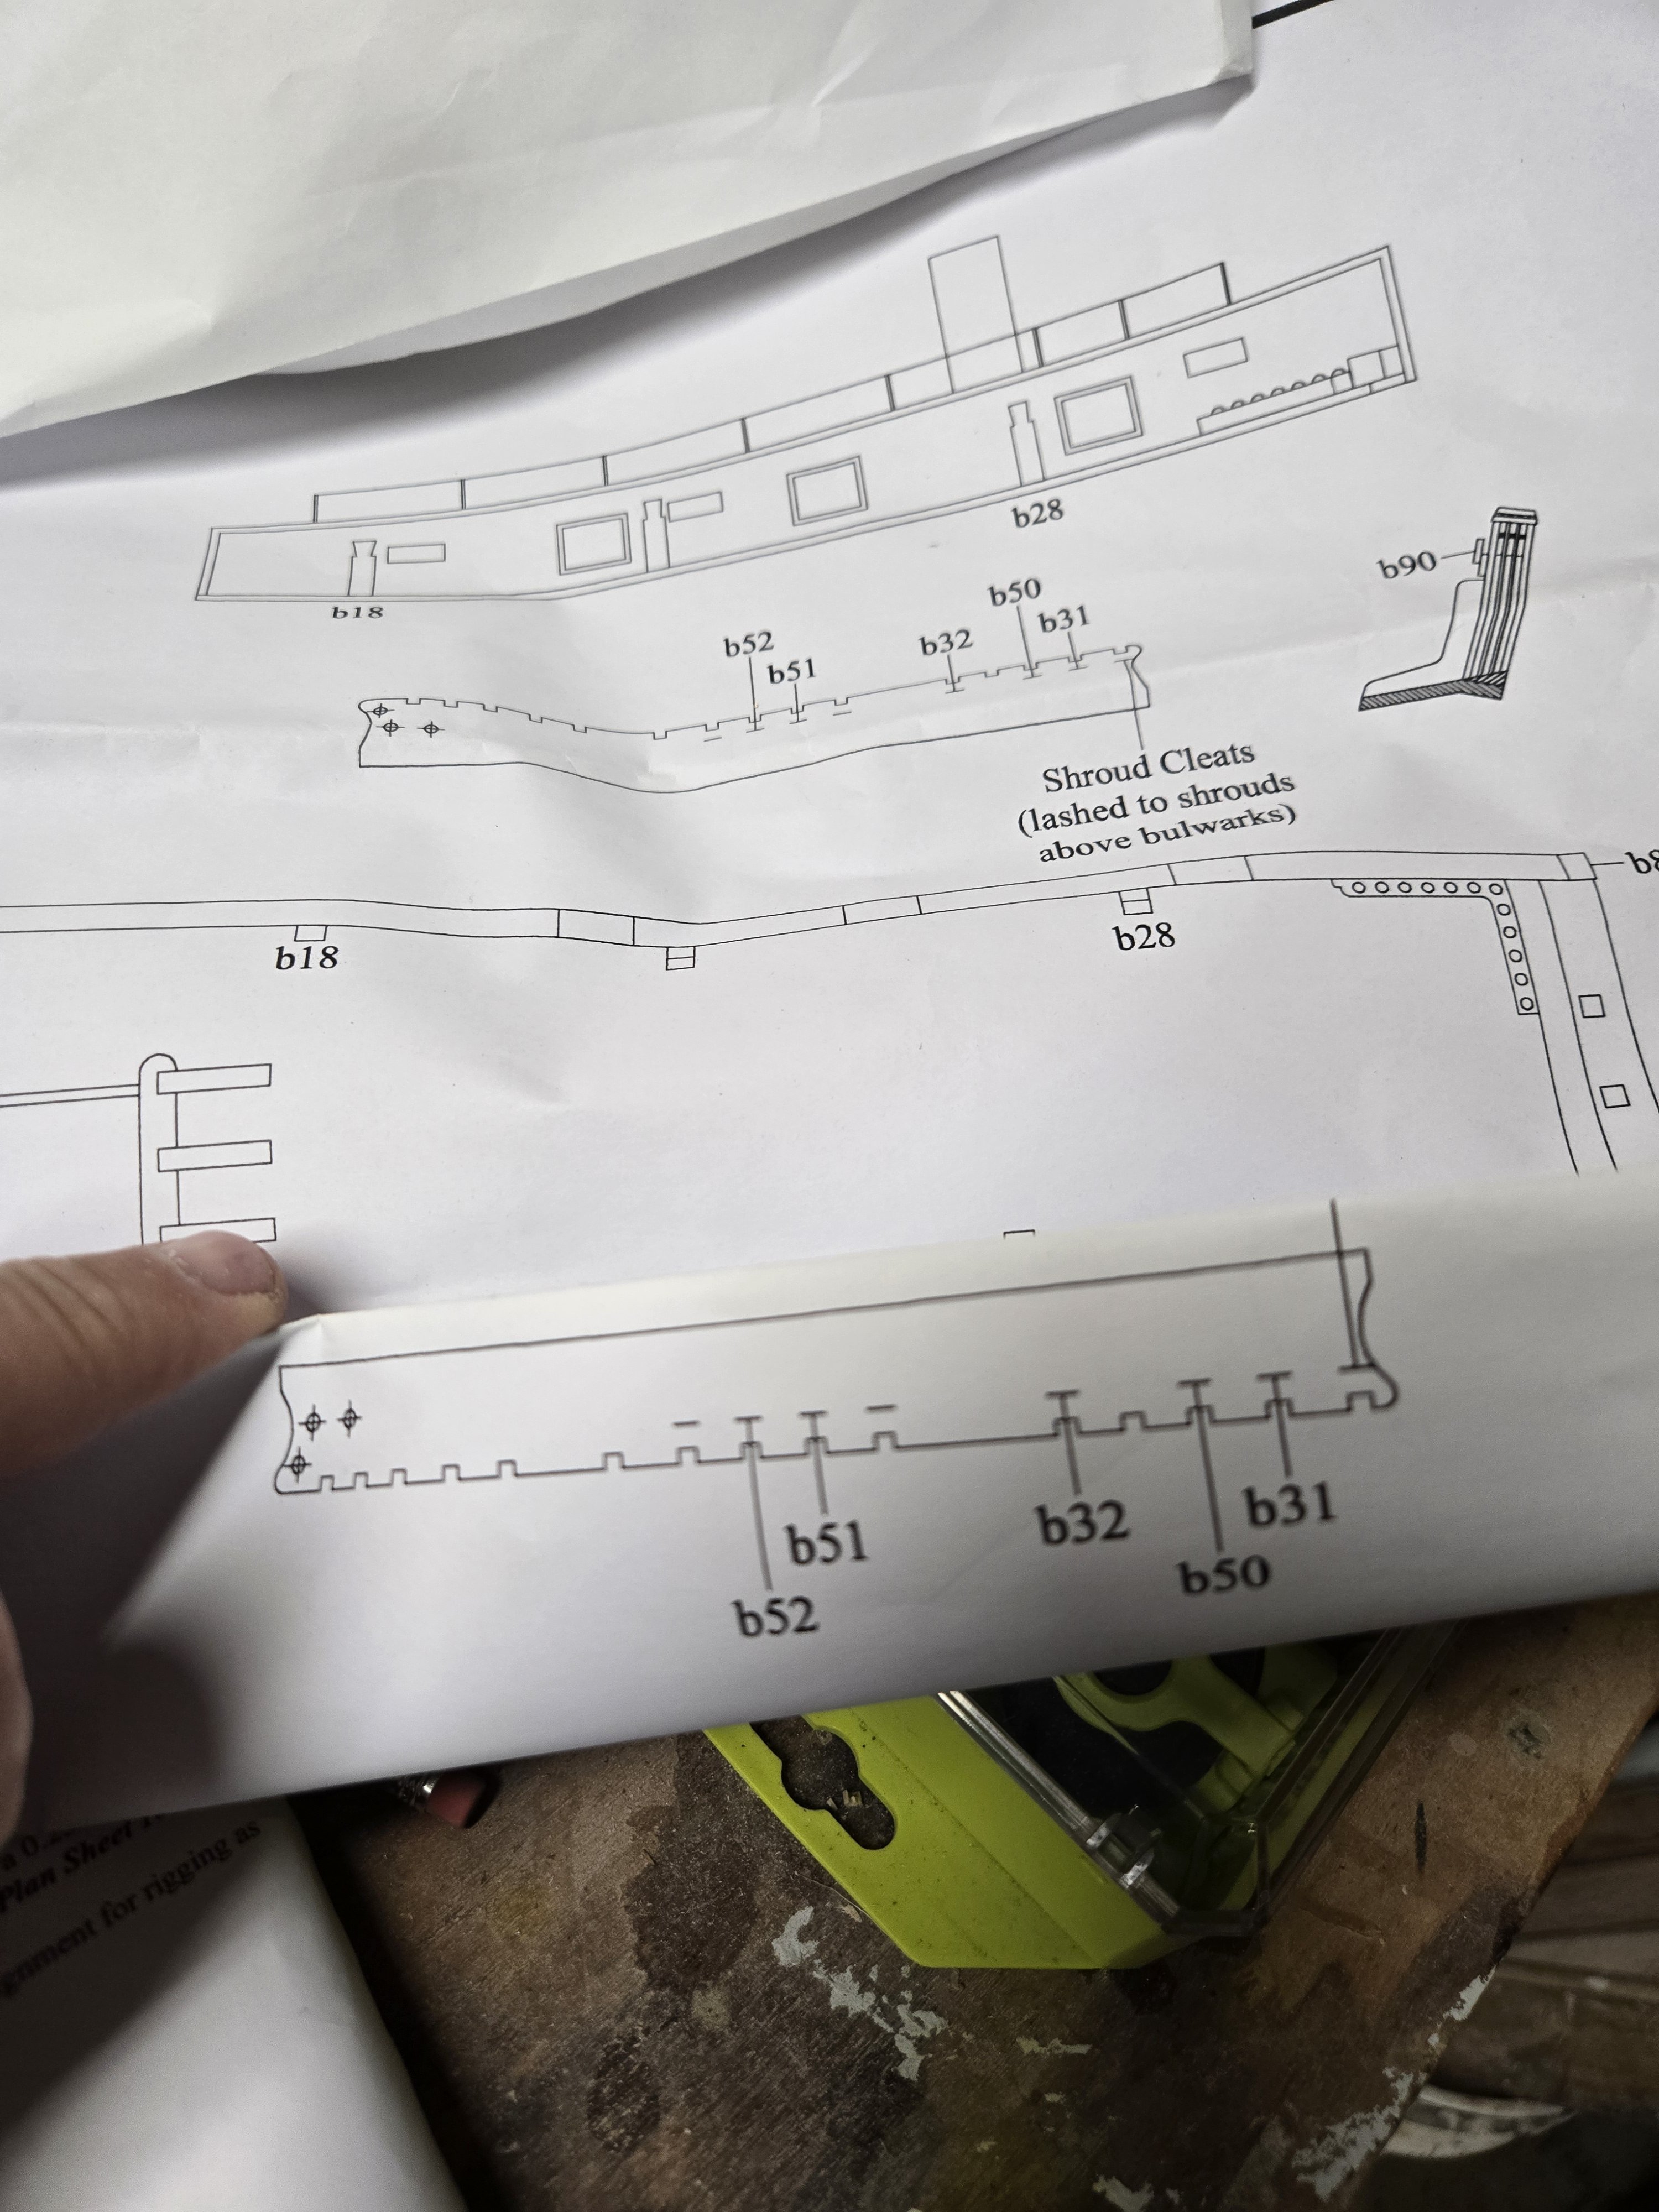
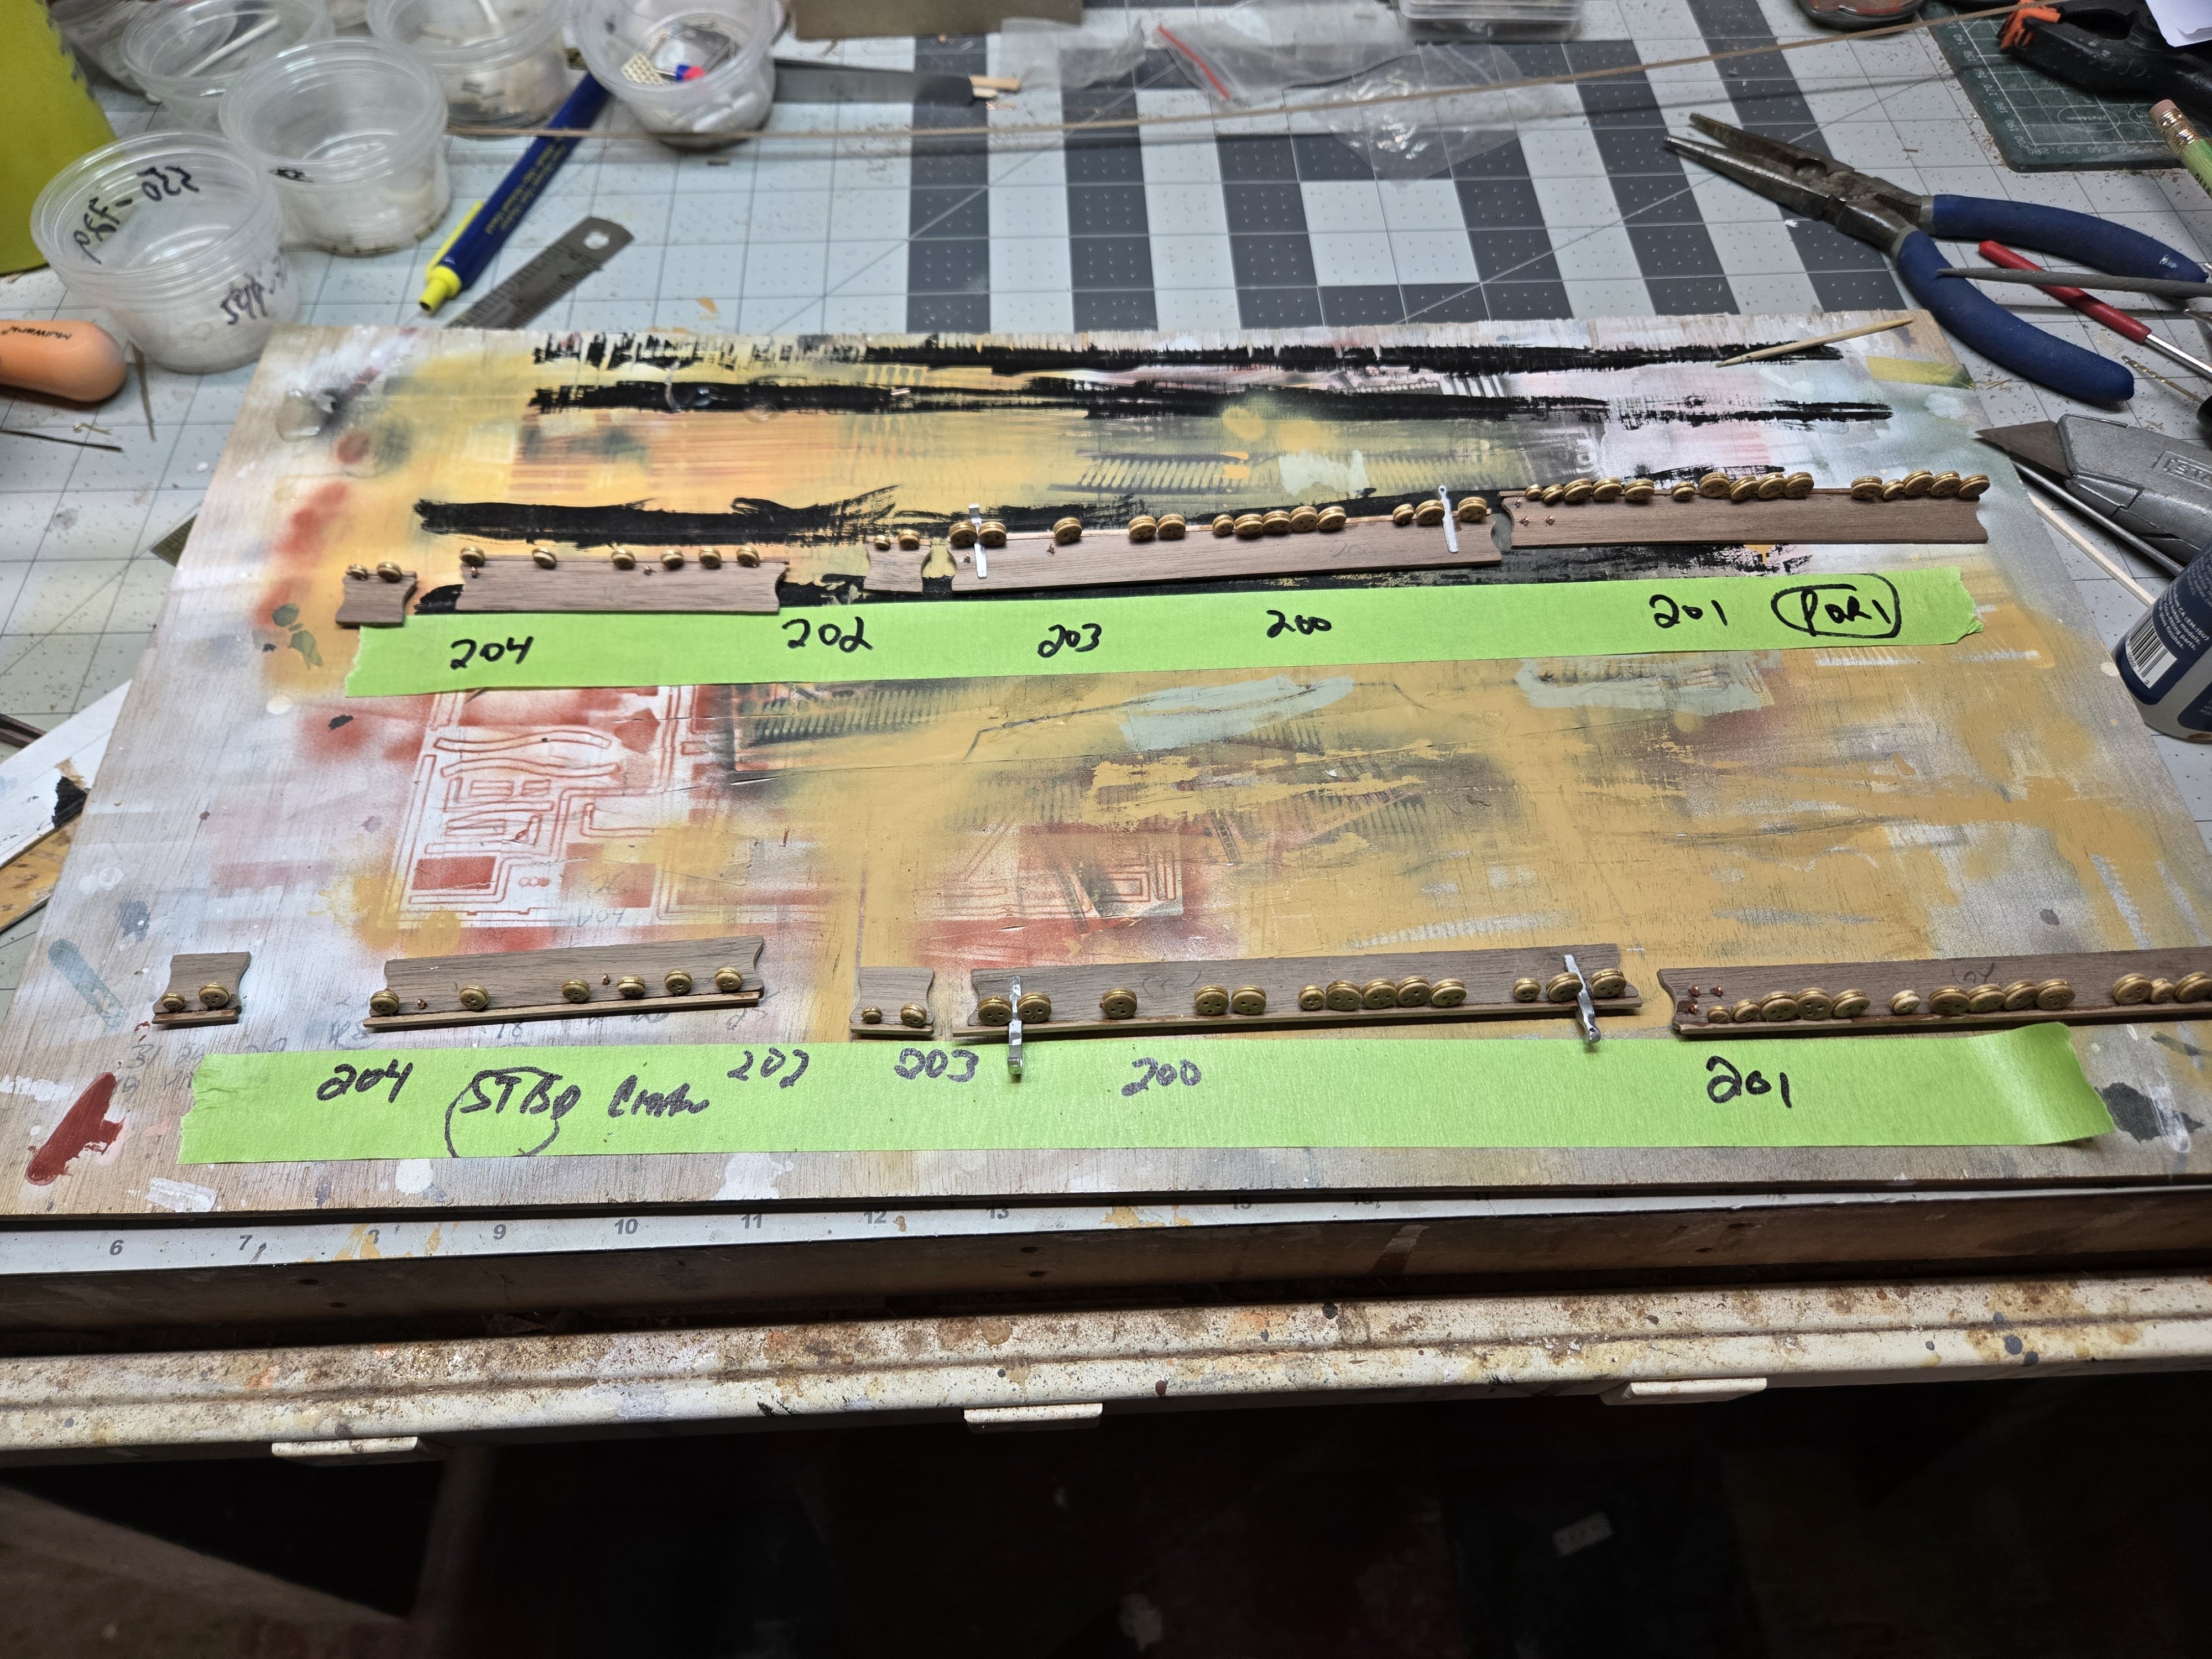
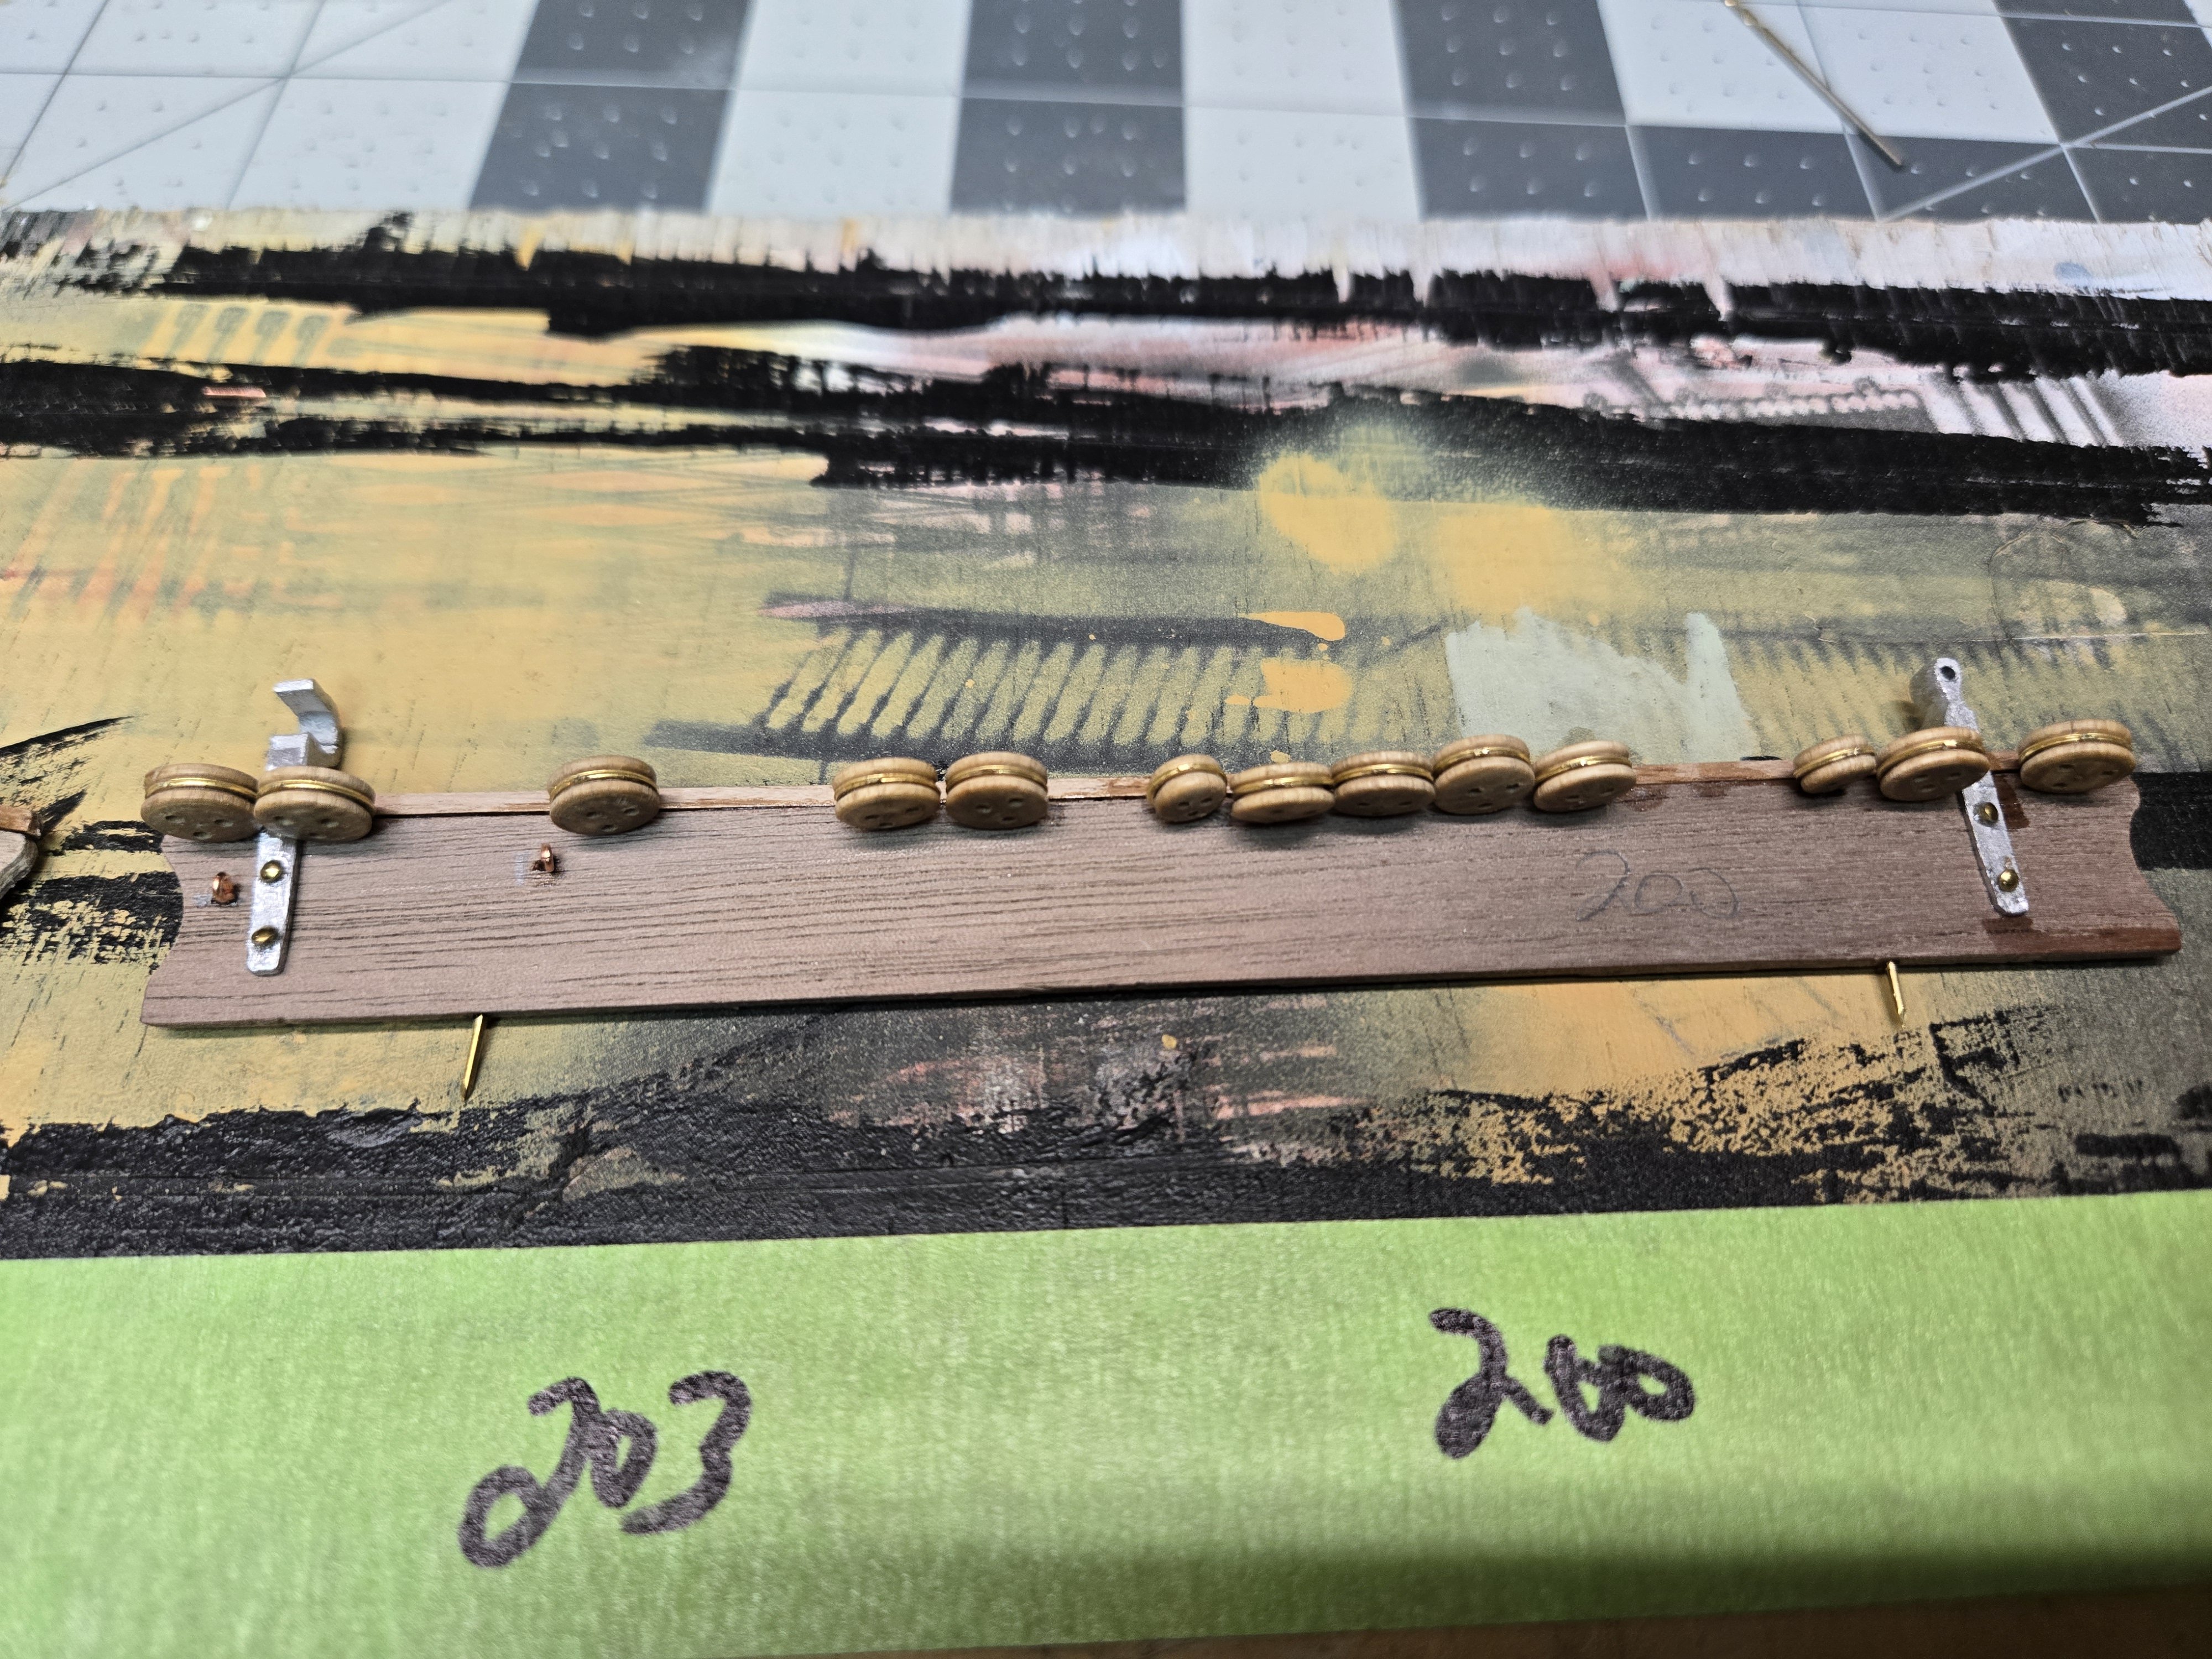
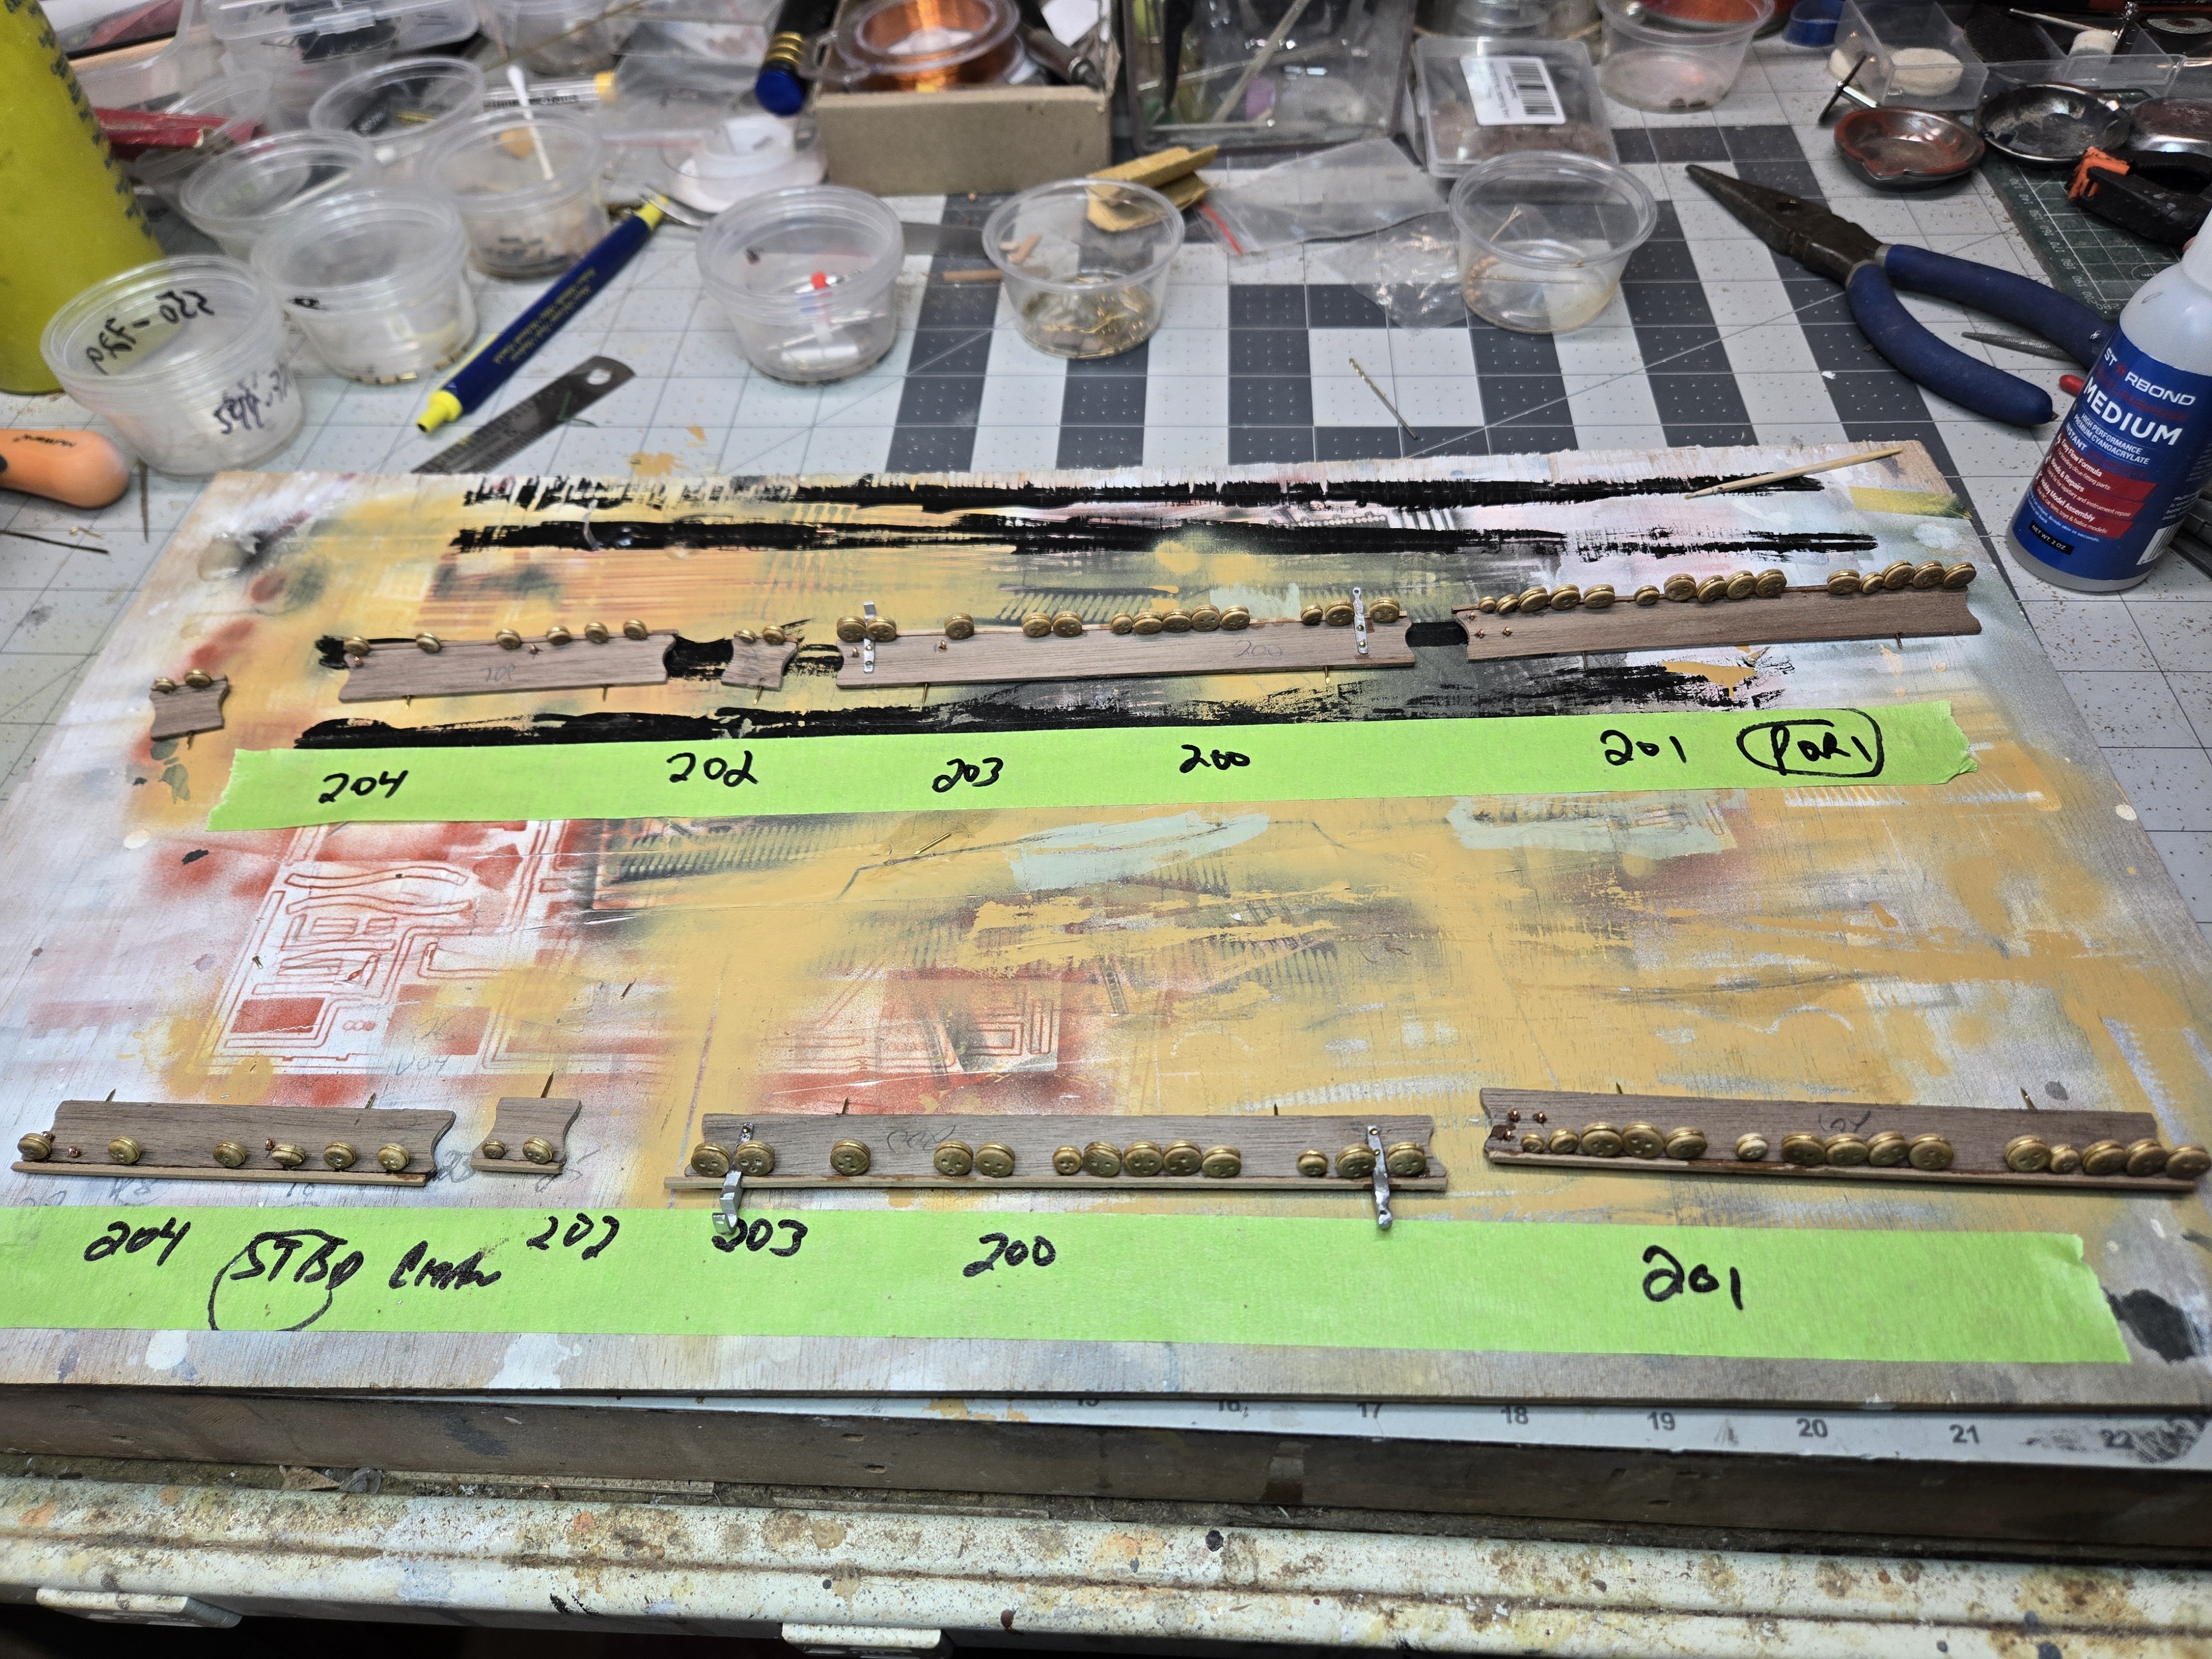
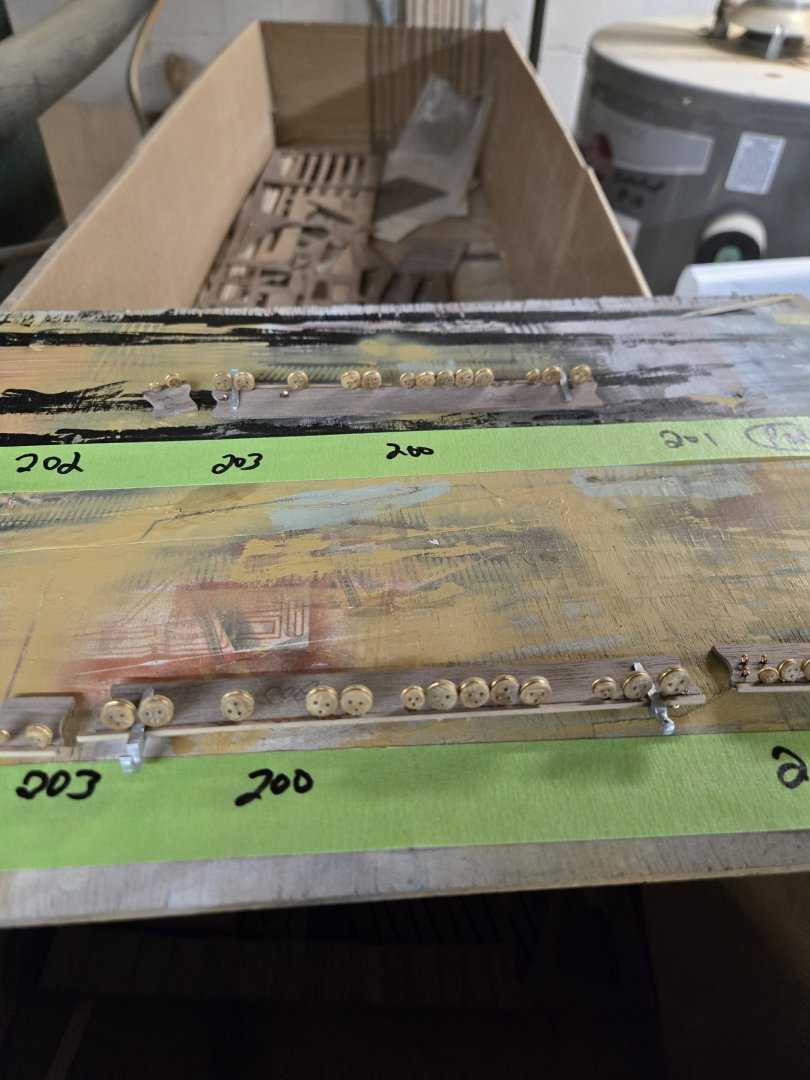
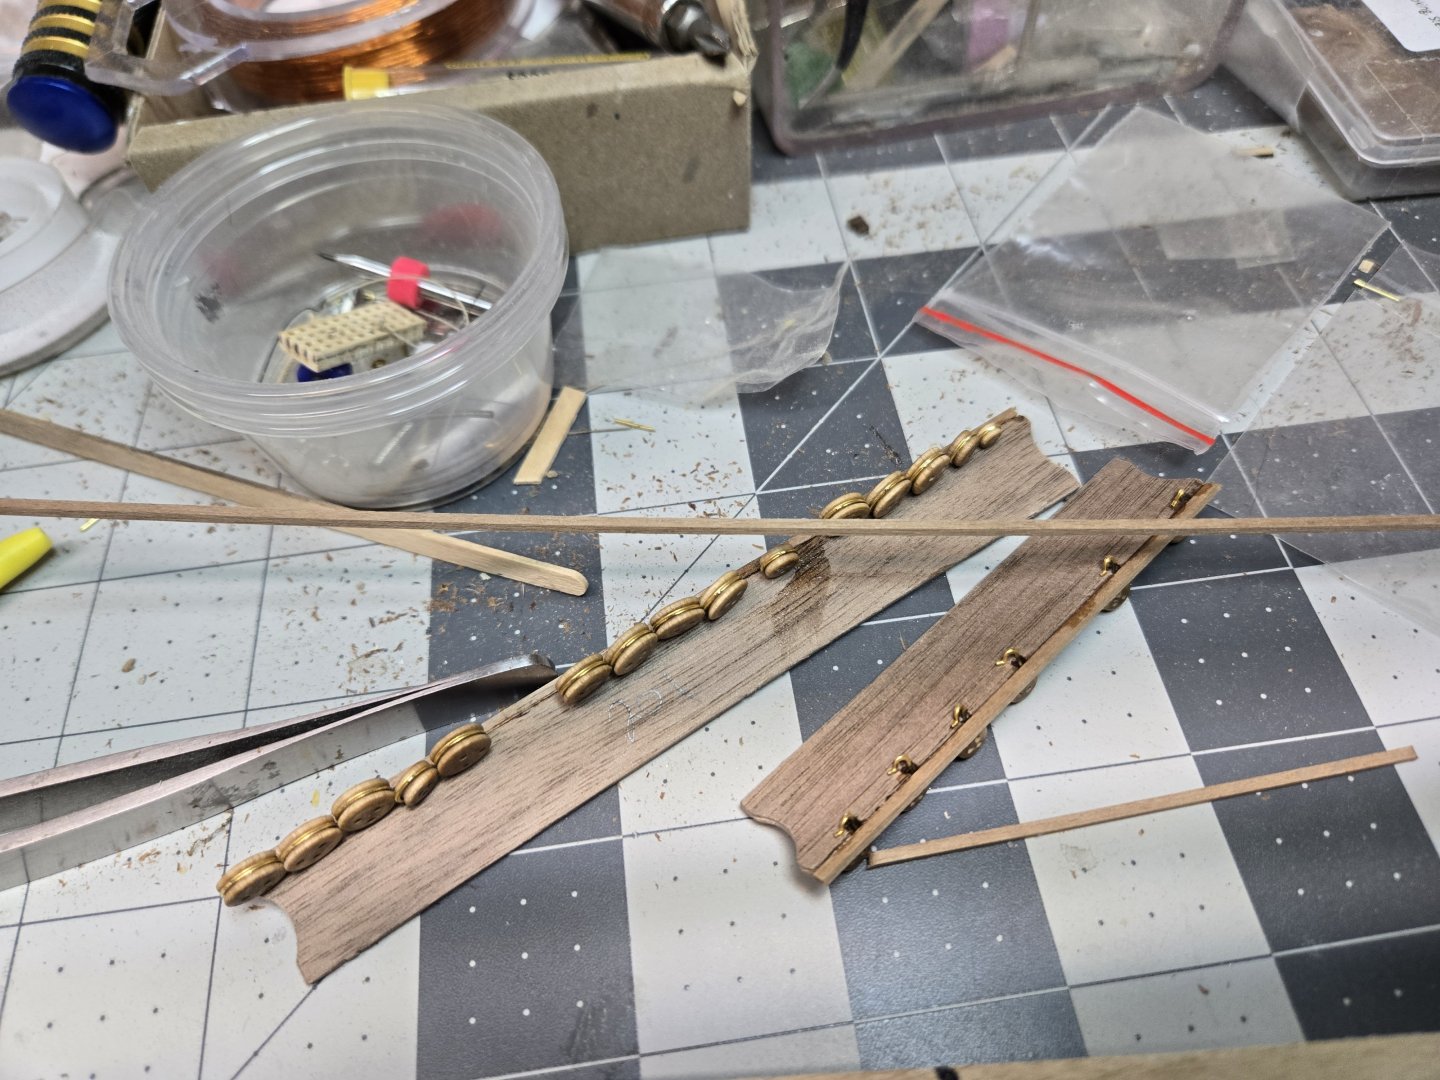
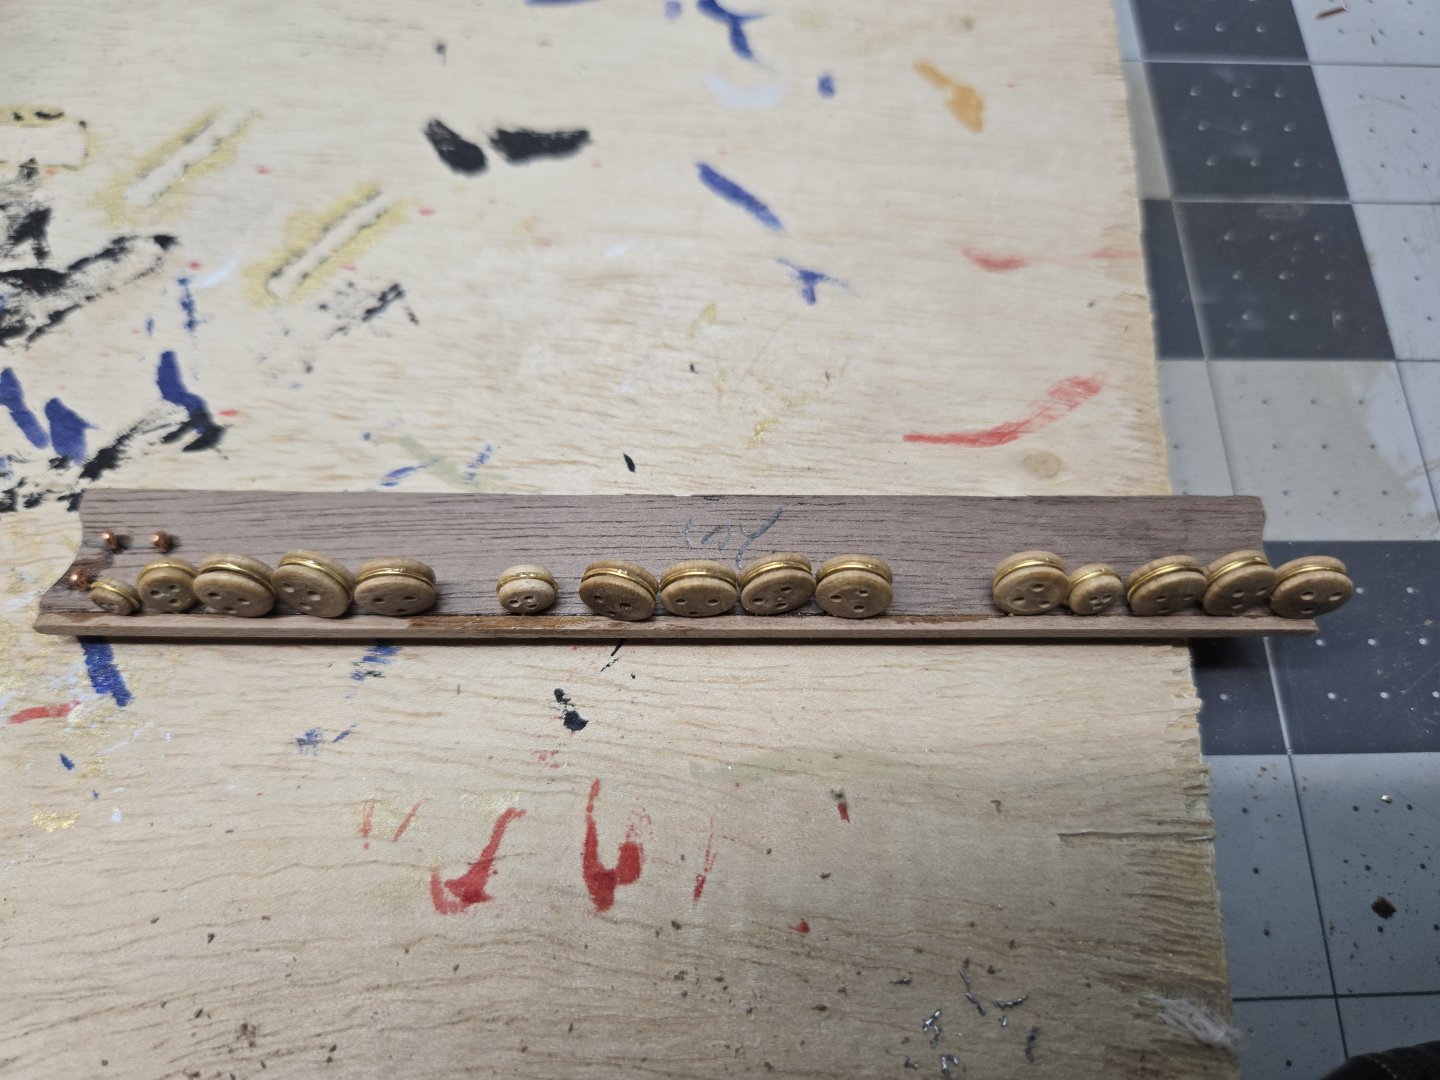
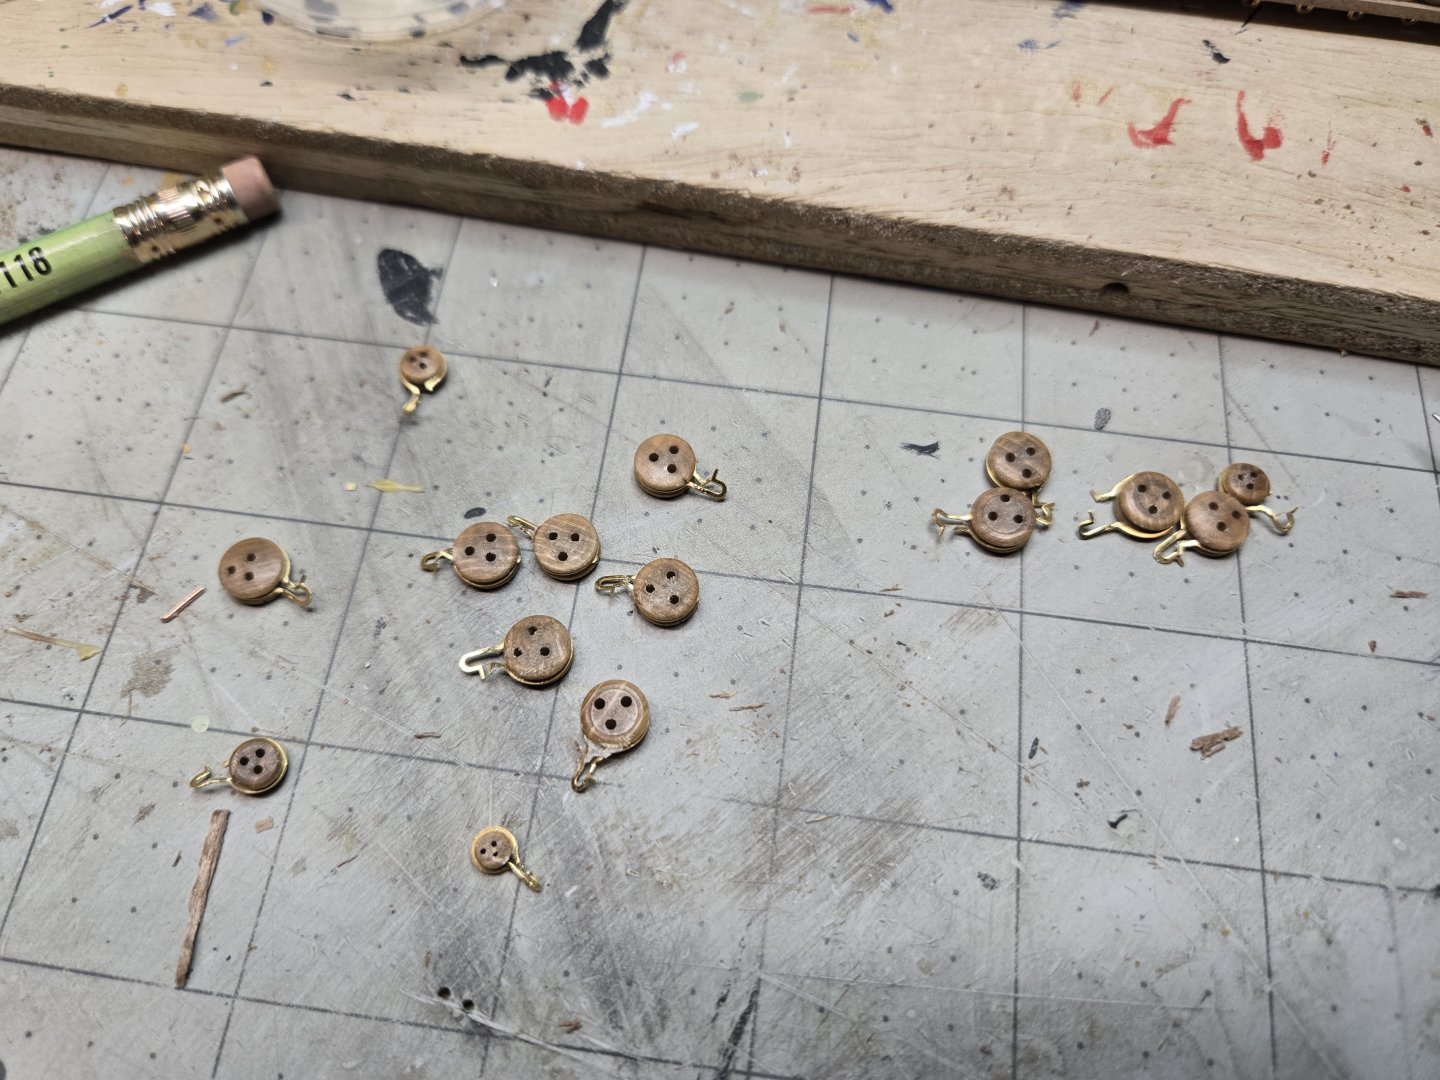
HI THERE! I am writing this almost 2 weeks after I posted this task as a warning to those who might be following my build as they are doing theirs....more for posterity I suppose as I think there are MANY other builders out there that would provide better guidance. Before doing the channels and then the chainplates, DO ALL OF THE PROFILES NOW!!!! First, this will ensure that your channels are more closely located where they need to be, that will also ensure that the chainplates after will be correctly located. Secondly, paint them to the quality level you are happy with. The manual does not mention the placement of the brass profiles until the 3rd from the last page. If you wait until then, you are fishing profiles under channels, between channel supports and chainplates. Just some words from experience as I try to figure out how I'm going to paint all of this!!! lol....what a world, what a world! While waiting on various painting coverups to dry, I began work on the channels. Some of the other builders soldered the strops in place. This was given to a builder by Caldercraft. They state that you fit the 2 nubs INTO the side of the channel. This would require drilling a hole into the side of the notch provided. I only have a .9mm drill bit left and there was no way I was going to be able to drill all those holes at an angle. I also tried to solder the nubs. That was almost impossible. Getting the PE to heat and accept solder was hard. It may have been the needle I was using and I was going to switch it out. Instead, I just tried to squeeze a strop in place. For the larger 7mm ones, it actually was easy to do. I would stick the top nub into the notch and squeeze the longer side in next to it. The lower nub I just left on the bottom of the channel to accept the chainplates. After, a little CA glue and it set up fine. The smaller 5 and 3mm were harder. For some reason, there wasn't as much room. To get around this, I cut the top nub off. Not the whole thing, just the nub that juts out. It made it easier to place these then. Once done, I added the 1.5x1.5mm over the top. Blueprint #2 shows the location of the deadeyes for all the channels on the starboard side. Everything went fine and I was very happy at my pace. I then installed the deadeyes for the other side, but didn't stop to think about them needing to be a mirror image. I didn't notice until I referred to blueprint #18 which doesn't show the actual deadeyes needed, but where the various copper eyelets go. It was then I realized that the port sides were wrong. I had to remove all of them are redo. Thankfully, that went fairly easy and I was able to place them correctly. After a sigh of relief, I added the cast studding sail boom brackets and supports. I sanded them a bit to match the real thing. Once I installed them, I added some nail heads I cut off to the tops to create some detail. I also added nails to the back of the channels to help install them. After, I began painting them. I am using my airbrush and have added 2 light coats. So far, so good.


-
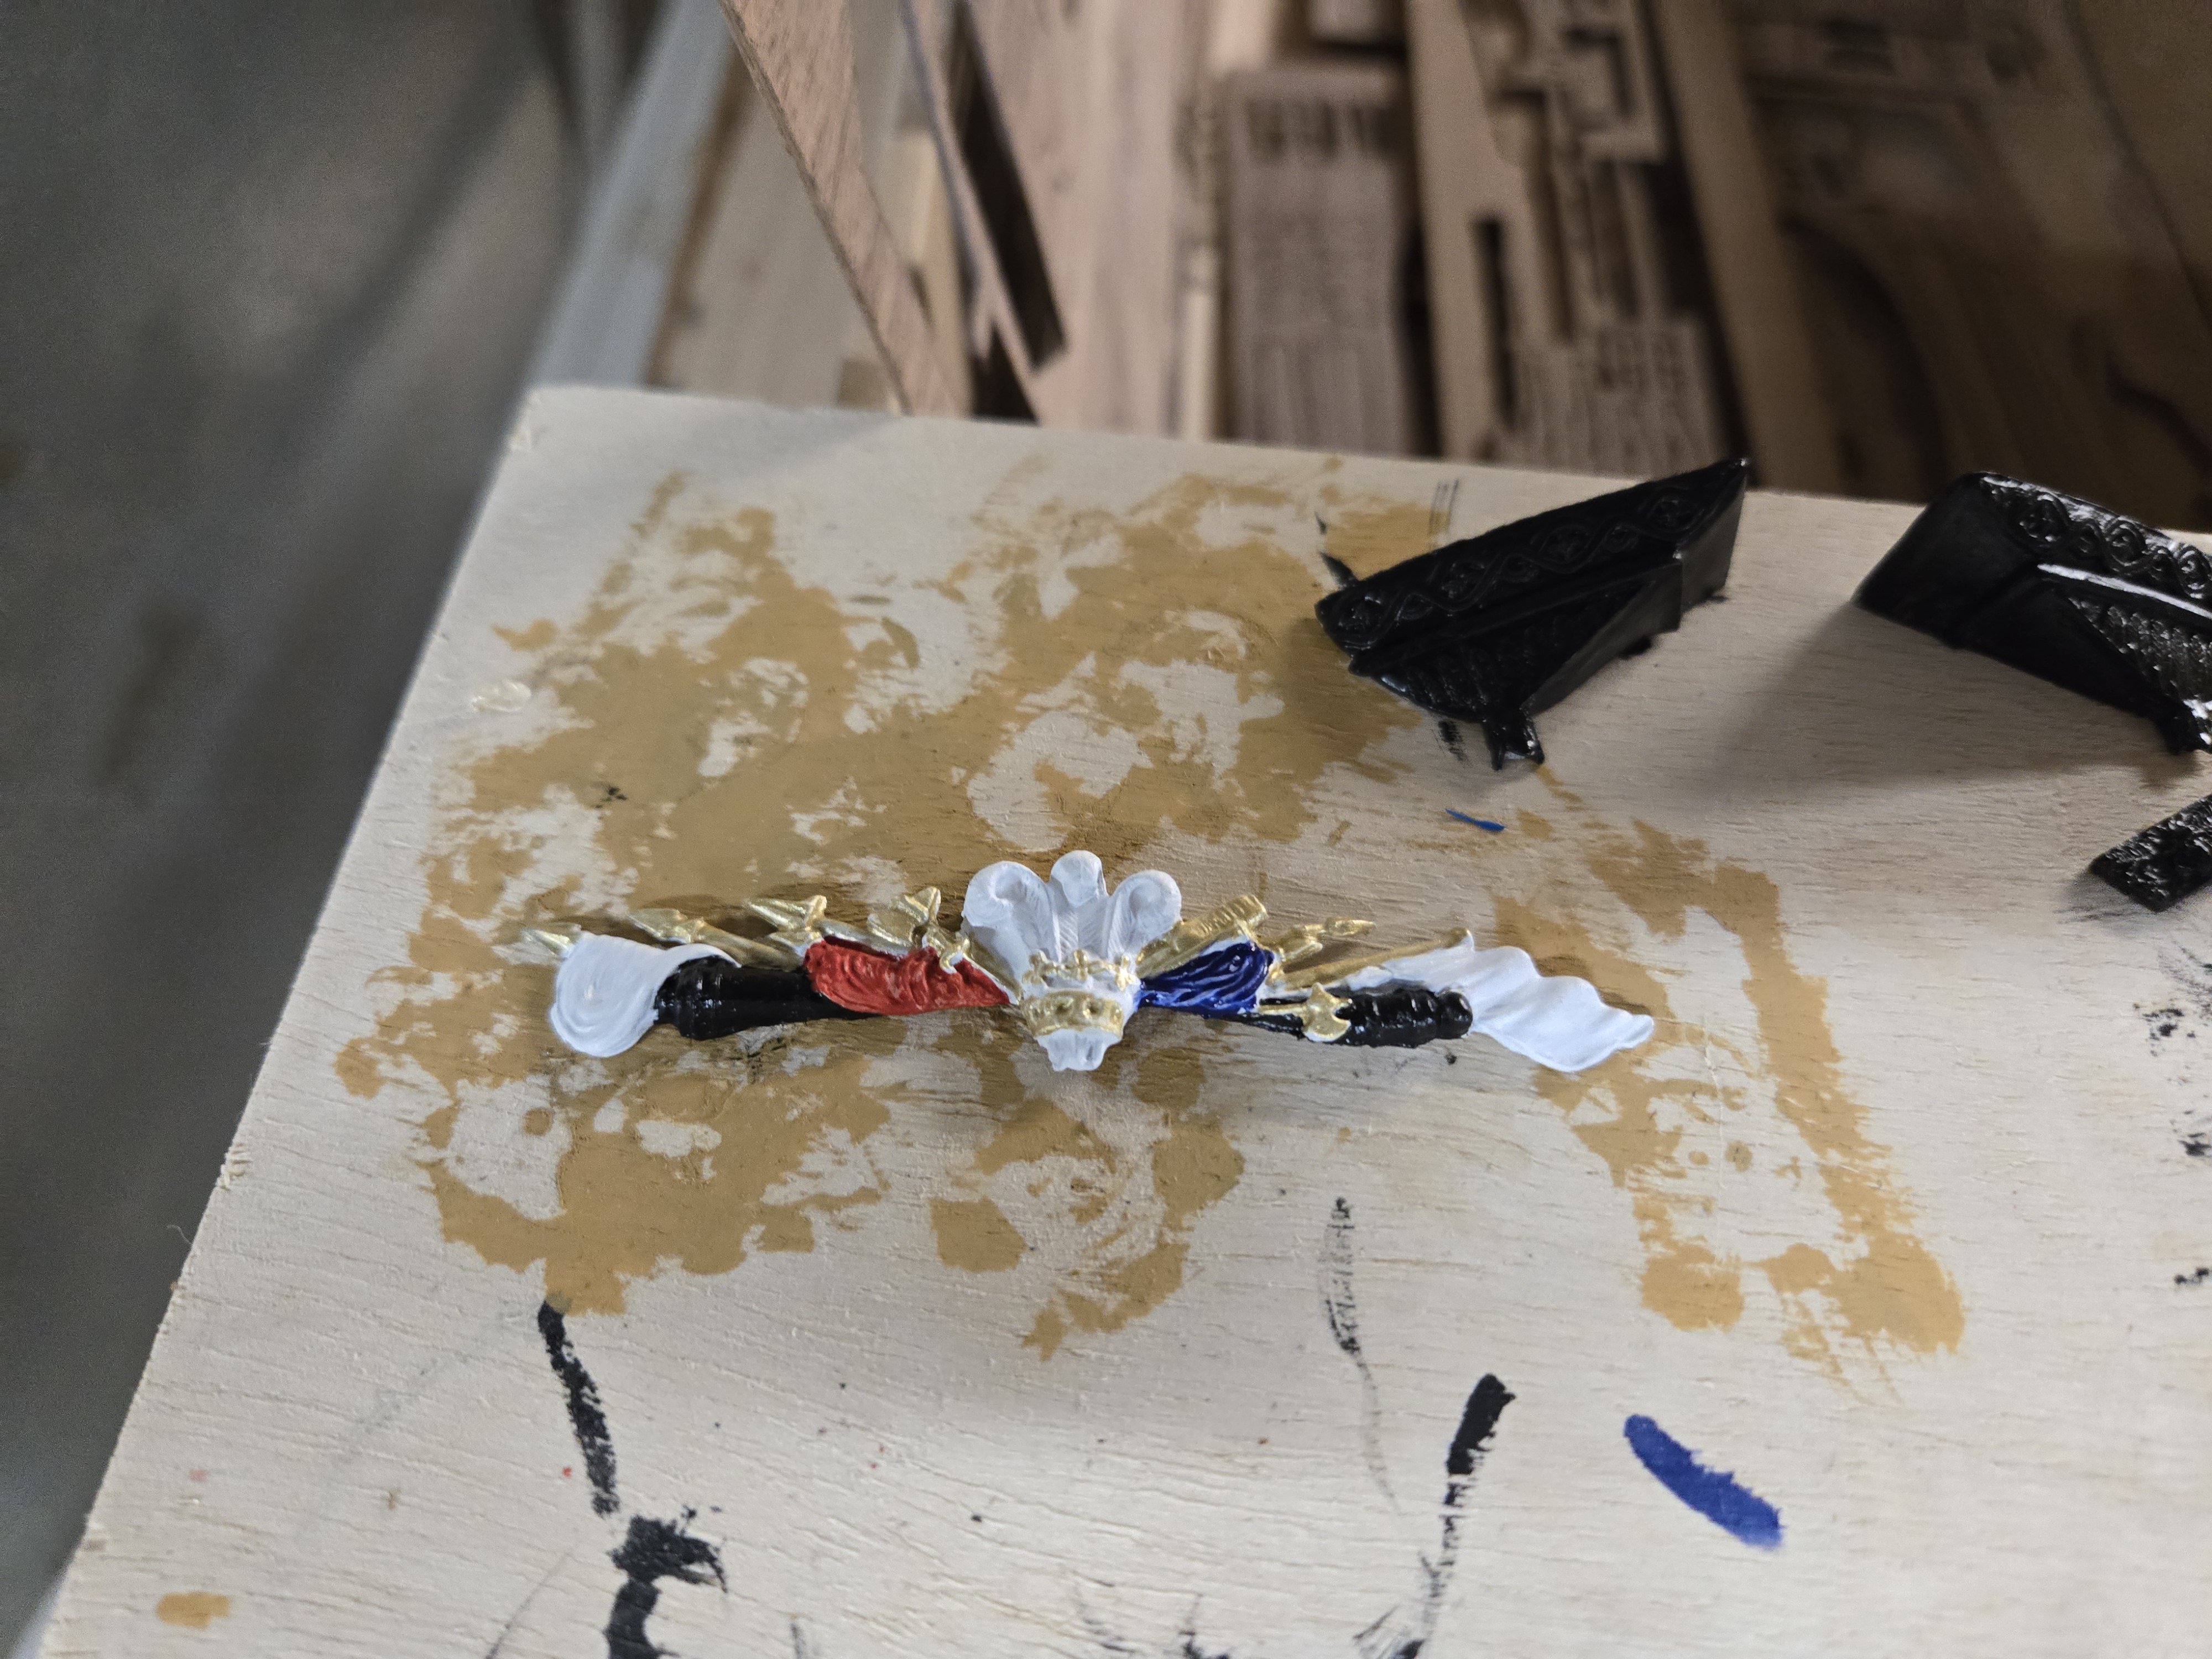
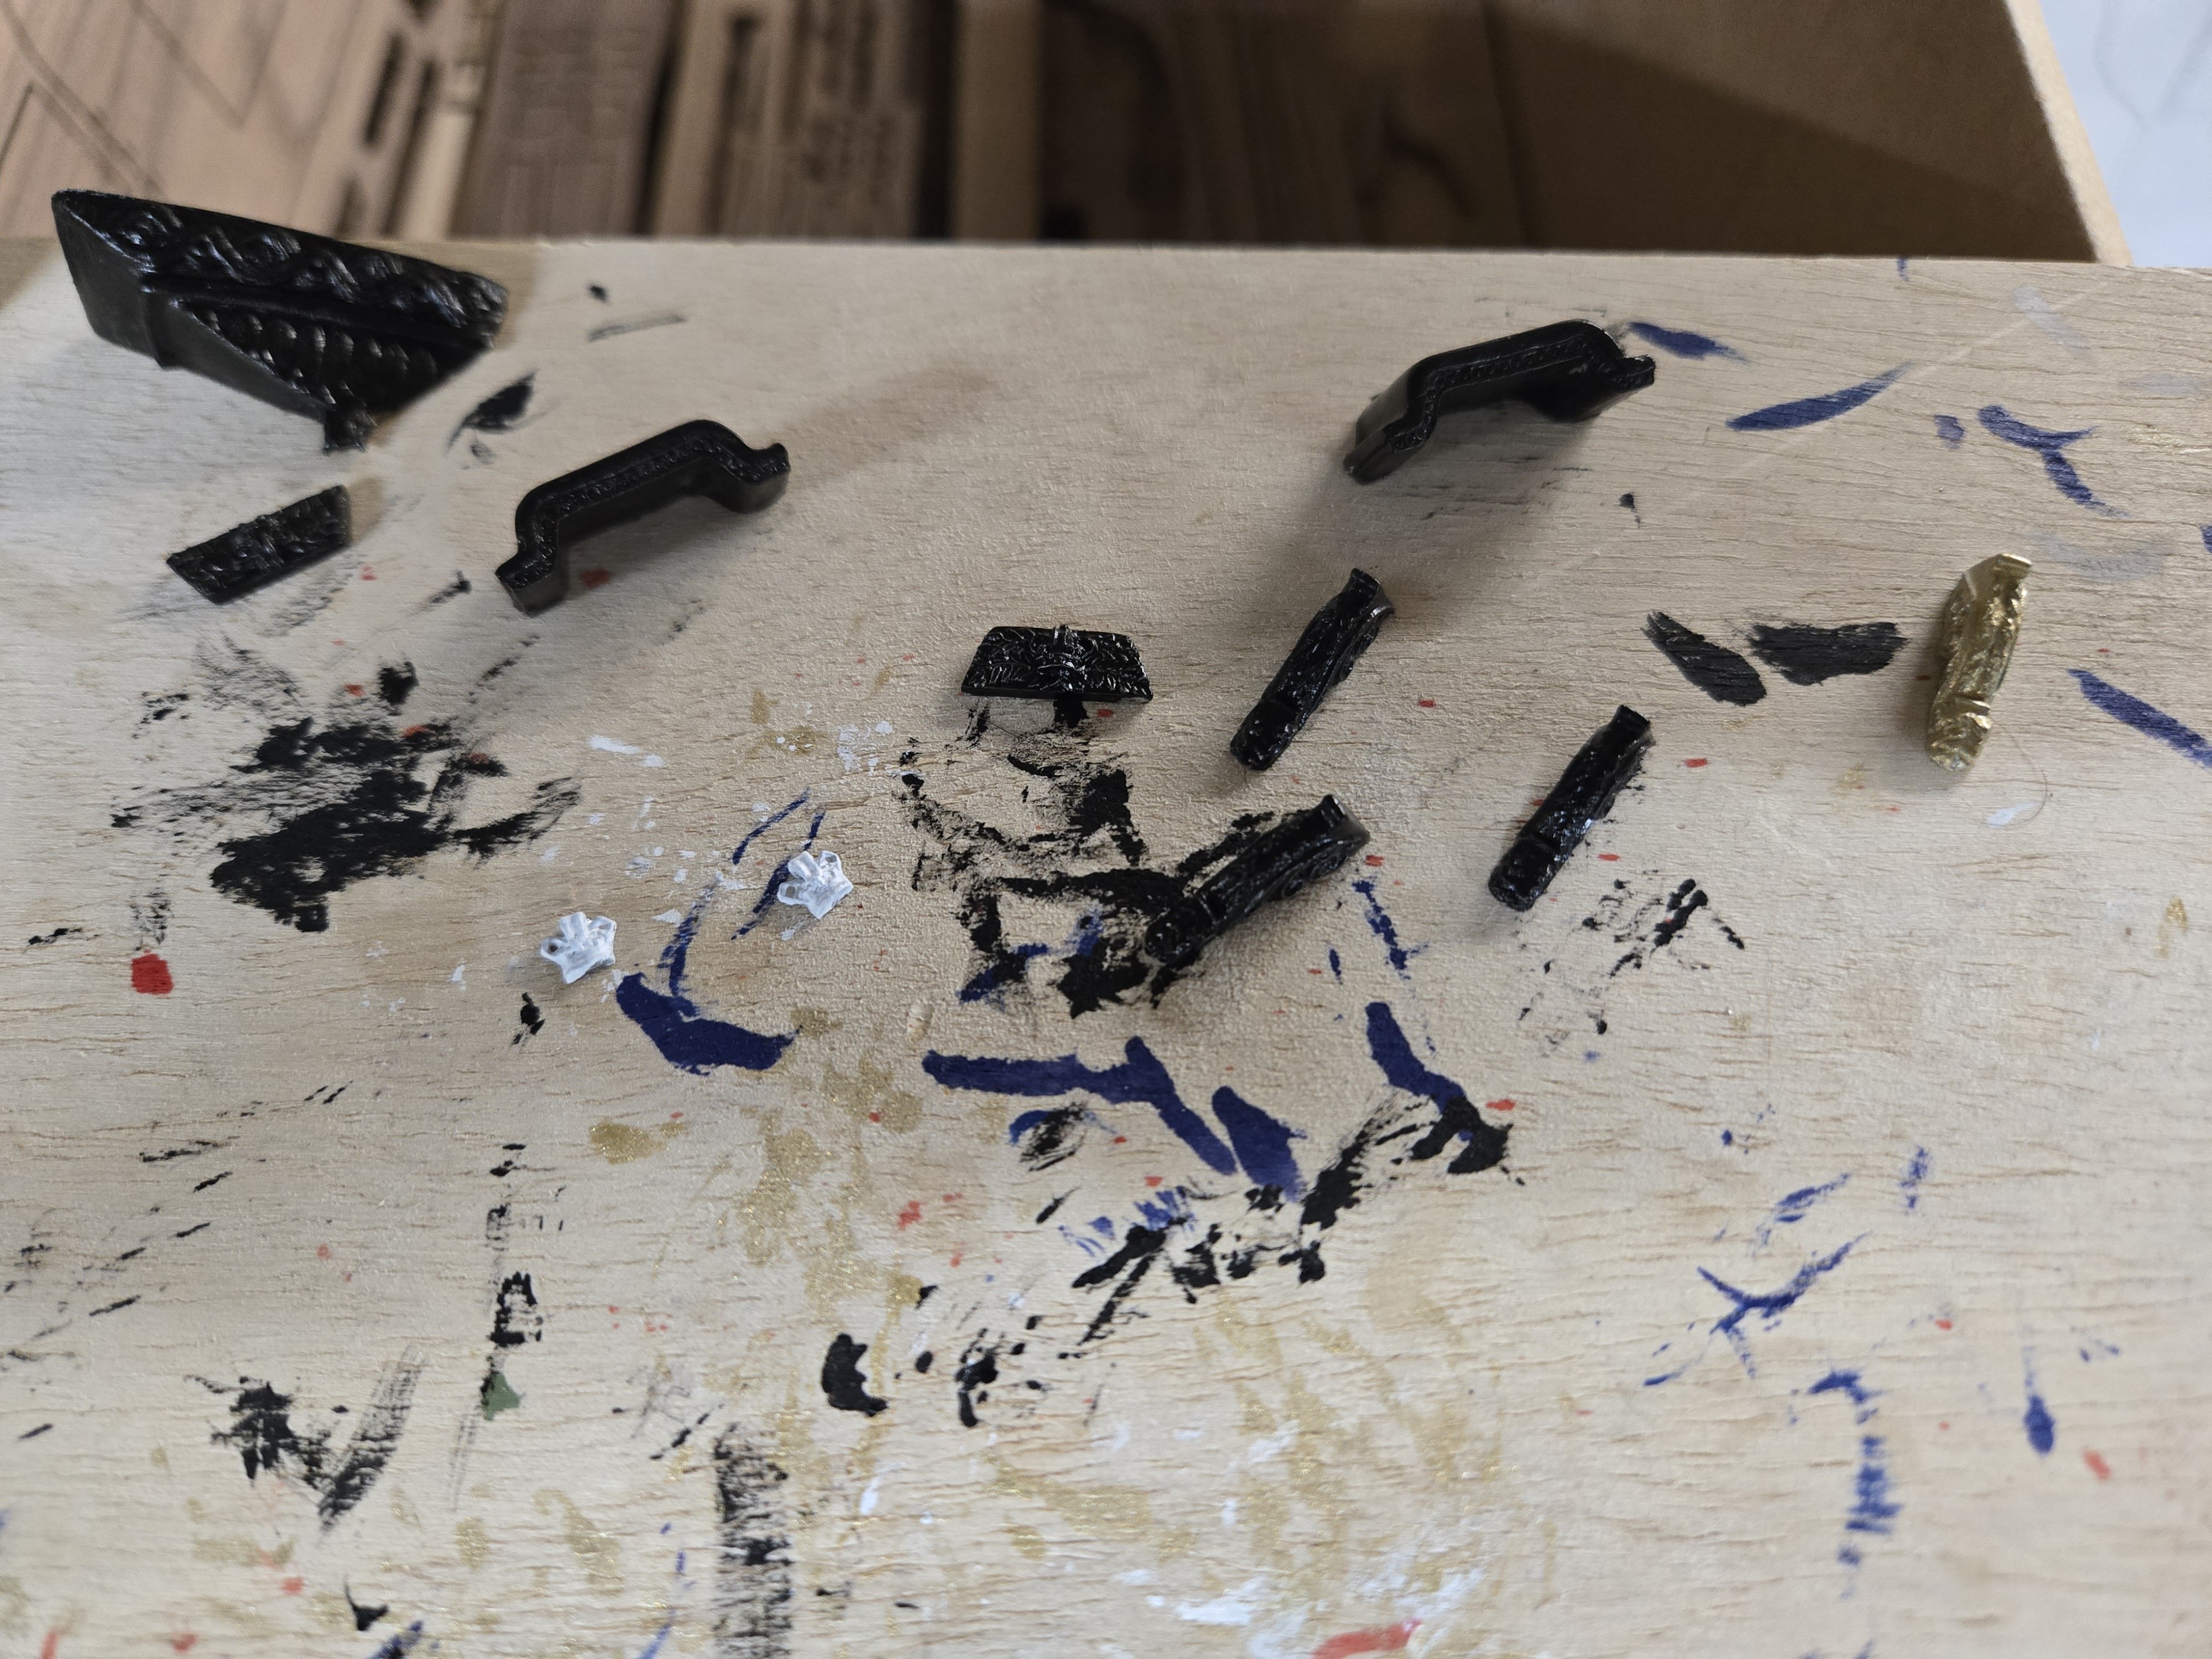
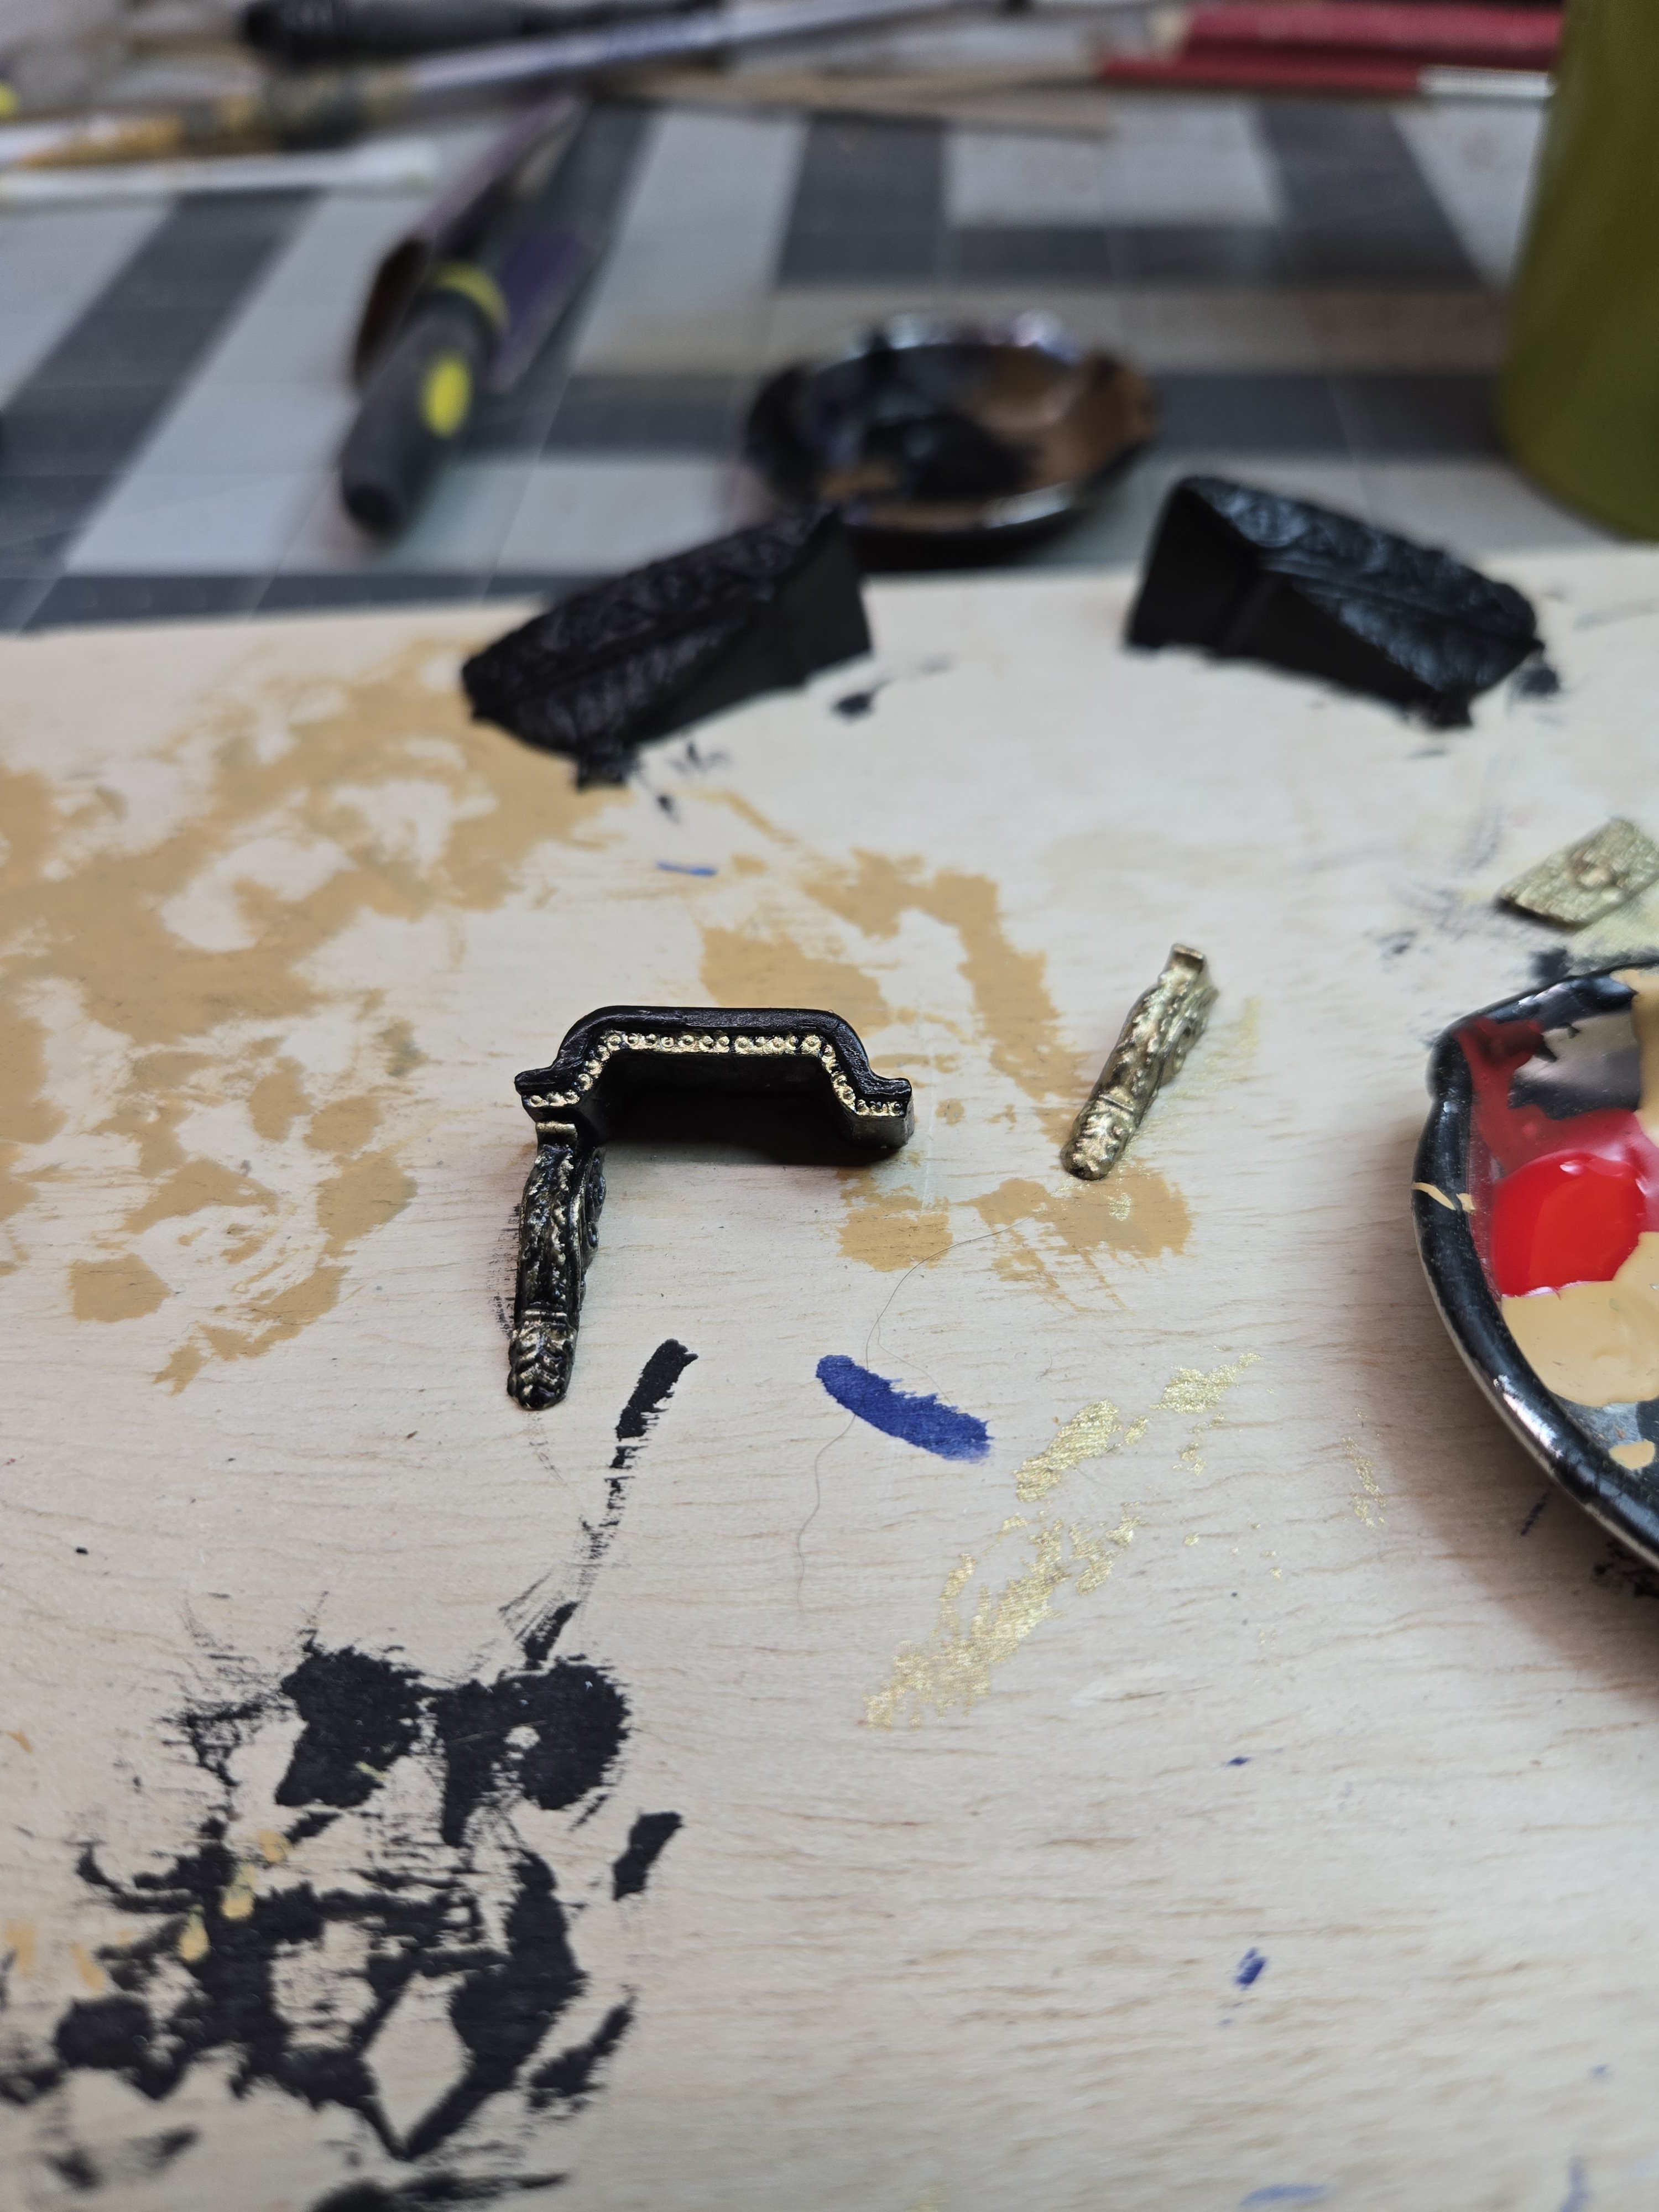
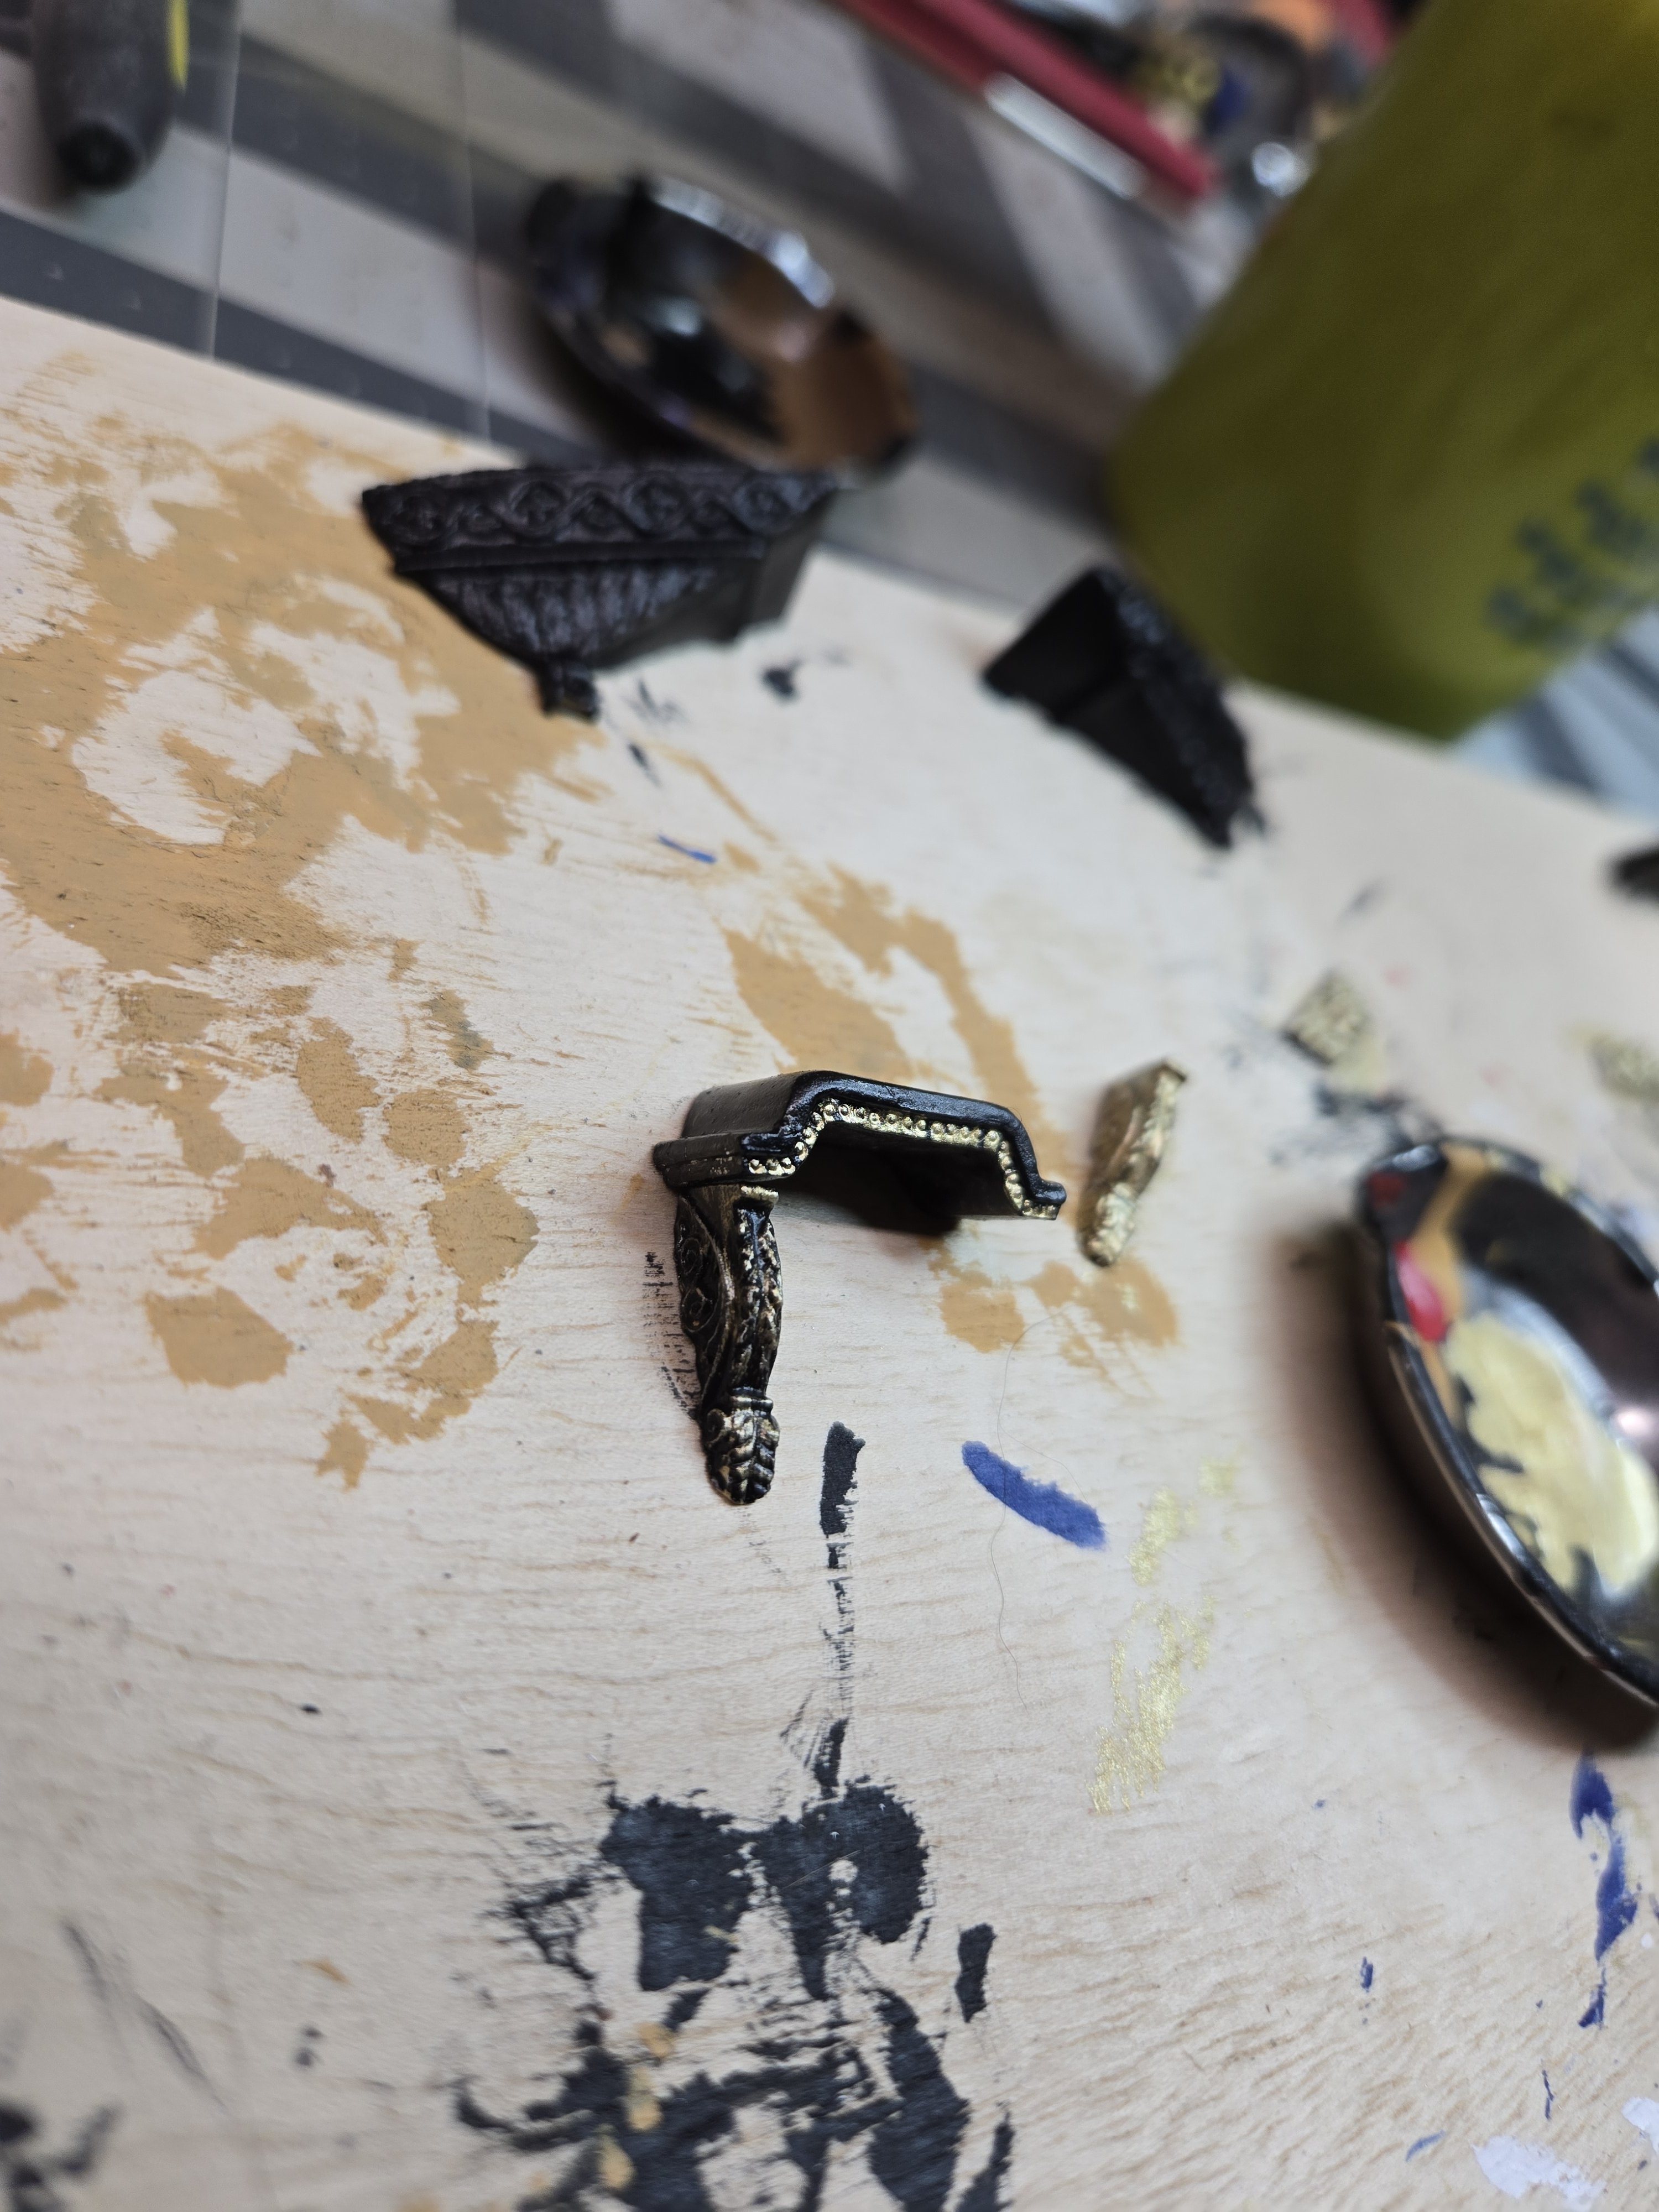
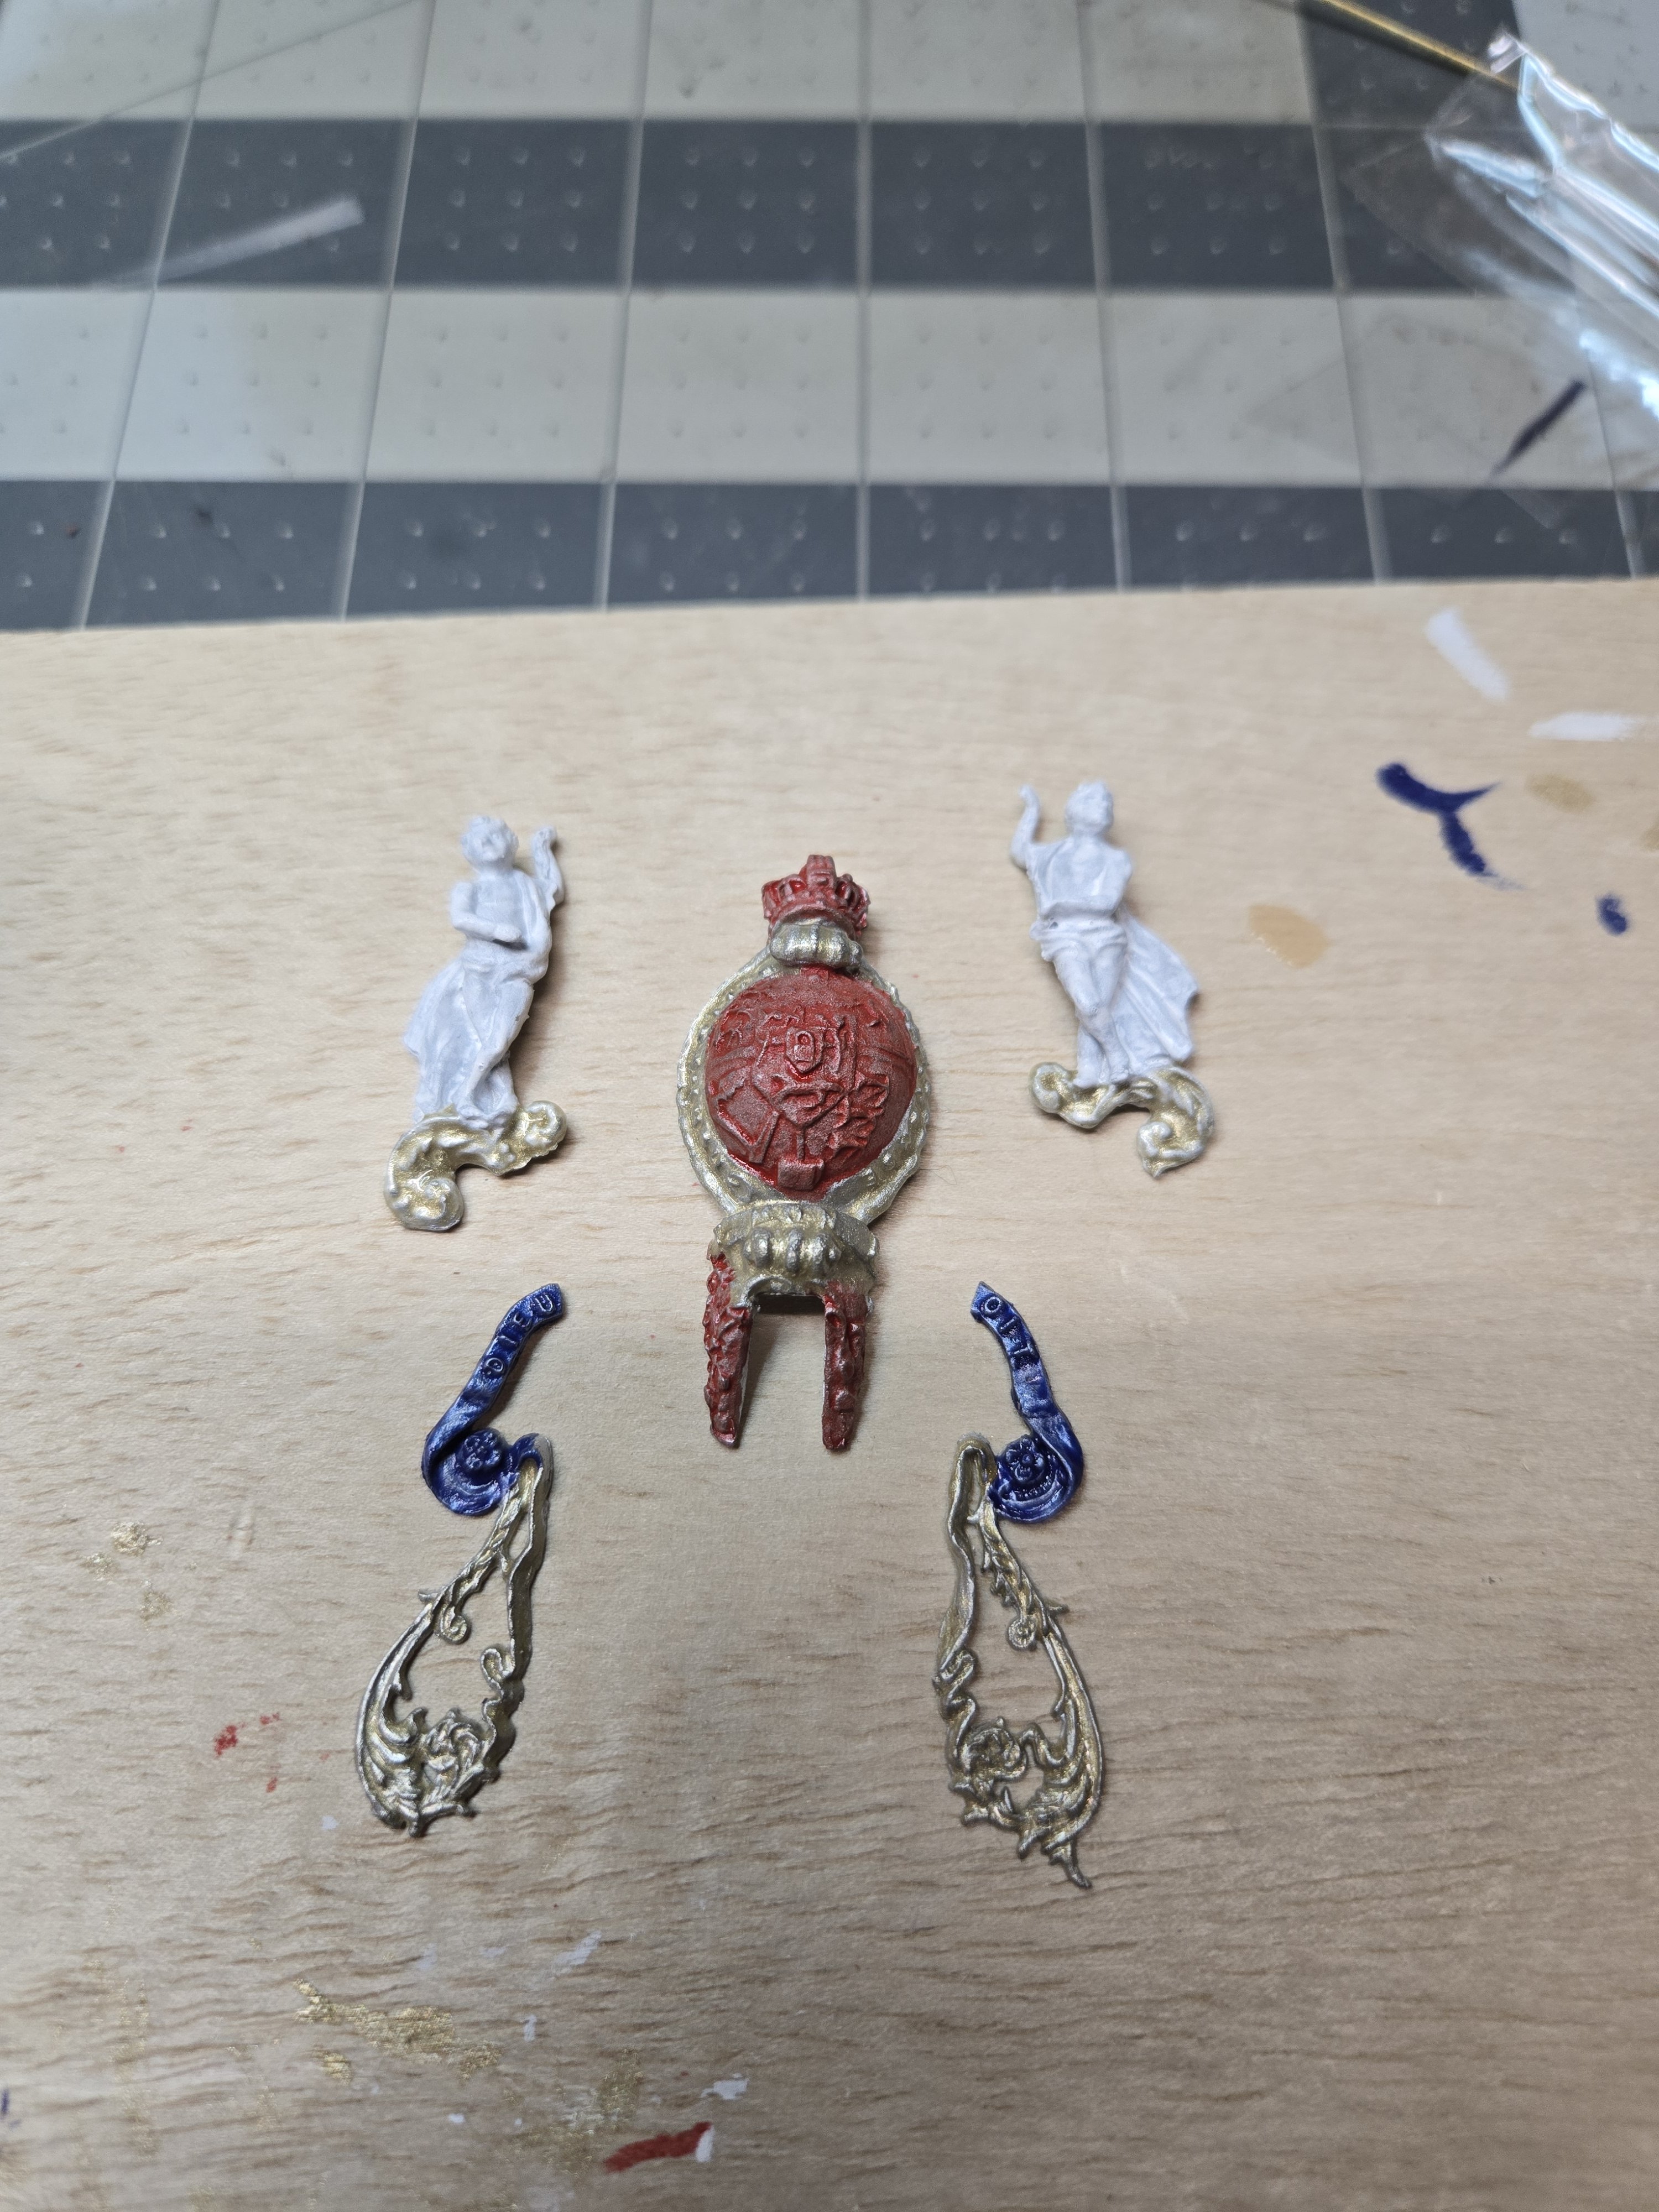
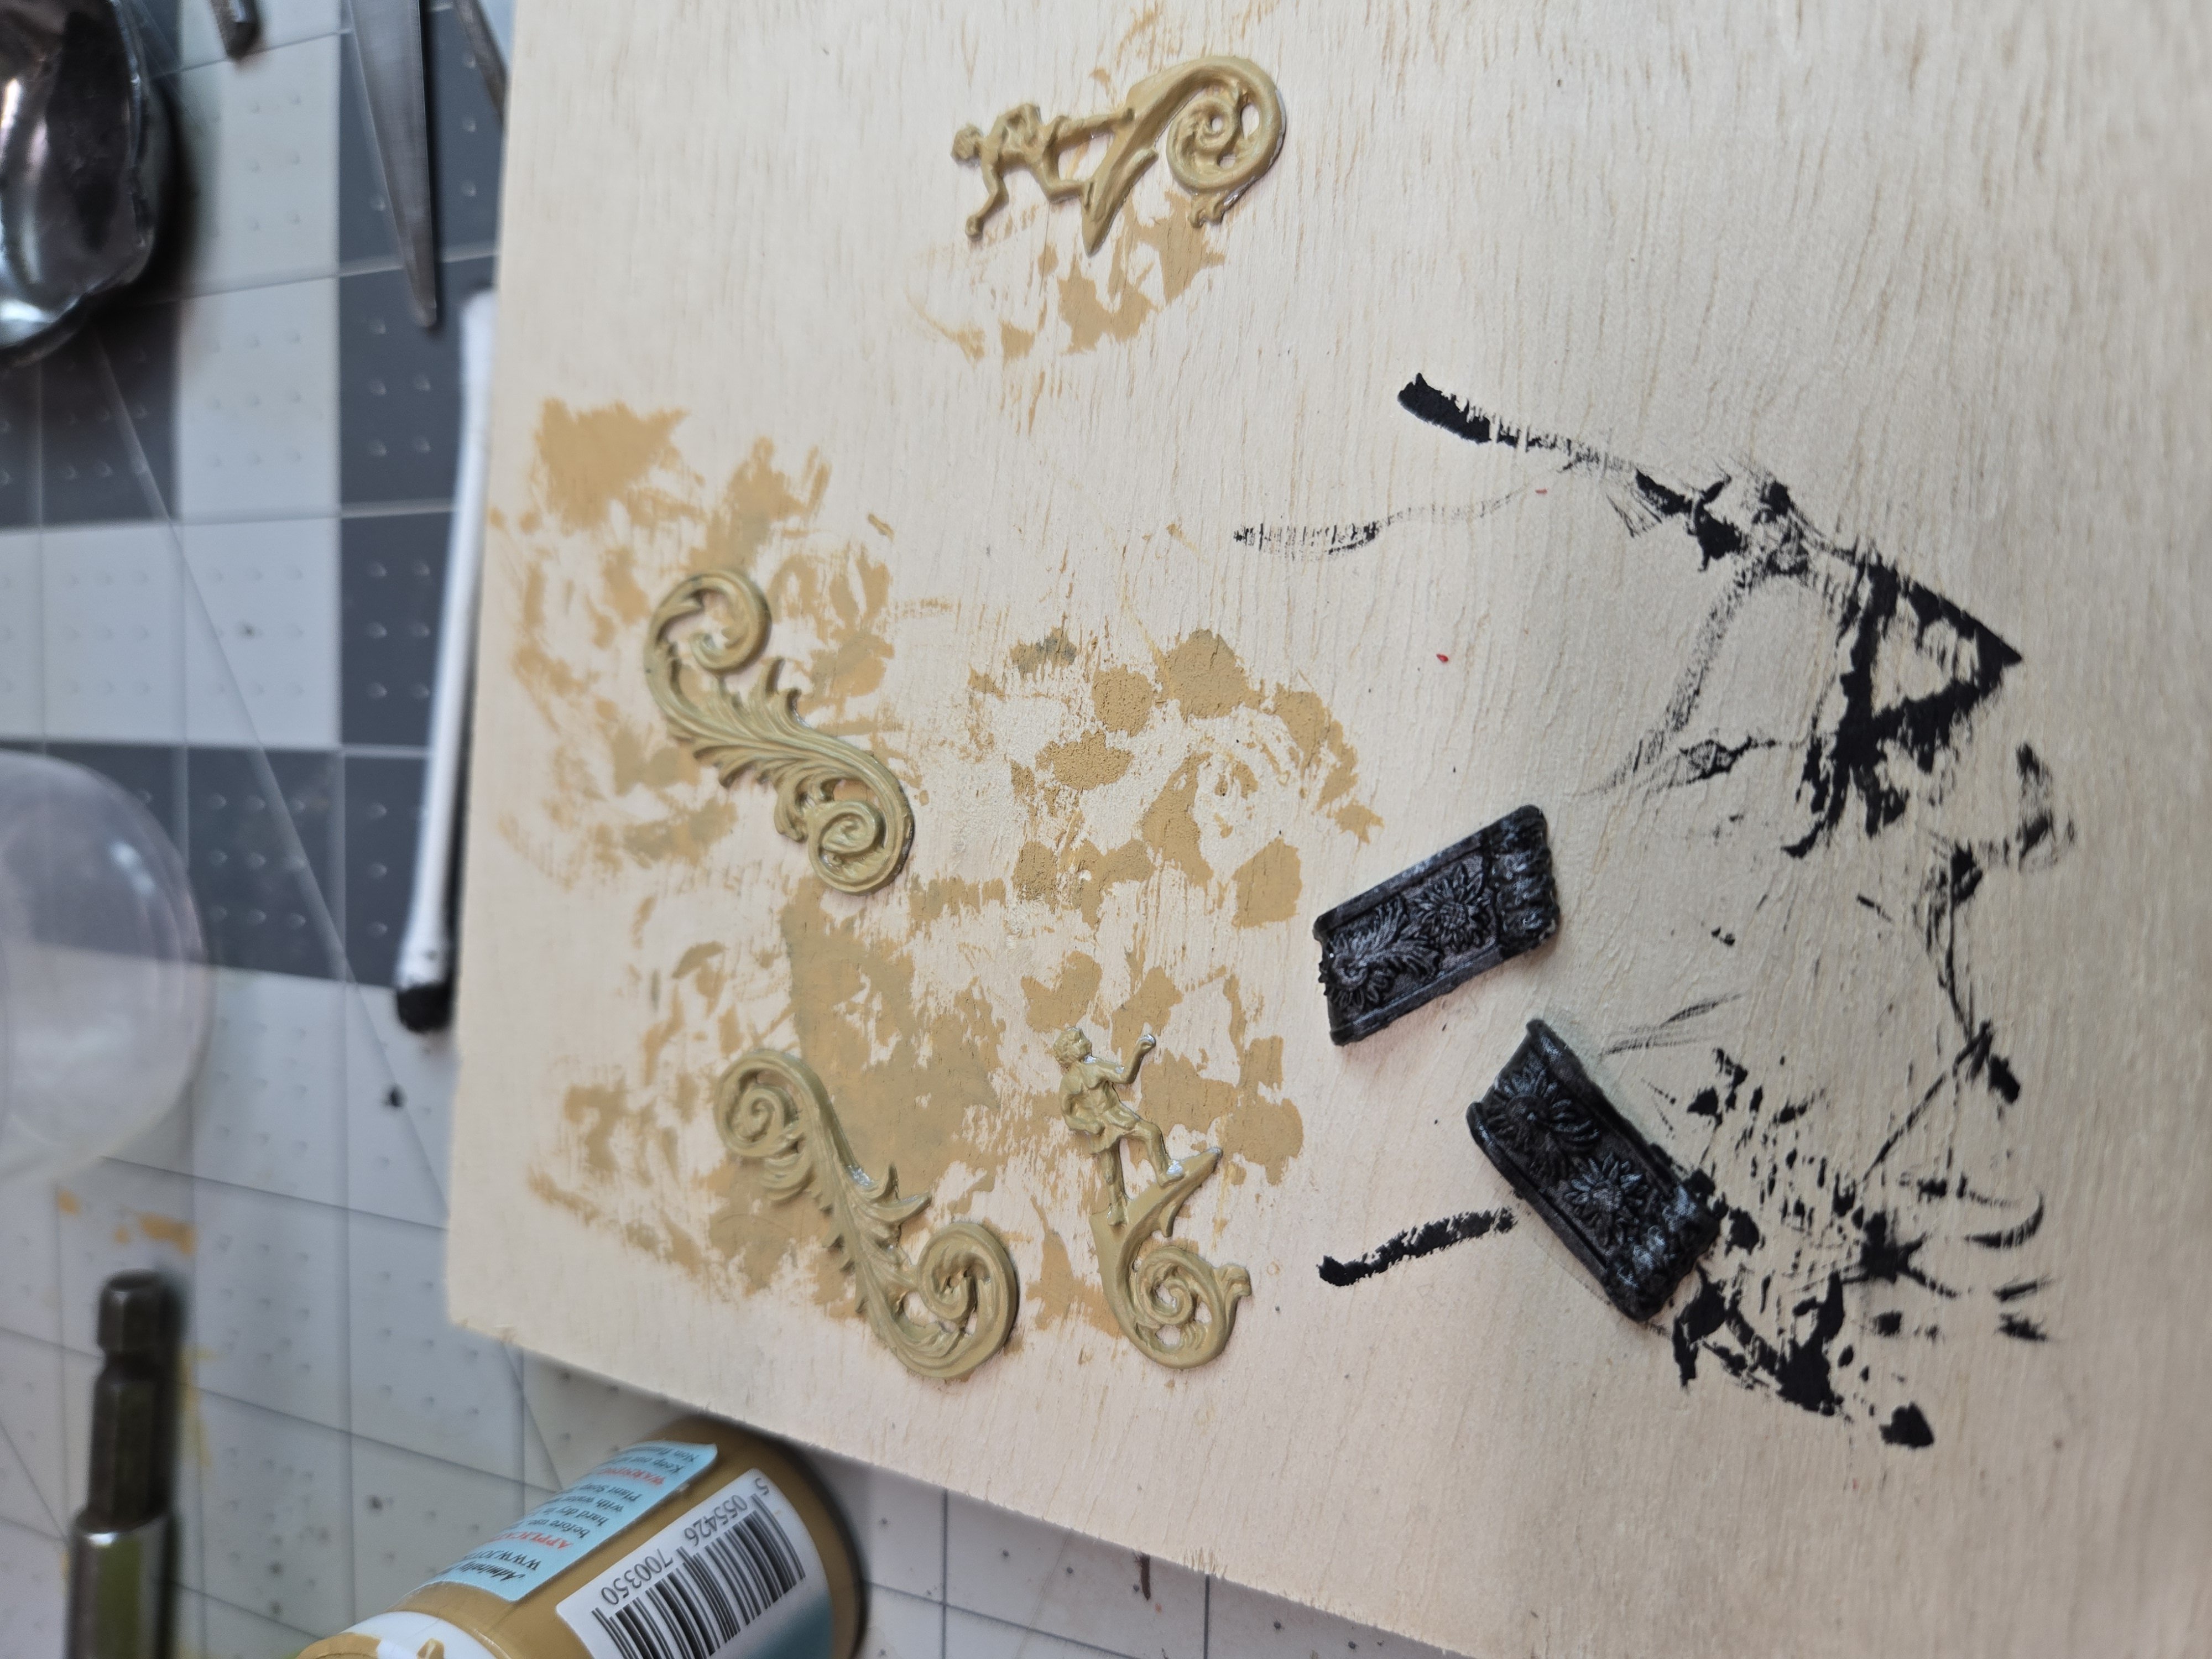
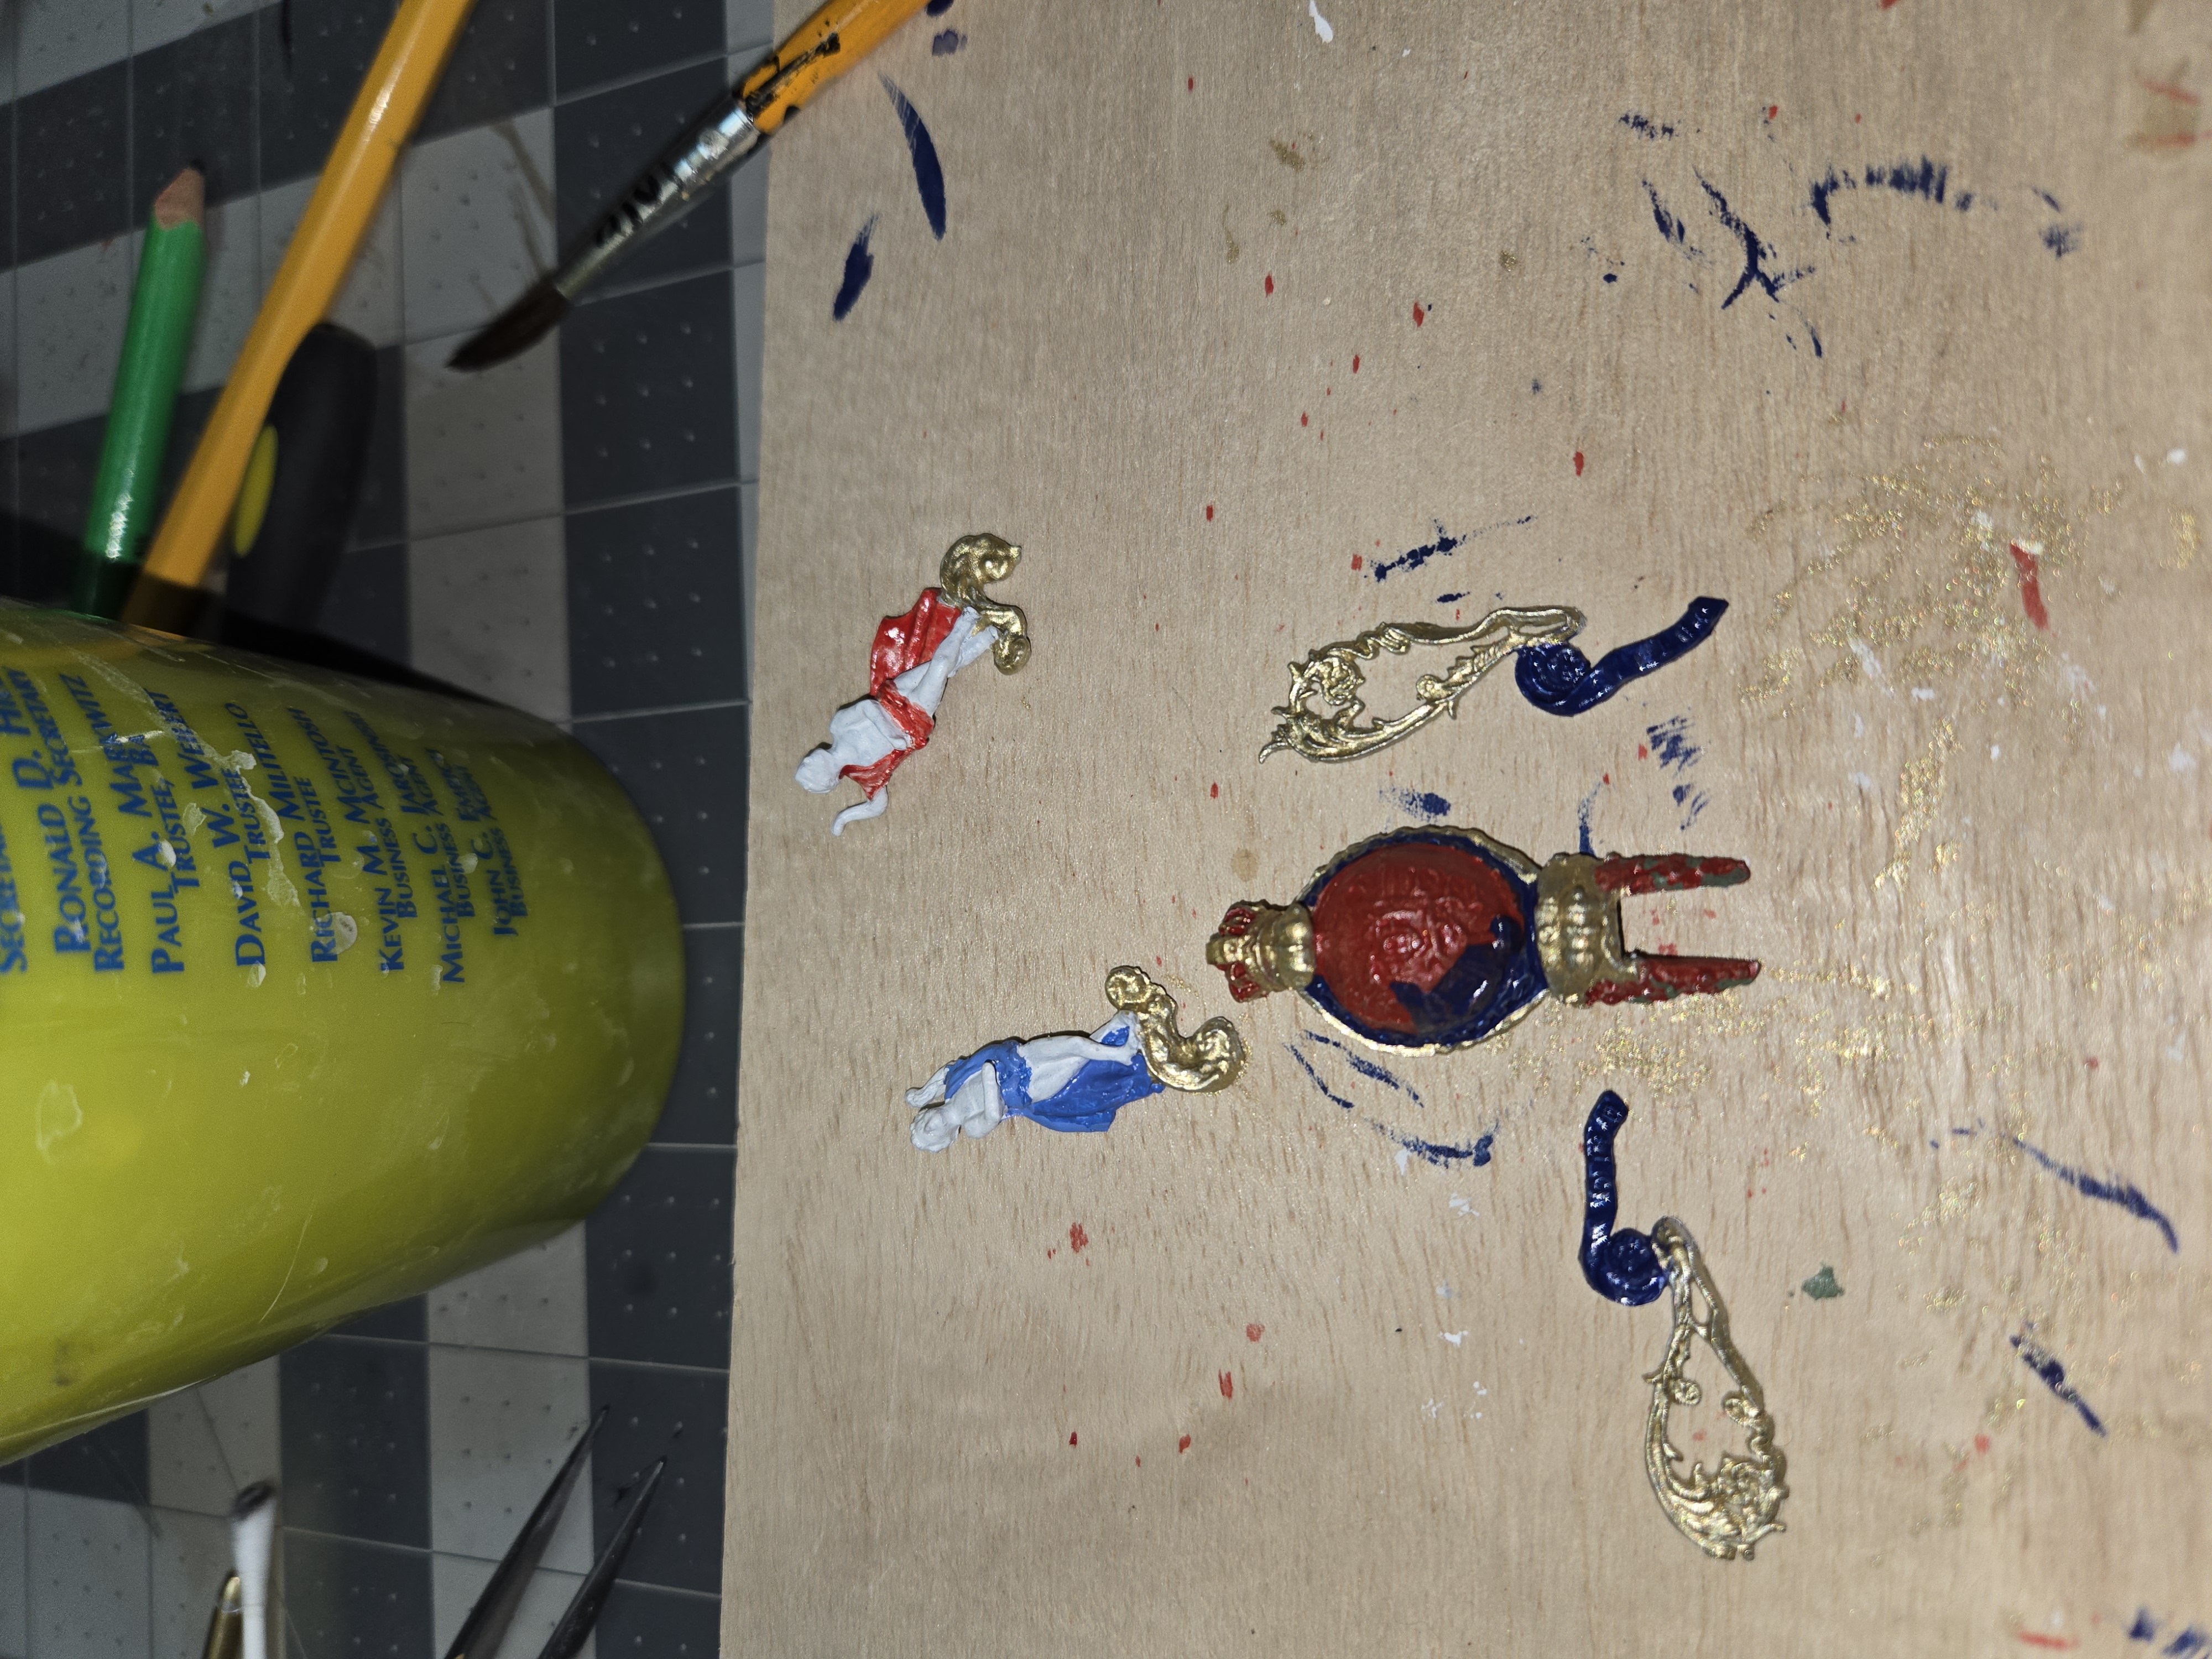
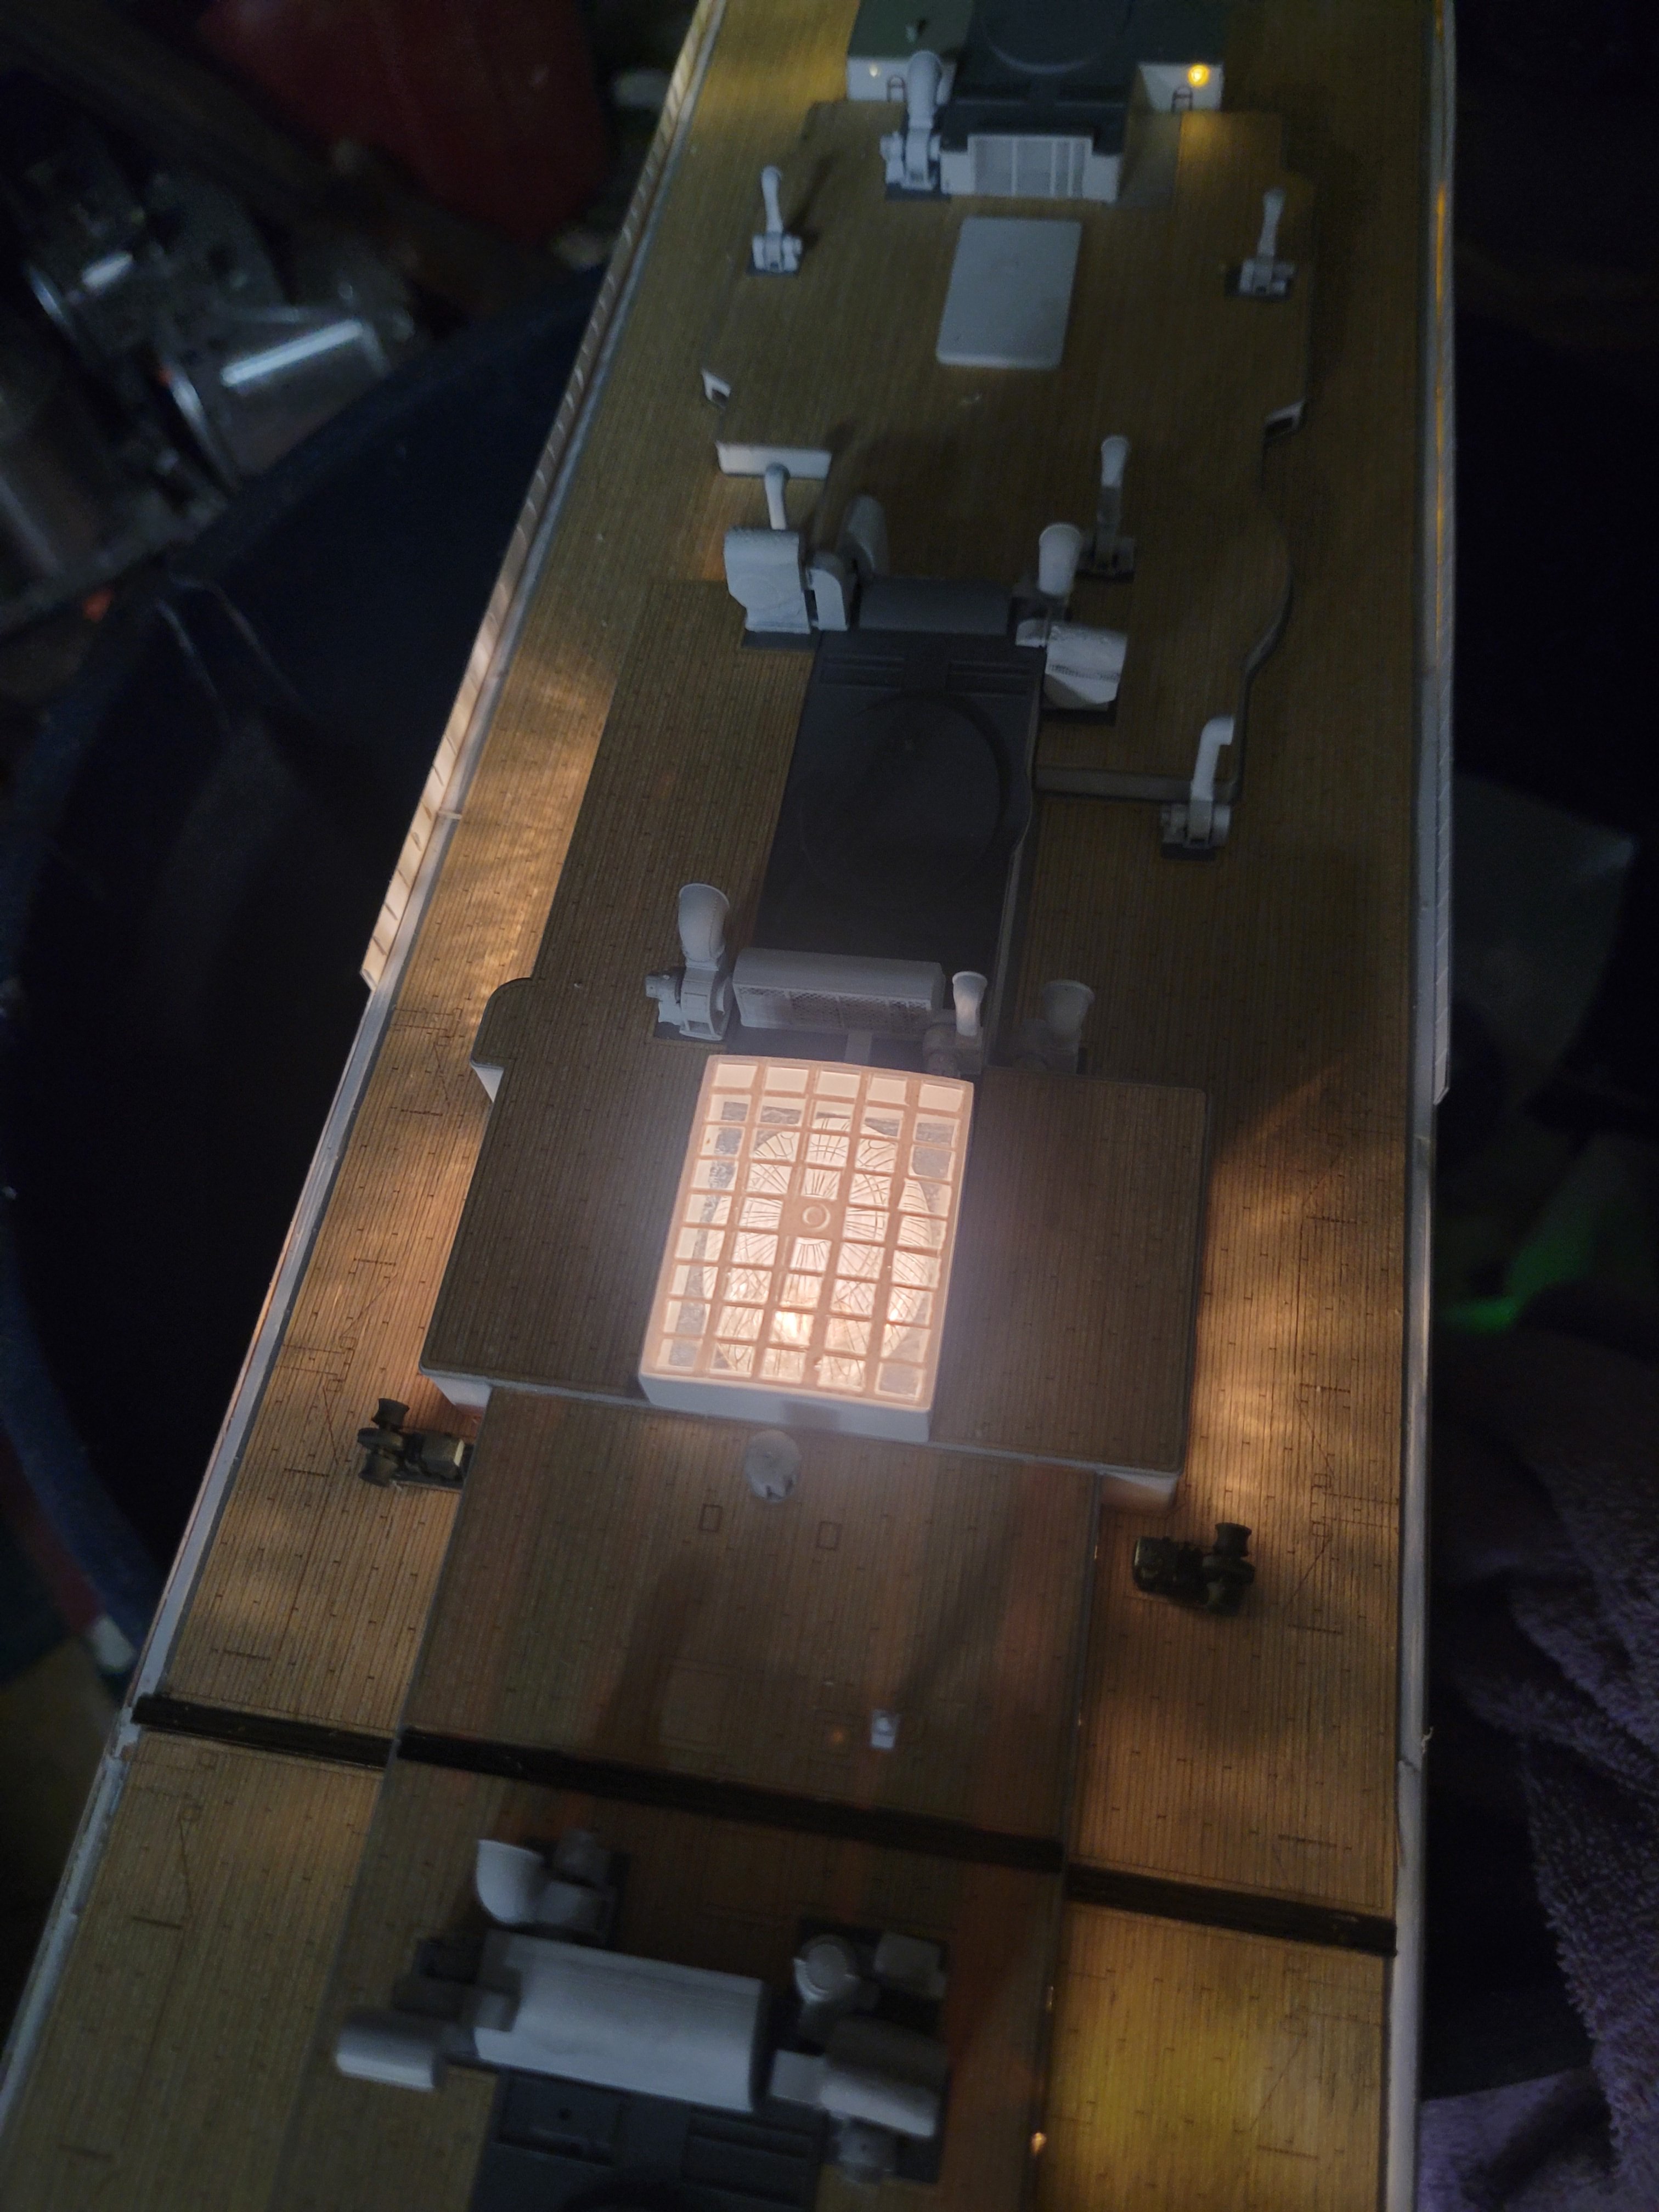
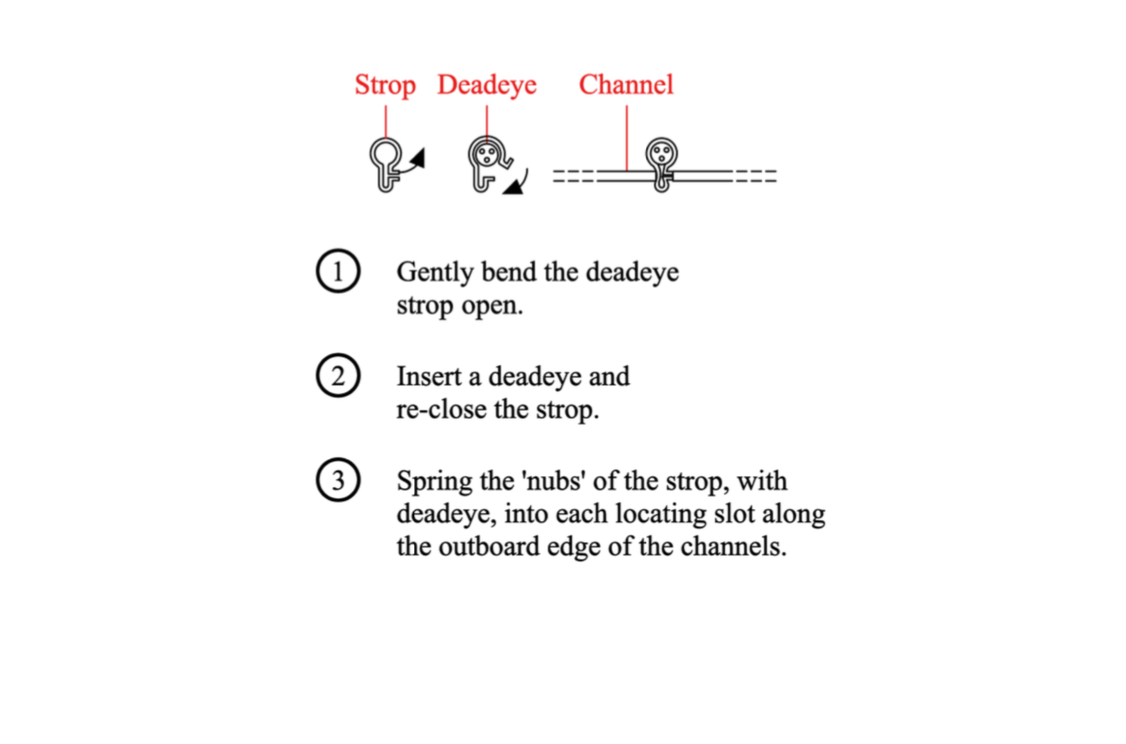
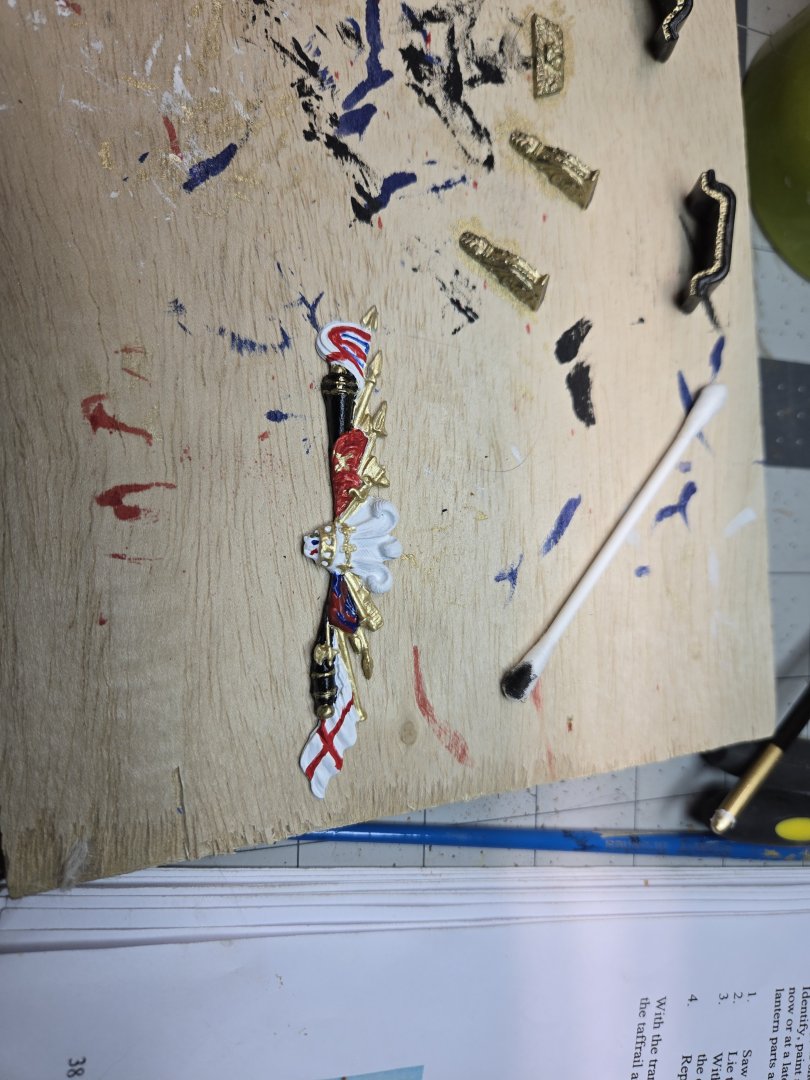
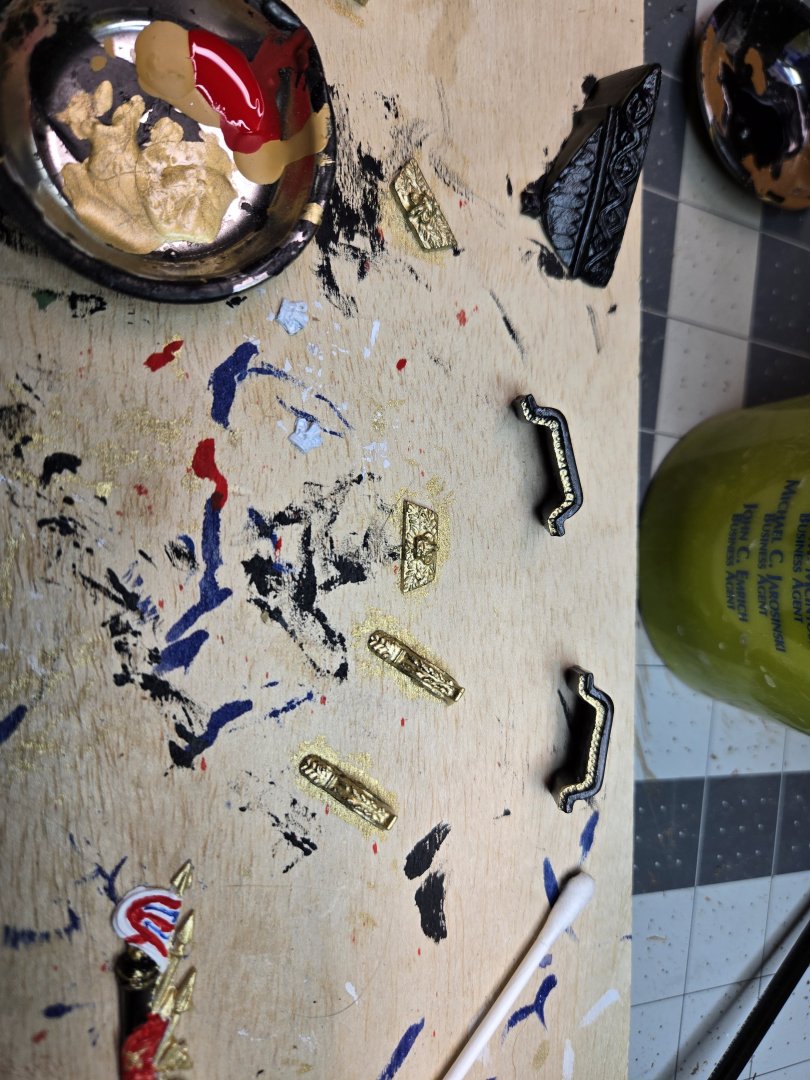
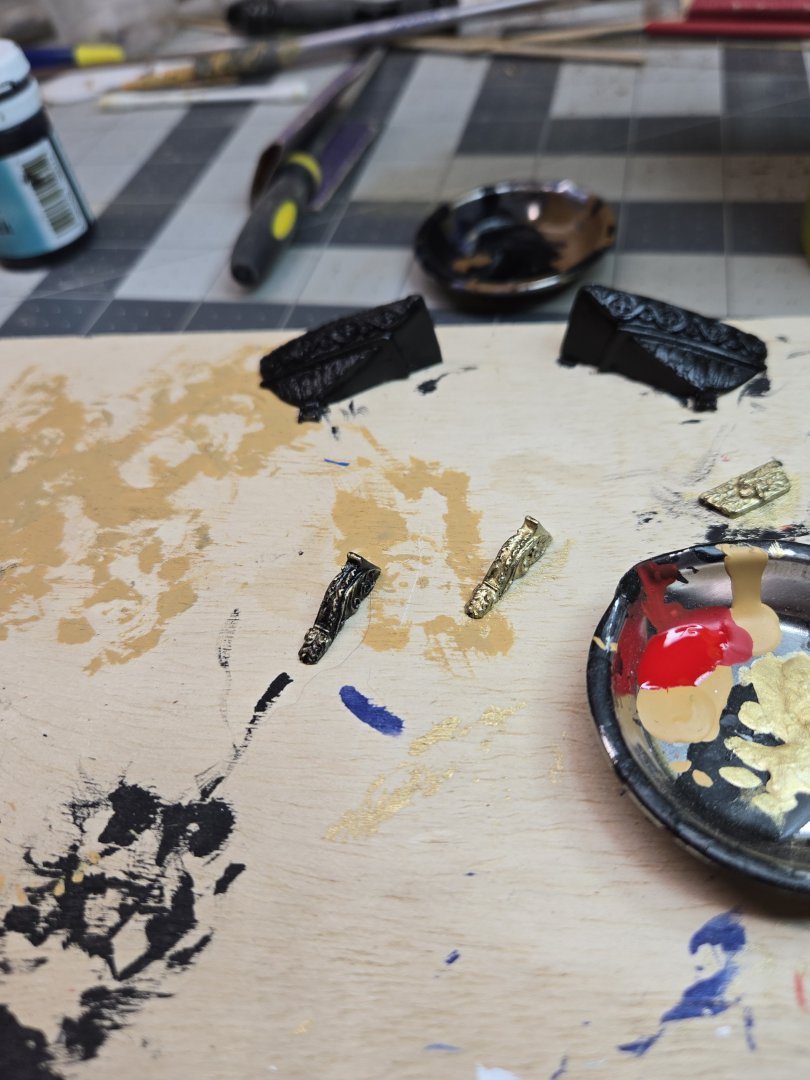
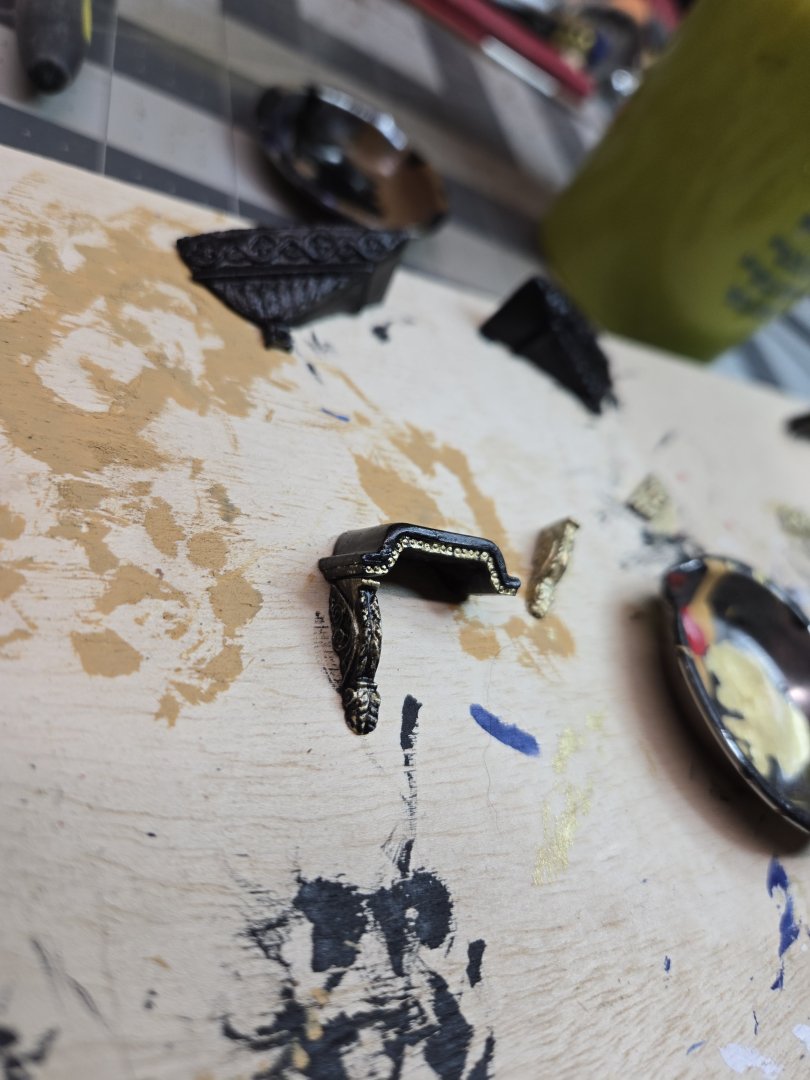
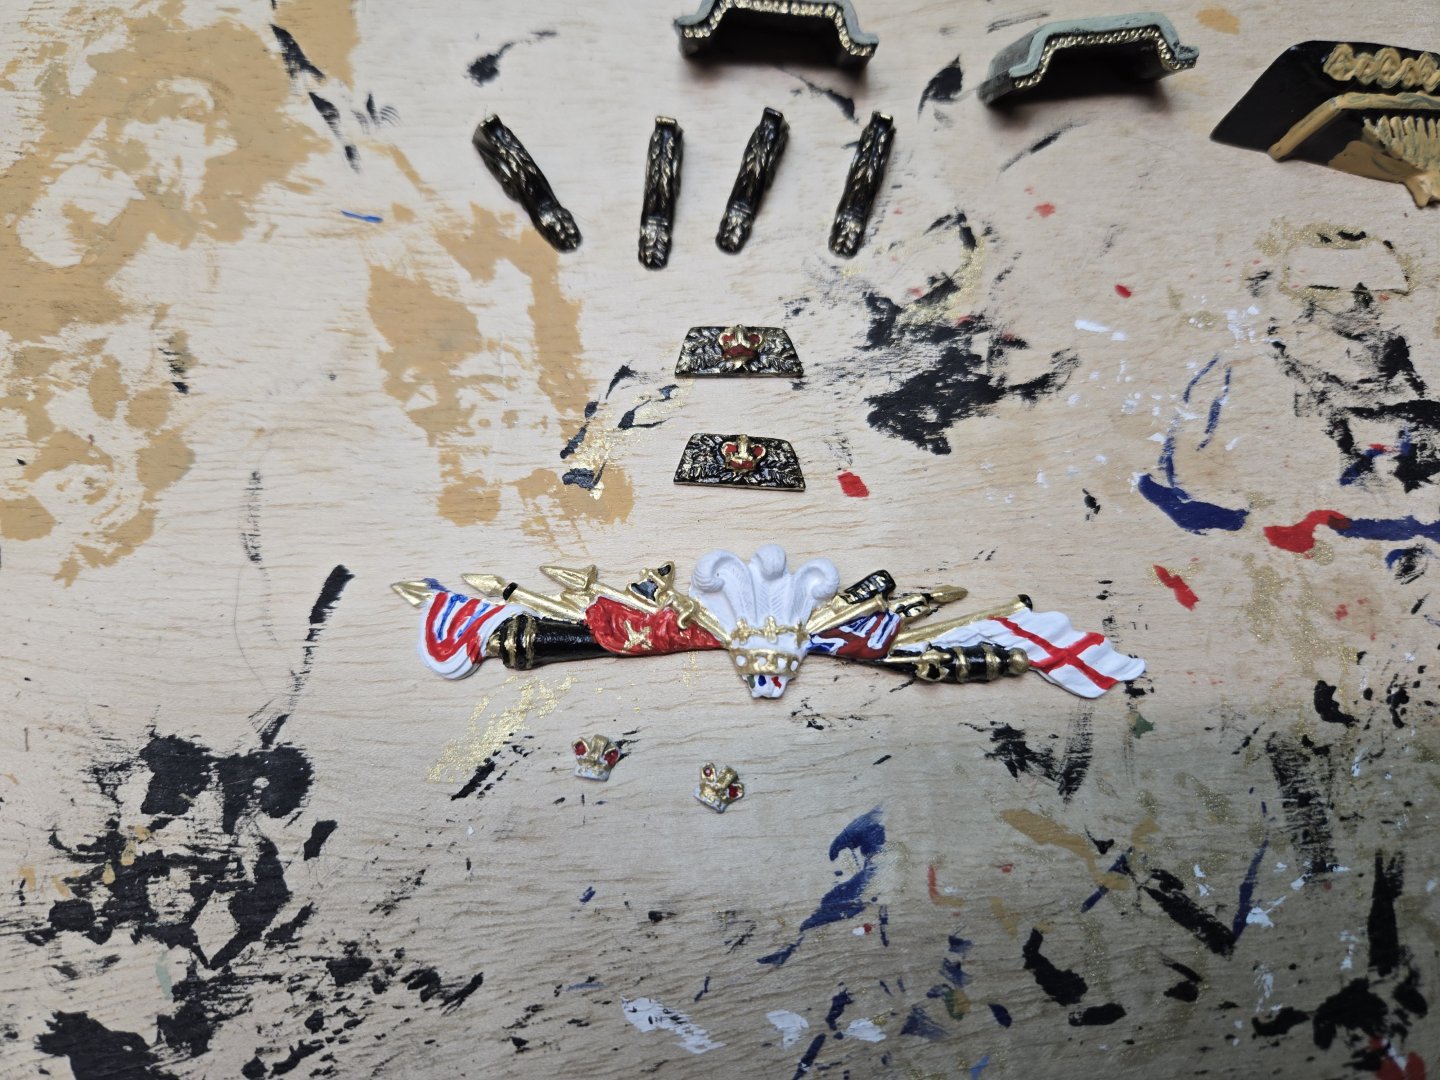
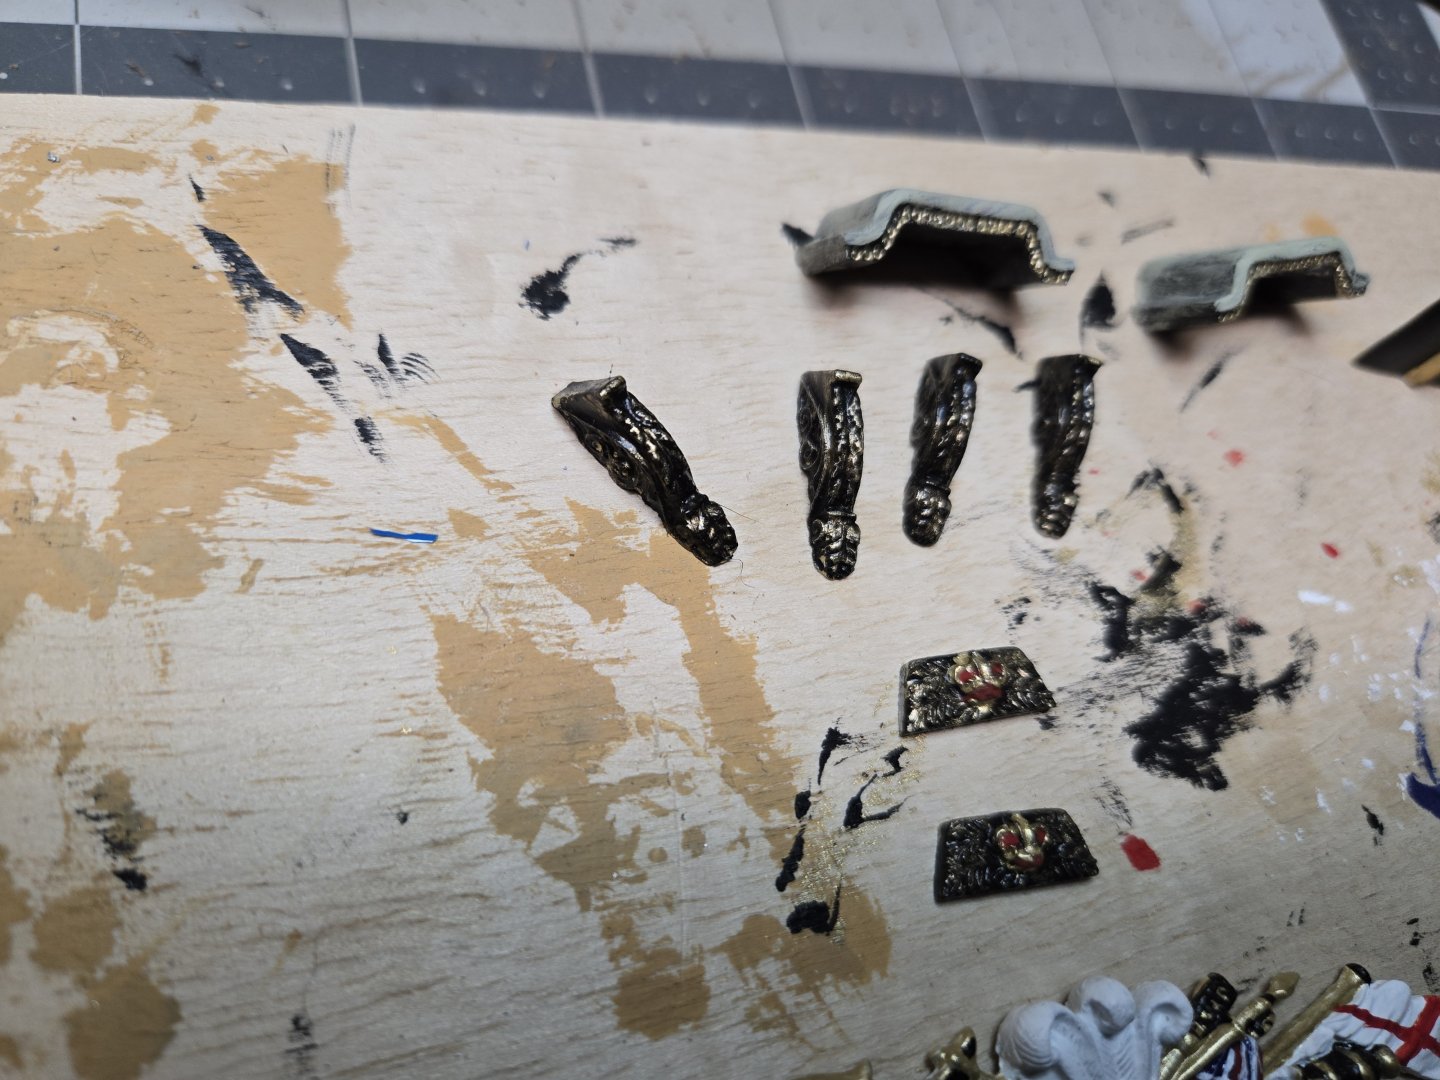
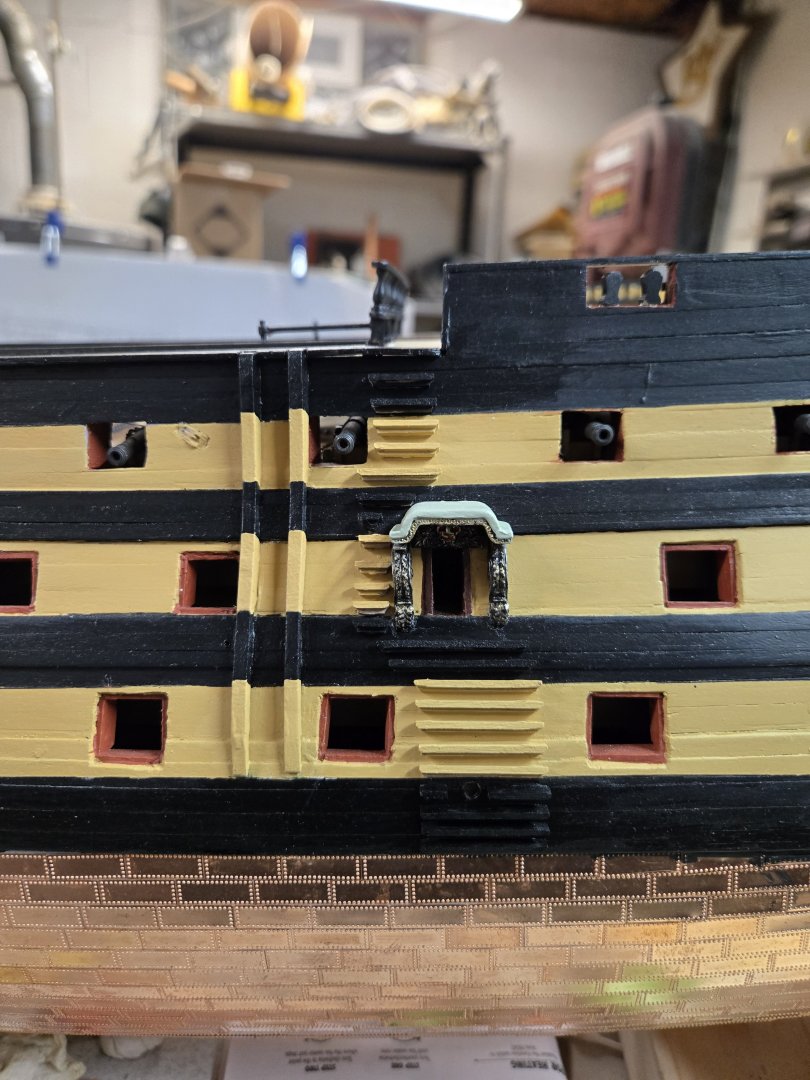
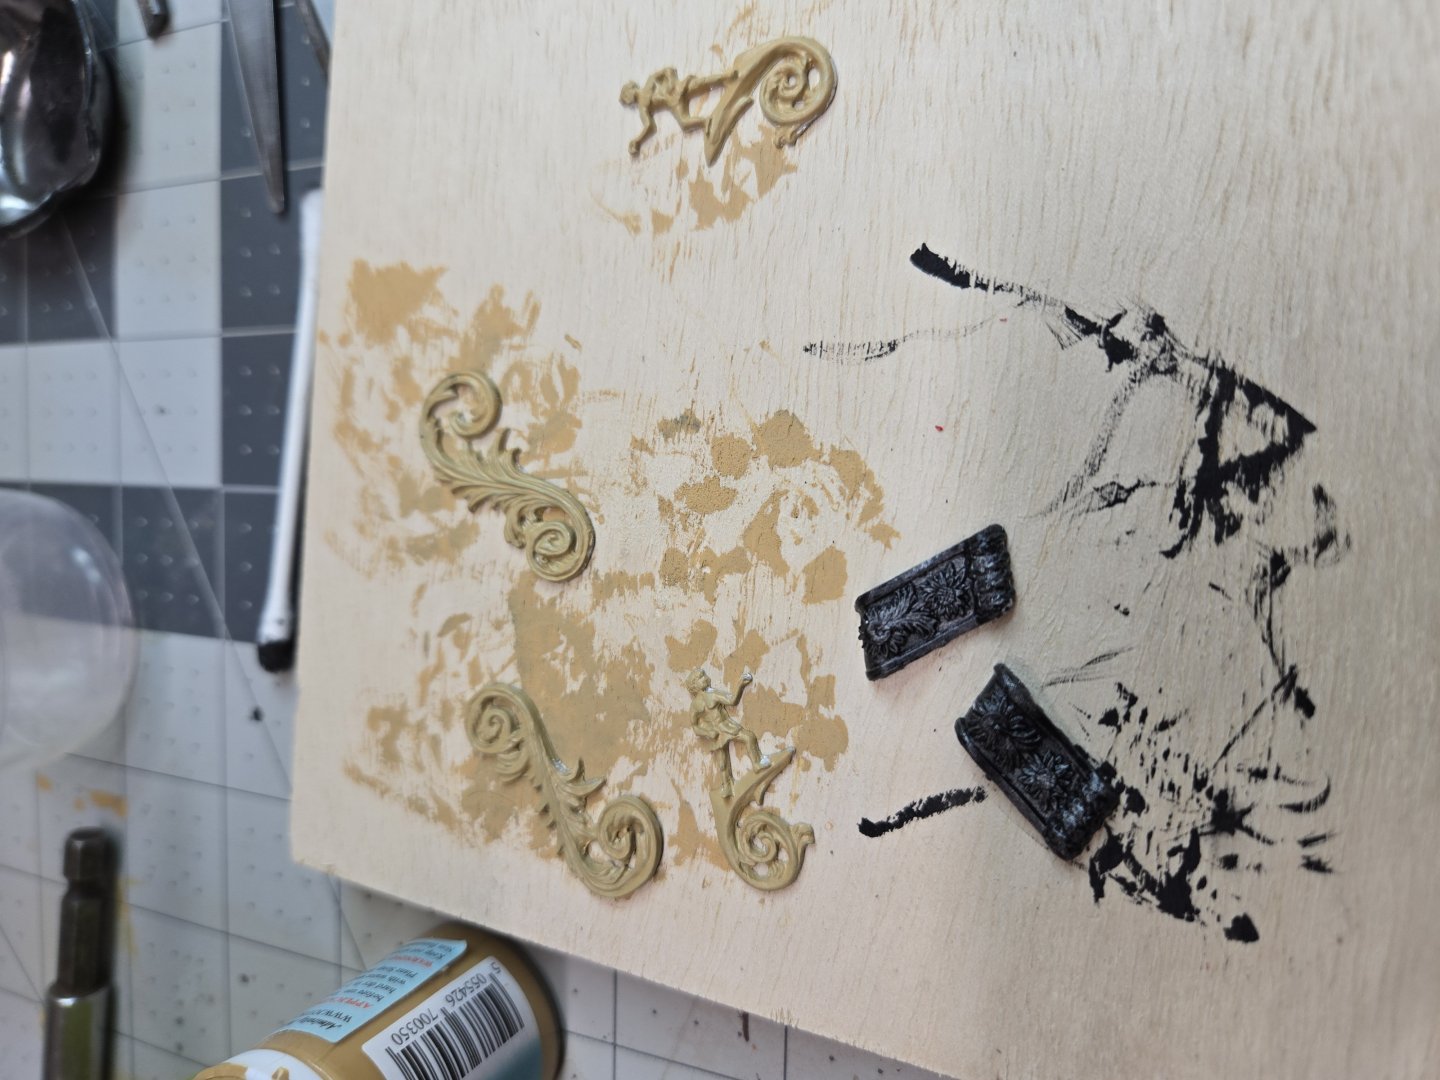
Working on the cast pieces requires some very small brushes and a steady hand. I have some nice 3-0 brushes....but steady hands went away years ago. Again for the trophy, I added the white first, then the black, then the red and blue. Once they dried, I added the gold and began overlapping some detail to the flags, cannons and spears. For the side entrance, there is a LOT of gold detail. But there is no way I could be able to even come close to mimicking it. One of the things I learned when doing the Titanic model was painting the metal work around the huge glass globe that sits above the grand staircases. When they said, was to paint the whole globe black and then almost immediately, wipe away the excess. You'll be left with the groves being black looking like the framing. So I painted the pieces gold and once they dried and painted them black and then wiped it off. It brought out the gold on the high spots. It isn't perfect, but given the scale, I really like it. Again I painted the roof tops gray to simulate the metal sheeting. My failure was in installing the pieces. I should have filed the tops of the side pieces to fit over the wales. Instead, I cut out the bottoms. Once I was done, i glued everything in place. They are a bit off center but they work. Installing the stairs wasn't as easy as it should have been based on my location of the entrances and because they were off center. Also the plans call for a widening gap as the stairs reach the top. I didn't see that, so one side will require a bit of a jump to get over the edge onto the deck!


-
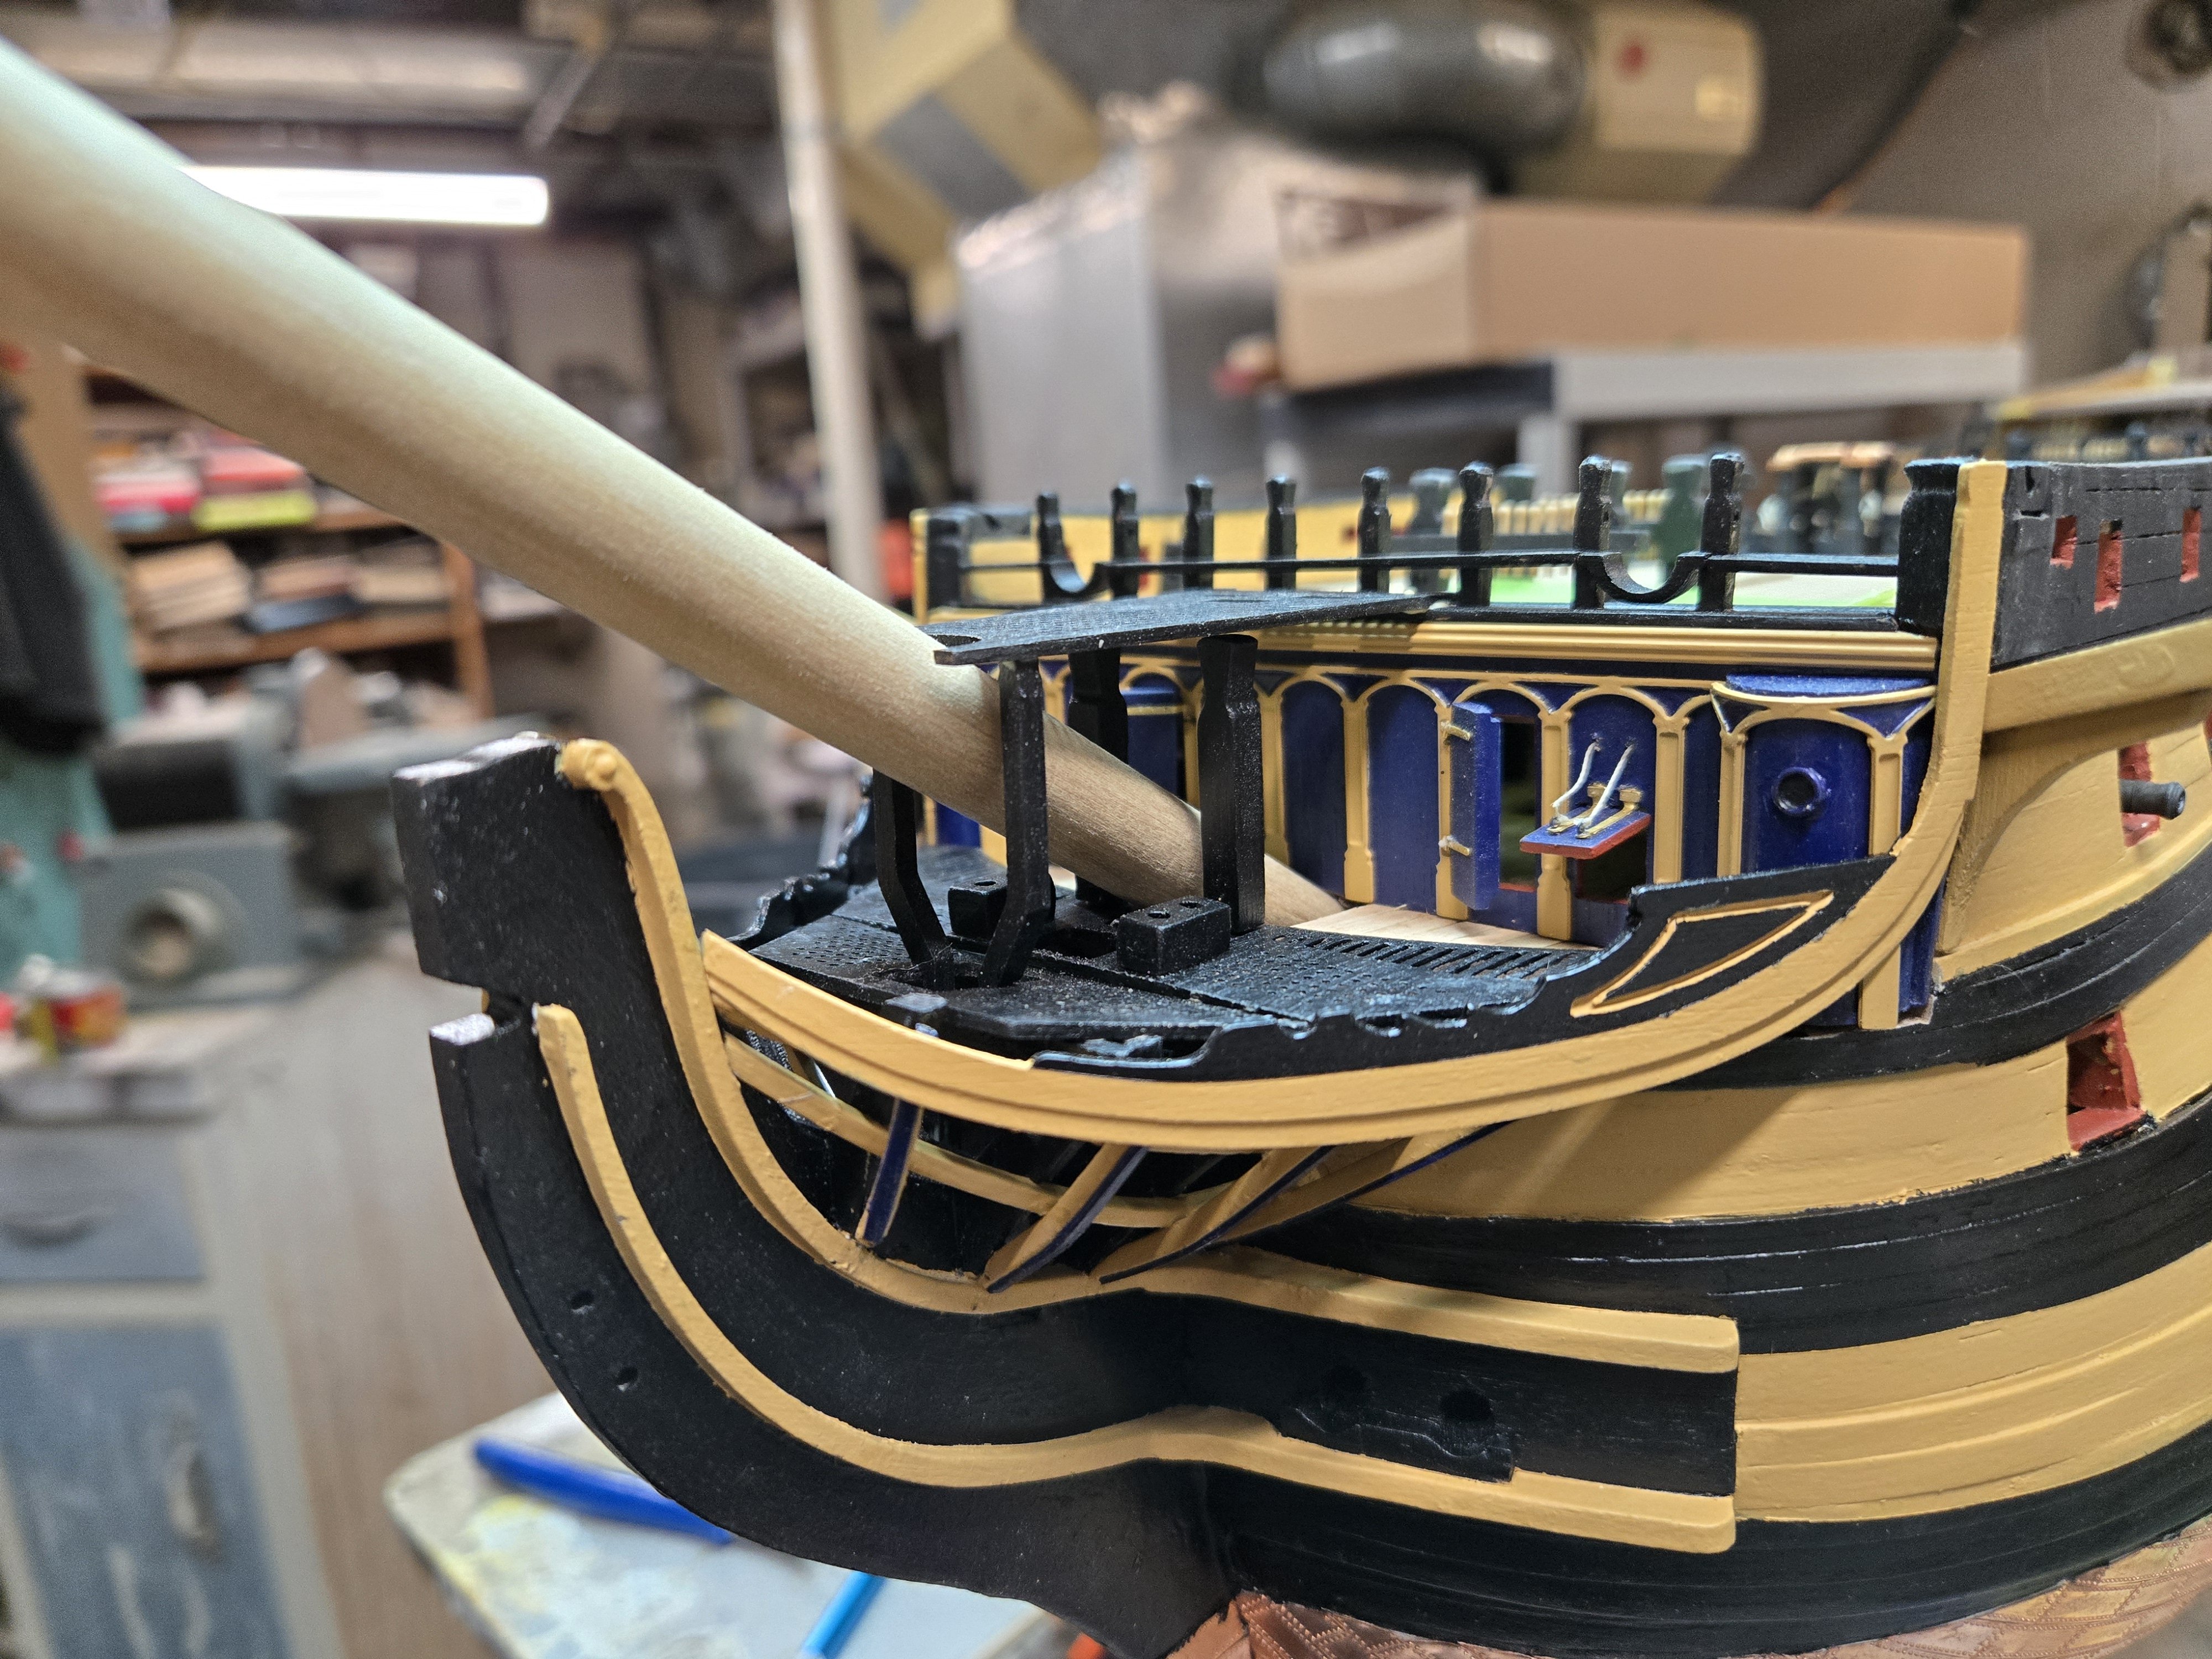
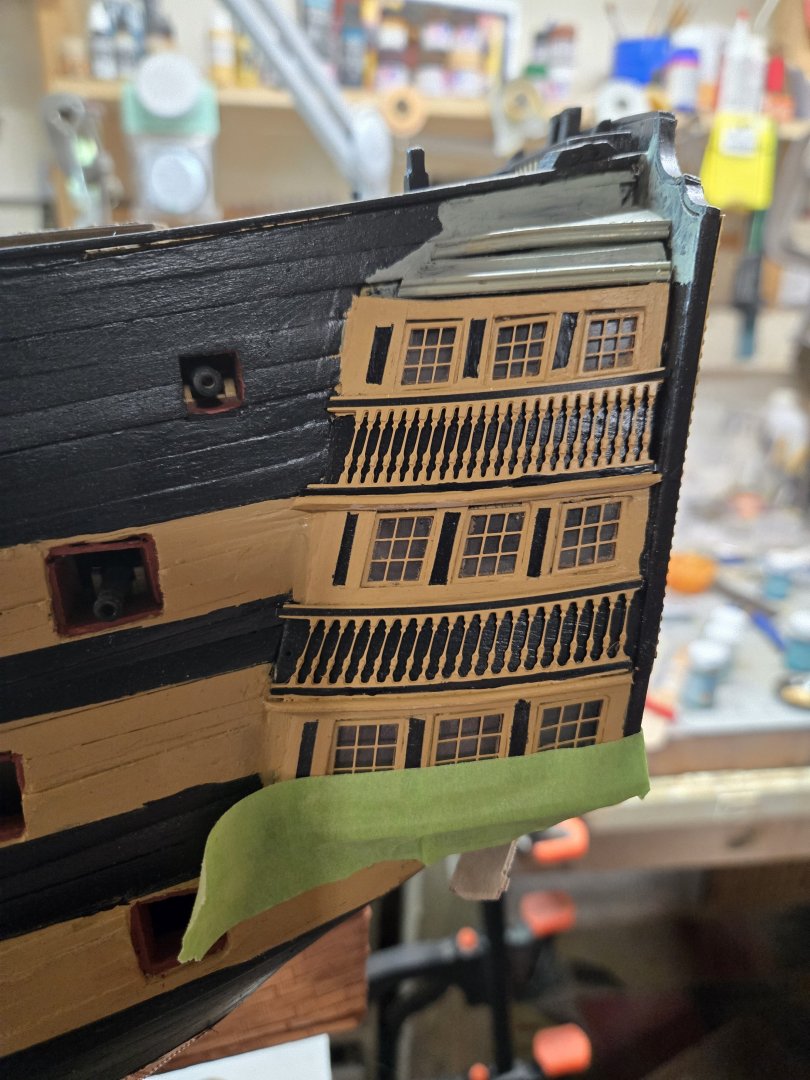
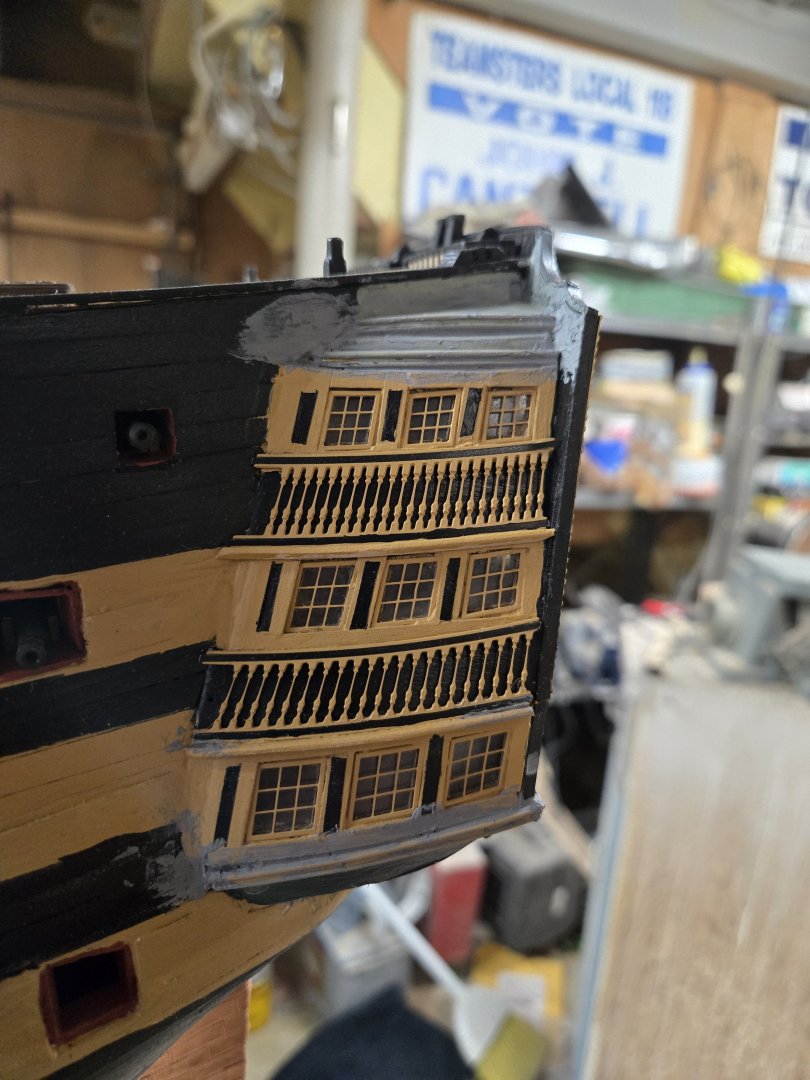
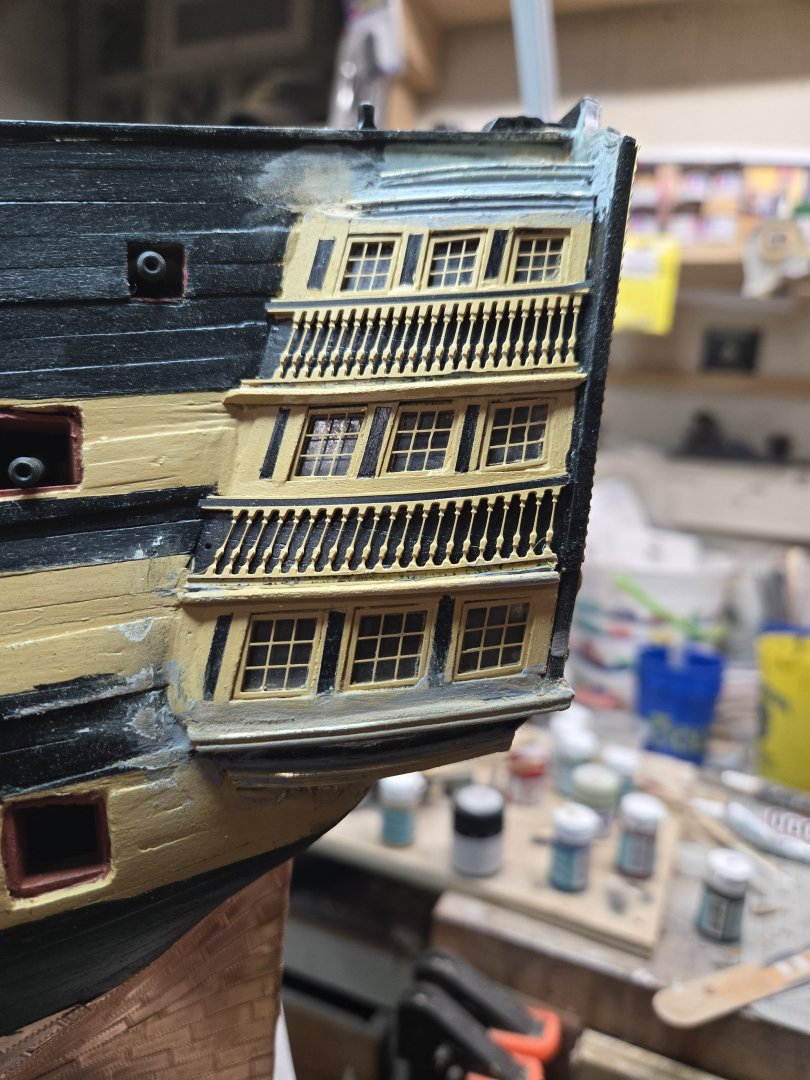
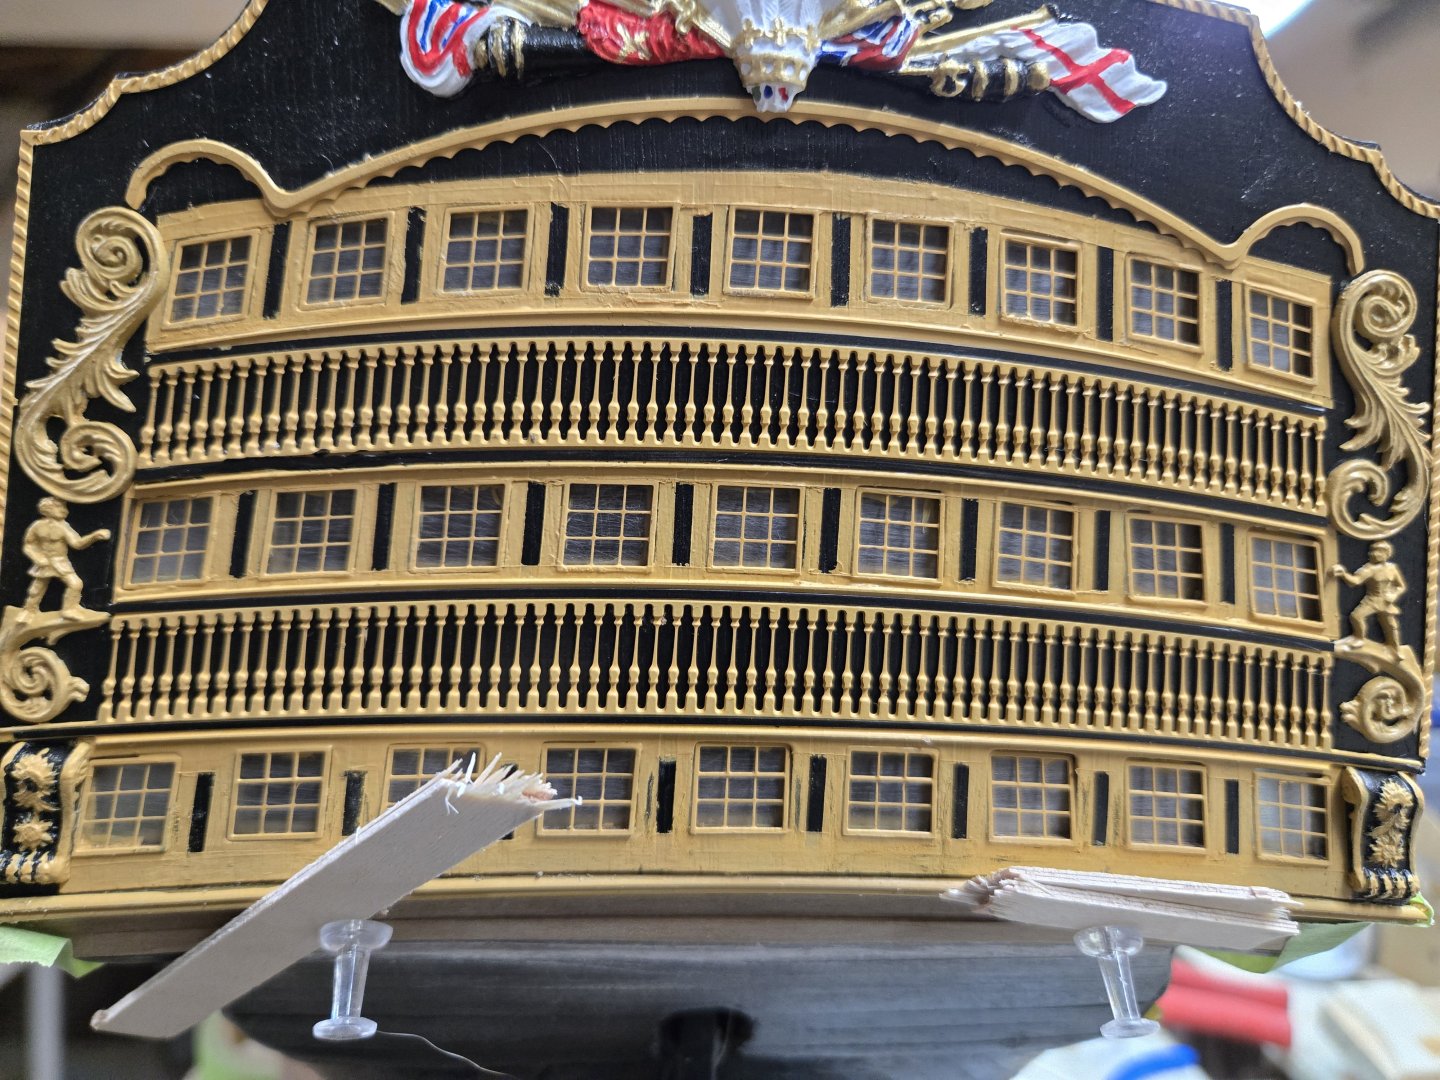
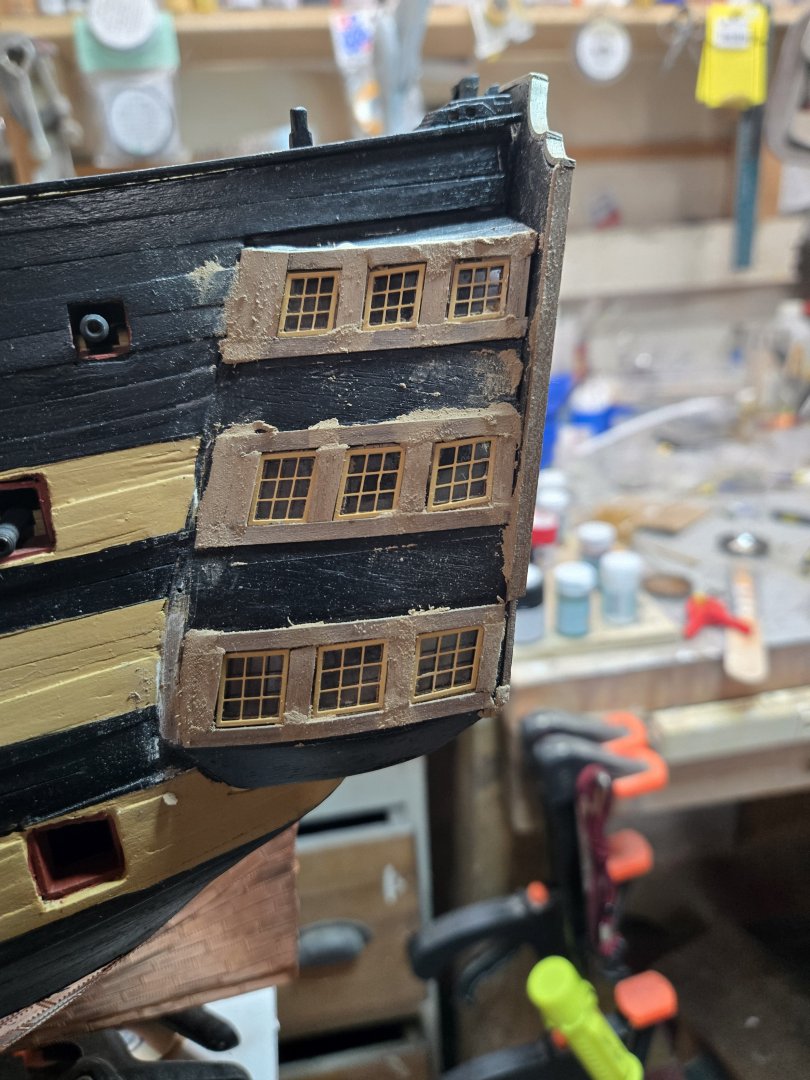
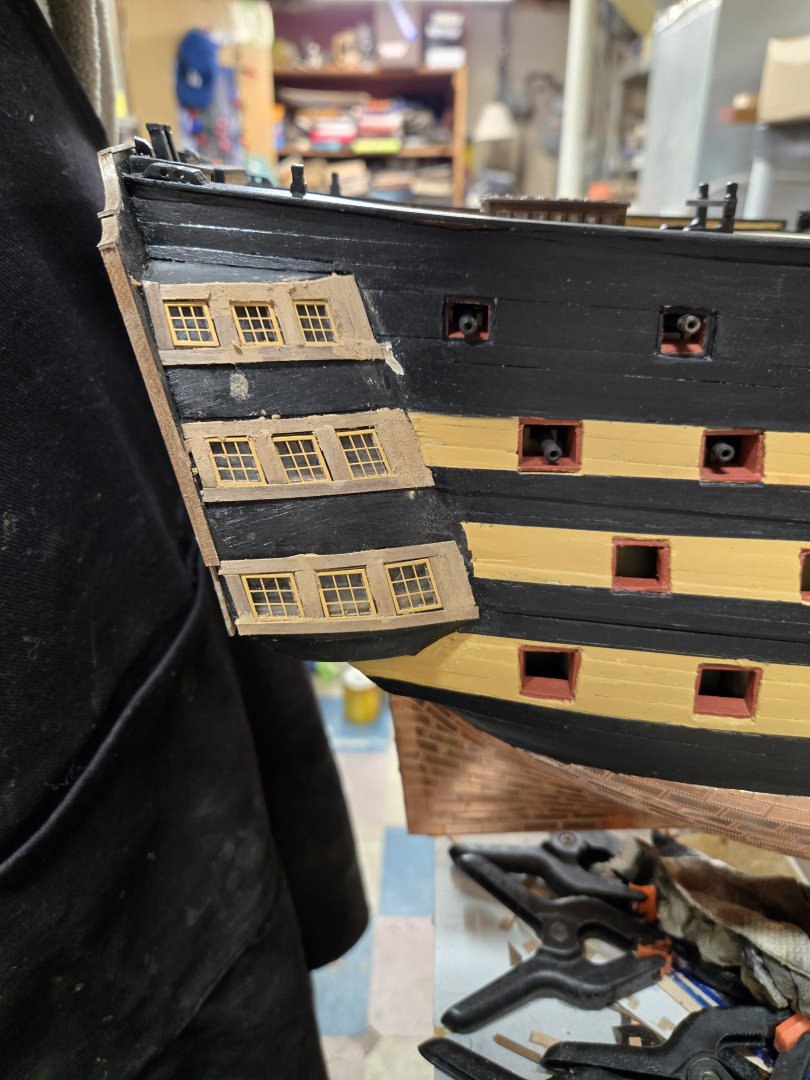
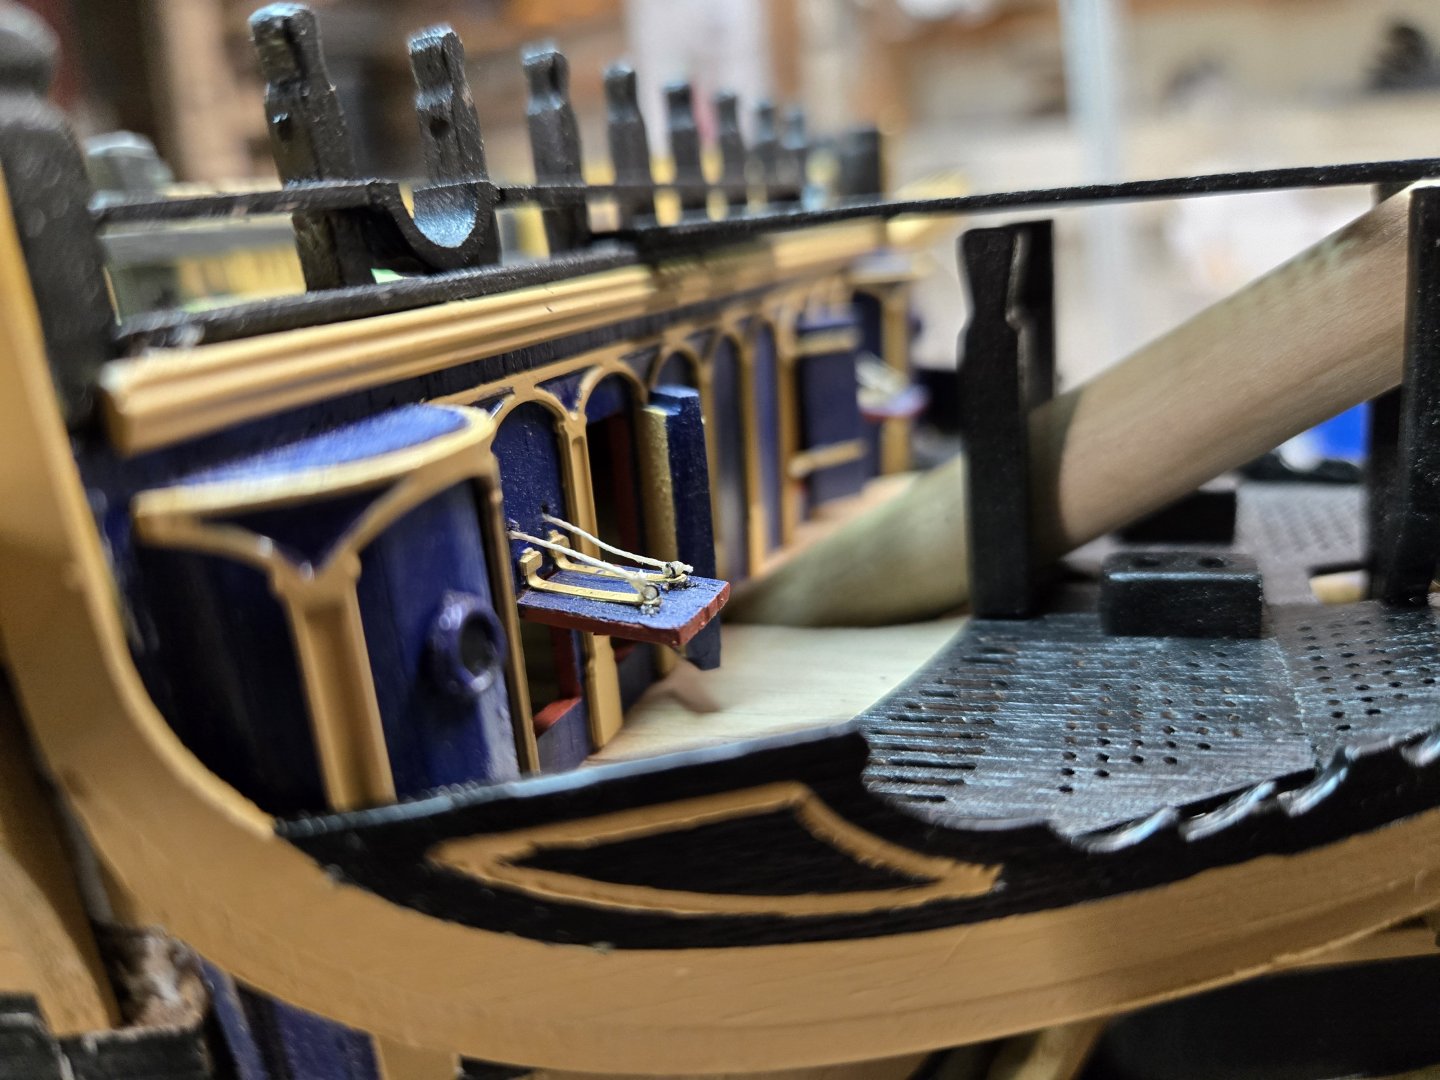
Working on the side galleries was the same problem. I taped off areas so that I could create the black accents. For the ballusters, I added the 1mm styrene painted black. It fit perfectly. To make the balusters fit, I needed to trim some off the side. Again, you can see that even though I added extra wood strips to create a recess, I didn't get the PE frames to fit neatly. There are gaps and the painting is uneven. I also added a strip of wood which I rounded off for the bottoms of the balusters. It does create some depth. The current HMS Victory have a tin/copper plated roof on the galleries. I opted to copy that as I liked the look a bit. It is the same color I used on the side entrance tops. I also worked on the profiles and used the filler to smooth things out. When doing so, I made a mess of some of the black accents on the balusters, so I removed them with the intent of adding new ones. This also allowed me to sand some areas and repaint a lot of it to clean things up. I added the styrene strips to the lower frames and cleaned up the lines. There will be more touching up as everything dries into place, but it is a bit better than my first run.


-
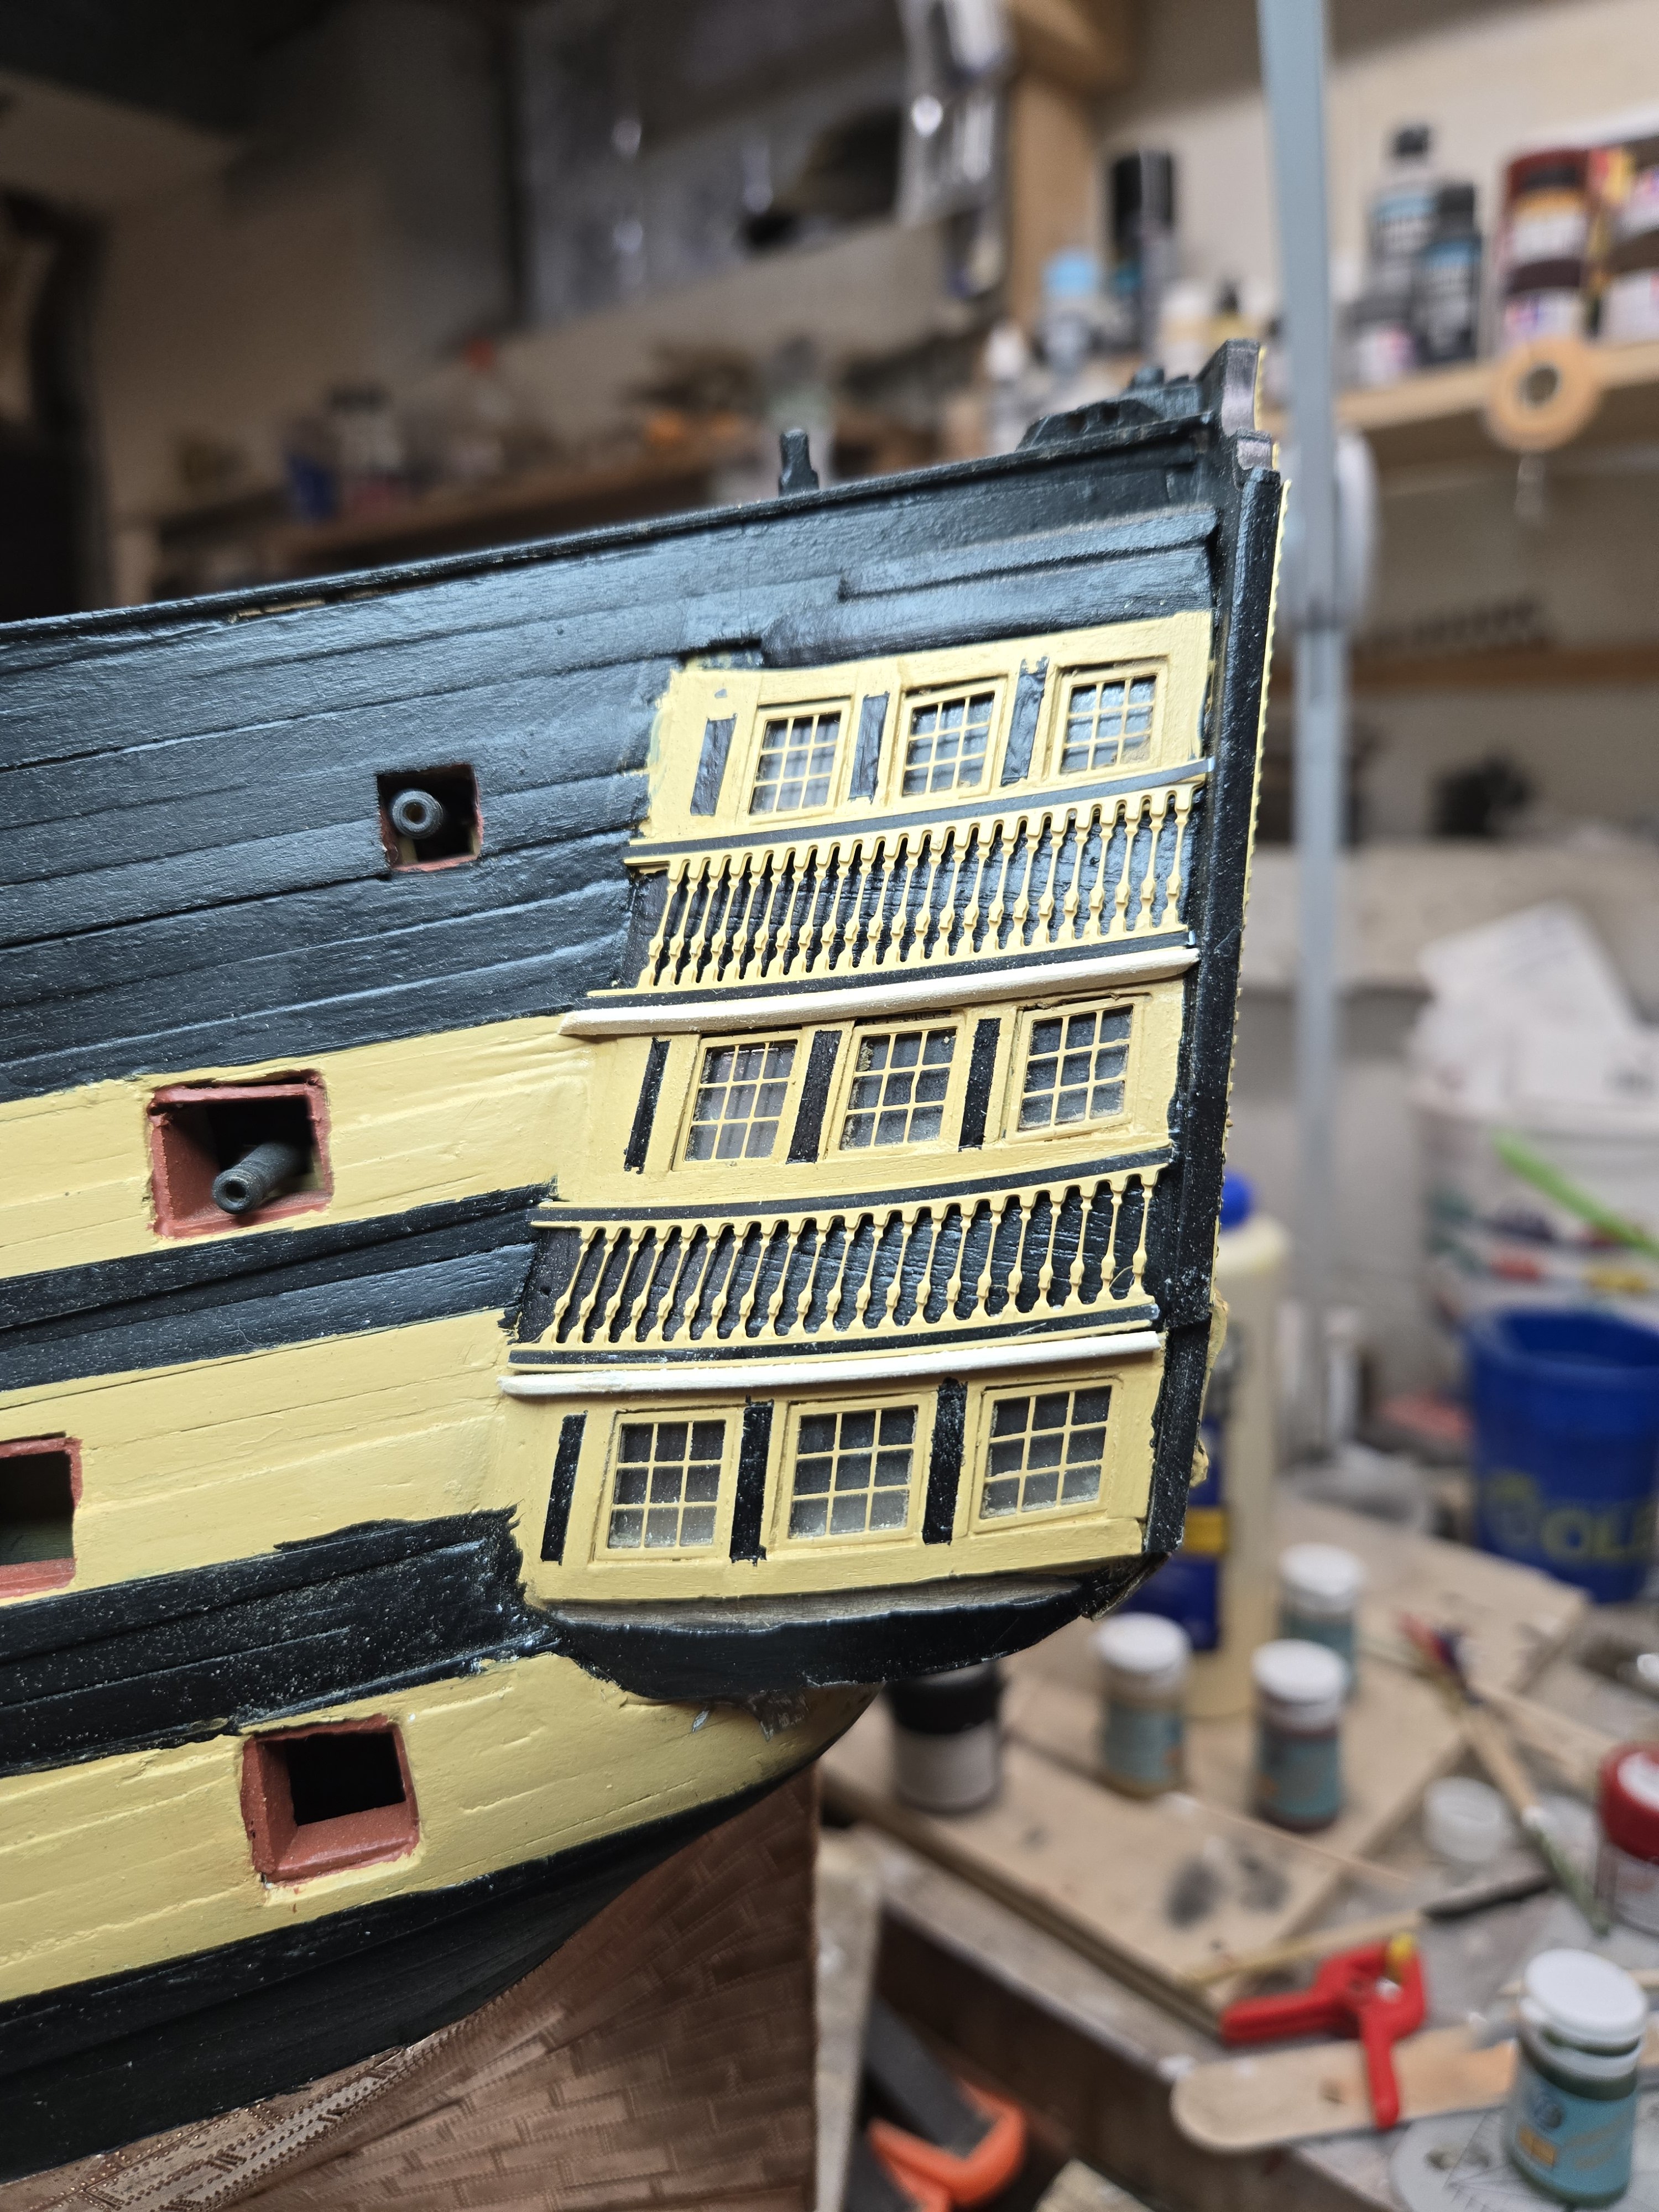
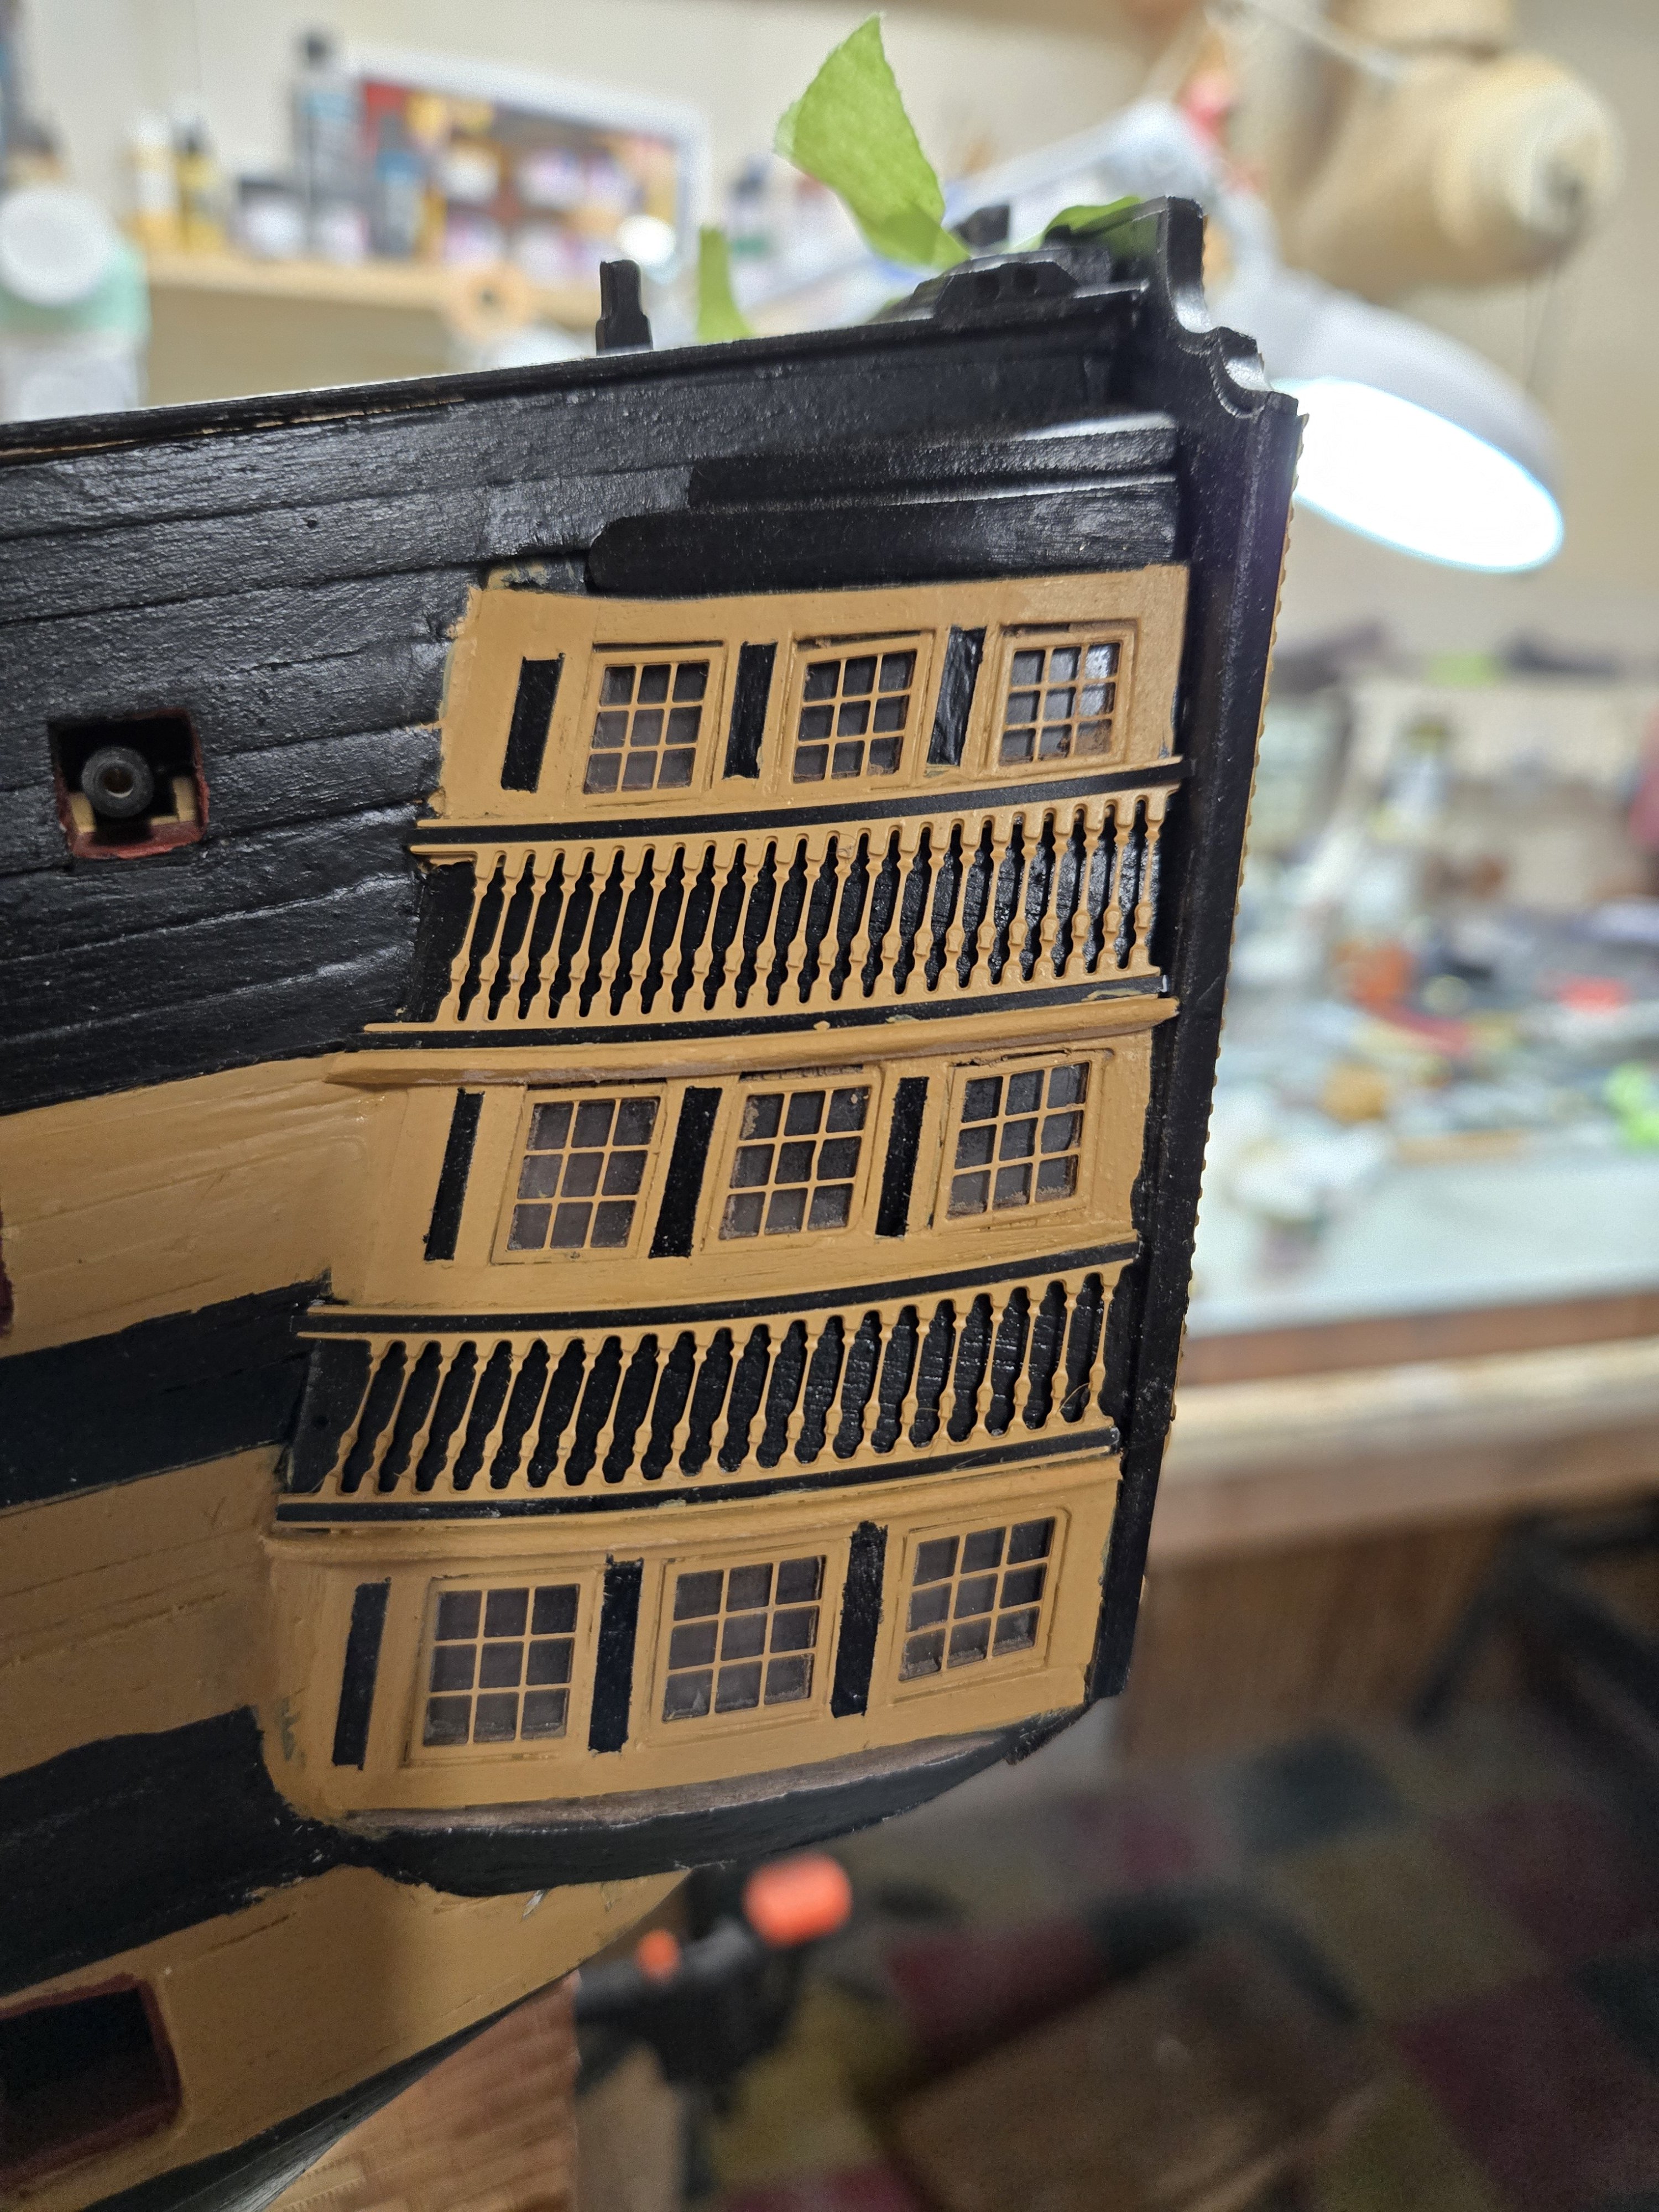
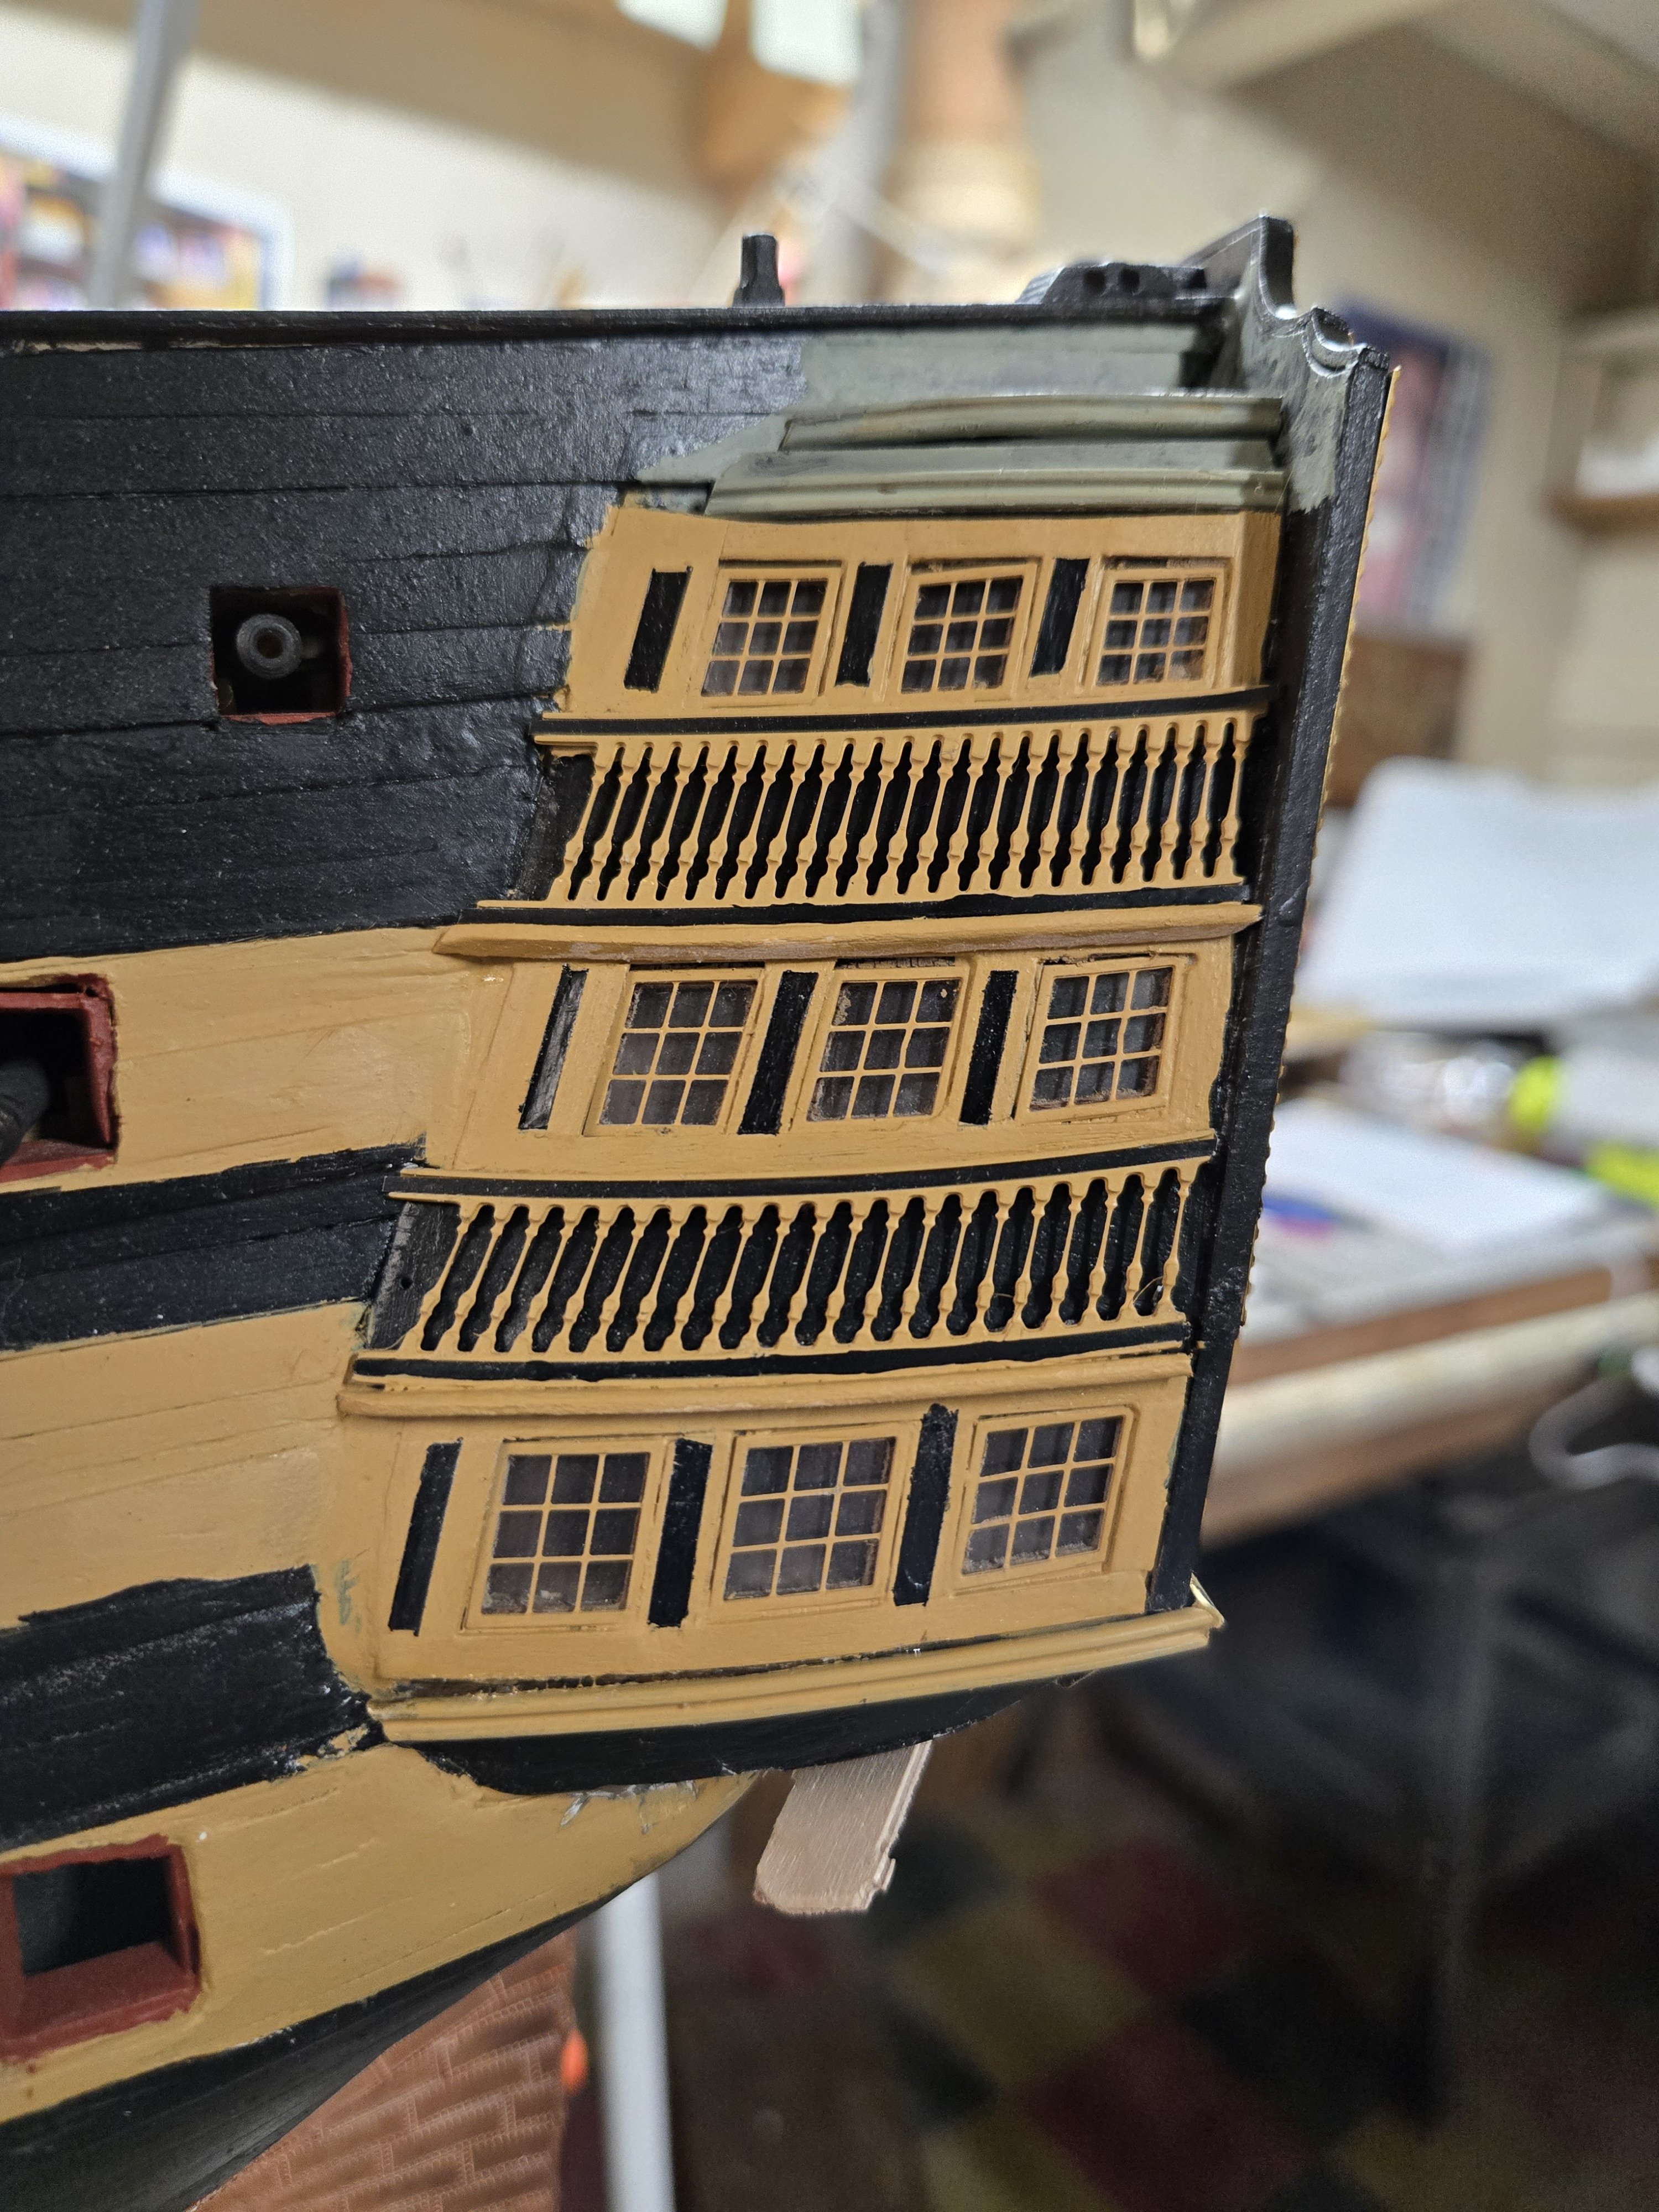
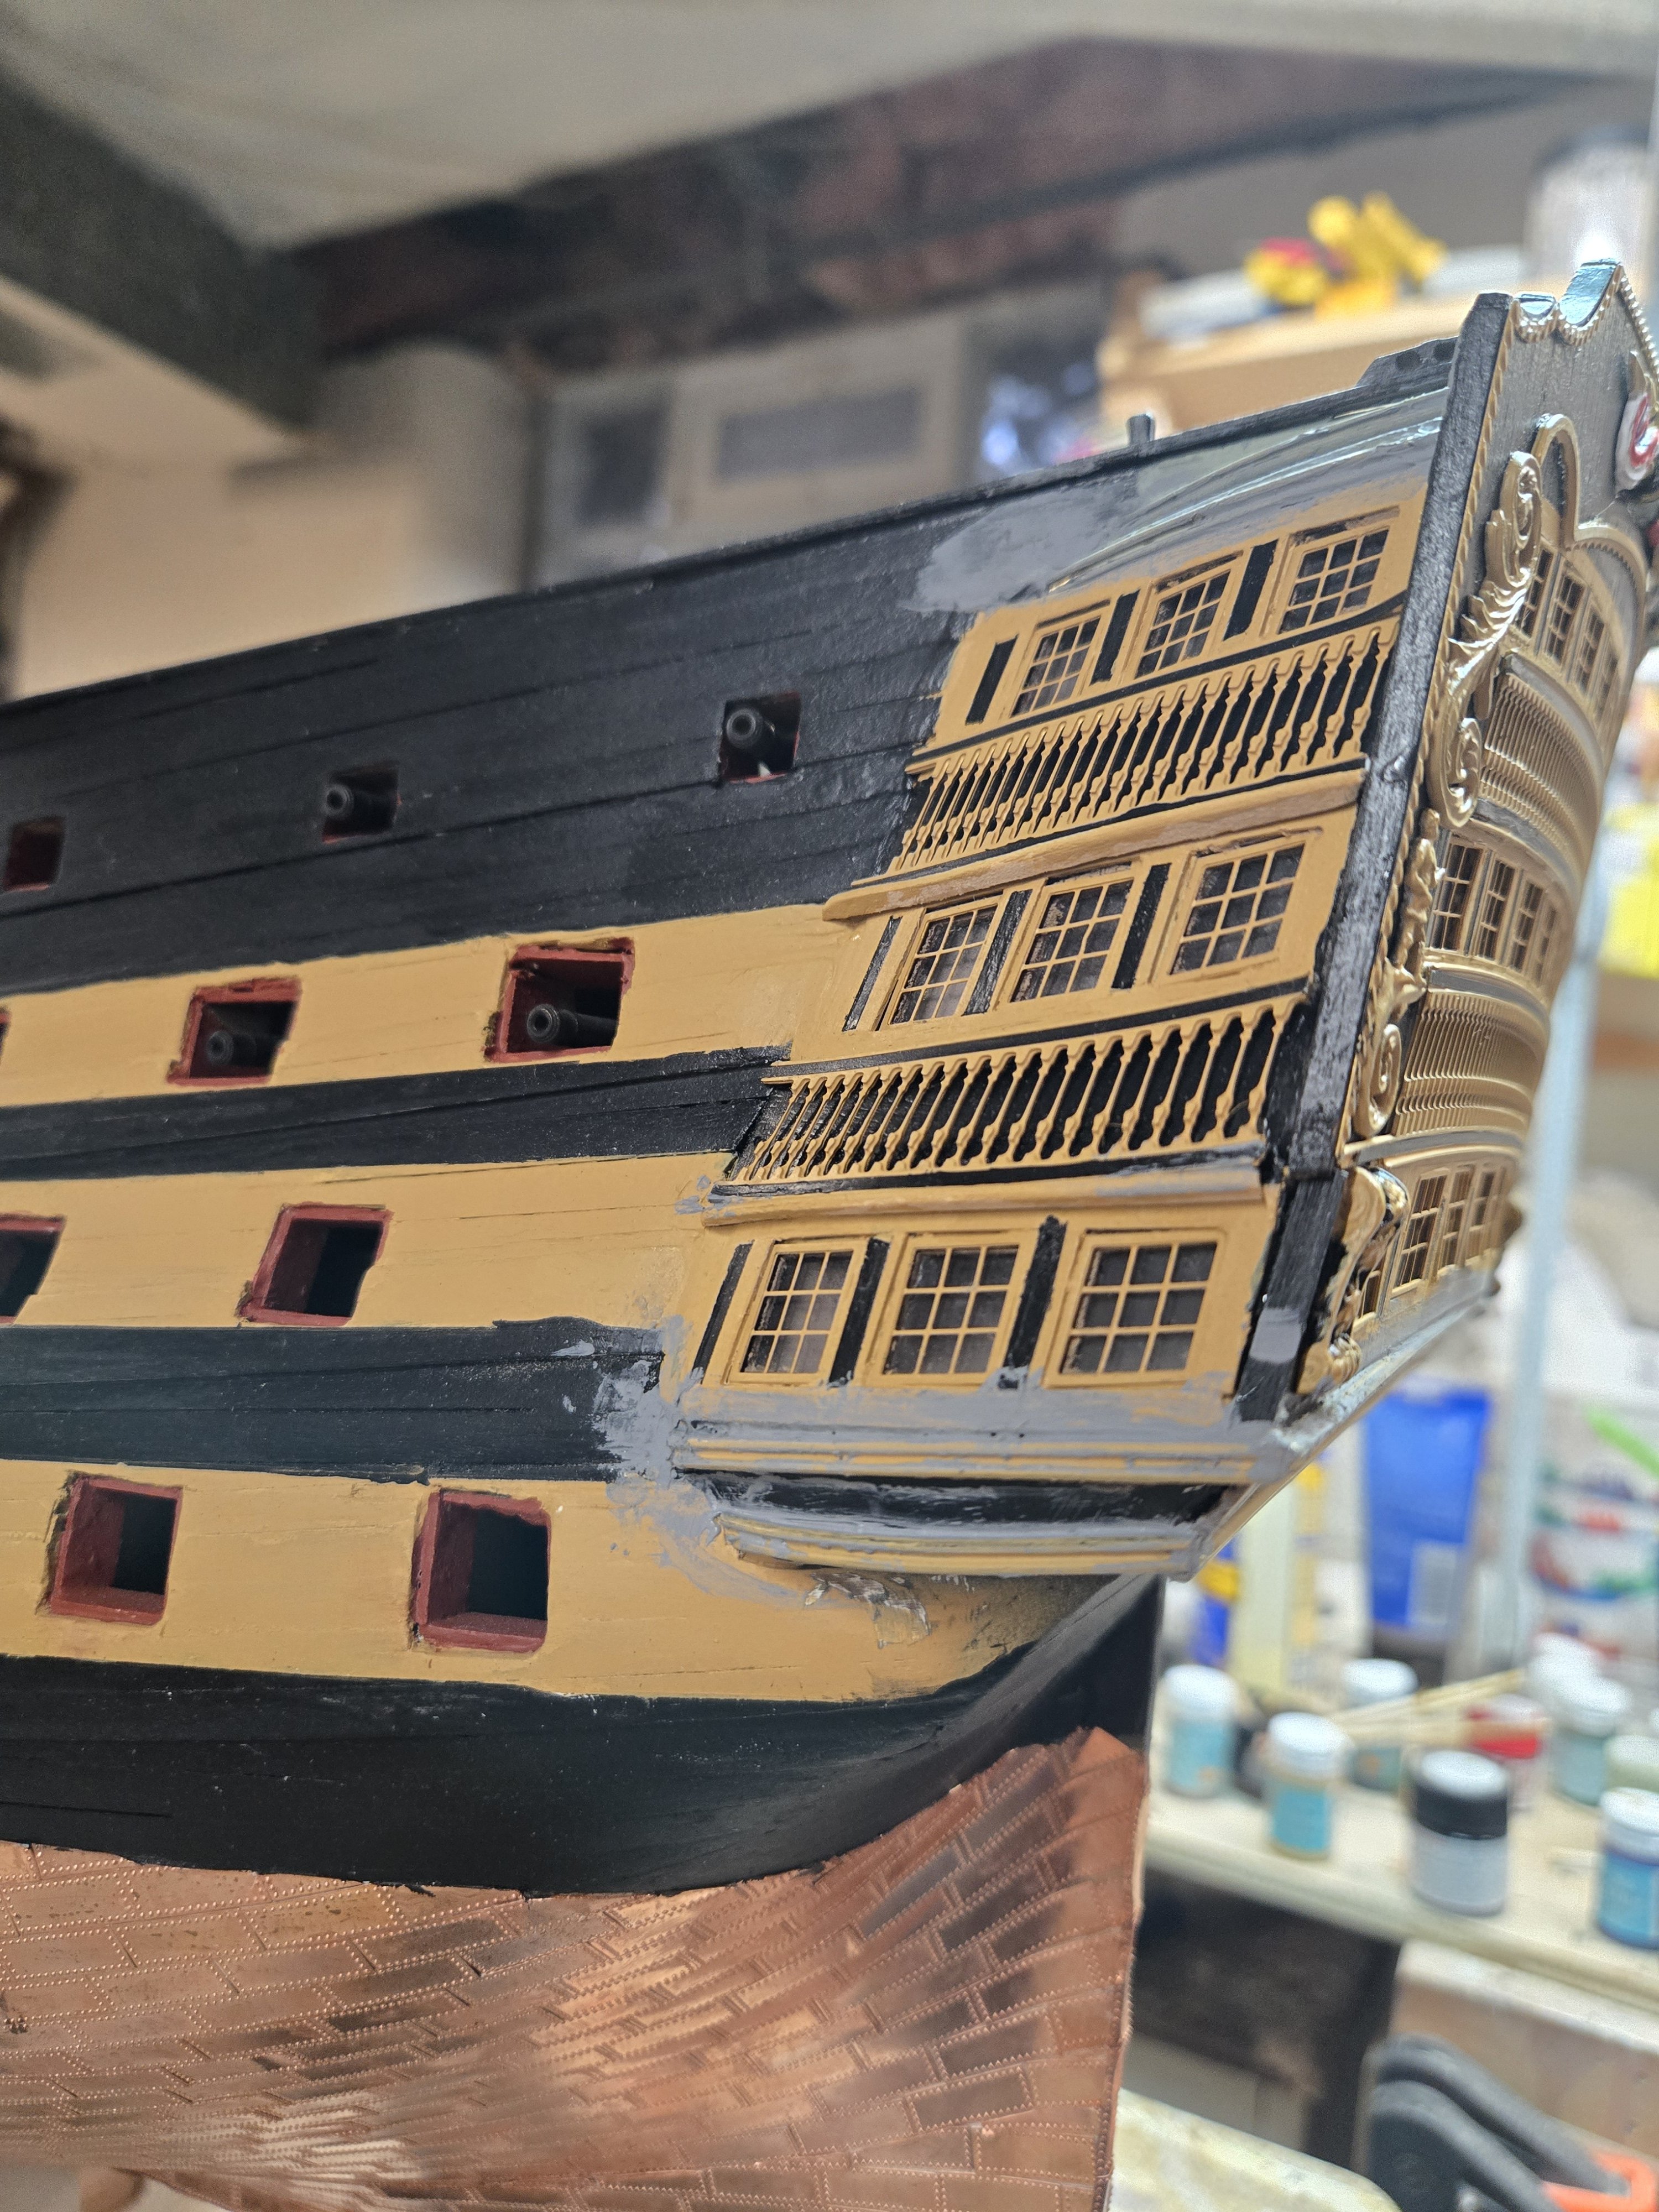
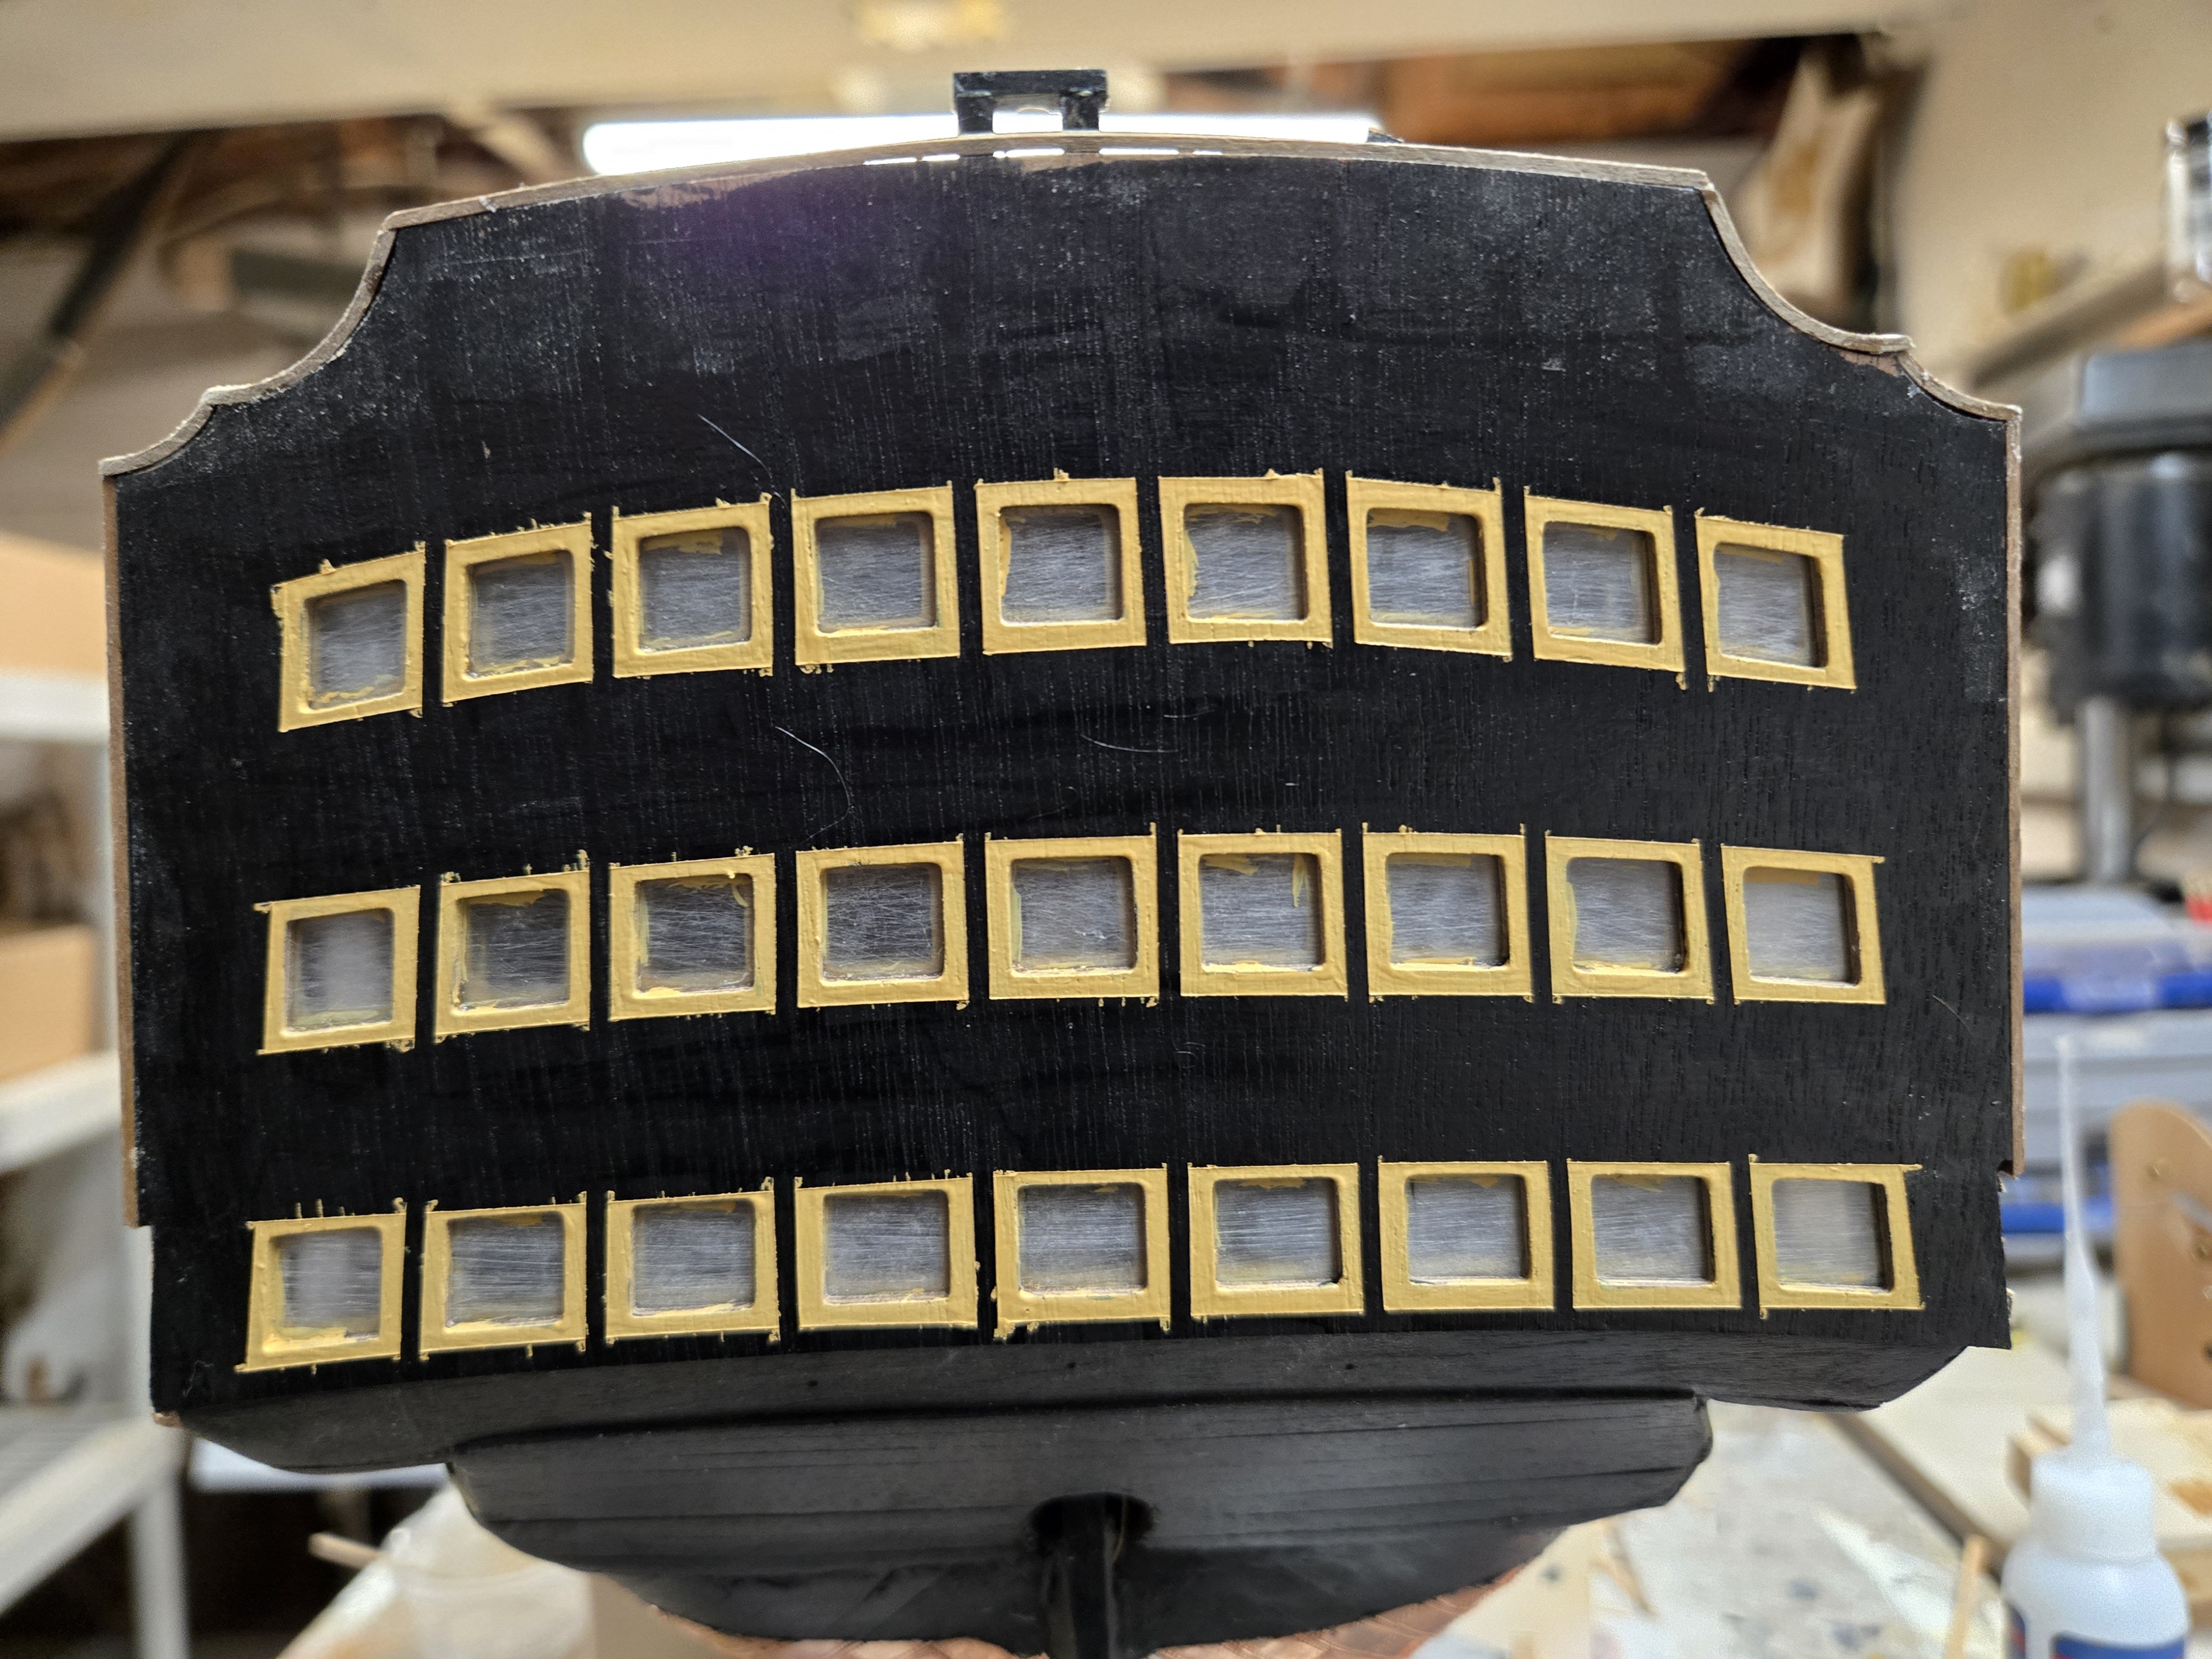
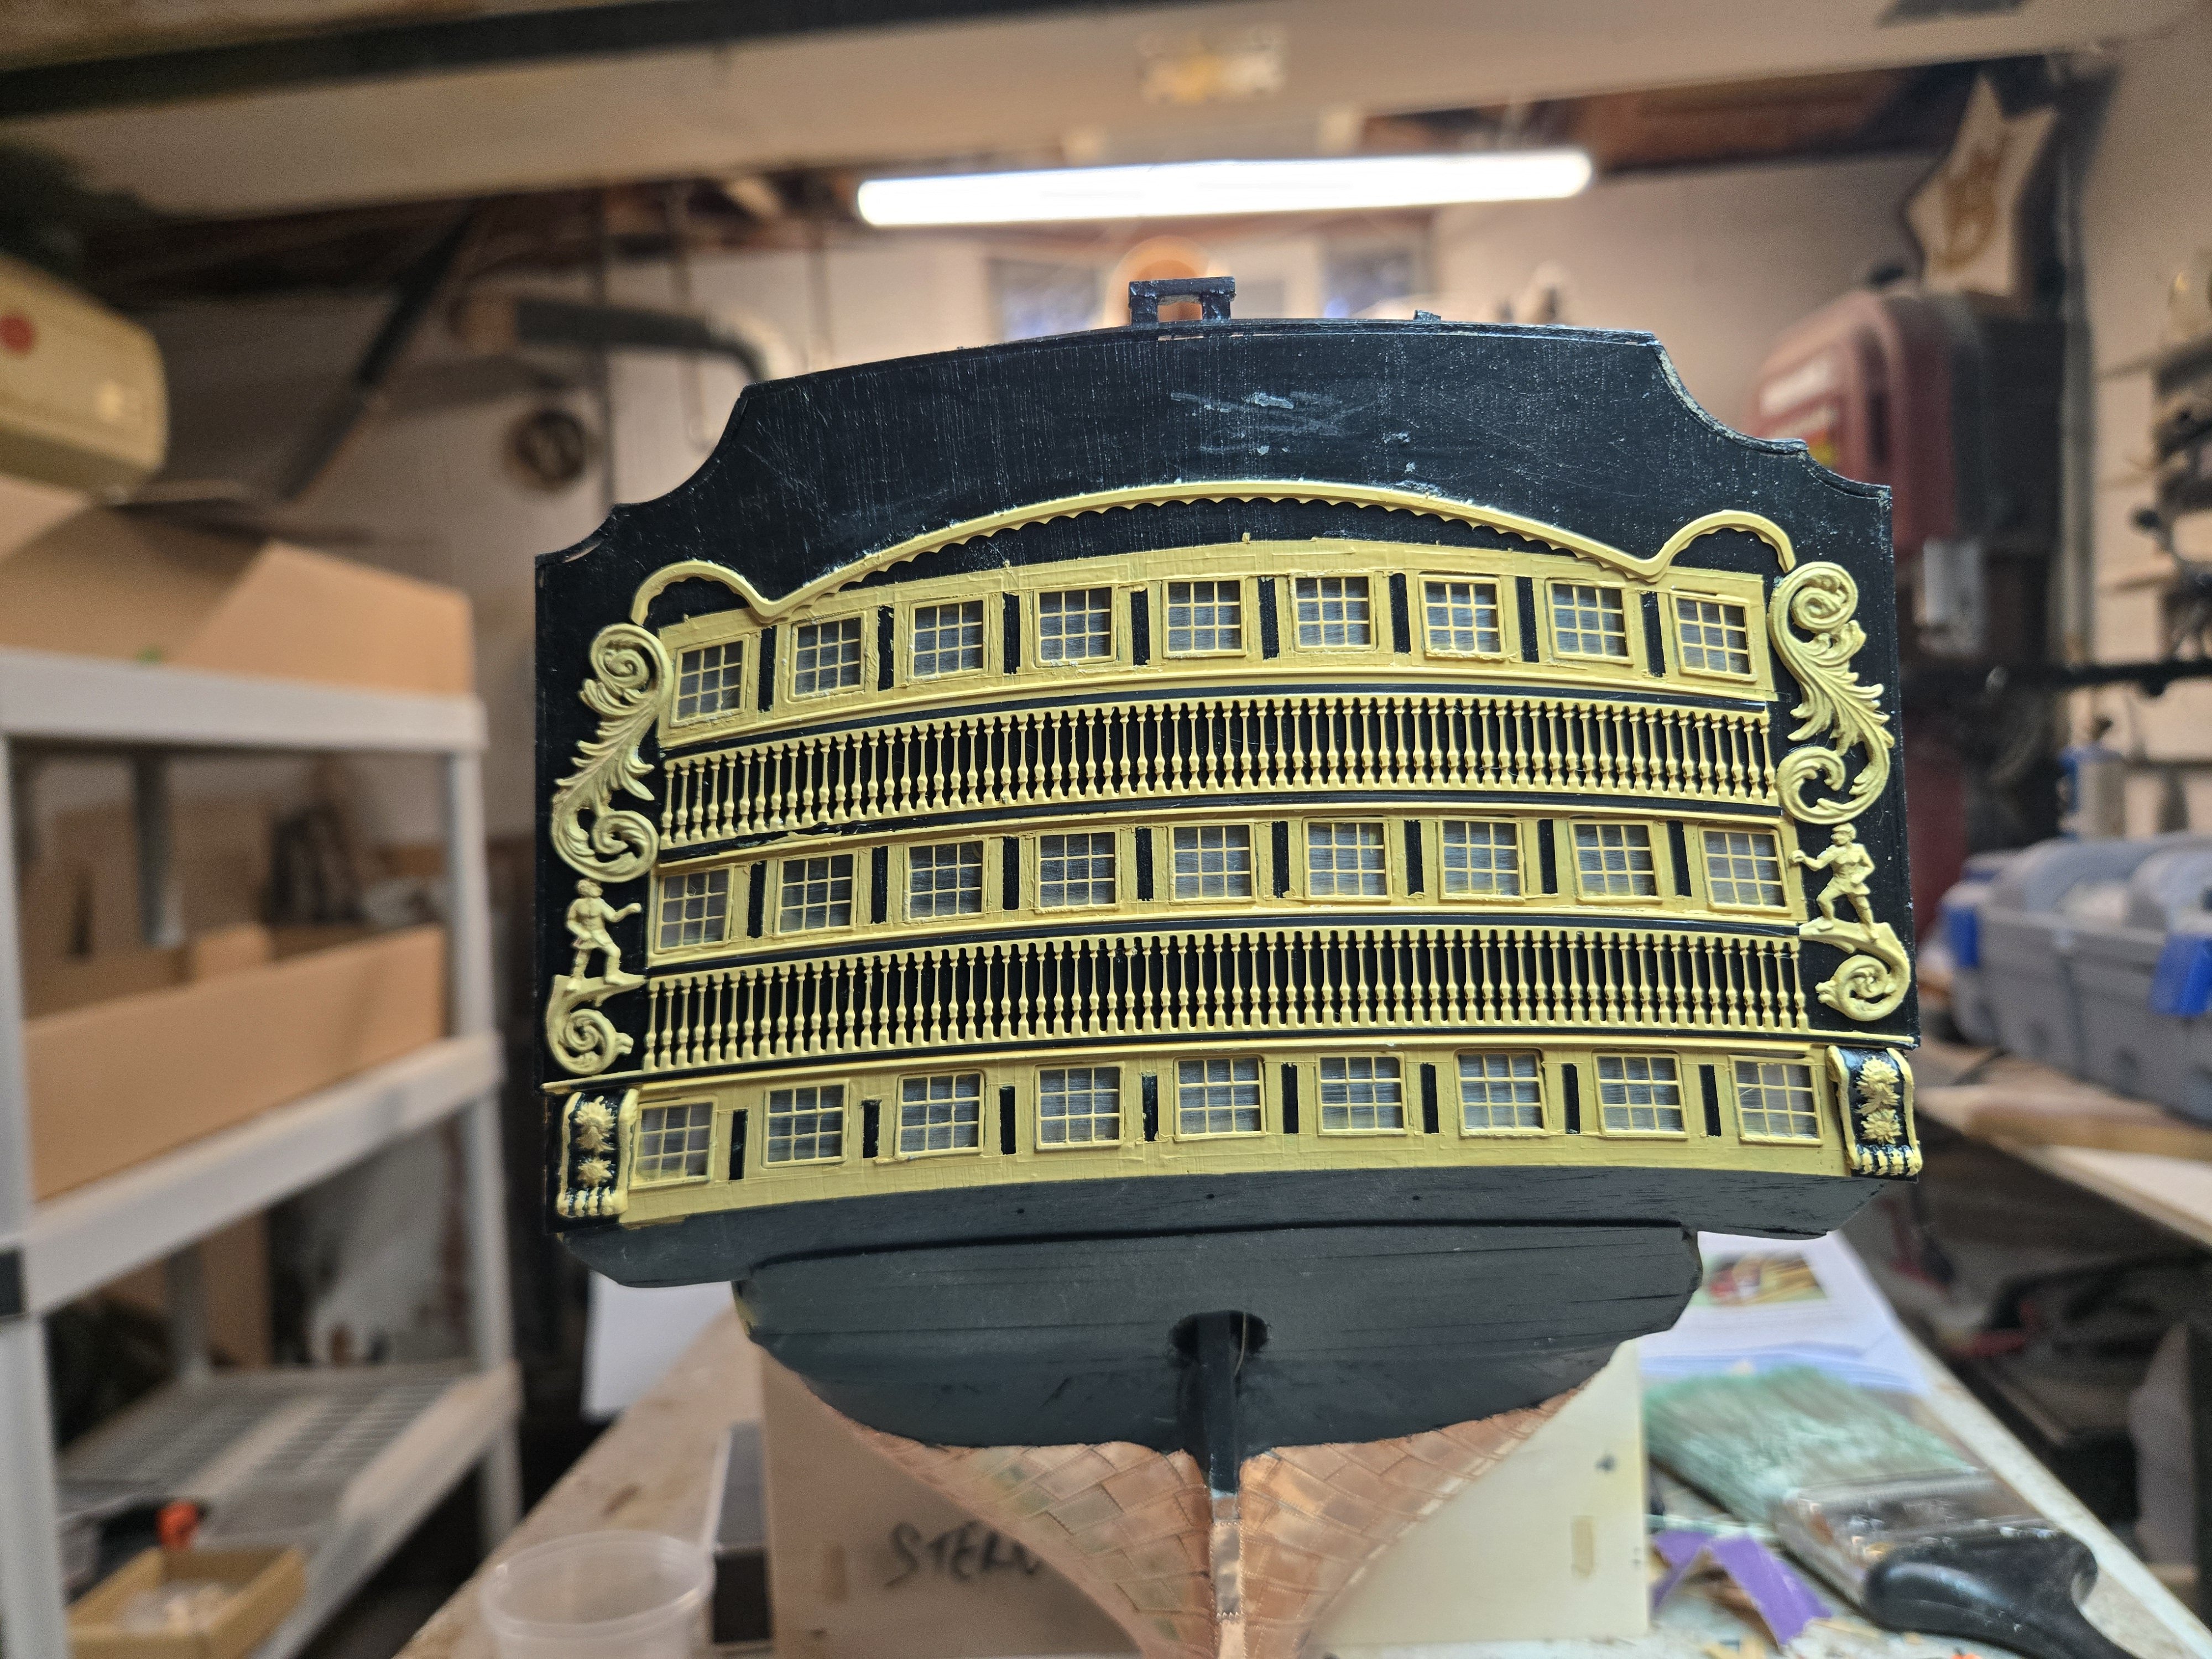
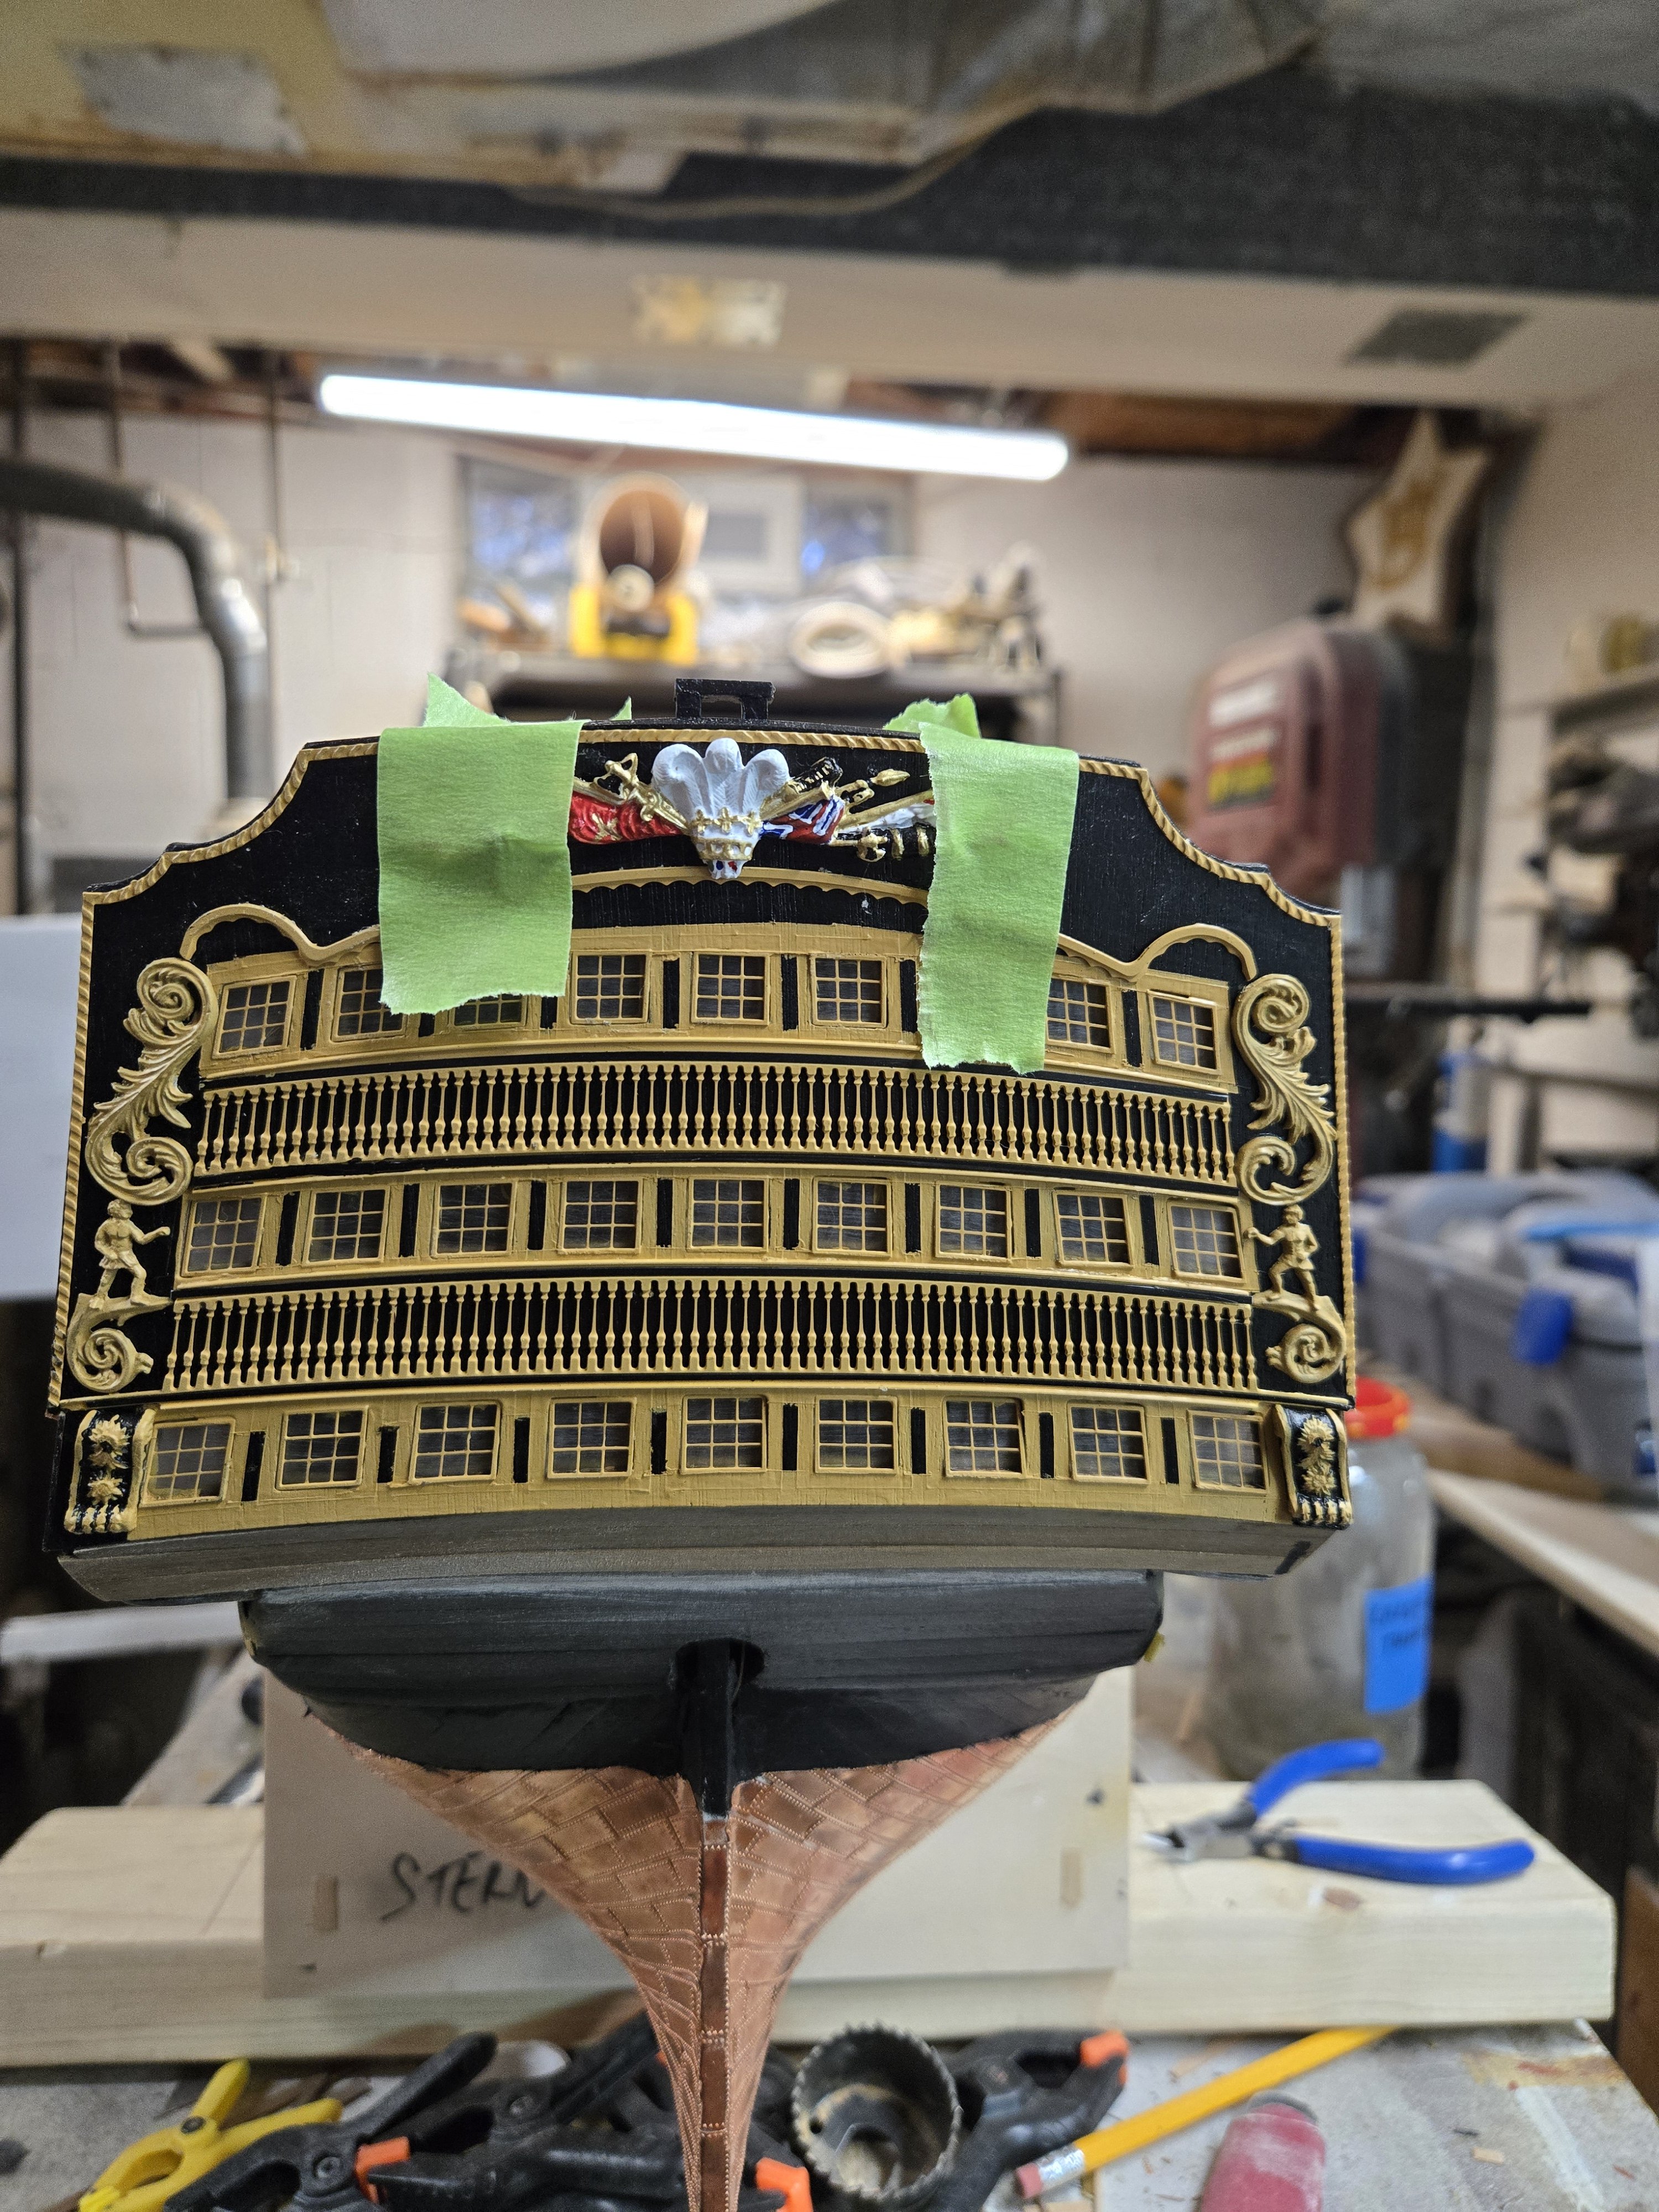
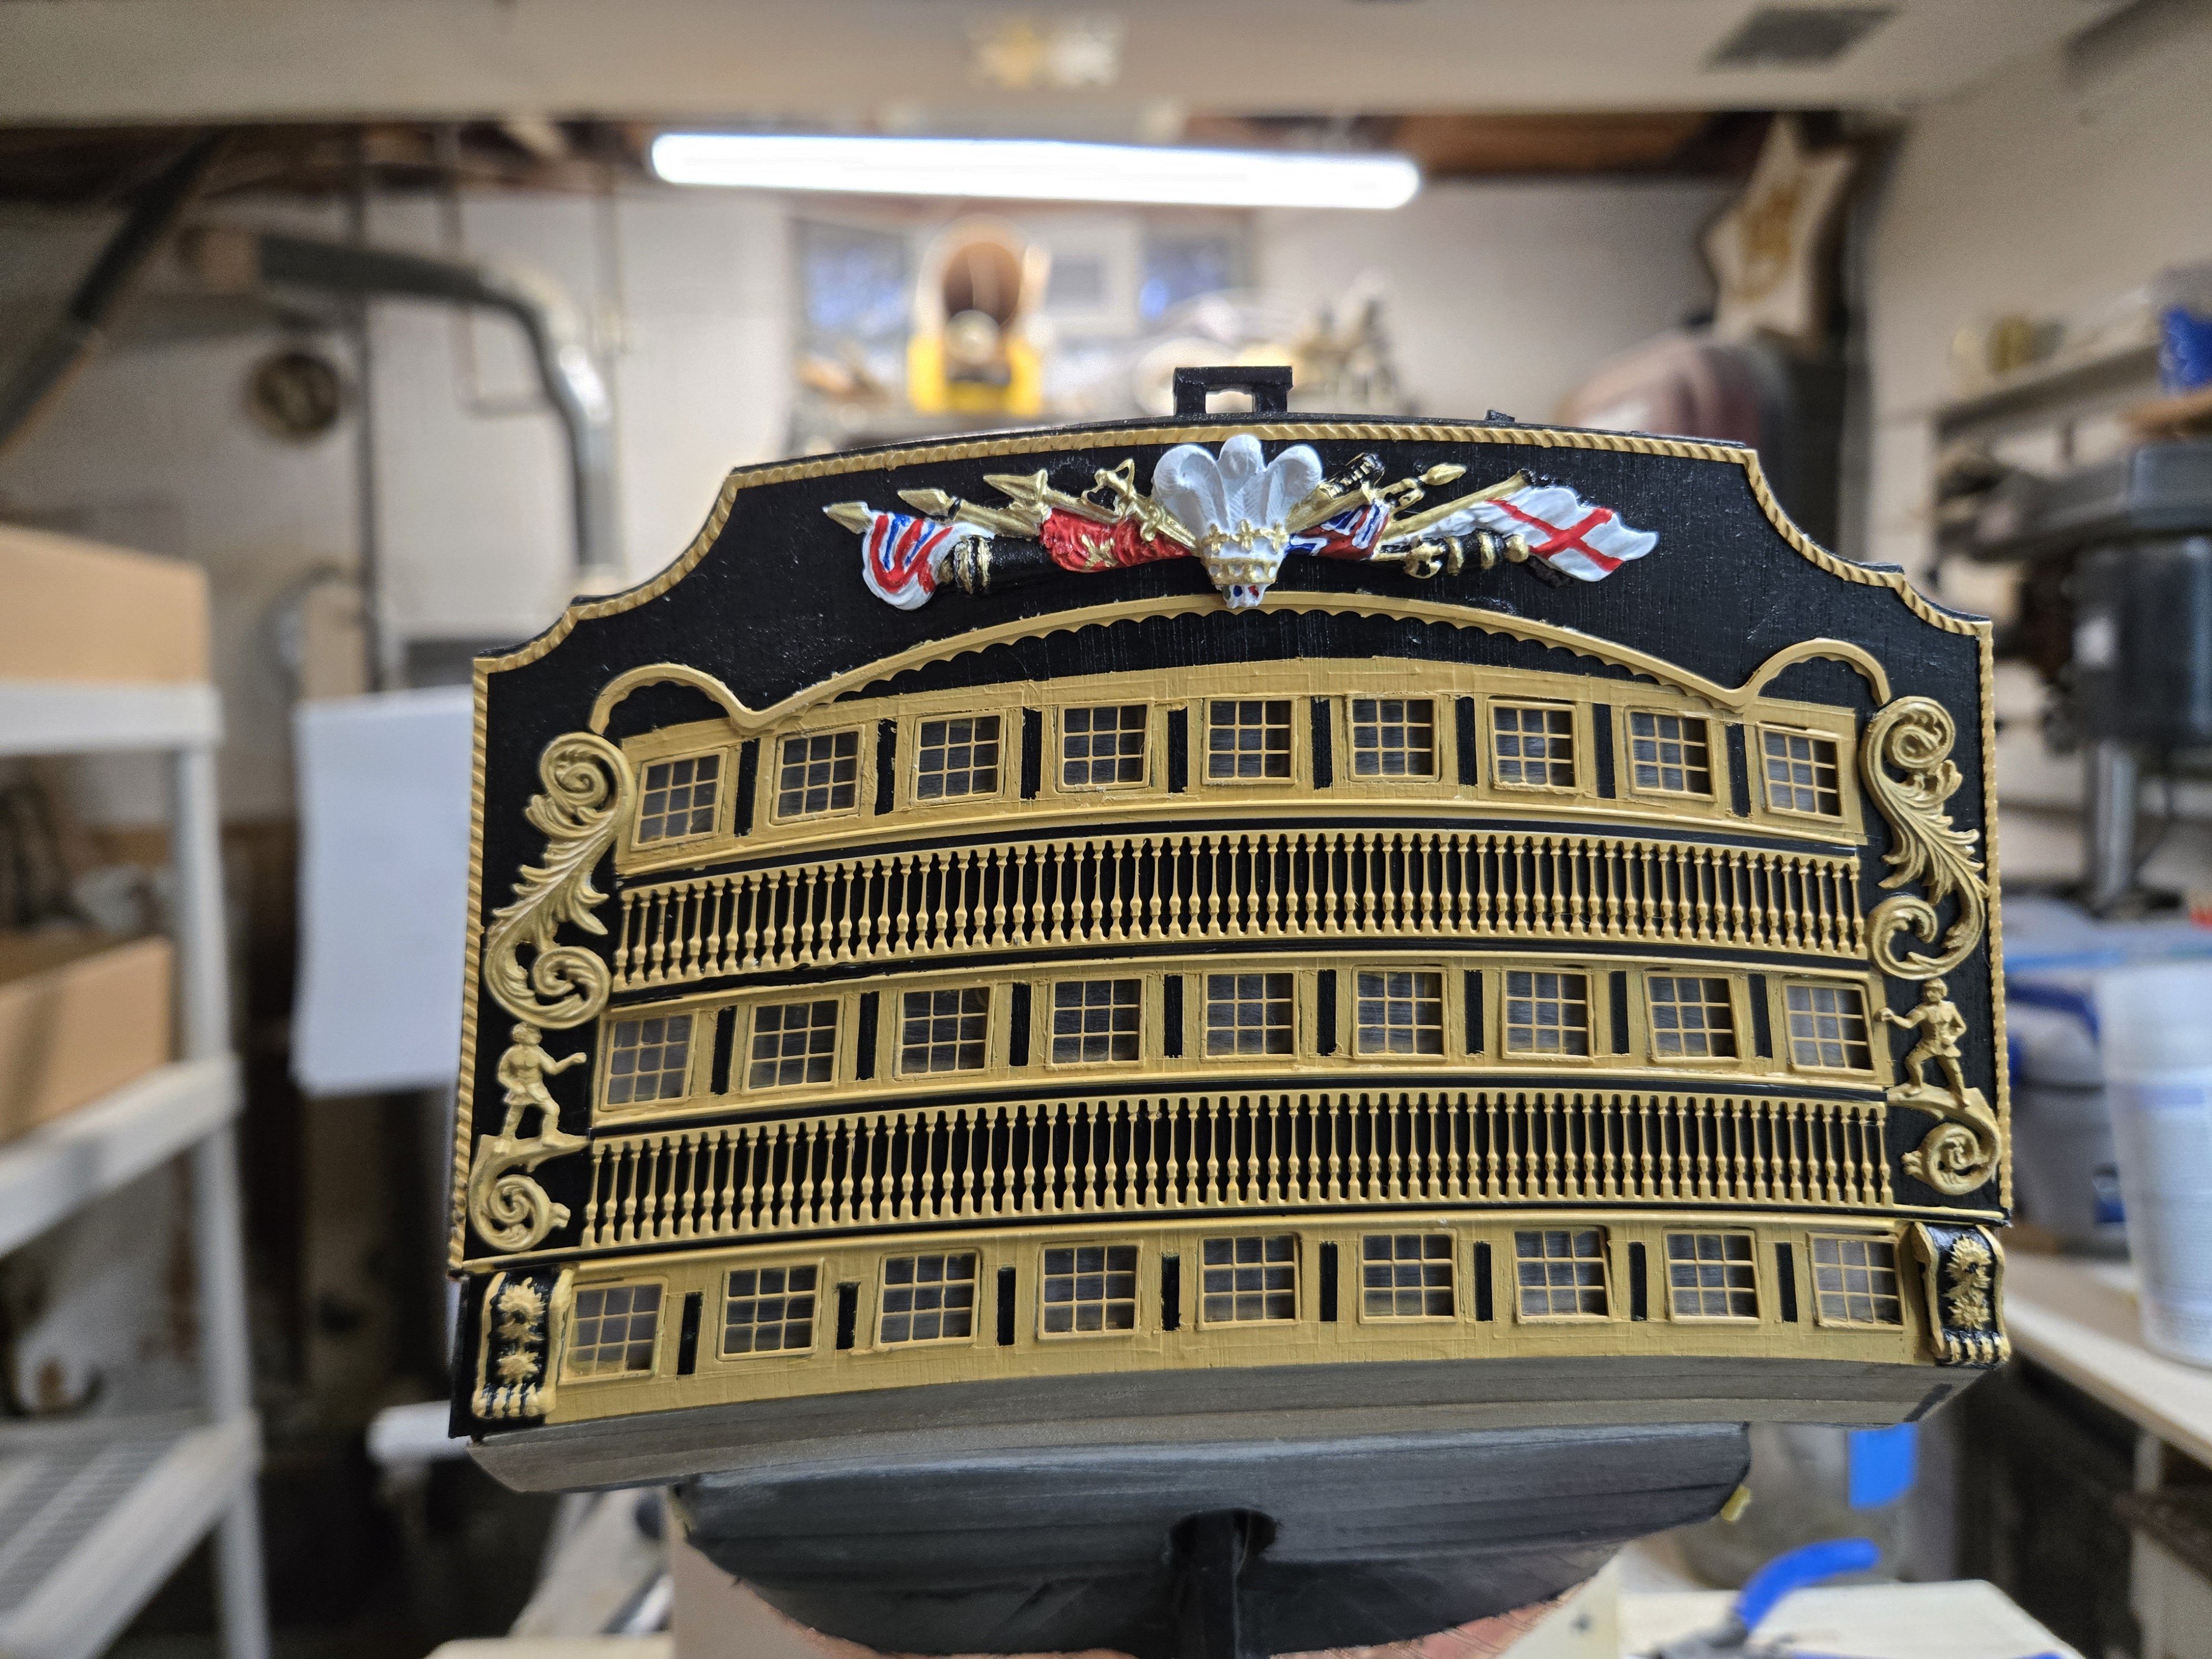
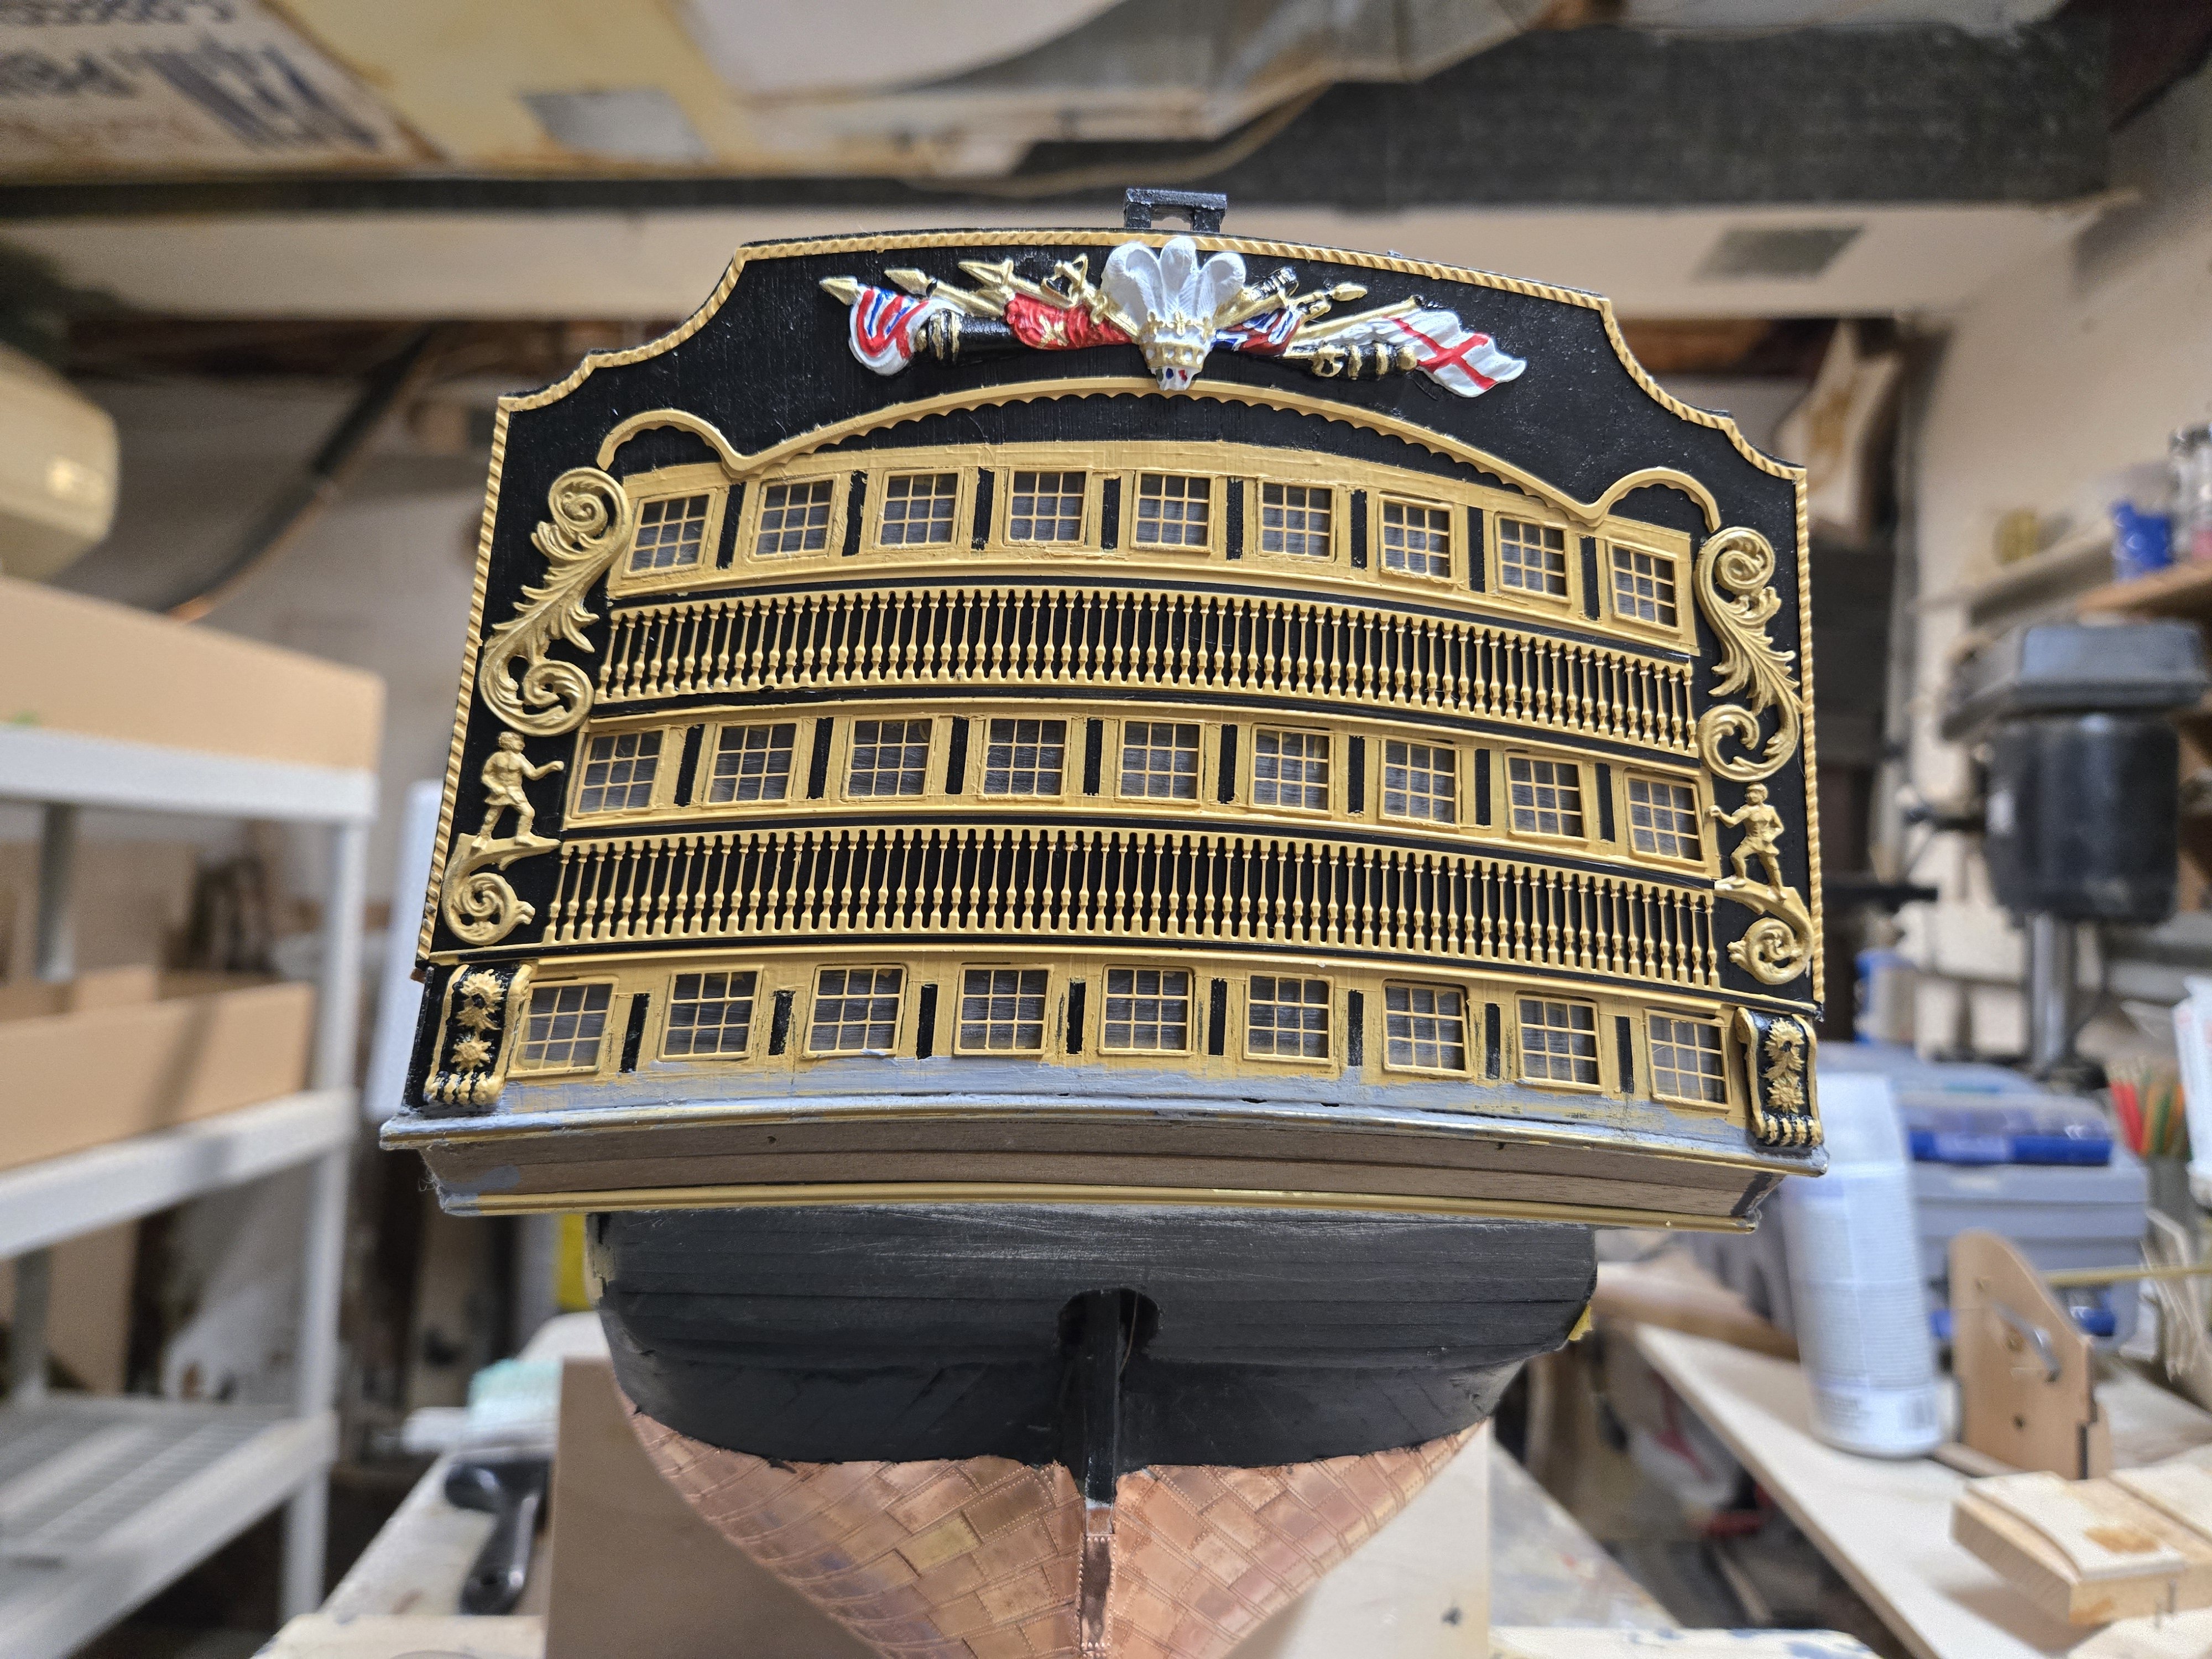
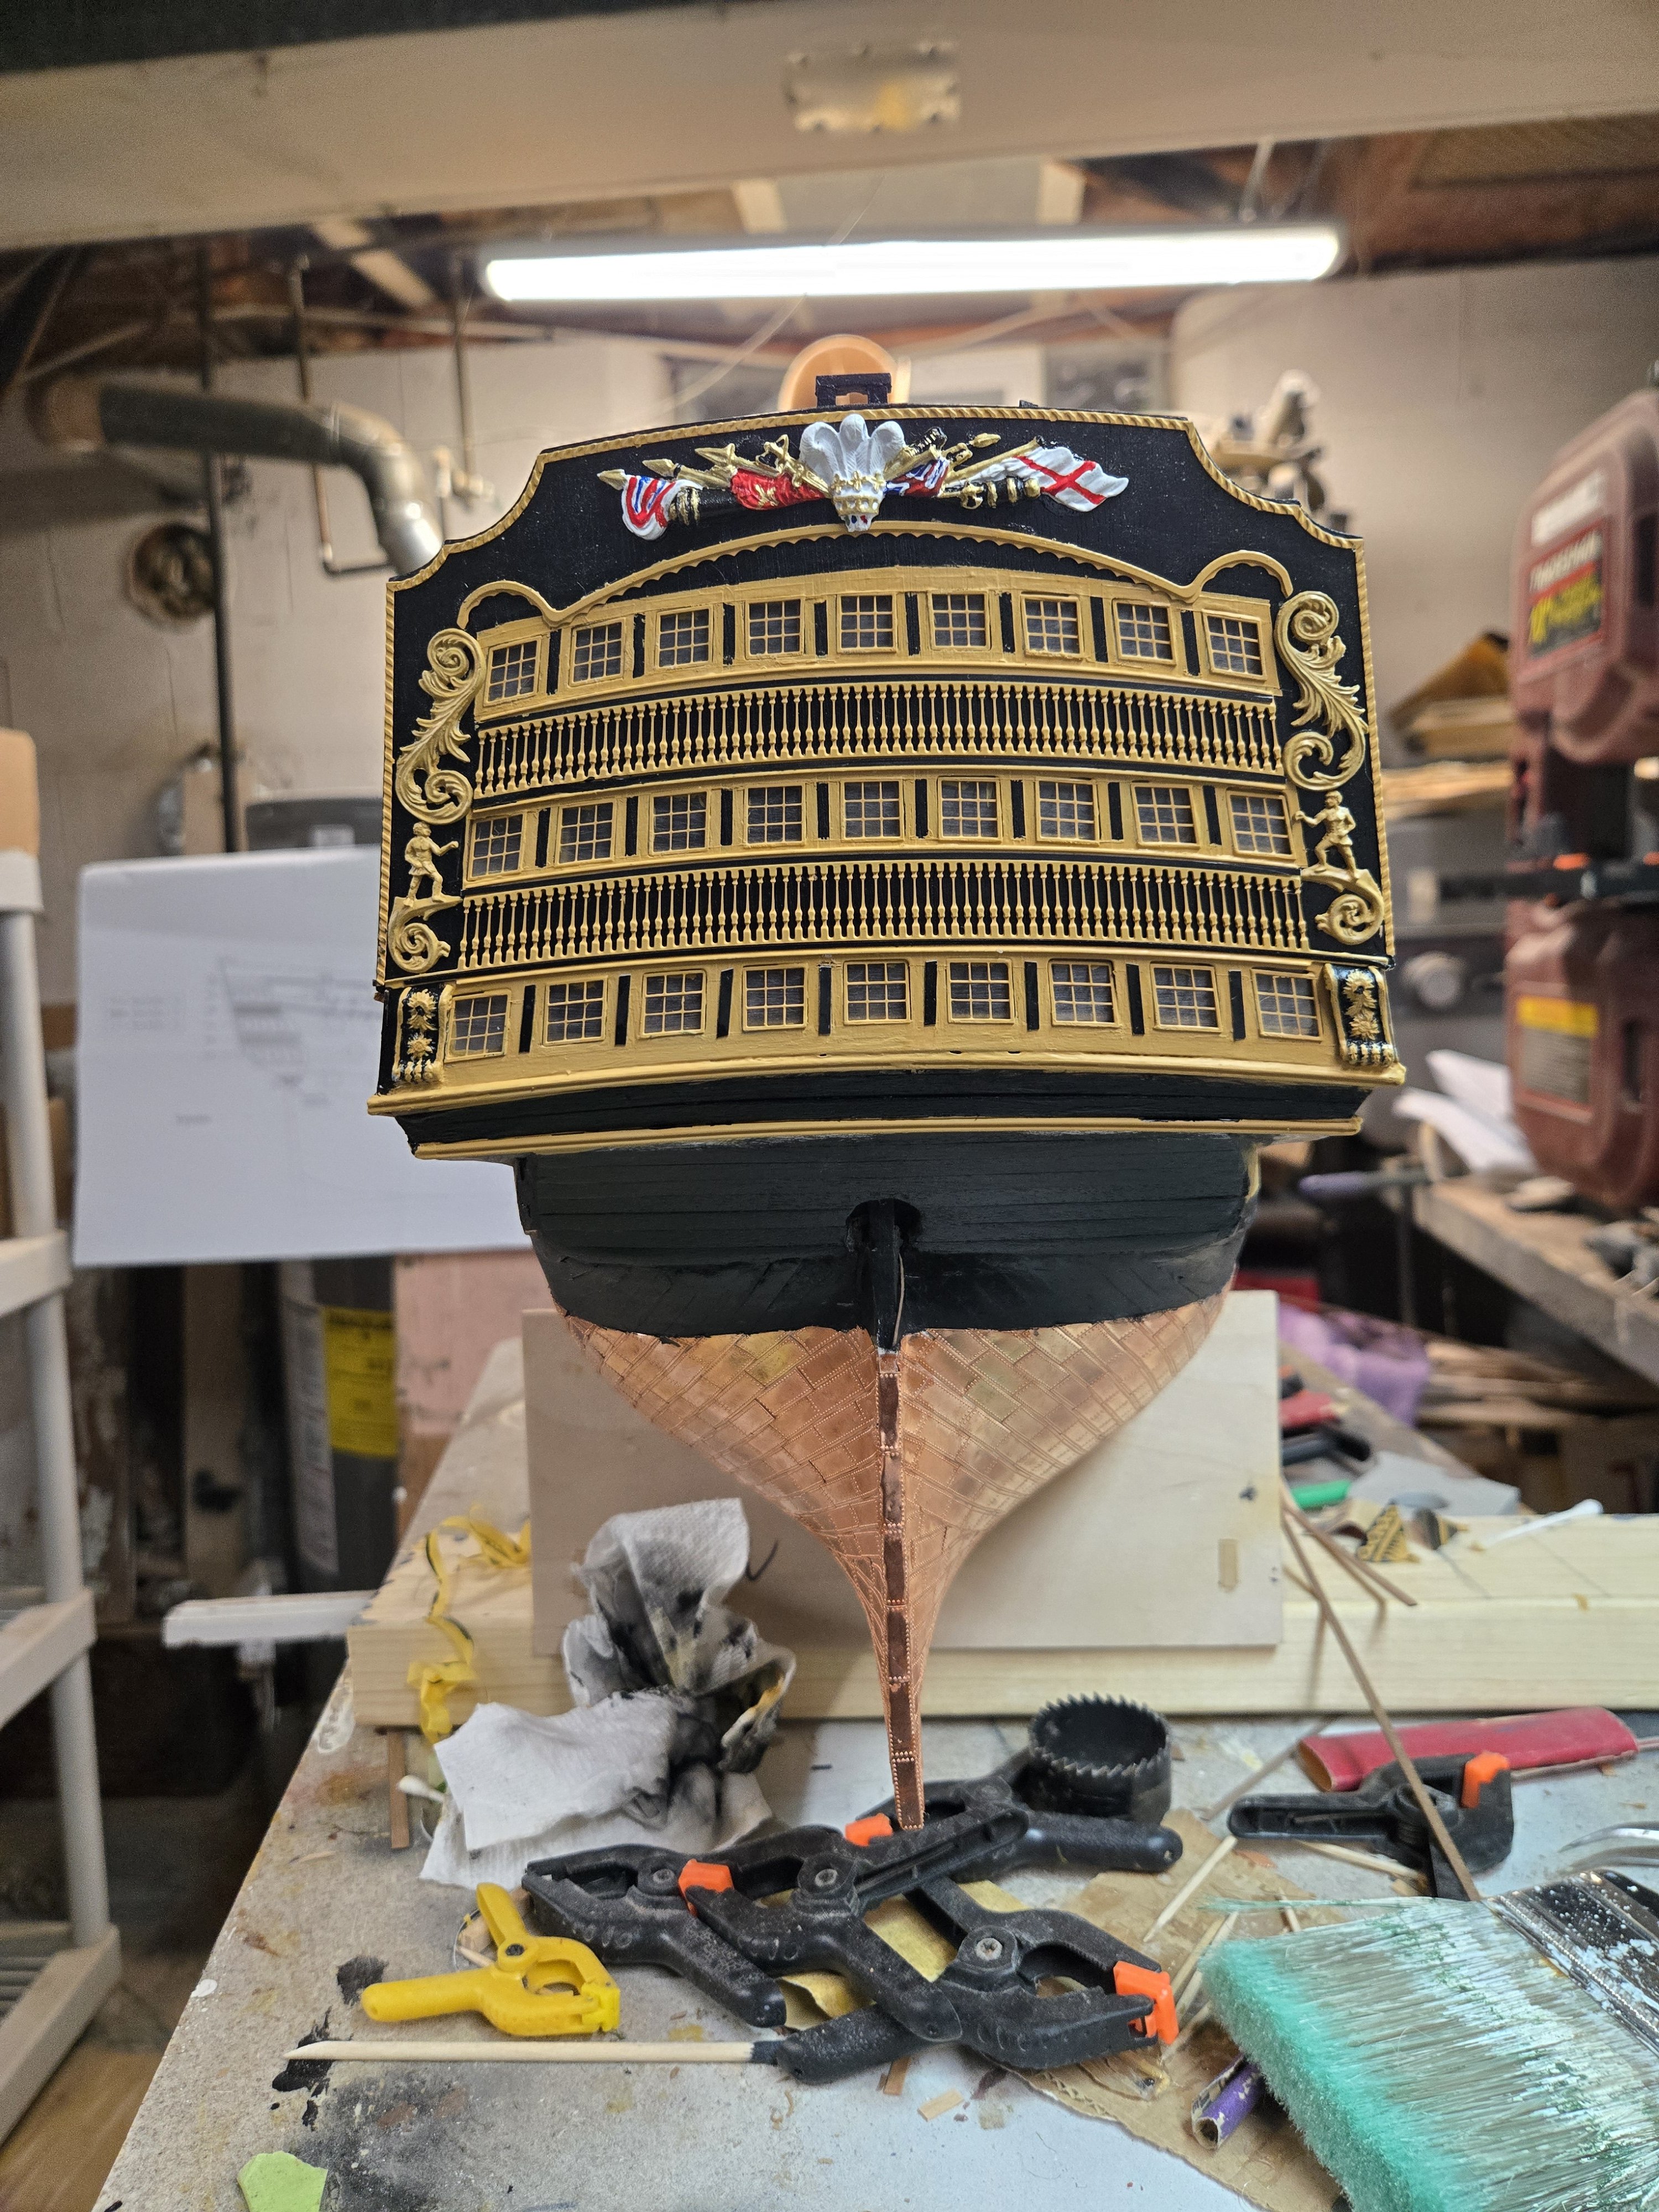
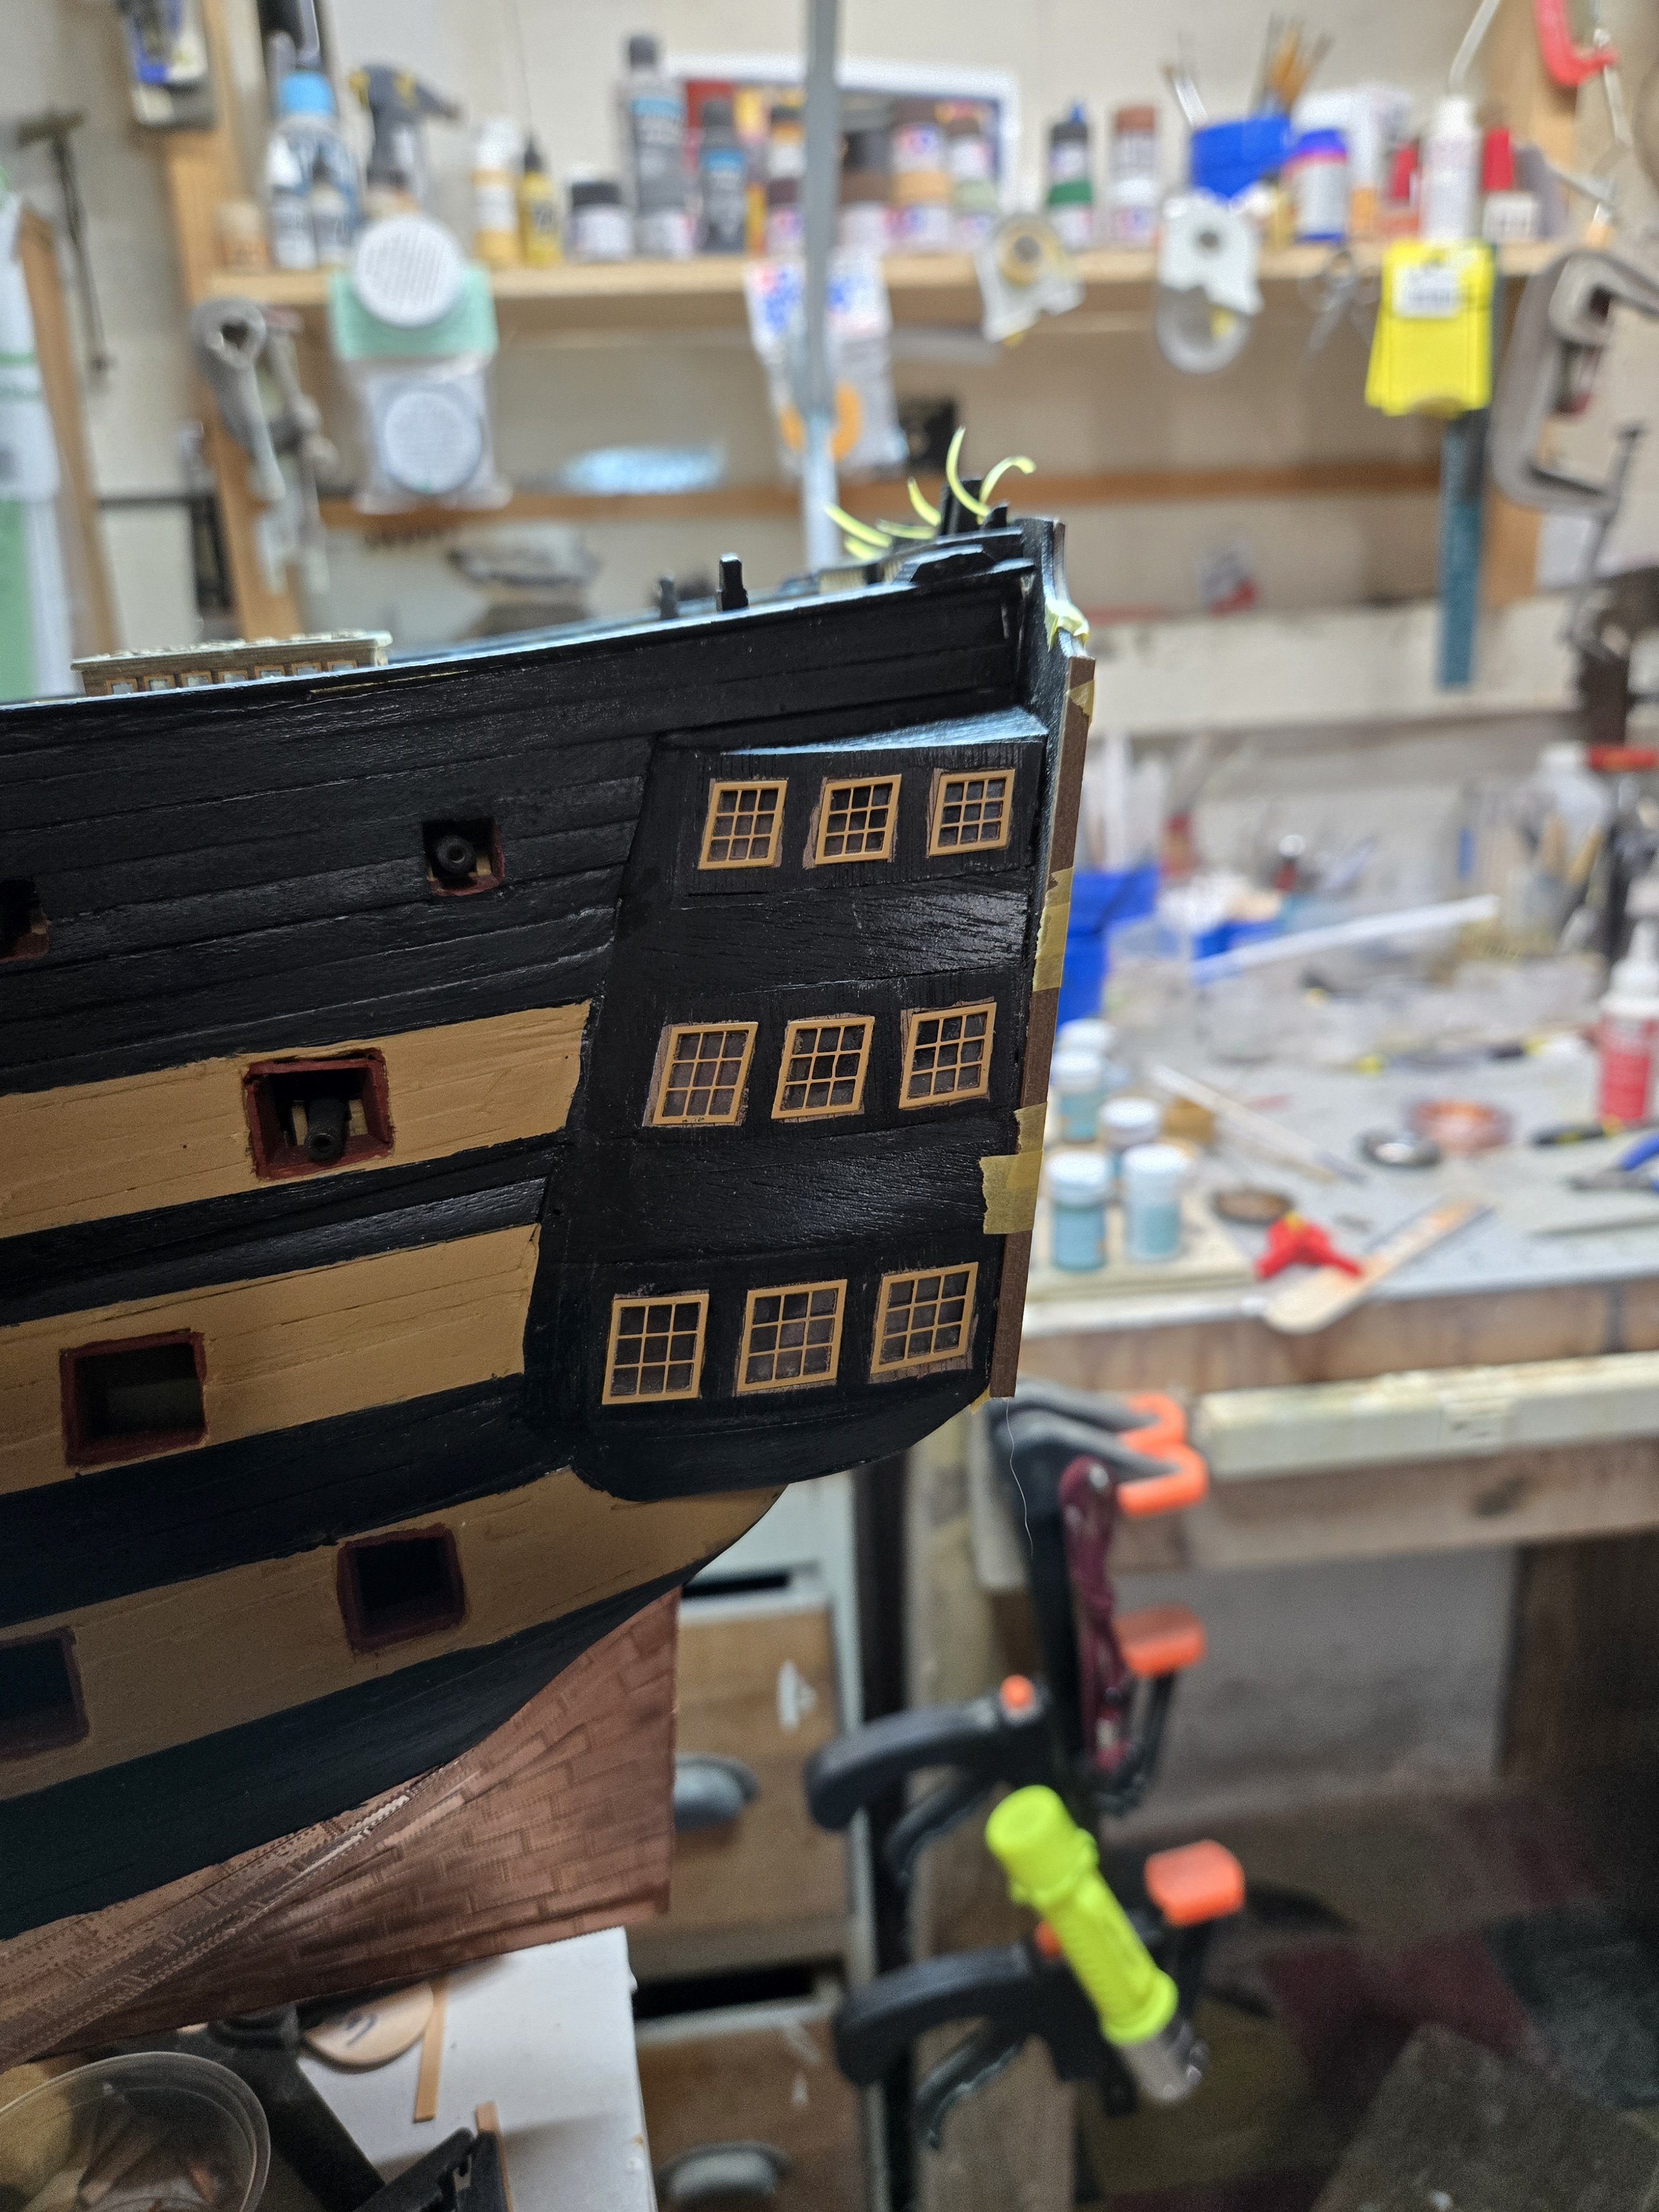
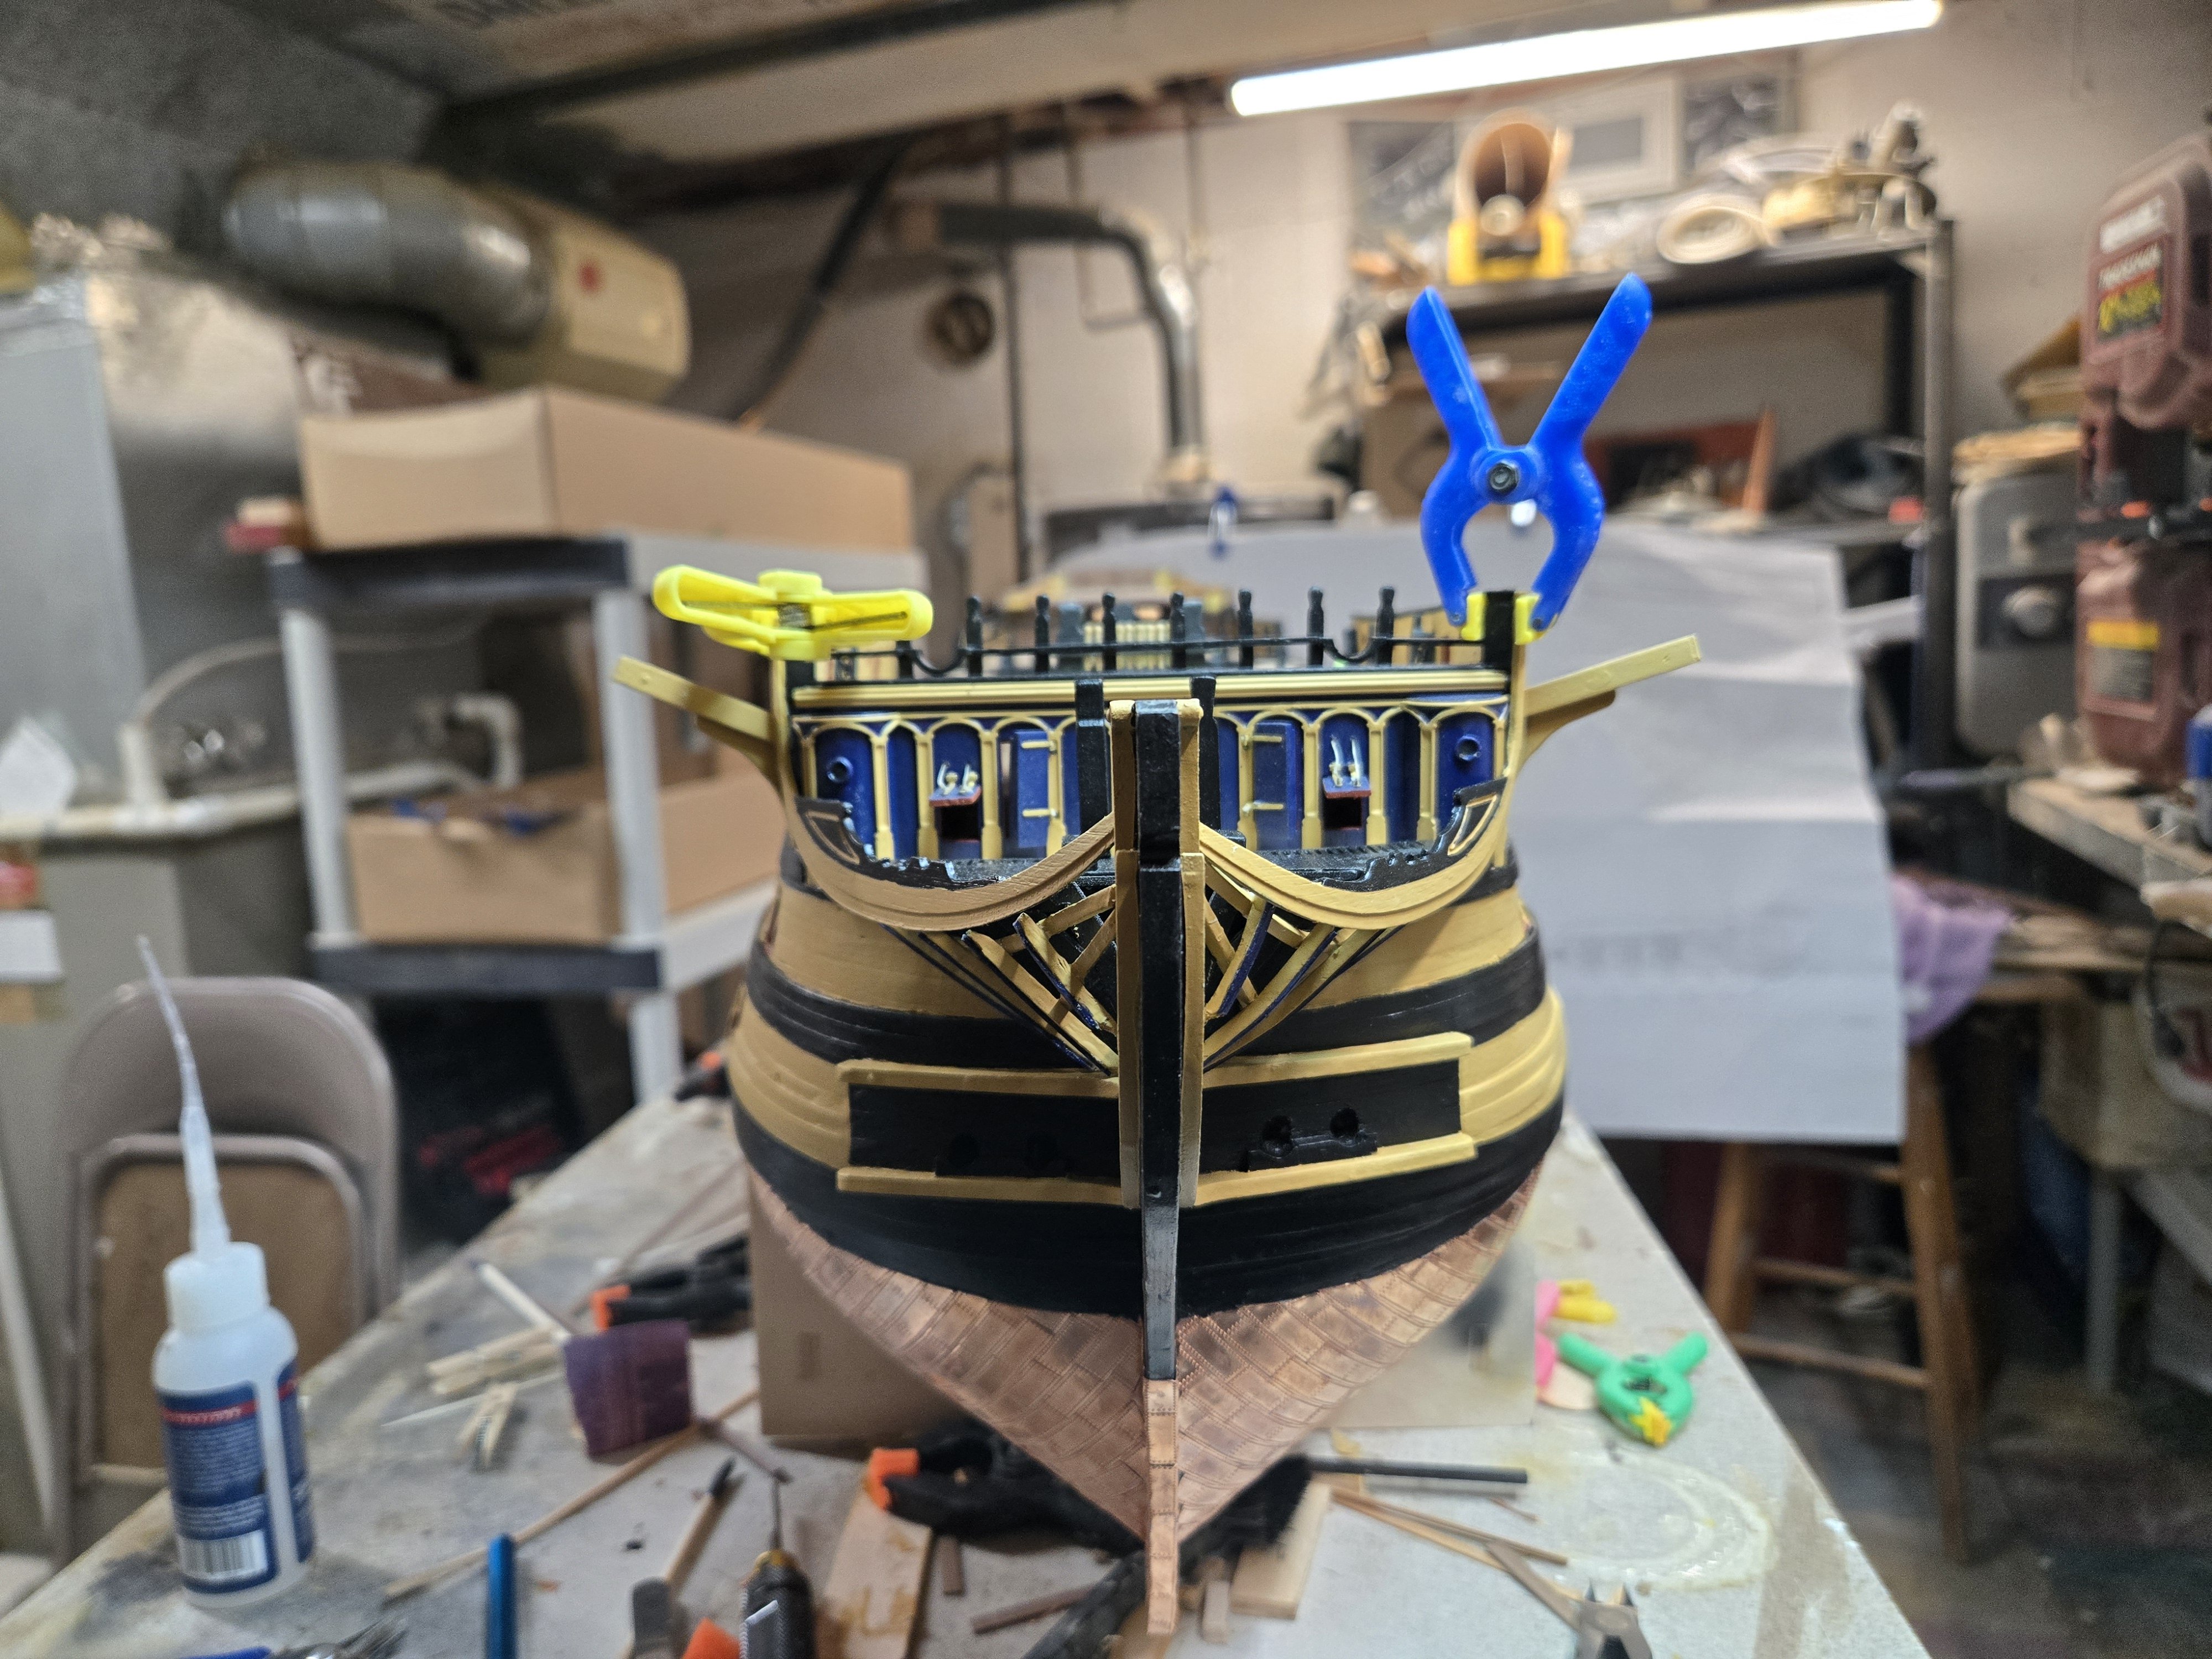
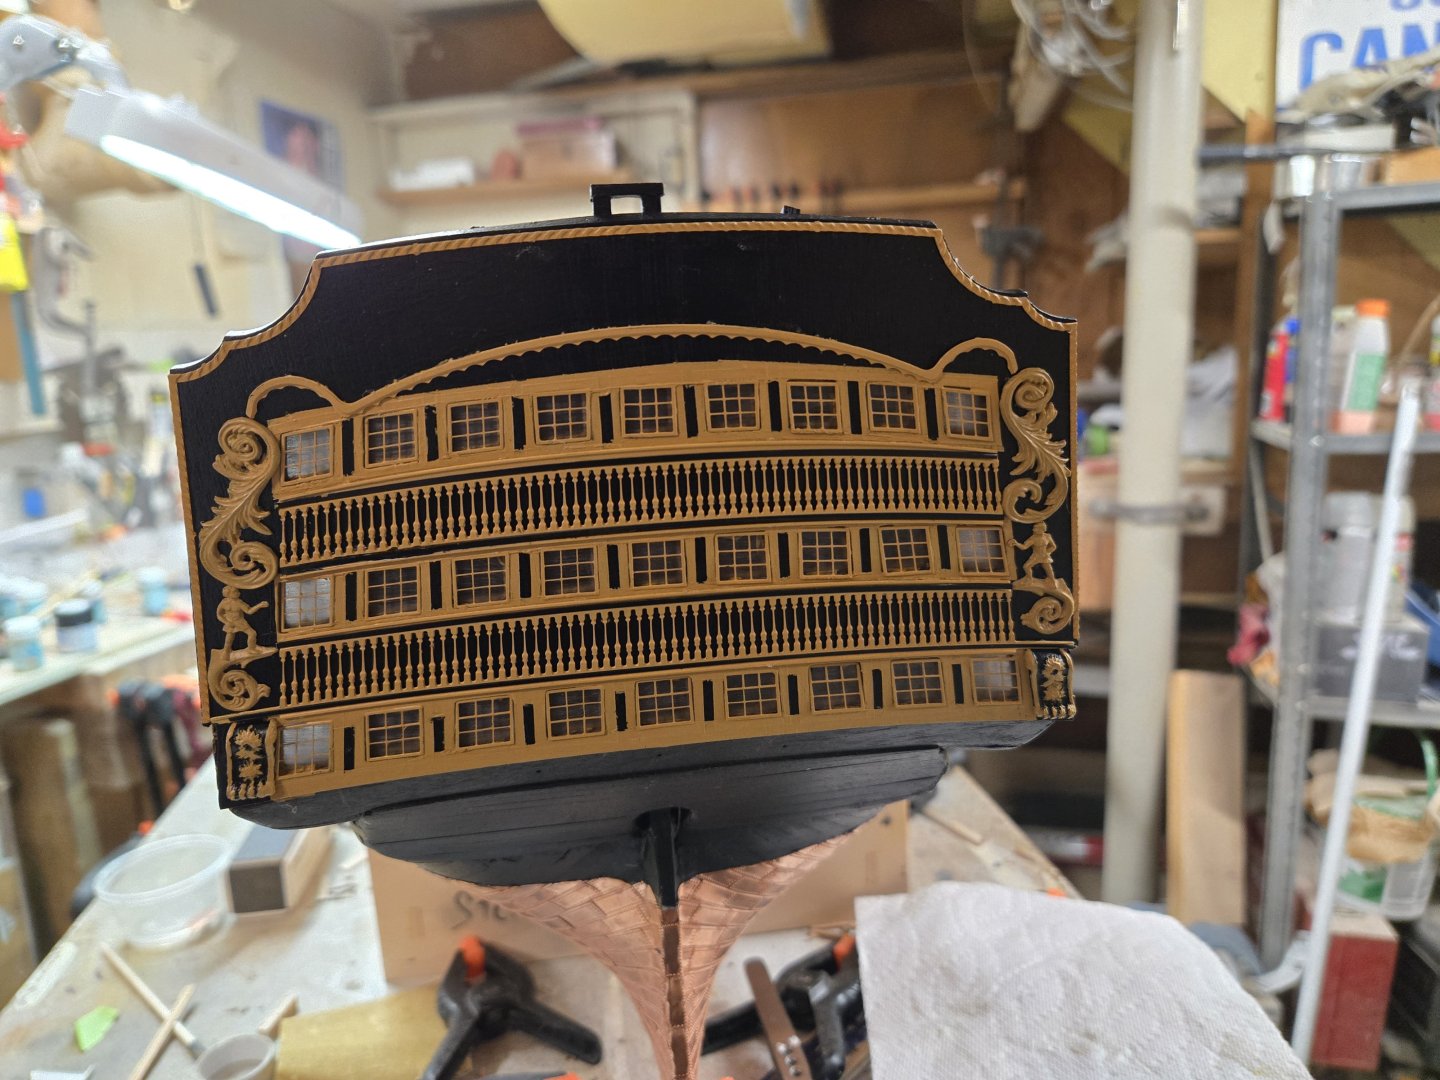
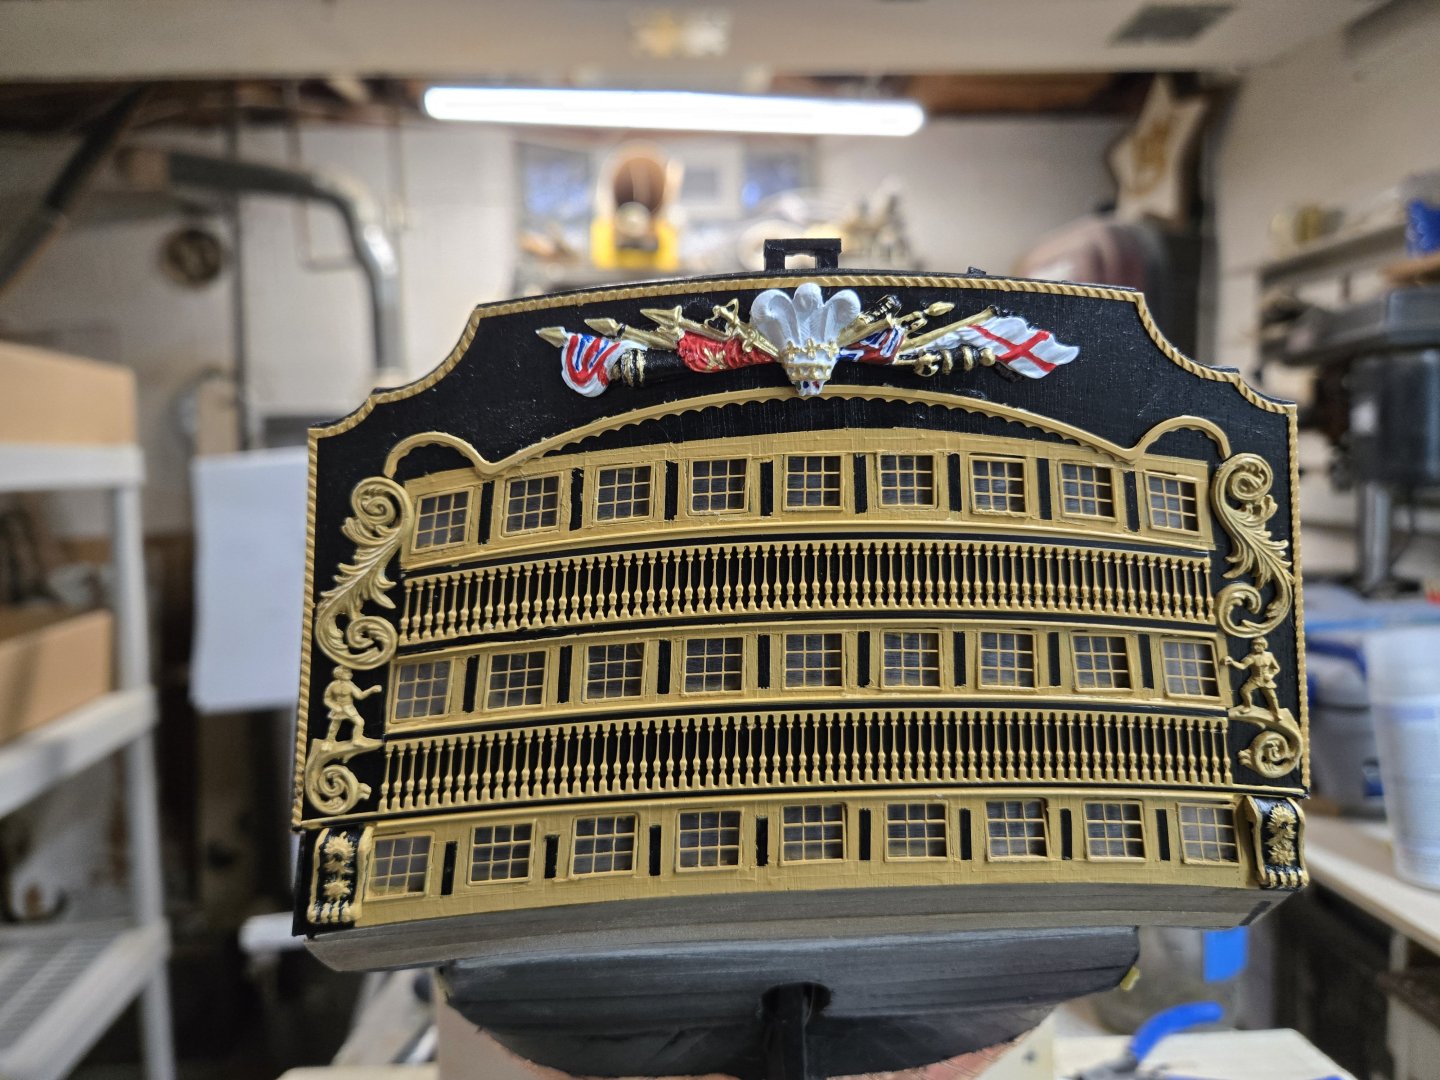
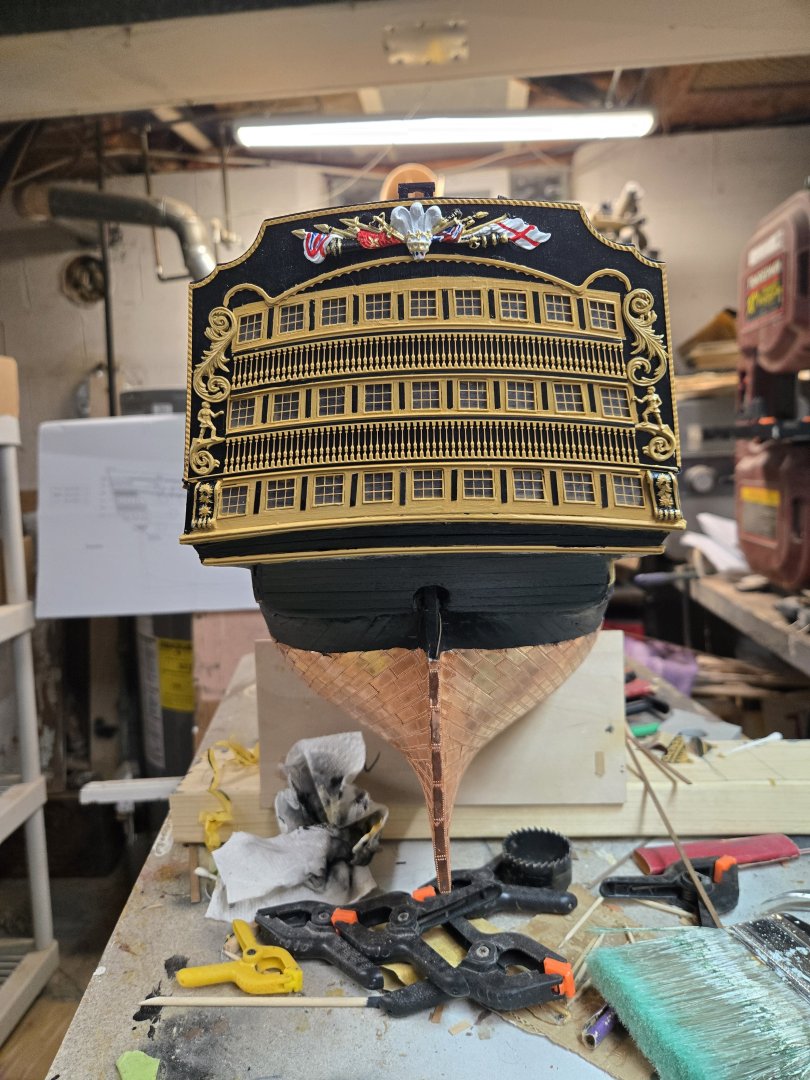
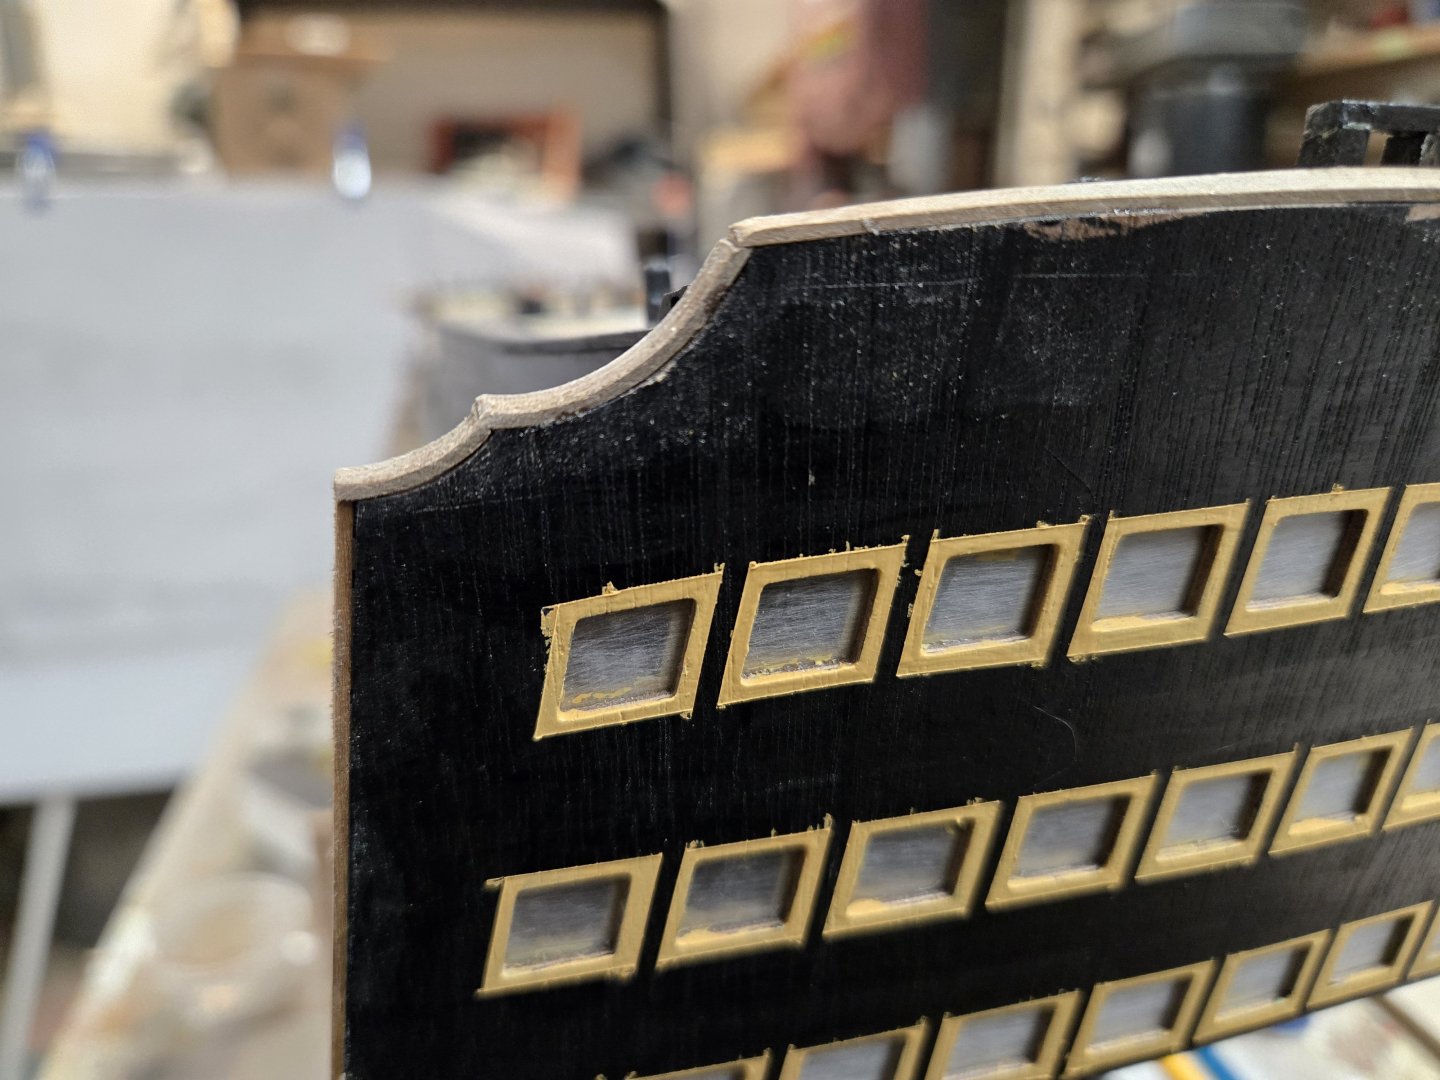
Ok, let's start with the very stern. I feel like the instructions called for me to add glazing to the back of the outer stern facia. But it also says to align the inner and outer facias perfectly so they create a recess for the PE window frames. Adding the glazing to the back defeats that. I think the glazing should have gone on the inside of the inner facia. Doesn't matter, I didn't do that. The first thing I did was glue the outer facia on (with glazing installed). For the glazing, I just use acetone I have laying around. I gave both sides a very good sanding to rough them up so they would be opaque. You can see here that I have also installed the capping, that will have to be filled in some areas but getting the bend wasn't that hard after a good soaking. I taped off around the windows in yellow so they would blend int easily with the PE frames. Doing that creates a yellow paint ridge as that layer or two of paint is thicker than the base. I wanted to just use the black background for the black accent in between each window. So I masked off the areas and painted again. Doing this created huge tape lines that honestly look like I just painted over tape and left it in place. I also wasn't as careful as I should have been when installing the frames. Some are askew and some stick out. I should have redid them... I then installed the ballusters. I used 1mm styrene for the black accents and that worked very well. I glued with white glue and worked fine. I am off in my installation of the various cast and PE decorations, but there was little difficulty in getting them in place. I used E6000 to glue them because it gave me more time to move them around. The negative is that this glue creates glue strands and gobs that you have to be careful of and because it doesn't set quickly, you have to make sure to hold it in place or it will settle out of alignment. I then added the trophy at arms. I am reasonably happy with my painting job. Perhaps I could have added a bit more detail using the black to highlight the spears, etc. But I think it came out very nice. I didn't bother cutting any of the PE to accomodate the trophy but it seemed to fit nicely overlapping the top molding. This is where I started hating where I was. I was angry at my lack of patience in installing the window frames and not having a plan for the paint scheme. I should have purchased appropriate sizes of thin styrene, painted them black for the accents, it would have looked 100% better. I then began the process of installing the brass profiles. I have a bench belt sander with side circular sanding disk. I was able to use this to shape and create the miters for the corners. I used a butane torch to anneal the profiles, you really have to wait for the profiles to turn a coppery color to know they have been annealed all the way through. Using pliers I was able to slowly bend and twist them as best as I could. Adding the profiles allowed me to sand the lower window area and try to fix it. I also had to add some walnut planking to accommodate the profiles. Once they were in place, I added some modeling filler (NOT wood filler) to the corners and to blend all of it together. I also used 1mm styrene strips for the lower accents. I will have to go back once they dry and trim them properly. There is also some touching up to the profiles where the black bled through. And there are few gaps in the joints that can be filled. Otherwise, the stern is fairly close to done. I still have to add back the 2 stern gun hatches and install the rudder. I also have to add the 2 cast drop decorations.


-
Oh how I wished I'd saved this picture and reviewed it before starting my channels! When I did mine, I didn't take into consideration that port and stbd would be mirror images of each other!!!! Made them all the same and now I'm having to redo one whole side! ....going to go through the rest of your build pics to be sure I have the future planned. MANY THANKS!!!!!
-
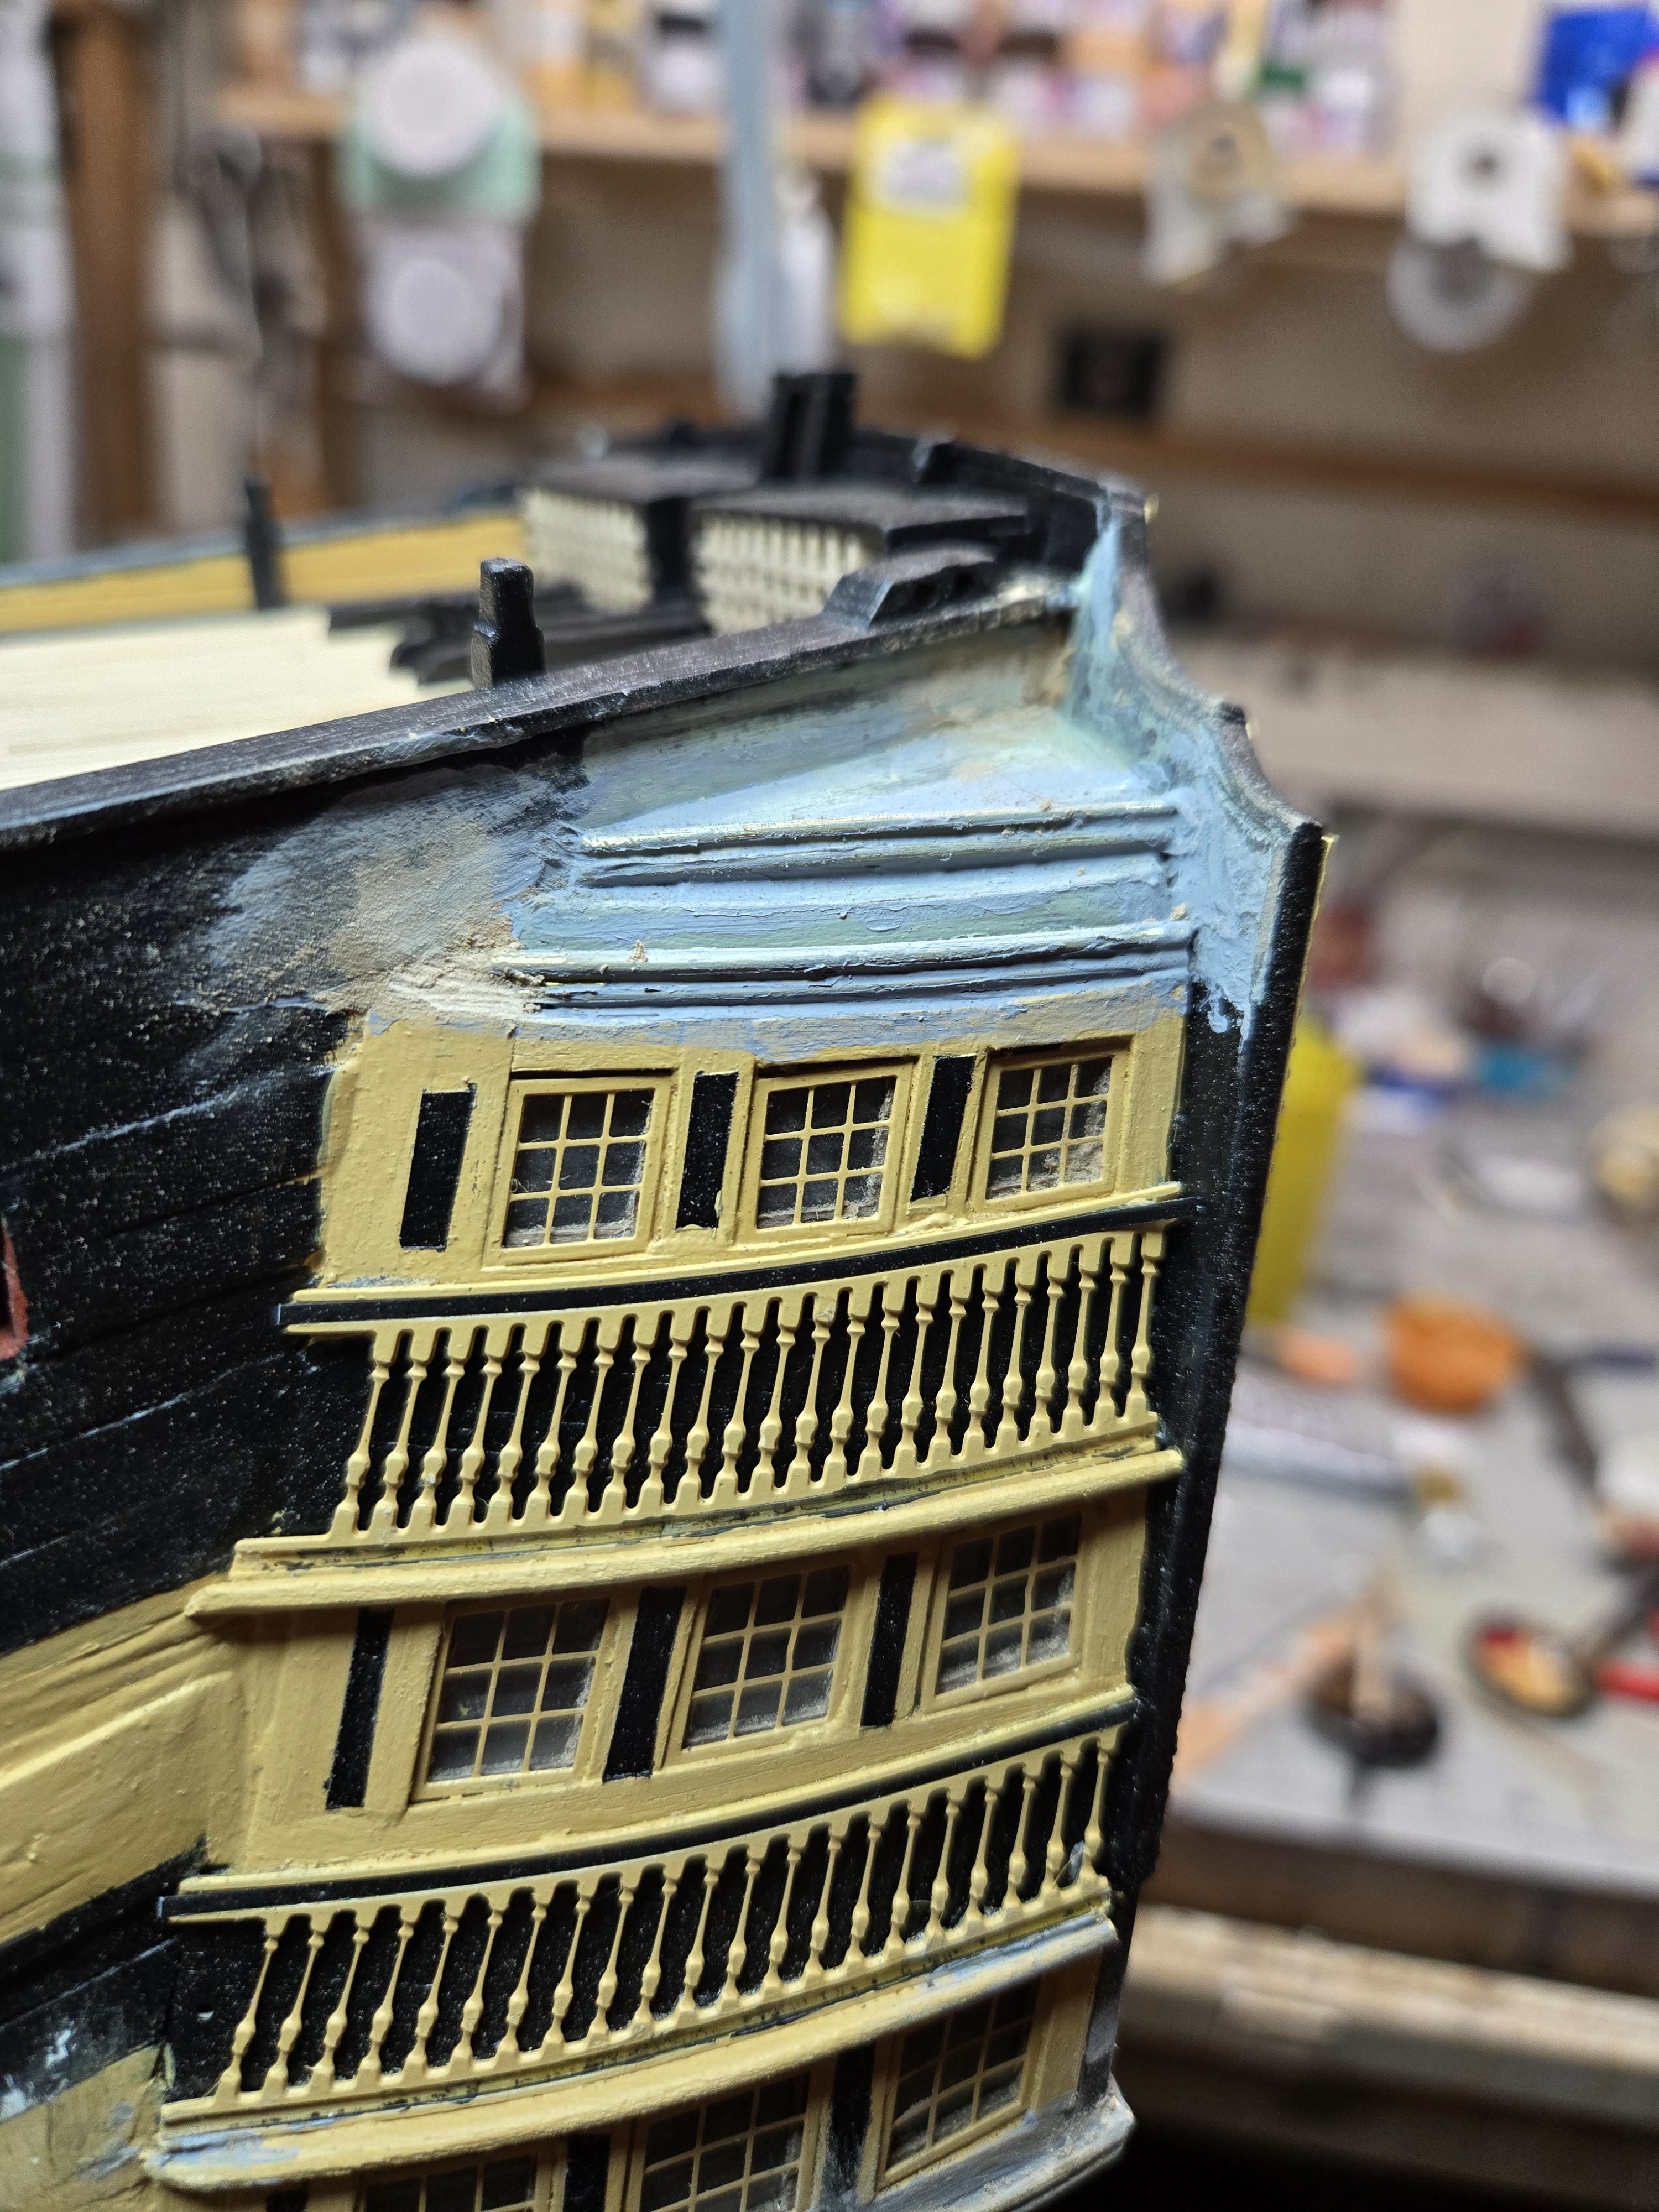
No pictures today. I cannot bear to post or look at them. If you look at the ones above, you can see that I perhaps did not have a good plan of attack while building the stern. The masking tape you can see created so many seams and bad paint joints that I can't even bear it! Instead of taping off black areas, I should have painted everything yellow and then maybe either added black styrene stripes for the black panels or taped off after the fact. Since, I have been working on fixing all of this. I have sanded where I can, added filler, sanded the filler, added some more and painted. I have worked on the brass moldings and they are tough. I have annealed them and the more you do, the easier it is to bend them into shape. I have a bench belt/disk sander so it made it easier to create the miters for the molding. After a fashion, I was able to get them close to fitting and once attached and set, I was able to use my Dremel sander to smooth out the corners. Once done, a bit of filler cleaned them up. I was able to finish the forward and stern cast pieces. The details on my pieces aren't the best and the lettering on the bow pieces are very light if at all. This also included the side entry pieces. I was proud of the look I got with them. When I installed them, the side pieces do not fit in between the wales. I wished I had looked at other builds more closely. The directions don't really give specific instructions, but it appears that the proper method would have been to notch the top of the side piece to fit over the top wale. I didn't do that....I notched out the lower wale for the pieces to fit. Eh...that made the stair set up a bit off. As for the stairs themselves, I was able to use a piece of the first layer hull planking as a spacer for the steps, it seemed to fit very nicely. BUT...as you get higher, the gap increases, so be aware of that! Because of my set up of the entrance, the stairs don't quite match the plans, but the aesthetics are there. Finally, I also started on the channels. I tried to follow a builder's path of soldering the strops over the deadeyes. That just wasn't working, it's very difficult to get the heat right on the PE strop. I tried with 5 or 6 but they were a mess. Finally, I just tried to attach the strop/deadeye to the channel slots. With some practice, I was able actually pinch the strop in the channel groove. I would leave the lower part of the strop under the channel groove for the chain plate. (pictures will be better!!!) The larger deadeyes were easy peasy. The small ones were just a pain. I had to trim the lower jutting piece off of them to get them fit nicely in the channel groove. Once I had a rhythm, I was cooking with gas. I had one stutter as I did the second channel after doing the first one....should they be reversed? I stutter stepped, but just kept on going and did the second one the same as the first based on the blueprints. There is no SPECIFIC mention that the blueprints (Sheet#2) should the orientation of the deadeyes for the starboard side, BUT that they need to be the OTHER way for the port side. I only saw that based on the diagrams in Sheet #18. Sigh. #18 has an overhead view of the channels so that the copper eyelets and cast brackets can be attached. I wish they also added the deadeyes for a better visual...or on plan #2, they showed both port and stbd channels so we would know. Or perhaps, as this is an expert model, builders would already know this from experience! So, embarrassingly so...I have to disassemble HALF the channels I was SO PROUD of doing!!!! Perhaps that is why this is just a written post. Tomorrow, I will finish what I did wrong and try to clean up the rest of the painting fiasco. Then I will post all the pictures...the worse, the bad and hopefully the ...NOT SO BAD?
-
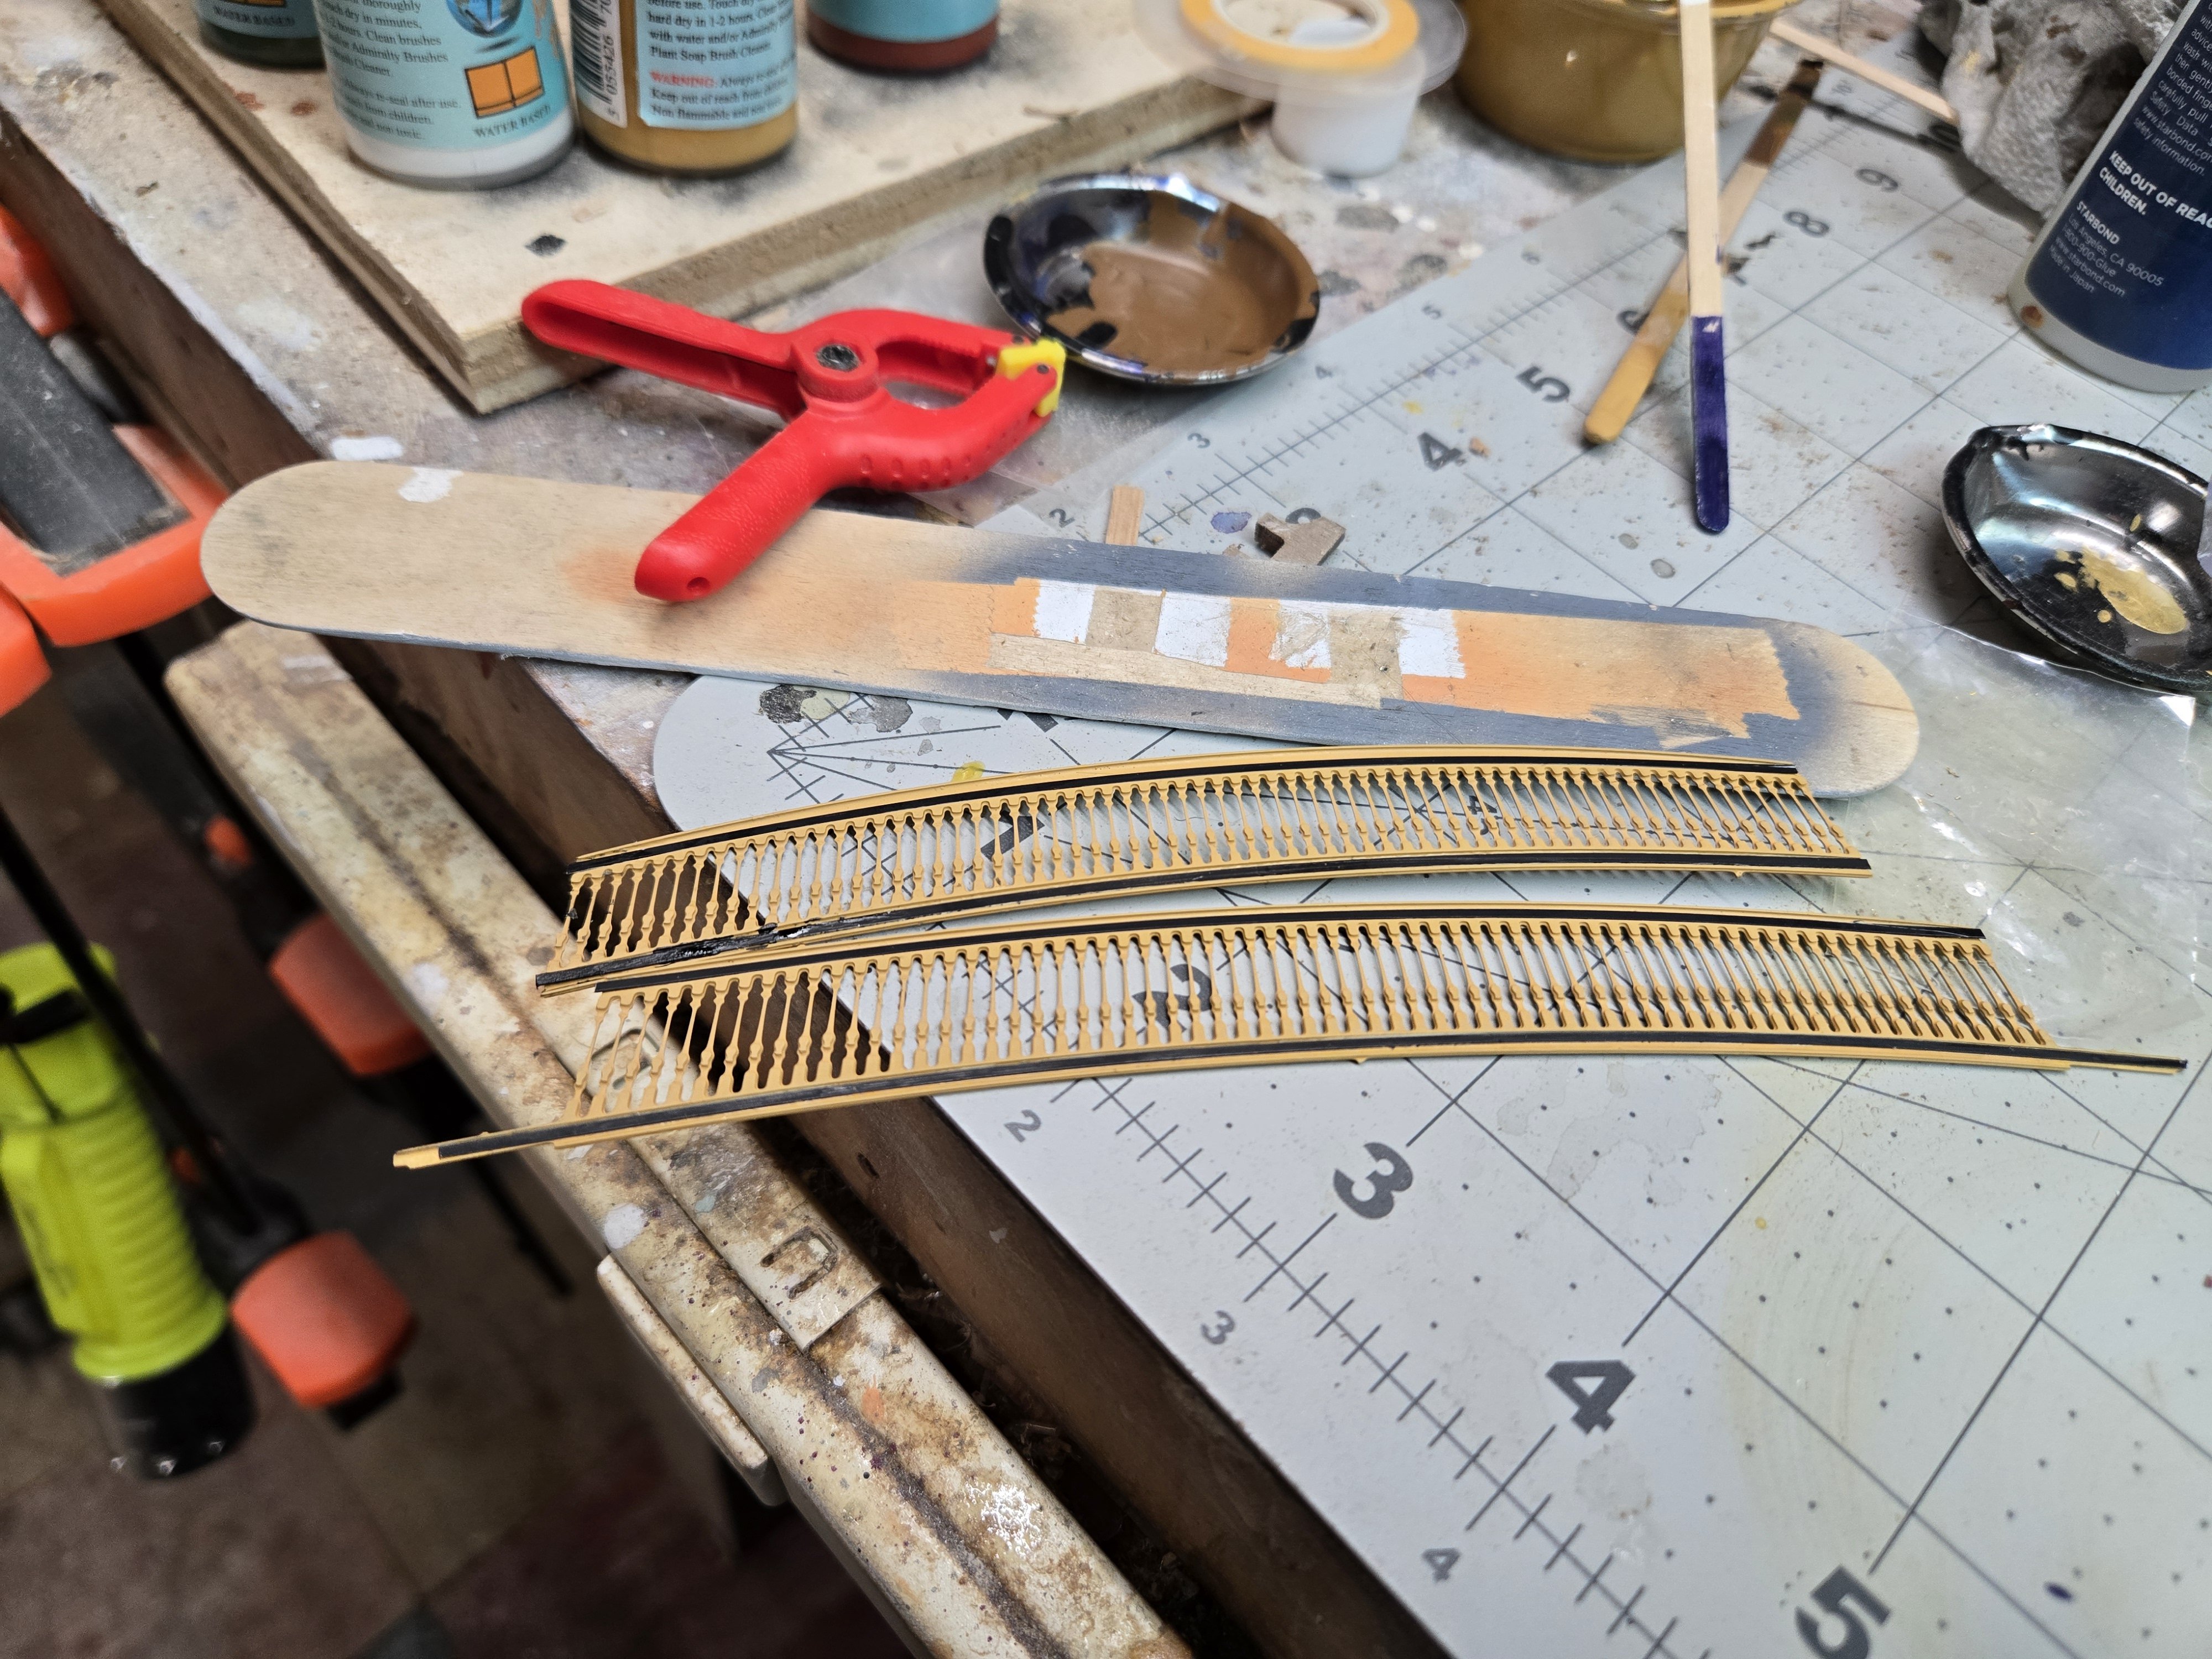
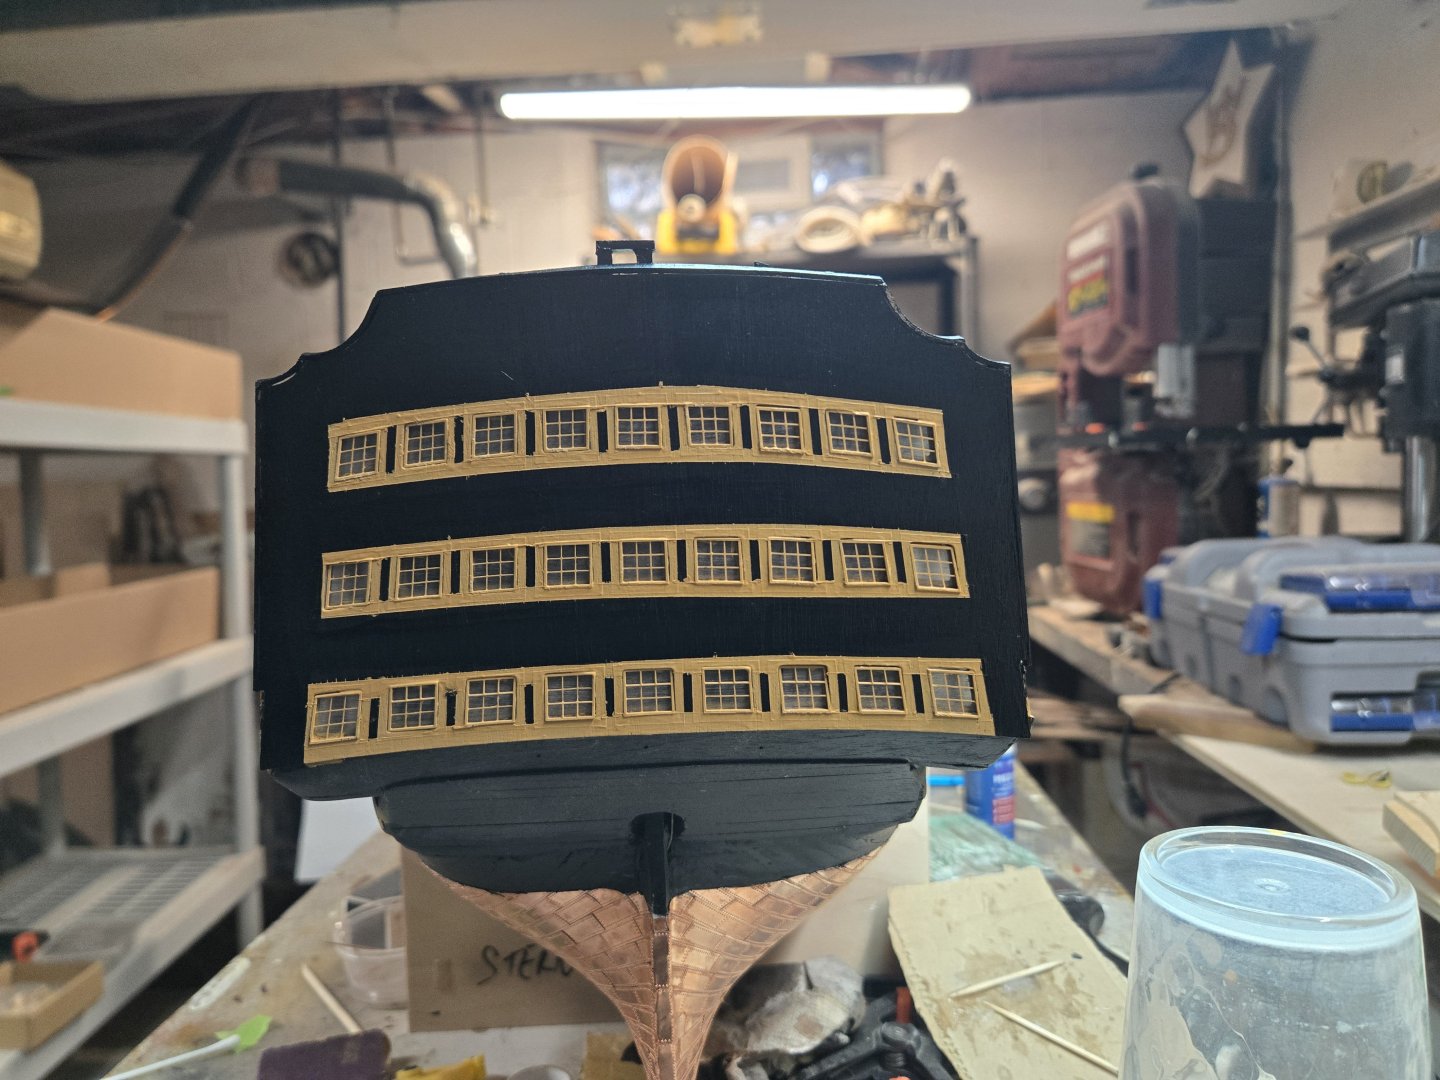
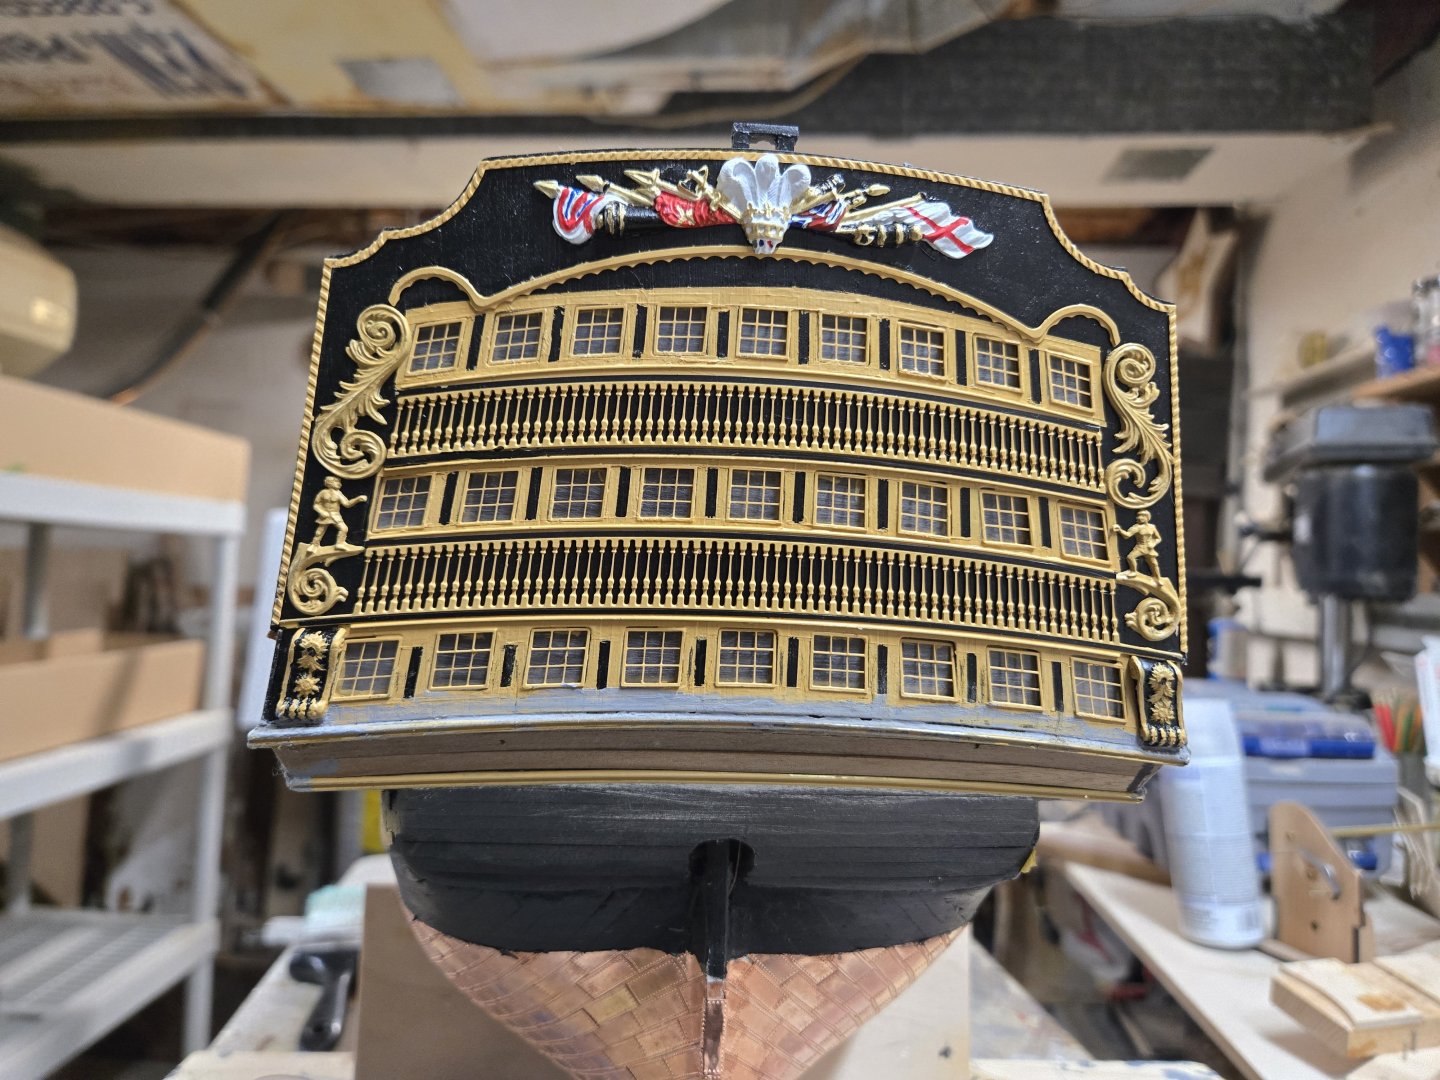
Working on both the stern and side galleries. The stern gallery required some work. I glued glazing to the inside of the exterior facia (#375). I then glued this to the internal facia that is already on the stern(#374). After, I painted it black and after it dried I taped off the areas around the window to paint them yellow and create the black banding in between frames. I have seen other builders add depth to the side galleries. I added some .5x3mm and .5x4mm walnut around the window frames. The balusters will fit over them so I will see how that works. I also added 1mm wide styrene painted black for the striping on the balusters. Once the wood putty dries, I can begin putting the frames and balusters on. I also added the facia capping after soaking them in water to get the proper bend.


-
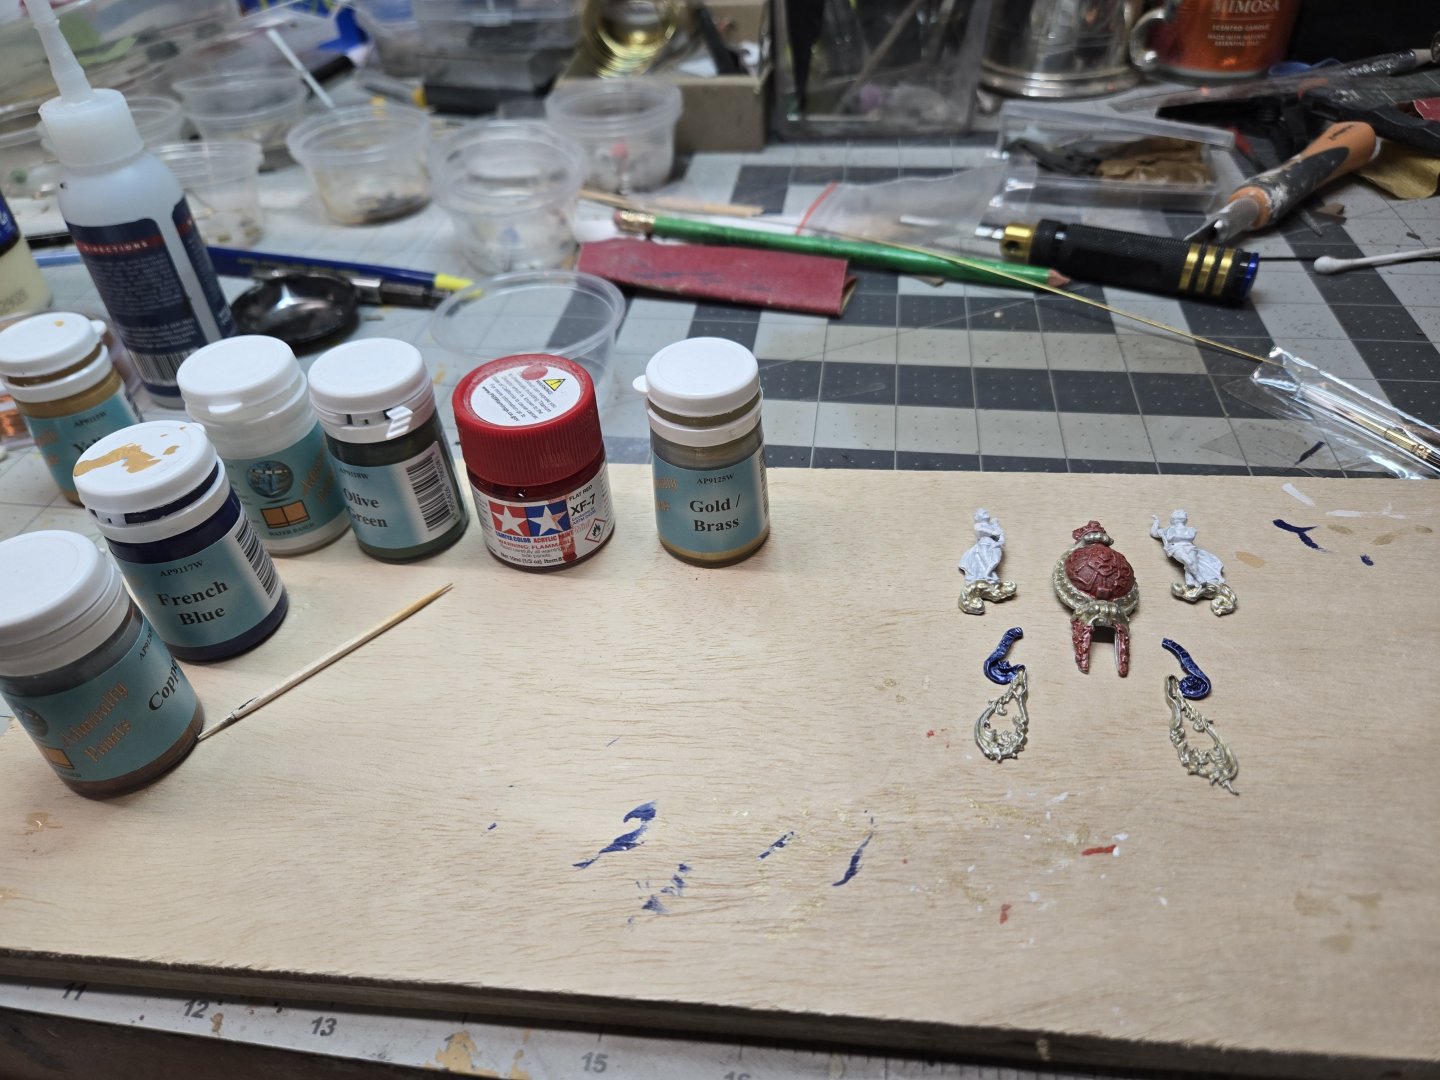
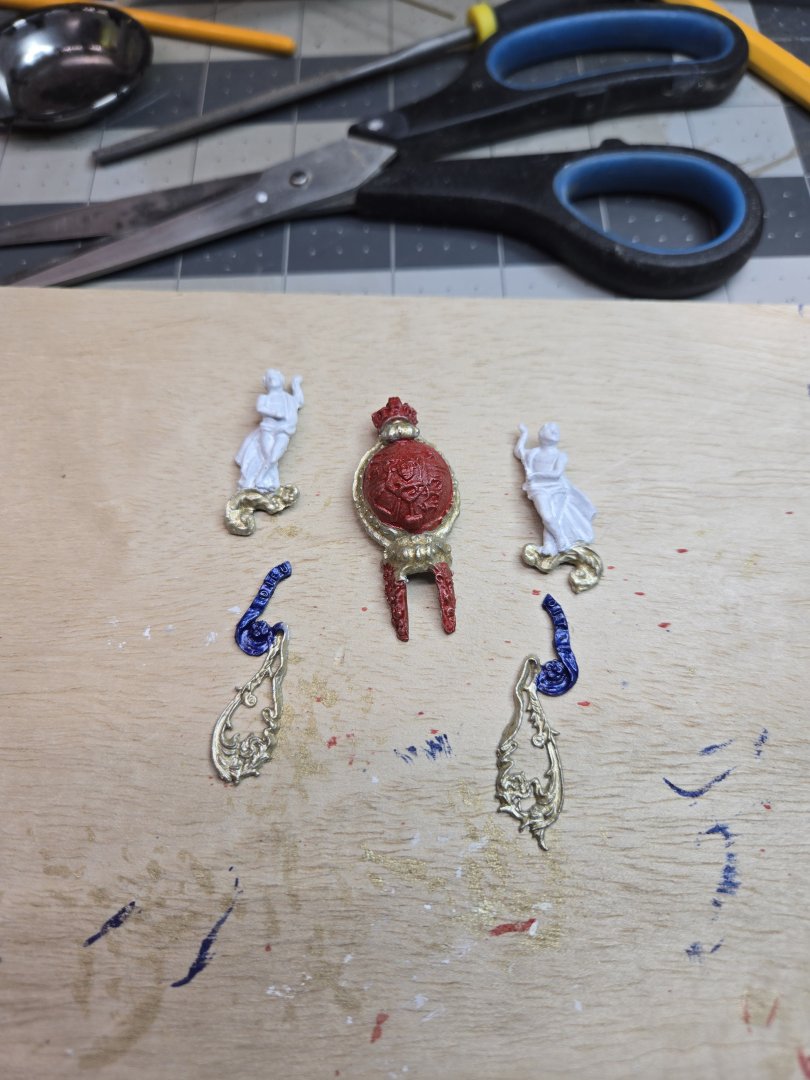
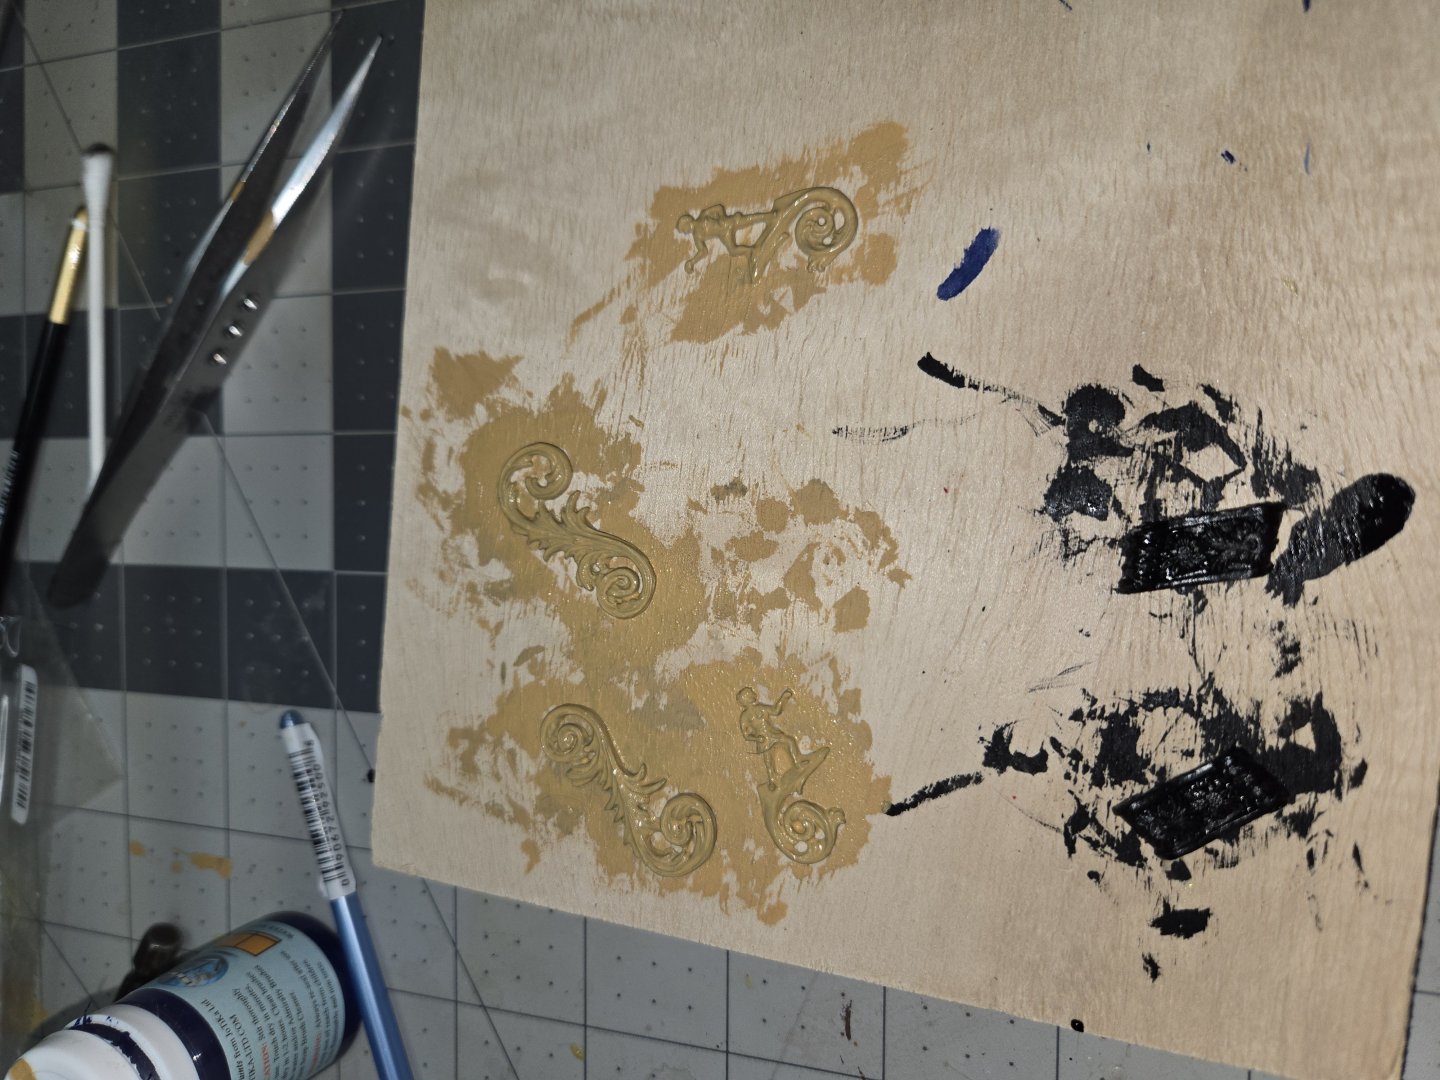
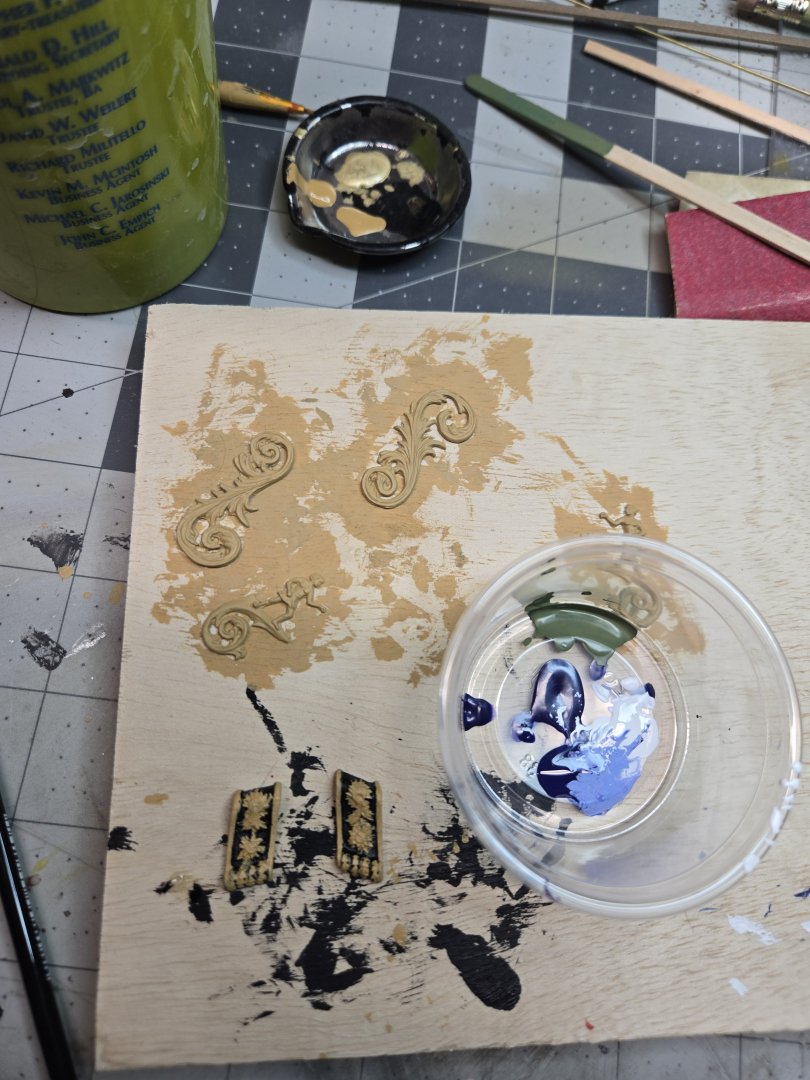
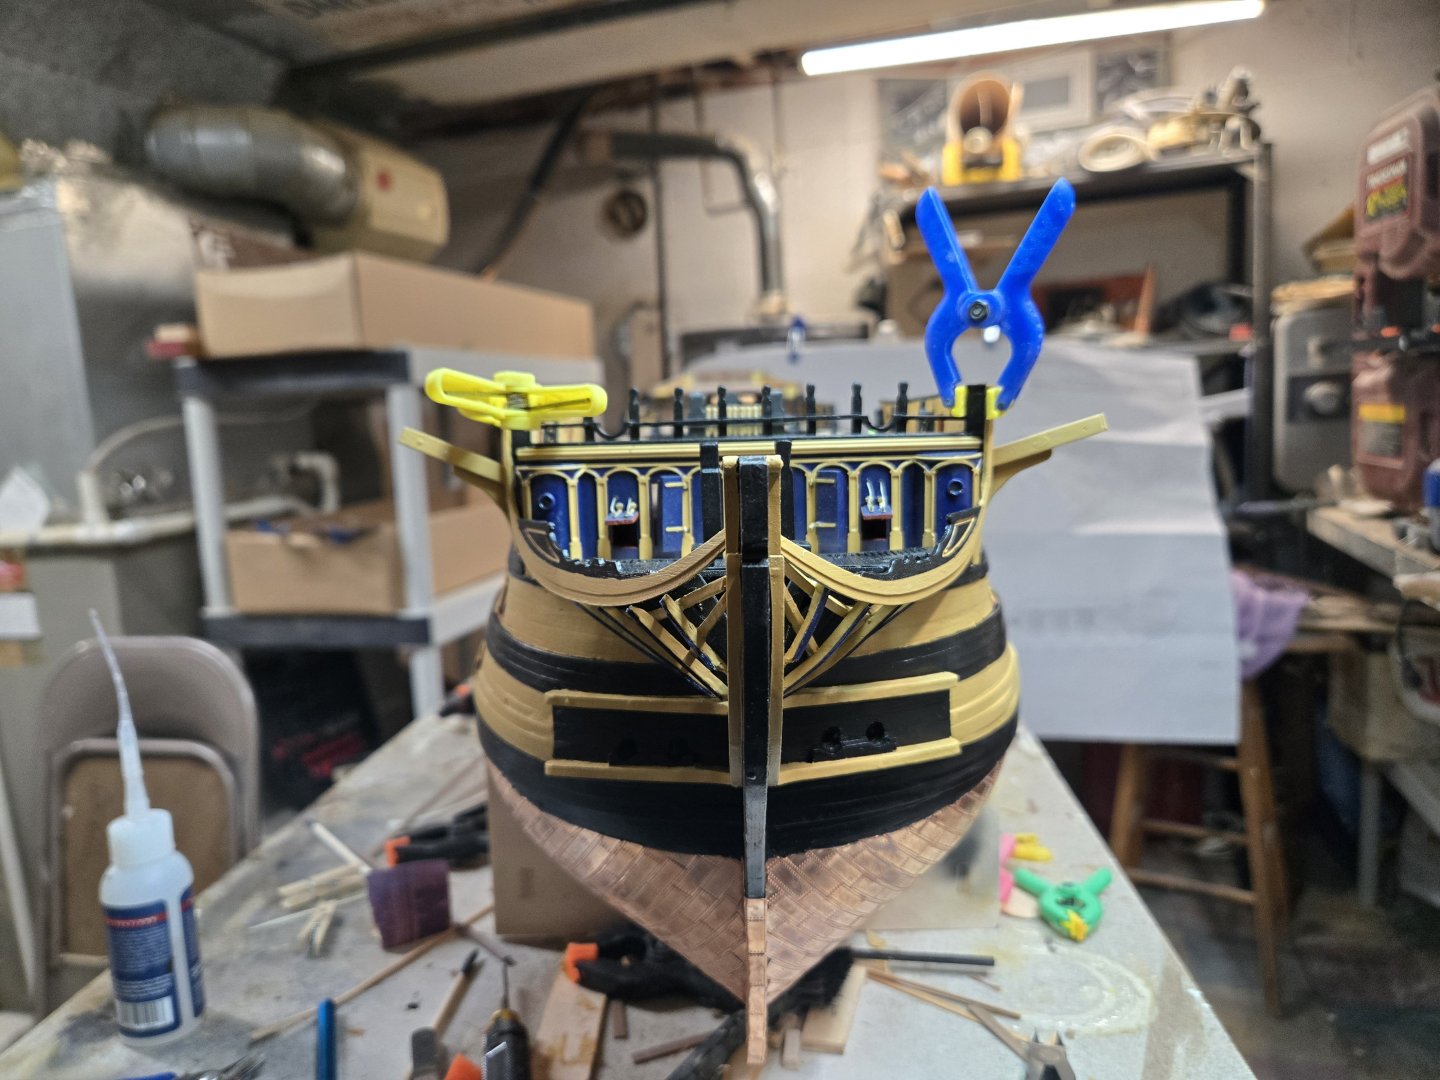
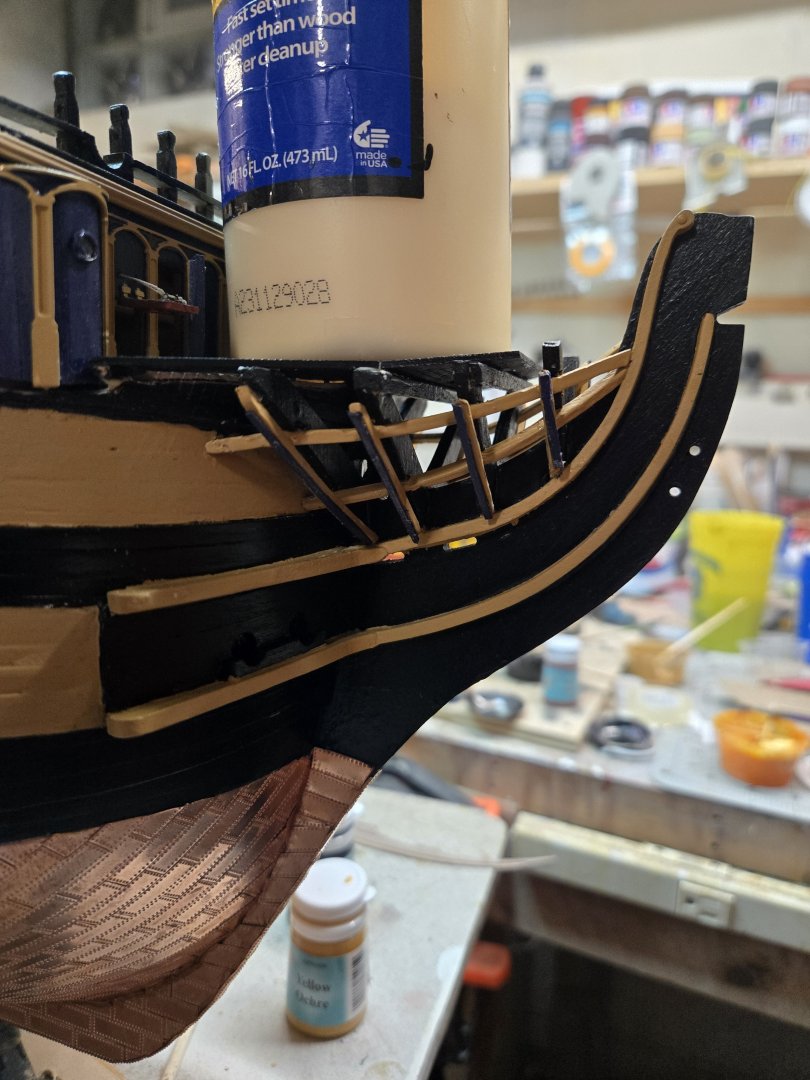
I wanted to take a stab at painting the cast metal to see what I'm facing. I figured I would paint the broad base colors and slower and lightly add layer after layer. I noticed the starboard cherub's cape is a lighter blue than I have. I mixed some white and the kit blue. They only issue will be when adding the 2nd or 3rd coat because it won't match. I did make an error when installing the stem bow curved rails. The directions specifically remind you to leave room for these castings. I didn't catch that warning and my rails are too close. I'll have to adjust these pieces to fit over one of the rails as I am not going to remove them from the stem....they are committed to their positions and would affect too many other pieces in that area.


-
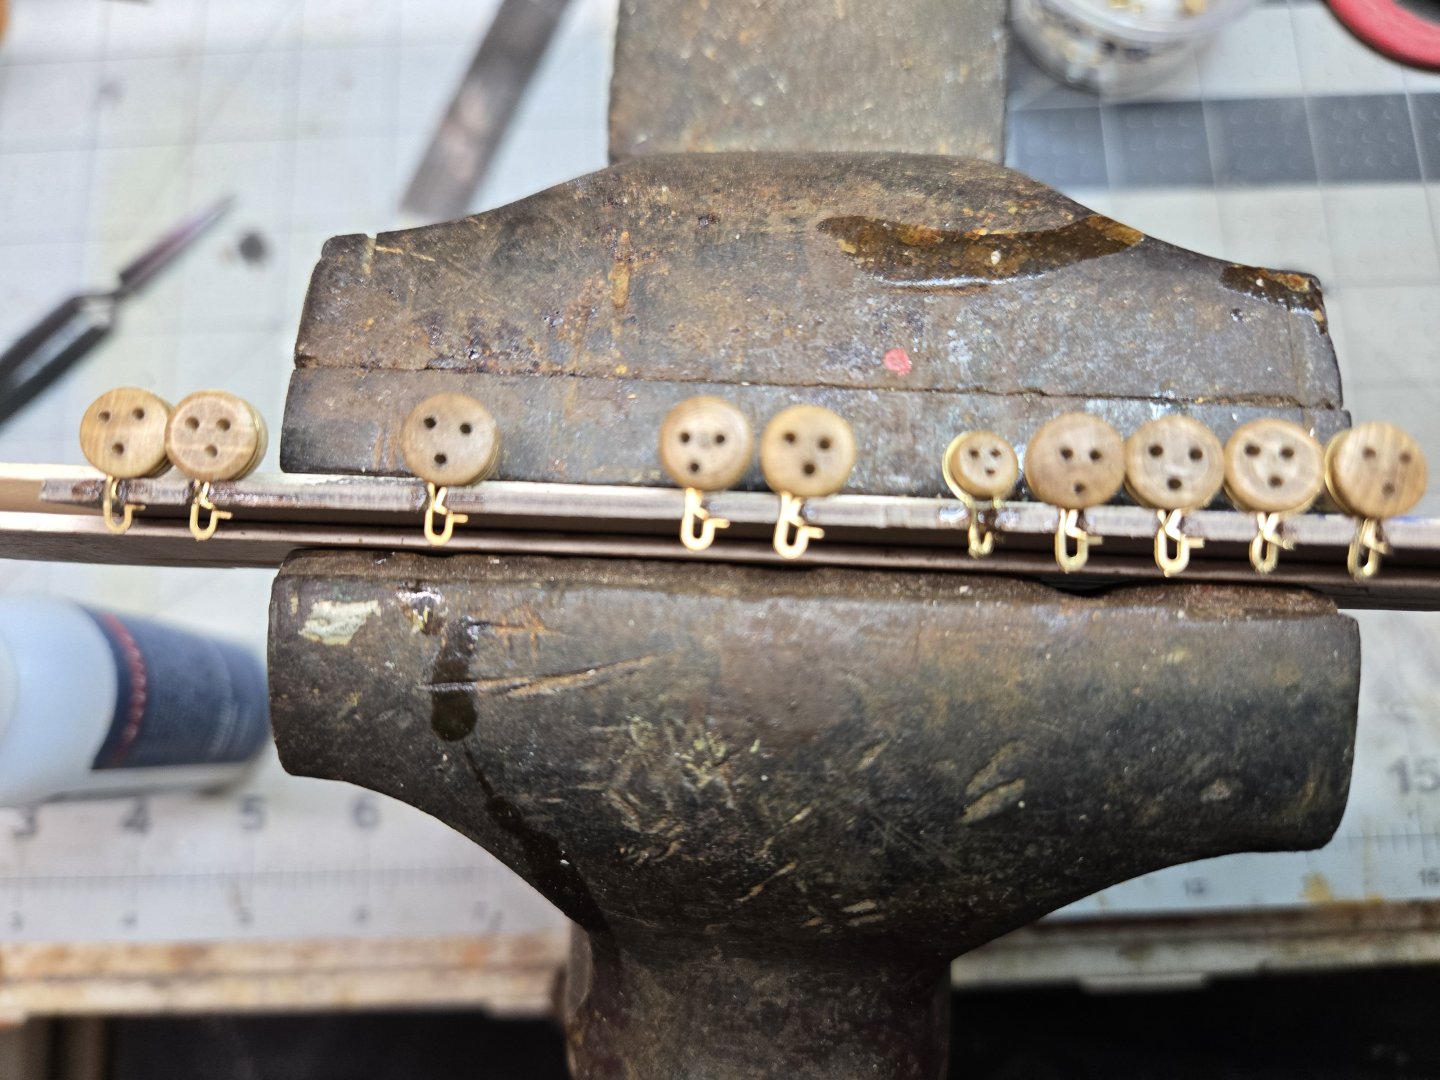
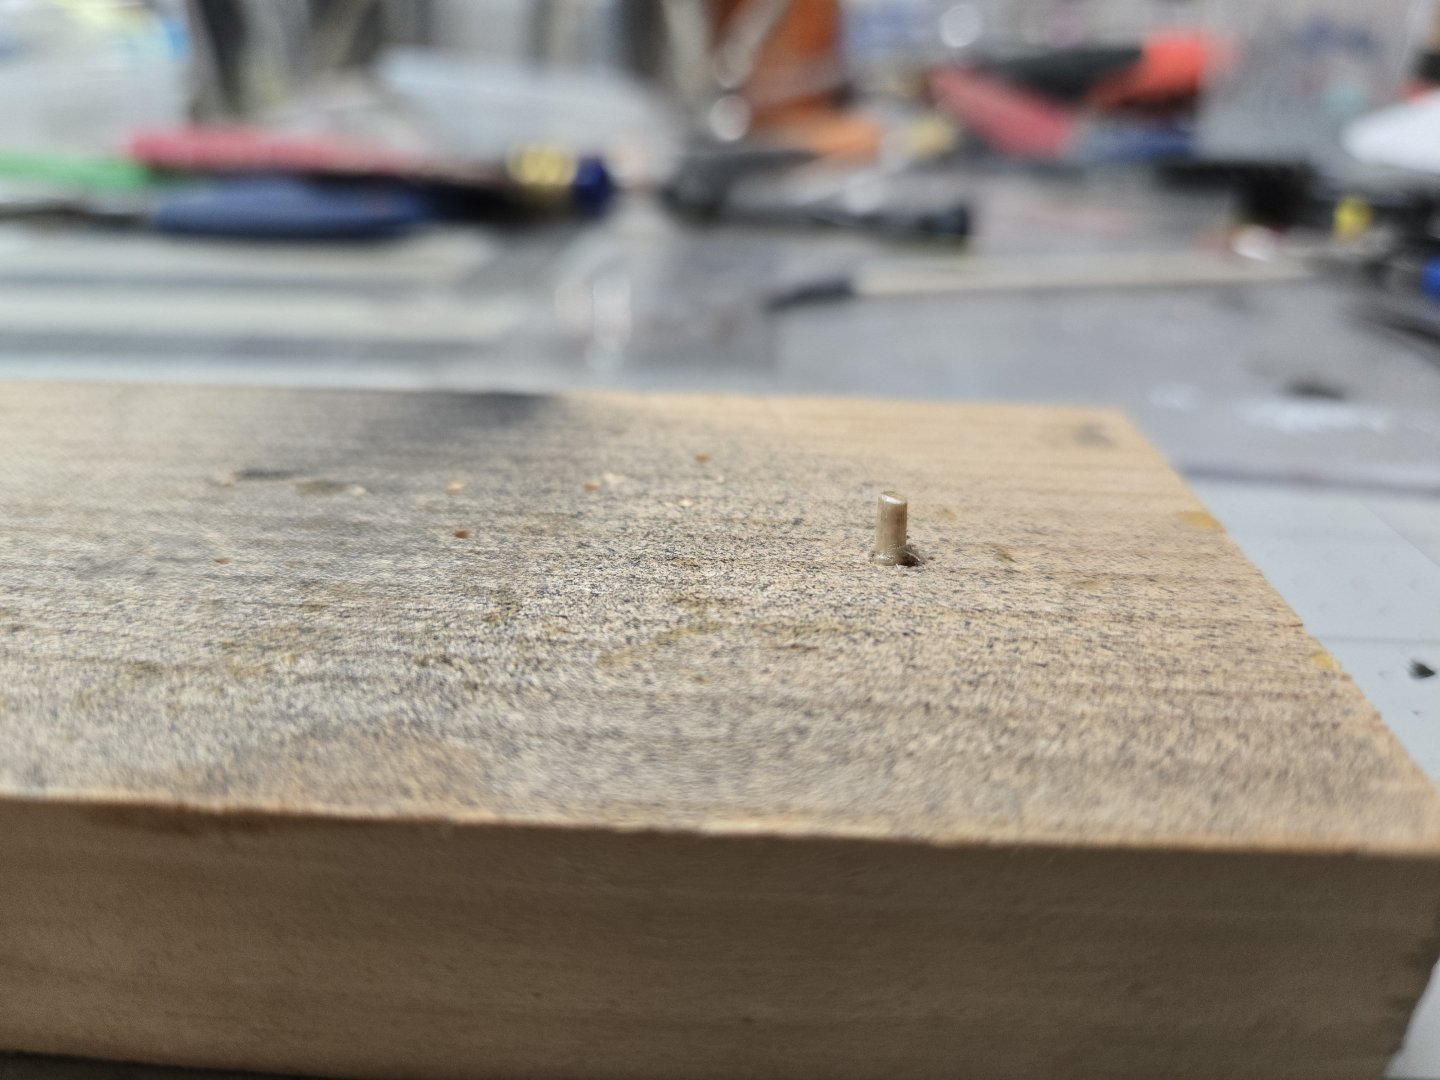
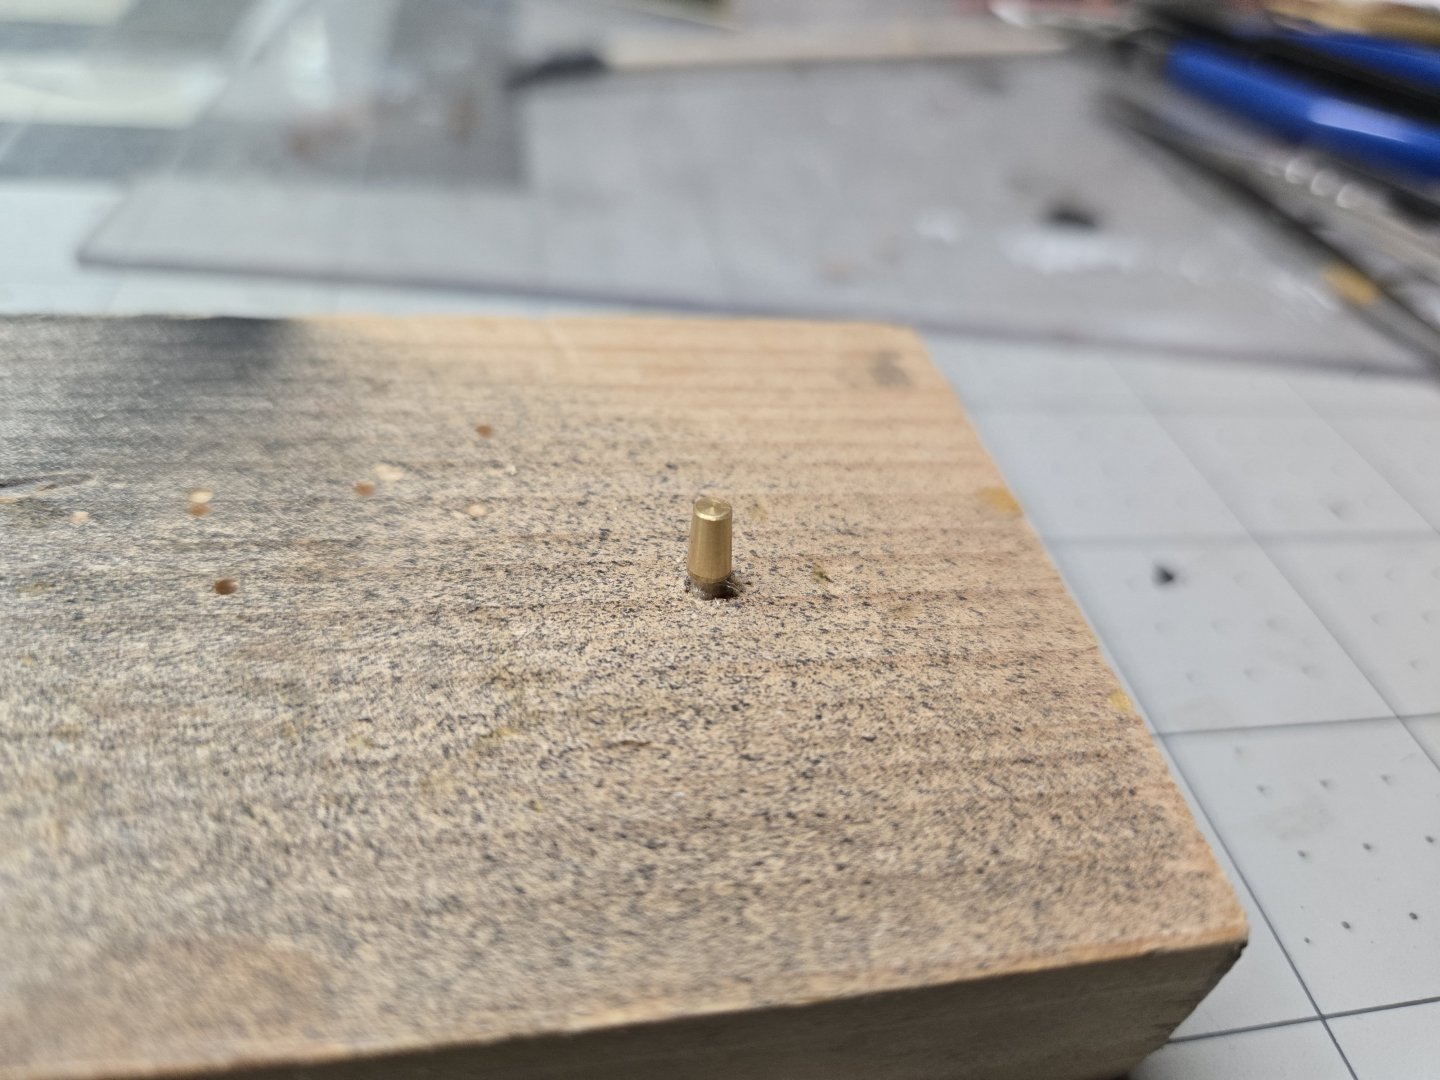
I saw Robert29's take on creating rings for the fire buckets. I put a toothpick in some scrap wood and pushed a brass barrel on top. I was able to wrap thin PE sprue around the base and use CA glue to attach. I plan on putting the glued edge to the back so they aren't visible. I also bought some Waterslide decal paper to see if I can make little decals. No big deal if that doesn't work. This is tedious work and I do 3-4 a day in between other...'funner' things.

-
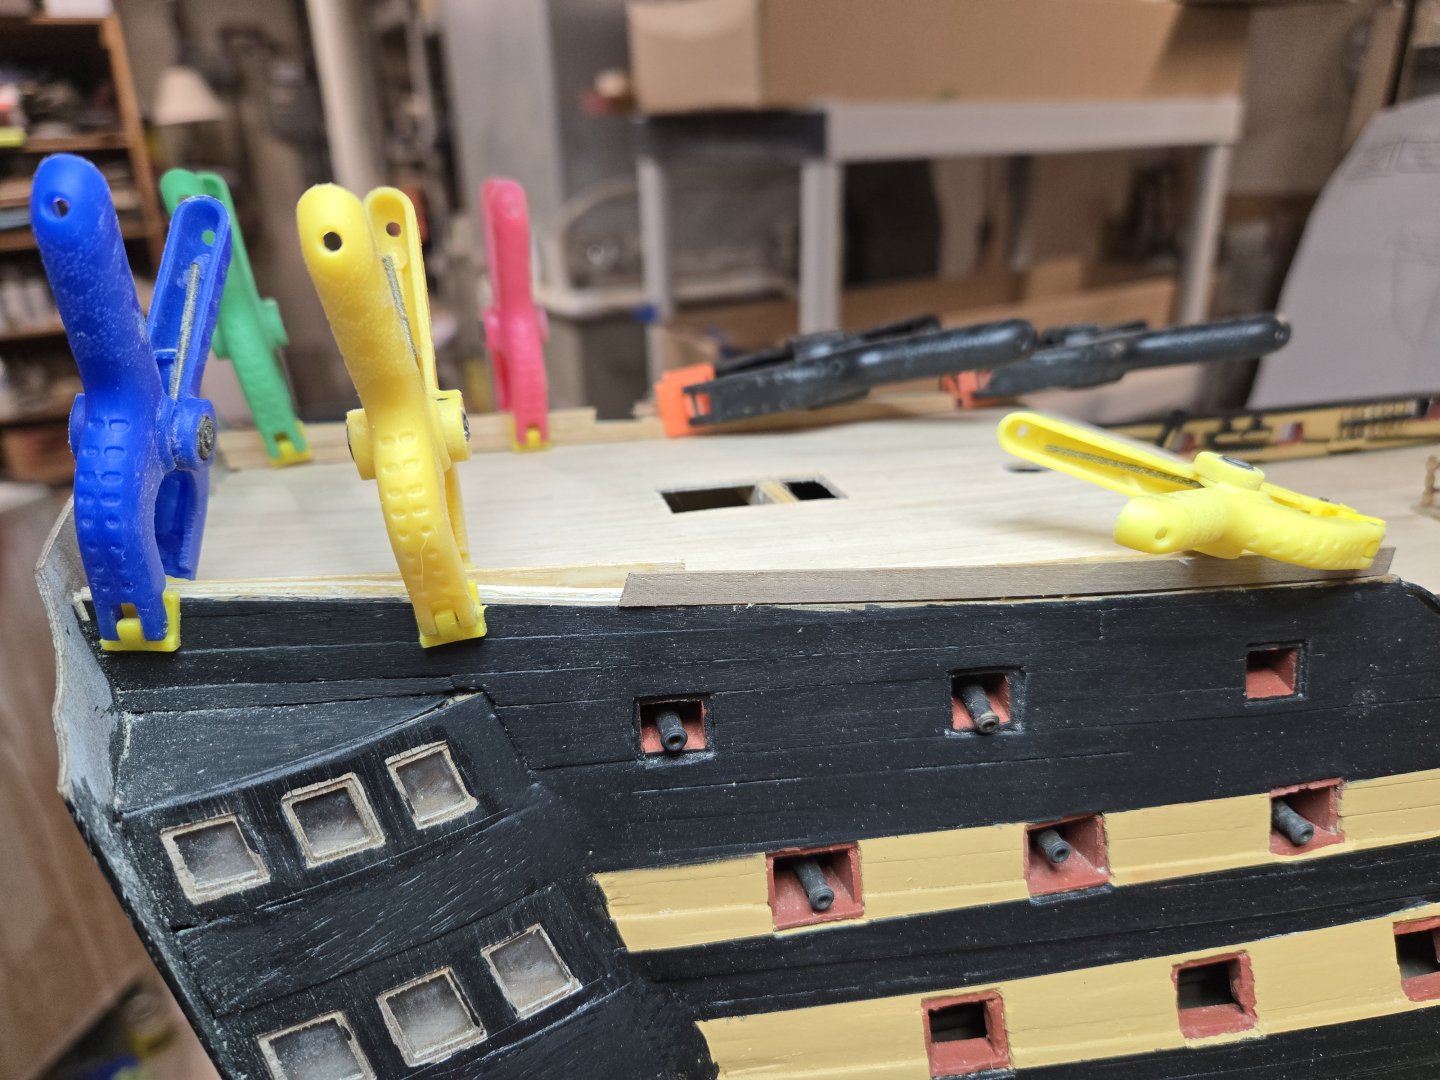
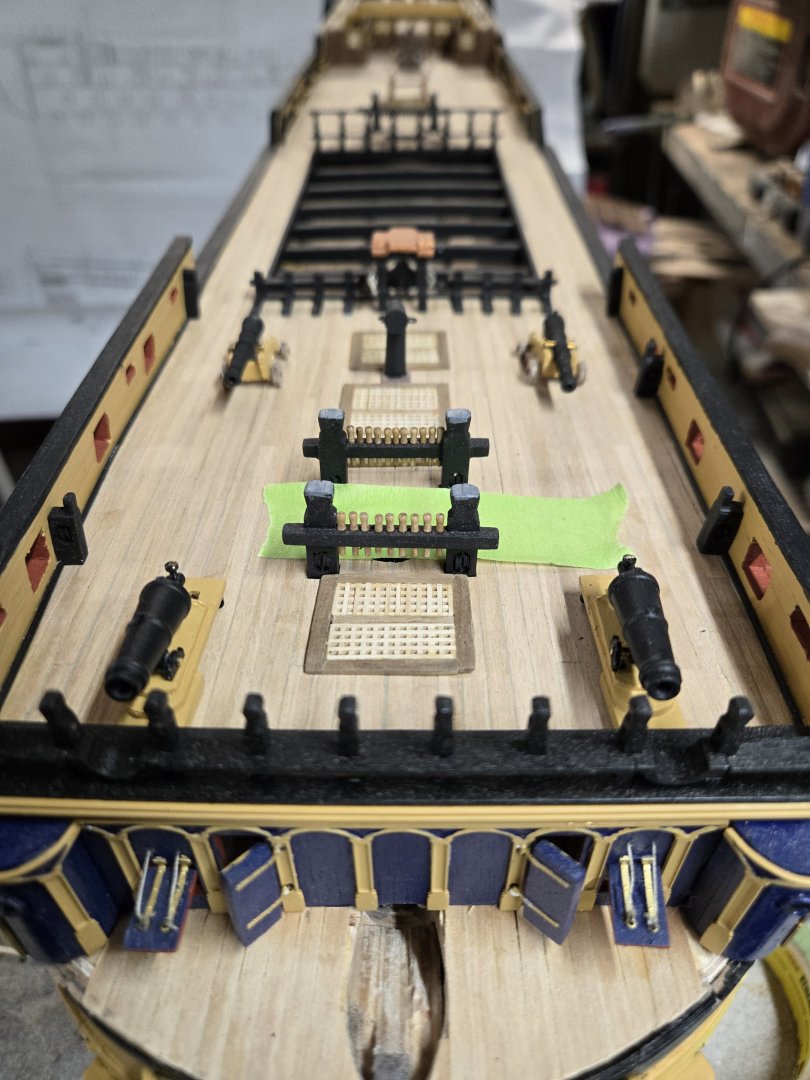
I was finally able to secure the poop deck barricade down using smaller clamps without their feet attached. This allowed them to grab the top rail and underside of the poop deck. Once painted along with the stair rails, things were looking ok. ....except for that skylight

-
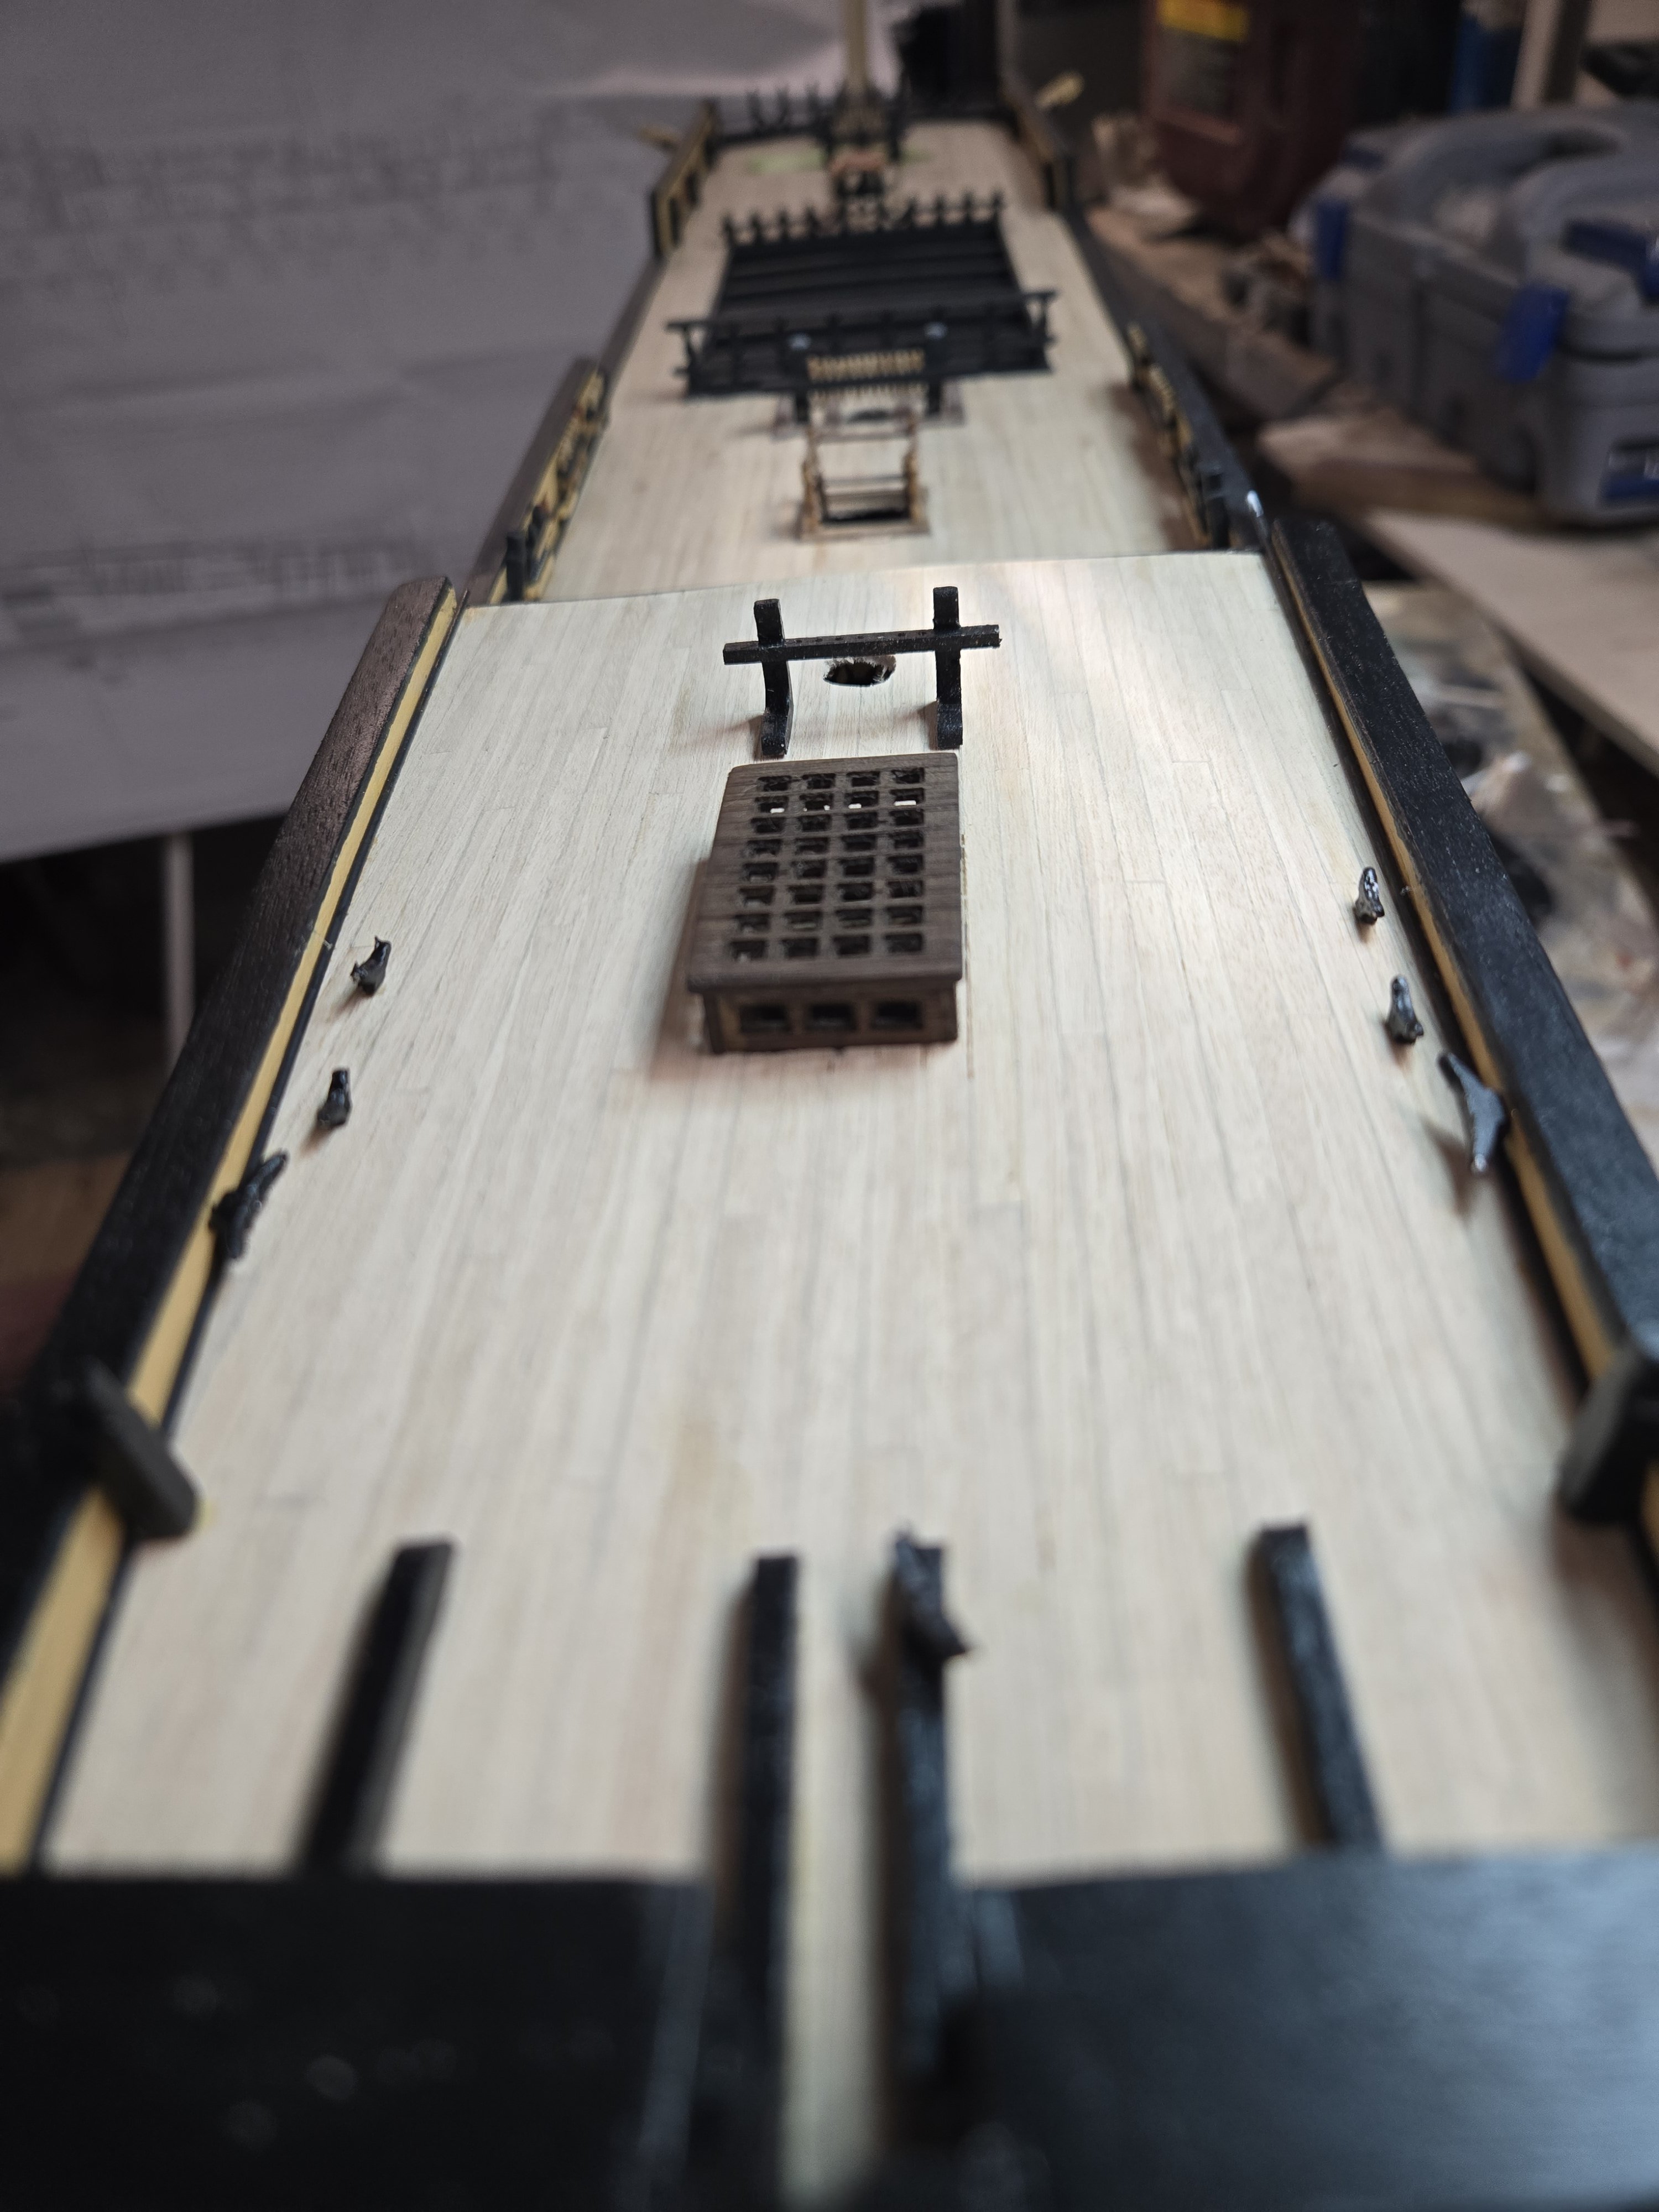
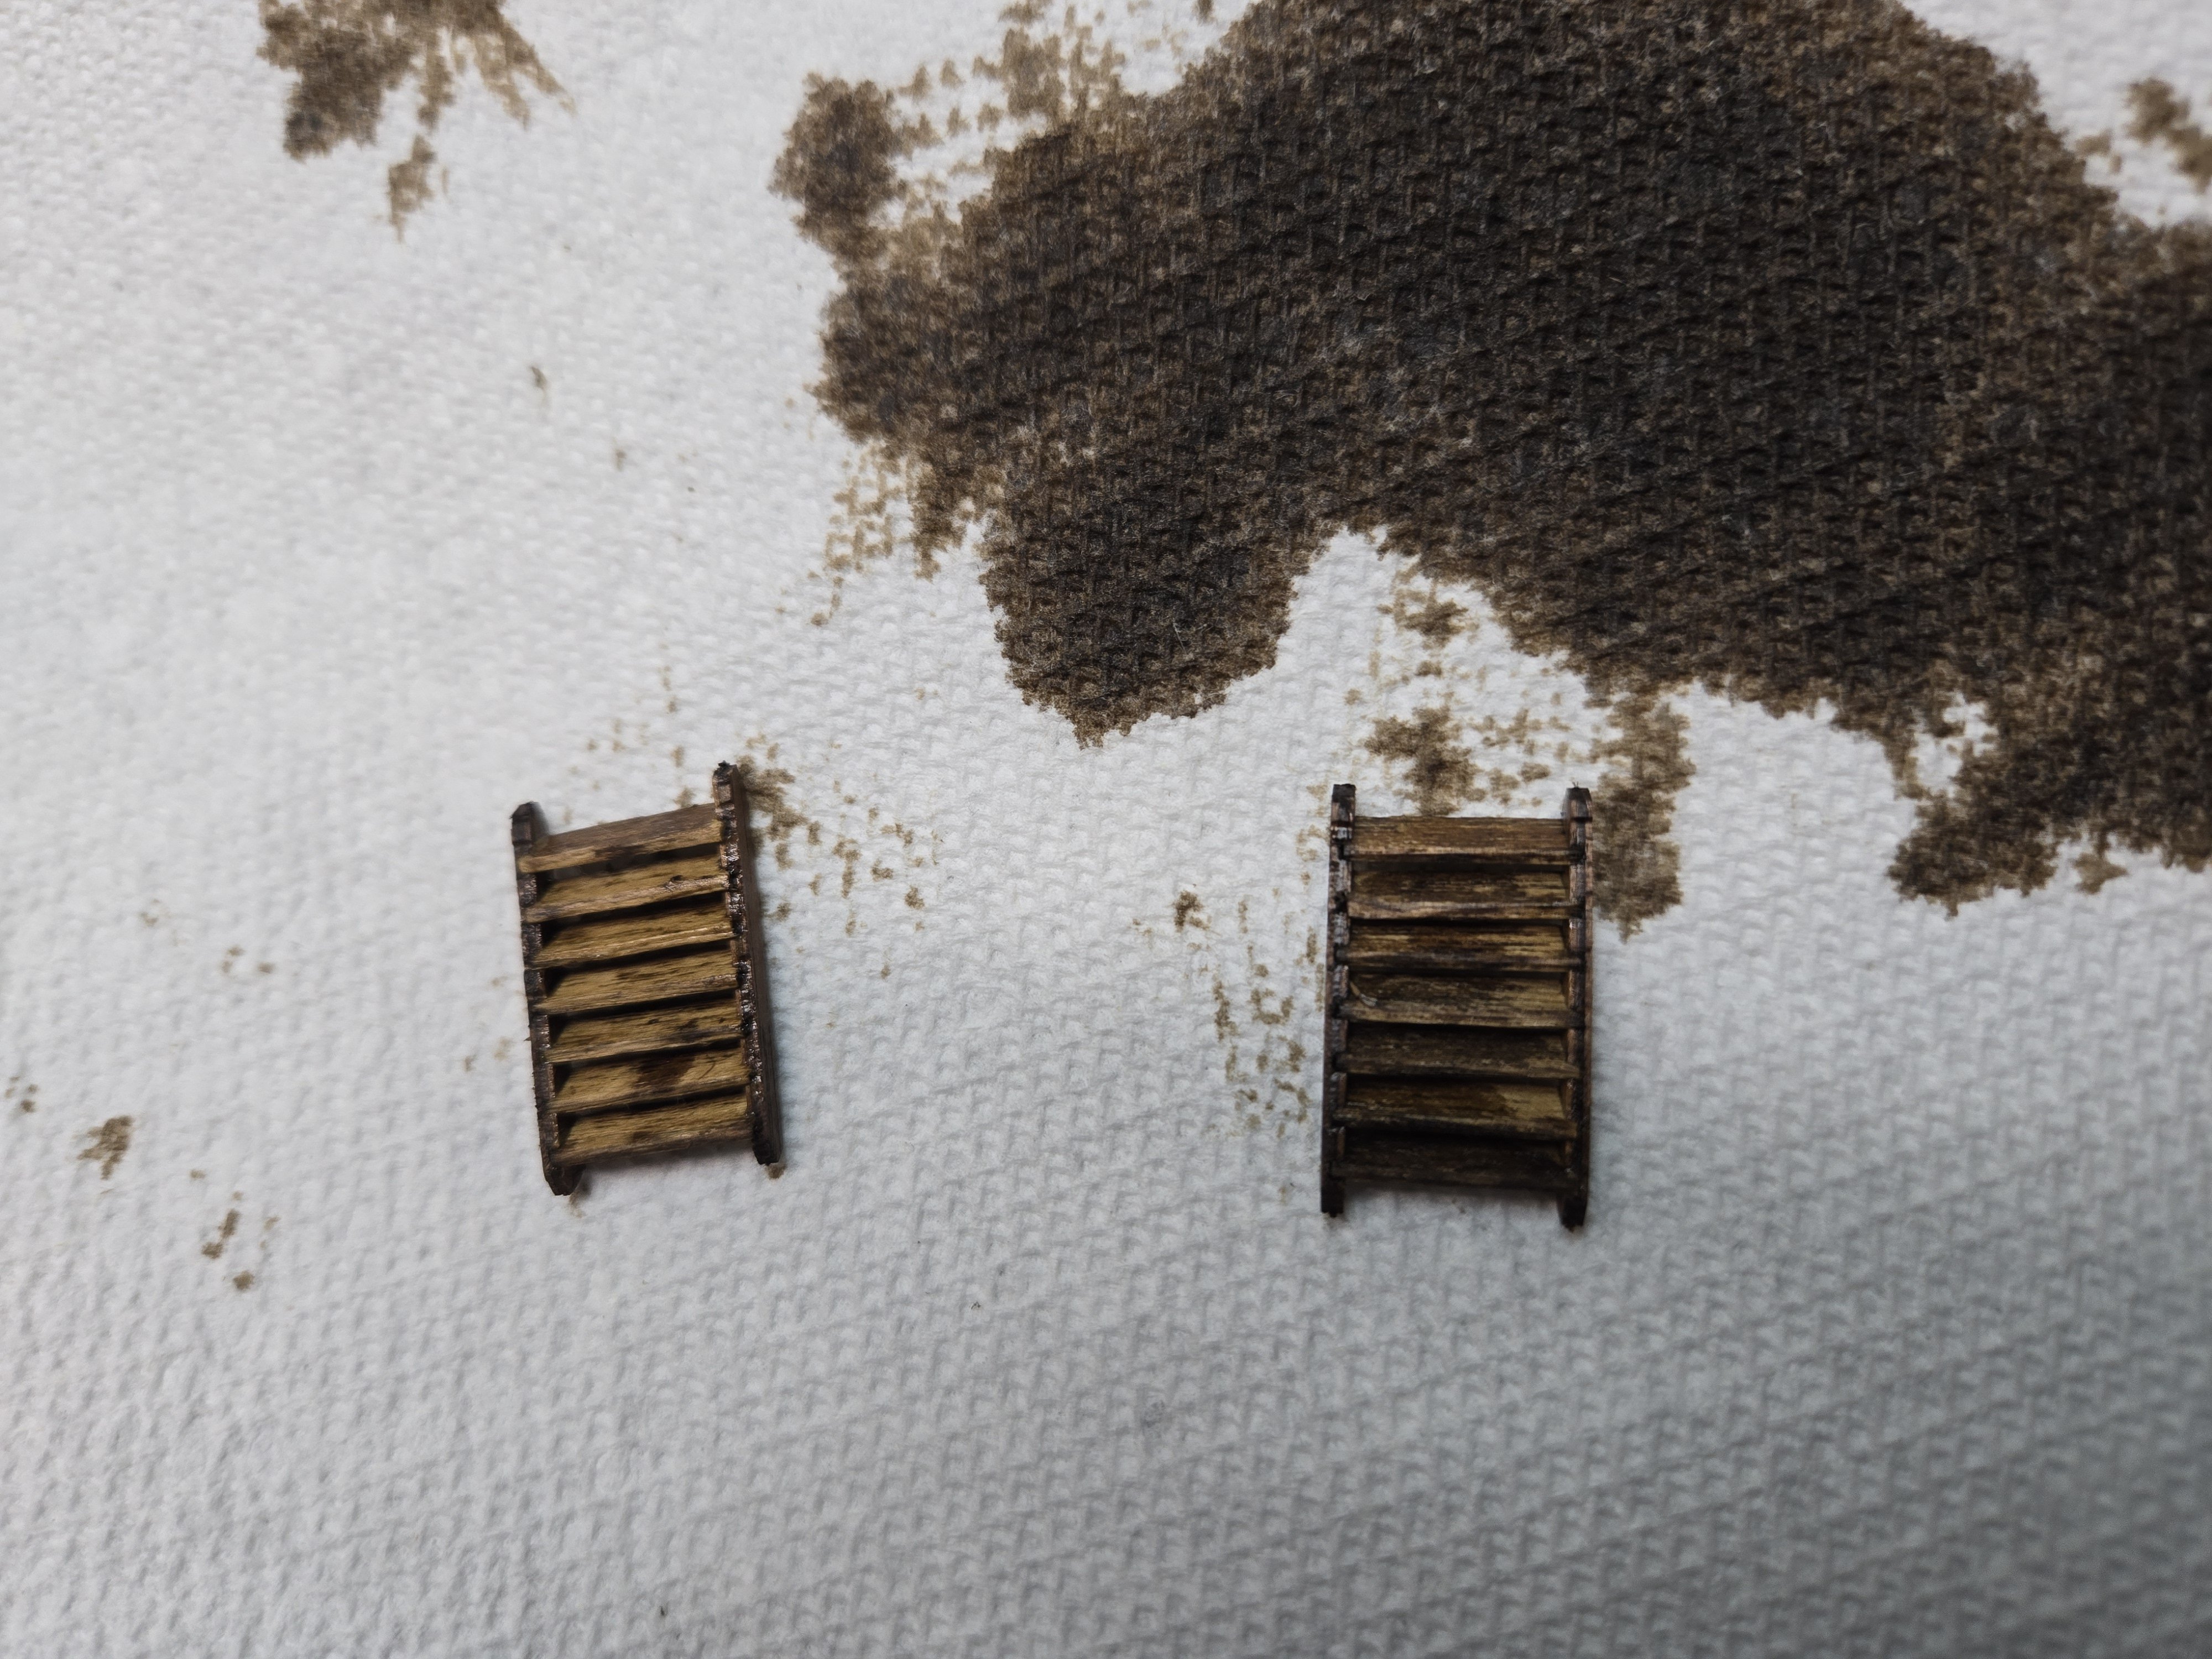
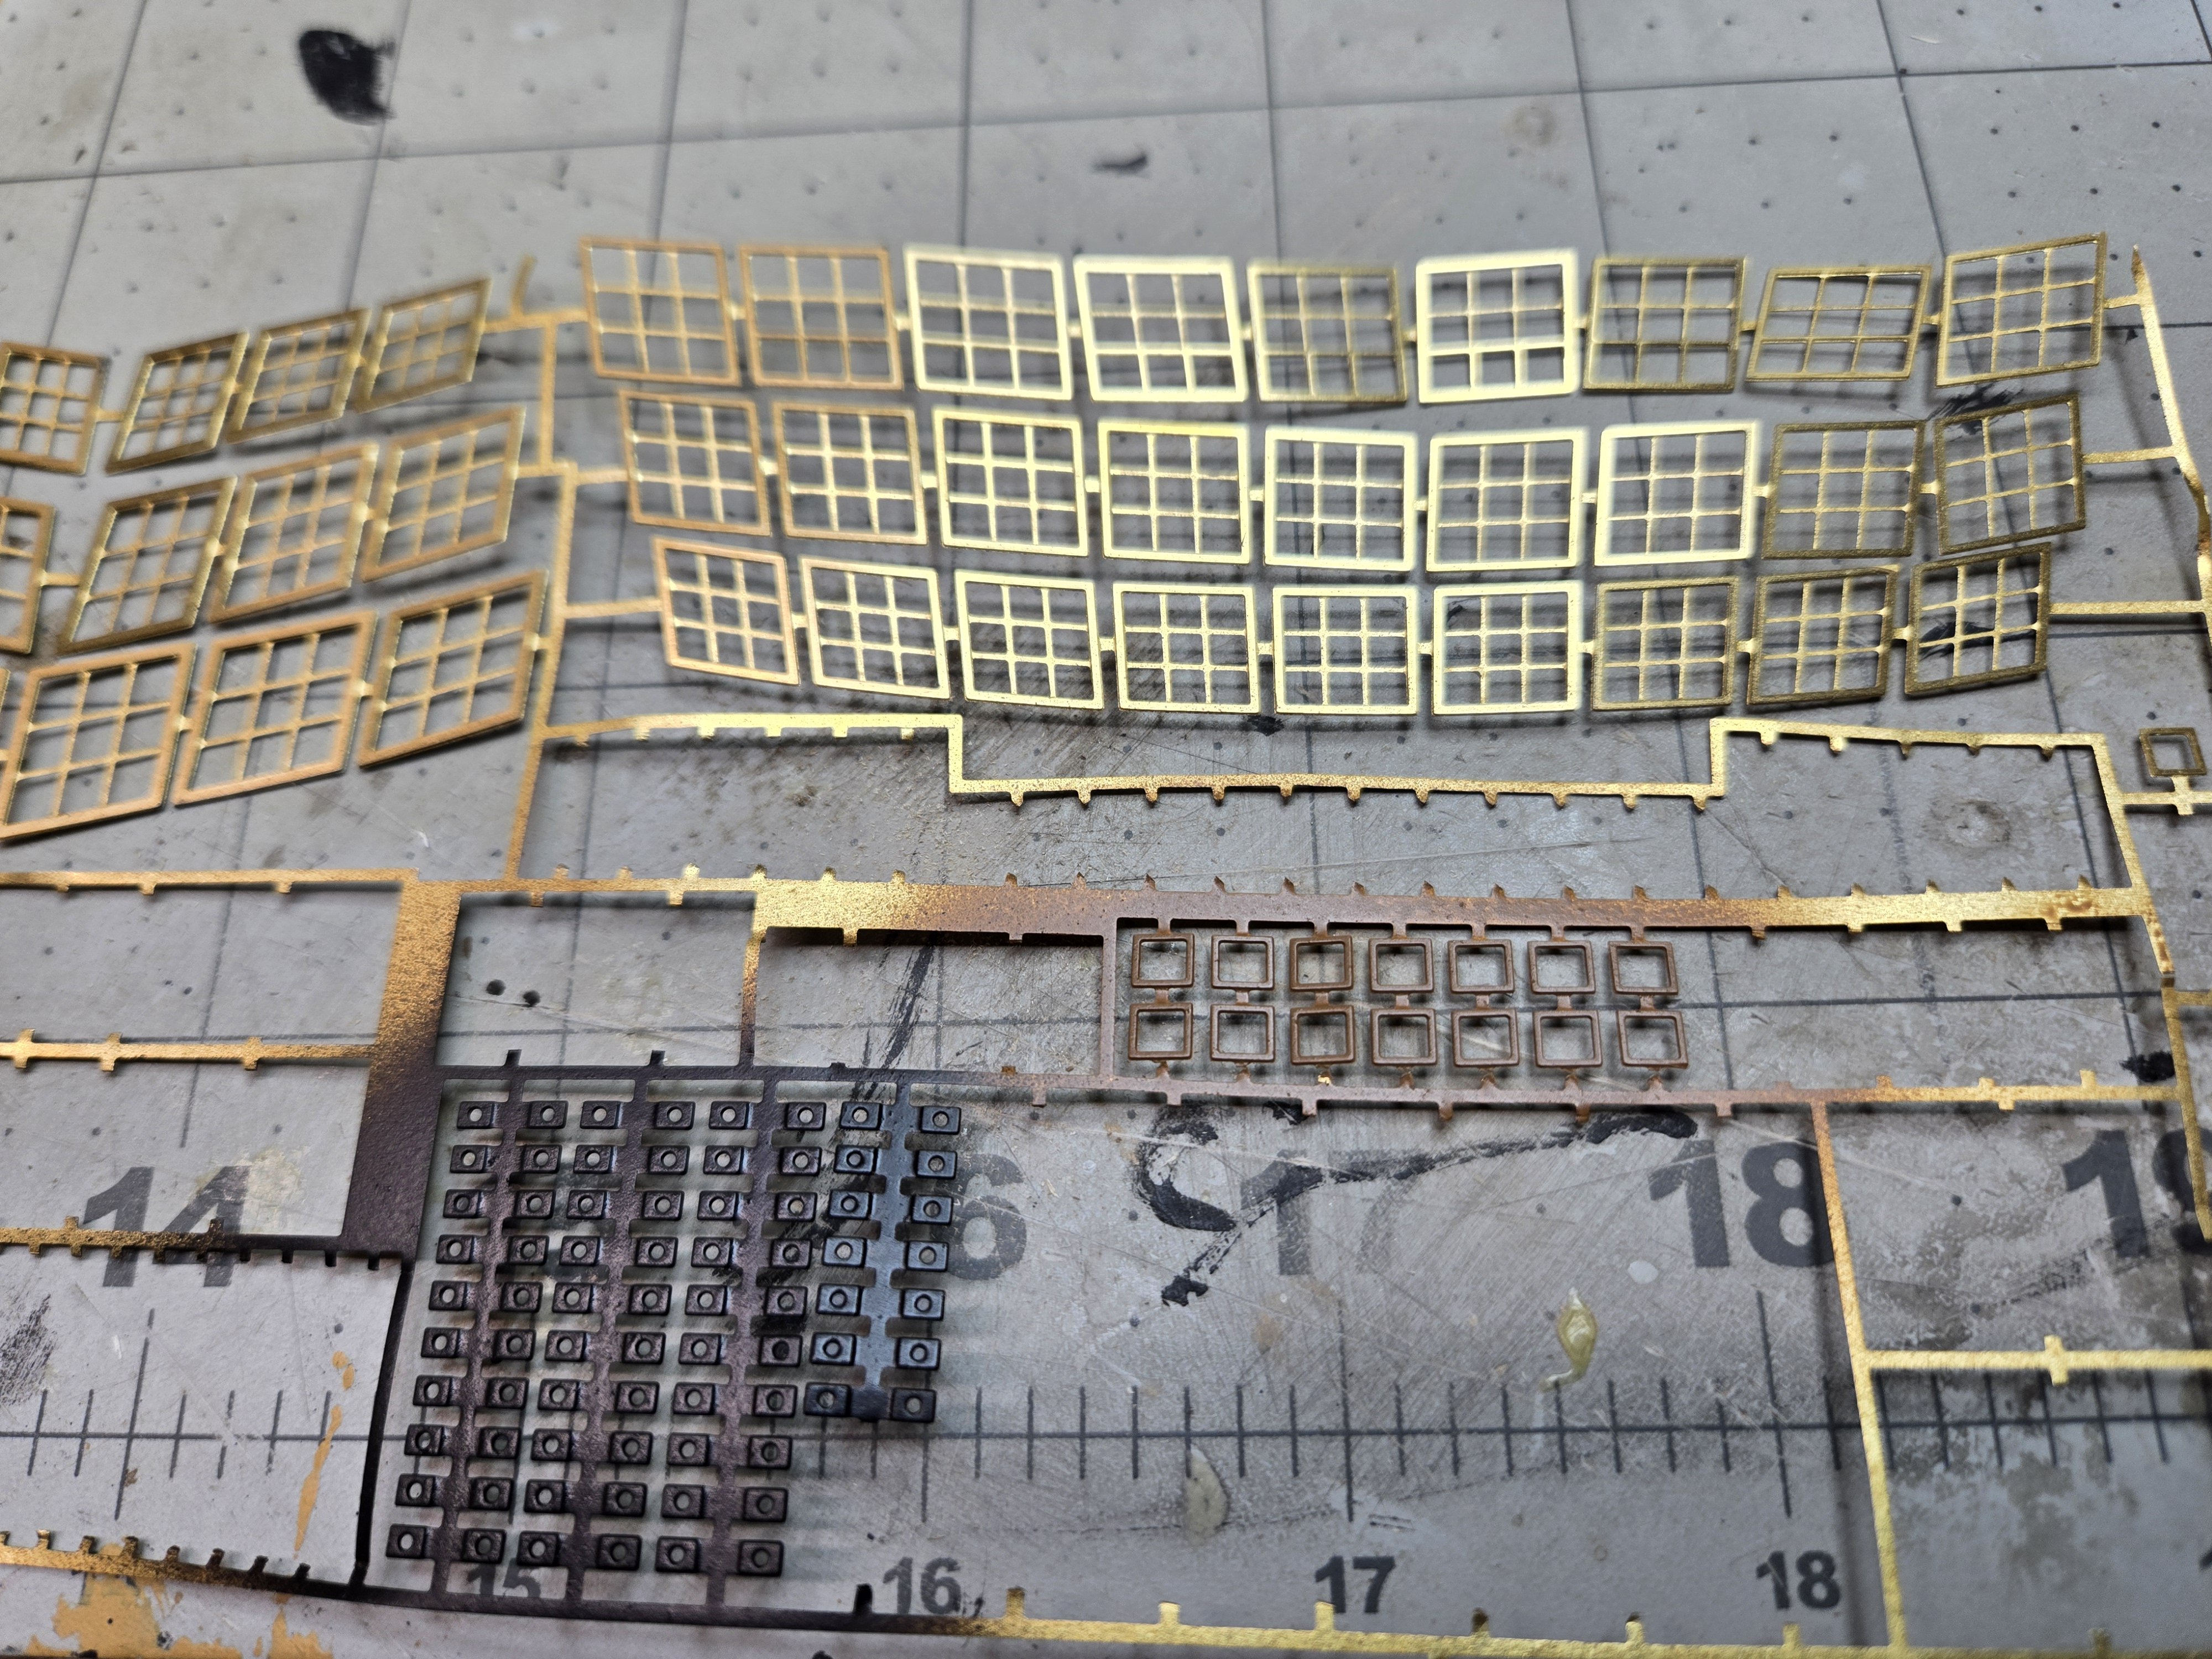
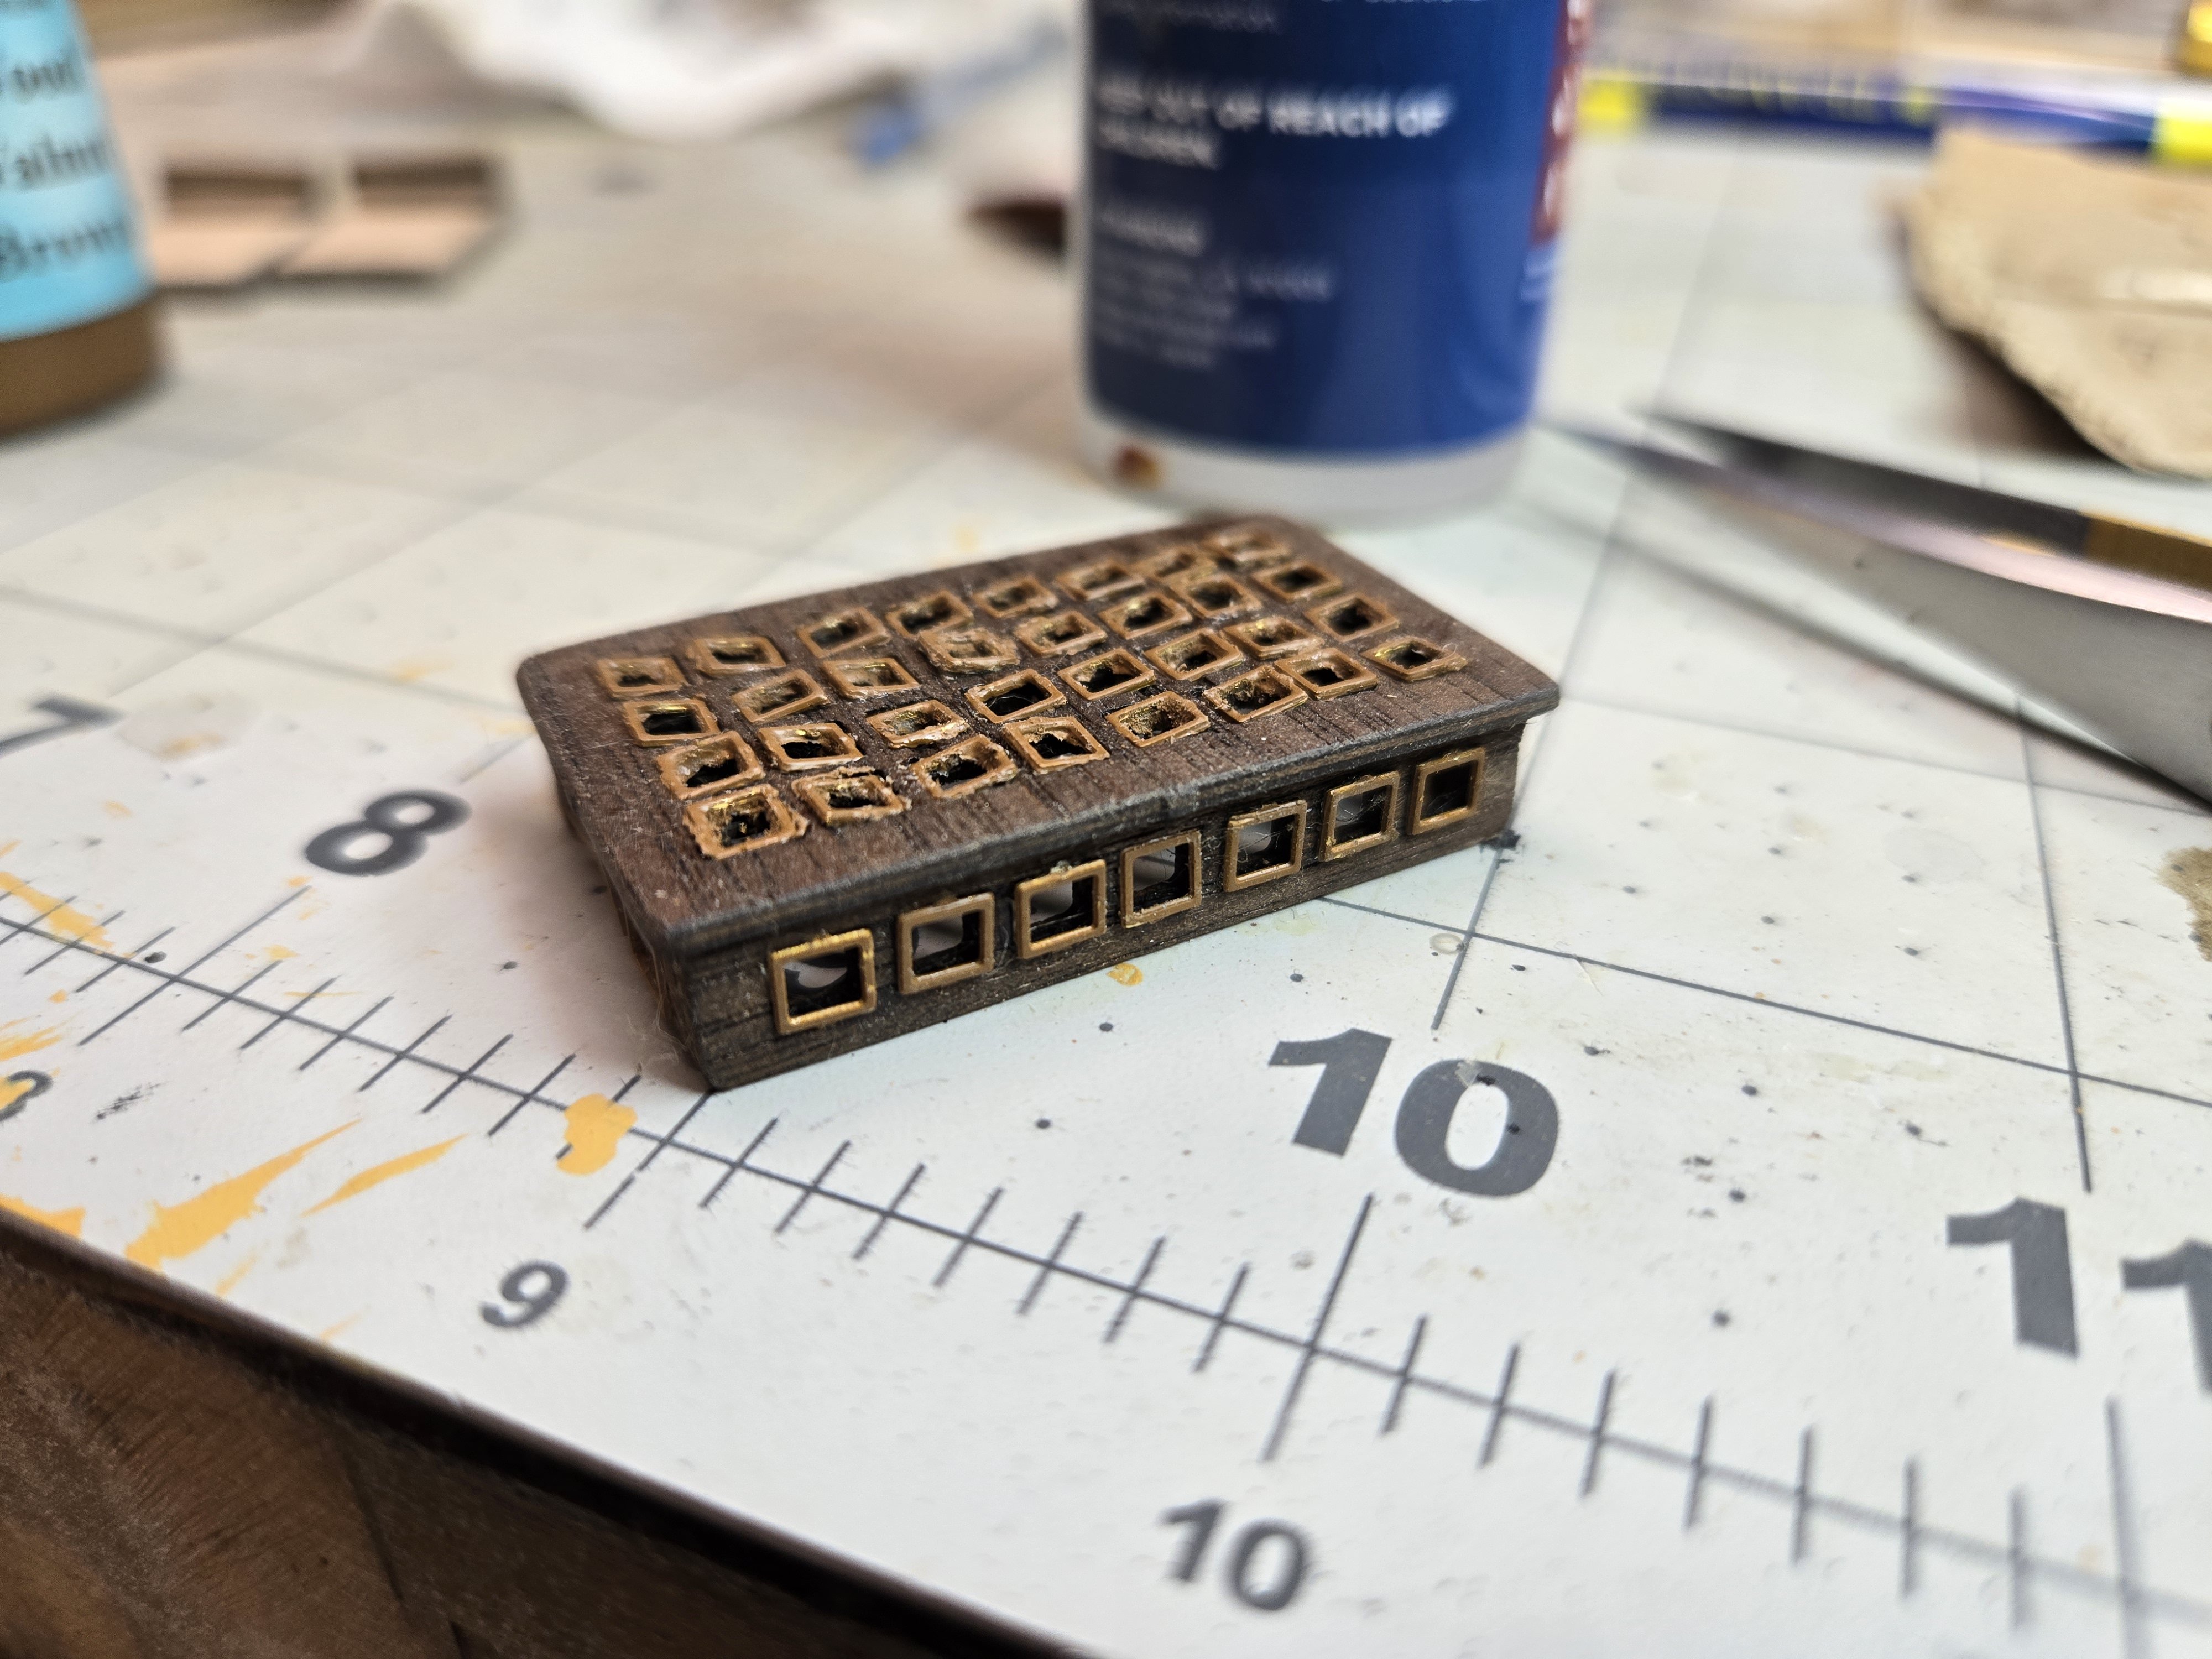
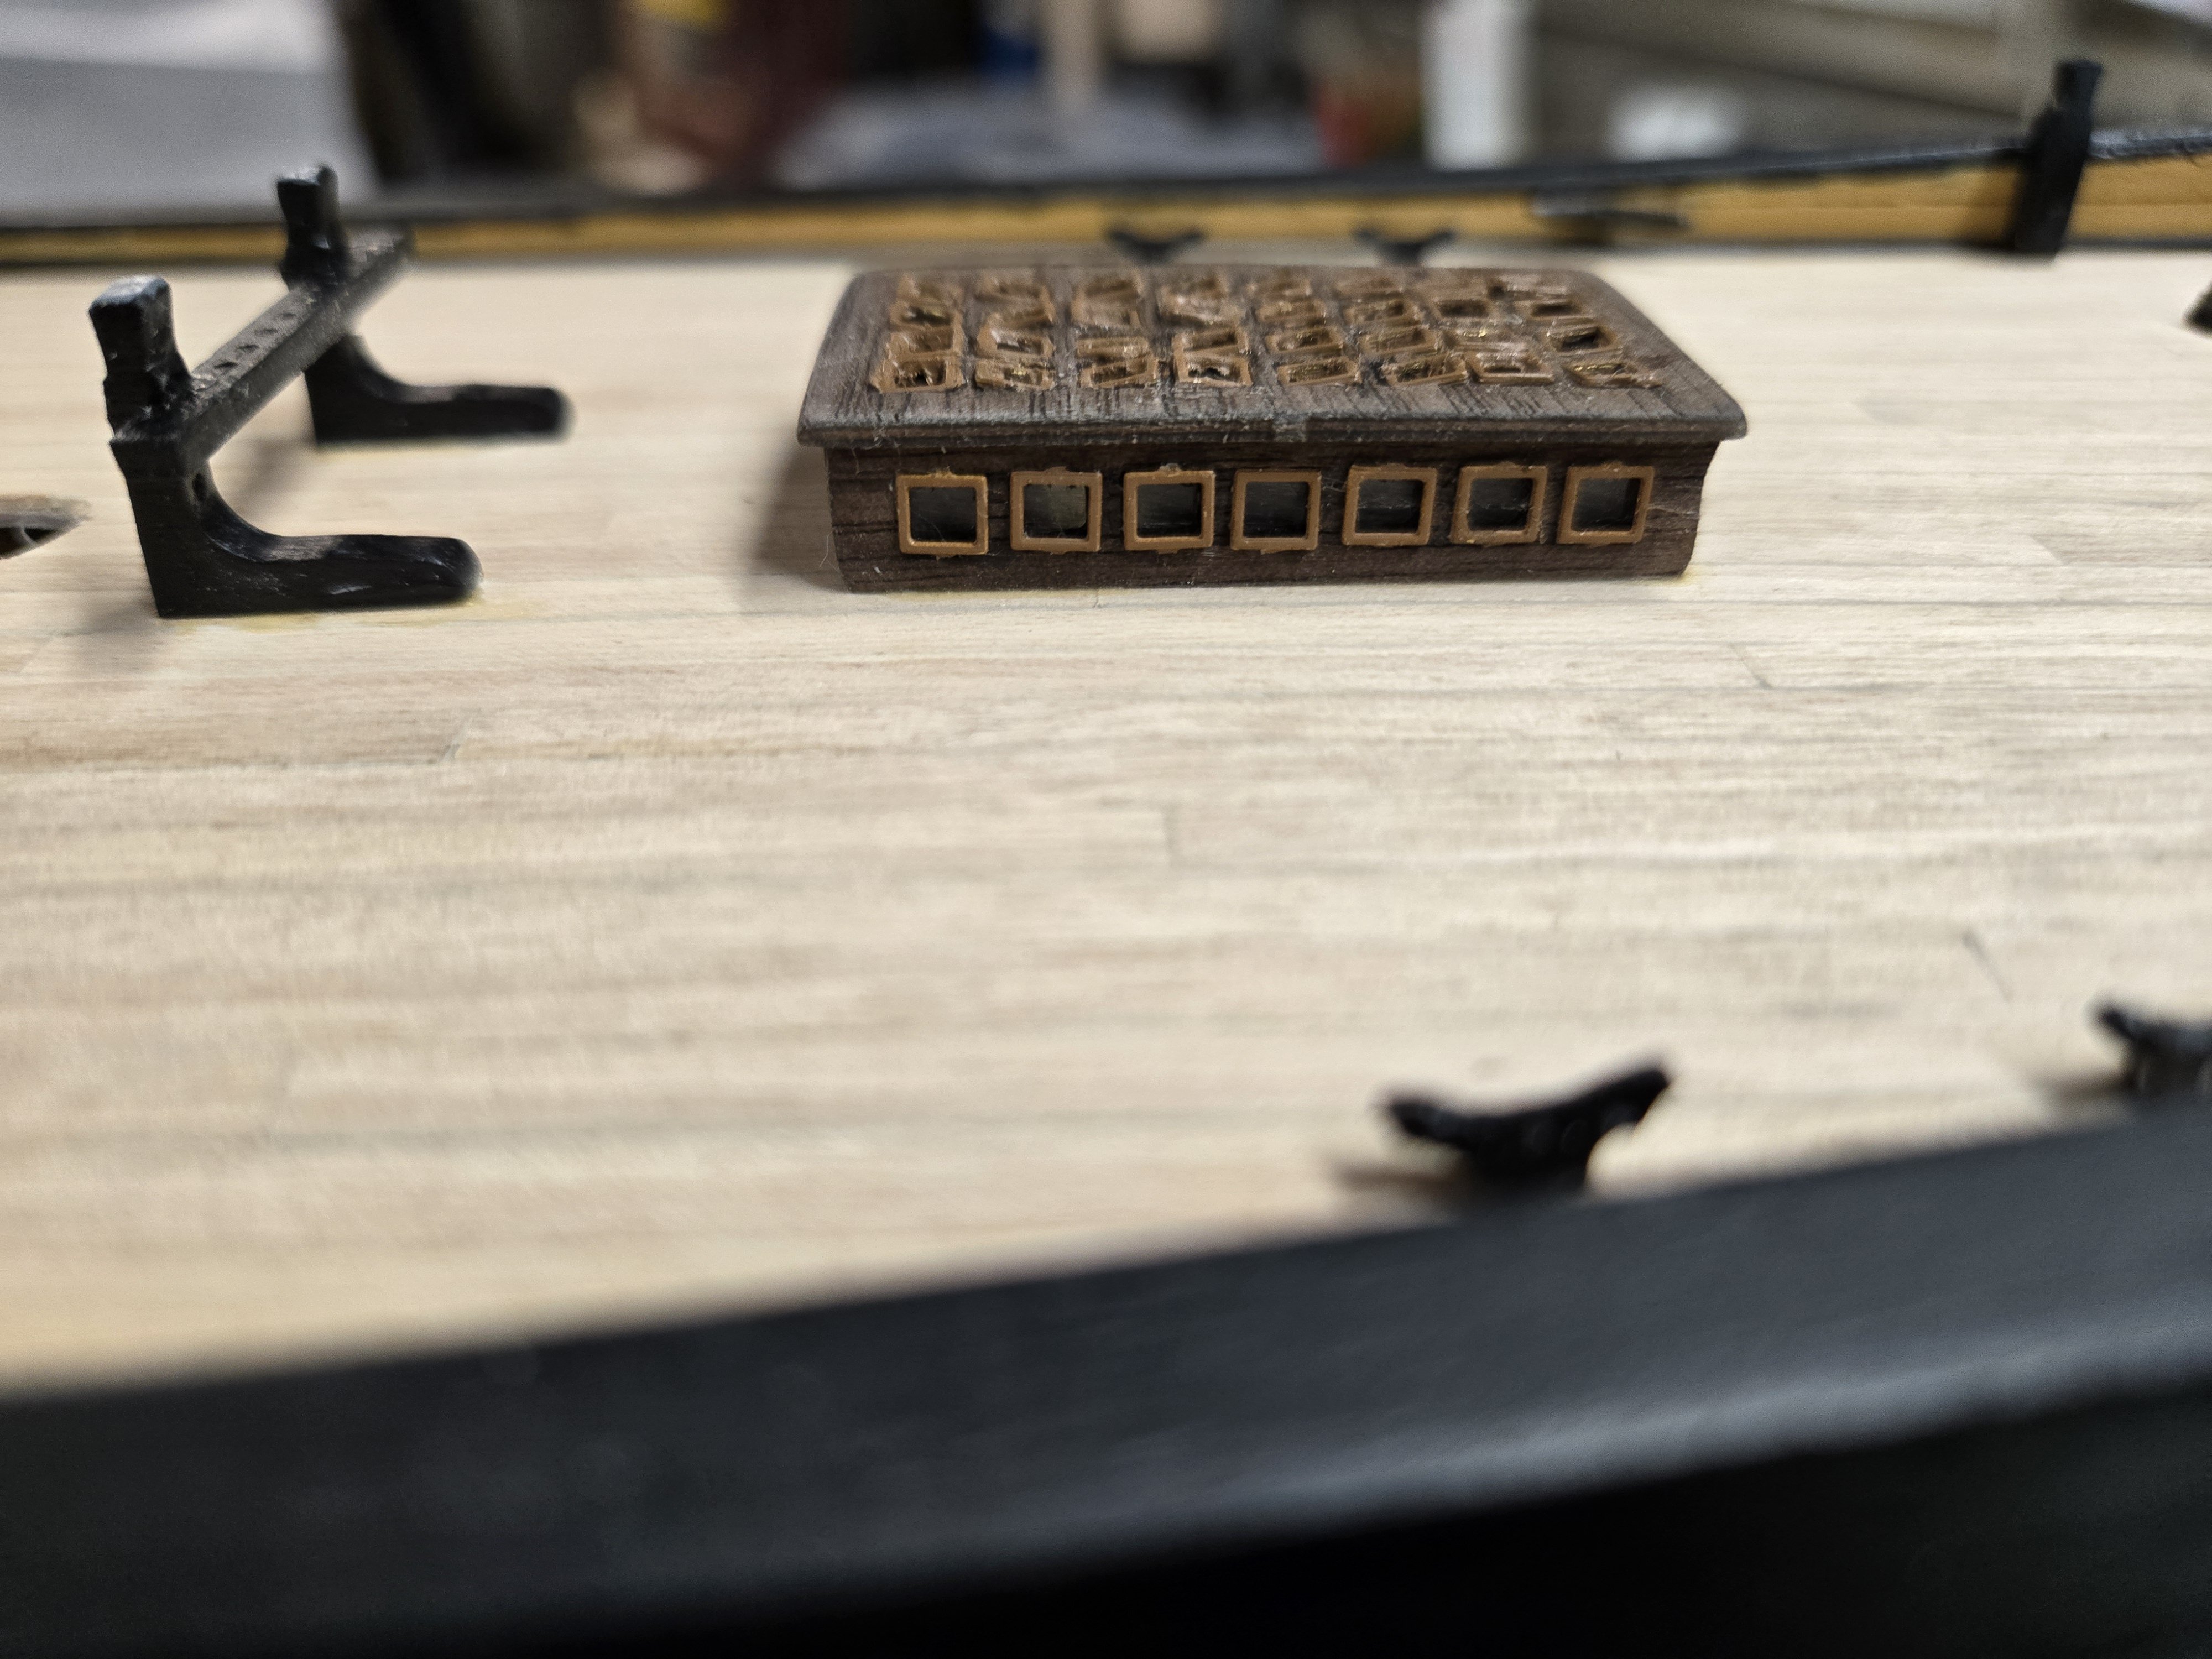
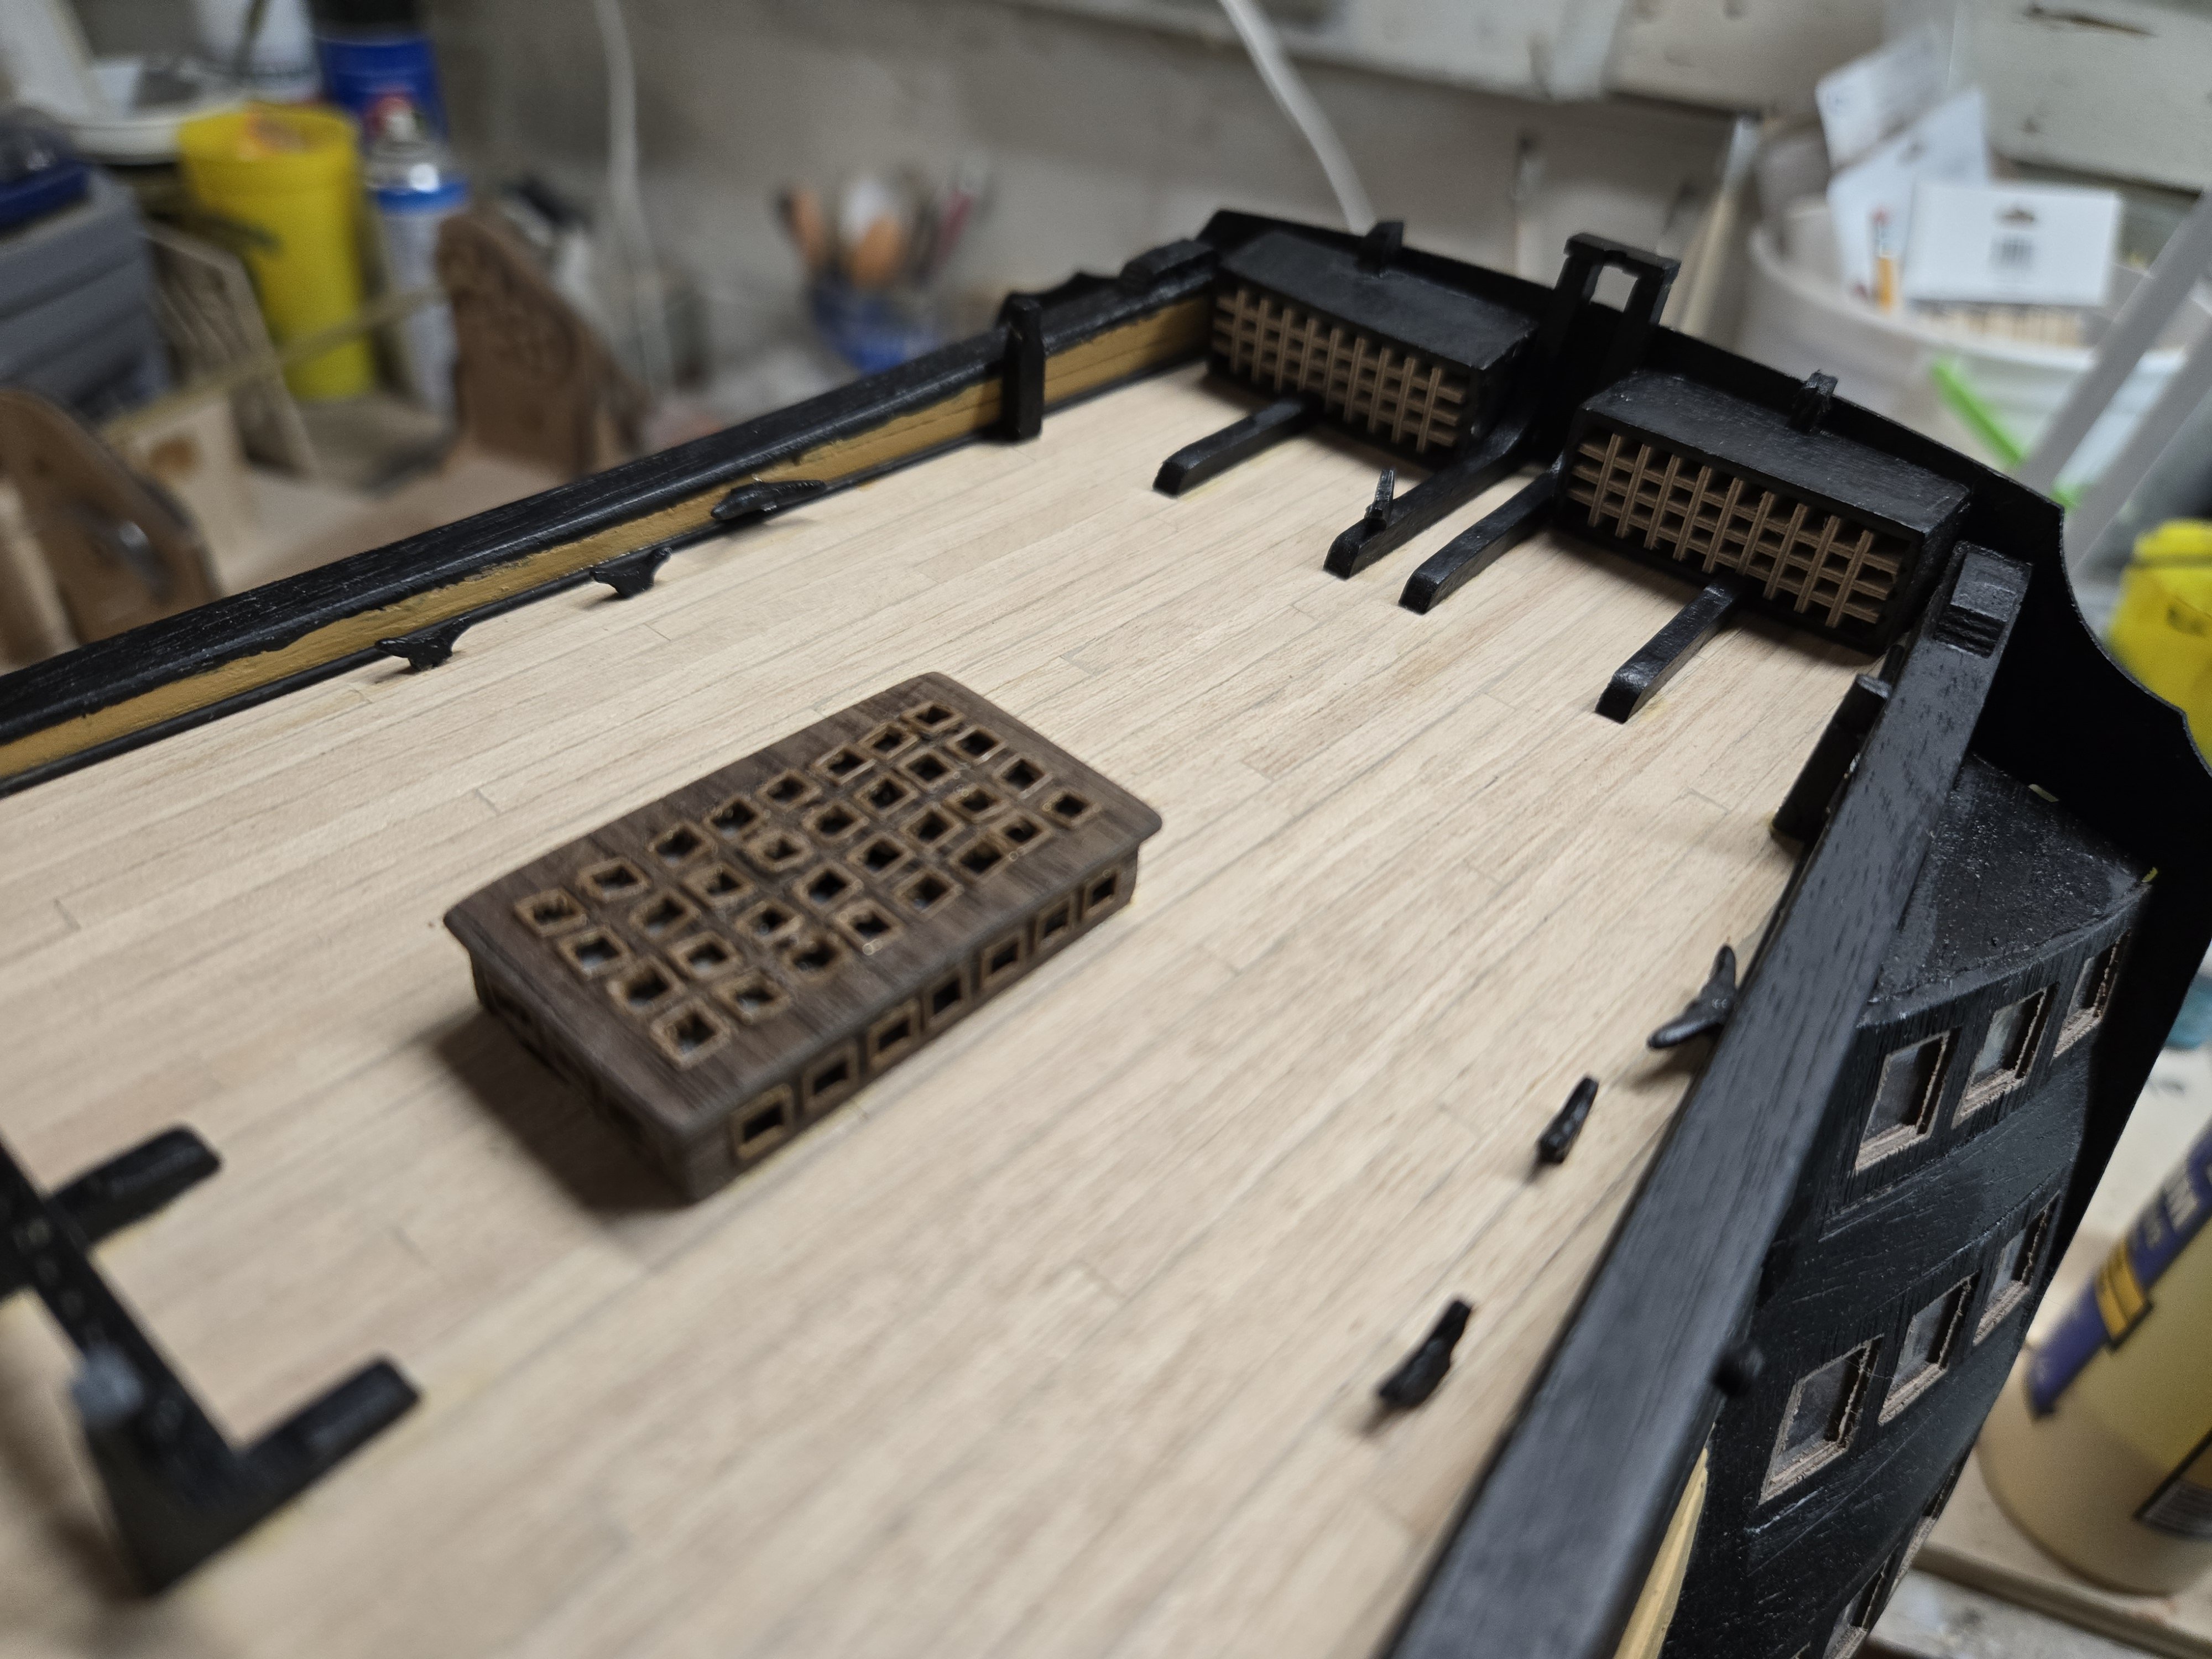
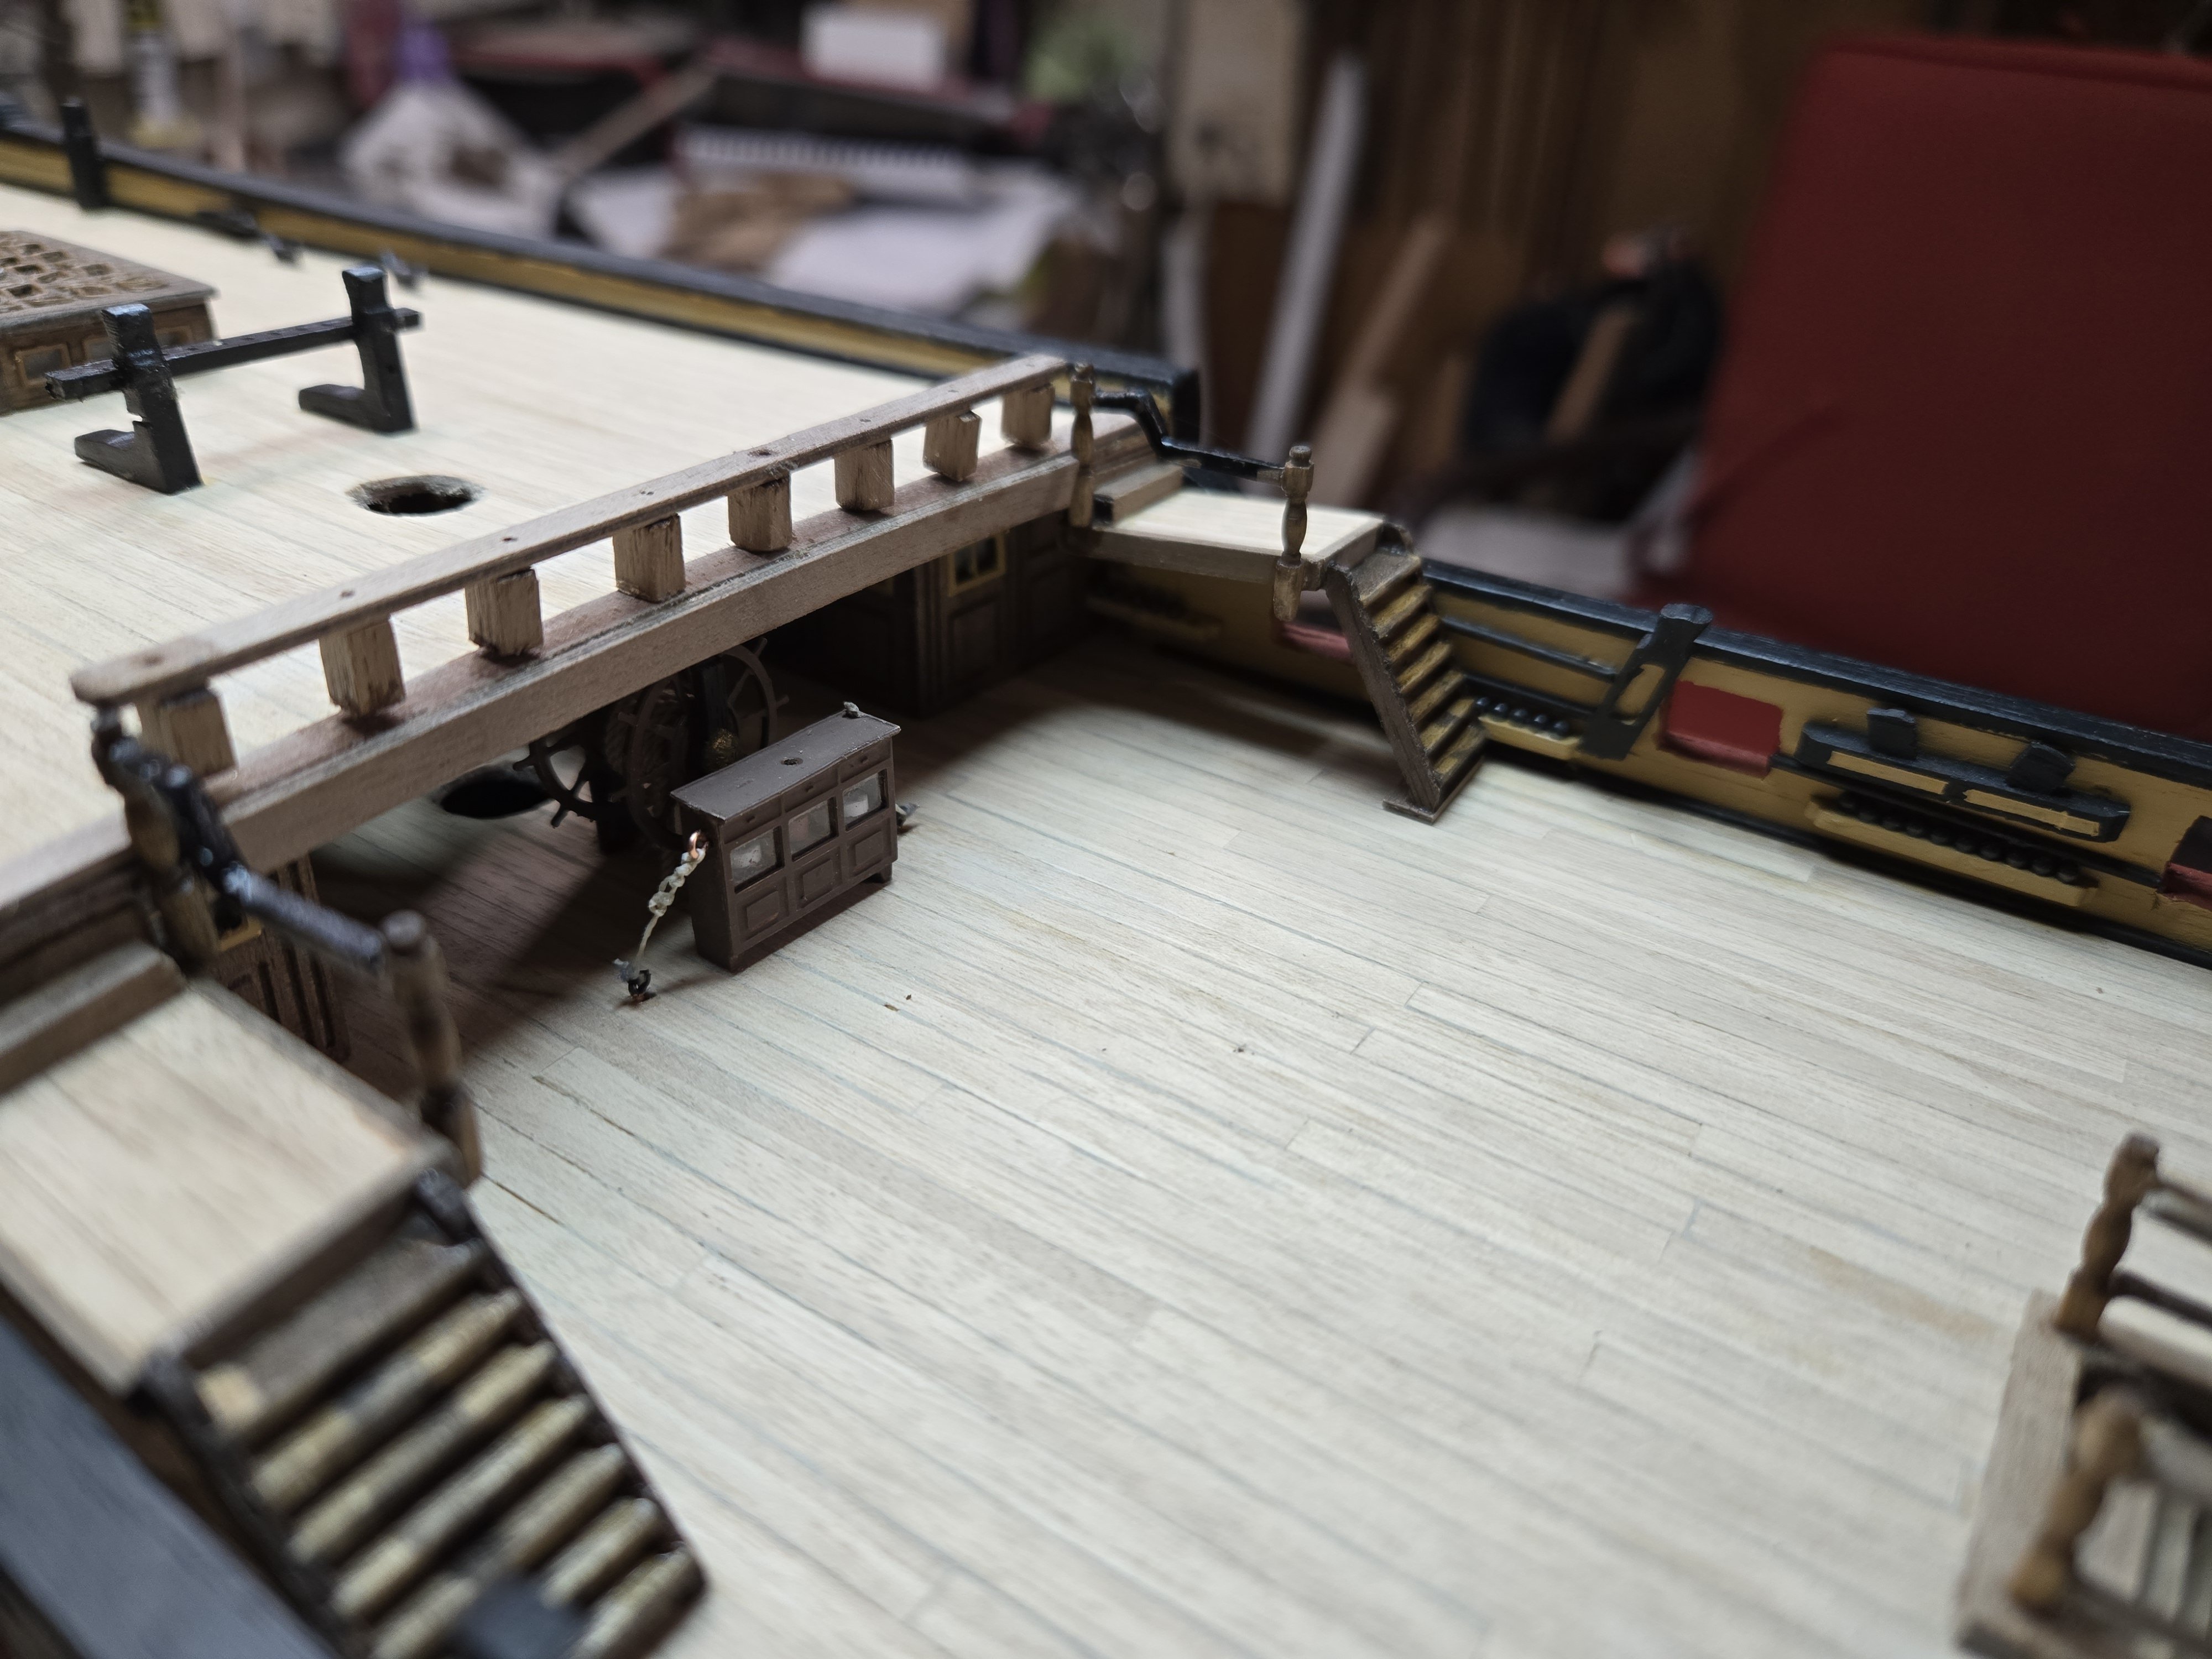
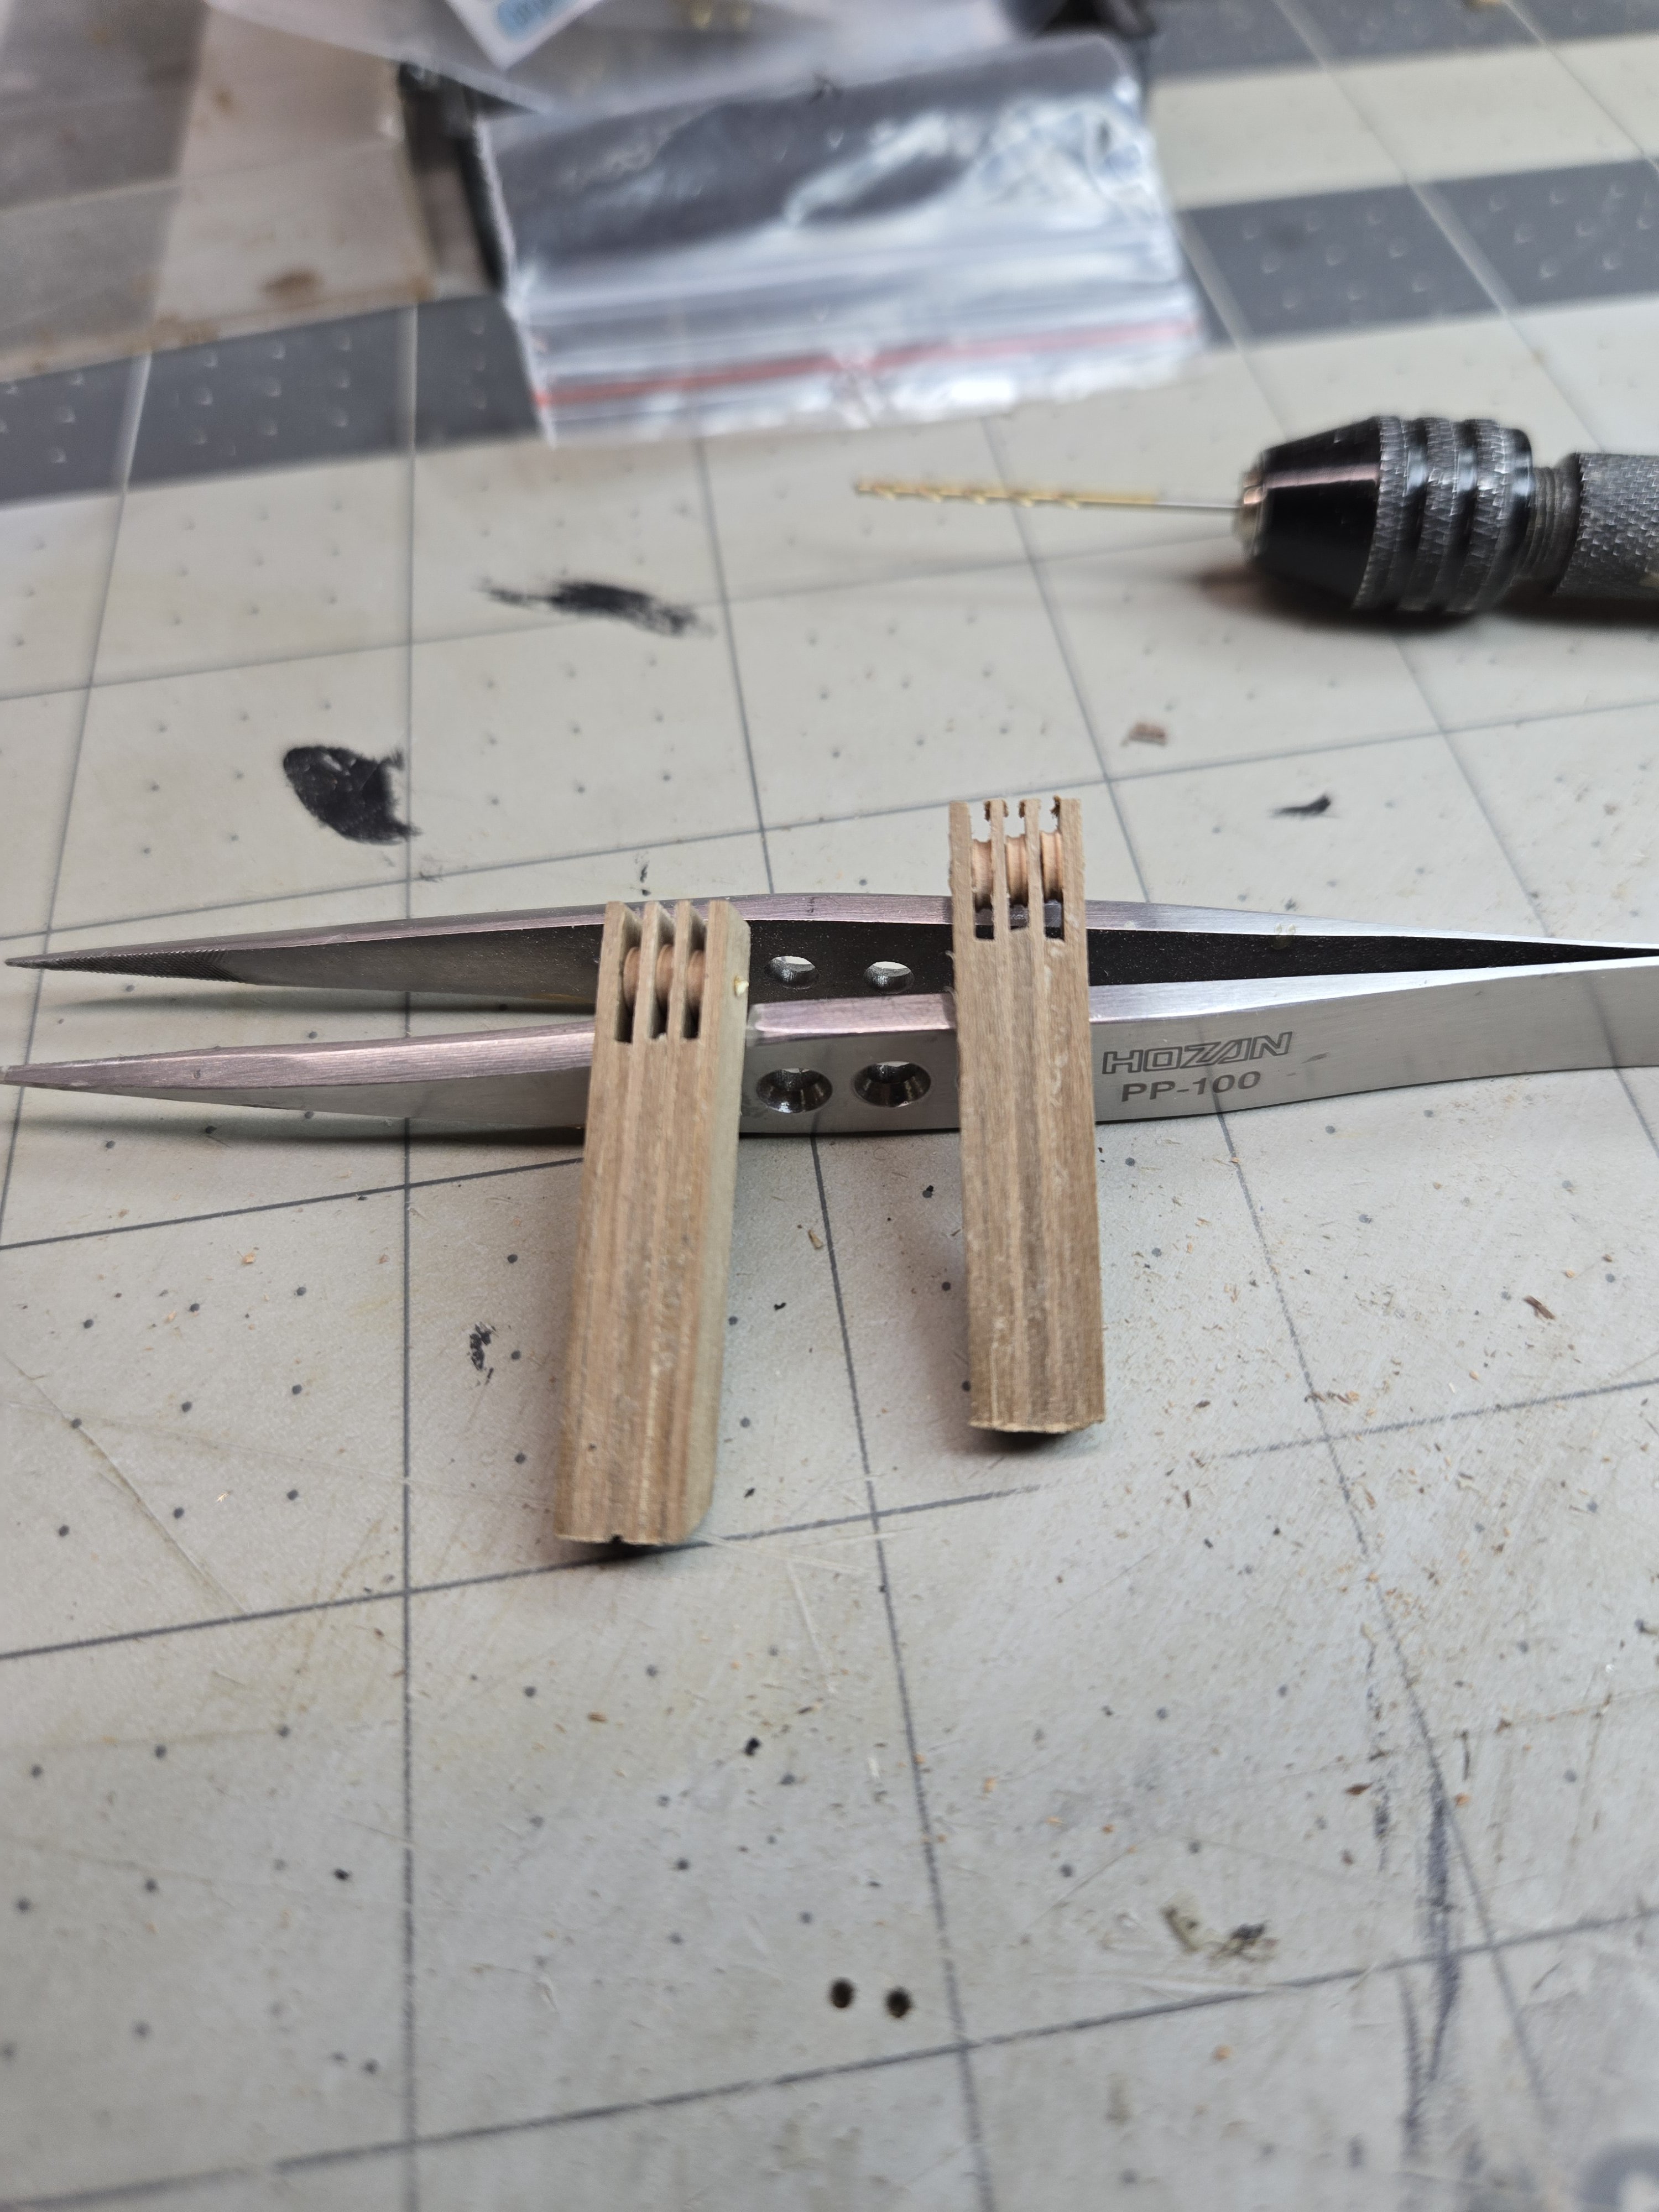
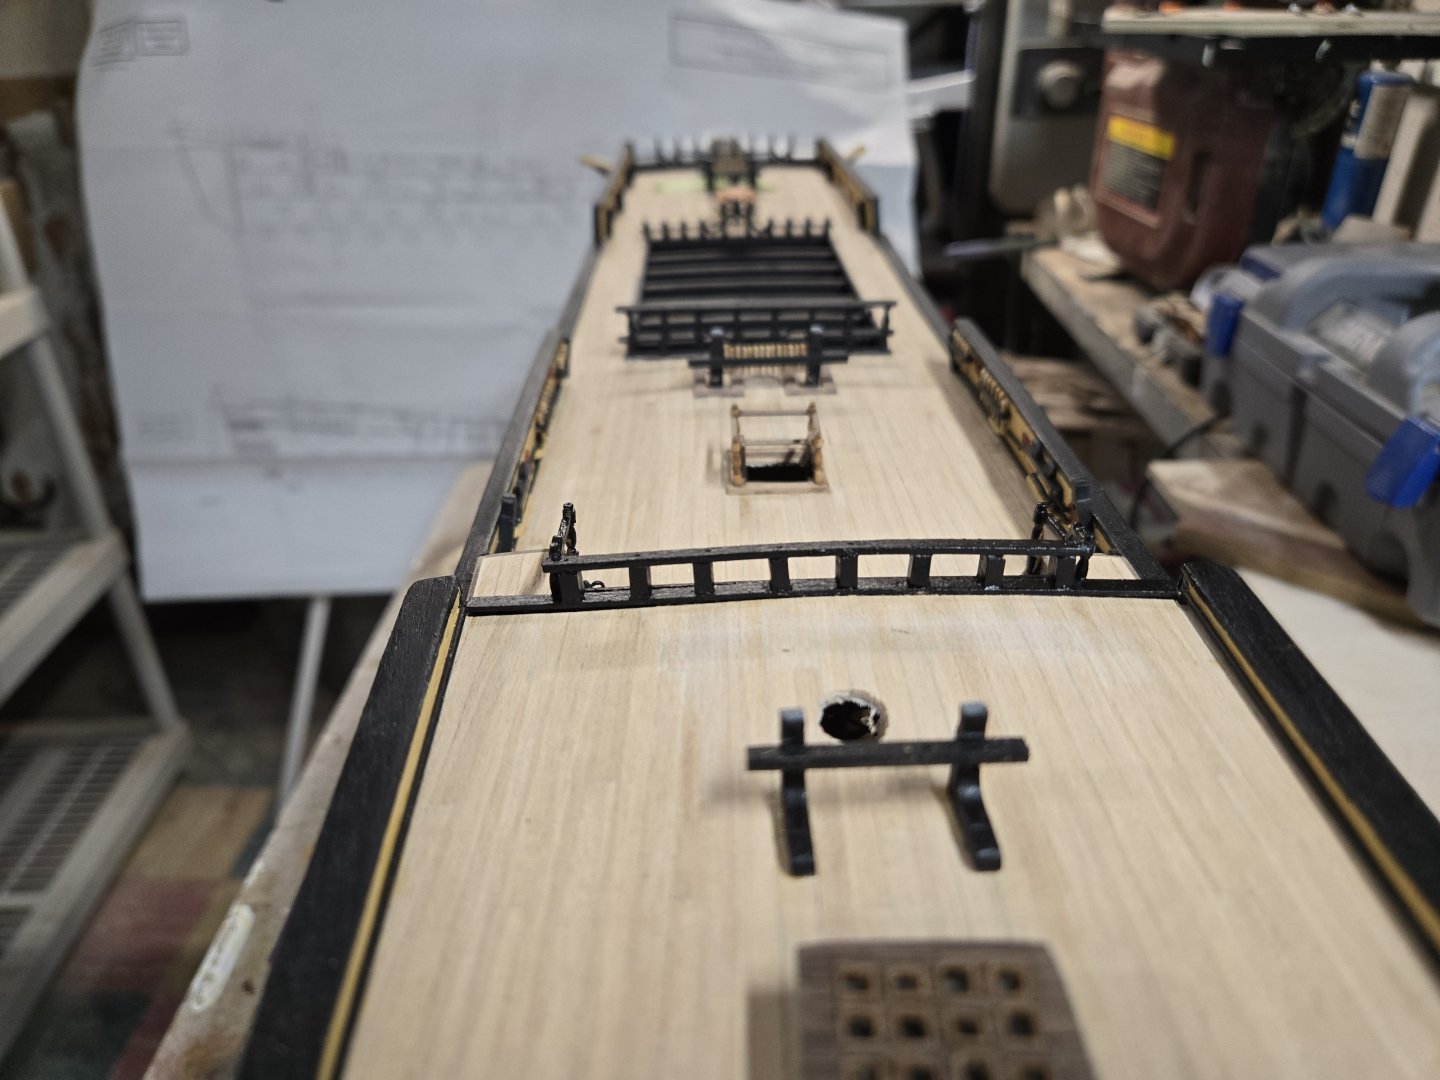
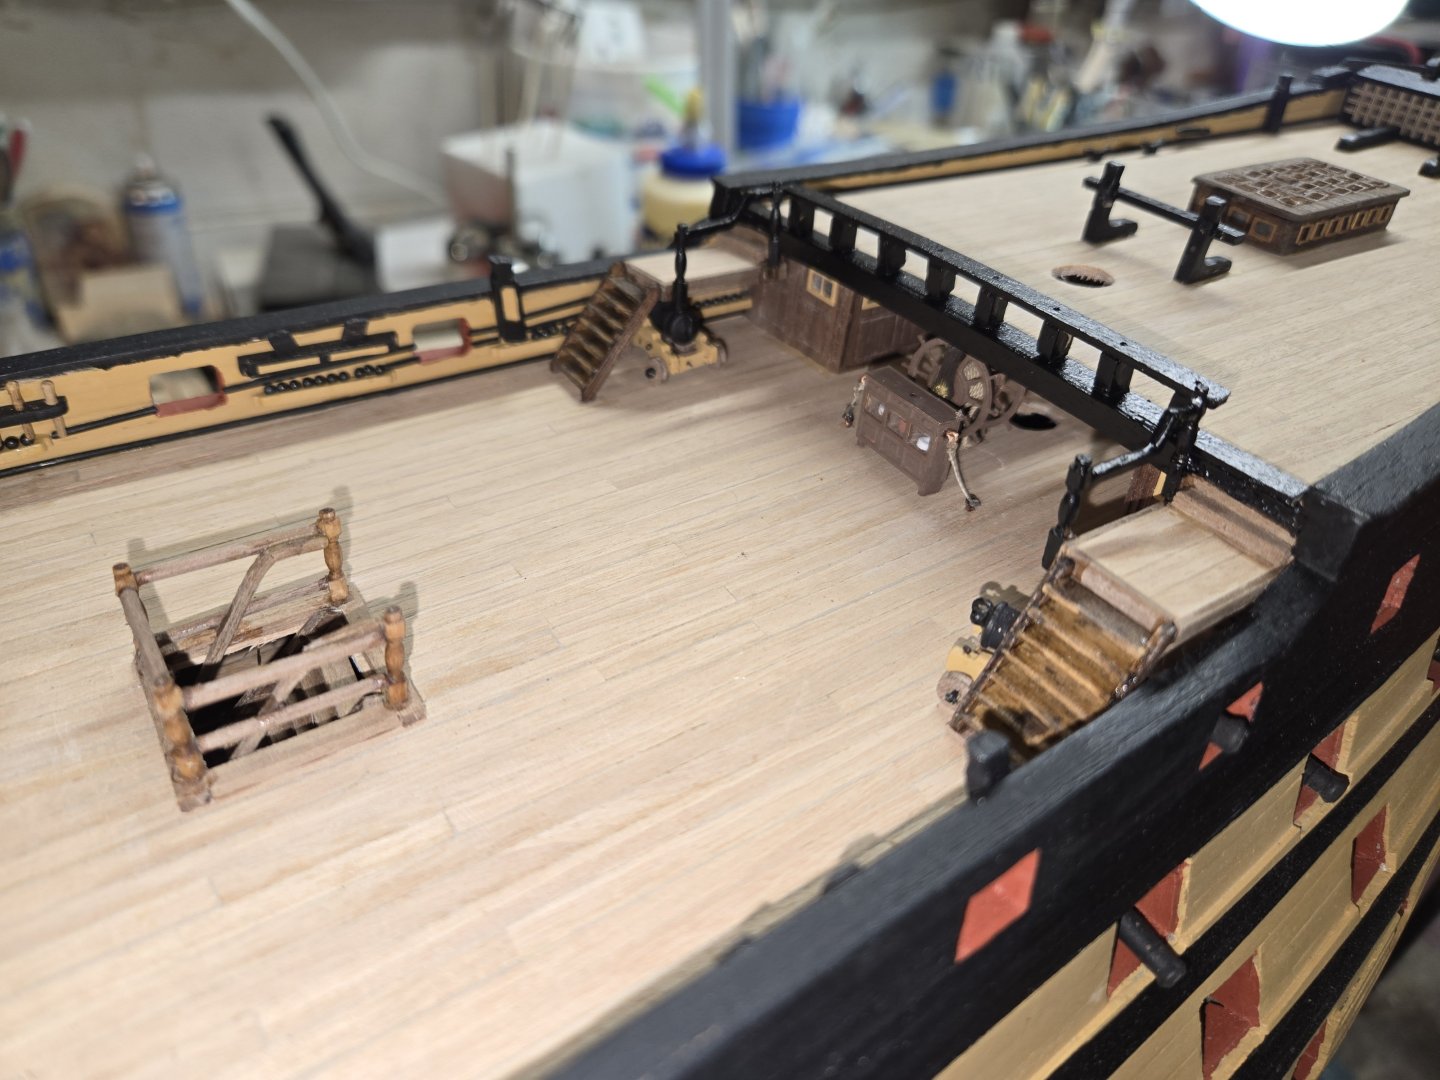
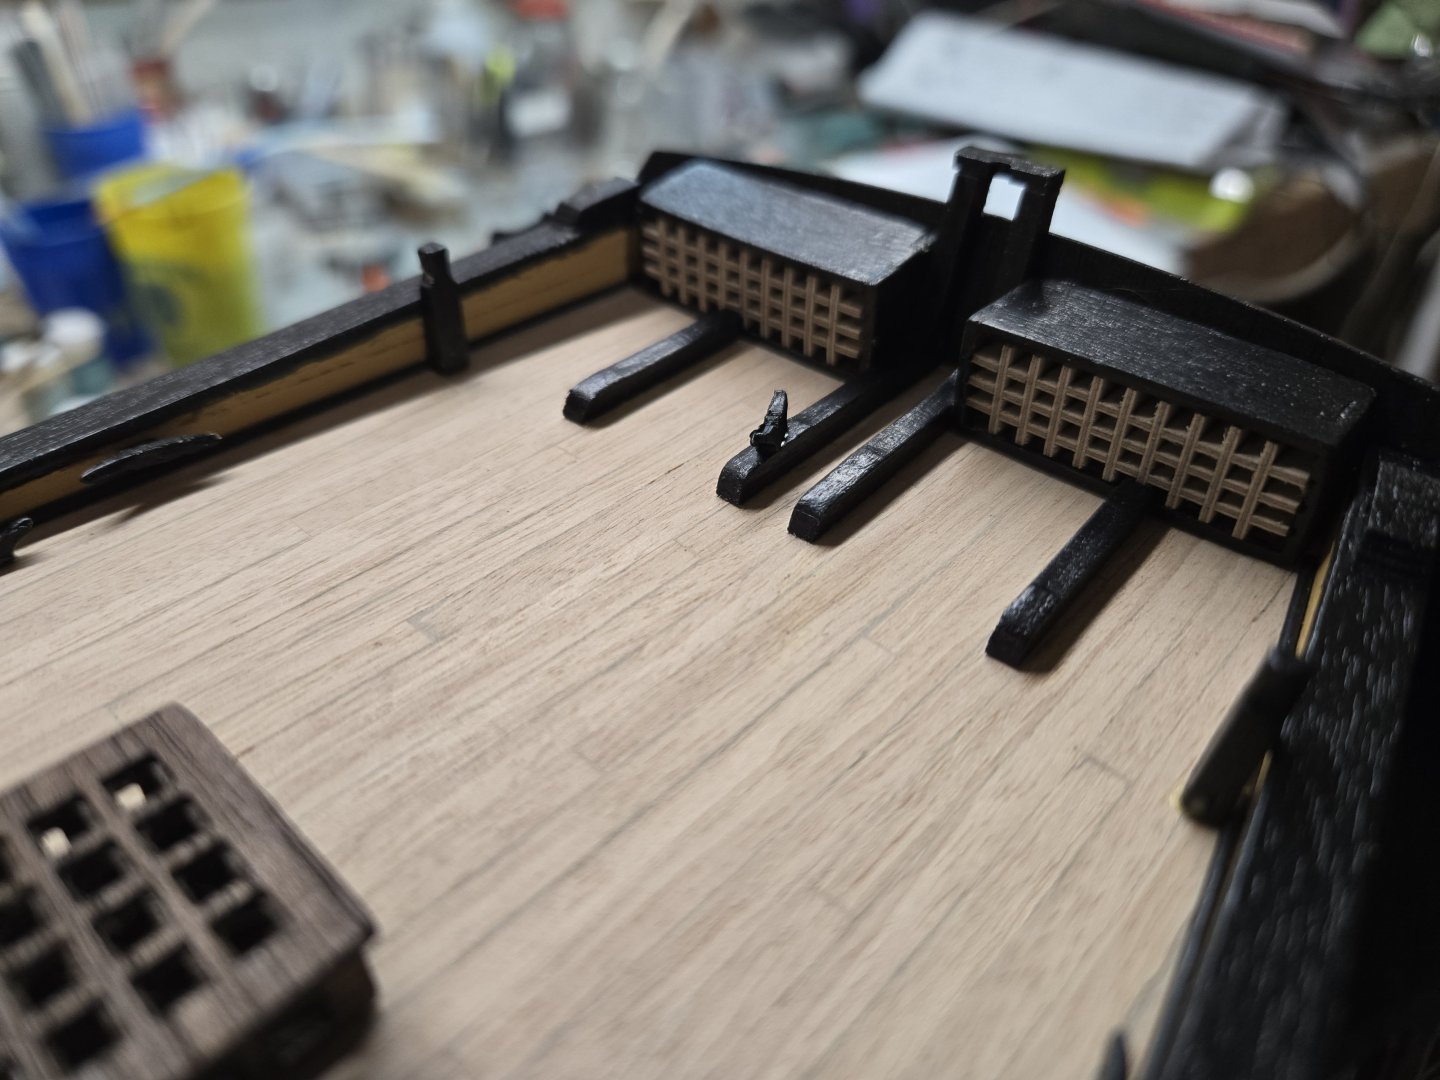
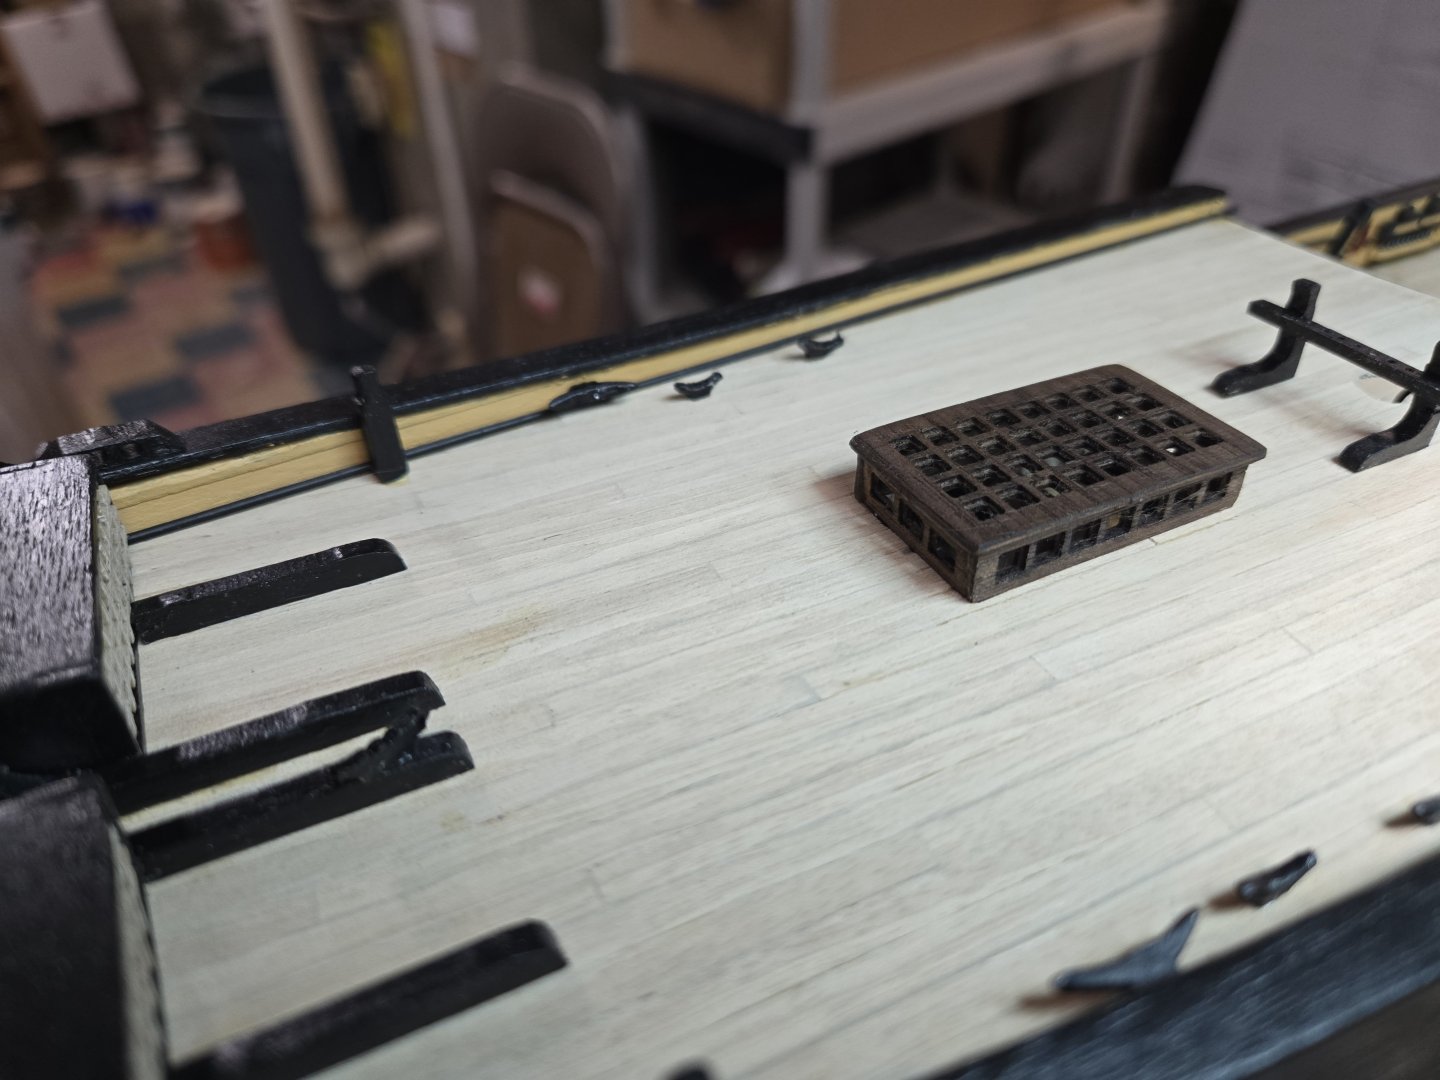
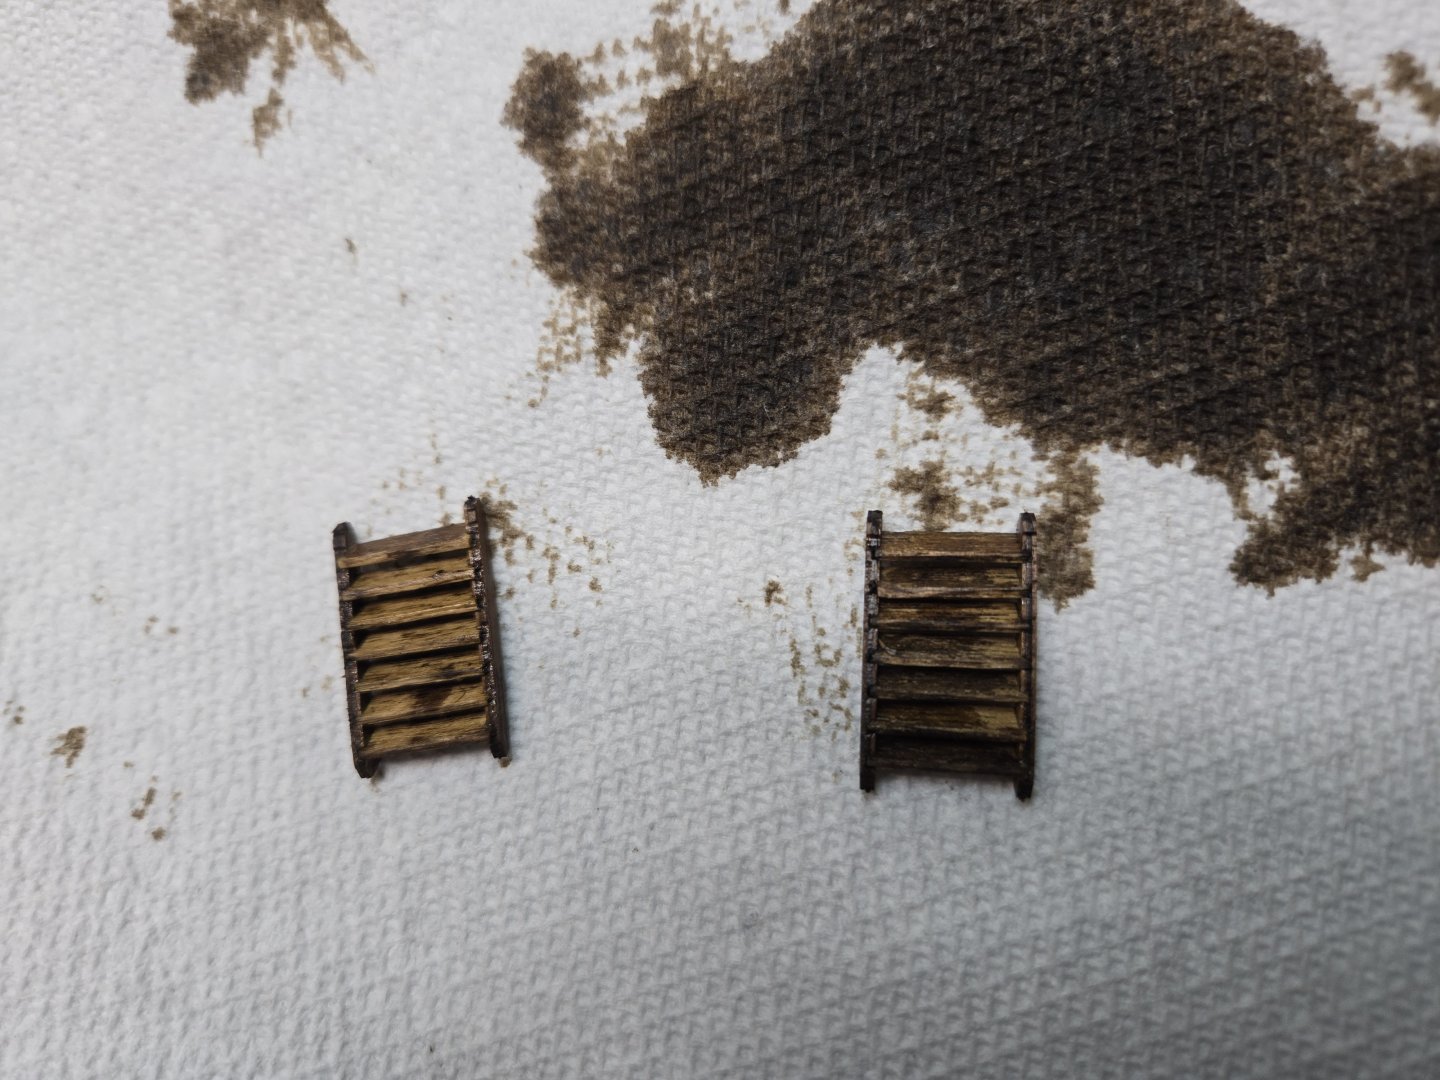
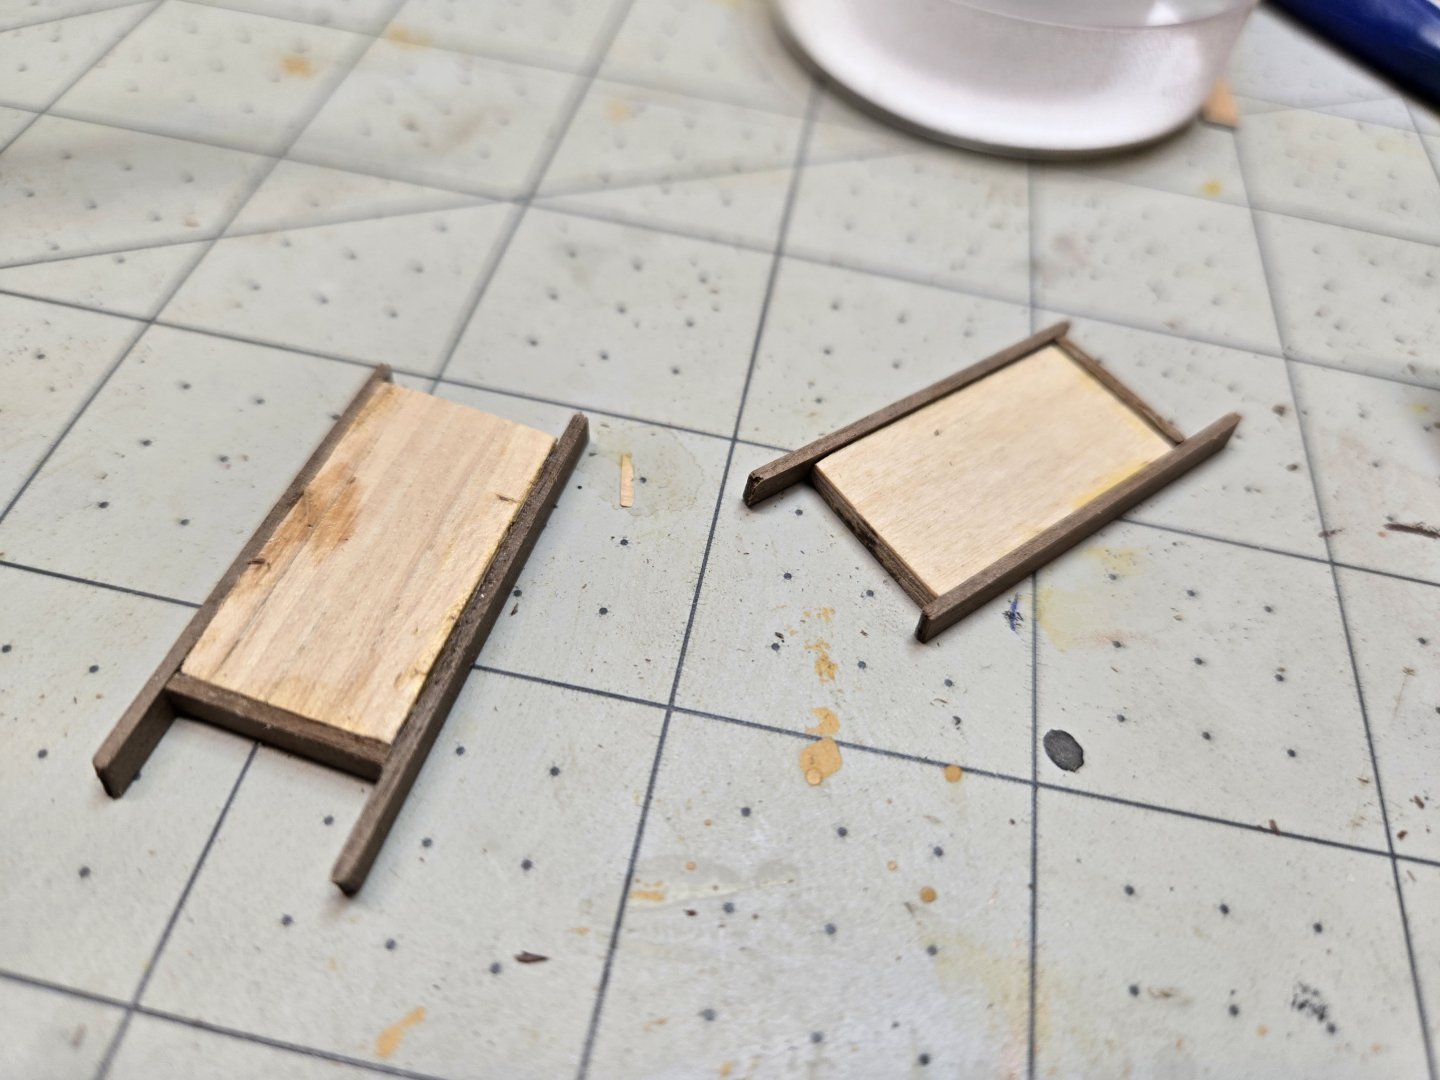
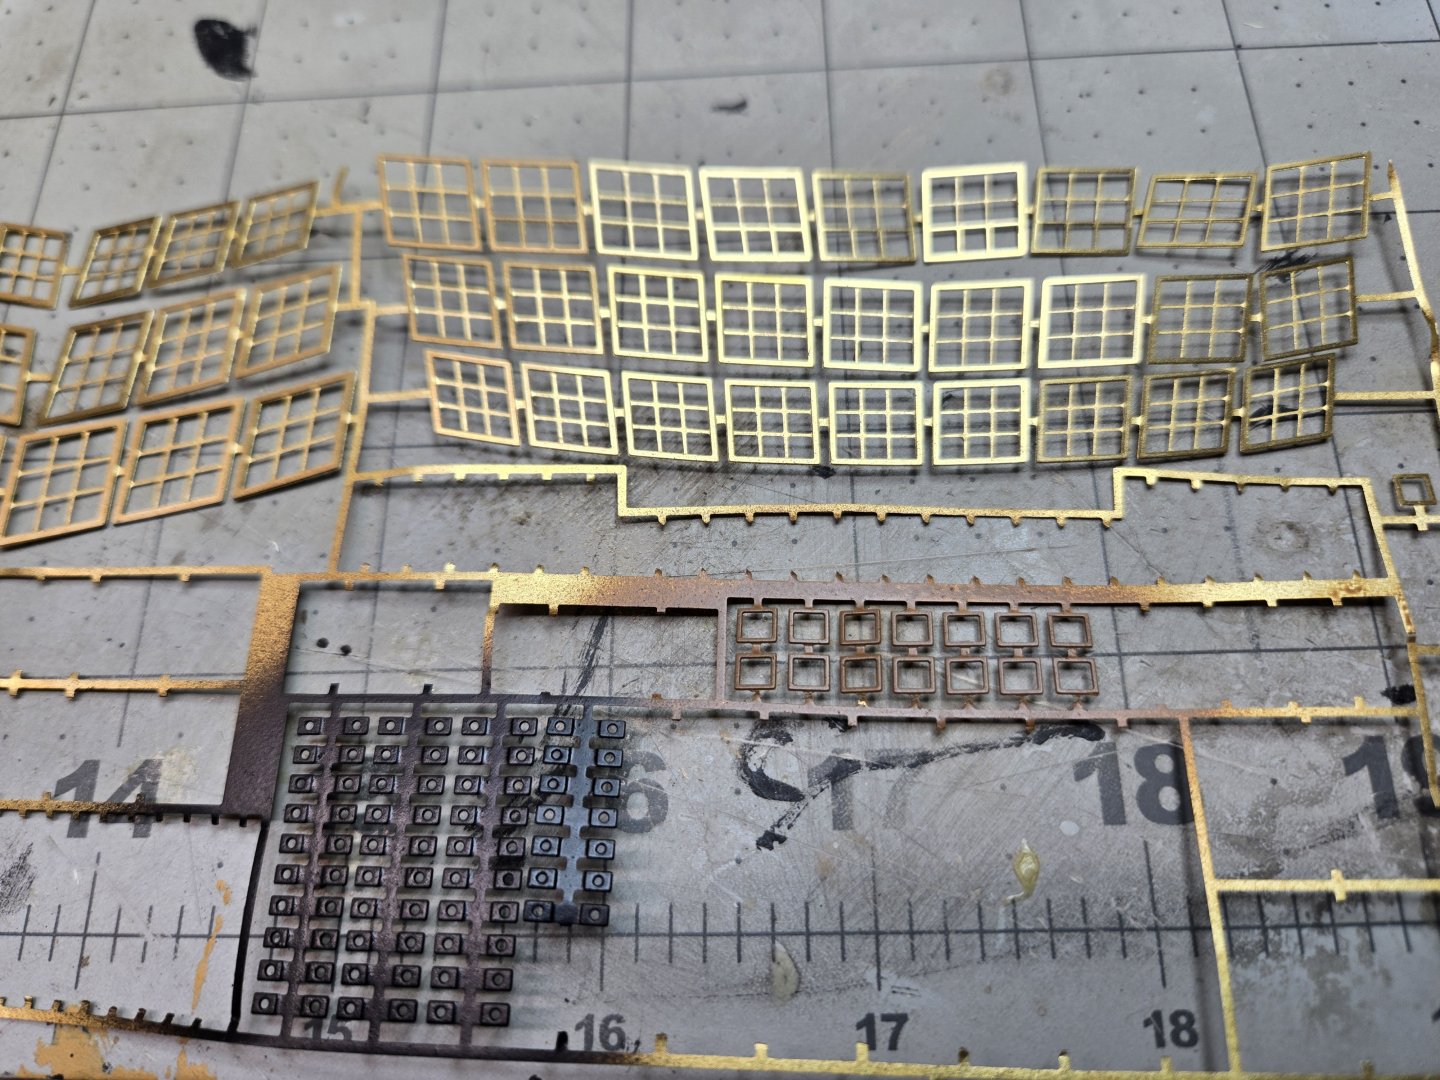
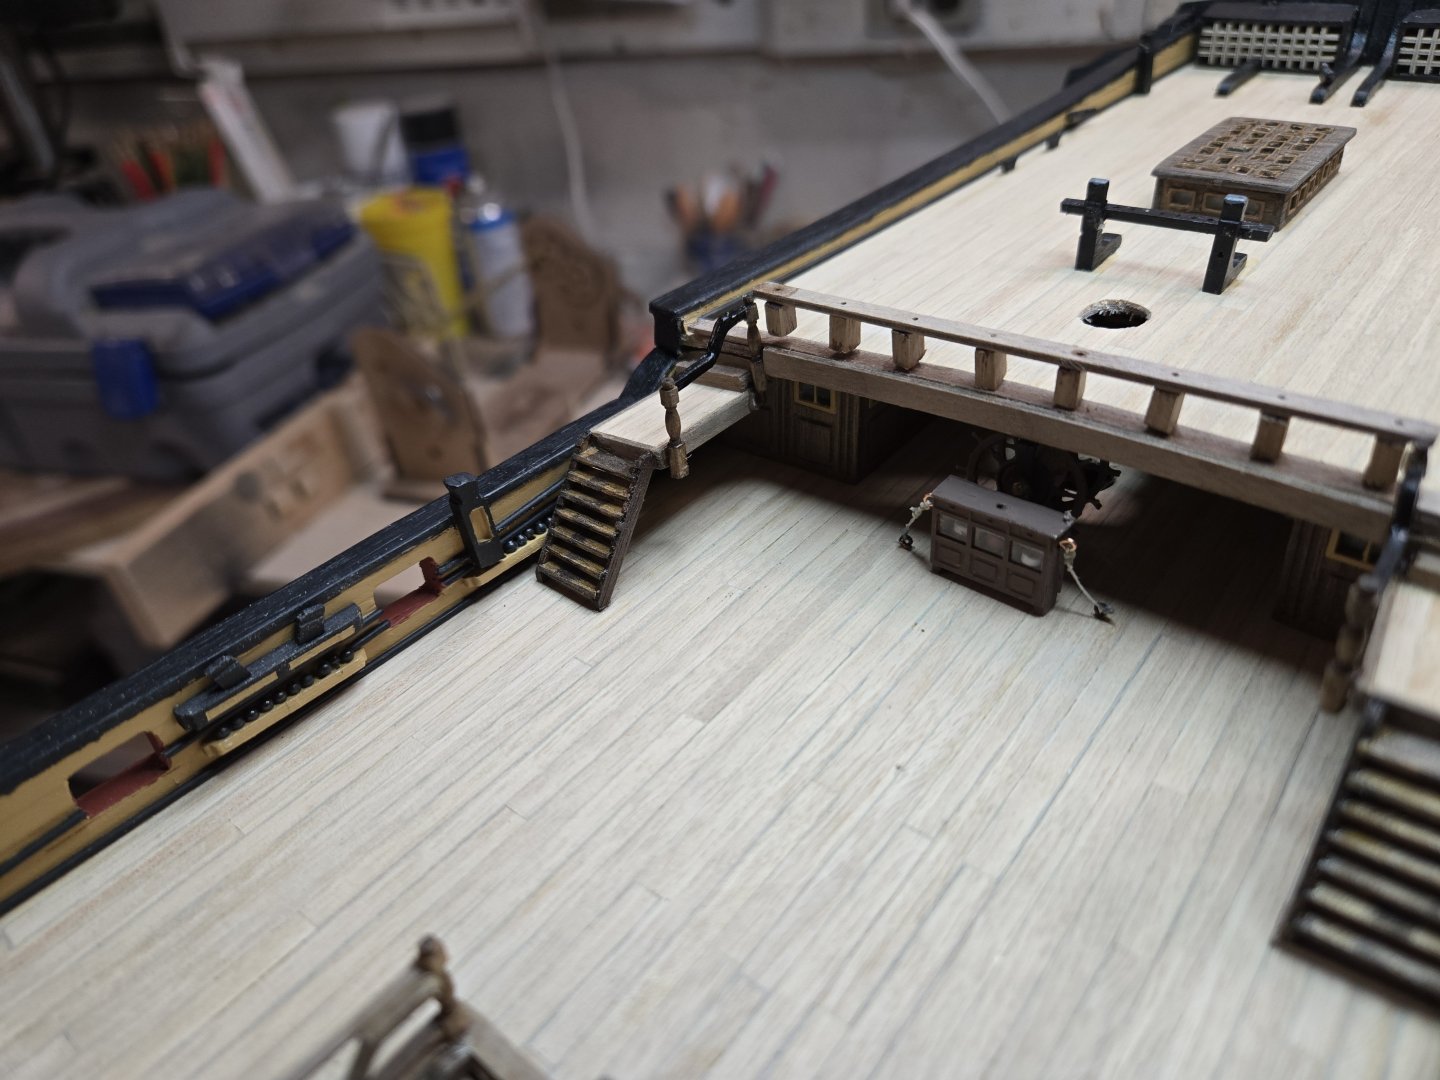
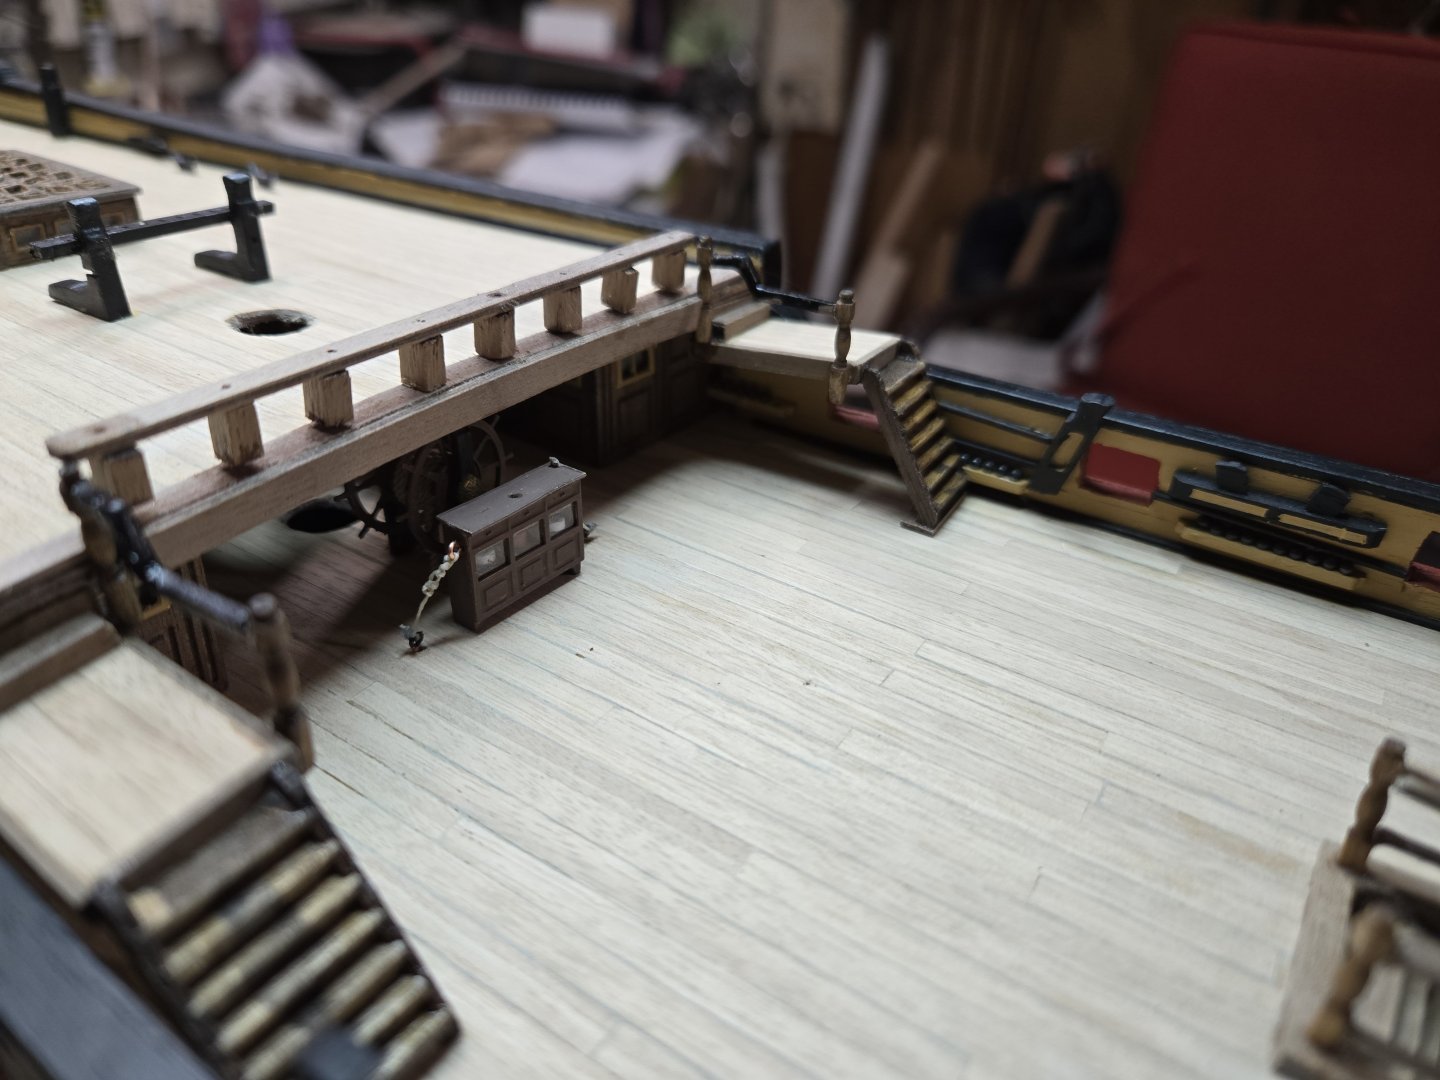
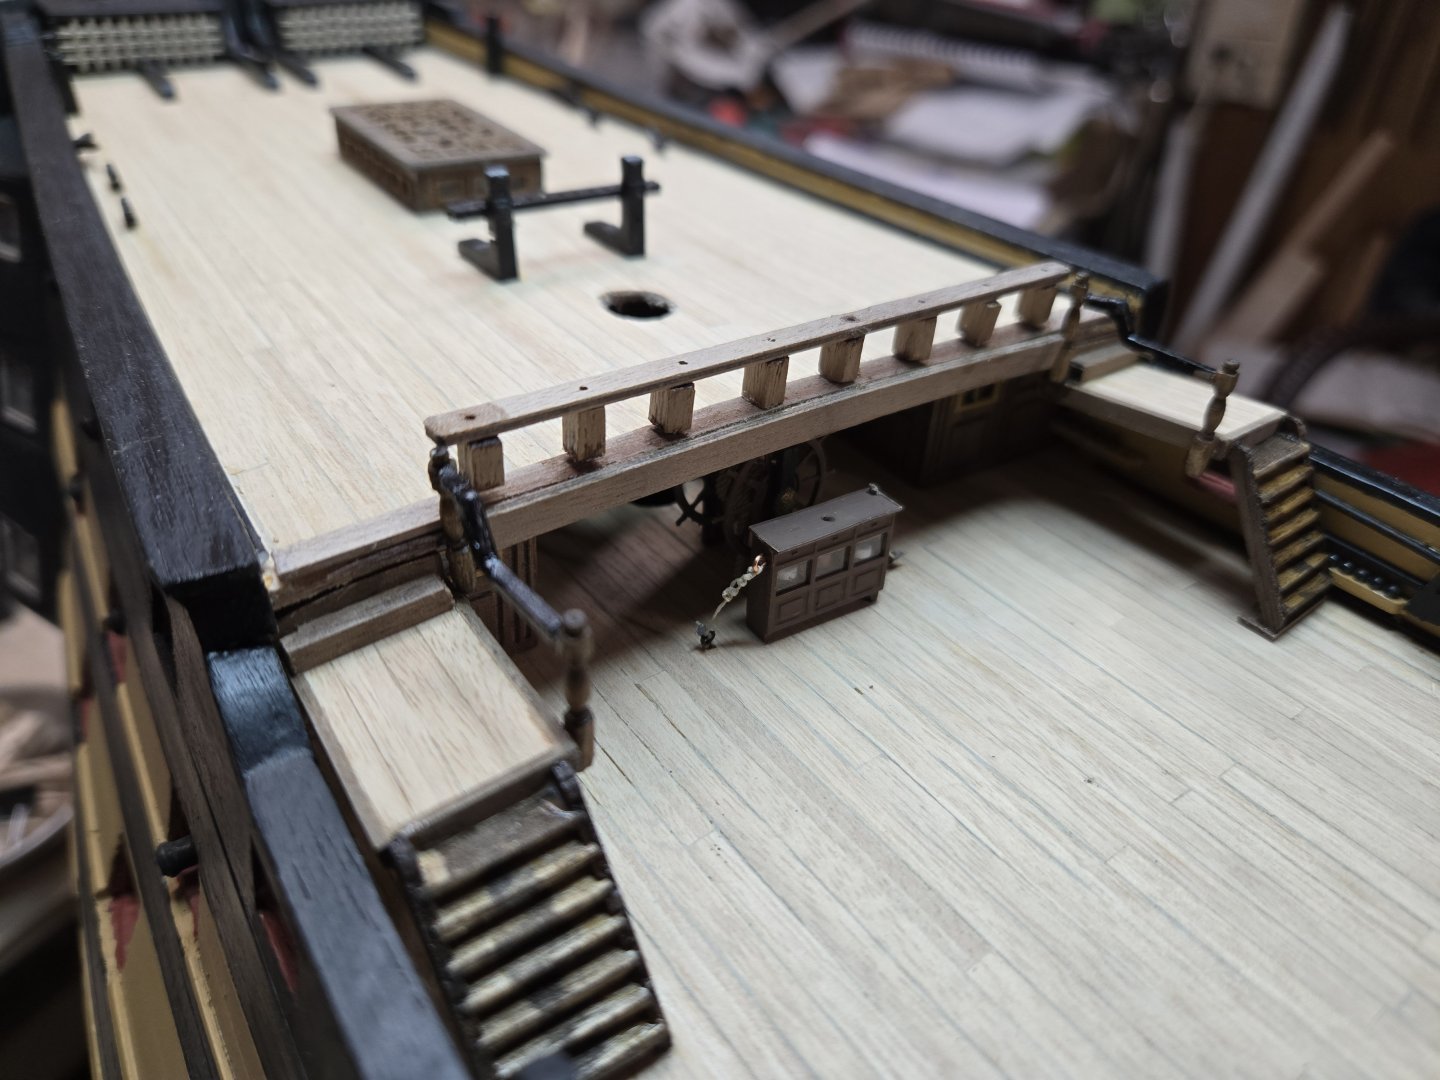
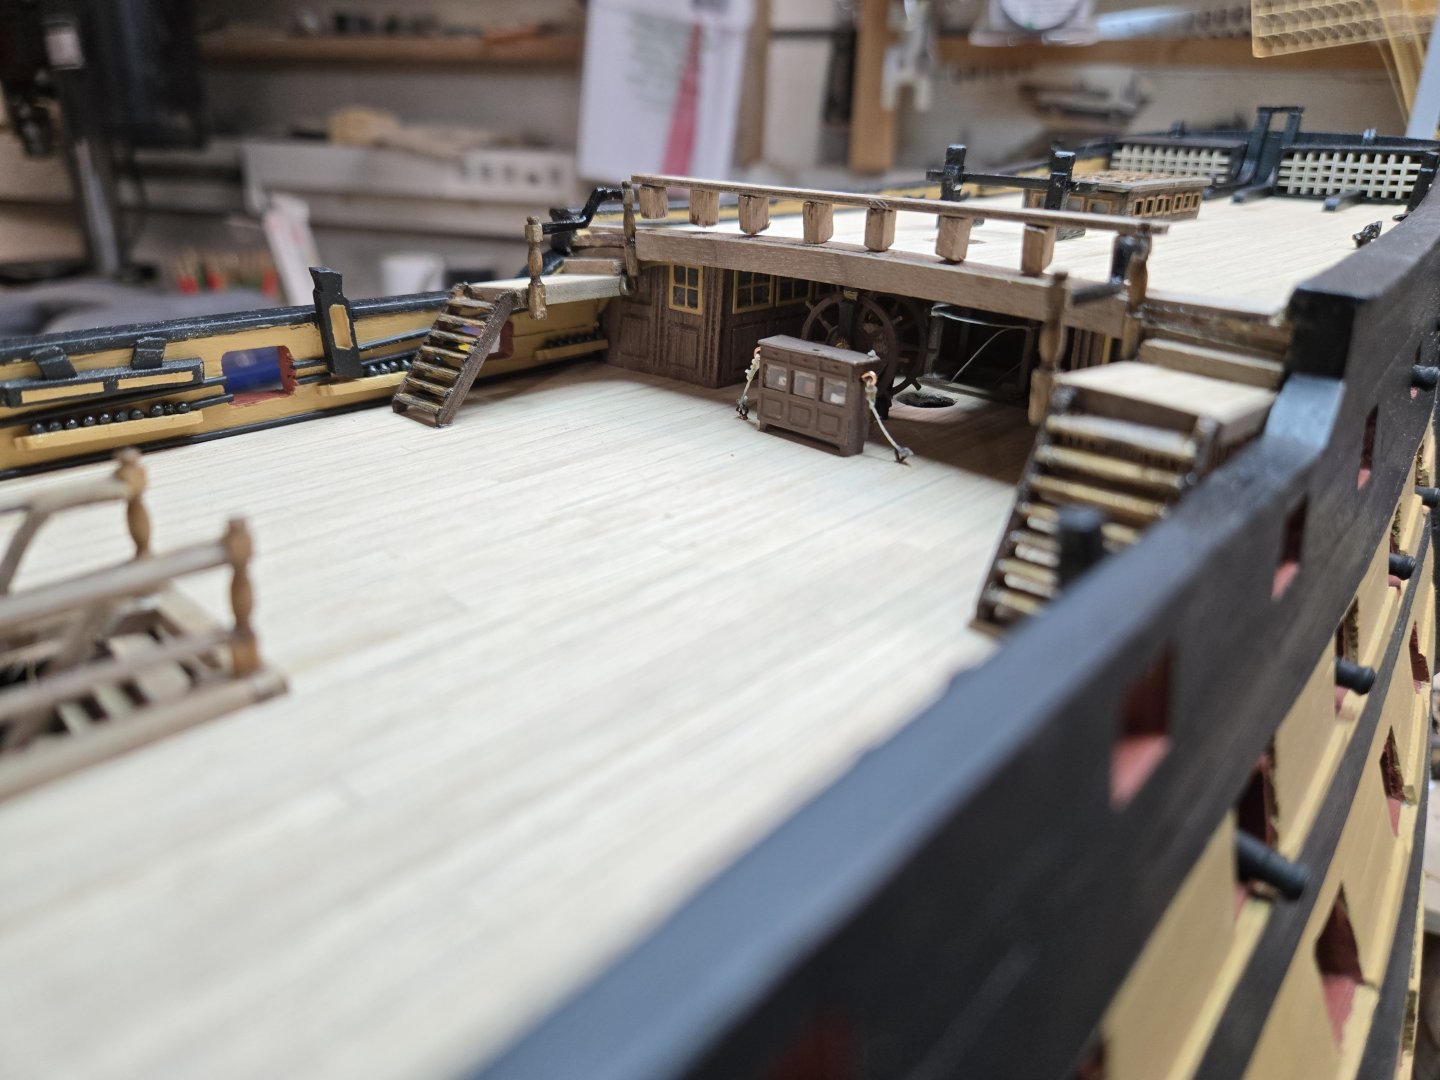
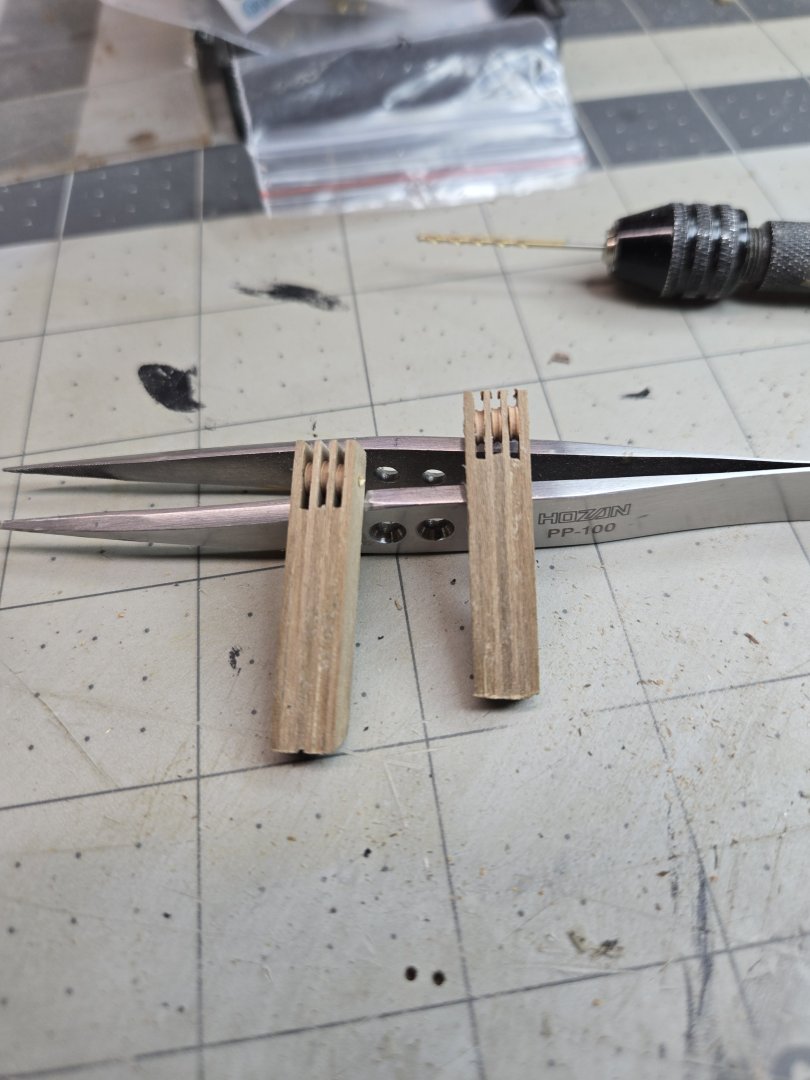
Worked on the various poop deck pieces. The flag lockers are a bit of a pain. I suppose I could have used masking tape to 'tie' them together as I glued them. Ultimately, the cabinet part came out fine. The parts manual has a full size silhouette of the shelve pieces. I laid the cut pieces onto the manual and then followed the blue prints to make them. They fit pretty tight and I didn't even bother gluing them. The shelf in the blueprint is for one side, you'll have to reverse them to make the other side.. I painted the cabinet with a few coats and then slid the shelving in, again didn't need glue as it fit snug. I did notice that the 2 pieces don't quite sit flush with the stern and I am not sure if they are supposed to or not. I sanded them as much as I could and then fit them in place. There are 2 small pieces that fit on top of the lockers to mock the extension of the knees. Trying to get them off the sprue sheets was impossible, they are too small and thick and kept breaking. I finally just took some scrap and sanded them on my bench sander as best as I could. The skylight just flat out sucks. The shell is fine enough. When it was done, I dipped it in walnut stain to give it a richer color. I spent some time cleaning out the grooves for the window frames. I cut the top frames and the shorter side frames off their sprue, placed them on double sided tape and applied Mr. Metal to etch them. The next day, I started painting them with a brush. I have a good airbrush, but I haven't used it in 5 months or so and just didn't want to face breaking it down and getting it ready. I SHOULD HAVE. The frames frankly look like ****. I tried to remove as much excess paint as I could...even using my tweezers to squeeze the sides to get rid of paint. The larger side frames looked a little better, but the top ones... I airbrushed the long side frames and they came out 100% better and that is what I'll be doing from now on with all the PE. The only negative is that painting them on the sprue makes it harder to get rid of the excess with a file or cutter. You can see the difference between the top and side and my guess is at some point I am going to remove the skylight, take the frames off, soak them in turpentine and redo them again. The next task were the 2 stairs from the poop deck to the quarterdeck. There is a mid platform and I opted to add decking to give it some detail. I also used the thinner deck planks for the stair treads instead of the walnut that is asked for. Even sanding the edges of the walnut make it difficult to get the stairs together. The deck planks work very good in my opinion. Once I had the treads in place, I added some watered down white glue to make sure they would hold. I knew it was going to cause and issue, because intent was to dip the stairs in walnut stain so they would match, but the glue keeps that from happening, but it was the best I could do. After, the directions call for the platforms, stairs and 2 additional steps to be put together and glued under the poop deck. The issue I encountered is that there is a crown to the poop deck. The first attempt and I could see that the platforms were tilted. I tried sanding the steps that go from the poop deck to the platform at an angle to counteract the crown. It helped. Ultimately, there is a bit of a gap, but they are fairly straight. I tried my best to make the wooden inside stair rails, I soaked some strips for a day or two and tried to heat them but couldn't get the short angles without the wood breaking. I ended up cutting pieces and reglueing them. They look ok and I've painted them black to hide the assembly work. I finished the day working on the poop deck barricade. Cutting the little 3x4mm pieces to create the base of the barricade is tough, my cutter tends to drift and the pieces come out with a bit of a taper to them. At 5mm in length, it's hard to sand them square. I was able to glue the little pieces to the poop deck rail (#388) but I COULD NOT get that stupid piece to glue to poop deck shear piece. The crown caused issues and I couldn't get any clamps around the barricade and the underside of the poop deck. Using white glue wouldn't work as it sets too slow. I tried using CA glue and for some reason it just wasn't setting. I gave up and will try again tomorrow. I bought some decal paper that might allow me to print the HMS Victory logos on the pails, but looking at the pails in the kit...they're like 1-2mm wide. I don't see it, but I will give it a shot and let you know!!! As I look at the pics, I may paint the stairs black too, I'll pretend there was major damage during a battle and the only replacements were already painted.....


-
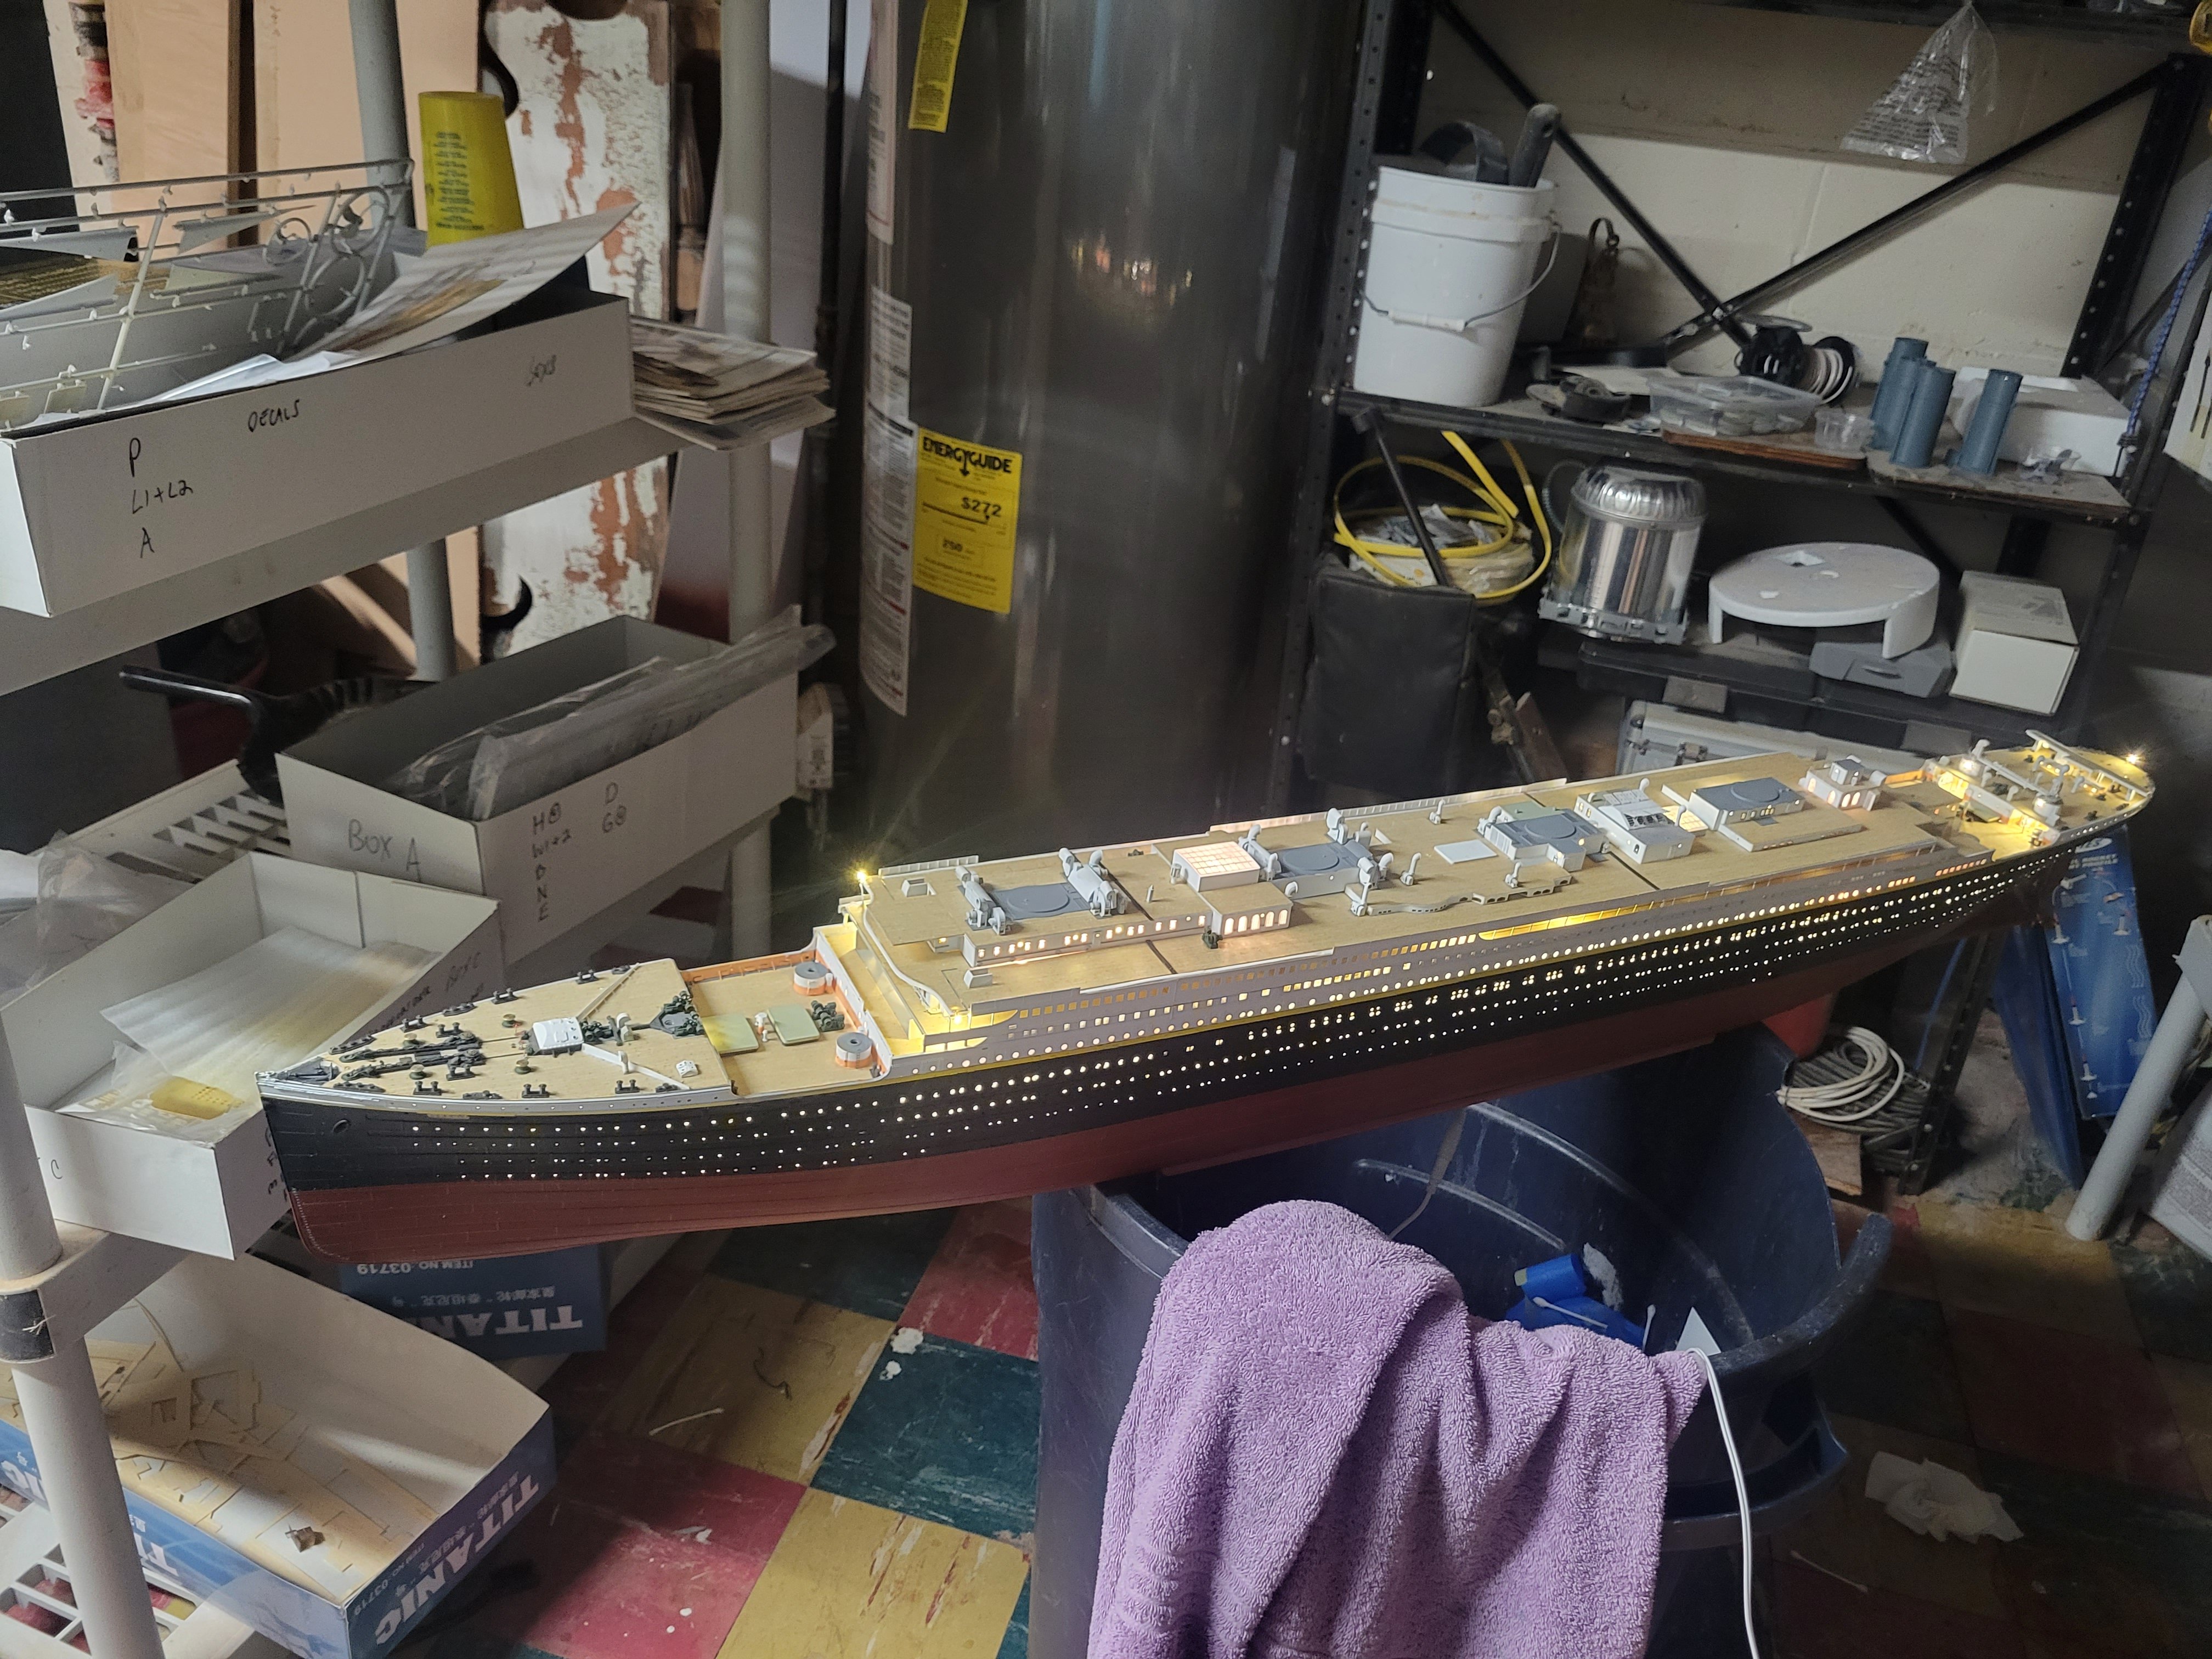
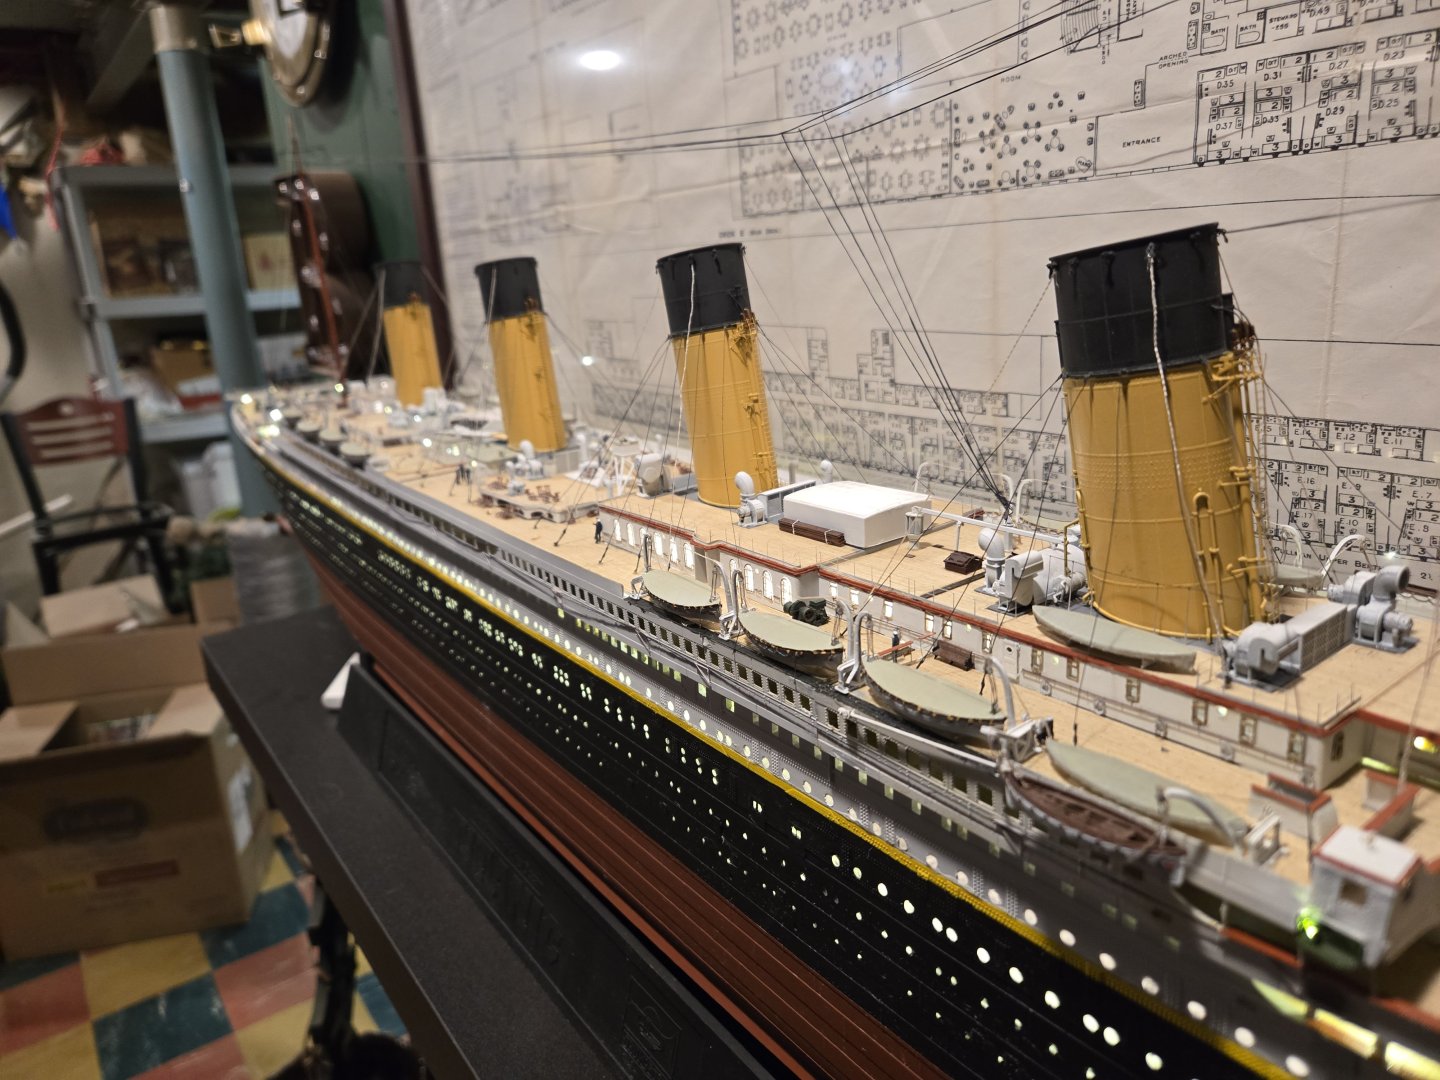
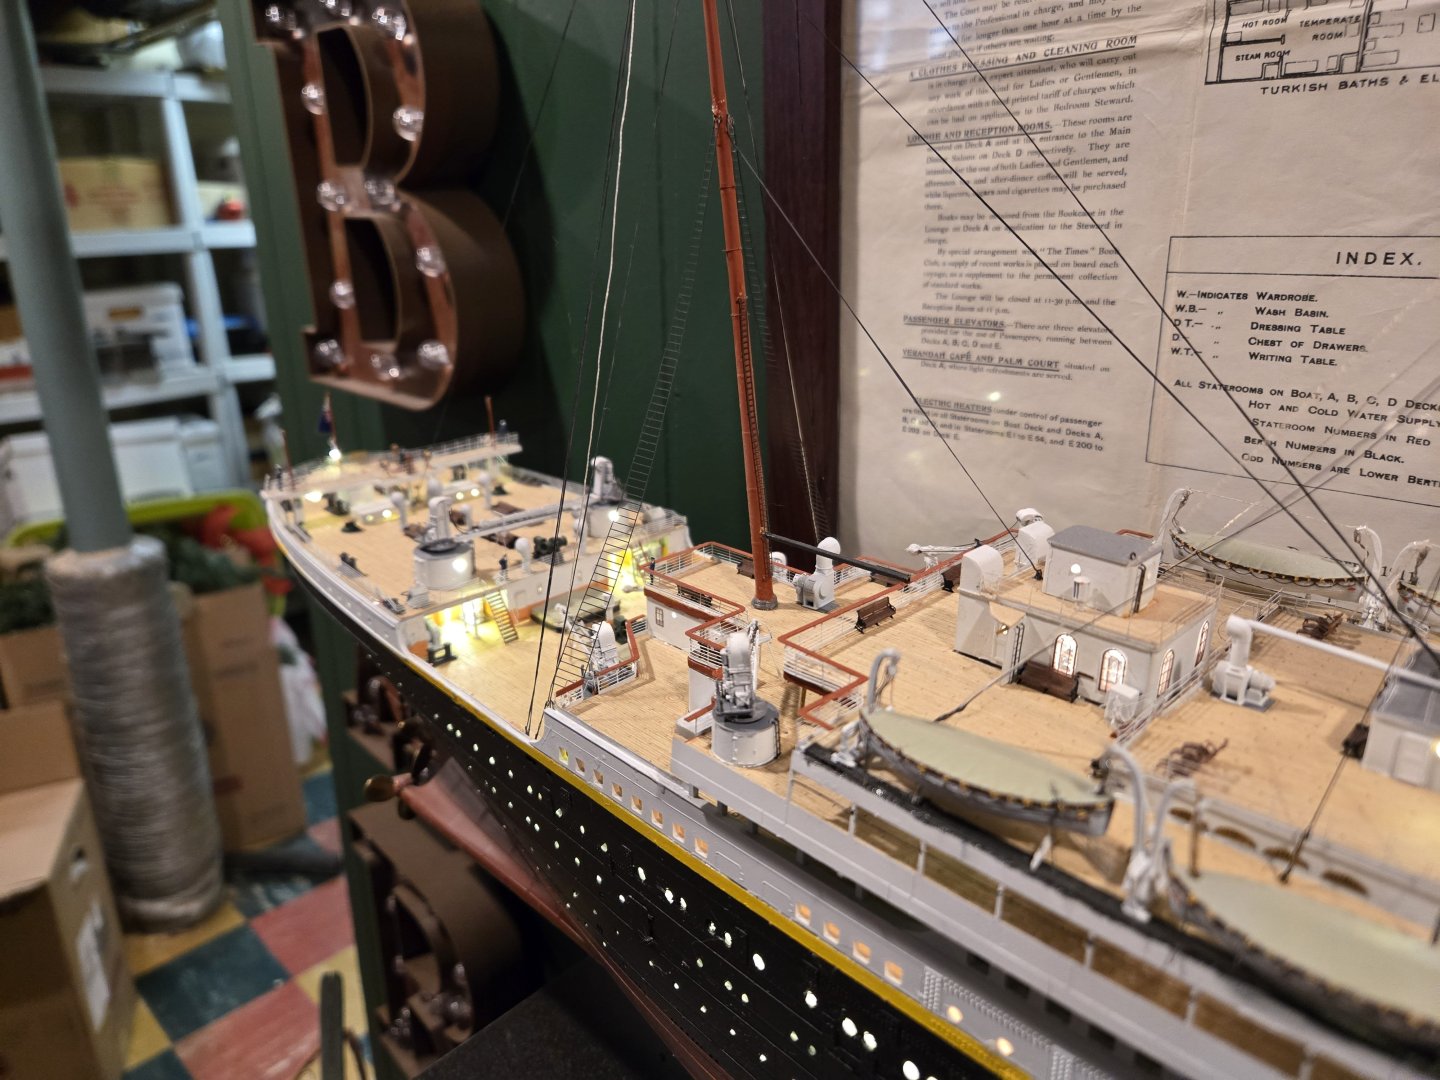
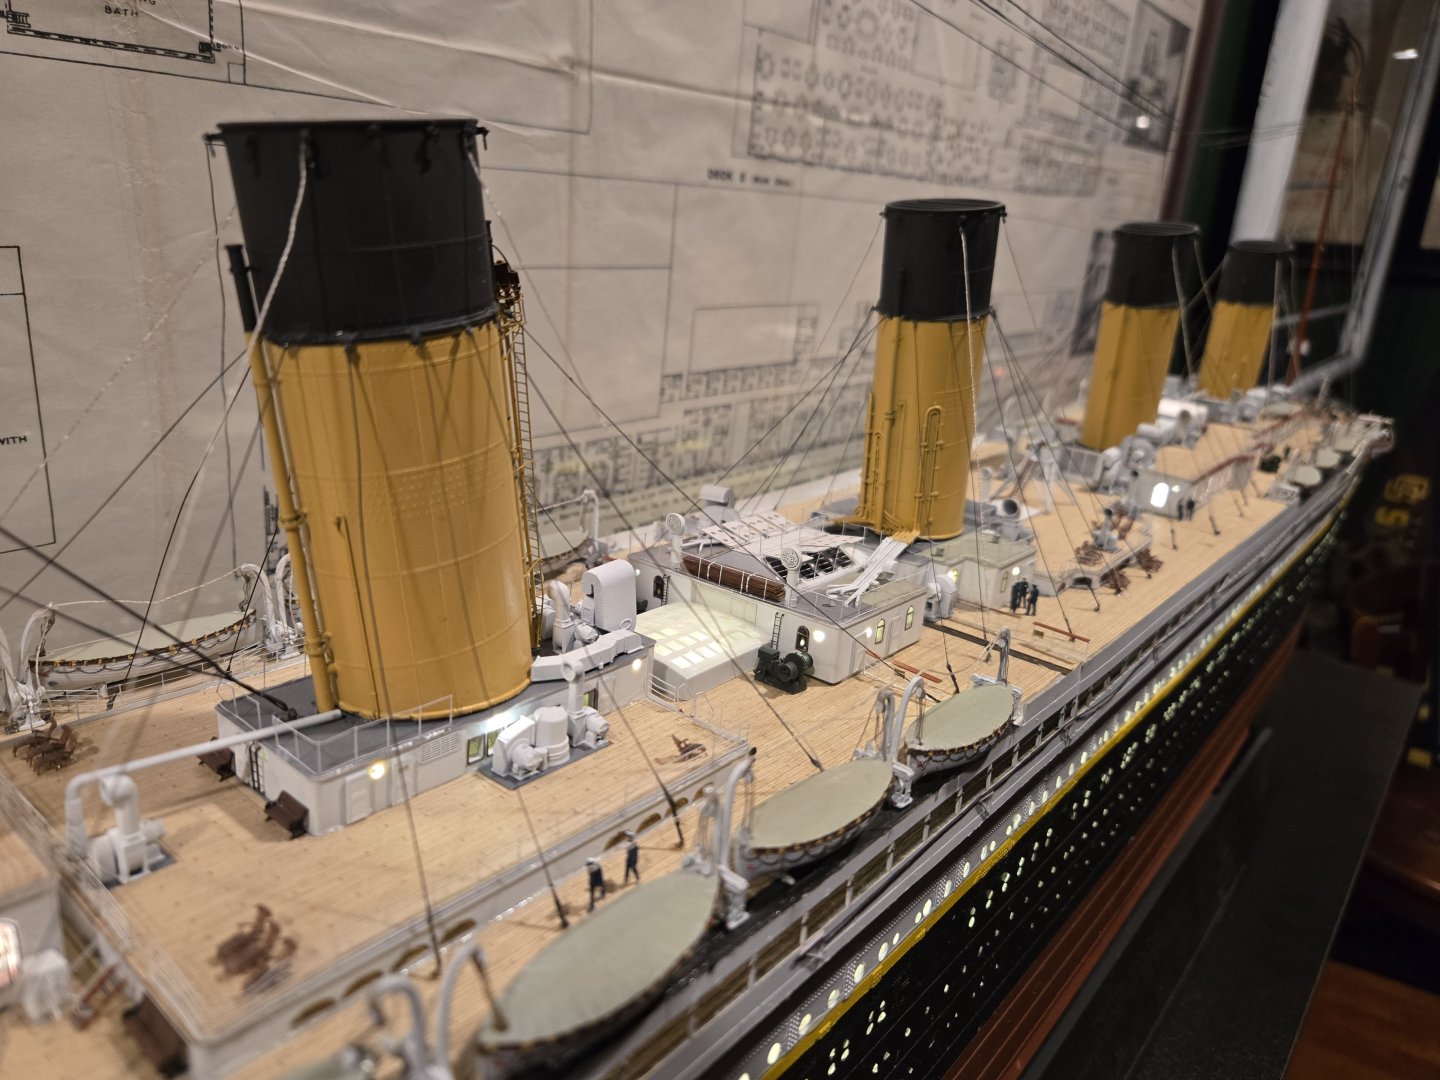
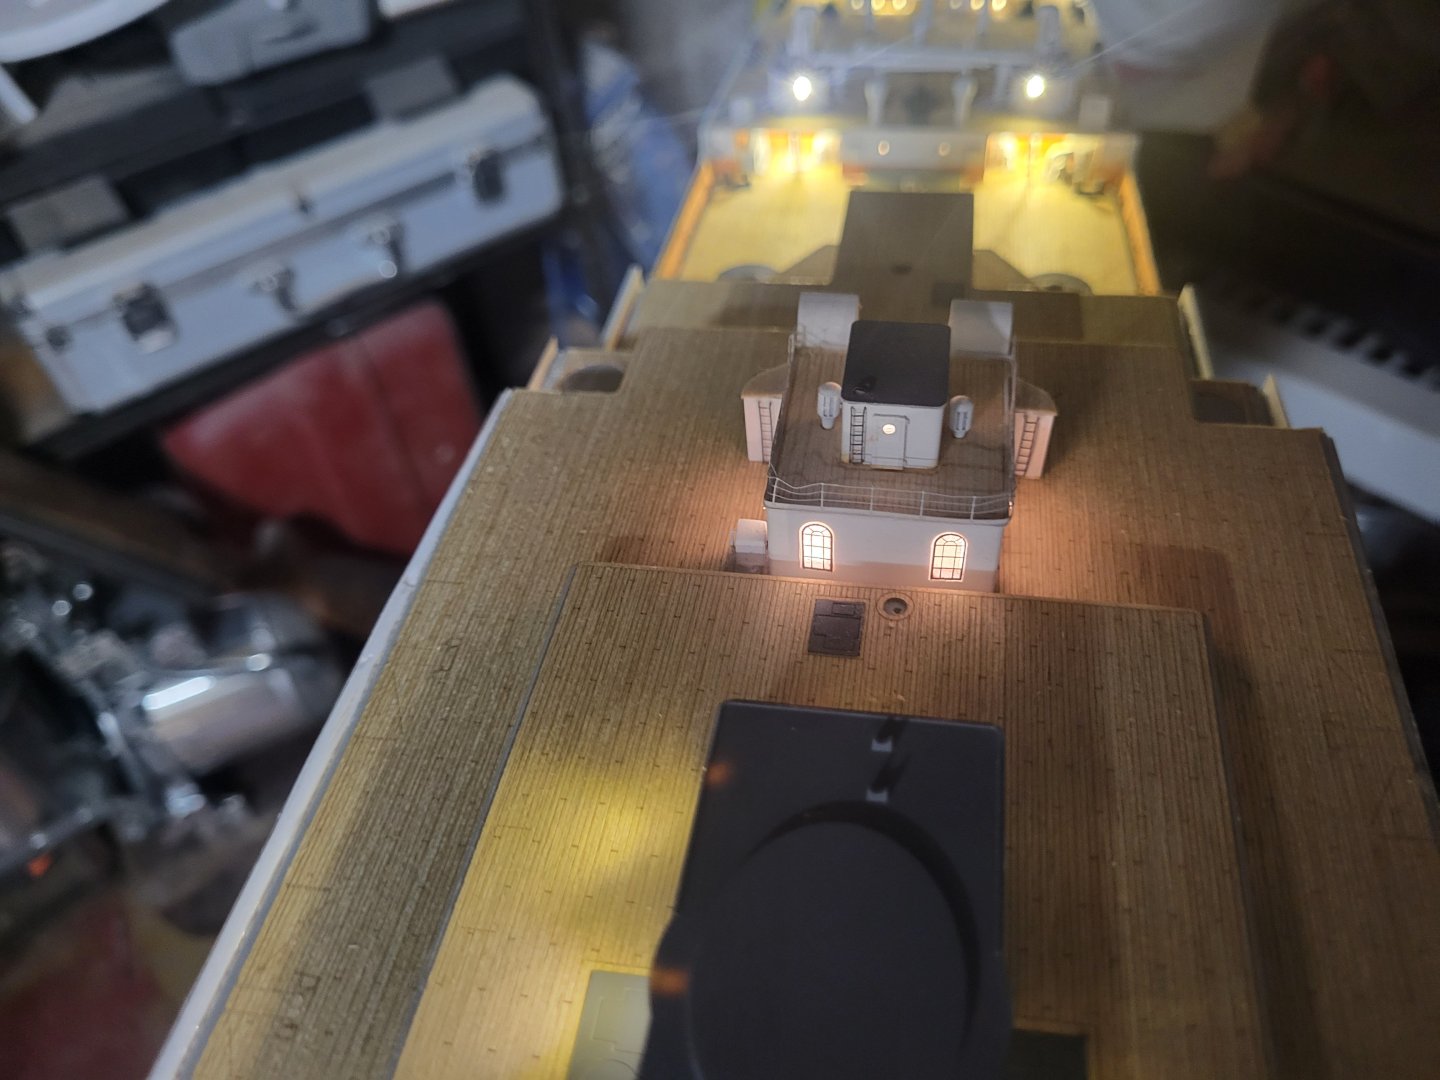
I didn't have any pics on my laptop, I must have moved them off to save space. The boat had about 4' of light strips in the bottom of the boat and then light strips under the C, B and A decks (A deck is just below the open deck where people walk) Plus almost 100 nano LED lights all over the place. The task was to keep all of it under 12volts and 3 amps or so....

-
I don't think you'd like christmas lights. Even small ones are huge. At the very least, you could look at LED light strips and/or little nano lights. The problem with nano lights is you need resistors to keep them from burning out as they can only take 1.5volts or so. The resistors will allow you to use a 12v power supply. That was the killer for me. I could only attach 4 nano lights to a resistor and keep them from burning out. More than 5 and 12v wouldn't light them, 3 an and they were too bright. LED light strips on the ceiling of the upper deck would light up all the work that gets done on the cannons, stairs, etc. Then adding strategic nano lights in stern to light the stern quarter galleries and up front so light shines through the beak head would be great. The nice thing about LED strips, you can stick whatever you need, say 10" to an area, then add a snap on connector to go to the next strip in an other area and hide the wires up in the rafters...so to speak. Then add a few nano lights to the Admiral's quarters behind the screen, one in the binnacle and if you can figure the wiring, 3 for the stern lanterns. I know you can get nano lights that flicker or get the required material to make them flicker. Then you could follow some of the builder logs and create little mini lanterns lit by those nano lights. I think I paid like $17USD for 50 nano lights (come with resistors), $18 for 16' of LED light strips. I did have to buy a solder kit and various wiring and connectors to connect everything. It's doable...lol.
-
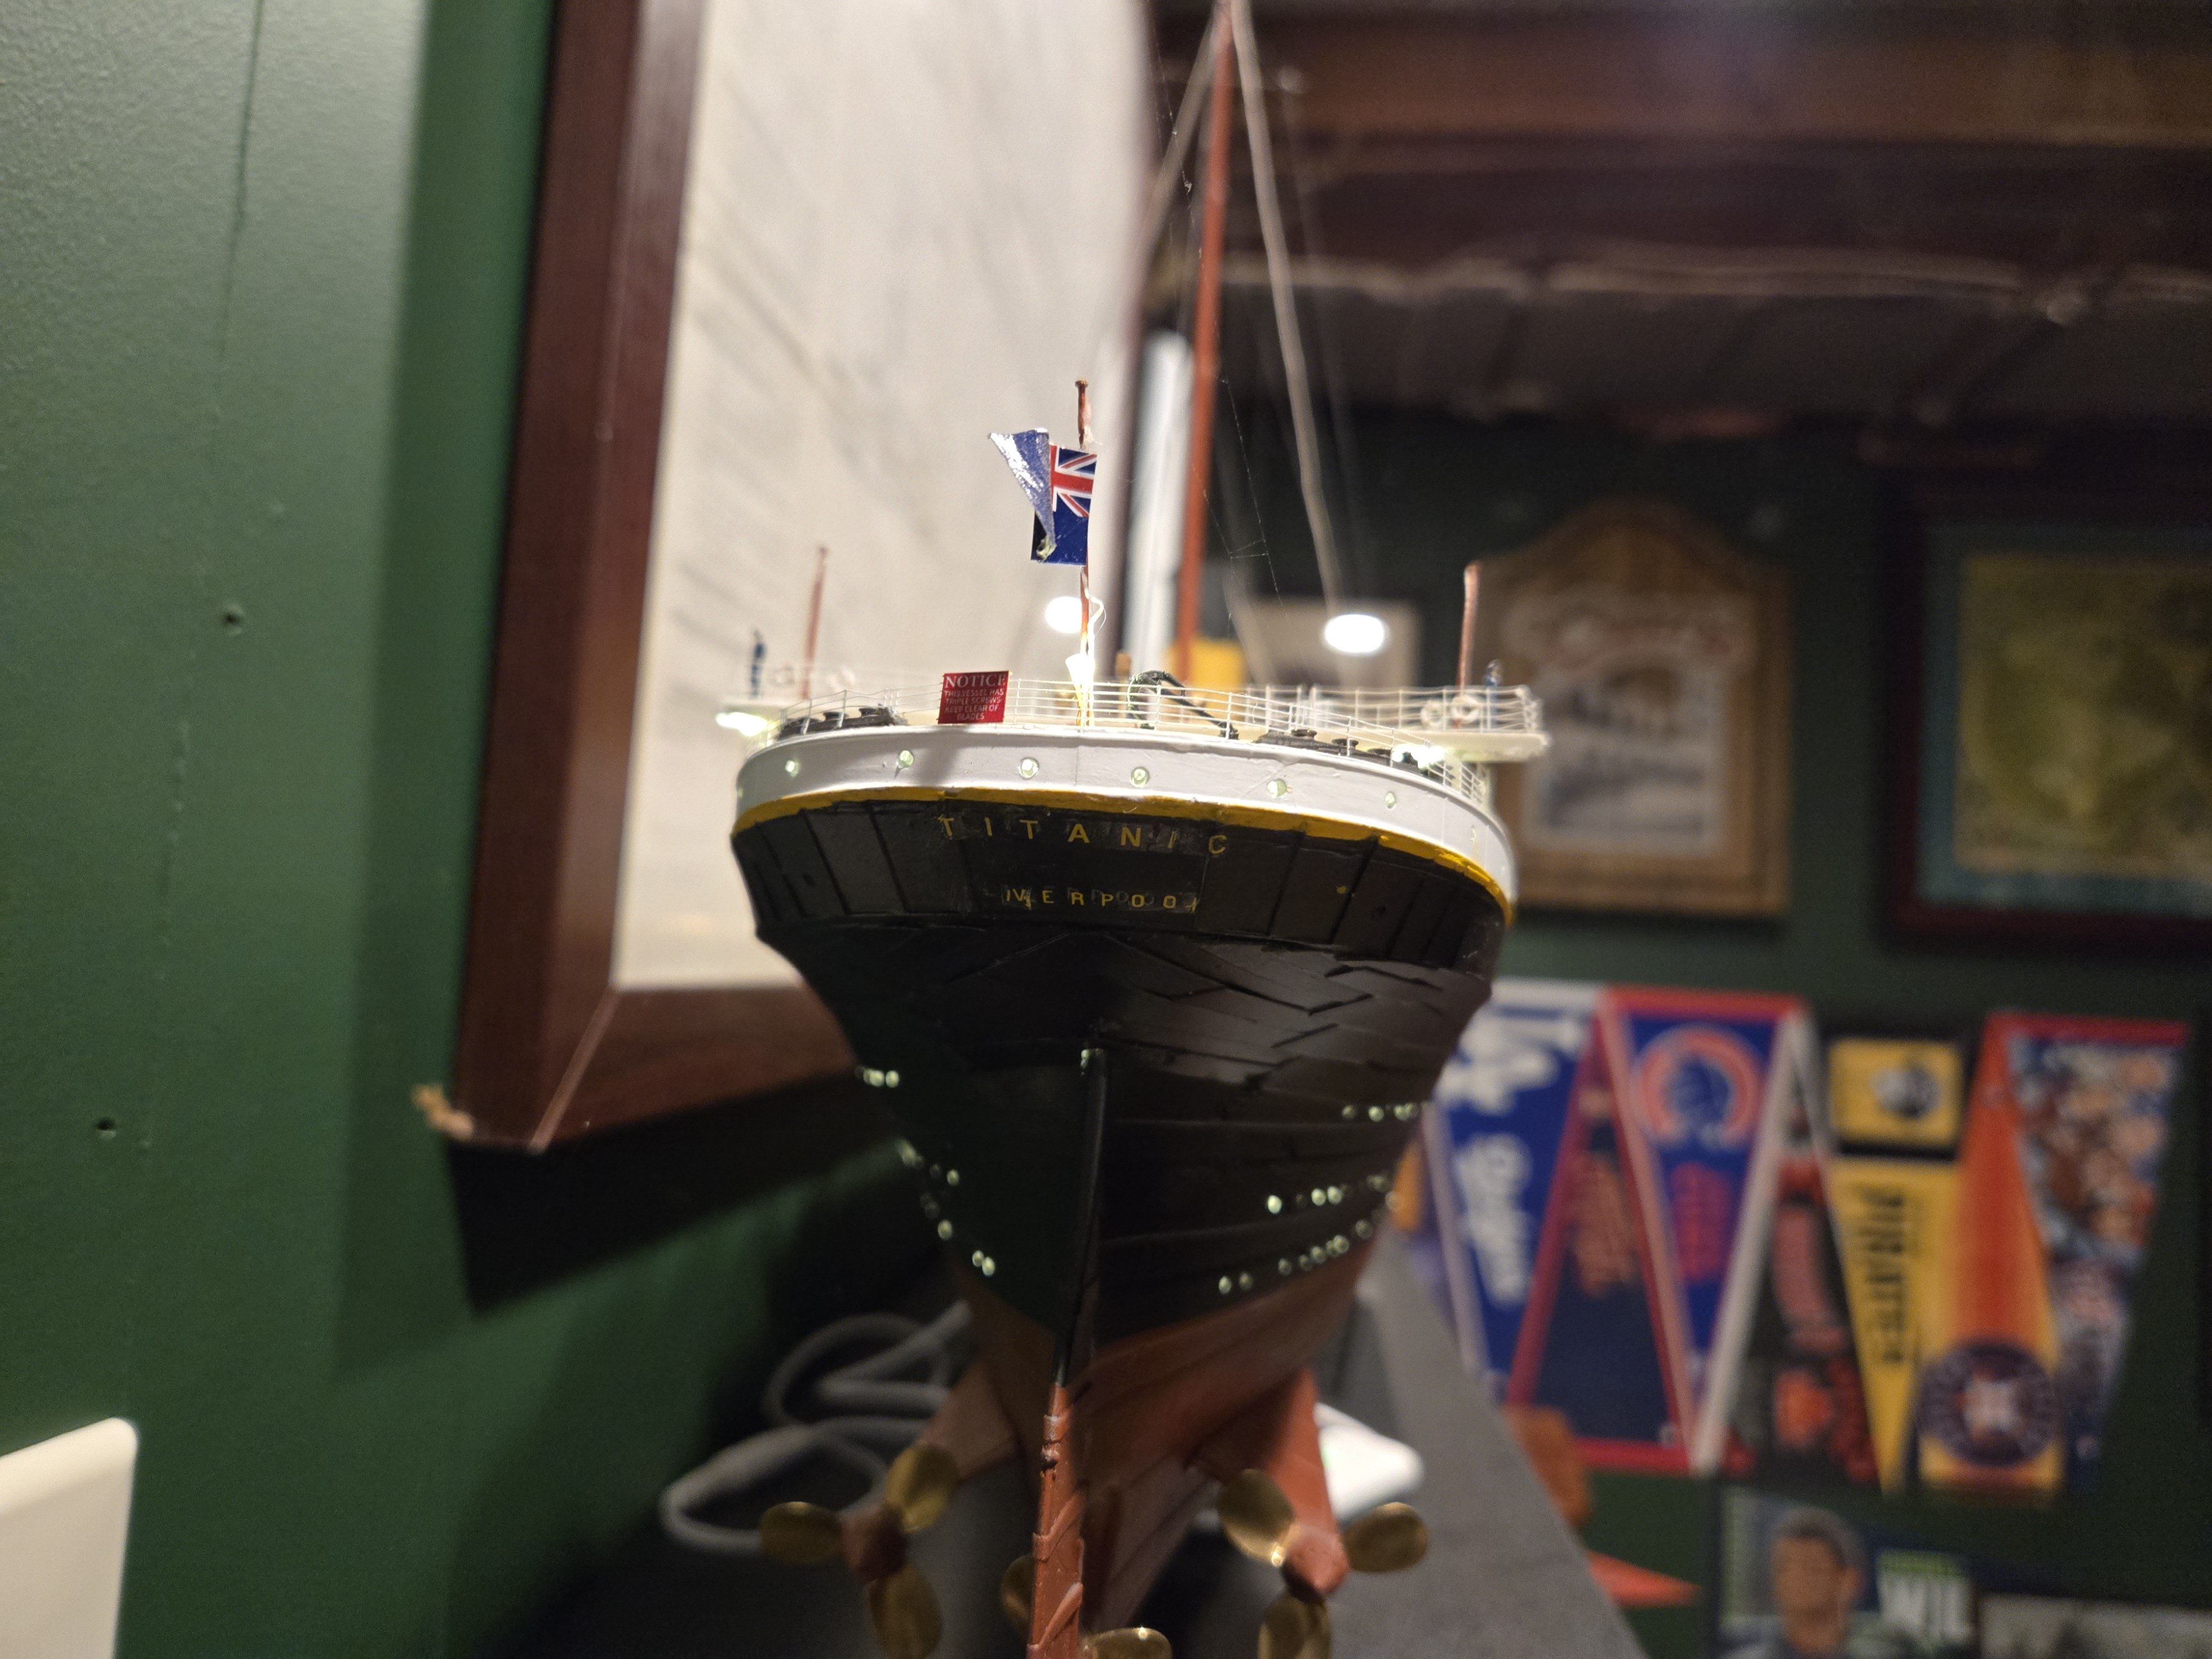
Making jigs is a great idea. I thought about lights, but they are a HUGE extra hurdle. I did them on my Titanic model. It was hours of creating mini light groups that didn't overwhelm the amp tolerance of the lights, getting them all soldered together correctly and making sure they worked from deck to deck. When it was done and glued beyond salvaging, I had some issues with one side of the model not quite lighting up as much as I wanted. I had bought one of those adjustable DC power supplies to test lights prior to moving on. It was a quite a project and I am glad I did it. But I knew that trying to add lights to this model when I had NEVER worked on a wooden model or something of this scale or difficulty would only add a level of frustration that I didn't want to face. Thanks! Chris


-
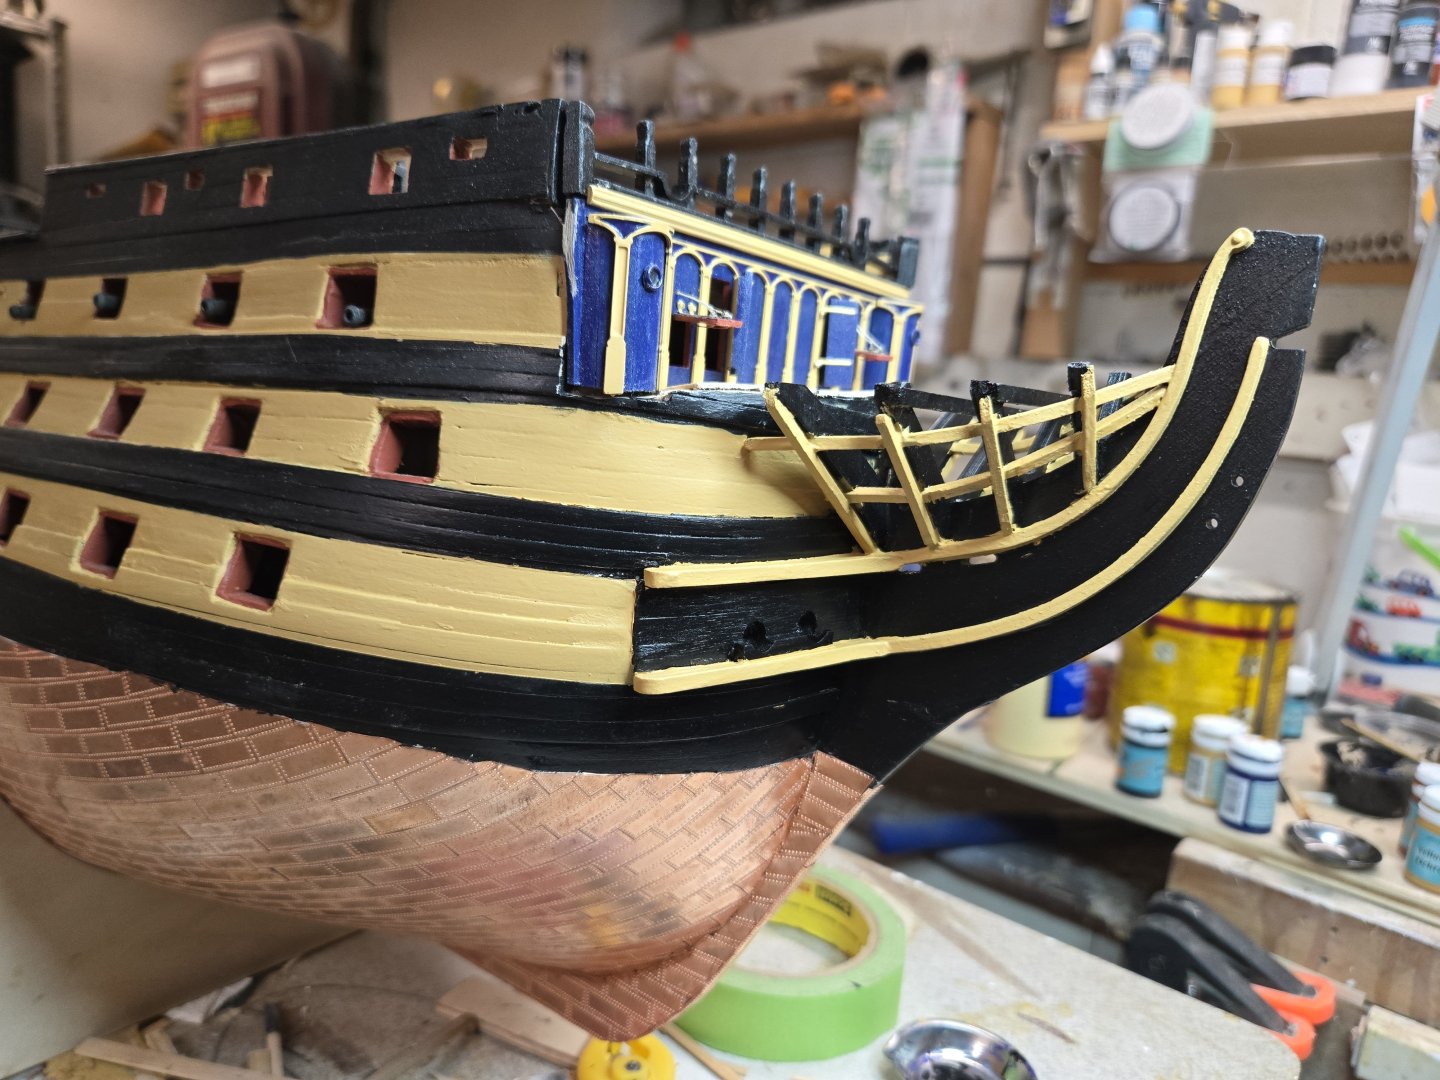
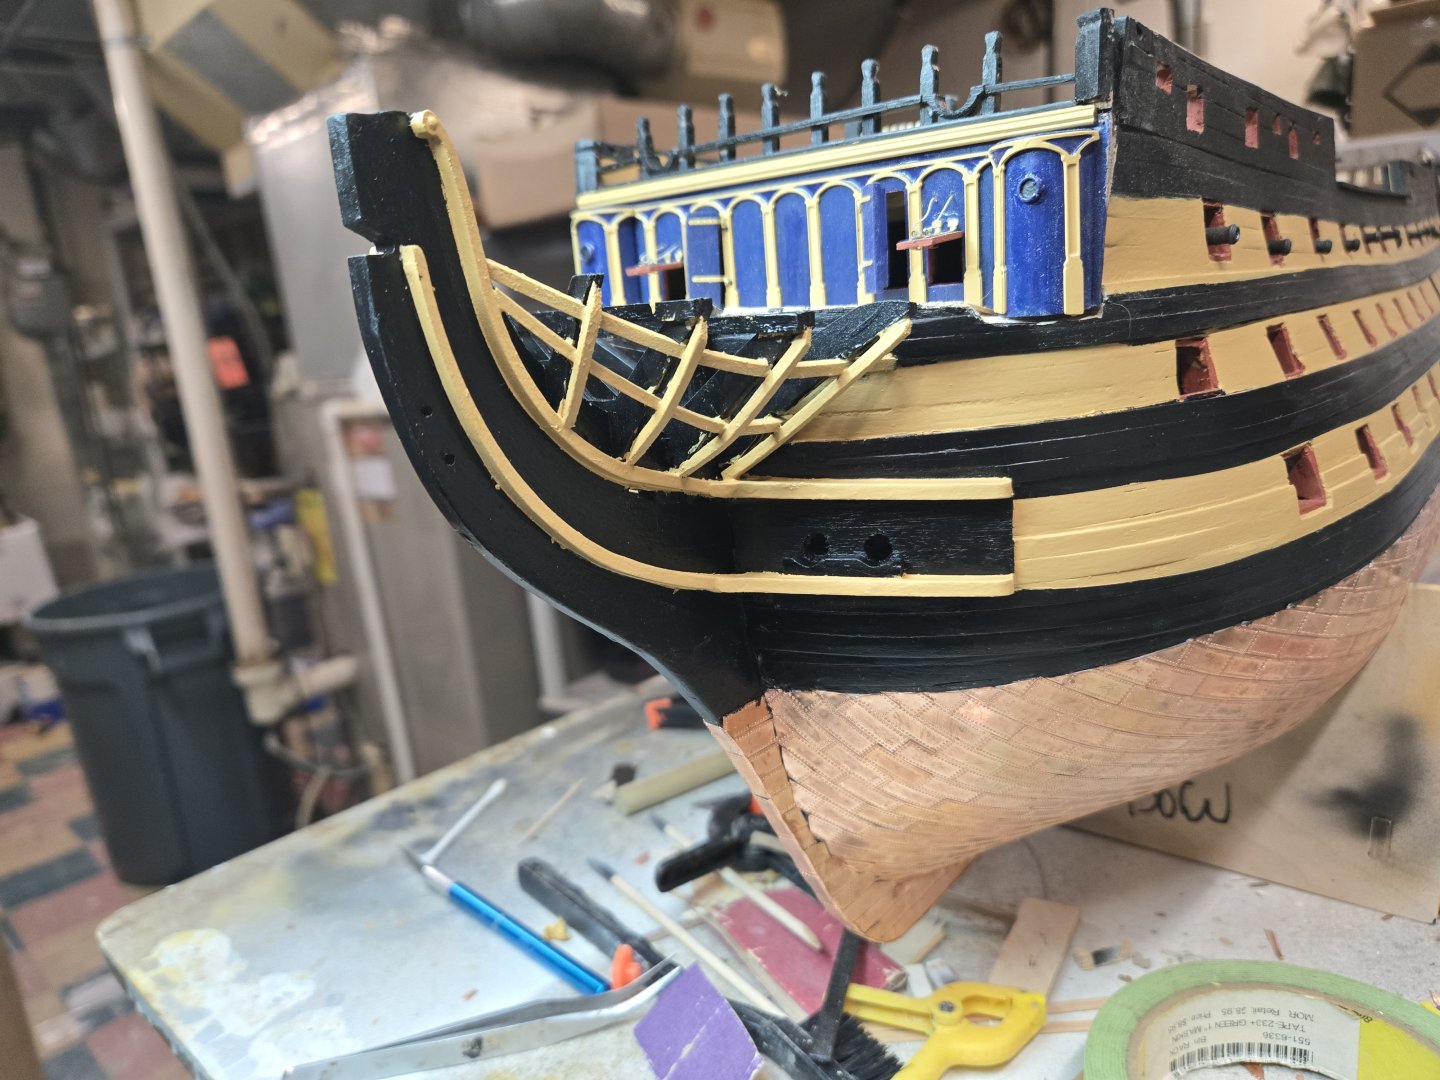
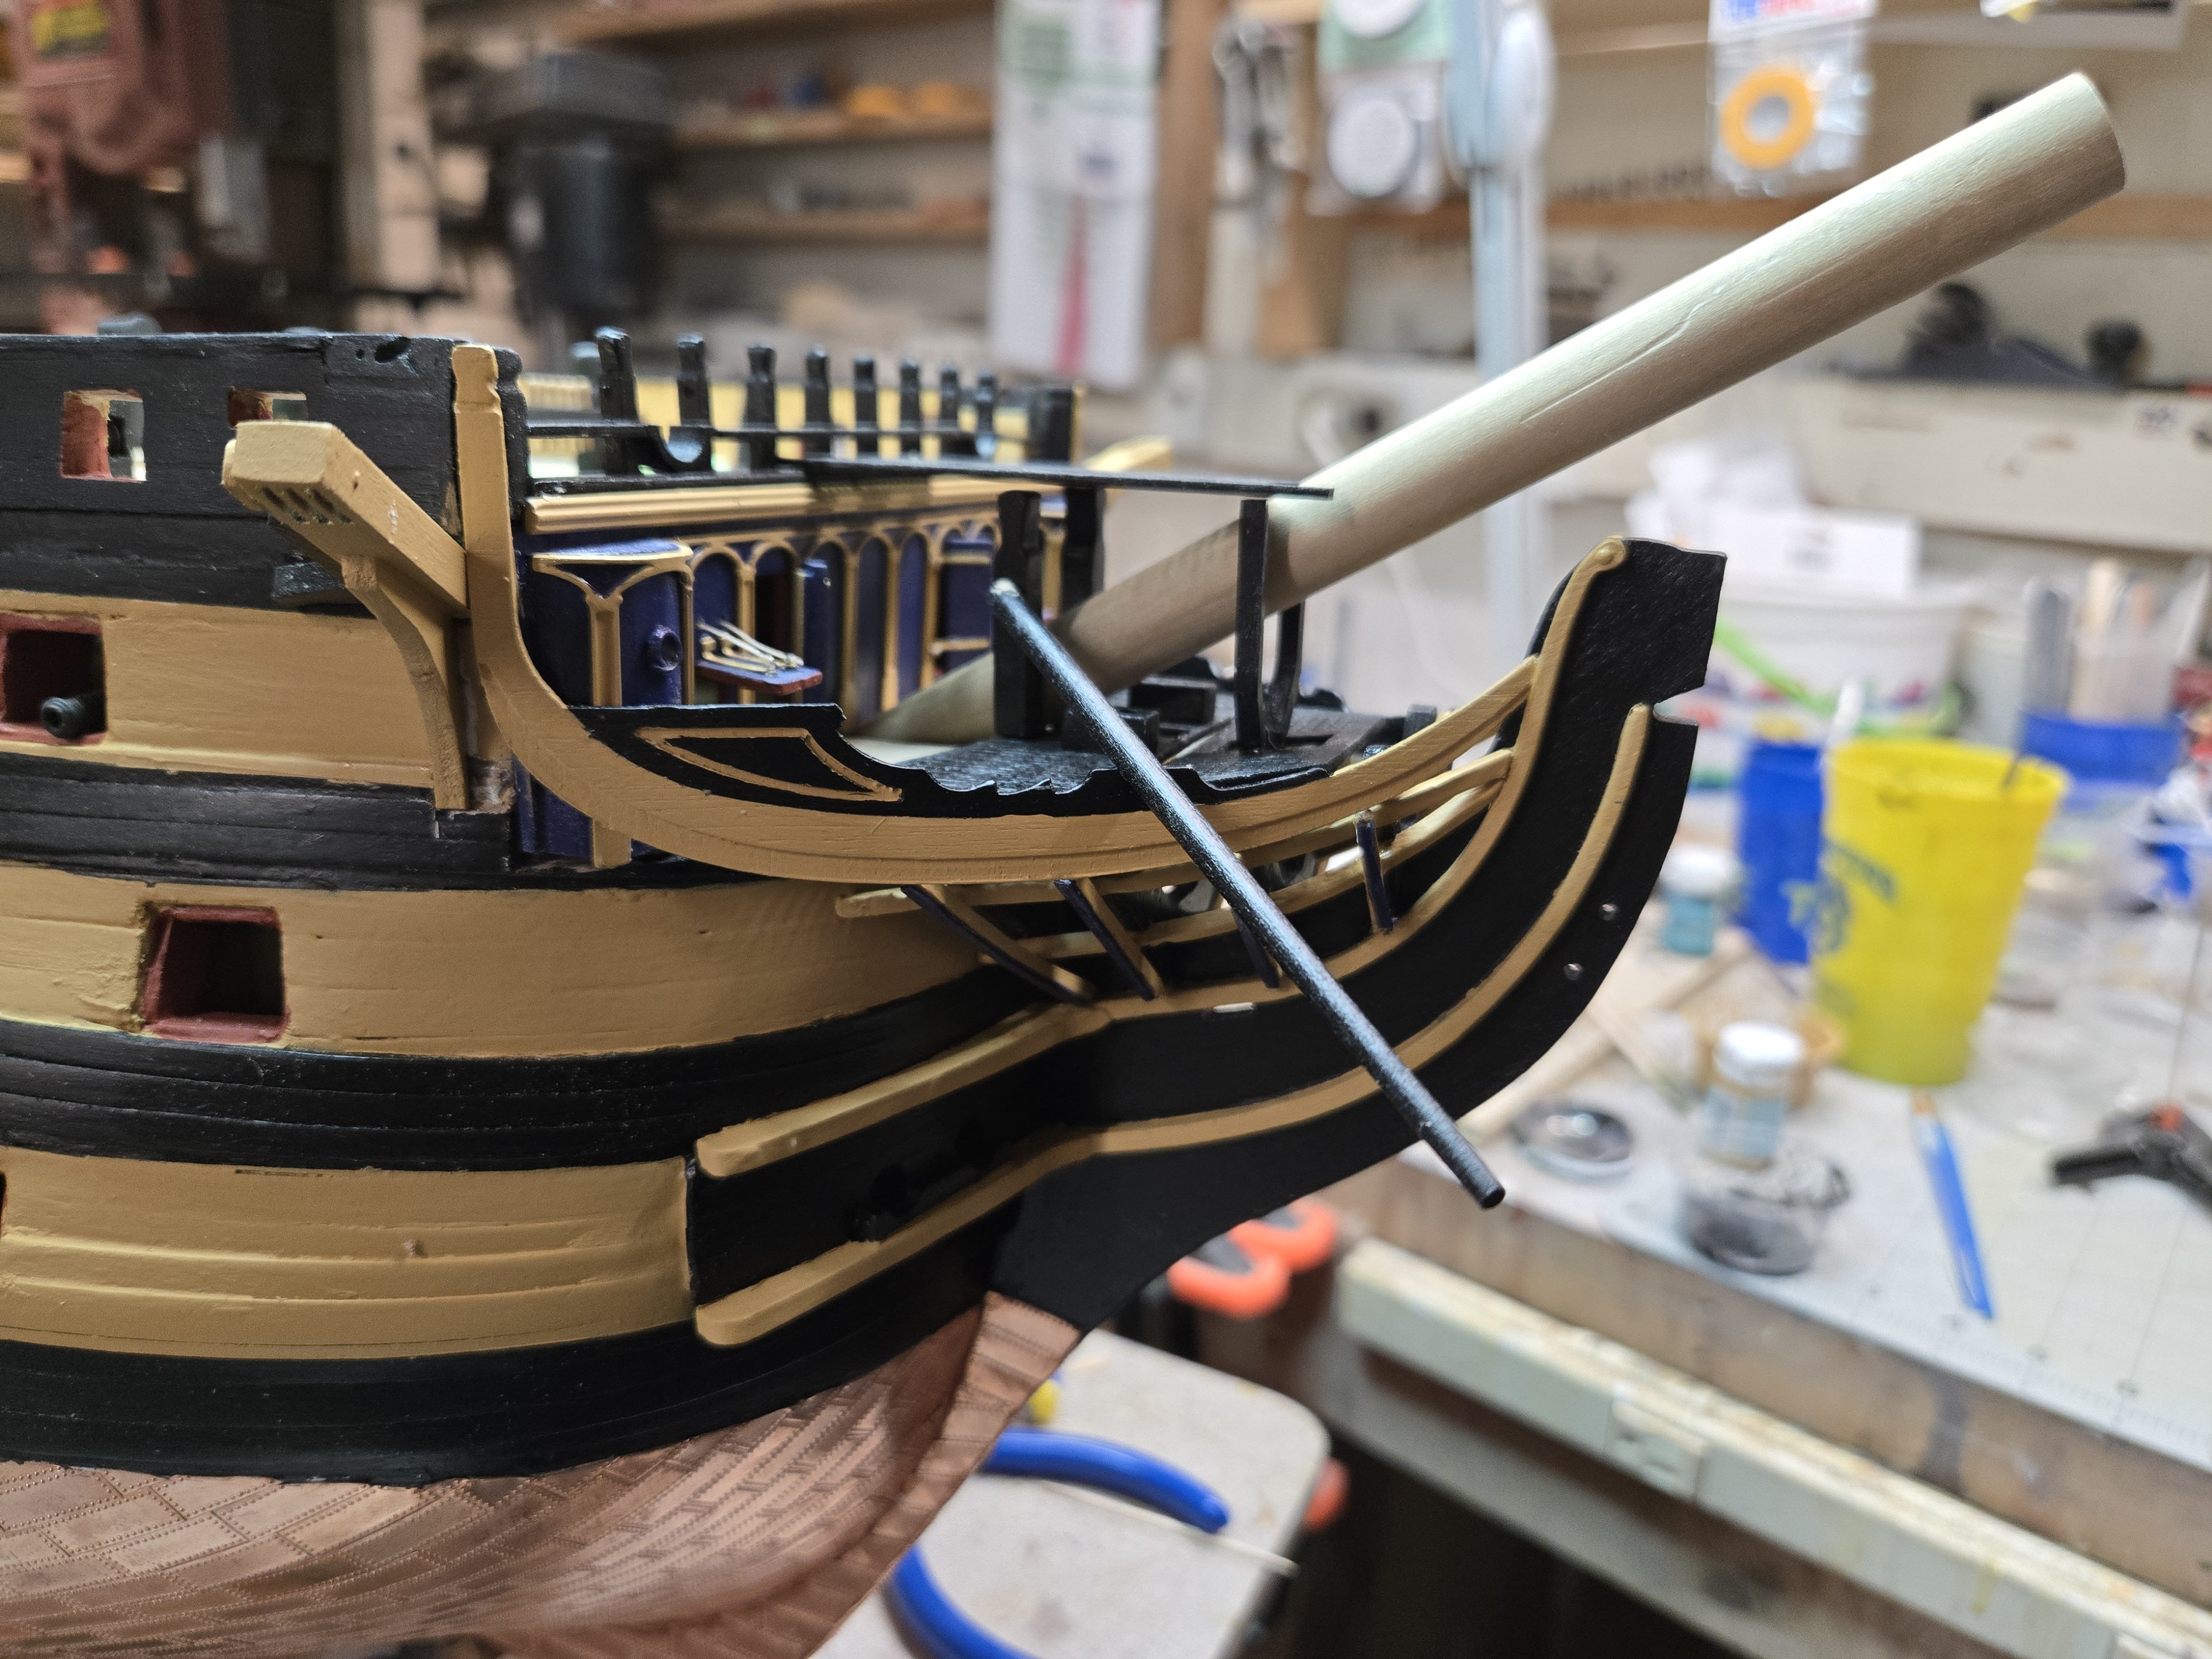
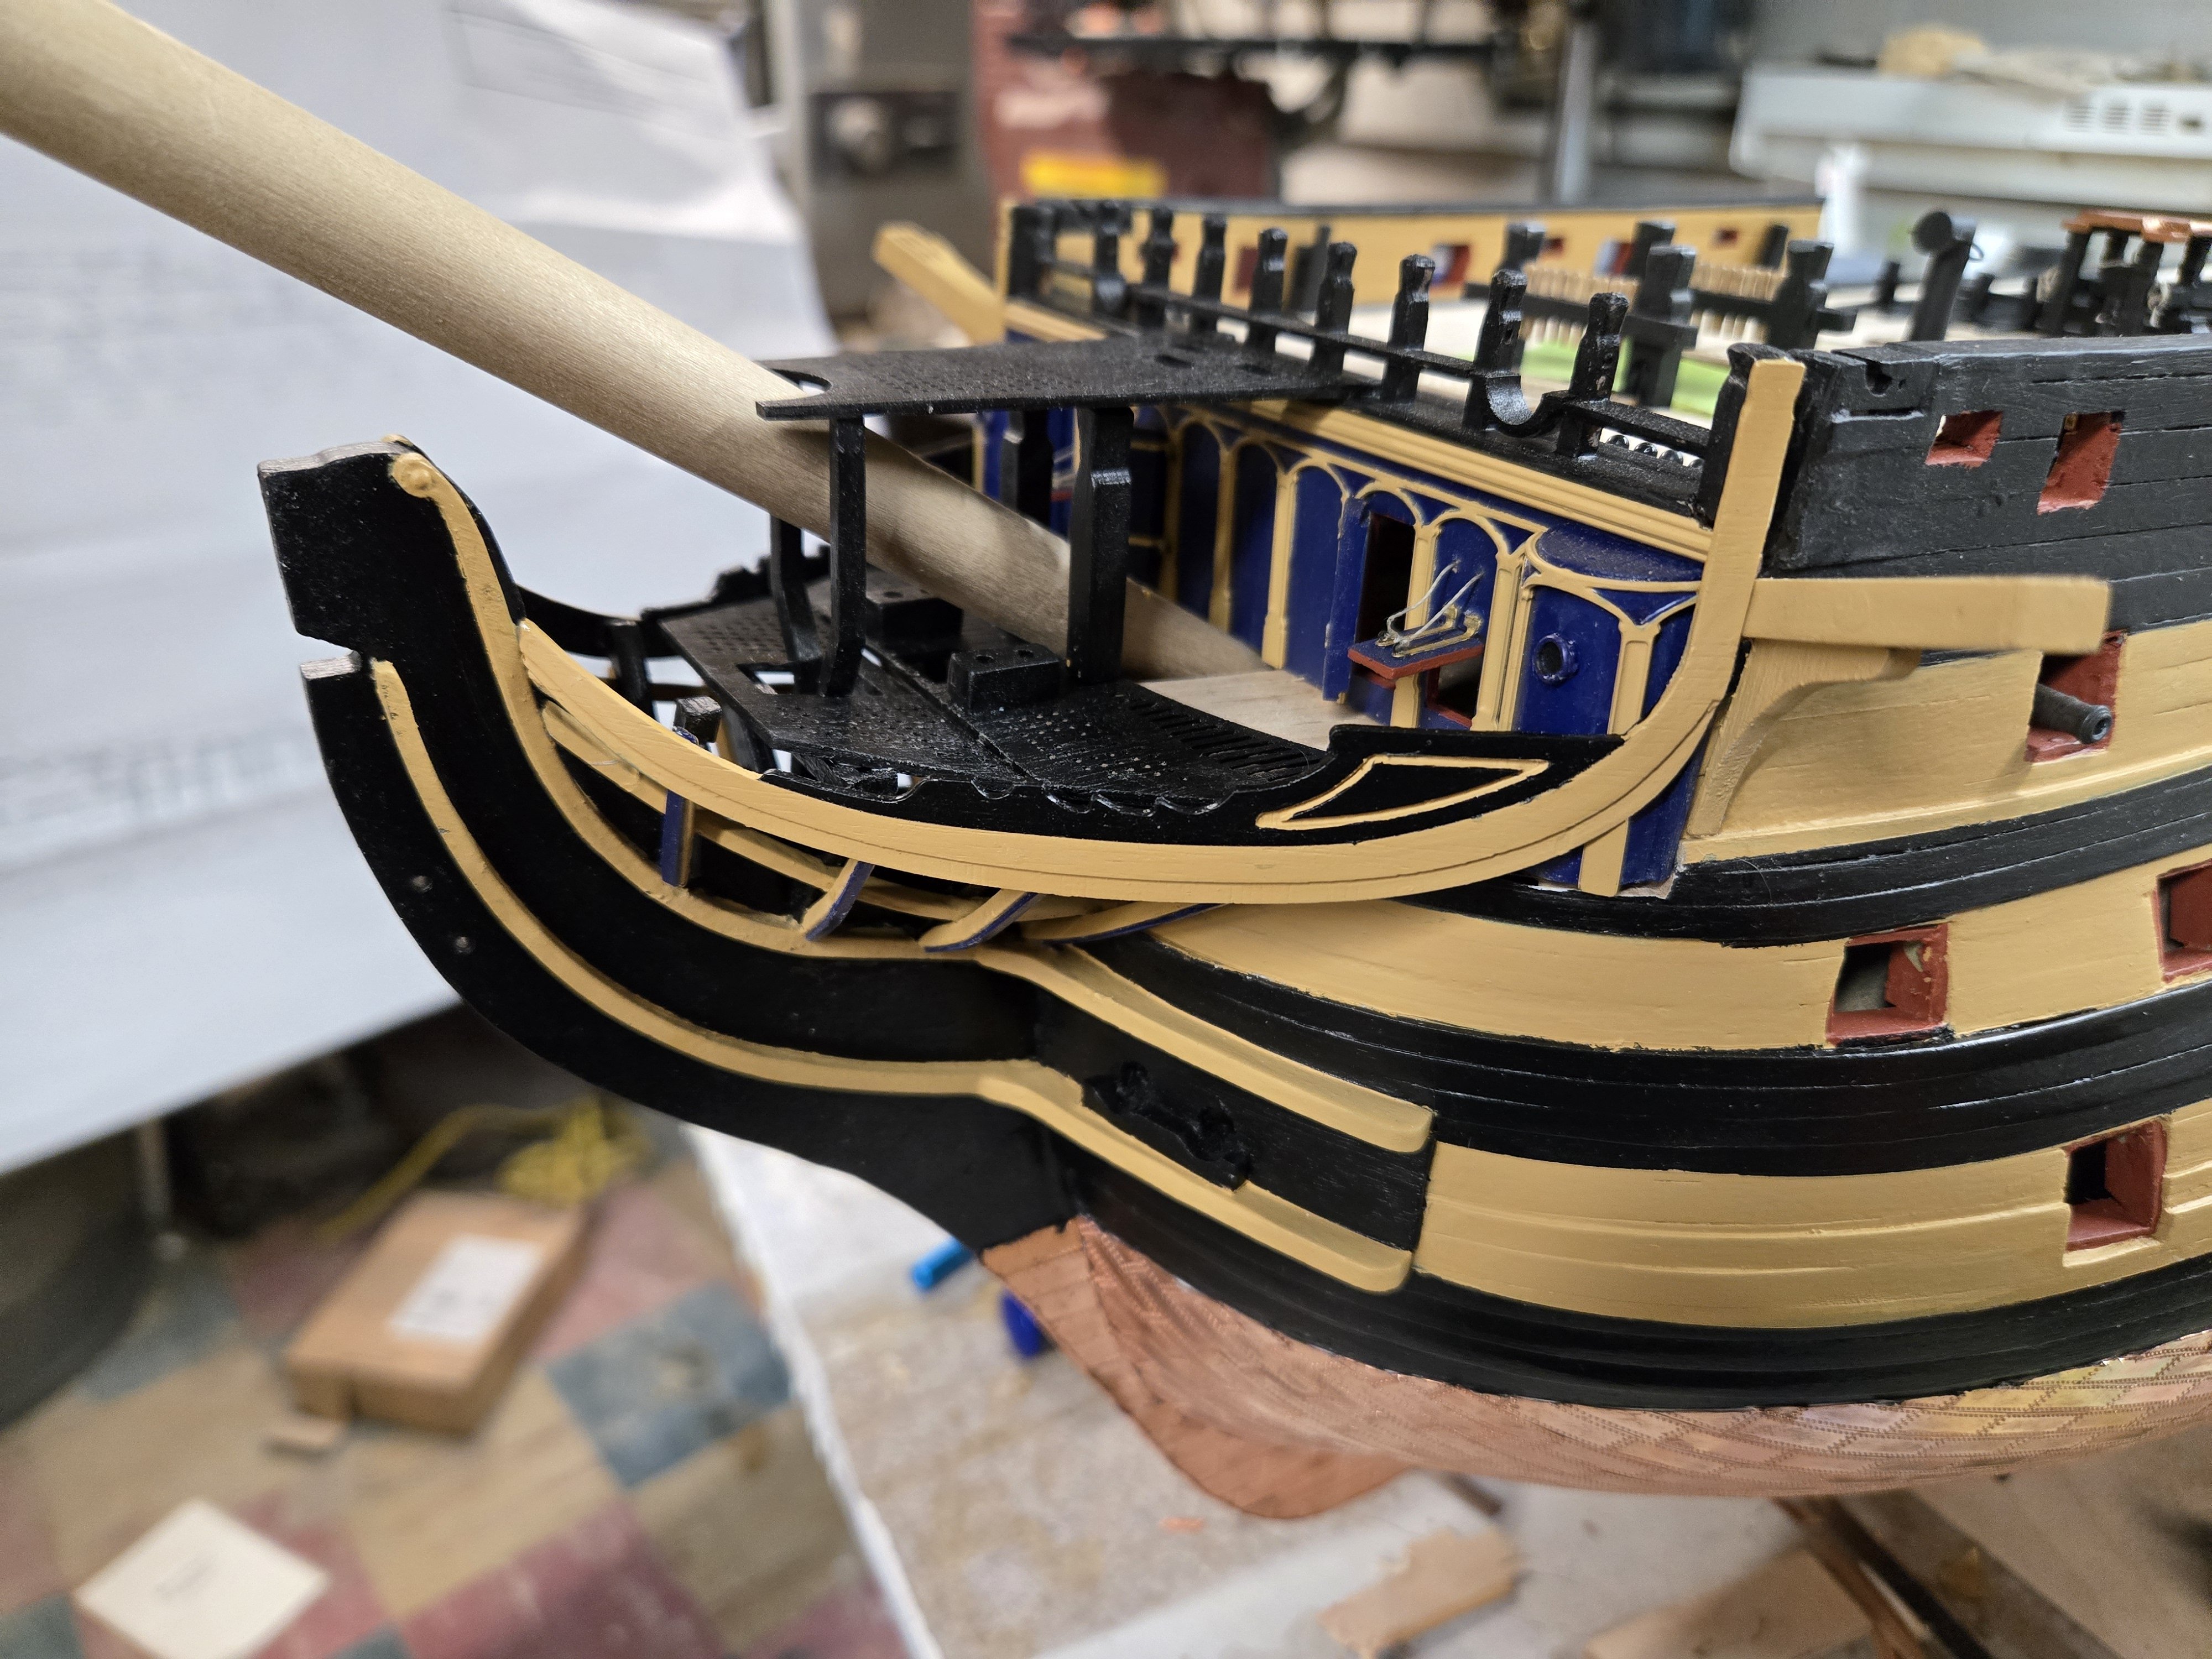
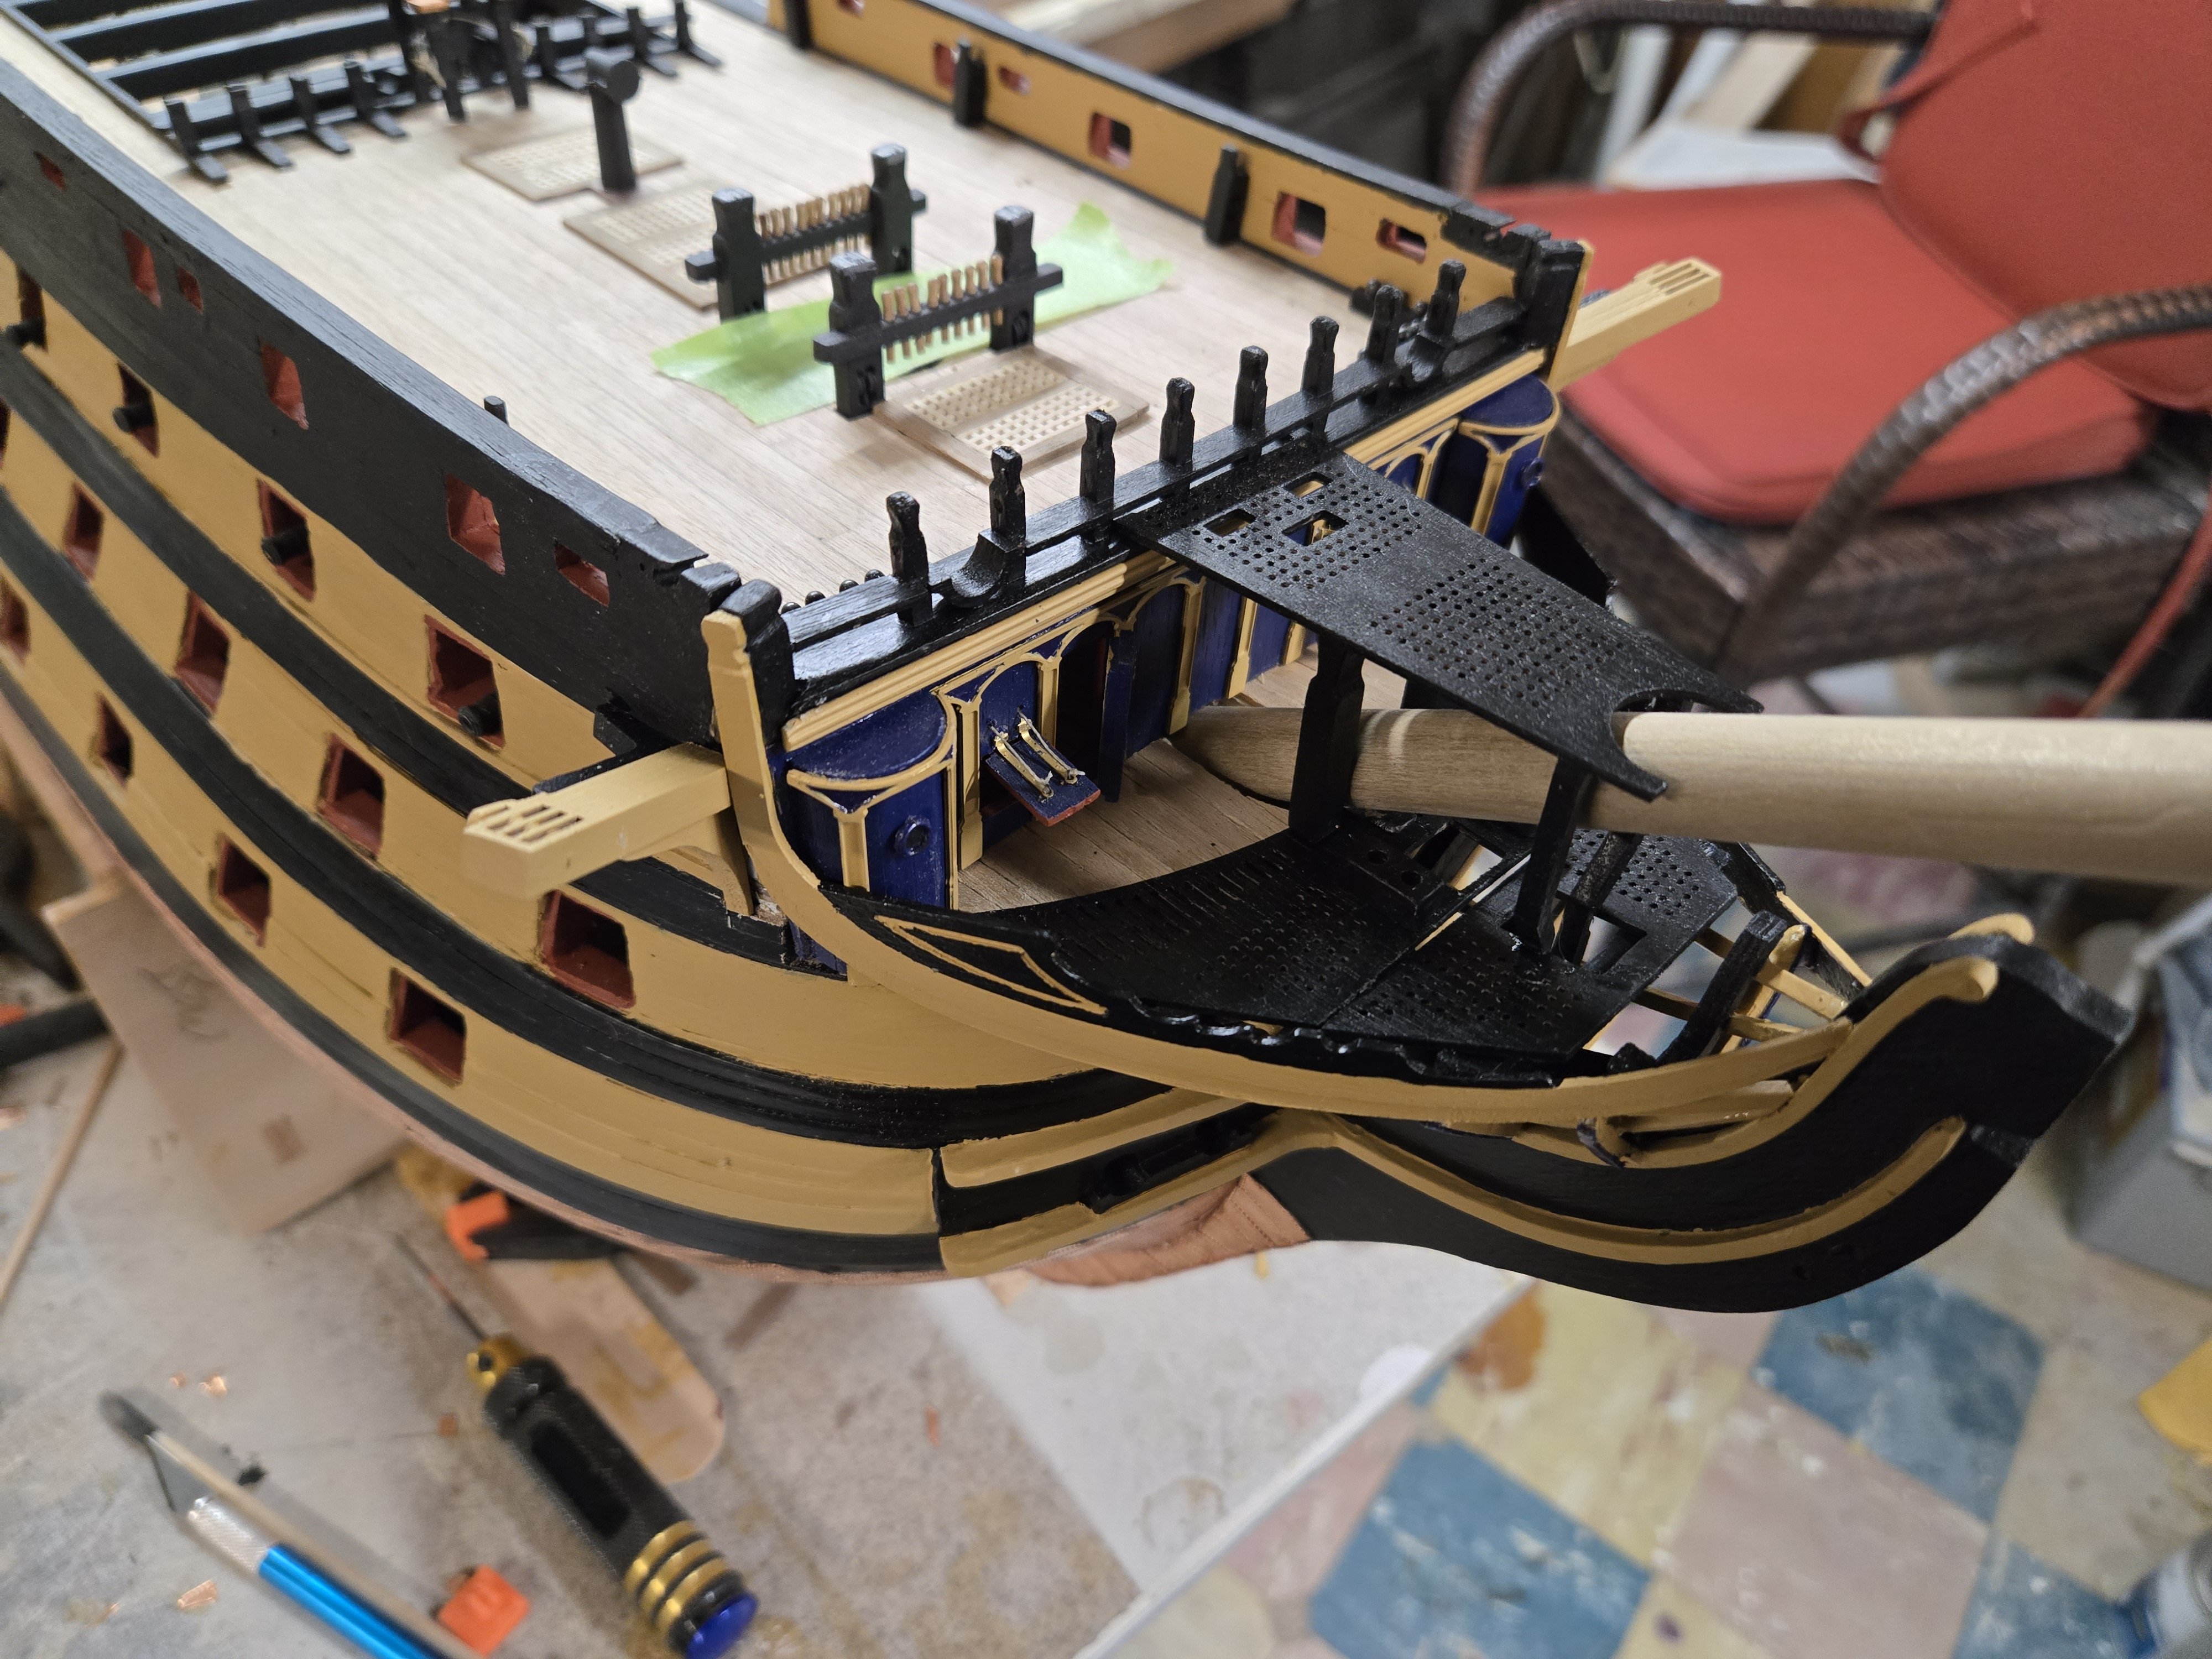
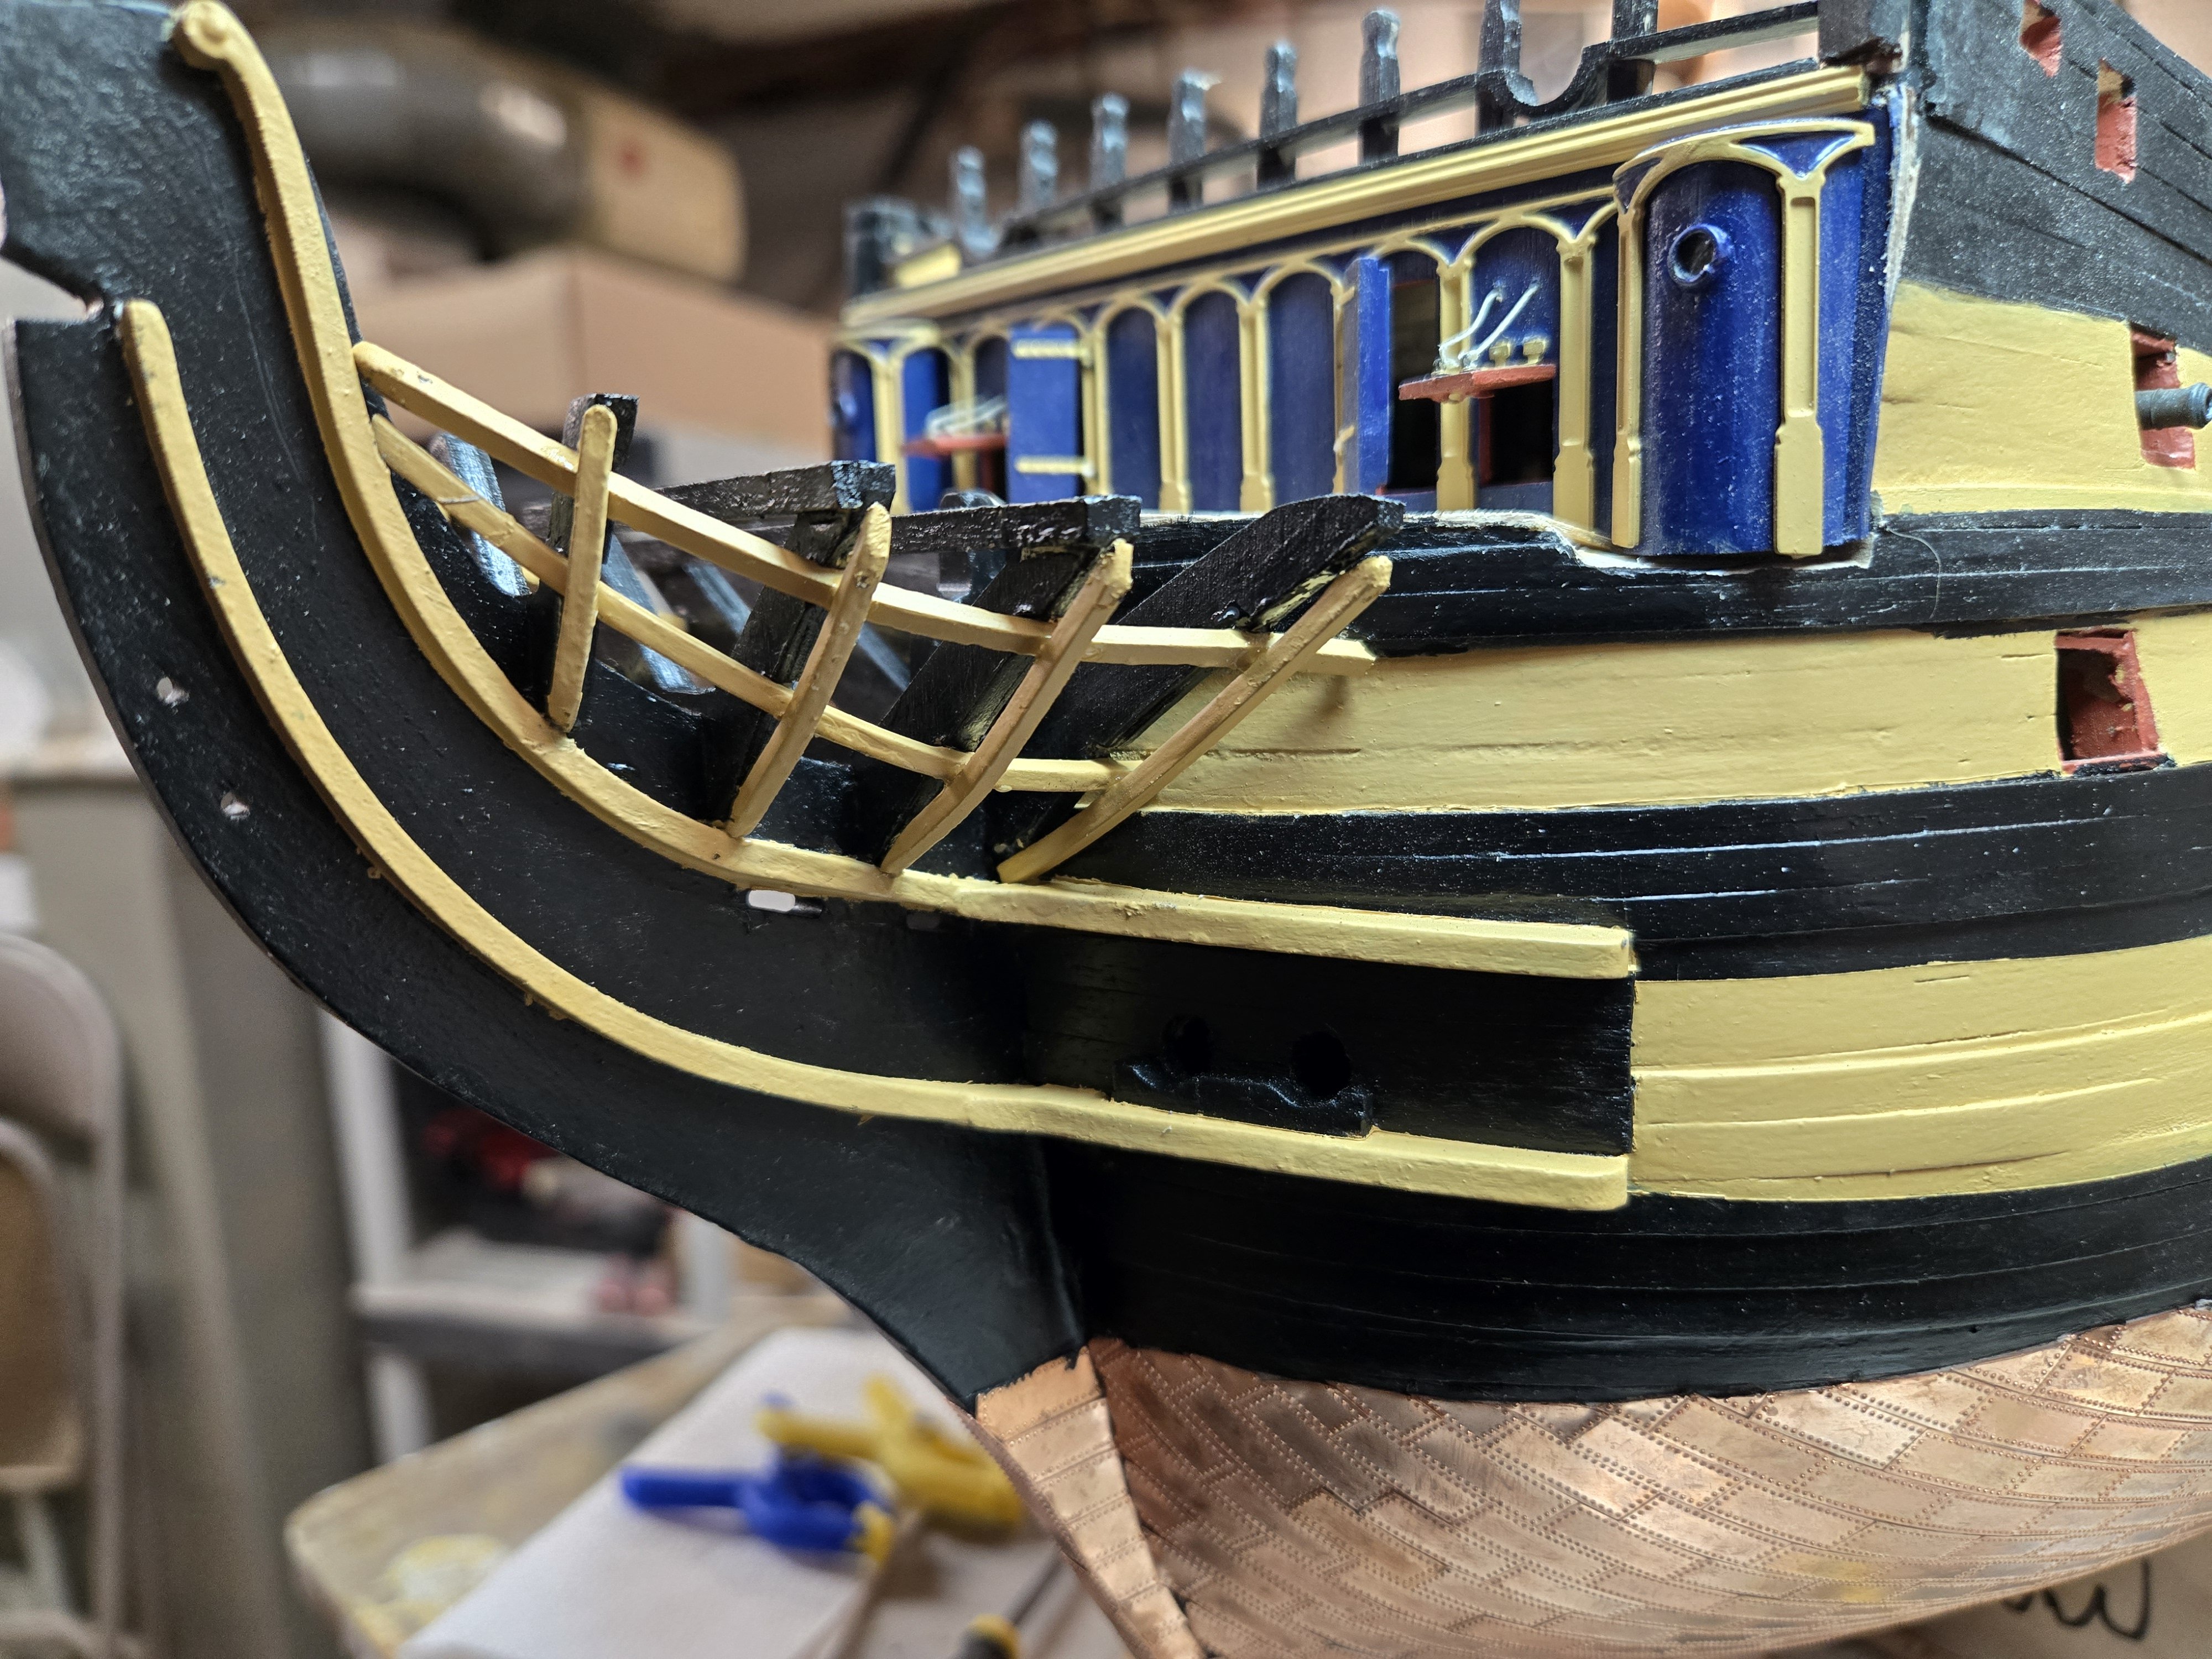
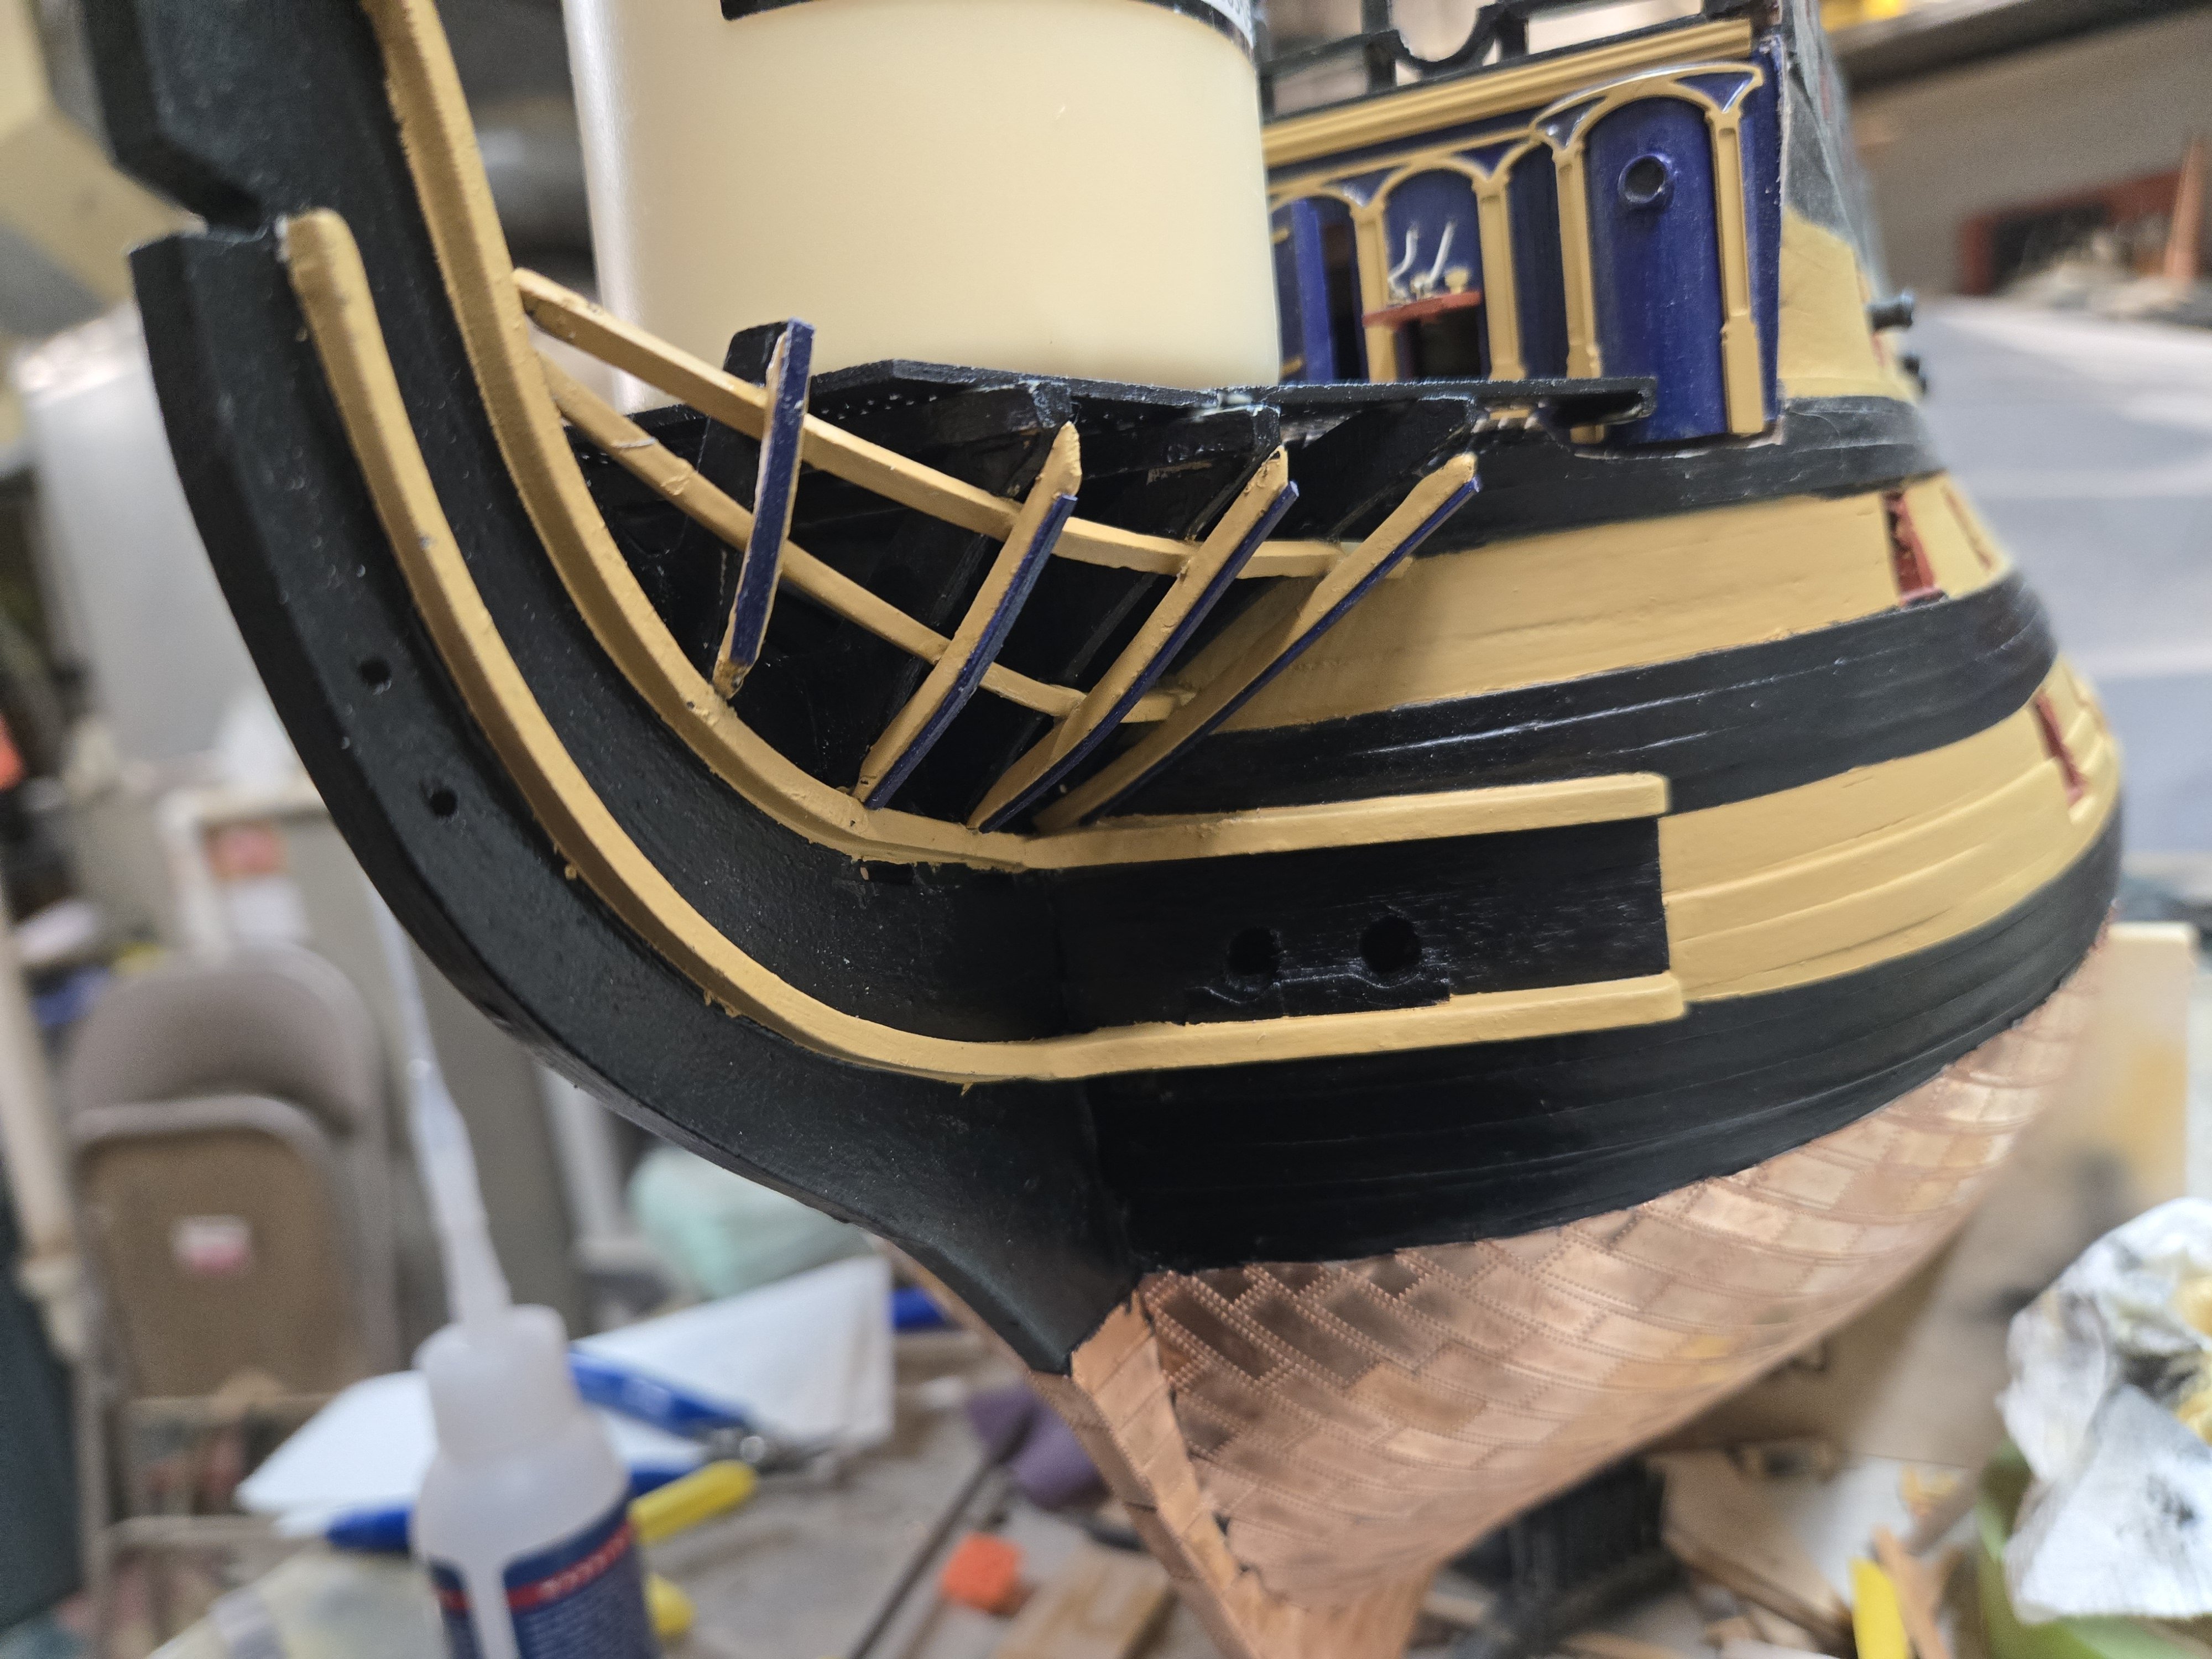
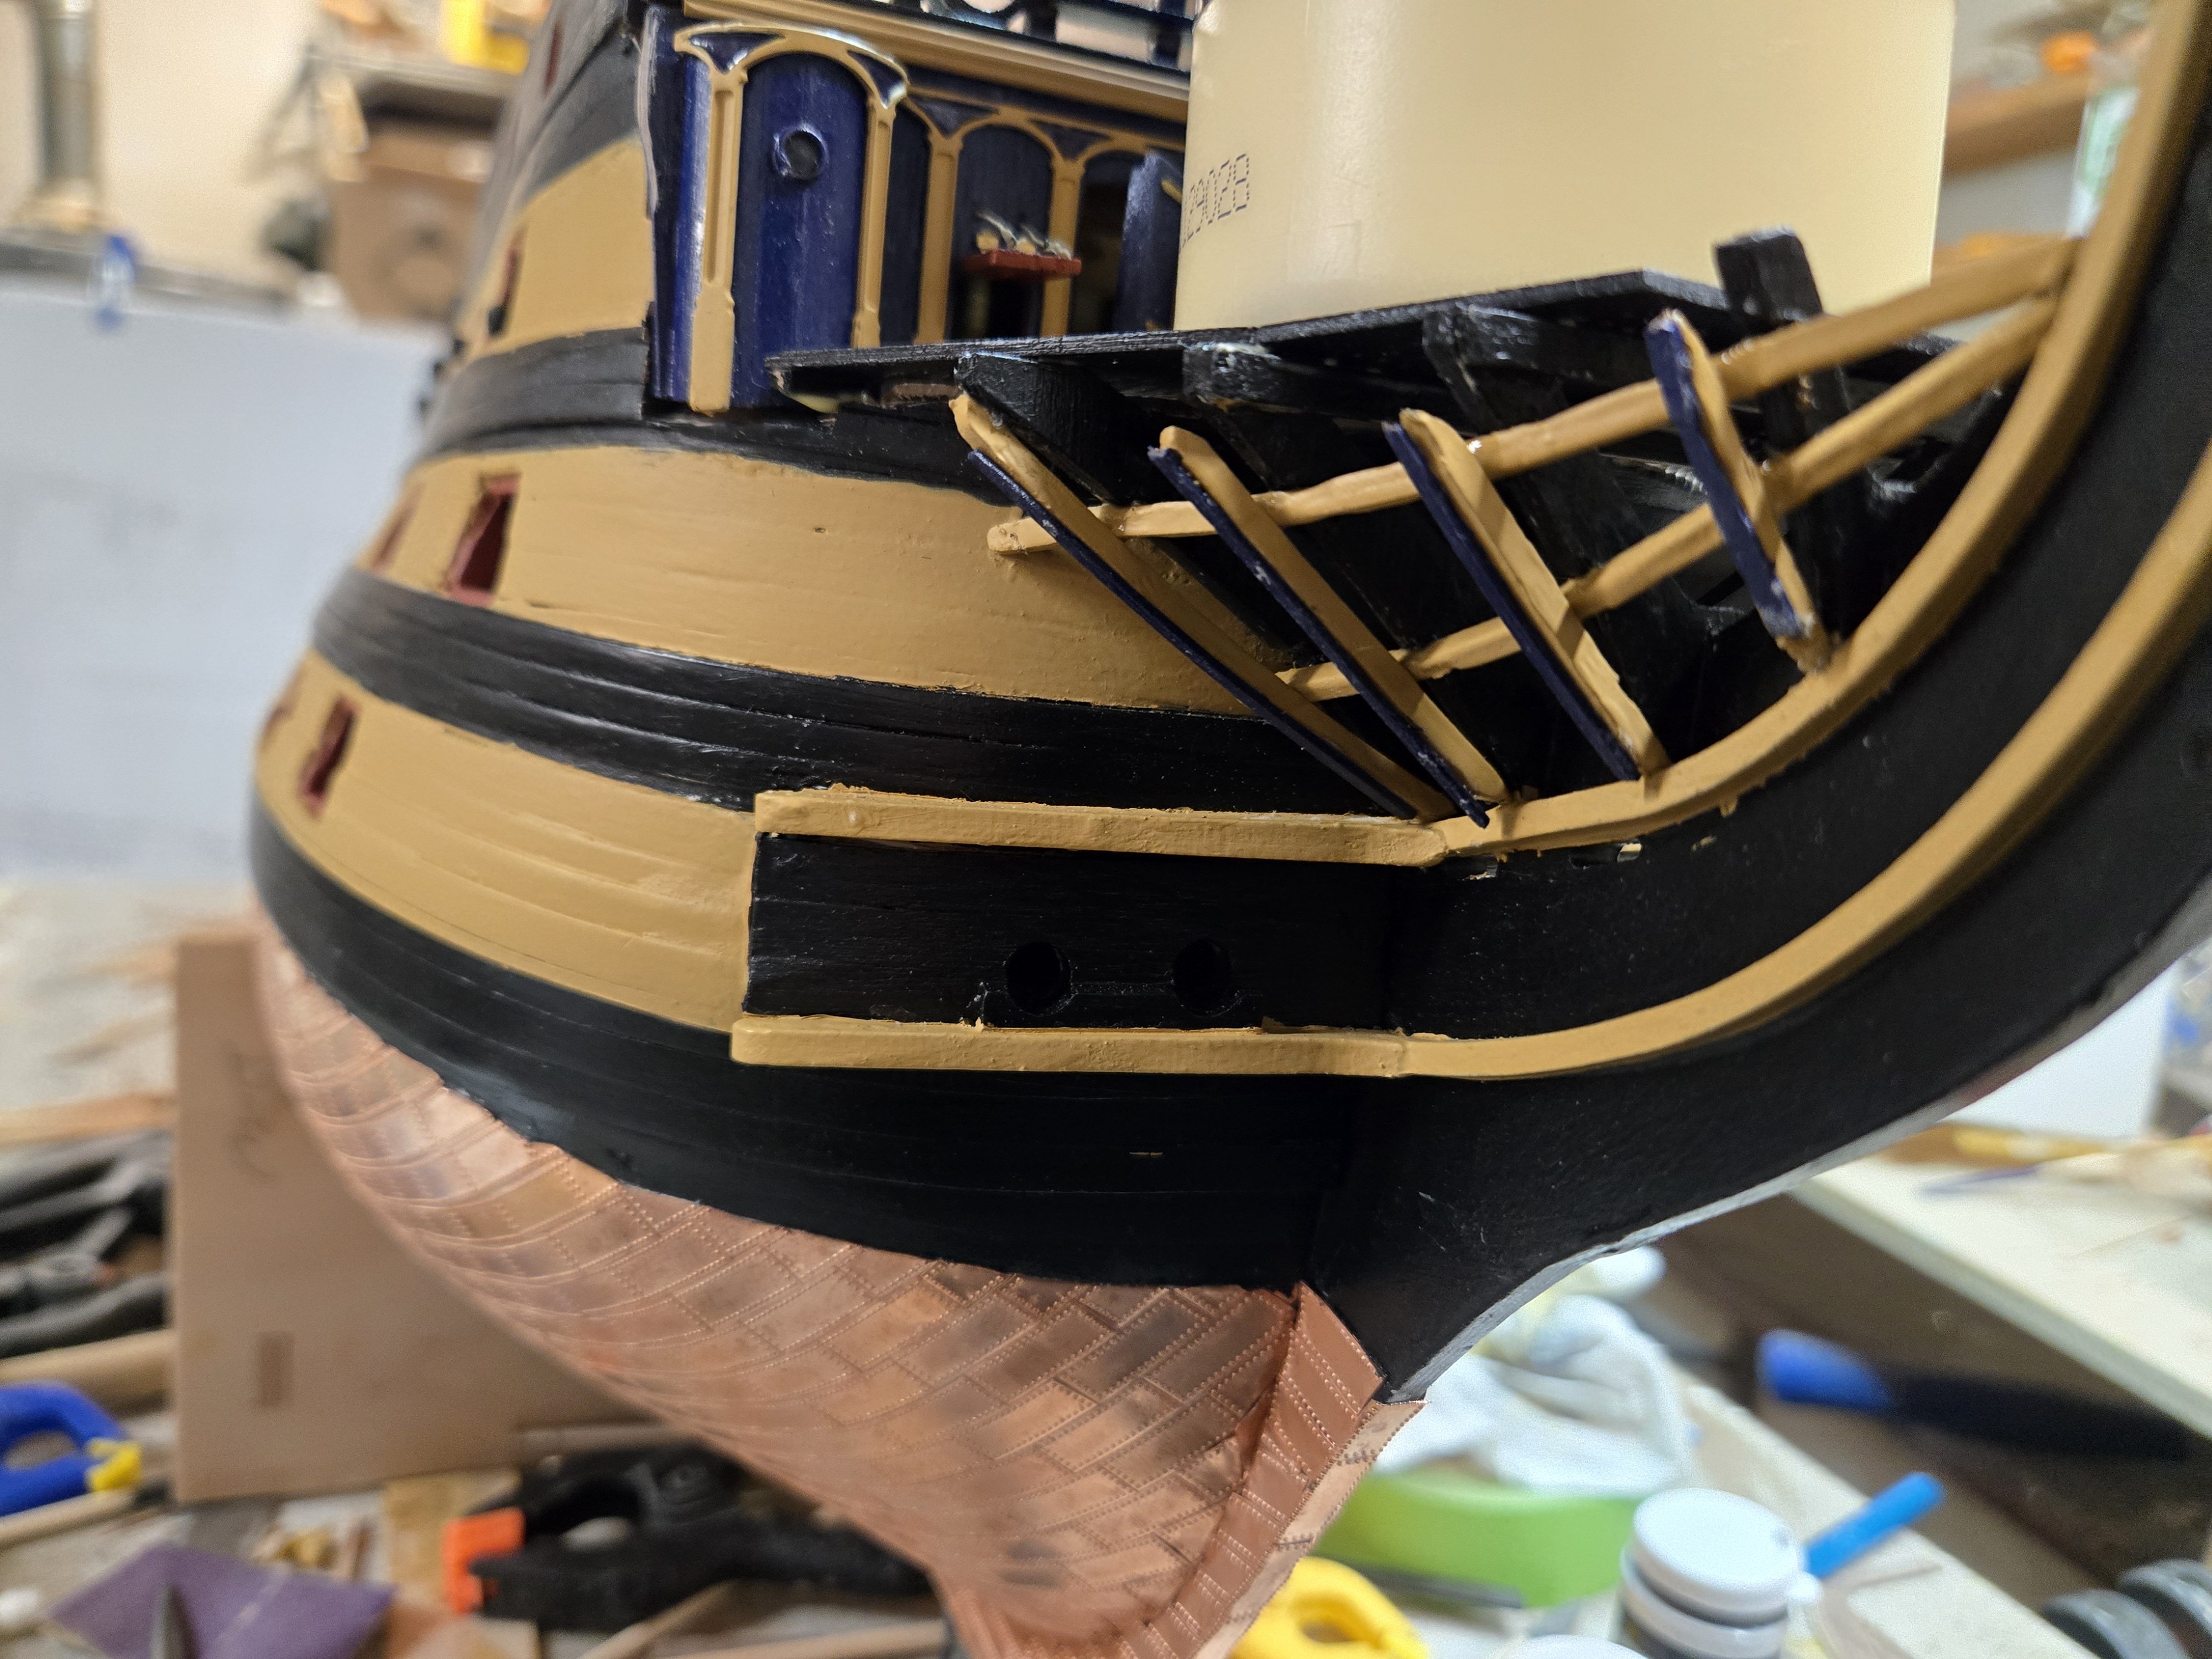
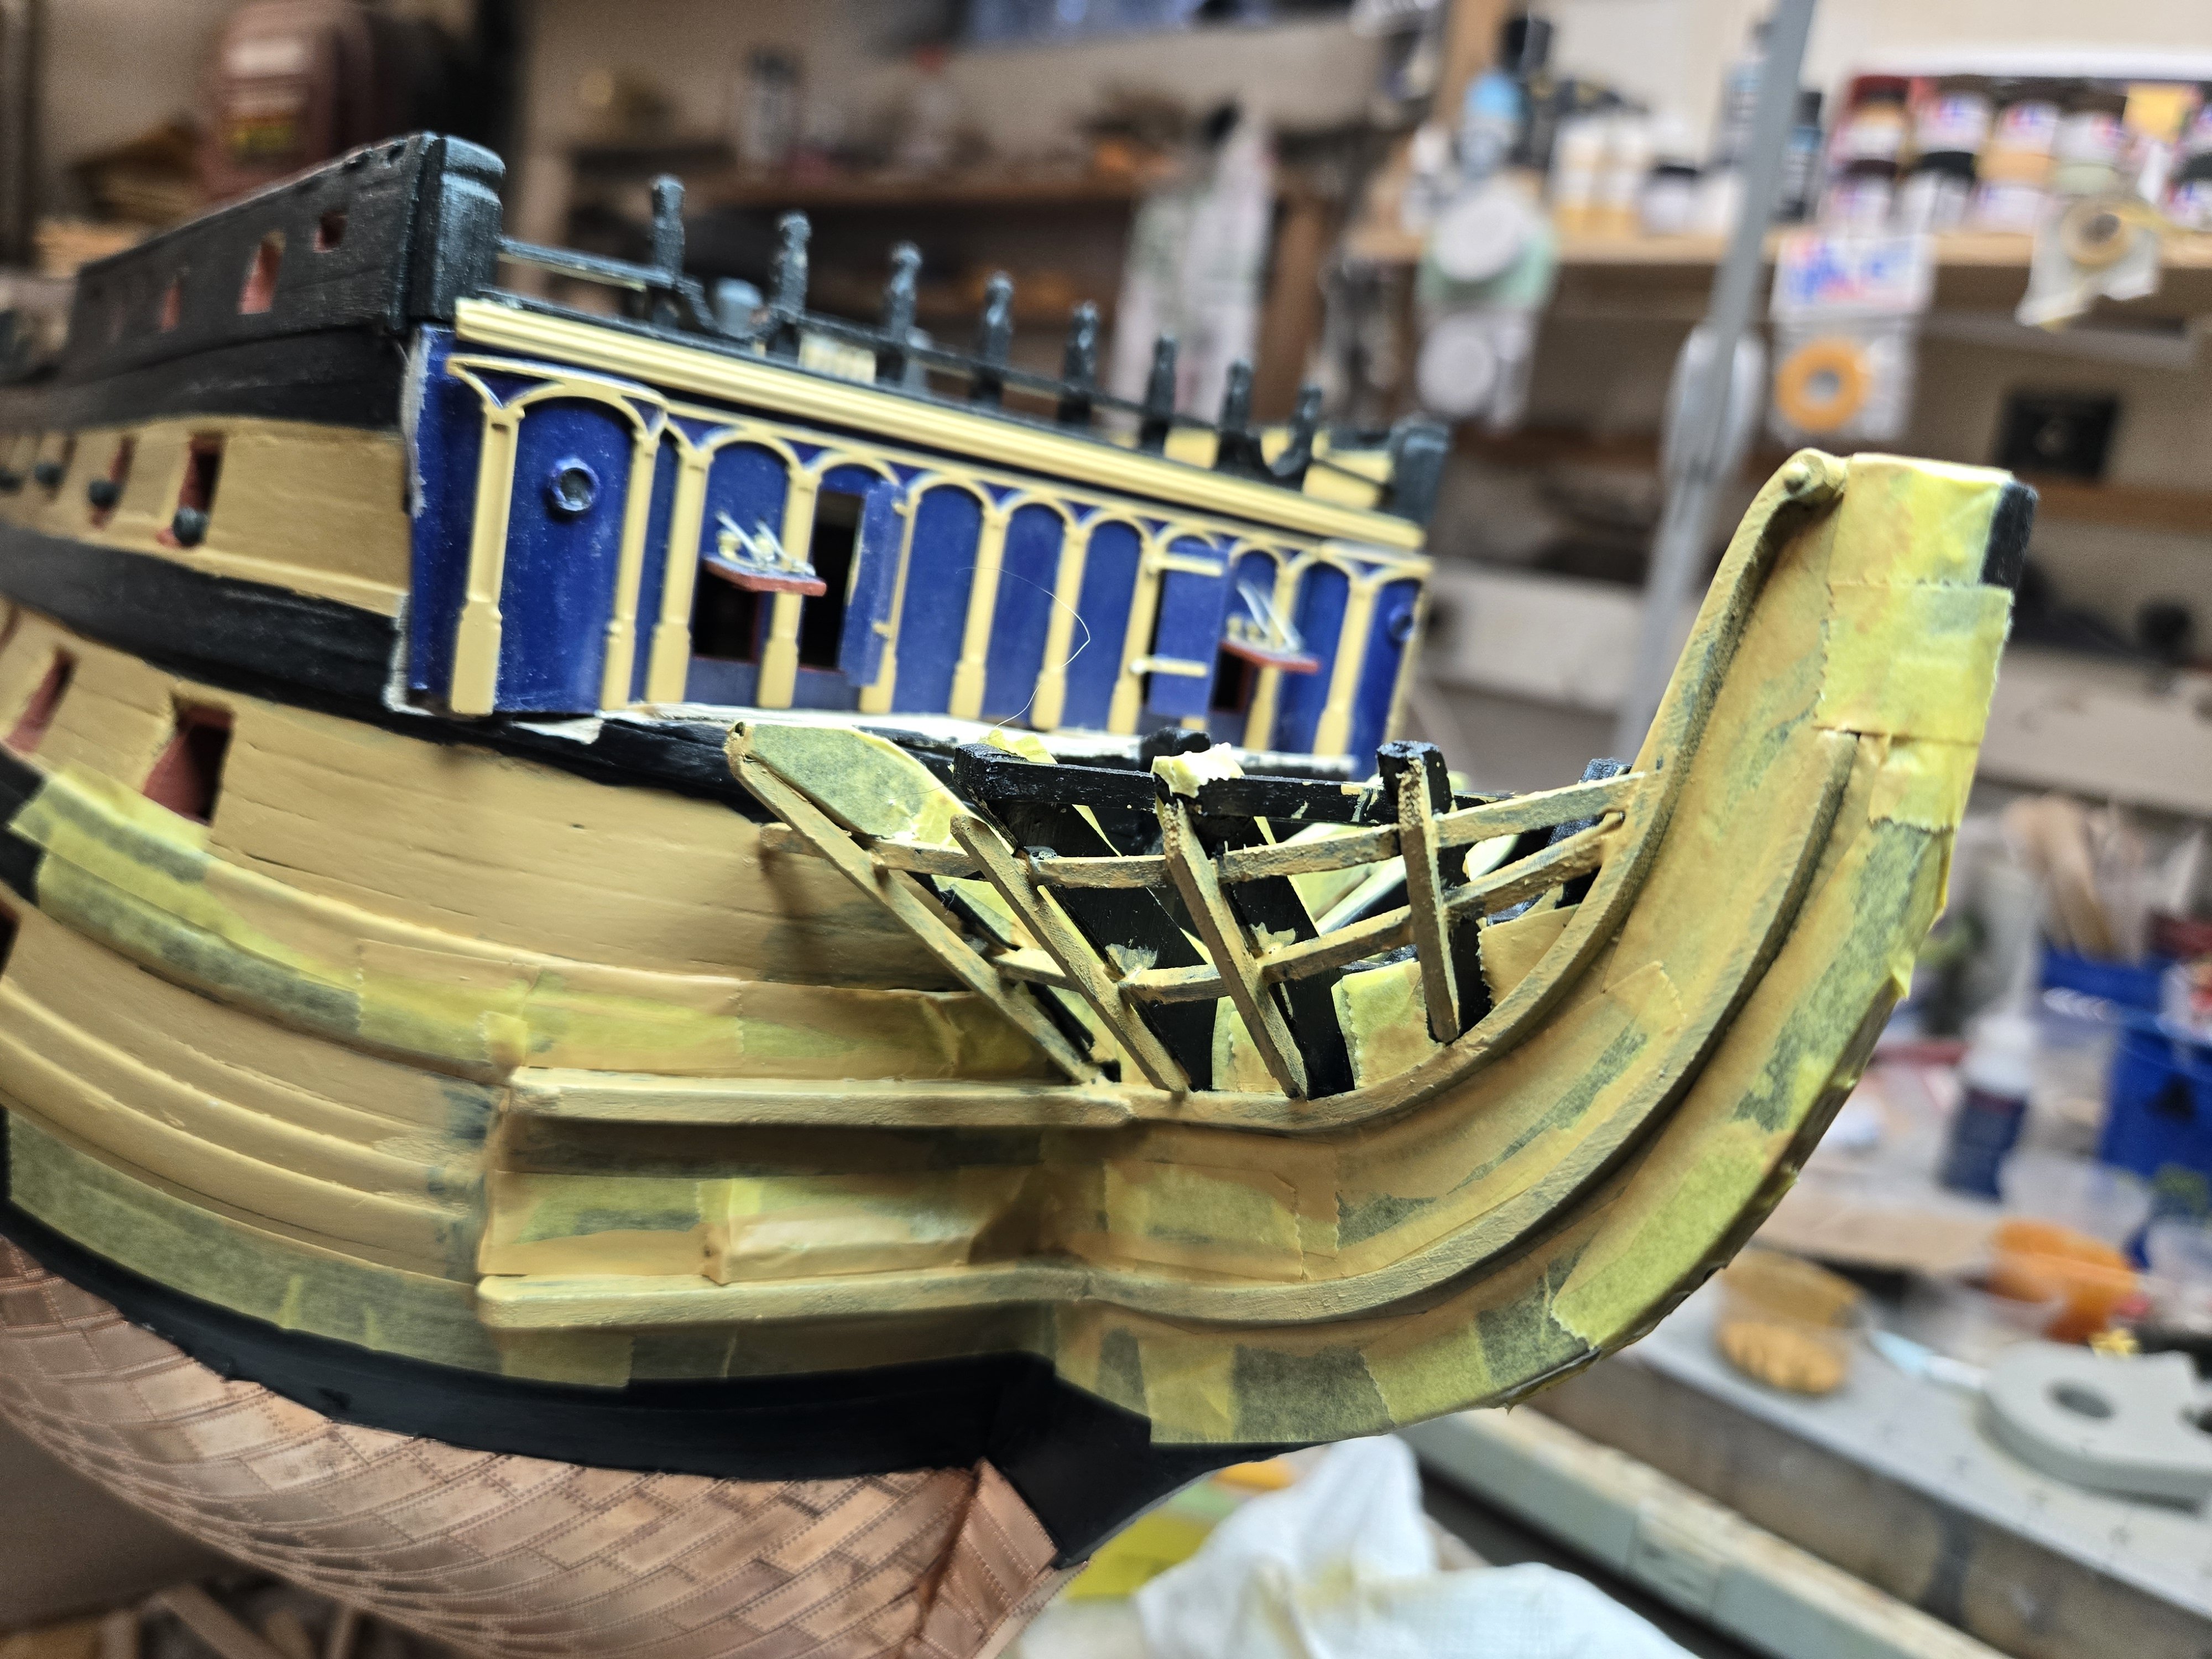
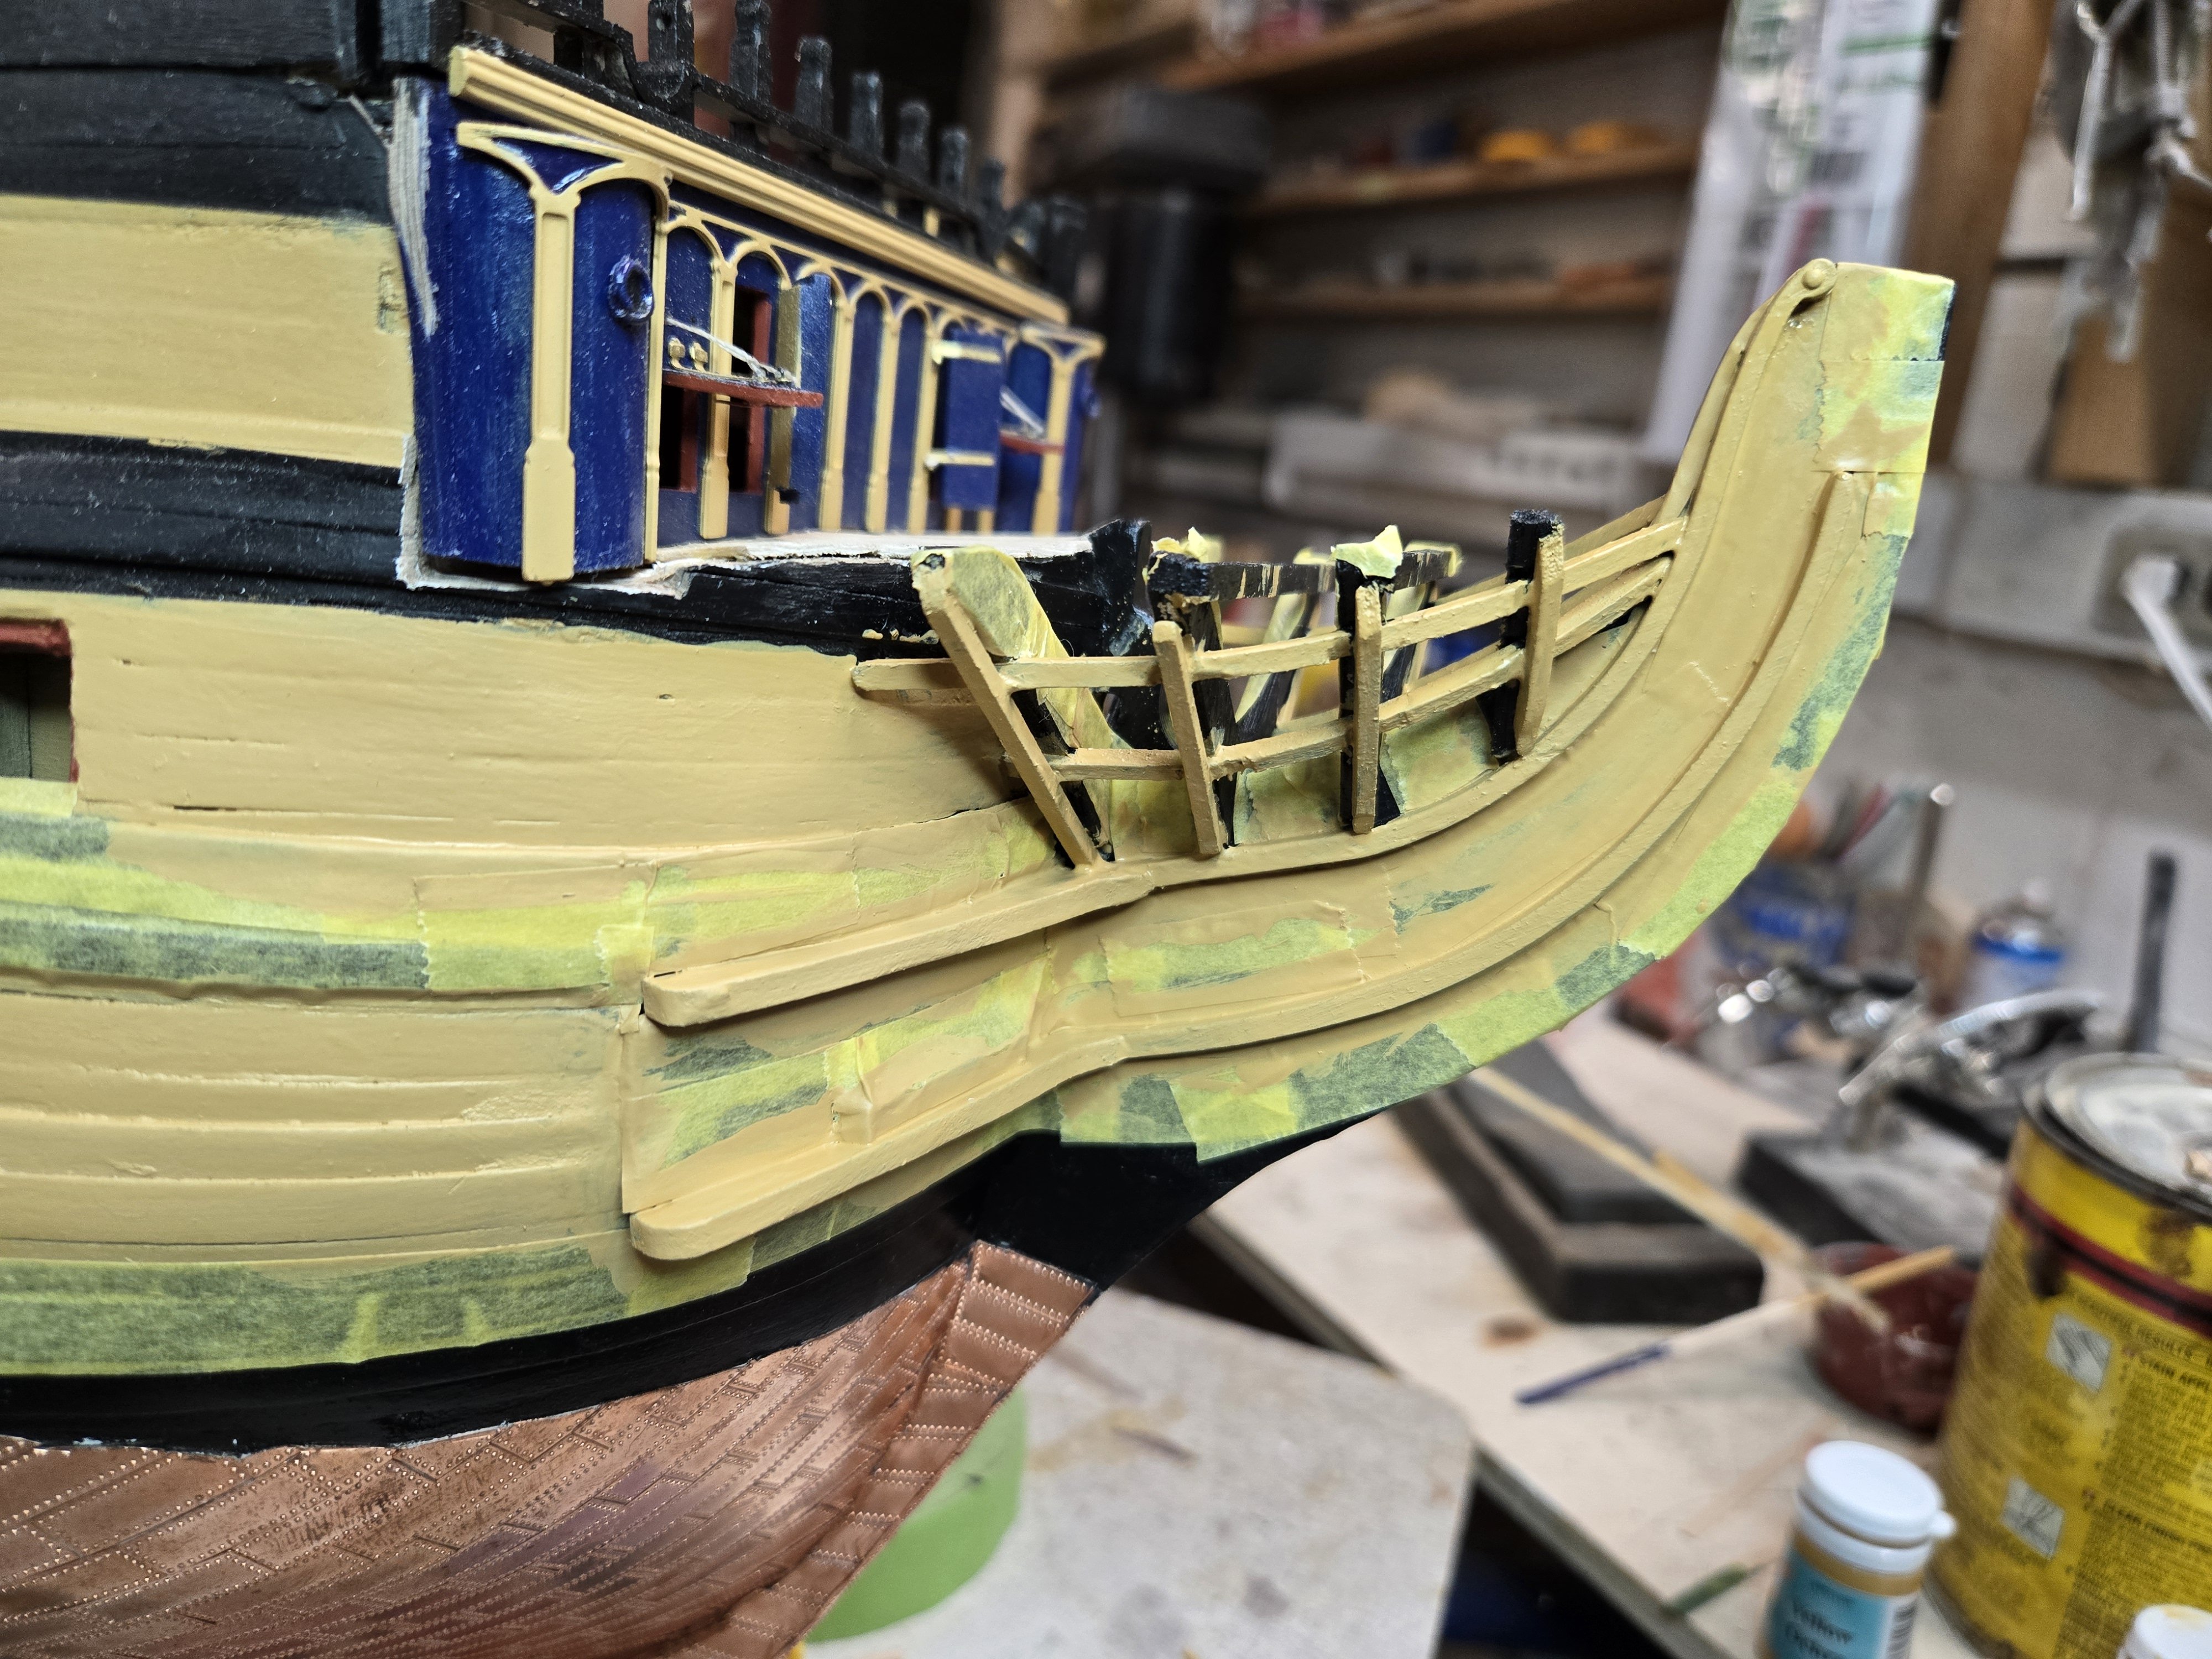
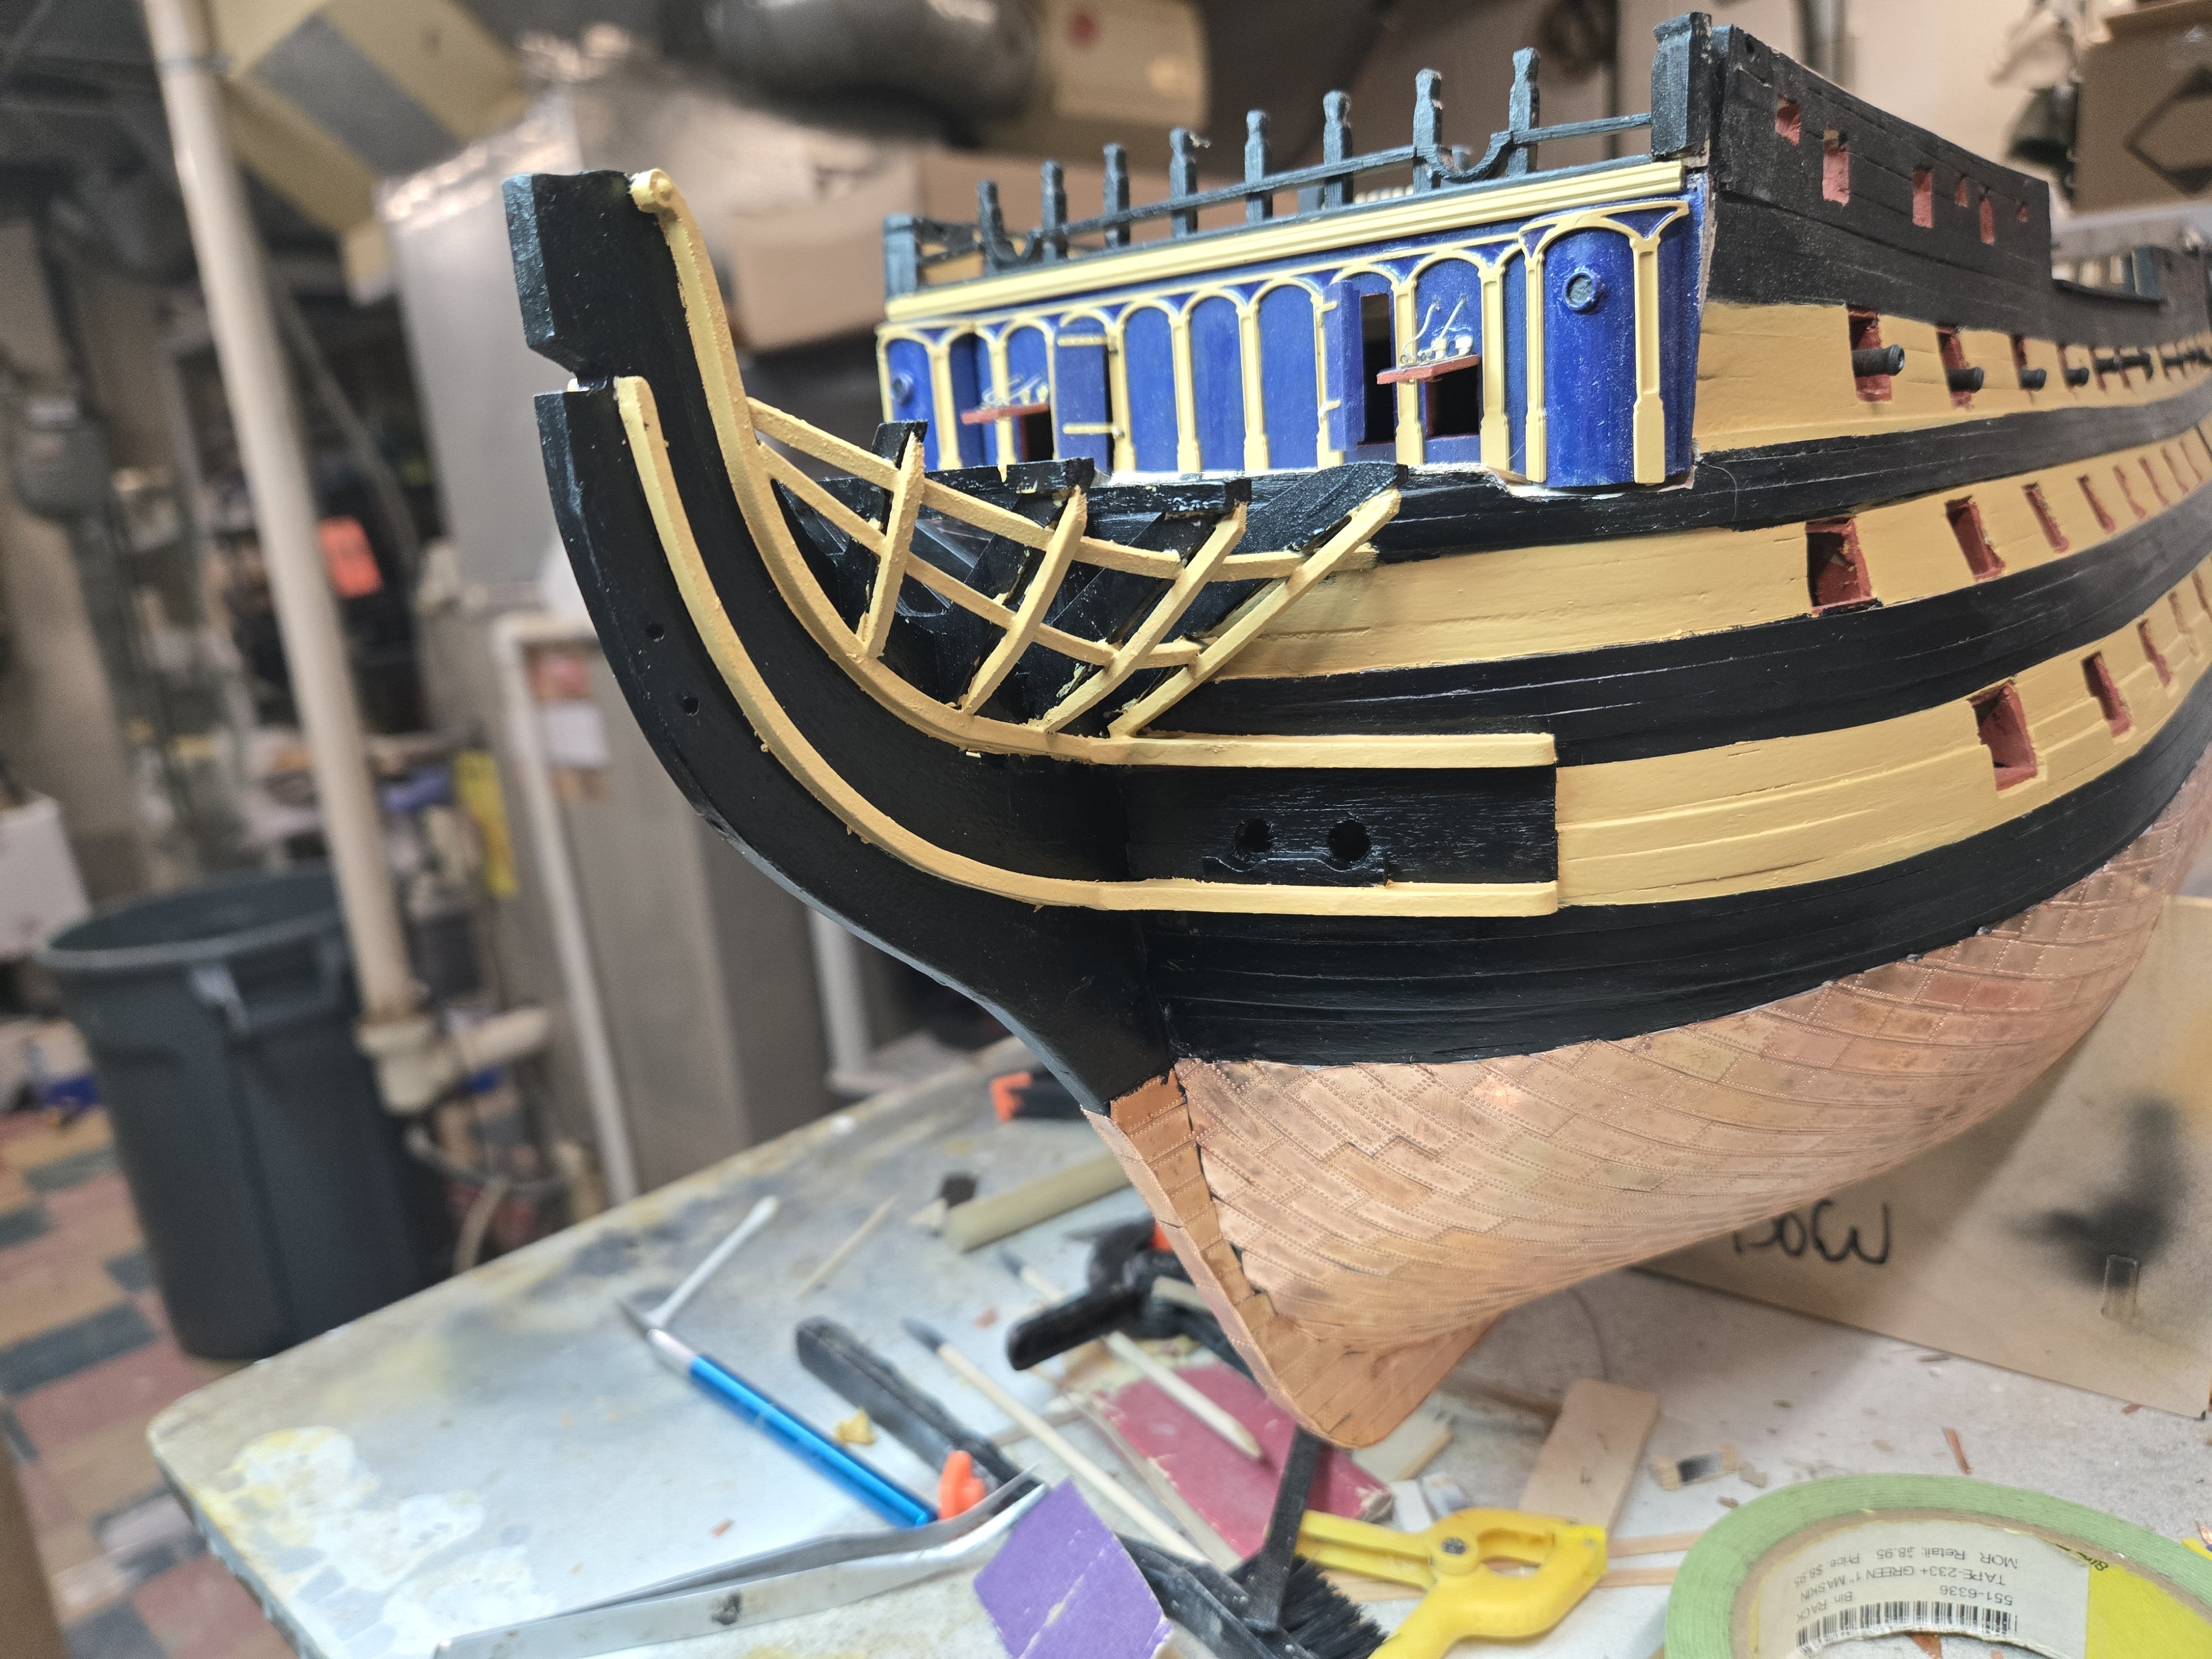
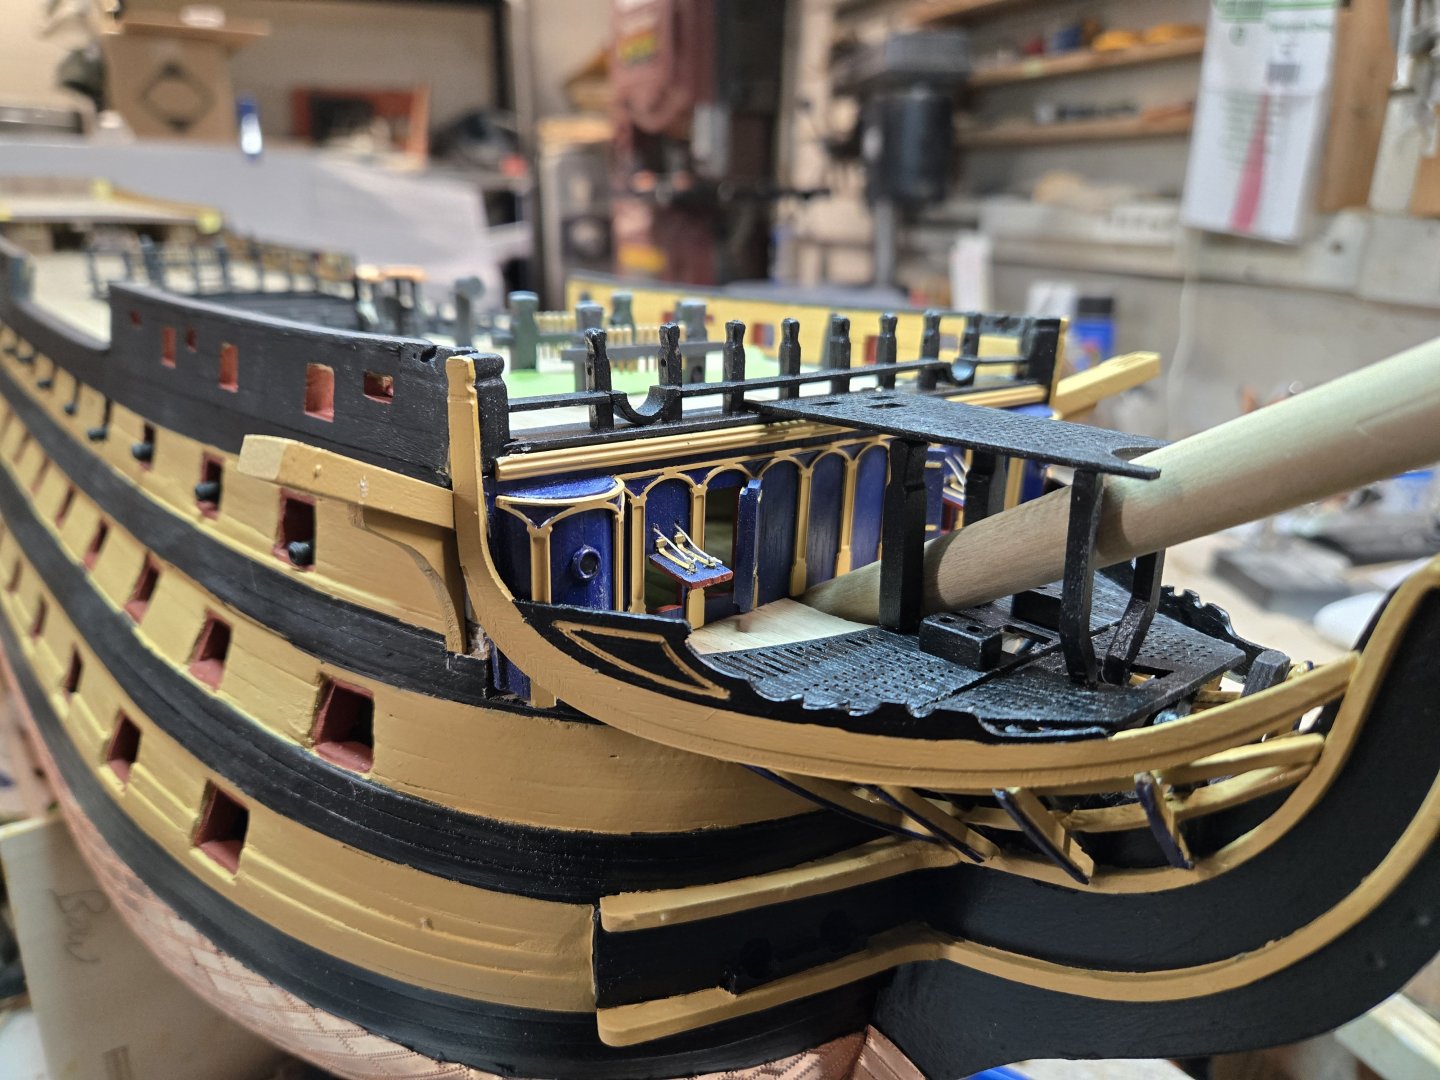
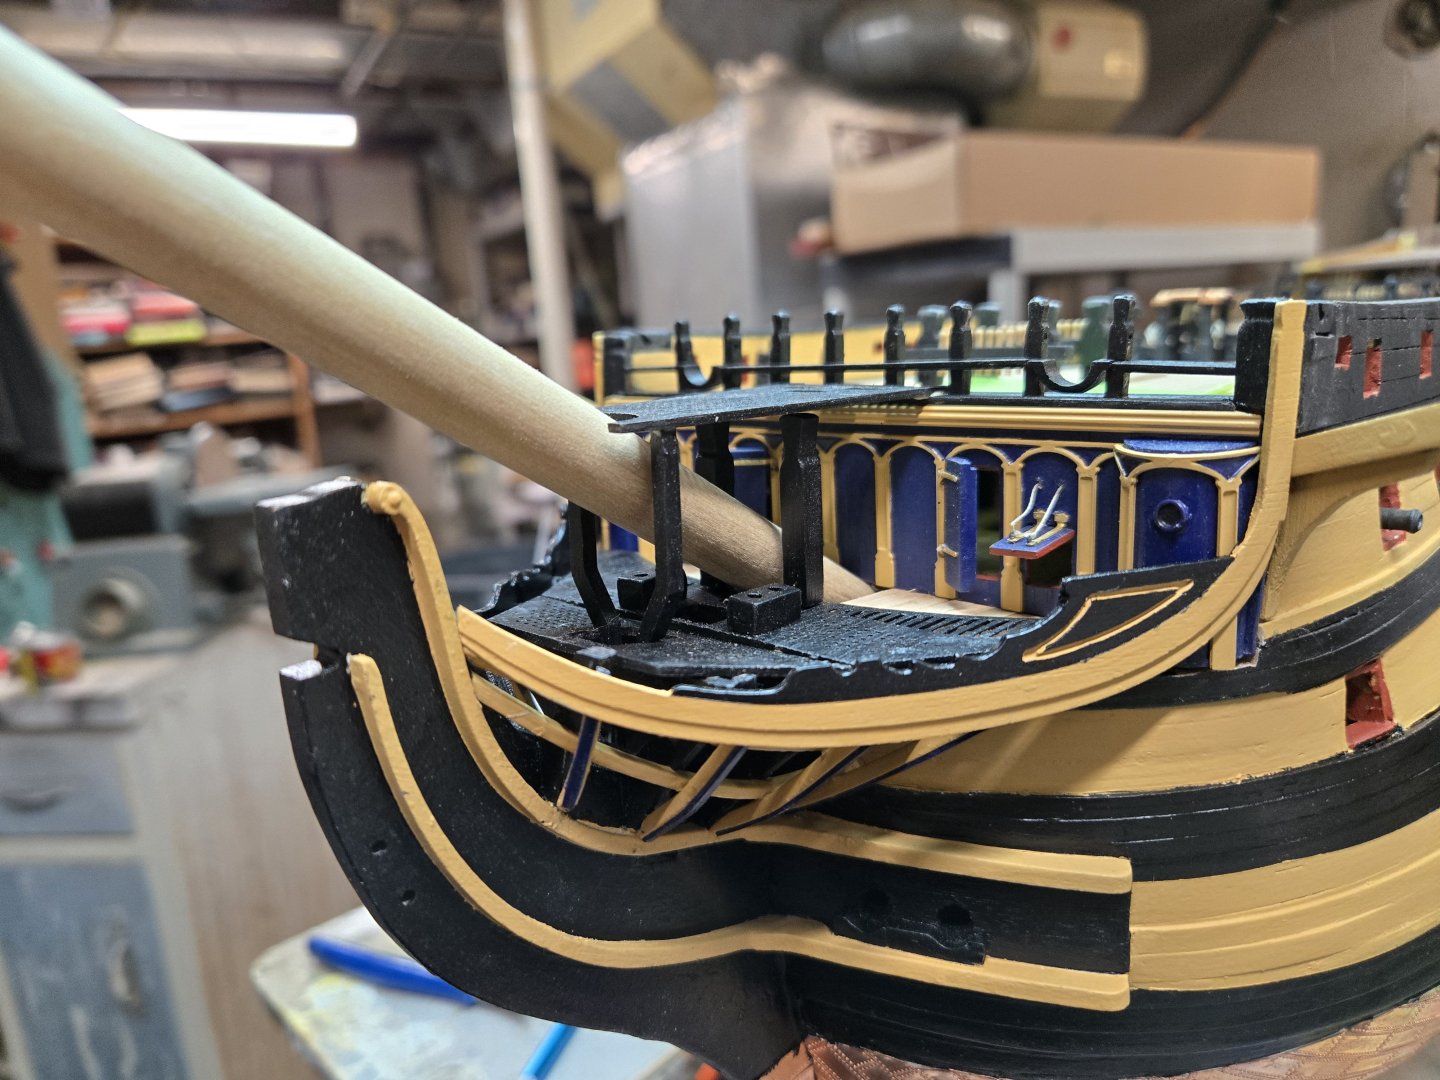
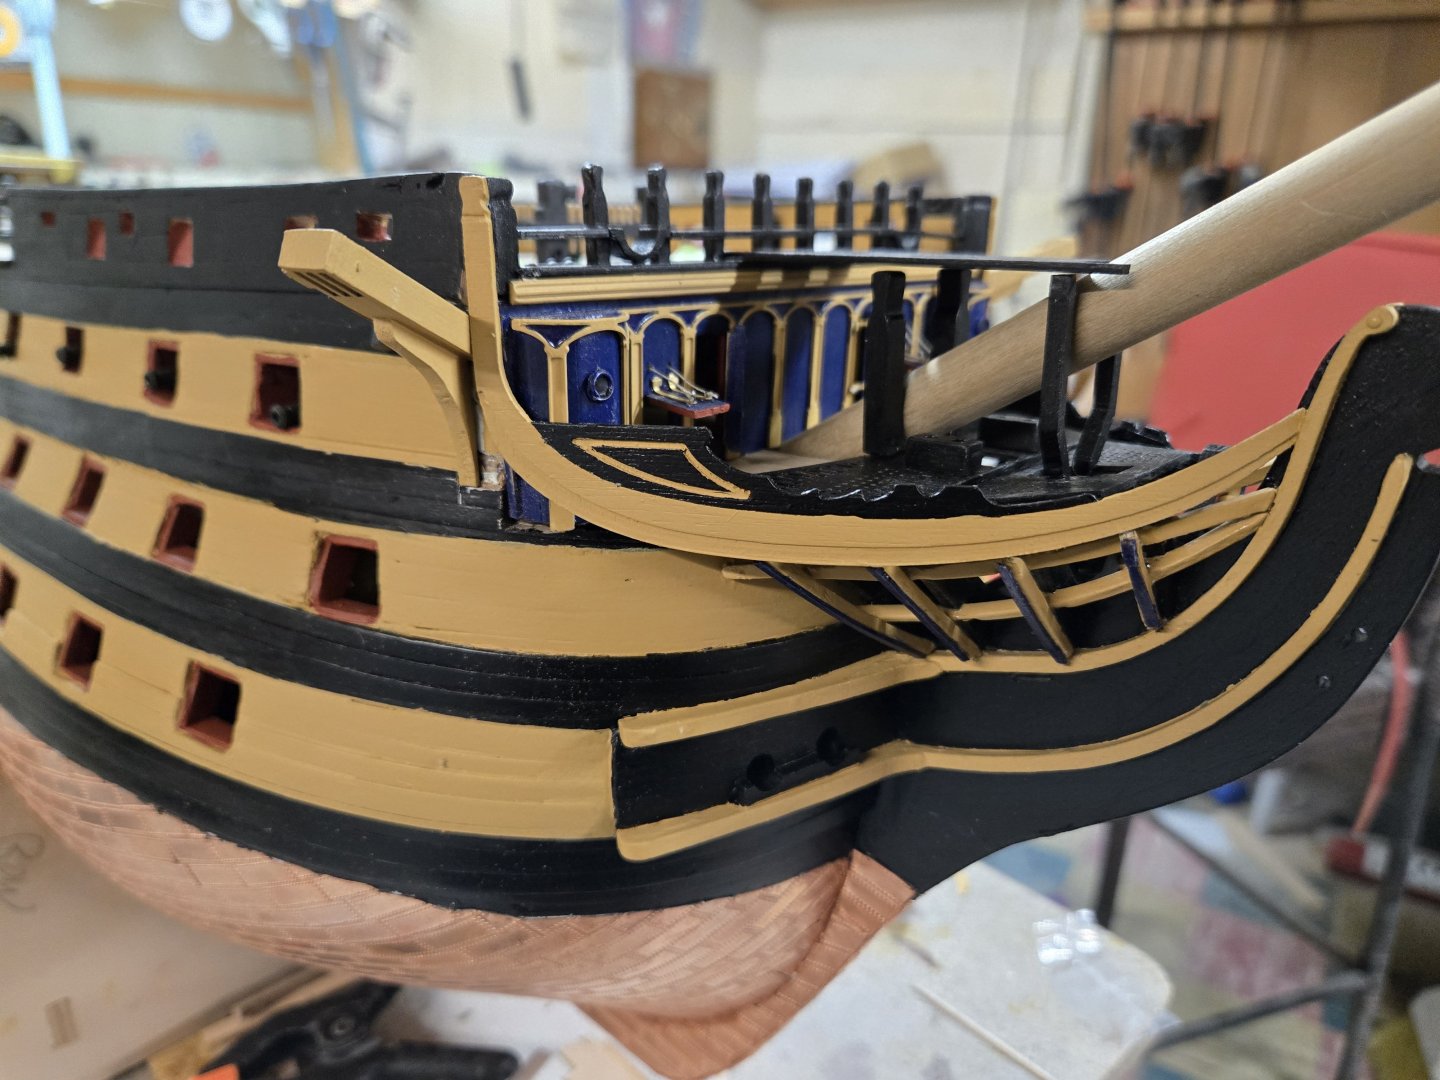
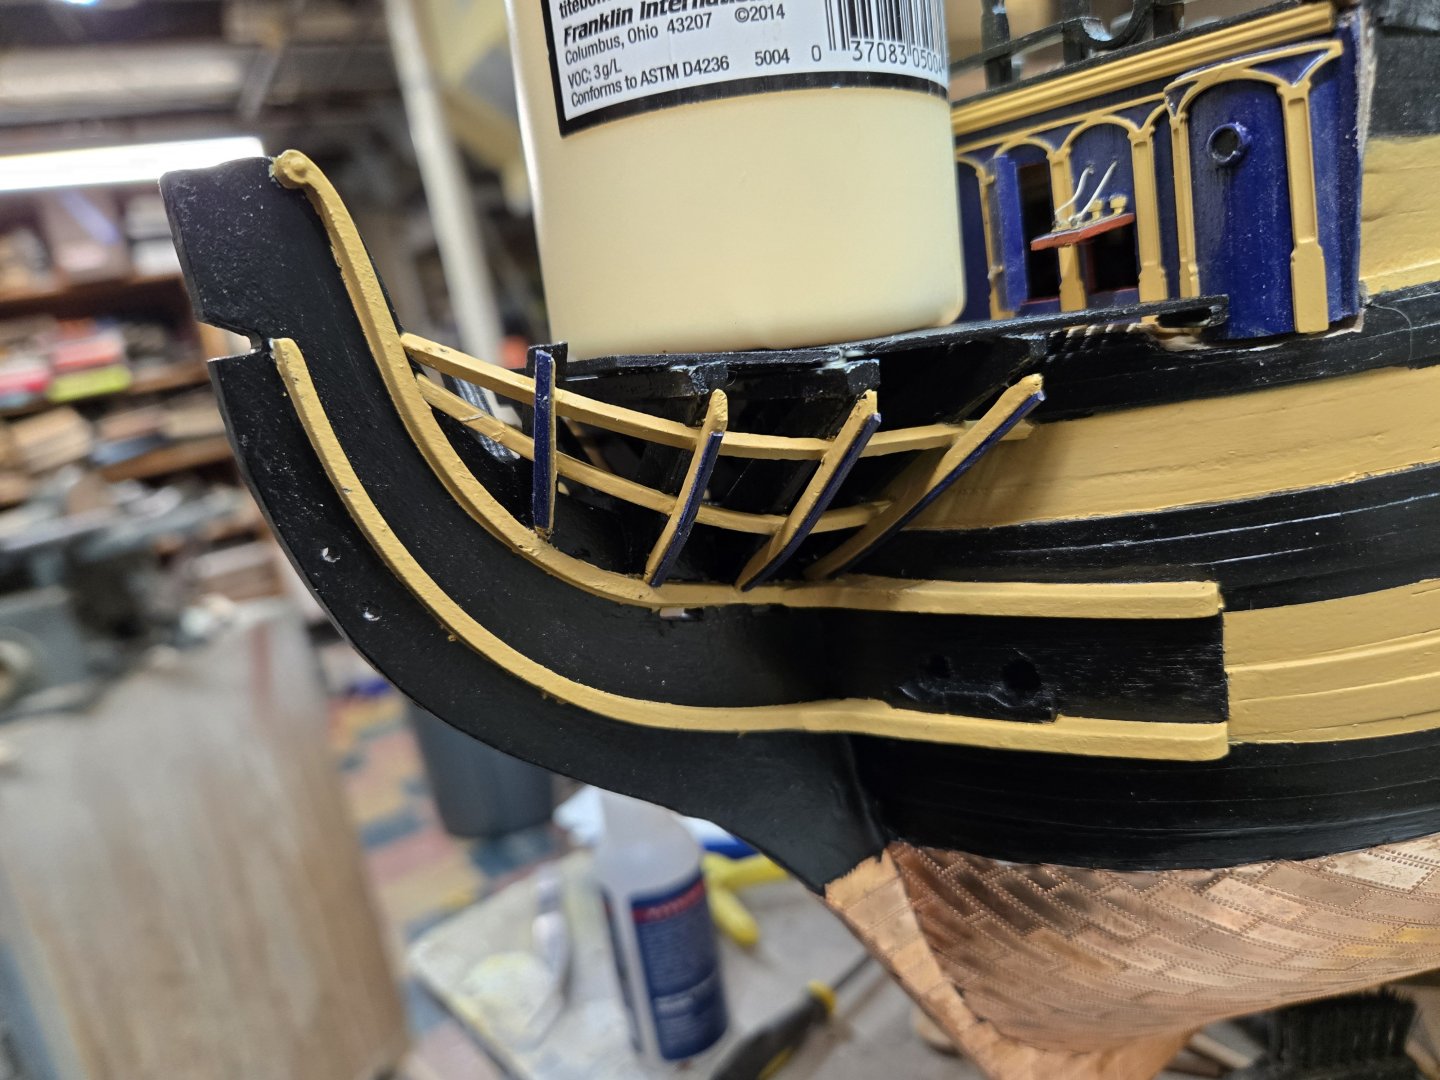
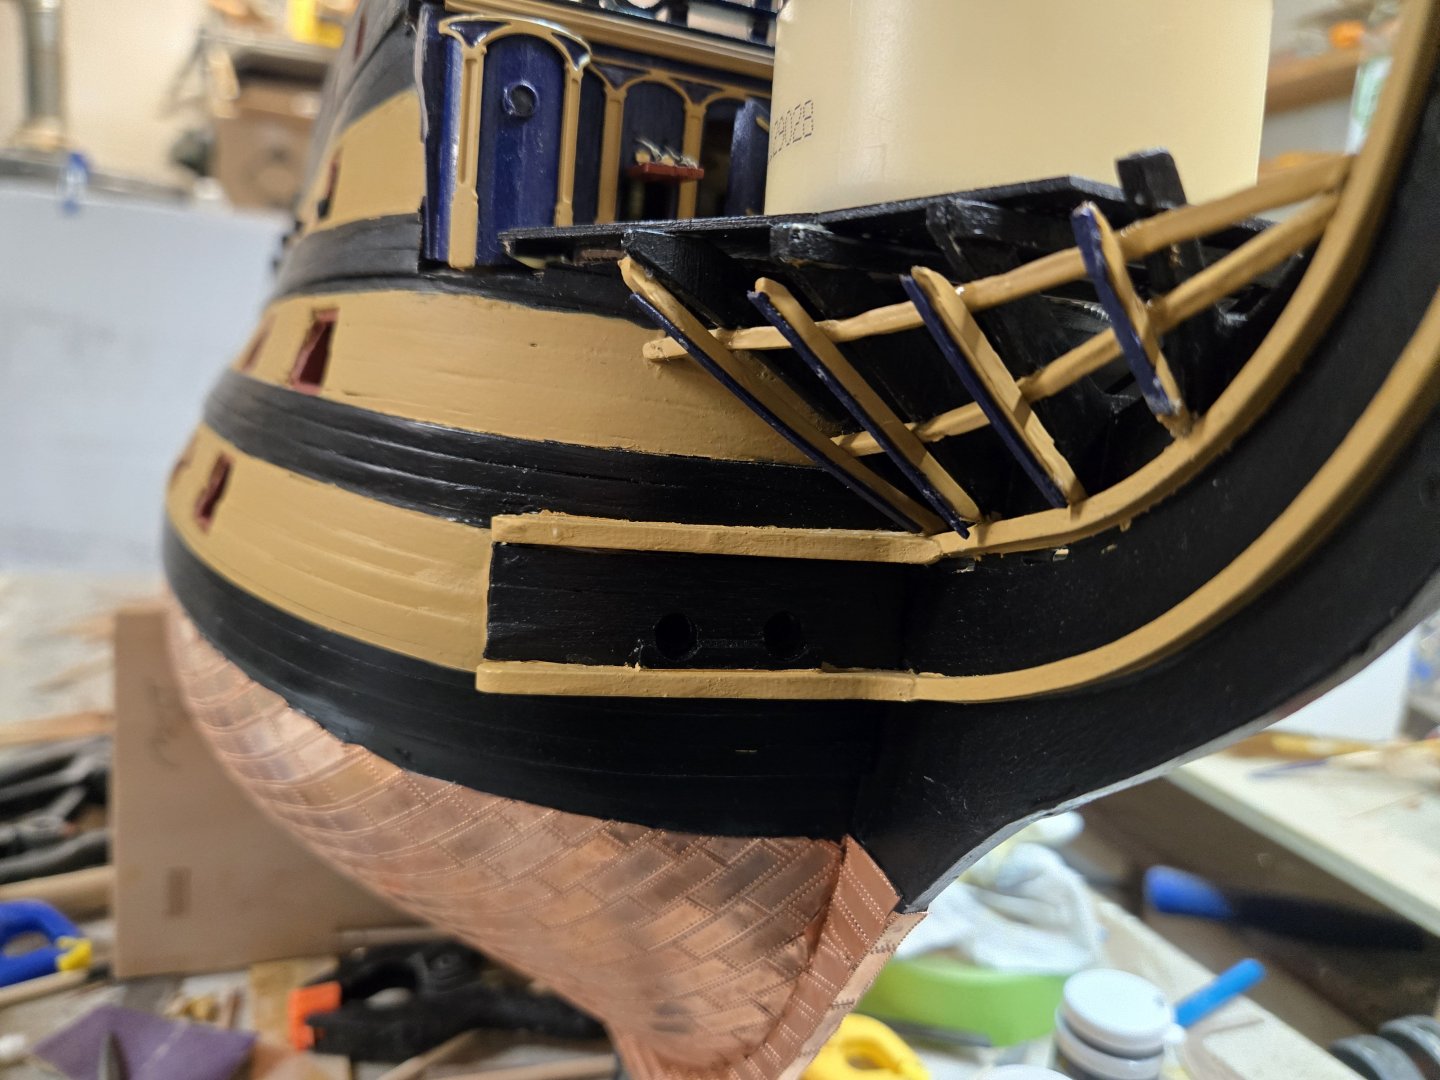
I think that it is the close up pictures that give me the jitters. At this scale, the amplify so many errors or inconsistencies. Perhaps I will only take and post long distance shots from now on...or maybe pics with some nice mellow coloring, add some gauze effects to obscure things!!! I finished the catheads, sanded the base and had to trim away a bit of the exterior hull on the starboard side to get it to fit. I still have to add the blue trim, but can do that on the hull where it's easier and steadier. After painting and adding black highlighting to the bow main rail (#394). The plans call for this rail to essentially fit tight against the main inner timberhead on the quarterdeck (#125) and then kind of tack glued to the bow rails and stem. I think if you look at more detailed plans there is an actual rail or timber that this rail would secure to. Either way, I glue and clamped the rail to the timberhead and the fit it to the stem (a little trimming was required). I used white glue for this and then tacked the inside against the bow rails with CA glue. I still have to shape the top of this main rail to fit into the timberhead seamlessly and I have to paint the top black. There is a little touch up I need to do...again and again and again. I added the knightheads after adding a piece of scrap dowel to simulate the bowsprit. After, I added the marine walk and support pillars. I have the boomkins, but I will add them when I begin adding the various masts. So, believe it or not. I think that is a wrap on the bow until I add the bowsprit and begin rigging. Oh...I have to add 4 doors, 2 fake ones and 2 smaller gun ports that have side by side doors....so I guess I'm not done.


-
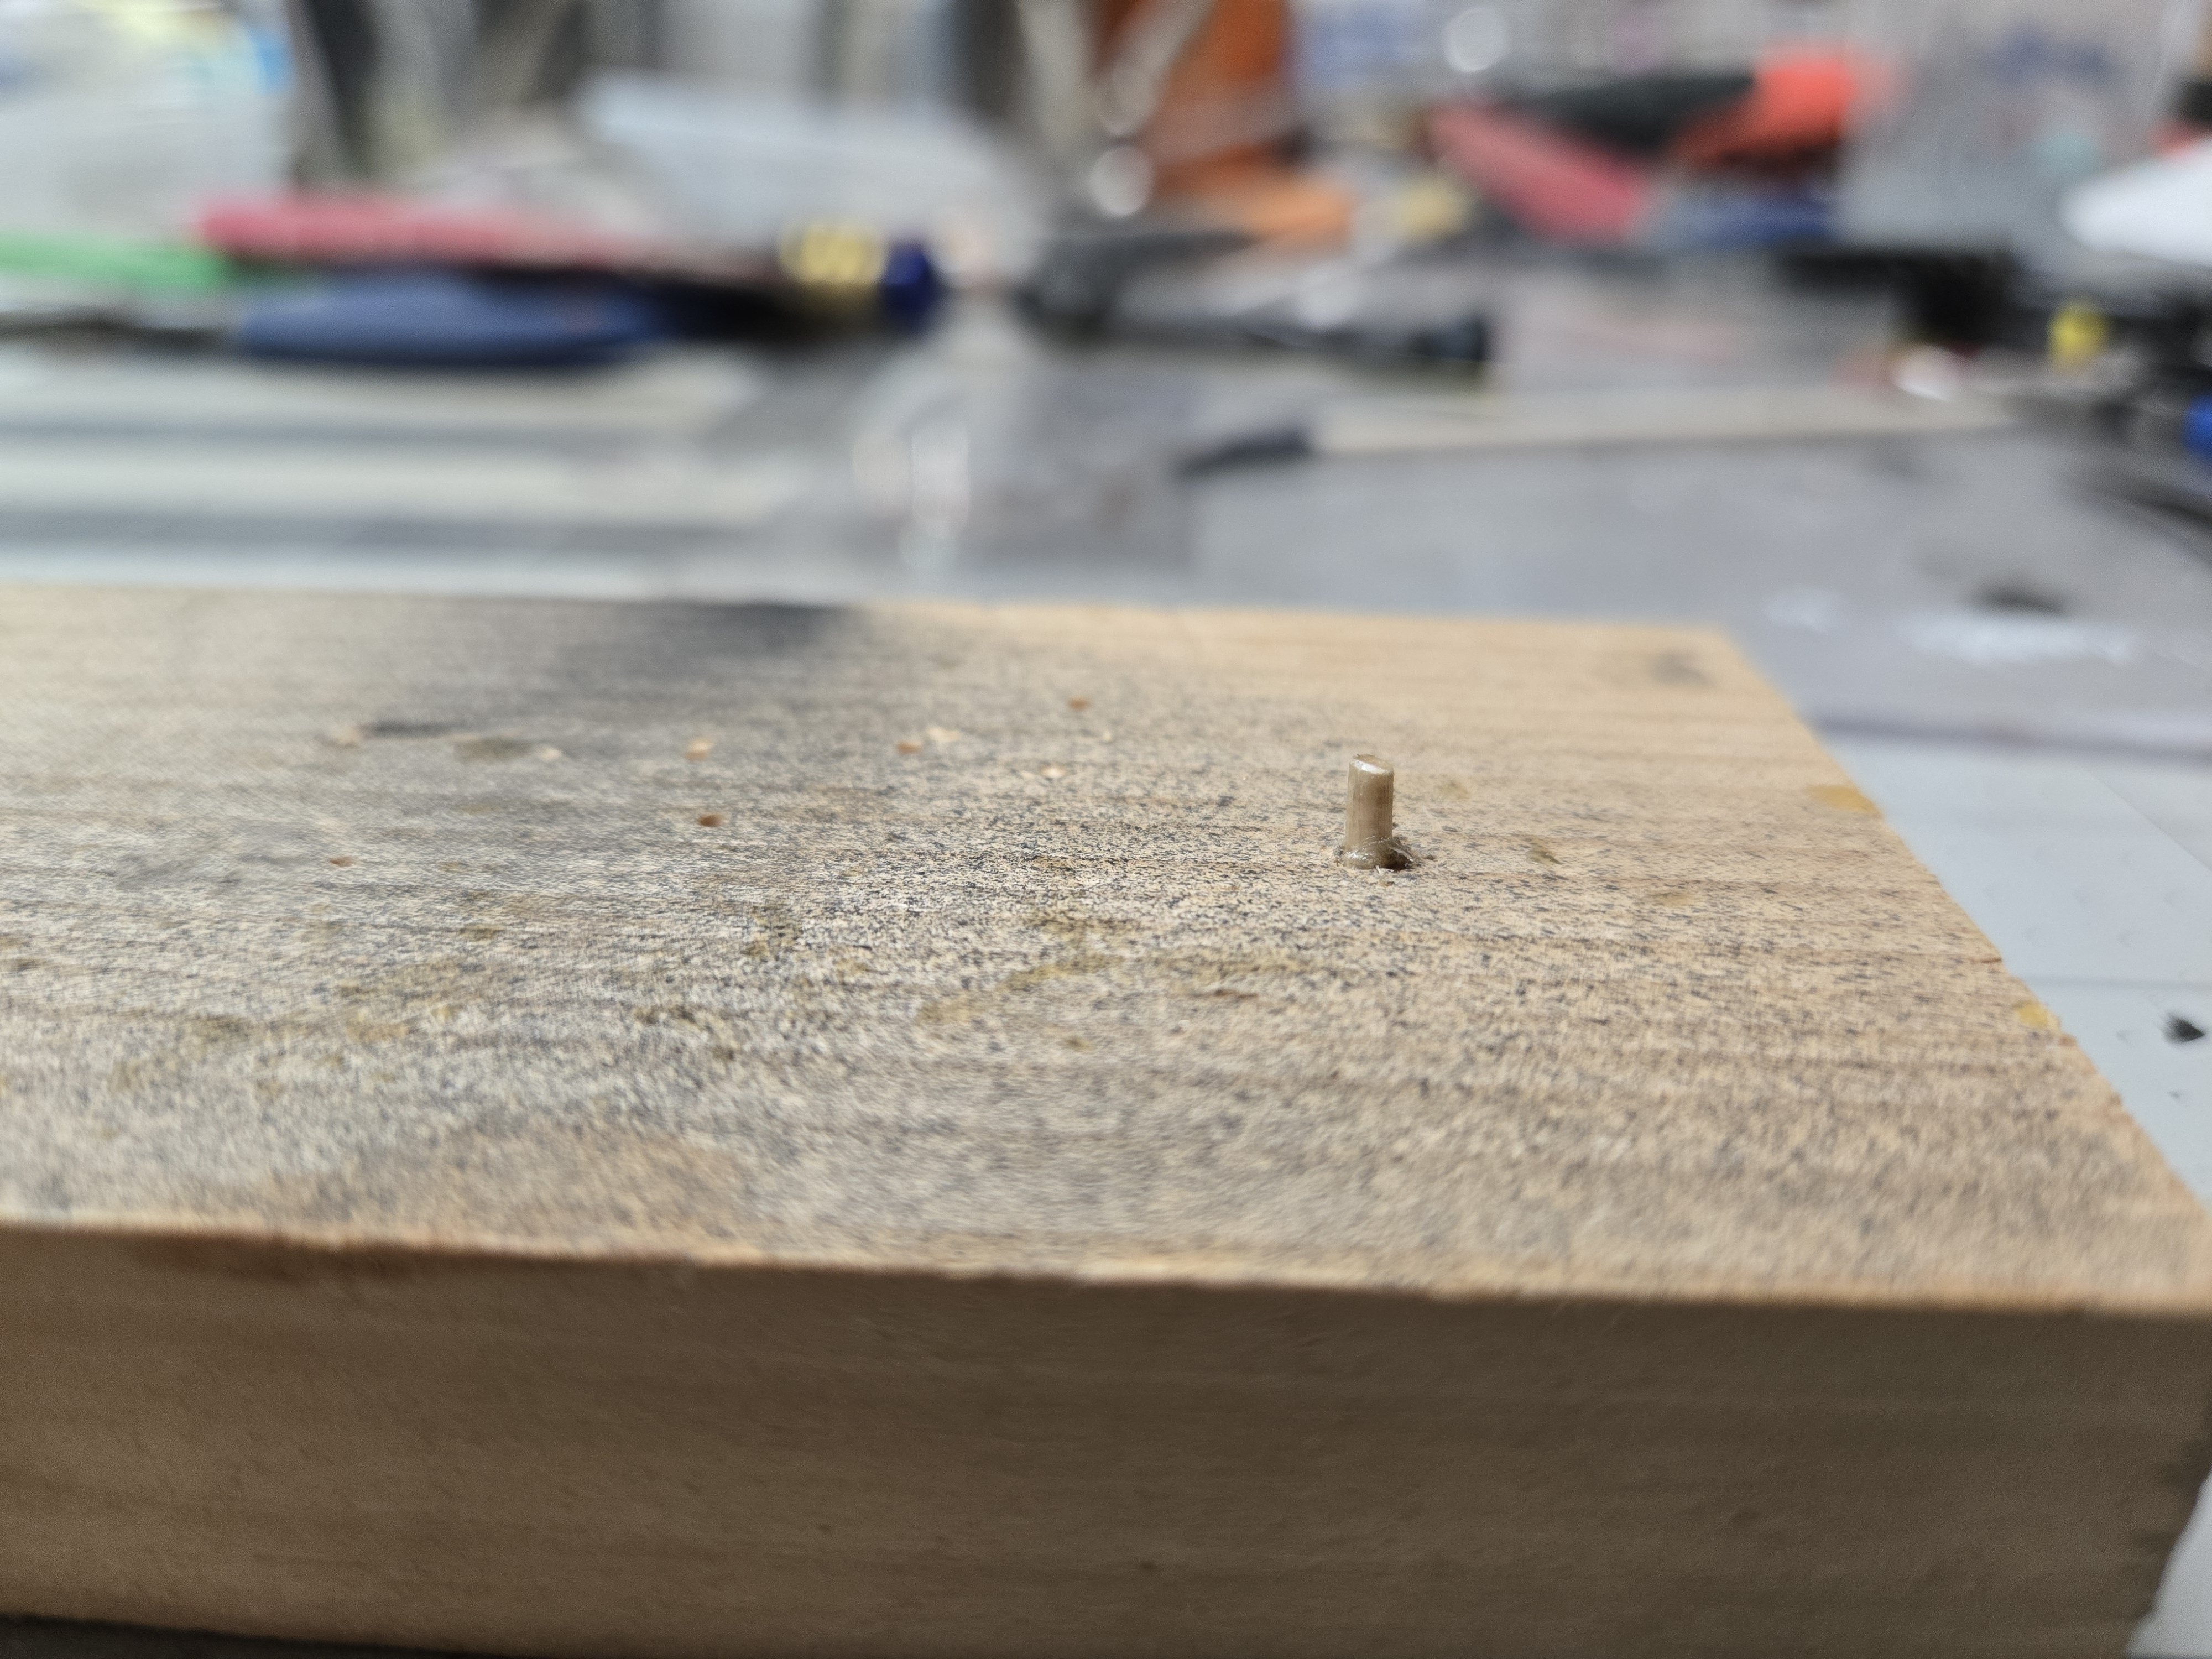
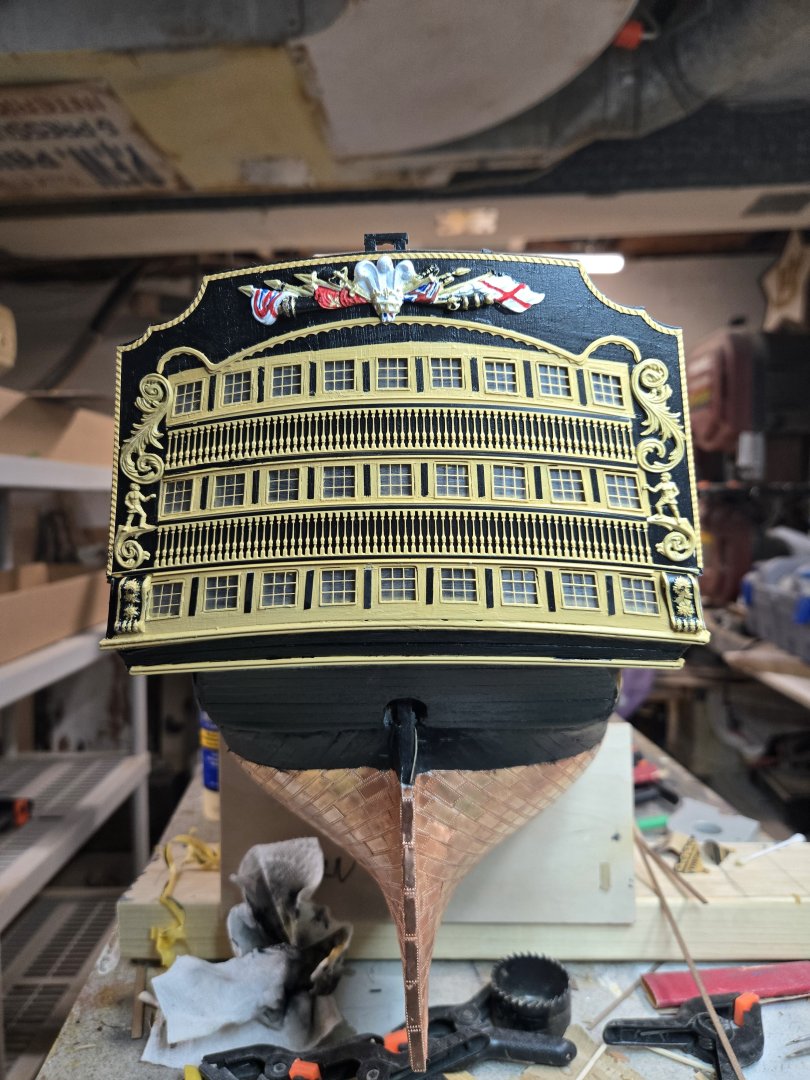
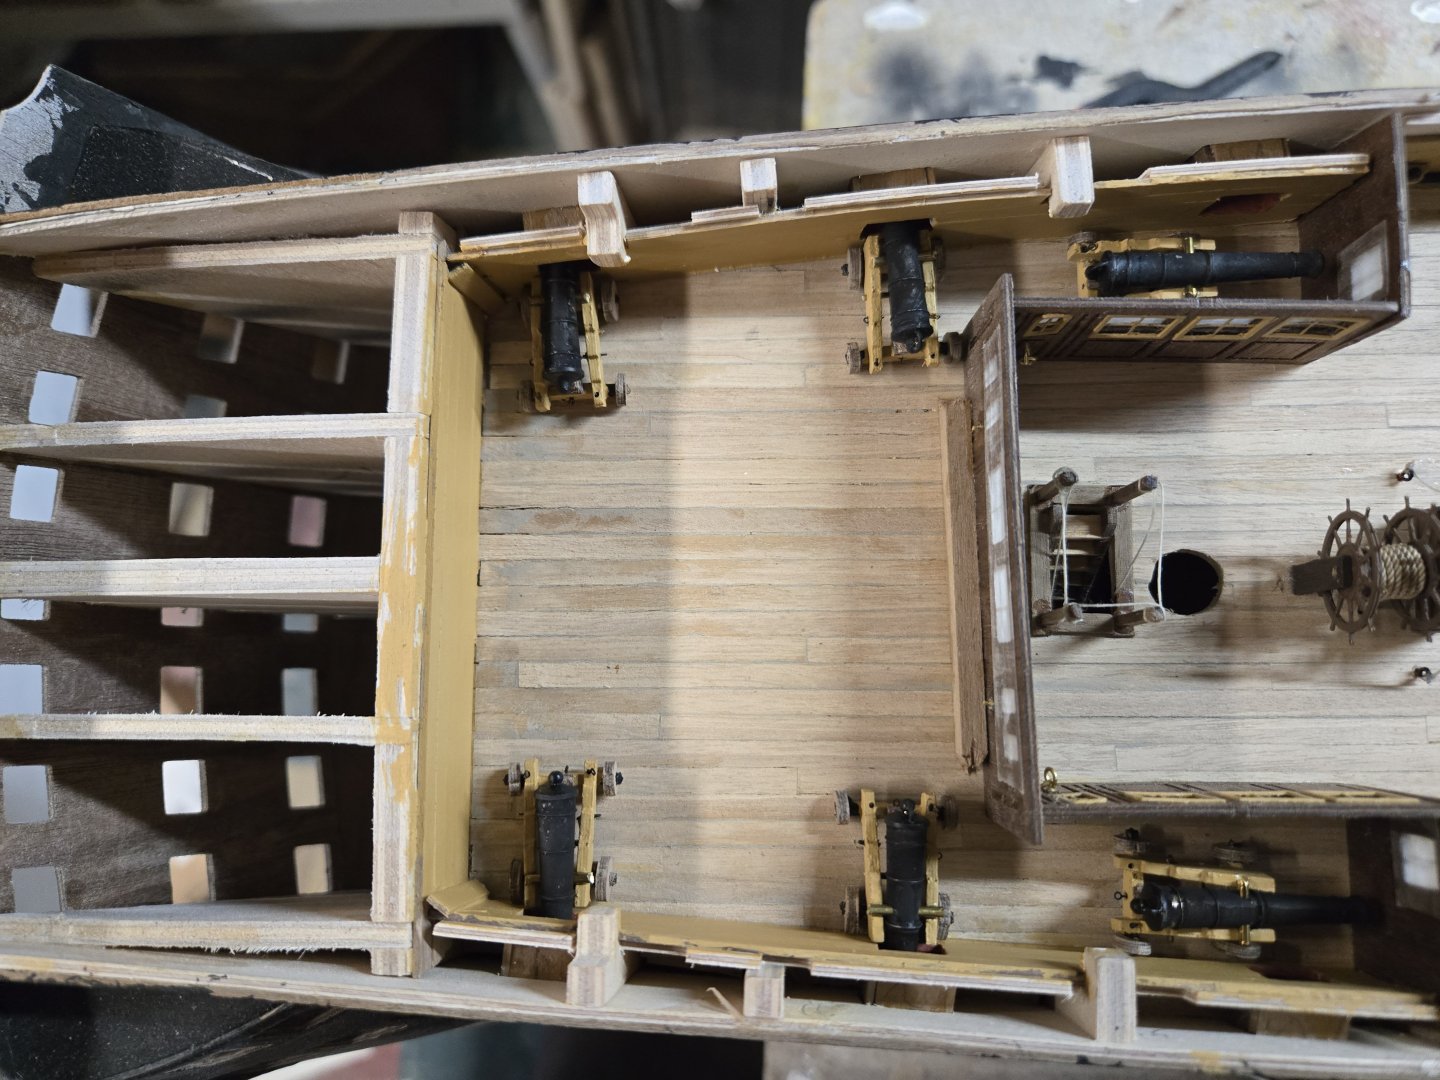
My work on the poop deck may have been a little overboard. I was concerned that I might not have seated the poop deck template low enough on the bulwarks. It seemed to fit, but in retrospect, there may have been a millimeter or two that I could have 'found'. The instructions call for adding a piece of scrap 1.5mm to the inside bulwark to flesh it out a bit, then add the requisite planking to match all the other interior bulwarks. But since I had little if any actual depth at the end of the poop deck (where it drops off back down to the quarterdeck) I though I needed to just a add a little bit. The actual bulwark from outside to inside consists of: the walnut 2nd planking (painted black), the plywood gunport template, the scrap piece just added. So I added another piece to the middle of this sandwich. I added about 3-4mm to the stern of the poop deck and tapered it down to about 1mm. On the outside, I added another piece of 2nd planking walnut to bring the hull up a bit and then when it was done, I added the interior planking. This actually gave me a nice base for the capping (#390). The work looked pretty bad, but once it dried and I was able to send it down and cap it, I think it looks fine. Hopefully I haven't created height issues later in the build! Once done, I added some stained wood filler to the deck, let it dry and then sanded it smooth. After adding 1 coat of matt finish, I was pretty happy with the look of the deck. I've checked ahead and wonder if the back of the stern facia should be planked. I'm going through other build pics, but it looks like the flag locker does a good job of covering this completely (I say this because I just started working on assembling these little buggers) I also added a walnut cap in front of the poop deck. It's a bit off and needs to be sanded better and some filler added. I removed the copper smoke stack from the binnacle so I wouldn't whack it while sanding.


-
Your work up to now is looking great. I just love when paint lines come out crisp and clean....just something perfect about that! I see you added caulking to the lower deck...I saw one builder lay string in between each plank to create the caulking. Looks good, but man that's a lot of work! I live in upstate NY, which is in the NE of the USA right on one of the Great Lakes. I spend our summers (April - October) sailing or hanging by the Lake. She's put away for the winter so I've started getting back into the model since last April....well at least until all the leaves fall and I spend a week doing that! I think right now I can spend about 5-6 hours during the day and then I go back down around 10pm for an hour or two. I figure I'm about 2/3's of the way through the hull instructions. I have to finish the poop deck and then tackle the stern. This are, like the bow is certainly going to be a challenge!
-
You can absolutely post any pictures you'd like here. I believe any builder log would encourage any pictures on their page. 4 years and 6 boats under your belt! That's some skill building and now that I think of it....don't put any pictures of your build on my page, I don't want to start crying!!!!!! Looks like you prefer Occre...
-
I appreciate your post! April and already at the quarterdeck!!! That's moving! I'm working on the bow and poop deck right now, the instructions are so vague at times. You'd think they would have revamped them in the last 21 years since the version we're looking at! If it's the cost to add more paper I get it, then perhaps a supplement of pictures on their website. The only other model I've done is Trumpeter's 1:200 scale Titanic. It's a huge 48" model with TONS of PE parts. It's funny, their directions have absolutely no words in them! Just numbered pictures of what goes where and how pieces fit together. I think that would be helpful. I spent 15 minutes this morning trying to figure out what they meant when explaining how to install the pillars for the marine walk. Once I came upstairs and looked at all the pictures of builds and live shots I keep on my harddrive, it made sense. But the words!!!!! LOL... Thanks again and at some point you're going to catch up!!!! Chris
-
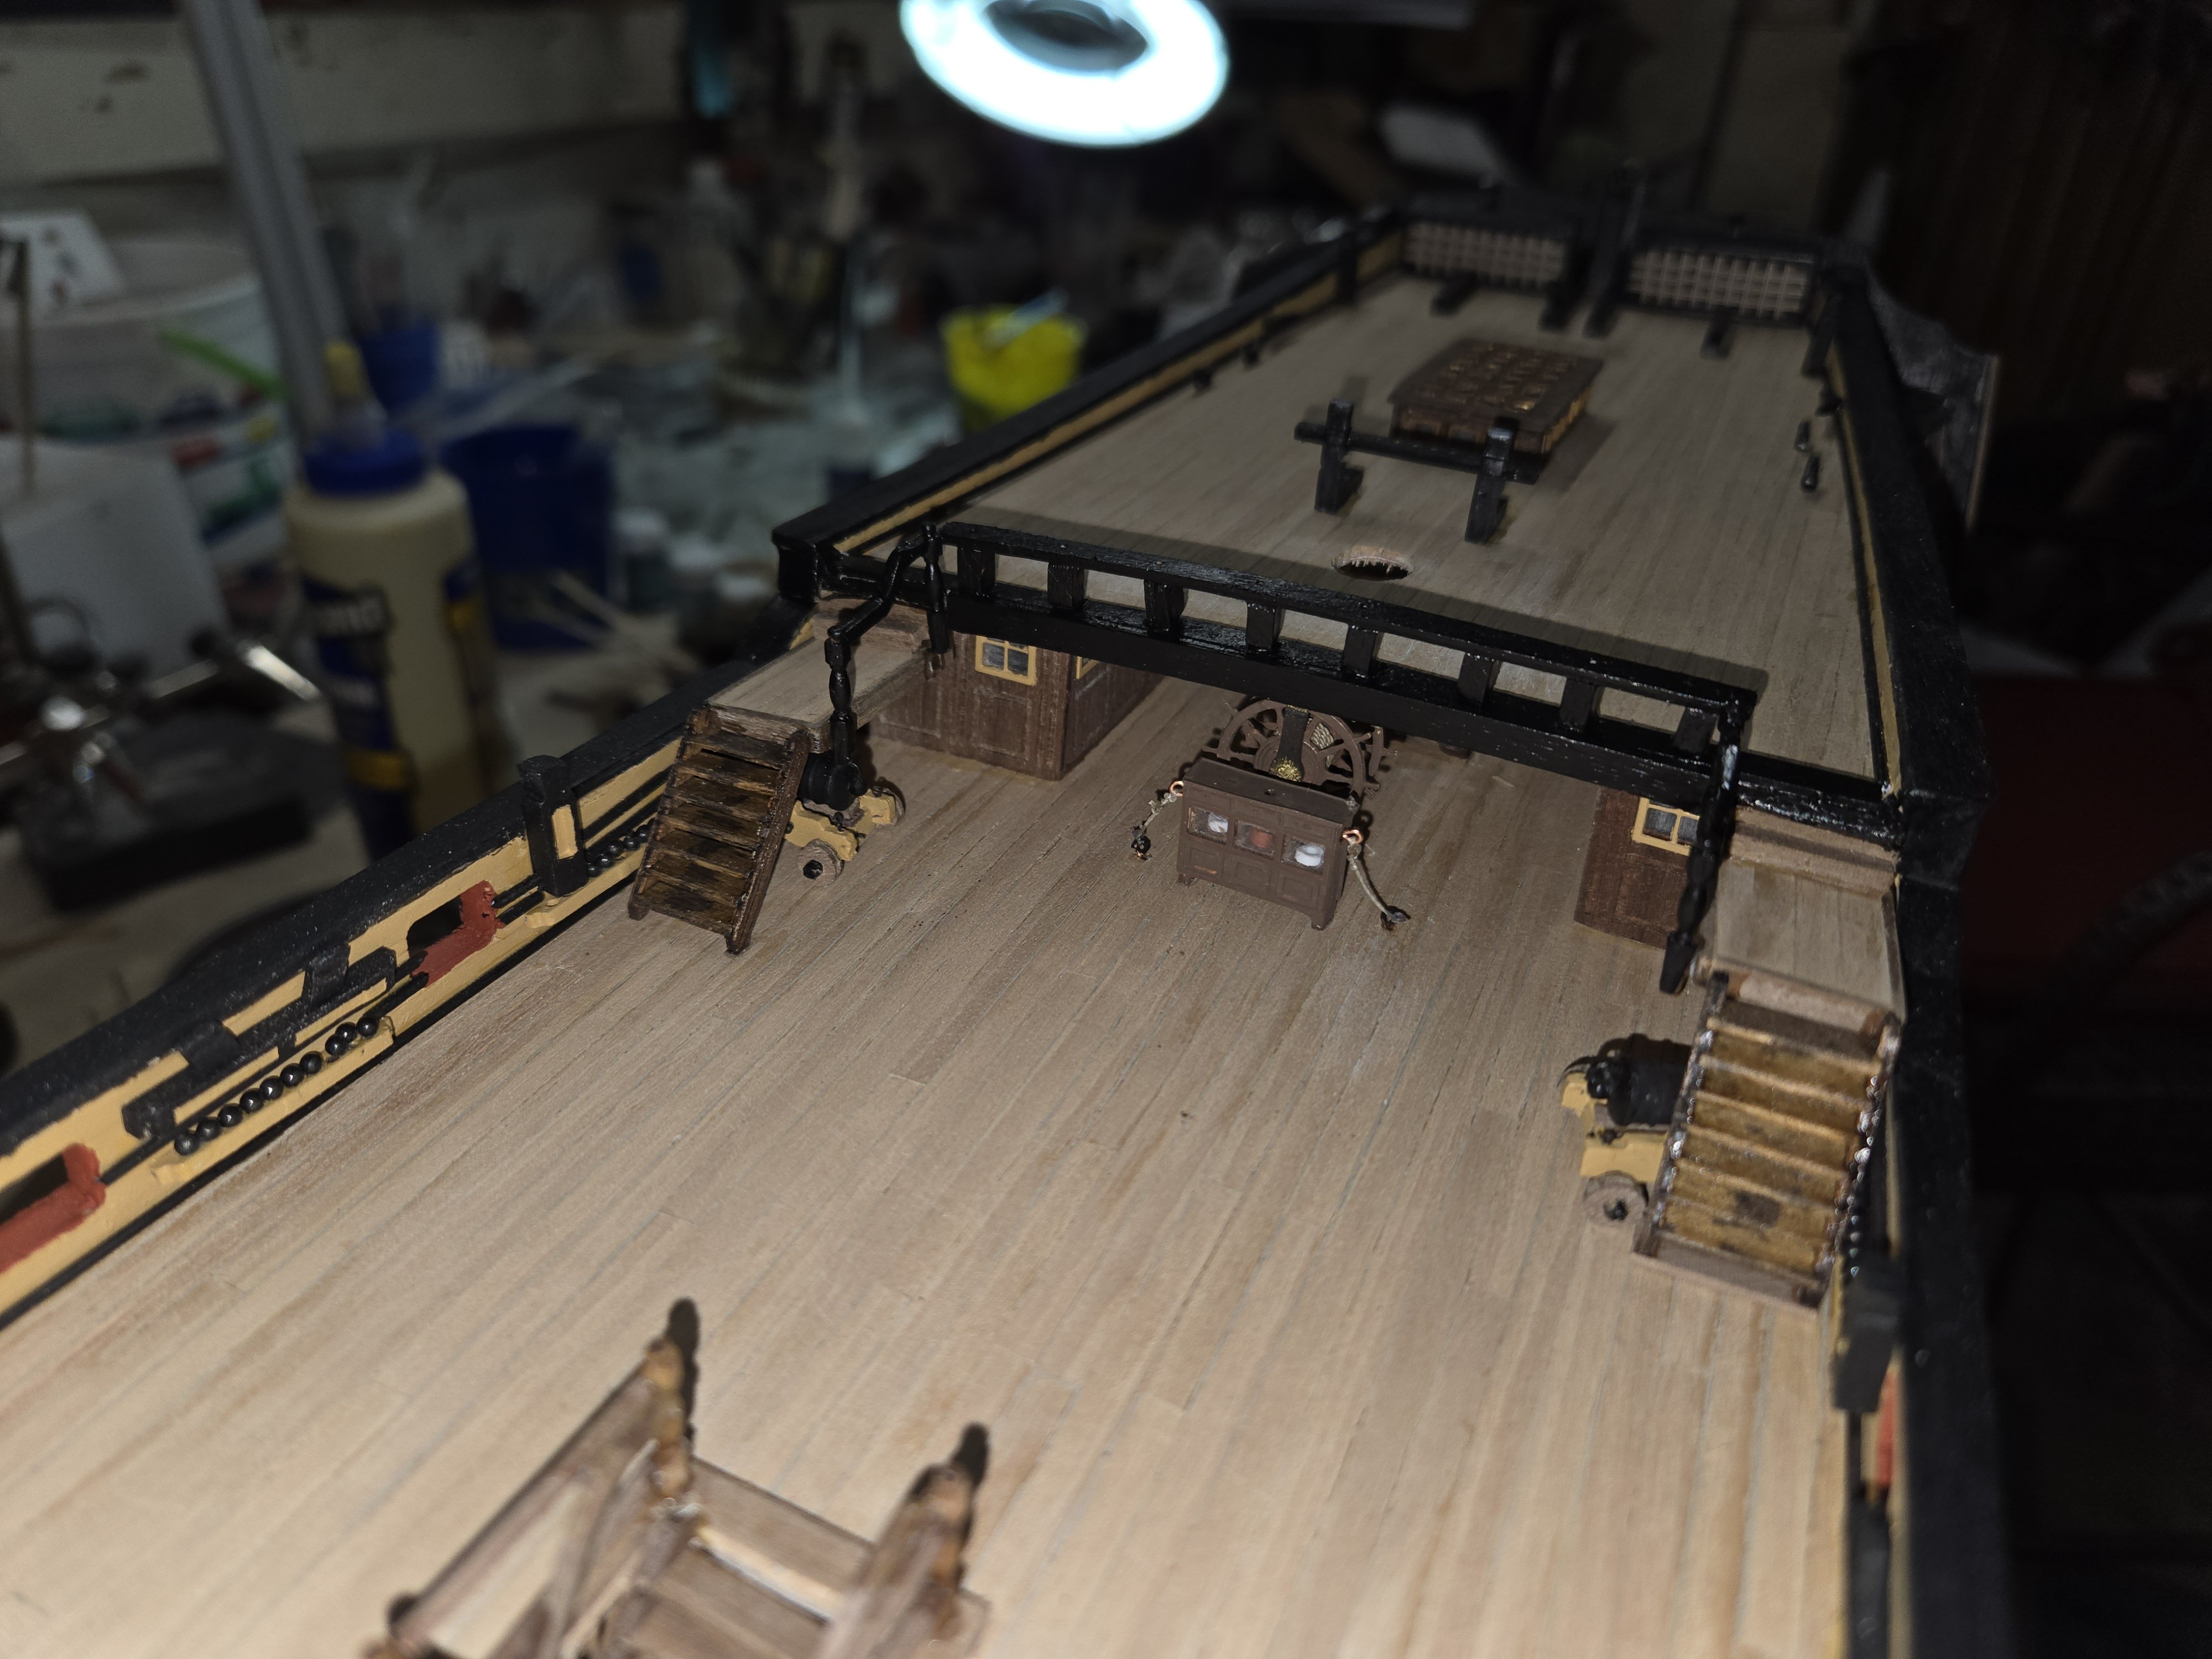
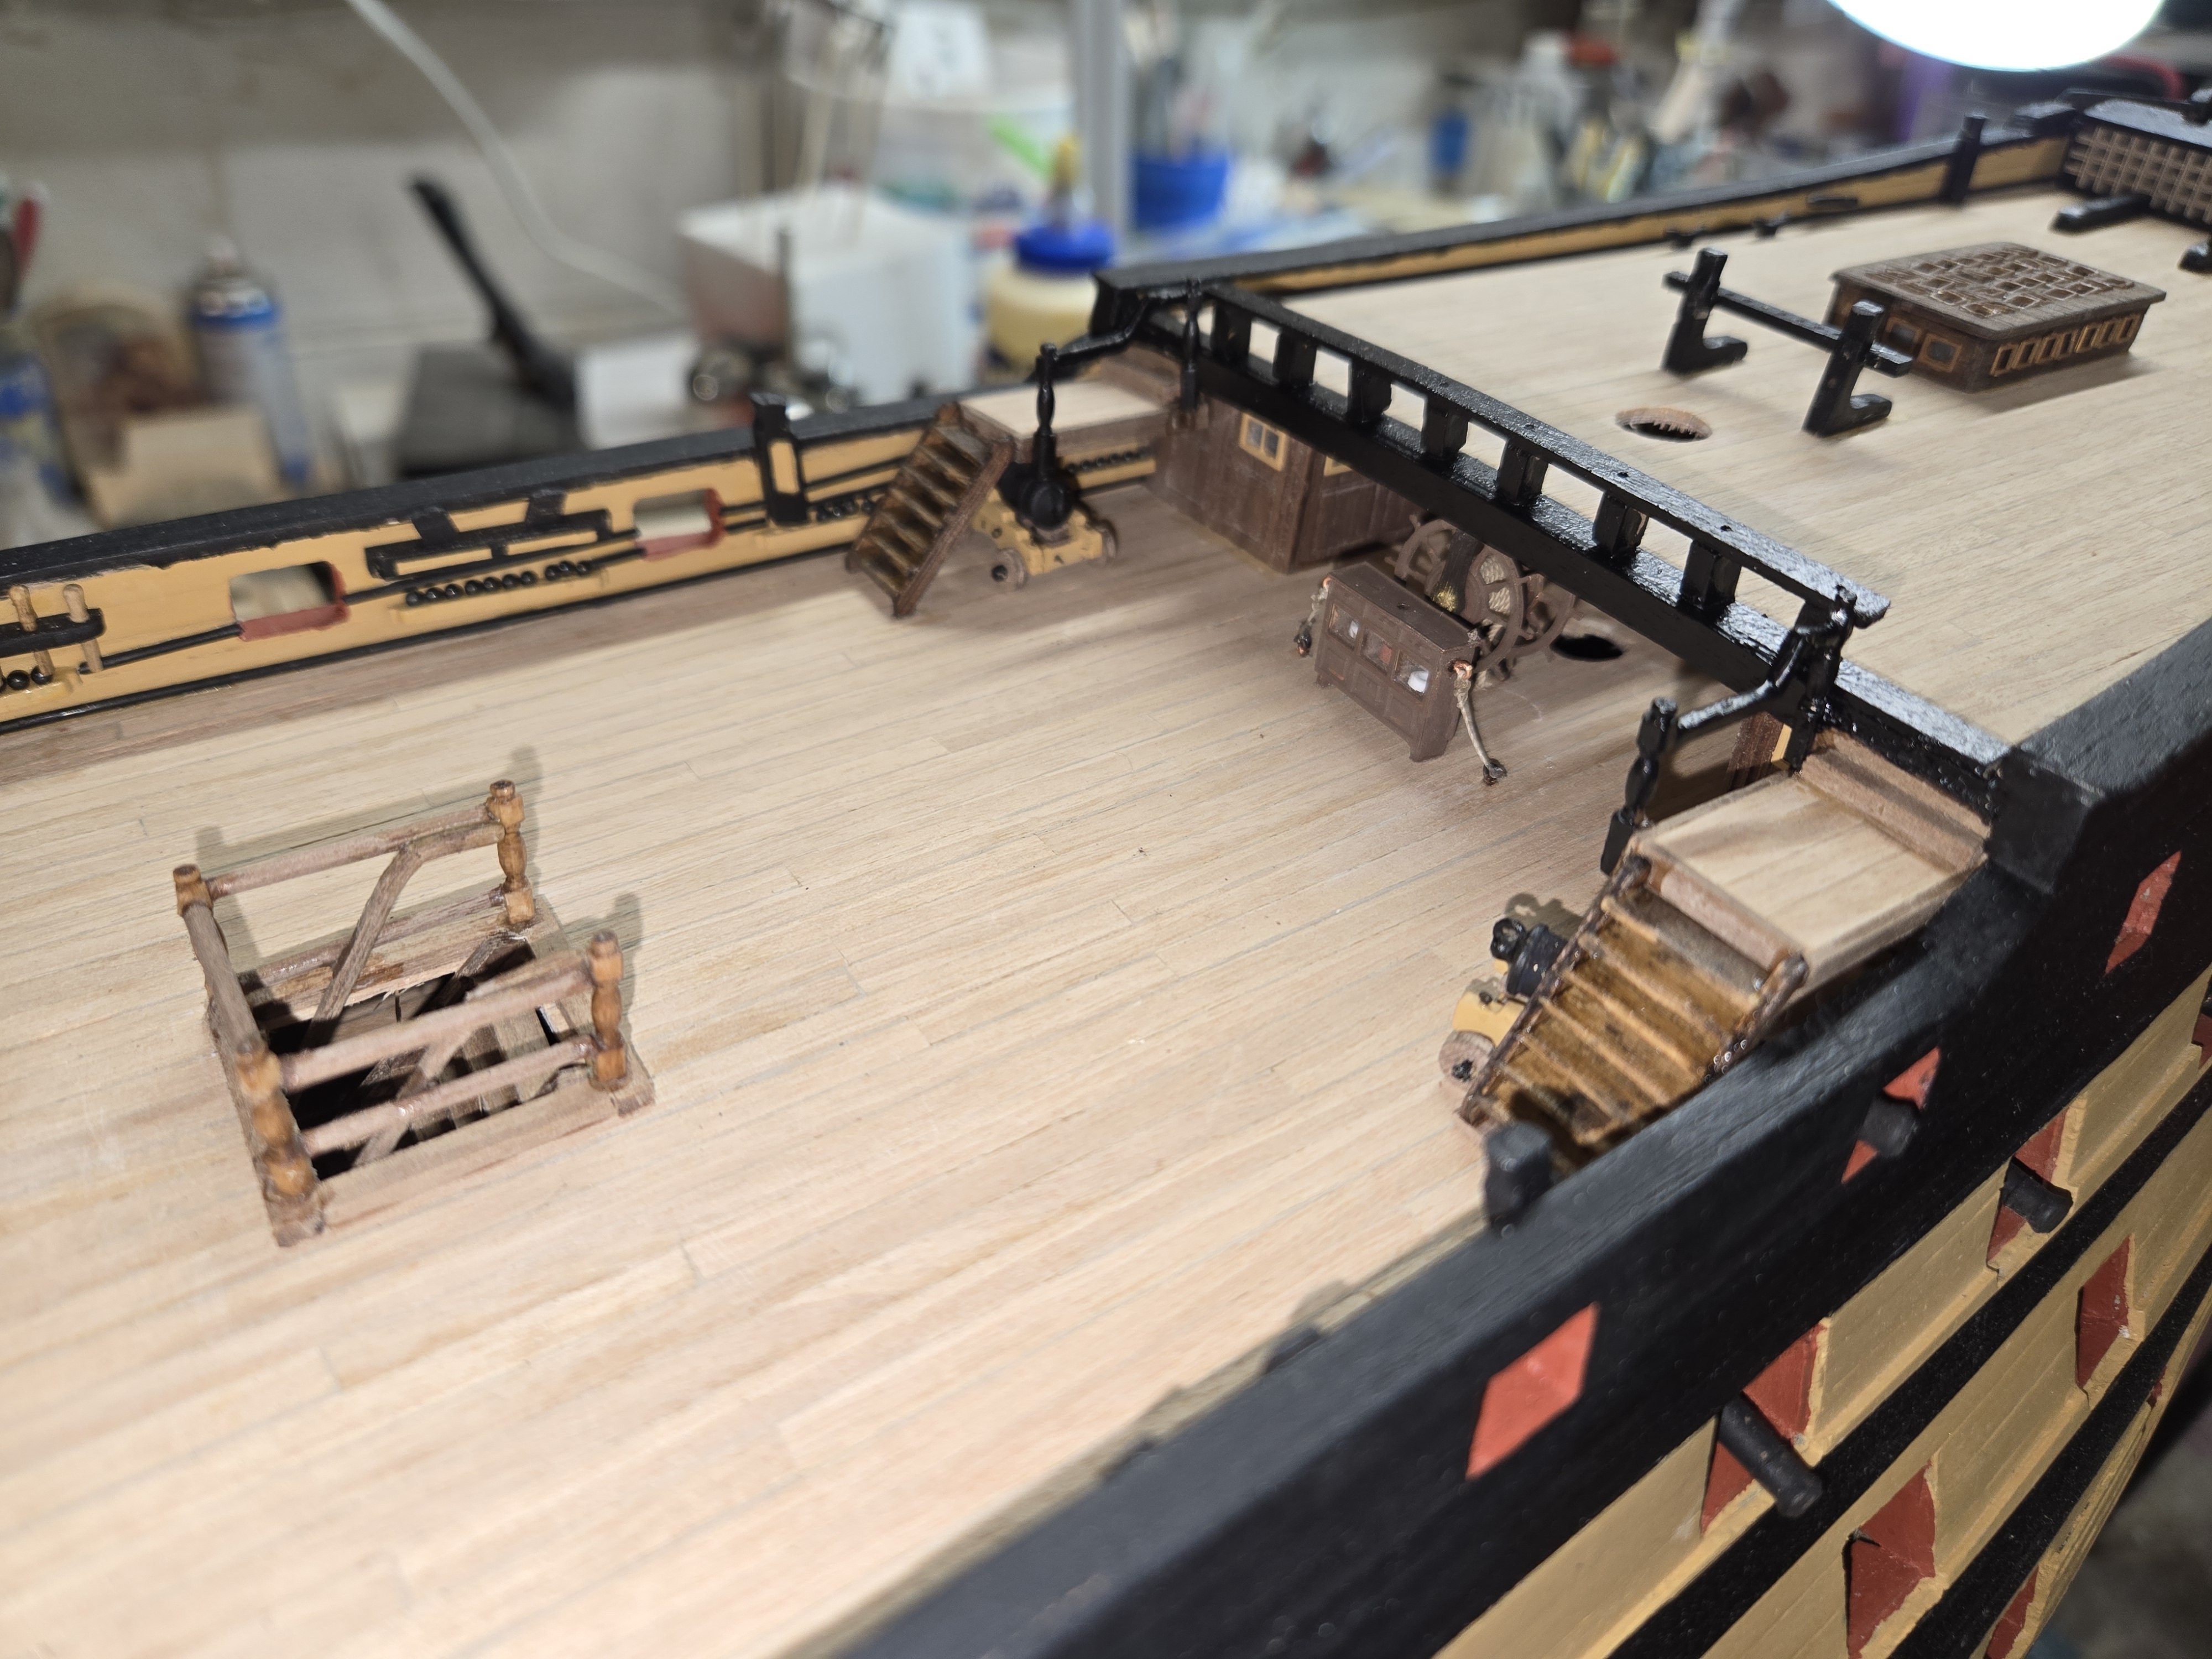
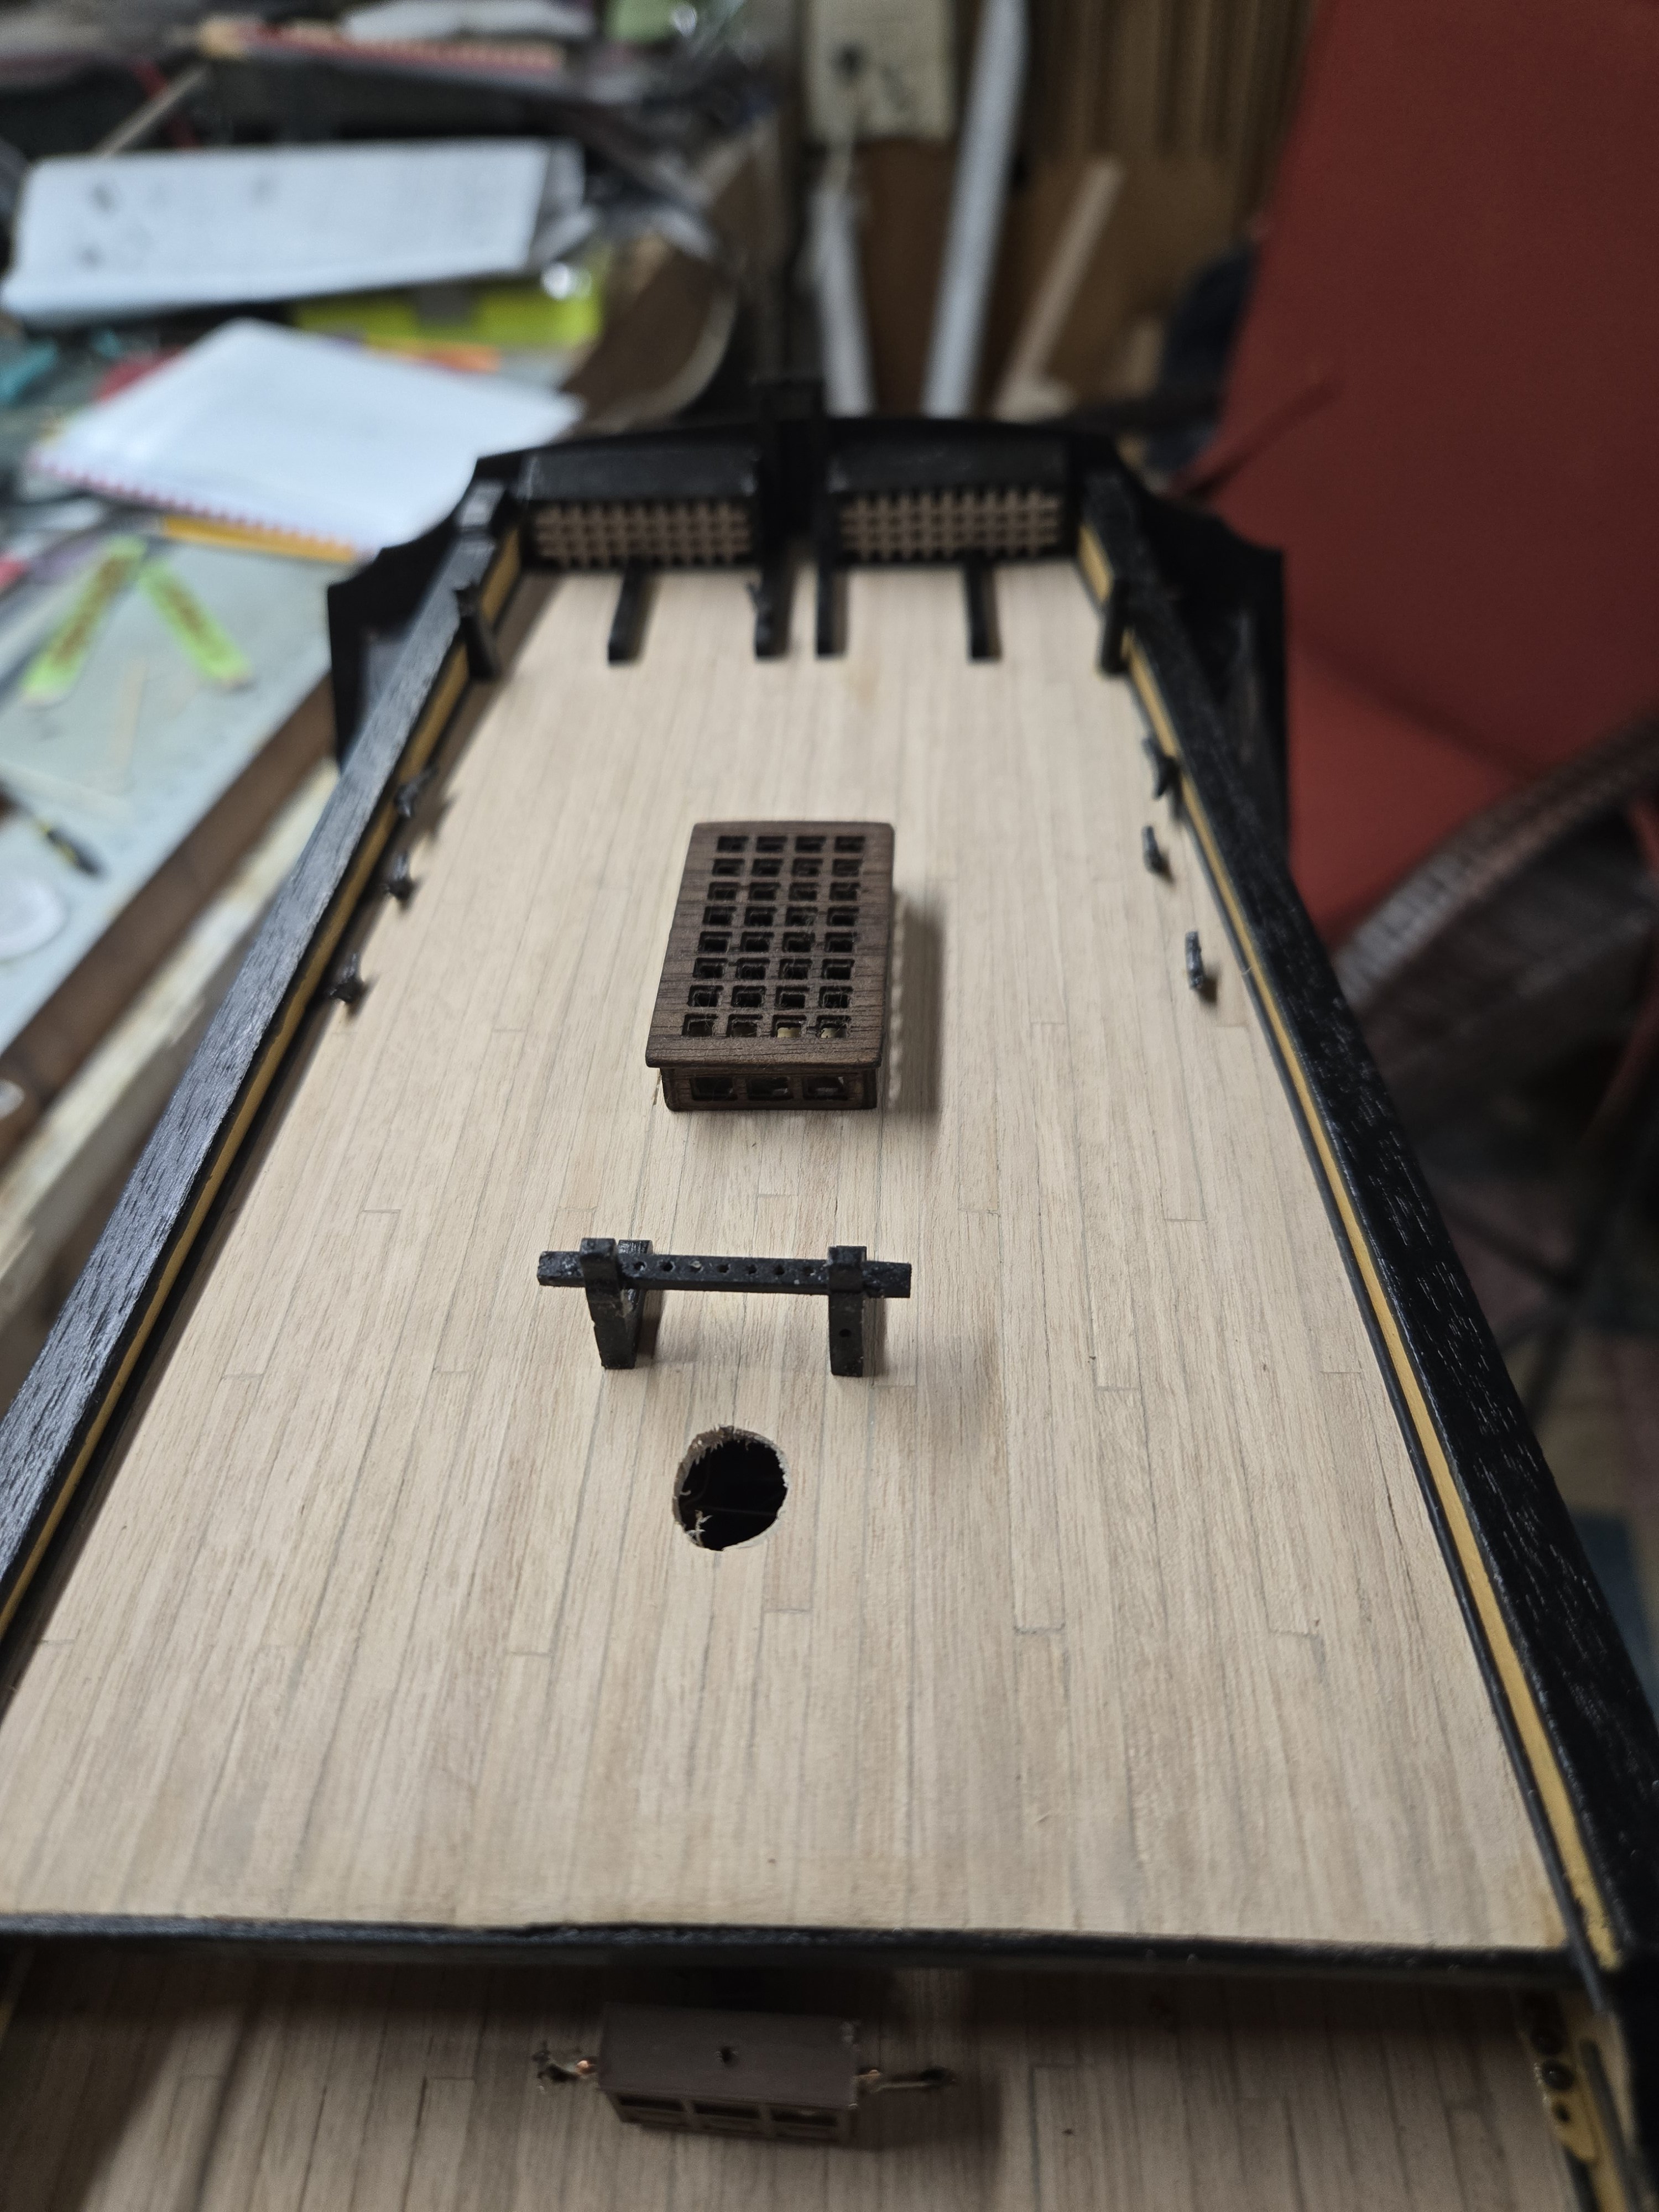
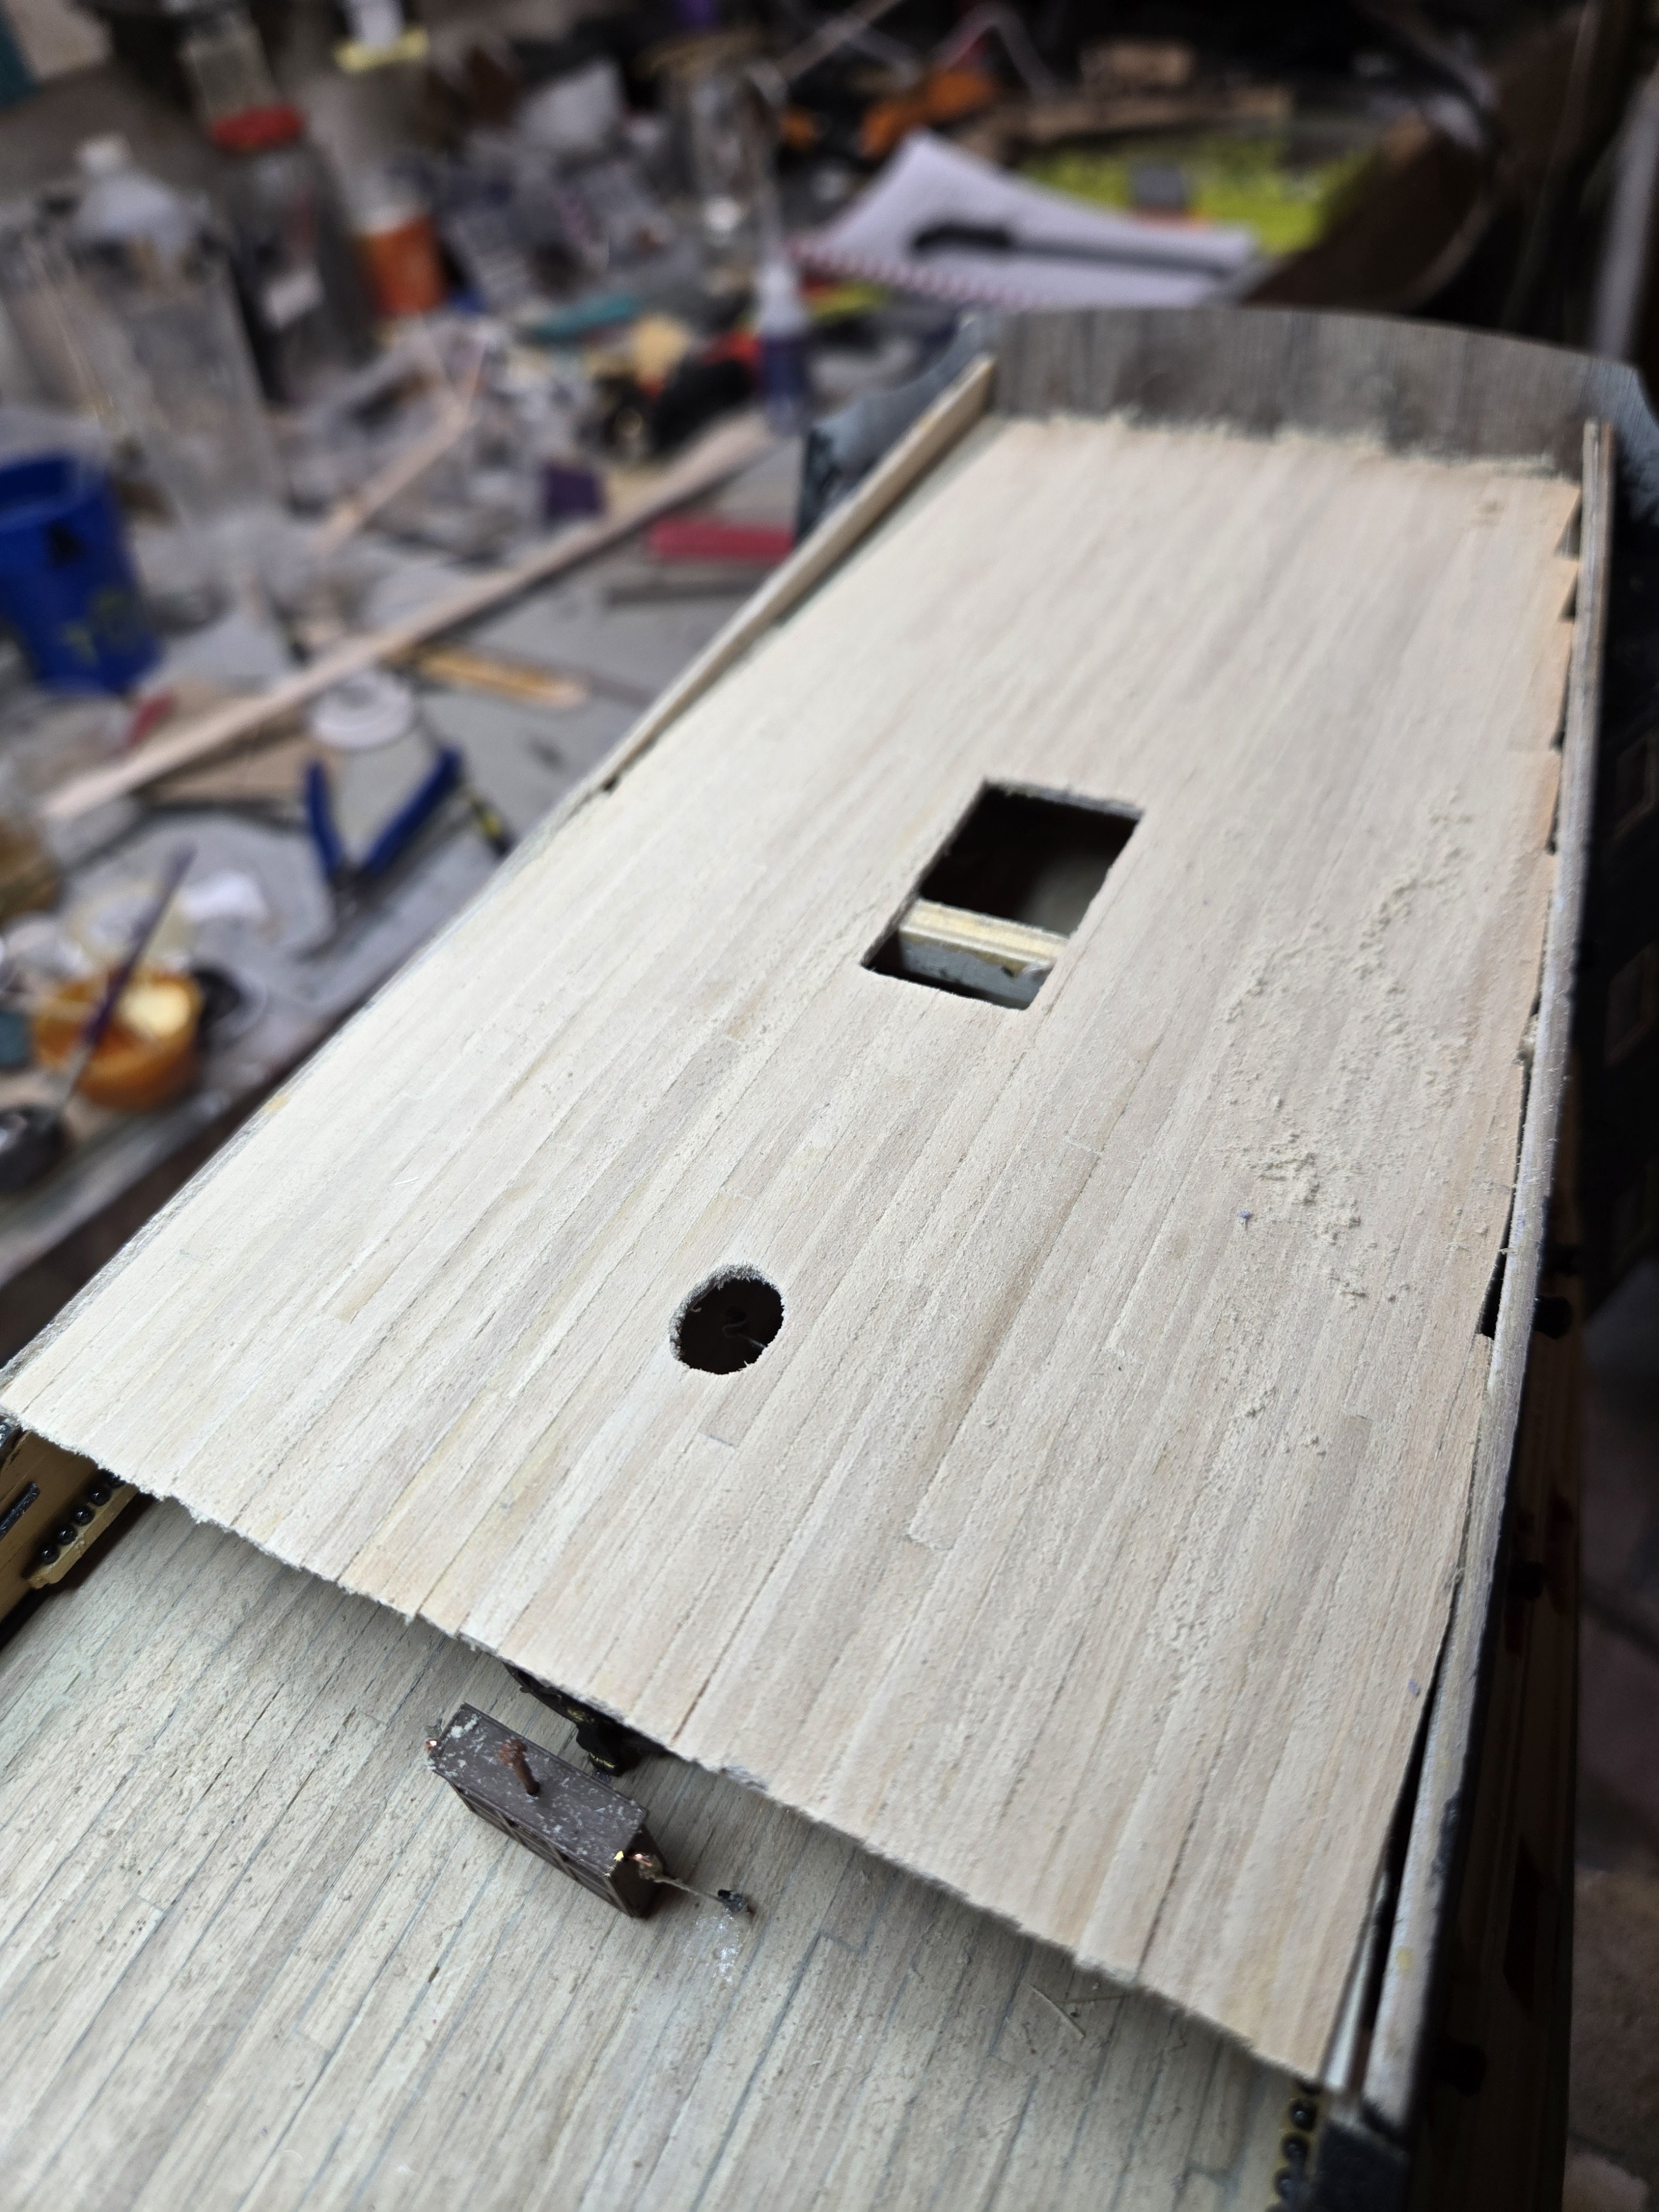
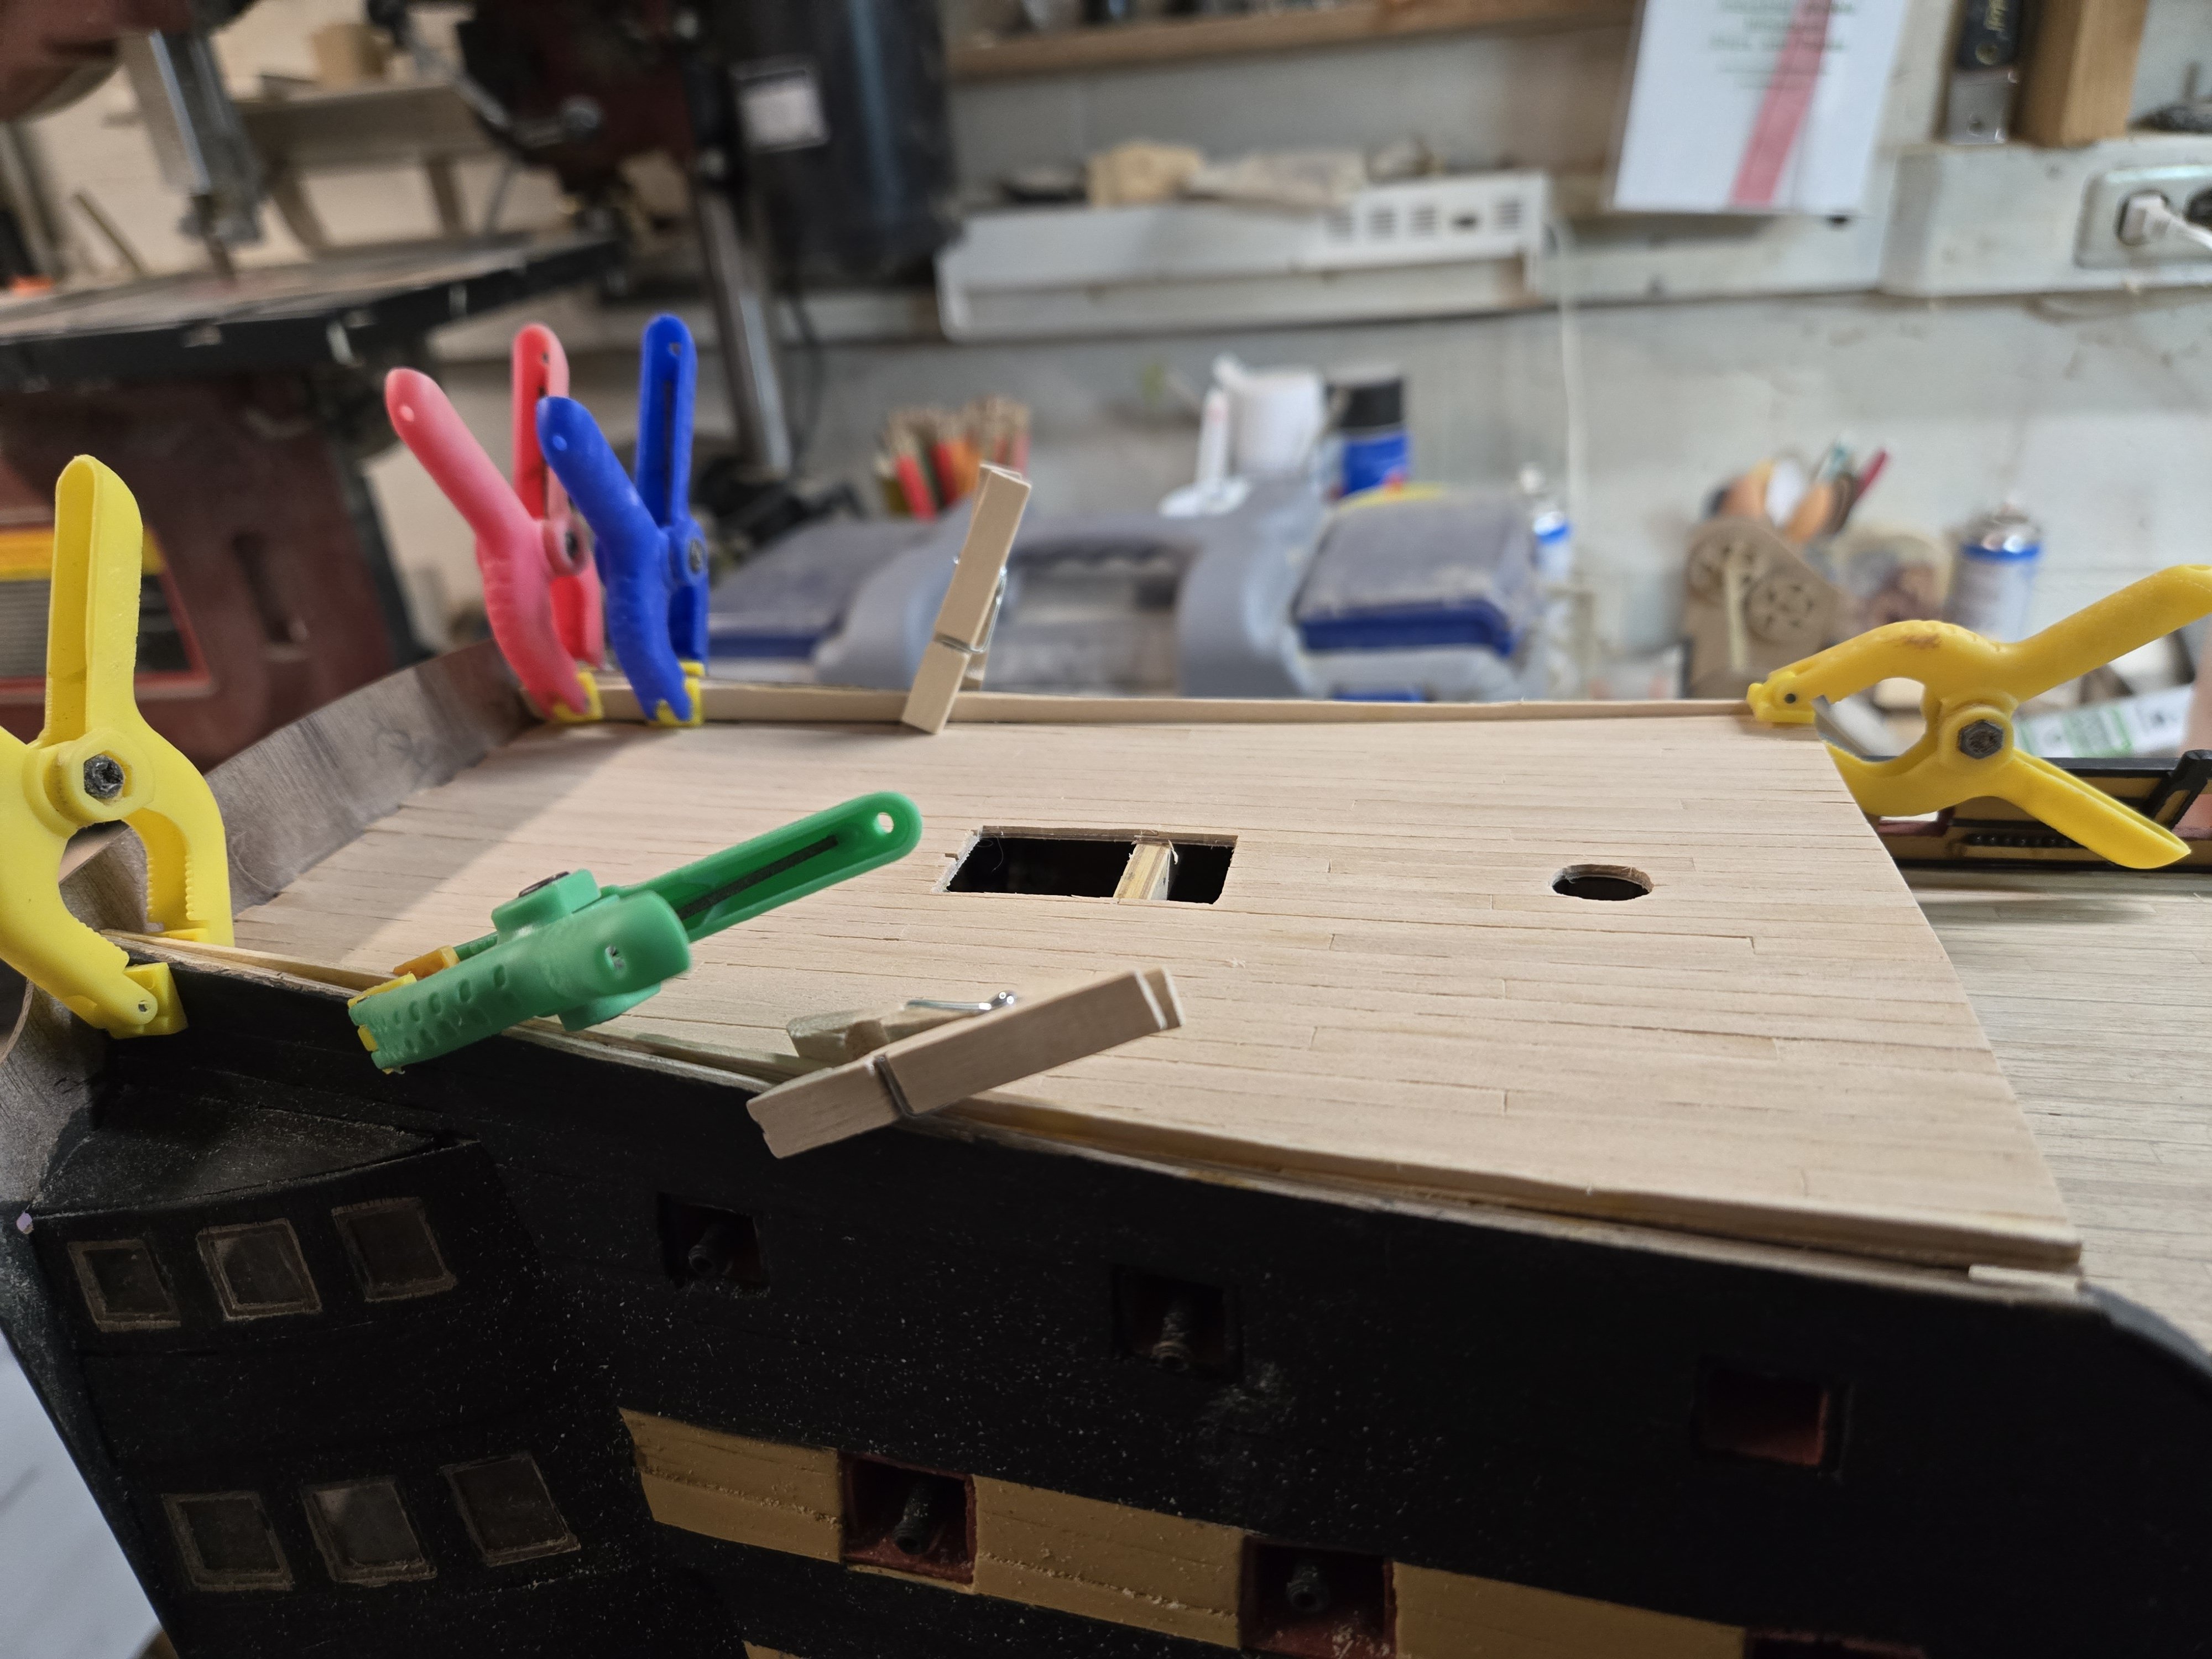
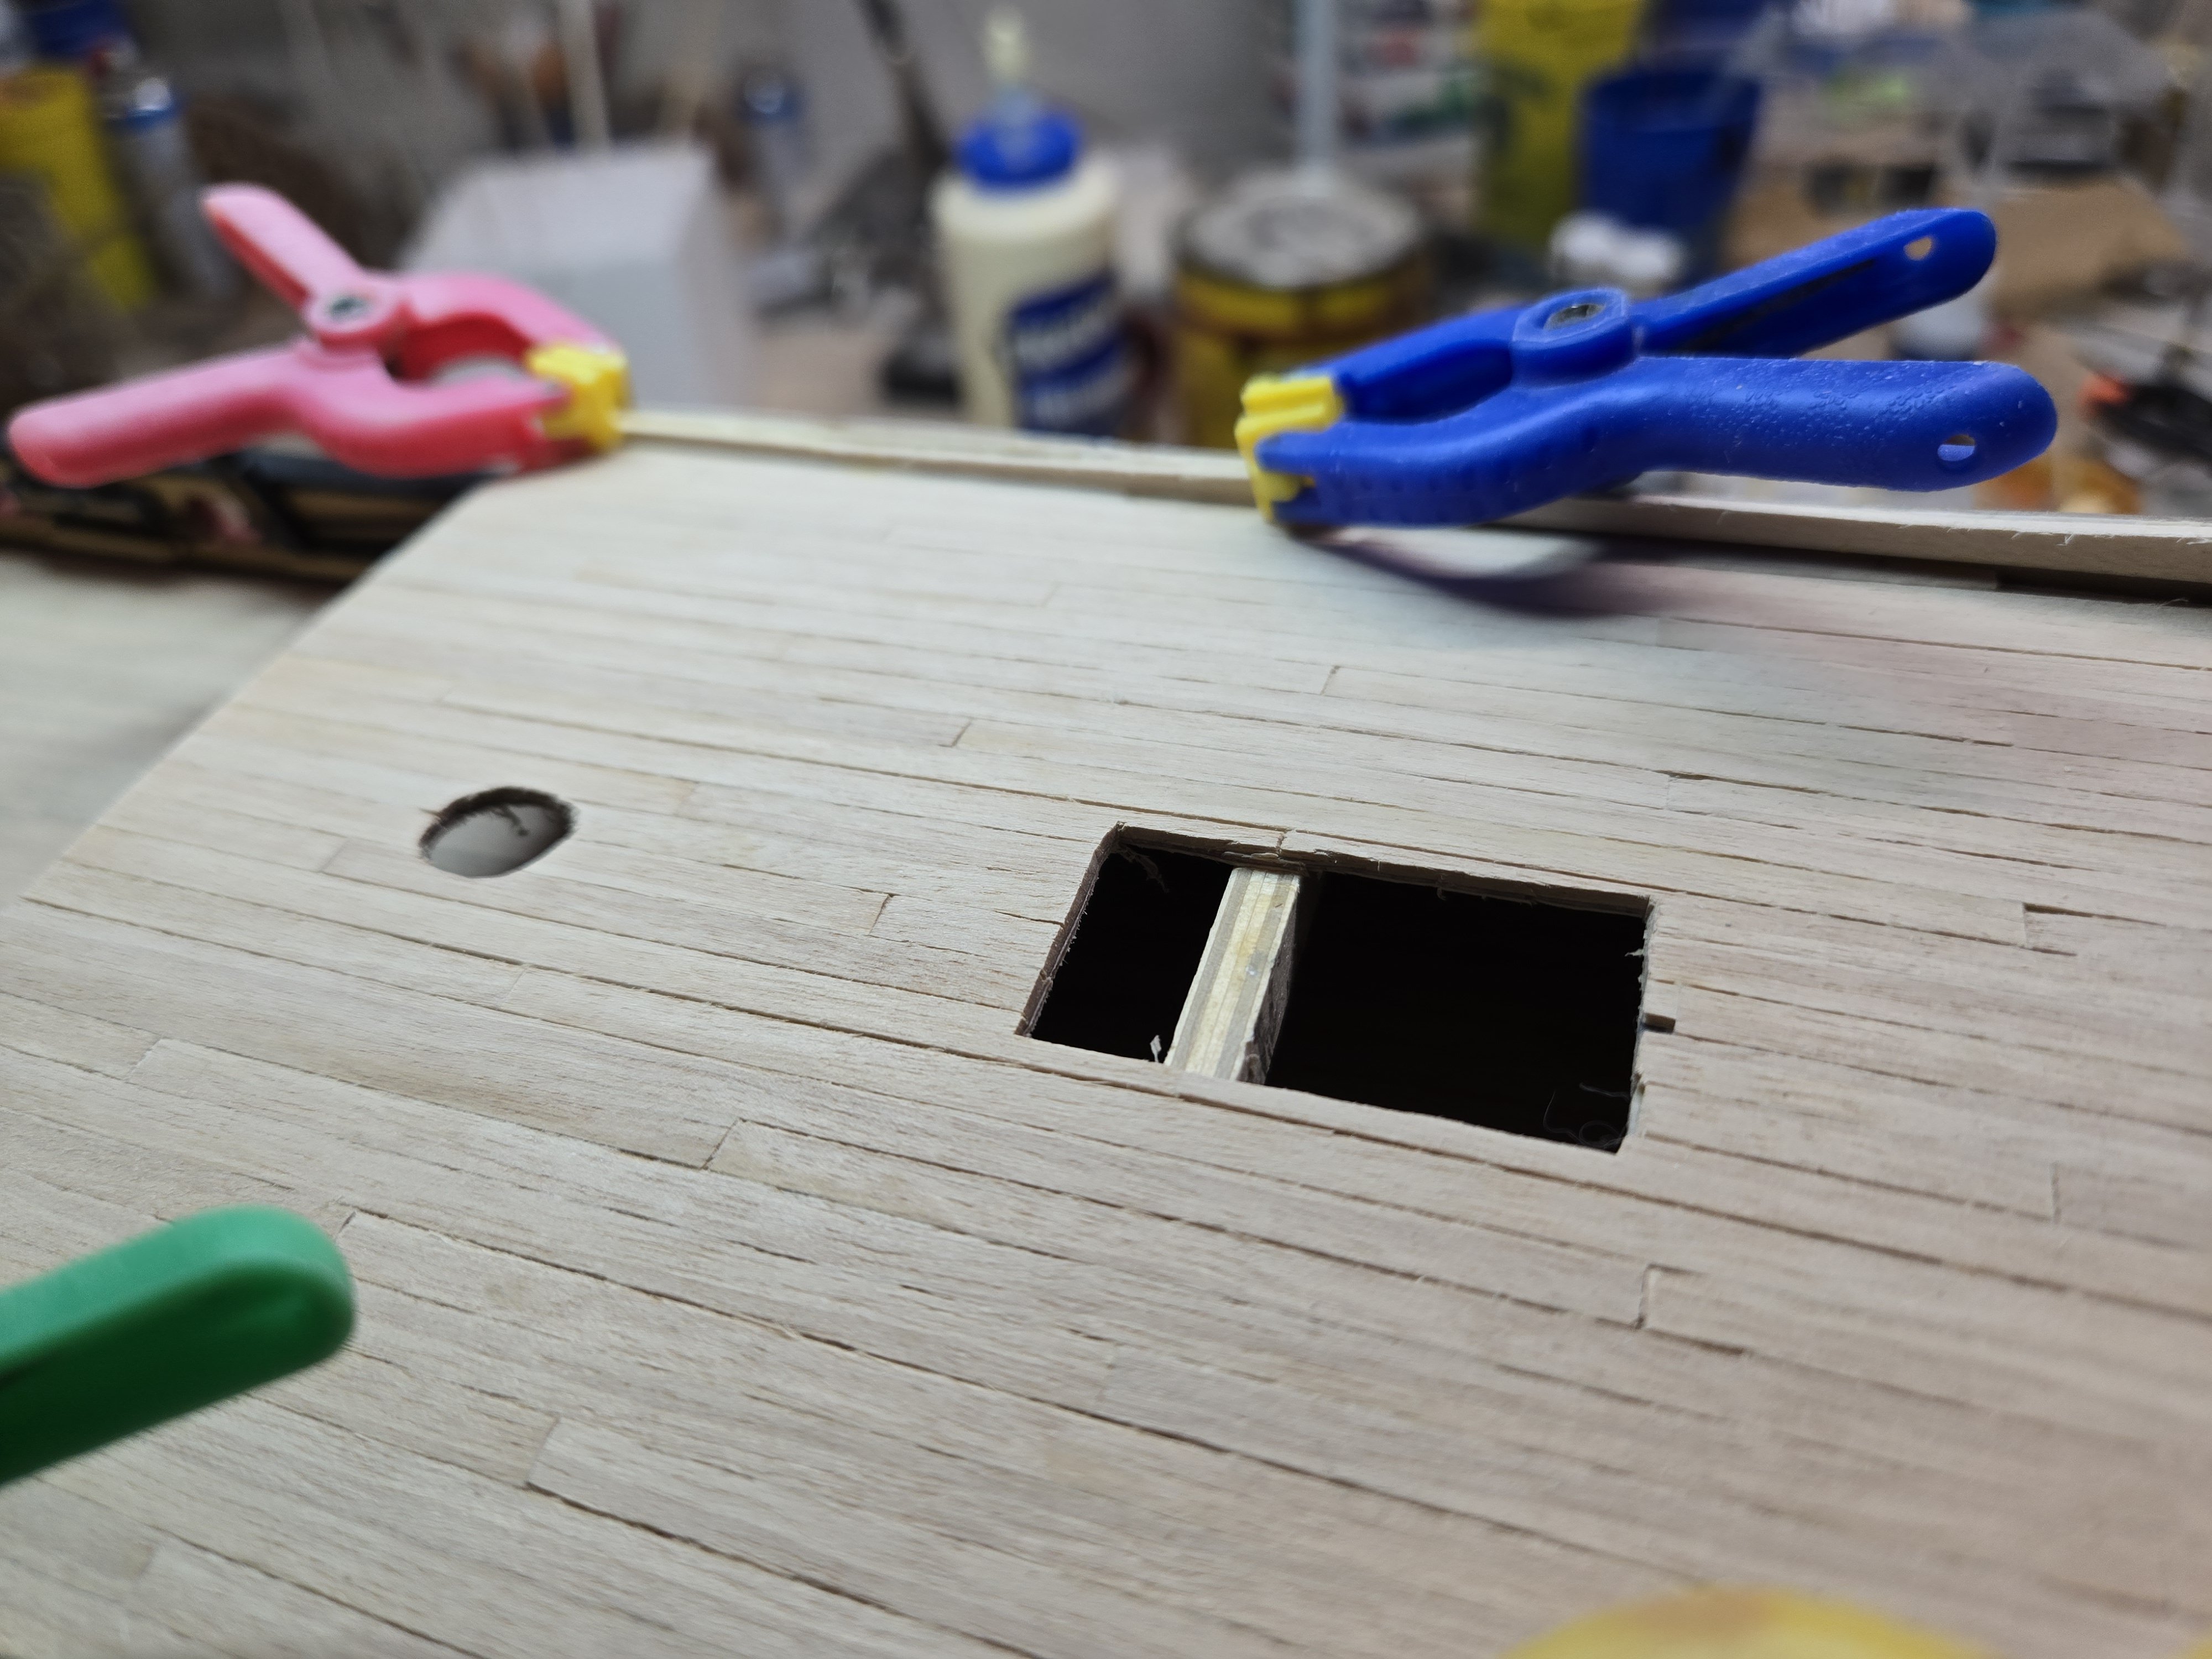
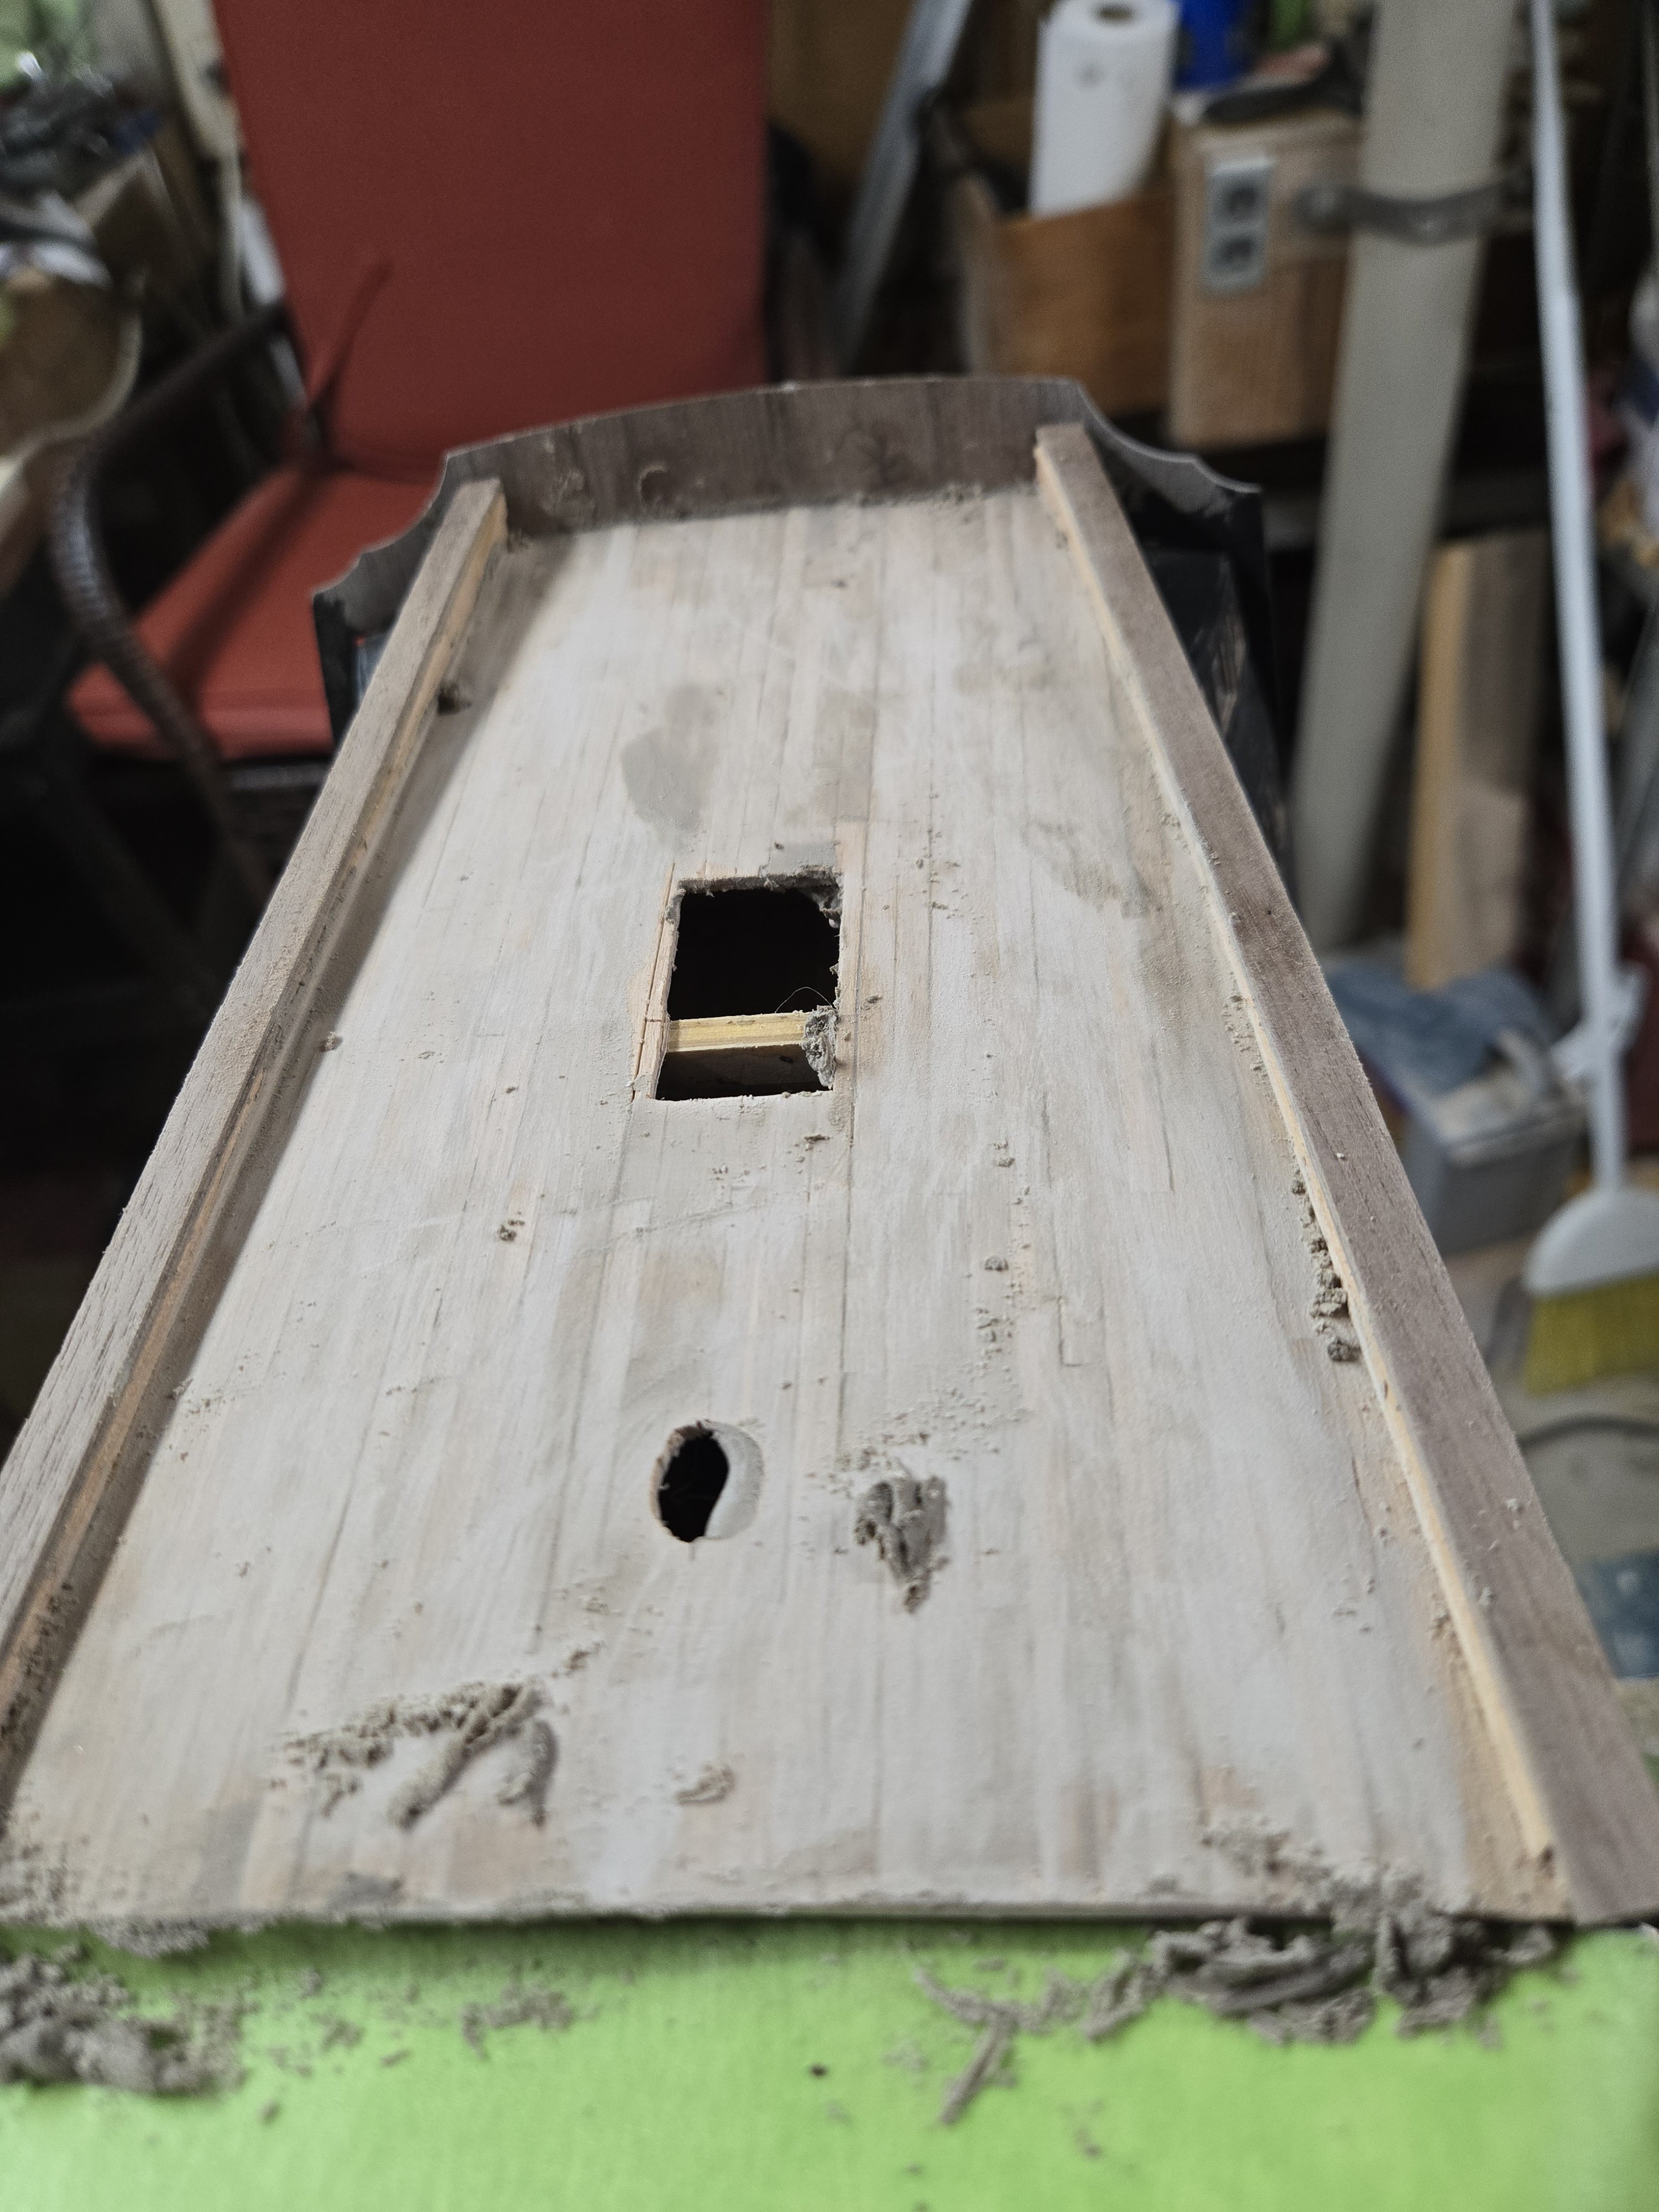
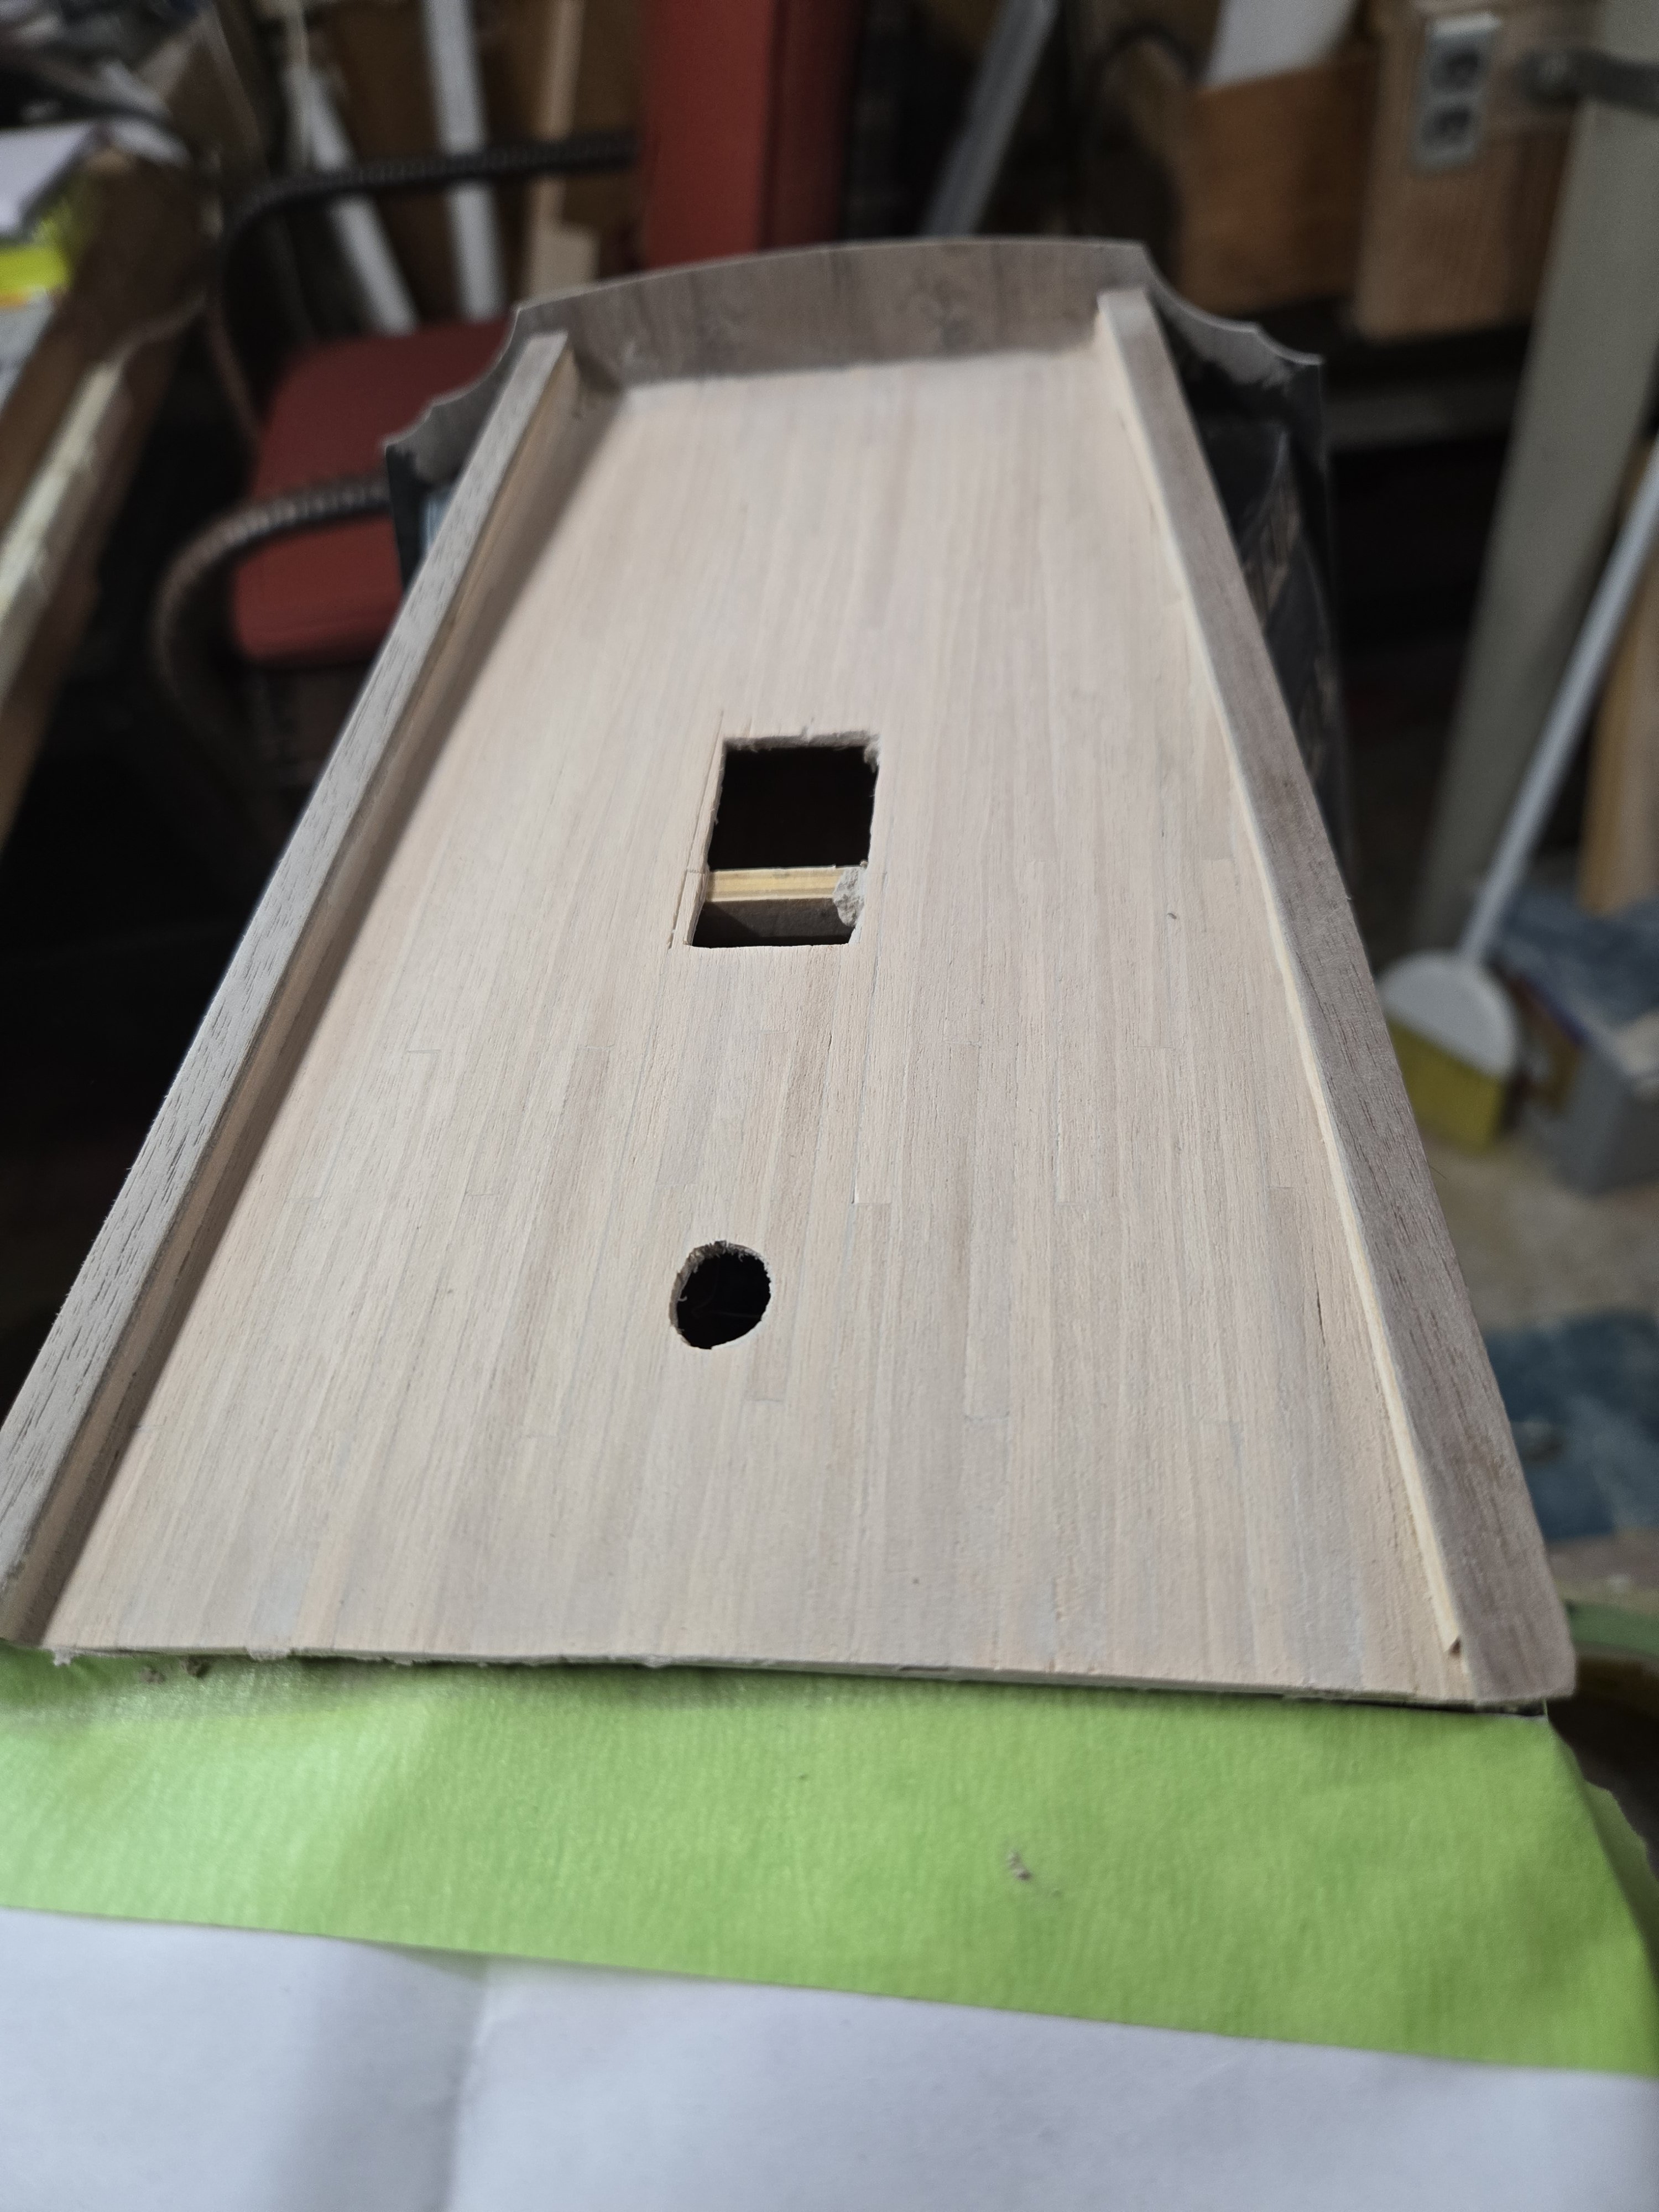
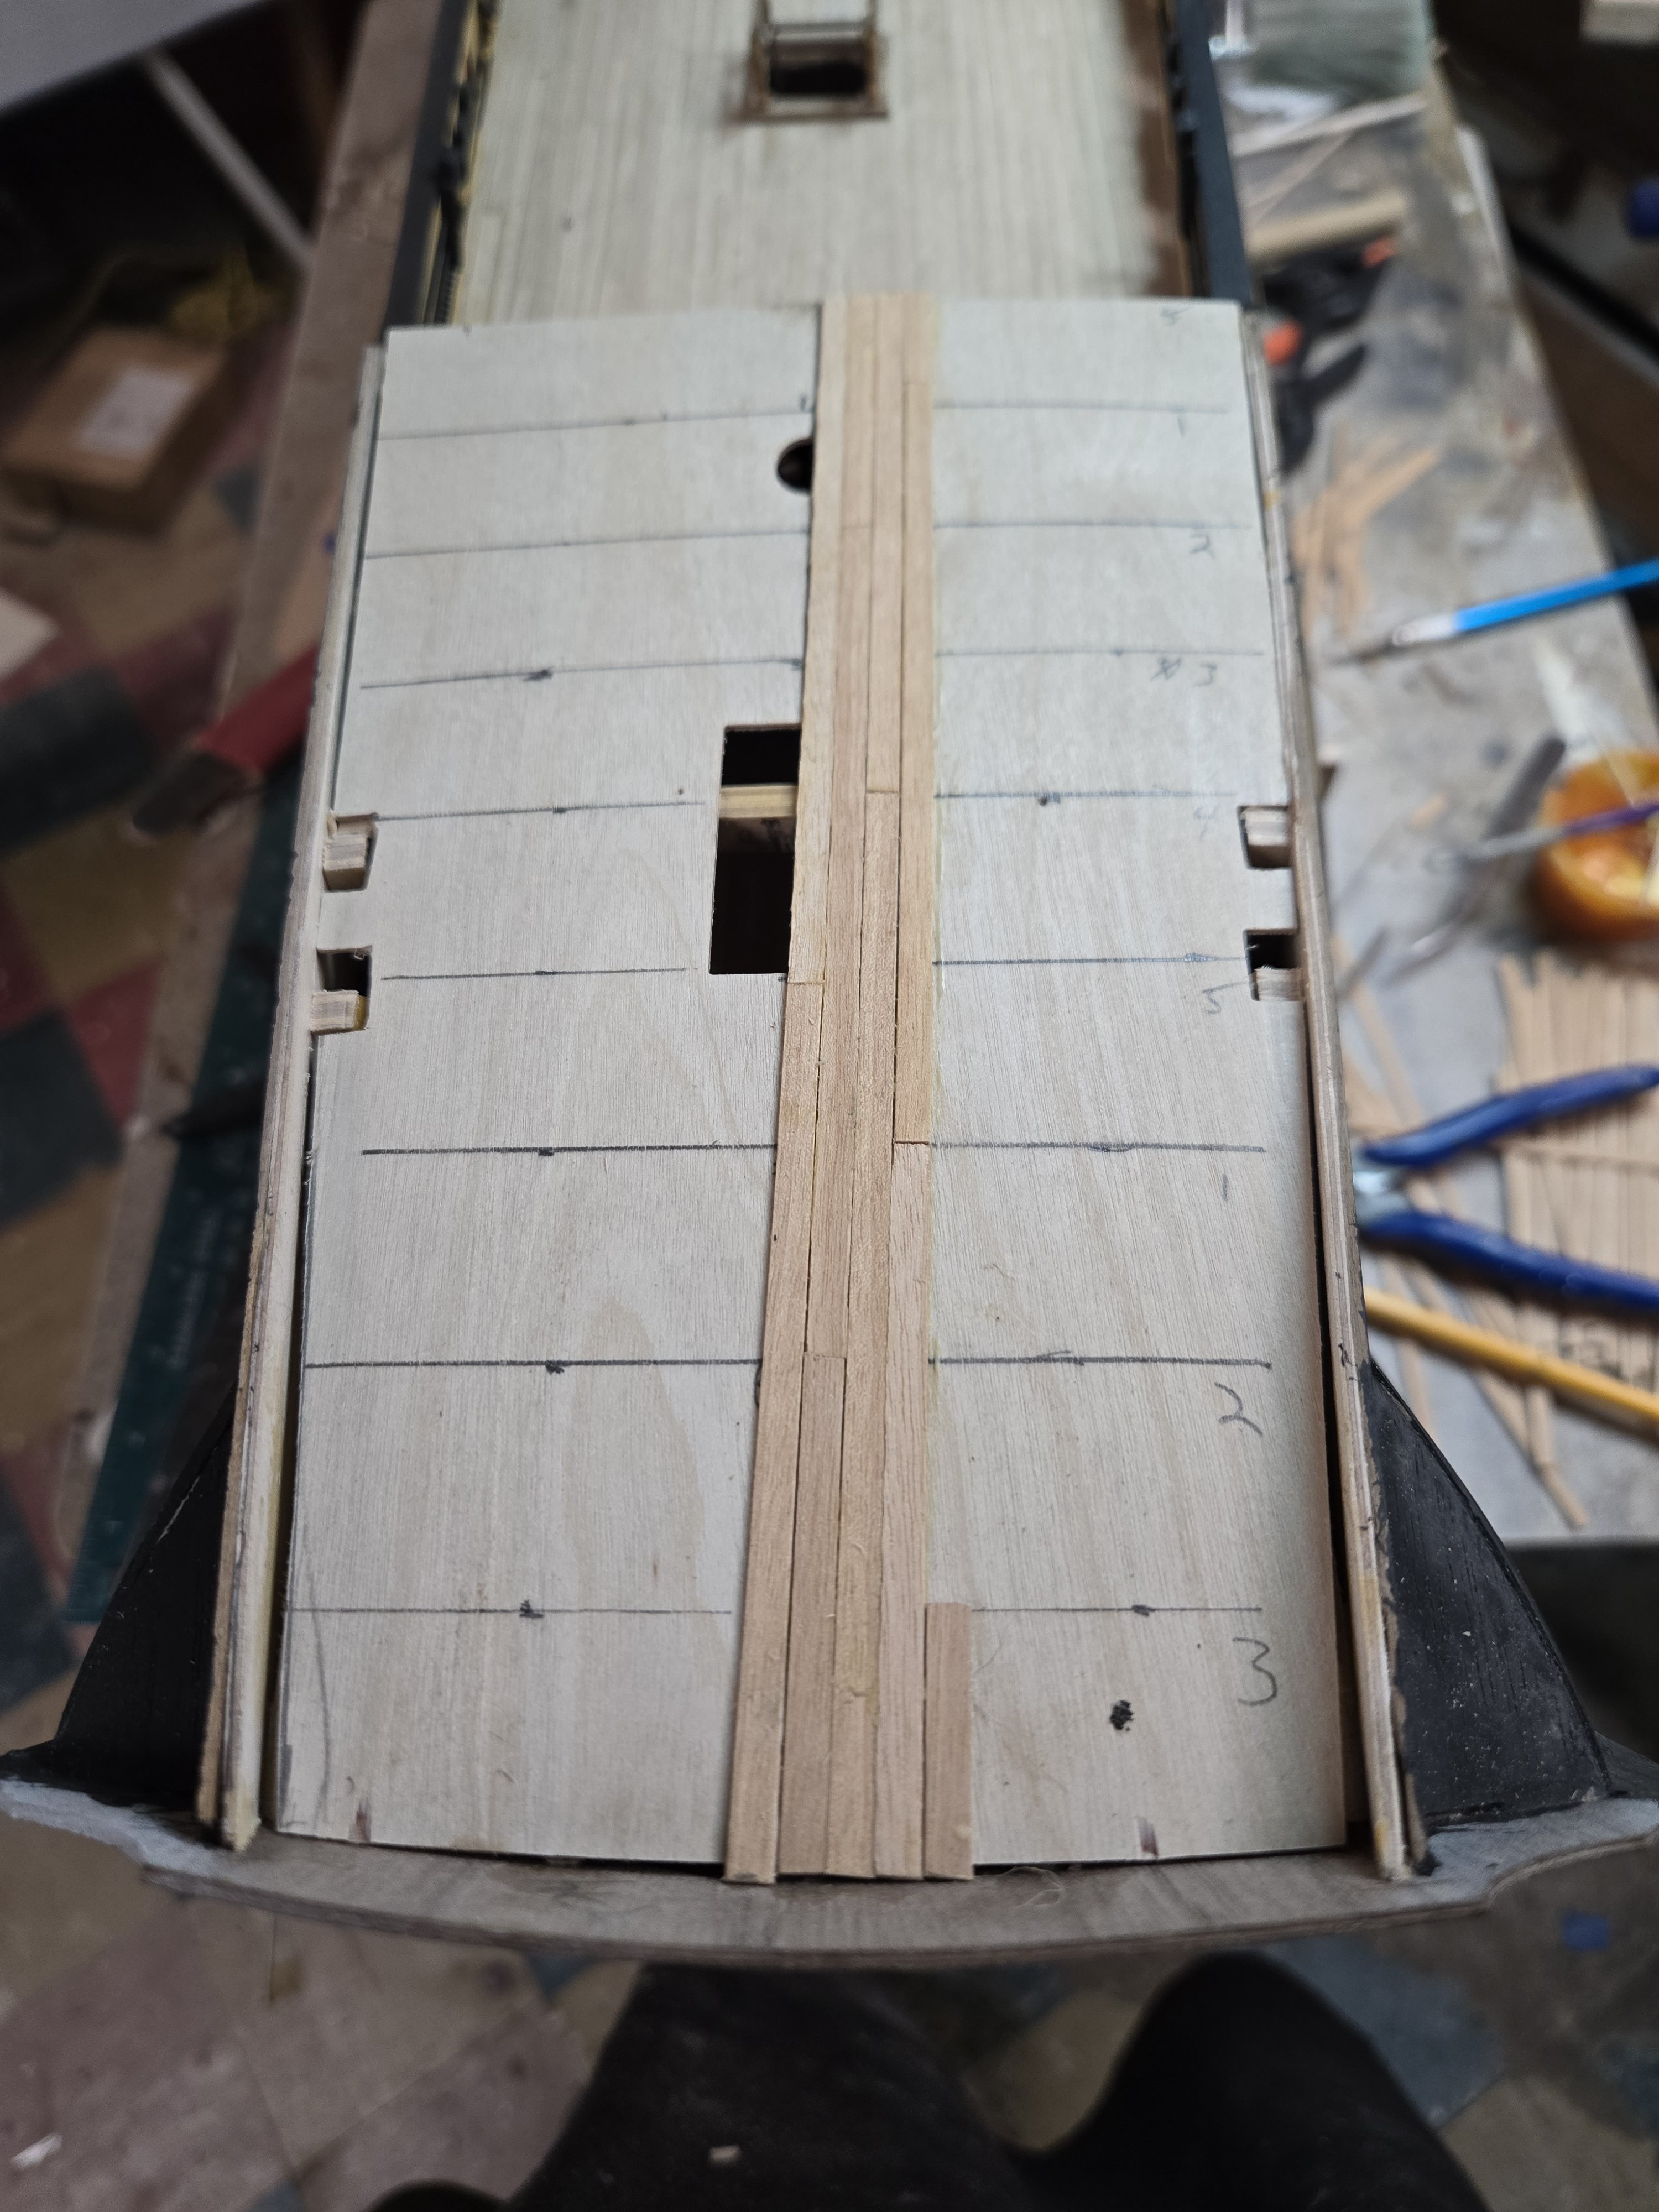
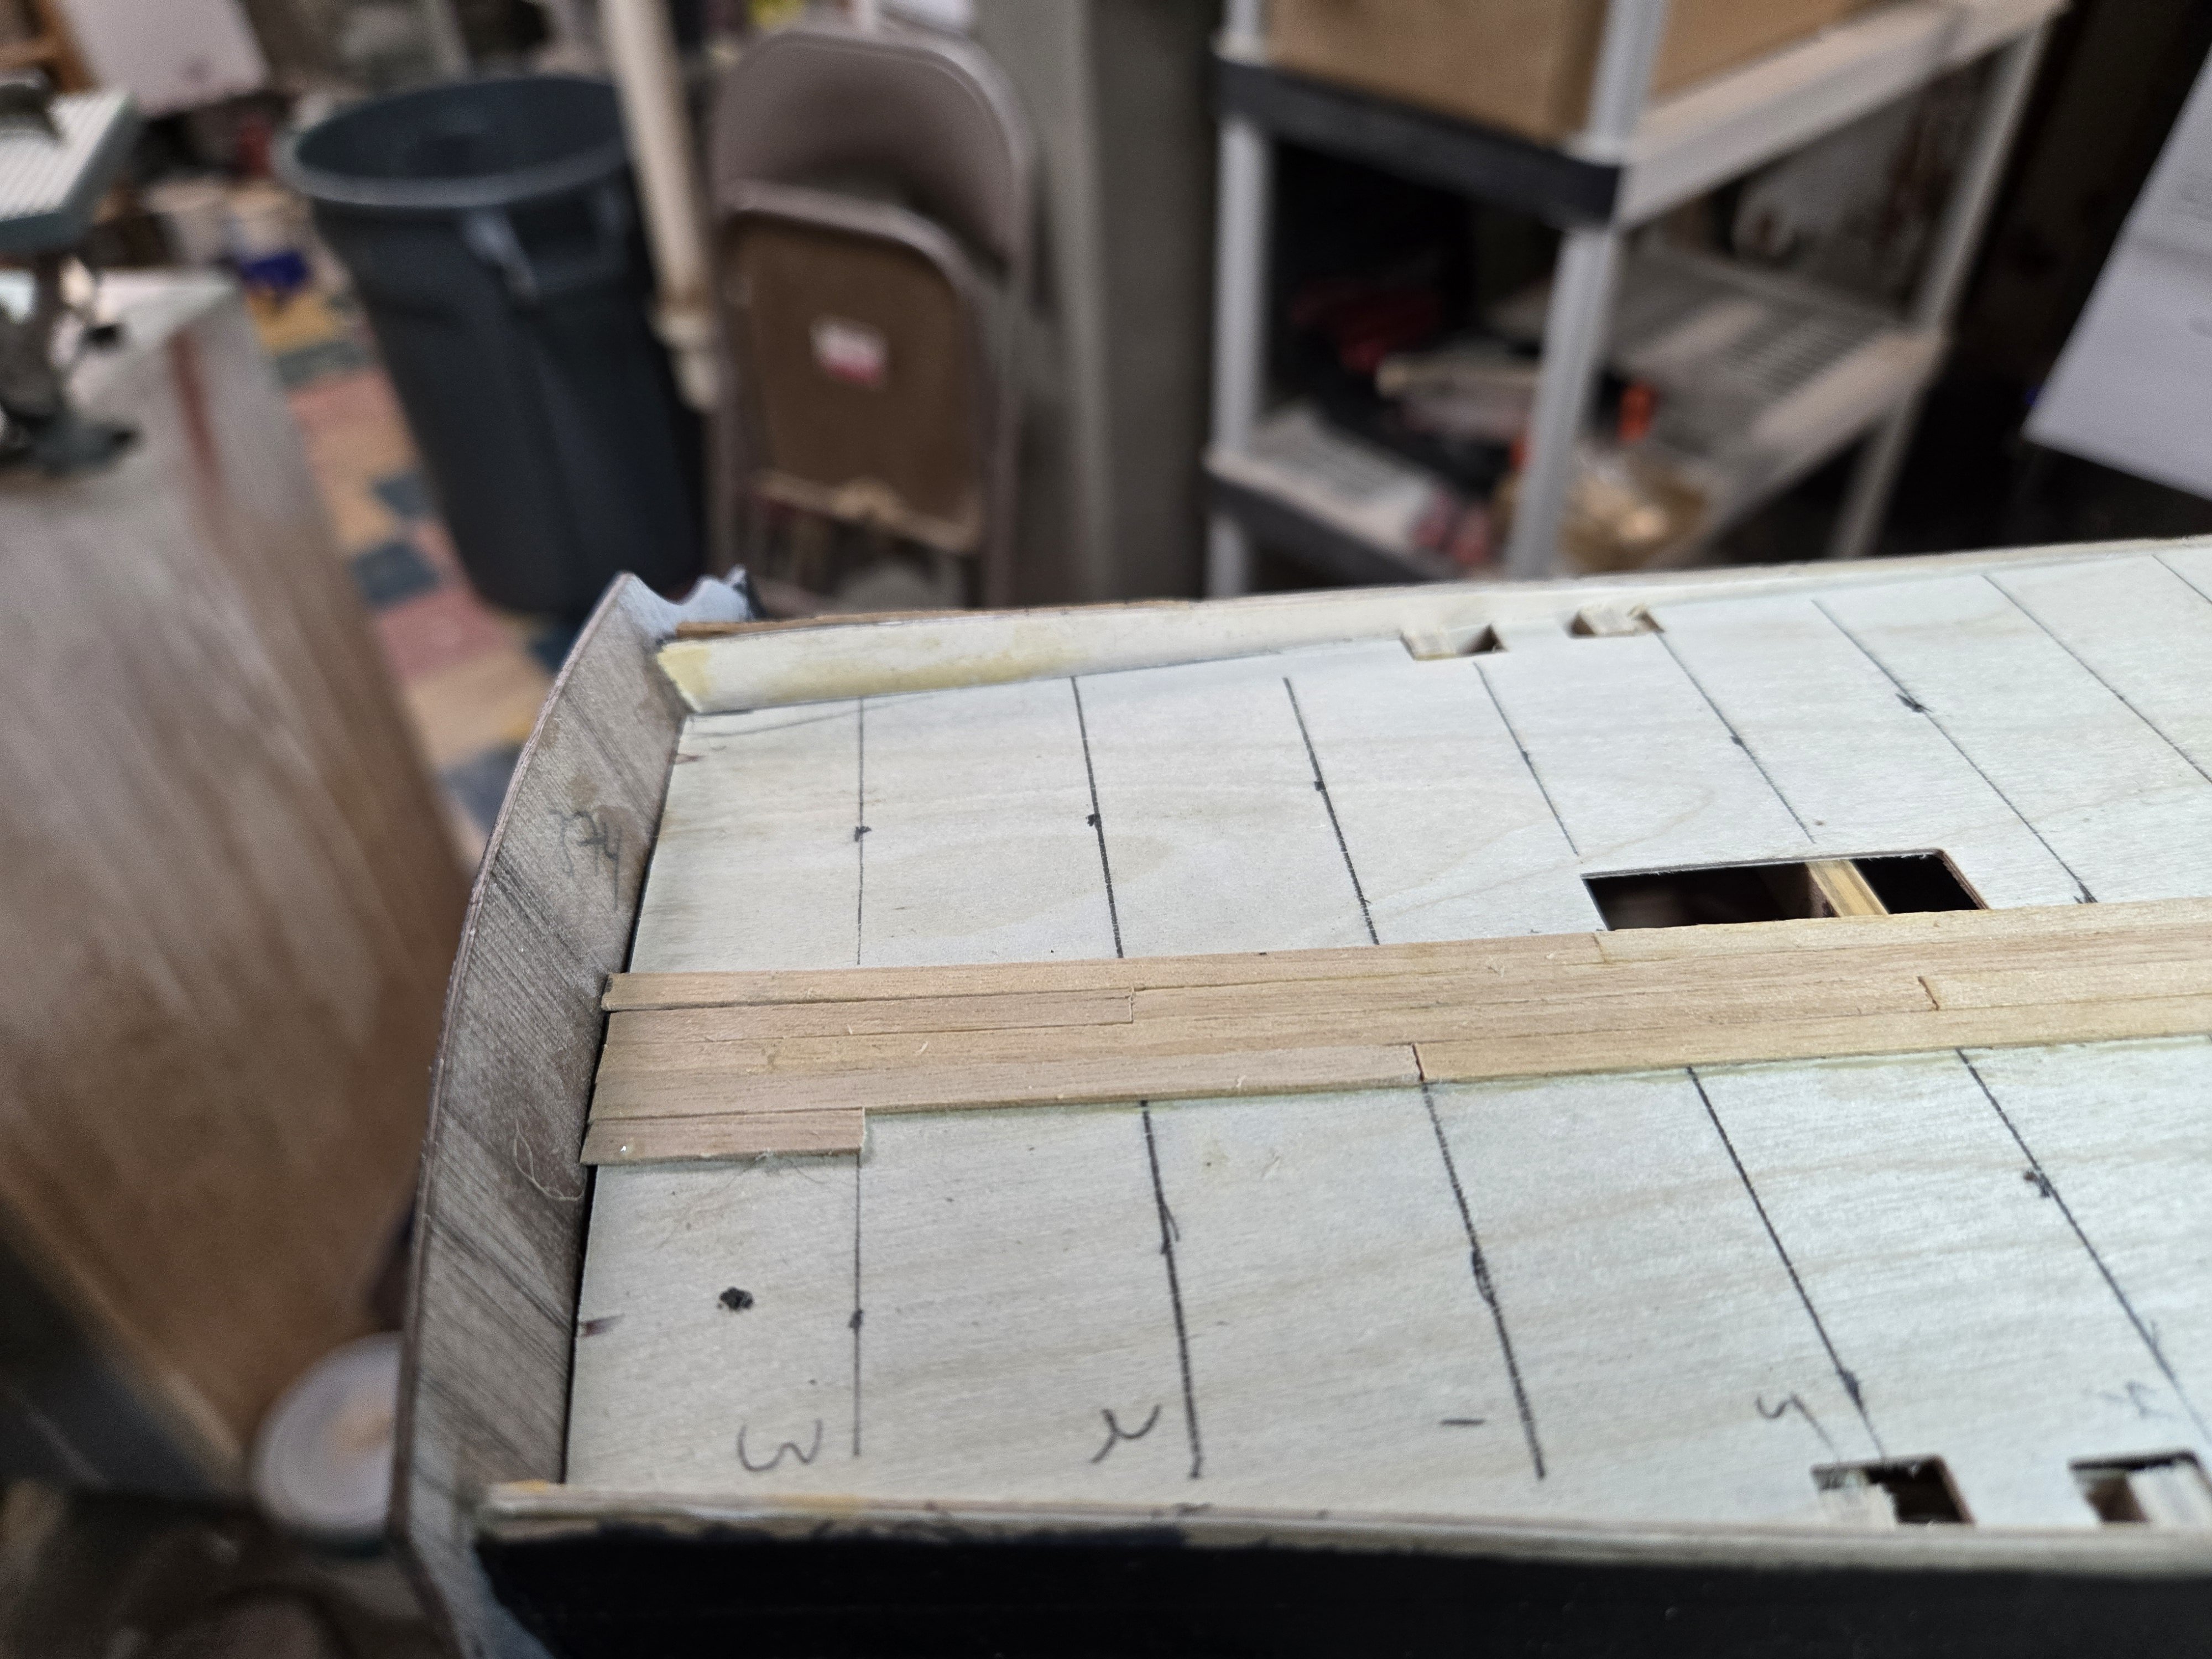
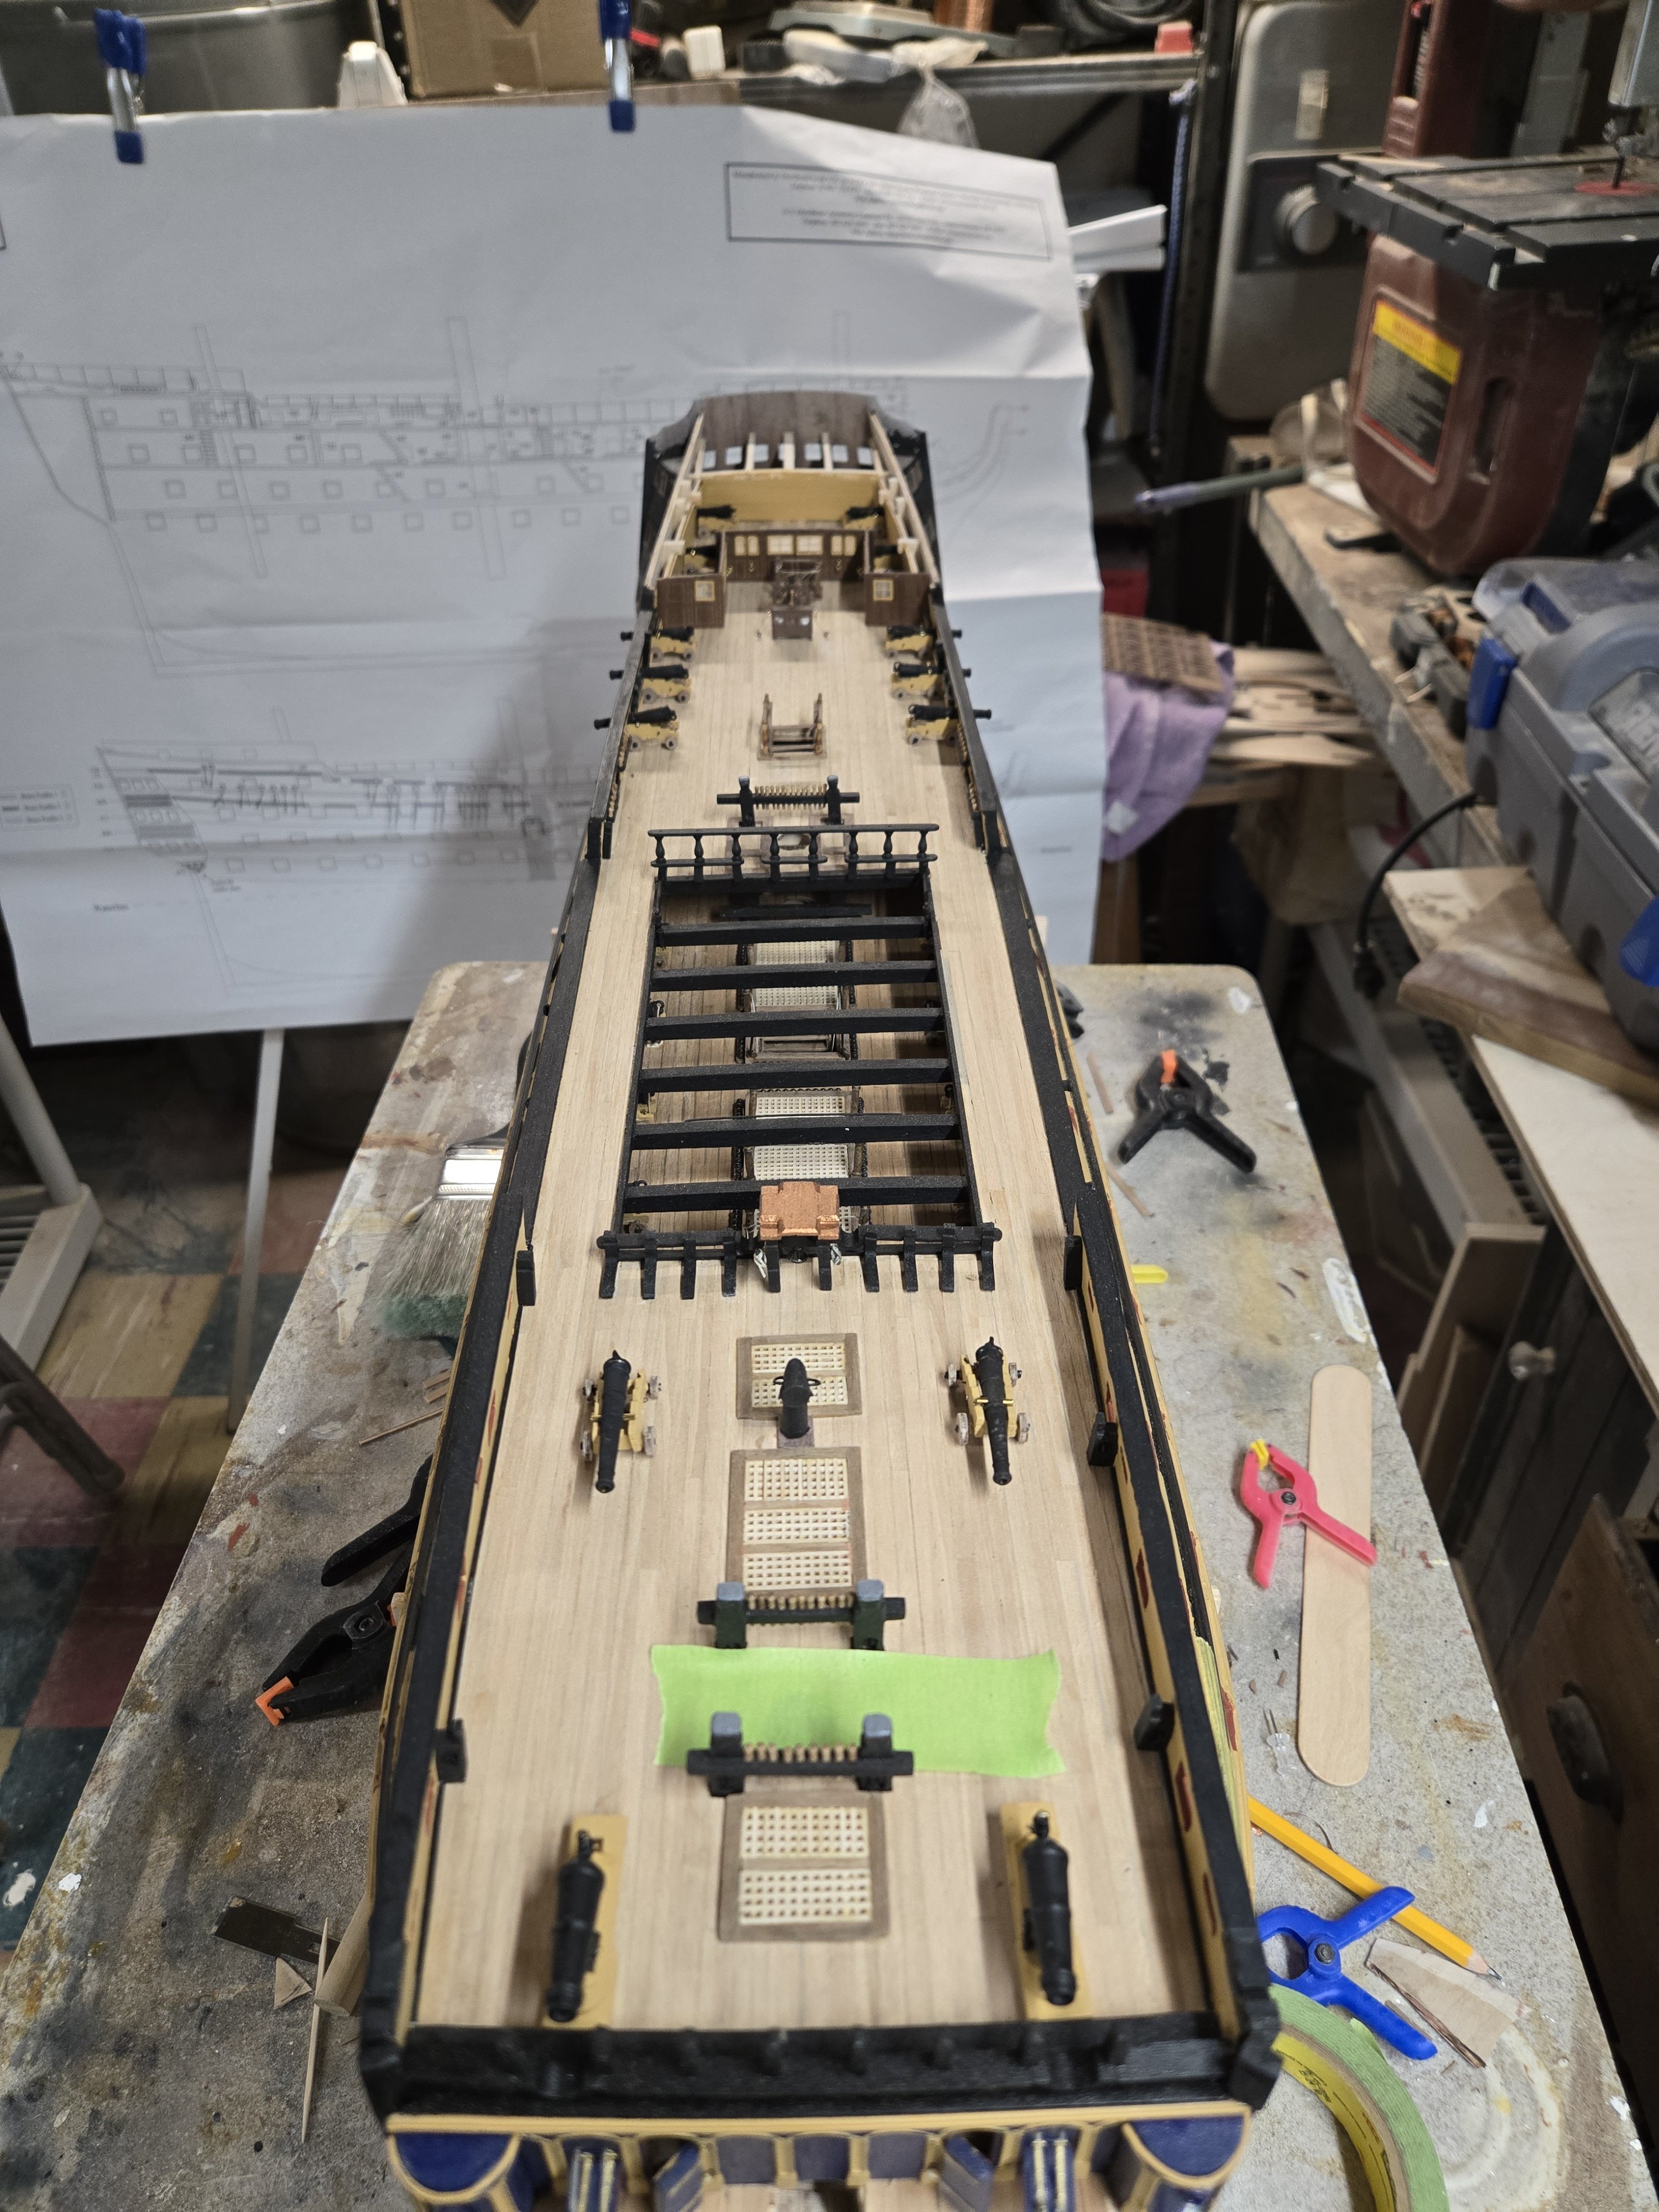
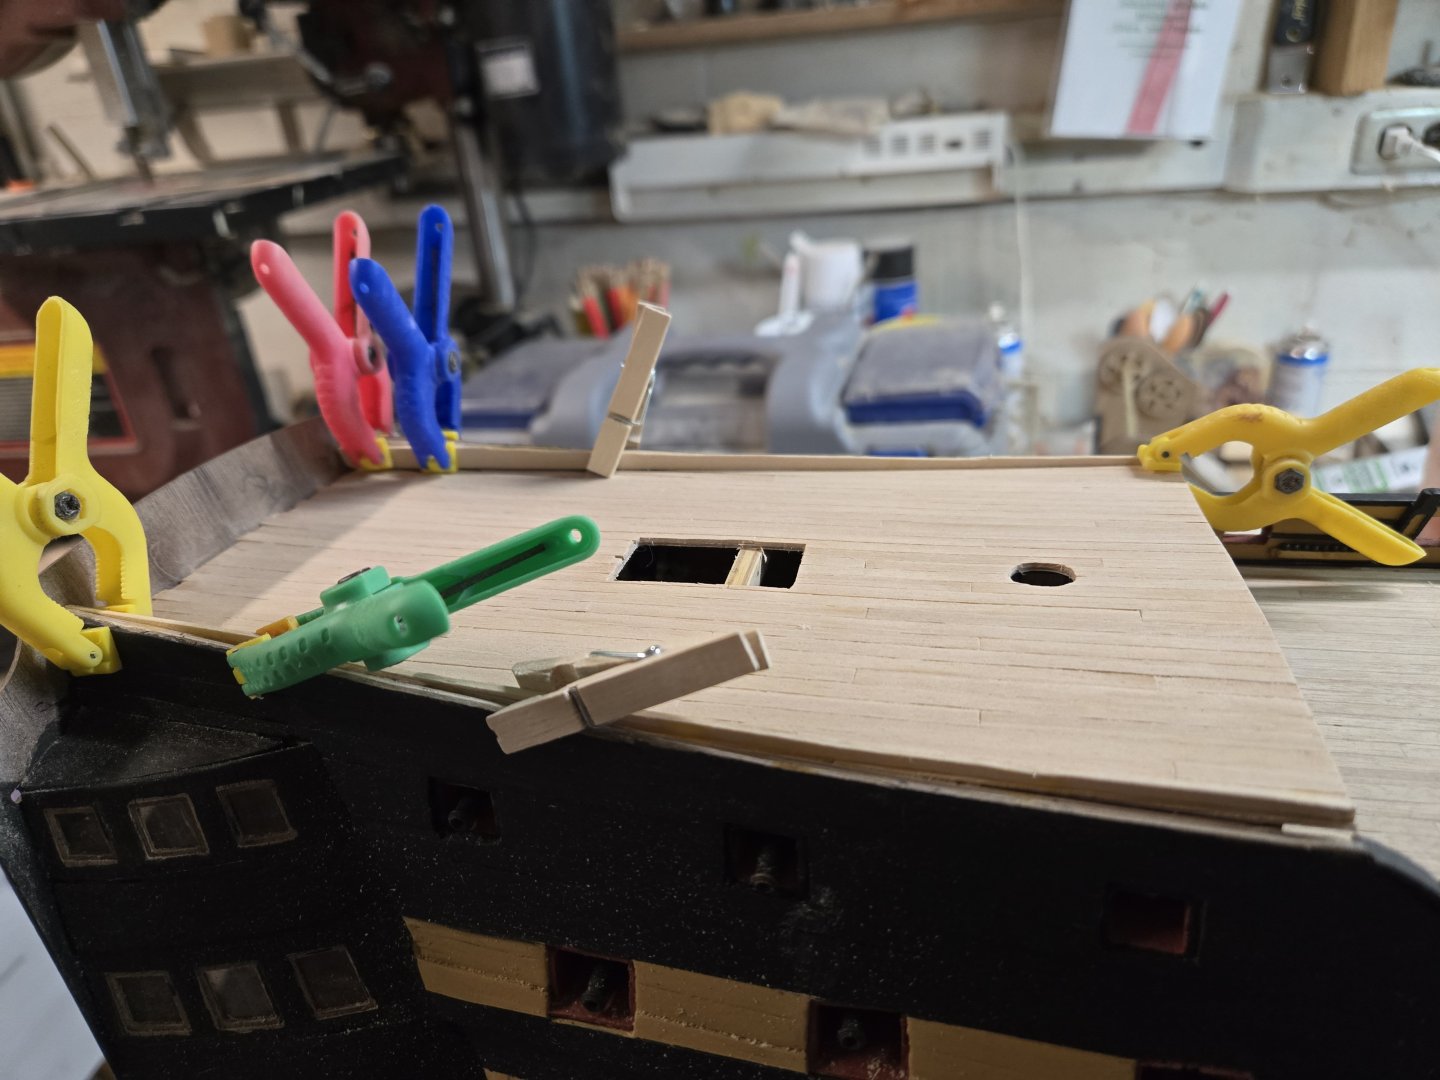
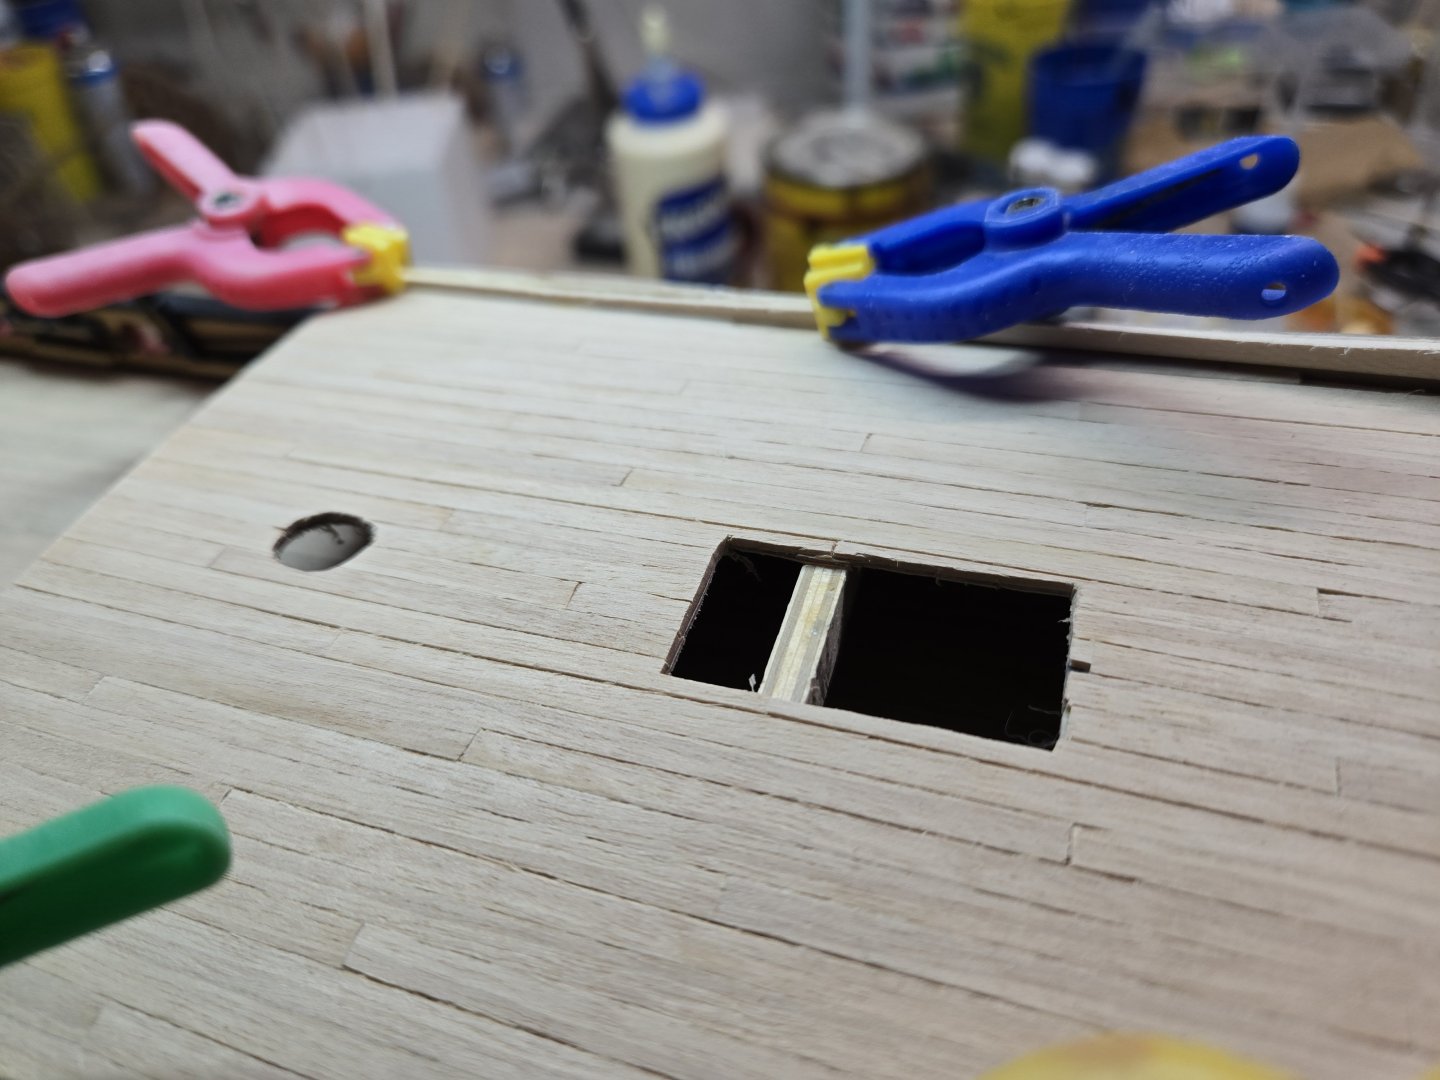
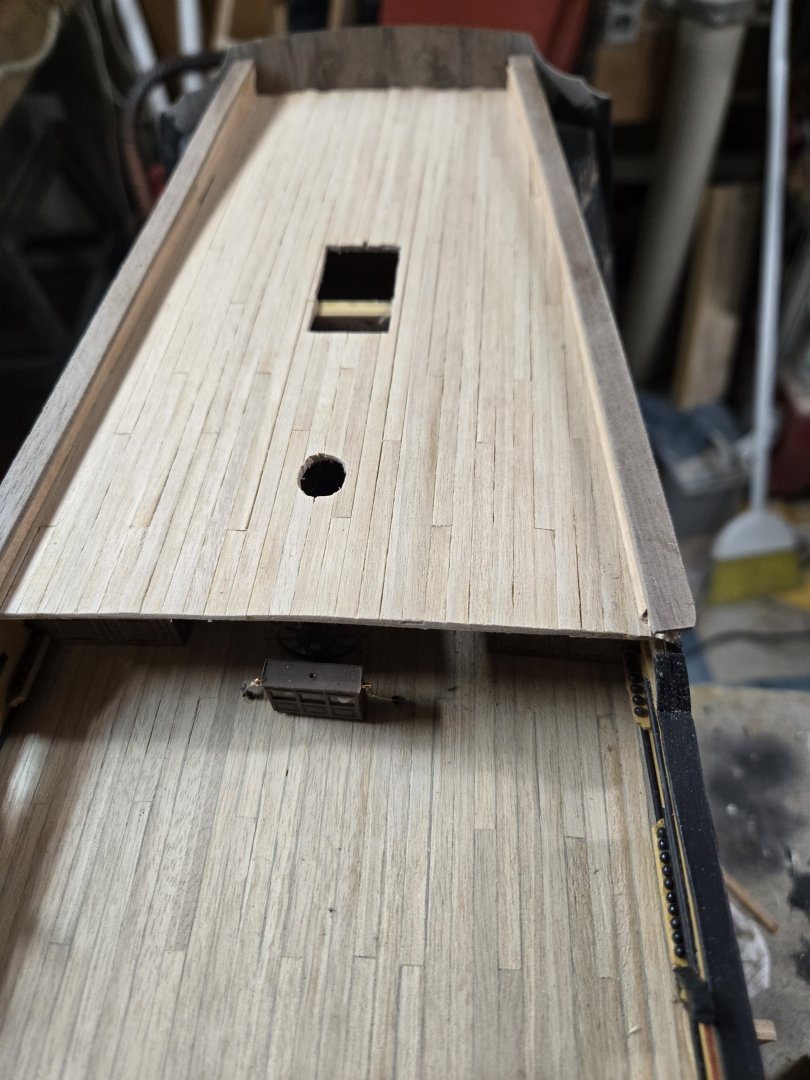
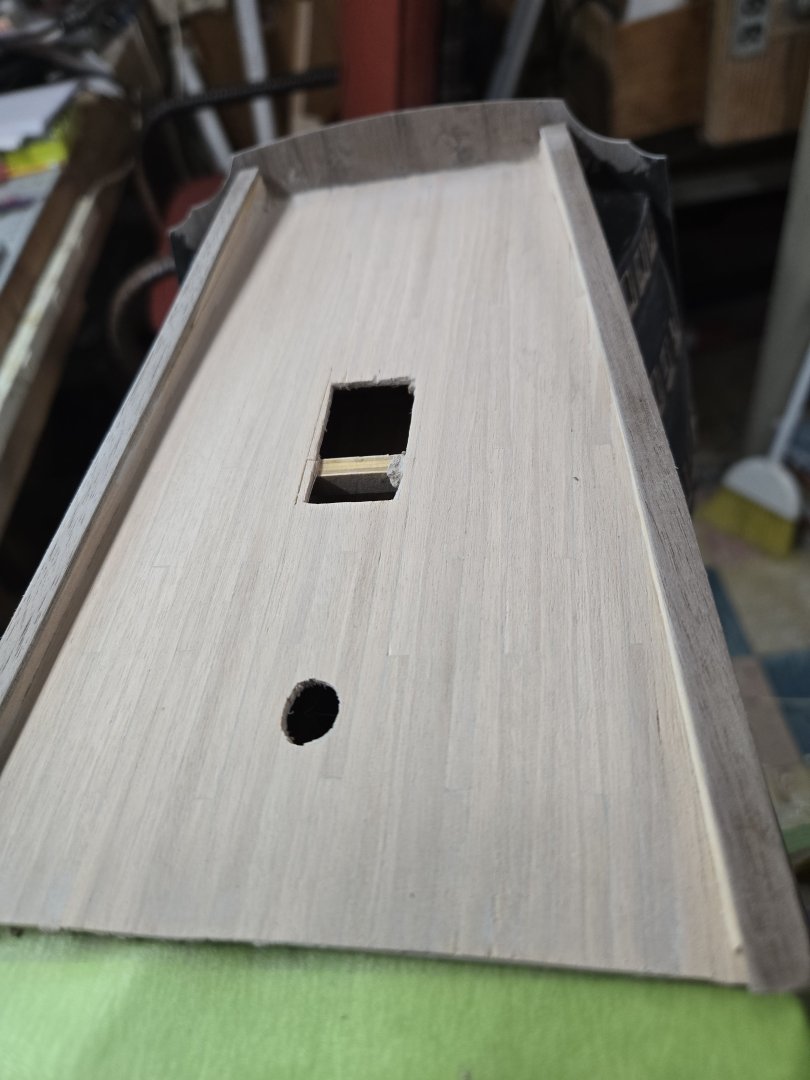
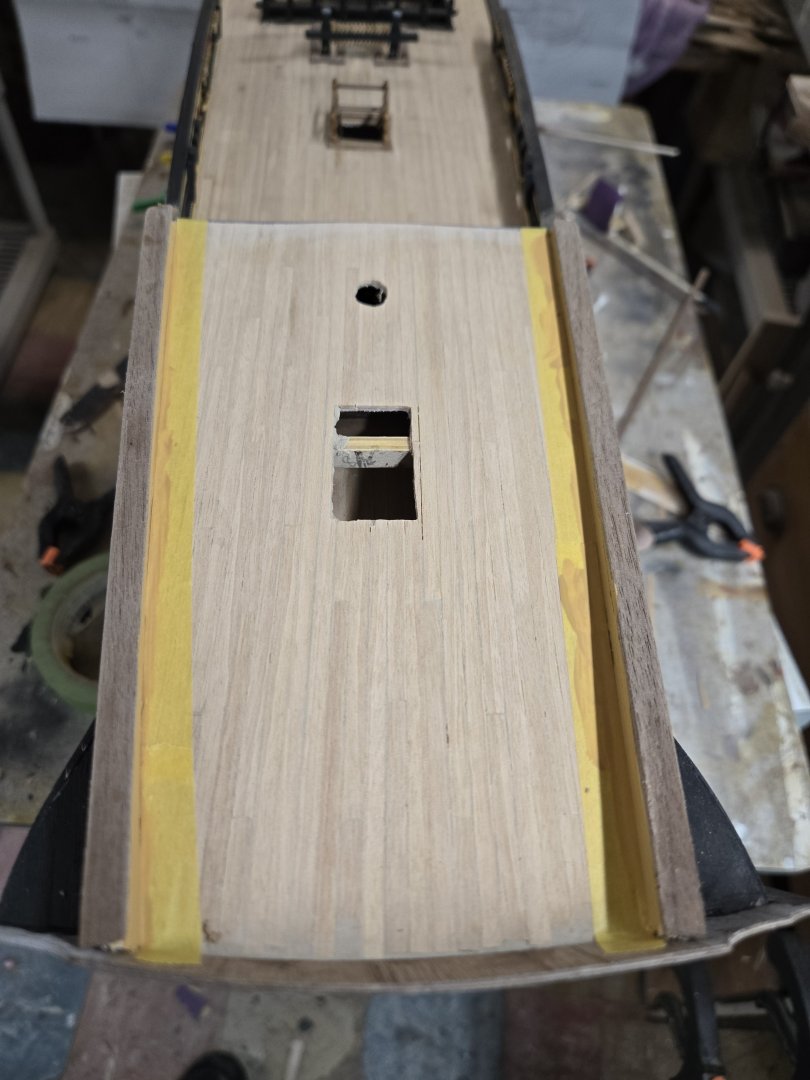
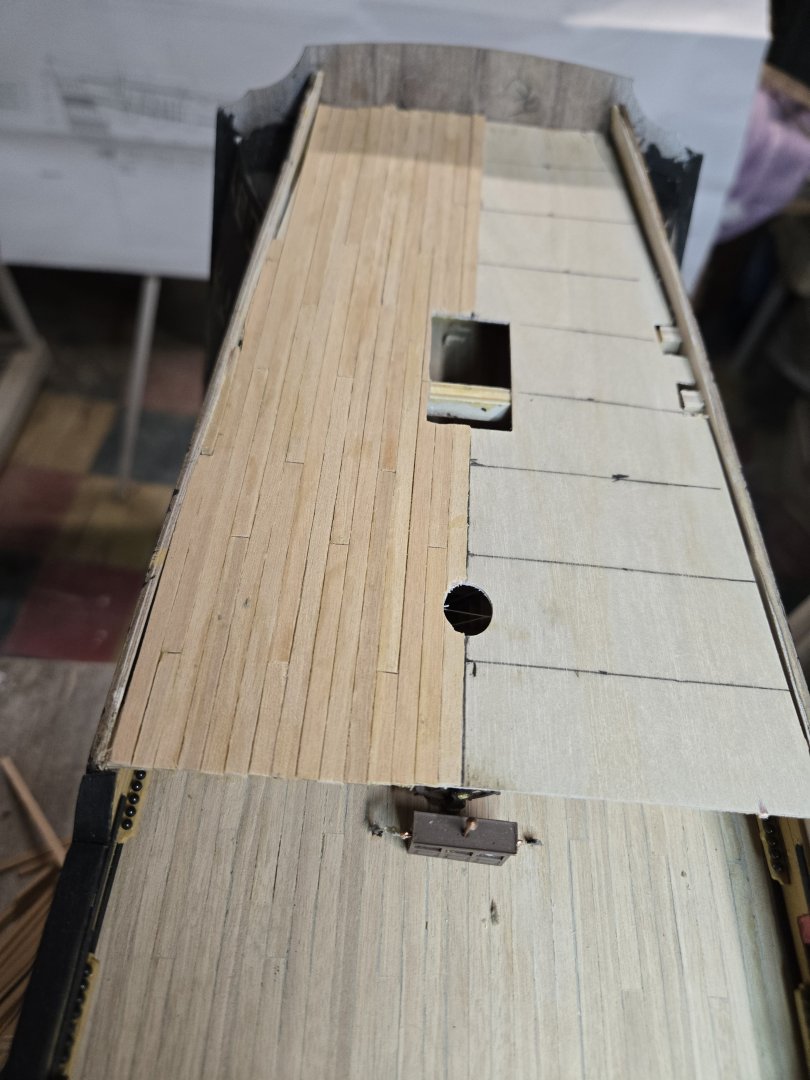
To wrap up the day, I started working on the catheads. I have 4mm wooden sheaves and they installed nicely into the assembly. I have to research how all the brackets attach and will work on them this week. I also added the poop deck. I thought there would be more side walling for this deck, but I see that the mattress hammocks must do that work for the ship. I planked one side only. I did it that way so I wouldn't lose the pattern and would be able to cut out the mast hole and hatch opening. Been a busy weekend! Thanks for ALL the likes, it's nice that people would stop by to look at (or even read!!!) my posts! Very humbling! Chris


-
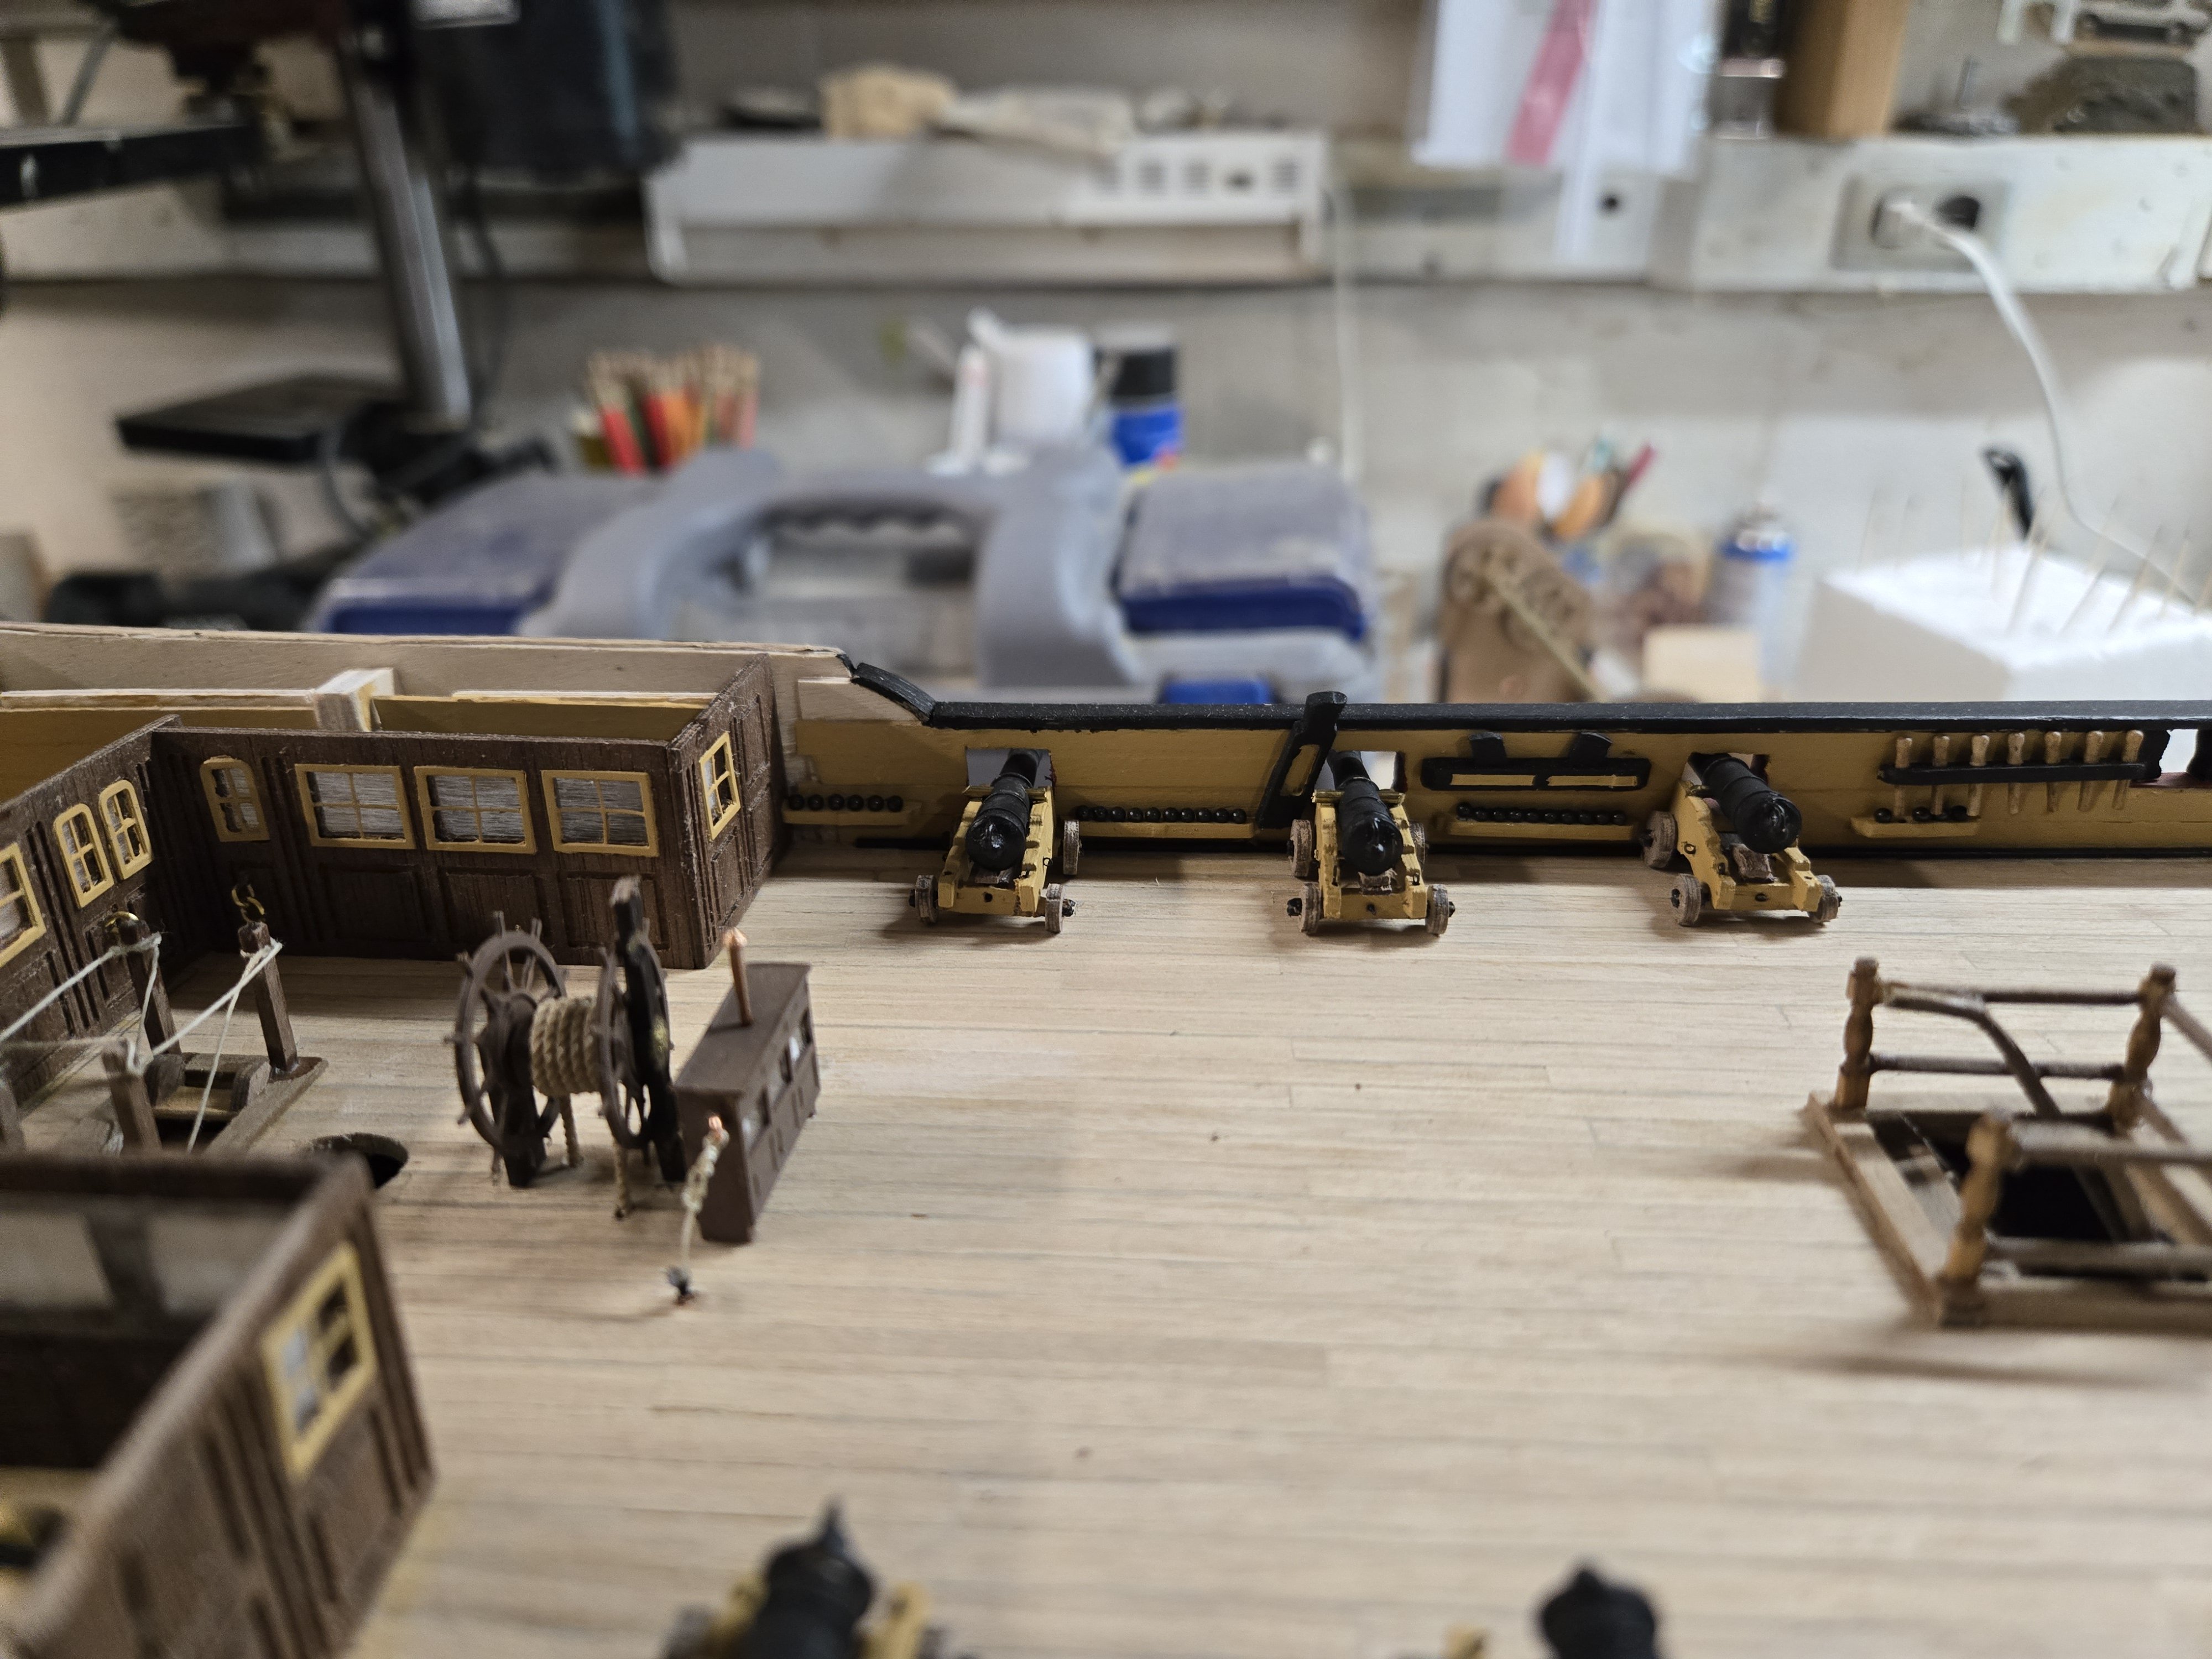
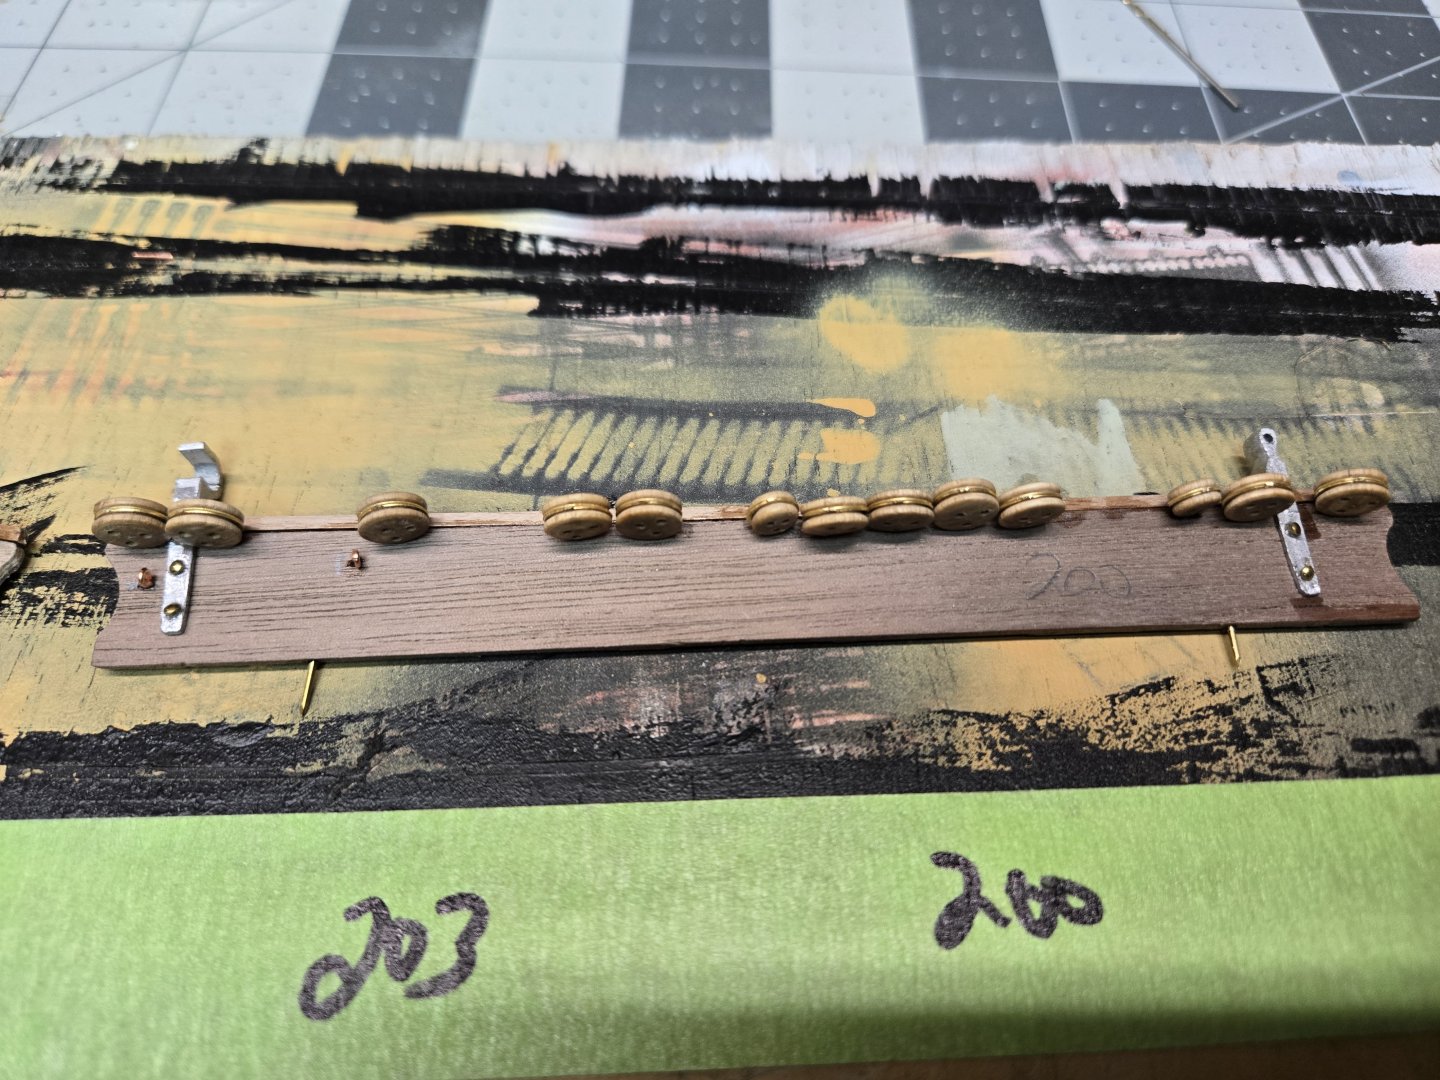
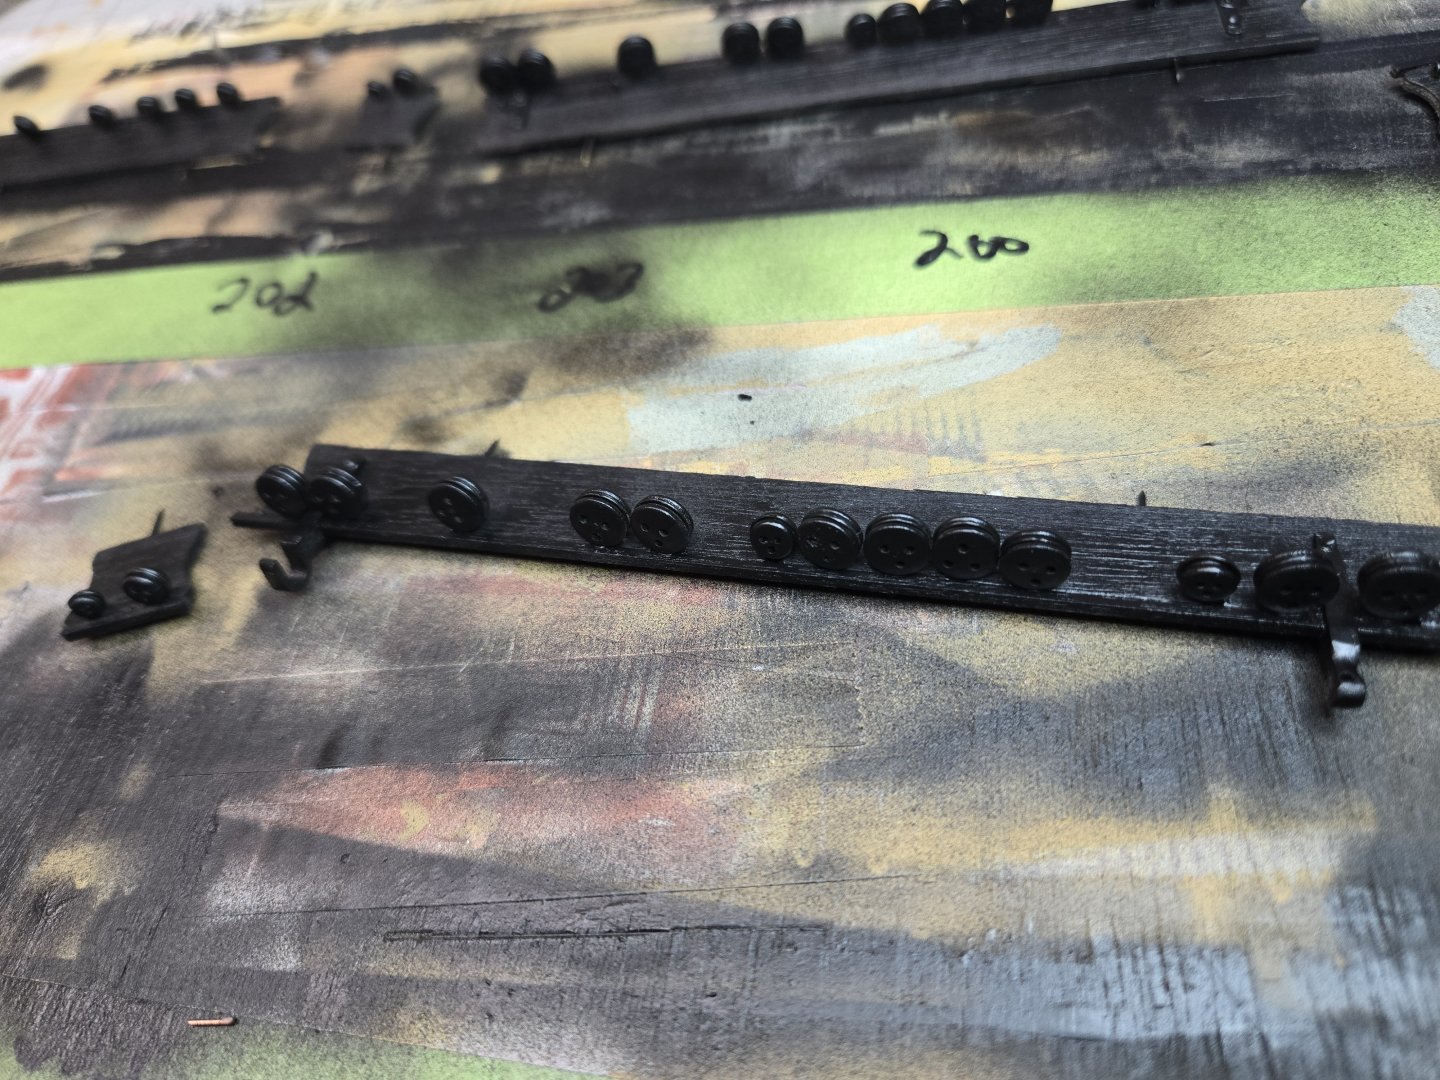
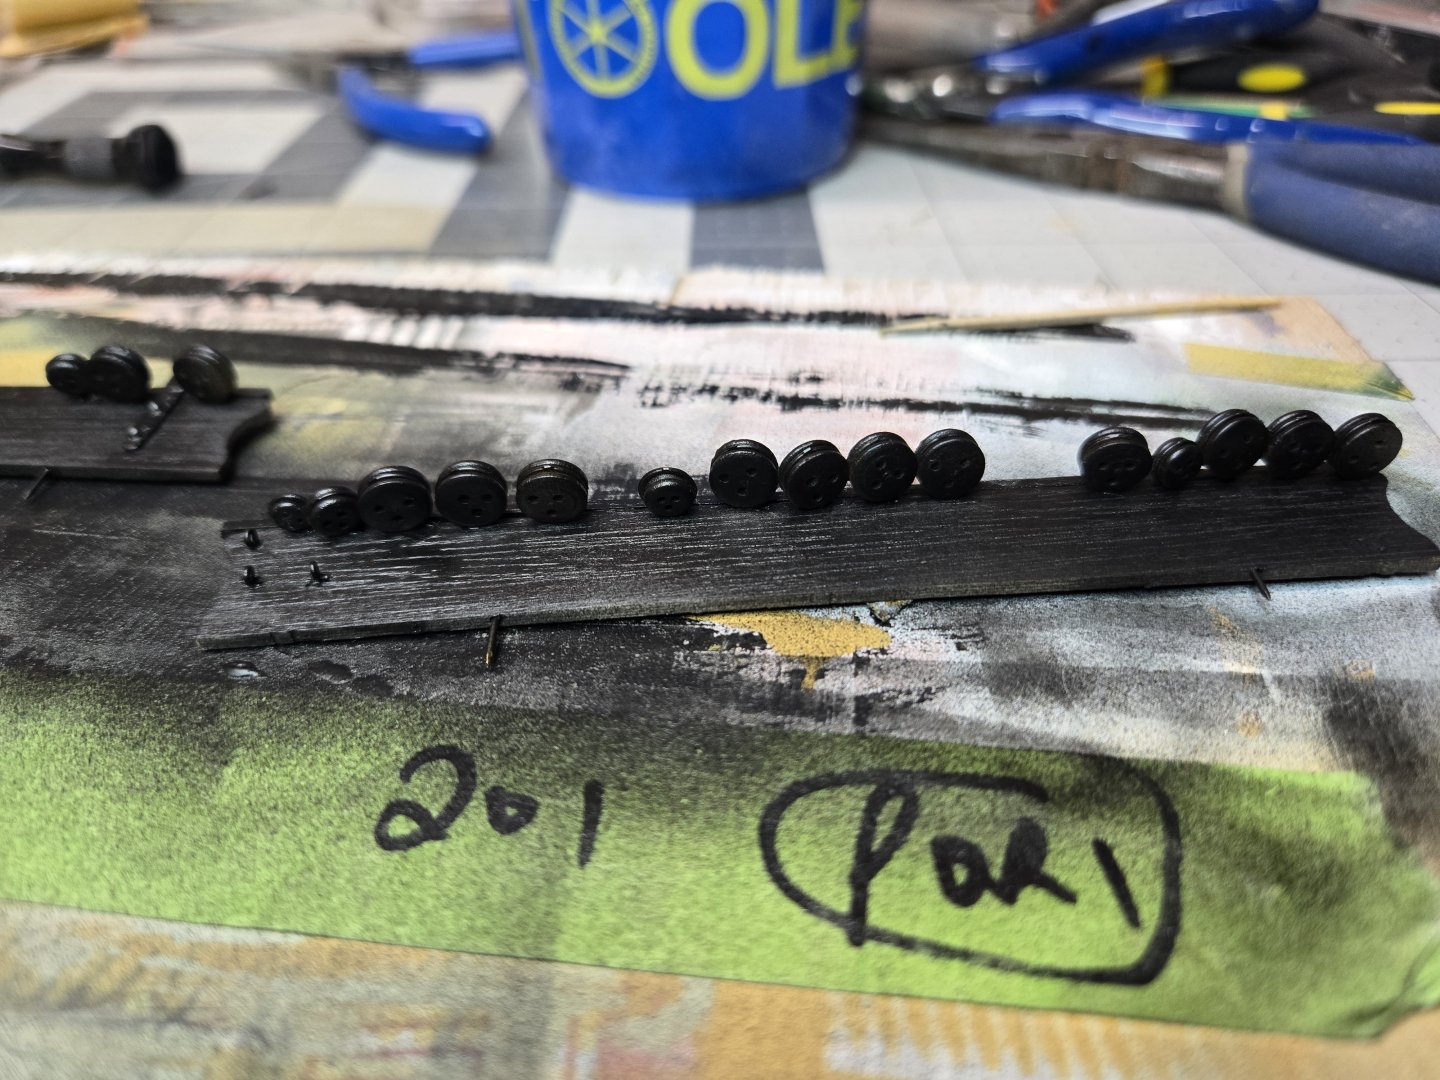
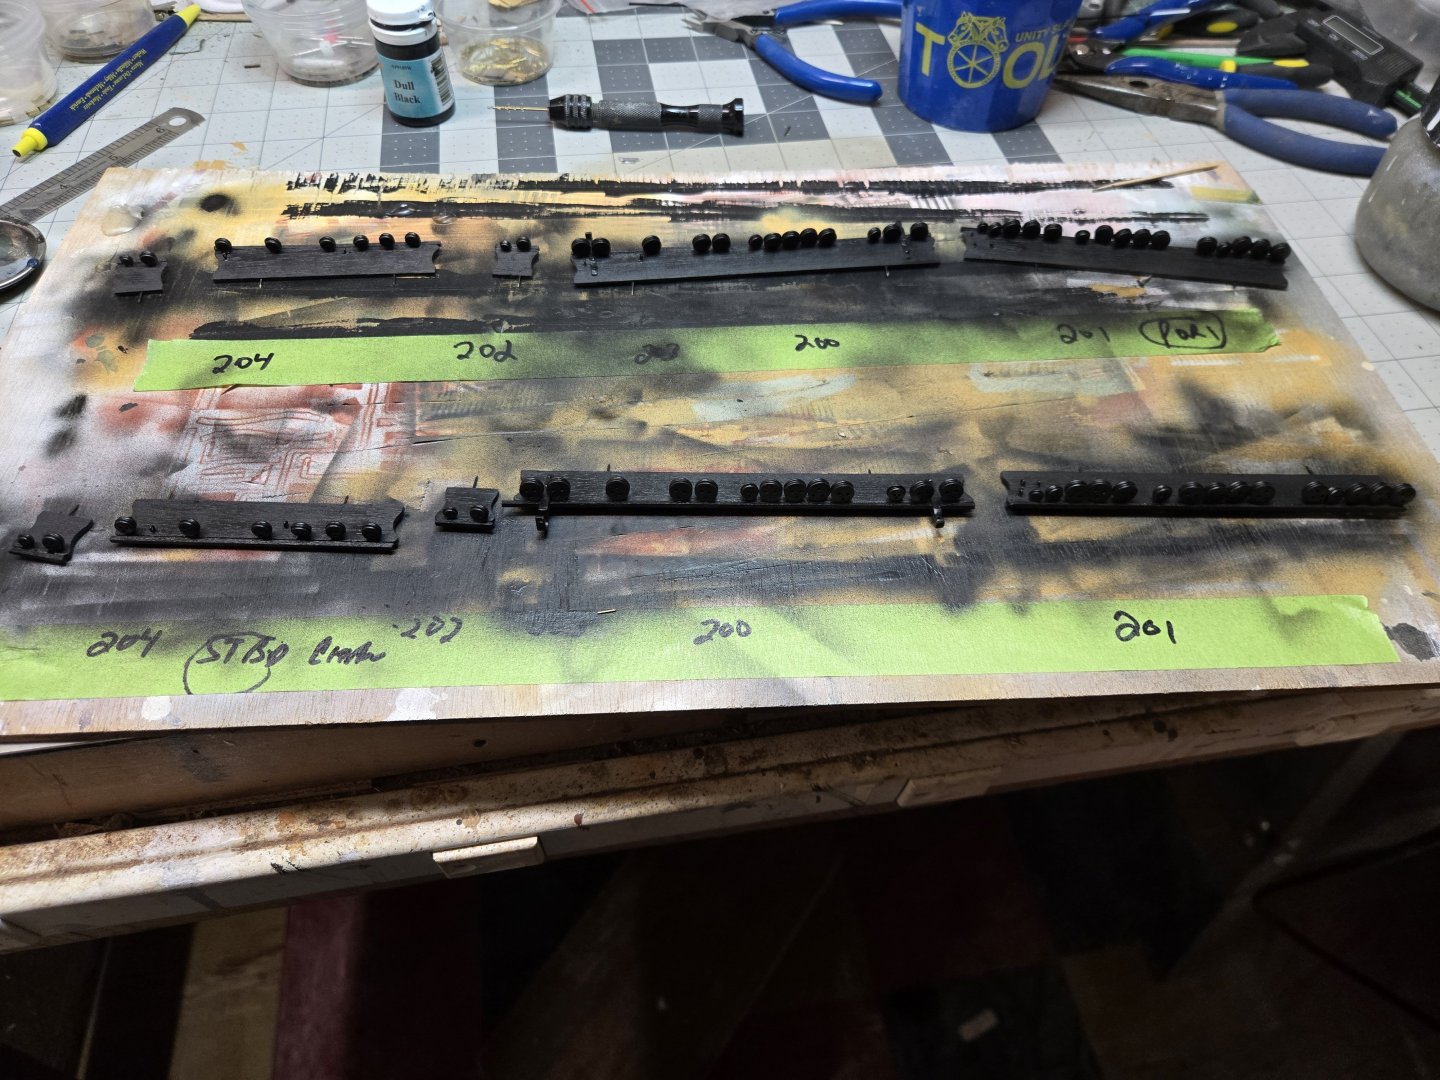
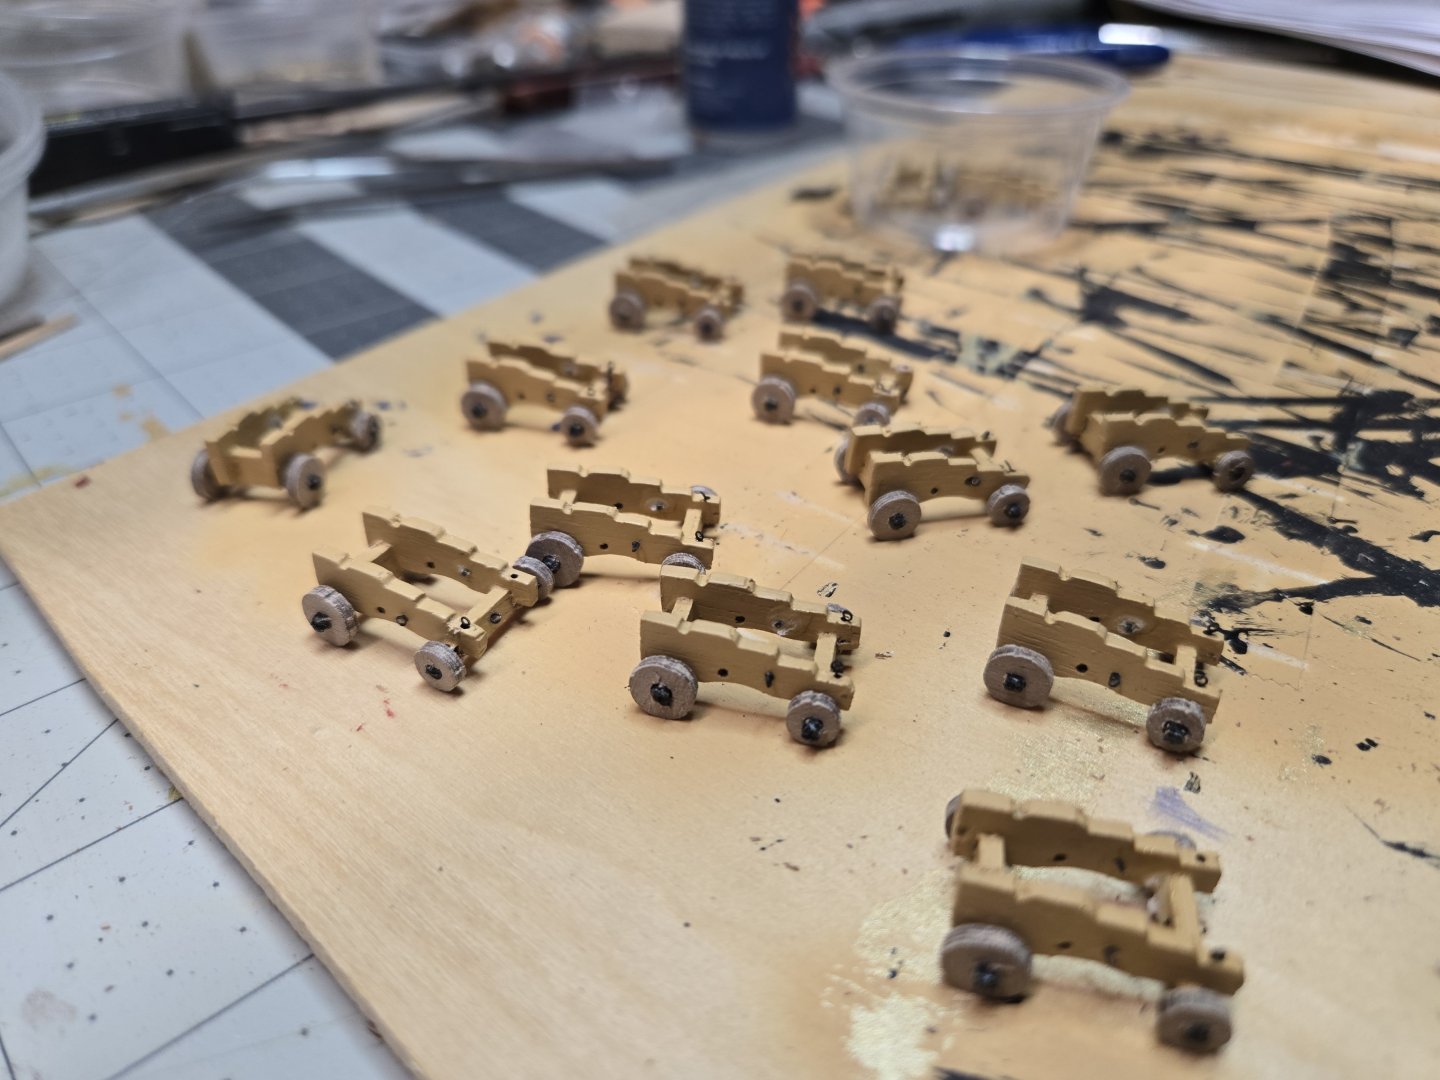
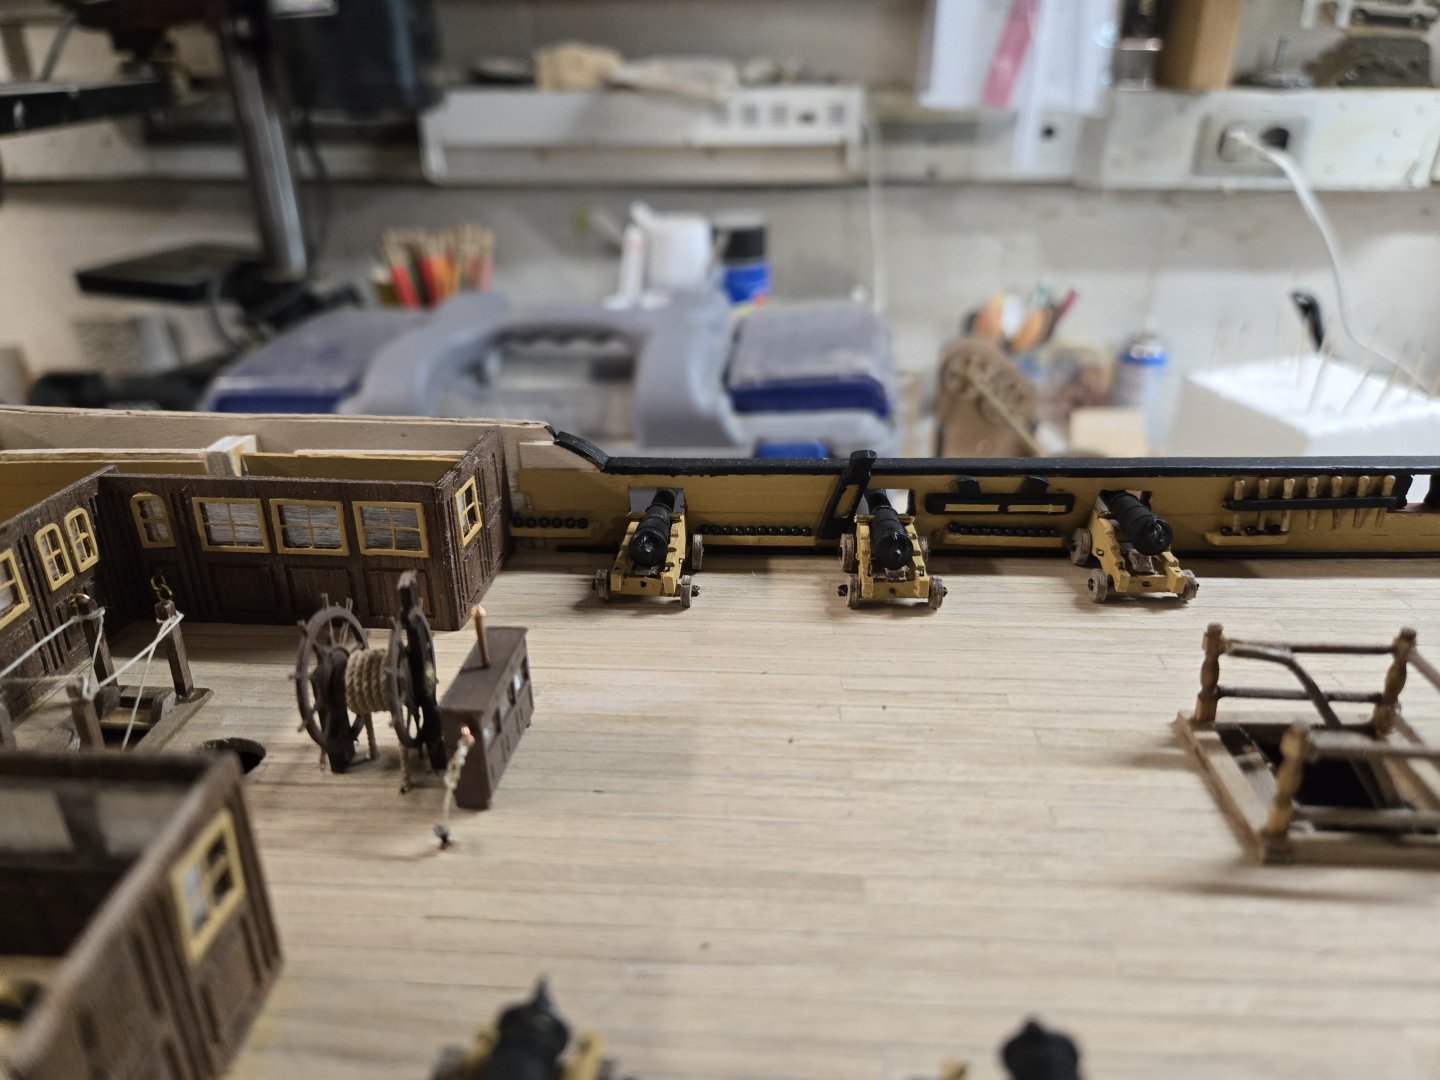
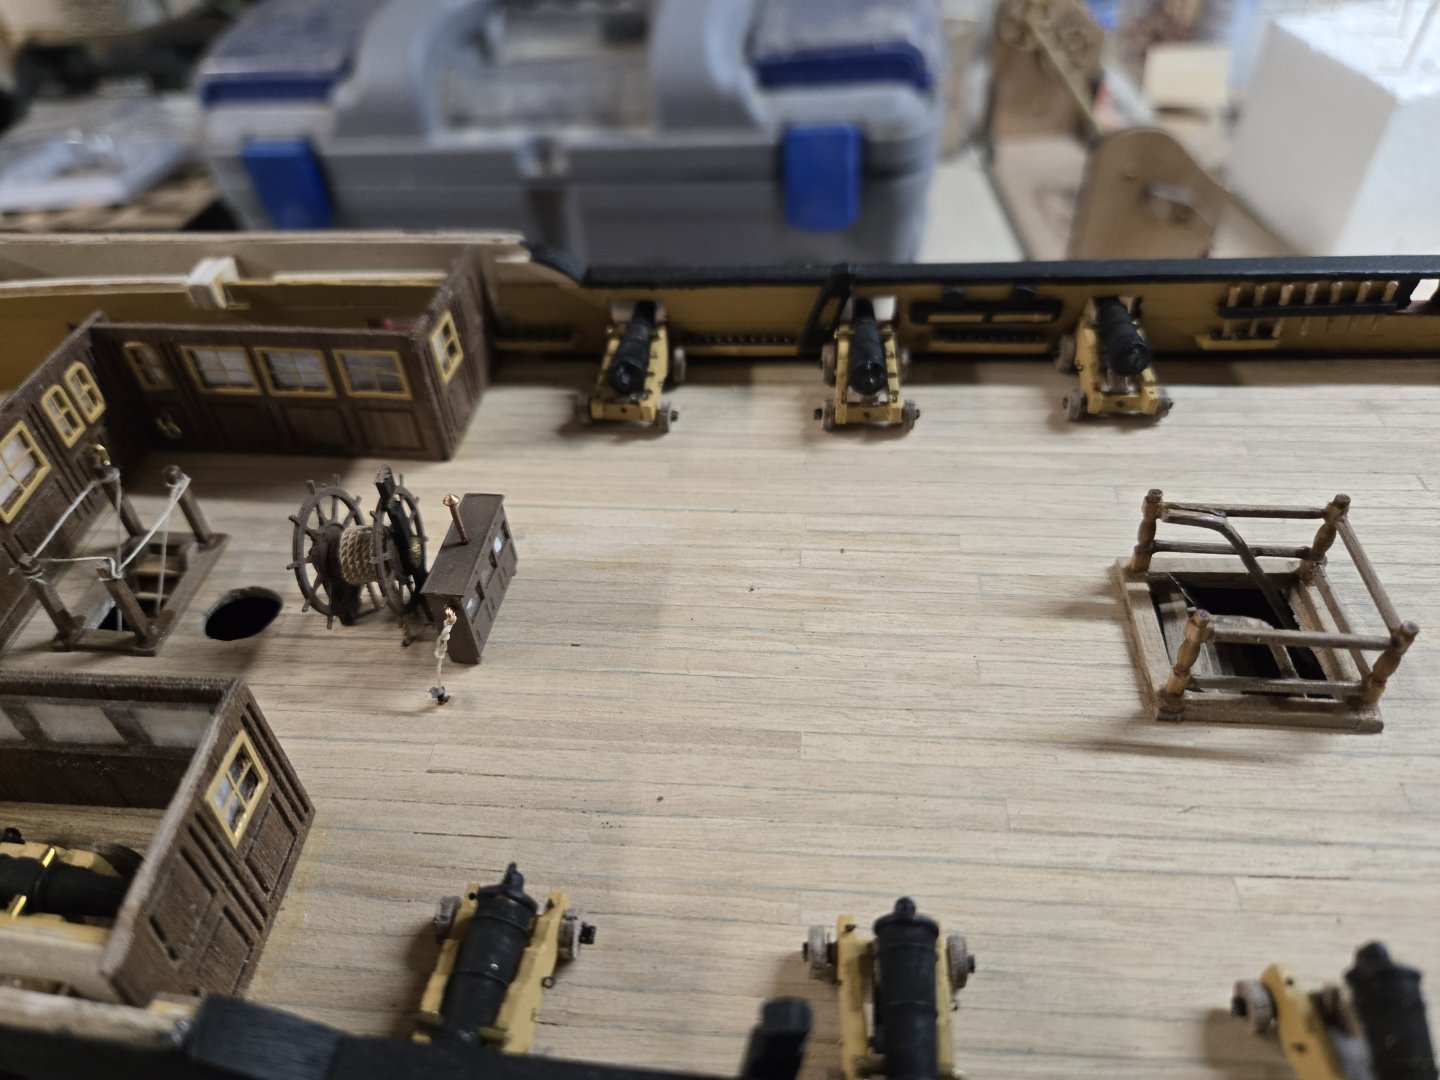
While doing all that, there was a lot of waiting time for things to dry so I continued to work on the cannons. There are 6 cannons that will be below the poop deck, I decided that these 6 will be minimally constructed. Just the bare carriages with enough to keep the cannons in place. I chose the 6 worst carriages and cannons for them. 2 or 3 of the breeching rings of the cannons fell off, so I used them. Another note: the earlier instructions mention that the hole in the cannon to hold the trunnion (brass wire) are off center, that means there will be a low or high spot and they needed to be mounted so the trunnion/brass axle needs to be low. I had to drill out the holes on all the wheels. After painting the axles before installation, I added too much diameter, but I didn't want to have to touch up the axle ends with black paint after installing the wheels....too sloppy. Most of the wheels fit in nicely, a few didn't but I didn't want to force anything and break them. There is also a piece, the quoin (#163) that is at the back of the cannon bed to help elevate the cannon. These are very crumbly pieces. Most disintegrated with handling. It's the wood grain, no matter which way they're made, they are subject to damage. I didn't bother butting the trunnion covers on the 6 under the poop deck and glued them in place. I will continue to work on the others!

-
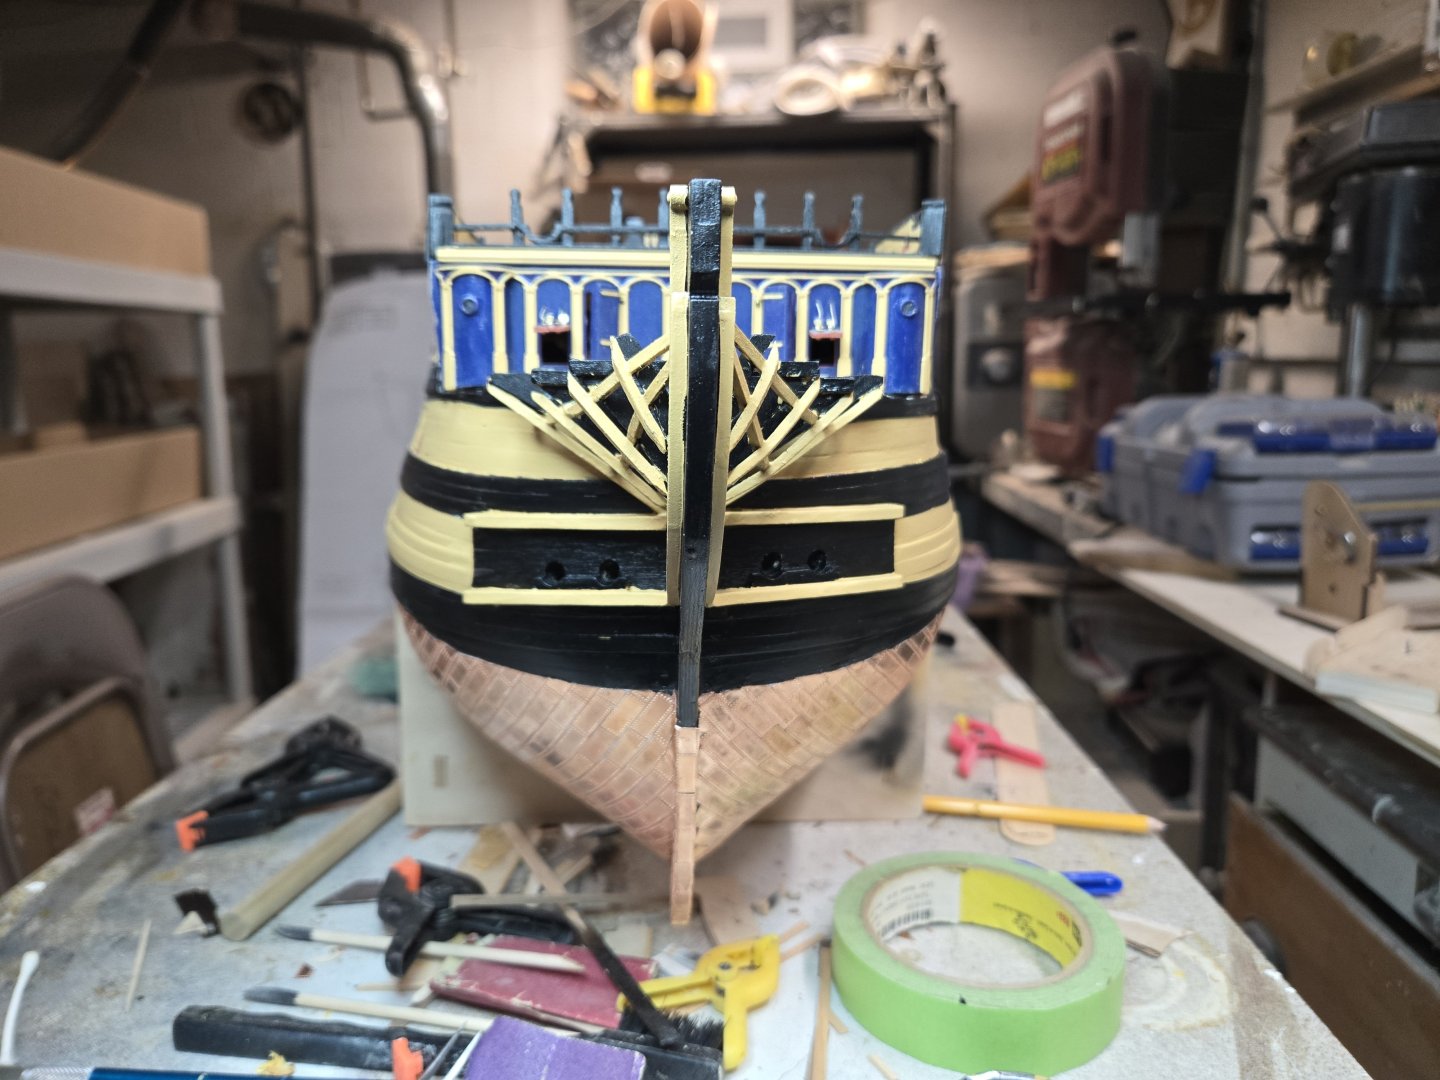
Today I did just that. I took them all off, I was worried they would break, but I got lucky. I sanded them and then painted everything. I also went back over things with a very fine paint brush to clean up the margins. I also took a piece of .5x3mm walnut and split it in half, sanded in smooth and painted one side blue. I decided I would glue this to the vertical rails. I can still some some touch up needs here and there which I will address...especially some of the lower spots that I don't see from my chair. Is it perfect, not even close, but it is much better than 24 hours ago, so I can sleep easier tonight.


-
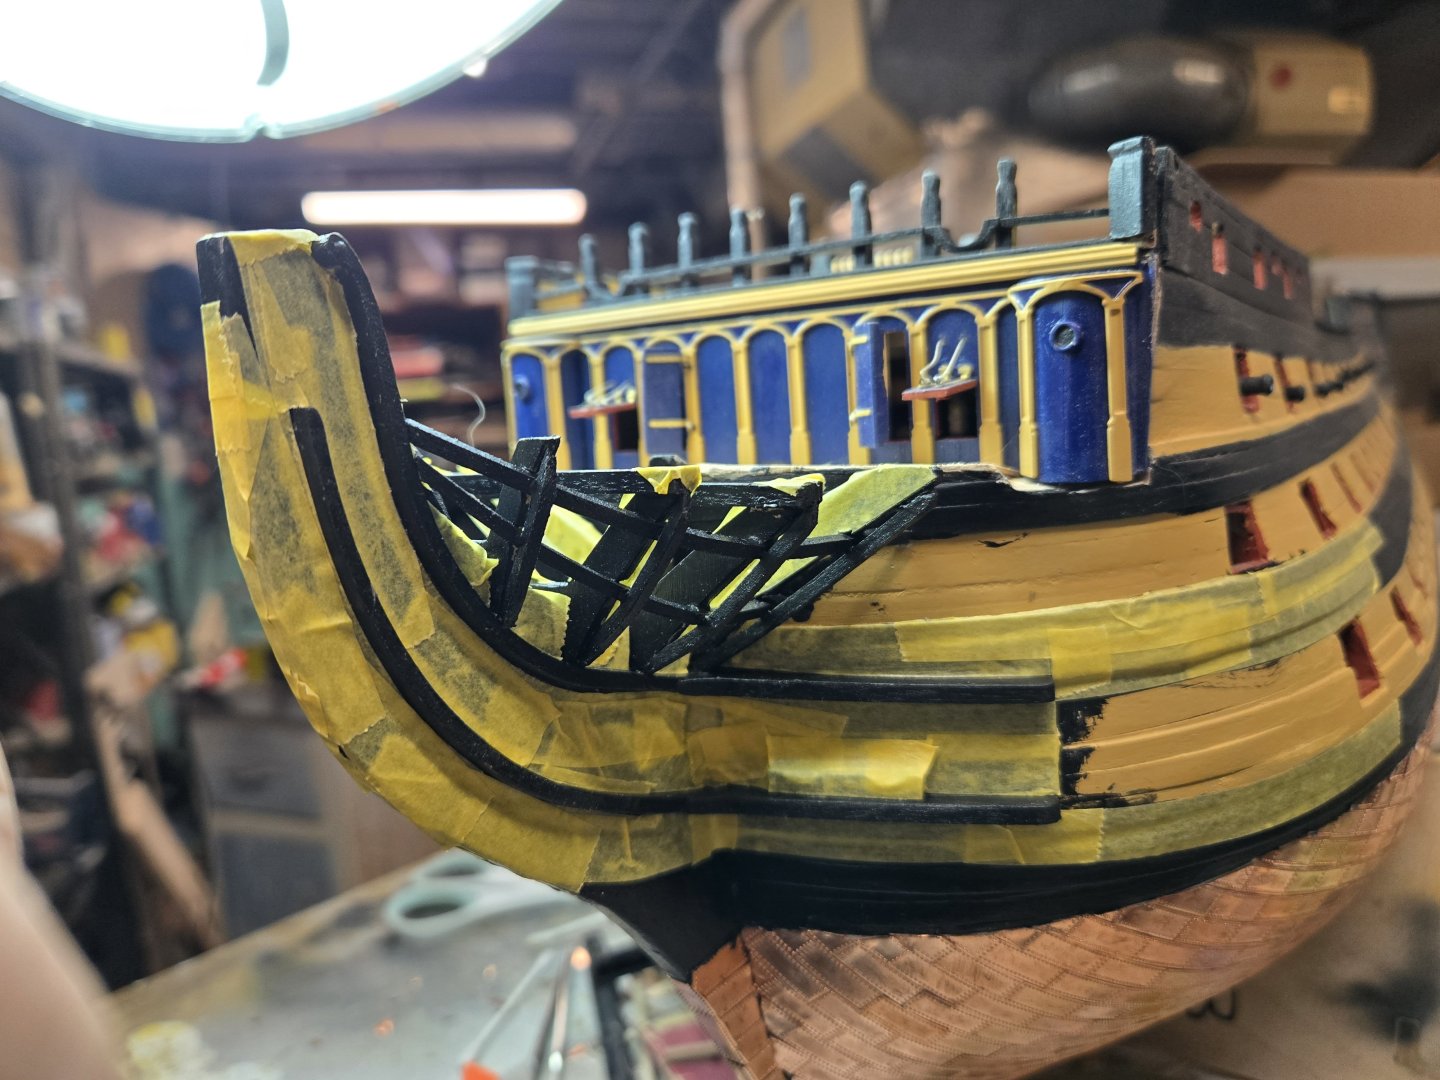
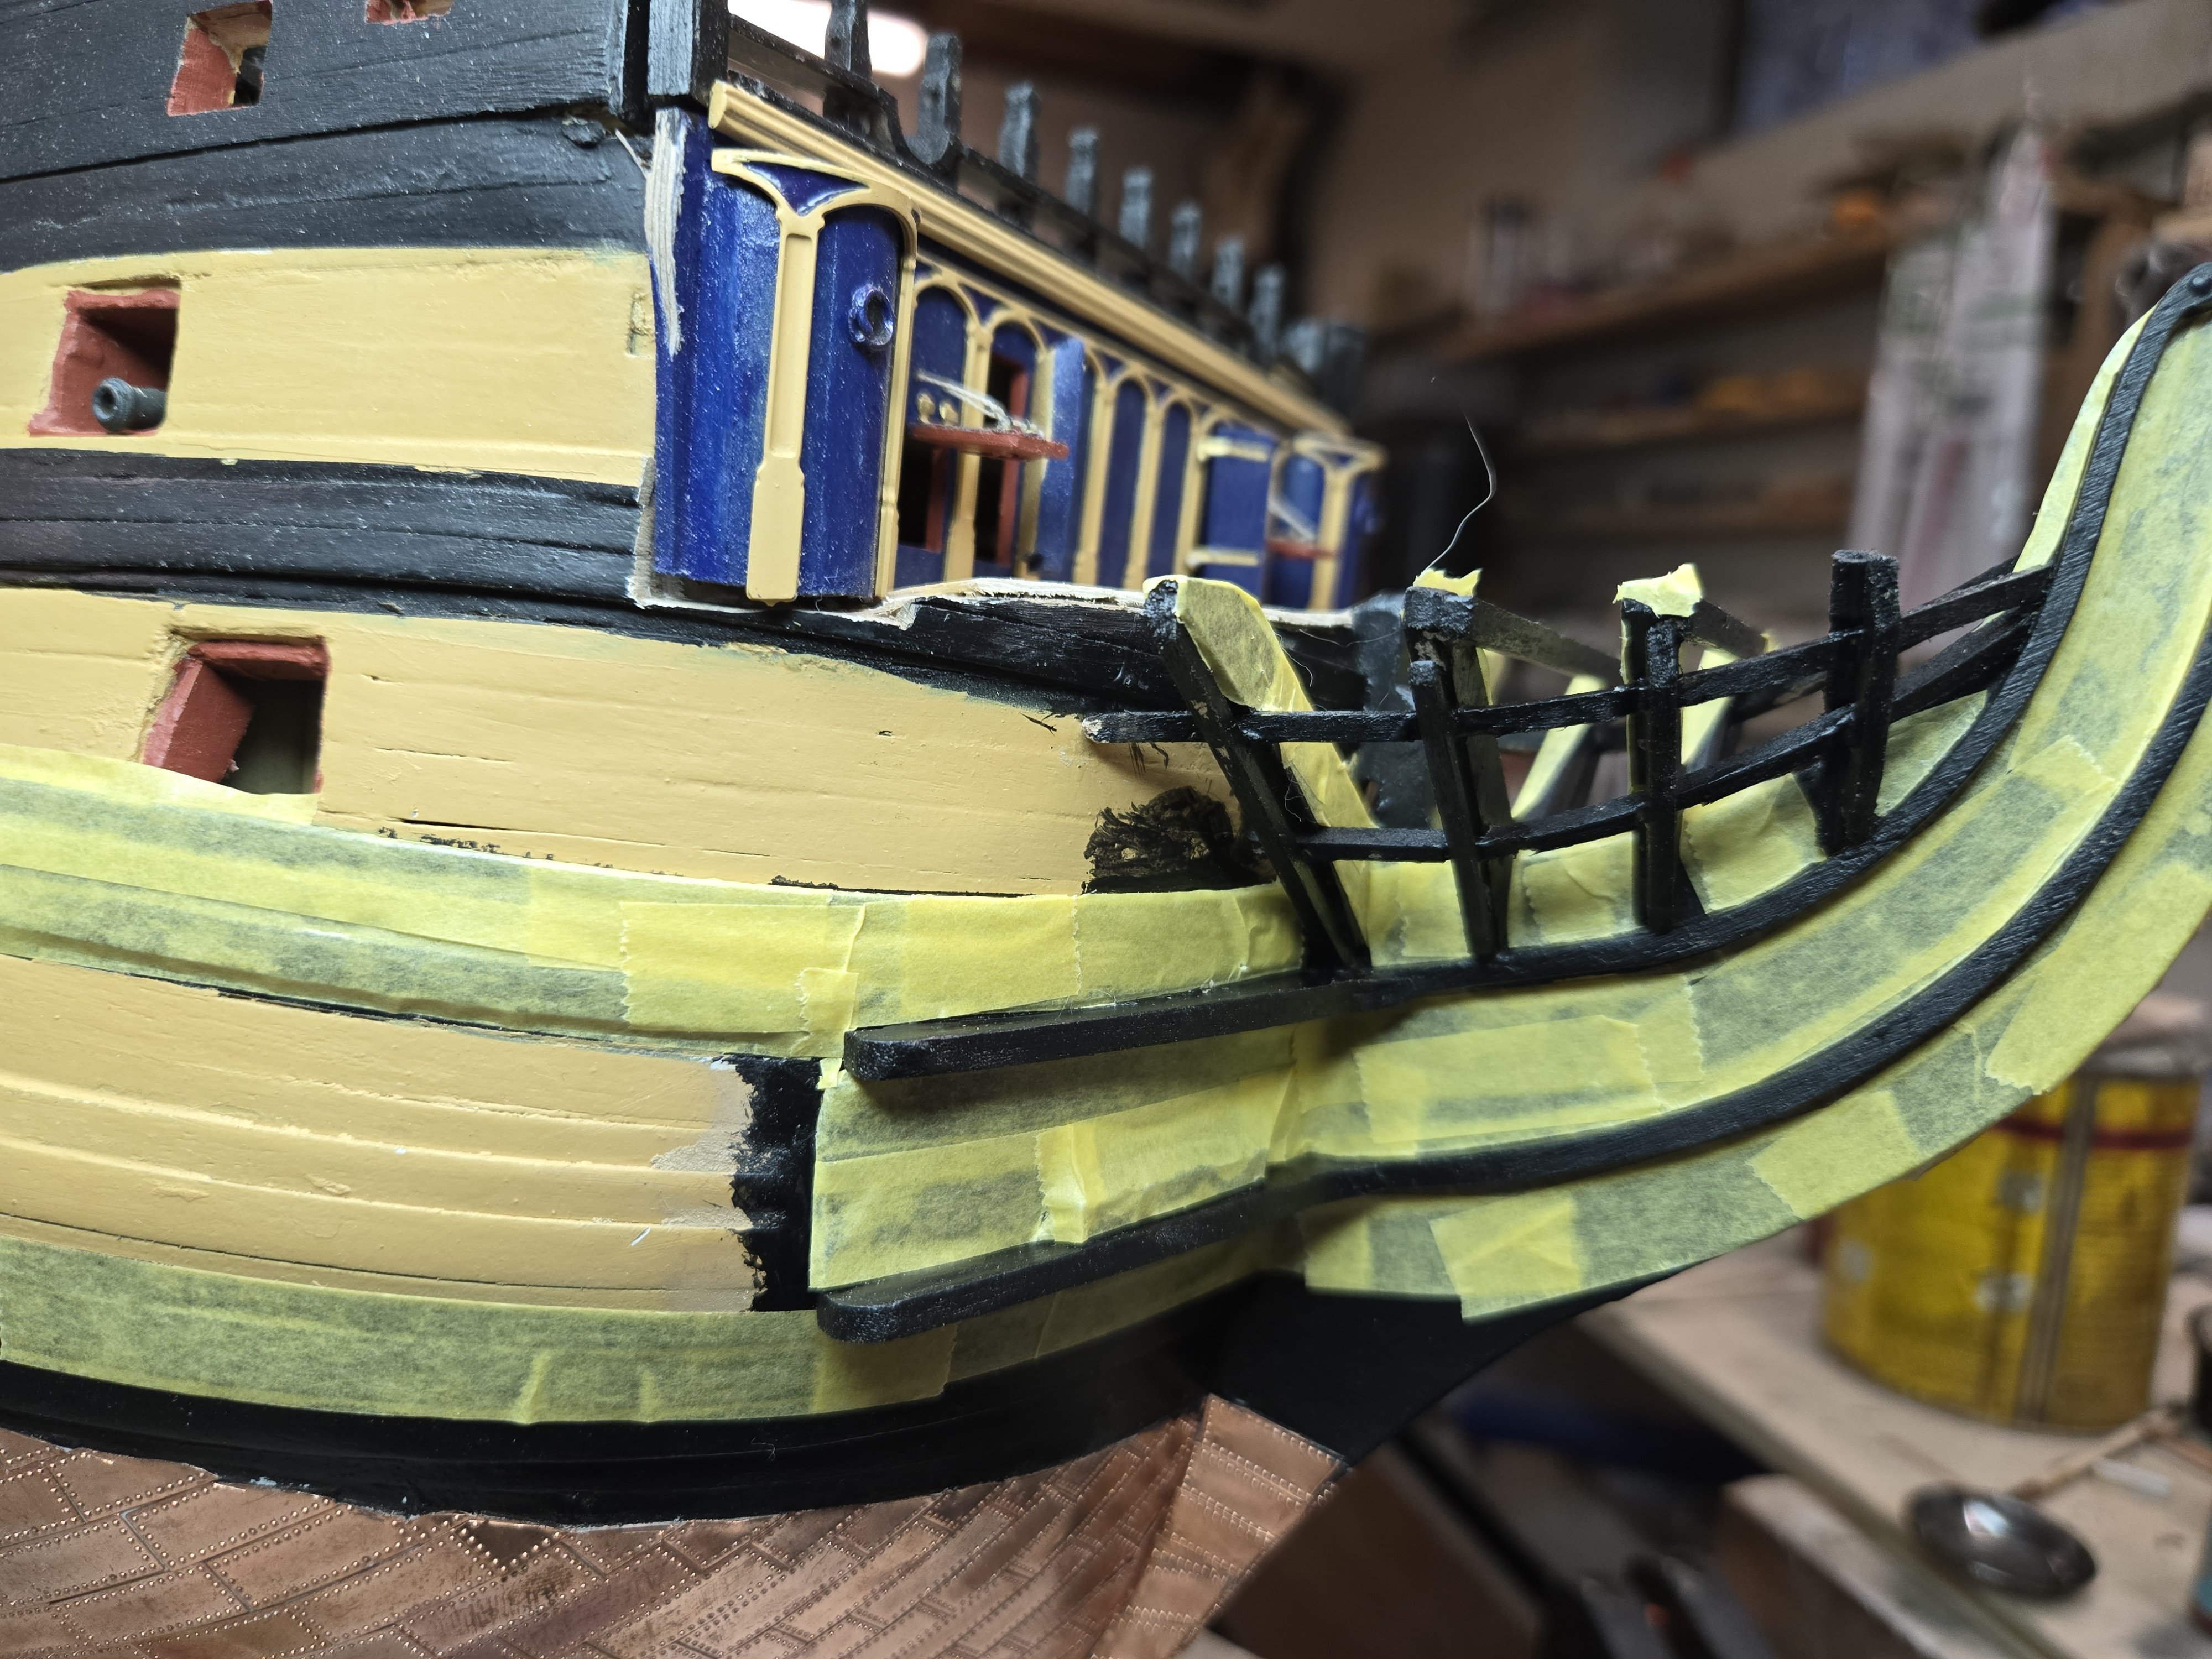
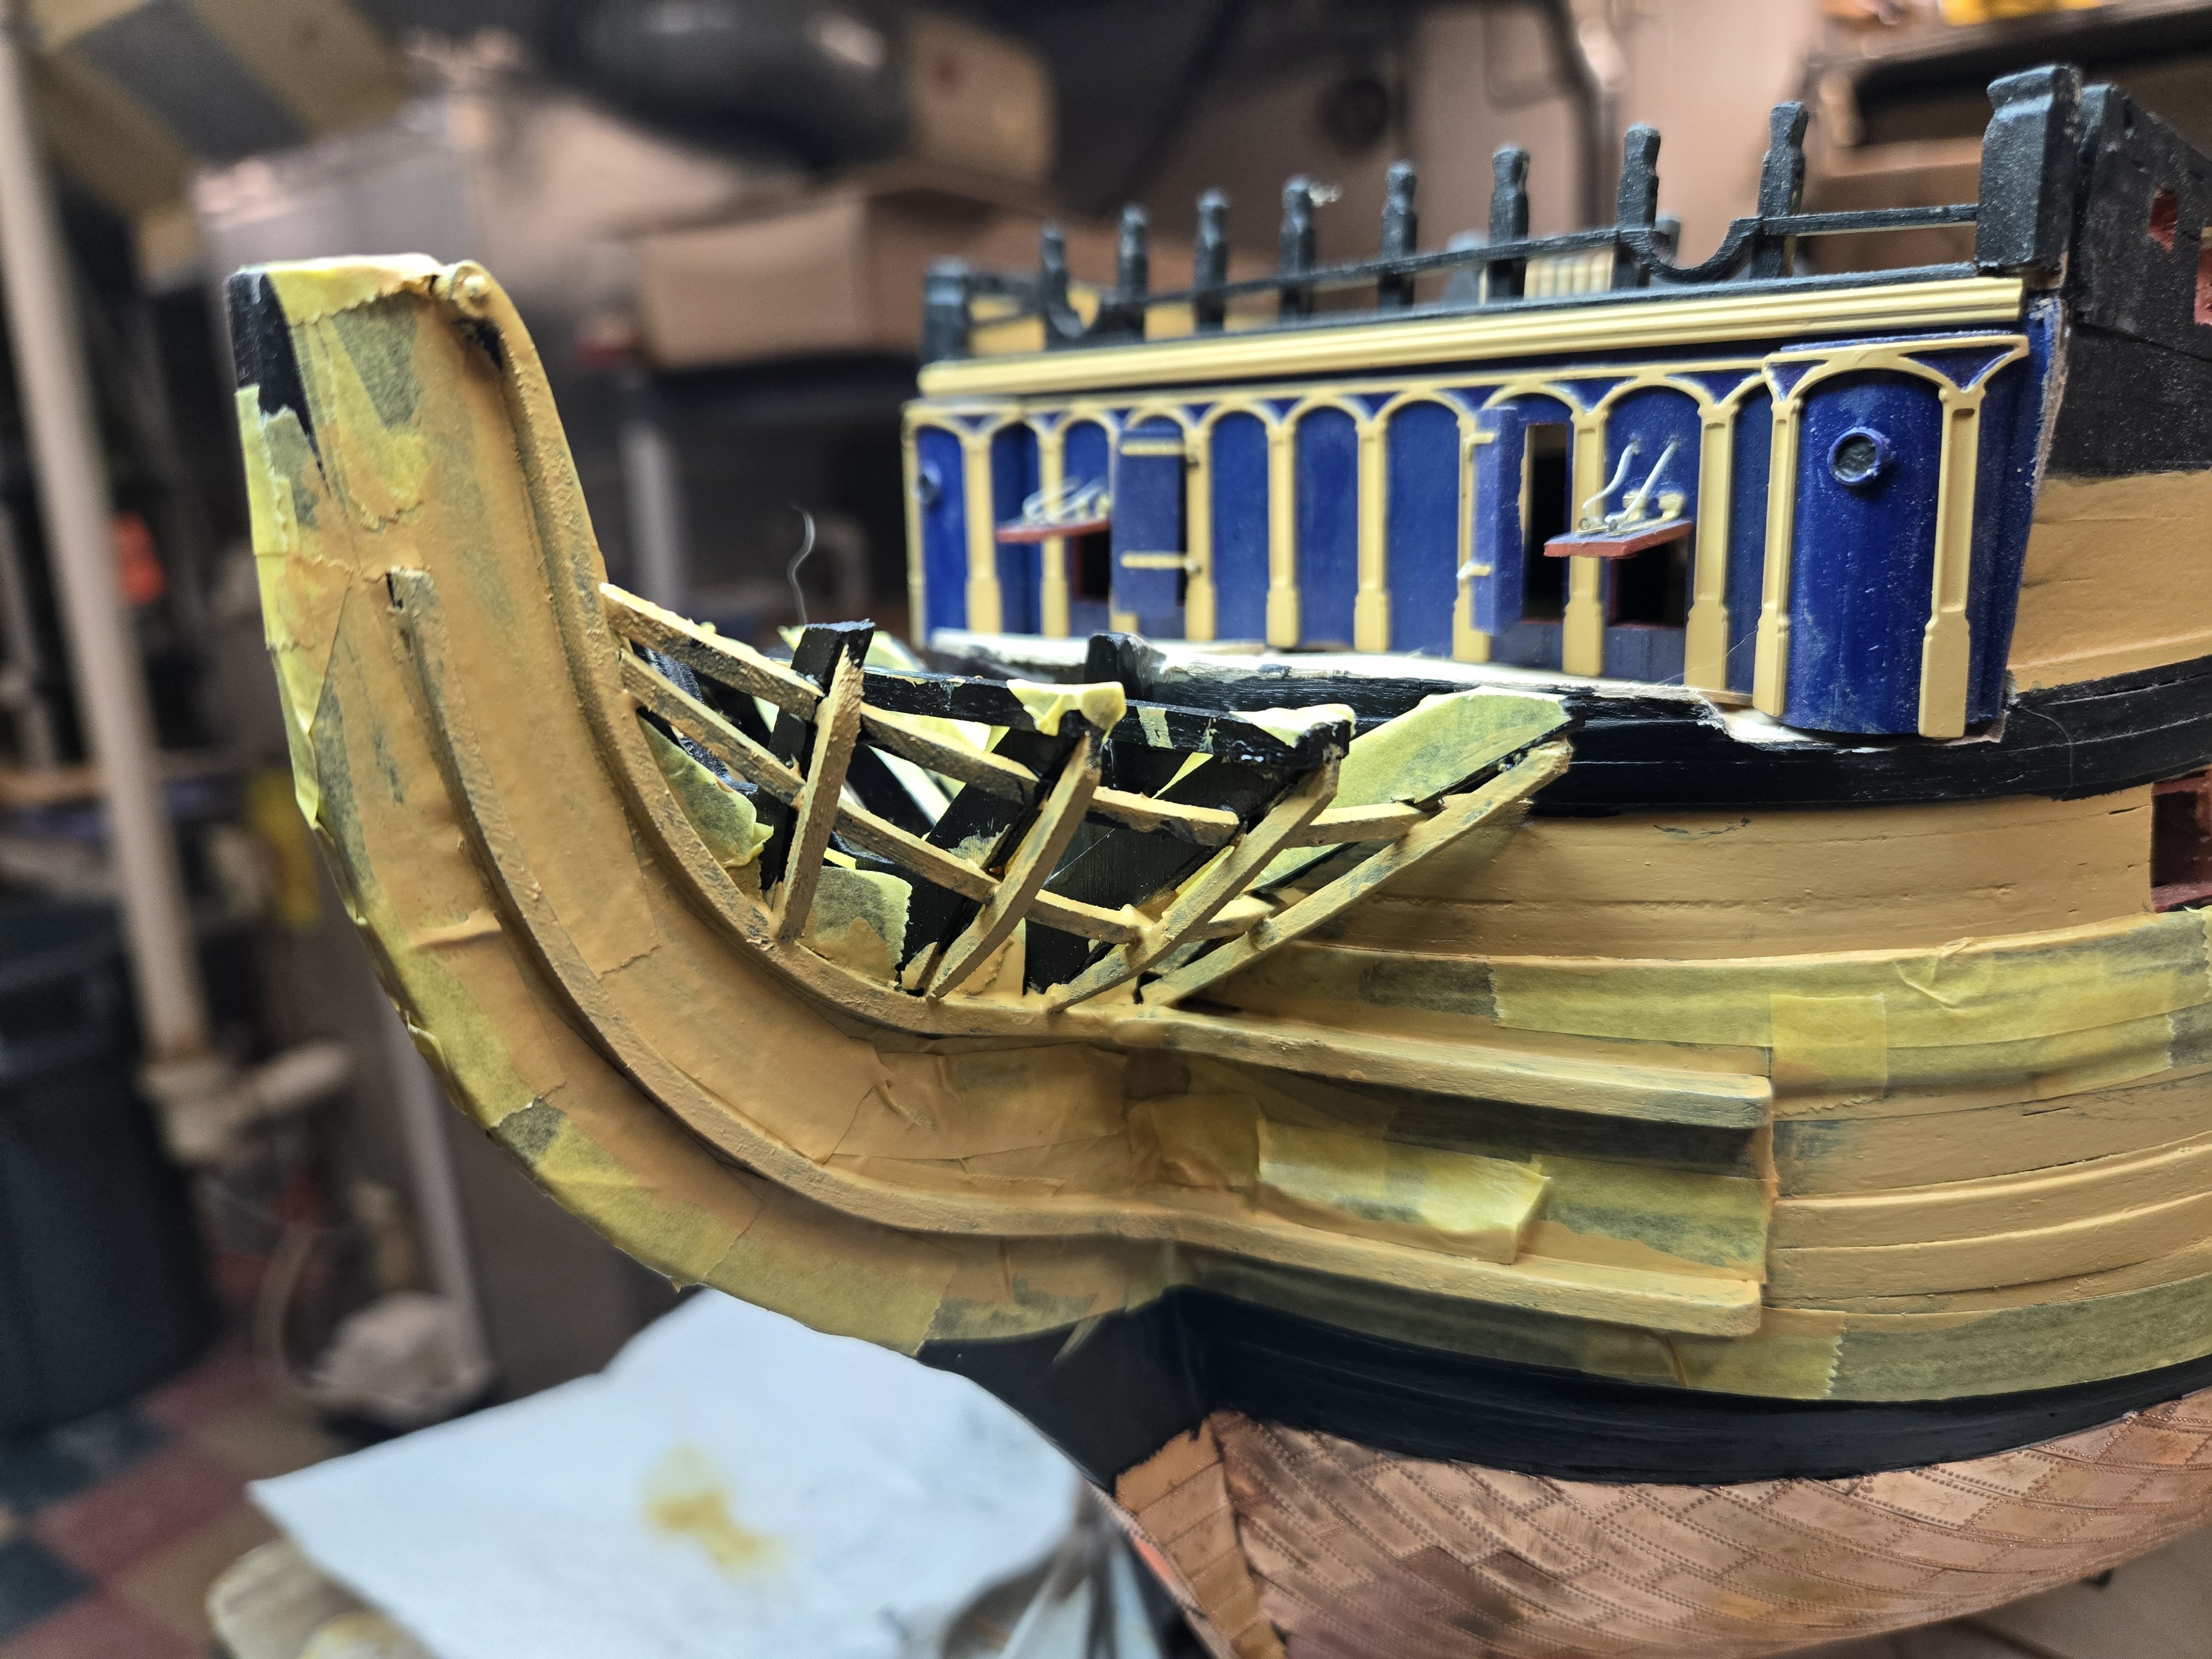
It took 4 hours to tape off everything. Using different sizes of Tamiya tapes, I had to cut little pieces to fit into corners. It very hard and towards the end I resigned myself to the fact that I was going to have touch up stuff. When it was done and the masking was peeled away, it looked ok from afar. But not close. It was a shoddy, clumsy mess and I just hated it. You can also see that one of the hair brackets (either side, doesn't matter) is tilted wrong. That's the problem from working so high up, it's hard to squat down and get that penguin's eye view of things. (I know you smiled at that....) I had such high hopes, only to see this result. It actually kept me up late and I decided that the next day I was going to remove all the rails, clean them up, paint all the interior black again, paint and sand the rails and reinstall fresh. I had some extra beech and there was 2x3 walnut I could steal if I had to.