

Chikpeas
-
Posts
19 -
Joined
-
Last visited
Content Type
Profiles
Forums
Gallery
Events
Posts posted by Chikpeas
-
-
I TRIED to do research on planking!But realistically the measuring and math was wedged into NOVEL long paragraphs and I couldn’t understand what was being said… I struggled really hard with this. Nothing made sense…. Soooo I winged it. Didn’t come out too horribly actually.
I was relieved that someone actually advised me to hide mistakes through painting, I still think of you whoever you were ✌️

It was Very rough at the bow. Perfect everywhere else, so I learned that’s my weakest point in modeling so far.
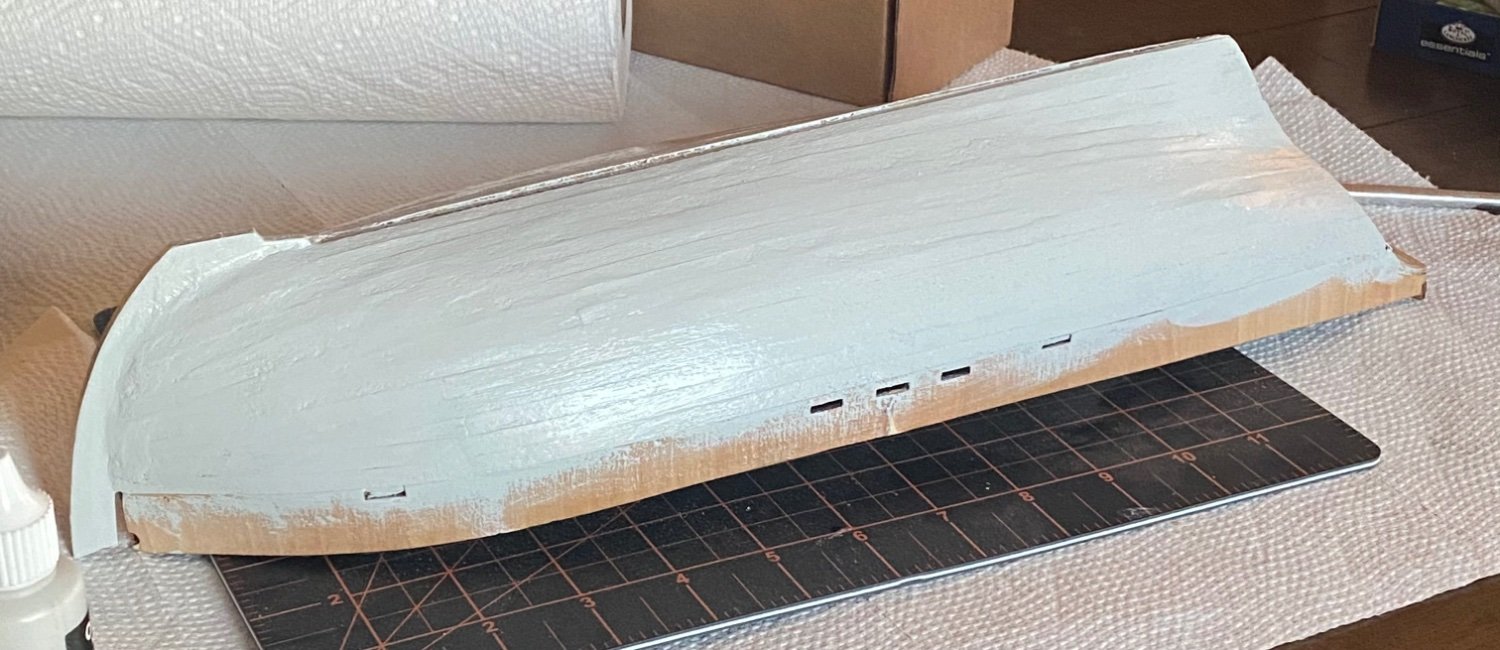
But again, filler and sanding bailed me out….

and then I drowned it in primer. Now, sure you can’t drown your problems with paint, but if you do it right……

you sure as hell can 🤣

I just was completely happy with how it came along.
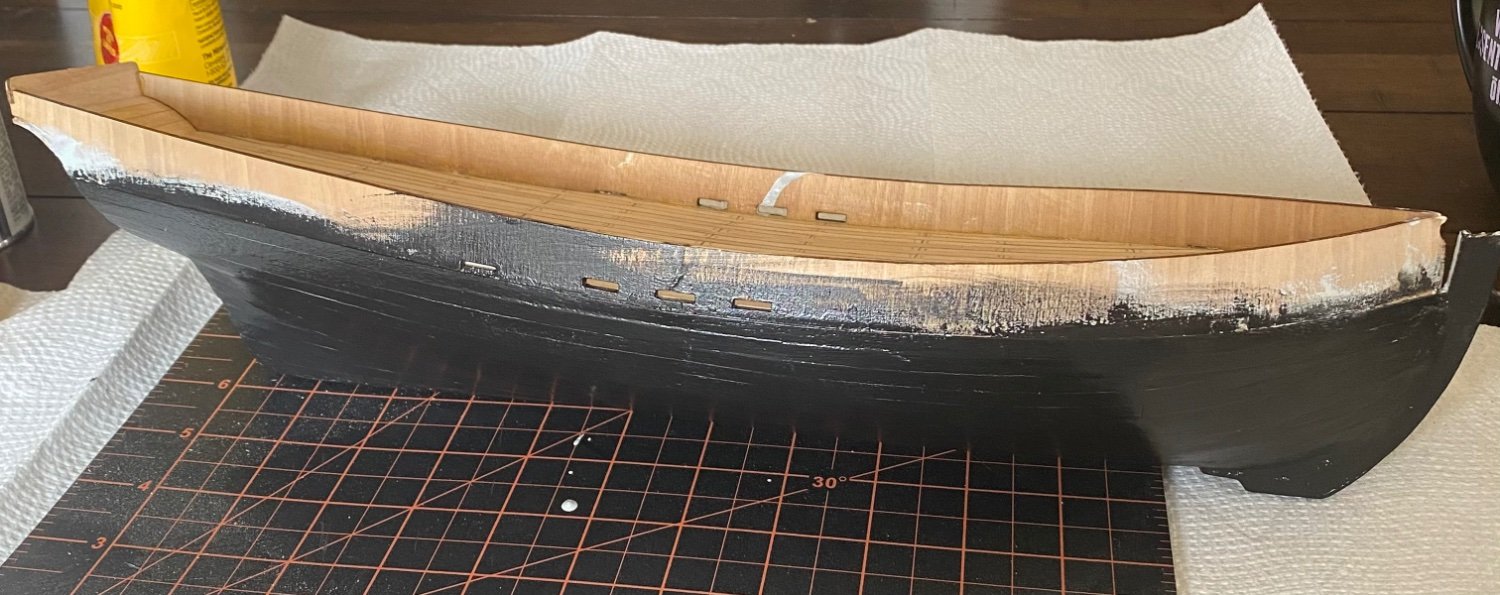
I know I might’ve jumped too soon into painting, but looking at the instructions, it seemed like a good idea to get into it. From here on out I’m going to be careful with how I glue and handle things, but now you get to see my second hell.
Remember that Varnish I applied? Well, the deck popped too much for what I envisioned.
so let’s dive into that journey next post 🙂
- ccoyle and GrandpaPhil
-
 2
2
-
1 minute ago, ccoyle said:
Like so . . .
That is GENIUS 😄That looks way easier than trying to sand brass nails 🤣🤣🤣 I’ll try that out next build thank you!
-
THIS FIX TOOK A WHOLE WEEK it was so painful
not to mention, my ship got broken and I lost a lot of the planks that actually Looked decent….
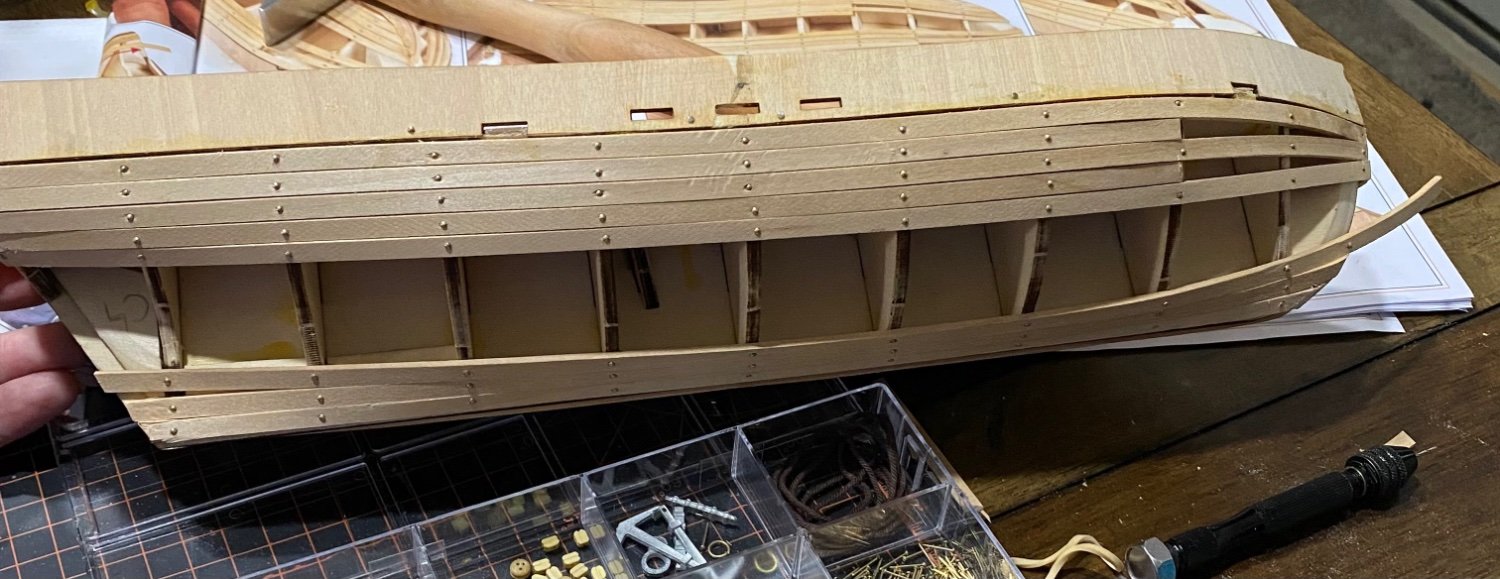
but she started to look a little better!!!
and even turned to looking like an actual boat 😭😂
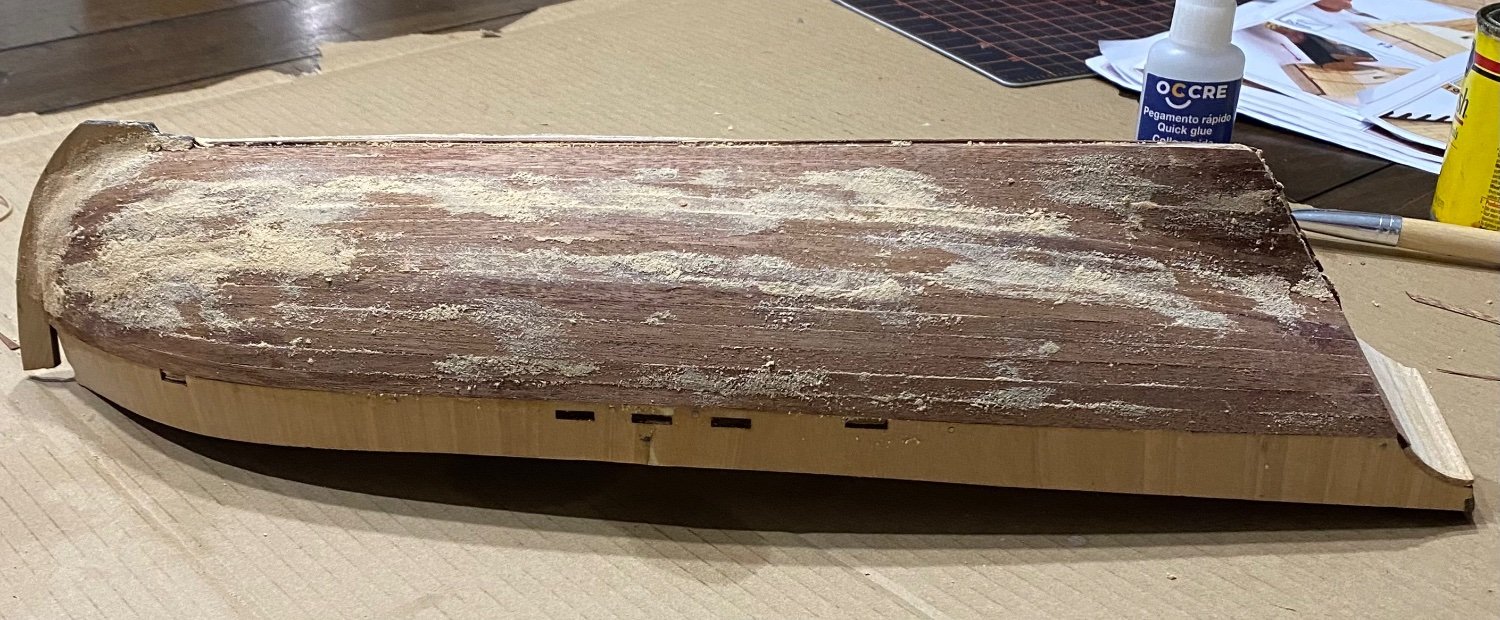
I found some excellent wood filled…. A bit of carving to create the stake plank appearance, and she was saved!
I have never used electric tools in my life, but I discovered a cordless model dremel off Amazon and put it to use. It did wonders in shaping and sanding.
This the second planking layer began!
- GrandpaPhil and ccoyle
-
2
-
5 minutes ago, ccoyle said:
One thing you'll quickly learn in this…
Oh I love that information! Thank you 🤣
Funny that you mention that, I absolutely am turning this into just a first ship progress- off the books. I’m even planning on remaking the flag. Haha!!!! -
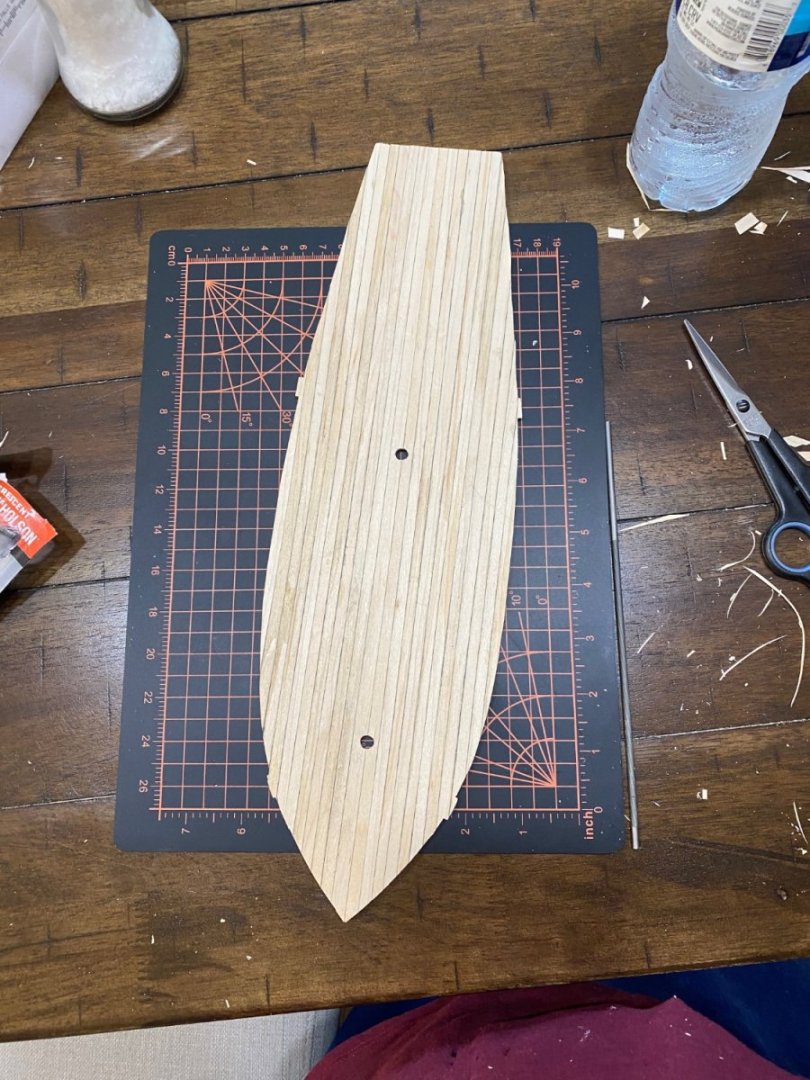
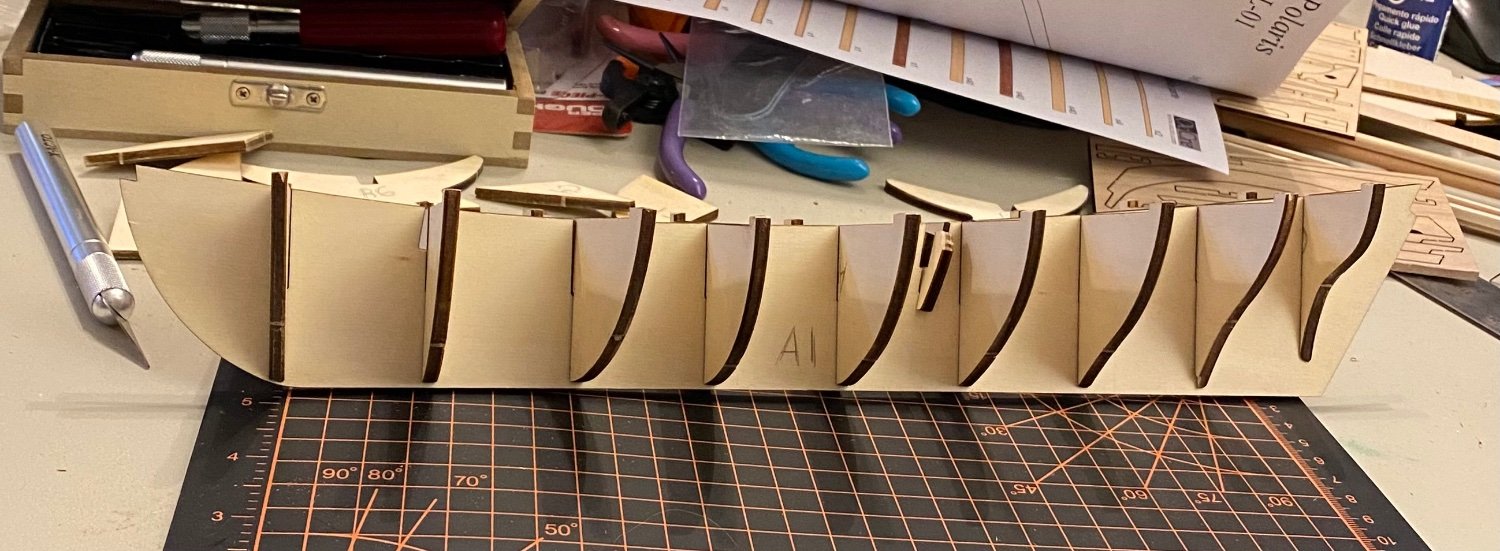
So there you have the first two days, one day of gluing the skeleton of this ship, and the second of getting the deck done and down, I was determined to devote a LOT of time into this project, something to stay distracted with.
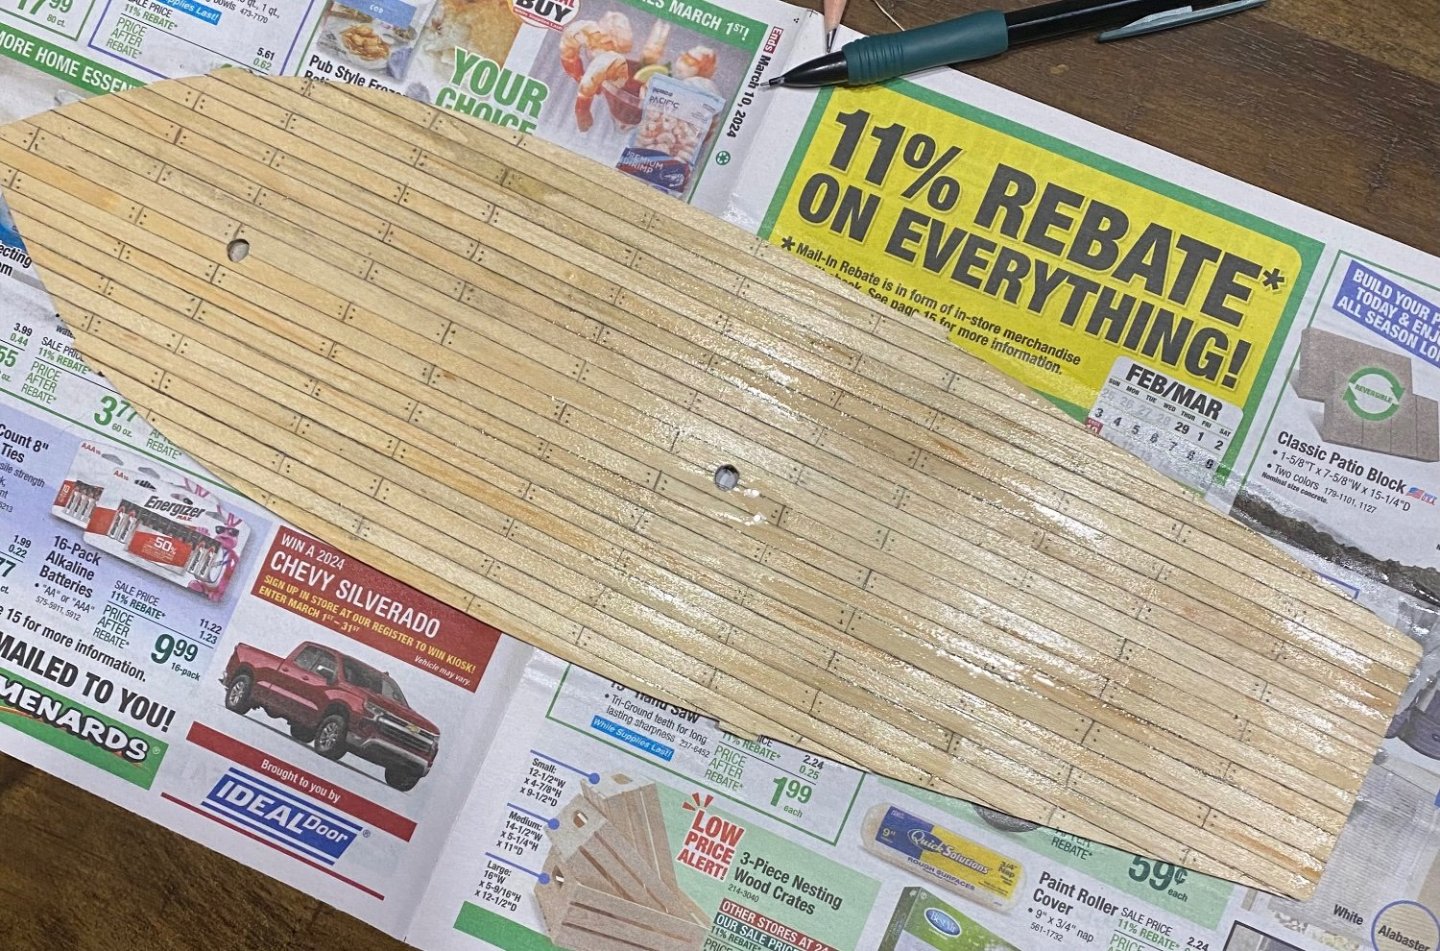
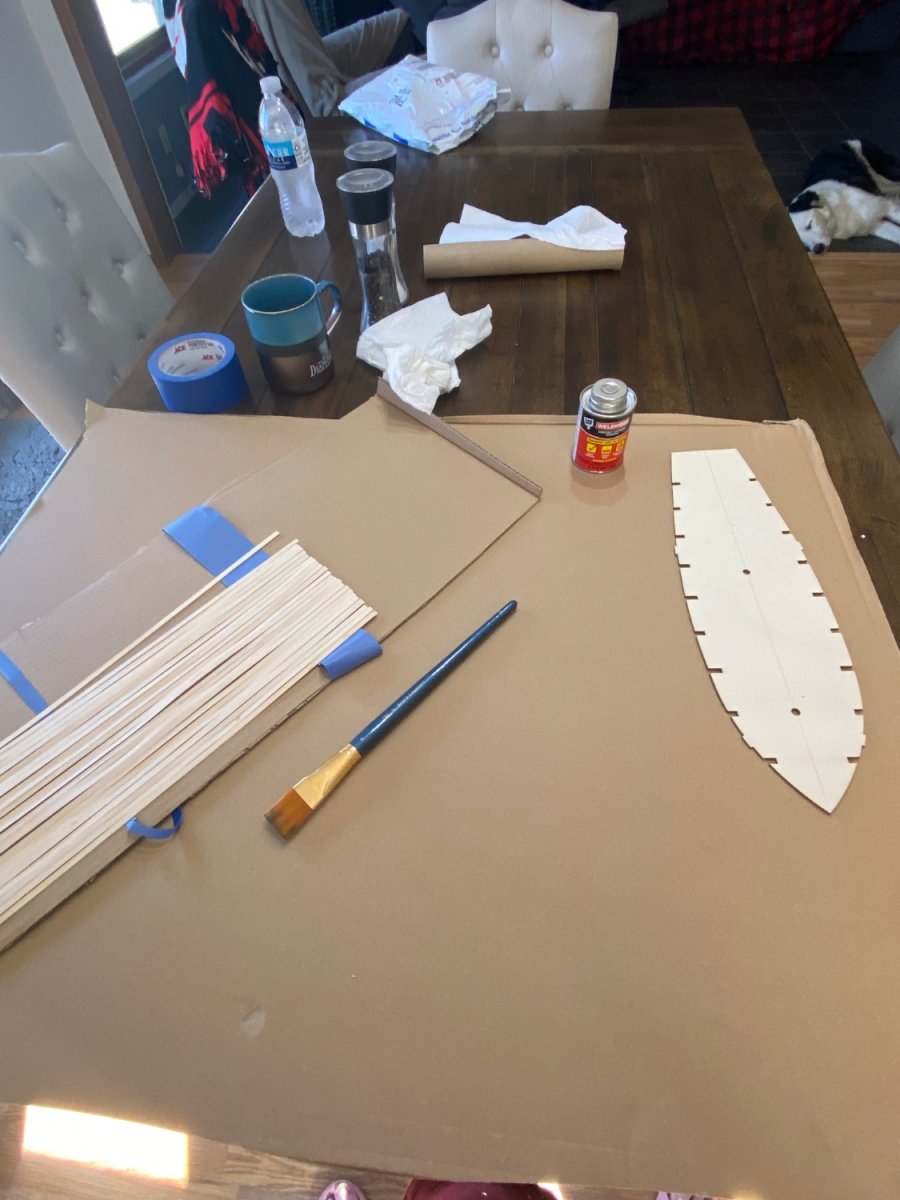
Then the first layer of planking!WHERE DO YOU GUYS GET MAGNETIC BRAD PUSHERS CMON…
I instead I learned how to hand-drill the holes, put in the brass nails, and use a small pin hammer to smack them in. My mom was beyond annoyed with the noise, honestly it was not a great time—- but I still had plenty of fun!

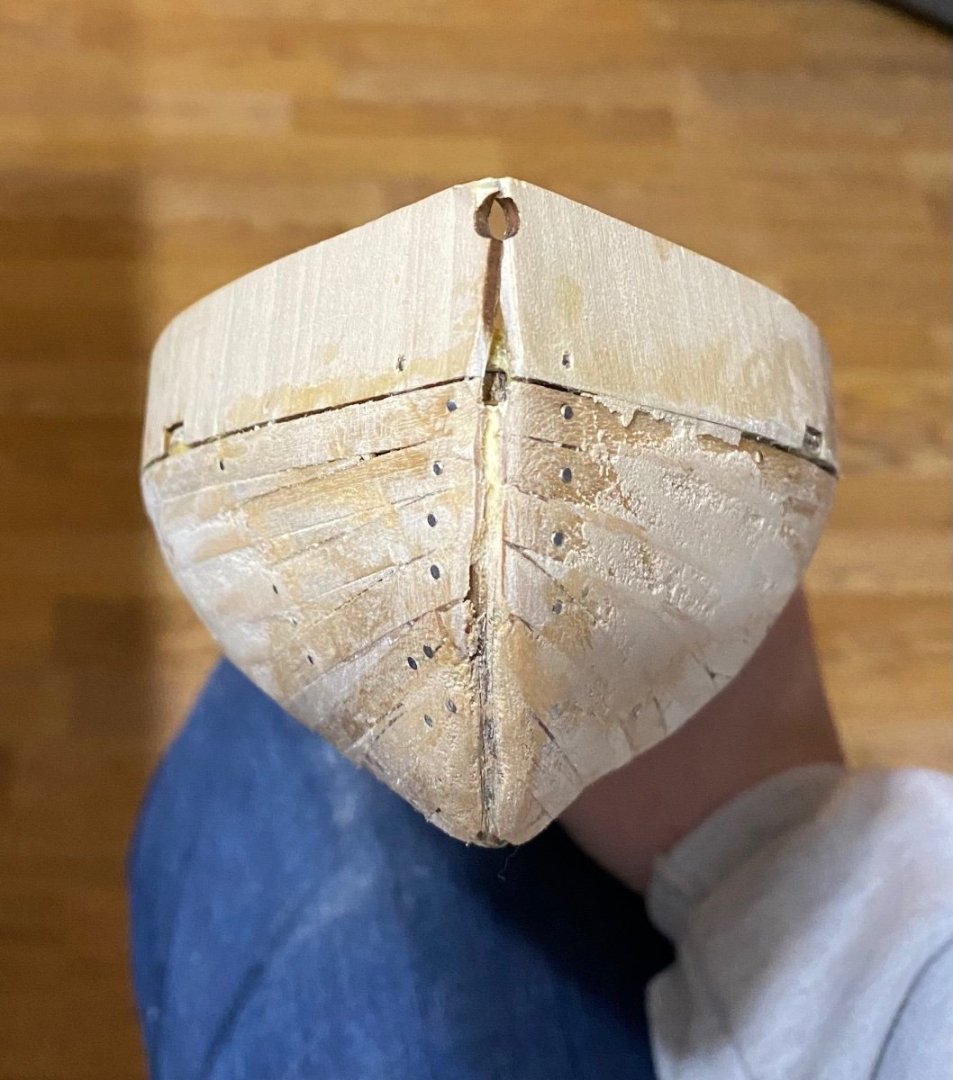
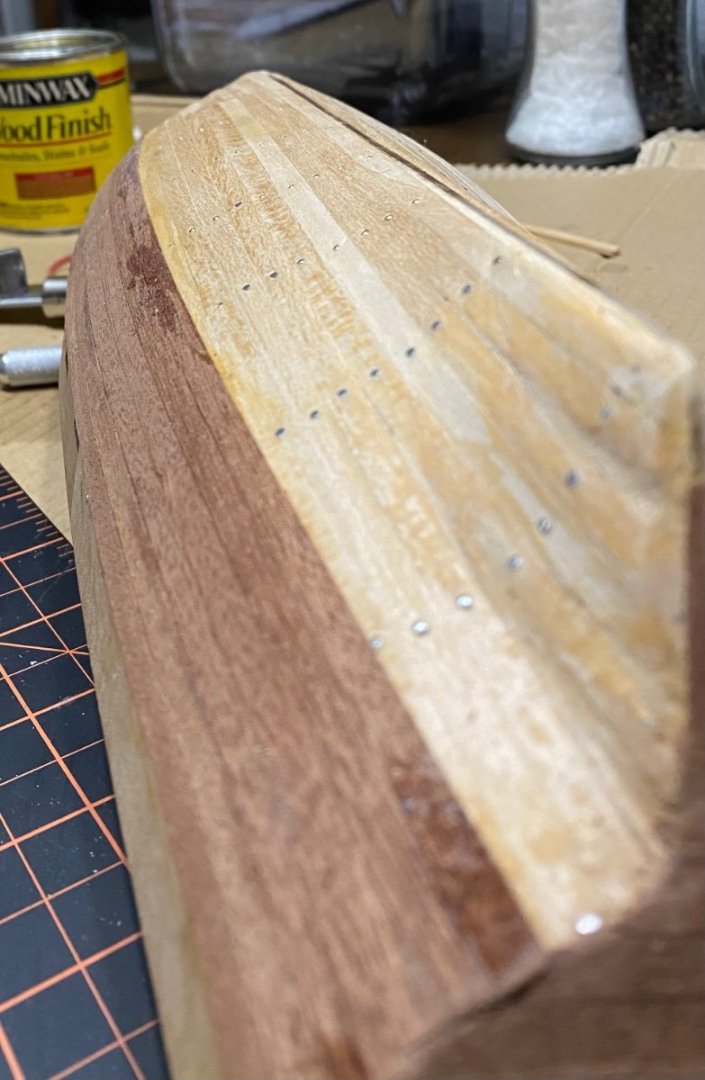
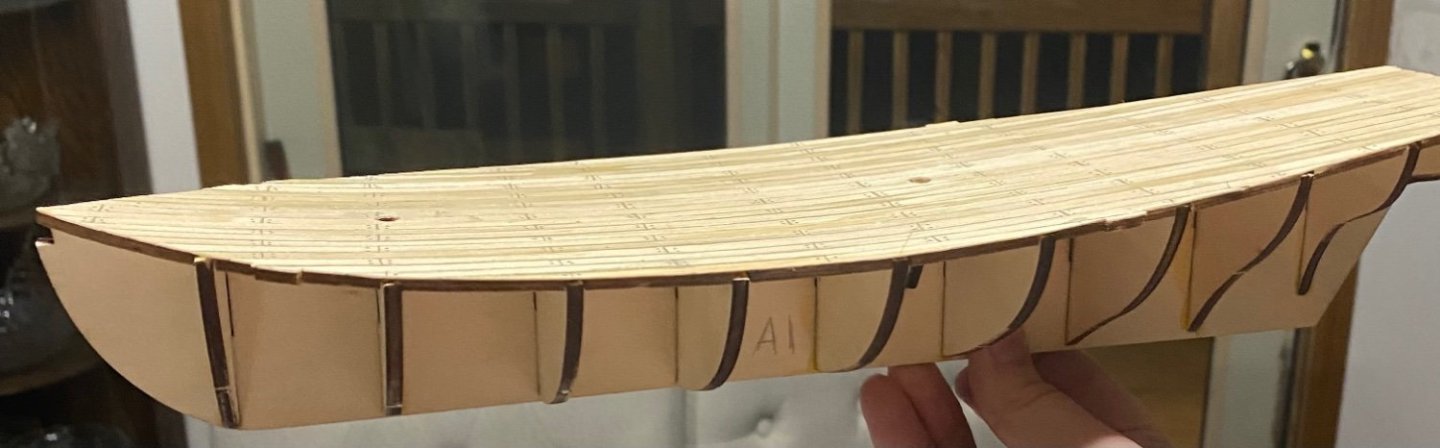
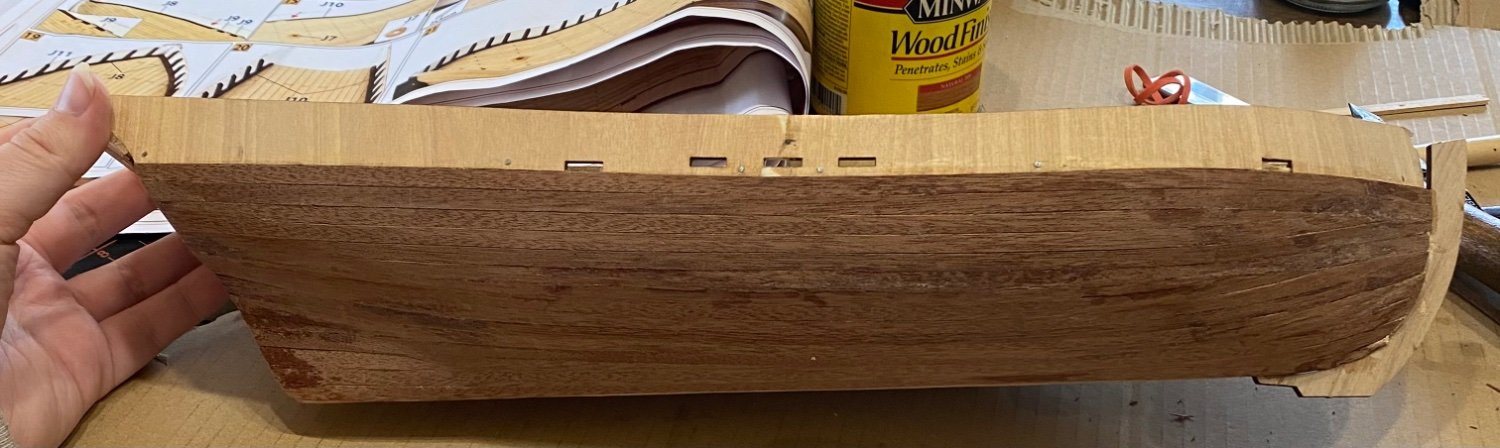
So far the instructions and videos were clear enough, I was sort of struggling with the bow of the ship. I hadn’t learned that if I curled the planks pre-setting them, they would have fit better and be easier to handle.

THUS, I started to have a WHOLE mess 🫣
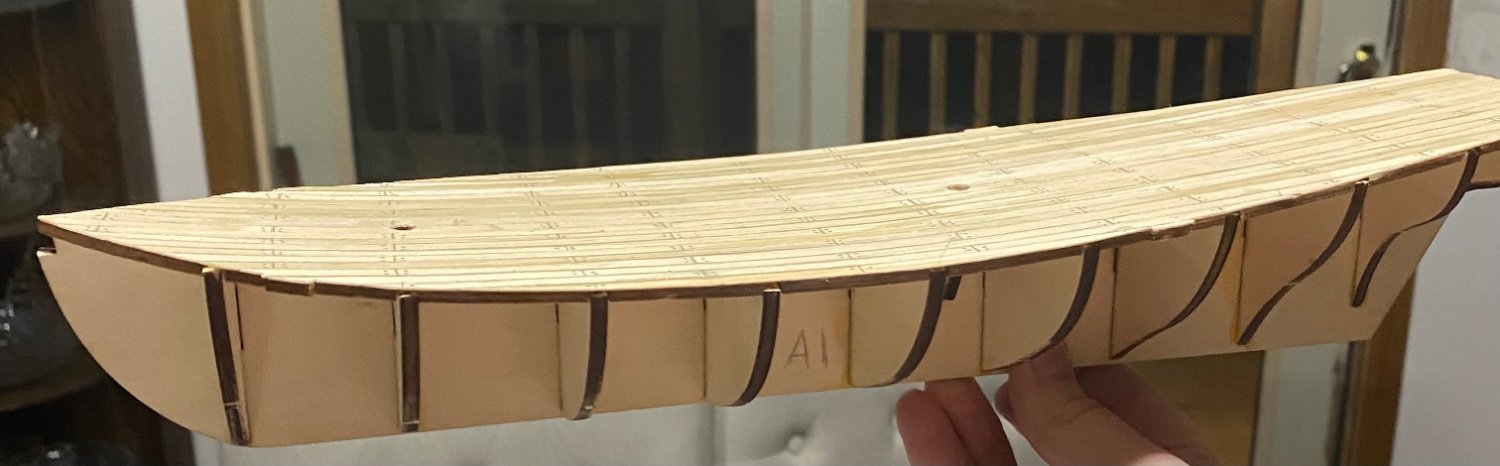
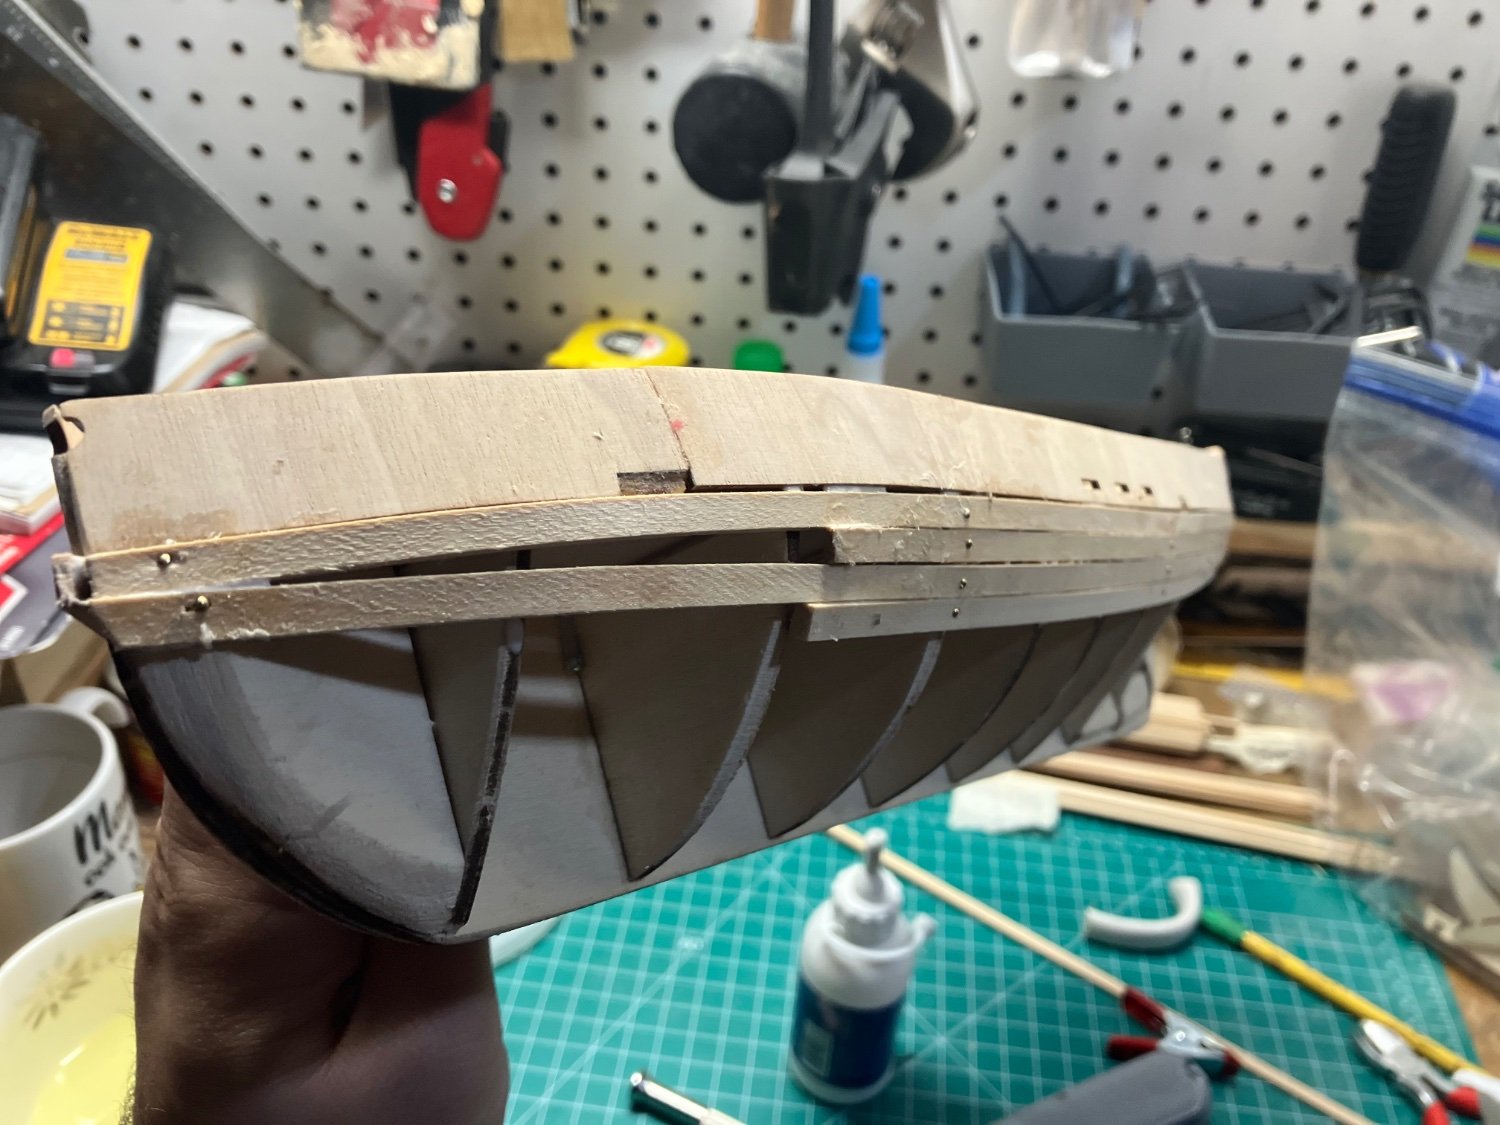
I cut the planks improperly, measured them wrong…. And this was the Terrifying end result…

ouch

Fortunately, I used to sculpt, so I know for my particular situation it wasn’t the end of the world. There was a second layer of planking, so as long as I could get the end result to resemble a sort of hull…. I could make it work….
this is the first and last time I hope to ever be doing that.
-
Hello!so being new to the ship world and to modeling them, I thought the Polaris build from Occre was a completely random kit specifically designed to help you into the world of wooden models.
I have since learned the Polaris WAS actually a real ship! And a steam one at that, so this kit is not completely accurate, from what I read this vessel was procured by the US Navy and was actually known as the USS Periwinkle prior to being an arctic expedition ship?
That being said, I took a lot of artistic liberty.
I have been learning some terminology in the nautical world, what parts and pieces are, how things work— but slowly. I have some learning disabilities so PLEASE don’t judge me too hard for sounding so basic with what I post!
I know there’s measuring involved to make the strake planks accurate, Occre is very difficult in the sense that they just shrug and have you figure out how to hodgepodge the pieces. You’ll see I followed Occre’s instructions up to the second layer of planking, where I tried to fiddle with things a little to make it easier.
anyway!
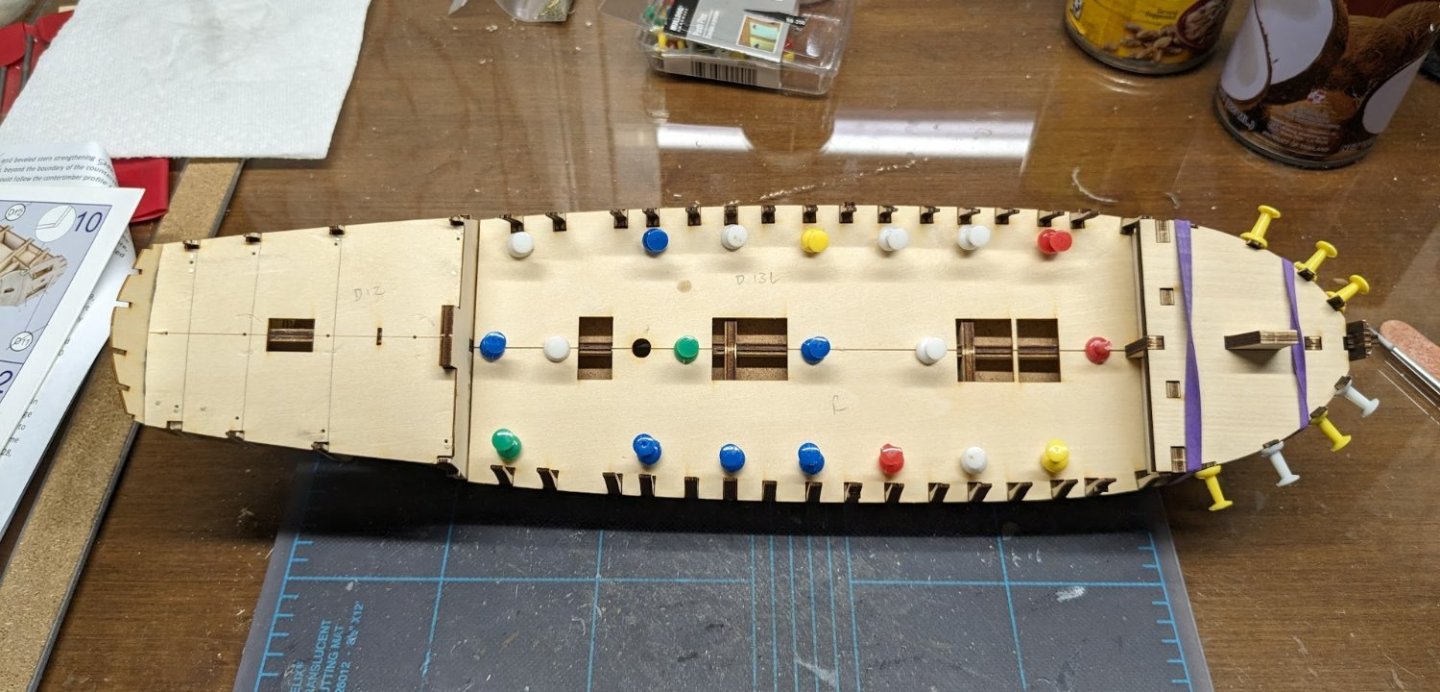
I used a 90 degree ruler to make sure that the ribs were PERFECT, and of course they were! Until I tried to glue the deck on.
Thankfully the wood glue I used it rather forgiving and a bit rubbery when it dries, so I could gently crack the ribs into place without breakage.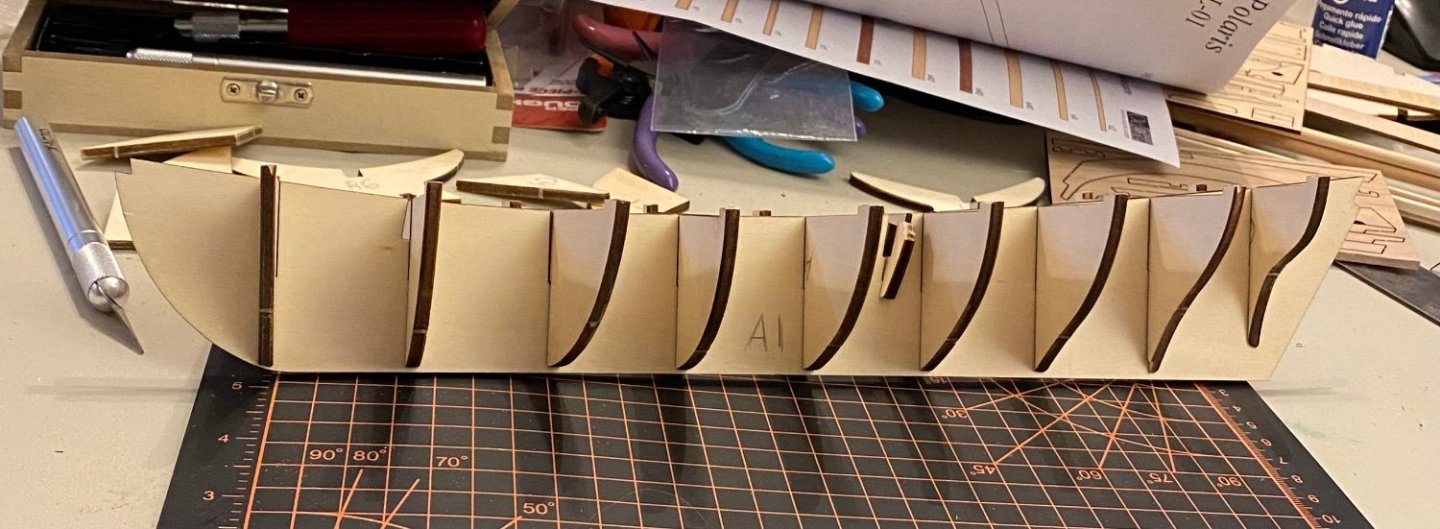

I learned the cement I was used “contact glue” was garbage. I must have gotten a bad bottle because the planks didn’t stick to the wood very well. It was a frustrating process of using the glue I bought from Occre to get everything to lay down well
AND HERE IS WHERE I MADE MY FIRST MASSIVE MISTAKE
I followed the instructions TOO precisely.
Using the varnish. That was a big whoops. It was after I applied the varnish I looked at other finished kits and saw that they stained the deck to get richer colors… Well, I guess I’ll be getting back to this—- and you can already tell what’s going to happen.
All in all, I was feeling very proud and excited to be getting this far

- Coyote_6 and GrandpaPhil
-
2
-
10 minutes ago, Jaager said:
I would use a filler at the stem and paint the hull.
or
remove the planking and buy a replacement from a site vendor or visit your local WoodCraft store and get a veneer that is better - sawn not rotary cut if possible.
Veneer just needs a steel straight edge and a keenly sharp knife. Strop often.
The color of the planking is way darker than any species that I believe was used for an actual ship.
To my eye, it looks brittle, course, open pore. - not even close to a 1:75 scaled down version of real wood that was used.
A Wayback machine view of this:
Taper the stem to about half its thickness at the outer char.
Cut a rabbet - a proper rabbet = the correct width in the stem. Small chisel. Practice a lot on scrap first.
Start the planking at the rabbet and add bonding as it fits aft.
Apply the same plank P&S - not all one side and then the other.
Planking width 6" -8" in scale with the the garboard maybe a bit wider.
Thank you- 🥰 I’m going to give it a go, and you’re right these planks are thin and Very brittle. Cutting them is a complete nightmare even with a surgeon 11 scalpel. I feel like I need to break out the dremel saw but I’m nervous these planks will split and crack like hell.
I really hope drowning it in paint will make it look better and fixing up the stem will do it justice…
-
Hey everyone, I am happy to have an arsenal of informative on actual planning shared here, for this build I just wanted to finish it just how I’ve been doing it and then learn the new planking methods for the next build,
but I ran into a rather large problem
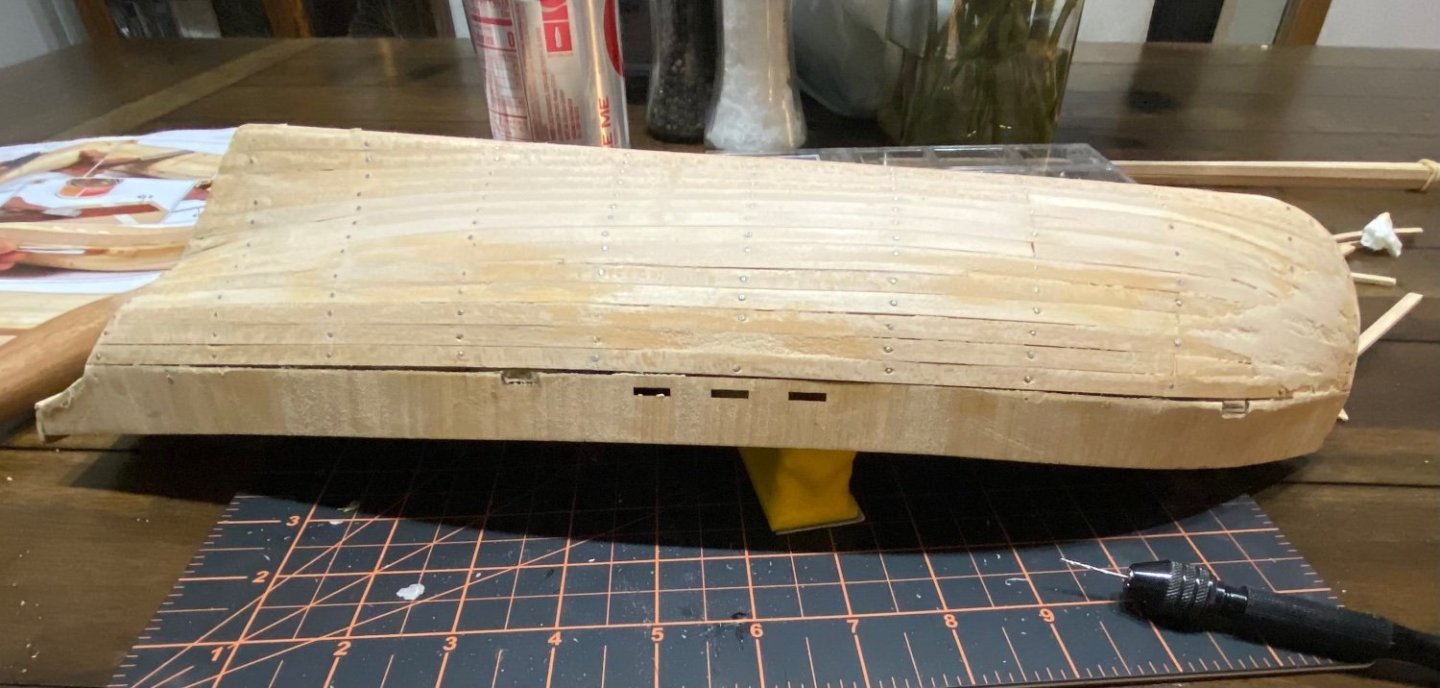
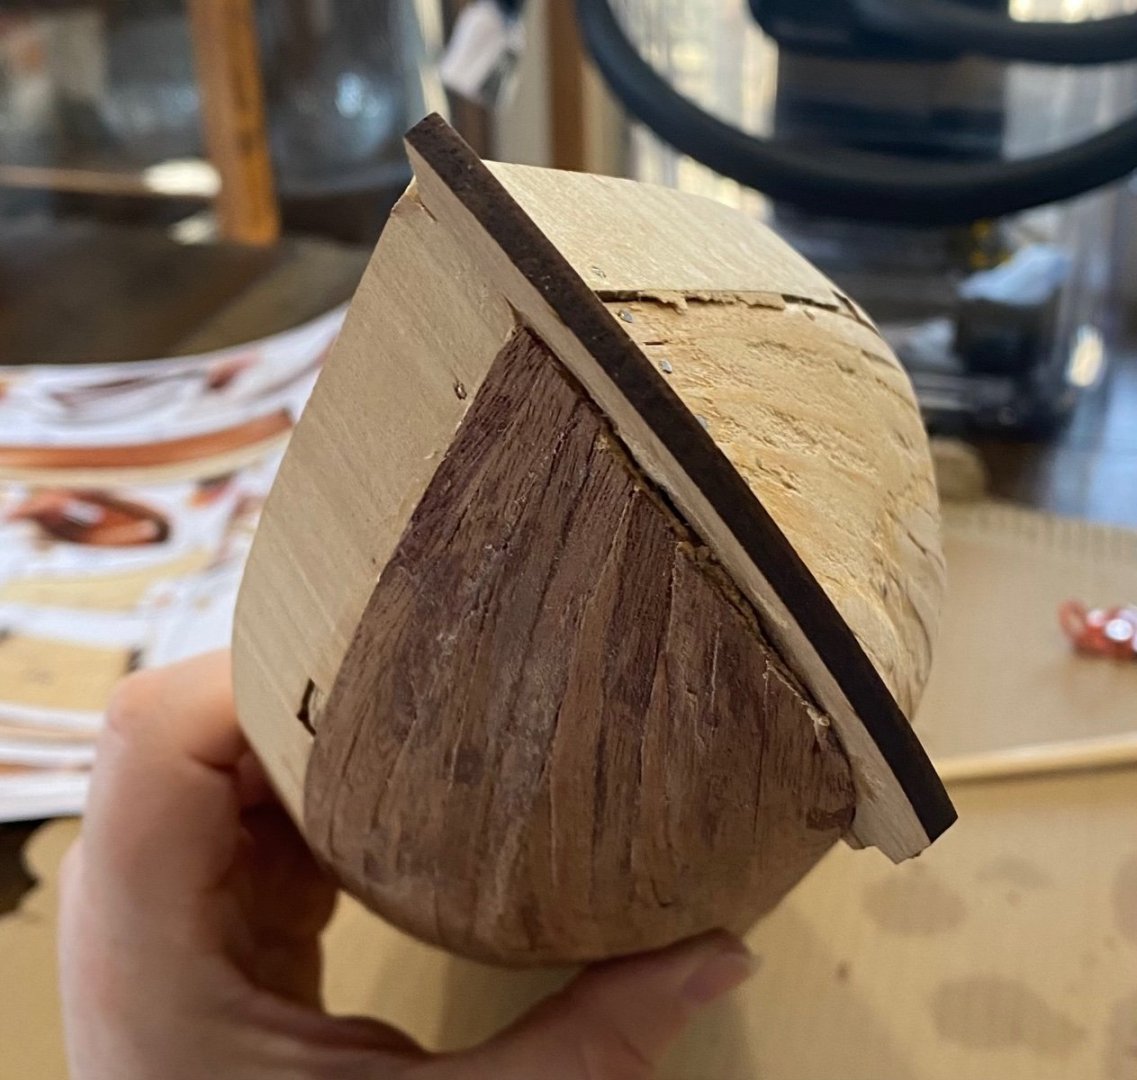
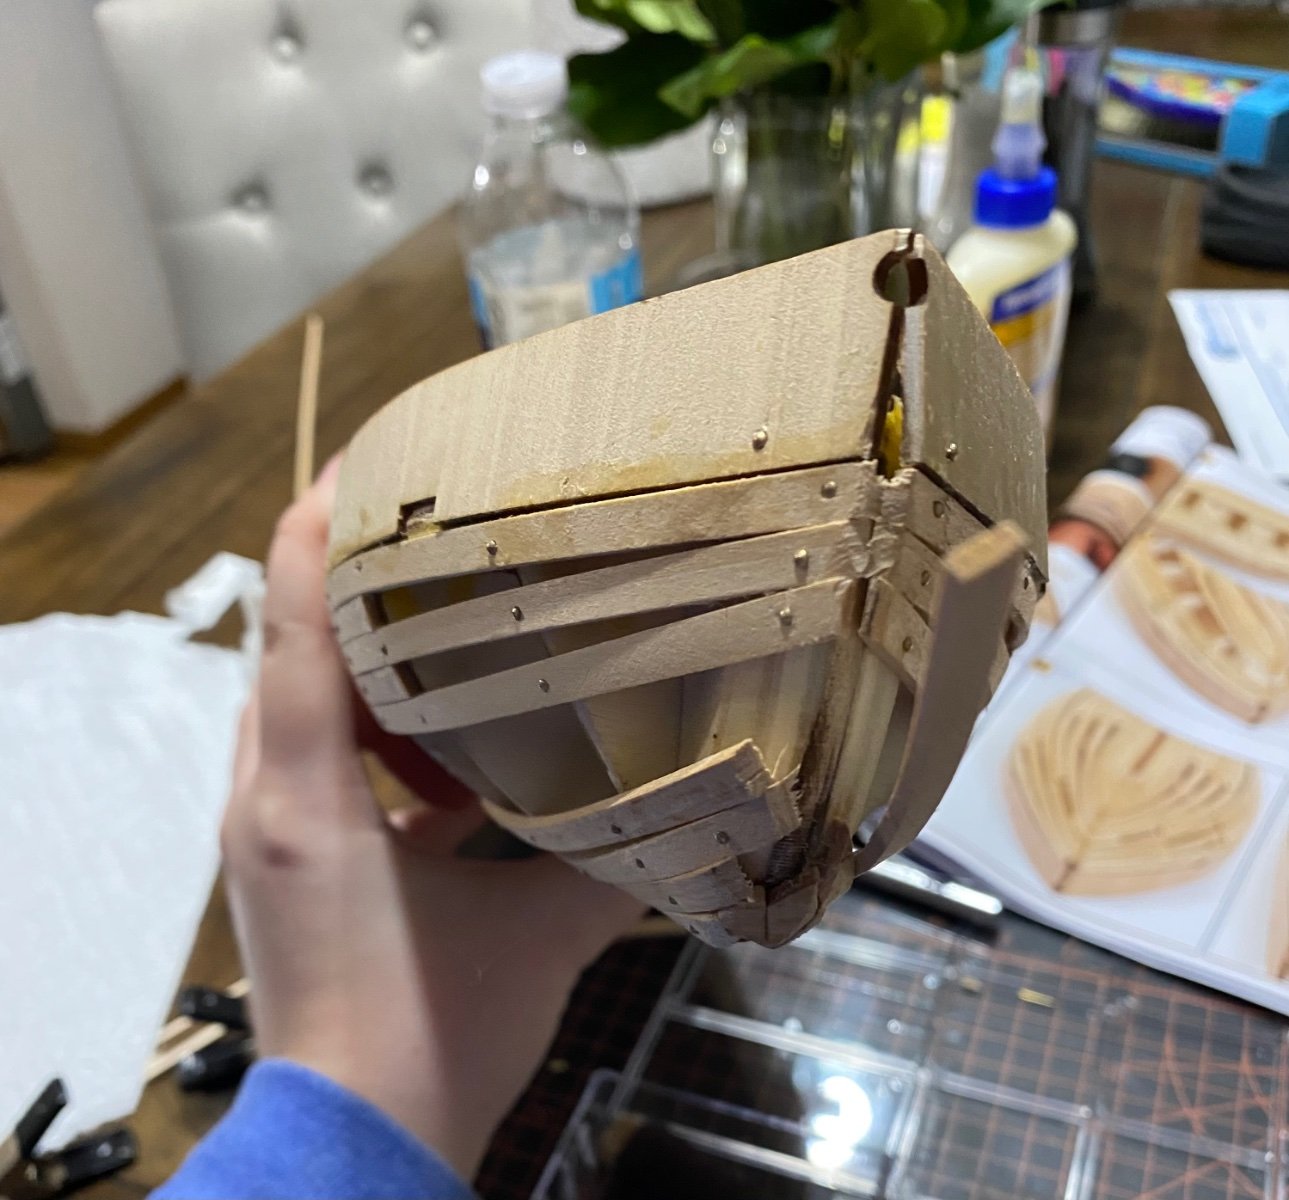
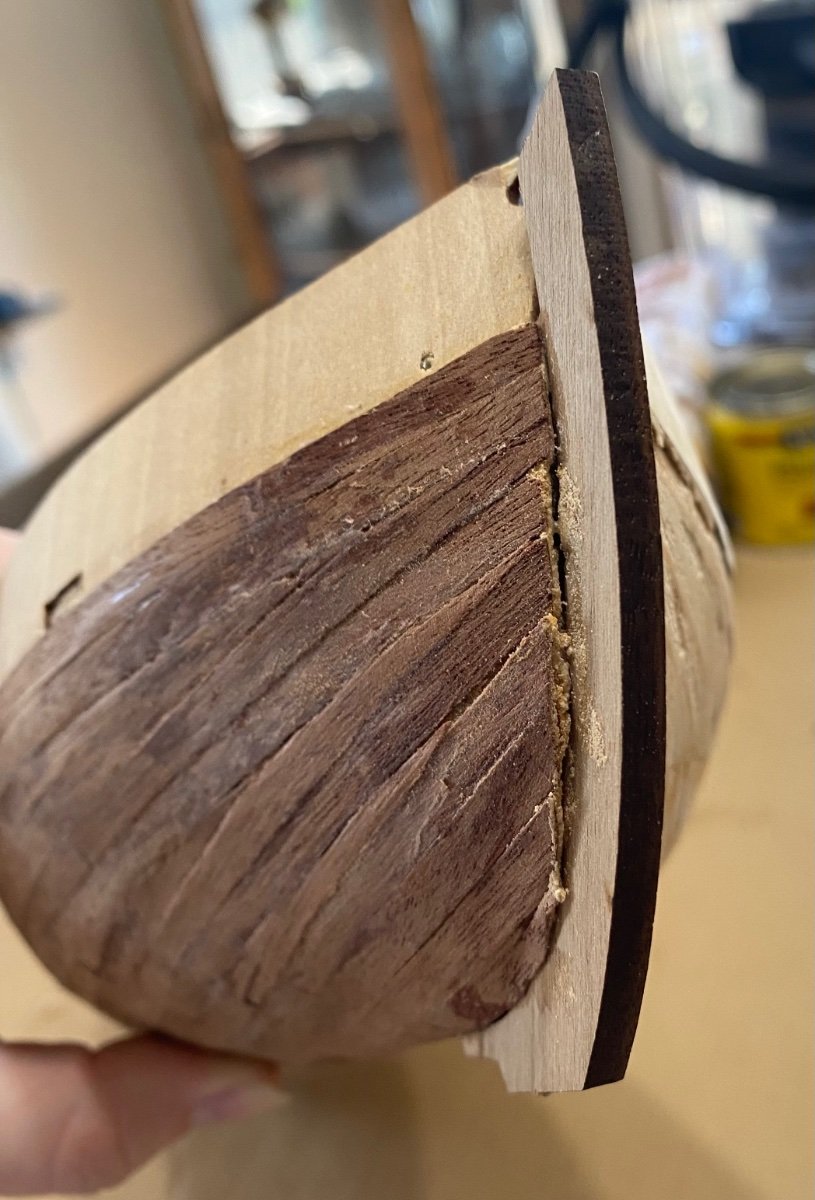
so back when I was trying to sand, I did it wrong. I couldn’t find any head-on images for this boat so I really didn’t know what I was doing and as a result, this happened:
how could I fix this? It’s completely due to the hull being misshapen… (it looks really gross on the planks right now but I’ll be fixing it)
could I sneak a third row of planking to extend the ends, tidy it up, and hide this?

-
14 hours ago, rmccook said:
The bow is tricky and that’s the one area they don’t show very clearly in either the manual or the YouTube videos. And it’s crucial, because if you read ahead, the keel has a bow piece that has to fit in perfectly in that notch and sit flush with the hull. It was the hardest part so far, but sanding, cutting, swearing, regluing, more sanding, more swearing, walking away for a week, etc finally got it in. I’d say Just keep it as neat as possible at the front so it’s all uniform if you do have to make any alterations to make the piece fit.
Thank you for the heads up!
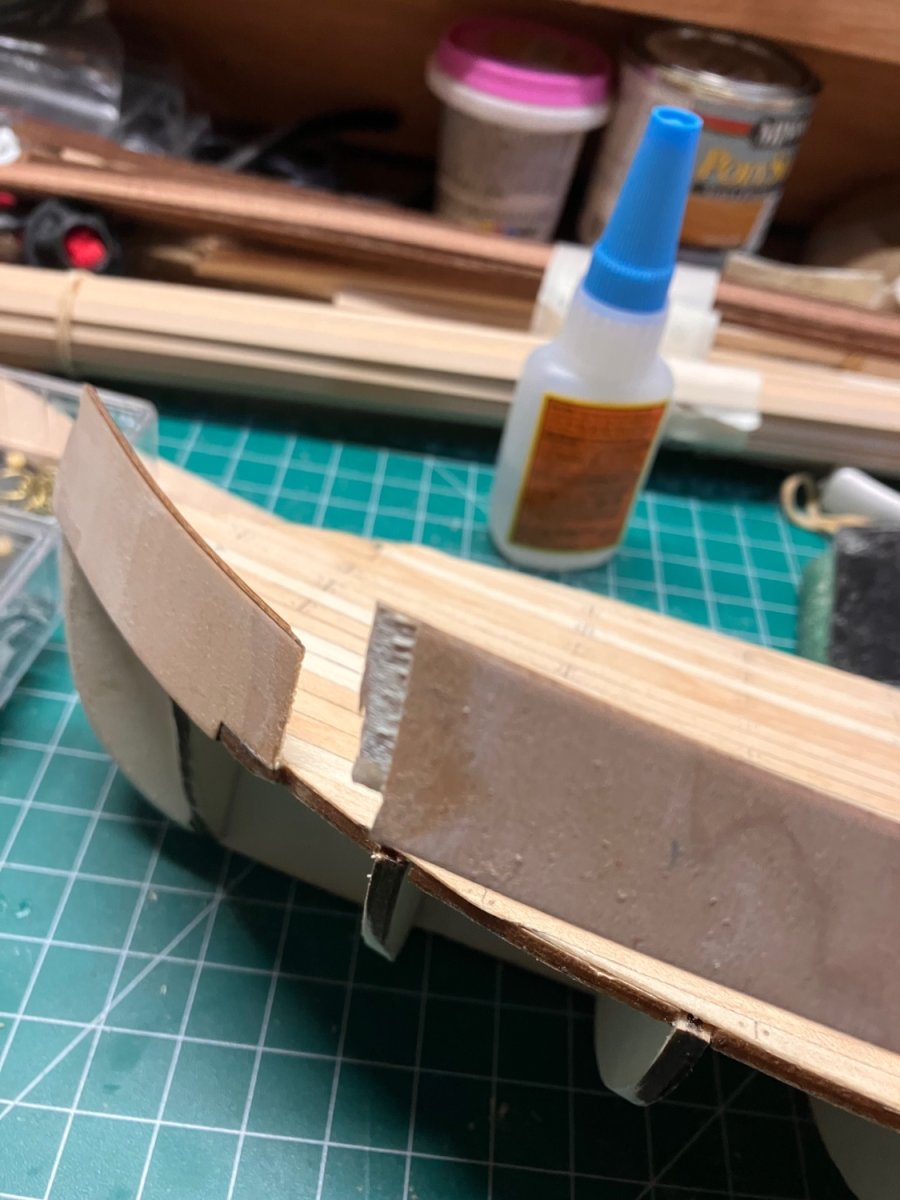
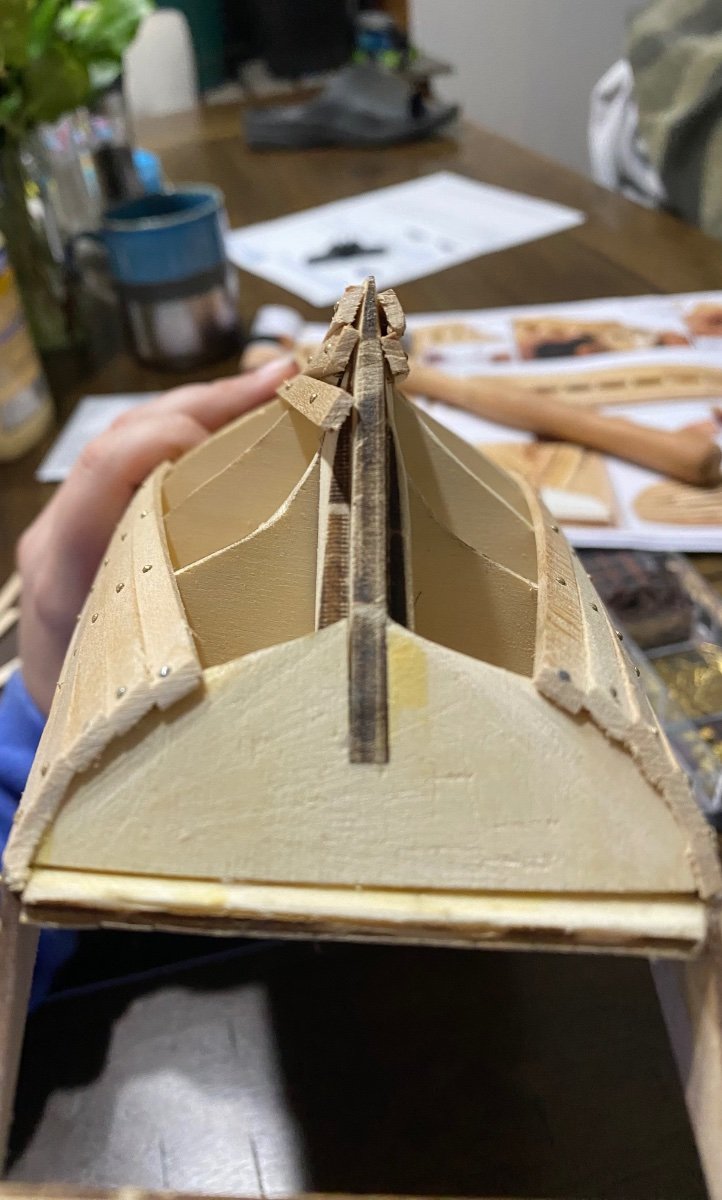
I complete agree, it is bloody awful, they really just skipped the entire bow and said “eh the pieces are magically supposed to fit there.”
so what I did is pack on a bunch of pieces so I can carve the wood into what it’s Supposed to look like instead of worrying about the first layer of planks looking gorgeous 🤷♀️🤦🏼♀️
I’m going to try and Actually do the planking more realistically to what is on the forums for the second layer. Hopefully it works!
I actually plan on painting the Polaris too, I just don’t like the wood finish look.
- GrandpaPhil, mtaylor, rmccook and 1 other
-
4
-
9 hours ago, Jaager said:
Things are not nearly a dire as they seem.
Polaris is a double layer POB build.
You are doing the first layer. The only function of the first layer of planking is to provide an adequate base for the actual planking.
The molds on most POB kits are too widely spaced to provide support by themselves. Even though the first Italian kits termed them bulkheads, this is not what they are.
Actual bulkheads are a feature of steel vessels and Chinese sea going junks. Western wooden ships did not have bulkheads. They are a mold of the cross section at their location.
For that first planking layer - just good enough for the outer layer is enough. Gaps between strakes are not important. They do not need to be filled. If there are dips and hollows between the molds, these need to be fleshed out. Often a scab of wood does a better job than spackle if the dip is significant.
If there is enough support for the outer planking, it does not matter what it looks like.
Okay, that makes me feel better 😅 -
1 hour ago, LCdr Dave said:
Hi Chickpeas,
Welcome to the forums. There is a ton of help here and you can google YouTube videos and find practicums and lessons that ago through planking in detail. I am not familiar with your particular model but when I started my Mayflower some two years ago, frustration let to me ripping everything off, finding more resources, and trying again a year later. I got ‘er done! I had to learn patience, how to bend wood in two directions, and more but it is all out there. From the bit that I see on yours, you are going to pre-bend the planks so that they sit without forcing them and you will likely need “stealer” planks to fill in the gaps.
Definitely check out other build logs to see what others do.
Best of luck,
Dave
Hello!
stealer planks for sure!I feel like I’m pushing the limits to the type of wood I’m currently working with, actually to the point that I’m splicing and puzzle piecing the bow. (The front? That’s the bow— I think.) Going to try to learn a different way to do planking in some of the videos others posted on this site like it was suggested, I would cry if I had to rip all the planks off right now😭
-
28 minutes ago, Jaager said:
If you click on the Articles Database link at the top here and scroll down to the Framing and Planking section, the bottom three articles will show how the planking should be done. You do not have the materials to match what is shown, but this may give you a map for adapting as best can. Or you can buy wider and better replacement planking from a vendor at the right side of this page.
You cannot spill an "S" shaped plank from wider stock with what is your kit supplied planking, Trying to edge bend to a serious degree is fighting the nature of the wood, so at least you should have some idea about the cause of your frustration. The garboard is the key to getting the rest of the planking to work out. For it, the edge opposite the keel should stay dead straight. Any removal should be at the keel edge and that should mostly be at the stem rabbet. Never bend the ends up the stem.
w o w, I didn’t know that.. I have a Lot to learn because I had to Google quite a few things you said 😅😆I’m fresh out of the oven in this hobby.
To get the planks to work, I steamed them for like 20 mins over a pot of boiling water and did a little crimping to get them to bend easier… that explains why I broke a few…
Thank you so much!!! I’ll finish this with what I have but once I’m Done I’ll go through what you’ve suggested, I might actually try another beginner build with other planks for practice 😄
-
17 minutes ago, rmccook said:
Mine broke too…
the good news is it glues easily…


I worried it looked terrible and spent time sanding, etc and only later discovered it’s covered up on the outside and painted and partially obscured on the inside.
Same thing with the planking - a second layer is going to go on, so it’s important for it to hold together and be smooth. But, aesthetically, it’s not super important if there are errors. You can slice and splice in planks, as long as it’s sturdy and the correct shape.
Now, if you’re like me and you break planks on the second layer, where they are much thinner and delicate, or don’t make clean cuts, which leaves it looking ragged, it’s more of a problem. I had to peel off a number of garbage looking outer layer planks and fit in new ones, particularly on the bow as I tried to fit the keel piece on… it definitely wound up looking a bit patched and I thought I had ruined it… but some obsessive sanding and varnish REALLY goes a long way. I probably won’t post a picture of THAT after seeing the gorgeous work some people do around here, but it looks acceptable to the naked eye, that is not inspecting it too carefully, which most eyes won’t since this model is probably going to live above my desk or workbench. It all *mostly* was okay, but most importantly, now I know what’s important to pay attention to on my next model (don’t ask me about the next one yet, I’ve got to get through the rigging).
The other thing I’ve read (here on MSW) is that OcCre has very good customer service and if you do irreparably break/lose something they will be very helpful in replacing. And when it comes to things like planks, copper wires, thread, little eyelet hardware, they seem to have packed a significant number of extras. Even when I had to discard planks I really botched I had plenty to spare and now that I’m down with the hull and deck, I probably have enough leftovers to do another half side of a hull, if I needed to.
LOL you broke it too, that made me laugh, I’m glad to see I’m not the only one.But- Hey that’s coming along really well though!!!! 😄
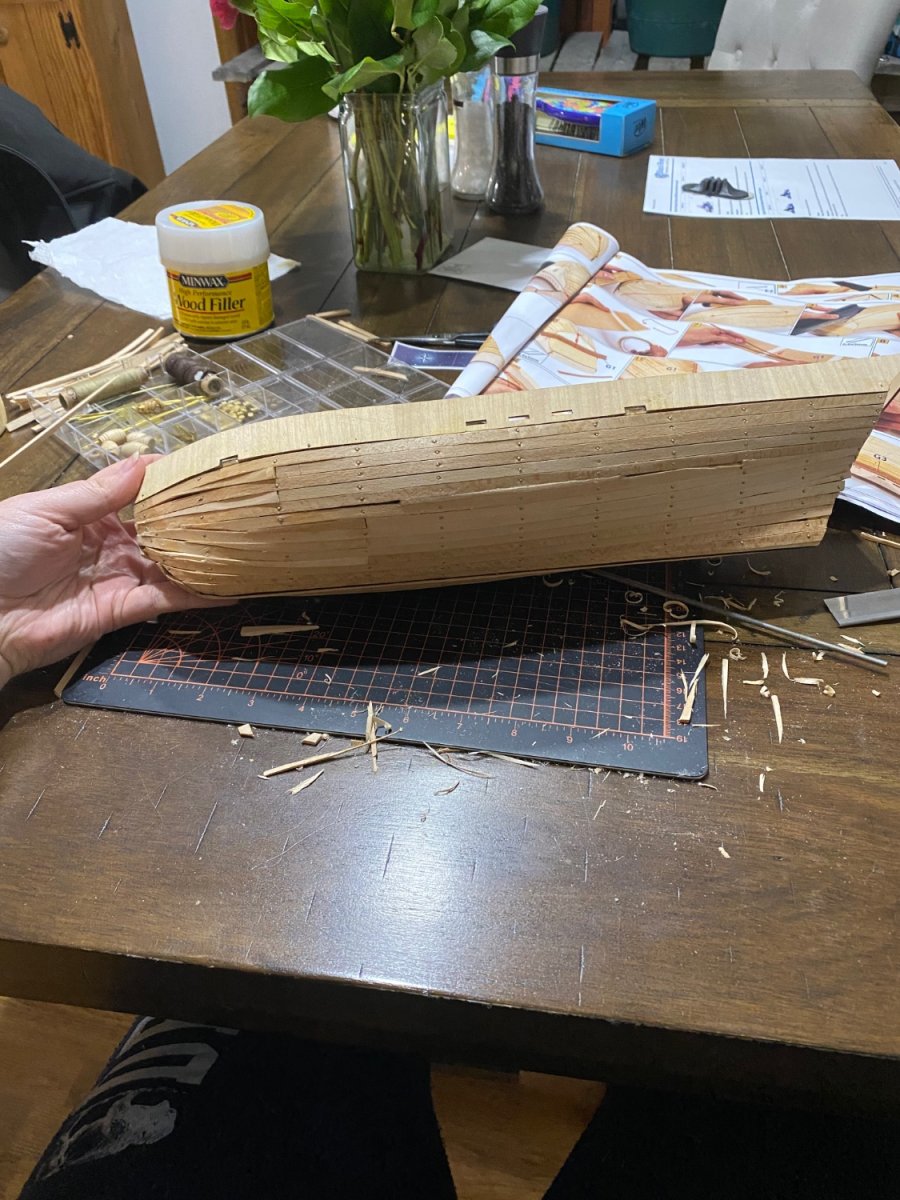
Here I’ll show my hot mess and shame, I can’t figure out How they wrapped the planks around the bow… it’s impossible. Maybe this will give you a bit more confidence on yours 😆

BEHOLD the Occre eyesore 🫣
gonna patch this together like a jigsaw puzzle I guess 🤣 I’ll take your hint at sanding this puppy like a madwoman.
Keep me updated on the masts and rigging!
-
-
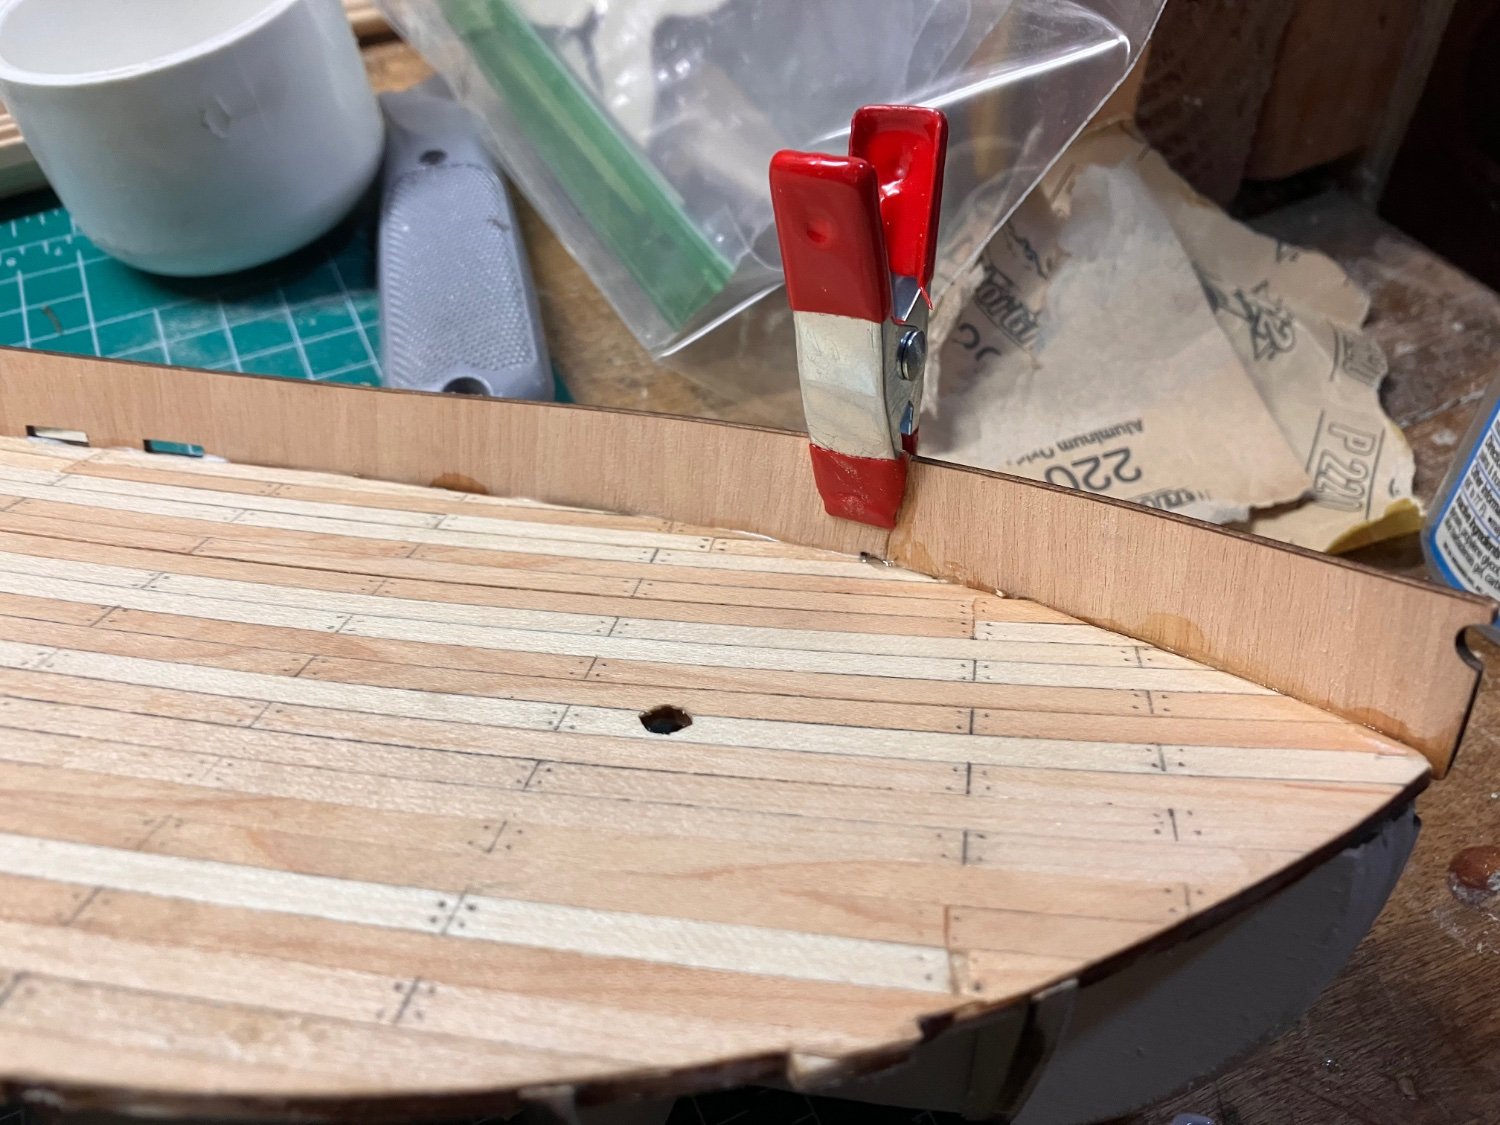
Hello!!!So I am having a Blast planking the Occre model Polaris, so far it’s really not complicated and I’m having fun and chipping along quickly!
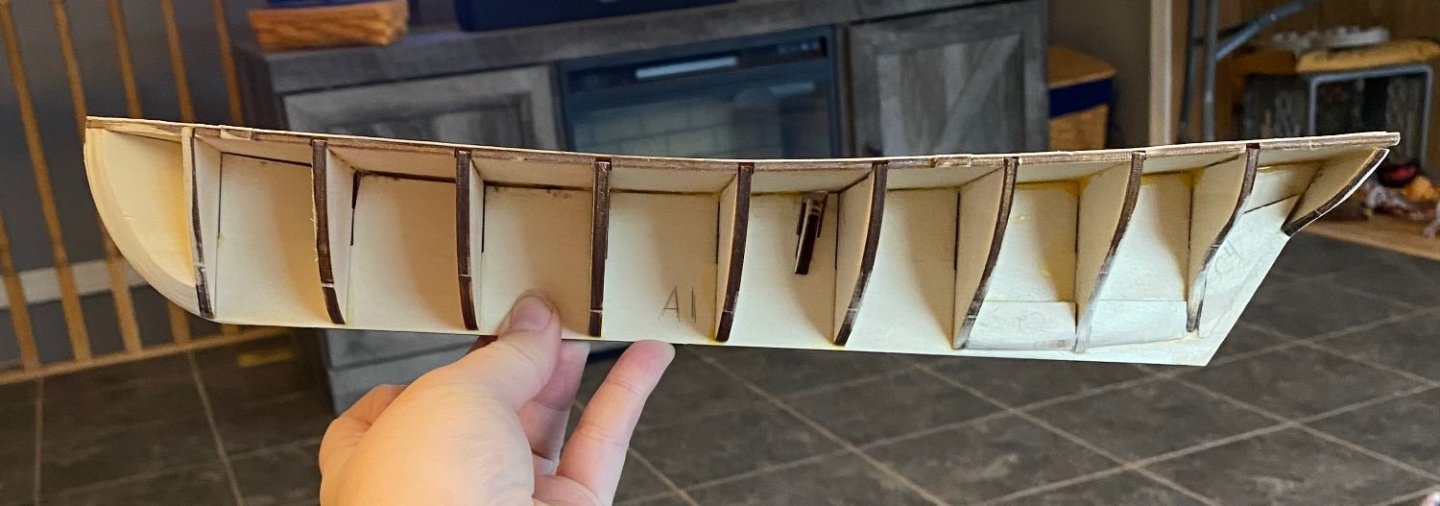
I just have one concern- that my planks are not laying flat against the keel? I have 0 clue how to make that happen. I don’t glue my planks down for this build because, having no idea what I’m doing, I can at least take parts off to Re-hammer and fix. But yeah- my planks are crooked and poking out.

I’m sure after sanding and all that, it’ll be fine, but I would like to know how YOU keep the keel pieces flat for my future hulls. The instructions aren’t helping me figure this one out on where things went wrong.
Did I not sand the ribs or supports enough? Does it require strong glue and clamps and bam easy fix?
Thank you SO much, you’re saving the Terror from future hell 🫣😂
-
5 hours ago, rmccook said:
Welcome!
I've just finished the first book of instructions (the hull part) for my Polaris and am stalling work on the mast and rigging. It's a fun kit!
I've found OcCre's manual extremely clear and easy to use, but the YouTube series they have for each step has been INCREDIBLY useful. Sometimes you just need a different angle, or watching someone do some tricky little thing that you just can't show in even the most detailed instruction or clear photo. I've also noticed that the videos slightly deviate from the manual, but always in ways that get it done.
My biggest piece of advice (as someone barely ahead of you) is that you should not be afraid to make mistakes, because you will make a lot of them, but almost all of them can be fixed with some sanding. AND, I've discovered, most of the mistakes I really worried about ending up being completely inconsequential because they were covered up.
I did not take shaping the bulwarks in the bow very seriously and ended up really worrying about it, but by the time the two layers of planking were on, sanded and stained, you'd have no idea something was amiss. It certainly is uneven in its shape in a way that would matter tremendously if it was a real boat trying to sail anywhere, but to the naked eye it can't be seen and it sits levelly in the stand. Same with the bow—really stressed over how the planks were coming together at the front, how it would all feet with the front section of keel, etc. and sanding, a small amount of wood-filler, and stain made my mistakes barely perceptible and now mostly covered by the anchors.Good luck!
Oh man thanks for sharing!!
I actually broke a lot of things so far 😑😂
The bulwark for example— broke in half. Not willing to talk about that, BUT, I fixed it and honestly you really can’t tell.

LOL!!! That little weird glue spot- I had no idea wood was so forgiving. I’ll also give you a dollar if you can find the plank that split in half.
glad you said that because I’m having a fit at how these planks aren’t fitting properly. Being an artist I keep telling myself if anything is Too off I’ll slap clay on it, model, and paint it to match 😂
What build are you going to next!!!
-
28 minutes ago, Knocklouder said:

Good luck on your journey! Tremendous amount of info here at MSW, and an even greater amount of help, just ask you'll see .

Those emojis are fantastic, thank you so much! I’ll definitely be bombing the place with questions 😀
- Keith Black and mtaylor
-
2
-
Goodmorning, evening, afternoon !
Someone from Reddit actually suggested me to join this website and I am BLOWN away by the amount of members and dedicated ship builders! I am very new to the hobby, and I can’t tell you how much I love and enjoy these projects. Seeing so many people in this hobby makes me so excited to share projects with and read! I really need a helping hand. Or five. 😅
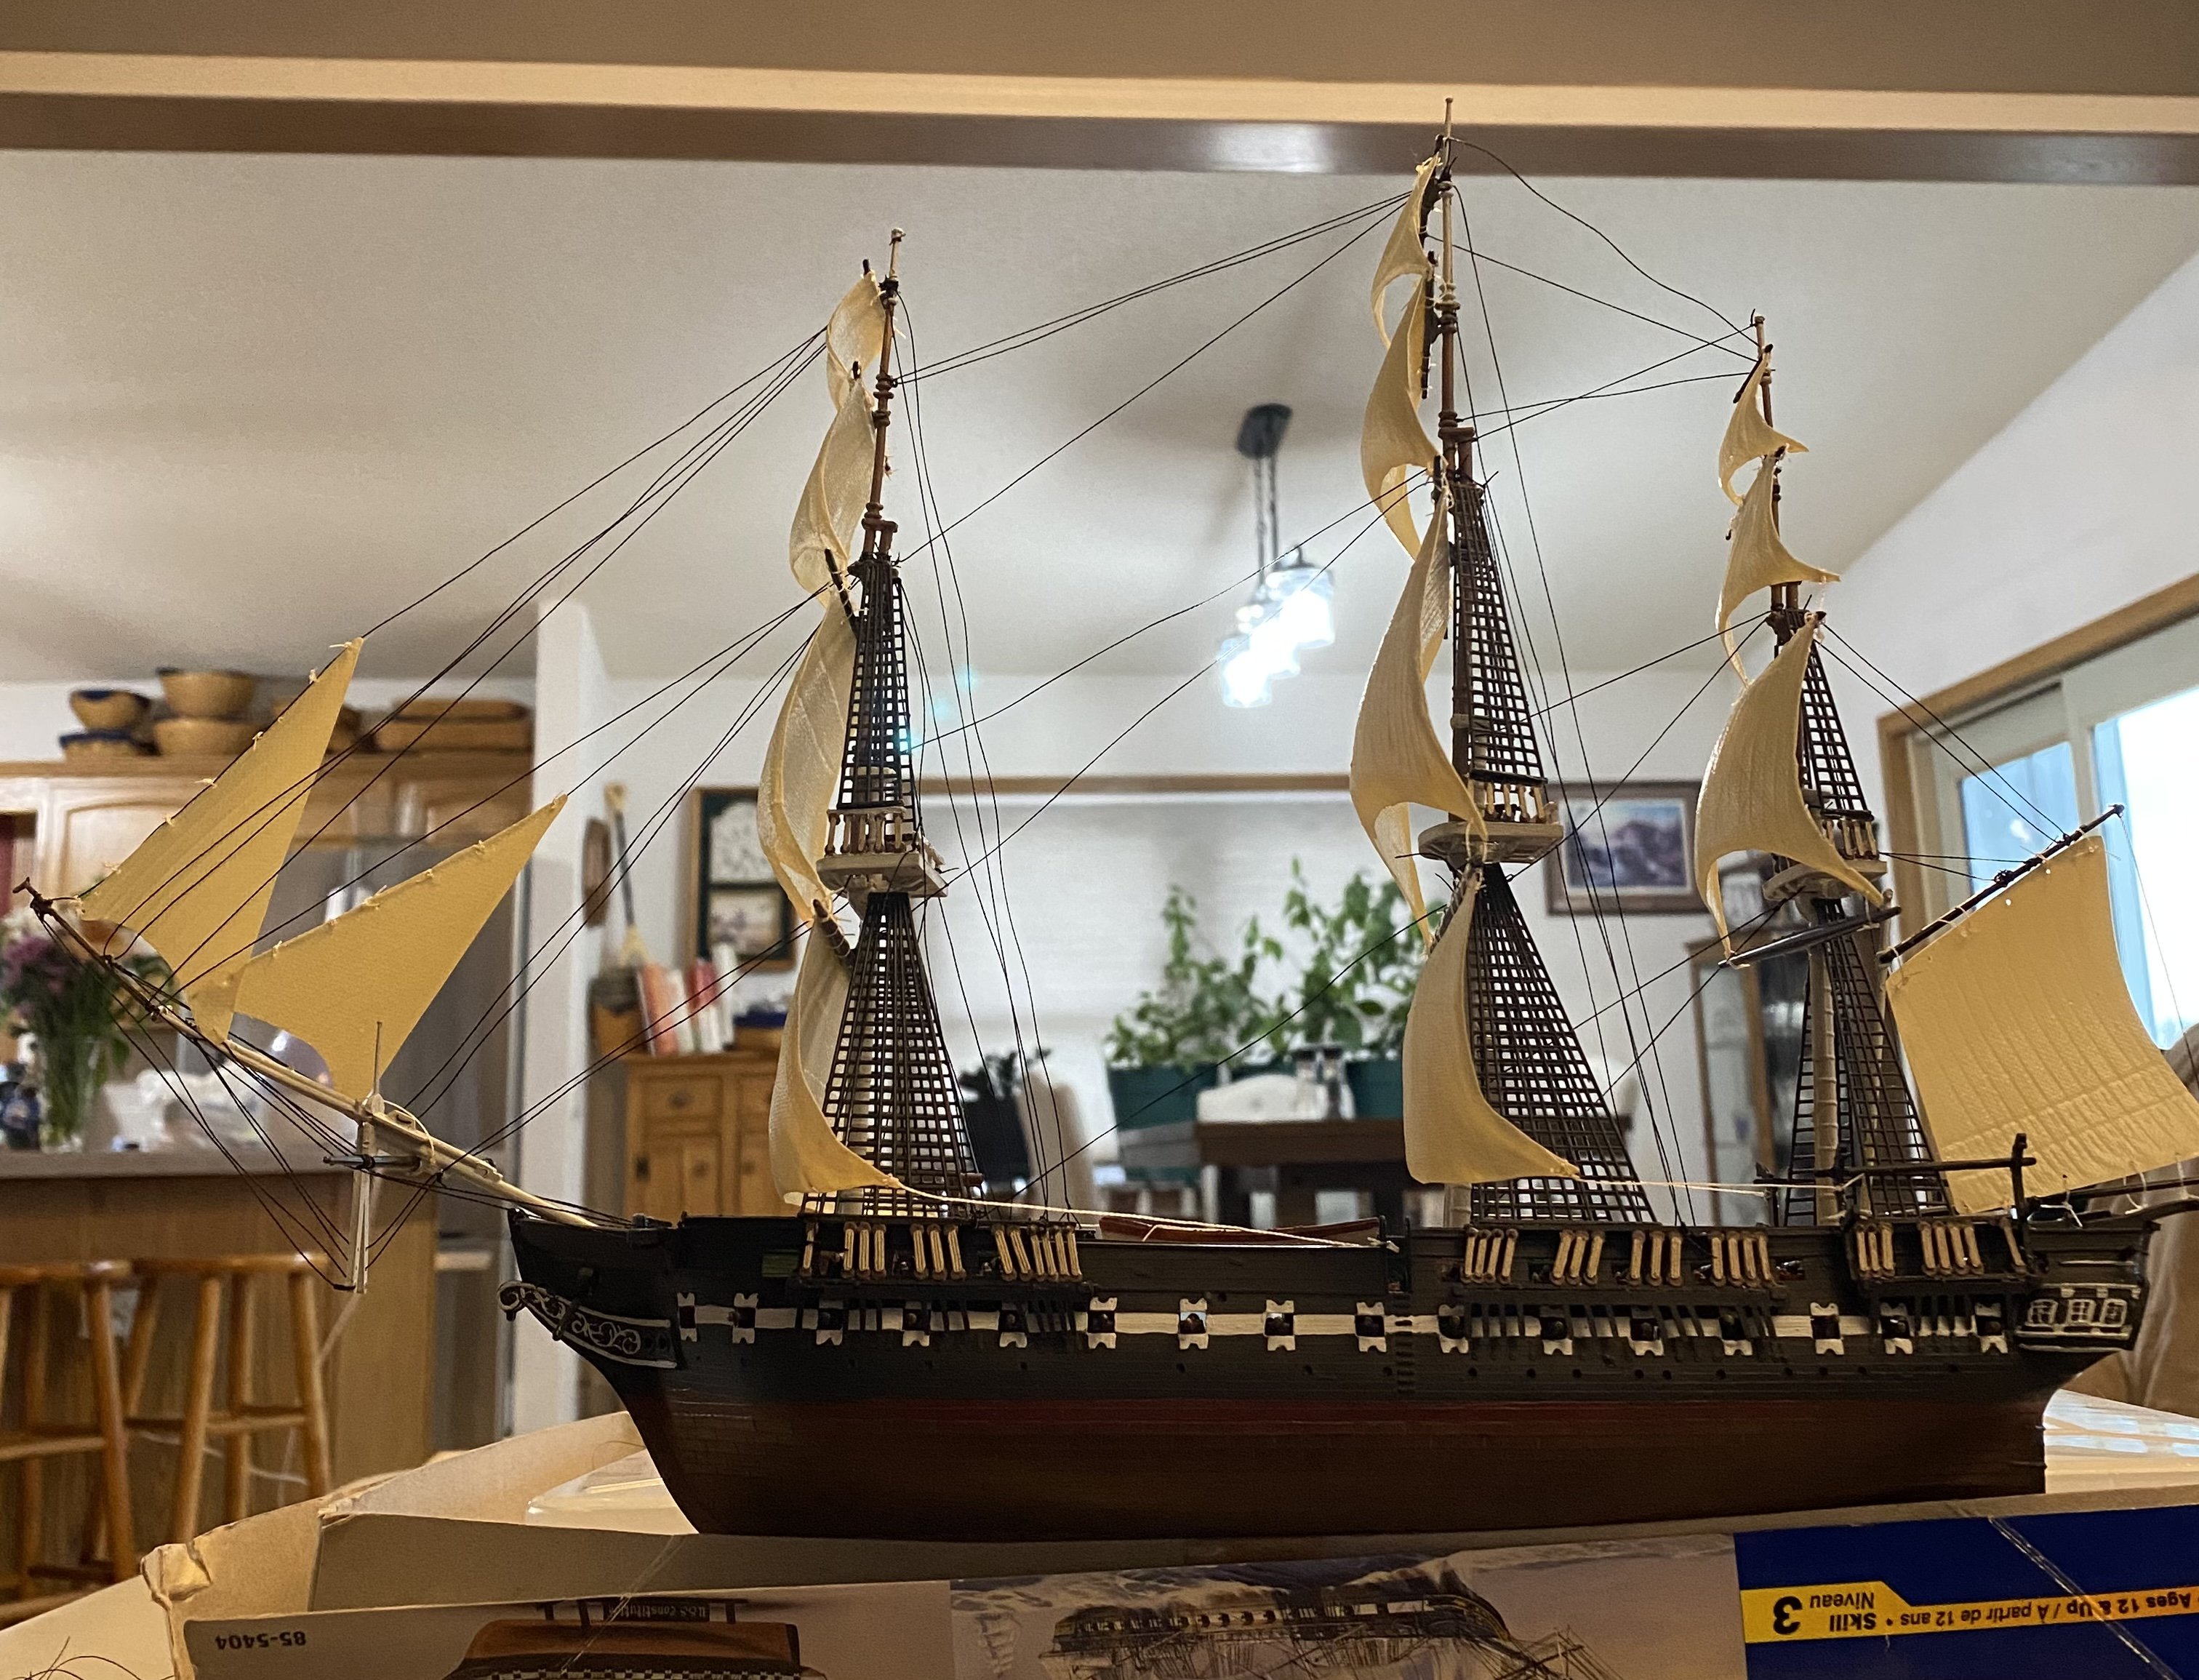
I am a digital artist, but I found this ancient USS Constitution model kit by Revel in the basement. It was my dads, so I wanted to give it a try.
I’m taking a brief break from rigging until I learn more tricks to do it because they don’t tell you much with these instructions, but I’ll share with you what I accomplished! (Yeah one of the sails is upside-down, they cut it wrong in the kit so I have to come up with a solution.)

Currently working on the OCCRE Polaris build, I have another OCCRE beginner project to experiment tips and tricks given by experienced members, and then when I’m confident enough—— The OCCRE Terror. One of my favorite historical ships.
I am so in love with learning wood working, I have never done anything that requires any skill before 🤣
The OCCRE company is my hero.I’d like to get to know and befriend some model builders, so PLEASE don’t be afraid to chat!
I’m interested in seeing your builds and projects, and any tips or advice you have to offer!!
Hope you all have a lovely day, can’t wait to get involved here!!! Thank you!
- GrandpaPhil, mtaylor, KevinR and 7 others
-
10


Polaris 1850 by Chikpeas - OcCre - 1:50 - first build - loosely based schooner
in - Kit build logs for subjects built from 1801 - 1850
Posted · Edited by Chikpeas
this is where I ran out of Occre’s magic instant glue, I felt lost.
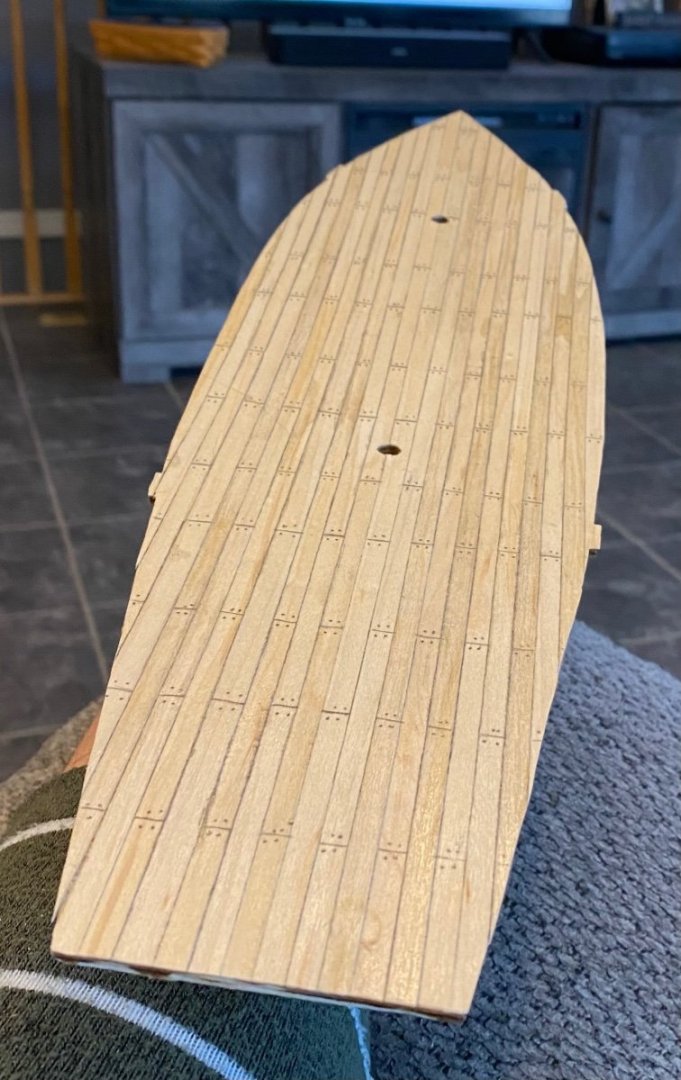
Anyway, The deck, remember the varnish?
yeah so you can’t stain wood after varnish apparently.
(Yes, I am a woman with 0 experience with wood, projects, anything like this! Haha!)
I tried to make an acrylic wash, that didn’t work. Tried to sand off the varnish, that didn’t remove it all.
I was down to my list will to keep this project and not give up…. I used the sander on the paint but it ended up looking way too weathered.
So- out came the crayola pencils. It worked, all thanks to the brilliance of a 5 yo! I feel quite a bit of guilt looking at the professionalism of the other build logs on the site, but I’m hoping gloss will make it a bit more not like pencils… oof.
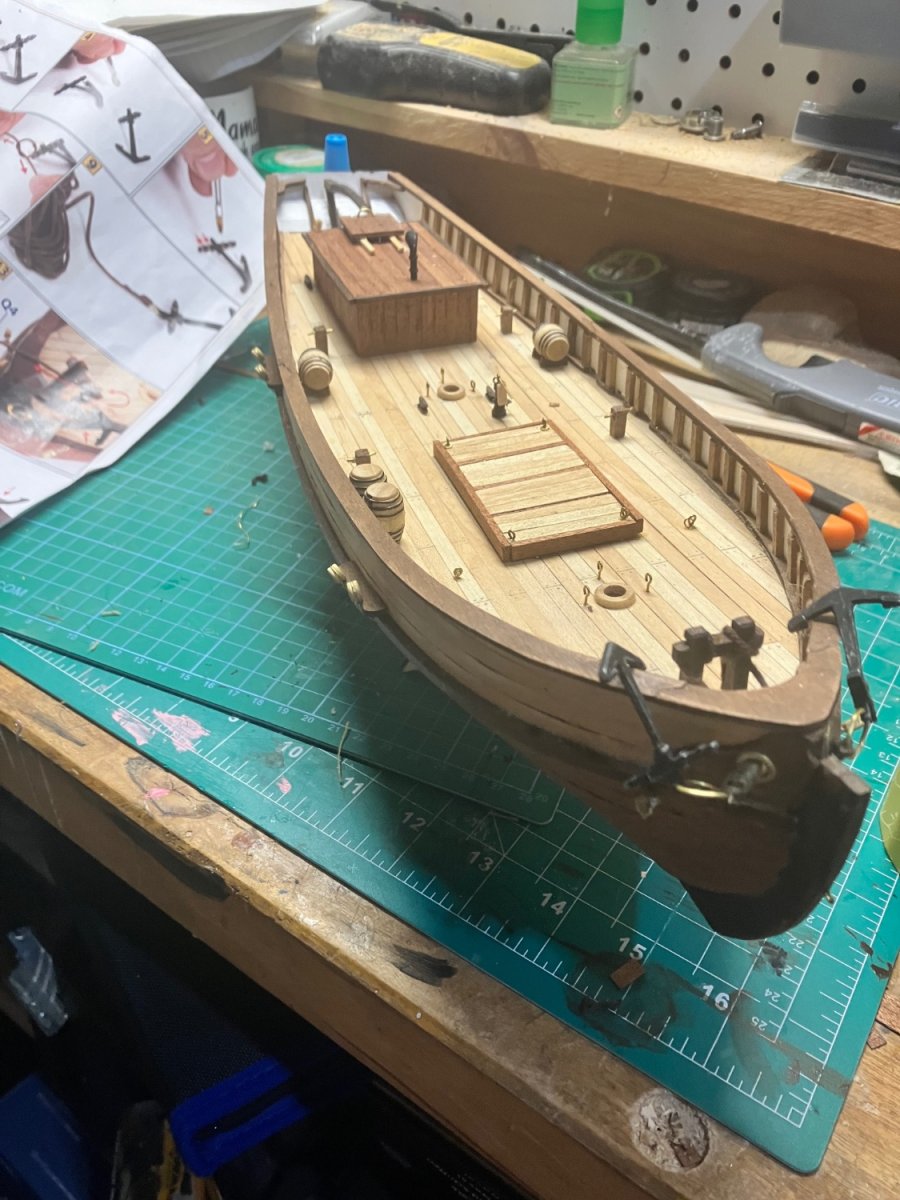
And here is my current progress!
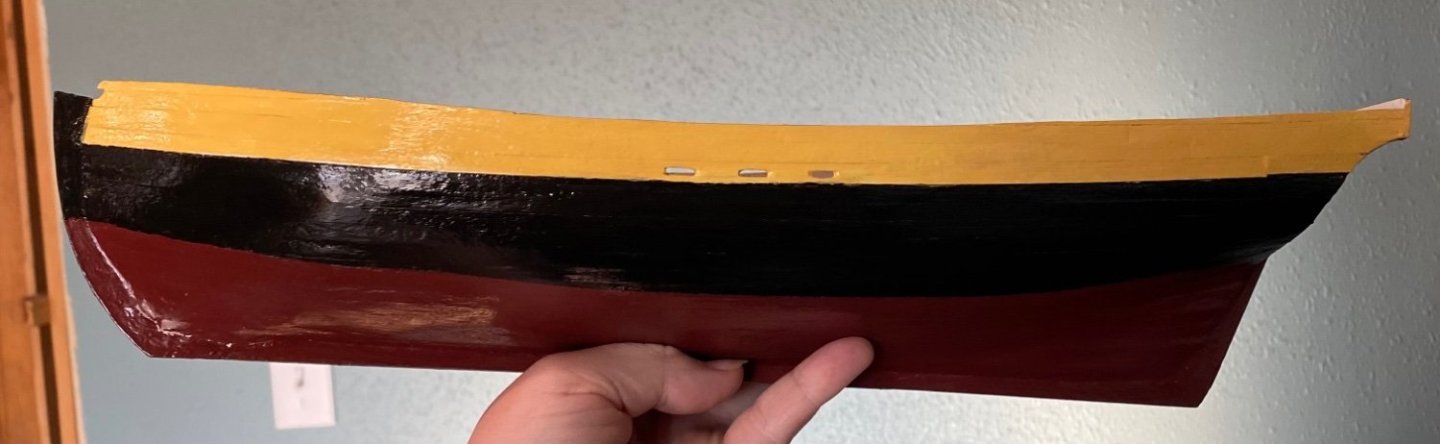
one layer of hull gloss done! I have some Side panel thing to do on it, but I get to start finishing it now! 😄
Thanks for reading the current progress!
I started this February 28th of this year, I hope to finish it soon!