rkre88
-
Posts
40 -
Joined
-
Last visited
Content Type
Profiles
Forums
Gallery
Events
Everything posted by rkre88
-
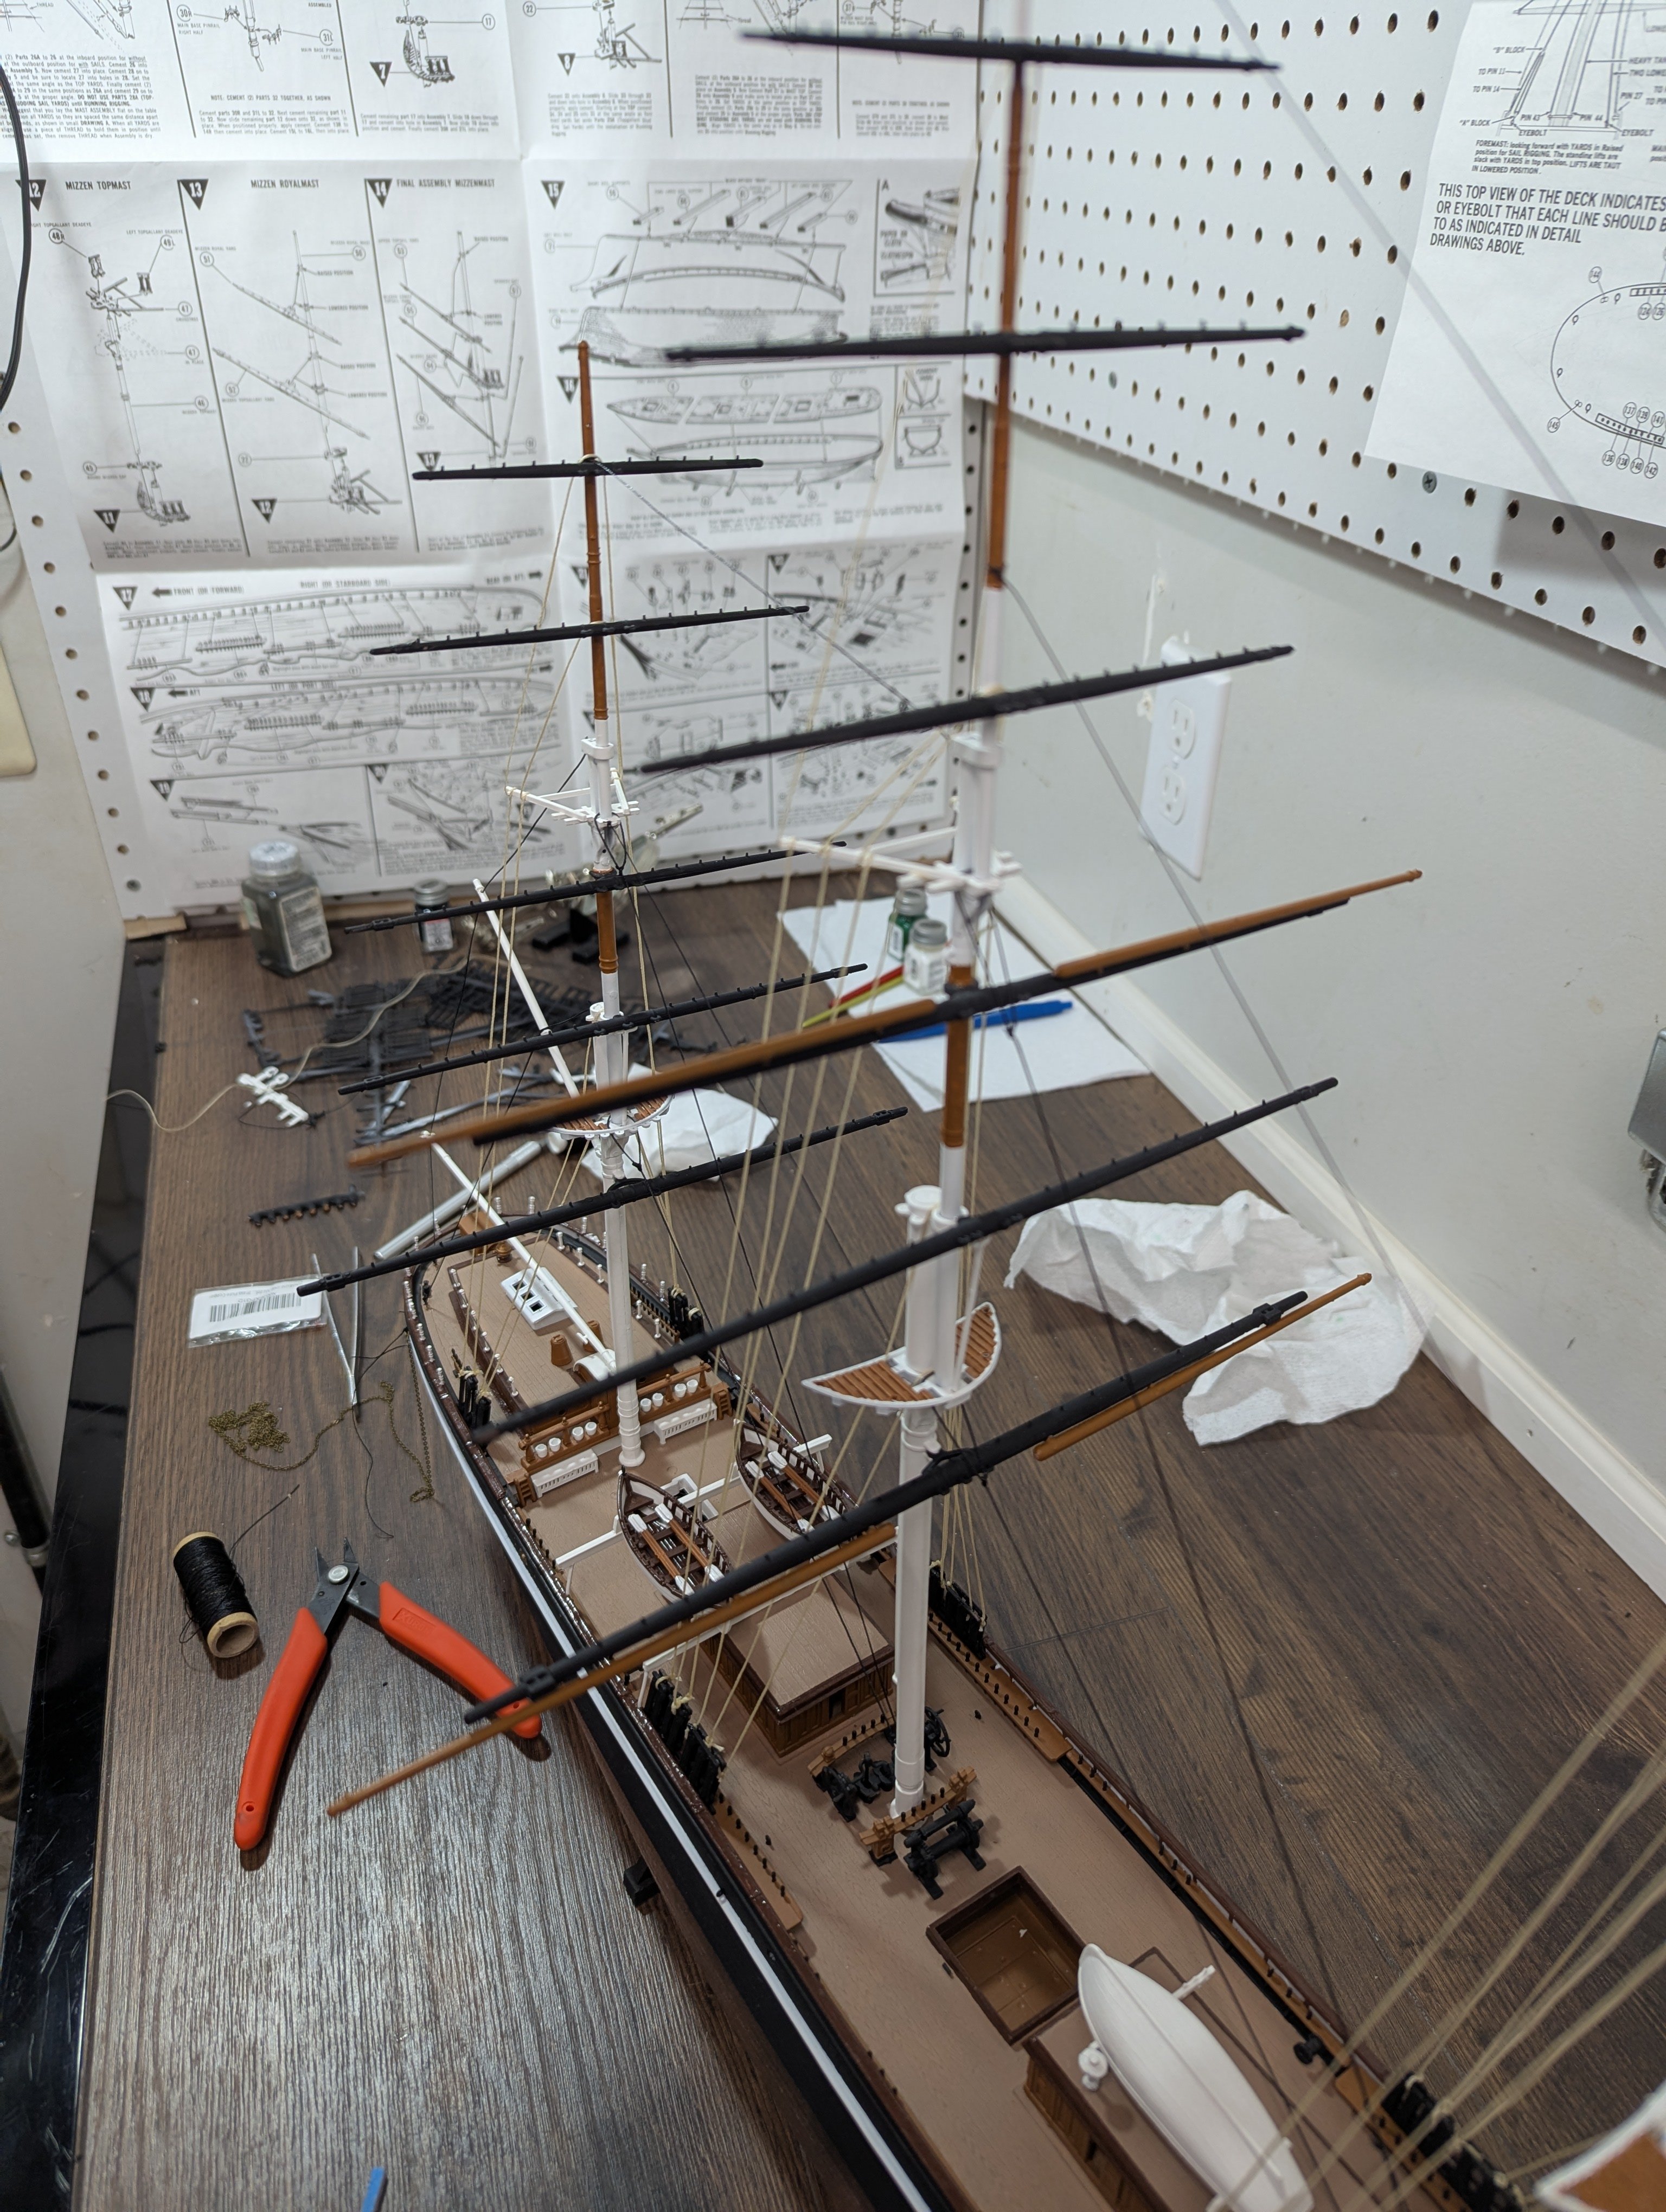
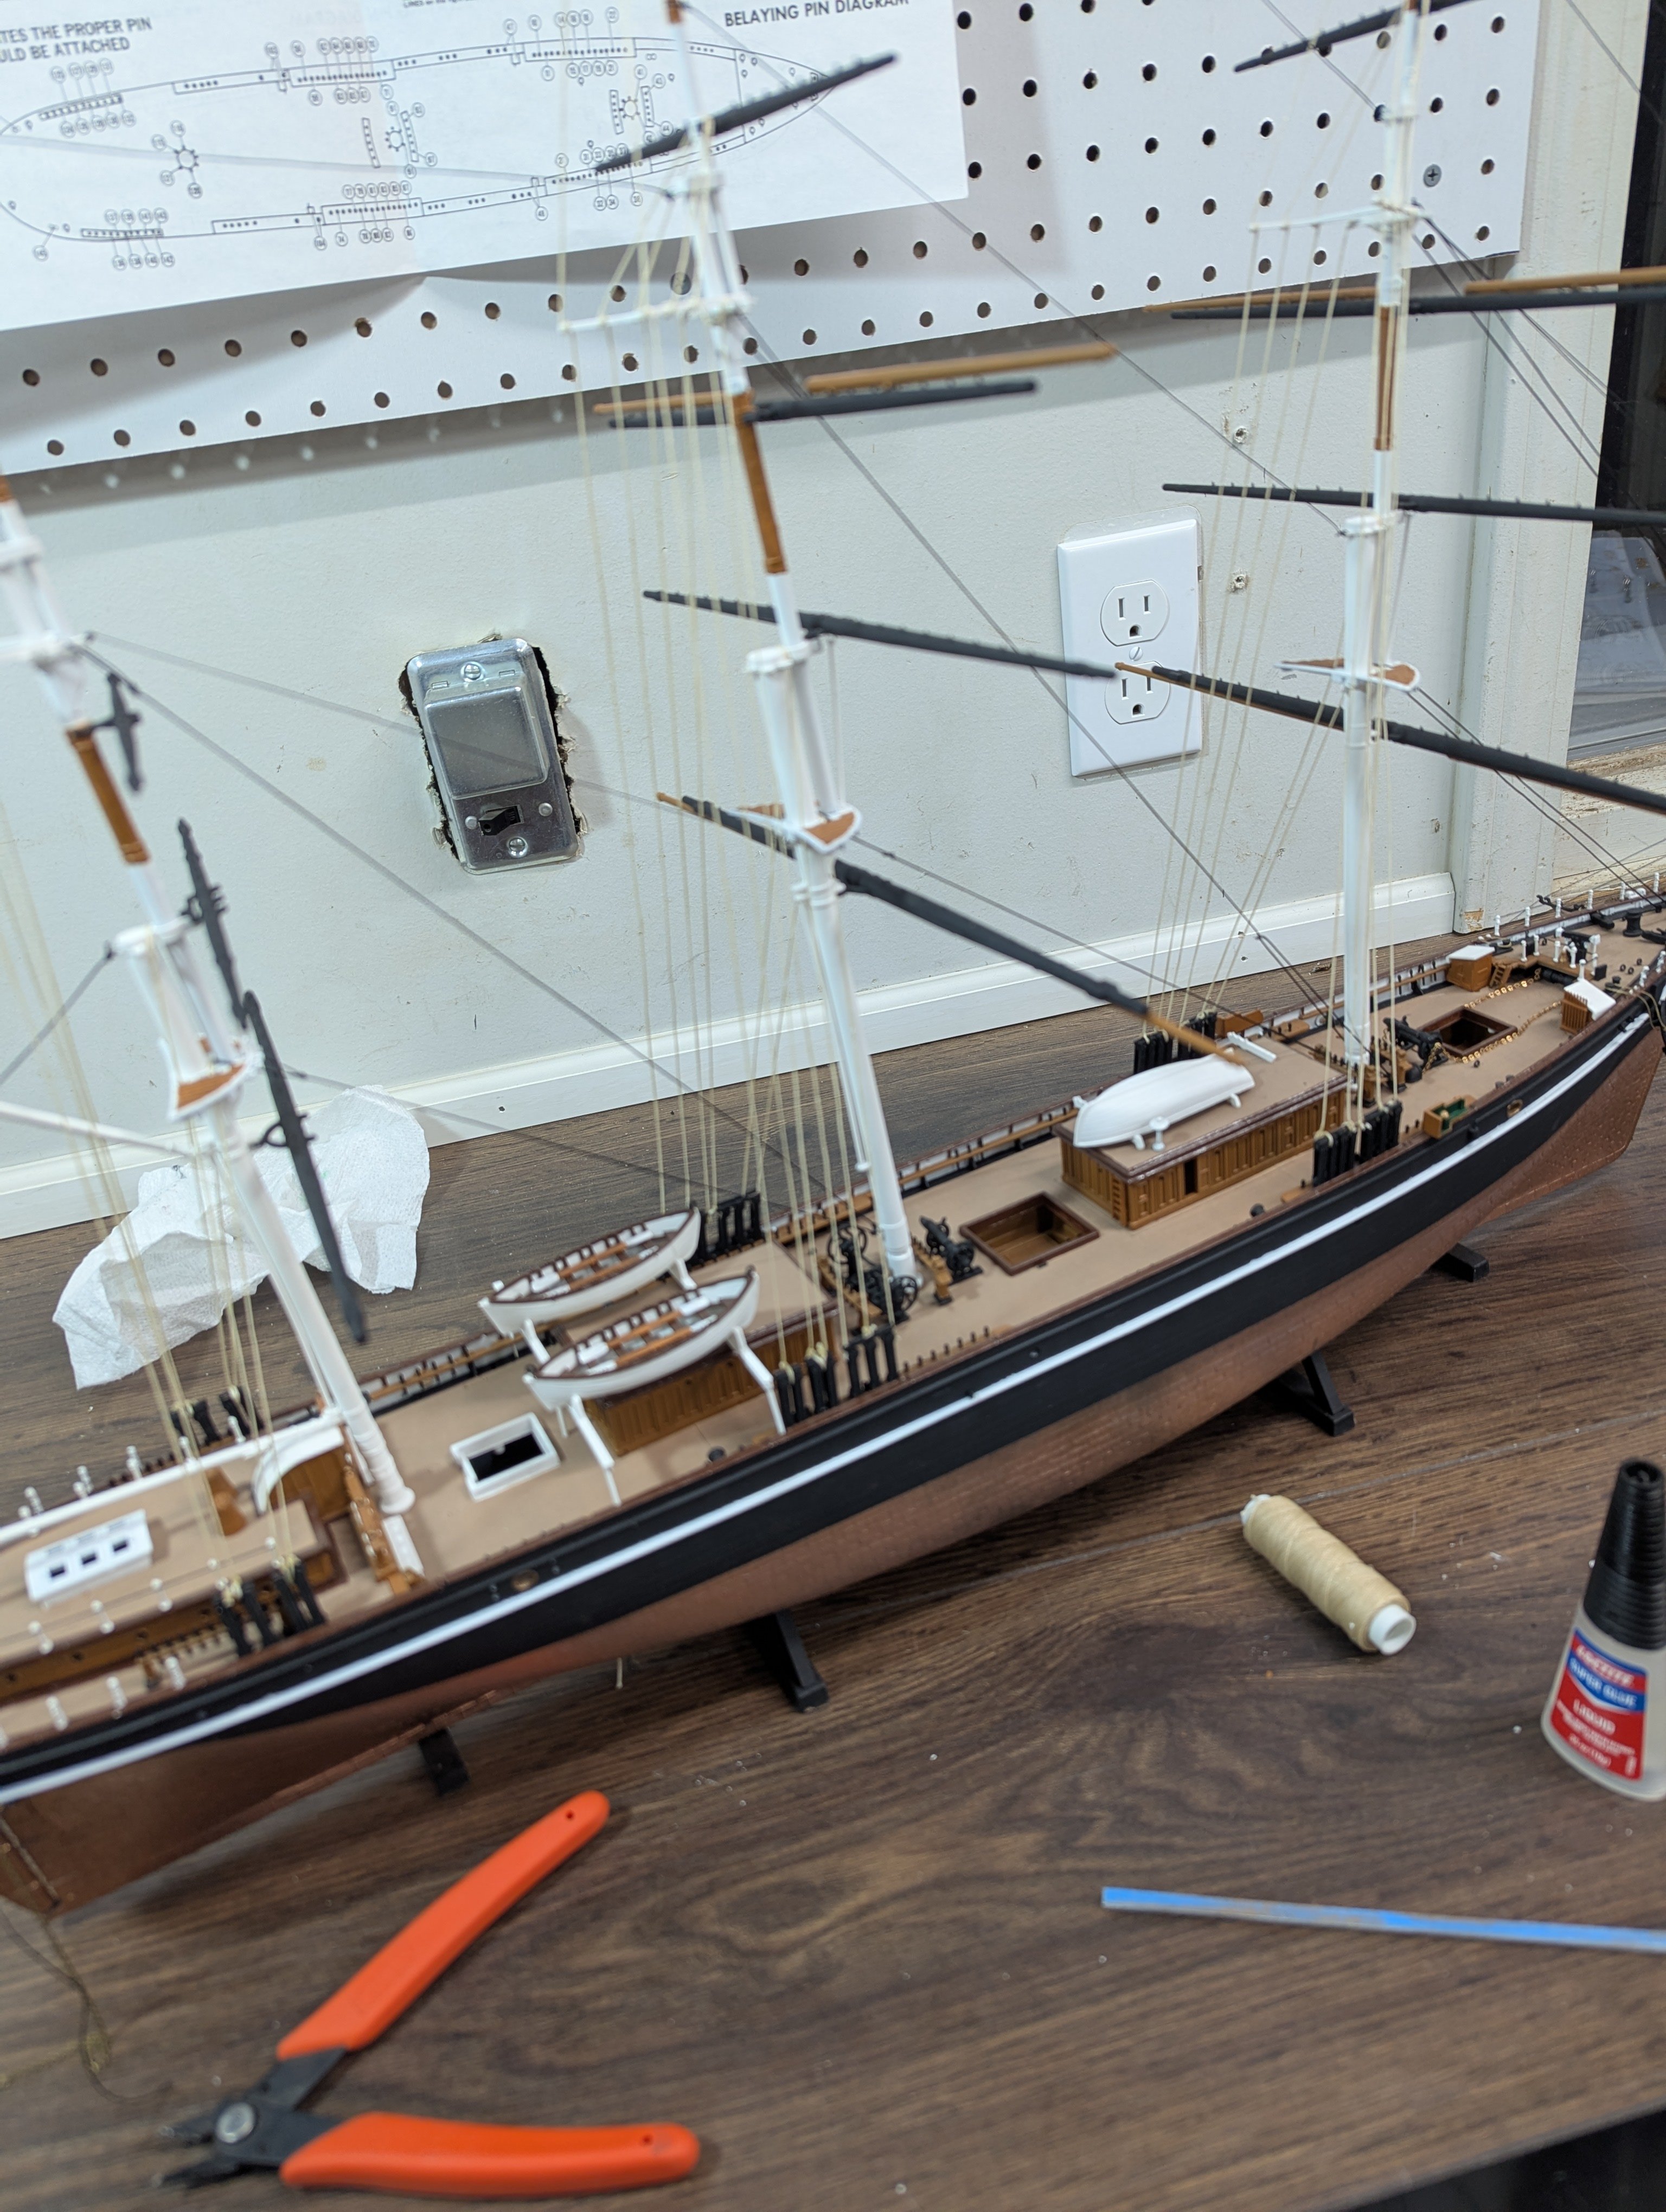
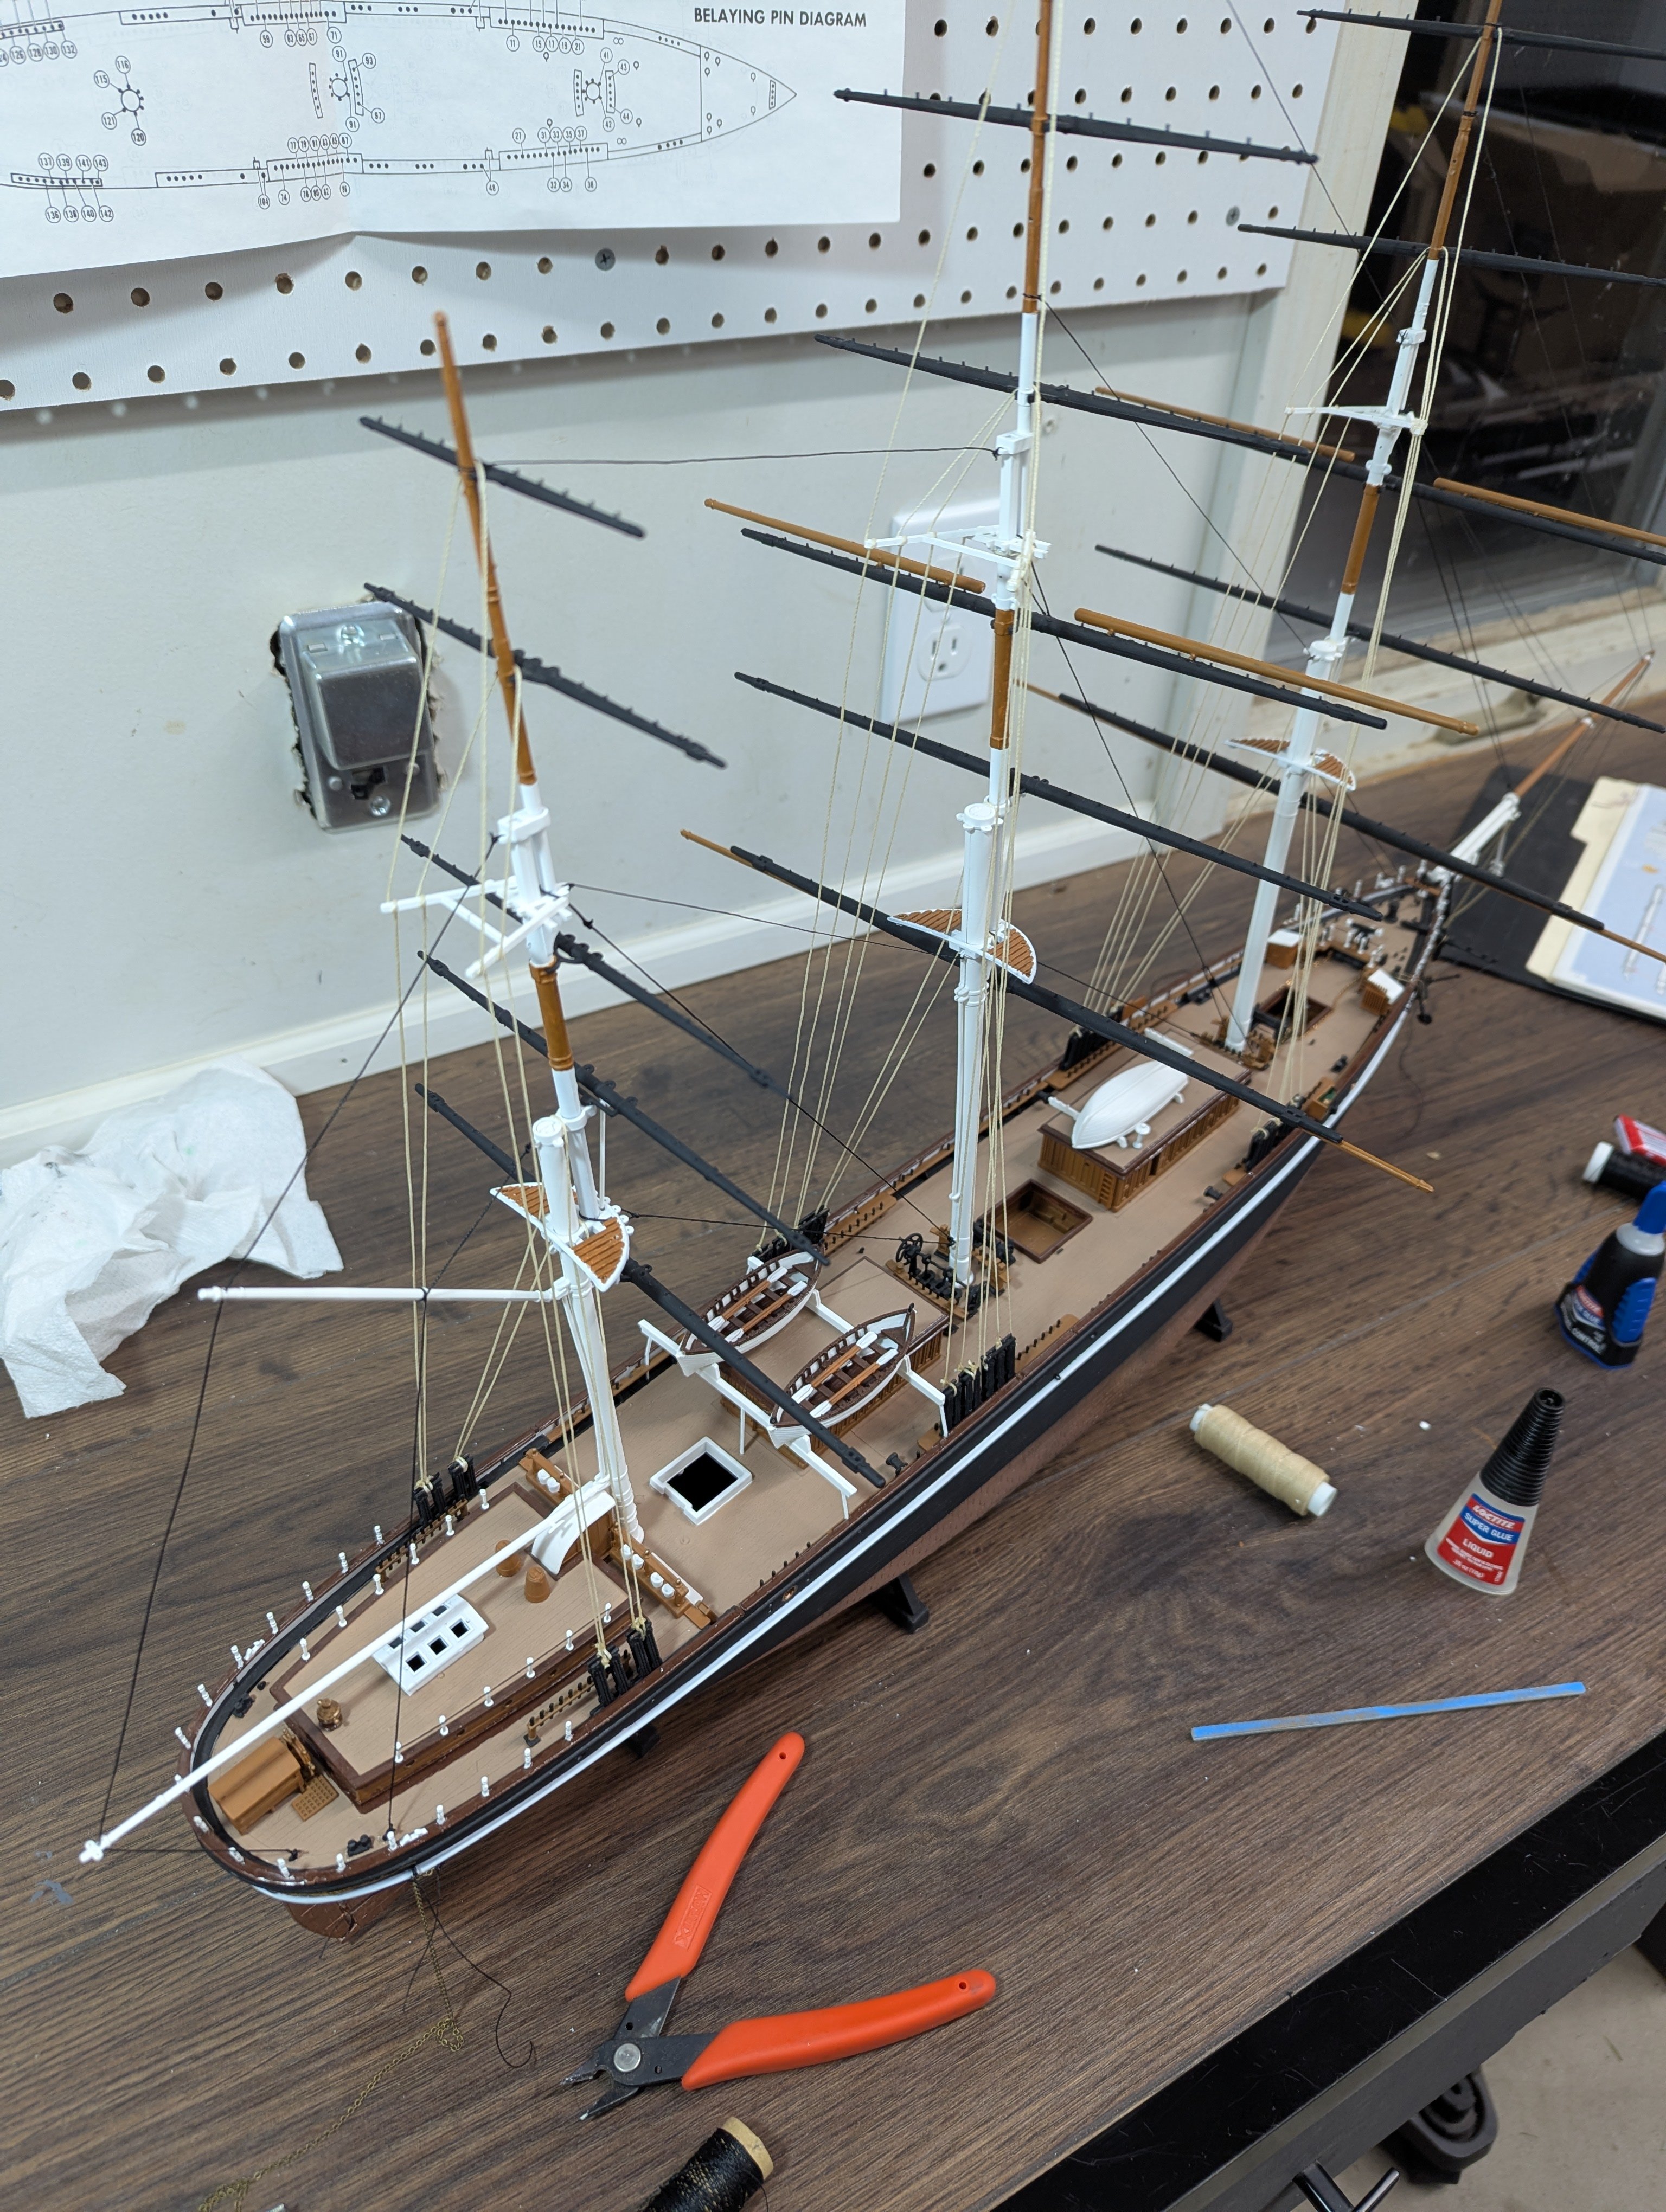
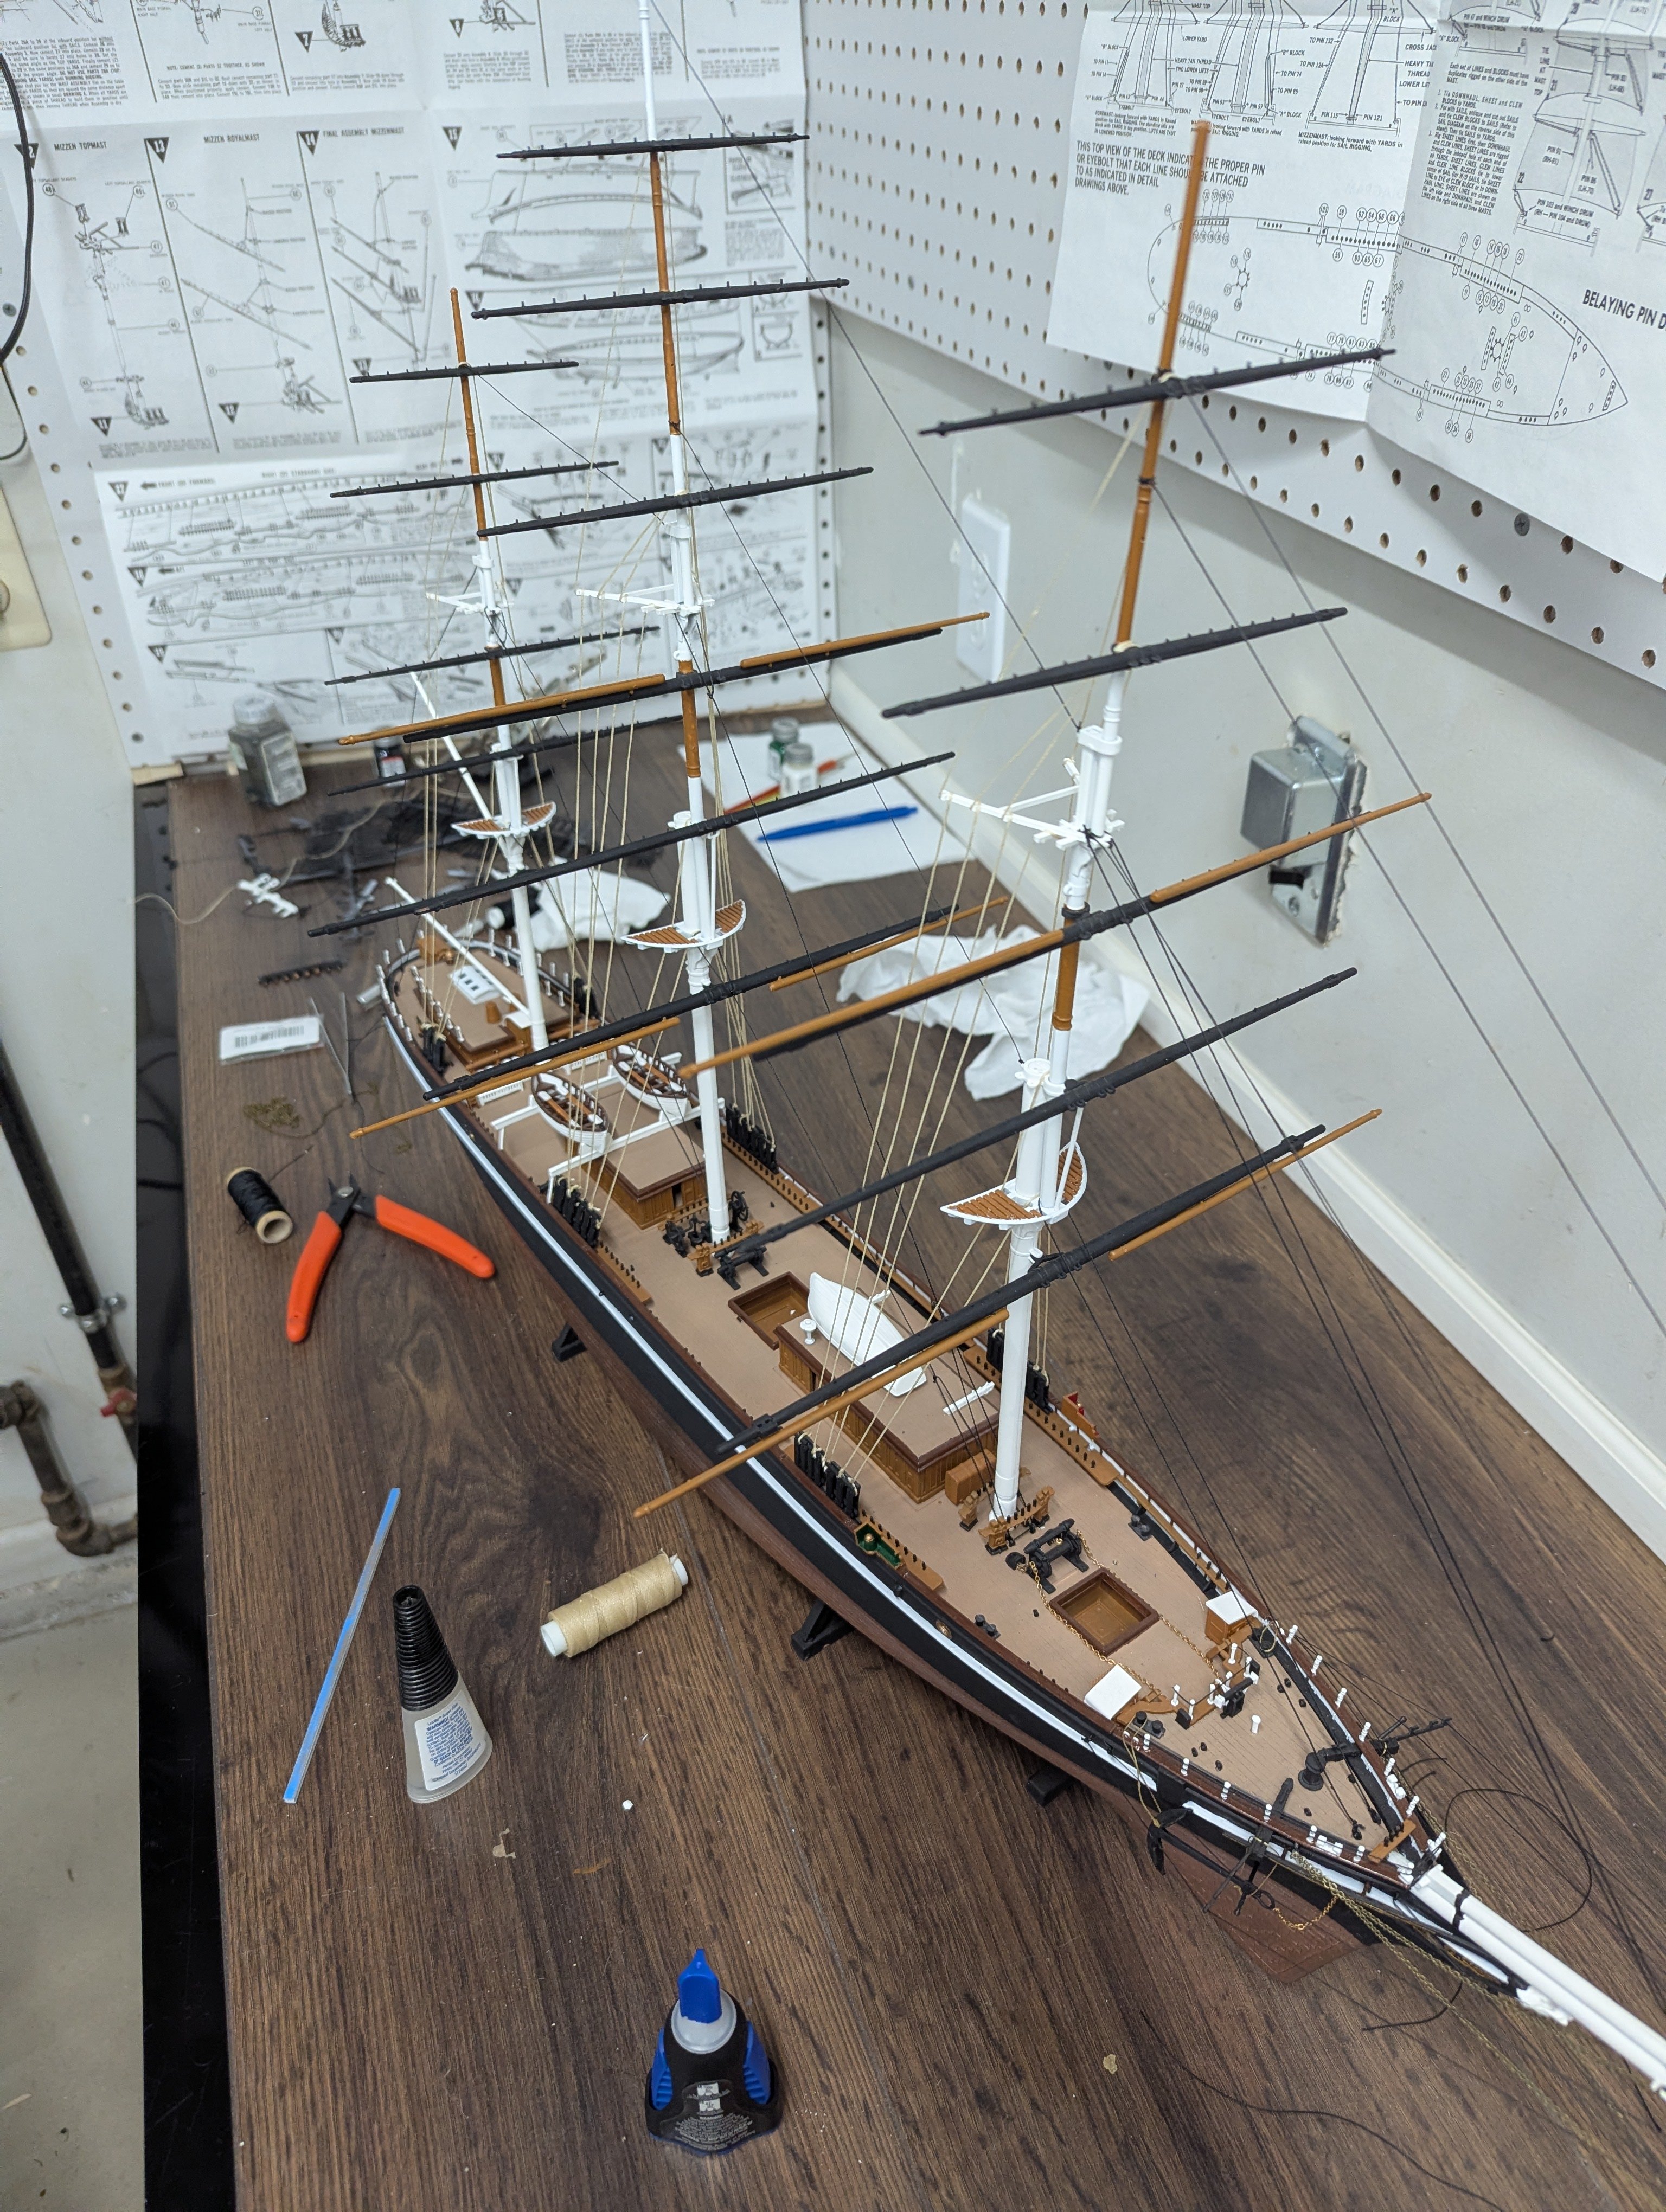
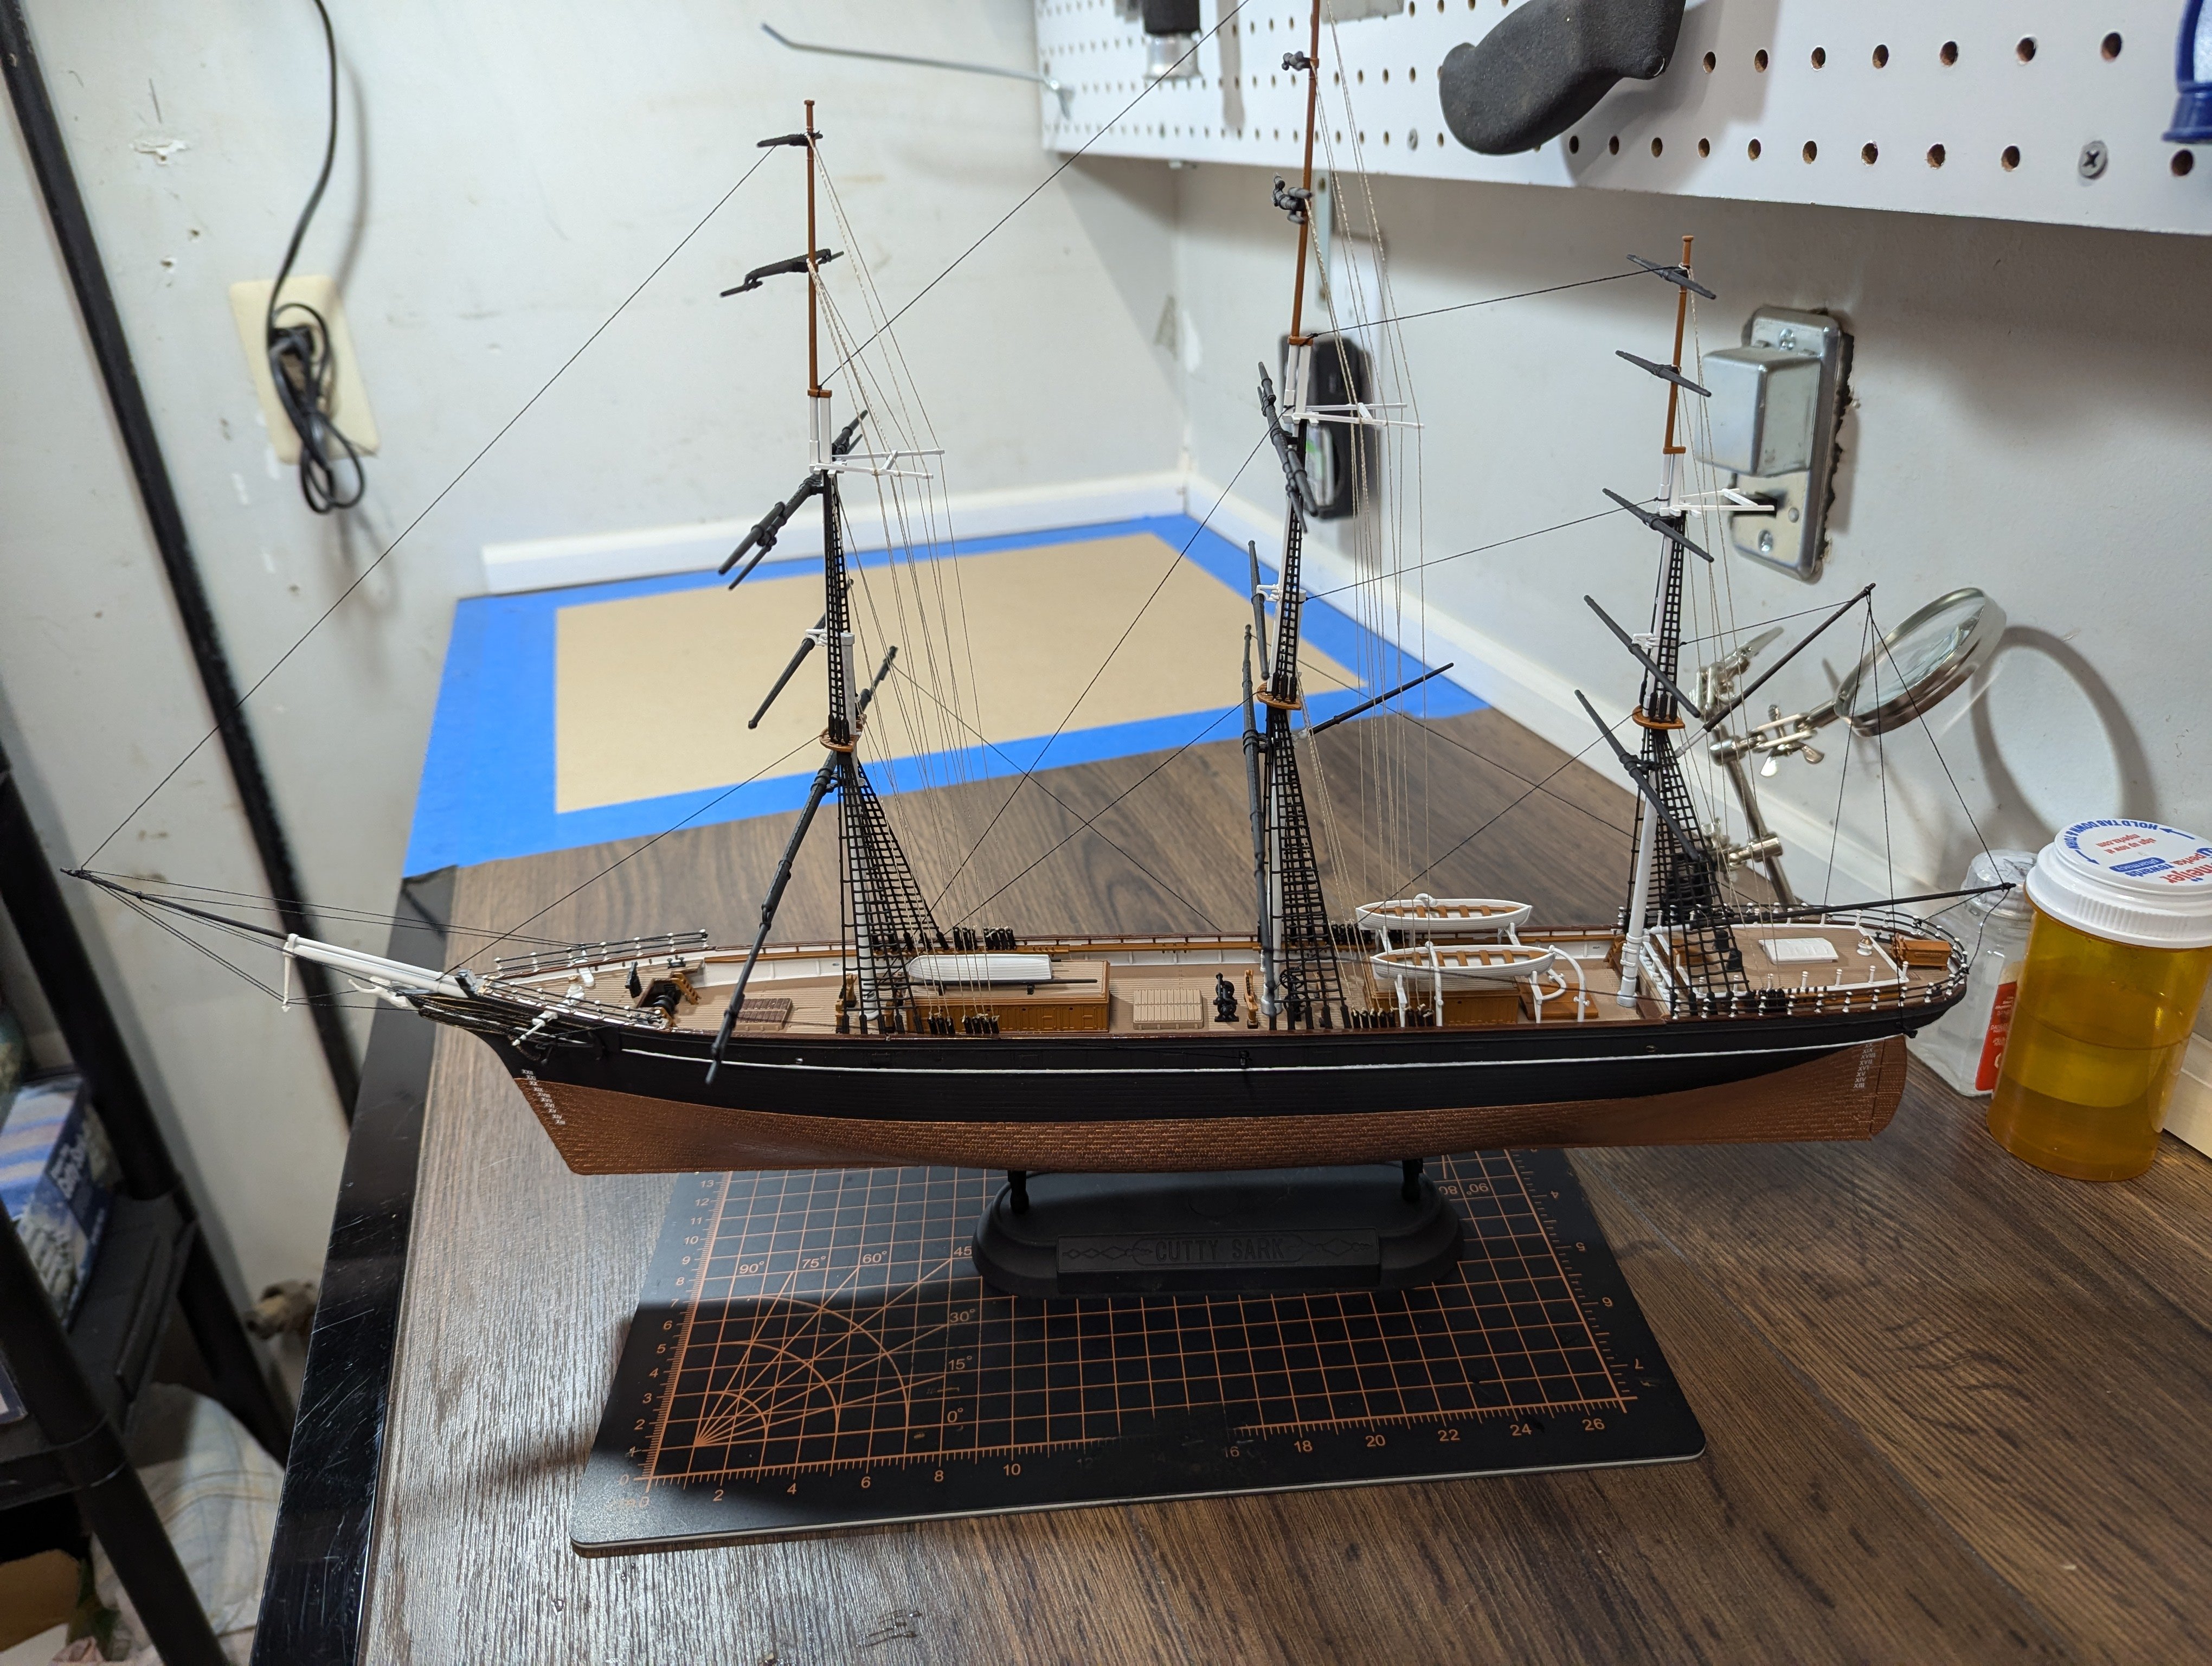
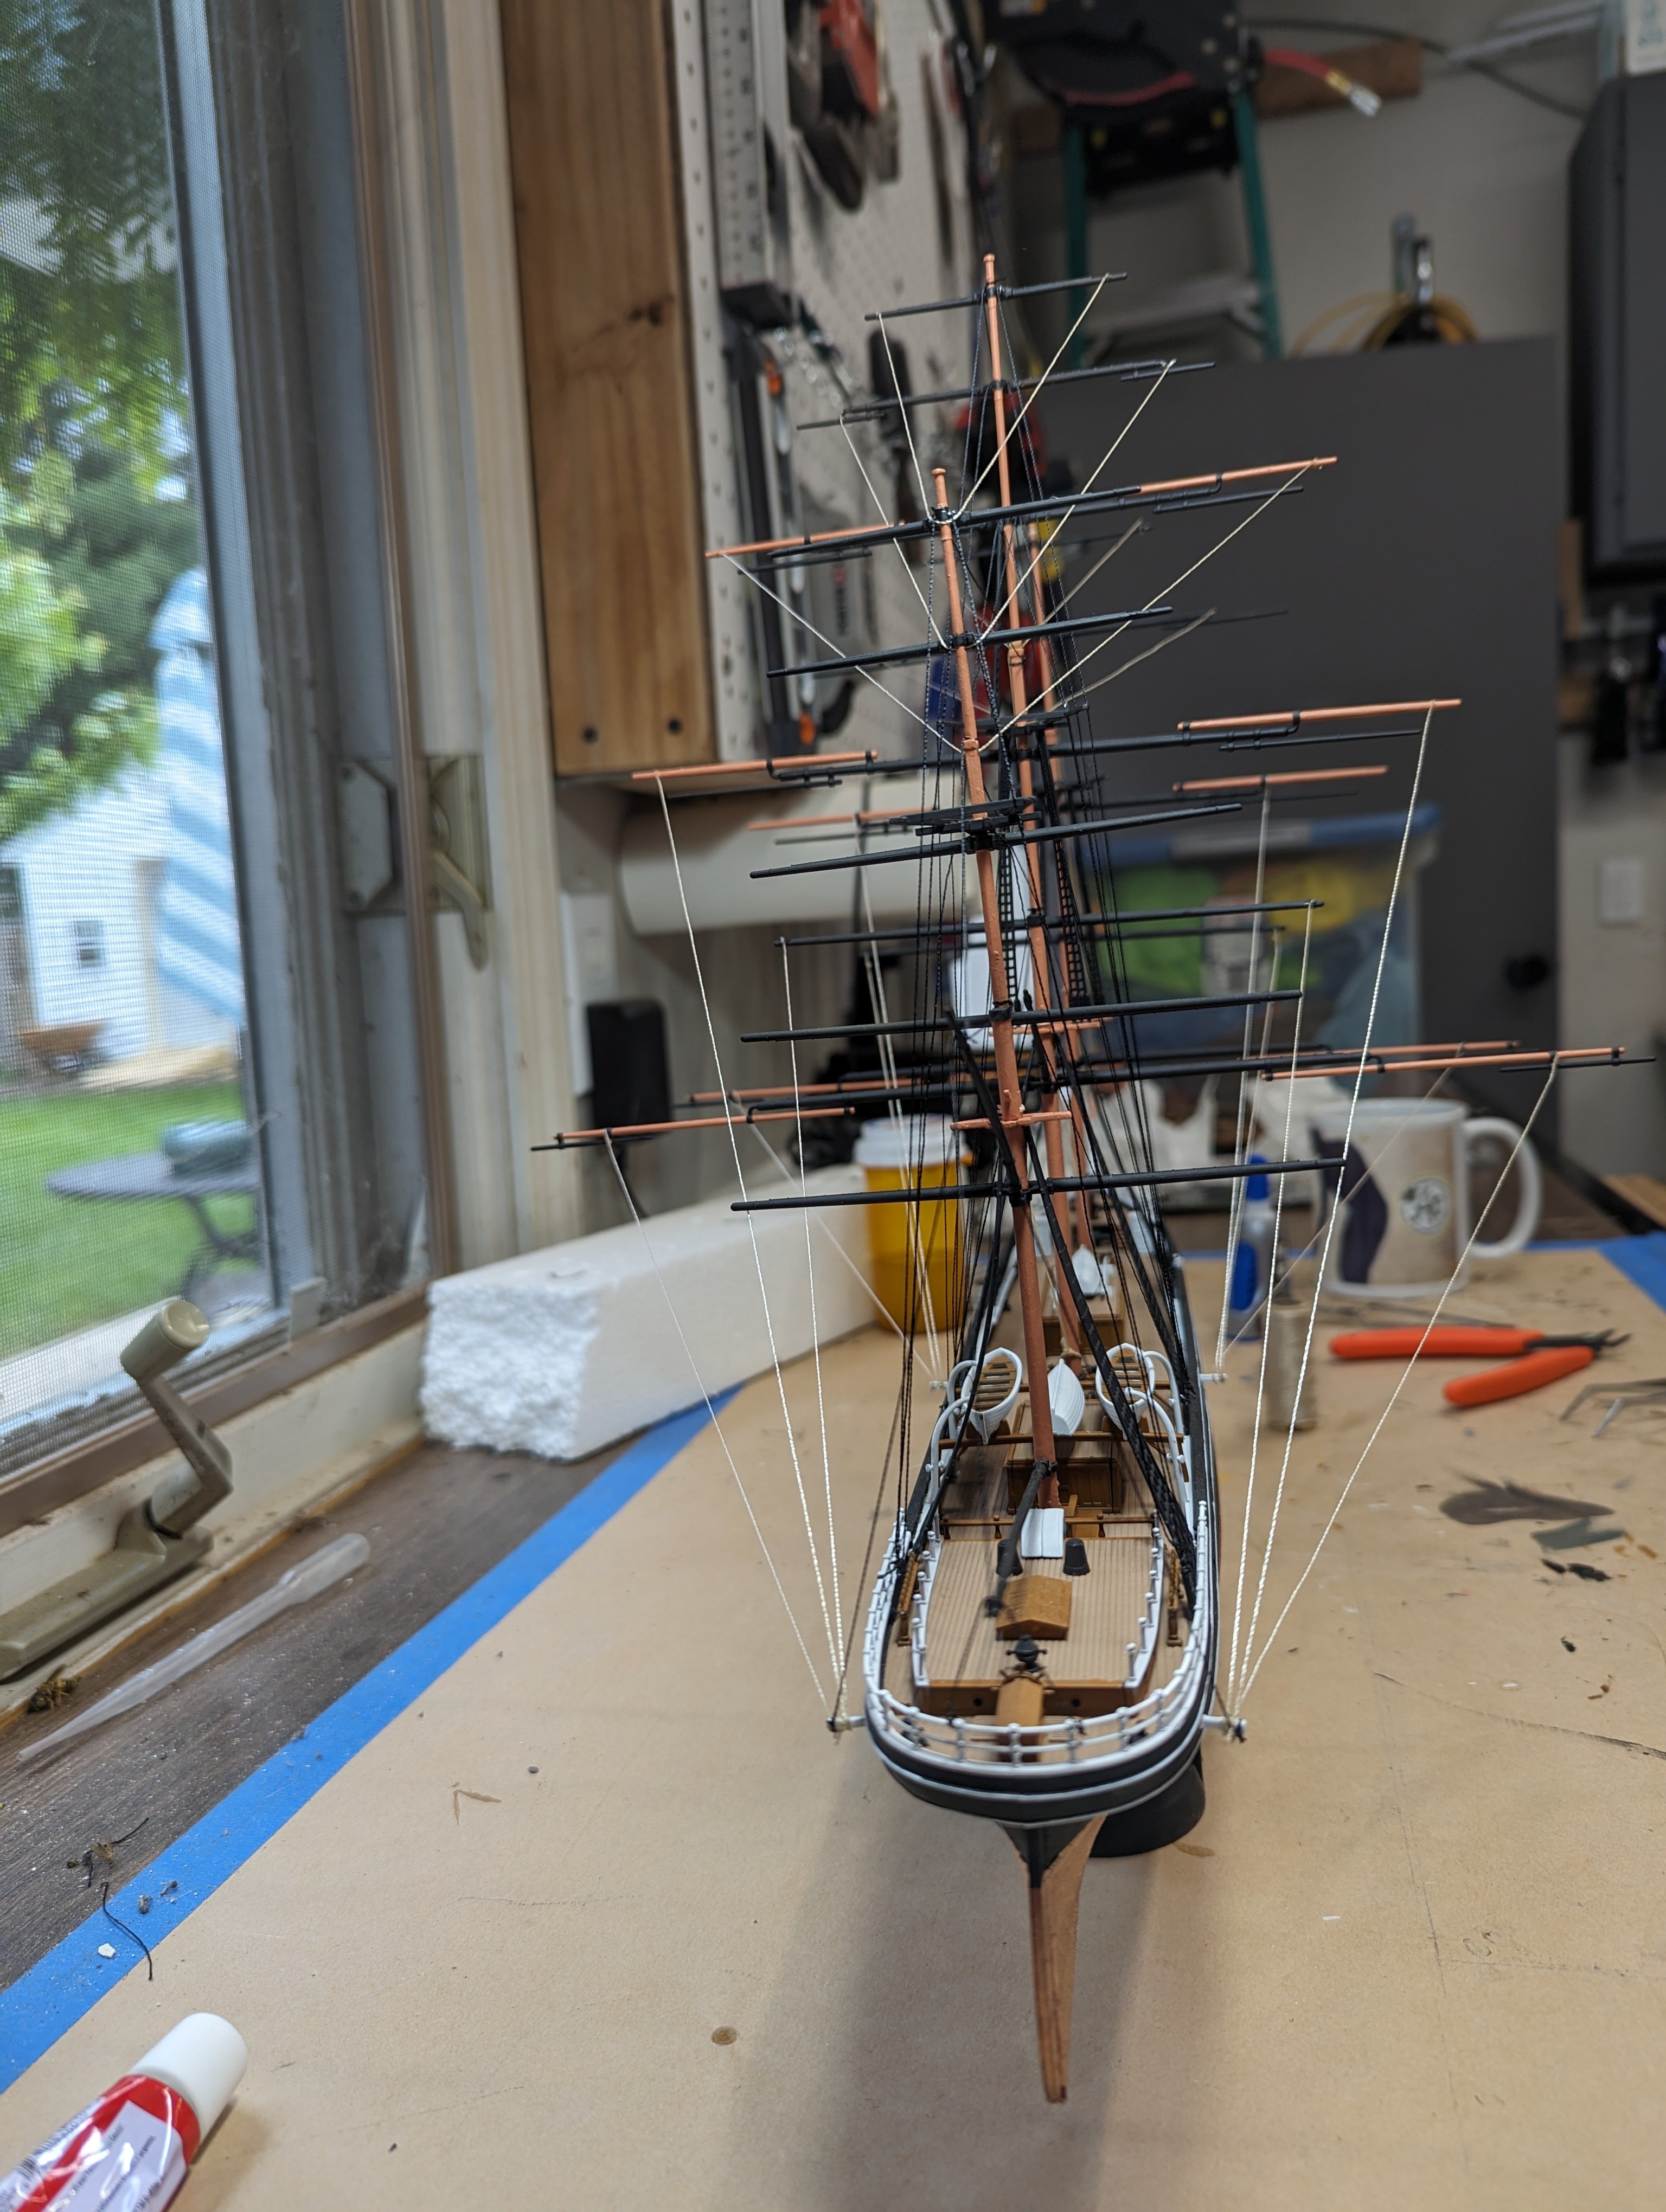
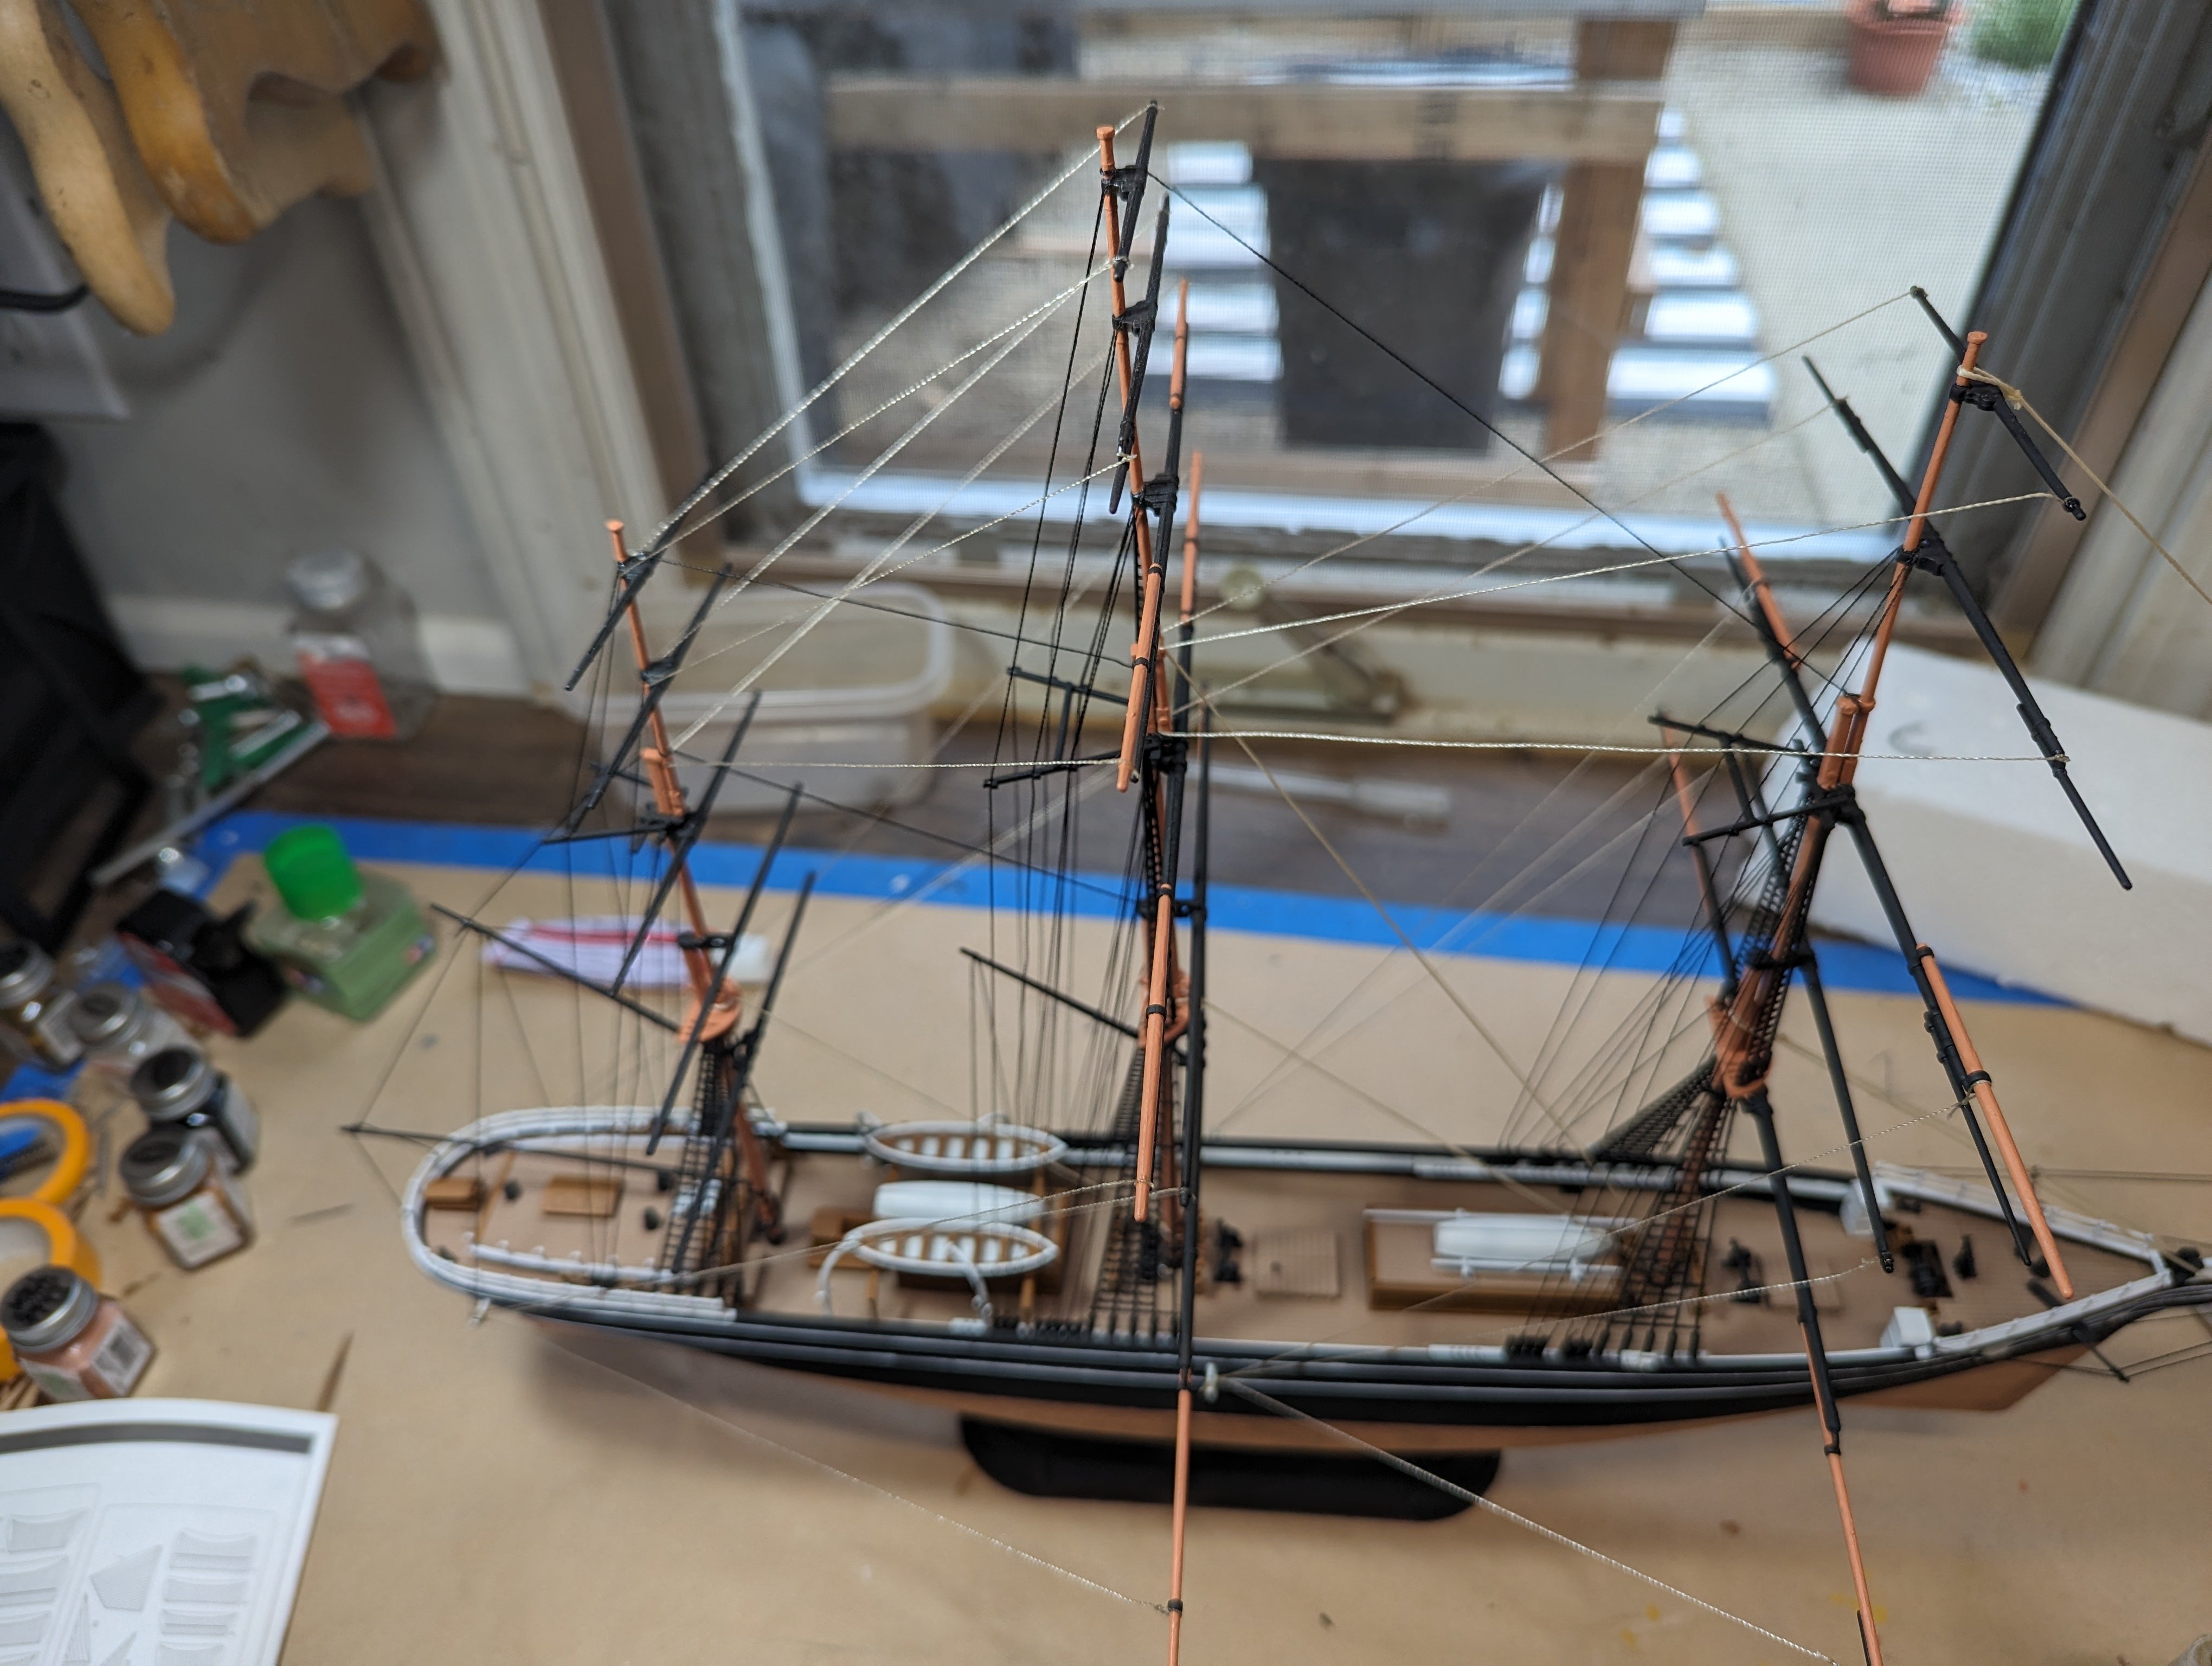
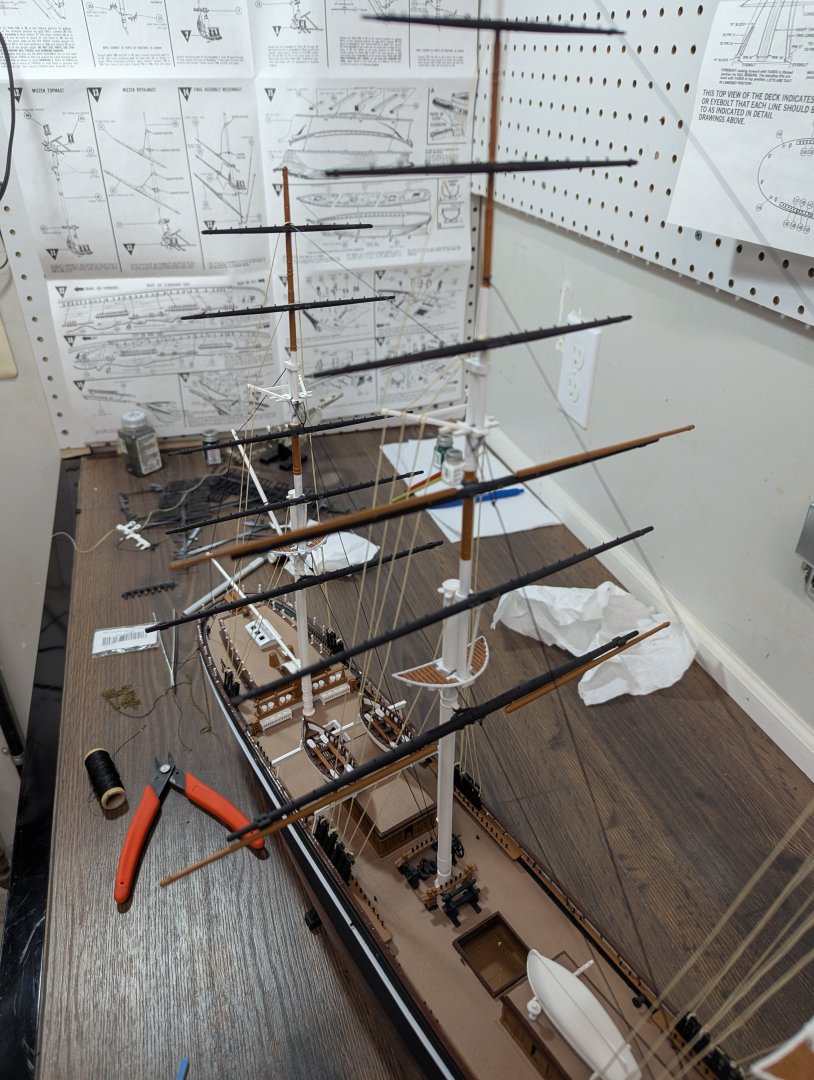
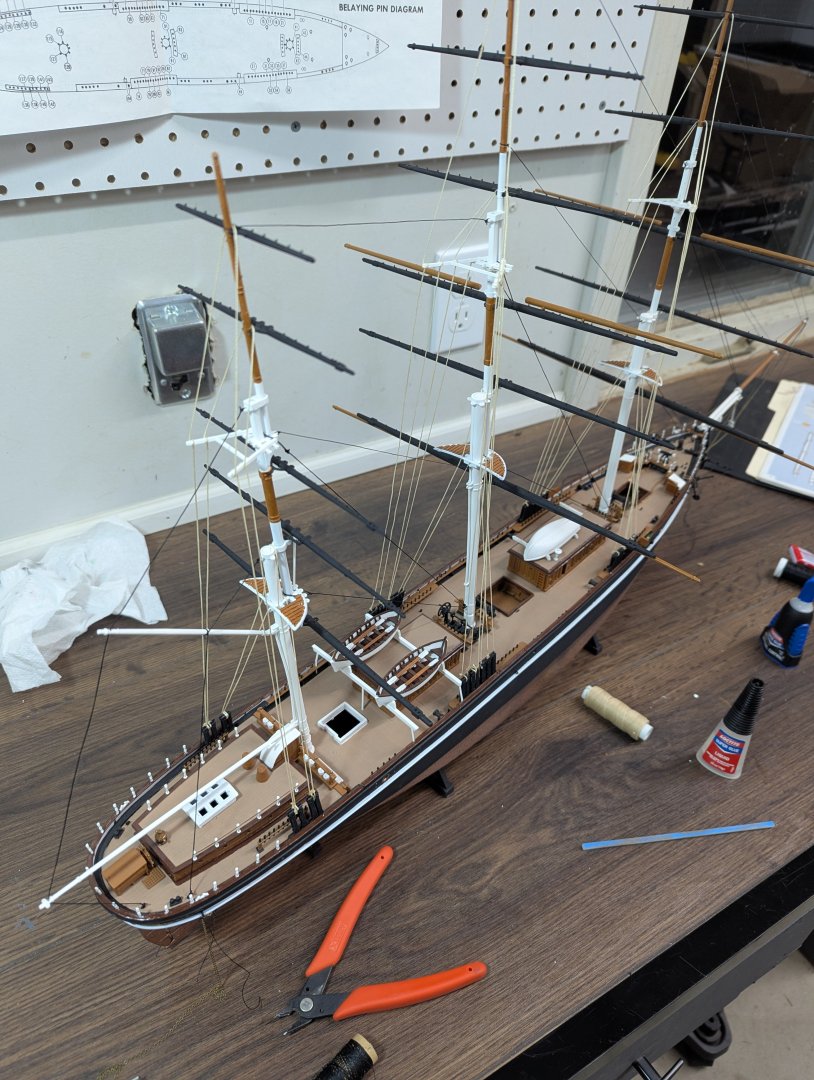
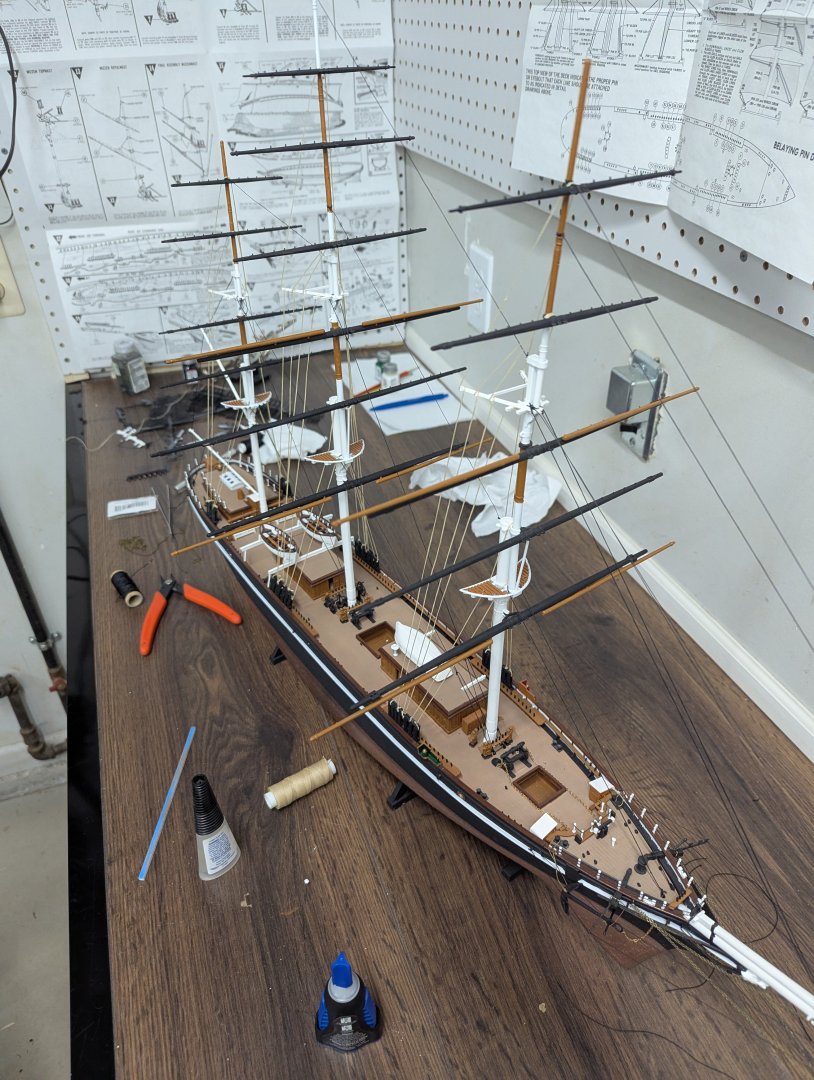
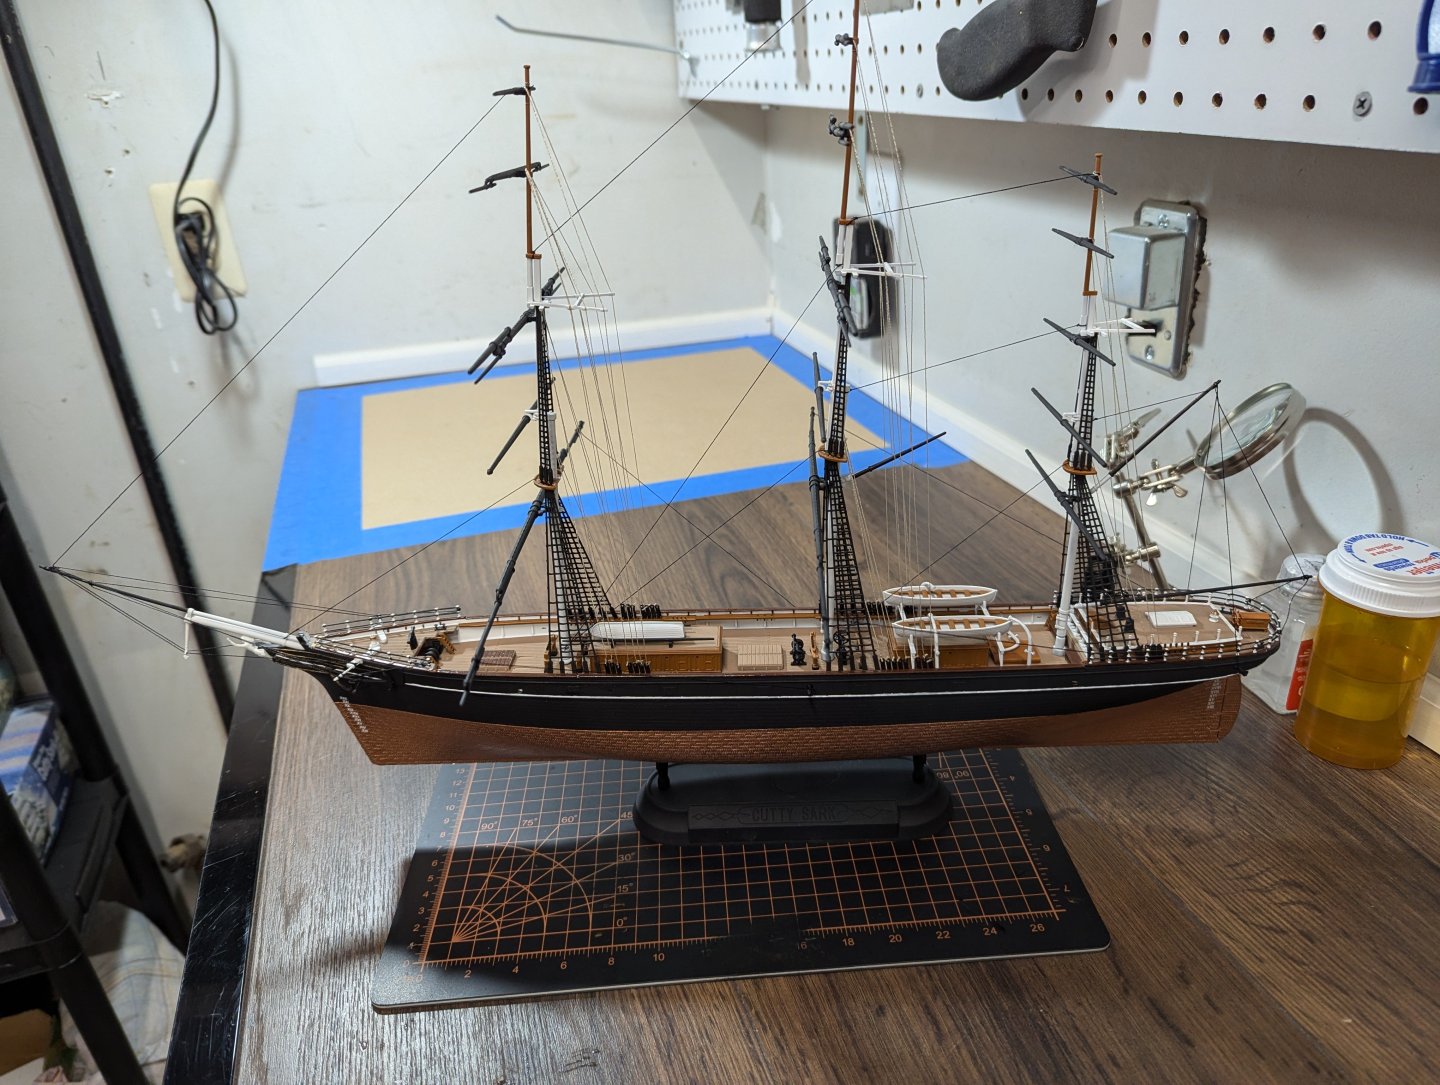
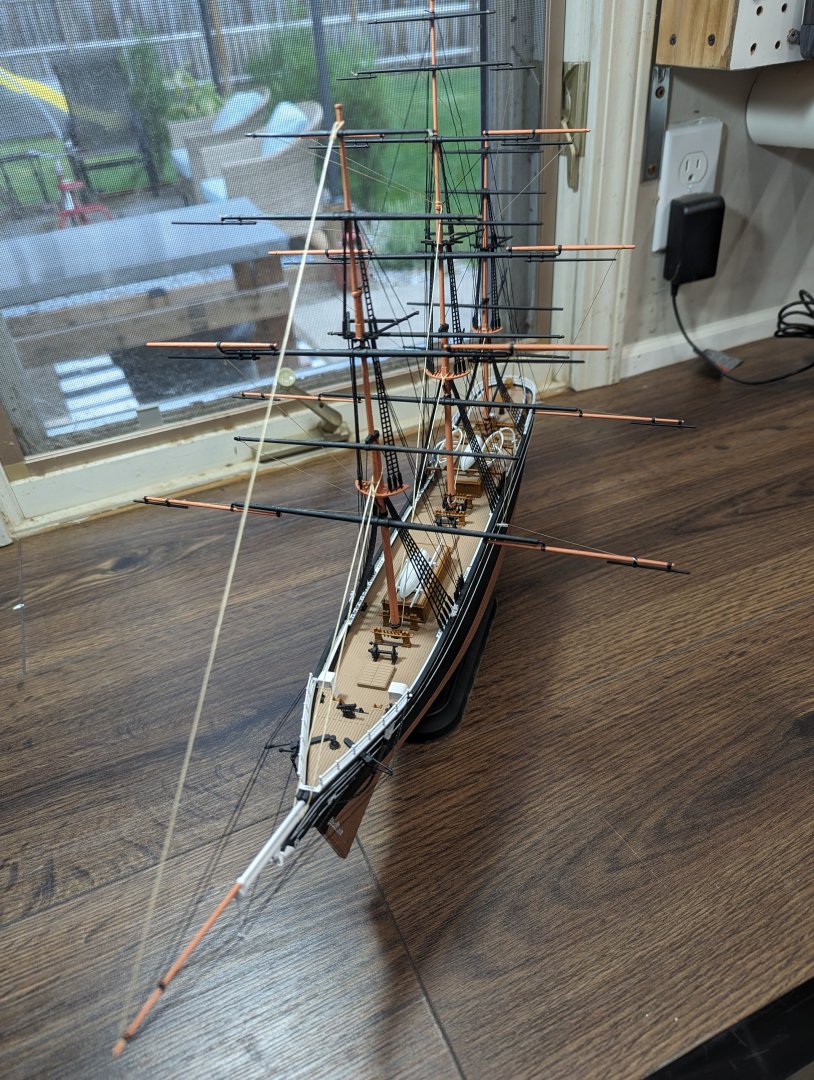
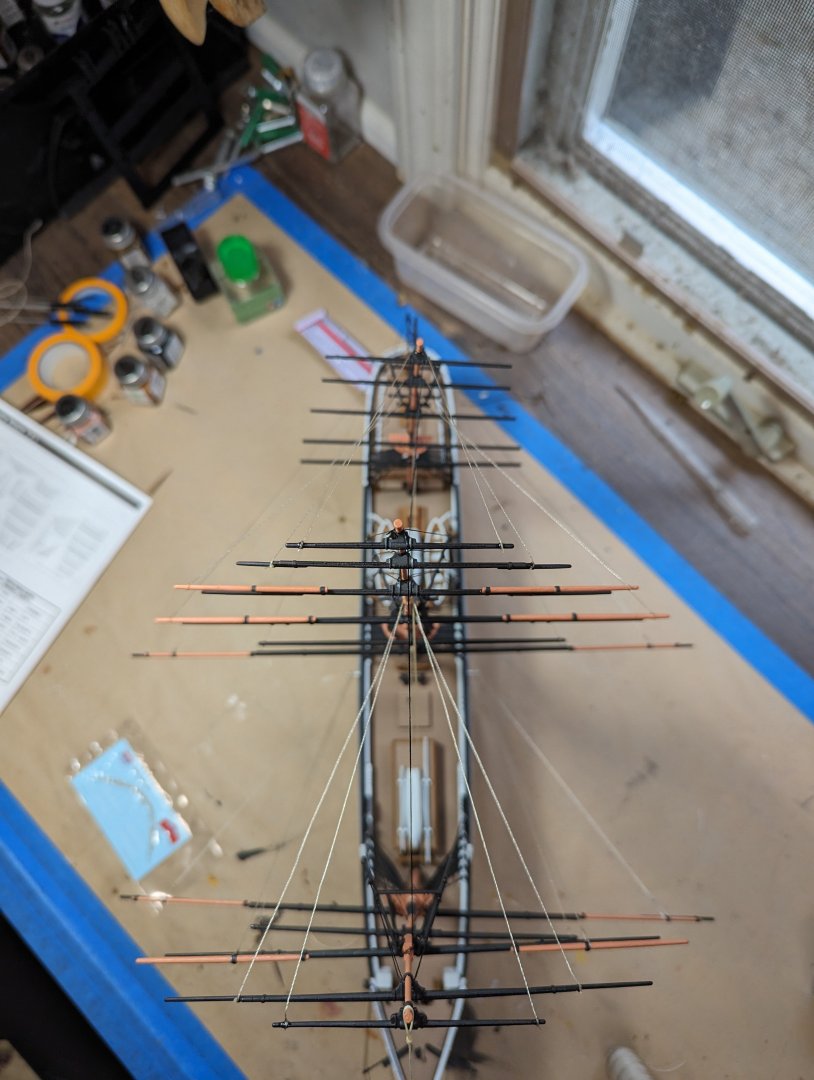
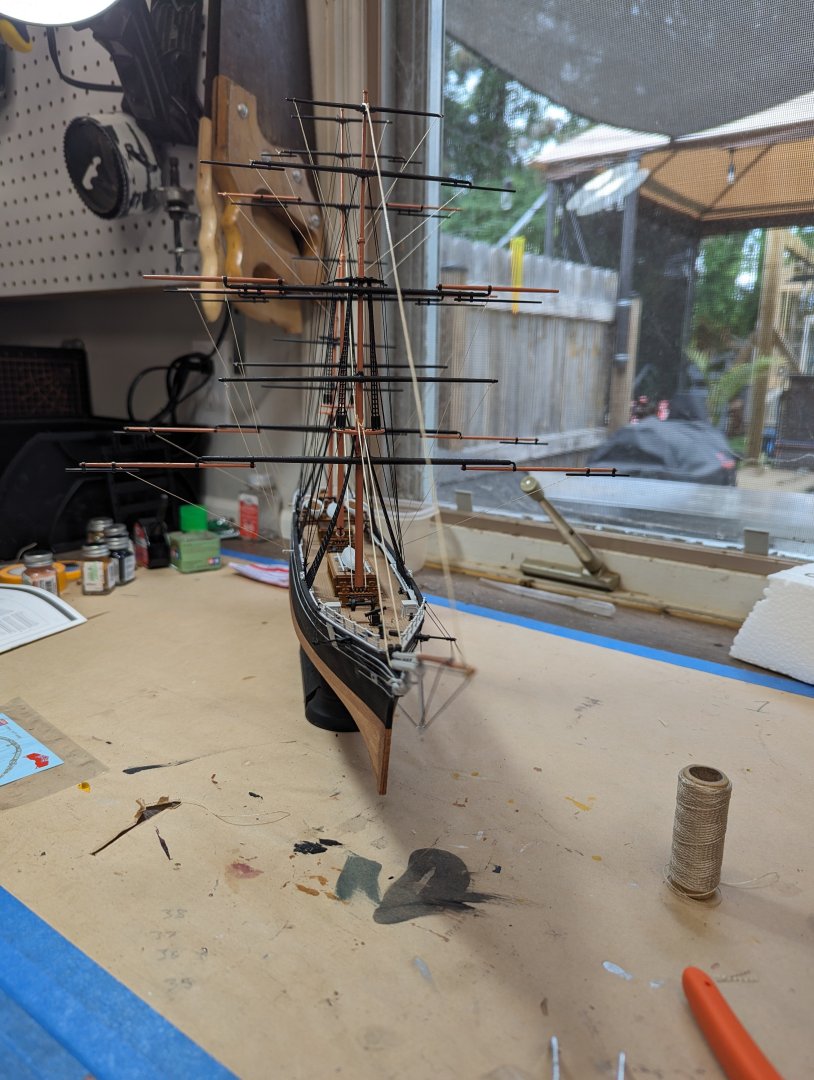
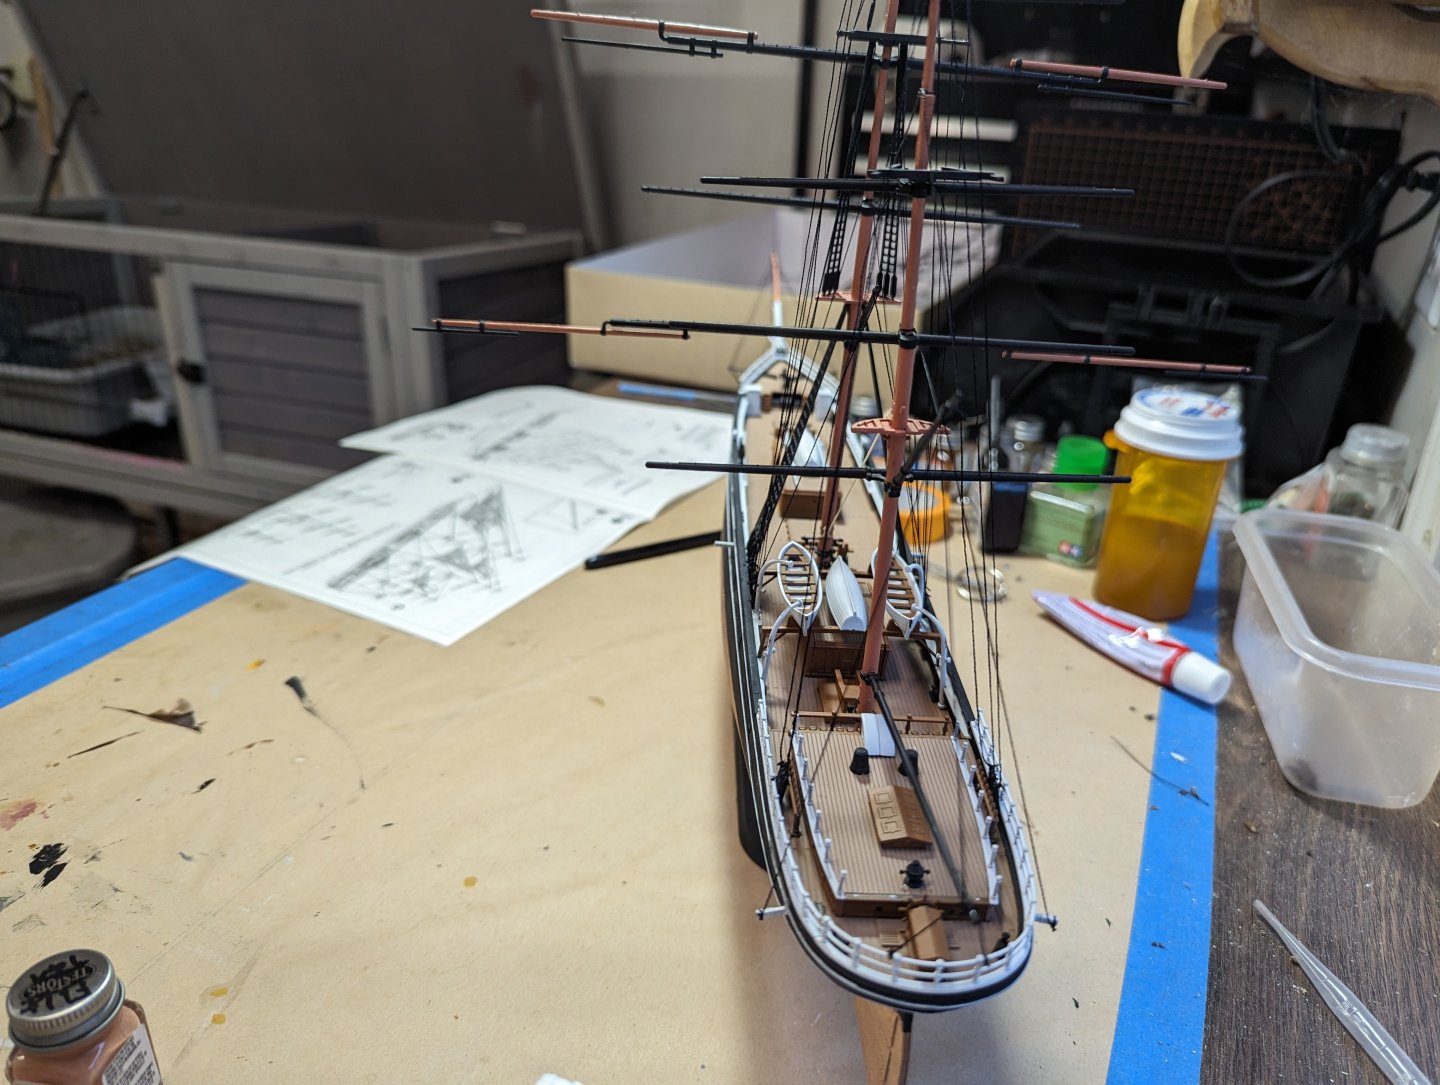
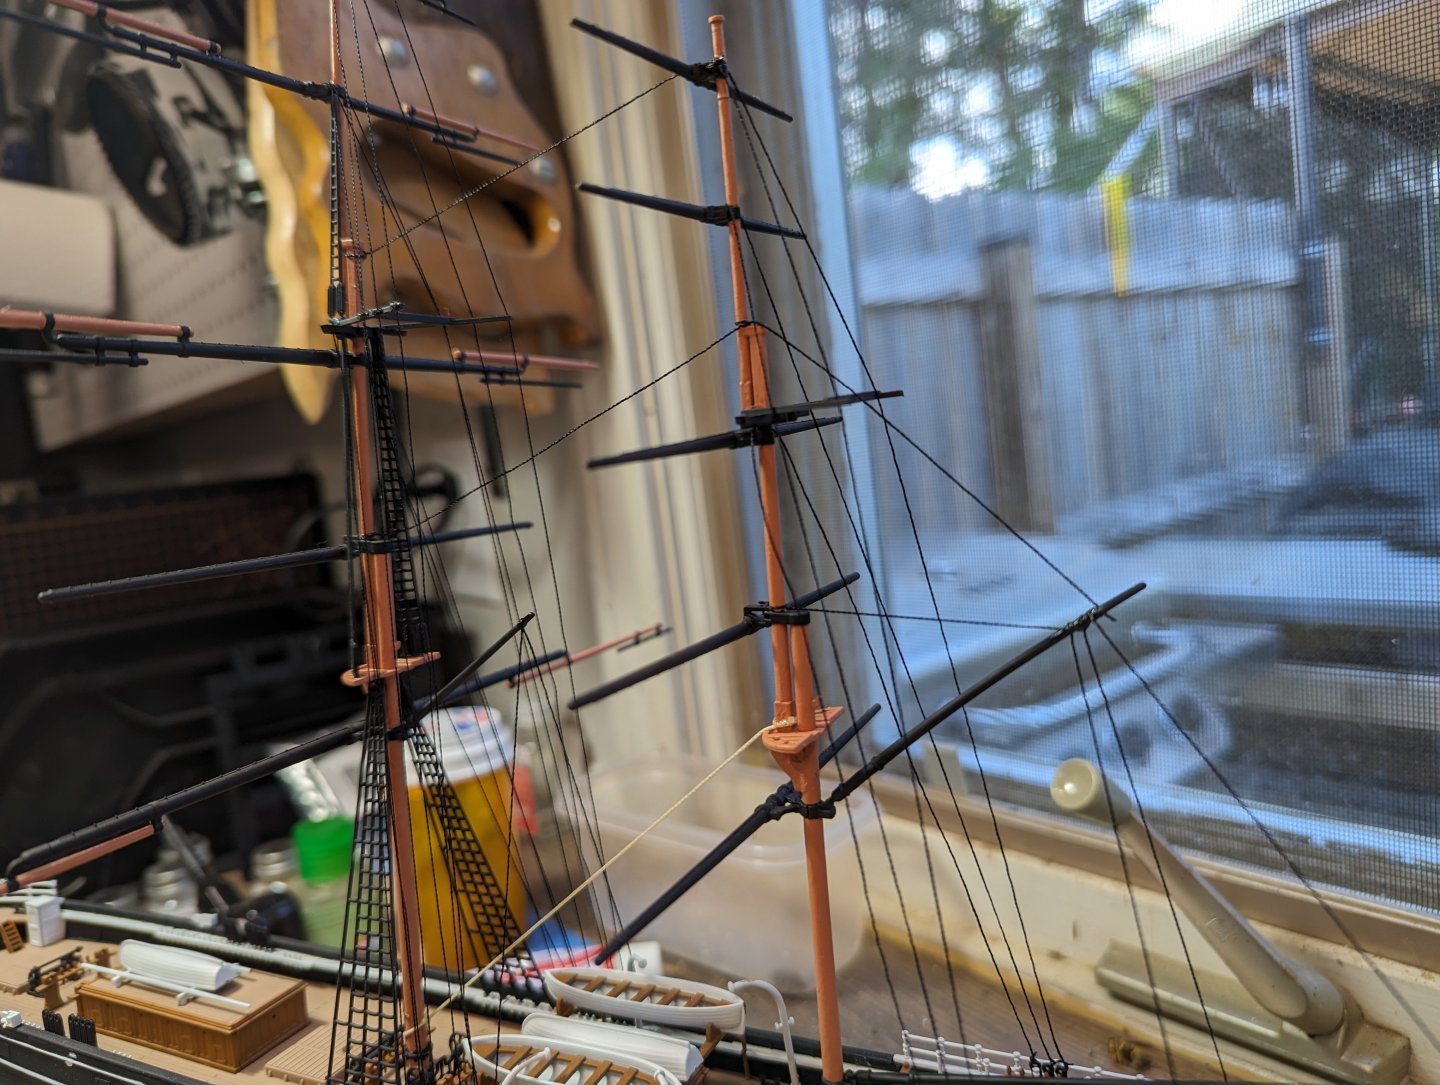
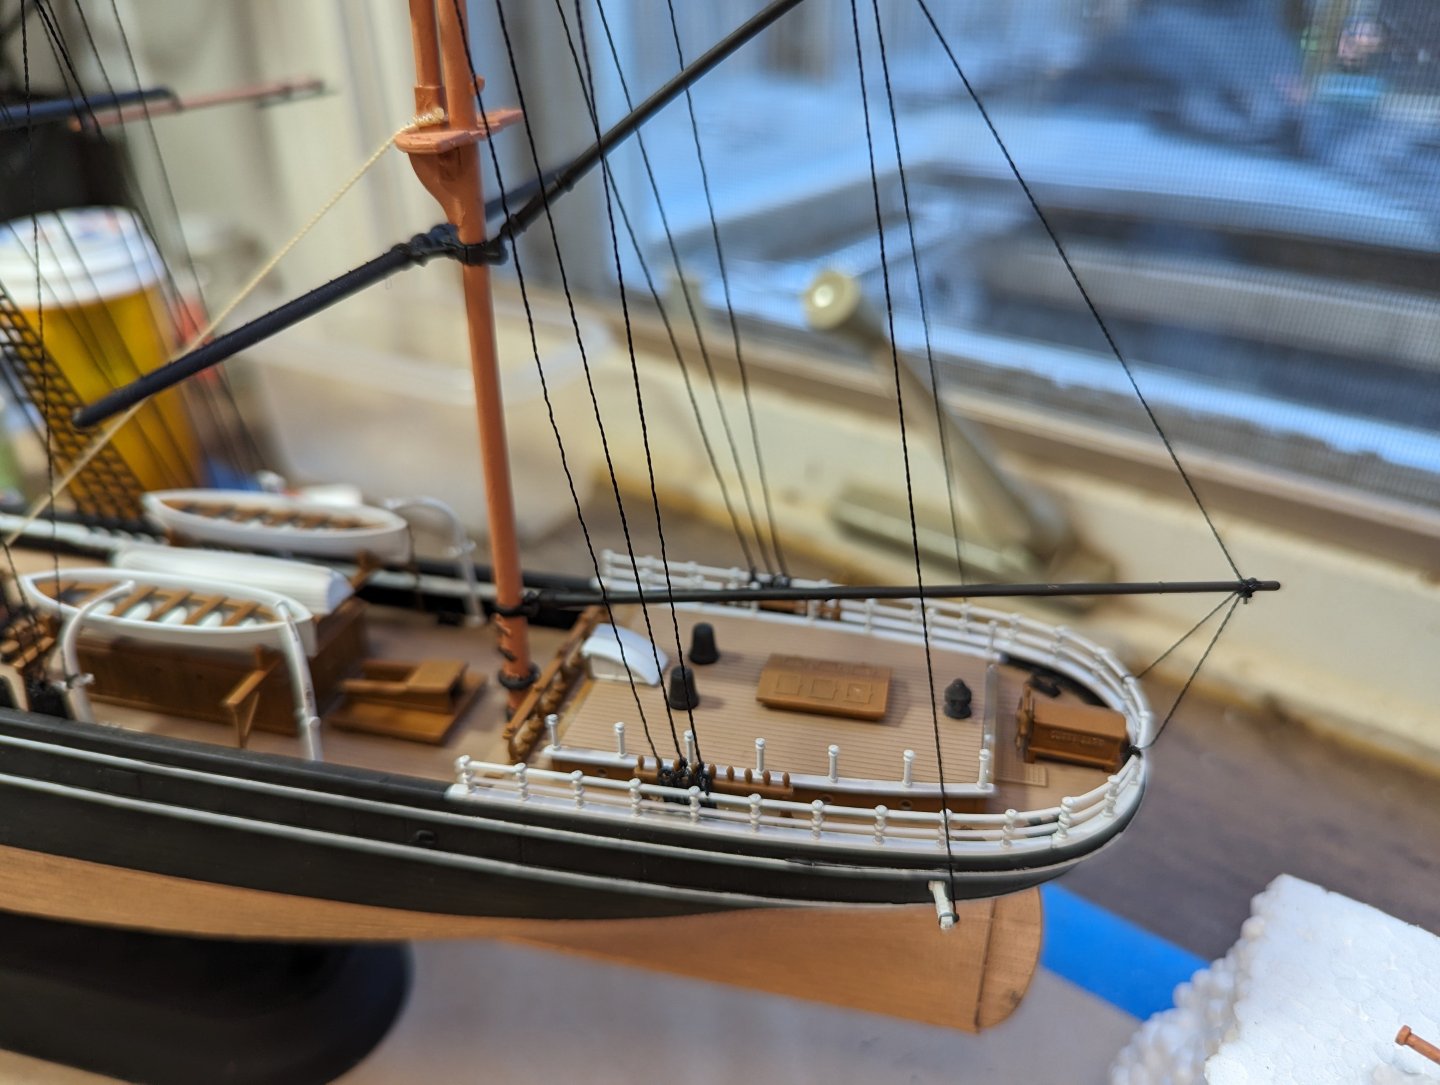
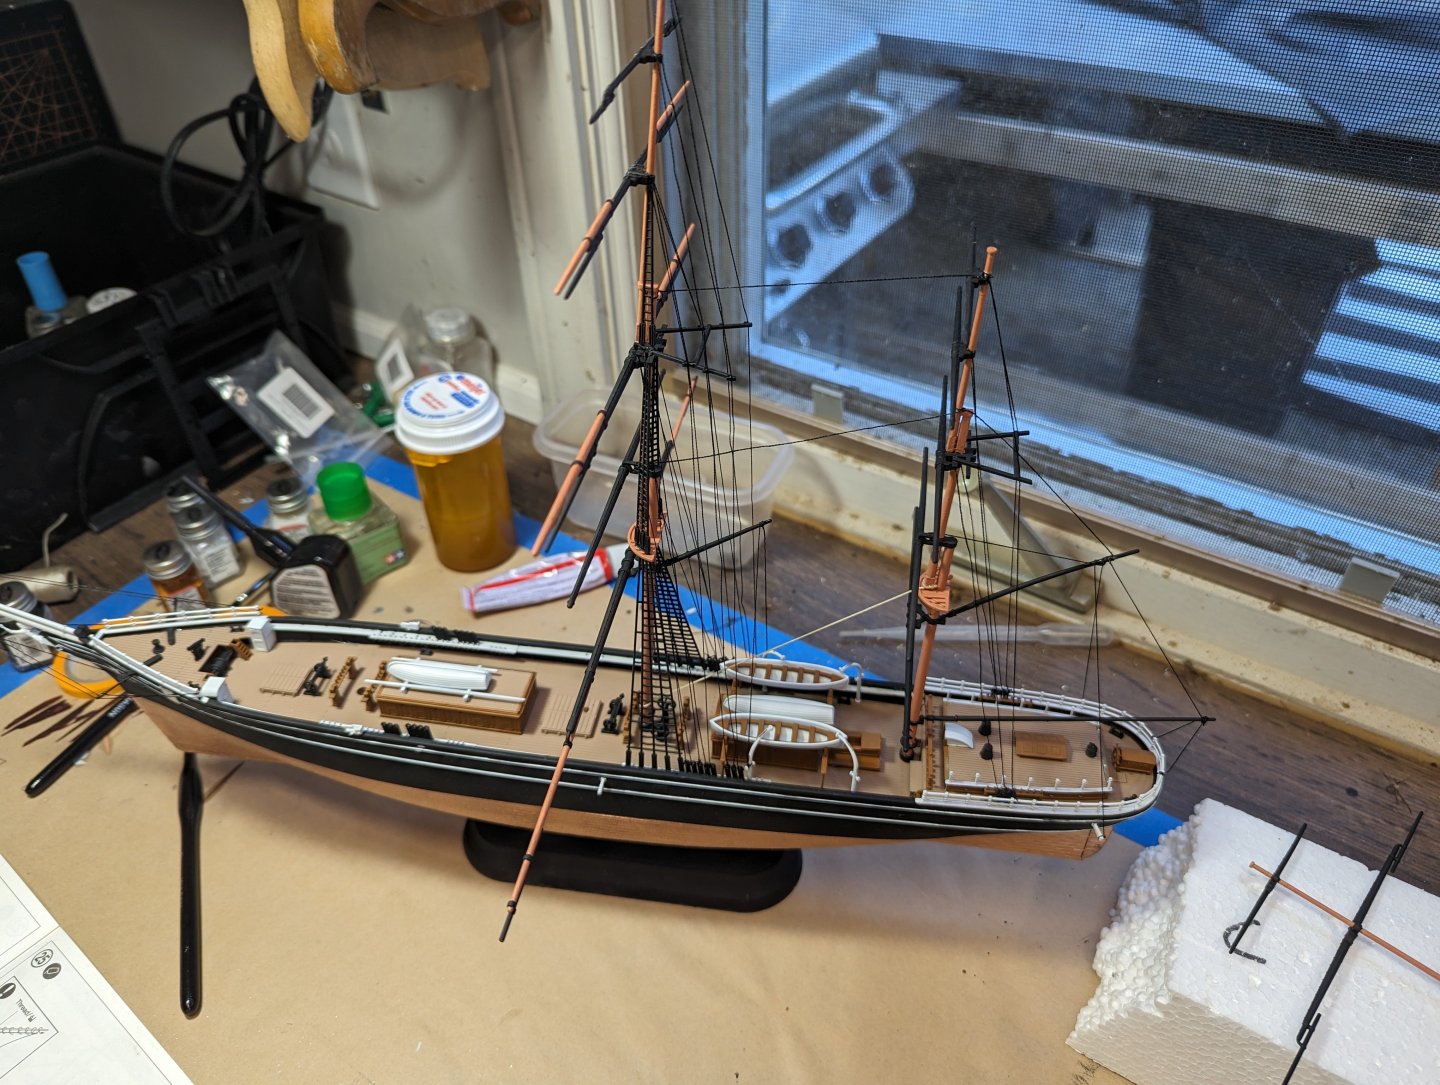
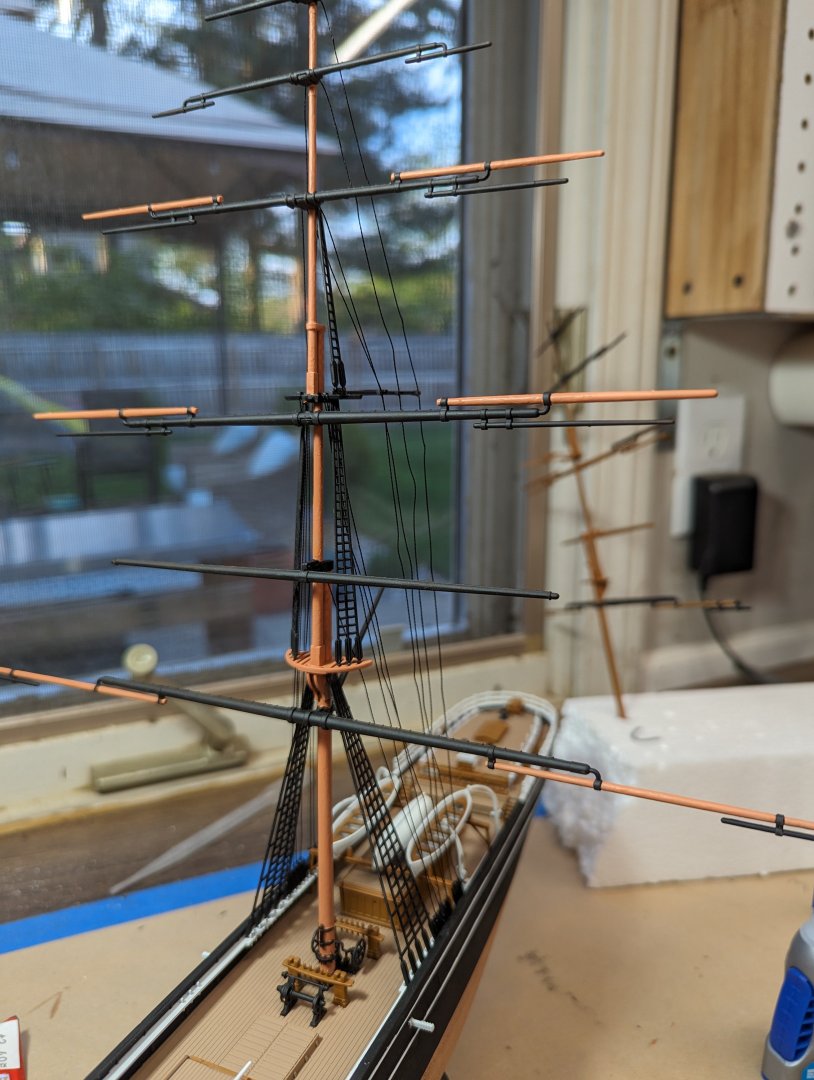
Winter is back in my neck of the woods and with it more time to dedicate to this project. Here's the latest. Got all the masts and yards in place and a good deal of rigging completed. Pictures tell you what I did. I am not planning to rig it to it's full potential. Will give that a shot on the next one.

-
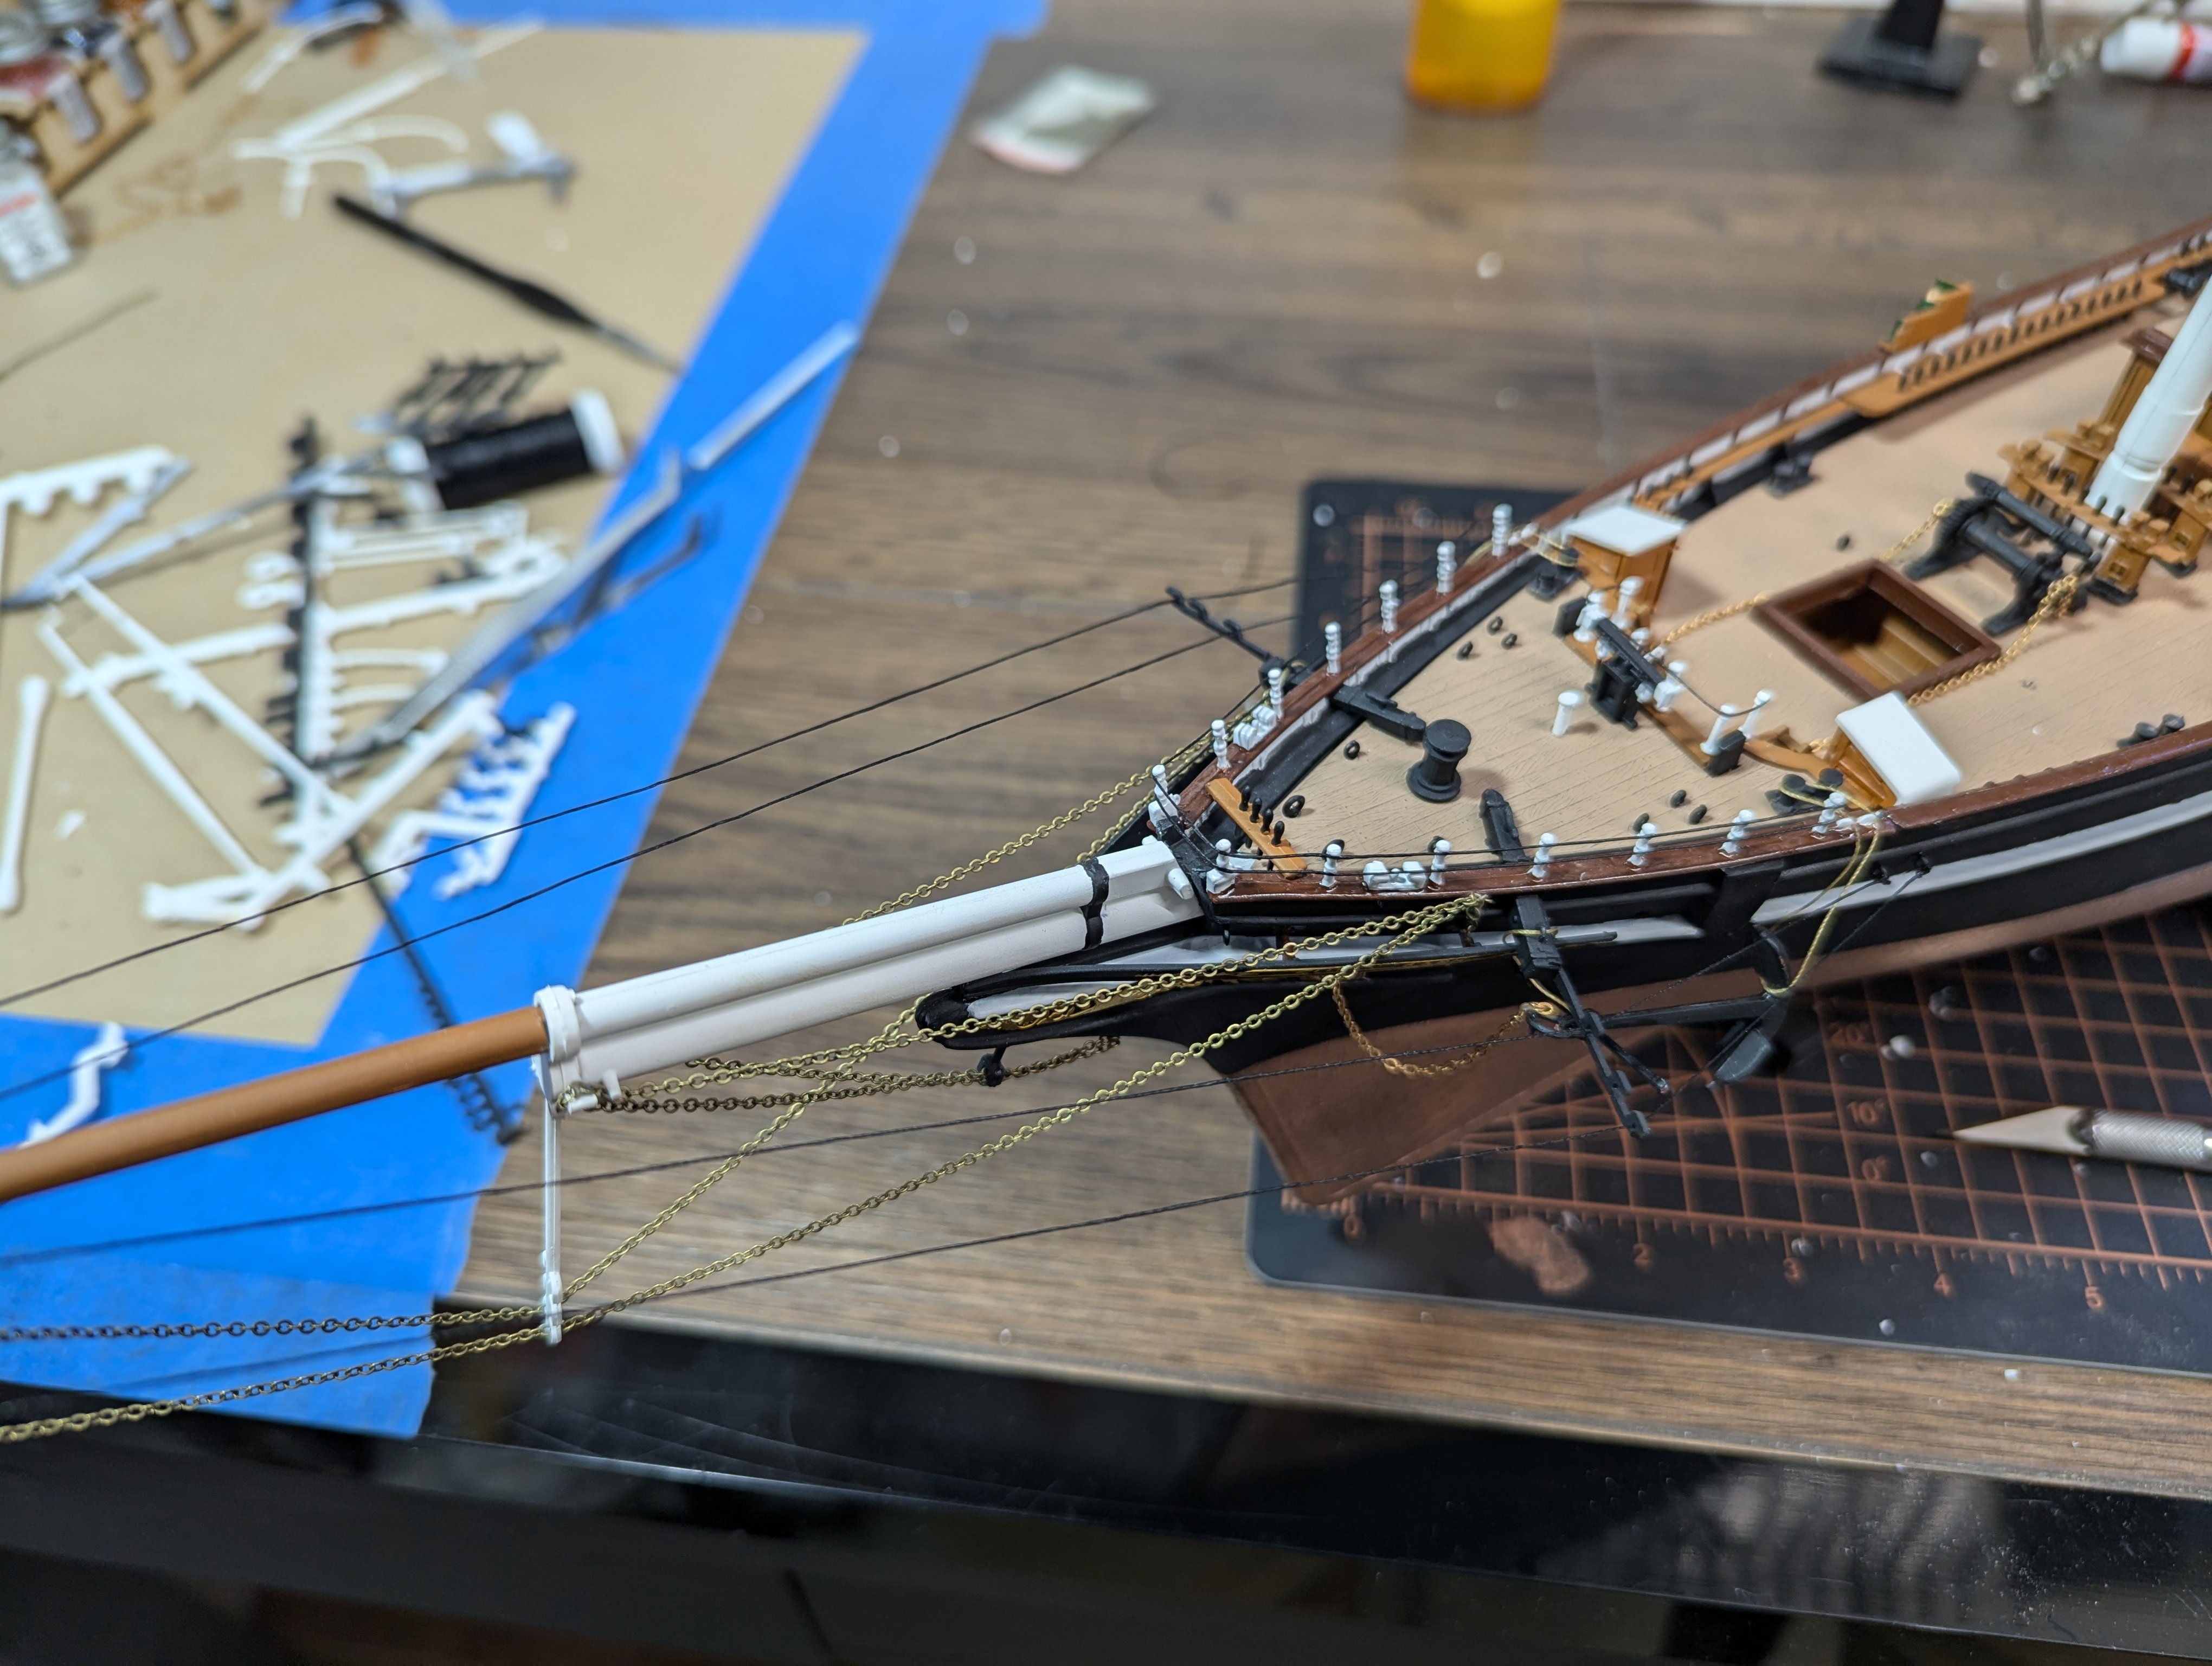
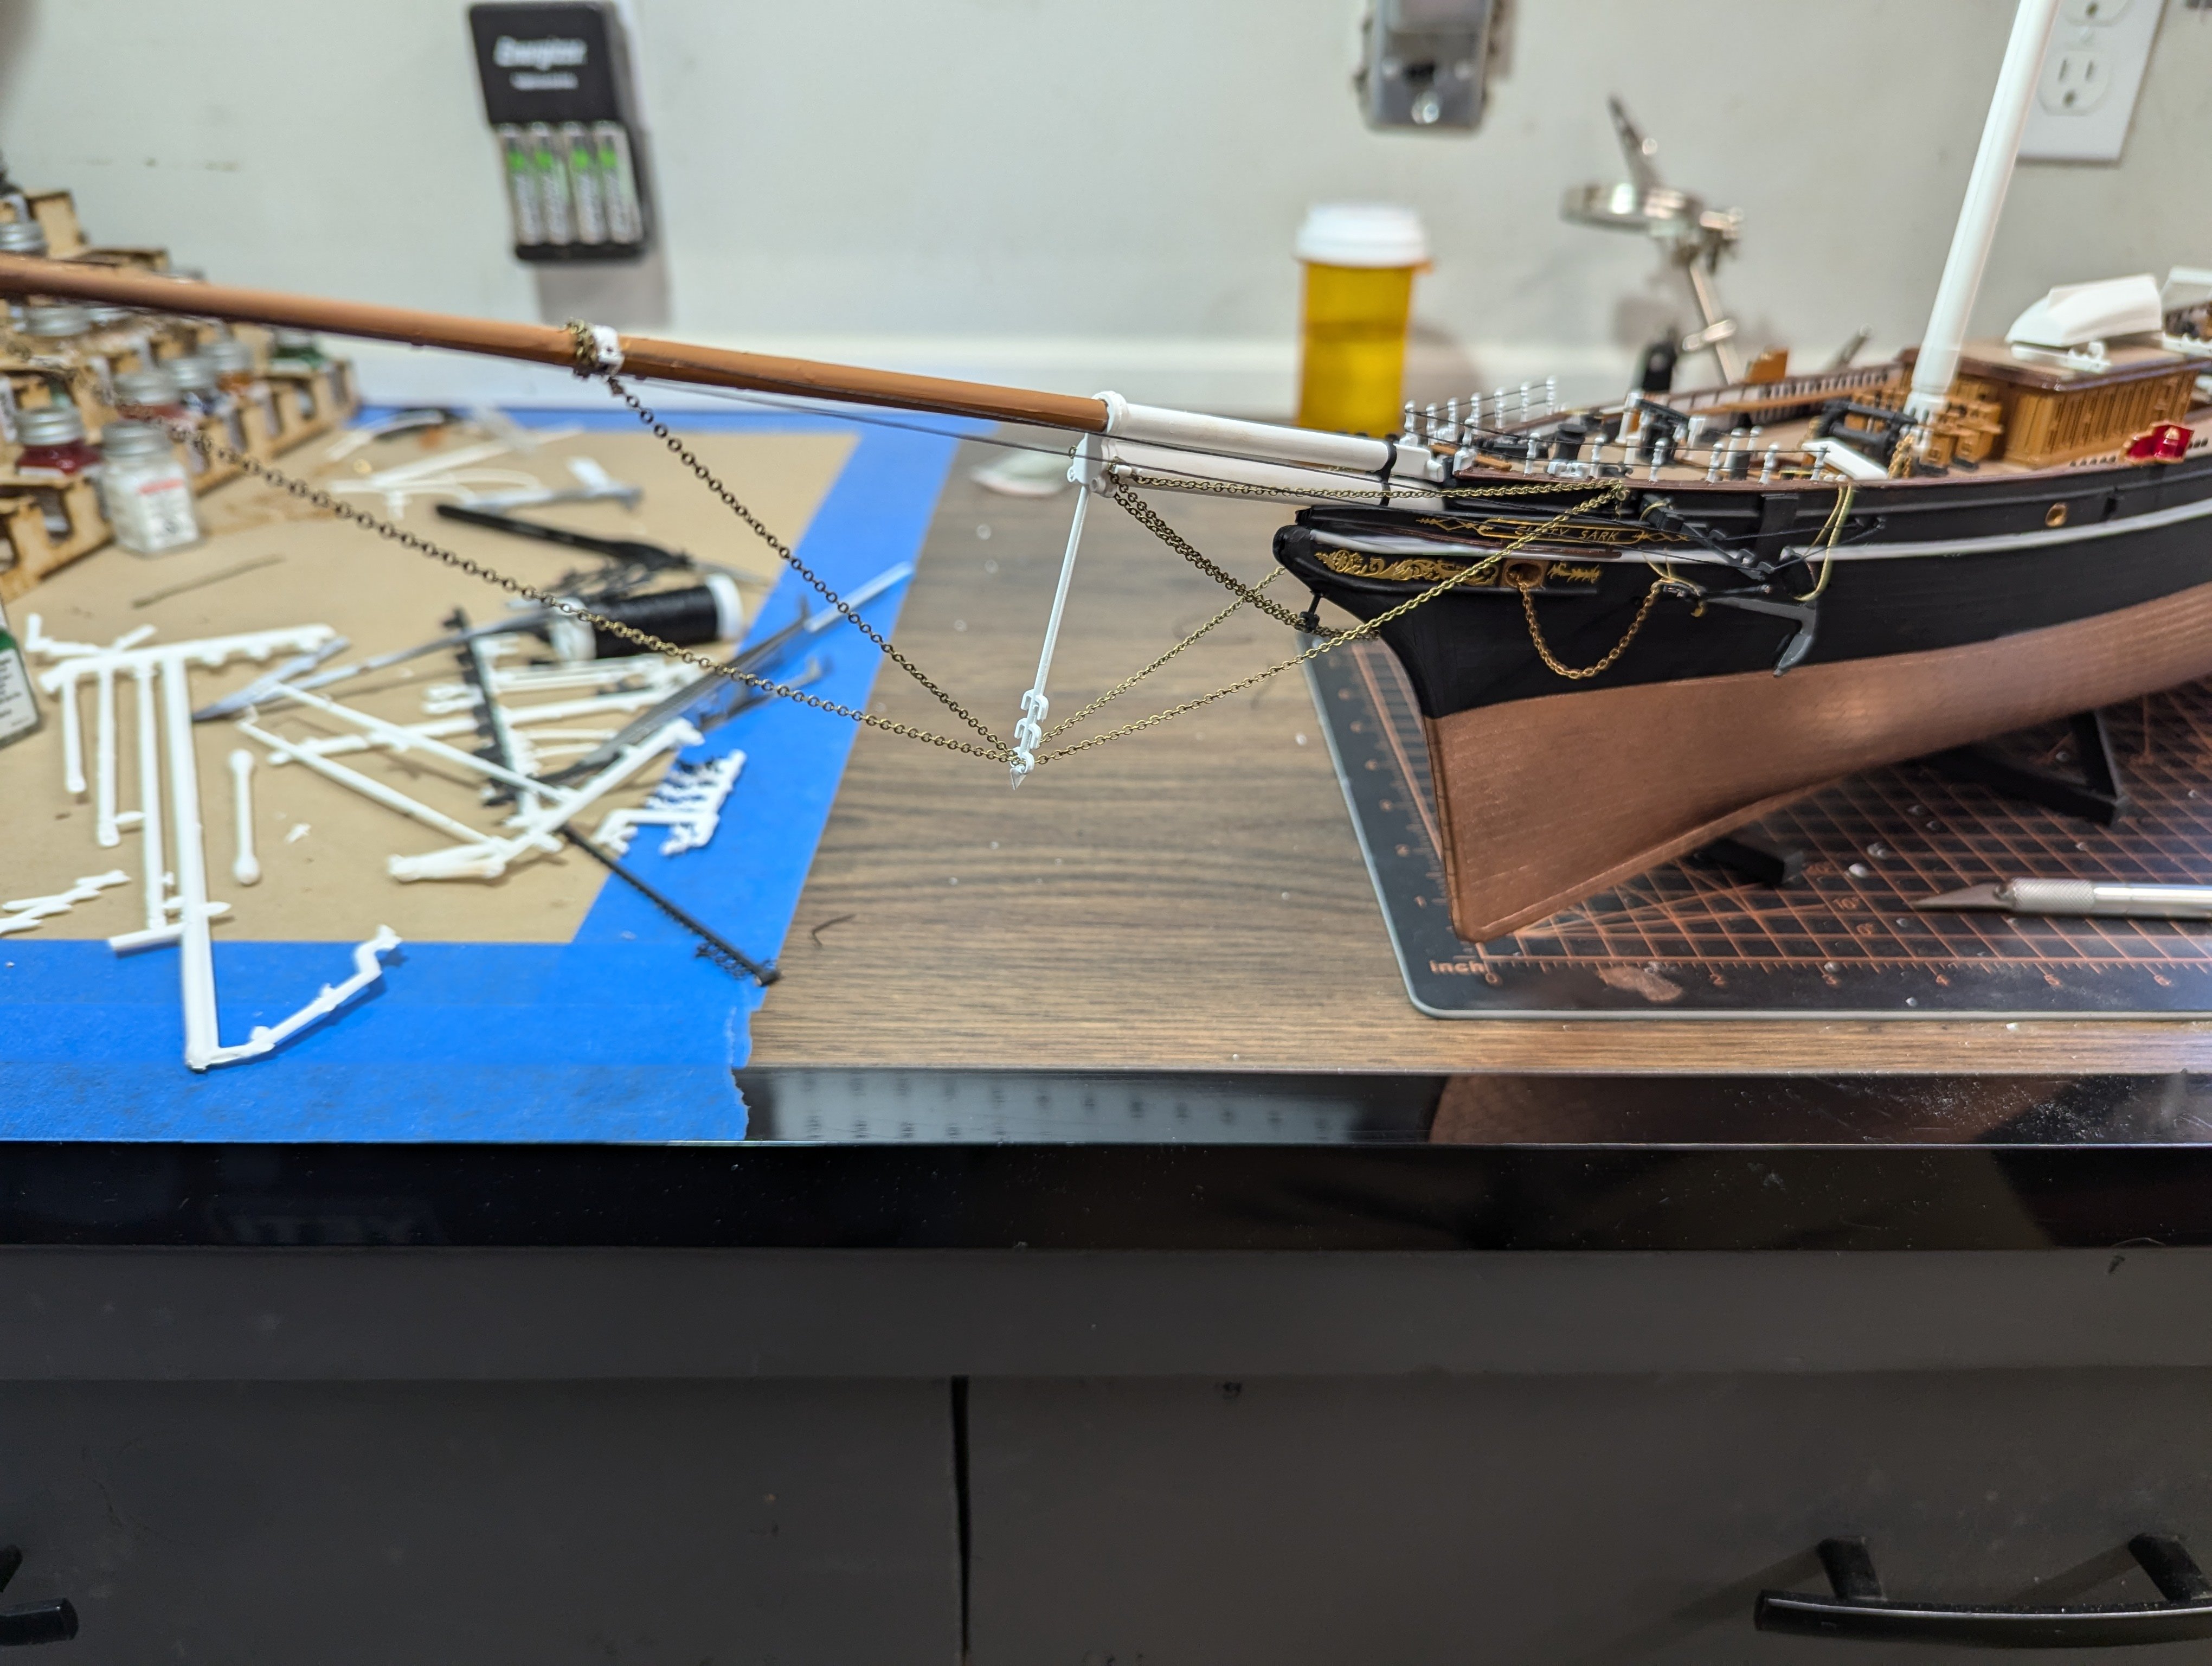
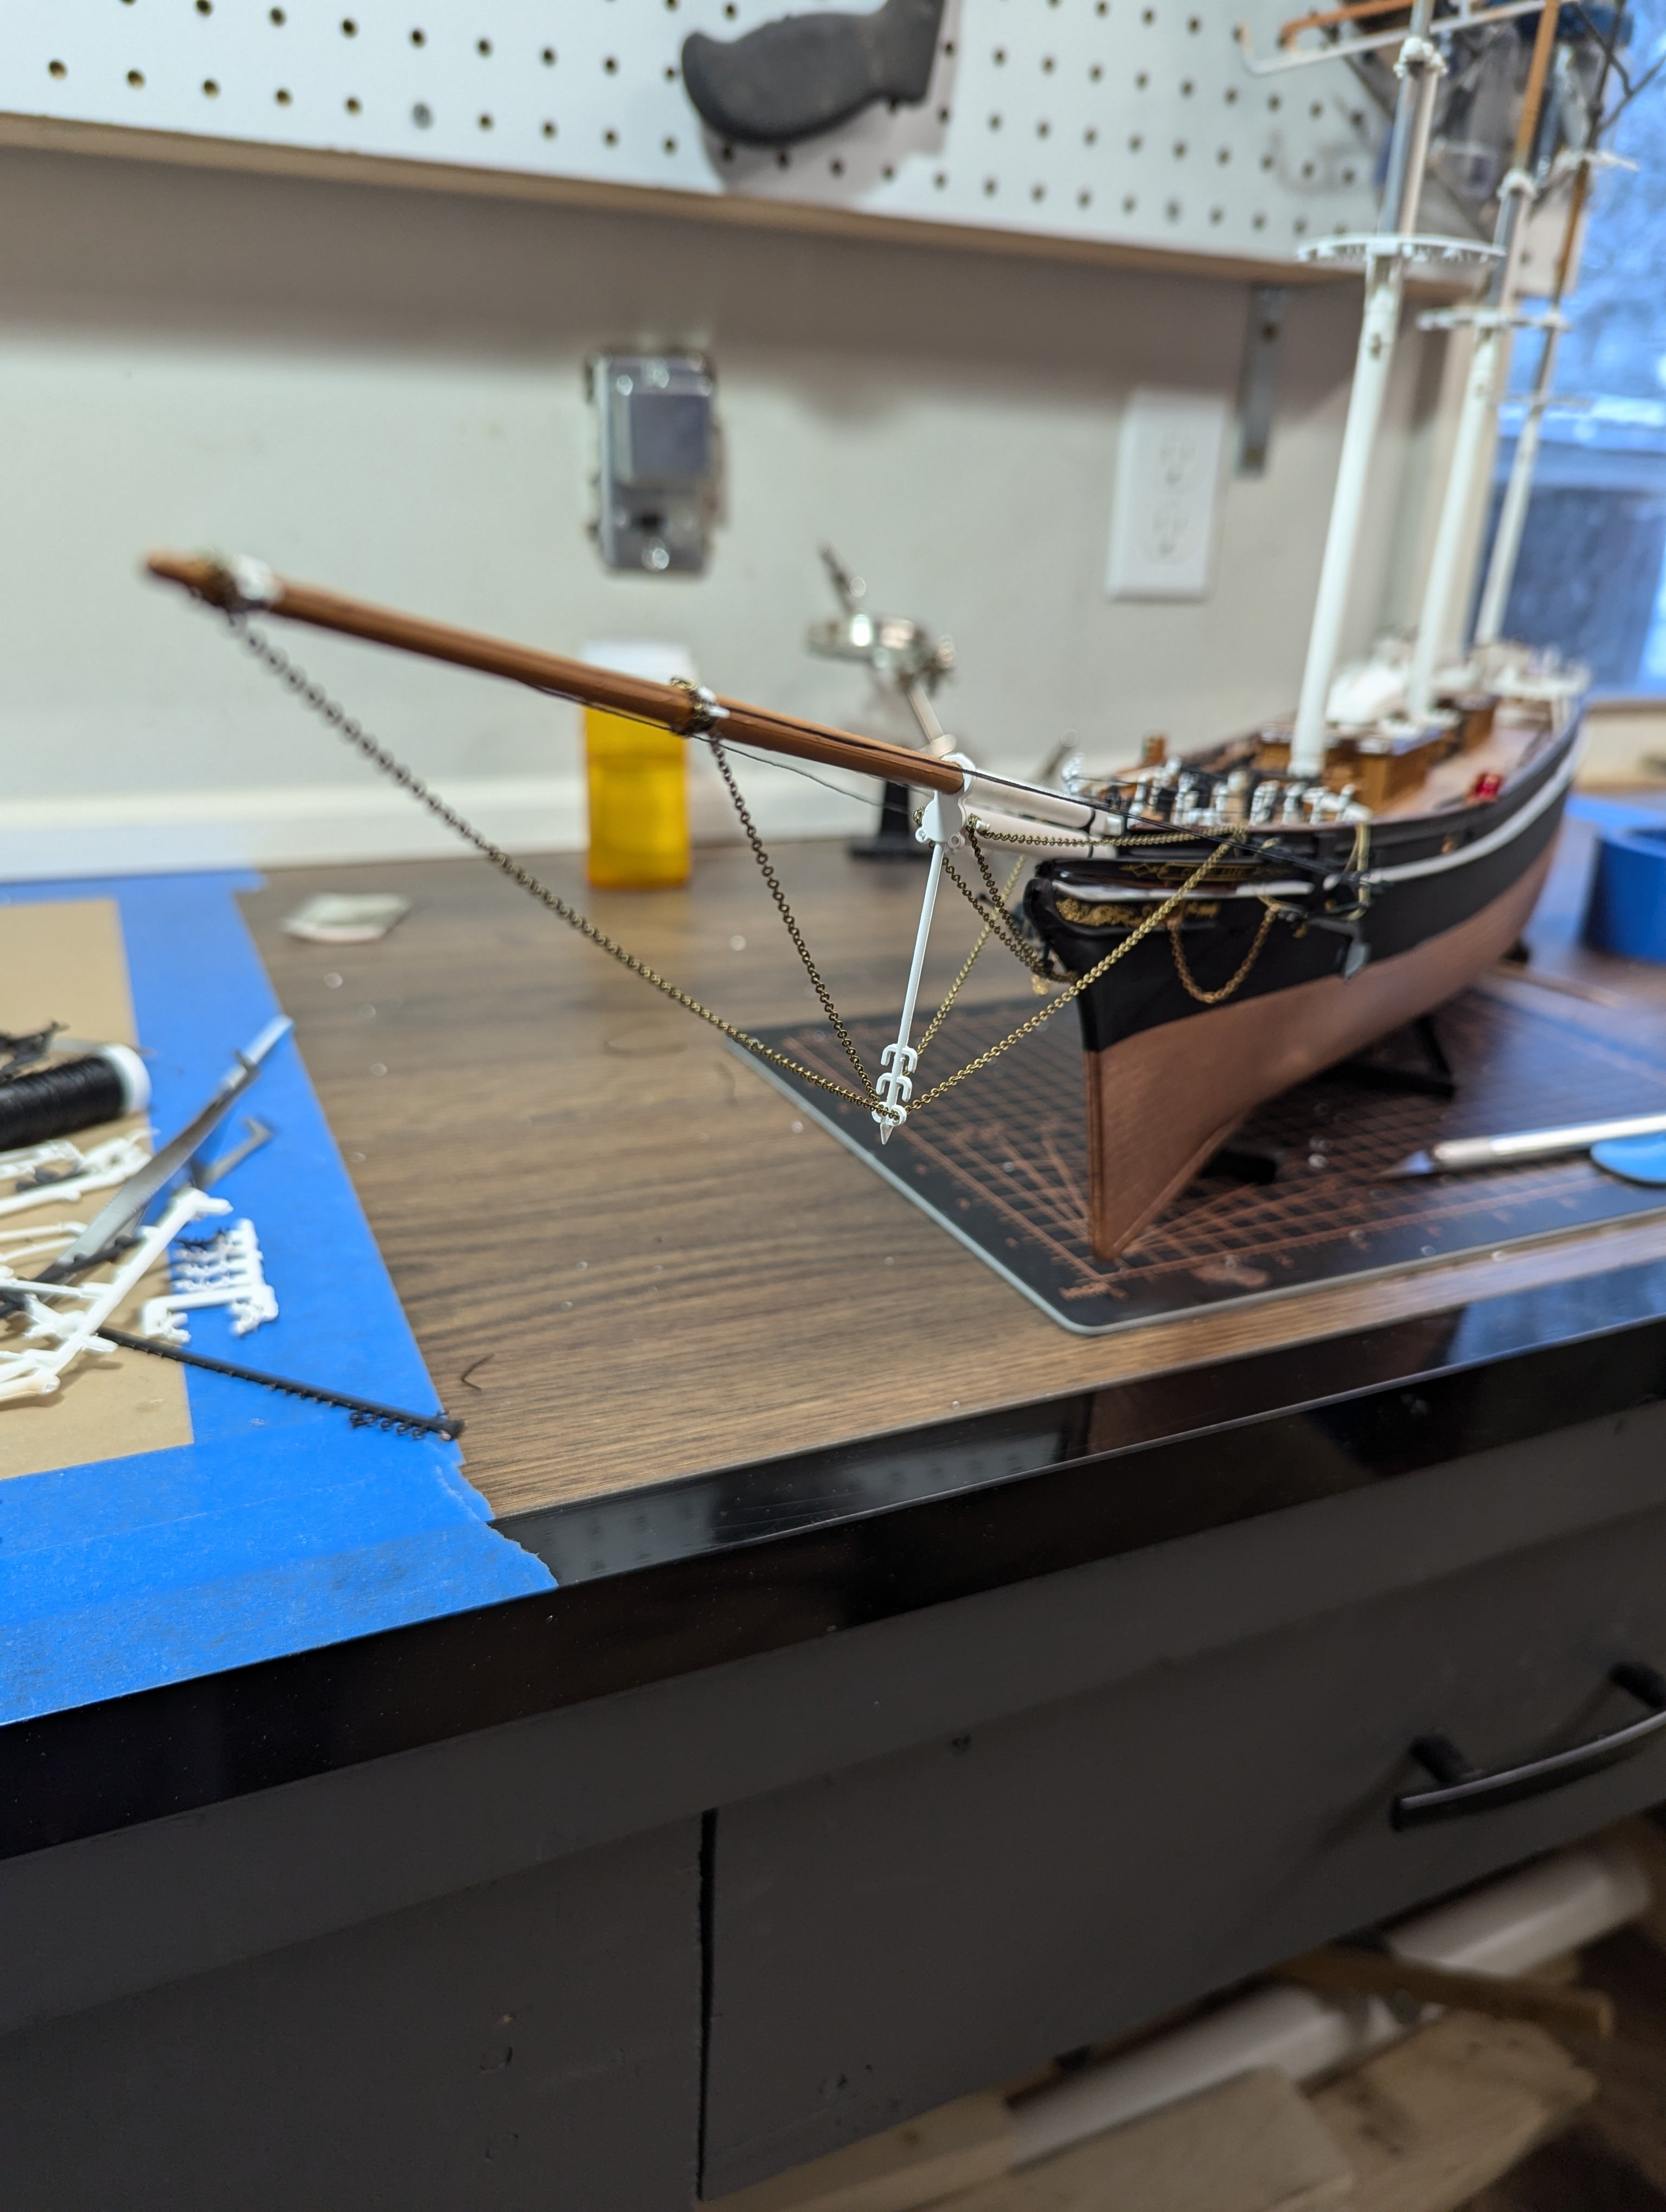
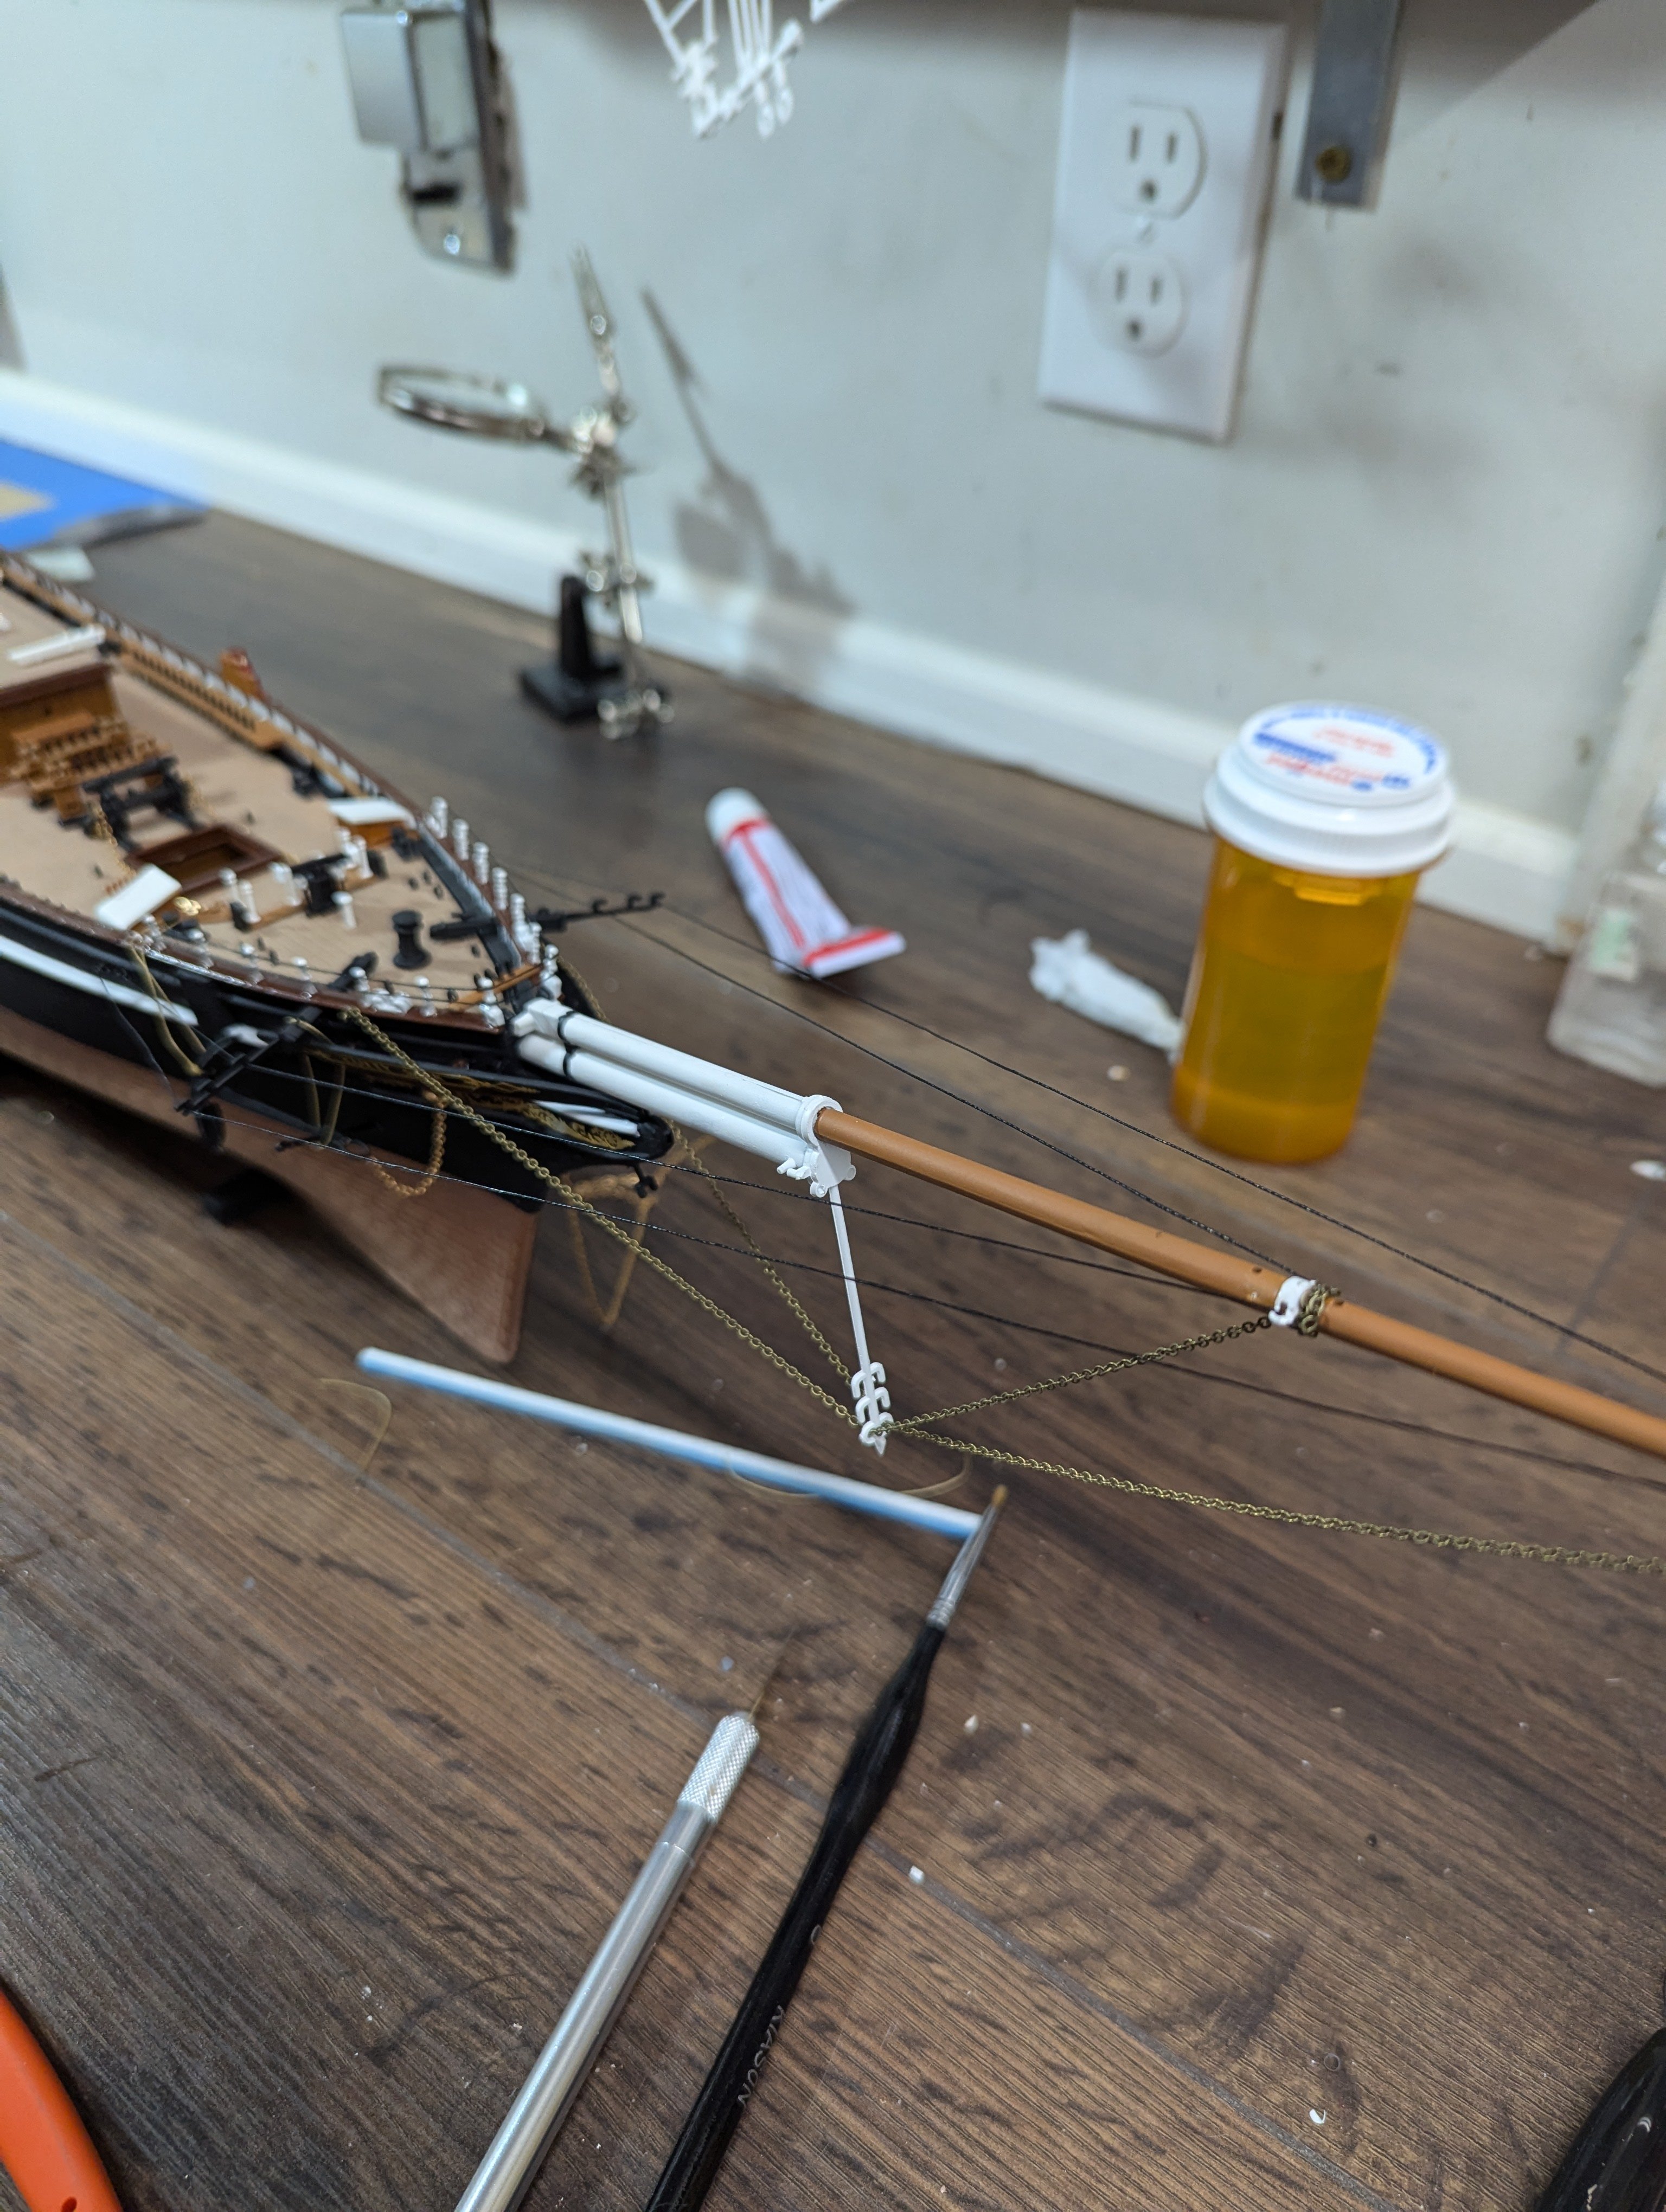
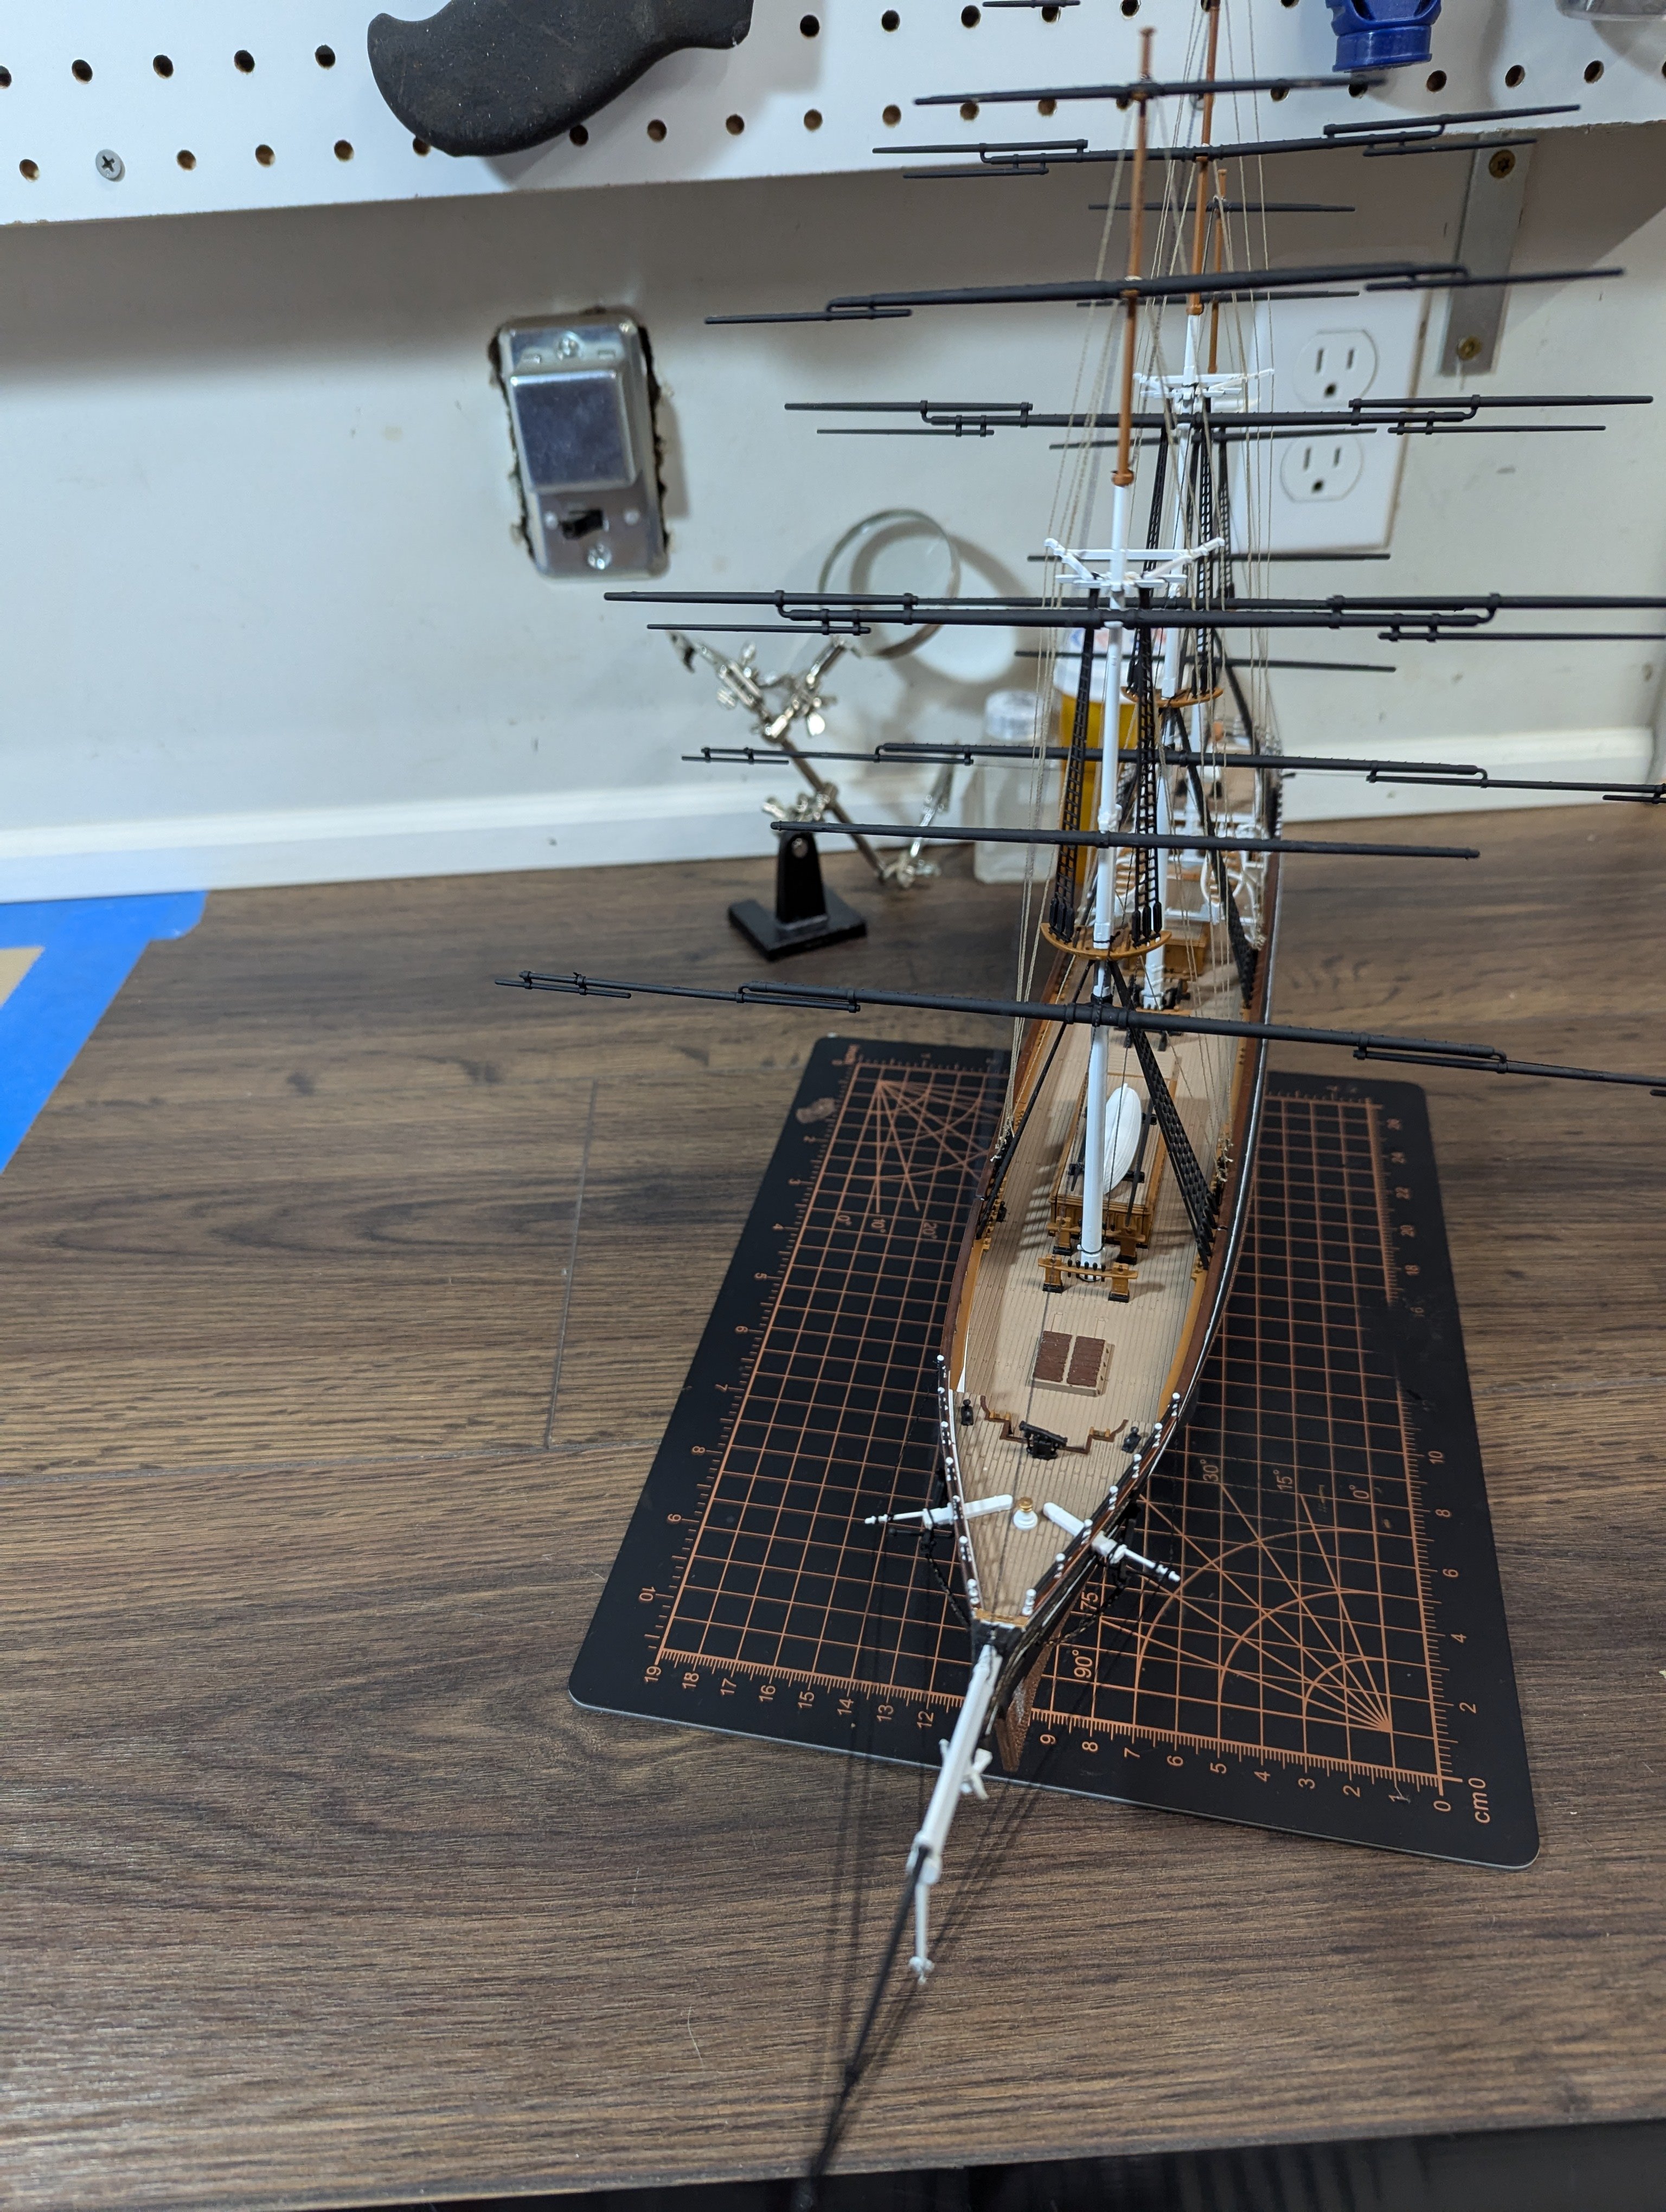
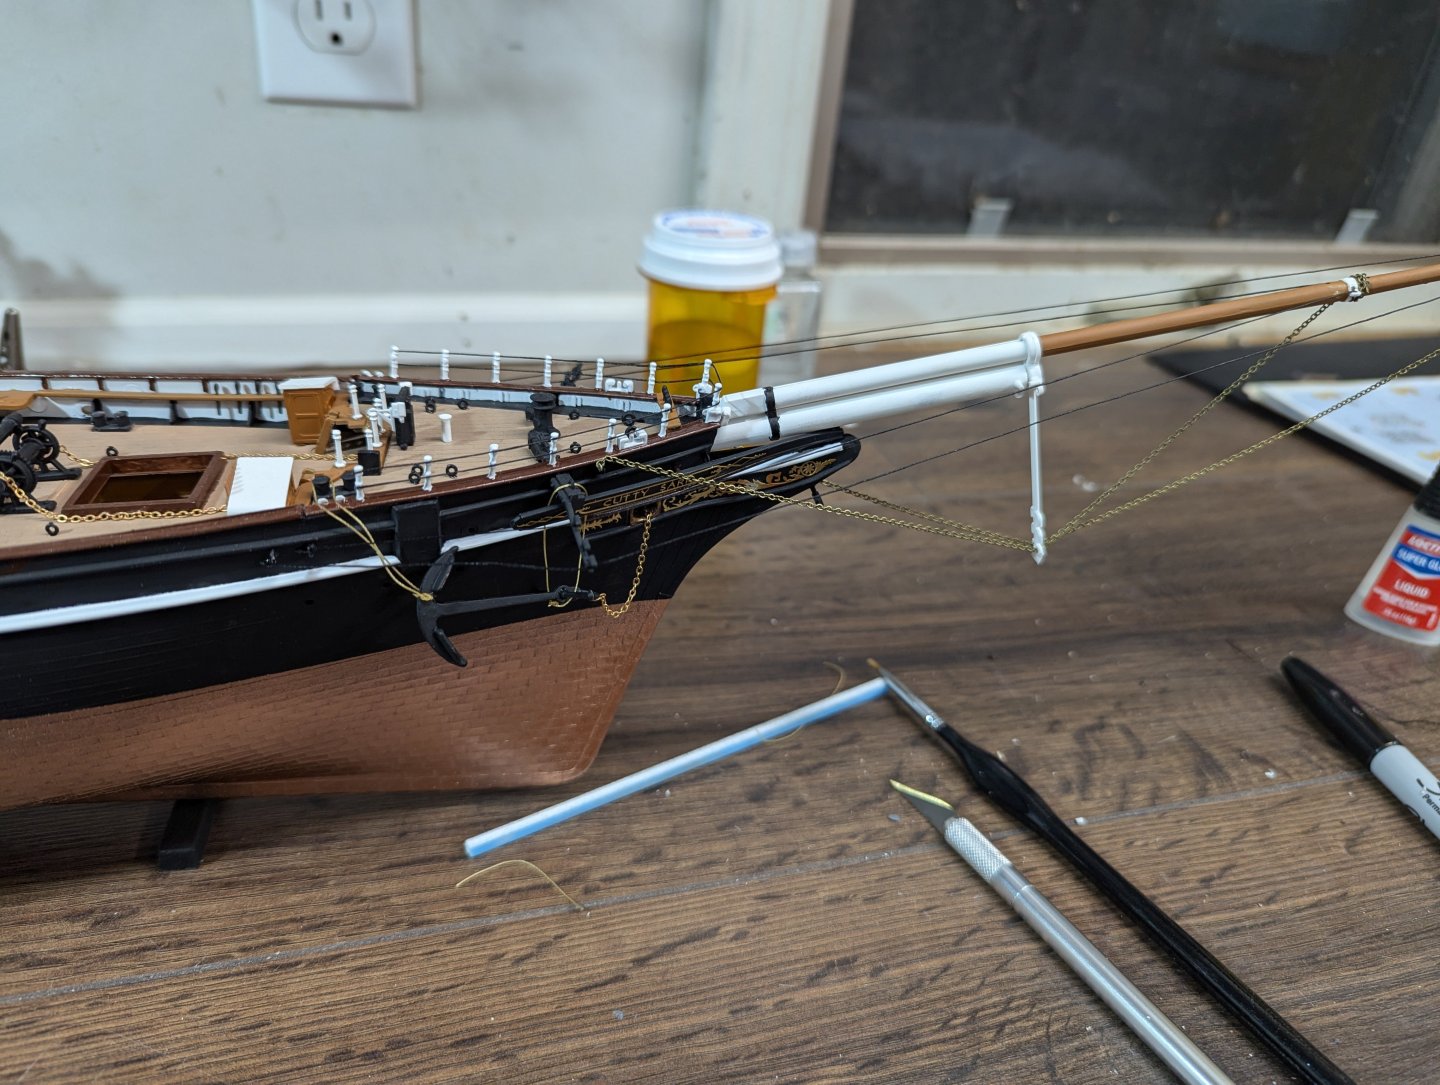
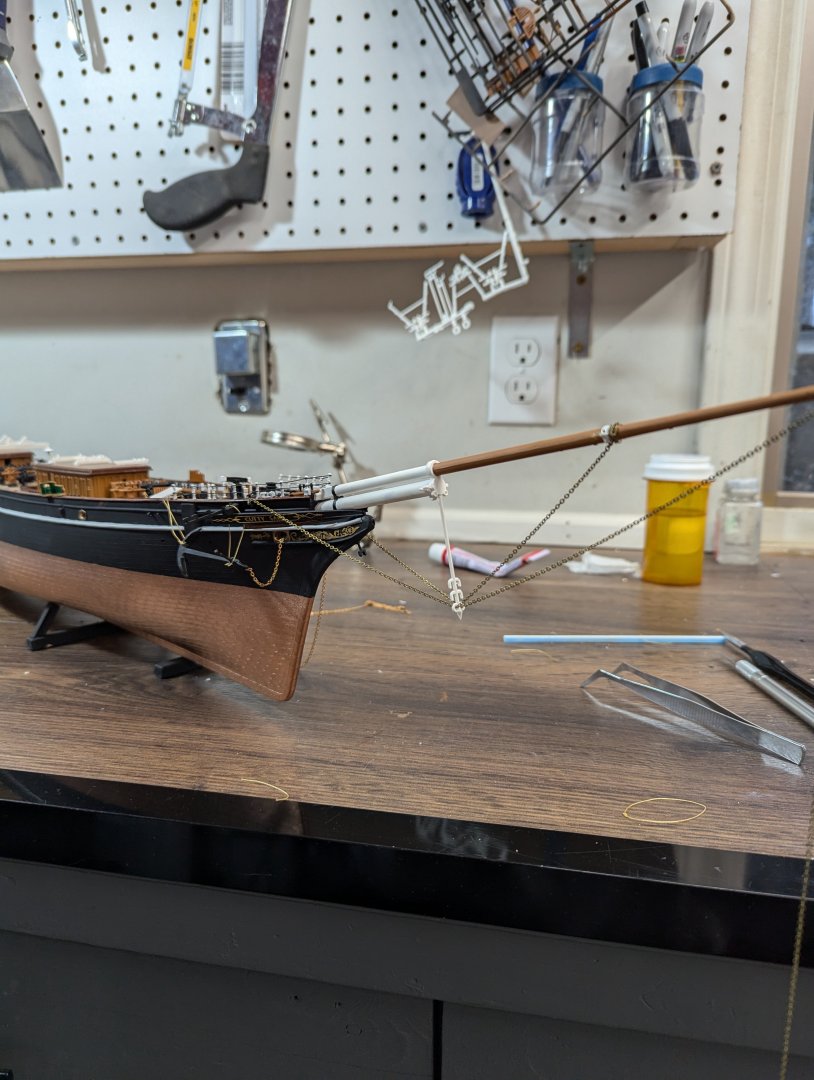
More rigging completed on the bowsprit.


-
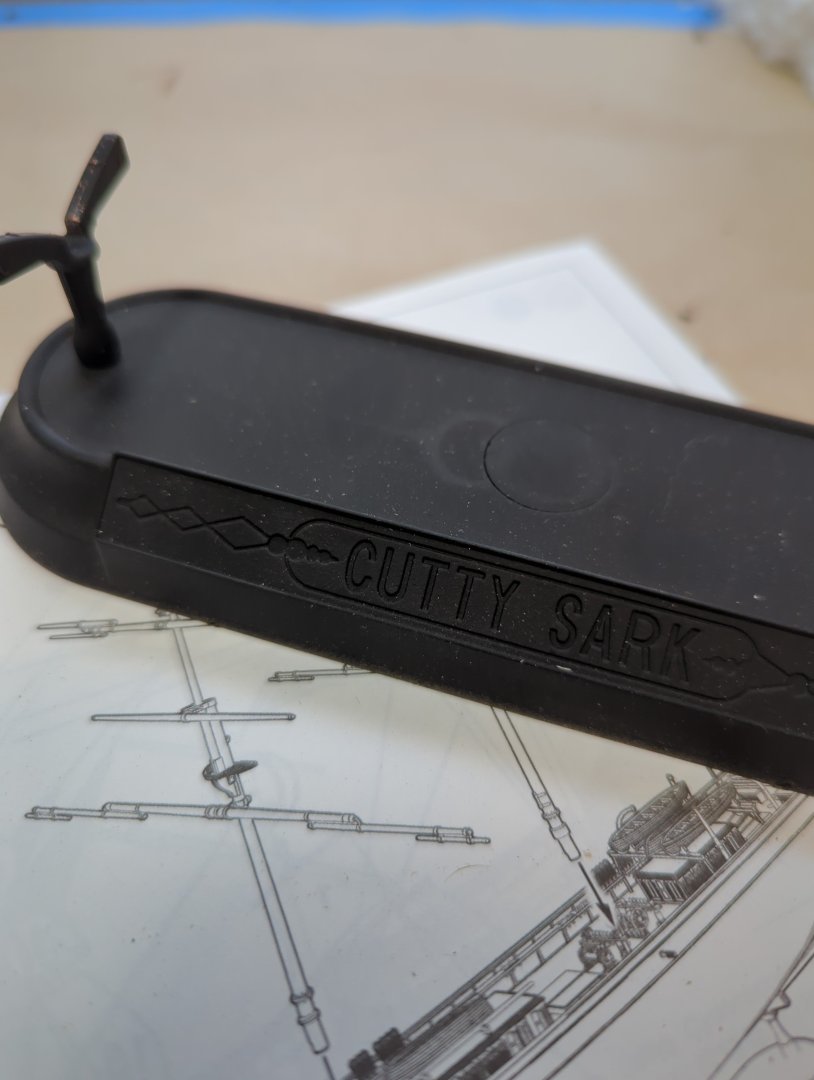
Just got a nice deal on "the next one." New in box 1:96 cutty, still in plastic wrap. 1987 version. Only set me back $60.

- 29 replies
-
- 3
-

-
- Cutty Sark
- Revell
- (and 1 more)
-
True that. I have experienced this myself on a past project. I turned from my workbench to grab something, turned back to the model and in doing so snapped the bowsprit right off! Luckily I was able to glue it back on easily enough.
-
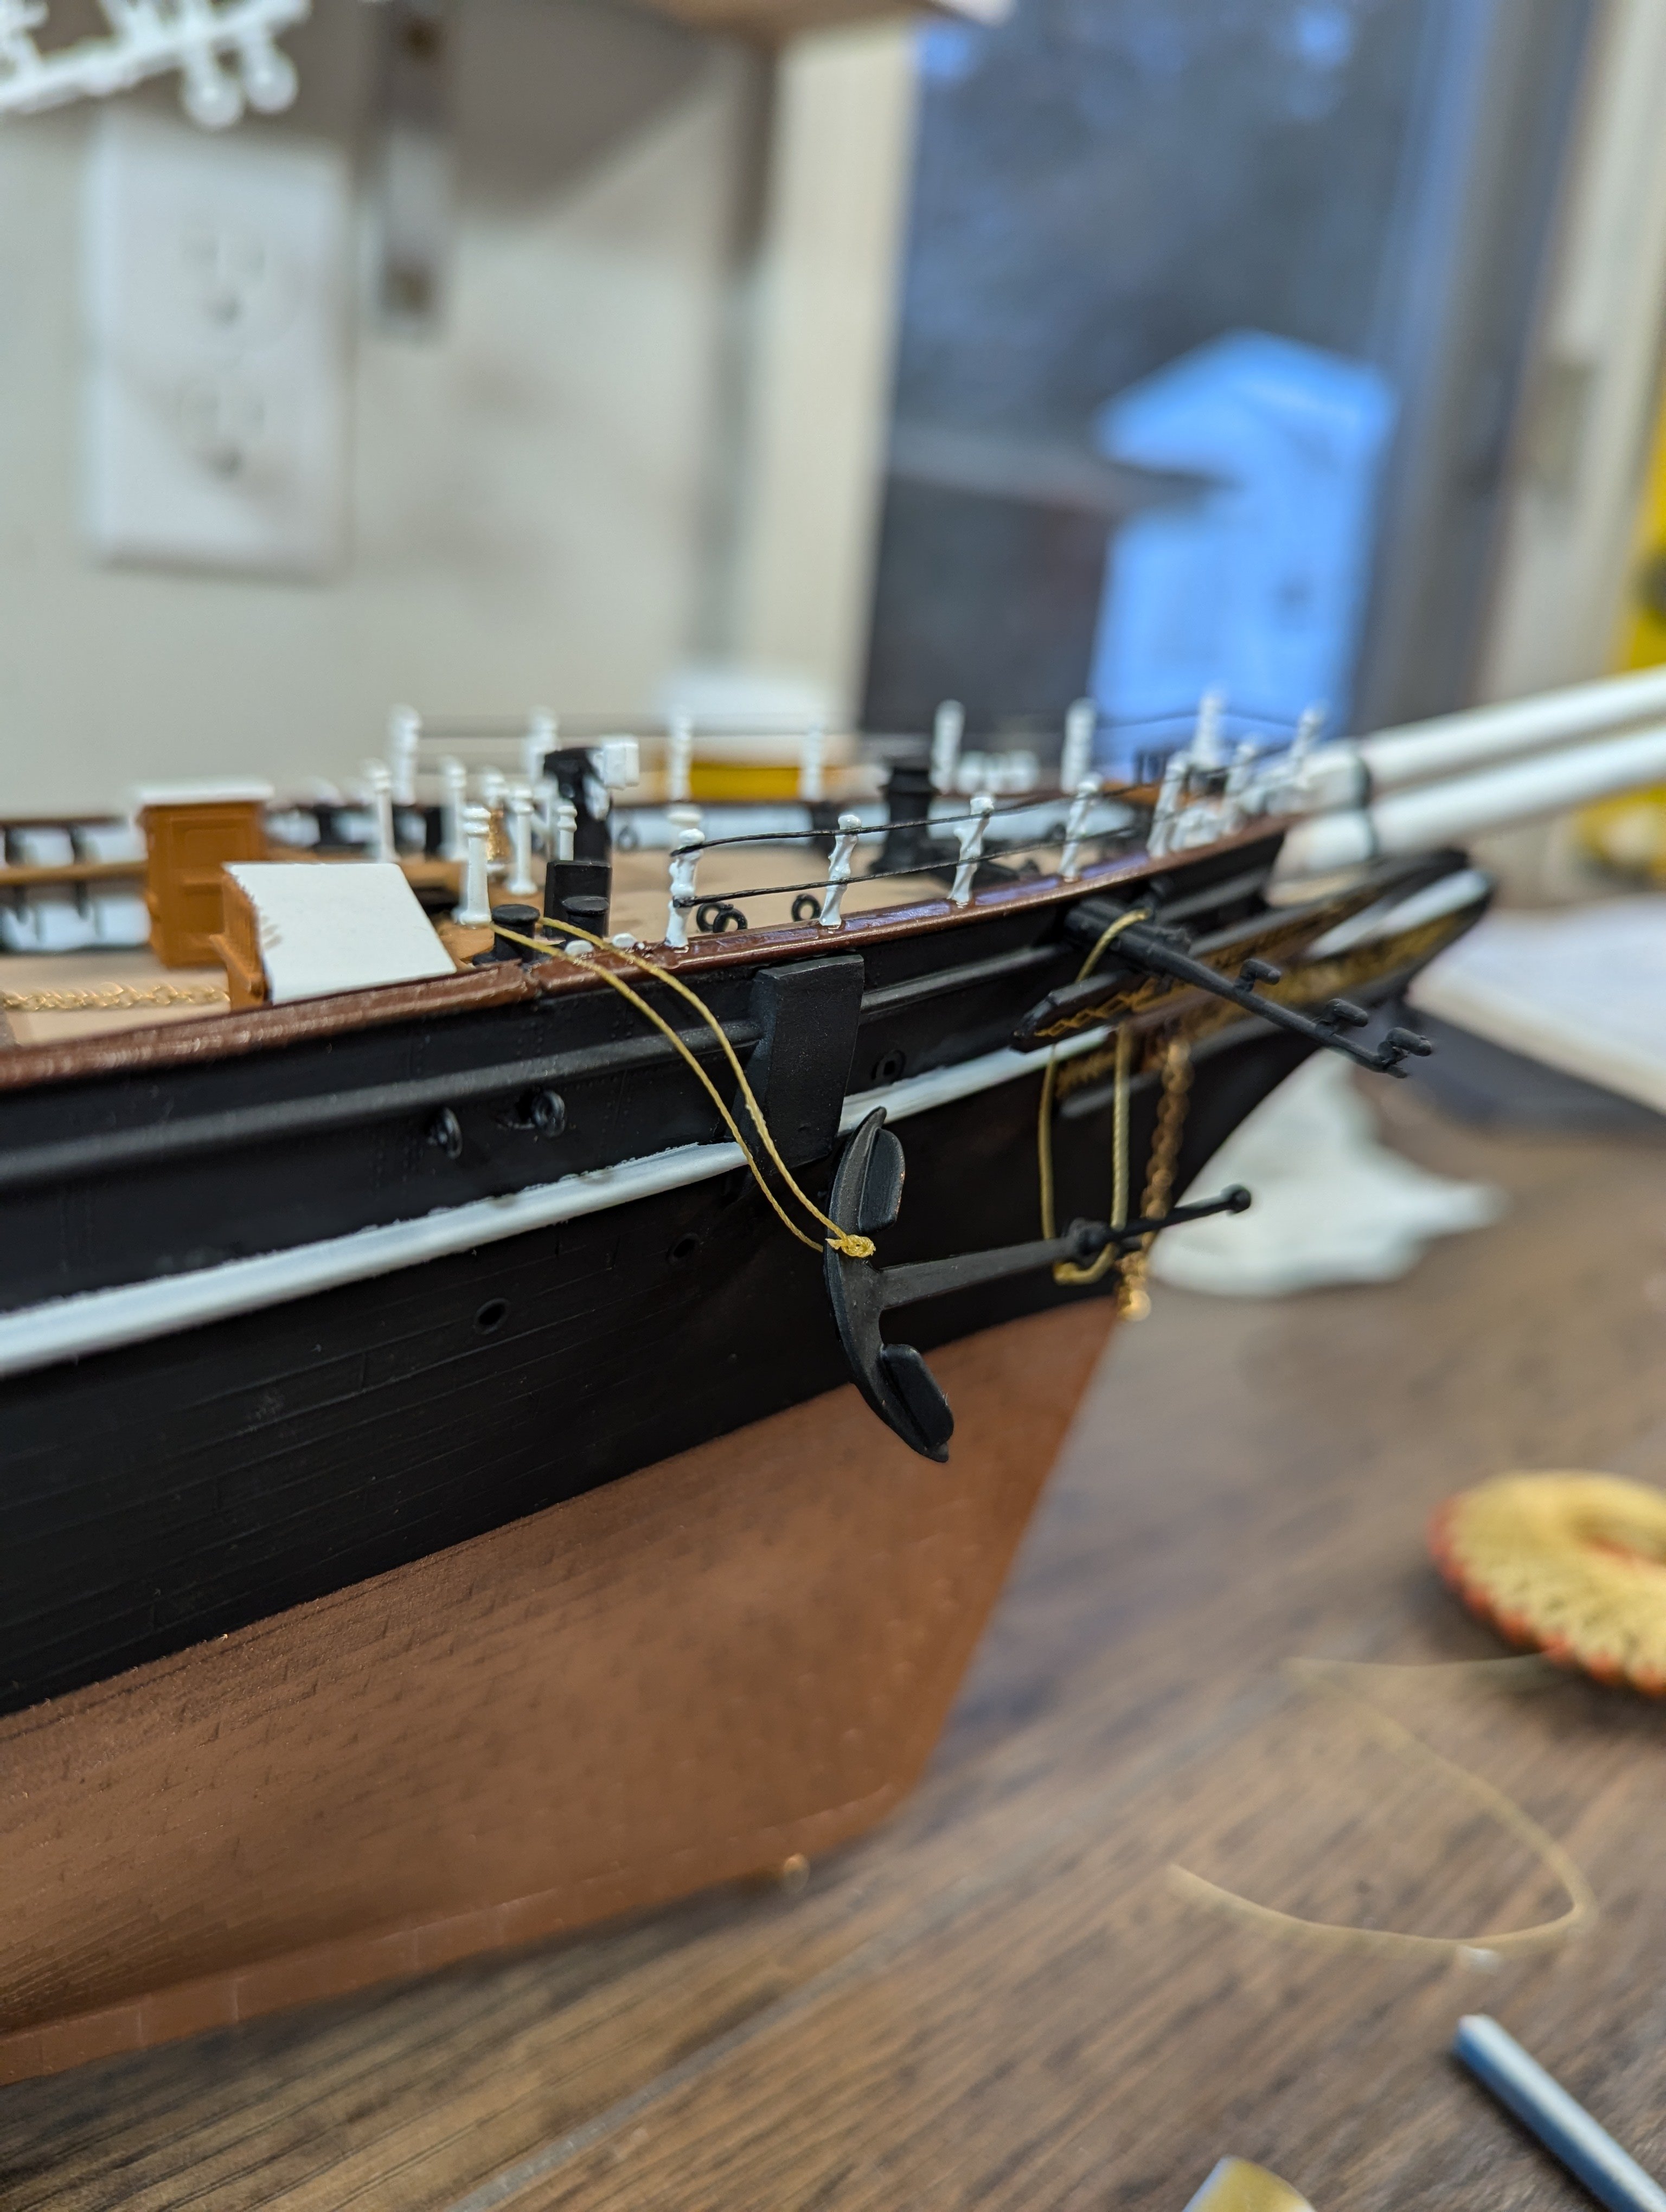
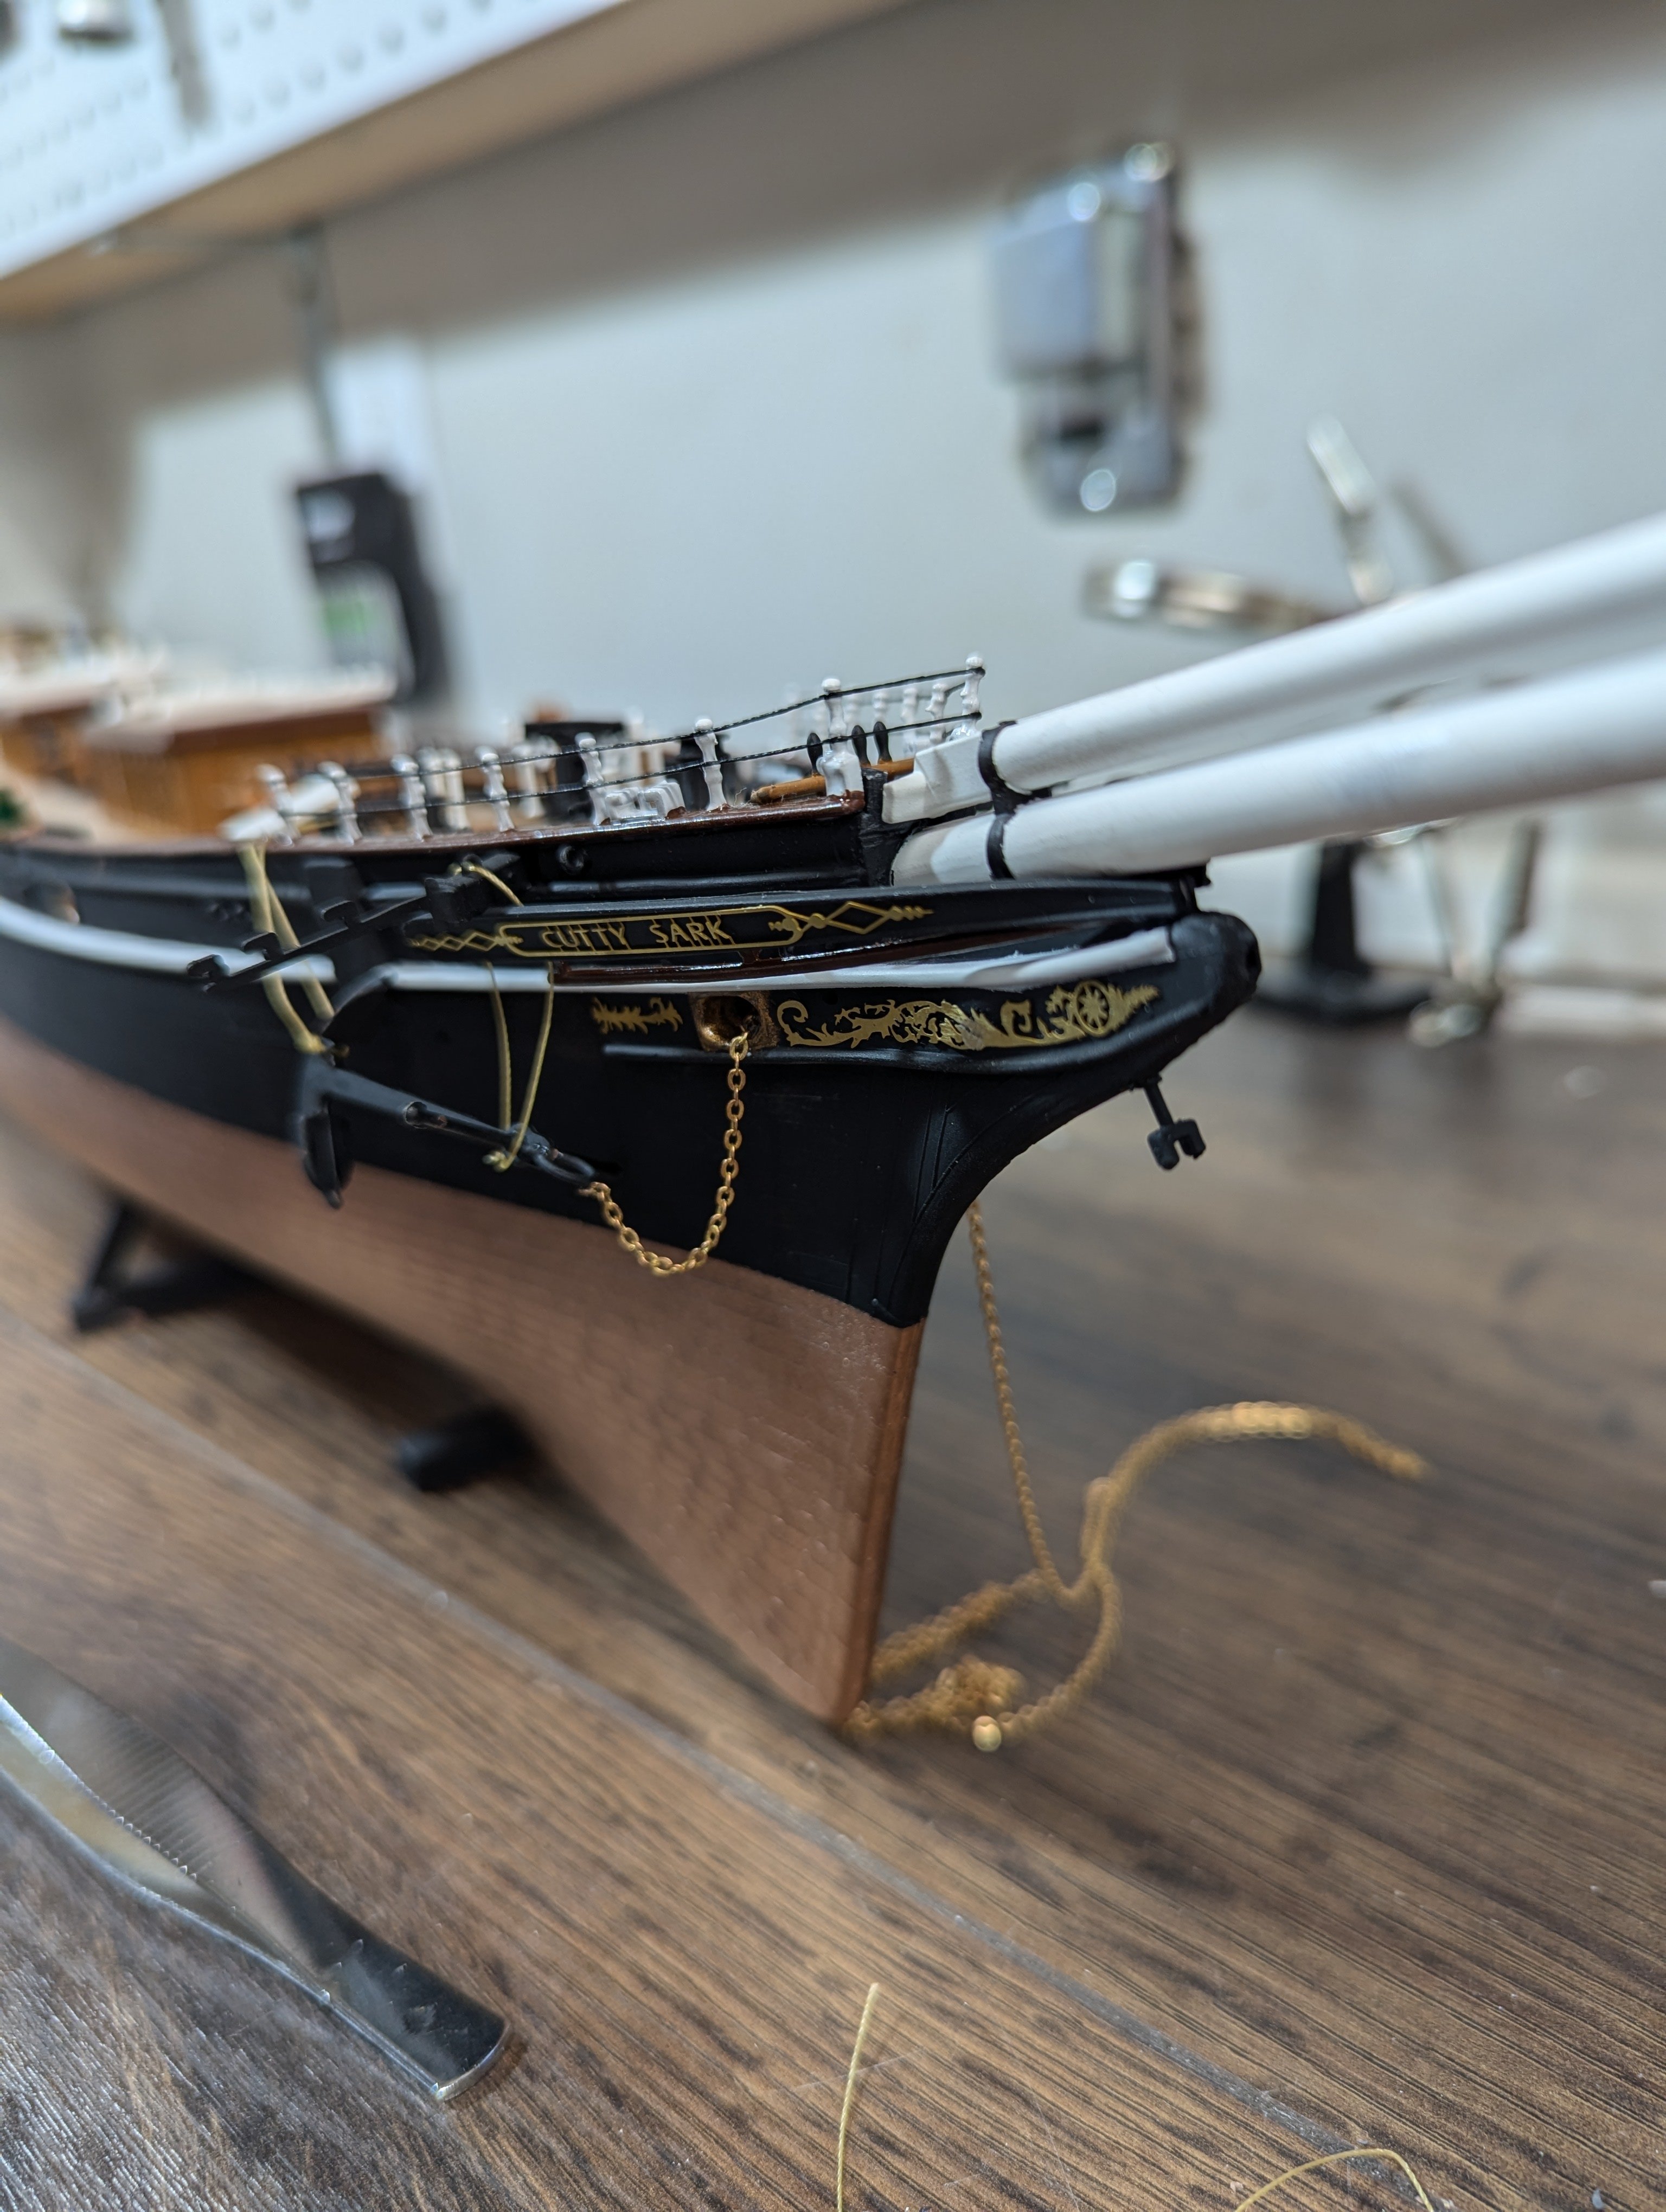
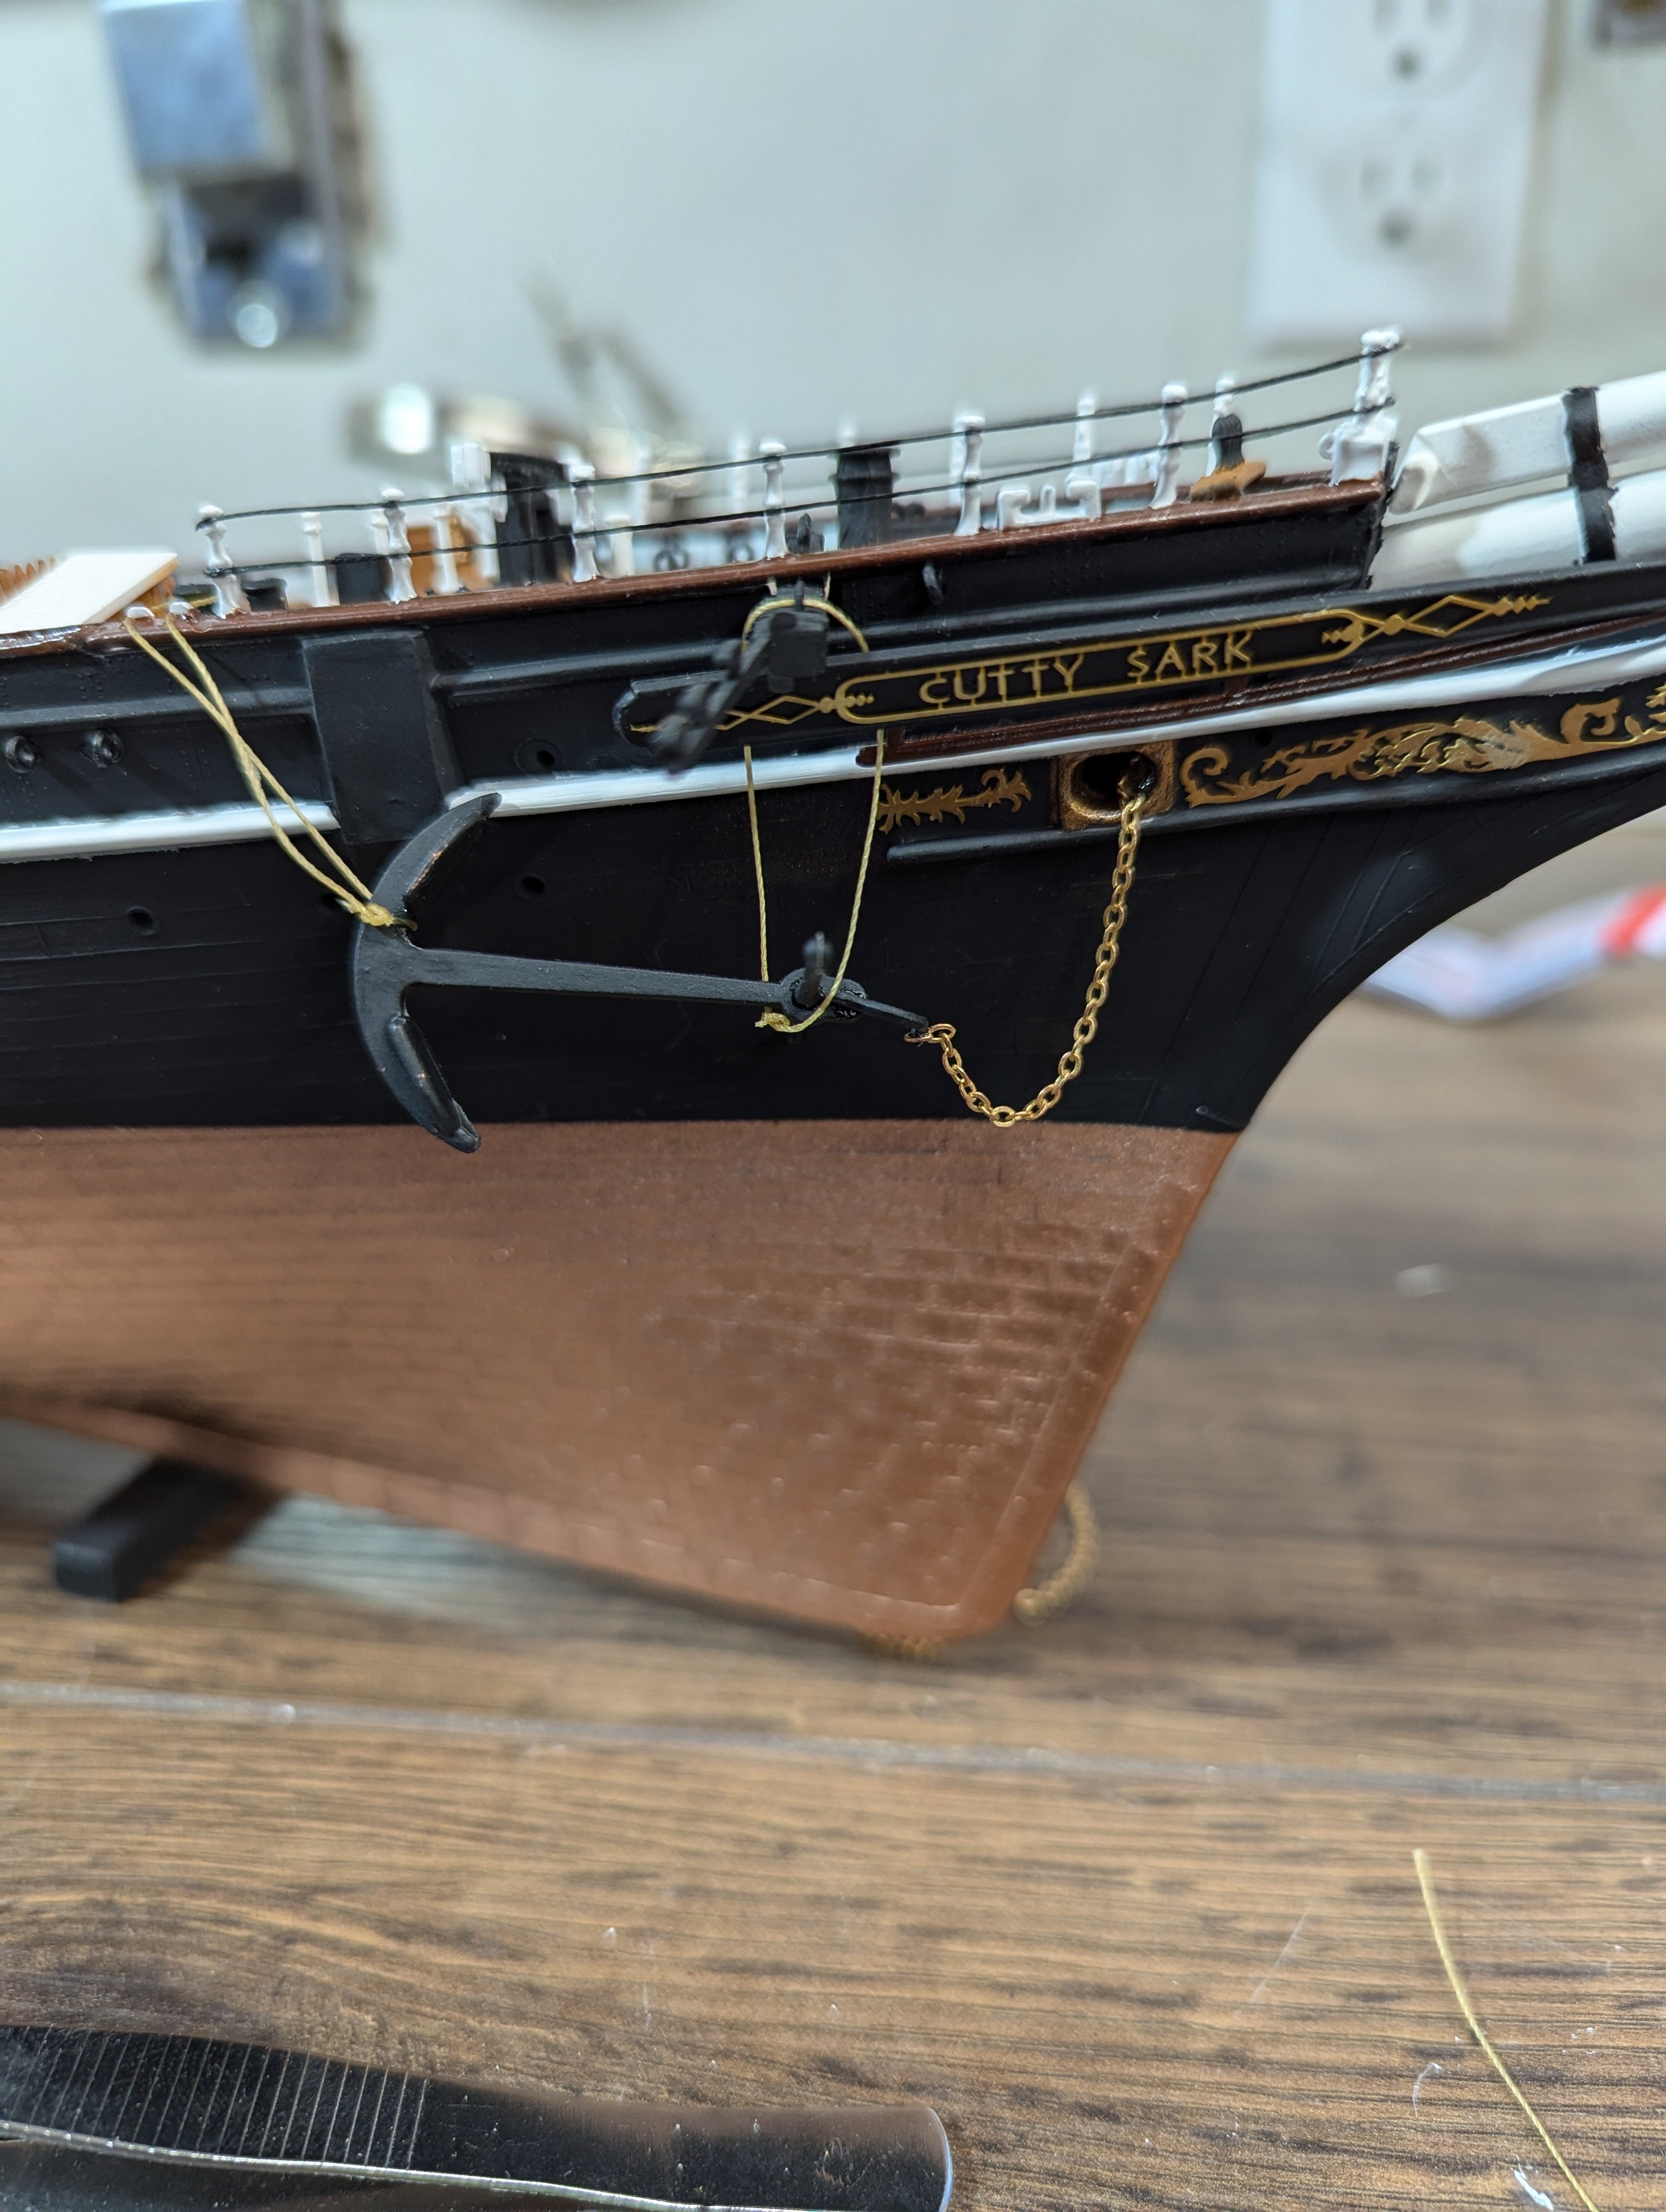
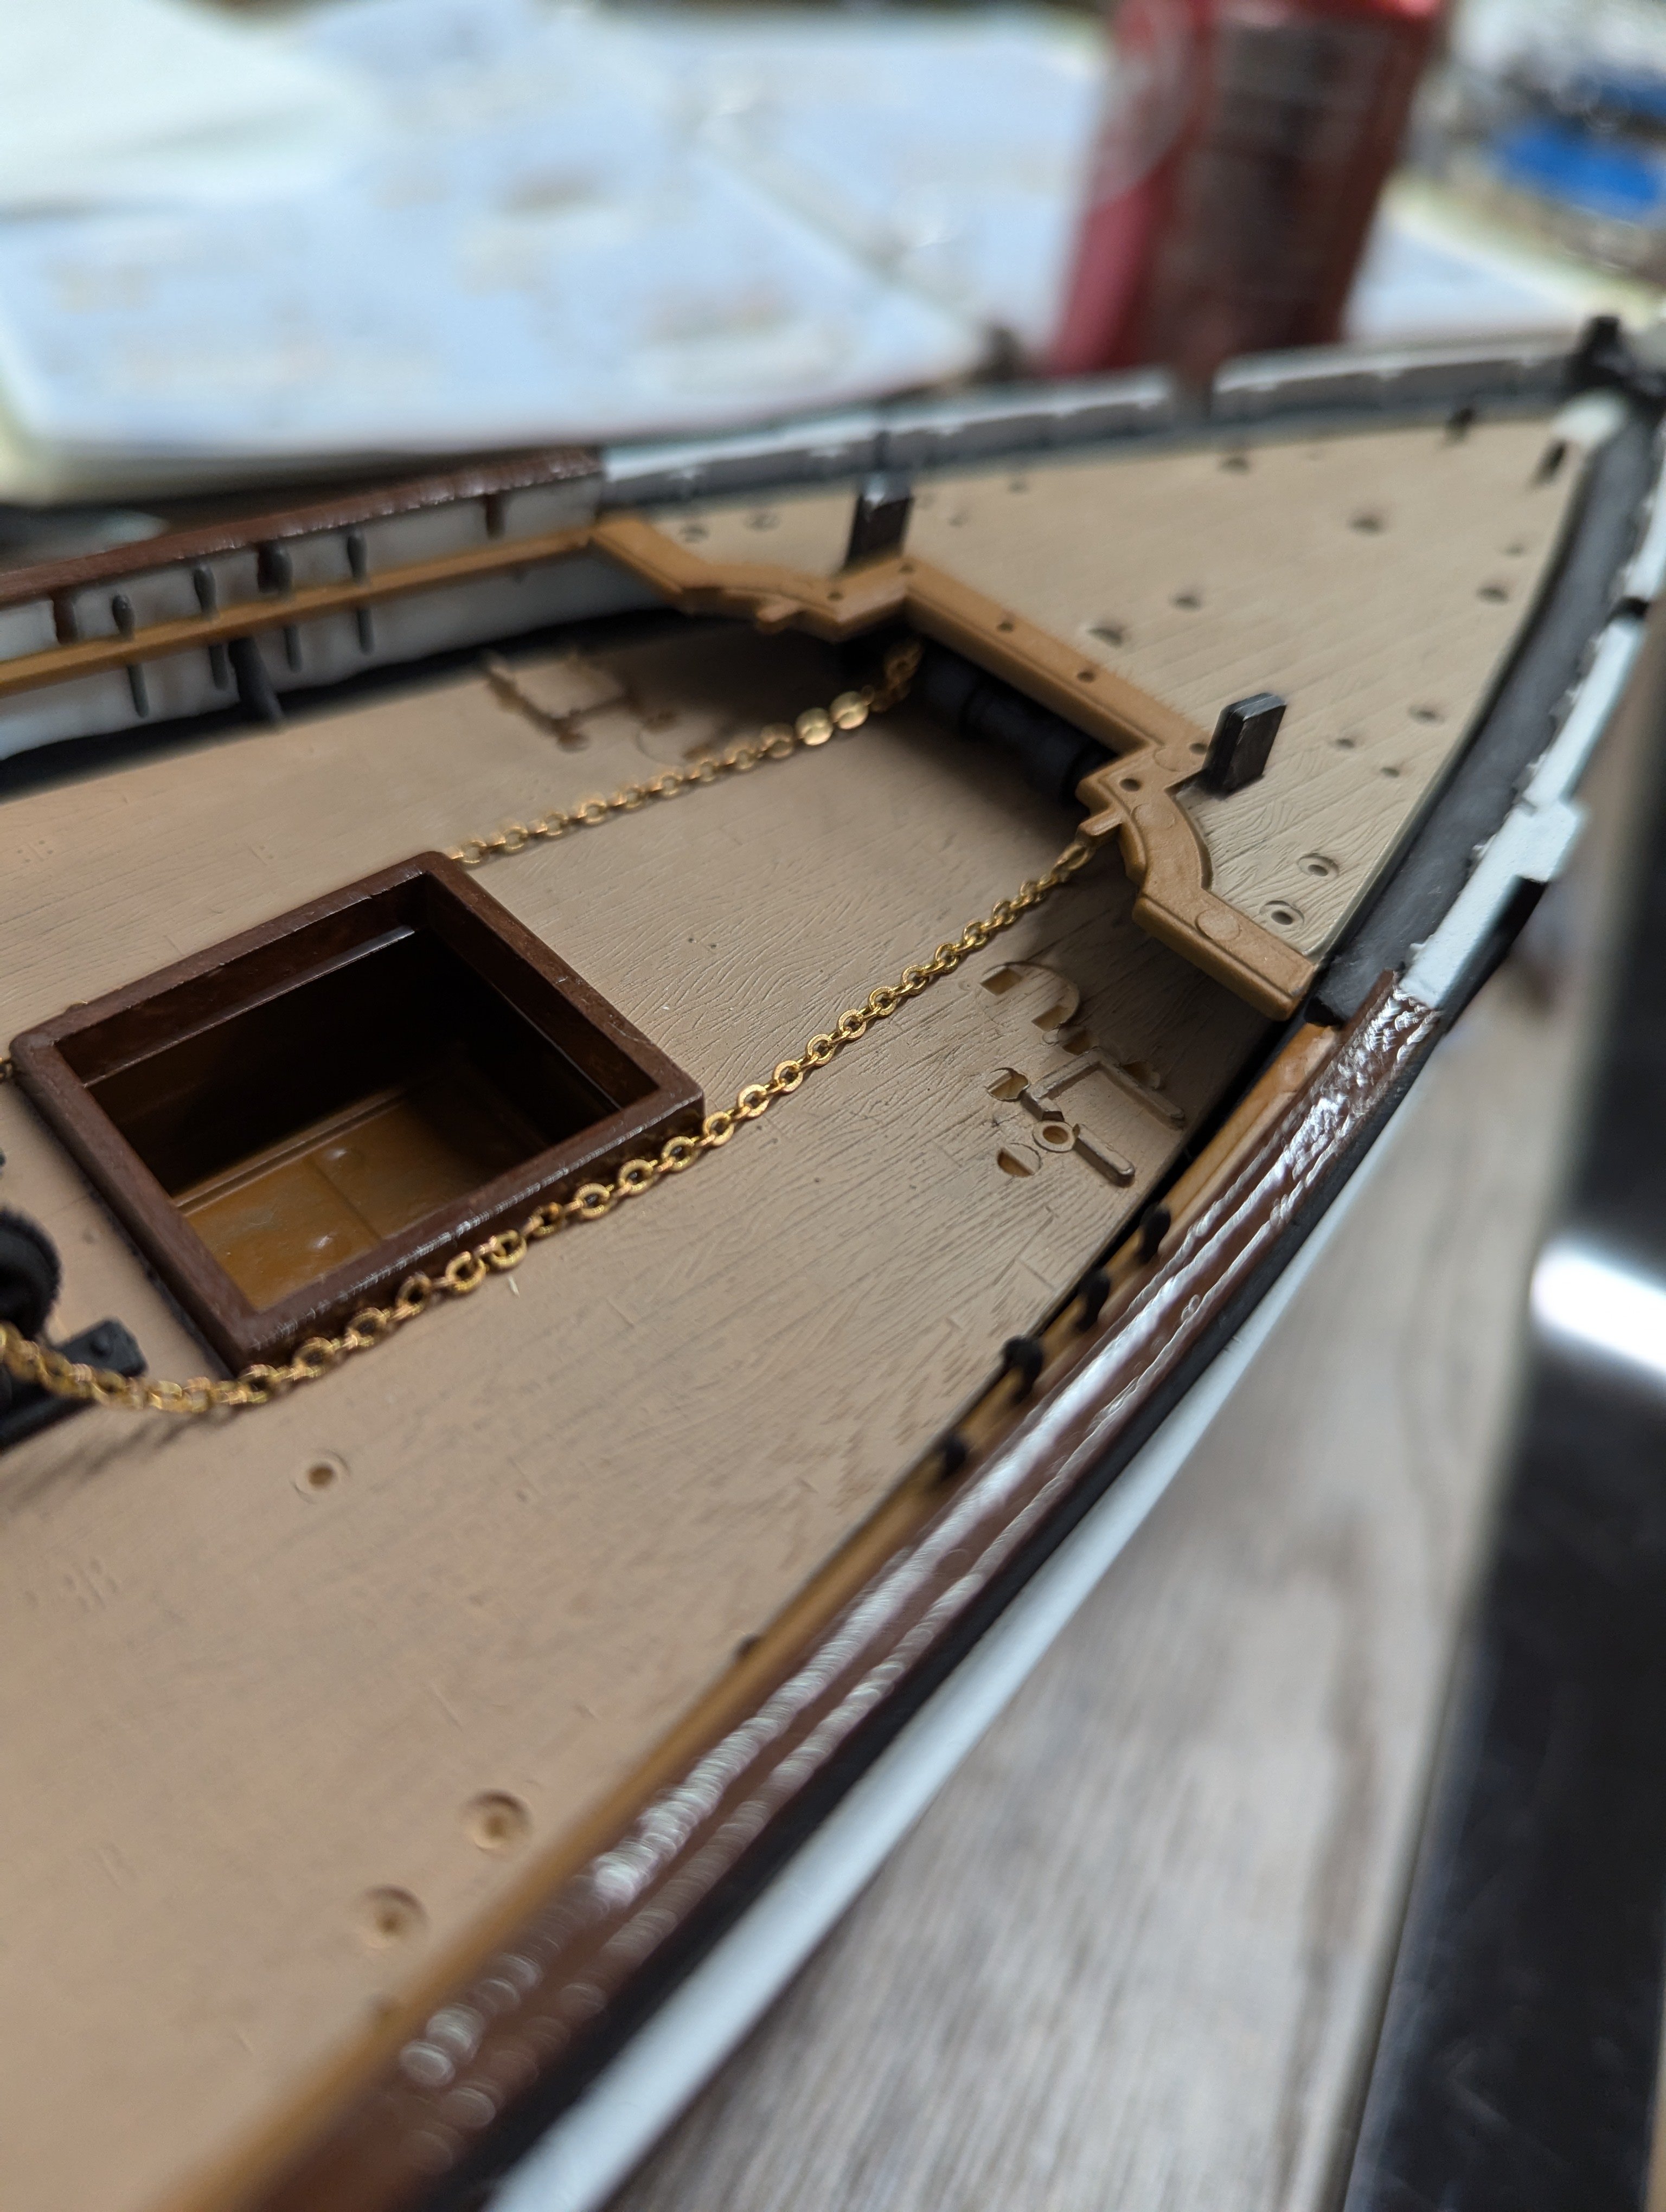
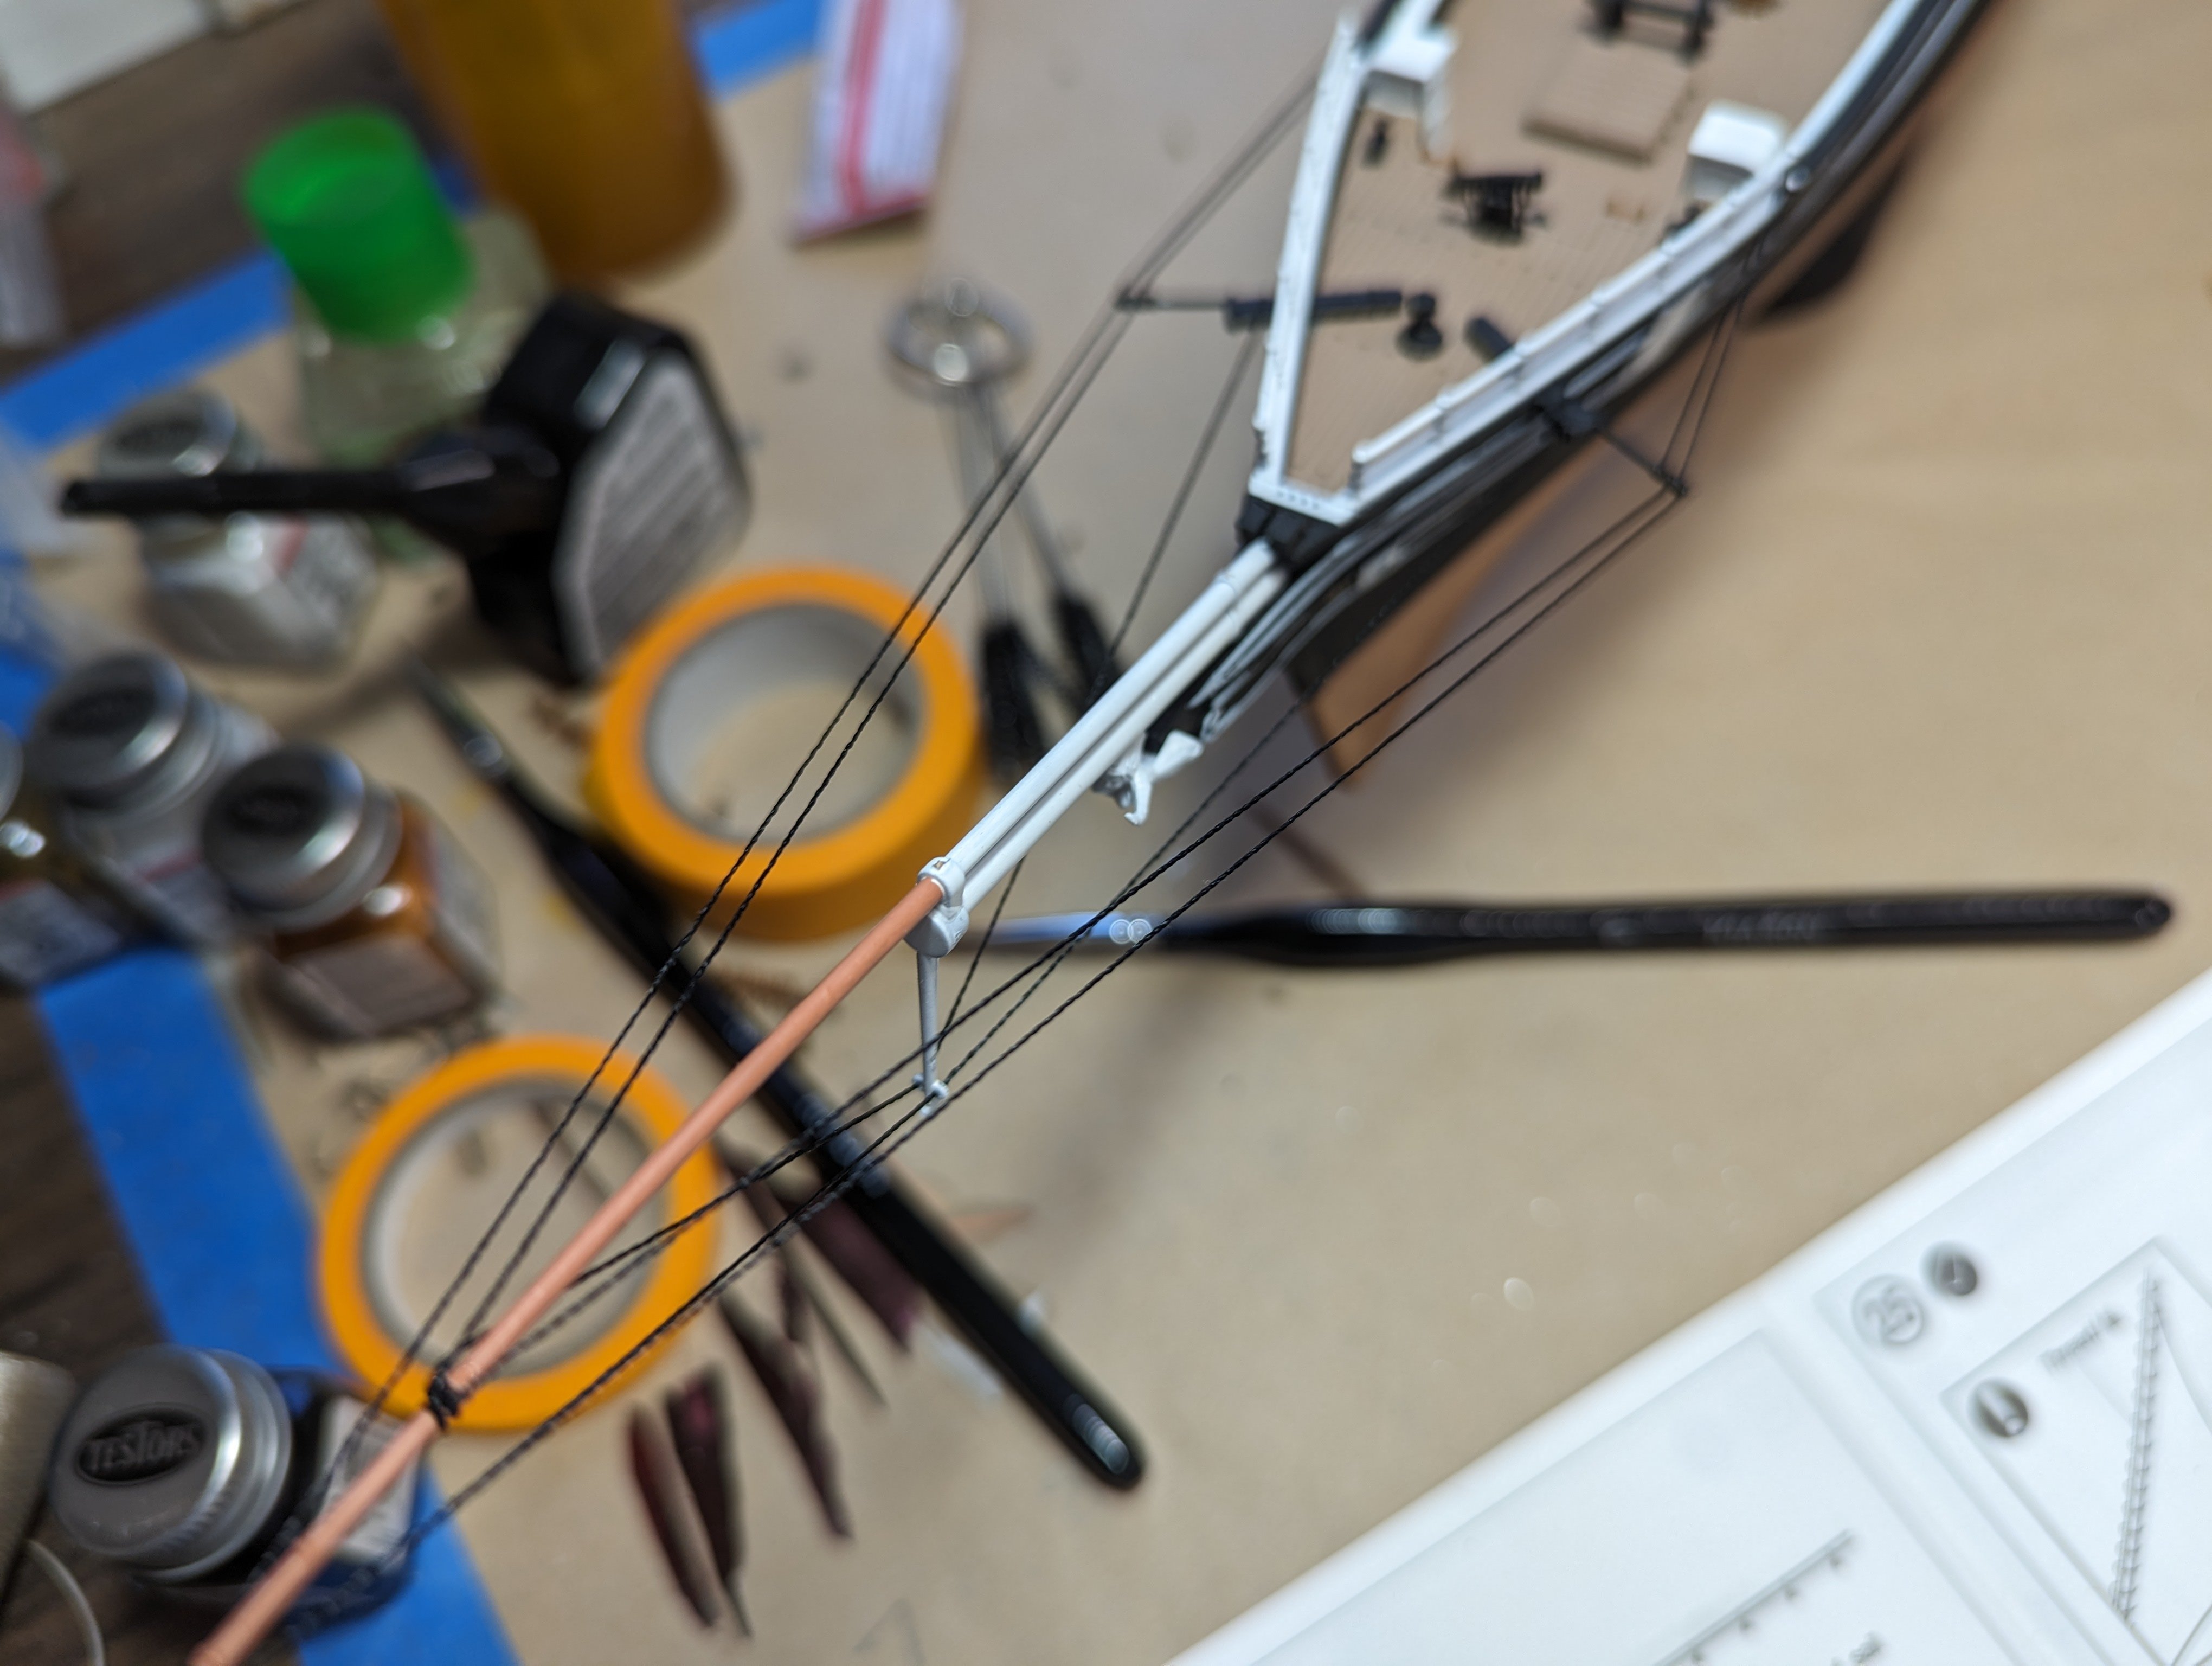
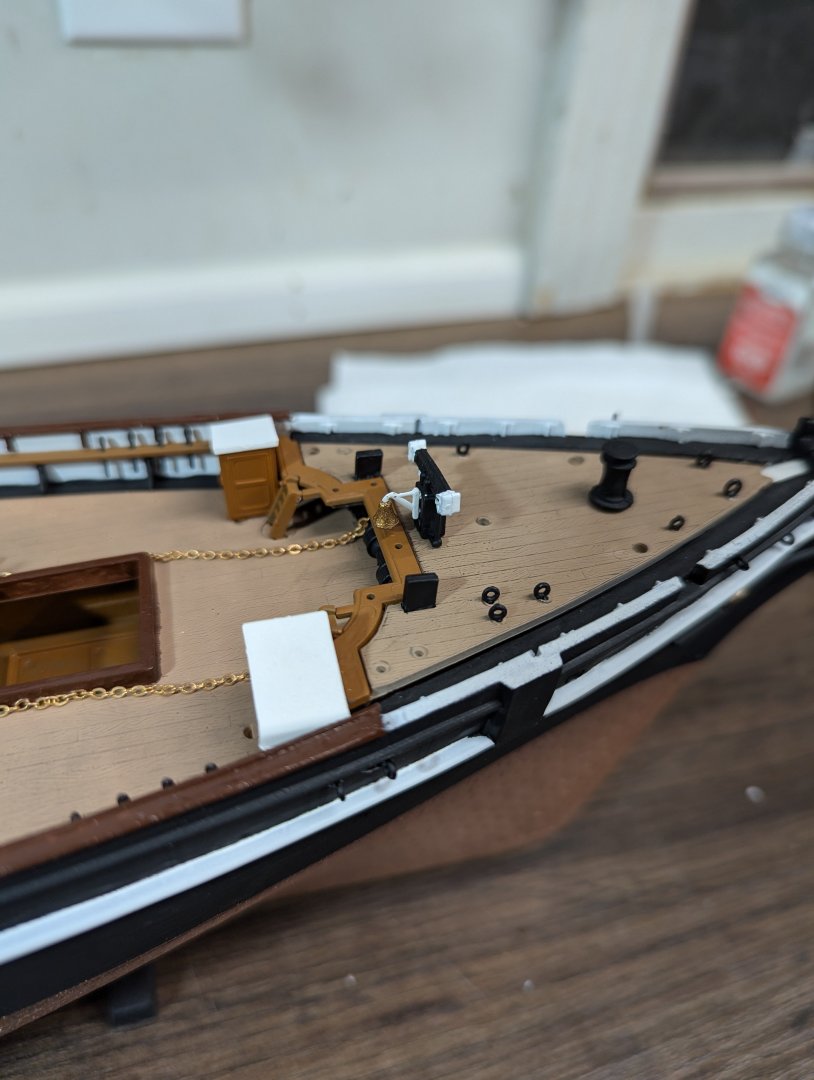
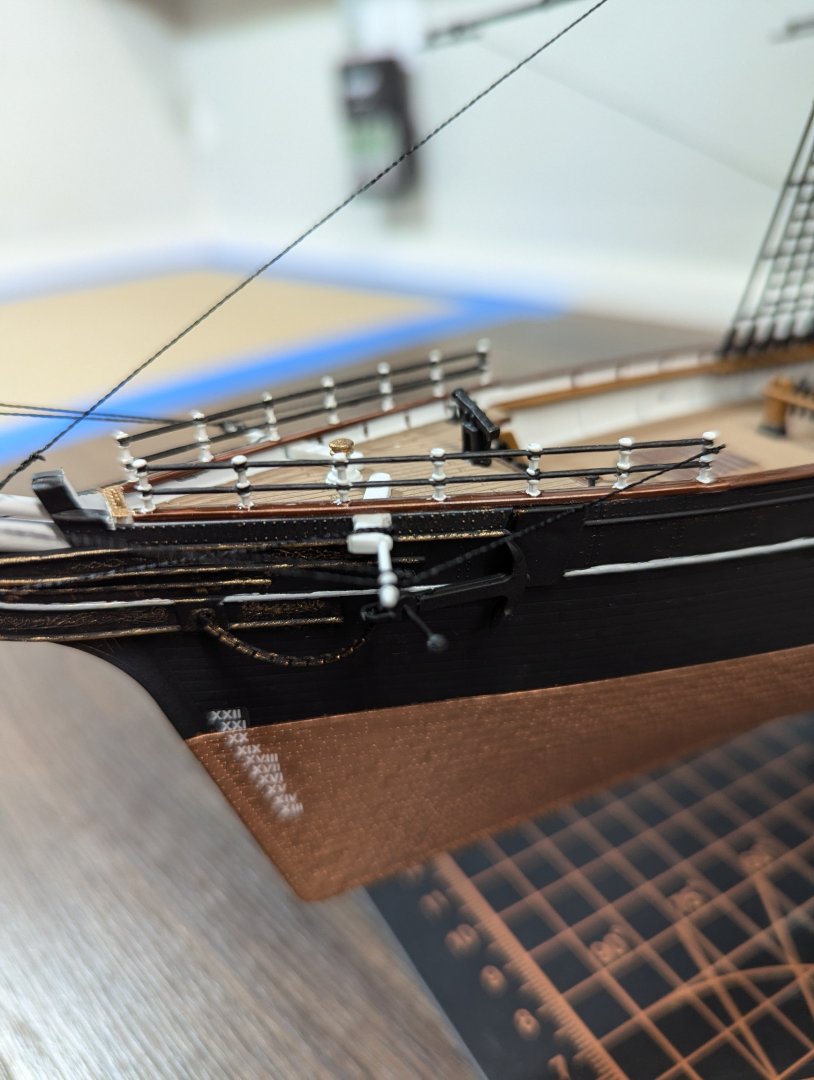
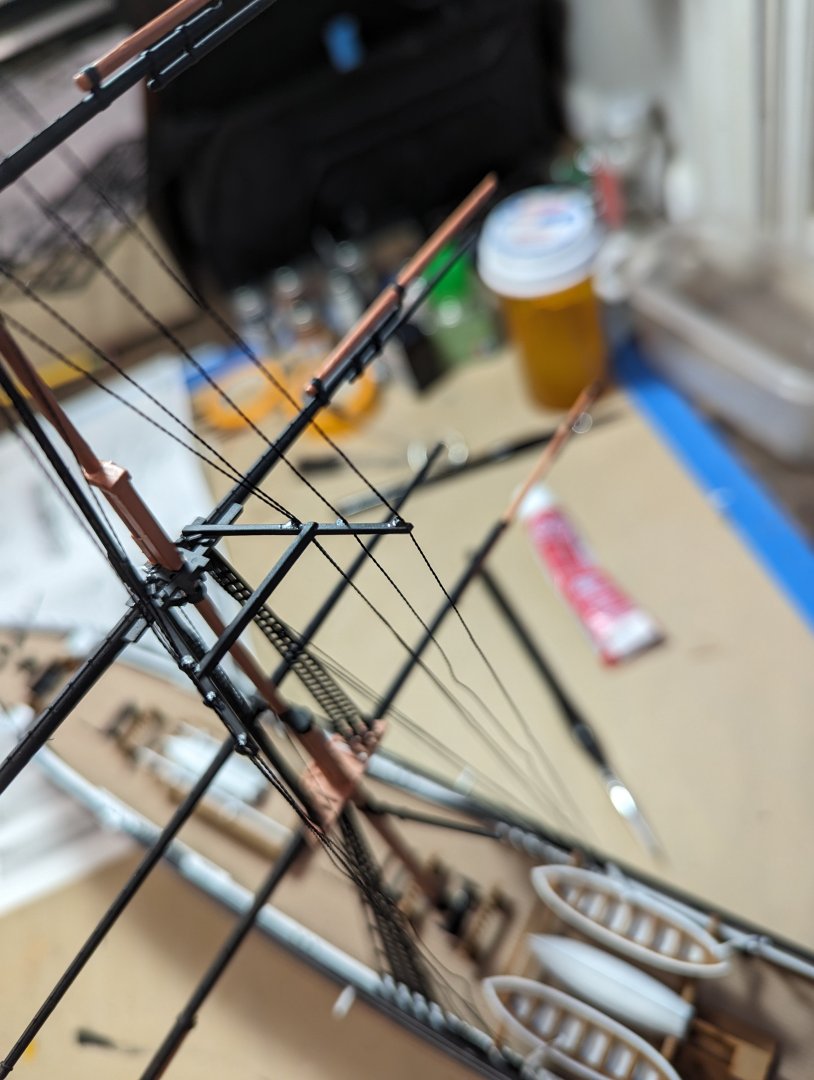
Got started on some bowsprit rigging. Couldn't really figure out a good way to attach the chains. This is what I settled on

- 29 replies
-
- 2
-
-
- Cutty Sark
- Revell
- (and 1 more)
-
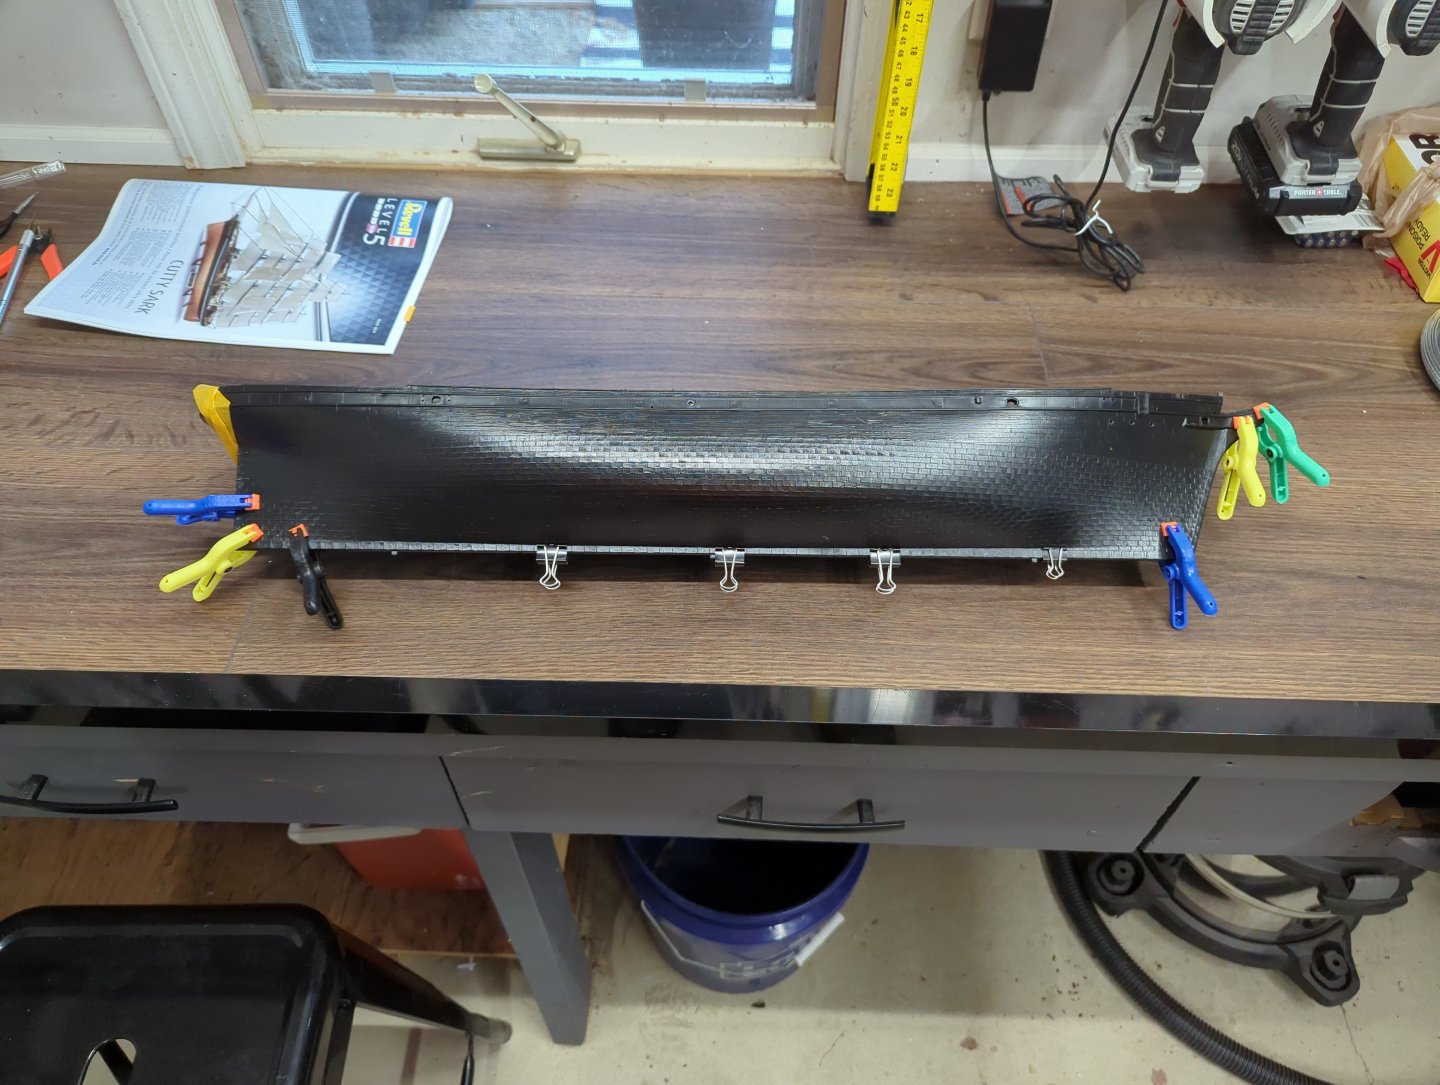
Here is one example of the multitude of problems. There is huge gap where two rail units meet up. More filling and sanding needed. Fitment in general has been a huge issue throughout. But overall, these things can be overcome.
-
Thanks! However, I make no claim to skill mastery or even close to that. There is a lot on this build that I am looking at and planning to do differently next time around. My fitment of the deck to the hull halves leaves much to be desired. Many things on this build that are "working" but definitely not right if one looks closely.
-
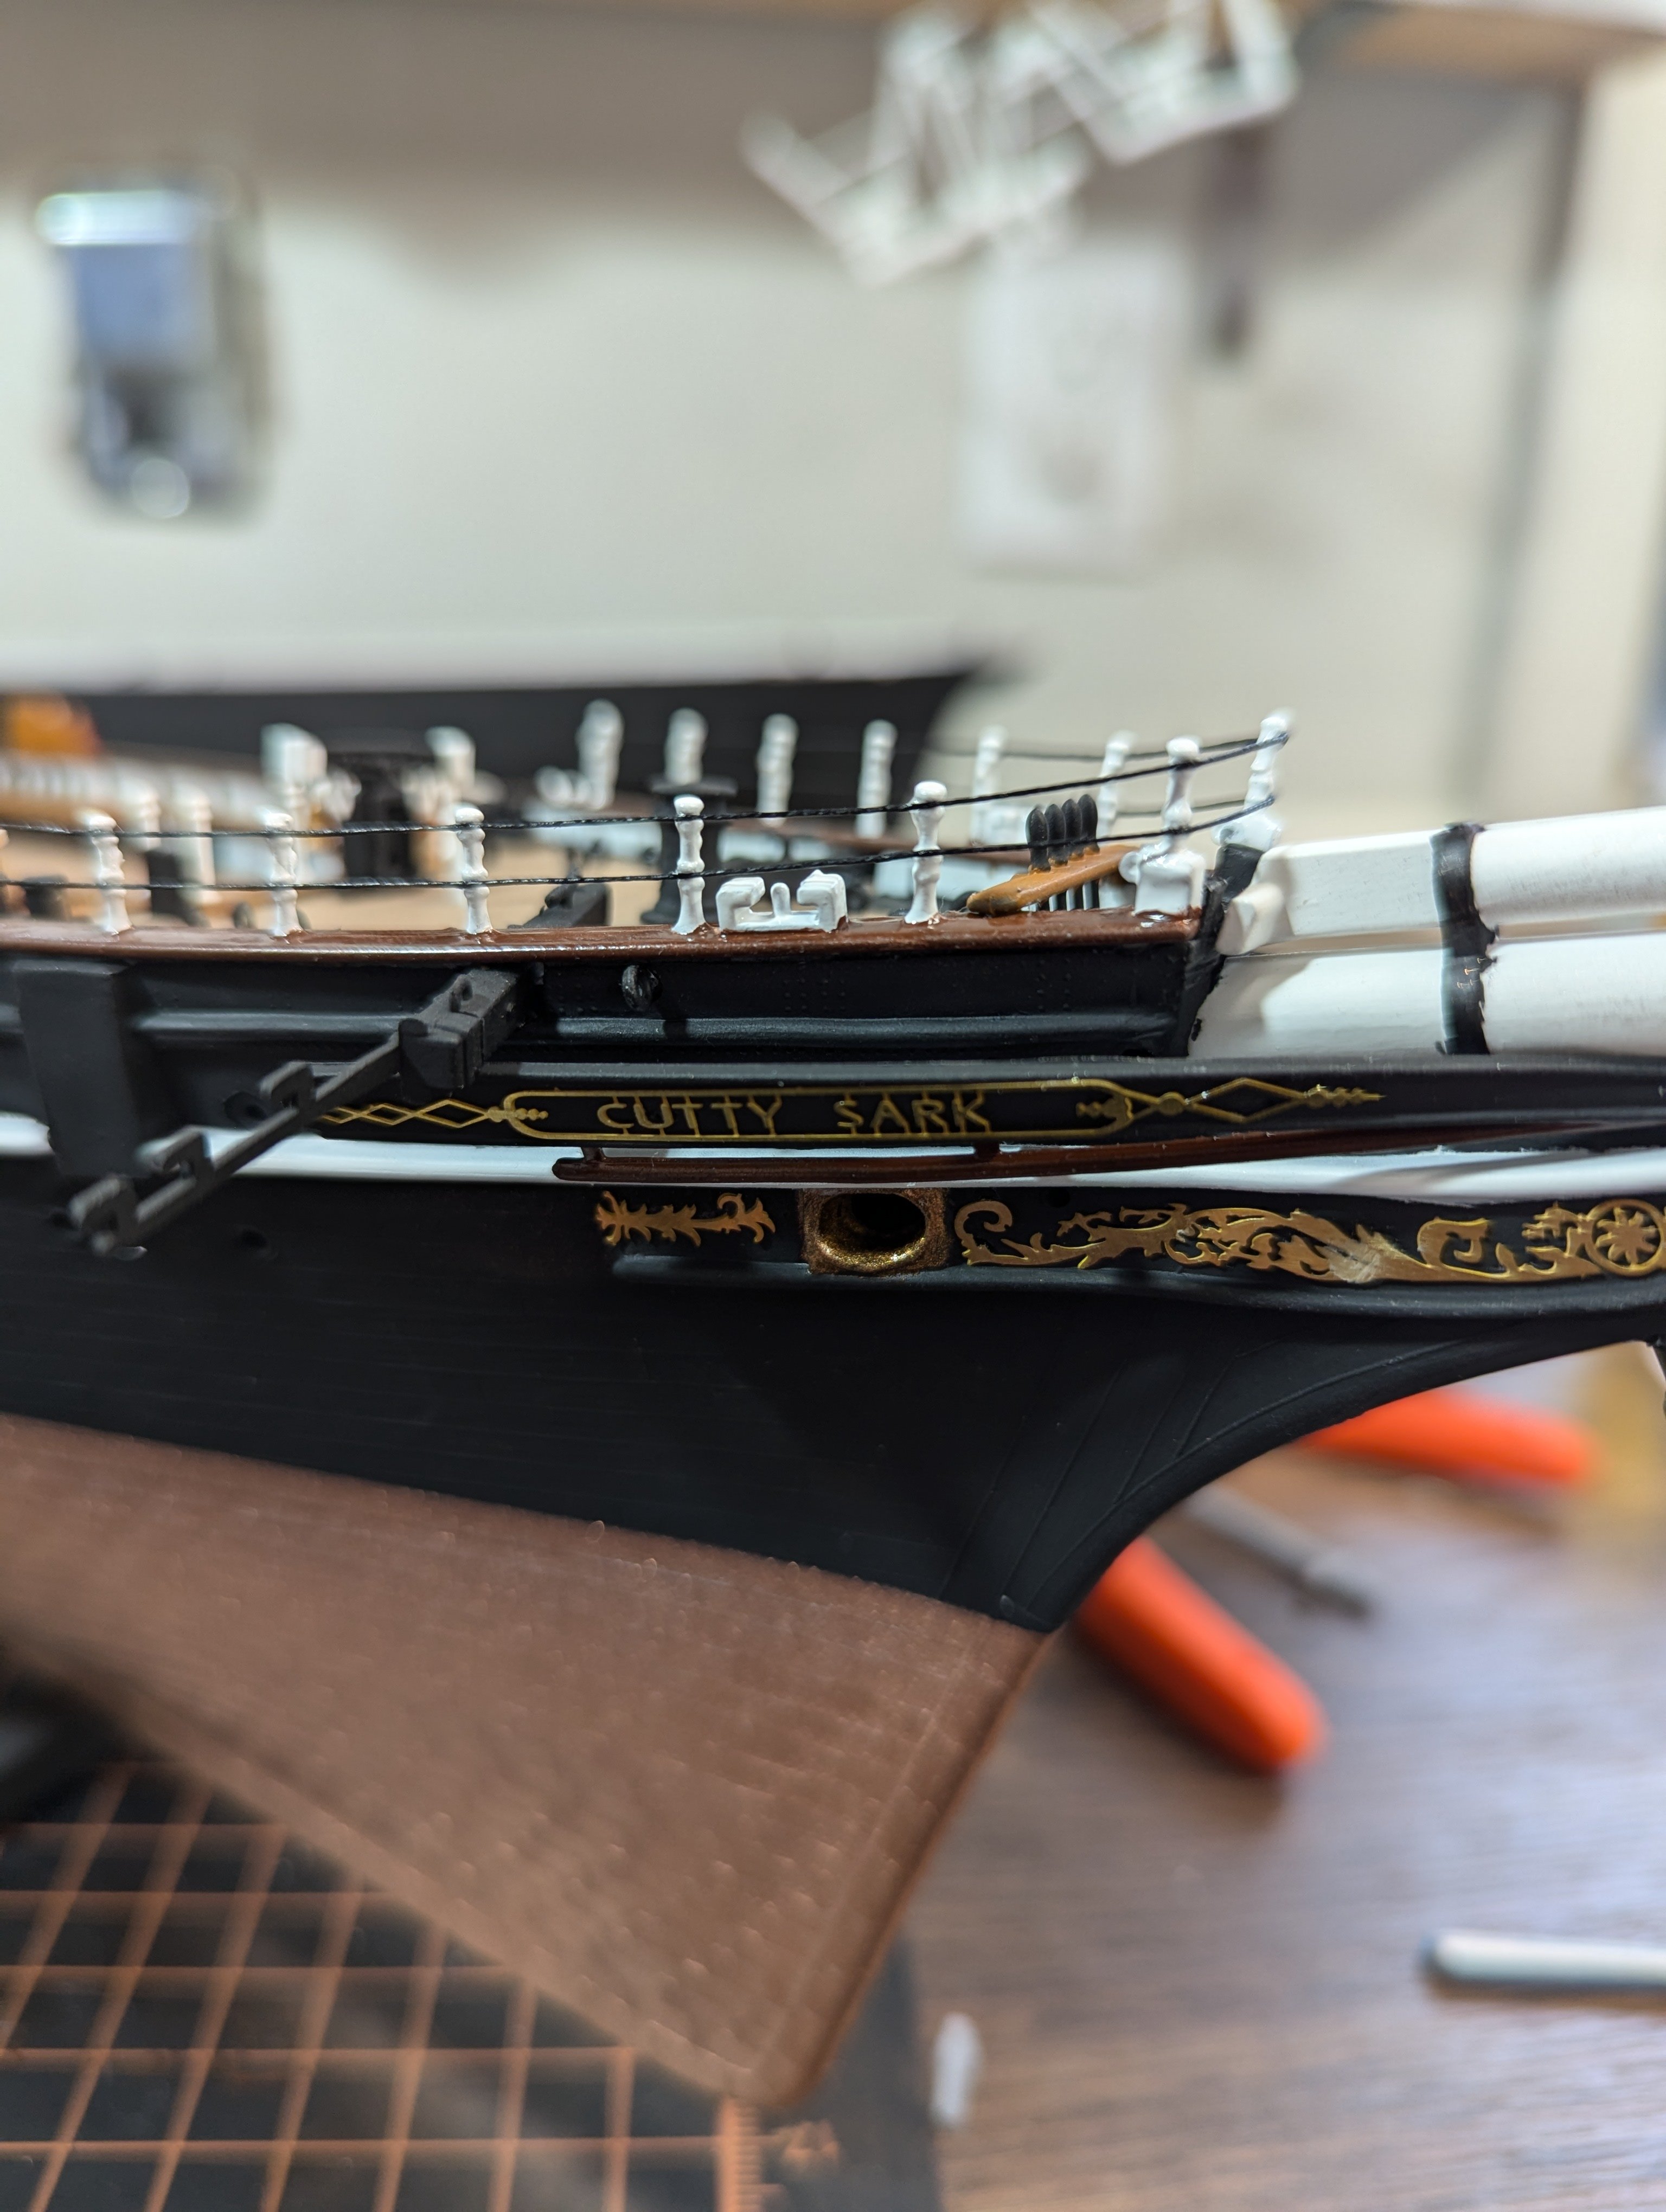
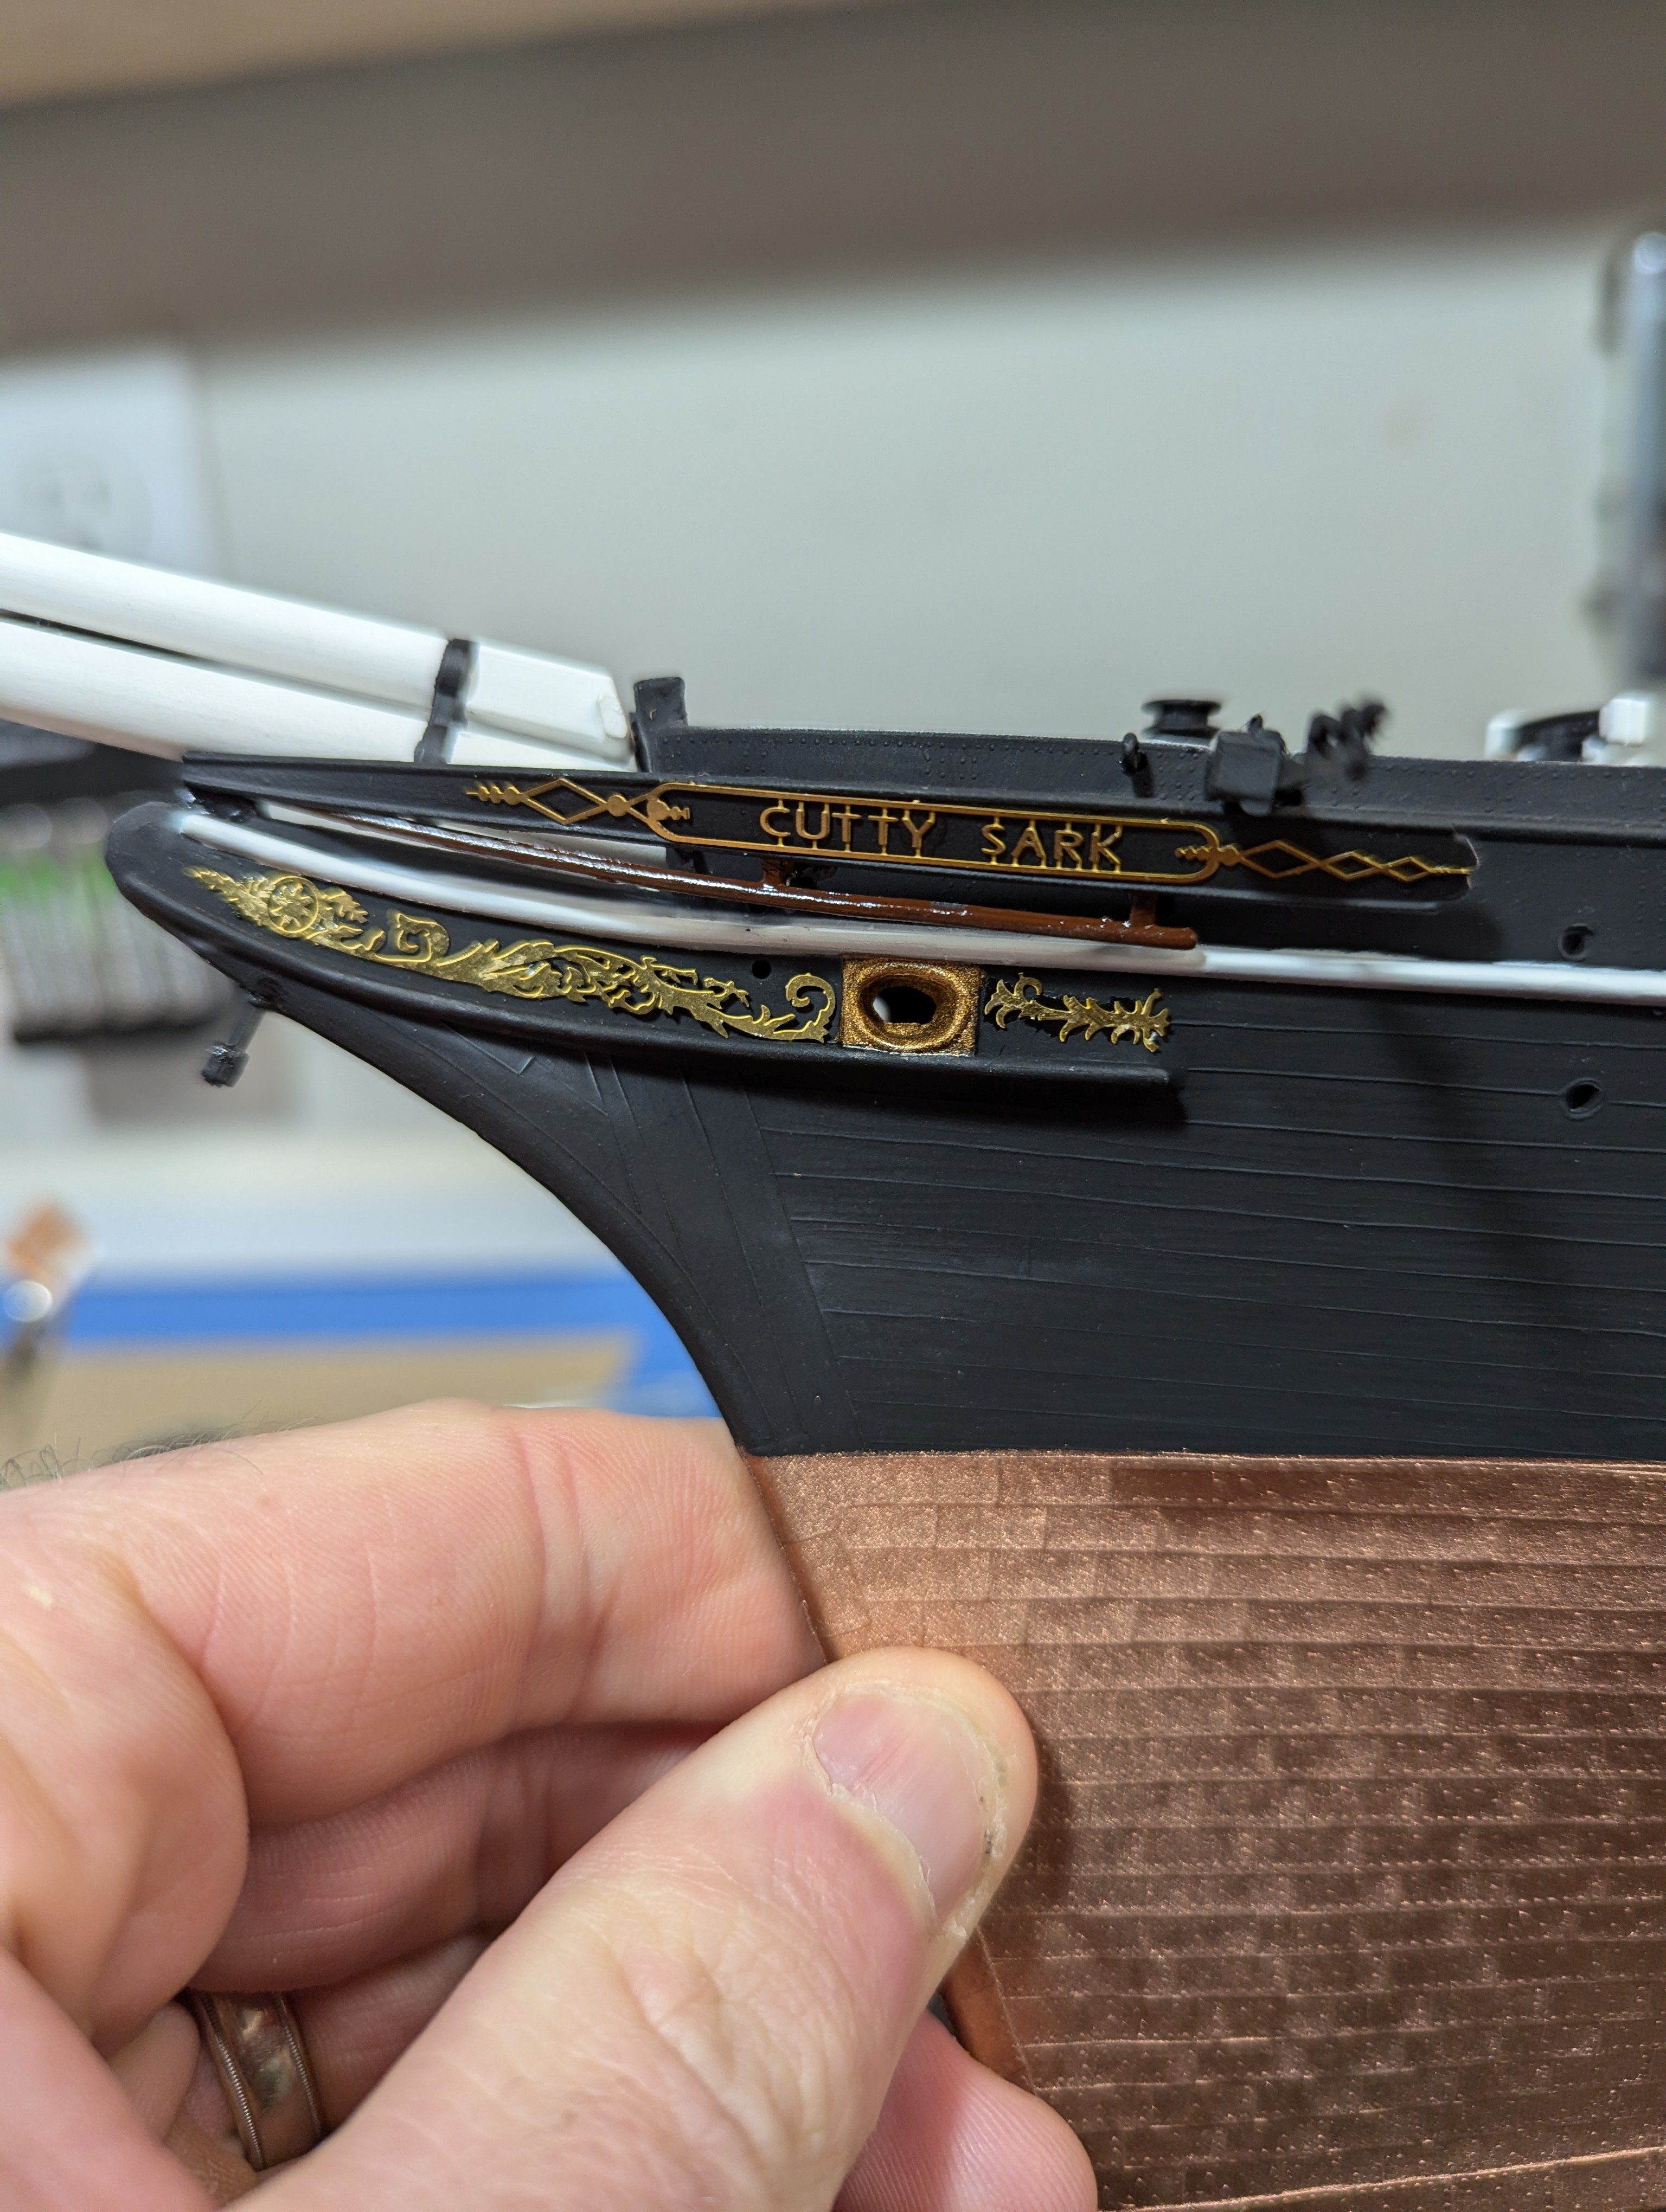
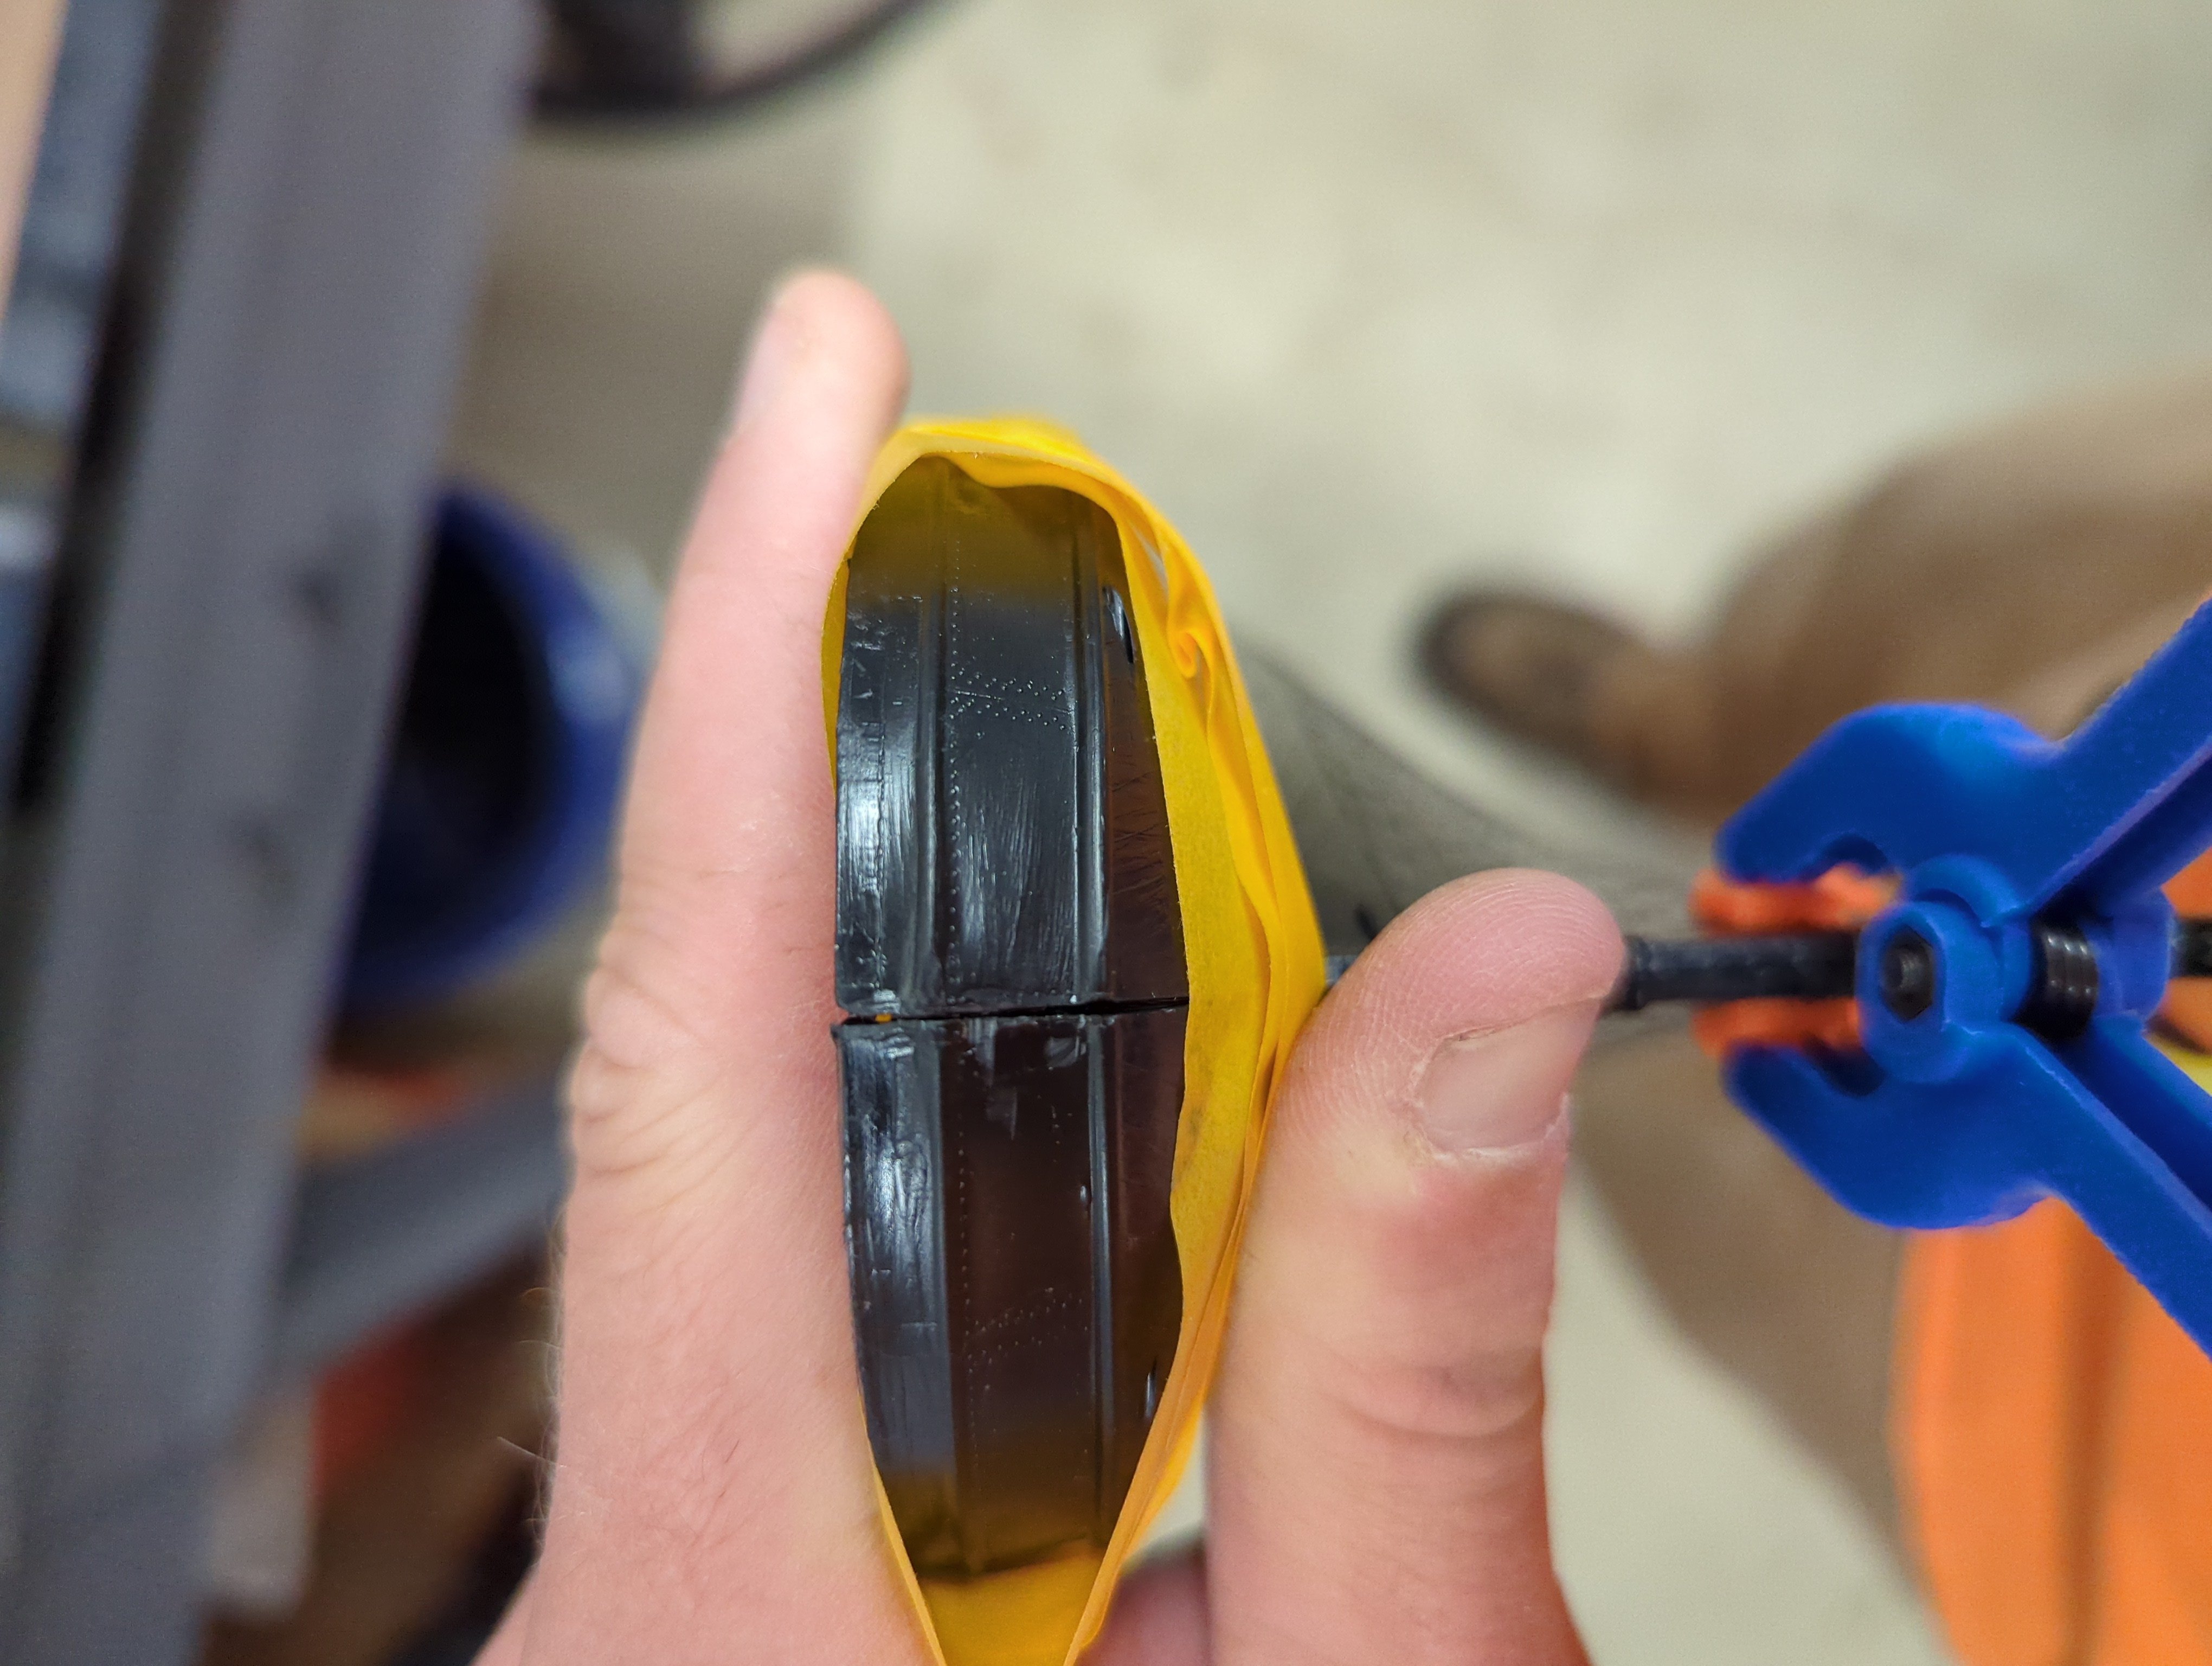
I tried Tamiya thin set per a recommendation I read, but that was a fail. Settled on superglue gel. Holds well. Unfortunately a bit got stuck on my finger and left a smudge. Stands out like a sore thumb on the pic. Any recommendations to remove it? I got a bunch of it off by lightly sanding, but didn't want to get too aggressive. I was looking at the bits you mentioned holding the letters and trying to figure out what I was going to do about that...
- 29 replies
-
- 1
-
-
- Cutty Sark
- Revell
- (and 1 more)
-
Realizing just how big this beast is going to be. Running out of workspace!


- 29 replies
-
- 3
-
-
- Cutty Sark
- Revell
- (and 1 more)
-
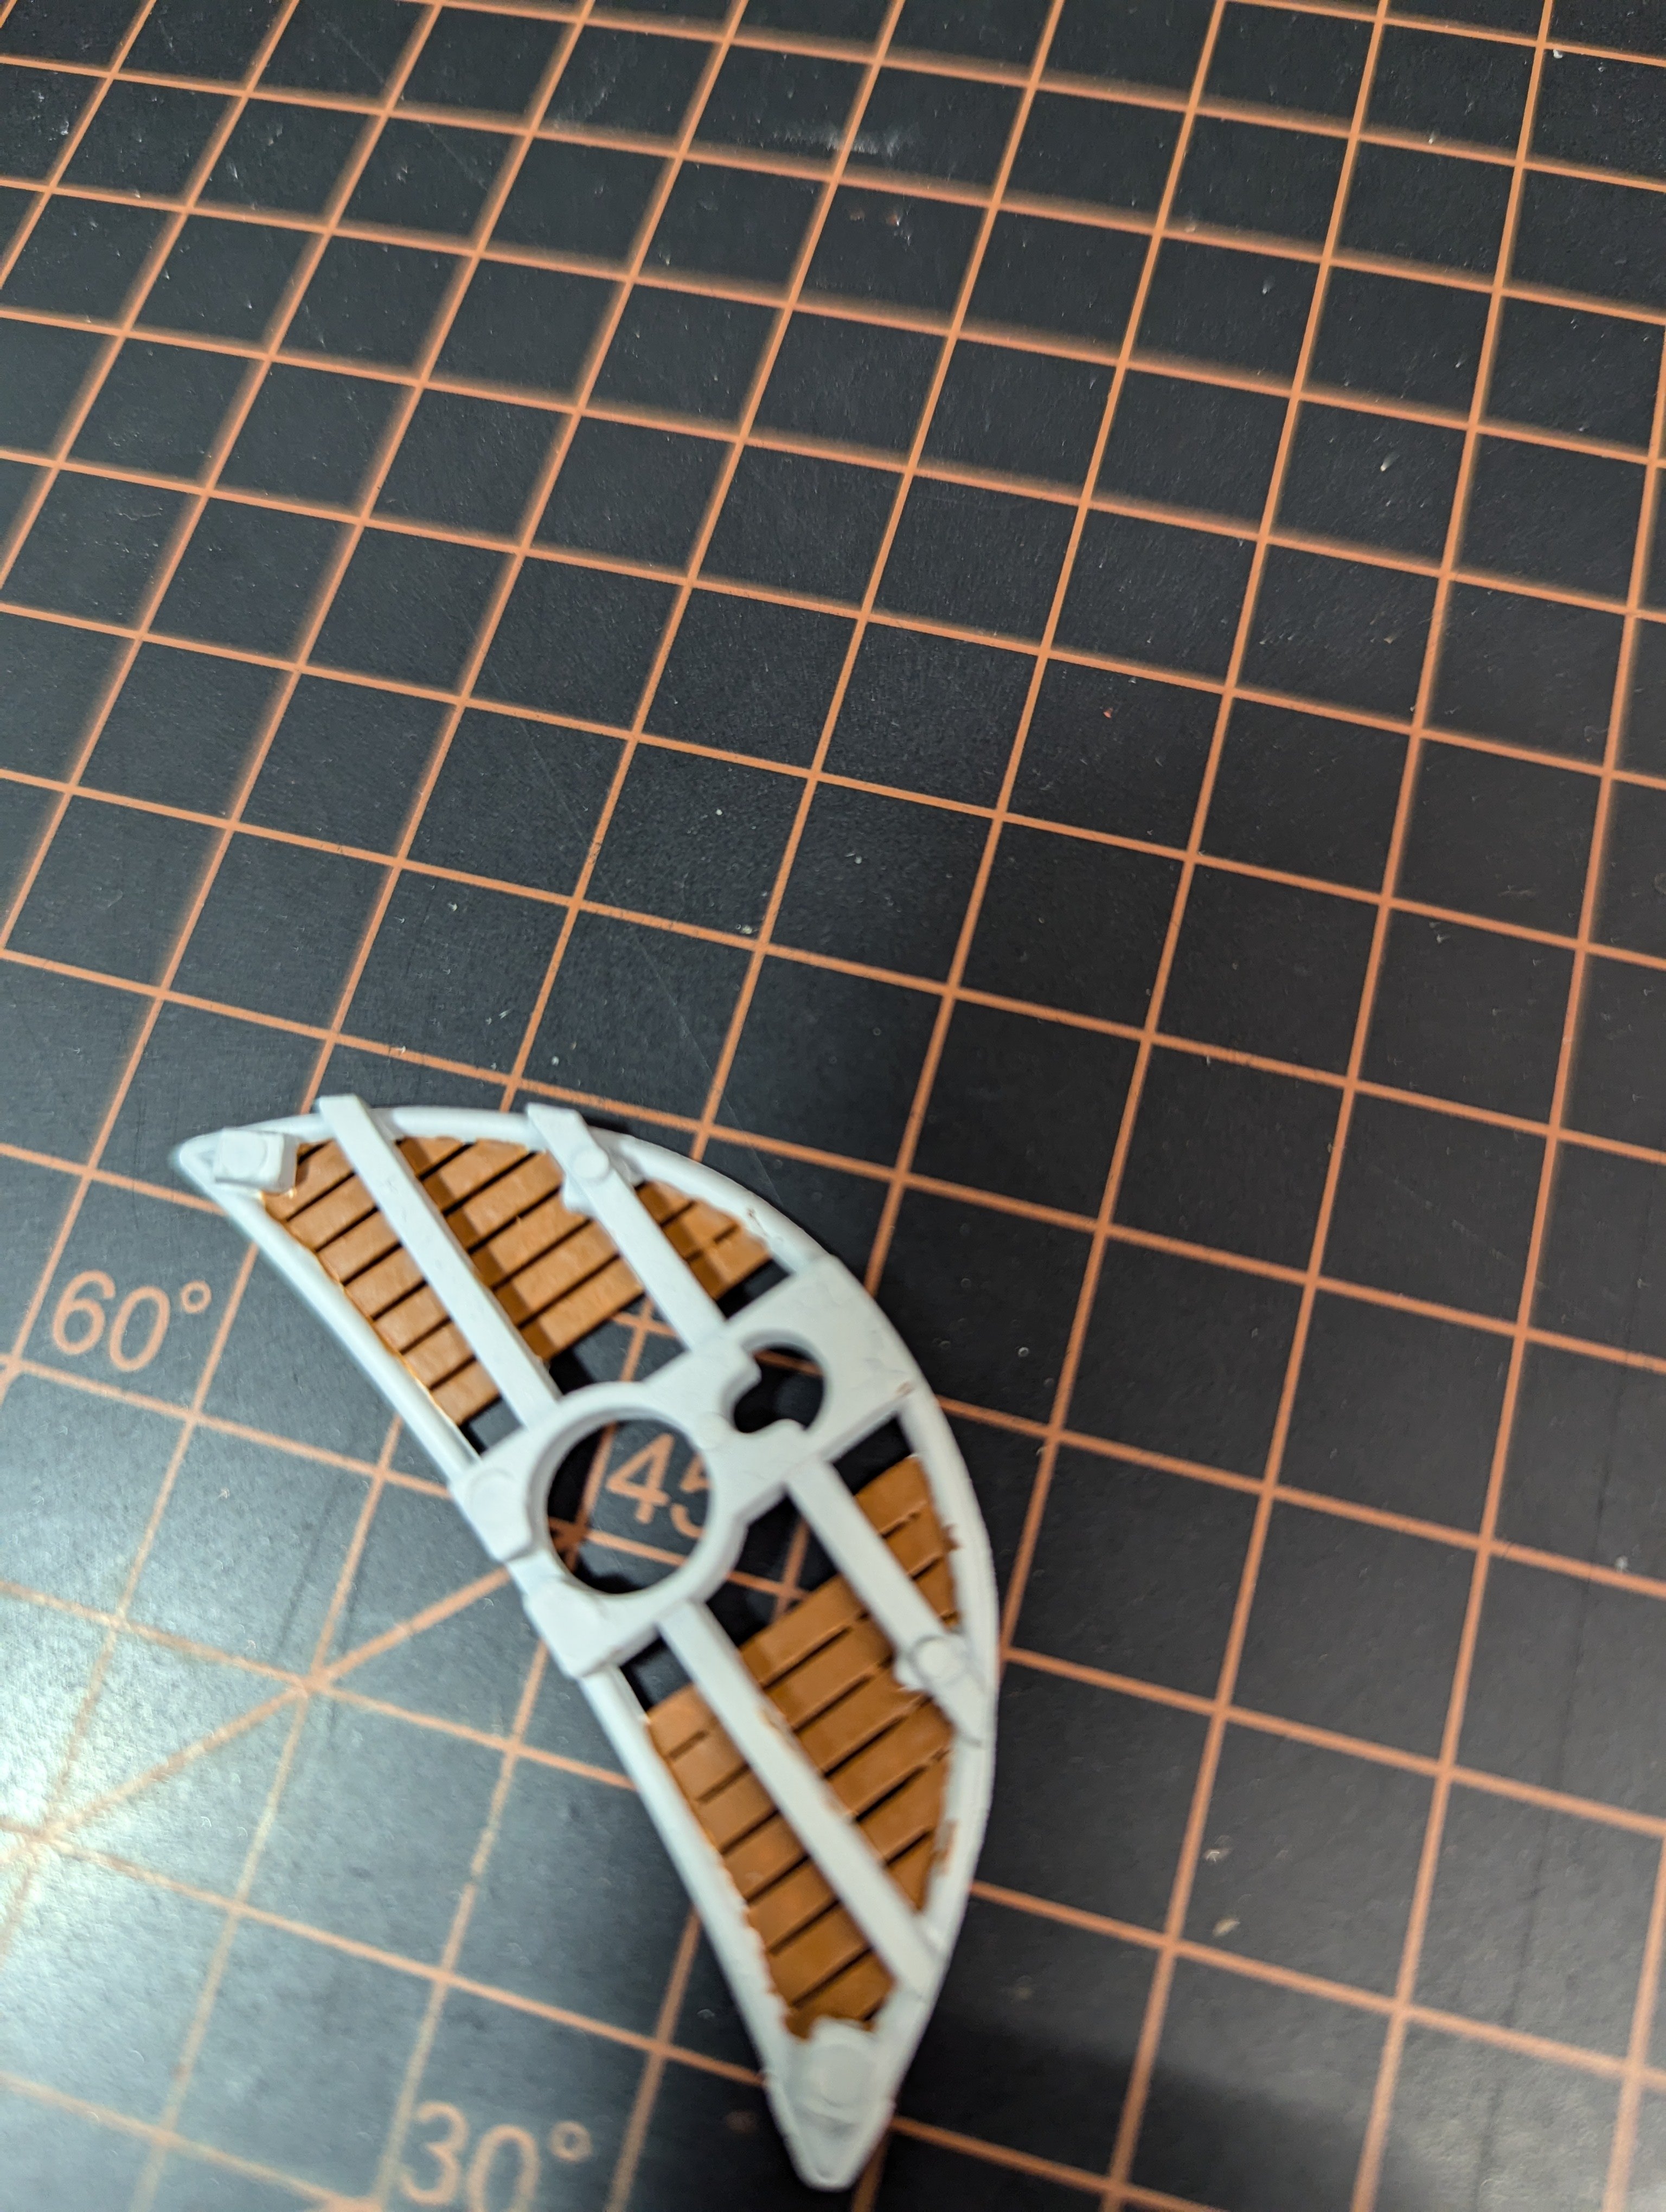
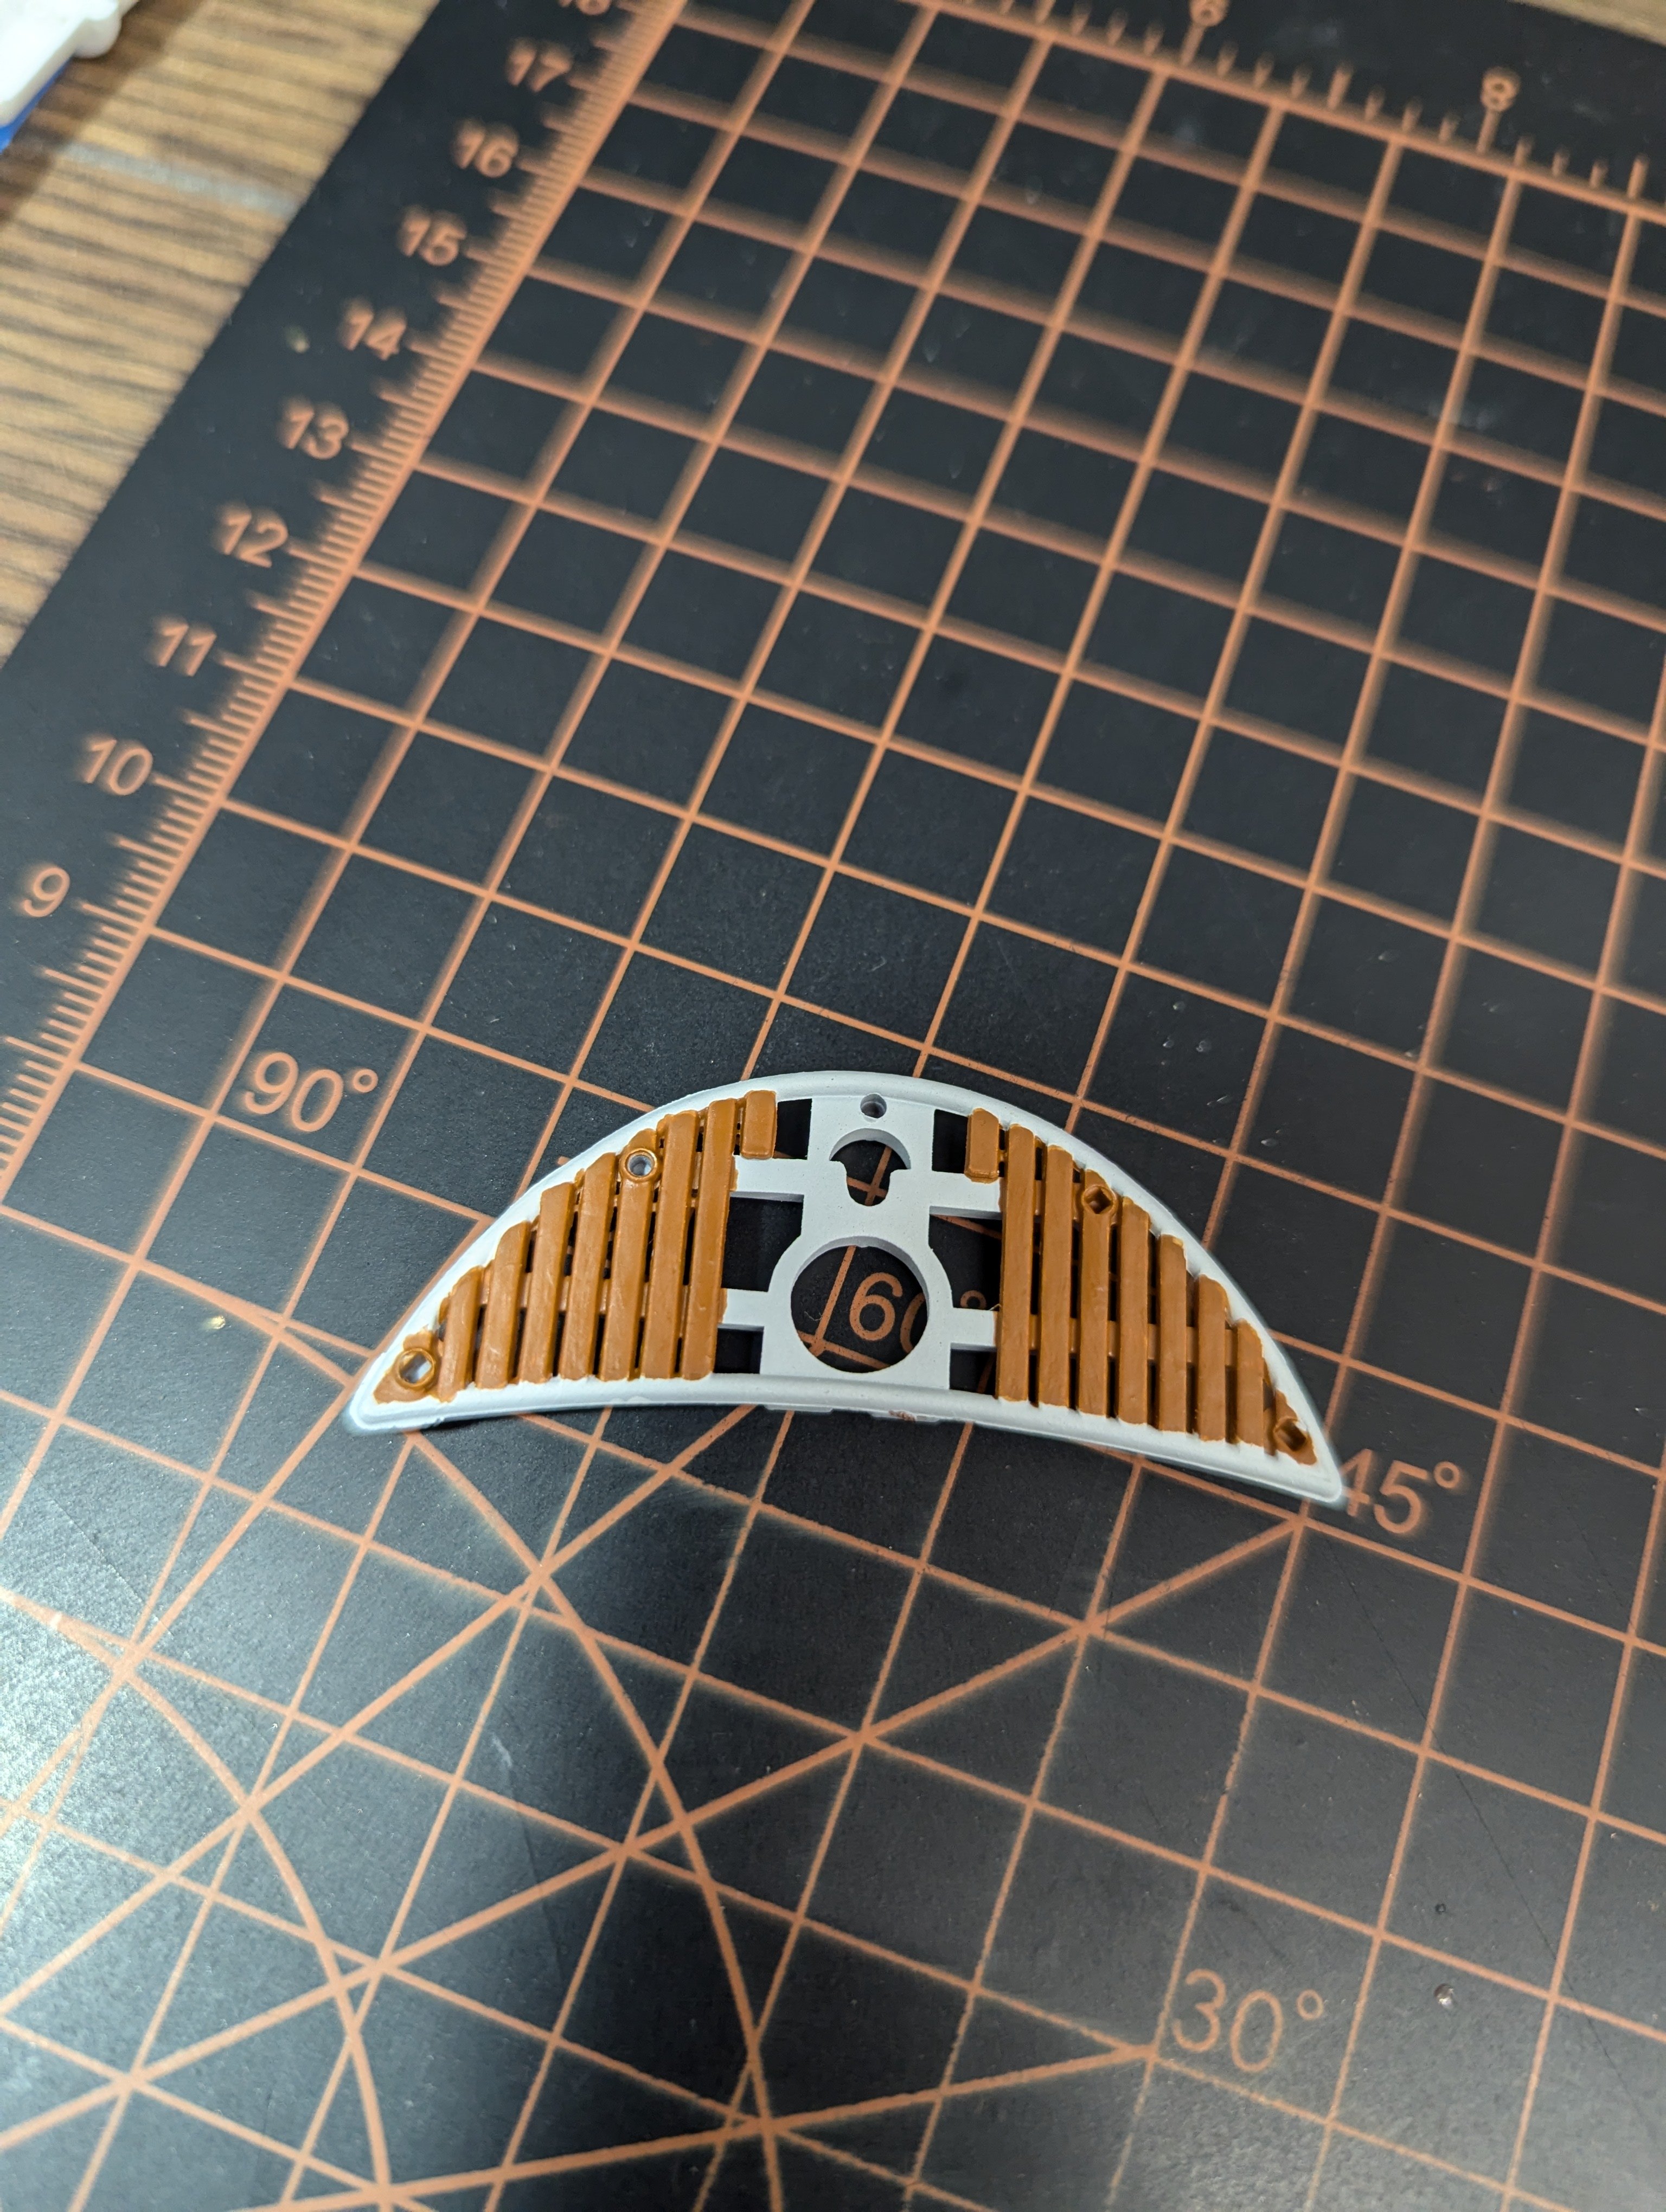
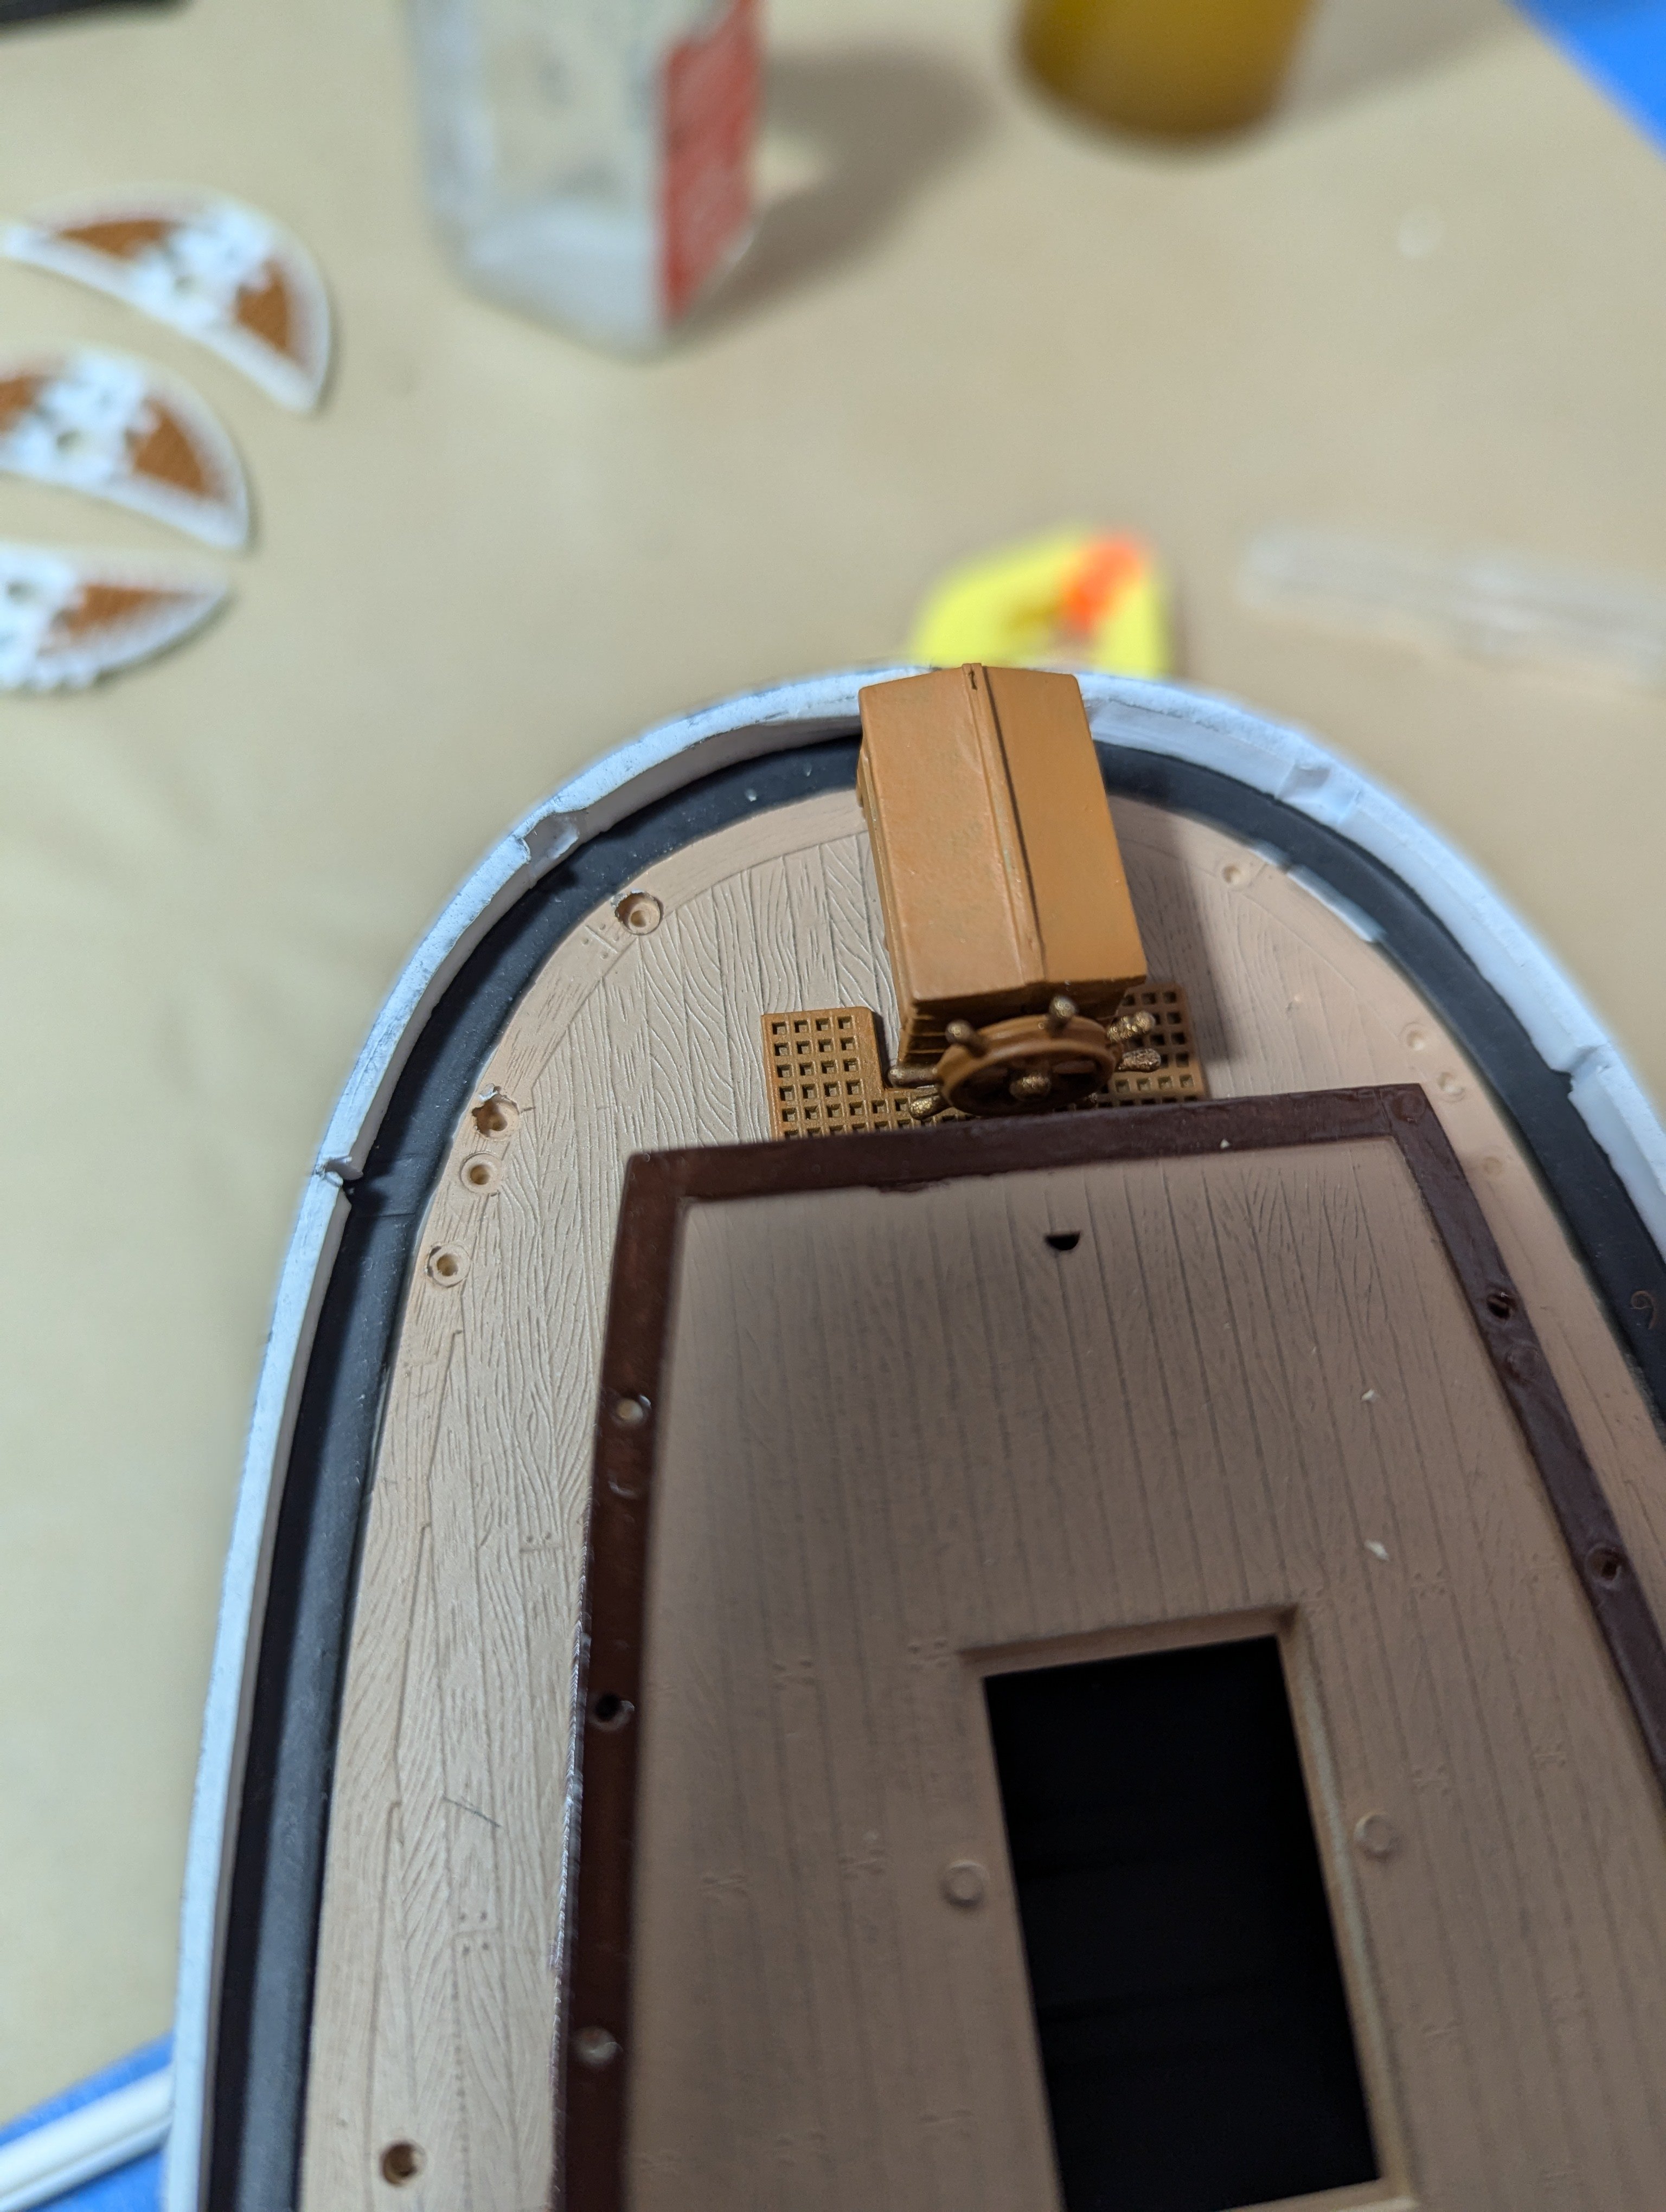
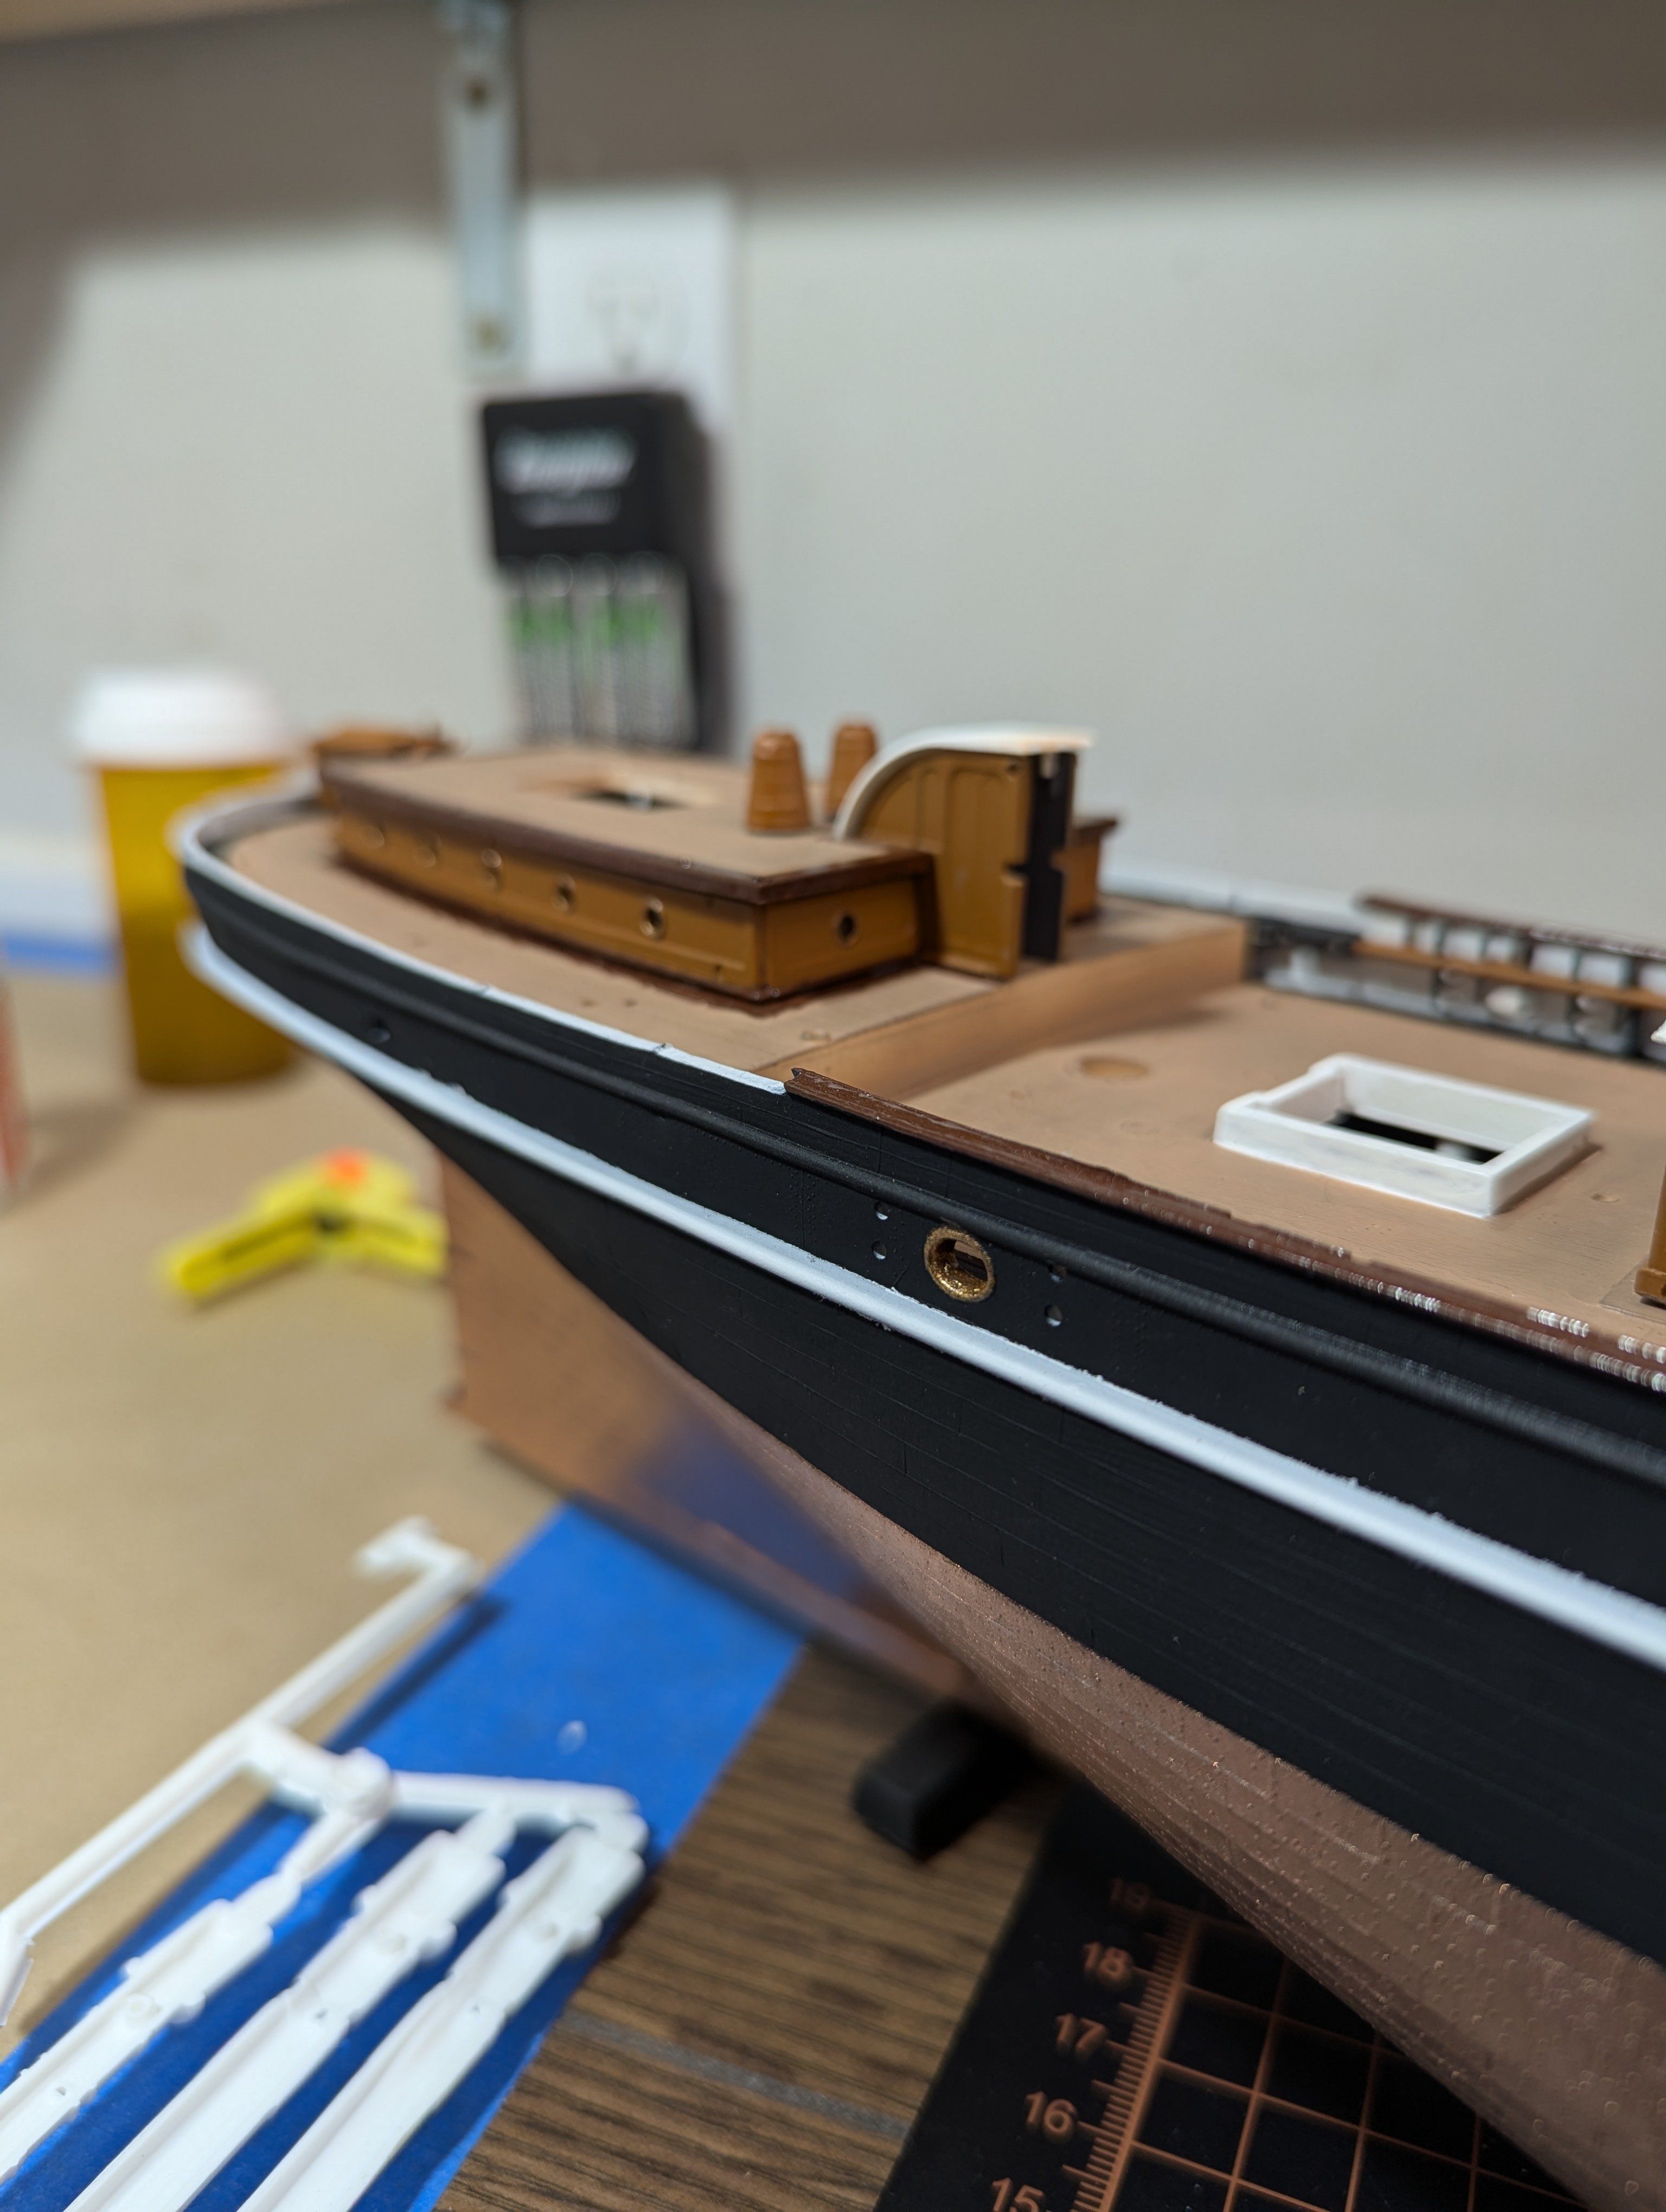
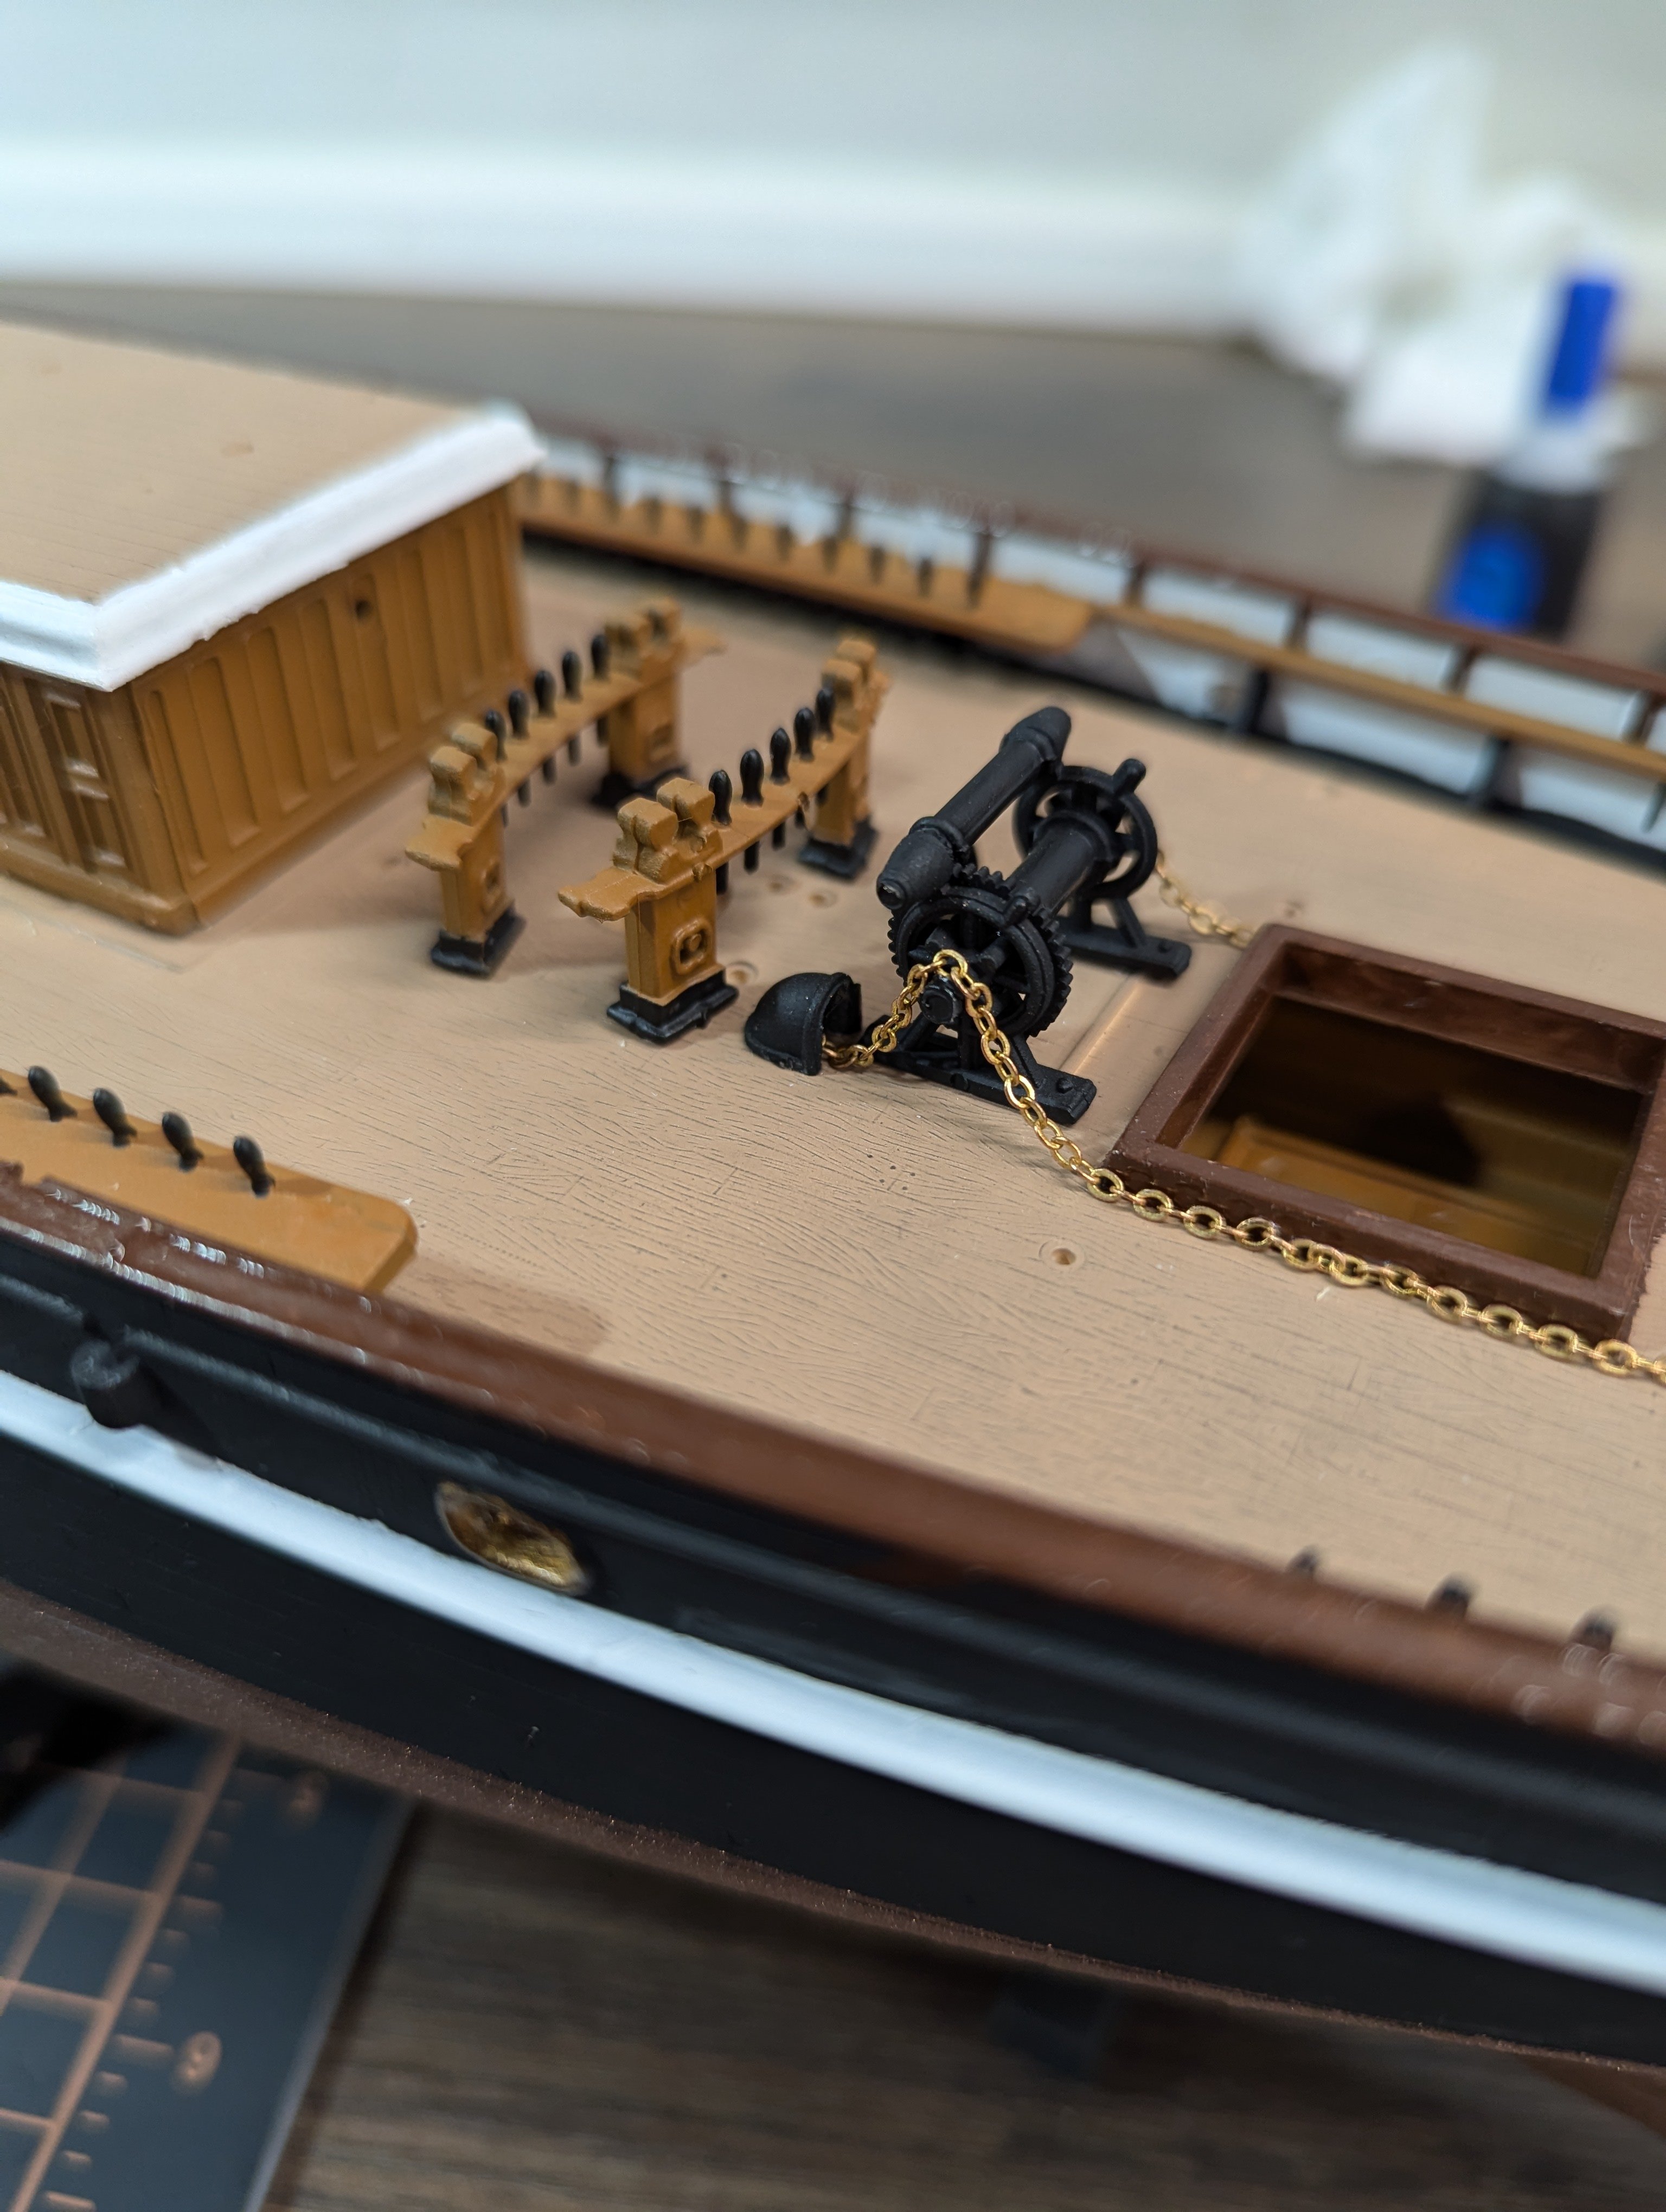
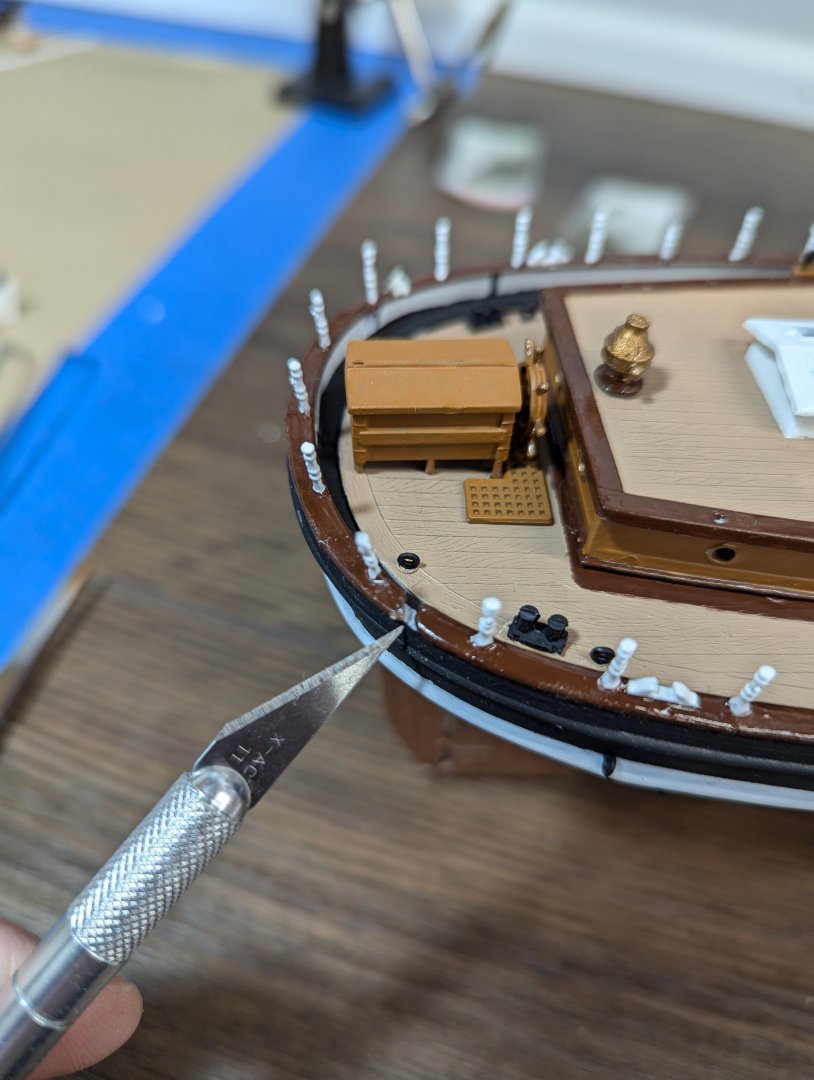
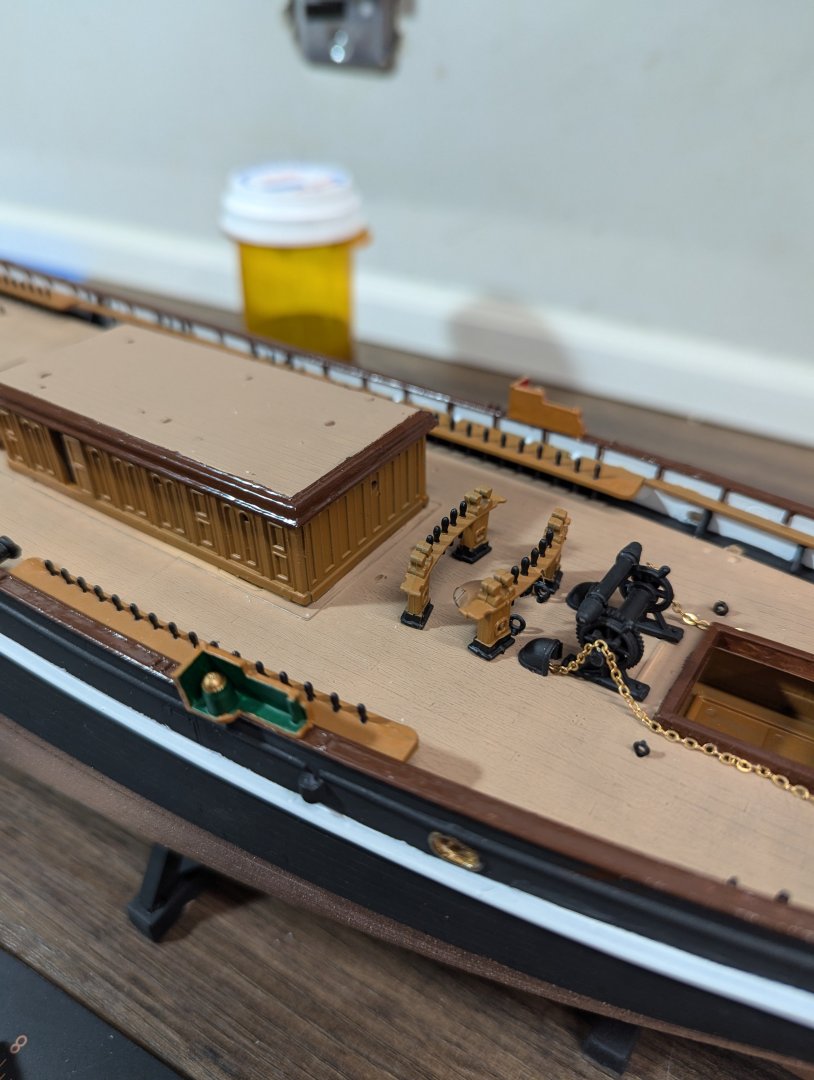
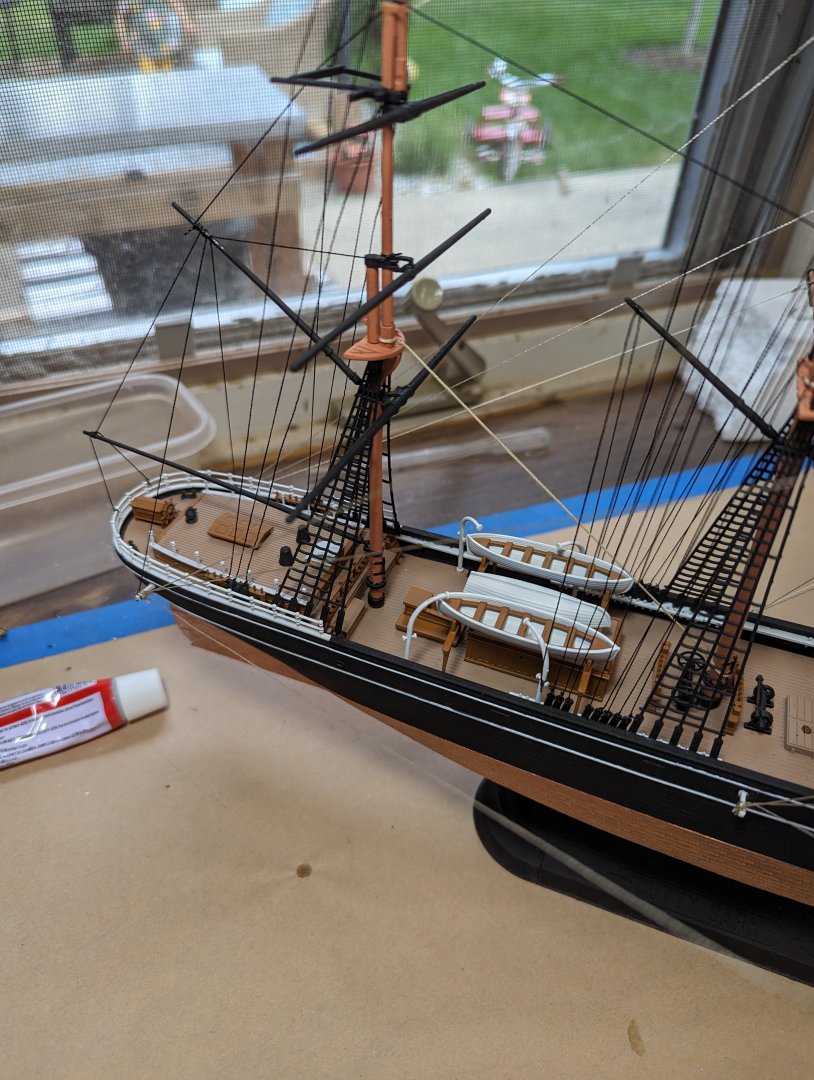
Got my photoetch kit last week and got some of it placed. This was my first time using photoetch. I love the look! Not sure if I can go back to those crappy plastic decals ever again. Currently working on the rope railings on the bow. More updates to follow.

- 29 replies
-
- 4
-
-
- Cutty Sark
- Revell
- (and 1 more)
-
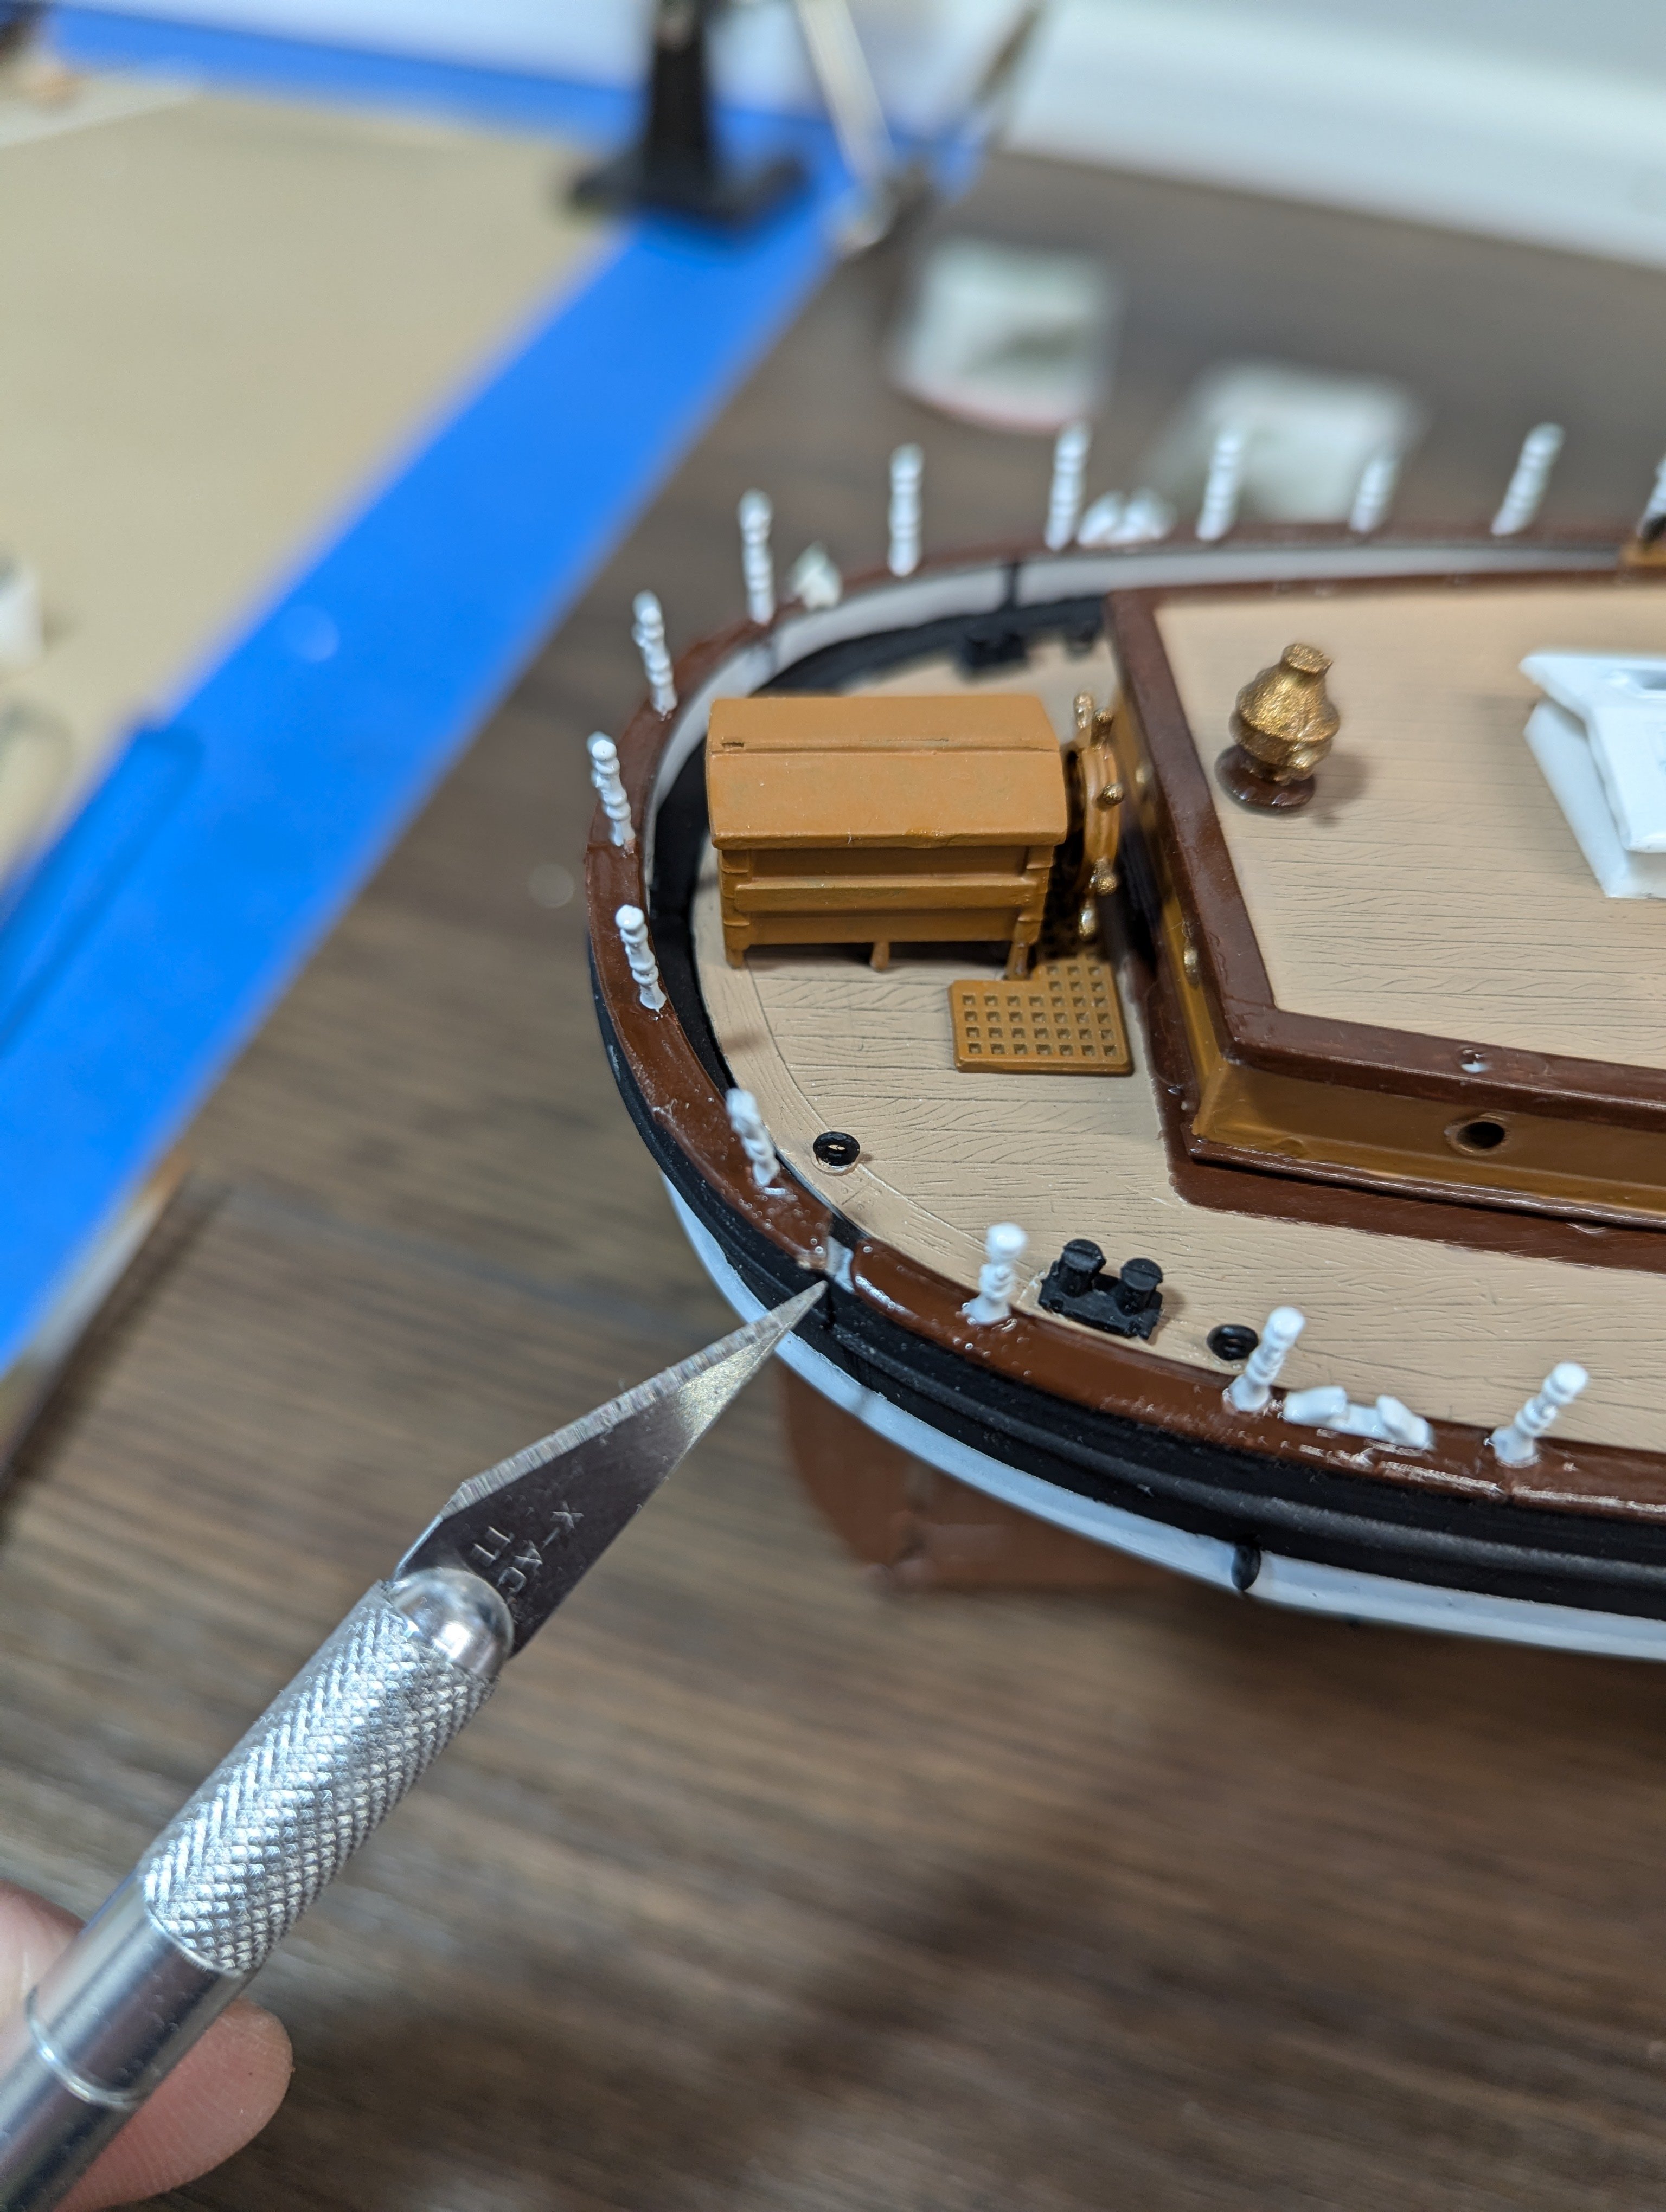
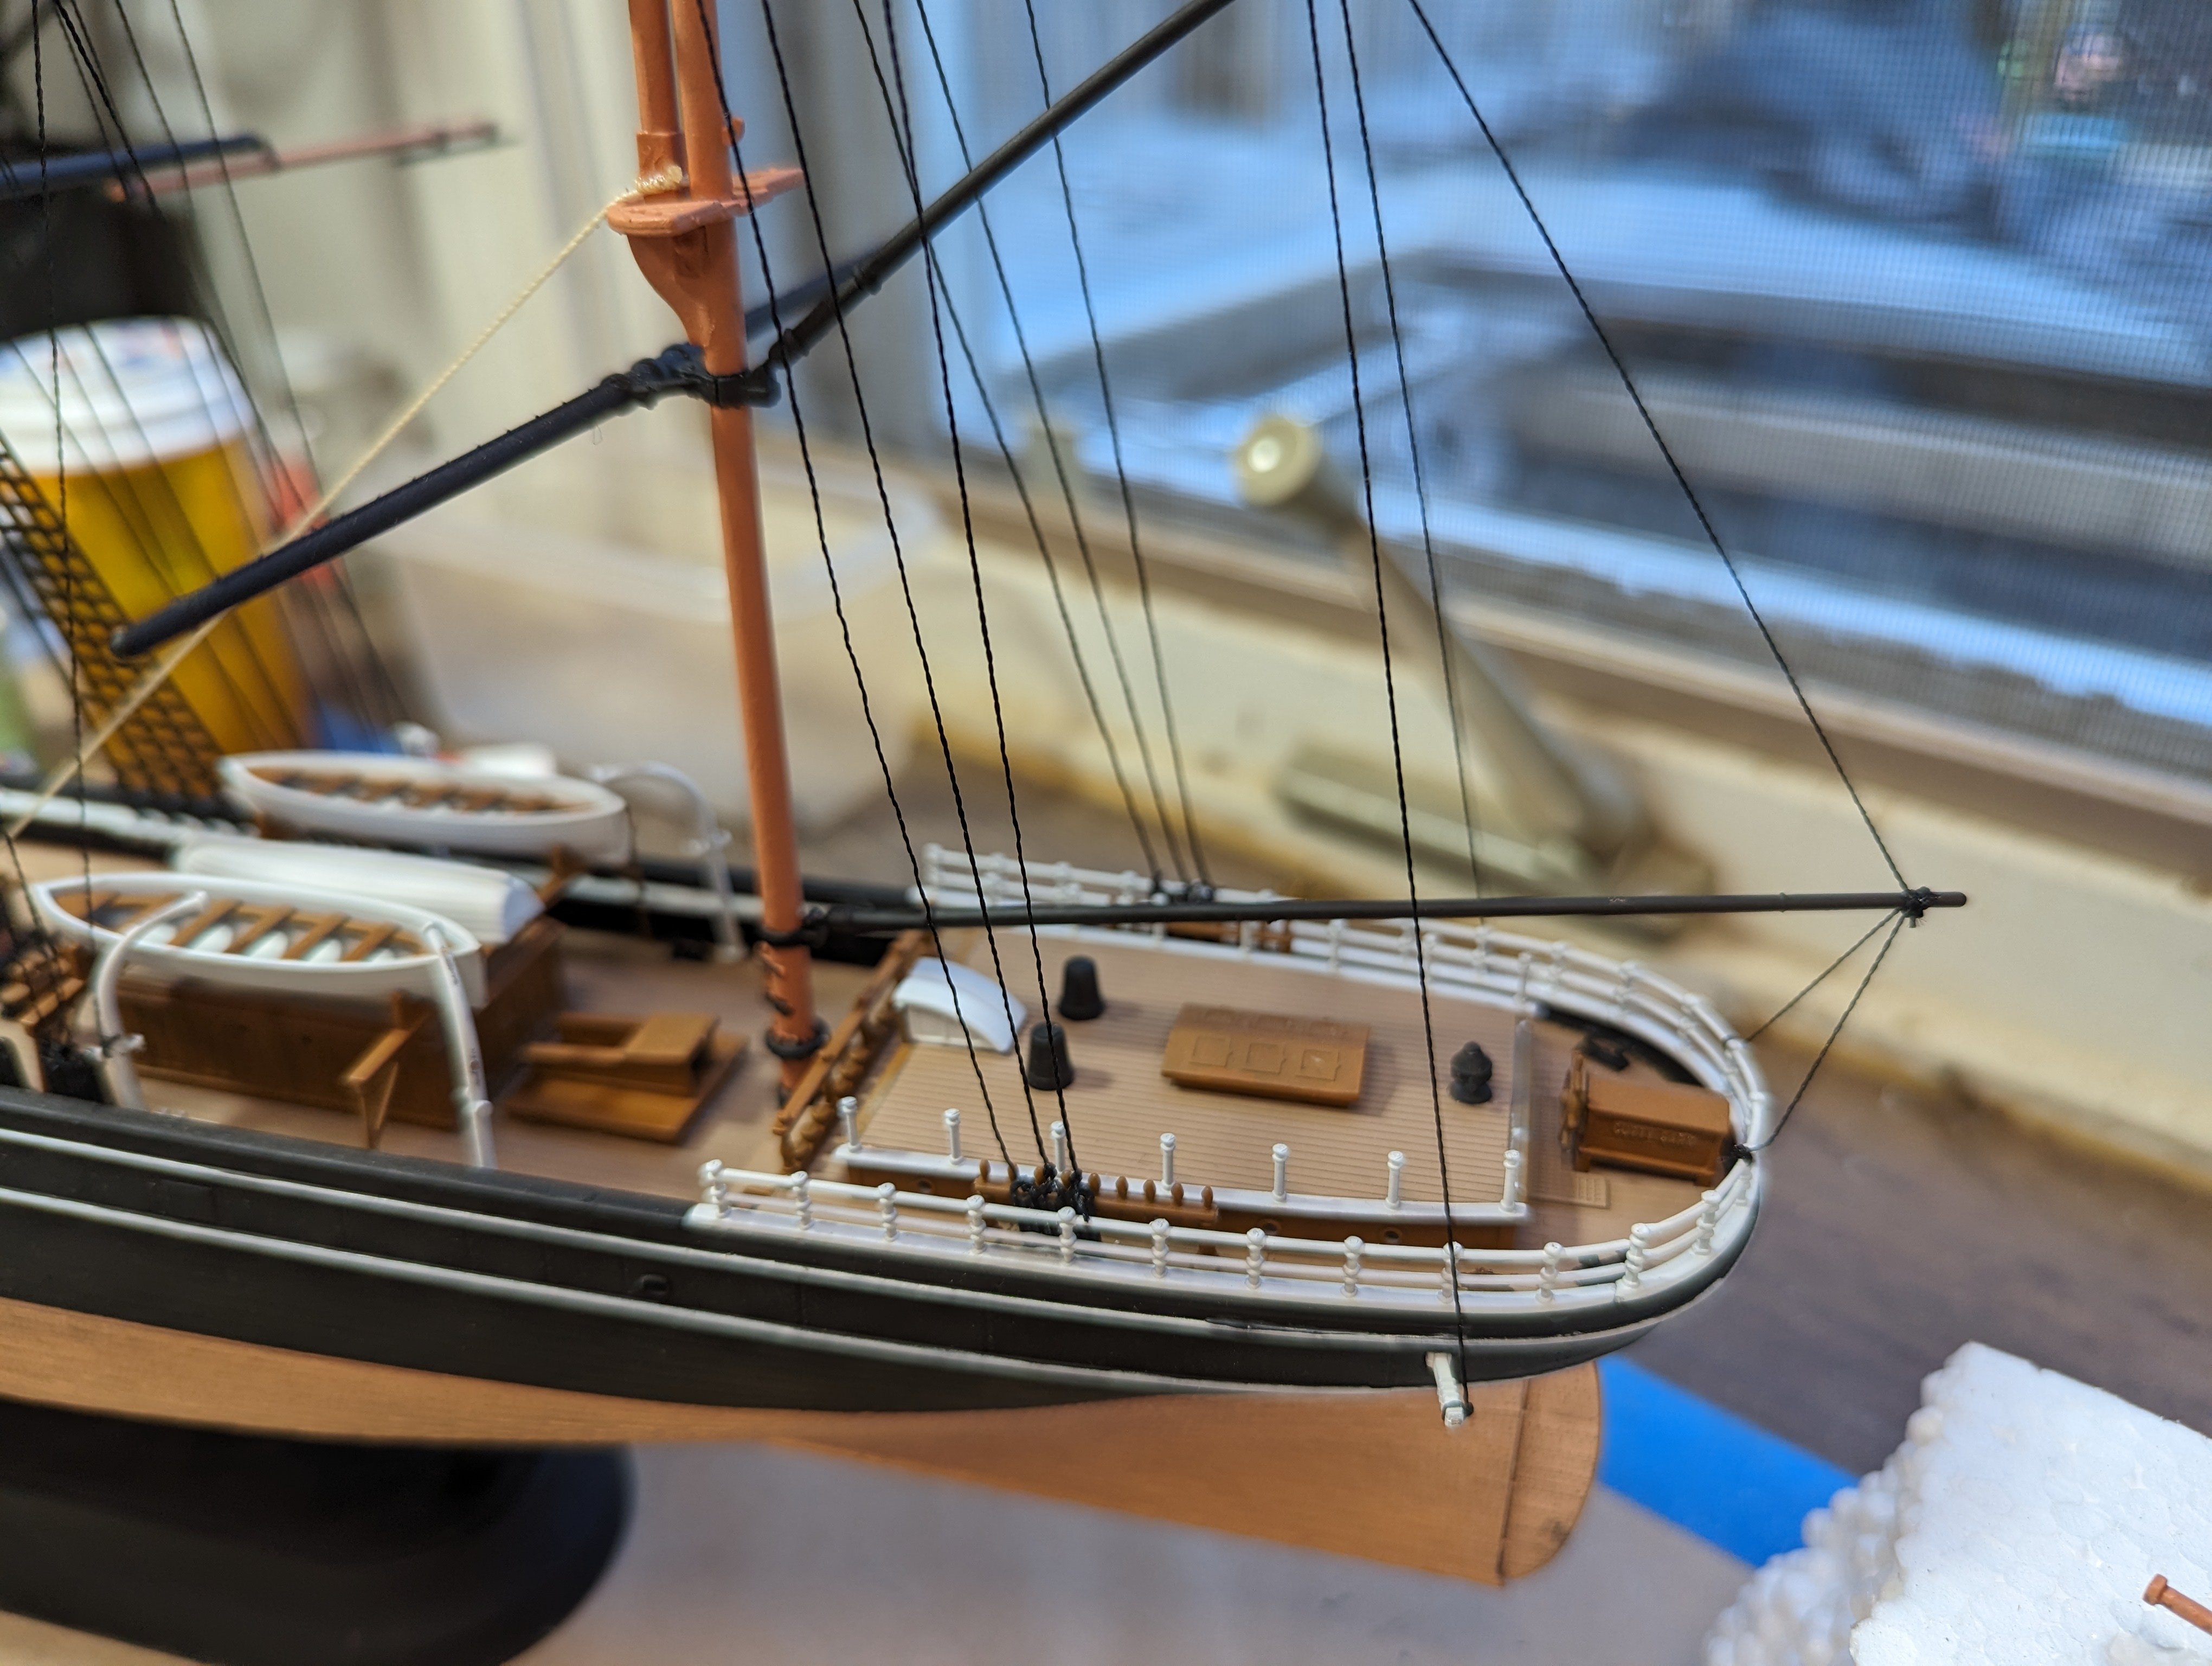
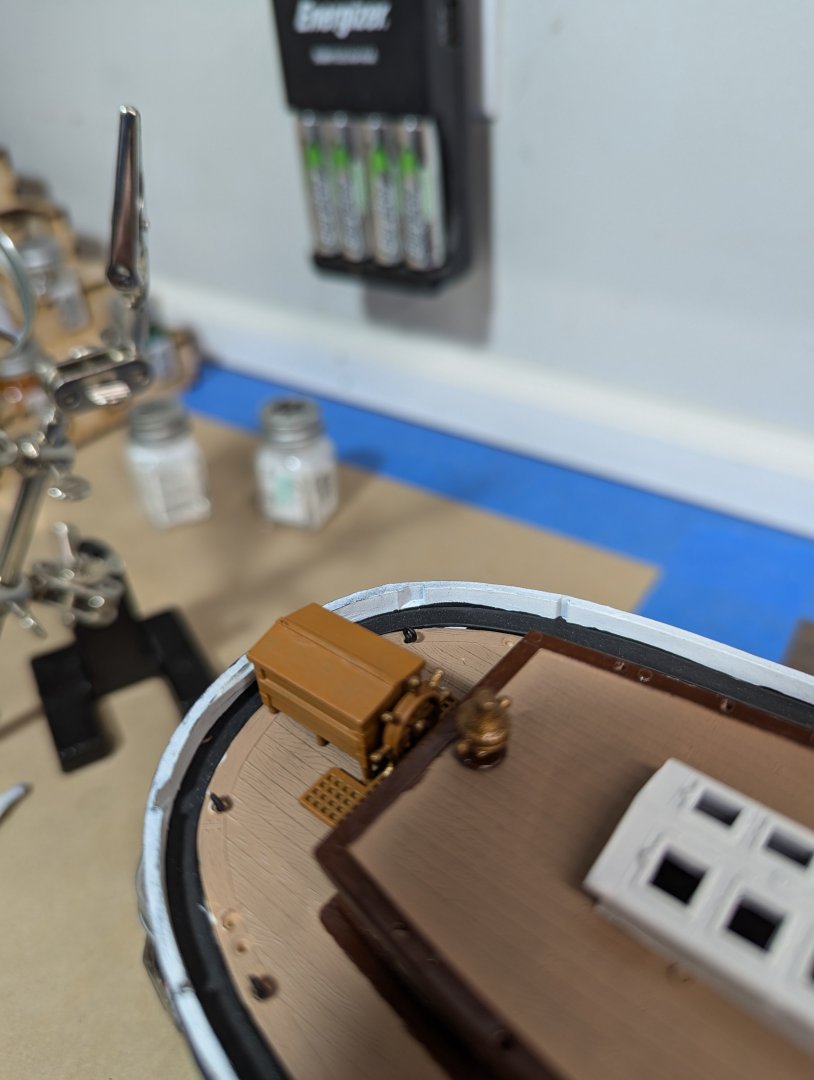
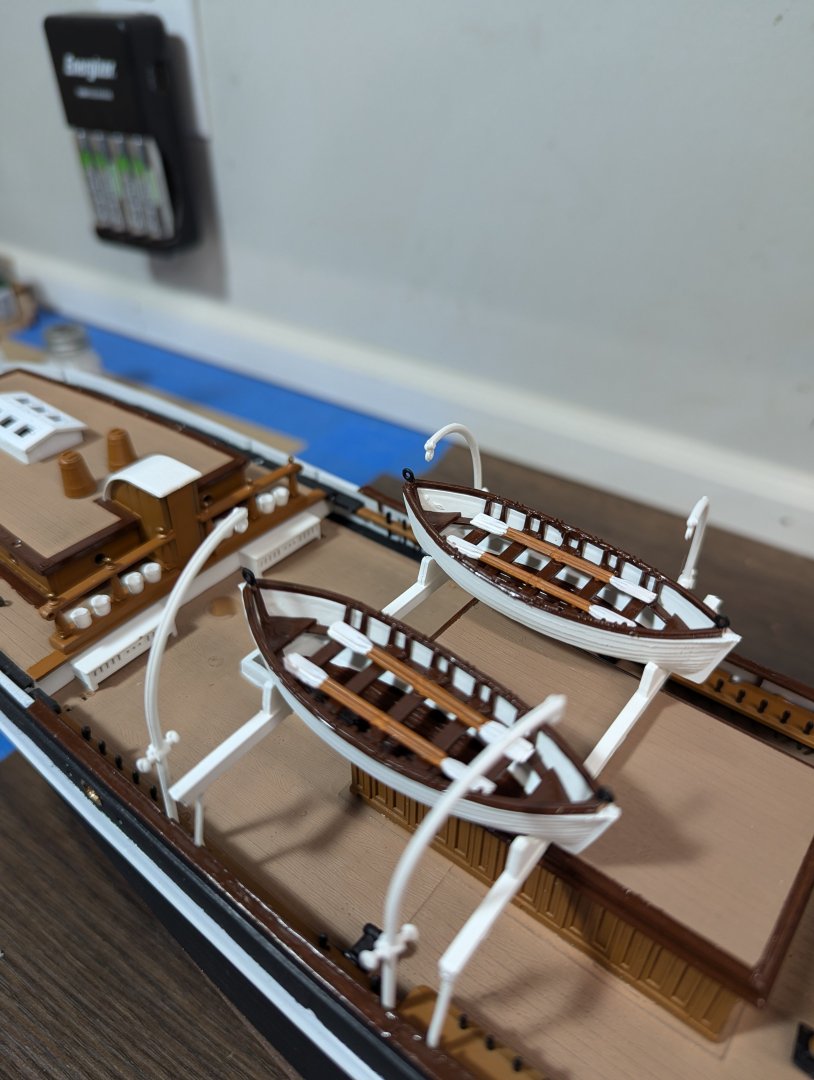
Made a little more progress. Got some more items attached to the deck. Davits are just loosely in place for now. Worked on the lifeboats a bit. Used some leftover deck cleats on the ends of the boats so I have something to attach to when I rig them to the davits. I am not liking the gold anchor chain supplied with the kit. I might get some black chain instead.
- 29 replies
-
- 3
-
-
- Cutty Sark
- Revell
- (and 1 more)
-
It's actually the 1/150 from Academy. Unfortunately on that kit the studdingsail booms and yards are molded as one piece with the yards. I am still relatively new to the hobby, so I have not really attempted sails yet
-
Back at it now. Finished a different build for a customer of mine. Here's the result of what was distracting me from the 1/96 project. Will post where I am at on the 1/96 asap.

- 29 replies
-
- 3
-
-
- Cutty Sark
- Revell
- (and 1 more)
-
It has been some time since I updated. Got slammed with work, plus I am working on a different ship as a gift for a customer of mine. Hope to be back at it this Fall/Winter
-
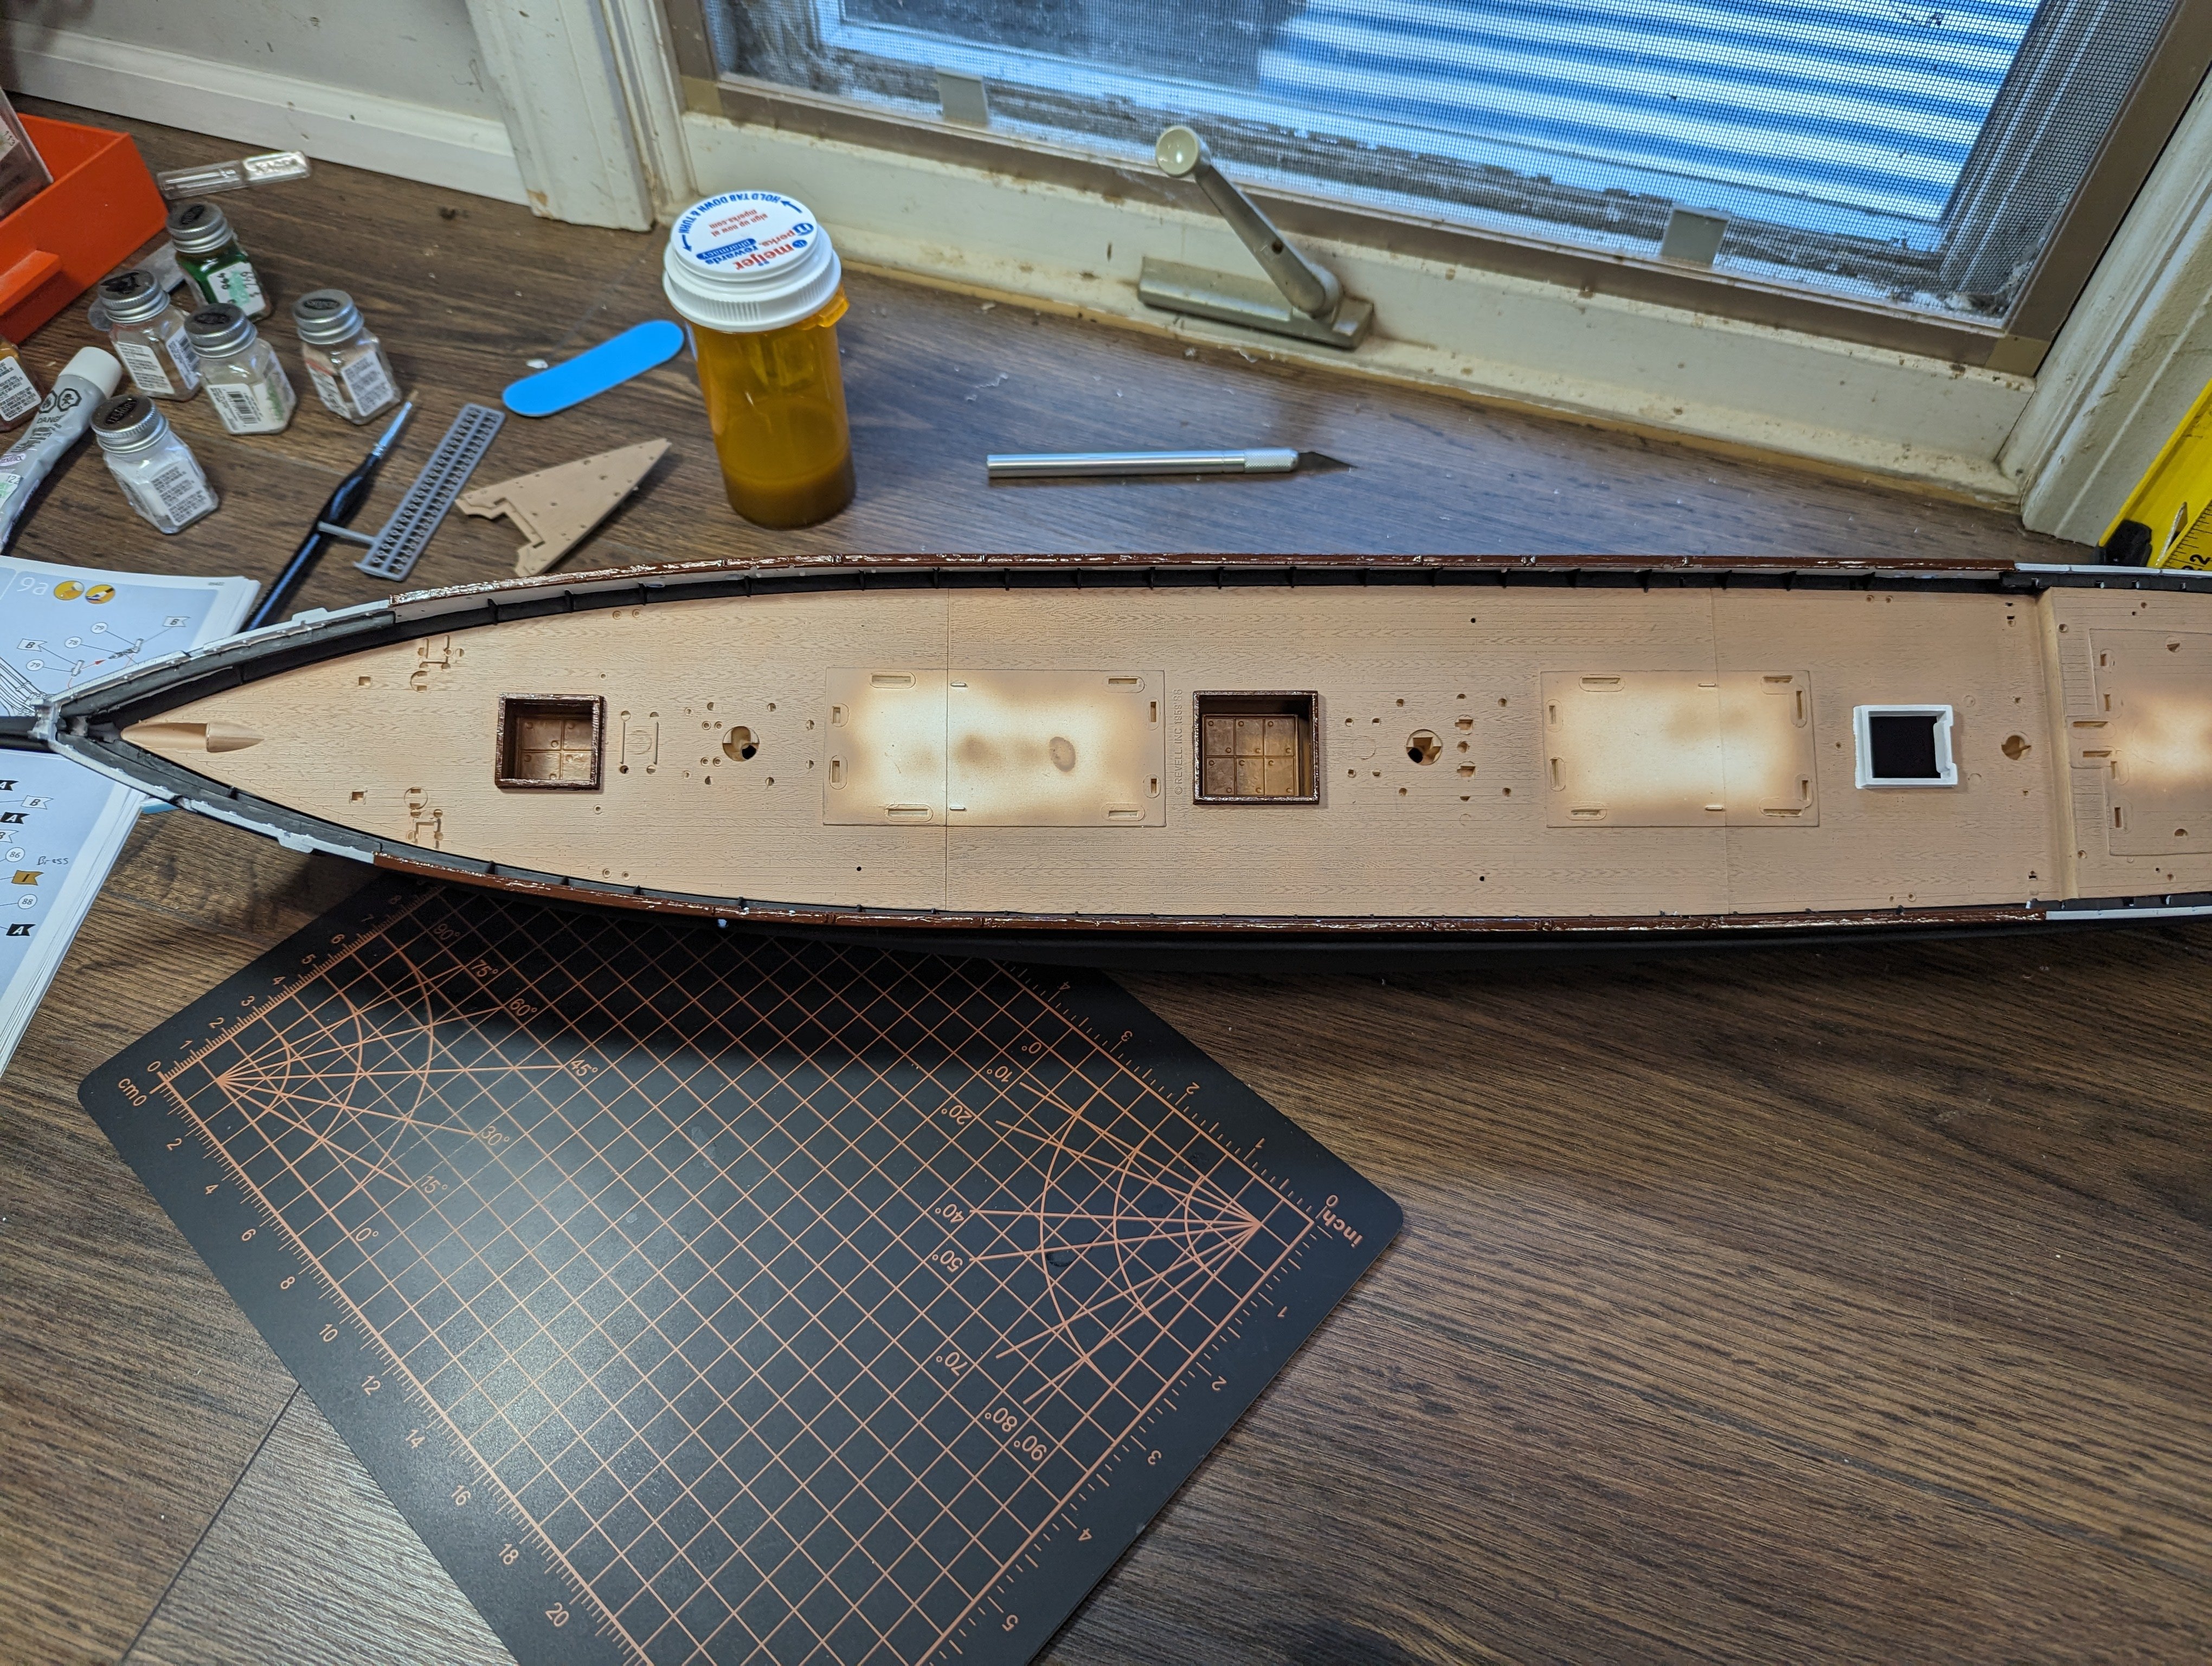
Quick update. Deck attached to hull and some painting done.

- 29 replies
-
- 2
-
-
- Cutty Sark
- Revell
- (and 1 more)
-
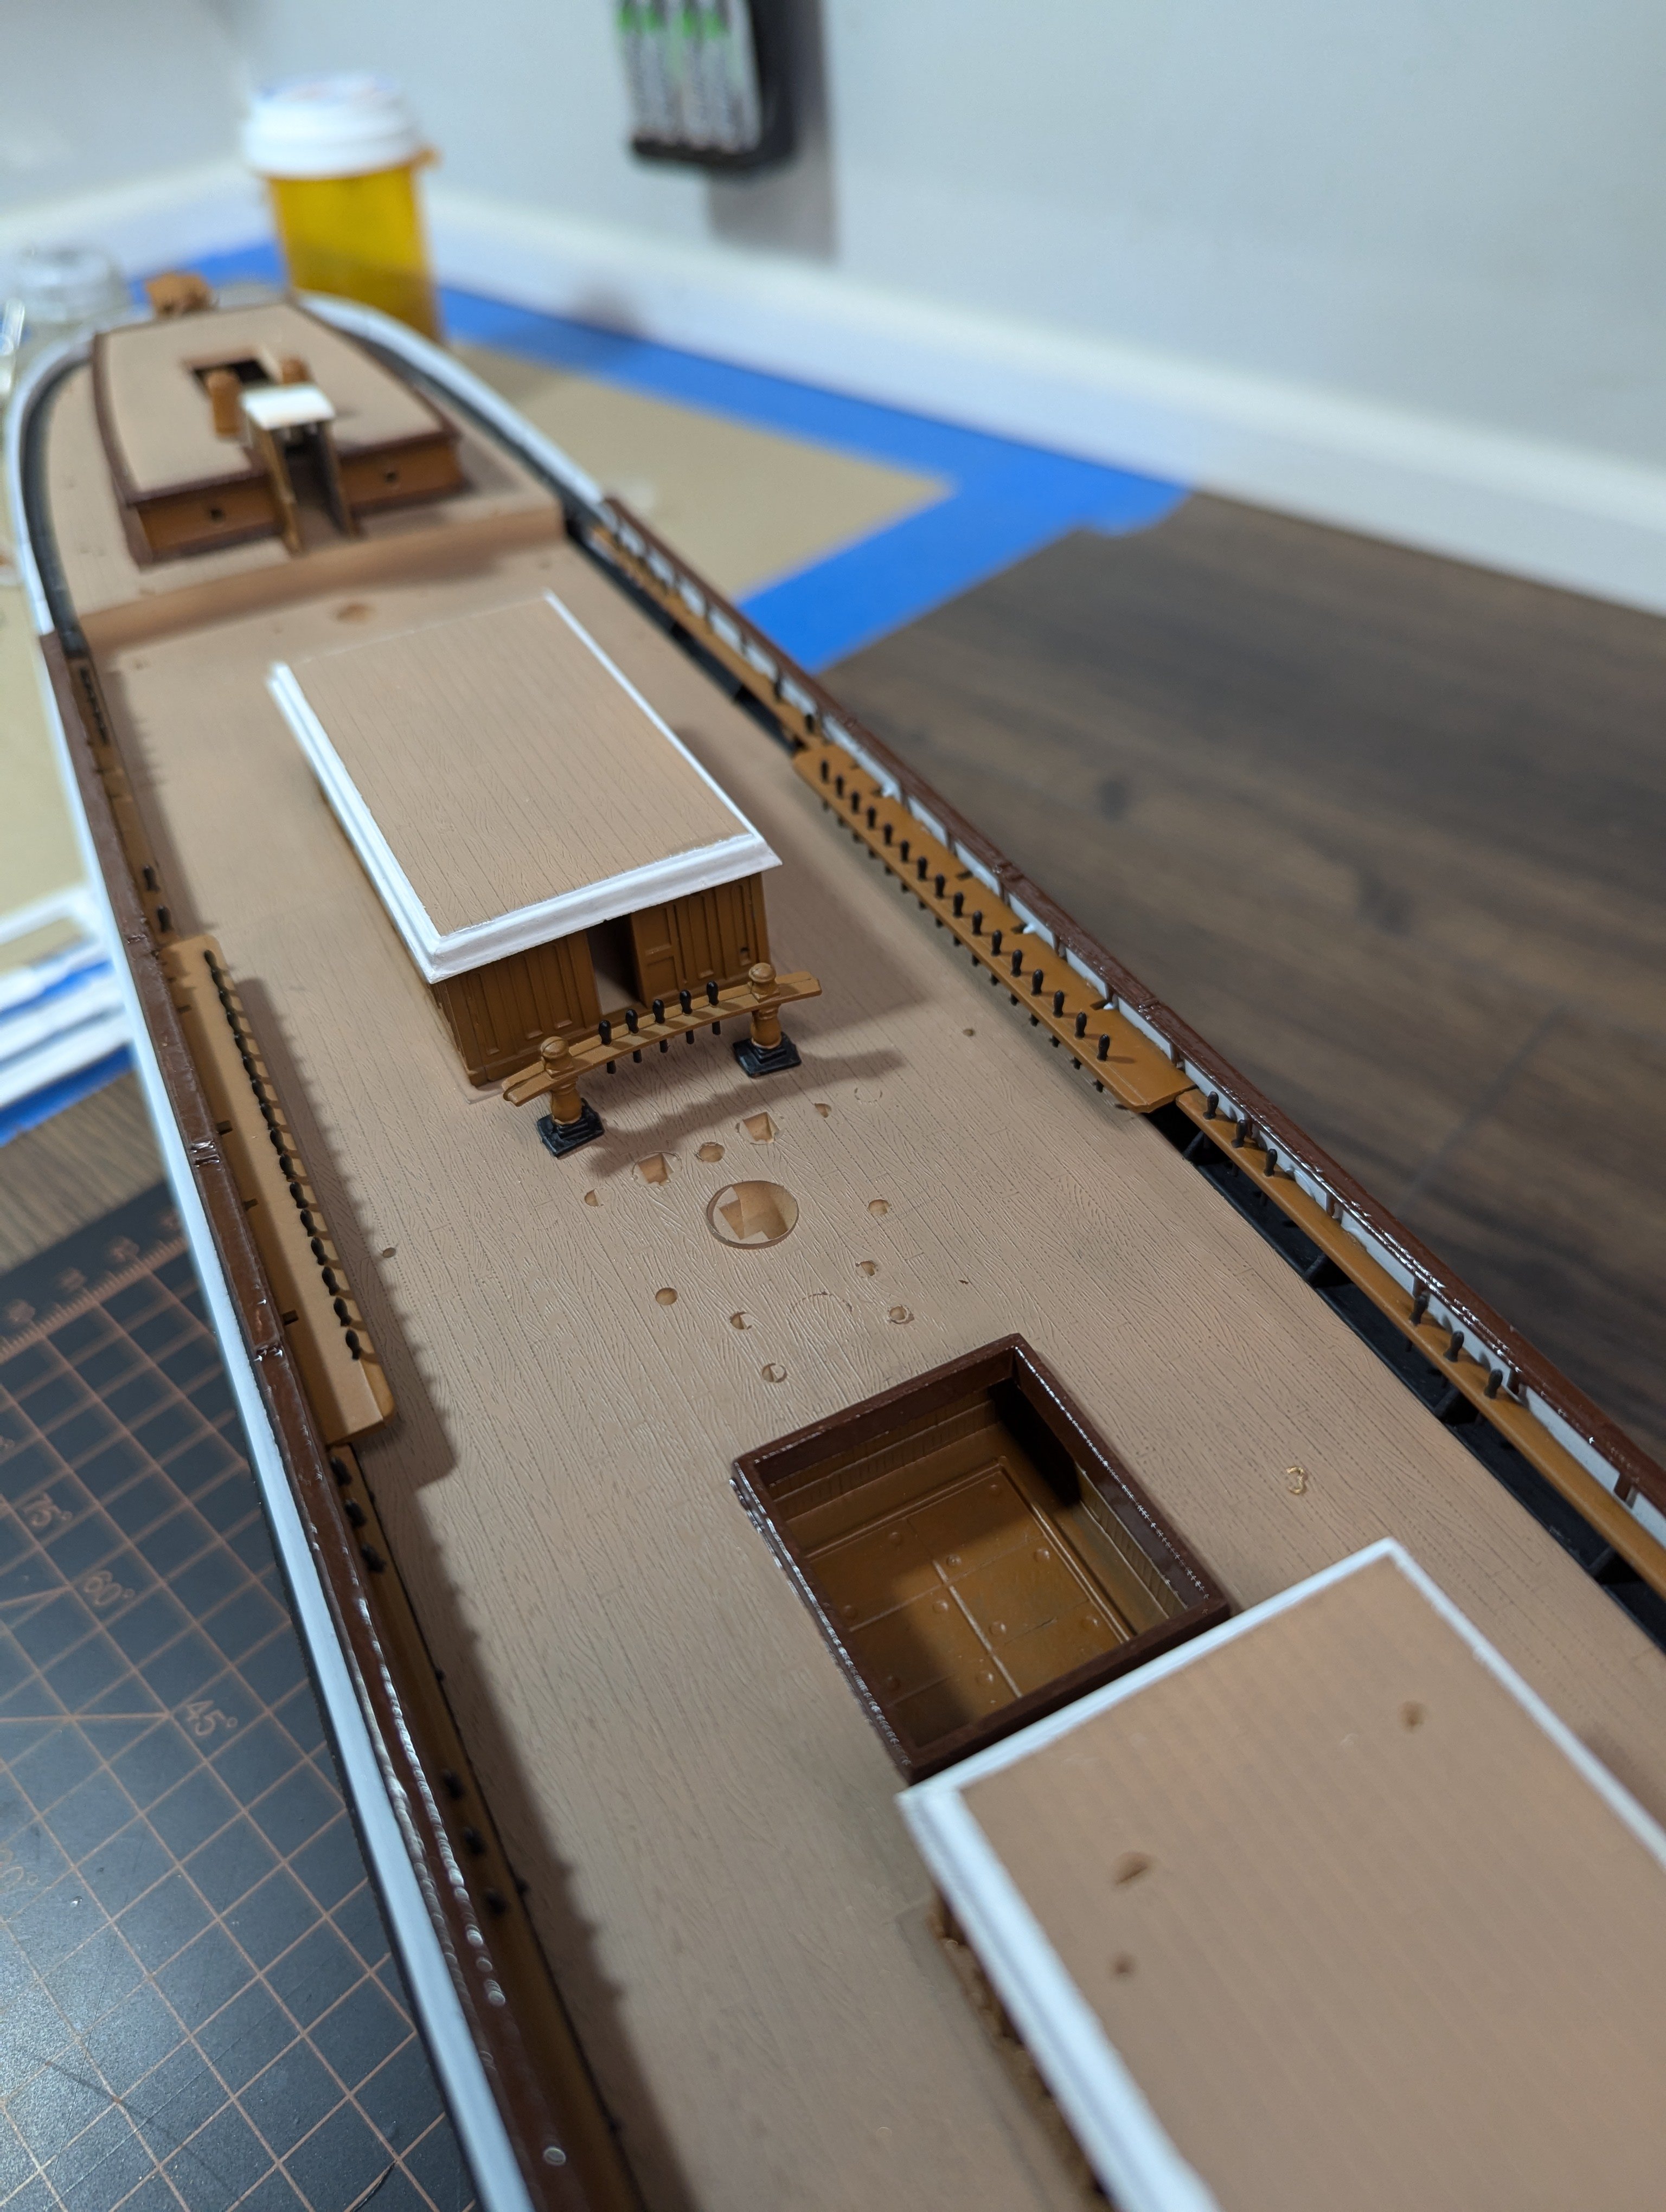
Main deck, fore deck, and cabin roof painted. I weathered the fore deck by rubbing newspaper on it. Planning to continue that. You can see before and after in the picture where I stacked the fore deck on the main deck.
- 29 replies
-
- 2
-
-
- Cutty Sark
- Revell
- (and 1 more)
-
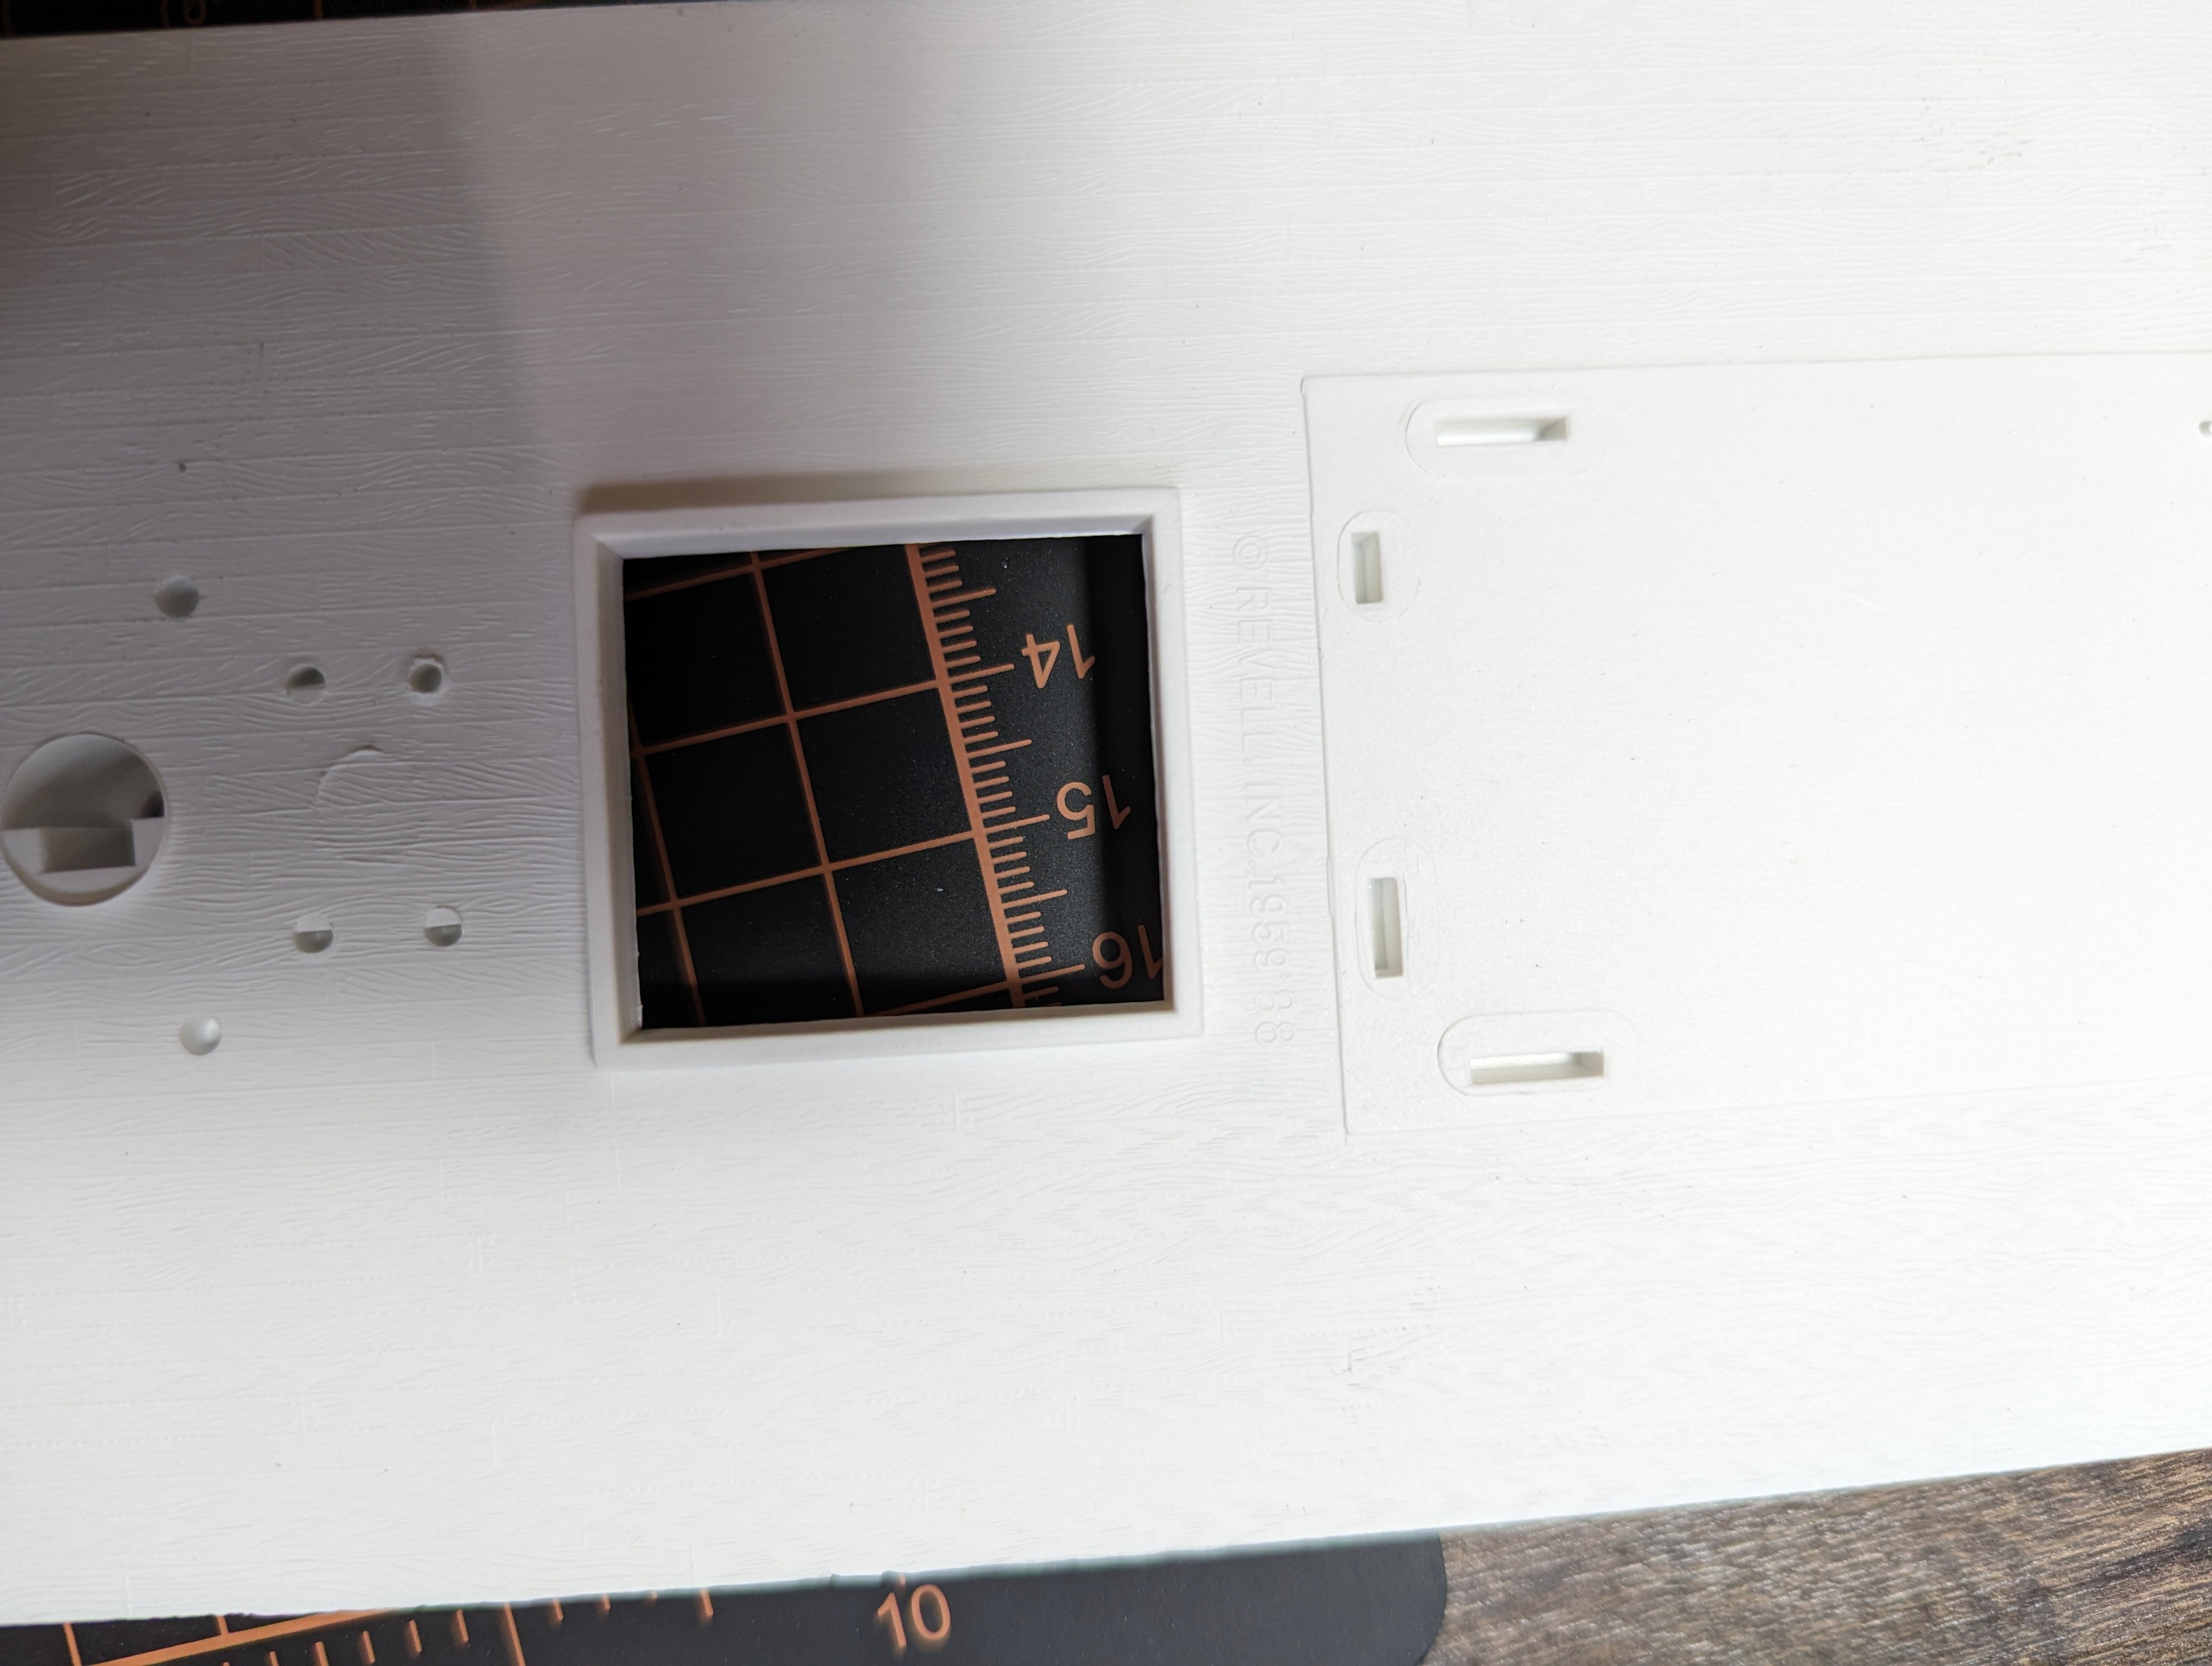
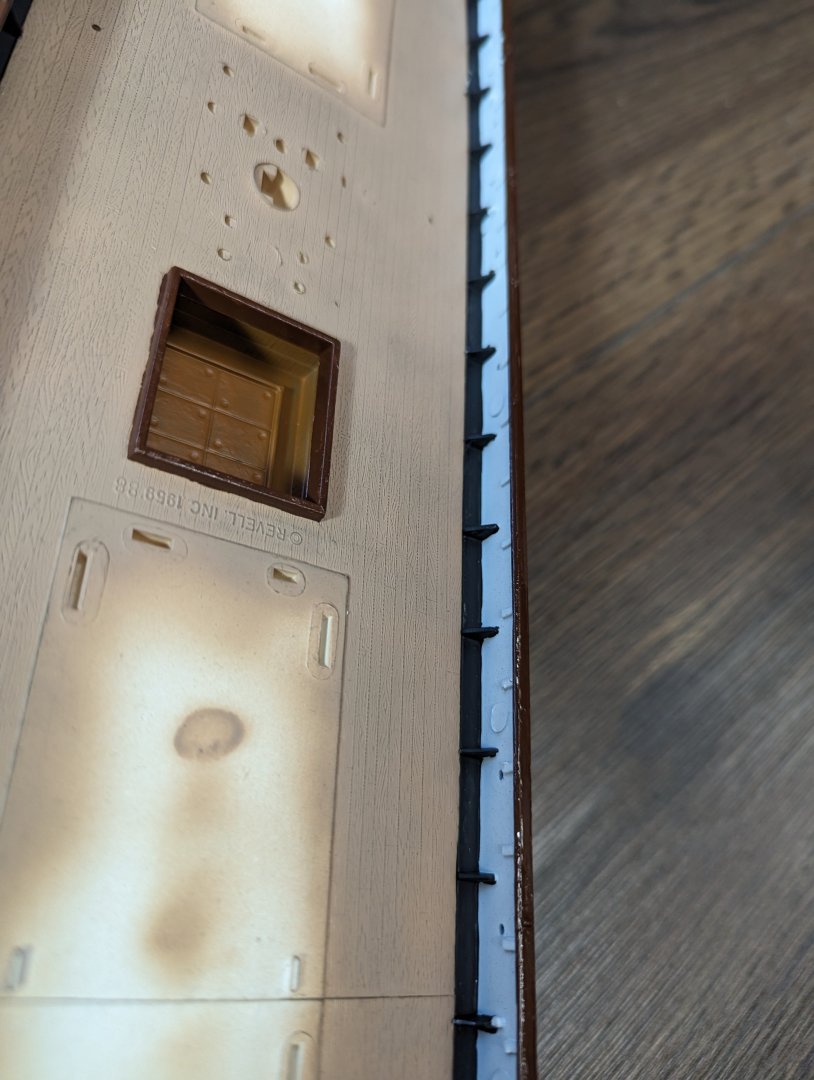
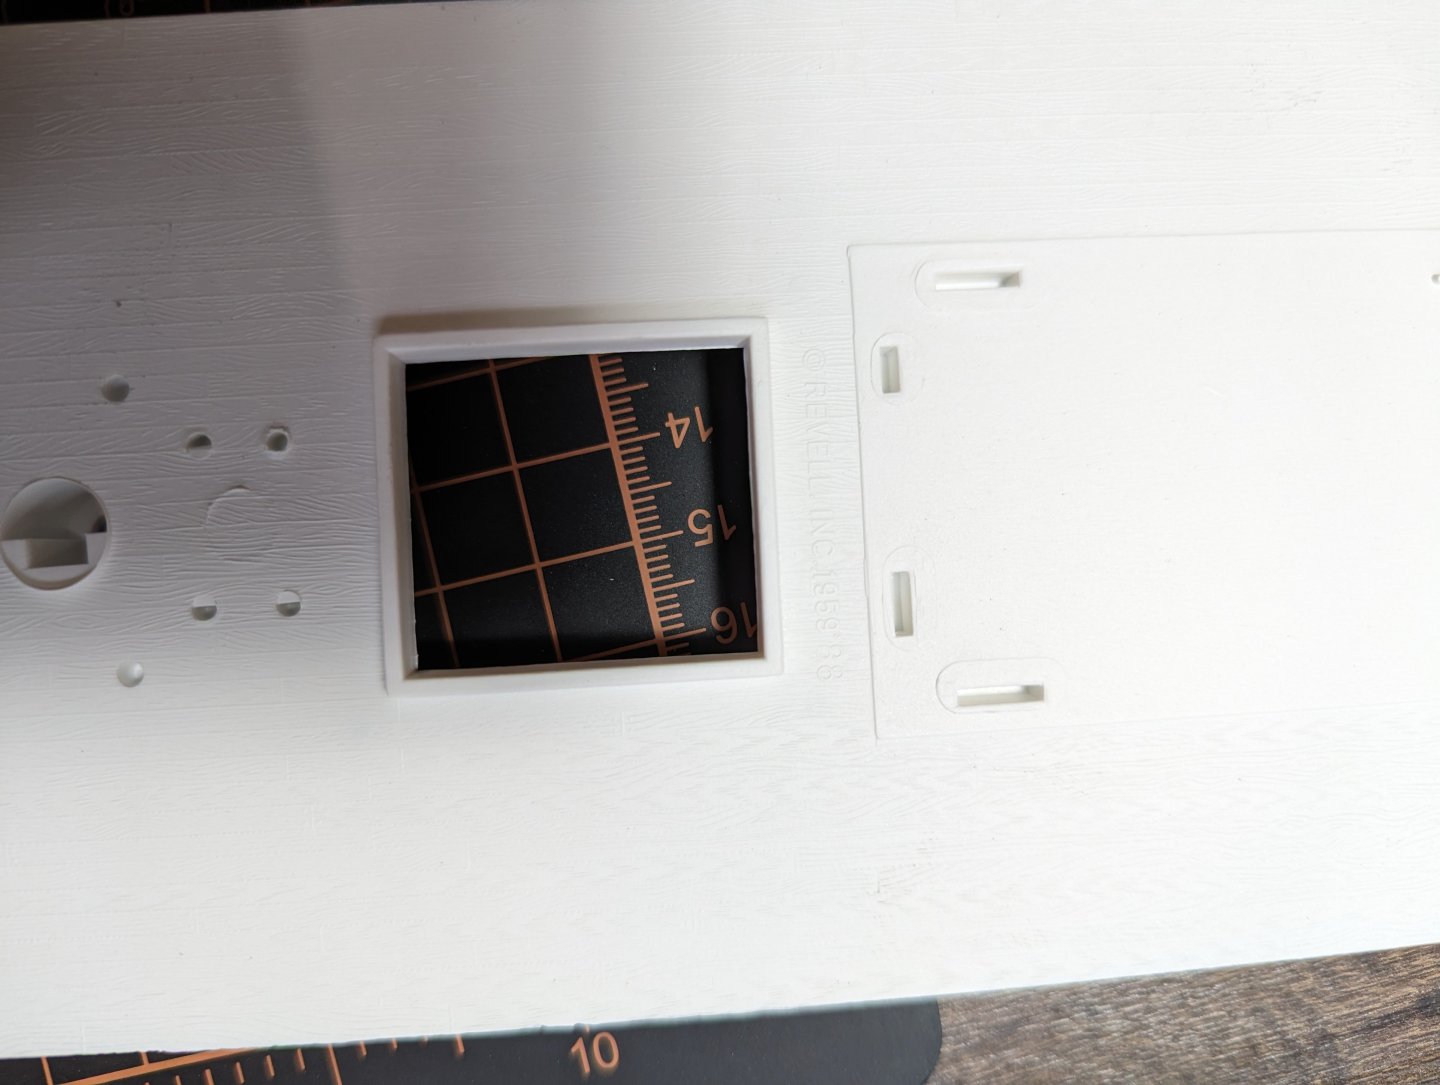
Dear Revell, Why?! Why did you feel the need to stamp your name on the TOP of the deck Sincerely, Ryan
-
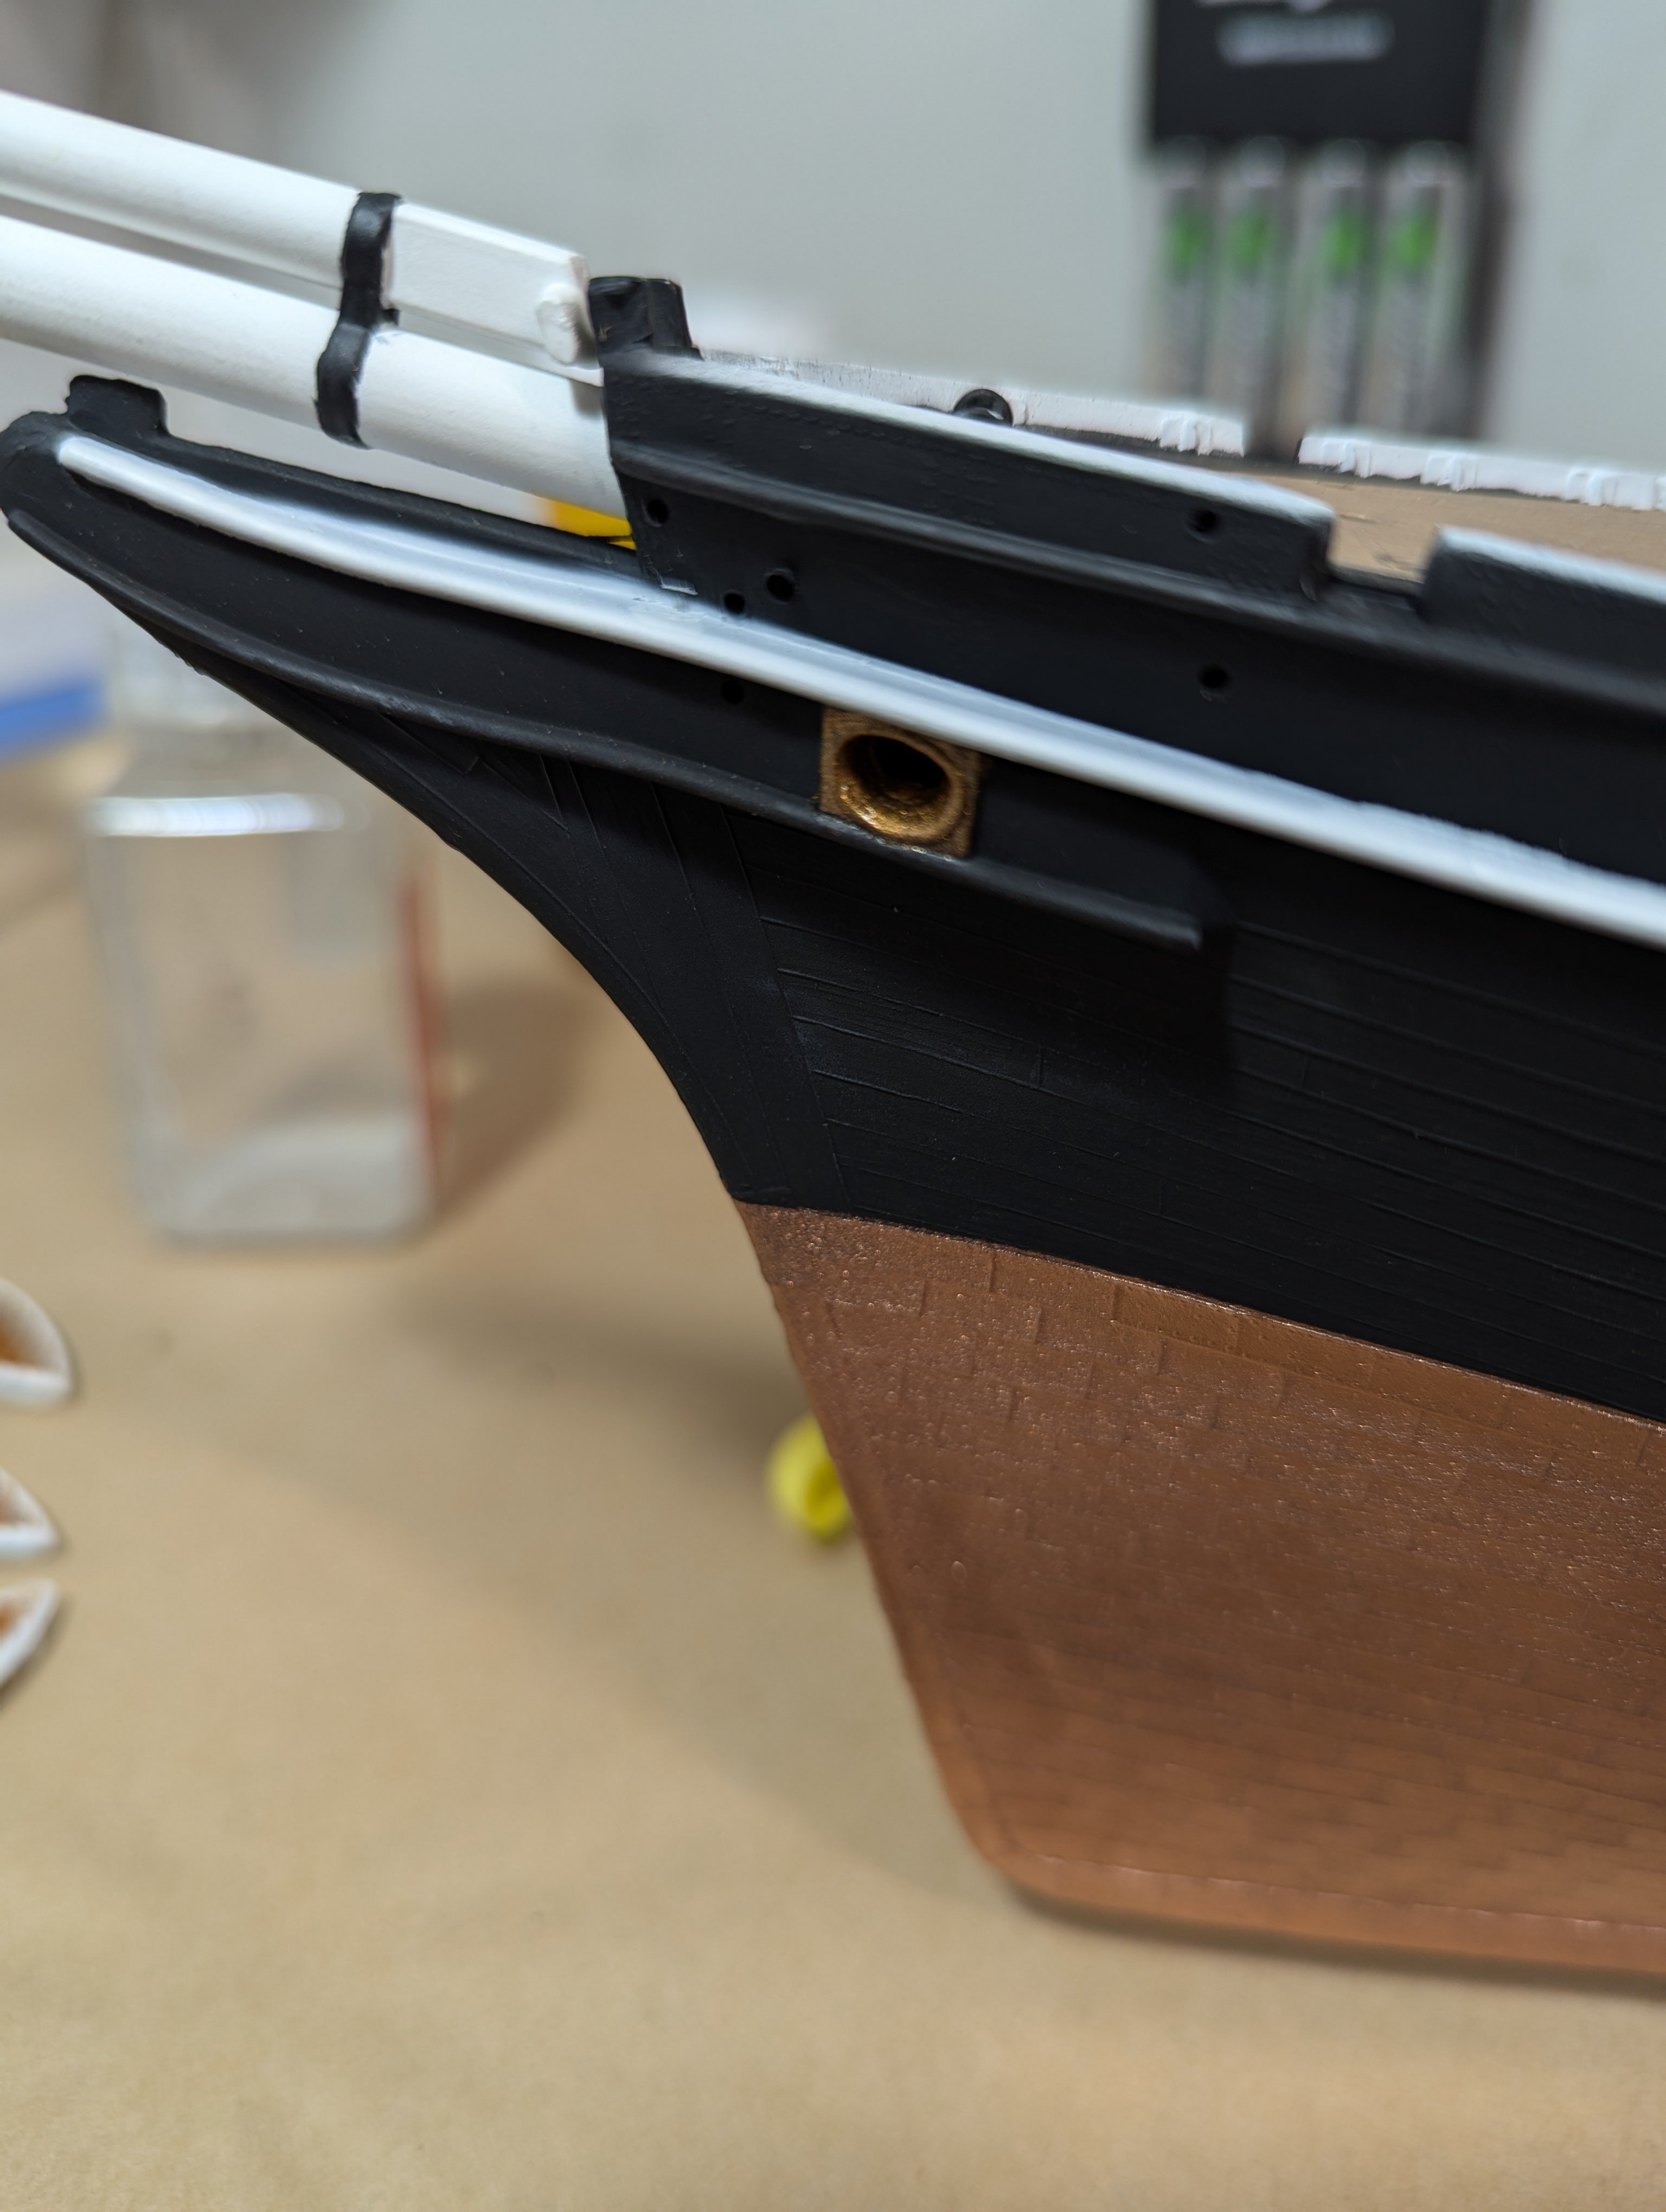
Well, Christmas came early. This purchase wasn't supposed to show up until July. Bummer. Guess I will just have to get a head start on it. Just wrapped up an Academy model which had no flash. This is going to be a different story. It isn't as bad as I thought it would be though. Looking forward to working with something bigger. I have never done one this big before. Got the hull halves glued together. Making the stern look seamless is going to take some work. Any tips and tricks from this who have done this model are welcome. Here we go!

- 29 replies
-
- 2
-
-
- Cutty Sark
- Revell
- (and 1 more)
-
Bob and Snug Harbor Johnny, Thanks for the encouragement! I am now officially finished. Here are my thoughts on the kit. Pros: Absolutely zero flash (not a bit!), everything fit great for the most part, nice detail for the deck boards, the yards were all one piece which made things easier (this did make painting more of a challenge). Cons: Plastic ratlines make the kit look a bit cheap, the designs in the hull were not distinct enough to get a good result when dry brushing the gold so I had to leave them black, there are no aftermarket parts (photoetch etc.) available for the kit that I could find. Overall a great kit at a good price. $63 on Amazon. They are going for north of $100 on eBay for whatever reason.
- 14 replies
-
- 3
-
-
- Cutty Sark
- clipper
- (and 3 more)
-
Finished with the rigging as far as I am going to take it for this project. I am not going to add sails. Just need to add the draft and stern decals and attach the anchors. Giving it to my brother tomorrow as a thank you gift. Where to next? I about have enough Amazon points and gift cards to buy my next project: 1:96 Revell Cutty!


- 14 replies
-
- 1
-
-
- Cutty Sark
- clipper
- (and 3 more)
-
Rigging is coming along. Never using the supplied rigging again. This stuff is terrible.

- 14 replies
-
- 1
-
-
- Cutty Sark
- clipper
- (and 3 more)
-
Quick update. Got some rigging done on the main mast and attached most of the preformed ratlines. The supplied thread is garbage. Will be ordering some good stuff on my next build. The rigging isn't the tightest, but once I rig the main to the fore, it should tighten up.

- 14 replies
-
- 1
-
-
- Cutty Sark
- clipper
- (and 3 more)
-
Anybody have any ideas on the easiest way to paint this base without making a mess? The name and details are inset and very fine. Use a toothpick to get in the grooves?
- 14 replies
-
- 1
-
-
- Cutty Sark
- clipper
- (and 3 more)