HOLIDAY DONATION DRIVE - SUPPORT MSW - DO YOUR PART TO KEEP THIS GREAT FORUM GOING! (Only 36 donations so far out of 49,000 members - C'mon guys!)
×


J Snyder
-
Posts
75 -
Joined
-
Last visited
Content Type
Profiles
Forums
Gallery
Events
Everything posted by J Snyder
-
 I agree completely! Question: did the blocks come with the kit or did you buy them separately?
- 6 replies
-
- 1
-

-
- swampscott dory
- bluejacket shipcrafters
- (and 2 more)
-
Question re "Line Off"
J Snyder replied to JohnWW's topic in Building, Framing, Planking and plating a ships hull and deck
Please take this advice with the proper amount of skepticism as I have not built a double planked hull. I think it would be a good idea to practice lining out on the first layer. The concern I would have is that the seams on the second layer will be very close to the seams on the first and could cause problems. Perhaps start the first layer with a garboard plank at a slight angle making it twice as wide at the stern then the bow then do the lining out from there. On the 25ft. sloop I helped build the garboard was at least twice the width of the rest of the planks and we did the lining off from there. That helped get the rest of the planks to a reasonable shape. If that would be too confusing at least make sure you prebend the second layer planks to fit without any pressure before fastening. Again I want to repeat that I have not built a double plank model before! -
Thanks again to all for the kind comments. One thing that would help with the directions would be to change some of the photos from the prototype (of the model not the full size) to using photos from the kit supplies.
- 81 replies
-
- 4
-
-
- Norwegian Sailing Pram
- Model Shipways
- (and 1 more)
-
I hadn't thought about a case. Maybe I'll build something.
- 81 replies
-
- 2
-
-
- Norwegian Sailing Pram
- Model Shipways
- (and 1 more)
-
Thank You all. This forum is a great resource for not only information but for encouragement to continue and I will continue. I have already started disassembling the belt sander for the conversion to a thickness sander.
- 81 replies
-
- 7
-
-
- Norwegian Sailing Pram
- Model Shipways
- (and 1 more)
-
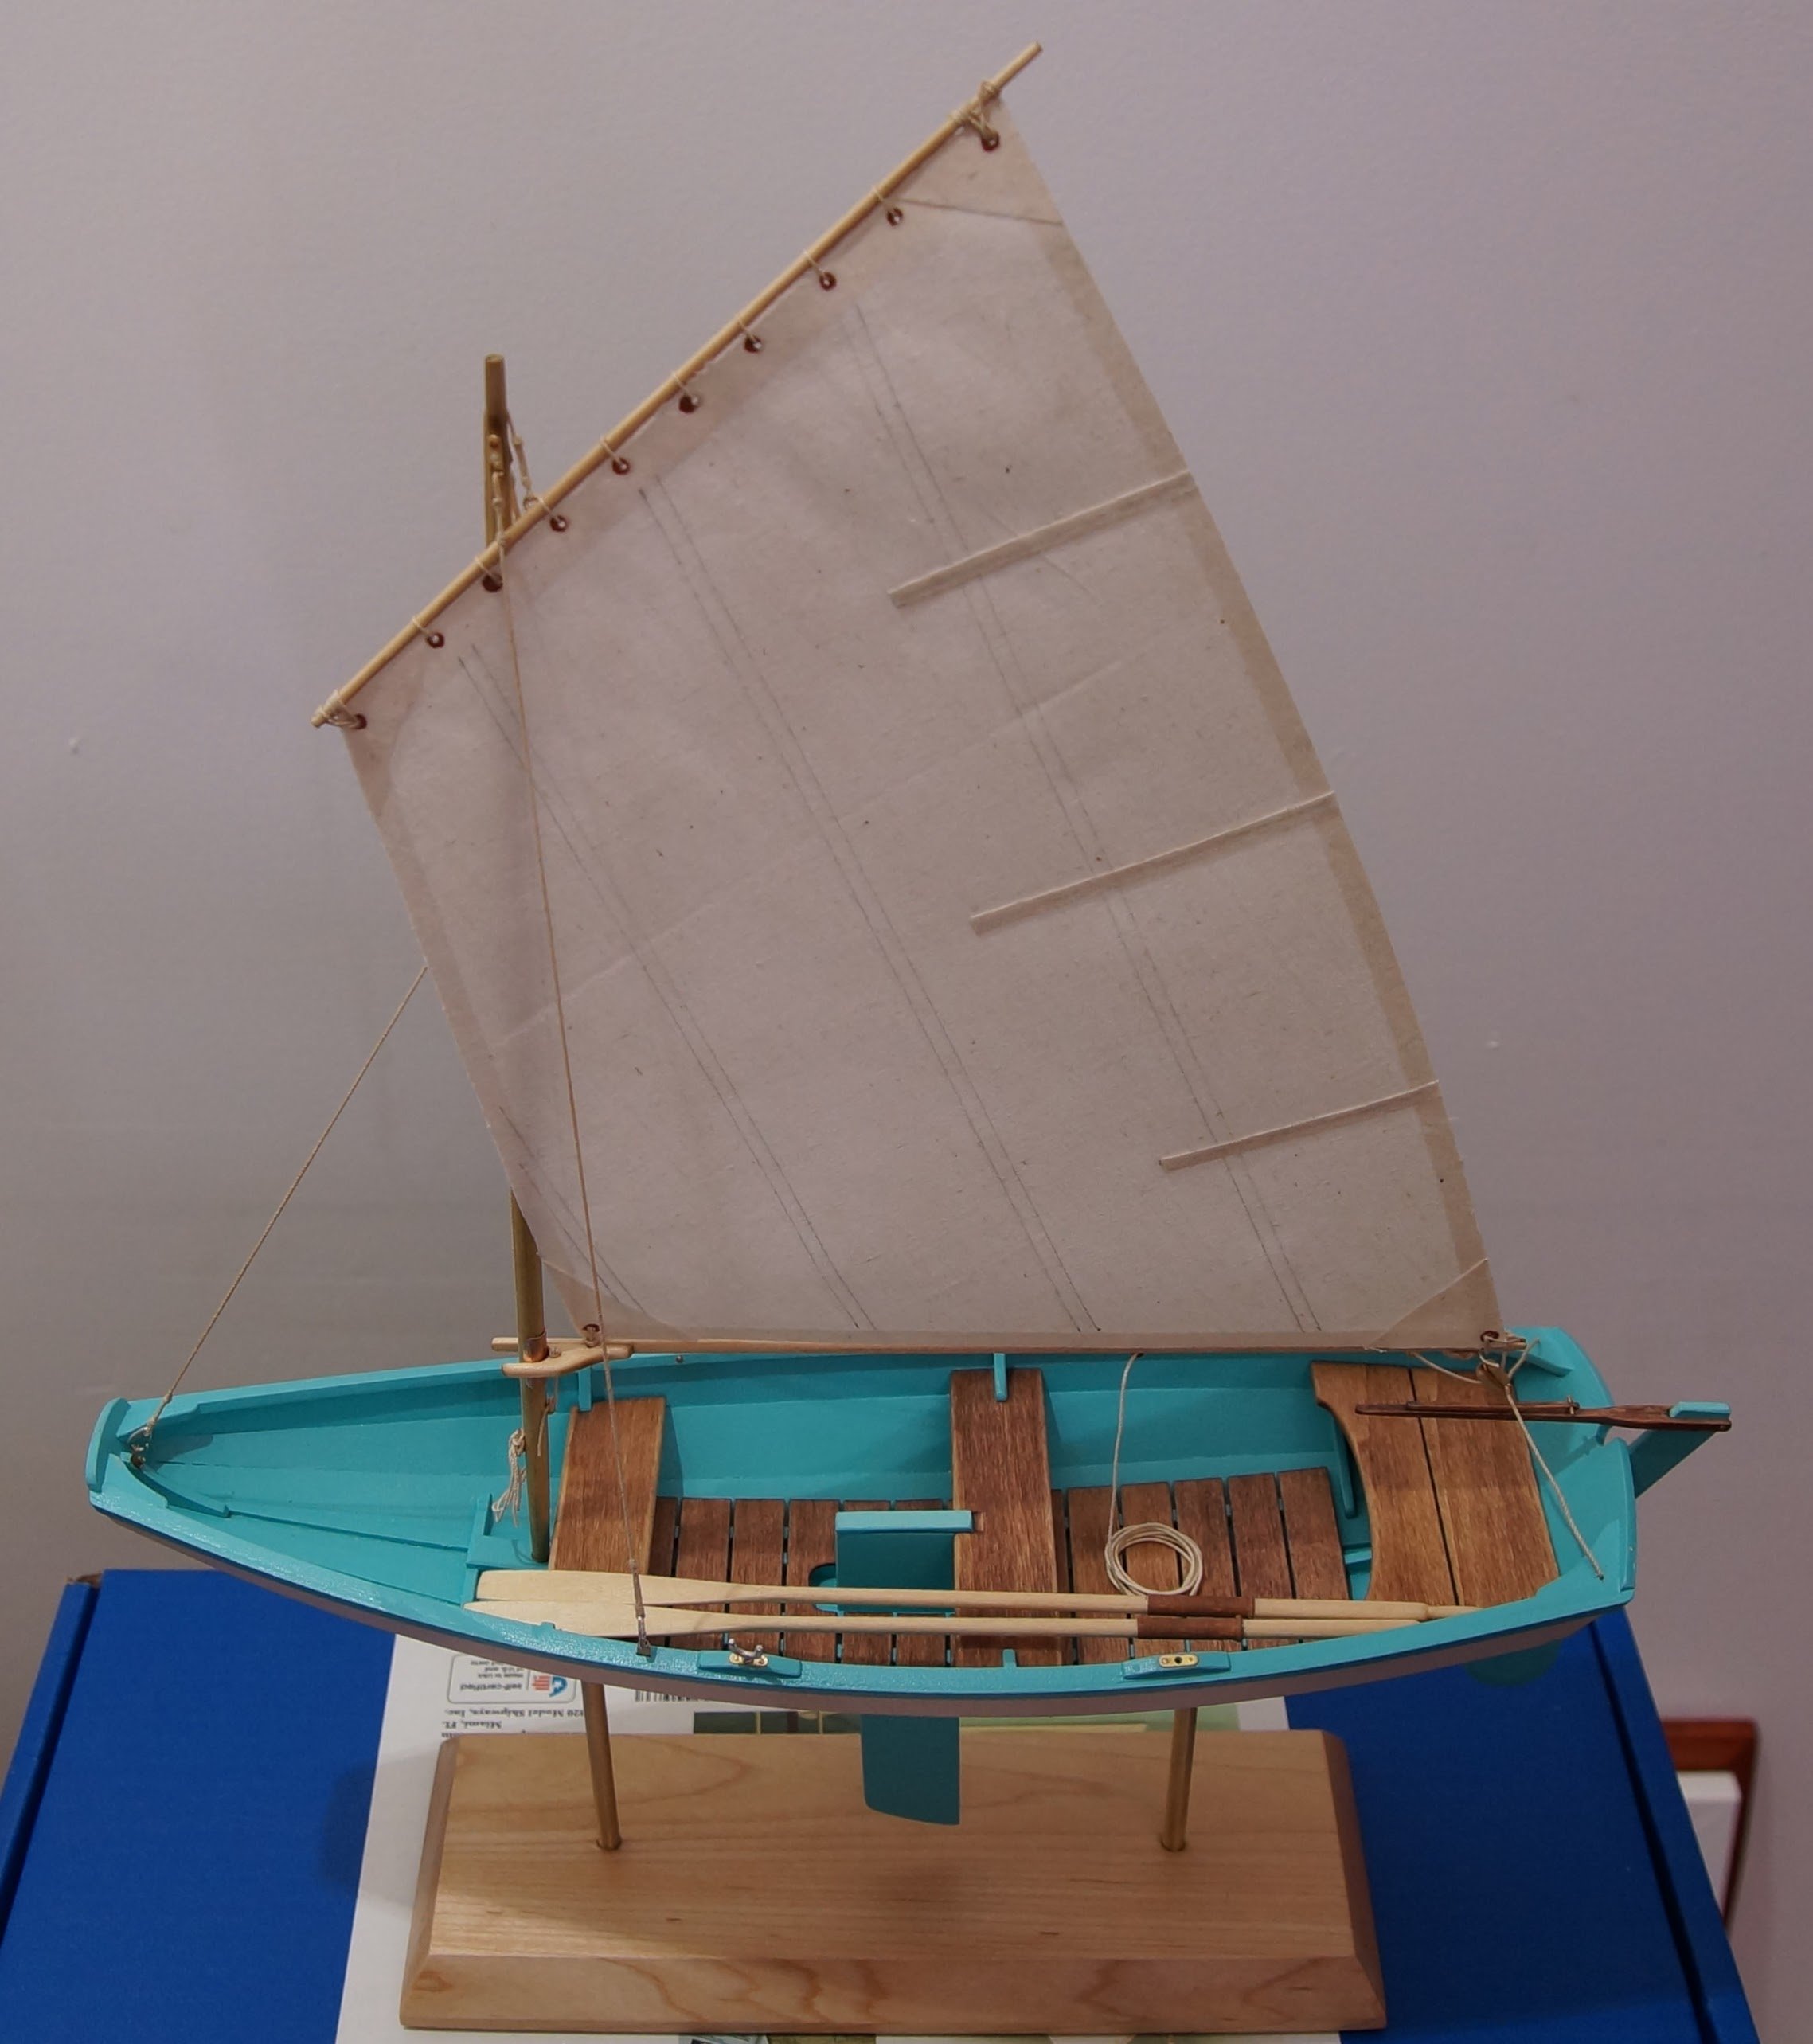
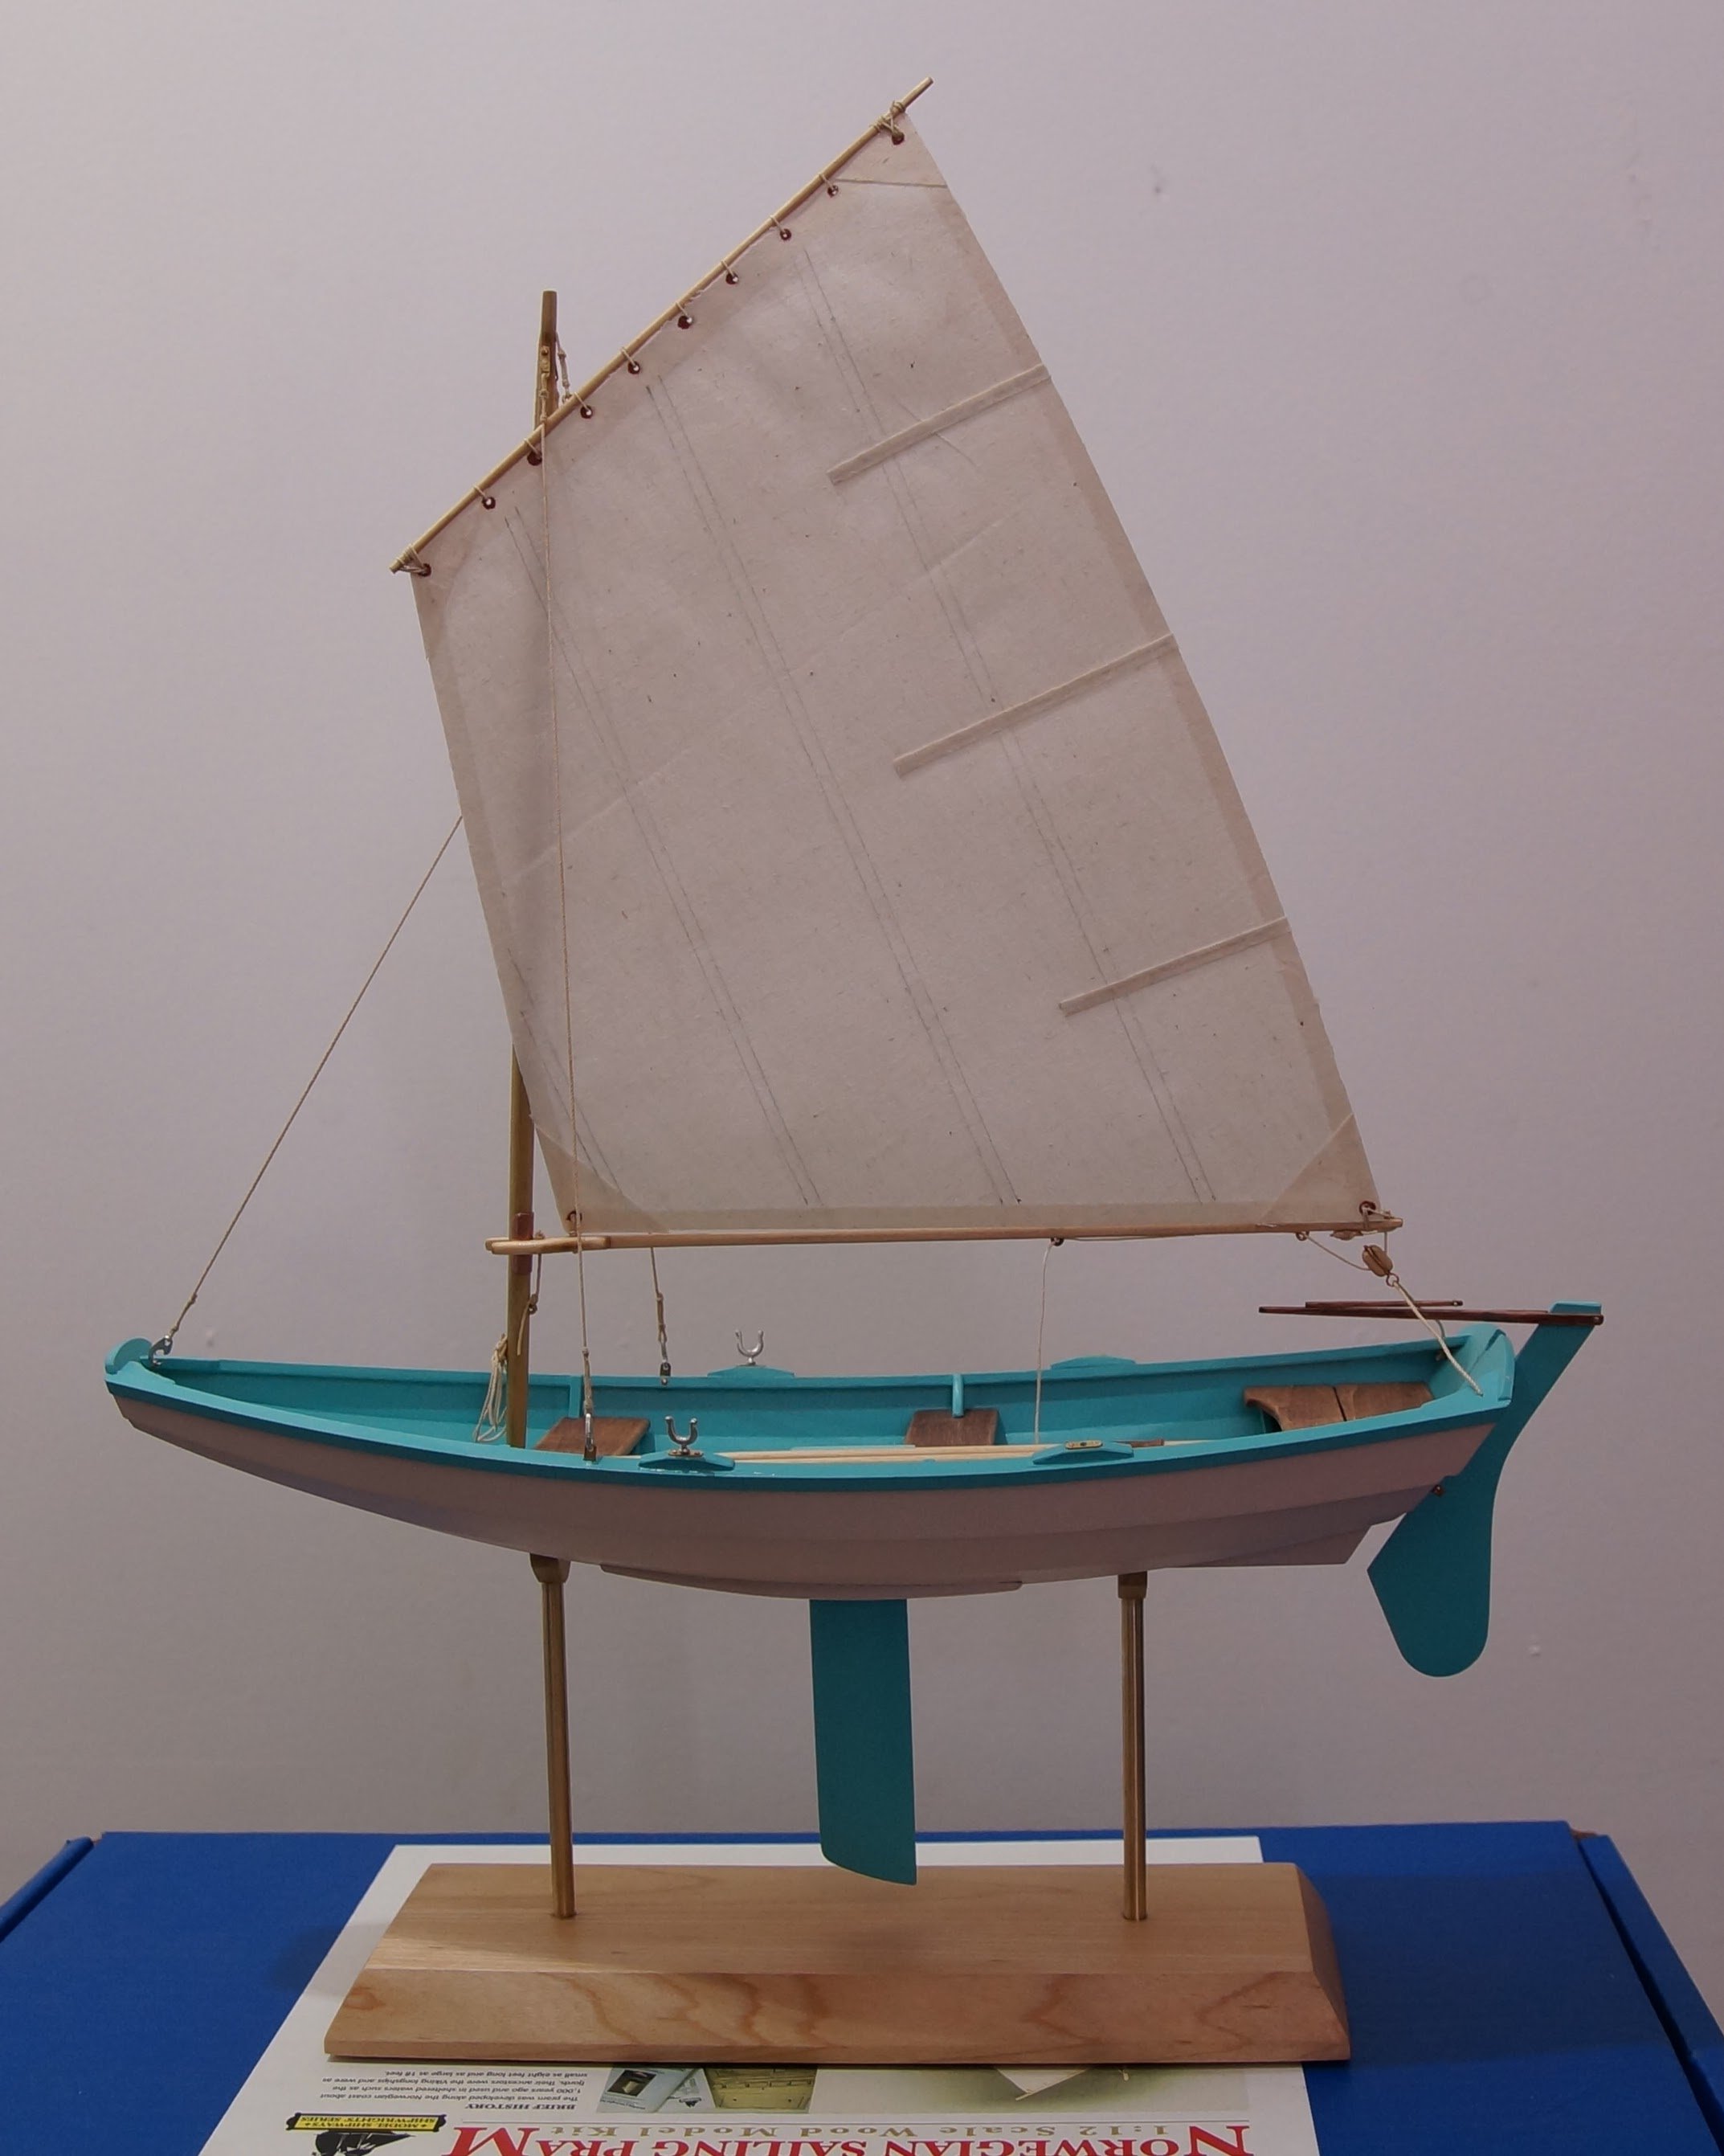
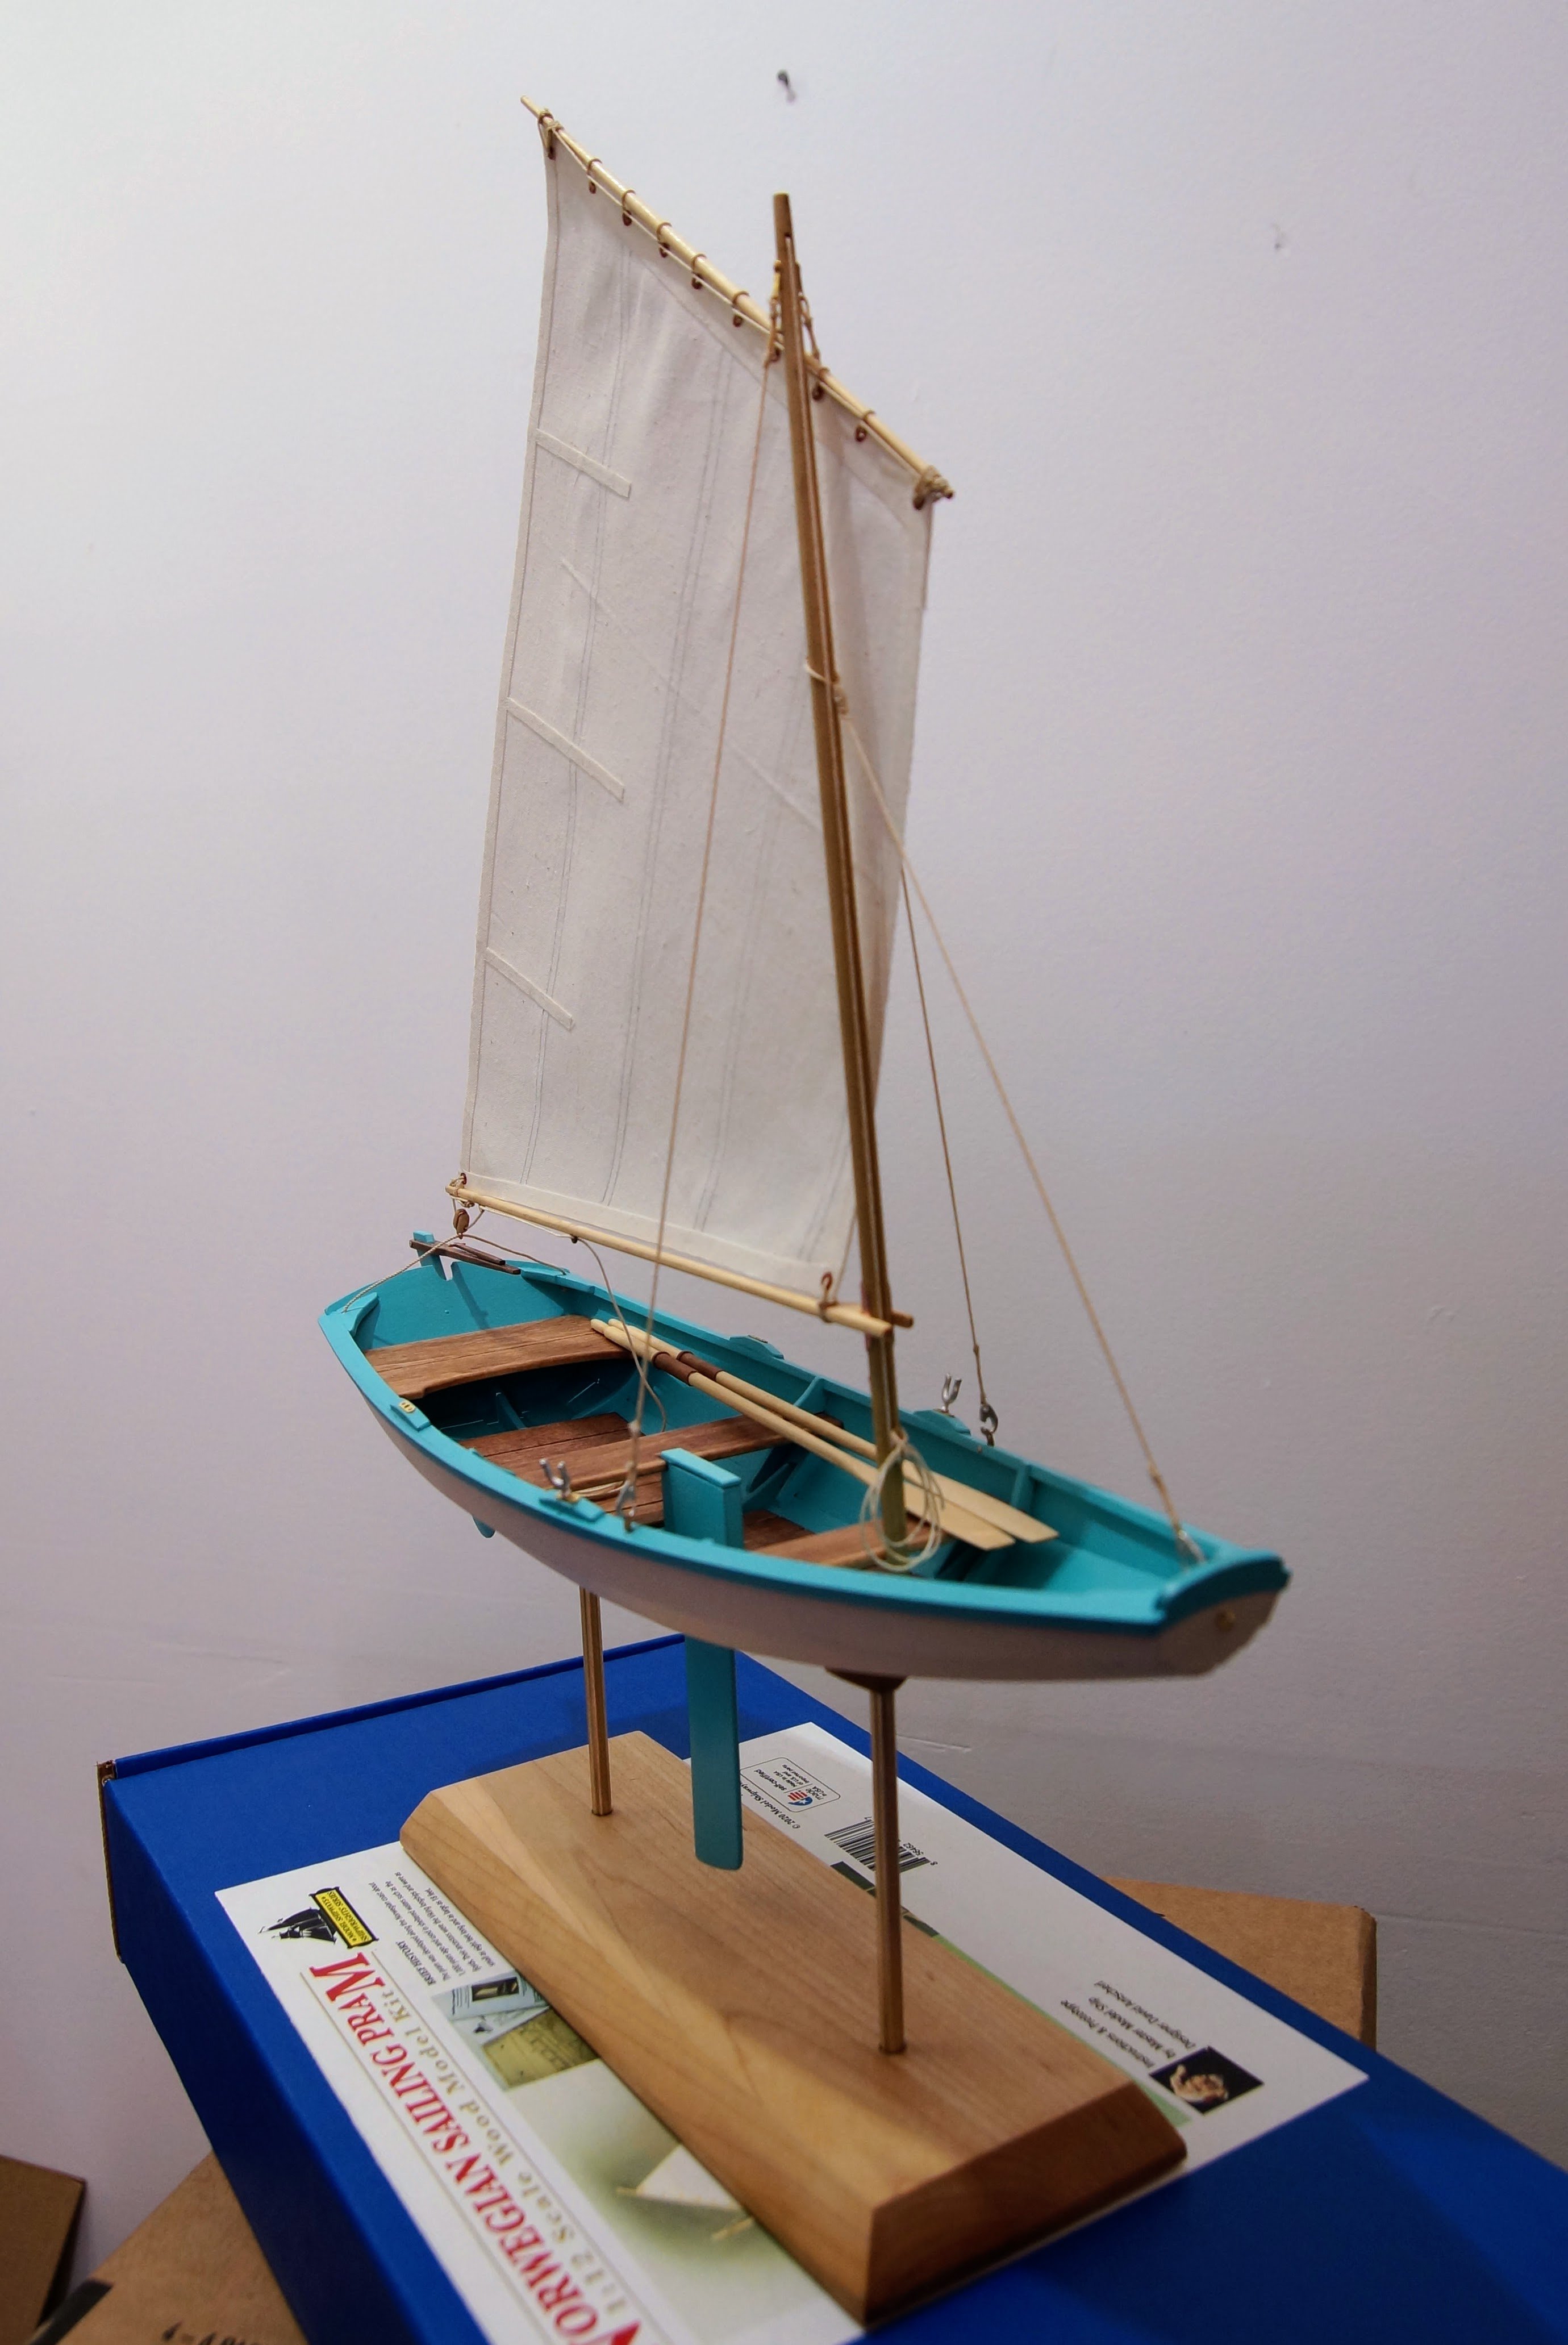
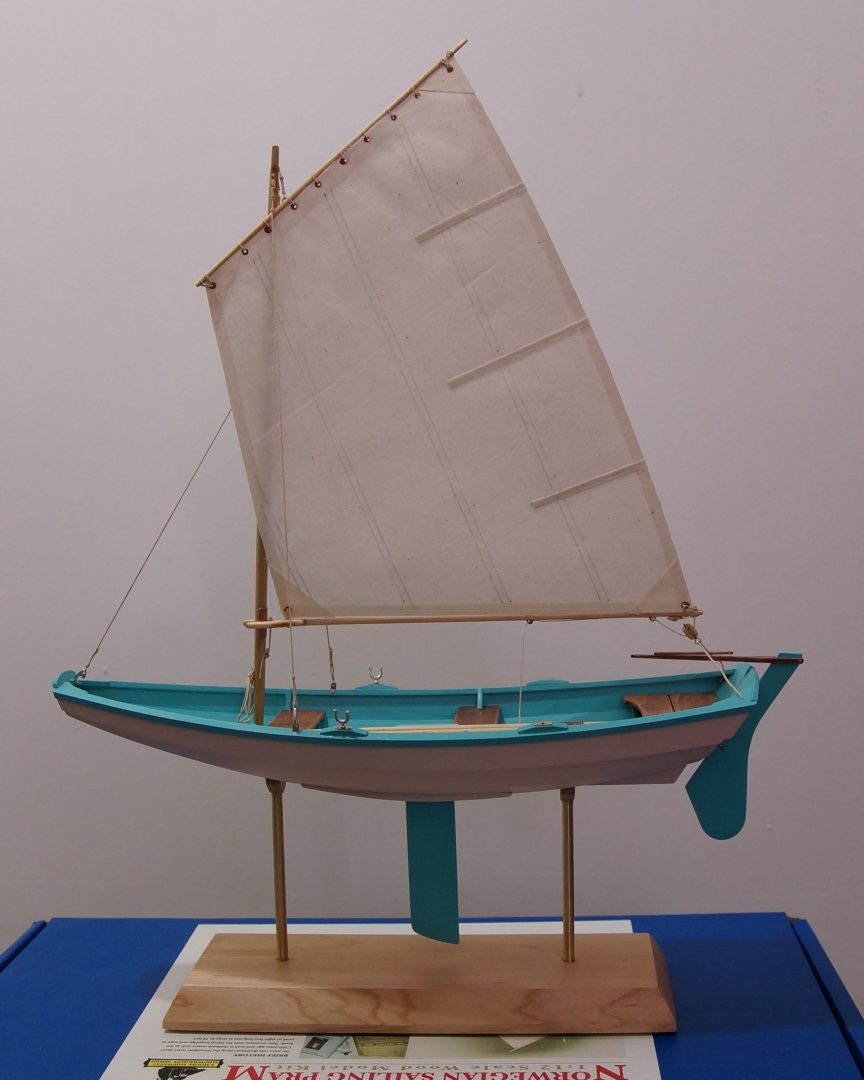
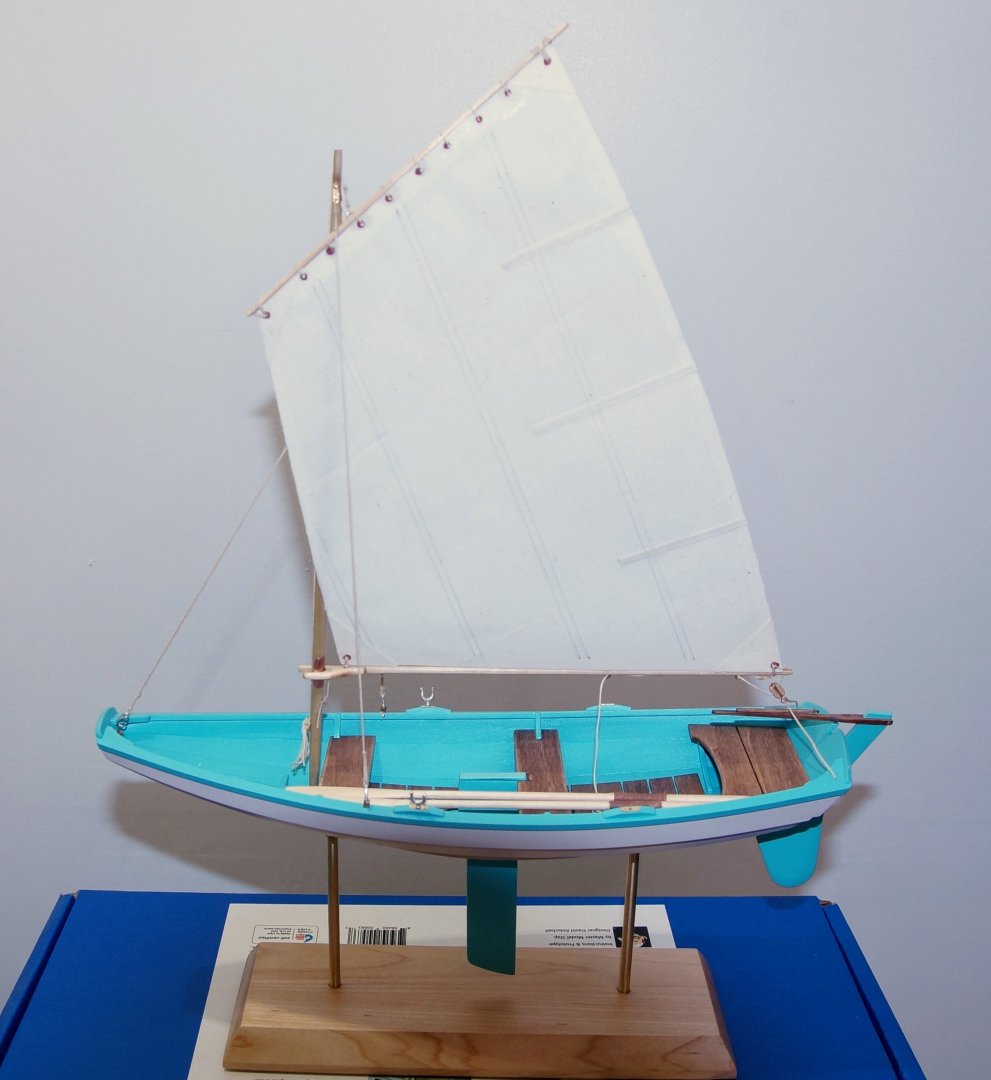
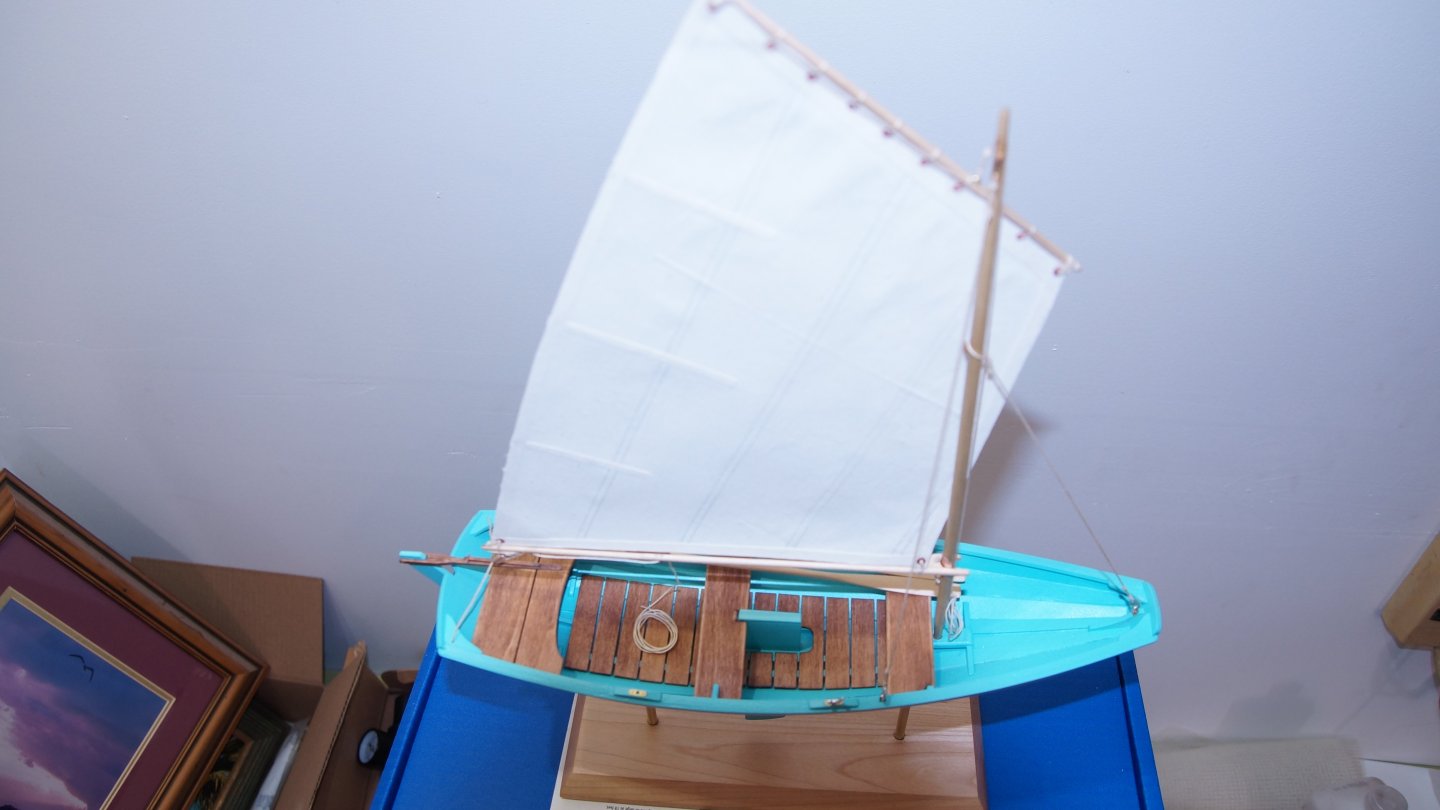
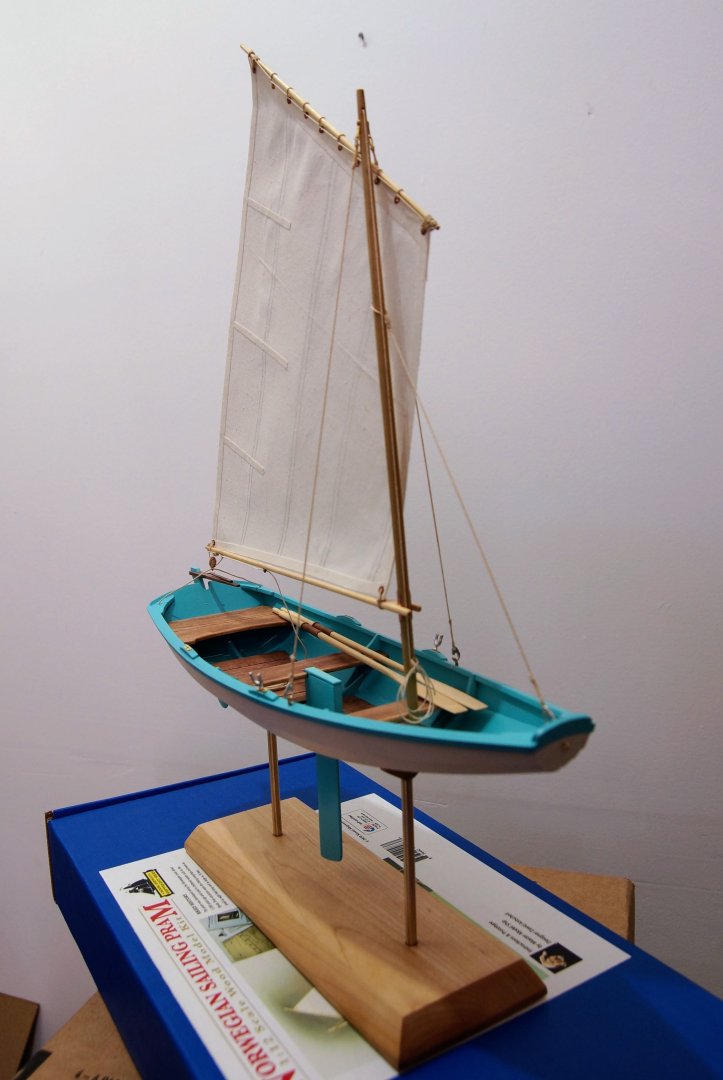
Pram is FINISHED! I got the outhaul lashings, halyard, and the mail sheet installed. For anyone that may use this I had scaled up the sail to 115% that was a mistake 105% to 110% would have been better. I should have ironed the sail cloth before painting on the thinned glue mixture as to of the creases didn't come out. I learned a lot, not on the construction or rigging of the boat but on working at a small scale, even though this was only 1:12. I have never used tweezers so much in my life. I kept trying to grab things with my fingers only to be frustrated and have to grab the tweezers. I'm not sure if I should post the picture here or some where else. It will be awhile before the next build as I need to work on the car I am building (Locost 7). I am also looking at converting an old belt sander into a thickness sander. I will try to post some photos of the conversion if it works. Still not sure if I will build the Lobster Smack or scratch build the Gary Thomas.

- 81 replies
-
- 13
-
-

-
- Norwegian Sailing Pram
- Model Shipways
- (and 1 more)
-
I laced the sail to the gaff and started on the boom and found I had forgotten to put the cleat on the boom. I had hoped to have the pram finished by now but now I need to let the cleat dry. I also found I installed the eyes on the boom on the wrong side. It will still work but the gooseneck will be on the other side then the plans show.

- 81 replies
-
- 5
-
-
- Norwegian Sailing Pram
- Model Shipways
- (and 1 more)
-
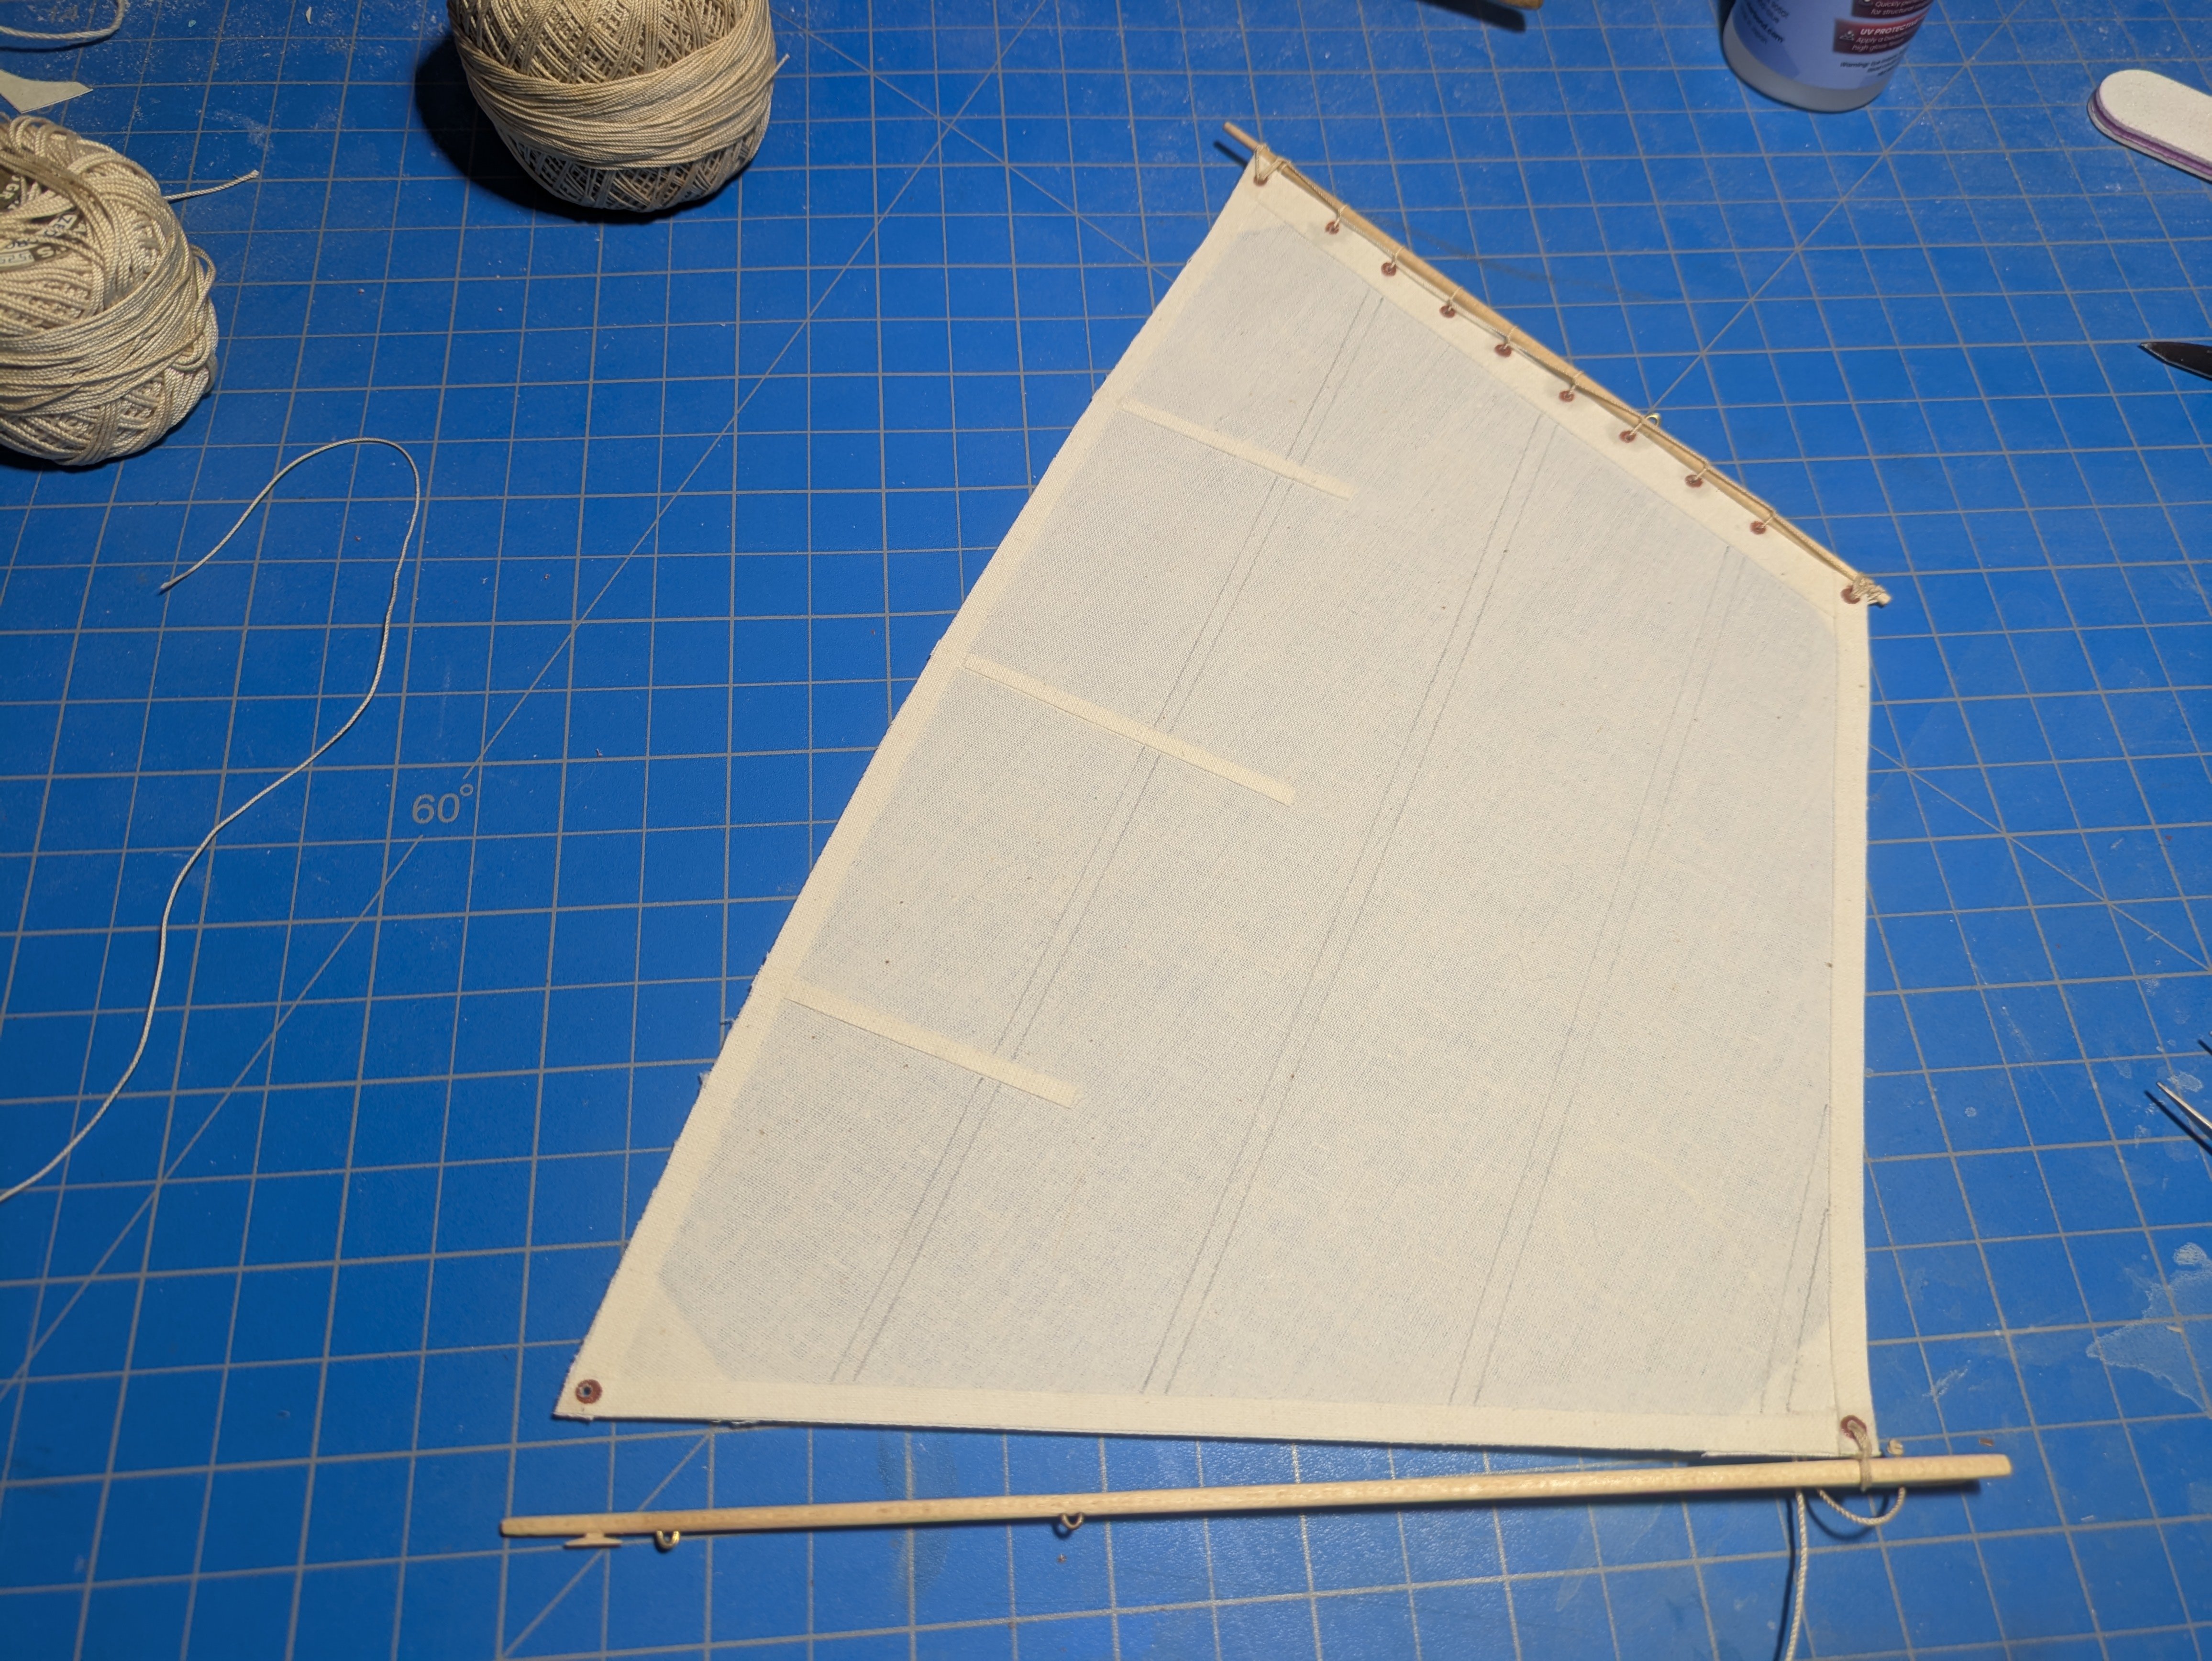
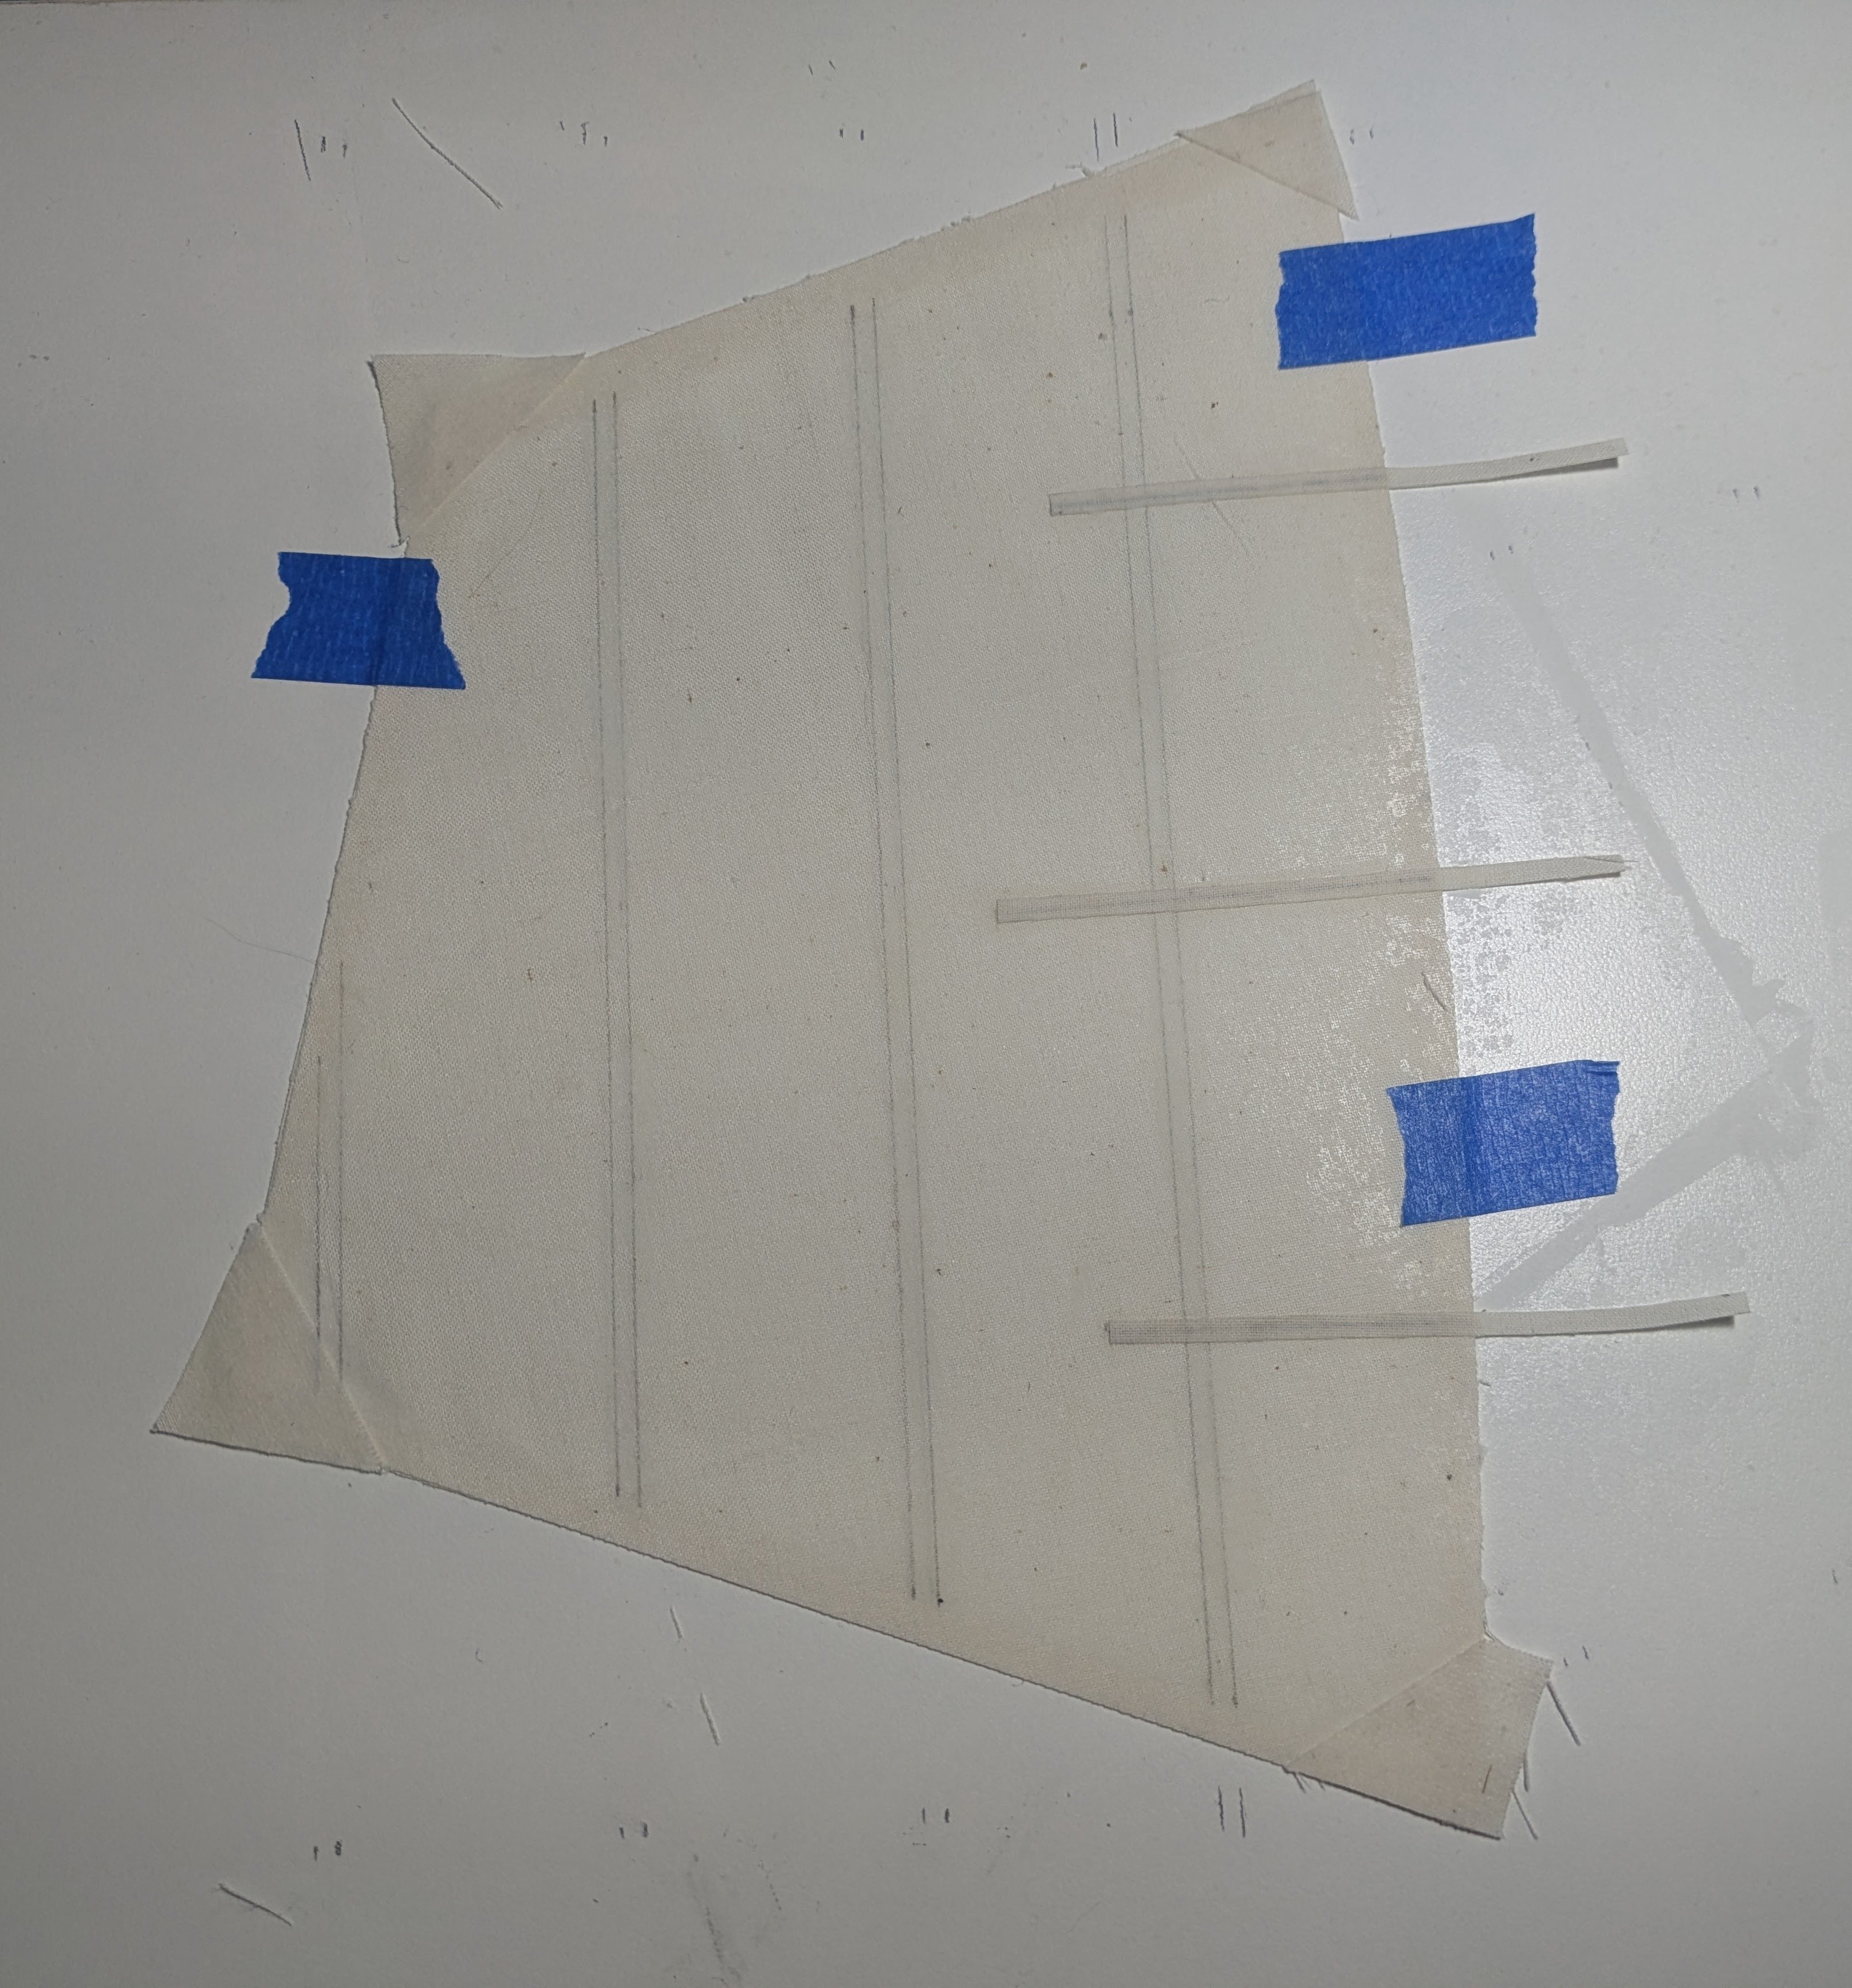
I forgot to mark out some seam lines before I put on the reinforcements on the first side. I turned over the sail and marked them out and installed the corner reinforcements and the other side batten pockets. Just waiting for it to dry.

- 81 replies
-
- 2
-
-
- Norwegian Sailing Pram
- Model Shipways
- (and 1 more)
-
Working on the sail. The layout in the instructions like all of the drawings is under size so I copied at 115% which fits the boom and gaff better. I am using the supplied sail cloth on this model to get it done. We will see how it looks, I'm not a big fan of real cloth on models as it looks out of scale usually. Instead of gluing the wood strips on for battens I am just gluing a fabric strip on each side as batten pockets (I hope that it will be stiff enough).

- 81 replies
-
- 6
-
-
- Norwegian Sailing Pram
- Model Shipways
- (and 1 more)
-
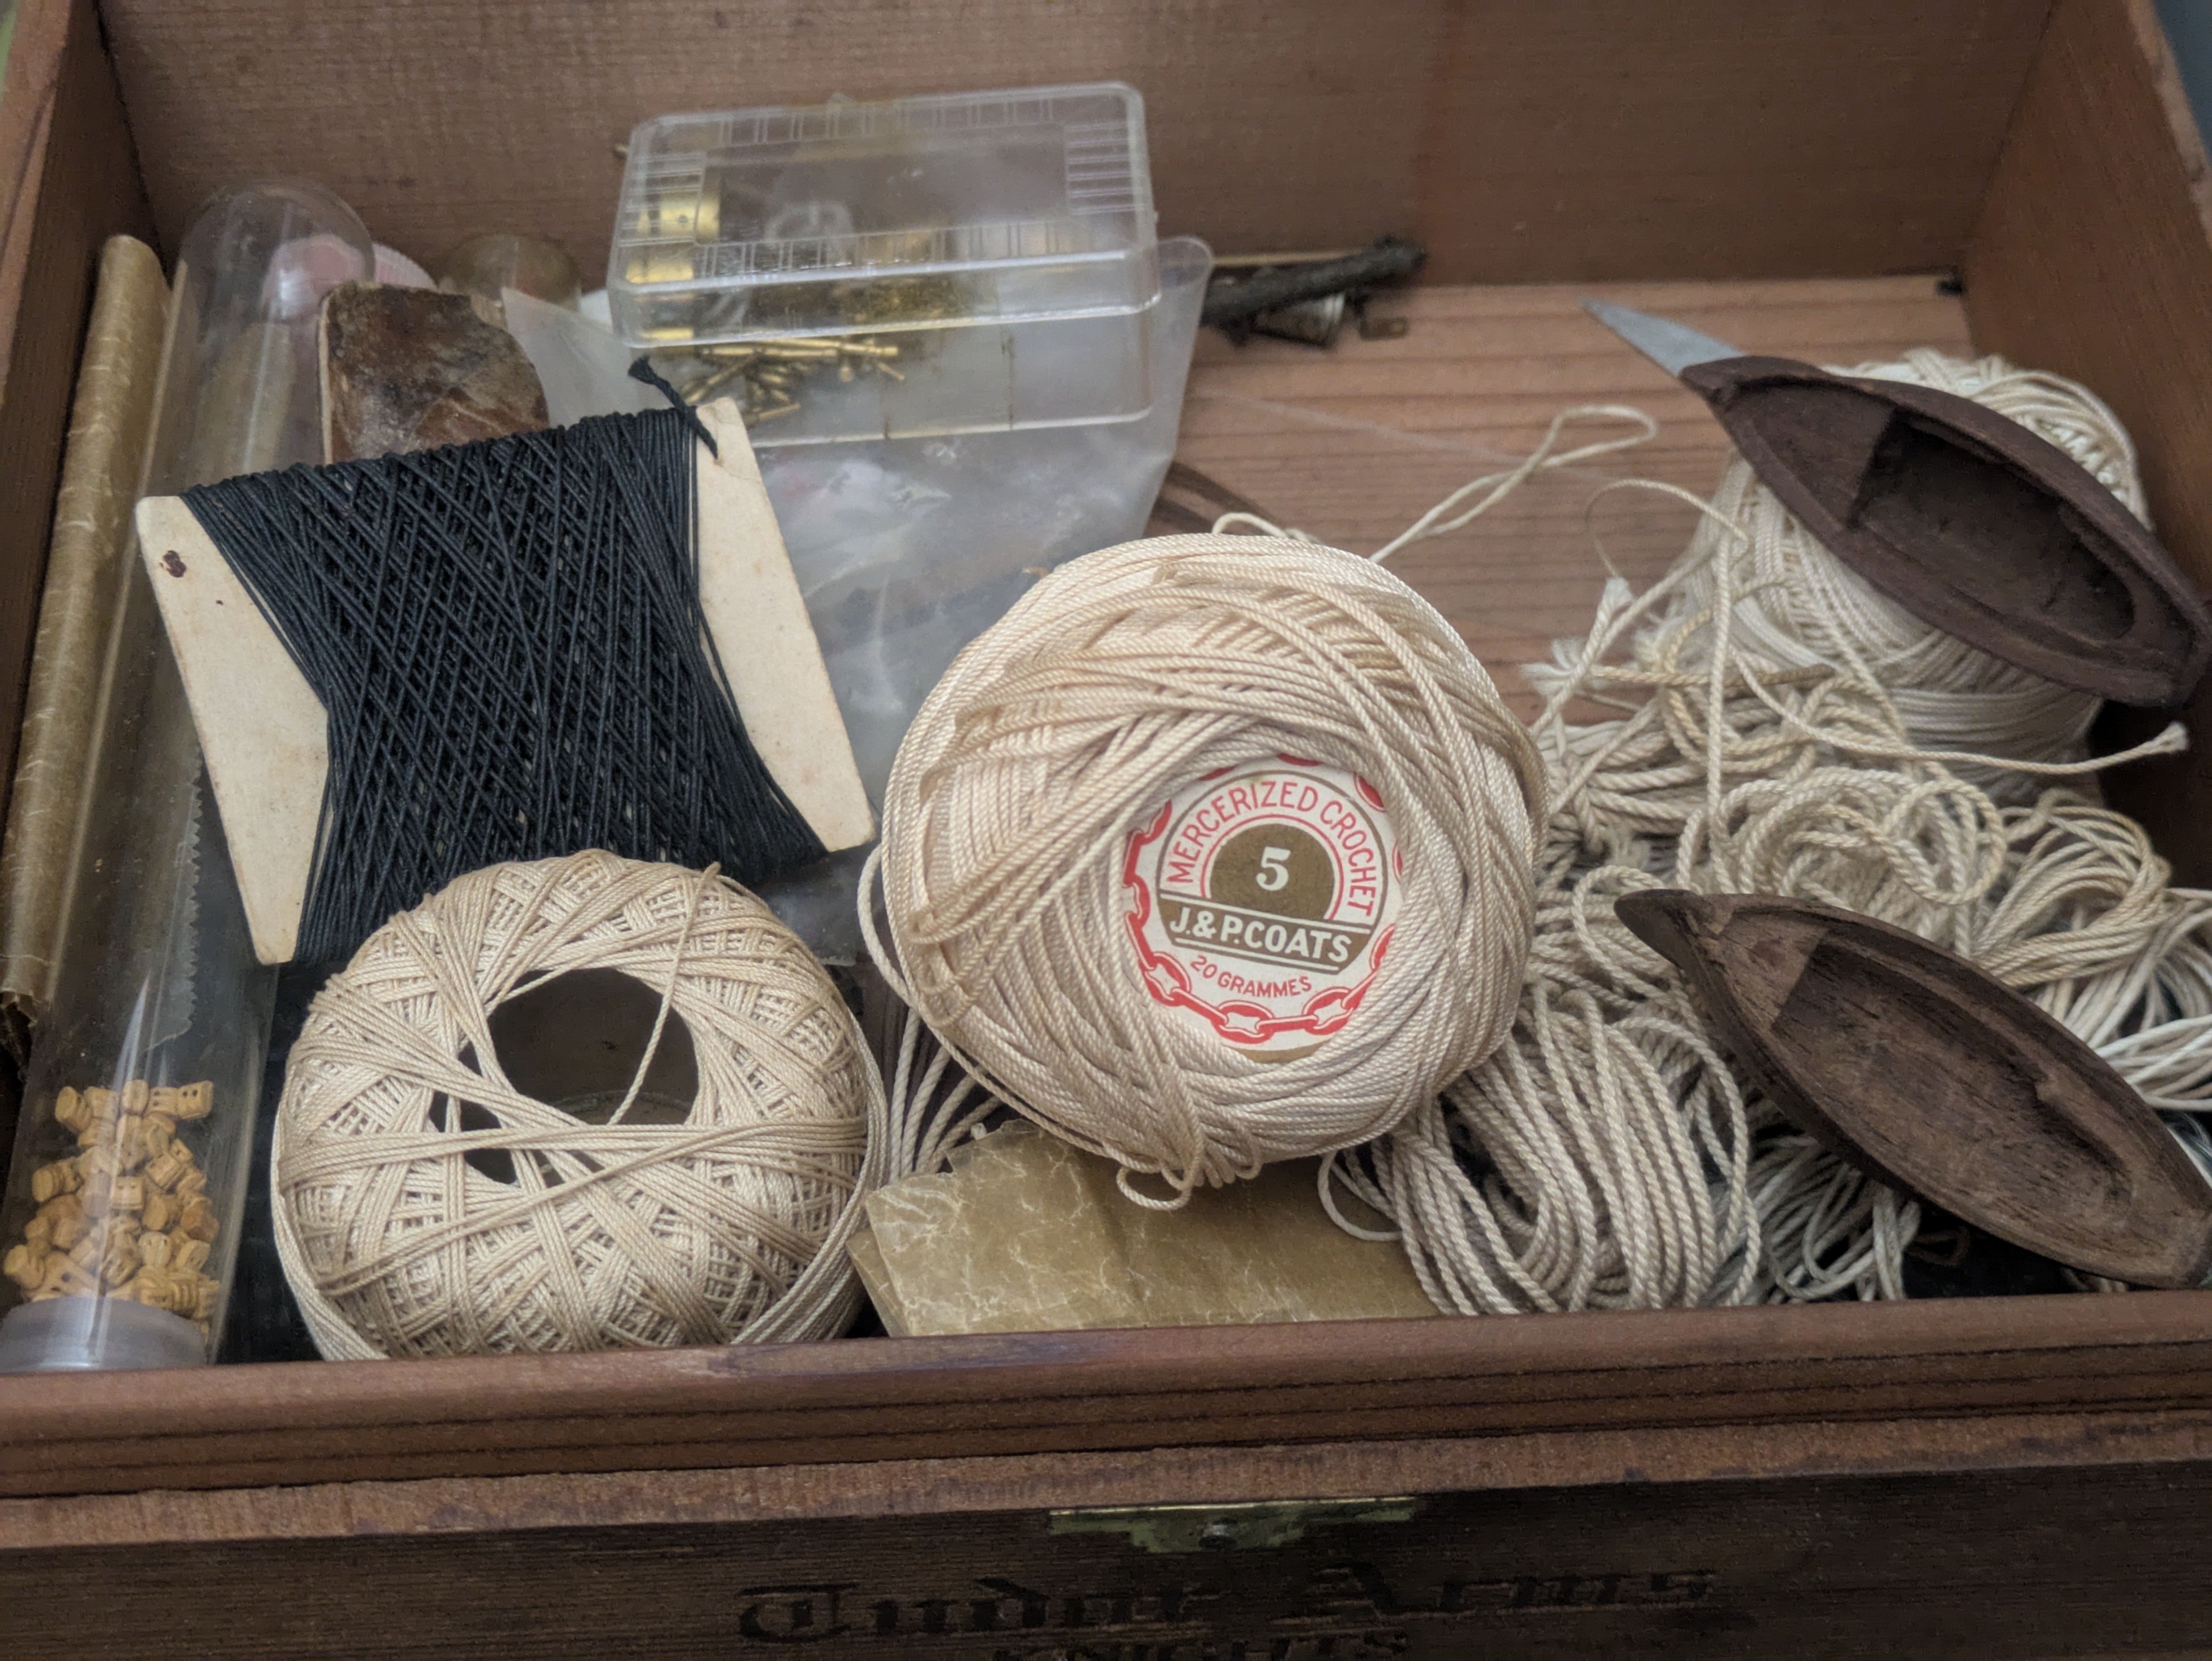
Thanks, yes the line seems really nice. There is a interesting assortment in the box, a few small boats, some blocks, deadeyes, belaying pins, and more.
- 81 replies
-
- 1
-
-
- Norwegian Sailing Pram
- Model Shipways
- (and 1 more)
-
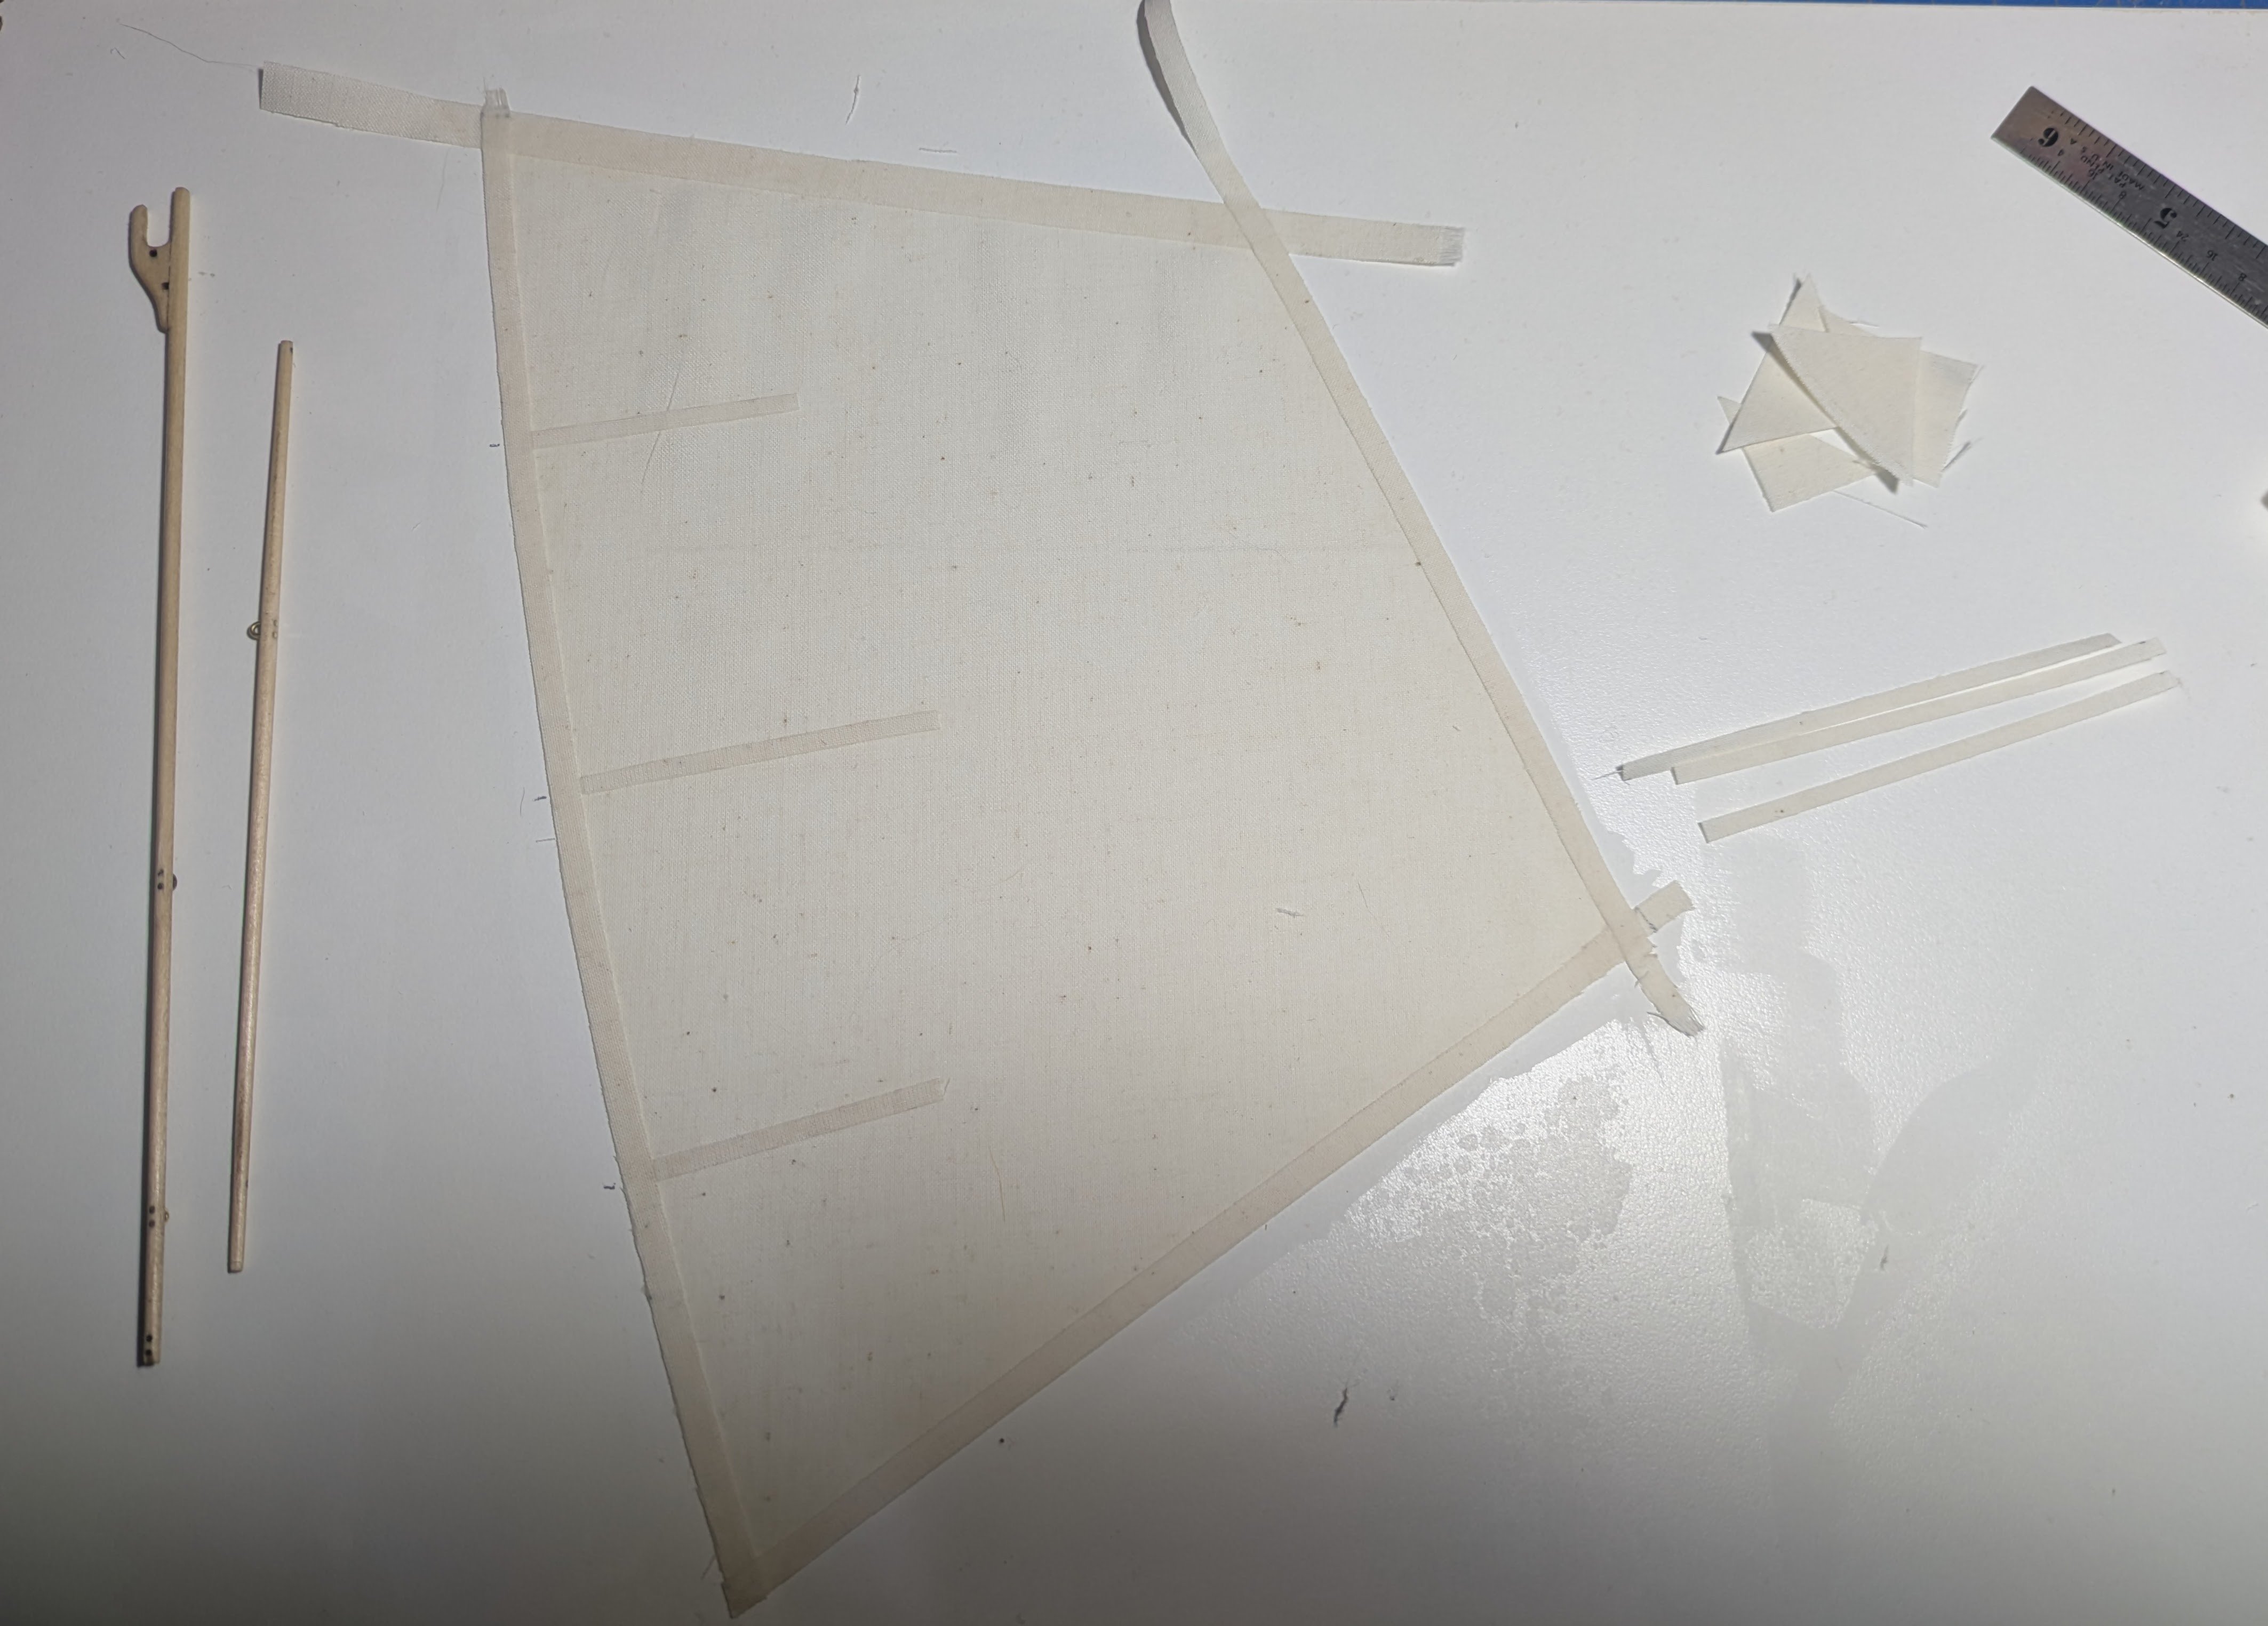
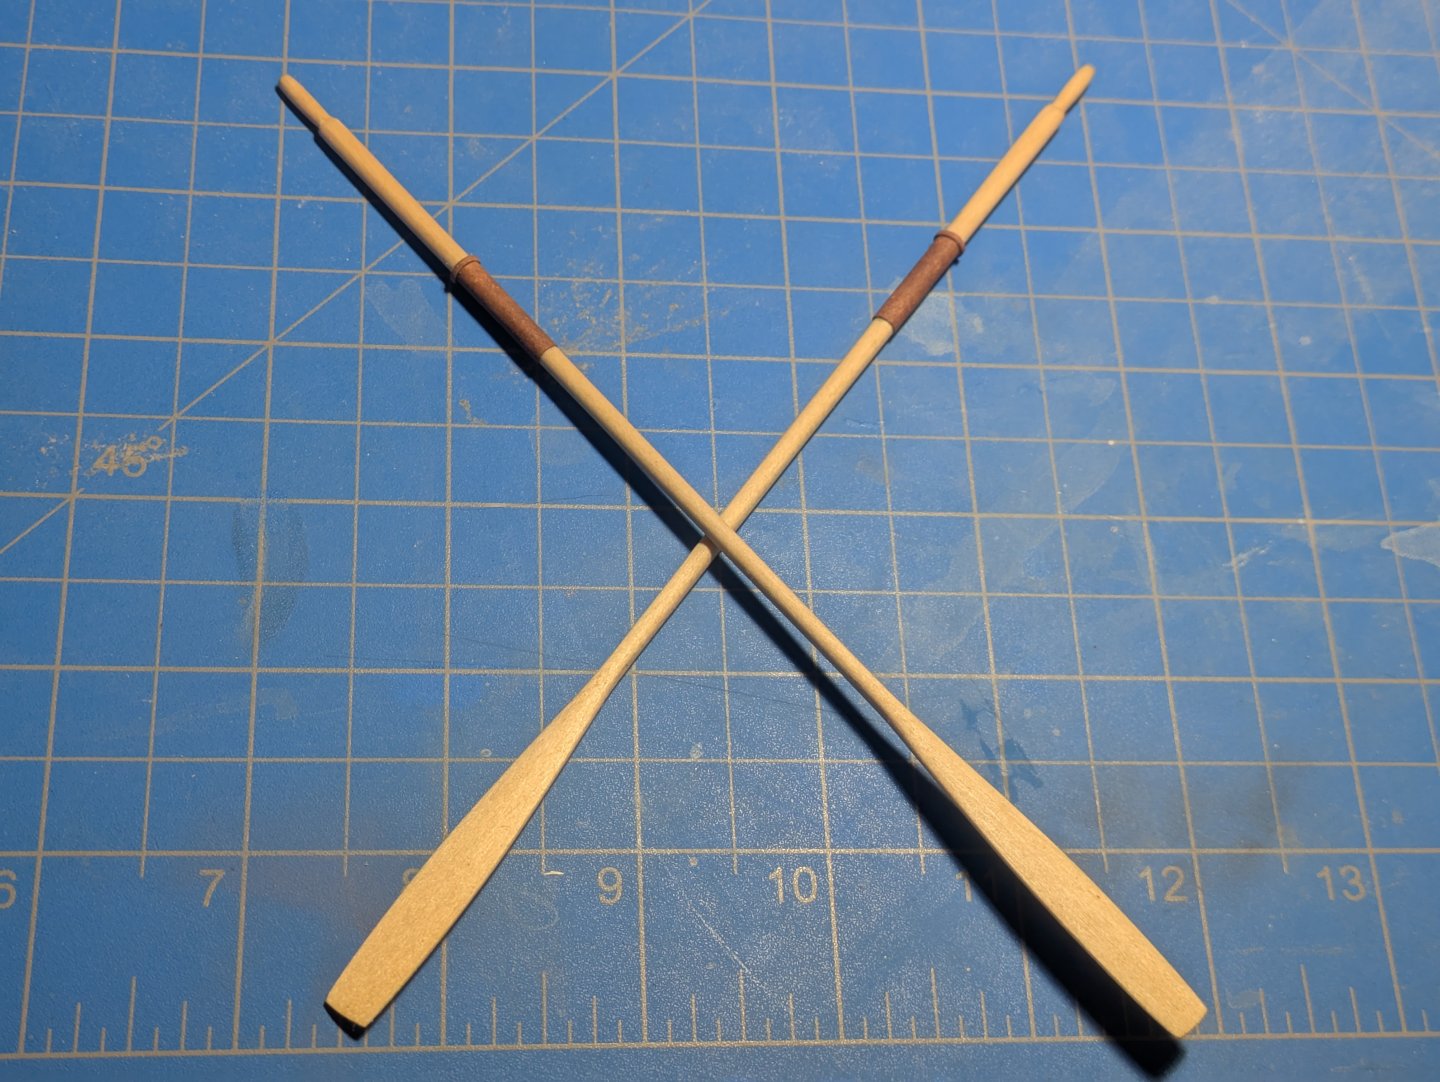
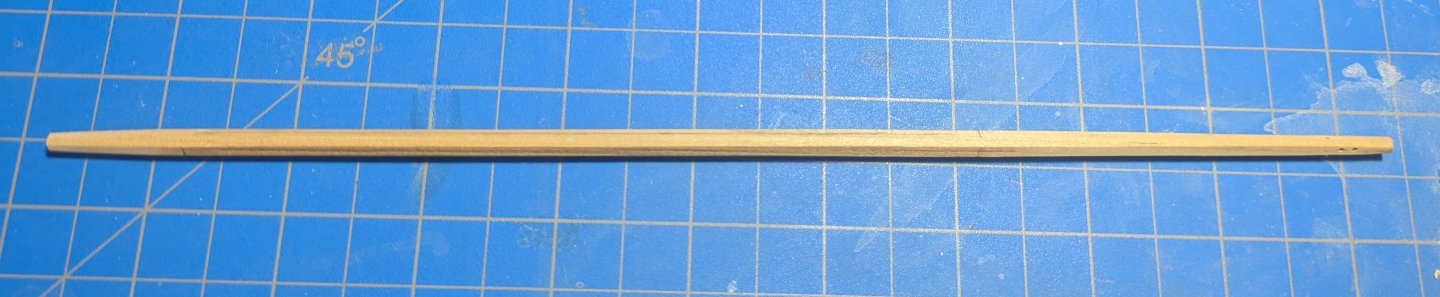
I got the eyes in the boom and gaff. I worked on the oars (just two) sanded and sealed then put on the leathering. I am not a fan of the cloth for the sail. I think I will try using silk span if it doesn't work I try to find something with a tighter weave. The line that came with the kit looks kind of shiny and as I had an old cigar box from my great uncle with a few things from his model building days including some old line I am using that.

- 81 replies
-
- 6
-
-
- Norwegian Sailing Pram
- Model Shipways
- (and 1 more)
-
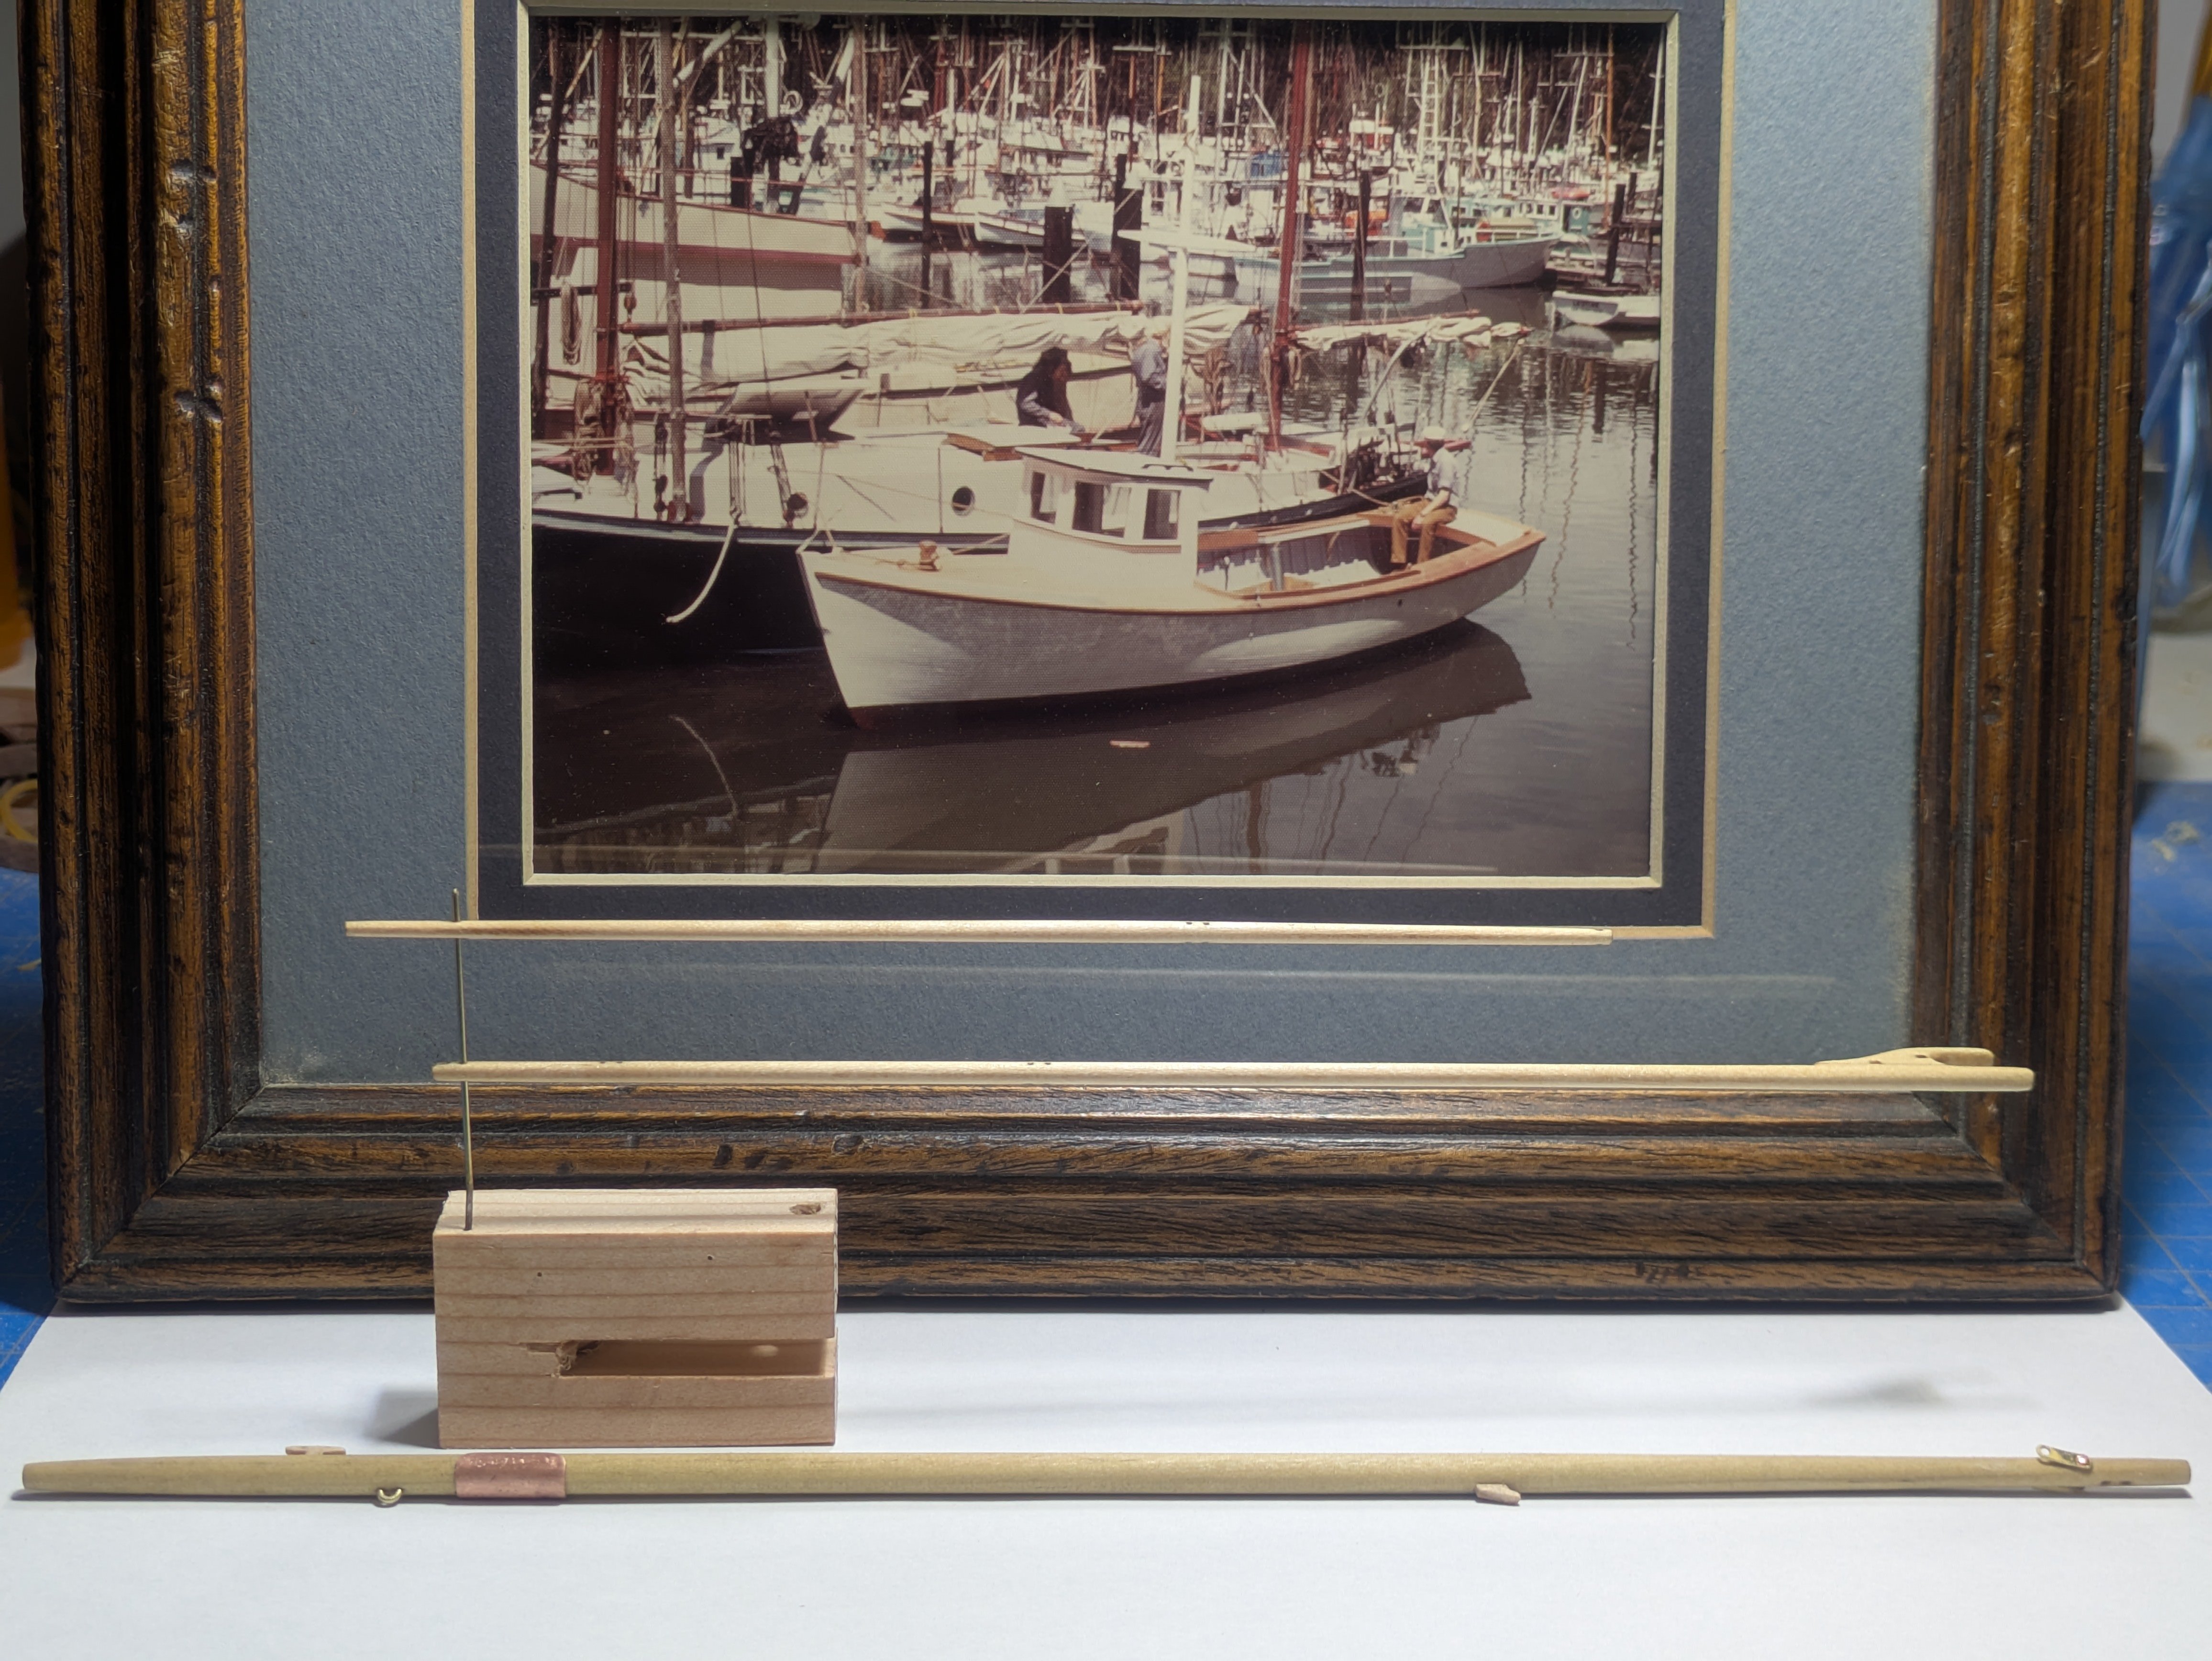
I got the spars sanded and I put a wipe on layer of poly. For the mast chafing pad Rather than the paper painted to look like copper I thinned out a piece of copper and used it as per the actual pram. After the poly dries I will finish the fittings. The mast step hole is larger then the end of the mast so I think I will make a copper band to fill the space. To block the clutter in the back I set a picture of one of the boats I helped build at the school near Fort Bragg.

- 81 replies
-
- 5
-
-
- Norwegian Sailing Pram
- Model Shipways
- (and 1 more)
-
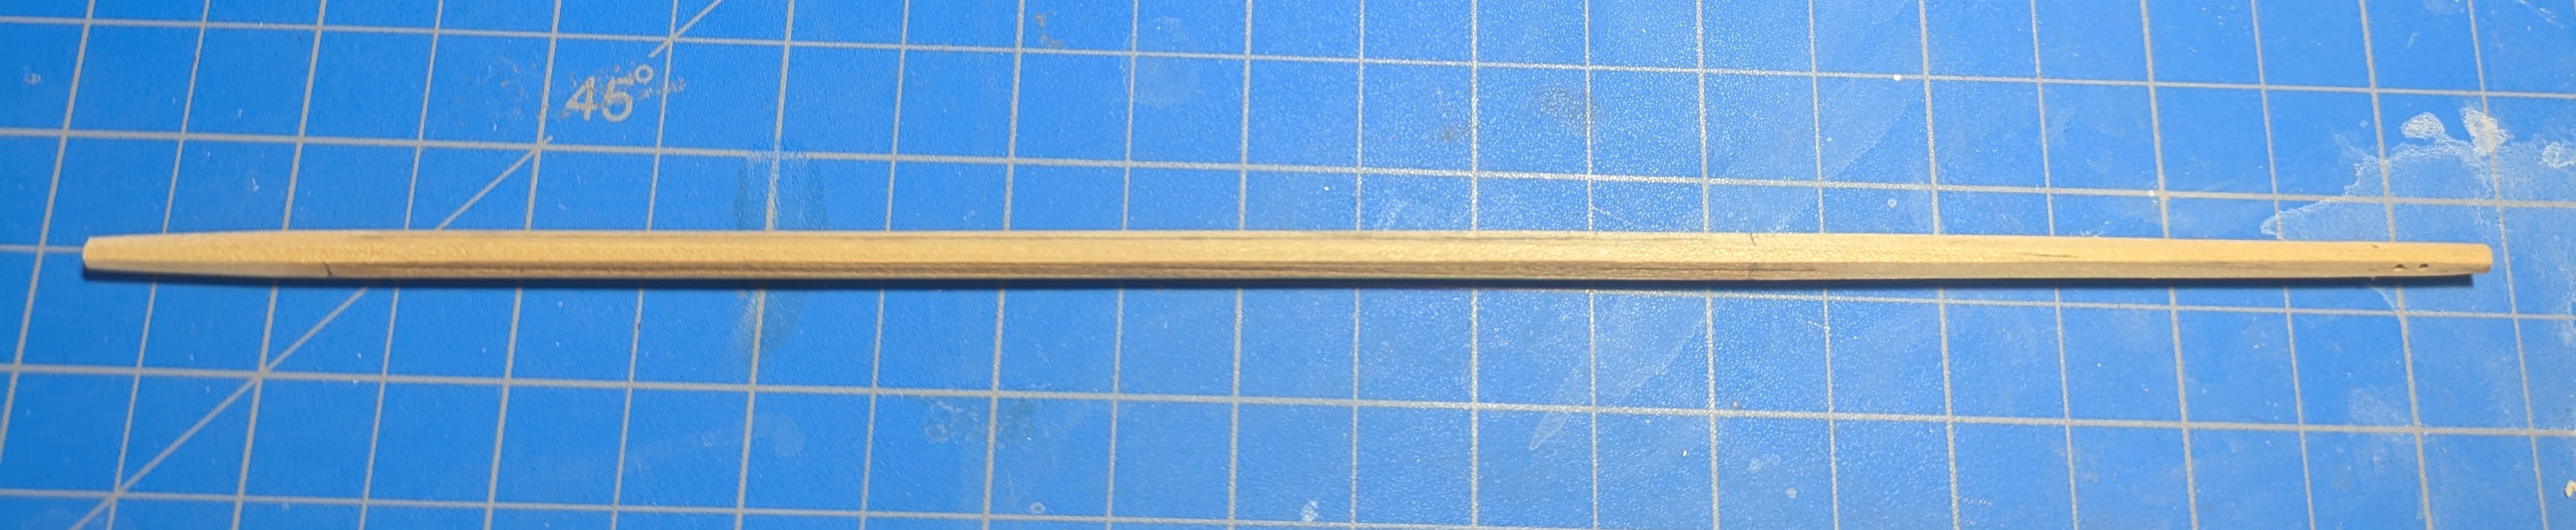
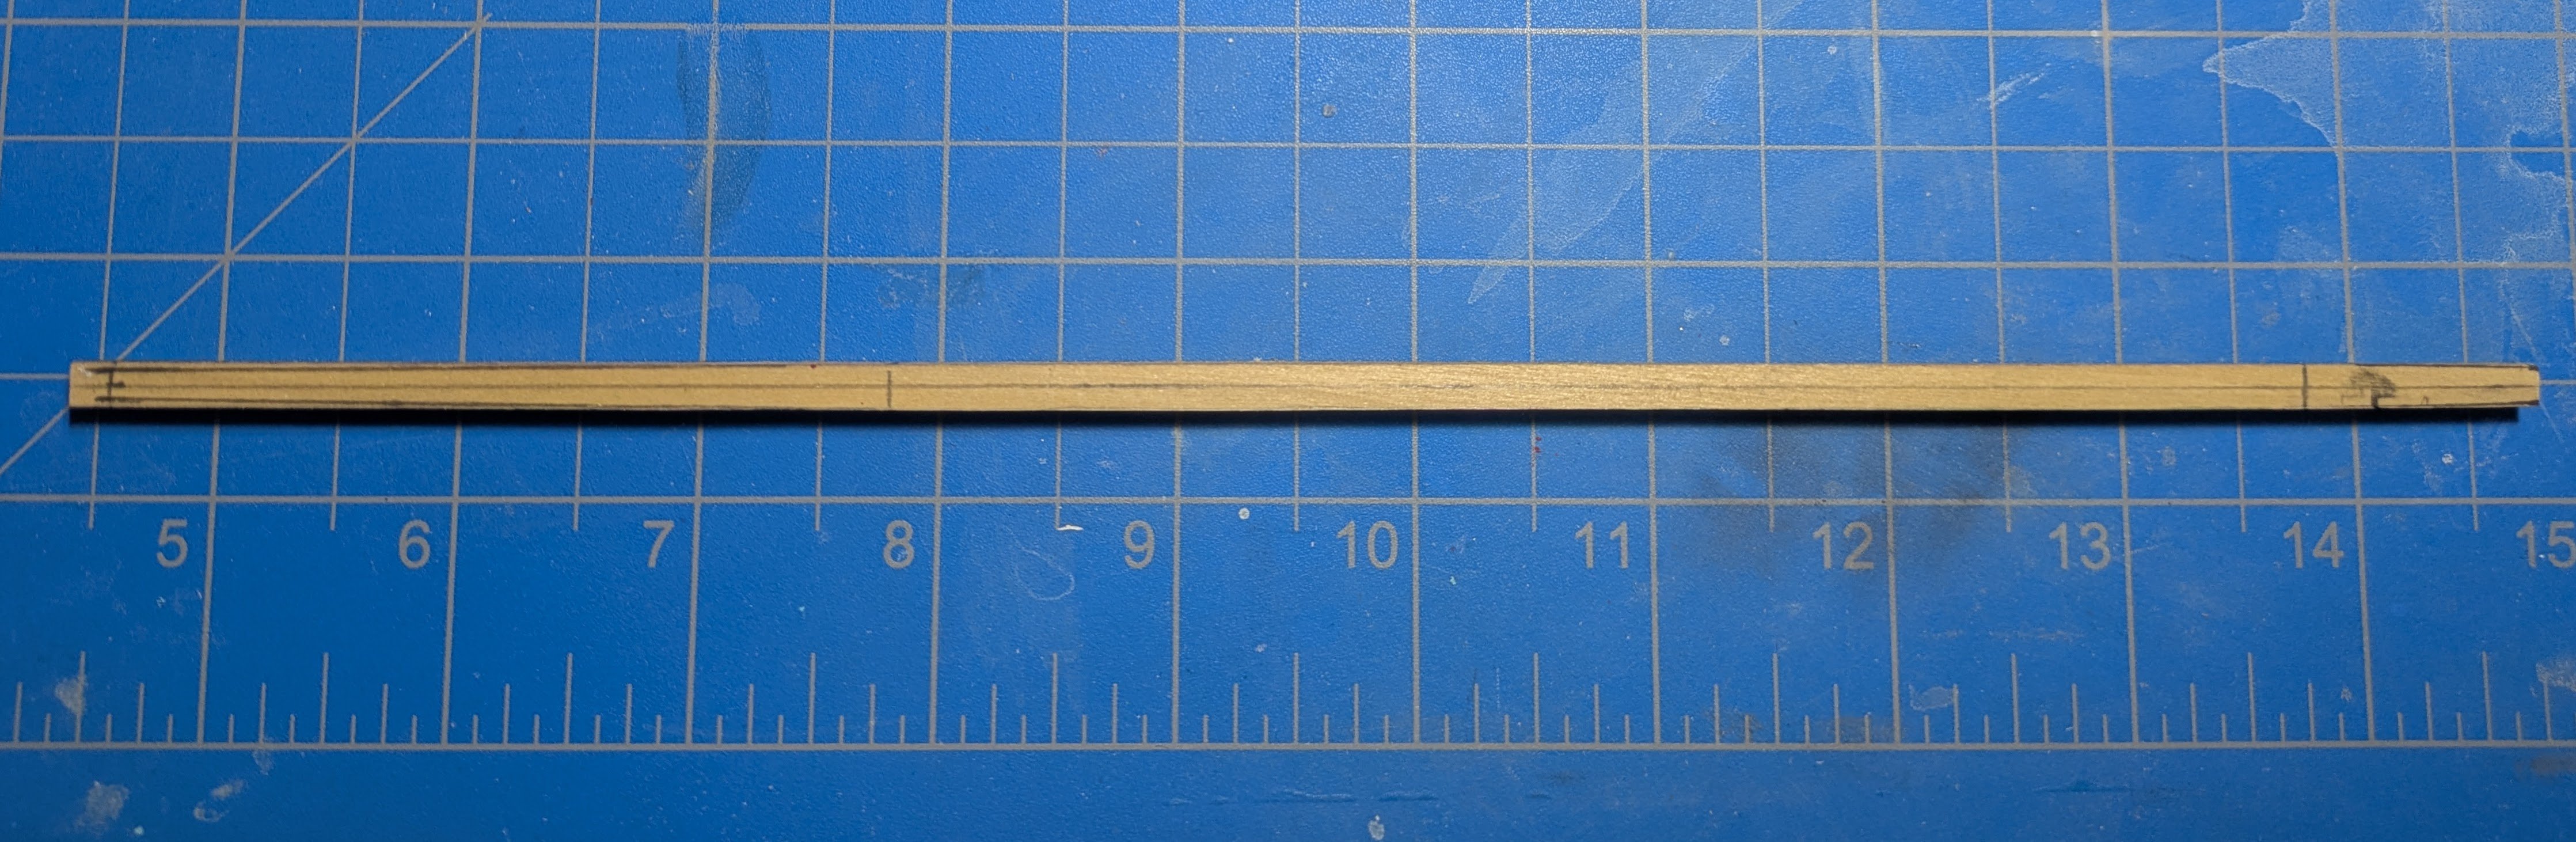
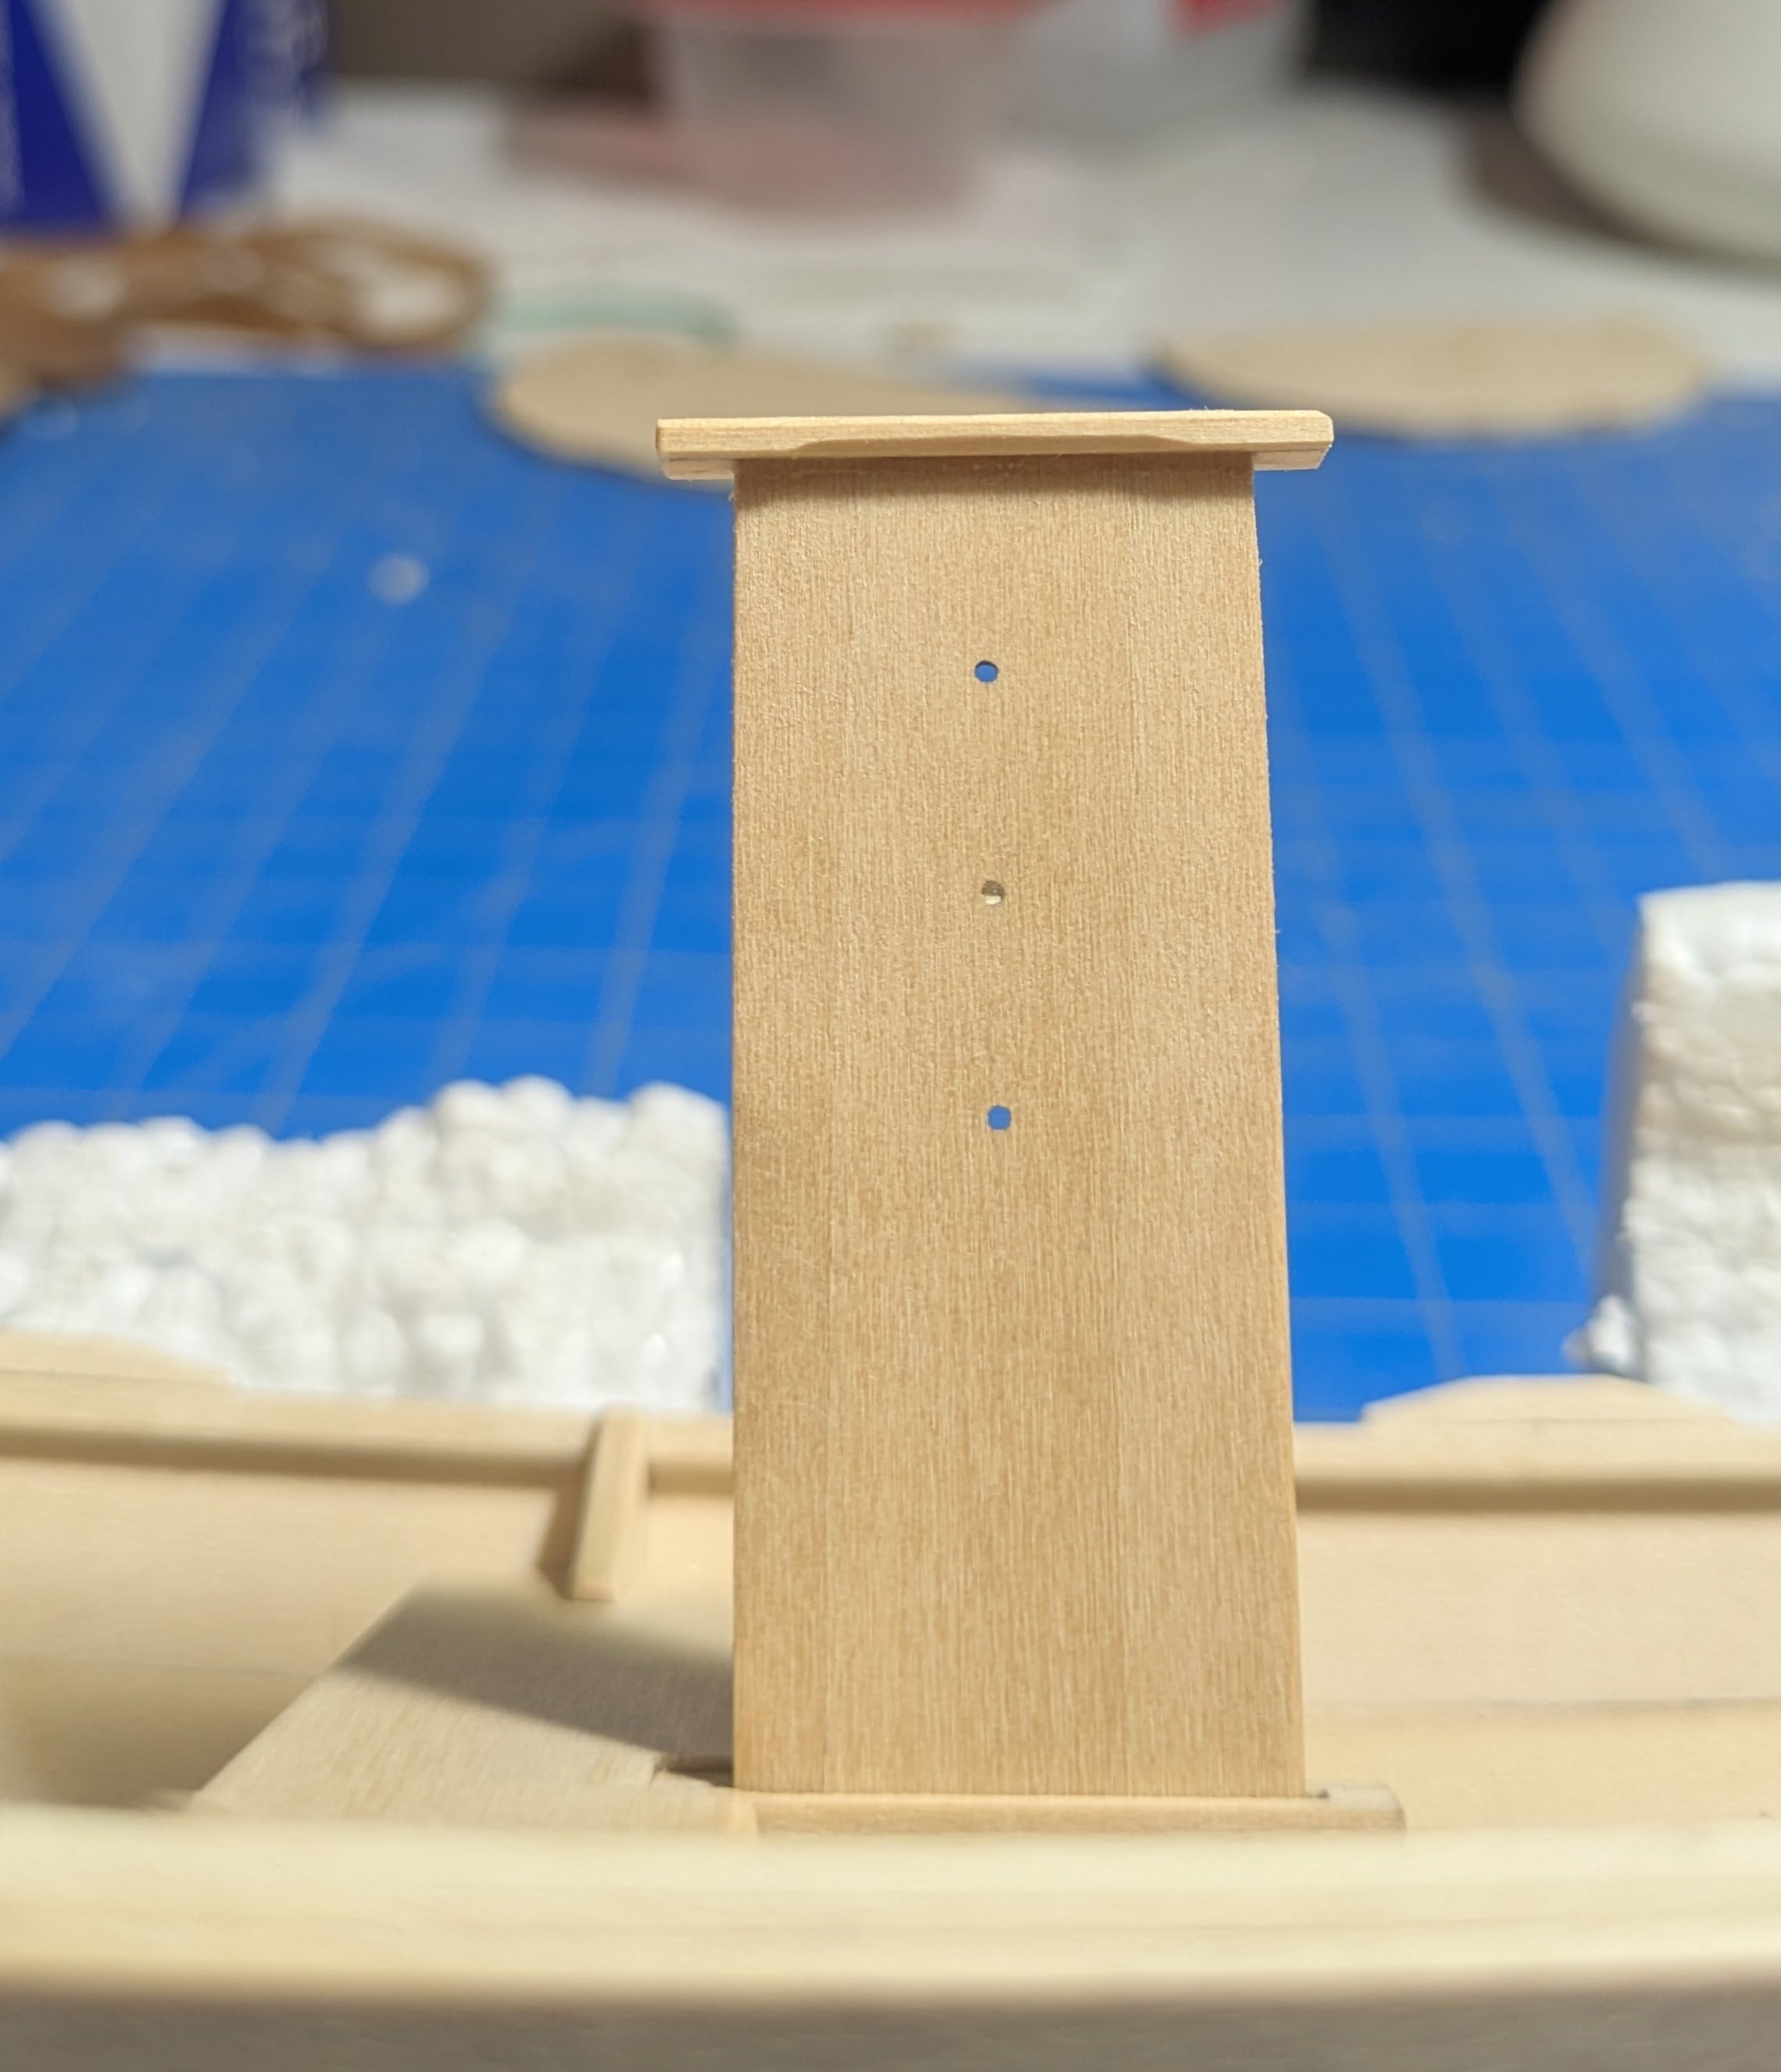
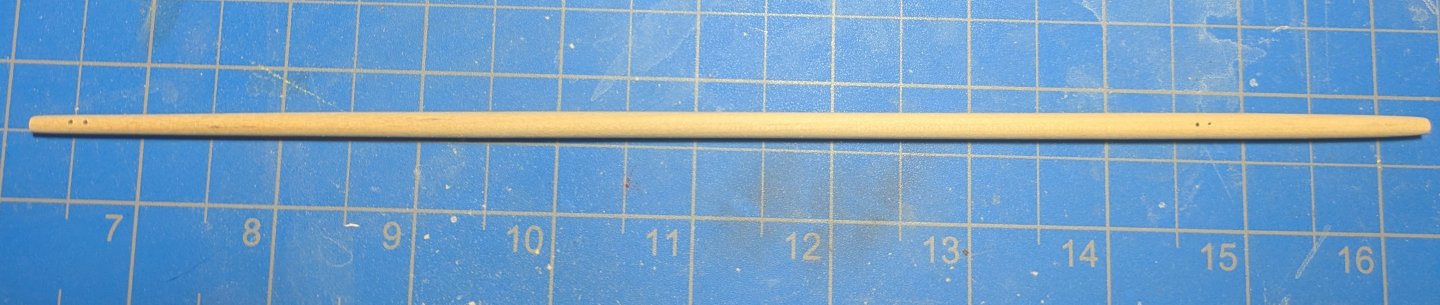
The top of the stand and the mast that I thought my be cherry was of course poplar. As it was obvious as soon as I started working with it. Anyway for the mast, I drilled the needed holes, tapered the ends, planed it to eight sided, then sanded it round. One picture is reversed.
- 81 replies
-
- 6
-
-
- Norwegian Sailing Pram
- Model Shipways
- (and 1 more)
-
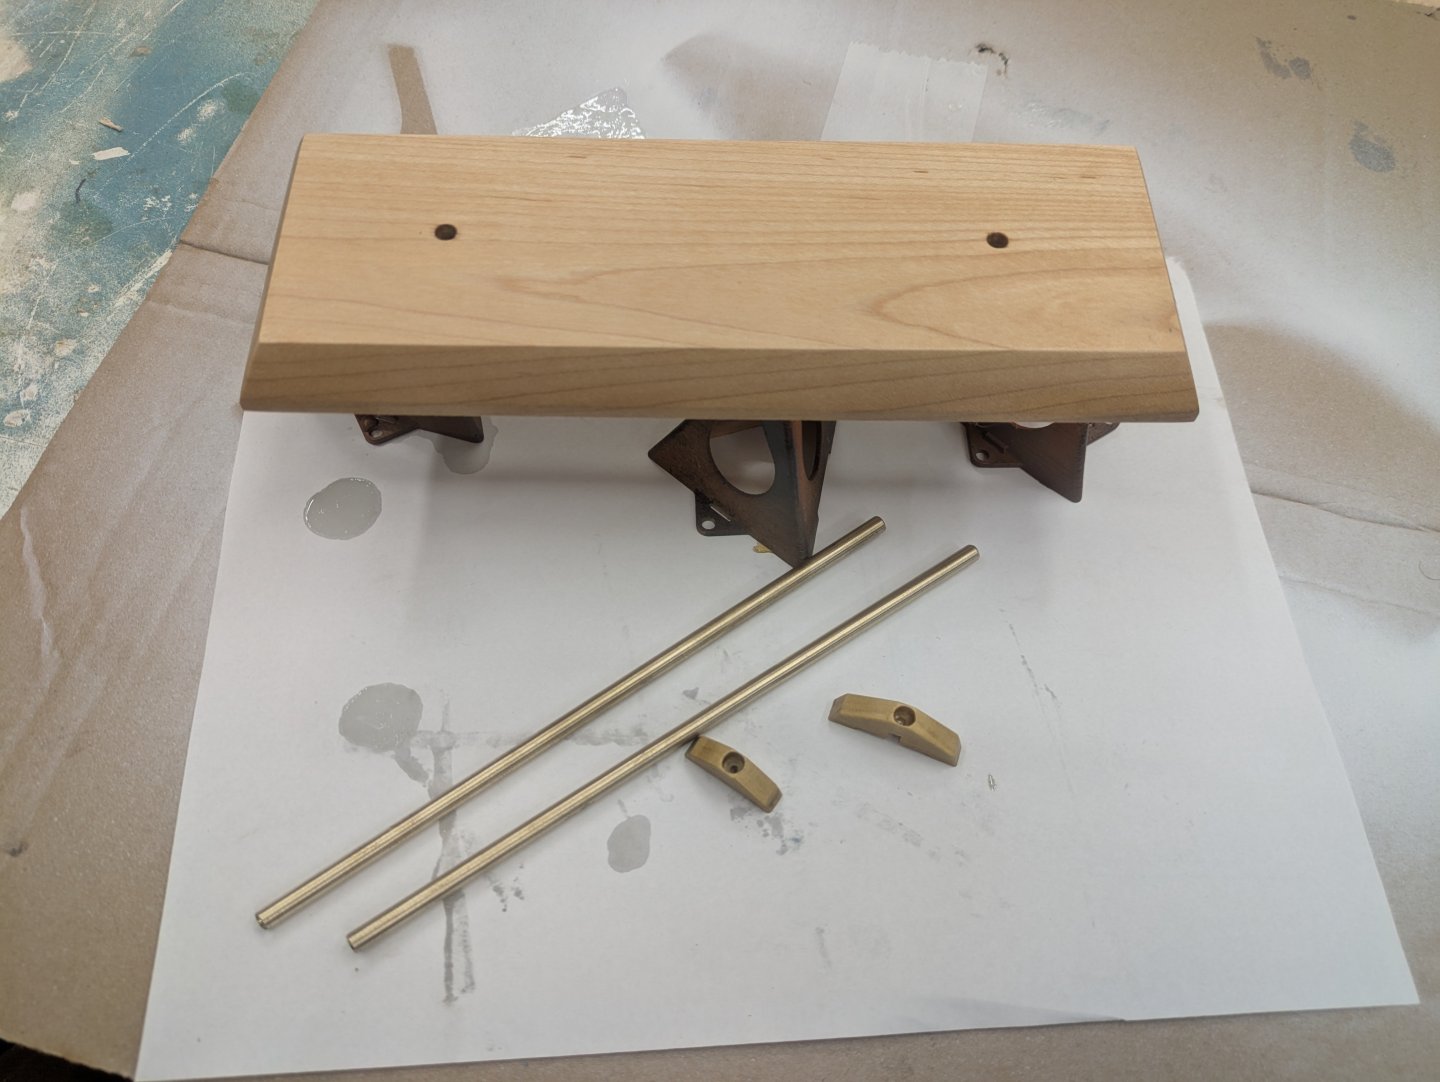
I went brain dead cutting the brass rod. Instead of two pieces 3" long I cut two over 6" long. At least I have plenty. I'm going to have a hard time gluing the boat to the stand. Here it is setting on the stand. I'm glad I cut the mast blank from 1/4" stock as it warped some but after planing to size it is nice and straight. I have it marked out for the tapers.
- 81 replies
-
- 7
-
-
- Norwegian Sailing Pram
- Model Shipways
- (and 1 more)
-
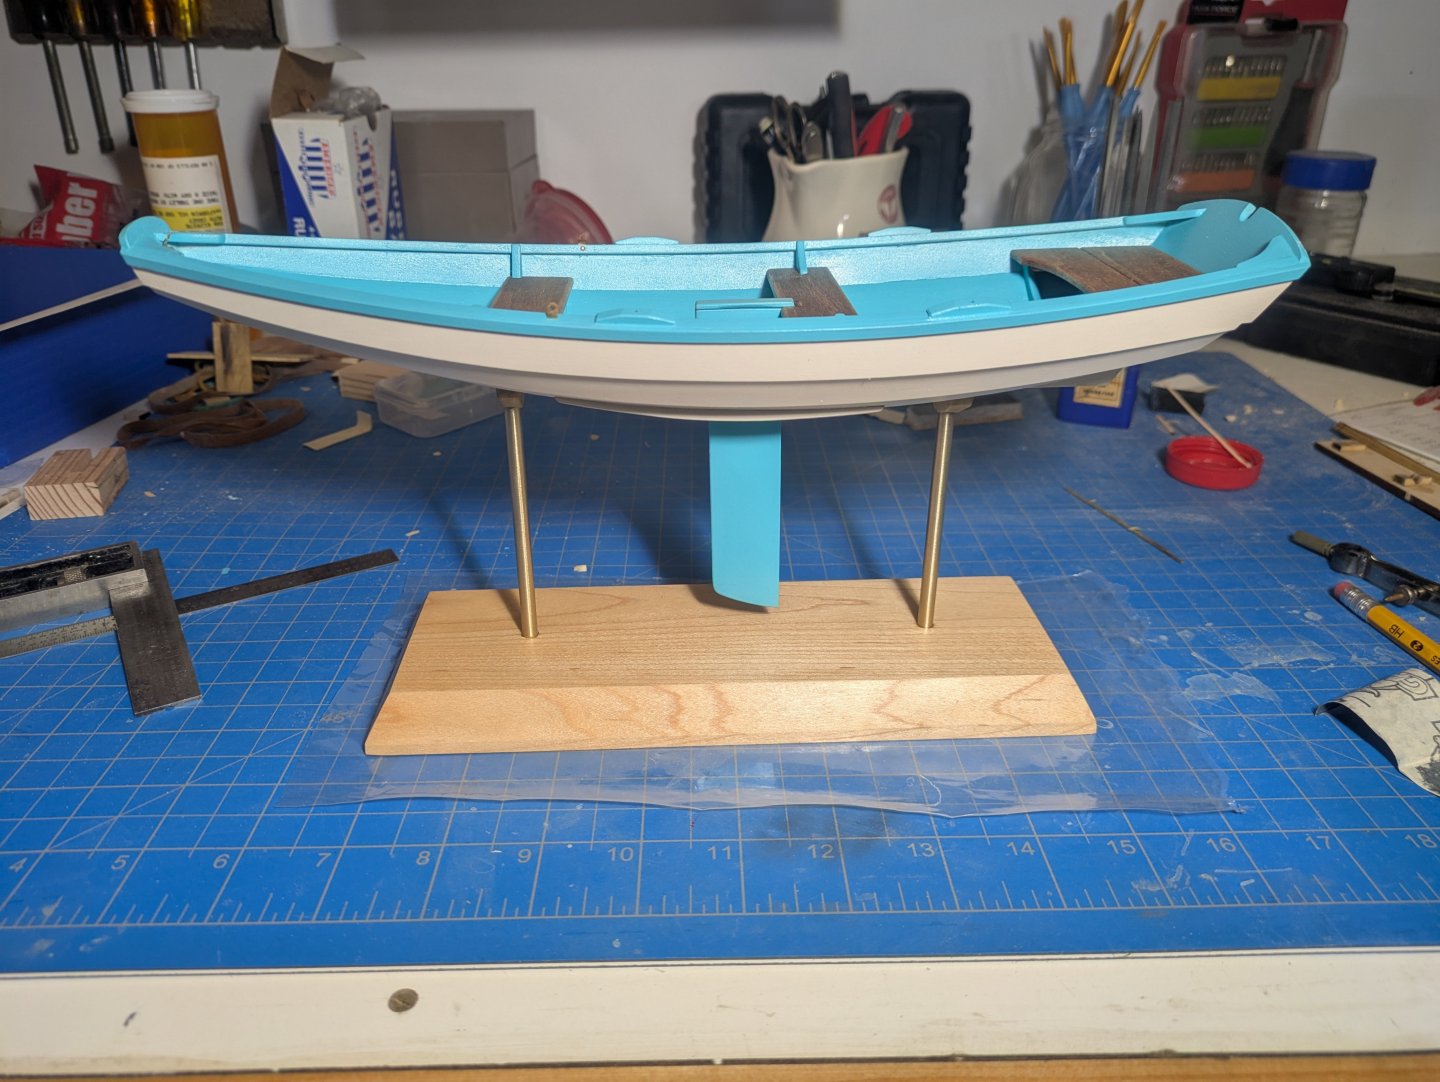
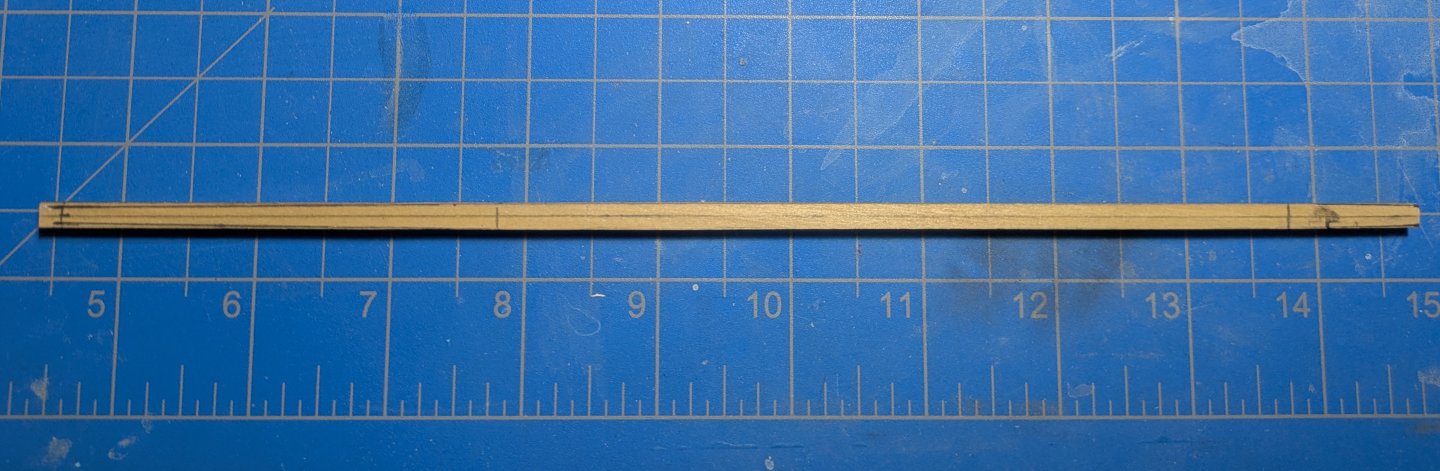
I started on the stand but couldn't bring myself to use the supplied parts. I found a piece of birch from an old cabinet and a section of brass welding rod that I will use. For the cradle I copied the supplied pieces to 1/4" cherry (I think) as I needed something thicker. Sealed in wipe on poly. Gluing up he mast halves I messed up with the alinement and cant use the dowels as they are bent so I cut a piece of the cherry and will use it.
- 81 replies
-
- 4
-
-
- Norwegian Sailing Pram
- Model Shipways
- (and 1 more)
-
I've looked through your build and used it for help with mine. Thank you for a great build.
- 63 replies
-
- 1
-
-
- Norwegian Sailing Pram
- Model Shipways
- (and 2 more)
-
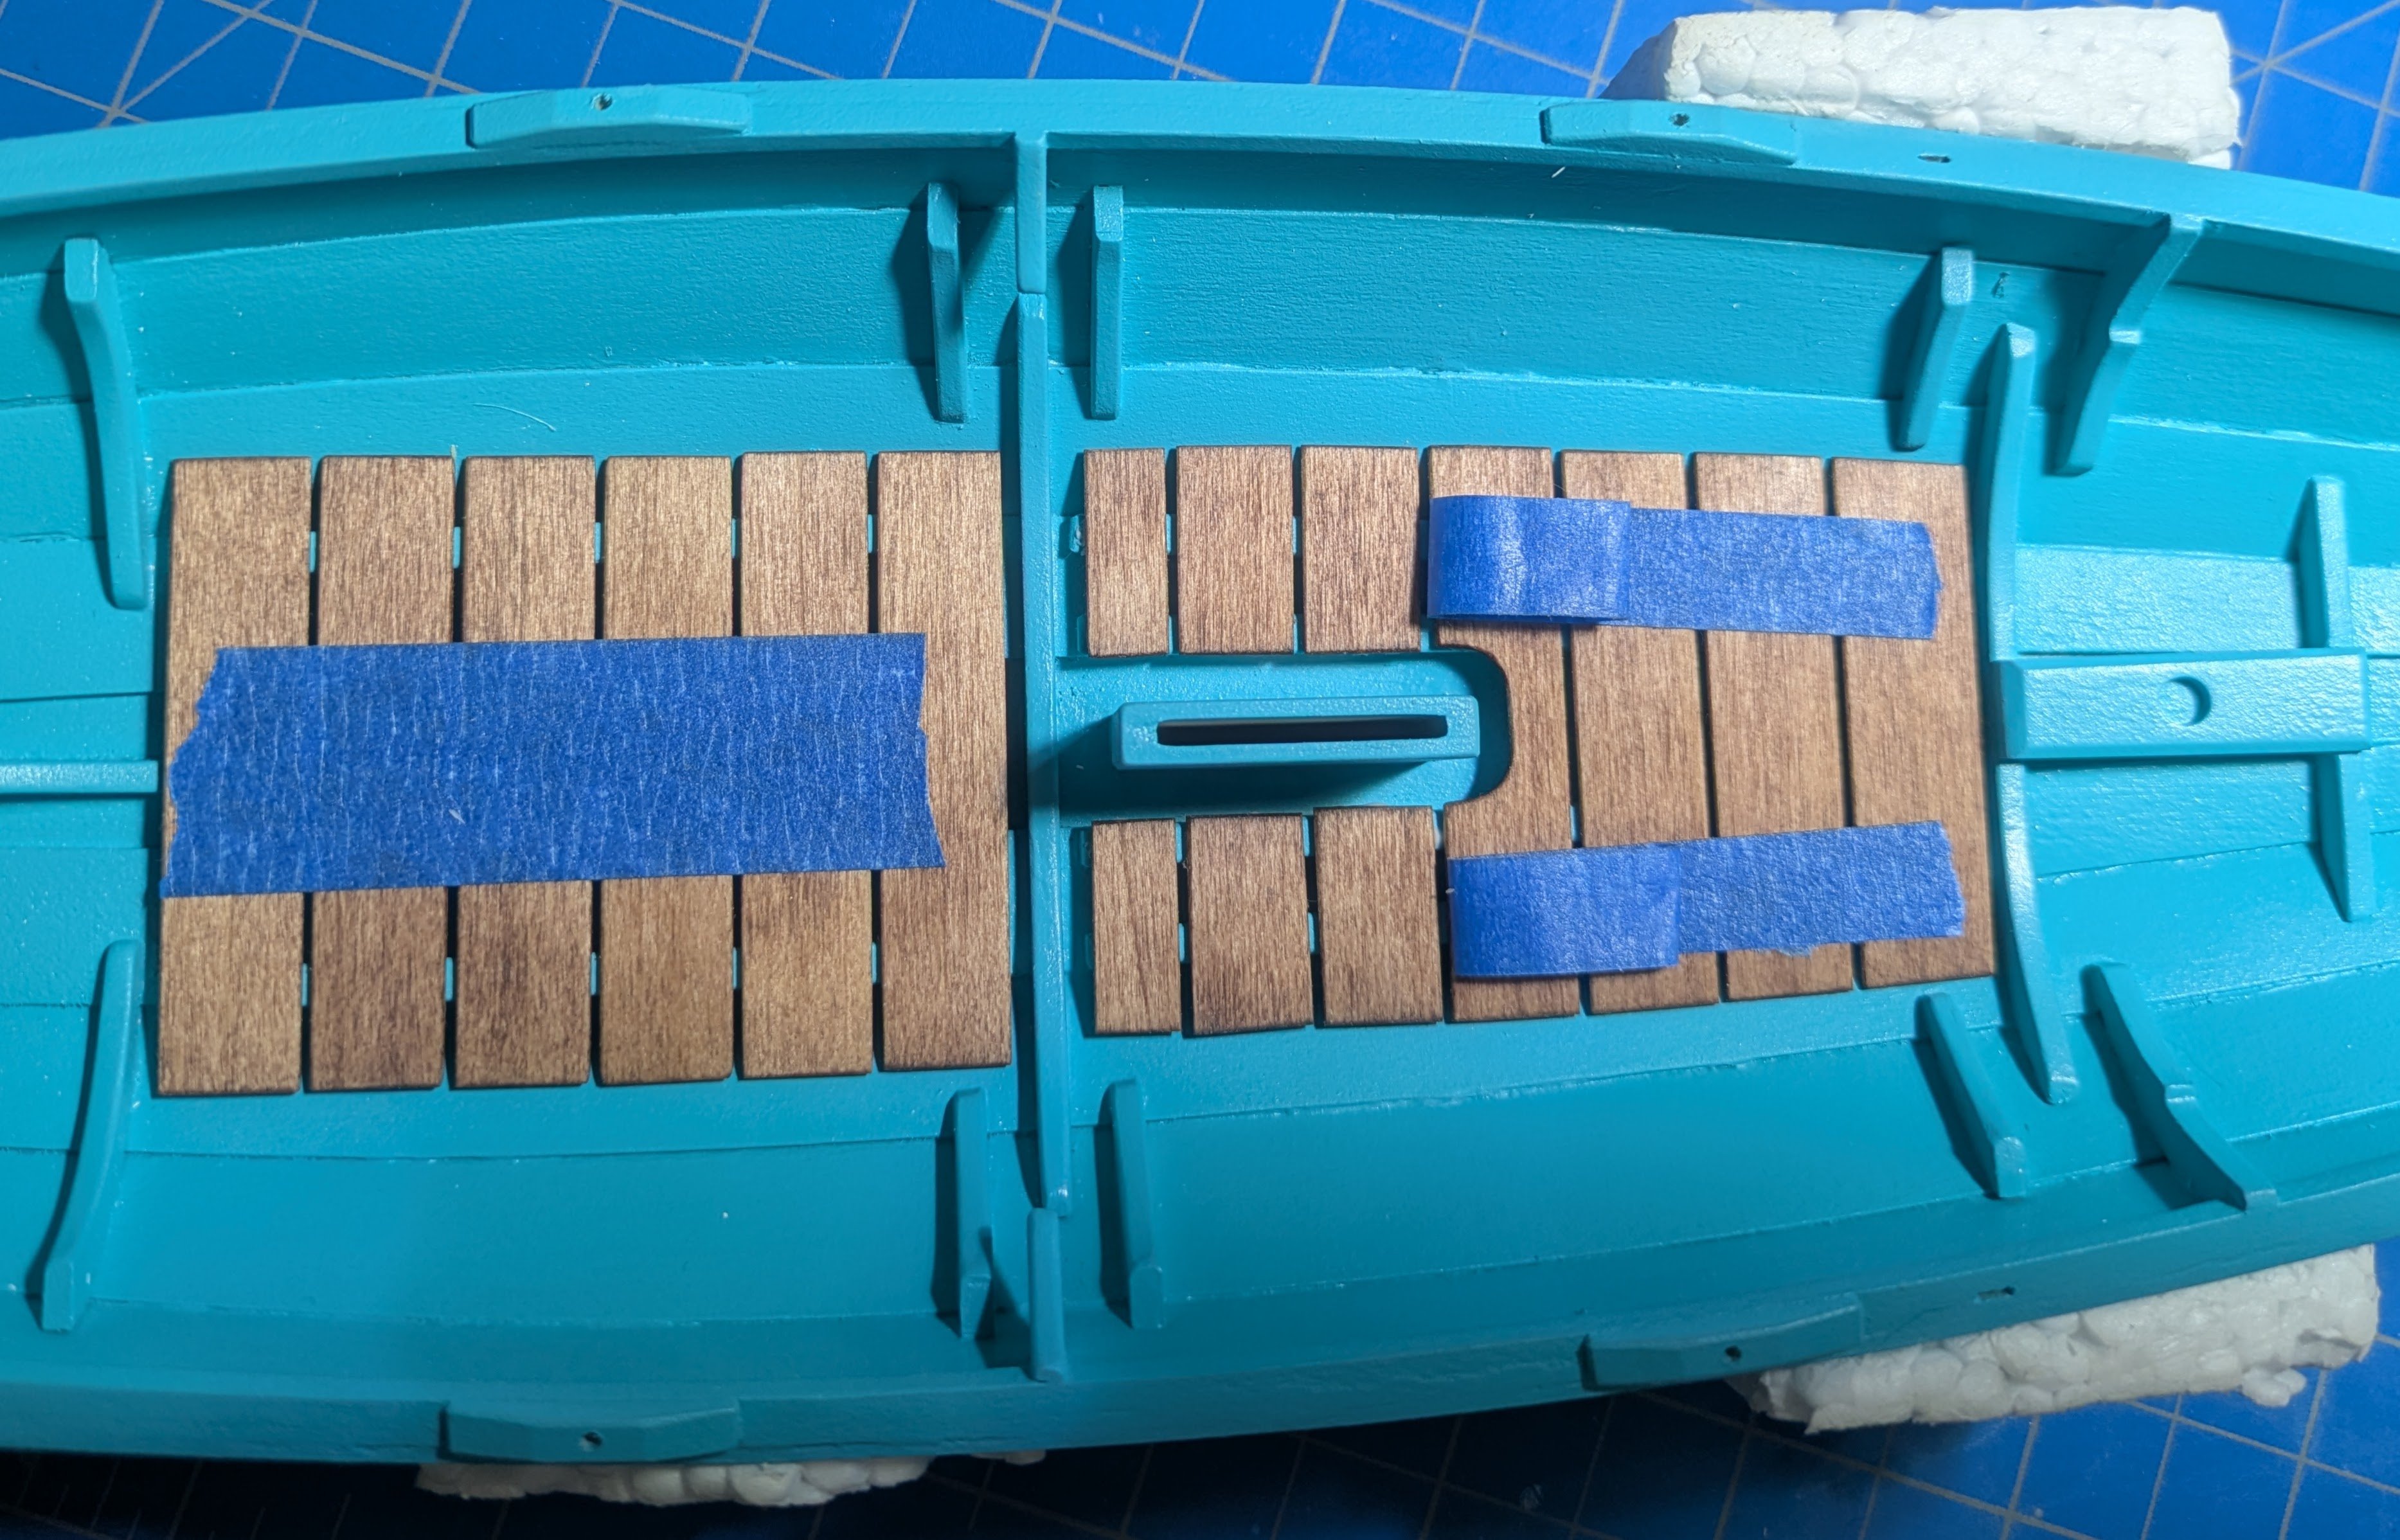
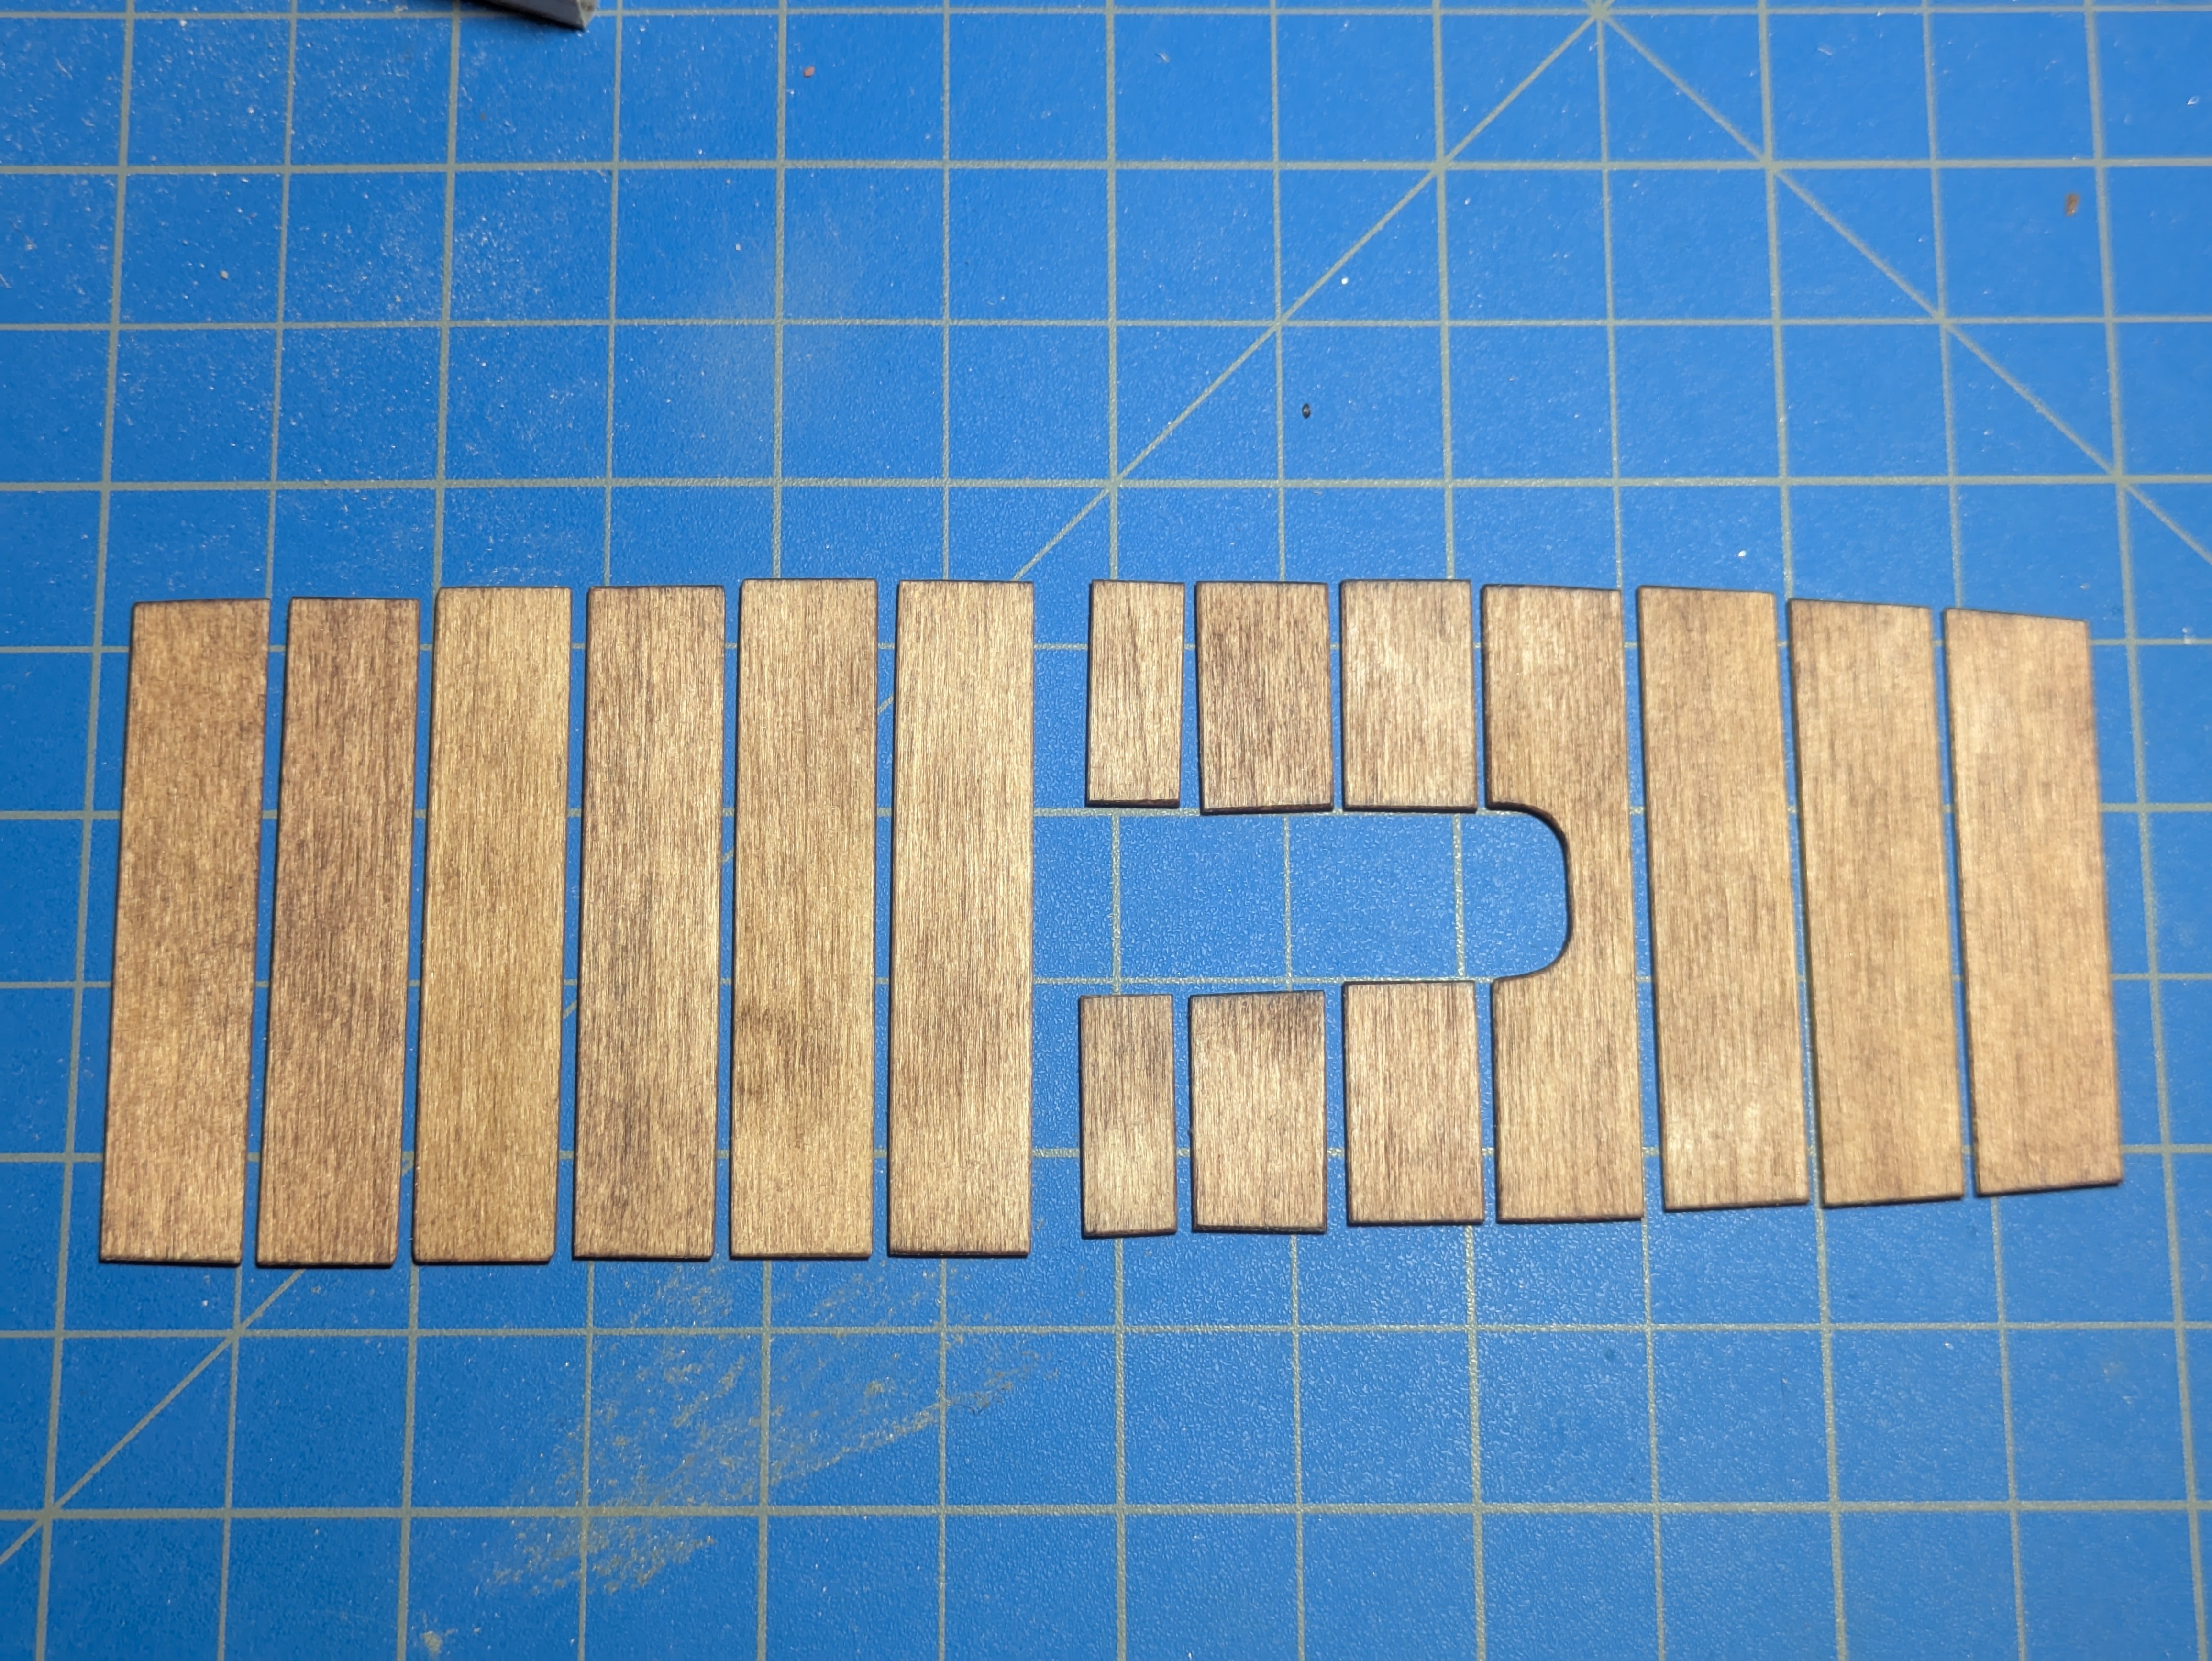
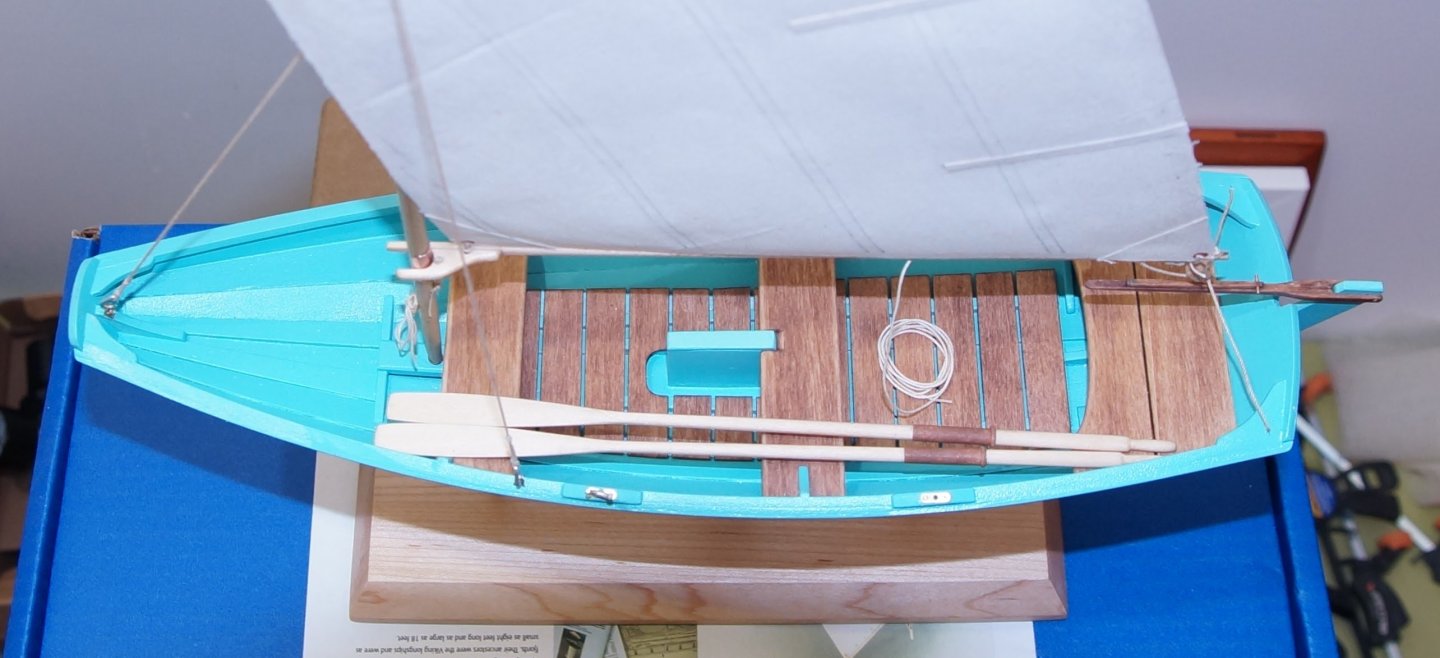
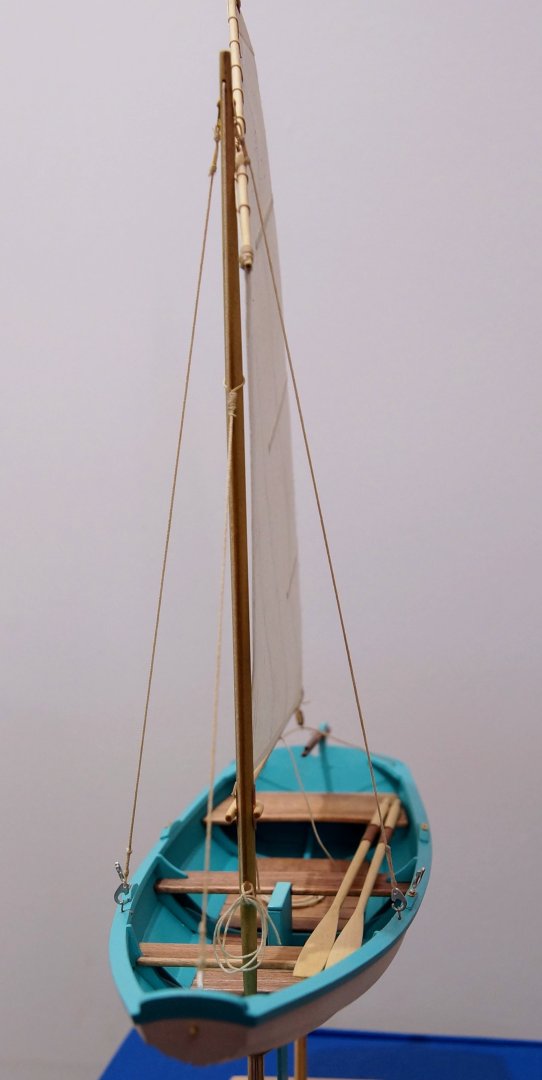
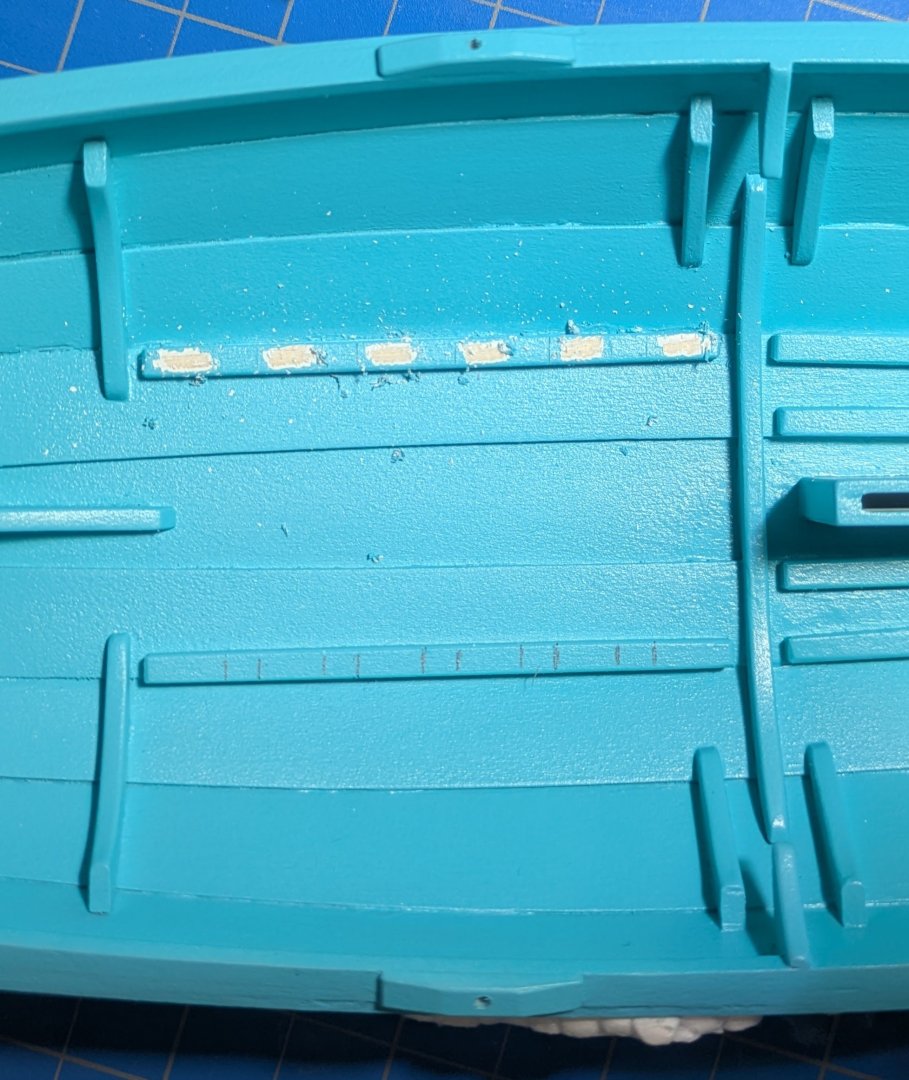
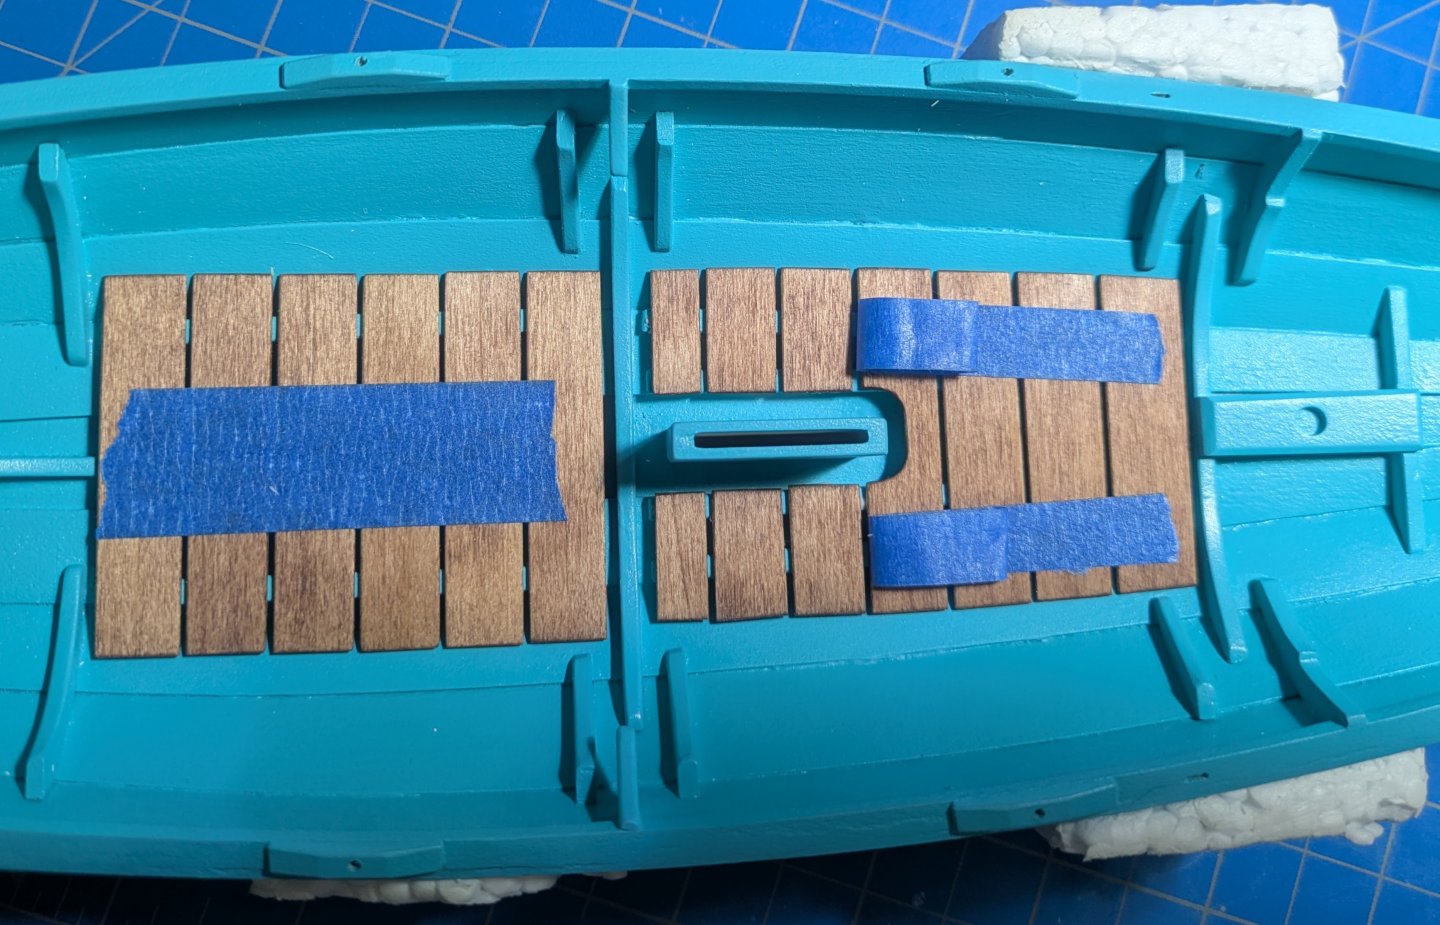
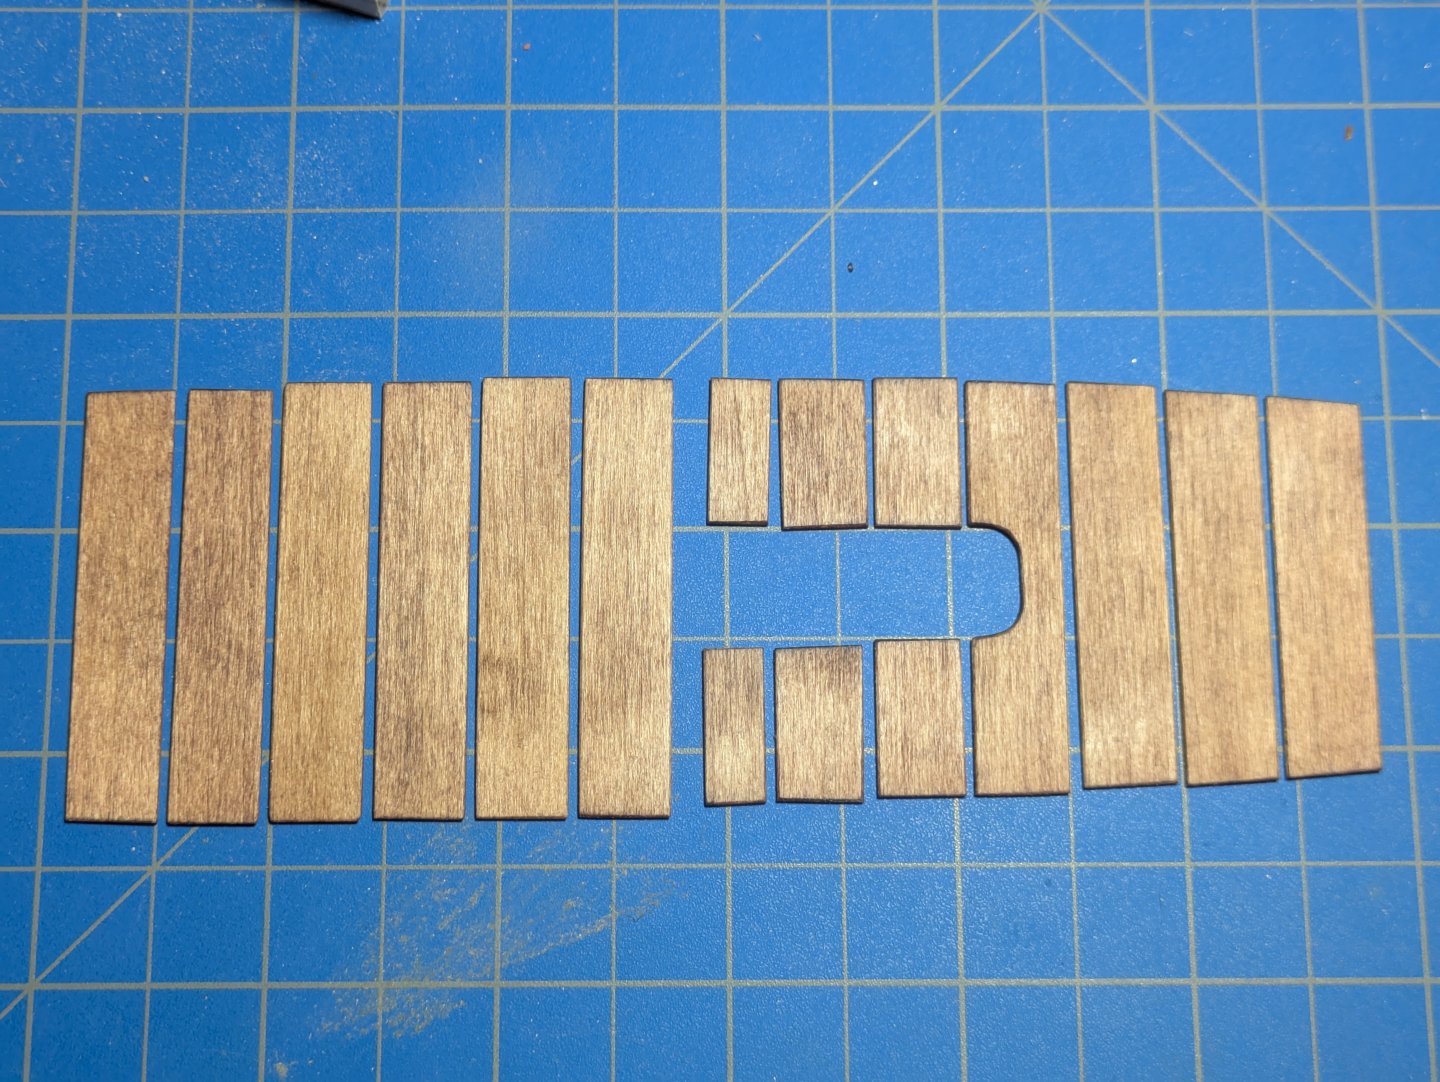
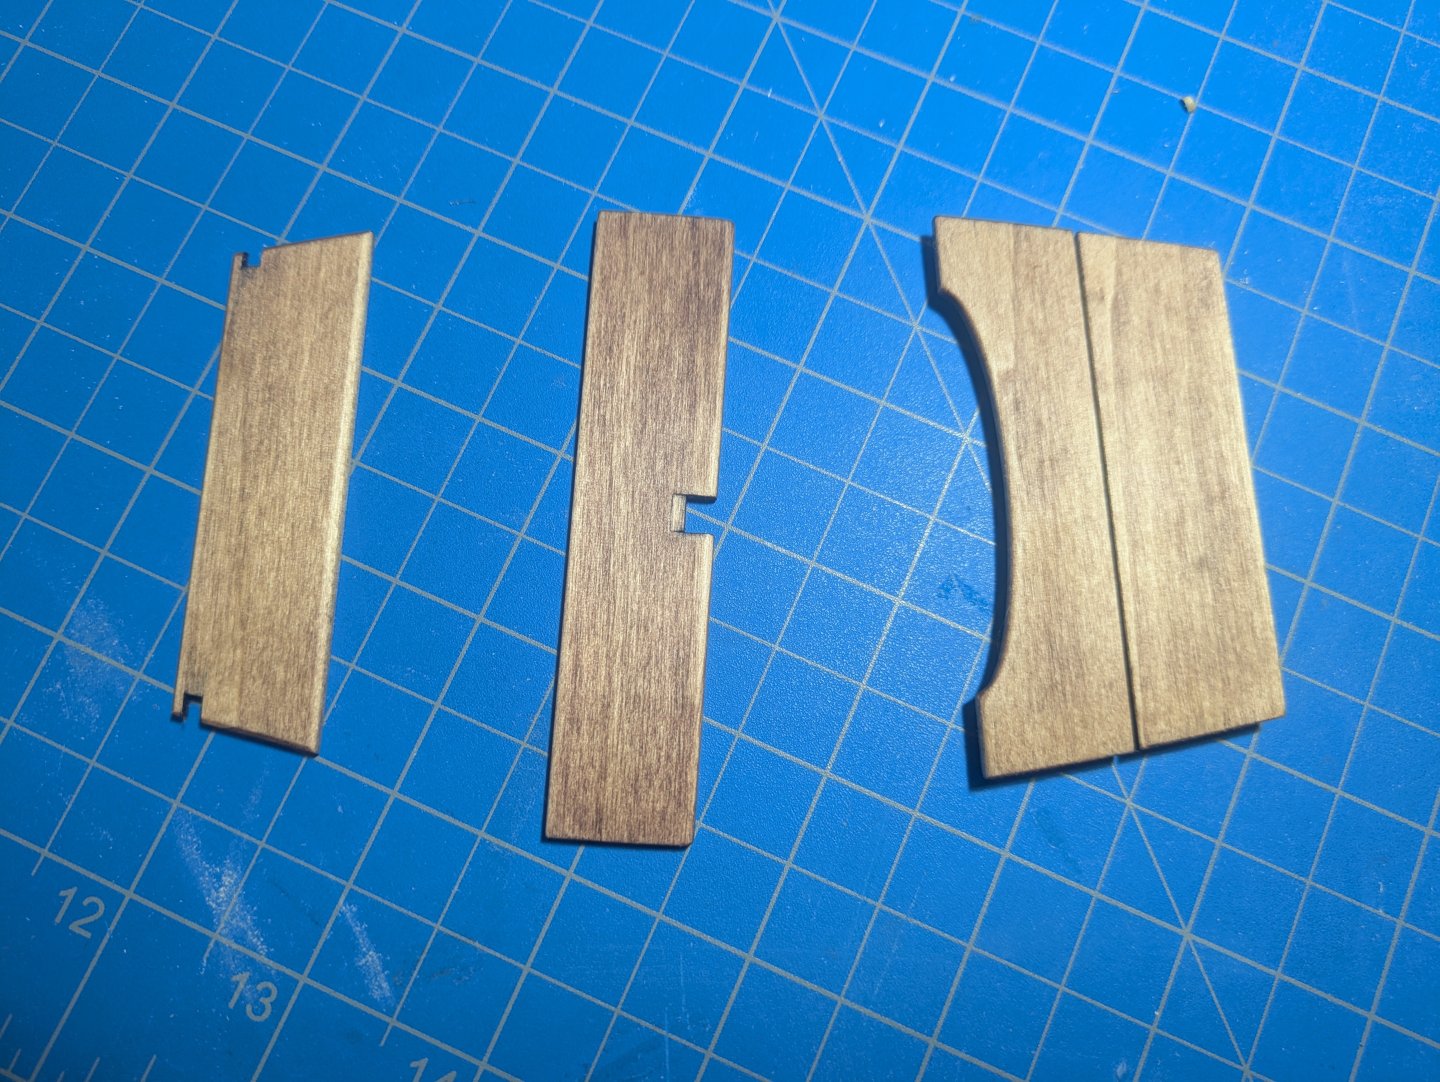
I put some tape down and stuck the floor boards to it lining them up. Then I taped the top side and after cleaning of some of the paint under where the boards would set, applied glue and moved the whole bunch into position. After the glue sets I will remove the tape.
- 81 replies
-
- 7
-
-
- Norwegian Sailing Pram
- Model Shipways
- (and 1 more)
-
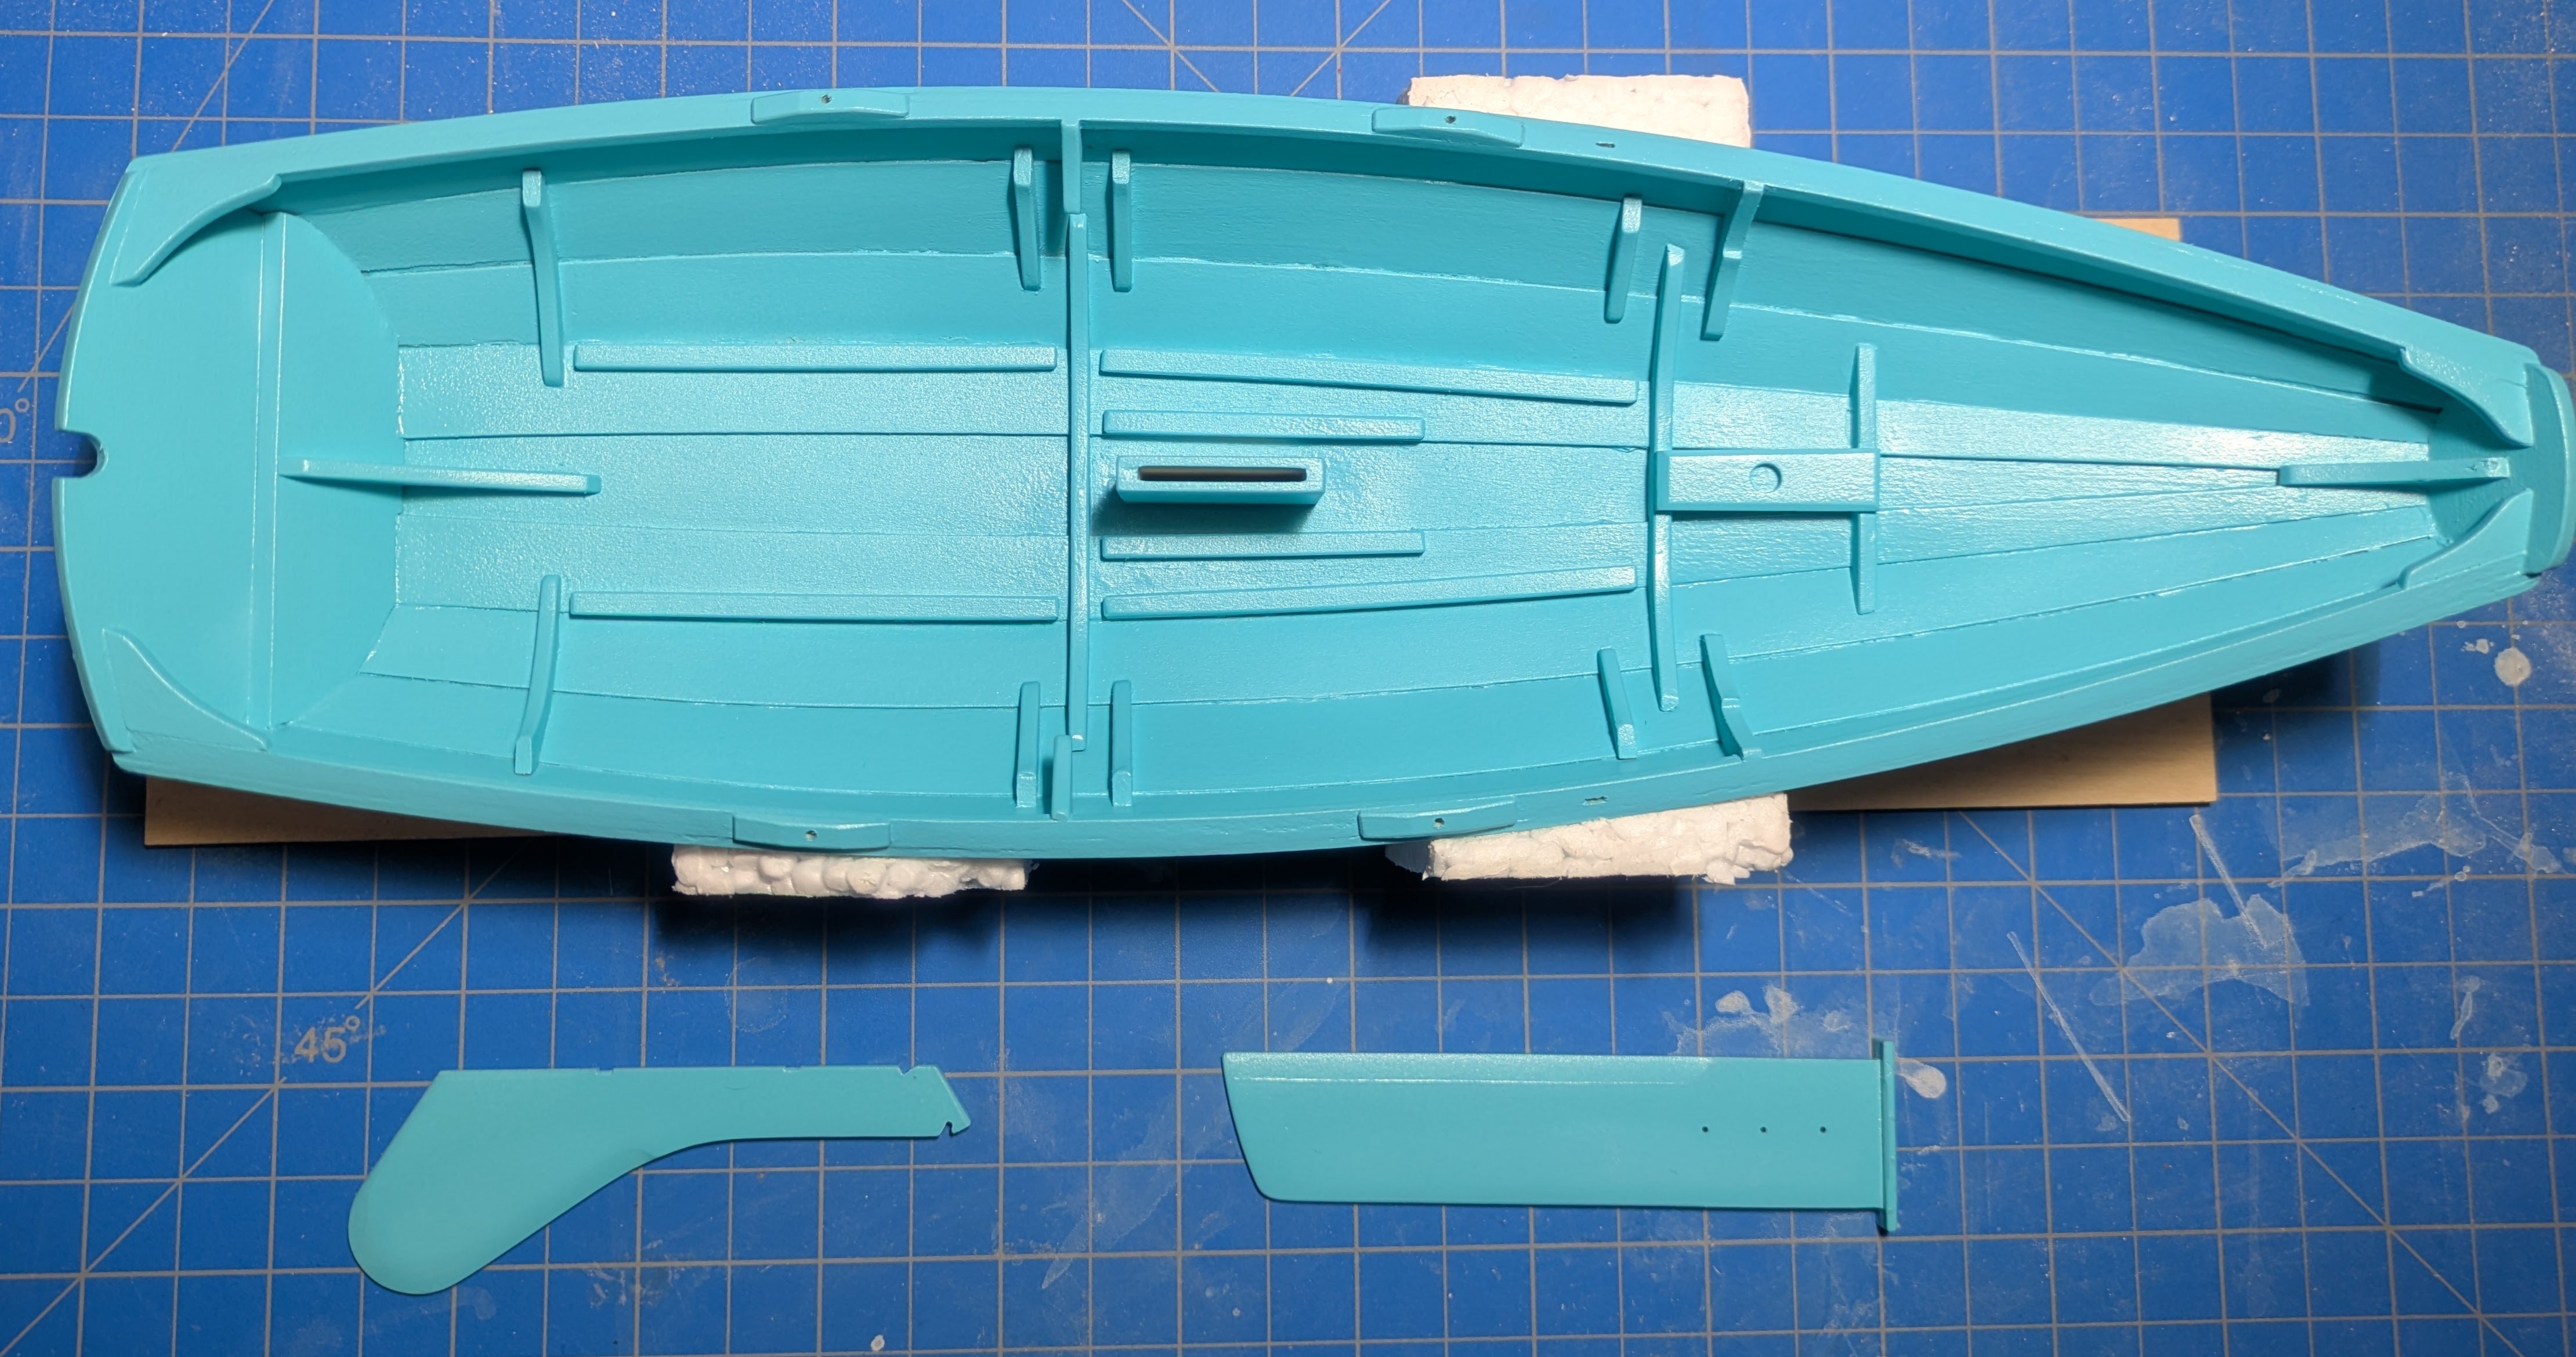
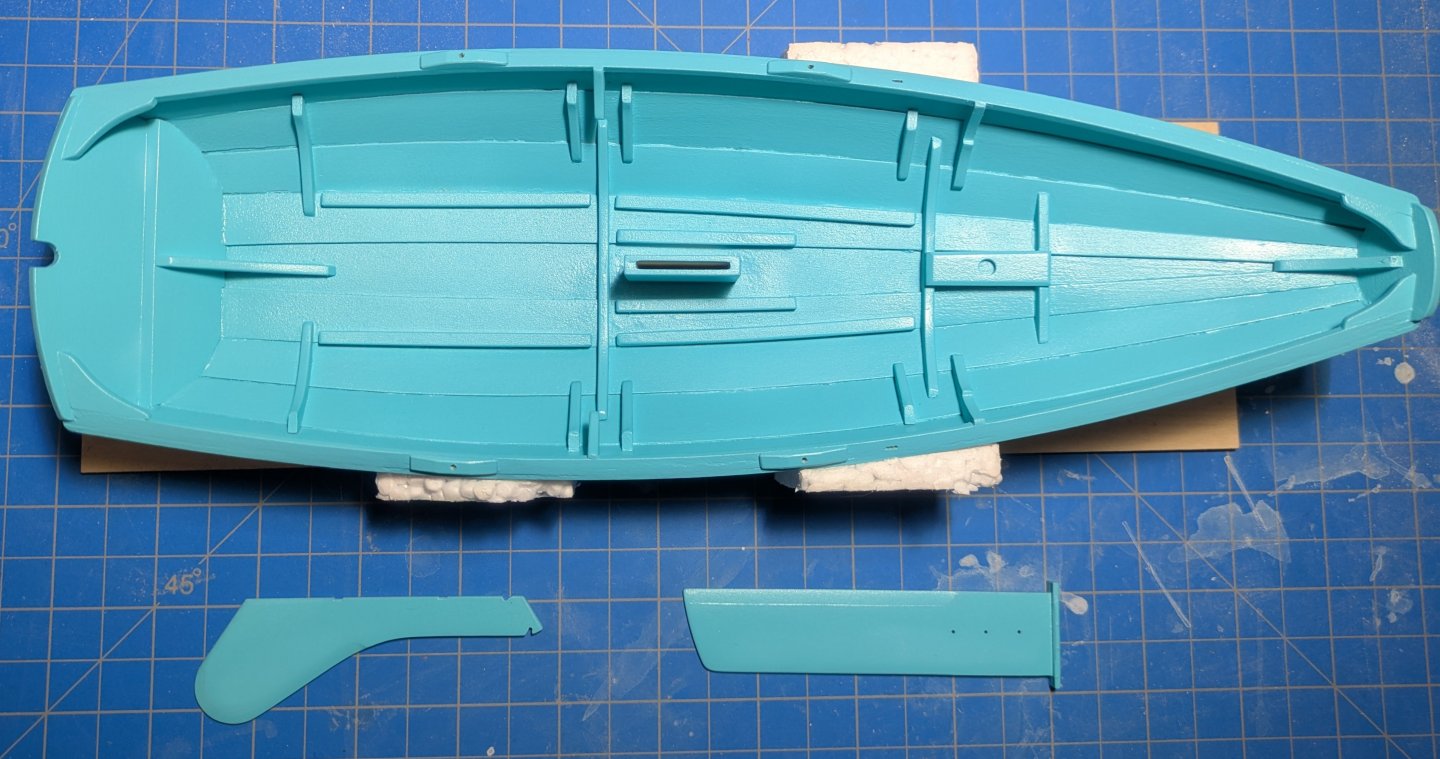
It's has a little more green tint them my computer screen shows but ether way it's done. I am going to let It dry some and install the floor boards.
- 81 replies
-
- 3
-
-
- Norwegian Sailing Pram
- Model Shipways
- (and 1 more)
-
Thanks I couldn't decide on Blue or Green so I just mixed them together.
- 81 replies
-
- 2
-
-
- Norwegian Sailing Pram
- Model Shipways
- (and 1 more)
-
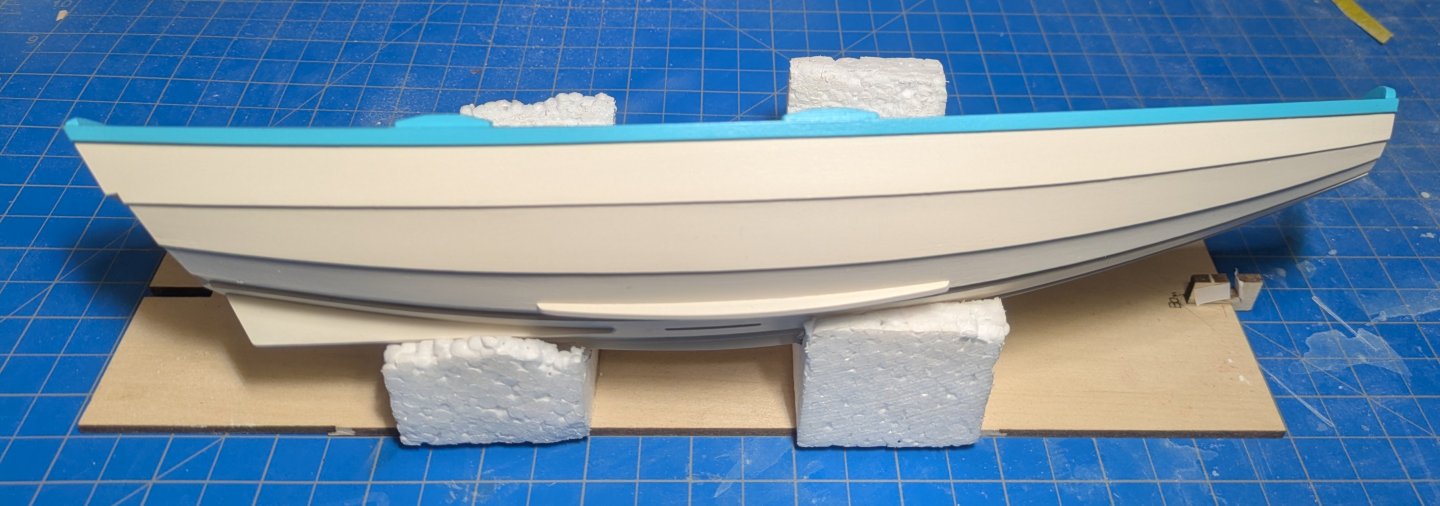
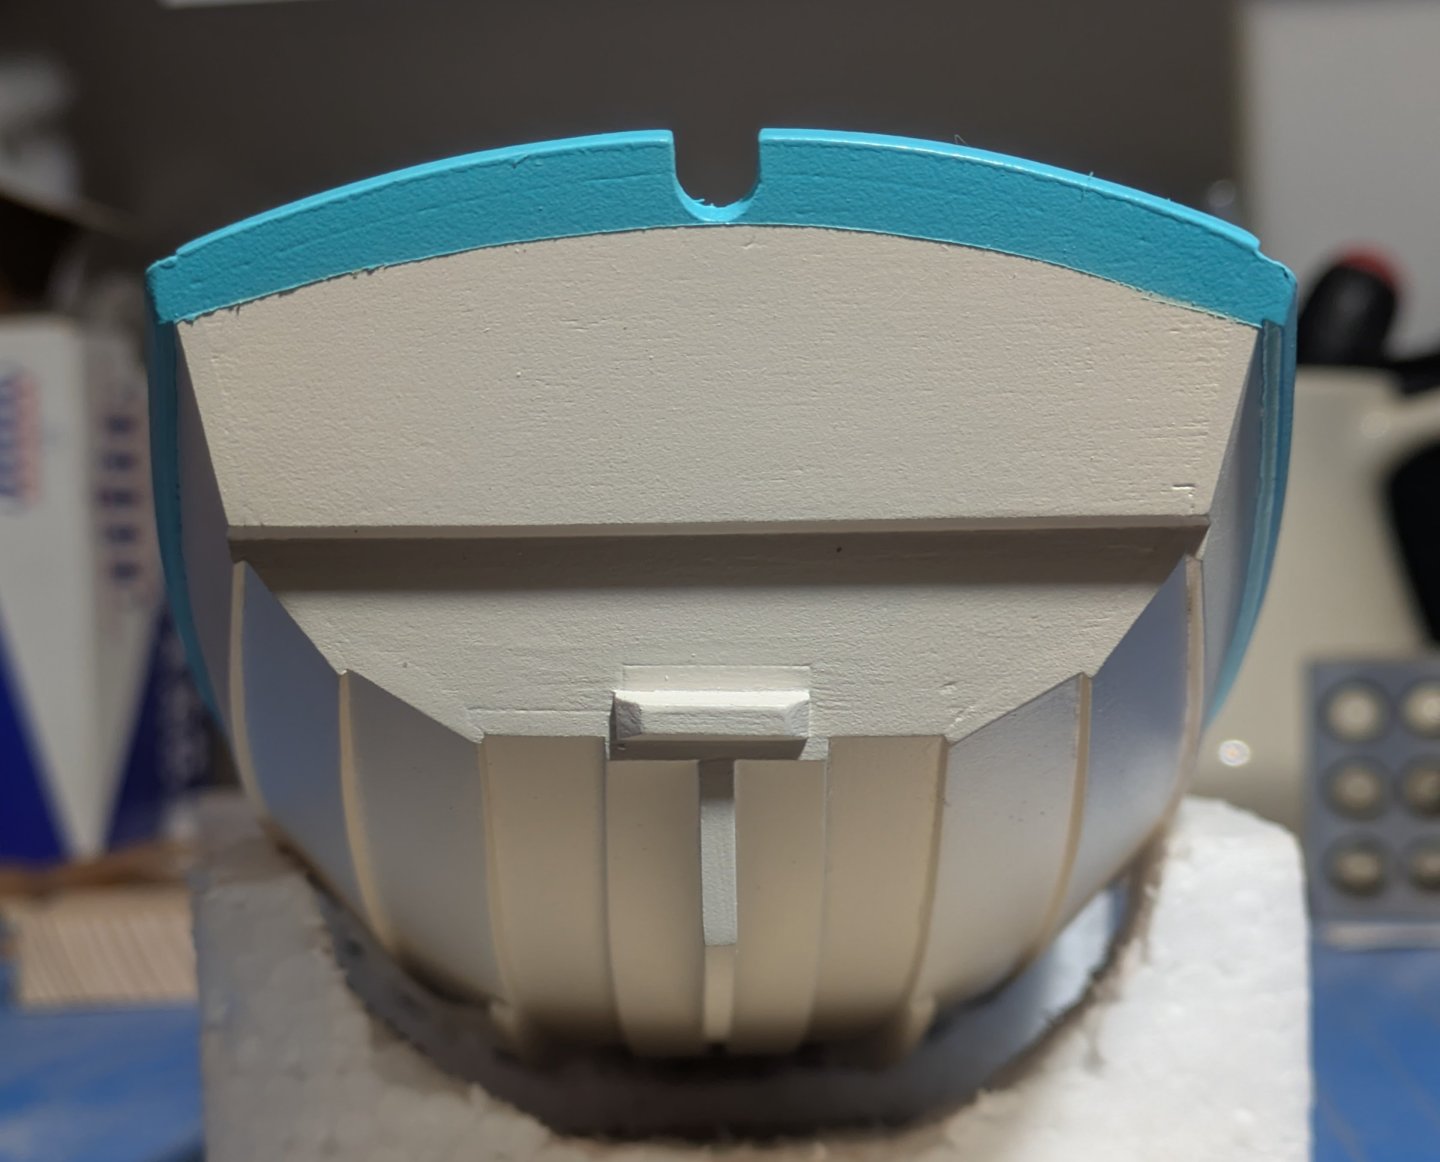
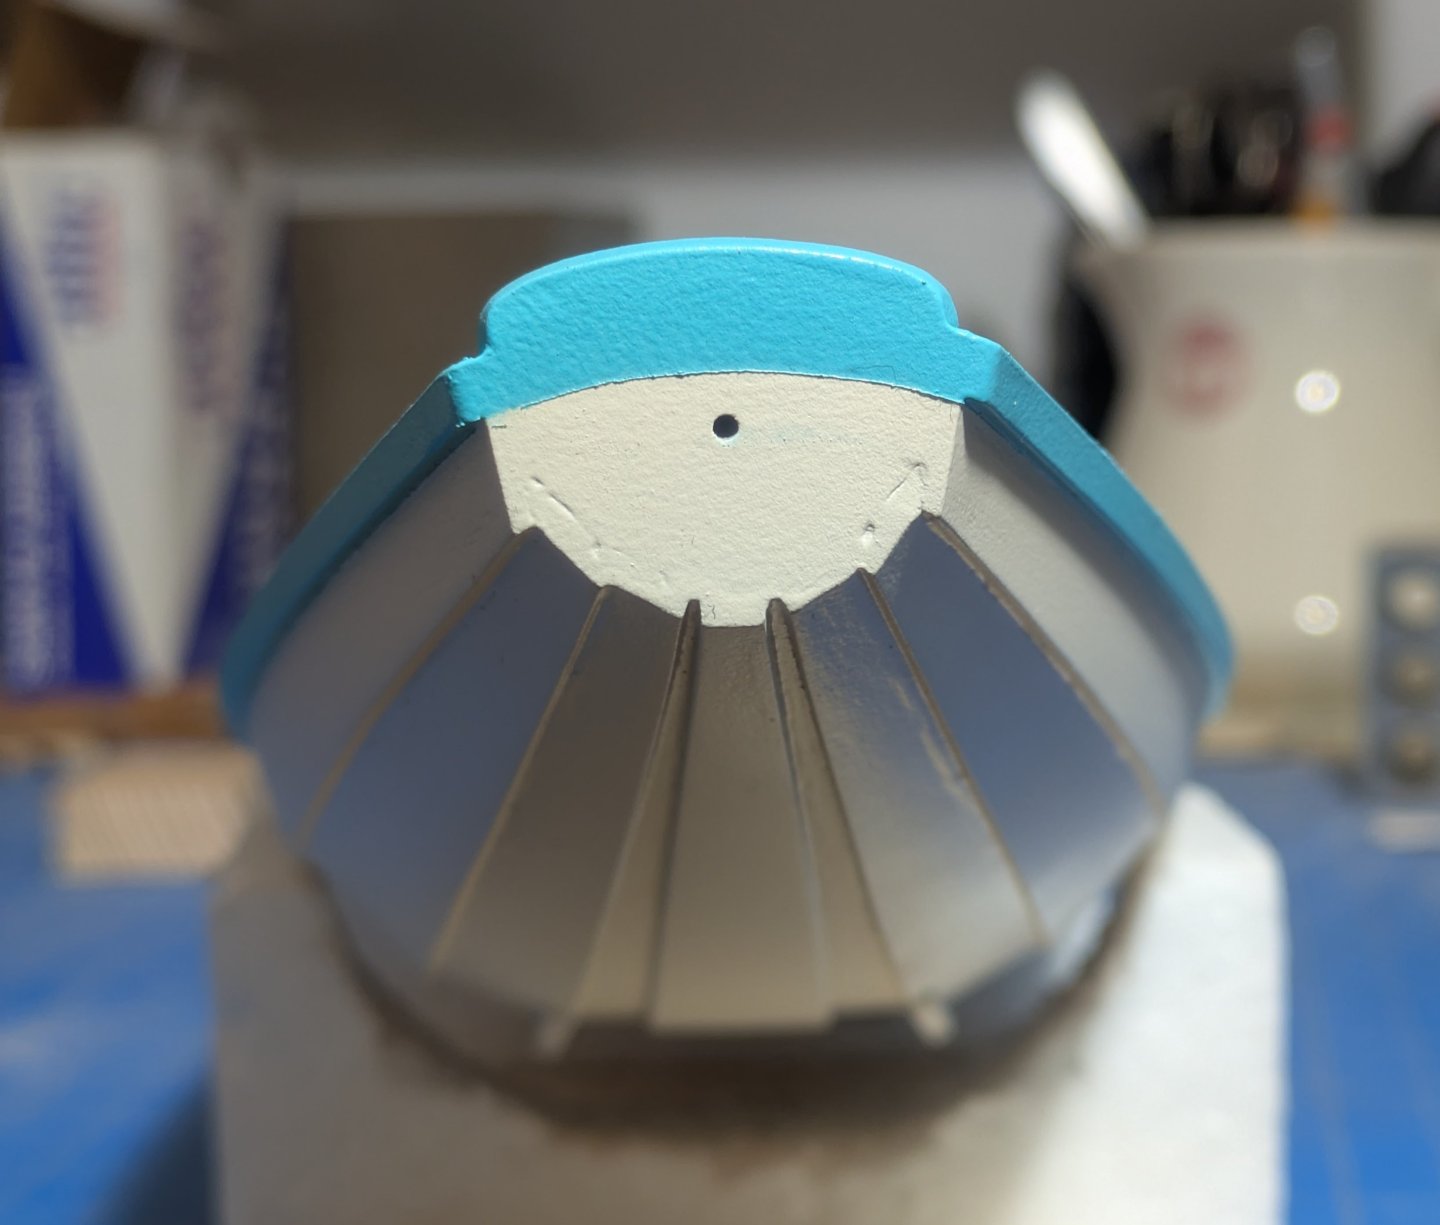
I don't know if I like the bow. The stern looks ok but I think there is to much color on the bow.
- 81 replies
-
- 1
-
-
- Norwegian Sailing Pram
- Model Shipways
- (and 1 more)
-
I decided on the paint colors. I am using Magic Fly acrylics (something my wife picked up for some signs)? for the outside I added a drop of Burnt Umber to the White to tone it down. On the inside, dagger board, and rudder I mixed Sky Blue, Emerald Green, And White to get a Aqua Marine color. I wanted the rub rail the interior color and I continued it around the bow and stern. Looks like I will have to do some wet sanding of those.
- 81 replies
-
- 6
-
-
-
- Norwegian Sailing Pram
- Model Shipways
- (and 1 more)
-
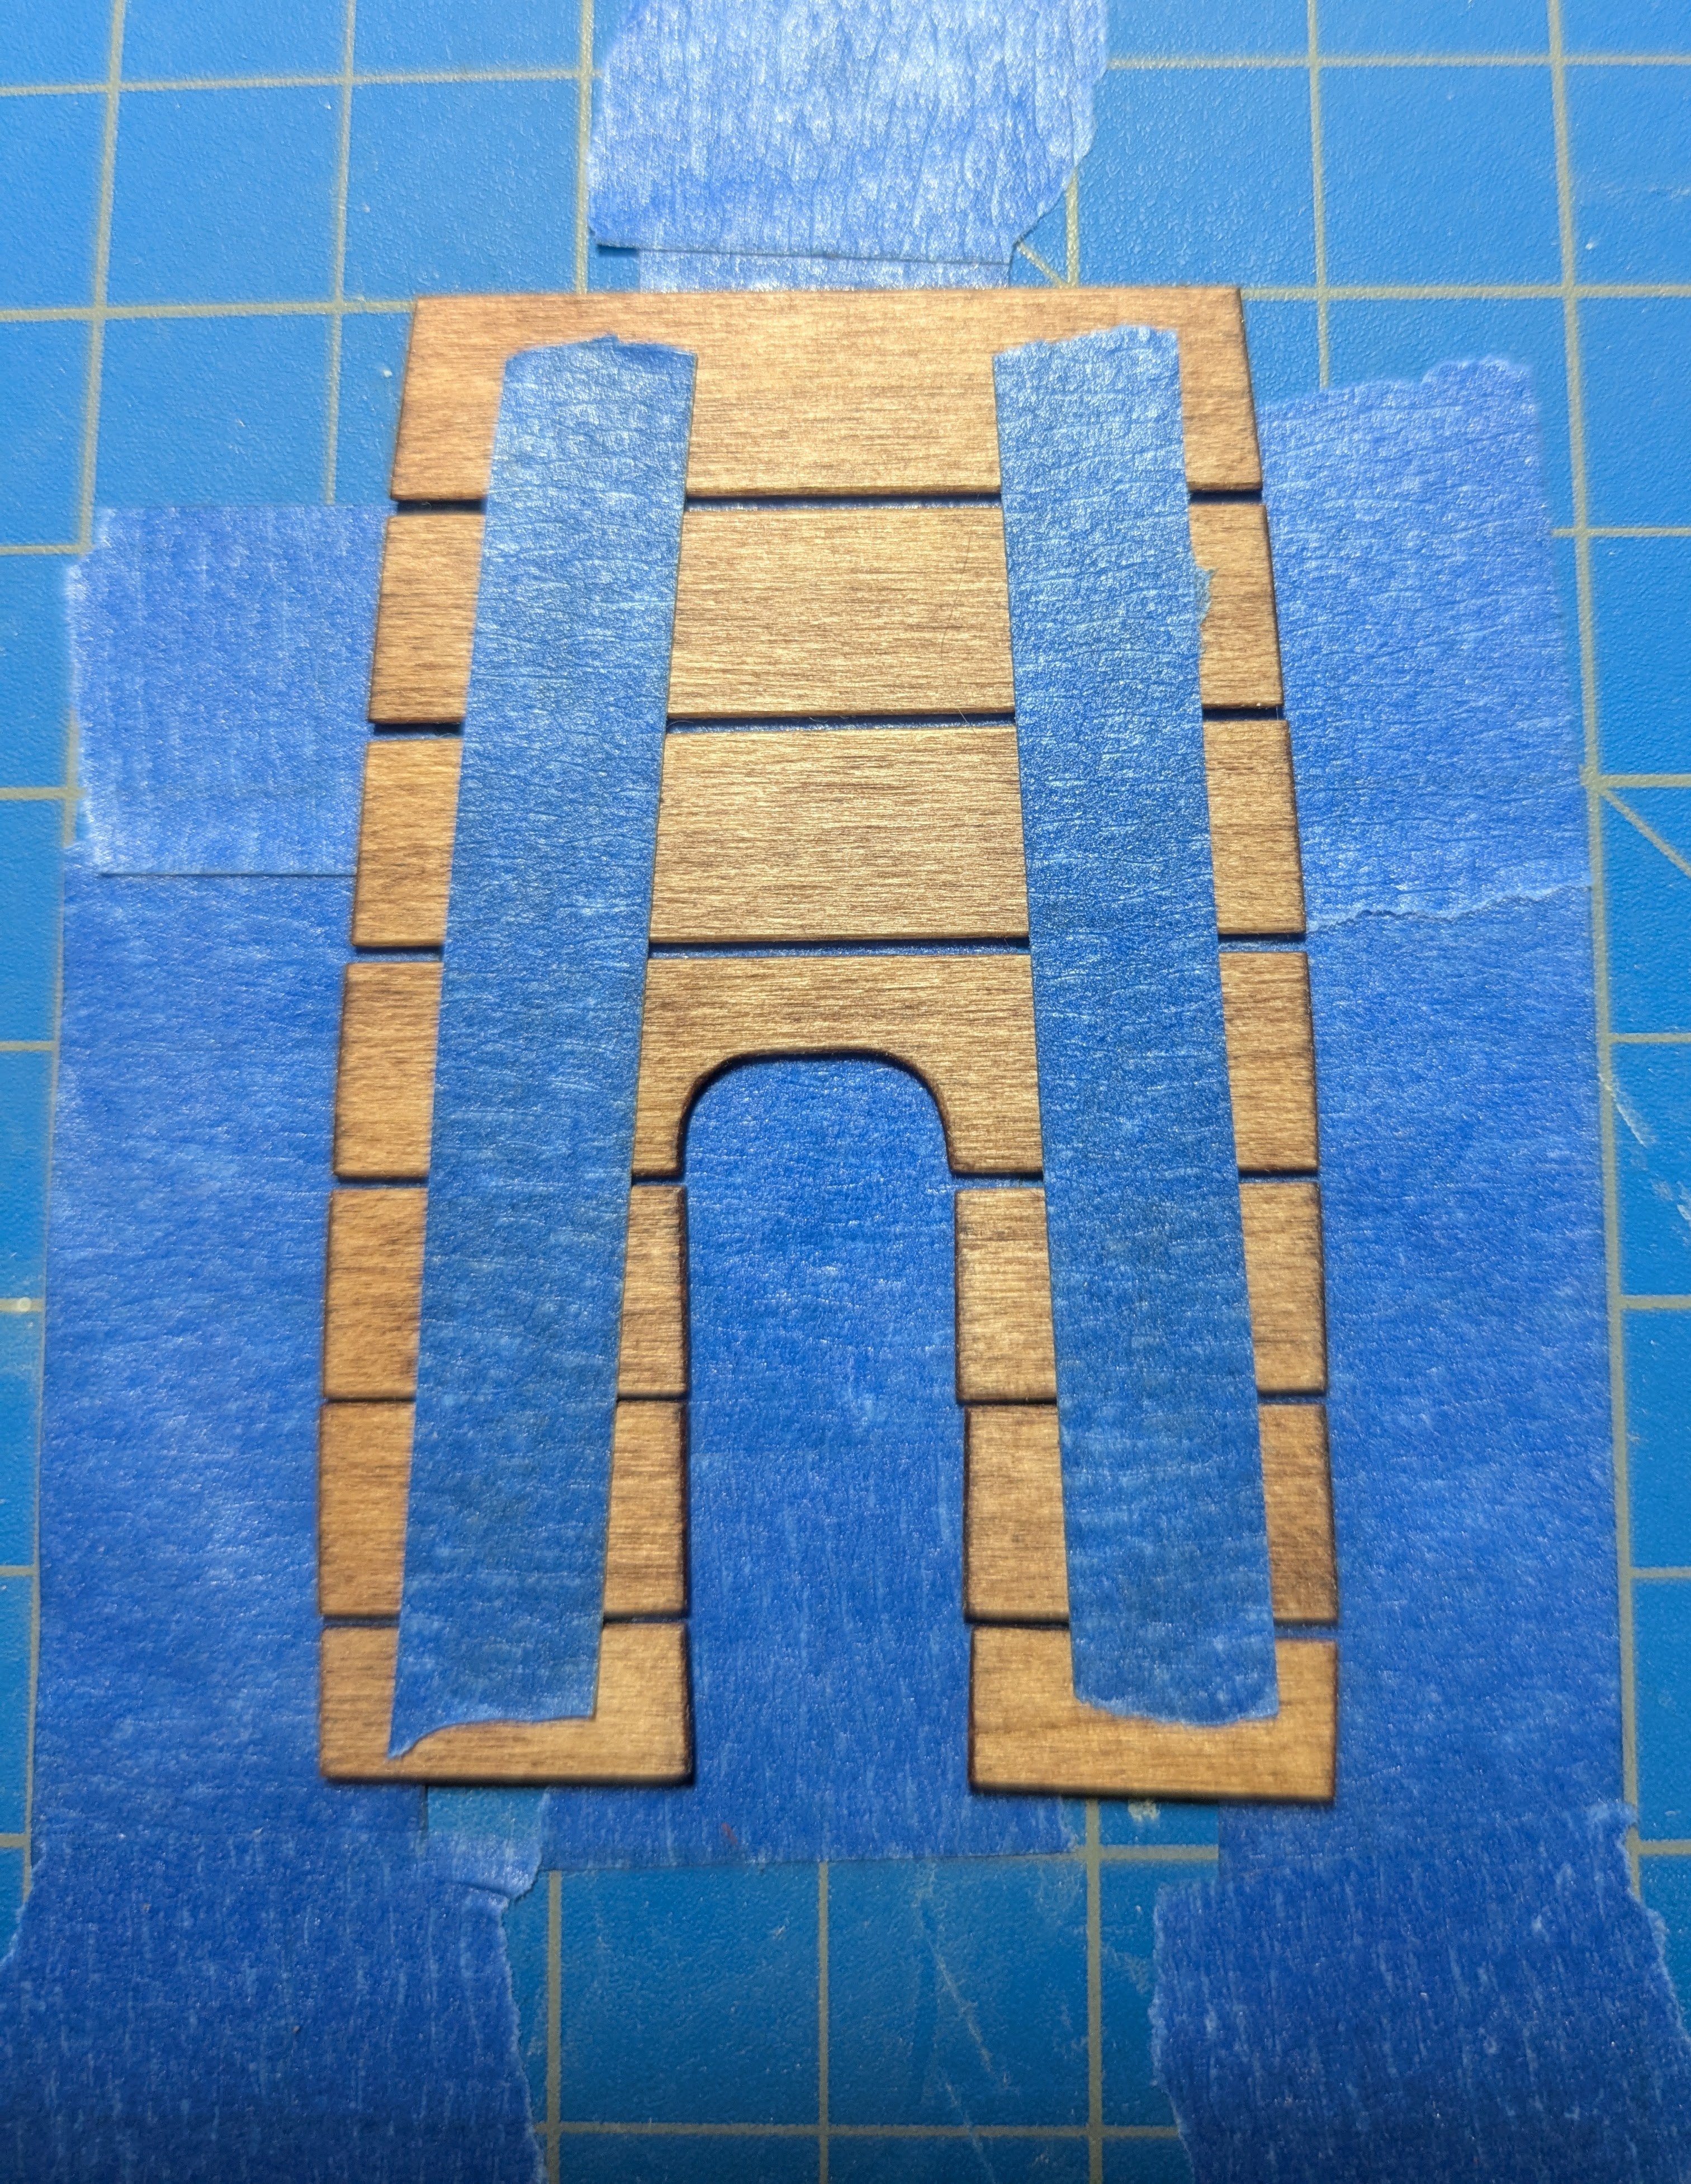
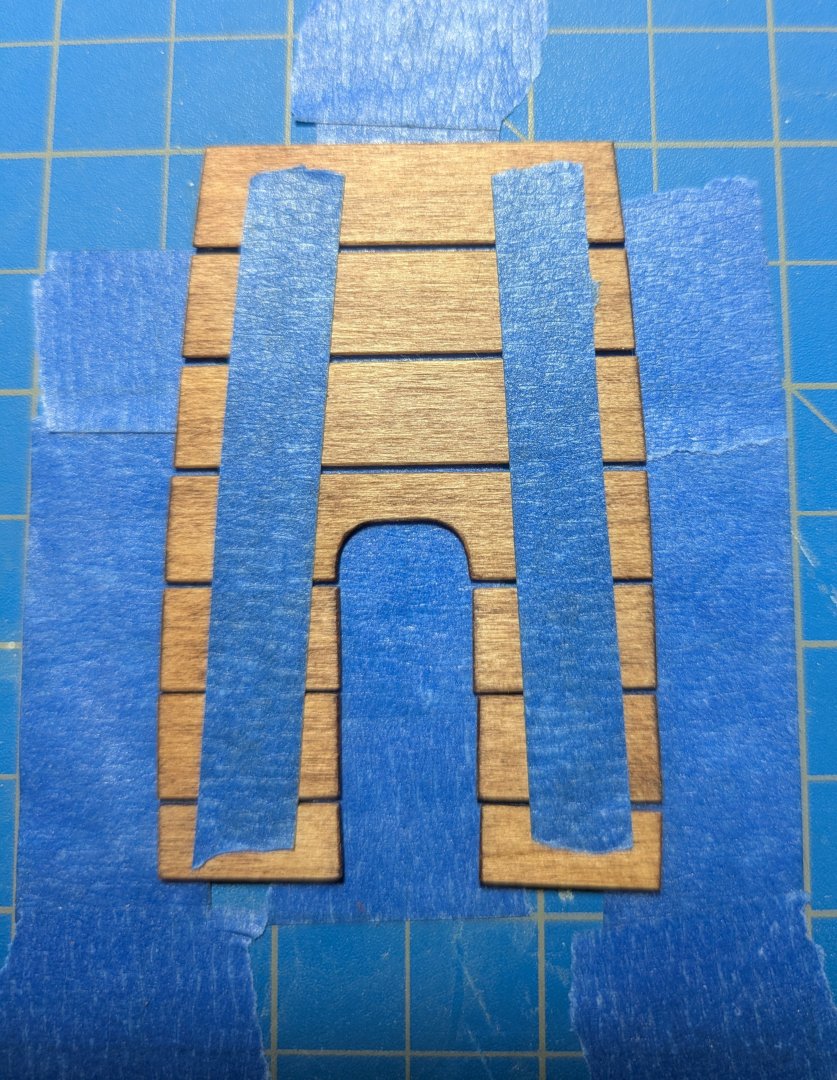
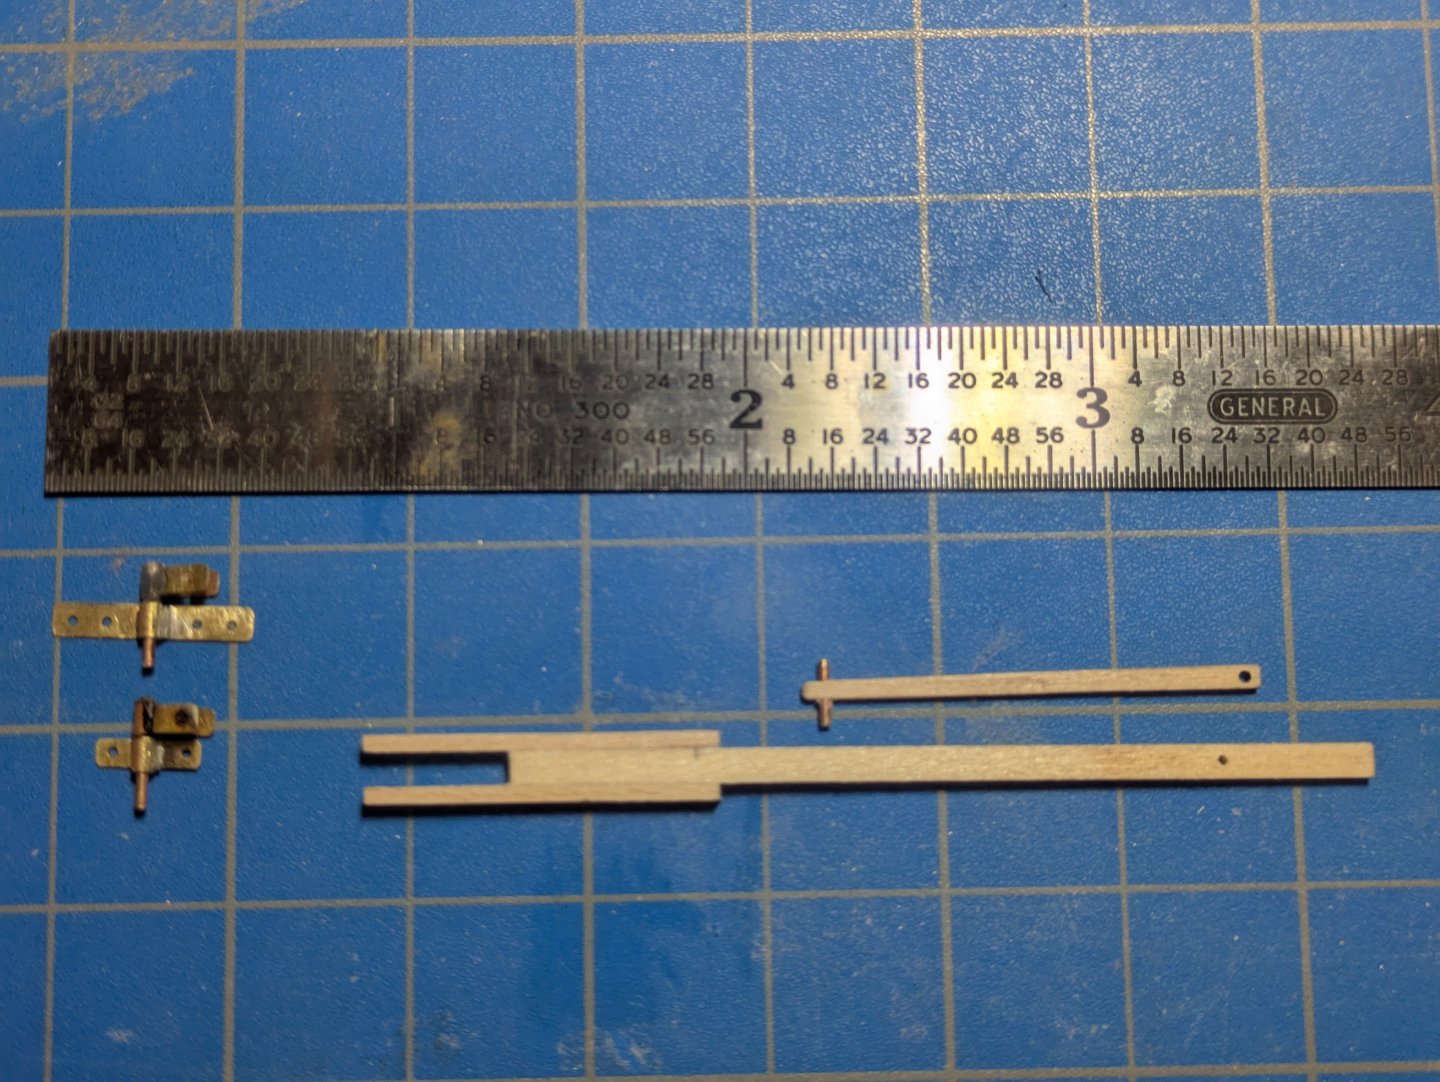
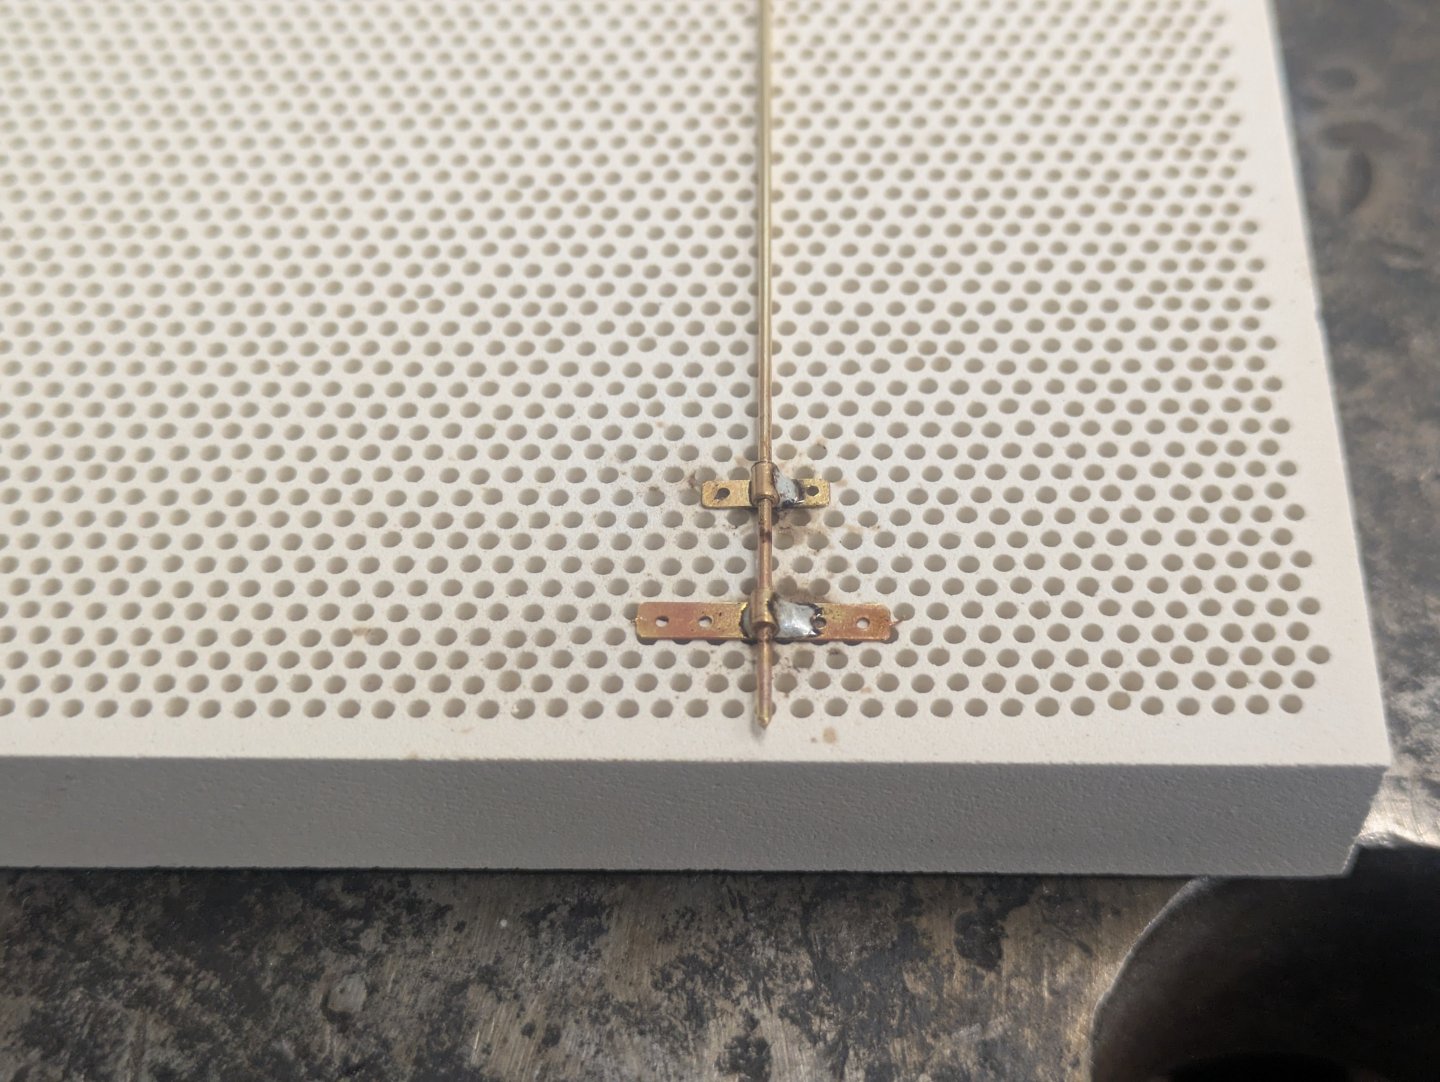
Between sanding the primer on various pieces in preparation for paint I got the pintles built. I tried following the directions to bend the strap around the tube but the straps are to short to have any meaningful hold on the rudder so I soldered the tube to the back of the straps. I also am working on the tiller. Boy the tiller extension at 0.042" is not much bigger than the brass rod at 0.032" that leaves 0.005" (0.13mm) on either side! I'm glade I have a good drill press. You can see (in another blurry photo) In the glue up of the tiller I missed the mark of where the cheek pieces end. I will have to remove them or whittle away the end of the tiller? I'll have to think about that one. Another item was the floor boards. I started on the rear as per the directions but didn't like the way rear board had to be cut narrower. I reduced them from 6 scale inches to 5 and they fit very nicely. Then moving to the front I thought I had made a mistake and would have to keep with the 6 inch width but I used some scrap and added two small pieces under the thwart. I think it will look OK. To get them to fit the hull and be even I taped them together with the spacing I am using and sanded the edges them placed them in the hull taped together. I will do the same when I go to gluing them in. I will try to remember to take some photos of that.
- 81 replies
-
- 7
-
-
- Norwegian Sailing Pram
- Model Shipways
- (and 1 more)
-
Yes, no problem with my file so far and I will make sure to use less solder next time.
- 81 replies
-
- 2
-
-
- Norwegian Sailing Pram
- Model Shipways
- (and 1 more)
-
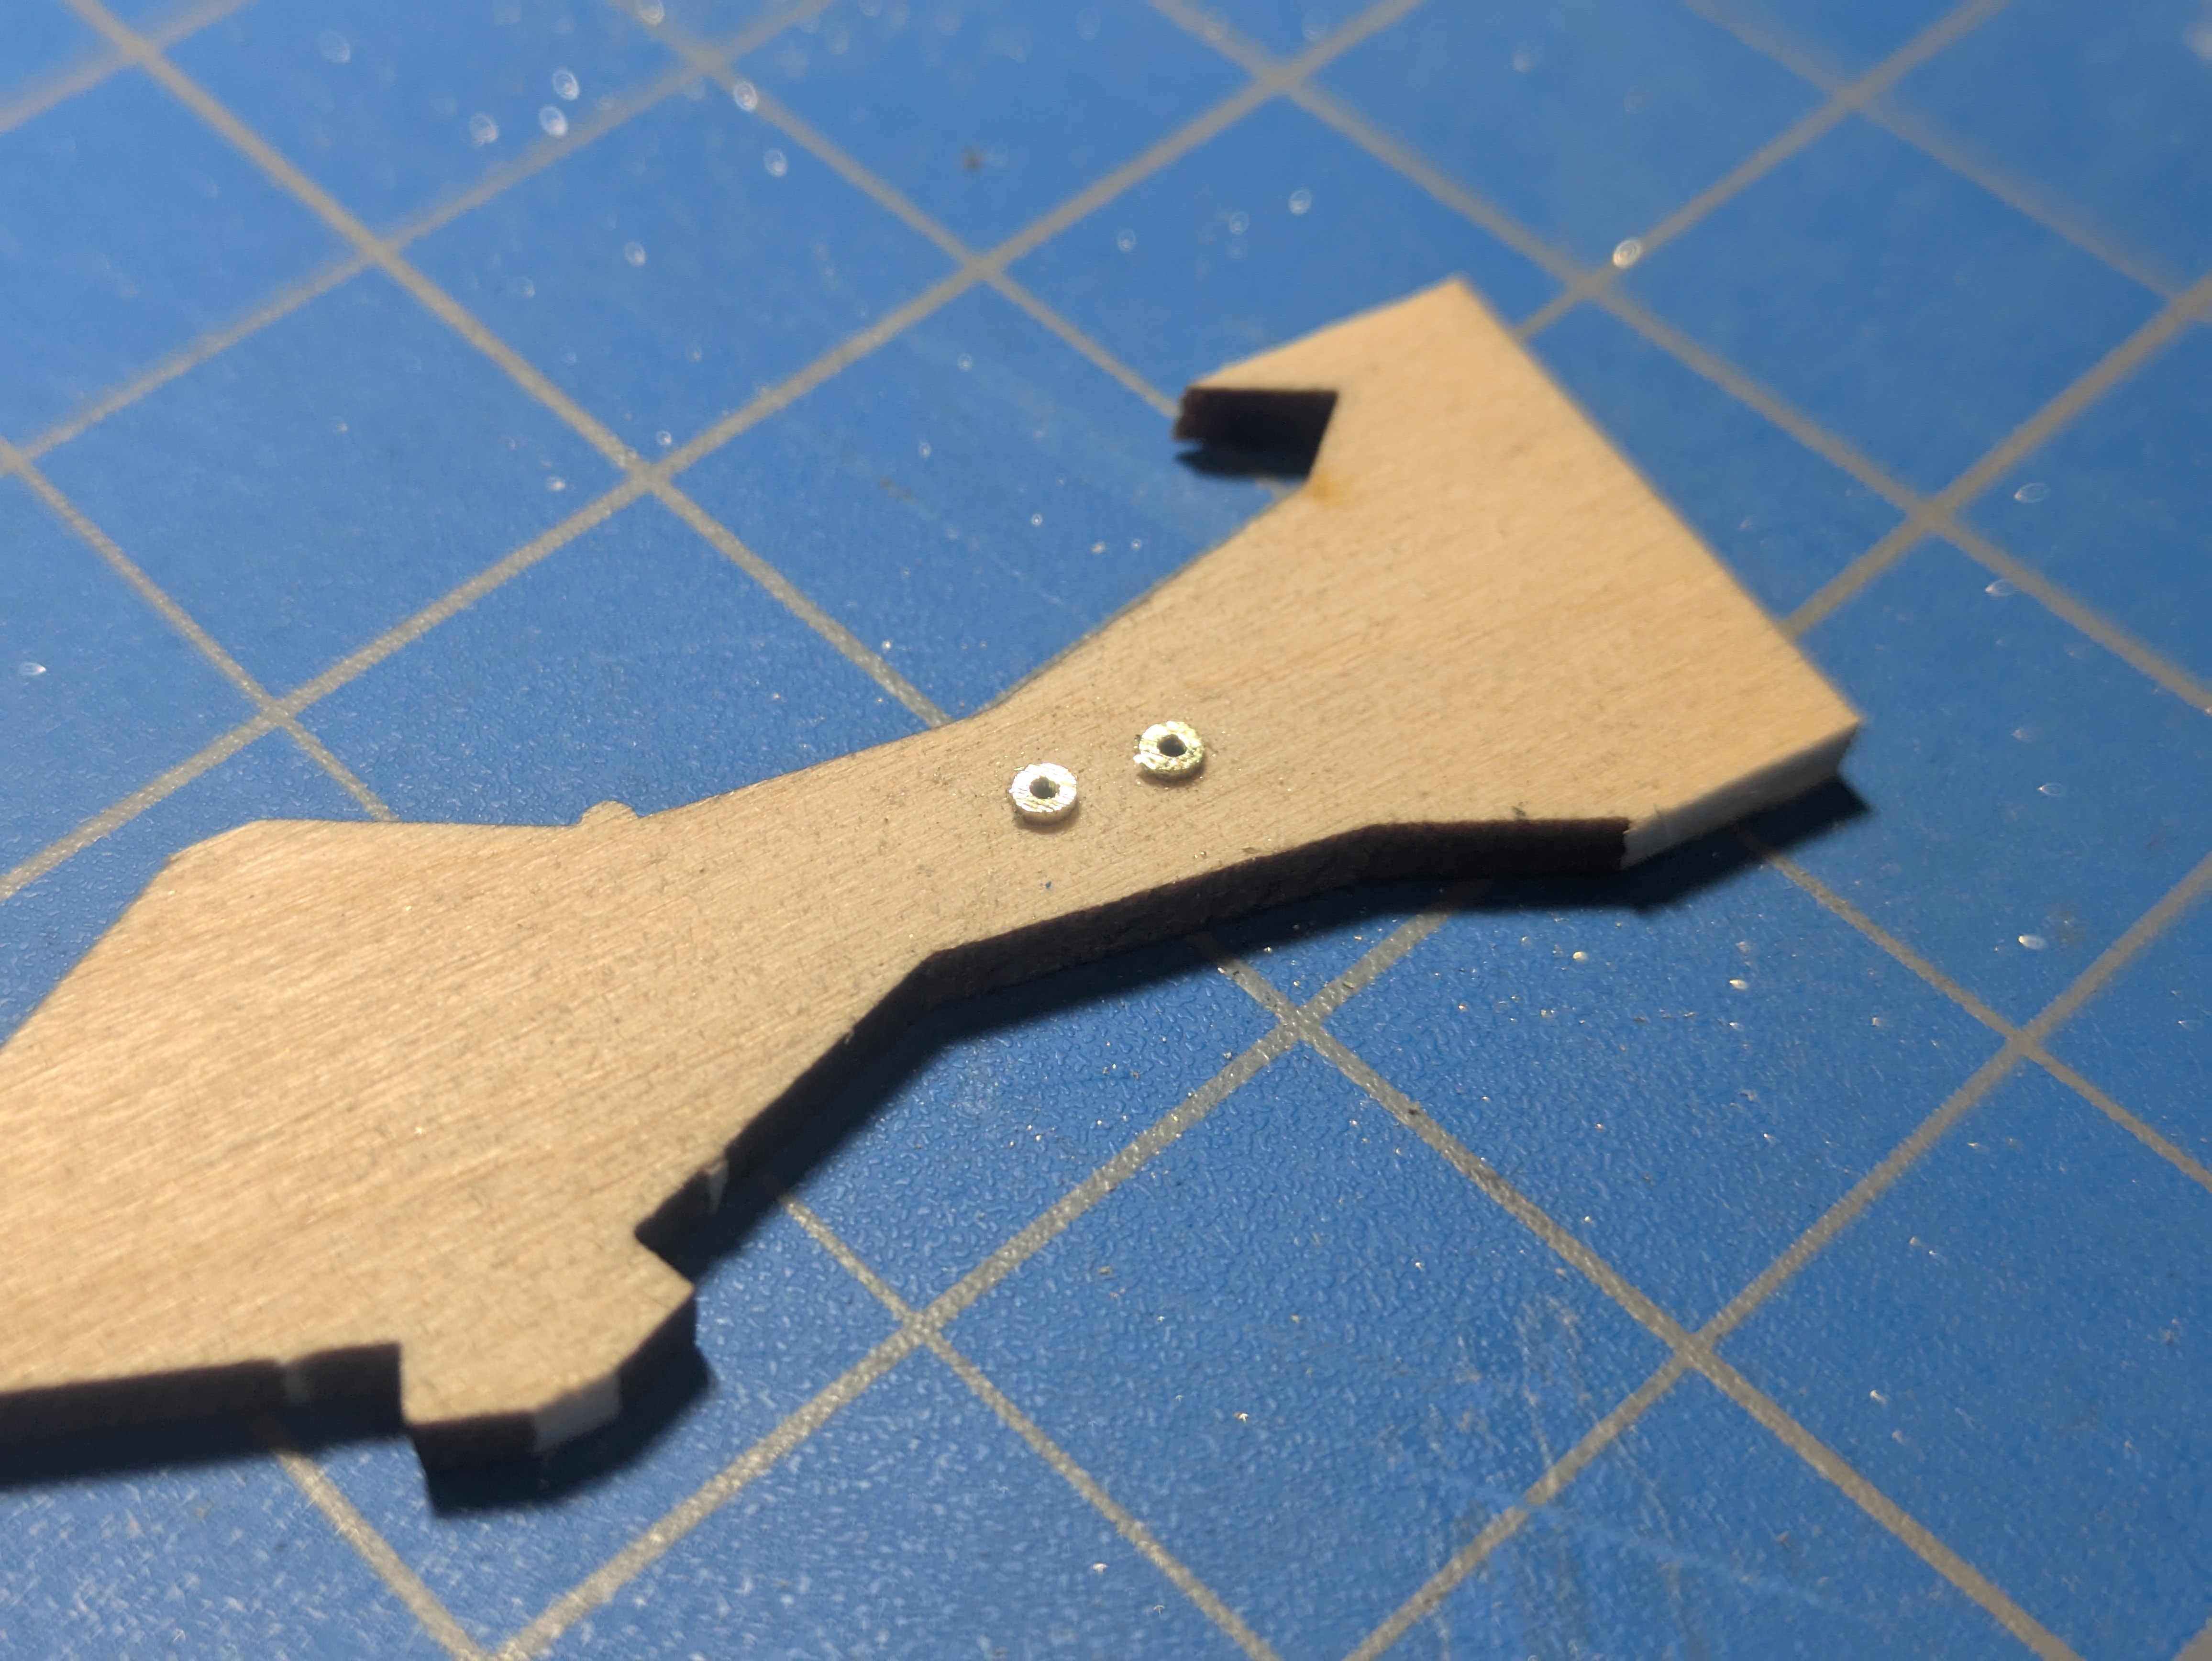
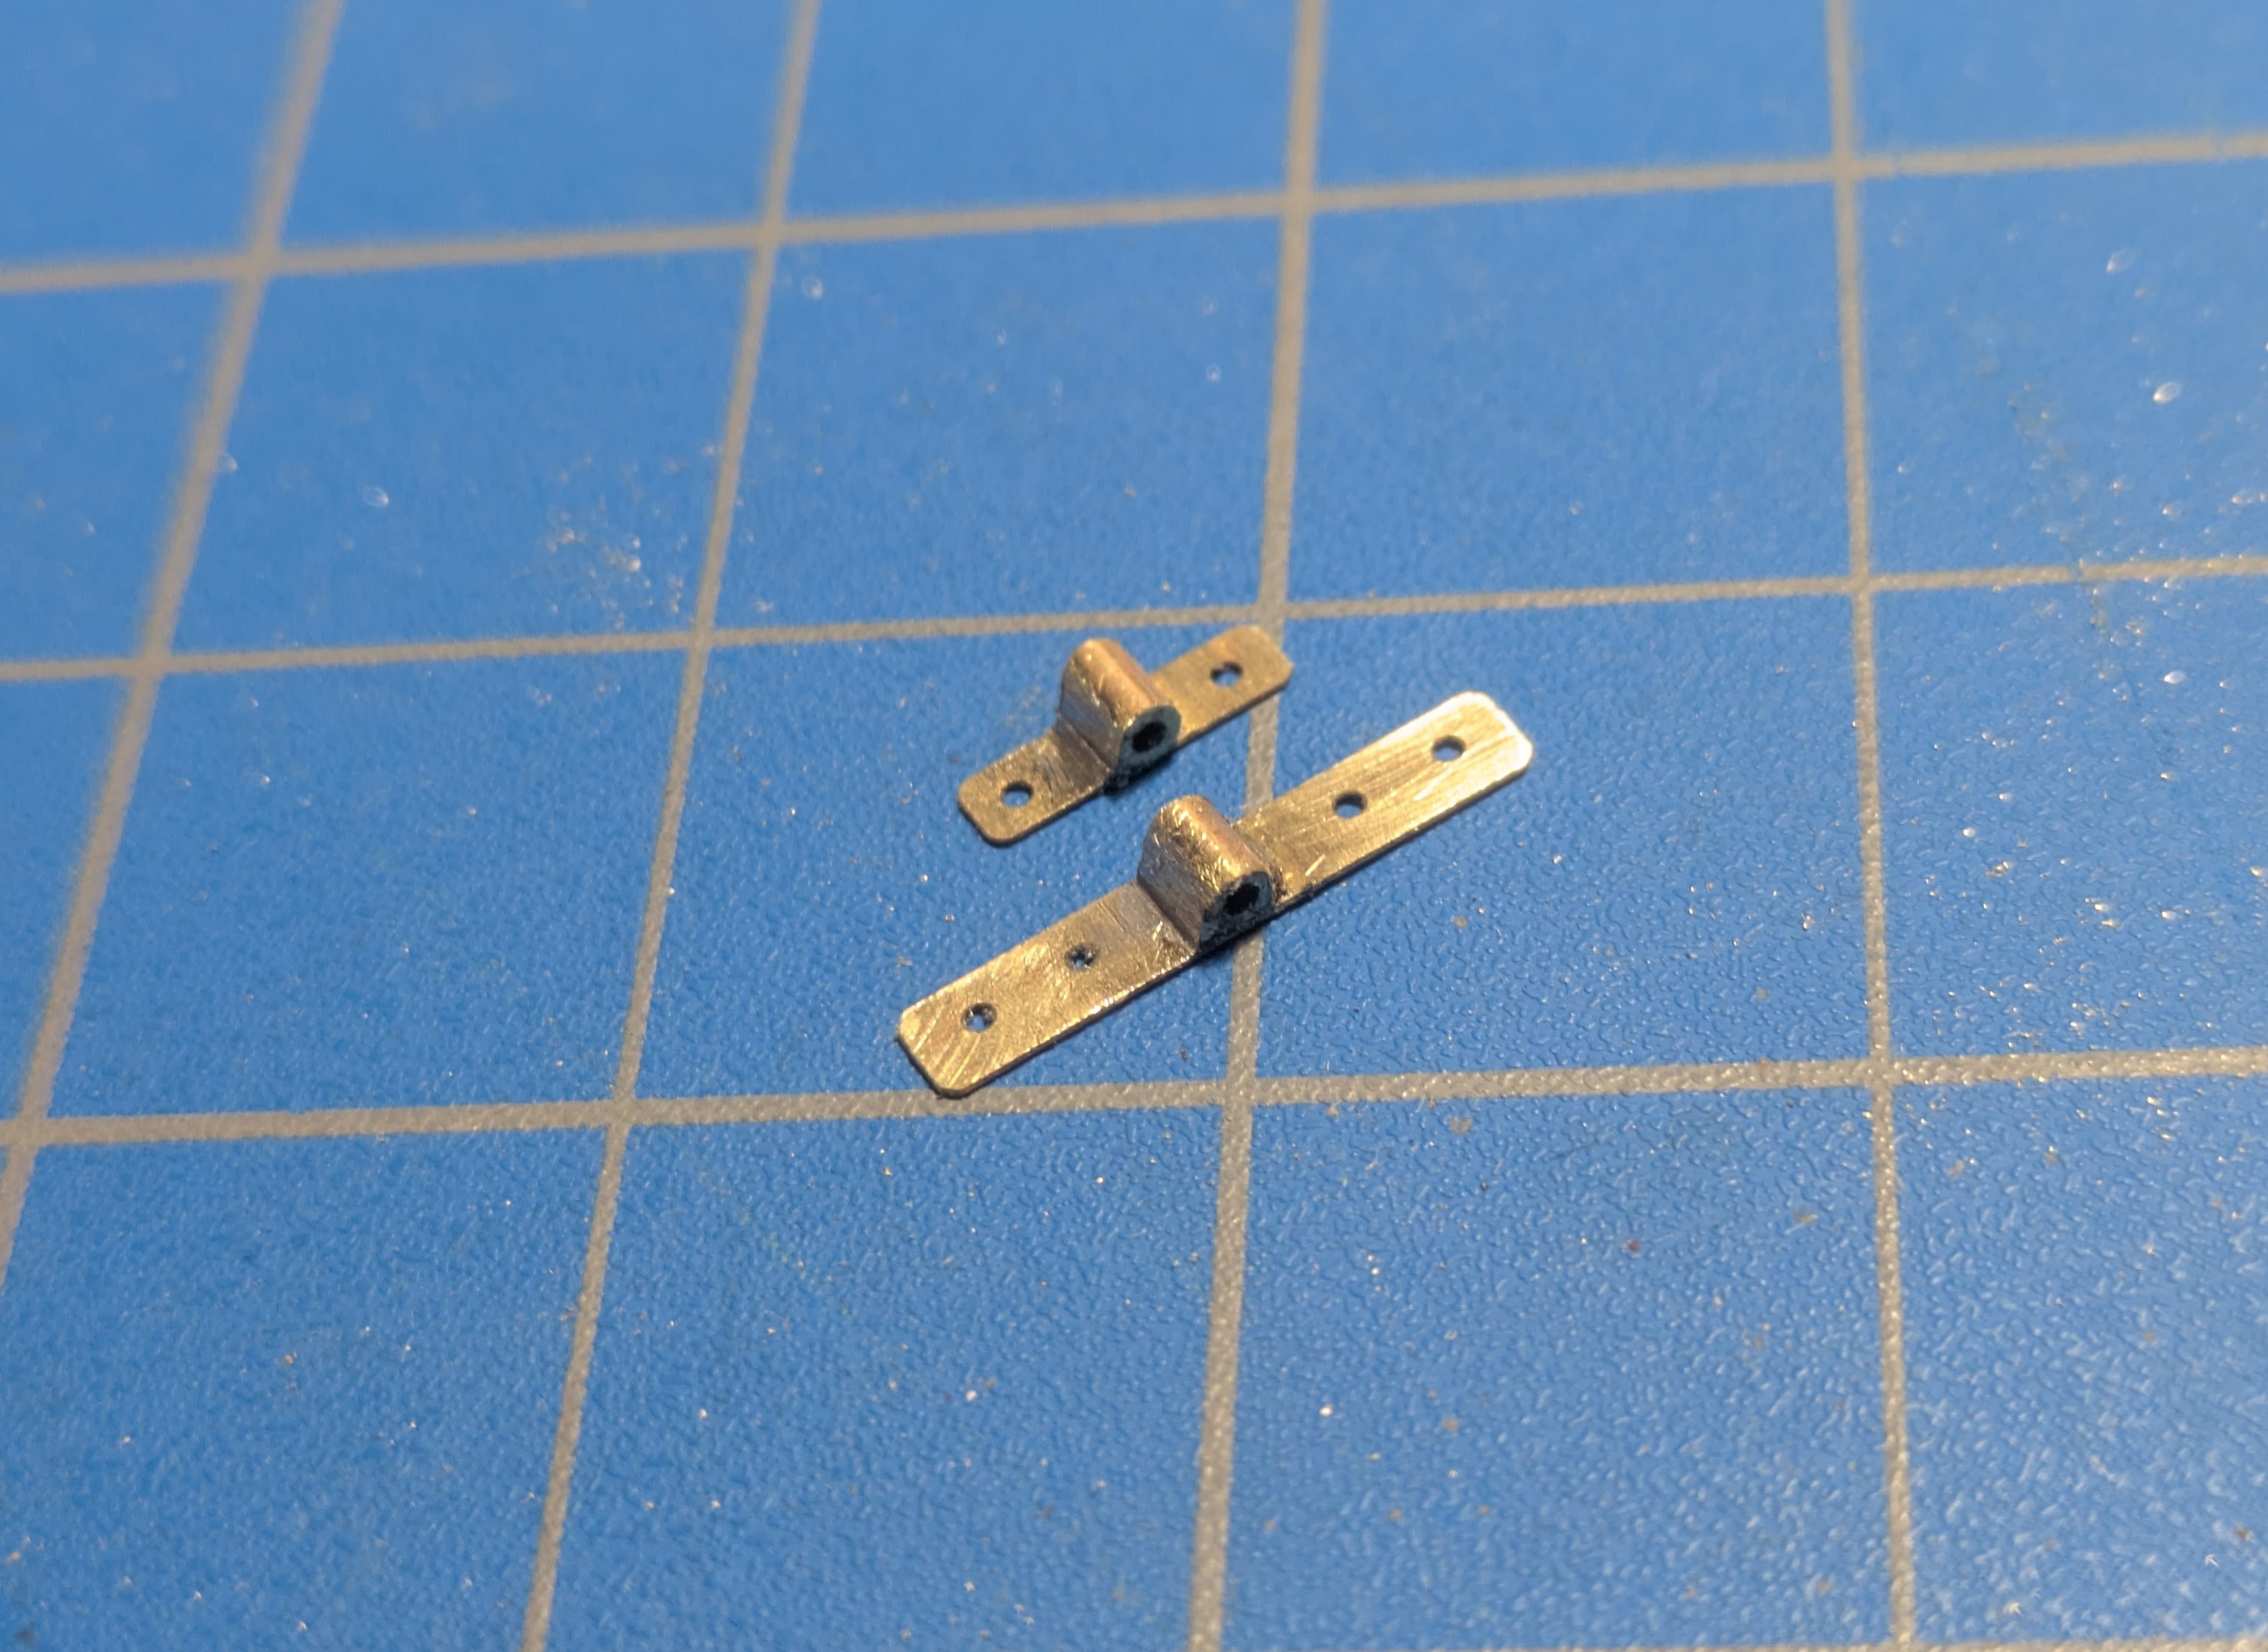
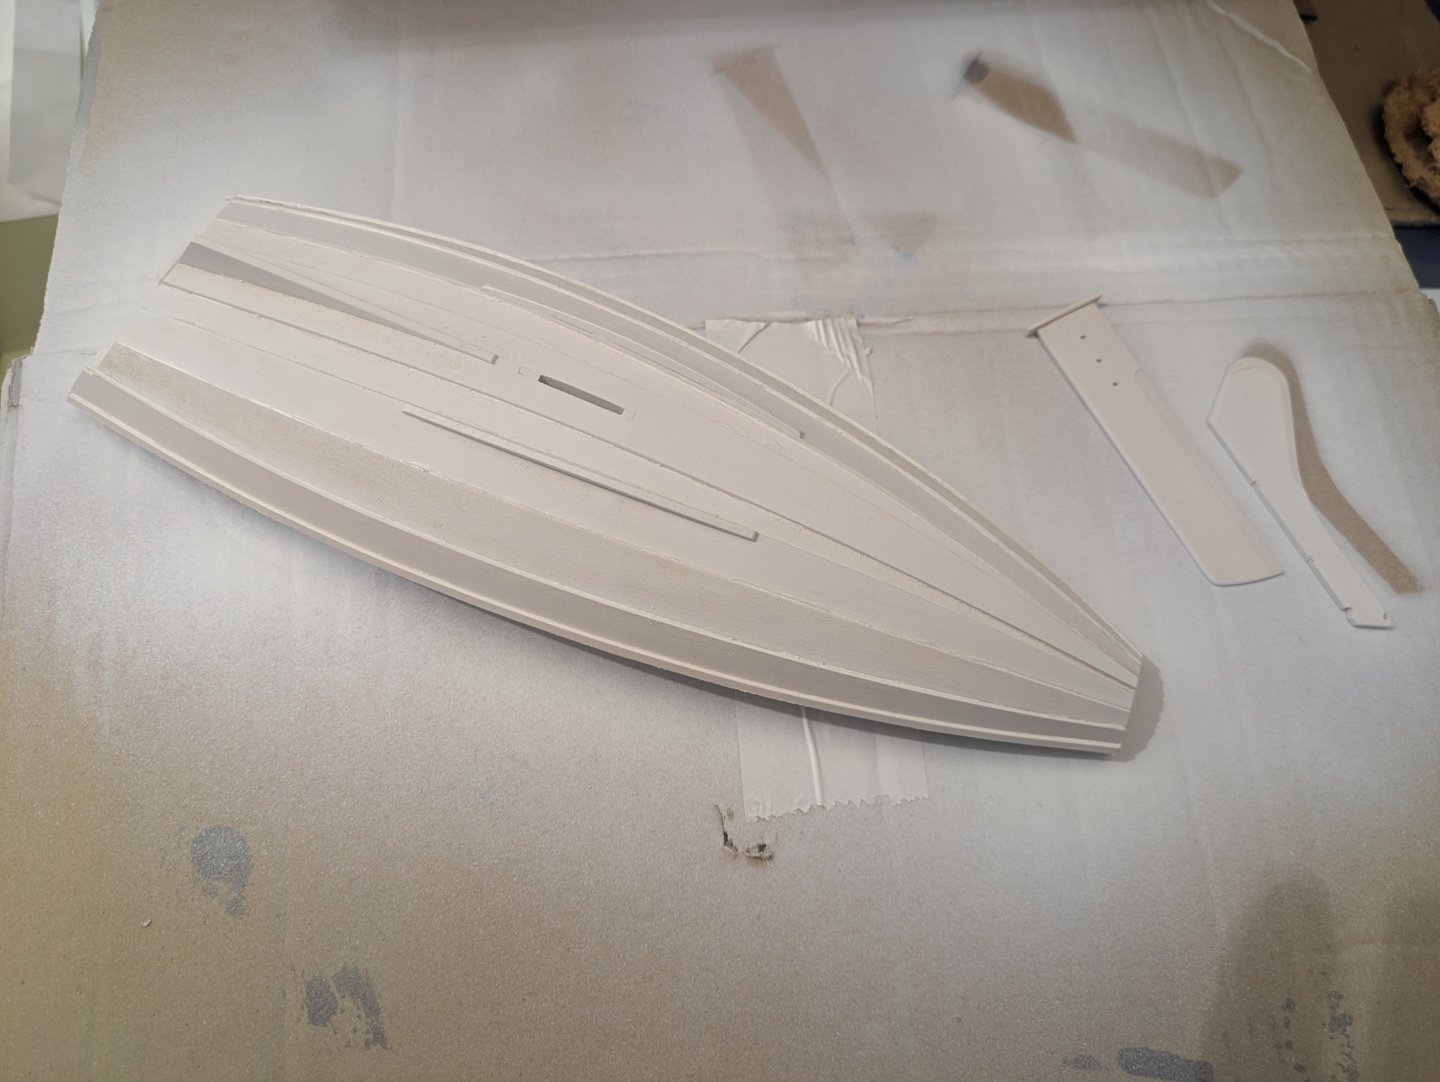
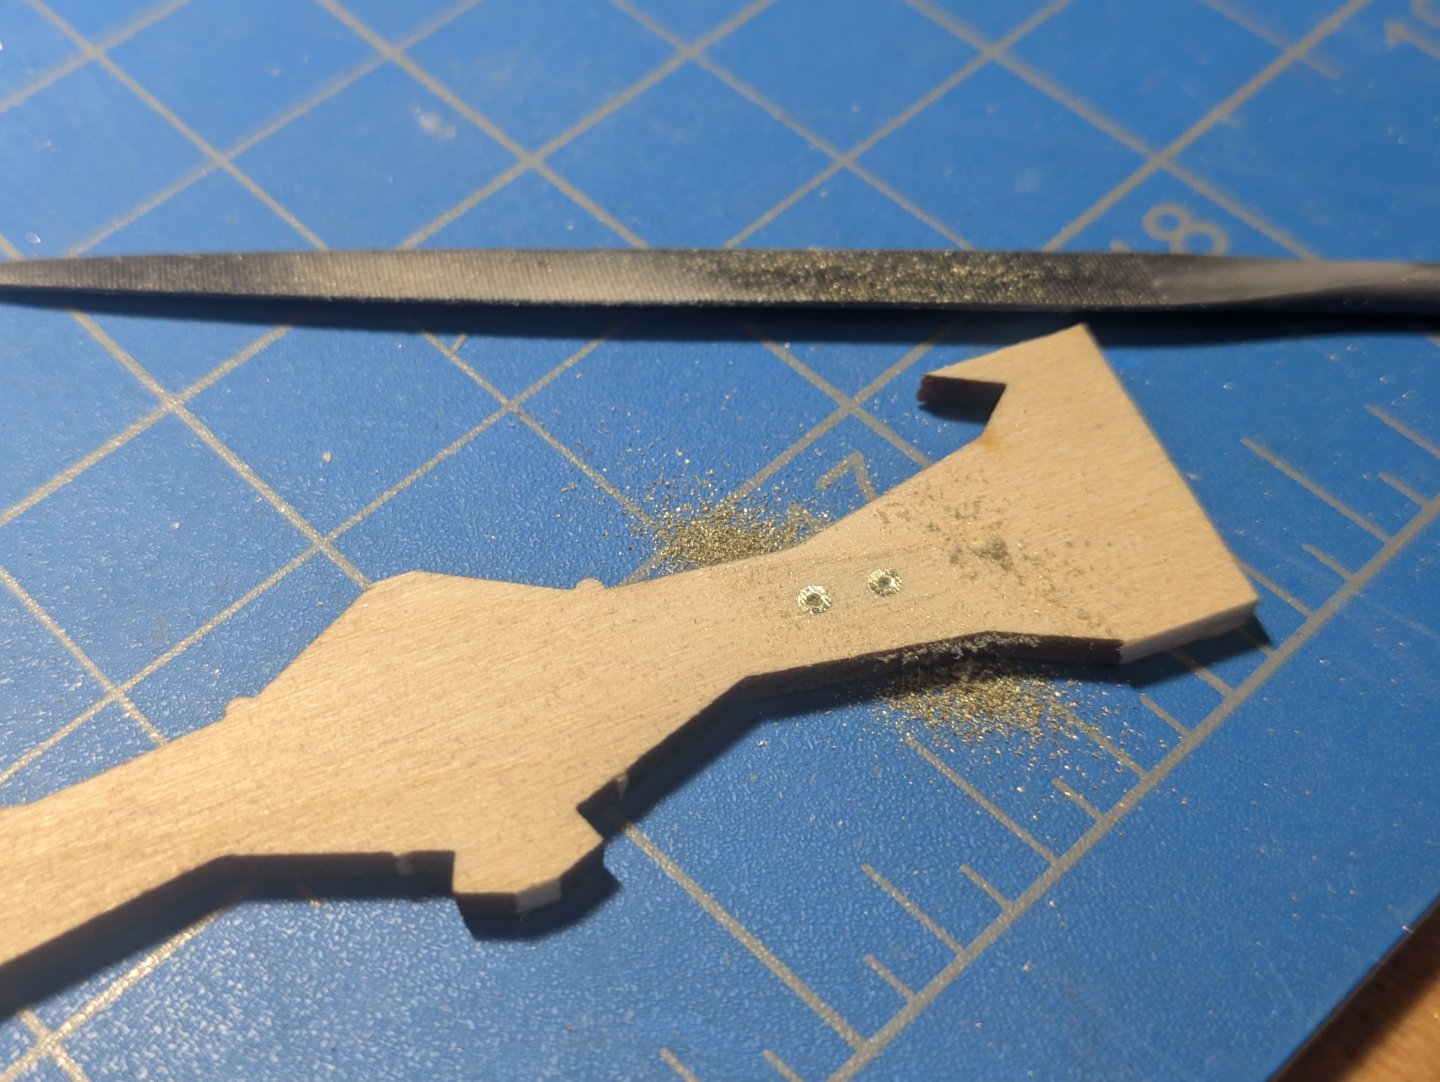
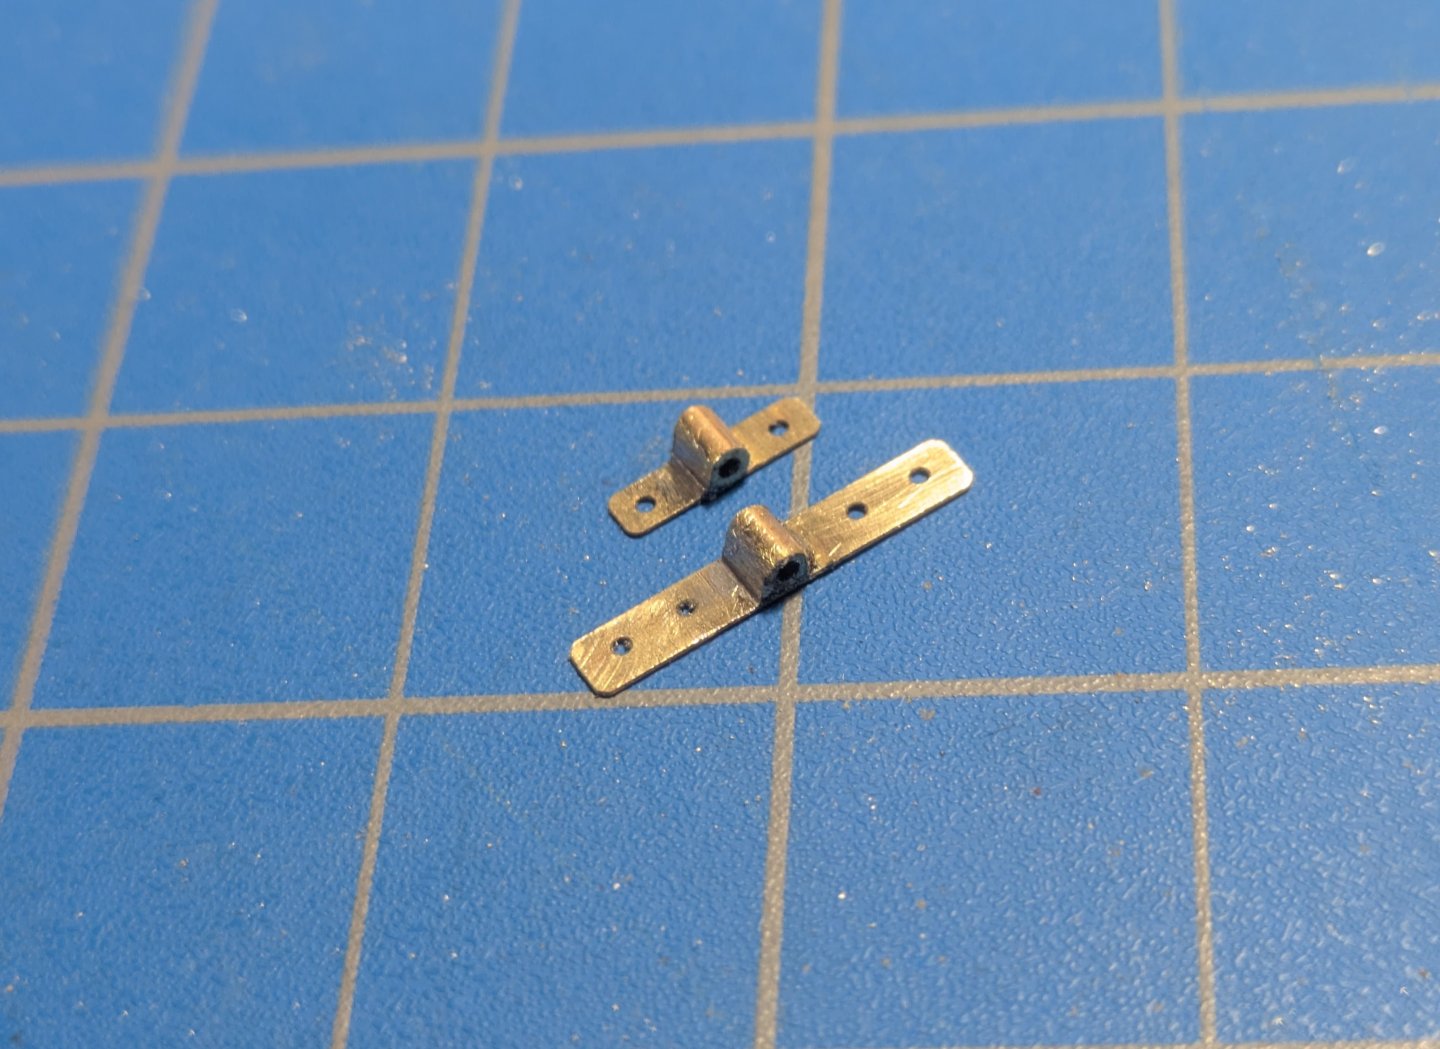
I sprayed some rattle can primer on the inside and outside. It was hard covering the wood as I am partial to a bright finish but this is just a skiff (pram). I stained and wiped on some Danish Oil ( thinned polyurethane ) on the thwarts for some contrast. While that was drying I made the rudder gudgeons. The directions state to drill two holes the size of the tubing in a piece of 3/32" scrap and file the tubing down to the wood for length. This worked perfectly and I would have never thought of that. I decided rather then Gluing the brass together I would solder them (good practice). I cut some solder and placed it on one side of the tube but the pieces were to big so I had to file it off I think it looks OK.

- 81 replies
-
- 7
-
-
- Norwegian Sailing Pram
- Model Shipways
- (and 1 more)
-
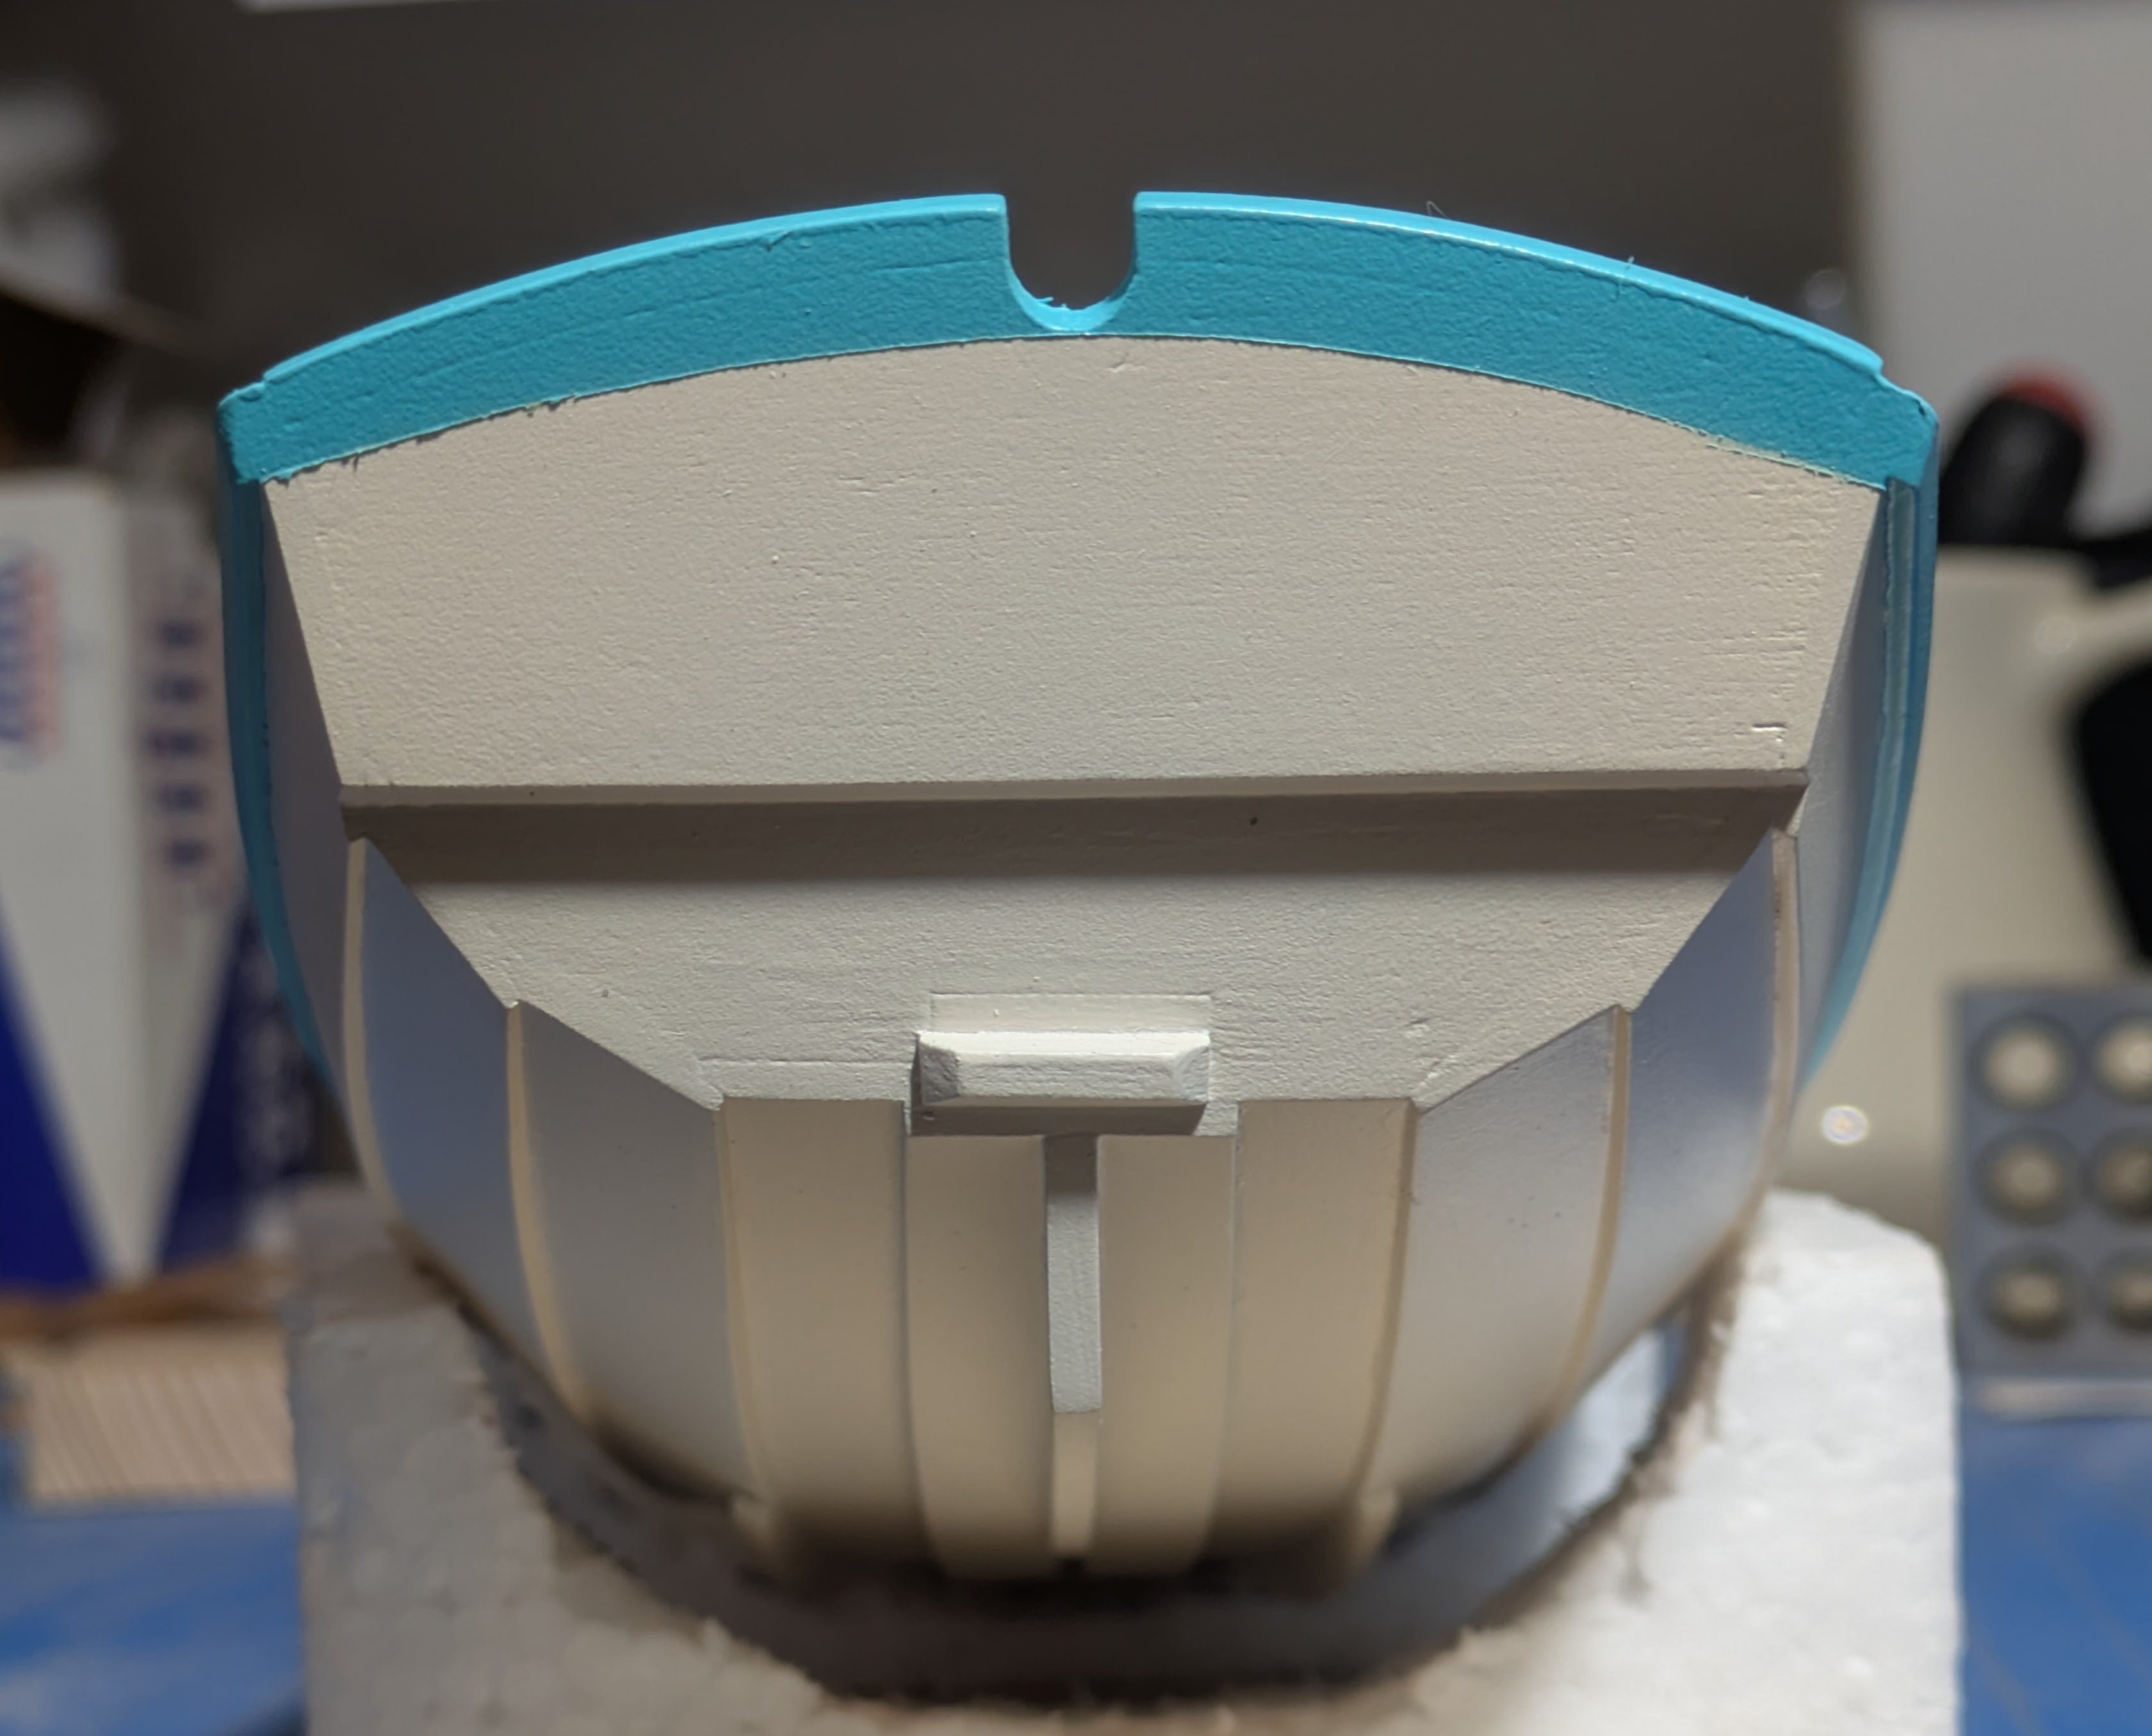
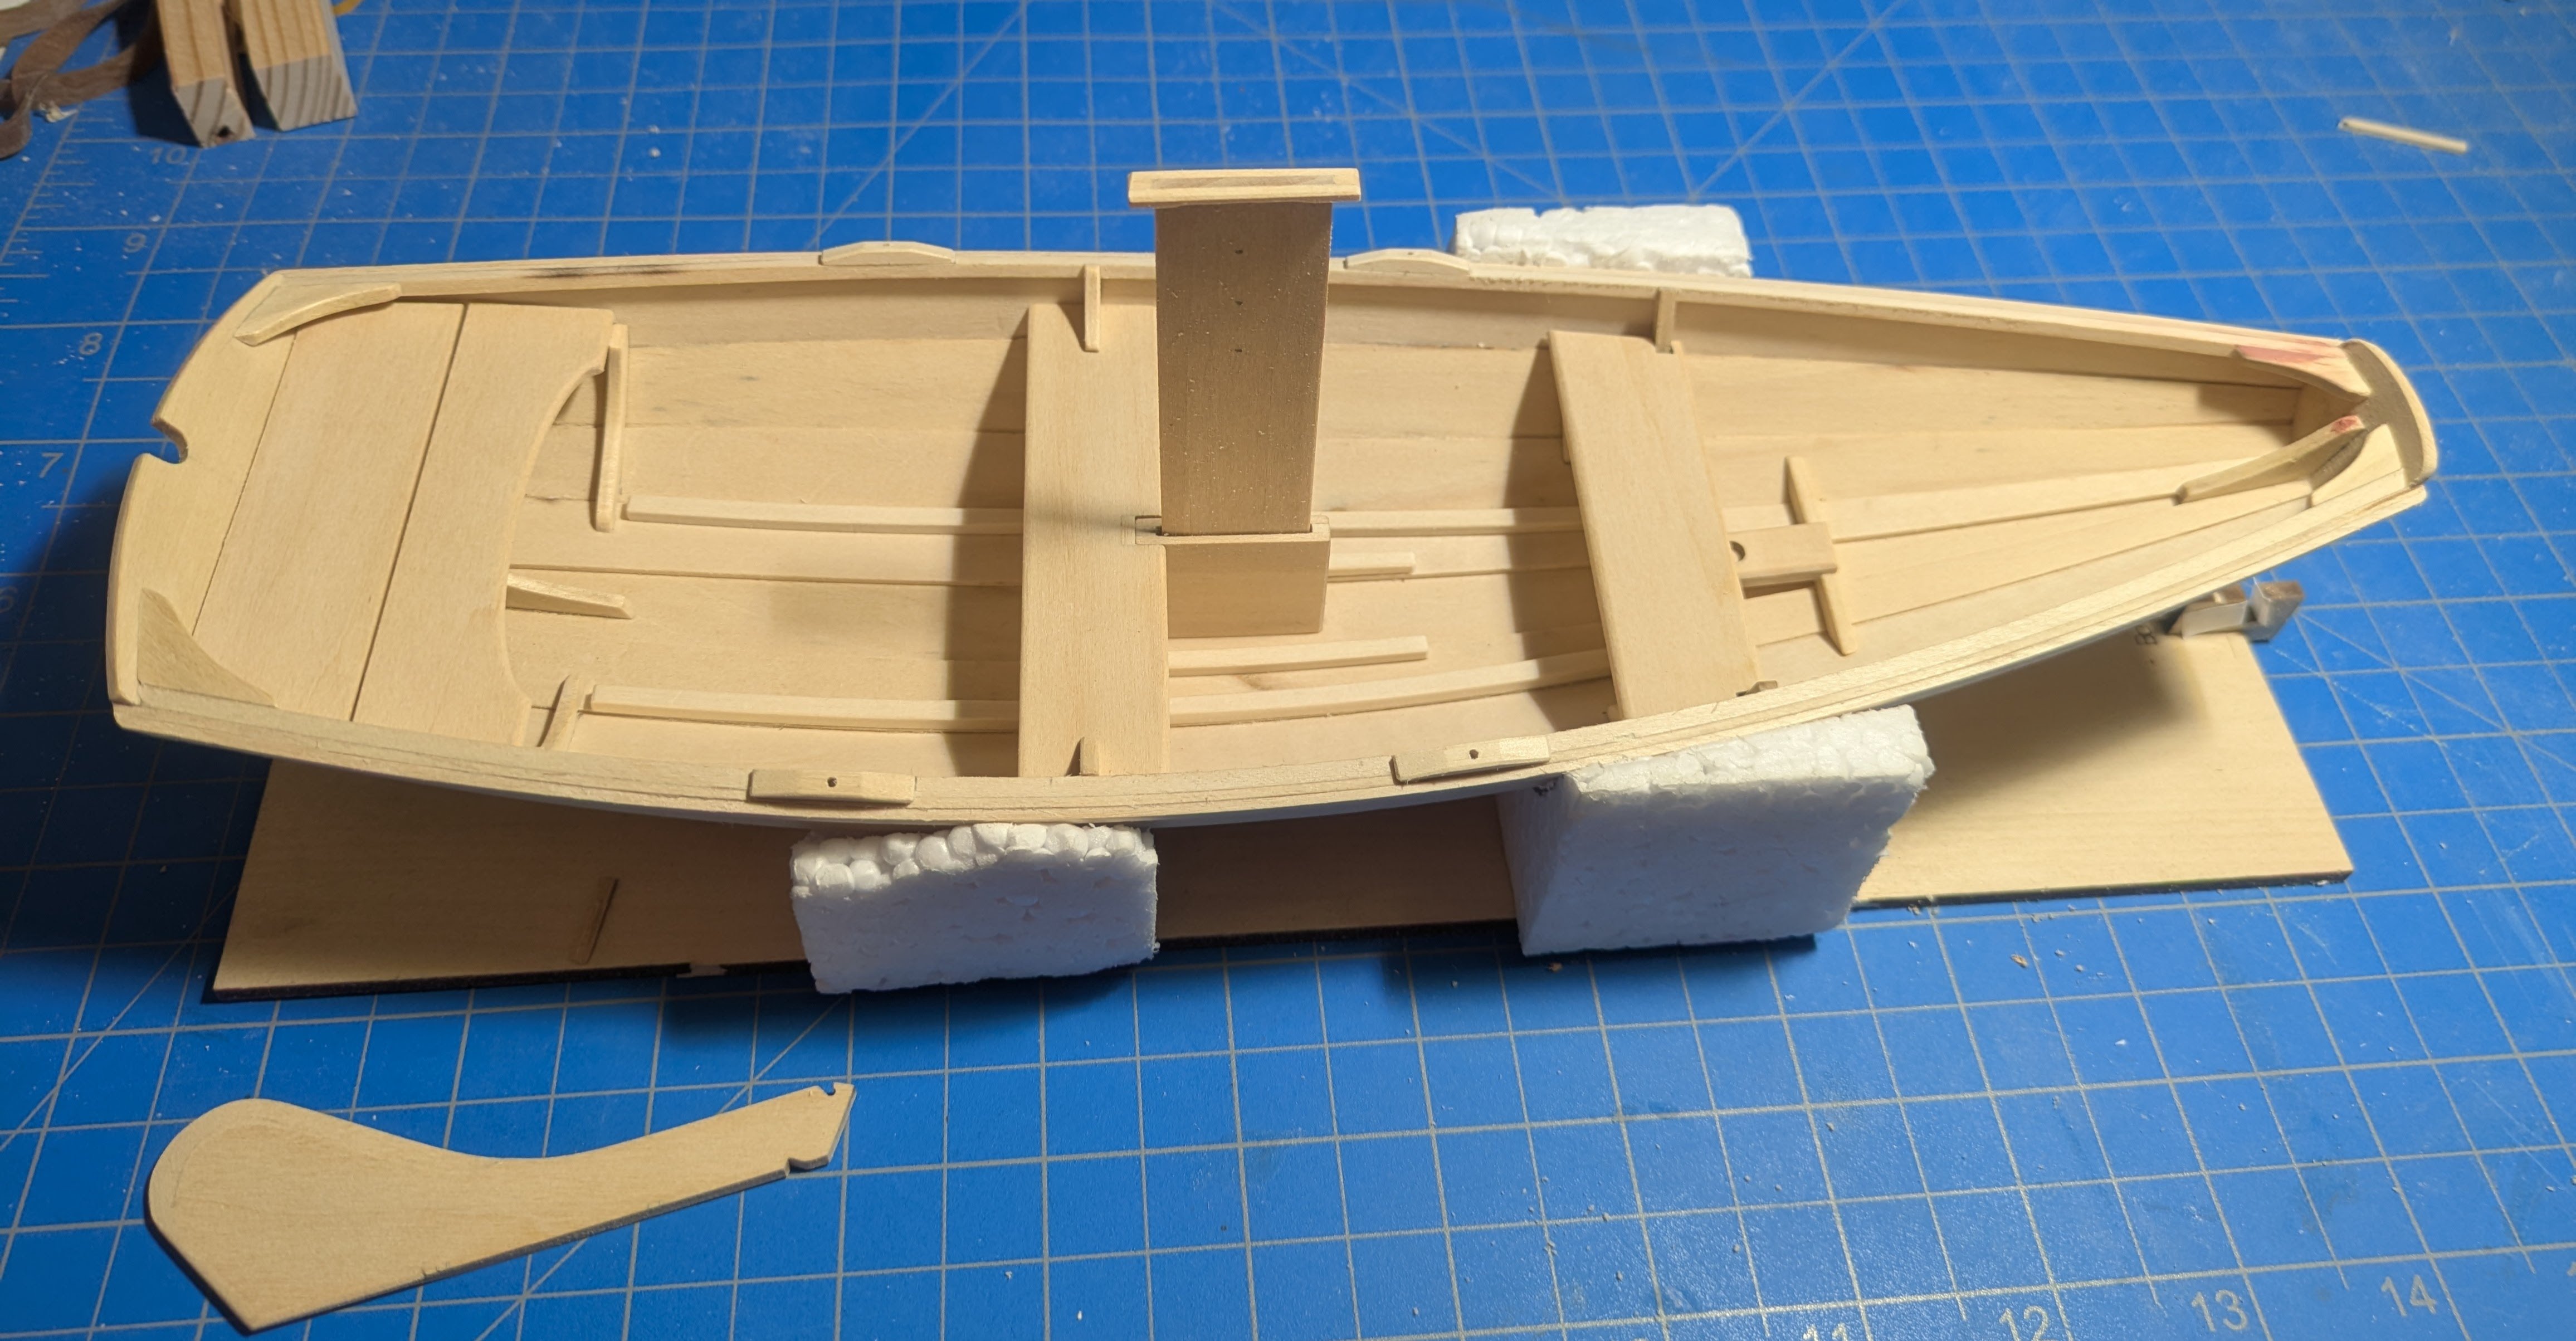
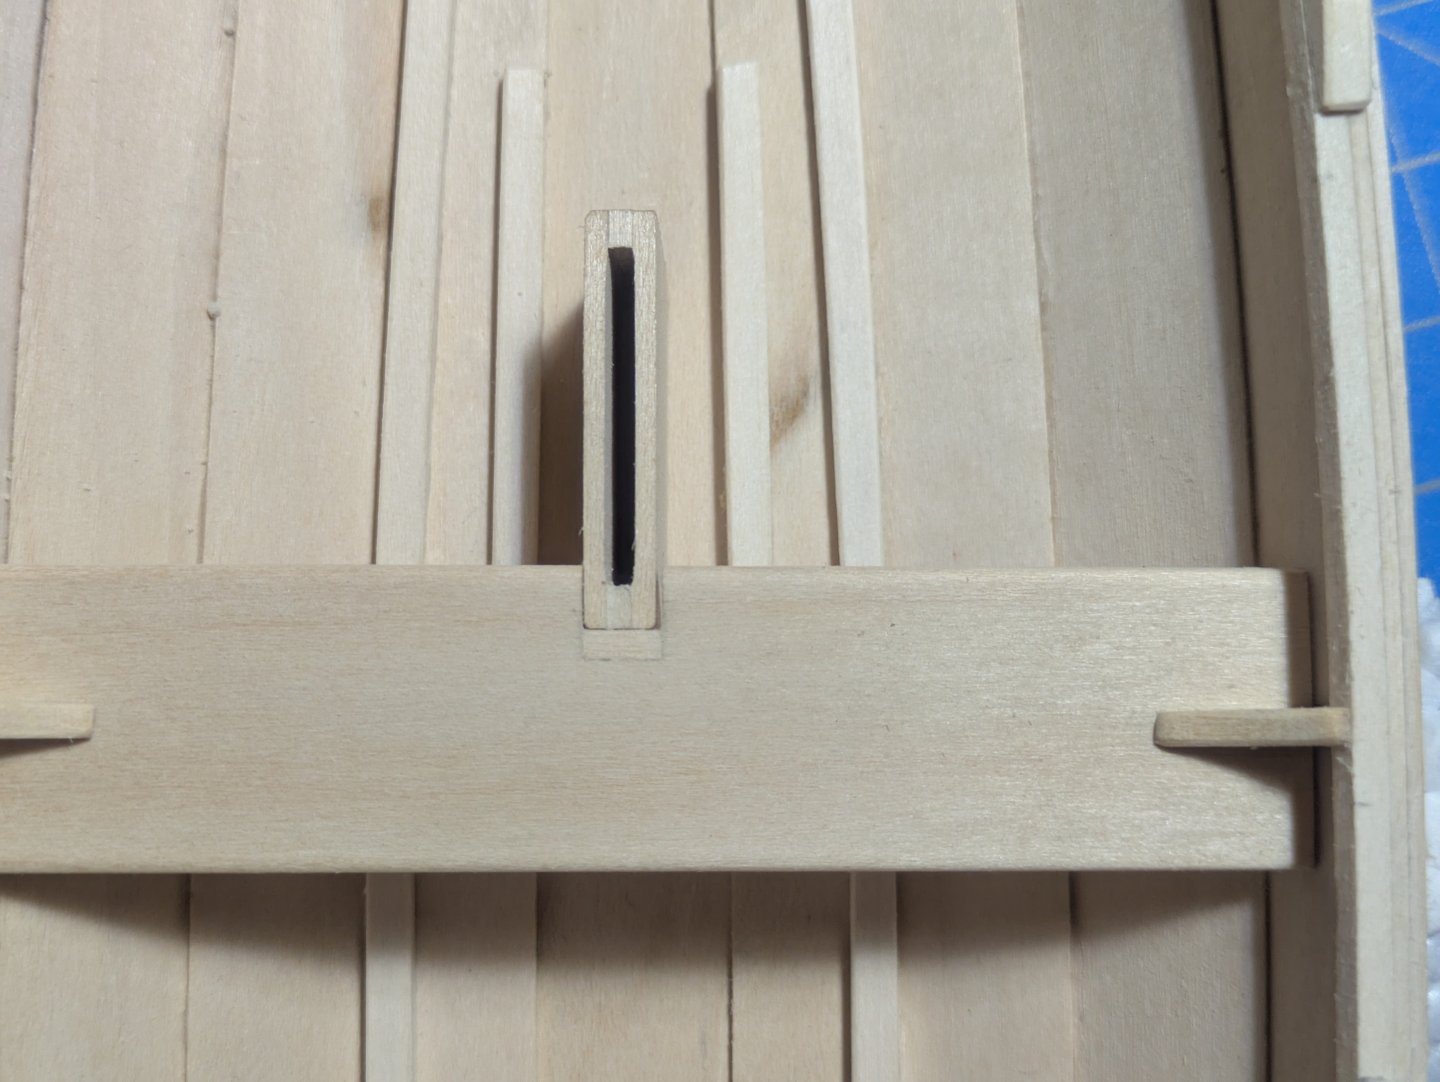
Just about ready for paint. The stern sheets, and thwarts are fitted but still loose. Midship knees are in. I had to trim them some as my thwart is just above the center board trunk and I didn't want to cut down the support knees (maybe I should have). You can see in the bow I had a few small mistakes that i filled with auto spot putty that I had (I will be painting anyway). The top of the dagger board (where I grew up a centerboard always swung down on a pivoted pin) has a smaller stop them in the directions. It just looked to bulky. I may have mentioned this already but by not moving the center board trunk to the back the midship thwart has a gap so I had to fill it in I am going to stain the thwarts but is it stands out to much I will just paint them. On preparing for painting I had given a sonic care tooth brush to my son in-law to modify as a micro sander. He wasn't happy with the way it worked. I( just got in from him and tried it and NO BUENO the vibrations don't move in the correct direction or far enough. He bought a MicroLux sander that I will use. He prints game characters and makes game scenery (boards?). I am already thinking about what I can have him print up.


- 81 replies
-
- 9
-
-
- Norwegian Sailing Pram
- Model Shipways
- (and 1 more)