
HOLIDAY DONATION DRIVE - SUPPORT MSW - DO YOUR PART TO KEEP THIS GREAT FORUM GOING! (89 donations so far out of 49,000 members - C'mon guys!)
×


Dan Poirier
-
Posts
111 -
Joined
-
Last visited
Content Type
Profiles
Forums
Gallery
Events
Everything posted by Dan Poirier
-
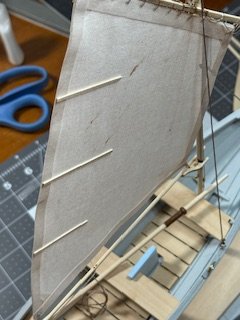
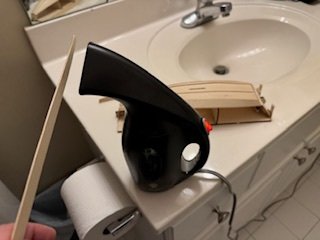
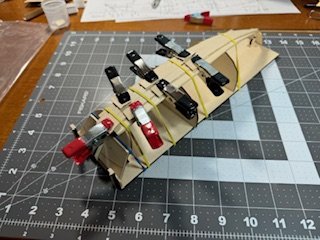
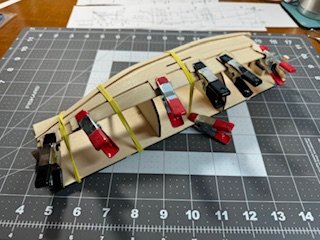
 I'm in the middle of planking. In my last model, I used steam to soften the planks for bending, but though it softened them fast, they seemed to cool just as fast and I found myself without enough time to shape the planks. This time I'm using hot water again. I did the first few in a thermos of boiled water, but the planks got too long for that. Now I'm just boiling them on the stove in a big frying pan 🙂 Being soaked through with boiling water, the planks stay hot and flexible longer. Of course, then it takes forever for the planks to dry again 😞. I'm guessing this is one of those problems without a perfect solution, but I'd love suggestions if there are better ways.
- 37 replies
-
- 4
-

-
- Model Shipways
- muscongus bay lobster smack
- (and 1 more)
-
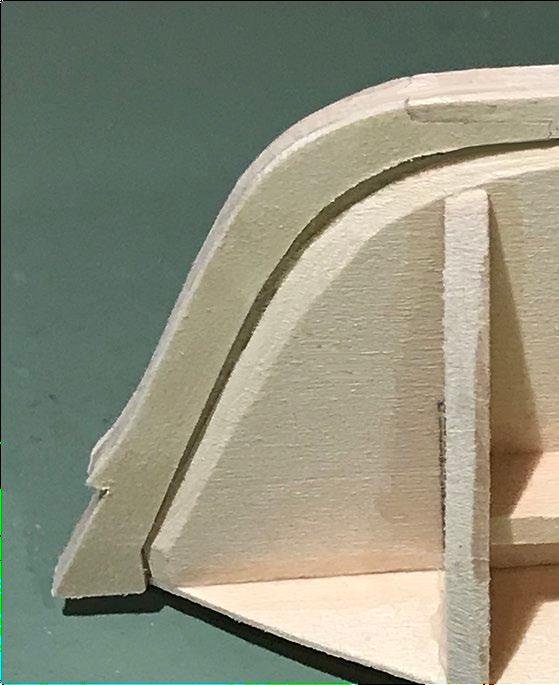
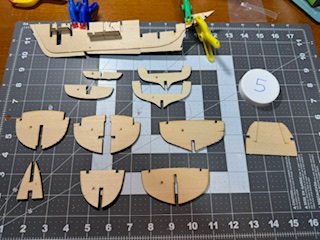
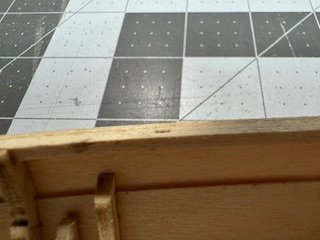
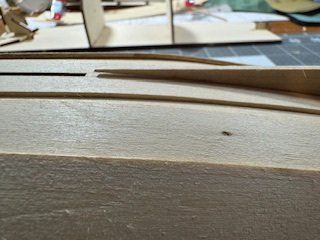
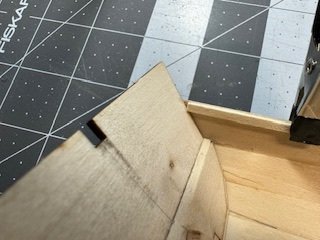
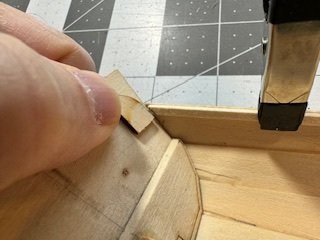
A quick side note. In step 10, one of the instruction photos seems to show a piece along the keel being installed upside-down. I think what might have happened is that the kit has changed and the photos have not been updated. The photos from the instructions show the end of the keel piece (to the right) rests over the end of the stem piece. In the model, this joint appears to have been turned over. Should I report this somewhere? Does Model Shipways follow these forums?
- 37 replies
-
- 5
-
-
- Model Shipways
- muscongus bay lobster smack
- (and 1 more)
-
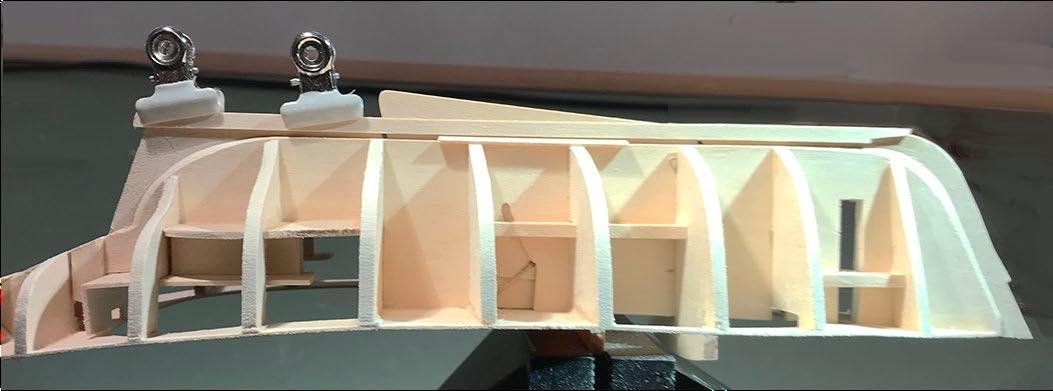
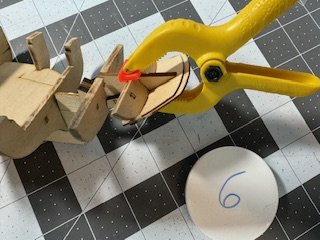
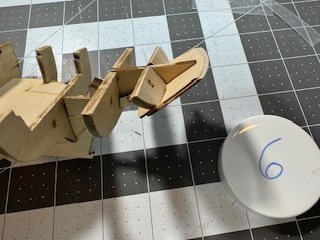
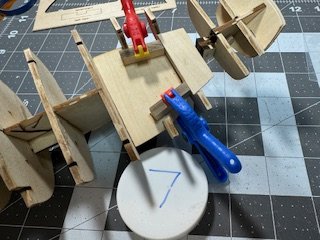
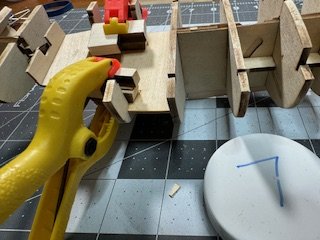
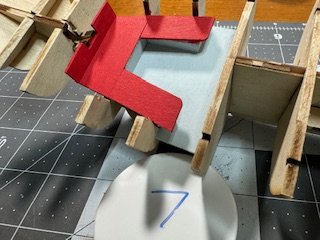
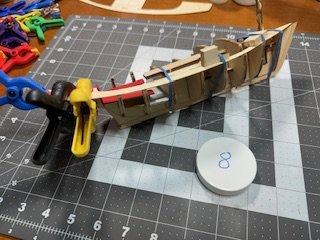
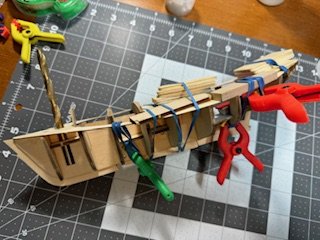
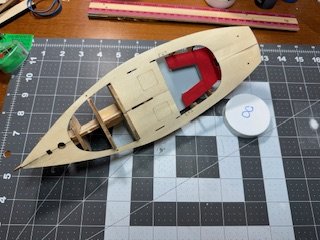
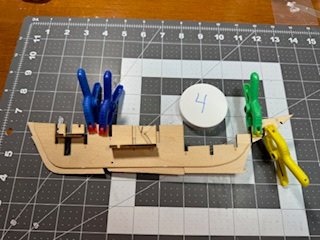
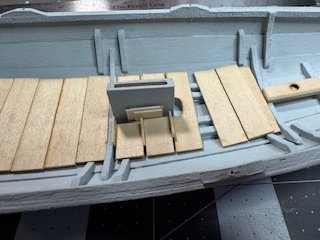
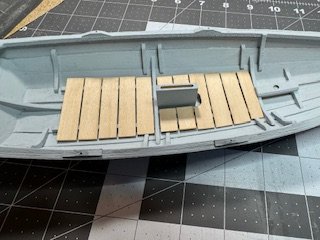
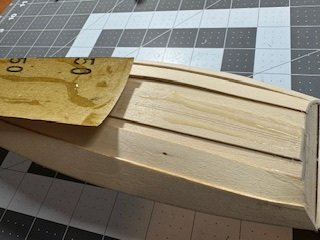
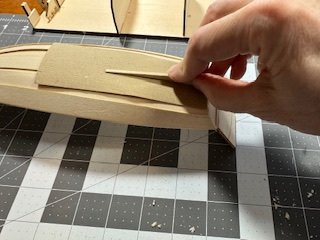
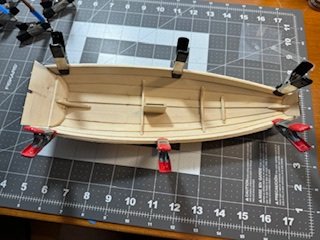
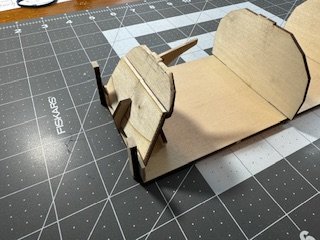
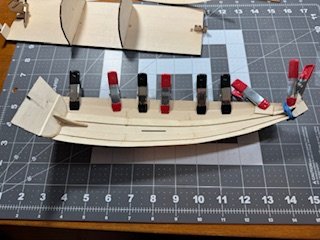
I've installed the frames now. To make sure they were exactly at right angles to the spine, I used rubber cement to position some temporary supports made from old scraps until the glue was dry. The transom and frame 10 had to be built together. The start of some interesting curves in this model. Plus, some fingers-crossed clamping as it was attached. The cockpit seats came next. These needed to be painted now since they'd be hard to reach later, so I got to bring out the red paint. And then, the deck. It came as two long, complicated, very thin sheets of wood that had to be wetted and carefully shaped into place, with more creative clamping and rubber banding. It took a couple of passes to get all the points that needed to be glued actually attached. It's really starting to look like a boat, and it doesn't yet have any hull at all. Very rewarding.

- 37 replies
-
- 11
-
-
- Model Shipways
- muscongus bay lobster smack
- (and 1 more)
-
I was struggling with this the other day. I edited my profile over and over and my signature never changed. It turned out that editing the profile only changes your profile page, which people have to deliberately go look at. To change my signature, I had to click my name at the top, select "Account Settings", and on the next page, at the bottom of the menu at the left, "Signature".
-
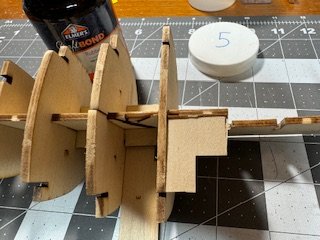
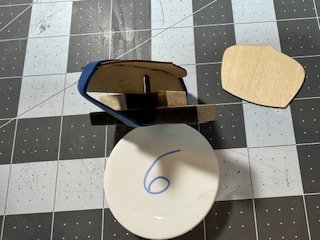
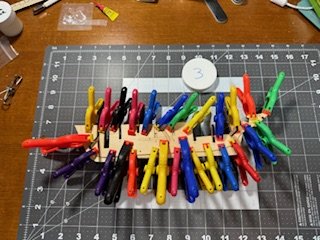
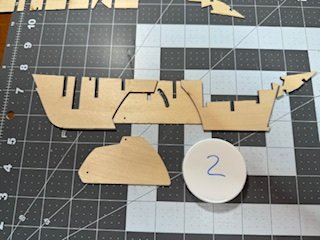
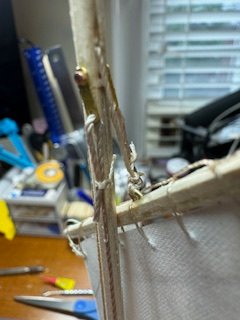
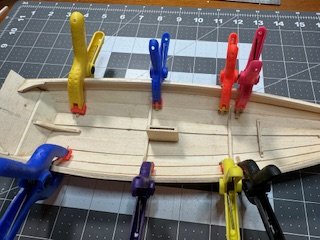
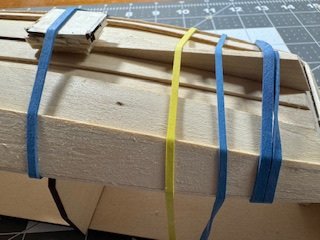
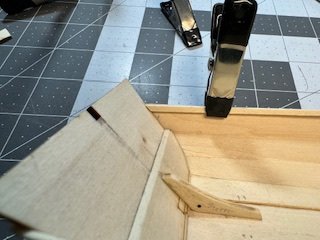
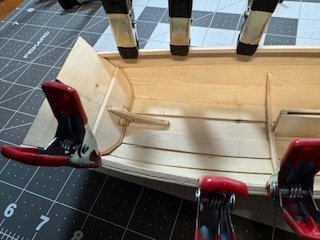
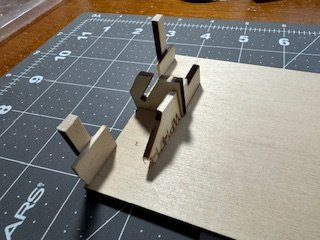
My previous two builds used frames or molds initially attached to a temporary board. For this one, we start by building the boat's central spine, to which the frames will be permanently glued. The spine is made up of several surprisingly thin pieces of wood, glued together. There's provision for a movable centerboard, but I decided to simplify the build a bit and just glued the centerboard in place. Gluing the main boards of the spine together took every clamp I have! After that was dry, several odd pieces were added to reinforce the spine at different points.
- 37 replies
-
- 9
-
-
- Model Shipways
- muscongus bay lobster smack
- (and 1 more)
-
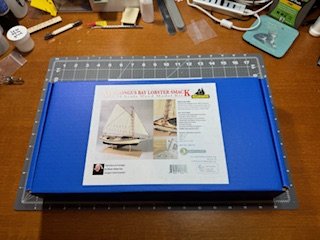
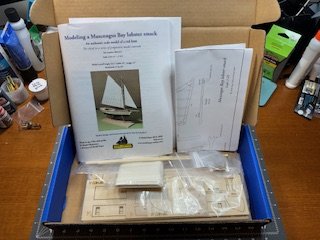
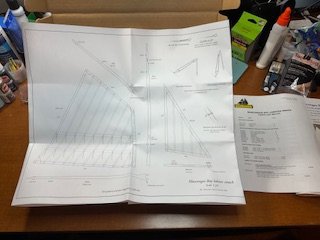
I'm starting my third ship model, the Model Shipways Muscongus Bay lobster smack (1:24). I'm especially looking forward to this one because I just got back from my first trip to Maine, and got to see how they fish for lobsters now. The kit was packaged like the previous Model Shipways models I've built, with the addition this time of an extra-large sheet with full-size diagrams of the spars and sails. I checked out the parts list, and everything seemed to be there.
- 37 replies
-
- 9
-
-
- Model Shipways
- muscongus bay lobster smack
- (and 1 more)
-
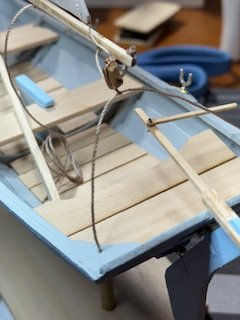
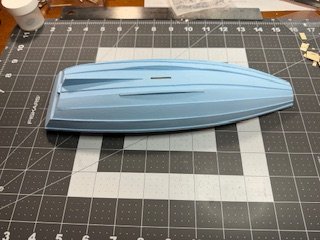
I got my own paint for this one, and chose Carolina blue for the outside and a light gray inside.
- 33 replies
-
- 2
-
-
- Model Shipways
- Norwegian Sailing Pram
- (and 1 more)
-
Looks nice, but $115.99 does seem a tad expensive. It looks like there are some other configurations at various price points.
-
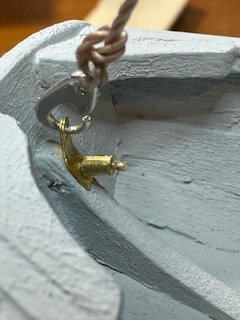
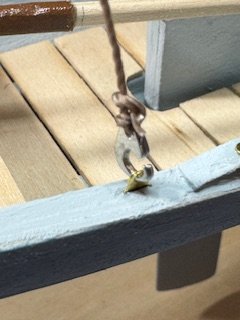
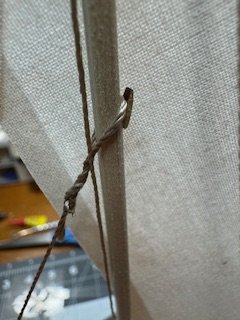
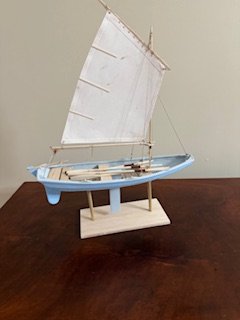
I added the oarlocks And finally it was time to hoist the sail! A forestay and two backstays hold up the mast. The sail is laced onto the gaff. And the traveler and main sheet control the swing of the boom. And that's the Norwegian Sailing Pram! Next: the Muscongus Bay lobster smack.
- 33 replies
-
- 6
-

-
-
- Model Shipways
- Norwegian Sailing Pram
- (and 1 more)
-
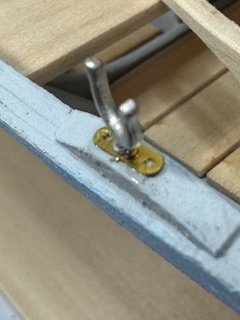
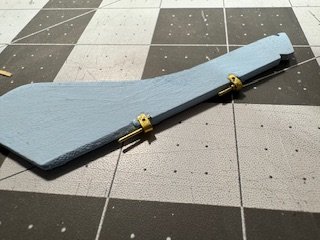
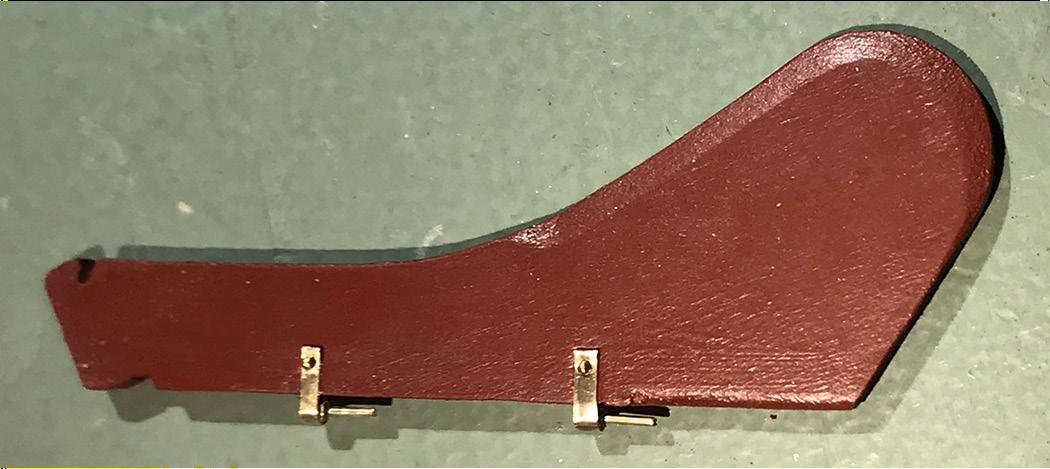
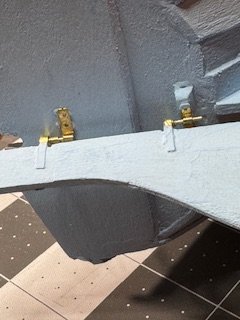
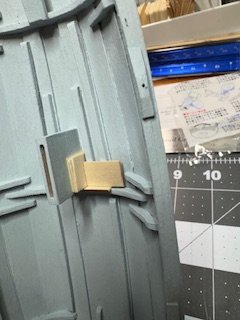
The rudder gave me headaches. First, the brass pintle straps provided seemed too short, definitely shorter than those in the photos in the instructions. Unfortunately the instructions didn't identify which parts in the photo-etched brass were which, but I could not find any other way to assign roles to the parts. Here's the photo from the instructions, next to my pintles: I ended up using some scrap brass from the photo etched sheet to make my own pintles. My other frustration was that the instructions called for CA glue to fasten metal parts to the painted wood. Using original superglue, it ran everywhere and glued together parts that were supposed to move. I ended up having to remake some of the hinge parts, and then went back to white glue to fasten those parts together.
- 33 replies
-
- 5
-
-
- Model Shipways
- Norwegian Sailing Pram
- (and 1 more)
-
I wish I had paid as much detailed attention during the planking on this model as you are doing! Mainly to keep the two sides symmetrical. Would more heating and prebending maybe help the planks fit better?
- 86 replies
-
- 3
-
-
- Model Shipways
- Norwegian Sailing Pram
- (and 3 more)
-
I just used a small brush to paint. Investing in an airbrush doesn't seem worthwhile for what little use I'd make of it. Although I bet it'd be a lot easier to get all those nooks and crannies on the inside painted. The lobster smack is on the shelf, just waiting for me to finish the pram.
- 33 replies
-
- 3
-
-
- Model Shipways
- Norwegian Sailing Pram
- (and 1 more)
-
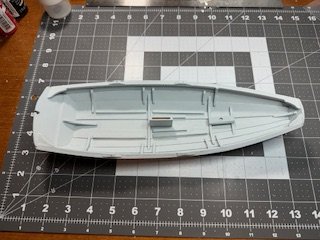
In the last few days, I've painted the hull and put in floorboards and seats. I chose a Carolina blue for the outside, and a light gray for the inside. I used thin pieces of scrap wood to evenly space the floorboards. And finally put in the seats. Still to come: some fittings, mast, sail, etc.

- 33 replies
-
- 6
-
-
- Model Shipways
- Norwegian Sailing Pram
- (and 1 more)
-
Exactly right on the importance of precision early in the project! It'll pay huge dividends later compared to hurrying early. (Ask me how I know...)
-
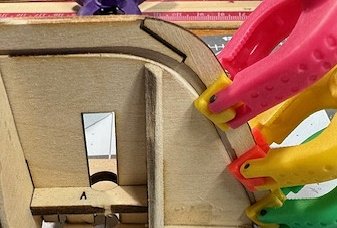
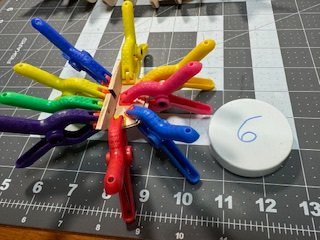
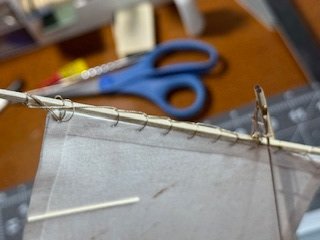
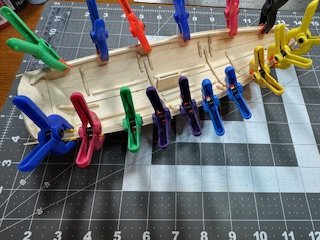
I picked up a bunch of cheap plastic clamps at Harbor Freight. Unlike the metal clamps with rubber-coated tips that came with my first kit, these shouldn't mar the wood. They have little adjustable soft plastic jaws. Here are the clamps at work, as I glue the frames in. Then I added the floor cleats. To attach the metal straps that hold the back stays, I was supposed to drill tiny holes, then use a tiny saw to make slots on each side. Lacking a tiny saw, I just made a row of tiny holes and removed the material with a hobby knife. I think it'll be fine. And here are the rub rails freshly glued on. If you were really looking close, you might have noticed one more set of frames in the boat in this picture than the earlier one, as I missed one in the first go-round. No harm done though.

- 33 replies
-
- 5
-
-
- Model Shipways
- Norwegian Sailing Pram
- (and 1 more)
-
Greetings from the Nation's Capital
Dan Poirier replied to AreyPotter's topic in New member Introductions
Welcome! Have fun building the dory; that's how I started last month. -
I'll bet that once that plank is painted, the repair will be undetectable.
- 23 replies
-
- 3
-
-
- Lowell Grand Banks Dory
- Model Shipways
- (and 1 more)
-
In the last week, I finished planking. The build board seemed unnecessary to hold the boat's shape by this point, so I didn't use it for the last few planks. I used a travel clothes steamer to shape the planks, which worked great. Skipping ahead while waiting for glue to dry, I made the rowlock pads. I also installed the skeg, first shaping it to match the hull's curve by rubber gluing sandpaper temporarily to the bottom. No pictures (I forgot, sorry), but I've installed the frames. My hull was a bit wider than it was supposed to be, maybe due to skipping the build molds for the last few planks, so they didn't fit very well at first. I misted the inside of the hull and used a couple of clamps to pull in the sides a bit, which seemed to help. The frames still weren't quite wide enough and I'm currently relying on glue to pull in the hull enough to stick to them. Fingers crossed. Now I've started on the inwales. I clamped them to the outside of the hull to dry and cool after shaping them, as suggested by another build log. Then I used a piece of scrap wood to mark the stern transom angle on the stern ends of the inwales, cut them to fit, and glued the stern ends in.

- 33 replies
-
- 6
-
-
- Model Shipways
- Norwegian Sailing Pram
- (and 1 more)
-
Well, I've ruined my sail and will probably need to start it over. It's completely my own fault. I traced over the paper pattern with a black gel pen so I could more easily trace it onto the fabric. Then I forgot to remove the paper before starting to glue things to the fabric, and the ink bled onto the sail. D'oh! I think I have some thin woven white fabric somewhere that I can try out as a sail. Maybe I'll experiment with dying it first. That should be fun. I'm just glad I'm not trying to make a living building boats!
- 33 replies
-
- 2
-
-
- Model Shipways
- Norwegian Sailing Pram
- (and 1 more)
-
Welcome! I hope you'll let us know what you decide to work on and how it goes.
-
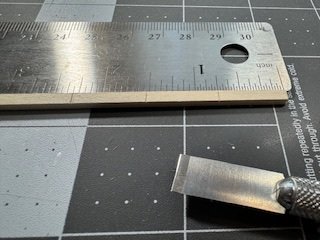
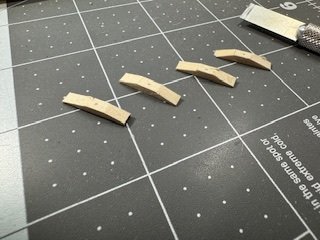
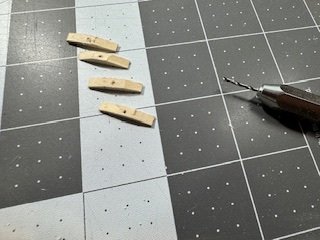
@druxey using a tiny sanding stick was indeed my plan. I've now tried to finish these gains by sanding. I'm not sure if I accomplished a whole lot. But I think I removed enough material for the ends of the planks to lie flat, and my sloppy craftsmanship will be hidden under the plank anyway.
- 33 replies
-
- 5
-
-
- Model Shipways
- Norwegian Sailing Pram
- (and 1 more)
-
I'm looking forward to seeing how this goes, especially when you have the plans for the real boat the model is based on. I'm just a little ahead of you on this model.
- 86 replies
-
- 2
-
-
- Model Shipways
- Norwegian Sailing Pram
- (and 3 more)
-
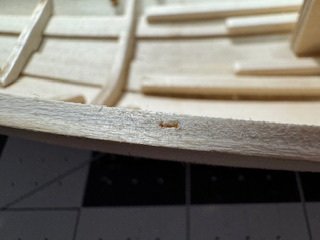
The last pair of planks are giving me problems. I have to cut gains, and my chisel-tip knife blade keeps going all the way through the plank. I think I'm going to try to repair the bad cuts with glue, and tomorrow when it's good and dry, see if I can't make the gains by sanding instead of cutting. I seem to do better with sanding.
- 33 replies
-
- 6
-
-
- Model Shipways
- Norwegian Sailing Pram
- (and 1 more)
-
Ahoy, mates...from central California
Dan Poirier replied to Capt. Kenway's topic in New member Introductions
Welcome! Enjoy the modeling. -
It's been largely a week of planking. I also skipped ahead and did some work on the mast rudder, and dagger board while various planks' glue was drying, but forgot to take pictures. I was annoyed at how wobbly the stern transom was on the build board, so I tried to stop it wobbling. Then I added the bottom planks. and the garboard planks and I'm working on the second strake. That couldn't be clamped while on the build board, but the boat is pretty rigid now on its own, so I think the build board has finished its usefulness.
- 33 replies
-
- 6
-
-
- Model Shipways
- Norwegian Sailing Pram
- (and 1 more)