
HOLIDAY DONATION DRIVE - SUPPORT MSW - DO YOUR PART TO KEEP THIS GREAT FORUM GOING! (89 donations so far out of 49,000 members - C'mon guys!)
×


Dan Poirier
-
Posts
111 -
Joined
-
Last visited
Content Type
Profiles
Forums
Gallery
Events
Everything posted by Dan Poirier
-
 Bulkhead #17 has appeared again, between the pages of the model instruction book. Phew!
 -
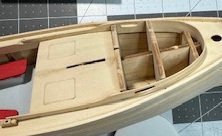
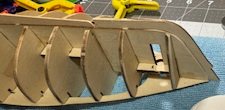
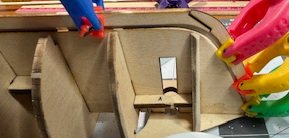
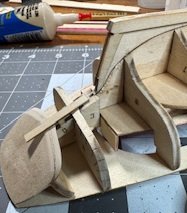
I'm assembling the skeleton of the ship (is there a naval term for this?) and it's really clever how all the flat pieces of wood are designed to slot together in different orientations until the whole thing is rock solid. One minor problem: bulkhead #17 seems to have wandered off sometime between when I installed it yesterday and after I'd been working on the model for a while today. It's not on the desk, under anything on the desk, under the desk, under other furniture, in the laundry, in the Roomba's dirt bag... just gone. I'm working on making a replacement from scrap wood but it's a challenge. All these pieces have lots of slots to fit together with other pieces, and that leaves some narrow weak points where things keep breaking. I'll keep at it, but it'll be a lot easier if the original piece finally turns up.
-
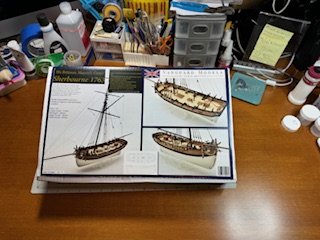
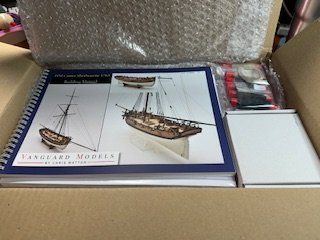
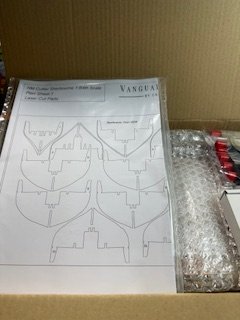
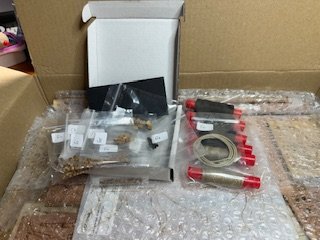
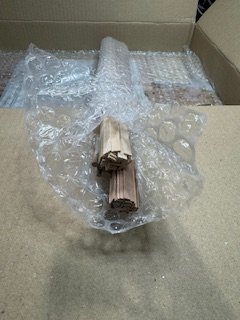
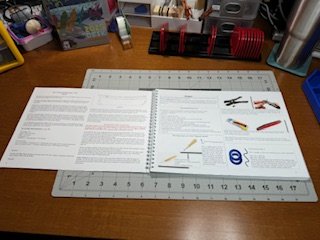
I'm starting on Vanguard Models' HM Armed Cutter Sherbourne. It's described as a Novice level kit, but it looks significantly more involved than my prior models, the three Model Shipways starter models. I took a few unboxing photos. The box has some nice photos of the completed model on the outside. Inside, by far the nicest set of instructions I've seen is right on top. There are what appear to be diagrams of the laser-cut parts sheets, as well as rigging guides. Fittings, "rope", etc. Long thin pieces and flat pieces 🙂 I'm looking forward to getting started.

-
Next up is HM Sherbourne from Vanguard models. It's already on the workbench 🙂
- 37 replies
-
- 4
-

-
- Model Shipways
- muscongus bay lobster smack
- (and 1 more)
-
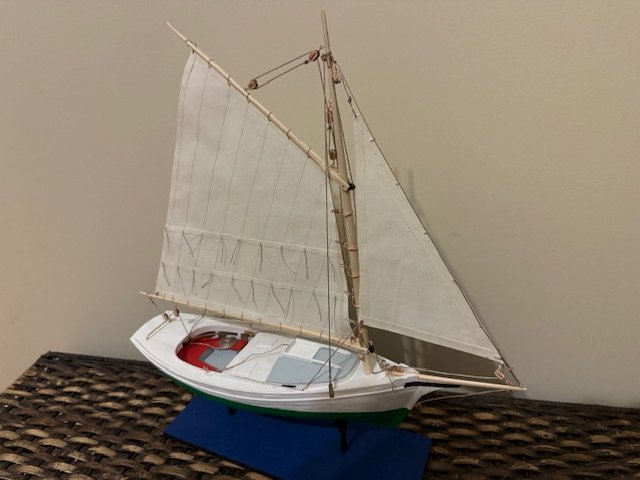
I've been making sails, doing the rigging, and finishing up odds and ends, and here's the result: There were challenges along the way, but as before, they made the completion more exciting.
- 37 replies
-
- 11
-

-
-
- Model Shipways
- muscongus bay lobster smack
- (and 1 more)
-
Welcome!
-
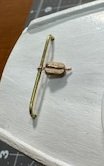
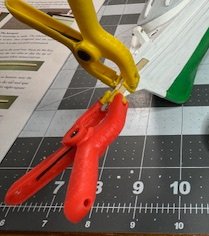
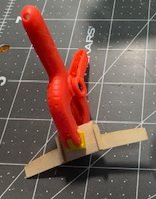
I'm currently using a pin vice hand drill that came in a set of beginner modeling tools I bought with my first model. It looks like this: It's okay with larger bits, but when I try to use something as small as a 0.3 mm bit, I have to use a wrench to get it tight enough for the bit not to slip. I don't like using tools that I have to force this way. That's using the collet with the smallest opening, as seen in the closer end in this picture. I'm wondering if I just need a better made instance of this same tool, and if so, how would I find one. Or is there a better tool for the job? I hope the vast experience on this forum can help me out.

-
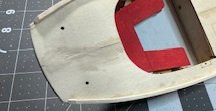
Looks good! I like the dark red paint on the bottom.
-
When I built the dory model, I had trouble getting my frames assembled straight. Maybe because I didn't notice the printed patterns were not quite to scale? Your post makes me realize that open boat models like this dory are really pretty challenging to get everything lined up just right. I'm building a lobster smack now, which, having a deck, conceals a very solid skeleton inside, to which everything else is attached. That gives the boat a much sturdier shape than having to just attach all the exterior parts to one another.
-
In previous models I've had to cut lengths of brass rod. I used a cutting wheel on a Dremel and it worked very well. This is the first time I've had to drill holes in brass, and I didn't find it easy. Trying to drill holes through the brass with a hand drill went very, very slowly, even after annealing the brass with a kitchen butane torch. I got impatient and resorted to trying to use the tiny drill bits in my cordless screwdriver/drill and that actually worked pretty well. I'll probably do that again if I can.
- 37 replies
-
- 1
-
-
- Model Shipways
- muscongus bay lobster smack
- (and 1 more)
-
I'm enjoying your build log. I did the Model Shipways dory as my first model. Seeing the one you're doing, I'm thinking the larger scale might have made it easier for a beginner. When you praise your micro plane, do you mean a very small wood plane, or a Microplane (tm) brand tool of some sort?
- 56 replies
-
- 1
-
-
- grand banks dory
- Midwest Products
- (and 2 more)
-
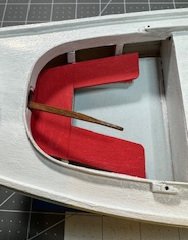
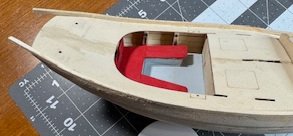
That is Plaid's Apple Barrel Matte Bright Red (20501E). I should say that after painting those seats matte red, I switched to gloss finishes. They look so much better (to me), in person if not in photos.
- 37 replies
-
- 1
-
-
- Model Shipways
- muscongus bay lobster smack
- (and 1 more)
-
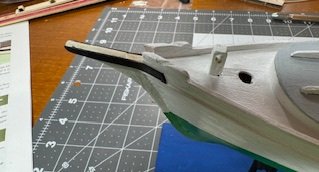
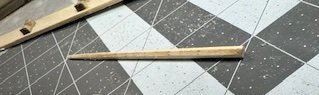
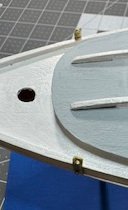
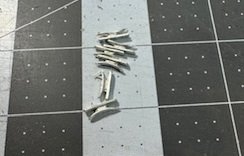
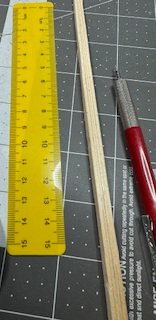
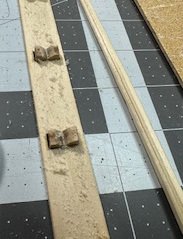
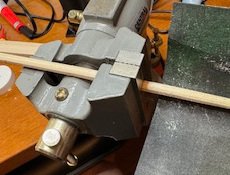
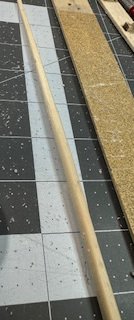
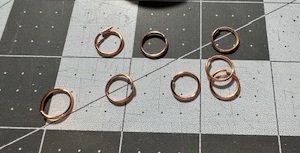
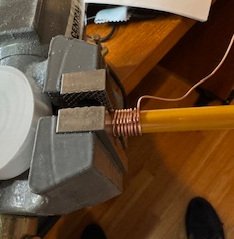
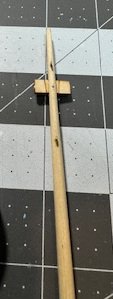
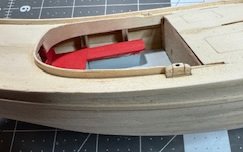
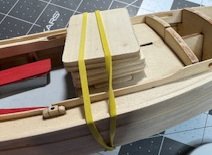
The boat is now painted, and work continues. The traveler, tiller, fairleads (eyebolts in the deck beside the cabin). The trailboards on either side of the beakhead. The bowsprit, which had to be rounded. The chainplates. For this model, they had to be made from a strip of brass. The cleats were provided, but needed painting. The mast was constructed by gluing together two laser-cut pieces, then trimming down the resulting long stick with a rectangular cross-section to a round tapered stick. The mast fittings included mast hoops, made from thick copper wire, some ring bolts, and two stop cleats, which were further trimmed after this picture was taken. The boom and gaff were constructed similarly to the mast. Up next: sails and rigging!


- 37 replies
-
- 8
-
-
- Model Shipways
- muscongus bay lobster smack
- (and 1 more)
-
Looks great!
-
If you contact support at ME and let them know parts were missing from your kit, they'll send them to you. I like how you're working out how to make things work.
- 86 replies
-
- 3
-
-
- Model Shipways
- Norwegian Sailing Pram
- (and 3 more)
-
Welcome! It would be great if you could post something more here about the models you've worked on.
-
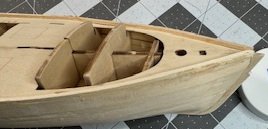
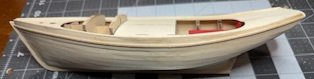
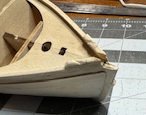
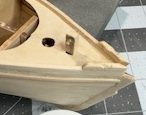
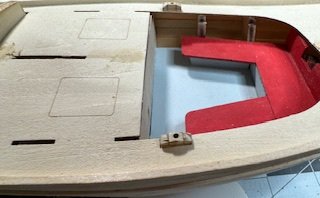
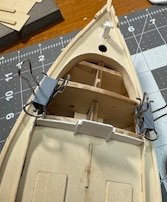
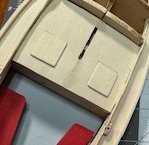
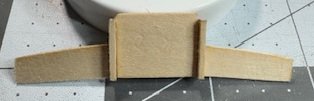
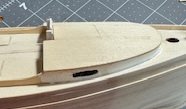
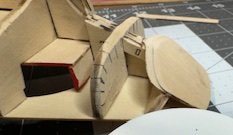
It's past time for an update. I've gotten most of the deck assembly completed. Trimmed the protruding sheer plank down to deck level all the way around. Except that it didn't quite protrude everywhere, so I glued in an extra piece of wood to fill in the gap, then trimmed everything down together. Trimmed the ragged plank ends around the transom and smoothed everything. Installed toe rails. And rub rails. The fairleads are a bit rough, but there. And there's a Samson post (what a name!) Oarlock pads. The coaming goes around the back of the cabin. The cabin sides go similarly around the front. There are window openings, so I painted a couple of little scraps black and glued them inside. The wet well covers are glued on. The cabin bulkhead assembled: Cabin bulkhead and roof installed. And you can see here the black pieces inside the windows. The sliding cabin hatch and runners are also installed, but I seem to not have any photos of that. Next up: some prep work and painting.

- 37 replies
-
- 11
-
-
- Model Shipways
- muscongus bay lobster smack
- (and 1 more)
-
Hello! I hope you'll consider doing a build log as you work on your model.
-
That hull looks so good! It took me two tries to get my hull even mostly straight. As I recall, I had to make some adjustments too in order to get the thwarts to sit properly.
- 86 replies
-
- 2
-
-
- Model Shipways
- Norwegian Sailing Pram
- (and 3 more)
-
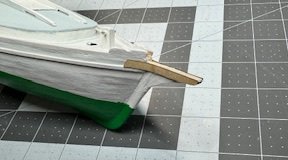
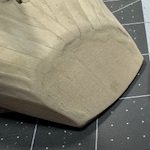
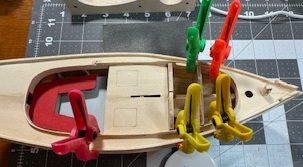
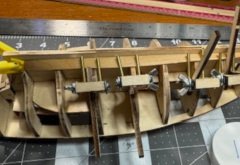
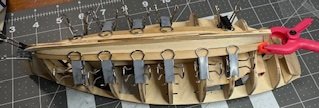
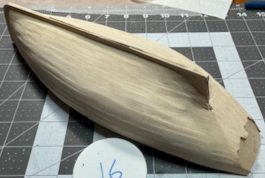
I'm about done with the planking, except for a tiny bit more work with plastic wood and sanding things smooth. I won't post plank-by-plank photos, but here are a few highlights. The hull mostly faired: Stem, keel, and sternpost: Installing the garboard, using some of the plank clamps I bought at Model Expo. These did not work very well for me. Then I made some clamps from binder clips like I've seen on some other build logs here, and was much happier with those. So, after a lot more of that, and also switching to using an electric plank bender, I started filling cracks and sanding and have gotten it looking like this:
- 37 replies
-
- 10
-
-
- Model Shipways
- muscongus bay lobster smack
- (and 1 more)
-
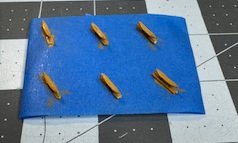
I'd like to make some kind of little signs to identify models that I'm displaying, without breaking the bank. They'd just say something like "Norwegian Sailing Pram" or "Lowell Grand Banks Dory". I'm thinking about what I might do with a computer and printer, or label maker, my model-making tools, and lots of little scraps of thin wood 🙂 Do others have favorite ways to do this?
-
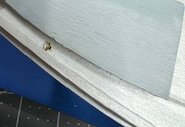
I had the same issue with the slot being longer than it needed to be for the daggerboard. I also had to sand the daggerboard thinner before it would slip easily up and down in the box. I think I even did a little sanding inside the box (with a long thin sanding stick) to make a little more room.
- 86 replies
-
- 1
-
-
- Model Shipways
- Norwegian Sailing Pram
- (and 3 more)
-
Welcome to the community!
-
Welcome! It's a great community.
-
Chuck's videos are great! I found them here on Youtube. His videos are not so much about bending planks around curves in the hull, my current problem, than they are about adapting rectangular planks to fit well on a hull that is not the same distance around on the top and bottom of where the plank is installed. In the beginner models I'm doing, the individual planks are custom-shaped by laser-cutting, so that's taken into account already. I'm sure I'll need Chuck's techniques when/if I start doing models that just come with a stack of identical, rectangular planks that need to be fitted. I've been browsing other plank bending videos, and I'm starting to think I want an electric plank bender. But before I do that, I'm going to read some more forums.
- 37 replies
-
- 2
-
-
- Model Shipways
- muscongus bay lobster smack
- (and 1 more)


