HOLIDAY DONATION DRIVE - SUPPORT MSW - DO YOUR PART TO KEEP THIS GREAT FORUM GOING! (Only 75 donations so far out of 49,000 members - C'mon guys!)
×


Jim M
-
Posts
165 -
Joined
-
Last visited
Content Type
Profiles
Forums
Gallery
Events
Everything posted by Jim M
-
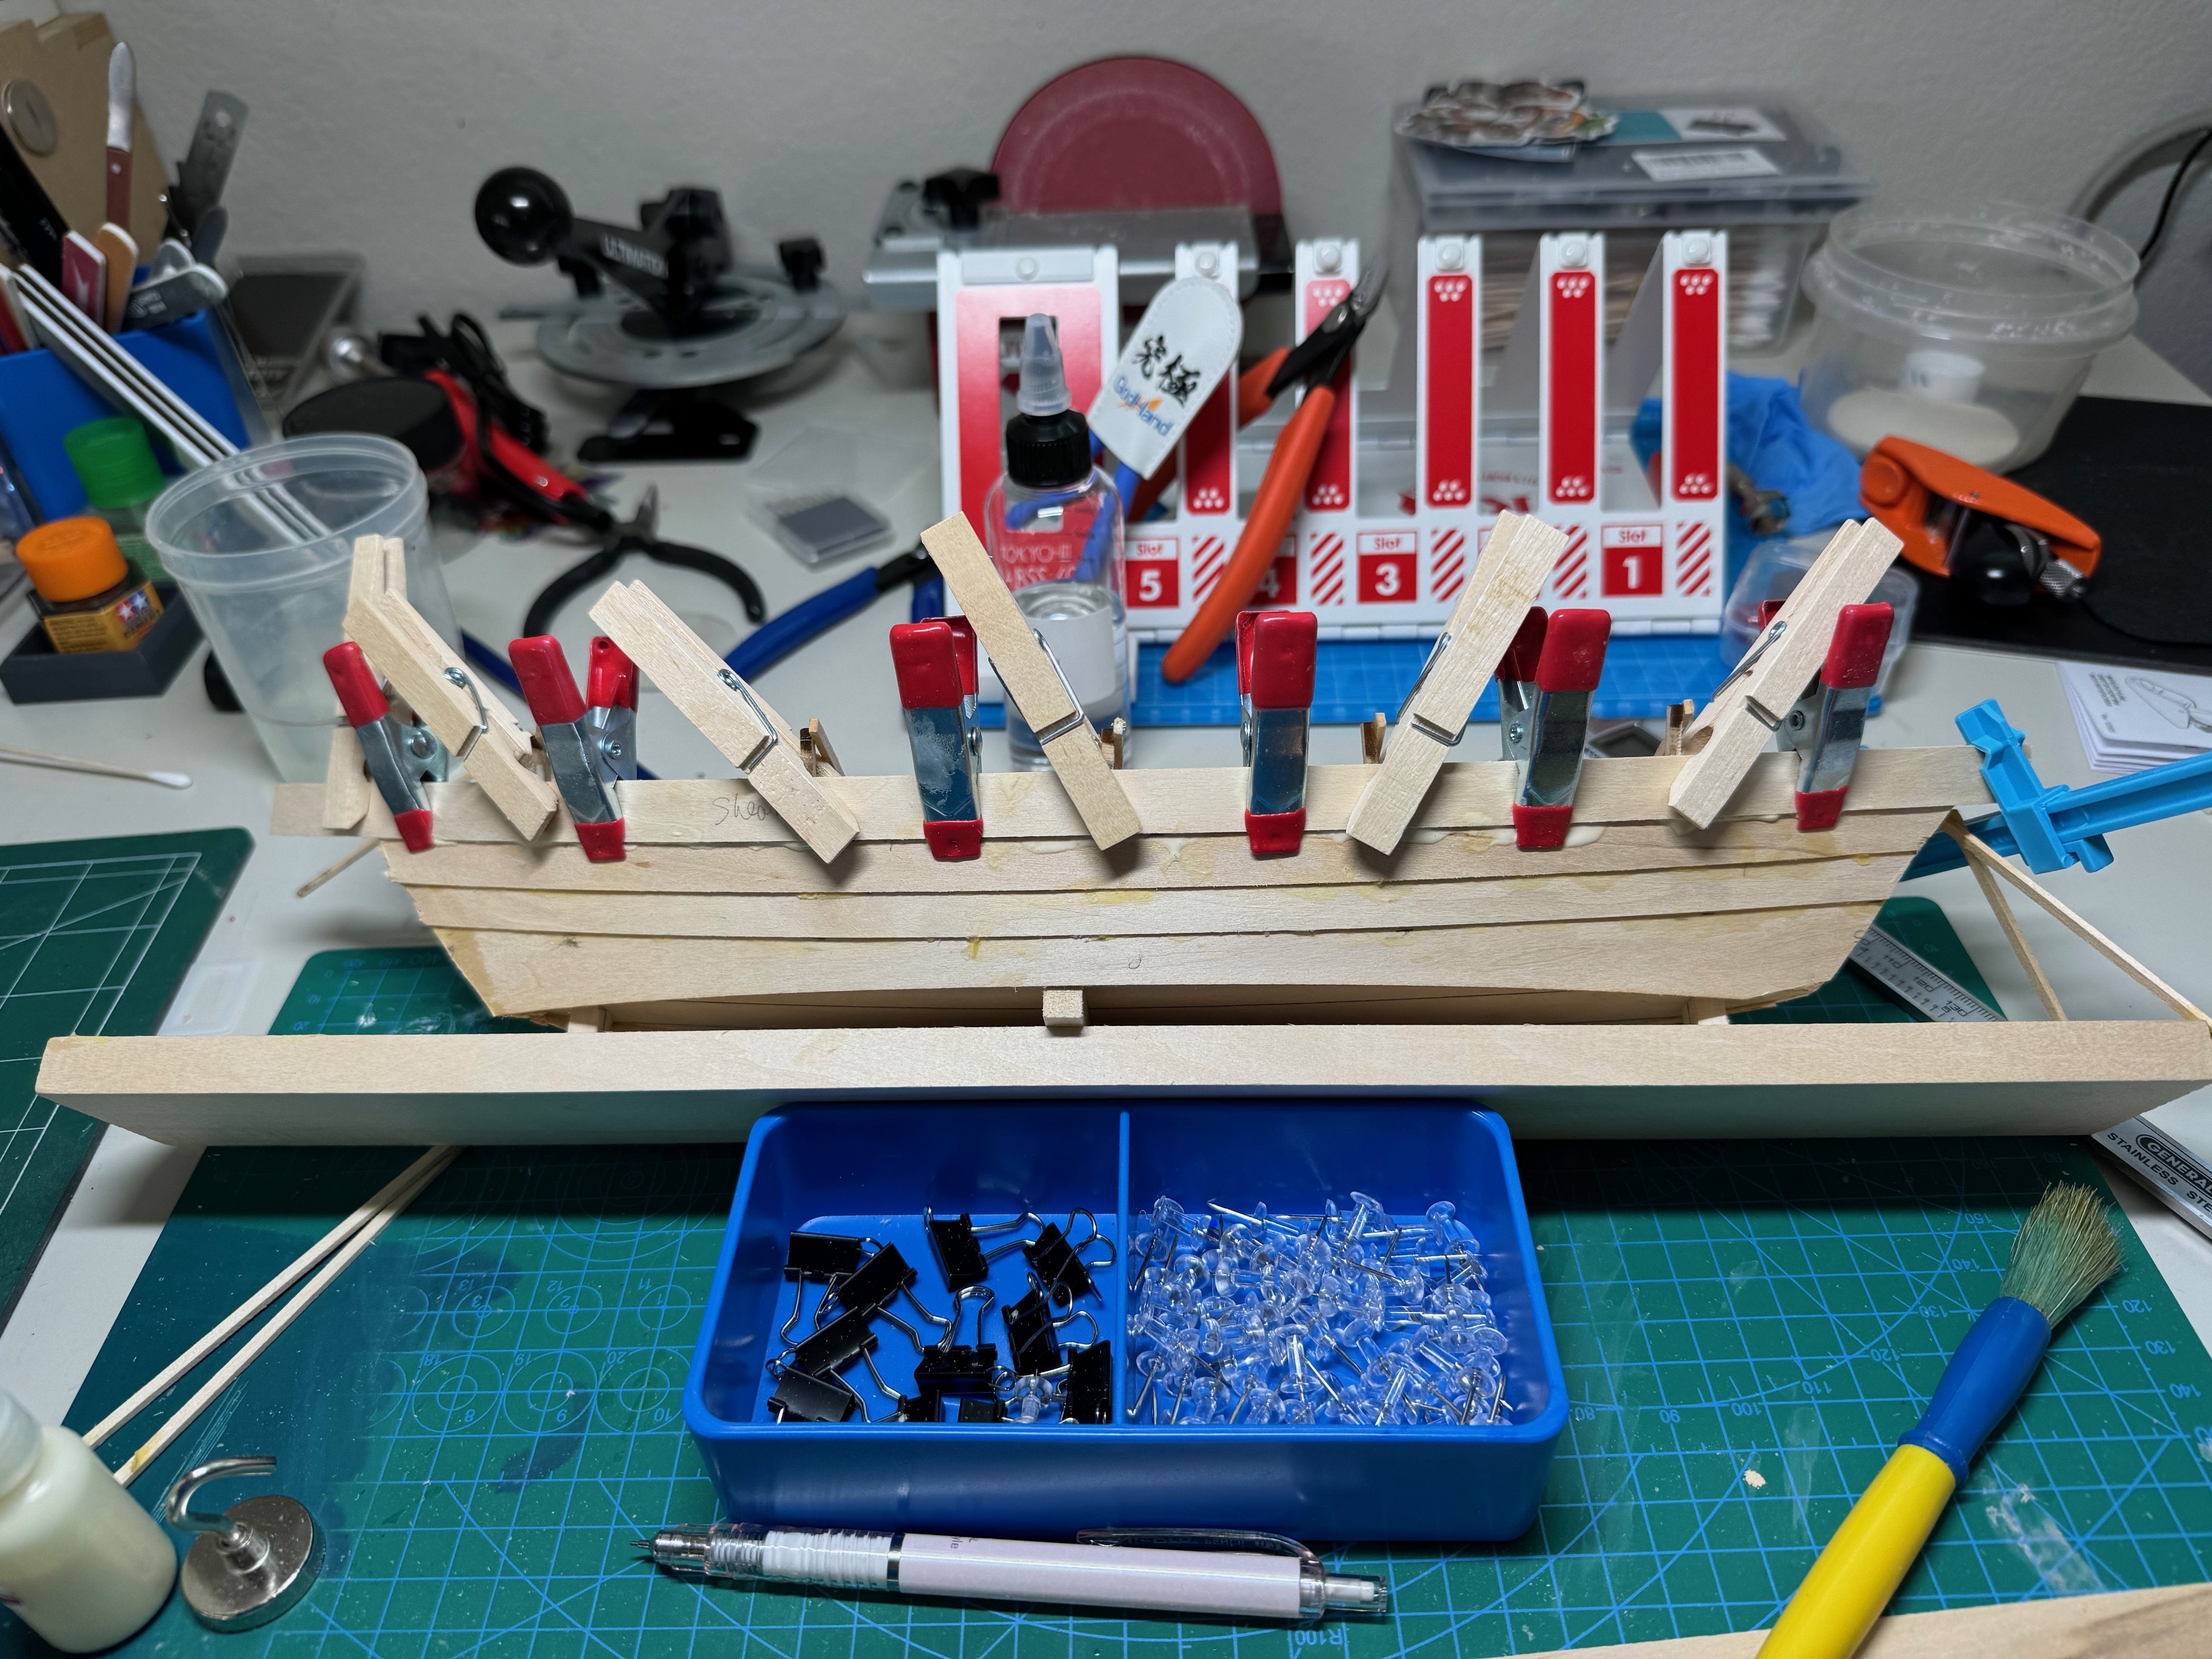
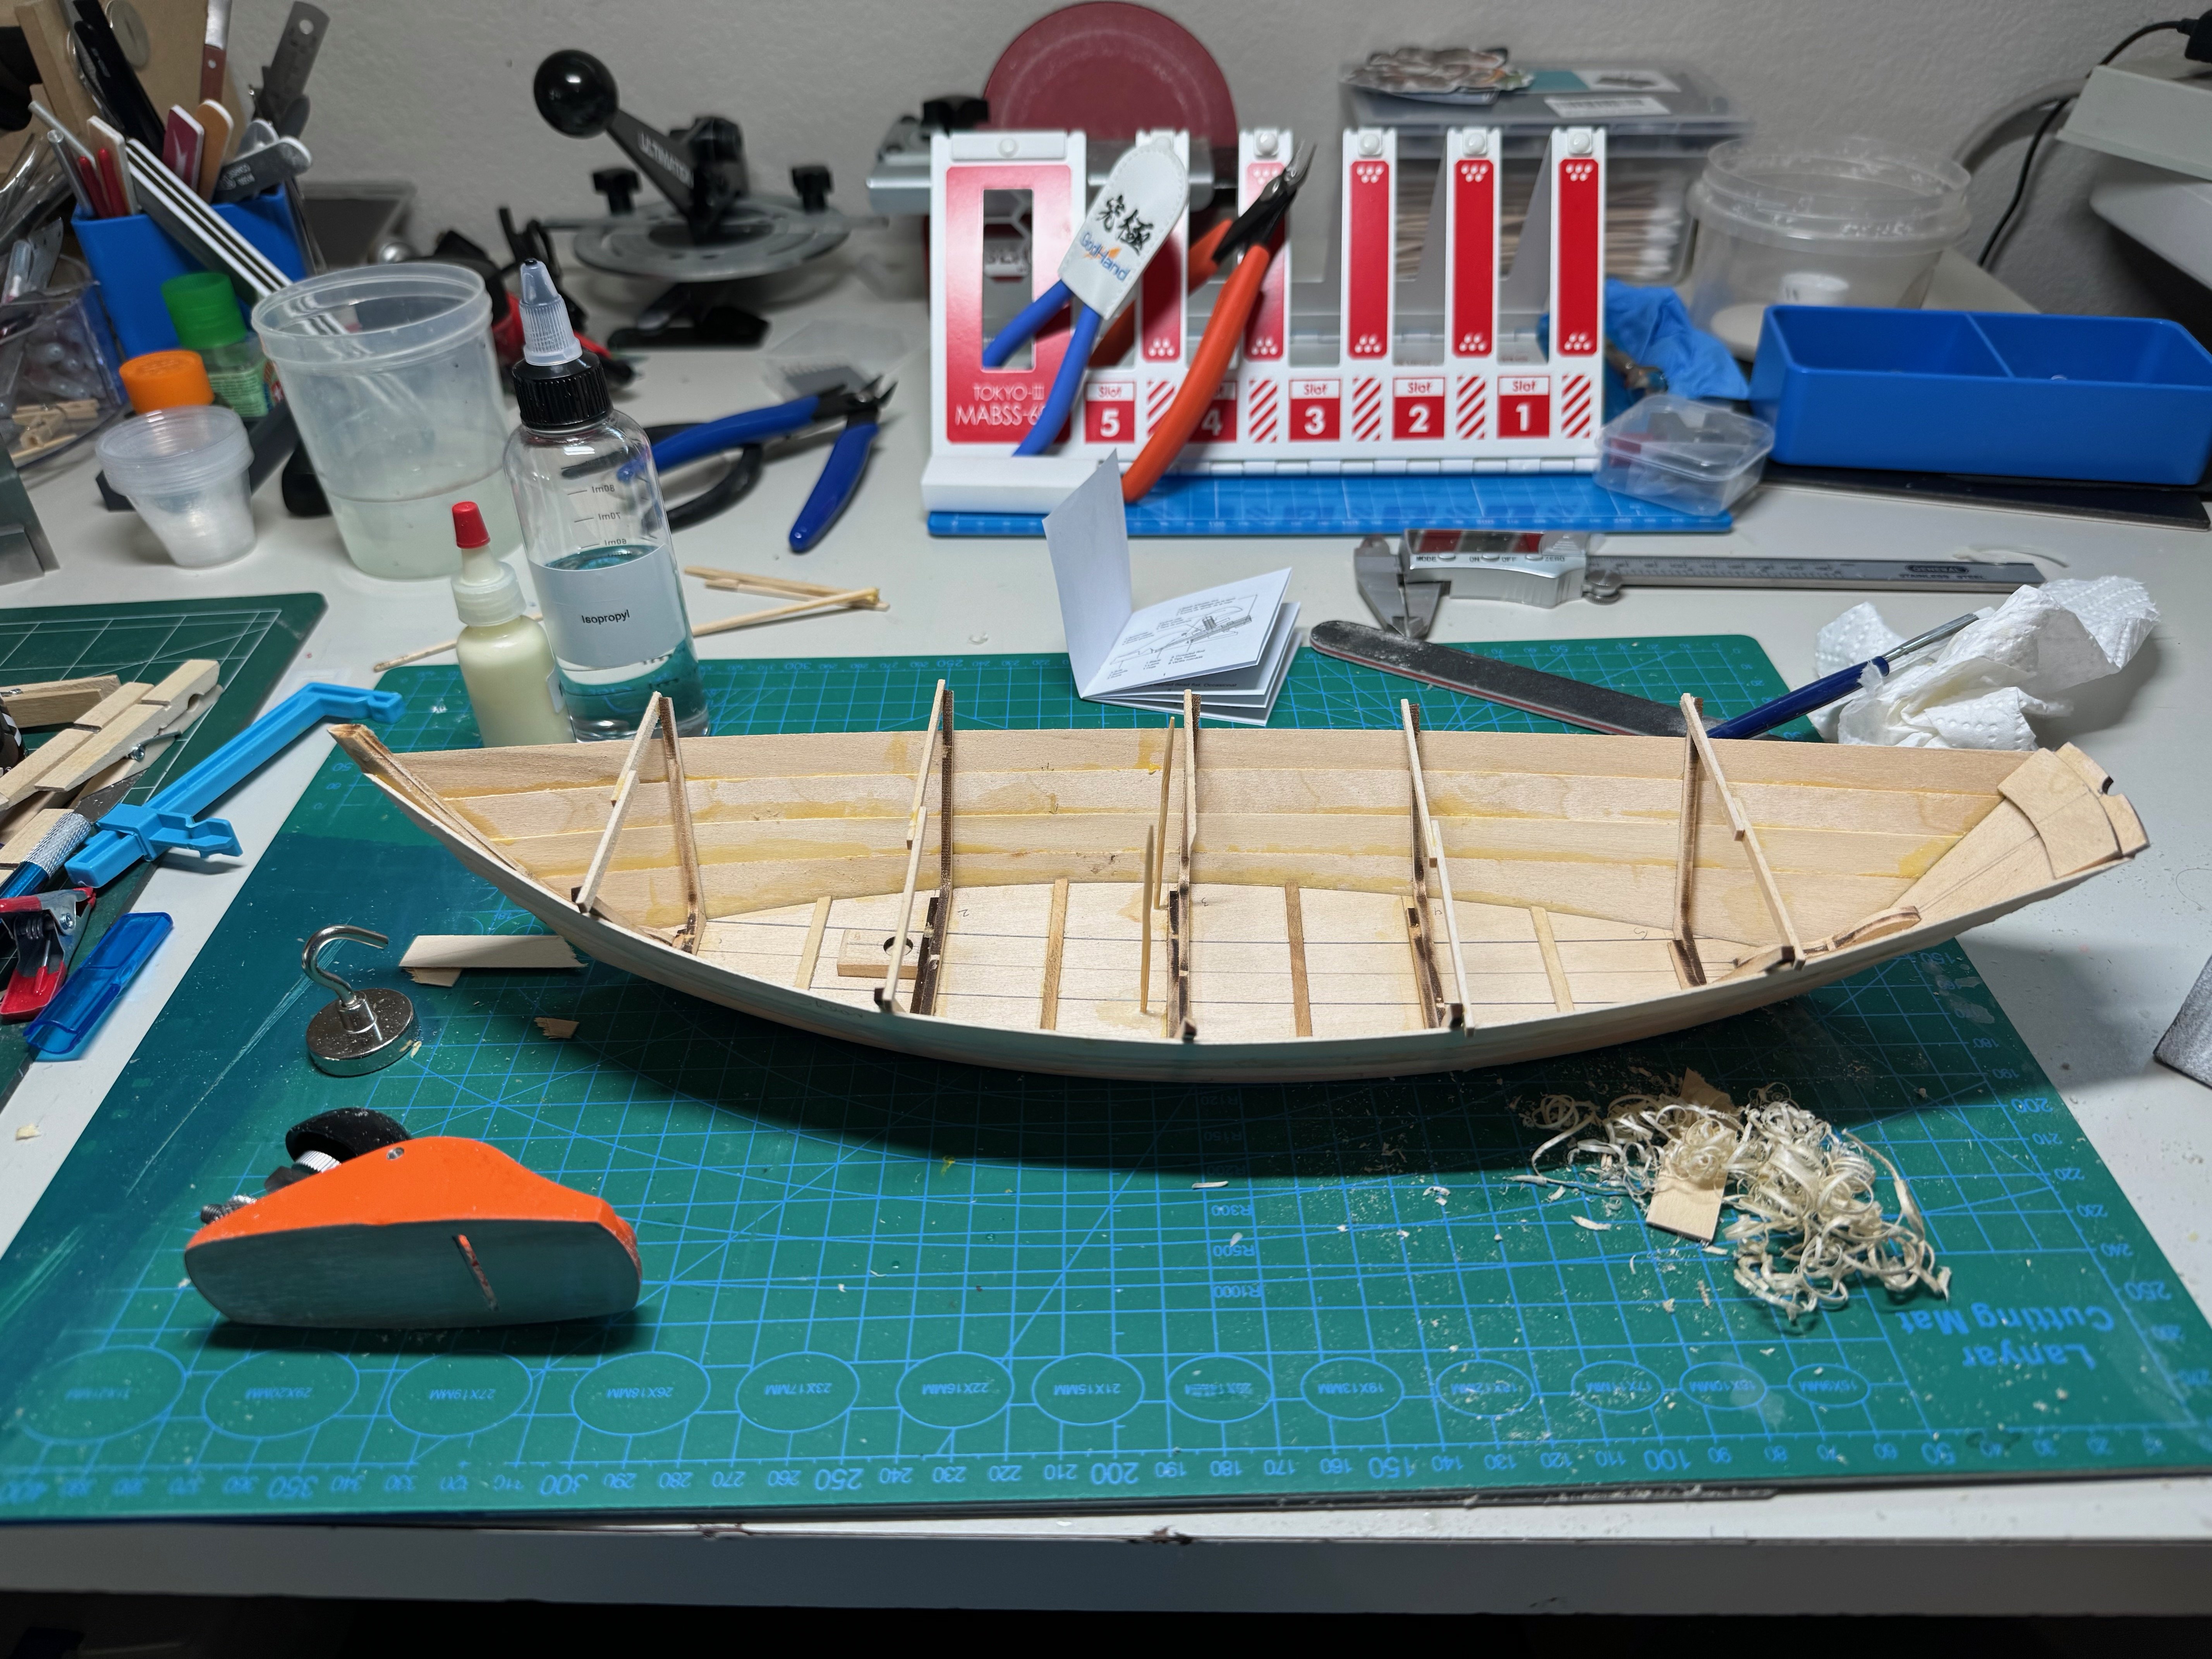
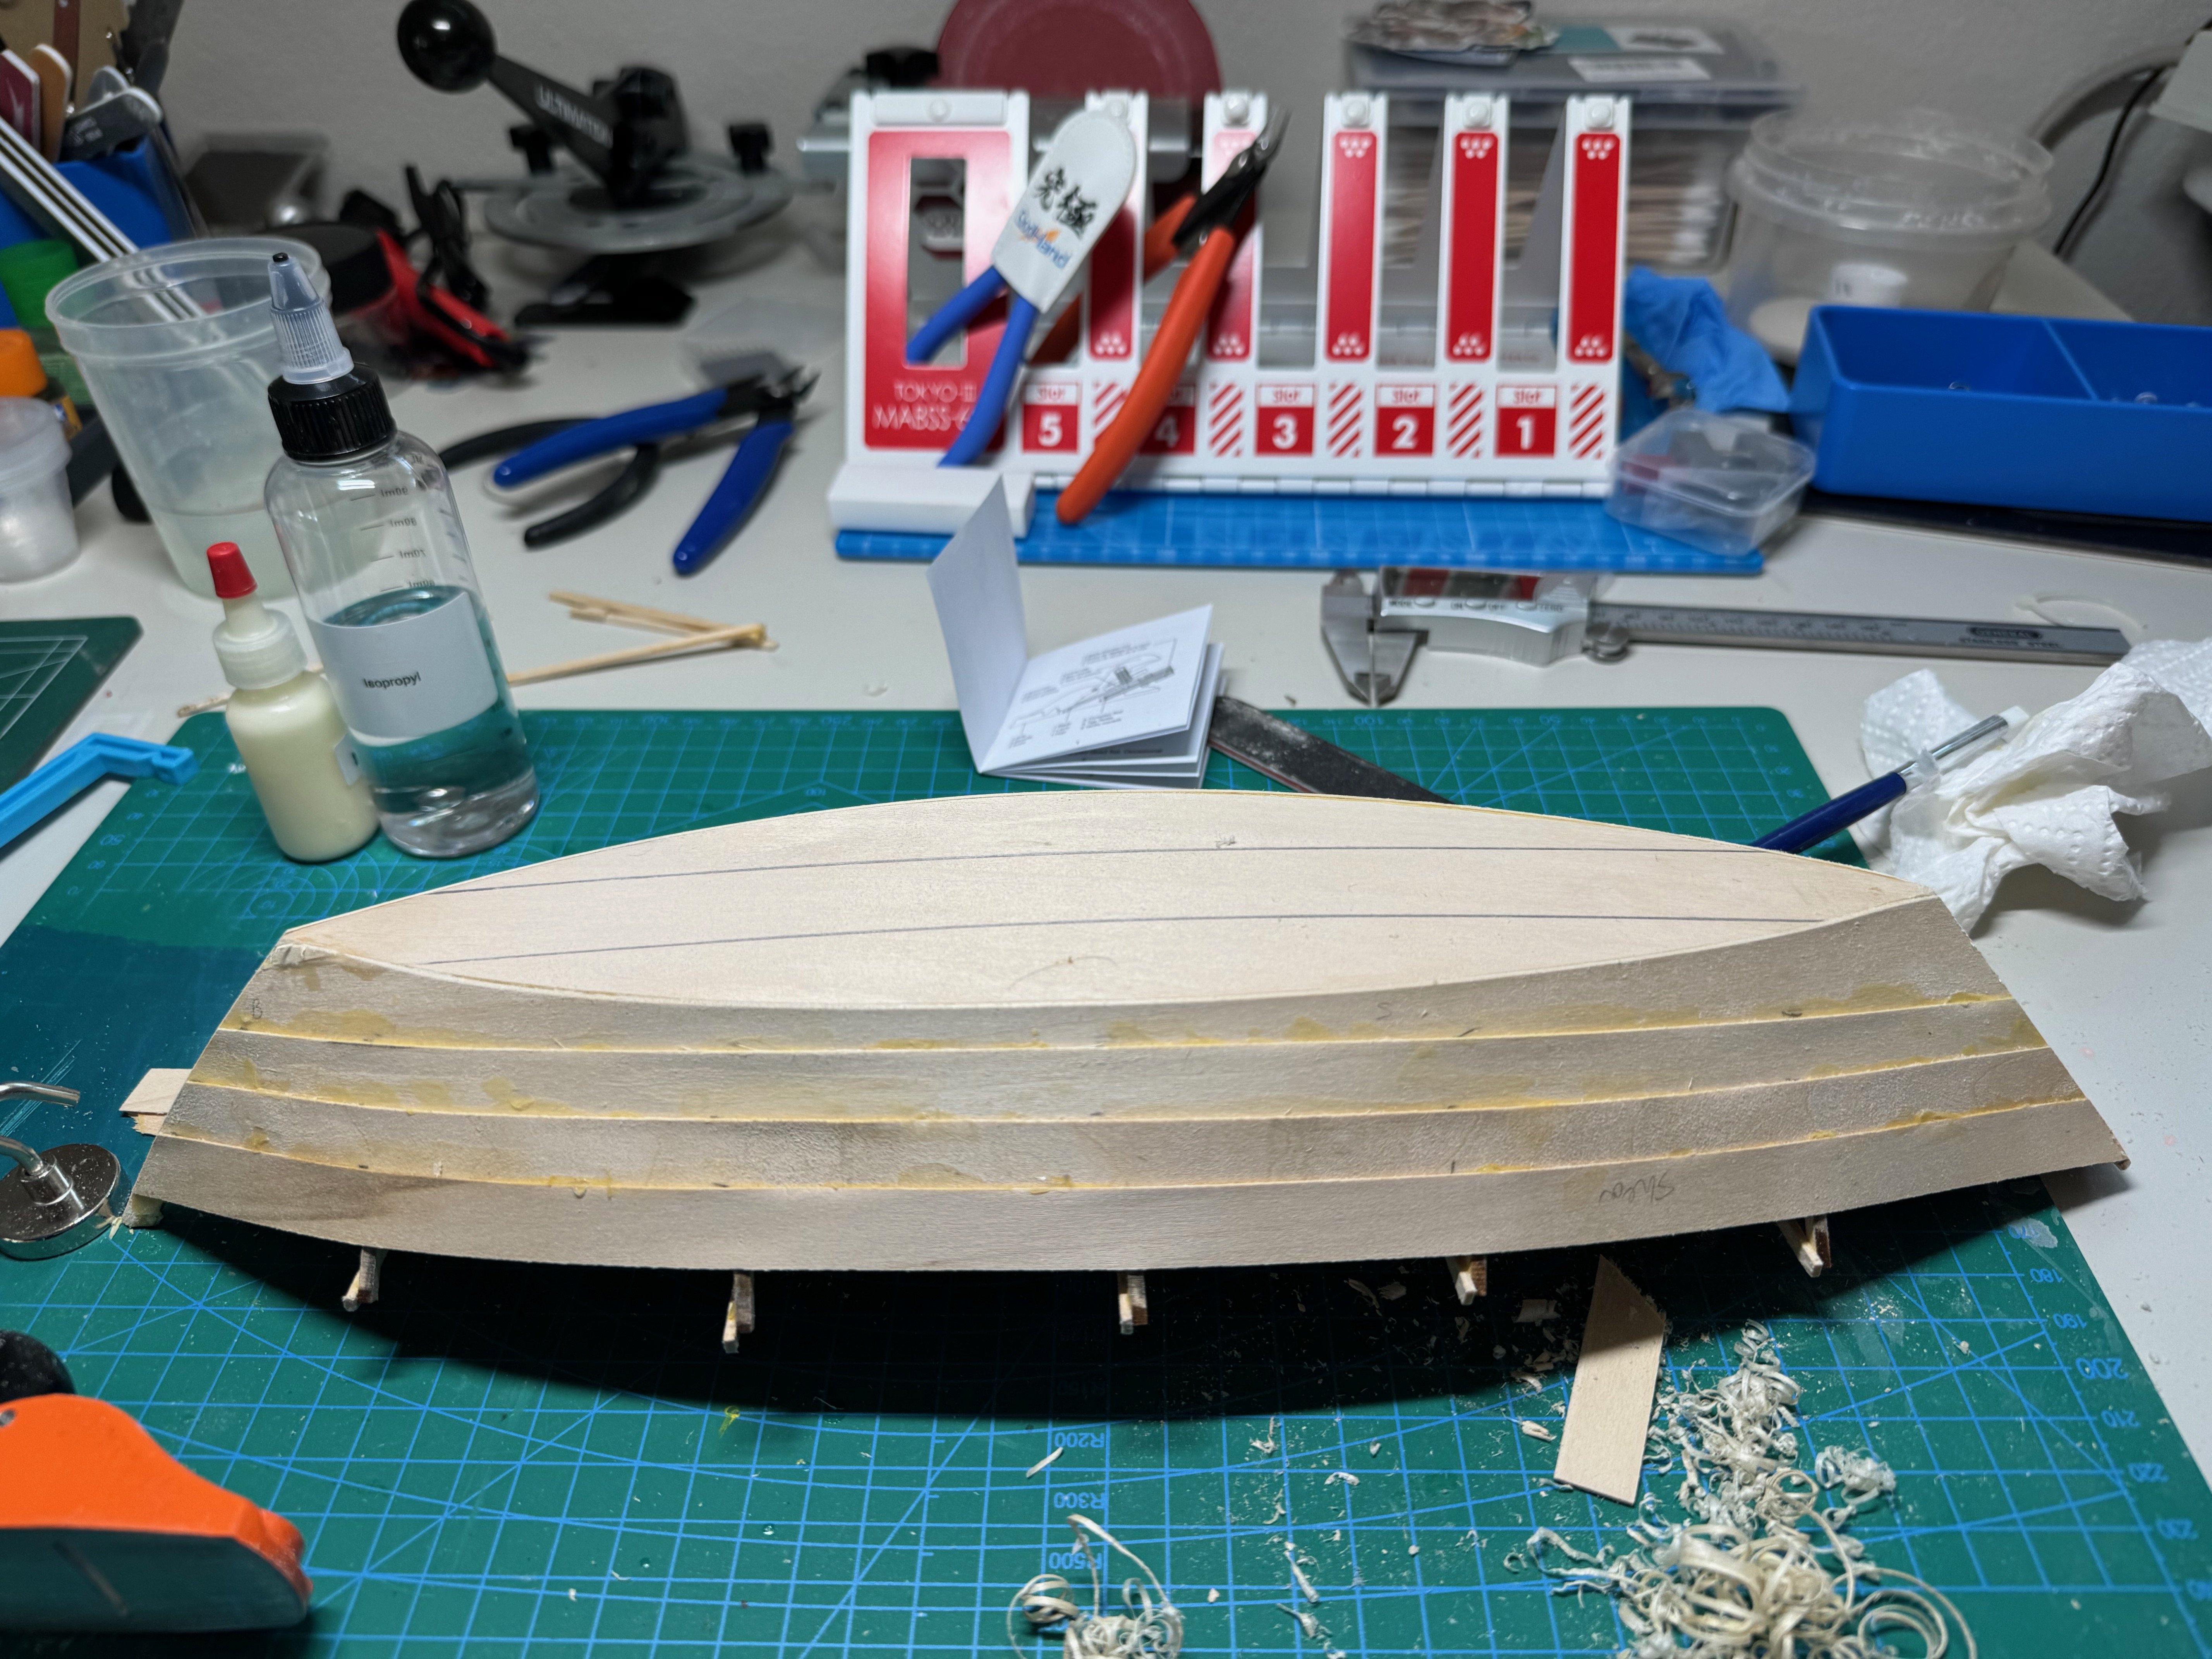
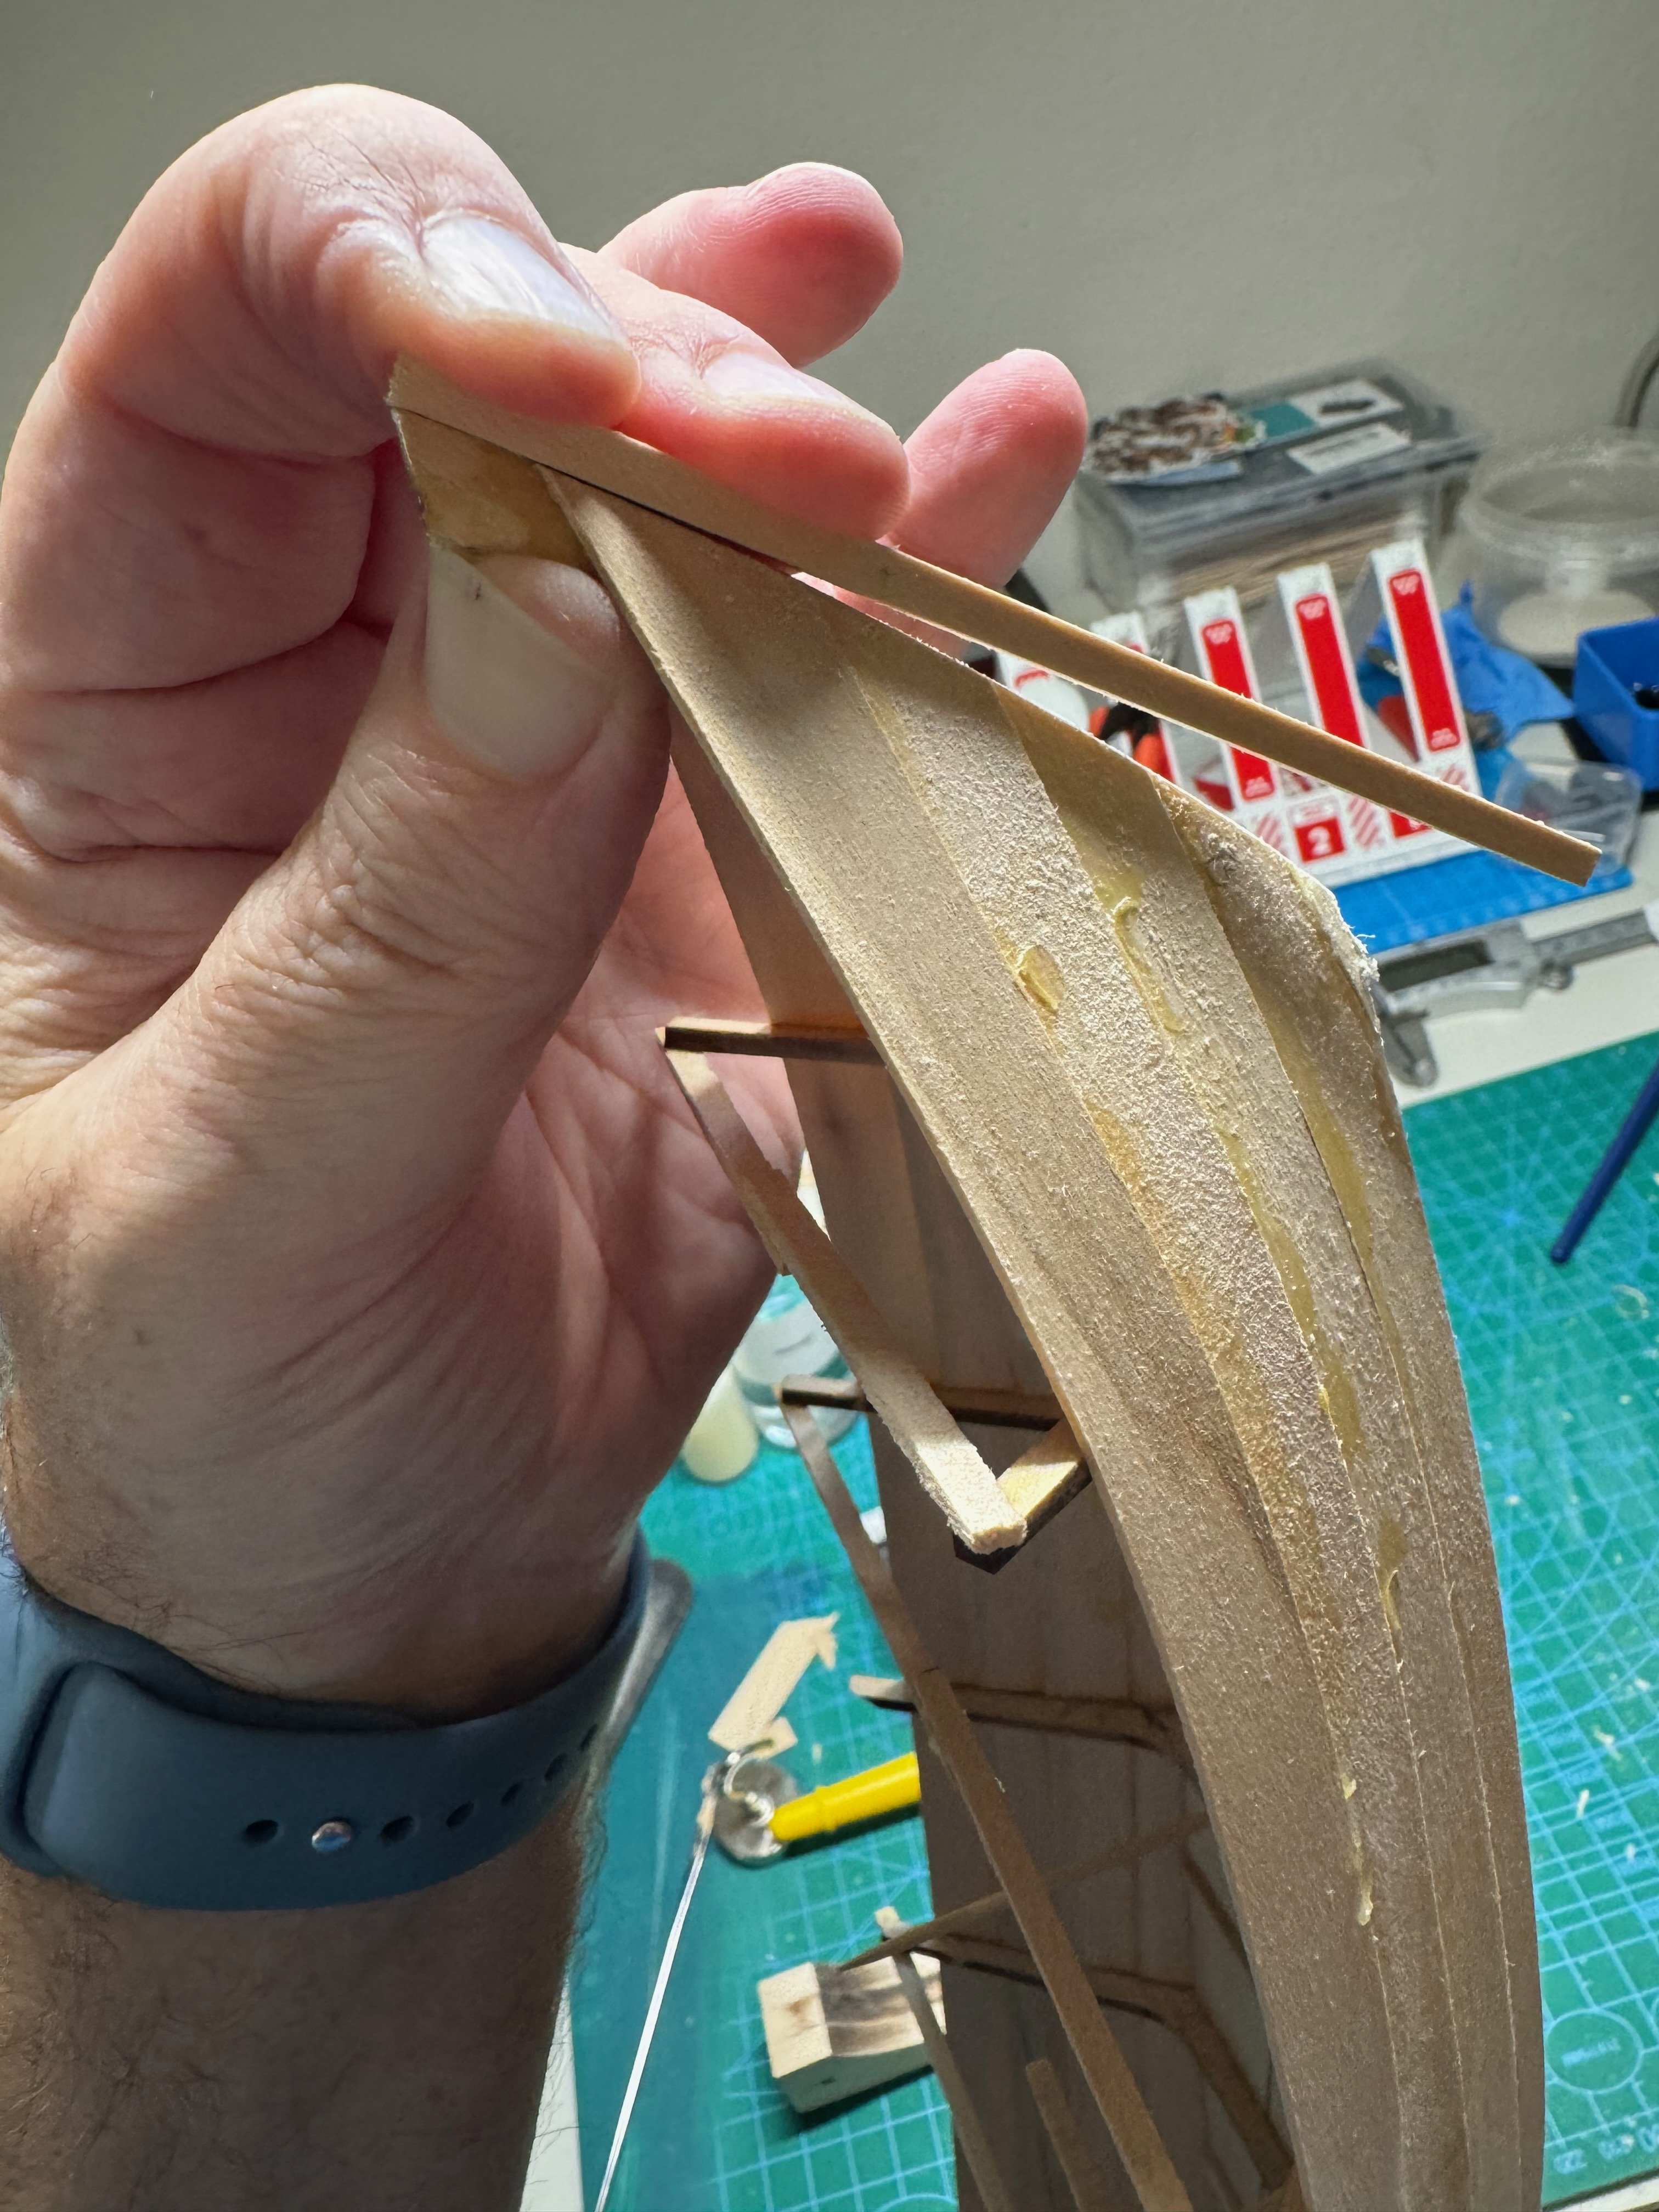
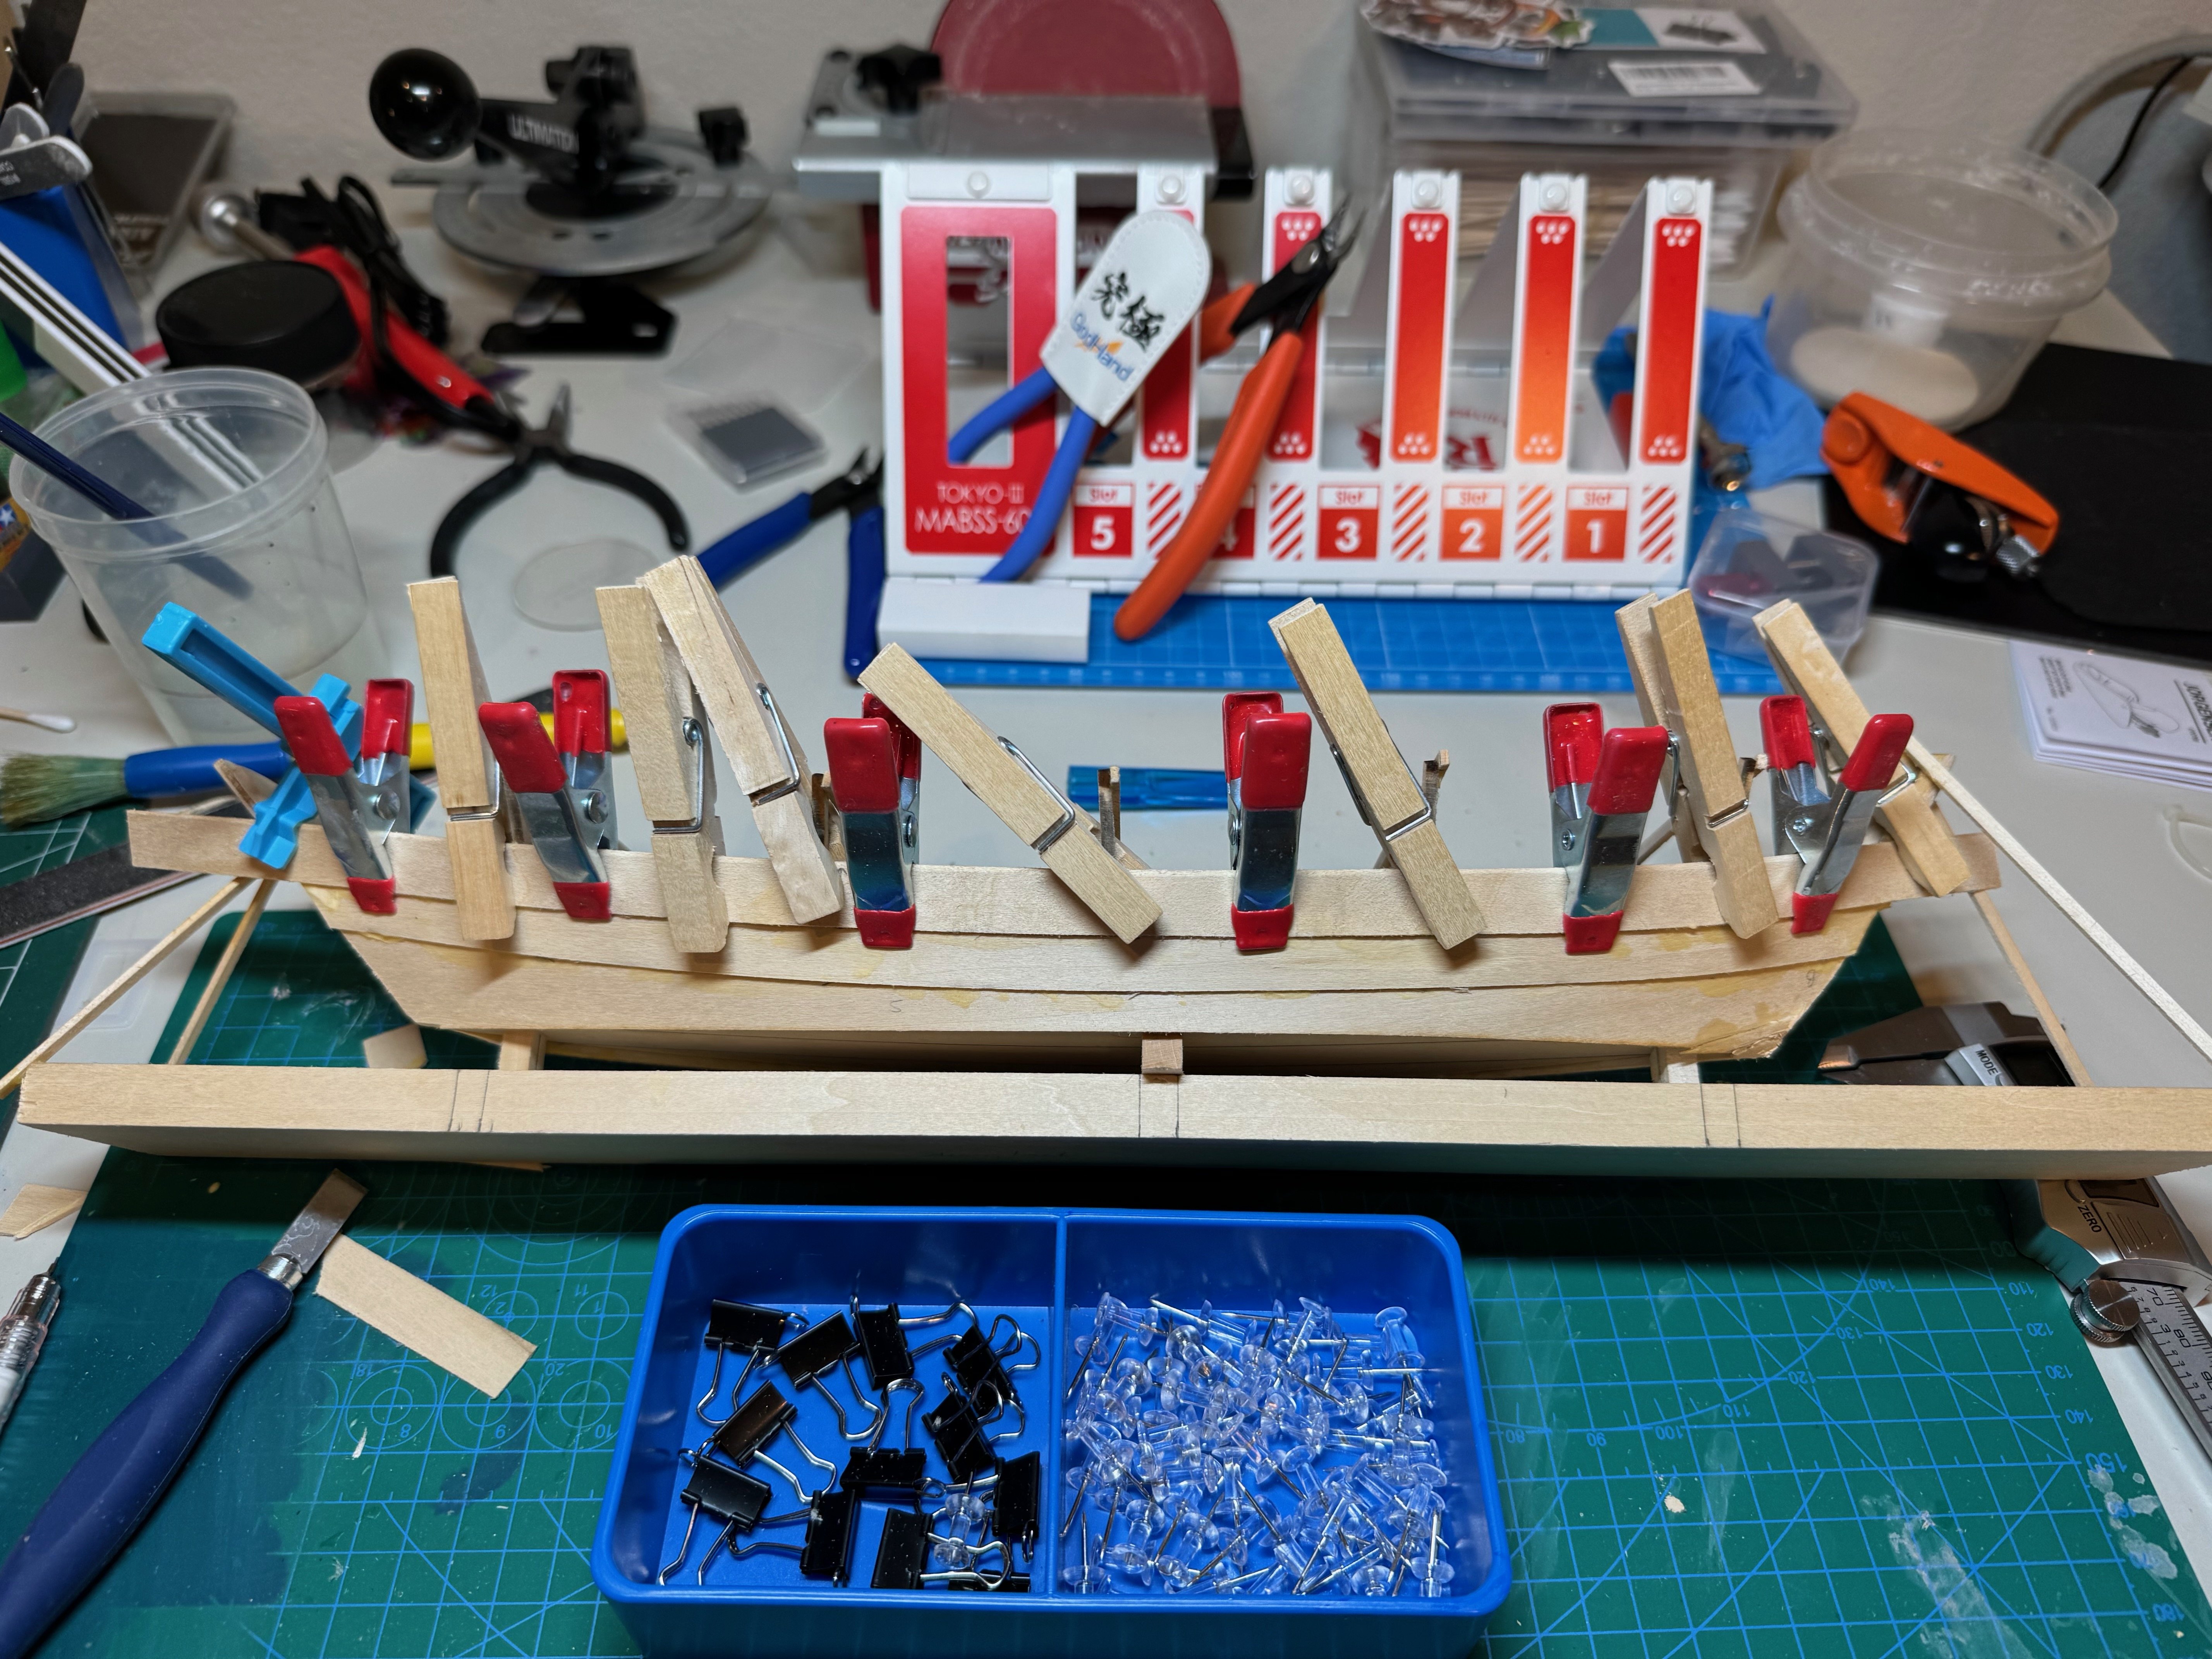
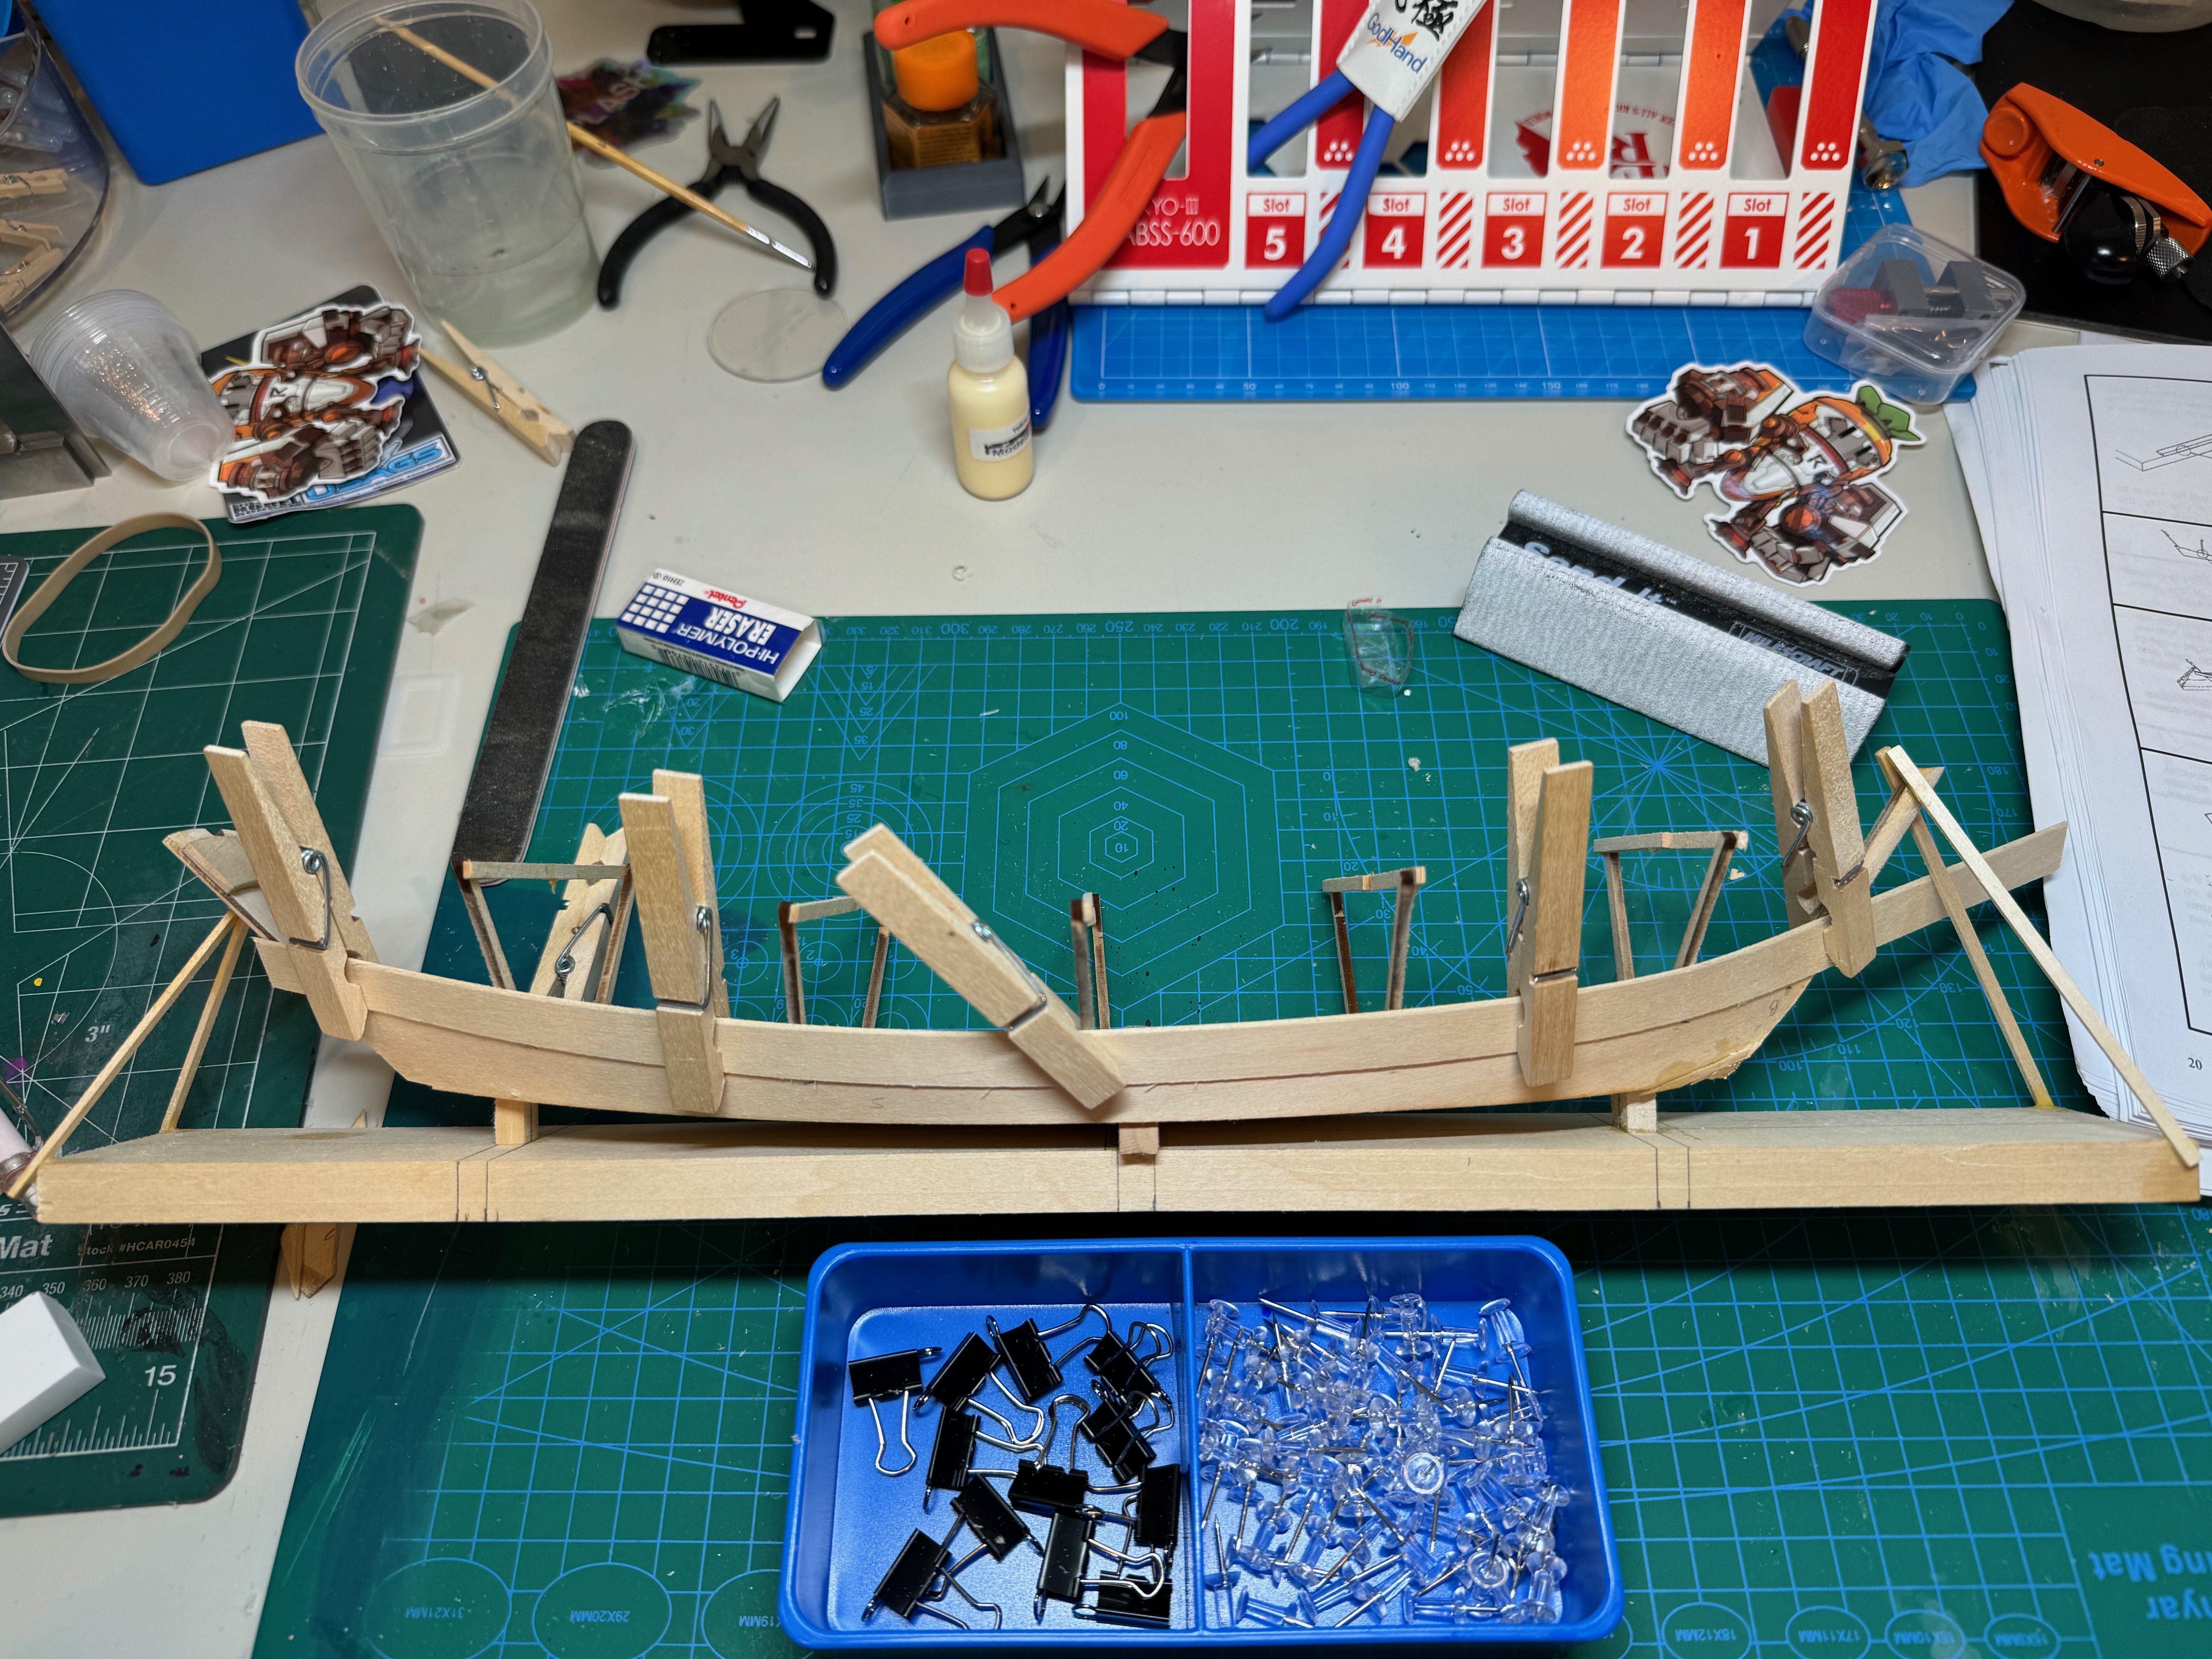
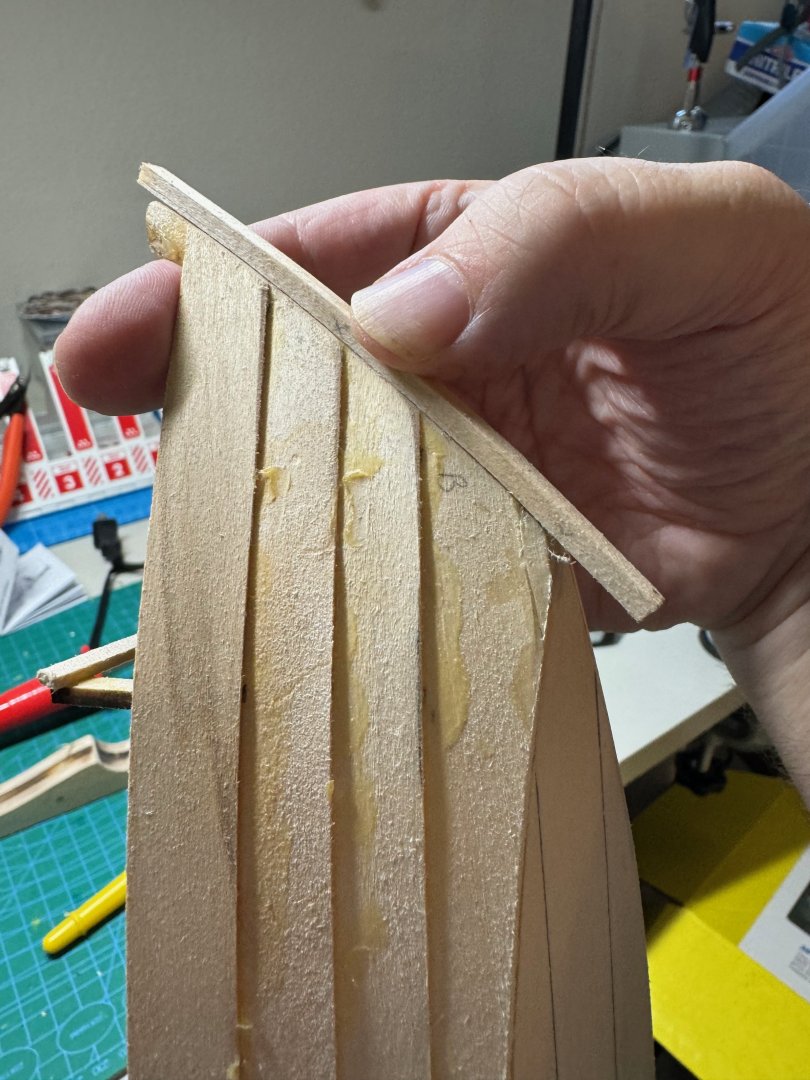
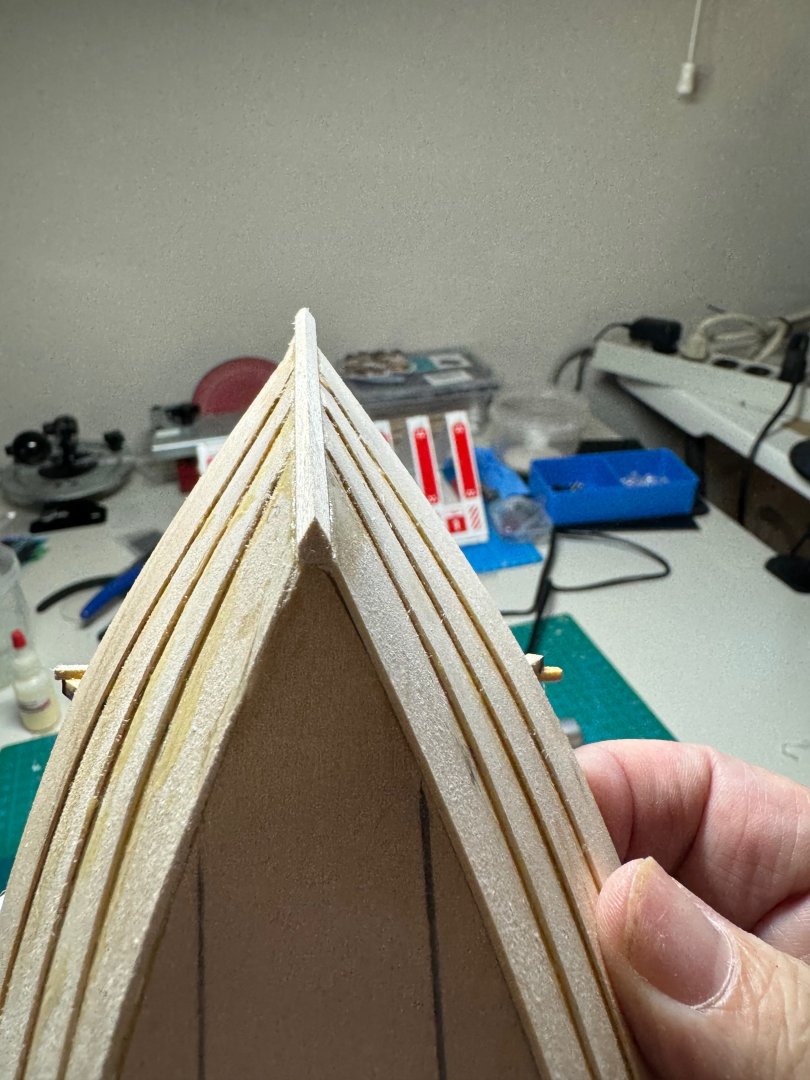
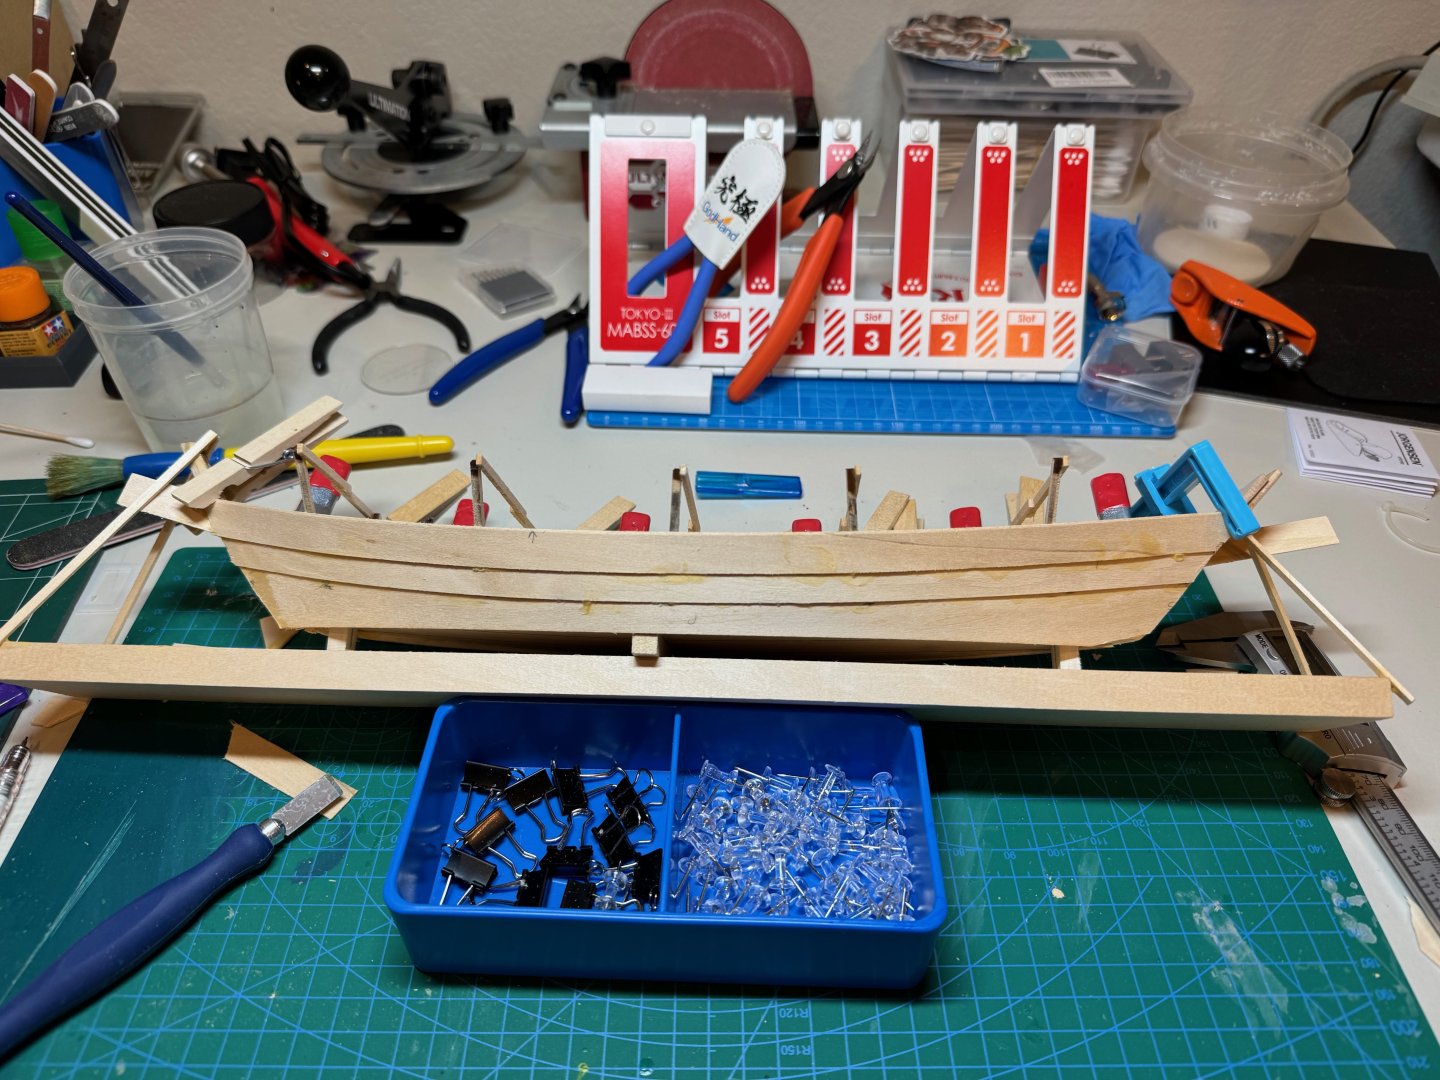
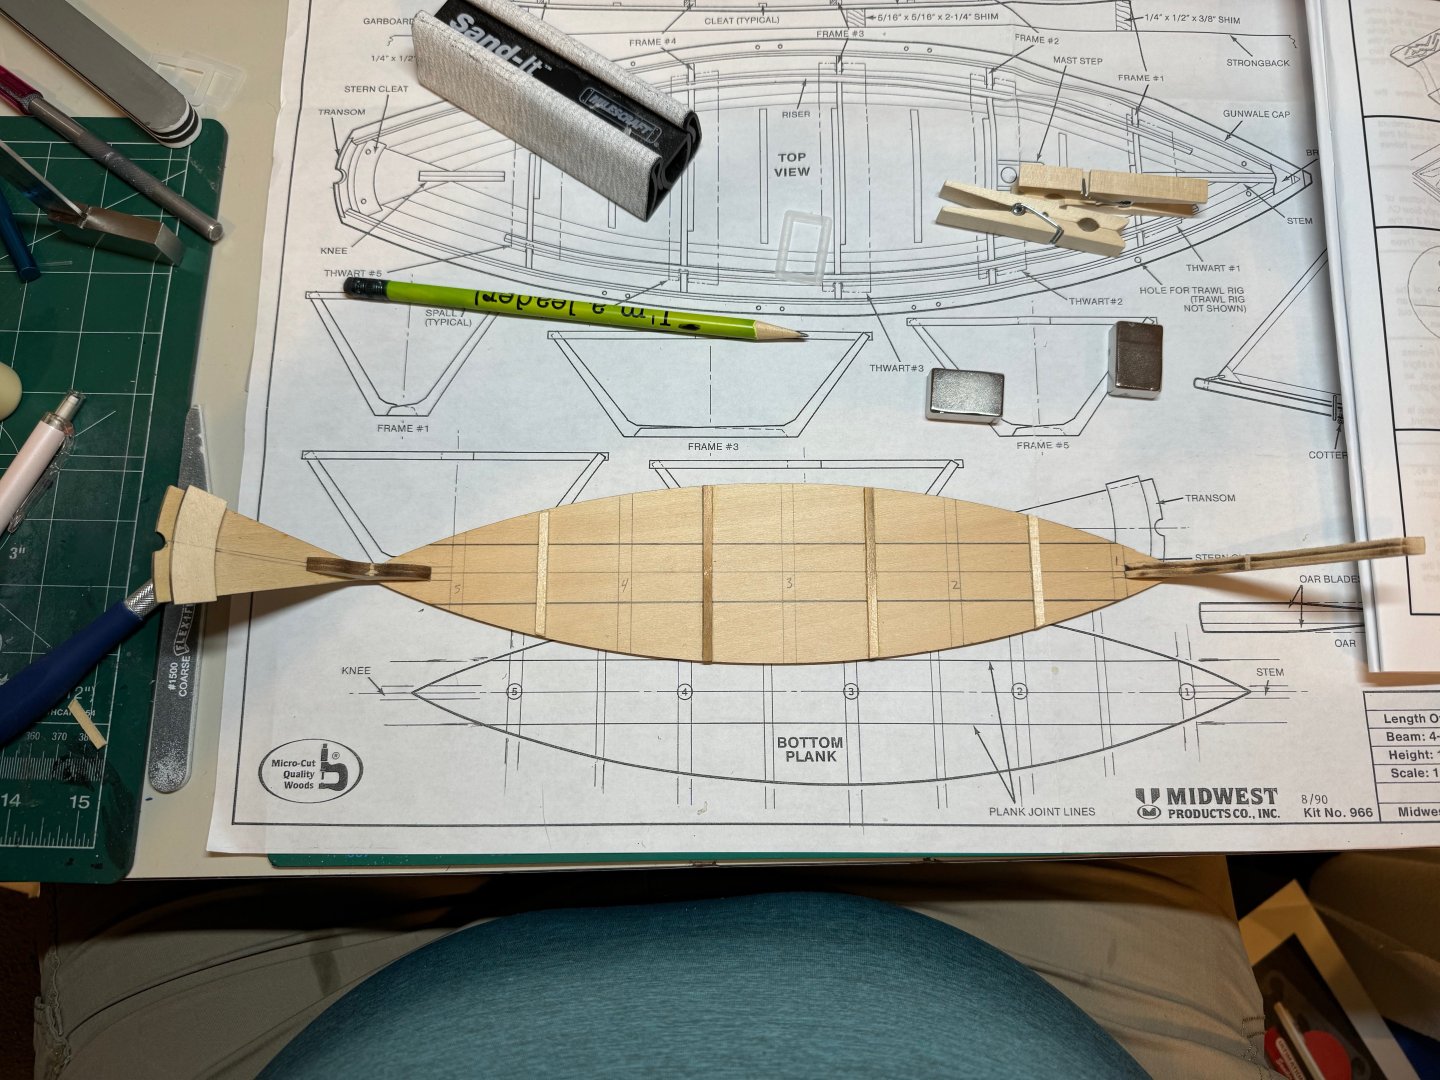
 Good evening, I mad a lot more progress on the dory. In fact I am about 1/2 done with the project, according to documents. Step 95/190. Today I added the shear planks but before I noticed on the starboard side, that one of the planks on the top middle plank did not have enough glue so I added more and proceed with adding the shear plank to the port side after removing the braces on the stem with some isopropyl. After the glue had a chance to dry, I also added the shear plan to the starboard side. About an hour later, I removed the Dory from the strong board by removing the pins in the center, and the braces on the transom with some isopropyl. I then plugged the two holes with toothpicks, and remove the excess plank material from the transom and bow. I also leveled out the garboards to be even with the bottom using my micro plane and sanding stick. I cleaned up the transom, and added some fairing on the planks. I also did some putty work on the tramsome and planks to clean up any gouges from scraping the glue, or obvious glue. By the way does anyone have a good recommendation of a putty that is better than the dap putty I am using? The plans call to add a false stem on the bow and you can see the curvature that is needed. The plans indicated to use ca and just bend it the plank. I rather use pva, so I soaked the stem in some hot water and used a plank bender to clean up the curve. I am really impressed with that tool. However the scorch marks where horrendous. I spent better part of 40 minutes cleaning up the marks, and it still not perfect. Next I applyied pva and glued the false stem to the bow after some sanding and planing to get a nice contact. I also added some fairing to the planks. Finally, the plans called to fair the false stem to a point, and again I used my micro plane and sanding block. I think this turned out rather nice. I highly recommend a micro plane it makes this work much easier and cleaner. Though my wife is tapping her foot as I need to vacuum the game room again.


- 56 replies
-
- 9
-

-
- grand banks dory
- Midwest Products
- (and 2 more)
-
I agree Dan, I rather have a semi or gloss on these kits. My plan for my Dory it to paint it using Mr Color lacquers with my airbrush.
- 37 replies
-
- 1
-
-
- Model Shipways
- muscongus bay lobster smack
- (and 1 more)
-
Dan that is very nice red, what paint did you use?
- 37 replies
-
- 1
-
-
- Model Shipways
- muscongus bay lobster smack
- (and 1 more)
-
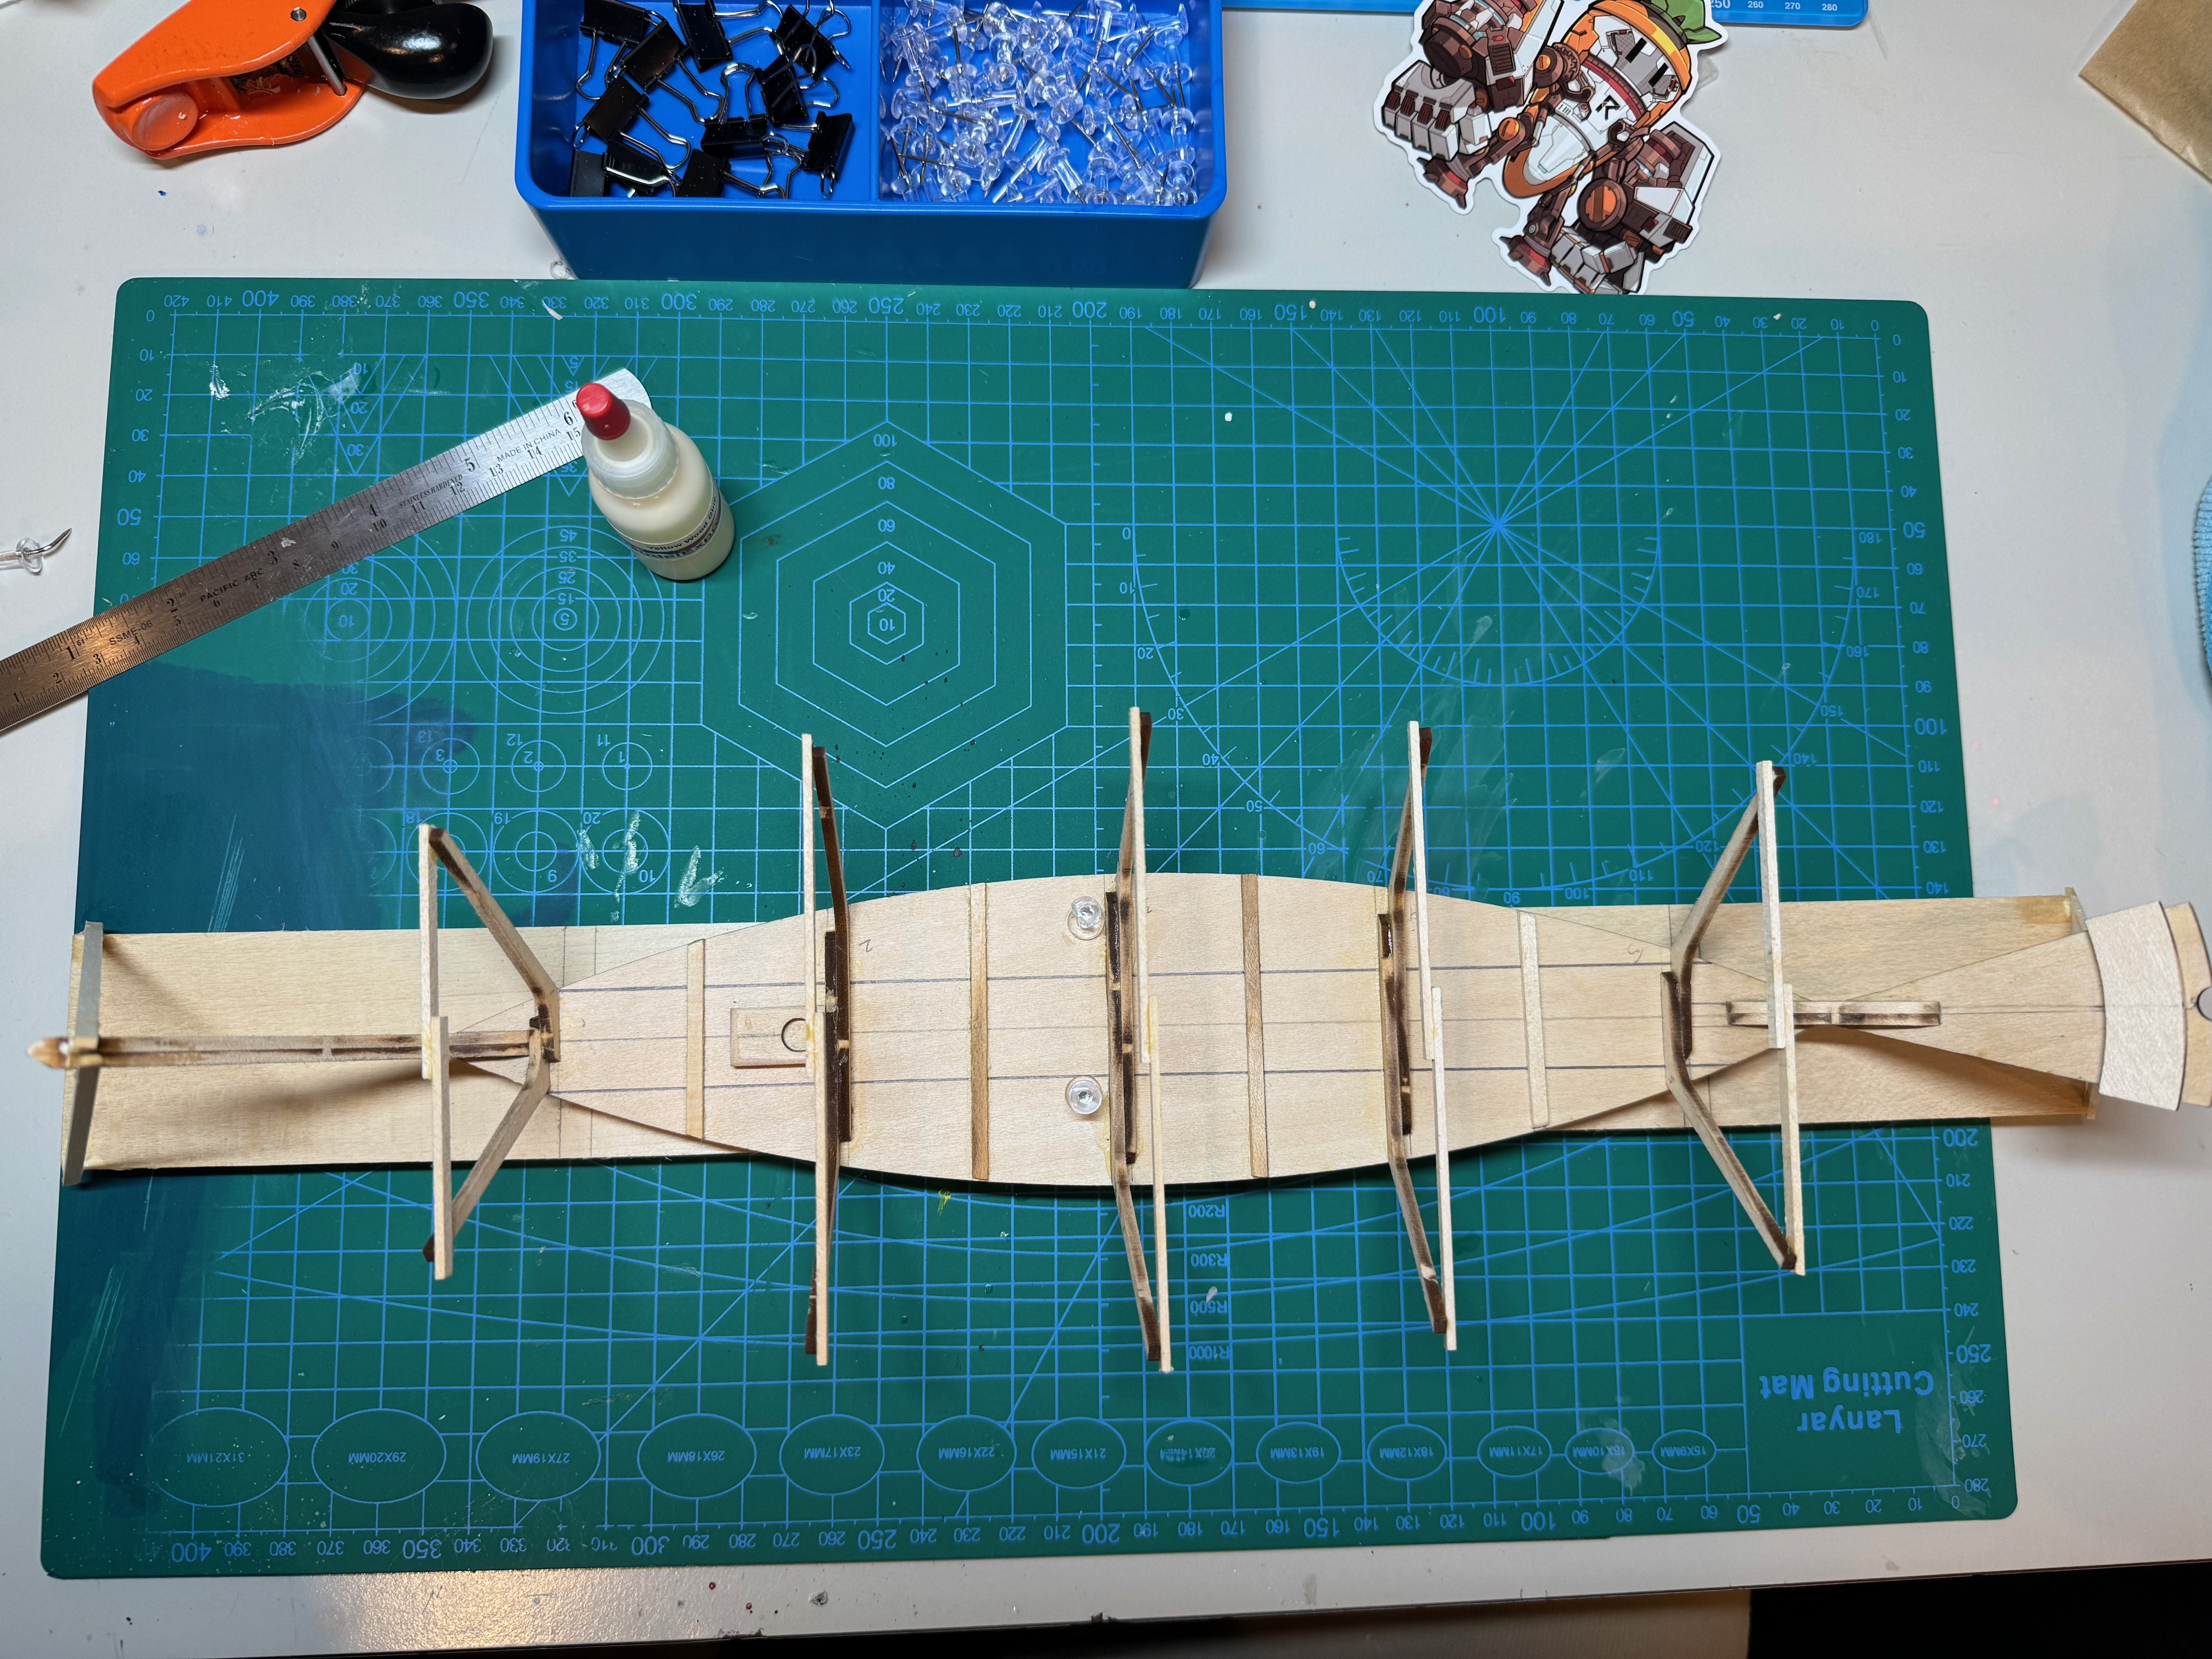
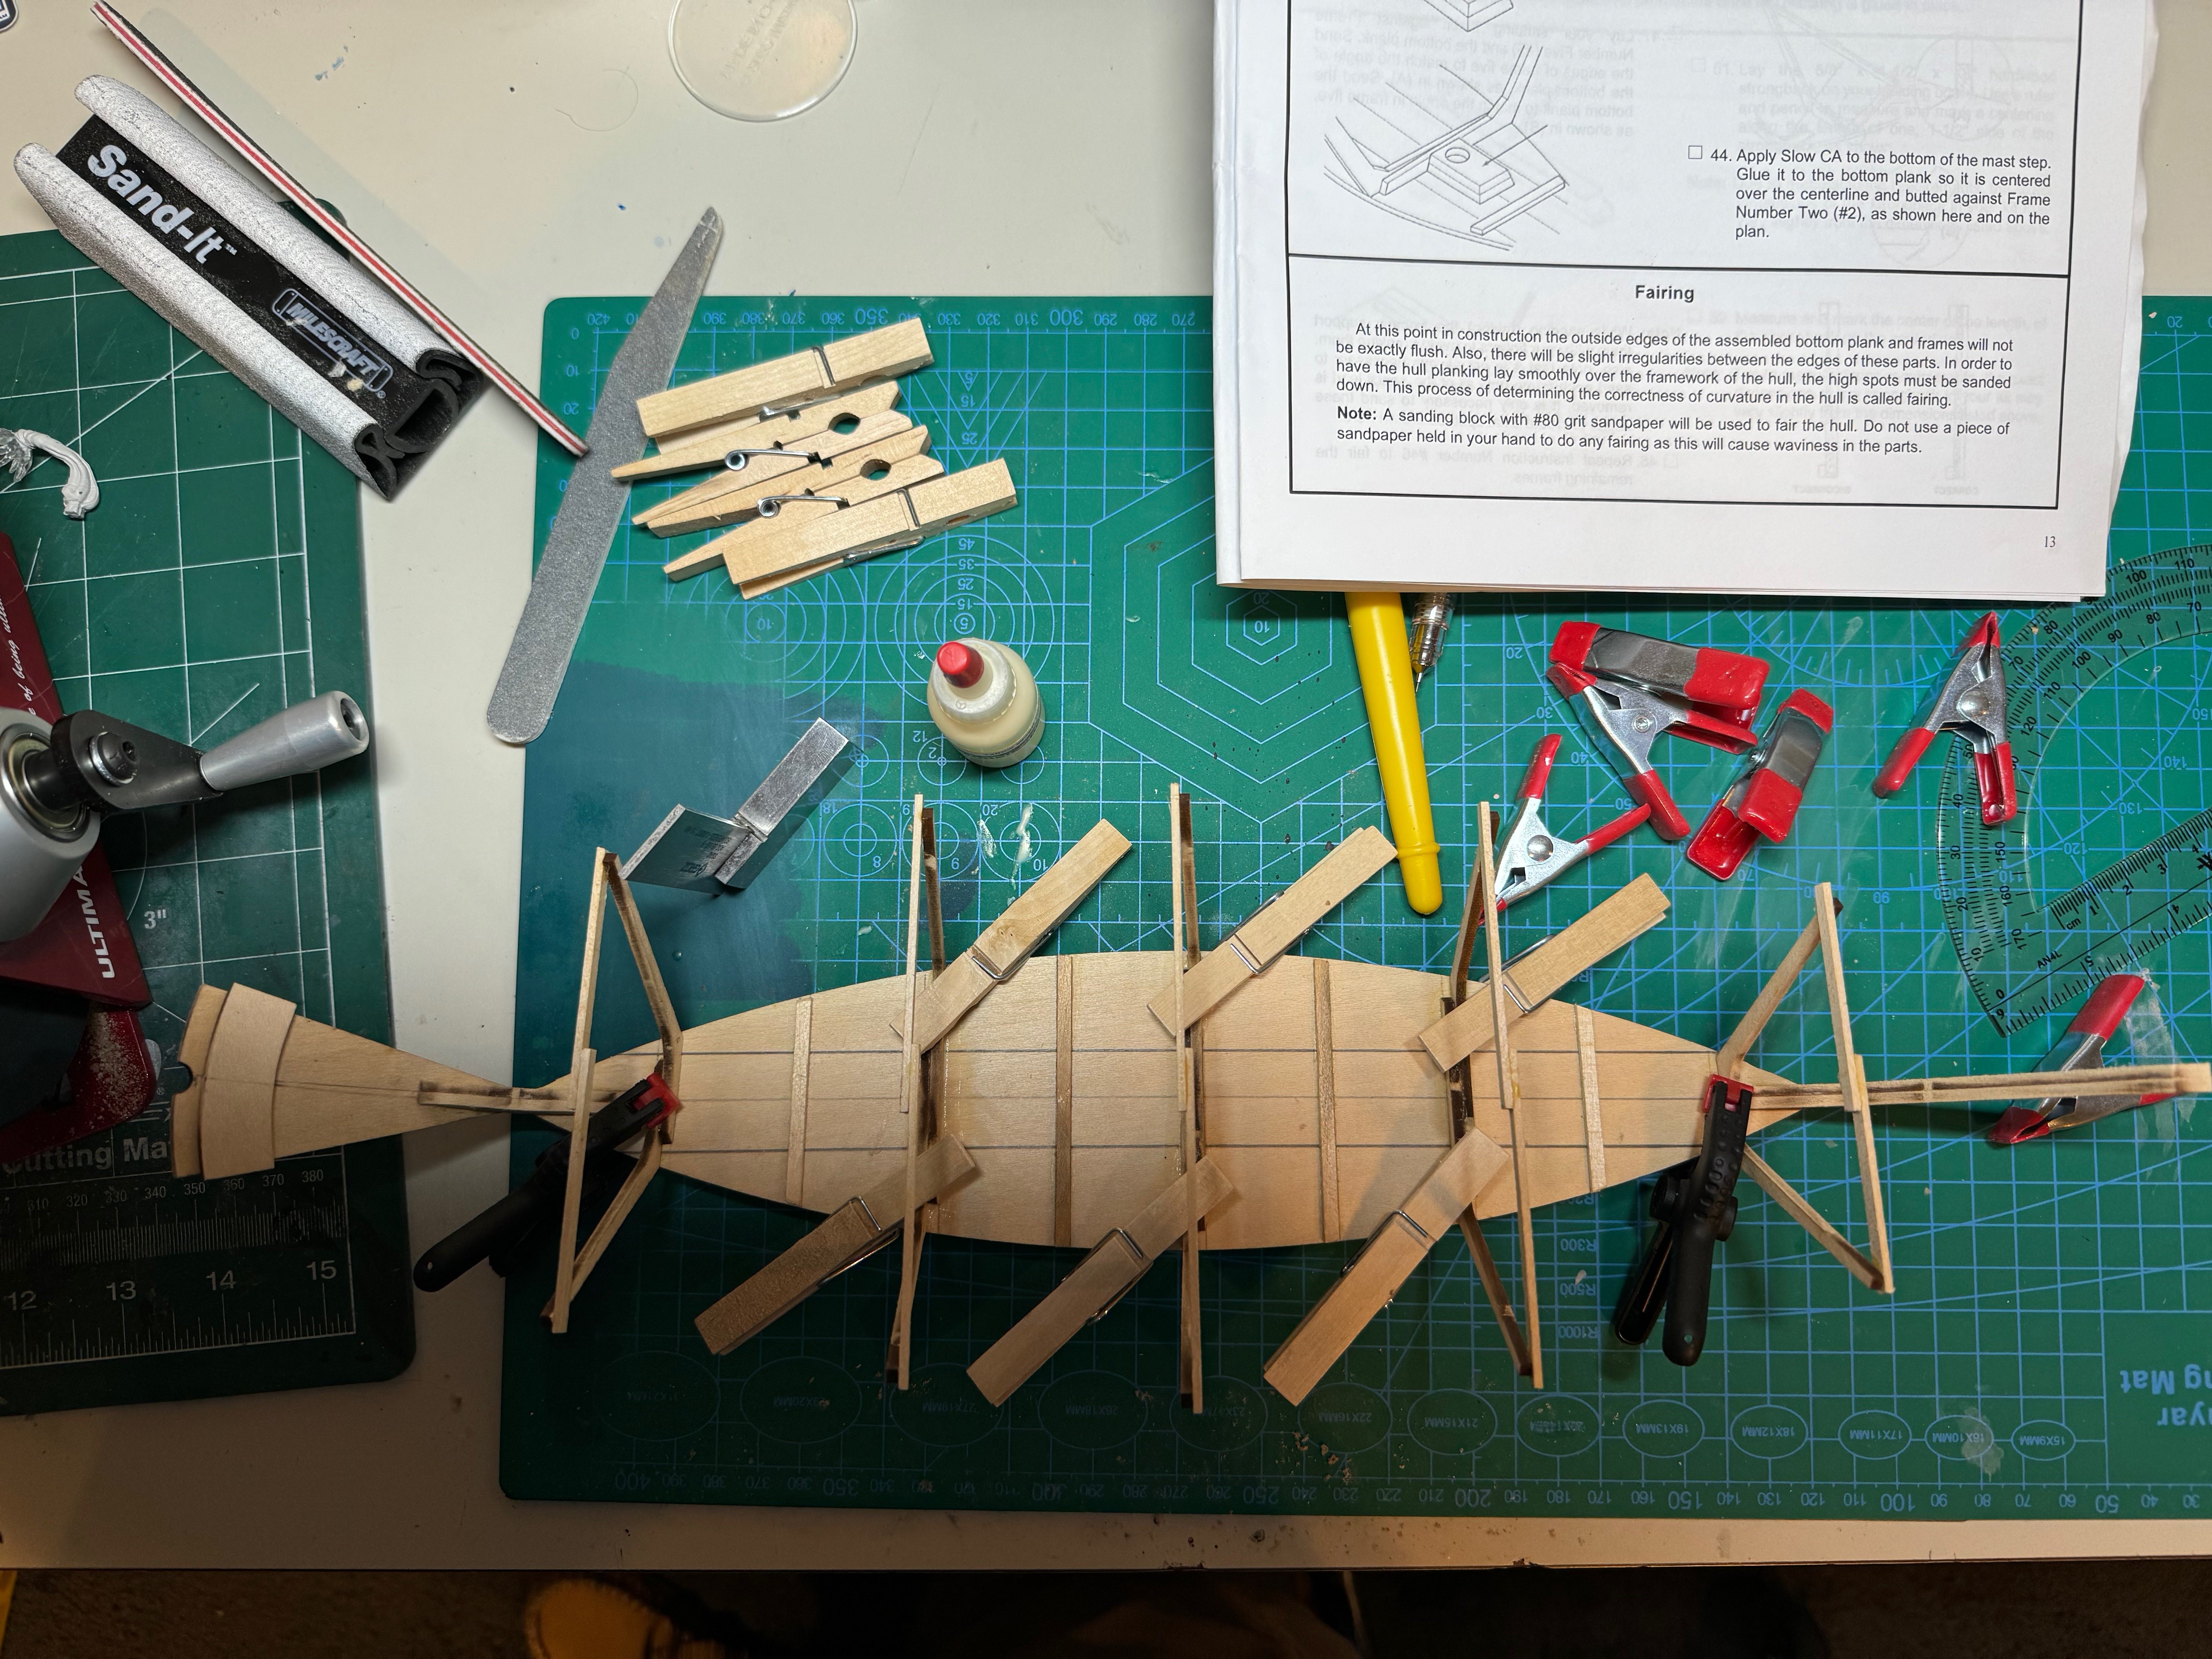
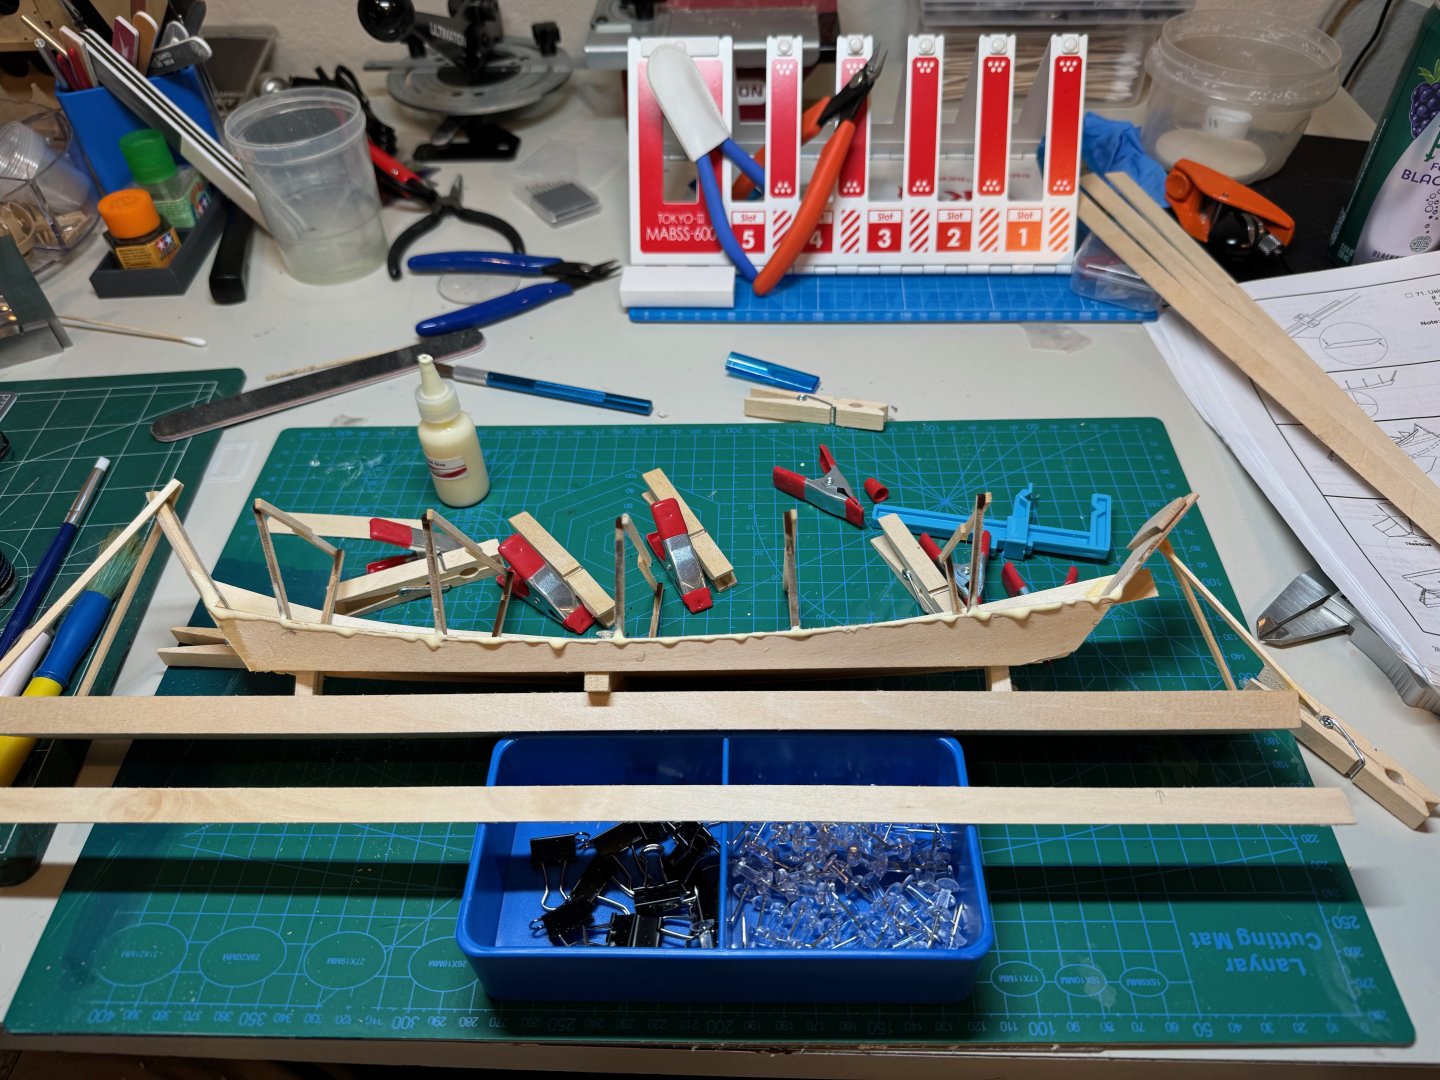
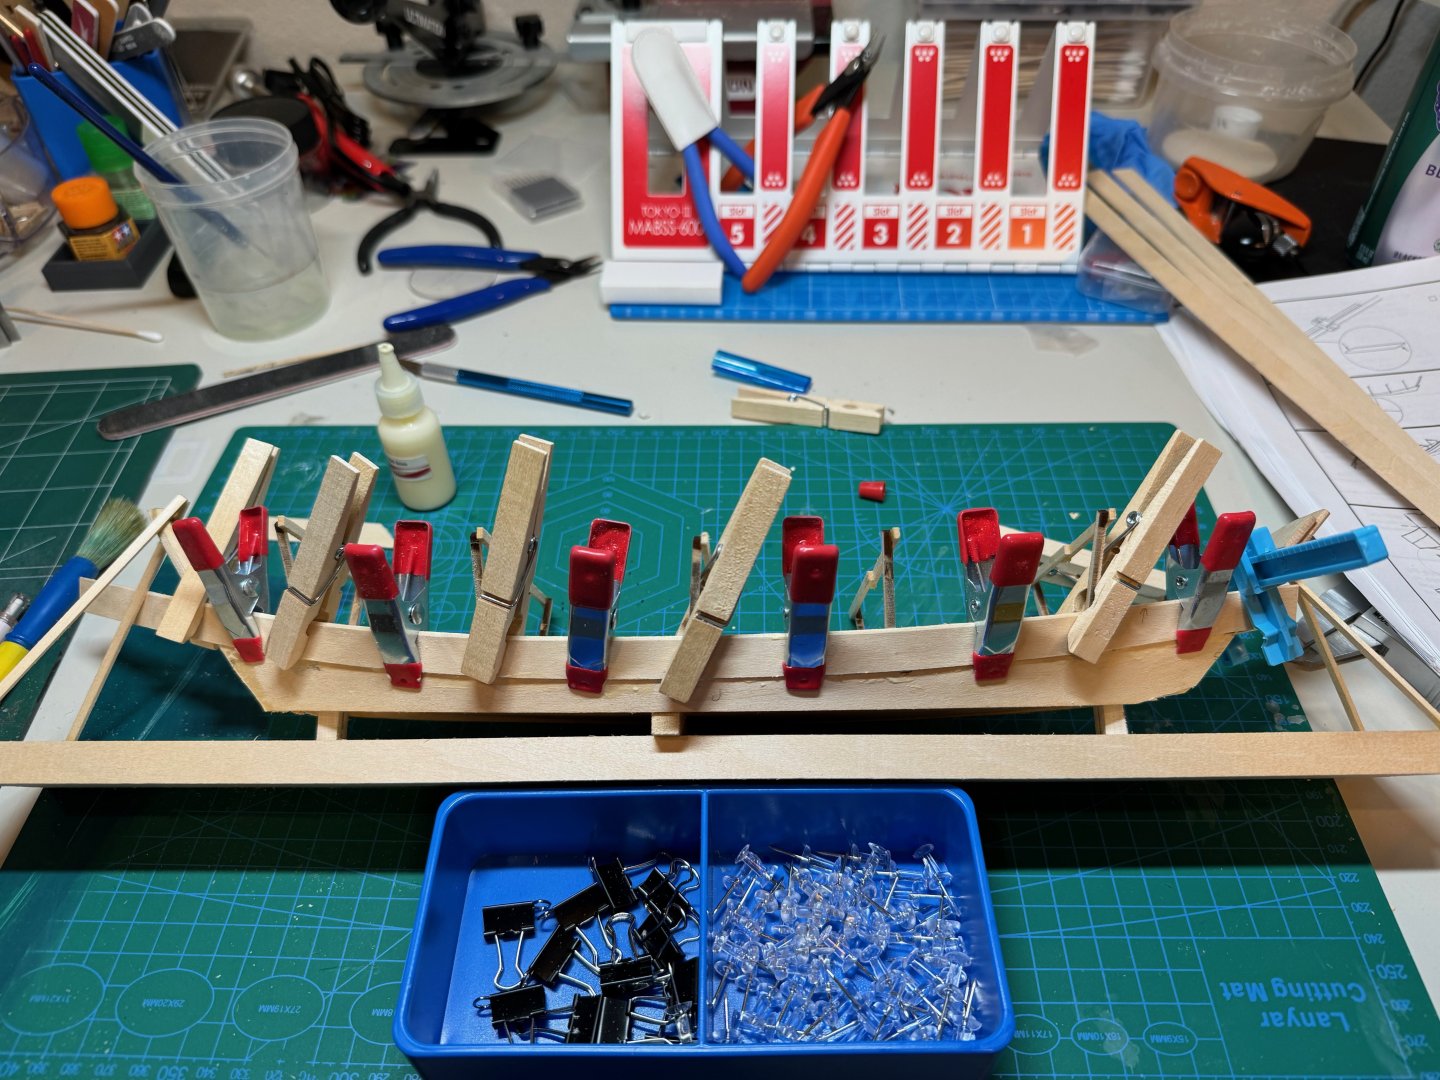
Good evening, Today I completed, the mid planks on the dory. One lesson I learned on the Model Shipways Dory, it is ok to use more glue. This time arround I was more heavy handed with the glue, before clamping and fitting the planks. Also if you look below I had to bevel opposite sides of the plan so that it meets up better. If you remember when I added the garboard, I had a bevel that was facing out, and on the plank I had the same bevel facing inside of the boat, along with a bevel that faces out on the top of the plank. Does this make sense? Here is the first mid plank clamped up. I did both sides before moving on to the second mid plank. Before doing the port side, I removed the excess from the planks after a good 30 minute soaking. Here I am clamping the second mid plank on the starboard side, if you notice the arrows on the prepped plank and the plank that is clamped you those are bevels. Finally the second mid plank is added to the port side. Another view of the starboard side.

- 56 replies
-
- 5
-
-
- grand banks dory
- Midwest Products
- (and 2 more)
-
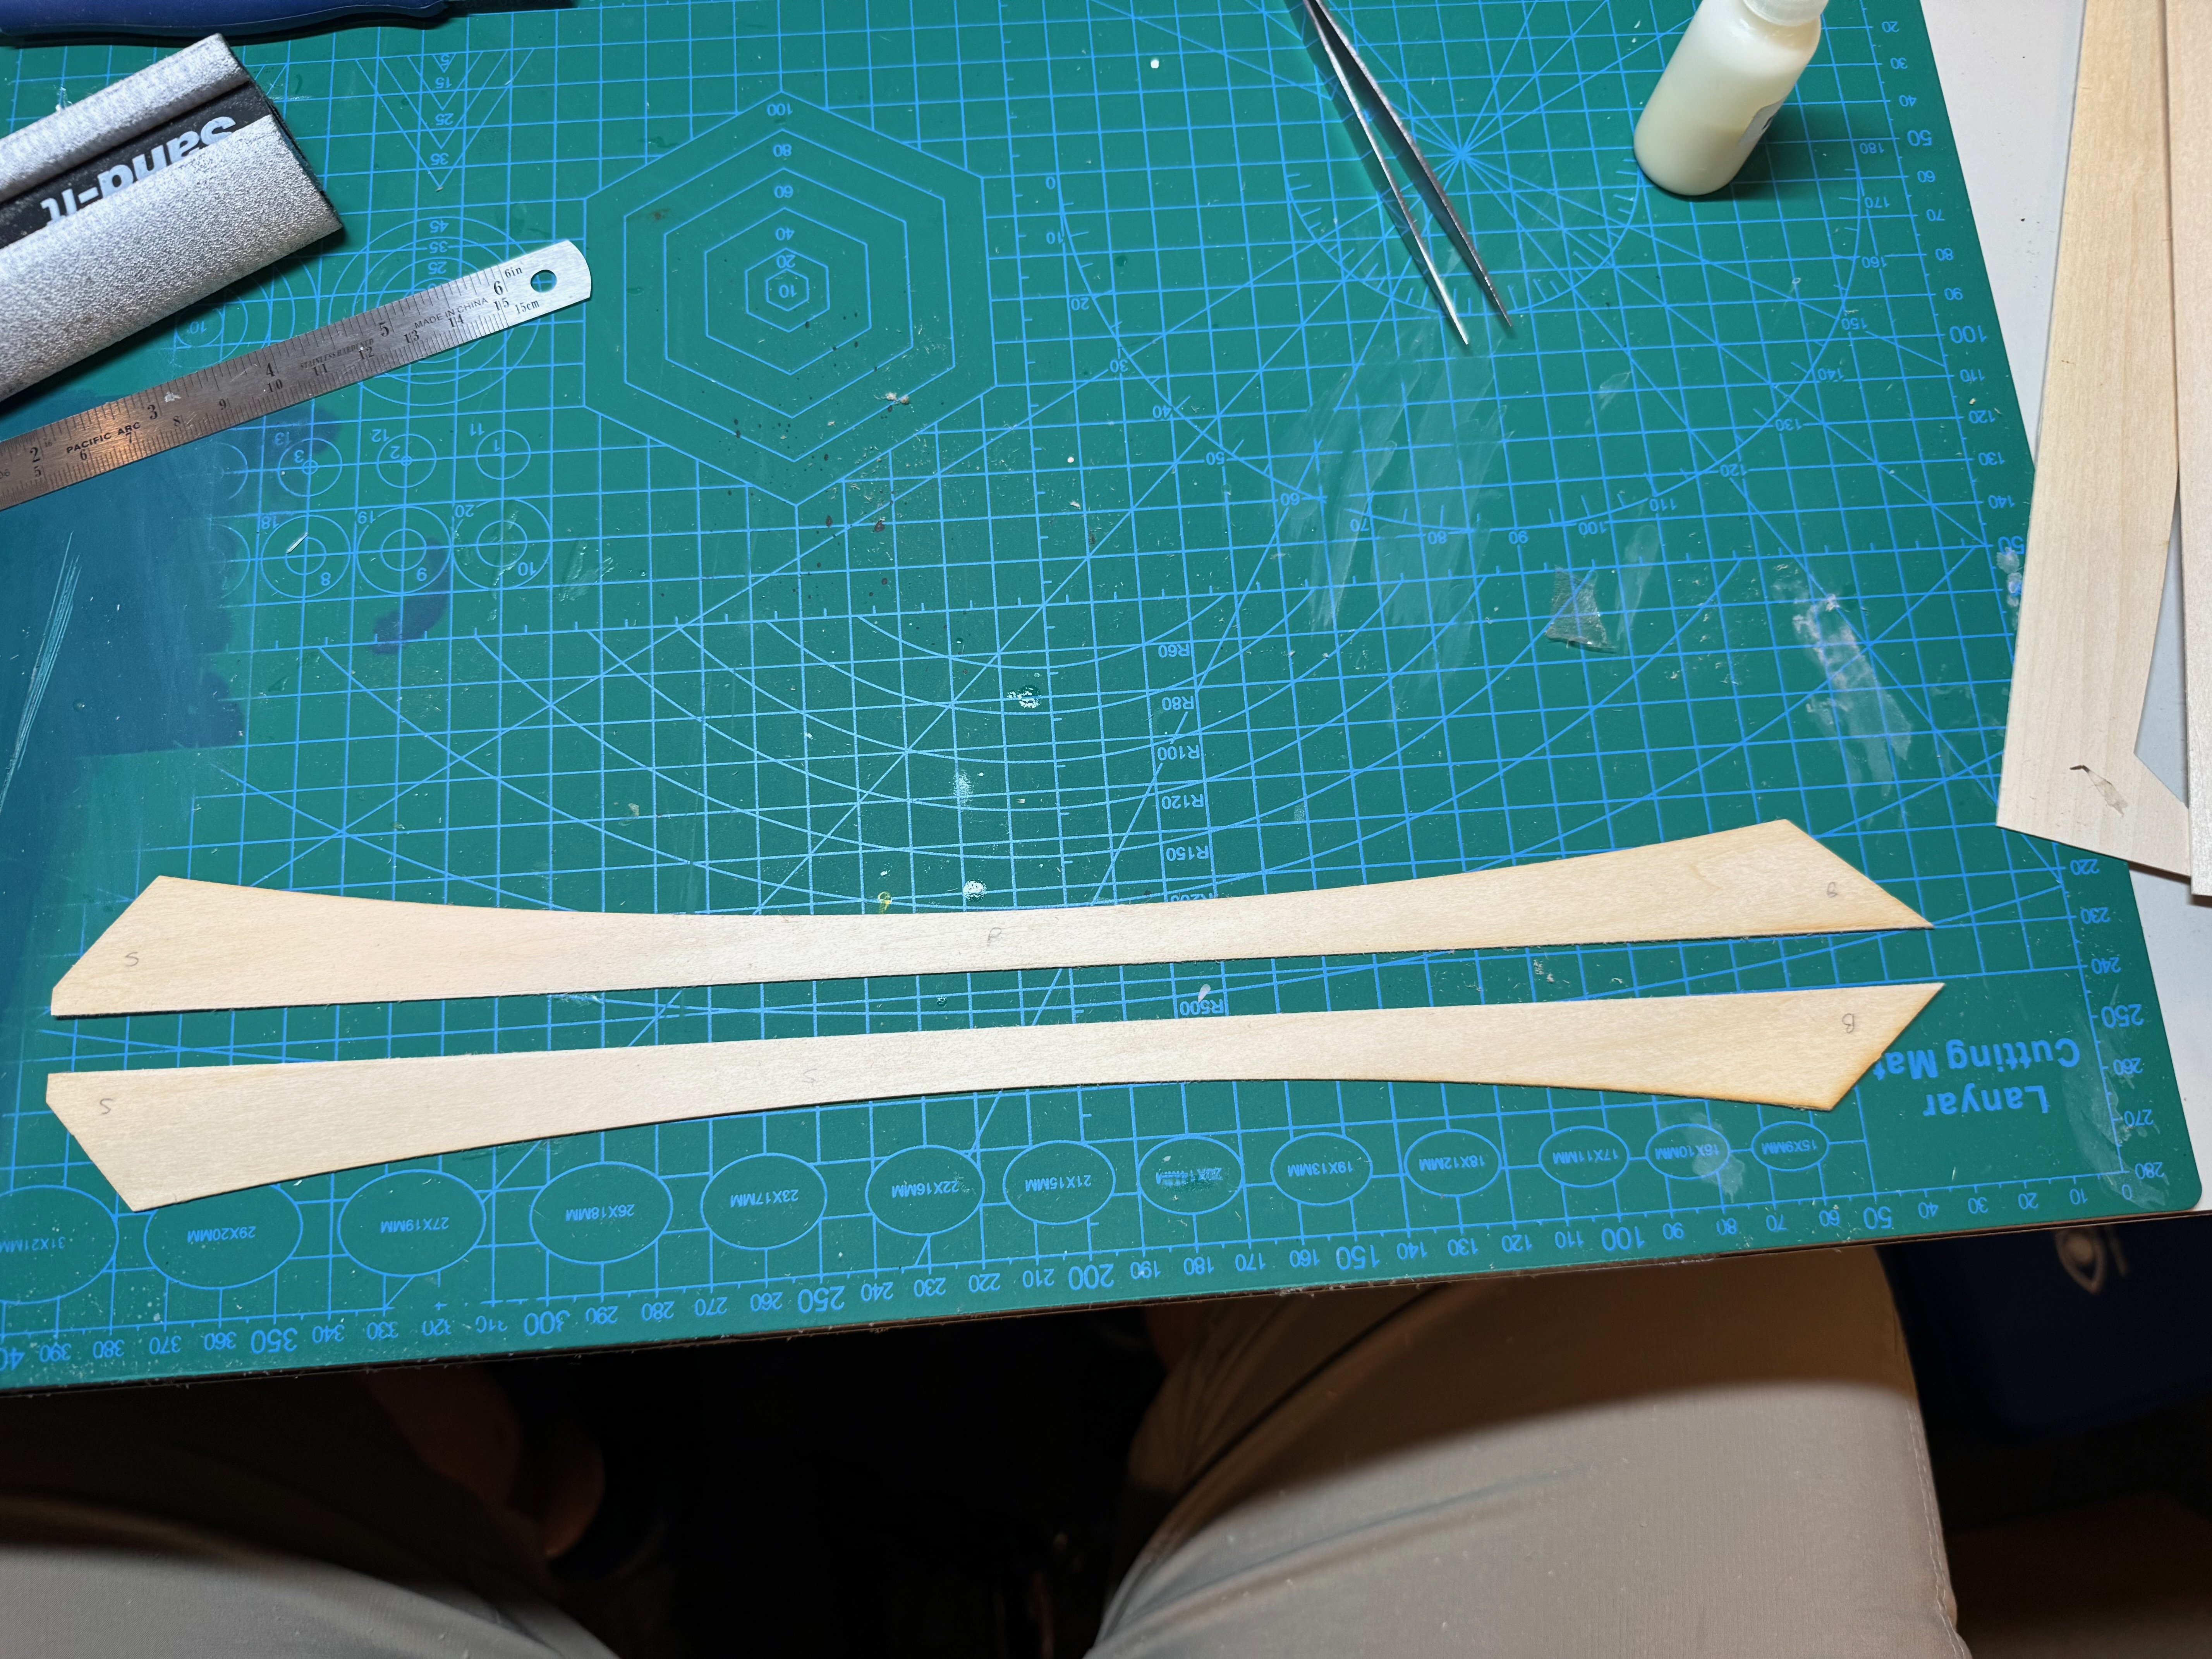
Jacques, I am finding this kit is a nice compliment to the Model Shipways Lowell Dory. In some sense it is easier because of the size. I am however learning some better techniques. For example one thing on this kit that is different is the planking we need to bevel the sides so we get a better connection between planks. The strong board approach is also interesting, and unique to this build.
- 56 replies
-
- 3
-
-
- grand banks dory
- Midwest Products
- (and 2 more)
-
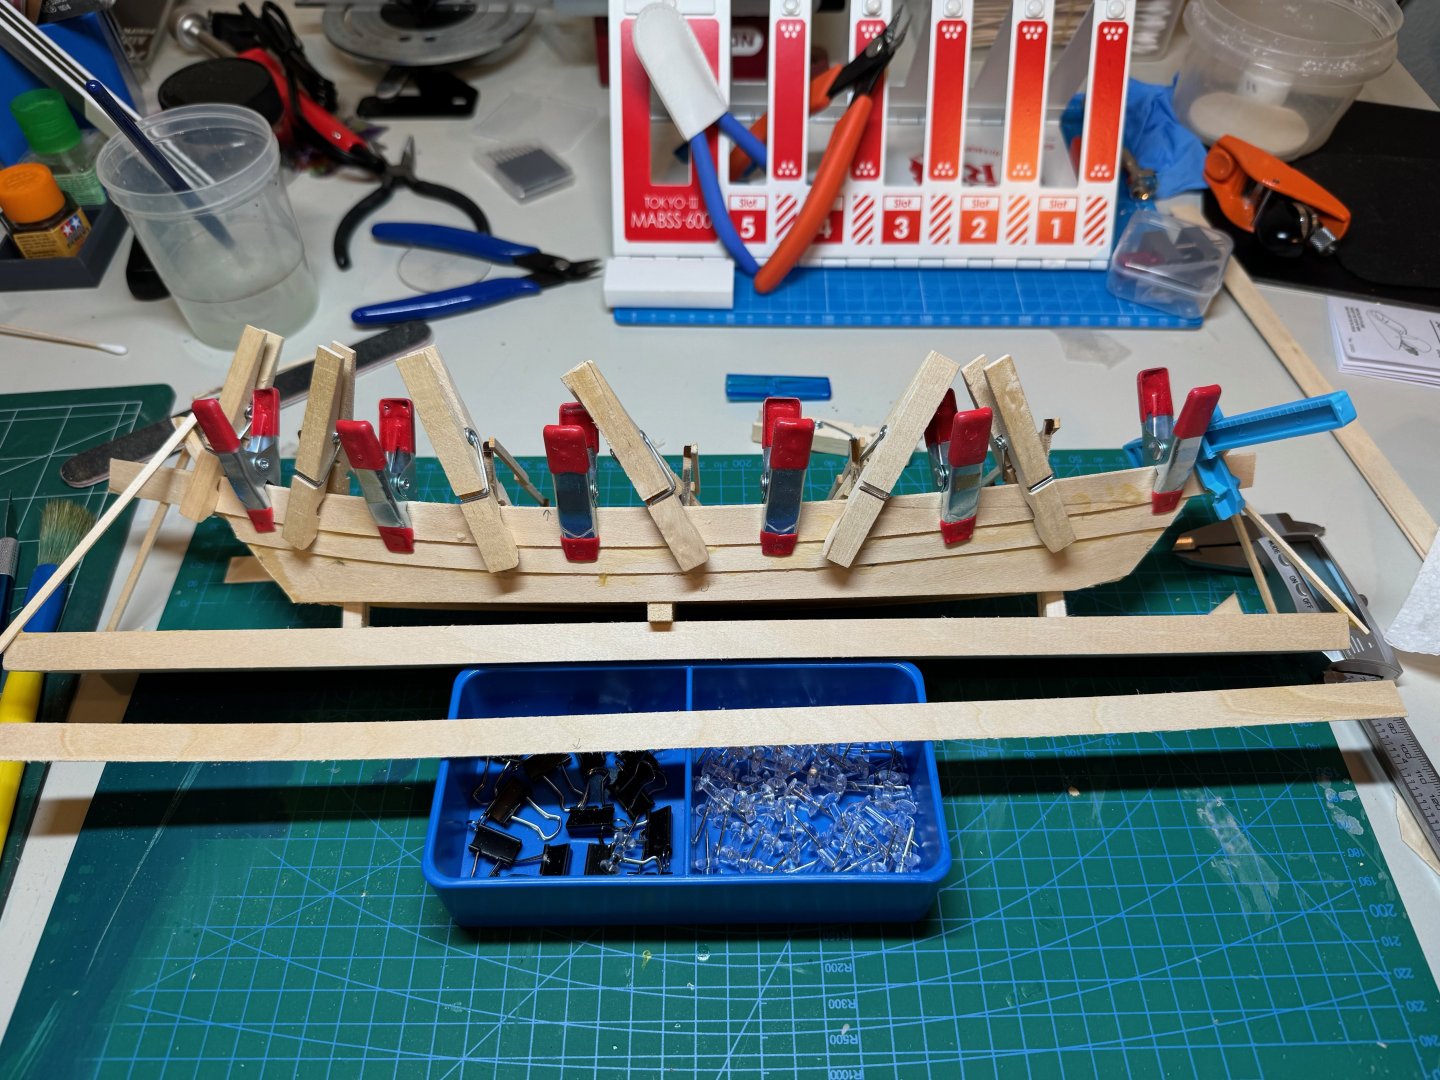
You know its Friday and 3:00ish and you decide you don't want to work. So I stepped away from the computer and did a little dry fitting of the first middle plank. The boss called for a two hour pair programming session, so I did not get as much as I would l have liked done. The plans did call to mark 1/16 of an inch down from the top of the garboard, and to bevel opposite sides of the plank. Below you can see the initial dry fitting looks pretty good. I did fill that one spot with some plastic wood filler, but it is goint to be a bear to clean up after I remove the Dory from the strong board.

- 56 replies
-
- 5
-
-
- grand banks dory
- Midwest Products
- (and 2 more)
-
Agreed, I am found that same issue with the Dory. I am currently working on another Dory by Midwest, and it is much more clear. Things are making more sense now.
- 86 replies
-
- 2
-
-
- Model Shipways
- Norwegian Sailing Pram
- (and 3 more)
-
Wow thank you for explaining that rabbet. I read the documentation two nights ago and i was confused. Secondly I really like your idea using that block as a brace. Great build...
- 86 replies
-
- 2
-
-
- Model Shipways
- Norwegian Sailing Pram
- (and 3 more)
-
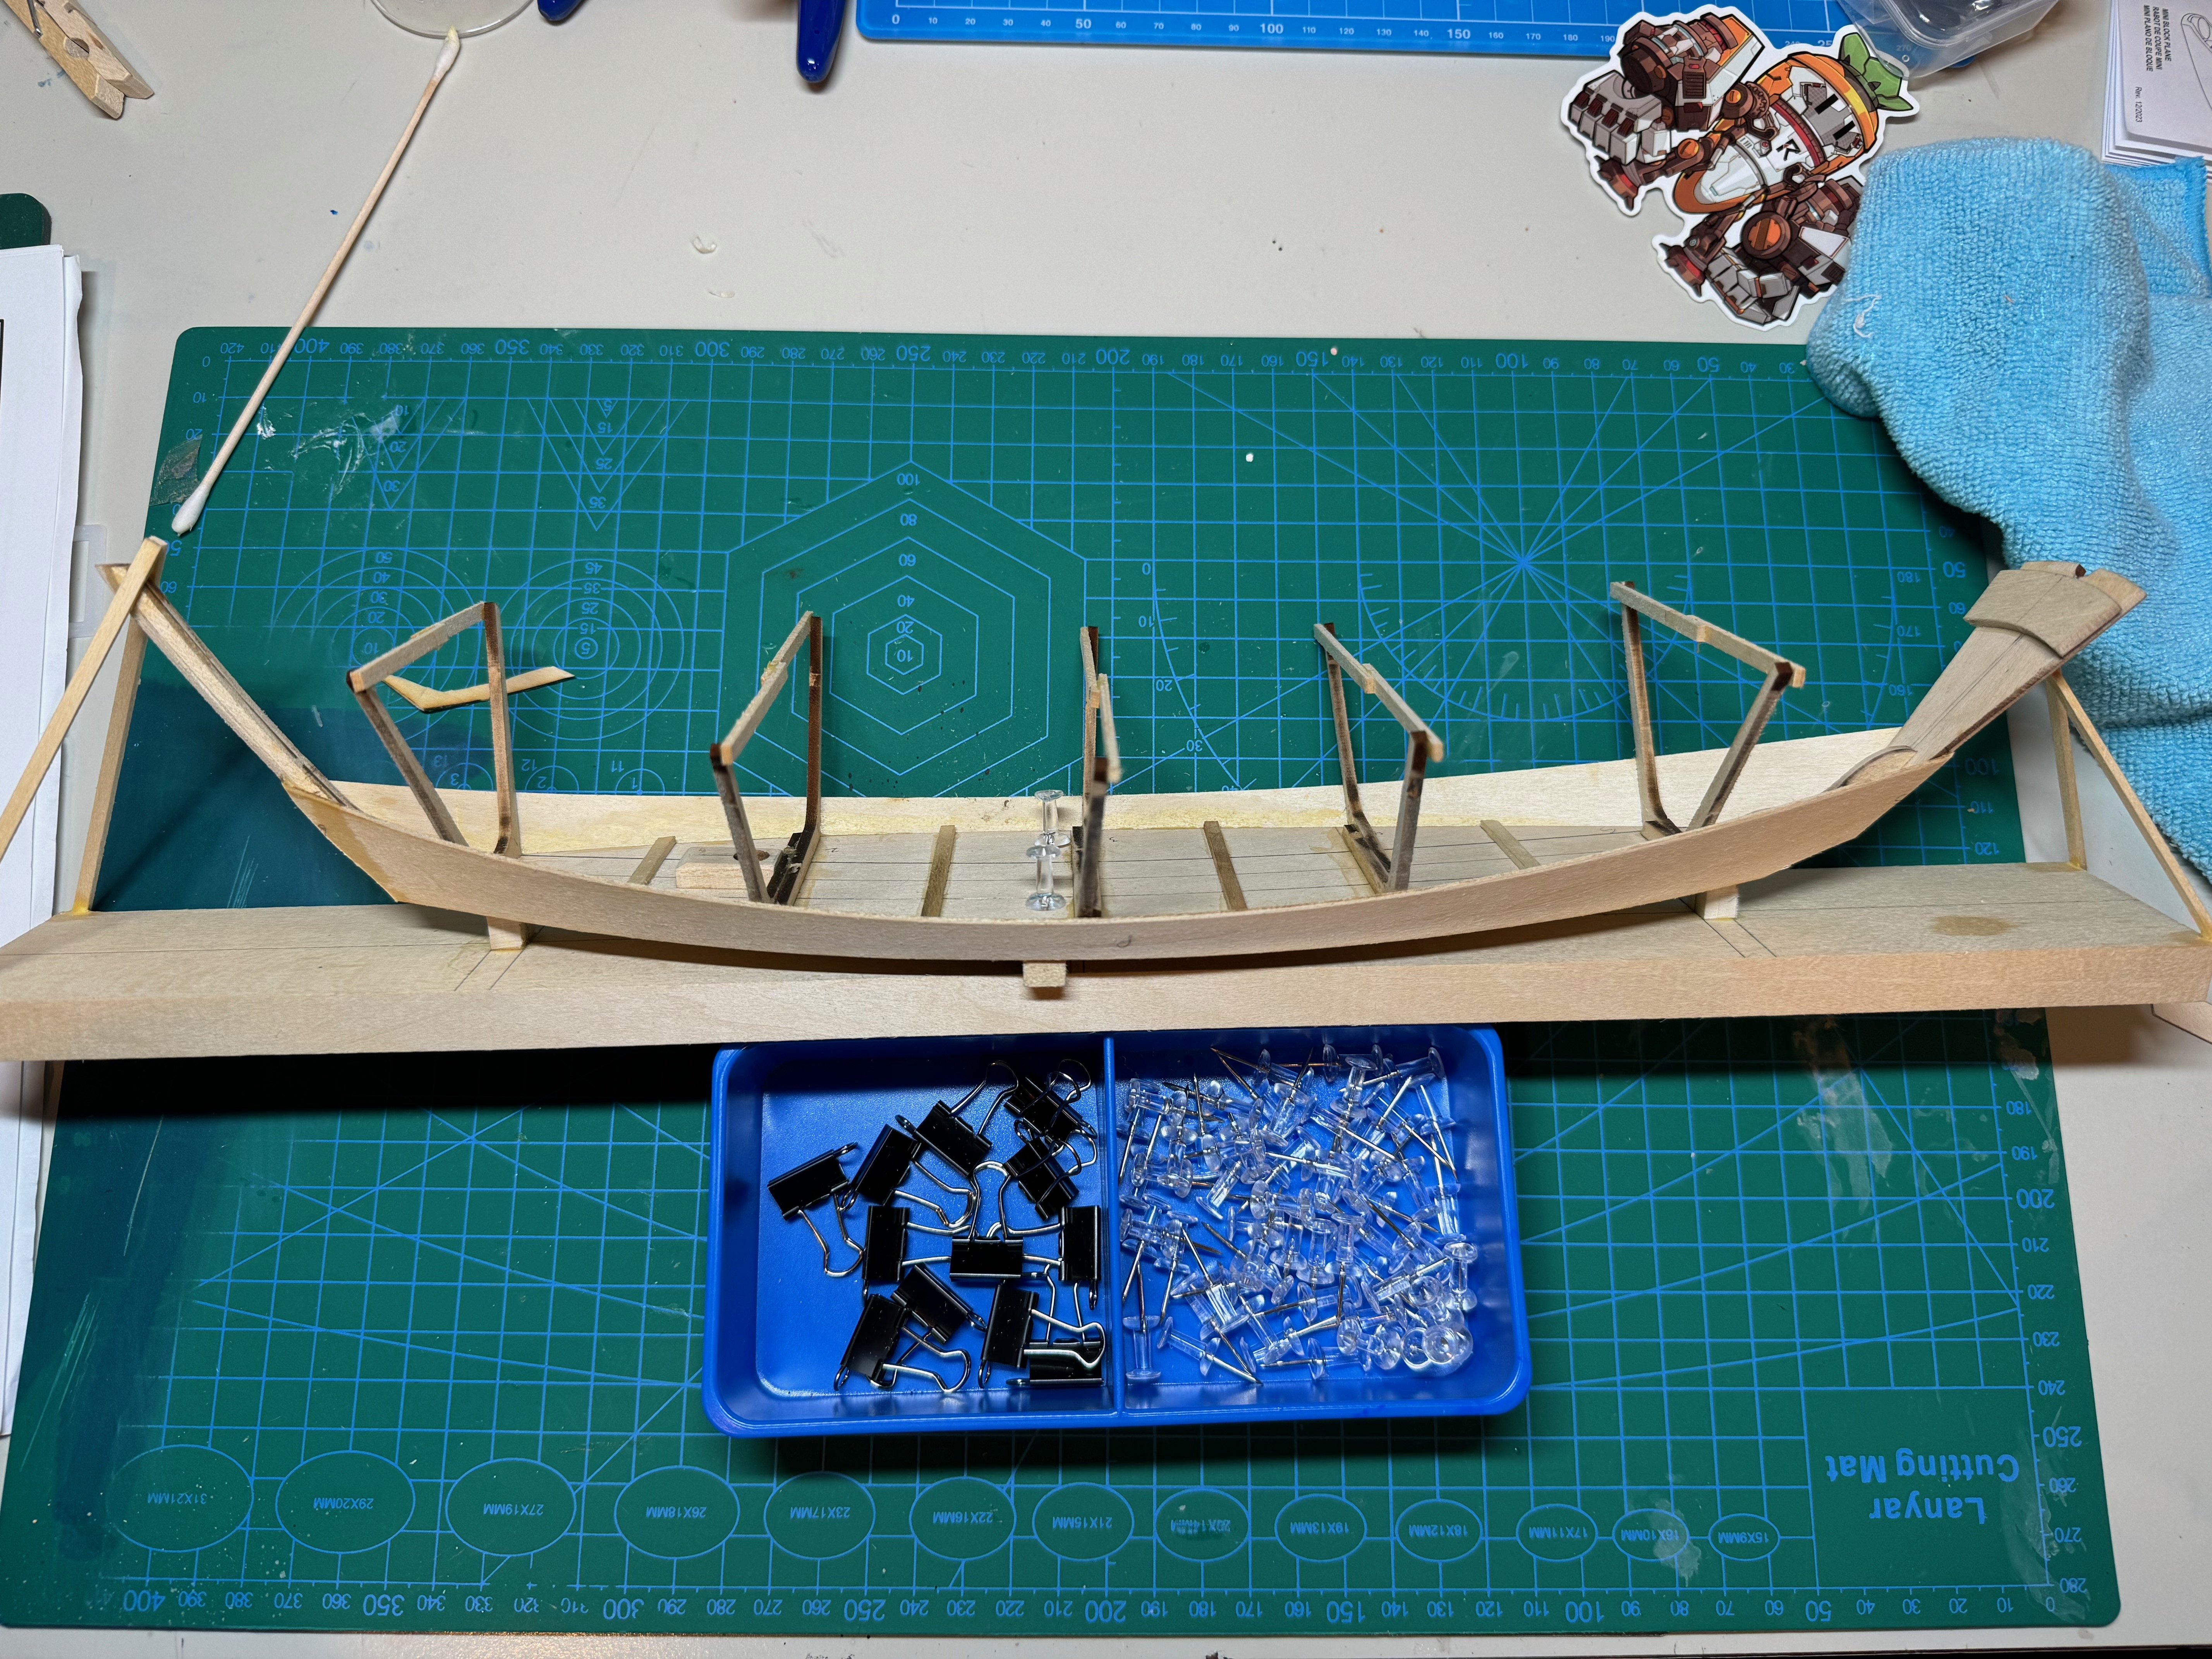
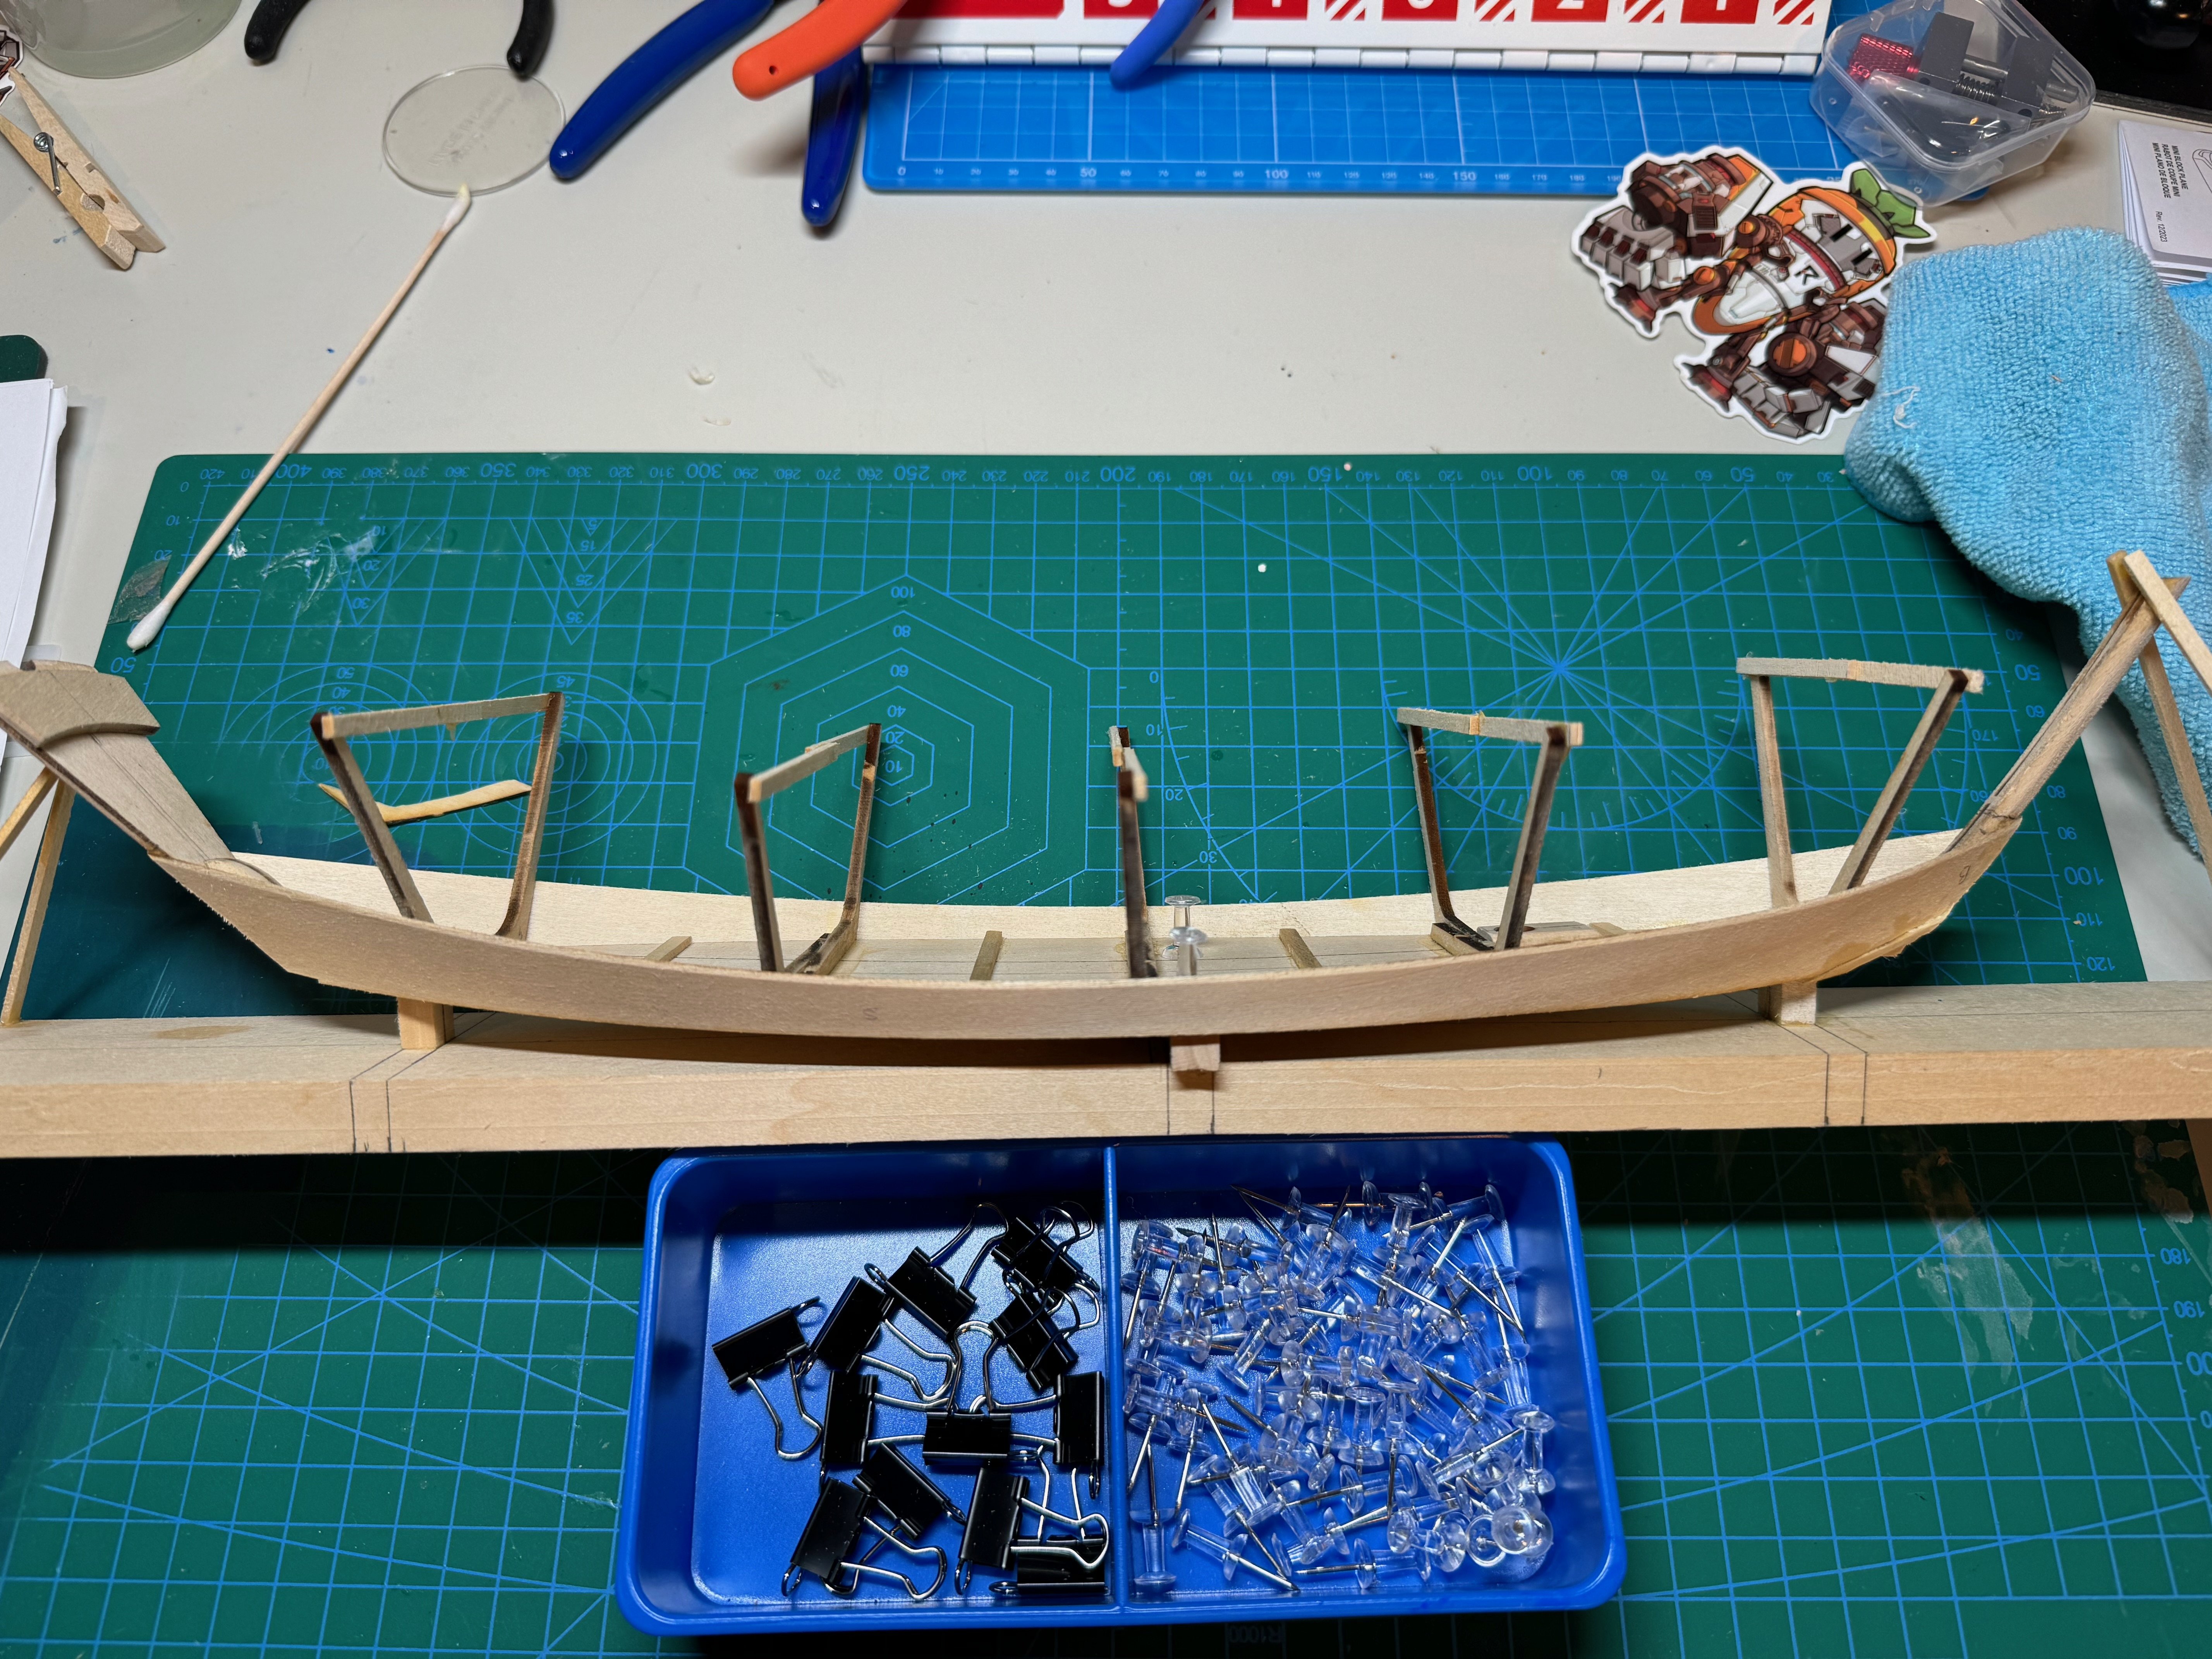
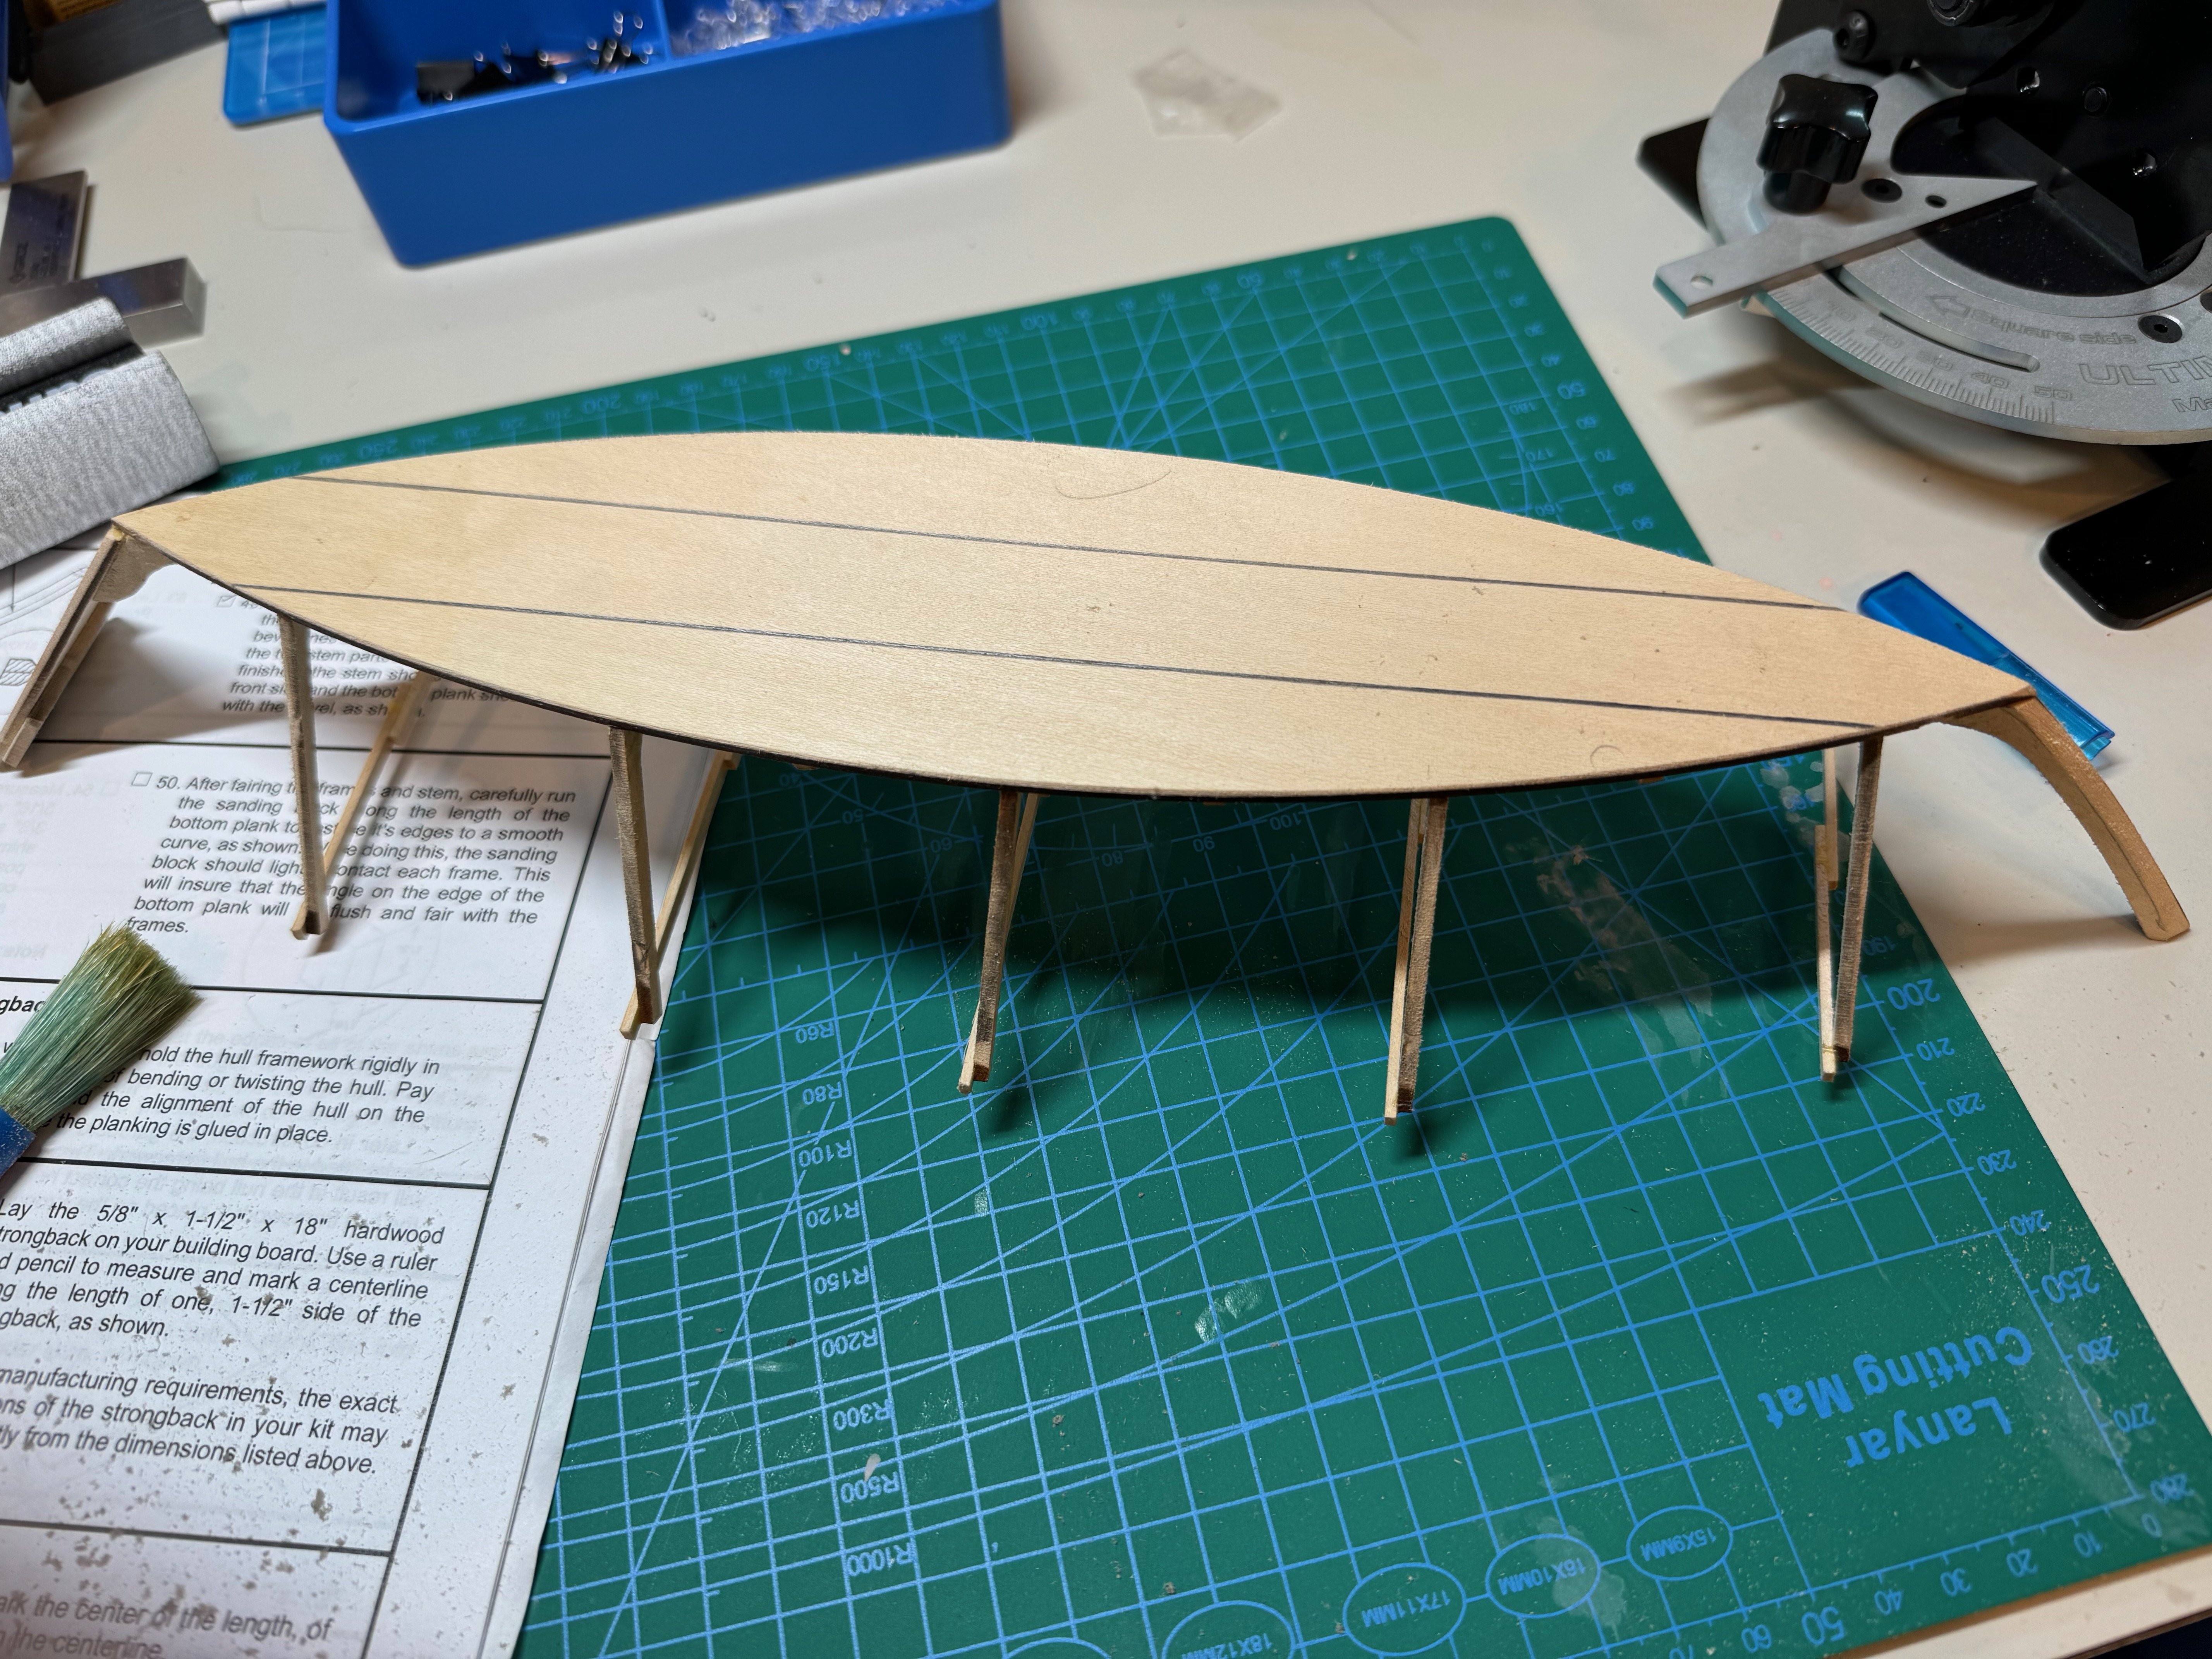
Good evening, Tonight, I mounted the Dory to the strong board. Then I bevelled the edges of the garboards before fitting them. I then added the garboards to the Dory. If you notice on the starboard side at the bow, the plank broke as I was trimming it. I tried to fix with some ca glue but that was a disaster. I guess it will be some wood filler when I remove the Dory from the jig. Have a good evening...


- 56 replies
-
- 3
-
-
- grand banks dory
- Midwest Products
- (and 2 more)
-
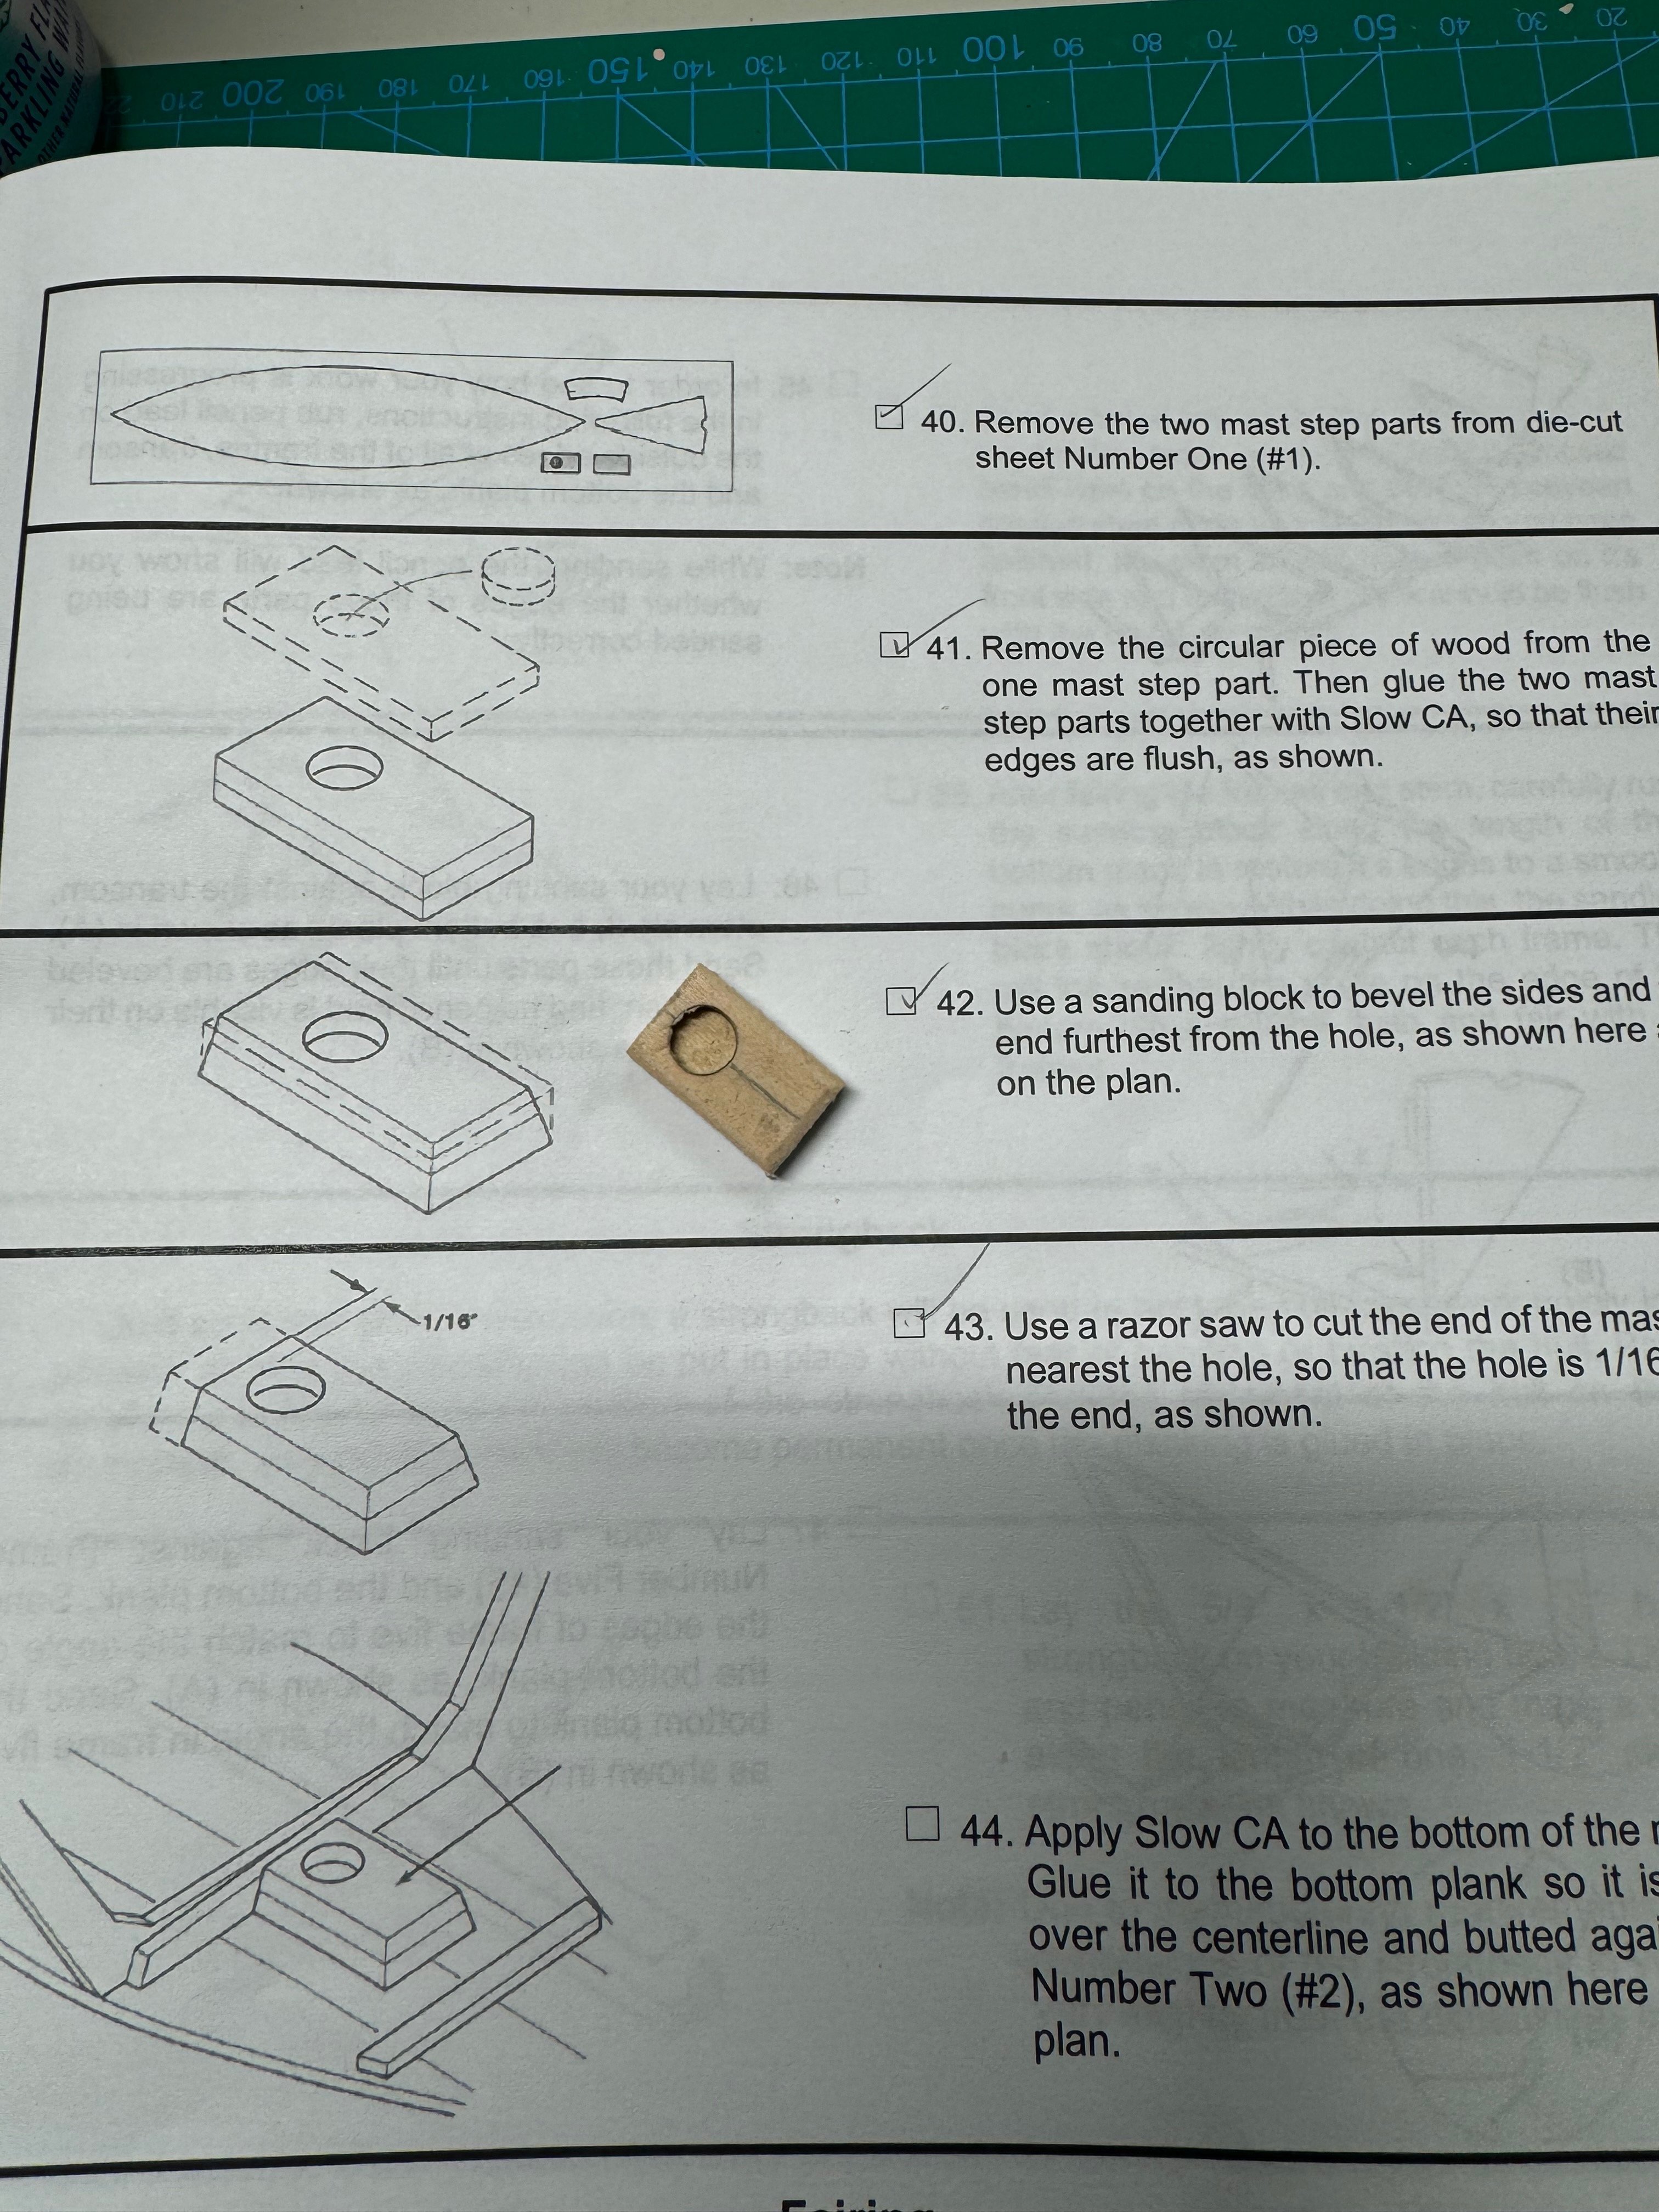
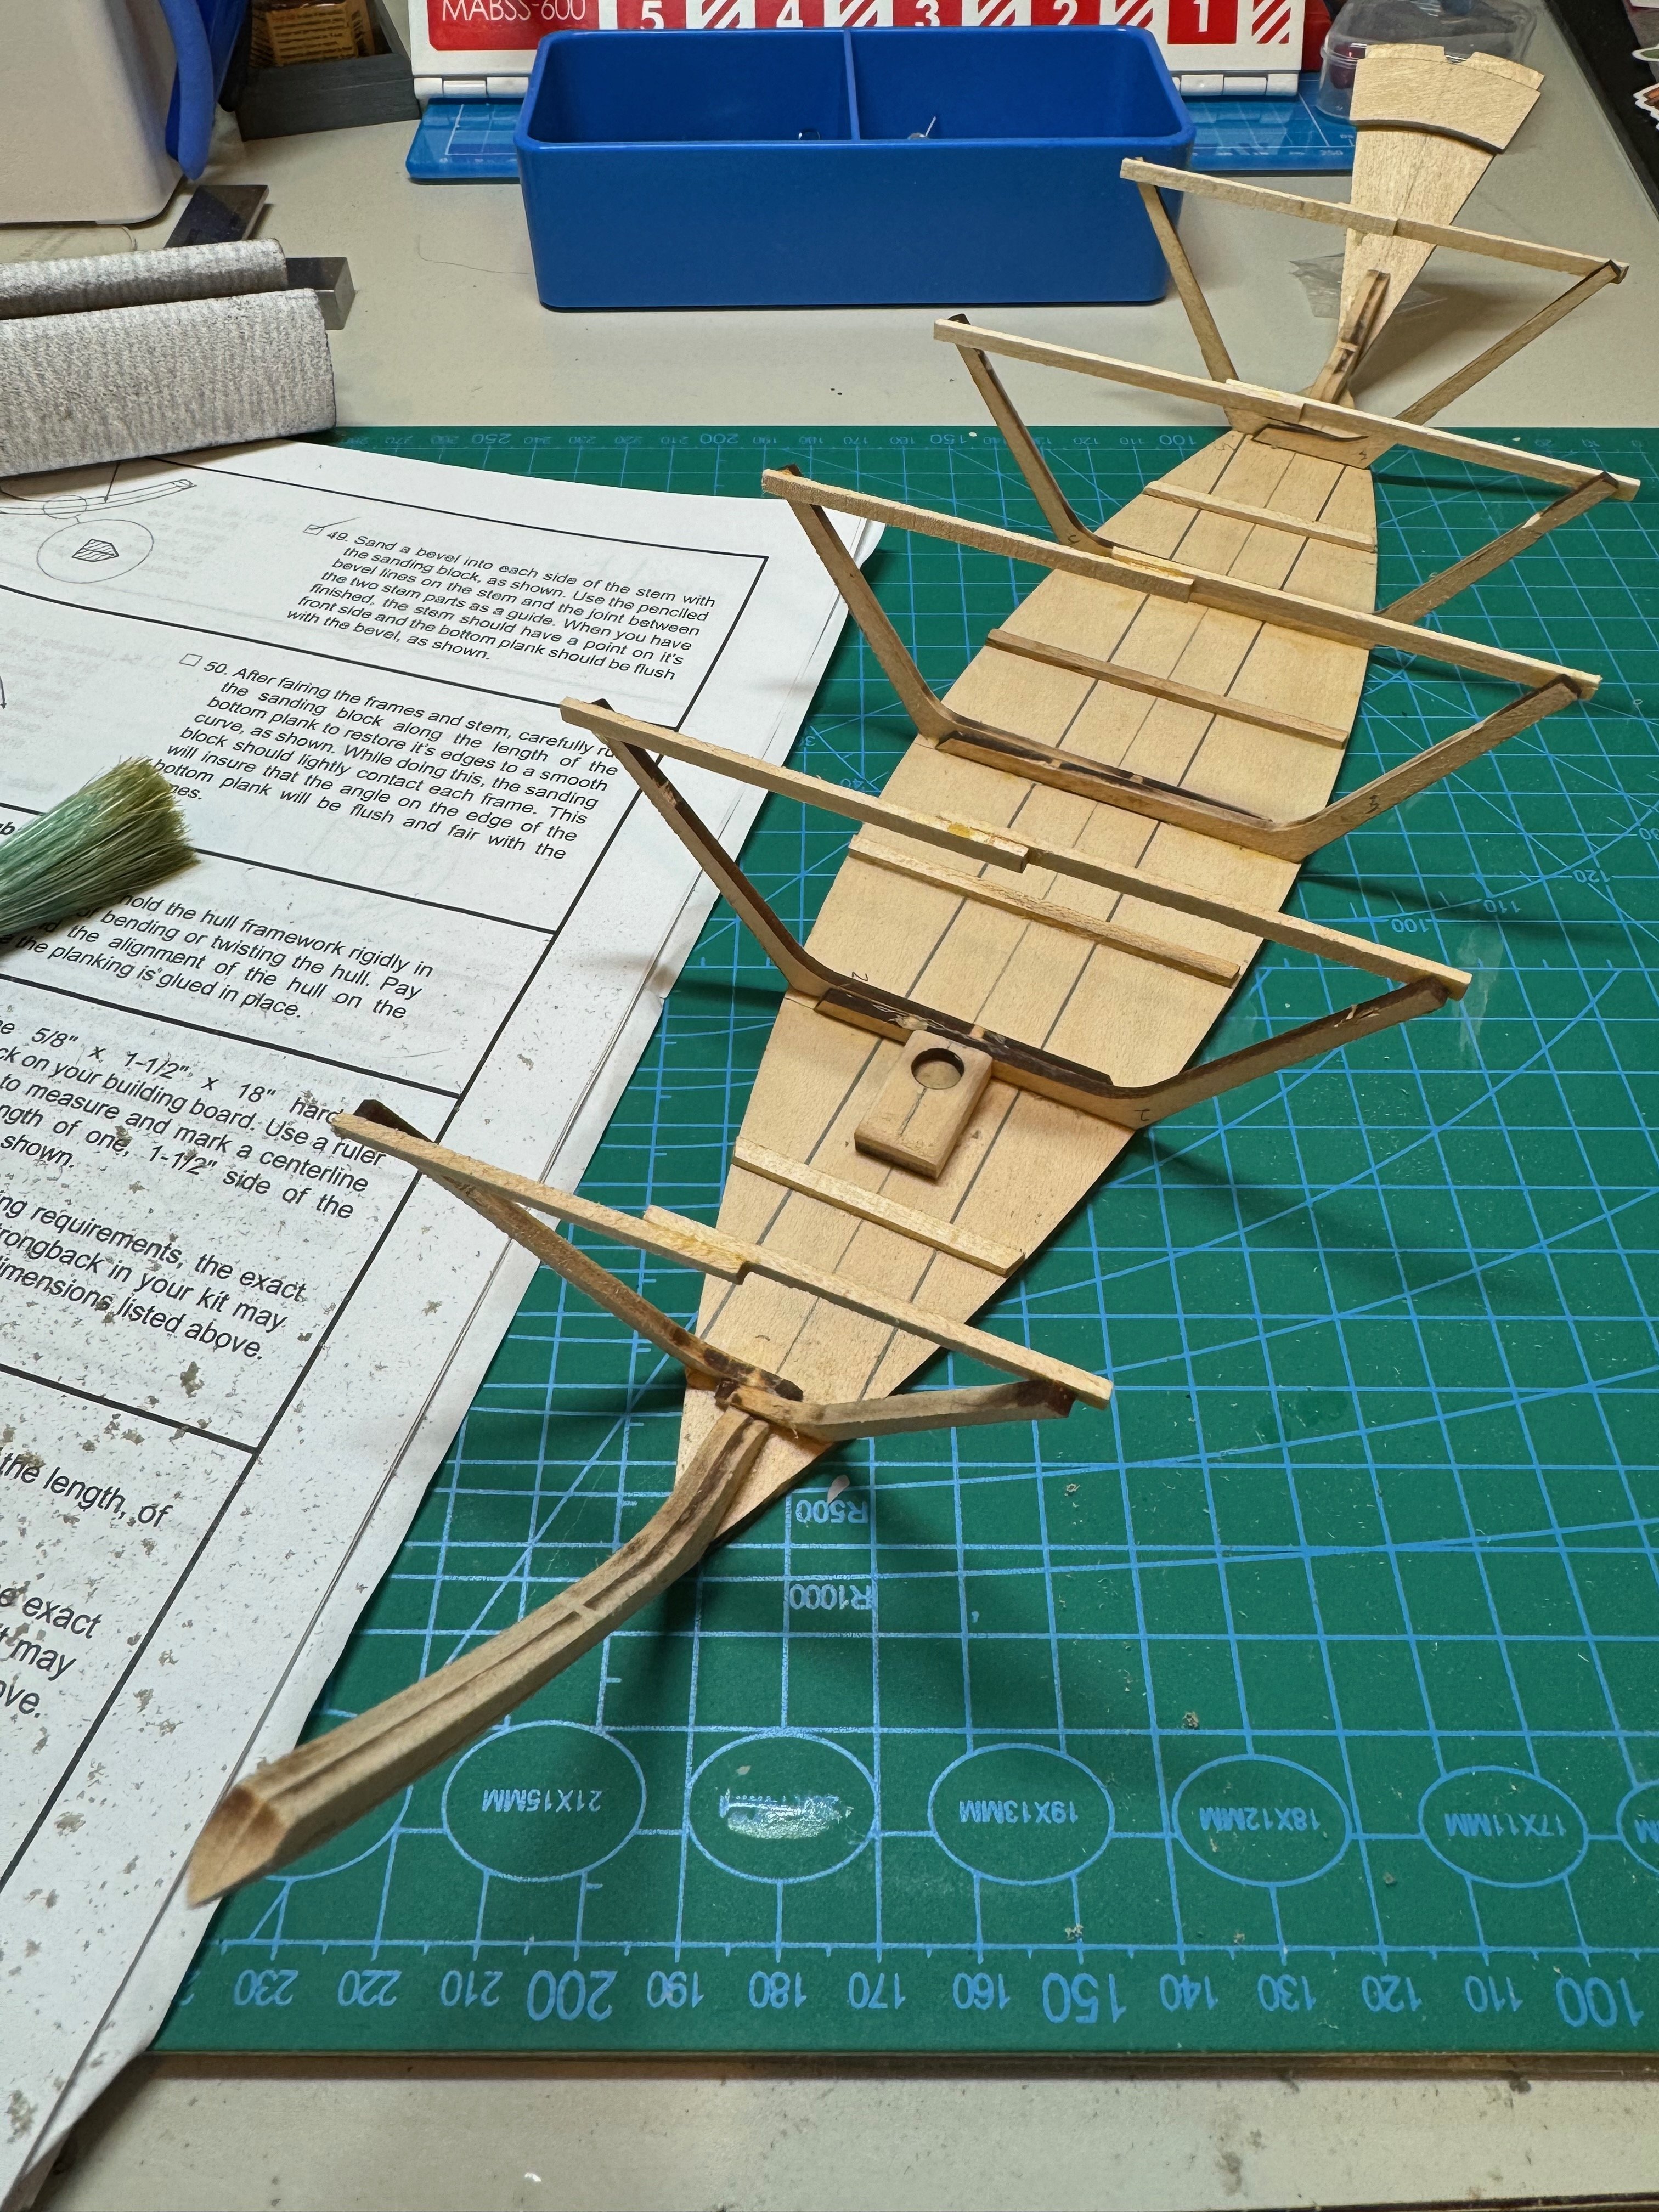
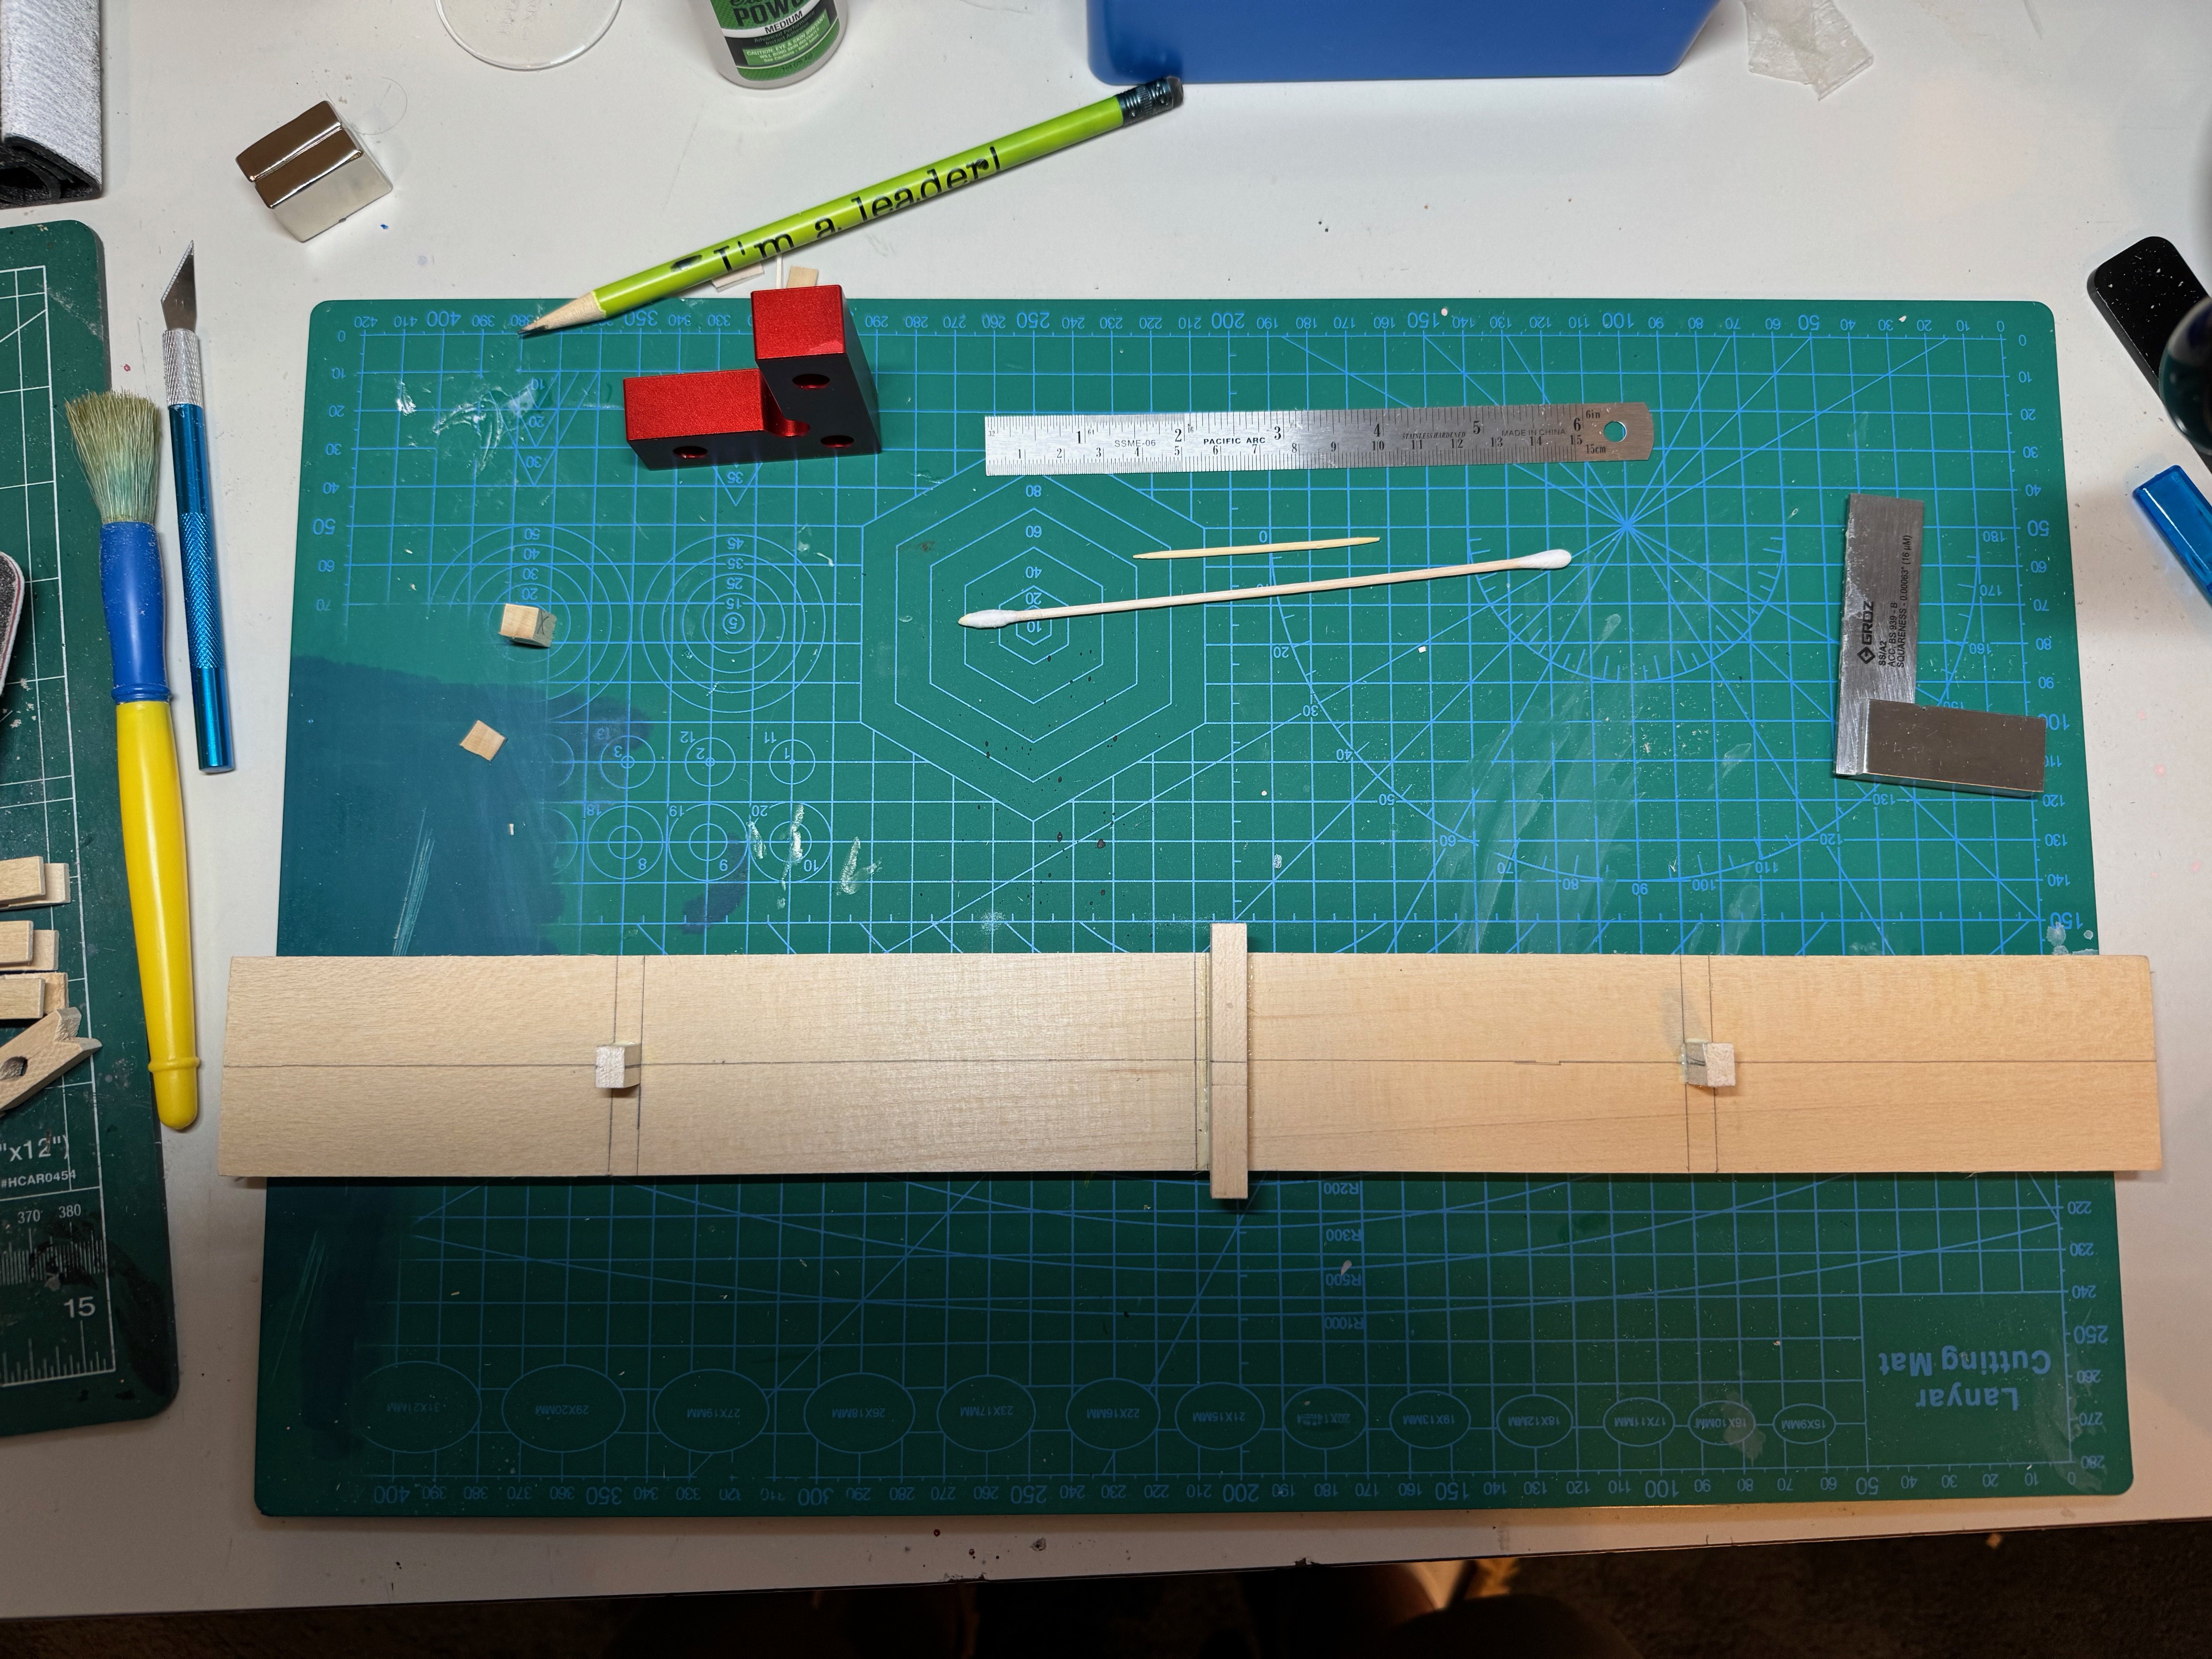
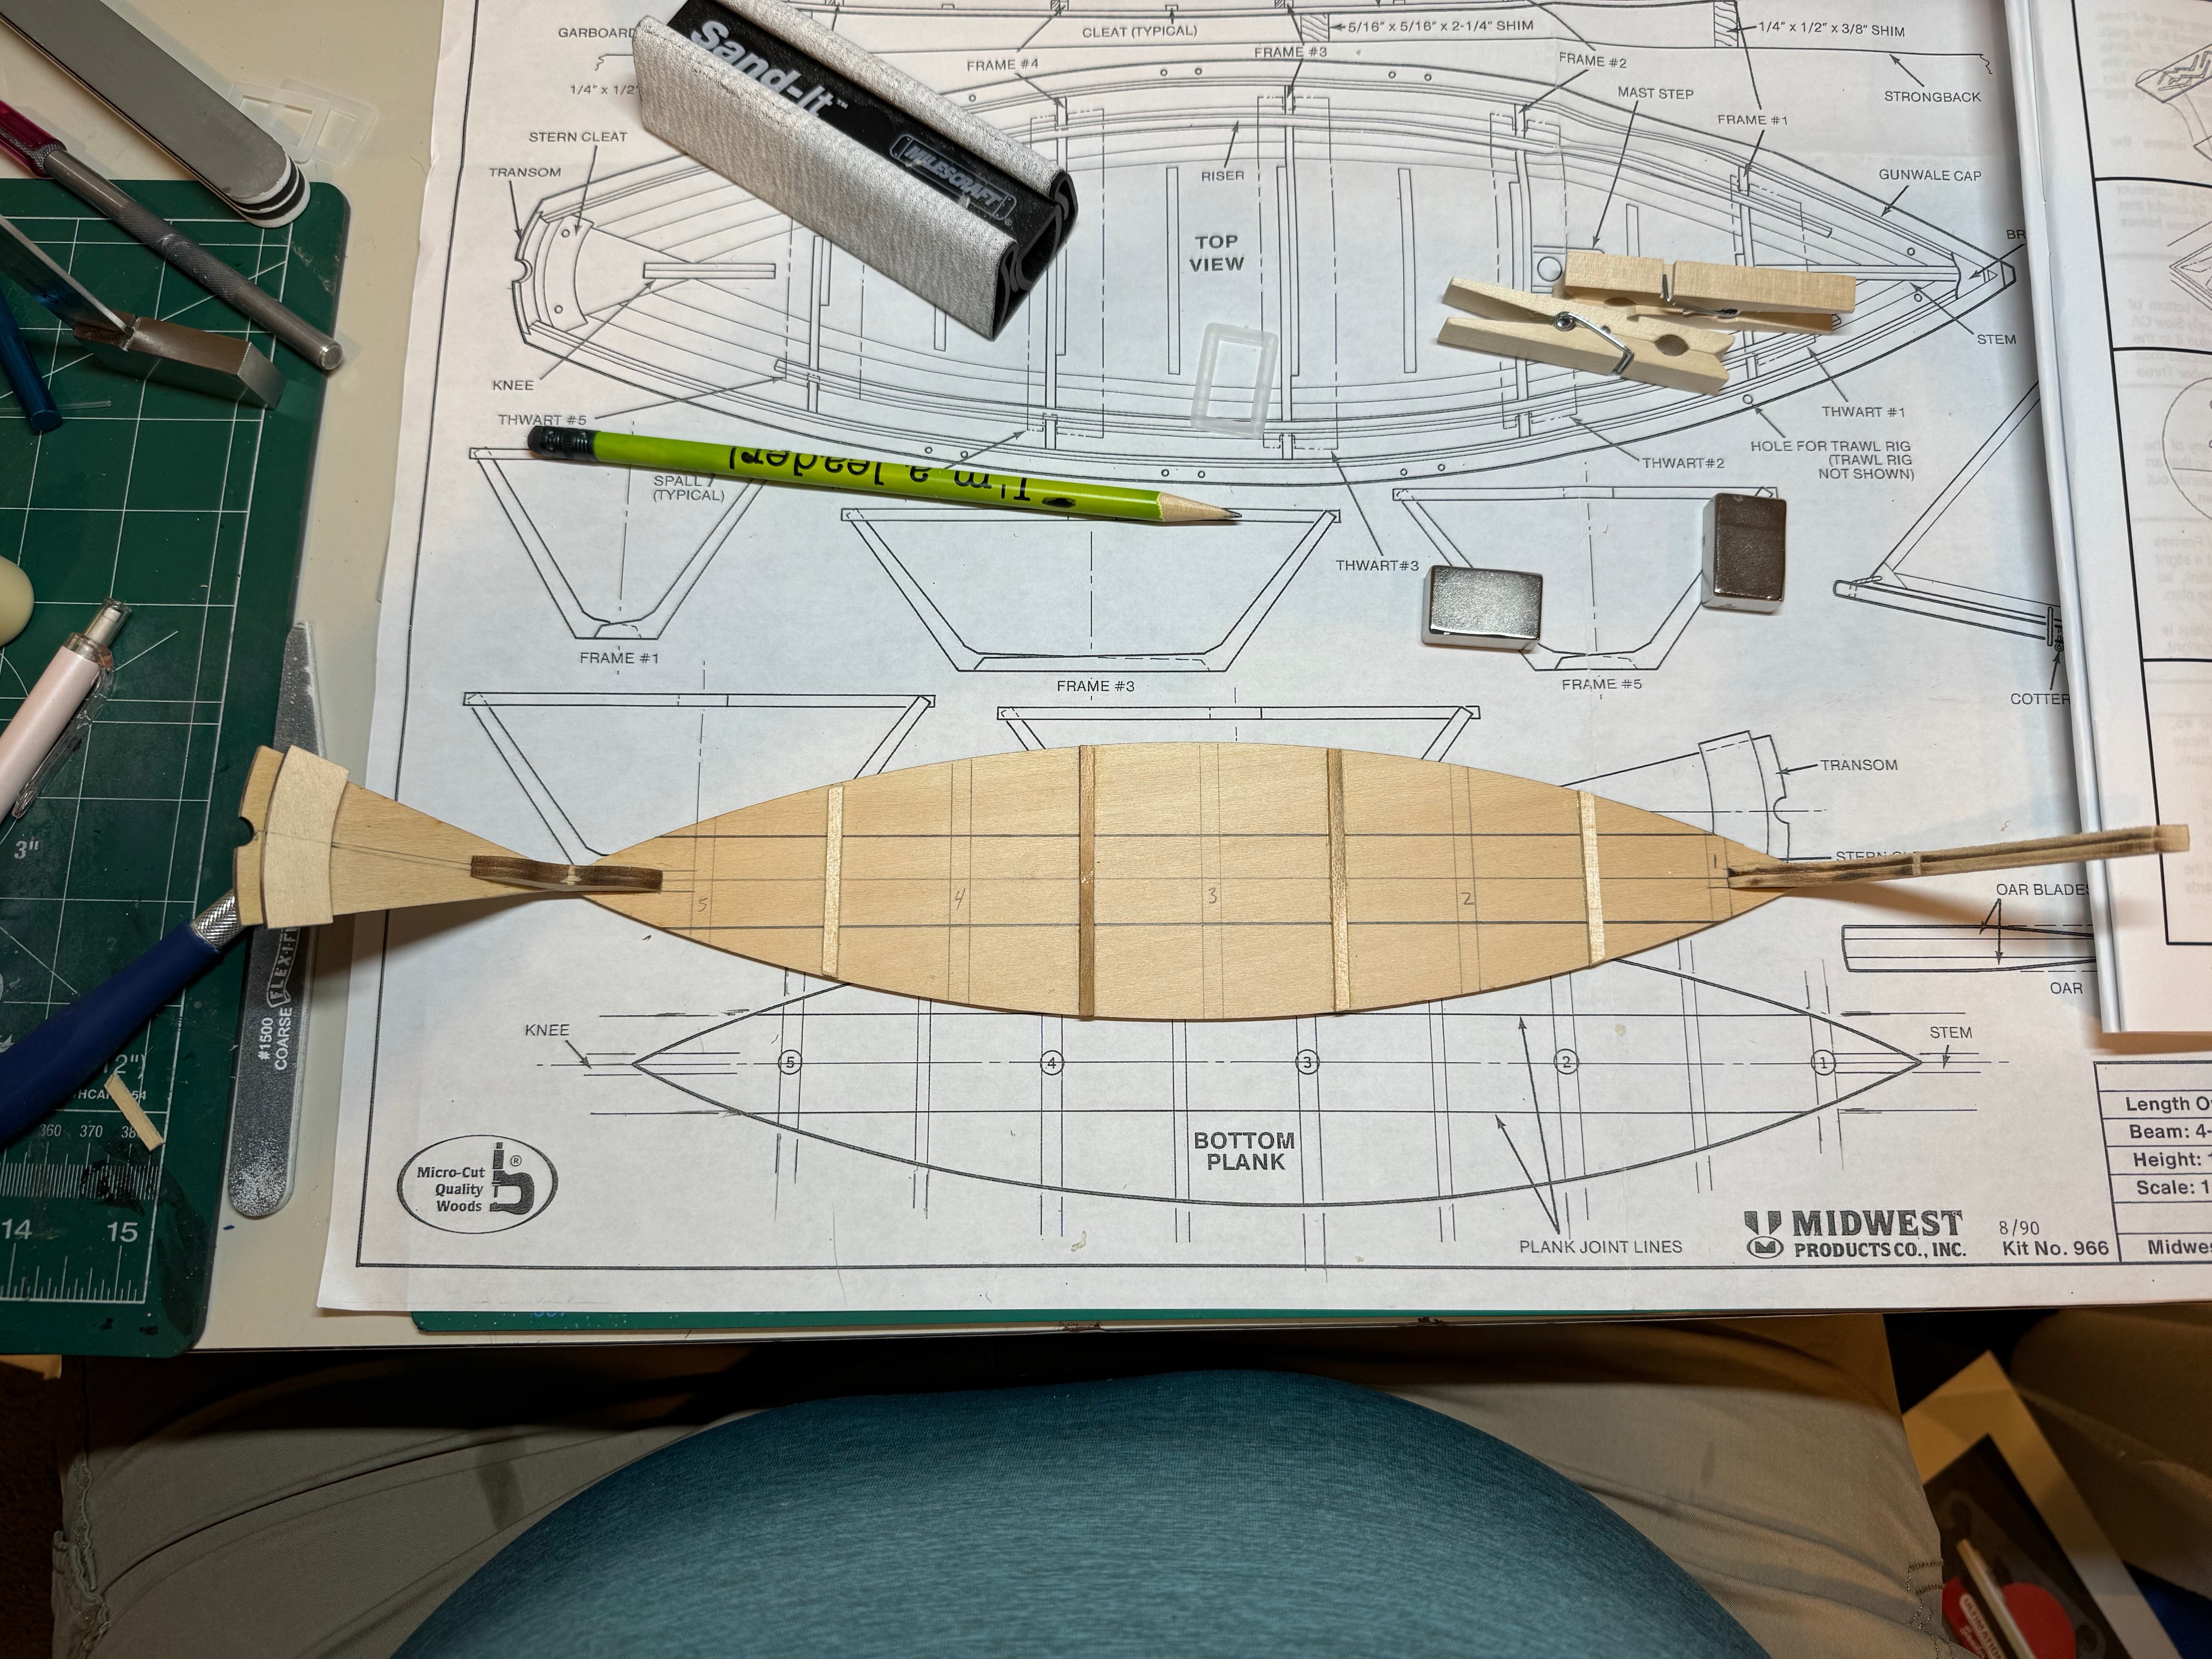
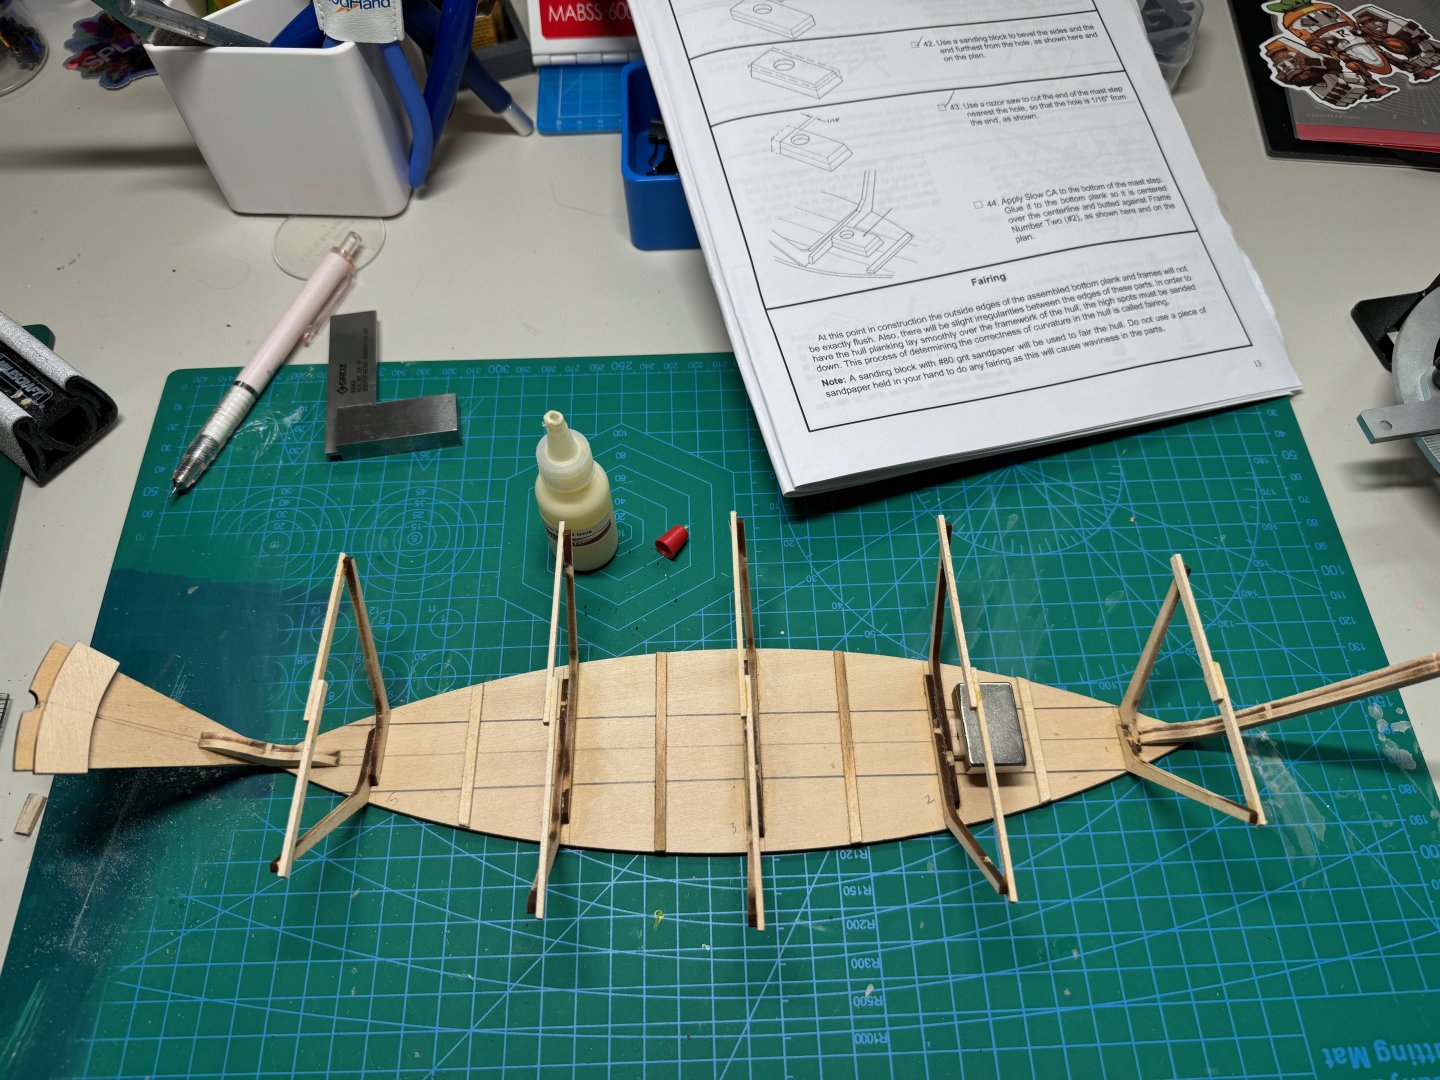
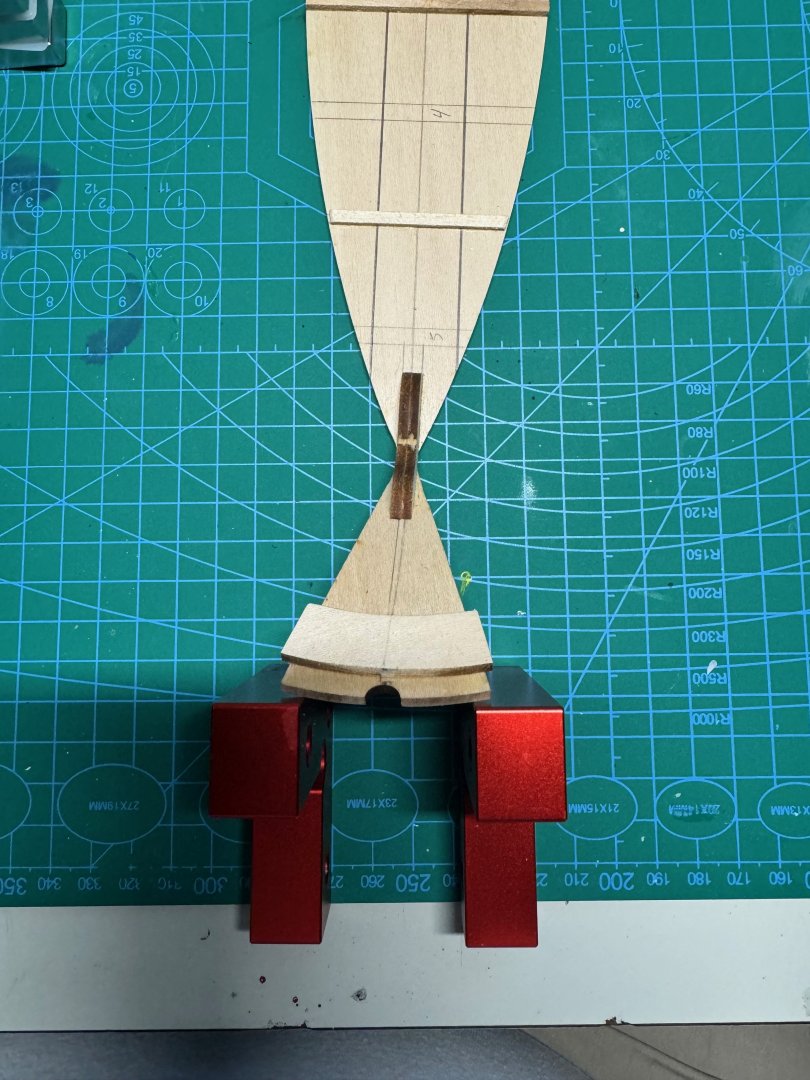
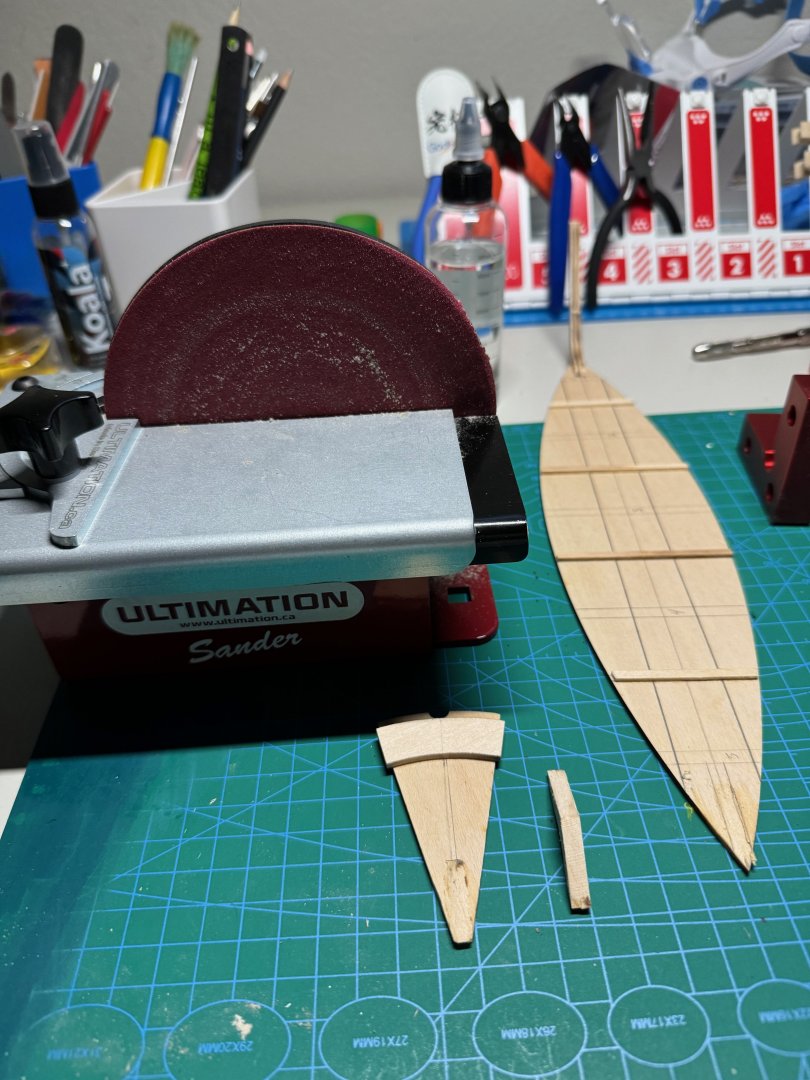
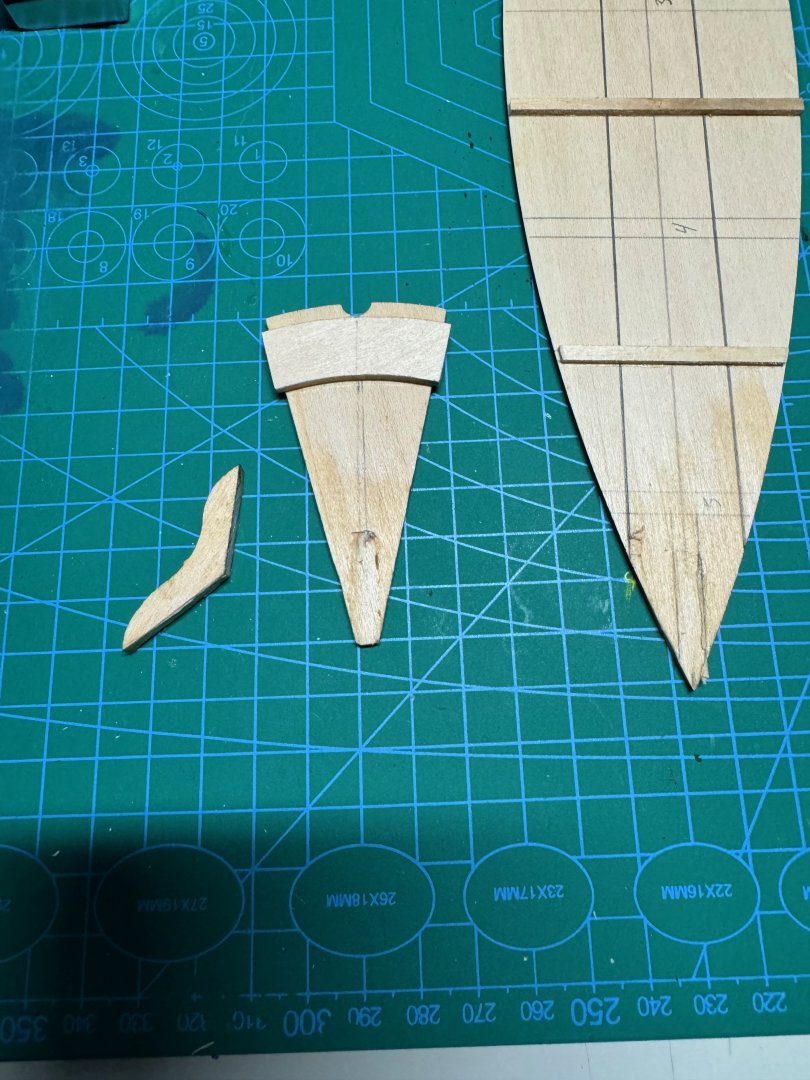
Good evening, I made some more progress today with the Dory. First I trimmed and bevelled the mast step. I had to trim the short end of the mast step to be 1/16 from the center of hole. I trimmed it a little long, and used my sander to get a perfect 90 for all axises (x, y & z). Next I added the mast step next to frame #2. After gluing i moved to fairing my frames, transom and stem. In hindsight, I should have purchased a wood plane to make the bevelling easier on the stem but overall I am satisfied with the result using my sanding block. One thing I learned from the Model Shipways Dory, is not to be as aggressive with the fairing. On that project I broke through one of the frames, and I had to fix it by adding some more wood to it. During this phase I did do a dry fit of the planks to make sure they where contacting nicely to the frames. Finally tonight, I was able to get the strong board ready. The kit arrived with the right dimension for the wood but the lengths where off, so I had to cut the pieces correctly. Below is the dry fit and marking of the board. Once was satisfied with the fit that includes everything is 90 degrees, I glued the pieces to the strong board. I tried using CA but, alast that product is my bane. I ended up using PVA so that the end of the night.


- 56 replies
-
- 7
-
-
- grand banks dory
- Midwest Products
- (and 2 more)
-
Dan, this looks wonderful. I have my Lobster smack arriving this week, and I am hoping to jump into it arround January. I still need to complete the sailing pram first.
- 37 replies
-
- 3
-
-
- Model Shipways
- muscongus bay lobster smack
- (and 1 more)
-
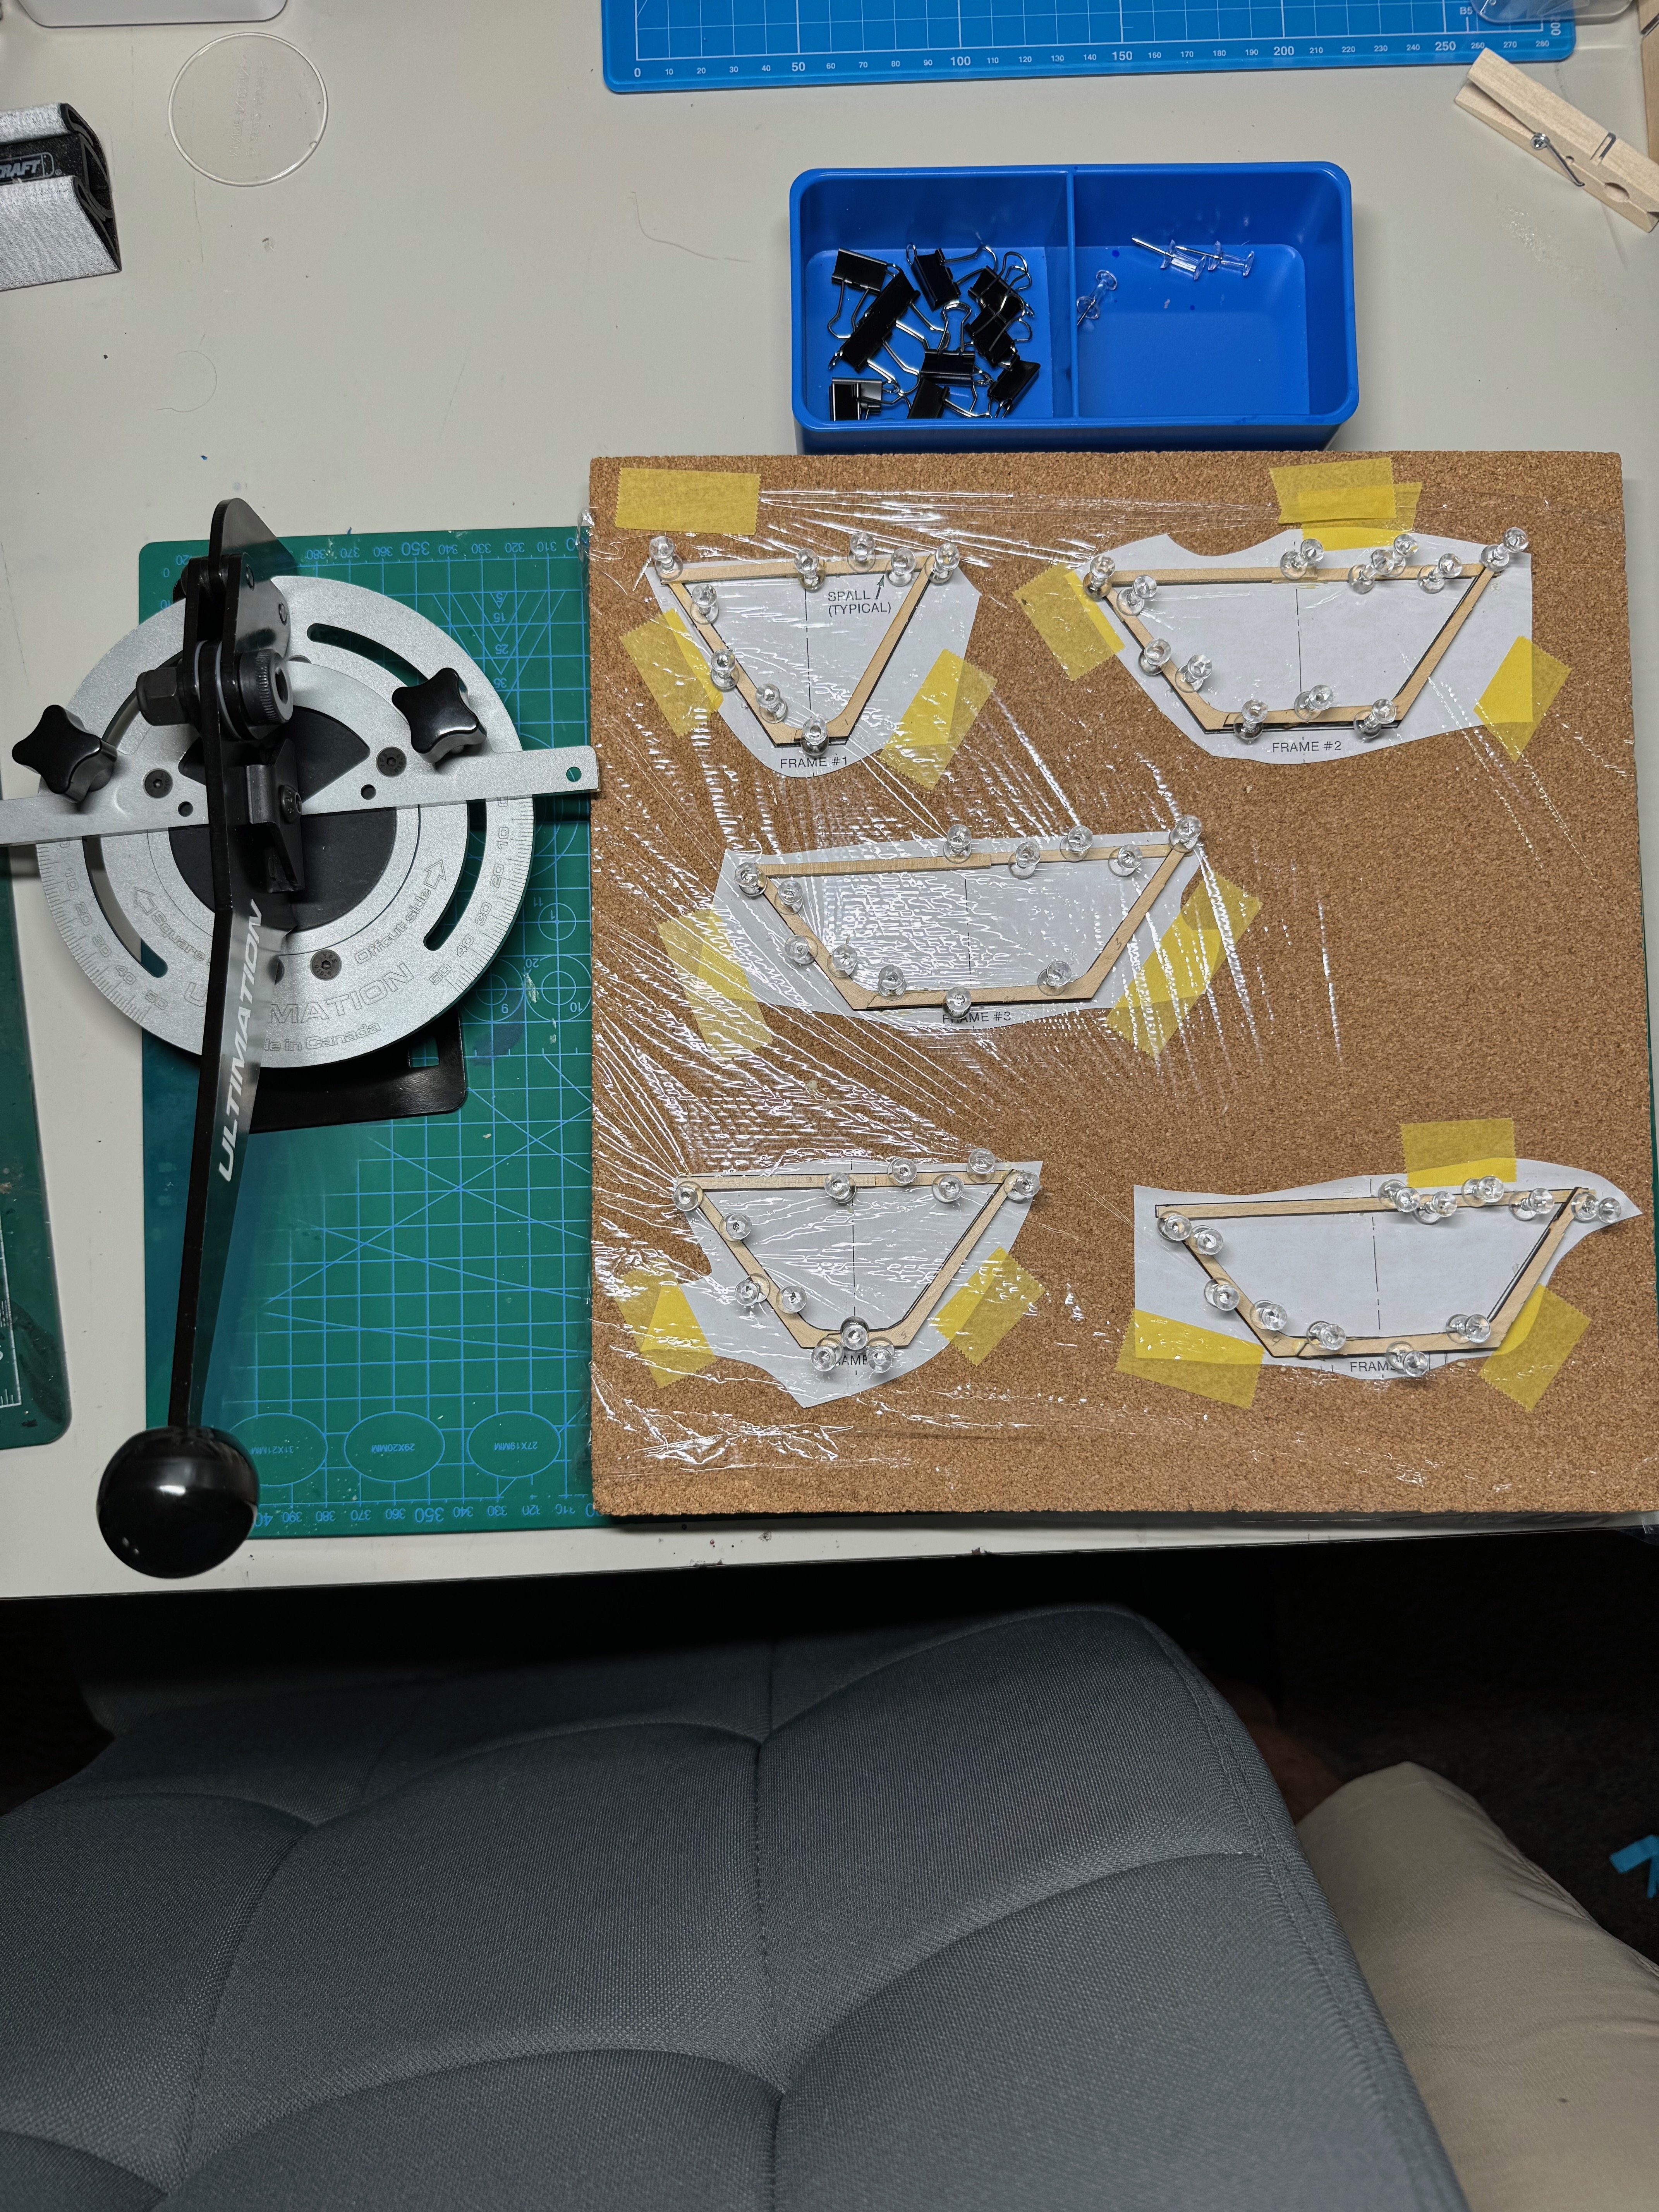
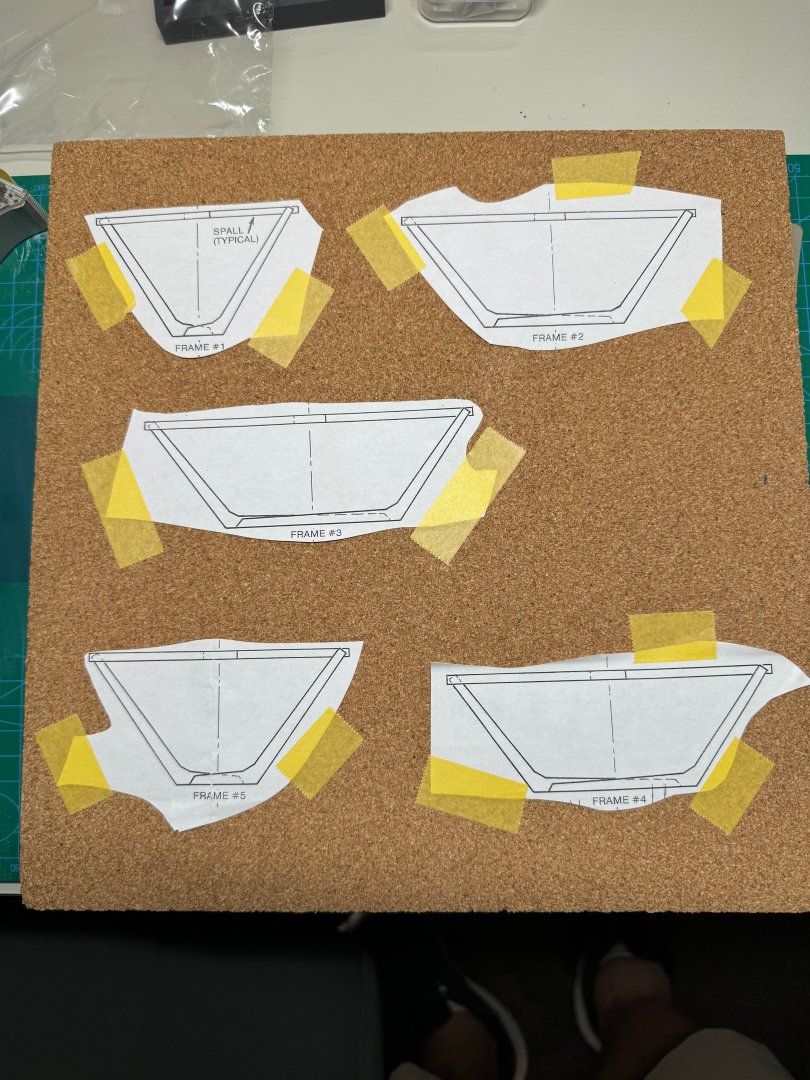
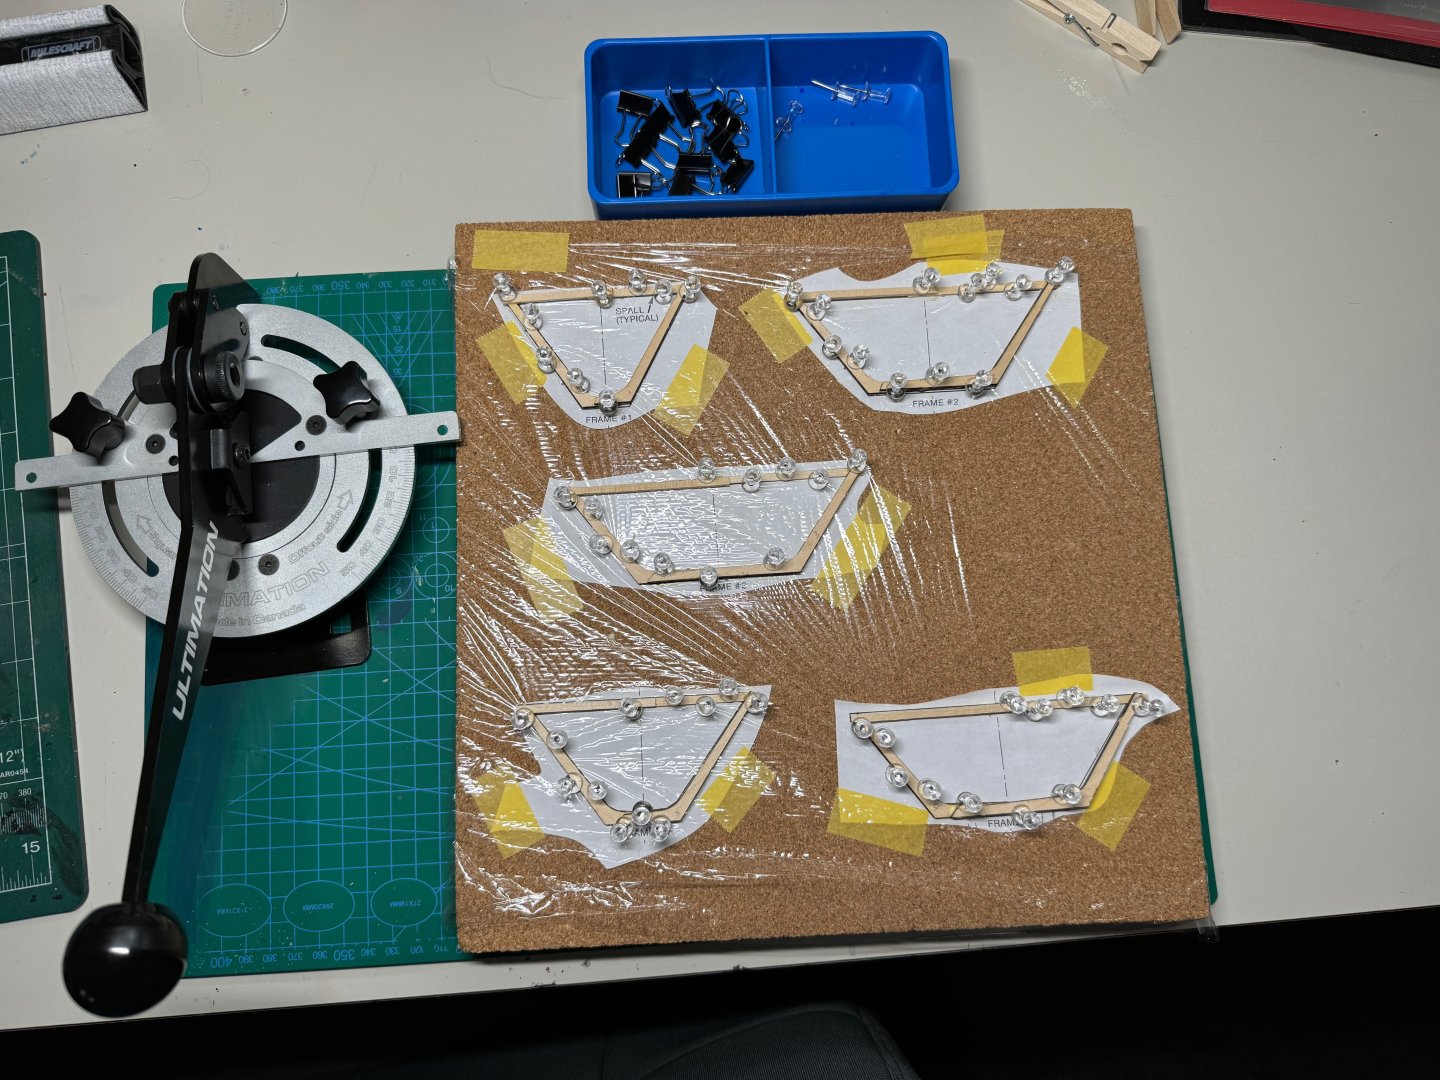
Good evening, my build board arrived today so I was able to make some progress. Considering my cork board is 12x12 I had to cut out the frame plans from the full plan so I could arrange them on the board. After adding the images to the board, I covered it with plastic wrap, and then started to build the frames. After the frames where dry I was able to mount them to the bottom plank. Finally, I was glued up the mast step.


- 56 replies
-
- 6
-
-
- grand banks dory
- Midwest Products
- (and 2 more)
-
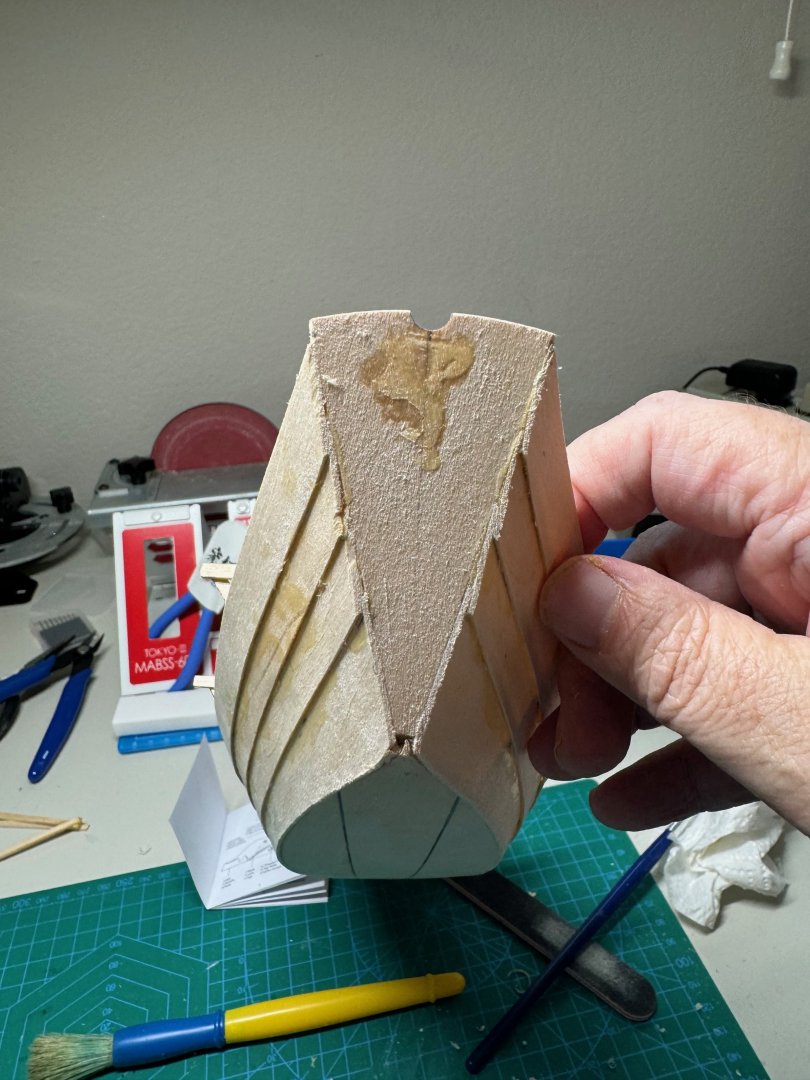
Good morning, I noticed my transom had a small twist favoring the port side. So I removed the transom and knew using isopropyl. I noticed the knee was not fully 90 degrees, so I reset the angles with some more sanding, then re-assembled. You can see the twist on the image wit the red squares. The second photo shows the reset for the transom placement.

- 56 replies
-
- 5
-
-
- grand banks dory
- Midwest Products
- (and 2 more)
-
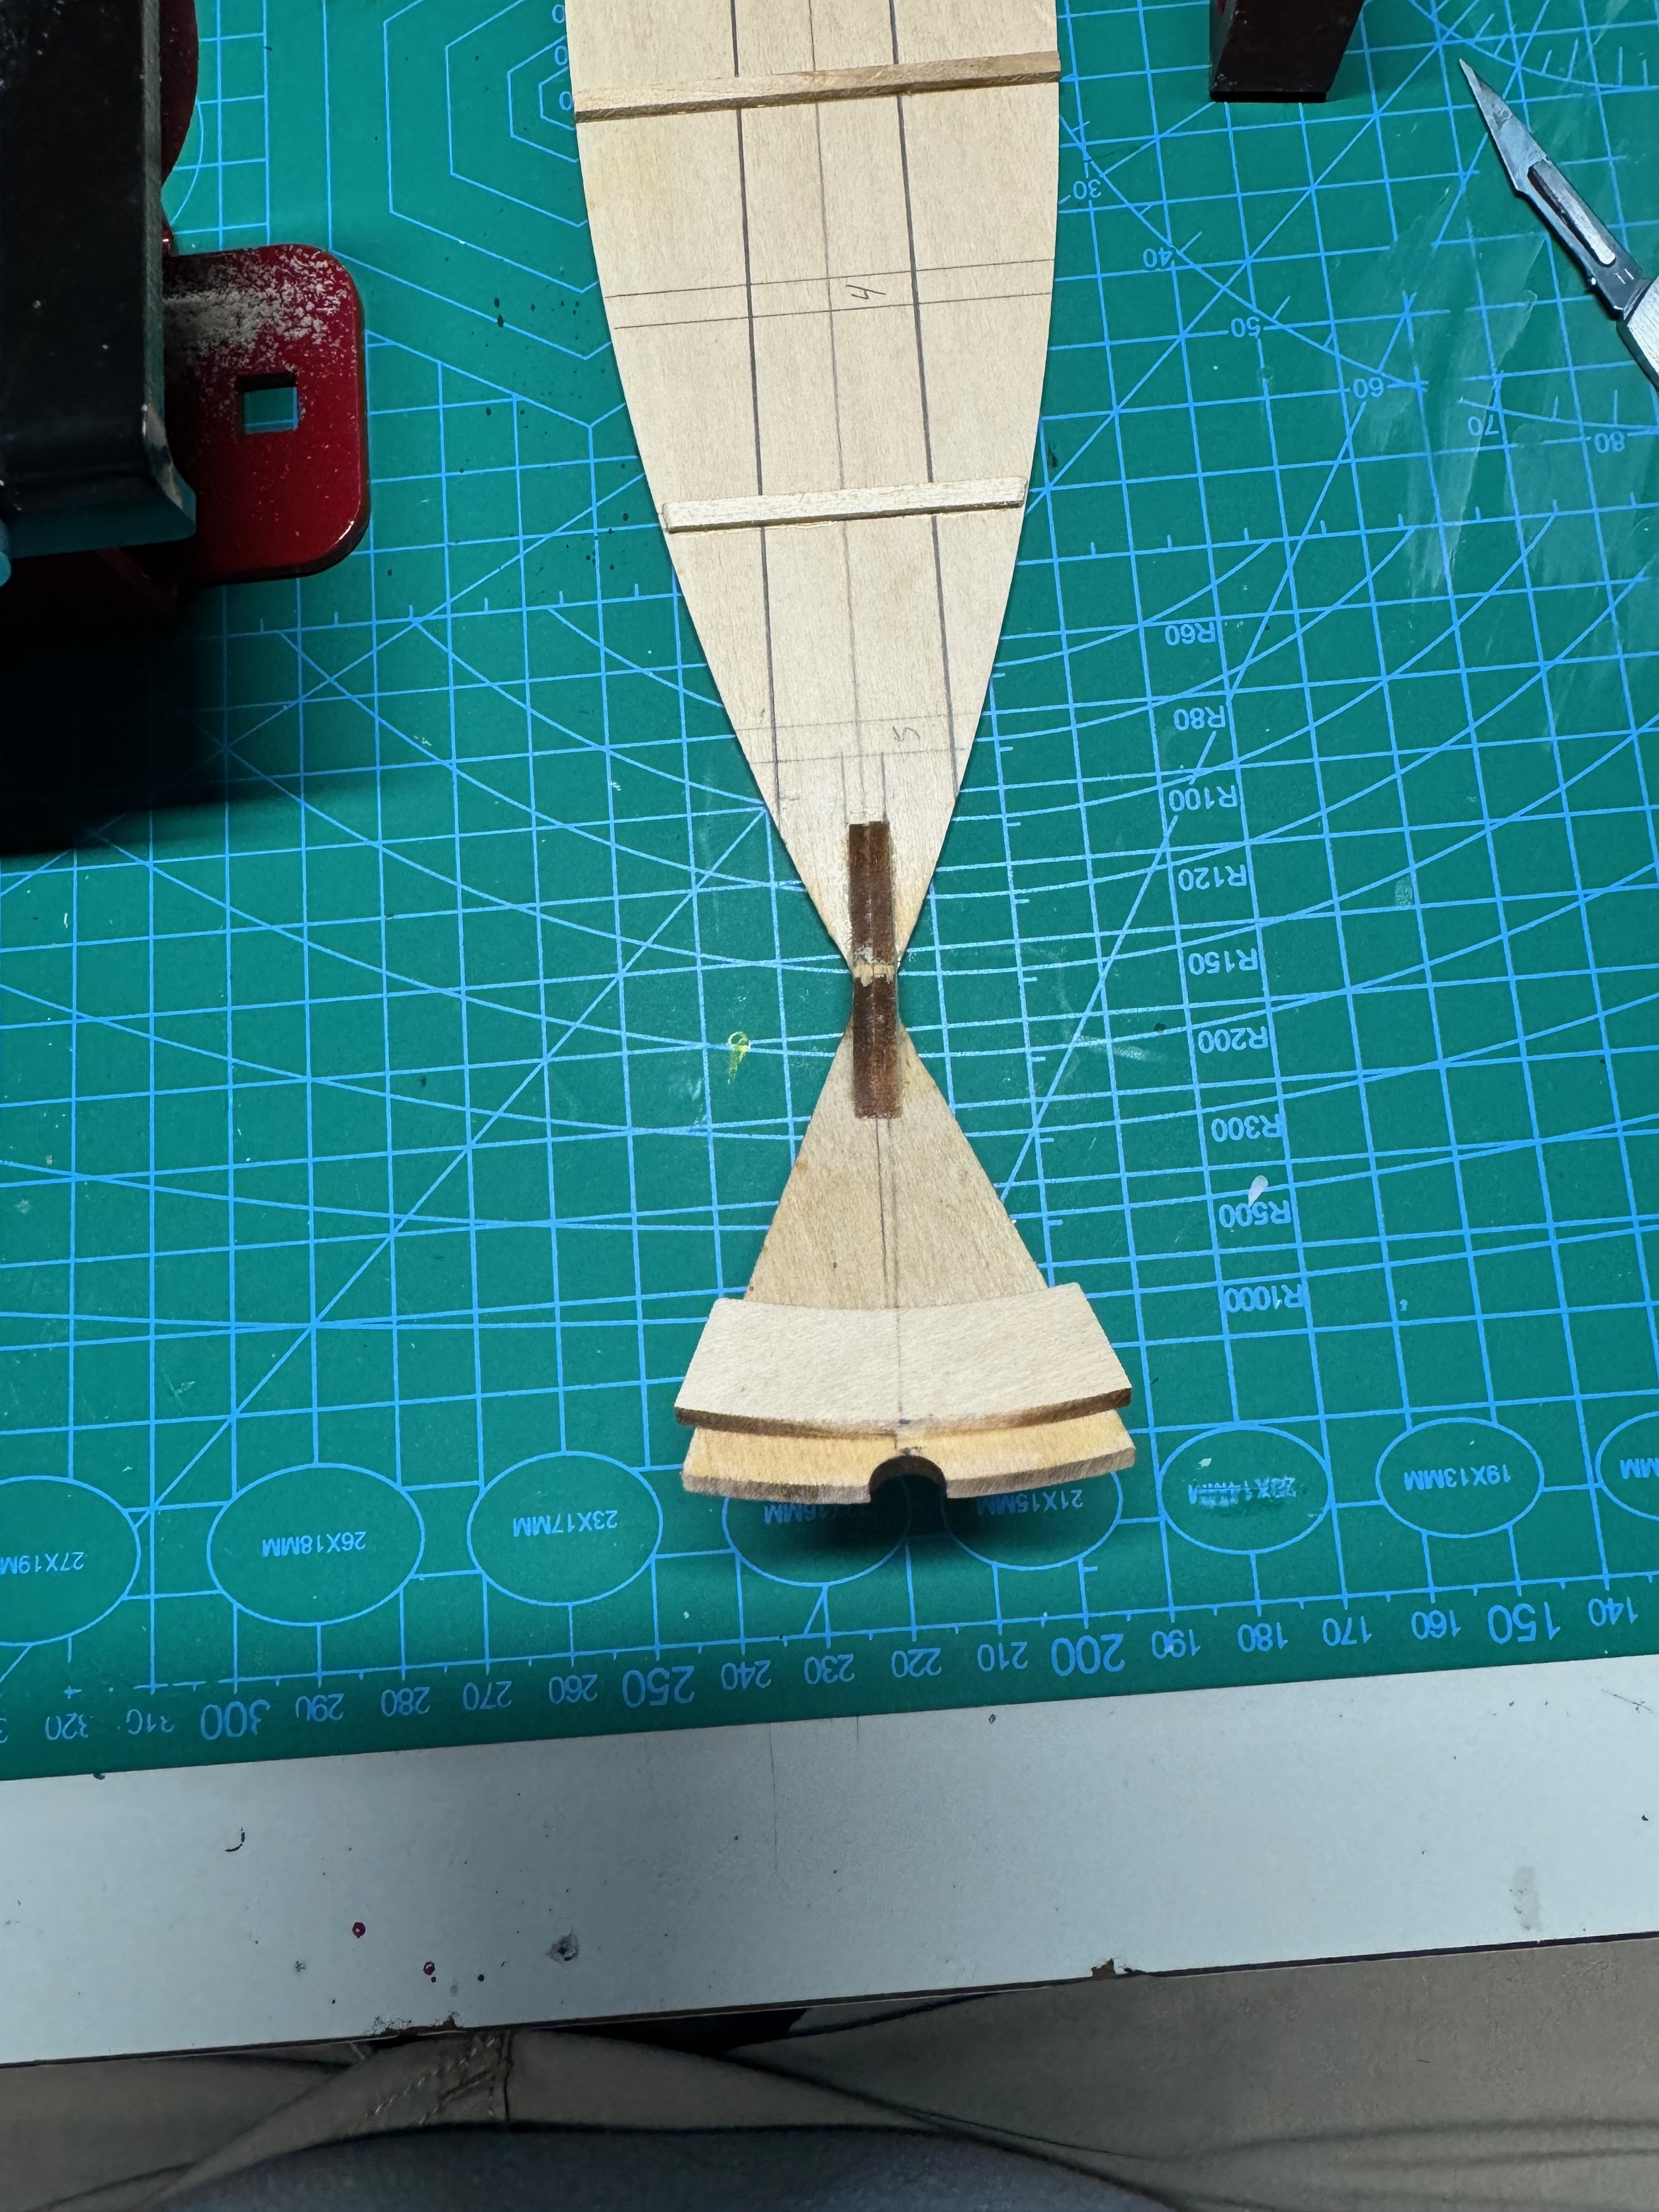
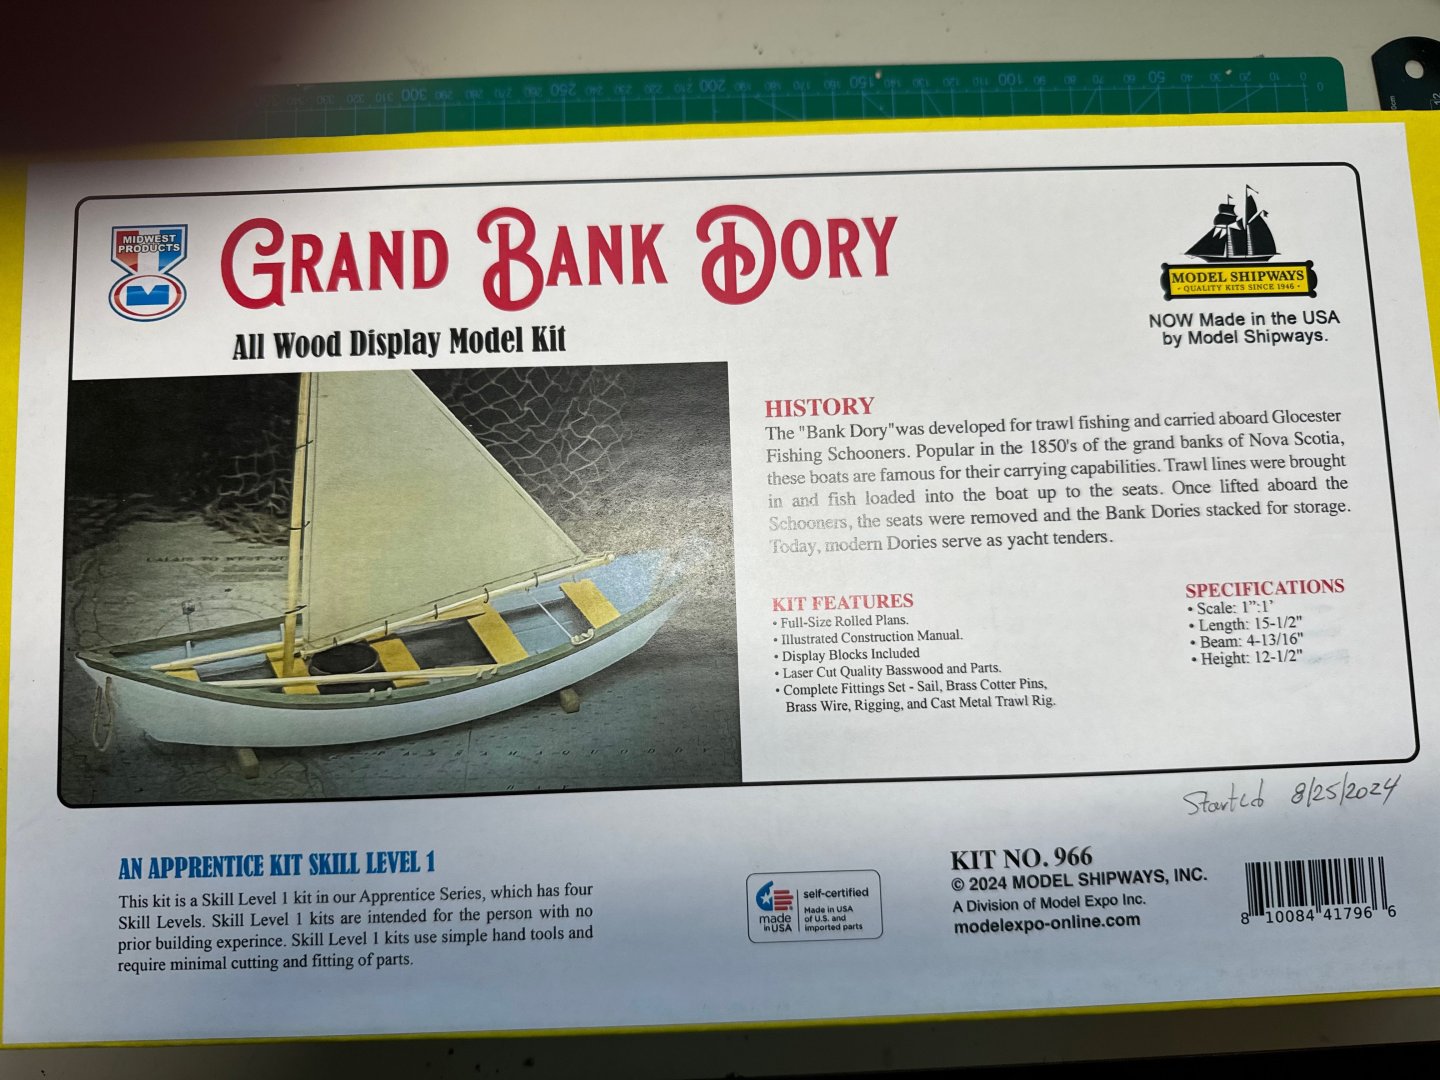
Good evening, I picked up this kit when on sale from Model-Expo. I finished their first kit in the Shipwright Series, but I am not as ready as I wanted to move to next ship in the series. Instead I wanted to do another Dory, and this is challenging me and I am having some fun which is more important. A little about me, this is my second ship model. The last time I worked on a model, it was almost forty years ago. I have picked up modeling this year, and I have been bitten by the wood model bug. On the side I am also doing some plastic models. I stated the kit on August 25, and started to look over the plans, and tonight, I was able to complete the knee, stem, transom, and the cleats. I tried something new today, I used magnets and a stainless steel board as a build board, and it seems to be functioning pretty well. However, I am still a little gun shy on using this method to make the frames, so I am waiting on a piece of cork to be delivered. The documentation is well written, however there is a bias for using CA glue, which I am not a fan of. I rather use PVA, and that is what I am using primarily with this model.
- 56 replies
-
- 8
-
-
- grand banks dory
- Midwest Products
- (and 2 more)