HOLIDAY DONATION DRIVE - SUPPORT MSW - DO YOUR PART TO KEEP THIS GREAT FORUM GOING! (Only 75 donations so far out of 49,000 members - C'mon guys!)
×


Jim M
-
Posts
165 -
Joined
-
Last visited
Content Type
Profiles
Forums
Gallery
Events
Everything posted by Jim M
-
 I am @kurtvd19. This build is adding some clarity to how ships should be planked.
 -
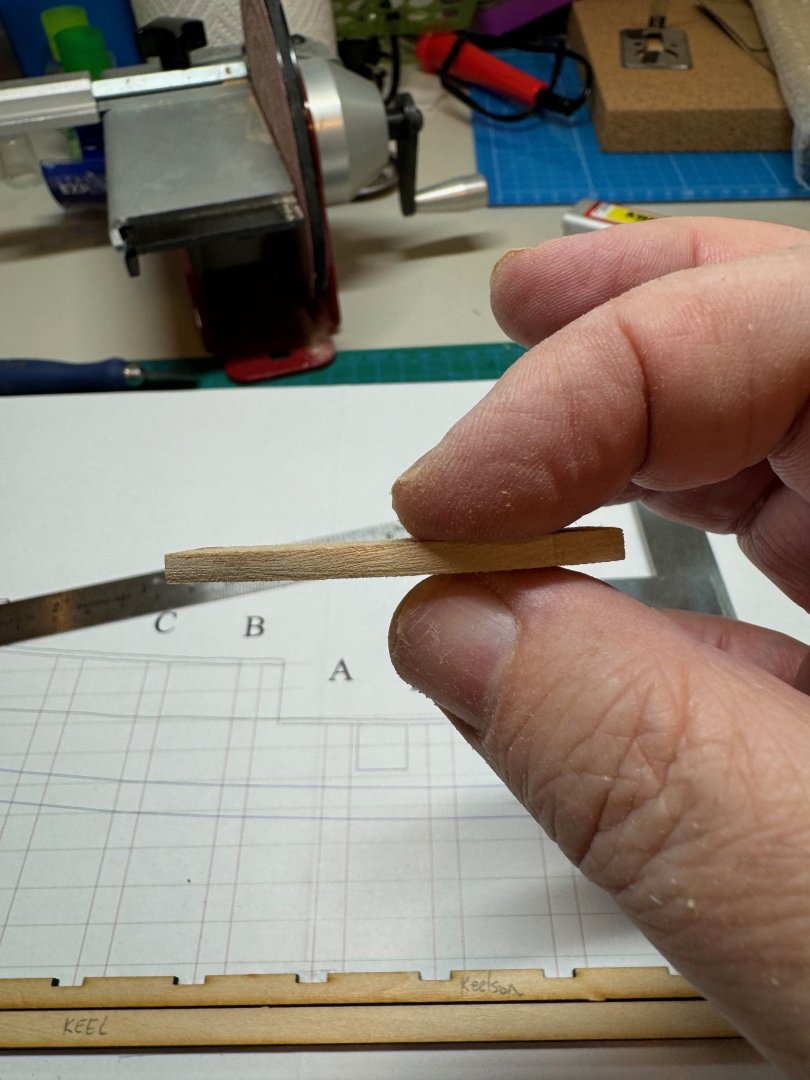
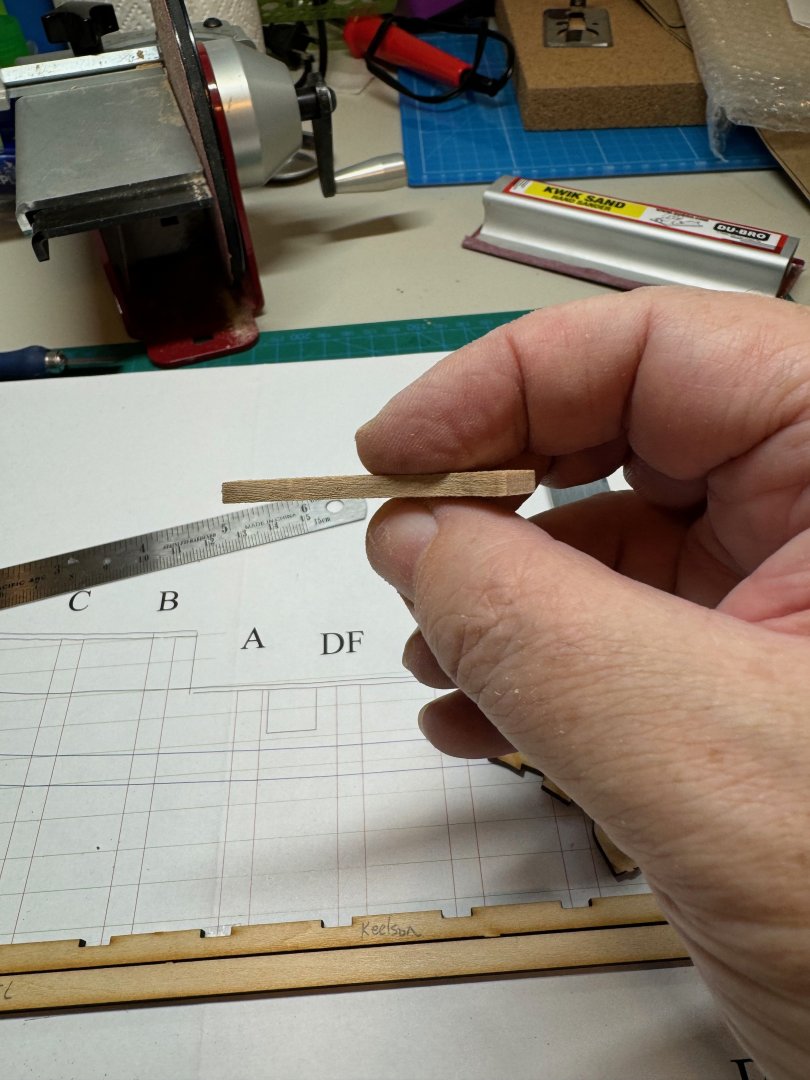
Good evening a minor update for today. I did some more fairing of the hull and i focused on the stern. The sample board is fitting nicely. Tomorrow plan is to get the counter in and finish the fairing. Hopefully I can get the planking bands identified jim

-
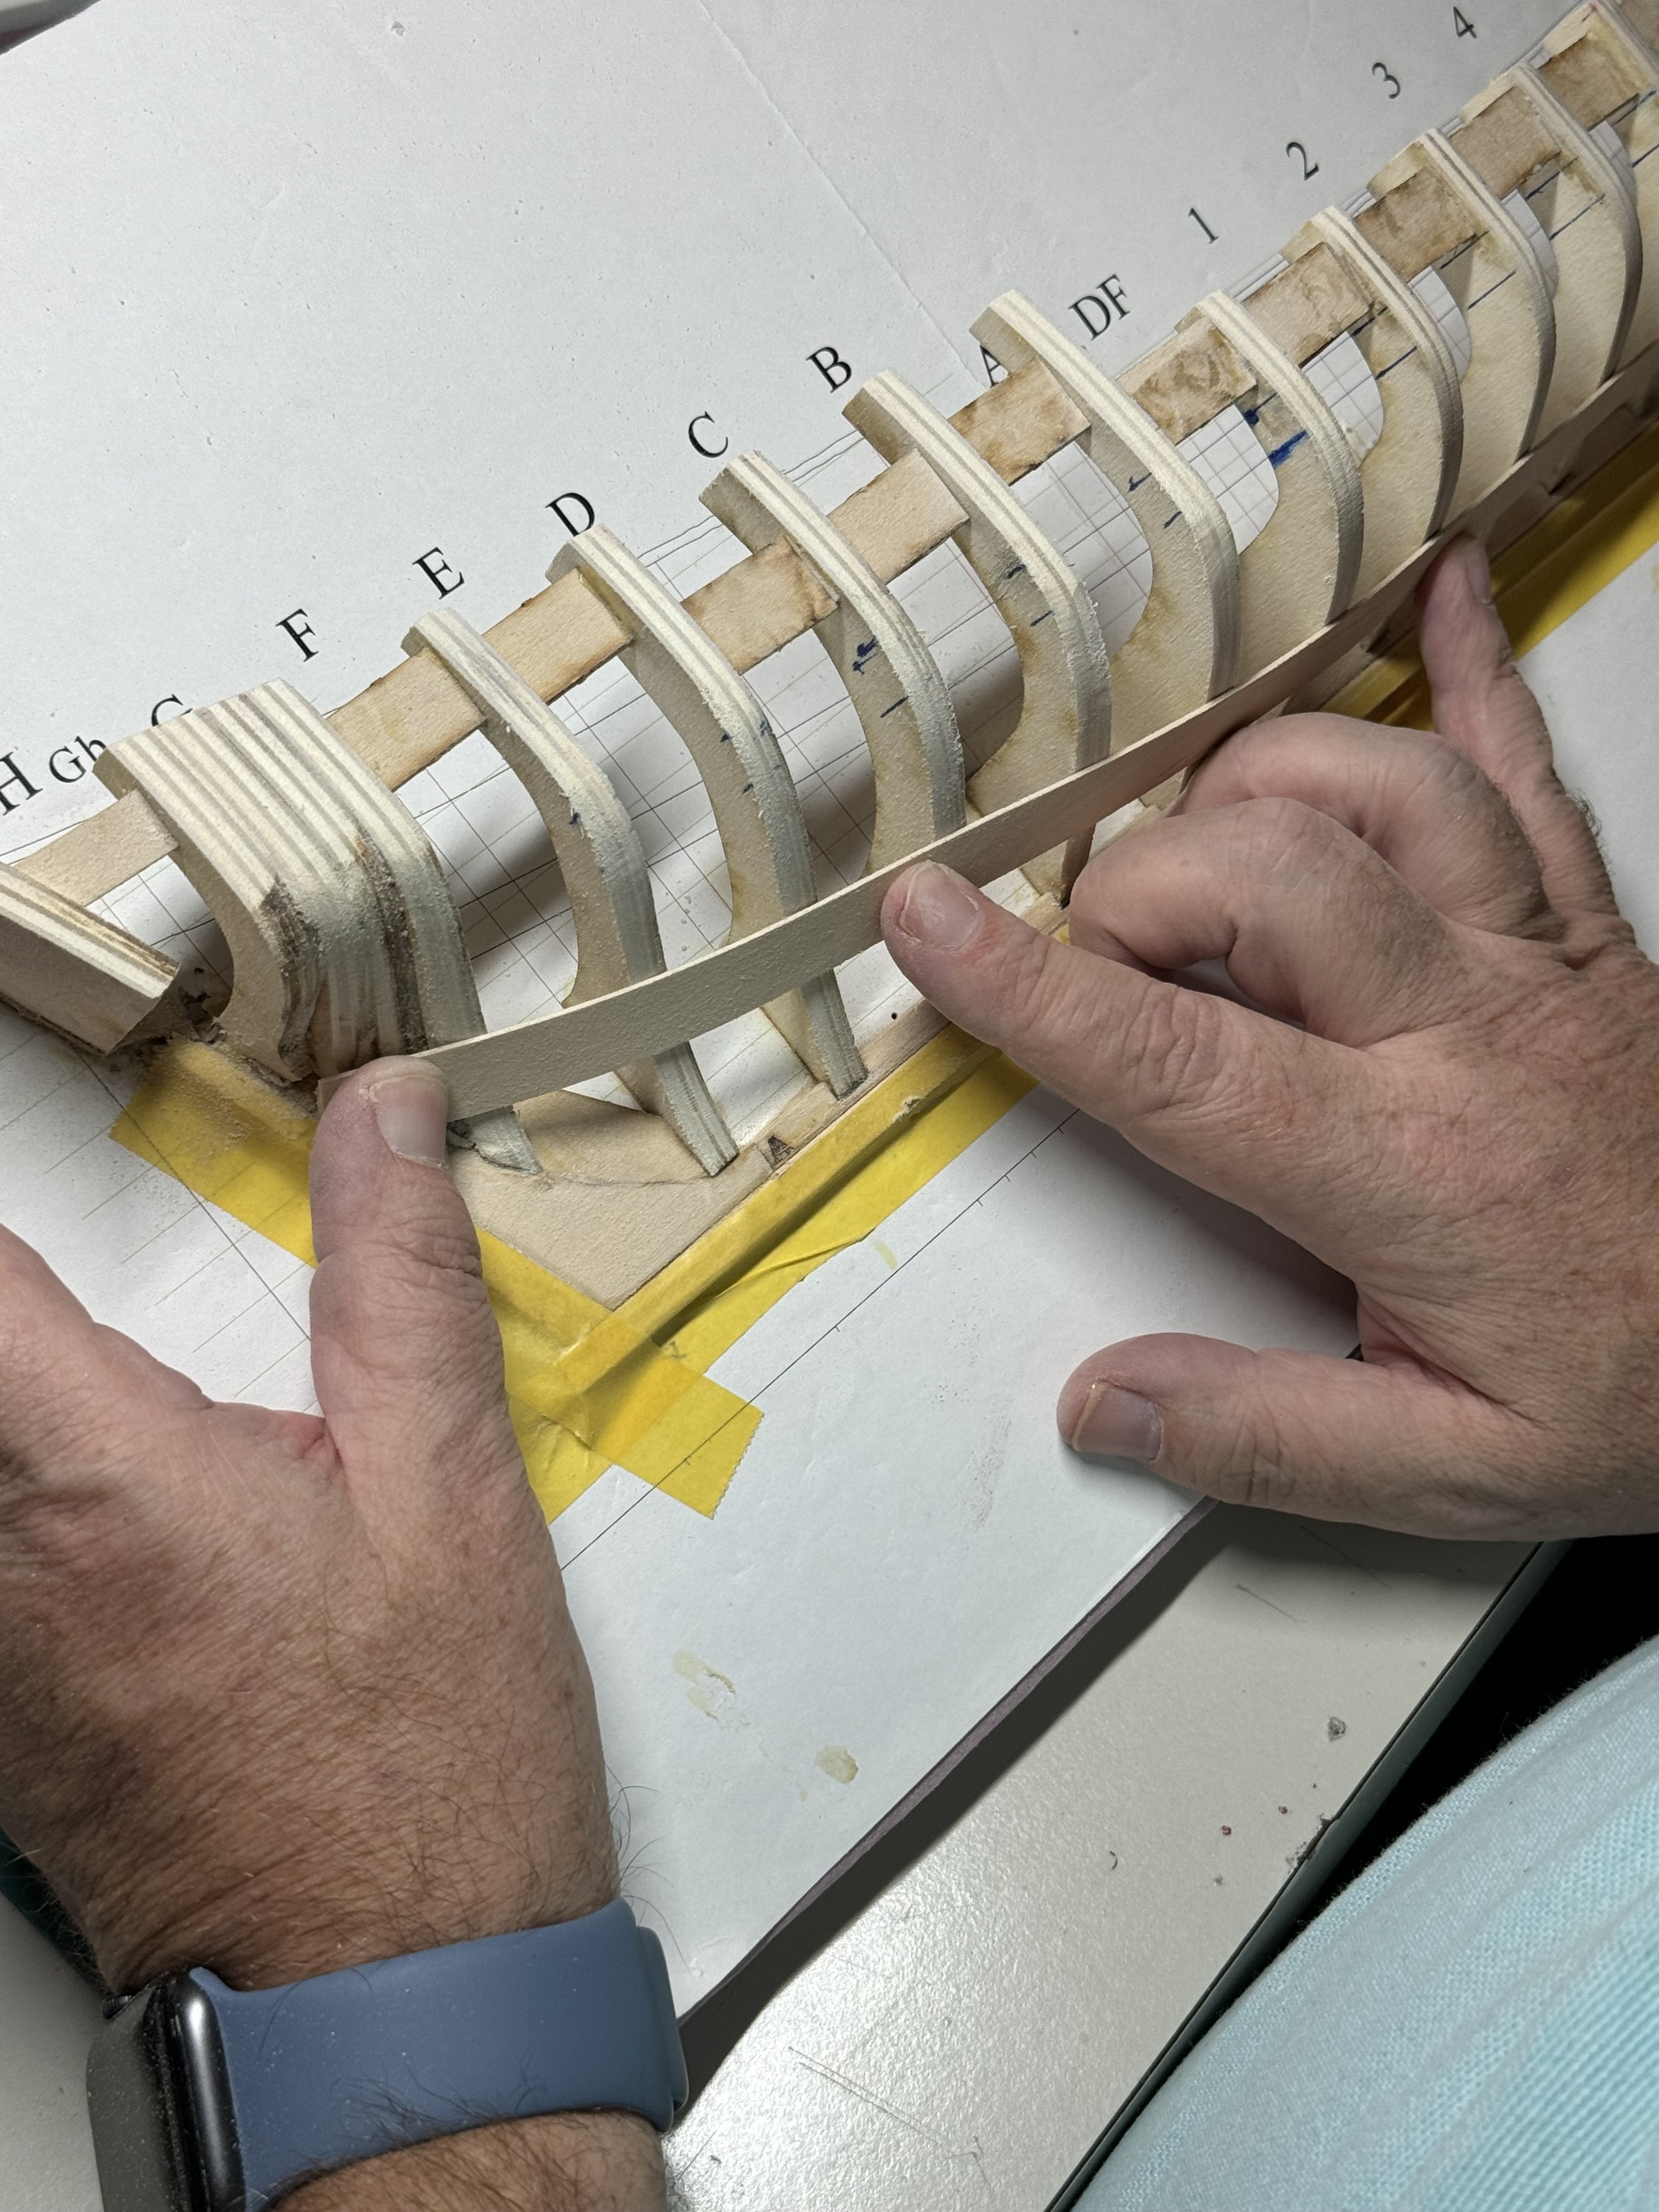
Good evening, I have a quick question regarding the garboard and broad strakes in general. In the planking tutorial we split the garboard into two planks and the broad strake into three. The remaining planks are then split into four. My questions are: 1. When the garboard is created is it generally 50 feet? Or would the ship makers use the same length as the planks of 25 feet? Similarly with the broad strake? 2. Would the planking patten then be in play if this is the case? 3. Are planks generally joined with scarf joints? would the garboard and broad strakes be double the length ok the planks when the ship is being built. It seems to be unrealistic that a 50’ guard boards are installed but more realistically a 25’ boards would be and the planking pattern would adjusted accordingly. Am I correct here? jim
-
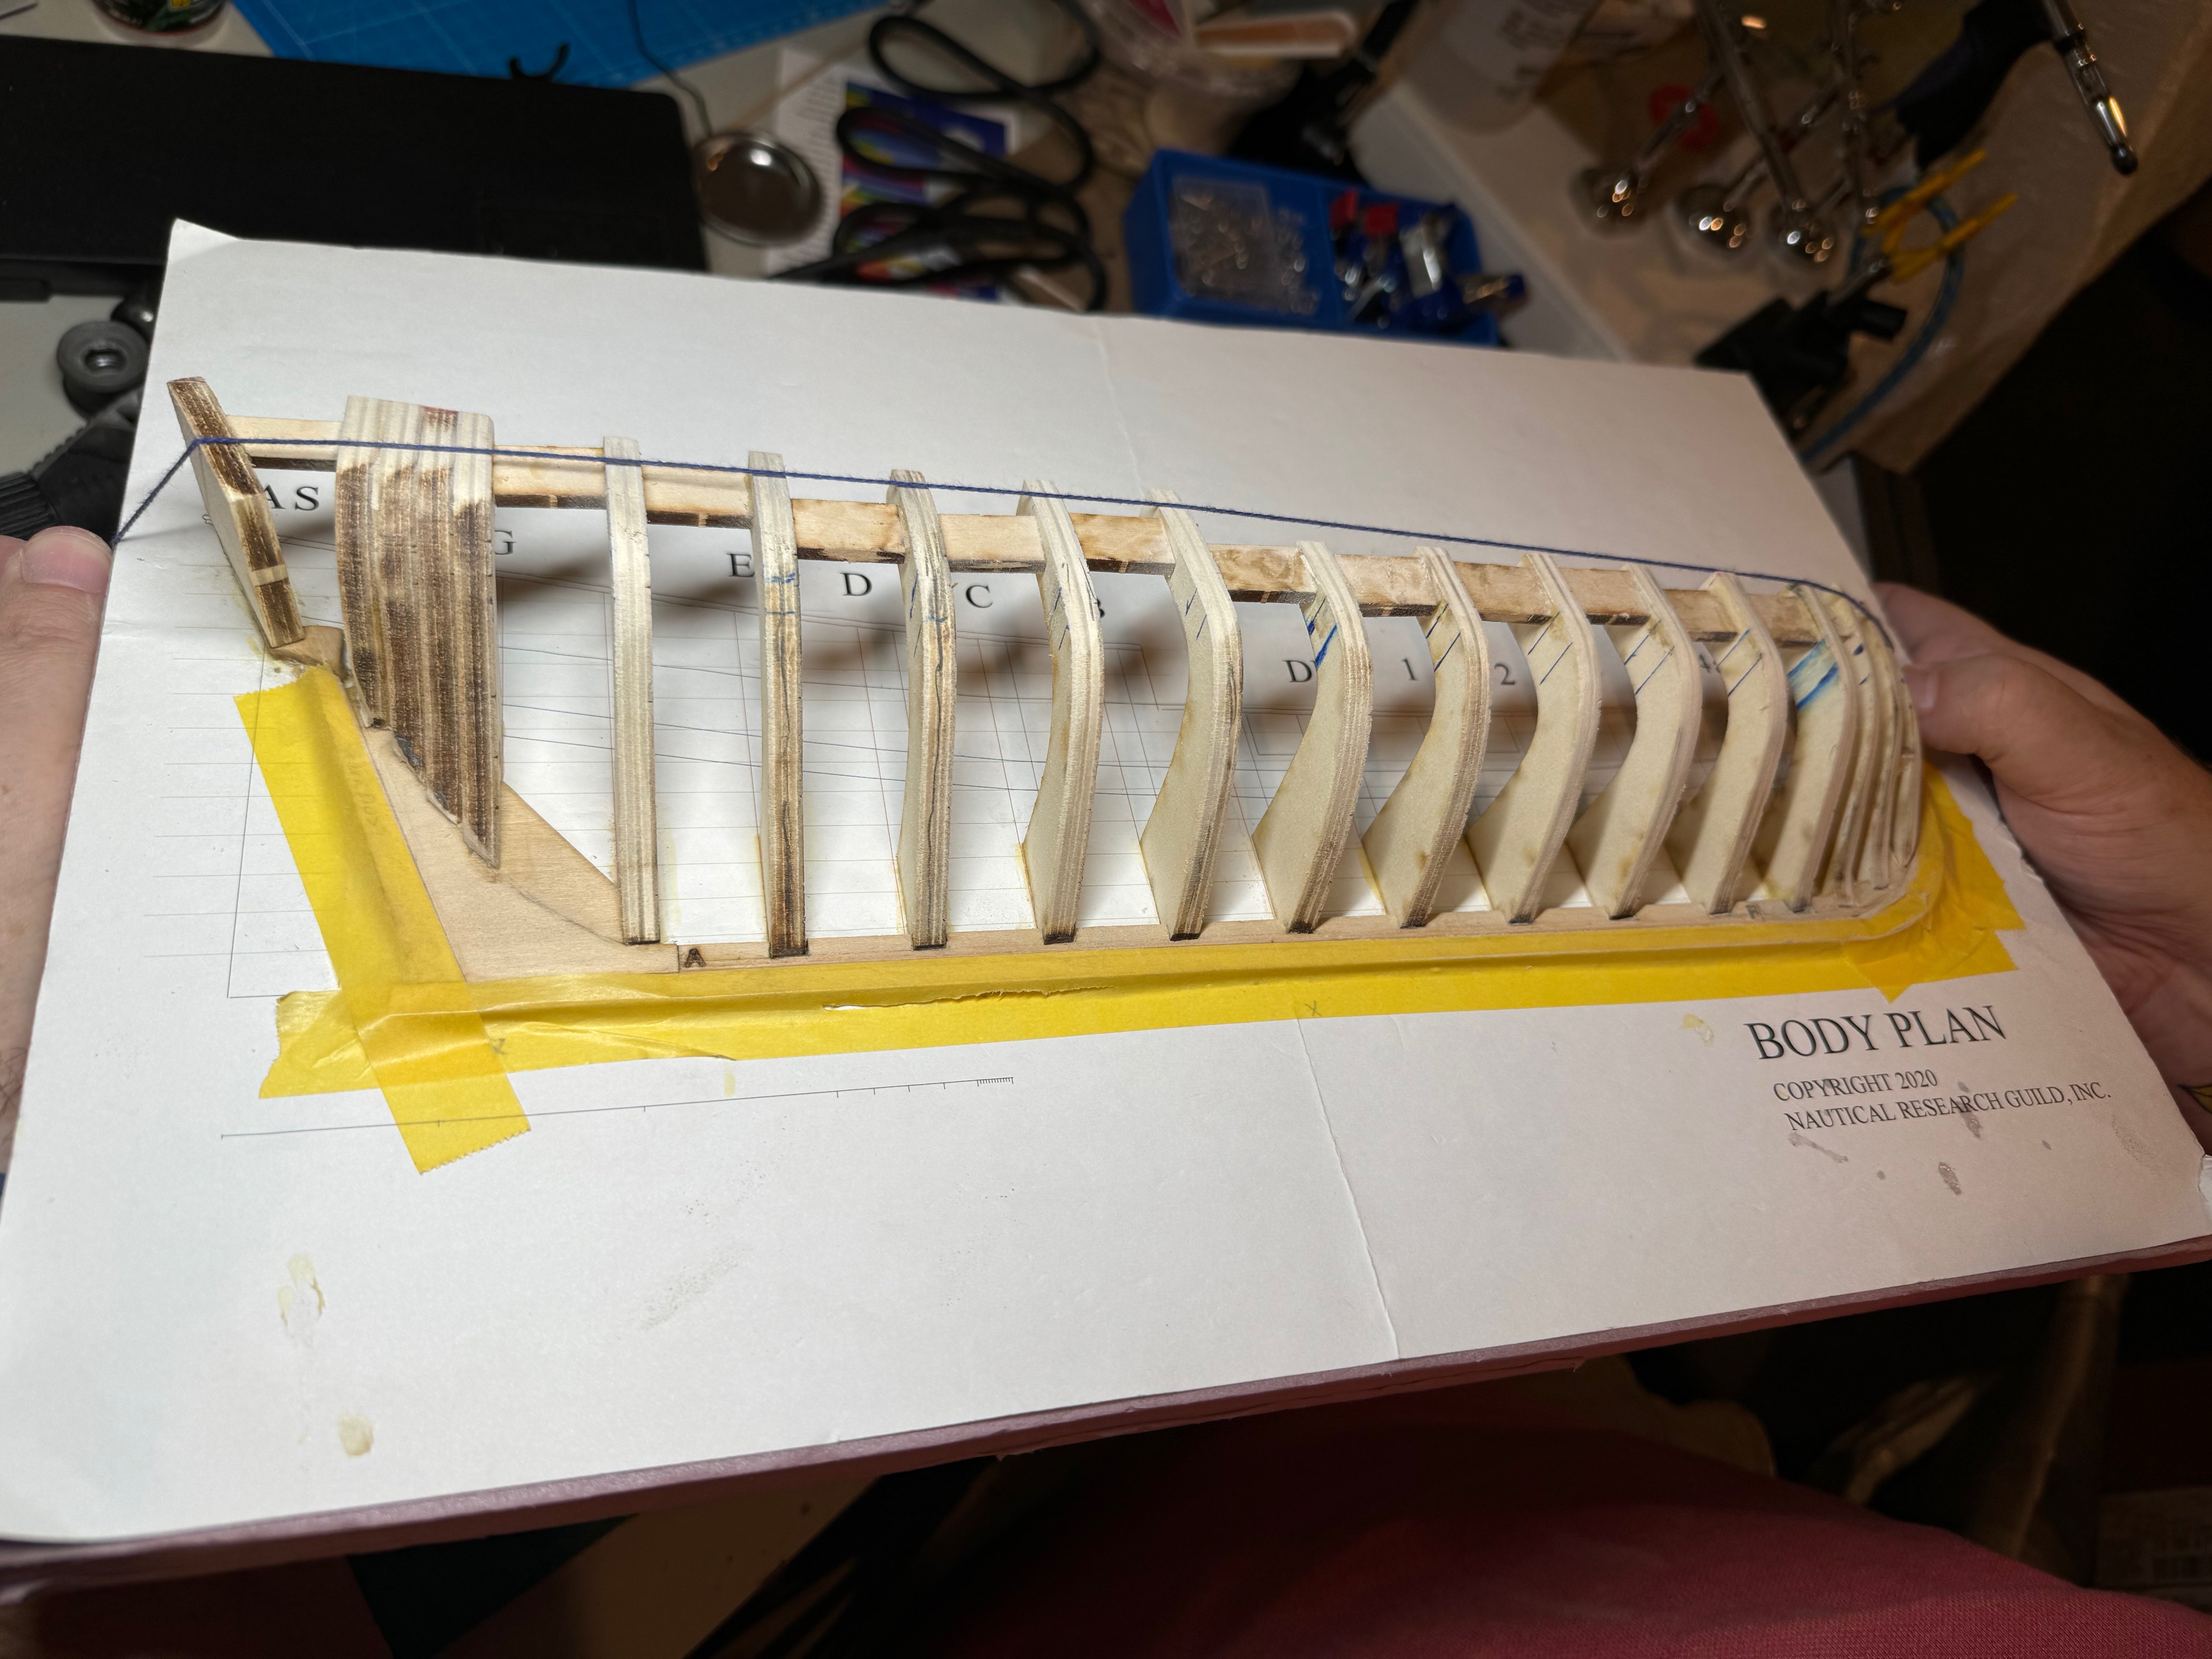
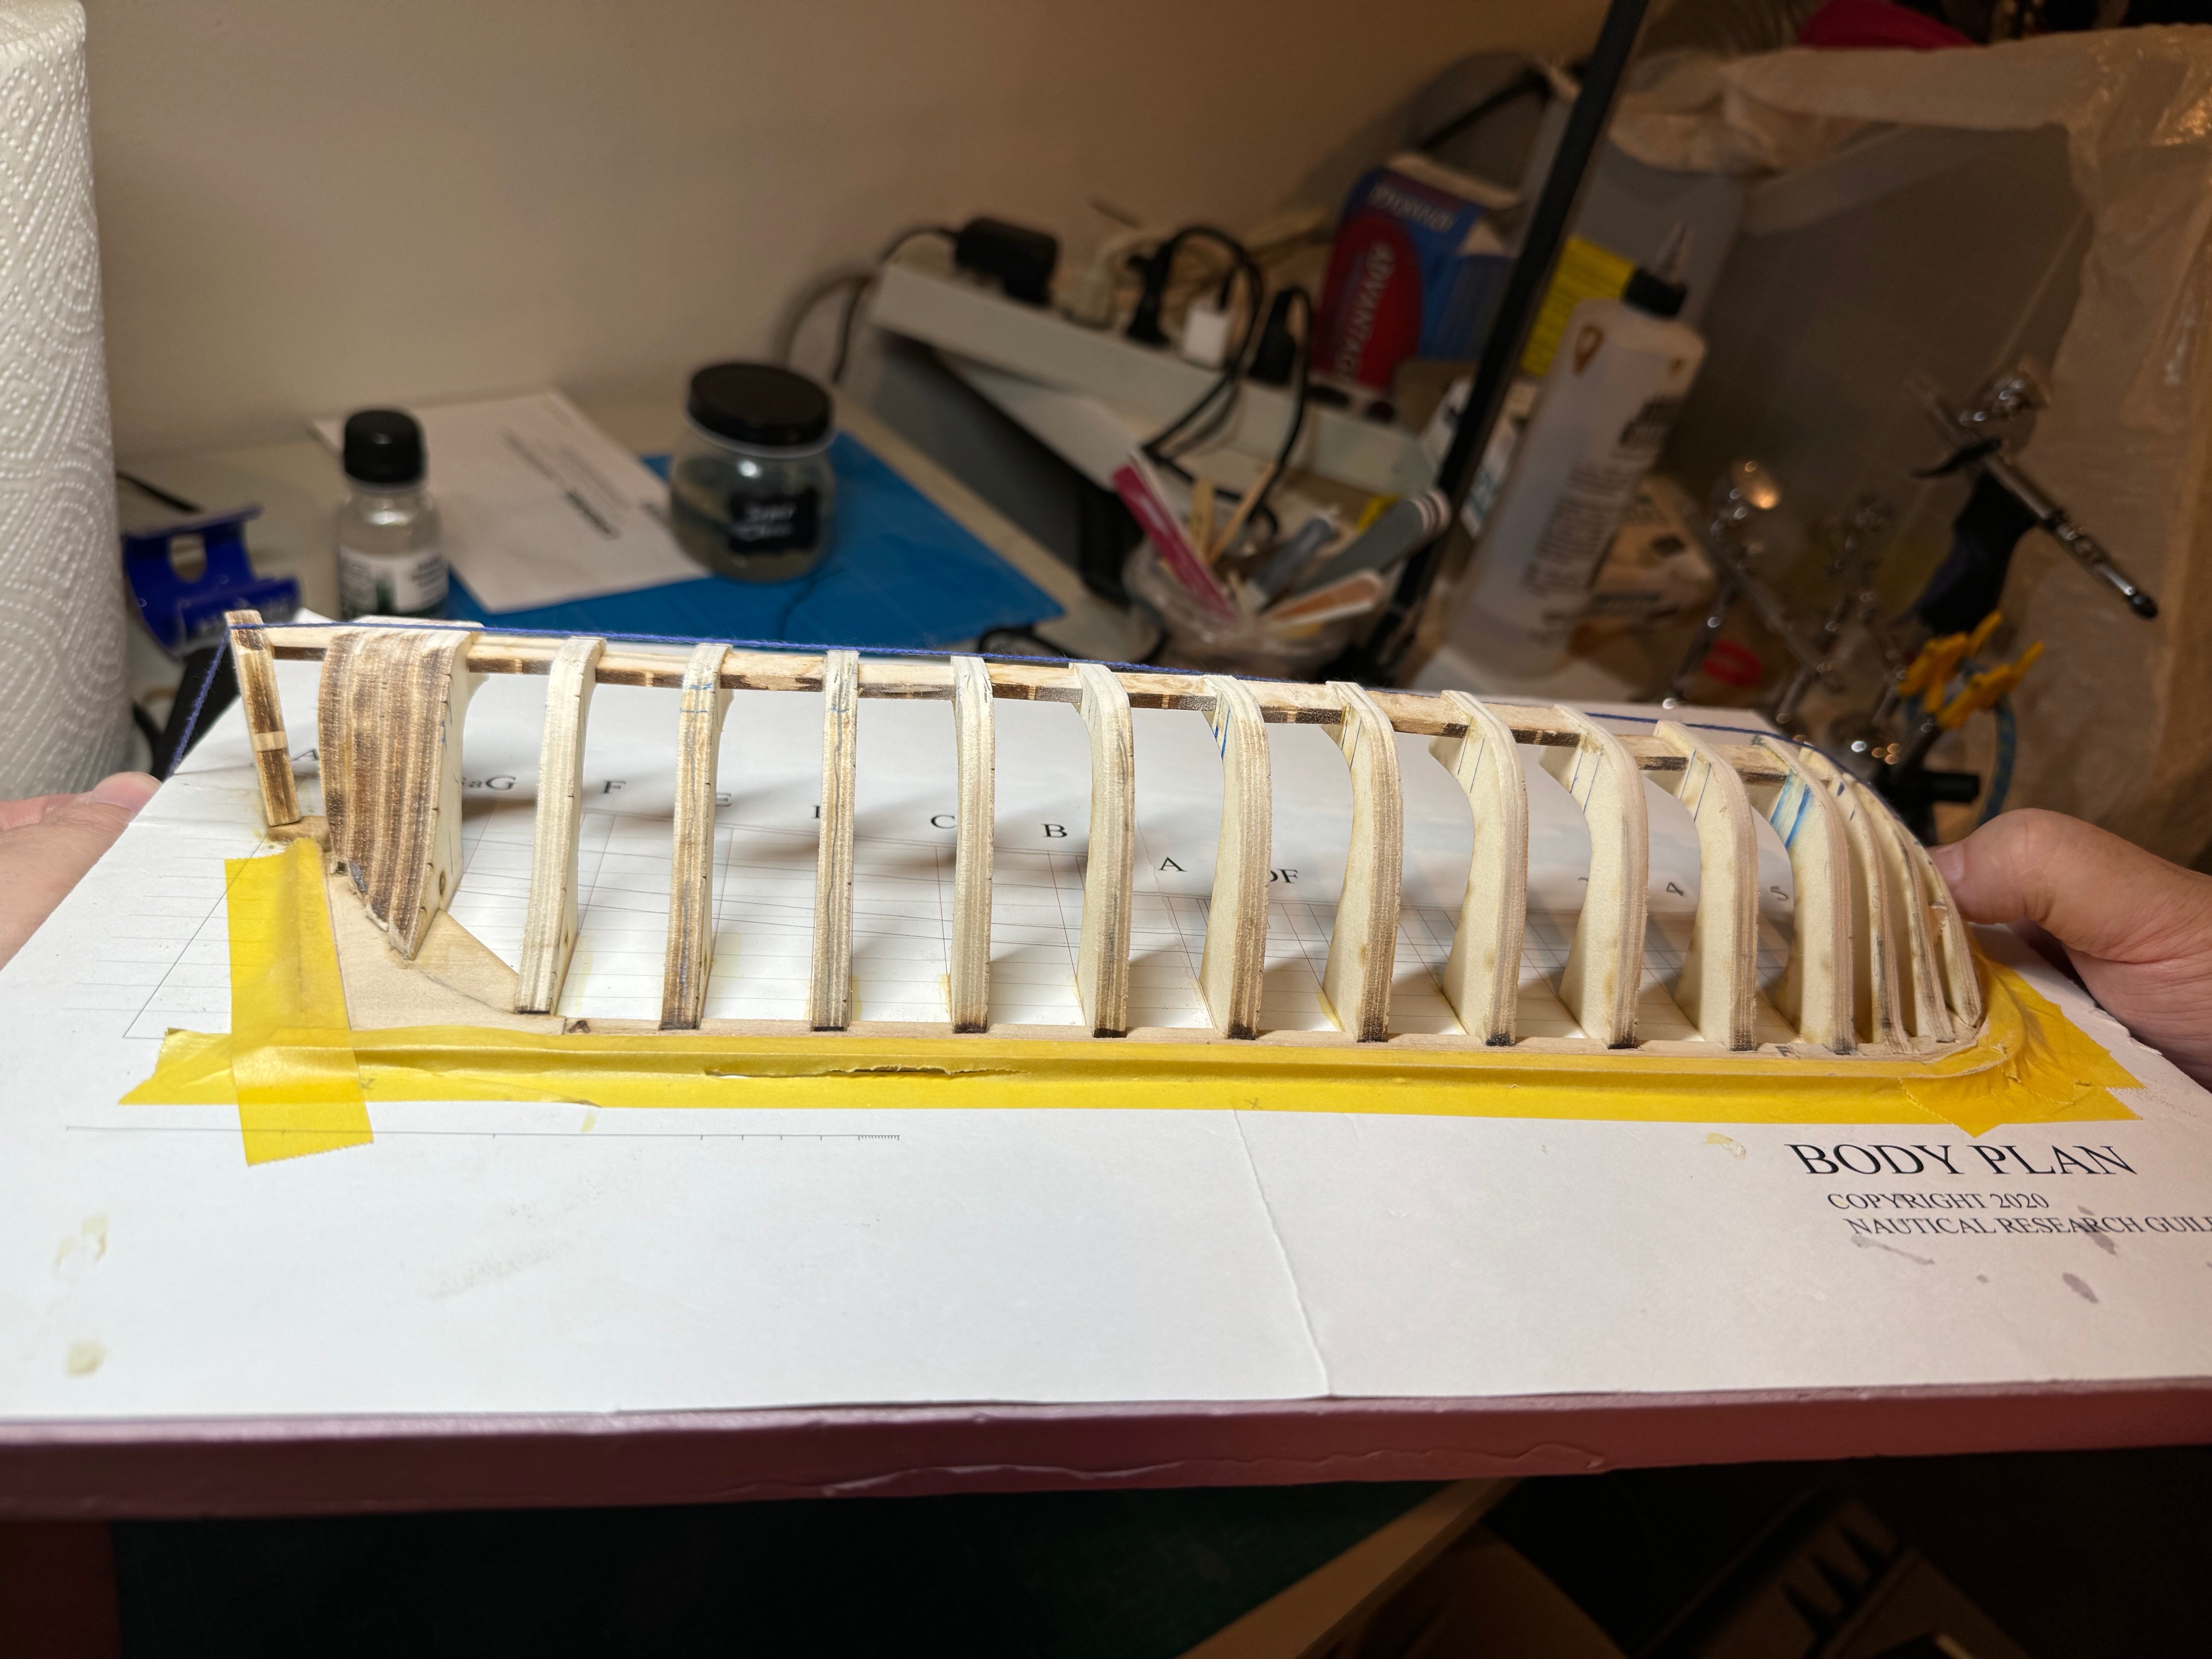
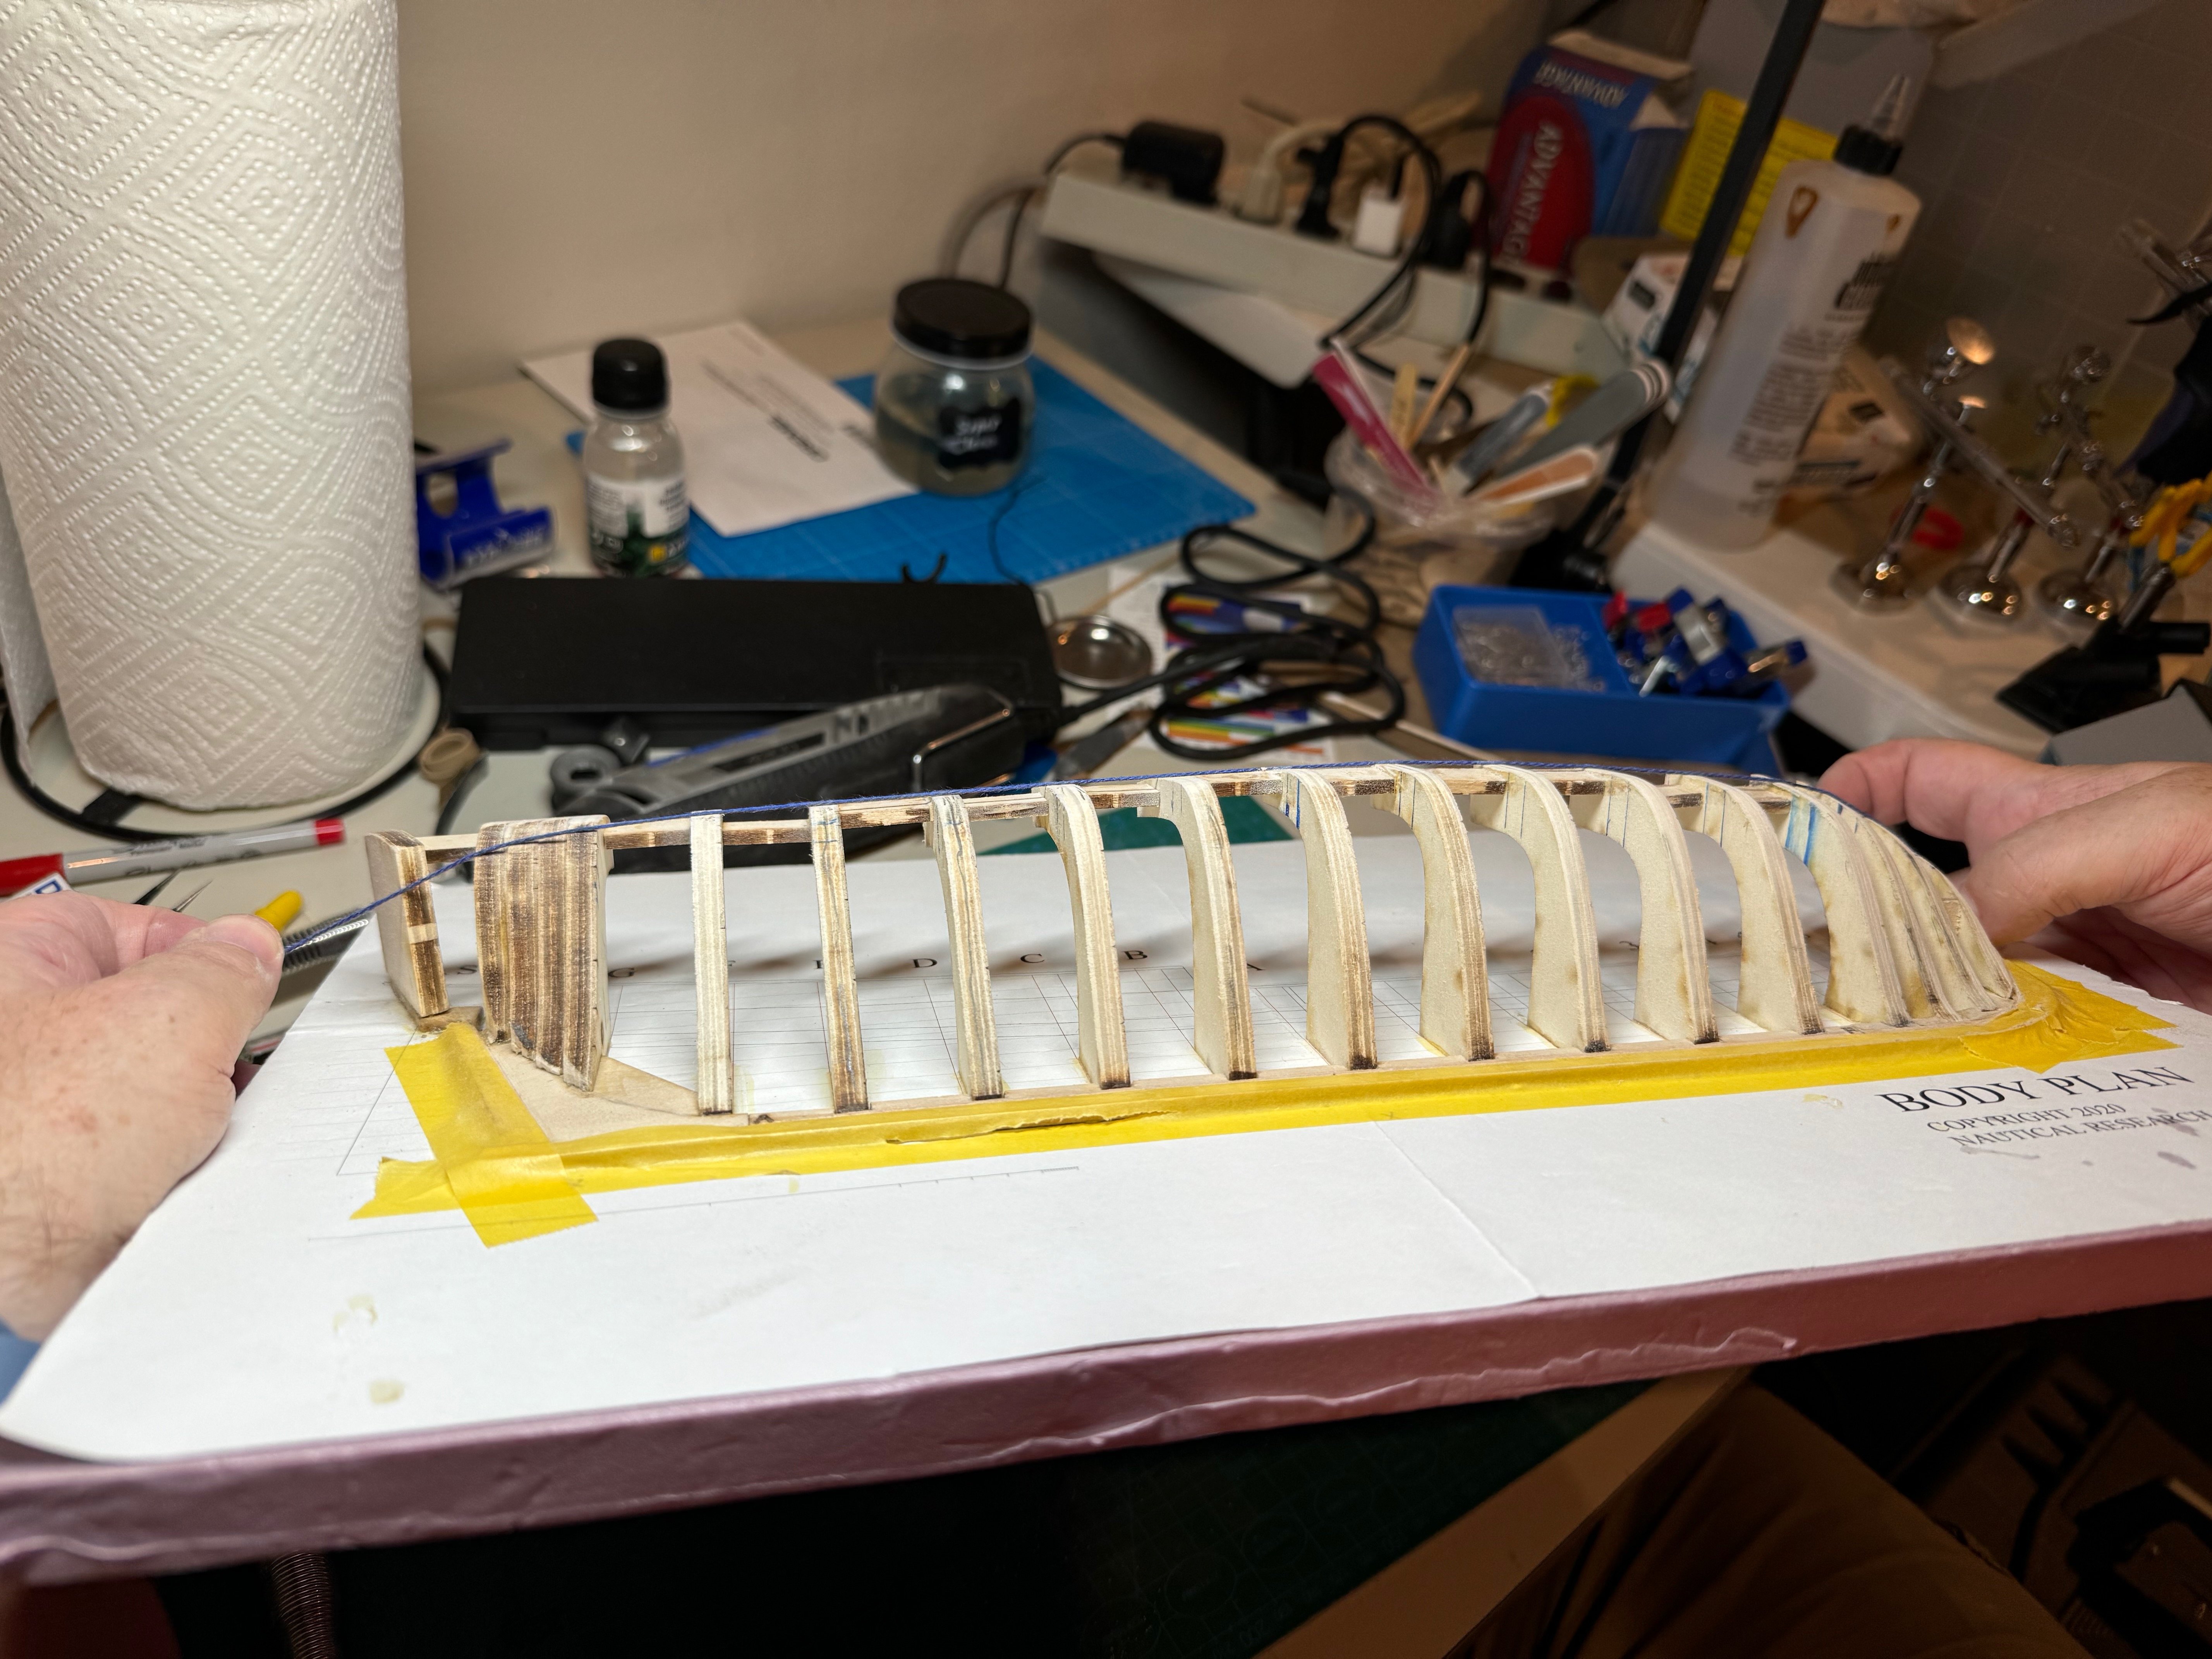
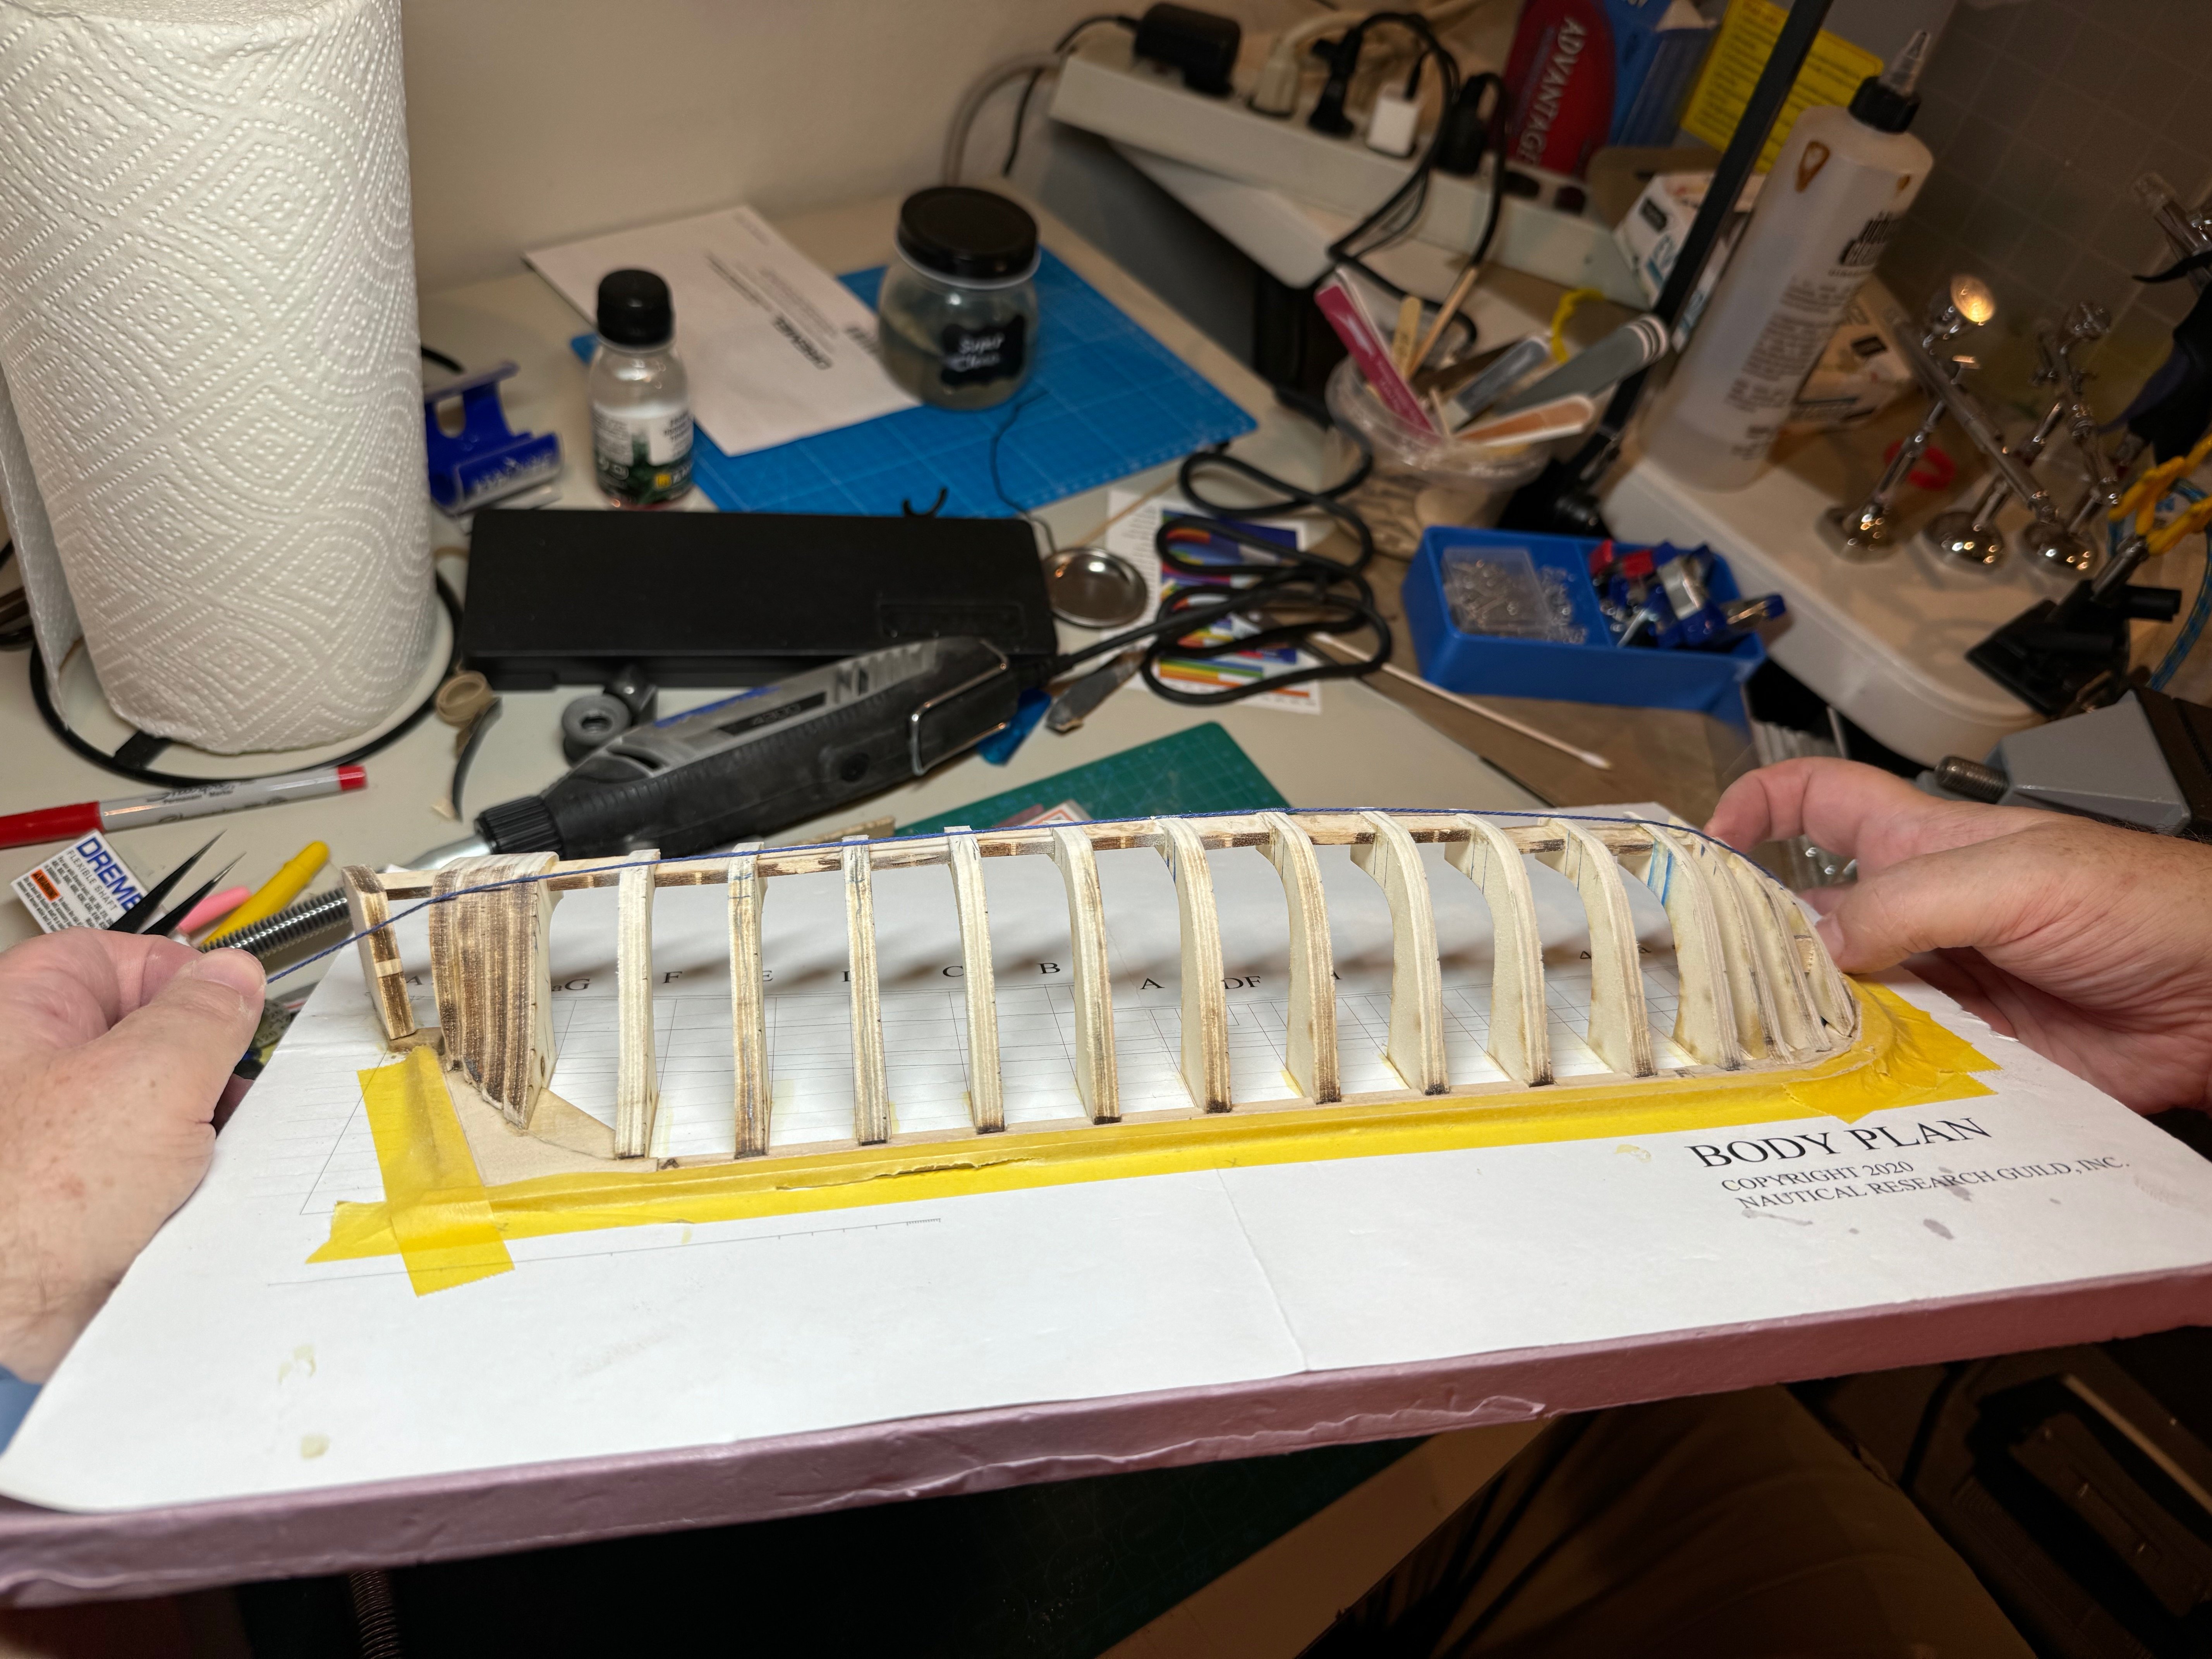
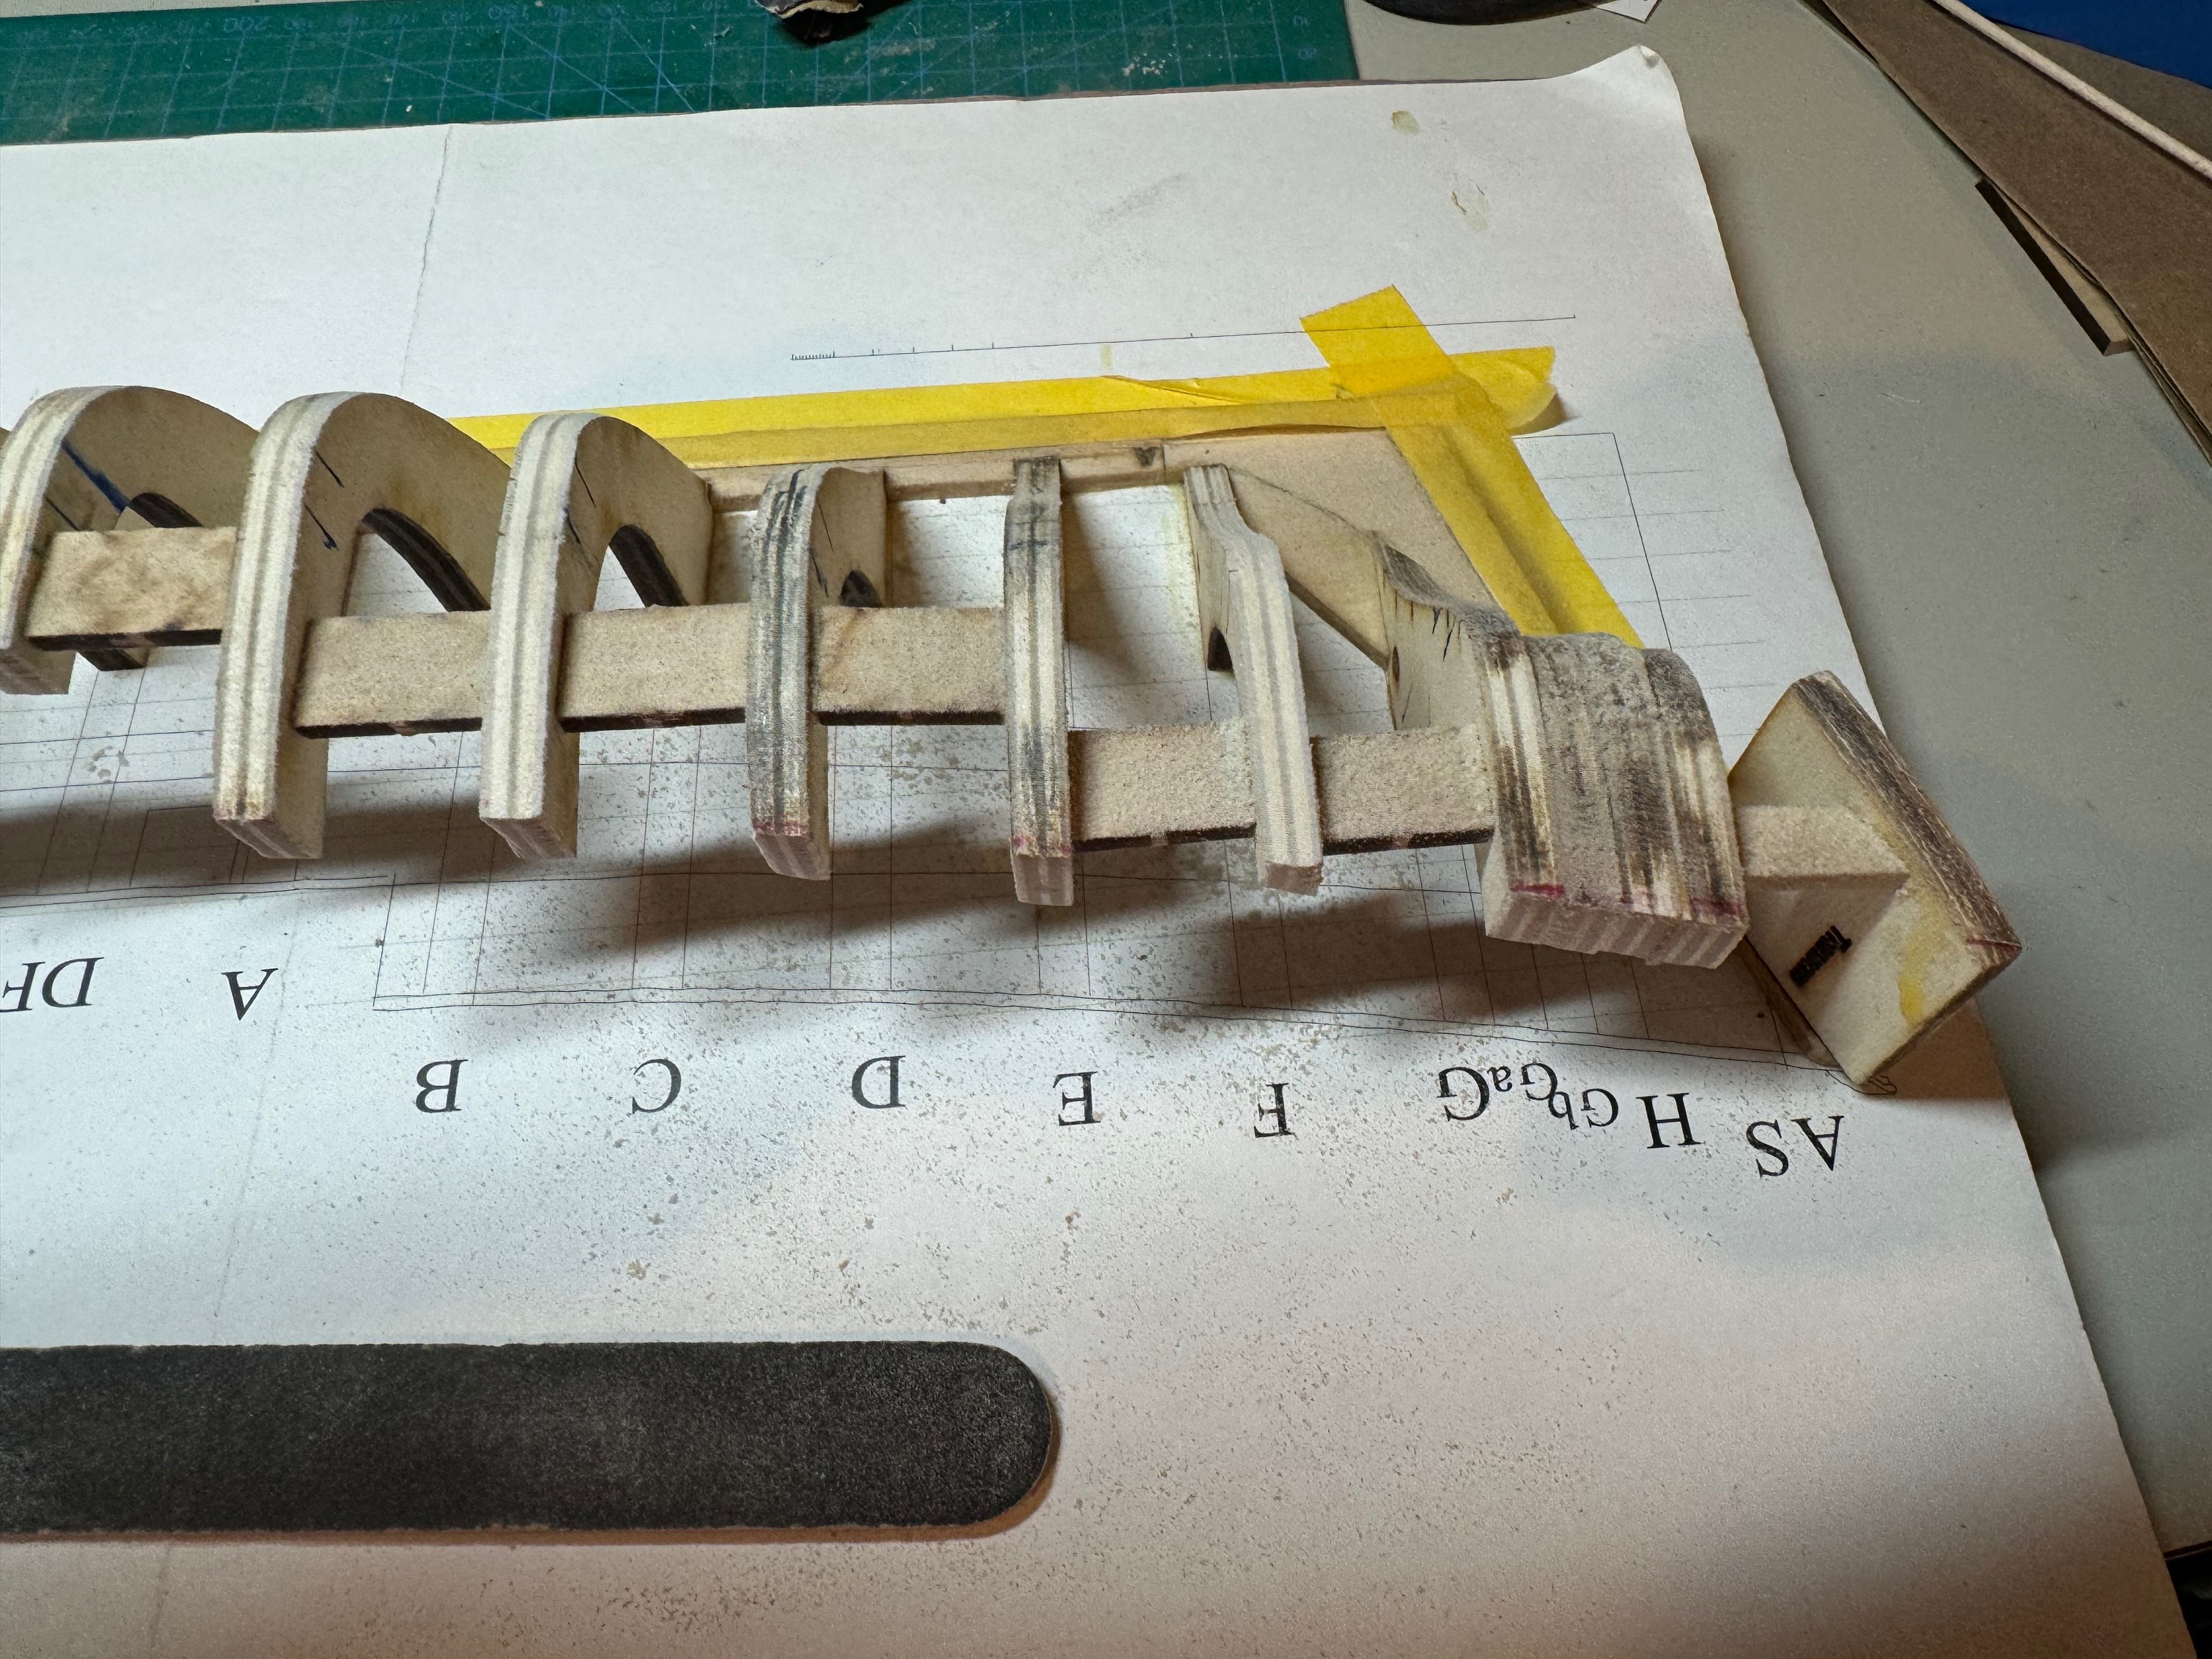
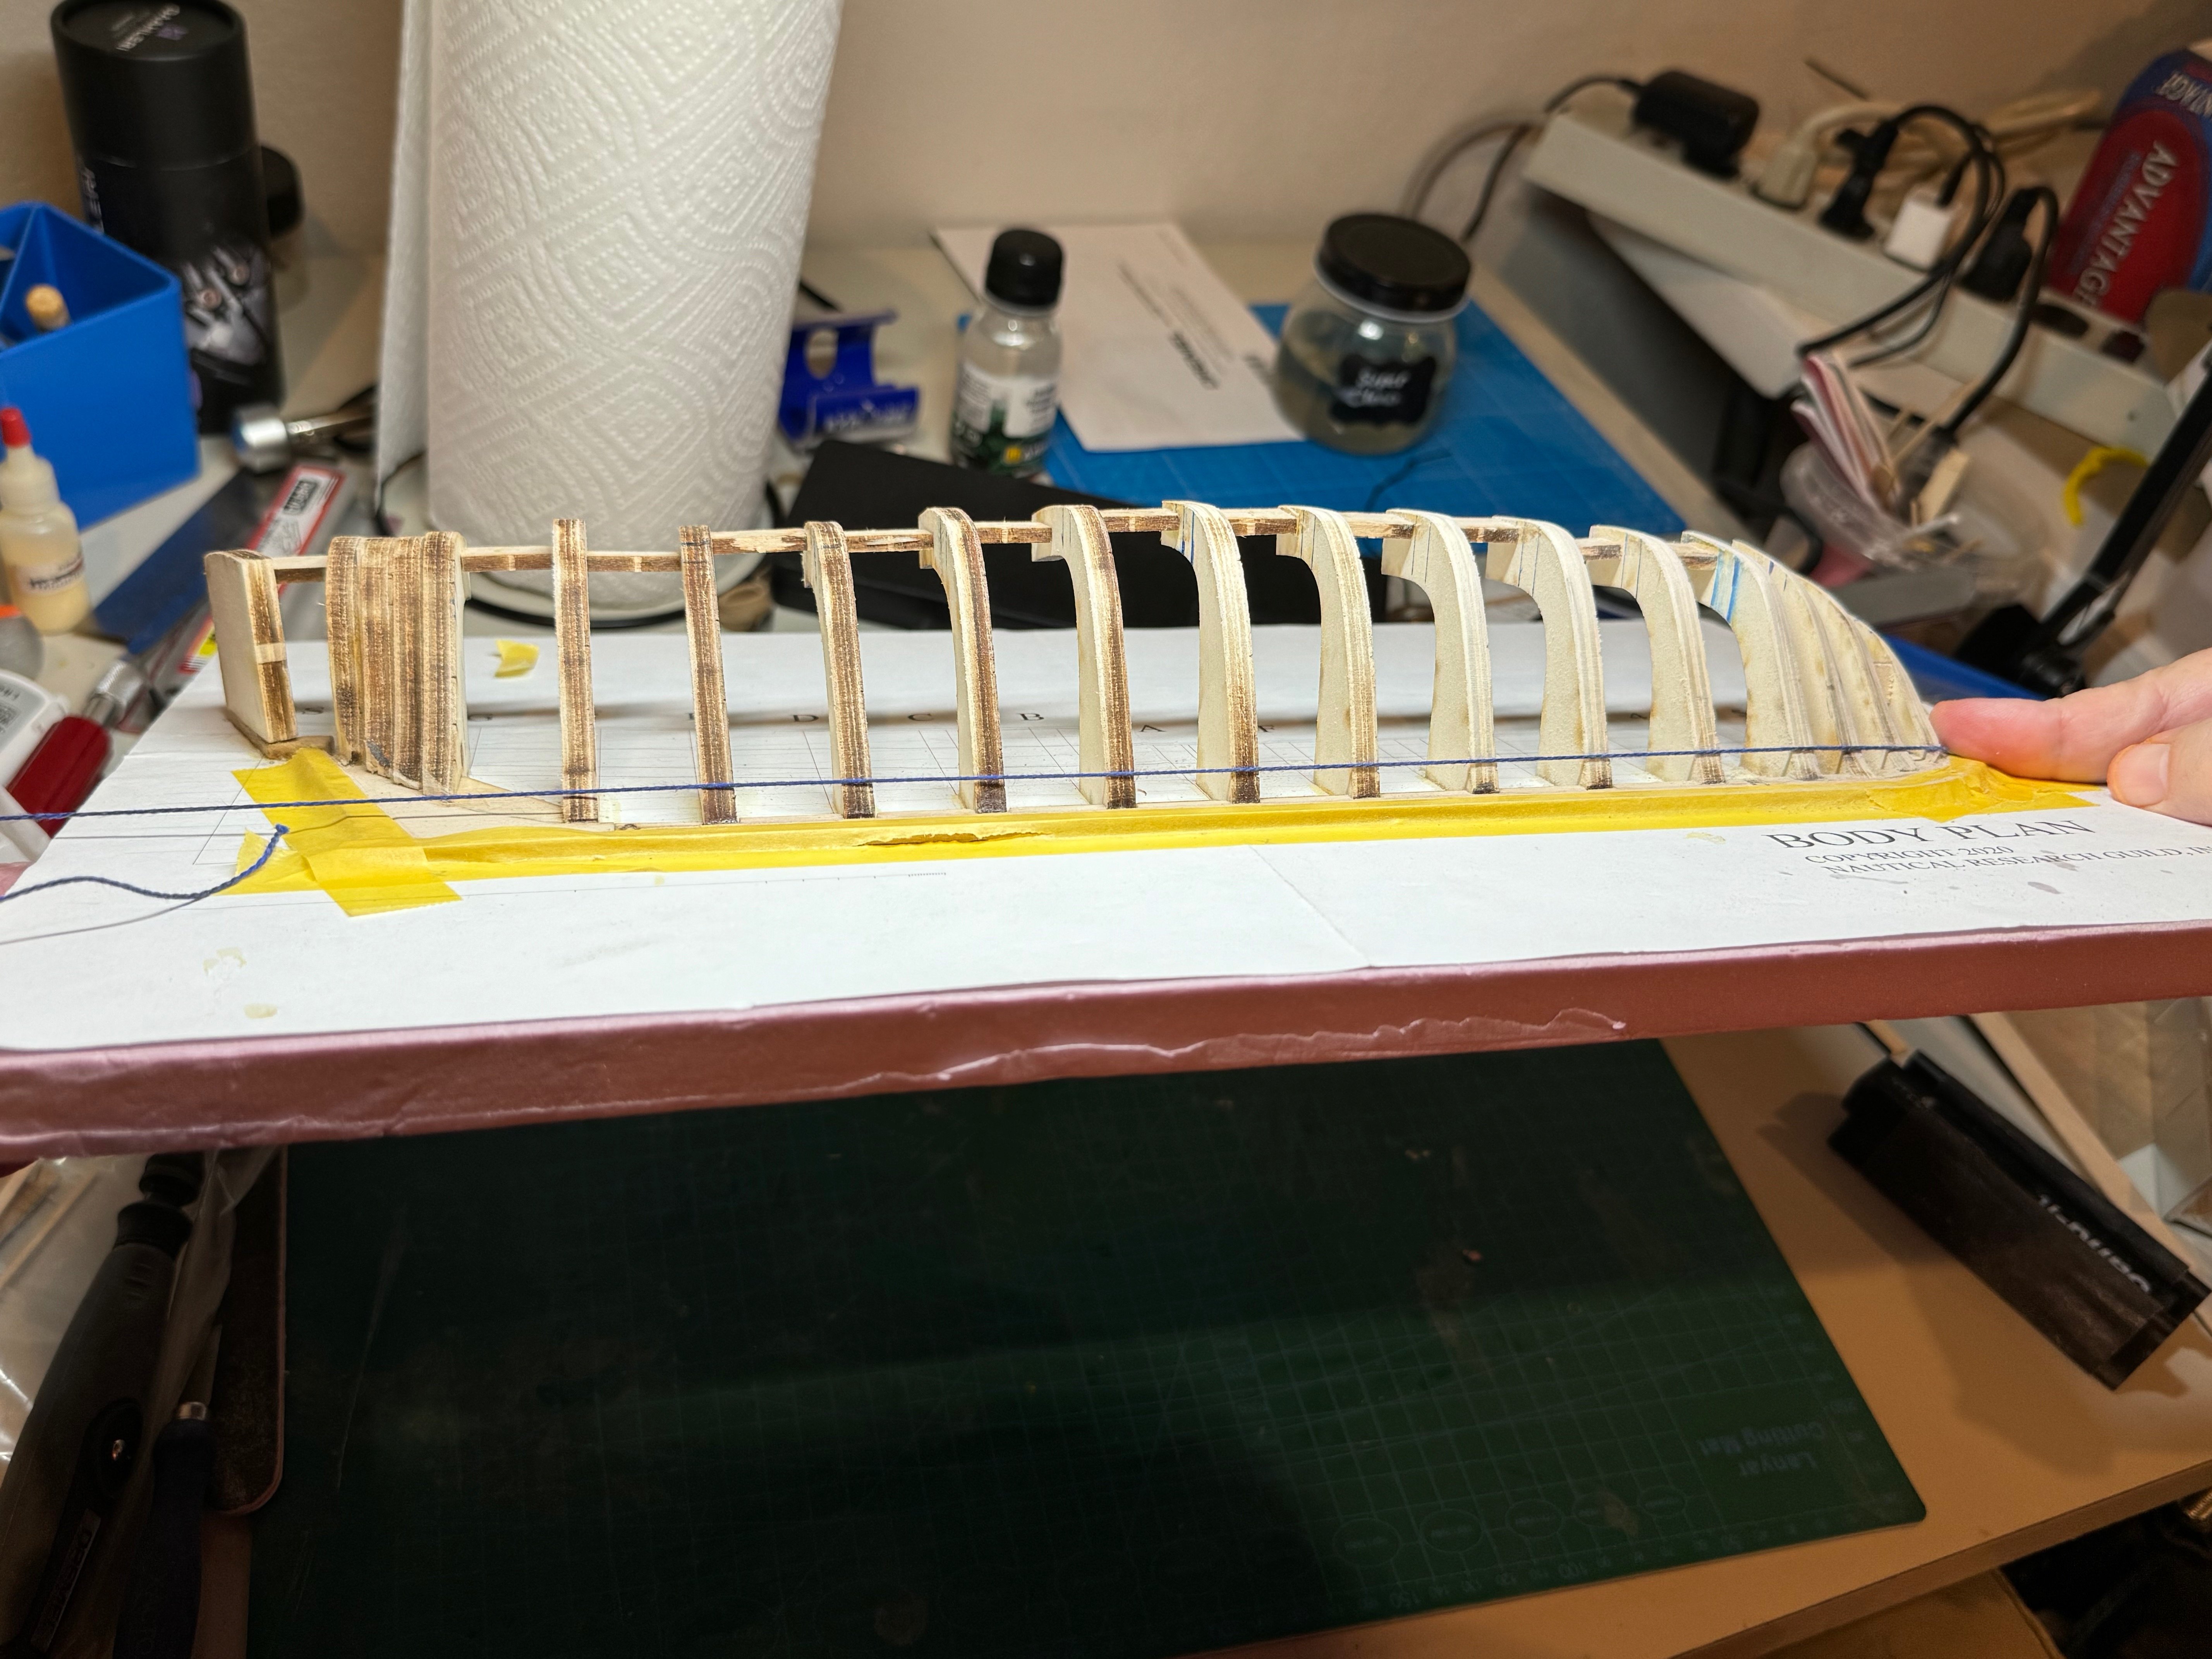
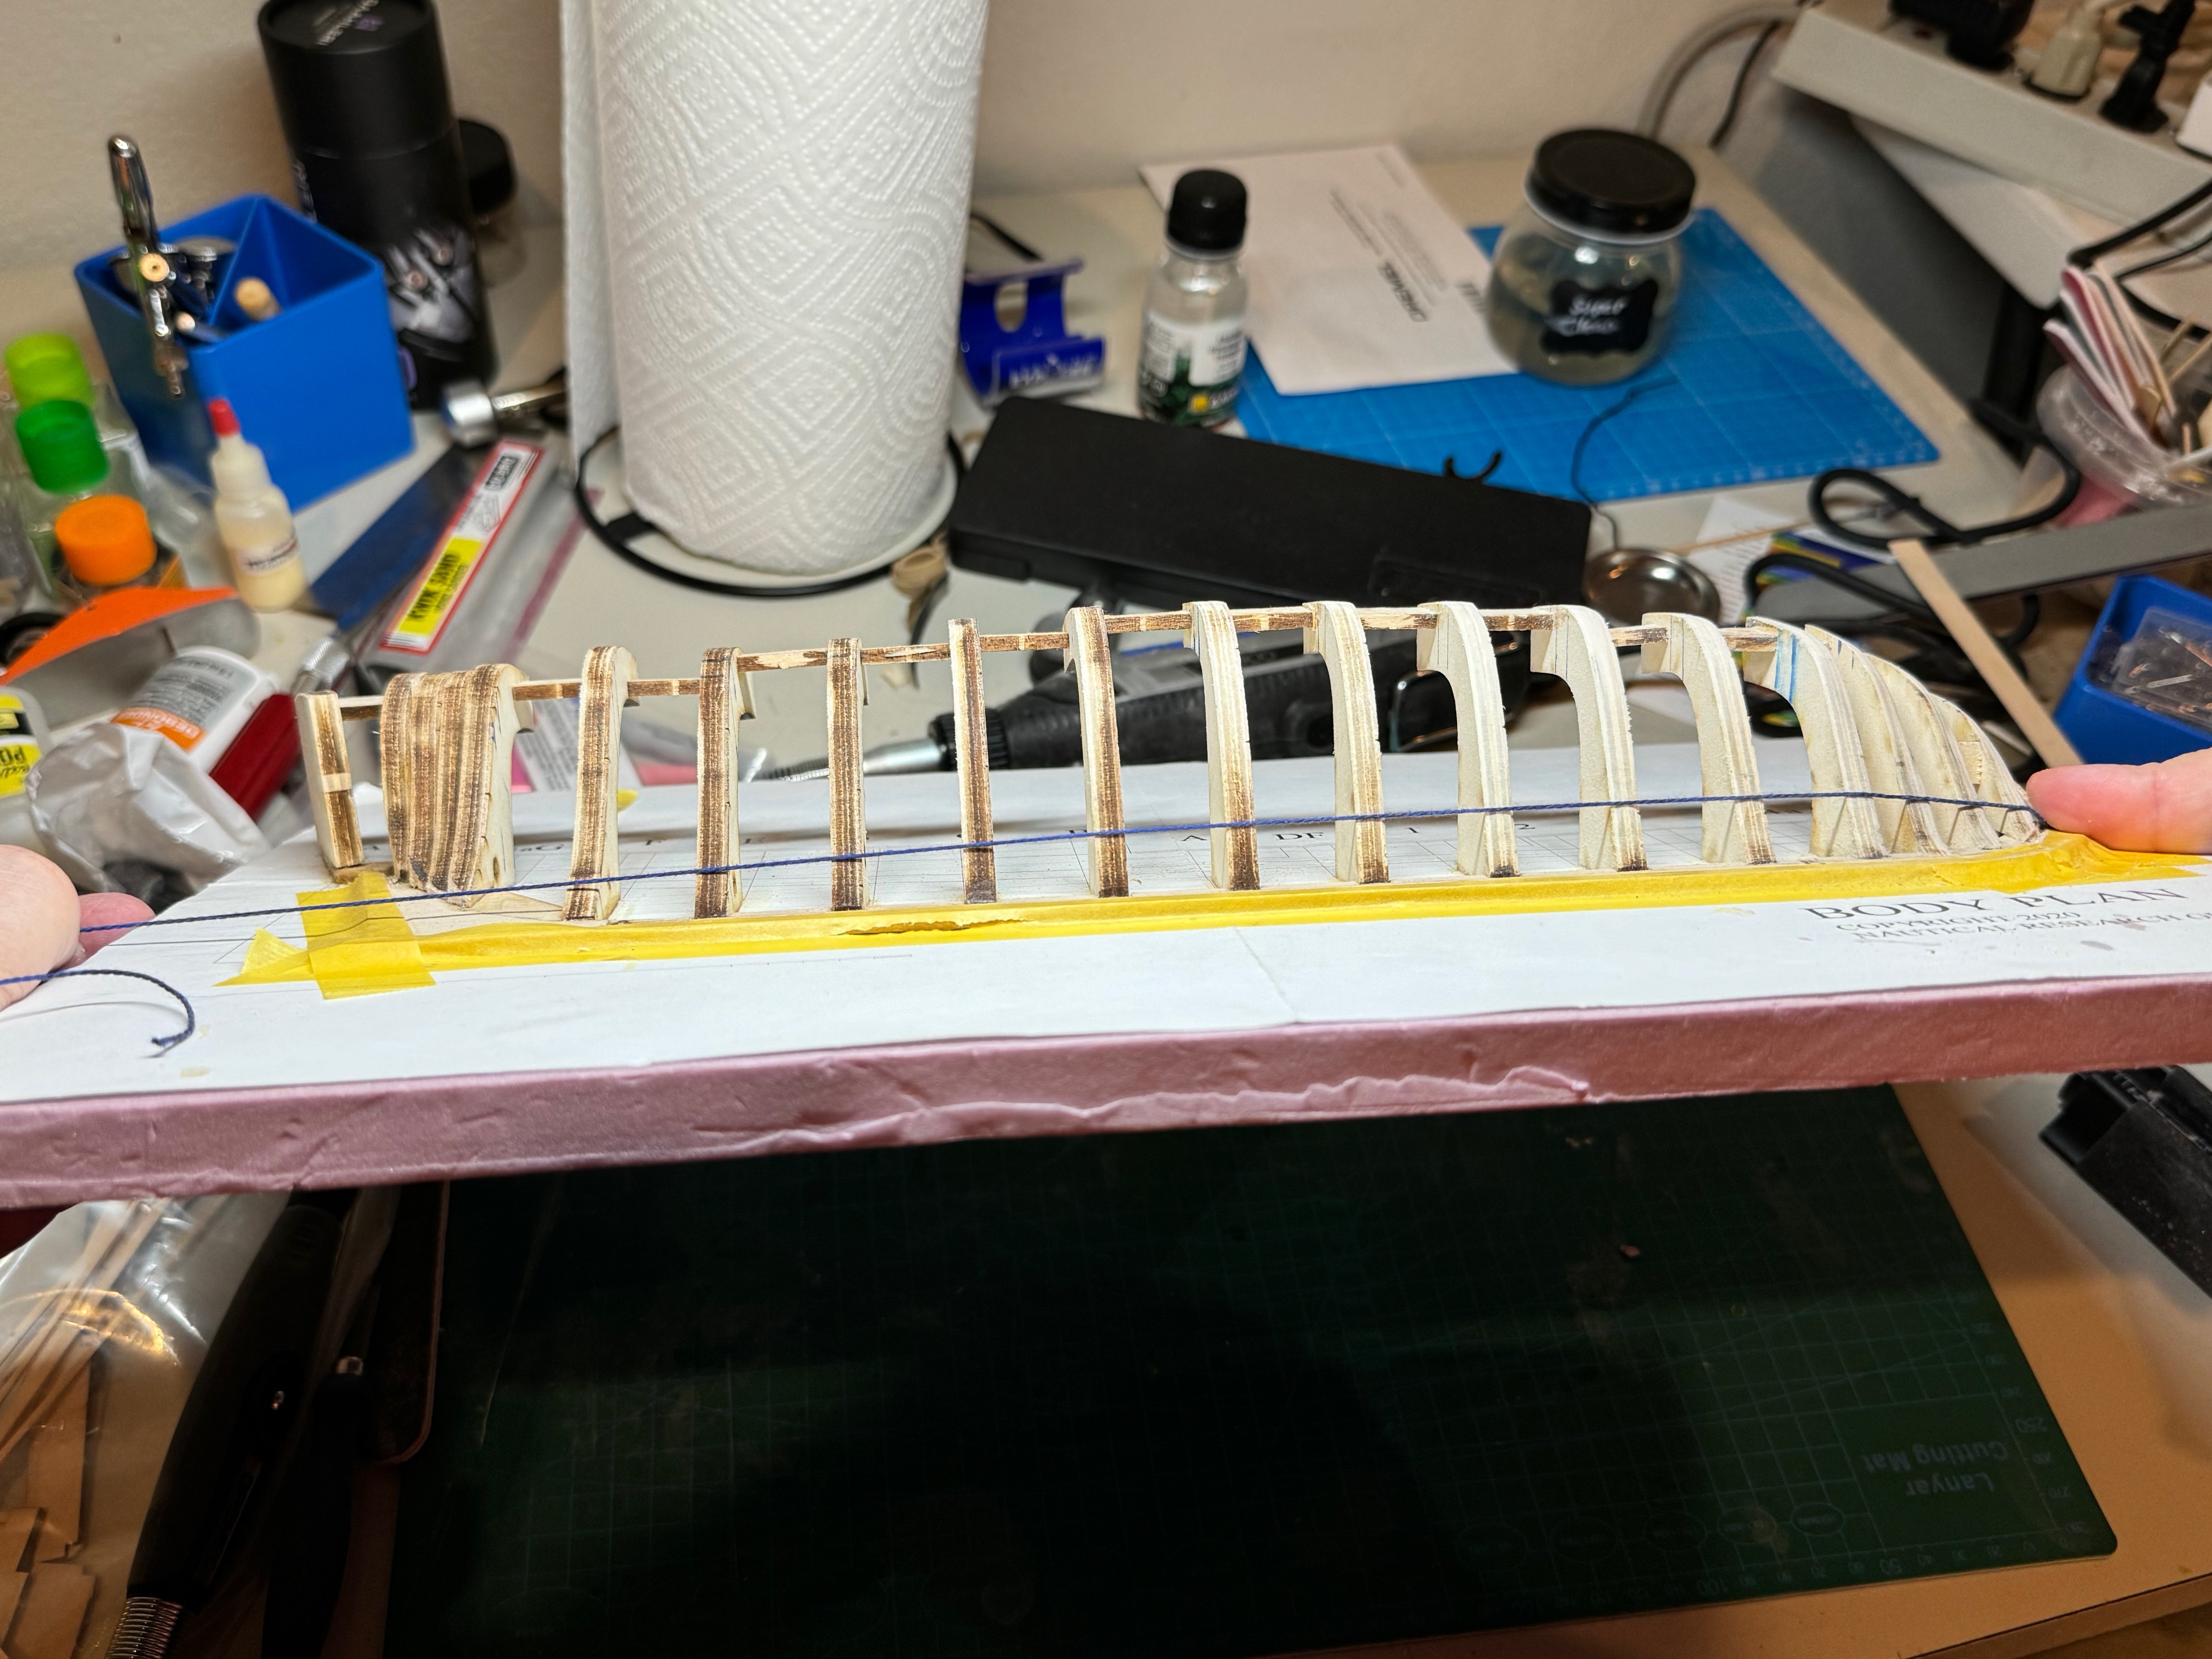
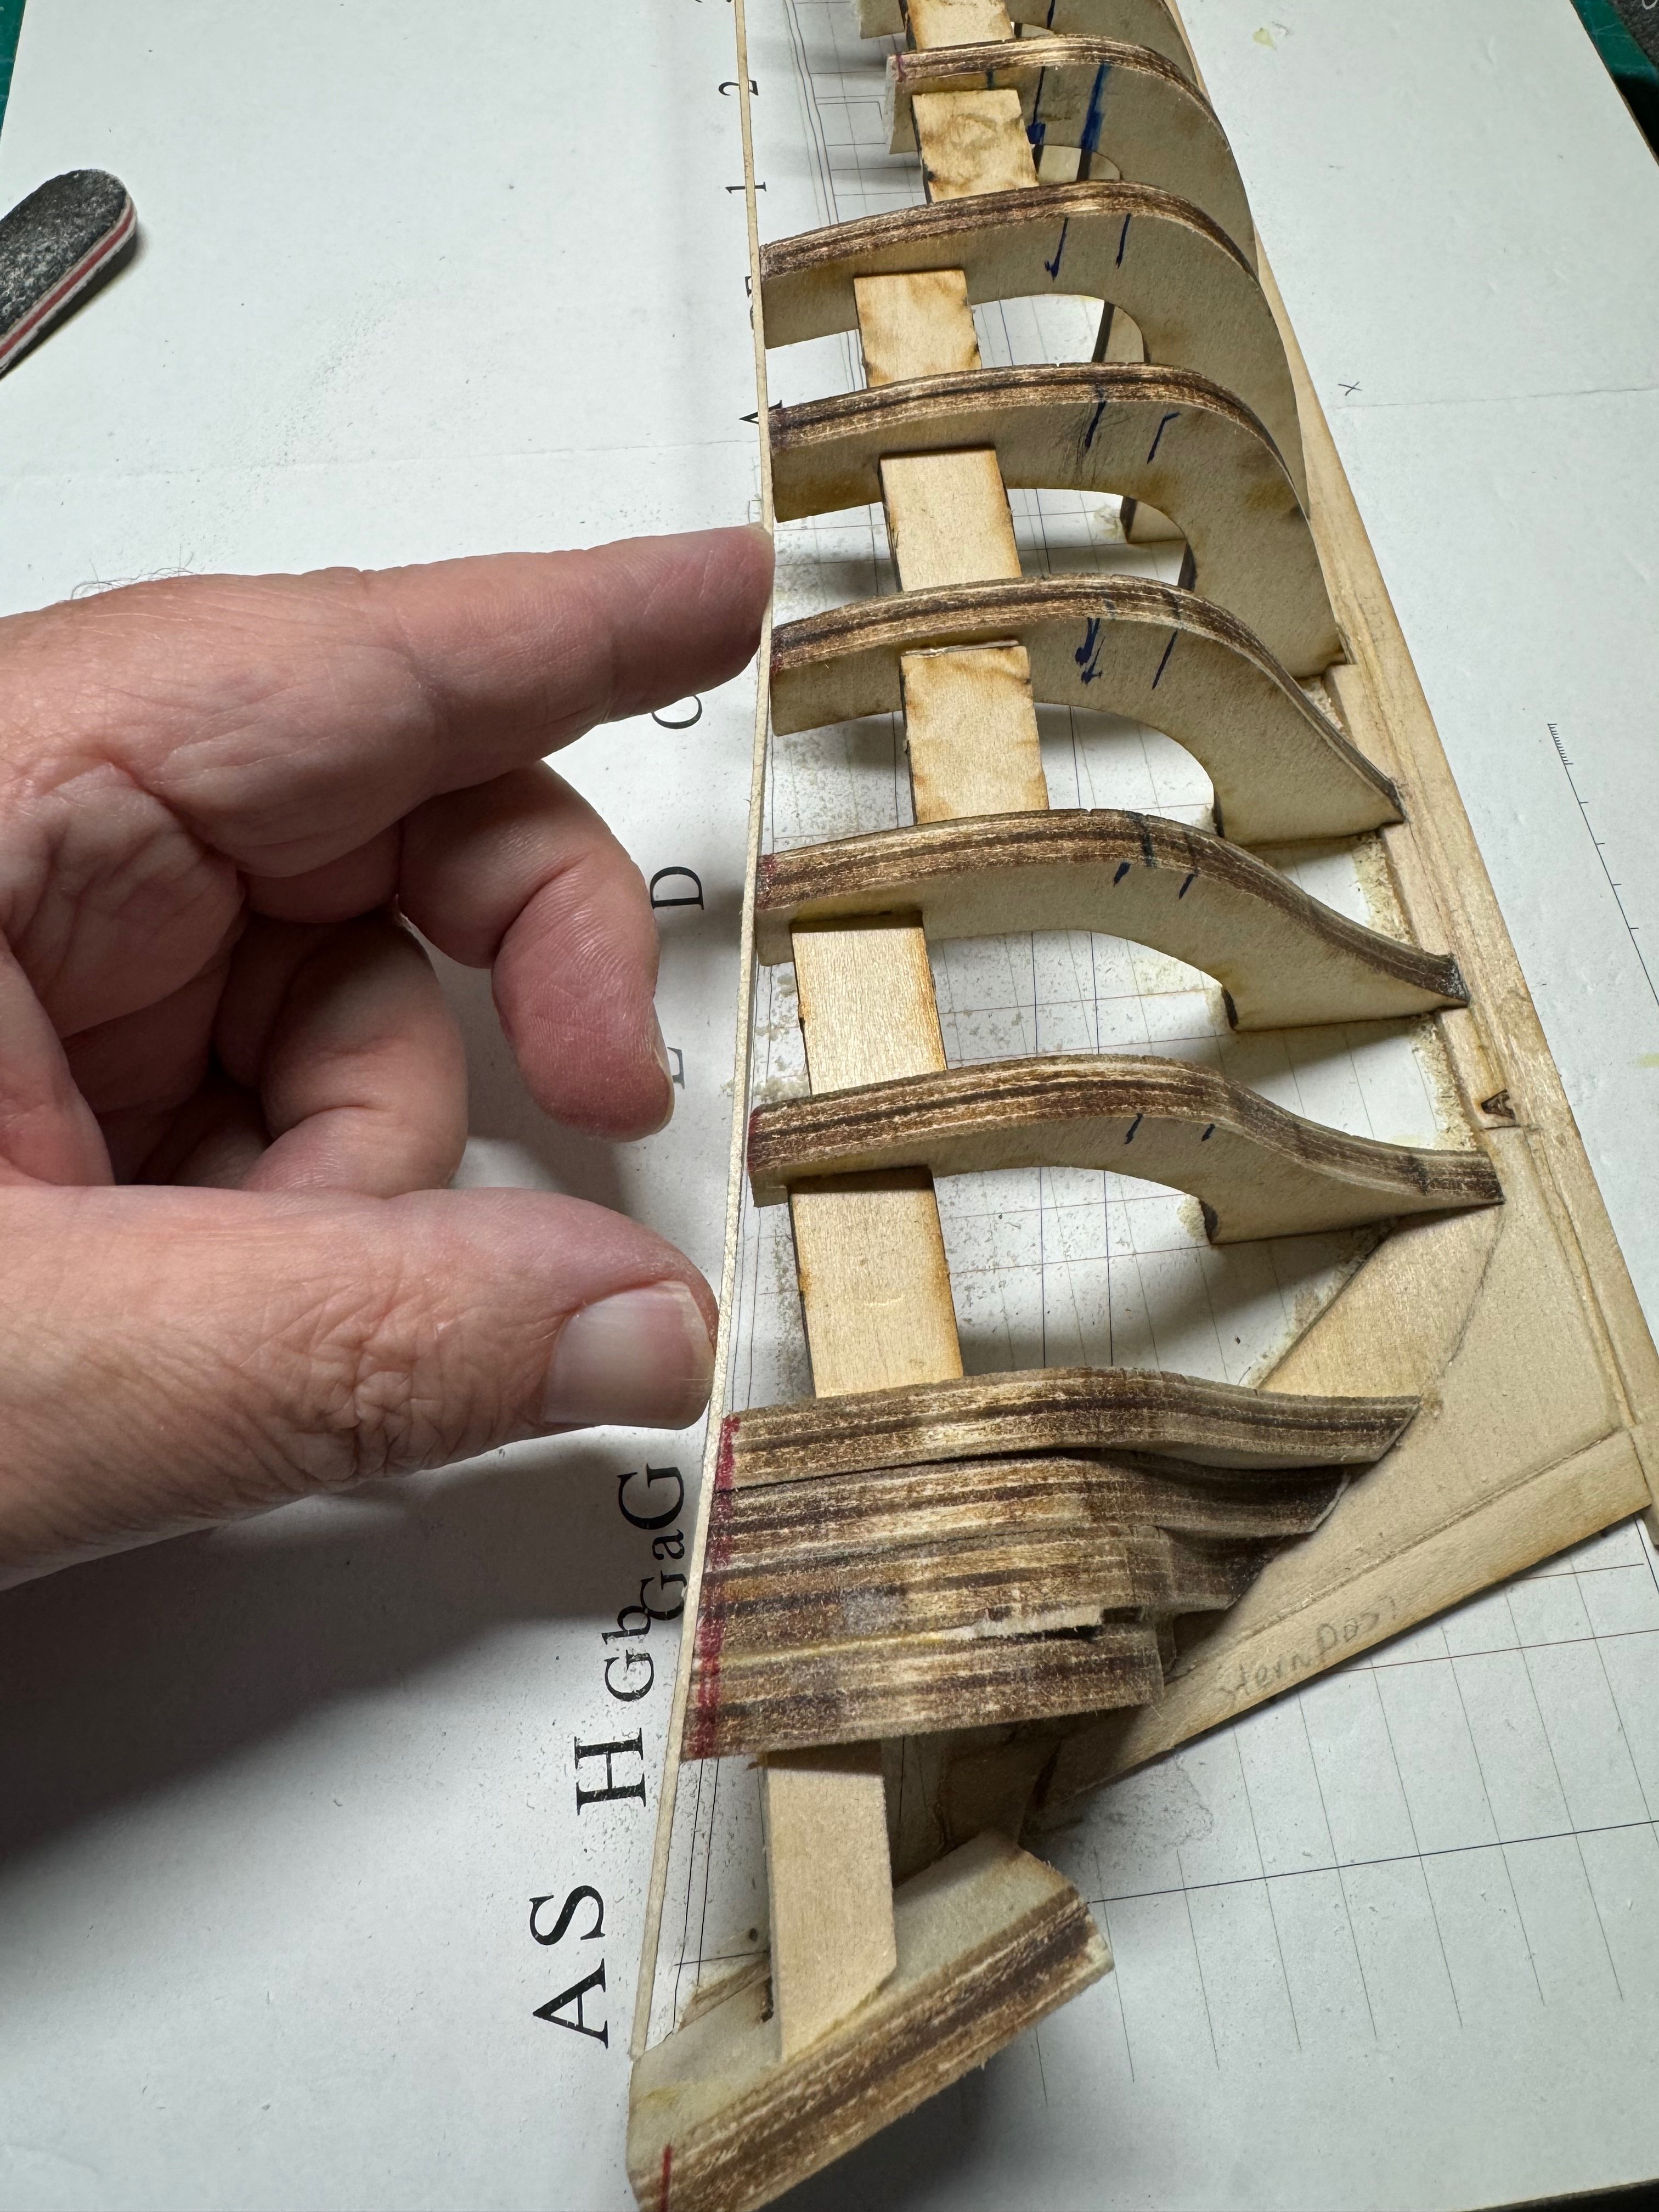
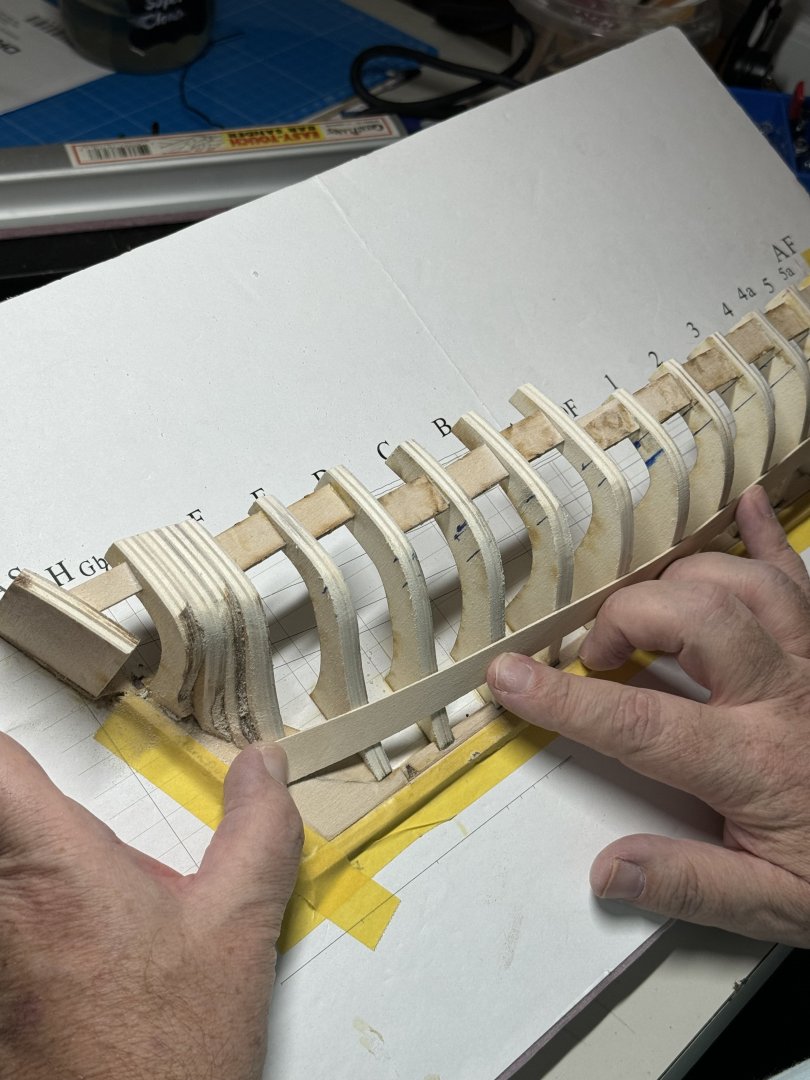
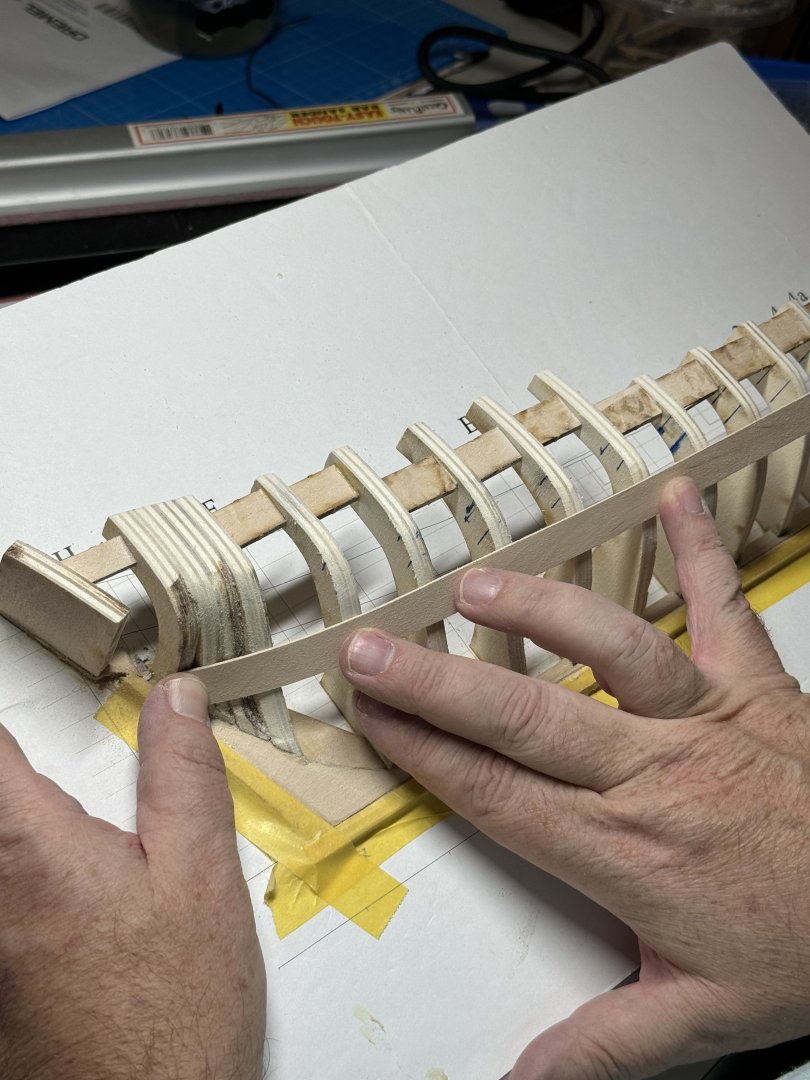
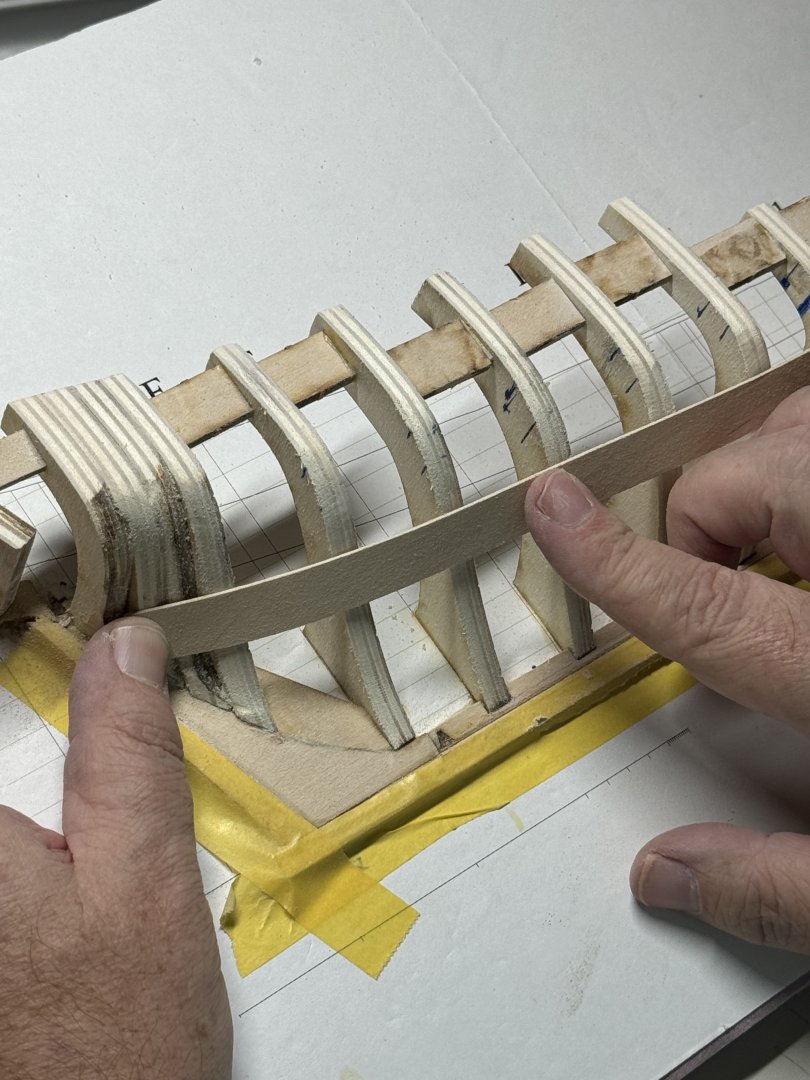
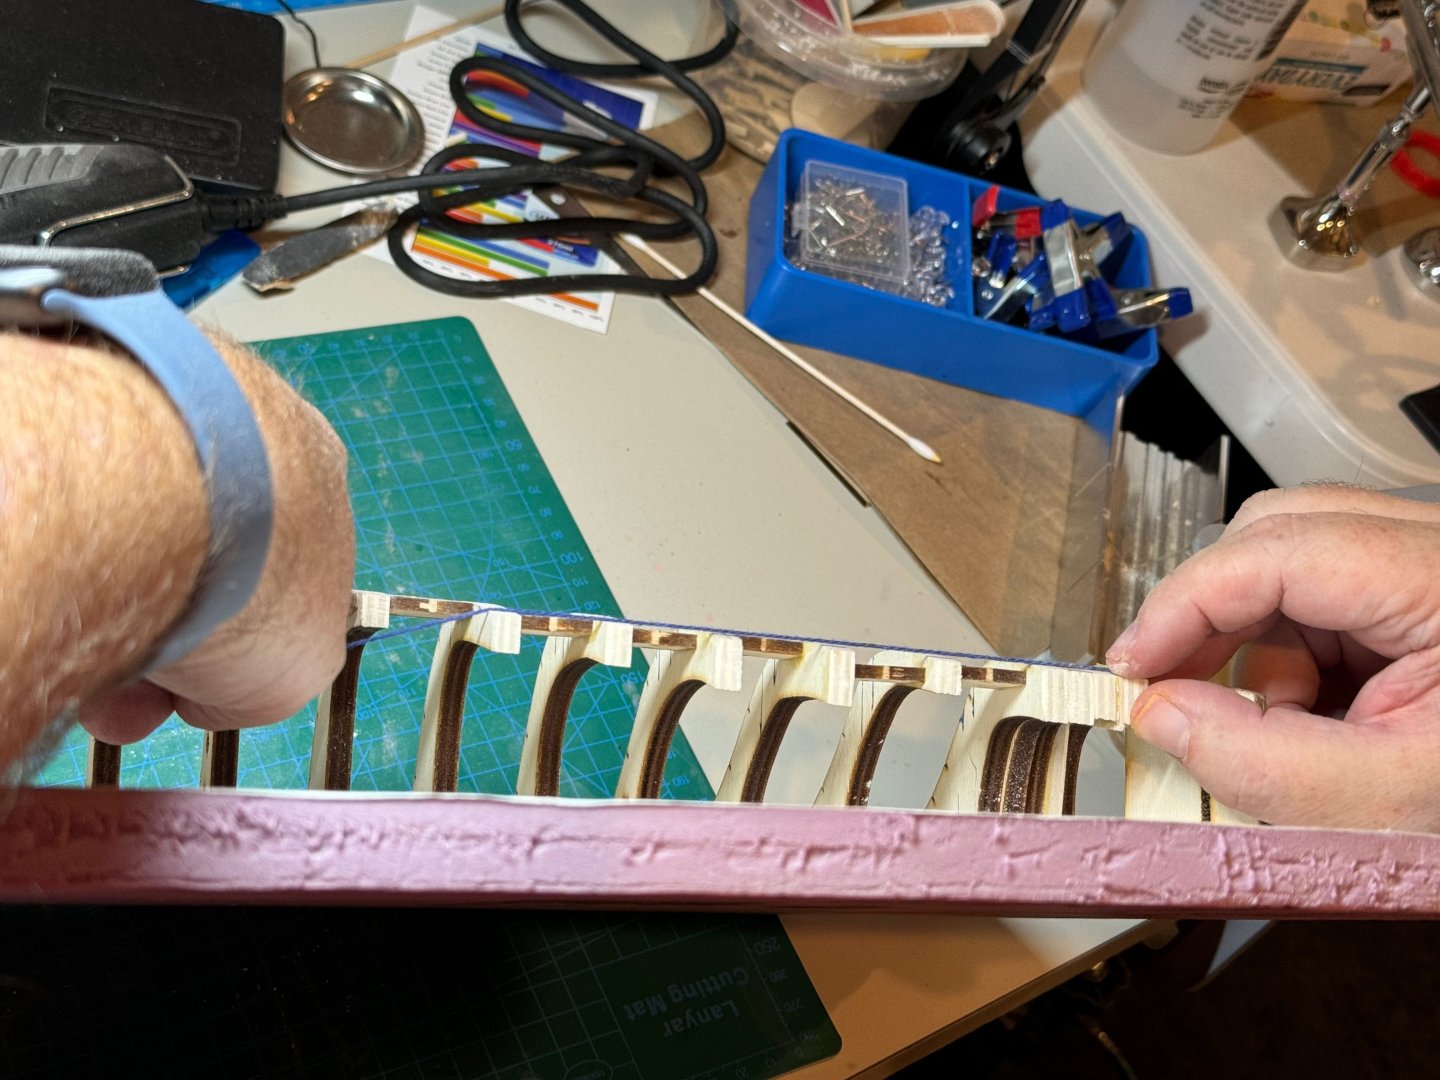
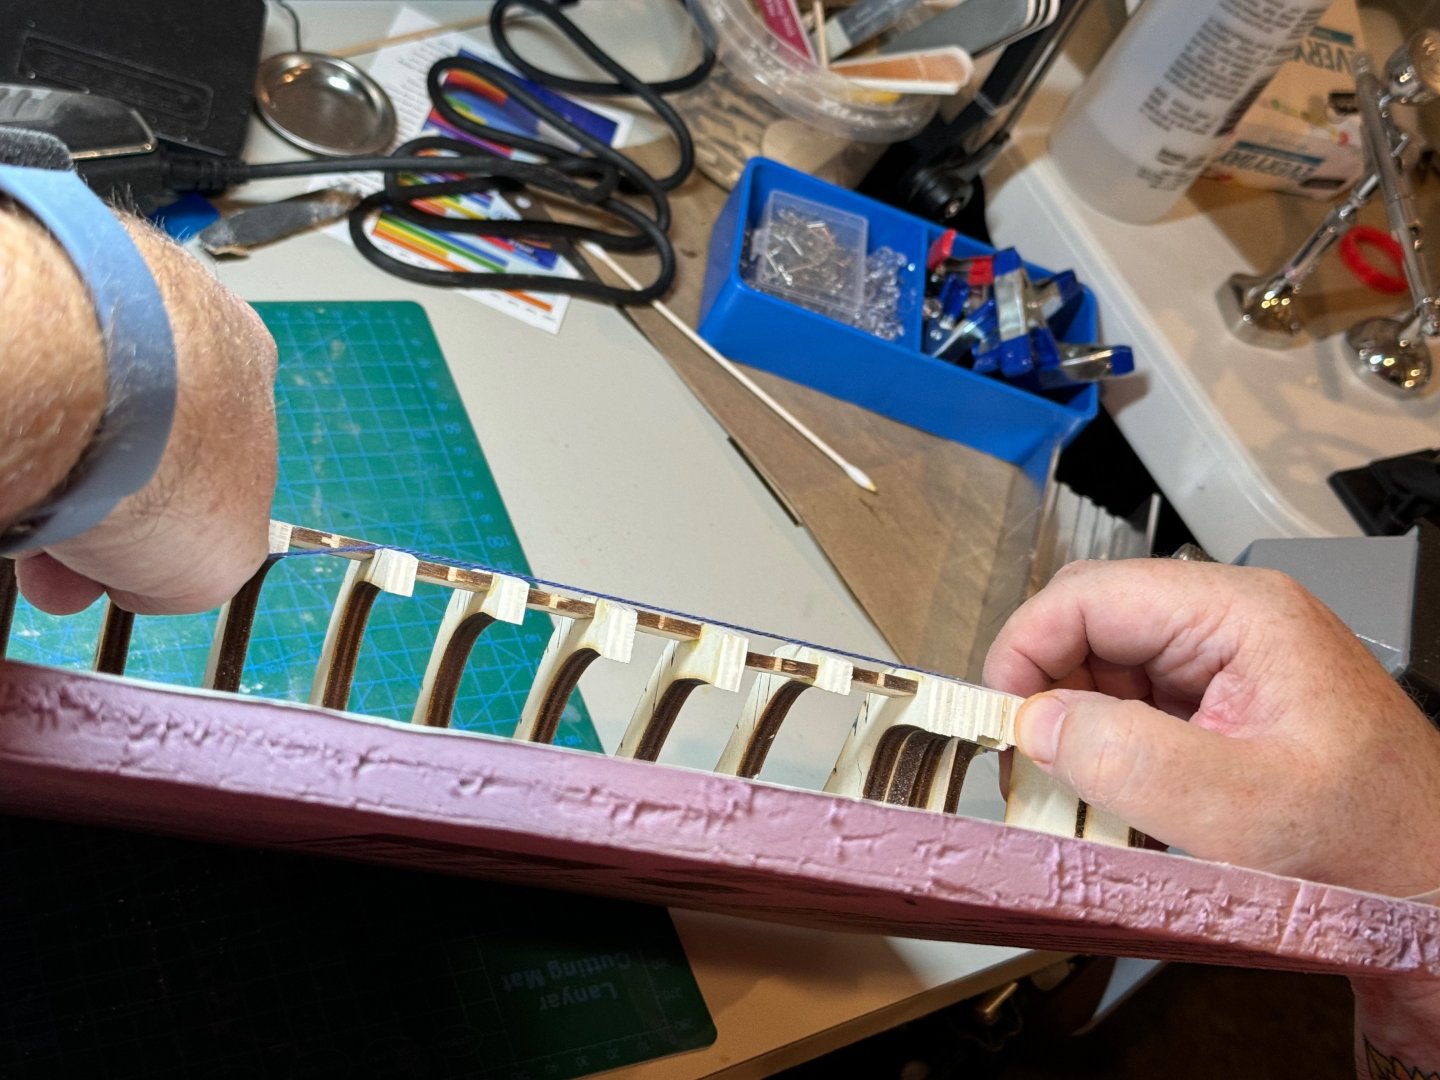
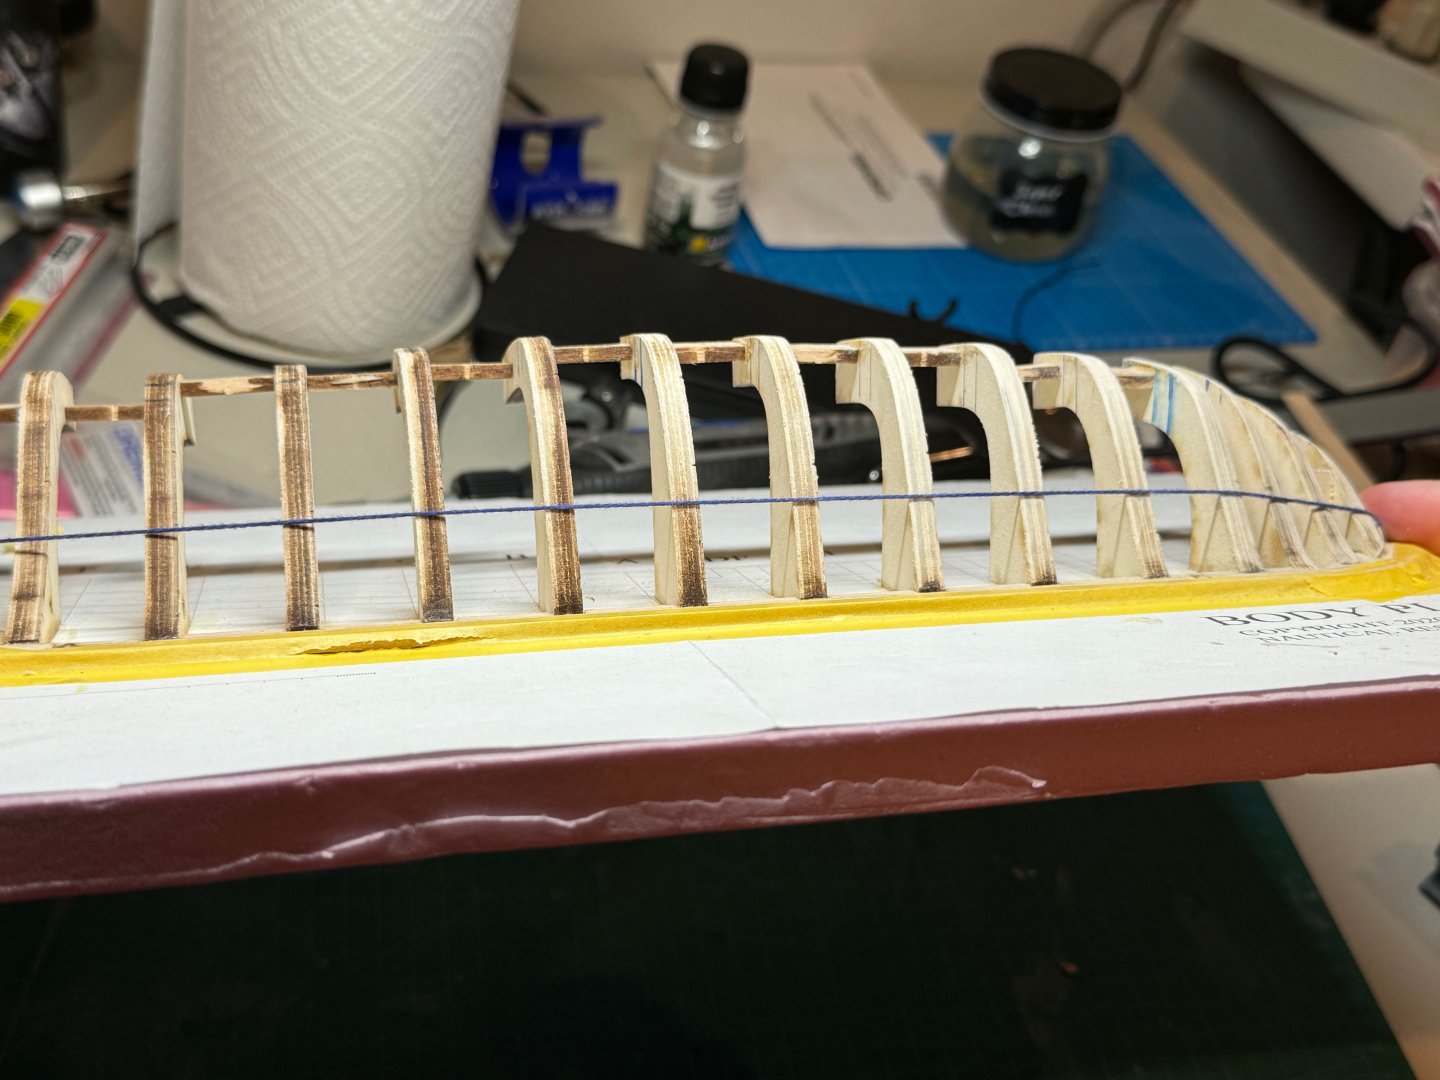
Good evening. A minor update on the planking tutorial. Today finished fairing the bow portion of the hull. I was able to get a nice curve on the hull. Here is a photo just about the second strake. This is approximately the second strake. The garboard Next, I started to tackle the top line in the stern. You can see I have a low spot on frames E and D. I used thread to give me a nice line along the bulwarks. More sanding, and I am getting a little closer. The lower top line is starting to curve nicely a little high spot on A. After some sanding with a long sanding block I was able smooth out that high spot Here you can still see the low spots on E and D. I am pretty close here, I need to thin out G a bit more, and get a nice line. I started to address the the upper part of the top line to blend nicely into the transom. Have a good night. Cheers


-
@palmerit I am starting to understand how planking and fairing should be done now. I am really loving my dremel with the wand attachment. I keep it at under 10k in speed and go slow. I am also using a 120 grit sandpaper so that is not that aggressive.
-
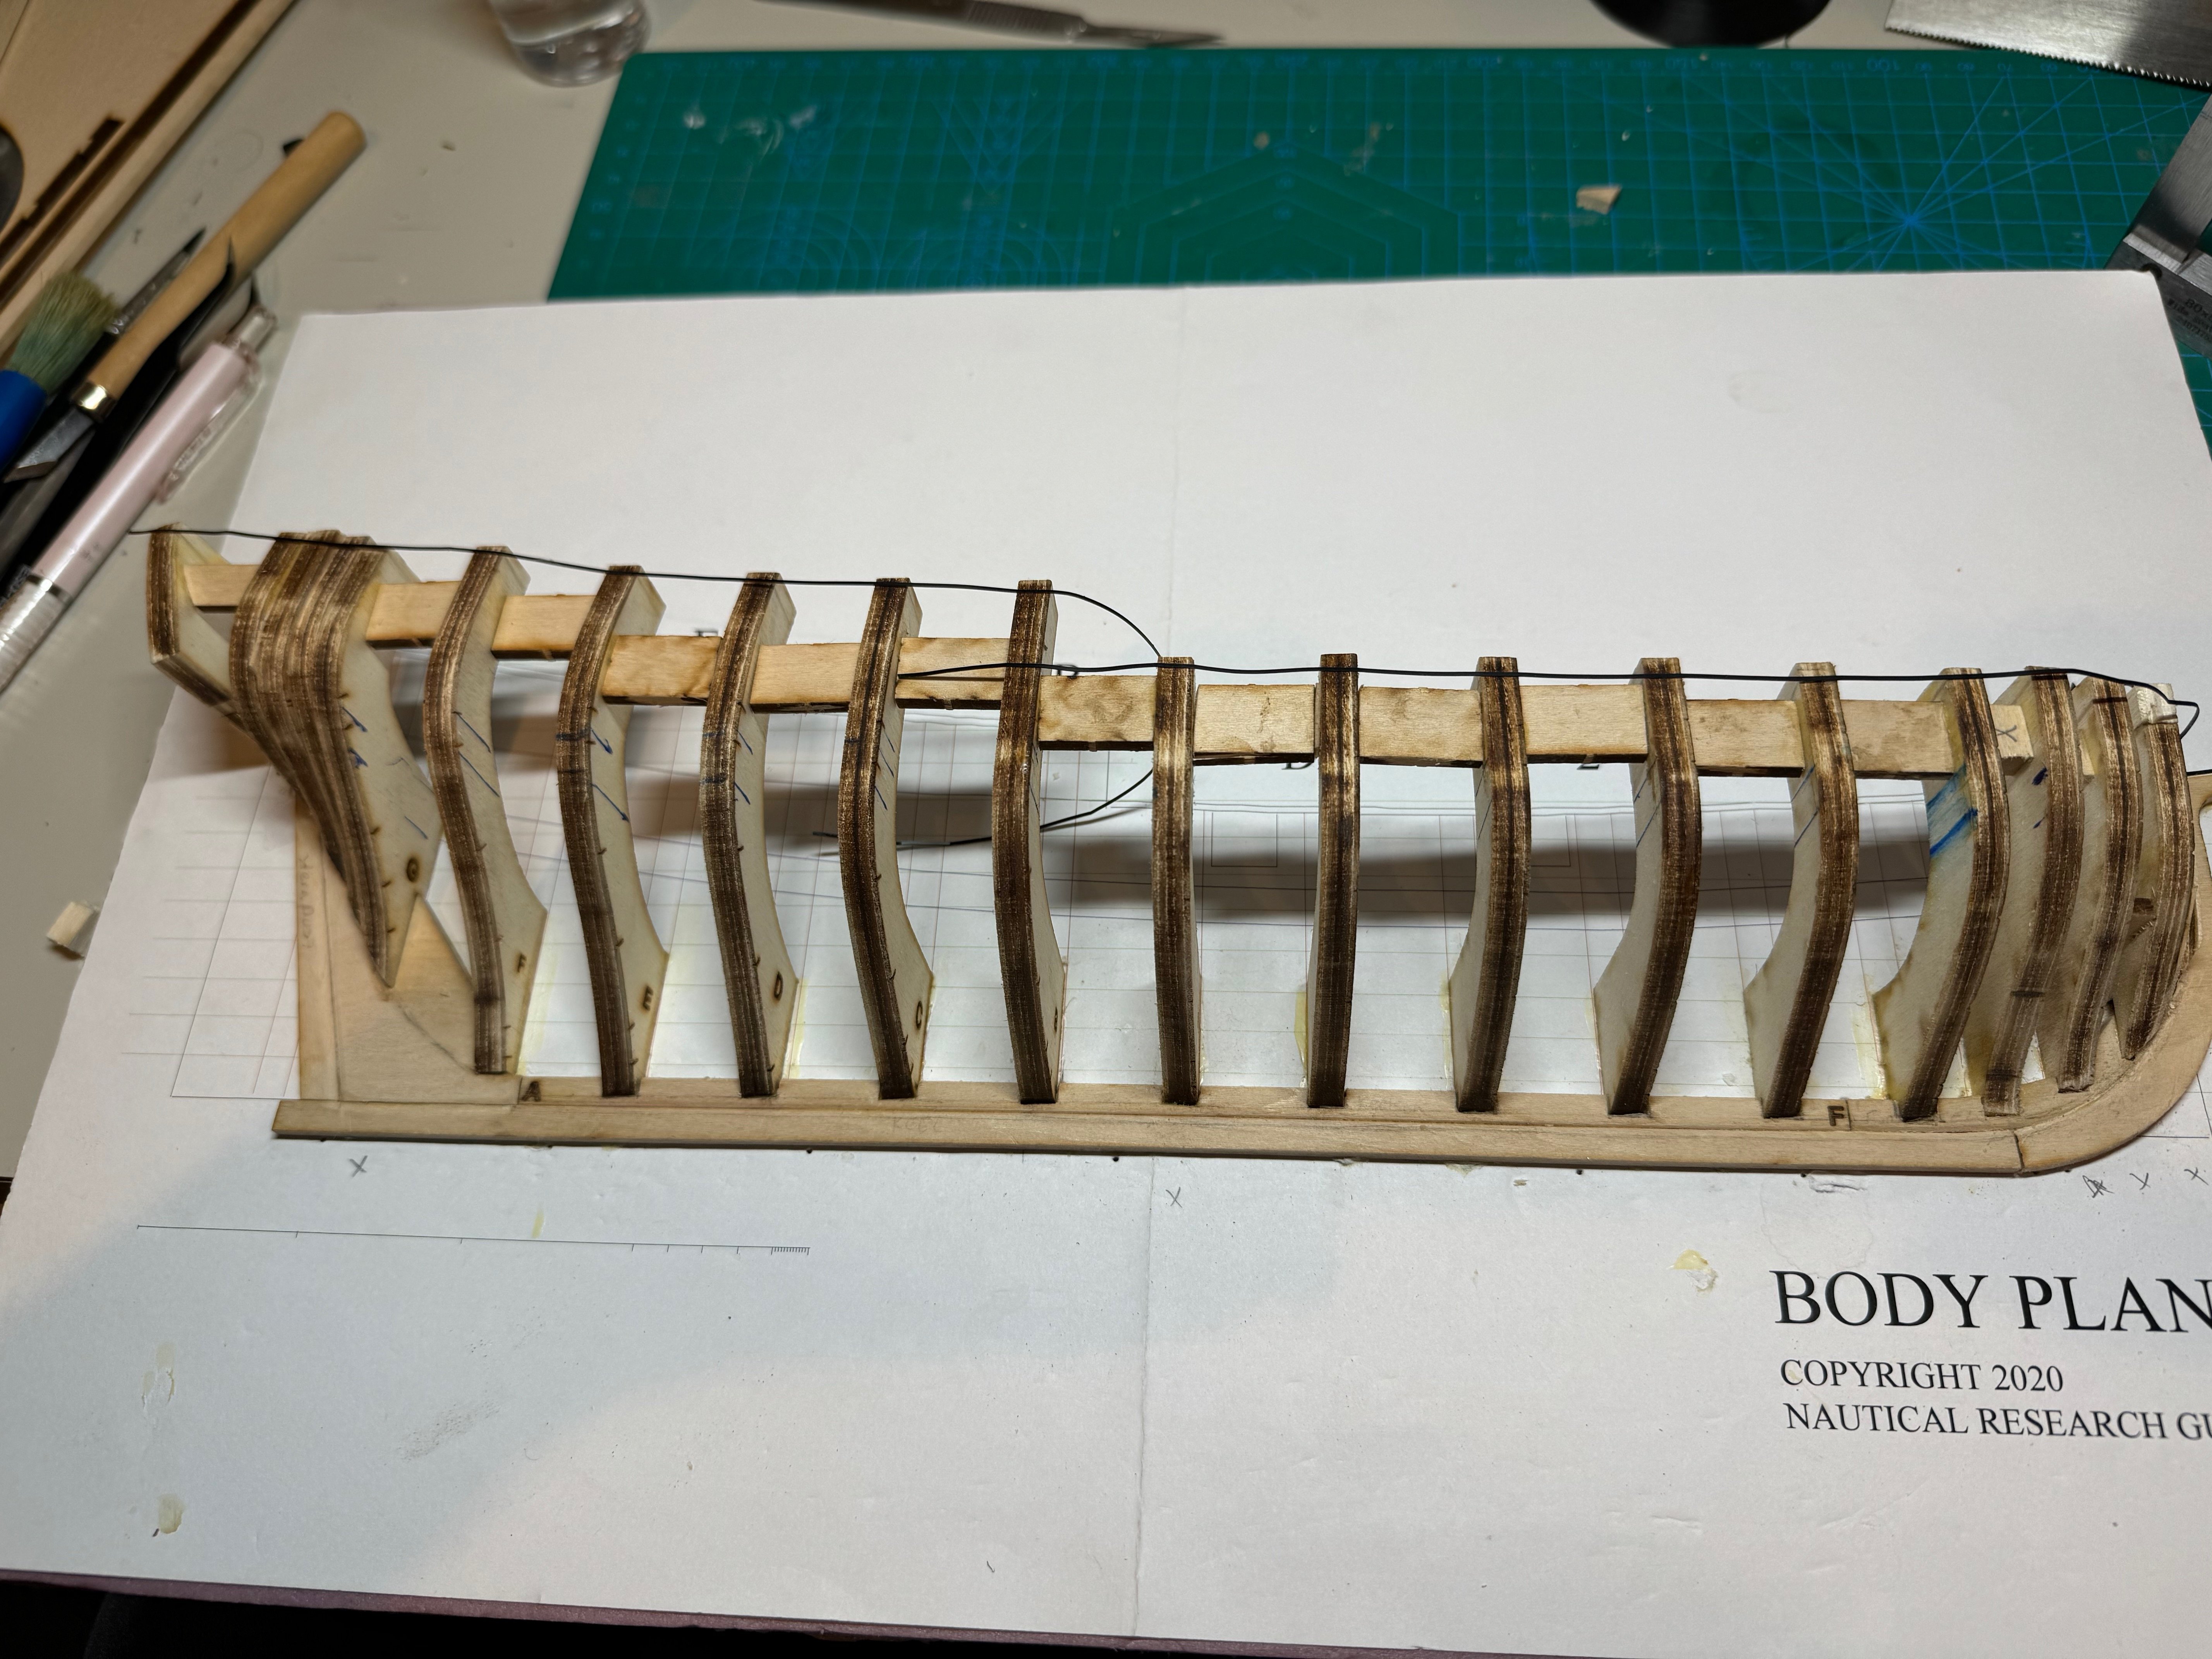
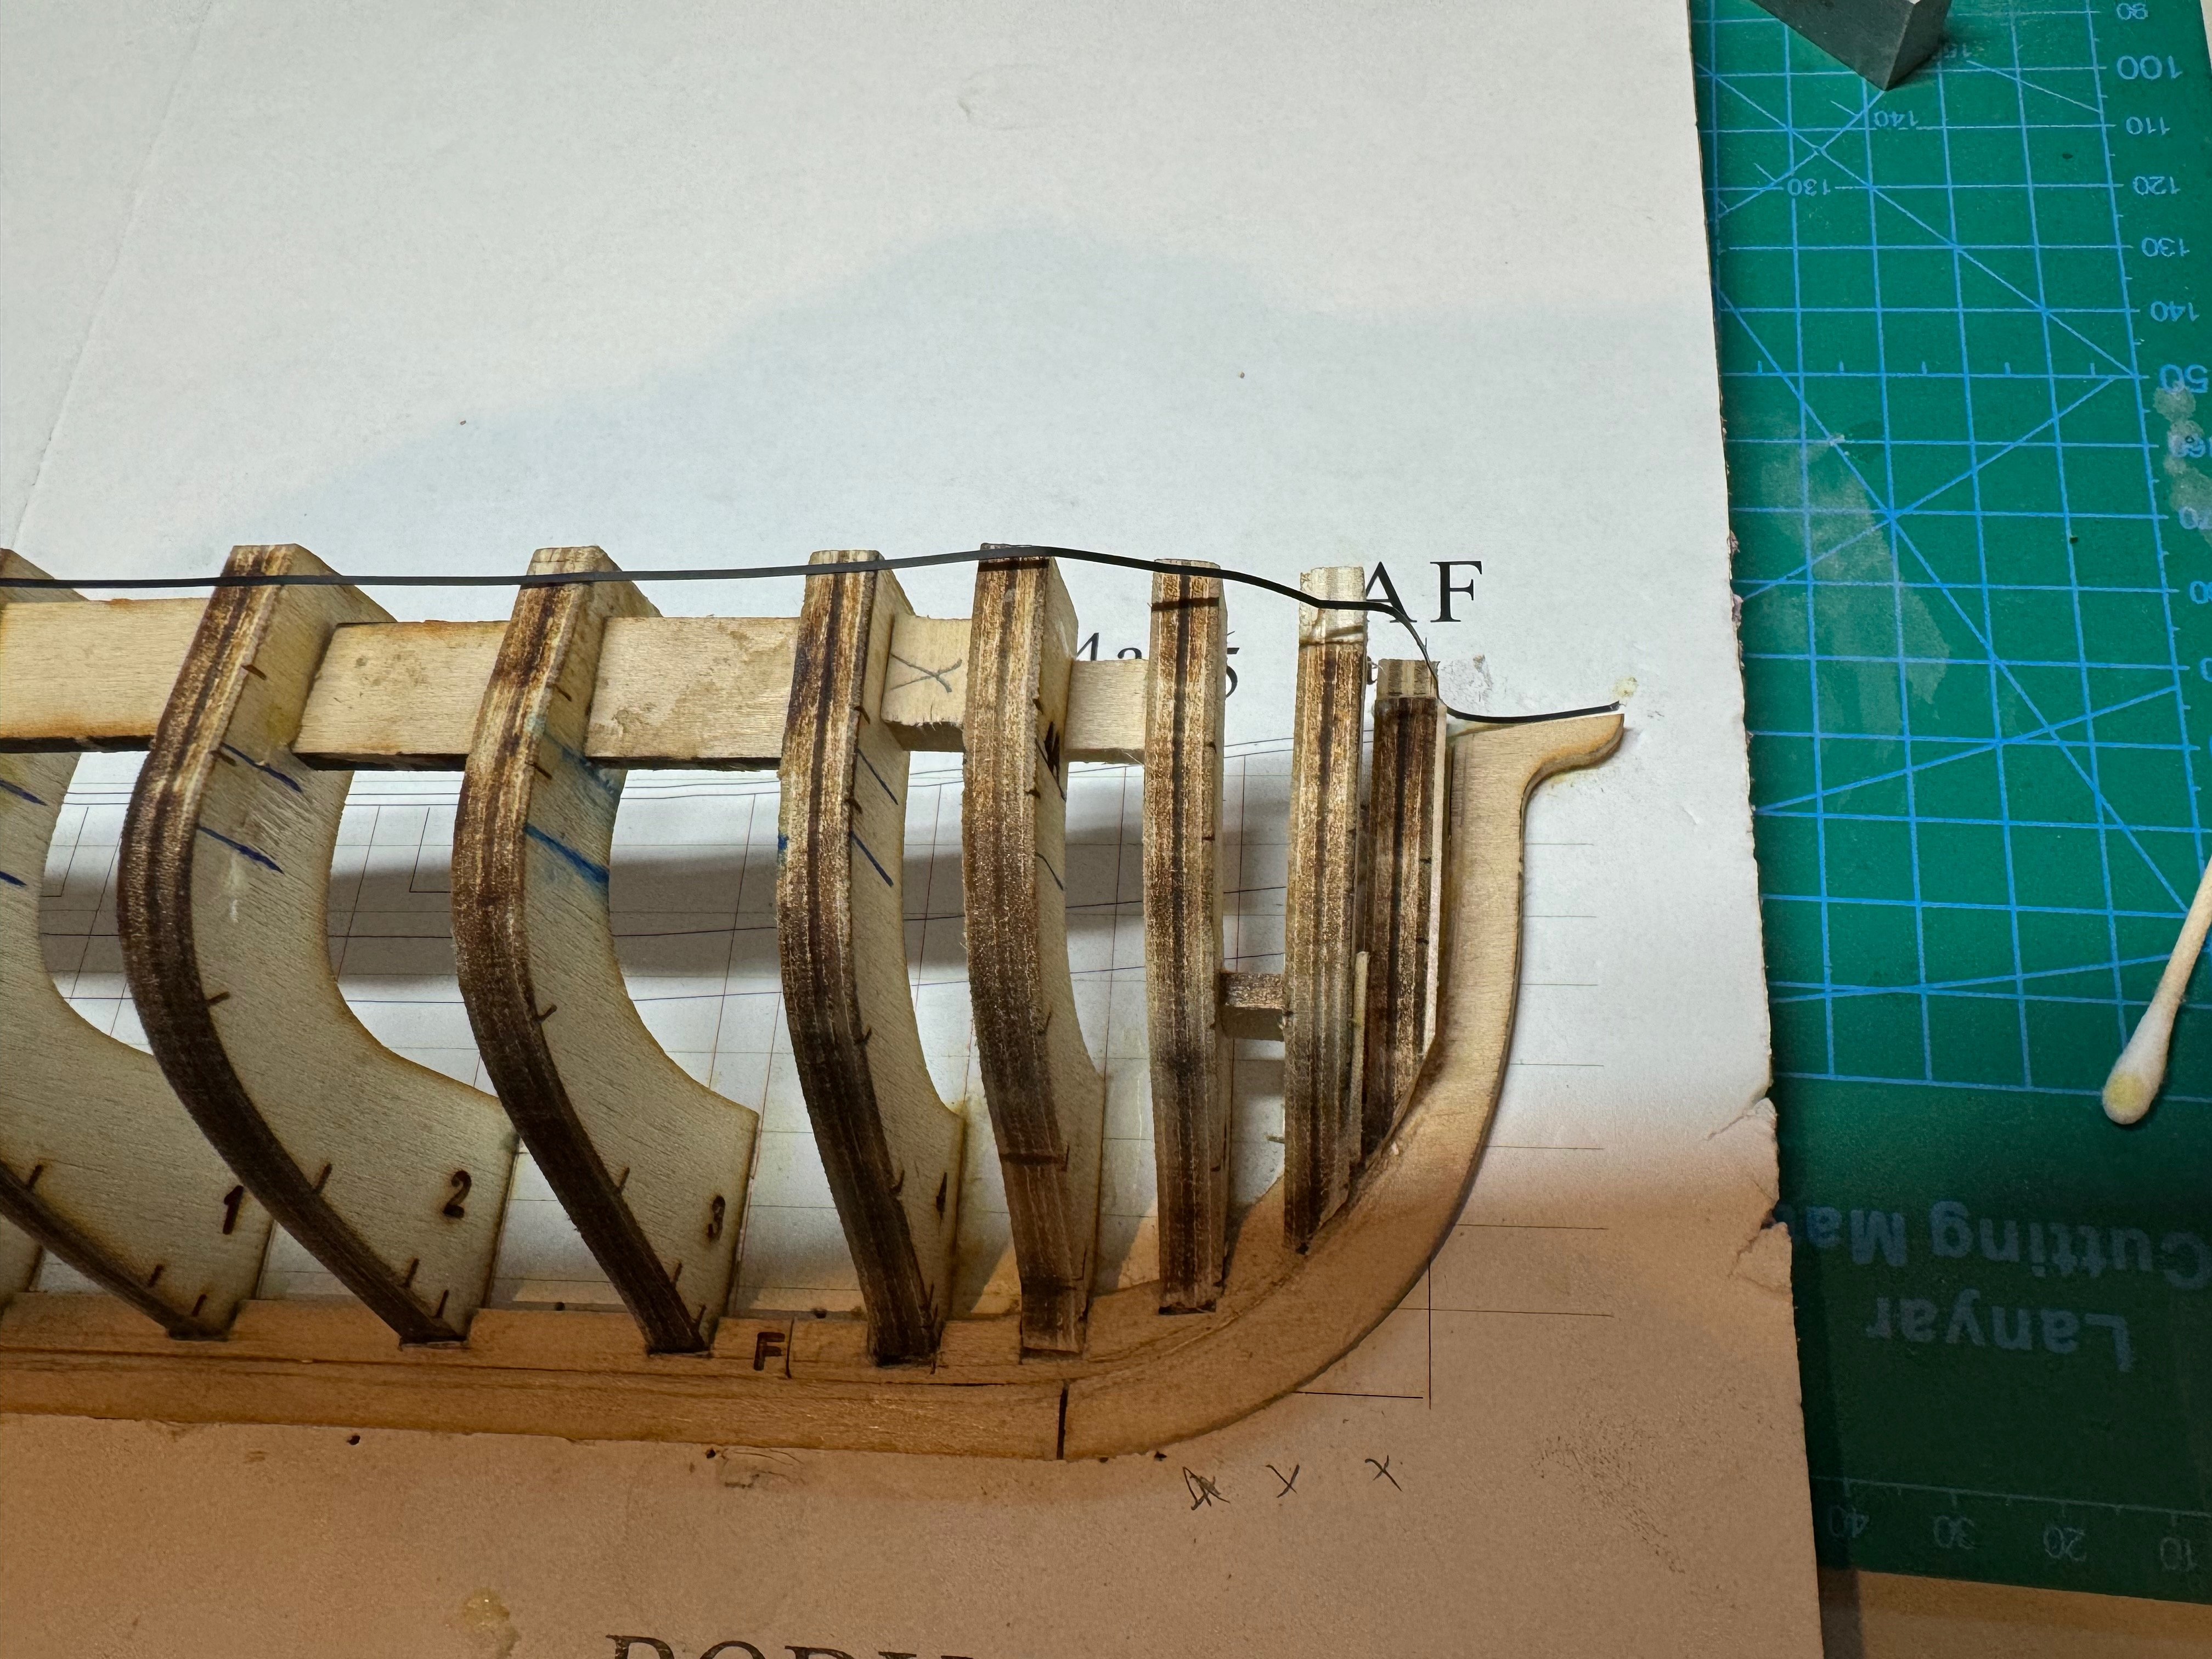
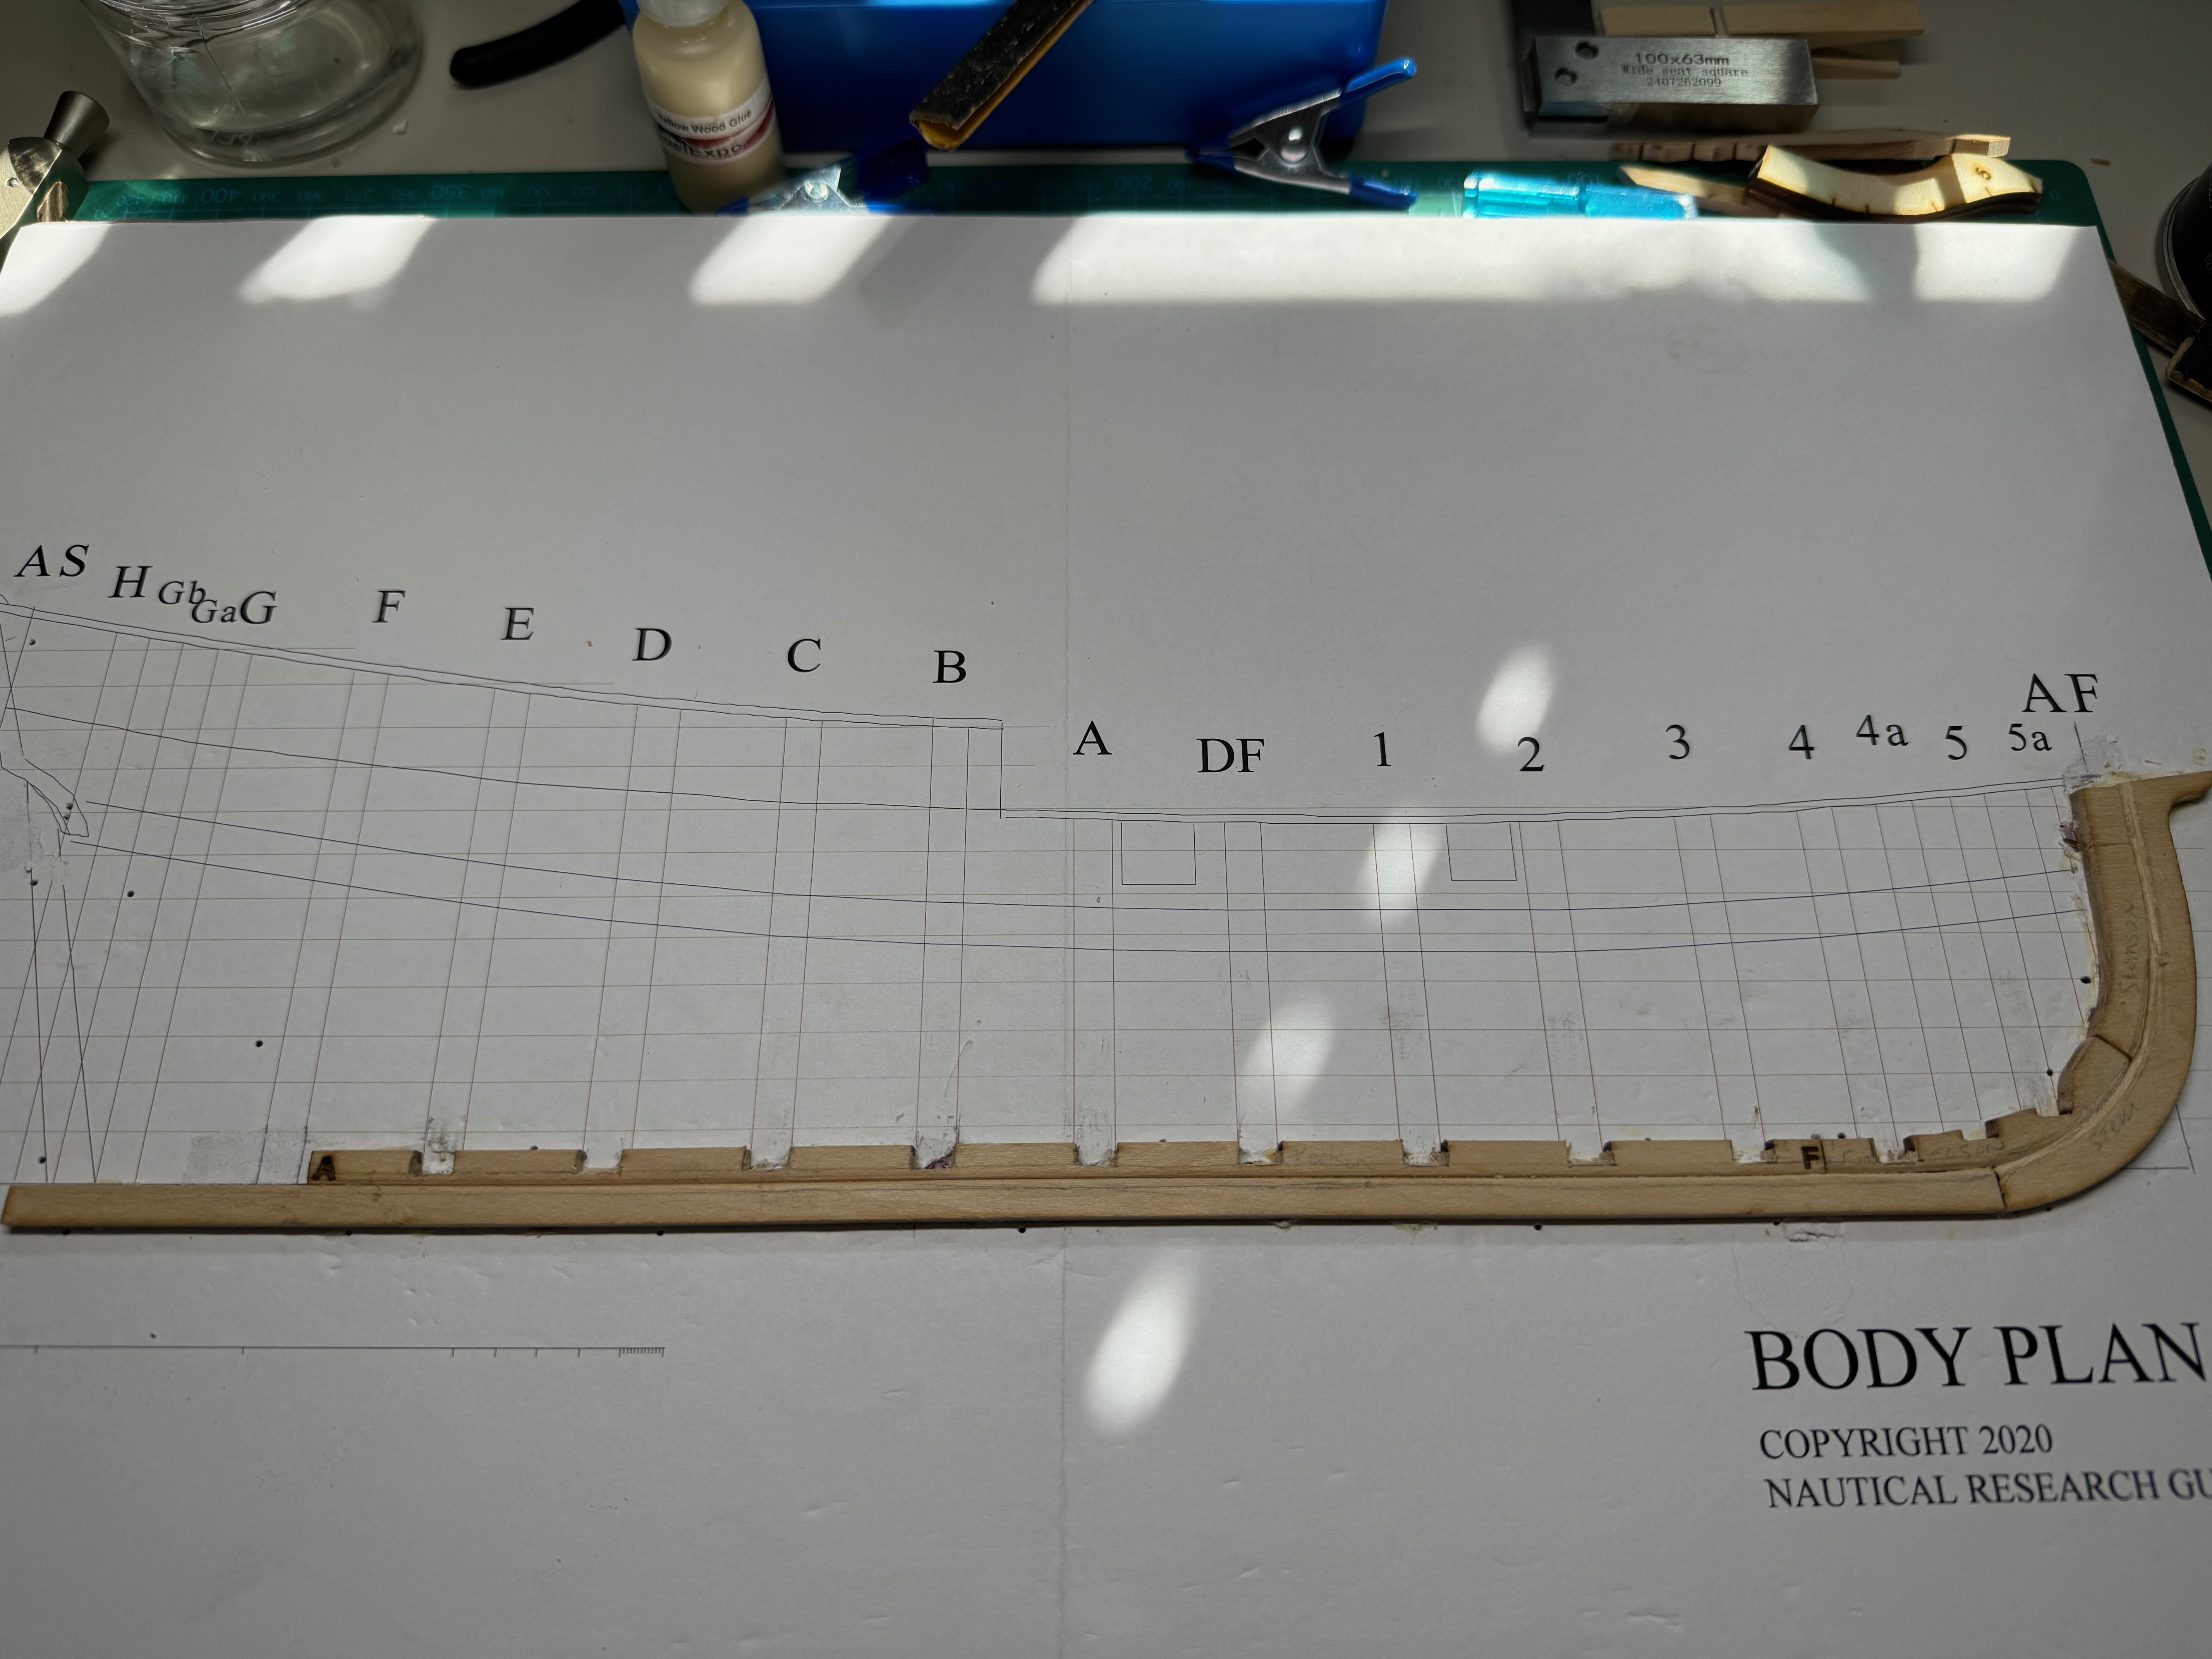
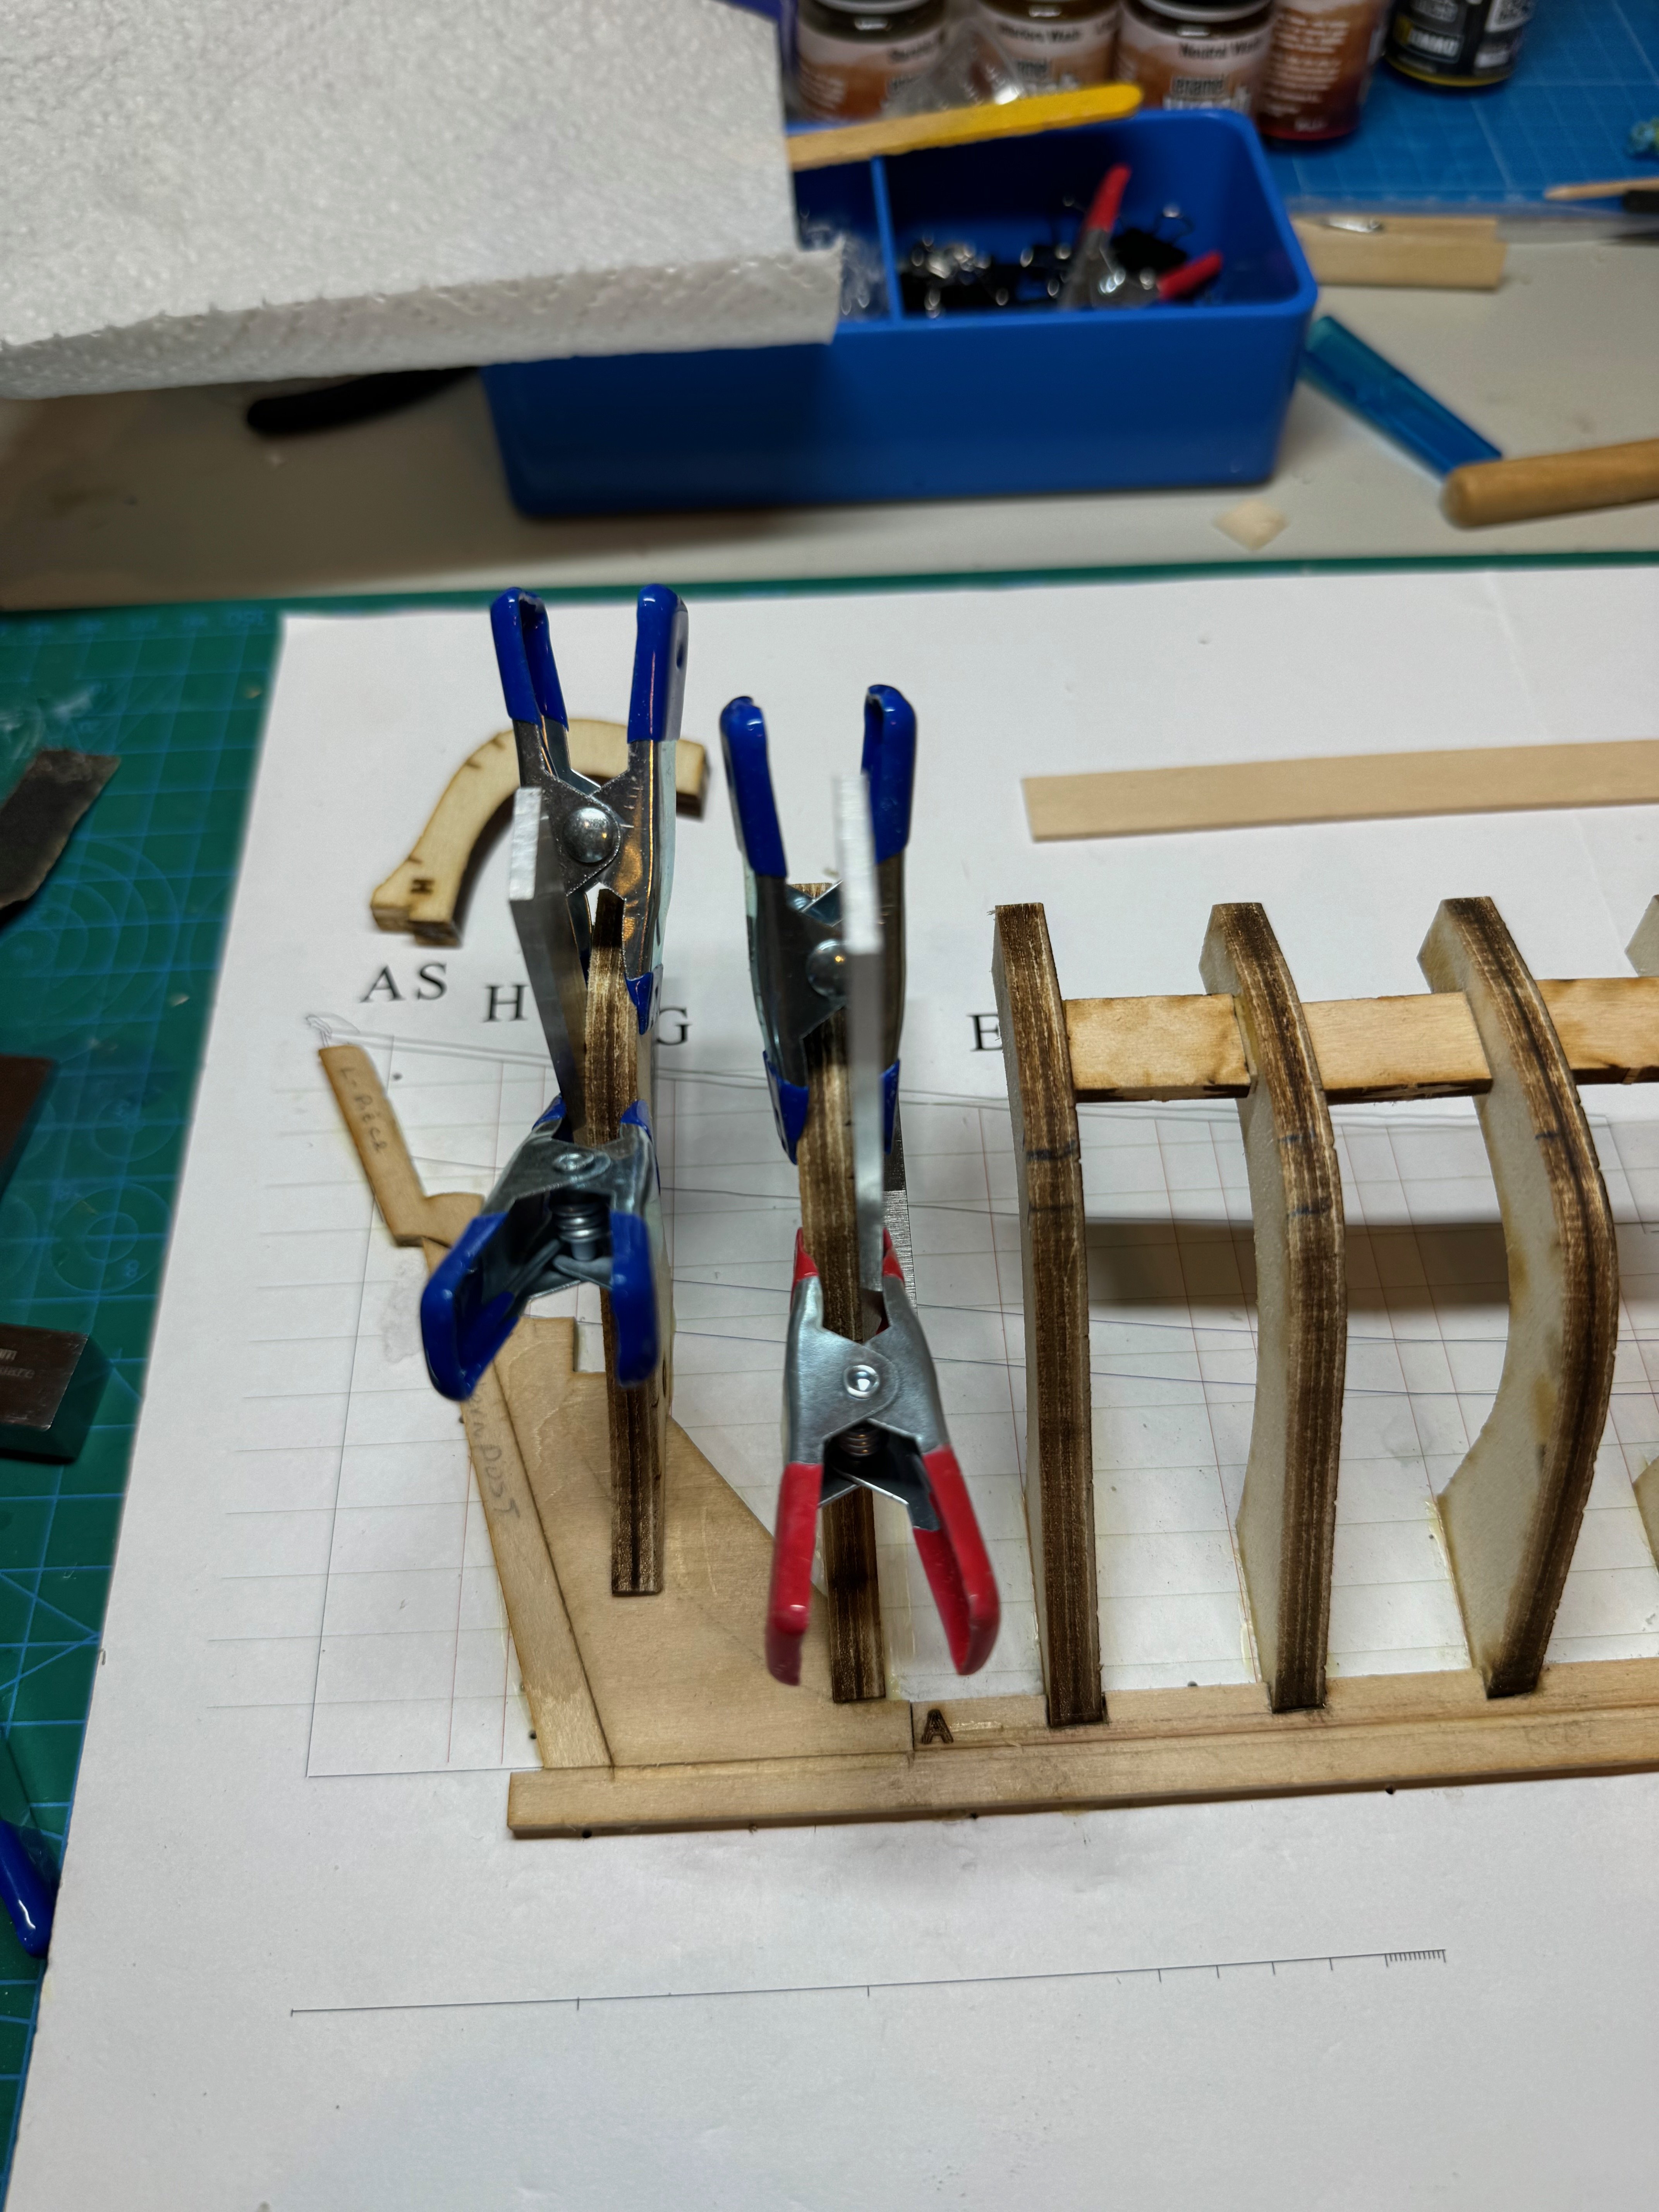
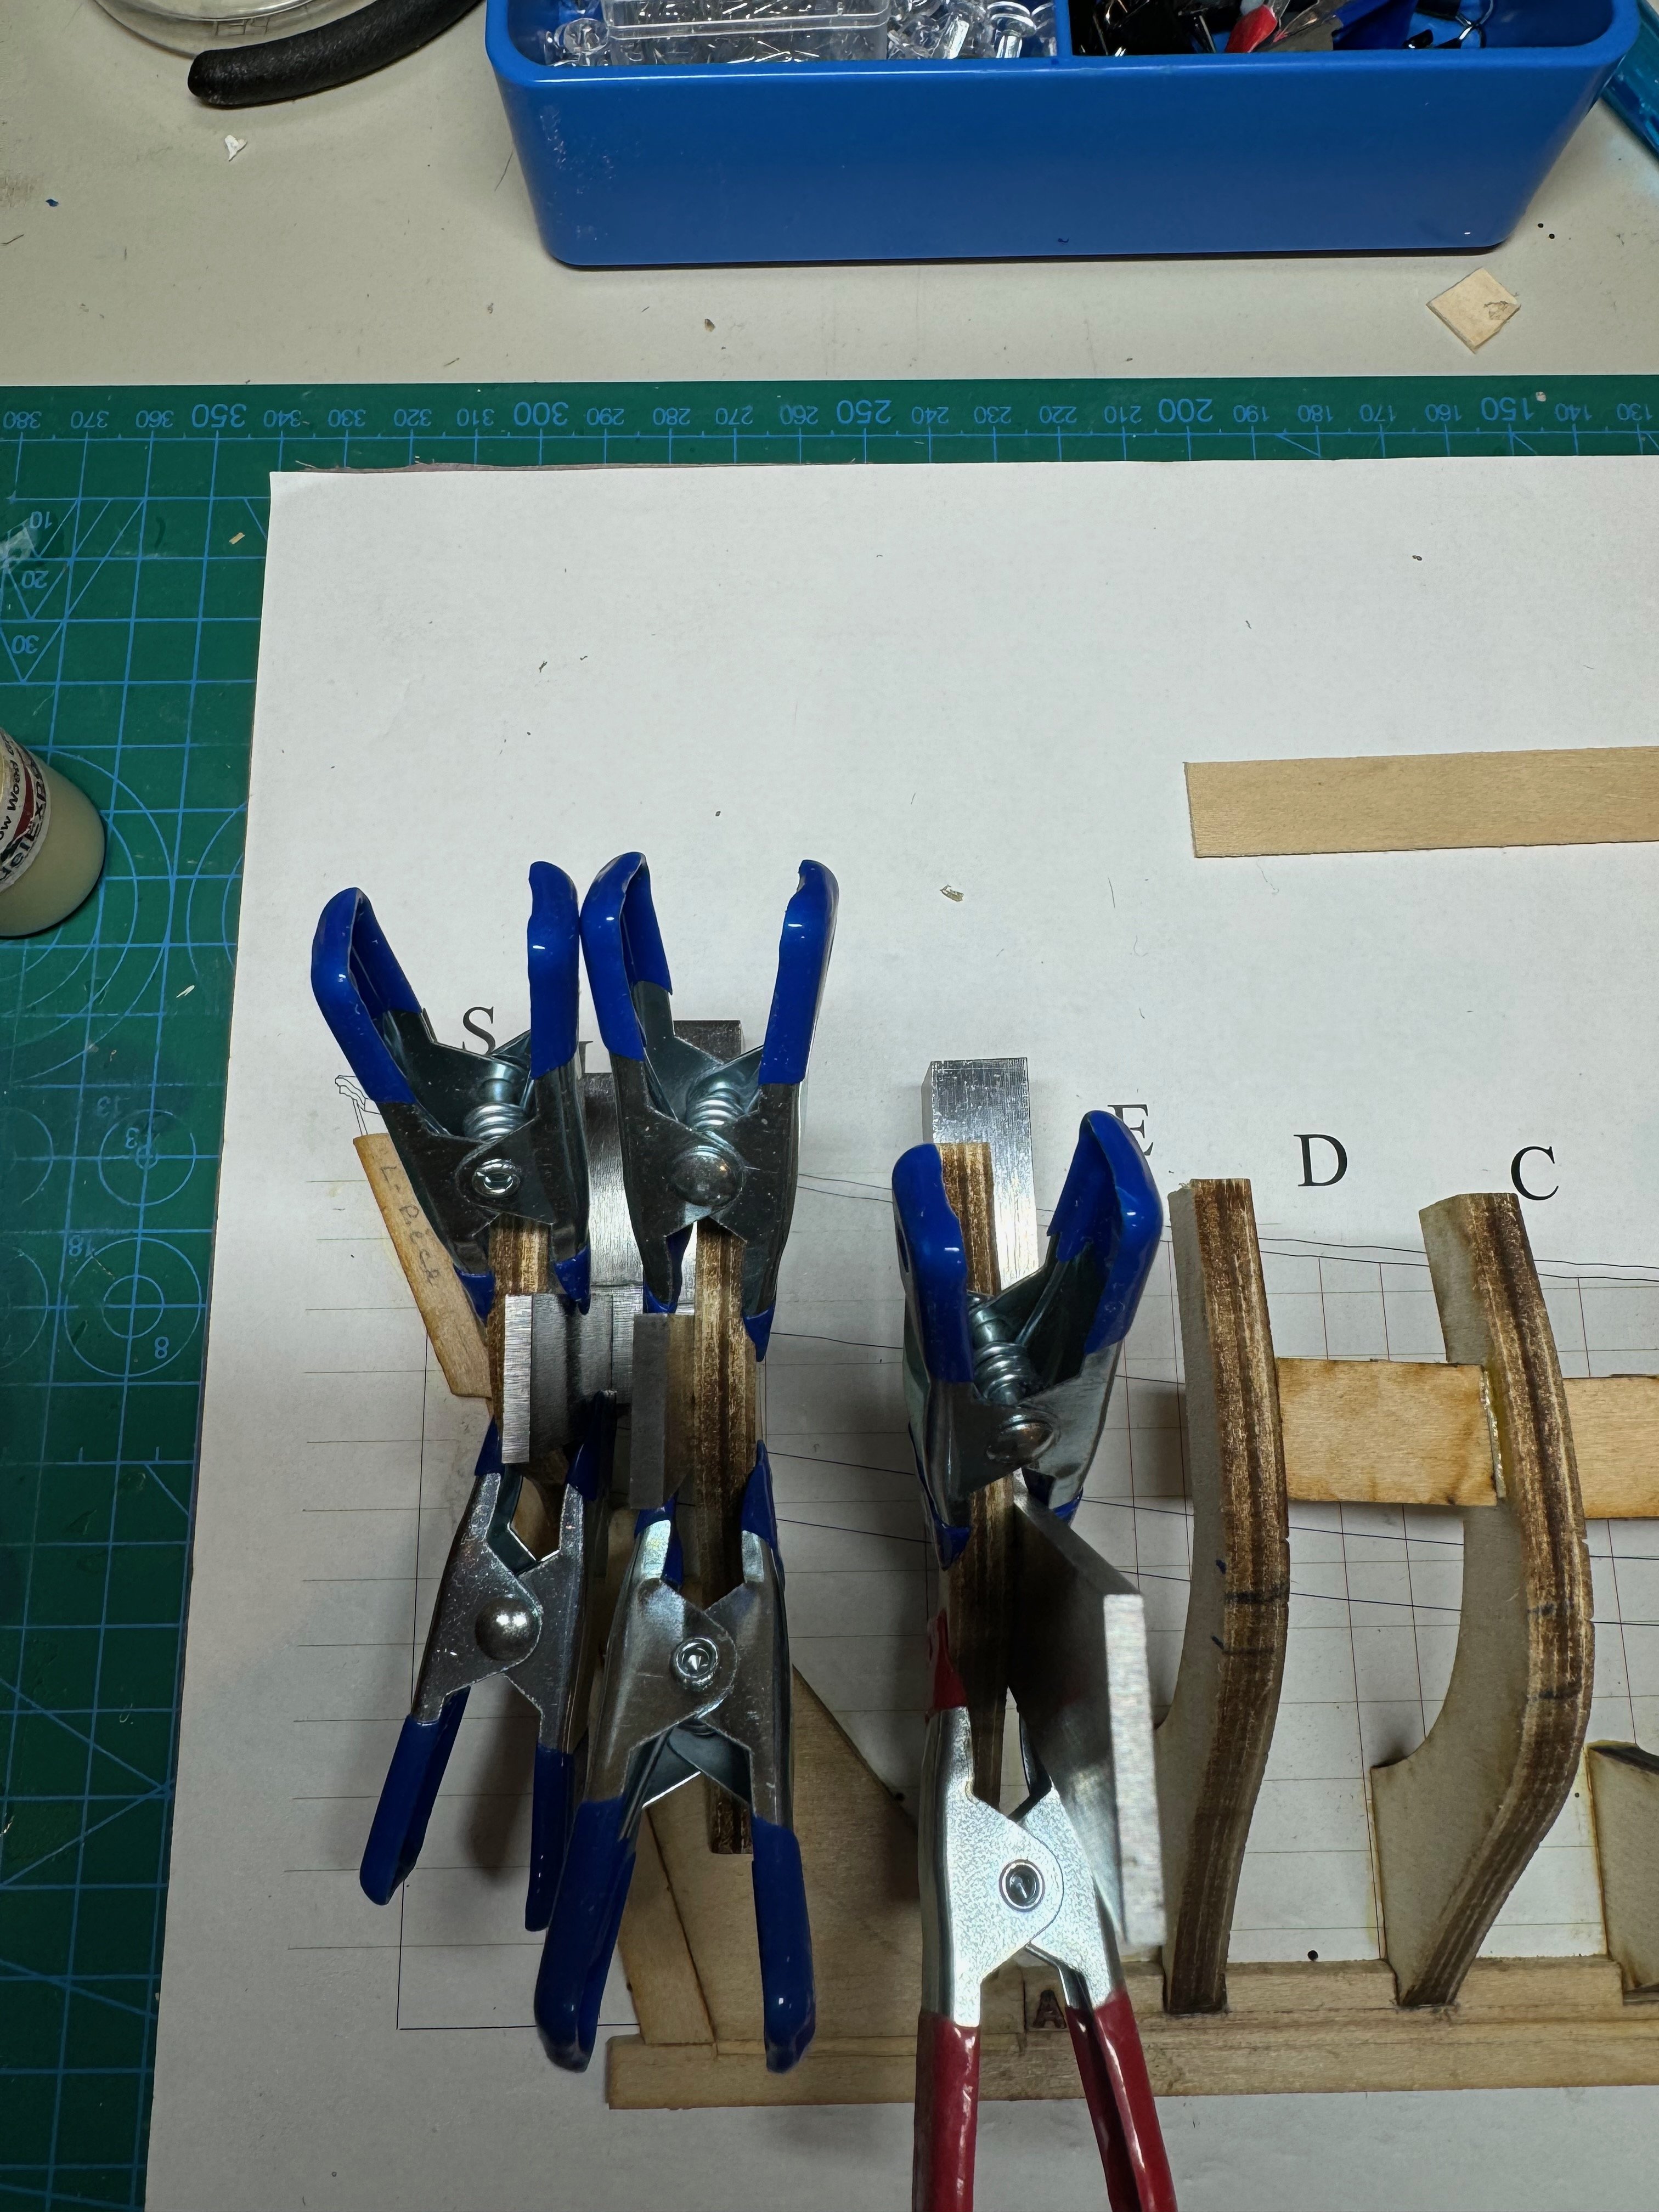
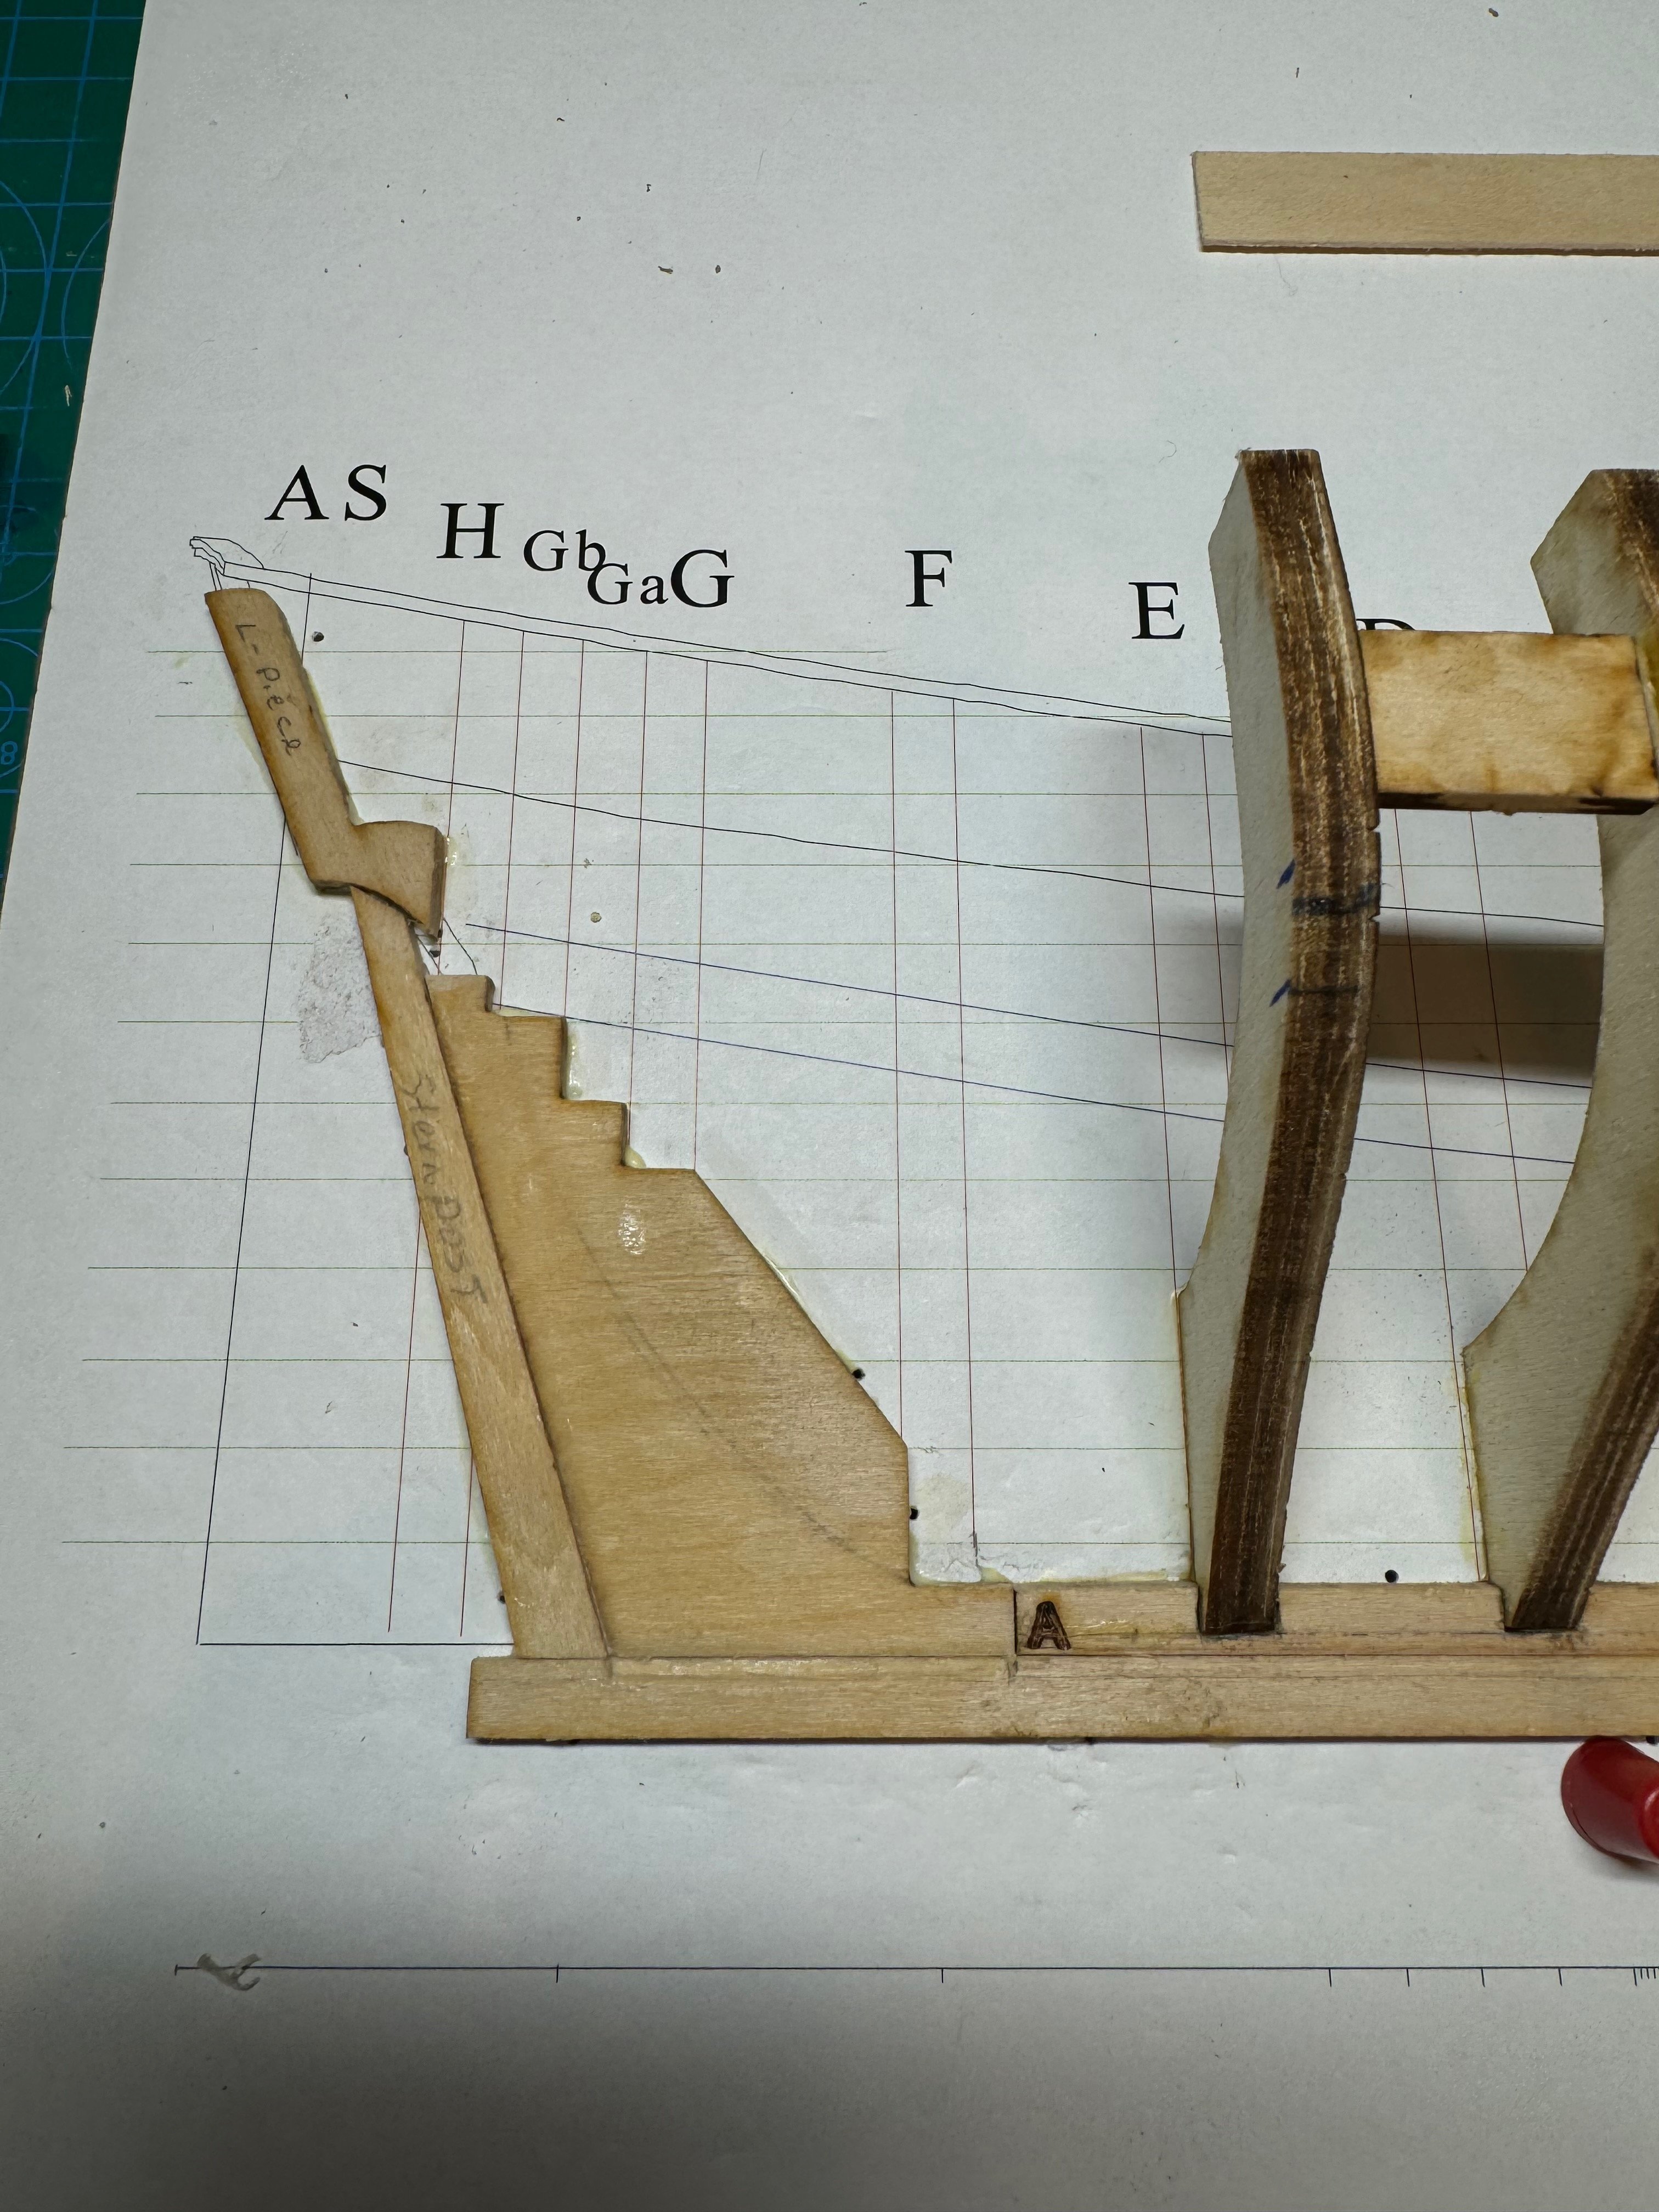
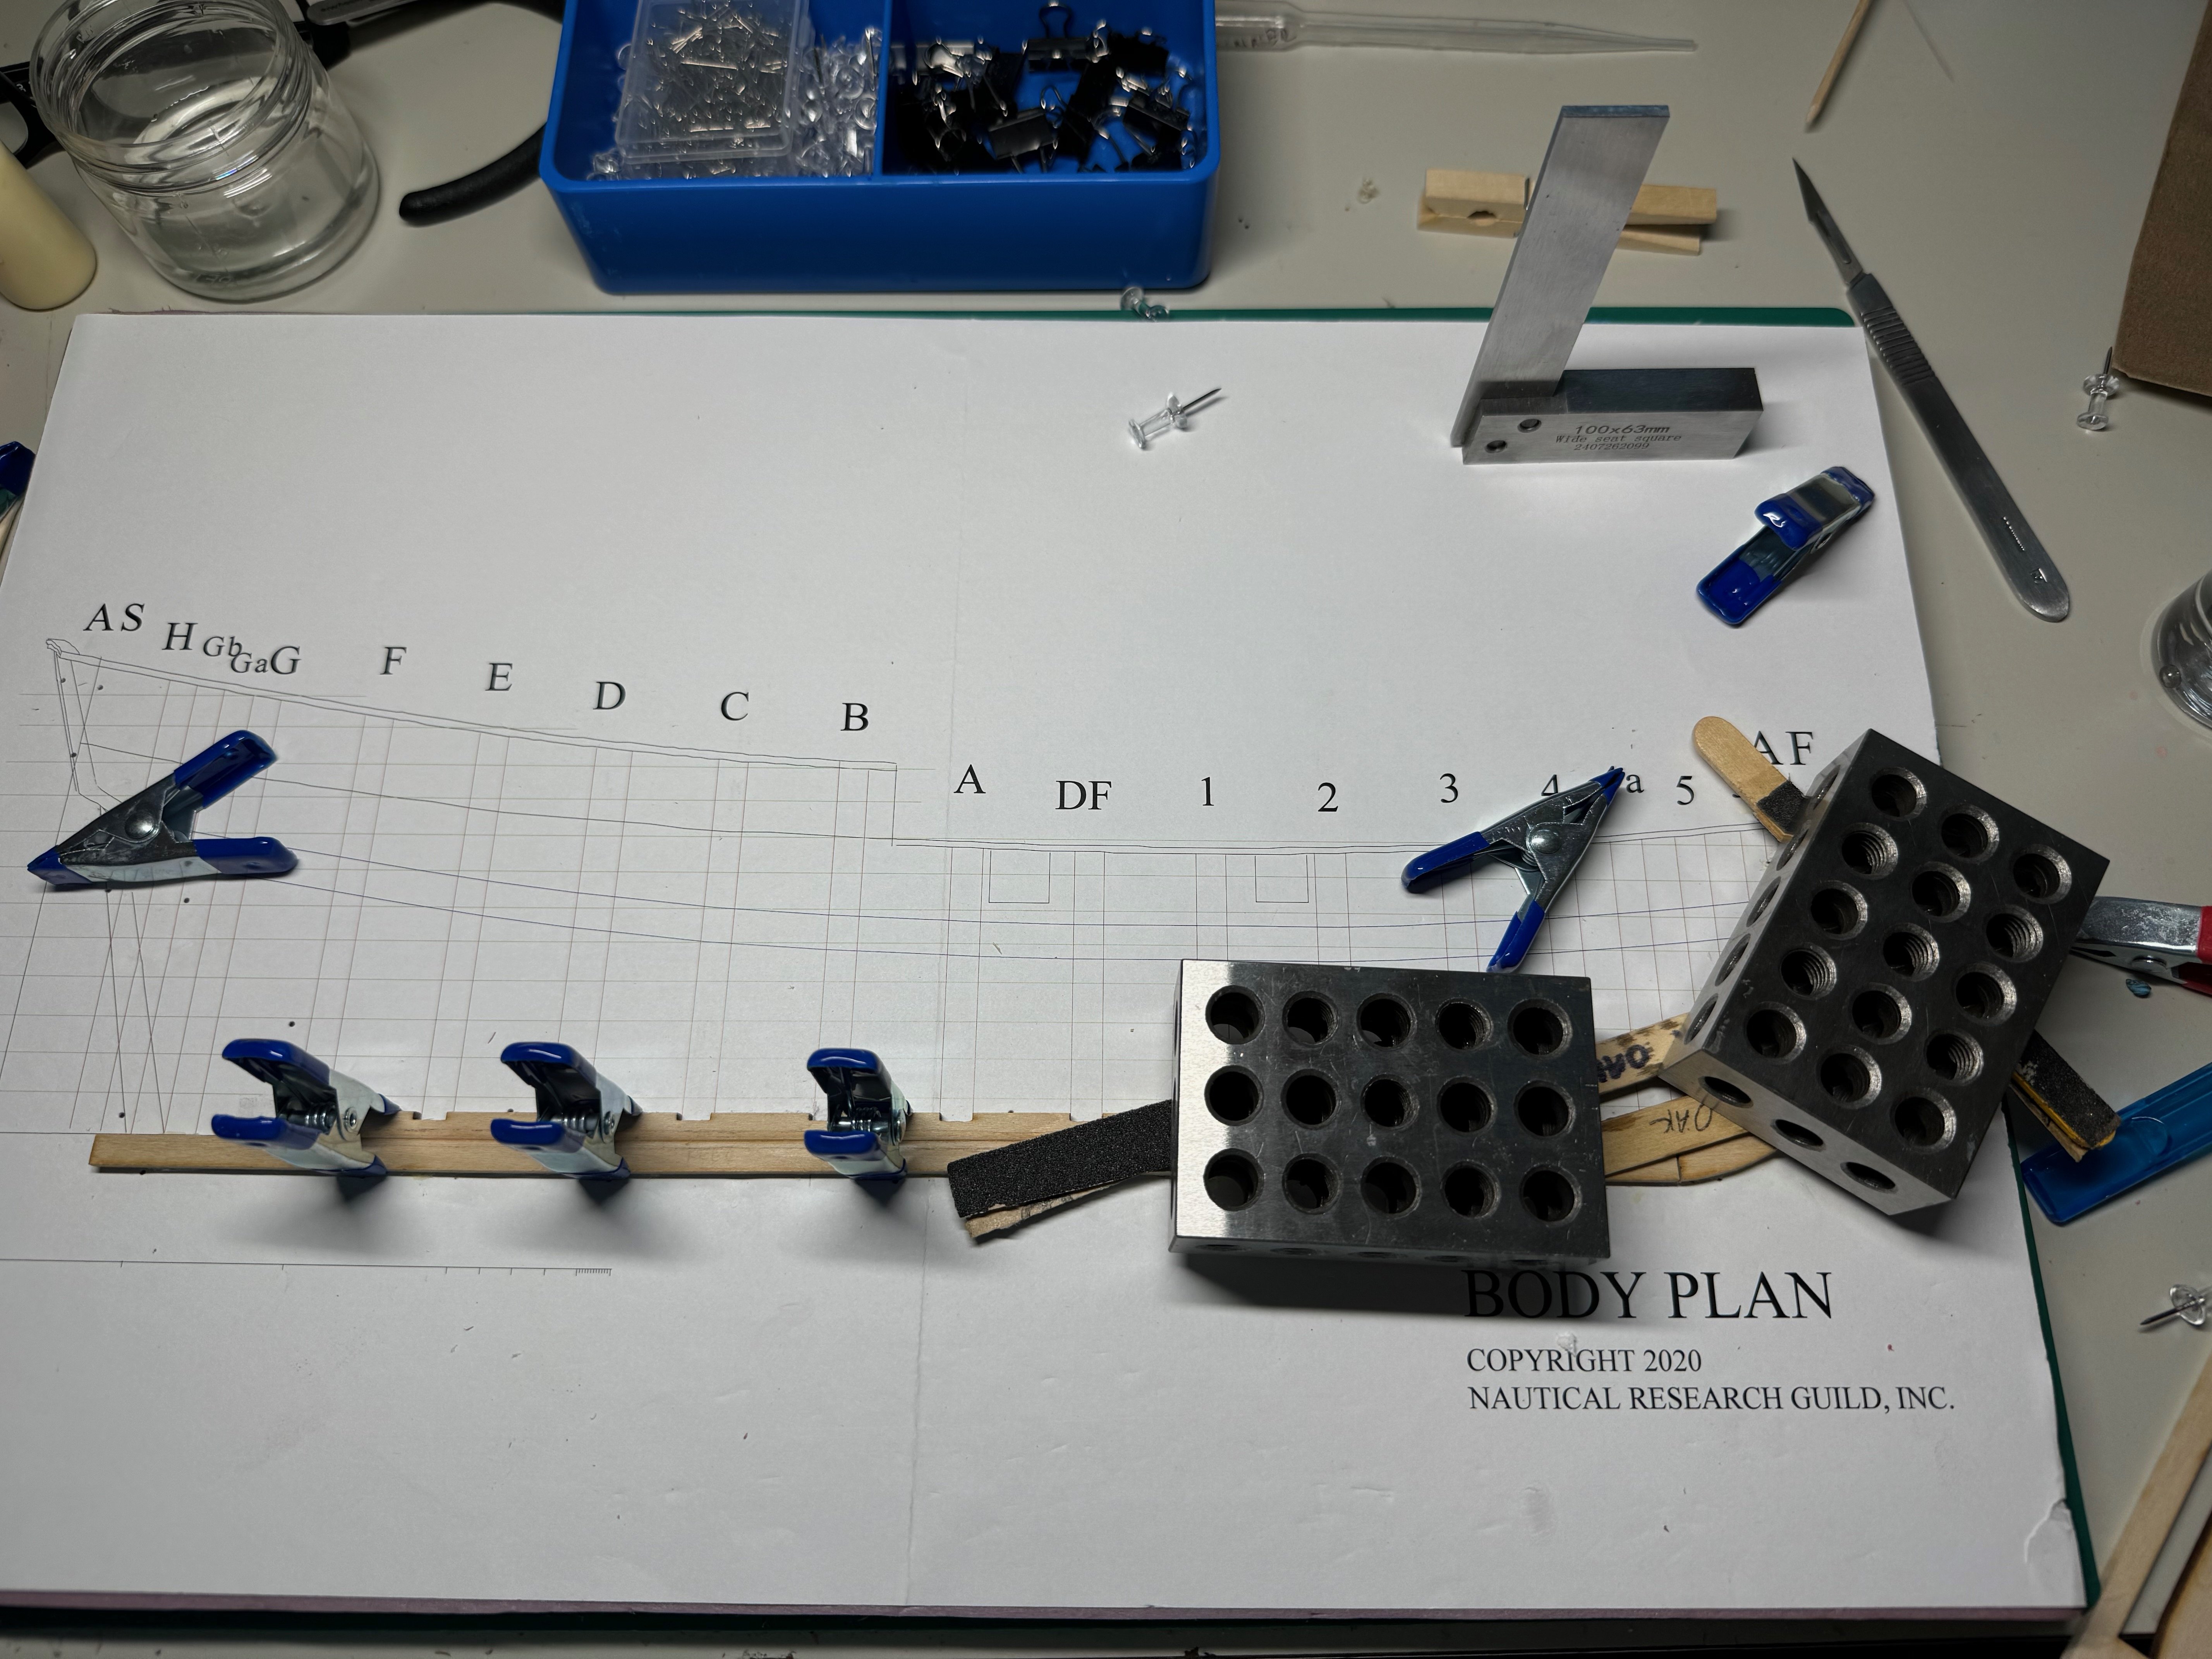
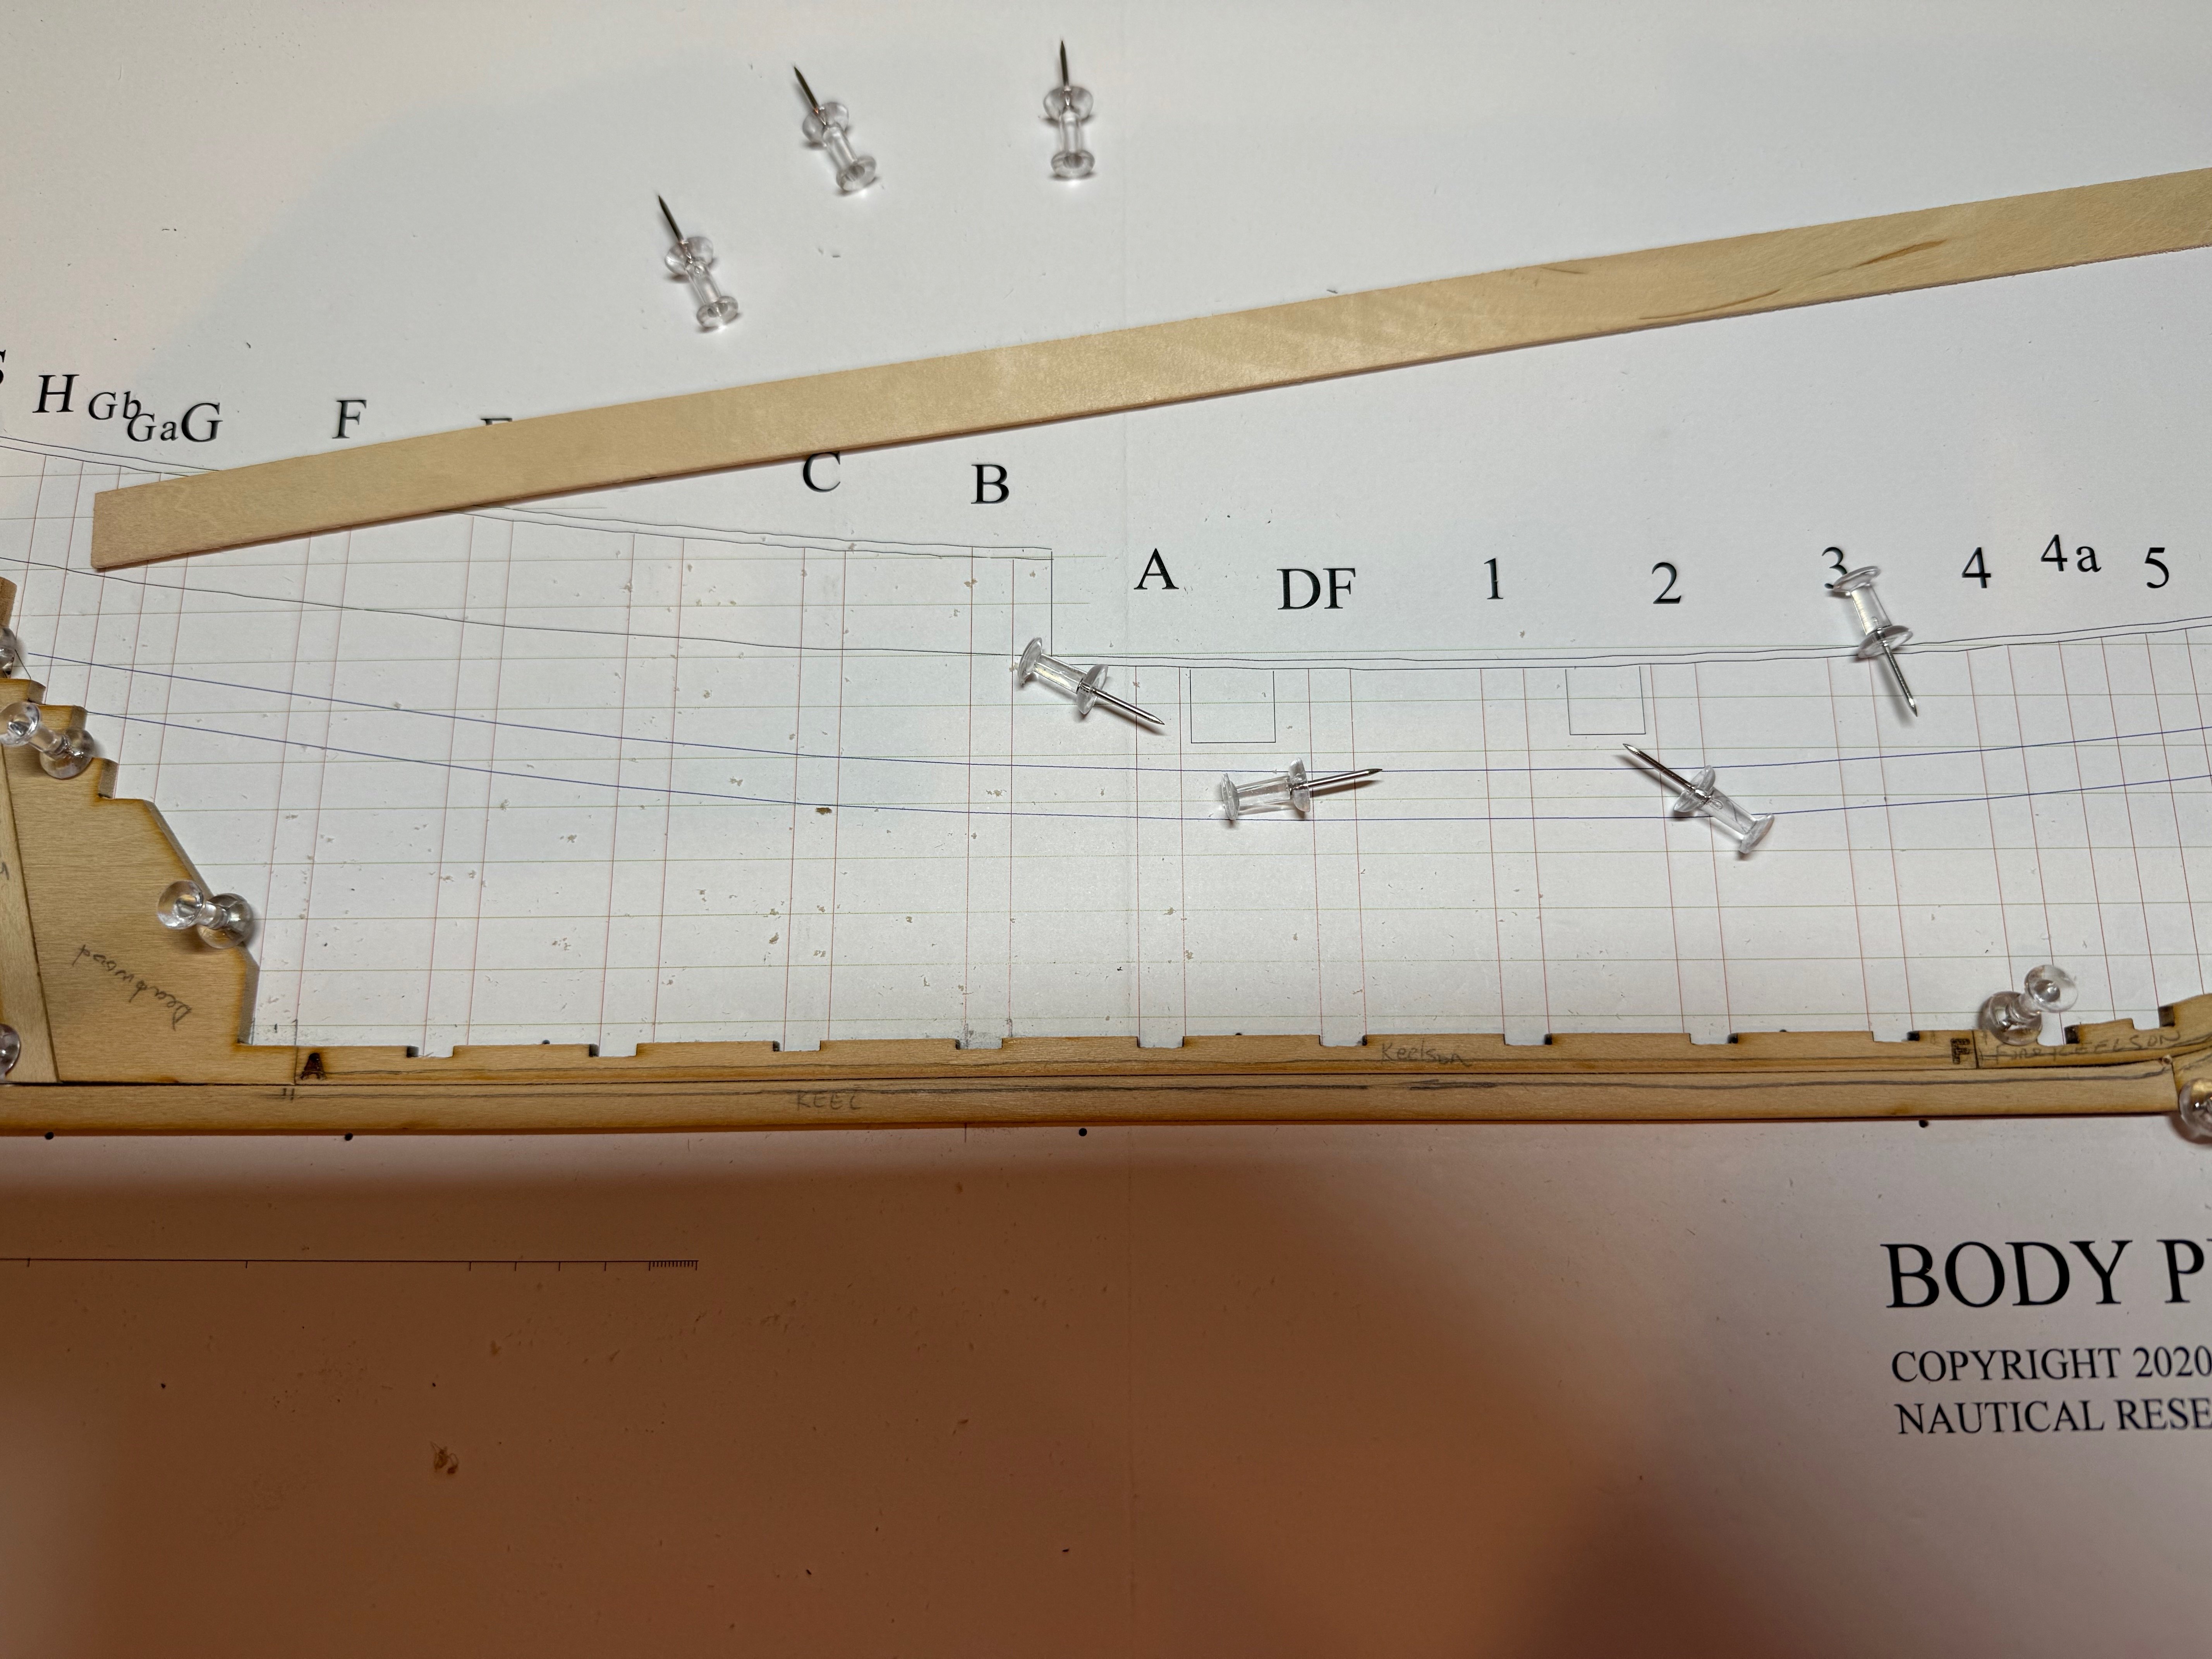
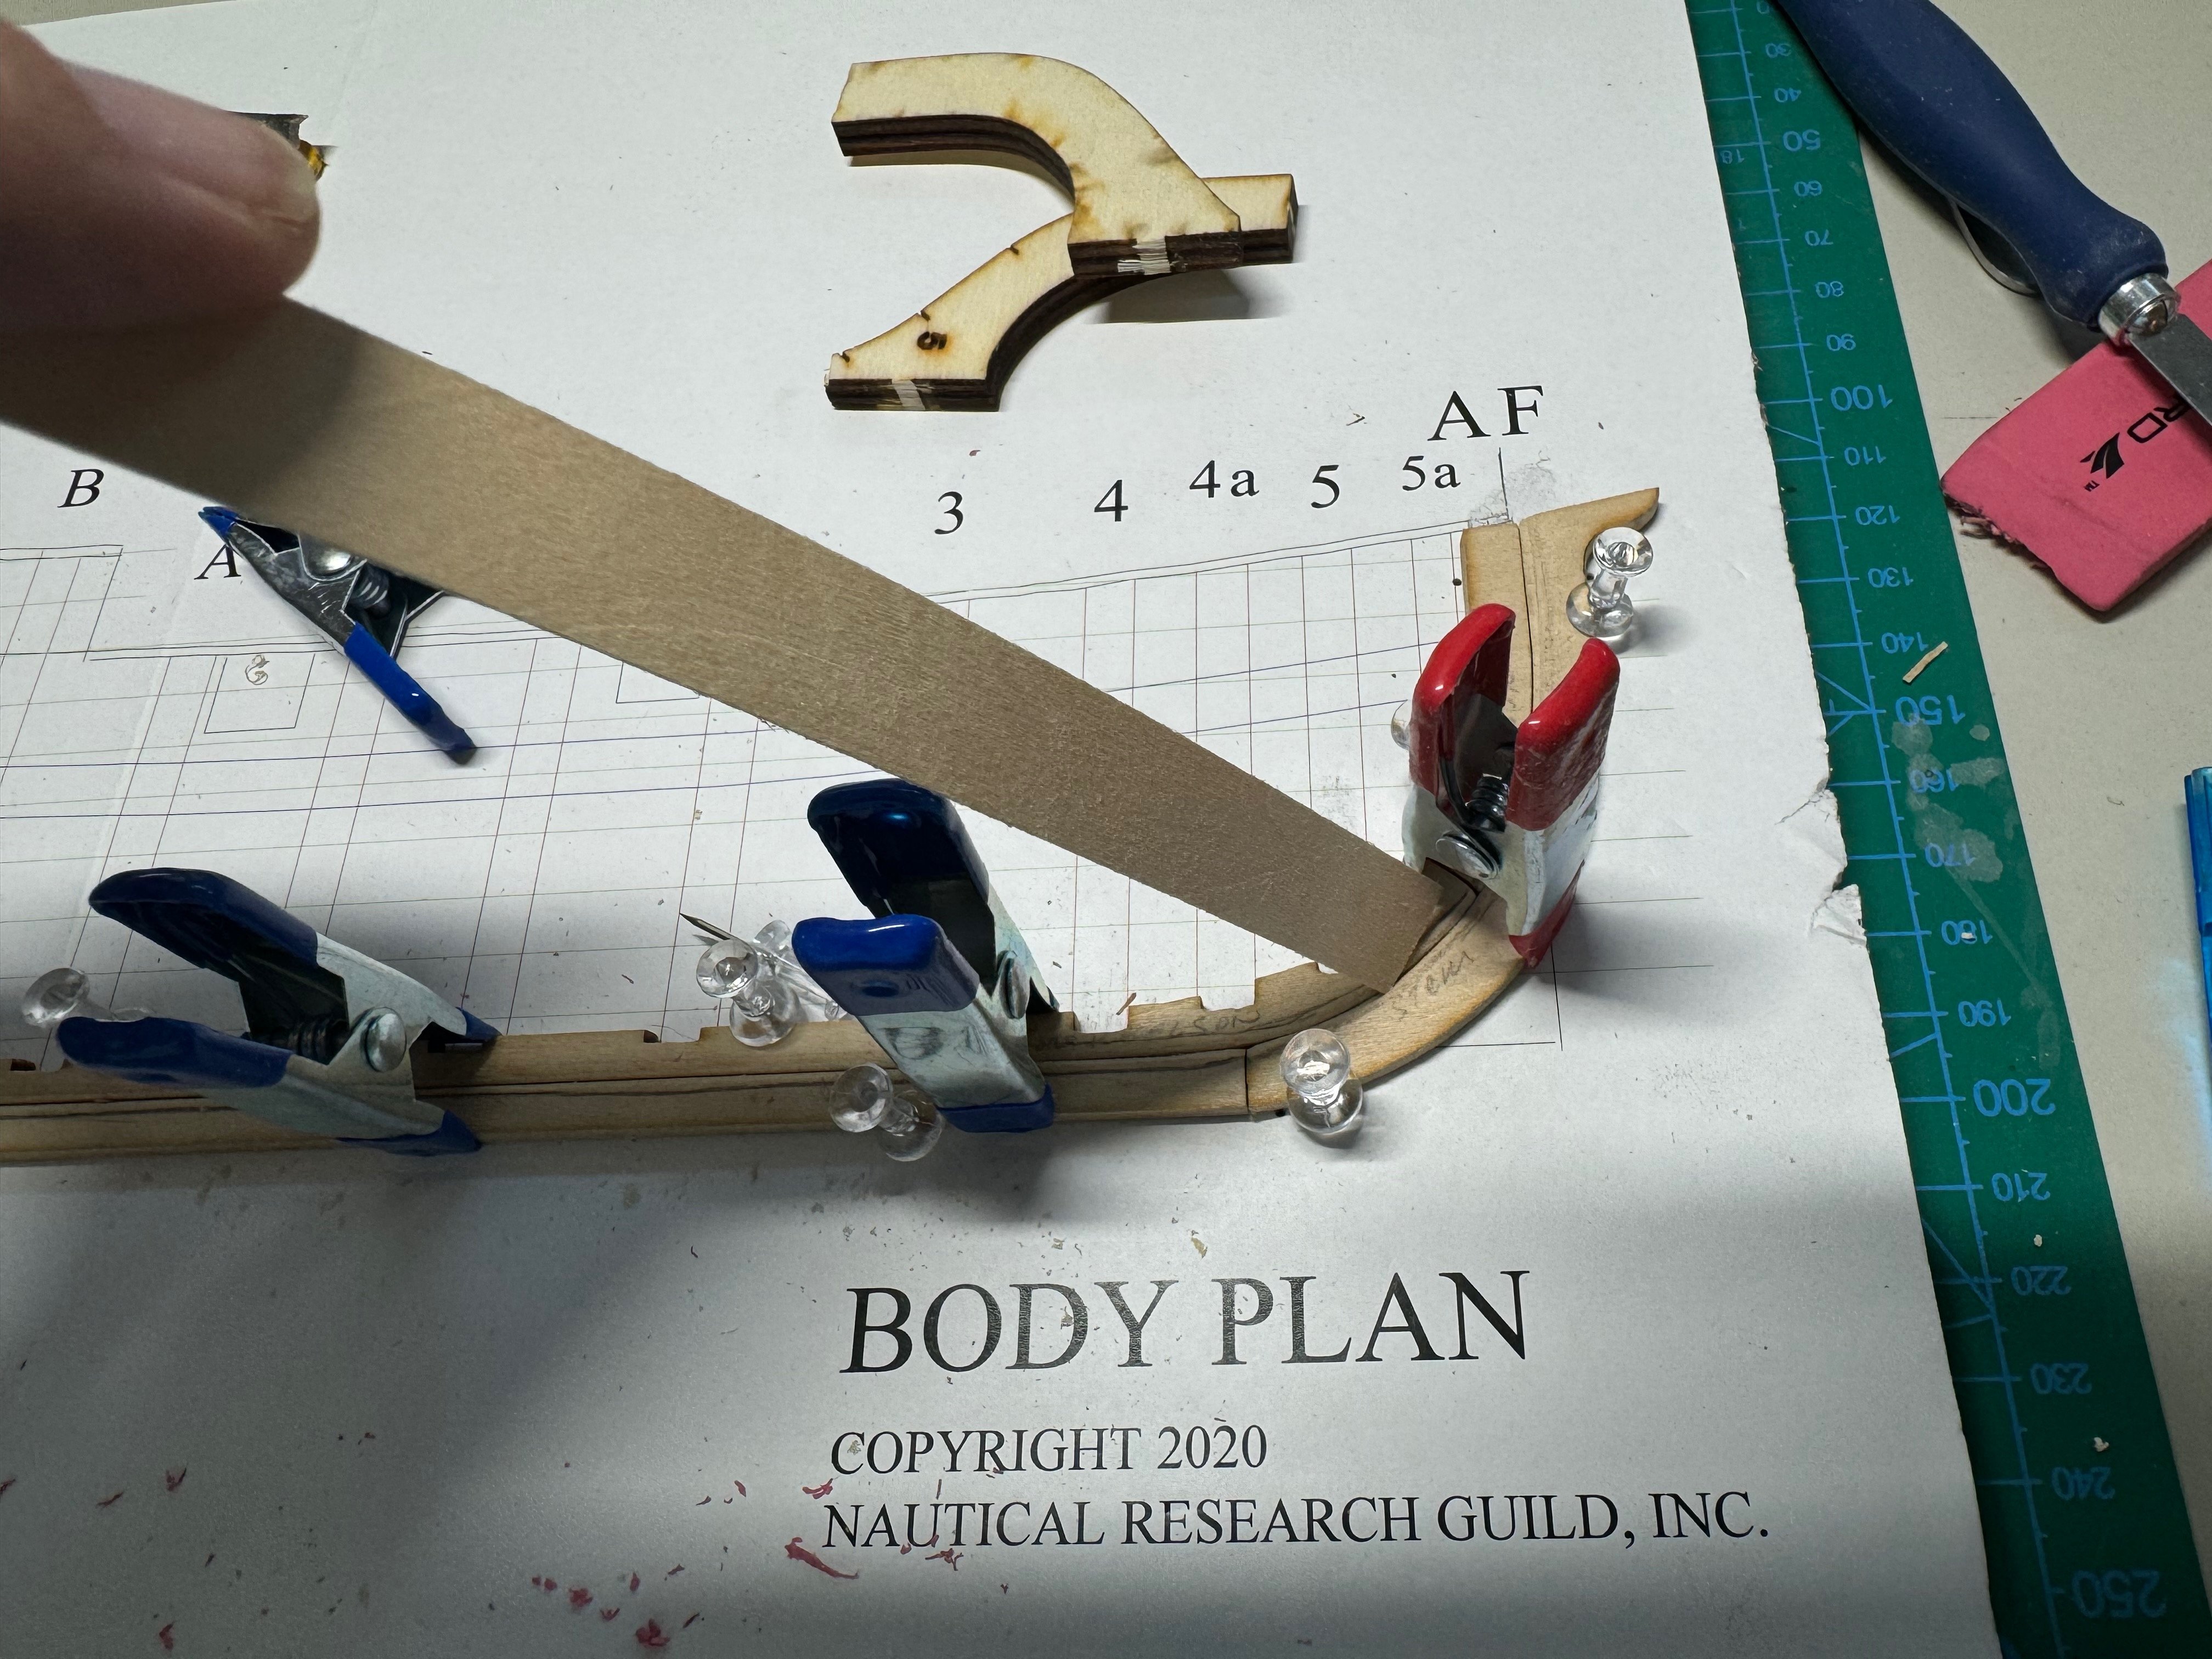
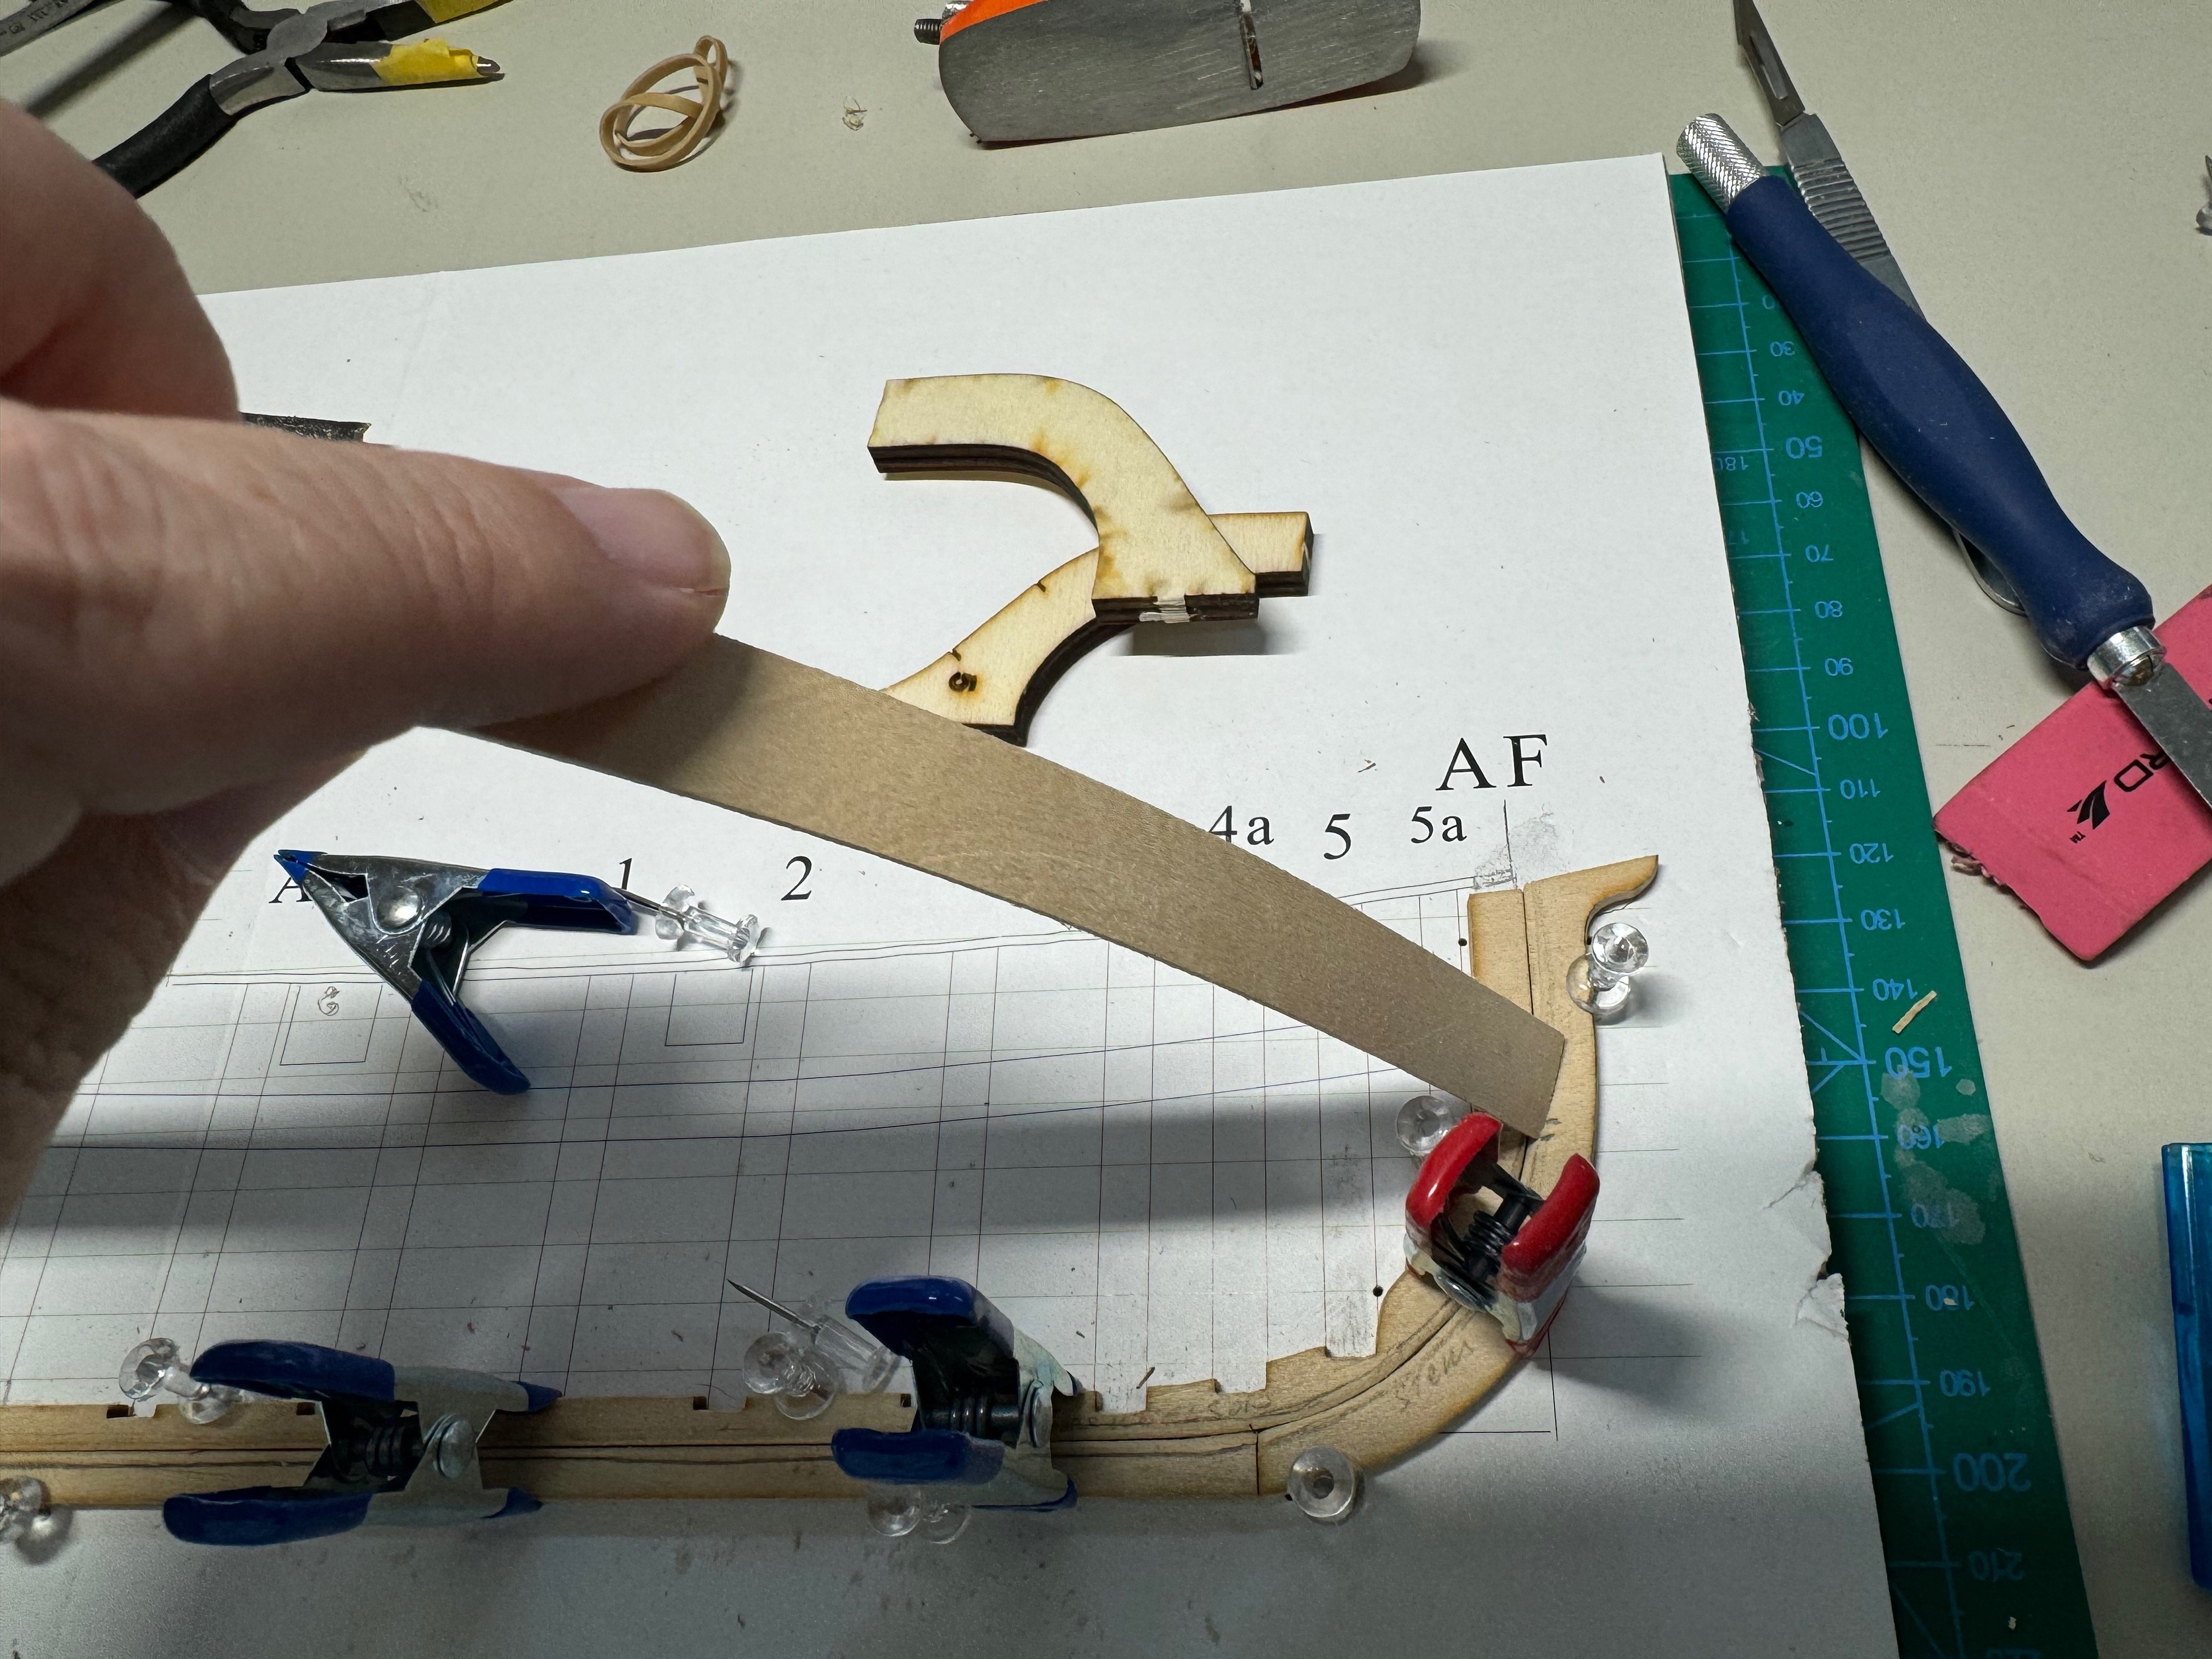
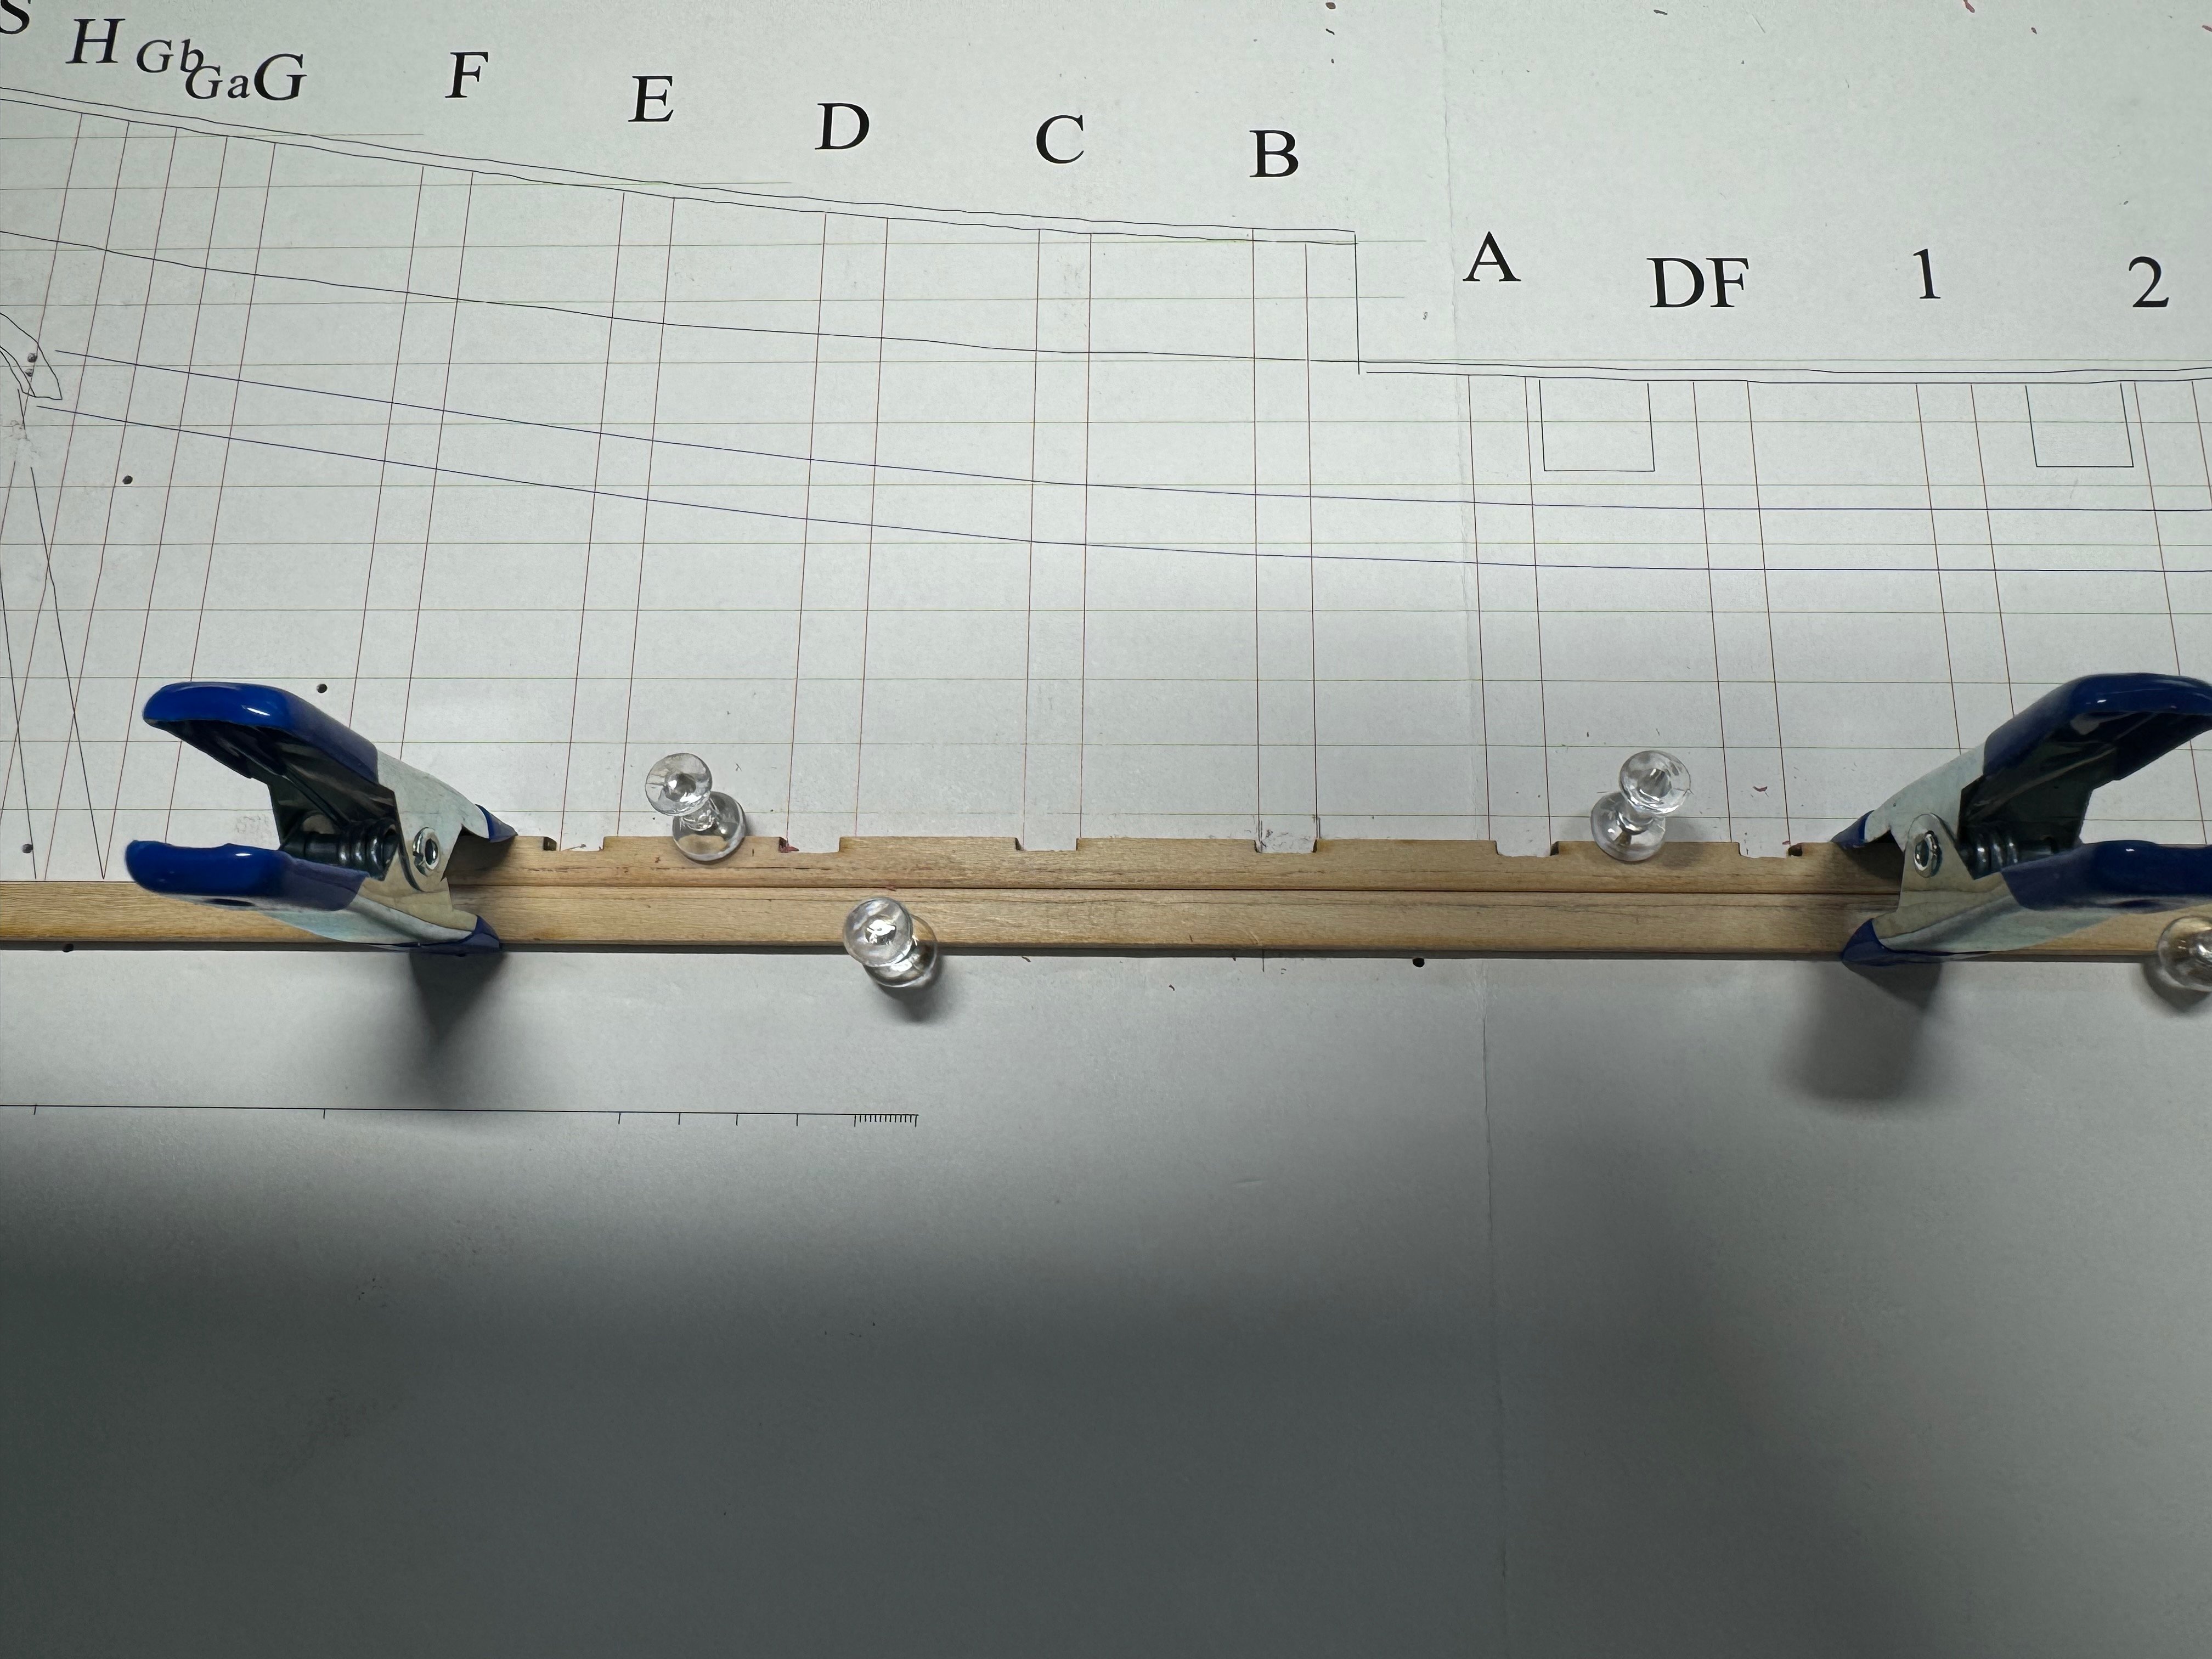
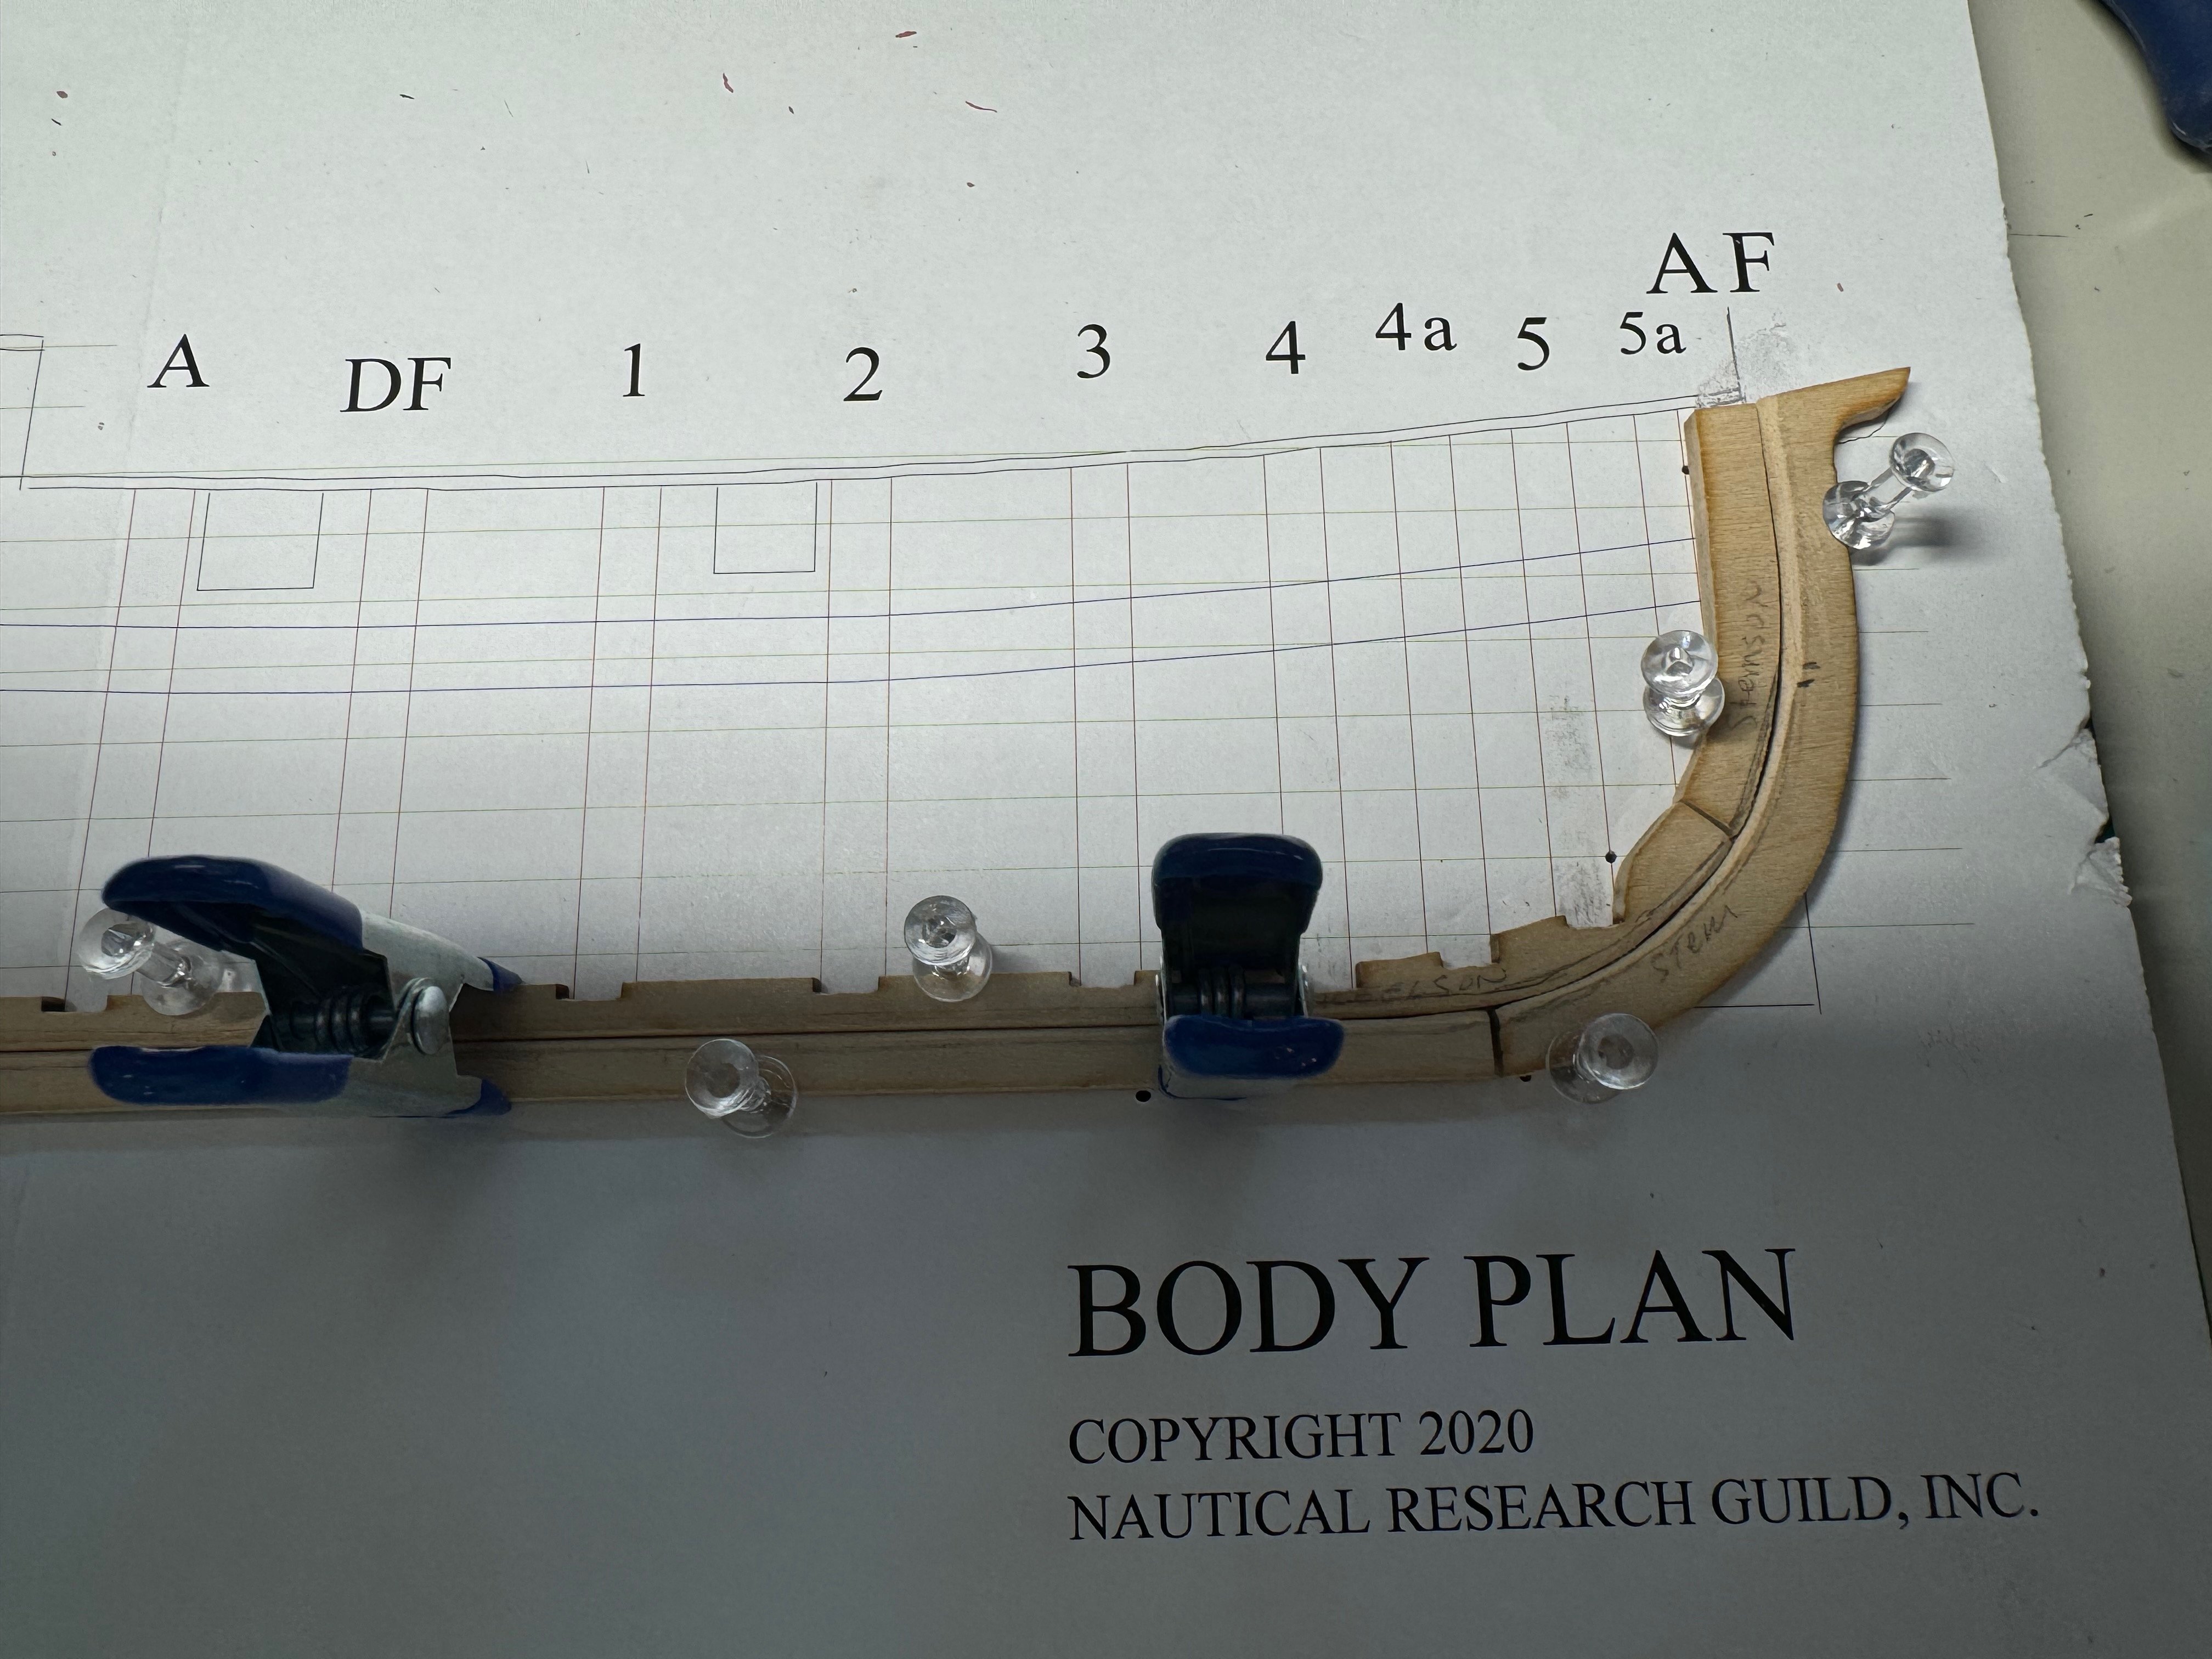
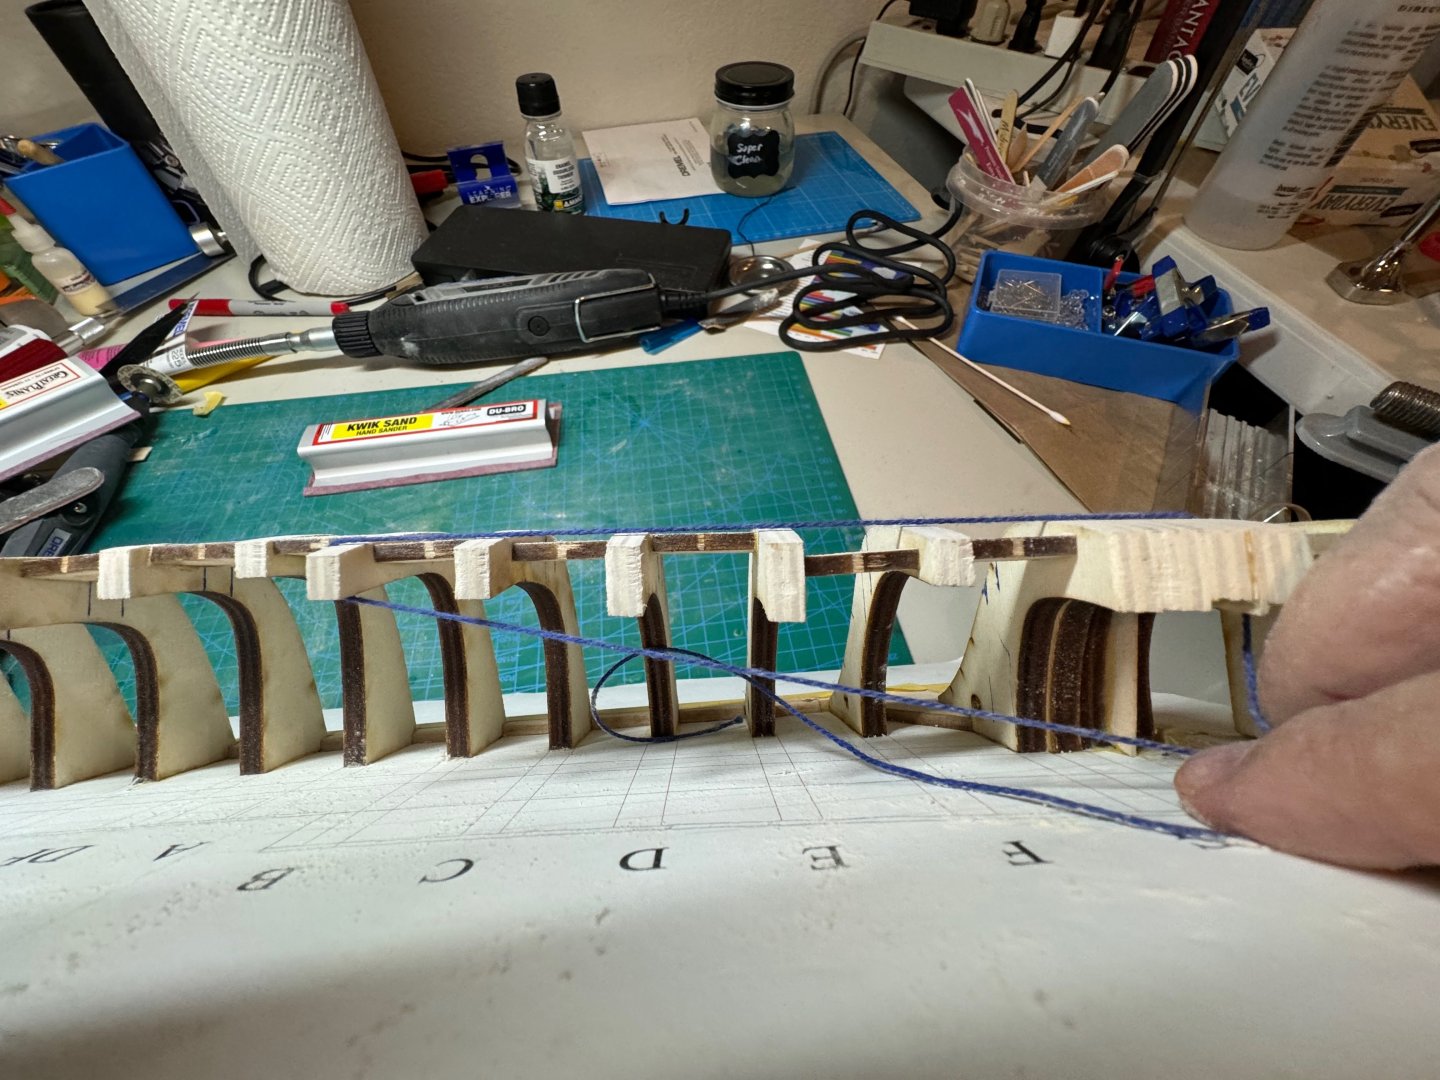
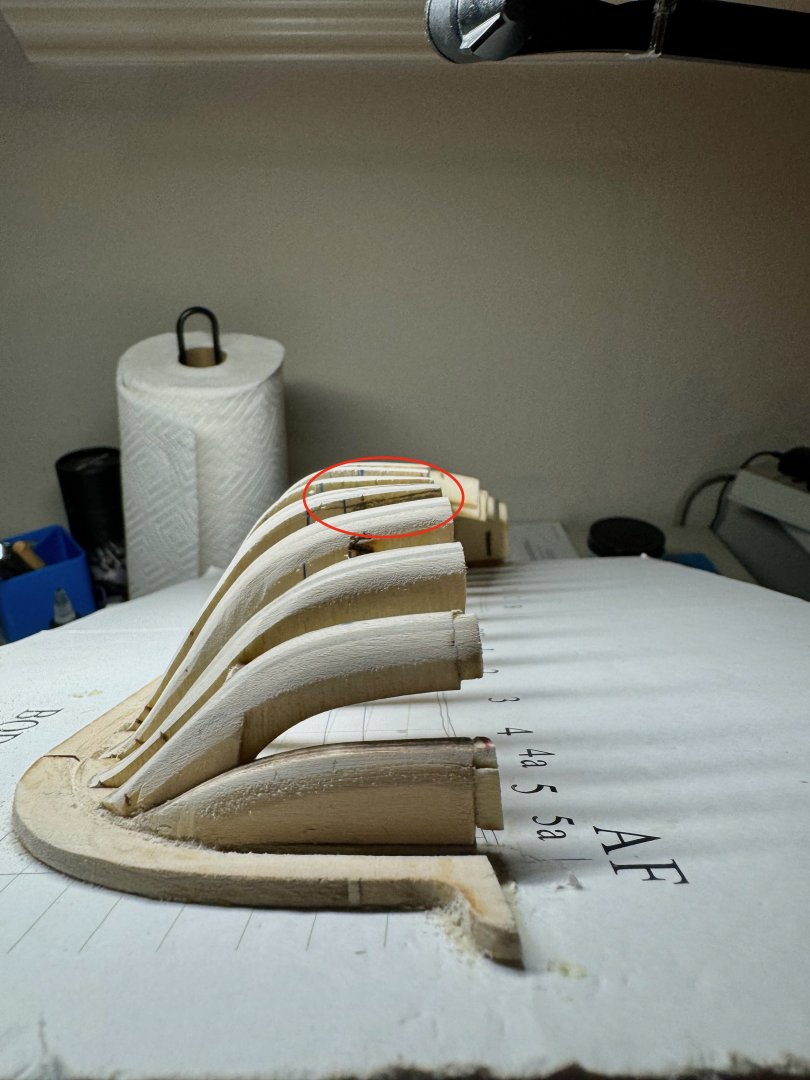
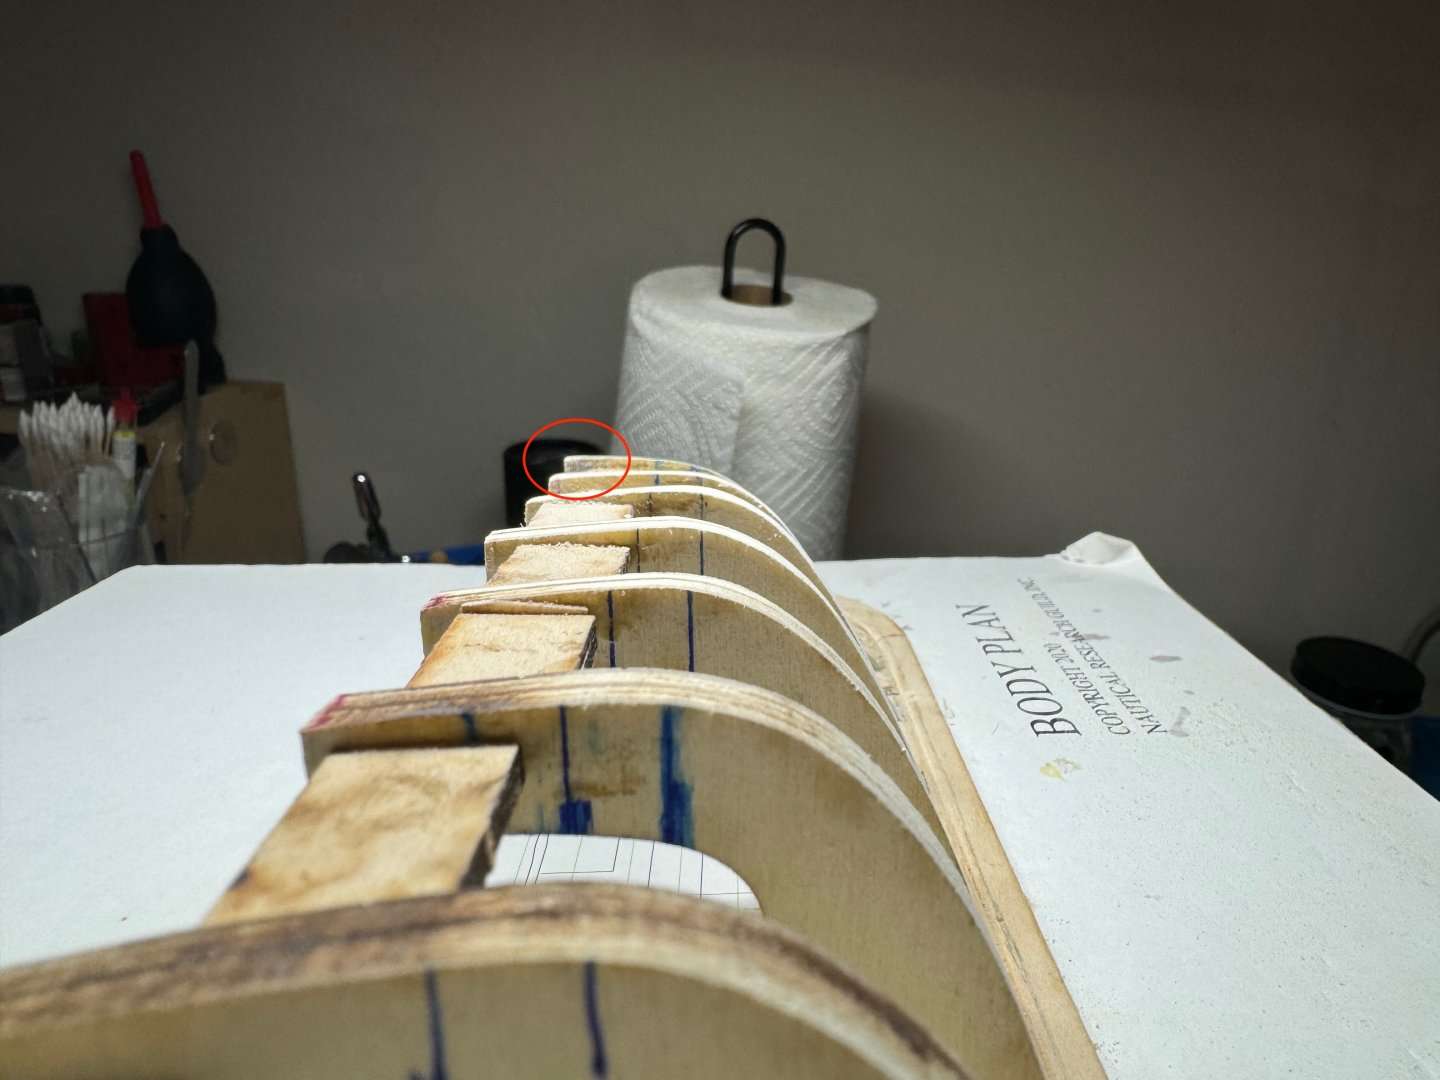
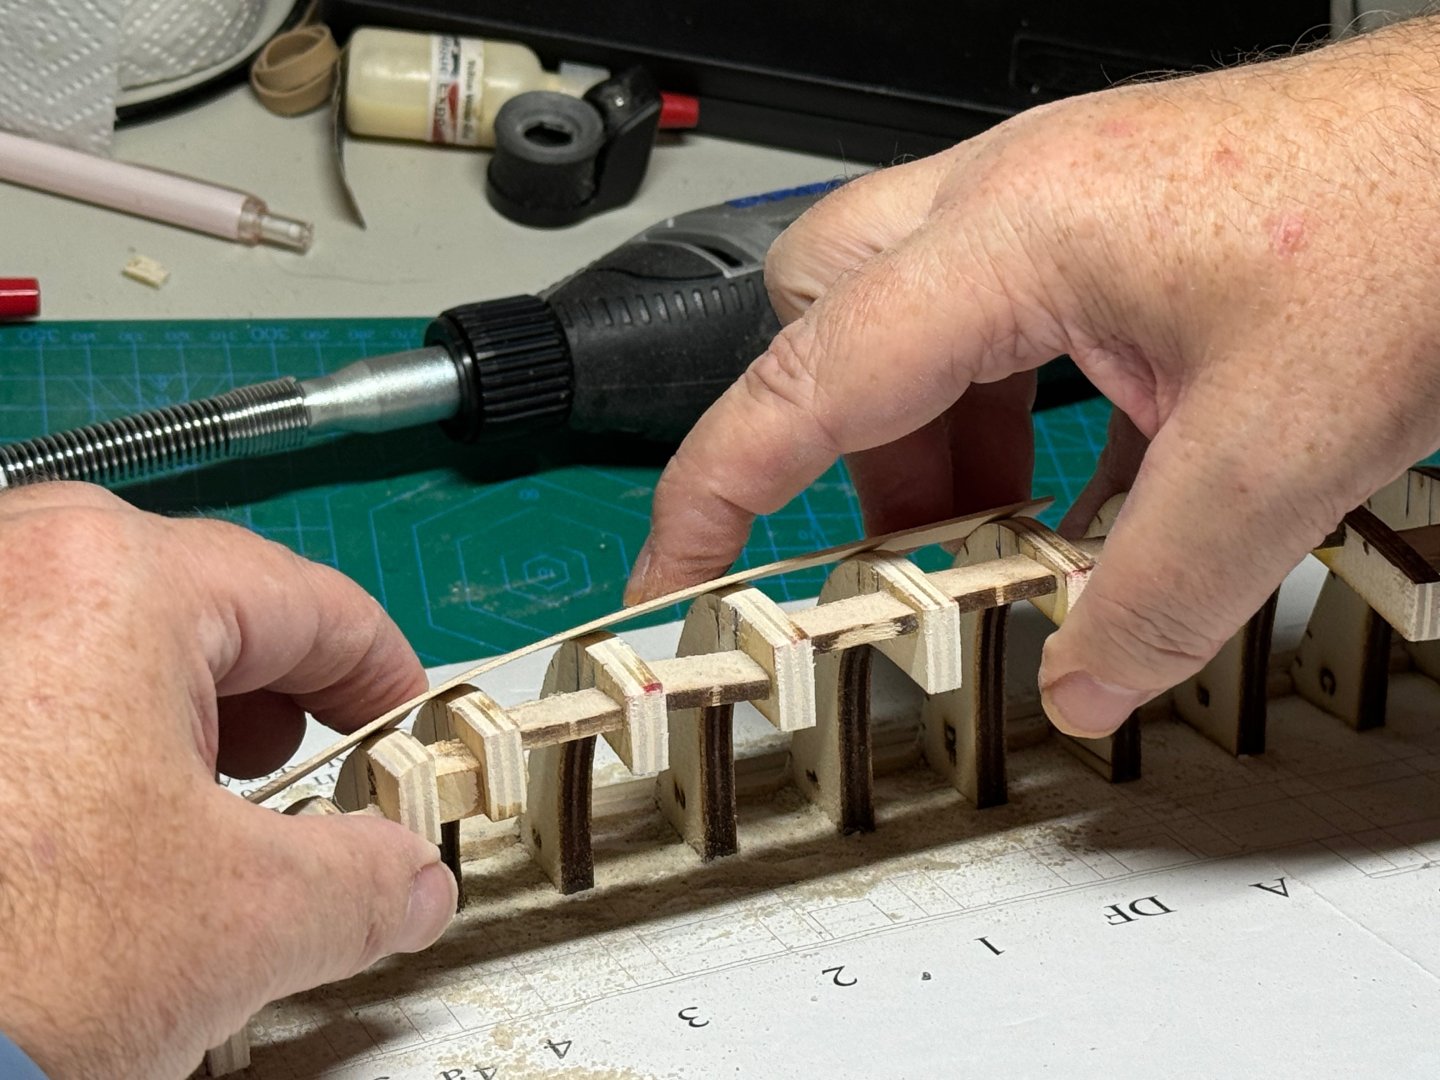
Good morning, I know it has been a while since I last posted. Real life has gotten in the way. By November 1, I had completed the following: I started with finishing adding the supports and the transom. Before adding it, I realized I glued the L-Piece onto the board incorrectly, so I had to pull out the isopropyl out and fix its positioning. I did use a square to line up the transom. For the next few days, I spent some time getting the top line correct. I used chart tape to help visualize the curve. From there I use a square to transfer the line to the bulwarks. If you notice, I had to add a shim on 5a and AF. This is because I deepened those connections. Overall I am happy with the line. Last week I broke down and purchased a Dremel. Thus last night, I finally got back to the project, and I started with shaping the top line. I purposely did not go all the way to my marks, so that I would have some room if necessary after planking to get the curves correct. Here is the stern section. It will require some more sanding, as there is still a high spot. The bow also is looking not bad. Here is a view of the sanded top line. Finally I started to fair the bulwarks from DF -> AF. The curve is starting to take shape and I am getting some good contact with the plank. Frame 4A is still not correct. I may need to add a filler to fix the line a bit. Also when I tested the fit along the top line i noticed I had a gap as frame 4 is causing a high spot. Overall the fairing is going well. I still need some more work on the bow half of the hull, but I decided to walk away last night as I do not want to rush things. Though I did notice that my bow rabbet is a little shallow so I will deepen it too. Cheers


-
@palmerit Very nice, that is what I did too. I just now to get my new Dremel broken in and sand down the top line. I have some pictures to post to update my status laster today. I also marked my whale lines early on the side of the bulkheads to make it easier after fairing. Did you fair with your Dremel or all by hand?
- 84 replies
-
- 3
-

-
- half hull planking project
- NRG
- (and 2 more)
-
how did you mark the top line? i am struggling getting mine to look right before sanding
- 84 replies
-
- 2
-
-
- half hull planking project
- NRG
- (and 2 more)
-
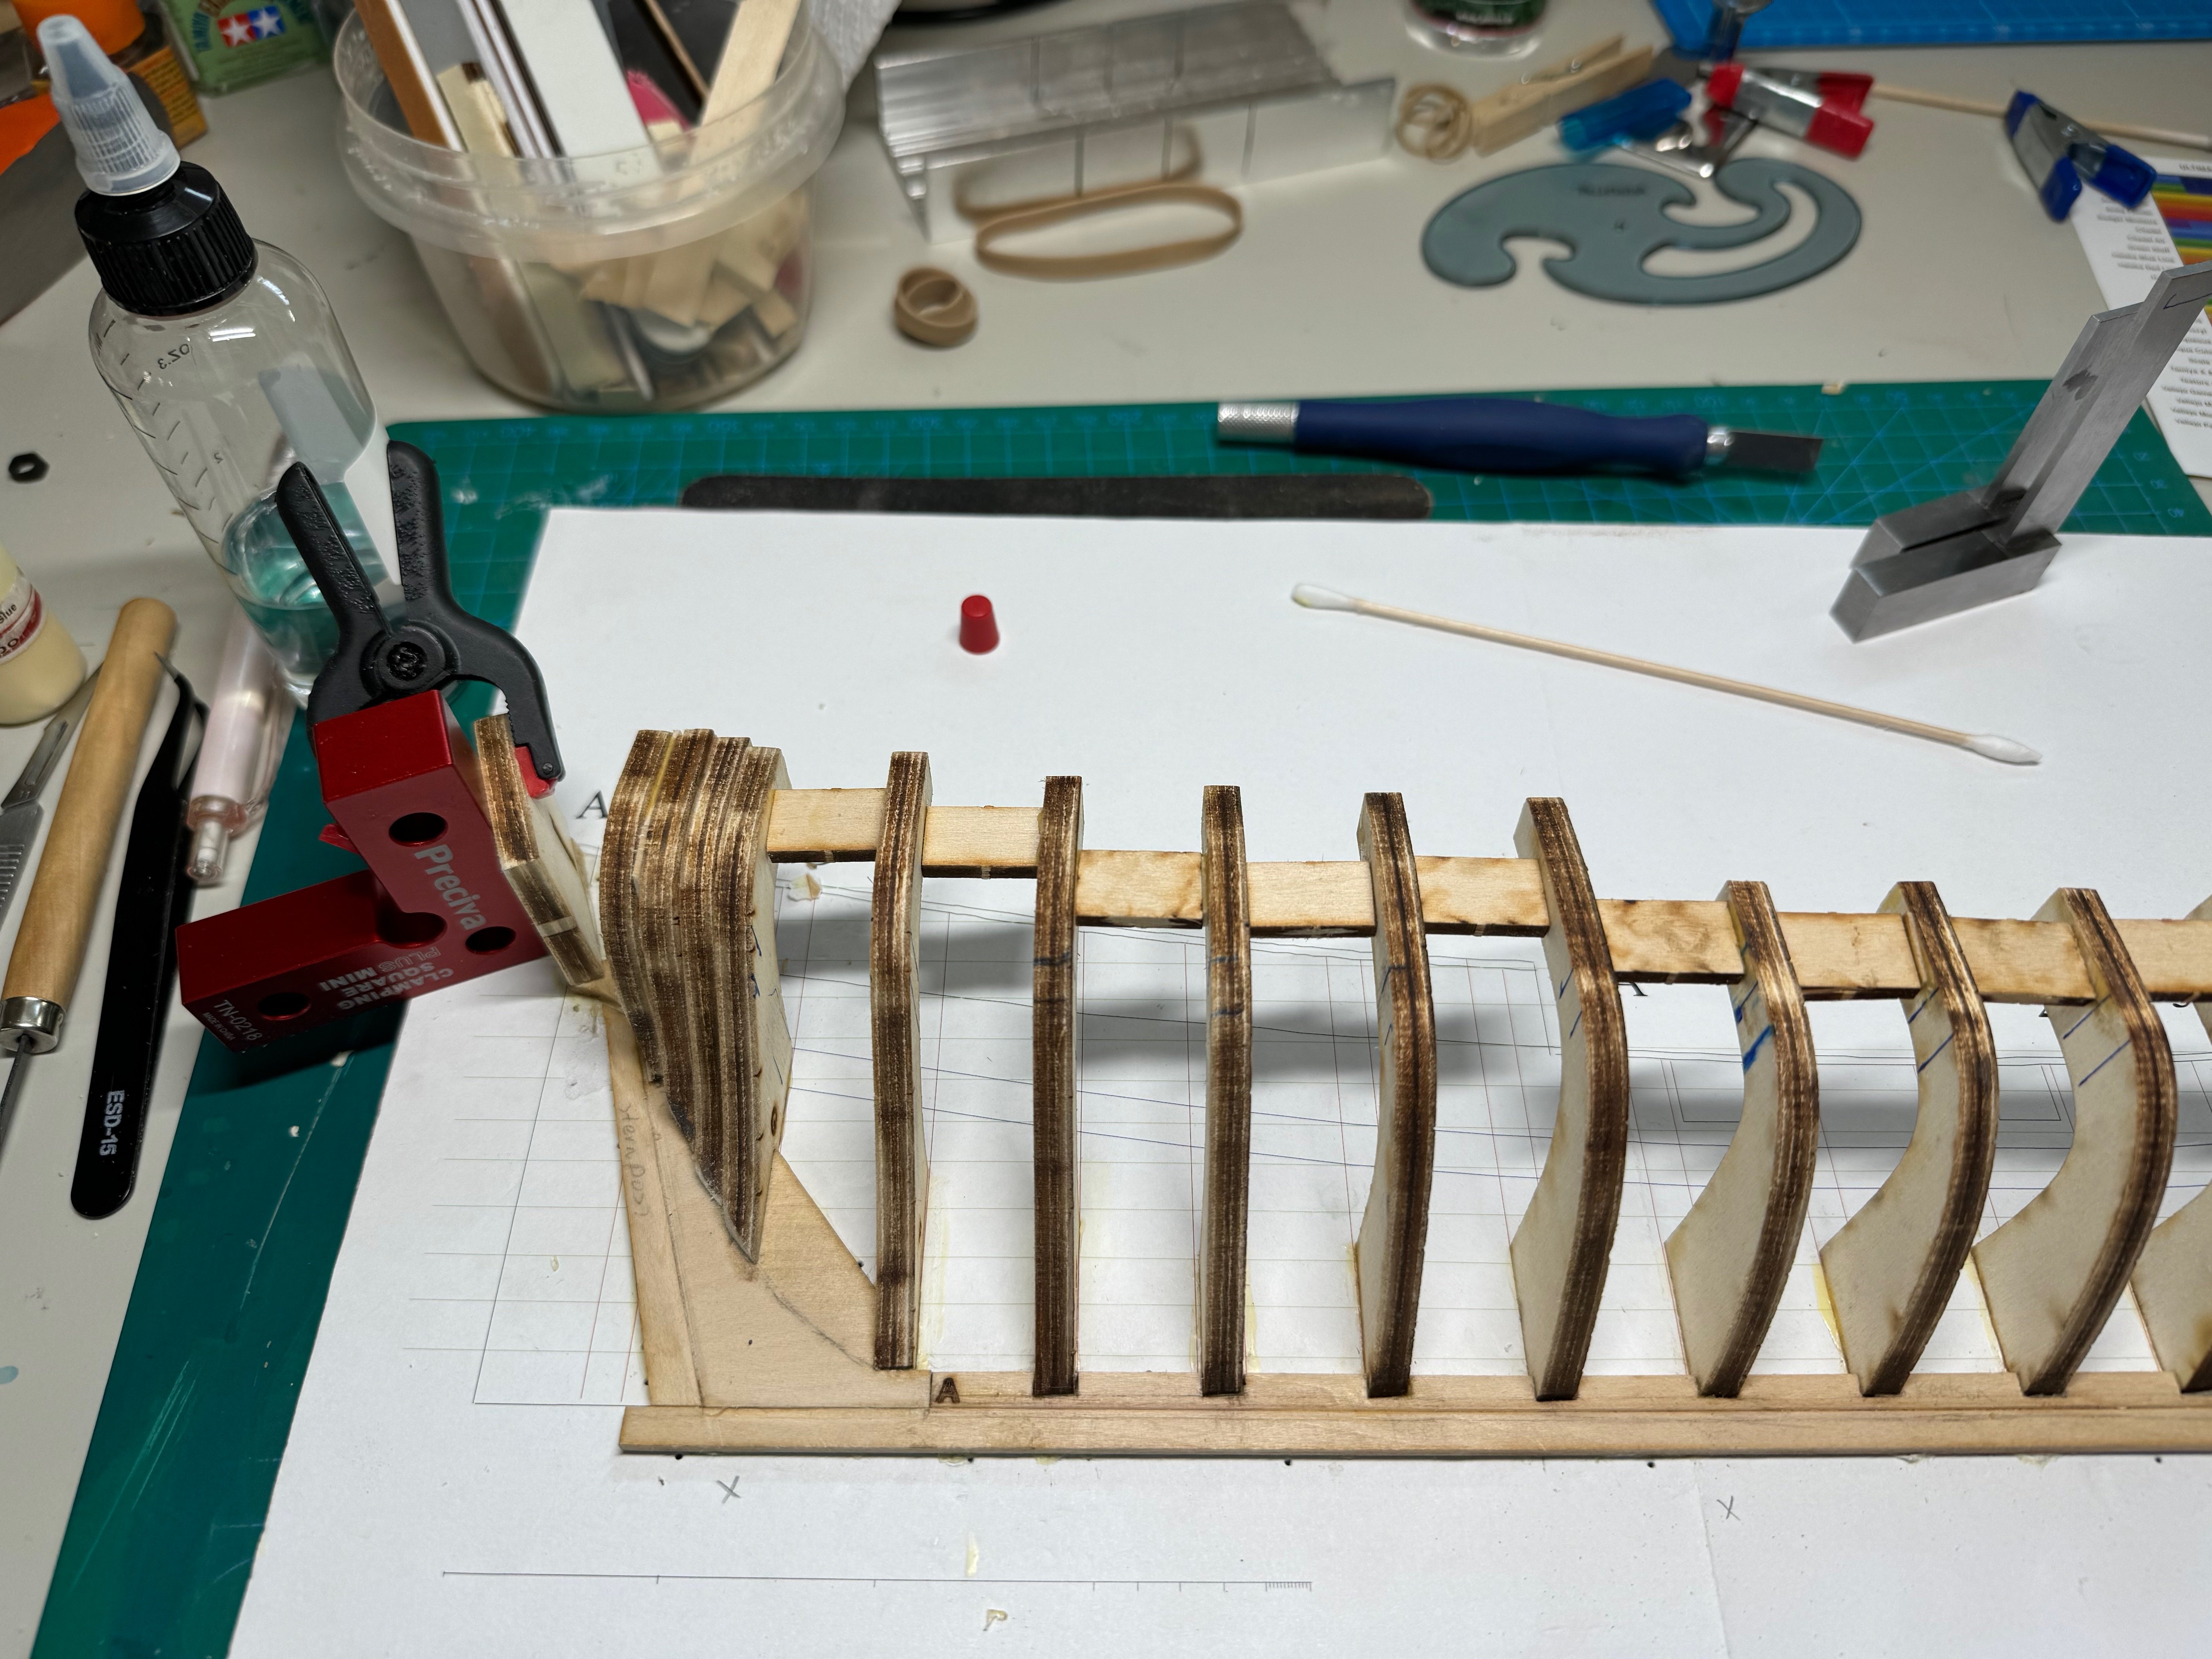
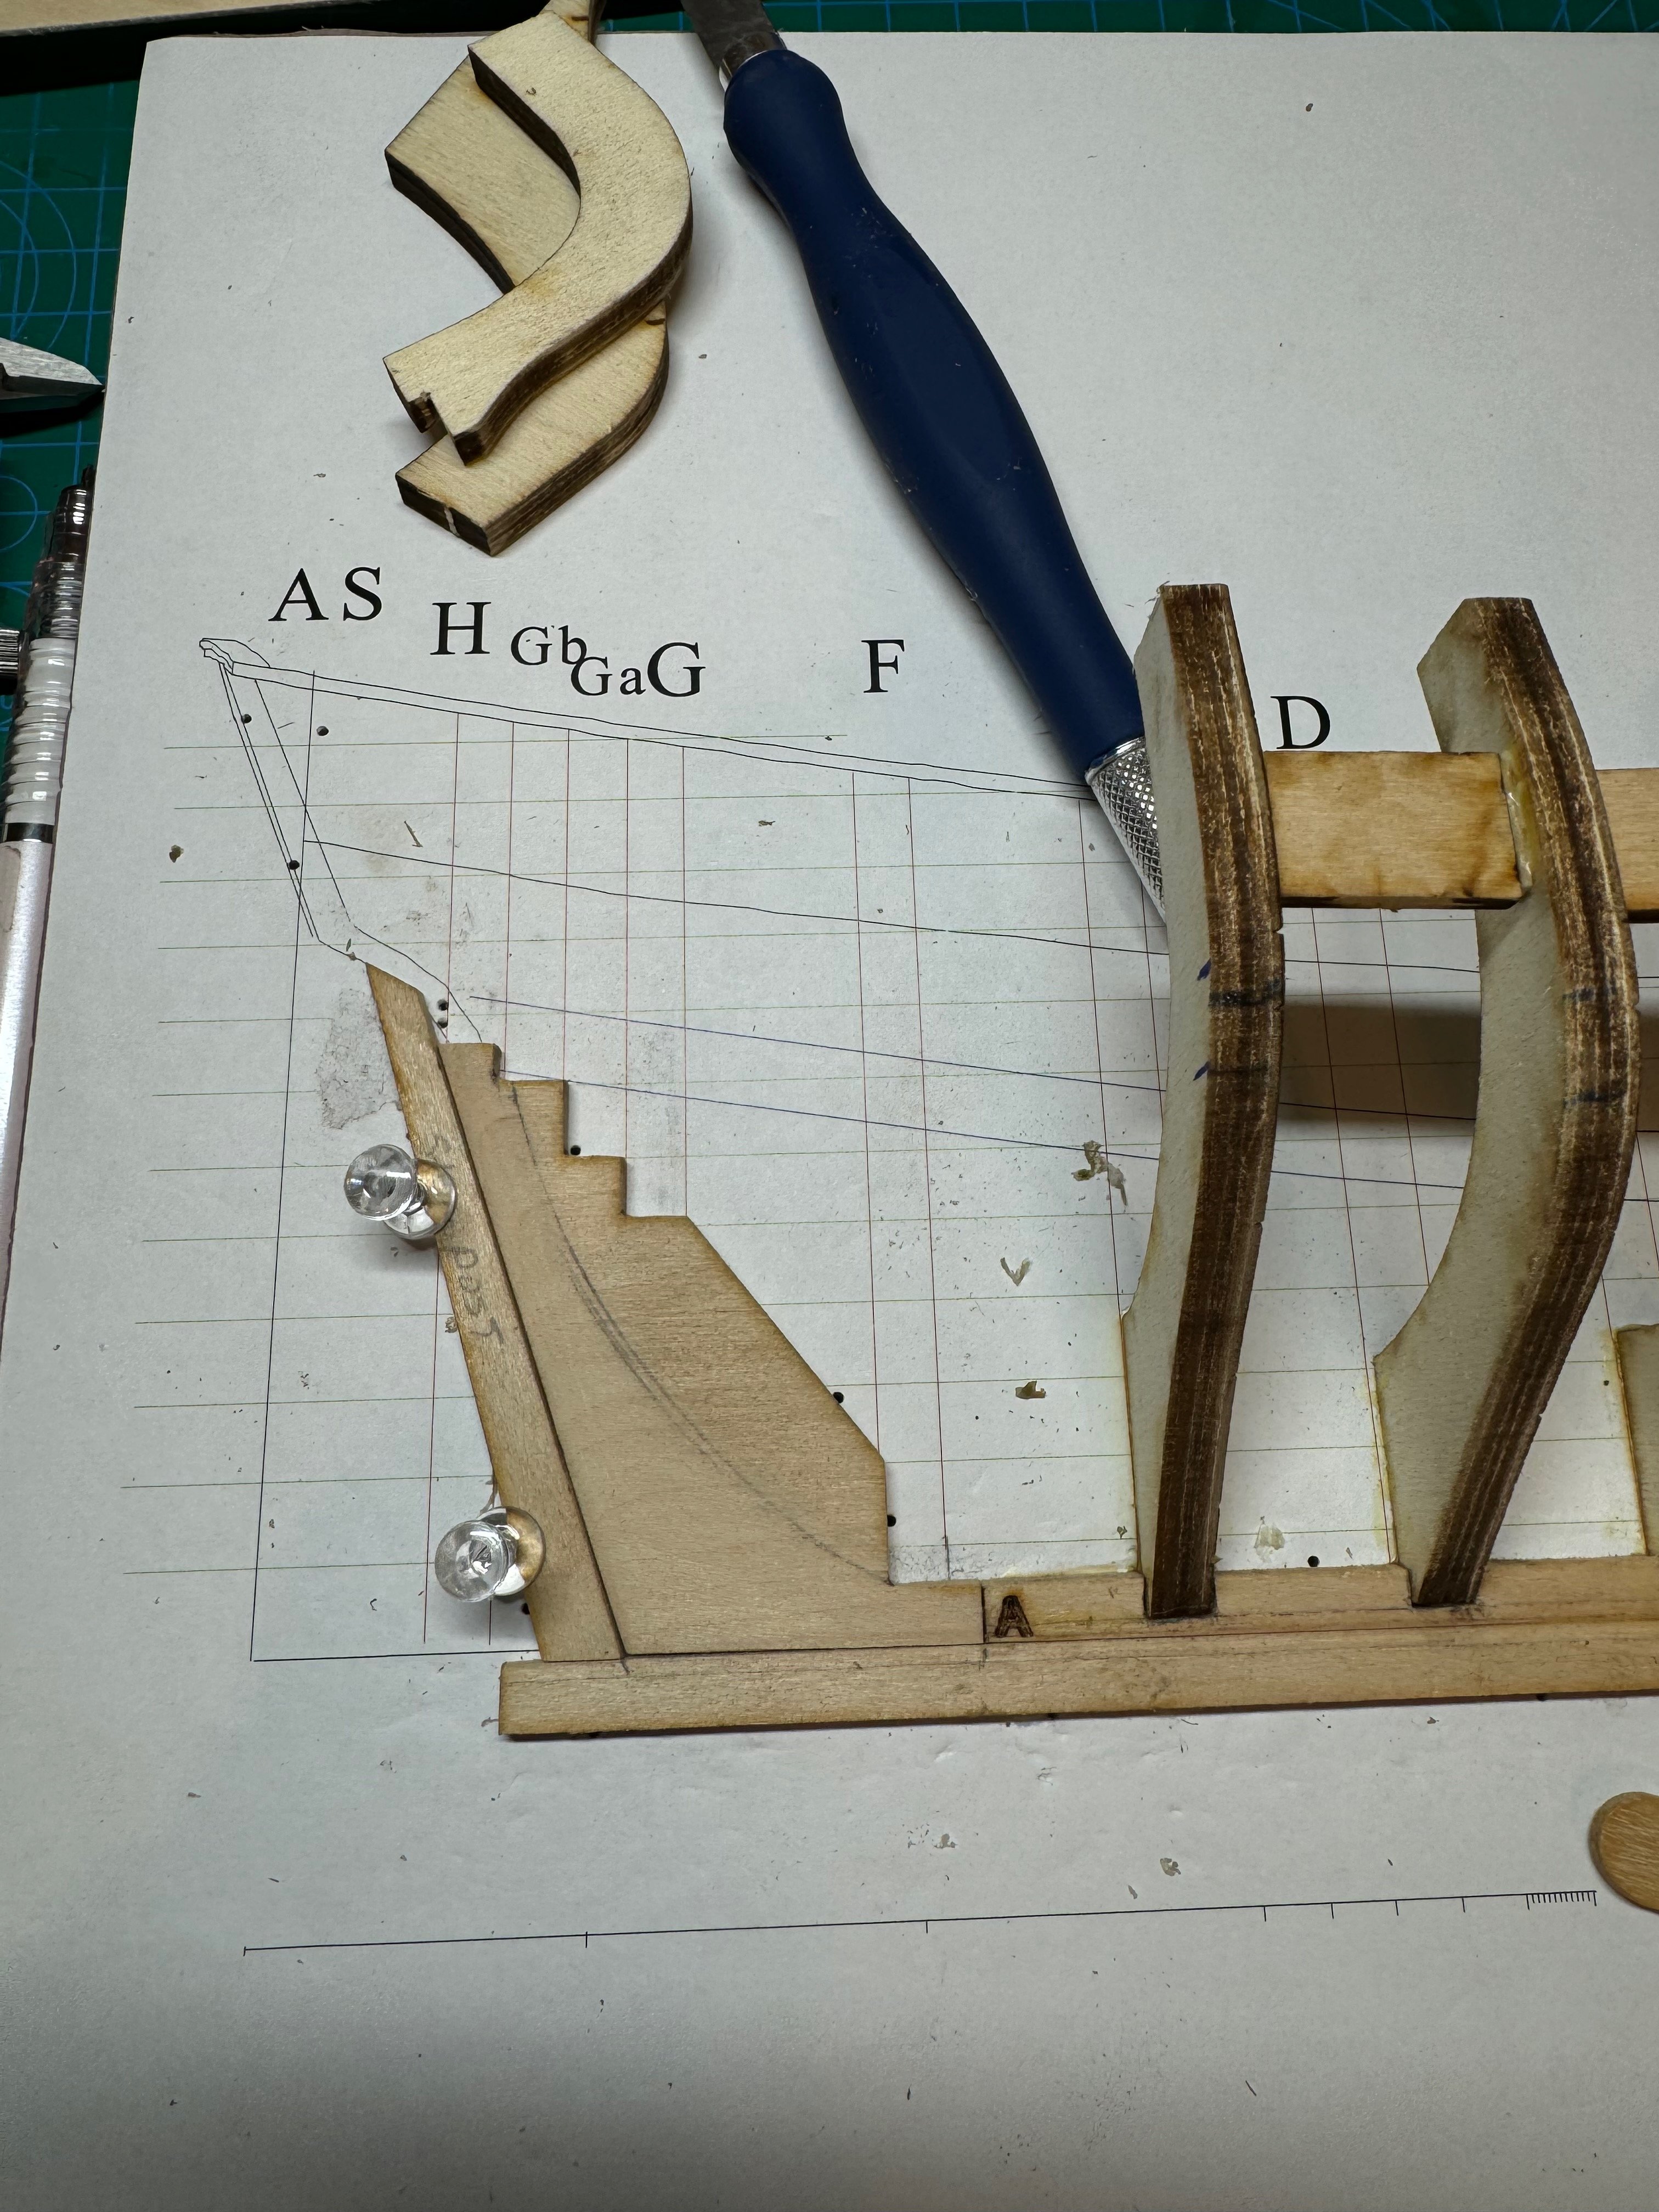
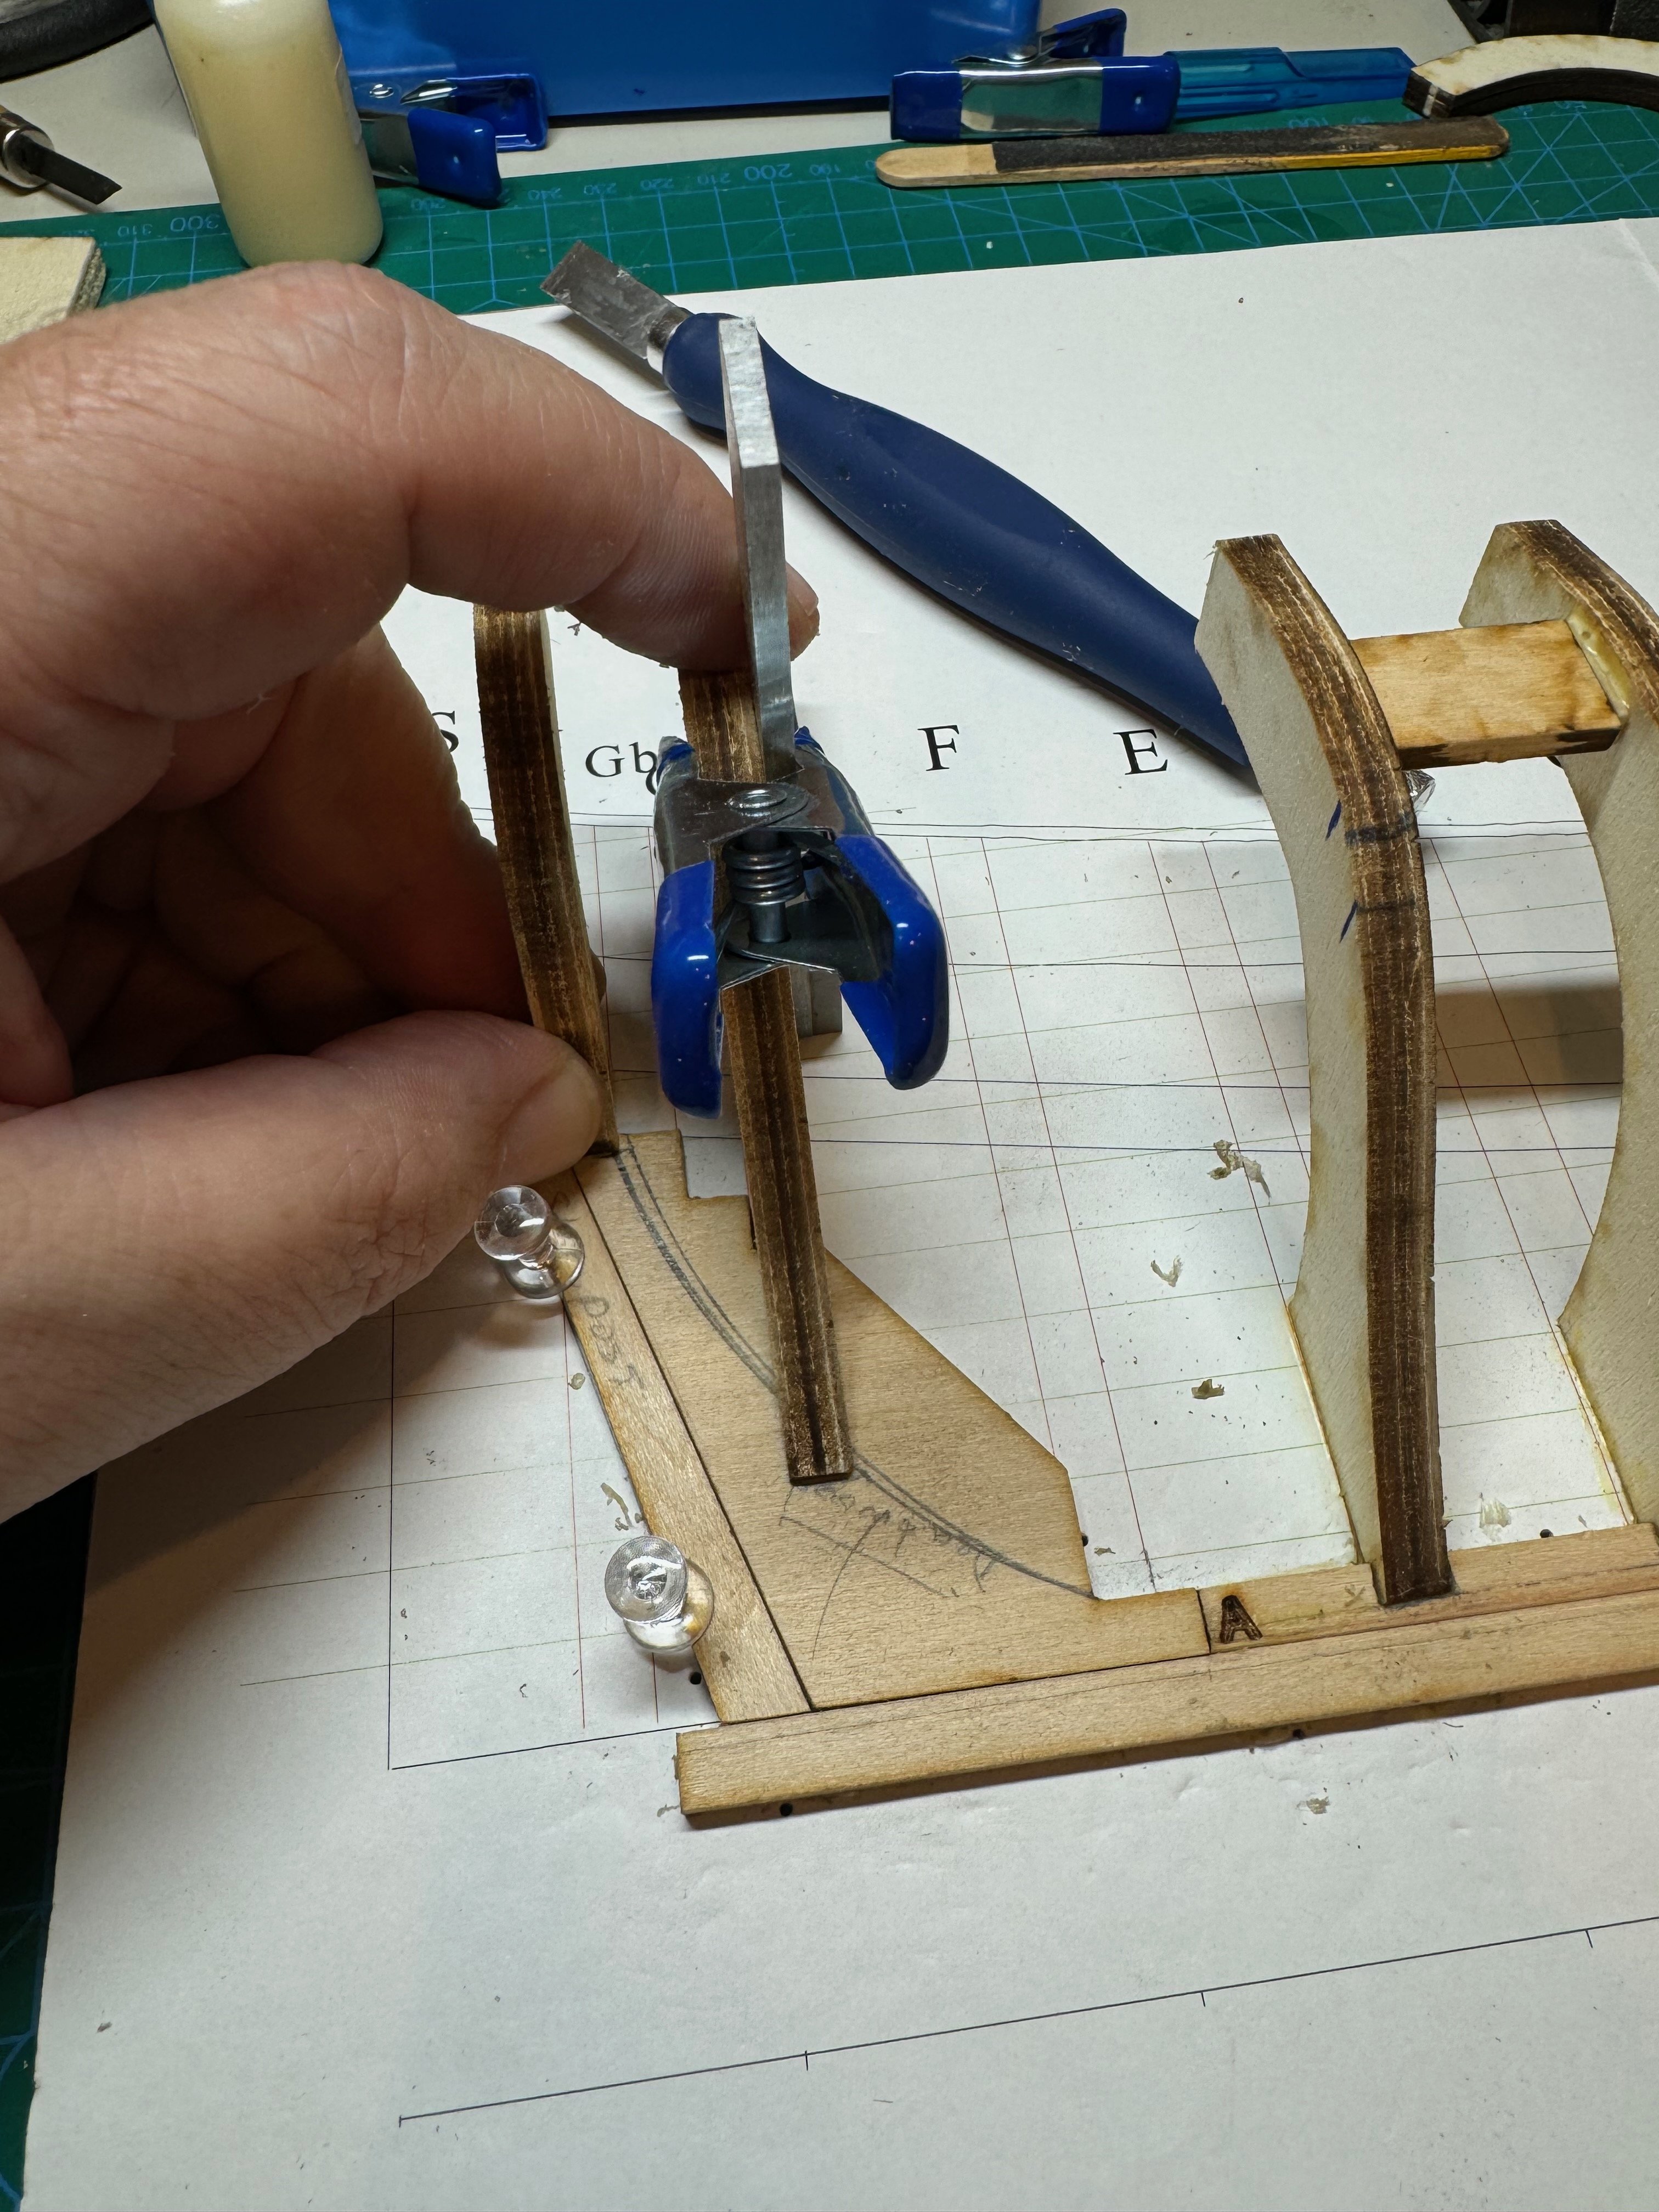
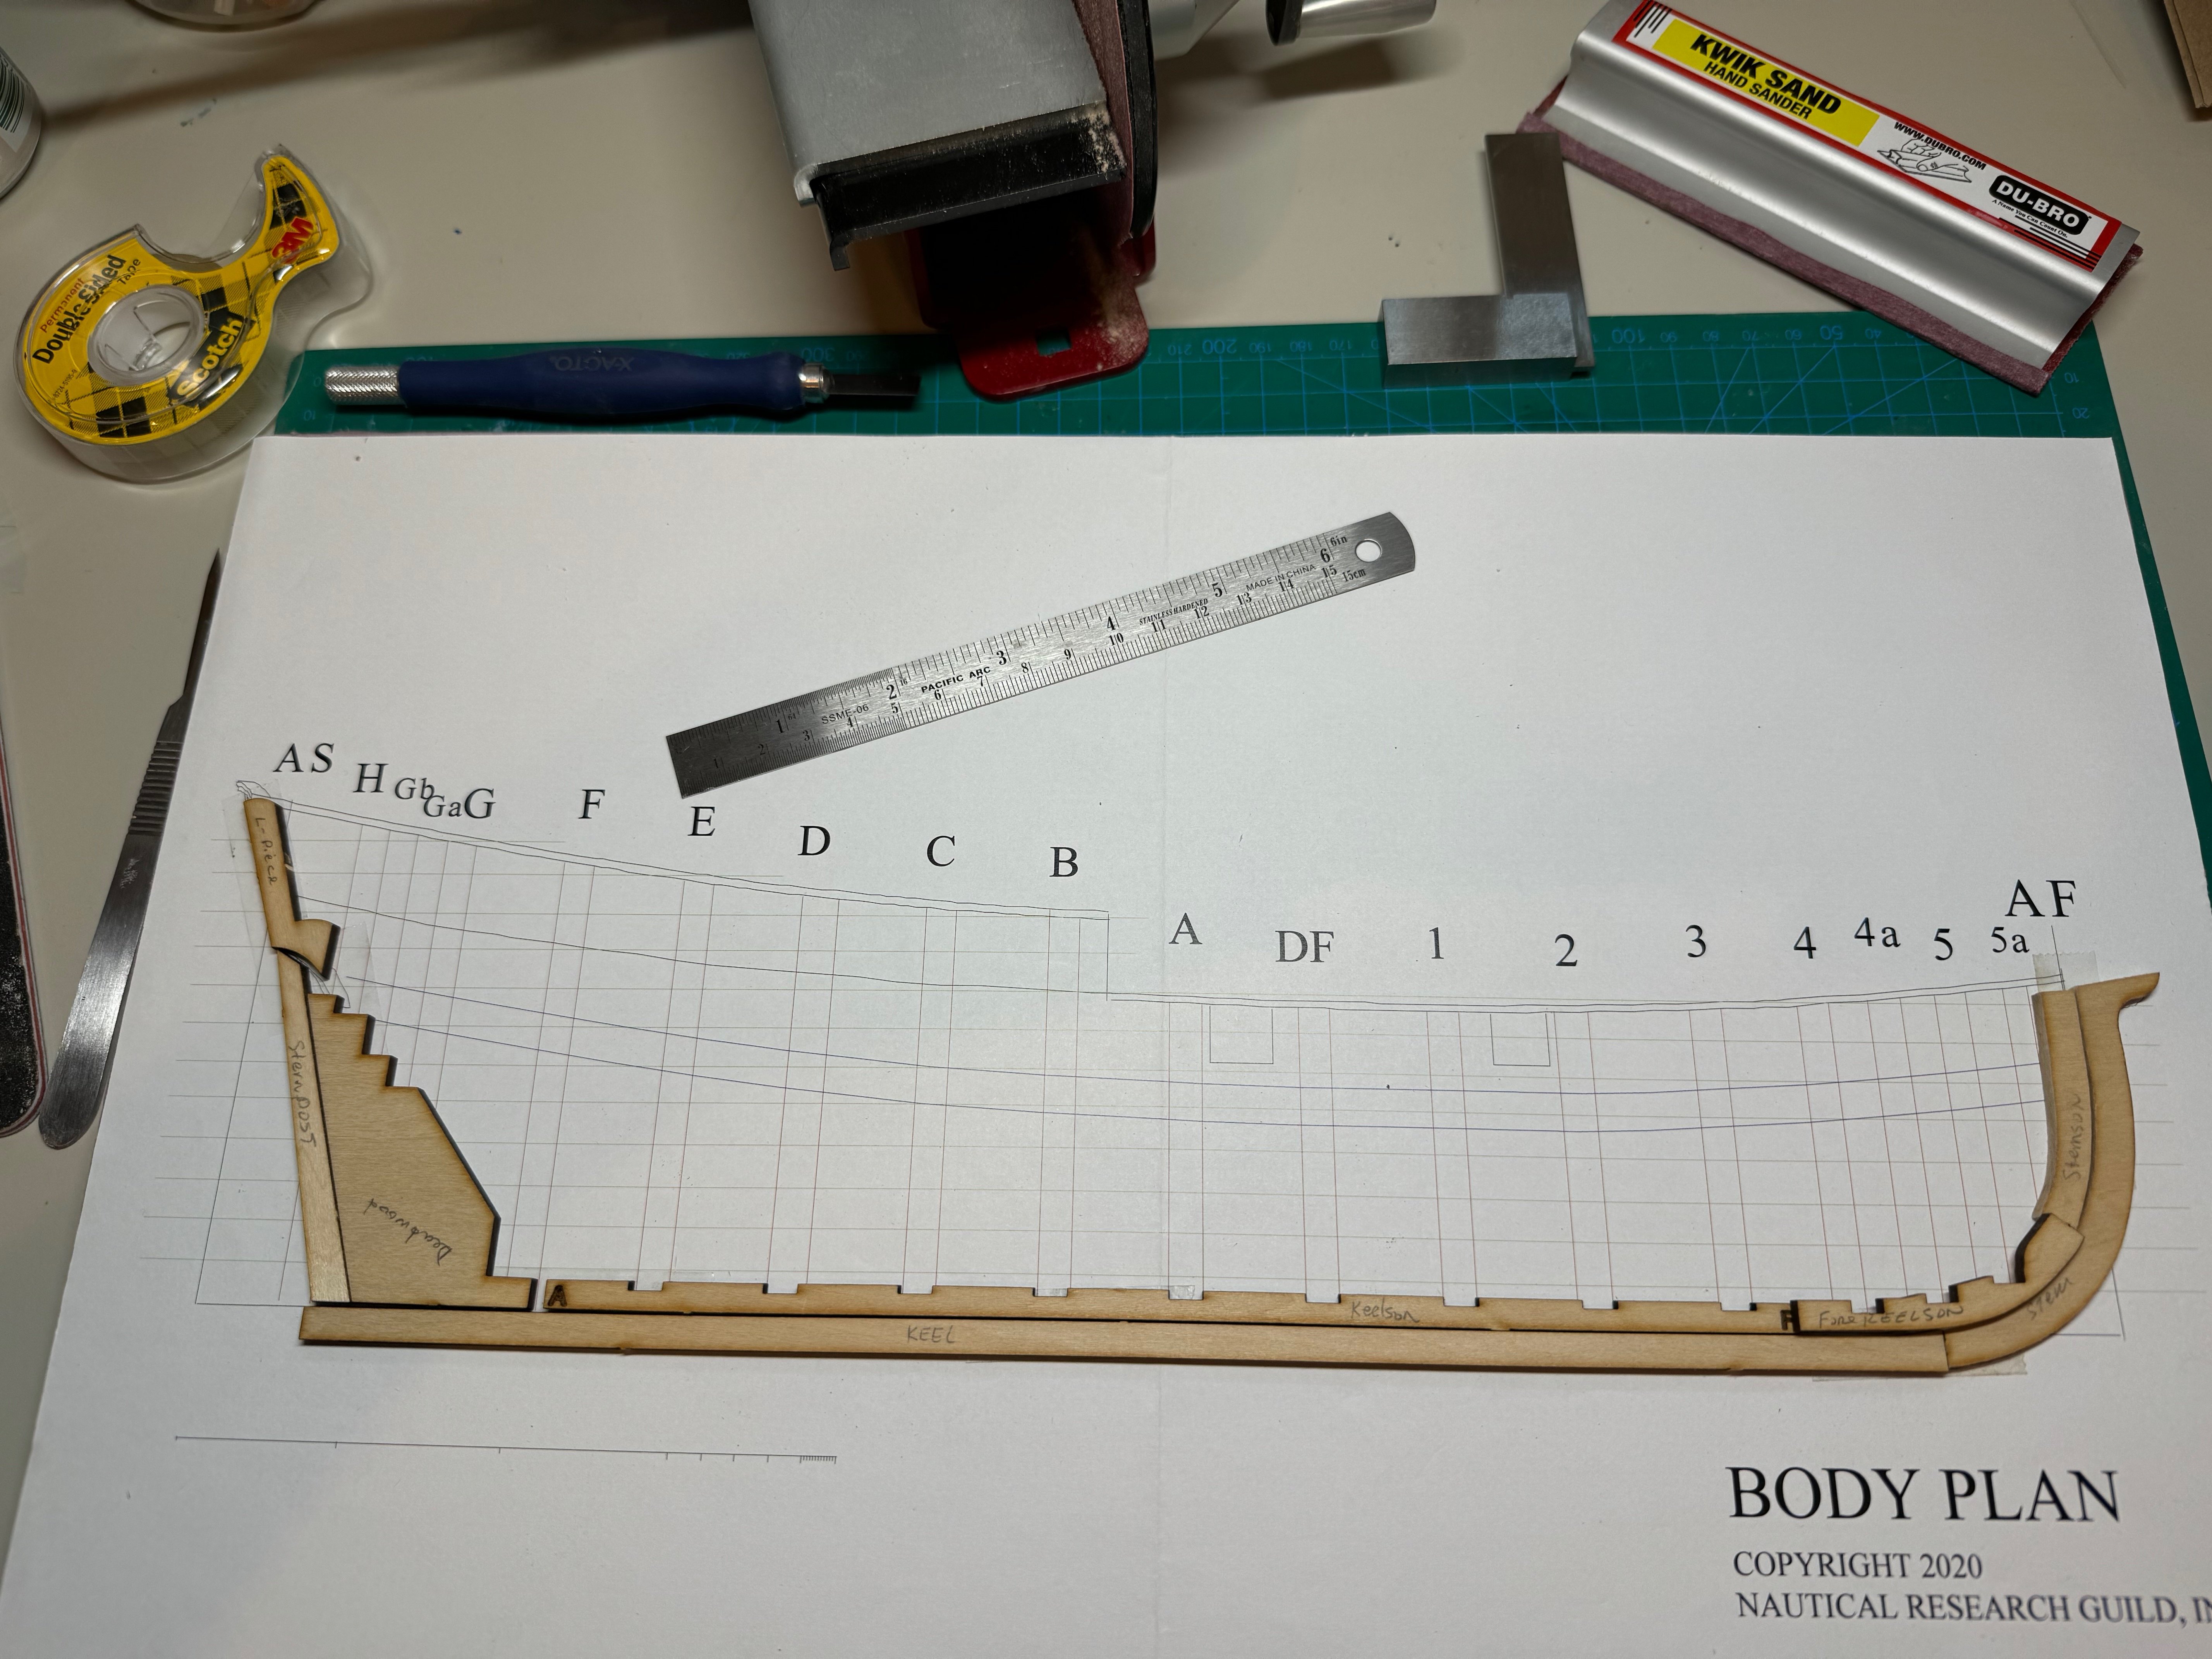
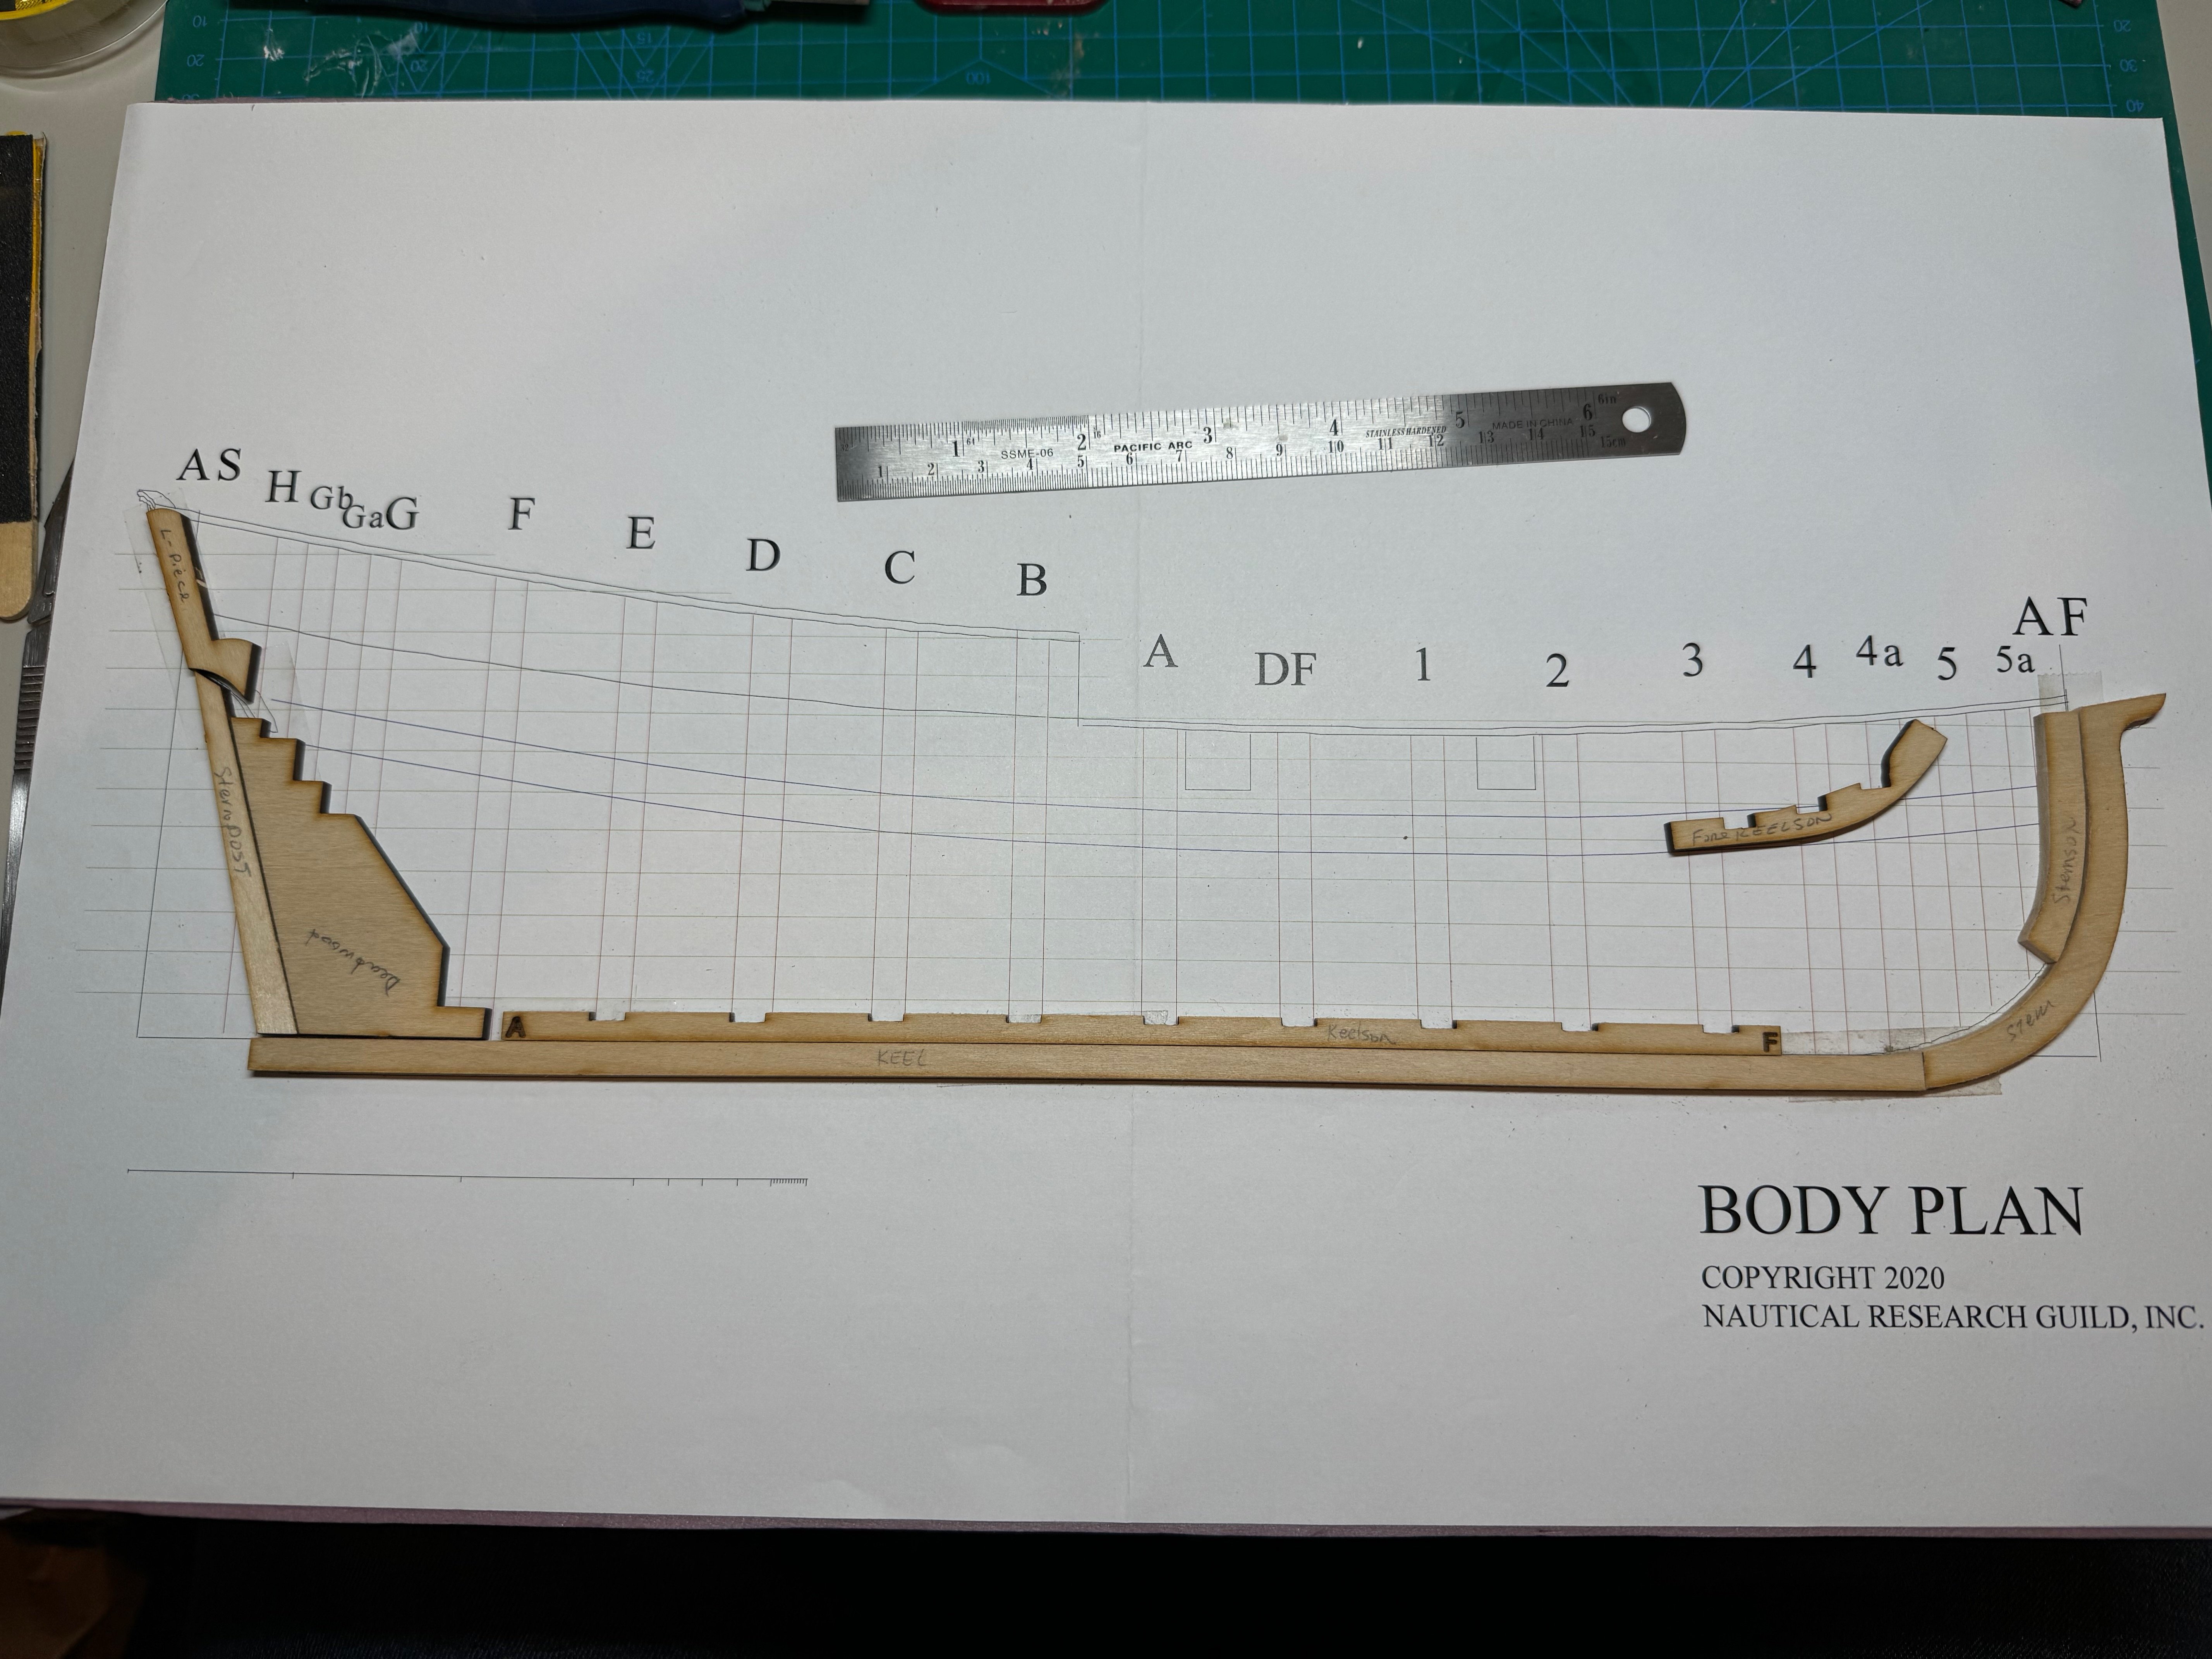
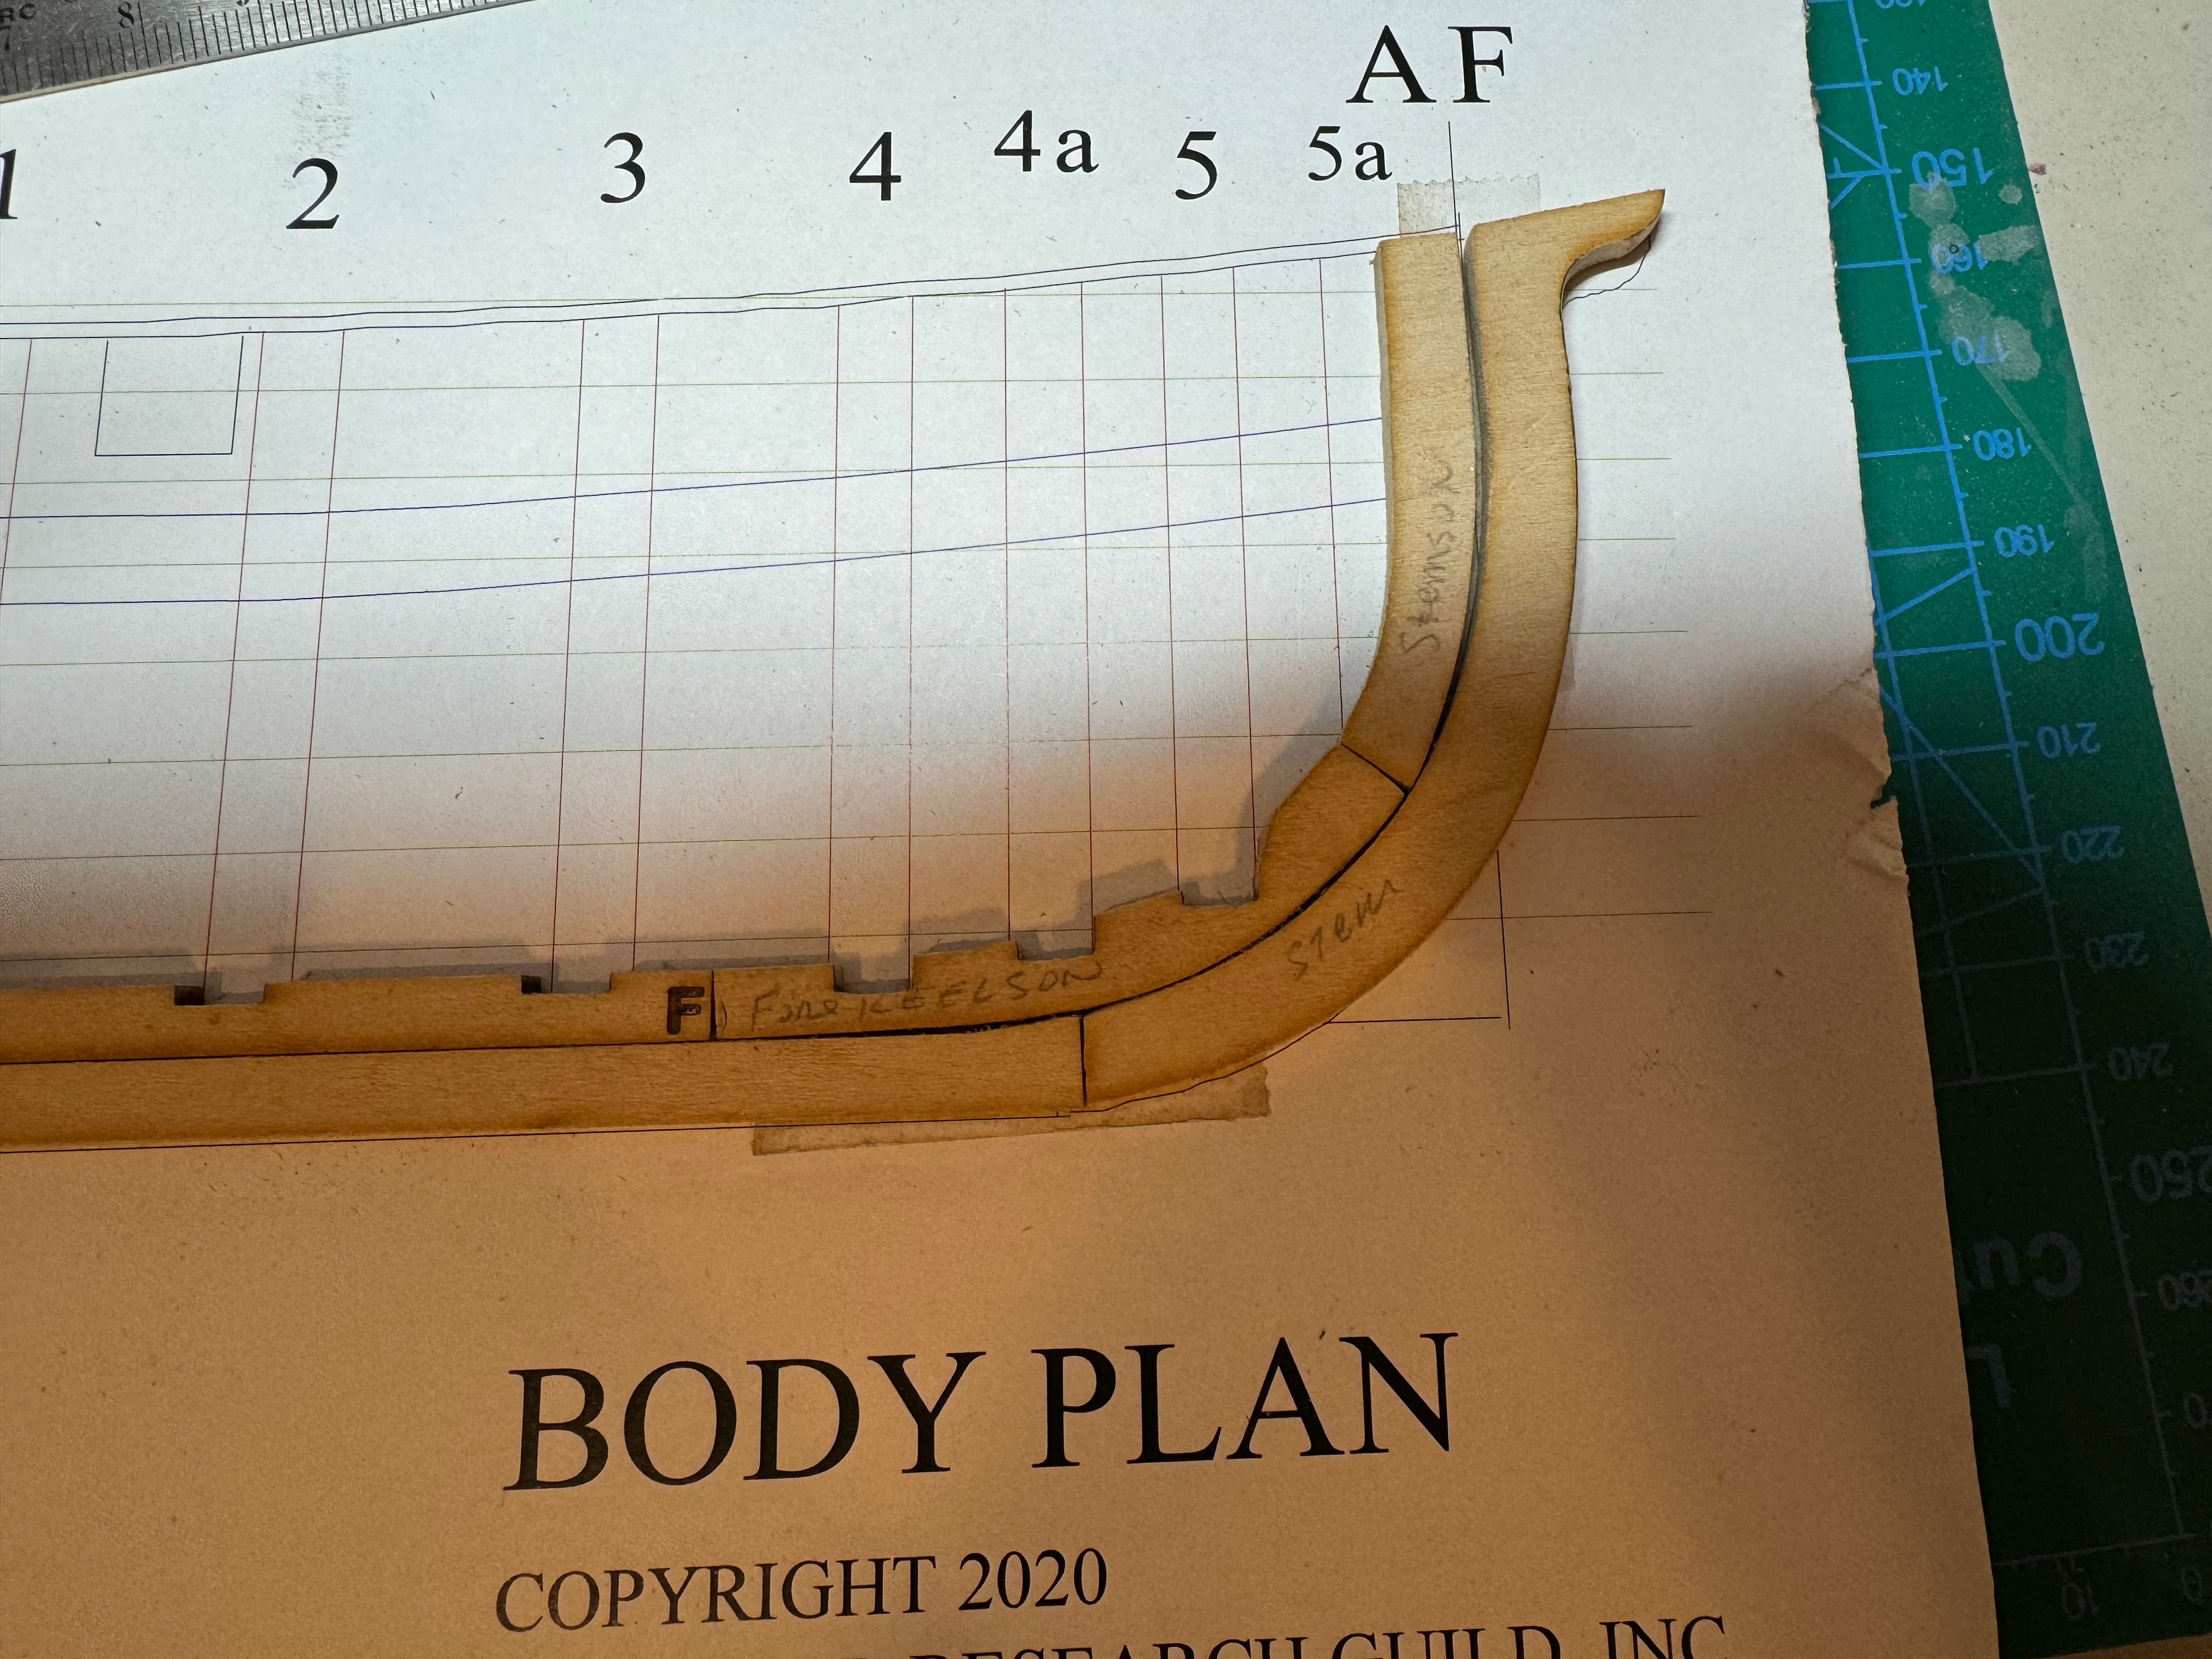
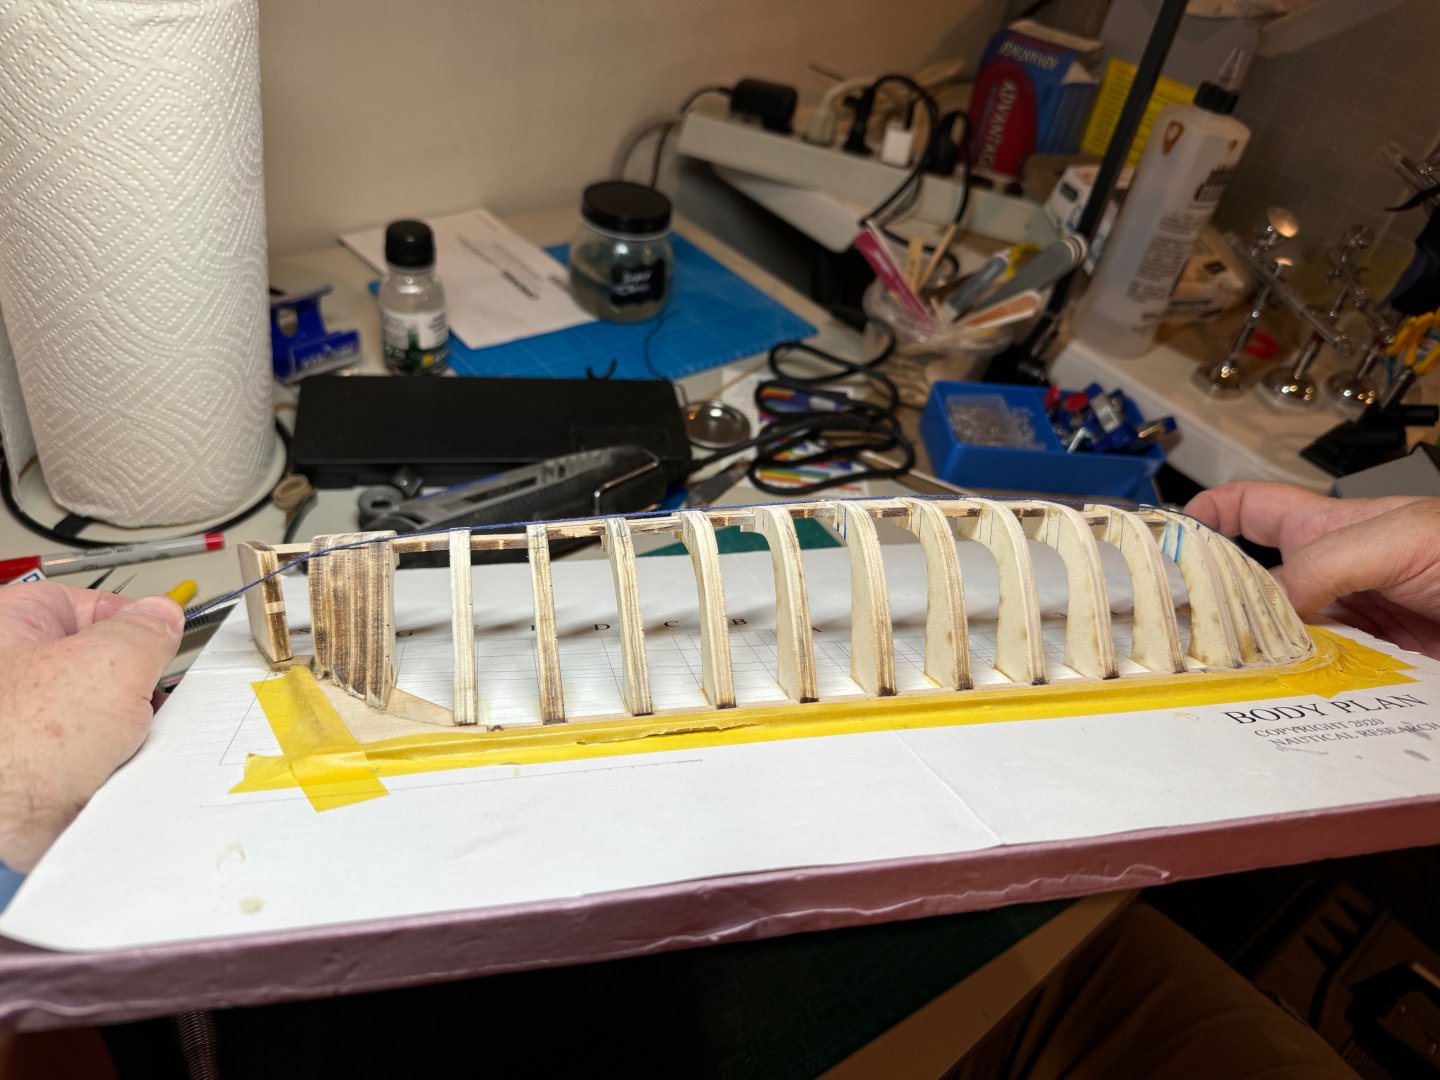
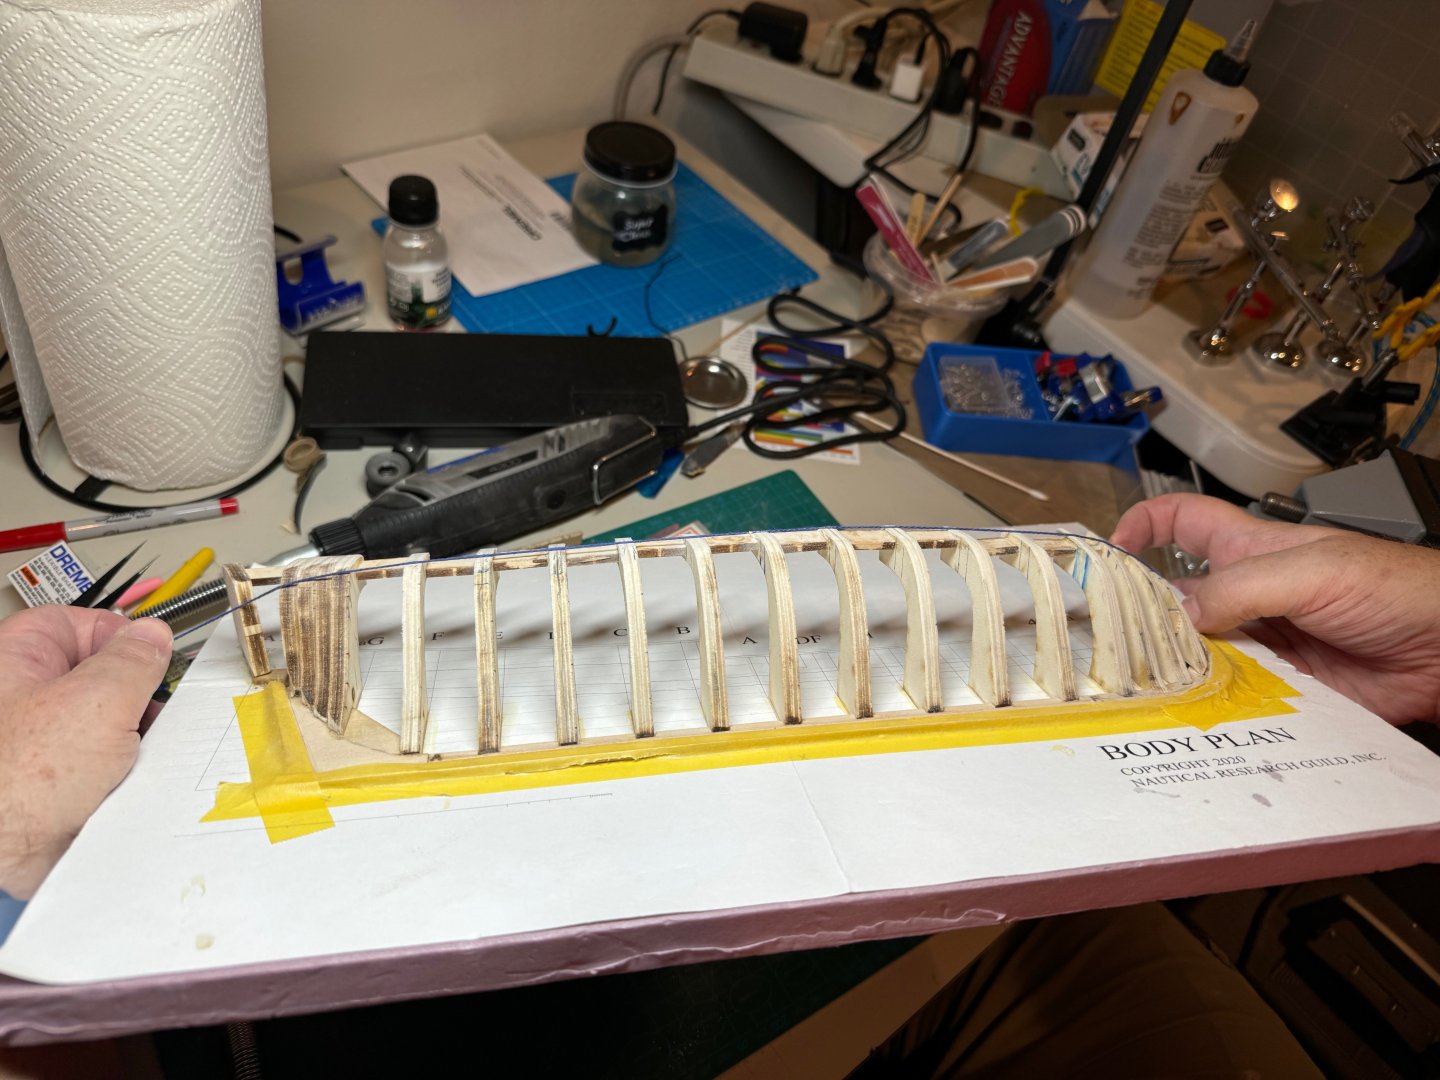
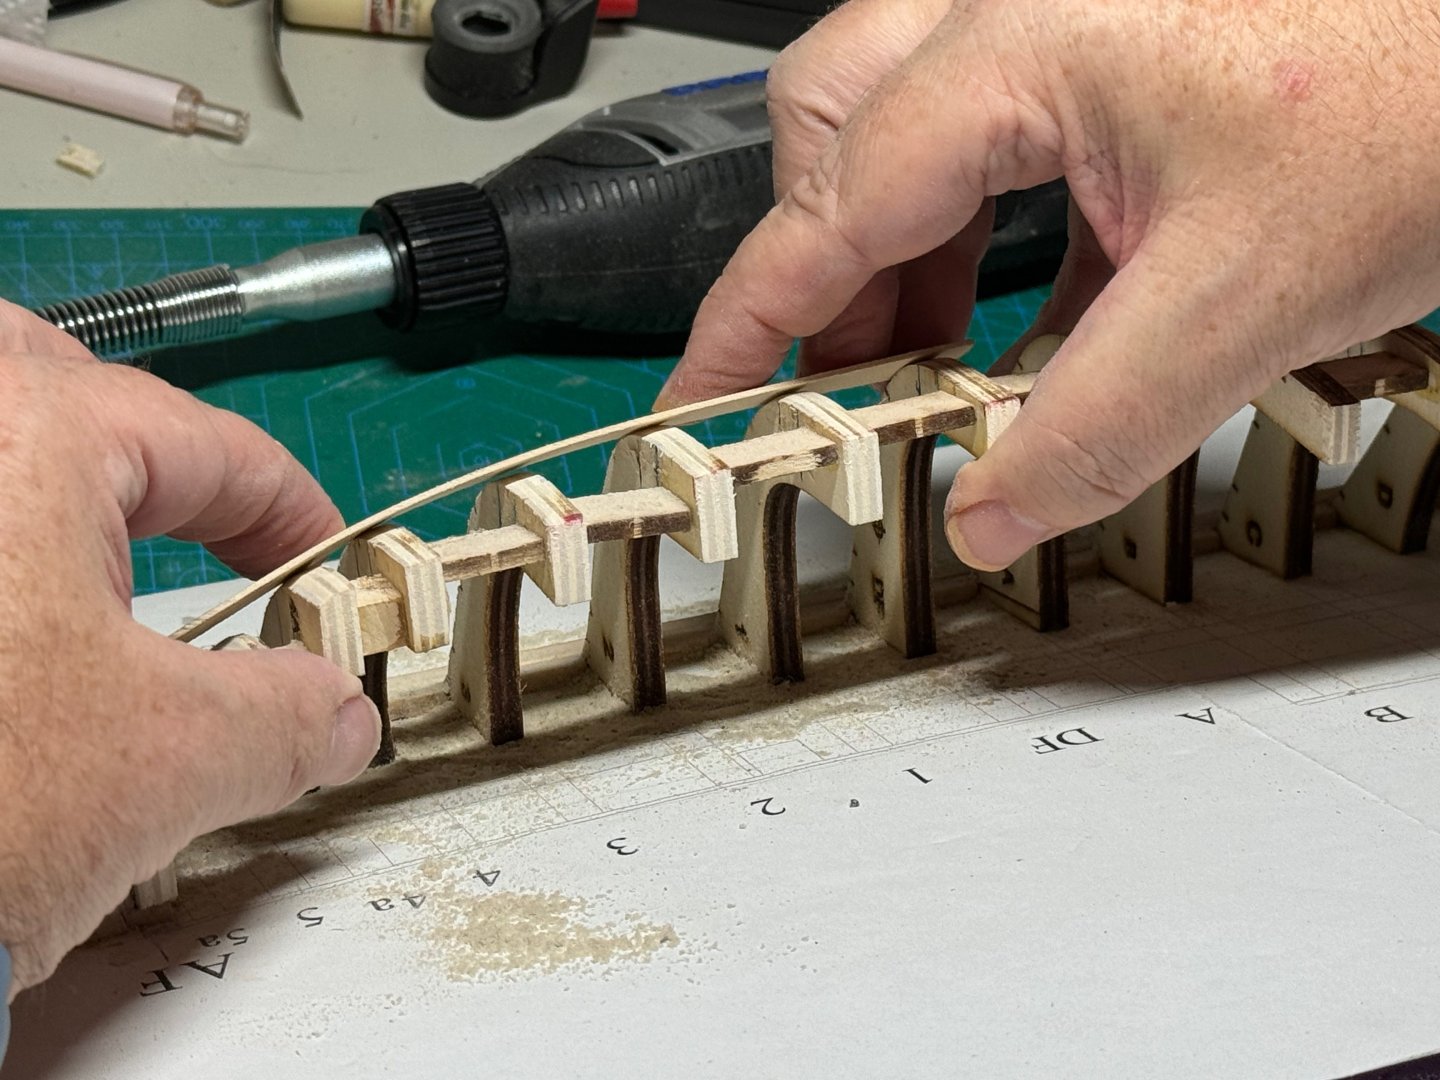
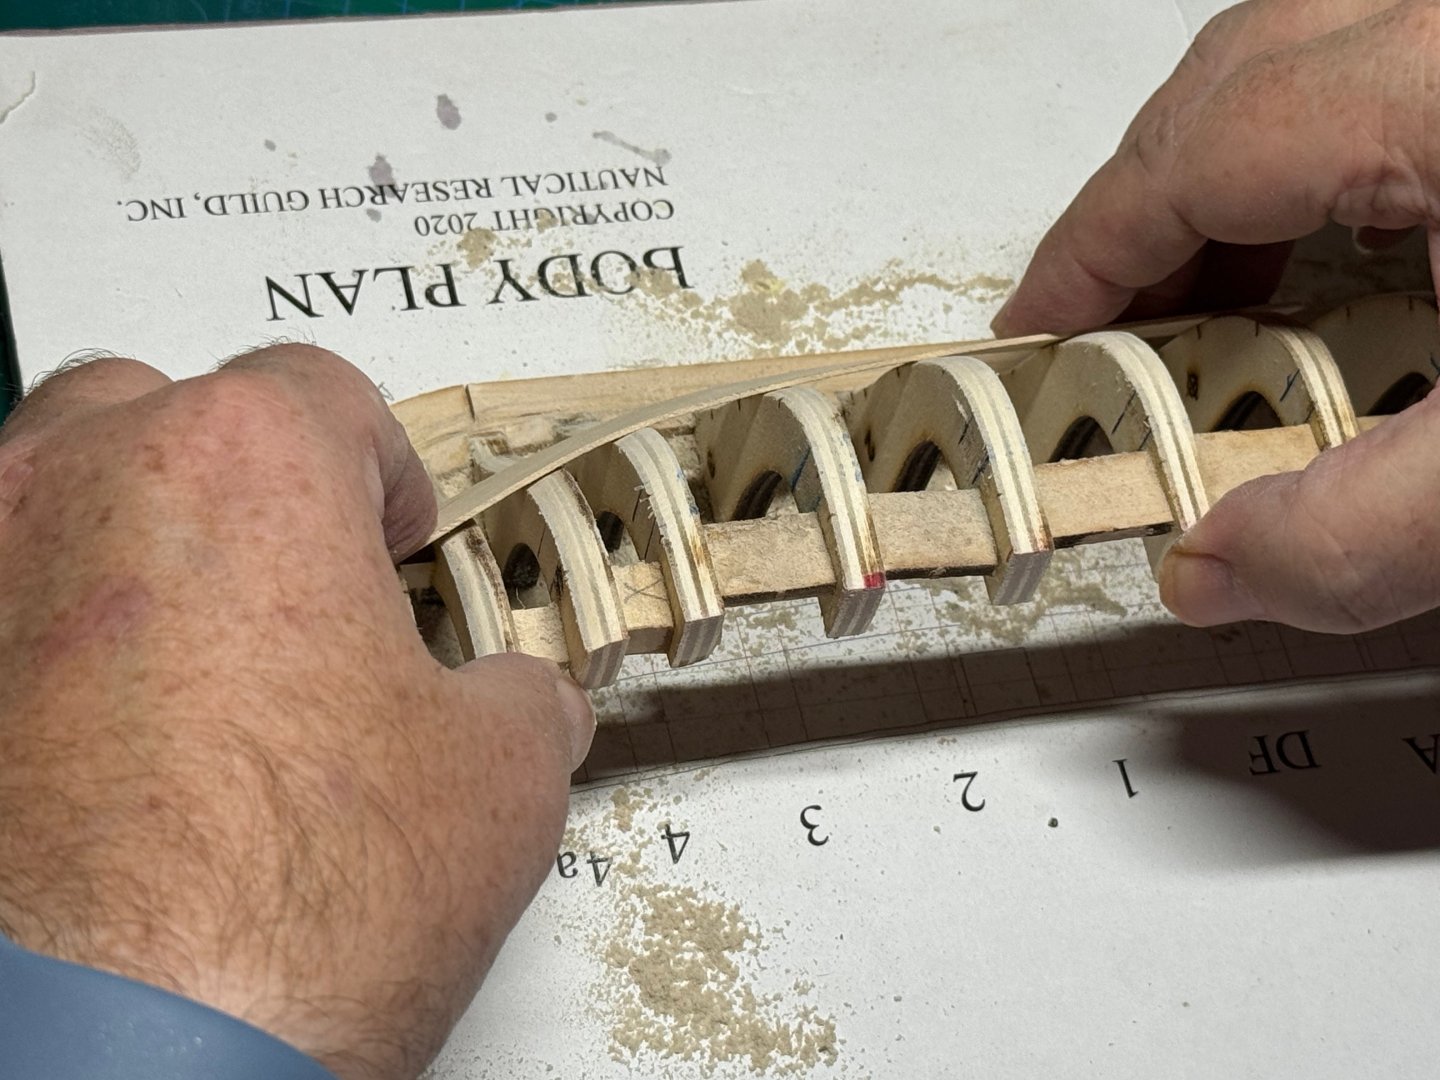
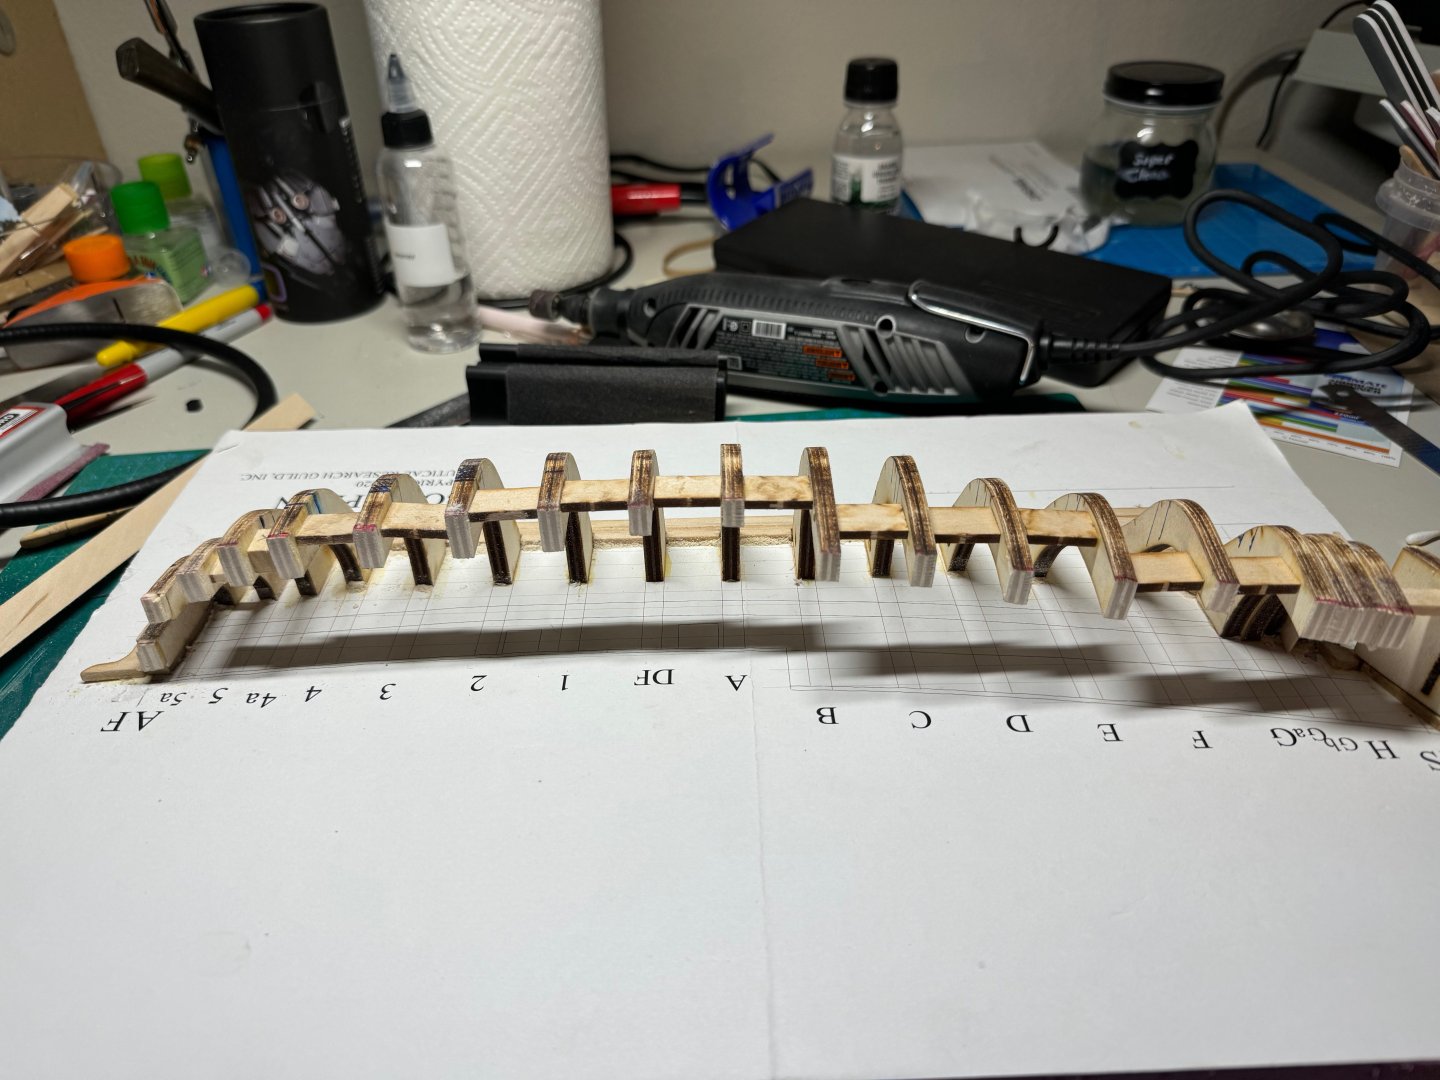
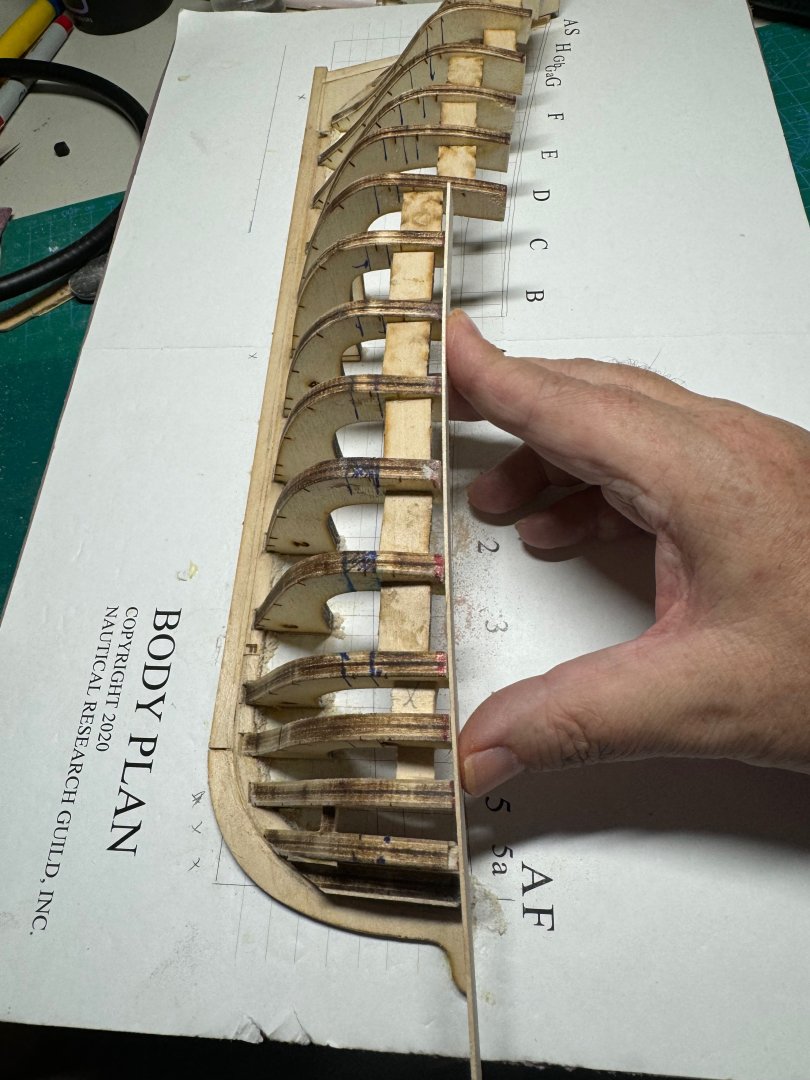
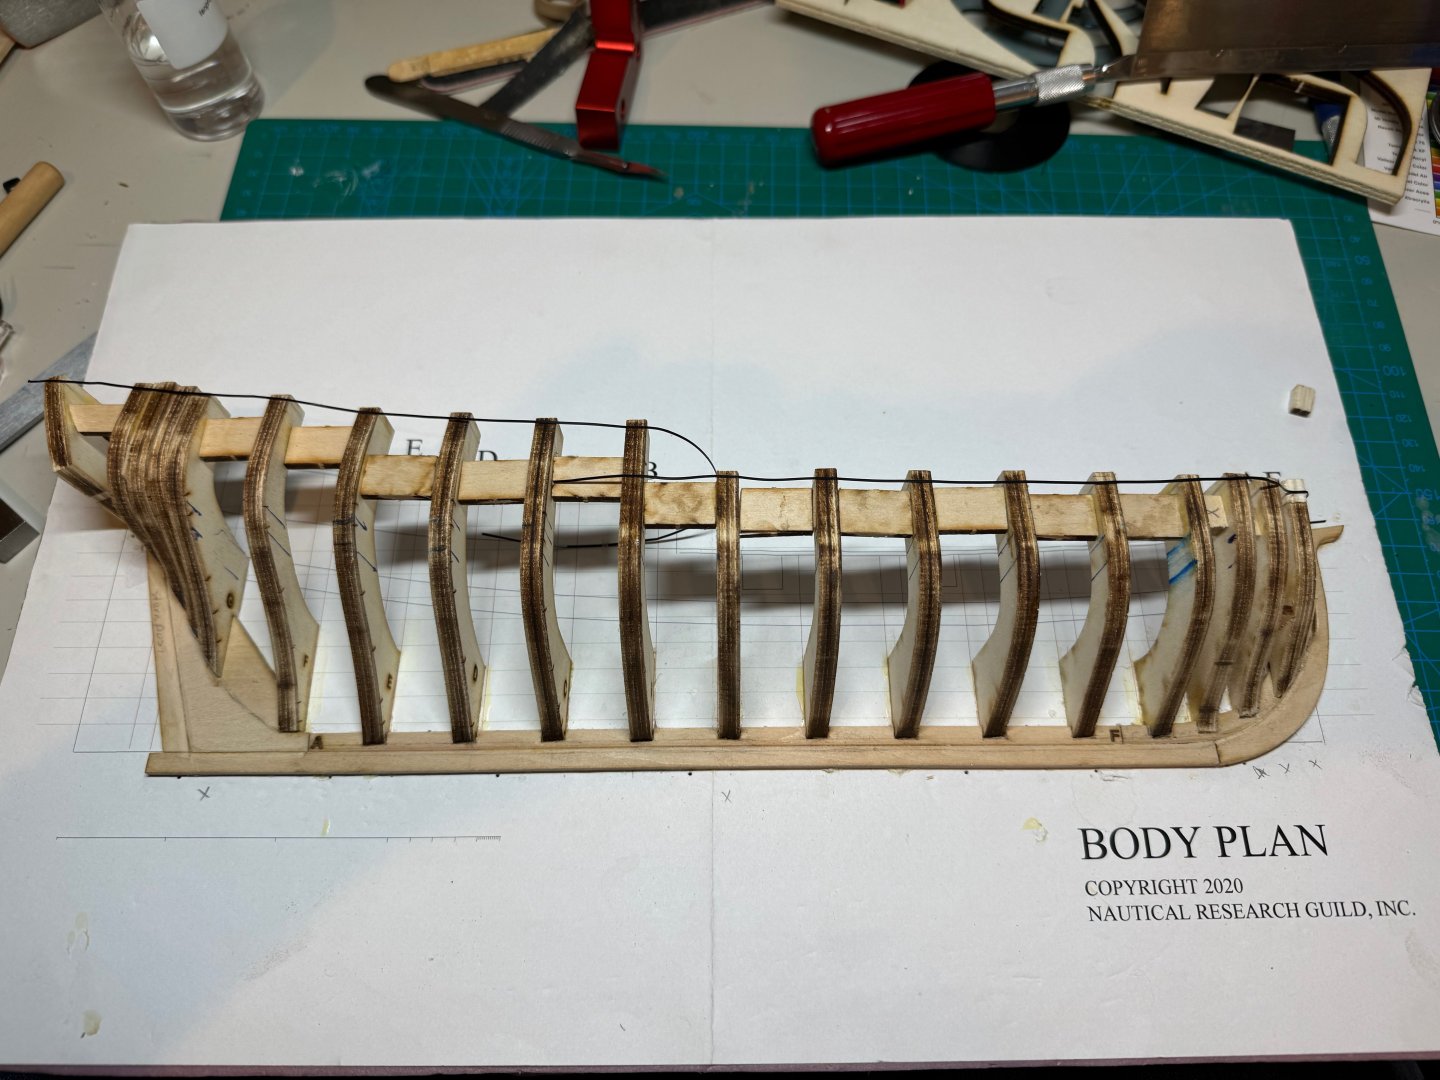
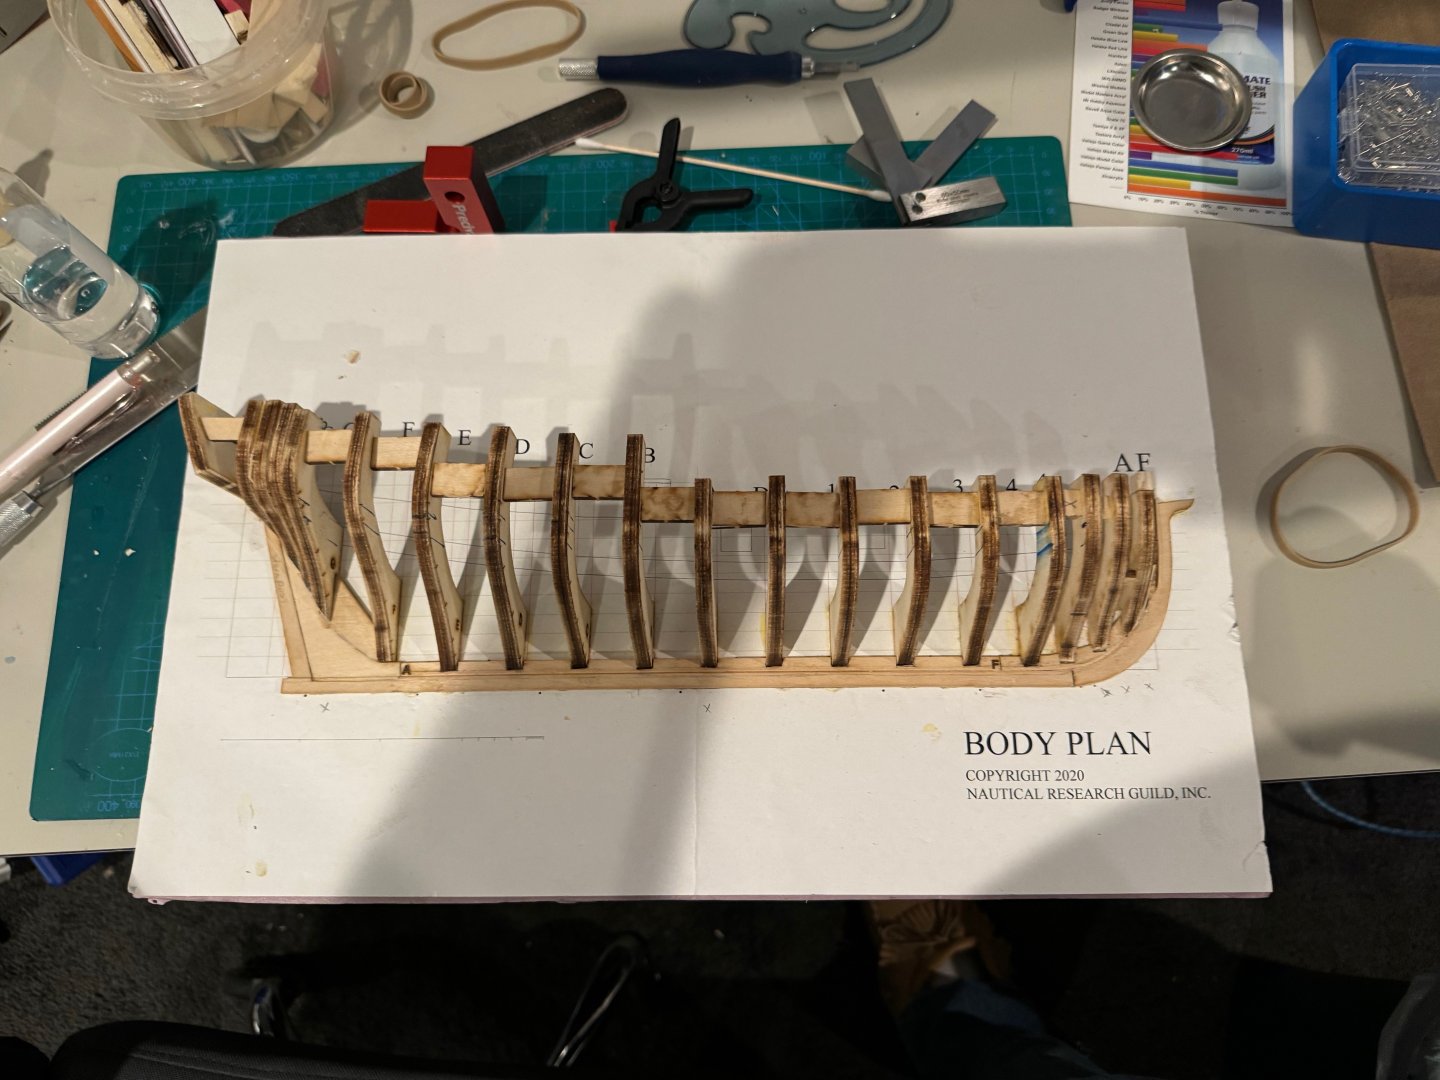
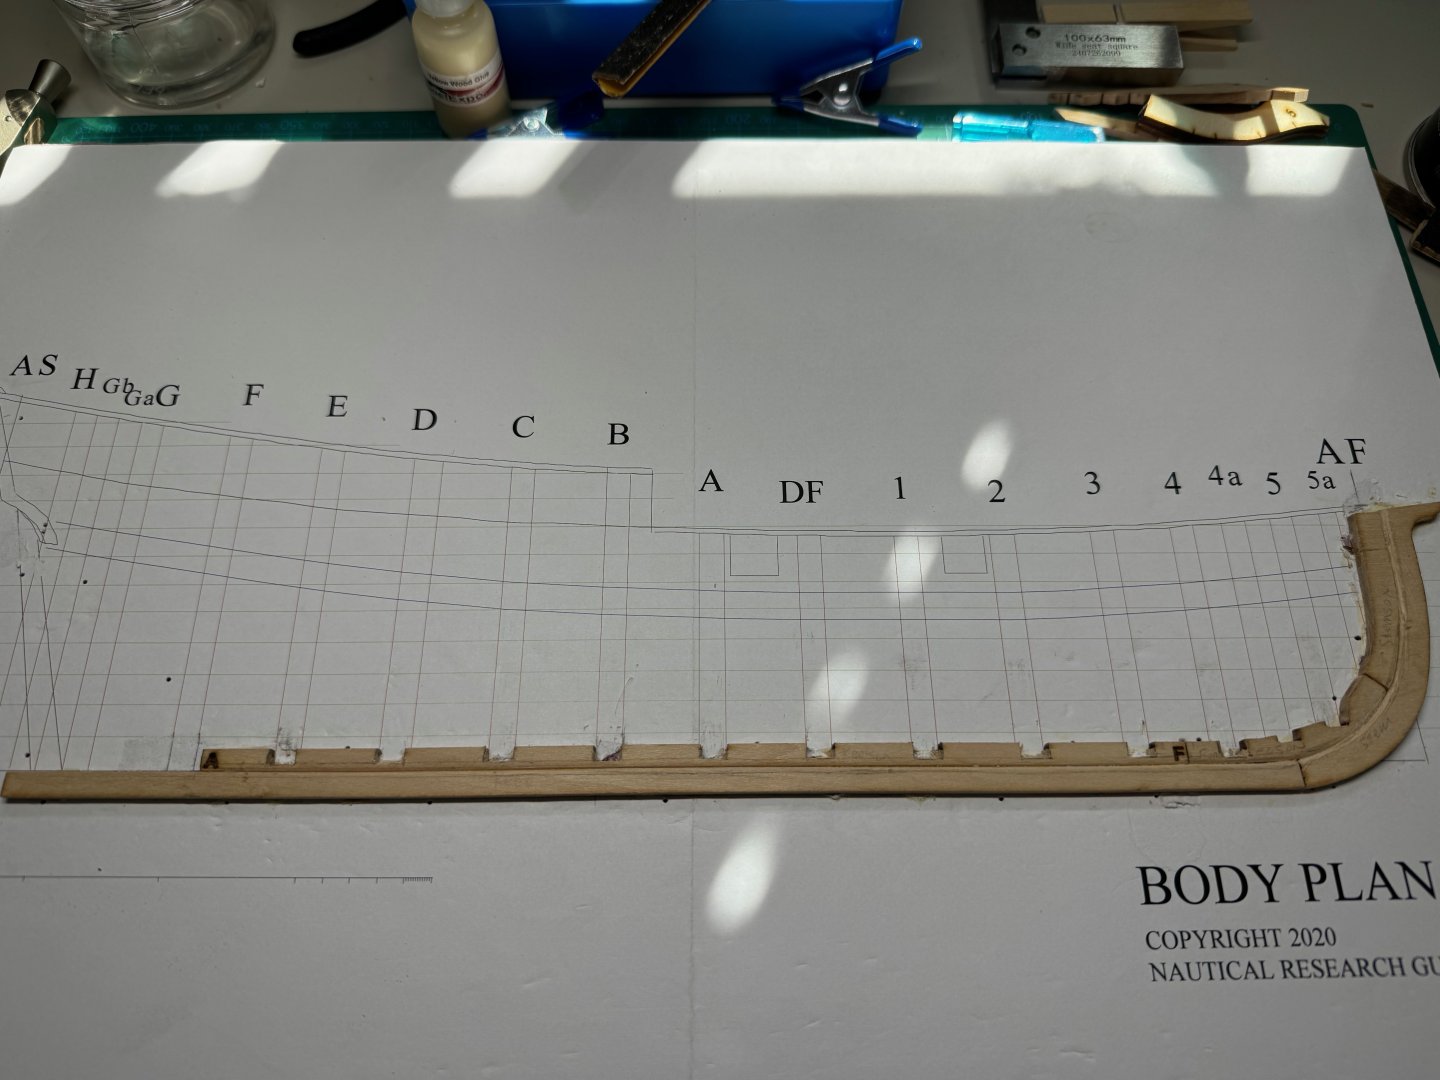
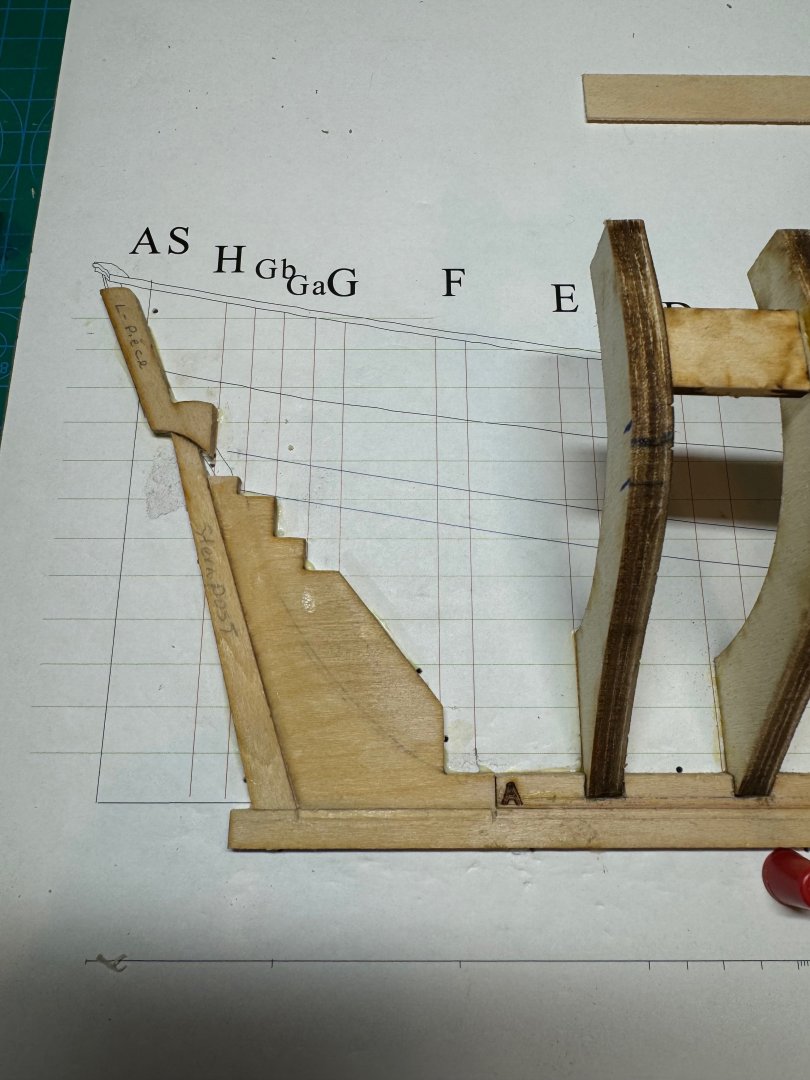
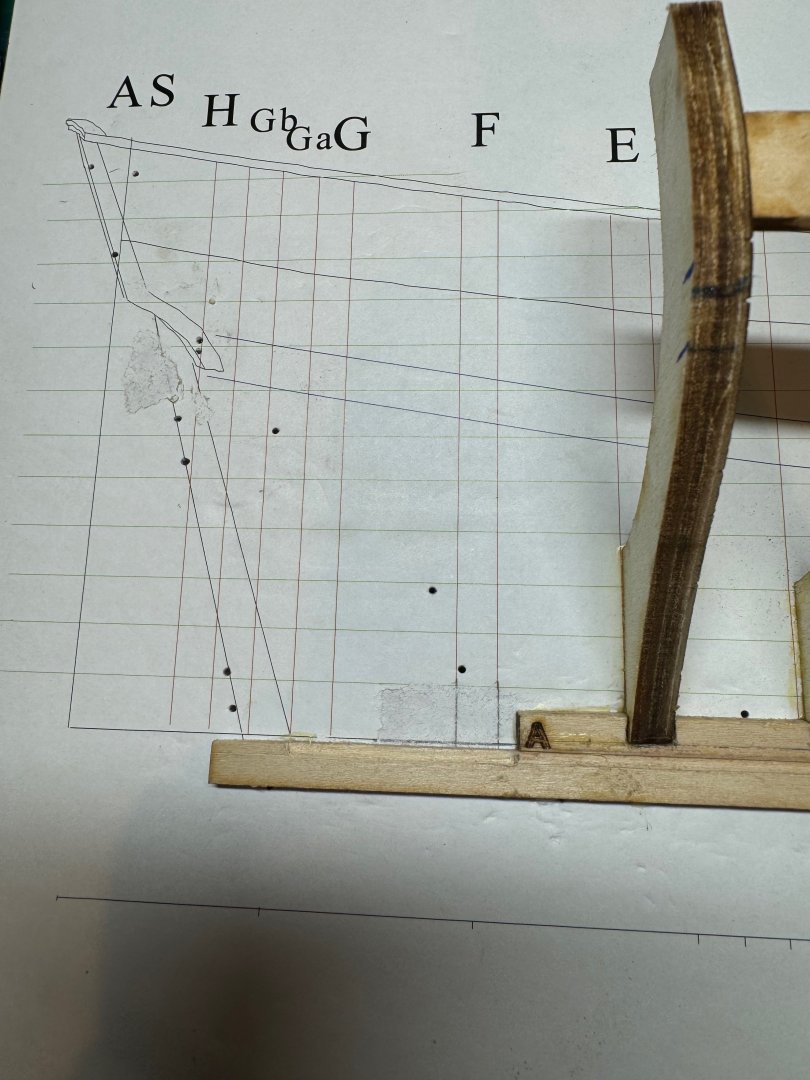
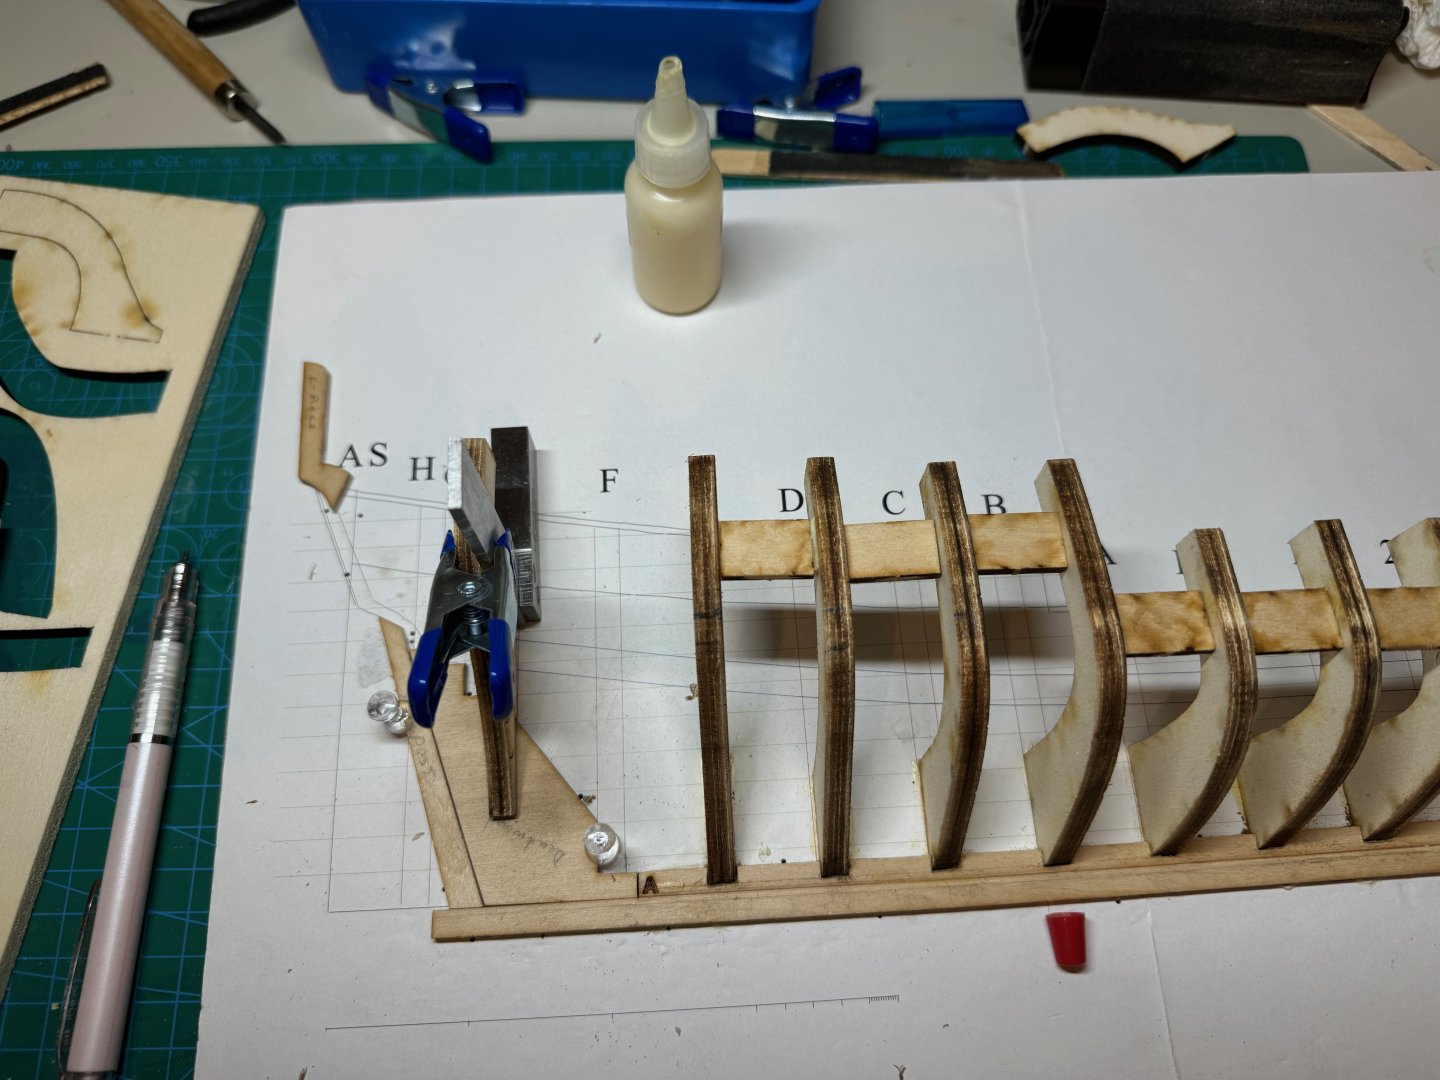
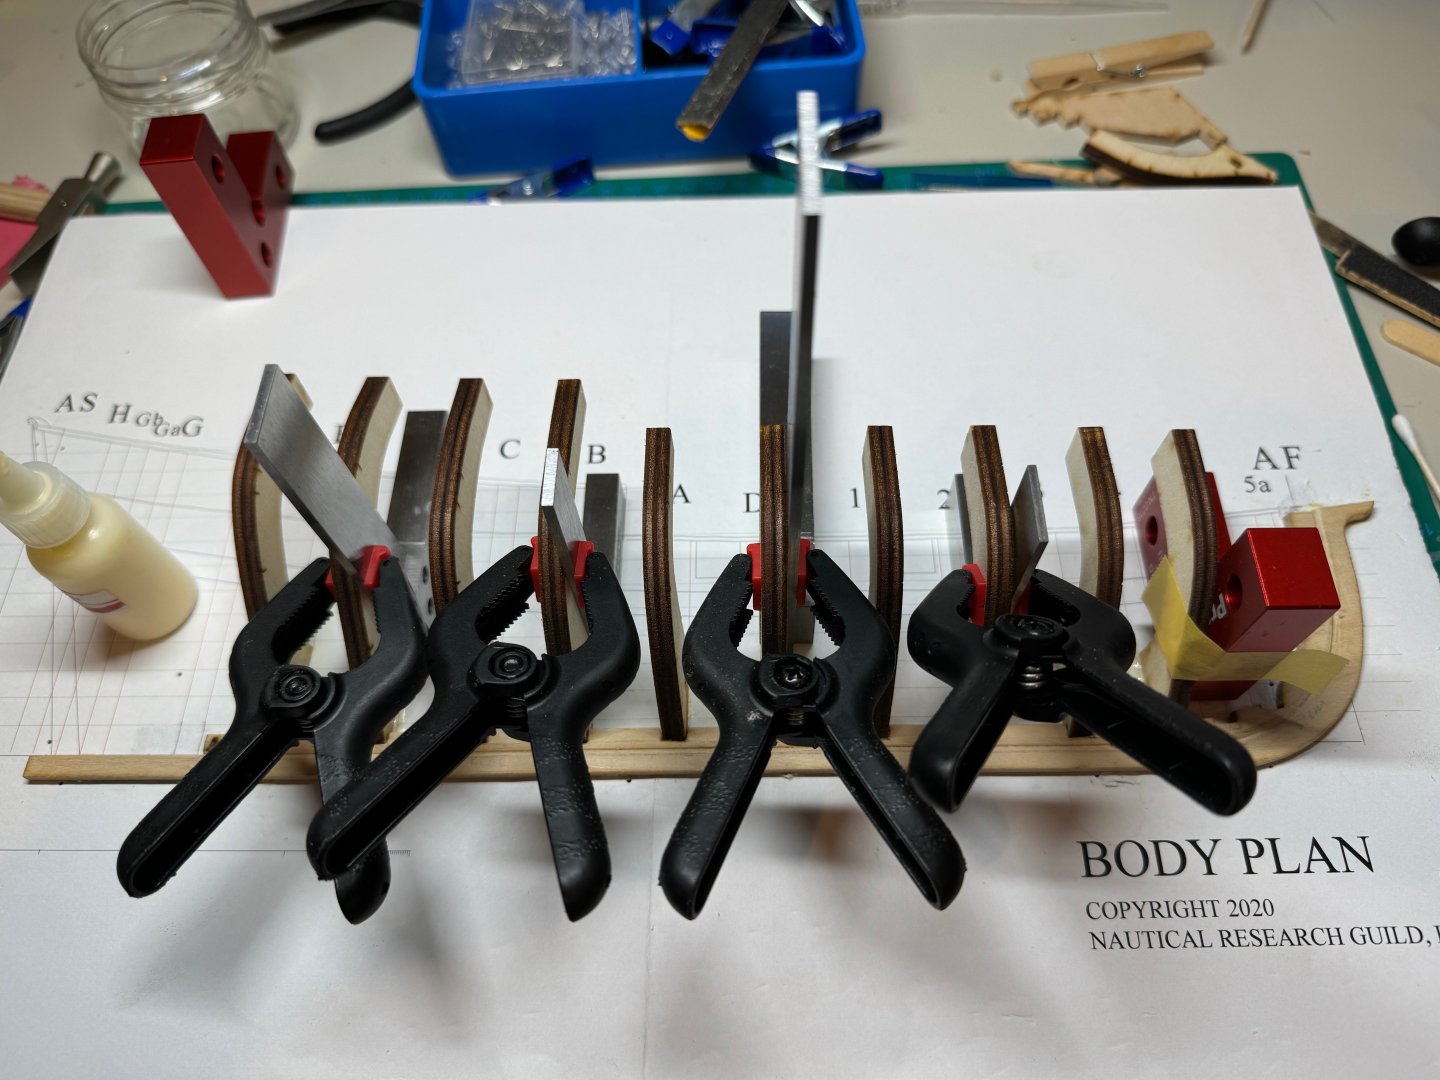
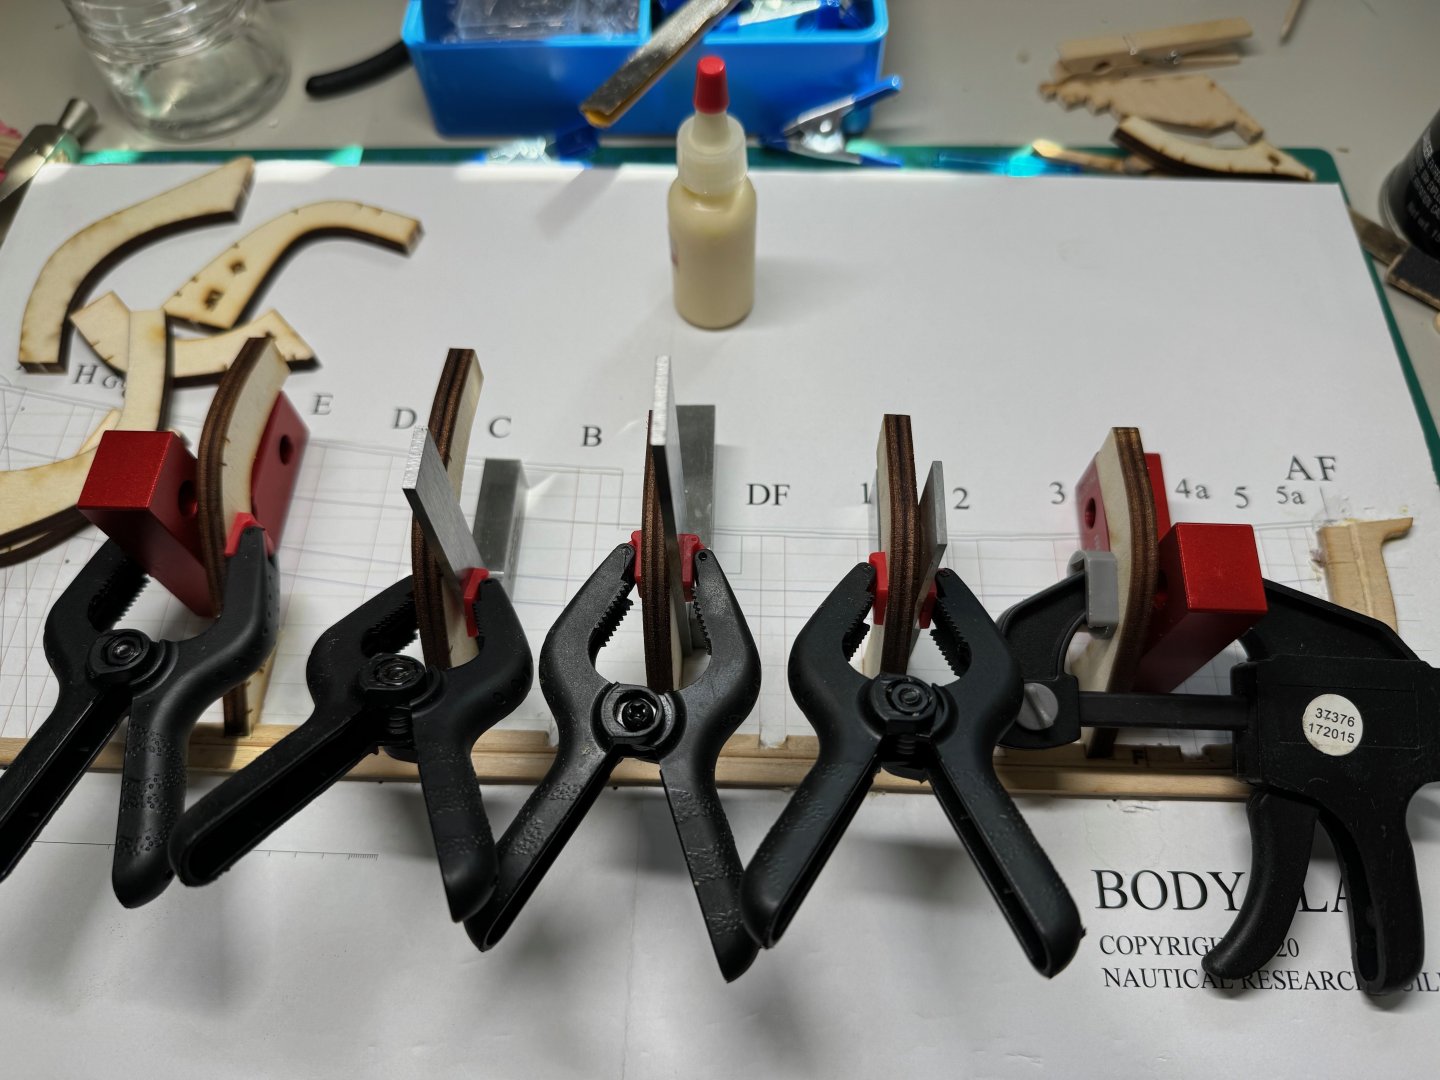
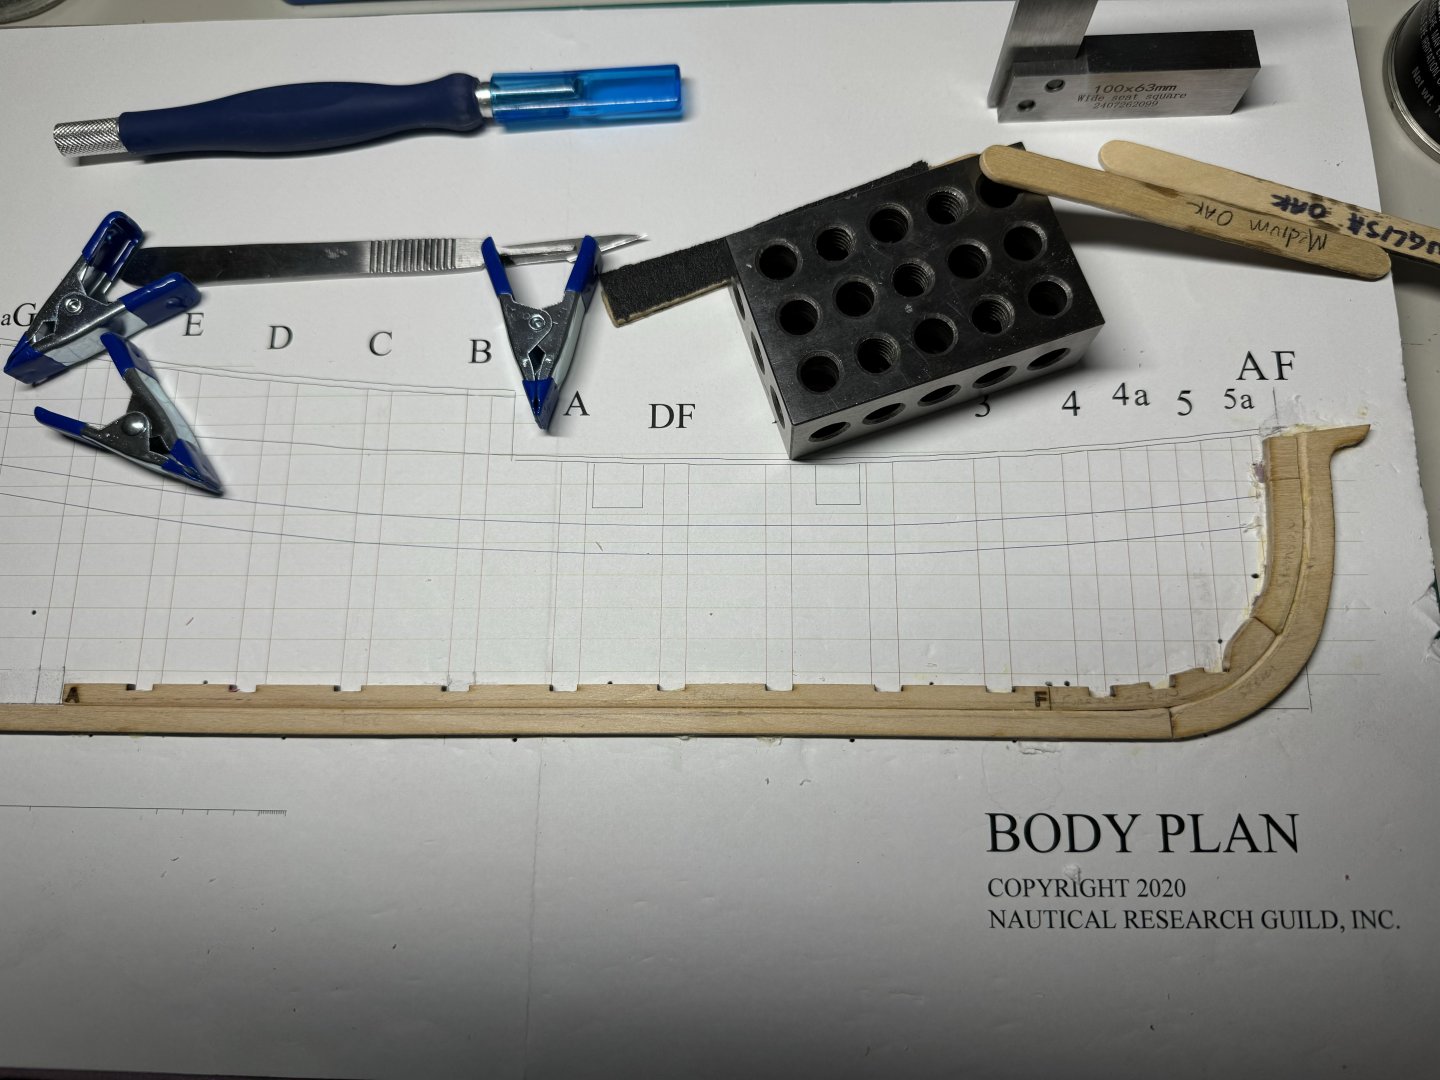
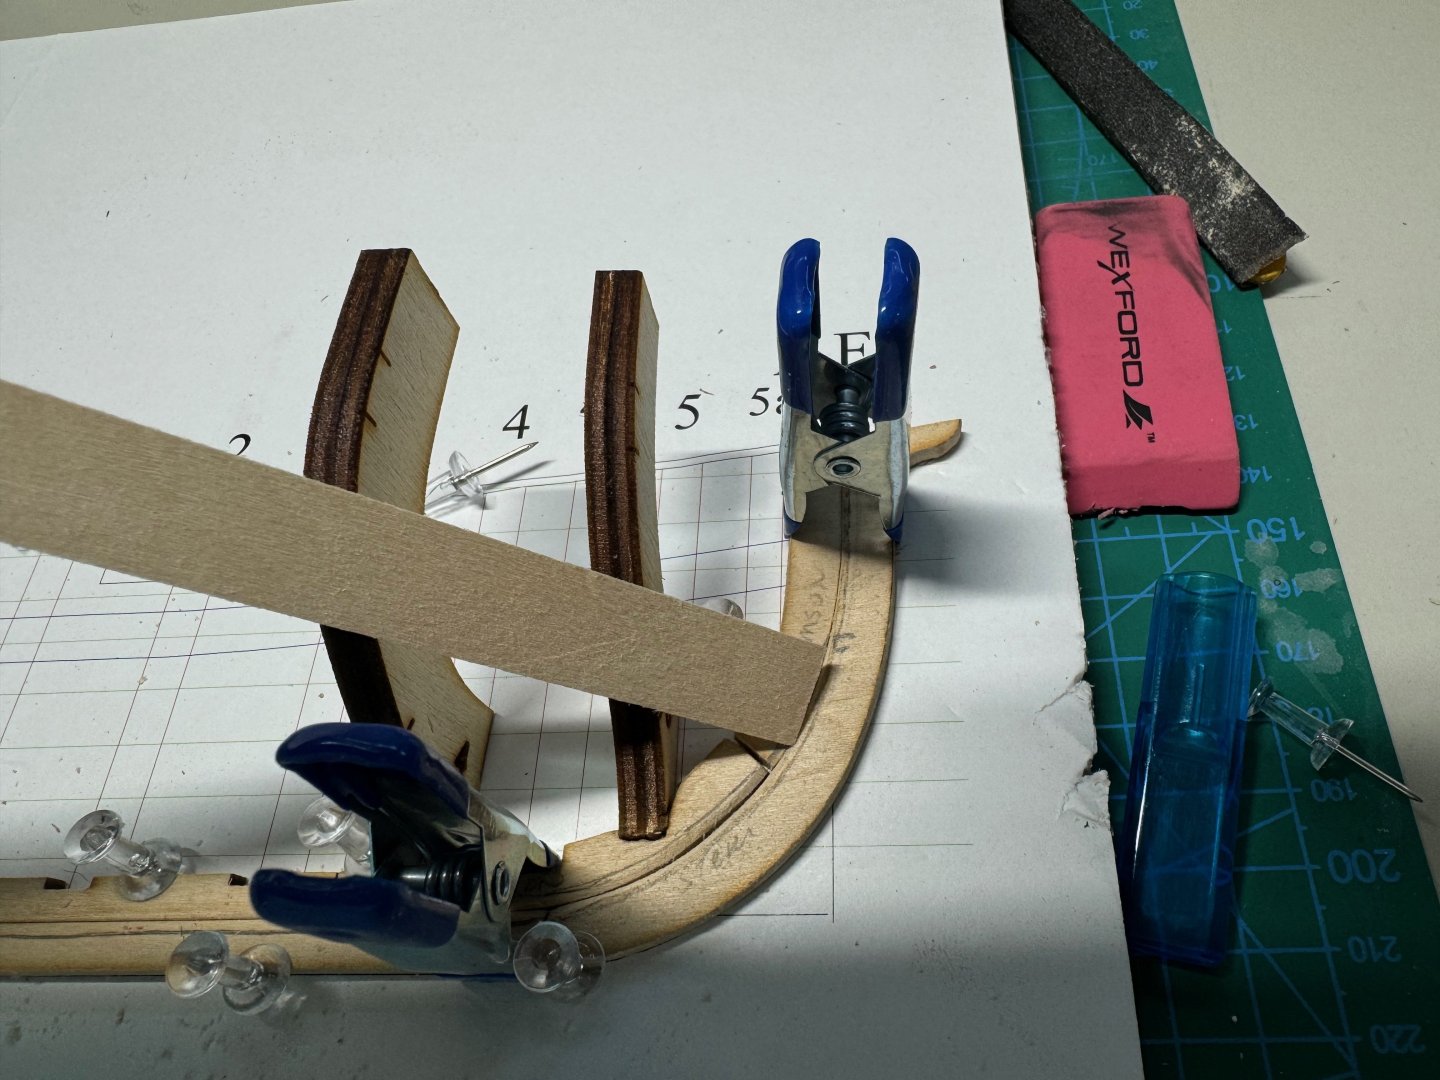
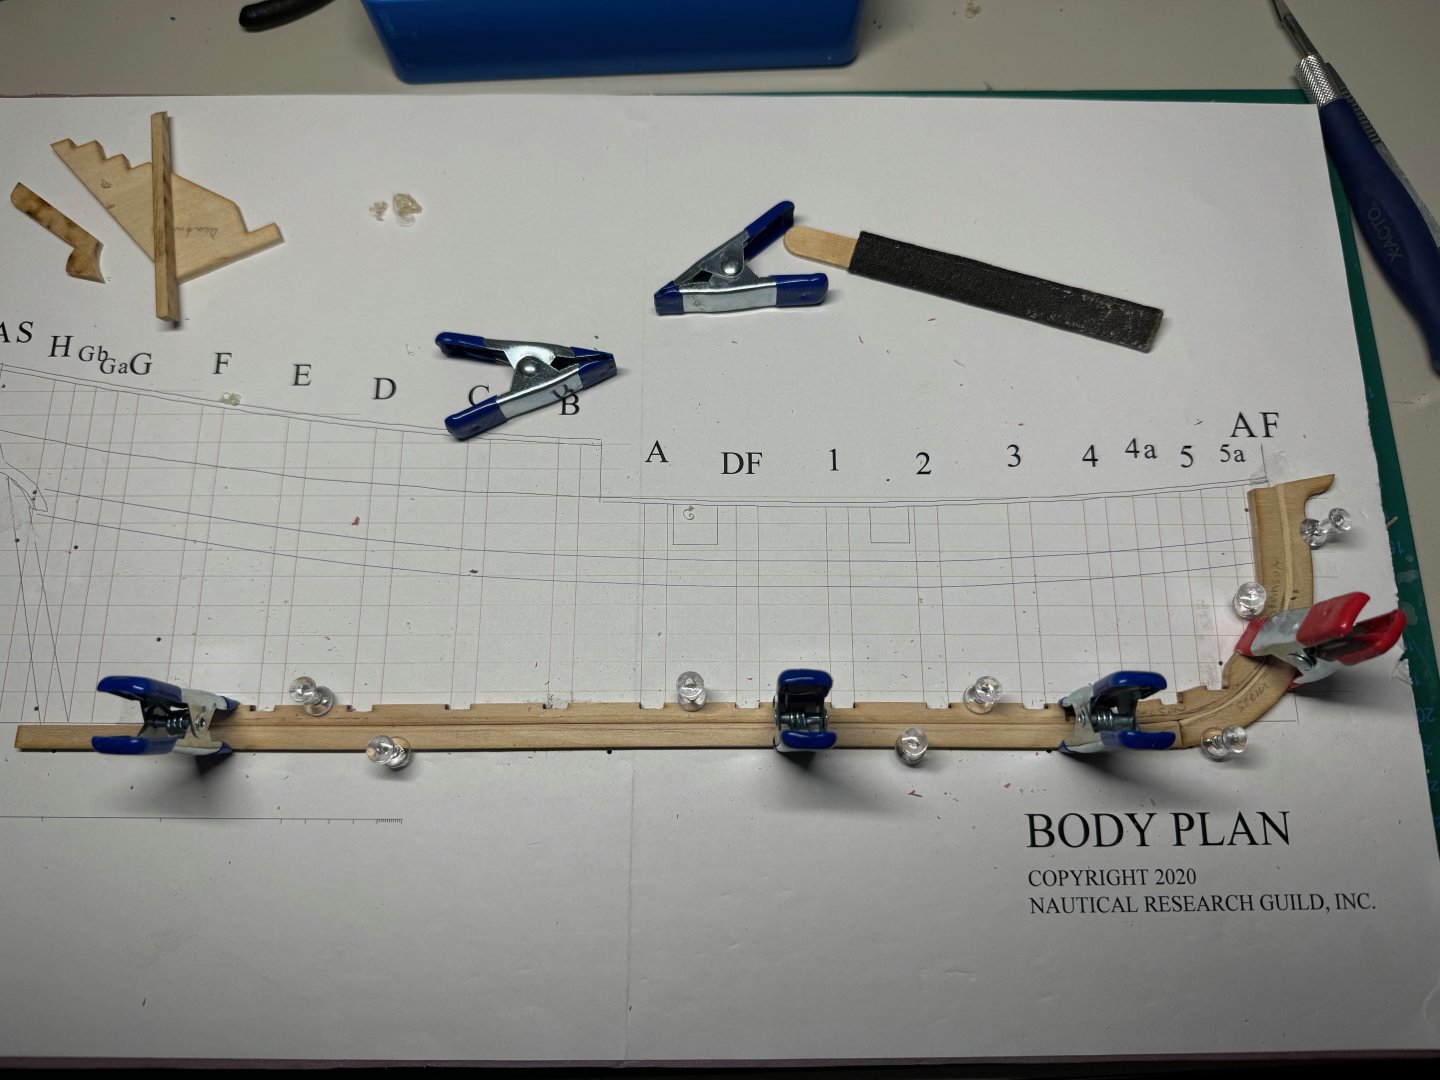
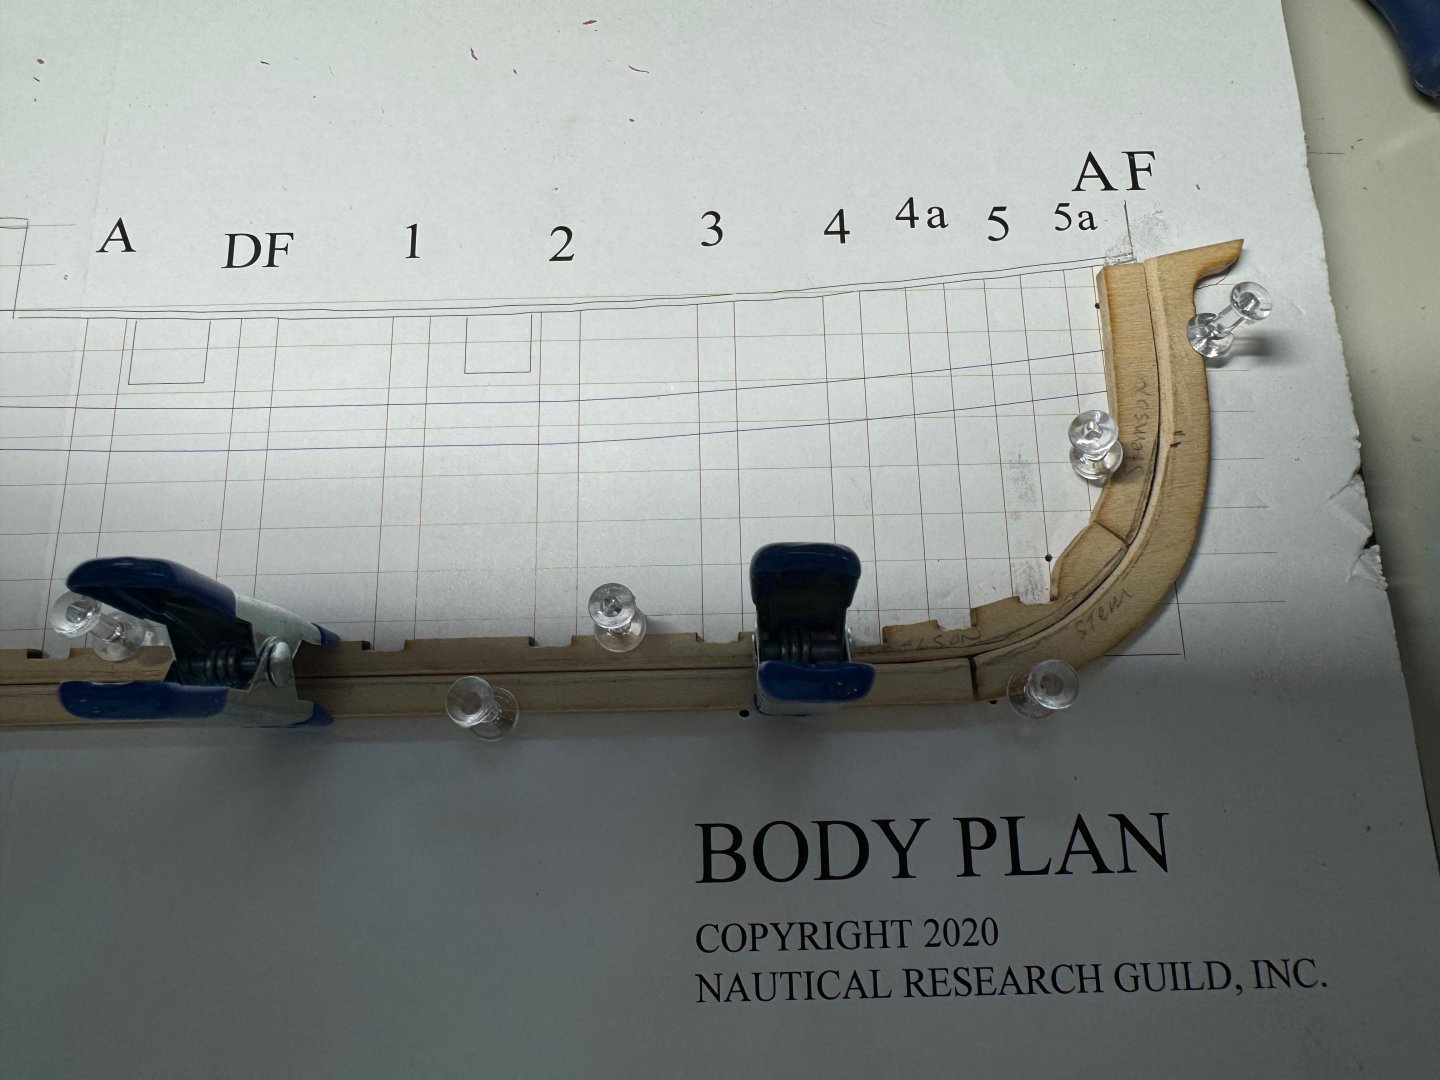
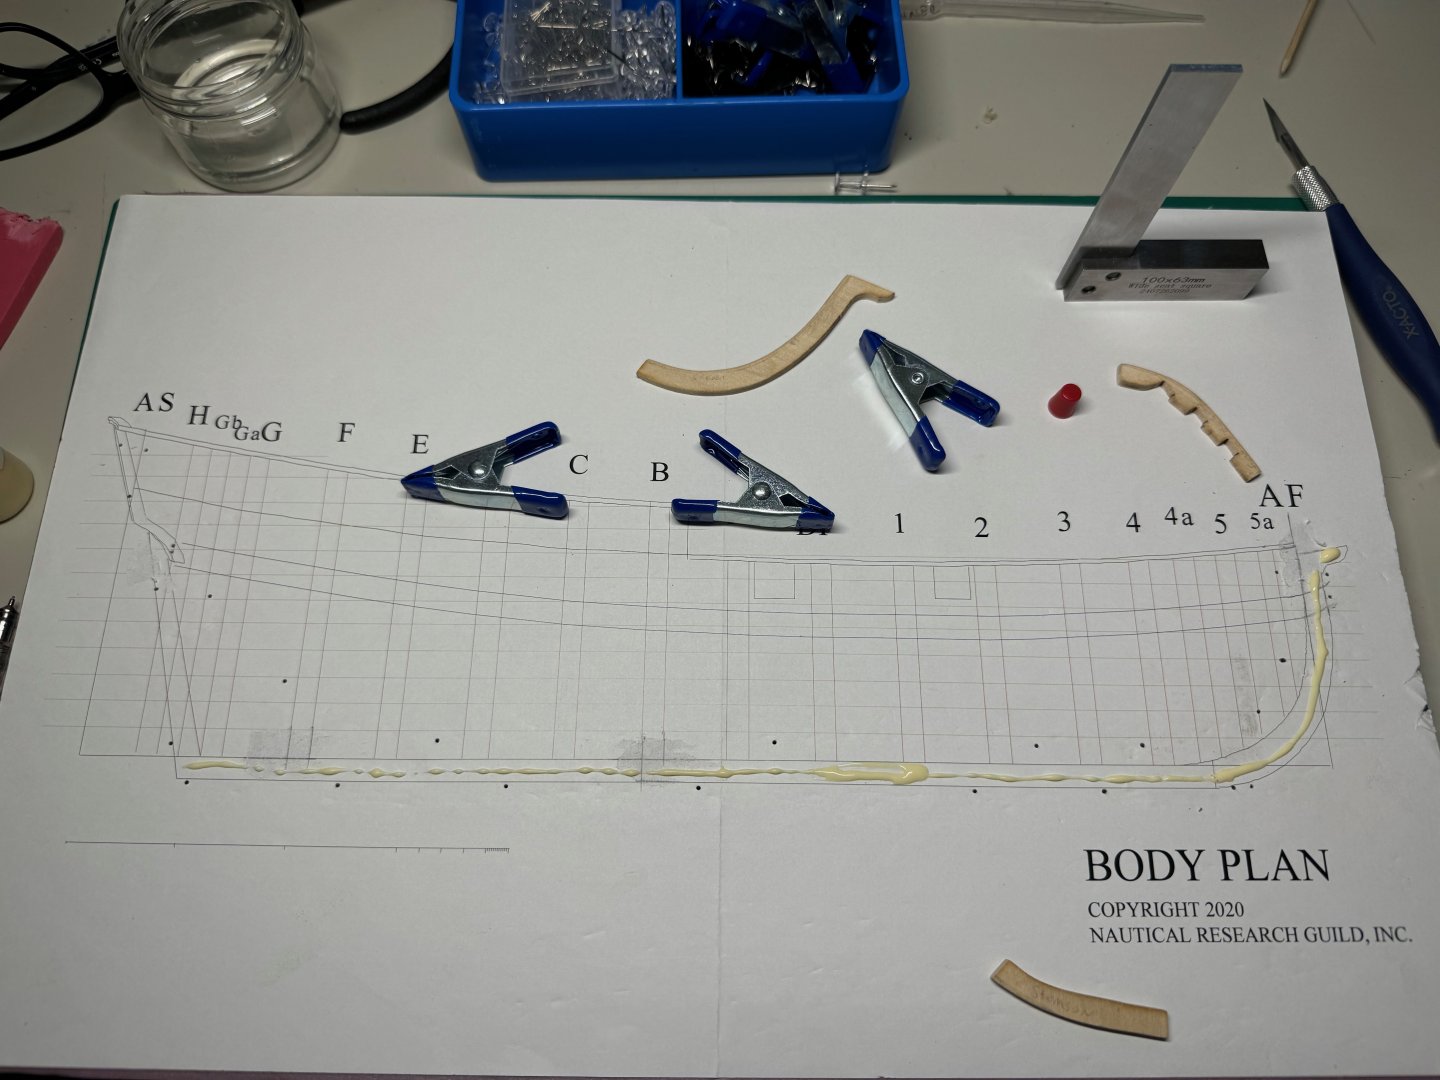
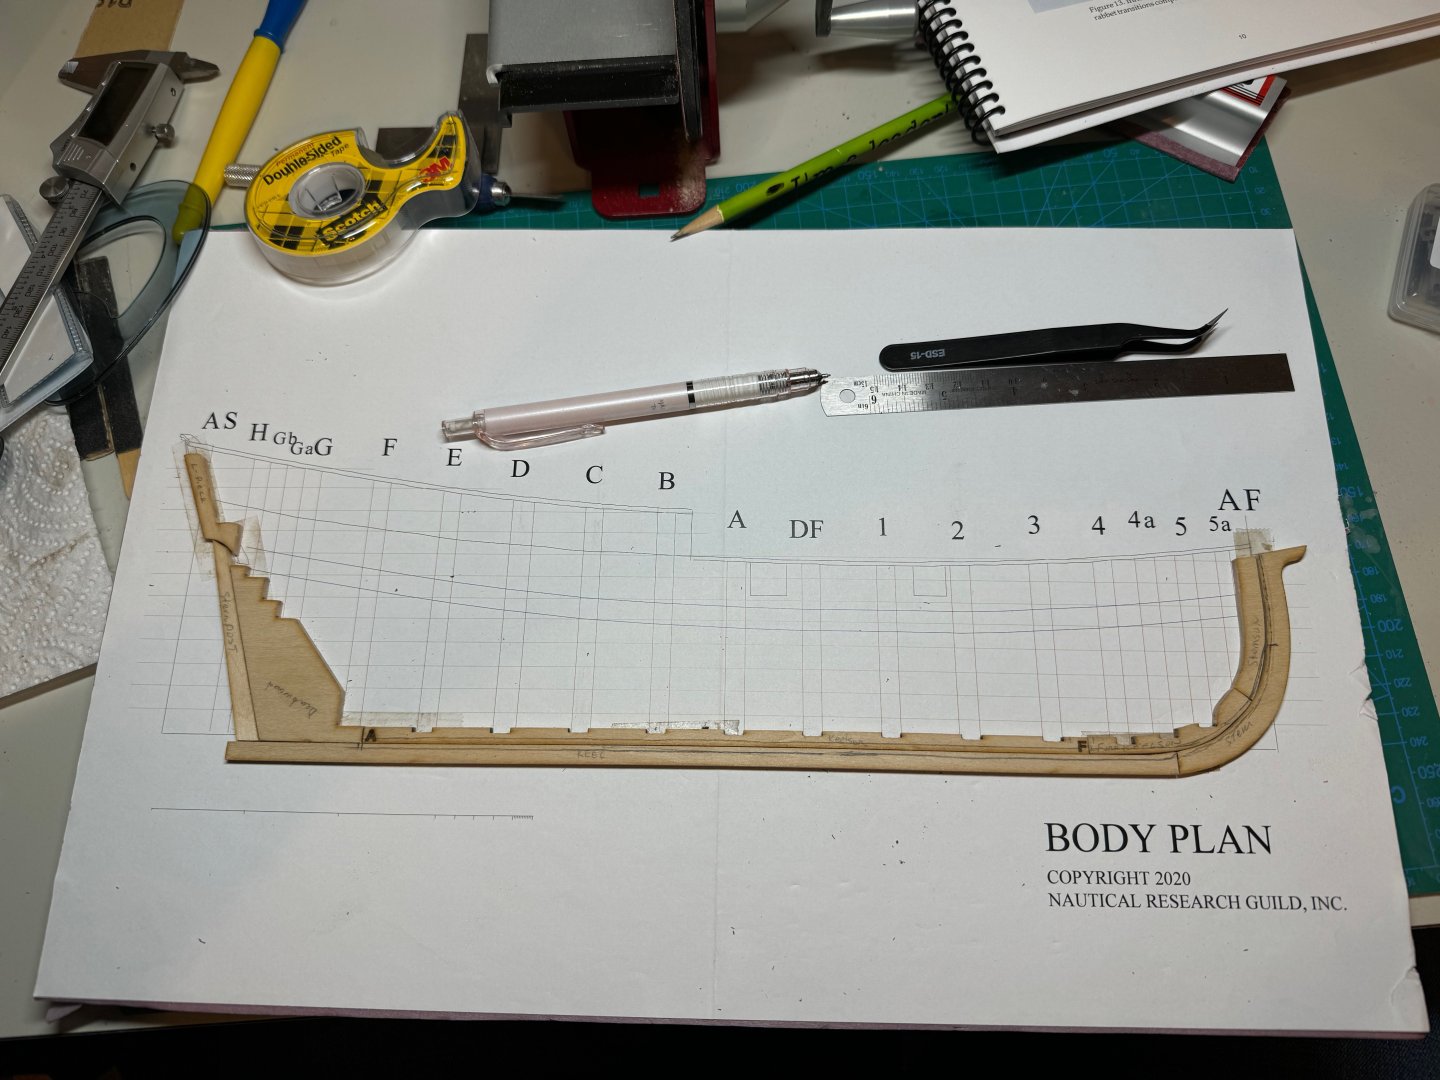
Good evening. Here is my next update. Today, I extended the slots on the keelson. Next I glued in the frames in two batches. Batch 1 -> Frames E, C A, 1, 3 Batch 2 -> Frames -> D, B, DF (O), 2, 4 Next I added the fillers, and knocked off some of the char on the bulkheads. I then marked out the bearding line use frames G and H as guides. I then took a french curve to make the curve. Next, I shaped the bearding line by marking 1/32 and then blending in the curve. Next i extended the rabbet along the keel until the the stern post. This rabbet is 90 degrees. I then glued in the deadwood, sternpost and L-shaped pieces Finally I glued in F and G frames. I initially had H glued in but I was a little hasty and removed it before it set. I will let this firm up over night and continue on the next step tomorrow. Cheers


-
Thank you for the kind words @AsherT. I am looking forward to seeing your build log.
- 56 replies
-
- 1
-
-
- grand banks dory
- Midwest Products
- (and 2 more)
-
i use the ultimation sander and cutter they are amazing.
-
Update here is the better picture of the glued keel. you can see where the keelsom broke.
-
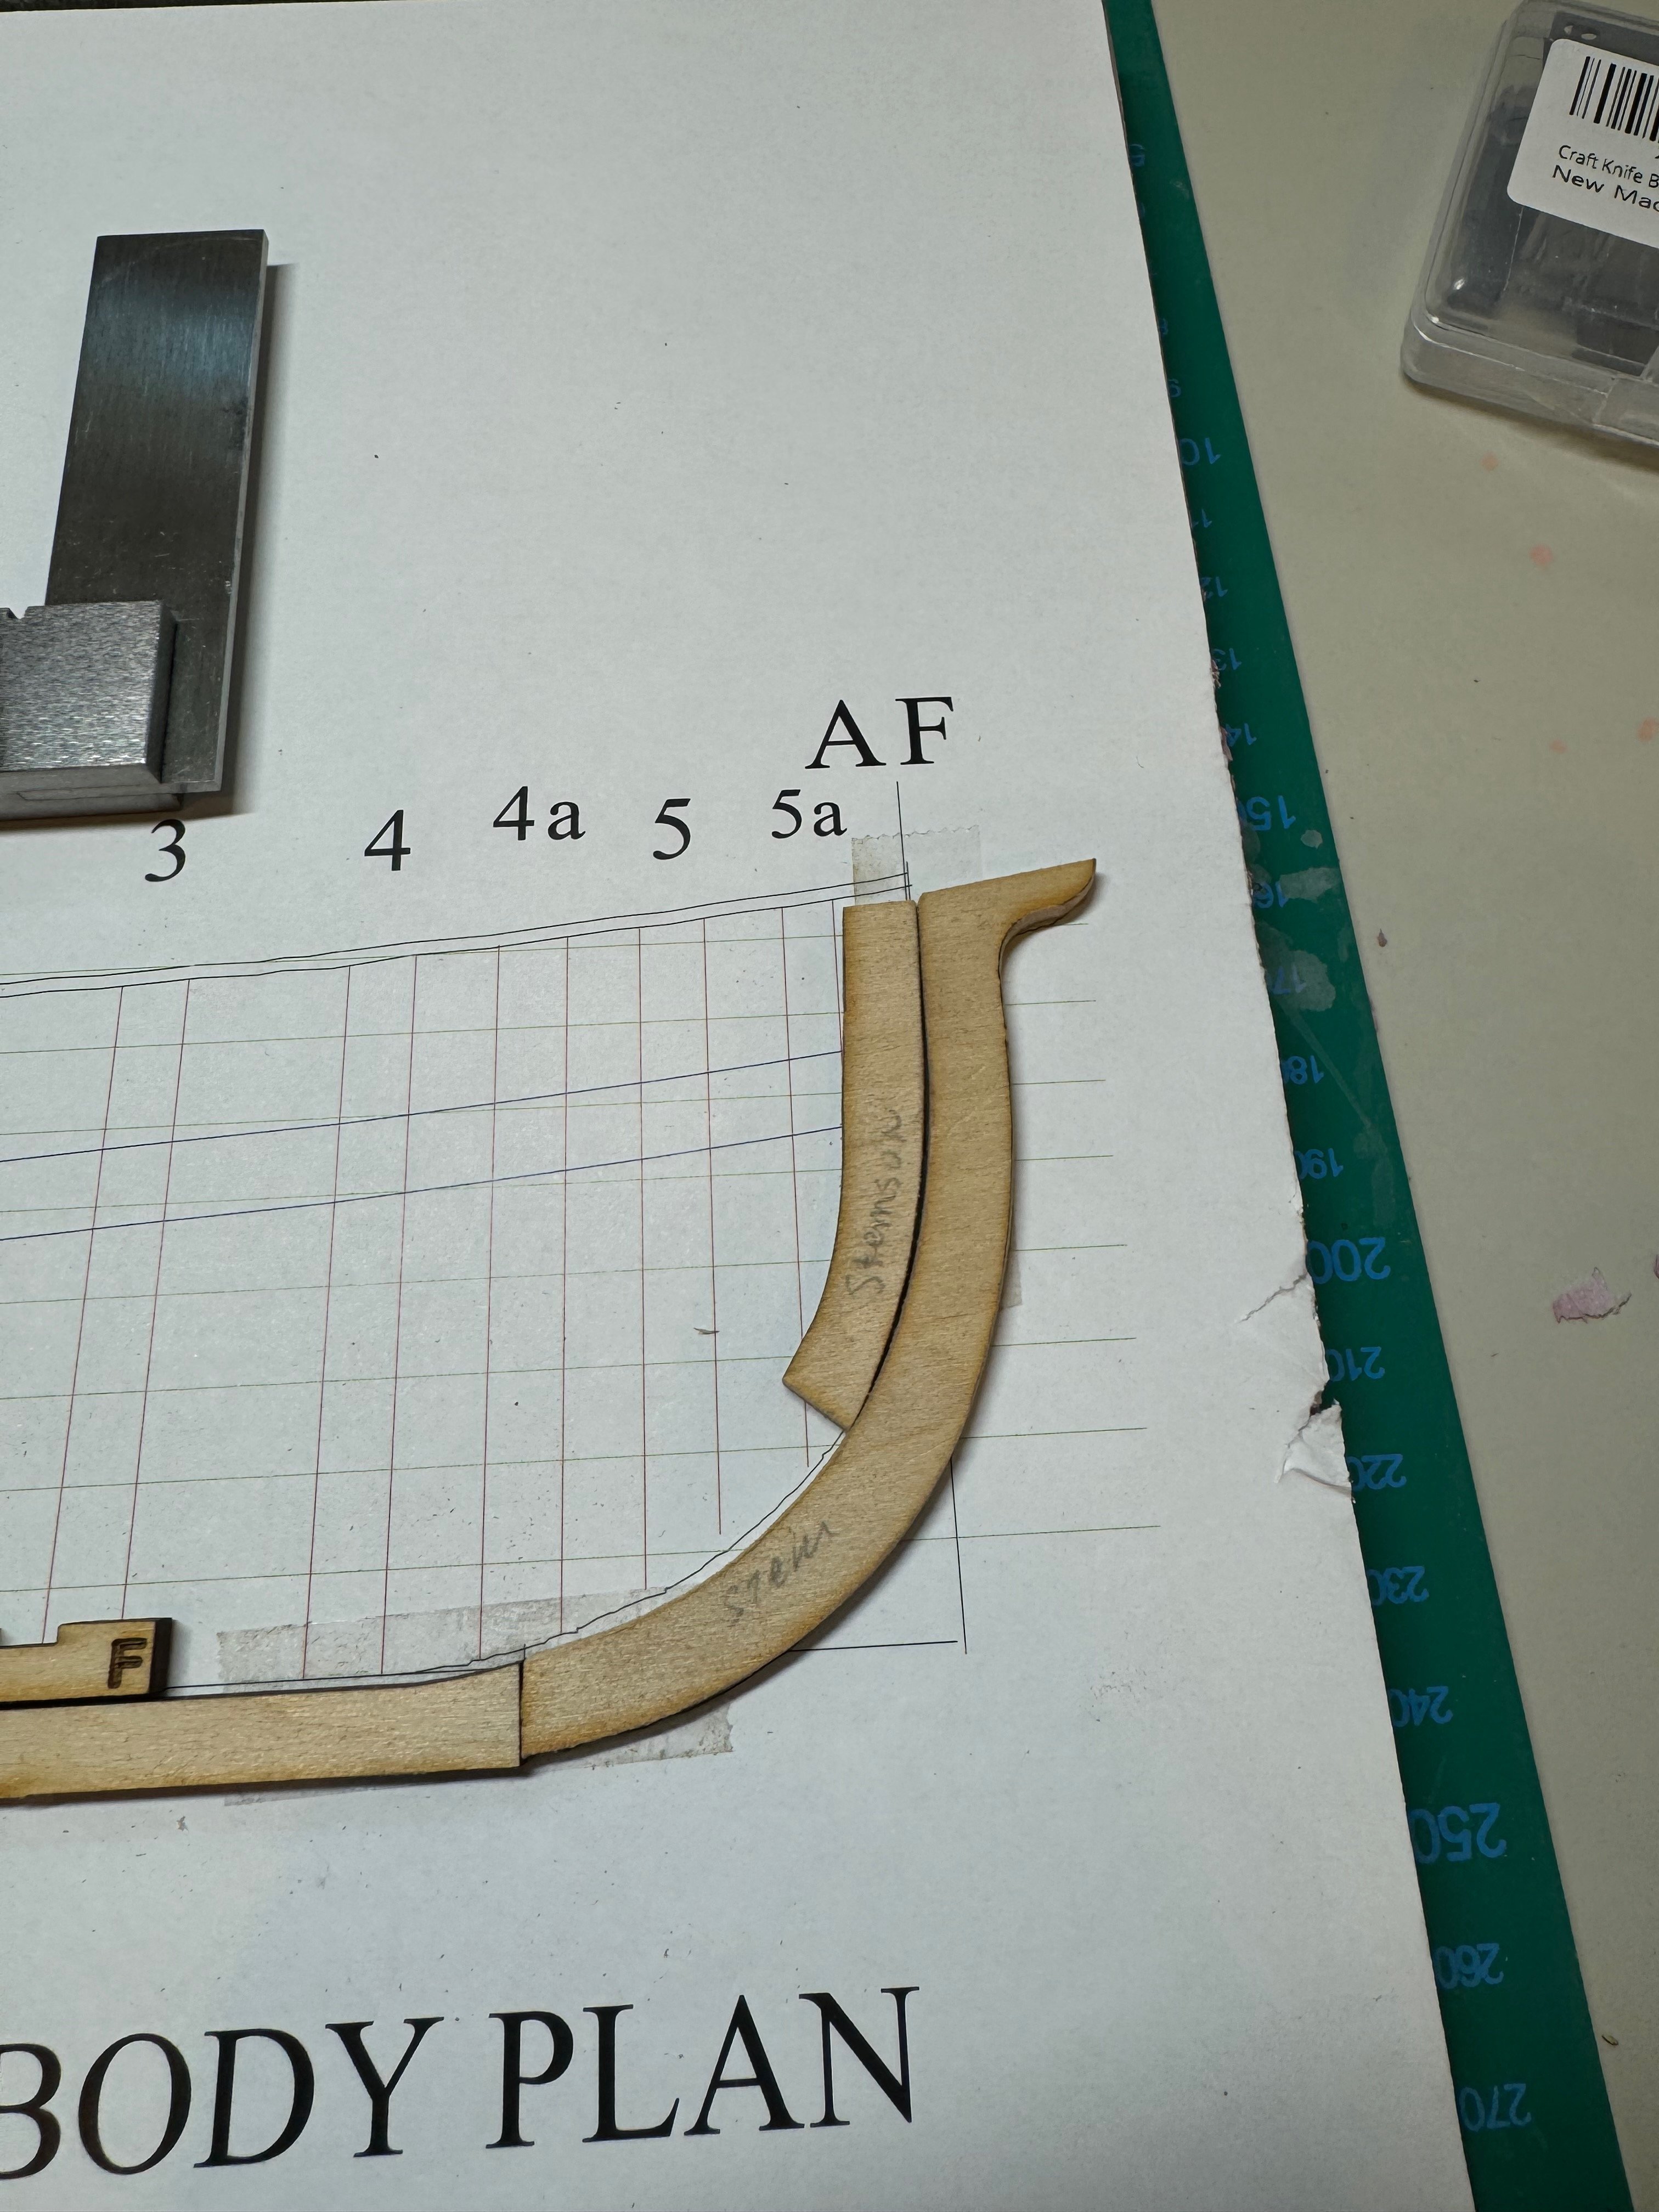
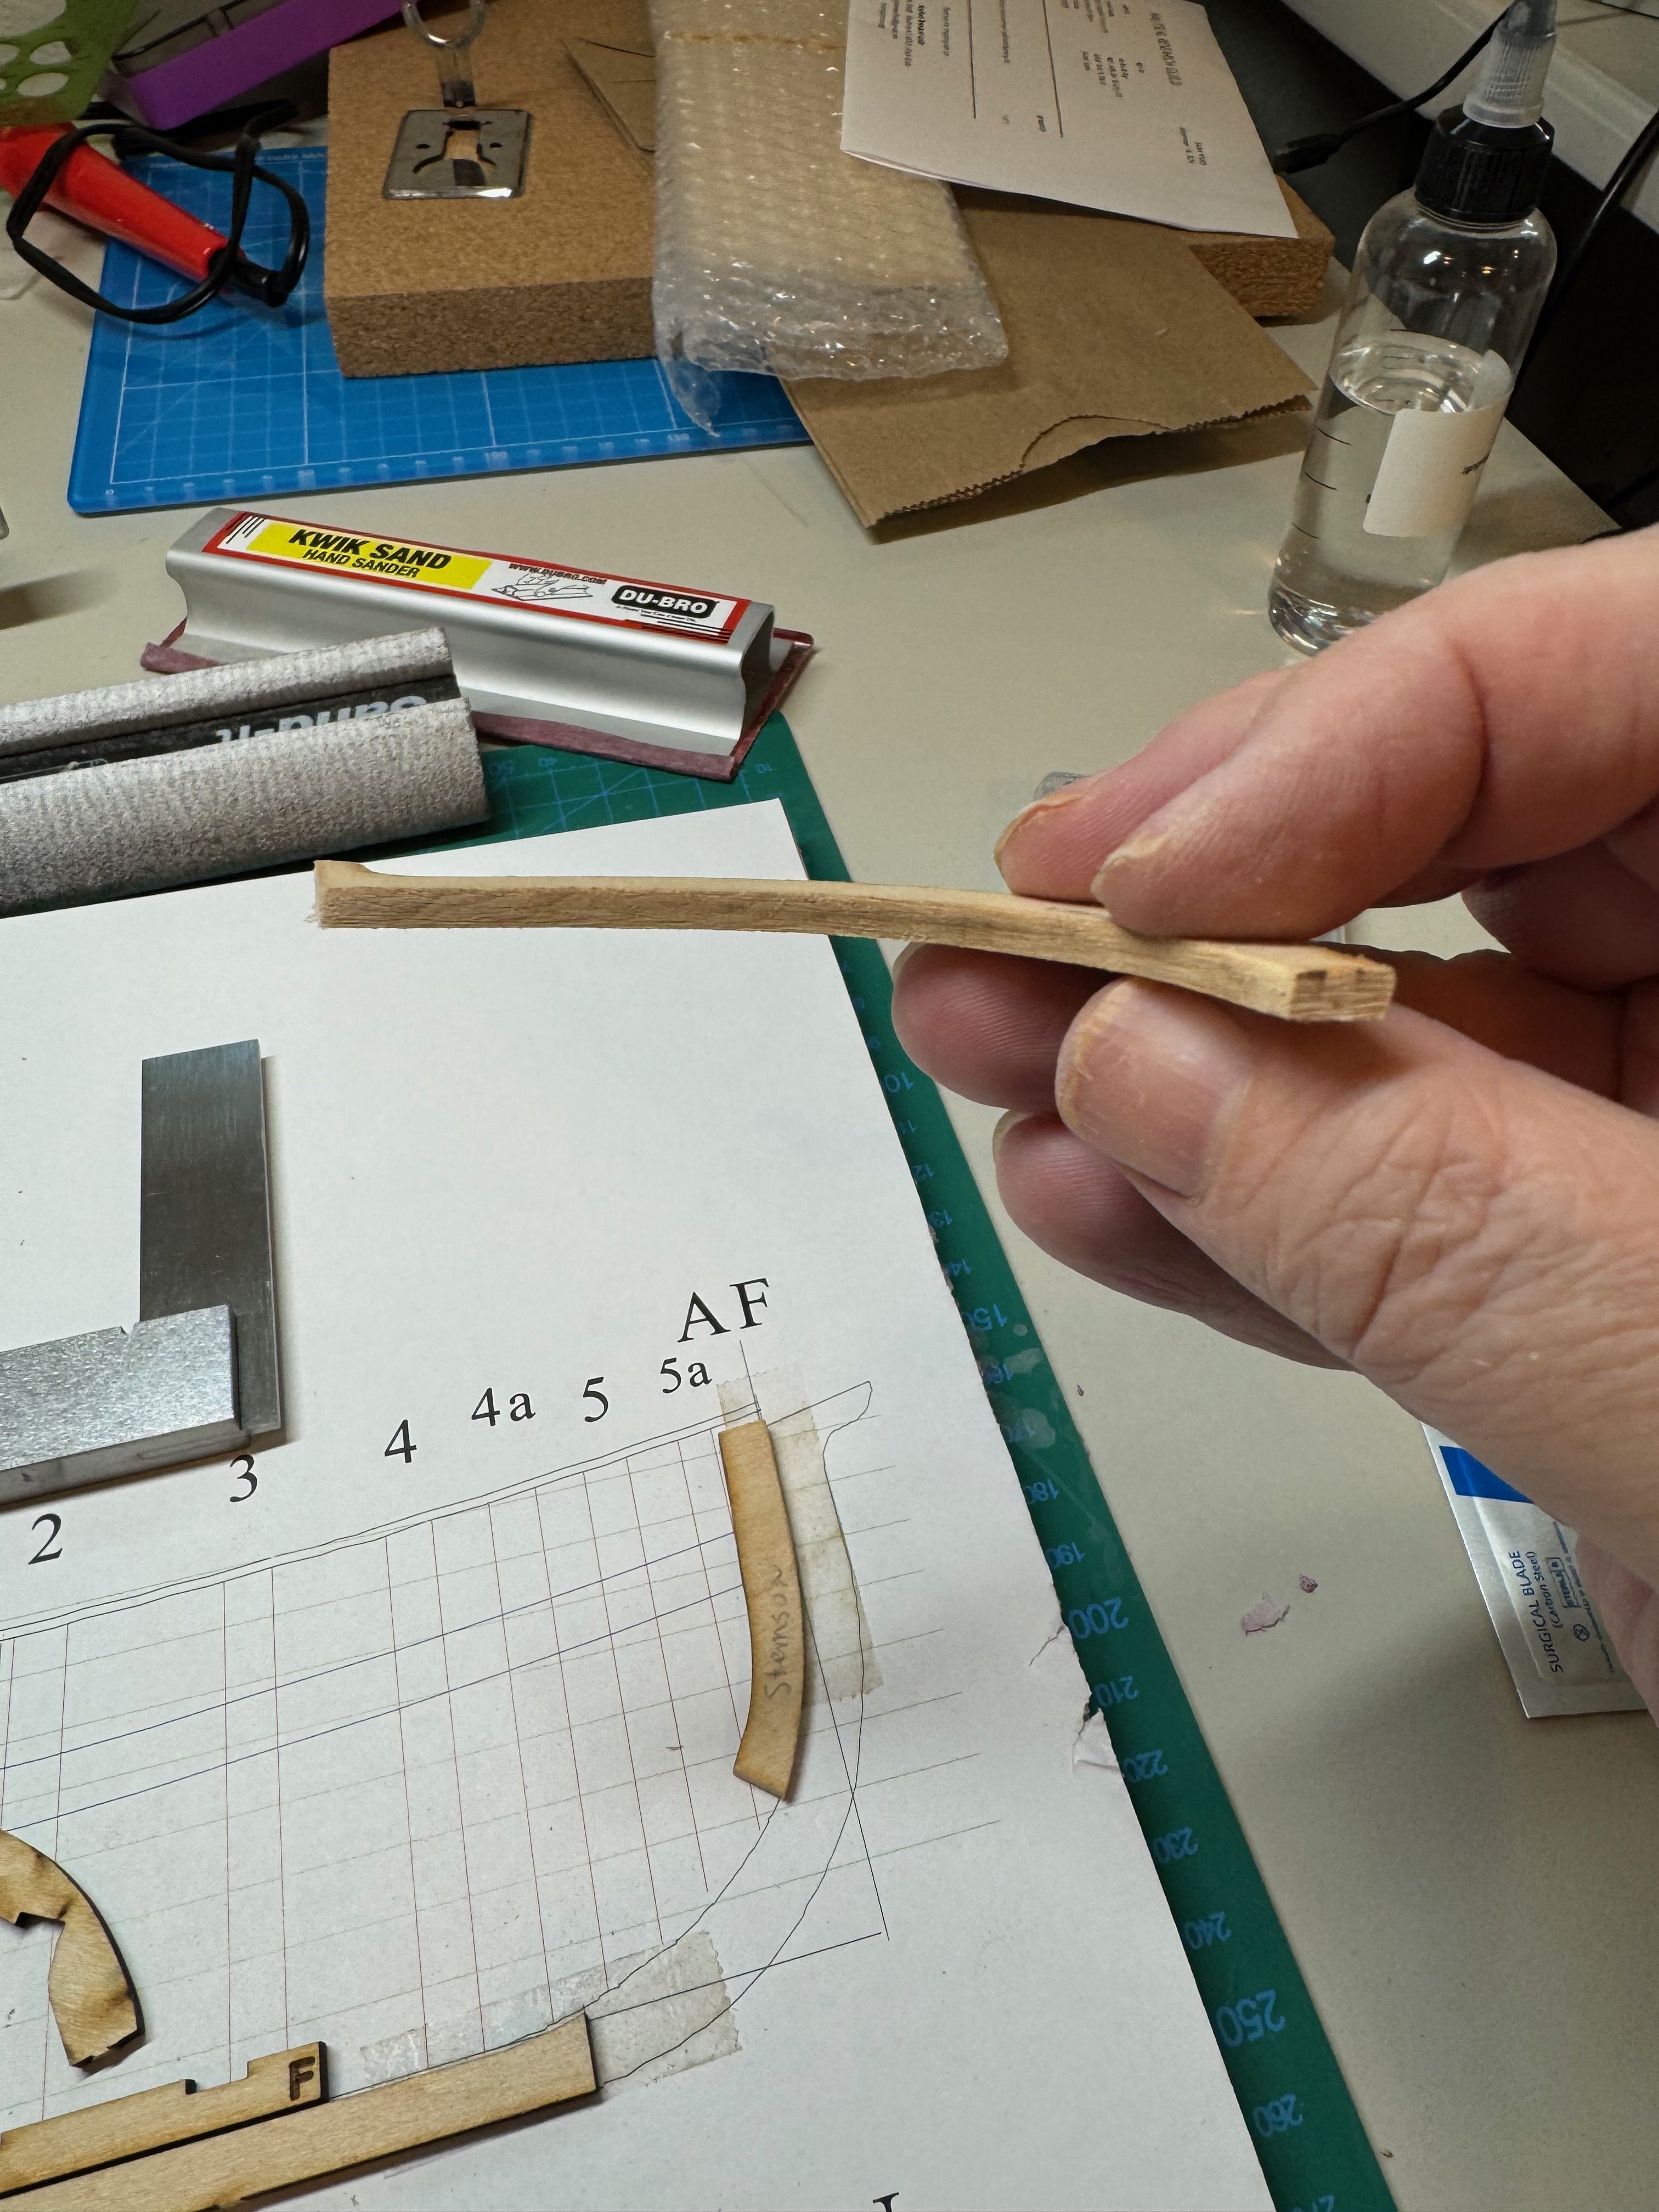
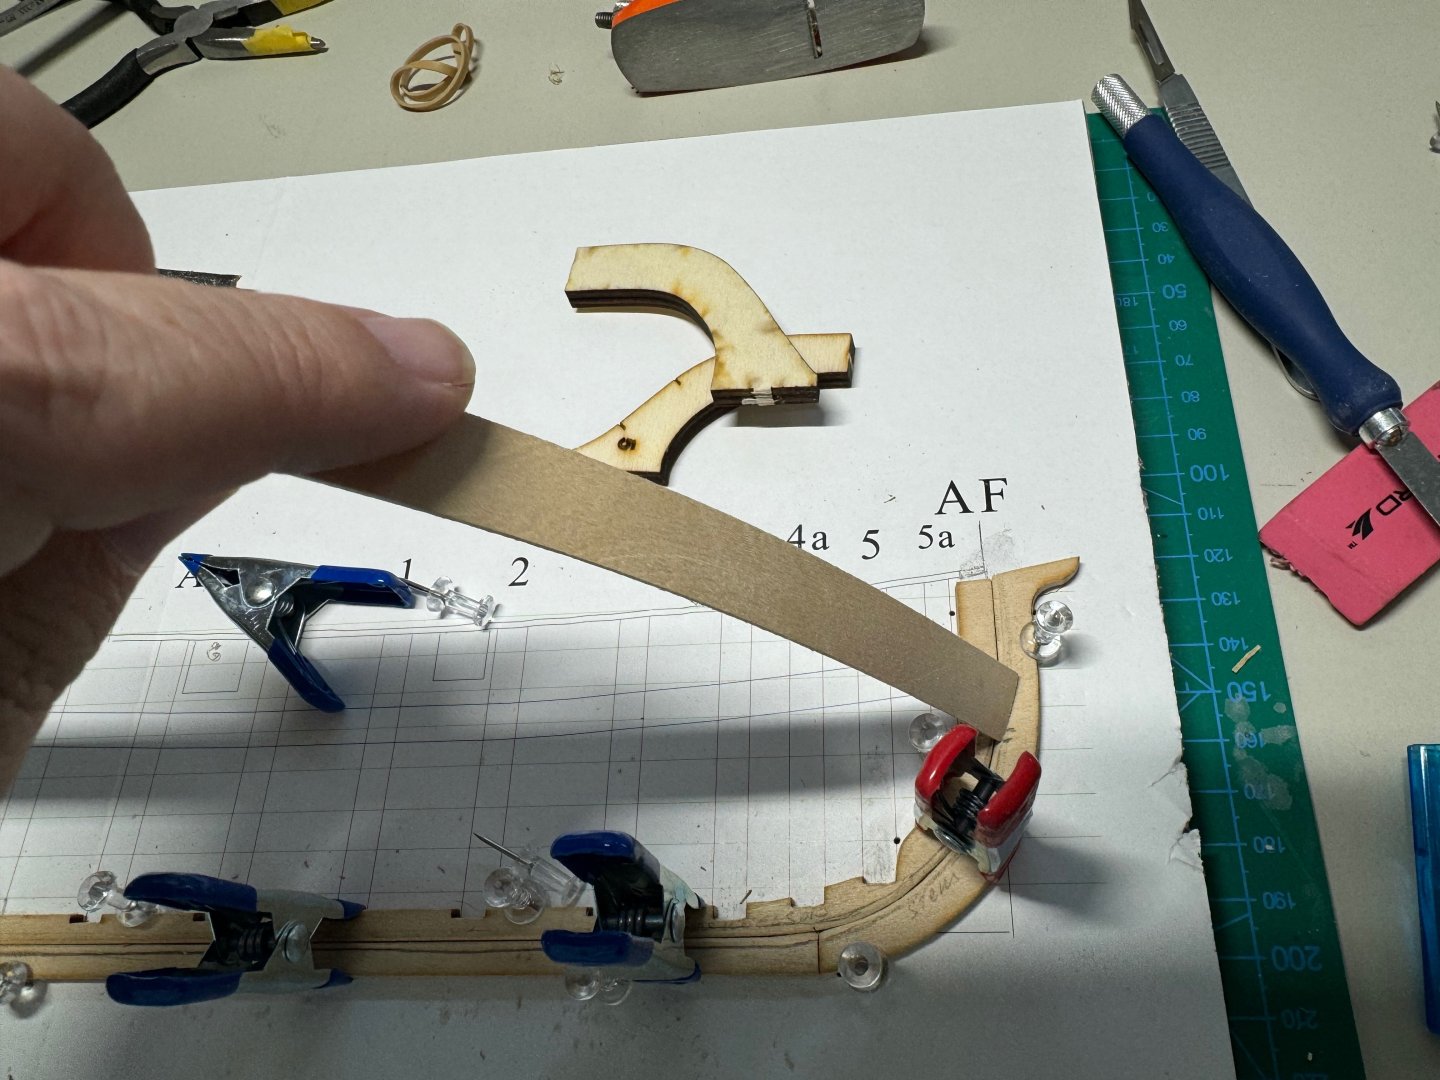
Good afternoon, I made some progress on my kit today, First I added the rabbet Next, i cut out the 4th and 5th bulkhead so I can get a better visualization of the the rabbet on the stem, and stemsom. I was able to get some good contract with a sample 1/32 piece from my last project. Next I spent some more time deepening the rabbet, and getting the angle right. I also use an eraser to remove some of the pencil marks Hopefully you can see the transition to 90 here in the stem Finally I started the gluing process I did break the stem post as I had to move it and it was setting up faster than expected. I noticed my crafting room was 78 I also found that the stem was lifting, so I used a couple or 3x2x1 blocks to hold it down. Cheers jim


-
i had a lot of fun with that model too.
- 28 replies
-
- 2
-
-
- Lowell Grand Banks Dory
- Model Shipways
- (and 1 more)
-
Ohh I missed the page 11 comment. Thank you.
- 84 replies
-
- 4
-
-
- half hull planking project
- NRG
- (and 2 more)
-
i am at the same spot and i just marked everything out and have given it a couple of days to reflect before making the cuts. i am still having a challenge in visualizing the rabbet at the stem. more so the start of the mortise and the end
- 84 replies
-
- 4
-
-
- half hull planking project
- NRG
- (and 2 more)
-
I picked up both the slicer and sander kit. Both tools are fantastic, and work as designed
-
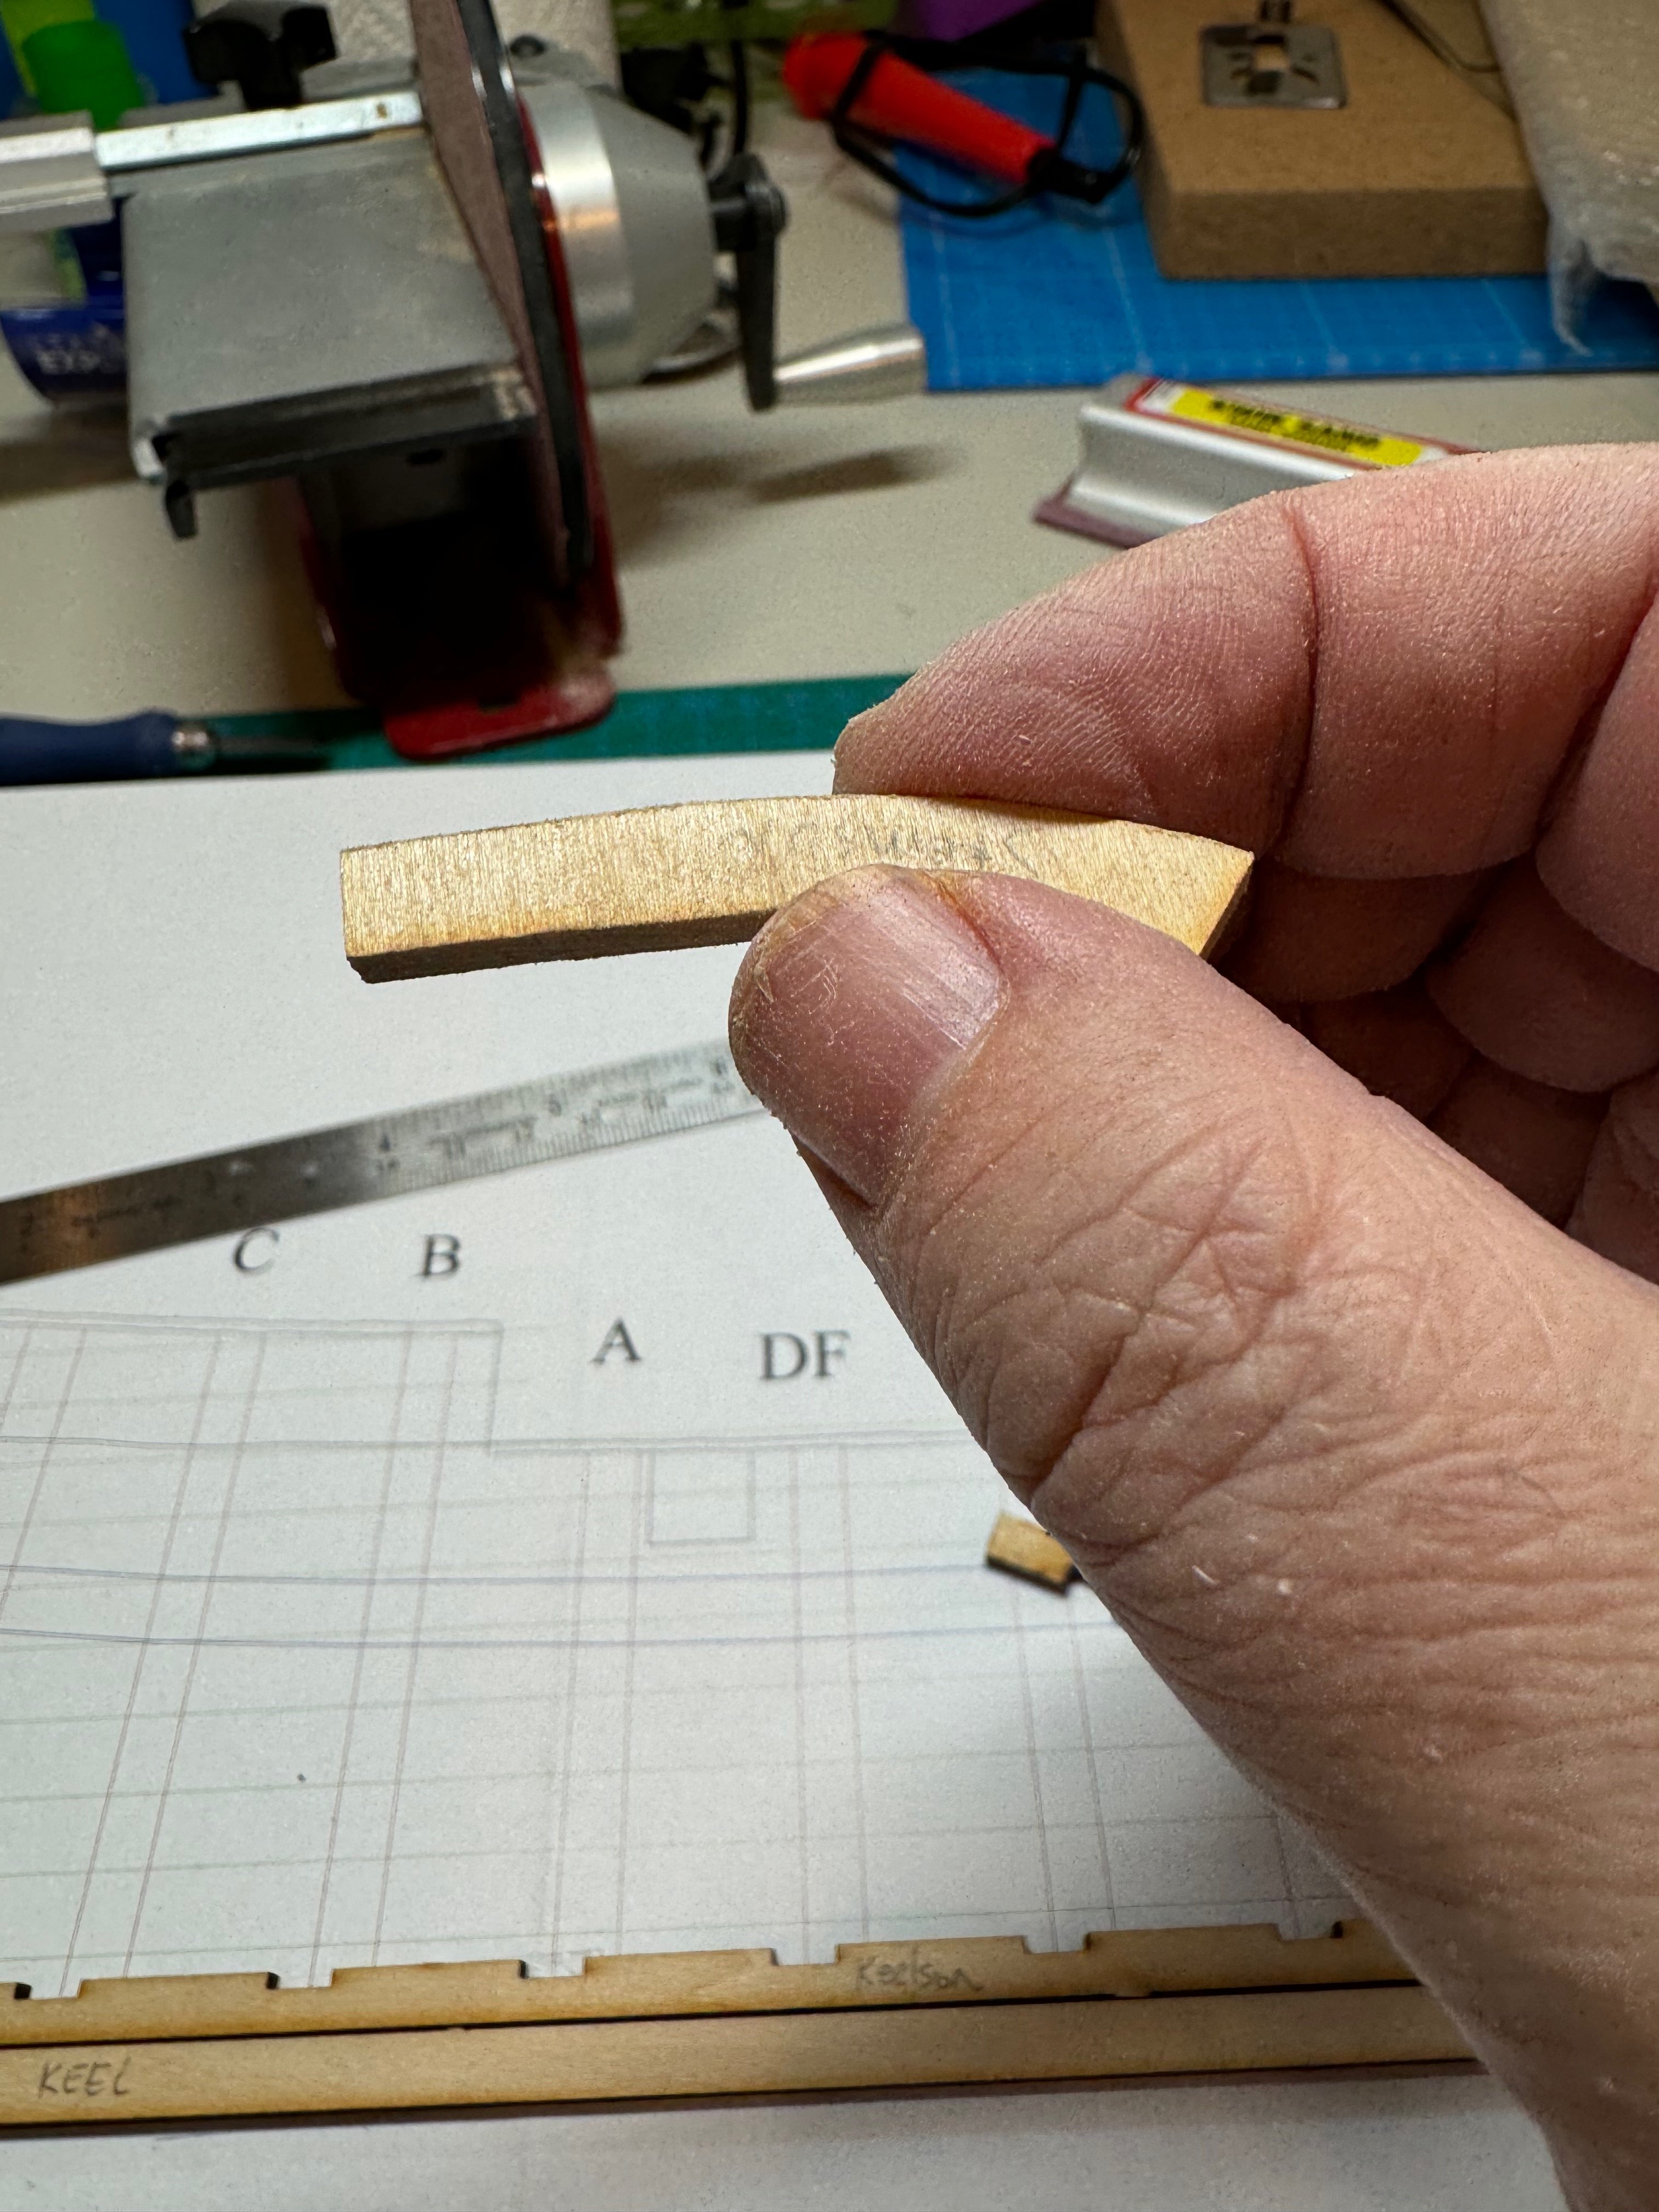
@Gregory I had to sand mine down a bit on both the keelsom and fore keelsom to get it to fit, and line up mostly to the lines.
- 84 replies
-
- 5
-
-
- half hull planking project
- NRG
- (and 2 more)
-
I see that the lines do not fully match on the keelsom. I had the same issue this looks really good.
- 84 replies
-
- 5
-
-
- half hull planking project
- NRG
- (and 2 more)
-
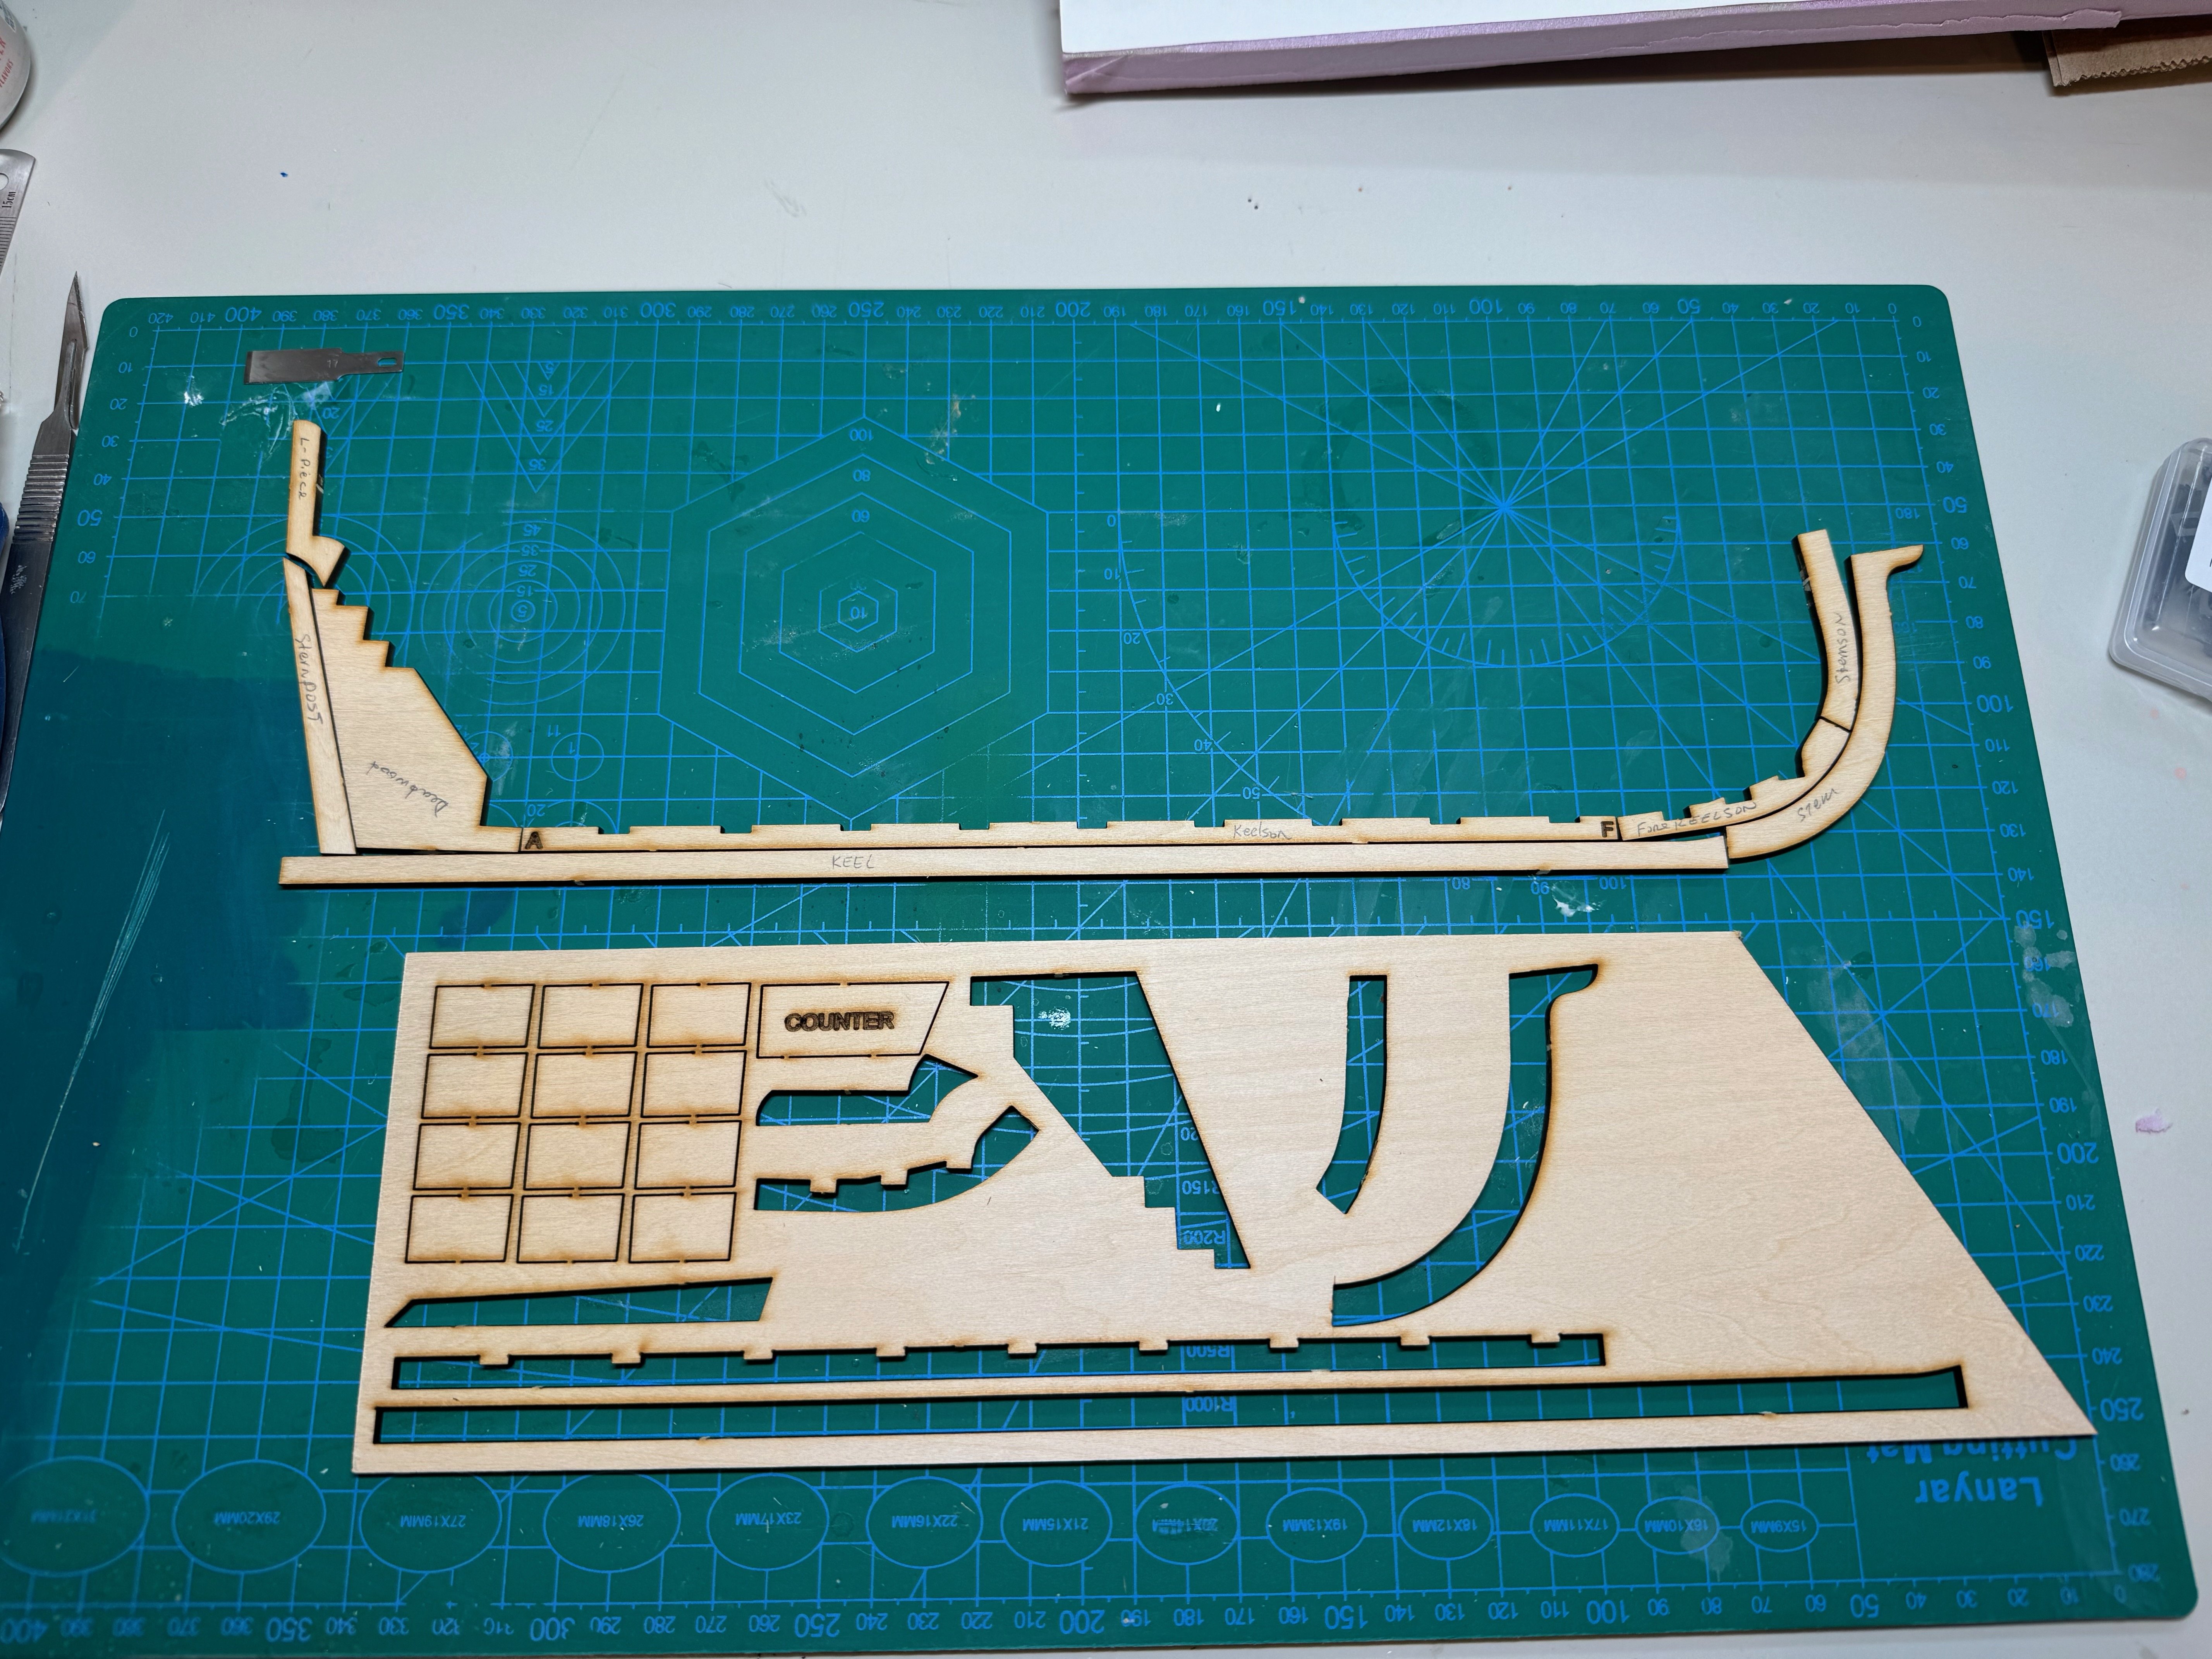
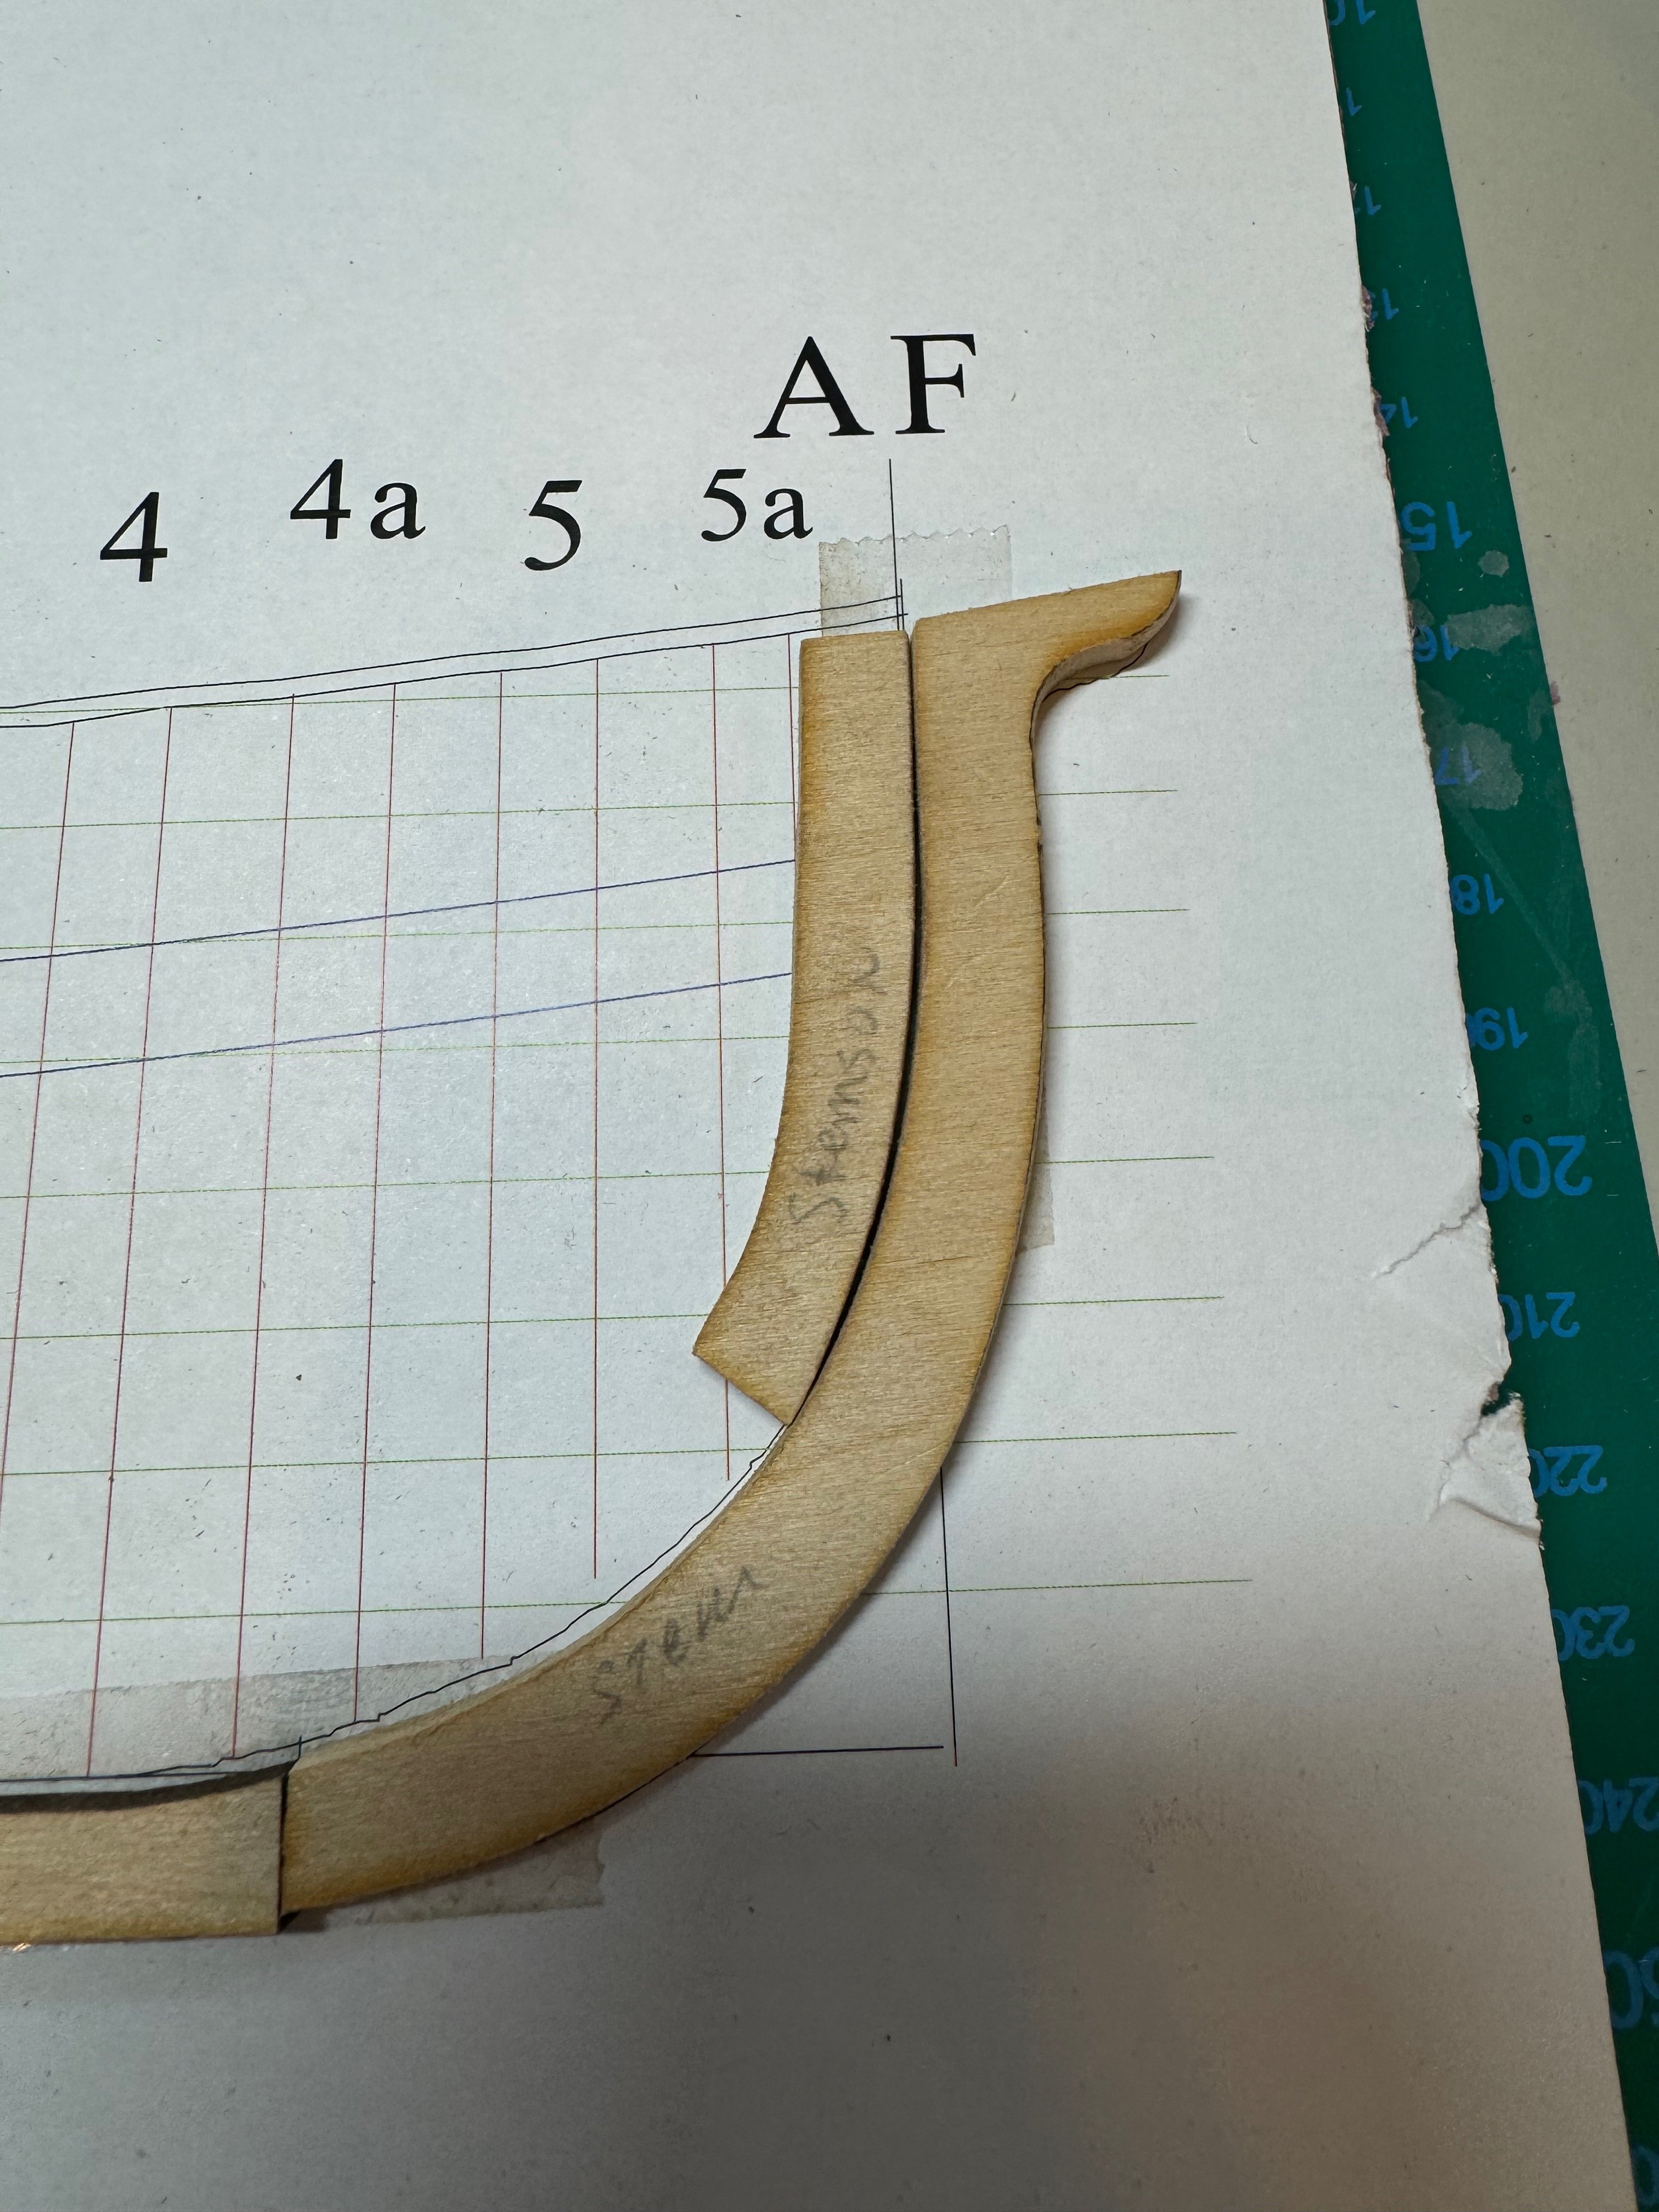
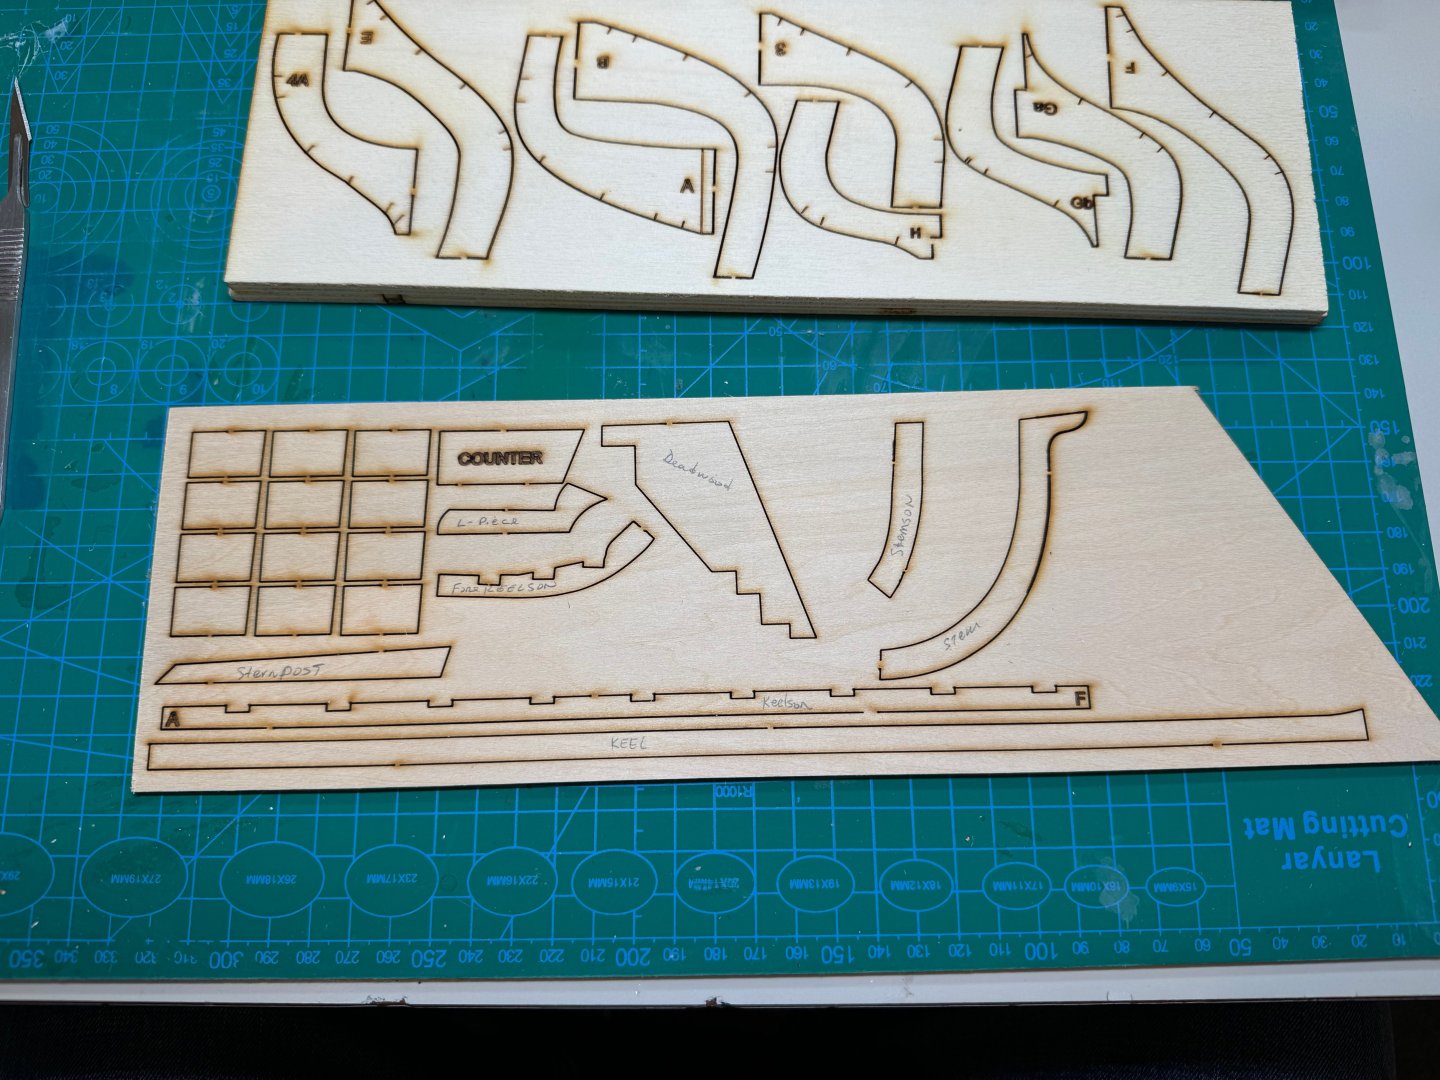
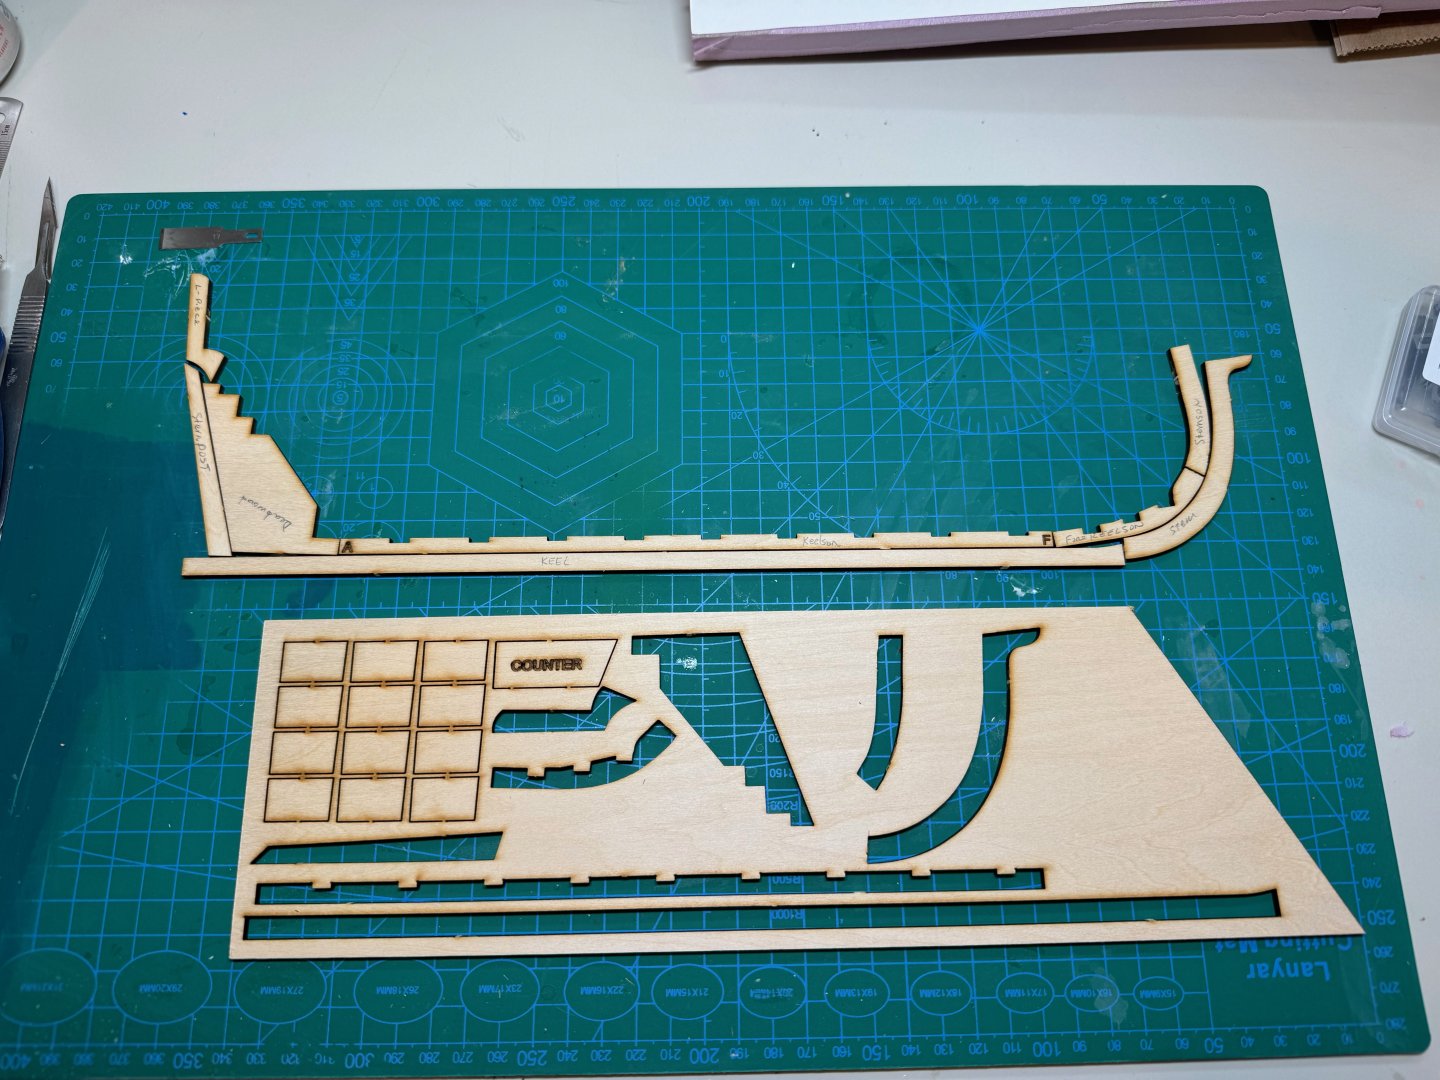
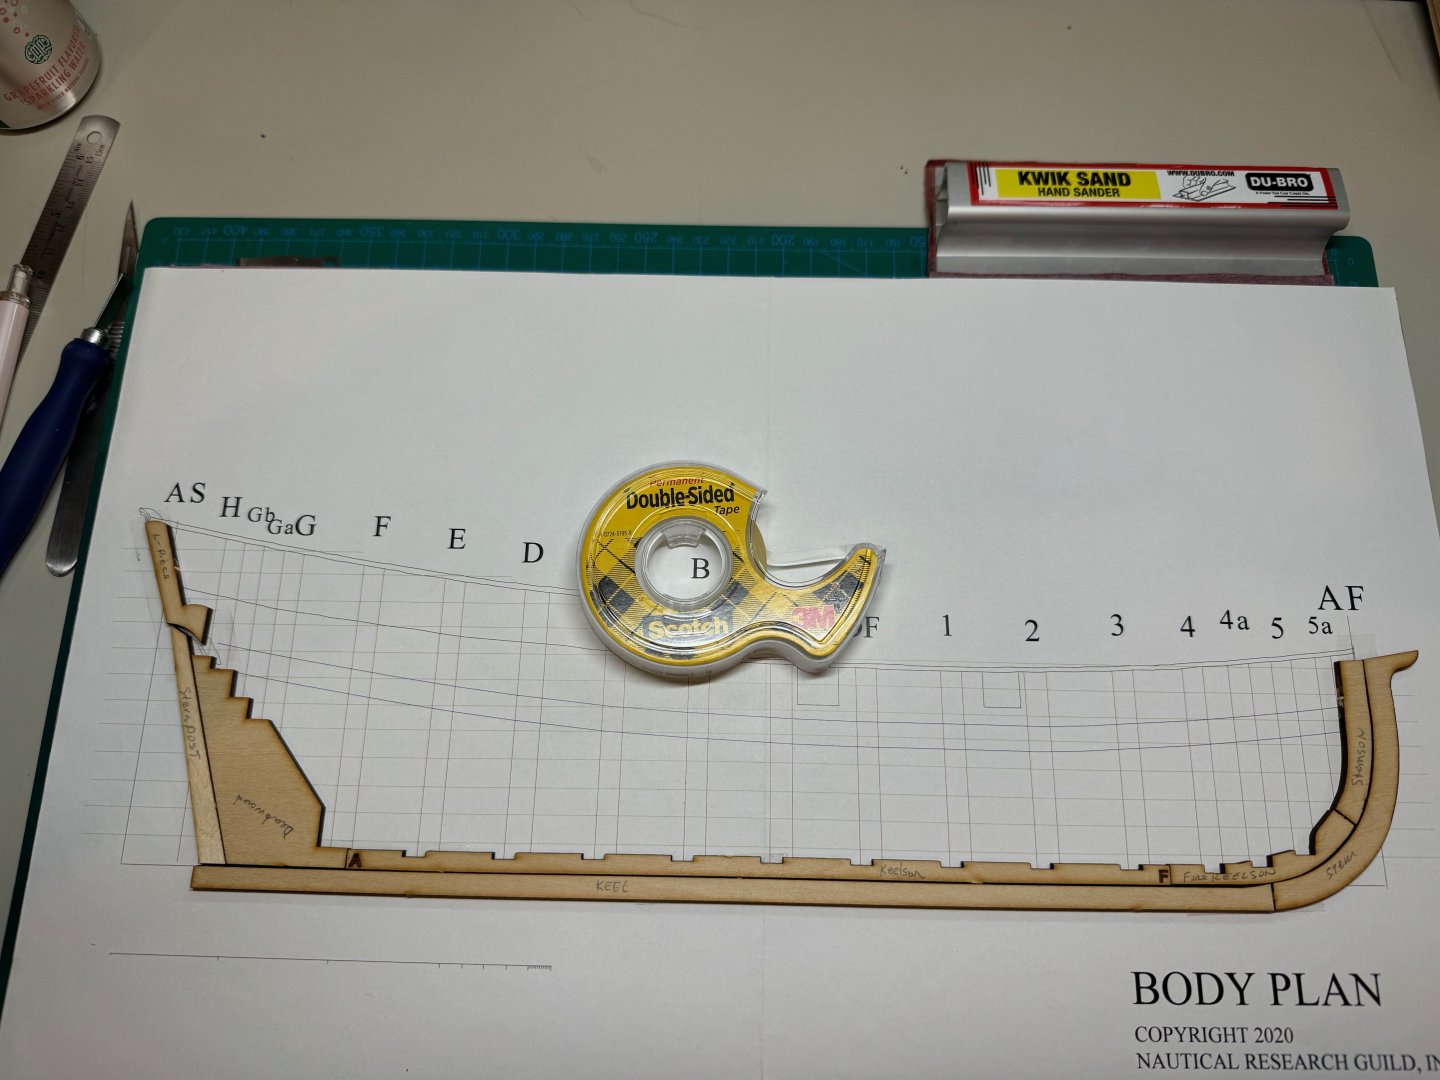
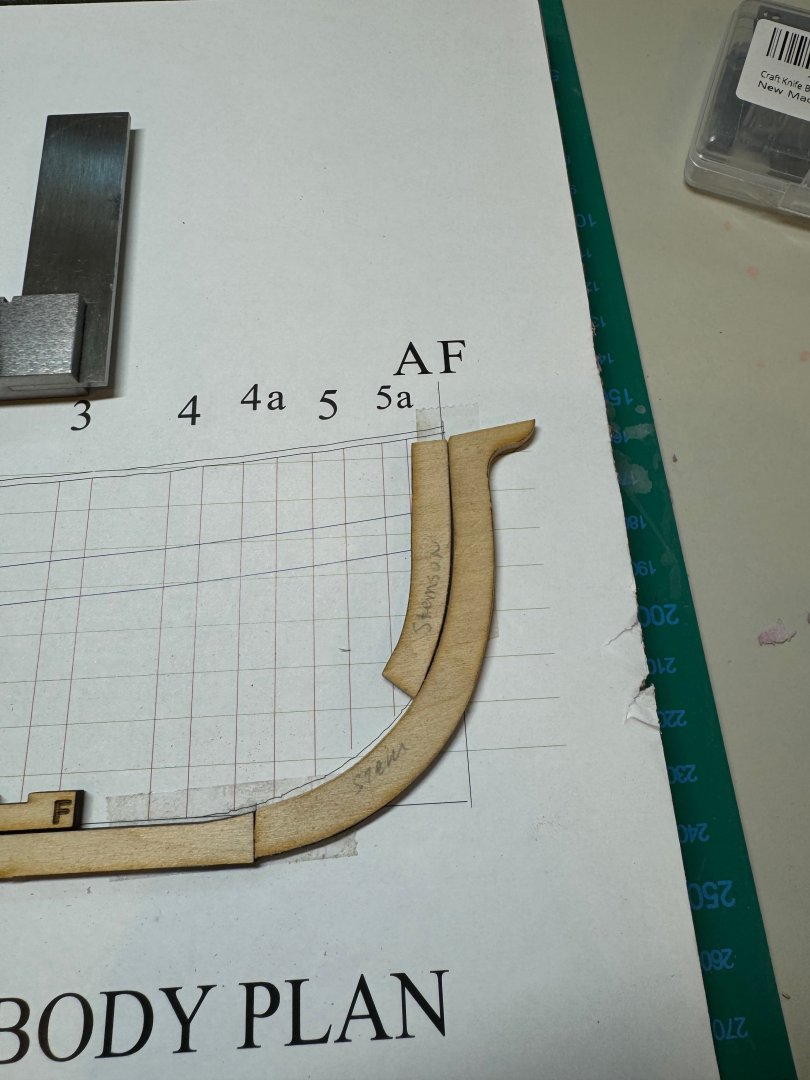
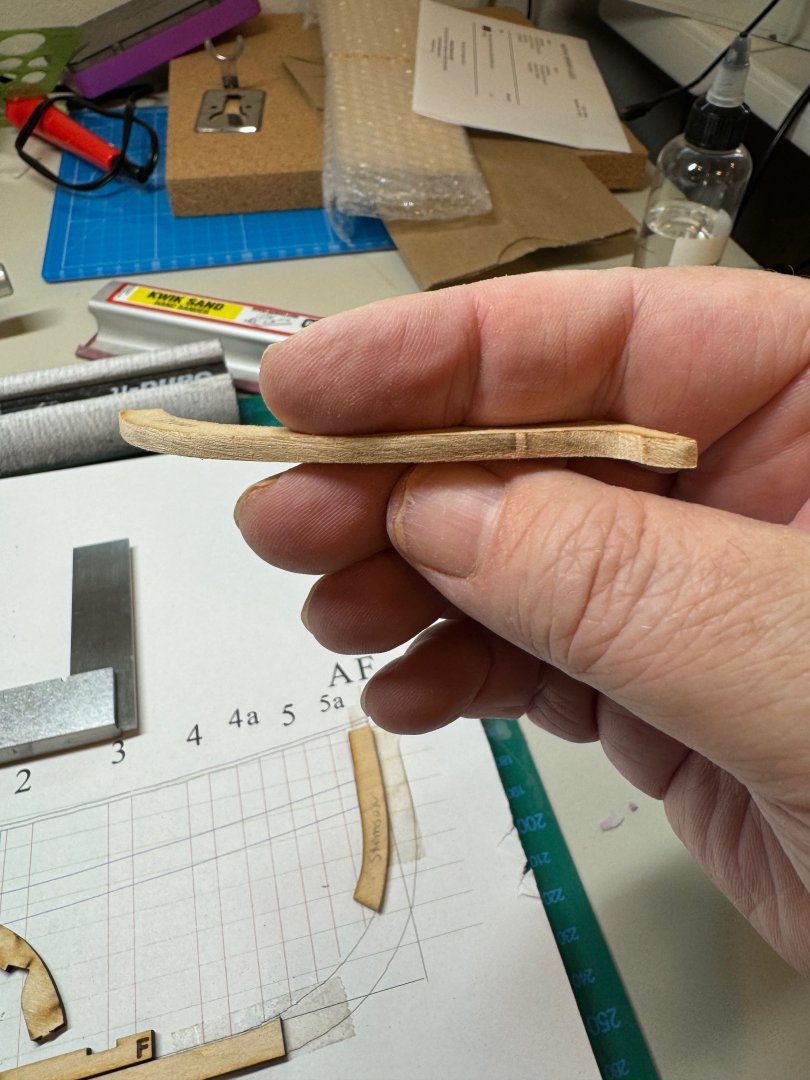
Good evening, After a challenging week, I was able to get some modeling done tonight. First I labeled the parts so that I could remember what is what Next I then cut out the keel, keelsom, stern post, fore keelsom, stem, stemson, deadwood and the l-piece from the kit. I then used some double sided tape to help dry fit the pieces Next I focused on getting the stemson and stem lined up correctly with a nice joint. I then removed the char from the pieces, to work on the fit. I ended up making a couple sanding sticks after trying to use an old blade to scrap off the char. The results are as follows: Finally the fit for the stemson to the stem now looks like: I continued per the manual with the following items to get a nice fit. I realigned my keelsom to the its matching bulkhead location, and then worked on the fore keelsom to get it to fit. and match its bulkheads. The final result is Finally today, I marked out the rabbets. I will let it sit overnight before I make some sawdust and cut them out. jim


-
@Dan Poirier i am so glad i have some company with this project. Very excited to see your finished product along with your log. jim
-
@JacquesCousteau very nice indeed. something to be proud of for sure. jim
- 82 replies
-
- 3
-

-
-
- half hull planking project
- half hull
- (and 2 more)