HOLIDAY DONATION DRIVE - SUPPORT MSW - DO YOUR PART TO KEEP THIS GREAT FORUM GOING! (89 donations so far out of 49,000 members - C'mon guys!)
×


MarcelK
-
Posts
6 -
Joined
-
Last visited
-
 ccoyle reacted to a post in a topic:
HMS Terror by MarcelK - FINISHED - 1/700 scale - BOTTLE
ccoyle reacted to a post in a topic:
HMS Terror by MarcelK - FINISHED - 1/700 scale - BOTTLE
-
 Snug Harbor Johnny reacted to a post in a topic:
HMS Terror by MarcelK - FINISHED - 1/700 scale - BOTTLE
Snug Harbor Johnny reacted to a post in a topic:
HMS Terror by MarcelK - FINISHED - 1/700 scale - BOTTLE
-
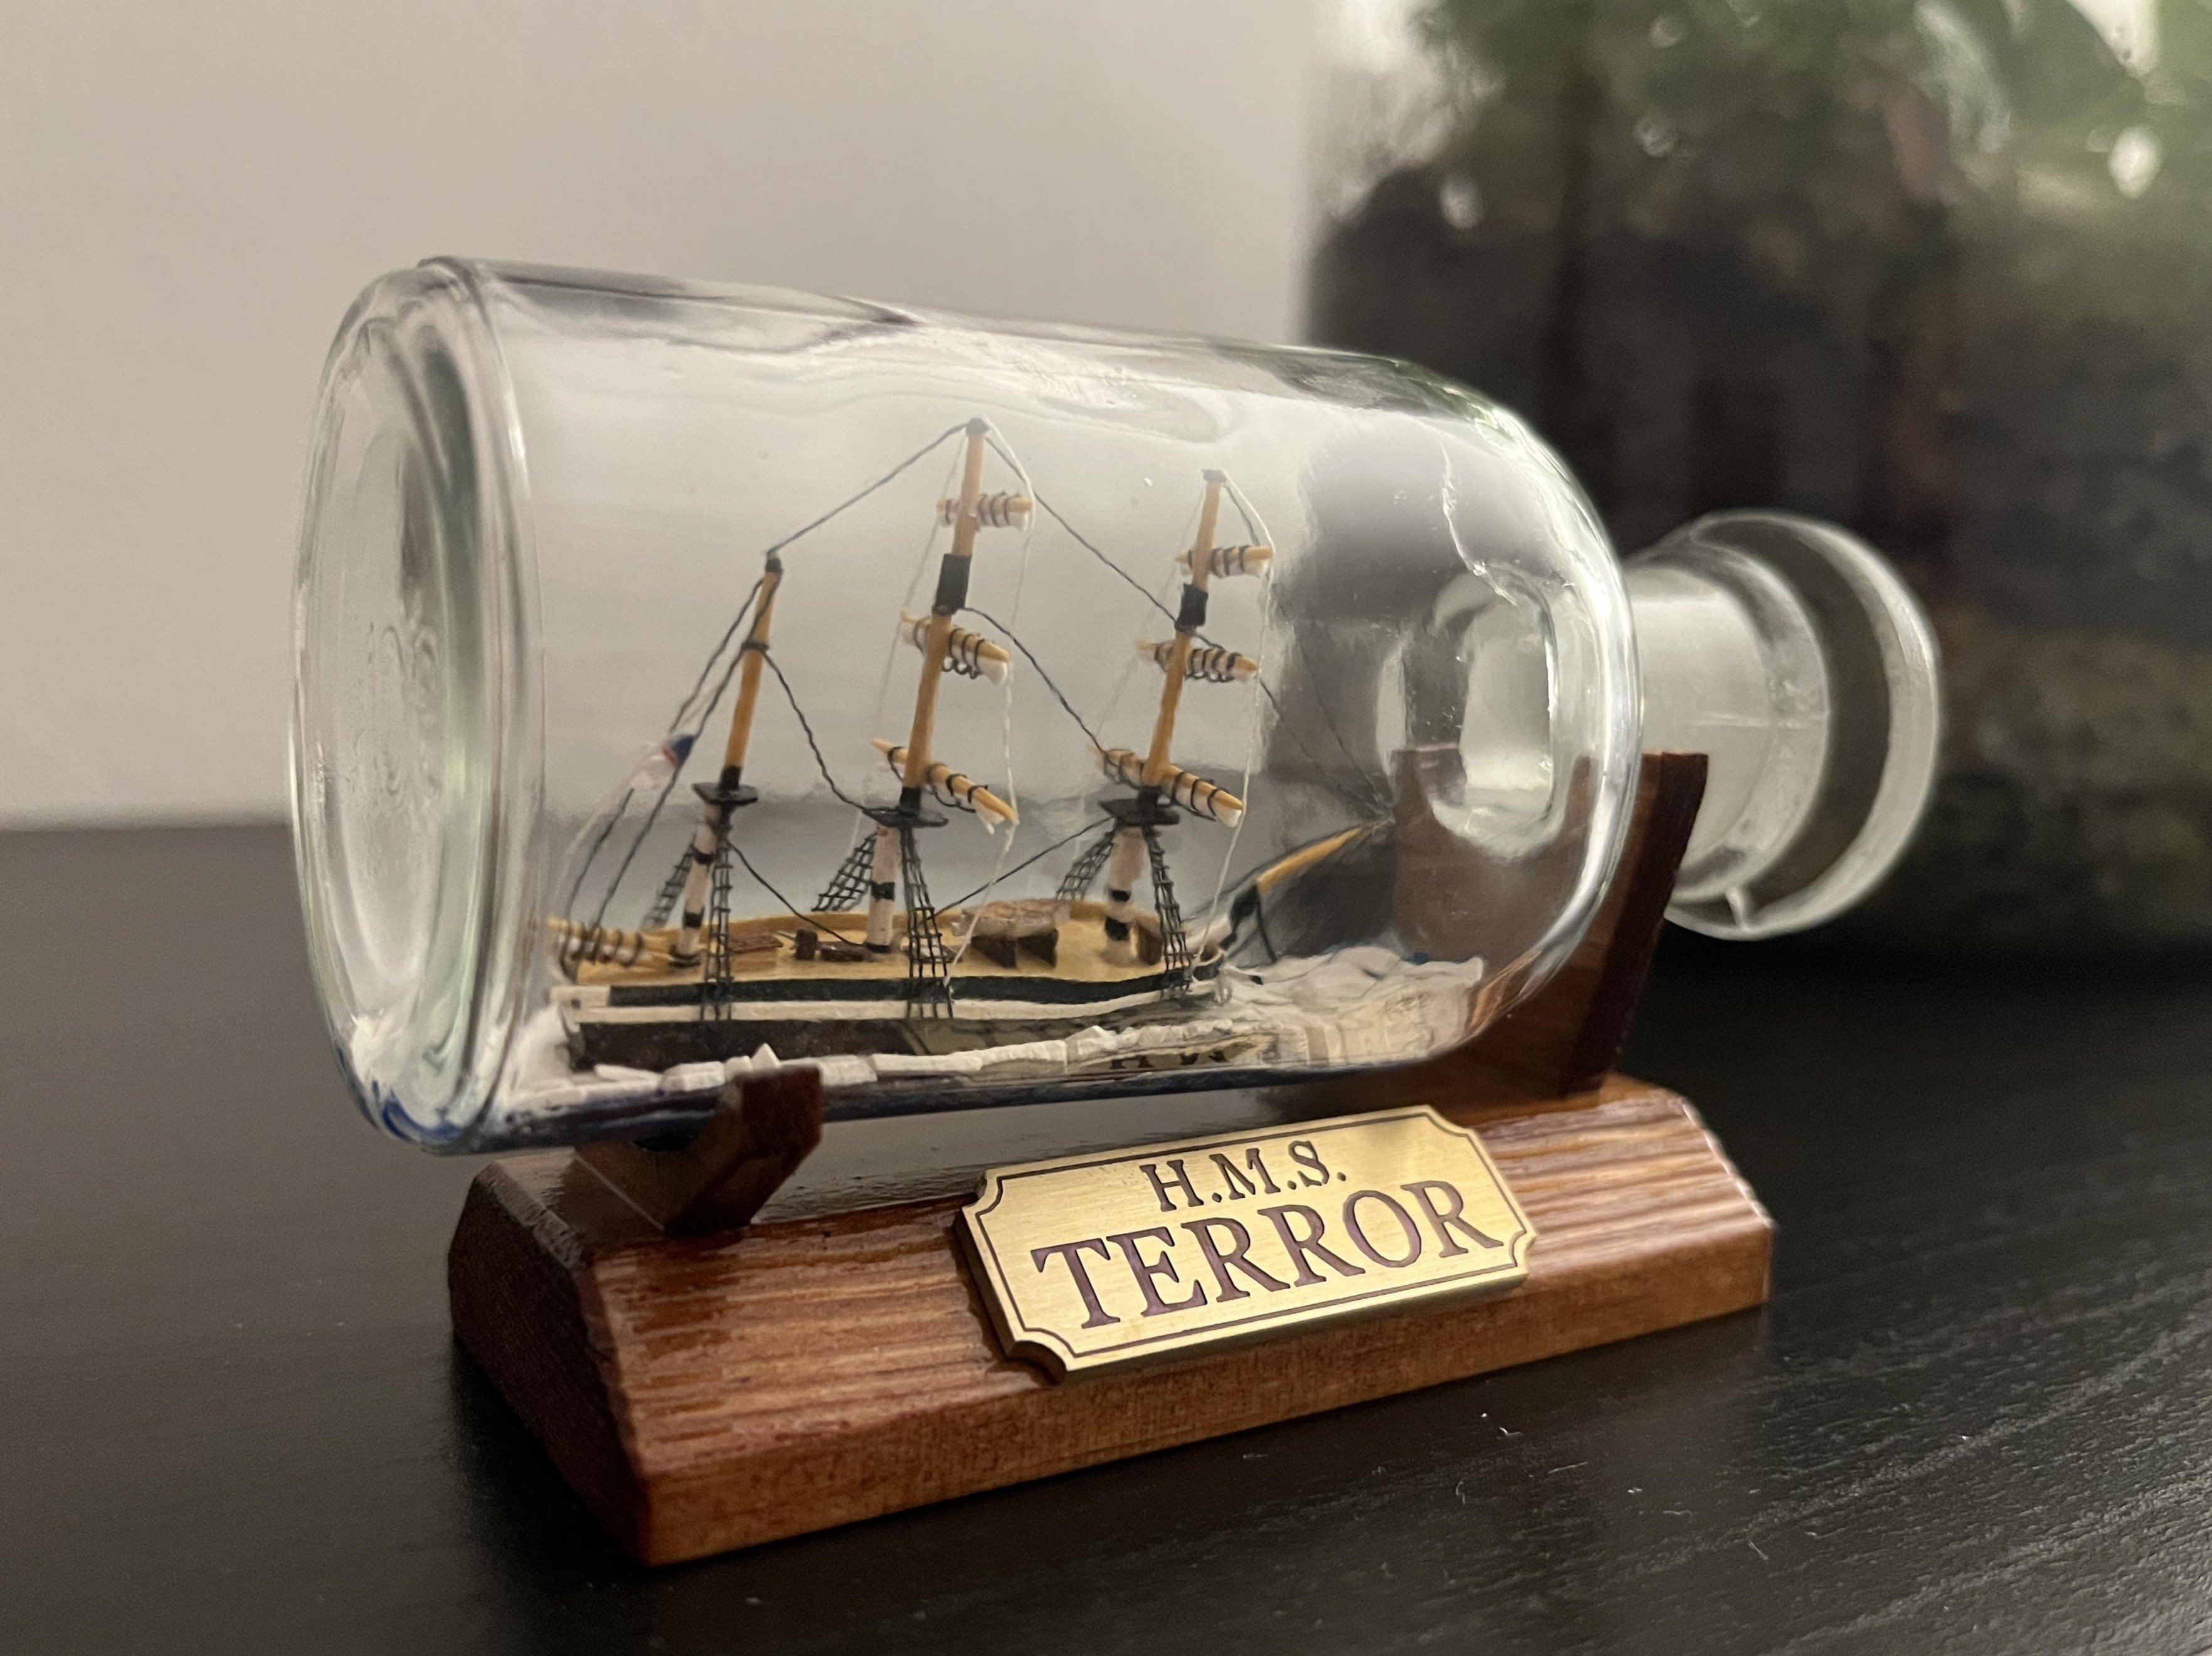
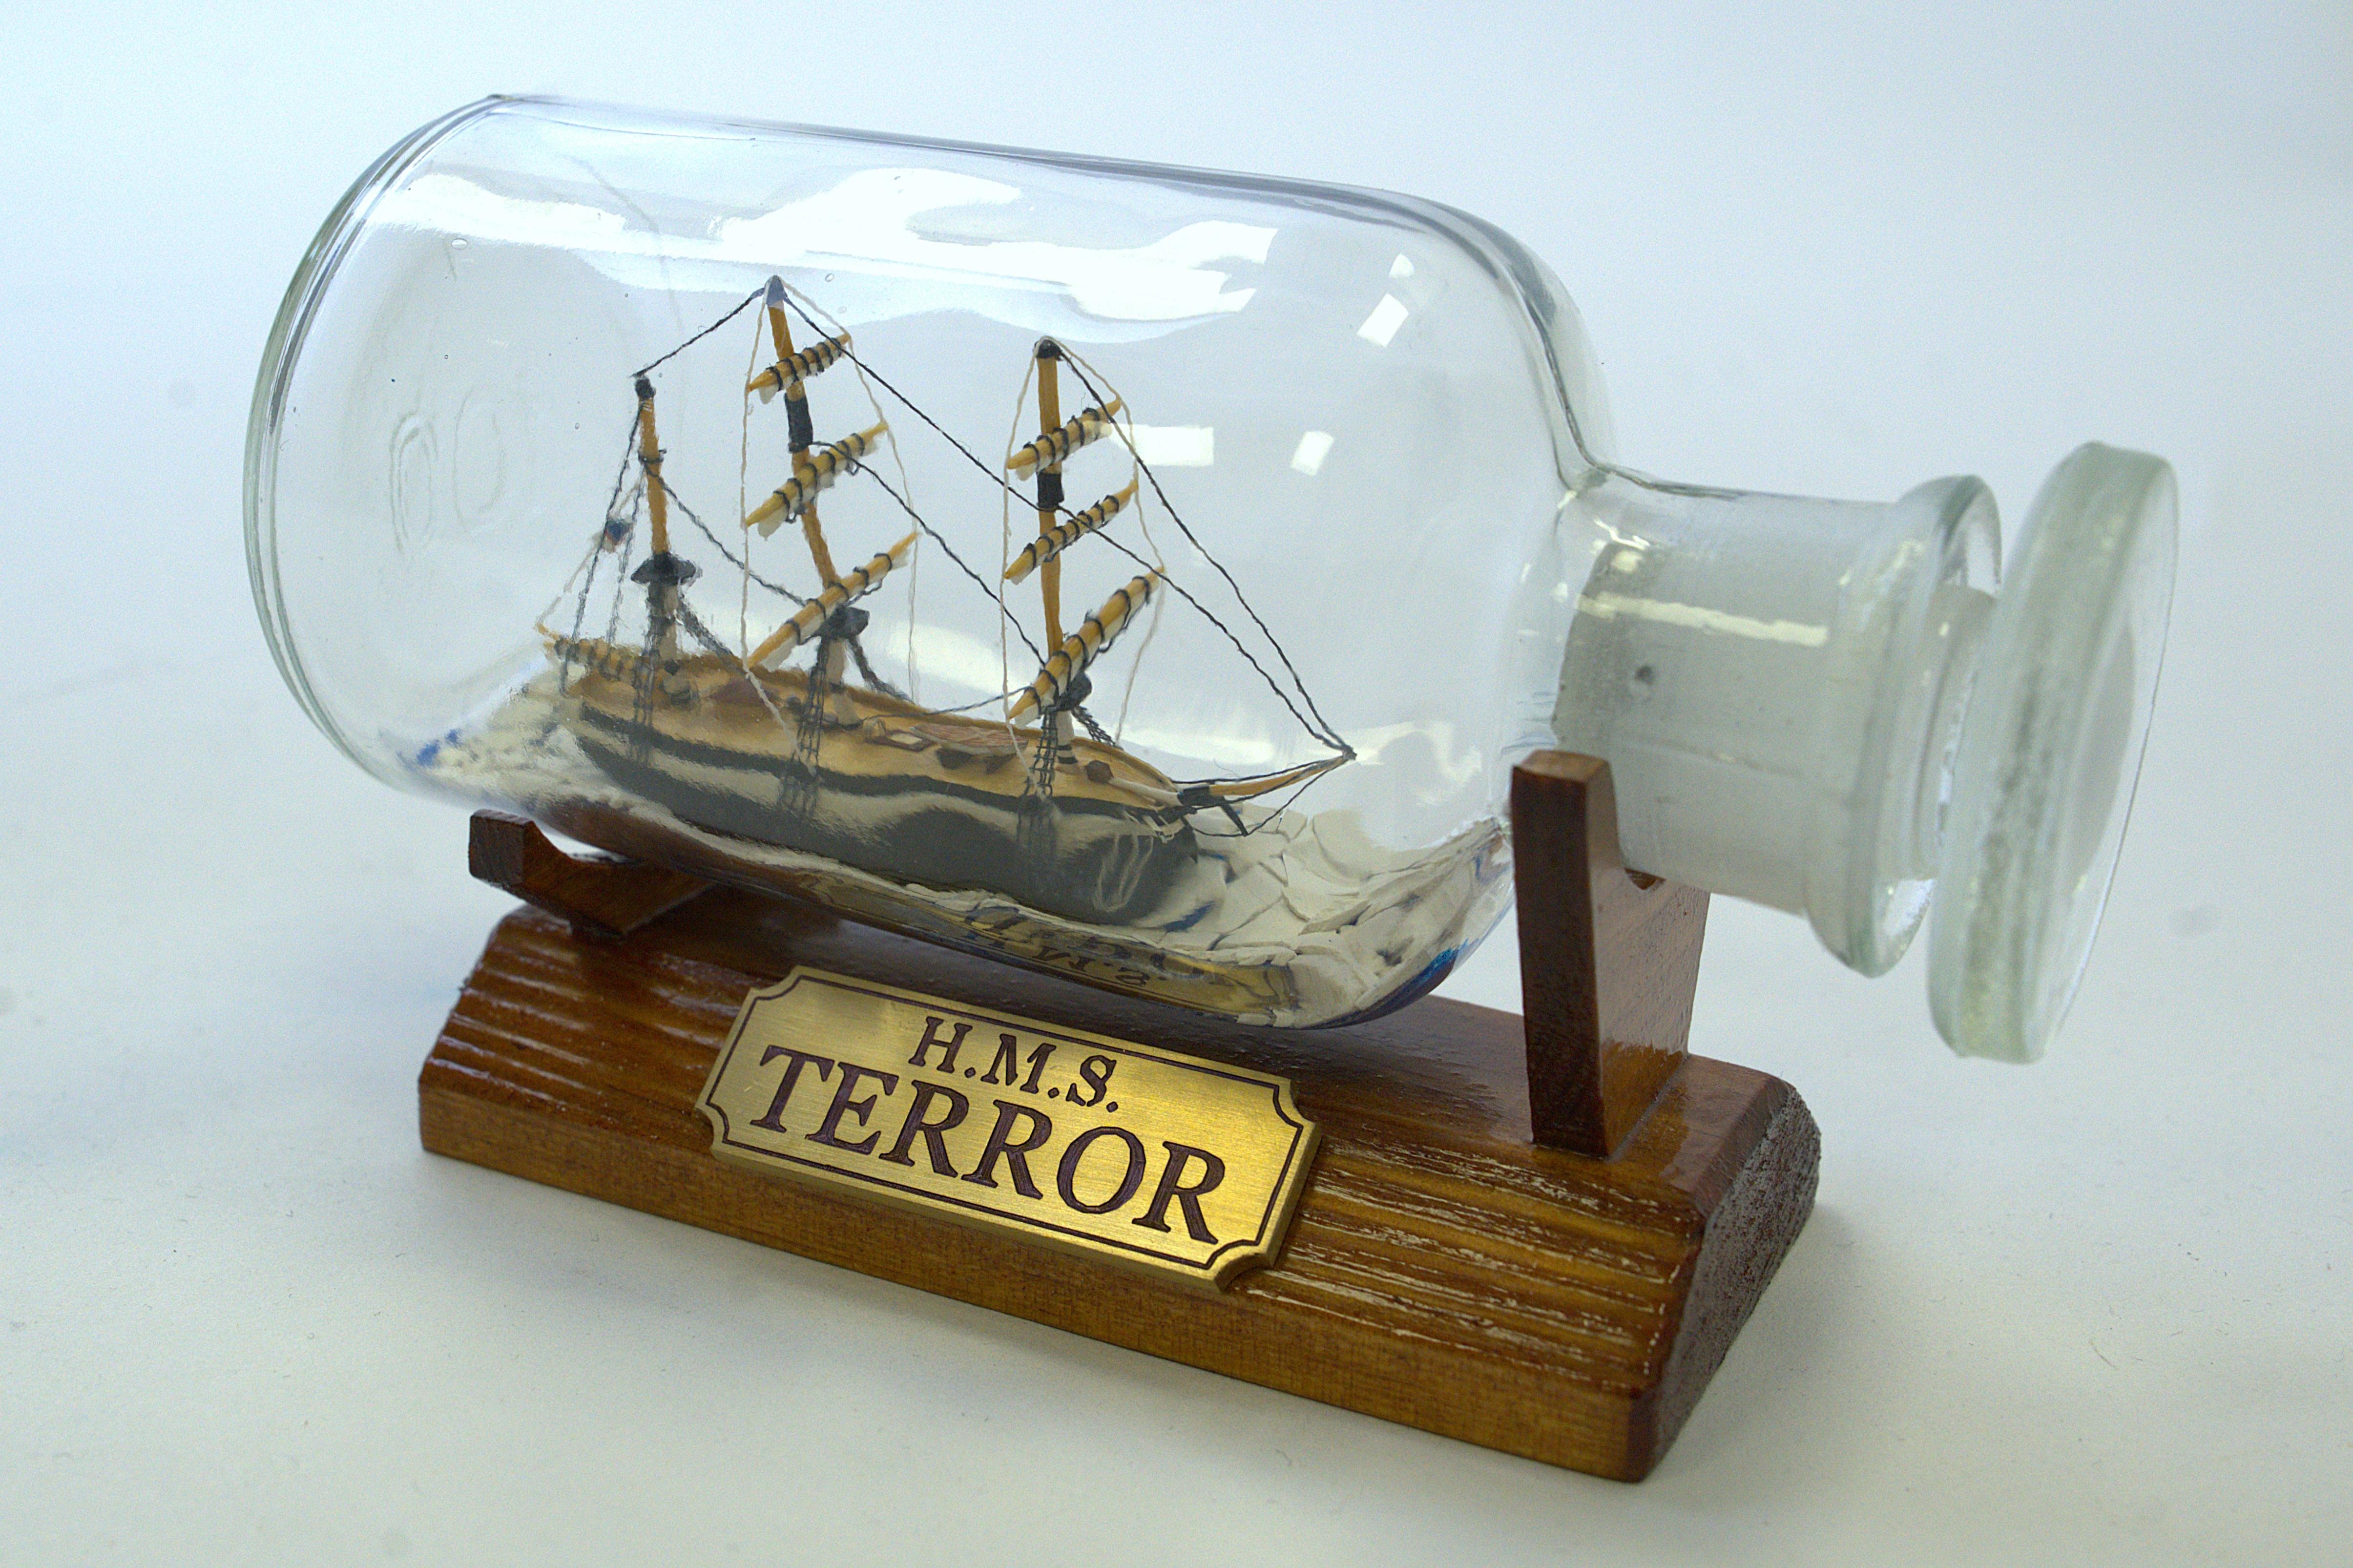
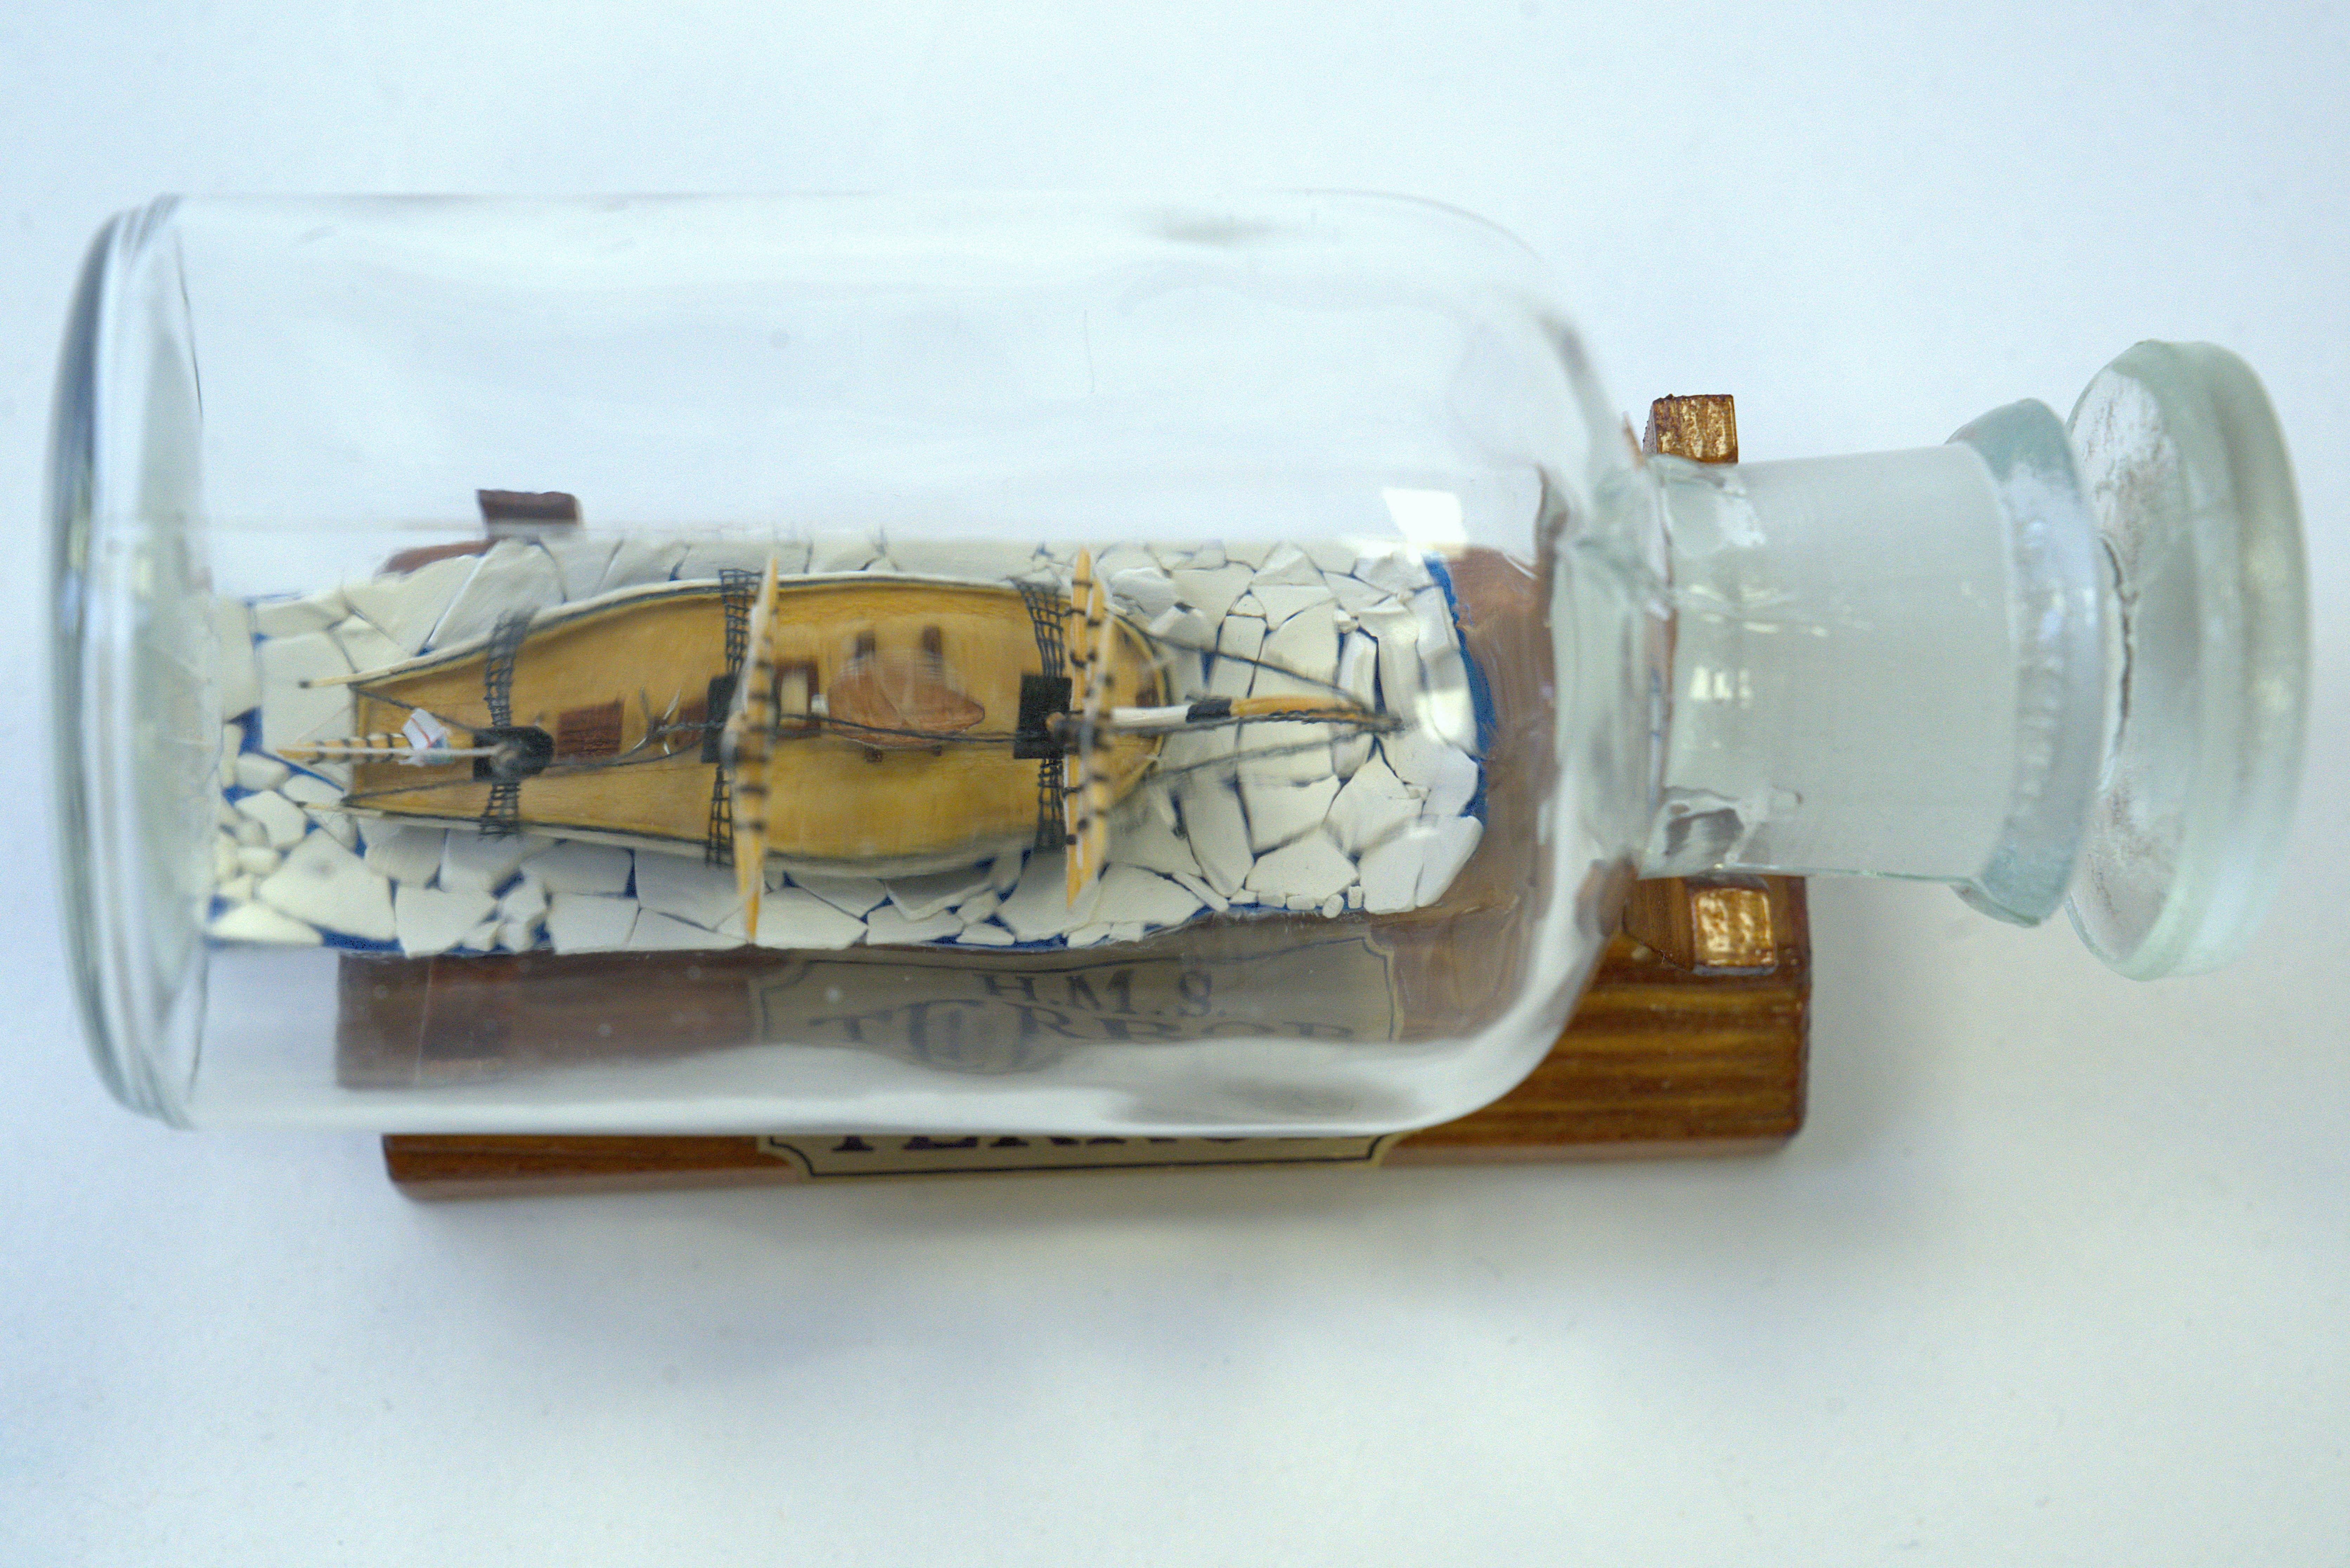
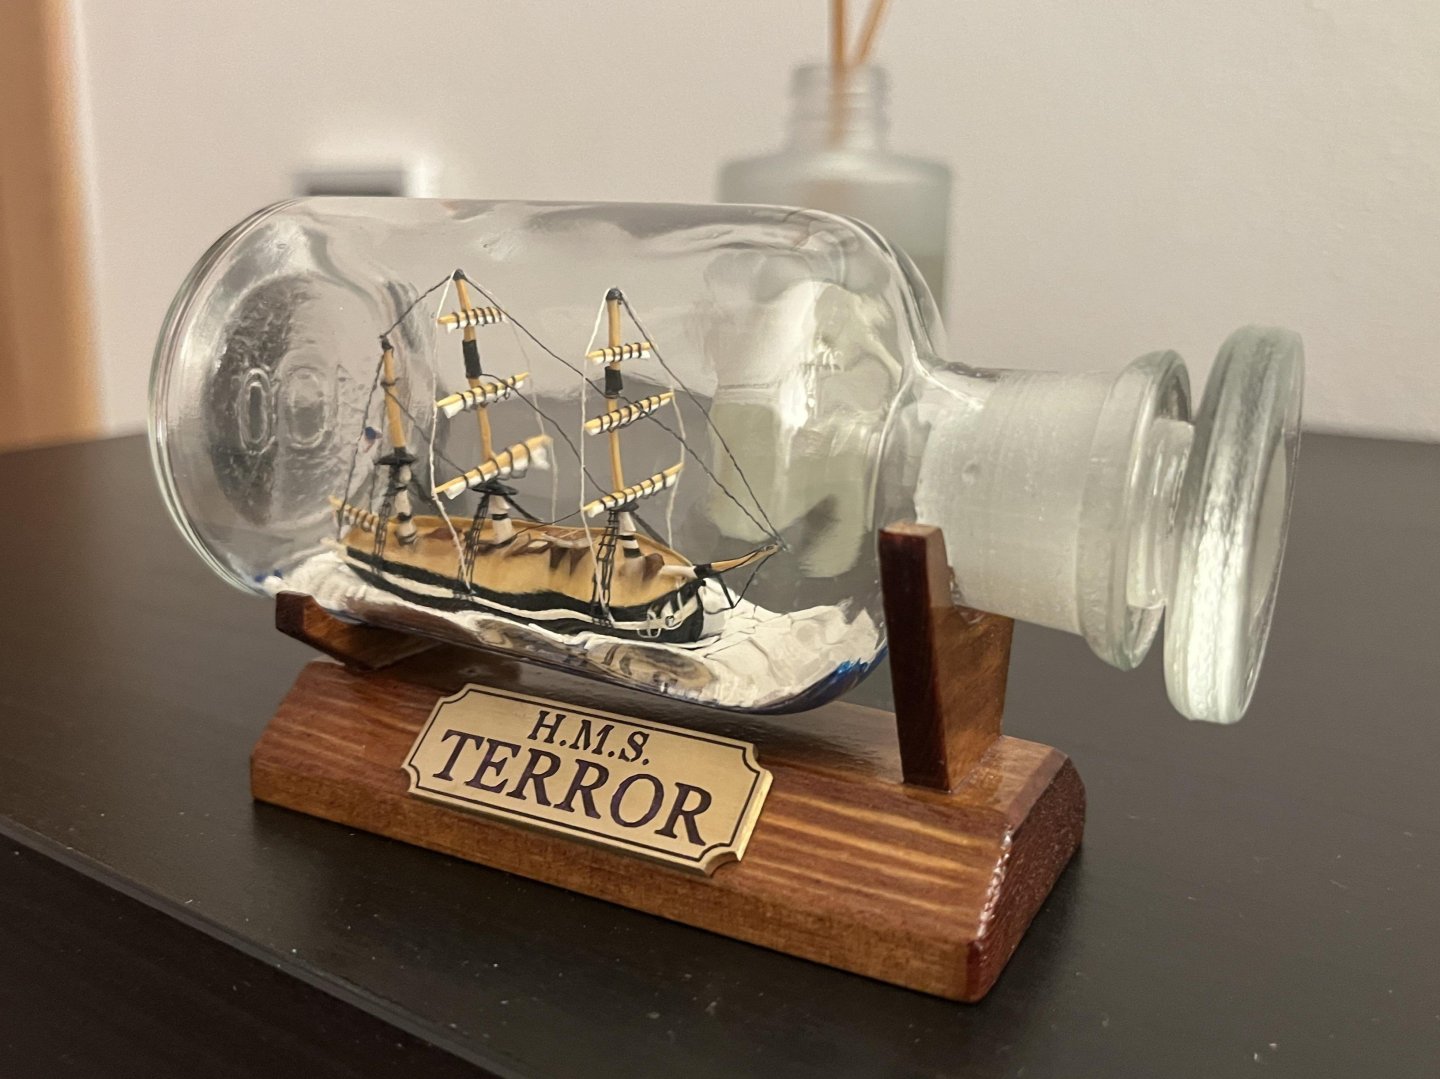
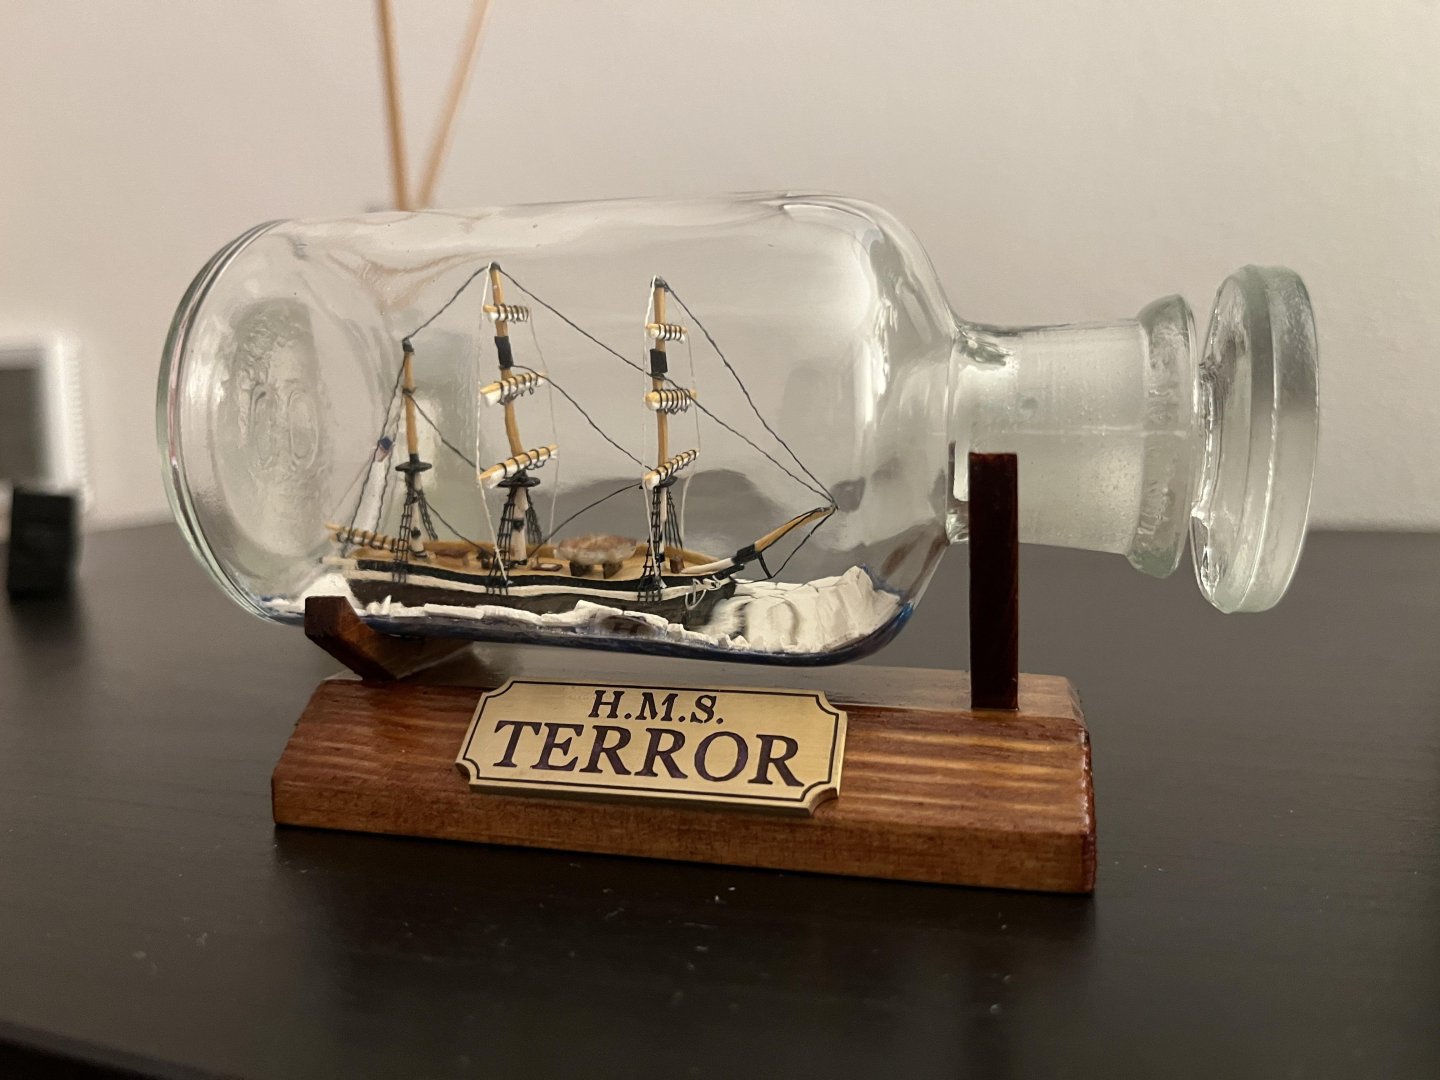
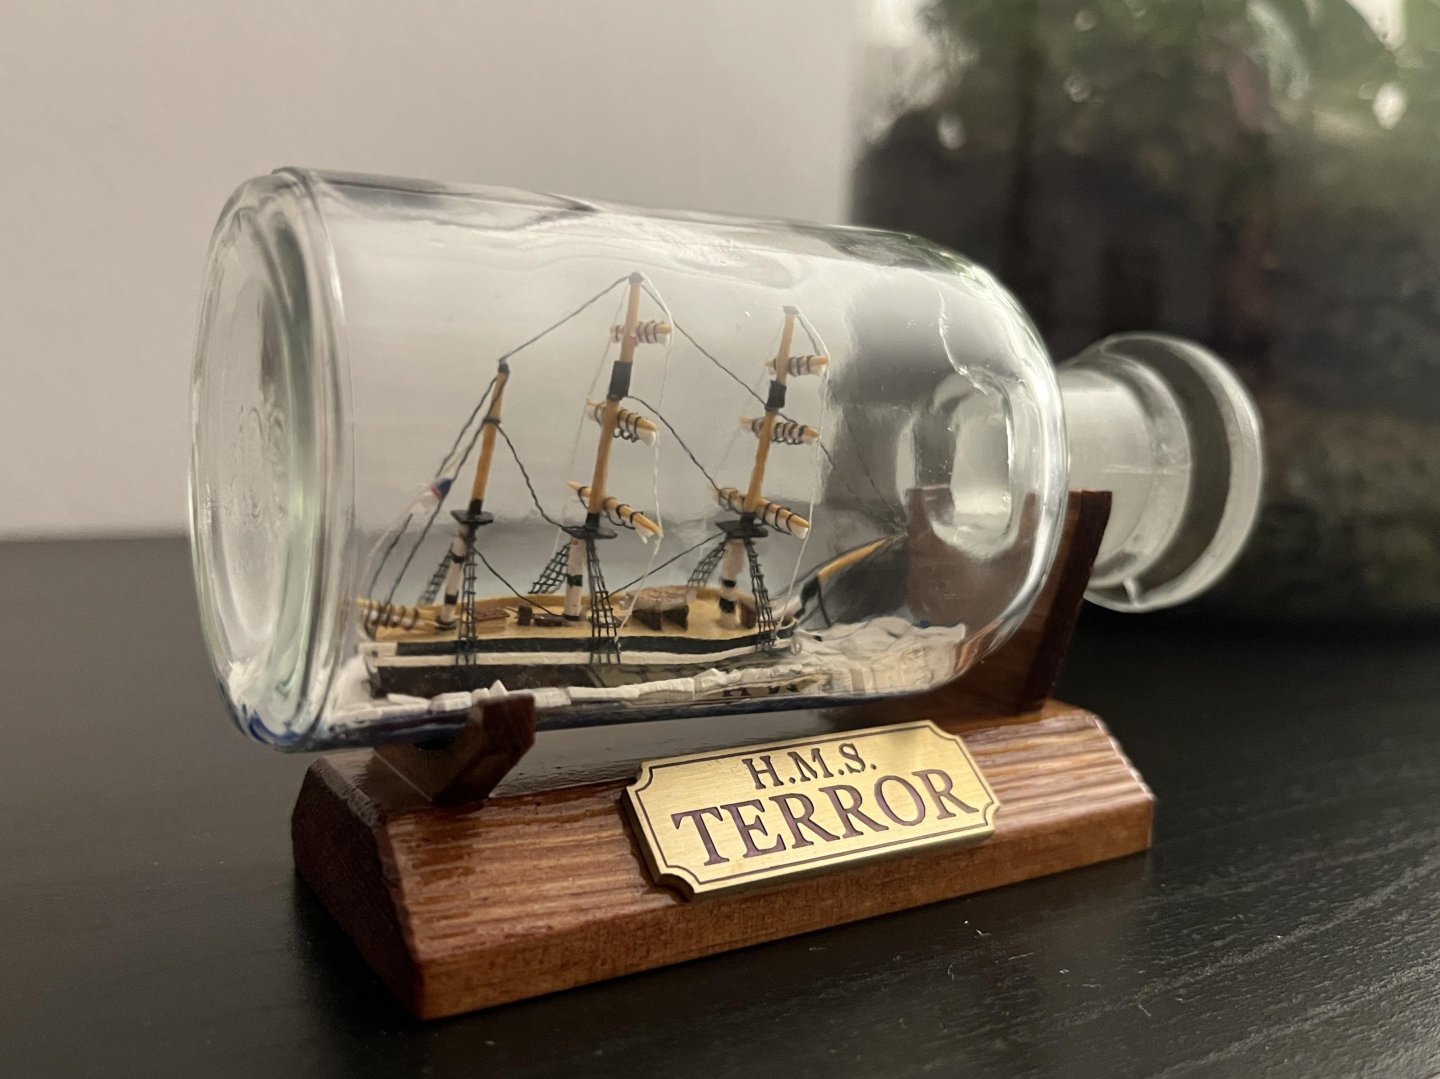
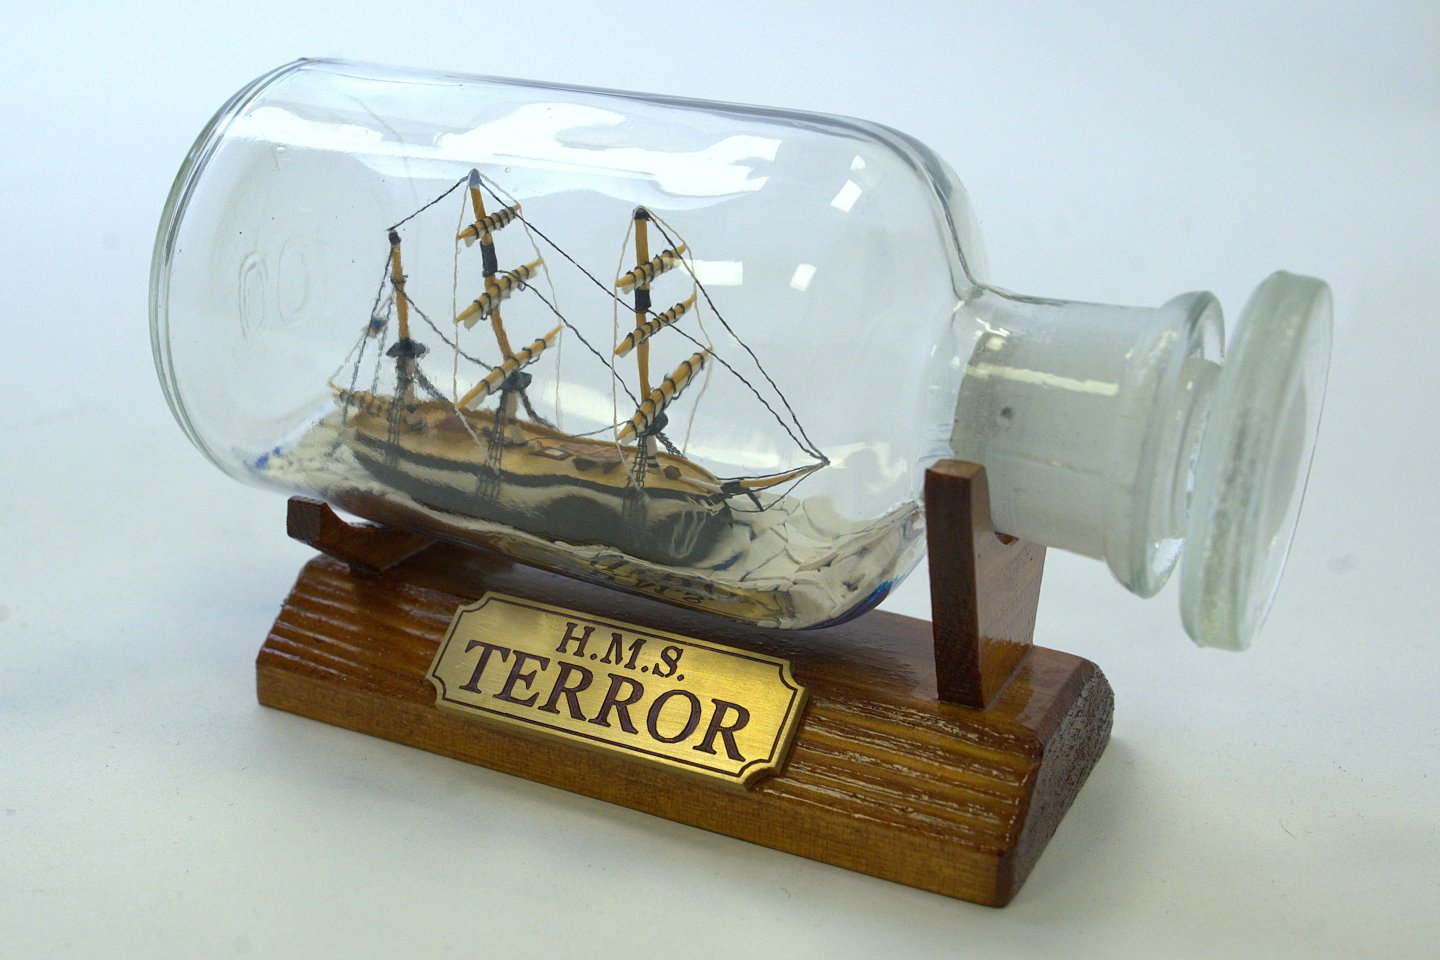
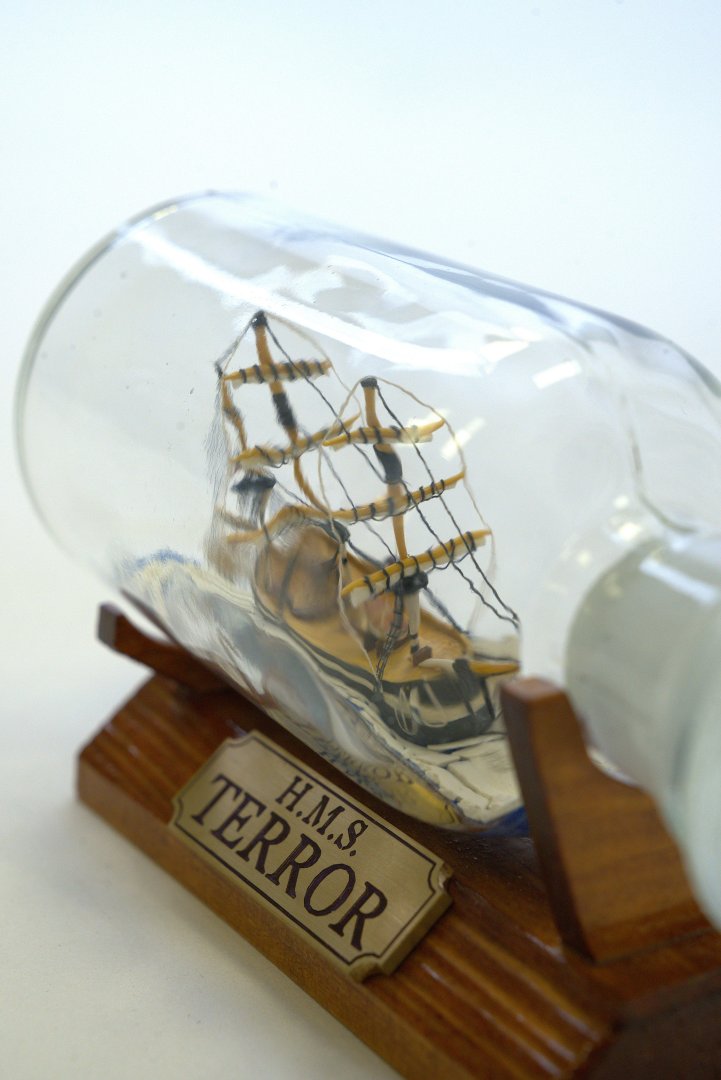
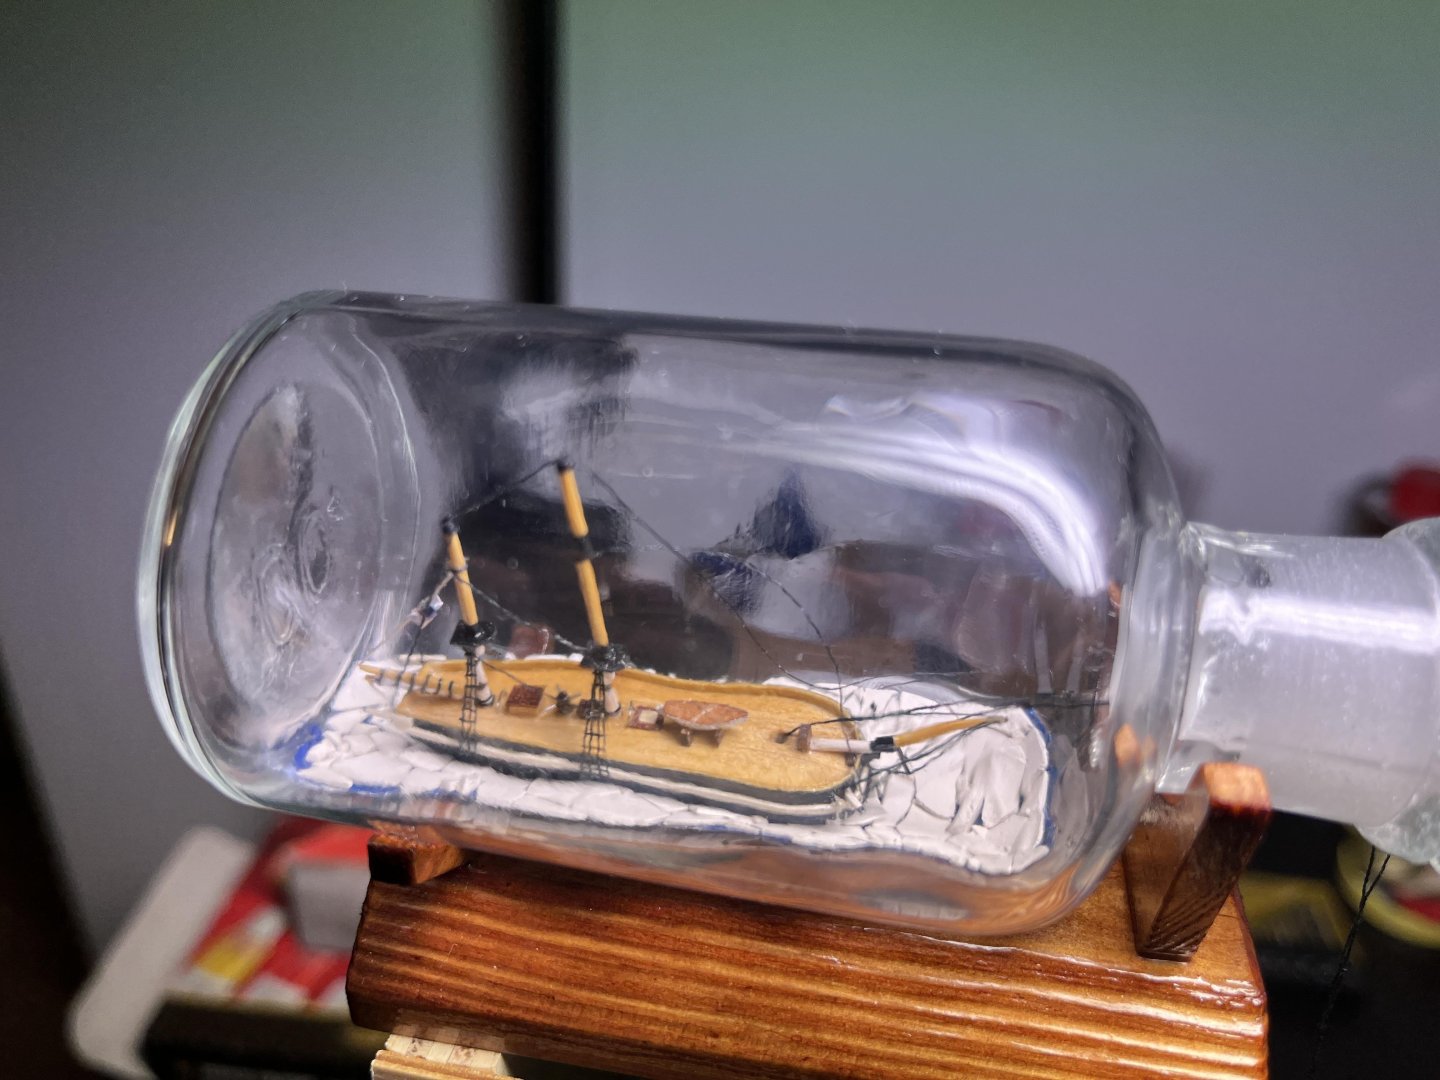
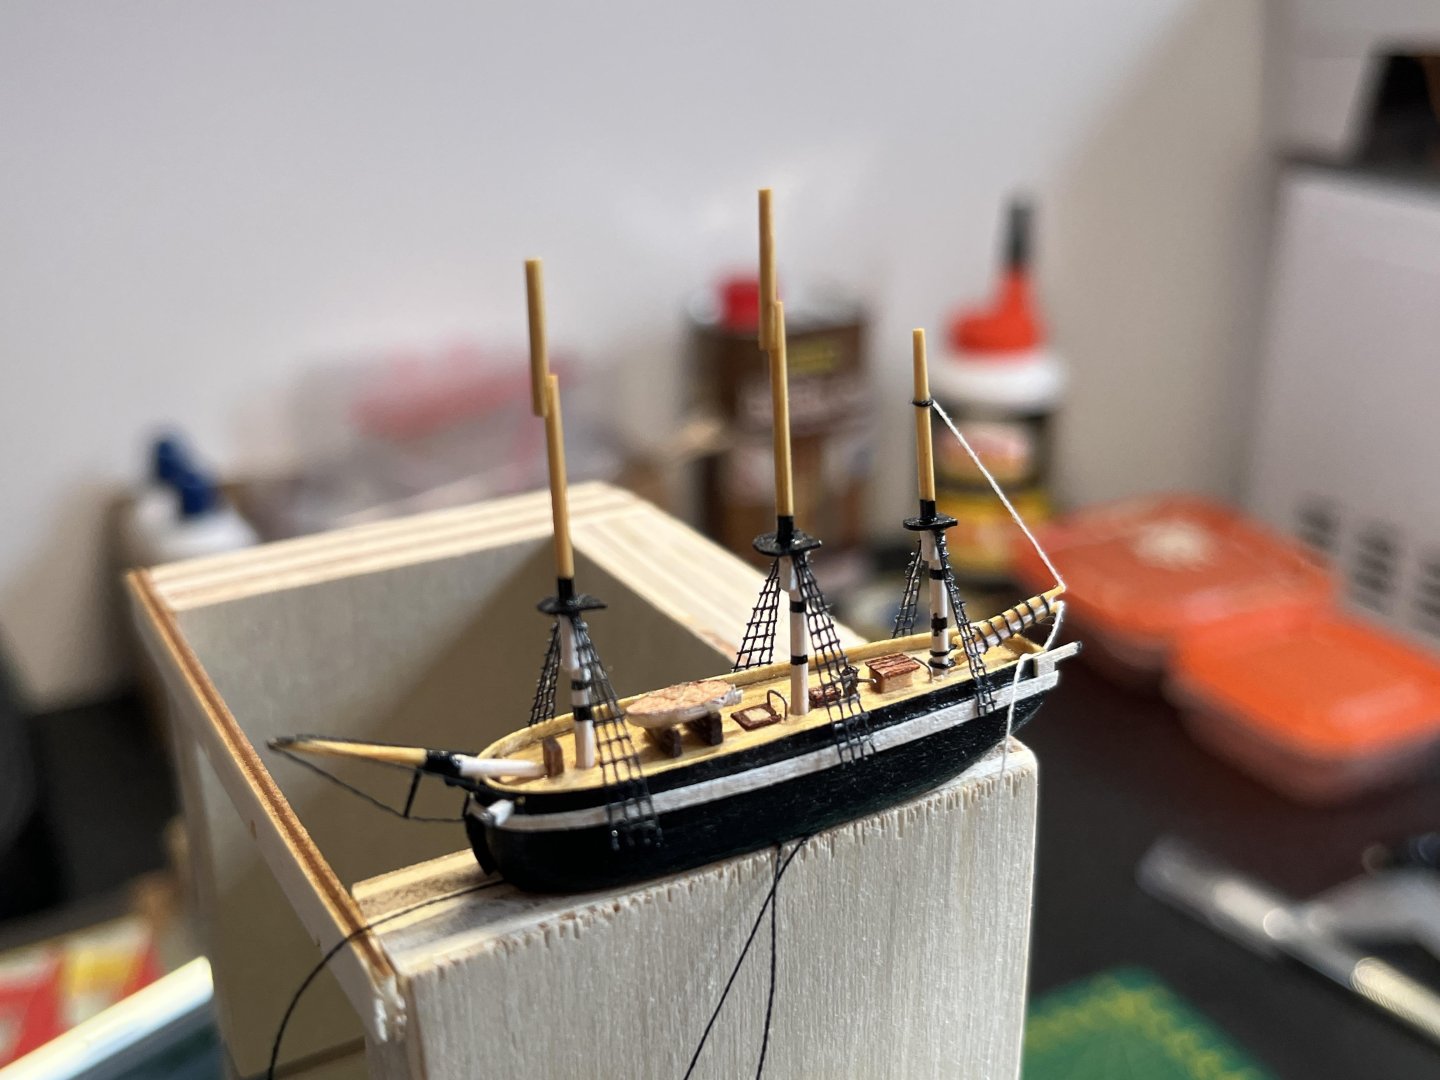
I am quite pleased with the end result. Lessons learned: Bottle clarity is important - deformations of the glass greatly complicate work in the bottle and make it difficult to photograph Make the bottom surface flat before commiting to the dimensions for the ship - water surface curvature doesn't look good Source better thread
-
tmj reacted to a post in a topic:
HMS Terror by MarcelK - FINISHED - 1/700 scale - BOTTLE
-
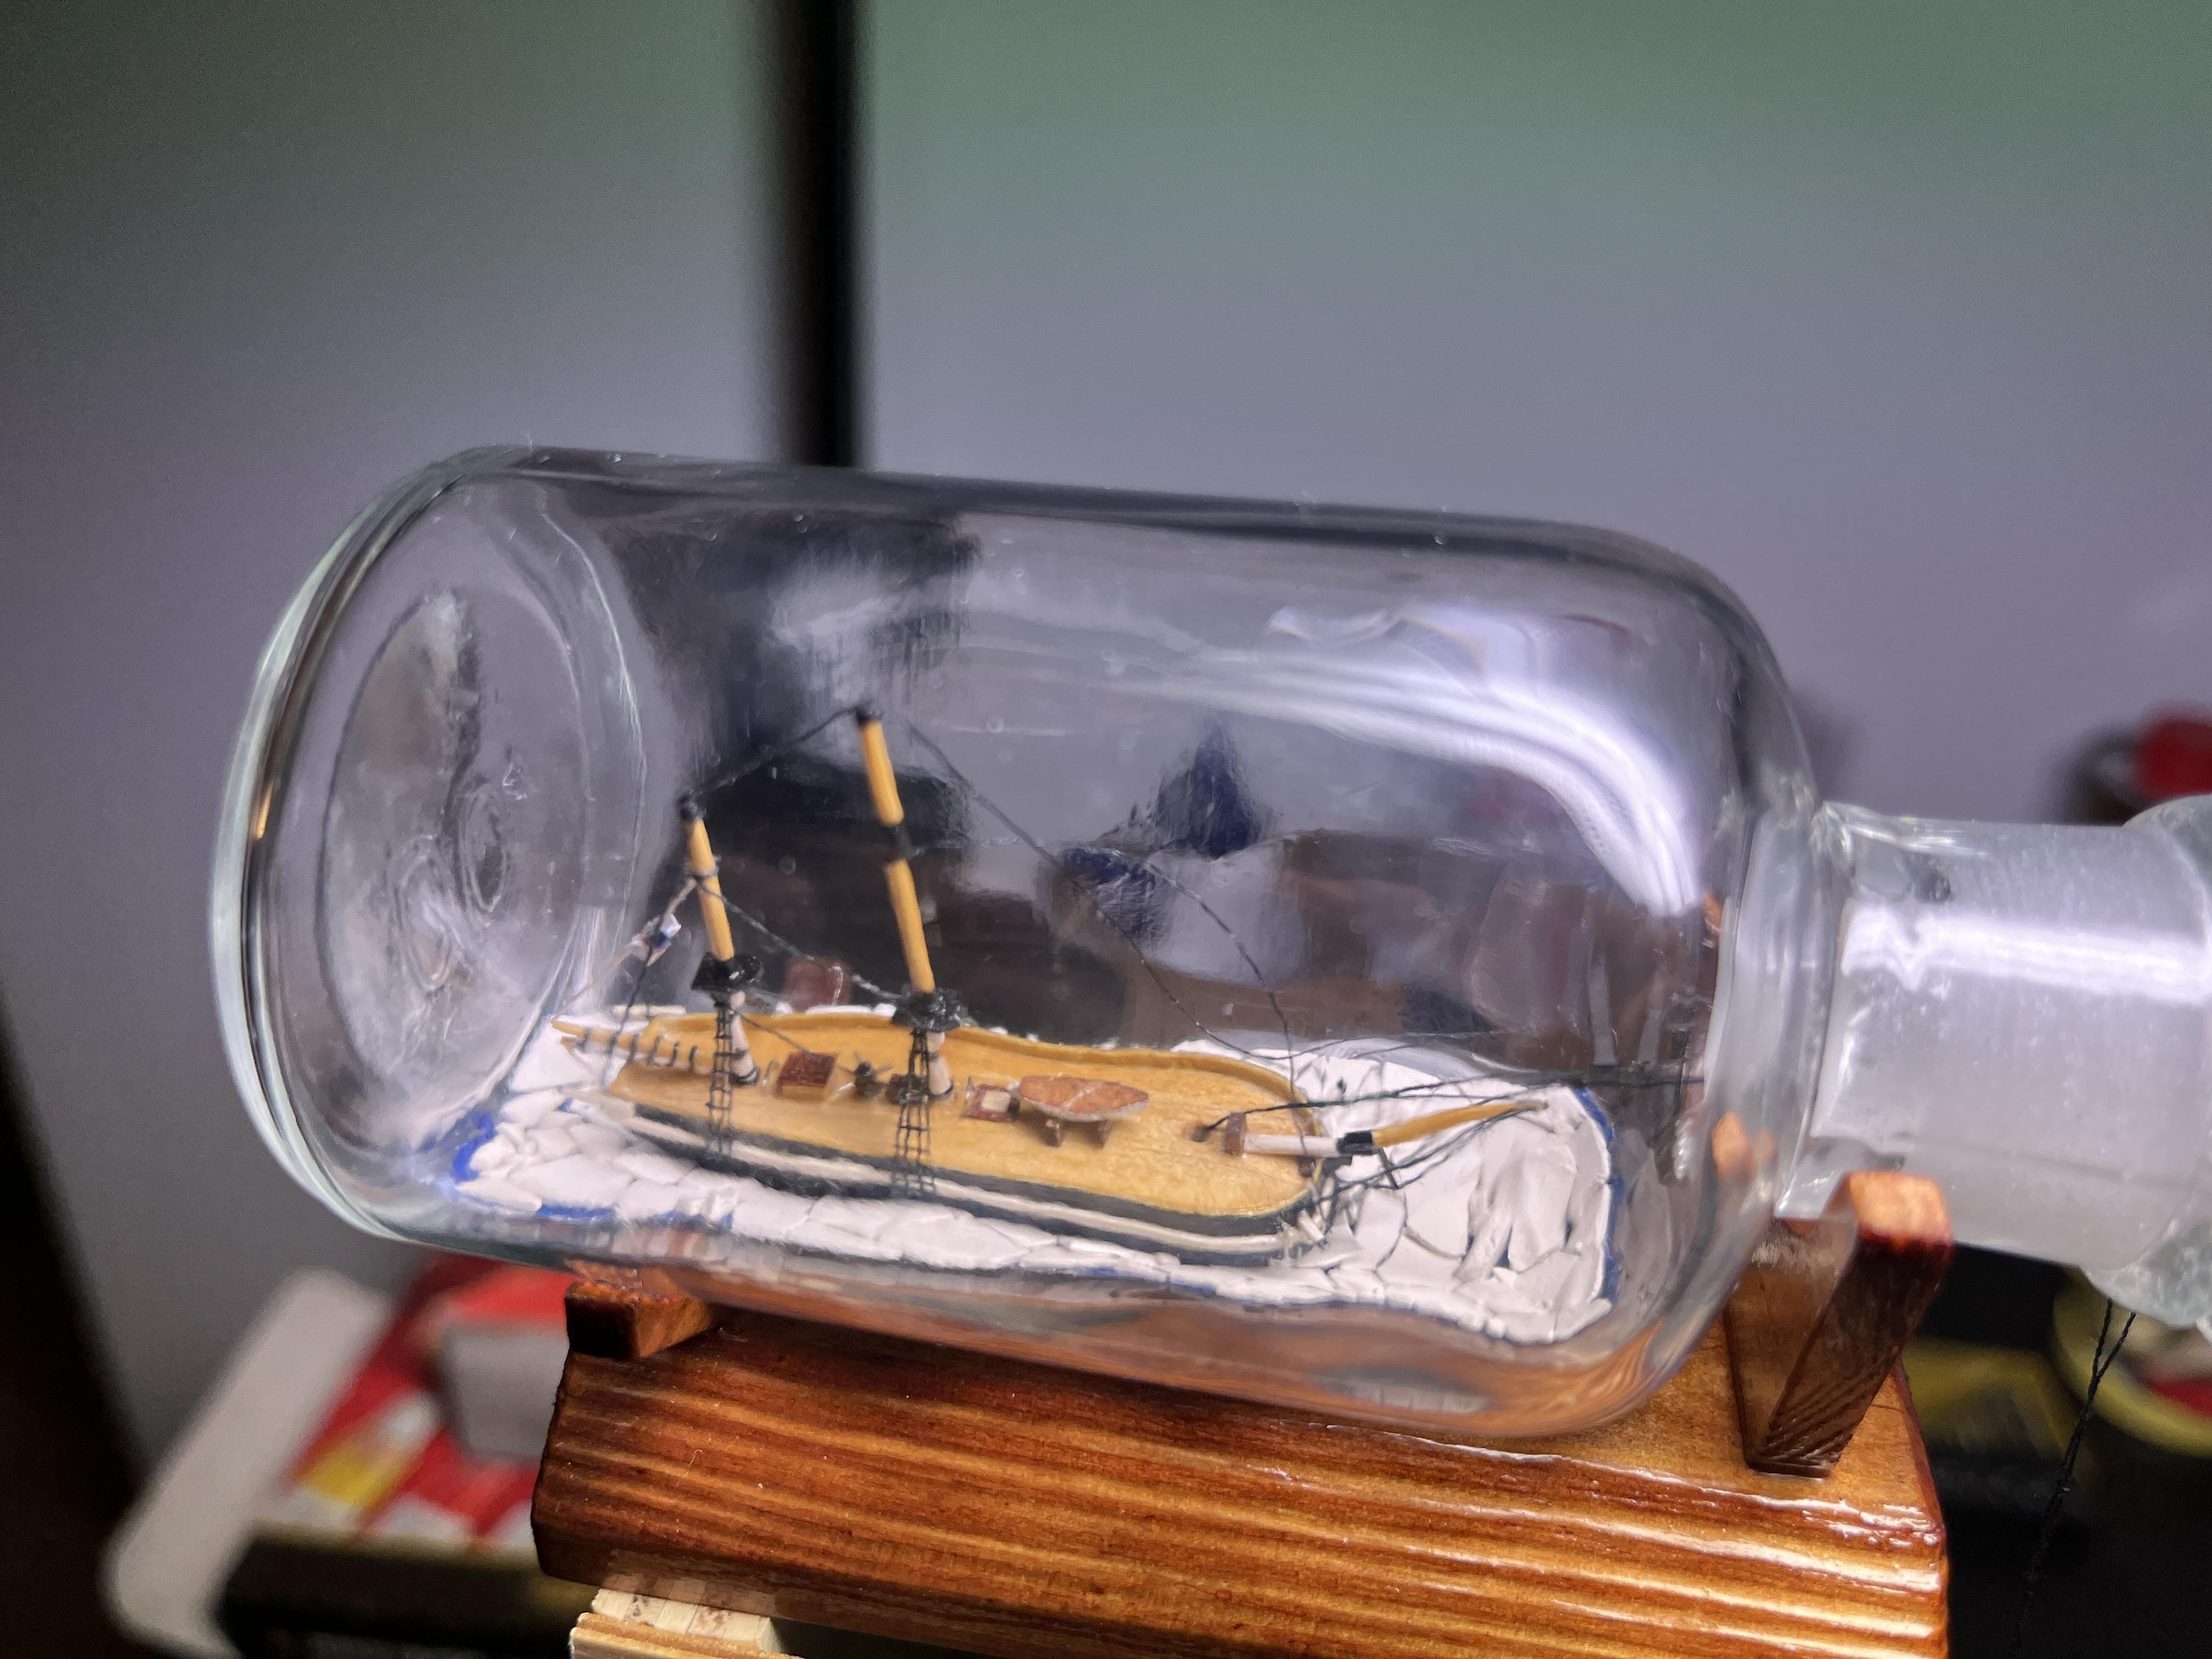
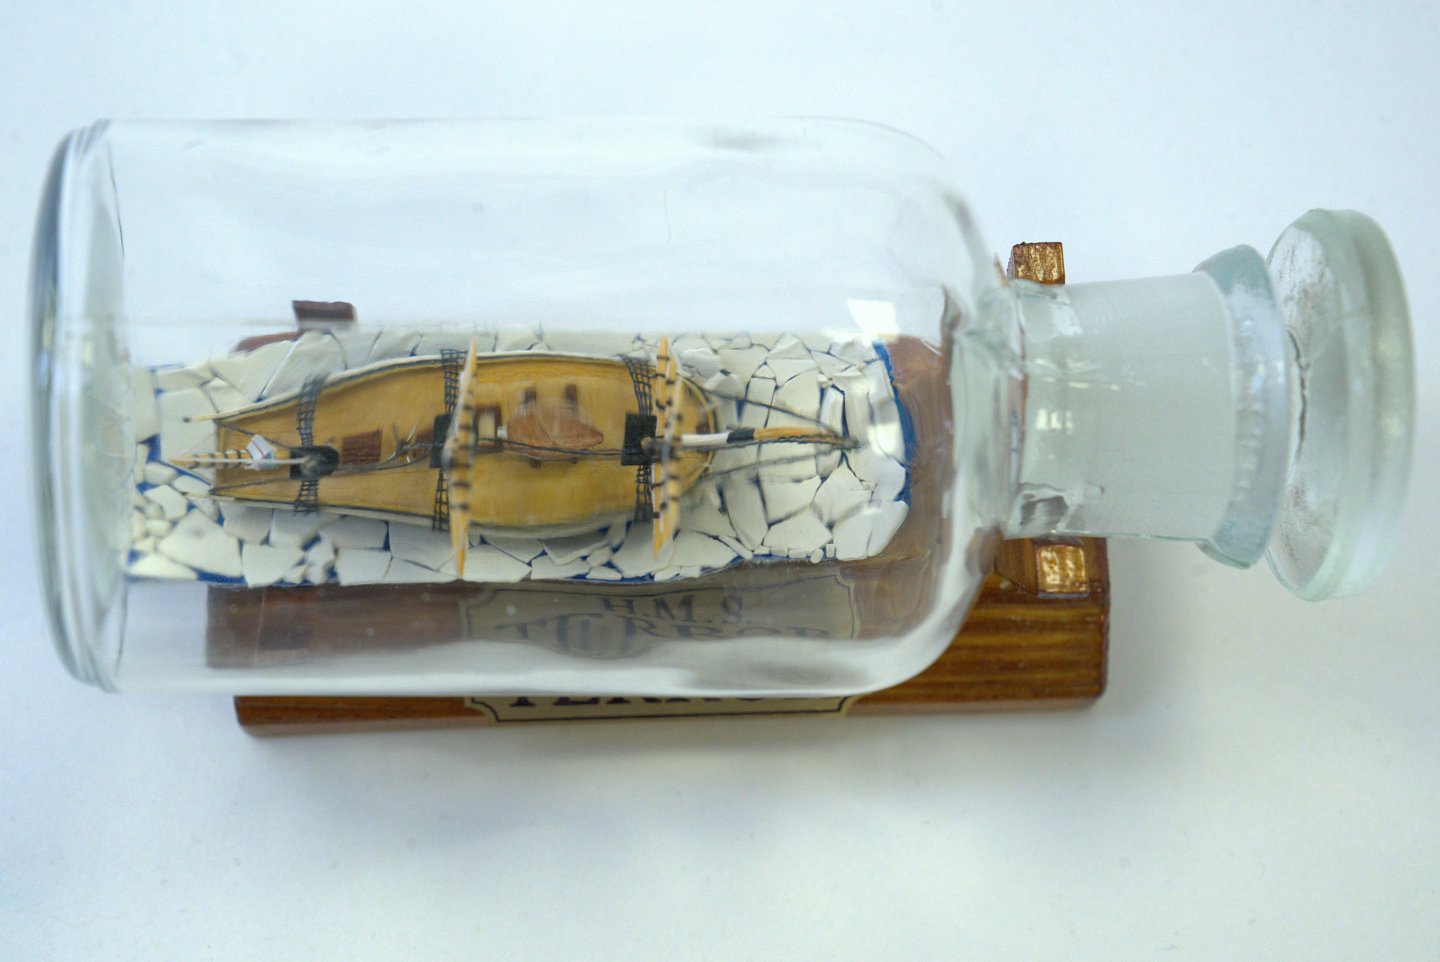
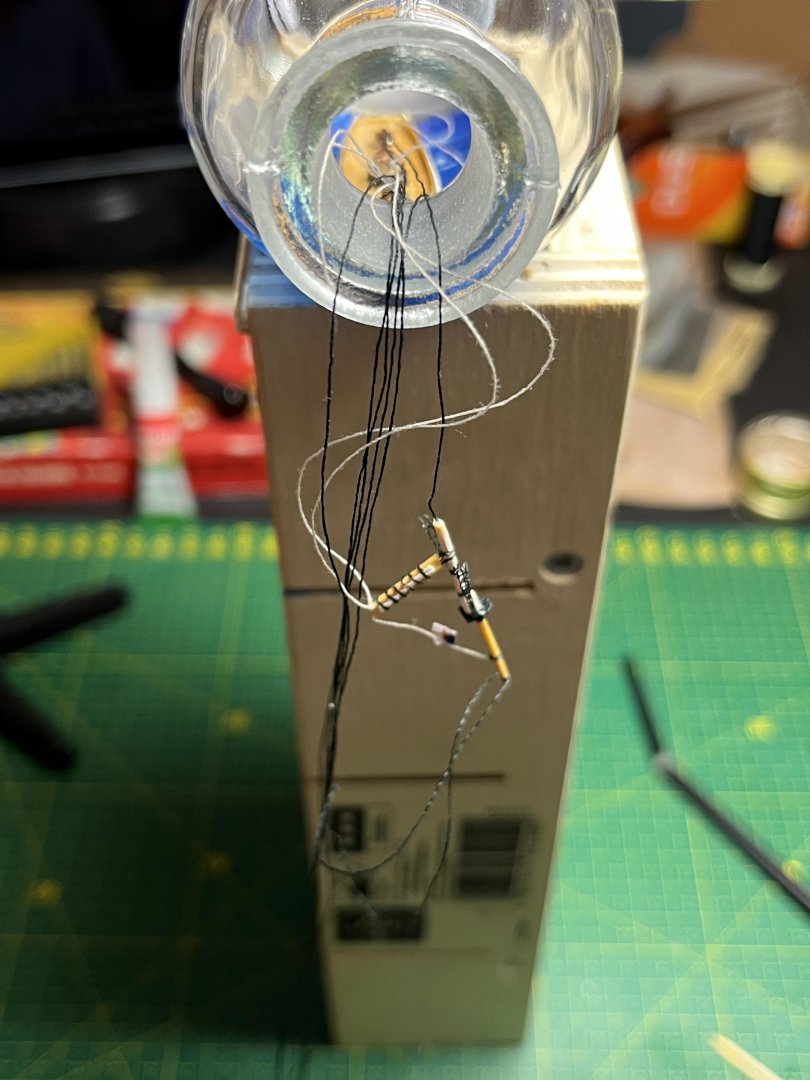
Bottling in progress - raising of the aft mast. After hull was glued in and aft mast and topmast were fitted, work on ice cover began. Icebergs are made of white plaster spread to a thin sheet and broken up to small pieces. Placement of individual pieces was more fiddly than anticipated and took a long time.
-
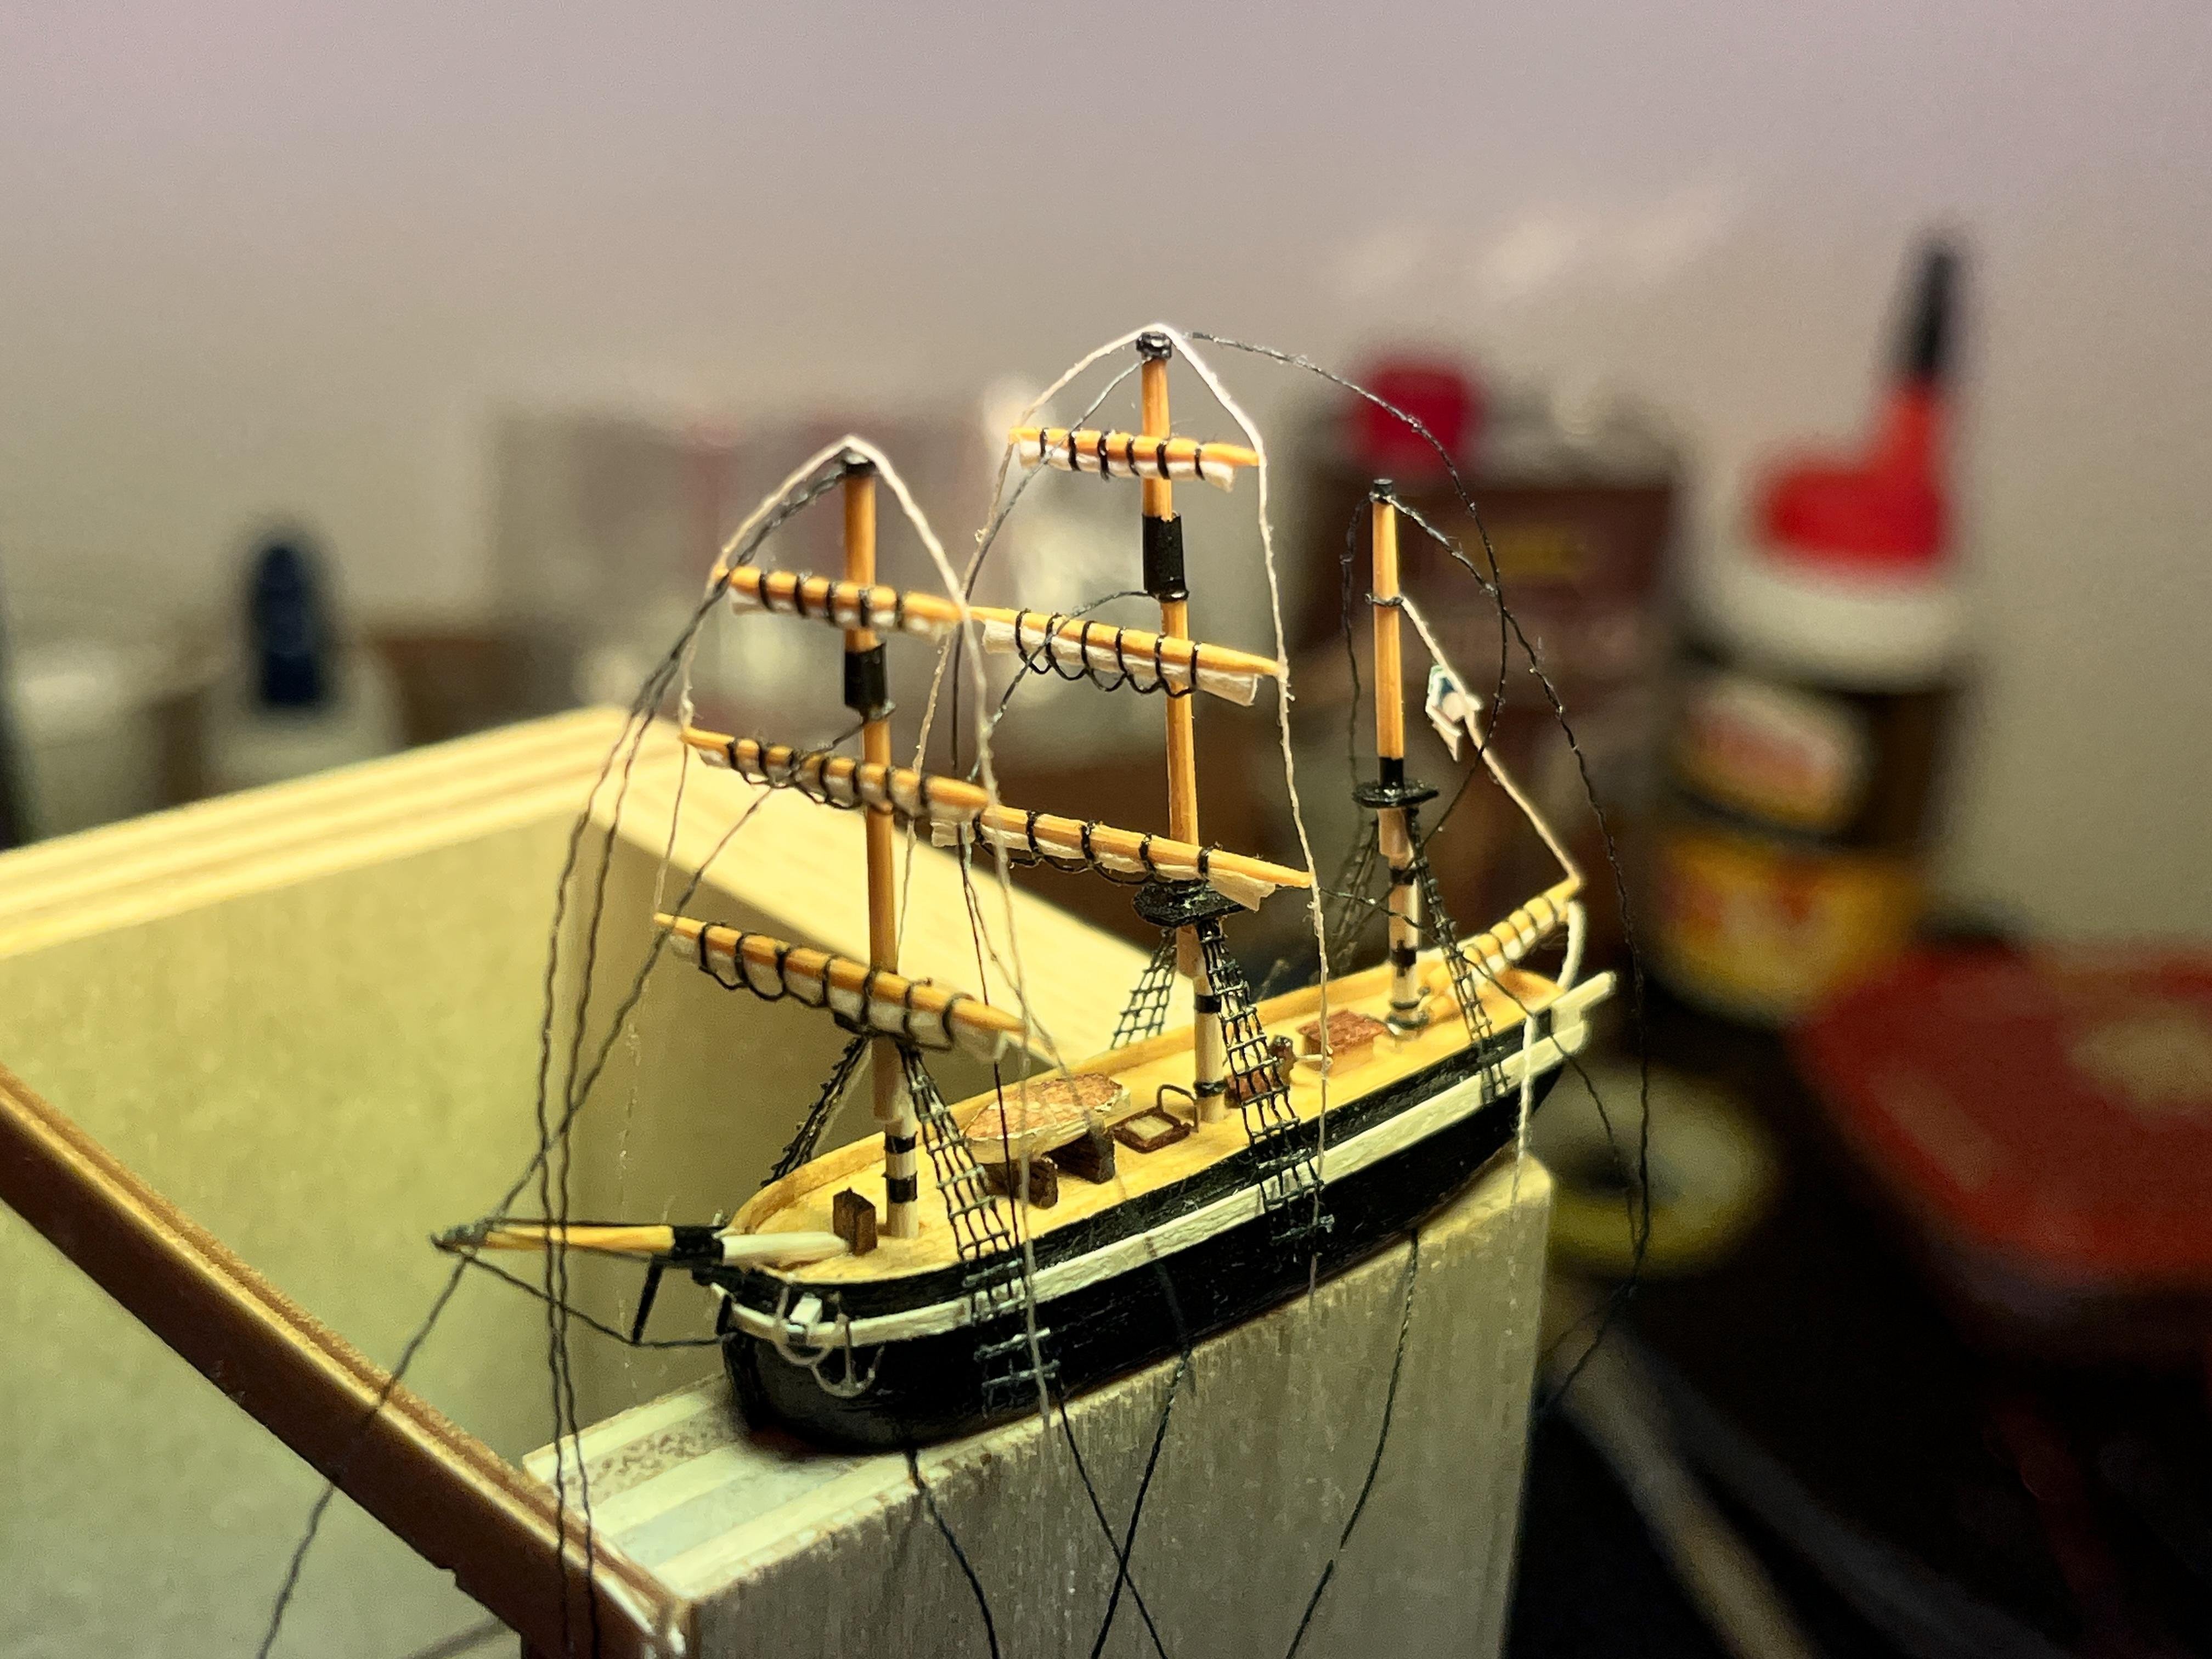
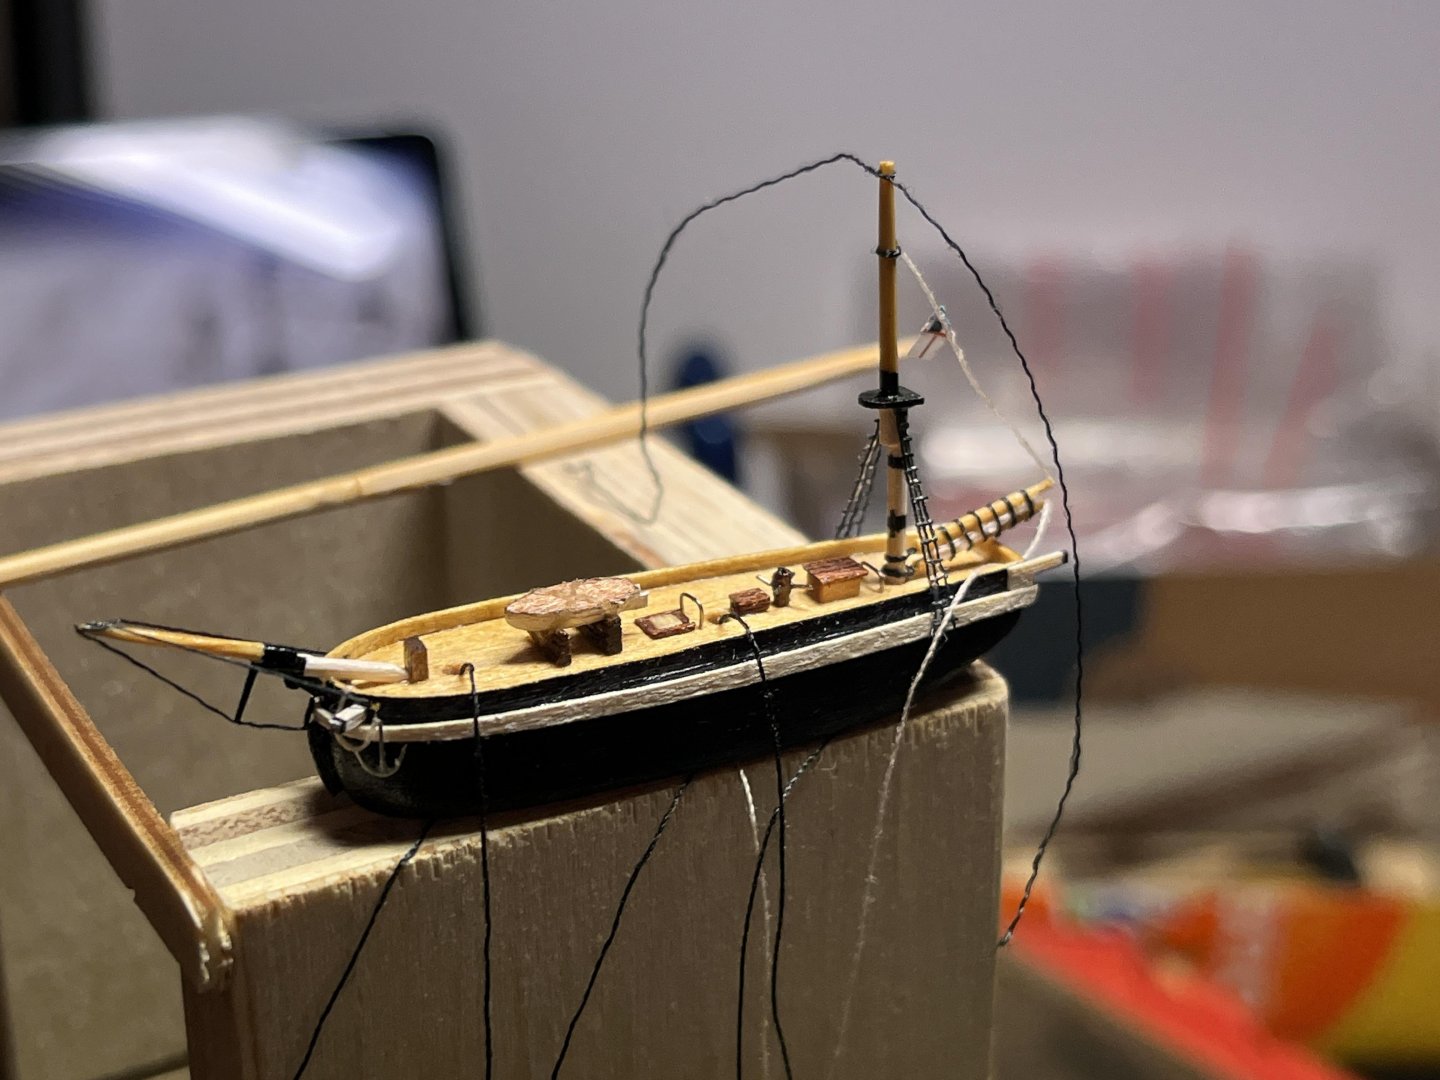
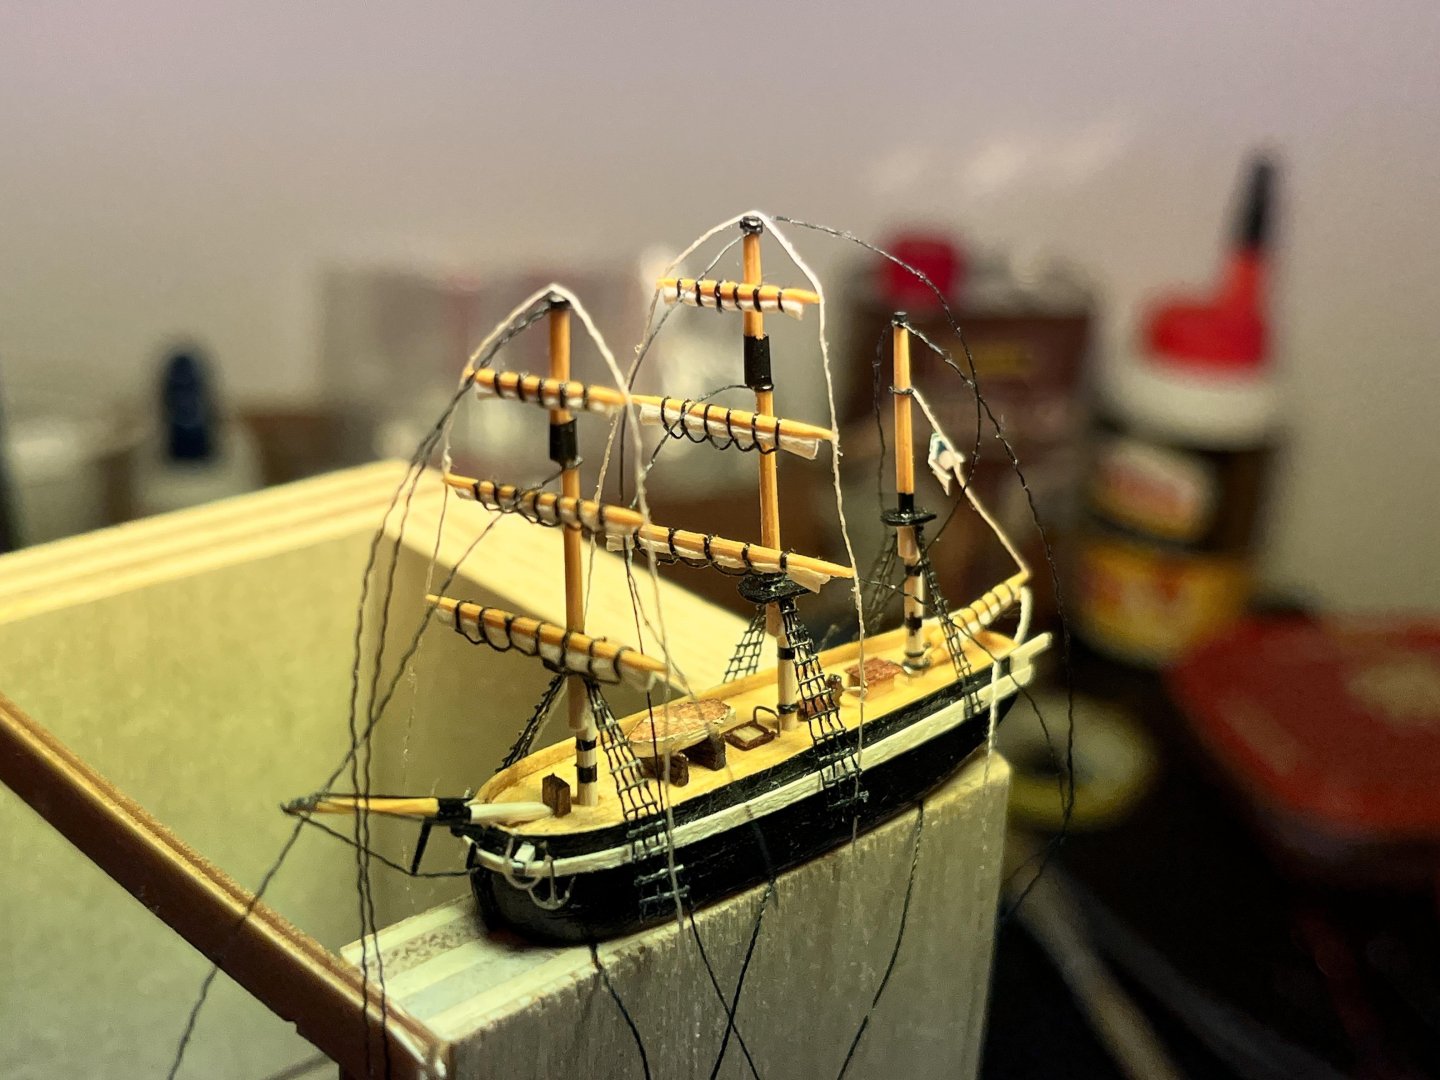
Added anchors and a flag. Work continues on the rigging. All masts and yards fitted. Final test fit before bottling.

-
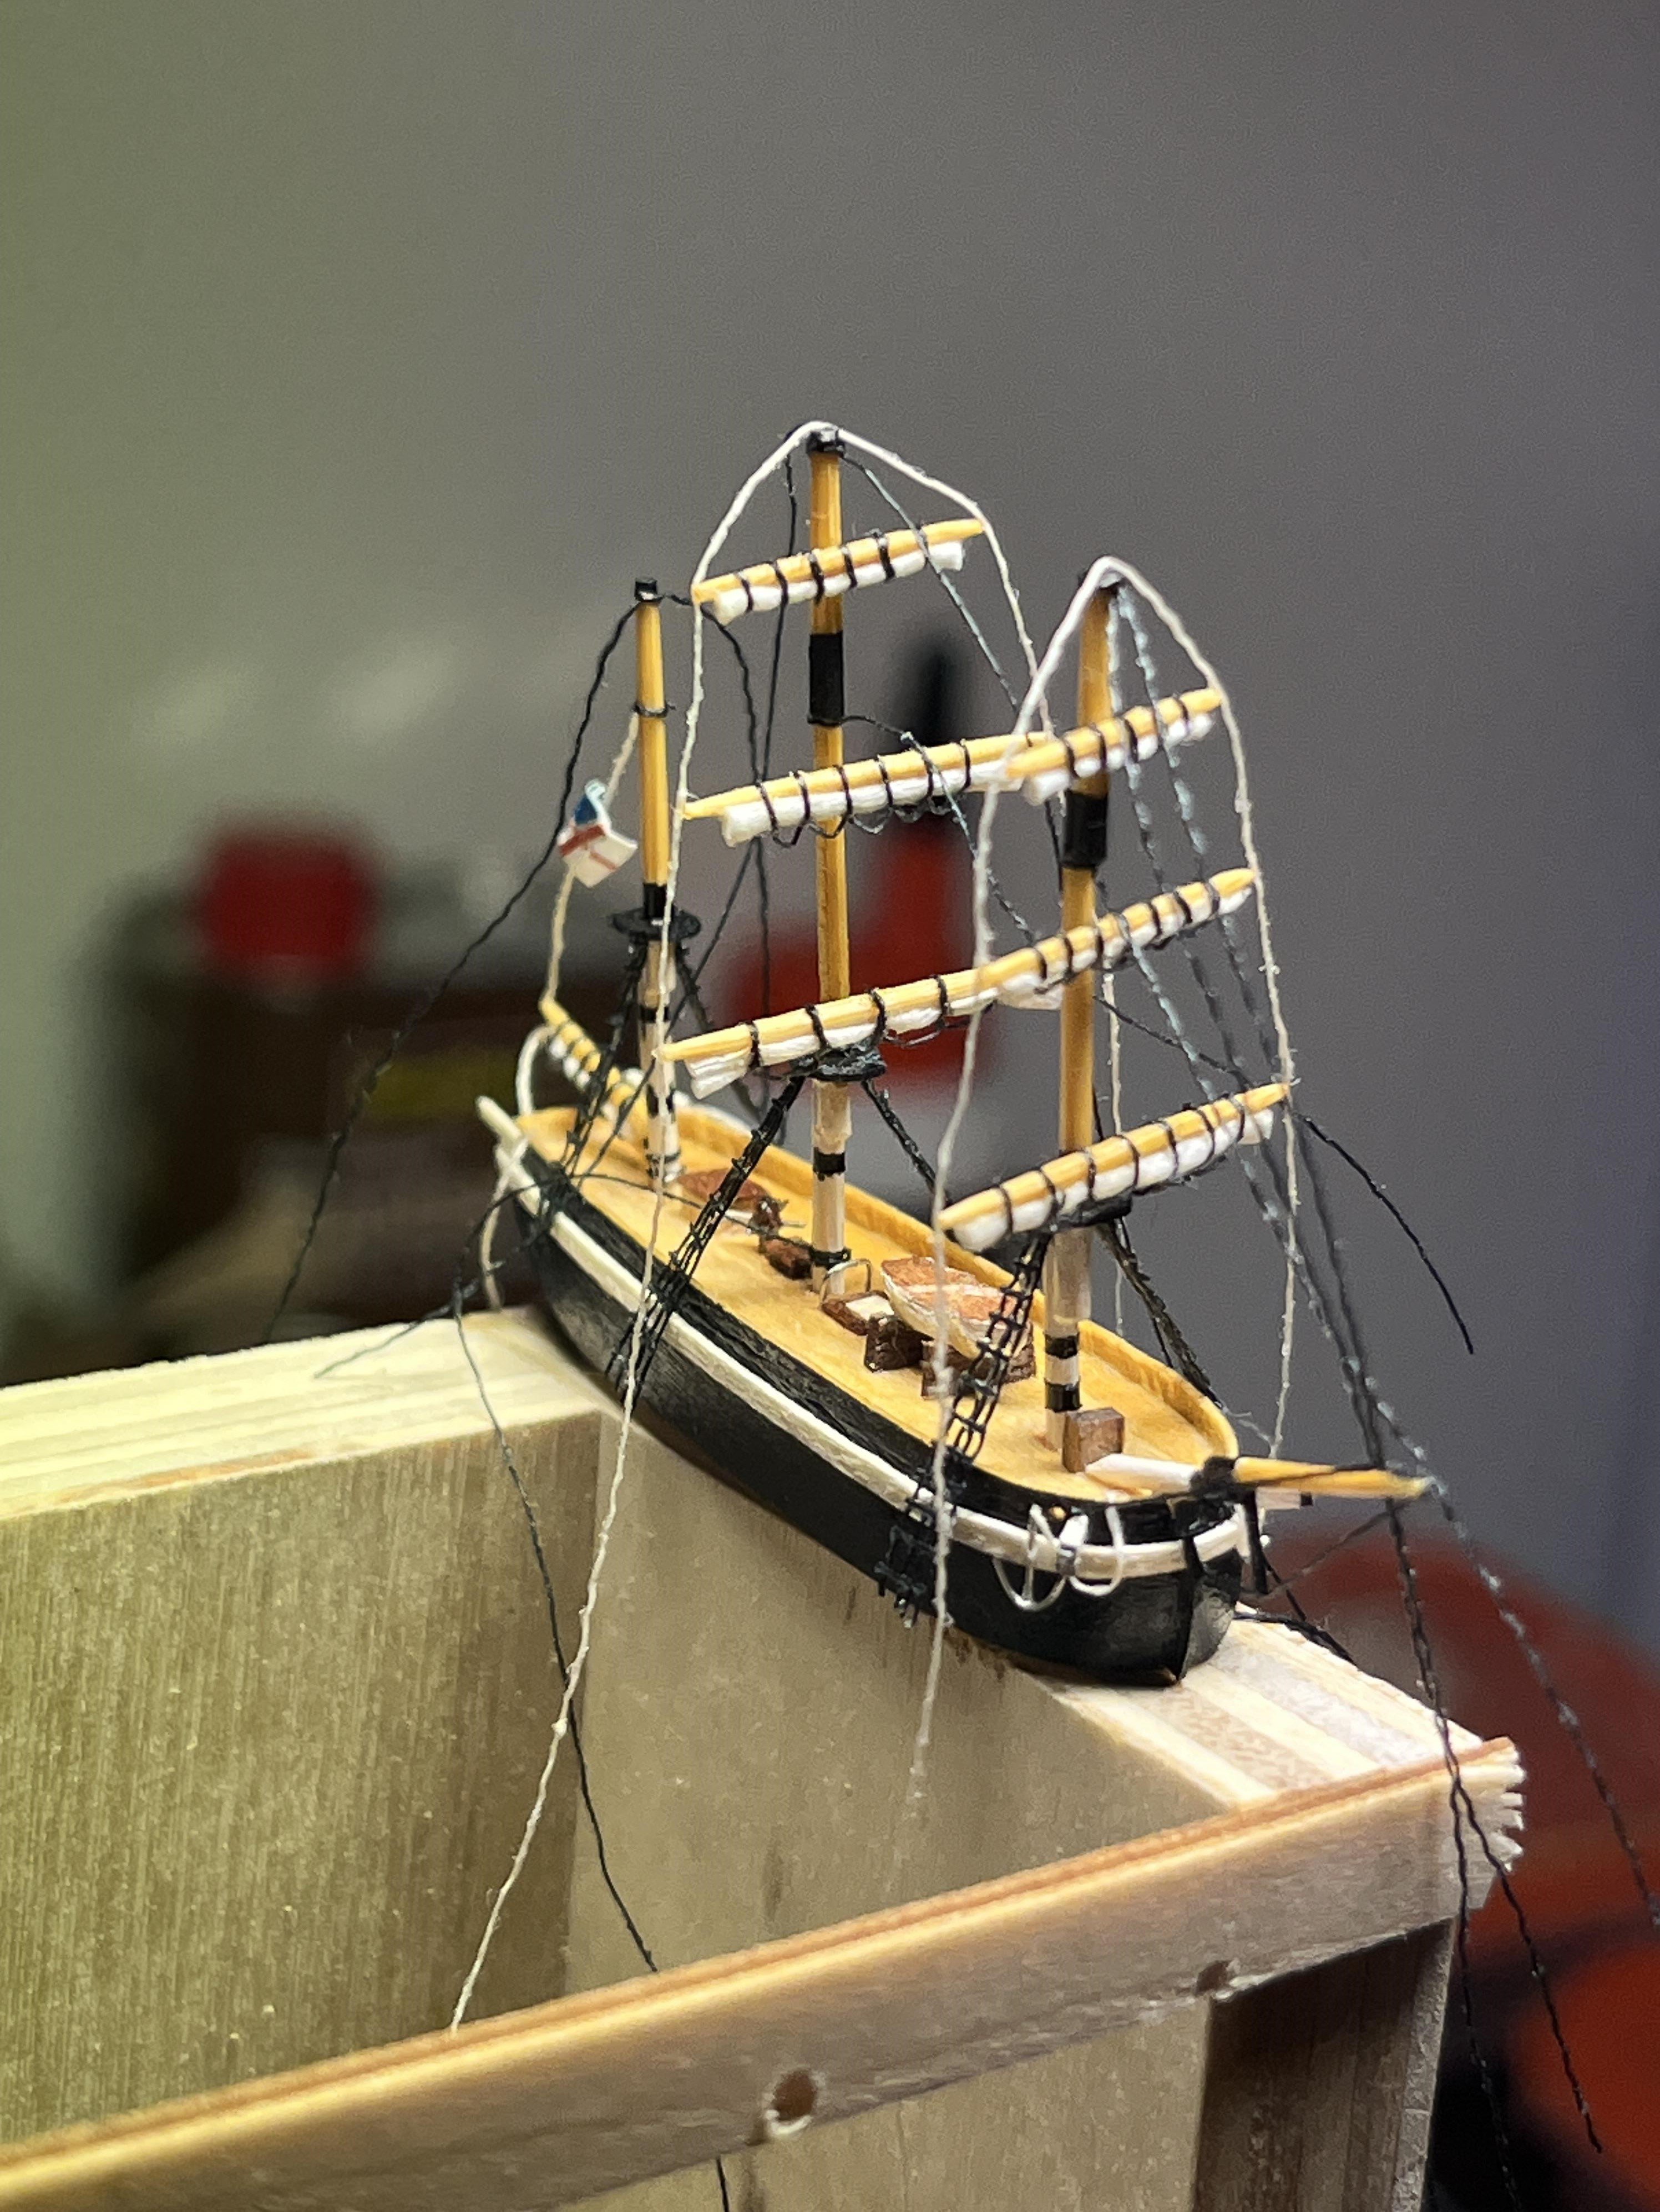
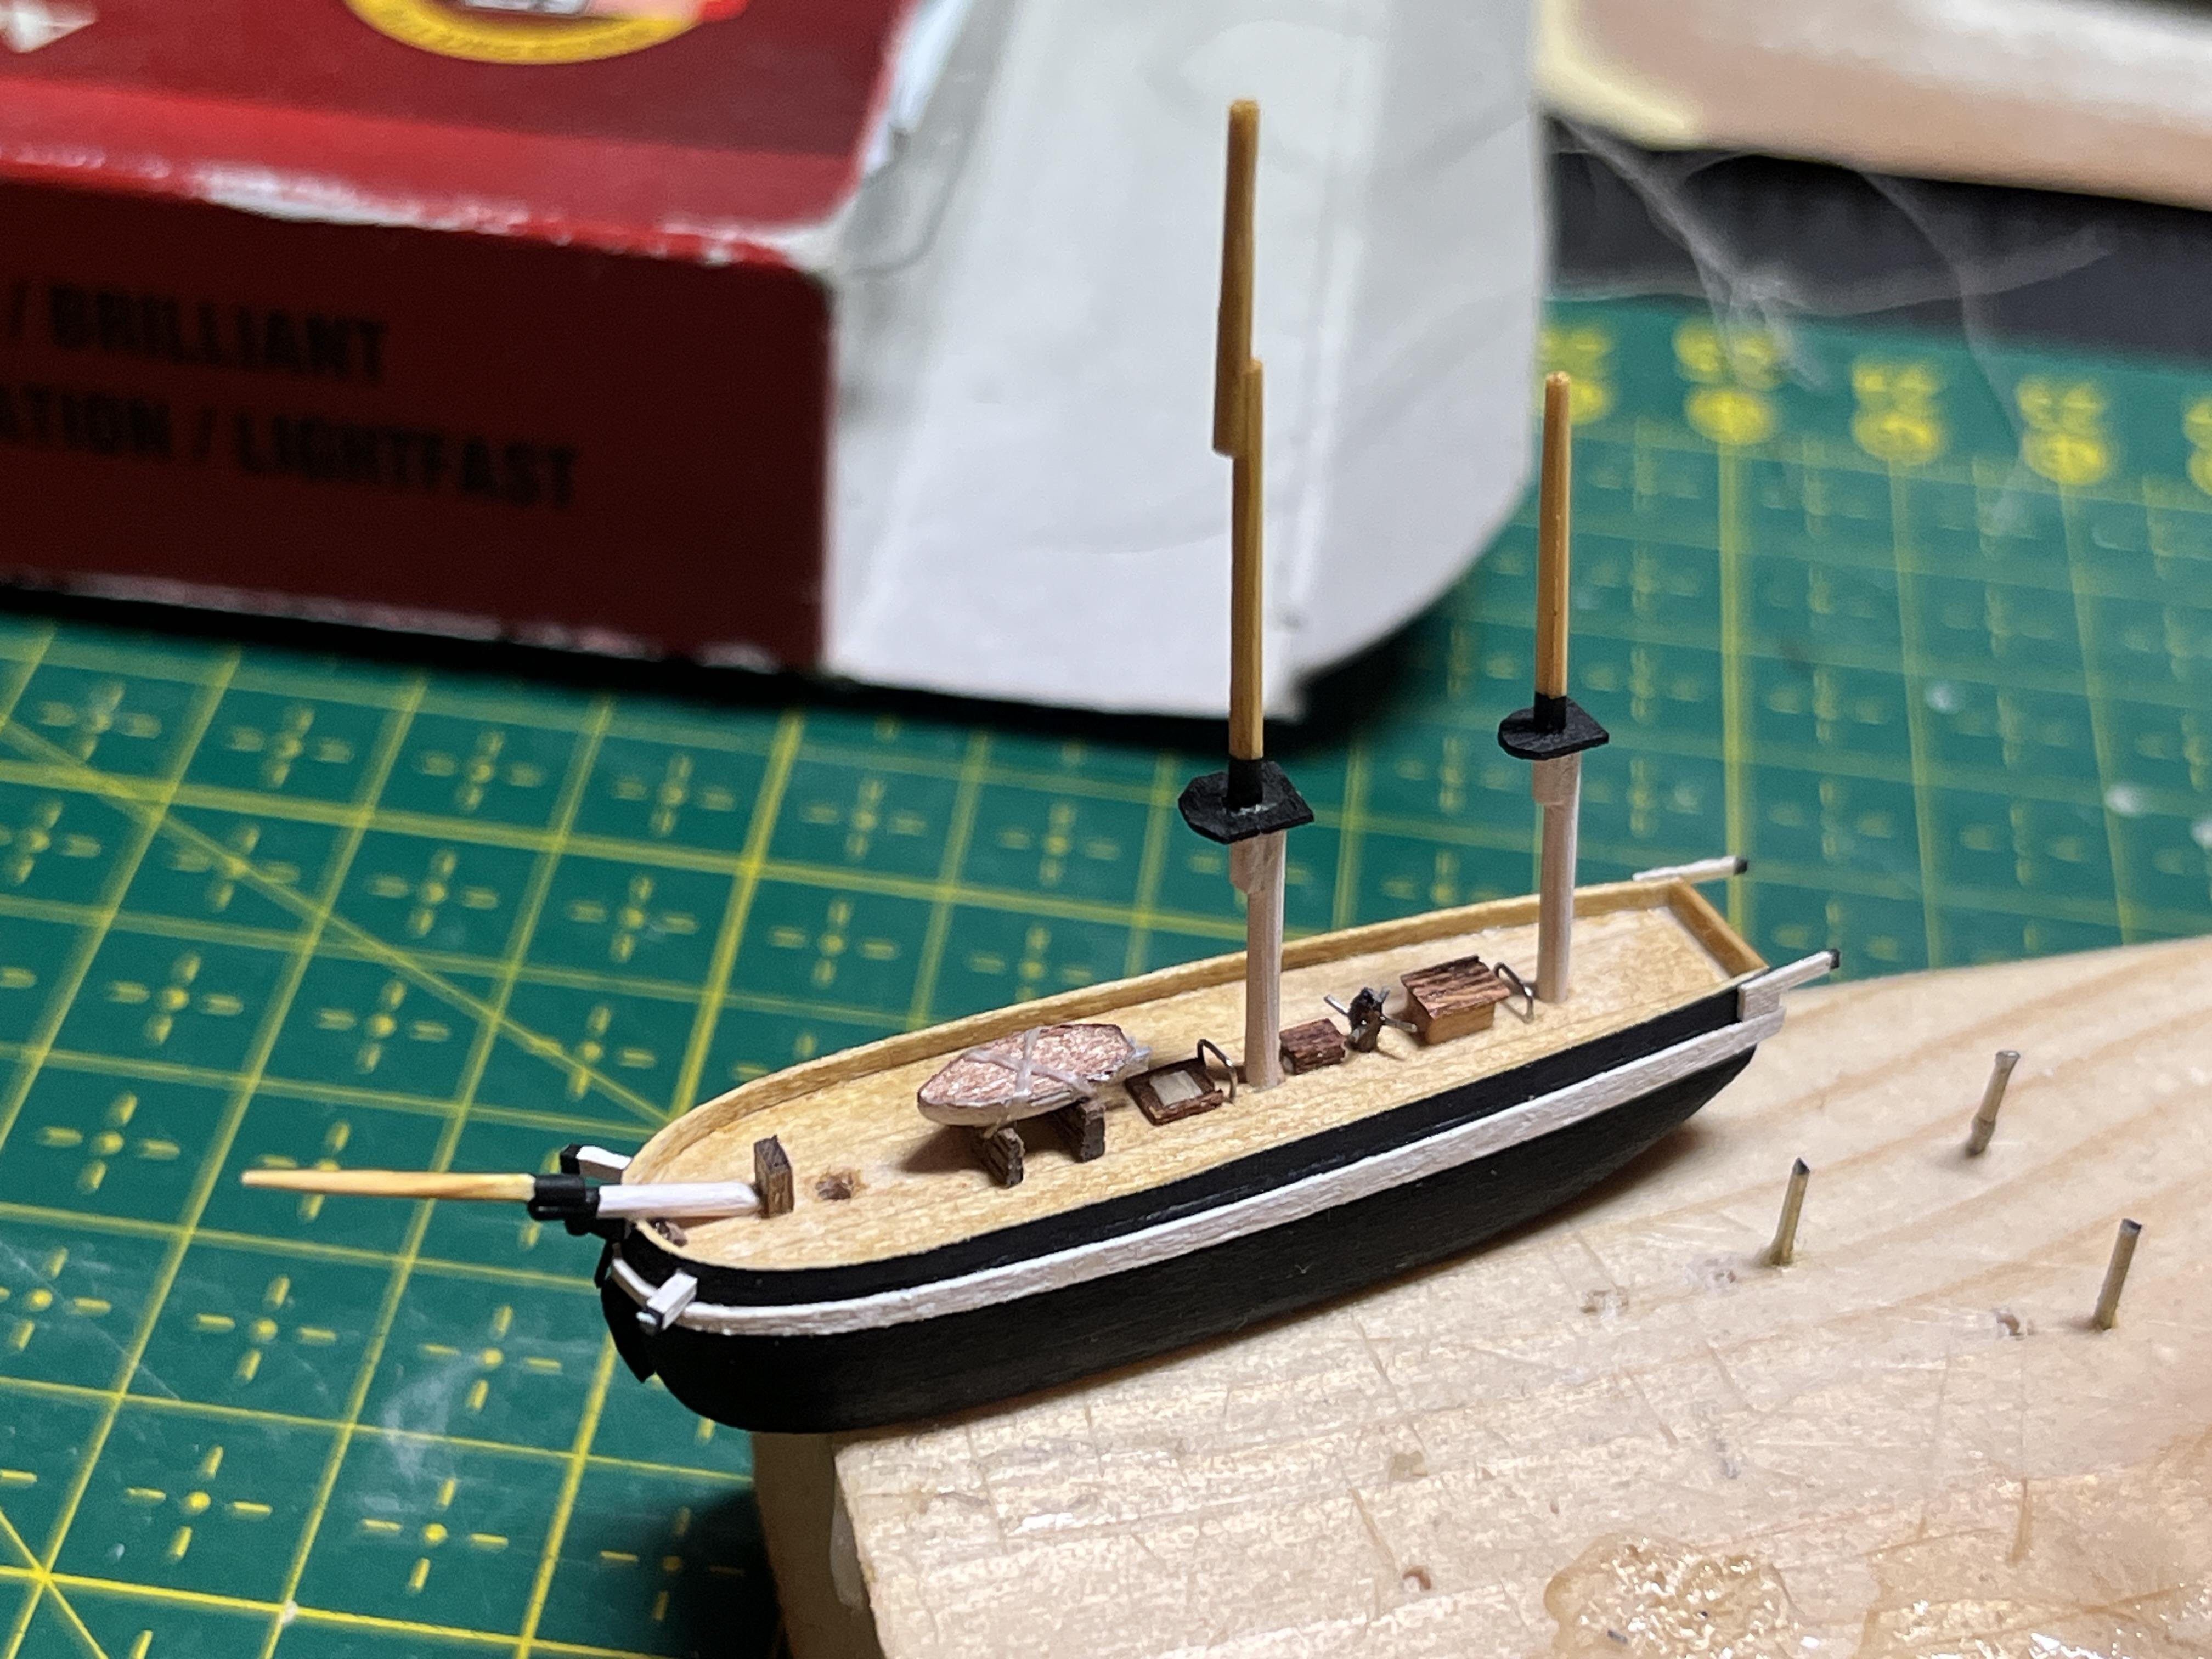
Added bowsprit rigging, aft mast boom and shrouds. After a bit of experimenting I decided on furled sails - first tissue paper furled sail visible on the boom. Foremast added, locating threads already visible at the bottom of the hull. Shrouds are fastened to the mast only, will be glued to the hull when bottled.

-
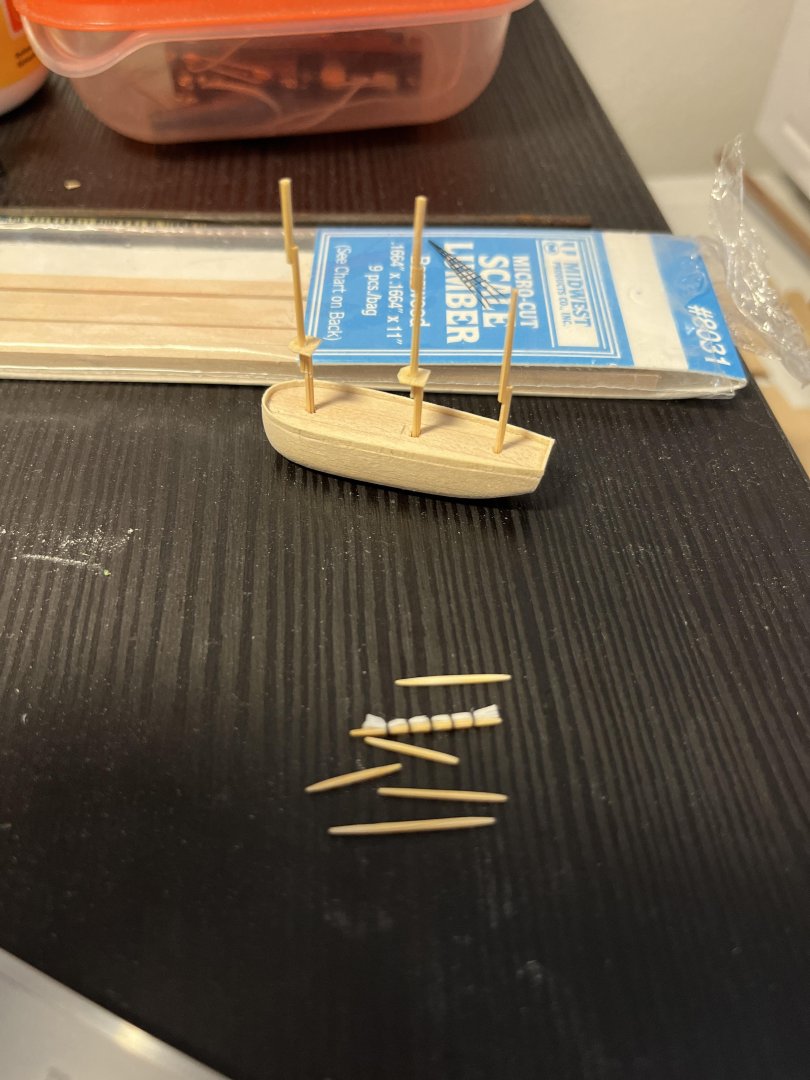
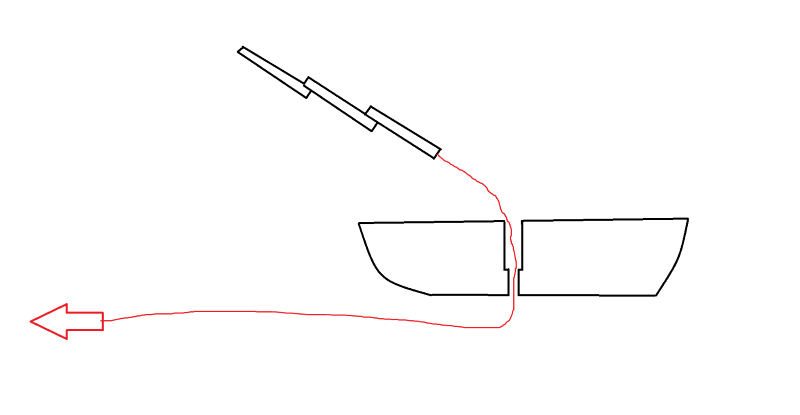
Hull painted, bowsprit and some deck fittings added. Masts were test fitted only here - I opted for separate hull/mast bottling with through-hull threads for easier locating of the masts later.

-
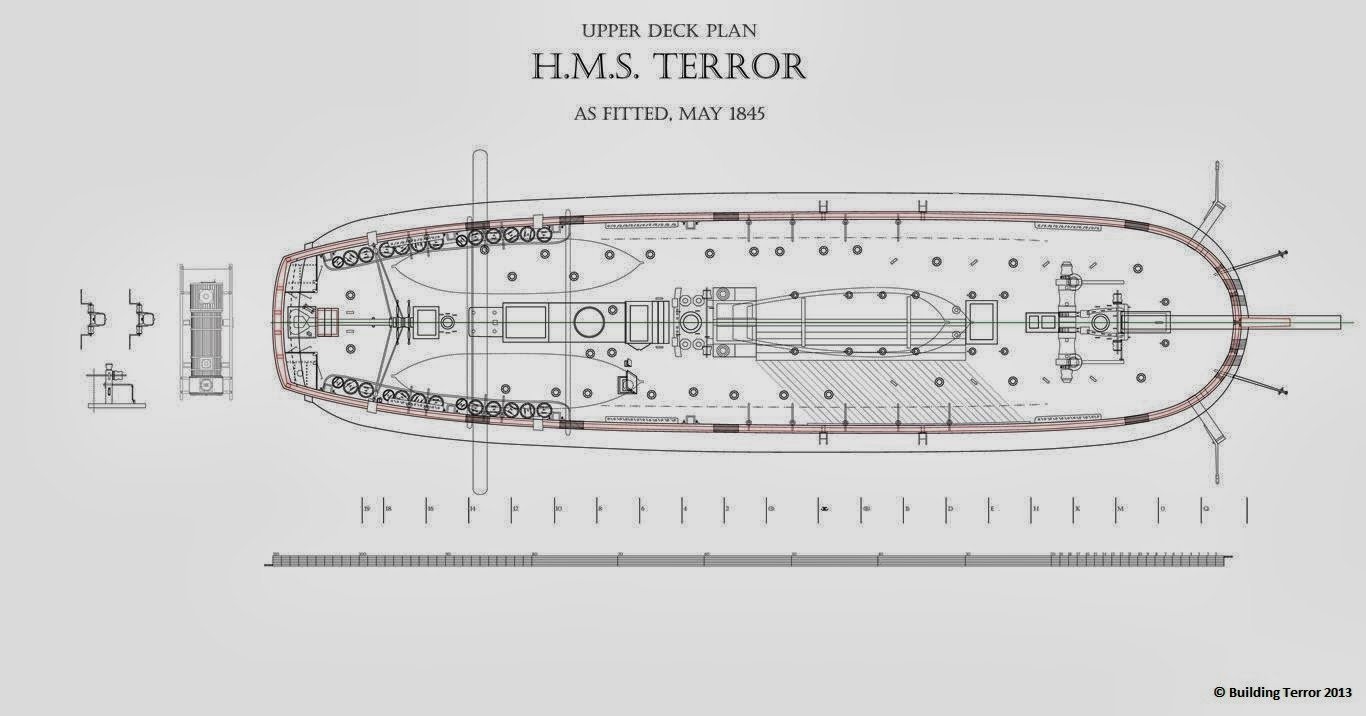
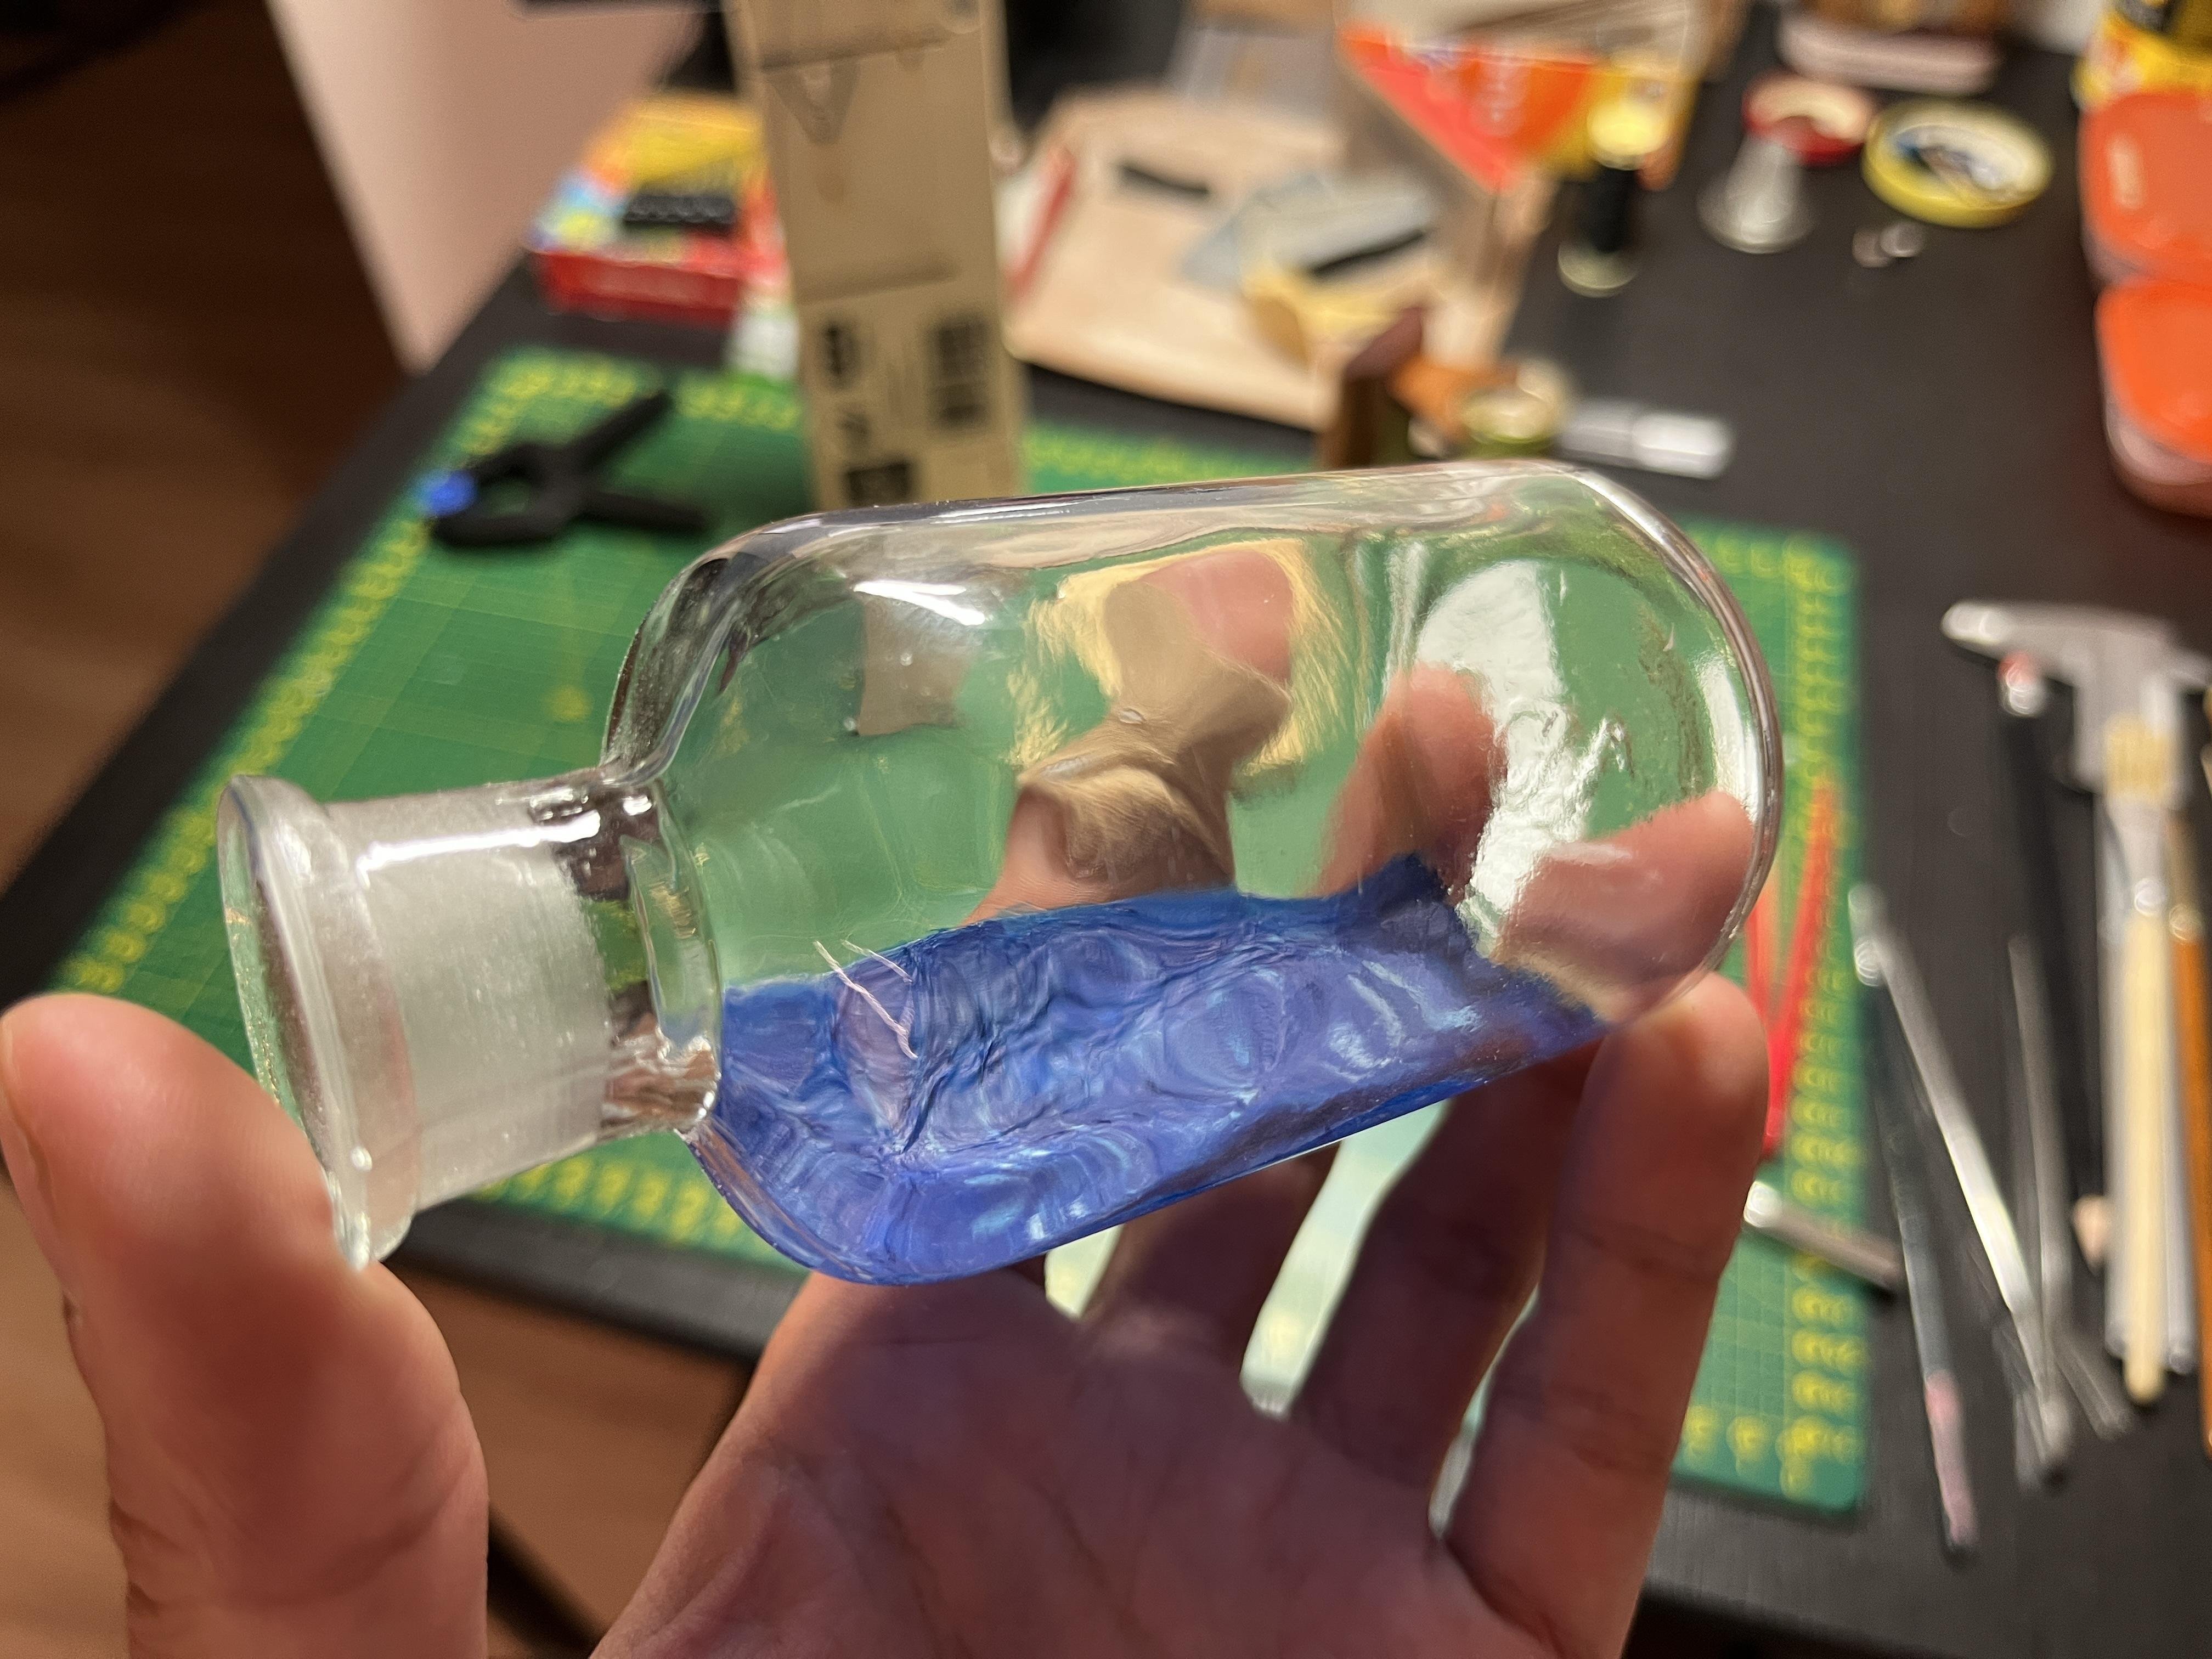
This cute little 100cc bottle has been on my bench for a while, couldn't really decide what ship to put inside. Having been long intrigued by the story of Franklin expedition, I lately stumbled upon the 2018 TV series and a decision was made. I was trying out the PVA glue + toilet paper method as shown here. It didn't look too bad, but I made it too wide and didn't flatten the bottom, so as it follows the curvature of the bottle, it had a "water on the sides" effect. I ended up cutting off and cleaning up about 5mm off each side (very unpleasant job), to reduce the curvature effect. Next time I'll definitely flatten the bottom first.. Based on plans kindly published by Mattew Betts of Building Terror, the ship scale was set to 1:700, resulting in a length of about 45mm (1.77in) excluding the bowsprit. Next picture shows the basic shape carved and work started on the spars.